

My Fathers Son
-
Posts
259 -
Joined
-
Last visited
Content Type
Profiles
Forums
Gallery
Events
Posts posted by My Fathers Son
-
-
I took a look this morning at my model and a photo I took of CS last October.
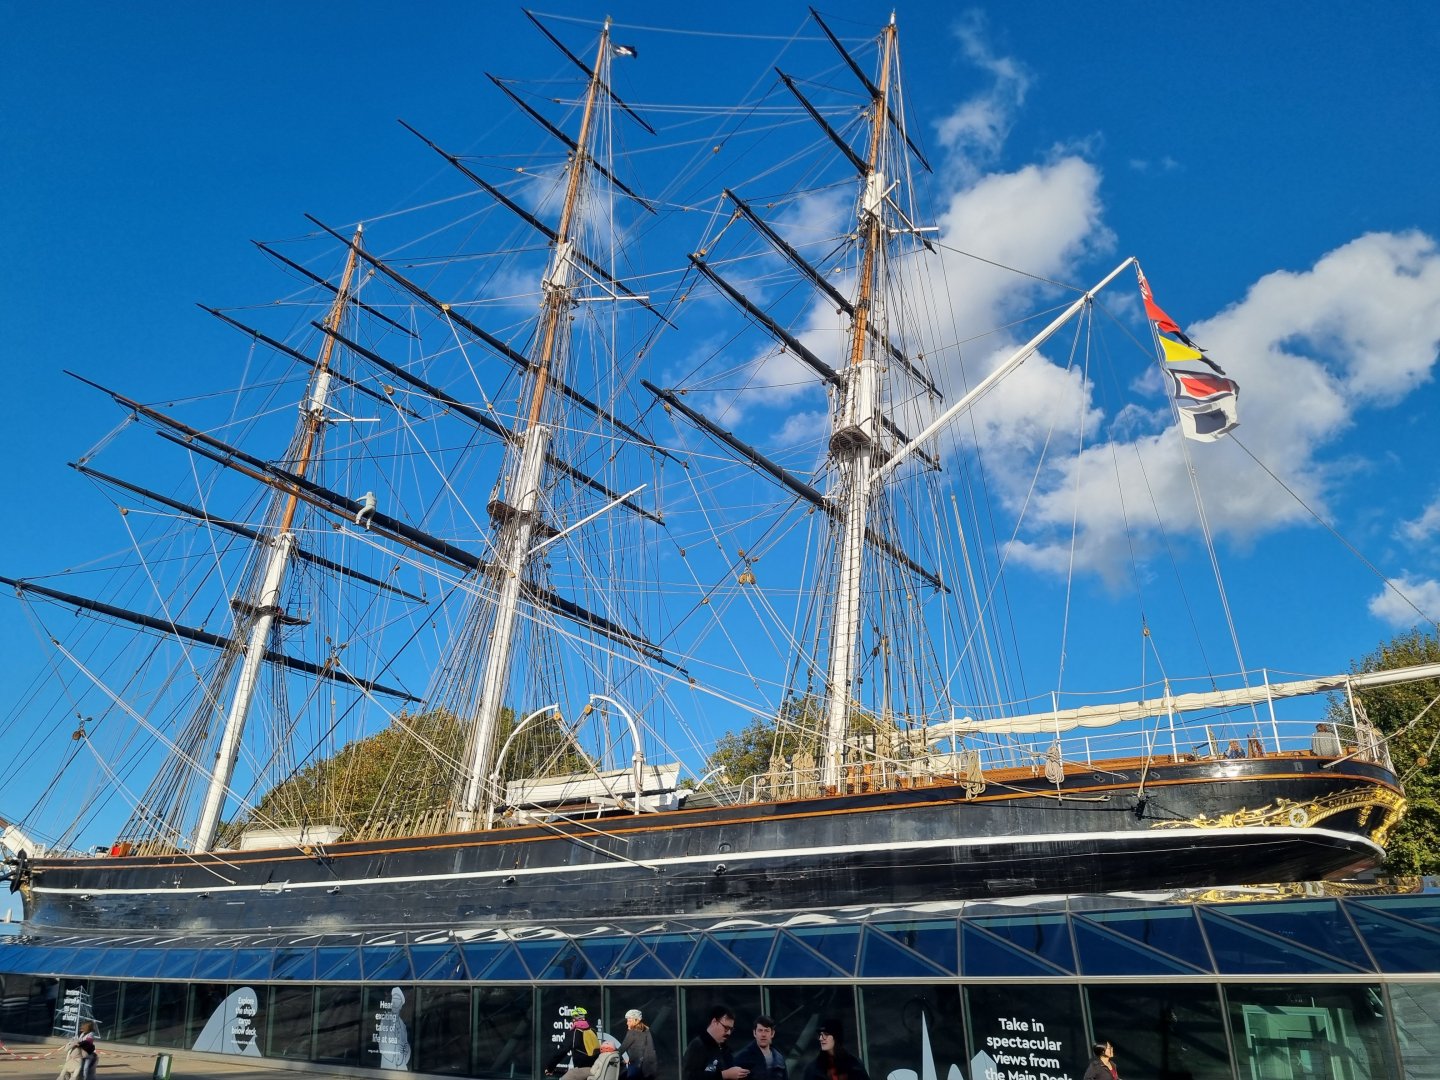
If you zoom in you can see at least 6 Water Doors.but no scuppers.
Looking at the model, they would be far too small so will revert to .y original pla which is the cut the outline into the planked surface or just stick a square piece of veneer onto the outside.
-
On 9/5/2024 at 8:26 PM, Snug Harbor Johnny said:
Rob pointed out that great seas could often pour over the gunwale going around the Horn,
The sea bed around the horn south of Africa and South America are littered with the wrecks of many a vessel. It's why the Suez and Panama Canals where created.
Far too many sailors lost their lives in those seas.
Simon
-
I must admit that, while I am aware of the scuppers, I had not though of the advantage that the central layer would give. The fact that the image I used for the plans was so small, the location of the scuppers was not clear. Also, the hinge detail will be very small for my fat fingers to fabricate. However, thinking about it, brass sheet cut to size with brass tube soldered to the top. Brass rod inserted through the tube and bent 90 degrees either side or embedded into the hull either side might be possible.
Have to give that some thought and maybe have a practice.
Simon
-
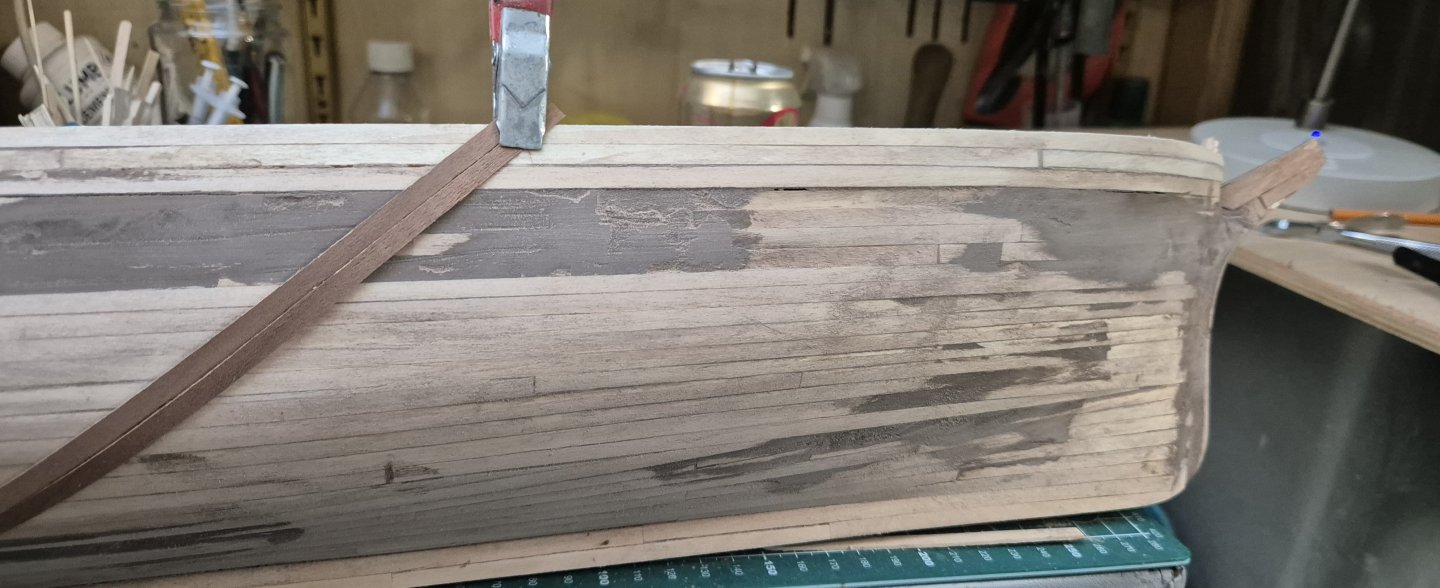
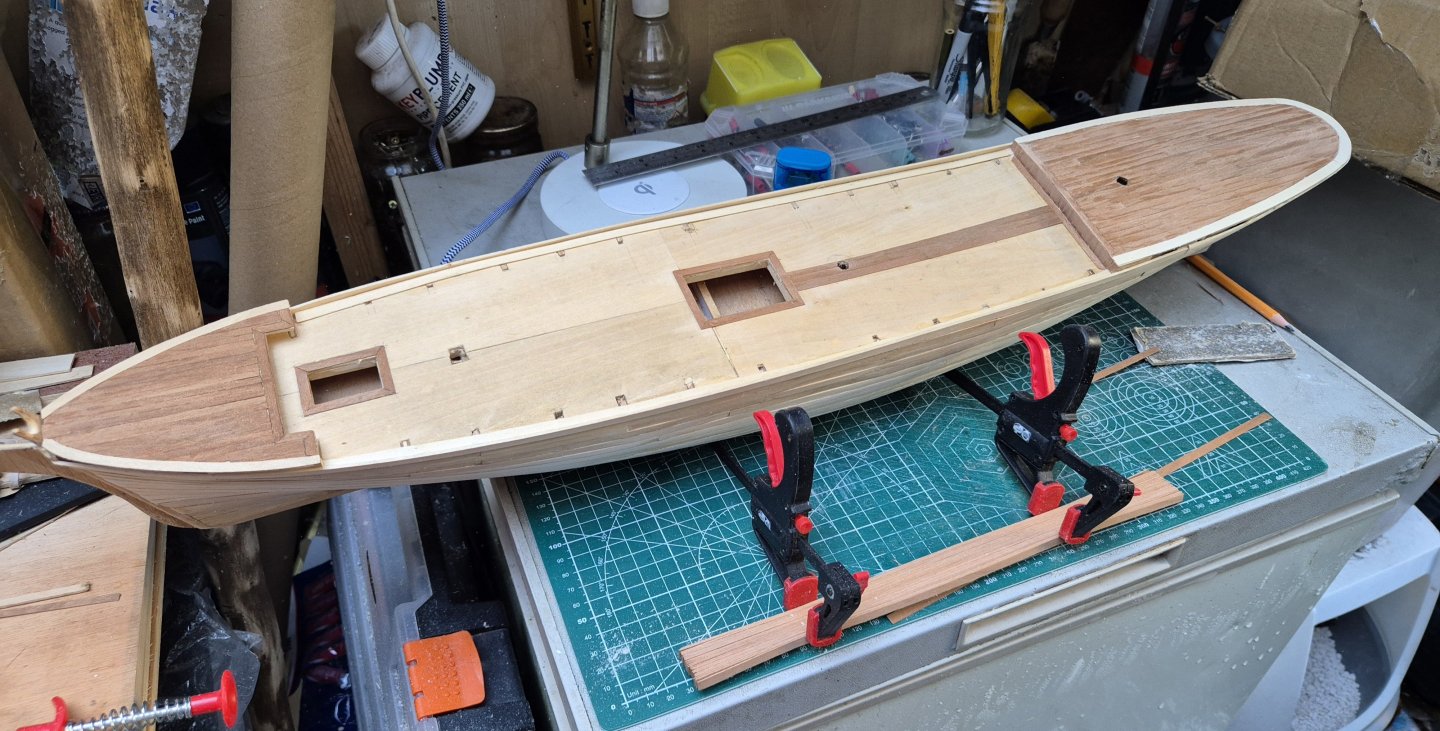
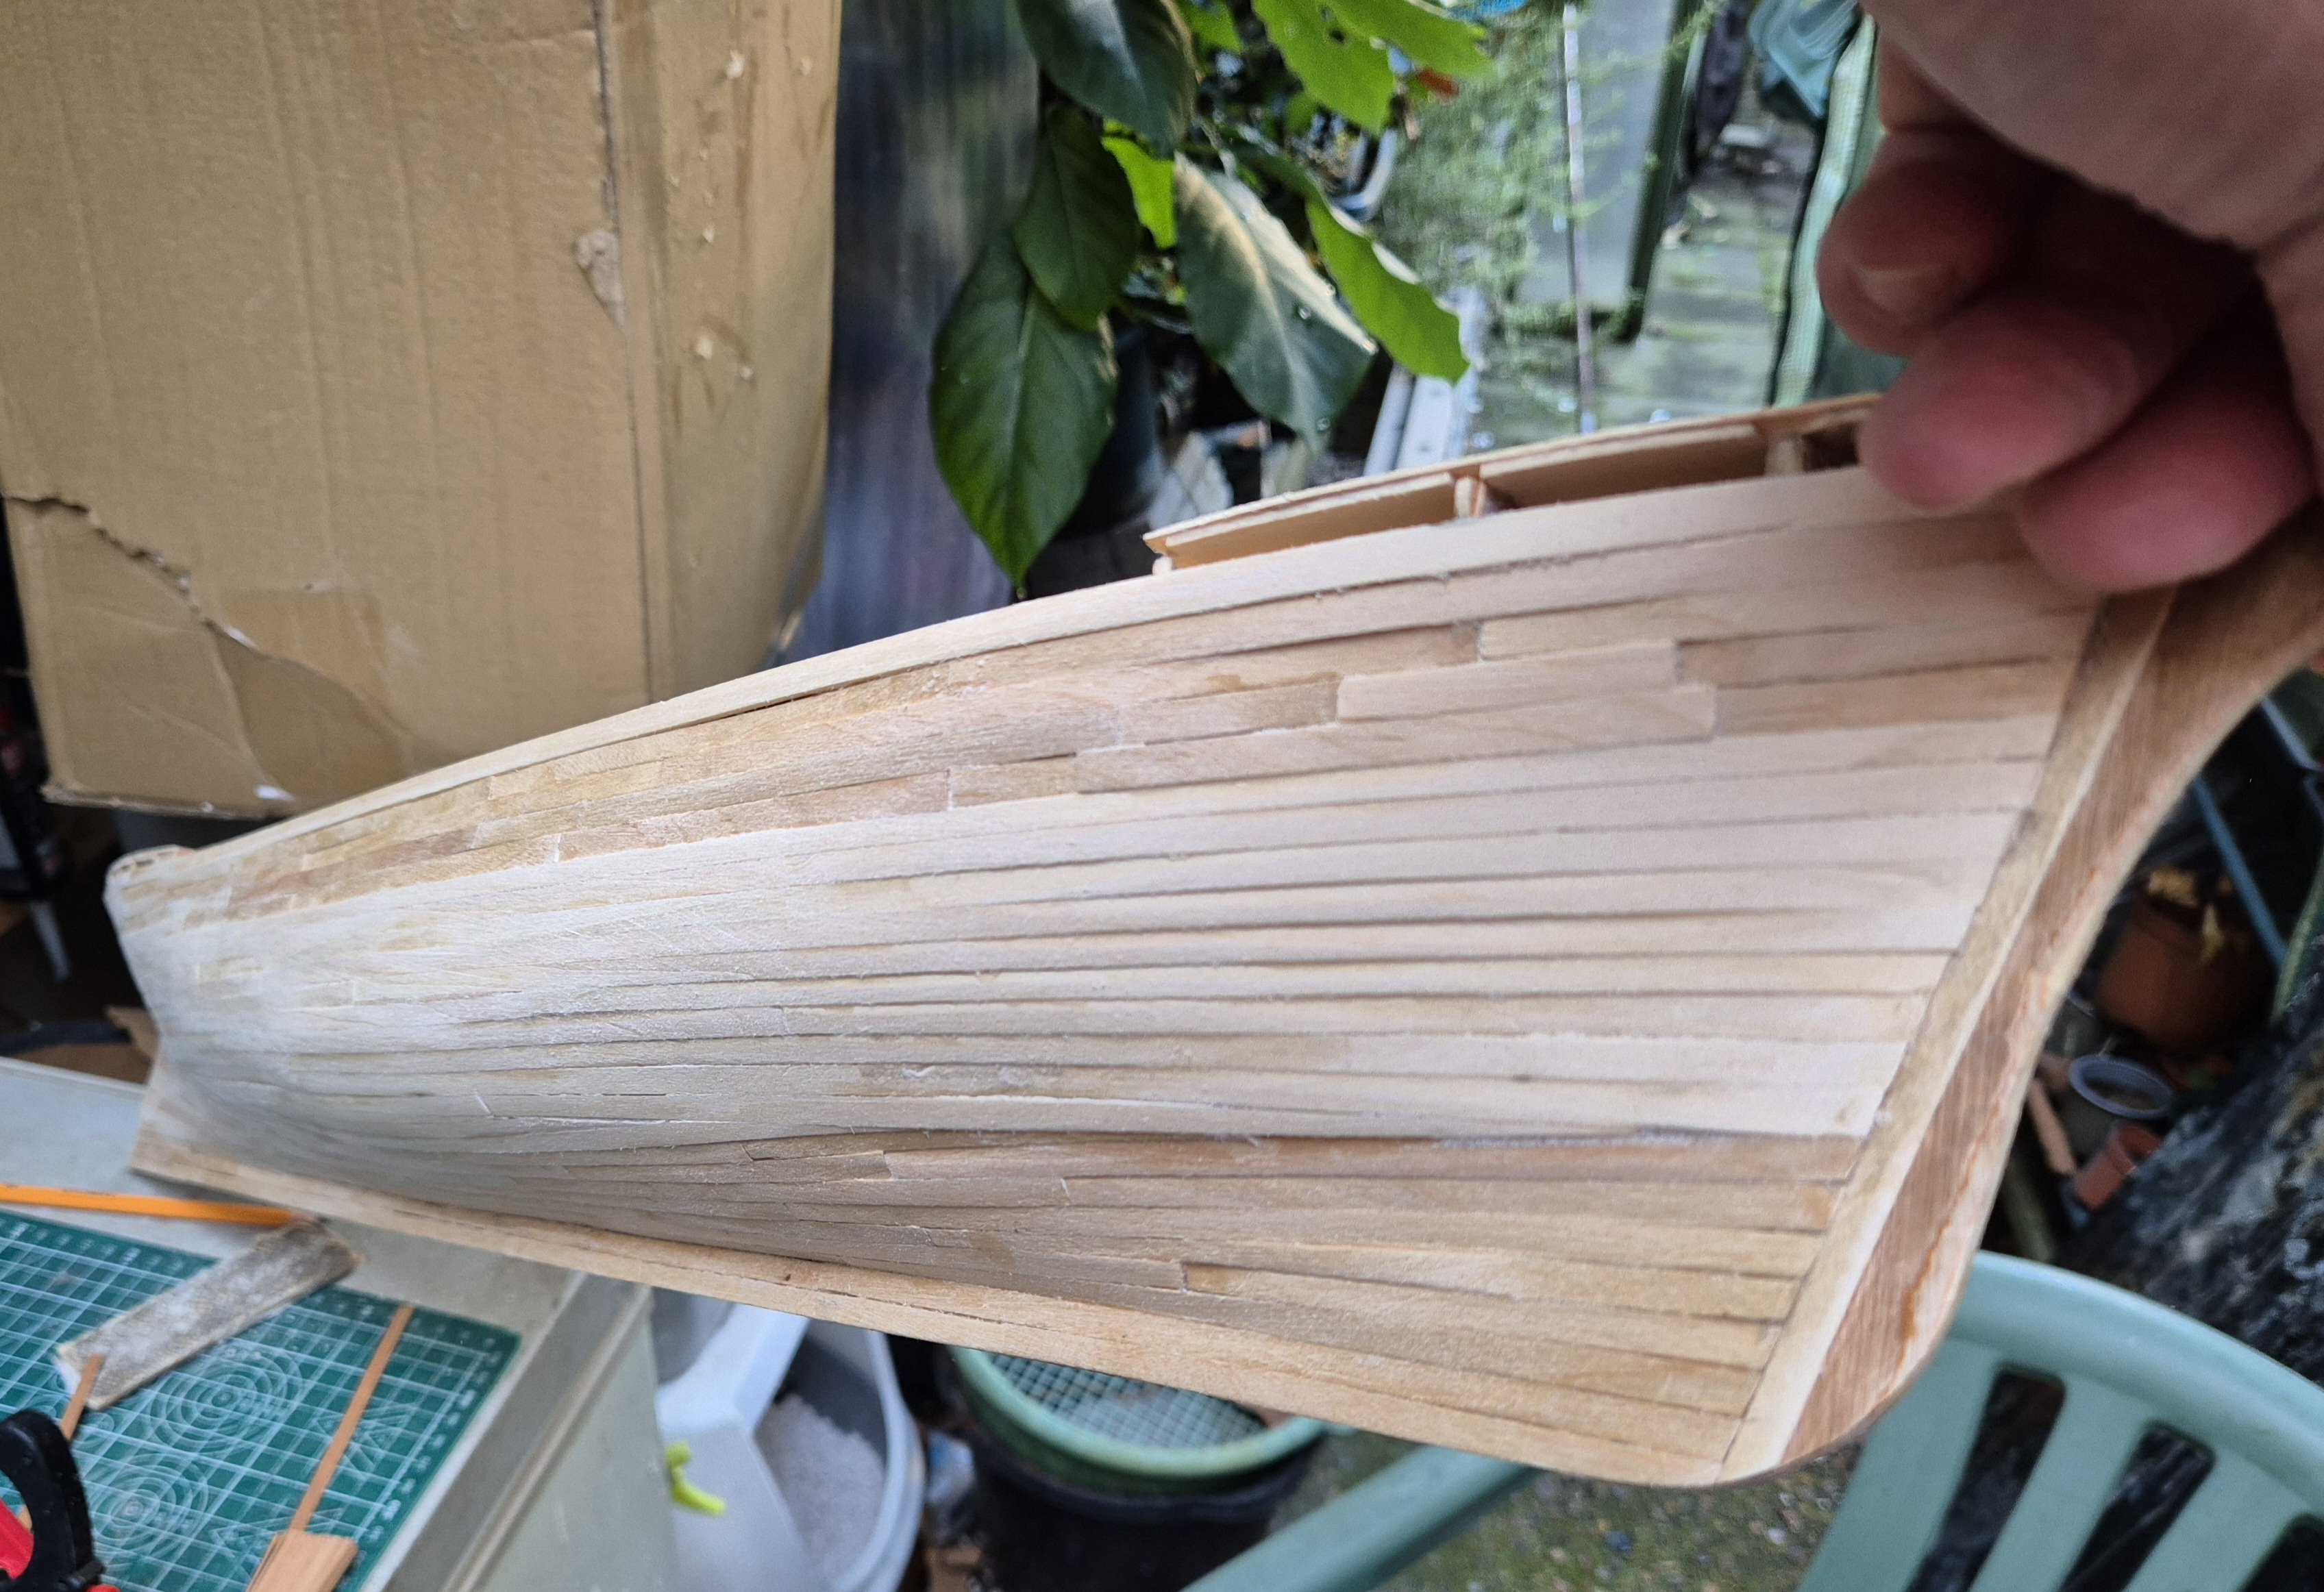
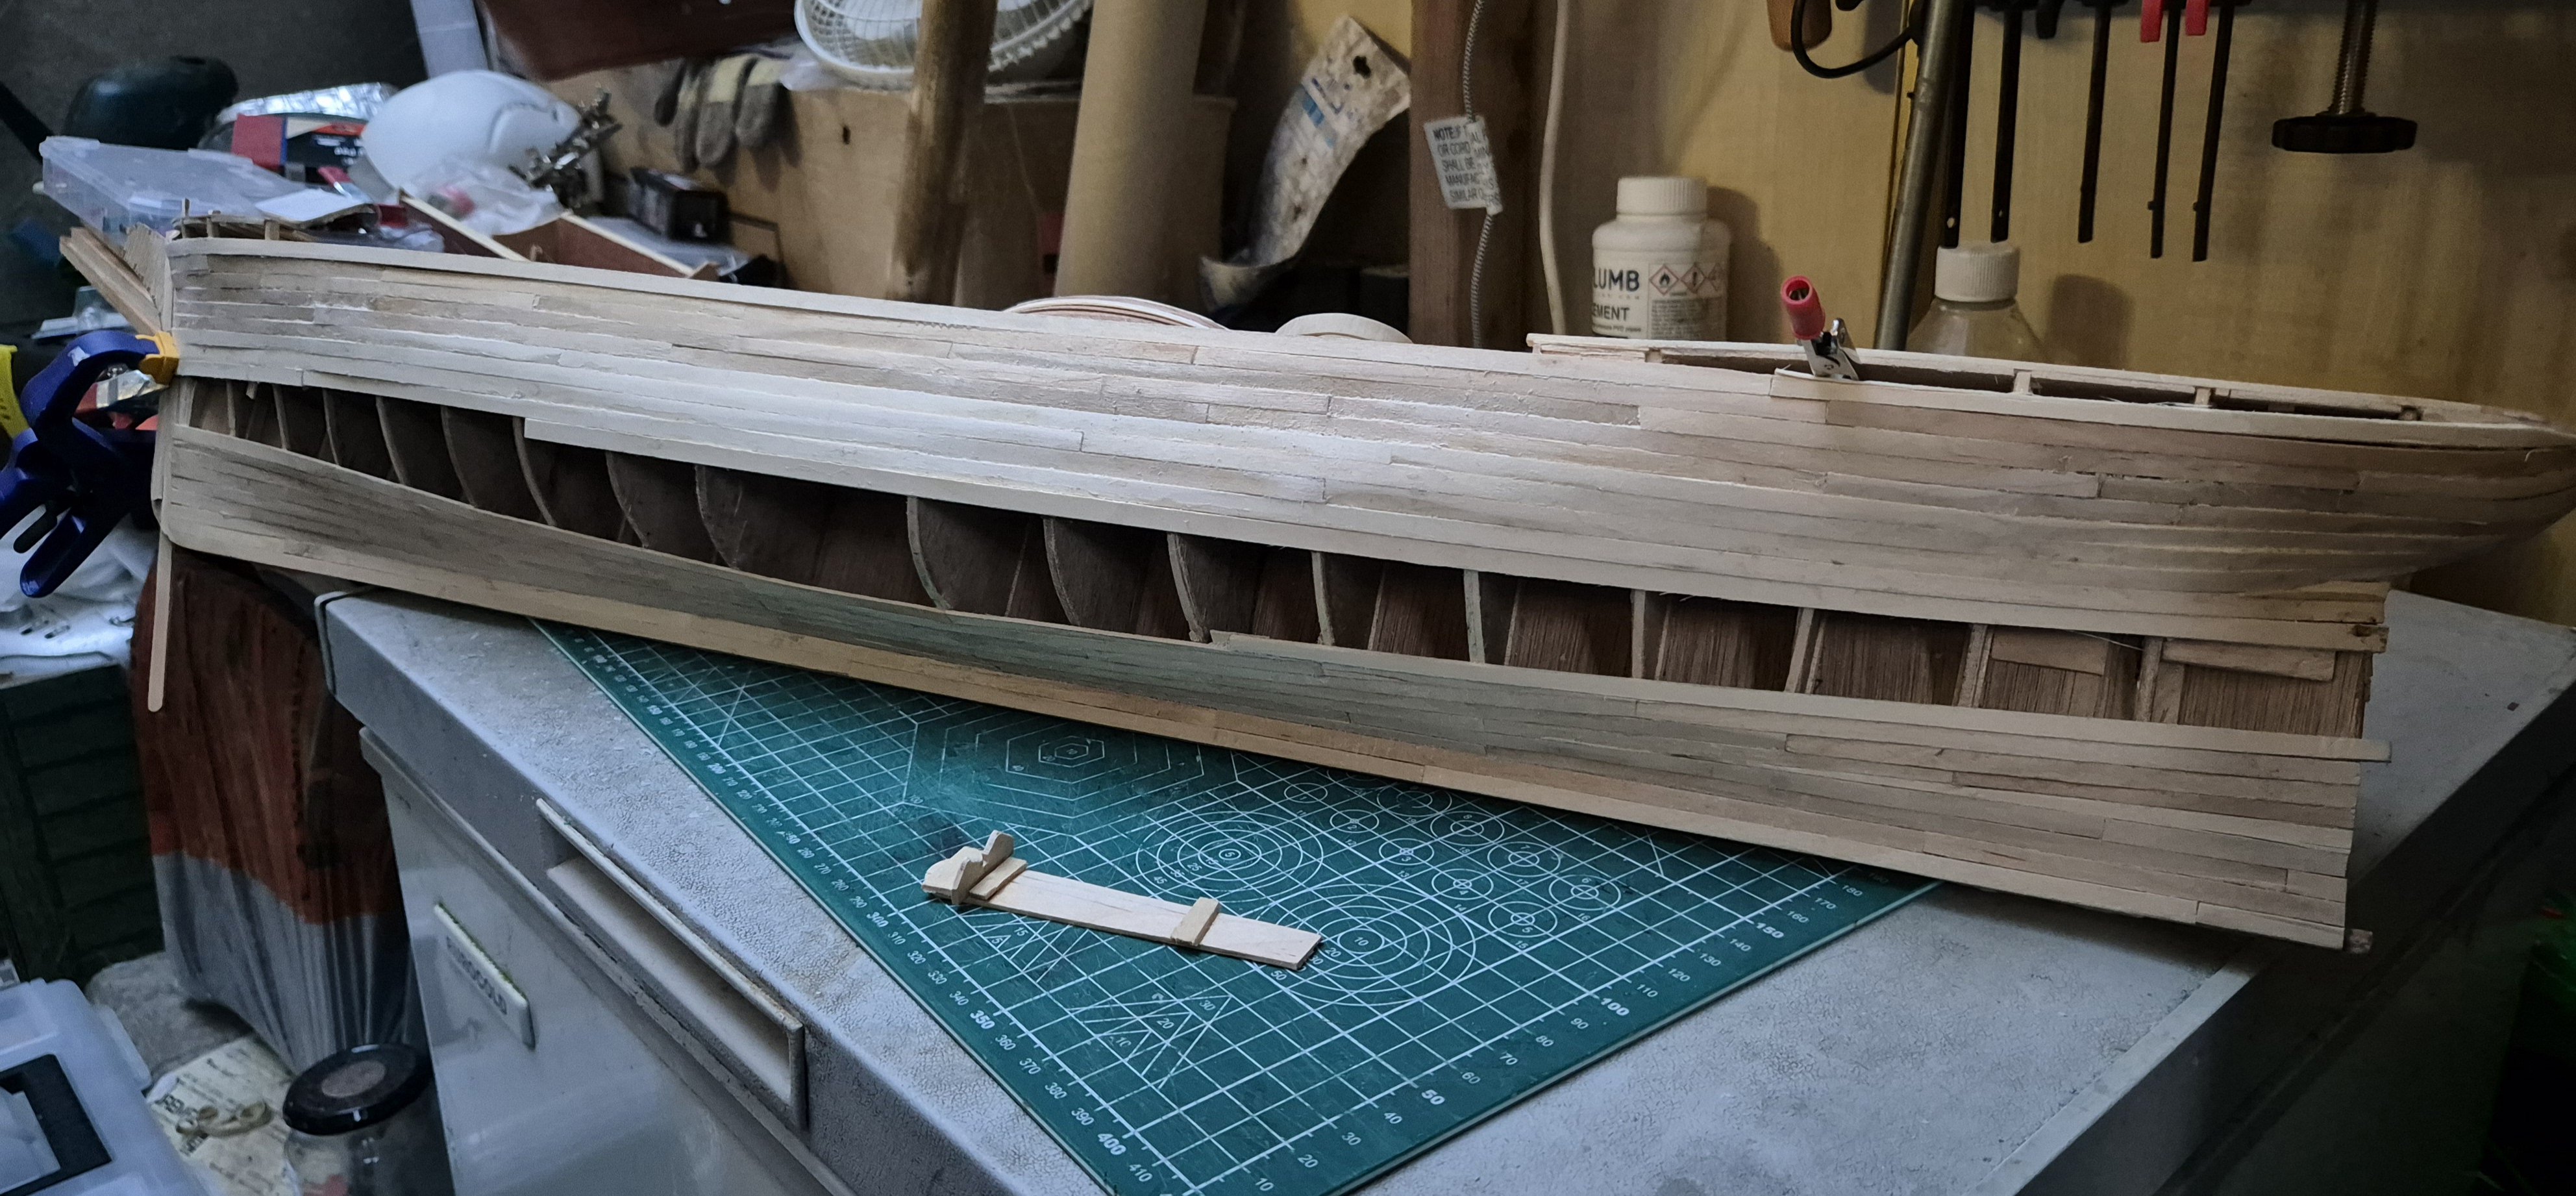
I have installed the bulwark and most of the sanding, just a little more to get the shape equal.
When I installed the bulwark, the supports are strong enough to keep the planks together but midships there is just too much flexing. I suppose I could add a couple of pins each side but haven't tried that yet. What I did do was clamp a metre steel rule to the sides to set the bulwark straight or at the appropriate curve and then run glue (pva) into any gap that appeared. This has improved its stability but not fixed it.
When I visited CS last, earlier this year, I noticed she is not double planked but triple planked. The first layer runs fore and aft as you would expect. There is a second layer that still runs for and aft but at an angle of about 45 degrees. This is clearest when you enter the door cut into the side of the hull on the starboard side. There is then the third layer that is horizontal fore and aft.
As the were built only a year apart and on the same river, just in a different shipyard so I am wondering if T would be the same.
This would give me the excuse to insert a 45 degree planking using veneer as this would not add any significant girth to the vessel but if I then add another 1/32" layer of basswood my hull would then have to strength of homemade plywood.
The veneer will wrap around the hull easily as I have shown here. Or, I could just do this to cover the area midships and blend it in before adding the last layer. It's the added stiffness on the bulwark that I am seeking.
Simon
- Baker, berhard and Keith Black
-
 3
3
-
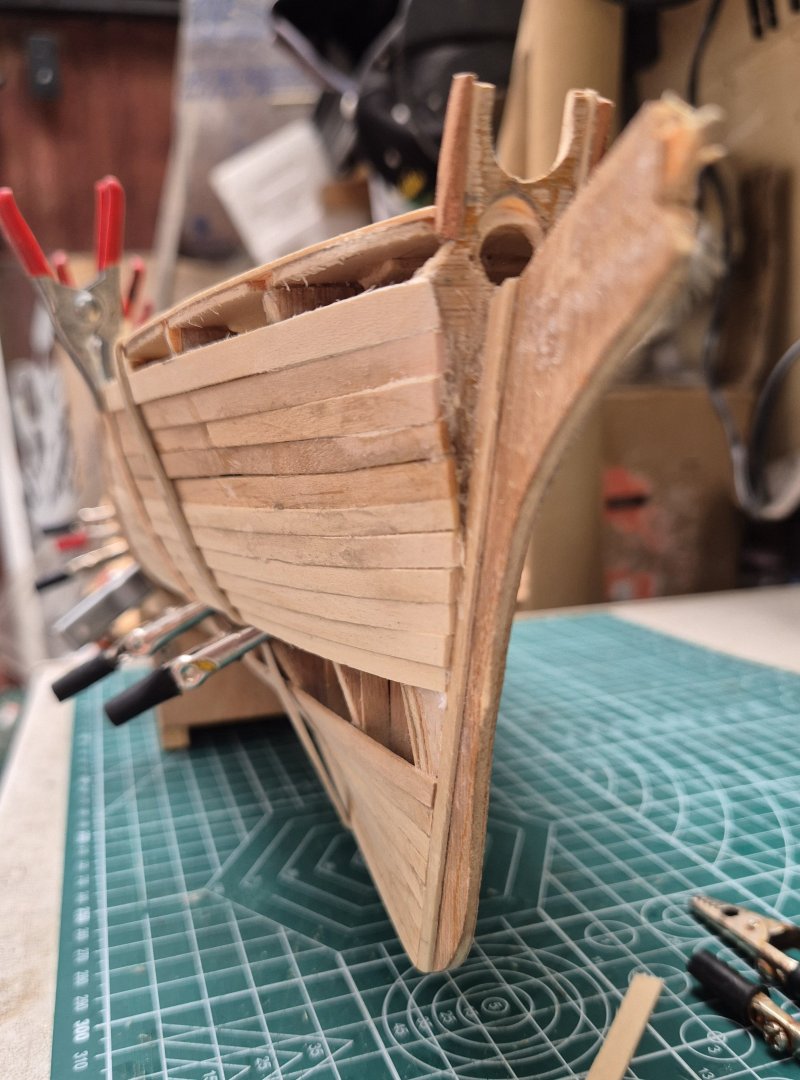
Started this morning on extending up the bulwark and repairing the prow. Took the family out for a few hours as off today and have the next 7 days on duty.
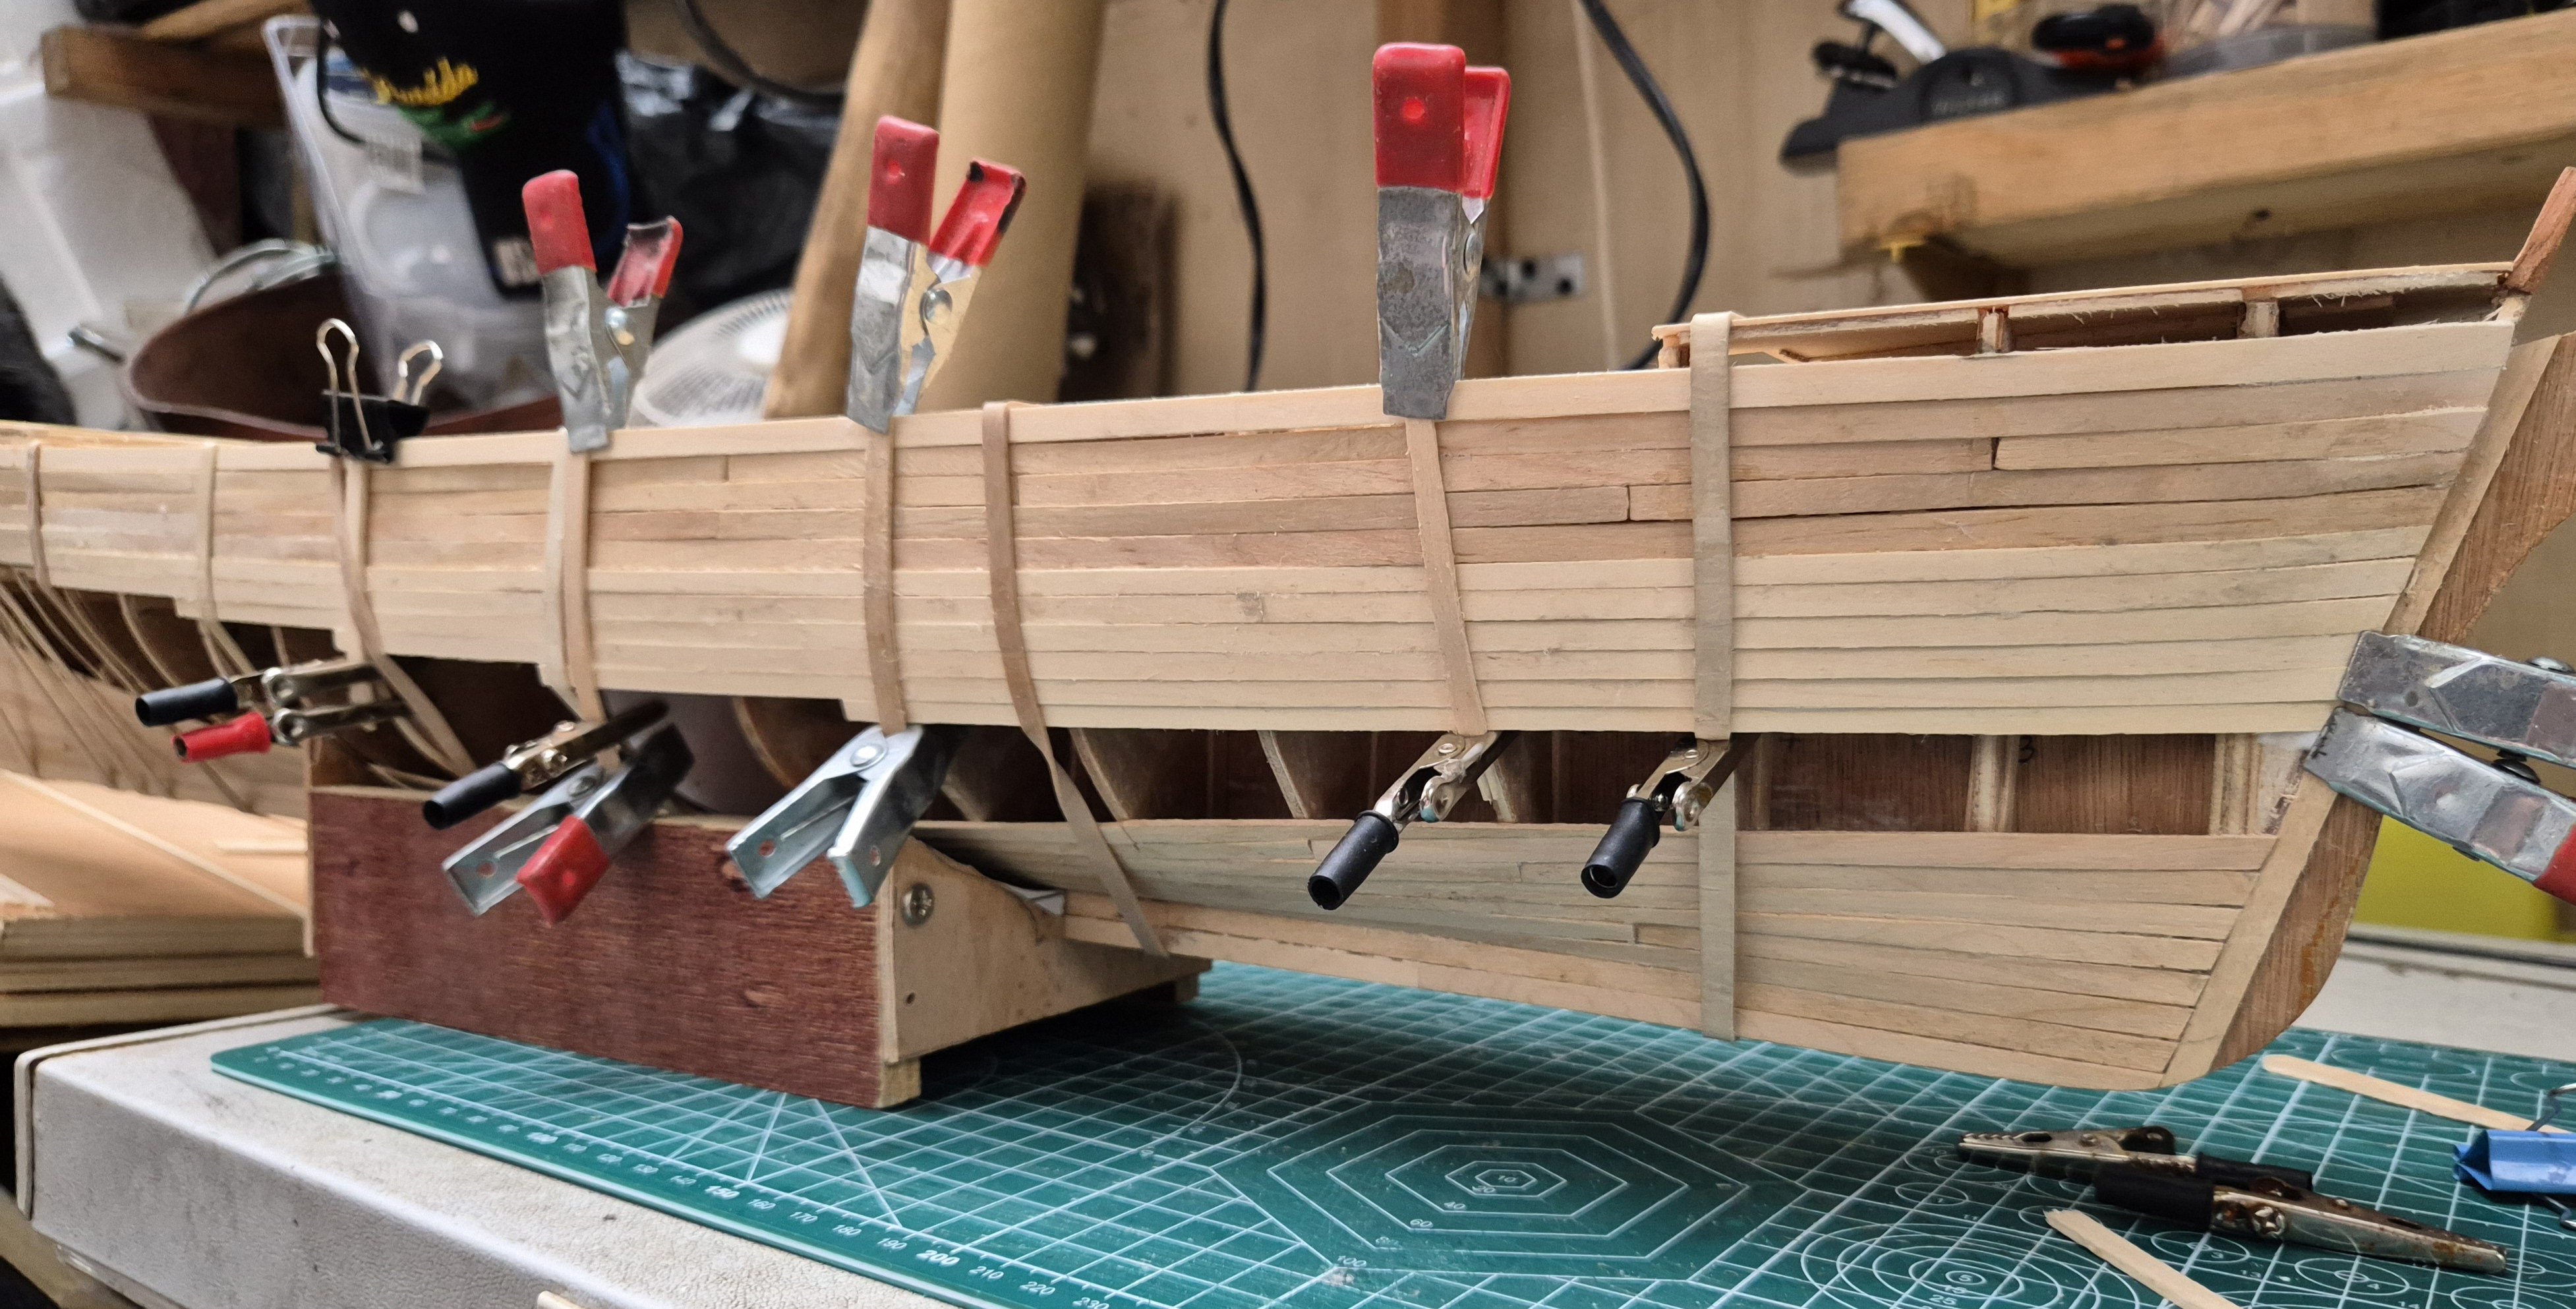
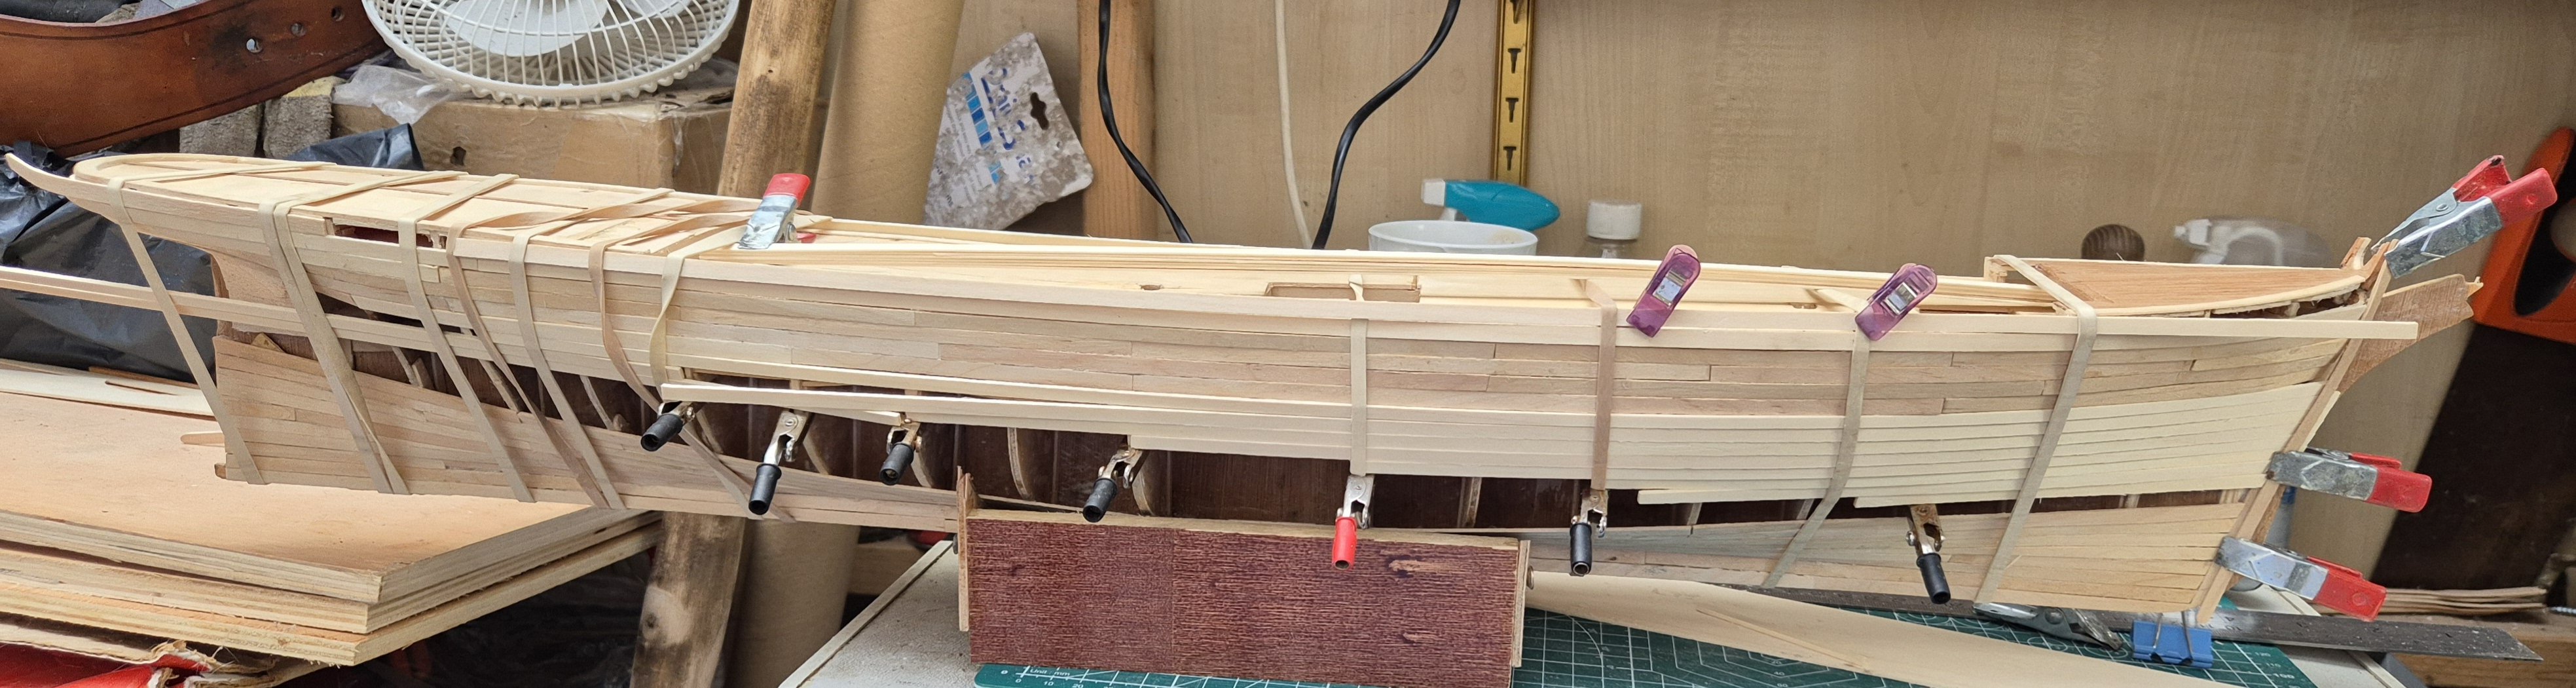
Hull planking were 1/16" but there is a gentle curve to both 1st and 2nd strakes and my supports are not man enough to hold that curve on that thickness. So I have used 1/32" and am doubling it up with glue the full length of each piece. Just the second layer on the first strakes and the bow to sort out but have to wait for the hot water to do its thing, they are clamped to the hull just below their final position so they should just sit nicely without any form of clamping other than each end.
Bit more smoothing to do on the hull before I decide what I am going to use to clad the hull.
Simon
- fake johnbull, Baker, Keith Black and 1 other
-
4
-
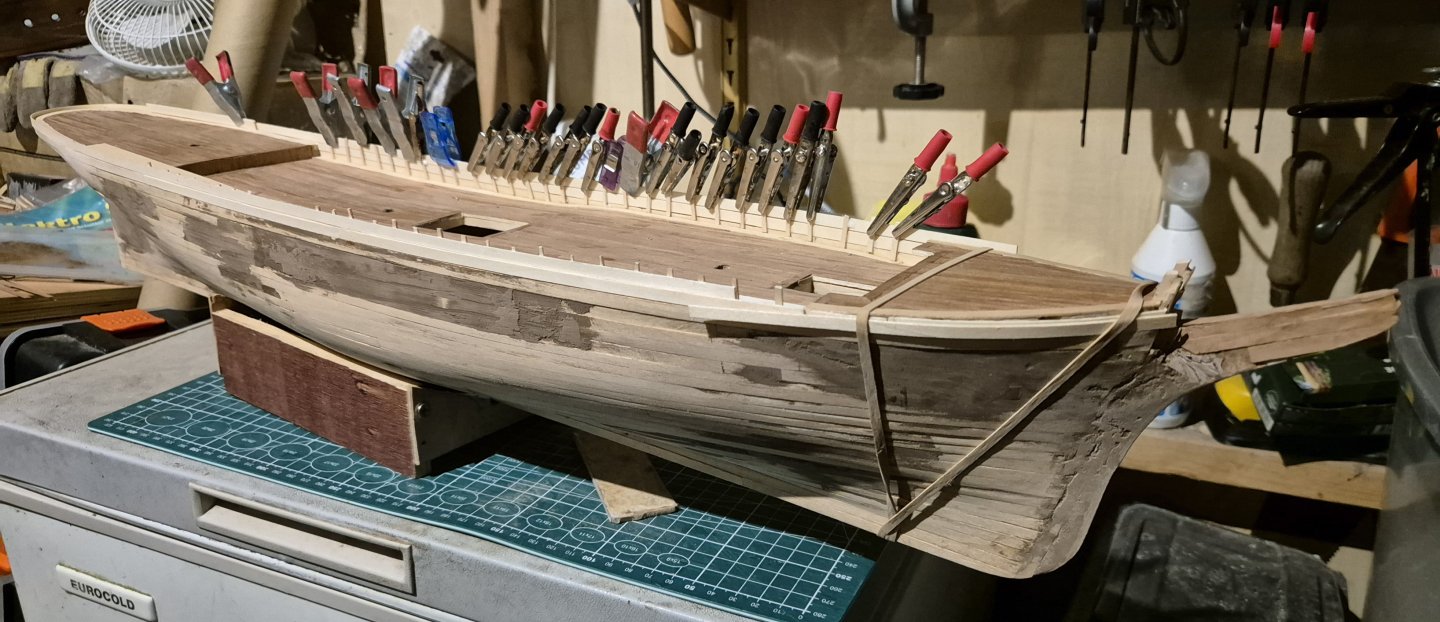
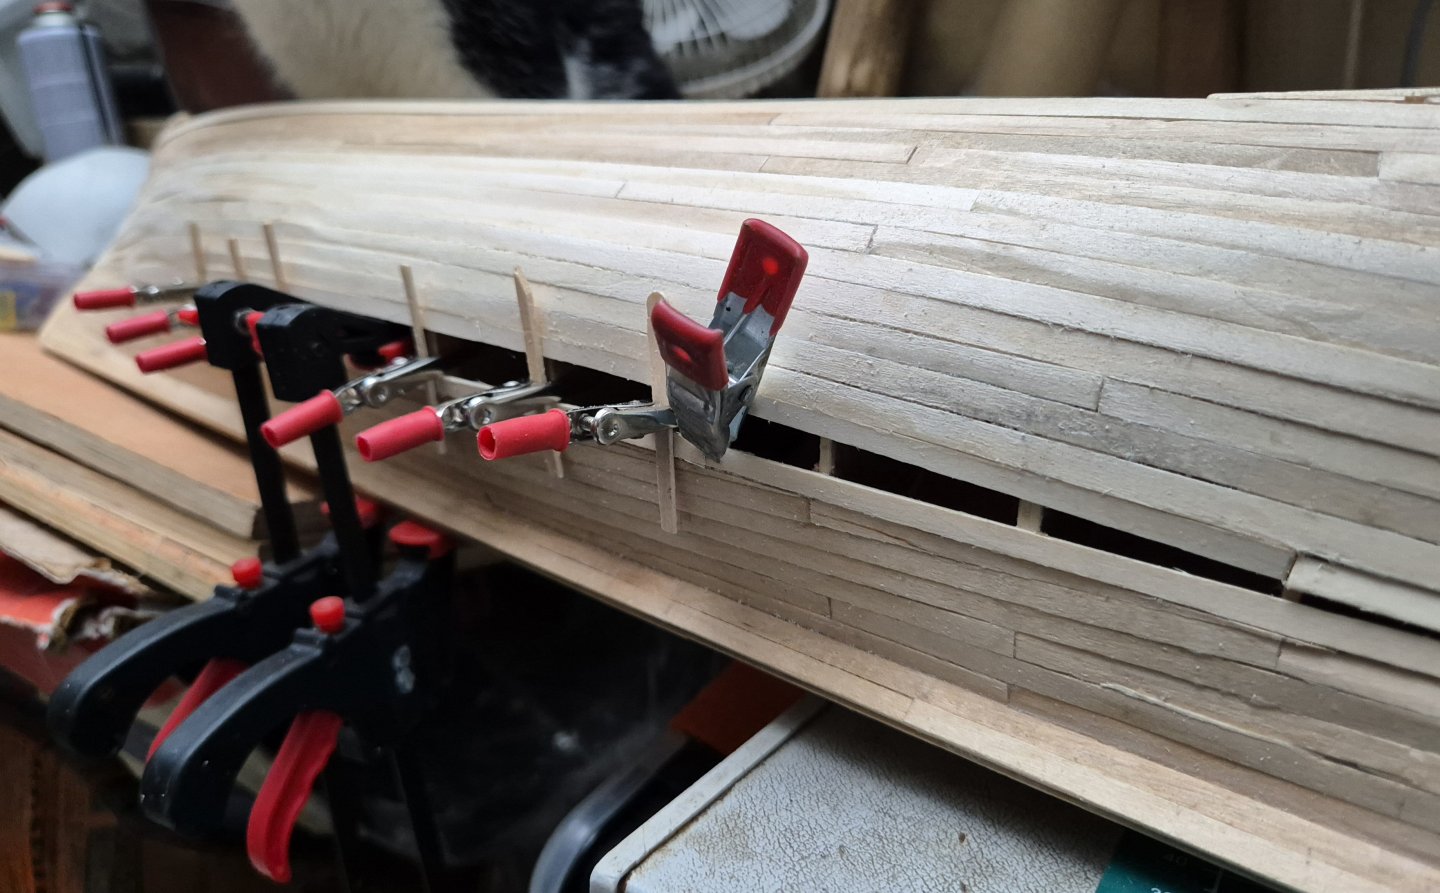
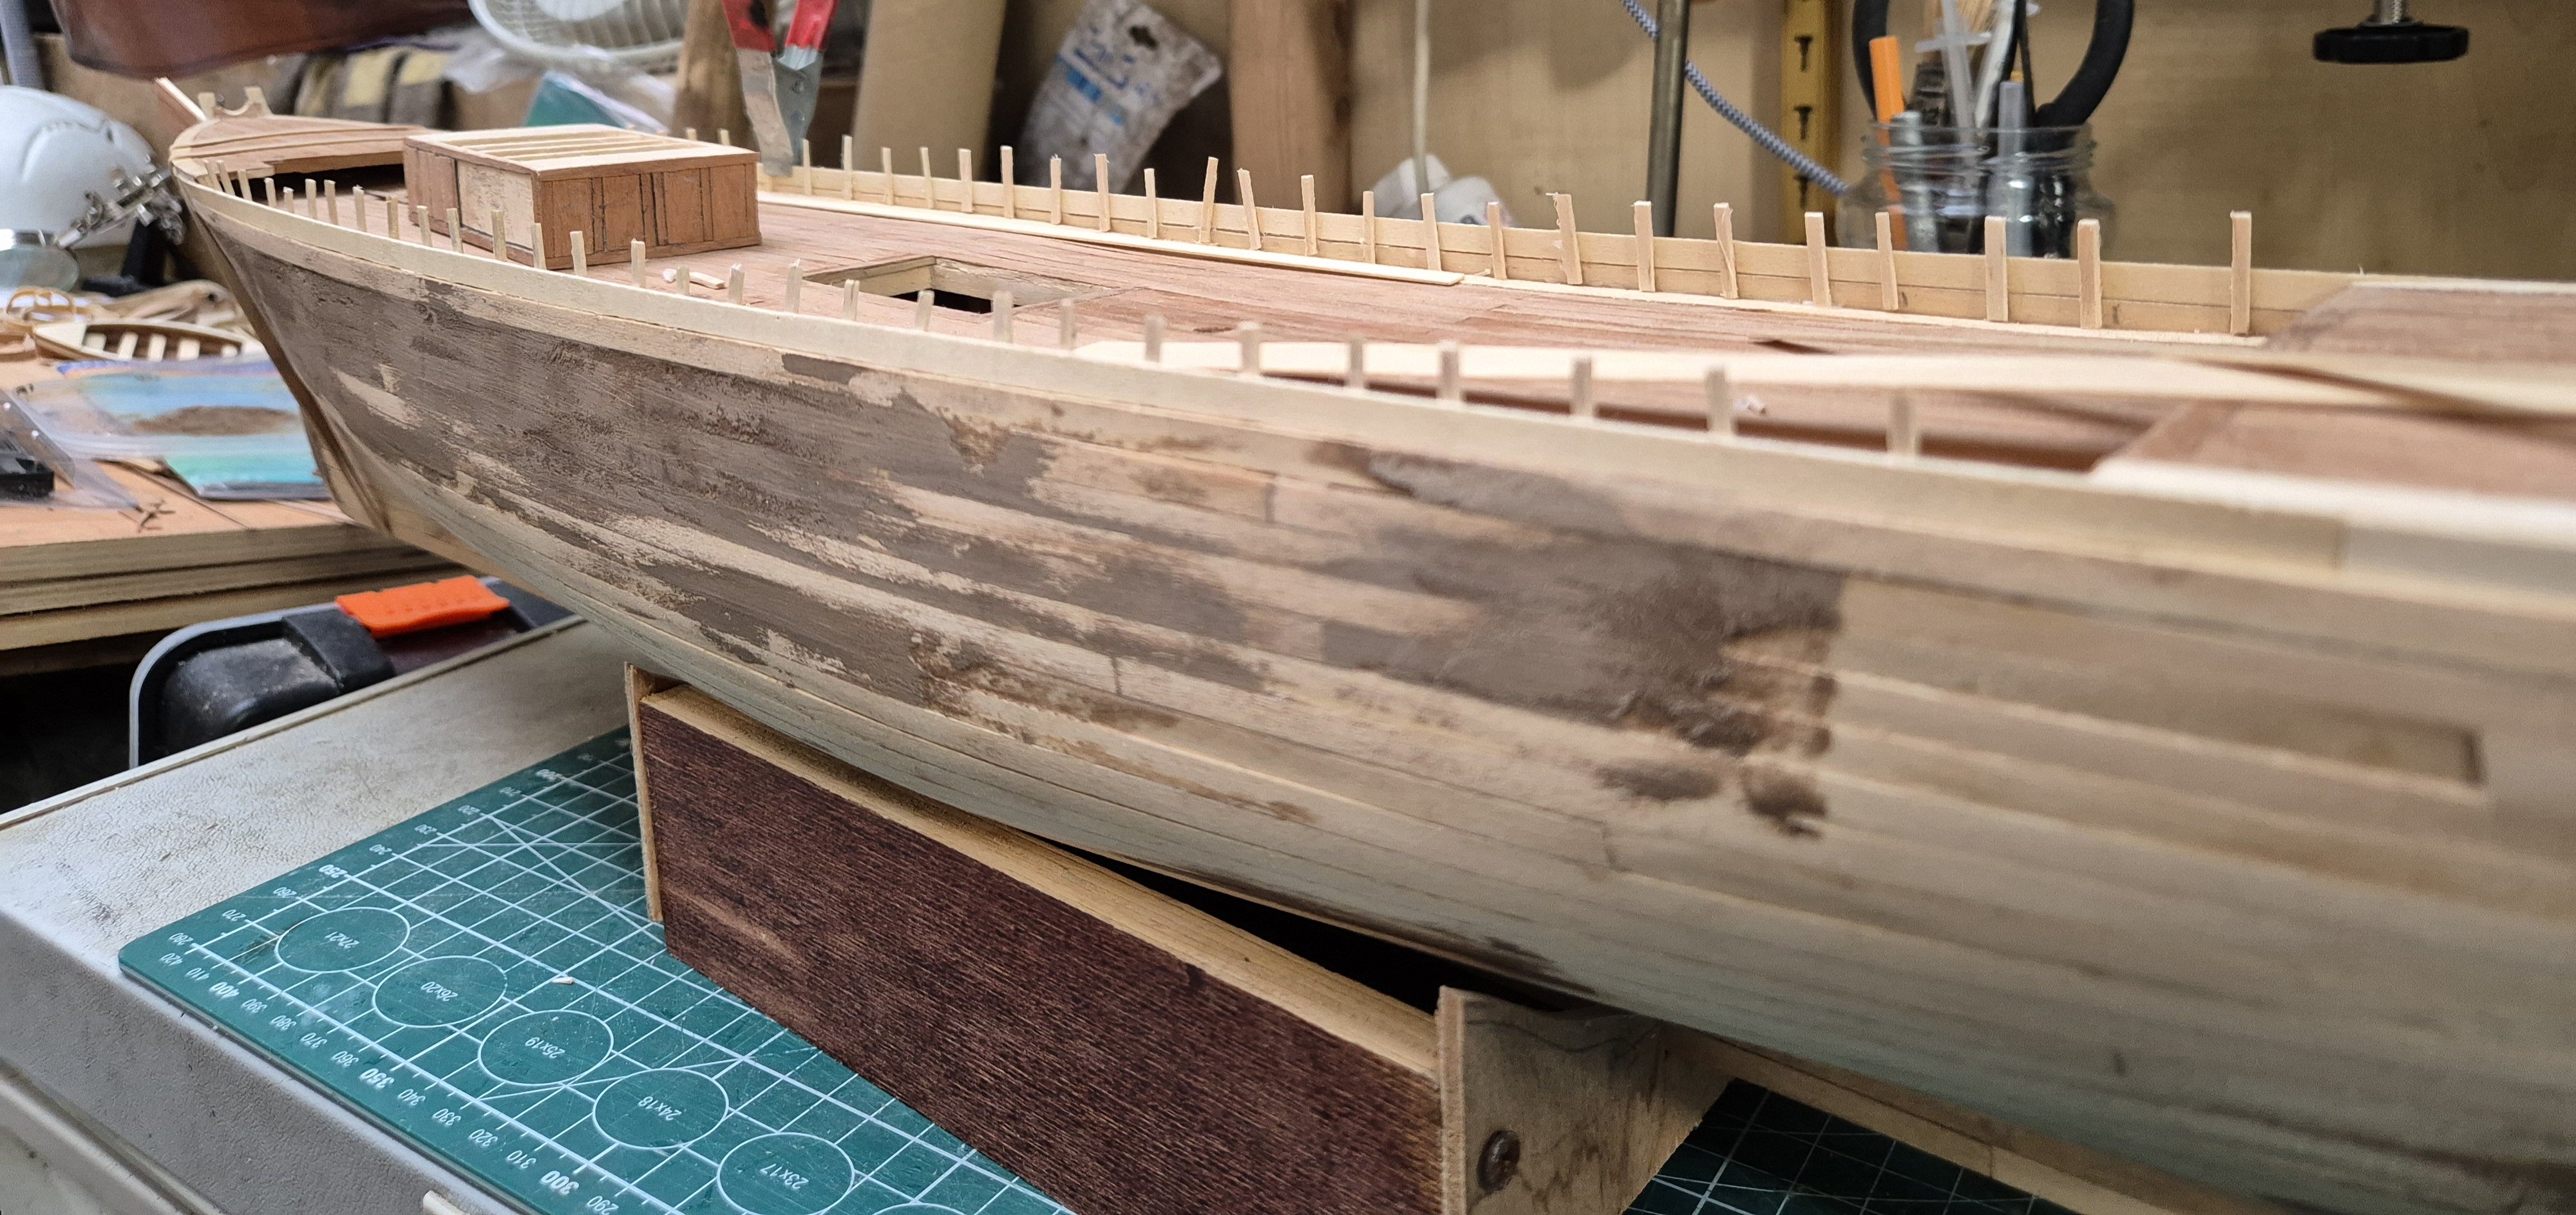
Last night I left my Admiral watching the Opening Ceremony for the games and sat cutting out and installing 58 mini planks to be the upright supports for strakes 1 & 2 midships. I also installed strakes 2 on both sides.

This morning I had risen at my usual 6am even though it's not a workday, made my coffee and was admiring my handiwork from the evening before.
One of the cats came to join me and jumped up on my chest, even though I had the boat I my hands. No problem, I will just put the boat down and pay her a little attention.
Not so easy and the scenes starts to emulate a scene from a Tom Sharpe novel. It seems my hands had been coated with something so slippery that the boat starts heading skyward as I grasp for it. Furry panics and every claw from all 4 feet penetrate my left shoulder as she launches herself into the back garden.
The boat has now crested the waves and is now heading for the floor while I flail in the air trying to grasp it and avoid the impending destruction of the stricken ship. Too little too late, it has hit the concrete floor bow first.
Having witnessed this awful event, I was sure that all was lost. I took a sip of my coffee and collected boat from where it had run aground.
Much to my surprise, the damage was not as severe as i had anticipated, thankfully.
The support for the bowsprite has shattered, the plywood delamination and the Knights head all but wrecked.
Several of the supports, 5 on the starboard side and 2 on the port side had broken off.
But that was it. I was not that upset about the prow as I had been planning to rebuild this anyway as it had a bias to port. The centre piece of the plywood had broken of close to the hull but the outer veneers were mostly intact. I simply cut a piece of 1/16 basswood and glued it in. I have strengthened this by laminating it on both sides with the cherry veneer from the planks left over from planking the deck.
I cut away the damaged timbers from the knights head and then added back the missing timber with more basswood. I can now build up the yolk and face the repaired part with cherry. I just need to build this up a bit more and it is reinforced inside the hull below the forcastle deck.

Disaster averted, I may have lost a day making good what was broken but the damaged parts a better than they were before. They are not finished but the light is gone for the day so putting her away for the evening.
Simon
- Baker, davyboy and Keith Black
-
3
-
Thank you Keith, I agree and am actually proud of what I have produced so far. I hope to finish the hull before the weather closes in and is less comfortable working outside but as my old decorator friend would say, I am fighting drying time.
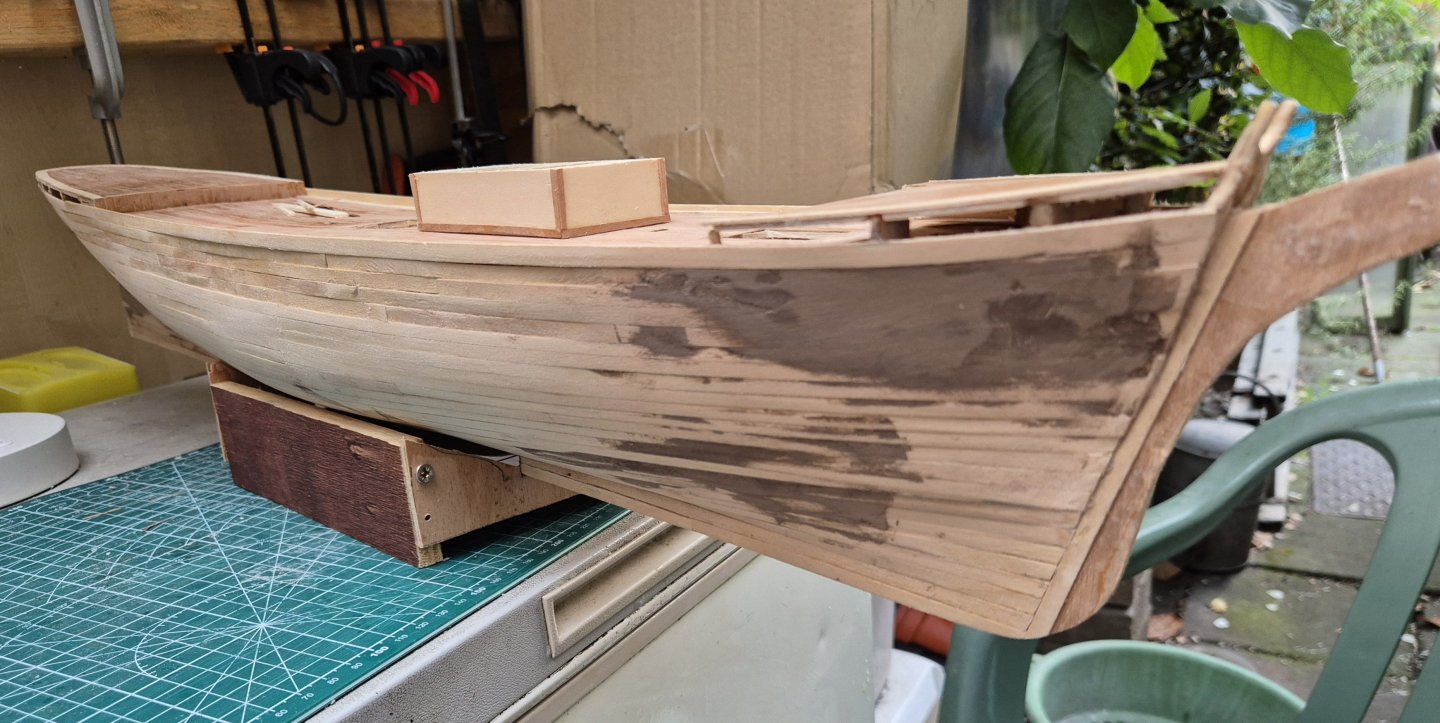
Even with thin layers, the filler needs two hours drying time before it can be sanded. Once applied, I have to put the hull to one side and work on something else. I have run out of small boats so have started on the deck houses.
The deck planking is all but complete, just one plank to go but that has to be shaped the full length and needs a little patience.
The forward deck house structure is completed. I will hold of constructing the roof until I have finished the marquetry on the sides.
Next jobs:-
I finish deck
2 apply next set of fillers on starboard side
3 set out door and panel positions on foreward deck house.
Simon
-
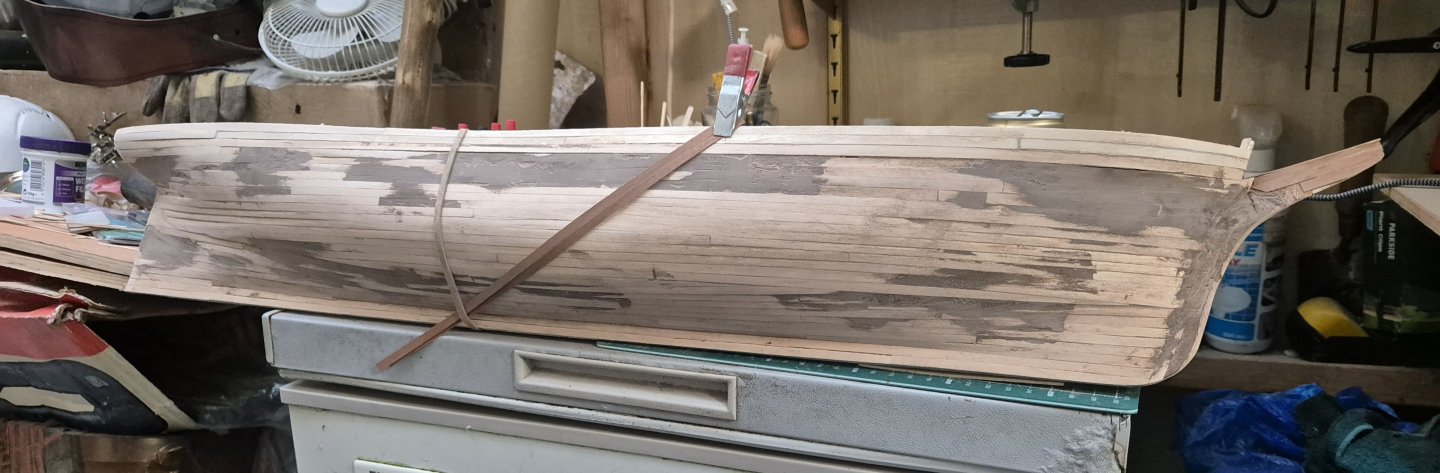
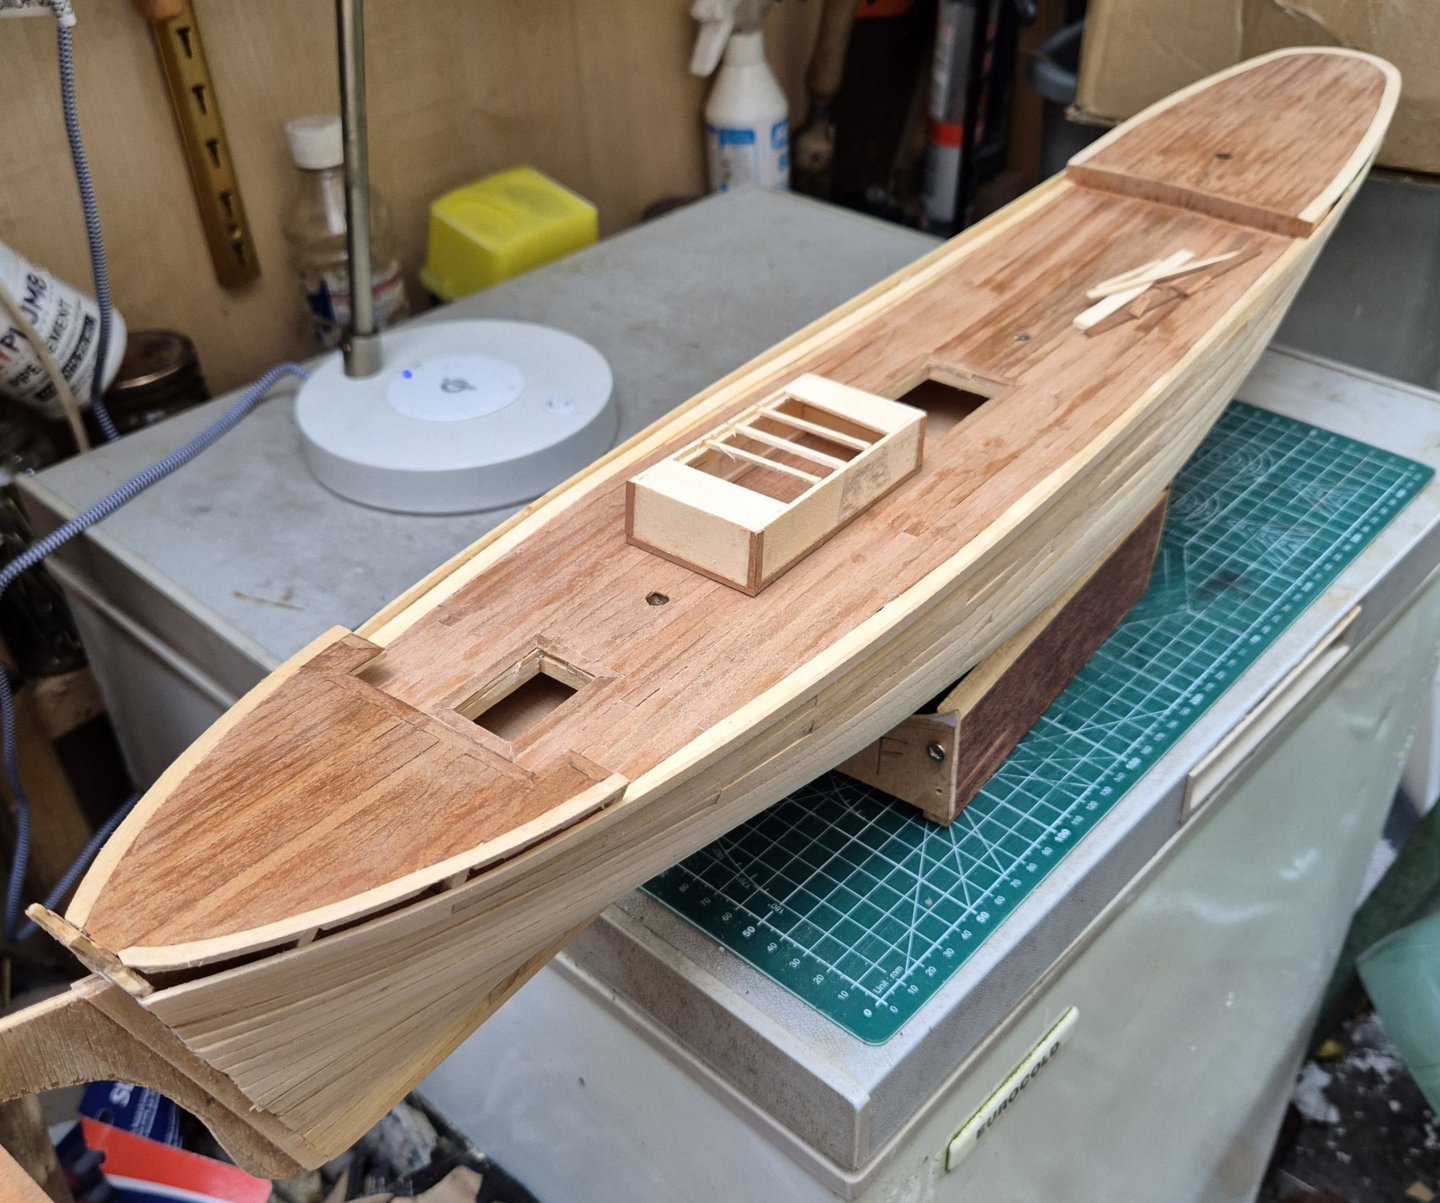
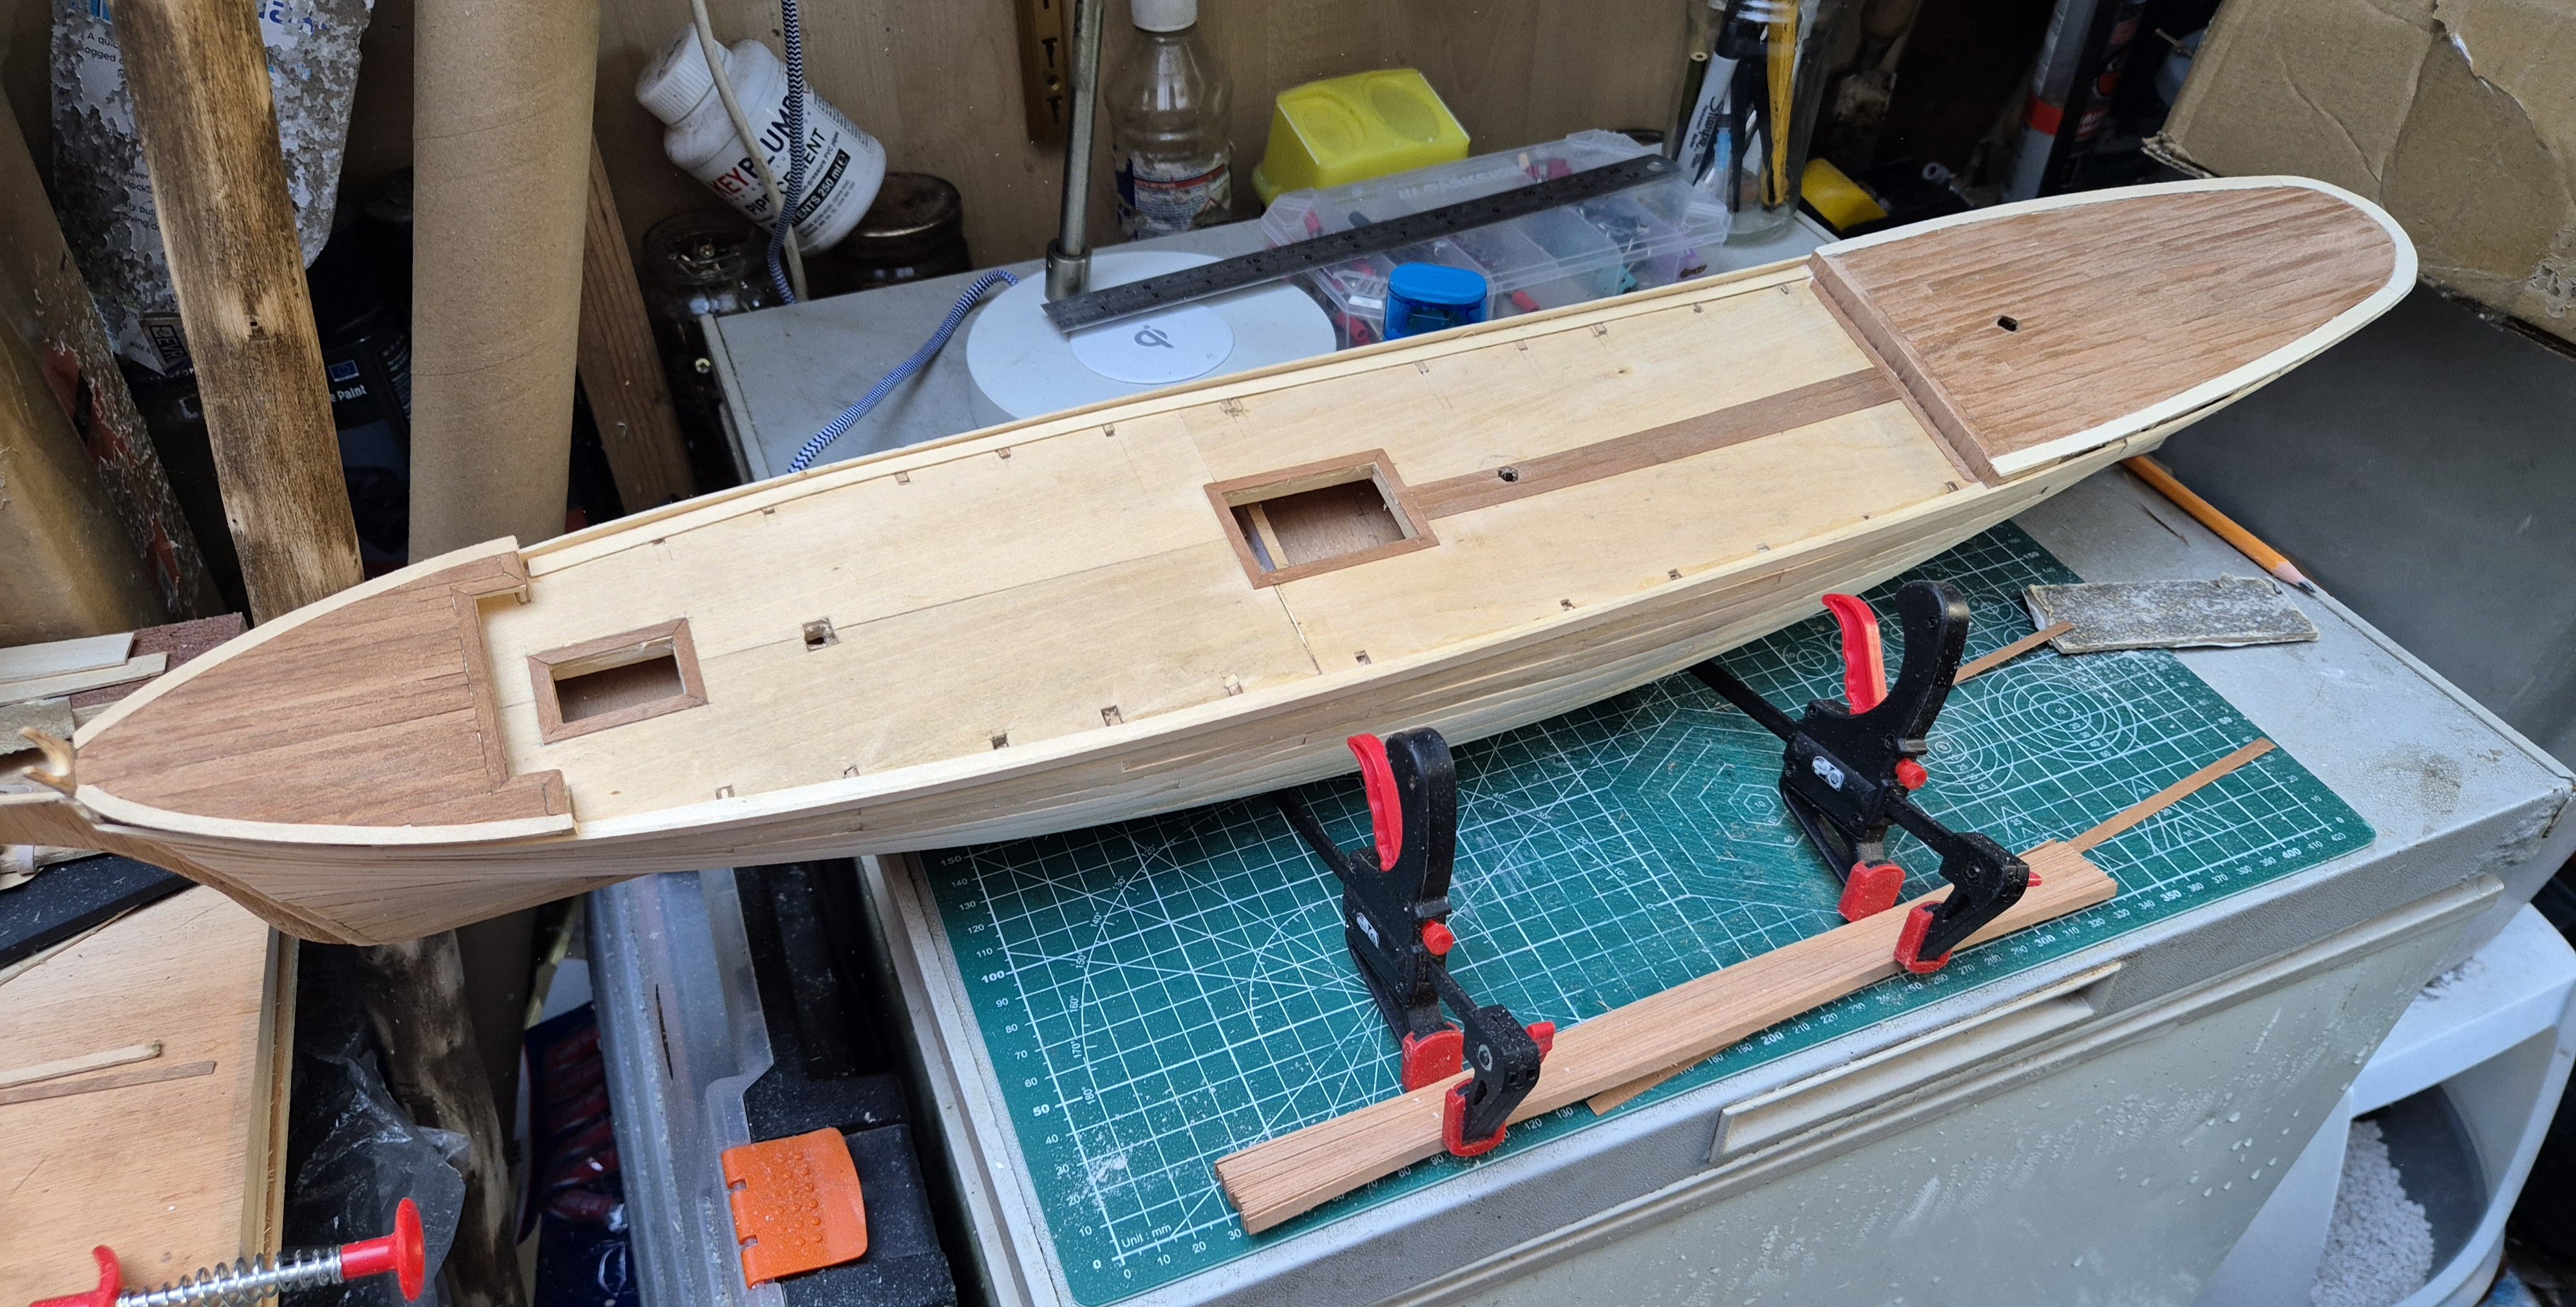
Did a little more sanding on the hull, can't be too enthusiastic as it's only 1/16" thick. The images today seem to exaggerate the errors in the planking.

The quarter deck has been planked in Cherry veneer. I have just cut an A4 sheet of veneer into 5mm strips by hand ready to plank the main deck.
Simon
- Baker, Keith Black, berhard and 2 others
-
5
-
1 hour ago, Baker said:
The hull is planked. A milestone reached 👍
7 work days in a row.
In my younger days, I had a system like that too.
7 days from 14 to 22.
2 days rest
7 days from 6 to 14
2 days rest
7 days from 22 to 6
3 days rest.tiring, but it paid well.
That sounds very tiring indeed. I am currently working in the self storage industry and it takes a team of 3 to run a store. As we are open 7 days a week, we take turns to work a weekend. That means that every third week you get Thursday and Friday off but have to work Saturday and Sunday. The following week you work a normal Monday to Friday which means every third week you get to work 7 days in a row.
You can see from the images I posted that there are a few places where some filling is required. I am curious what others use as a filler?
Thanks for the likes, I am glad to have completed a milestone, or I will do once I can sort out the top Strake and gunwhales.
Simon
- Keith Black and Baker
-
2
-
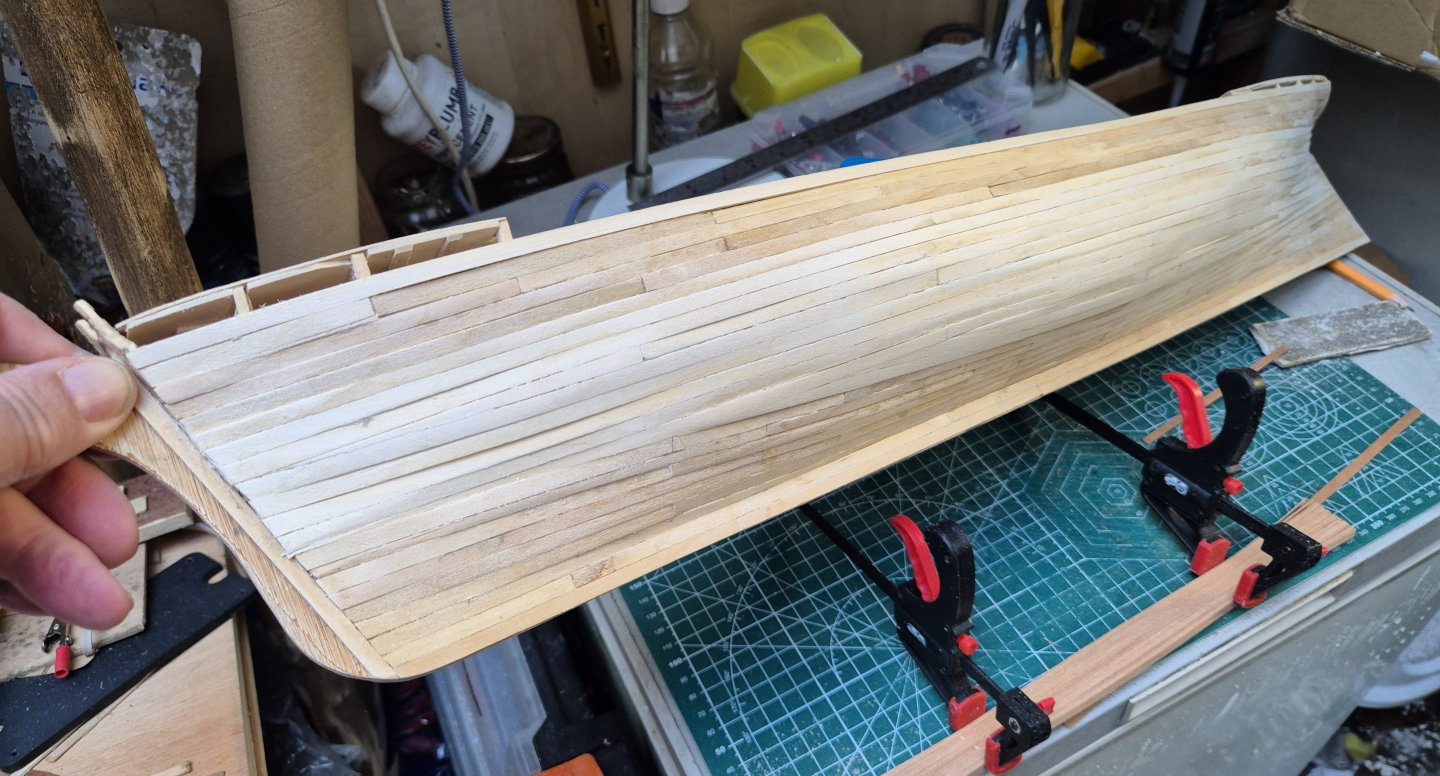
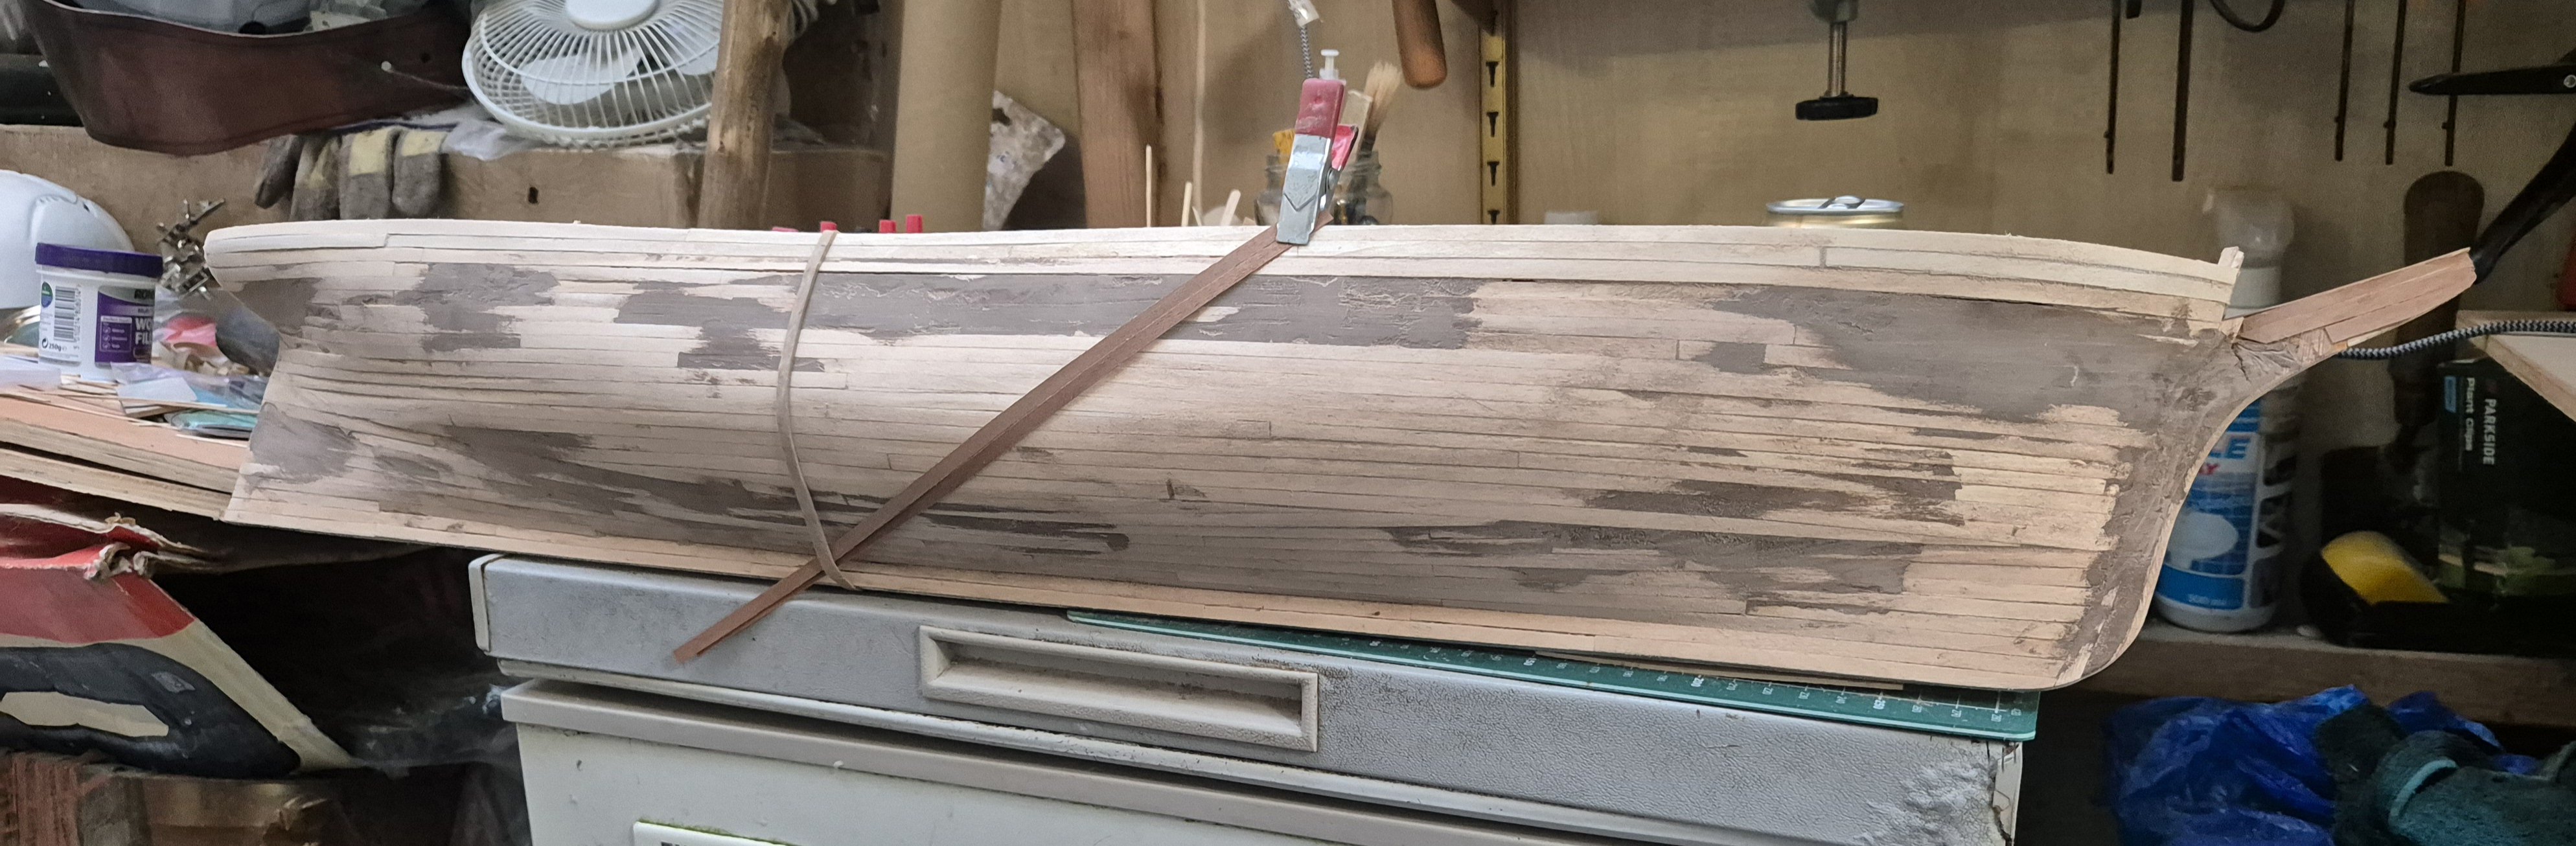
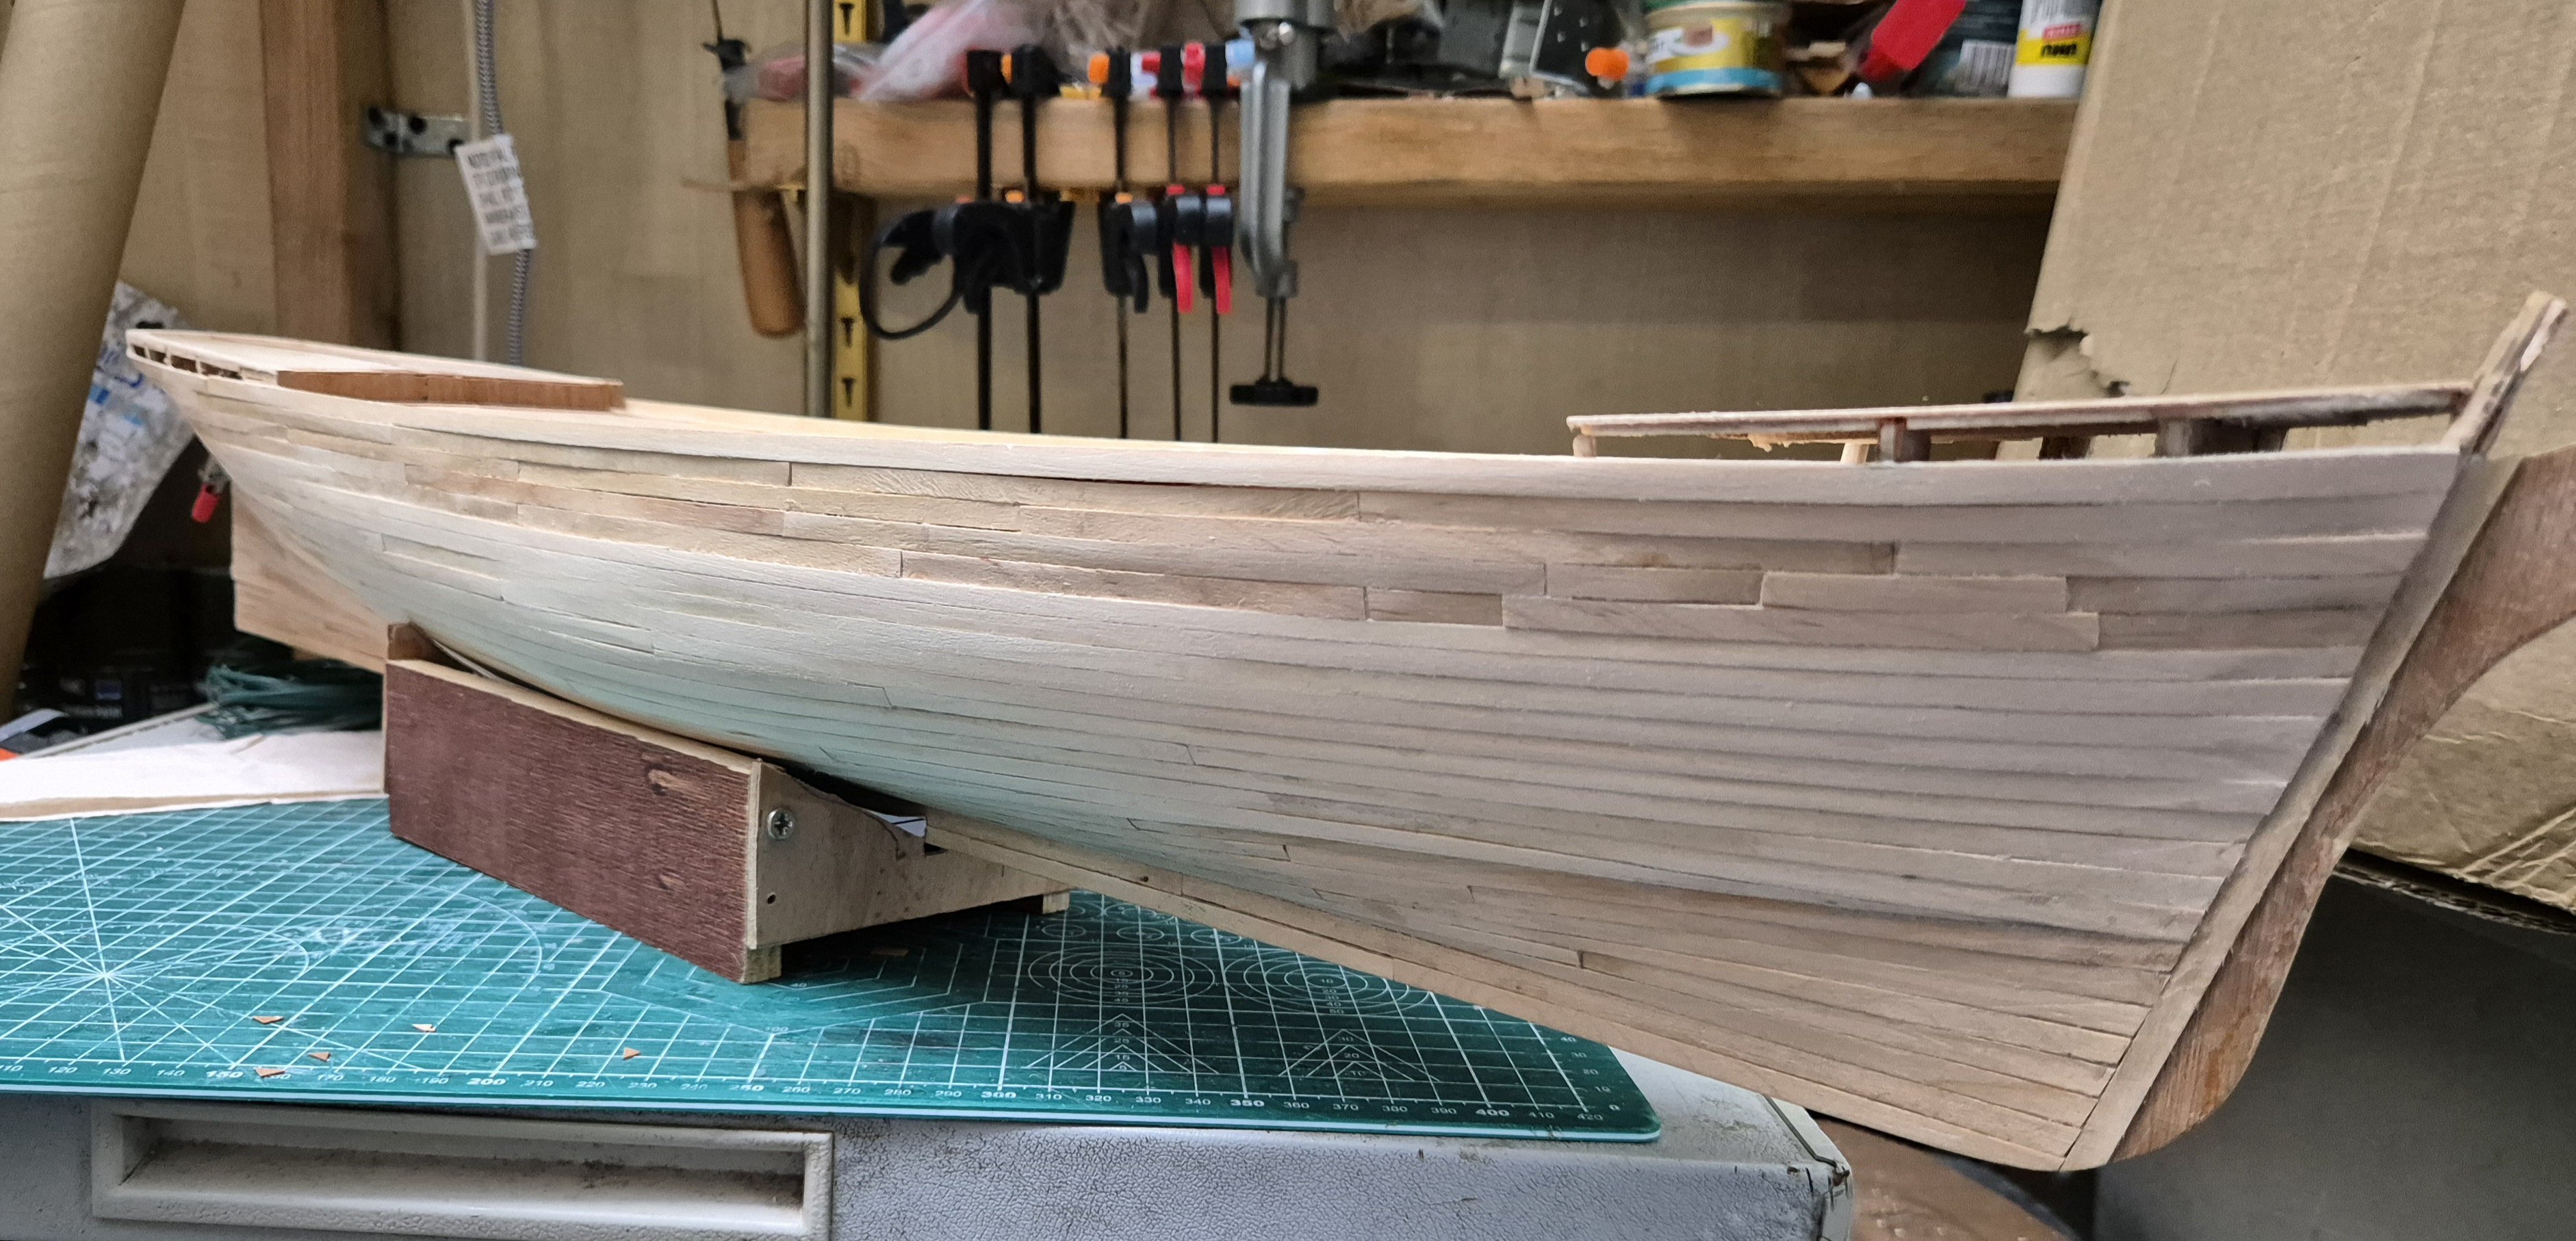
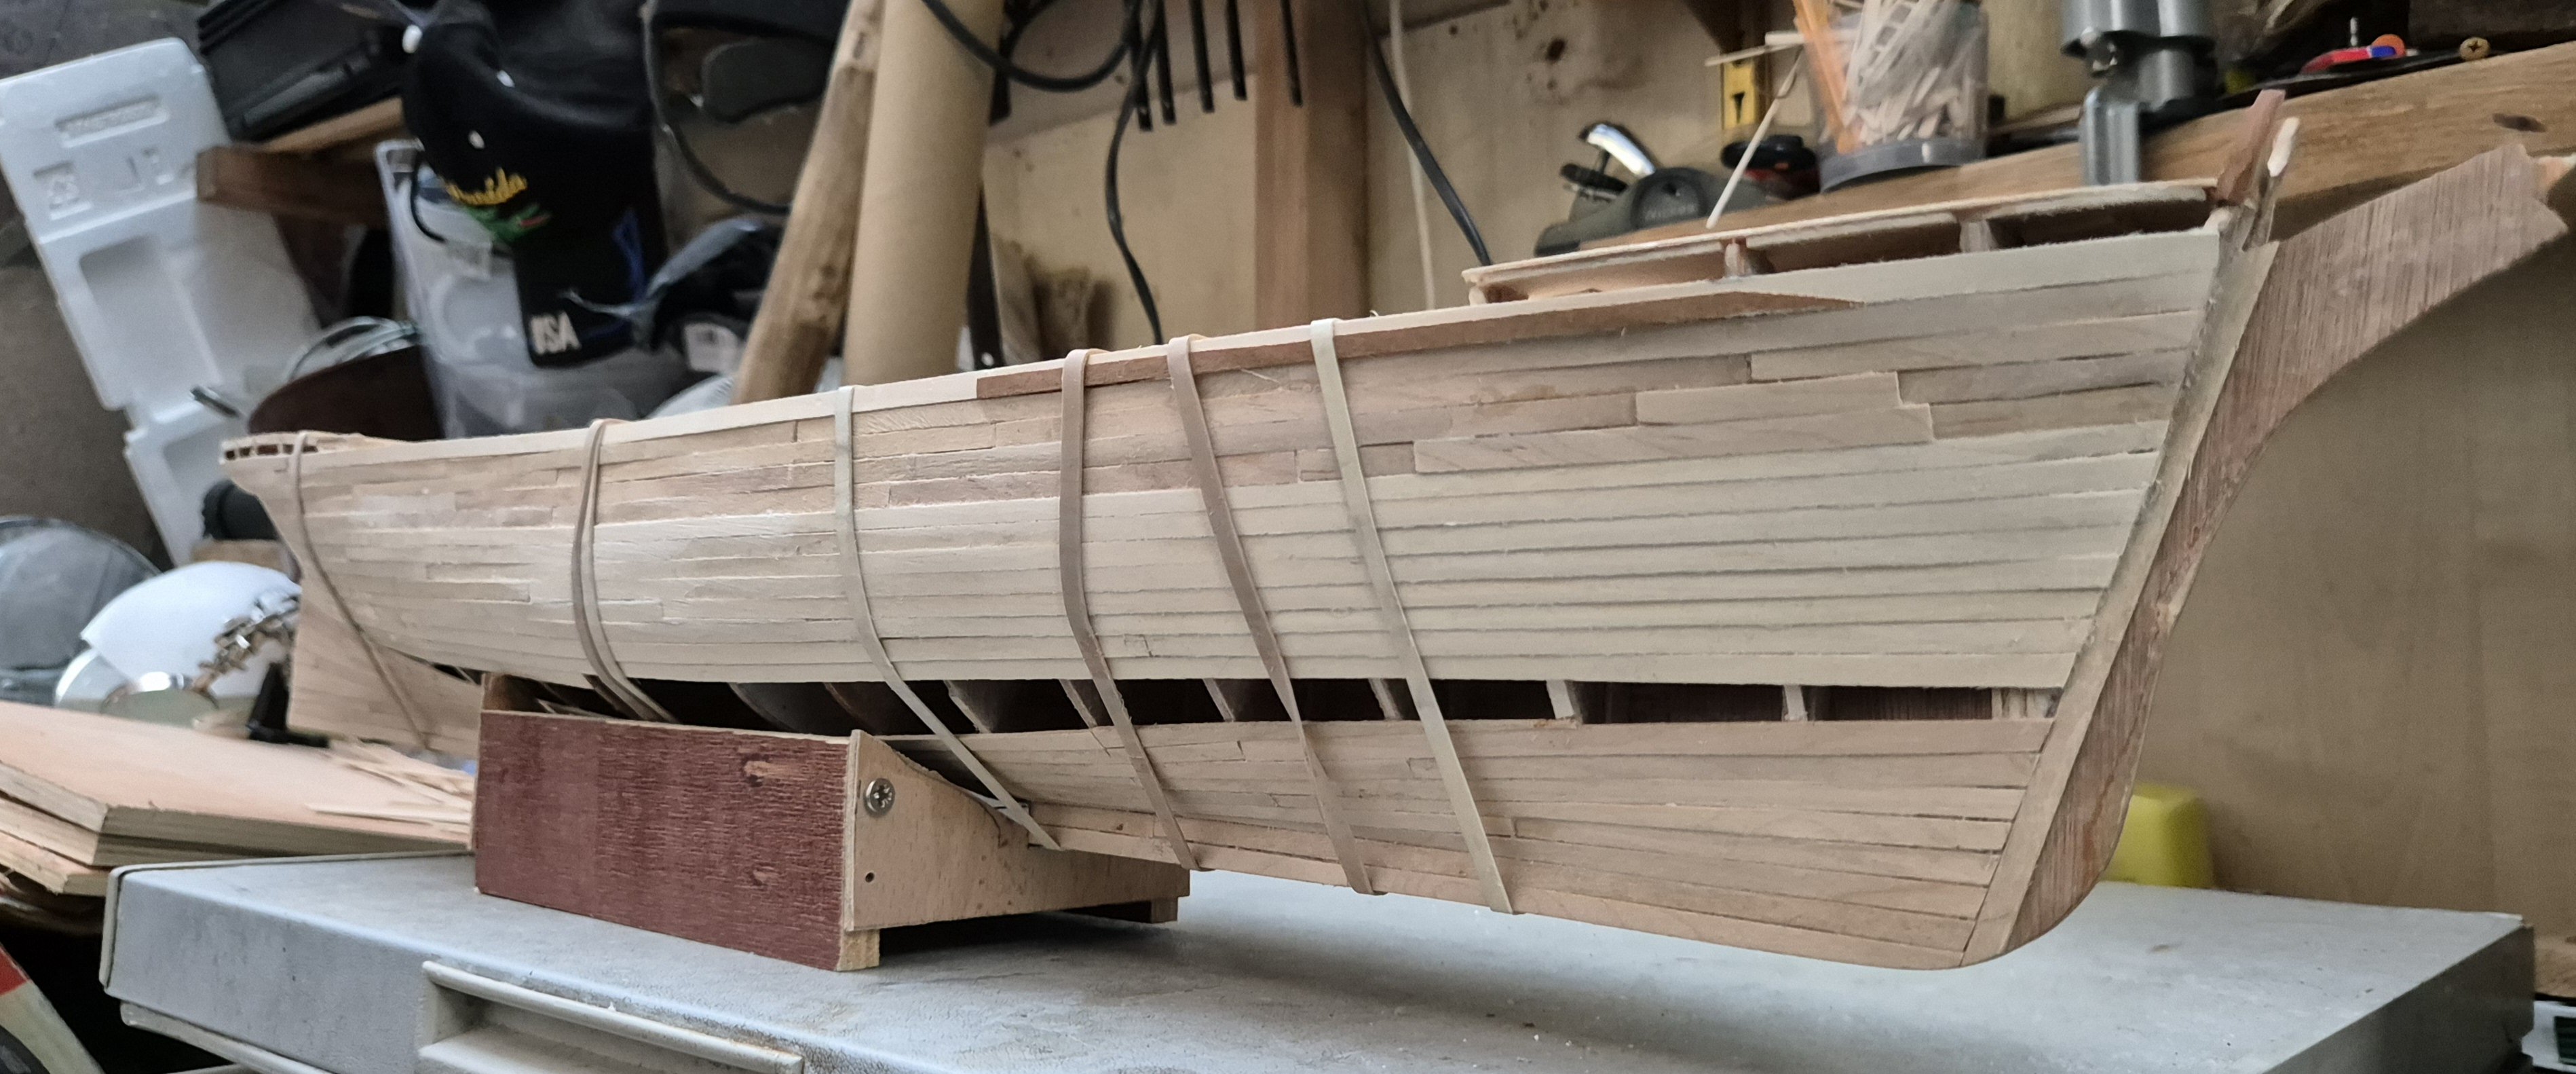
The hull is planked. It's had a rough sanding with Stanley knife blade as a scraper and P60 grade sand paper. It's not perfect but it's surprisingly even . I could still add a second layer of planking but as I will be filling any voids and painting the finished item, I am not sure I need to.

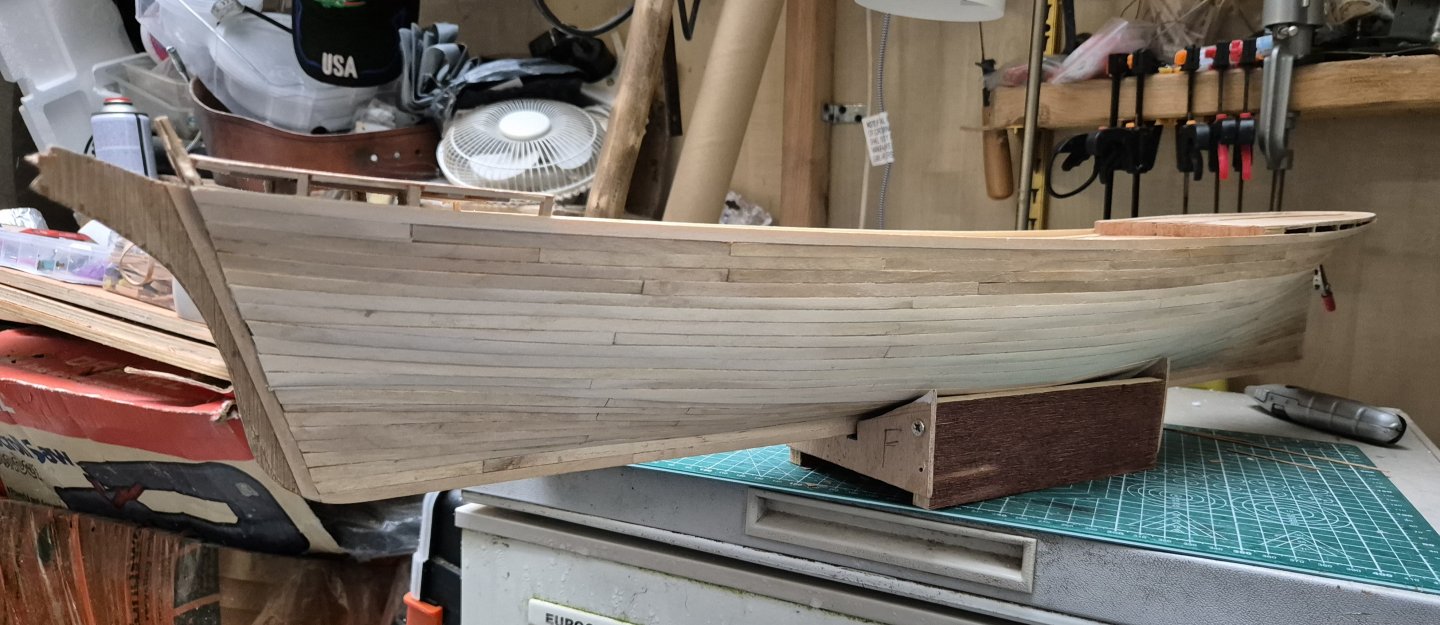
Yes, I still need to add the gunwhales but I need to do some modifications before I do that.
The gunwhales a midships have vertical struts every few feet and I need to consider my options.
I can make these from very thin strips of wood or, I can find some fine panel pins or dressmakers pins as I think they may have been an extension of the angleiron framework.
On CS these are metal and have a diagonal brace as well.
Tomorrow is my last day in a 7 day working week so i am finished for the day, going to vegetate in front of the telly.
Thanks for all the likes guys.
Simon
- fake johnbull, Baker, Keith Black and 1 other
-
3
-
 1
1
-
On 8/19/2024 at 1:44 PM, Kauz said:
Hello,
just found this thread on the SNR forum:
https://snr.org.uk/snr-forum/topic/clipper-thermopylae-bowsprit-support/
Perhaps of interest 🤔.
Well that is interesting but what is a panting?
This appears to be some sort of support or fixing for the bowsprit. All the root of the bowsprit is below decks. This is secured on my model by passing through a hole in a bulkhead so it's angle and pitch is fixed.
It sounds like this was not so on the real thing and the bowsprit terminated at a large block. It sounds like this might have had to be reinforced by a cross member extending across the beam under the forecastle fixed in place with knees to ensure it didn't move.
I am only guessing mind, so if anyone has a different view, I will be happy to listen.
I am still contemplating whether to close of the forecasted as in the antique model referred to by Rob or to leave it open like CS to accommodate the pig pens and sail lockers. CS also had a few bunks deep into the forecastle and as Big T only had one deck house which would probably be the galley, carpenters and sailmakers workshops.
My frustration today is waiting for glue to set up so I can fill in the gap in the port side.
Starboard side has had a session with a scraper followed by 60 grade sandpaper. Next is 120 grade followed by 200. I might have to use a sparing amount of isopon first.
Simon
- Baker and Keith Black
-
2
-
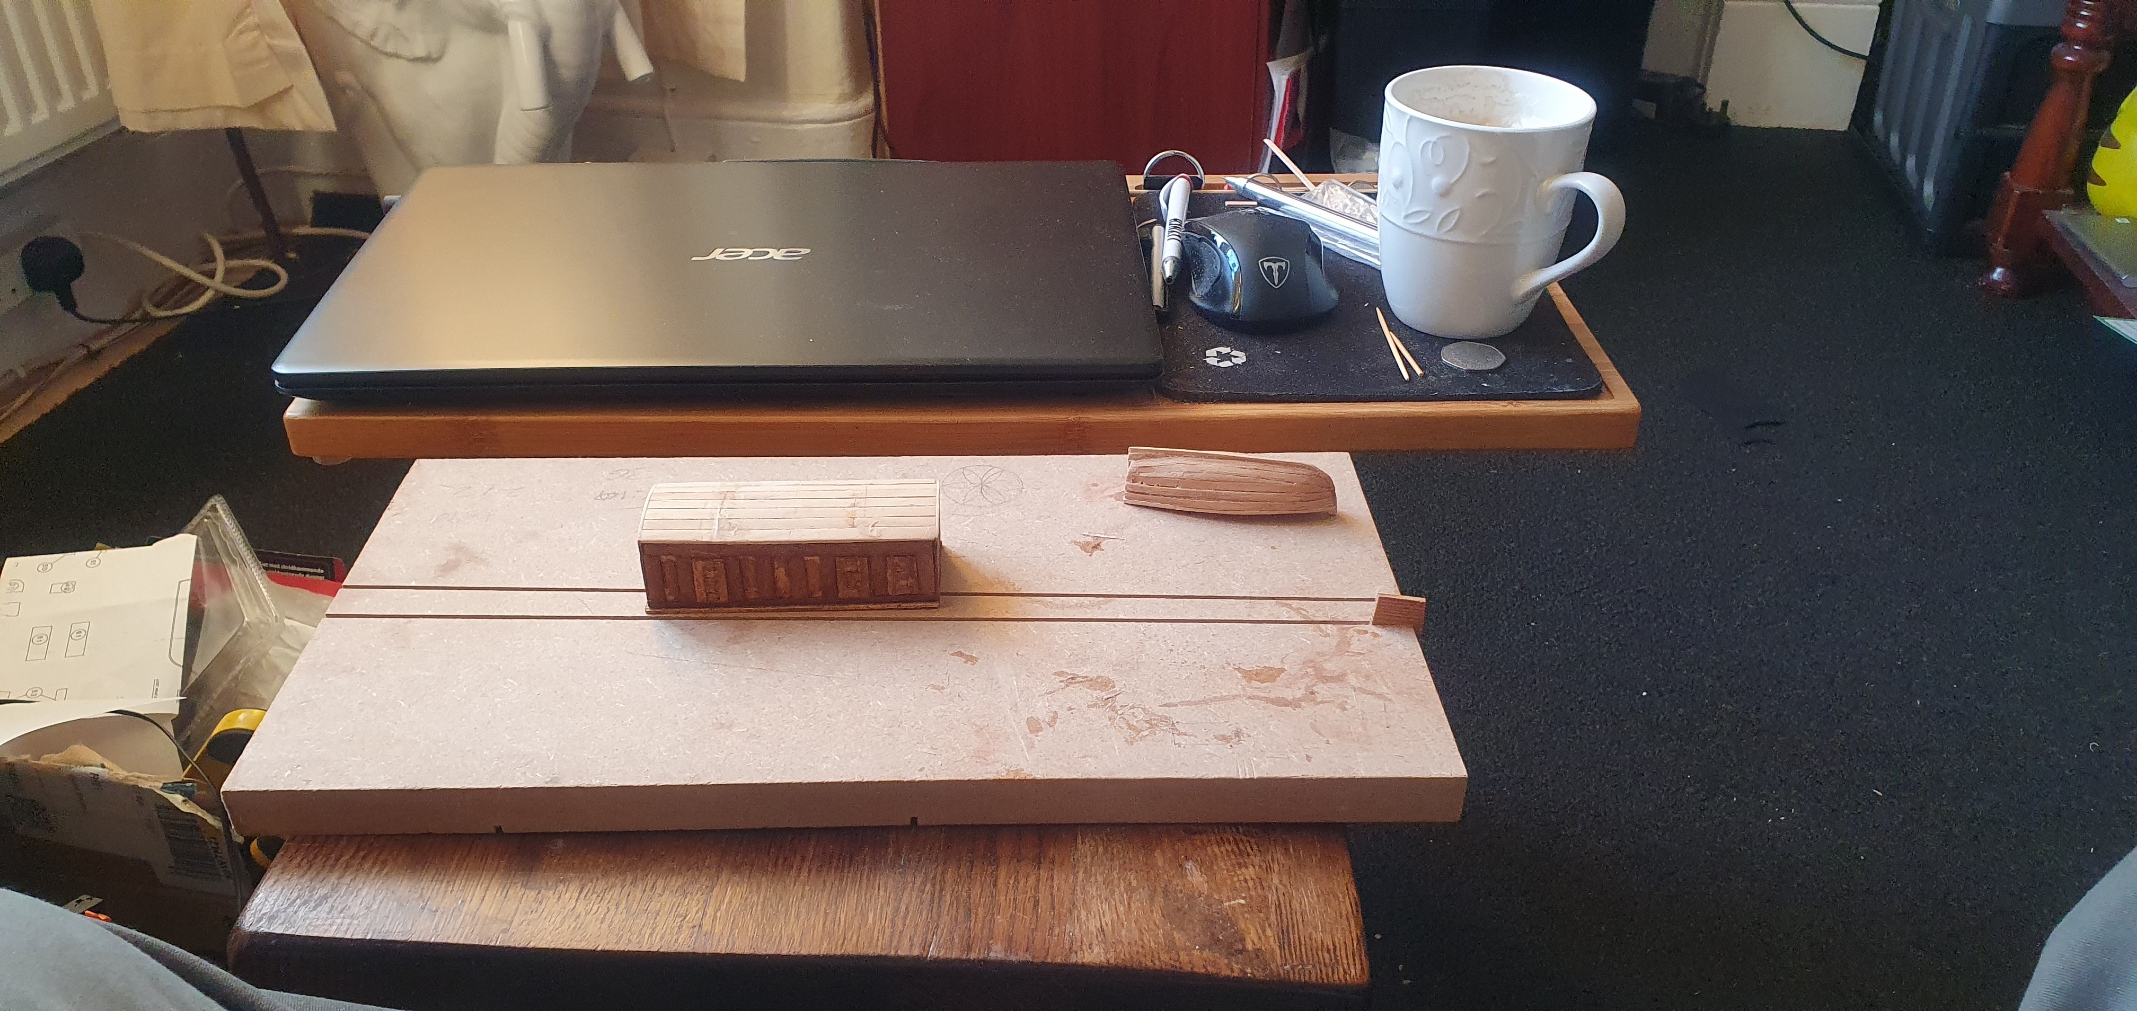
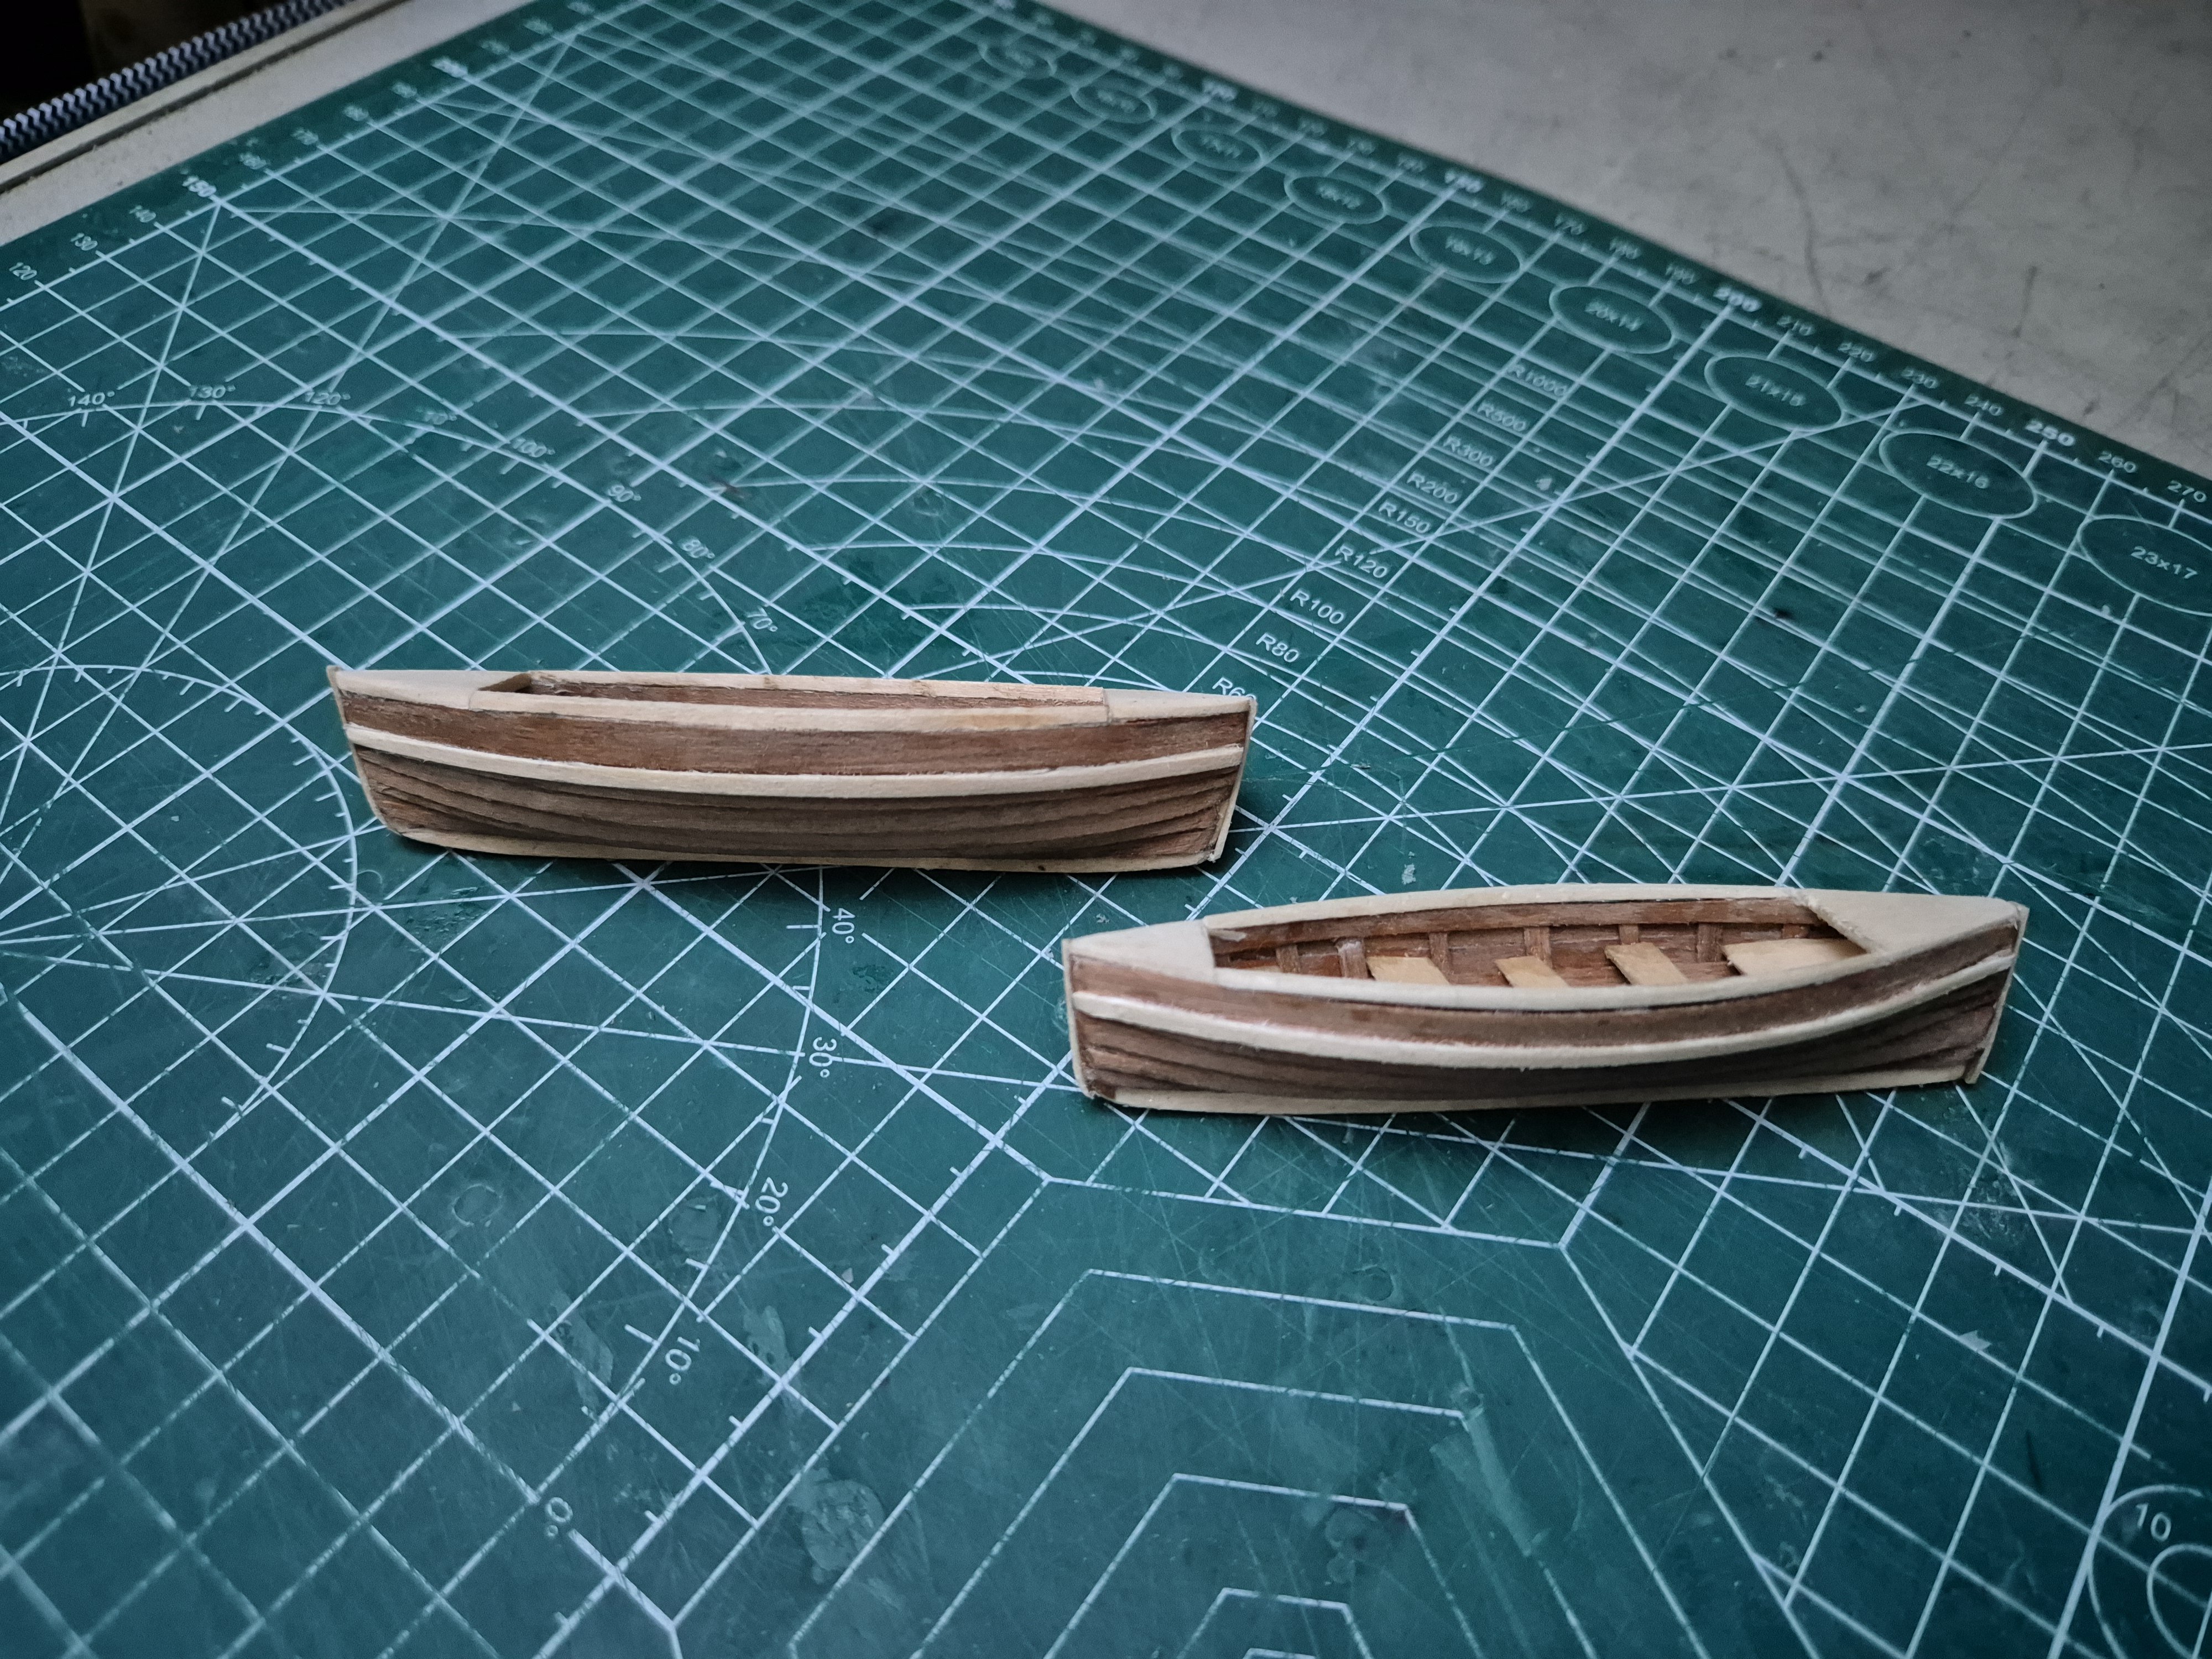
That's all three boats made, just have to paint them now.

Back to planking the port side of the main event.

Simon
- davyboy, Knocklouder, Baker and 4 others
-
7
-
2 hours ago, Baker said:
mosquitoes in the air....??? ☹️
Yeah, lots of the little nibbles.
- Keith Black and Baker
-
 2
2
-
Finished the hull on the second boat. Next is to fit the internal bits, gunwhales and rubbing strake last so they look the same. Second time around seems easier but the trick is to get them to match as they will sit side by side.

Pictures a bit dark as I am sitting outside and can't be bothered to turn on the light.
Simon
-
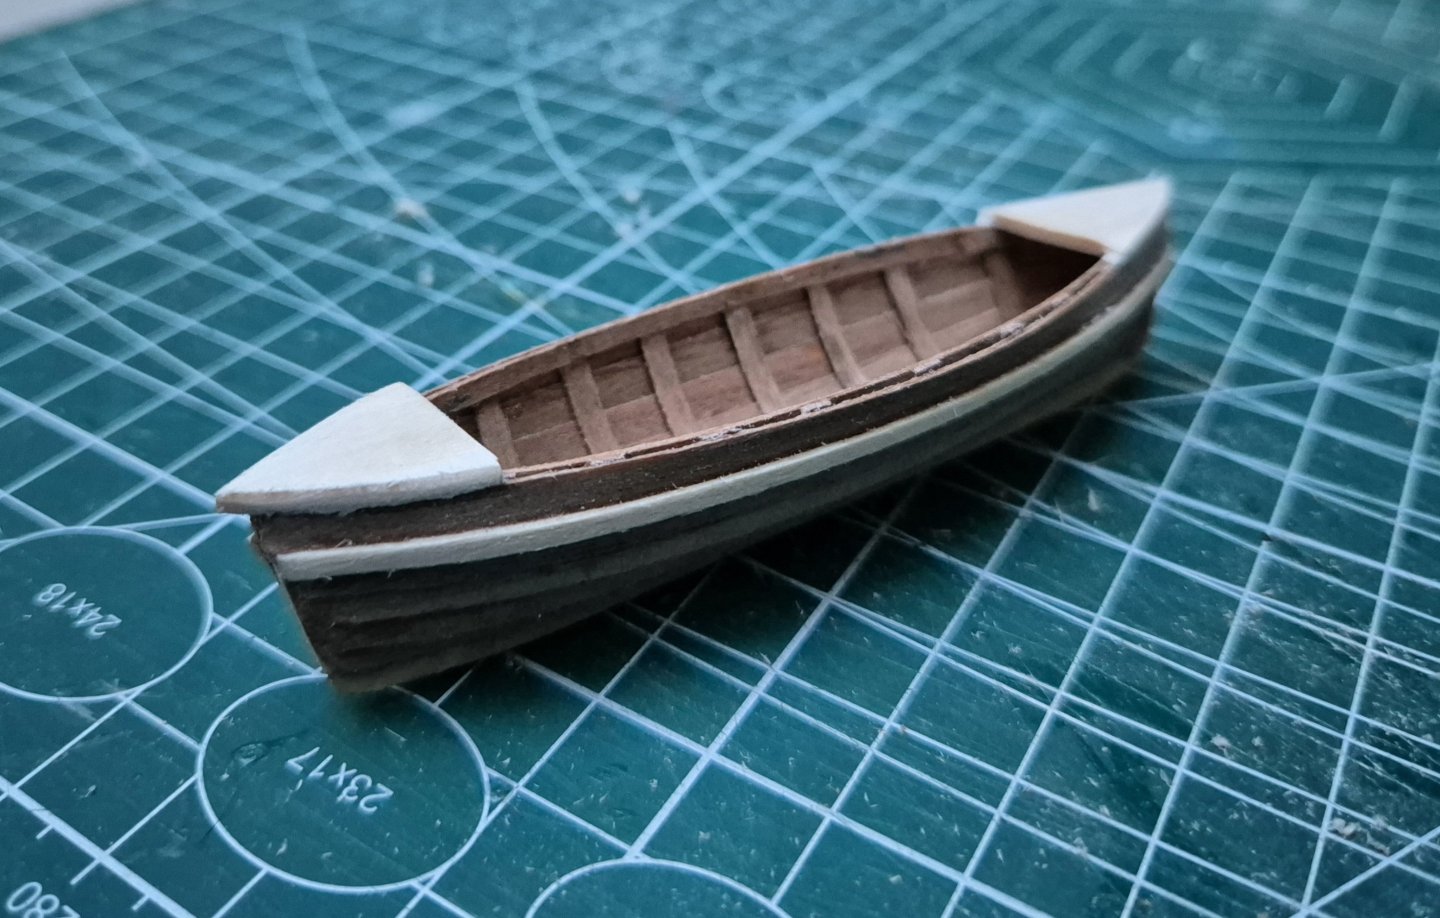
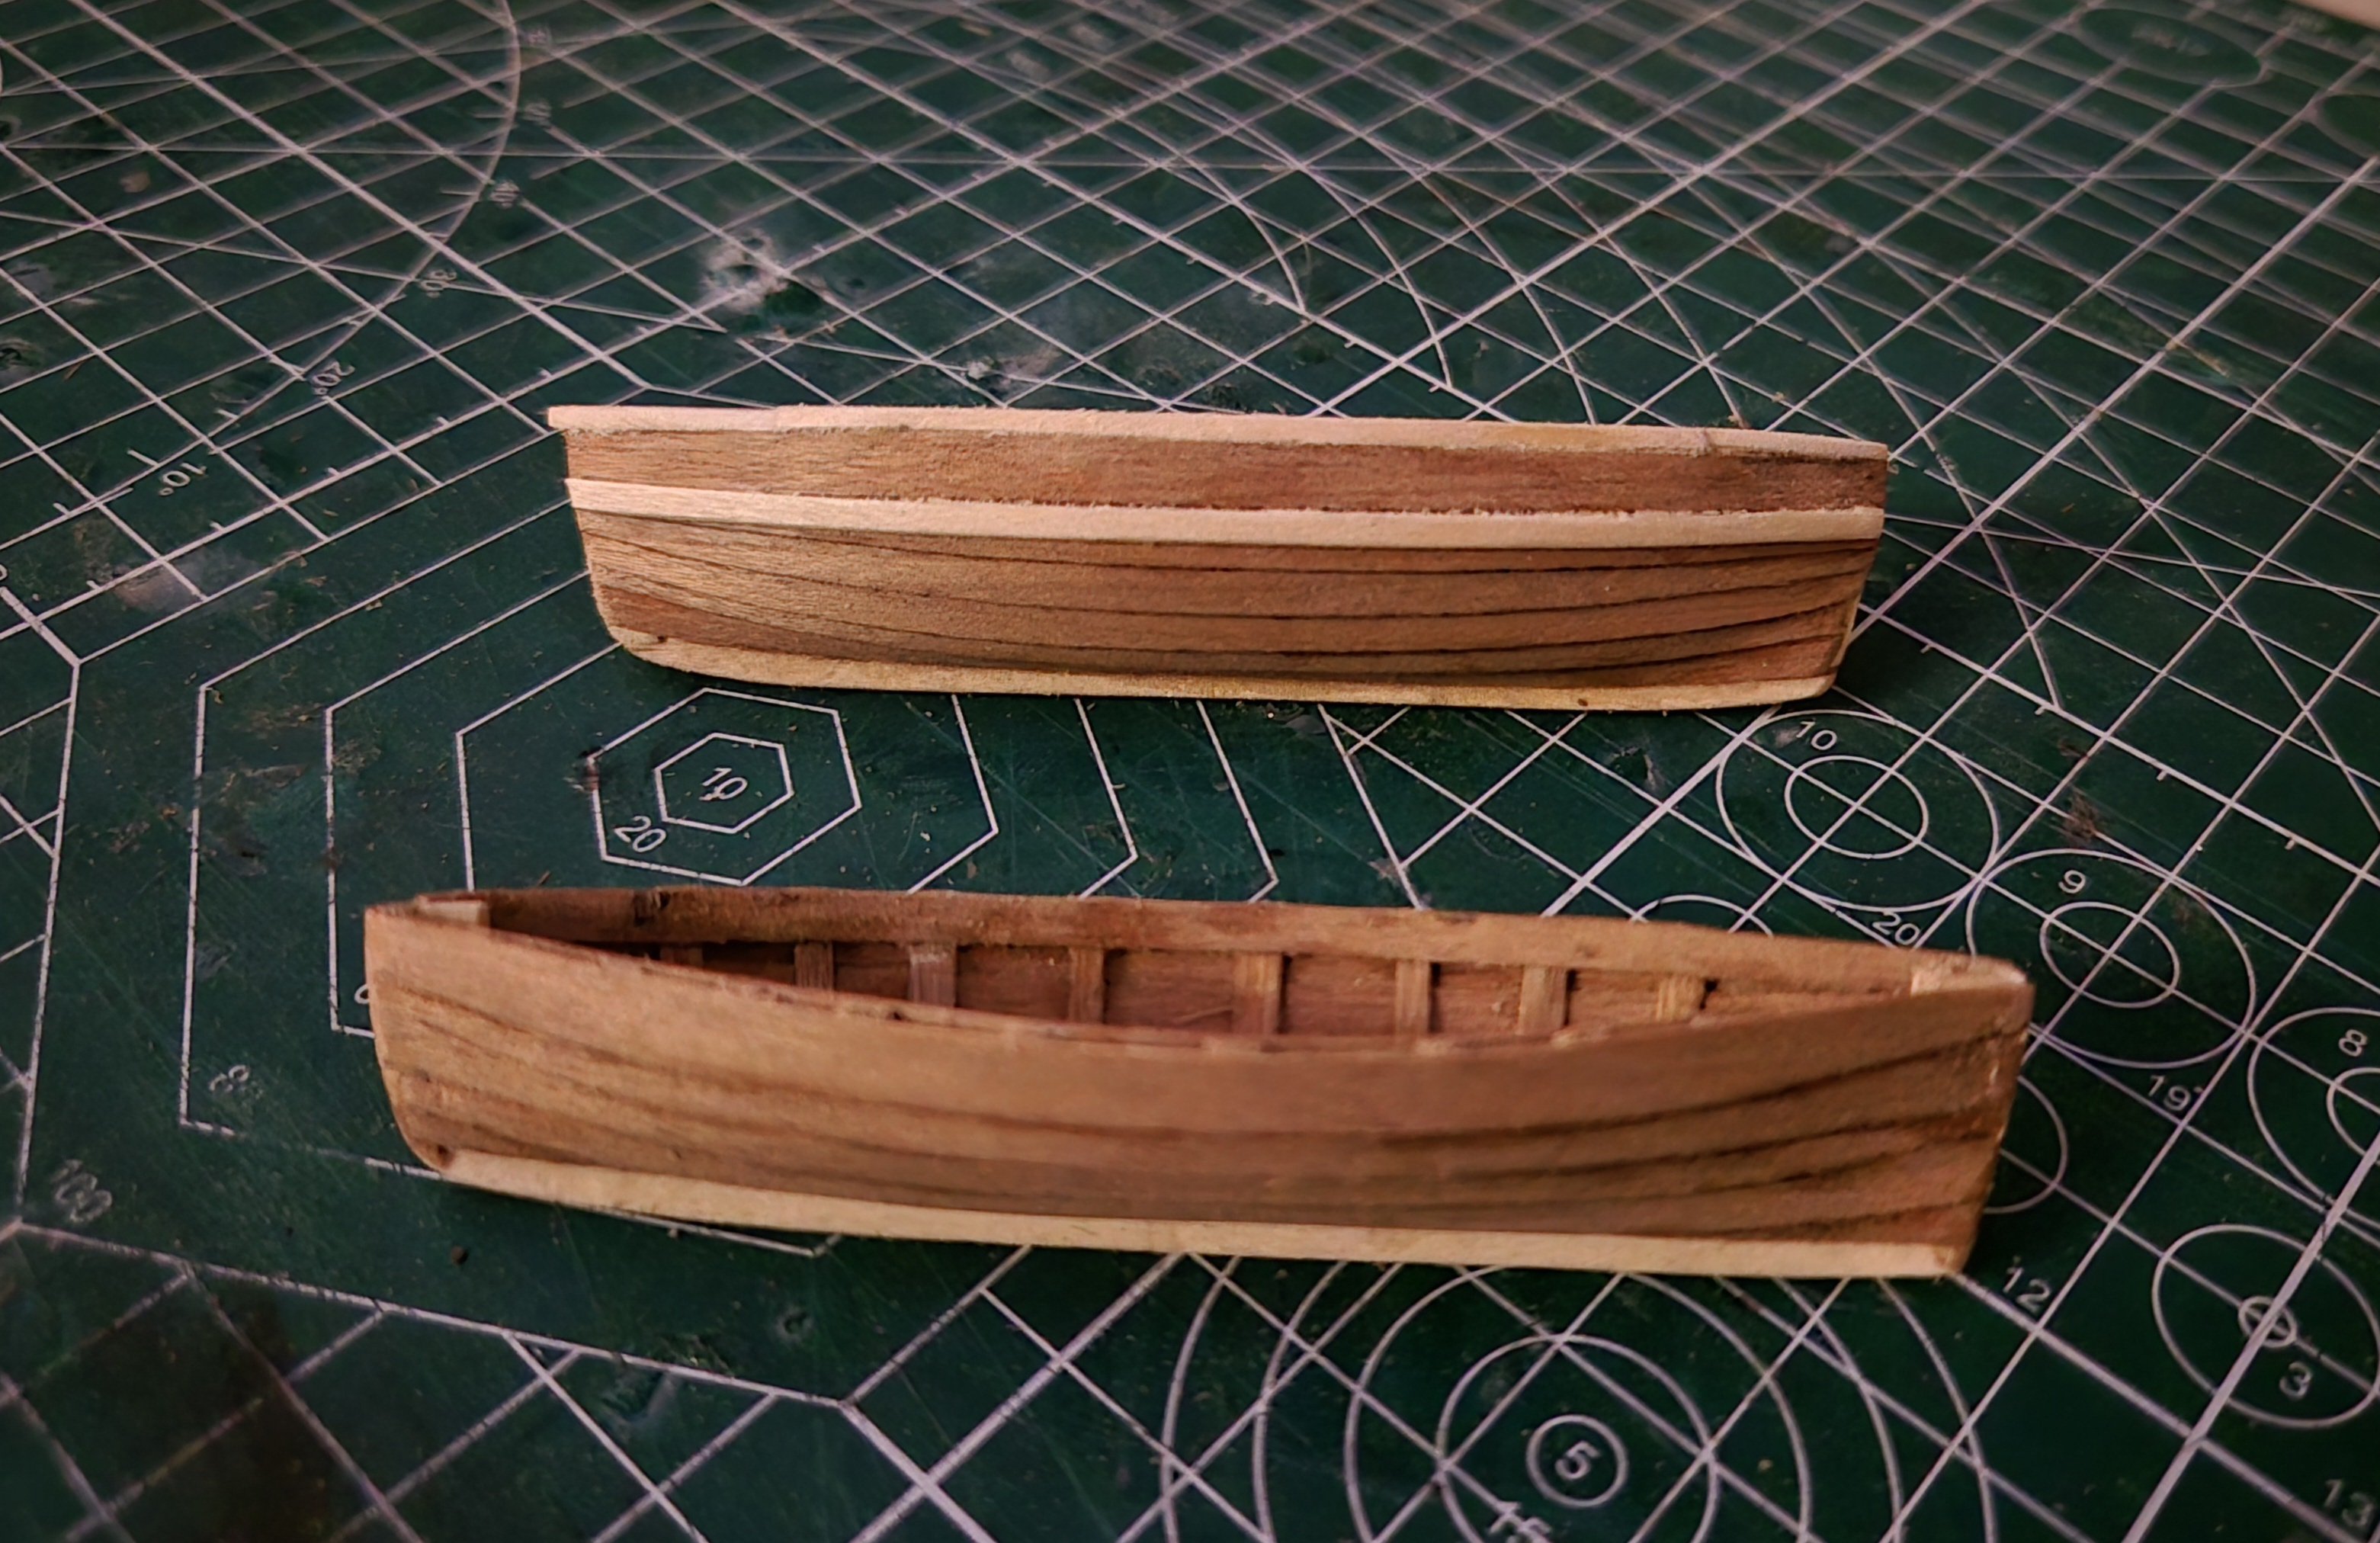
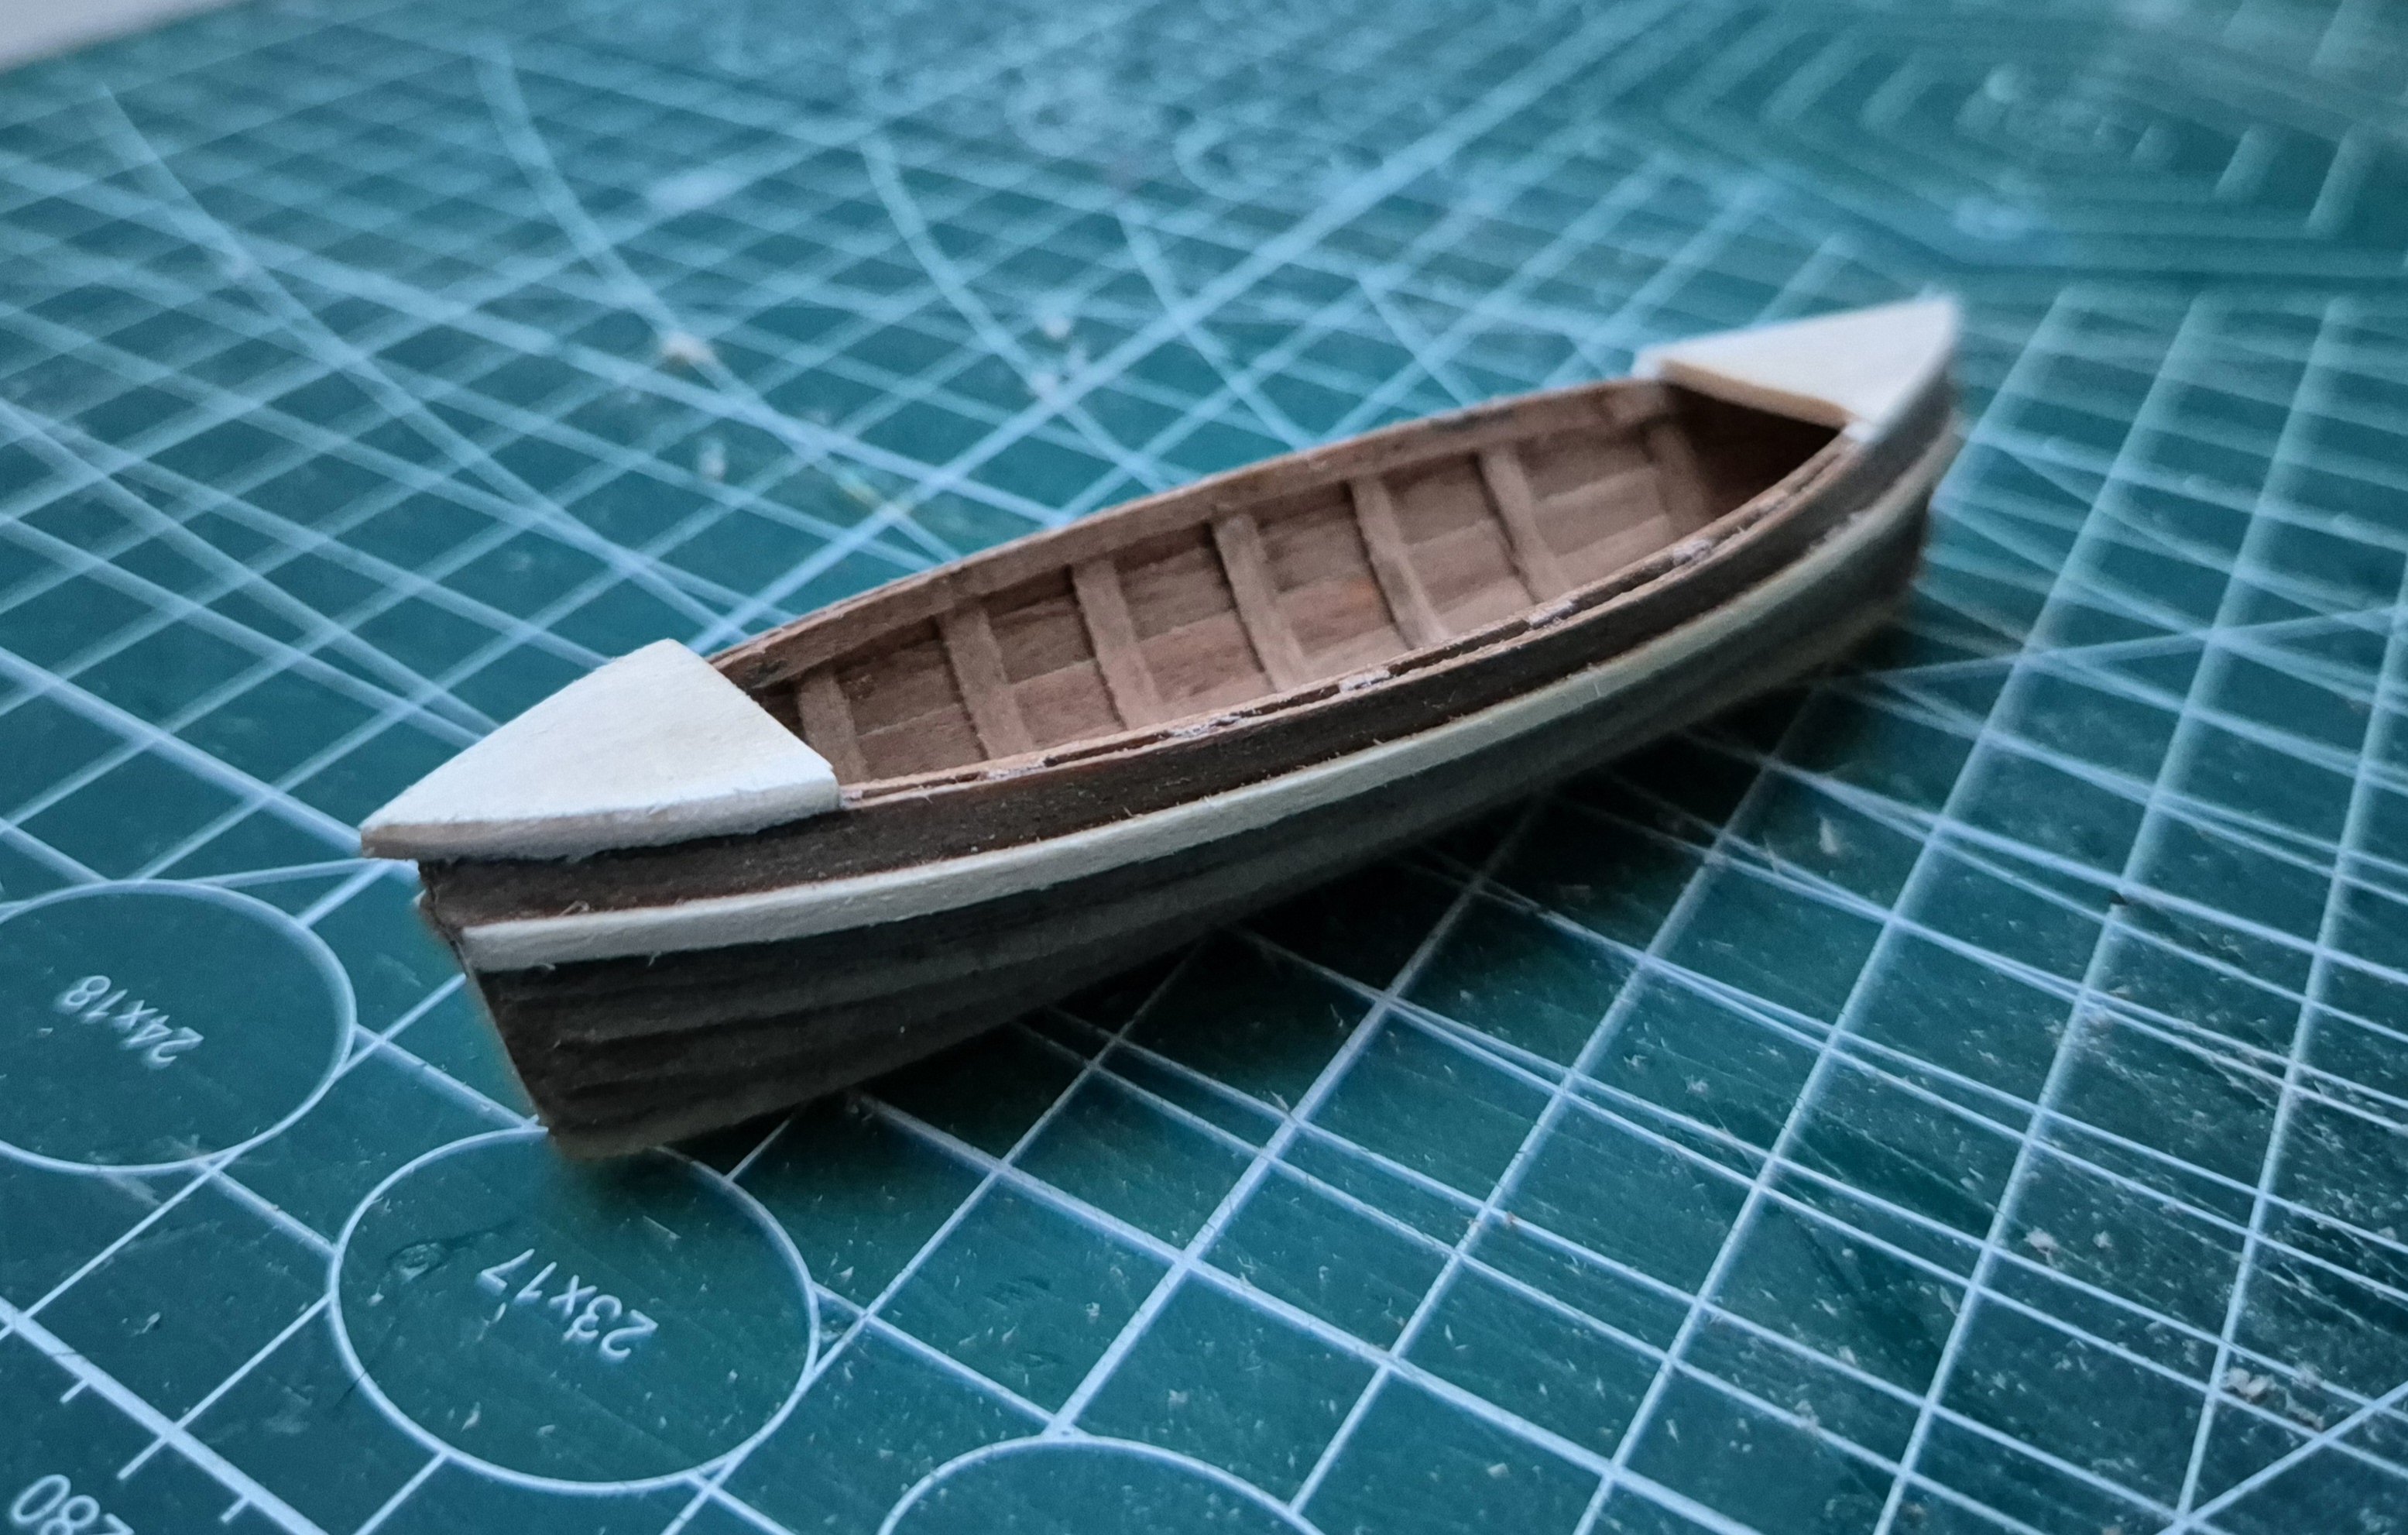
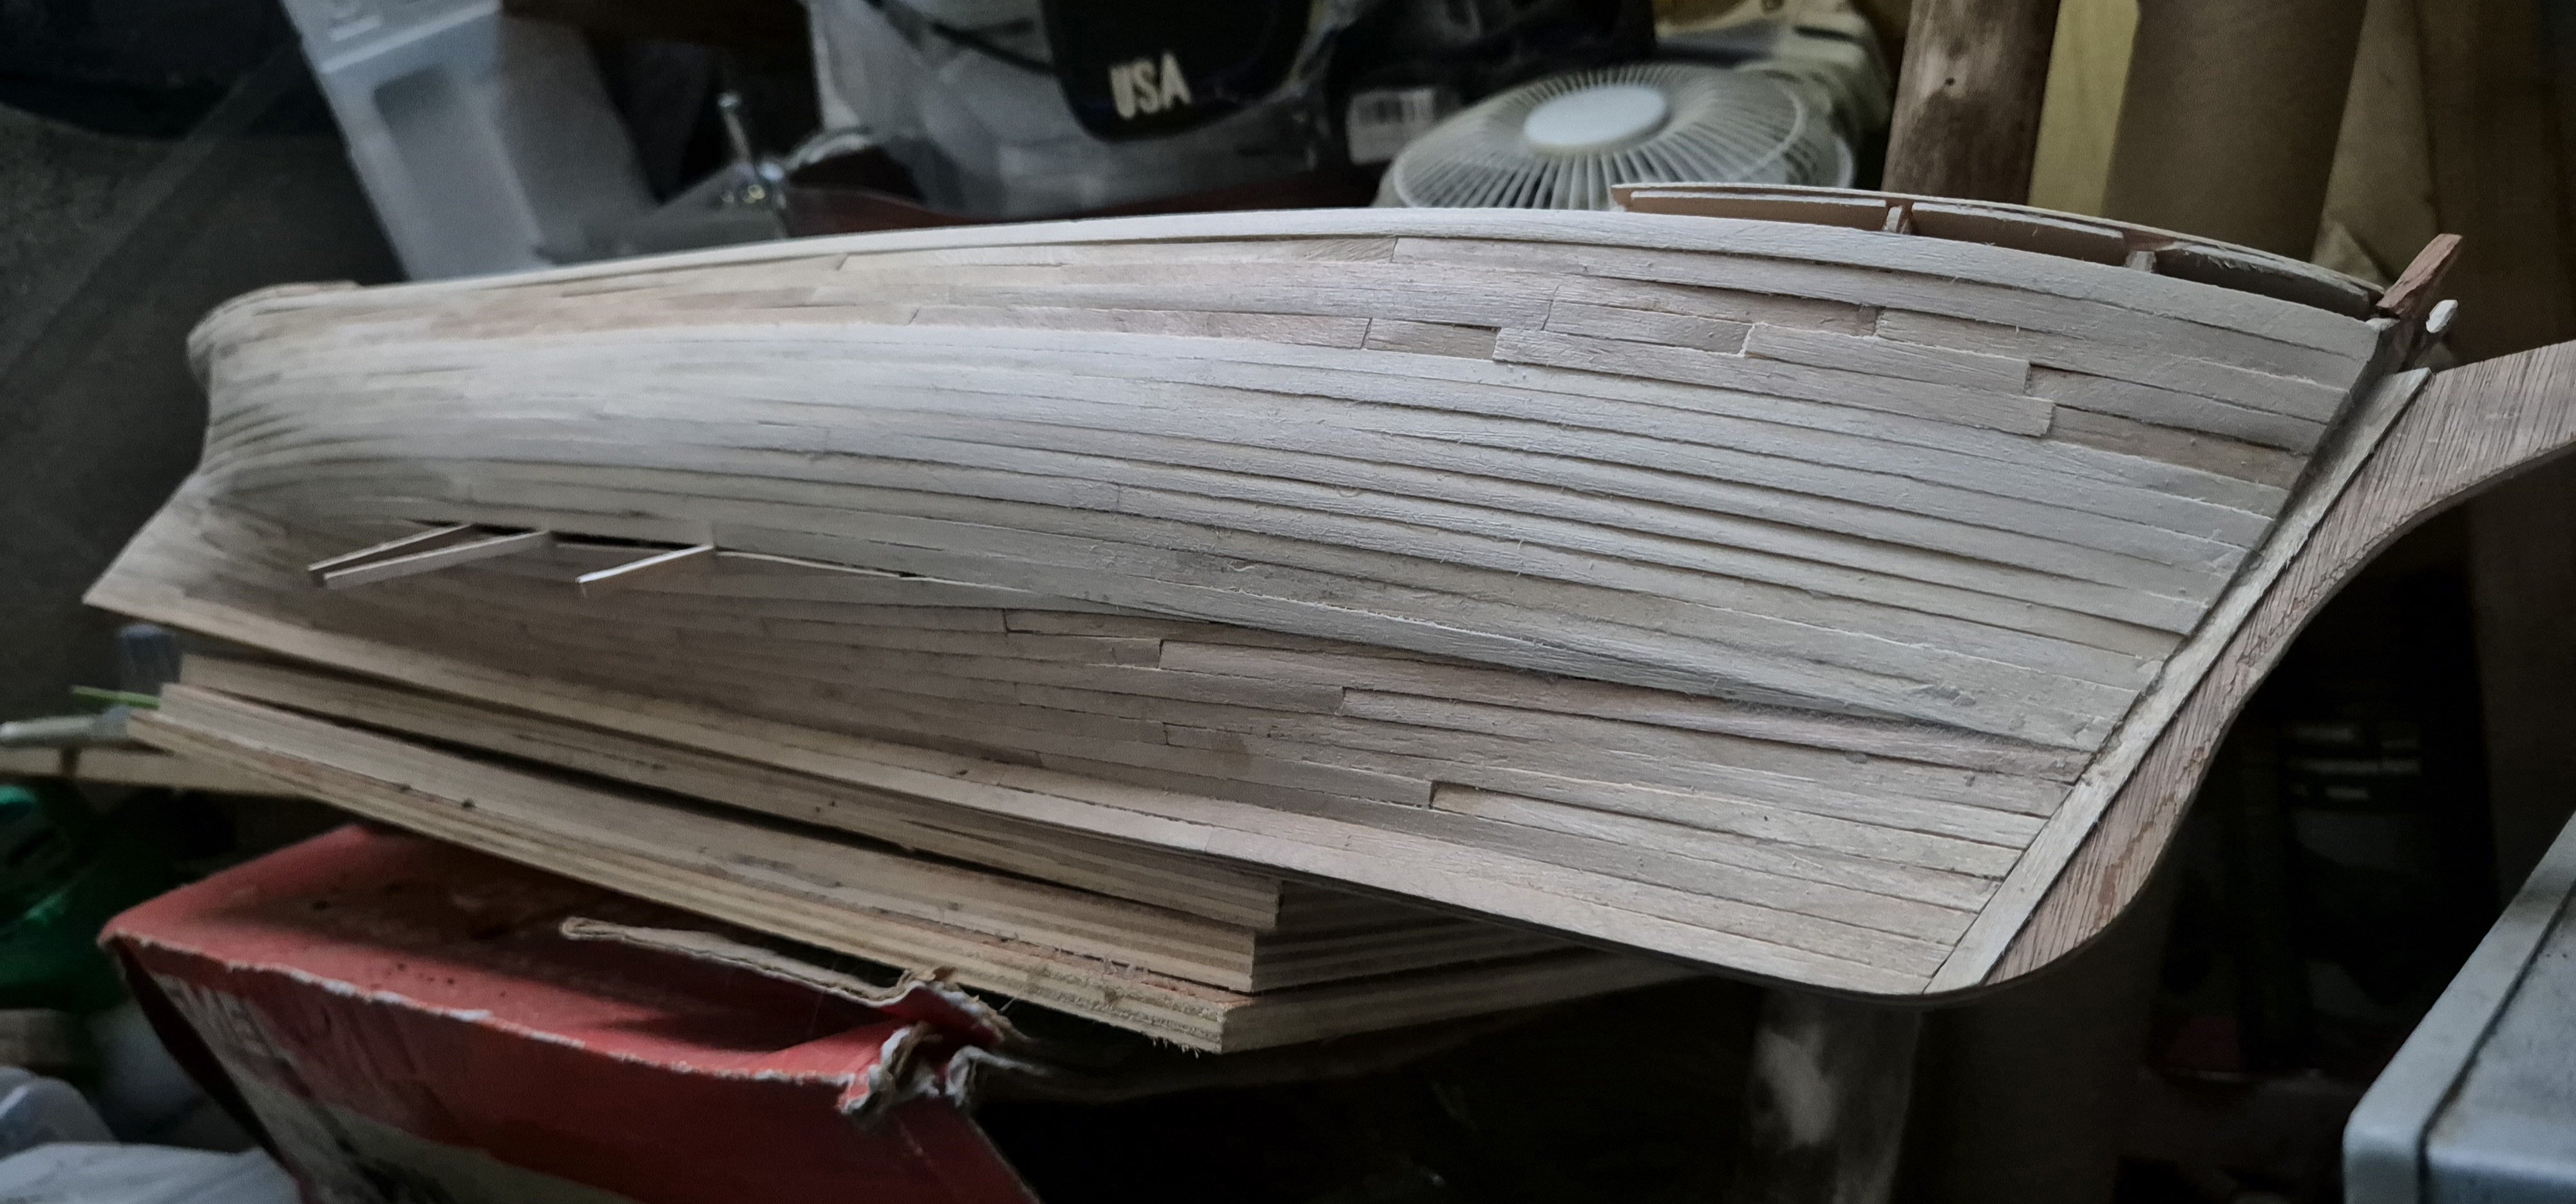
This is the finished article.

And this is its double in production .

I have since made sure it would release from the plug. Also trimmed the ribs back to the internal gunwhale and added both garboards..
That was enough for this evening, it was 31c in the shade and humid to boot.
Simon
- Baker, berhard, Snug Harbor Johnny and 1 other
-
4
-
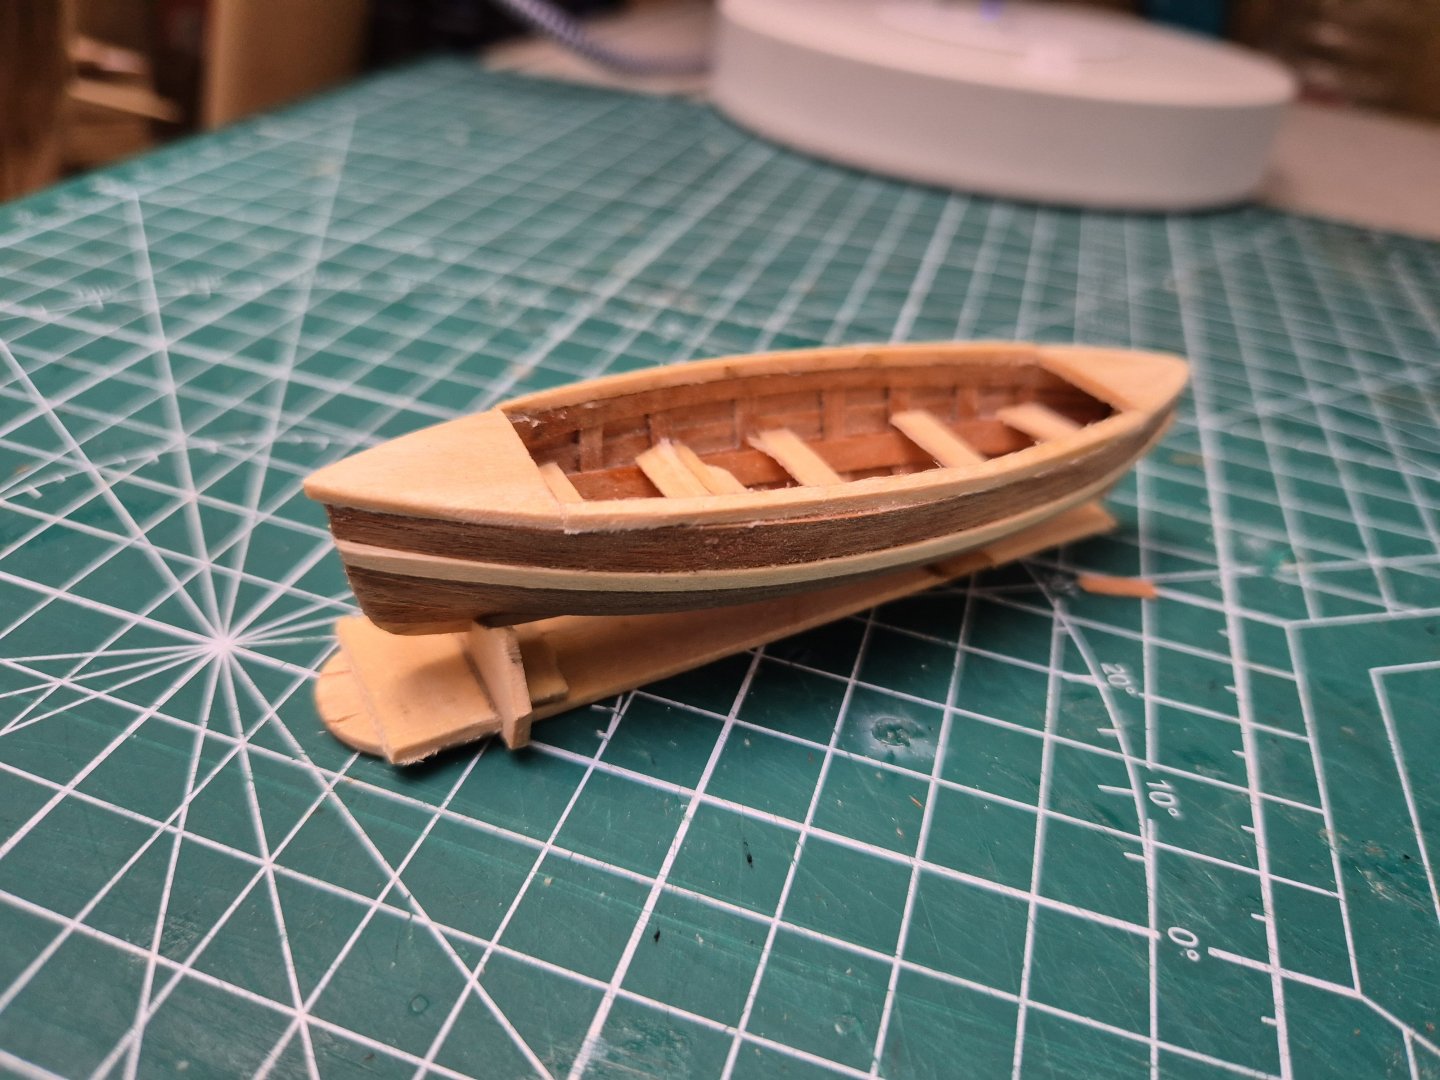
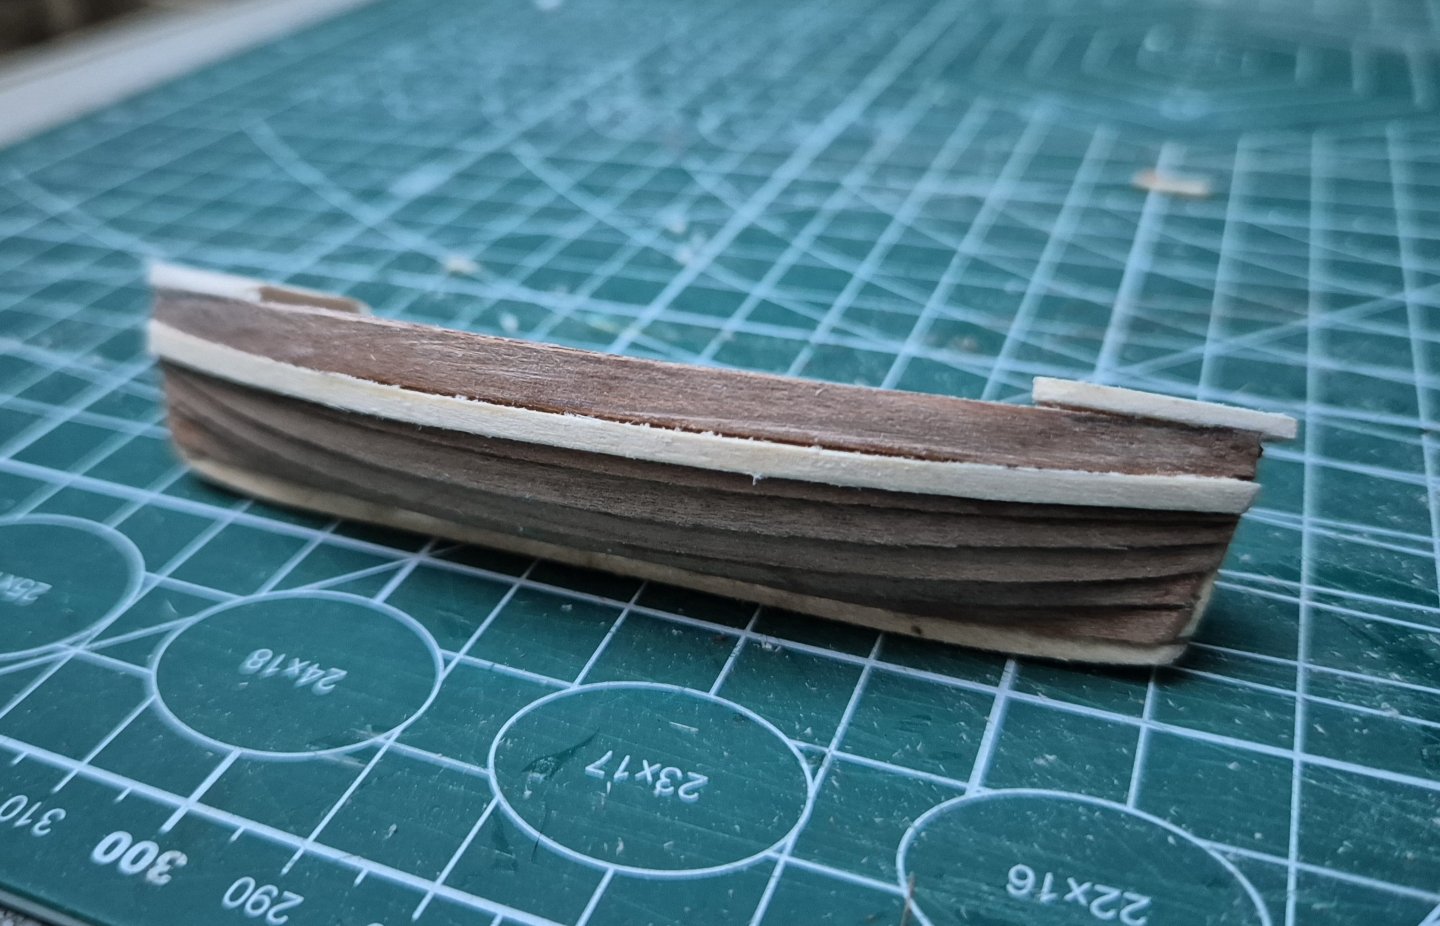
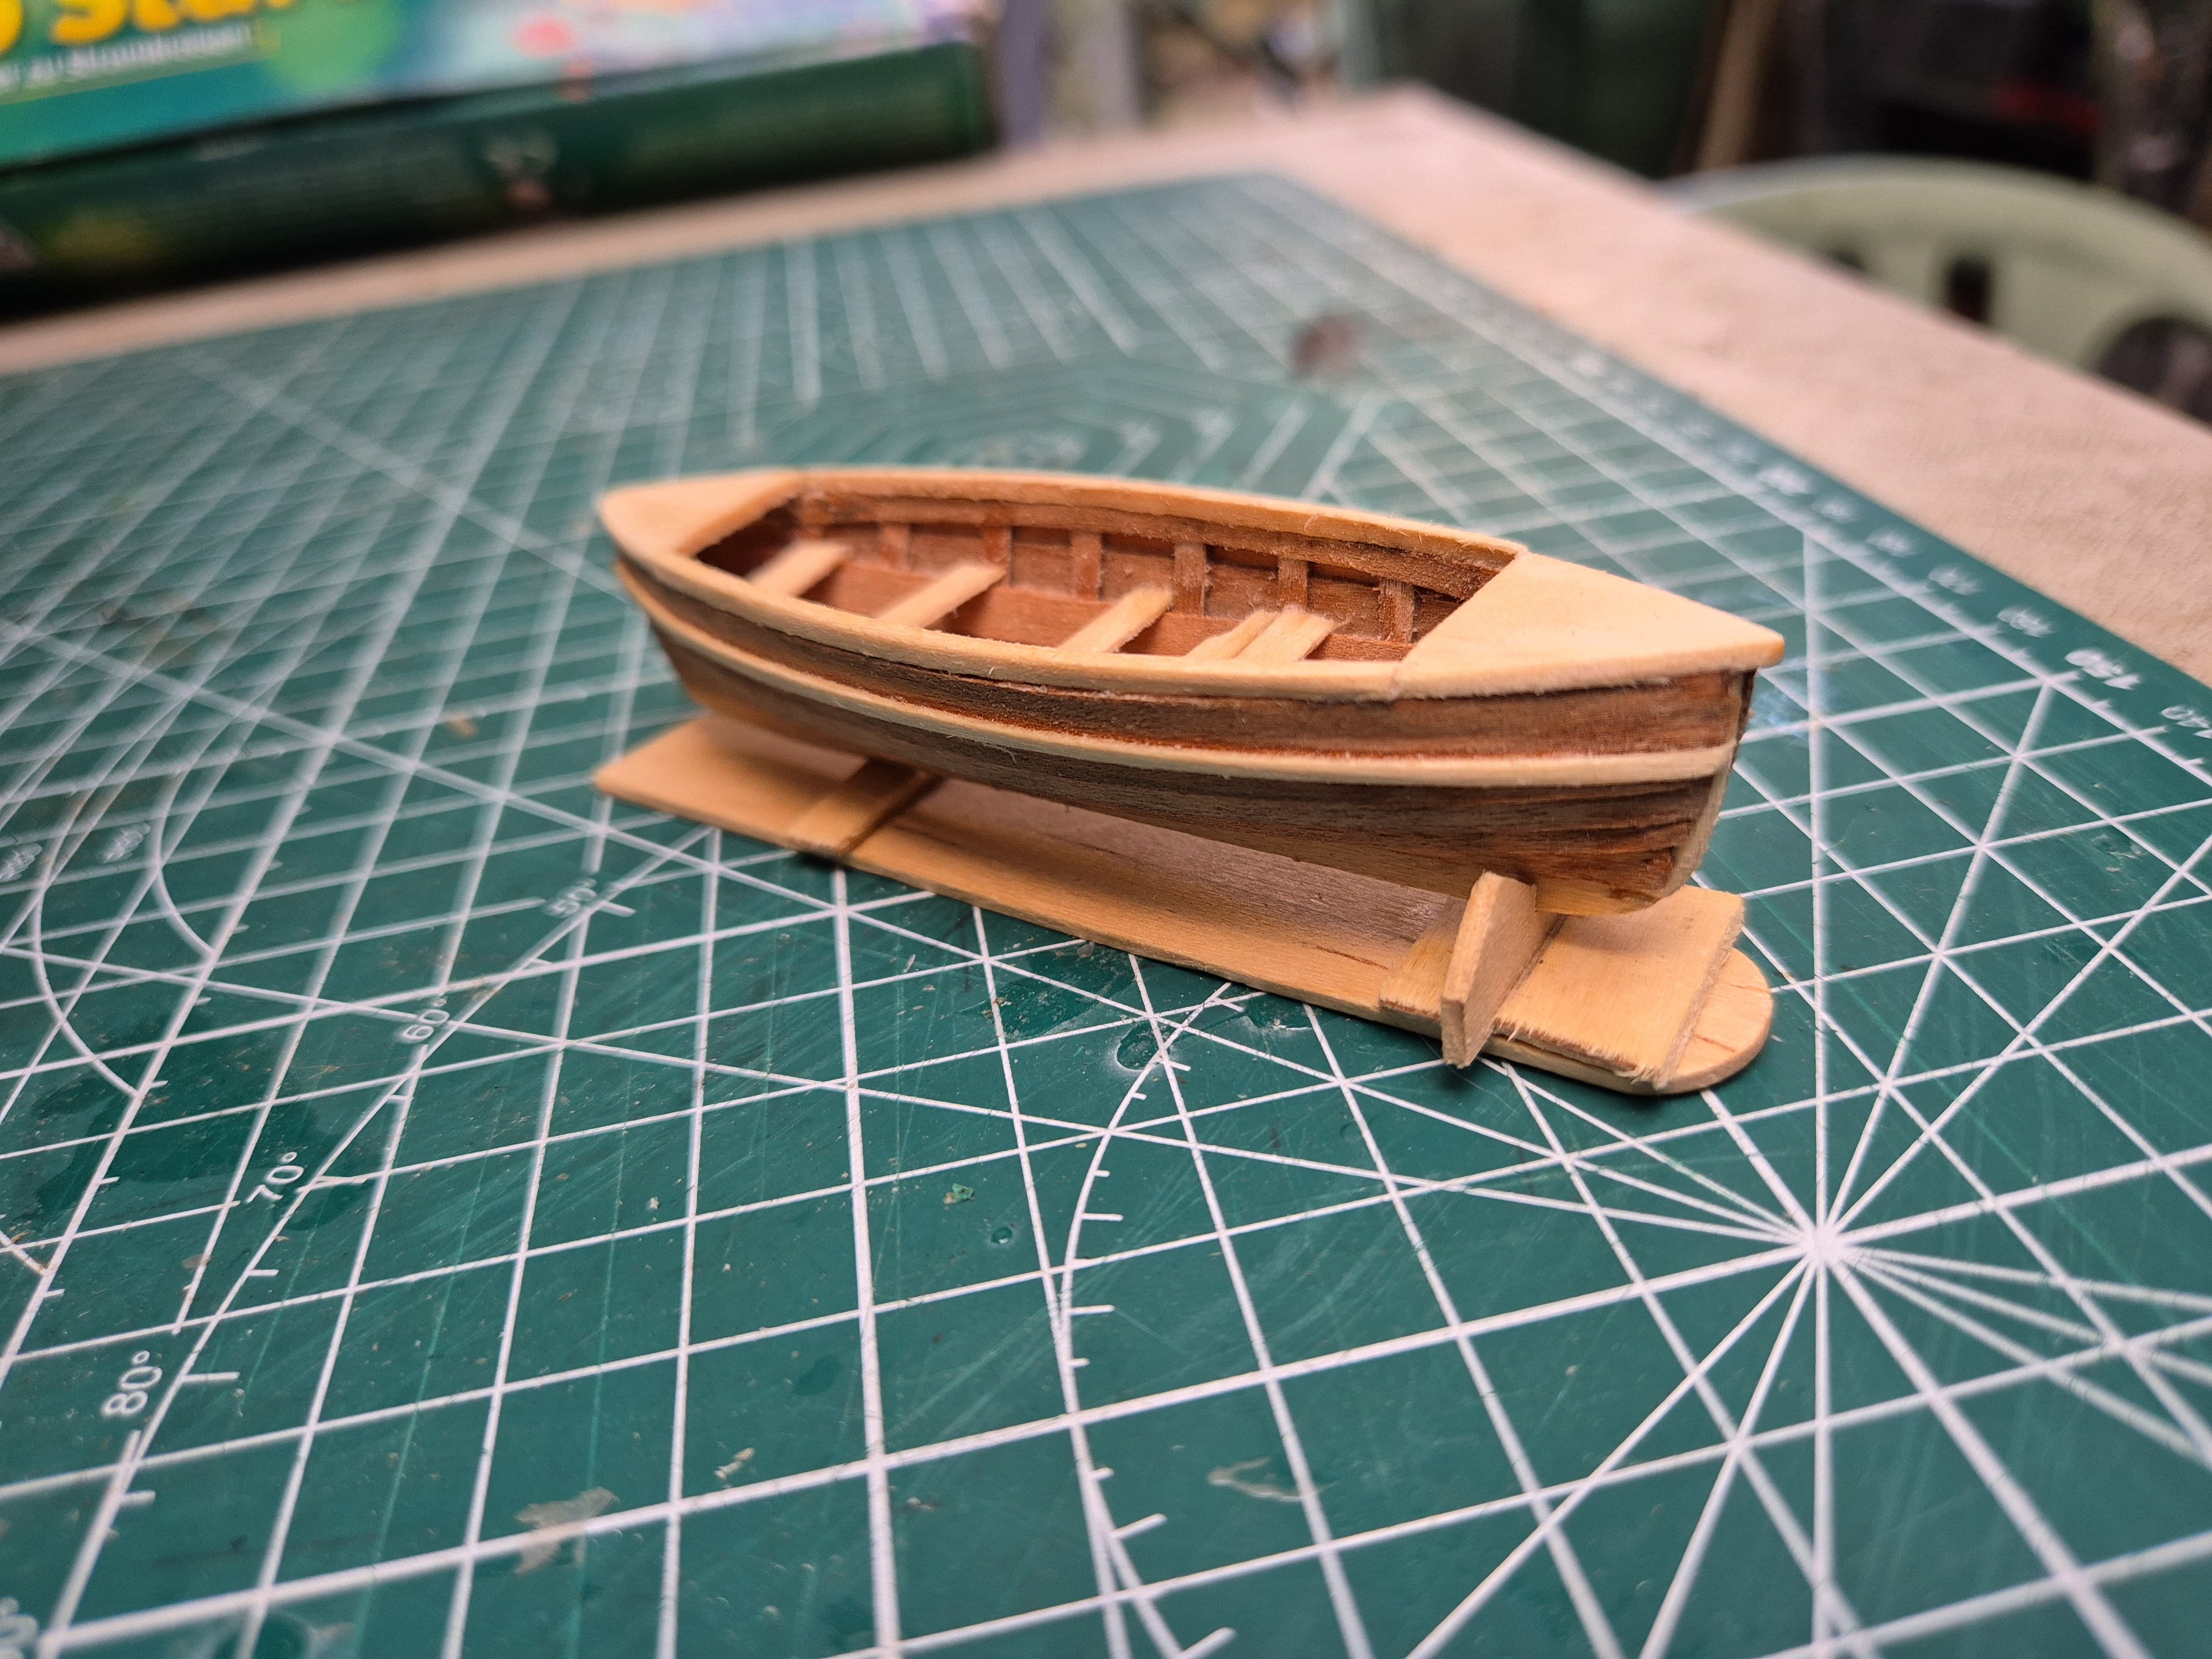
Finished planking the first lifeboat. Still a bit to do, add seats and footboard, bend and mount the rest of the gunwhales and I will be happy with this one. Reducing the timbers to veneer made all the difference.
Simon
- fake johnbull, Baker, Keith Black and 2 others
-
5
-
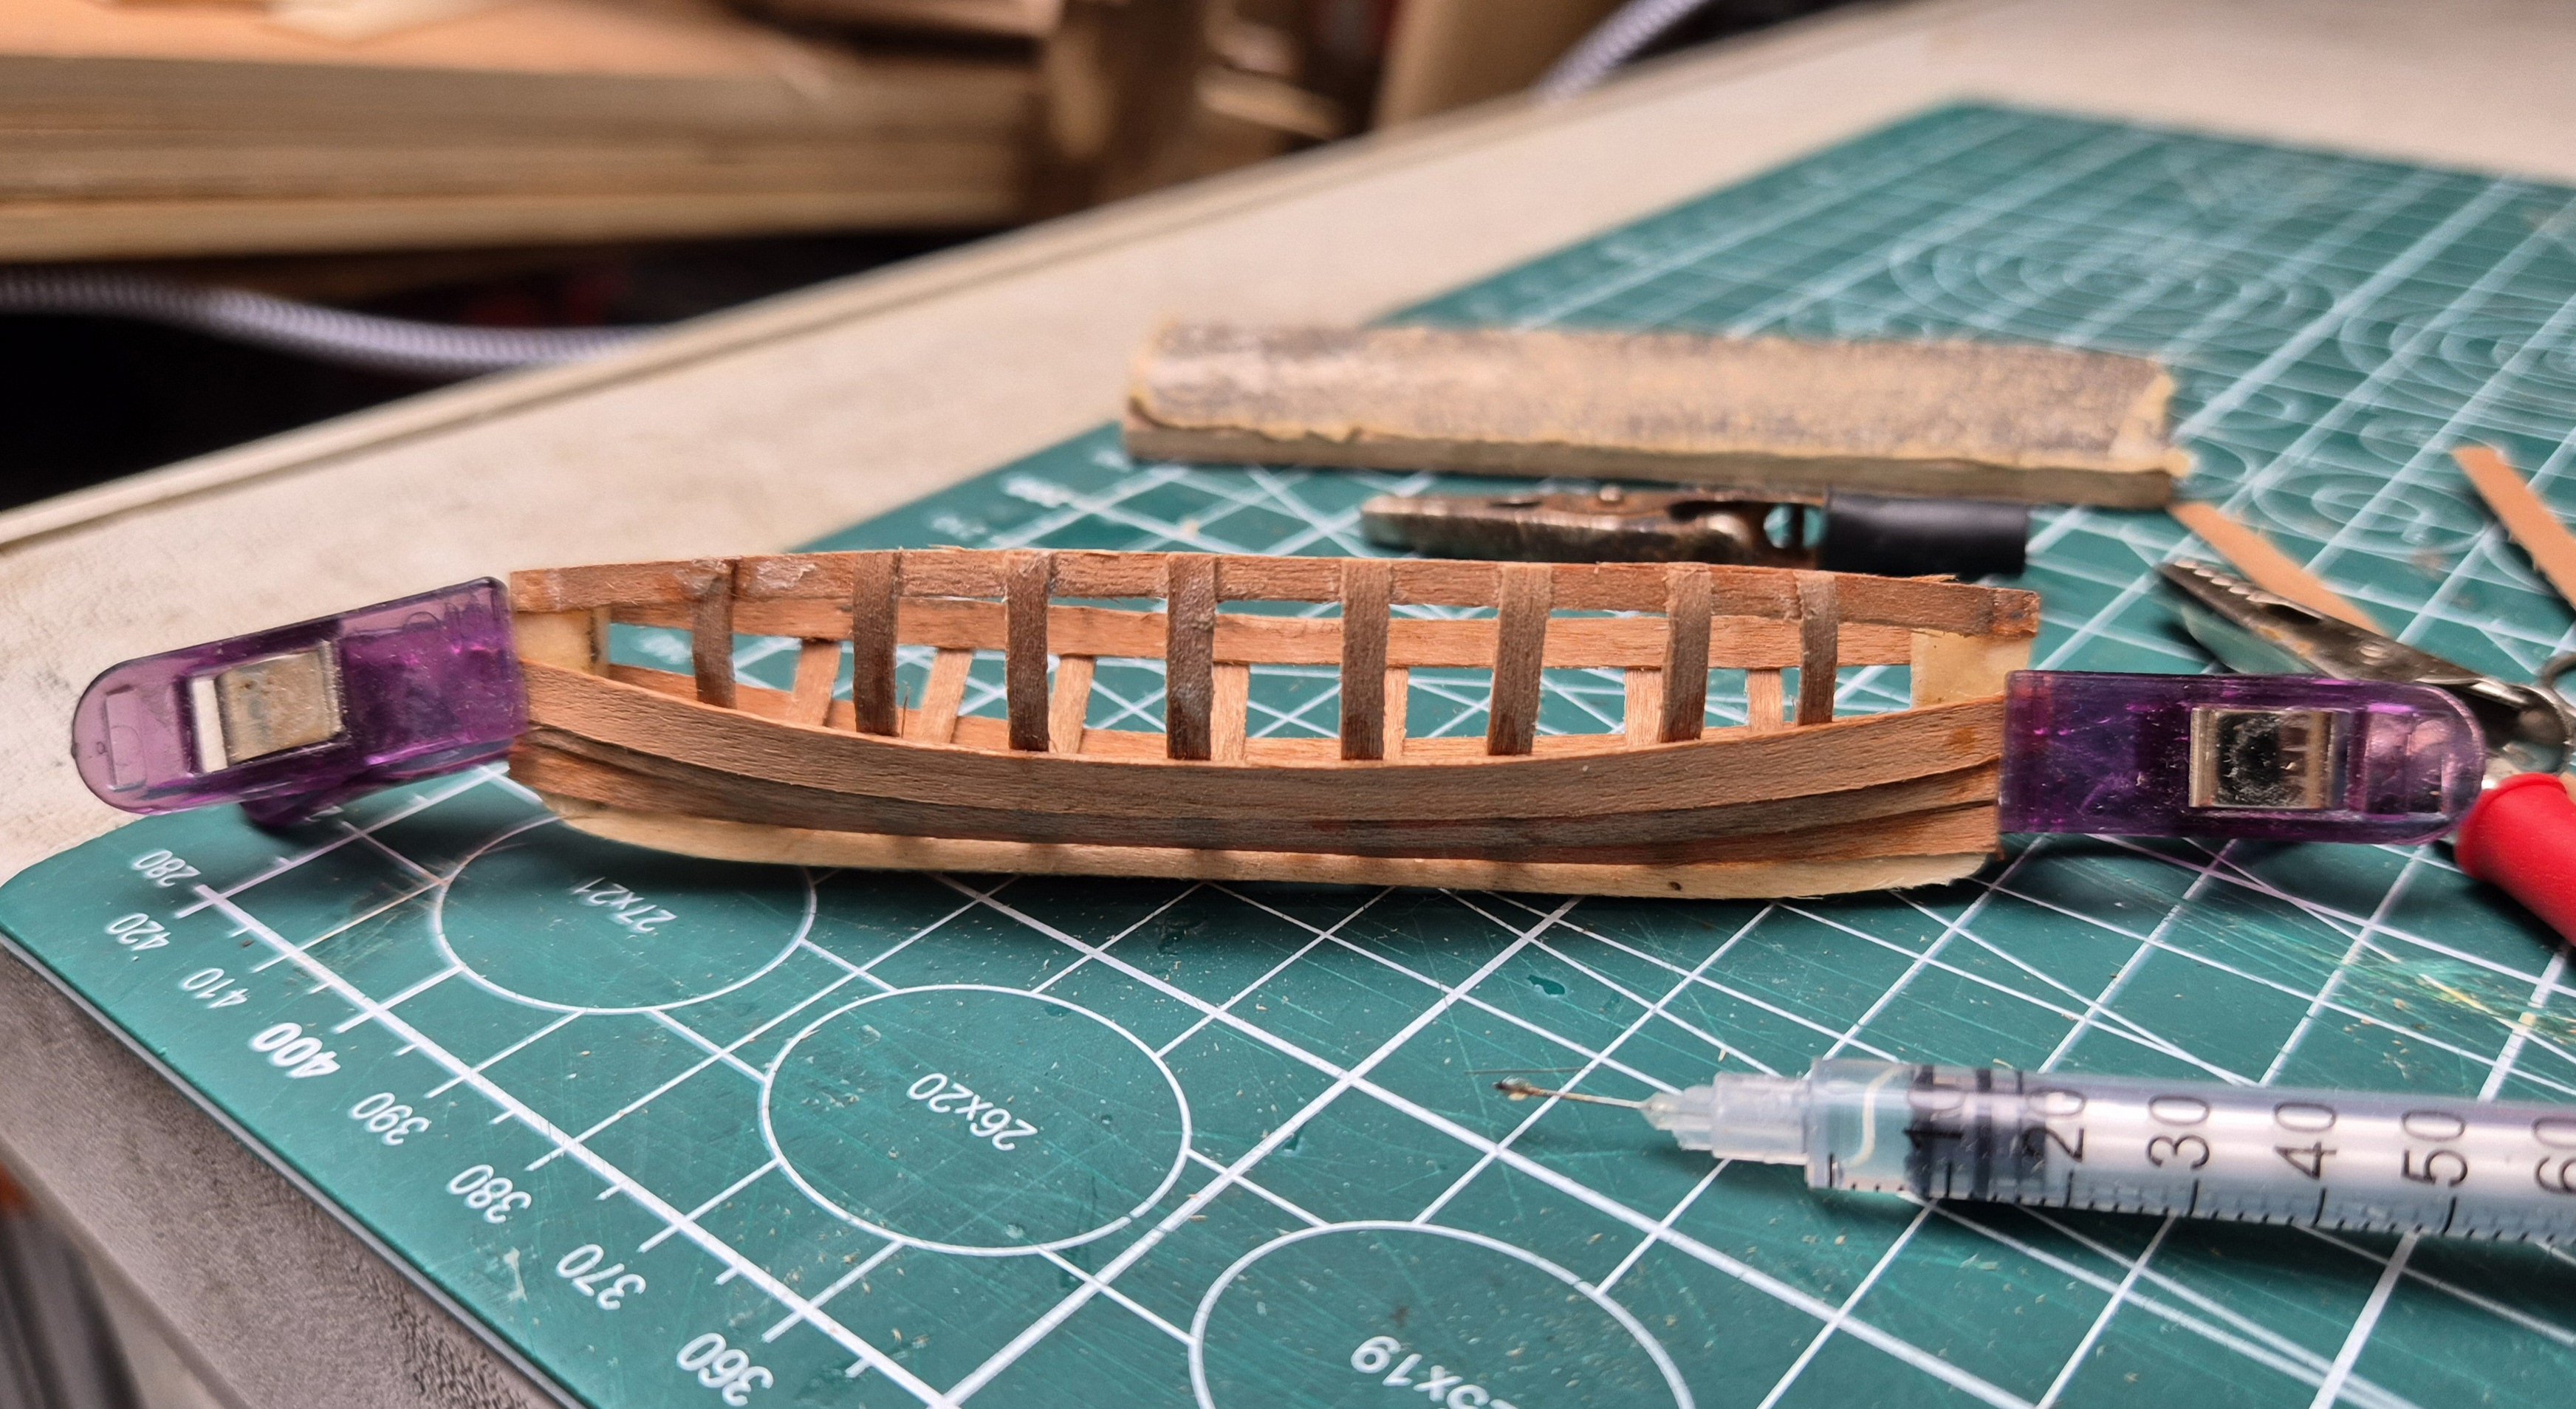
Continued with the lifeboat.
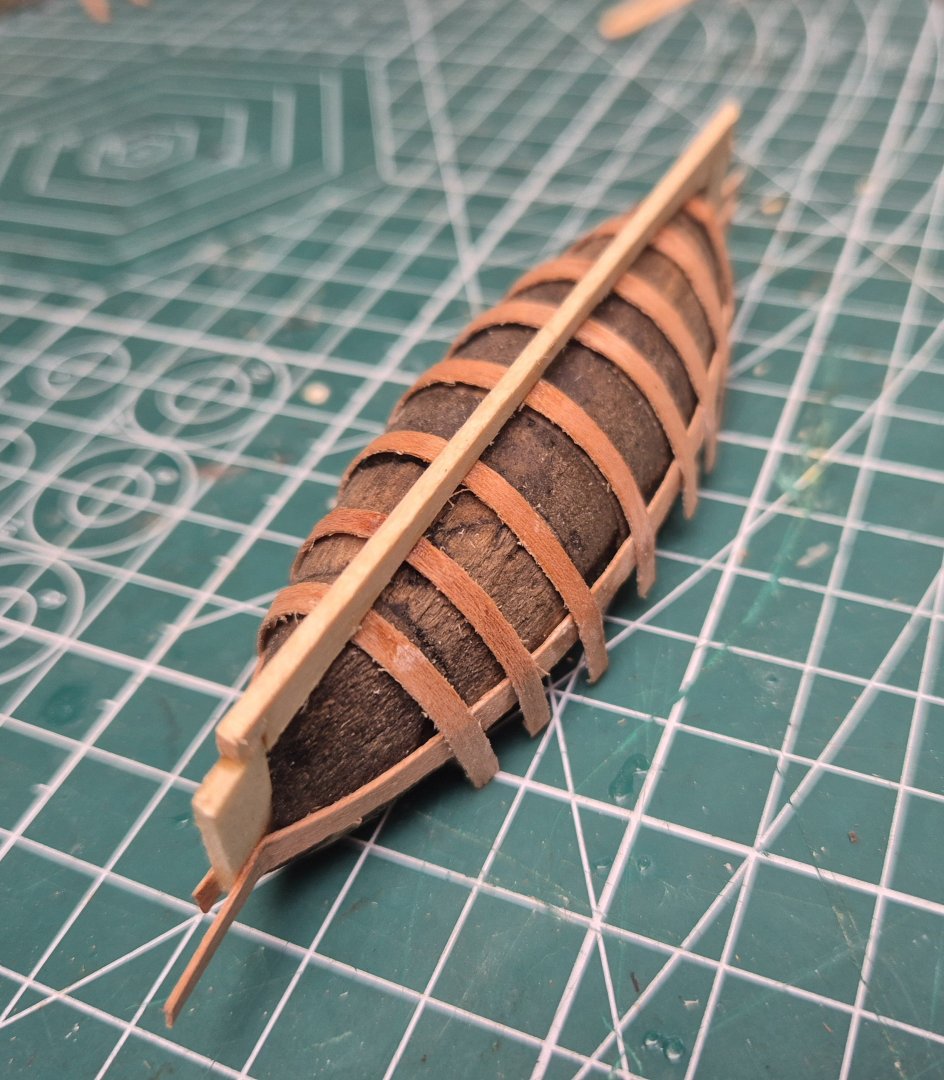
So that was the frame and provisional stem/stern posts and keel.
This is how far I have taken the planking this morning. I don't wet the boards as I want the tension in the board. You will note the syringe I use to run a bead across the bottom edge of the board where it overlaps the board below. Then I inject a little glue into the intersection of each rib and post.
There is only a small amount of tapering needed.
Simon

- berhard, Keith Black, davyboy and 1 other
-
4
-
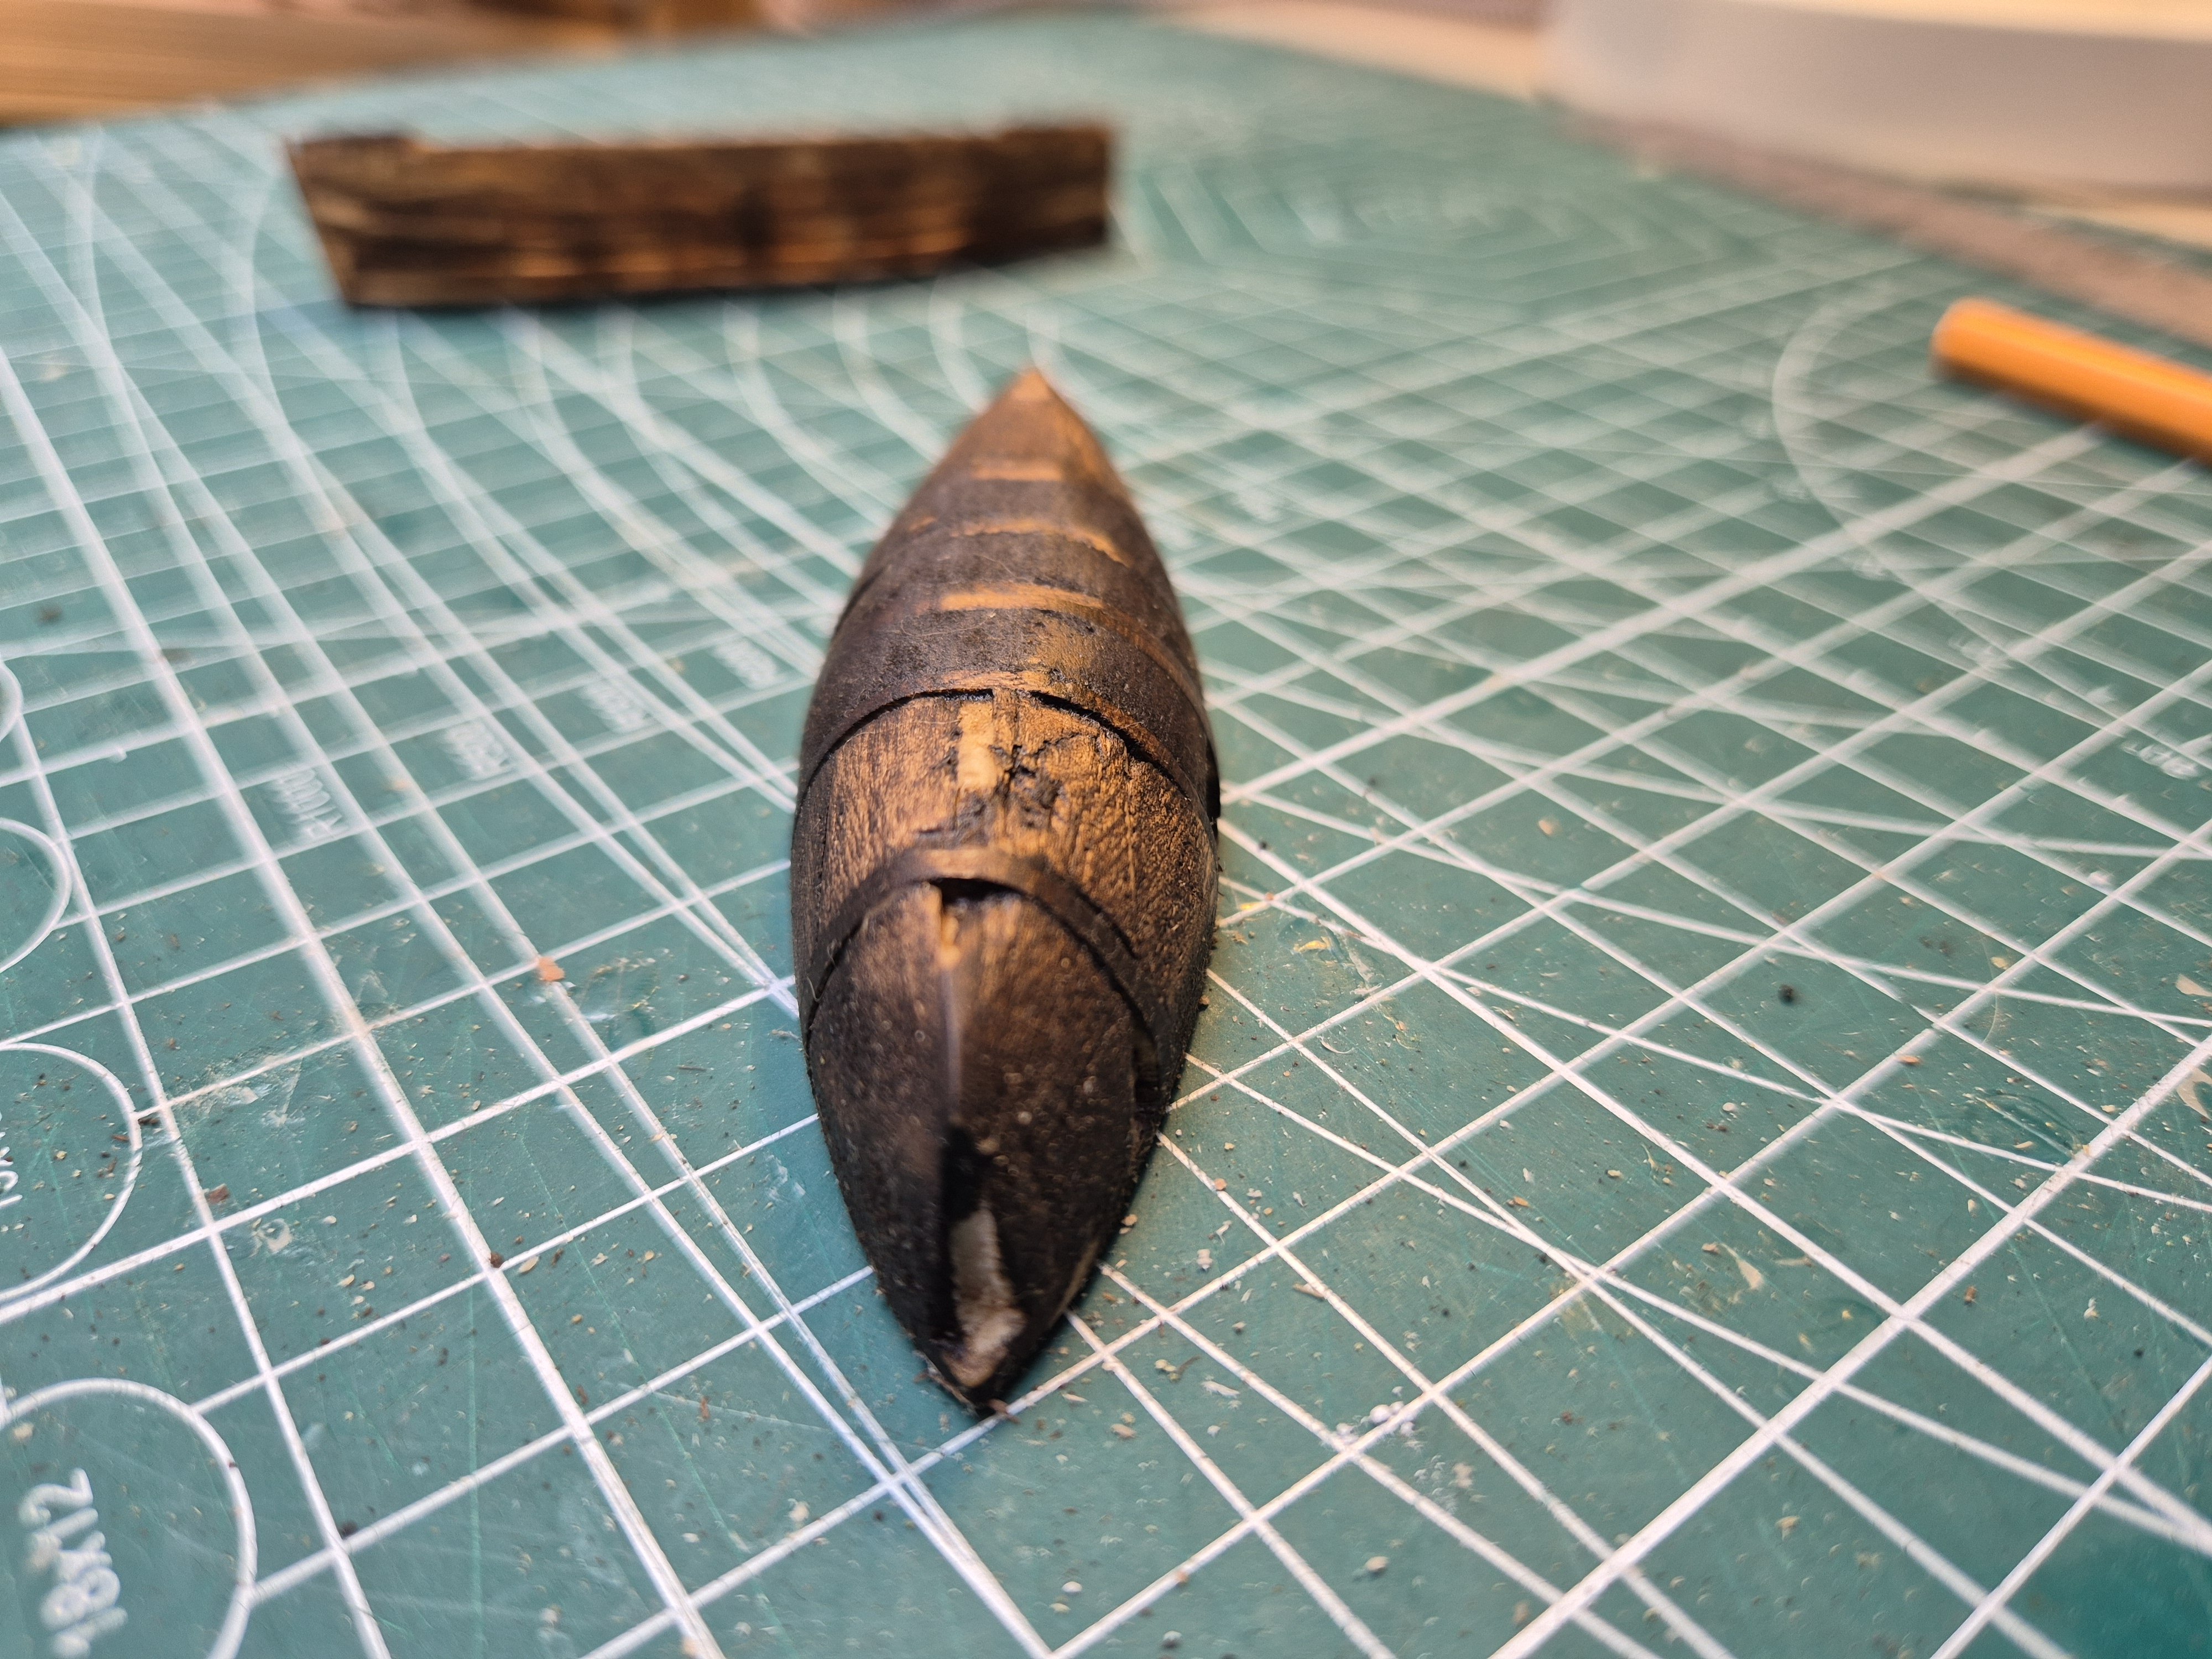
OK, I completed it and made a few internal bits.
Don't like it. 1/32 wood is too thick and ruins the scale. The transitions from Bow/Stern to midships are too severe, she is too broad in the beam and to cap it all she is asymmetric.

Checked the plug and yes, that is were the fault lies. I used a more accurate compass and straight line to equalise the shape and used 60 grade paper to adjust it. I have then used 600 grade paper to smooth it out. Lastly, I have given it a generous coating of coloron was in the hope that the CA will stick less to the plug.
I use a syringe with a very fine needle to apply CA, it's the only way I can control the flow. This does have the advantage of being able to clamp a piece in place and then inject the glue into the joint instead of gluing up and then rushing to get the piece into place.
Simon
- Baker and Keith Black
-
2
-
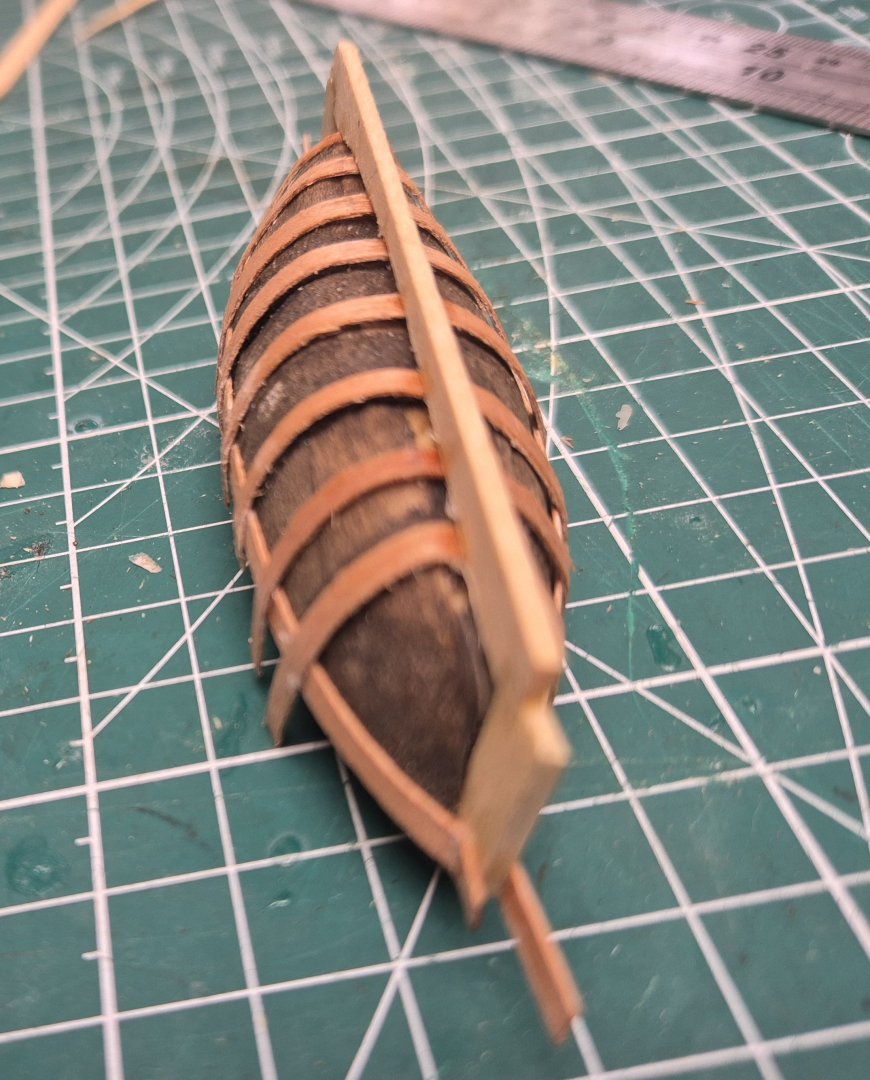
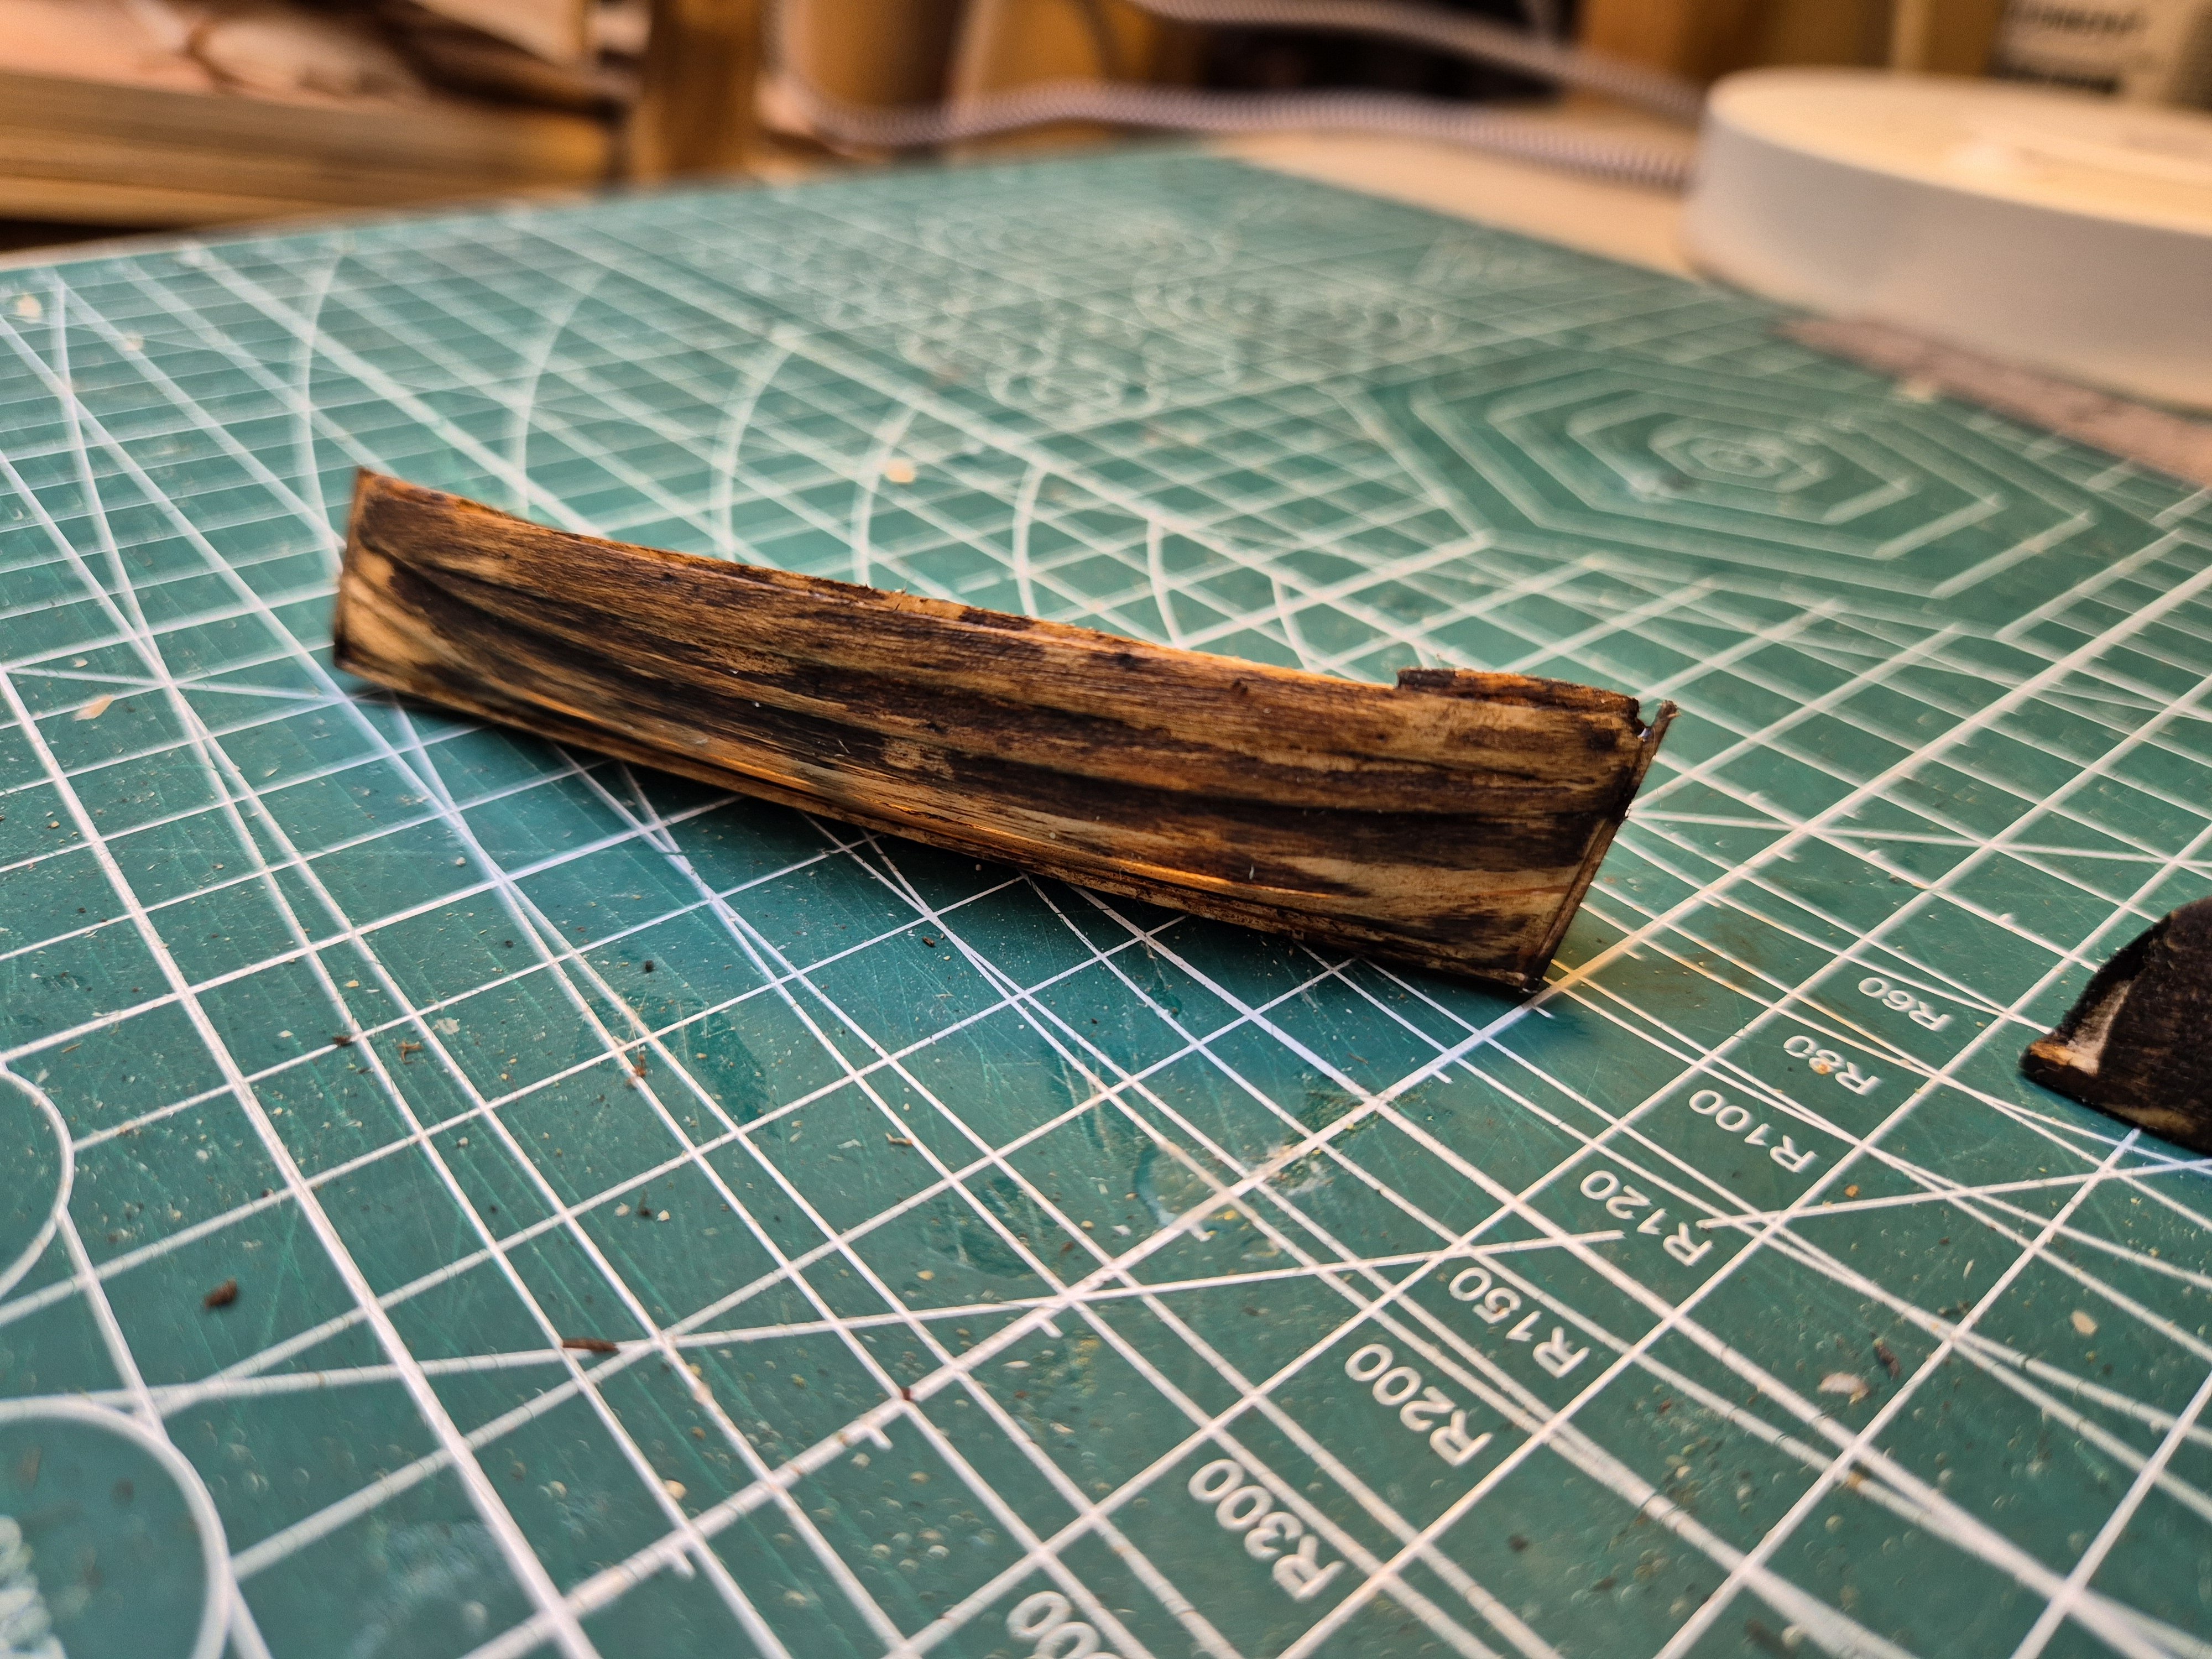
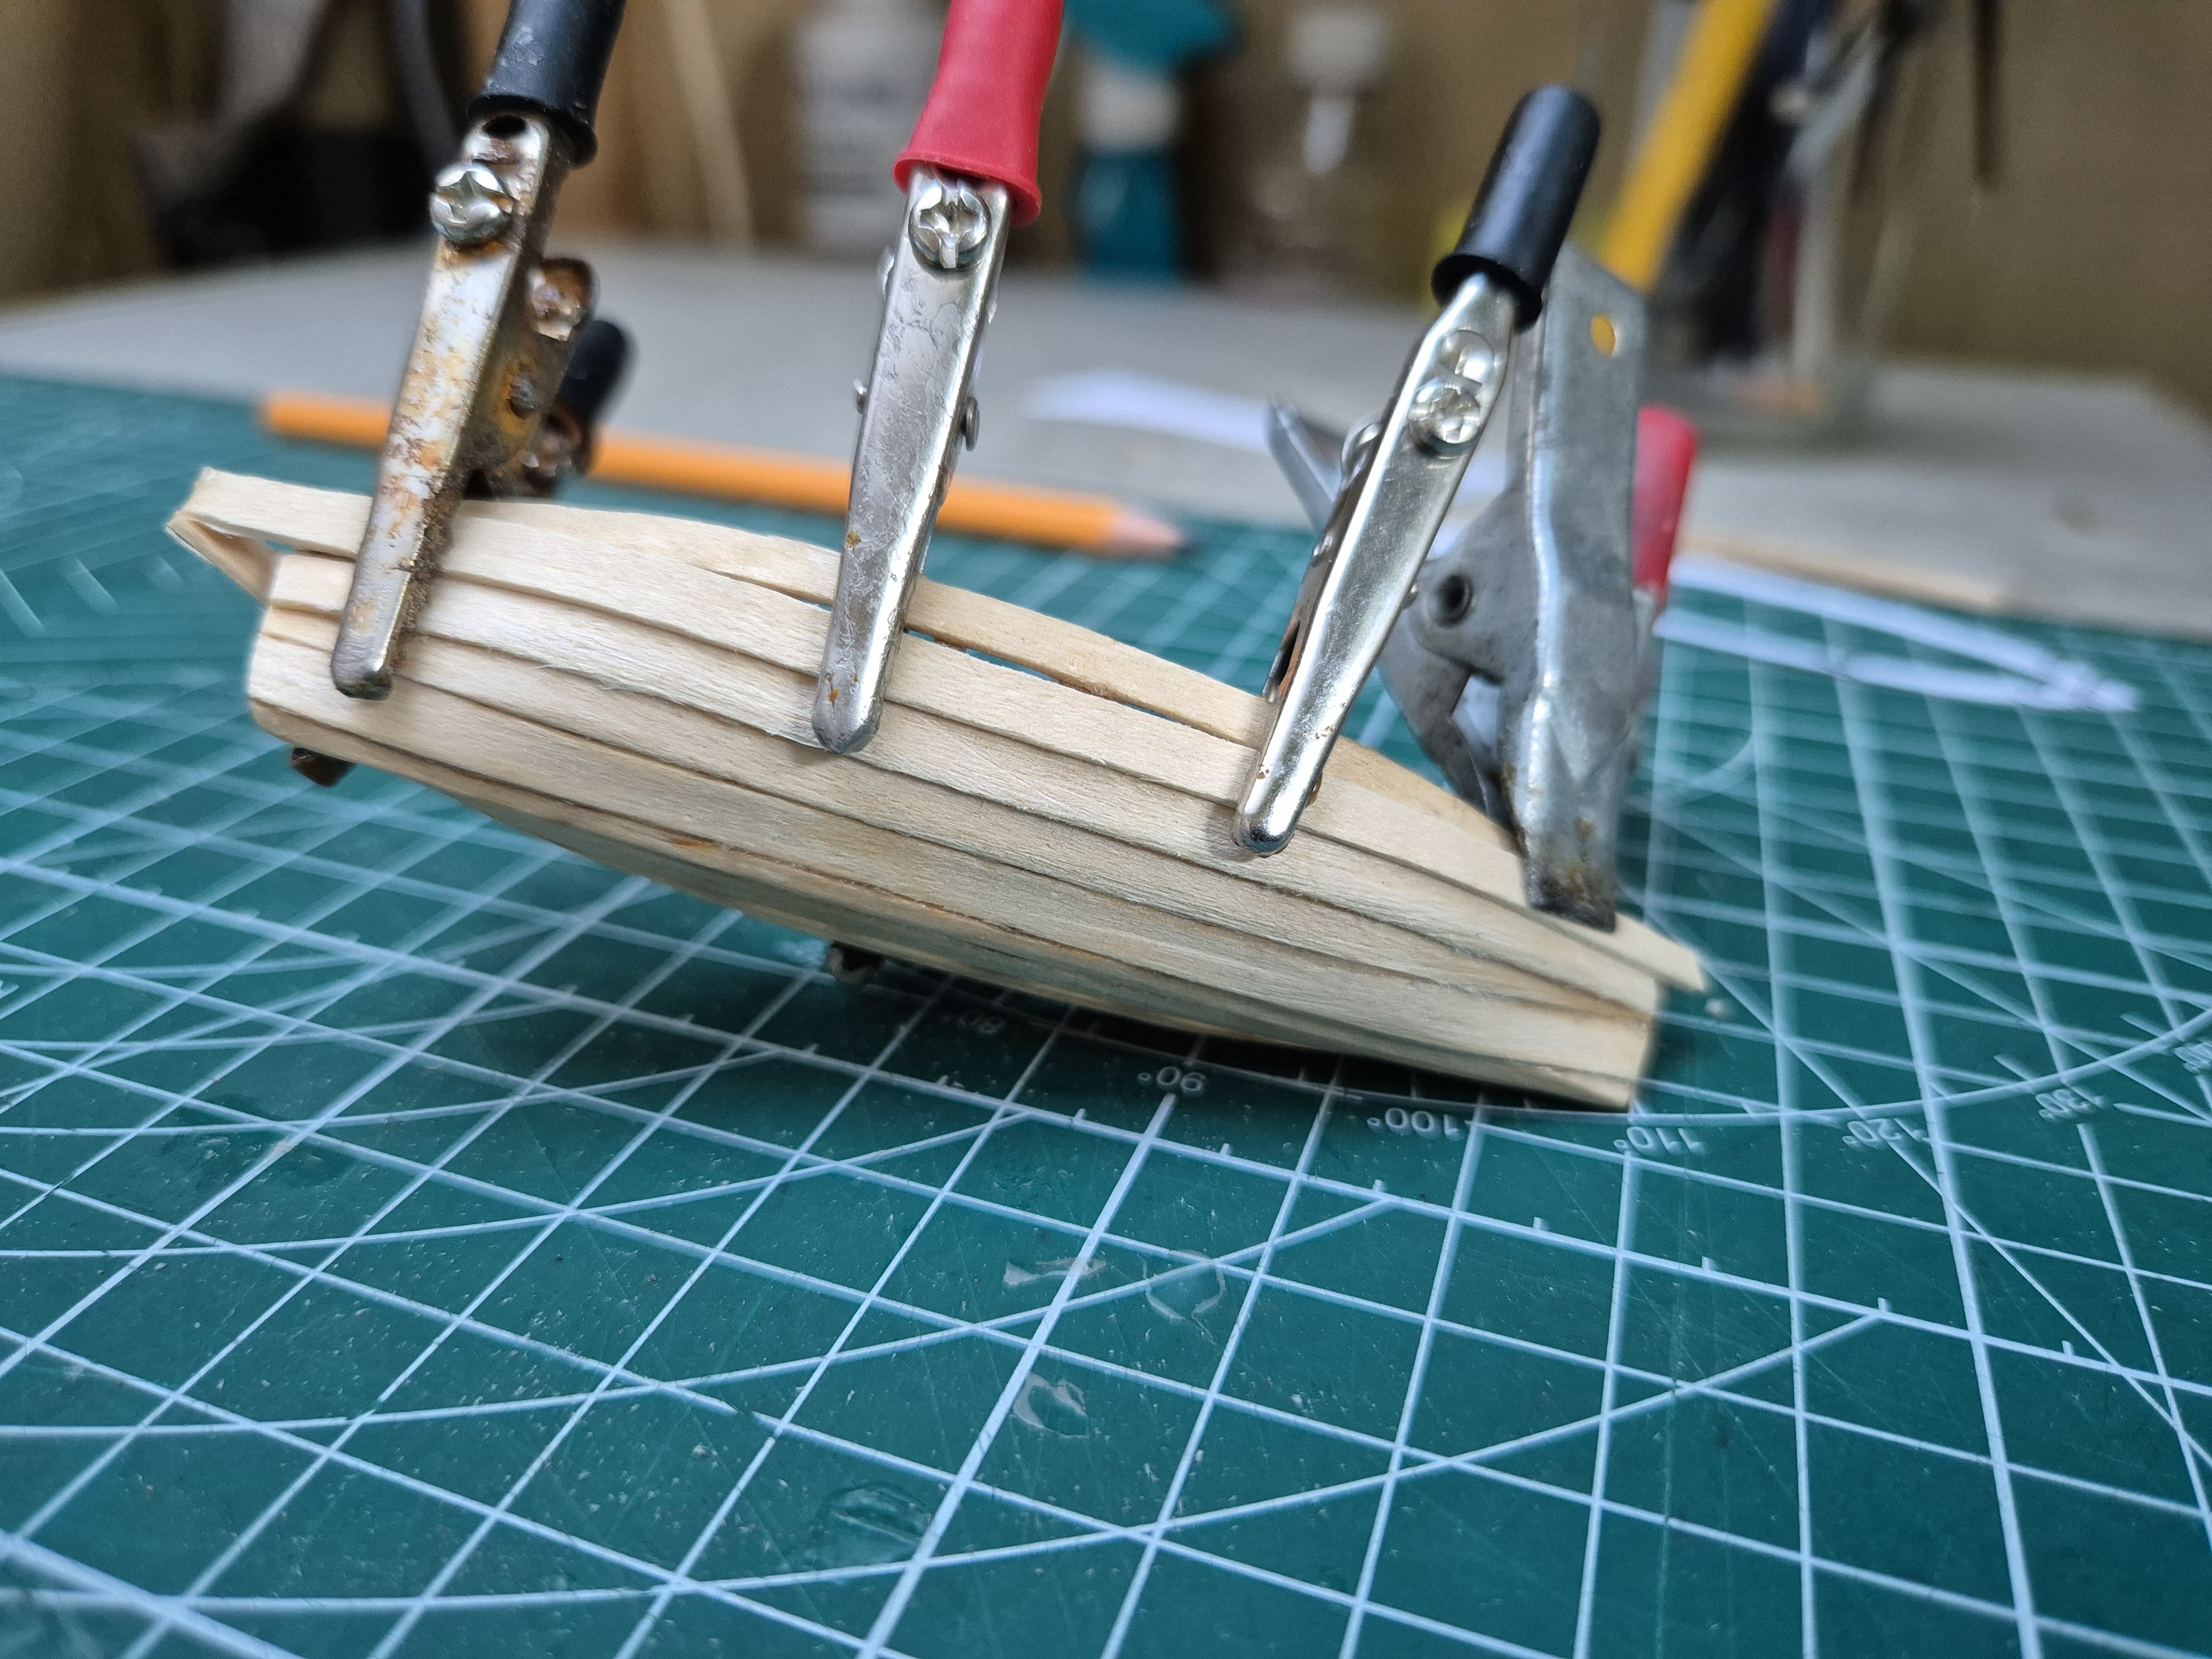
In between working on the port side planking I have been working on the lifeboats.
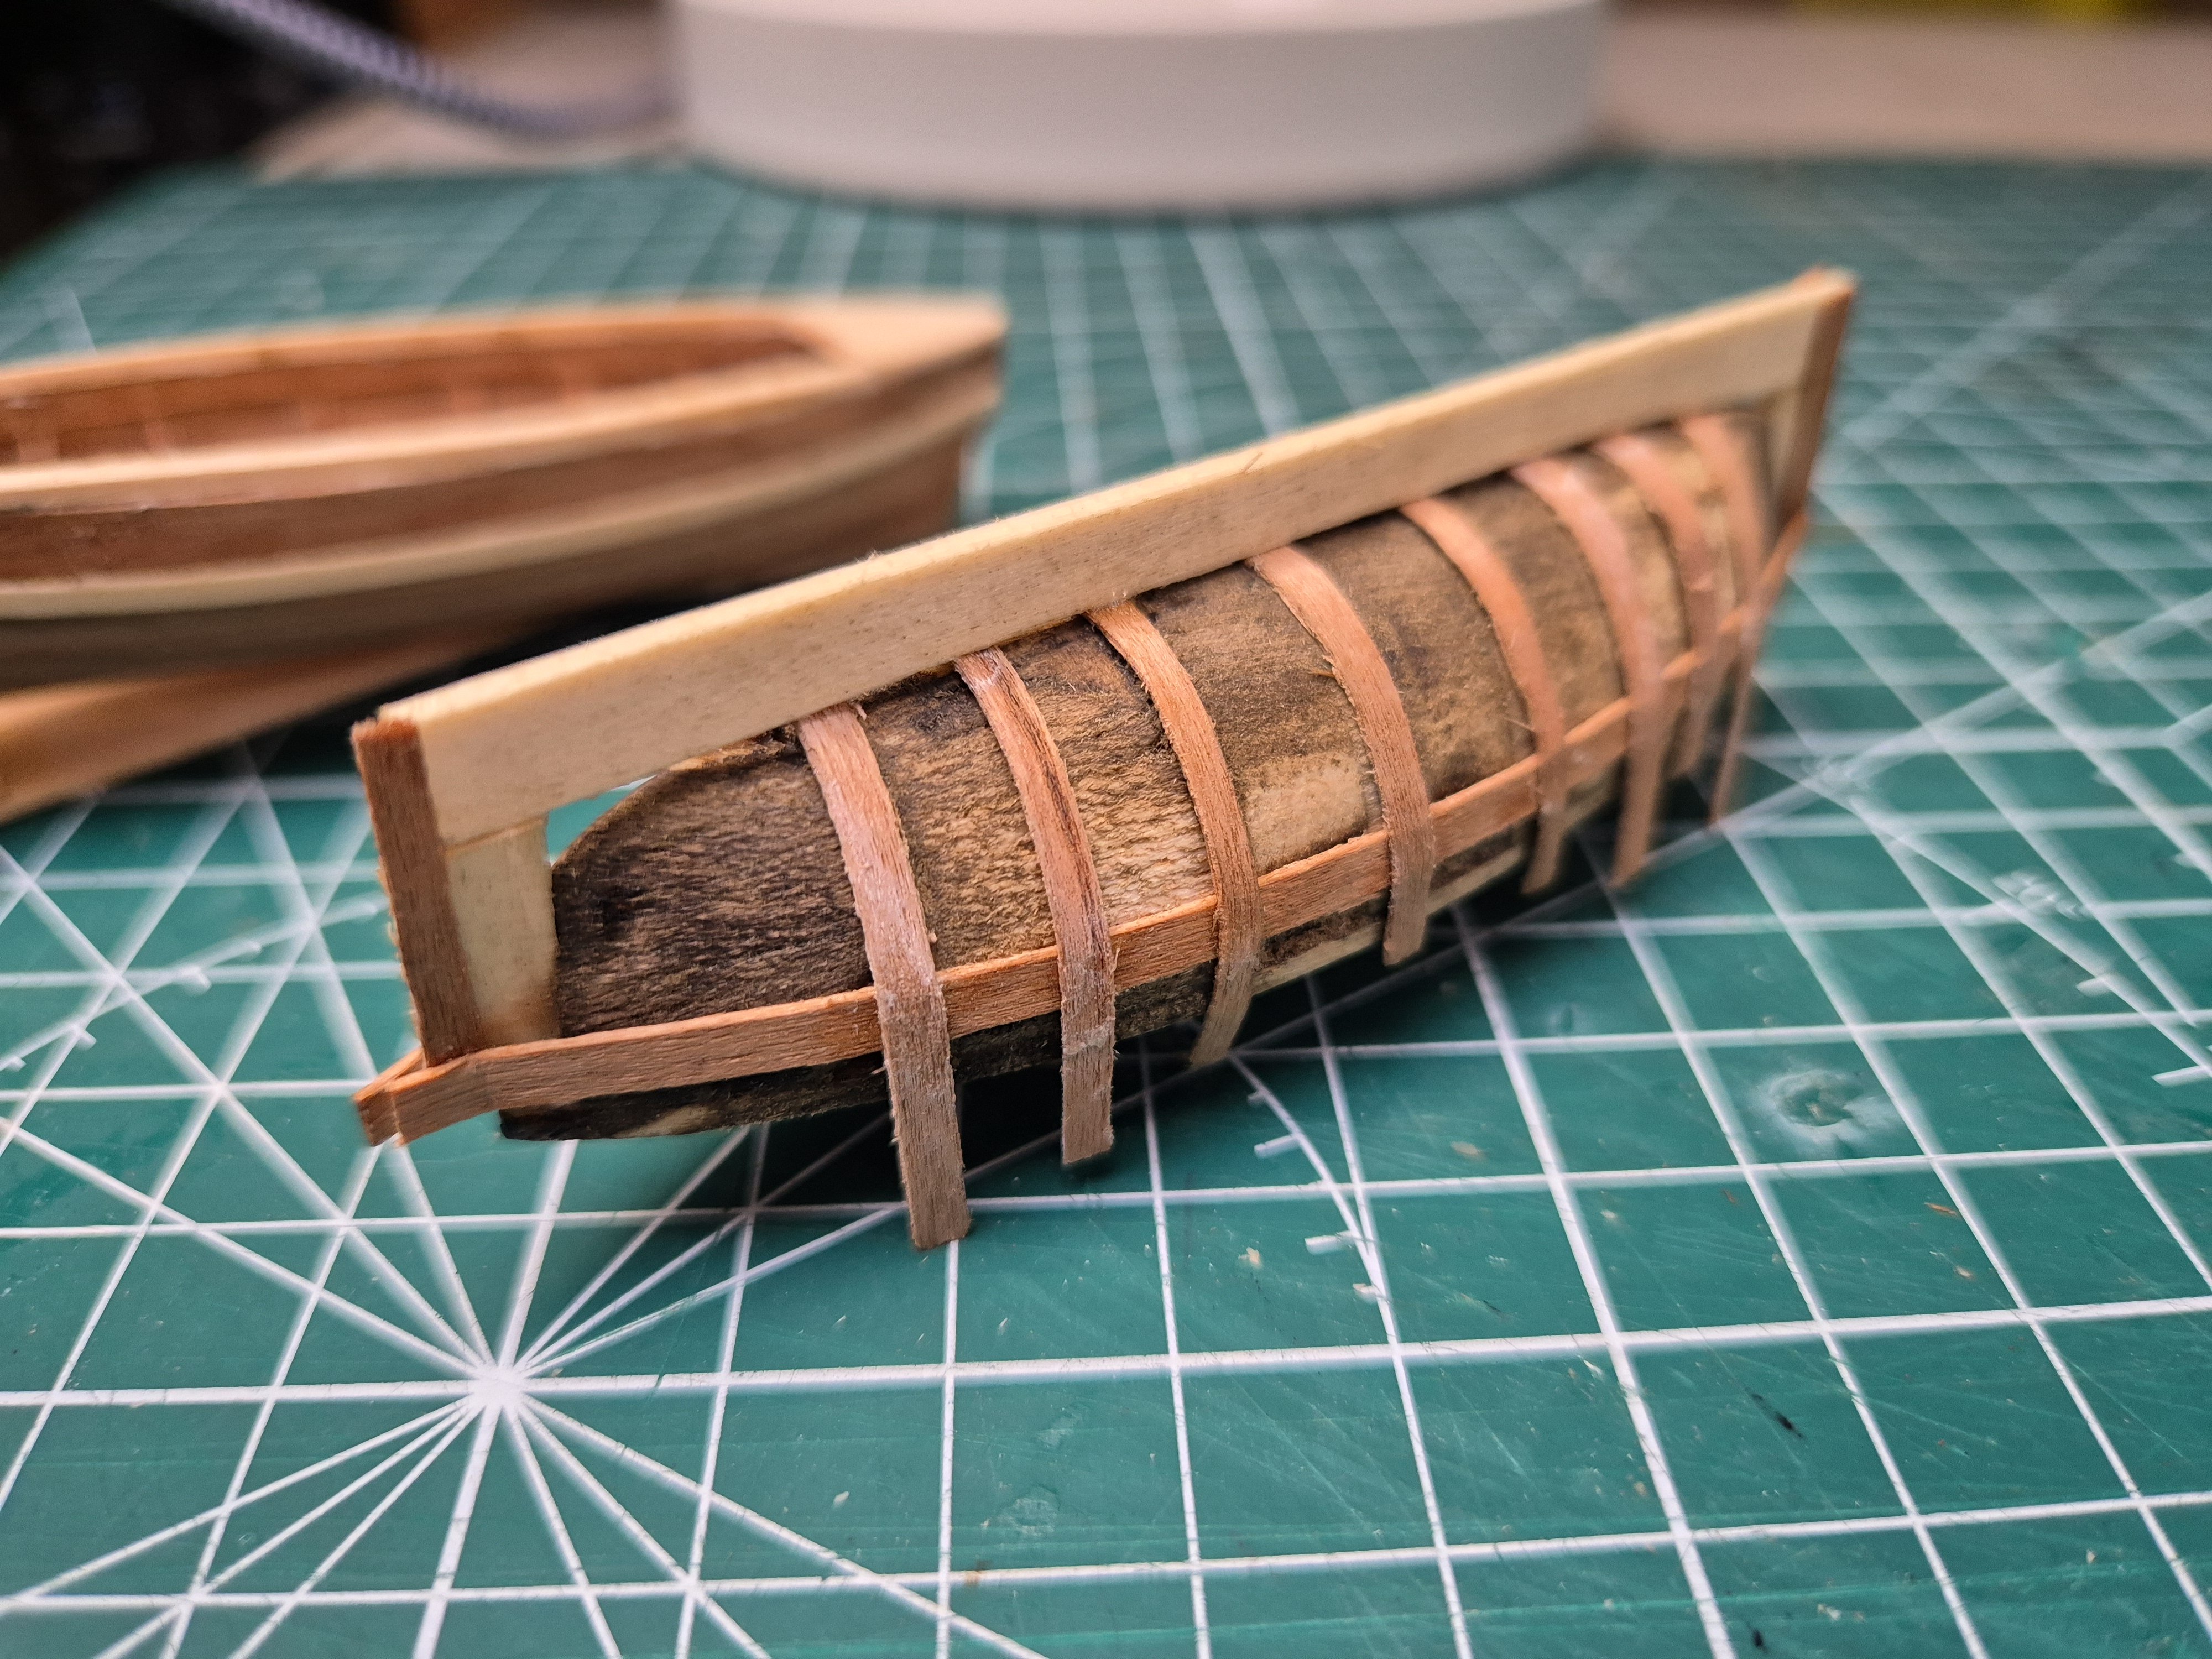
I decided to make a solid plug this time. I cut out the flat shape and frames from 1/32" basswood and then filled the spaces between with balsa, yes that really expensive wood as soft as a sponge.
 The idea being that I could soak the ribs, stretch them over the plug and pin them in place while they dried. Almost worked but had to resort to rubber bands and spring clamps in the end.
So after that I glued on the garboard strikes and Gunwhales and when the glue set up overnight, removed the frame from the plug. Bleeping CA seeps through on every joint and end up having to use a craft knife to ease it away.
Have then been planking it and as they are clinker built, I have overlapped the boards and filed of the excess.

two more strakes and the basic boat is done. Just the internal fittings to do then. That will be one down, one to go as i have already made the jollyboat.
Simon
- Baker and Keith Black
-
2
-
I had hoped to close of the Starboard side this evening but was defeated by drying time and the weather.
Just one small infill and then two full strikes for the gunwhales and can safely move over to the port side. Lots of sanding to do.
Simon
- fake johnbull, Keith Black, Baker and 1 other
-
4
-
Long and winding is about right. It takes time to persuade the wood thar it really does want to assume that shape . Still, not too far from closing up the Starboard side.

There Is something about the shape of the hull that stopped me from tapering each strake and I have a small section midships that I need to shape and blend in. After sanding, I will take stock of whether I need an outer 1/32 layer of planks.
Simon
- Keith Black, Baker, fake johnbull and 3 others
-
6
-
The next two pieces glued up and clamped in. This has been easier now I have accepted that I need to use linger lengths of timber. Clamping is an issue and have had to think outside the box more than once.
I have had to bow to the wishes of the wood as far as the cutwater is concerned.
Frames 2 to 14 all have concave curves. 3 is all but straight with 2 having a convex curve. I just can't get a clamp to hold in this area so have surrendered to the wood and allowed it to set the curvature.
This may be the lazy way out of this issue but it has created a gentle, smooth transition from forest to keel. I have a little bit of infill to sort at the top were I tried to insist but I am content with how she is turning out.

Simon
- Snug Harbor Johnny, Geowolf, Baker and 2 others
-
5
-
This popped up in my Facebook feed.
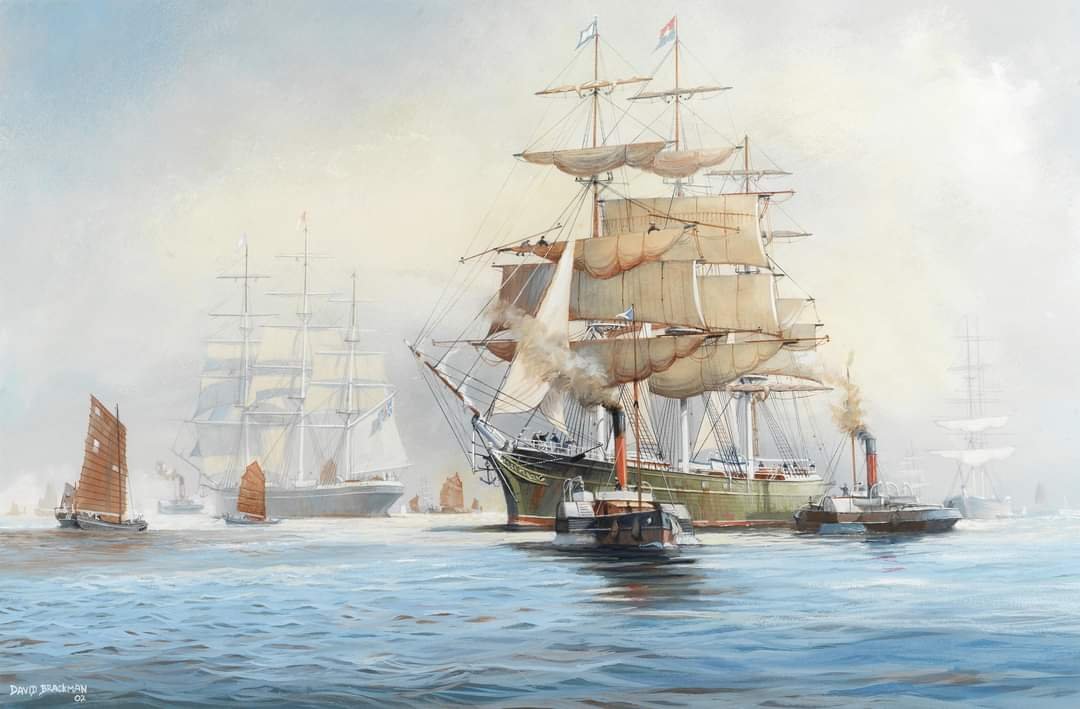
Foochow harbour 1869.
- davyboy, Keith Black and Baker
-
3
-
Another start late, finish late day and won't be home till 20:30 at the earliest so I doubt I will do much tonight.
I have managed to do some planning this morning and have cut out a few strikes from 1/16 basswood.
I have temporarily clamped these in place on the Starboard hull.

What coffee sticks I have left I will use on the port side for a bit of continuity but plan to use the basswood to finish the planking. As there is only one joint in each strake, I will use a knife tip or scribe to imitate joints to match the other wood.
Simon
- fake johnbull, Keith Black and Baker
-
3


Thermopylae by My Fathers Son - or as near as I can get it
in - Build logs for subjects built 1851 - 1900
Posted
Thanks all, and I knew there would be a plumber in here somewhere. Lol.