


Capella
-
Posts
136 -
Joined
-
Last visited
Content Type
Profiles
Forums
Gallery
Events
Posts posted by Capella
-
-
Cathead. I'm so glad that I ran across this log.
I purchased this very kit around 2010 as my first endeavor into the world of wood model ships. I worked up to the first planking and set it aside when life and such got in the way.
11 - ELEVEN - years later I decided to pick it back up (I restarted last fall) and am now a little into the rigging.
My workmanship is certainly nothing great to look at - the kit calls for painting the hull, wales, bulkheads and such and it was a great way to cover up the myriad of ooopse, gaps and cover-ups. But my mantra throughout has been, "this is my FIRST ship, and it's MY ship." Critics be damned. 😉
The rigging is proving to be quite challenging. As this is my ffirst wood model ship I'm sticking to the kit plans - but as you well know sometimes it's just not possible to do what the plans call for.
I am heartened to know that my frustration with working through the instructions is not solely due to my inexperience, but is also due in part to the poor instructions and poor quality workmanship of the parts and materials provided. I am sure that my next project will be a much better experience.
Reading through your log has been inspiring. Thanks for sharing your project with us!
-
On 3/14/2017 at 1:40 PM, Captain Cutter said:
I just bought this kit. My first ship ever. I was hoping you can tell me about the lathe to the Keel. Did you use the 1.5X3X320 (mm) dark wood piece?
Thank you for your time.
Sincerely, Captain Cutter
Hey, Cap'n Cutter.
This ship is also my first shot at wood ship models. I bought it probably around 2010 or so. I started it, got to finishing the first layer of planking and then life happened.
Then COVID happened and I finally picked it back up. I'm currently about a quarter of the way into the rigging.
How did yours turn out?
-
Thanks, reklein.
I did some more research, hemmed and hawed a lot and finally just went for it.
I'm working with round stock, and the "drill-in-one-hand/dowel-in-the-chuck/sandpaper-in-the-other" method turned out to work quite well once I got the hang of it.
For my first time, I'm okay with the results. Of the seven masts, spars, jibs, etc. that I cut and shaped, most look pretty good. I broke three of them, but I had some store-bought dowels of various diameters standing by for just such an eventuality.
My next step is to put all of that together with their respective fittings, and then I'm on to the rigging (the next thing I'll be stressing out about for days before actually tackling).
Question:
Do some kits come with square stock? From all of the reading I've been doing on the subject it seems that starting with square stock is the best way to go.
Maybe it'd be worth purchasing square stock to replace round dowels that come with a kit for future projects?
-
I'm getting ready to taper the masts and spars on my ship (Ranger Revenue Cutter by Corel - my first wood model ship). I've spent a LOT of time reading up on various tapering techniques and I'll be using the method of holding a drill in one hand and sandpaper and the end of the dowel to be tapered in the other hand.
My question is, does anyone have any suggestions/tips on prepping the dowel, such as marking it up to properly know what part of it needs to be tapered and how much. I know I'll need to frequently check my progress and I have sandpaper from 150 to 400 grit.
Any suggestions will be greatly appreciated!
-
-
1 hour ago, allanyed said:
To which parts are you specifically referring?
Allan
So, I'm working on this ship, the Ranger Revenue Cutter by Corel (my first wood model ship). The post's main picture shows the parts that I want to paint brown: the base for the cannon, the "cross bars" for the anchors, and the oars. They are all made out of metal.
But the question is moot now, as I purchased a brown acrylic this evening and it worked well for me.
-
-
20 minutes ago, LyleK1 said:
Just my two cents...
I usually use a blend of colors to achieve the look I want.
It depends on what the piece was actually made from but also on personal preference.
I have enough different colors that I can blend to get virtually any shade of brown that I want.
Thanks, but at the moment I just have what came with the kit: a primer, two types of black, white, and clear satin.
So I'm in the early stages of building up my paint stock! 🙂
-
There are several parts of my ship's accessories that are made of metal (I'm not sure exactly what type of metal, but they're bronze in color), and I'd like to paint them so they look like wood.
I'd appreciate it if someone could suggest a specific color that would accomplish this. If it matters, I've been using acrylic paints for the rest of the ship.
-
Okay. Yeah. My math was off. Expo's offering 12 strips measuring 1 x 4 x 500mm @ $4.99 for the dozen, vice Modeler's 1 strip measuring 1 x 4 x 1000mm @ $1.01 each.
Thanks!
- mtaylor and Paul Le Wol
-
 2
2
-
I needed some more walnut strips of varying widths and thicknesses.
I first went to Modelers Central. I was only able to find one of the three items I need. But I was surprised to see that they sell them in 1000 mm - 1 meter - lengths. I even went so far as to email them to confirm that wasn't a typo or something. But at less than $1 per strip, I figured that was pretty good. However they didn't have everything I need and I'd prefer to get everything from one vendor.
So I visited Model Expo. I was able to find everything that I needed there, but they sell their strips in 12 pieces totalling 500mm - and at $5 a pop. A HUGE difference compared to Modelers Central products.
Does anyone have any explanation for this weird discrepancy?
-
I'm in the 2nd layer planking phase on my first wood model ship. BOY what a challenge!
I just ran across this kit and instructions today and will definitely be purchasing this.
I started to go through some of the posts and would like to offer a suggestion:
Many nautical terms are being used in referencing the various parts of the ship. The kit and instructions are targeted mainly to newcomers of the hobby, so many people will not be familiar with a lot of the terms. As I am going through the steps in my own project, I sometimes have to look up a particular term to know what exactly the instructions are referring to.
I'd like to suggest that, as nautical terms are brought up in the logs/instructions, a short description be included along with a given term.
Thanks!
-
6 hours ago, grsjax said:
Check the sponsors listed on the right side of the home page of this site. Some good sources there.
Thanks. Will do.
- Ryland Craze, AlleyCat, catopower and 2 others
-
5
-
15 hours ago, allanyed said:
Capella,
Are you interested in any specific era or nationality?
Are you interested in accuracy or are you OK with what the kits provide? With a few exceptions the manufacturers of the kits seem to have done little, if any, research so a lot of the materials are not at all realistic in appearance and scale. Study the many build logs here at MSW (both scratch and kit) rather than relying on advertisements from the kit makers and suppliers.
Two you might want to consider based on build logs and comments here at MSW
Model Shipways - models designed by David Antscherl
Models from Syren Ship Model company
You can always try kit bashing for any of the less realistic kits.
If you have sufficient room to work, maybe consider investing in tools and a few books and give scratch building a chance. This opens you to thousands of vessels rather than being relegated to a few dozen.
In the end, what makes you happy with your investment is the way to go.
Allan
Hi, Allan
Good questions and good points!
As far as what I'm interested in, pretty much any masted ship (except sailboats or similar pleasure craft) from any relevant era, and American or western European.
Accuracy isn't a big thing for me.
I'll bookmark those sites you suggested for when I'm ready to tackle another project.
Thanks for taking the time...
Mark
- catopower, Ryland Craze, Dave_E and 2 others
-
5
-
Pretty much the title says it all.
I'm in the finishing phase of completing the hull on my FIRST wood model ship (still have to do the superstructure, rigging and sails, and painting) and I'm already considering what I should do next.
I googled "wood model ship kits" and came across the site modelerscentral.com which I found to be a good source of wood model ships.
I'm looking for other suggestions on good sites to consider for future projects.
Also, I'd appreciate recommendations on sites for wood modeling resources such as tools, paints, and materials.
Thanks!
-
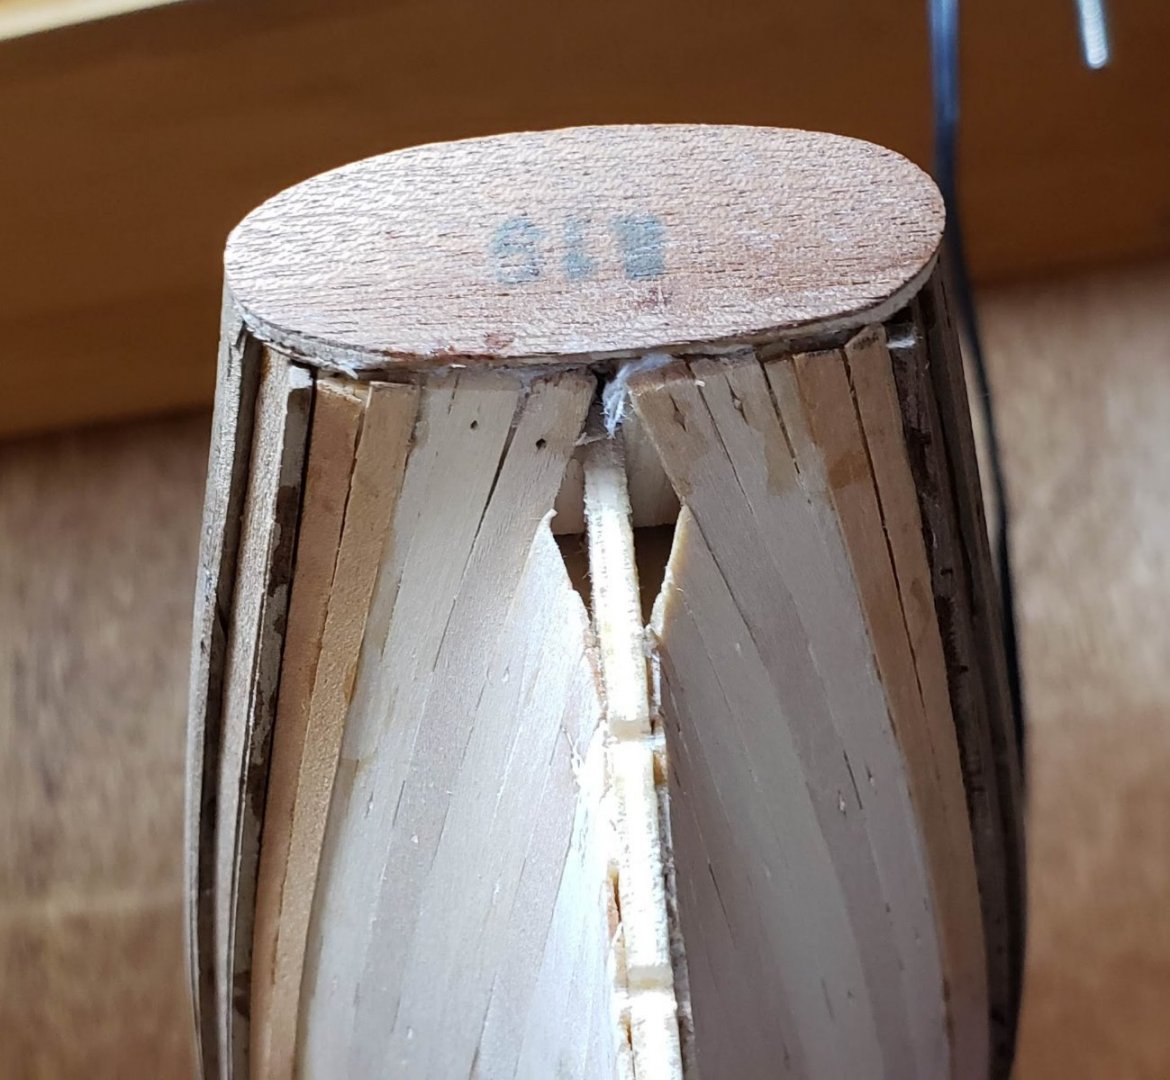
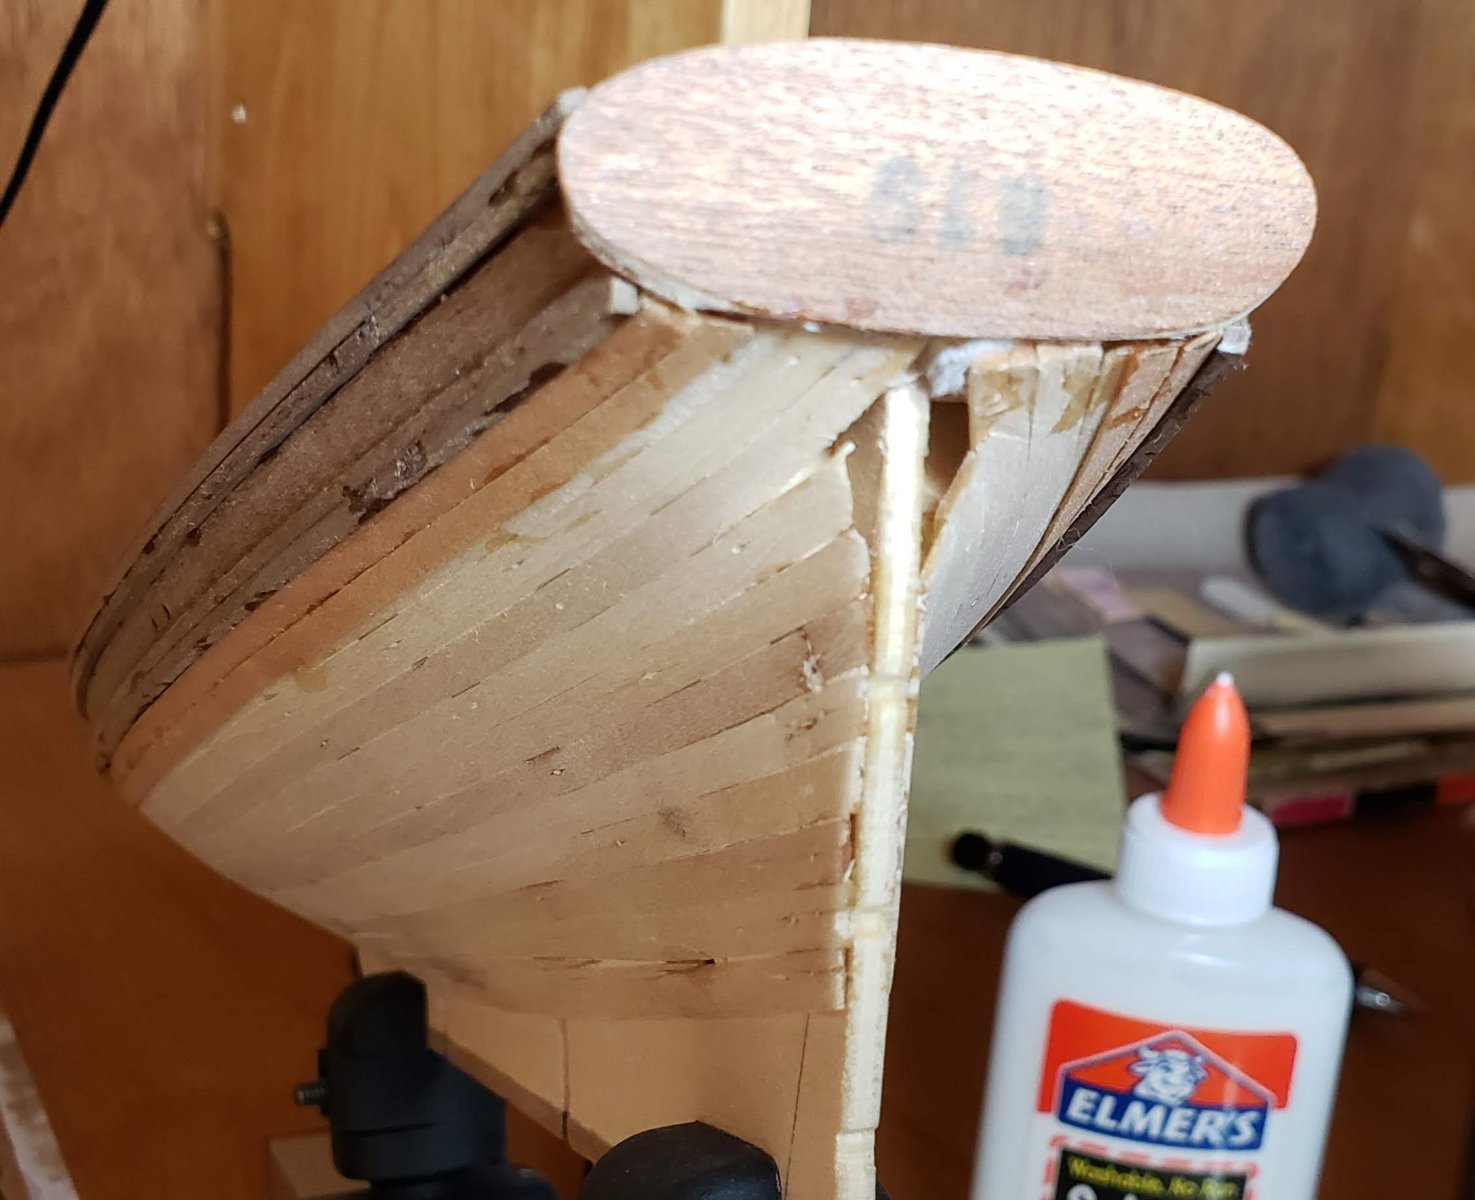
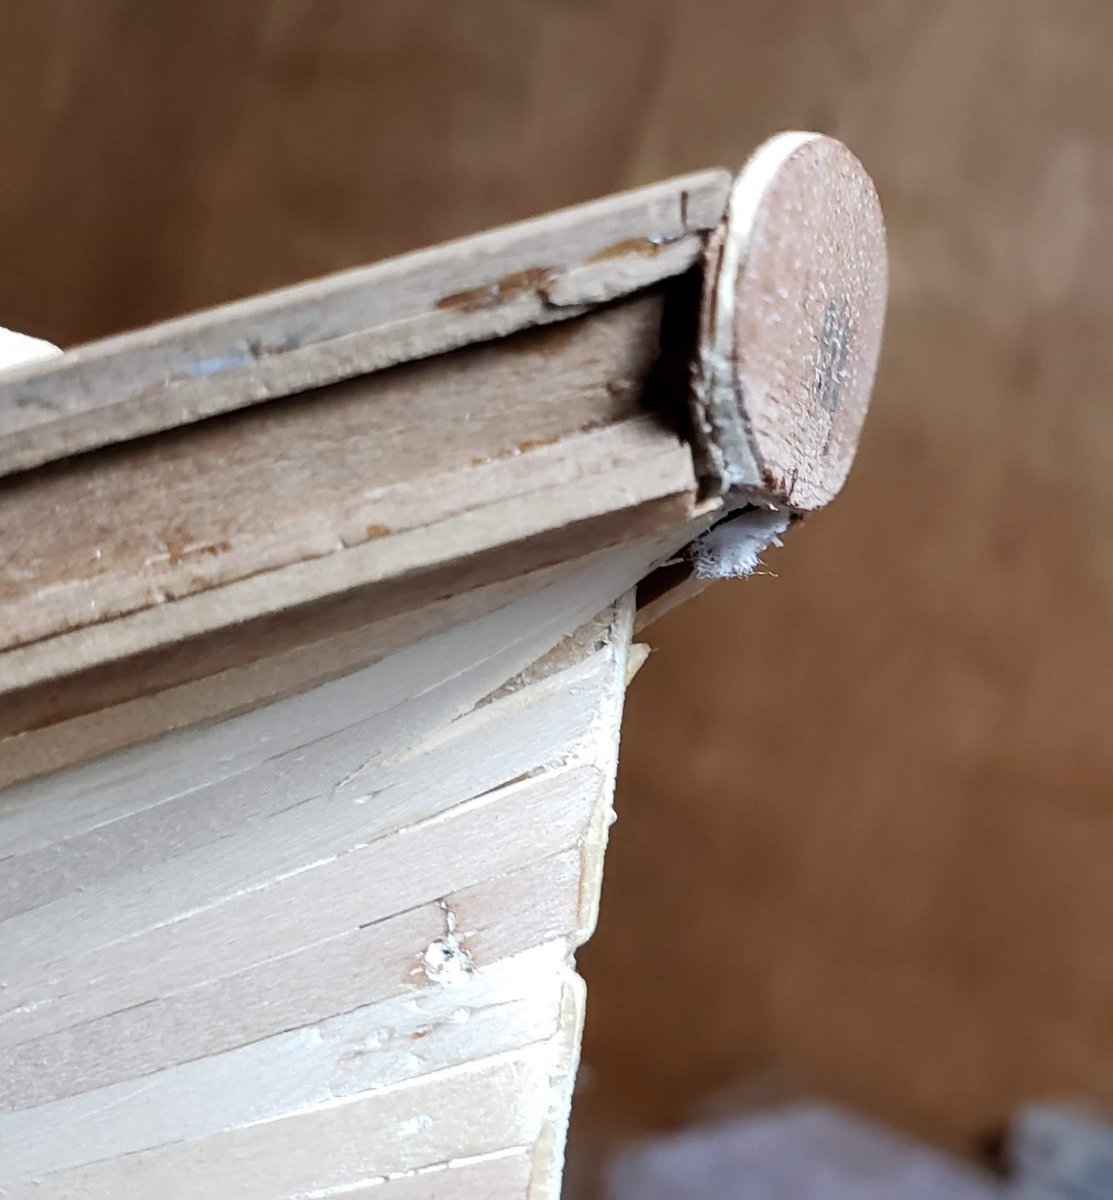
This is my first ever wood model ship.
I did the first layer of planking and then set the project aside for a few years.
I just got back into it and the second layer of planking is my next step.
Obviously, I'll need to address the huge hole in the back, and the only thing I can think of is to run the second layer planks to butt up against each other from each side to cover the hole. Obviously that will require some precision cutting, placement and gluing. My other thought was to extend the keel out a bit more to give the second layer planks something to attach to other than each other - as I should have done with the first layer - but as I said, this i my first wood model, so I don't have any extra wood for that option.
I thought I'd check here to see if anyone has any suggestions.


-
14 hours ago, Gregory said:
I really like this one. The 3 jaw chuck is really useful for a wide range of sizes without changing collets
like a lot of traditional pin vise'..
36 Pieces Vise Hand Drill for Jewelry Making Set
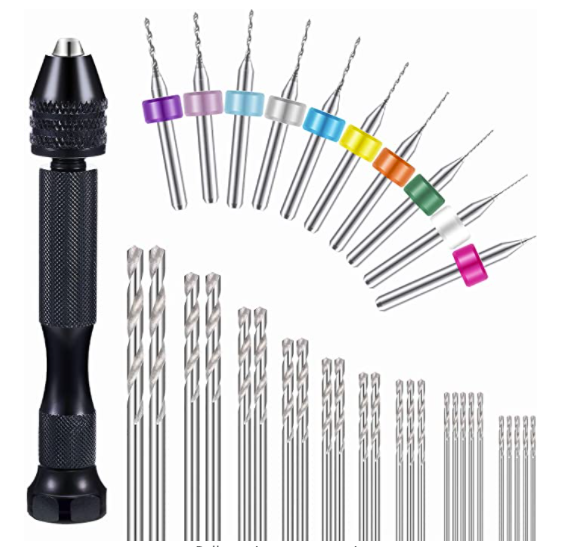
If you get something like this, be aware those burrs at the top are brittle and break easily, but it is
easy to get replacements.
Thanks. I looked at that one and some others. I finally landed on this set from CML. $15.

To those of you who have suggested getting something from Starrett: As I noted in my original post, I am working on my first ship, so I may or may not decide to continue the hobby. Do you really think it prudent for me to spend $100 - easily more - on something that I don't know if I will ever use again??
-
I'm working on my first wood model ship (Corel Ranger) and I need a pin vise and a few bits.
Could someone suggest a decent set for me?
Thanks!
-
I'm working on my first ship and a big source of frustration is soaking the planks in warm water.
Currently I'm using a 12in x 6in shallow plastic bin and getting hot water from the sink, but obviously I have to keep replacing the water.
I was looking at immersible heaters on Amazon, running around $25 - $30 - and I think that might work. I've found a few that can be used in plastic.
But before I bought one of those I thought I'd check here to see what others are using.
- mtaylor and thibaultron
-
2

USRC Ranger 1819 by Cathead – FINISHED – Corel – Scale 1:64
in - Kit build logs for subjects built from 1801 - 1850
Posted
I do not have a build log - didn't even know that was a thing until last fall when I picked it back up.
I plan on starting one for my next project - whatever and whenever that will be...