HOLIDAY DONATION DRIVE - SUPPORT MSW - DO YOUR PART TO KEEP THIS GREAT FORUM GOING! (Only 64 donations so far out of 49,000 members - C'mon guys!)
×


Techtonic
-
Posts
178 -
Joined
-
Last visited
Content Type
Profiles
Forums
Gallery
Events
Everything posted by Techtonic
-
 Are you using the thread from the kit? I had slight fraying with my Beagle but nothing like as much as what it looks like you are getting. Also, a tip on the belaying, the rope should go round underneath the pin. That way it is impossible for the pin to be pulled out by tension on the rope. There's a good description half way down this page: http://www.sdshipmodelersguild.org/public/scuttlebutt/frmRigging.htm
 -
Another great video - Thanks! These will be very helpful, I'm about to start building my Pegasus in the next few weeks.
-
In Mastini's "Ship Modelling Simplified" he says 16" (about 40cm) is the correct spacing. In LucienL's picture I would say the man is about 4.5 ratlines tall, which would equate to 6' which is about right. 16" at 1/60th scale is about 6.5mm. That is the spacing I used on my Beagle.
-
Thanks for the video - it was excellent! Very well made and it shows very clearly what is required at each step. it looks like it is going to be an invaluable resource when I come to build mine. Are you planning on doing more videos for the rest of the build? Do you have any estimate of when they will be coming out?
-
Me too! Though I'm still trying to decide whether to make them fully deployed or furled, or somewhere in between. I made an experimental test sail with some silkspan a few weeks back so that may be the route I go. But it's definitely not as easy as I was hoping to get a good result. My last ship, the OcCre Beagle, came with ready made cotton sails, which to my eye actually look pretty good despite the oft stated scale issues with using cotton. I did find this example of someone else's Pegasus build with sails which might make a useful reference: http://ysmc-world.la.coocan.jp/exhibition/ex2013/16.html. Interestingly it seems like he added an extra royal yard and sail at the top of the fore and main masts. I'll be following with interest how you do it.
-
I have this kit sitting on my shelf ready for me to start building in in the next couple of months. So I am very much looking forward to seeing your videos.
- 64 replies
-
- 1
-

-
- amati
- victory models
- (and 1 more)
-
Are you referring to the three small 'house' like deck fittings? If so, these aren't cabins but rather skylights and stair access hatches. You can see this on the cross section diagram here https://forum.game-labs.net/topic/4728-hms-beagle-with-plans/. You can also get a good view of them here https://www.cloudtour.tv/beagle/panorama_/0_3.
-
Hey Mobbsie, Good save on the fore peak! You definitely want to fit the king plank before the fittings as it runs under many of them. If it's 1mm too high you're going to have to do some extra work on the fittings to file out a matching recess. You seem to have spaced out the chain plates/deadeyes in a strange way - particularly the ones for the main mast. The spacing on the port and starboard sides look different. On the starboard side, for the five shrouds that form the ratlines you have a huge gap between the fore two shrouds and the aft three shrouds. That will make the ratlines look pretty odd. One other thing - the chain plates should really slope in line with the shroud/backstay that is attached to it like this:
-
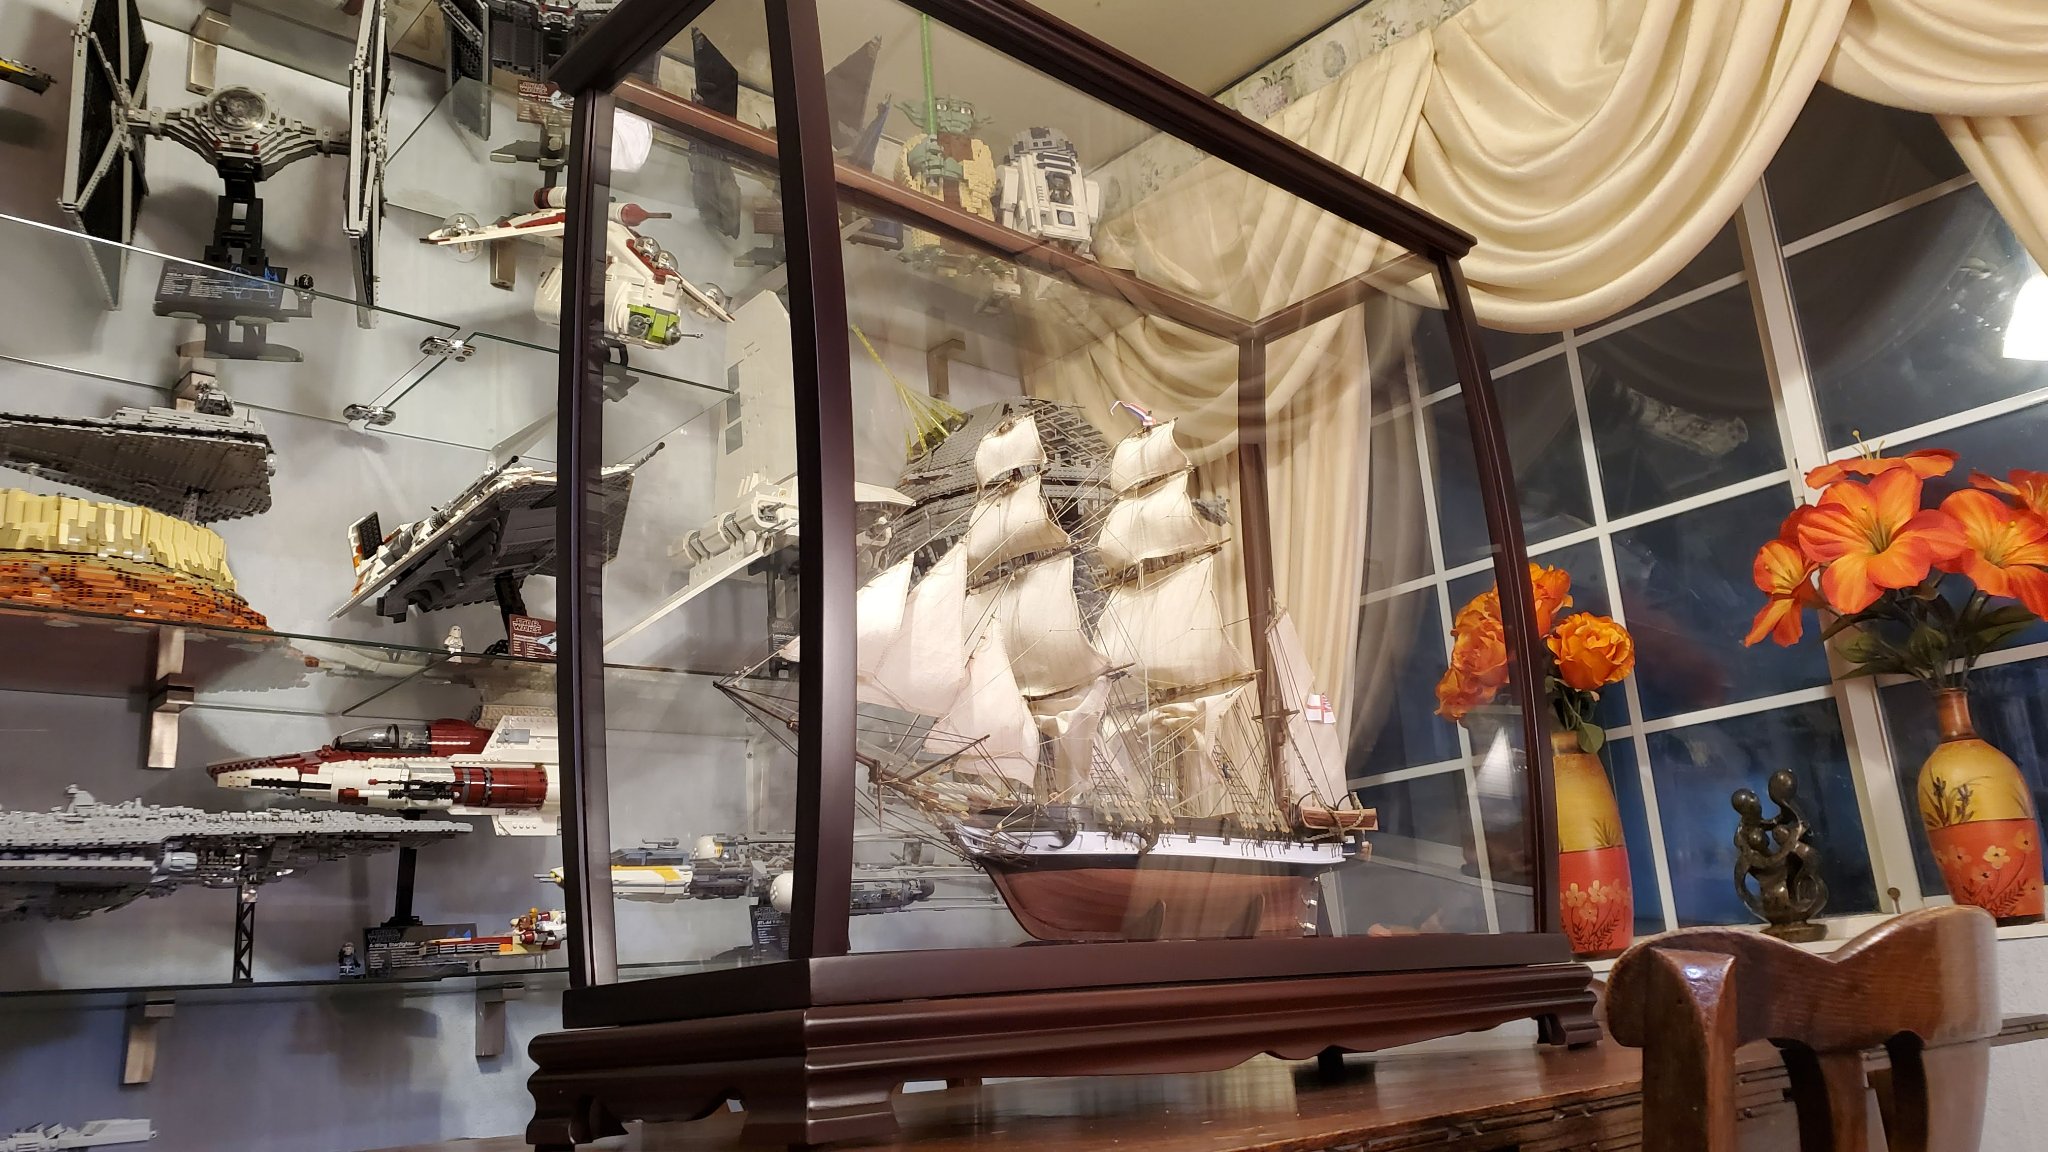
While I like the Star Wars movies I'm not as fanatical as the display might suggest. I just like building the large Lego starships that are aimed at the adult builder. Problem is they only take between a day and a couple of weeks each to build and now I've run out of room. So I needed to move to a hobby where it takes a lot longer to build each model - and wooden model ship building certainly meets that criteria! It's also considerably more of a challenge - and I relish a challenge!
-
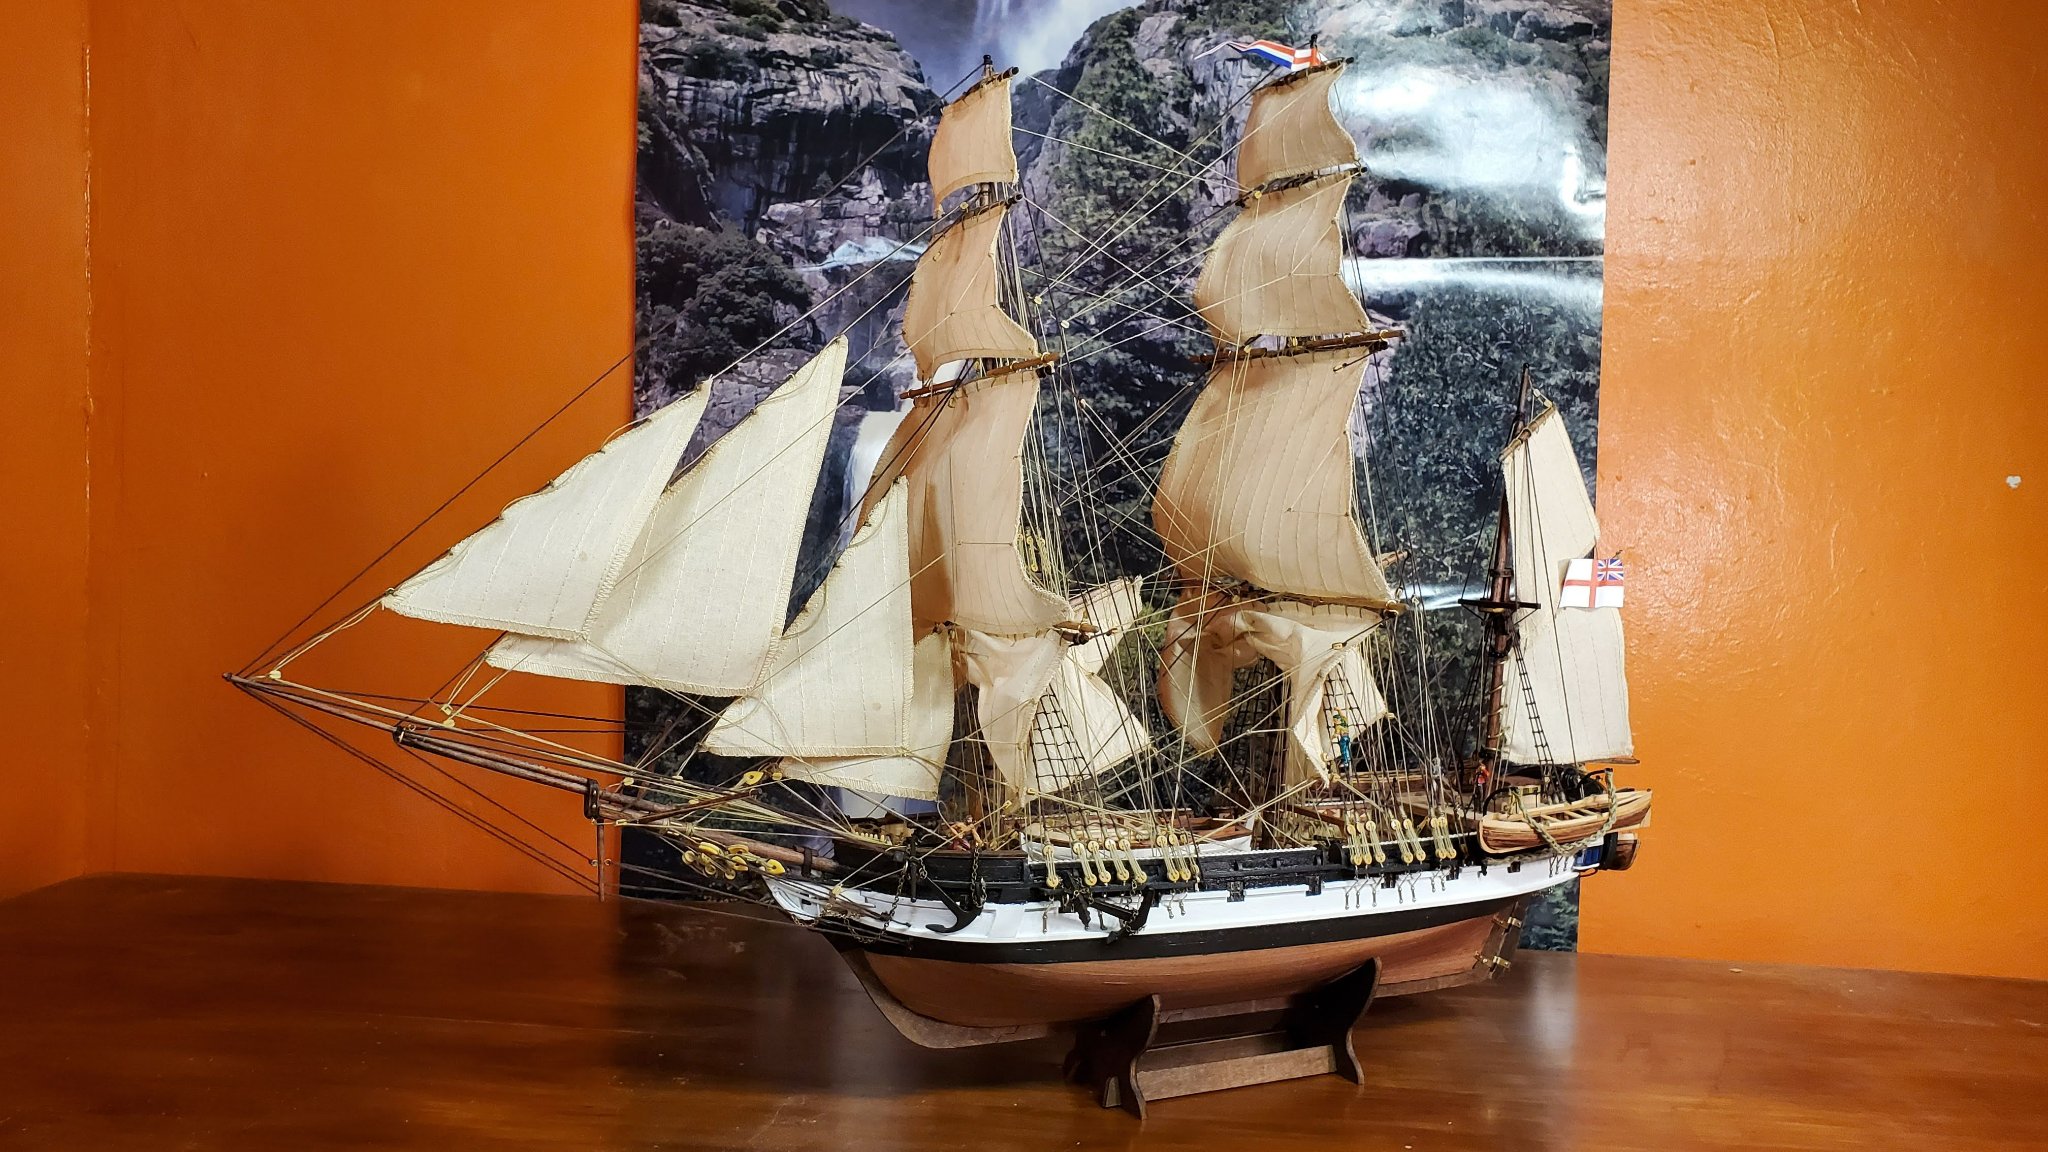
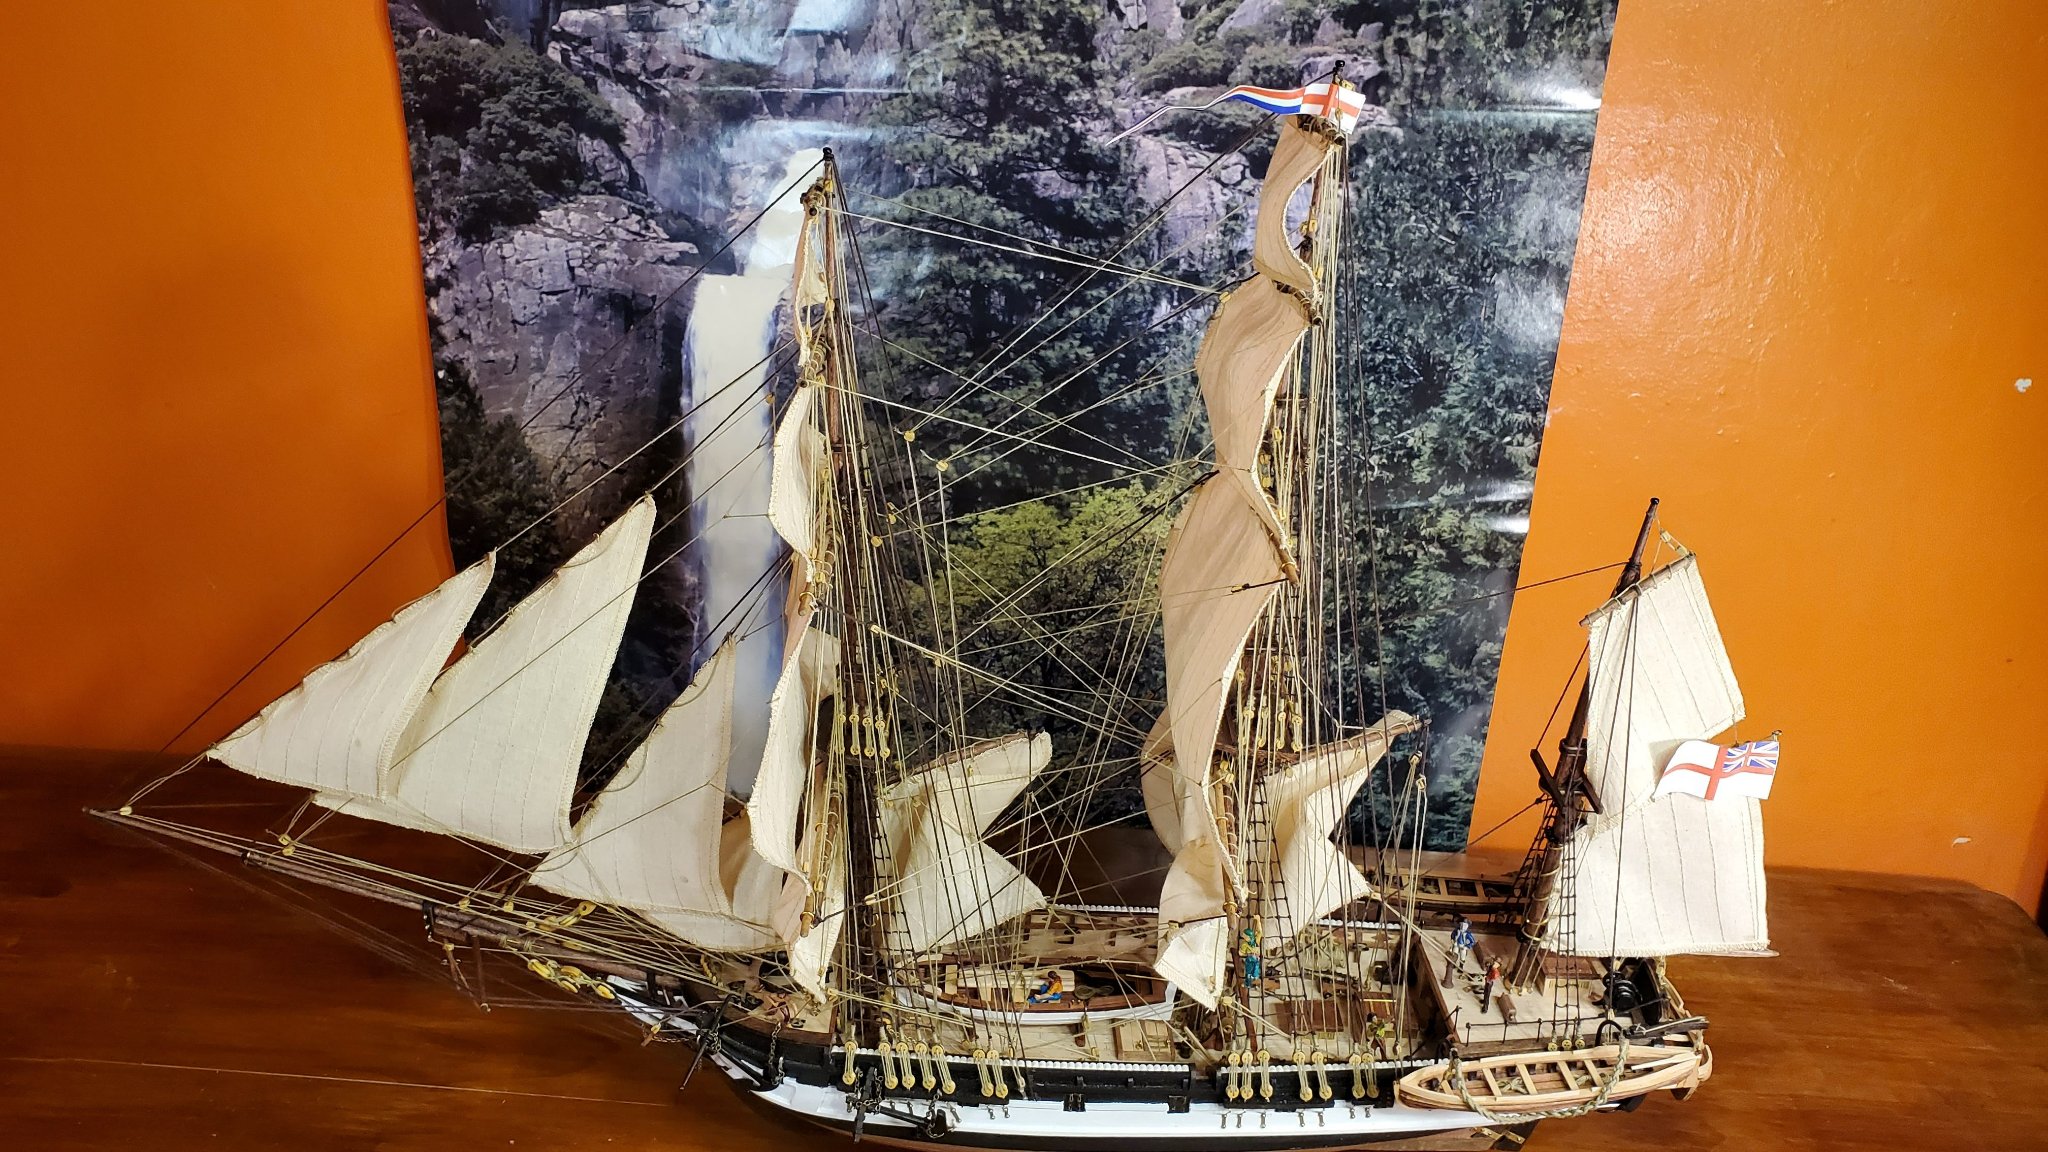
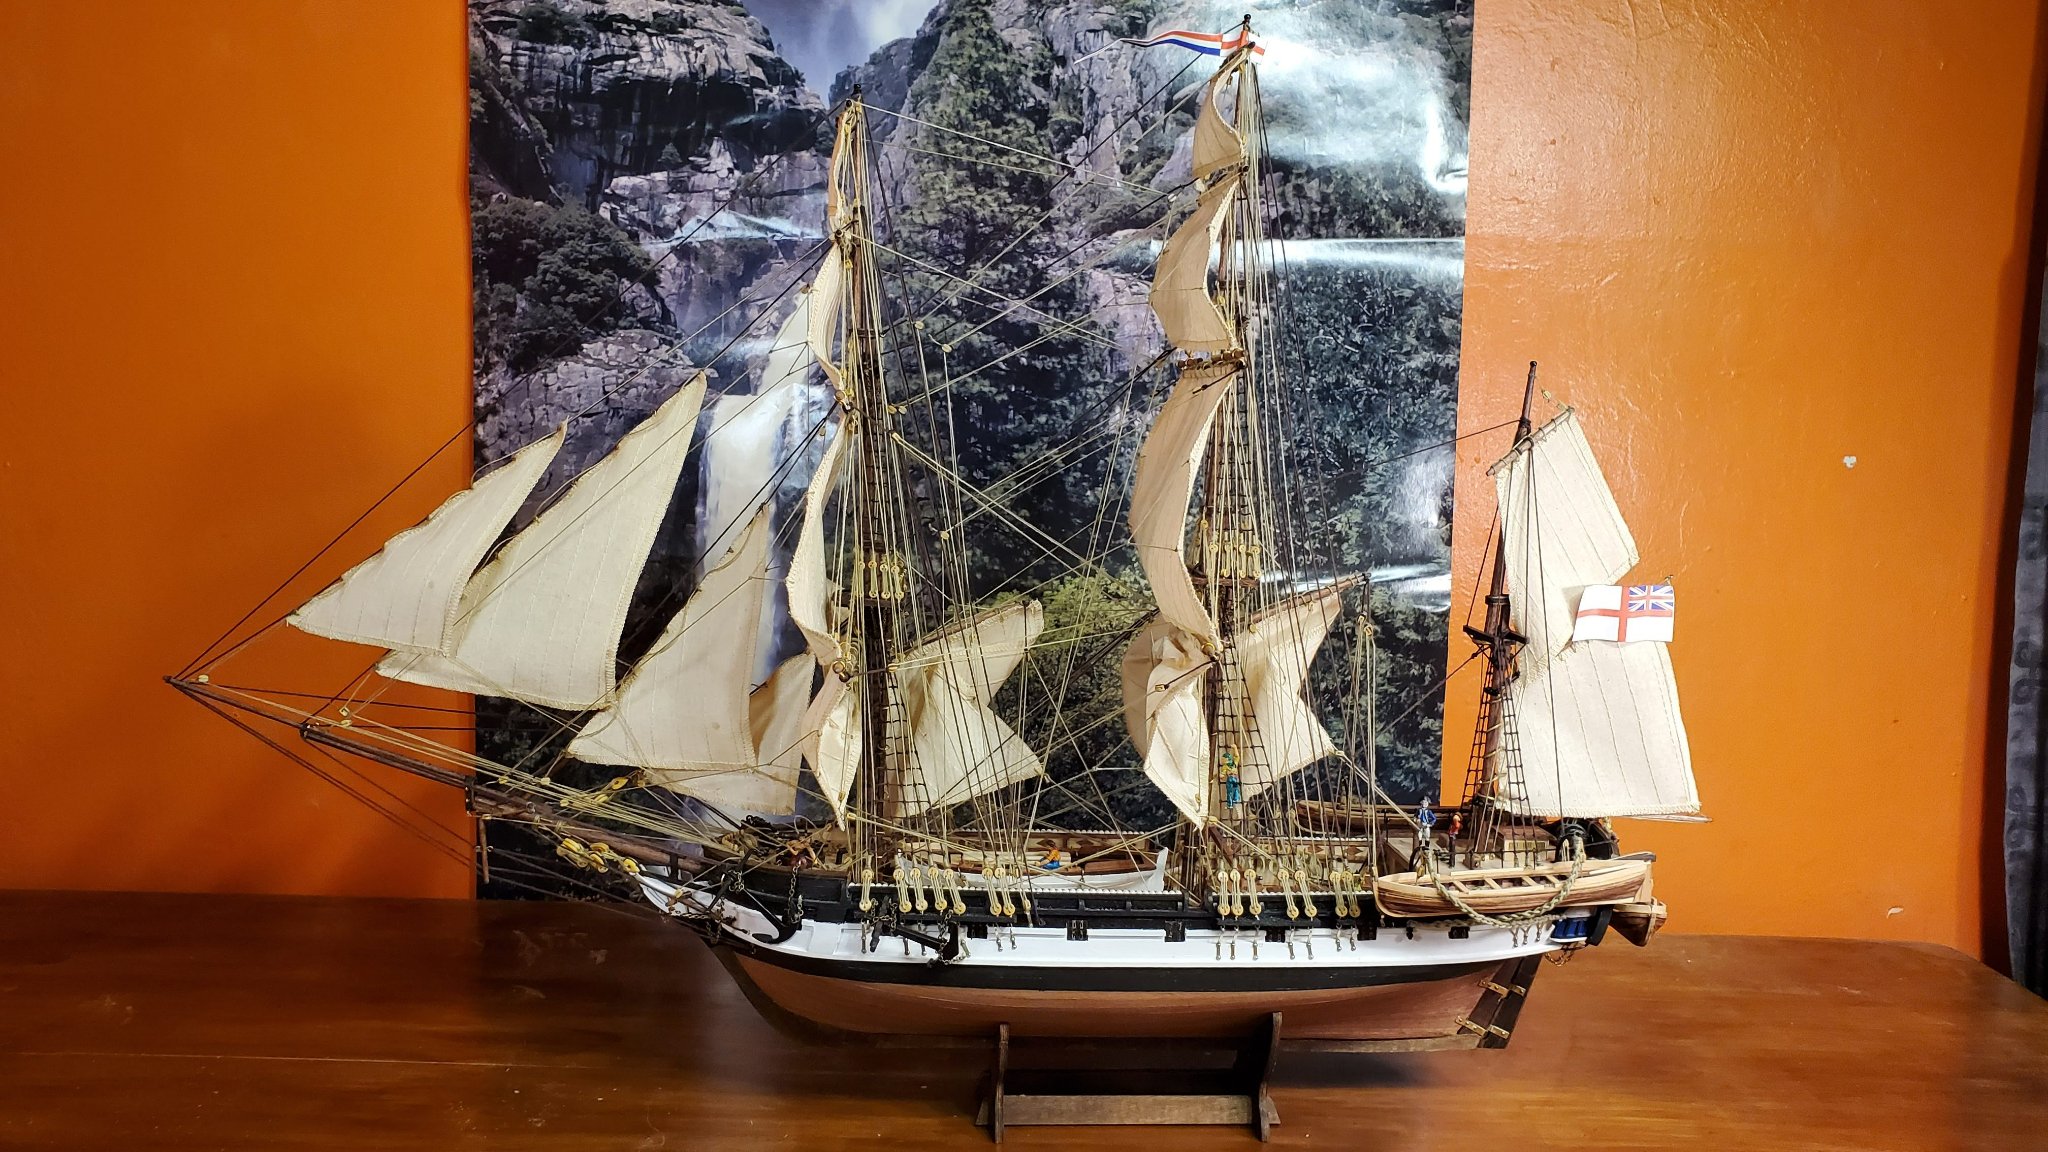
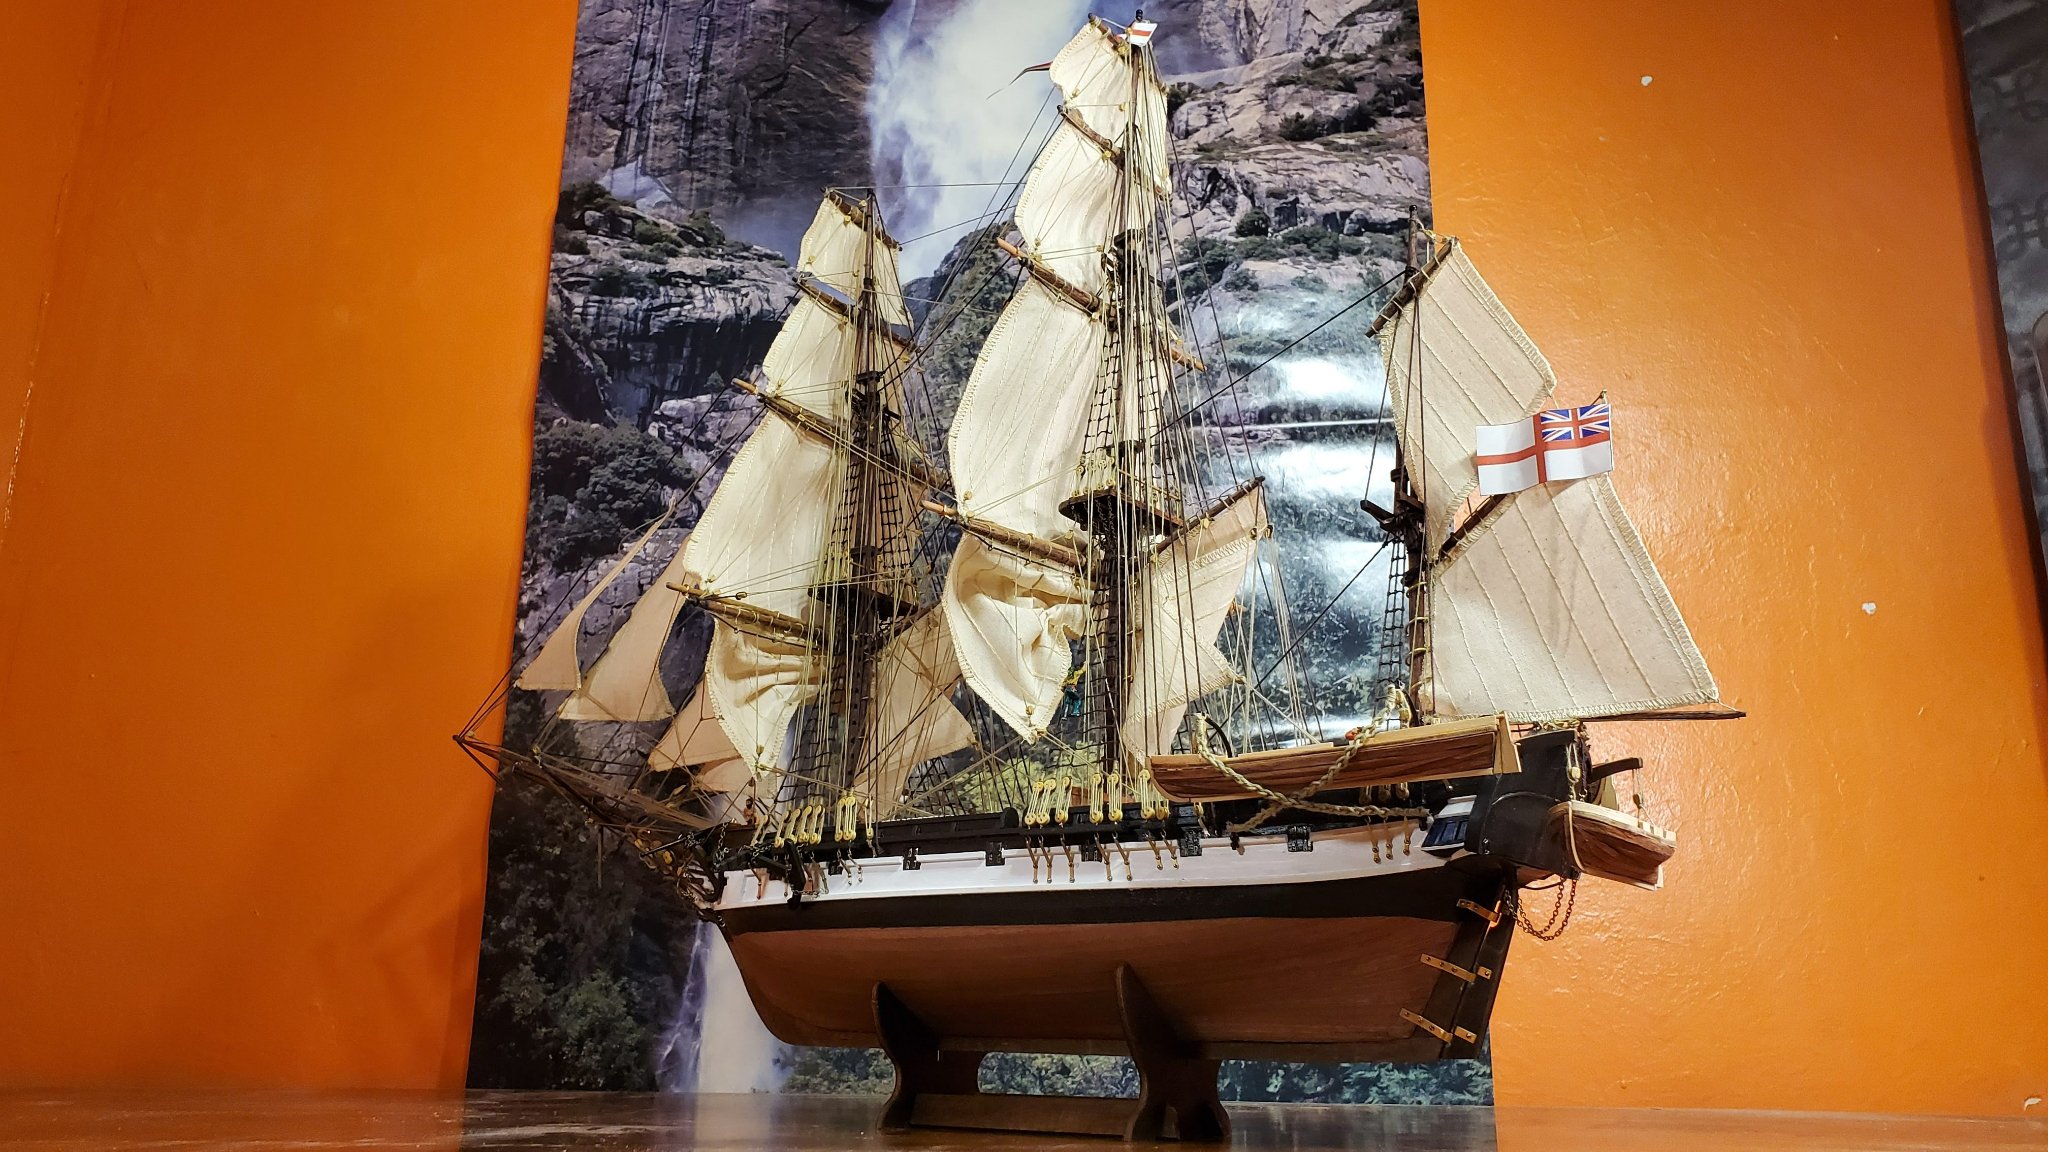
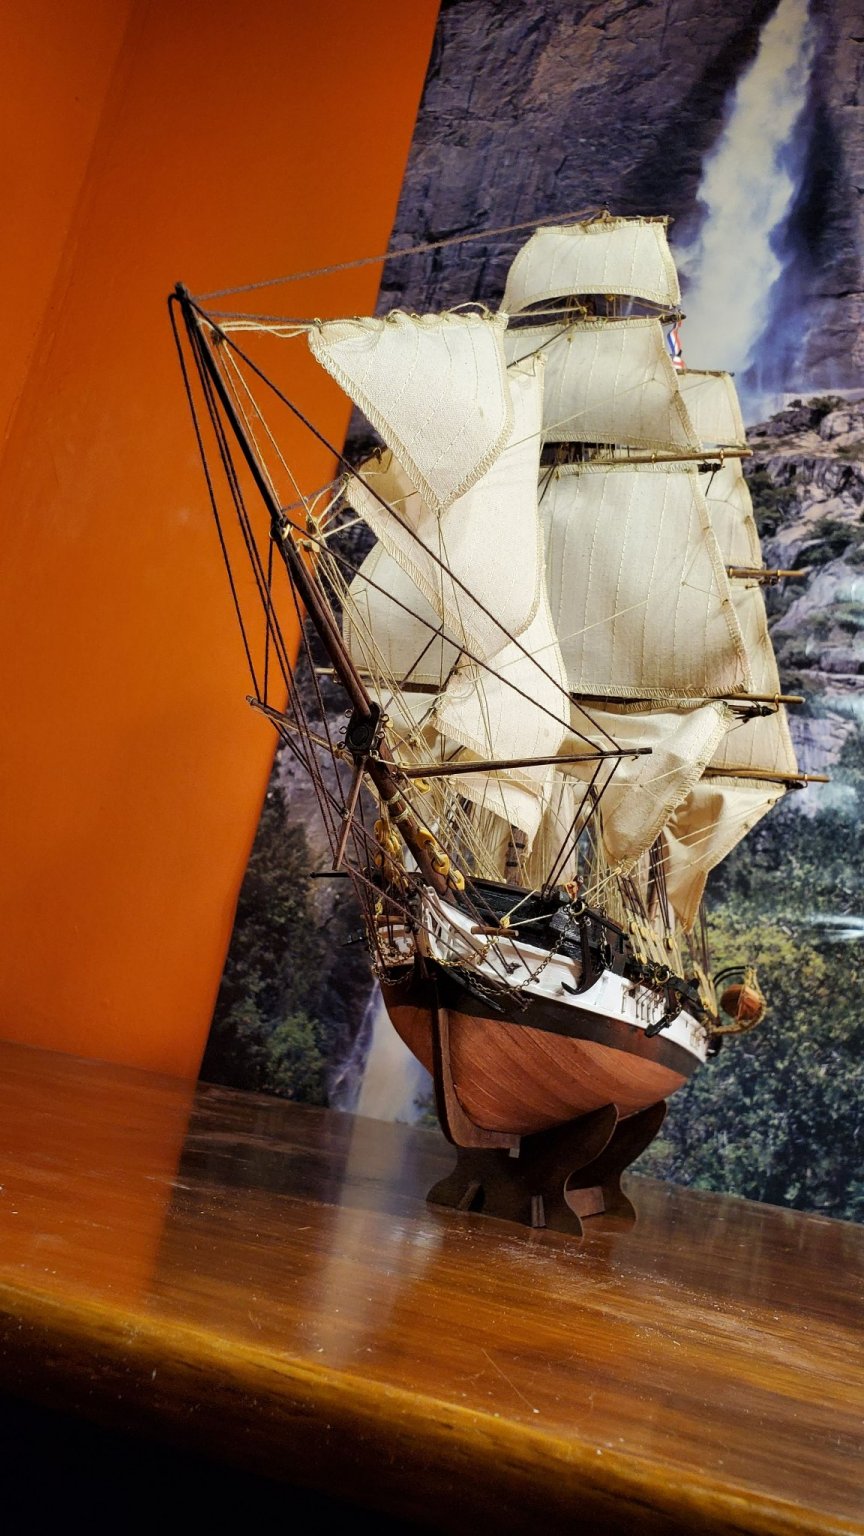
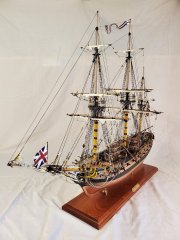
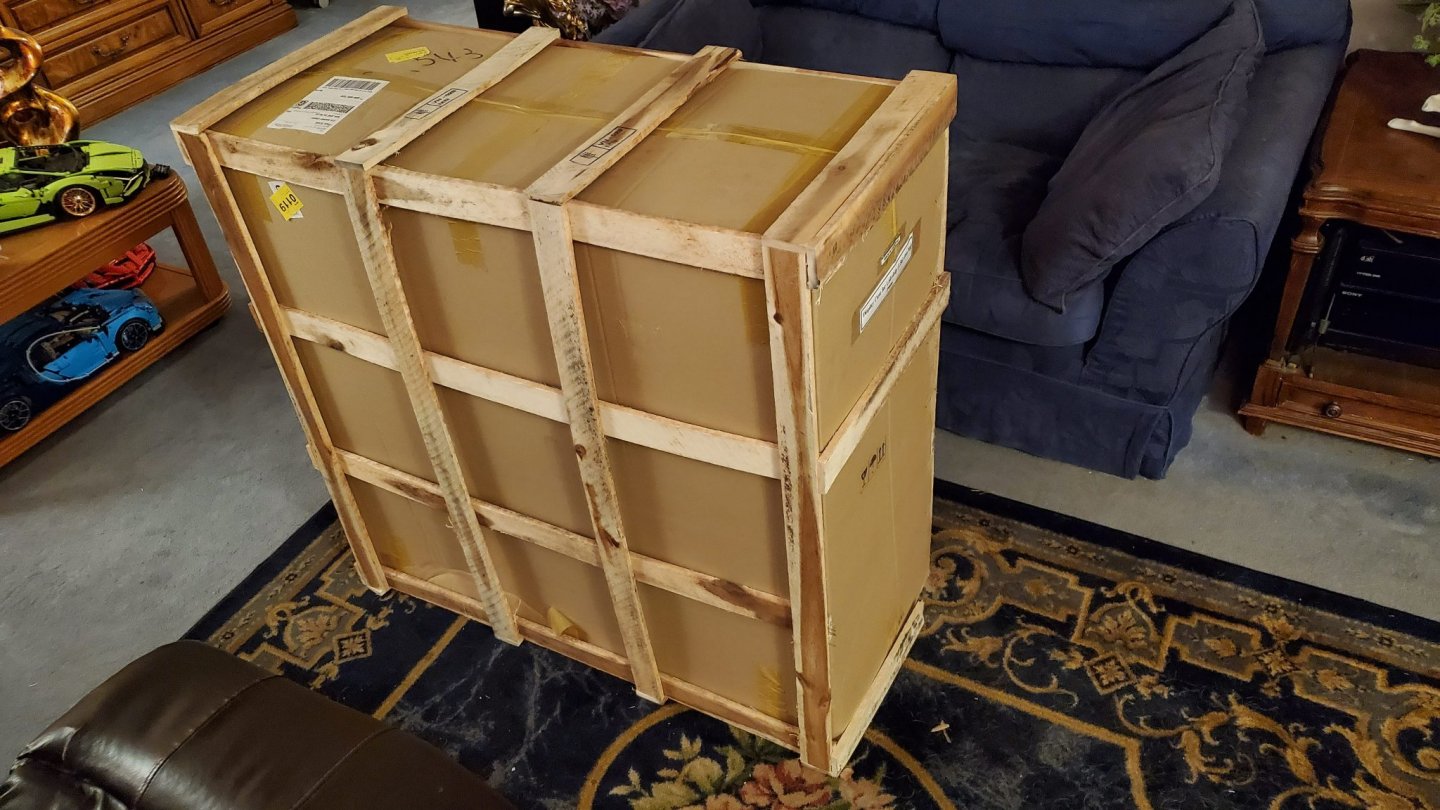
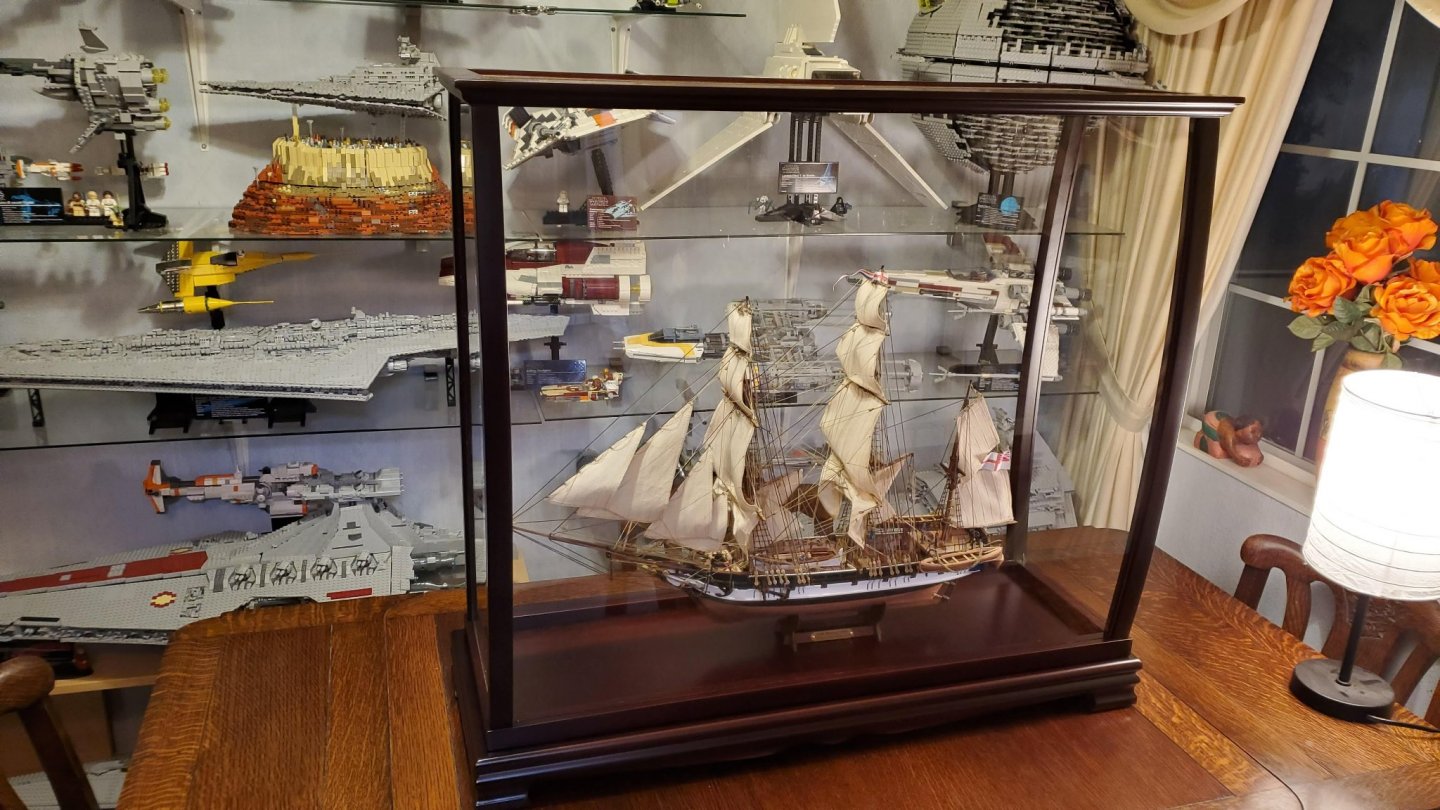
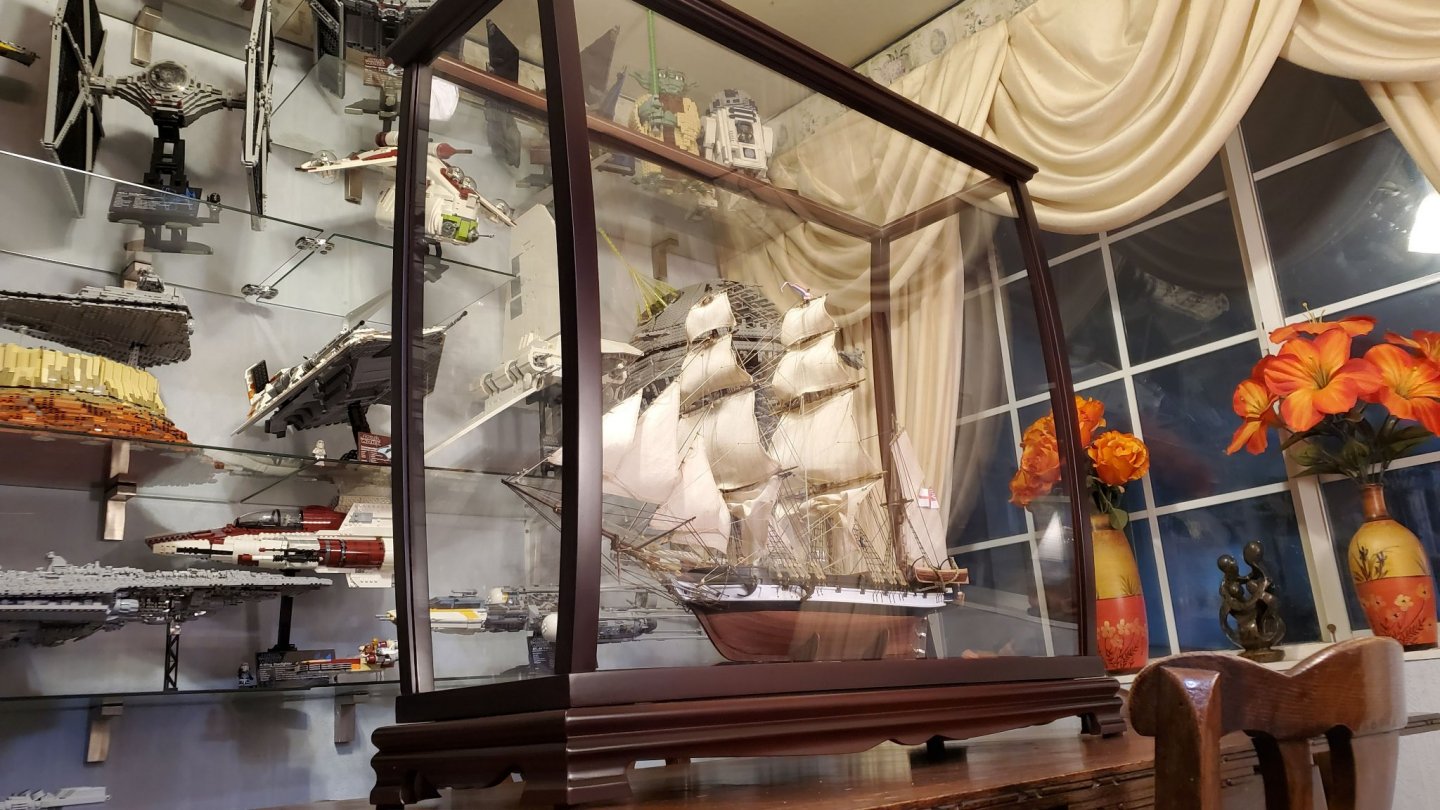
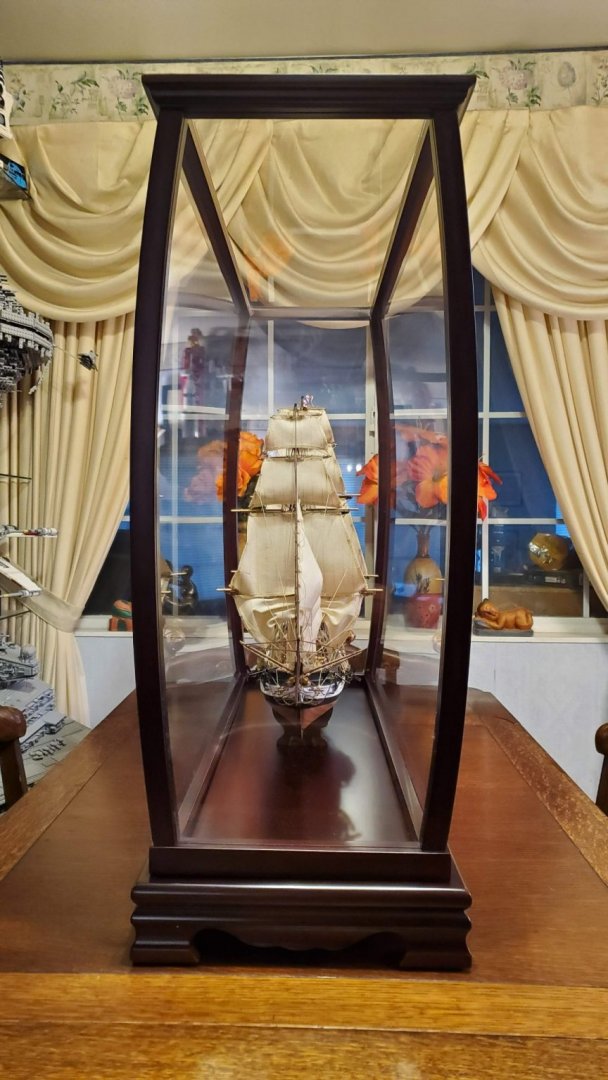
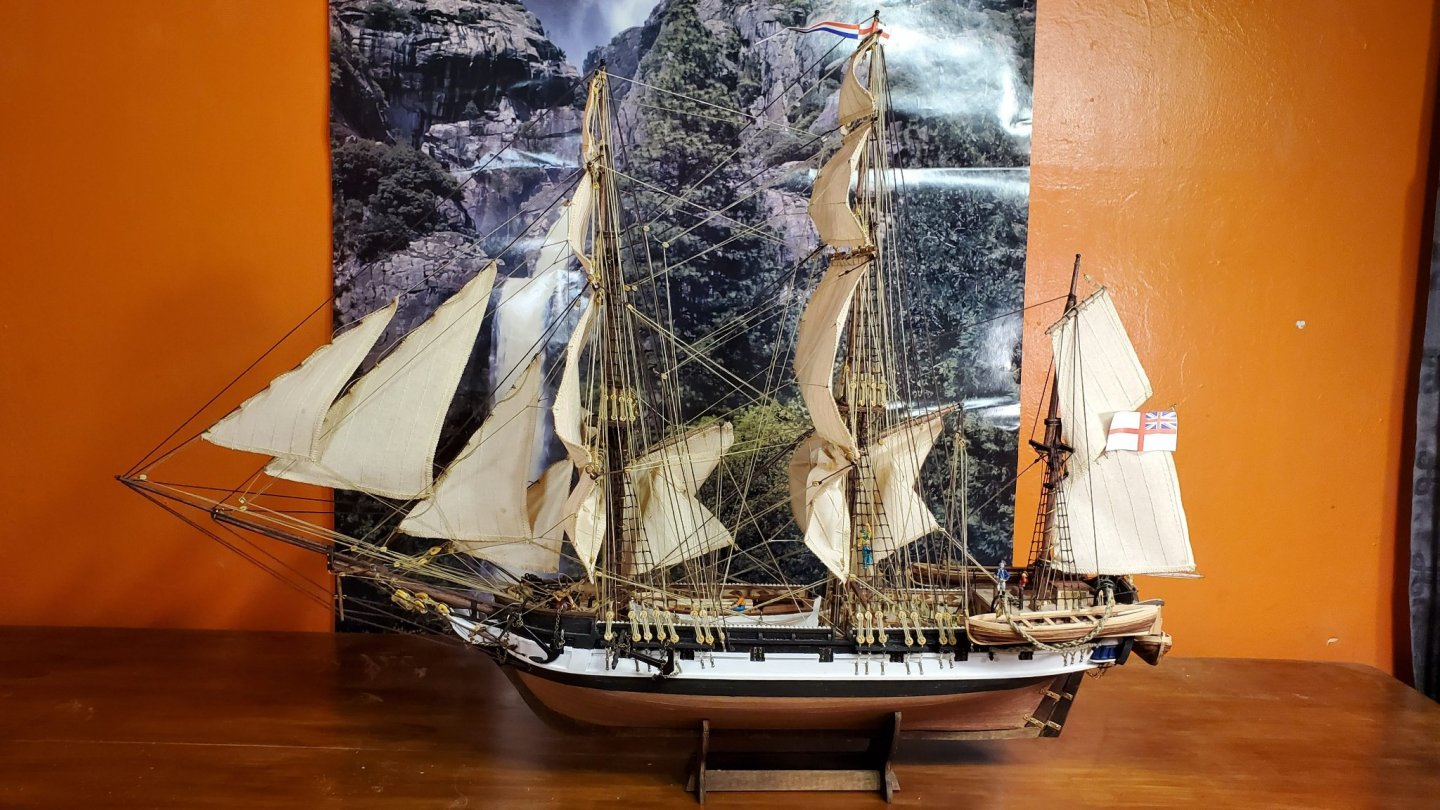
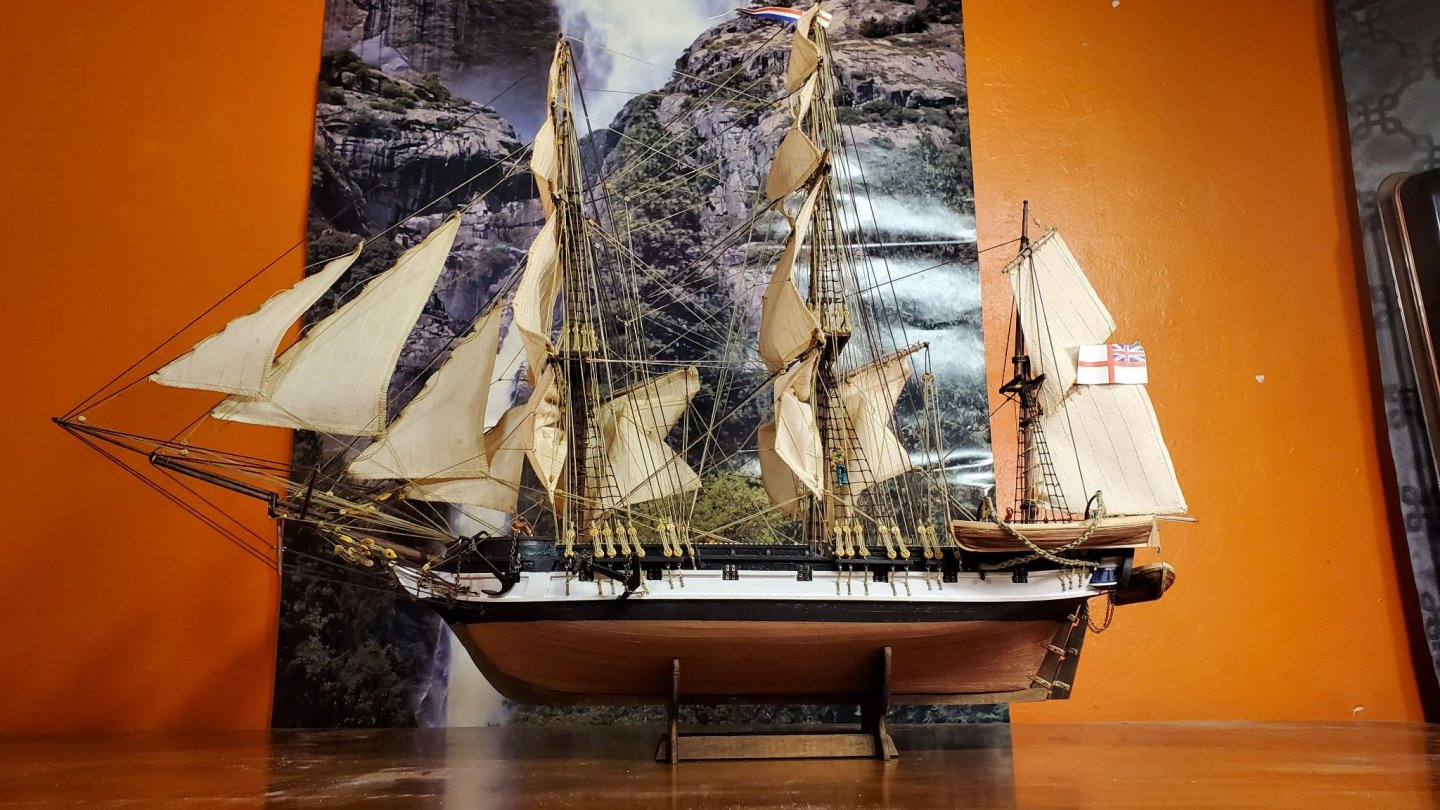
As promised before, here are some final images of the Beagle in her final resting place inside the Old Modern Handicrafts P006 display case. I also added a brass name plaque to the stand. I got the display case directly from ojcommerce.com and I can highly recommend them. The case was well over $100 cheaper direct from them than anywhere else I could find it (even their own store on Amazon), and it arrived within a week of placing the order. It comes ready built in a huge crated box: The case is a perfect size for the ship and really shows it off from all angles: You might just be able to spot one of my other hobbies in the pics, lol. Also, I decided on my next build - I just ordered the Amati Victory Models HMS Pegasus. I figured this would be a reasonable step up in size and difficulty for my second build, and I love the decorative look of the ship. It doesn't come with sails but I'm very tempted to add some fully furled sails made with silkspan. It'll be a few months before I start the build, which will give me plenty of time to research up on it.


-
Your copper hull looks excellent! Very realistic effect in the end. Well worth the effort you have put in. My next build will be the Amati HMS Pegasus which comes with copper plates for the hull. Though I probably won't go to the lengths you've gone to for realistic weathering. I will be leaning more towards the decorative look than the authentic look as it is a very decorative ship.
-
Welcome to the HMS Beagle builders club Mobbsie! Having just completed this kit I will be following your build with interest. If you're ordering replacement wood deadeyes note there are actually two sizes of them in the kit - the smaller ones are used for the mizzenmast and topmast shrouds. I did find the supplied thread has some 'tufting' on it - particularly noticeable when backlit. I'm no expert but I suspect better quality thread would probably resolve this. Other than that the thread seemed adequate. I was curious why you left the center deck planks off? Have fun with the build!
-
Thanks for the useful info Henry. The blocks at the top of each line are all fairly close to the mast. If they were belayed at the foremast pin rail then they could run straight down mostly parallel to the mast. But I think the problem may be that the foremast pin rail on this model only has 6 pins in it in total. The instructions already have you belay 12 lines to these 6 pins - so doubling up on each pin. This is done for the foresail rigging and the sheets for the fore-lower topsail. But all the lines that originate from higher up are belayed out to pins on the bulwark. My feeling is that in the real ship there would have been more pins on the foremast pin rail allowing most of the upper rigging lines to be belayed closer to the mast. But in the model this is not possible due to physical accessibility issues. I did notice on the main mast that most of these upper lines get belayed further aft of the mast so don't interfere with the ratlines. I think with my learned experience of "don't always trust the instructions to be correct", if I was to do it again I would do similar with the foremast. There are pins further aft of the foremast but the instructions use most of those for belaying the foremast gaff sail rigging. I think I would swap these with where the the upper rigging is currently belayed to.
-
Thanks for the reply Allan. "first thing that looks odd is that there is a shoulder block coming off the yard arm with a pendant and the line appears to run aft." That's definitely how they show it in the instructions - both the paper and video - here's the part of the video where they rig it. You'll see the yard lift blocks are there, just on short tan lines, while the braces are I think what you are referring to, and are on thicker brown lines about an inch long. It is entirely possible (or even probable) that OcCre rigged it wrong. For the sails, I had read in several places about the issue of scale so I knew they were not going to look entirely realistic. But since this was my first ship I thought I'd stick with the supplied sails as there were already enough challenges. Definitely something to consider for the next build though now that I have more experience.
-
I just finished my first build, the OcCre Beagle (build log). Now I'm questioning myself as to the way I have rigged several of the running rigging lines coming from the upper sails. It's too late for this build, but I'd like some clarification for future builds. I've run these lines in the way that produces the least obstruction from the masts between the top of the line and the belaying pin that the instructions indicate it should attach to. So for the lines to the upper sails that the instructions indicate to belay to the pins on the inside of the bulwark, I've rigged around the outside of the mastop and then back in through the shrouds/ratlines. This is almost line of sight so would put very little strain or friction on the line in real life. You can see this here: There's more pics of the finished ship here that may also help show what I mean. Now that I've finished, I've looked more at other ship builds and see that, on most, lines like these are run down through the topmast lubber hole and then splay out to the belaying pin on the inside of the bulwark. This creates more of a bend in the line, and in the real ship, I would think would cause more friction and fraying of the rope at the point it touches the inside of the masttop. On the other hand I can see that the way I have it rigged would make it more difficult for crew to climb the ratlines. So my question is which is the correct path to use for these kind of lines to match real rigging? Or in the real ship would they belay these lines to pins further astern so that they don't interfere with either the masttop or the ratlines?

-
Thanks! 8 double blocks 40+ single blocks 6 large dead eyes 10 small dead eyes 11 belaying pins 9 parrels 1 10mm brass ring 2 5mm brass ring 7 3mmm brass rings (though I used more on the actual build than the instructions show)
-
Congratulations on completing the ship Pete! Looks like I just pipped you to the finish post, not that it's a race, lol. Your ship looks great!
-
Another photo I thought might be useful for other builders of this particular ship - what was left of the kit at the end: I thought this might help plan where you need to be careful and frugal with material. There is a huge amount of spare 2x5 limewood - I'd say pretty much enough to plank a second Beagle. There's also a large amount of spare sapelli veneer and a decent amount of sycamore veneer. Relatively there is a lot of spare: 2x2 sapelli 4x4 sapelli 6mm dowel 1x5 limewood (though much of this is needed to make up for the large shortage of 1x3 limewood) 0.8mm raw thread 0.15mm brown thread (only used for the ratlines) Brass pins There is very little remaining of: All dowel sizes except 6mm 2x2 limewood (but the excess 2x2 sapelli can be used for the painted stringers if needed) 3x3mm sapelli 0.5mm brown thread The 0.15mm raw thread was quite unbelievable for me. There is five (I think) reals of it. I was getting nervous towards the end as I saw my last real dwindling. I finished the last flag pole with literally only and inch left over - just enough to tie the knot! Now During the long lines of running rigging I had over estimated the lengths of most lines by 4 to 10 inches to be on the safe side. So all the rope coils that I added at the end were made out of the excess offcuts from previous lines that I rummaged for in by garbage can! Shortages that I had to buy substitutes for: Not enough eye bolts. Don't be deceived by the eye bolts in the picture - they are what is left after I bought an additional pack of 60 and also made maybe 10 or 20 from scraps of wire while I was waiting for them to be shipped. This seems to be a common shortage that other builders have reported. 1mm brass wire, I was maybe around 18" short of what is needed. Again this seems to be a common issue. Chain. I suspect the kit is supposed to have two lengths of chain, mine only came with one. Others have not reported a shortage of chain so it may be a one off with my kit. 1x3mm limewood. Though there is a lot of excess 1x5mm limewood spare, so I split that down the middle and used it to make up the shortage. Despite the shortages of some items (which are reasonably cheap to get replacements) I would highly recommend this kit for all levels of builders. For beginners, like me, only do this kit if you have patience and enjoy a real challenge, and understand it is going to take about 300 hours to complete. The OcCre video tutorials on YouTube are excellent, as a first timer I'm not sure I could have built this without them. But with them it really does make this an ideal kit for the ambitious newbie. You will learn a huge amount about many aspects of model ship building while completing this kit.
-
Thanks! You'll get there soon enough with your build too. I was where you are about 6 weeks ago and you seem to be going at a similar pace to me. Summer is coming and the room where I work will be getting too hot to work in. So I'll need to wait until Fall before starting another ship. Will give me plenty of time to choose the next model. I also need to figure out a way to work without being affected by the CA glue. The last couple of weeks since I figured out the cause I've increased the ventilation, it has helped to some extent but I still get affected. Still, the finished product and the great enjoyment of the build experience has certainly been worth the suffering.
-
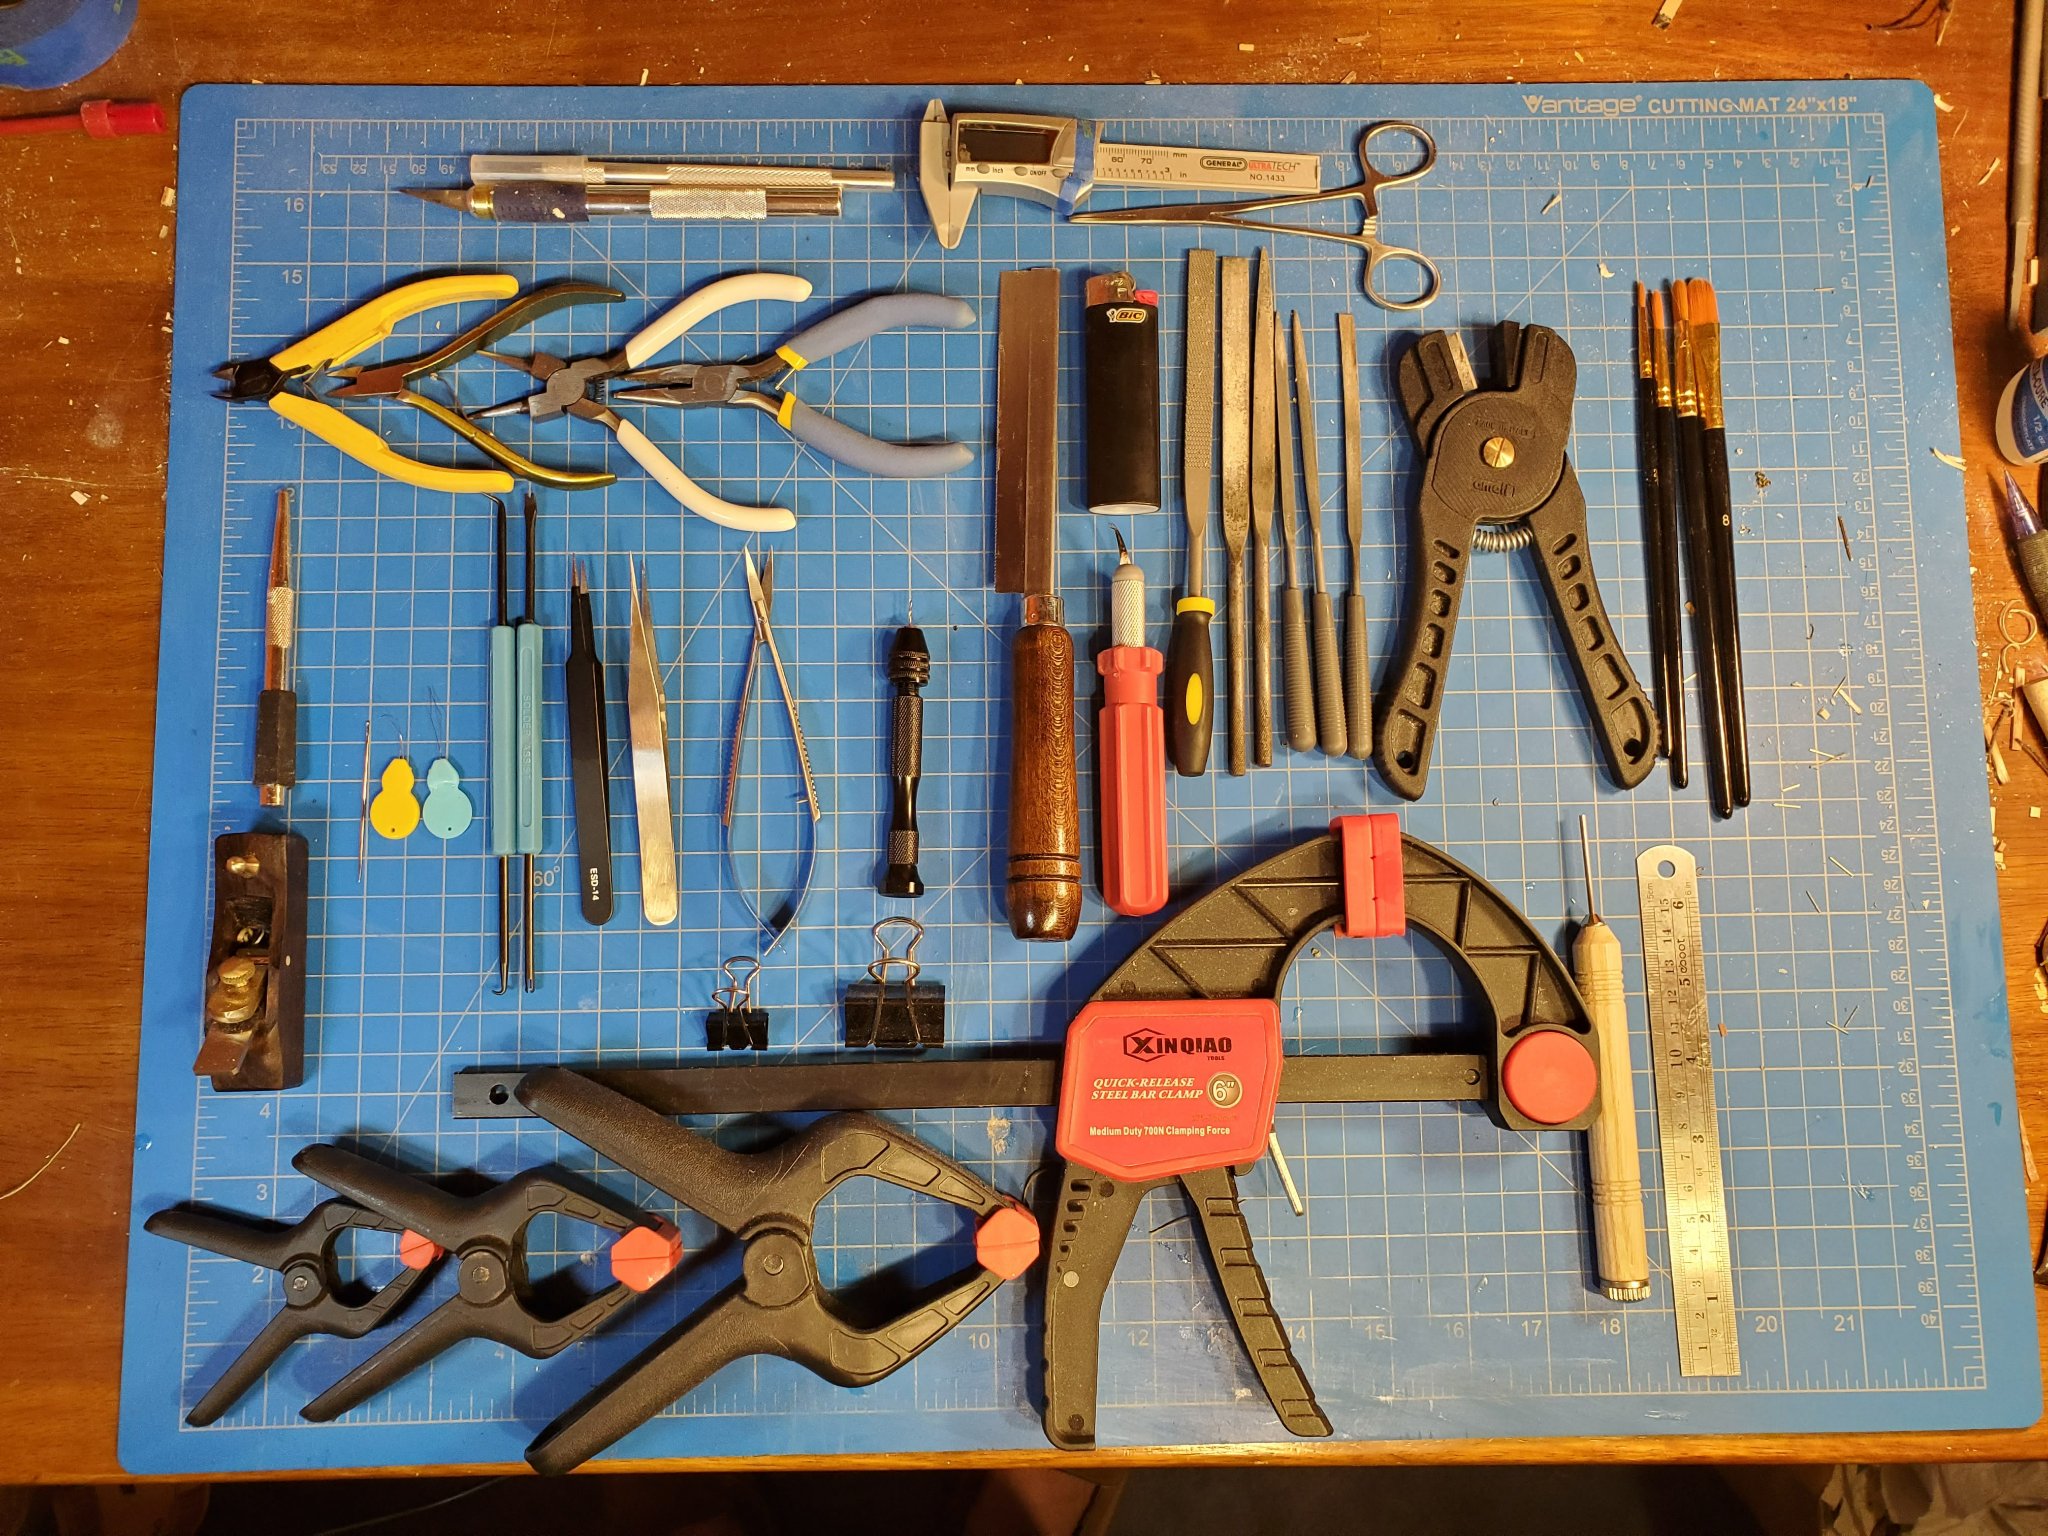
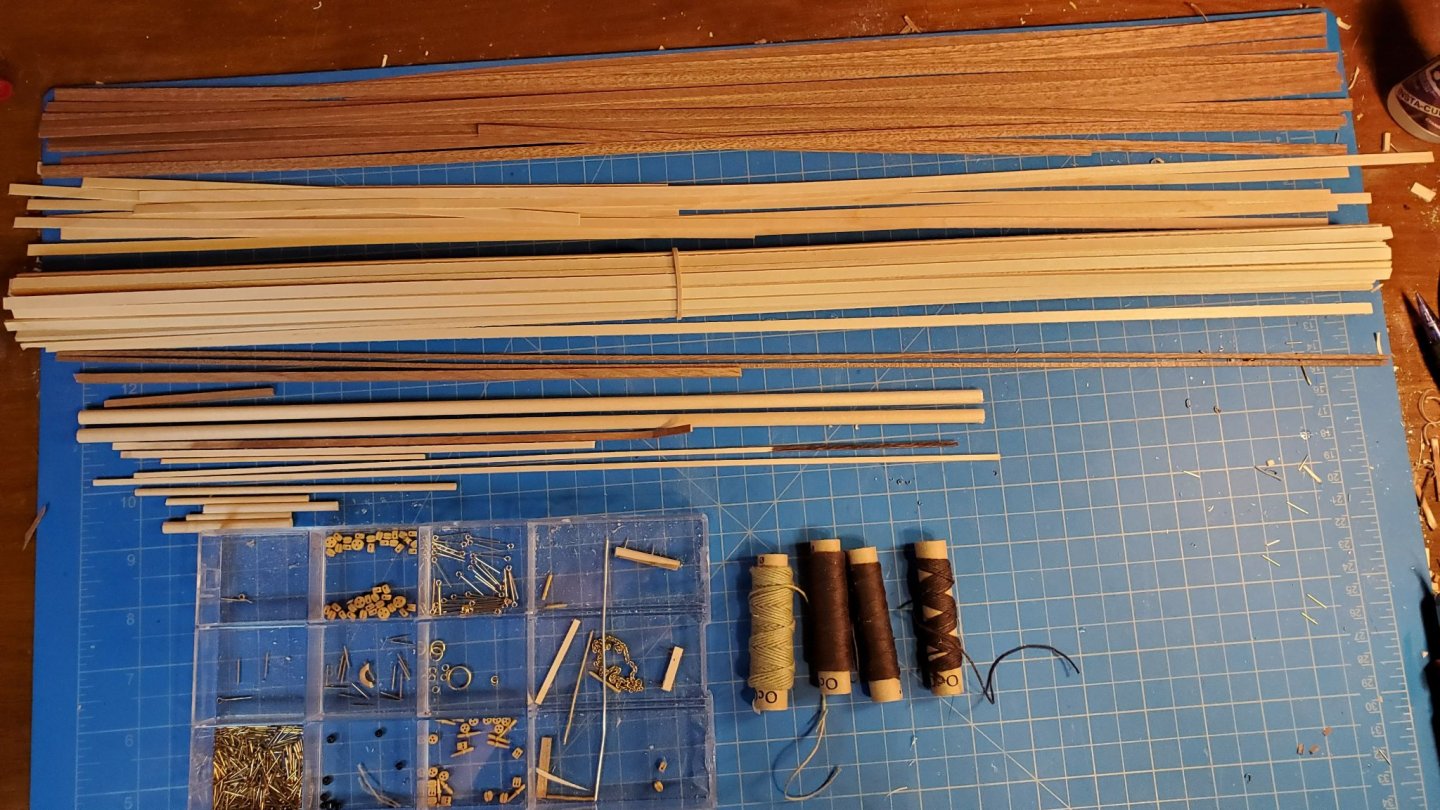
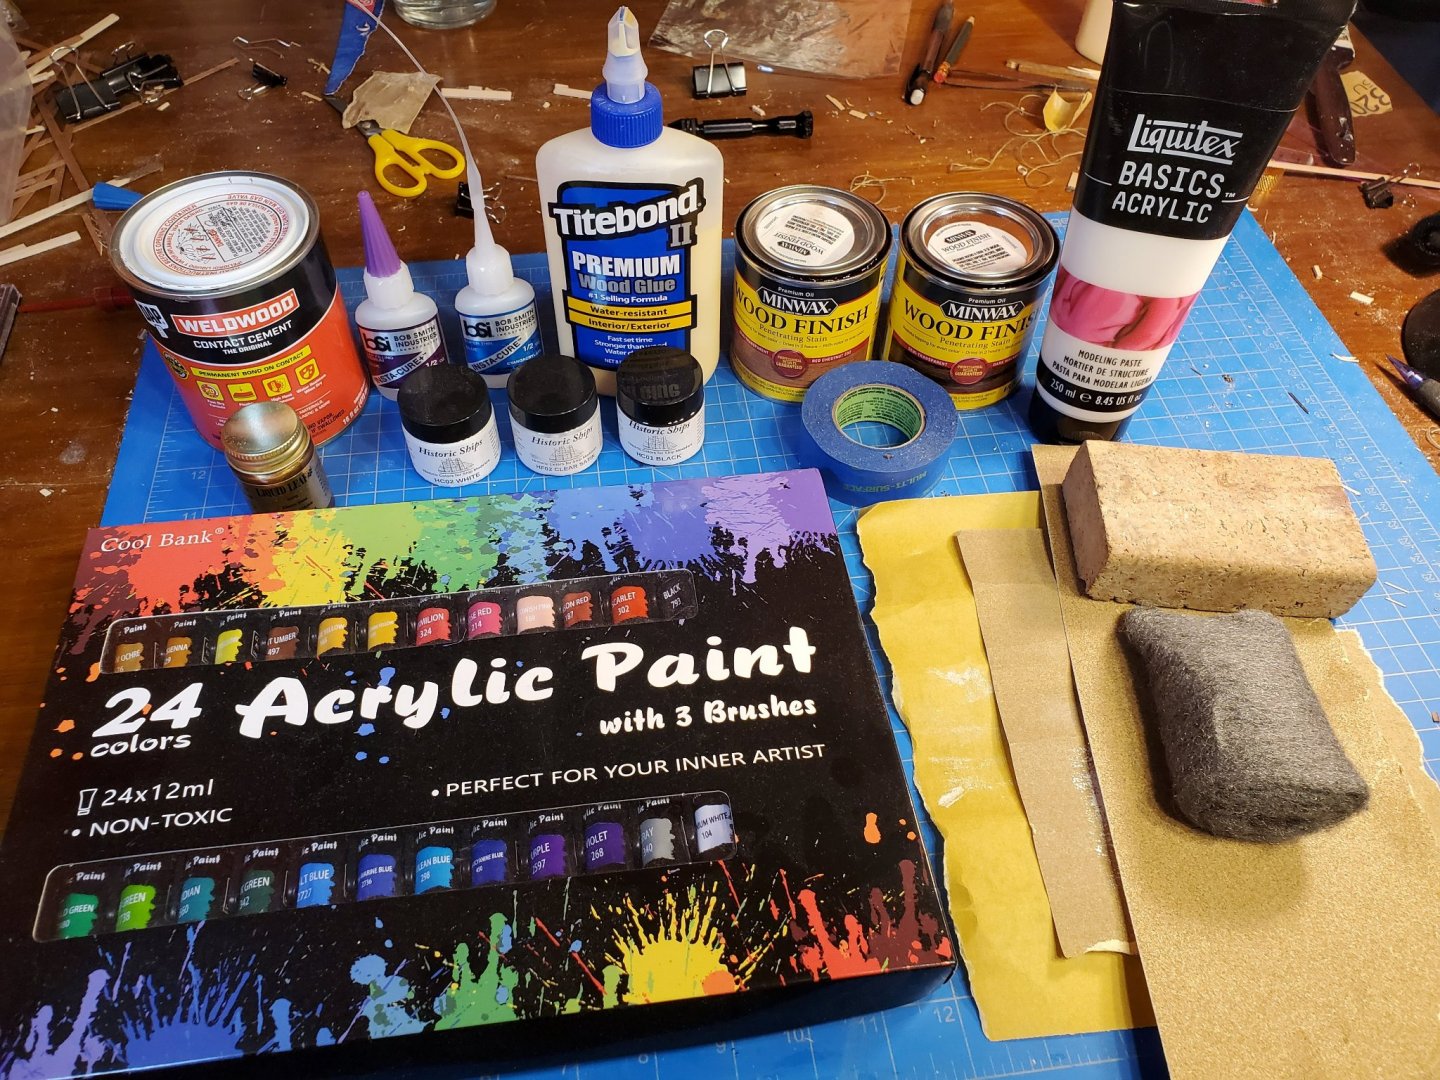
I see one of the frequent questions asked by beginners is "What extra do I need to build the ship?". Well anyone reading this who is about to tackle this boat here is what I recommend: Tools: In roughly left to right, top to bottom order: Hobby knives, one large one small Micrometer, either analog or digital. Optional but will make it easier to work out which piece of wood/wire to use 'surgical clamp' optional but makes some of the later rigging easier where access is extremely limited due to other rigging being in the way Thin tip flush cutters, amongst other things - great for cutting the photo etch items off the sheet. Small pointed pliers (optional but useful in some cases) Small Round nosed pliers (optional bit useful for bending wire into curves and making hooks) Needle nosed pliers Razor saw Lighter (for cleaning Glue Looper V2) Glue looper V2 - excellent for applying glue to rigging. Various needle files. A small rasp file is optional but useful where lots of wood needs to be removed. Plank bender Various paint brushes Center punch, optional but useful for drilling holes more accurately in the right place Sewing needle Needle threaders Belaying tool set e.g. https://www.amazon.com/gp/product/B083GTLZL1 Two needle point tweezers Surgical scissors Pin vise (small hand drill) + 3mm, 1mm, 0.8mm, 0.5mm drills Electric drill (not shown) plus 1/4" drill Small (1") hand plane for whittling masts/yards Various clamps Pin pusher 6" ruler For consumables I'd recommend the following (other brands may be substituted): Contact cement for second hull planking and deck planking Gap filling CA glue Low viscosity CA glue Wood glue Dark stain of your choice Light stain of your choice Modelling paste for smoothing first planking (wood filler would probably work just as well) Gold or bronze metallic paint for cannons and figurehead Good quality white and black acrylic paint Satin finish acrylic varnish Good quality masking tape Acrylic paint set Course/medium and fine sandpaper e.g. 120, 220 and 320 grits 0000 steel wool Sanding block Glue accessory set (e.g. https://www.amazon.com/gp/product/B0823R994B) (Not pictured)

-
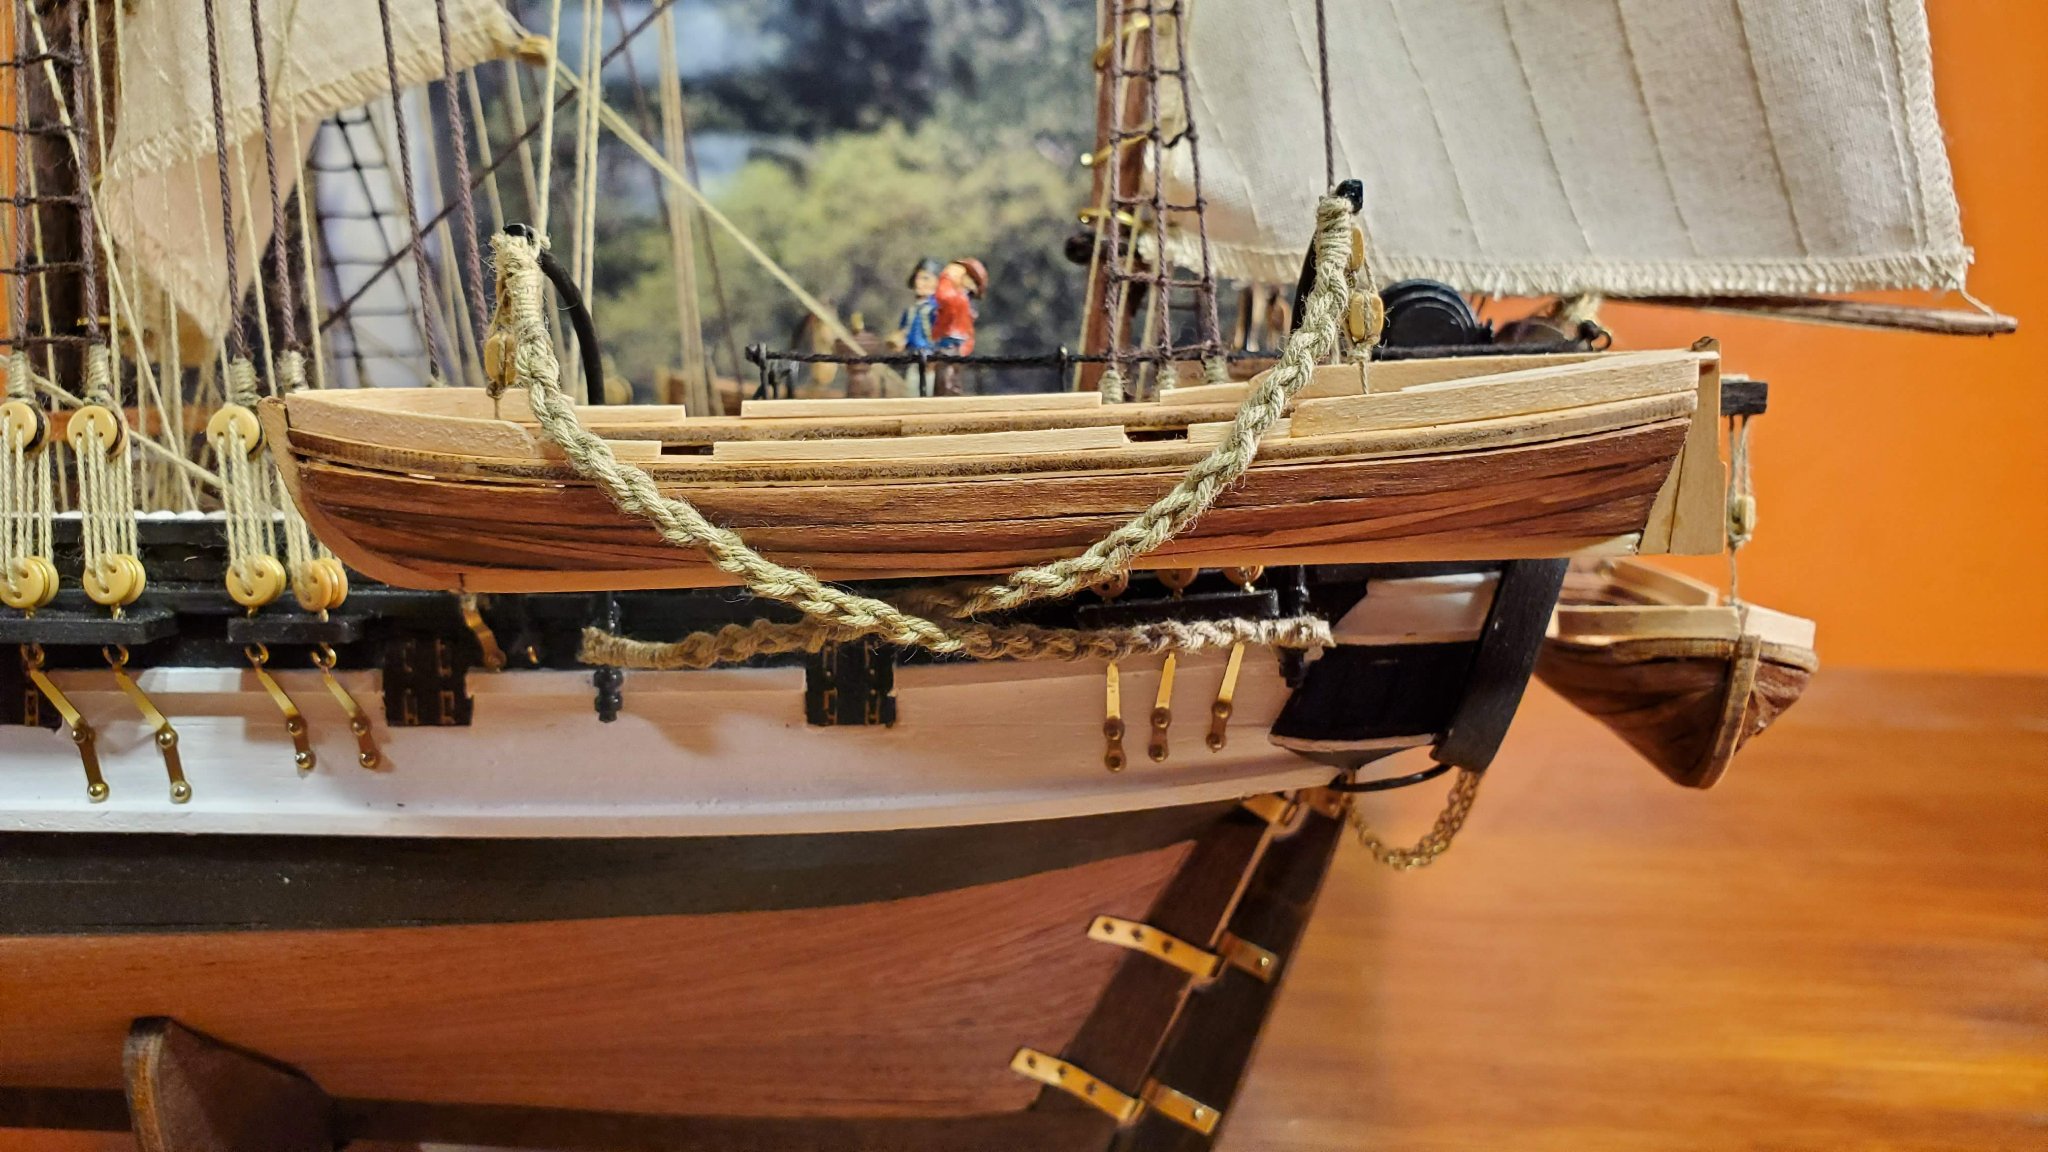
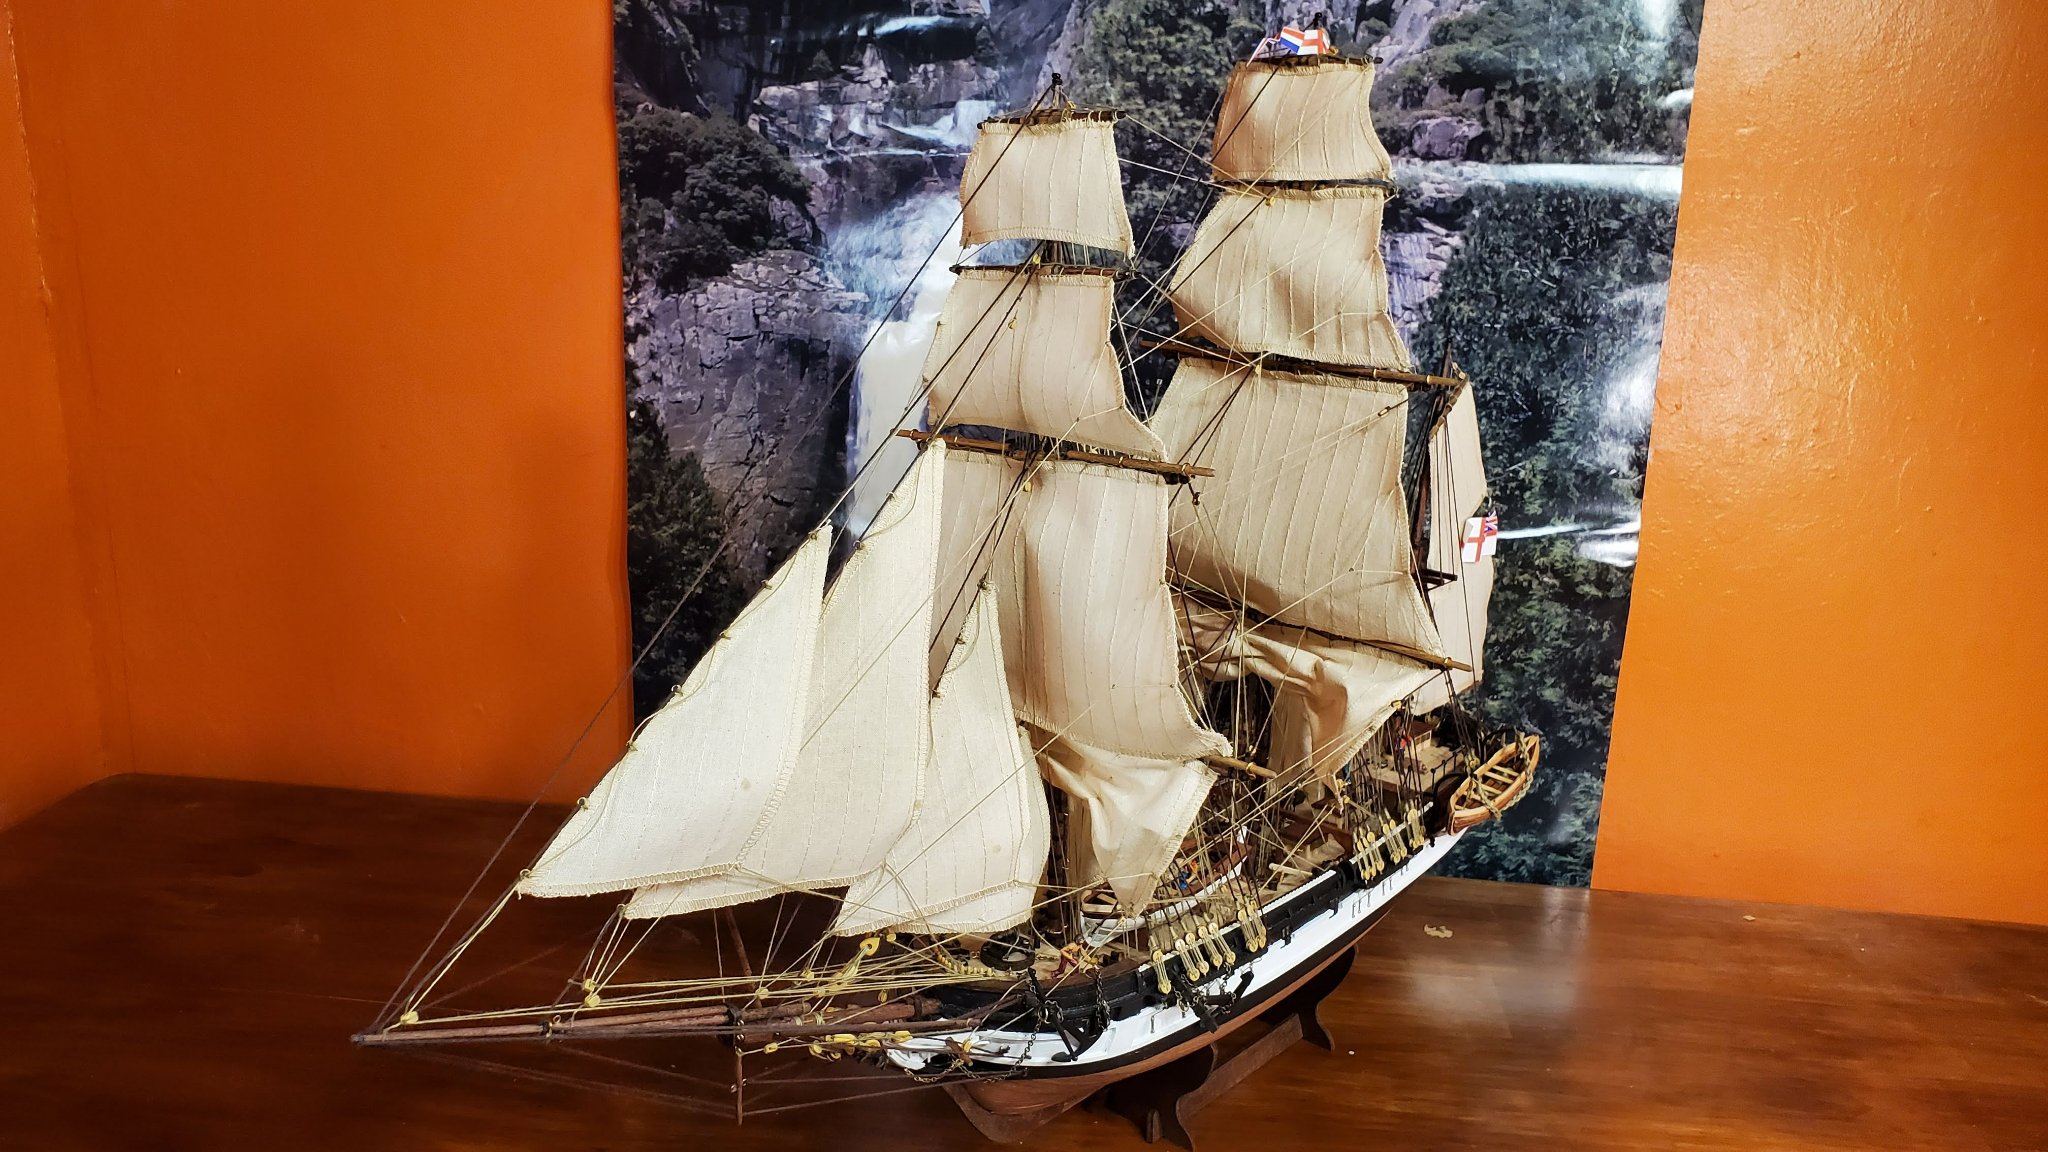
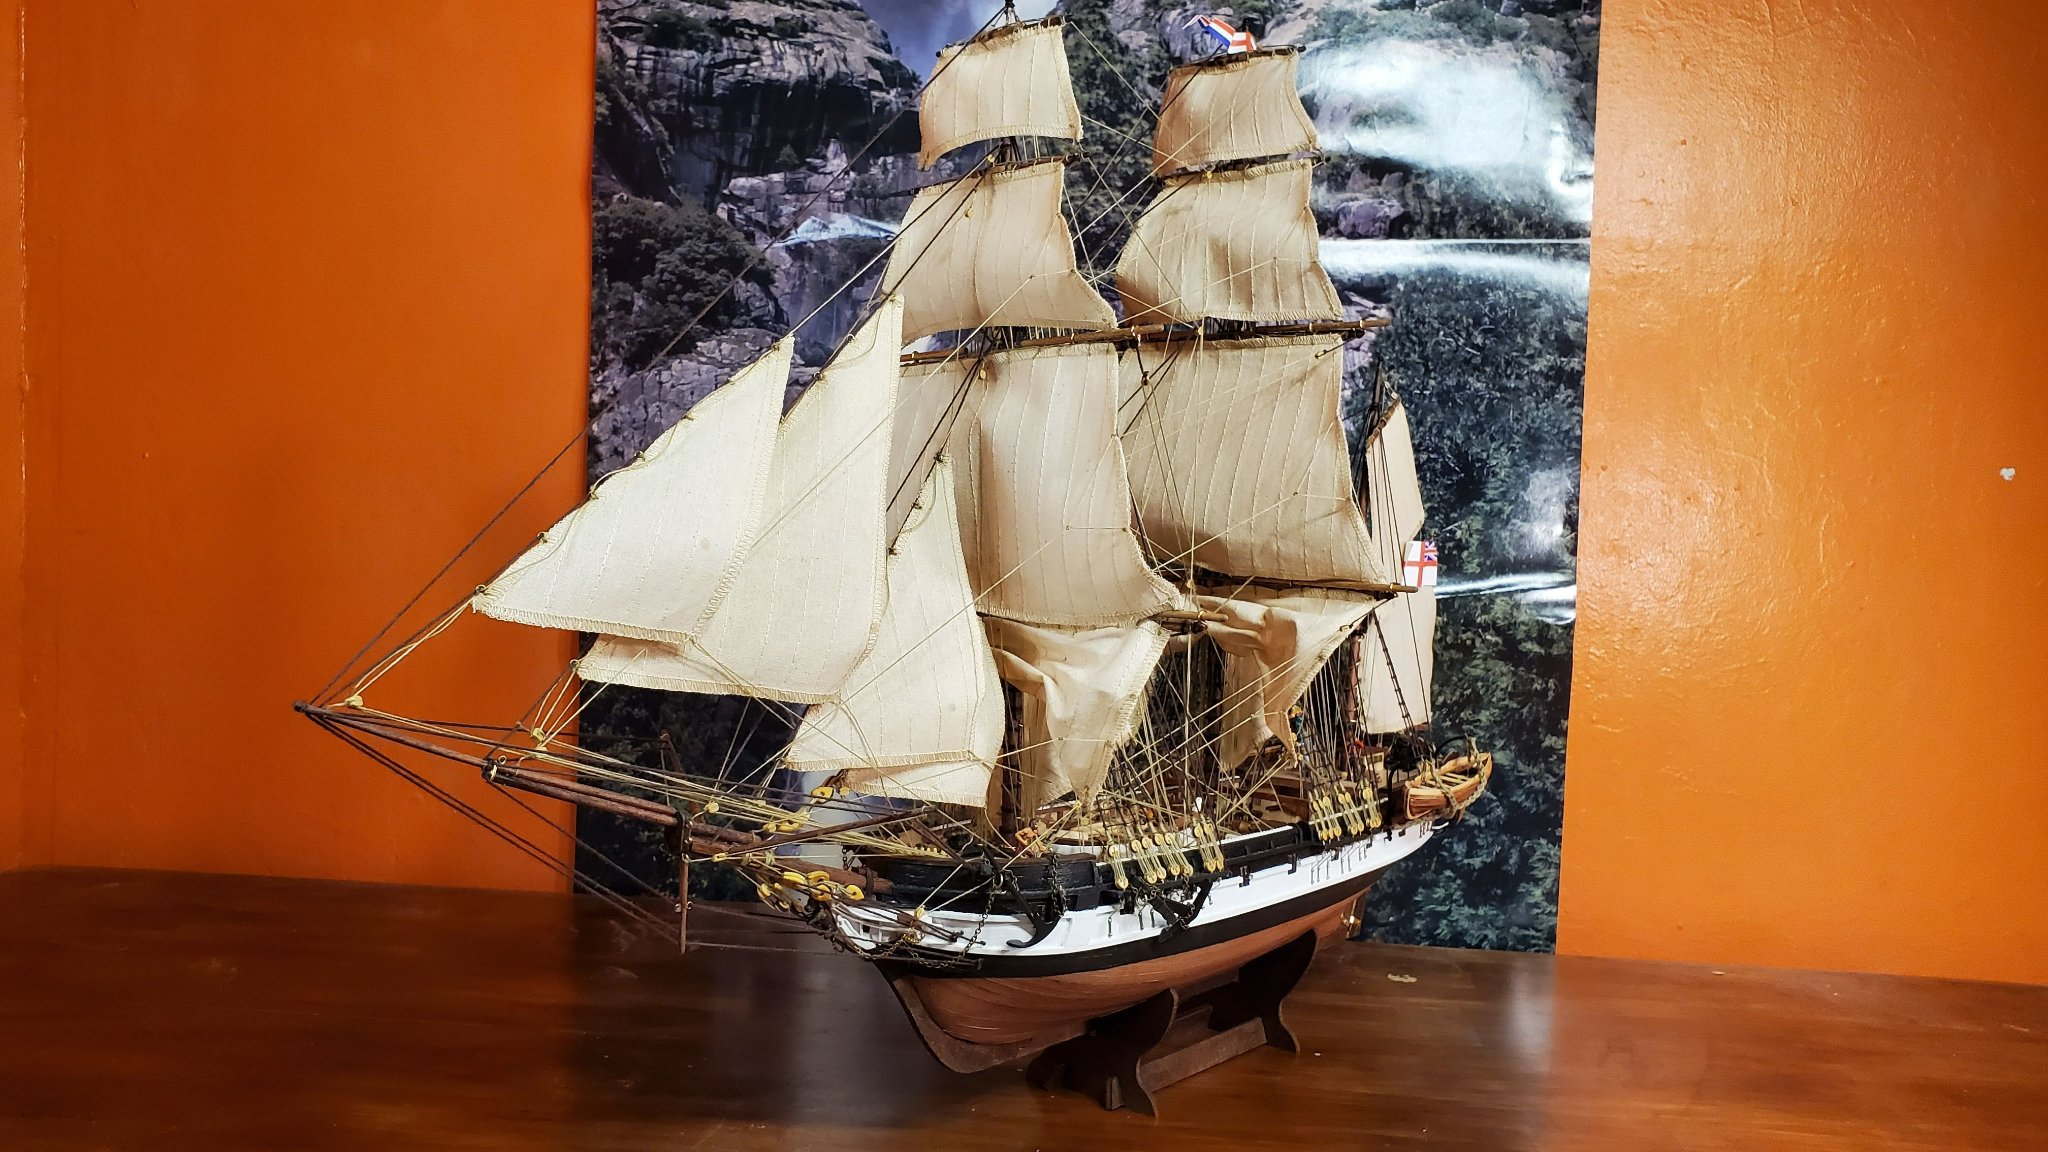
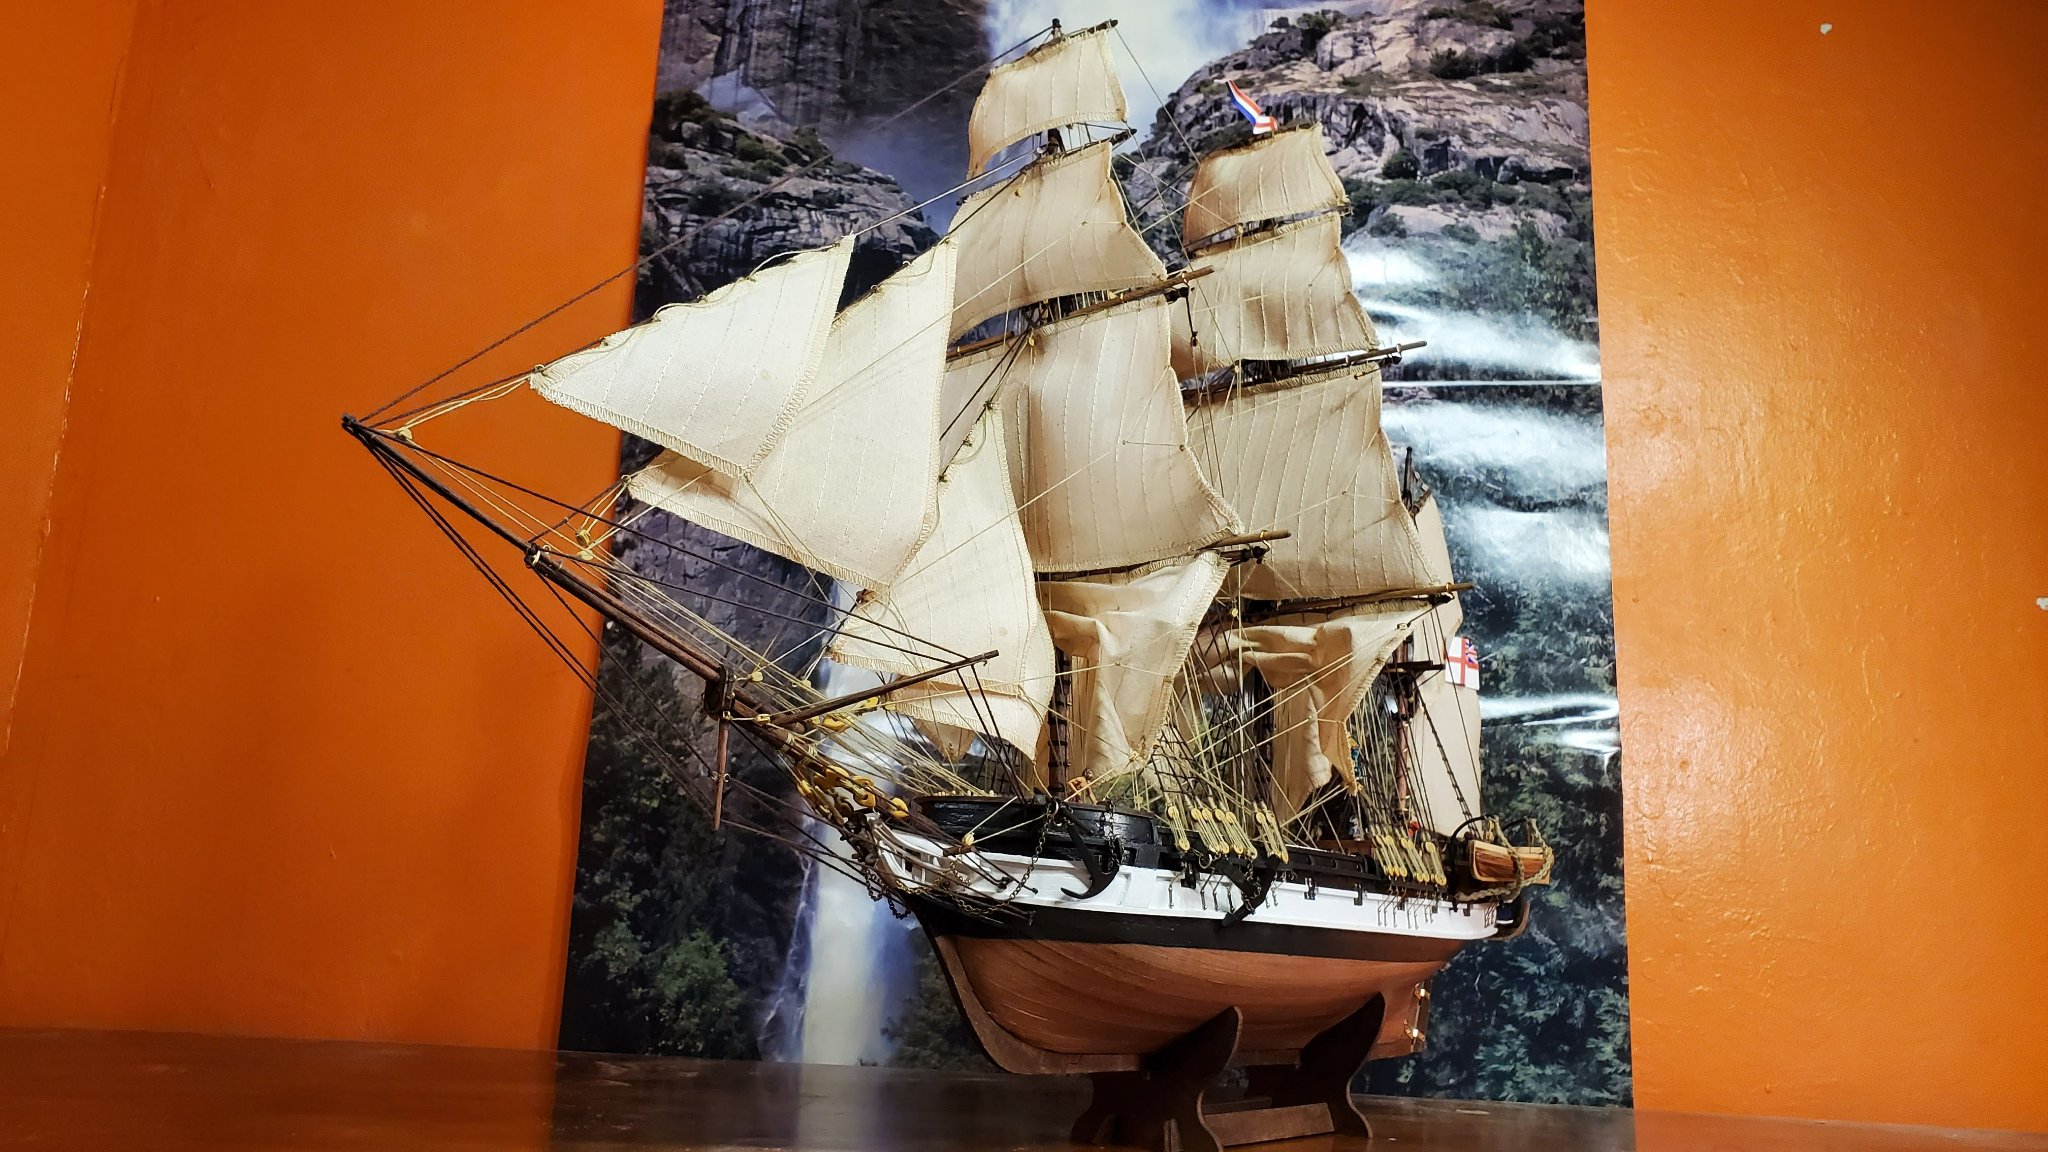
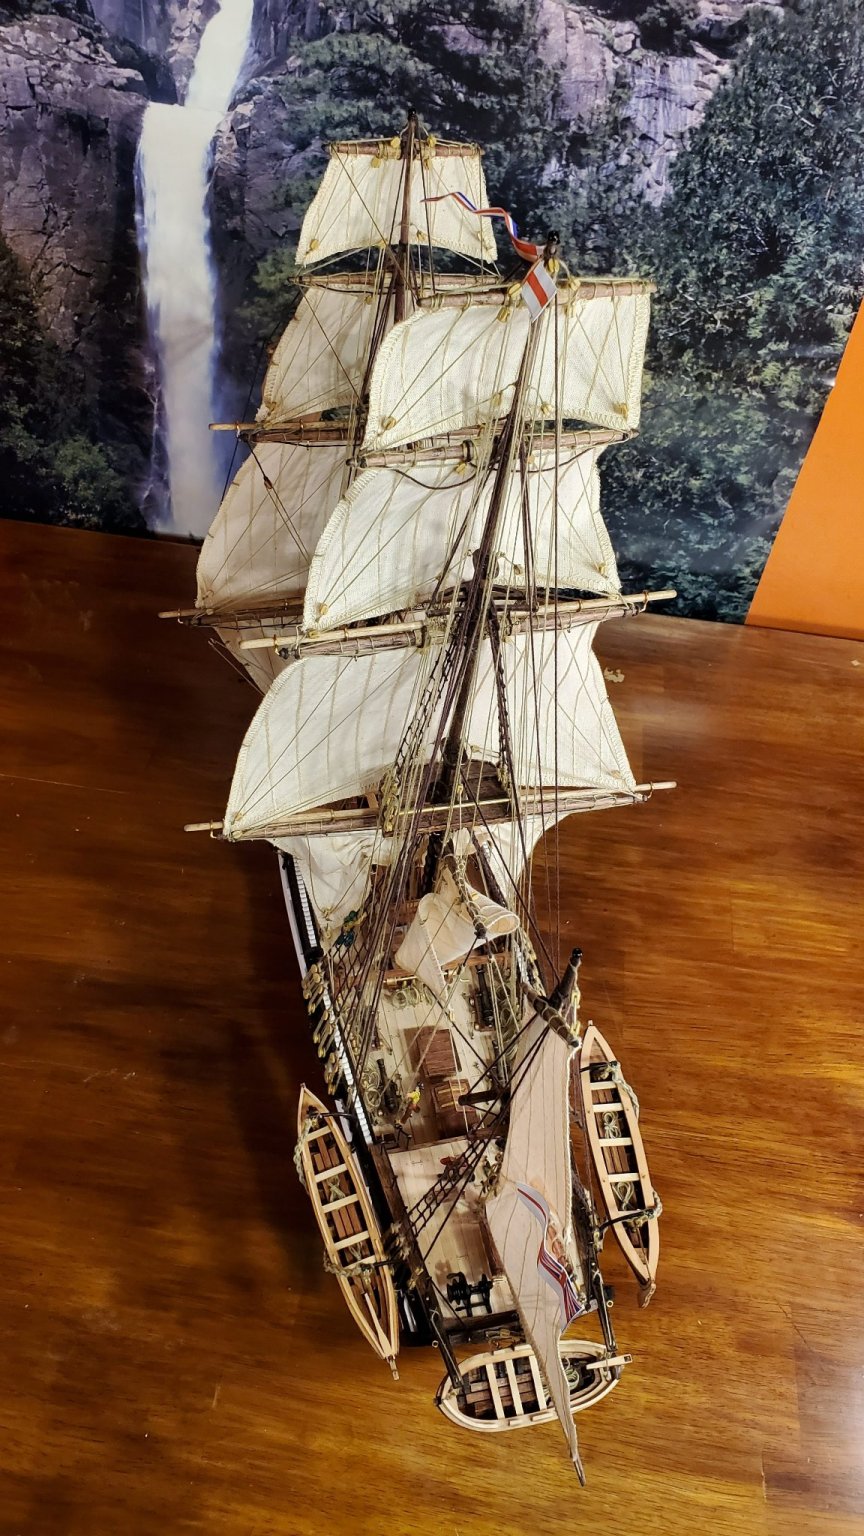
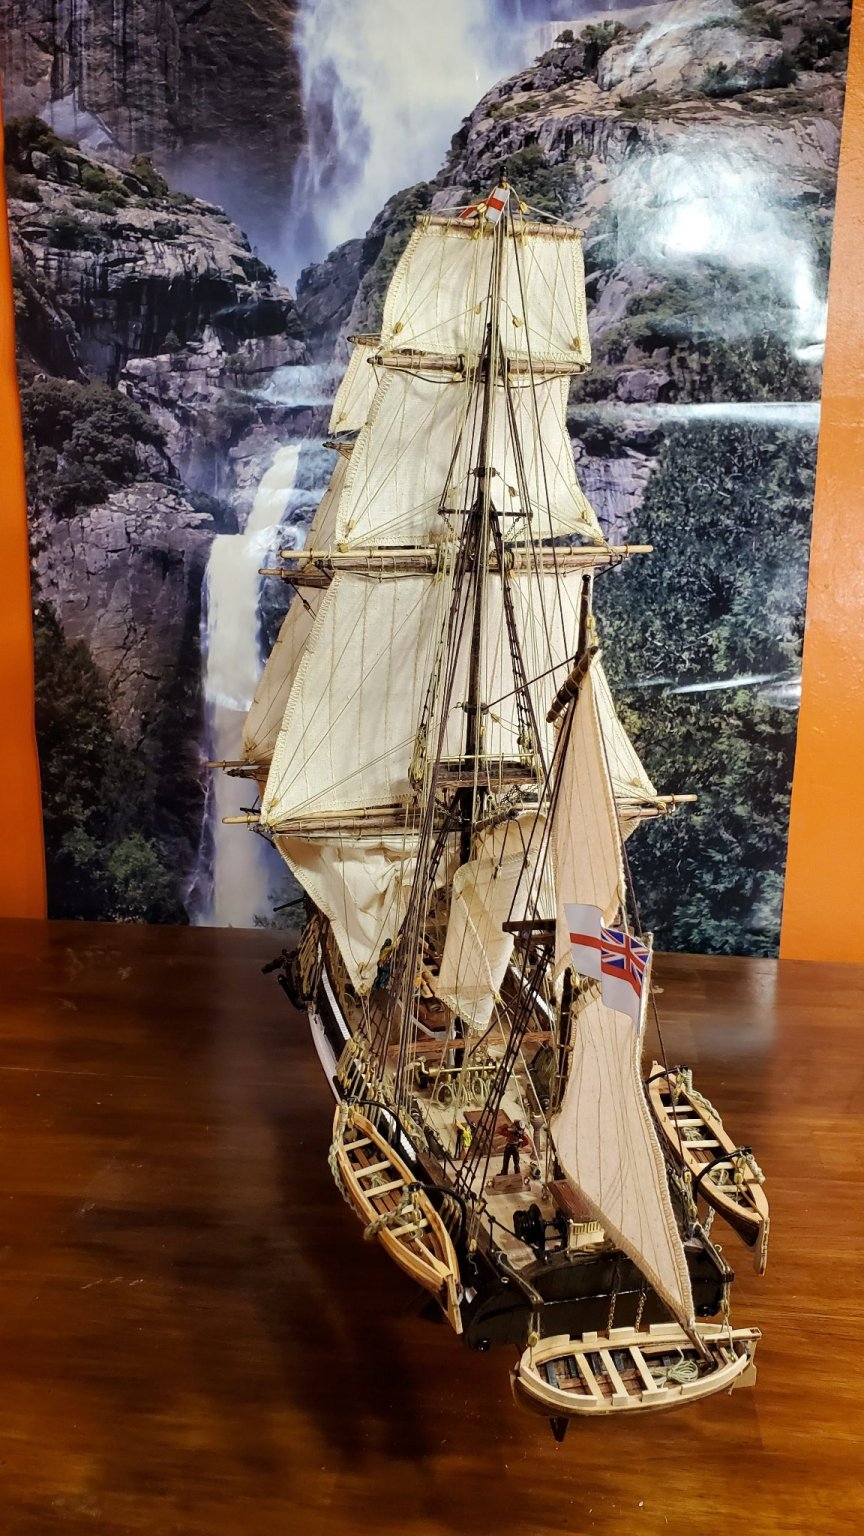
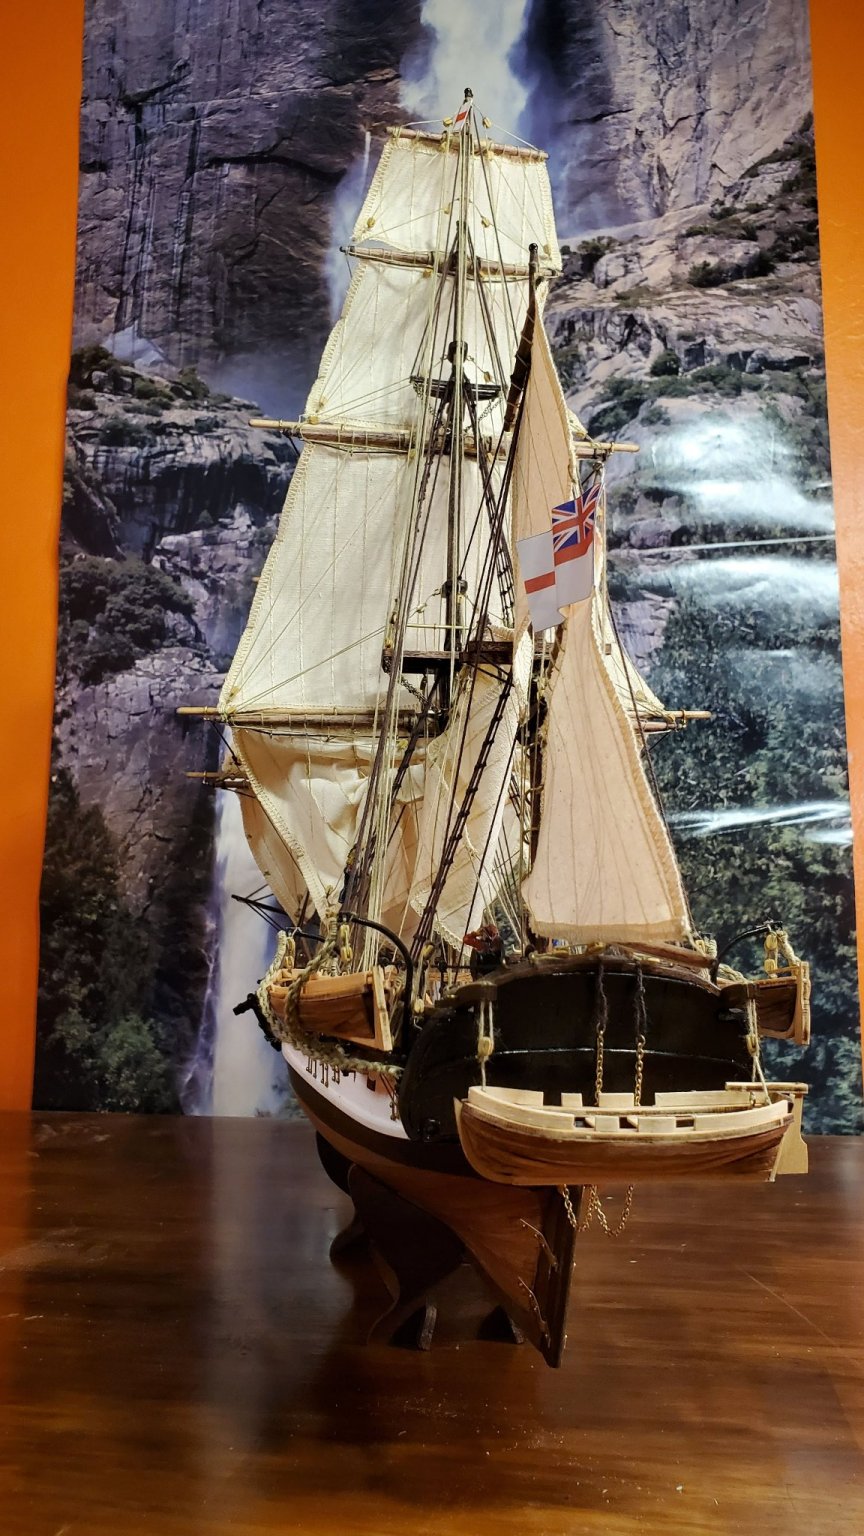
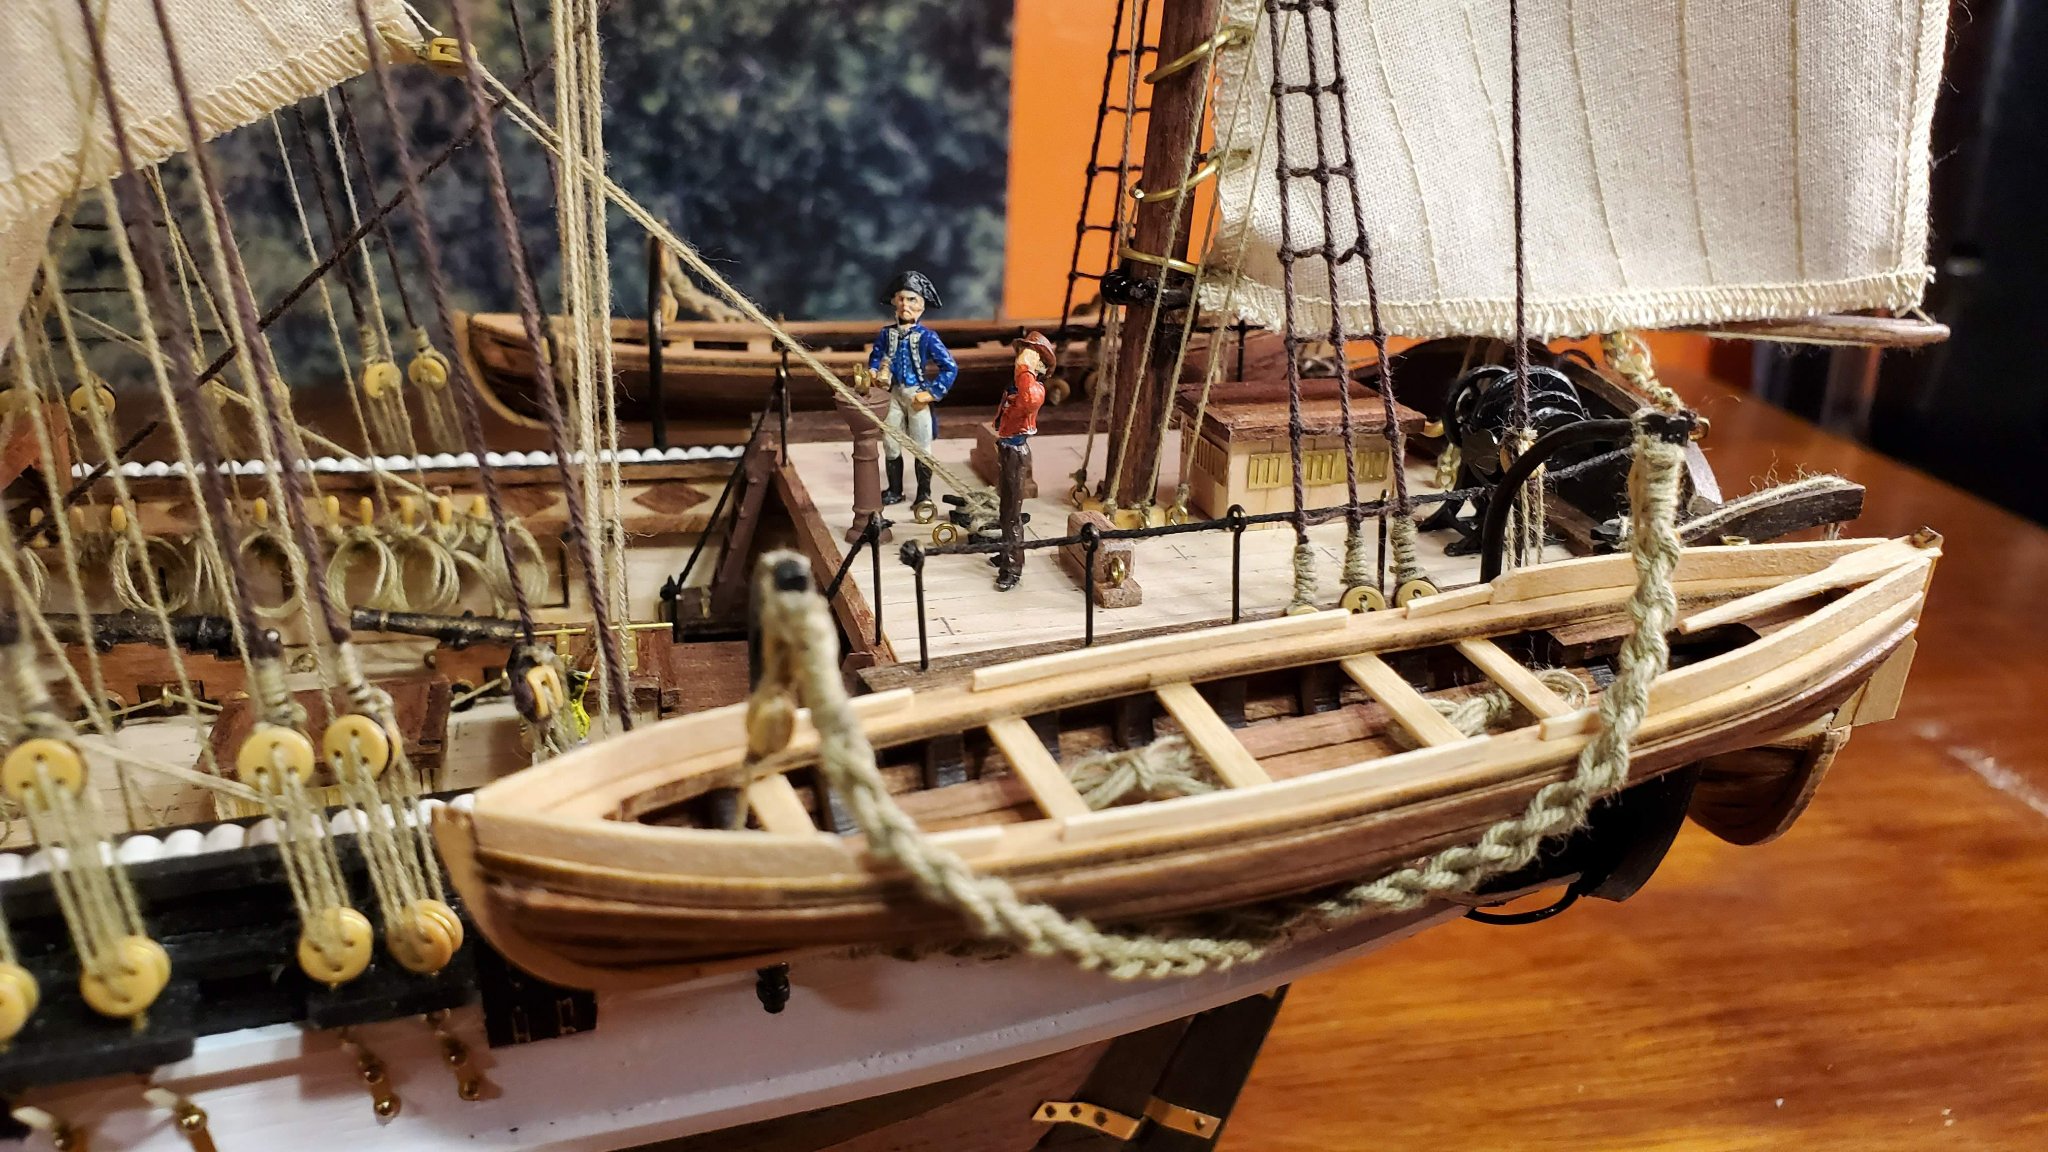
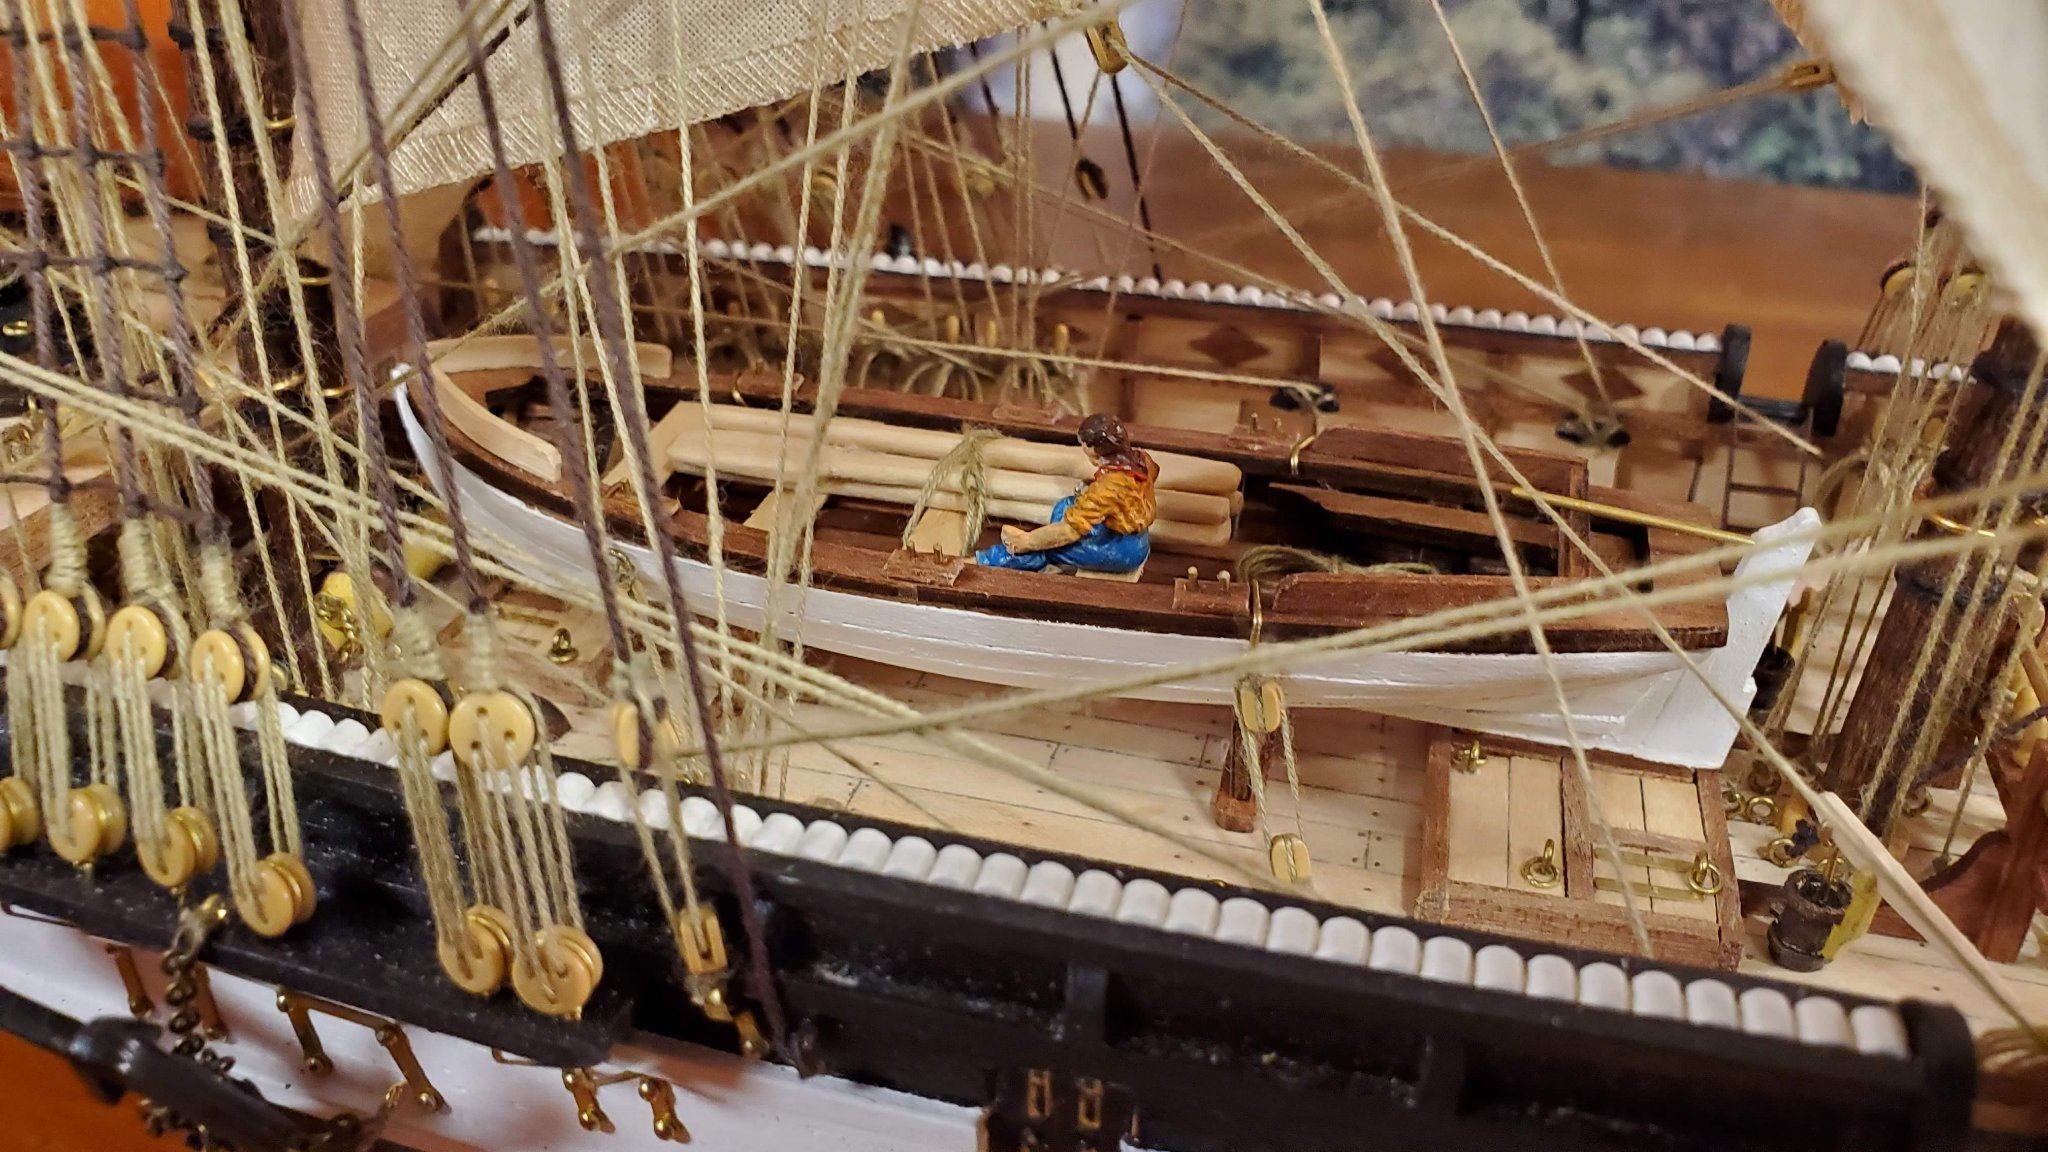
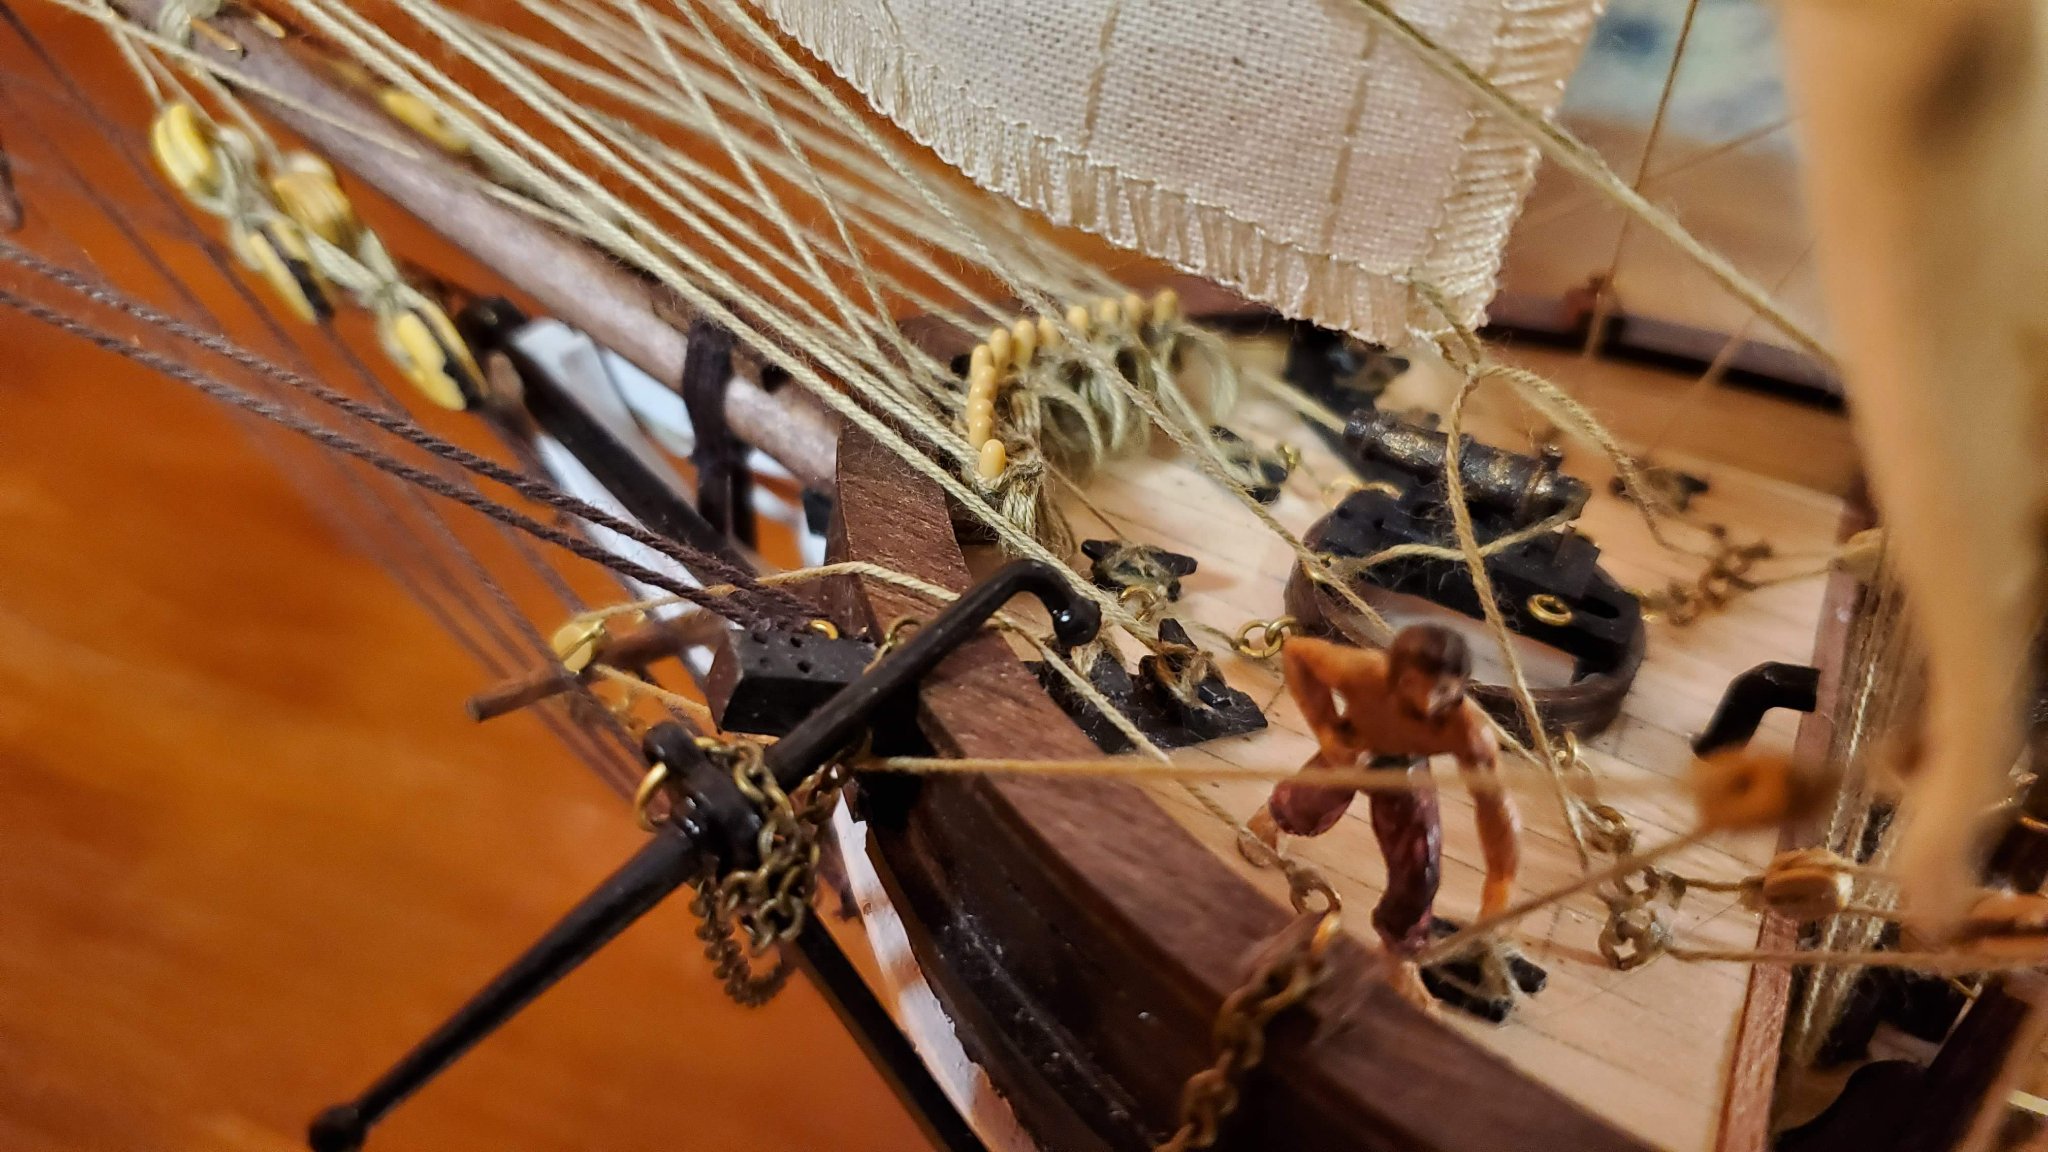
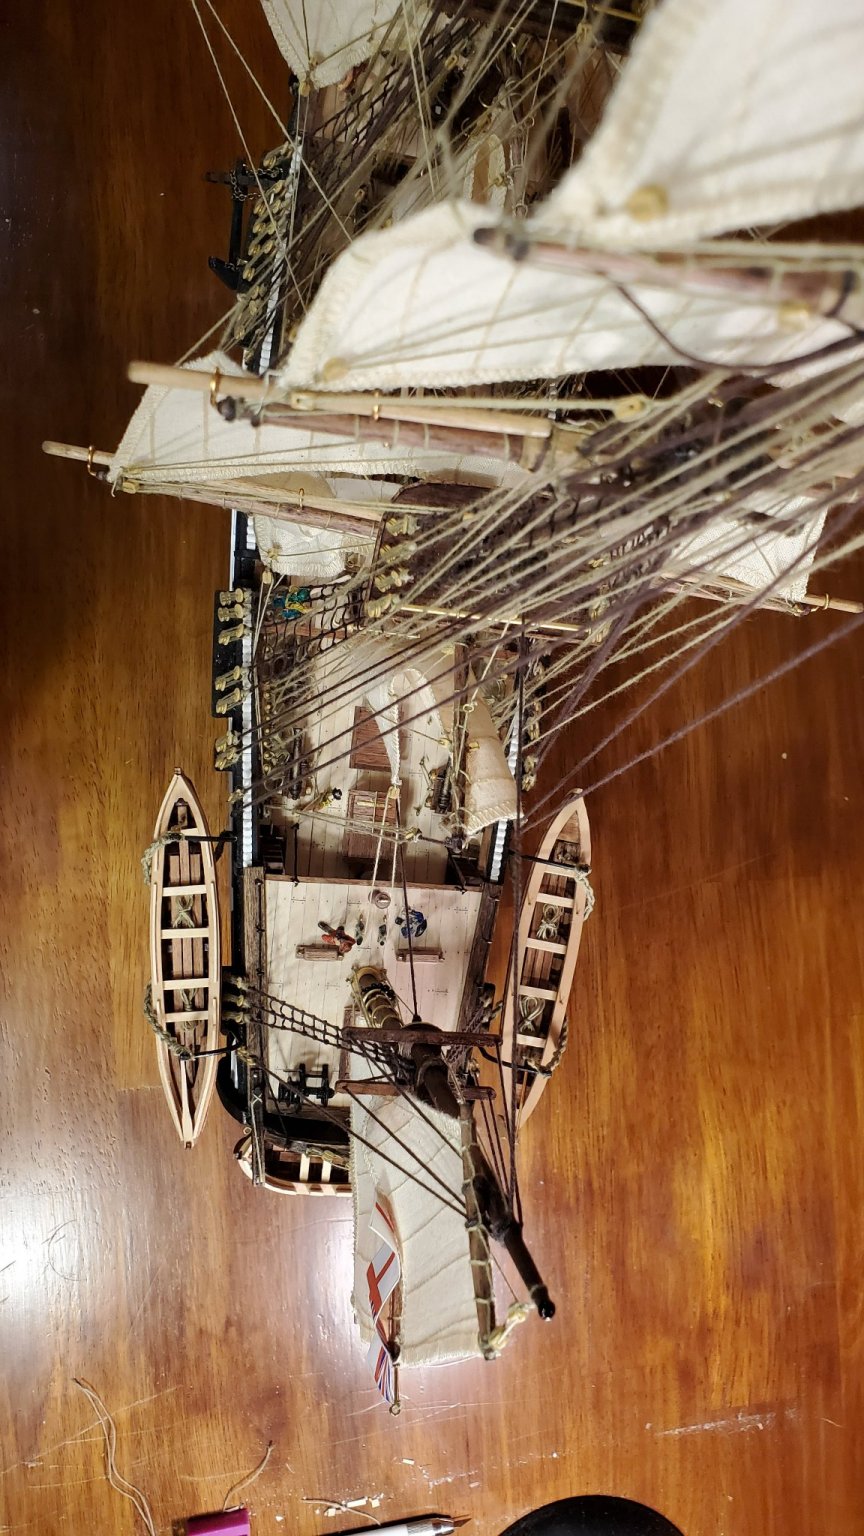
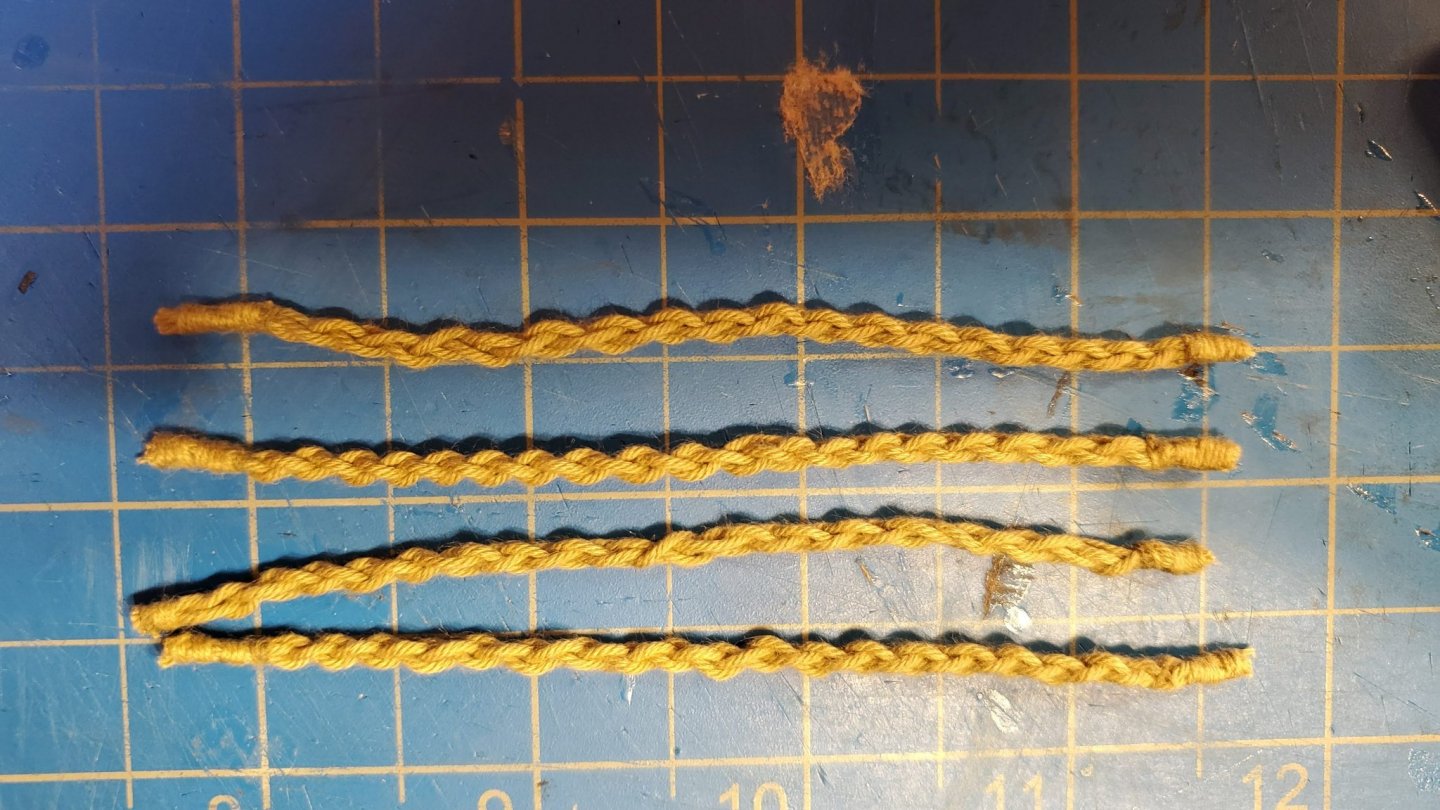
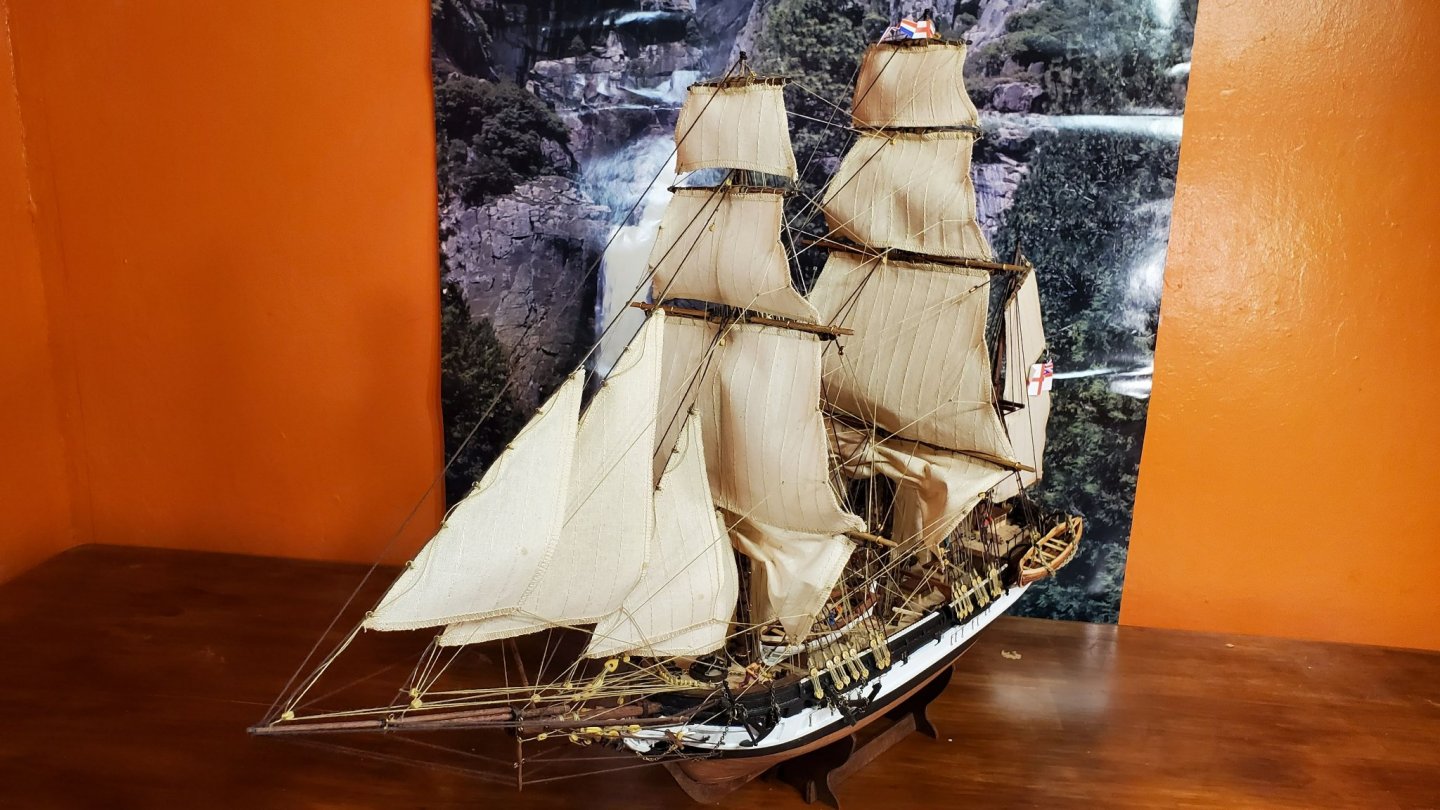
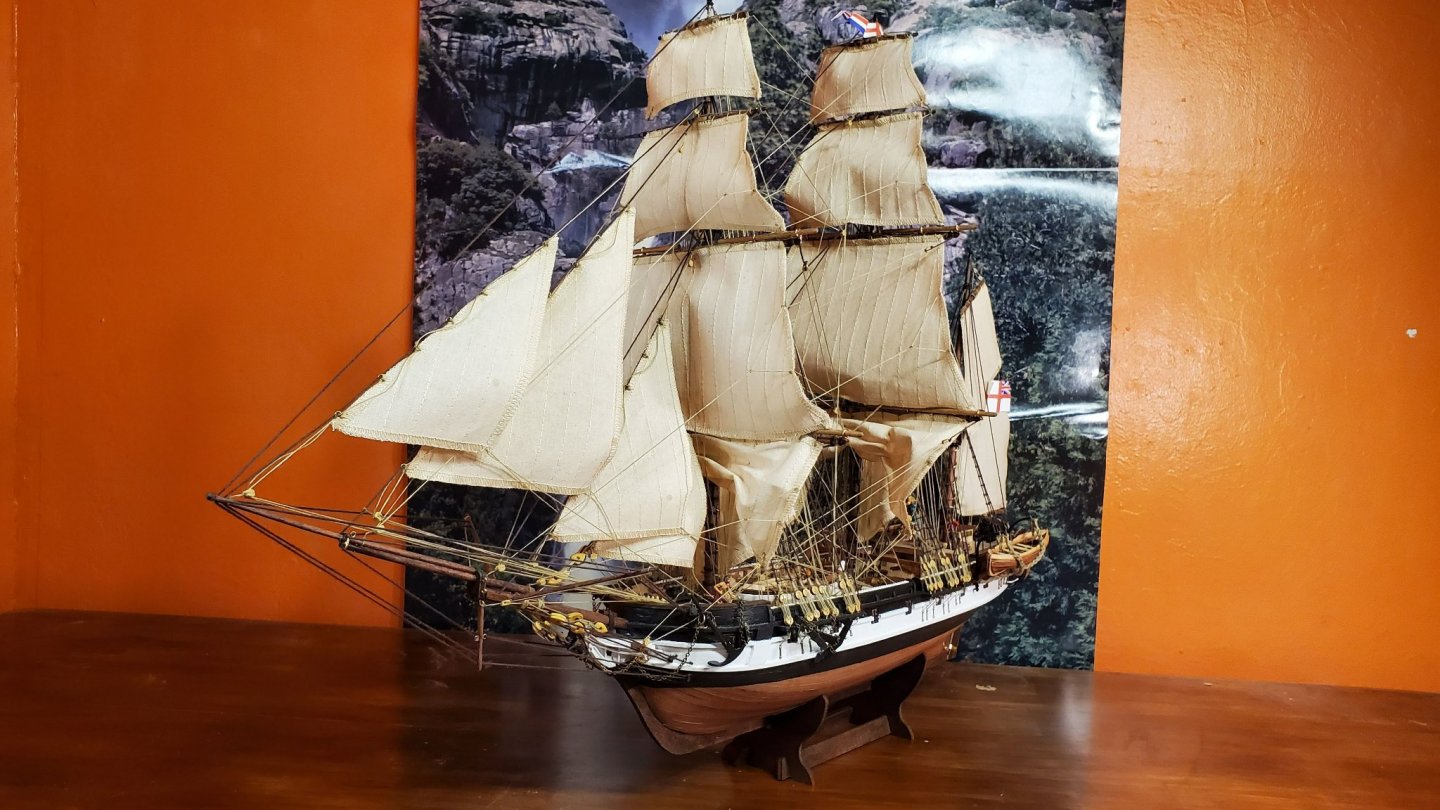
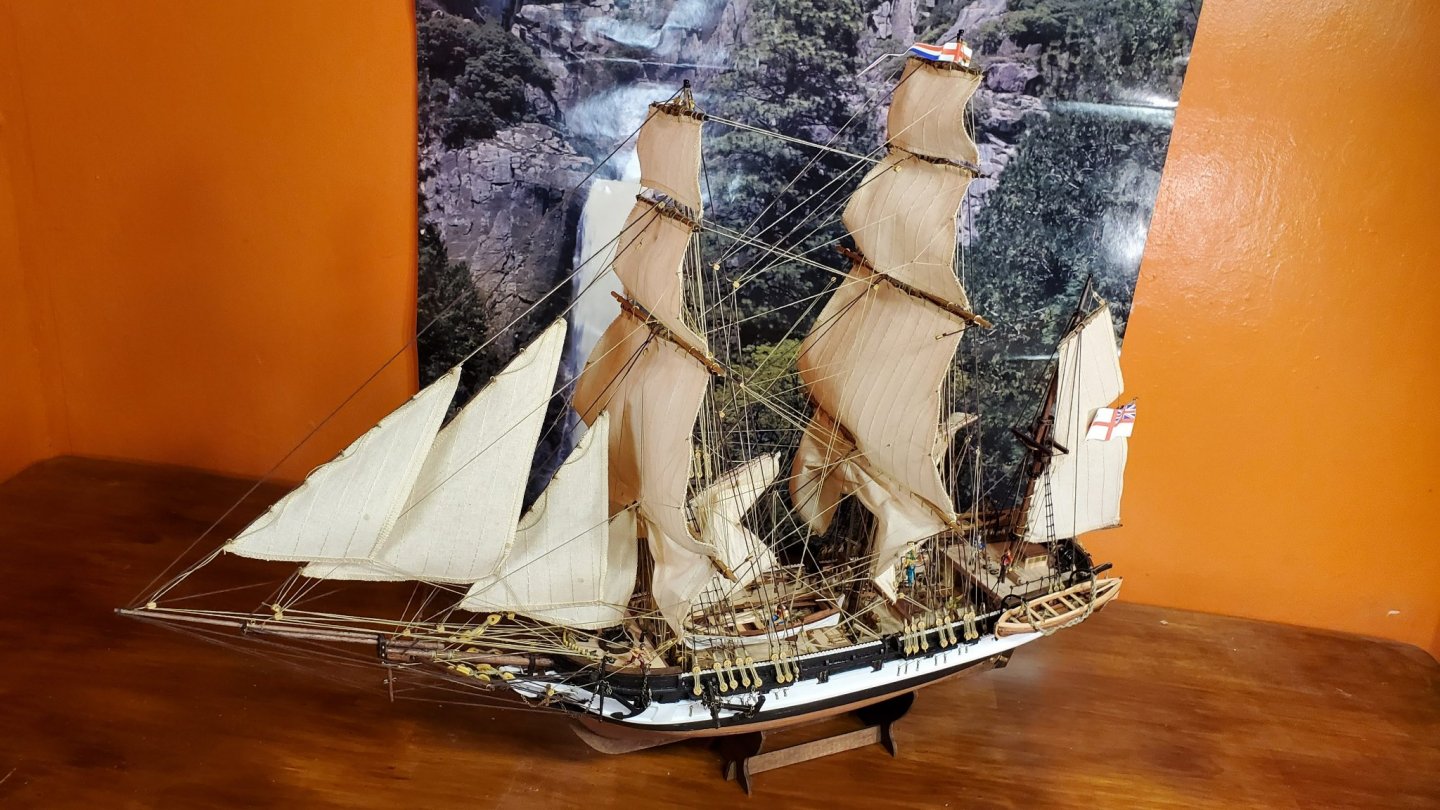
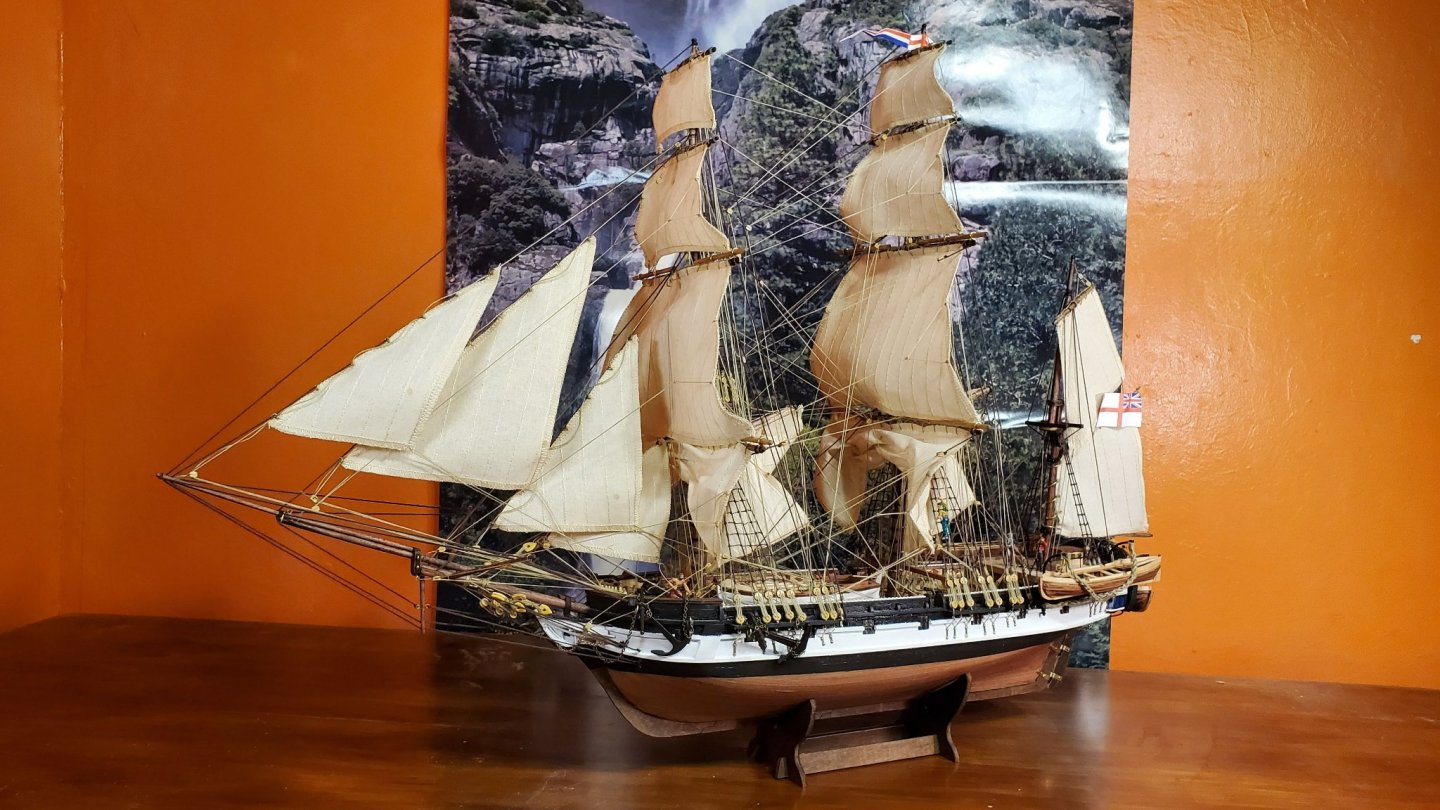
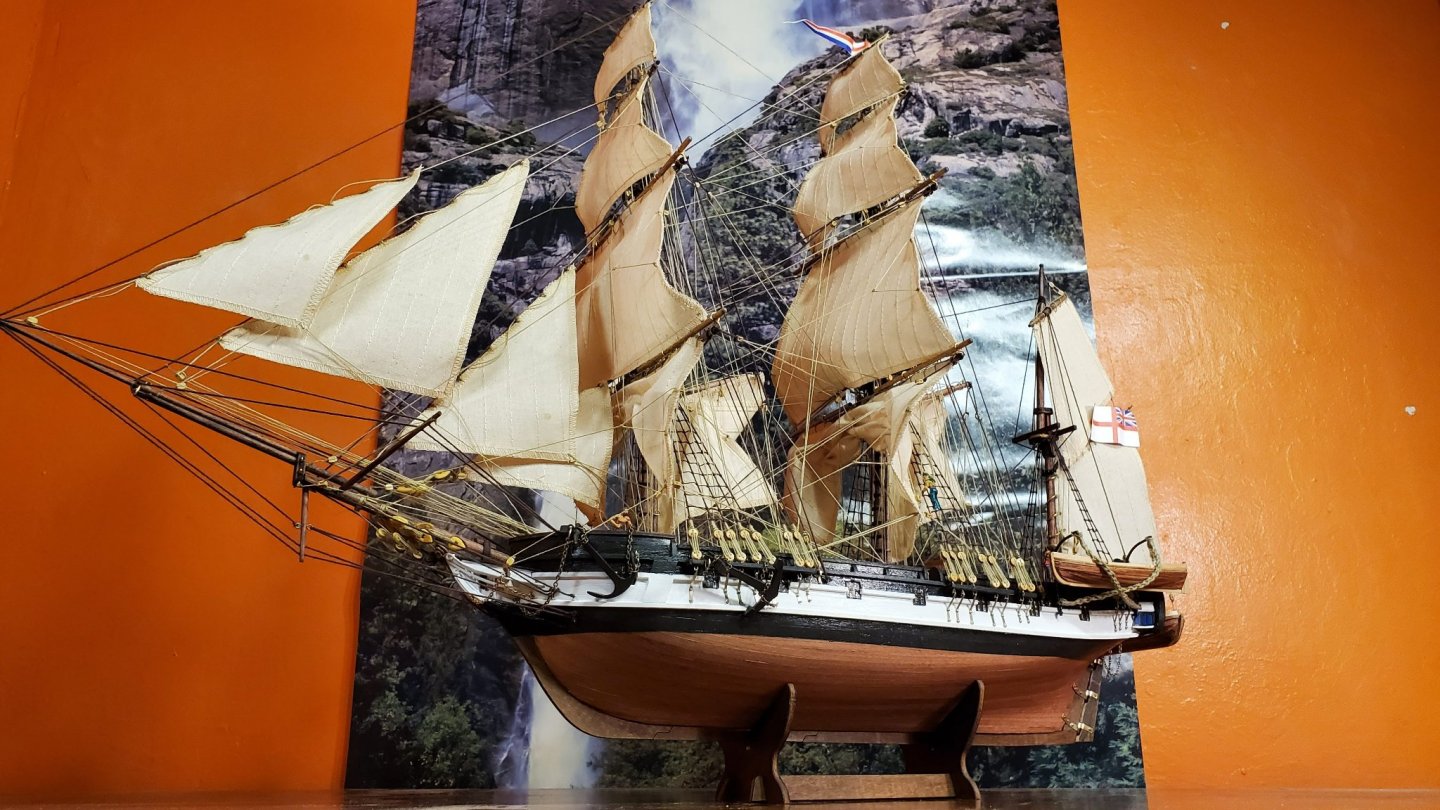
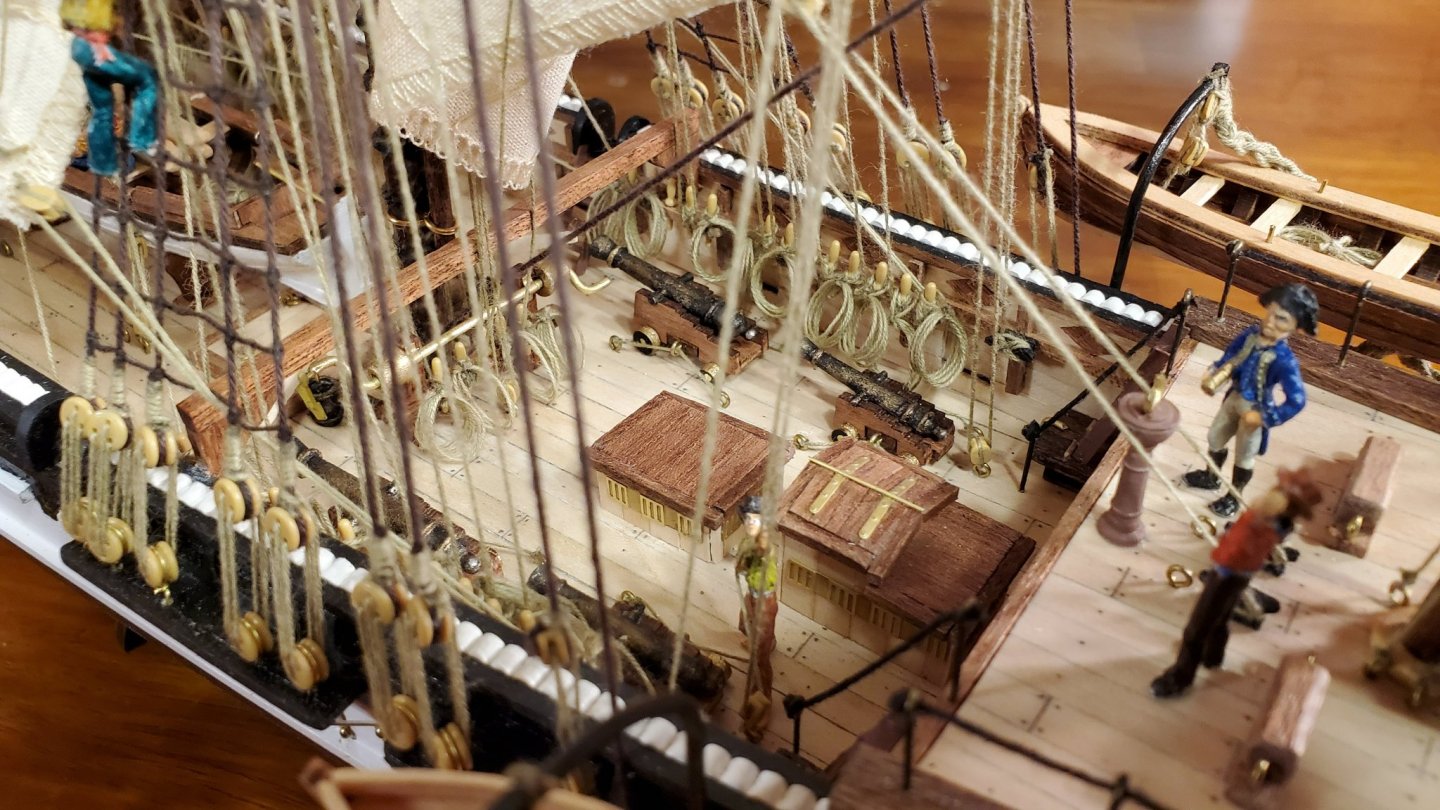
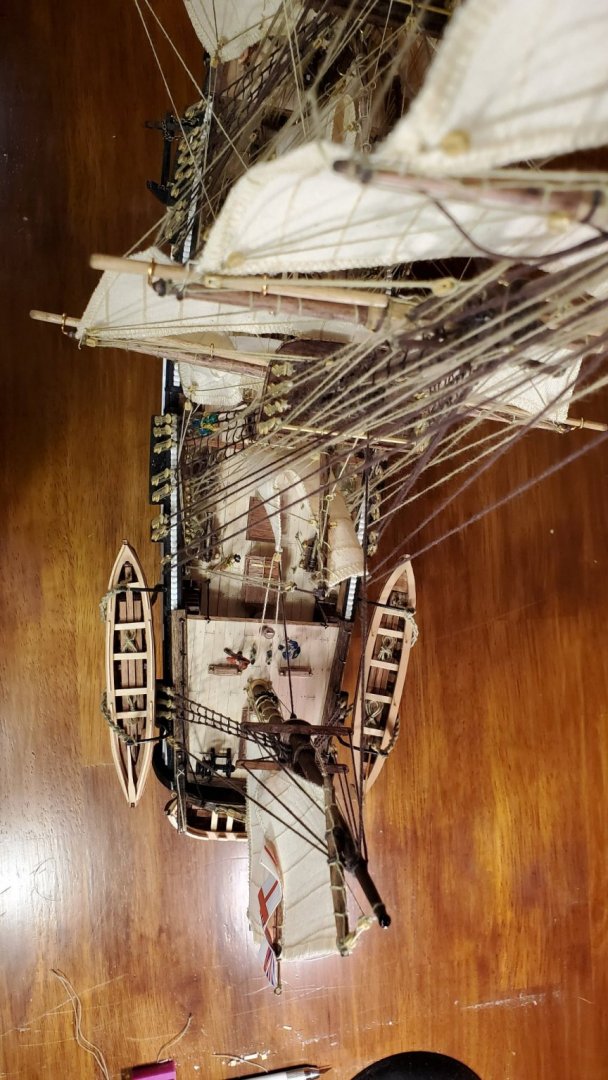
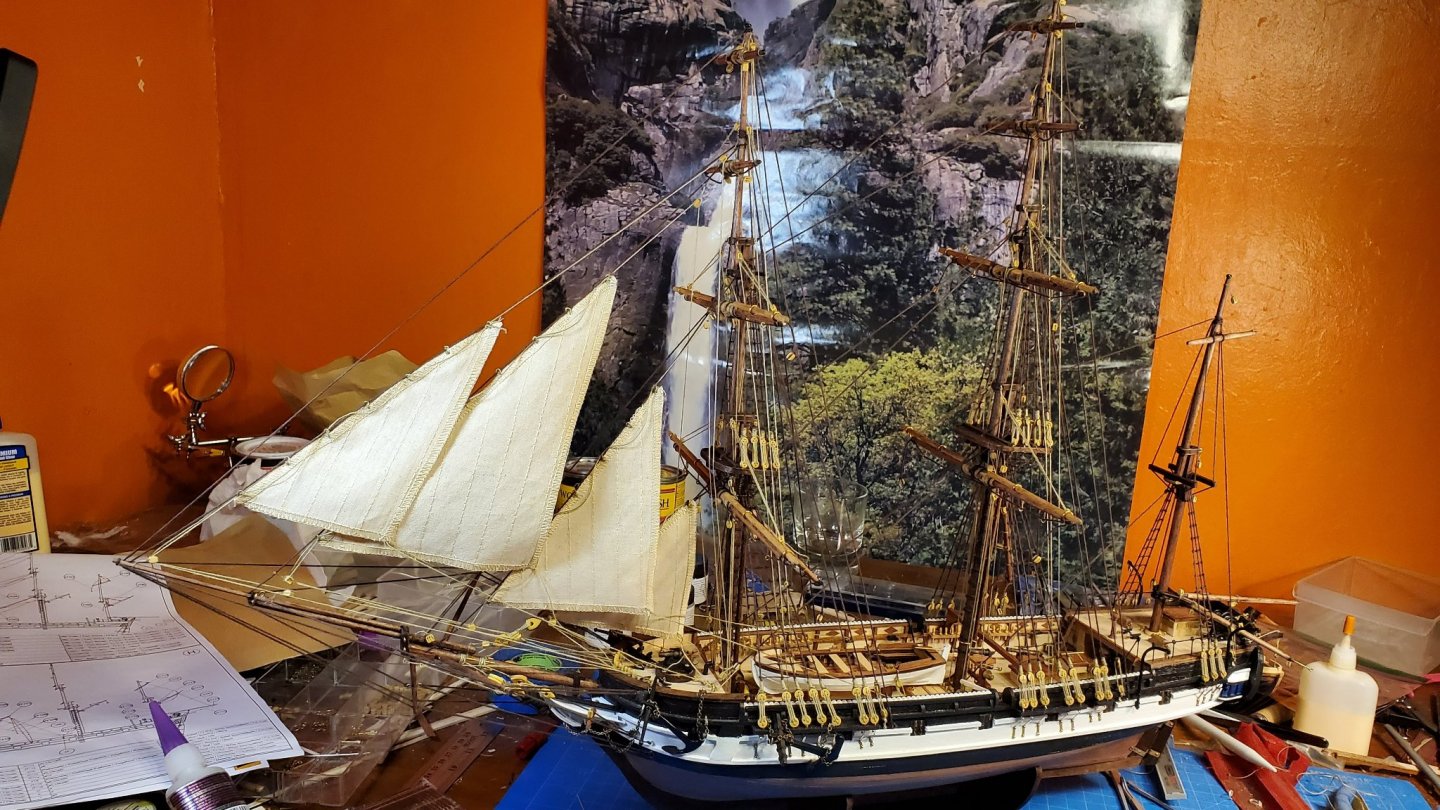
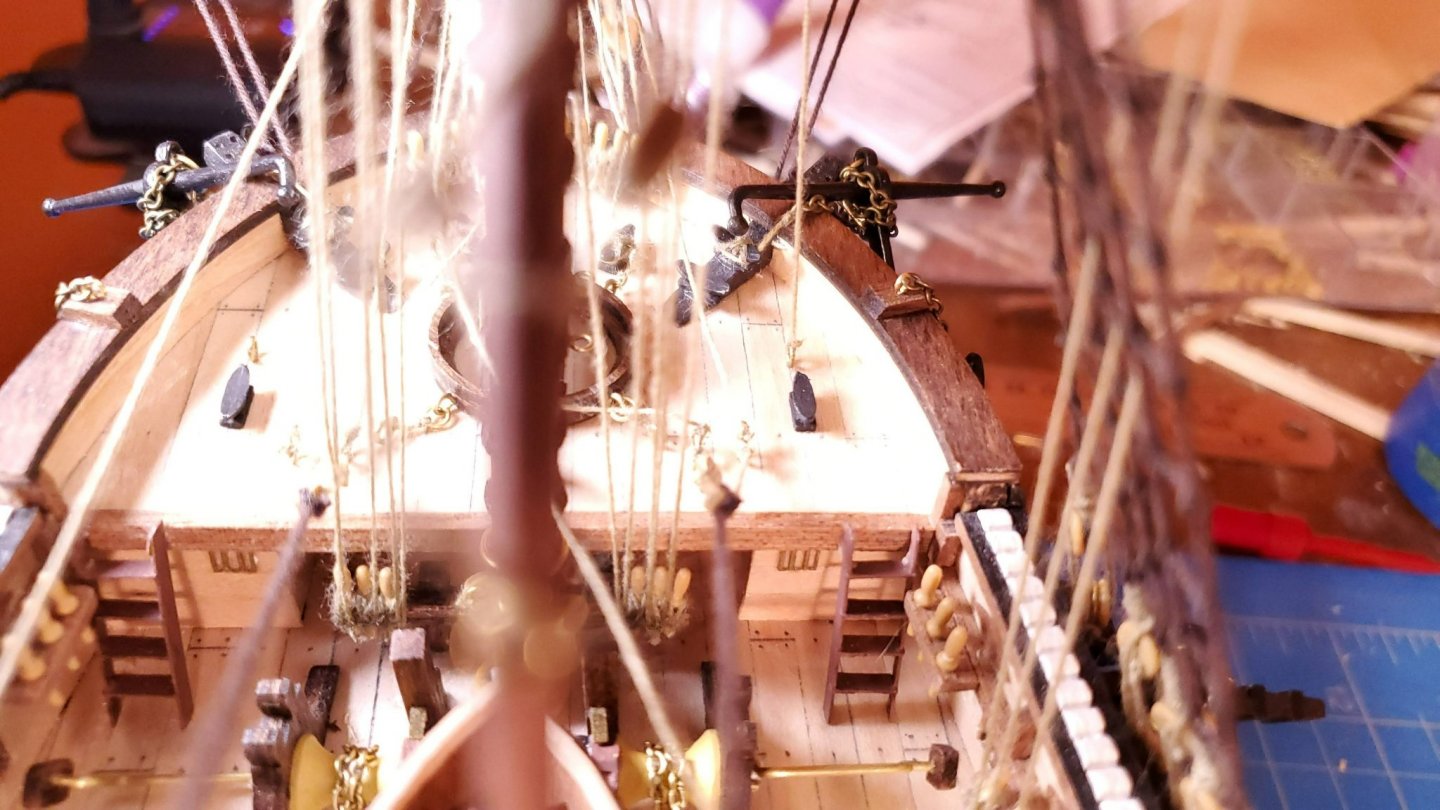
Well today is a very exciting day - after about 3 1/2 months and easily over 300 hours of work - she's finished! (well I may still dabble a bit, but as far as OcCre's instructions go she is finished). To keep the dust (and my cat!) off the ship I have the Old Modern Handicrafts P006 display case on order. Once I have it I'll post some pics of the ship in the case. Final jobs were installing all the upper sails along with their running rigging. Installing the gaff sails Installing the braces Installing the flags Installing the boats Then I added a few of my own flourishes Installed my figures that I painted earlier Carved some oars out of the 2x5 and installed them on the center boat Created rope coils to go in the boats. Created rope coils to hang on the belaying pins. For the securing rope for the boats I used a 4 strand braid rather than the method the instruction videos show. Takes a while longer but looks more realistic: Boats installed: Now some pics of the completed model: Here you can see the oars I made. Once I installed the figure it dawned on me the the shafts were way to thick for his hands. But too late to fix it as I'd already glued the oars in place. The rope coils for most of the ship were made around a 9mm dowel. I used the method described in Mastini's Ship Modeling Simplified, but added my own modification to create a small loop at the top to hang it with. The rope coils for the bow pin-rail were made around a 6mm dowel as there is less ground clearance Back of mainmast Back of foremast


-
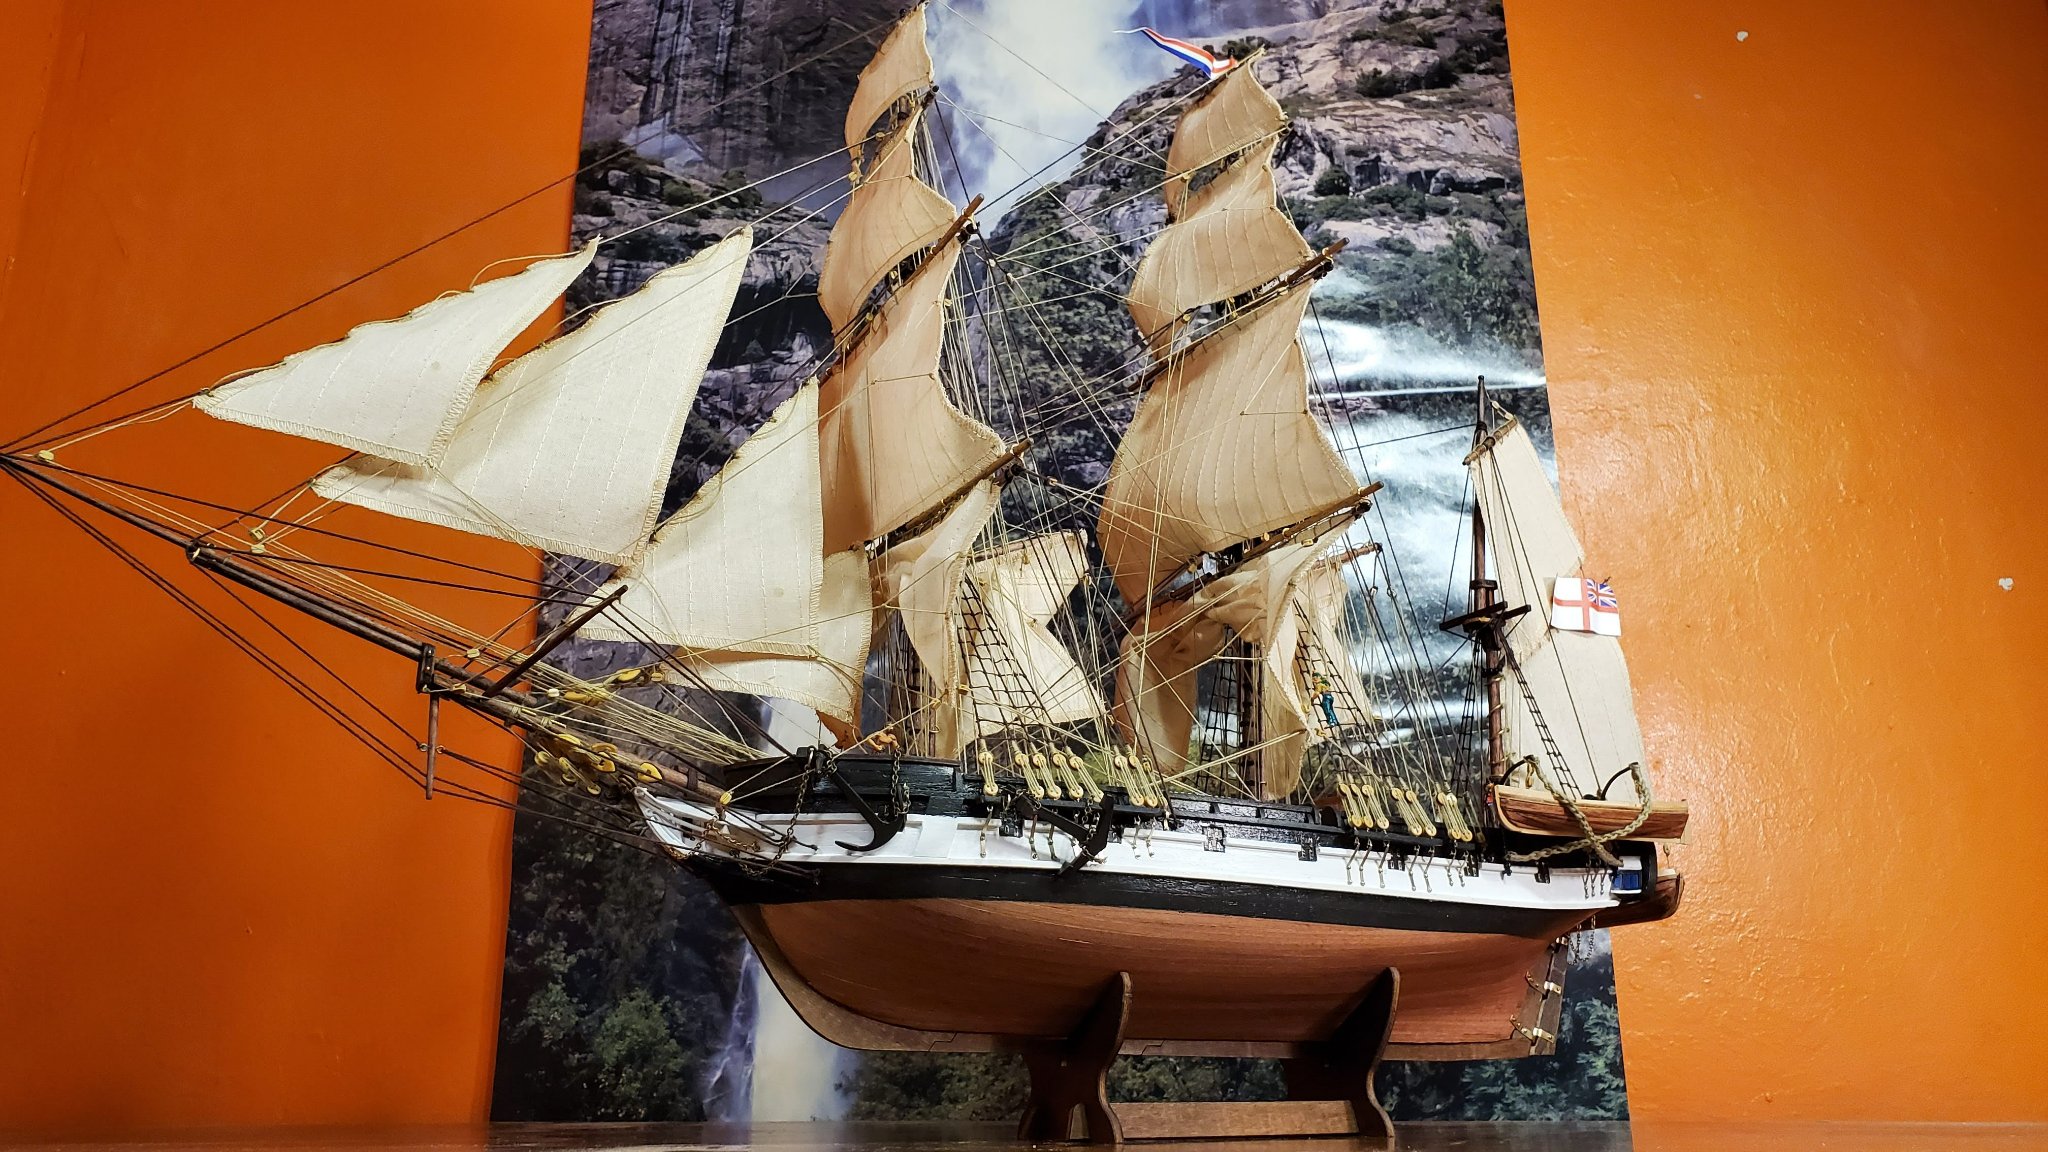
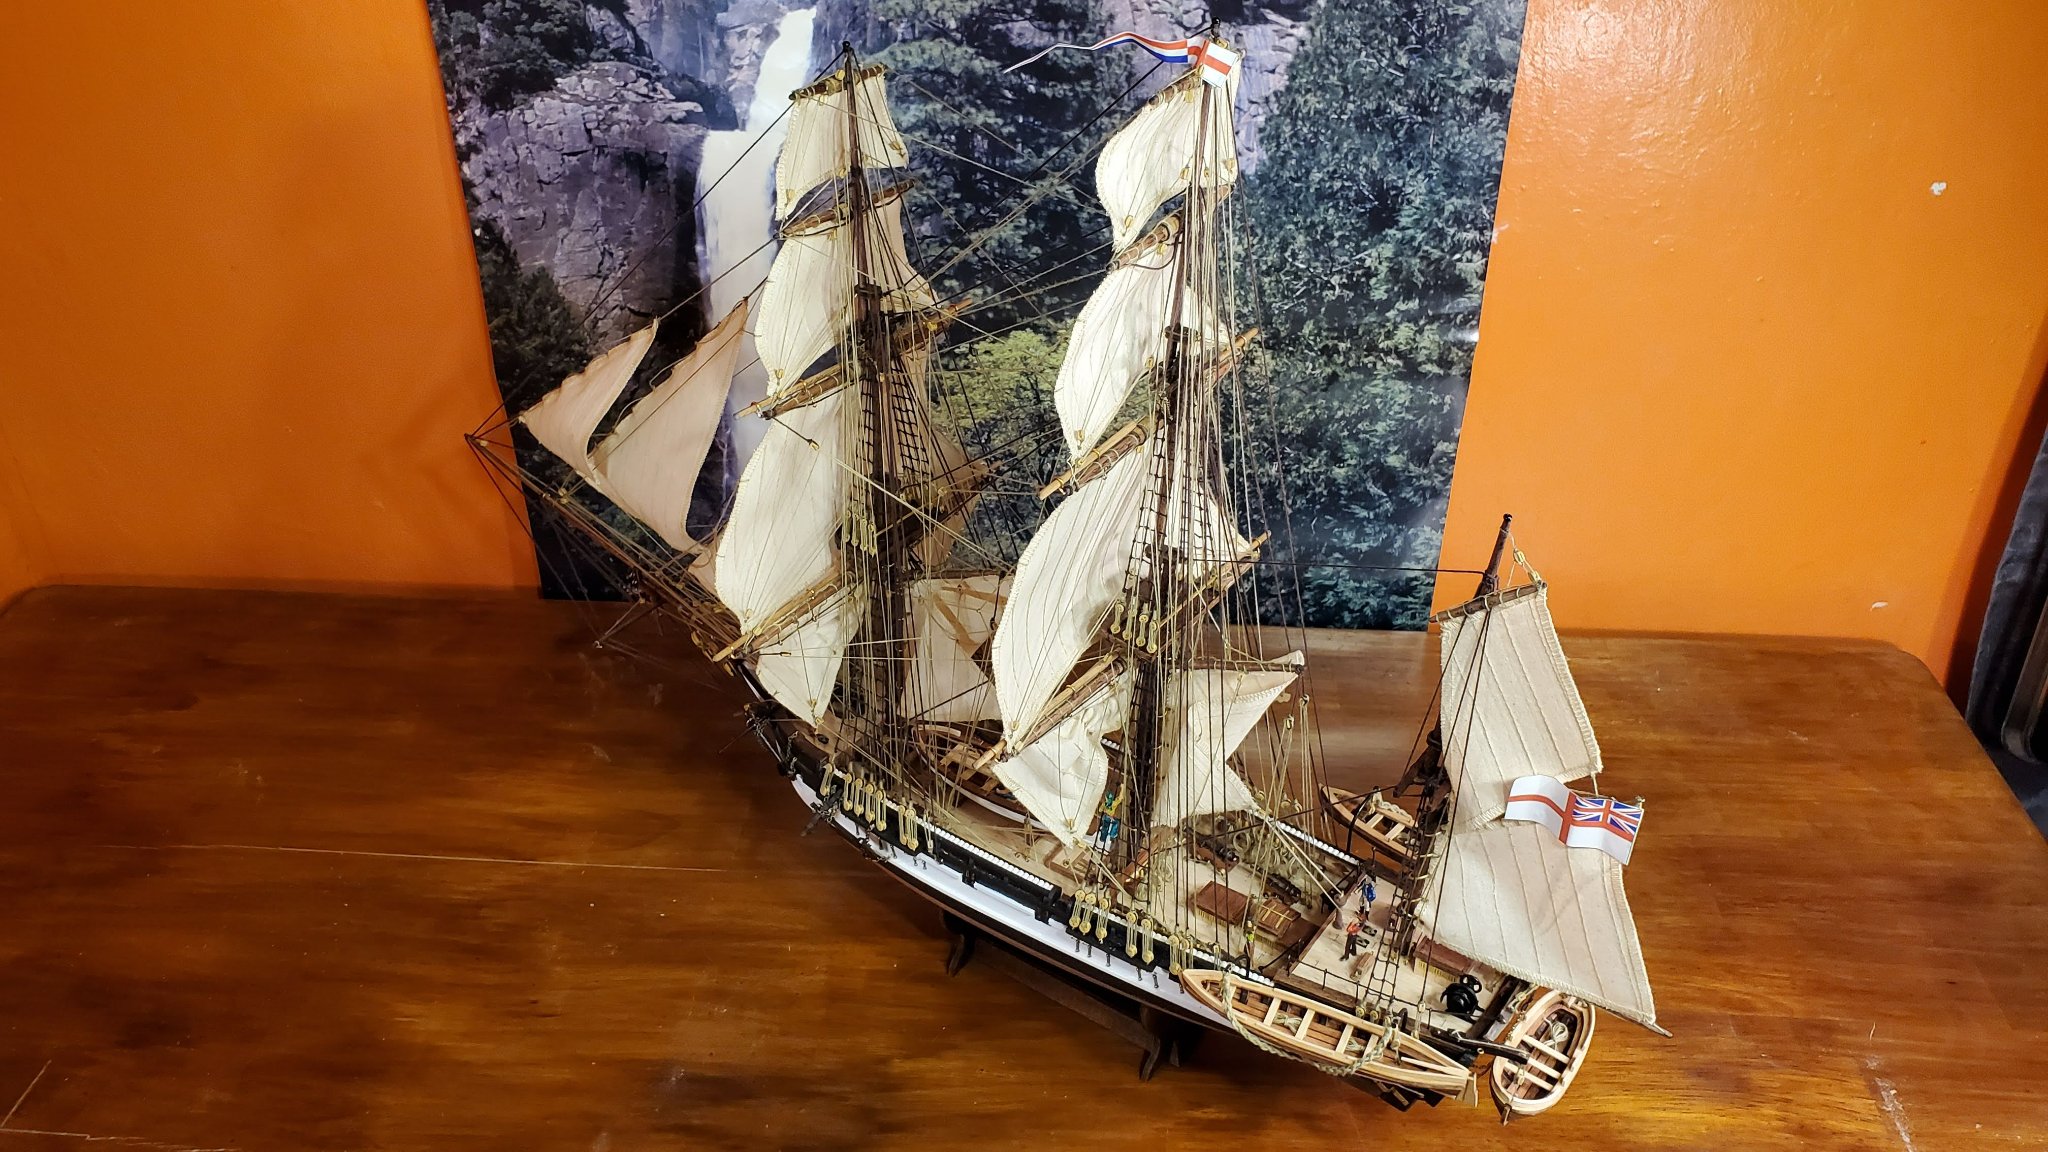
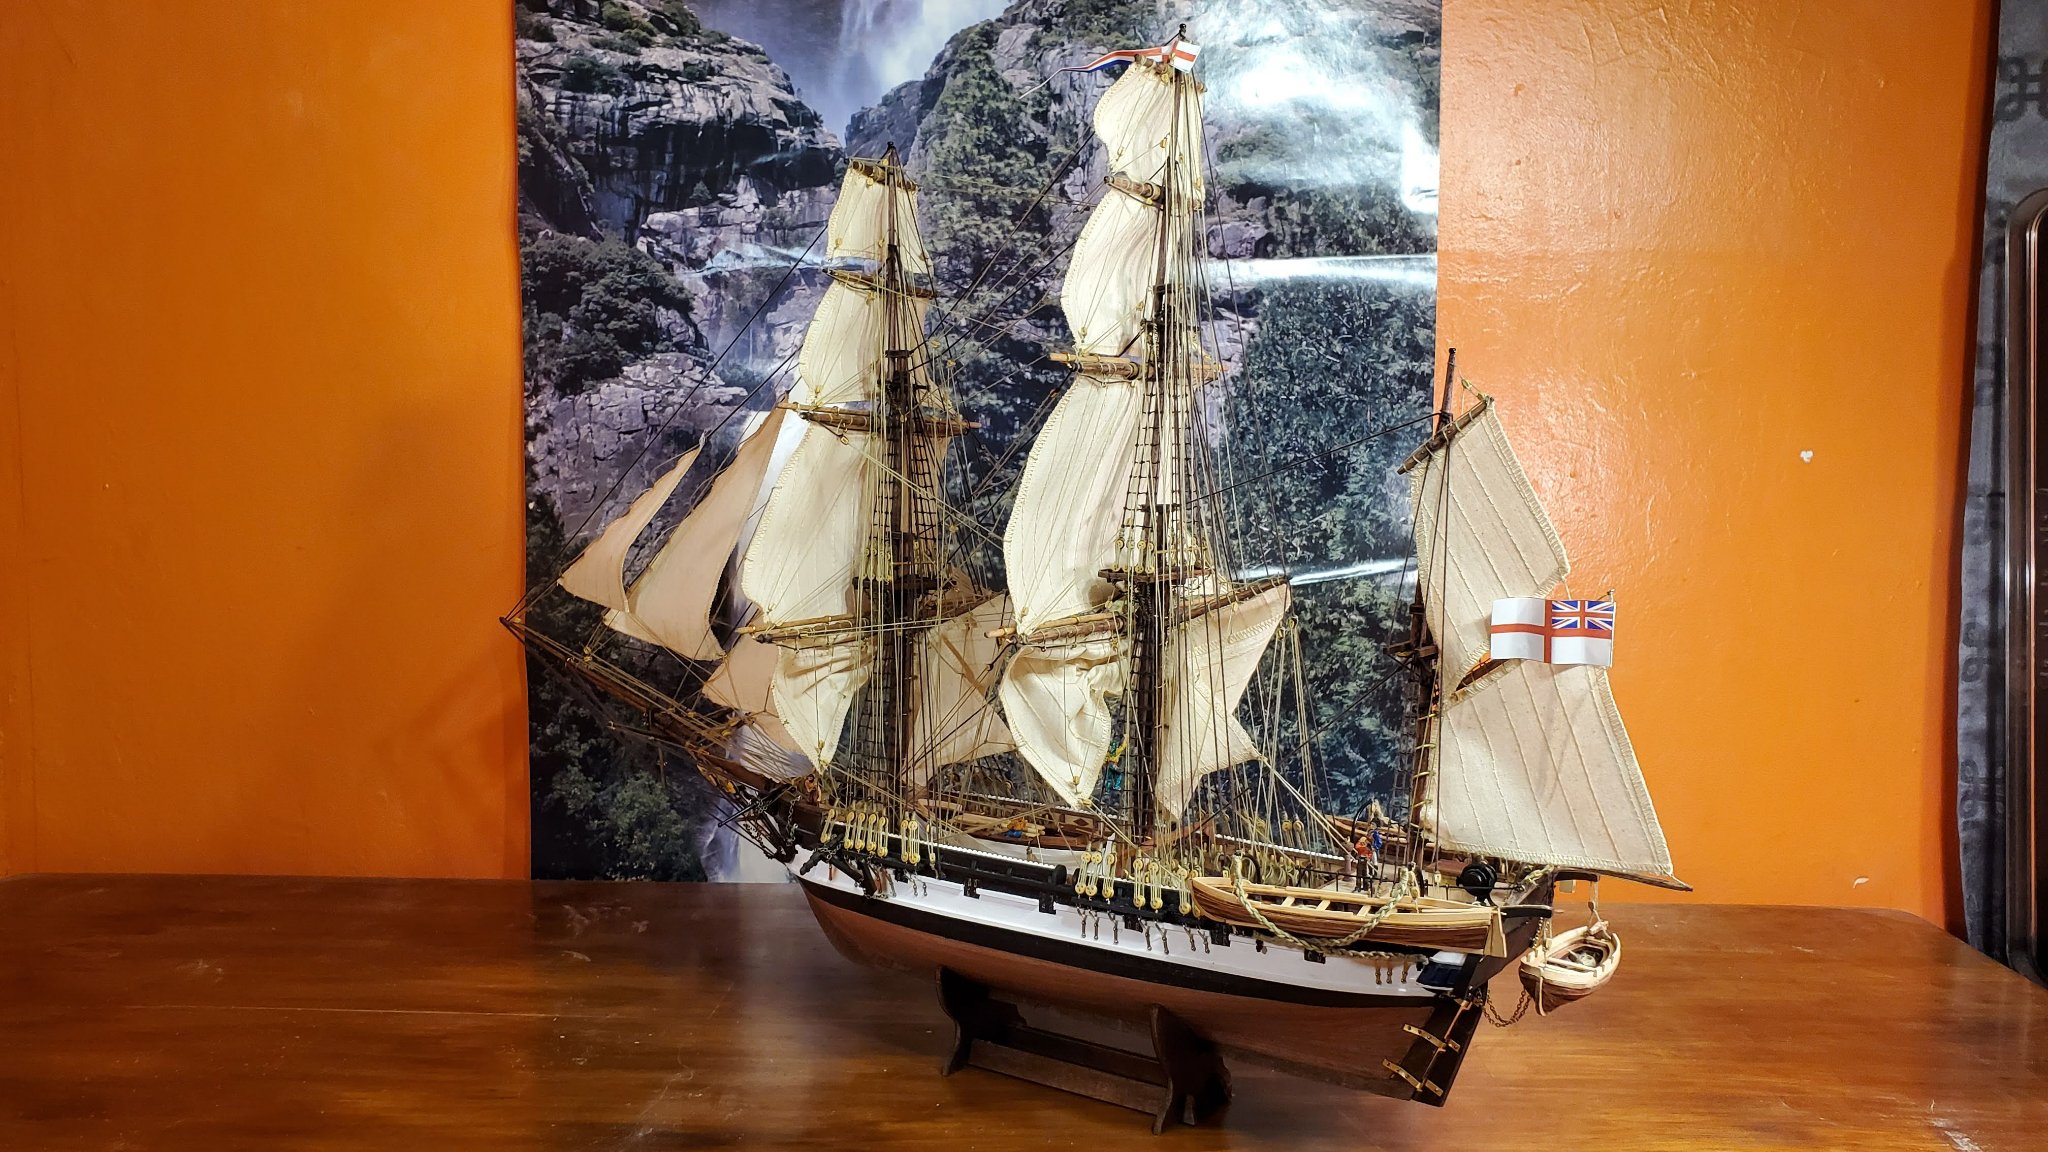
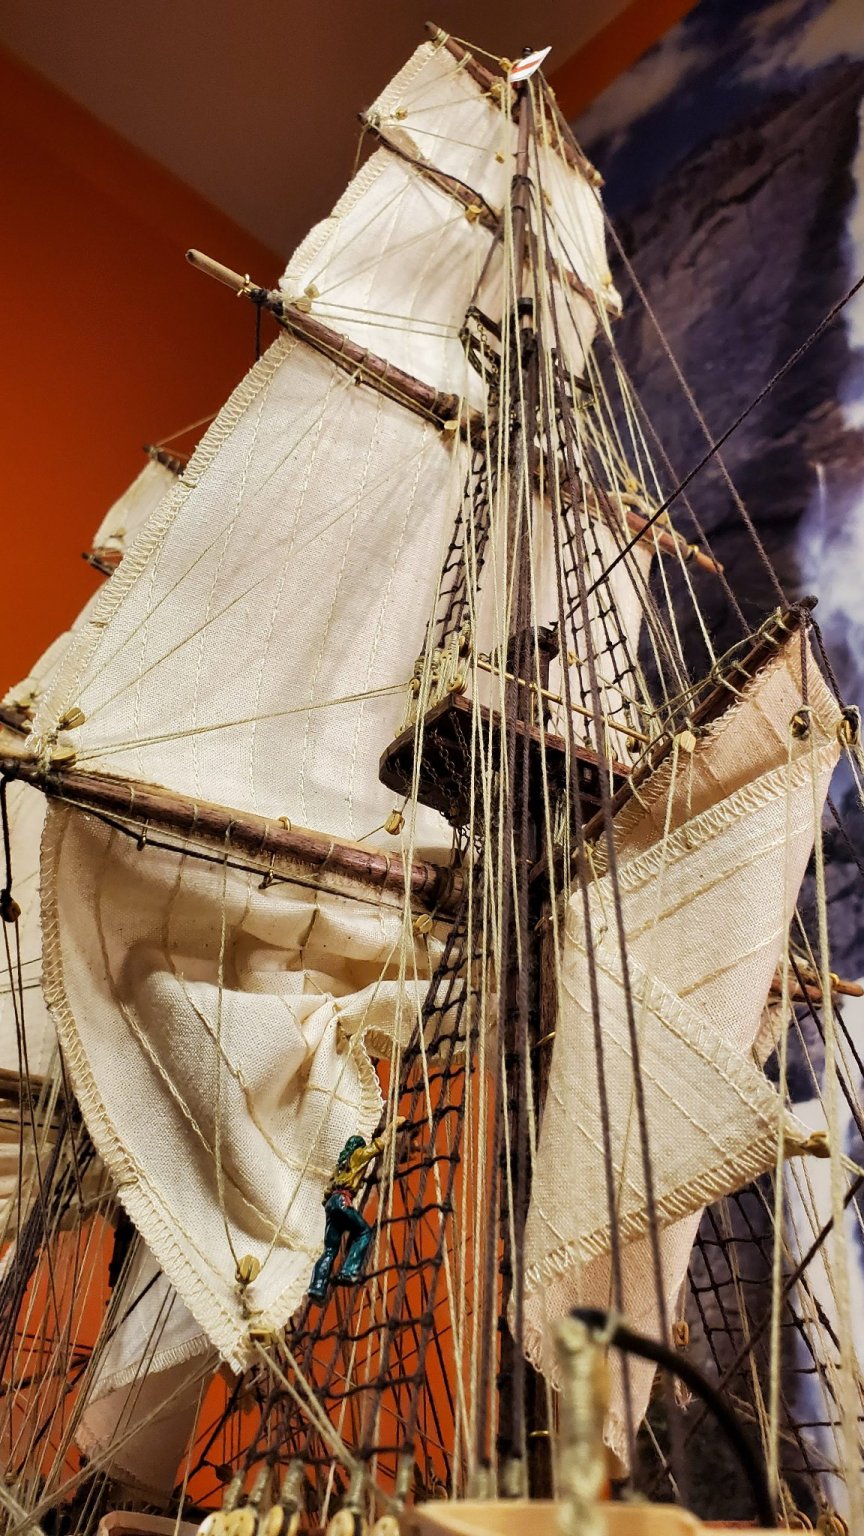
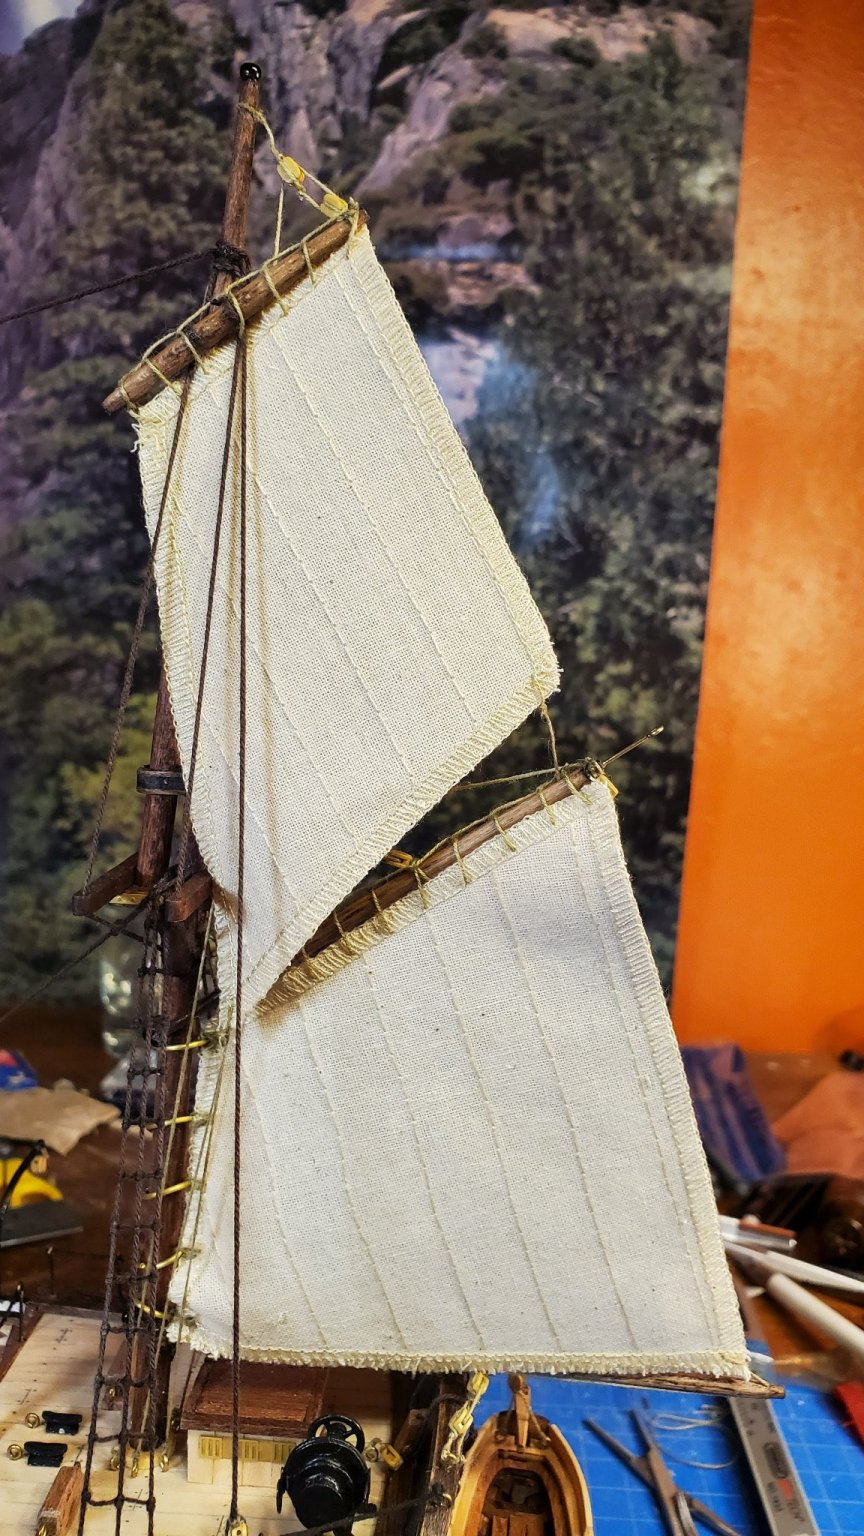
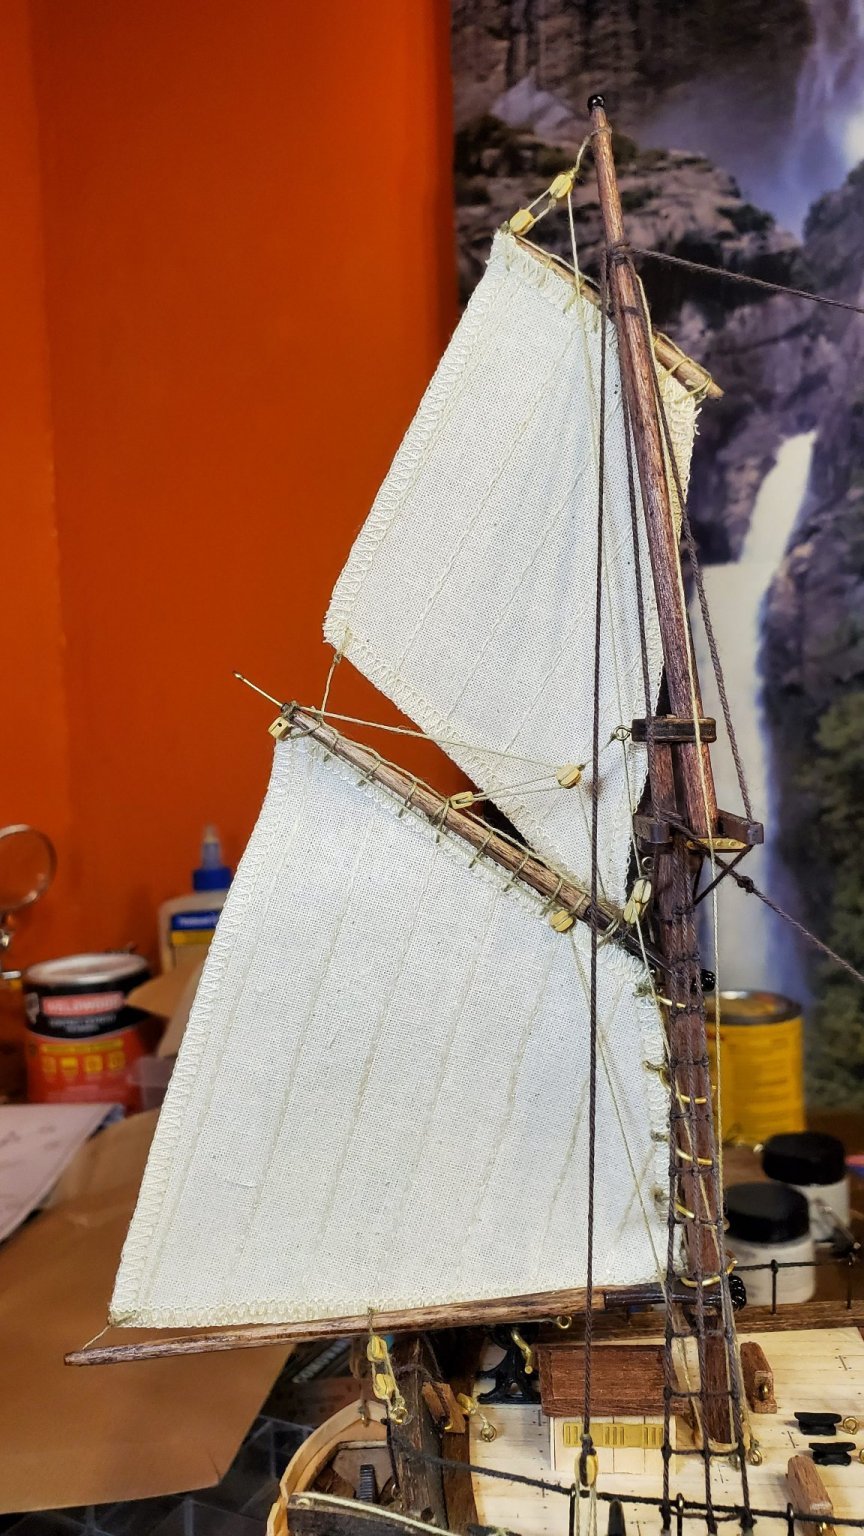
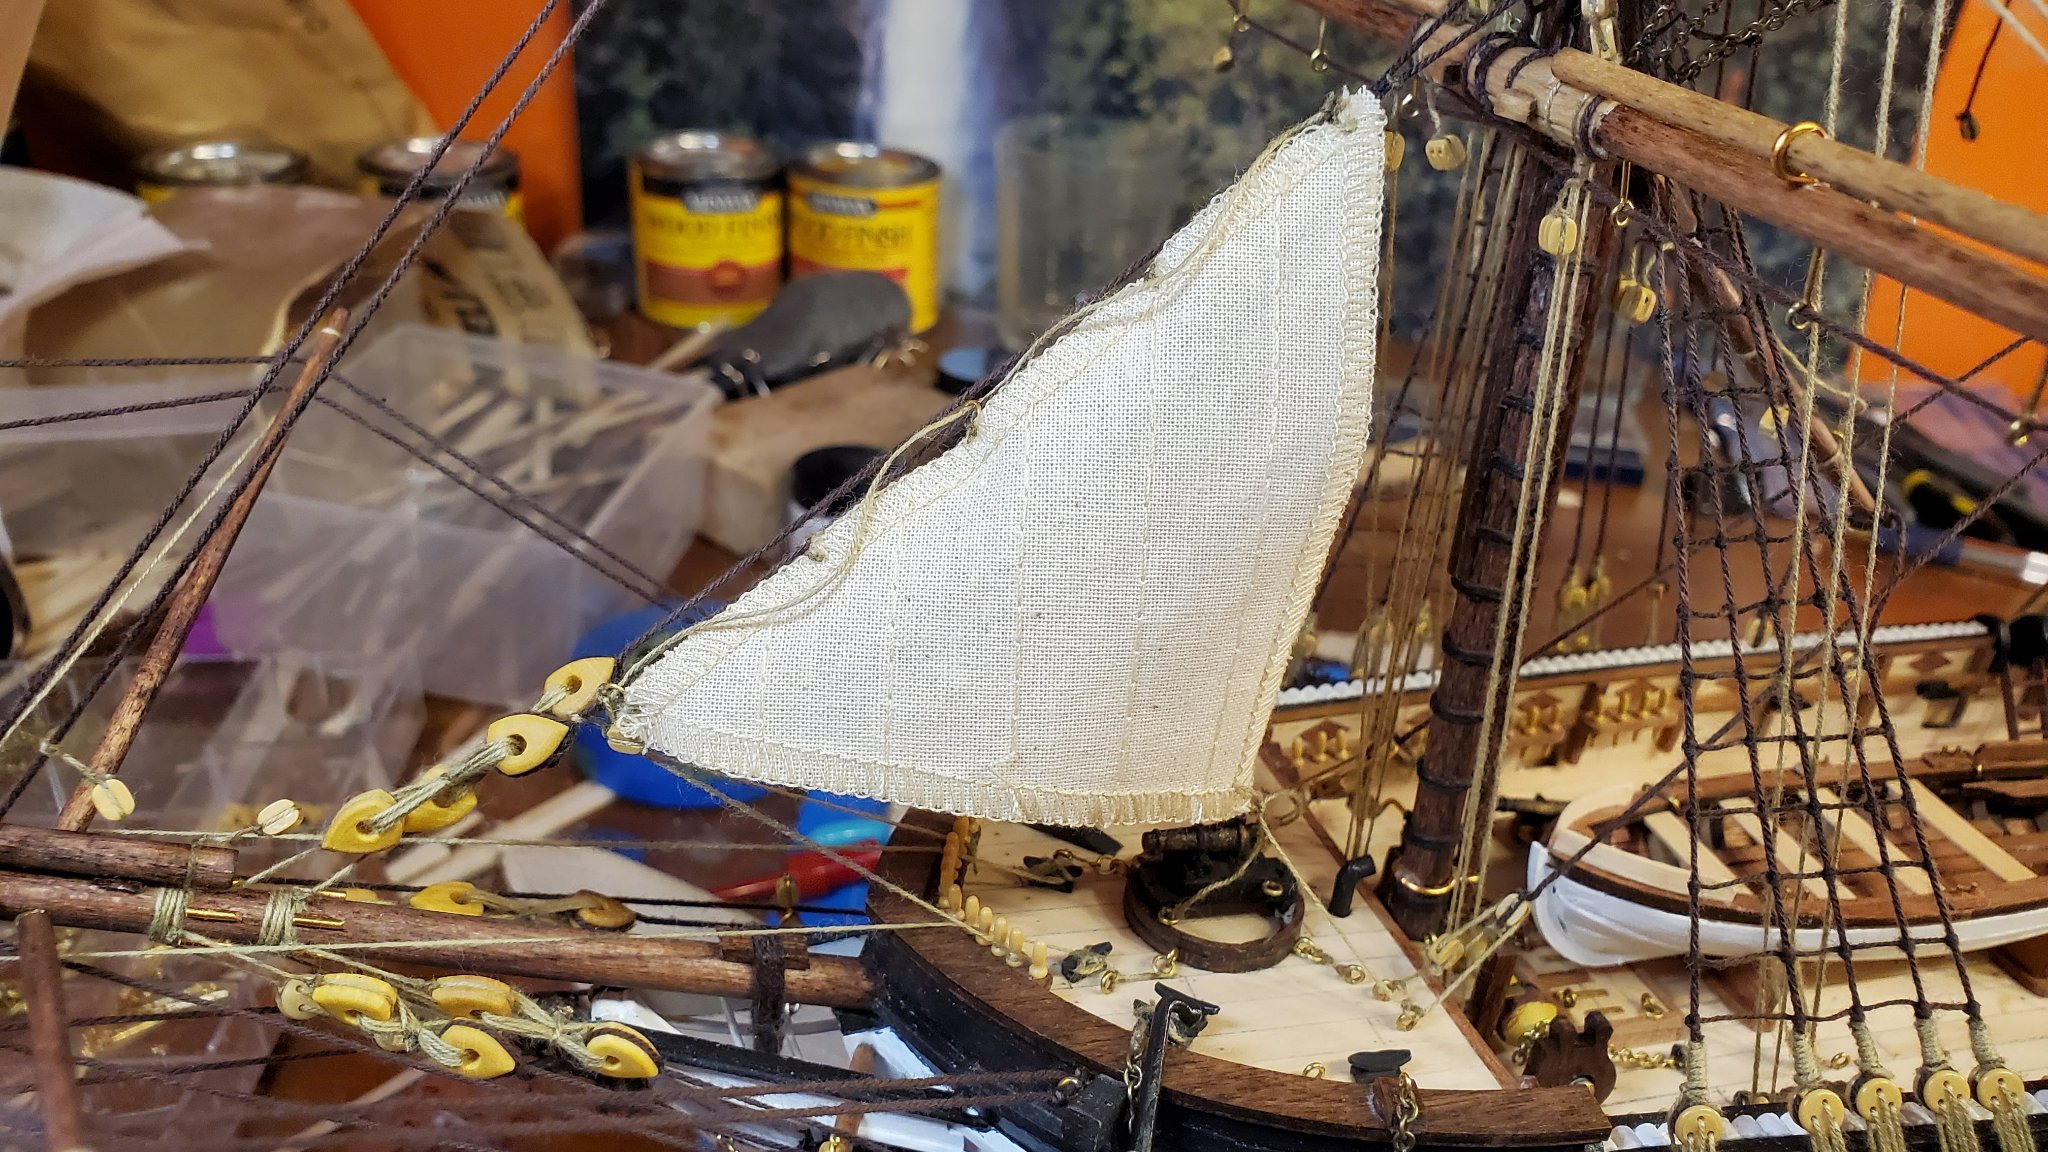
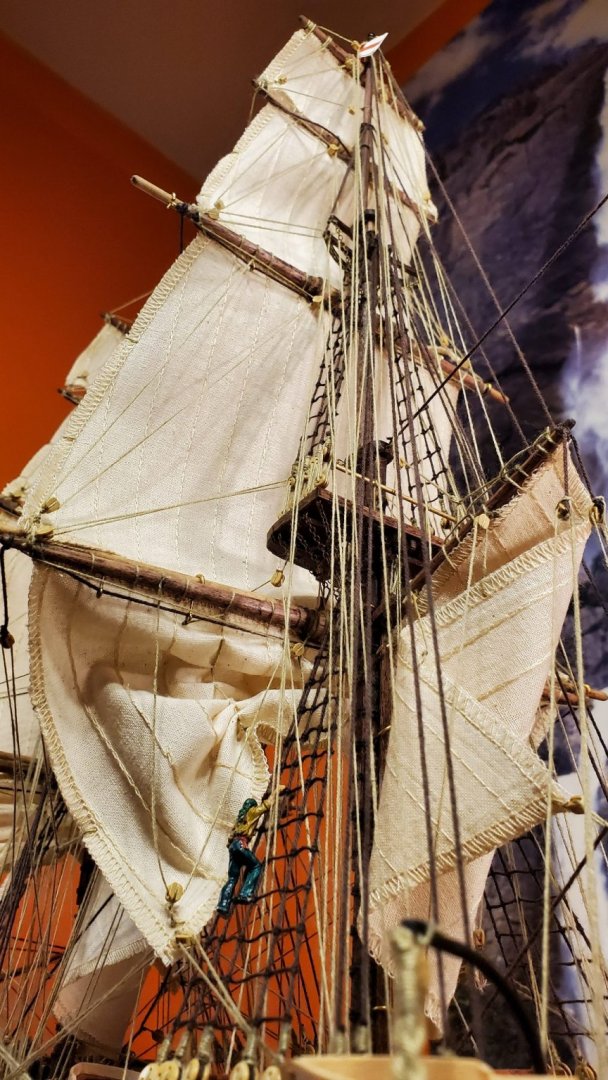
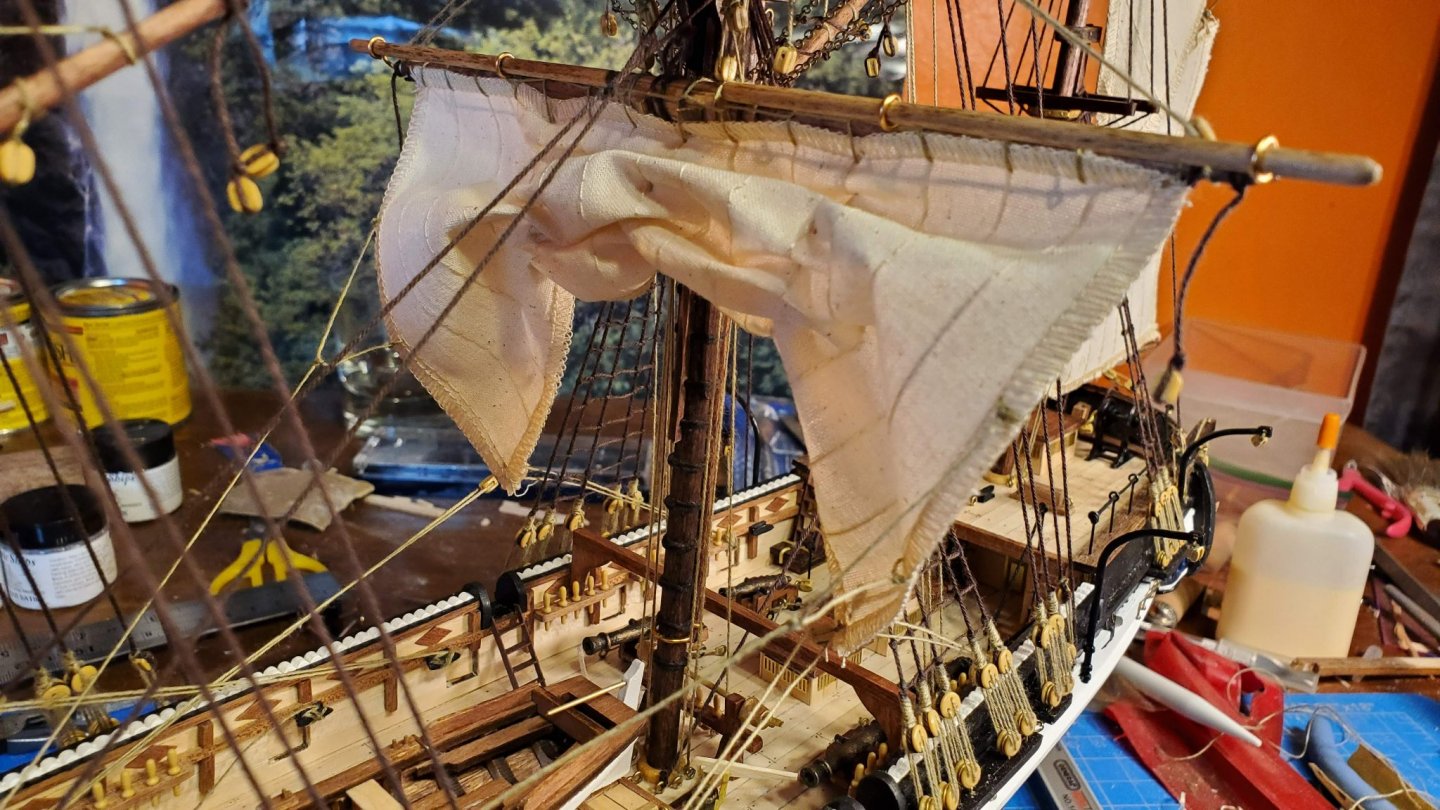
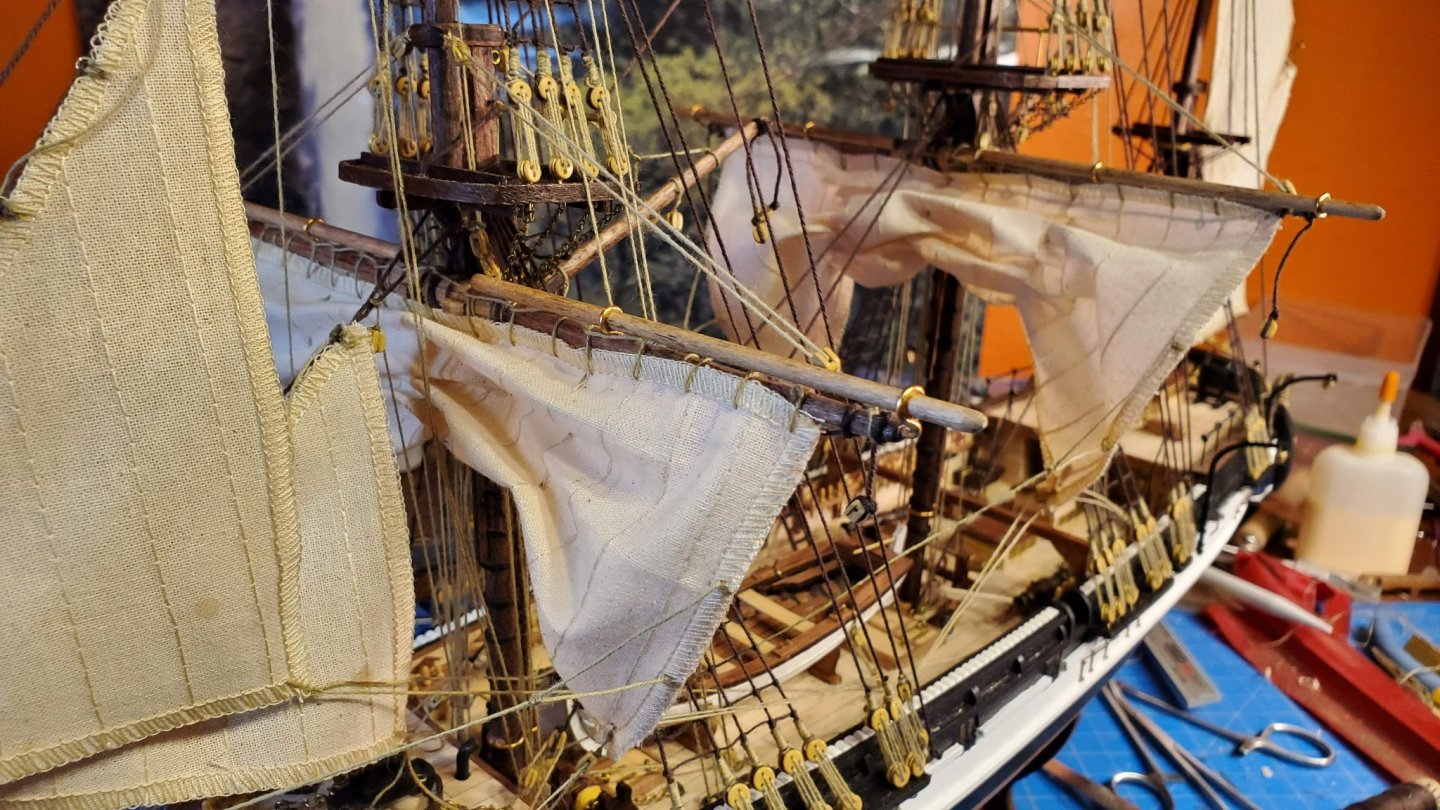
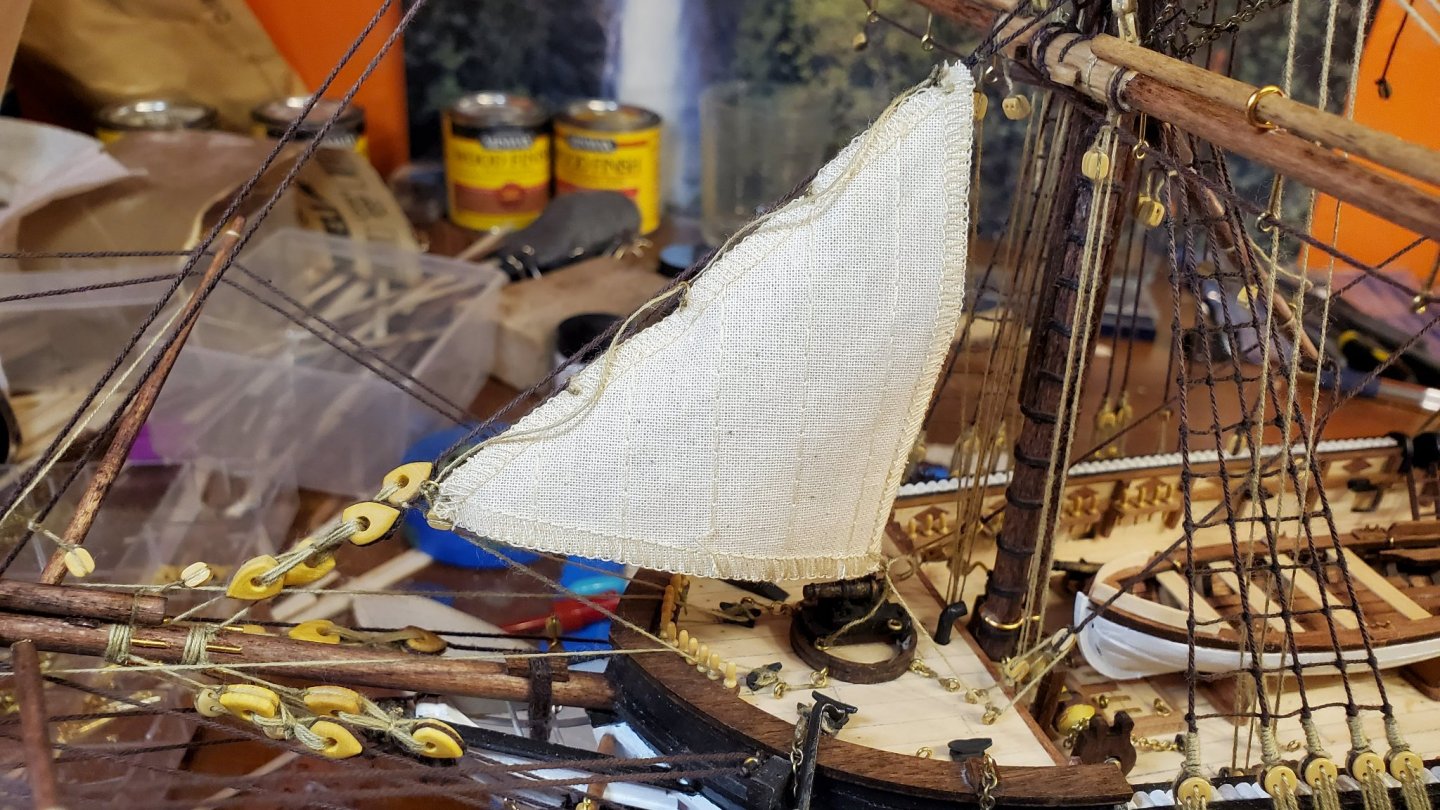
Work is progressing on the sails. The Mizzen Mast sails: You can see I've opted for the overlapped method of threading the top of each sail rather than the spiral method that the instruction videos show. The OcCre promo images of the ship show the overlapped method and I thought it looked better. Next I did the lowest sail on the main and foremasts. The YouTube videos show the gaff sails being done first, but reading Pete D's log he said he had to remove one of the gaff sailsas it got too much in the way to access the belaying pins. I would definitely agree with this and will leave the gaff sails until last. You'll see in these pics that I furled these lower sails to give a better view of the deck. The promo pics have the sails furled like this but the instructions do not show you how to do it. I wove three of the 0.15mm raw threads through each sail and tied them off at the bottom of each sail. Then once the sail was mounted I pulled the top of each thread to concertina the sail up as shown.


-
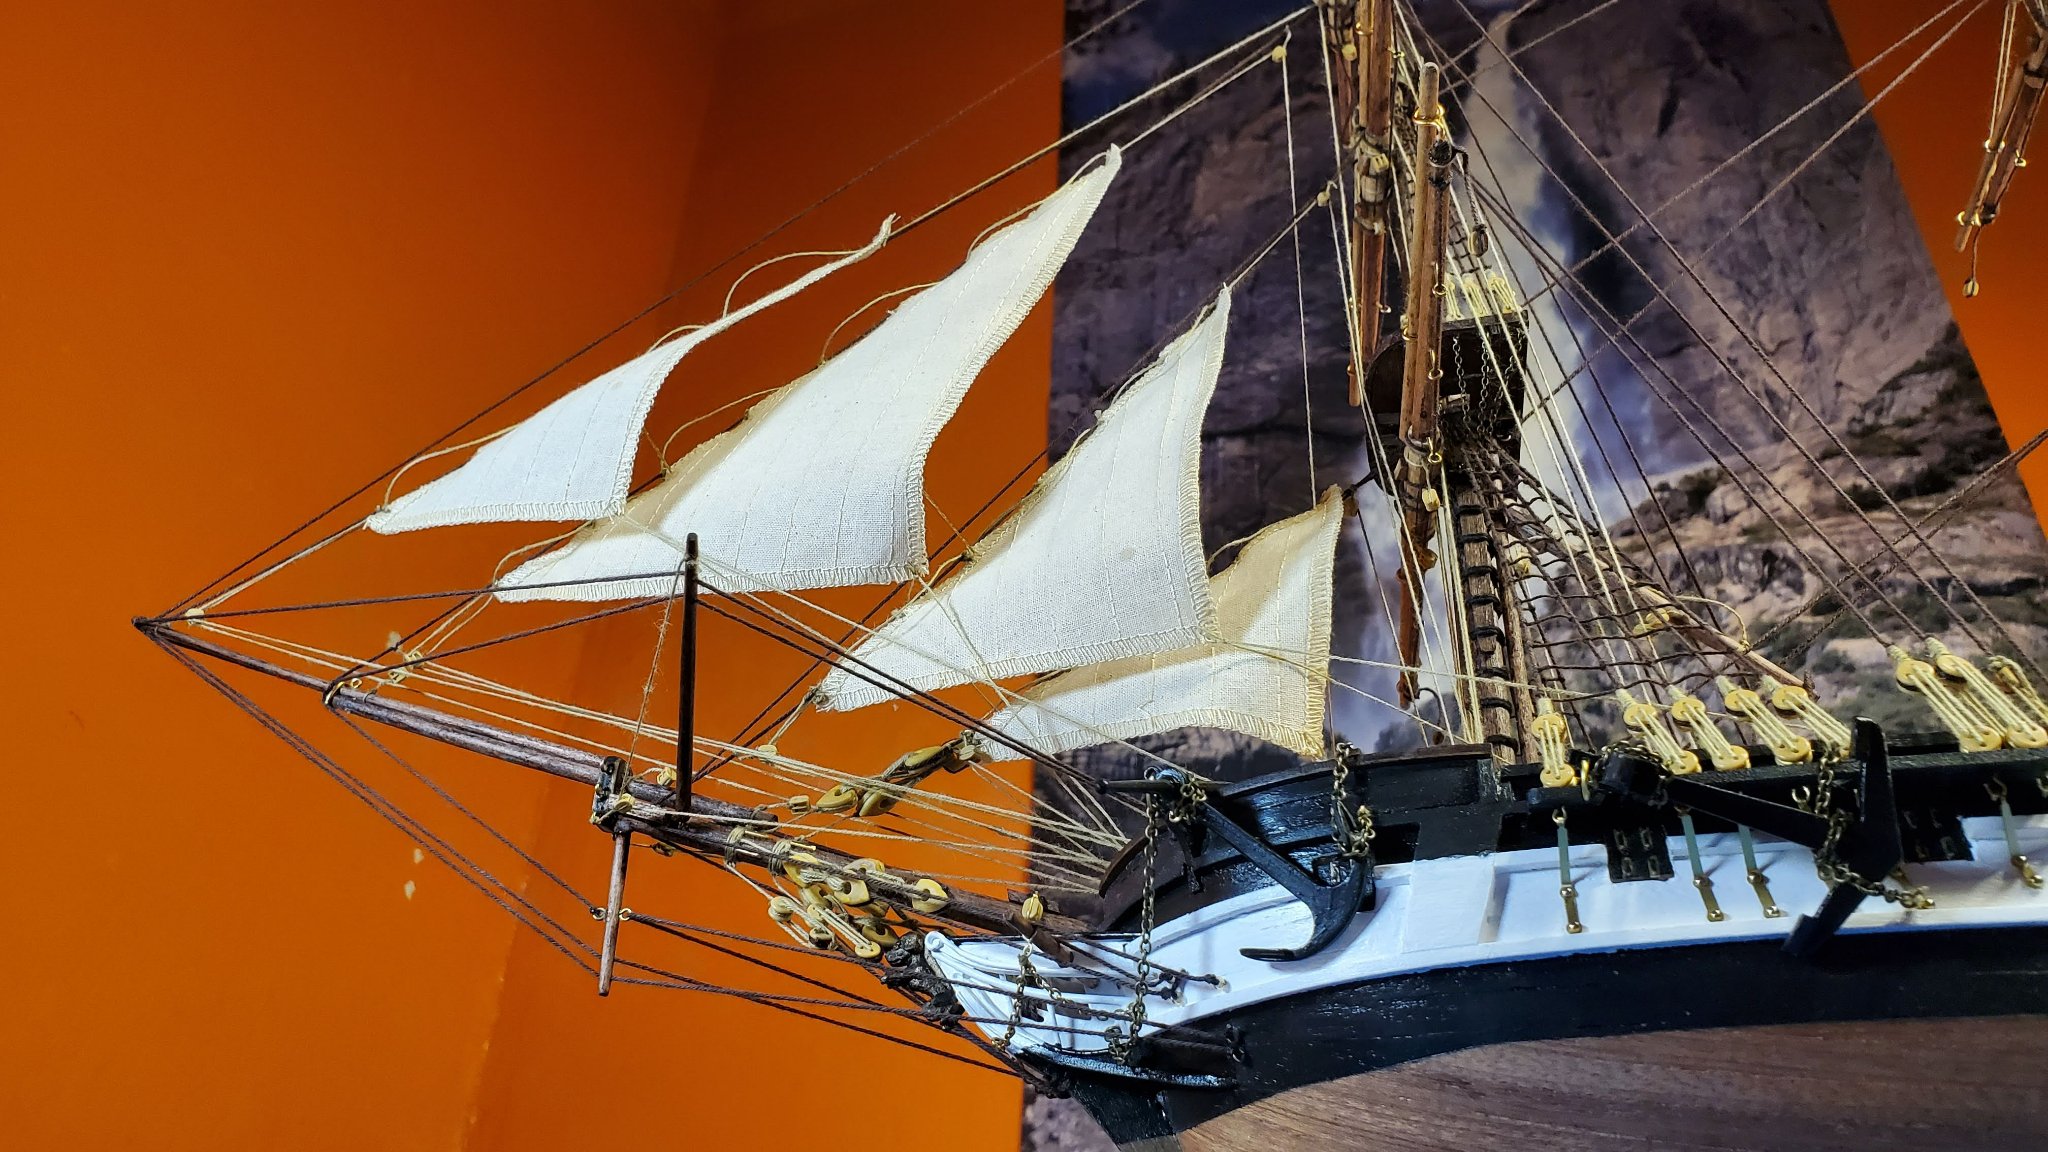
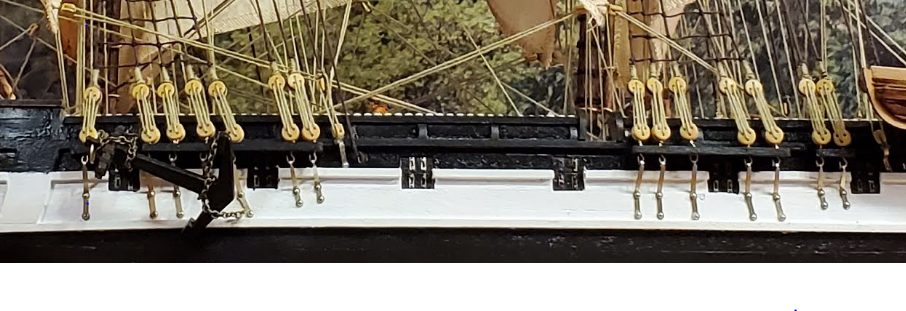
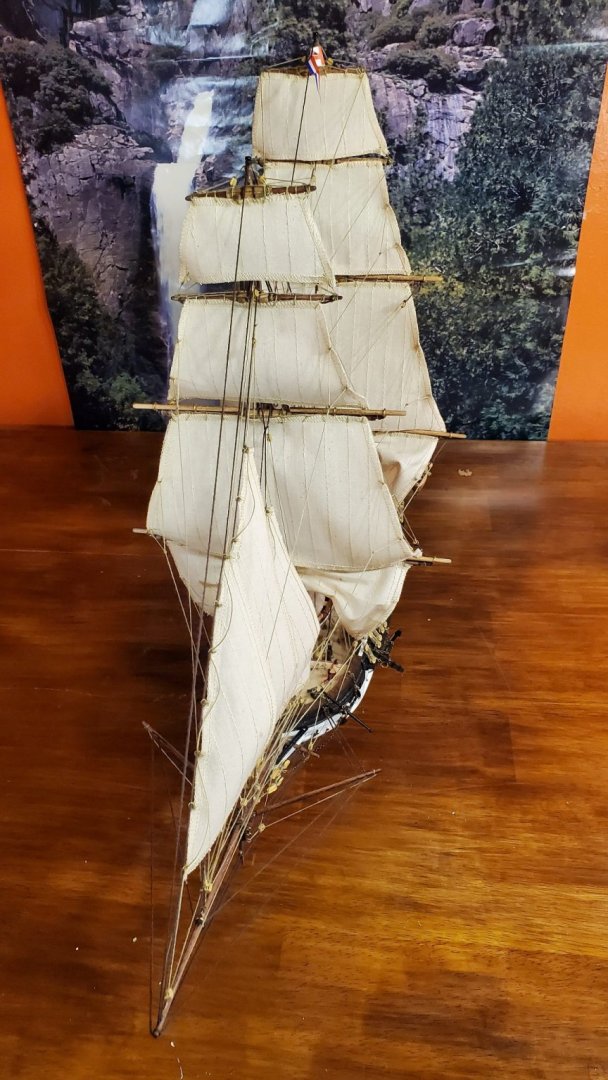
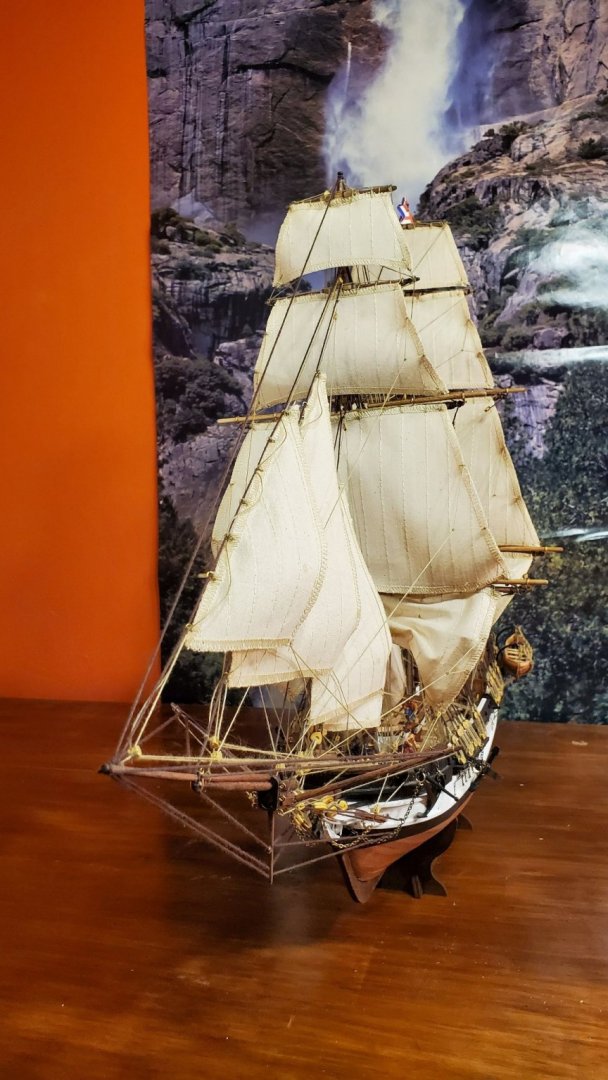
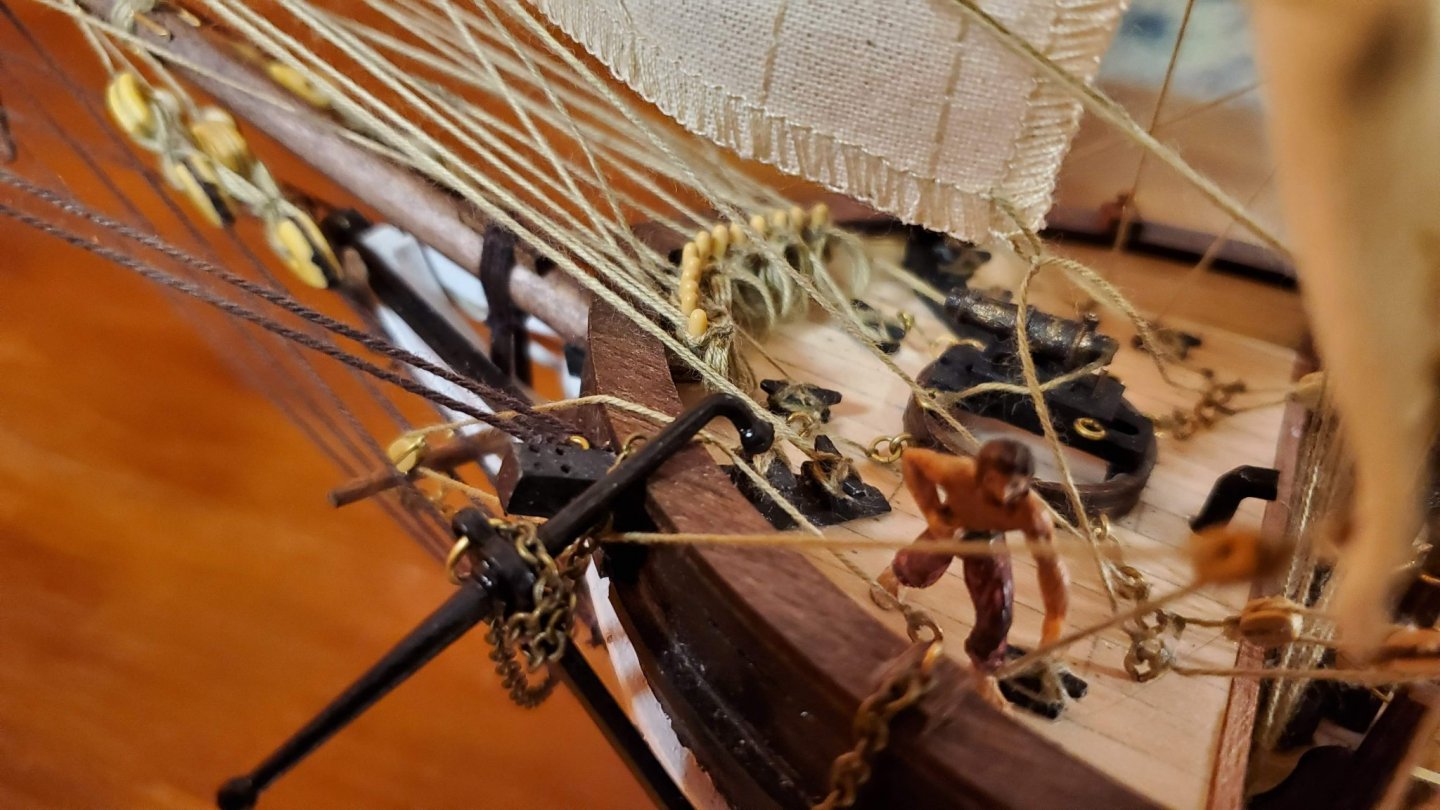
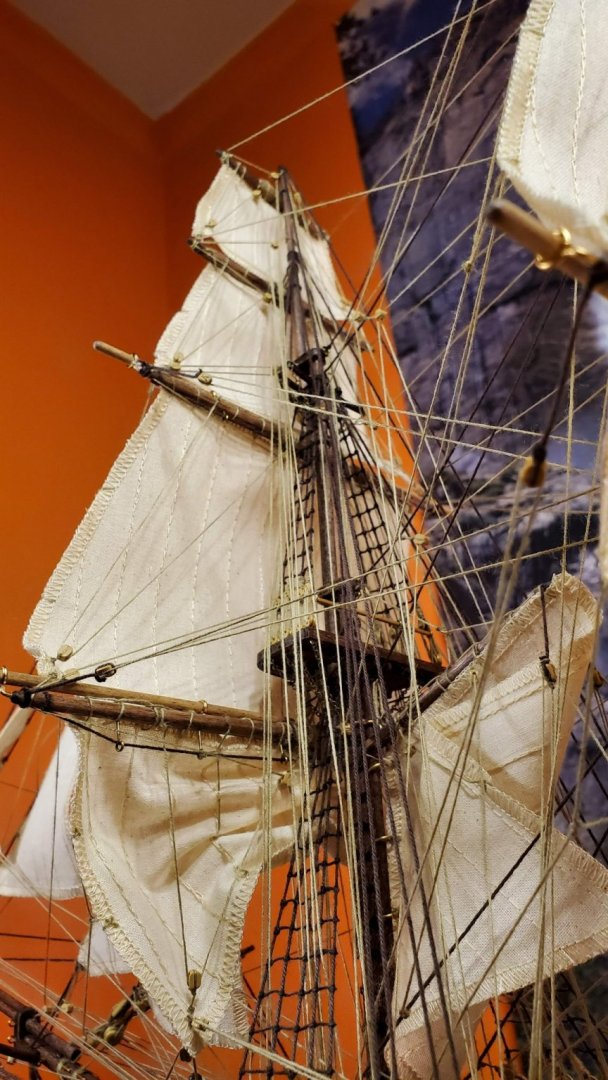
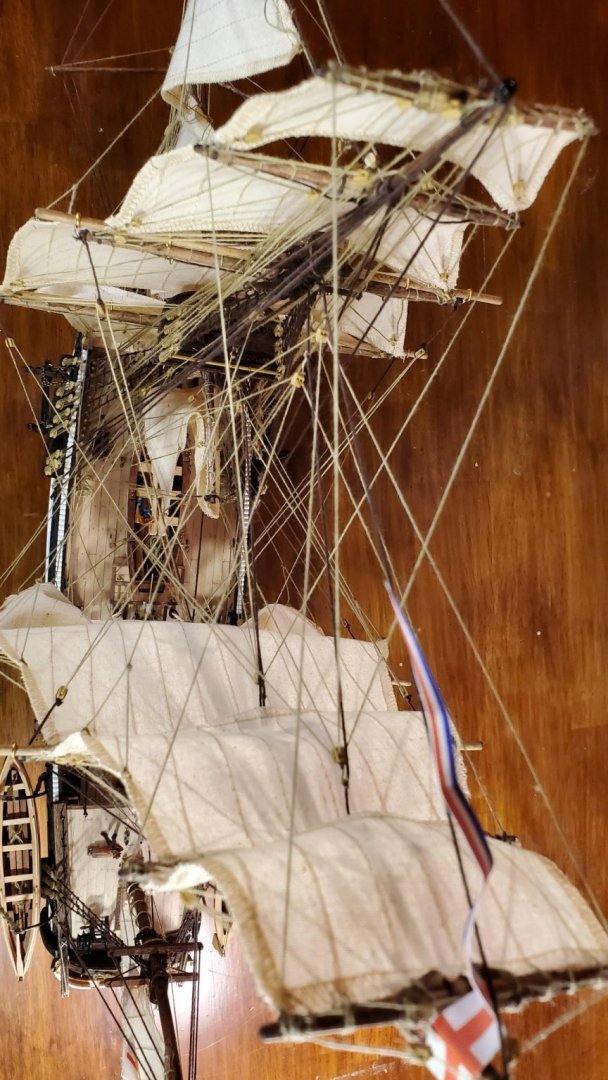
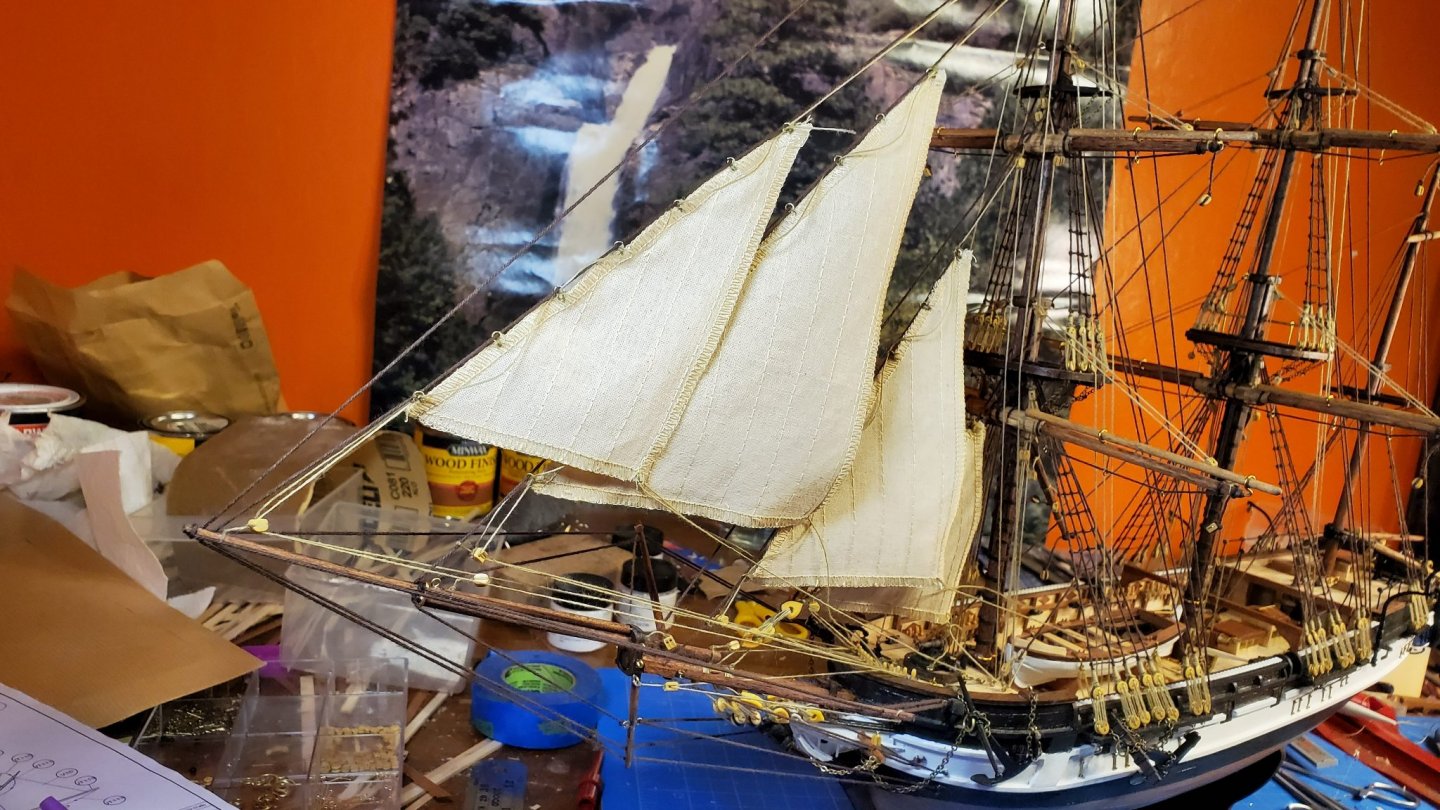
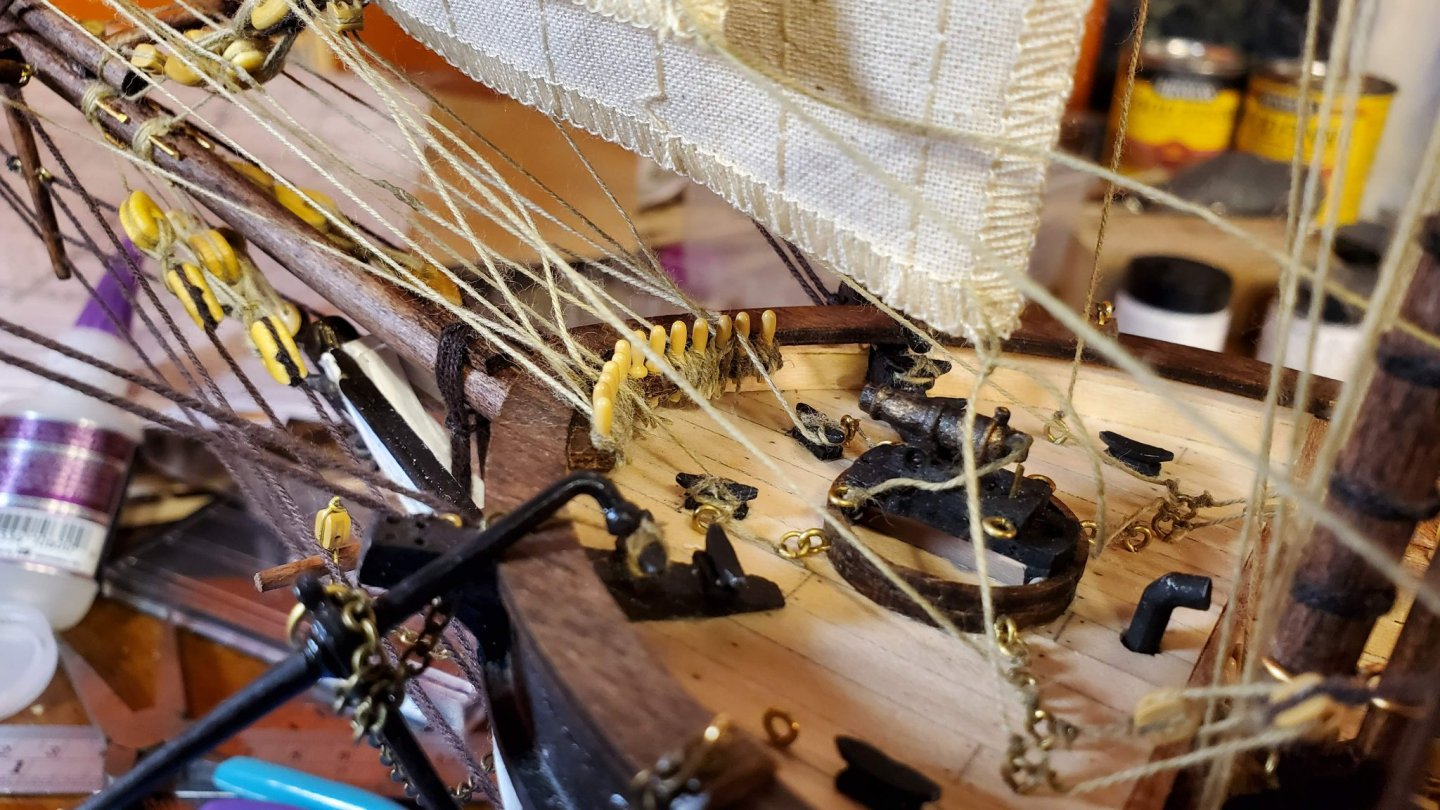
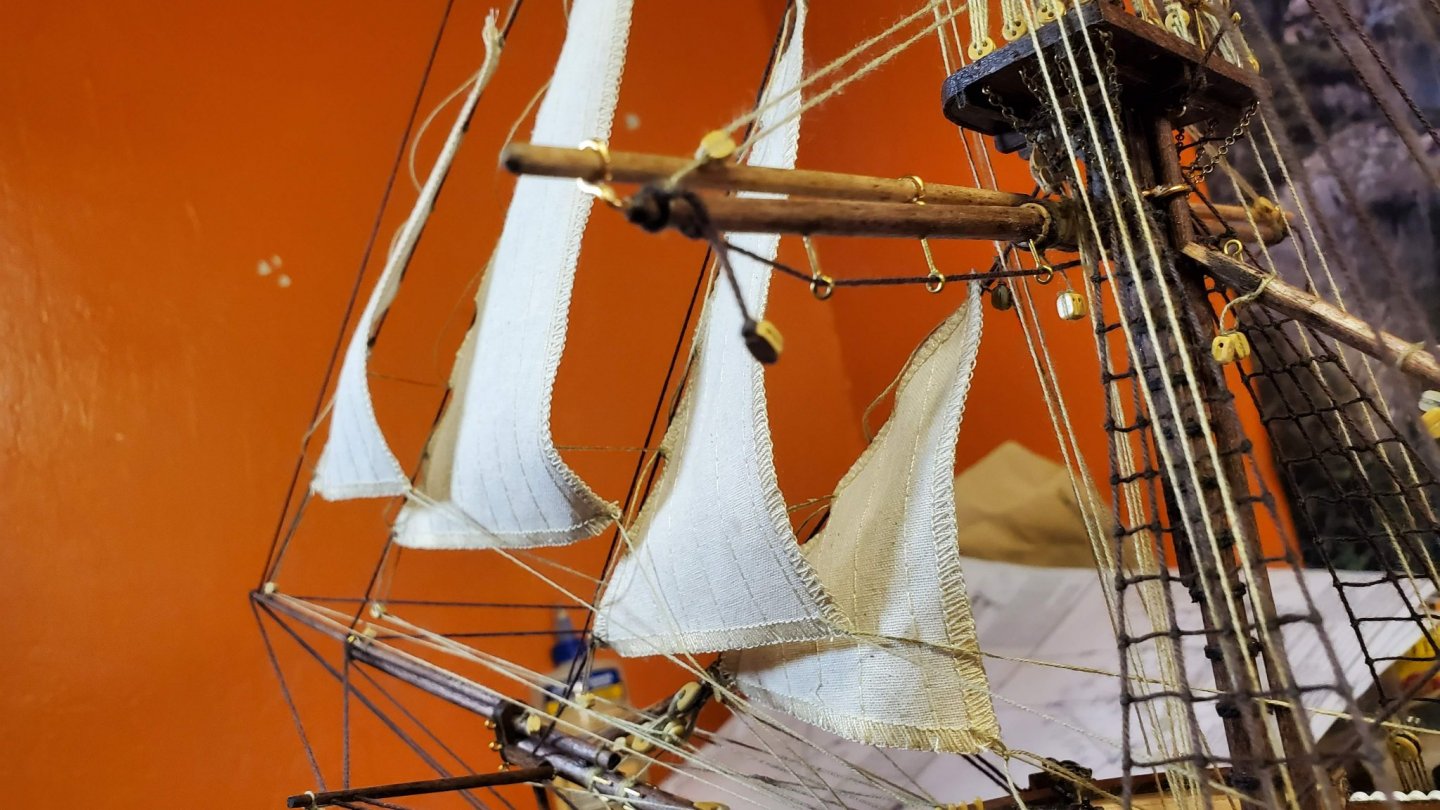
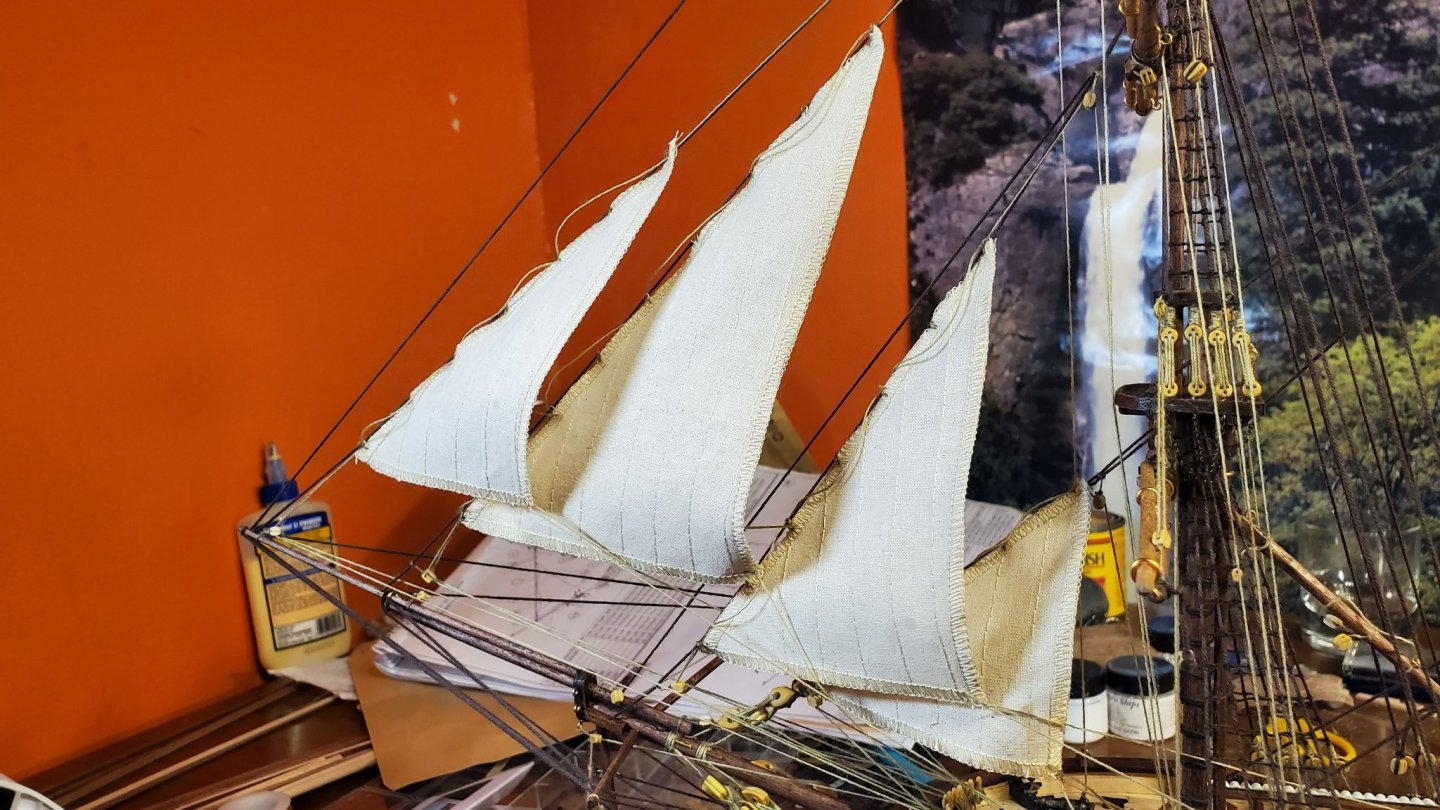
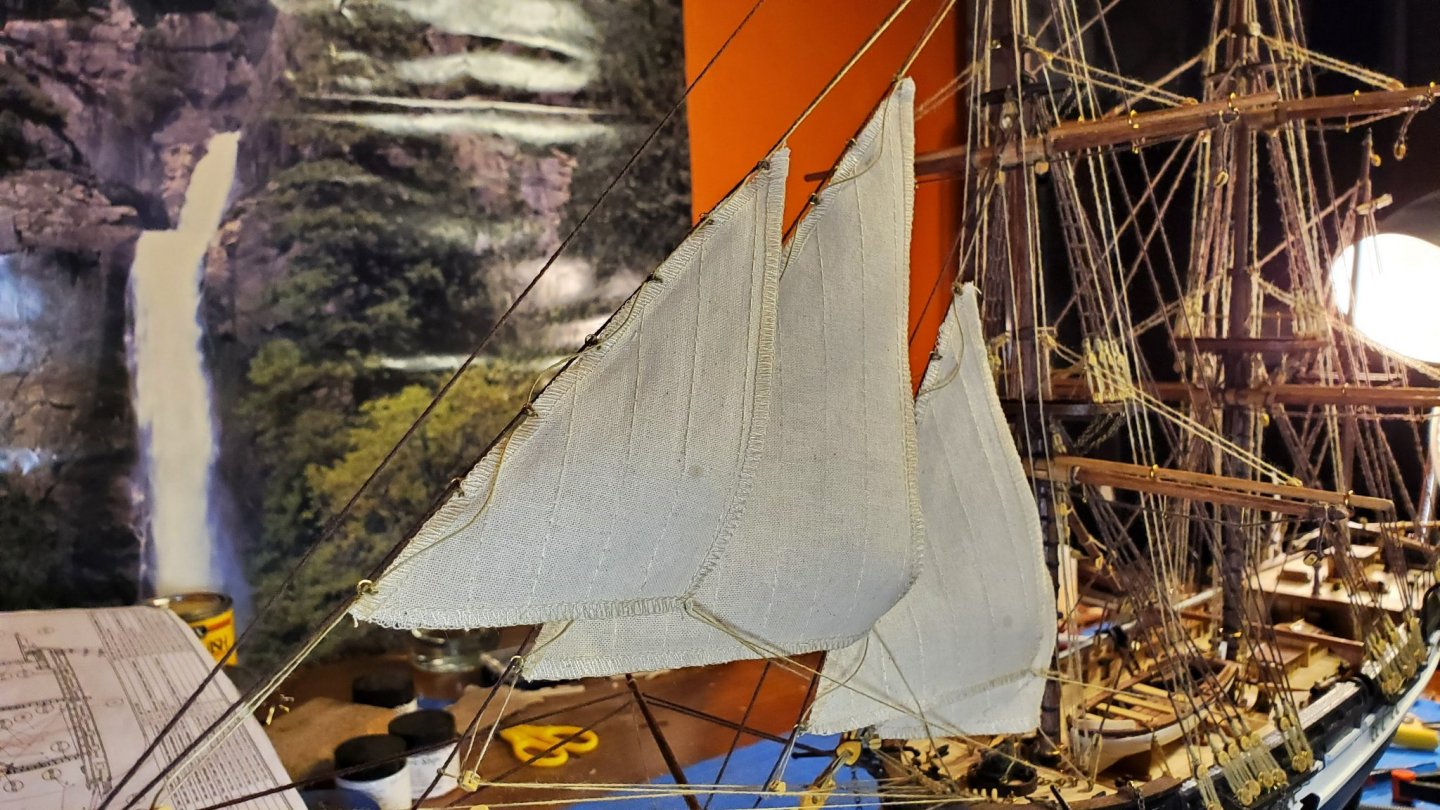
Yard lifts and halyards now done, as well as the front set of sails. Here's the first sail I did, this sail is pretty much symmetrical so be sure to rig it with the stripes vertical so that it will match the other sails. Now with all the front sails complete, you can also see the lifts and halyards running rigging for the main and foremast: Close up of the sails - you can see I put more of the small metal rings on each than the instructions show as I thought this would look better. The front belaying rack: Some of these were really hard to do properly. The belaying pins are too long for this location so earlier in the build the instructions tell you to cut off the bottom of each pin before installing it. Some of the pins I had cut off more than others. For some pins this meant there wasn't enough sticking down below to be able to catch the thread on. I admit that on a few of these I cheated and didn't do a proper belaying and instead just glued it in a way that looked somewhat like it is supposed to. I'd recommend anyone reading that that is yet to install these pins to take care and trim the pins to a length that allows them to fit but still leaves enough protruding to be able to thread around. The foremast belaying pin rack: This rack is has the pins so dense, with several of the pins having multiple ropes belayed to it, and in a difficult to access space, that again I cheated on a couple of the ropes and just glued them in place. The front sails had a flat appearance like there was no wind. I'd read about using dilute PVA glue to stiffen them into shape but figured this would not help much in this case it really needs something to push the sail outwards. I had the idea to create some little 'rods' out of the 0.15mm thread by applying CA glue to a straightened length of thread. I then placed and glued these 'rods' in between each of the sails to push the sail outwards in a way that made it look like there was some wind. For the closest sail to the foremast this cant be done as there is no inner sail to push against, so for this one I glued the sail to one of the JT105 threads. In this first pic you can see the 'rods': They are kind of hard to see, which is the idea, because they are made out of rigging thread they blend in well and don't look out of place. They are of course a little delicate so I'll have to be careful with the front sails now. Here are some other angles to show the effect: Here you can see a slight dark spot where each rod is glued - but it's not too bad I think.

-
My symptoms are similar to allergy symptoms but I don't get itchy eyes which I usually get with allergies. I did try Claritin but it didn't help at all with me. I did read somewhere that the reaction to CA in some people is not an allergic reaction but rather an irritation of the mucous membranes, so antihistamines would not help. But I guess everyone is different so it may help some people like yourself.
-
The box art and promo pictures show a prototype model which has them pointing downwards, but in the video and once you assemble it they end up pointing upwards. Note there is another error in the instructions. The eye bolts that go on the inner end of the spreaders should be rotated 90 degrees from how they are shown in the instructions.