HOLIDAY DONATION DRIVE - SUPPORT MSW - DO YOUR PART TO KEEP THIS GREAT FORUM GOING! (Only 13 donations so far - C'mon guys!)
×

luponero
-
Posts
236 -
Joined
-
Last visited
Content Type
Profiles
Forums
Gallery
Events
Everything posted by luponero
-
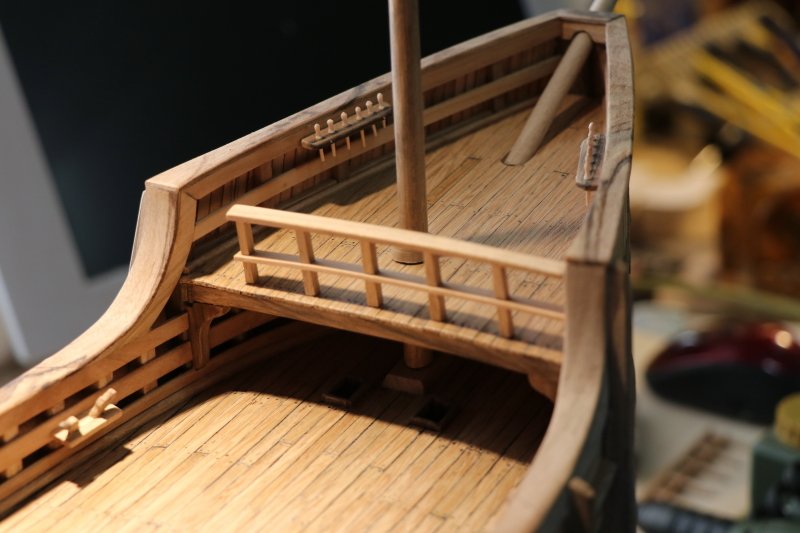
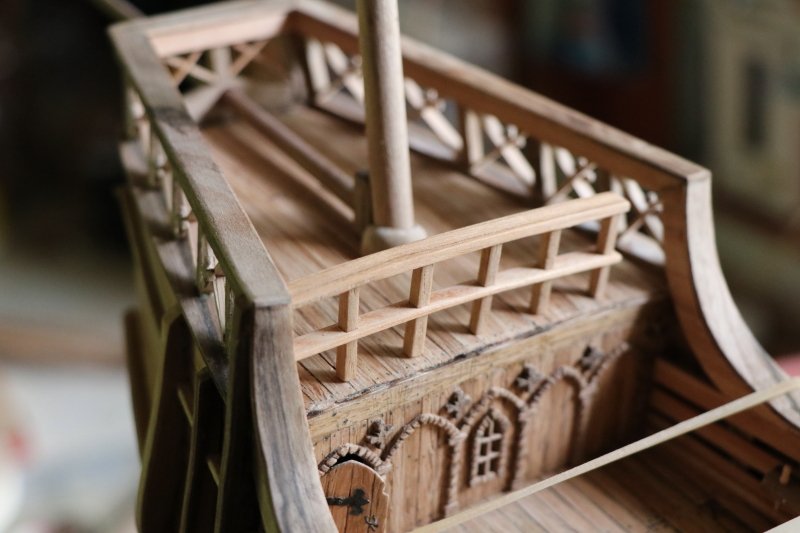
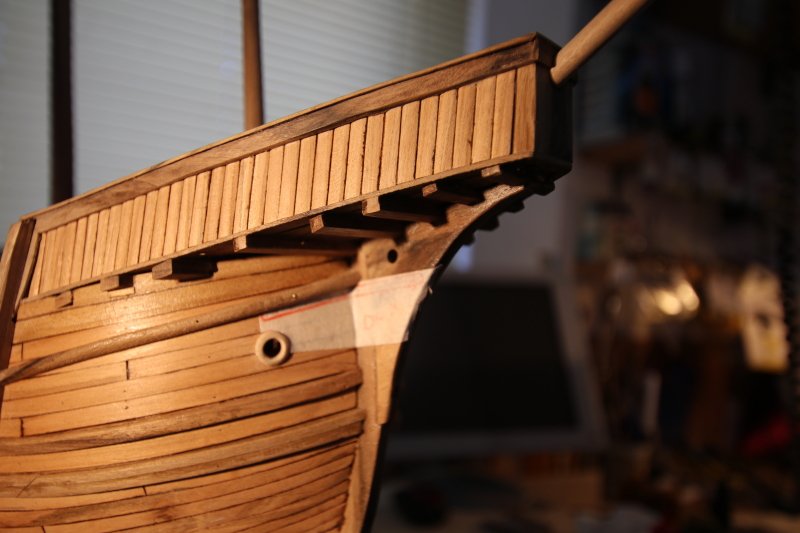
 The construction of the parapets was the next step, to make them I used the cherry tree, limes and cutters were the tools used to avoid doing damage on the bridge, I used the paper tape the marks of the holes for the railing uprights for all the parapets the system used was the usual one, they were positioned without gluing, for now last, the overall view we proceed, albeit slowly to the next black Wolf
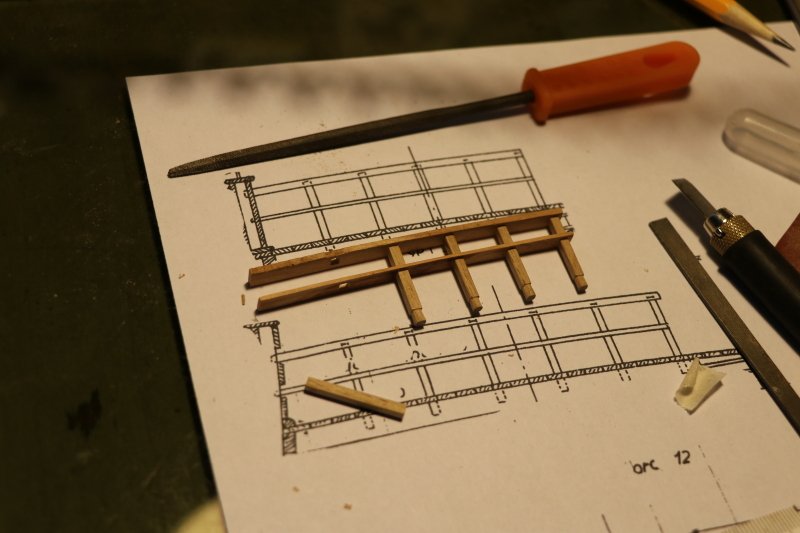
- 197 replies
-
- 6
-

-
- santa maria
- carrack
- (and 1 more)
-
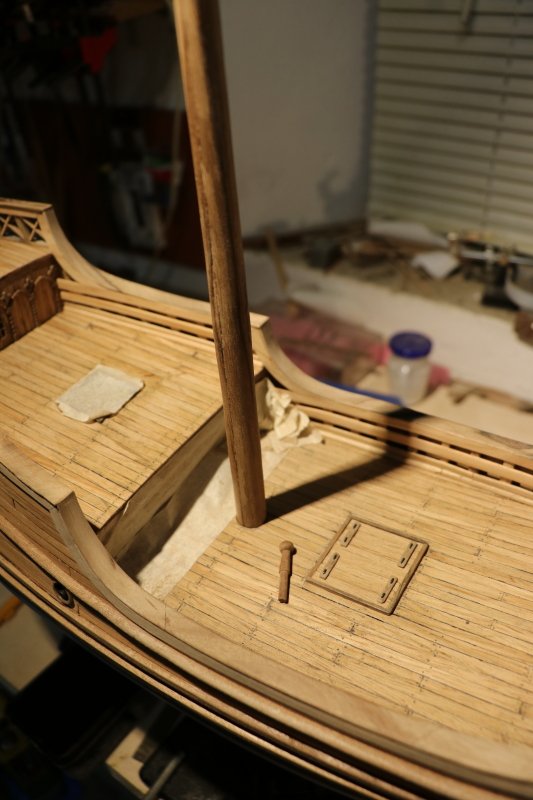
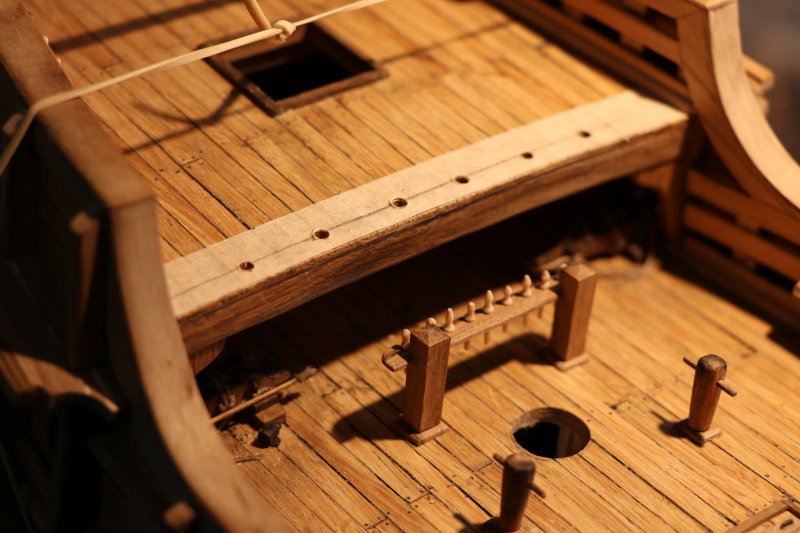
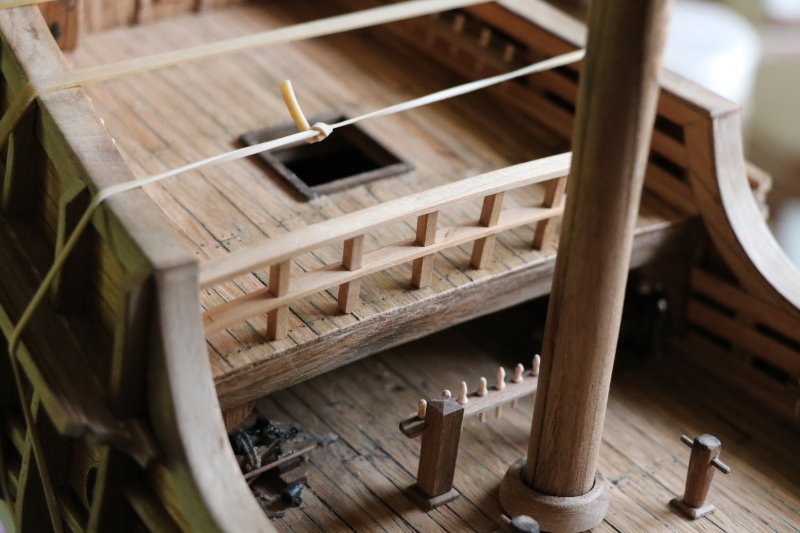
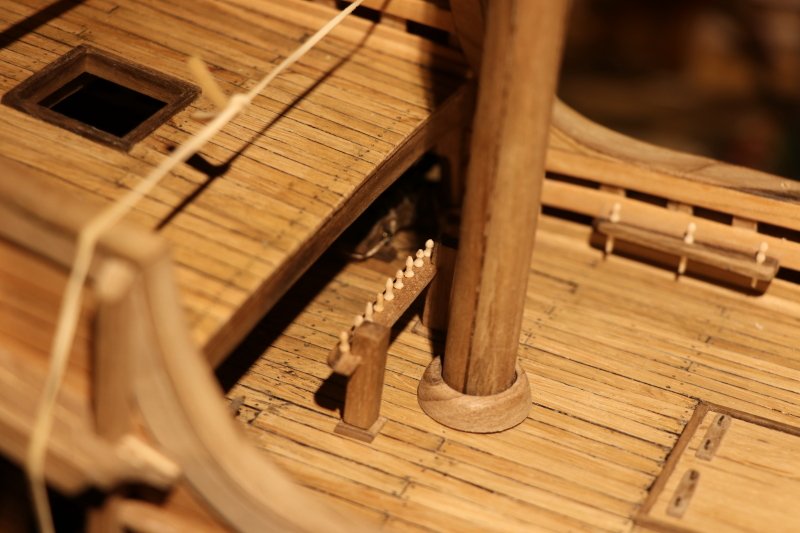
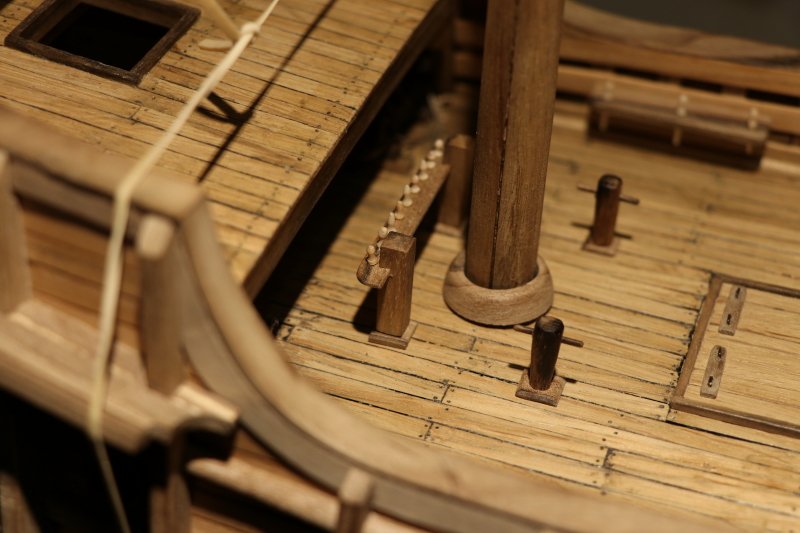
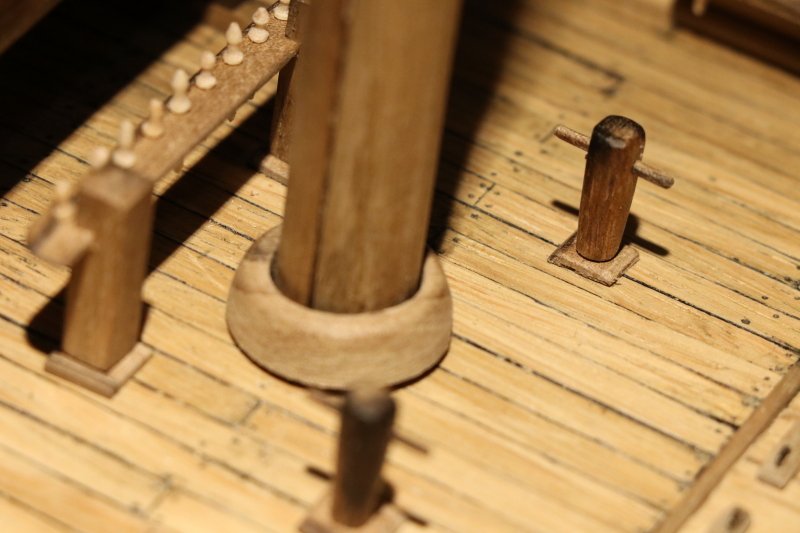
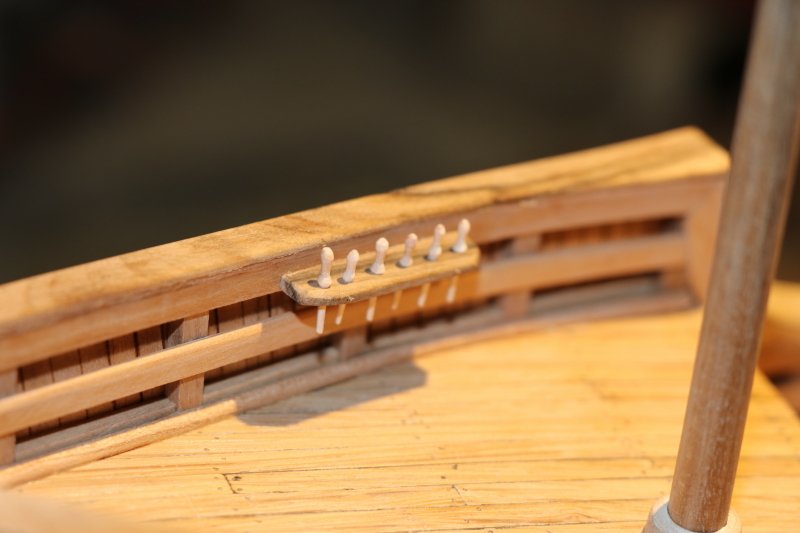
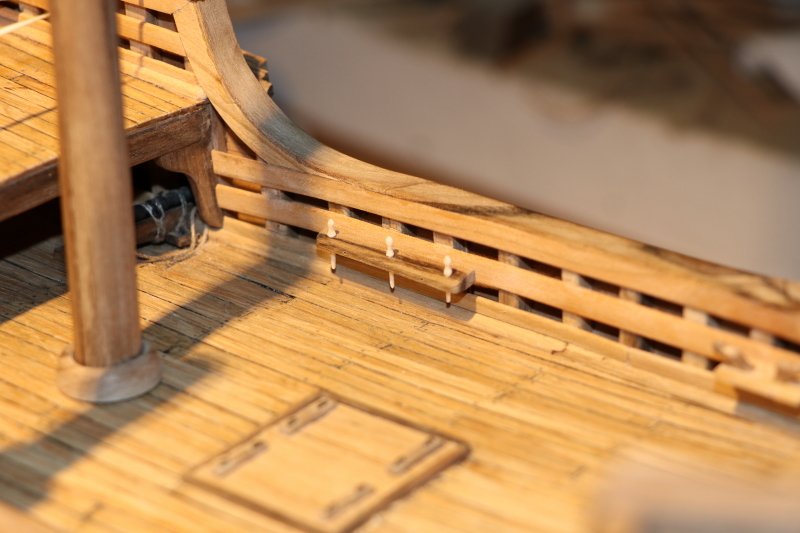
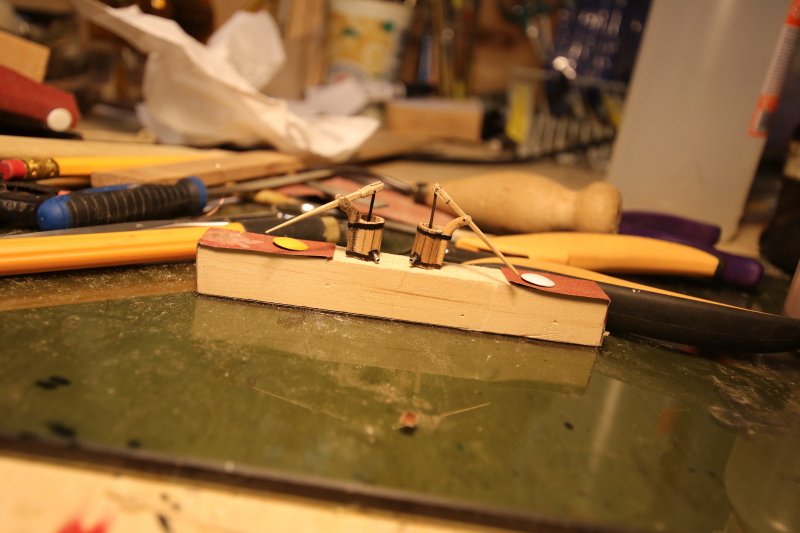
near the main mast the anklet with bitts and patience, while on the front two strong square bitts, the bitts end on a square base and fit into the 2 mm hole made on the bridge with this little update I greet you to the next black Wolf
- 197 replies
-
- 5
-
-
- santa maria
- carrack
- (and 1 more)
-
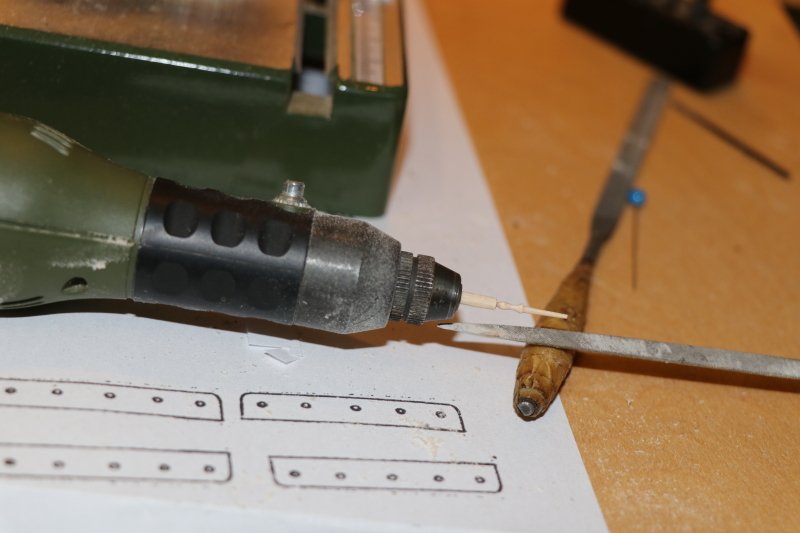
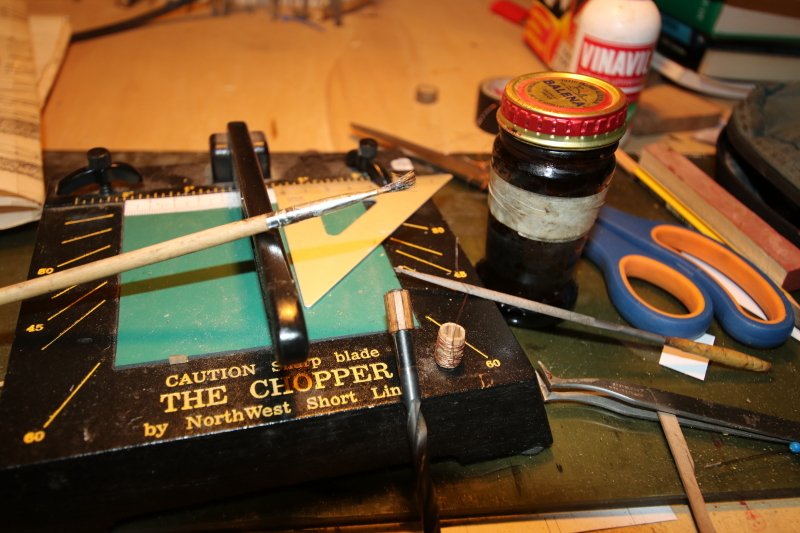
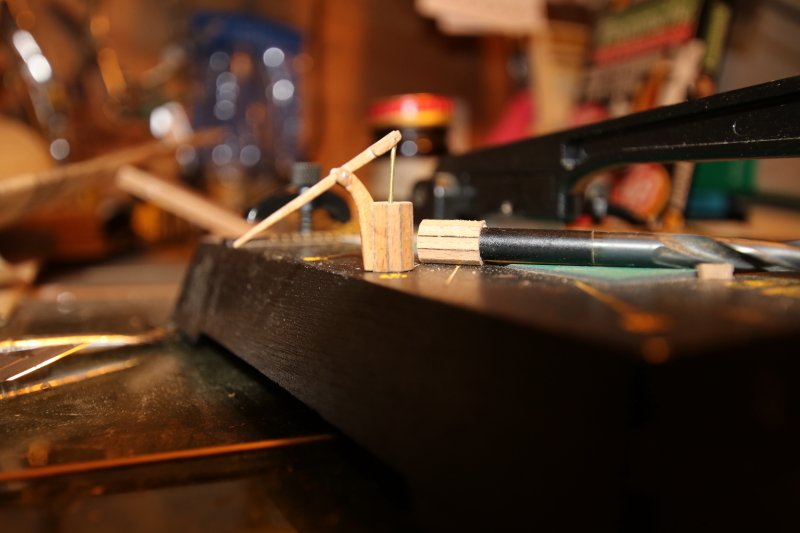
I thank my friends for their appreciation, the next jobs are the realization of the ankles and the anklets, to make them I used the classic "toothpicks" finished with the drill and the limes while for the anklets, walnut strips stopped with nails and glue the pegs will be cut to the thread by rewinding while for the realization of the ankles the photo shows the workmanship and results (pieces of simple realization better than those found in commerce) carry two anklets
- 197 replies
-
- 3
-
-
- santa maria
- carrack
- (and 1 more)
-
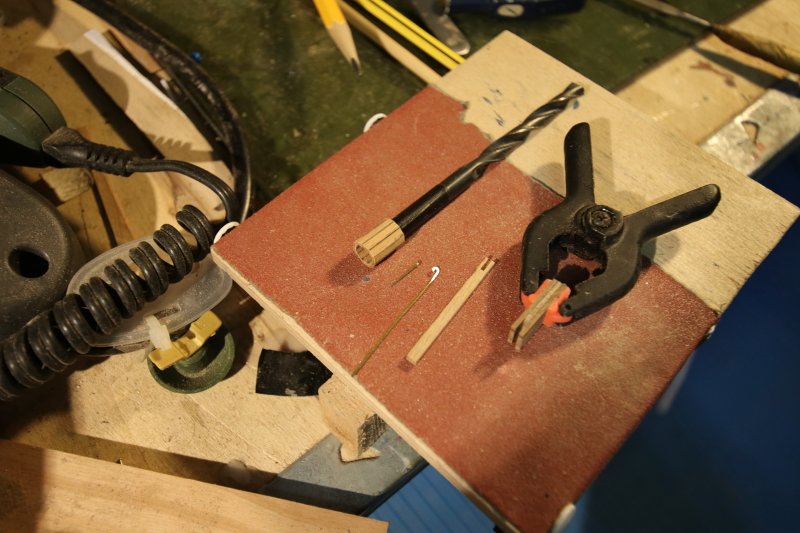
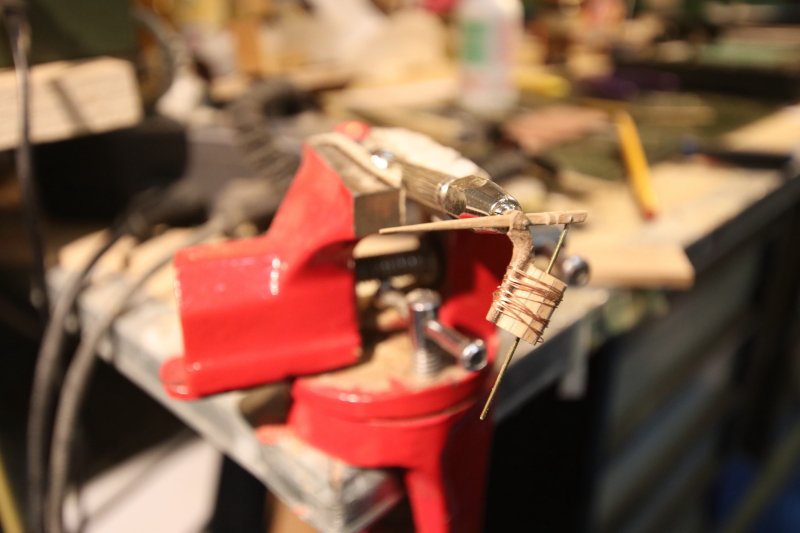
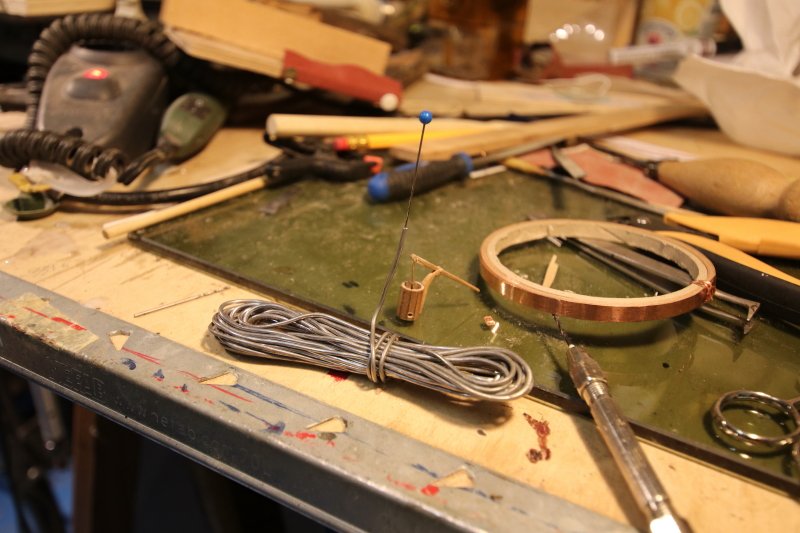
later the works continued with the construction of the bilge pumps, to make them I used as a base a tip of the d. of 5 mm covered with adhesive tape on which I quickly glued the strips of the width of 2 mm, then I prepared the pieces that make up the pump, making the rod, the handle, and the plunger assembling them together placing them on the main part using the copper wire to hold them in place during the gluing to make the water outlet pipe from the pump I used the tin wire, widening the central hole with a pin I inserted the water outlet pipe into the hole, and I finished making two small copper bands painted outside the pump to the next black Wolf
- 197 replies
-
- 10
-
-
- santa maria
- carrack
- (and 1 more)
-
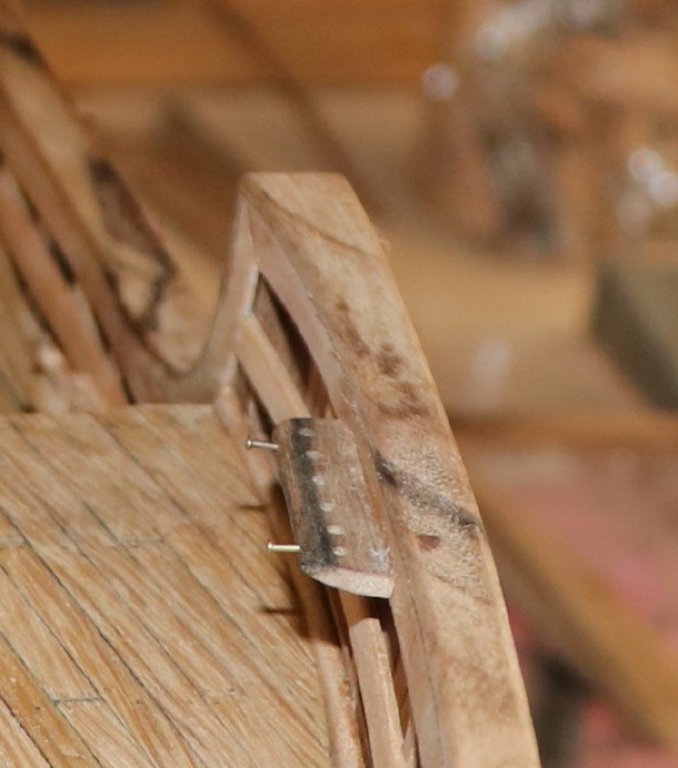
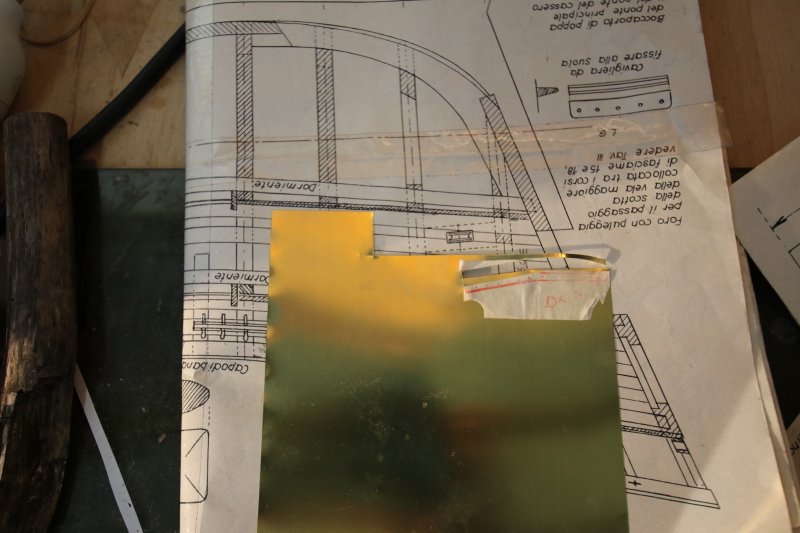
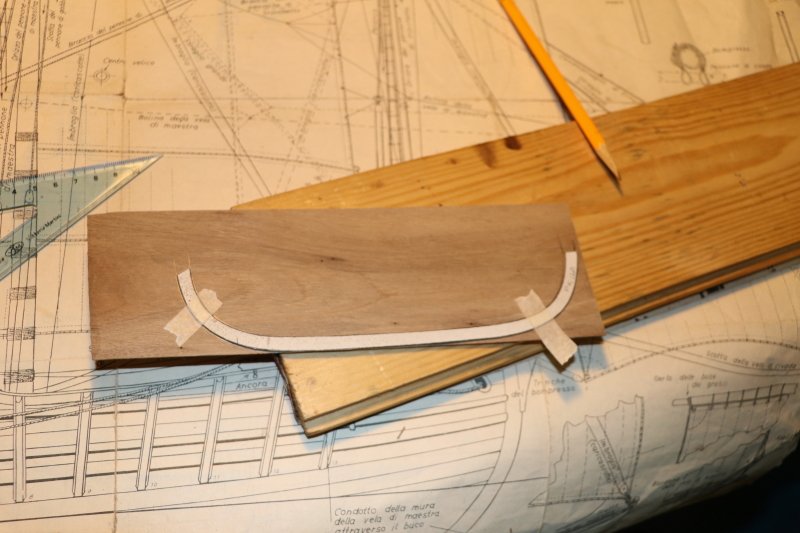
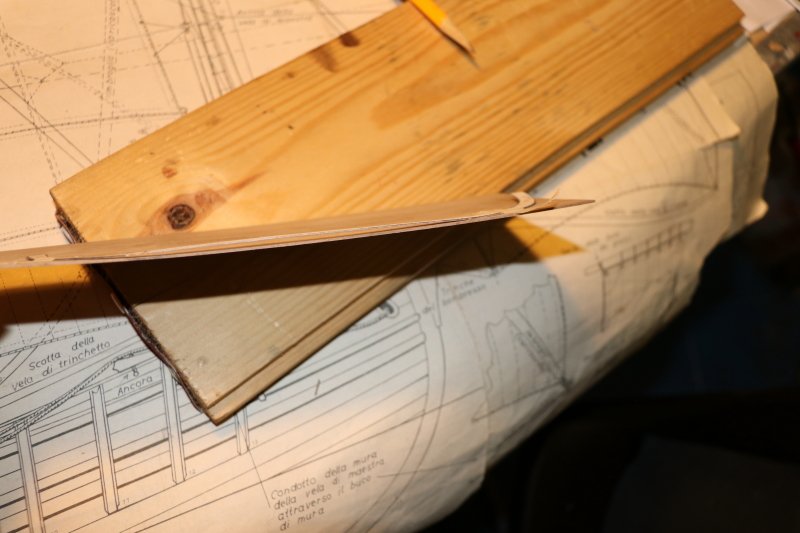
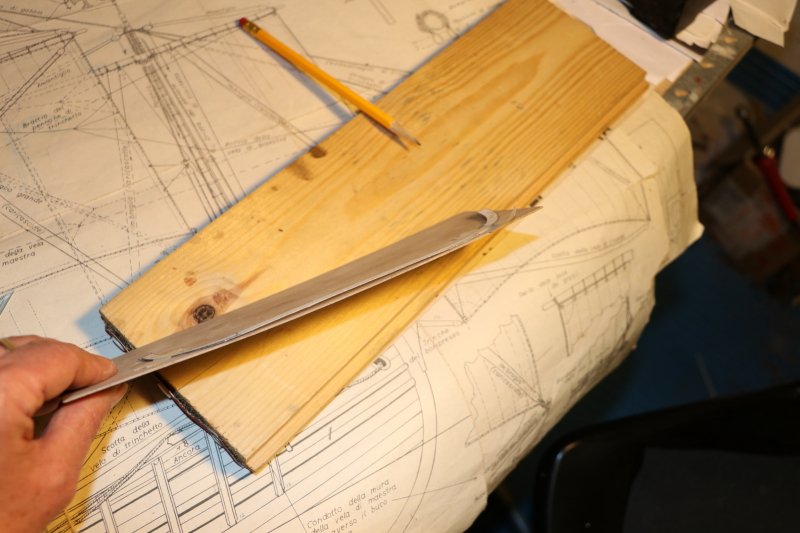
A small update of the works, related to the creation and installation of a bracket near the bow, to make it I used adhesive tape on which I drew the profile of the bracket, after which I cut it realizing the shape shown on the brass plate he allowed me to make the stirrup in a precise way, I made some holes in which I passed the brass thread, then I would brown it,
- 197 replies
-
- 4
-
-
- santa maria
- carrack
- (and 1 more)
-
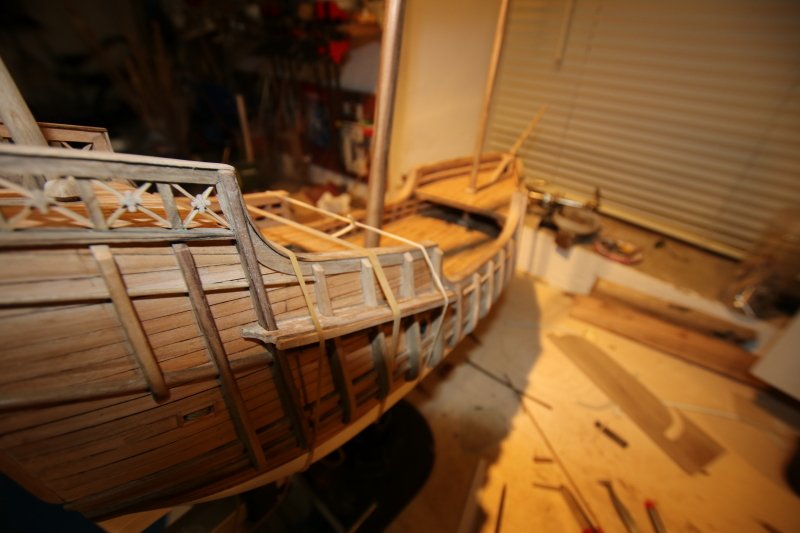
later I prepared part of the pieces that make up the parasartie of the mast, these too are only fitted together without gluing, and even these pieces have been modified in the parts of the drawing related to the joints near the fenders (it was inevitable) for this aspect to "glue" them,for now I will stop them with rubber bands to the next black wolf
- 197 replies
-
- 5
-
-
- santa maria
- carrack
- (and 1 more)
-
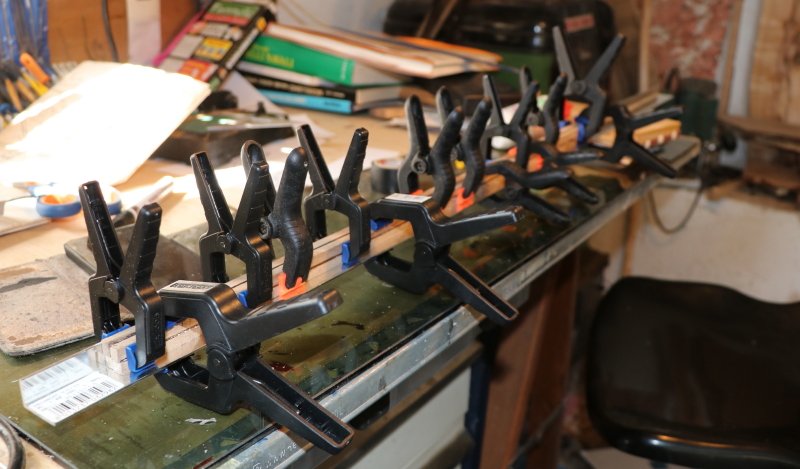
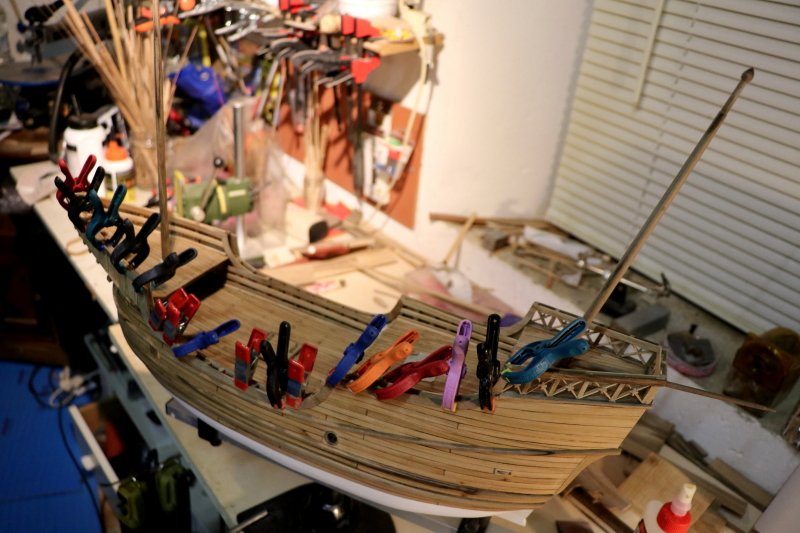
I resume with the work update, it was the turn of the fenders, which I thought were easy to work and insert, I thought, probably the design of the fenders has undergone over time with the various re-editions and the withdrawal of the modification card and, more surely, the installation of the loops is different from the parts that on the fenders should fit together with them,so I brought back the pieces on the walnut board with a thickness of 4 mm, I only cut the edge and I brought back the various fenders on the sides checking that the drawing of the joints was a couple of millimeters apart, so I had to pick up the points of contact with the incintoni and work with the file, the situation seems very simple but in reality the correction of the pieces has engaged me for several hours, I have tried the pieces without gluing them only after having finished laying on both sides would I have thought of gluing them verifying the inclinations of the same that vary with respect to their positioning
- 197 replies
-
- 4
-
-
- santa maria
- carrack
- (and 1 more)
-
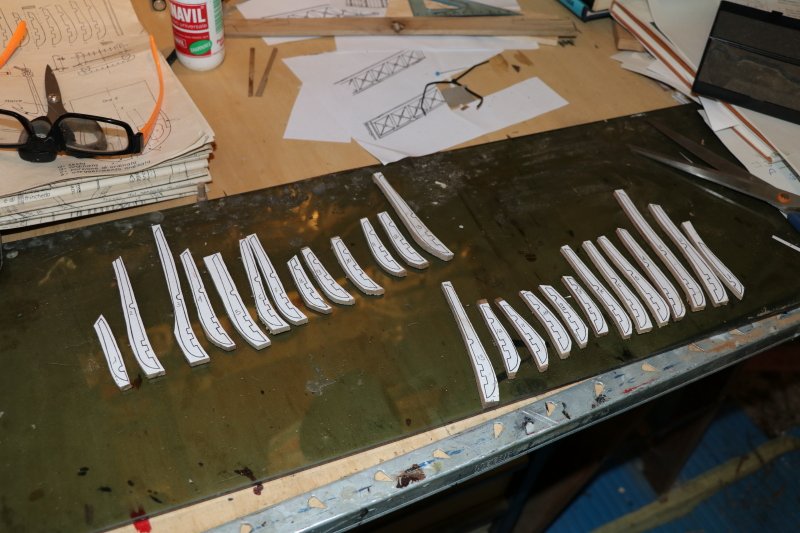
Hello Franco, you are continuing very well, the 70 pieces you are making are called in the Venetian dialect "baccalari" their shape resembles the wing of the seagull, they were fixed on the blanket in correspondence of the beams, (precisely alternating a beam yes and one no) they served for support the "posticcio" the beam on which there were the oarlocks oars, follow the "Fleur de Lis" monograph which is much more precise and detailed than Corel's drawings so keep it going well !!! Fabio
- 510 replies
-
- 1
-
-
- reale de france
- corel
- (and 1 more)
-
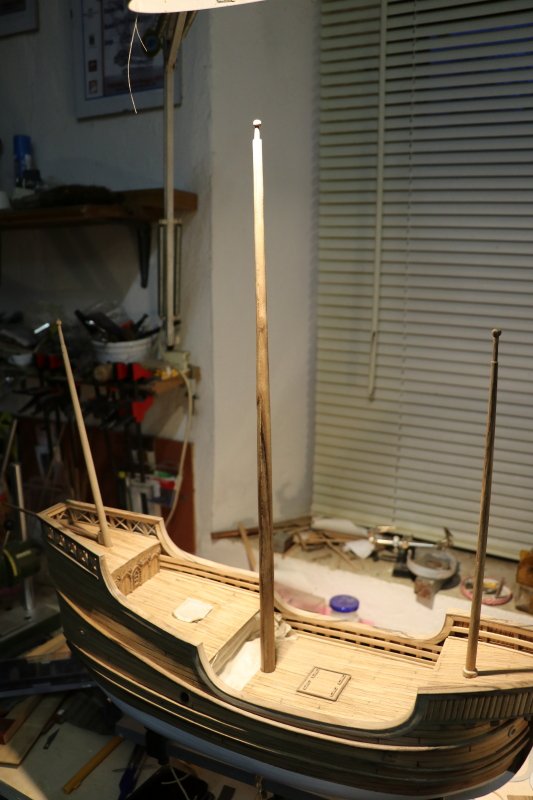
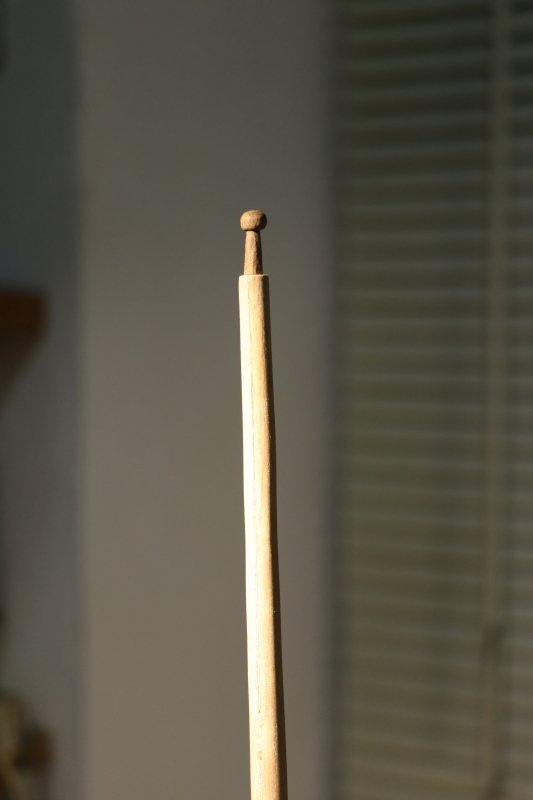
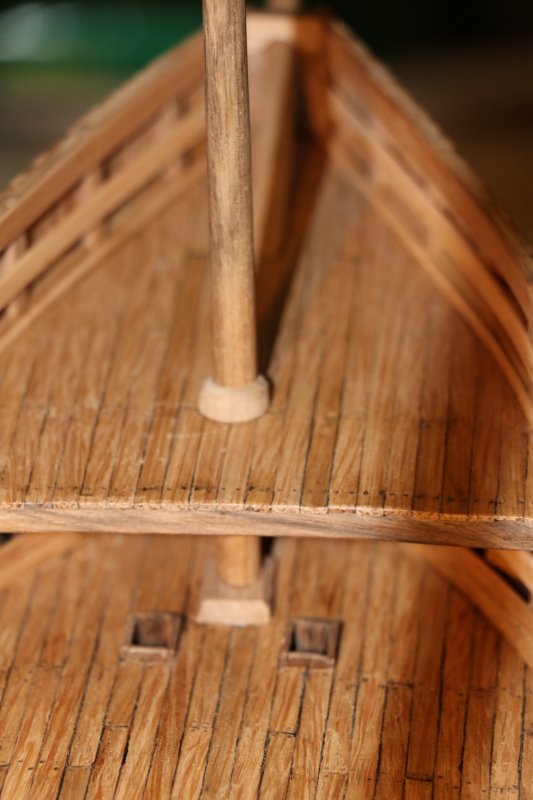
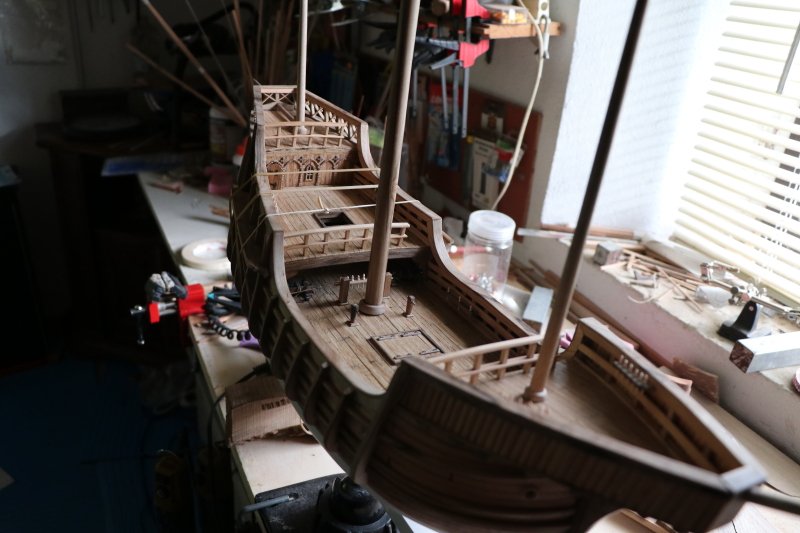
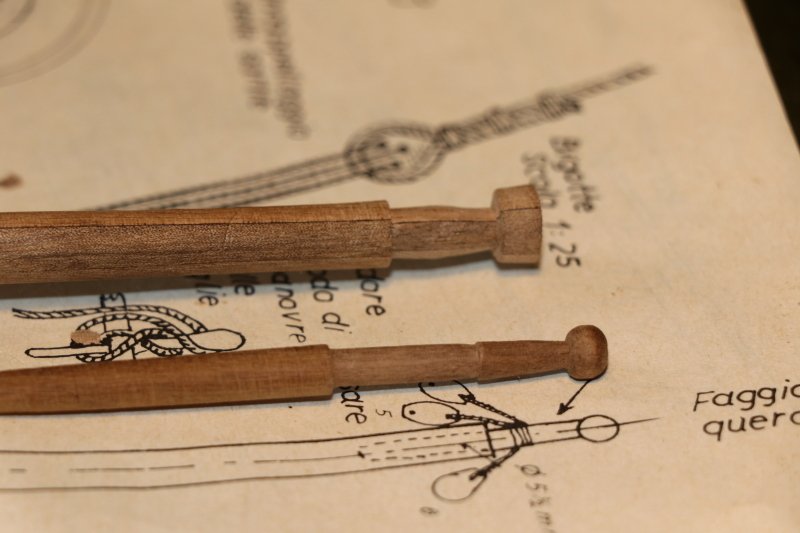
After turning I made the hole on the bridge and I tried the bigger tree, the dimensions are considerable at the base is 13mm (75 cm) the height is greater than the length of the ship, it is said that this was one of the details of the Santa Maria "not appreciated" by Colombo himself (... it seems ...) the "white" part at the top of the tree is a defect in photography, due to overexposure) above, the ratio between the major shaft base diameter and the final element that enters the masthead hole complete major tree detail and with this I greet you, I go to sleep luponero


- 197 replies
-
- 5
-
-
- santa maria
- carrack
- (and 1 more)
-
"Children should follow in the footsteps of their fathers ..." so, come to Florence yourself (where it's nice to get lost ...)
- 197 replies
-
- 2
-
-
- santa maria
- carrack
- (and 1 more)
-
I know Gilberto Penso's drawings, have you been to Venice?
- 197 replies
-
- 1
-
-
- santa maria
- carrack
- (and 1 more)
-
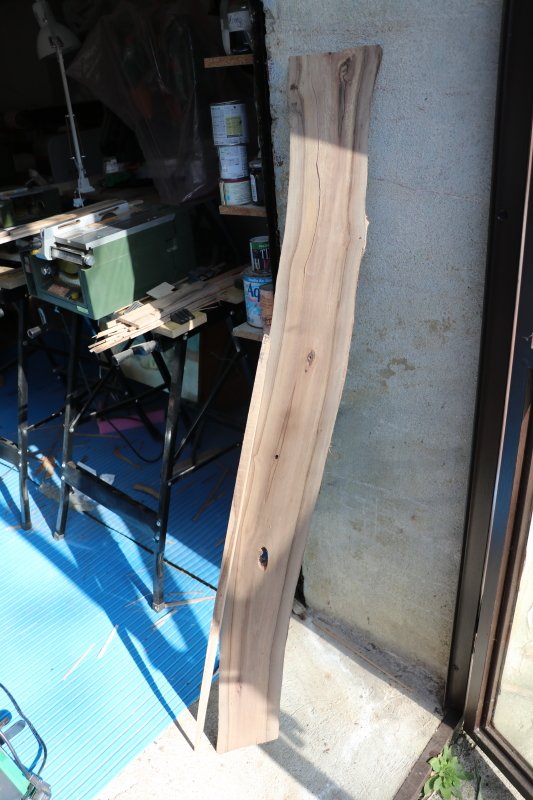
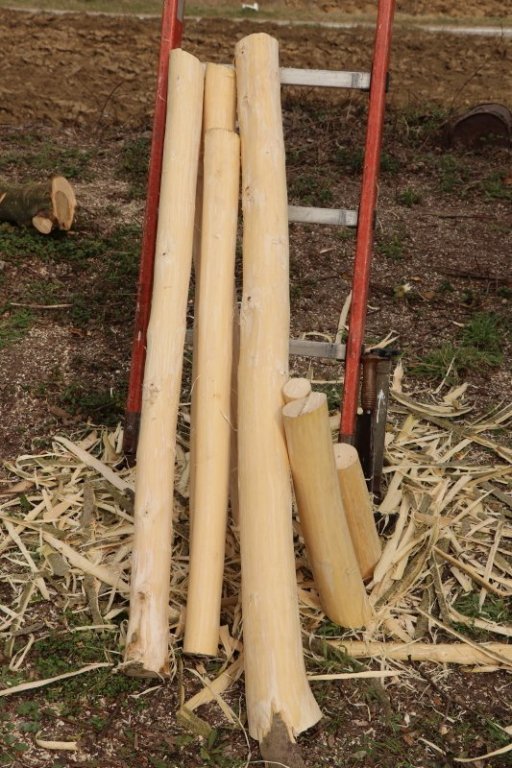
You're right Cog, unfortunately as a seasoned wood I only have the walnut and cherry (in considerable quantities) I also have pear, apple and white maple but they will be seasoned in a year or so, I carry the photo of the maple that I "potato" in the garden of the house and which I partly seasoned with the intention of making 1 inch boards timber that I would like to use for the next model that I plan to make Fabio
- 197 replies
-
- 1
-
-
- santa maria
- carrack
- (and 1 more)
-
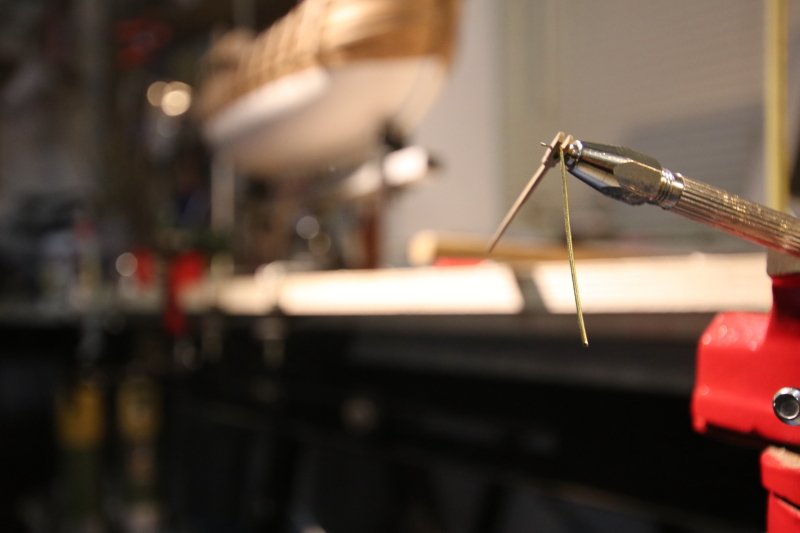
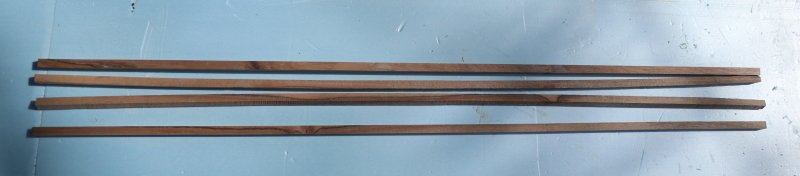
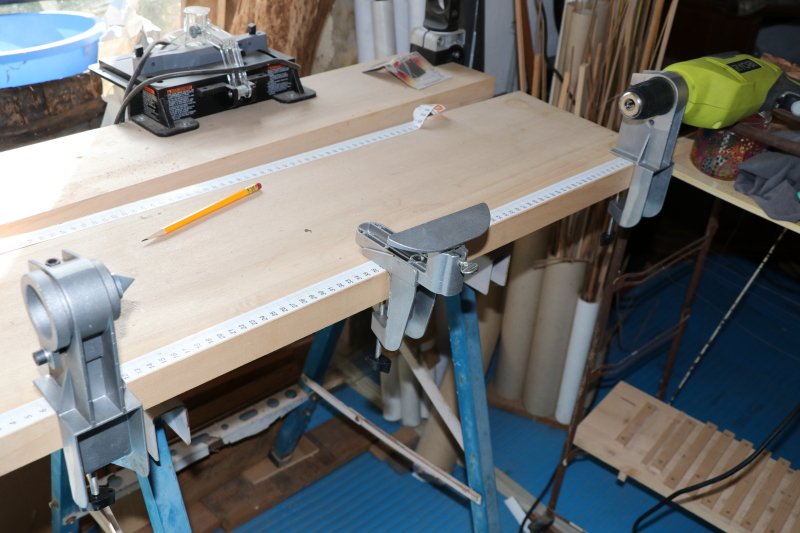
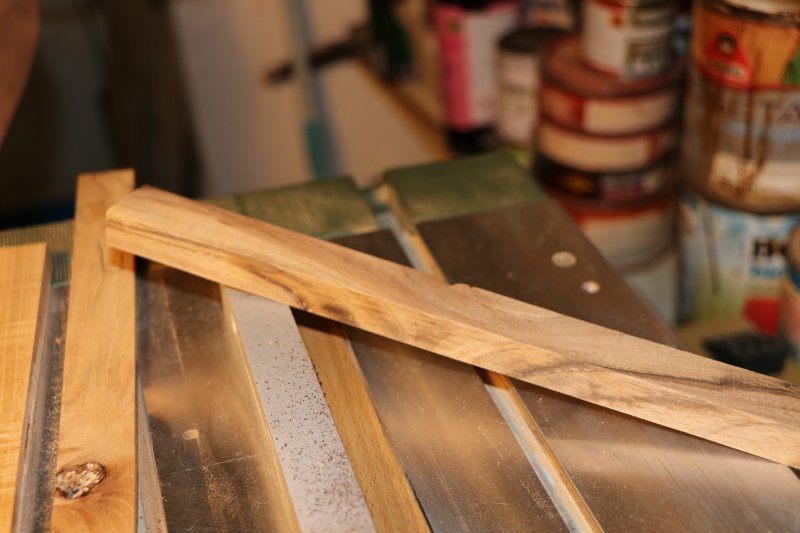
An update of the work carried out, the next work was the realization of the major tree, the measurements are very high, both for the diameter and for height, so I thought of making it with four pieces of wood joined together, creating a "compound" tree so first I chose the table I would have used even if the choice was obligatory: walnut I cut the 8 mm strips and the continuations I joined them by obtaining a beam 16 mm wide to join them together I used an "L" shaped steel profile to avoid misalignments but when I thought of using the lathe I realized that the piece was longer than the size that the lathe could work so I had to use a "manual" lathe using the drill and parts of the lathe that I can independently assemble on the work table allowing me to turn the "long" piece, (over 100 cm) in the photo below, you see the upper part of the tree (three strips are visible, of the four, with different colors) the upper part will be removed later, the upper part (made with another strip) that must be inserted in the hole made in top of the tree, as shown in the drawing at the next update black wolf


- 197 replies
-
- 4
-
-
- santa maria
- carrack
- (and 1 more)
-
hello Cog, you're right, lately I haven't updated the shipyard because I returned to work, unfortunately I had to think about recovering the time spent on vacation ... however, the sooner I update the site with the work done, see you soon Fabio
- 197 replies
-
- 1
-
-
- santa maria
- carrack
- (and 1 more)
-
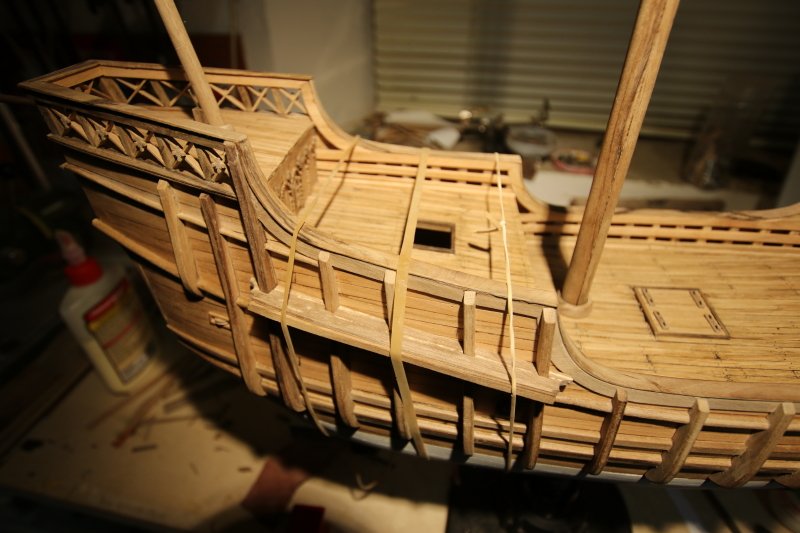
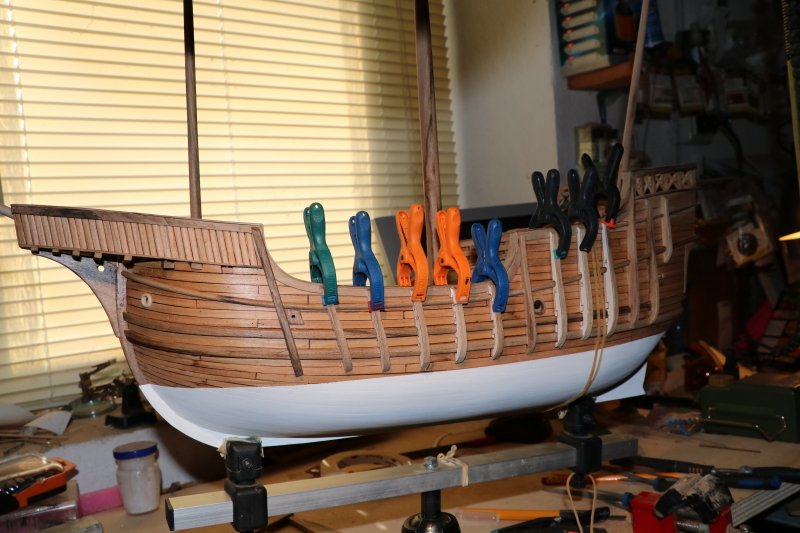
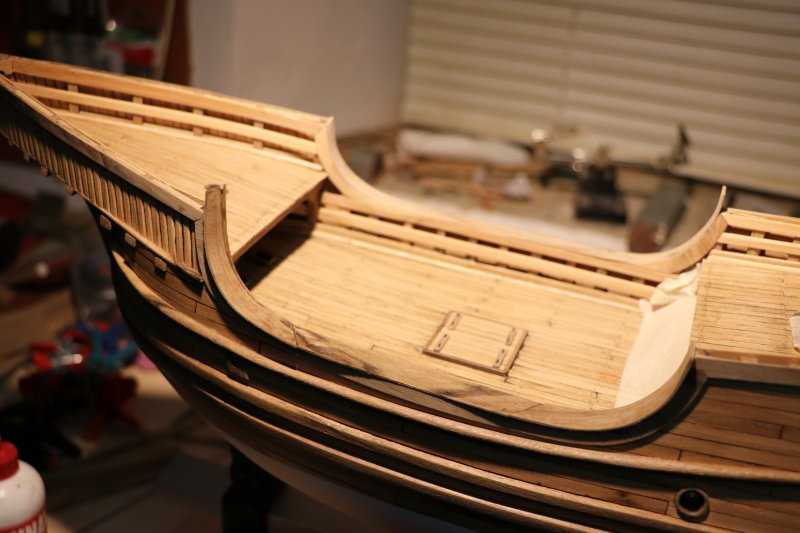
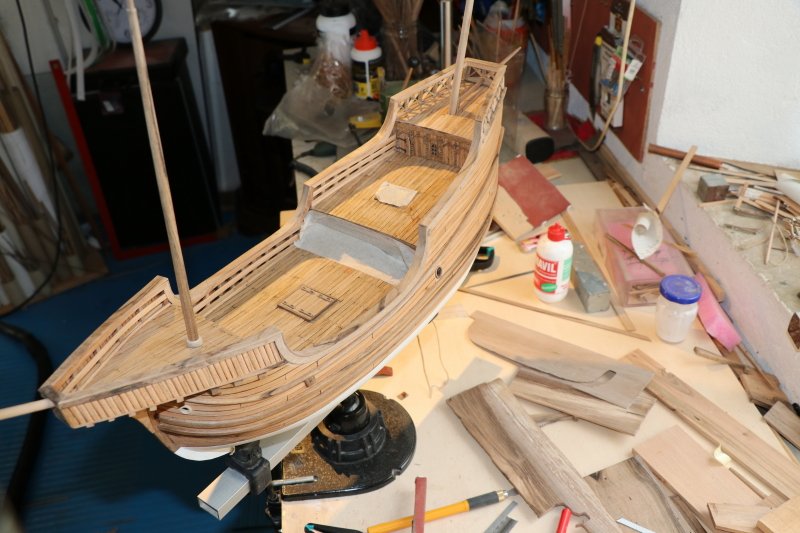
After laying the moldings I put the gunwale, always in walnut always using strips of 5 cm to make the curvature (even if these of the main deck was necessary to make them with three parts, joined with simple interlocking, under the carryover the walnut board that I used to make the strips made with the "fet", (it is the walnut that was in the backyard, but four years ago a strong wind made him fall, and I made many tables for modeling, and with the trunk of the boards of 6 thickness cm, with which I made a large table, but this is another story ...) carryover of the photos with the finished gunwale it seems that the issues related to the loading of the images are finished, I have not found any problems, the system puts more time loading images, but it seems much more stable, see you next time black wolf

- 197 replies
-
- 4
-
-
- santa maria
- carrack
- (and 1 more)
-
yes Cog, I had to decrease the size of the photo (the photos that I post are already old compared to the original are usually around 400 kb, and I have no problrmi insertion, with the last inserted I 's decreased to 180 kb, and the system allowed me to insert it without problems) See ya' Fabio
- 197 replies
-
- 1
-
-
- santa maria
- carrack
- (and 1 more)
-
I had to change the photo to insert it, then finally, inserted see you next time black wolf
- 197 replies
-
- 5
-
-
- santa maria
- carrack
- (and 1 more)
-
nothing to do I always get the error message "! -200" maybe next time black Wolf
- 197 replies
-
- 1
-
-
- santa maria
- carrack
- (and 1 more)
-
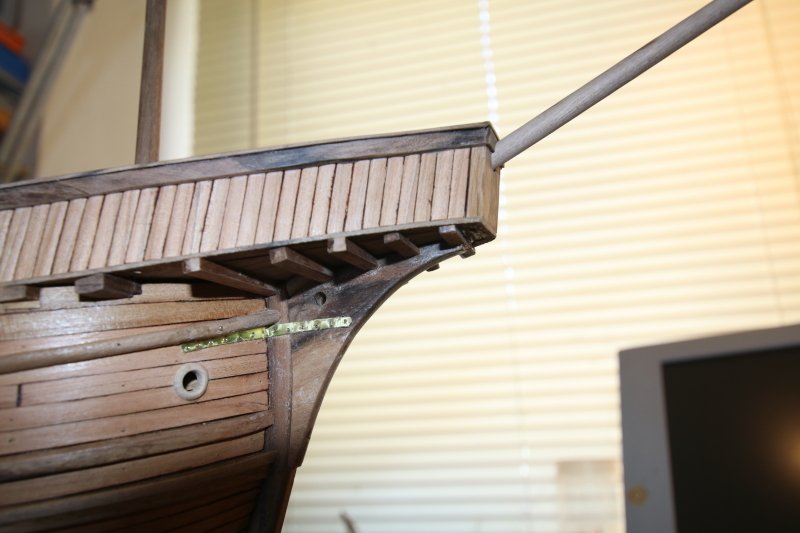
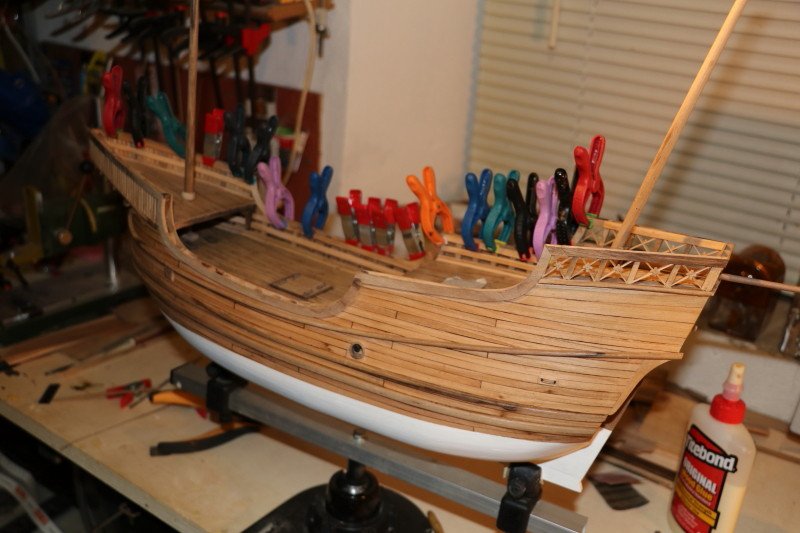
"thank you for the likes", after finishing the internal moldings I started to make the external ones, to make them I had prepared a cardboard shape, the wood used is the walnut, are whole pieces to make them I had to make the walnut boards of 8cm x 1mm as you can see I have brought the shape with the pencil and then I cut it out, positioning it on the wall connecting the whole profile of the ship finished the first part I realized the other (the error system 200- in the insertion of the image, I try to insert it later)
- 197 replies
-
- 3
-
-
- santa maria
- carrack
- (and 1 more)
-
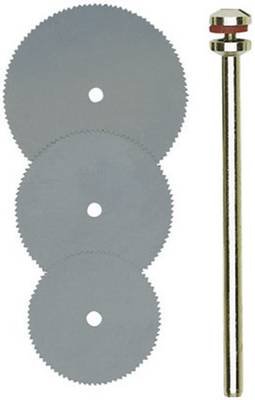
It is very convenient it is a kit consisting of three disc blades with different diameters_ kit 28830 proxxon useful for cutting on already placed details Fabio
- 197 replies
-
- 4
-
-
- santa maria
- carrack
- (and 1 more)
-
Congratulations Patrick for your build, I started following him now, ... better late than never, because it's really beautiful, and I'll definitely continue to follow him! Fabio called luponero
- 756 replies
-
- 2
-
-
- galleon
- golden hind
- (and 2 more)
-
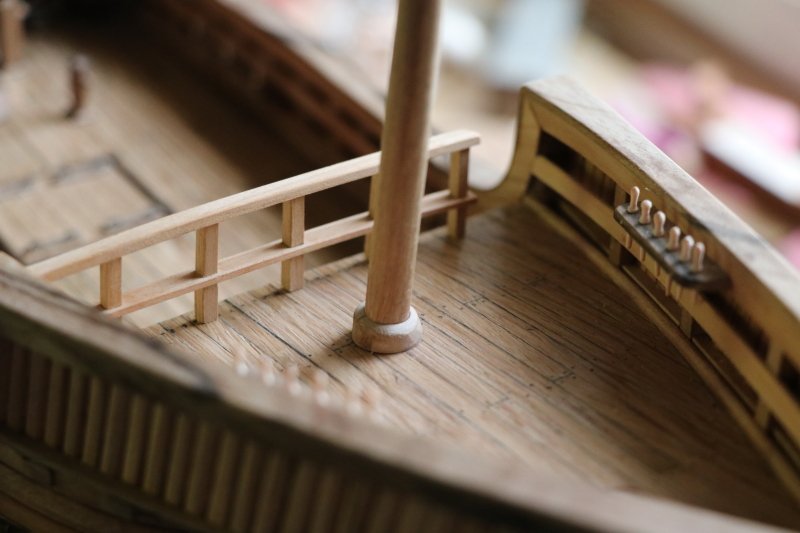
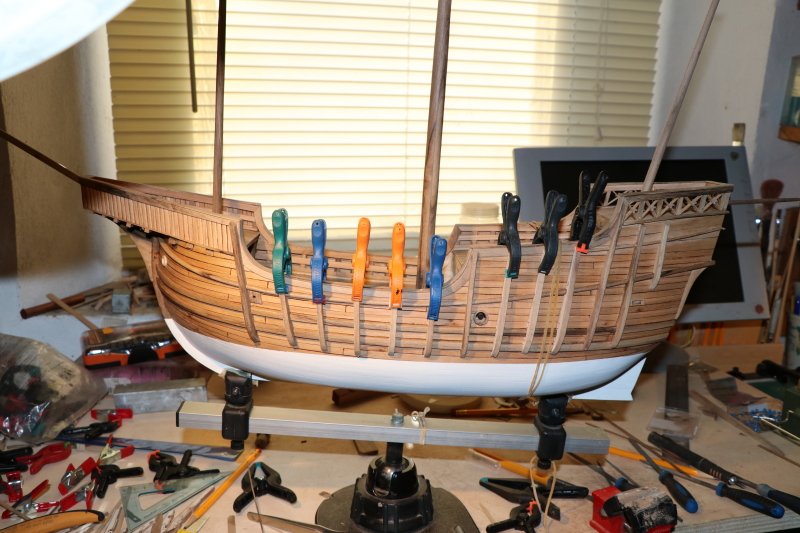
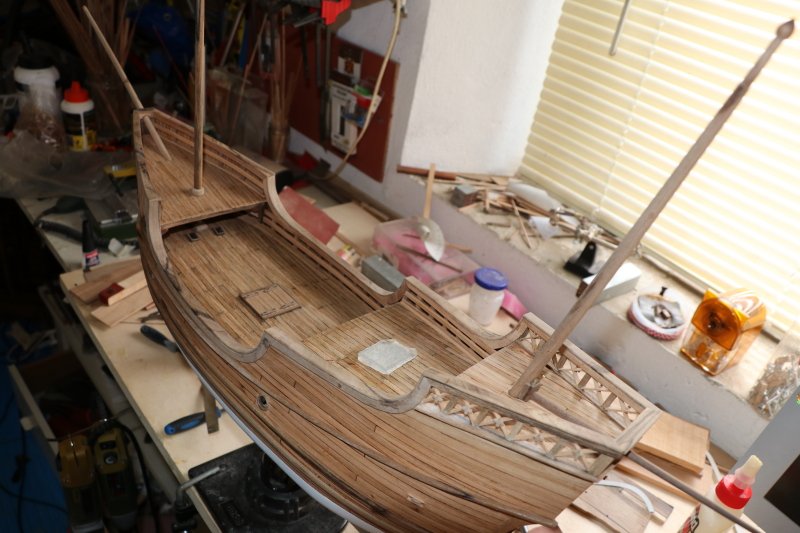
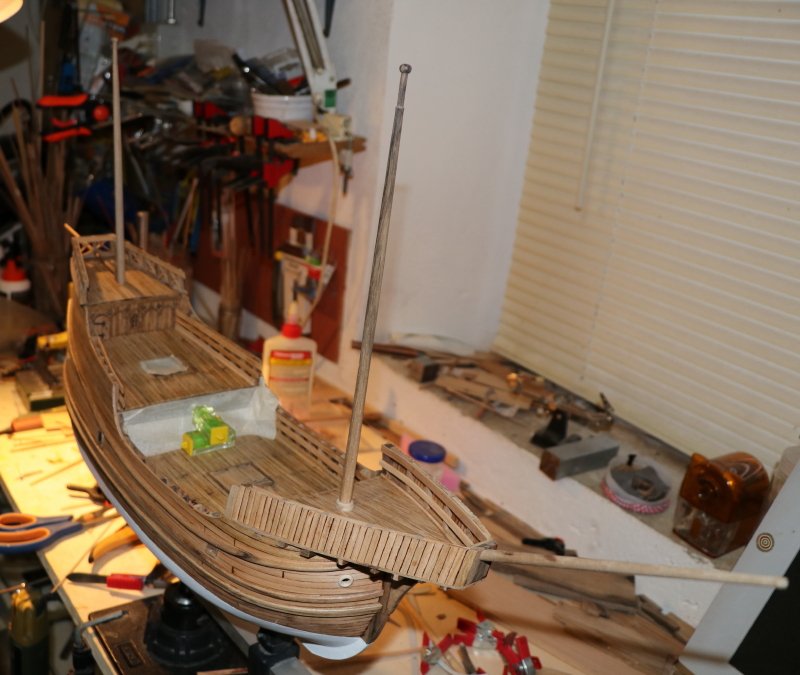
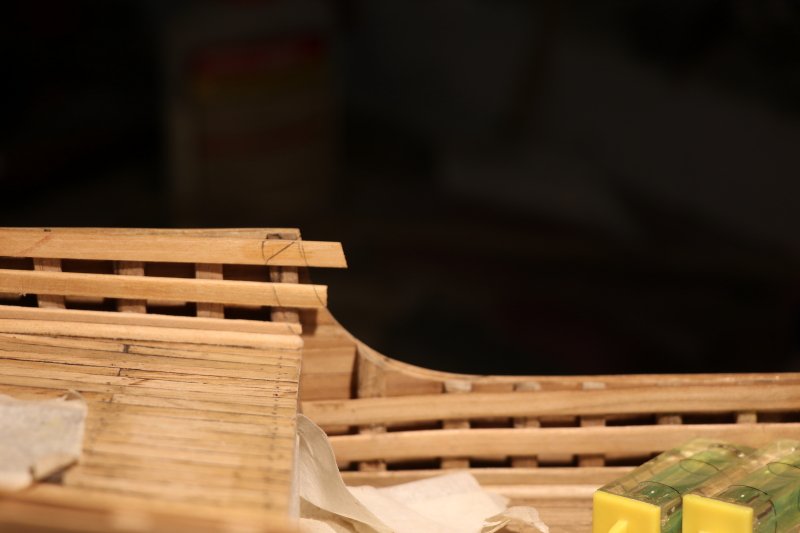
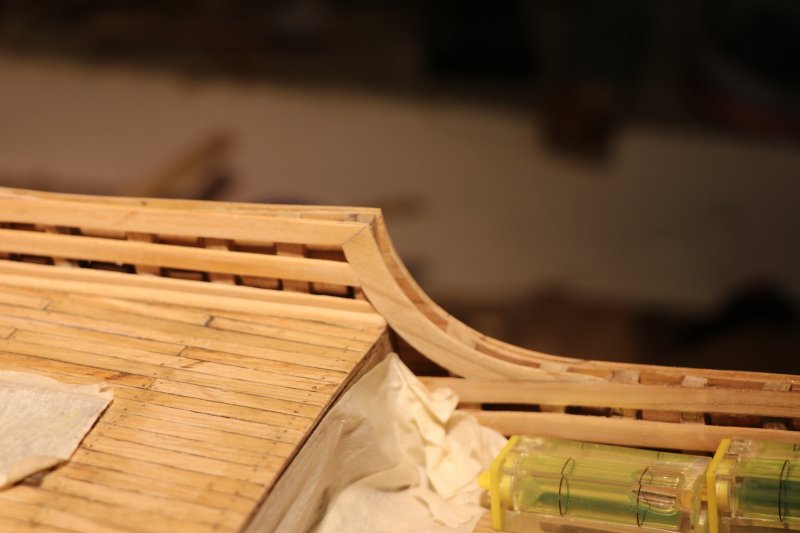
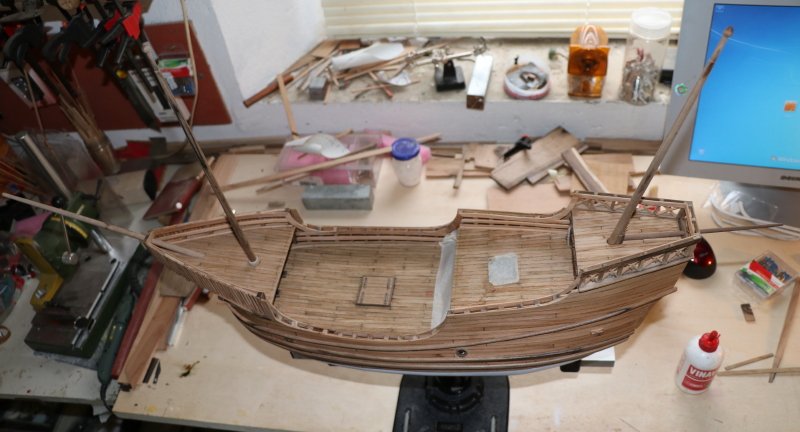
Still some updates on the work done on the caracca, the positioning of the foremast shaft, (always made of walnut) its inclination is towards the bow After the tests, without gluing the tree, I continued with the plating inside the sides to finish the moldings of connection with the upper parts, specular to the external molding on which the gunwales is laid, with the pencil I bring the curvature, then I cut the interested part with the blade, to insert the part made using the templates, which were used to make the moldings ending them on all sides of the boat see you soon black Wolf


- 197 replies
-
- 8
-
-
- santa maria
- carrack
- (and 1 more)
-
thank you, Patrick I'm happy if you follow the work, Steven, the image is a miniature taken from the French manuscript n. 6440, dedicated to the Zeeland family of De Vere, late 15th century. reported with a scanner from the book, I do not know if the English version exists, but I can assure you that it is very beautiful, with images of medieval paintings, that you would surely appreciate, eventually, you can translate the pages by doing the scans and using the translator as I often do, I have to run out "we'll hear" then Fabio
- 197 replies
-
- 4
-
-
- santa maria
- carrack
- (and 1 more)