luponero
-
Posts
236 -
Joined
-
Last visited
Recent Profile Visitors
1,708 profile views


-
 davyboy reacted to a post in a topic:
San Giovanni Battista 1598 by luponero - Medicean galleon
davyboy reacted to a post in a topic:
San Giovanni Battista 1598 by luponero - Medicean galleon
-
firdajan reacted to a post in a topic:
San Giovanni Battista 1598 by luponero - Medicean galleon
-
GrandpaPhil reacted to a post in a topic:
San Giovanni Battista 1598 by luponero - Medicean galleon
-
JacquesCousteau reacted to a post in a topic:
San Giovanni Battista 1598 by luponero - Medicean galleon
-
Baker reacted to a post in a topic:
San Giovanni Battista 1598 by luponero - Medicean galleon
-
Dave boatswain reacted to a post in a topic:
San Giovanni Battista 1598 by luponero - Medicean galleon
-
Dave boatswain reacted to a post in a topic:
San Giovanni Battista 1598 by luponero - Medicean galleon
-
Dave boatswain reacted to a post in a topic:
San Giovanni Battista 1598 by luponero - Medicean galleon
-
Dave boatswain reacted to a post in a topic:
San Giovanni Battista 1598 by luponero - Medicean galleon
-
Dave boatswain reacted to a post in a topic:
San Giovanni Battista 1598 by luponero - Medicean galleon
-
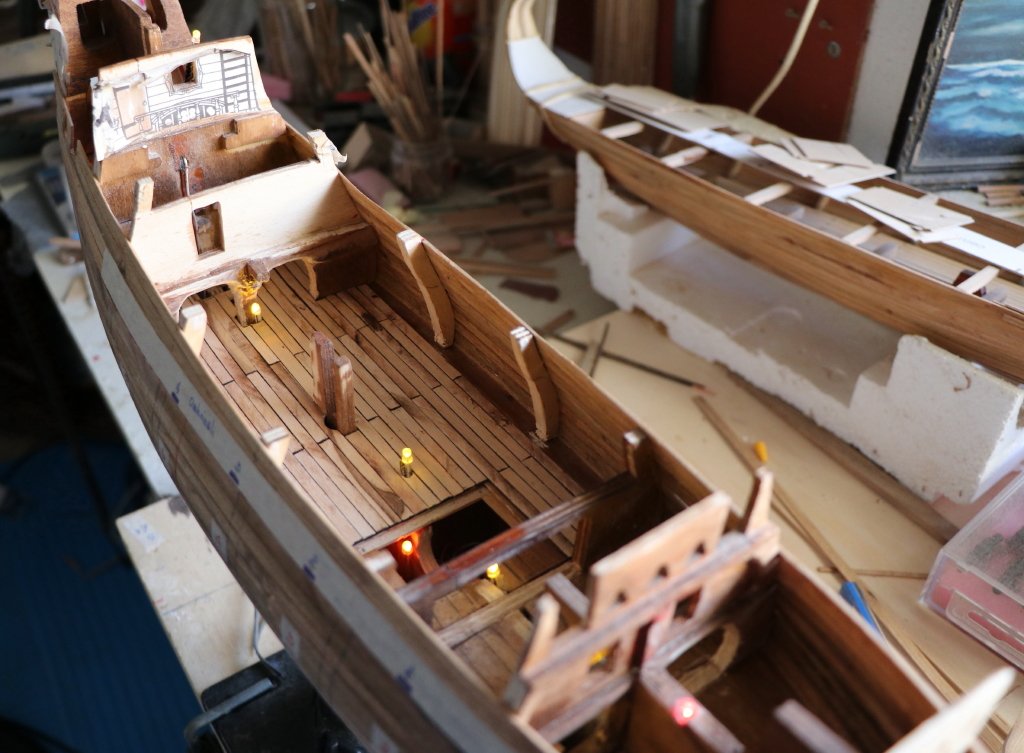
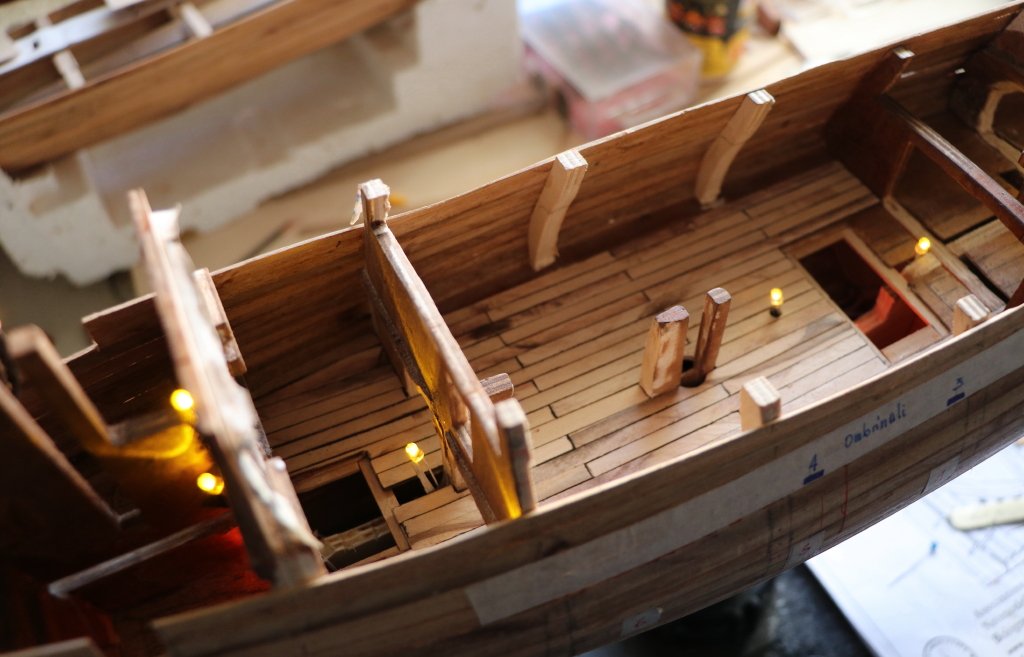
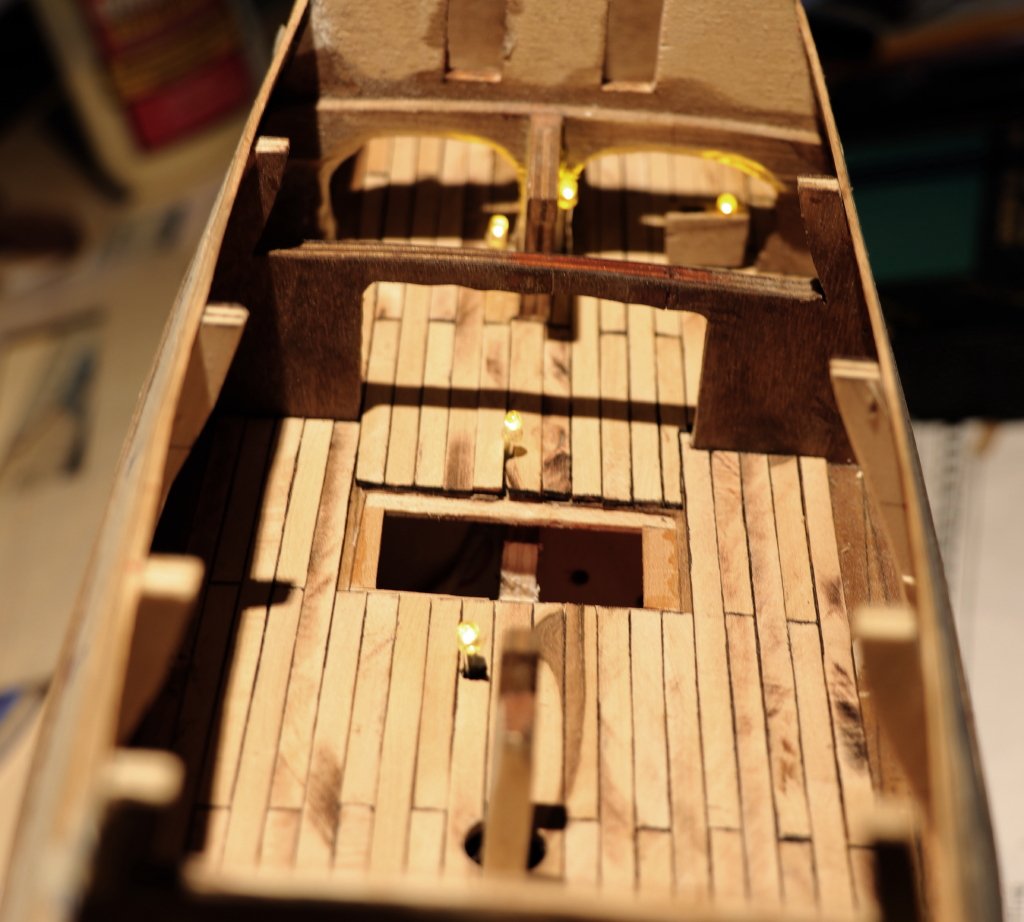
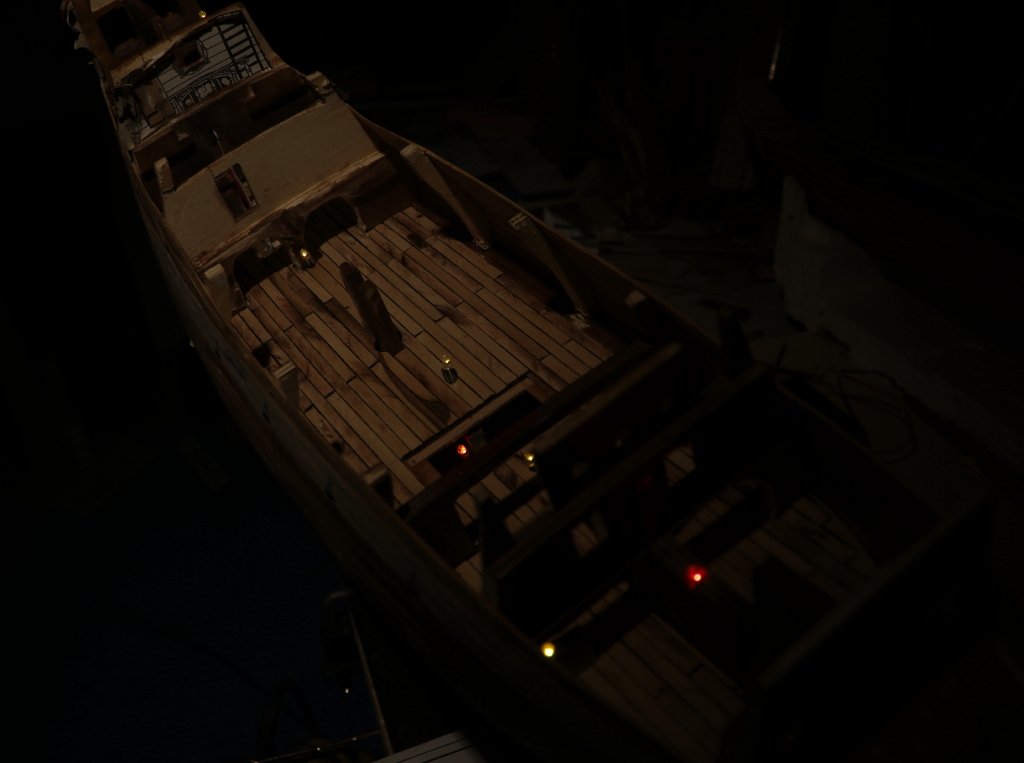
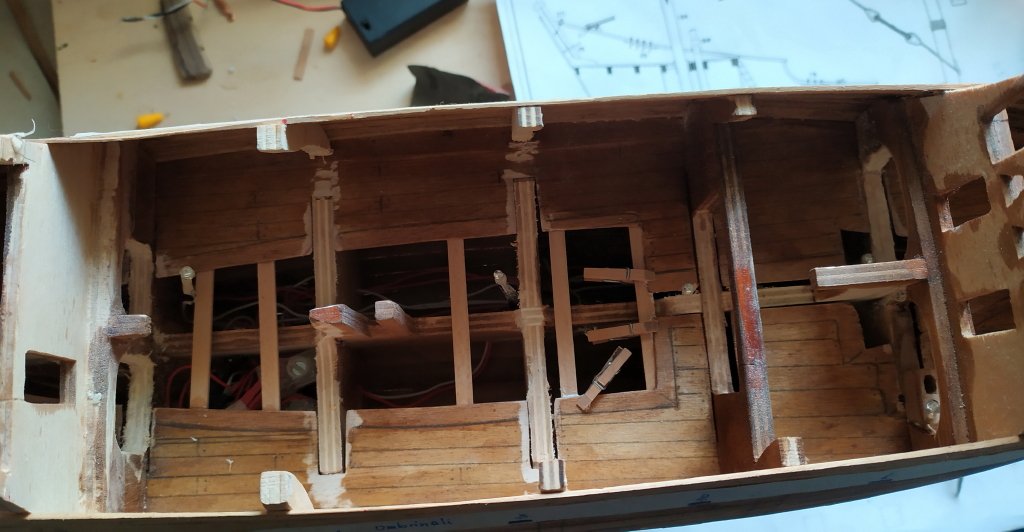
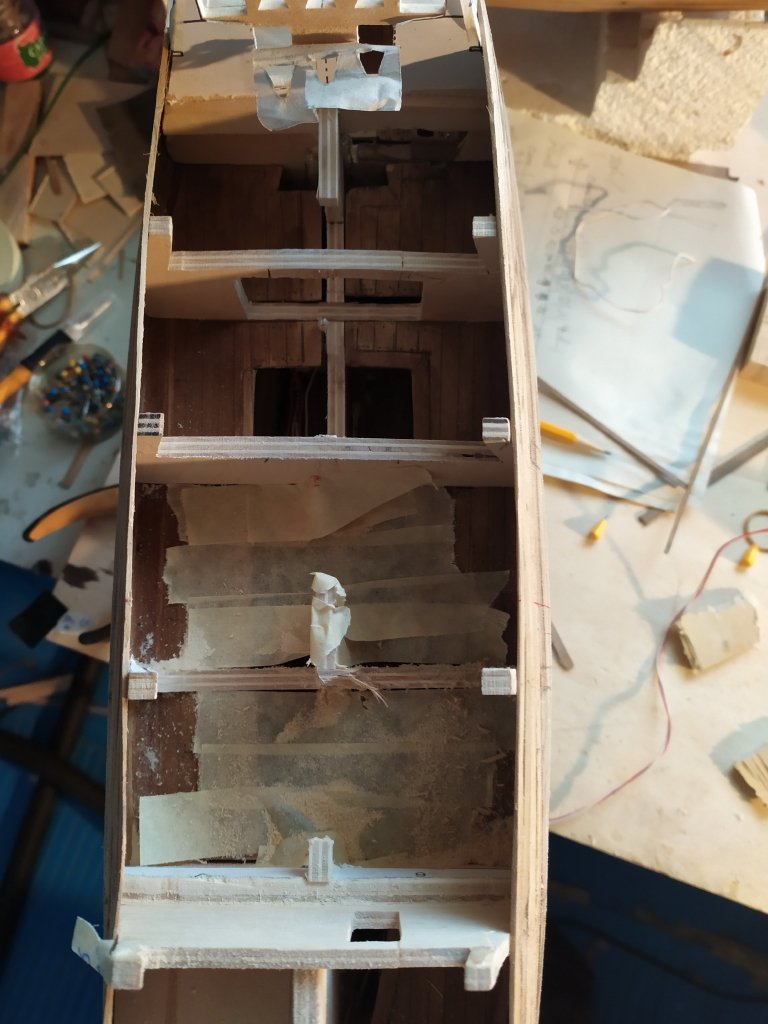
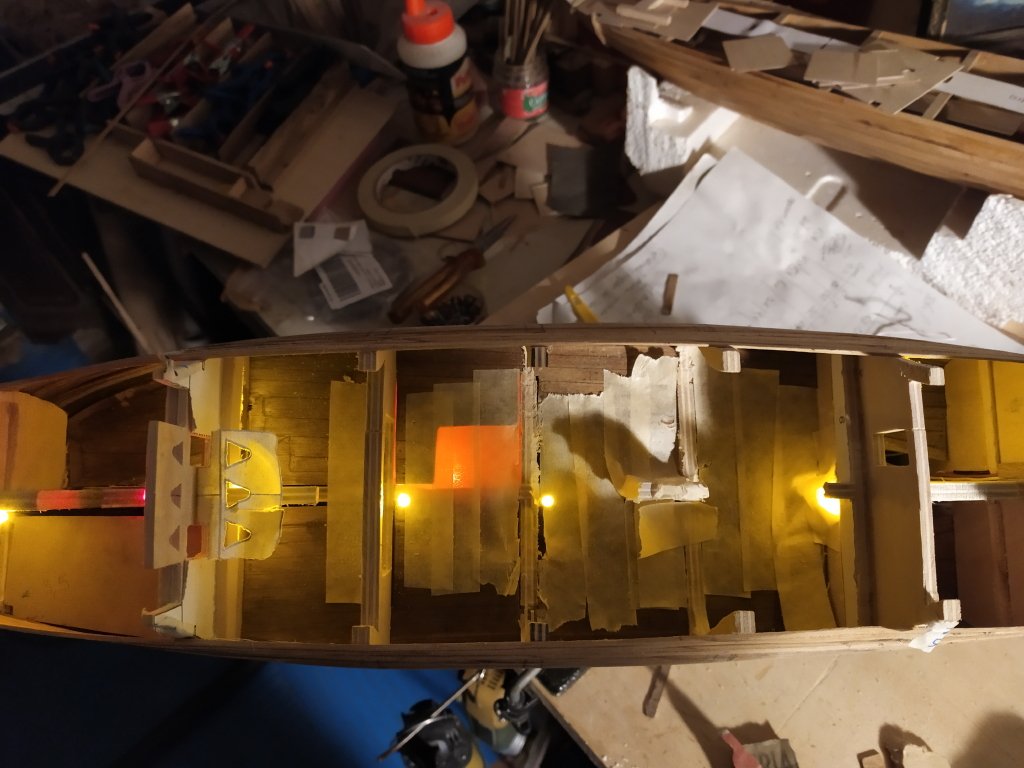
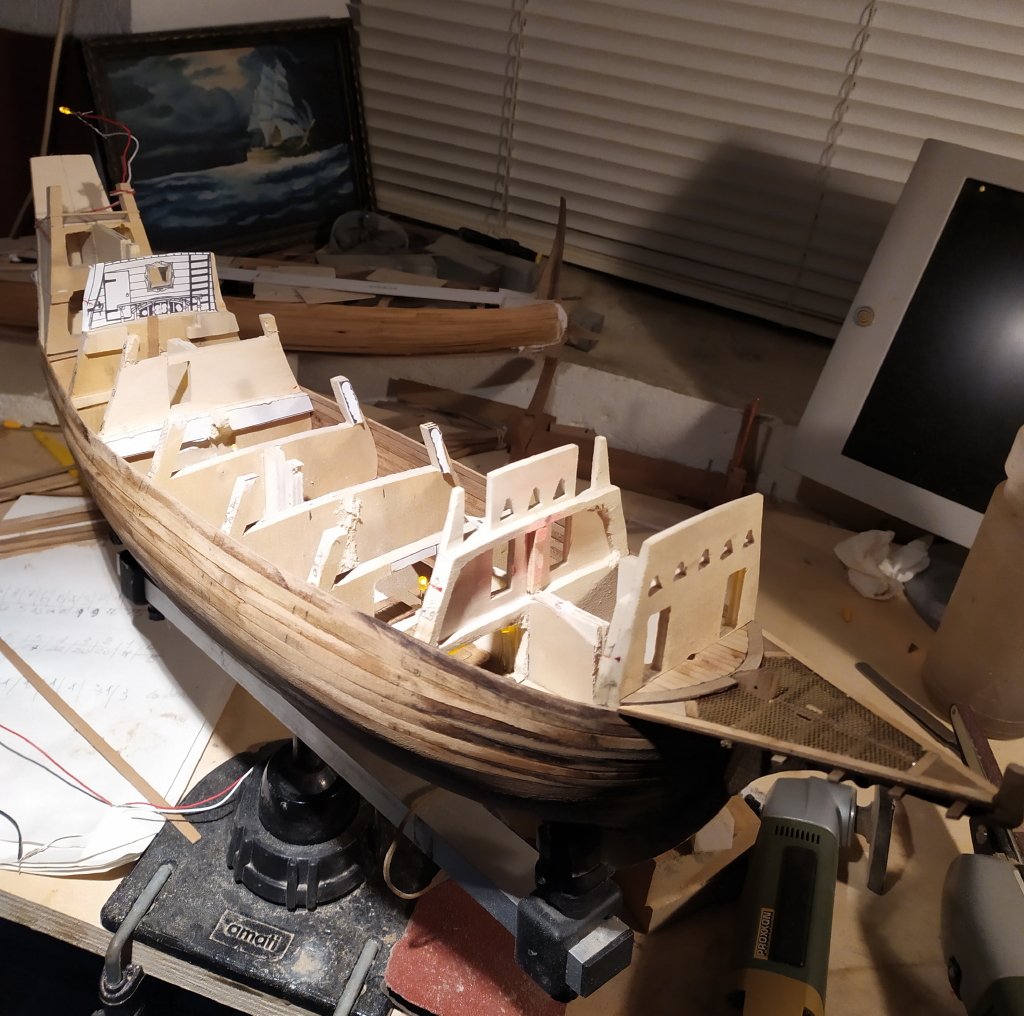
 I thank my friends for their welcome appreciation, I continued laying the strips on the deck, always widening the openings on the bridge, always checking the operation of the leds leaving to finish the gunwale, which I will build when I have removed the frames preparing the openings for the grating see you next time
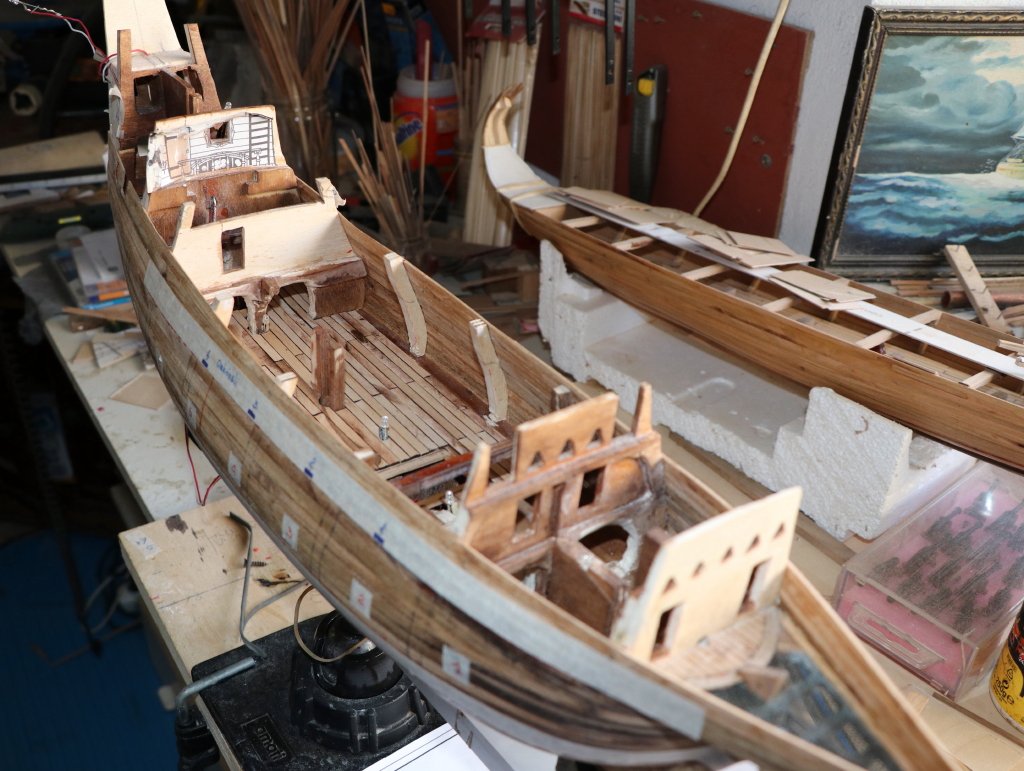
-
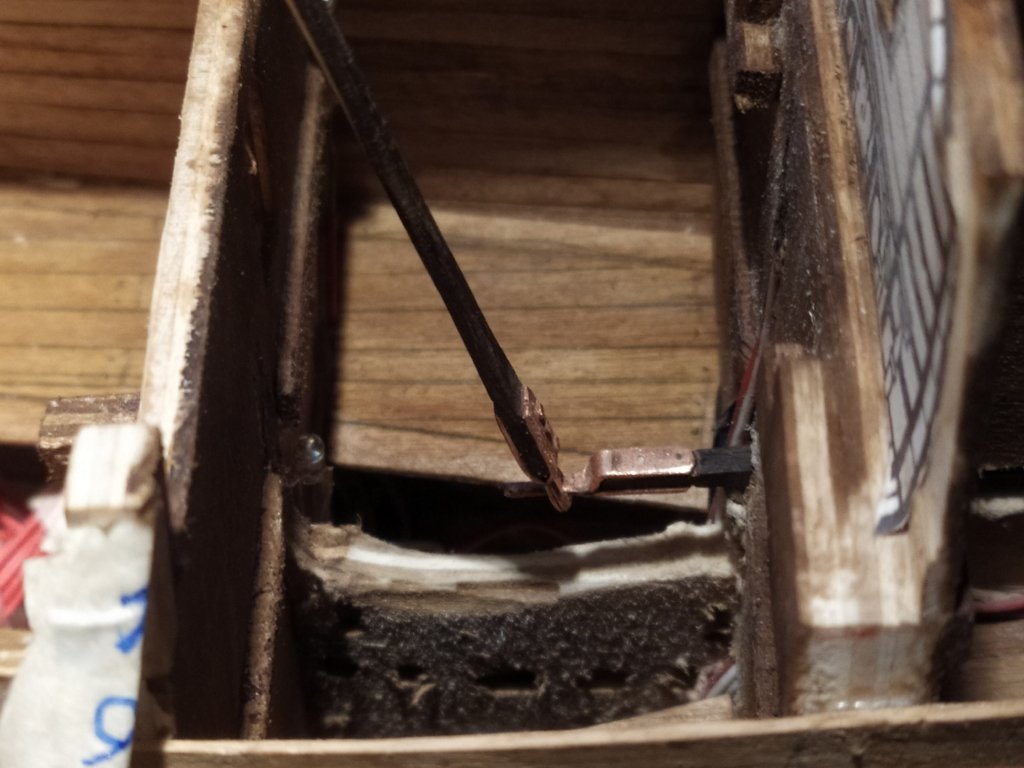
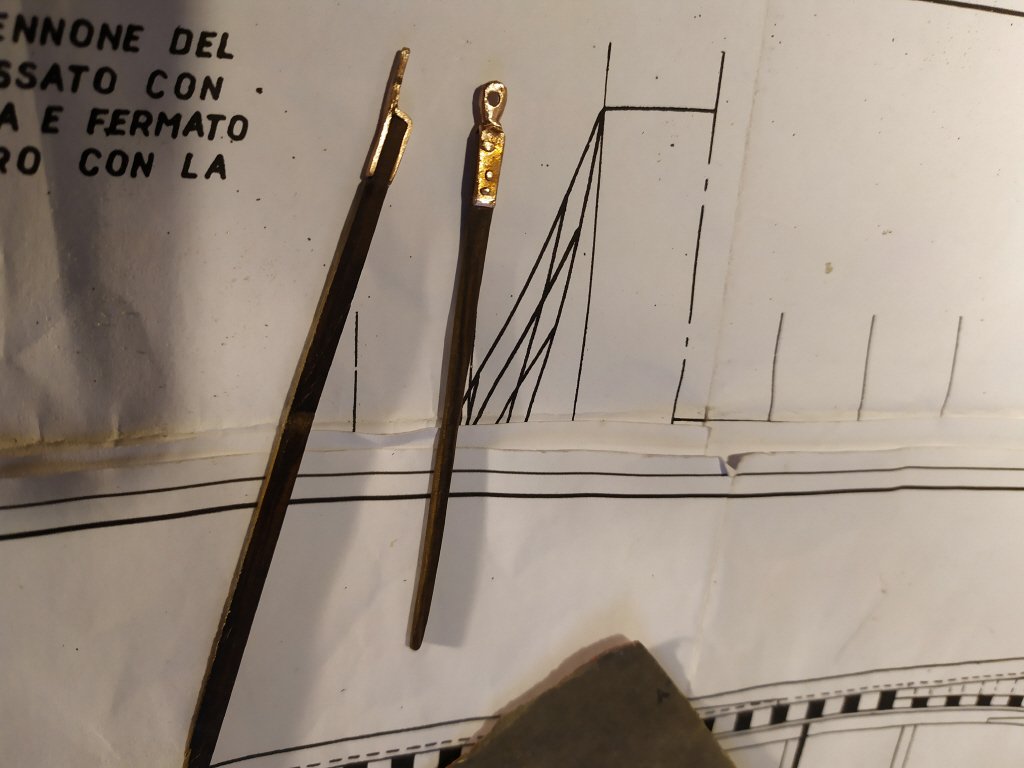
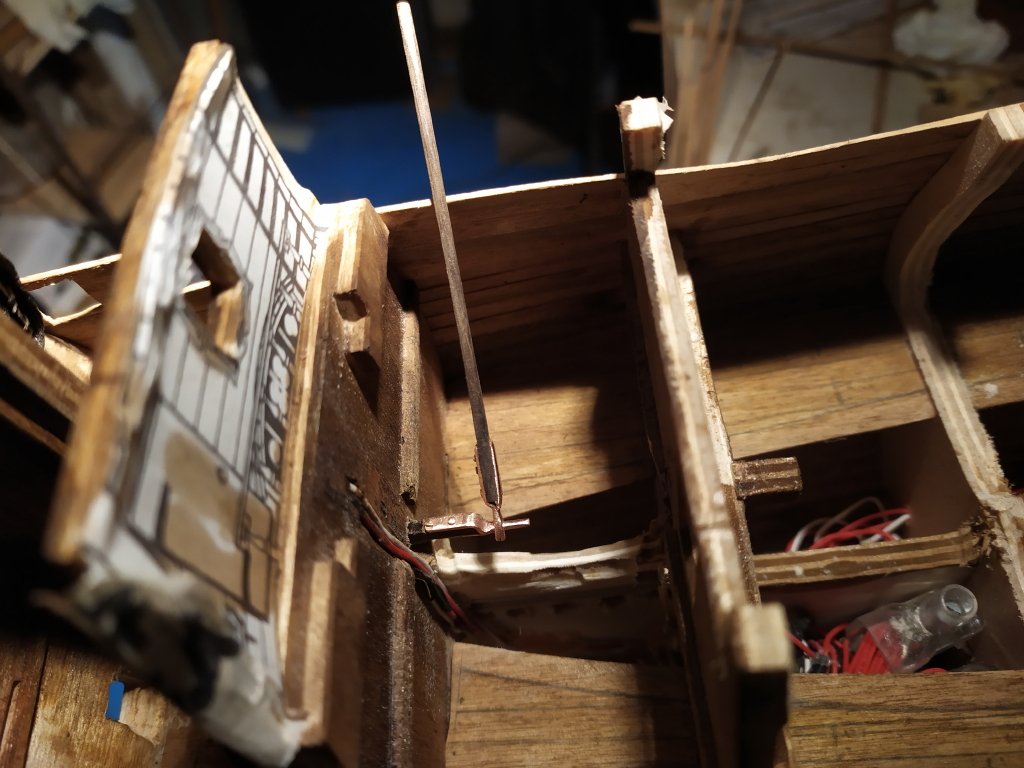
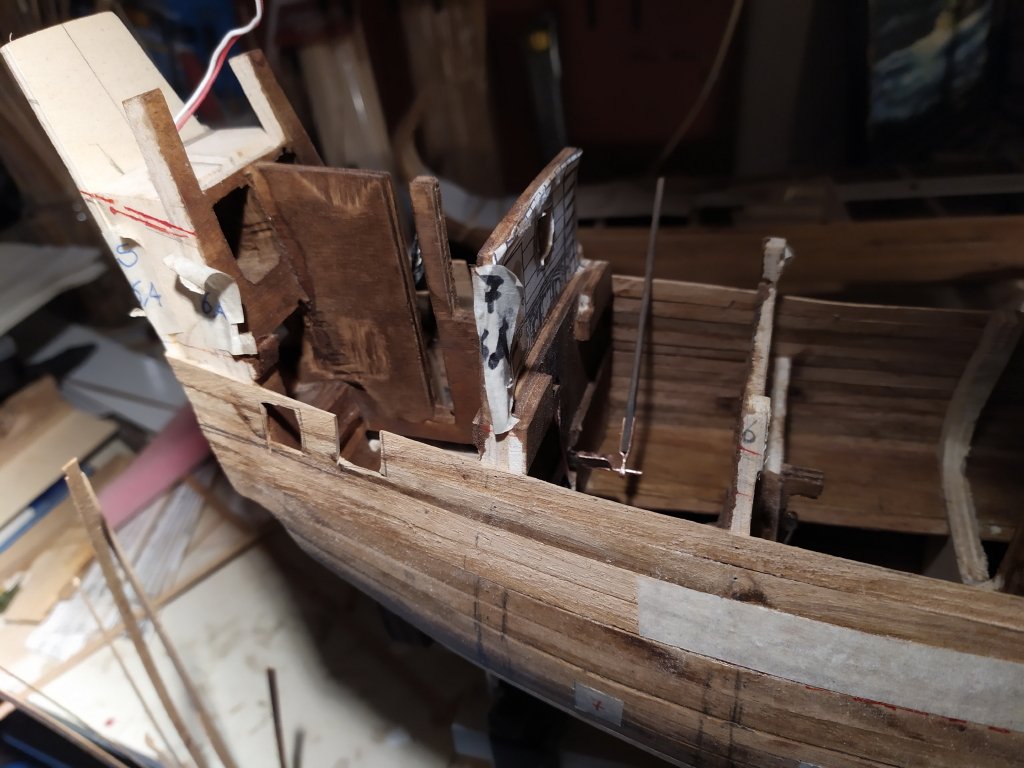
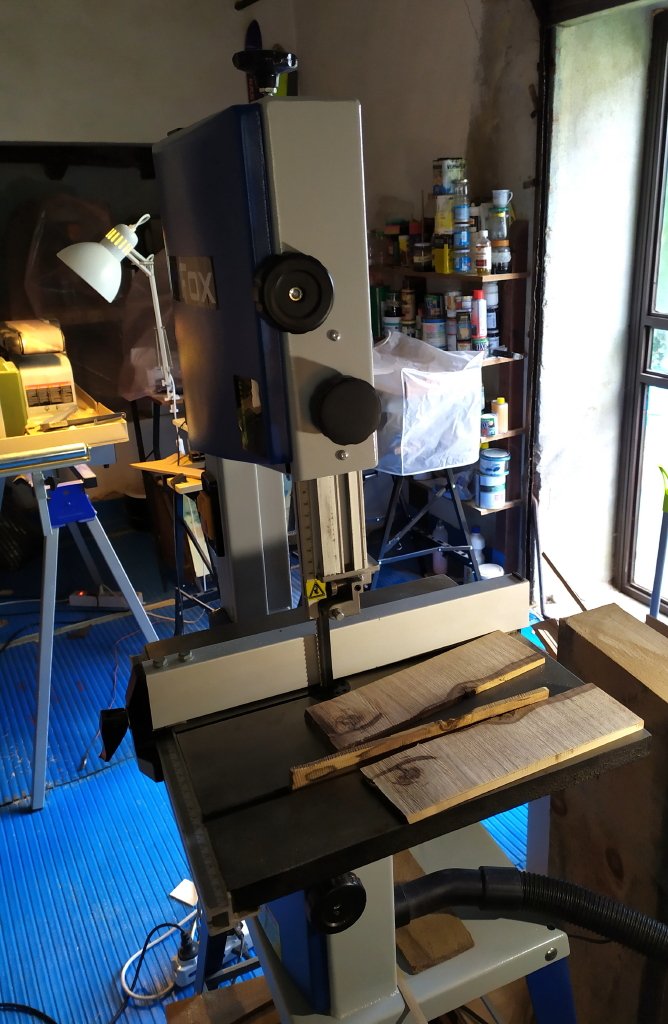
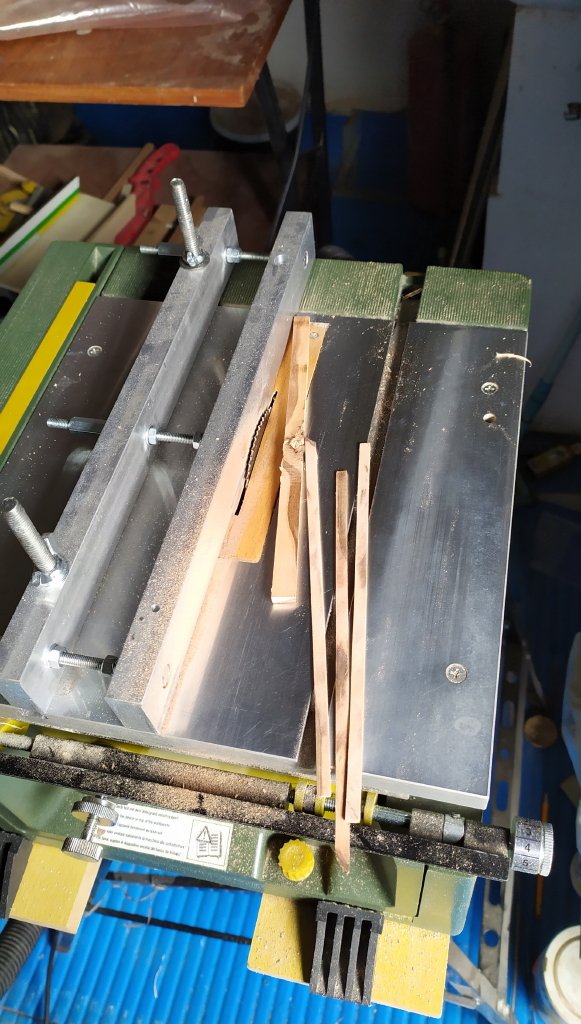
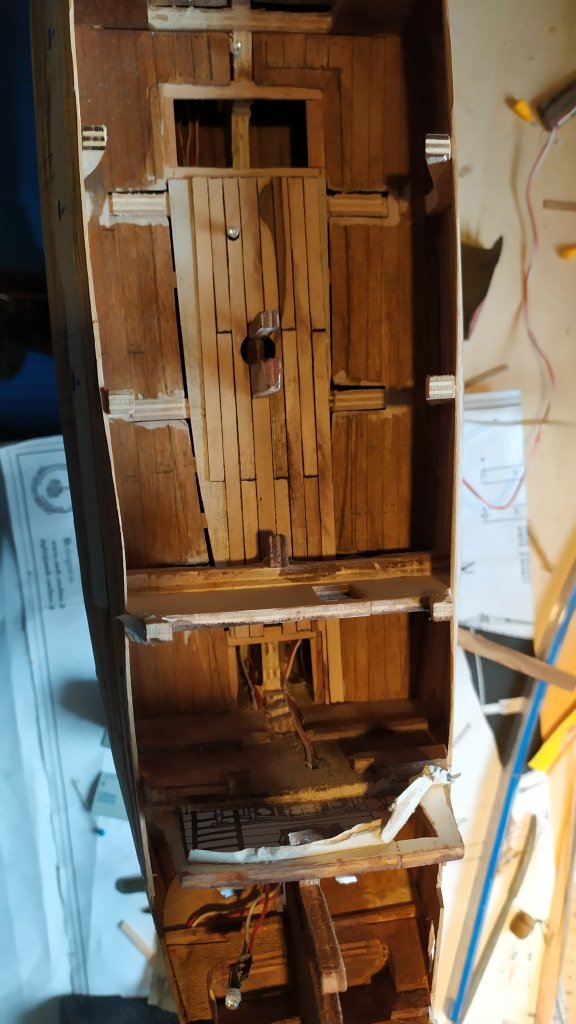
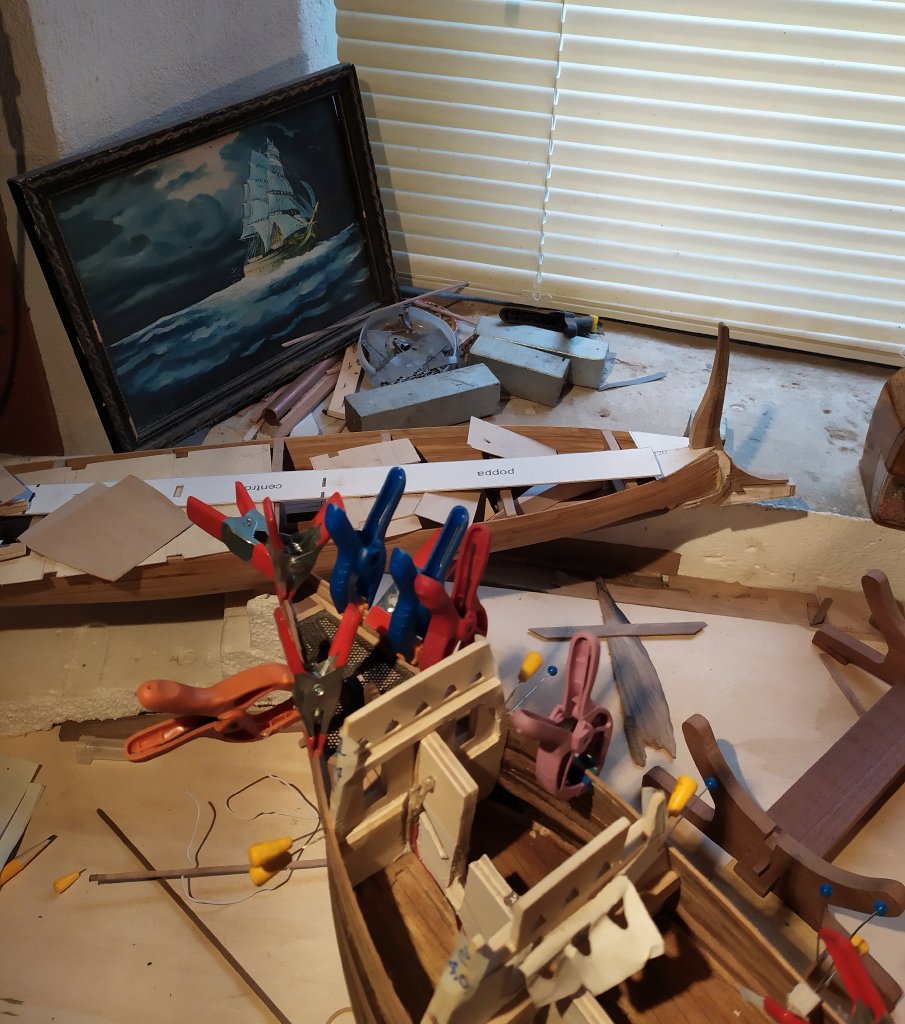
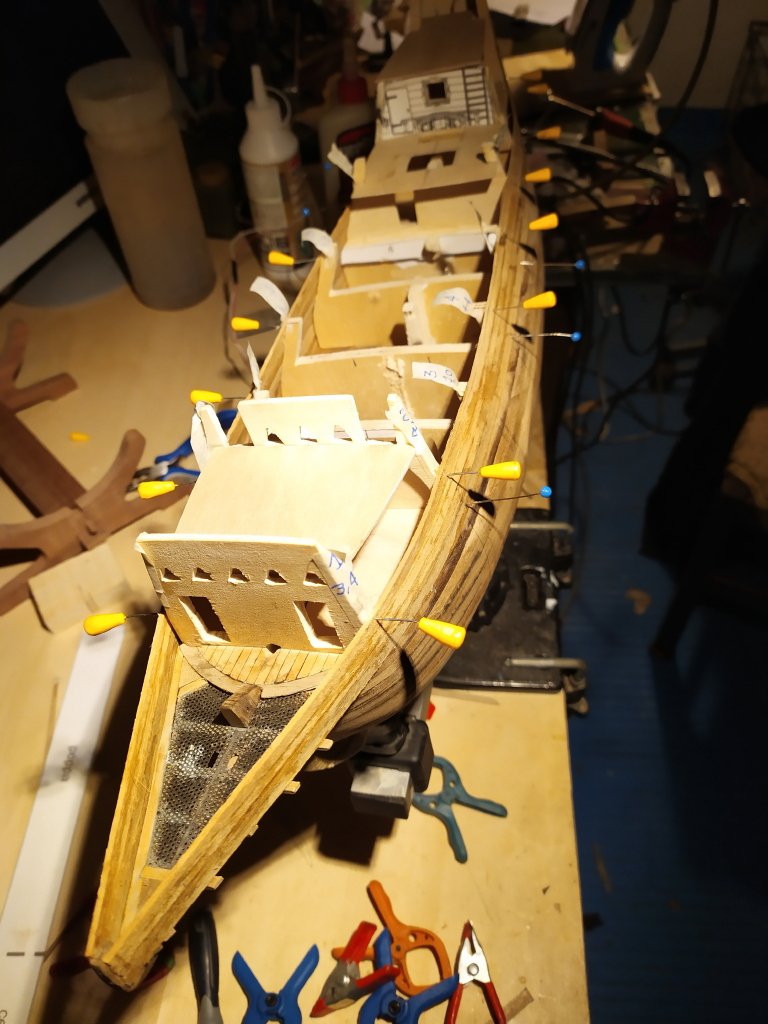
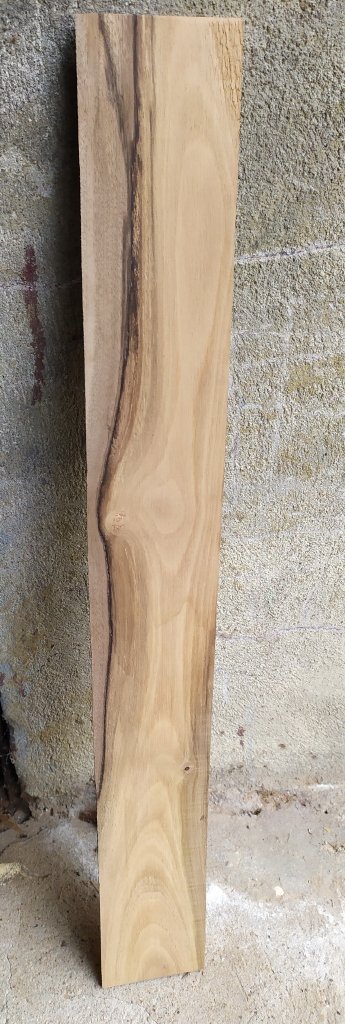
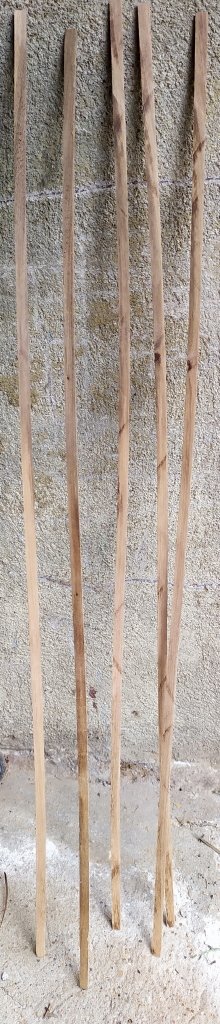
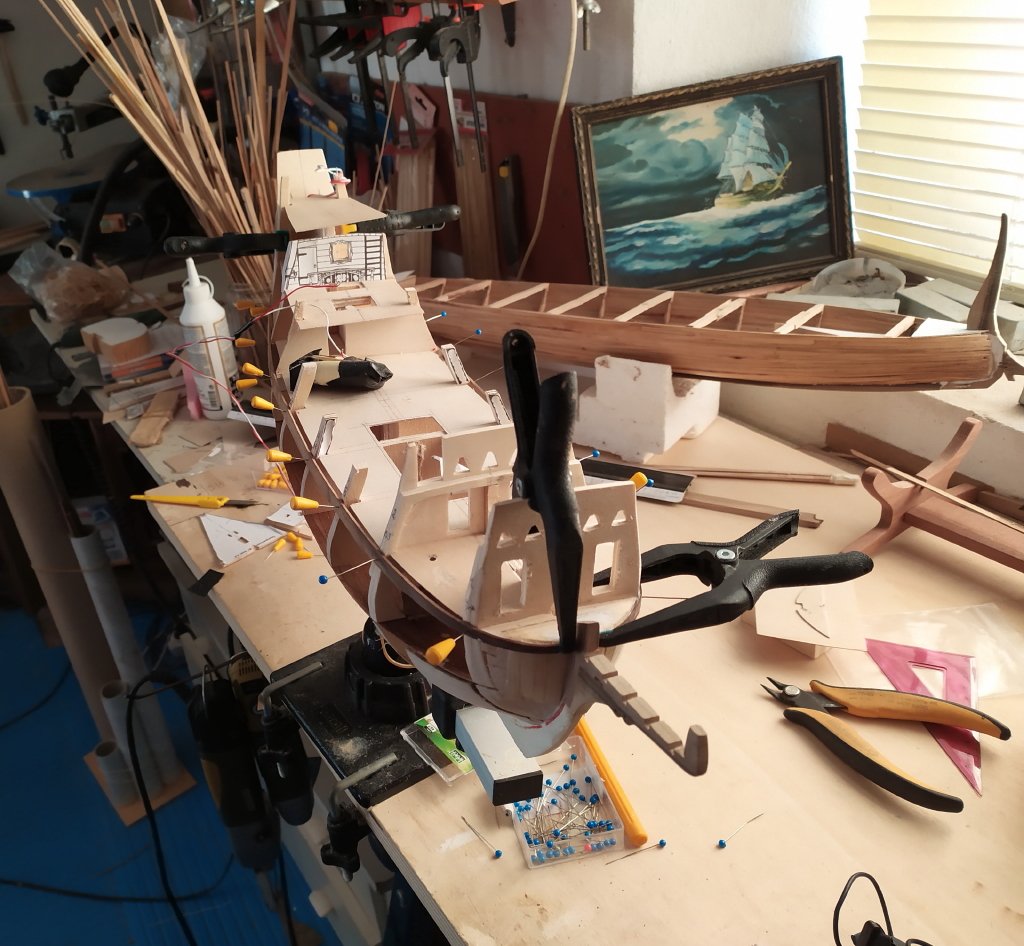
Once the guns were finished, I continued with the realization of the details present on the battery deck, another detail is the lever rudder that is maneuvered by the helmsman in the appropriate housing, which is a raised floor above the battery deck, the rudder is formed by two rods joined by two metal pieces at the end that stopped at the rudder rod allowed it to be maneuvered, I made the rudder and rods, later I will have to make the mechanism (the joint) that allows you to "distribute" the maneuvers to the rudder being locked on the base where the helmsman is. To place the rods and create the "visible" details from the openings of the cannon hatches, I have to continue to enlarge and mill the internal parts very close to the lighting system, risking to do considerable damage I started to prepare the strips to make the bridge, (I will make boards of 6m with a width of 30 cm, reported in 1/60 scale, or strips of 10 cmx5mm wide,) for the essence I decided to use some elm, these are boards that I made 6/7 years ago so well seasoned, I cut a piece and I opened them with a band saw, (seasoned elm is hard as steel) the next step will be to plan them to a thickness of 5mm and with the foot with the aluminum guide make the strips 5mm wide with a thickness of 0.8mm while on the opening I carry the "beams" with some strips that I only need to support the part made to close and delimit the openings where I will make the grating delimiting them with the jaws I begin to put the strips on by putting weights on them to keep them adherent to the plywood this is the result, now I can start laying the deck battens the next detail will be the realization of the grating, for now I conclude by wishing everyone a Happy 2021 that is better than 2020 !!!


-
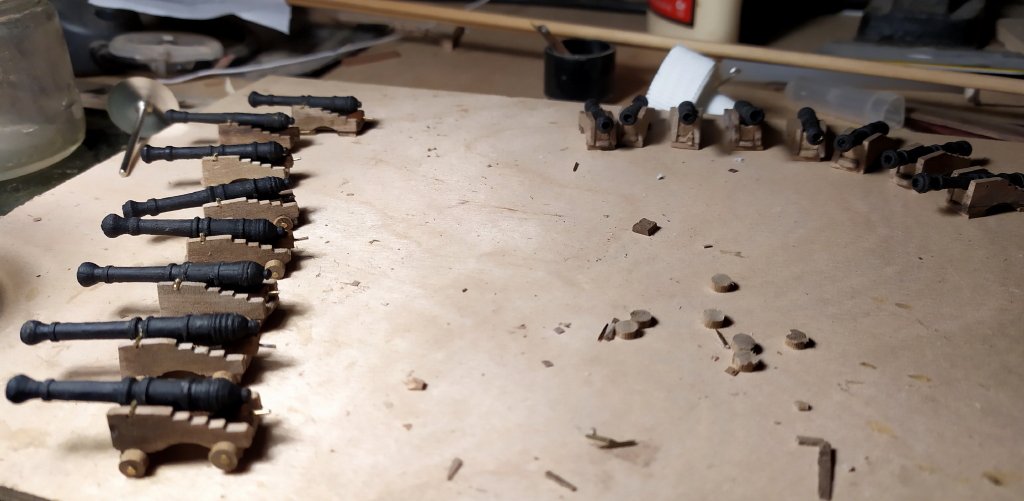
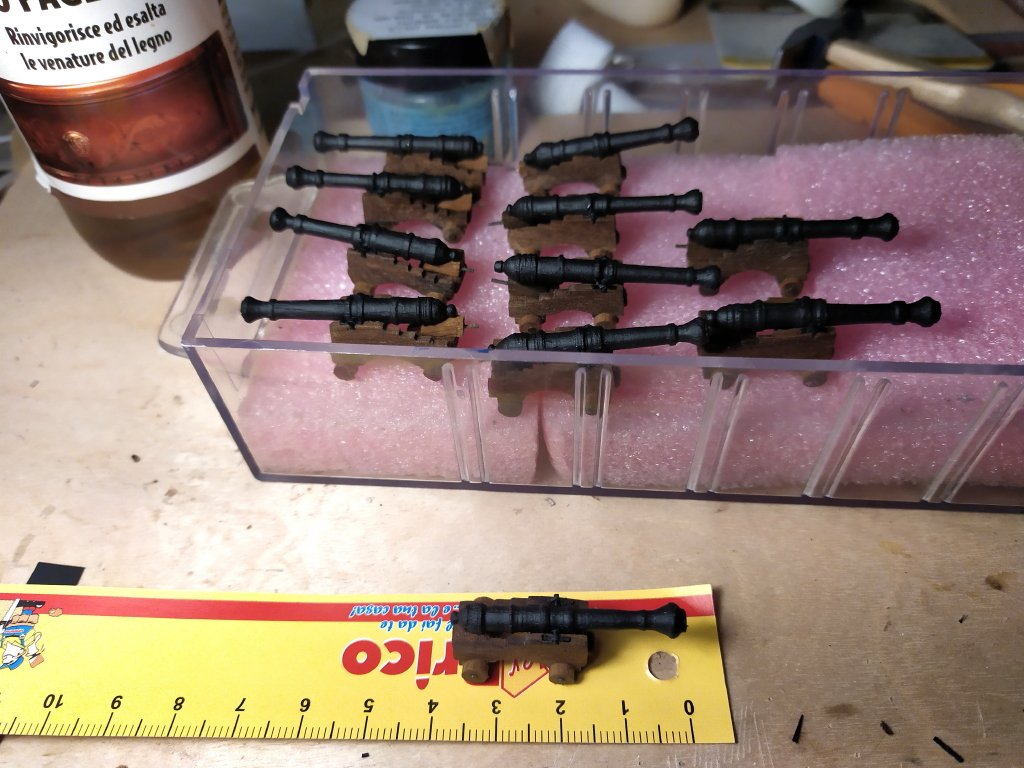
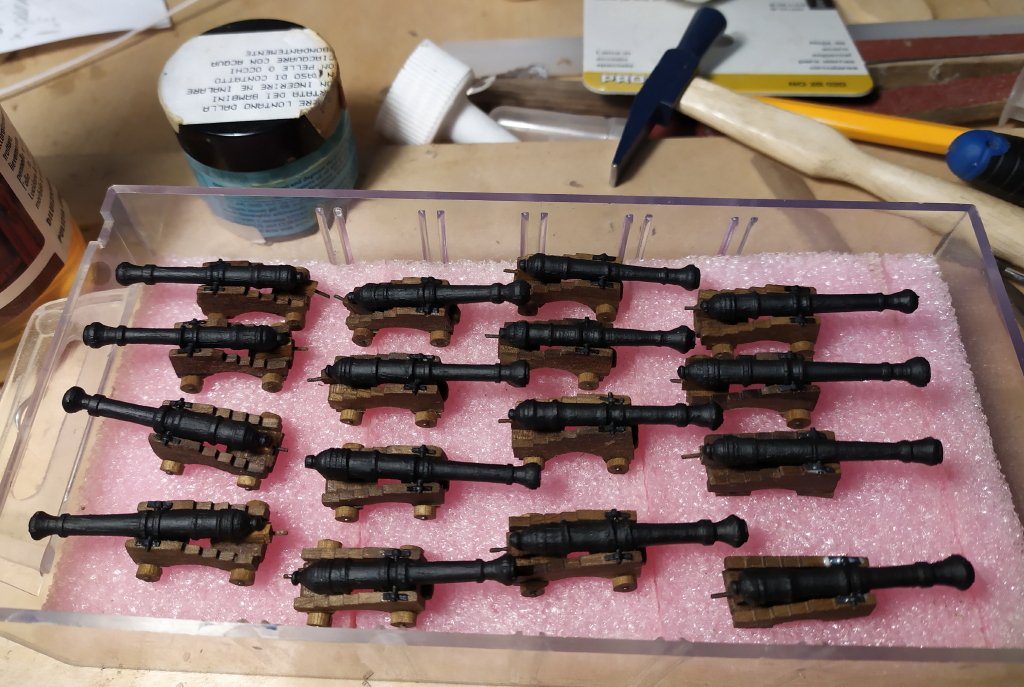
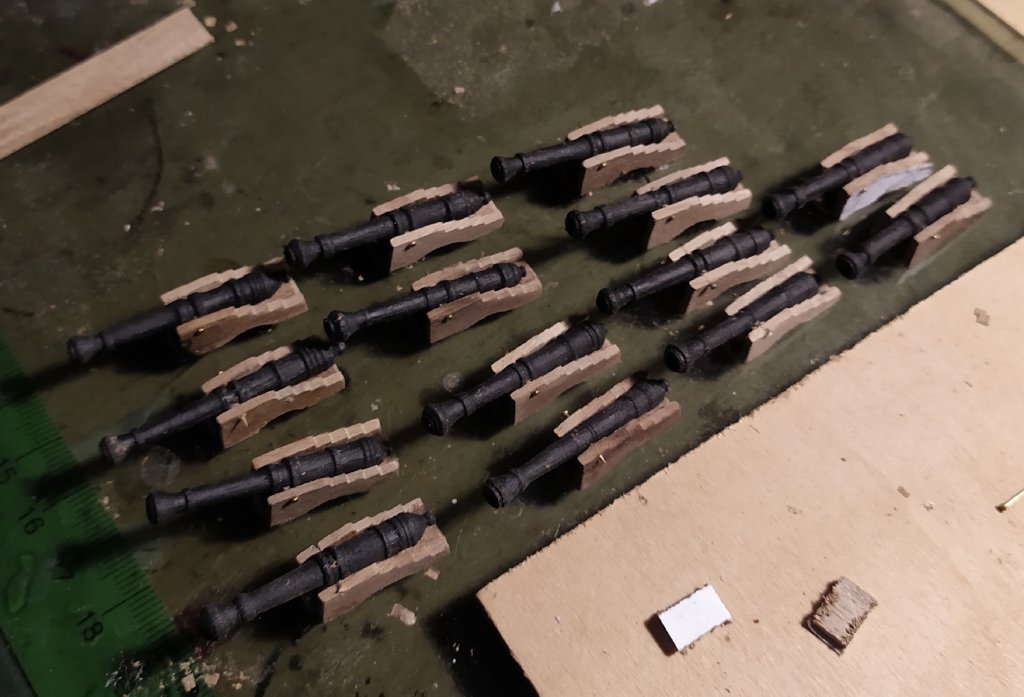
Grazie per il vostro gradito apprezzamento, il lavoro prosegue nella realizzazione dei particolari delle pistole le fasi di montaggio dei particolari piano piano l'artiglieria è costruita ci sono ancora alcuni dettagli che realizzerò in seguito il regolatore del colpo la brunitura dell'ottone e l'invecchiamento della carrozza and the second base coat the sixteen guns are almost ready see you next time black Wolf

-
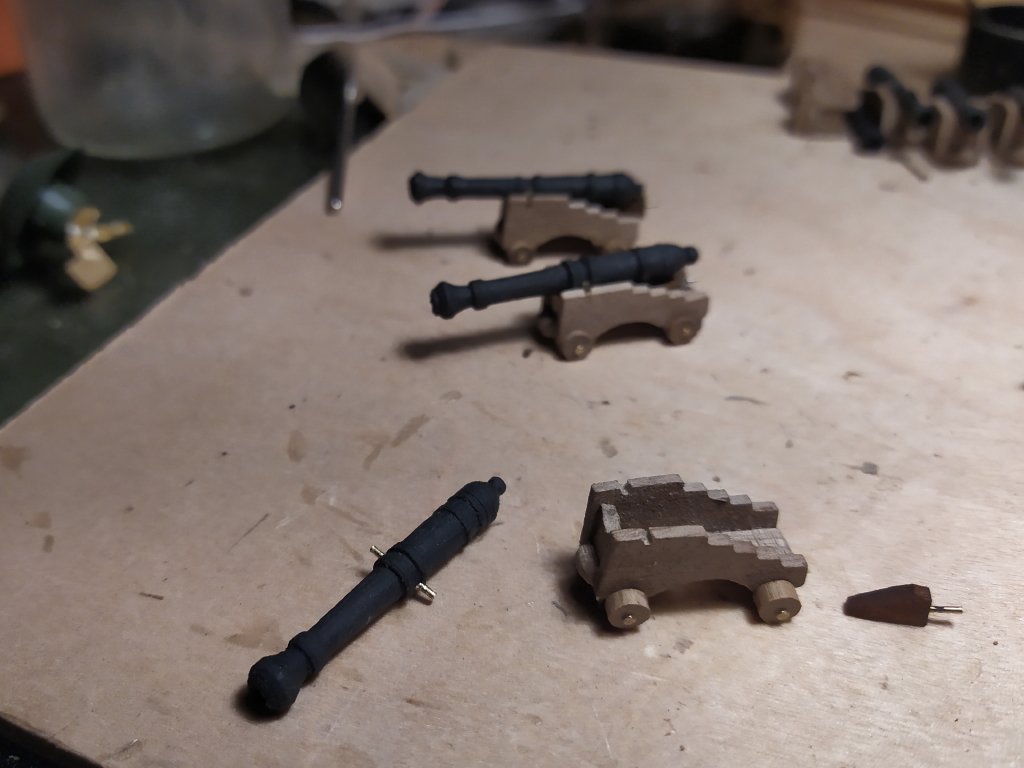
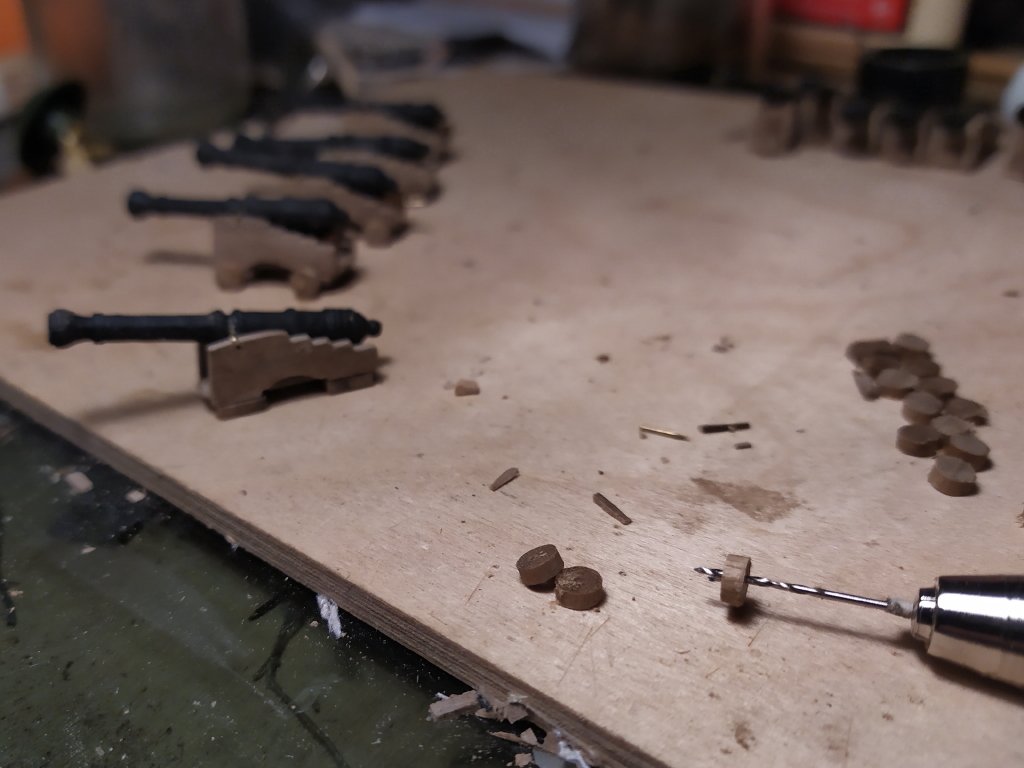
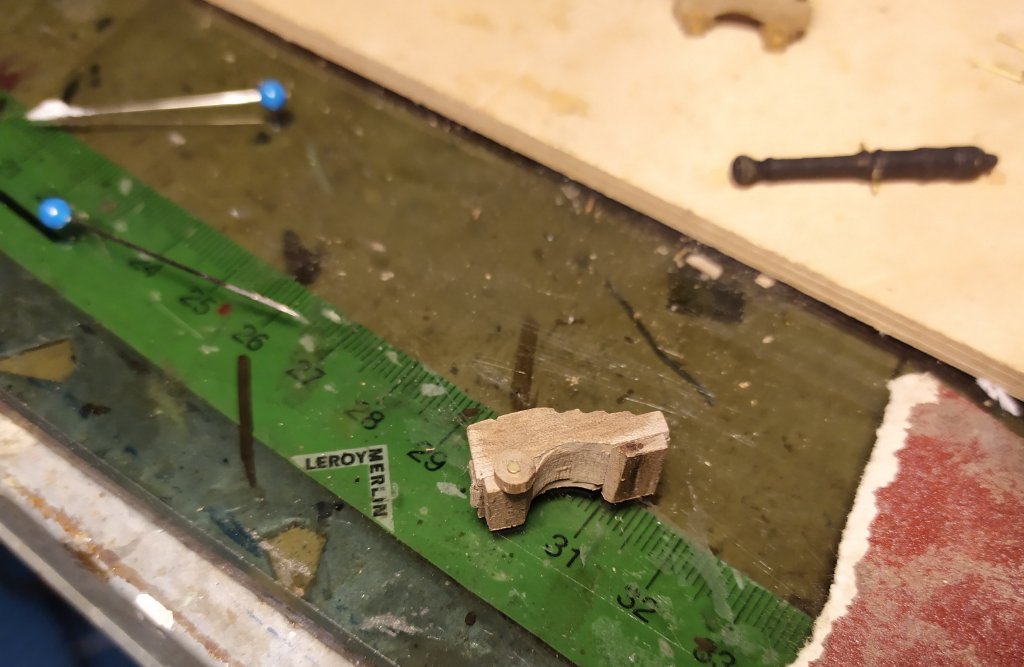
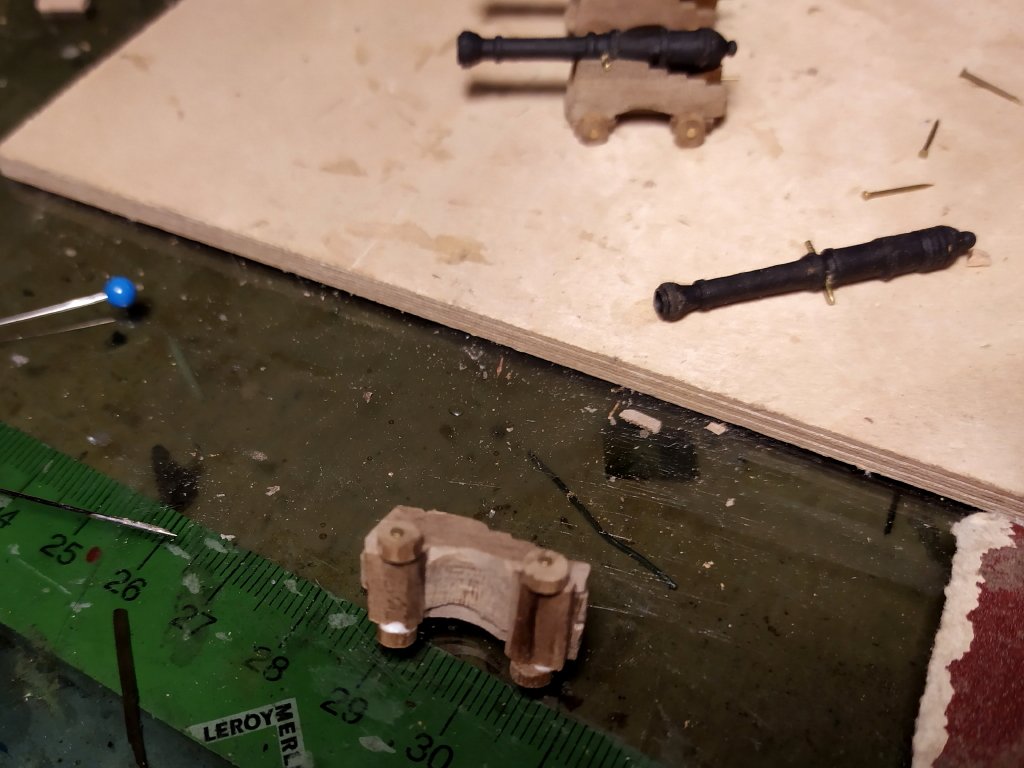
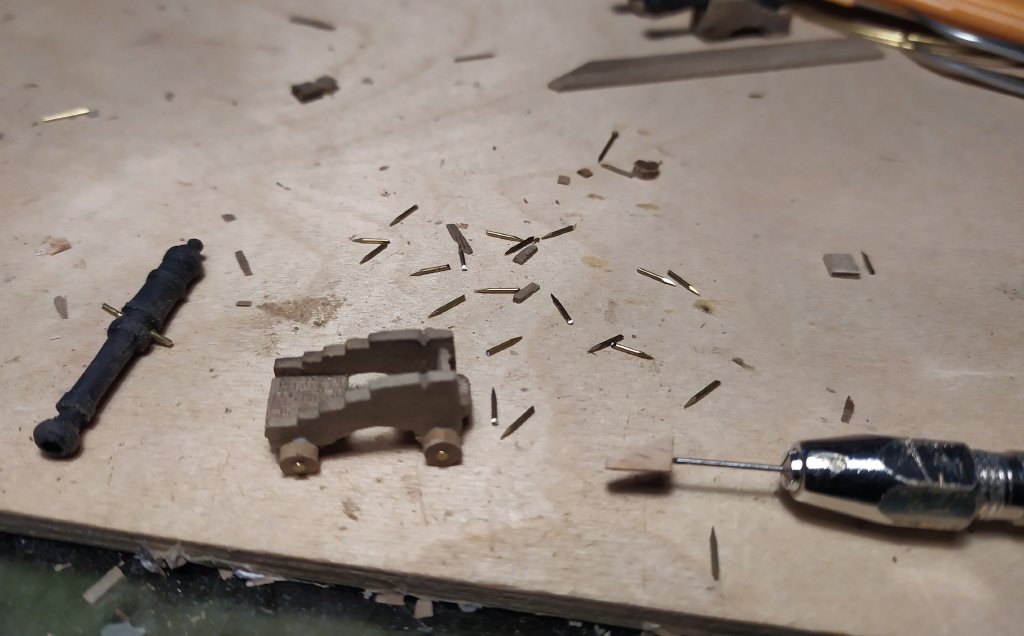
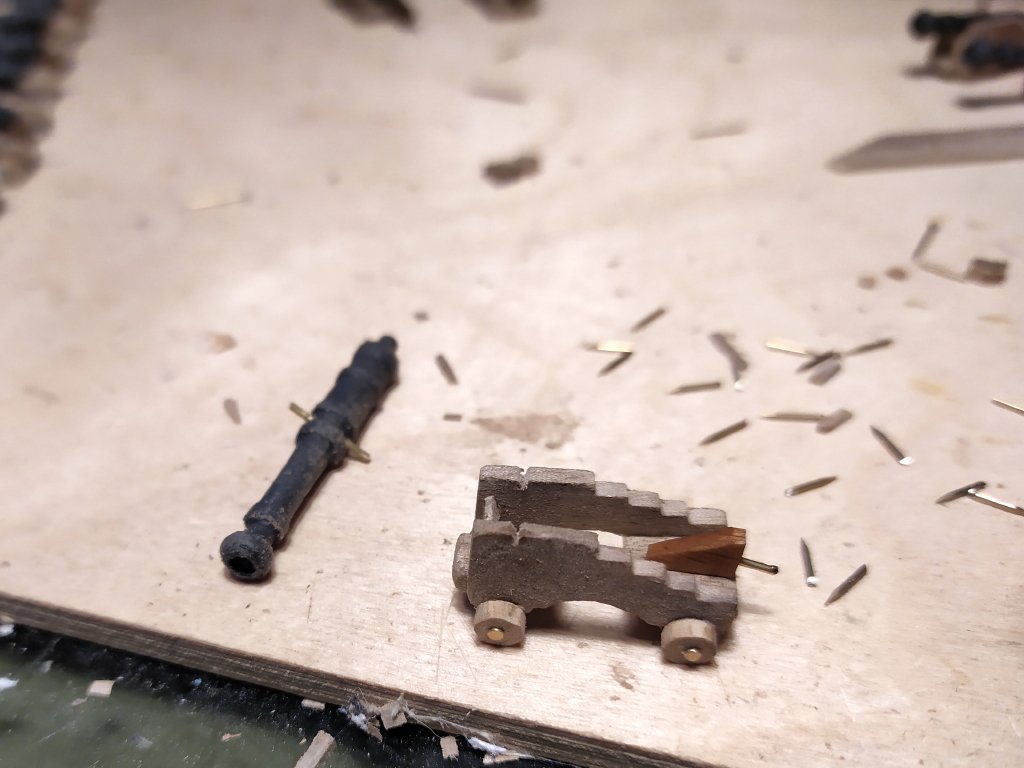
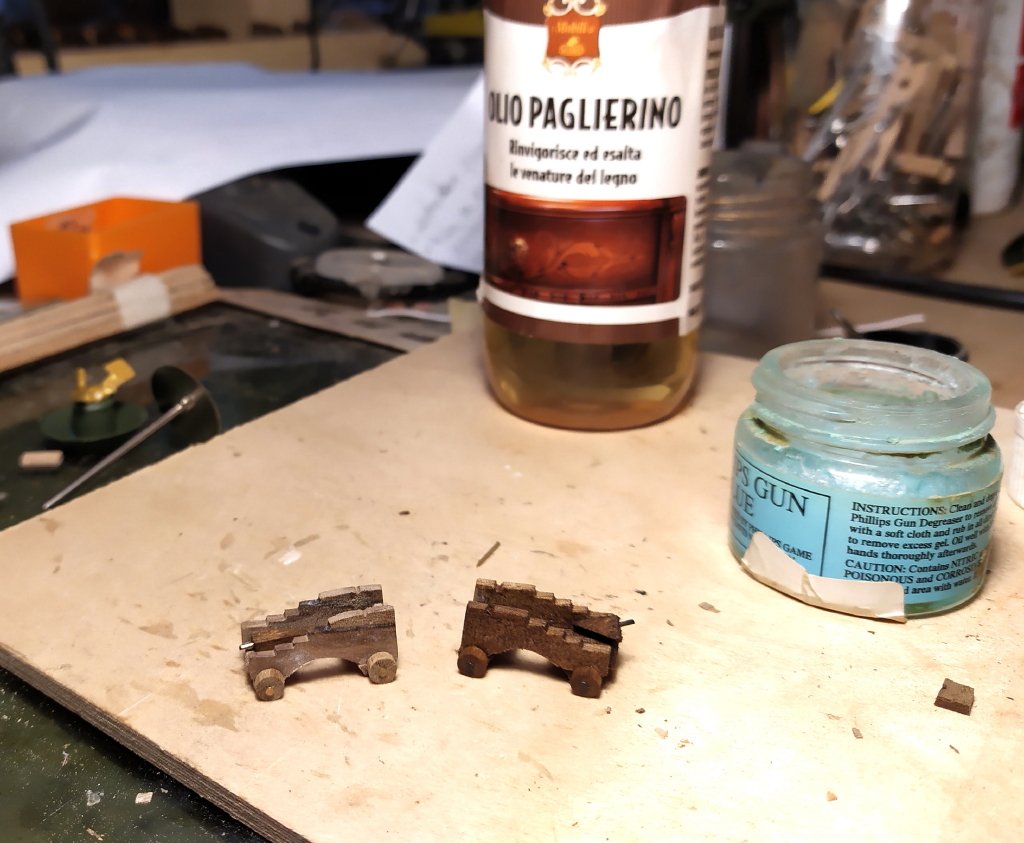
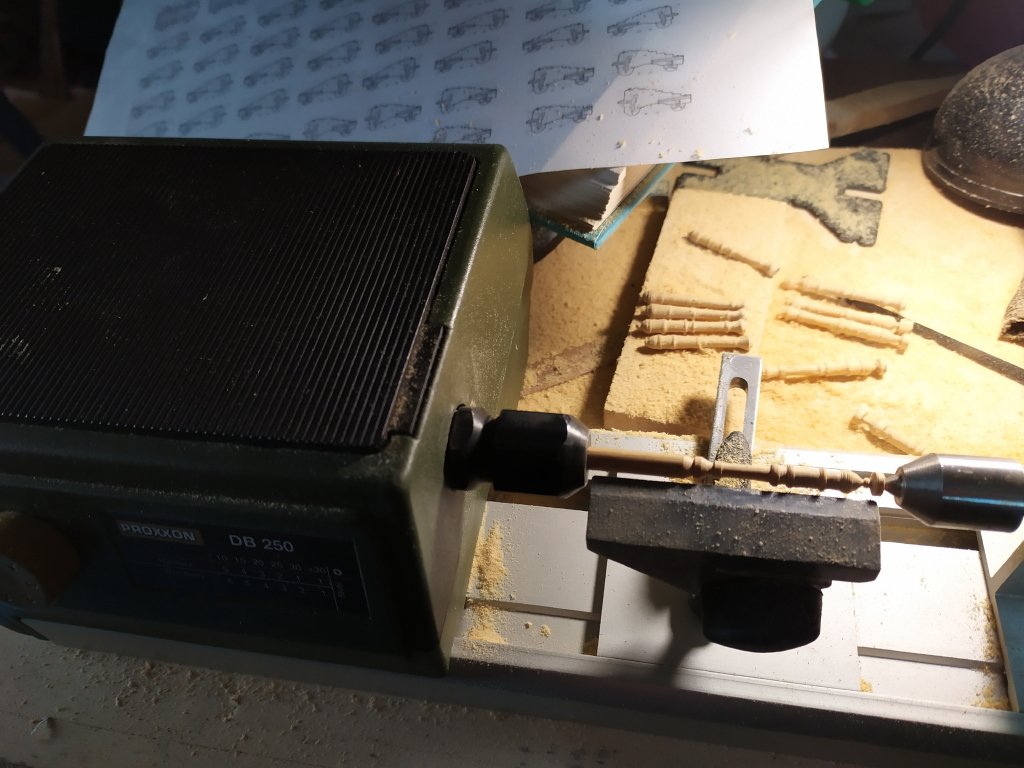
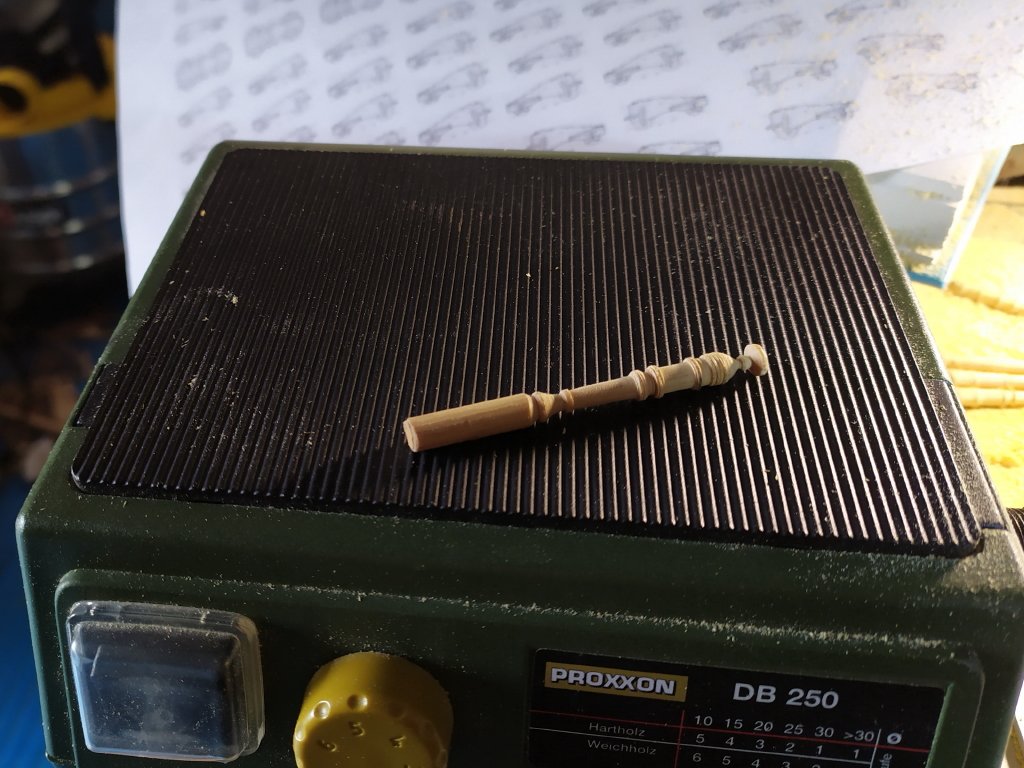
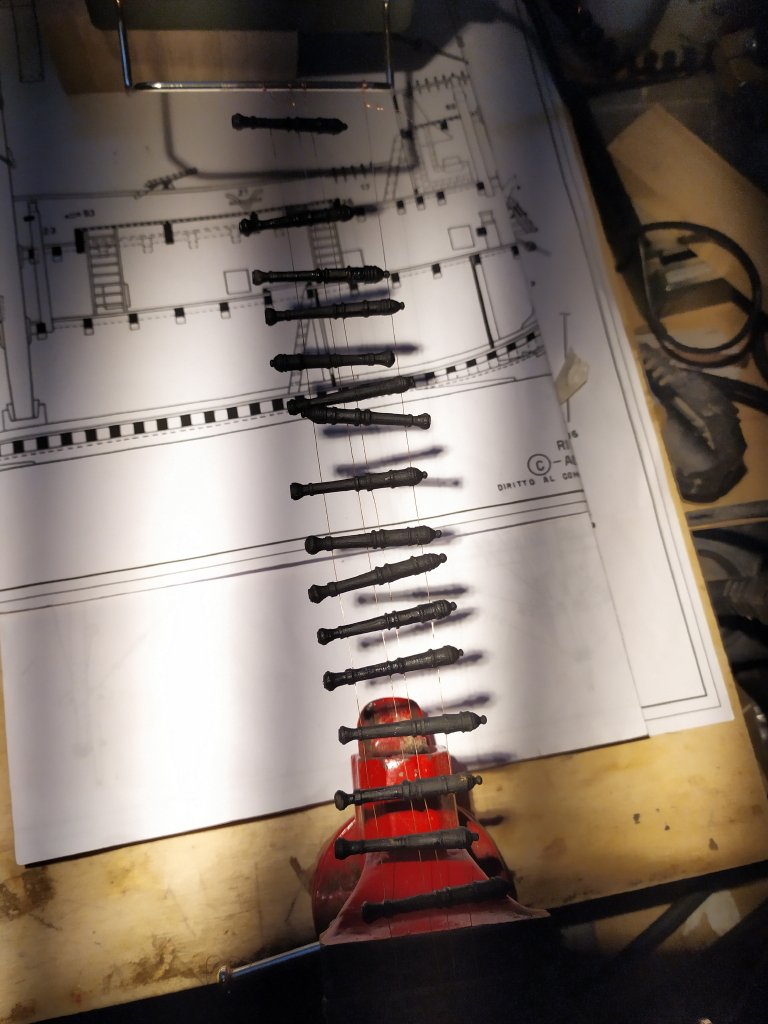
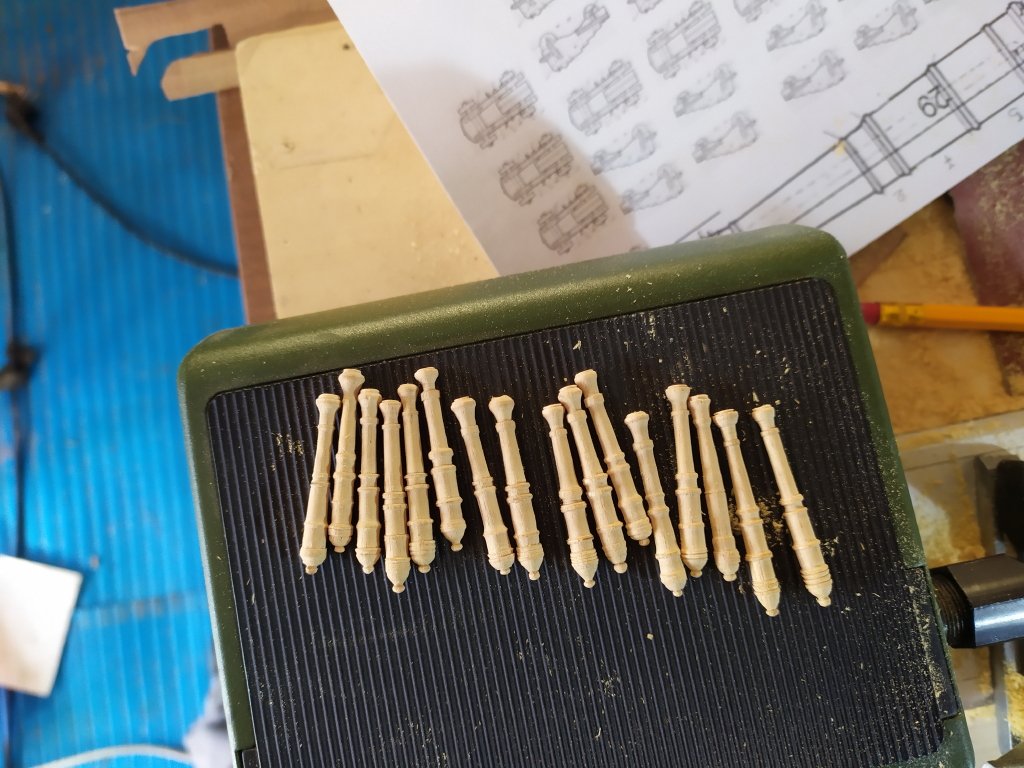
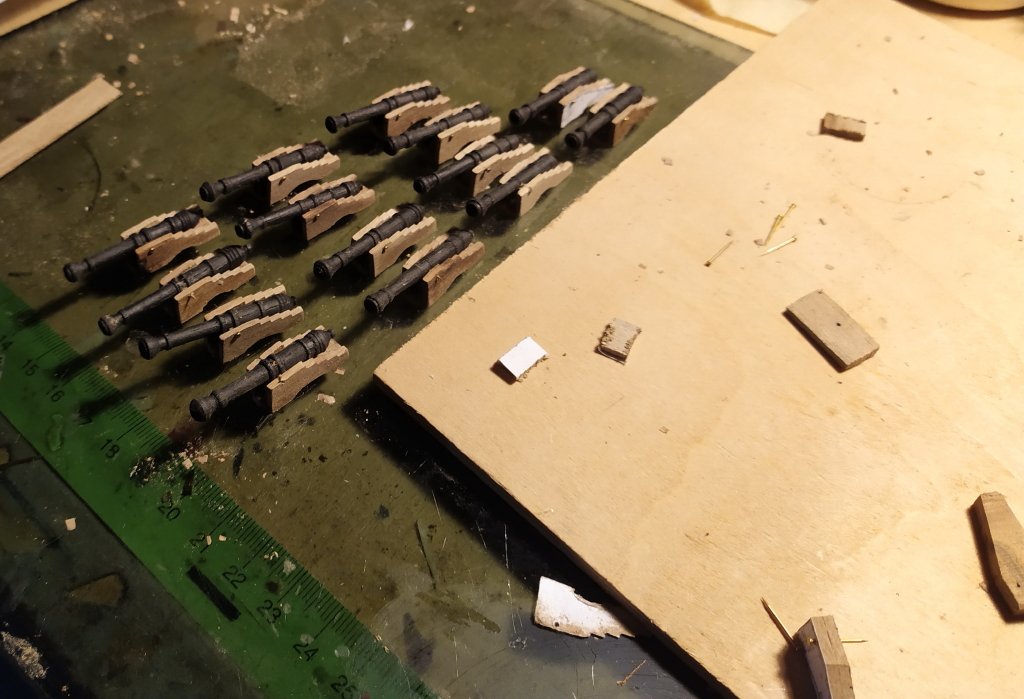
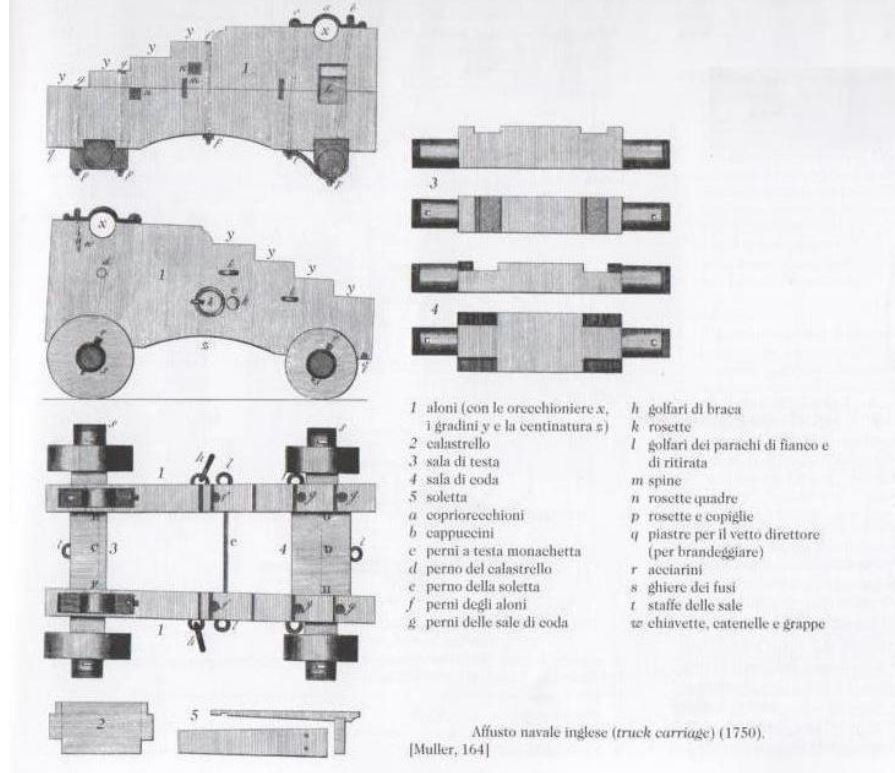
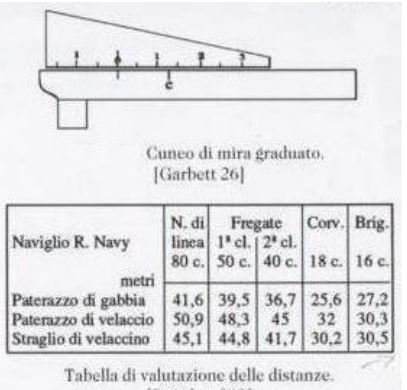
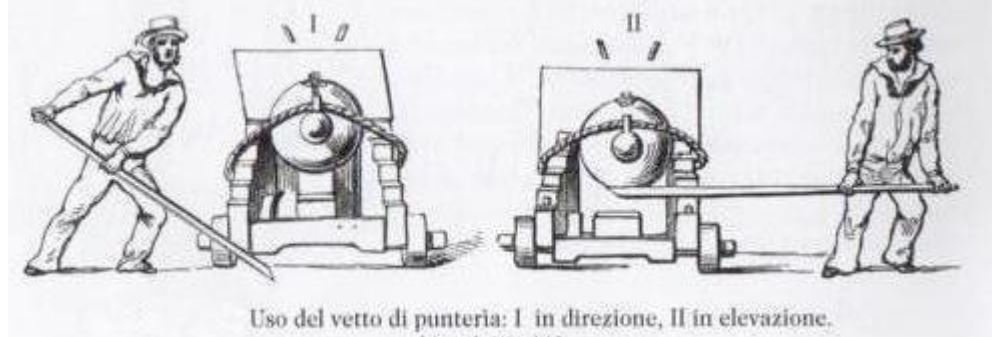
But before the openings on the sides and the final realization of the planking I decide to make the various accessories that were on the battery deck, I can only do it now, later I will have to "seal" the command deck and this will limit access to the parts under. I start with the construction of the cannons, these are 16 cannons that Sir Dudly with the renovations of 1600 will increase to 64, they are medieval cannons of the 1500 for which made in a more coarser way than the cannons of the 1700, for their construction I used the lathe and rummy like wood to make the rods that are 36mm long I had to make some mini gouges after finishing them I painted them with black water-based enamel I started preparing the carriages (I also made falconets, but they don't satisfy me very much ...) for the realization of the trolleys I used the "cherry" as I said for their realization I rely on the English cannons of the 1700s, trying to make them more "coarse" in the processing of the cannon barrel, the melting technique of 1500 was different from the one that will be used later while the construction of the trunks, I presume that it has not had any obvious changes, I carry a drawing of a 1750 carriage and the shooting wedge with the indications of the "lift" for the shooting, the shooting wedge over the two maneuvers, I°_ horizontal direction shift II° _ in elevation see you next time luponero

-
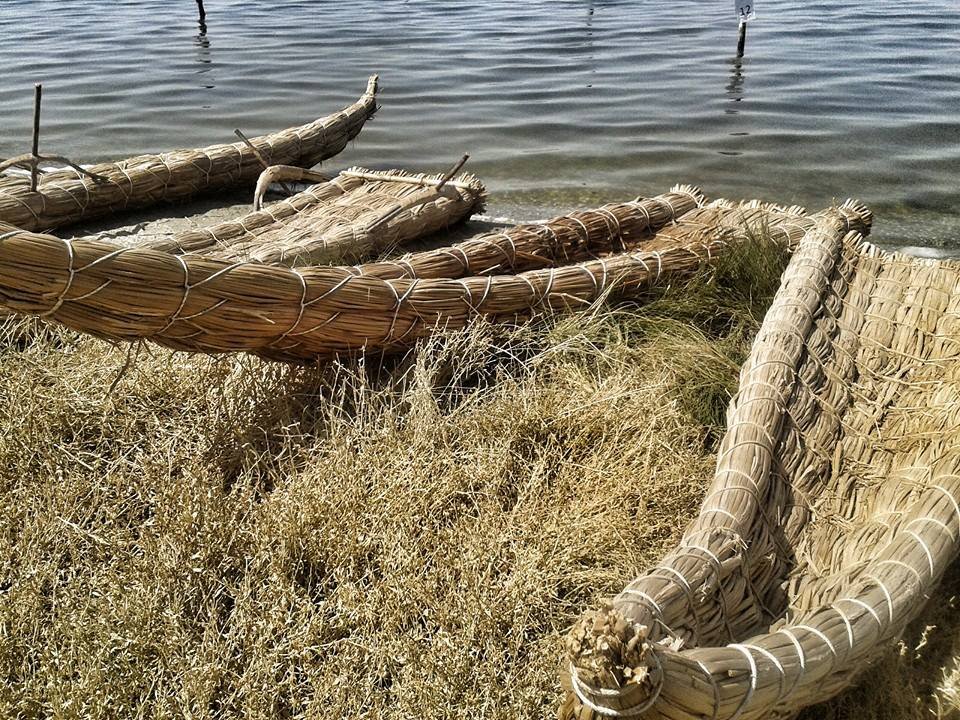
You're very good Harvey, I saw the canoes you make, beautiful !!! It seems that the canoes they make in Sardinia are similar to those made in Peru on Lake Titicaca by the pre-Columbian populations. I wish you to canoe with the Paiute natives very soon. https://www.youtube.com/watch?v=4ATDR7FfVxc with regard black Wolf
-
Welcome Harvey, in the magical world of naval modeling, I see that you like canoes, I am attaching the image of an ancient canoe made with papyrus and dry straw used for fishing, they are still built in Sardinia, it is a primitive boat, thousands of old years and still alive in the ponds of Cabras and Mar'e Pontis are called "fassoni" again, welcome luponero
-
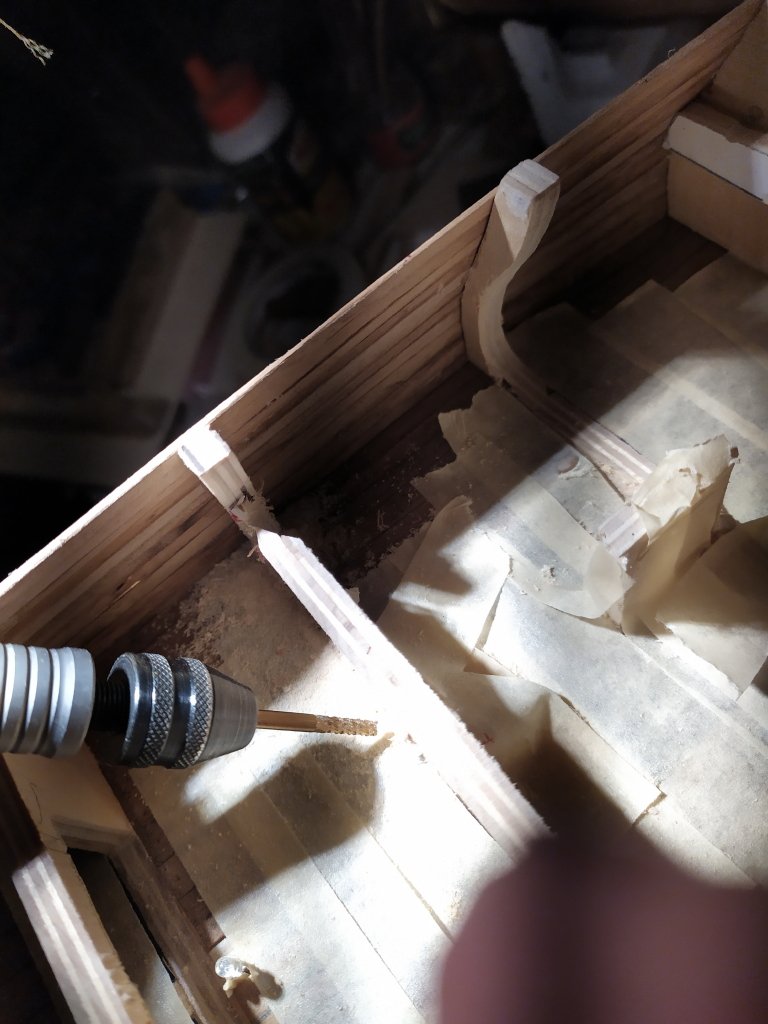
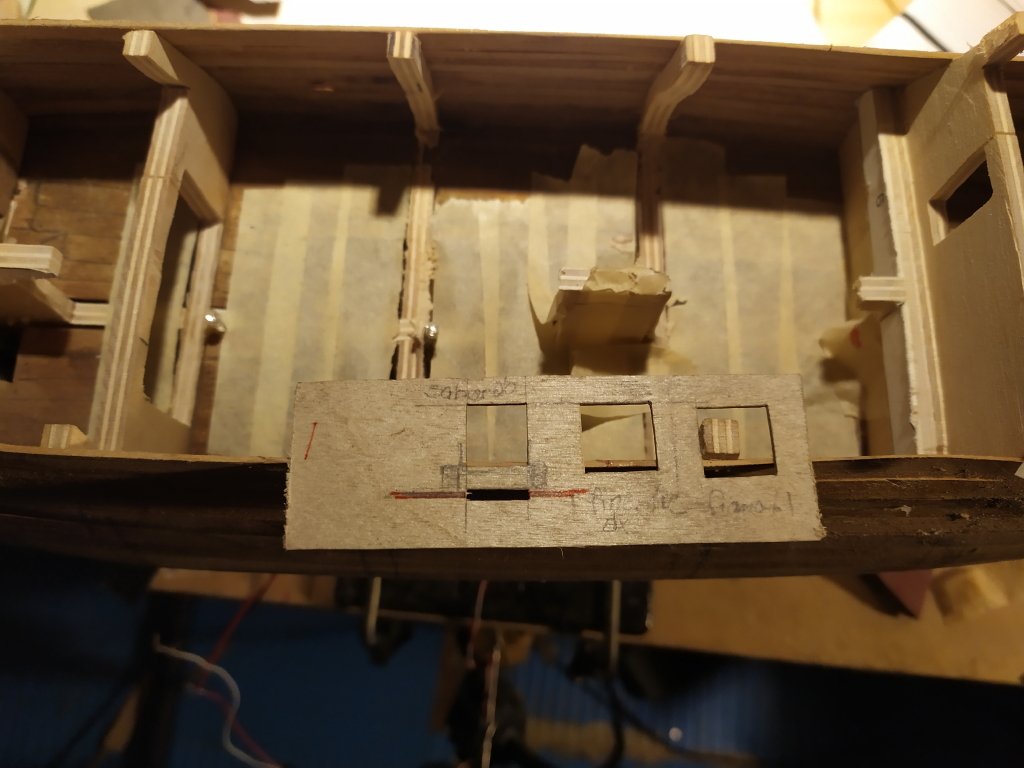
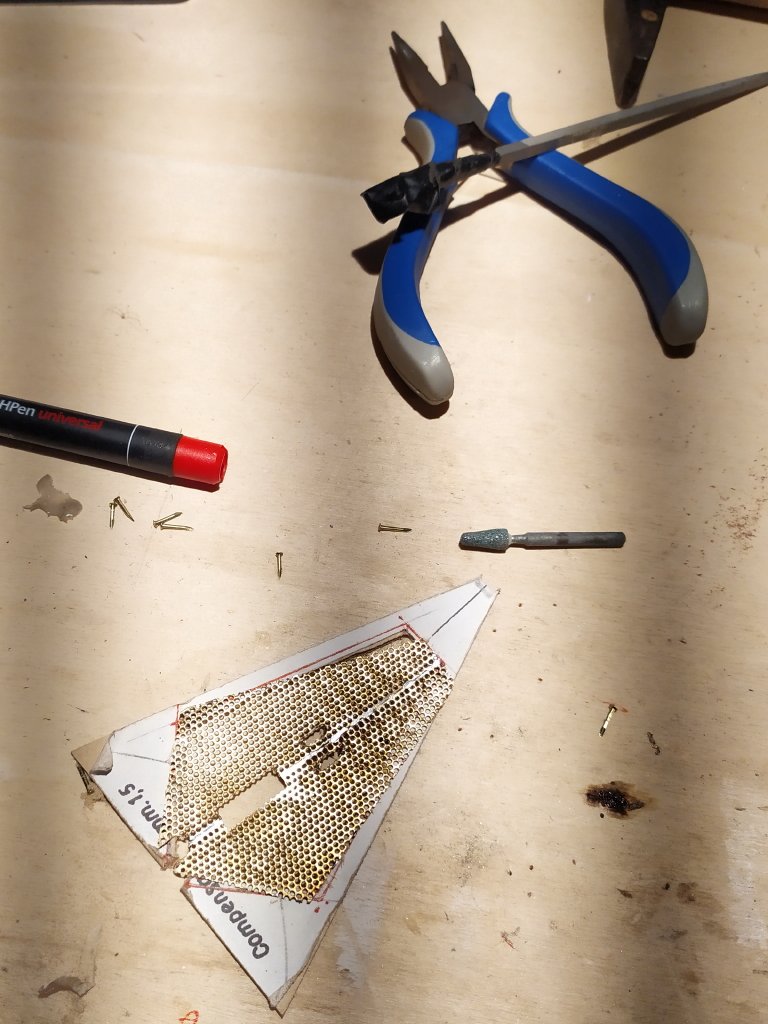
I thank friends for their kind appreciation, as I said before starting over and finishing the planking I want to finish the details present in the battery deck, on the deck there are 14 guns, in the project the developer recommends the use of "truncated" barrels, a solution that I don't like, so I'll have to start with the construction of the guns and the opening of the gunsports, which follow the "curvature" of the bridge, in Italian they are called lozenge gunsport, that is the lower and upper horizontal side (the thresholds) of the sandbank were parallel to the deck plane while the uprights (vertical sides) were parallel to the ribs so that the shape of the hatch was "rhomboidal" called lozenge, in other situations always, always maintaining the "parallelism" with the bridge, those squares were used for ease of construction, however it was avoiding the "ladder" construction for obvious aesthetic reasons, especially in galleons or vessels with many guns, the SGB has 16 guns, two of which at the stern, so the sand "lozenge" does not affect much different thing I presume, in ships with a larger artillery equipment, pasting of explanatory images (hoping that the translation is understandable) I insert some drawings relating to the diamond-shaped sanding blocks which show the position of the sanding blocks with respect to the curvature of the bridge but to work on the bridge setting it up with the details, I have to open the frames, the most complex part, working with the cutter near the wires of the lighting system is not easy, just "touch" a wire and the lighting risks not working With adhesive tape I protect the openings from the dust produced during processing with the milling I start to widen / open the frames after practicing the openings I check that the leds still work has become a "paranoia !!!" I prepare a template that will be used to make the openings on the side of the ship, windows, gunsports the red line made under the gunsports, serves to verify the one shown on the side that follows the curvature of the bridge, to open them in the right position I carry over with adhesive tape the precise position of the gunsport openings and of the holes for water drainage (limber holes) Openings that I will carry out, when I am, sure that I have finished all the work on the bridge see you next time black Wolf


-
"lusterklem" in English I don't know, in Italian translated it would be "clamp", in Tuscany it is also called "mammoth" but think about how language can change things, however it is that object where you attest to the electrical wires, but from the "lusterklem" to the switch where the batteries are, do you go outside? of course: beautiful creation !!! luponero
- 756 replies
-
- 2
-
-
- galleon
- golden hind
- (and 2 more)
-
Hi Patrick, I am very pleased that you have restarted with the work, which I follow with considerable interest !!! (very interested, given the constructive similarities with the SGB that I am making , ) a question "on the fly" the wire that powers the LEDs you leave it visible outside? or do you foresee a different passage that makes it invisible? luponero
- 756 replies
-
- 1
-
-
- galleon
- golden hind
- (and 2 more)
-
luponero reacted to a post in a topic:
Golden Hind (ex-Pelican) by Baker - FINISHED - scale 1/45 - Galleon late 16th century
-
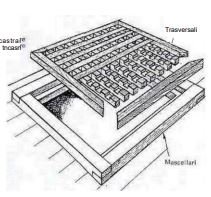
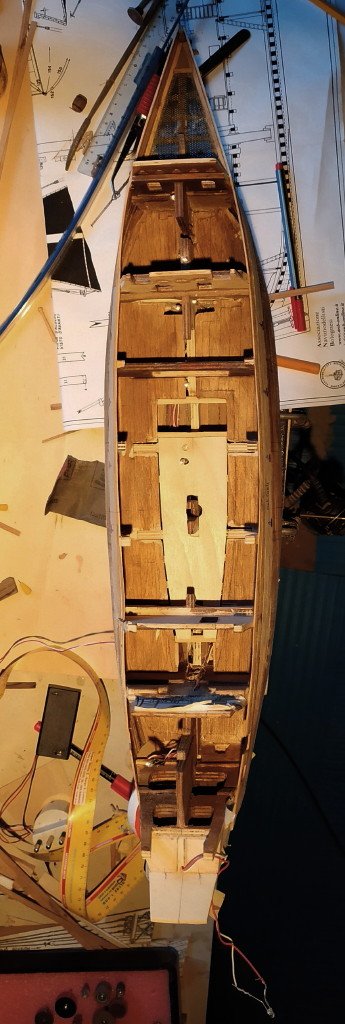
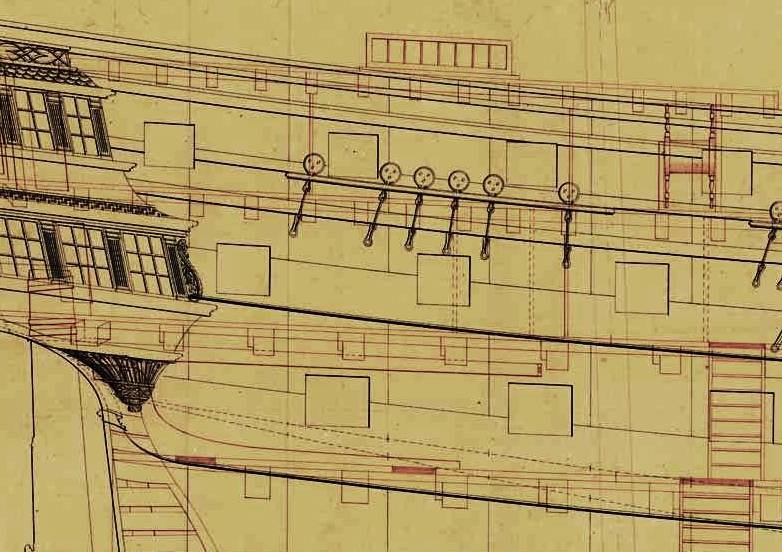
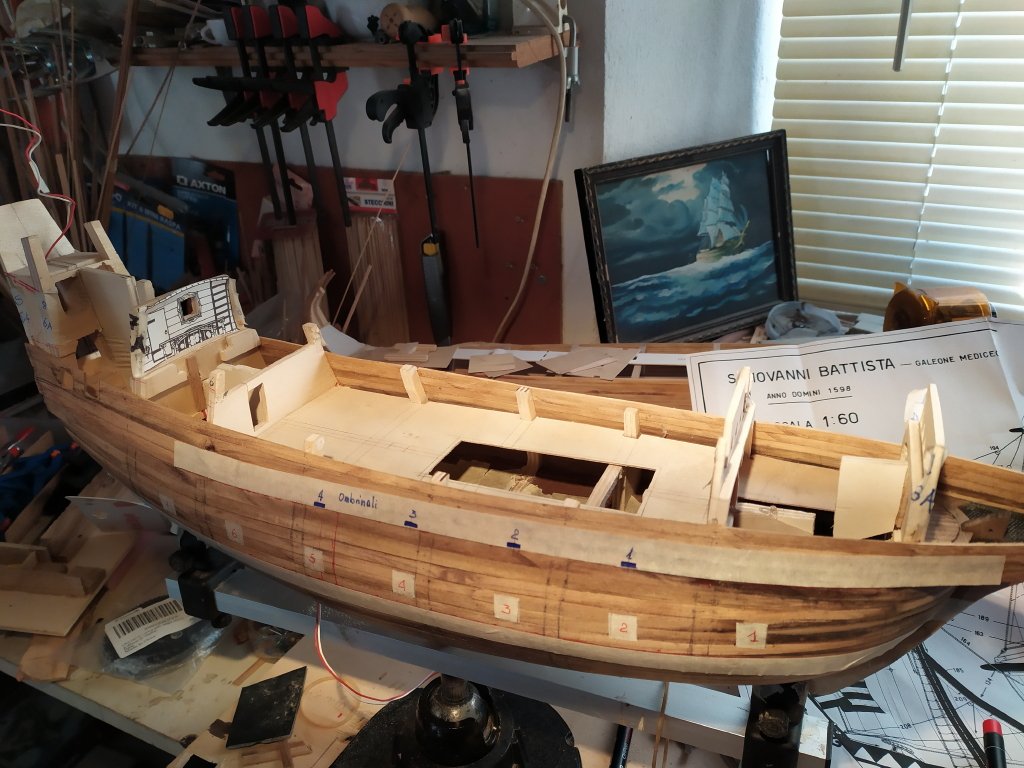
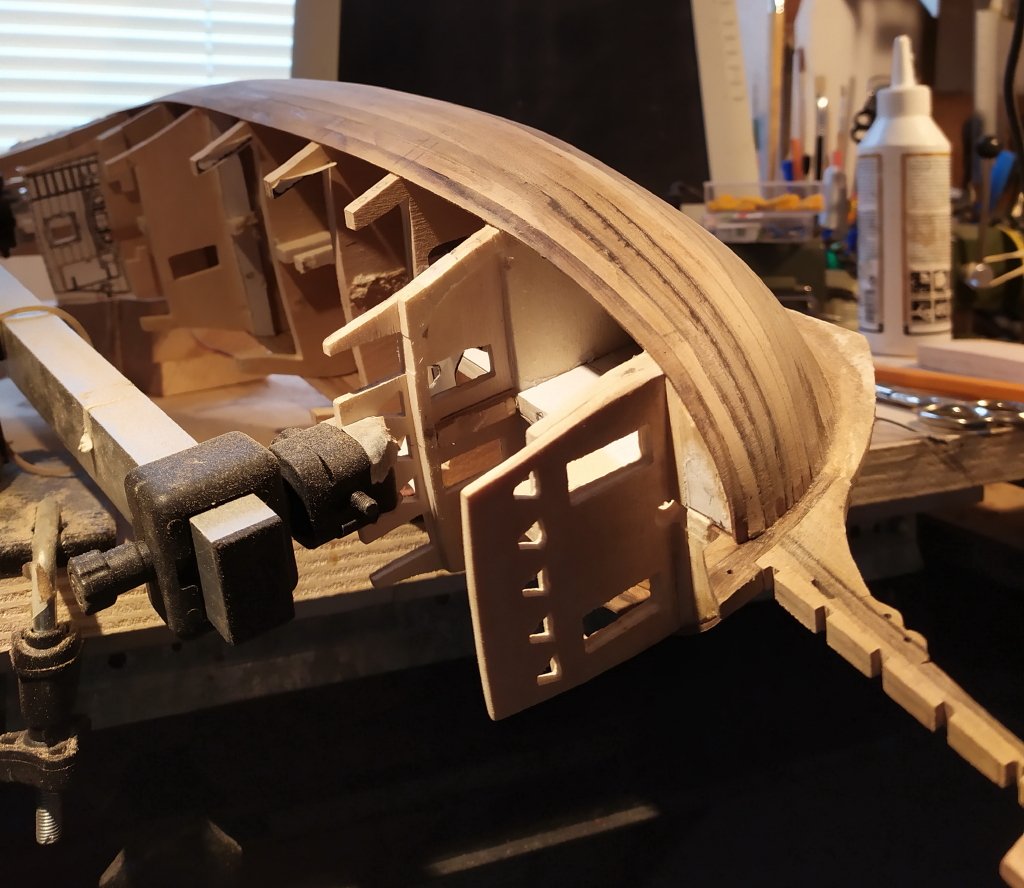
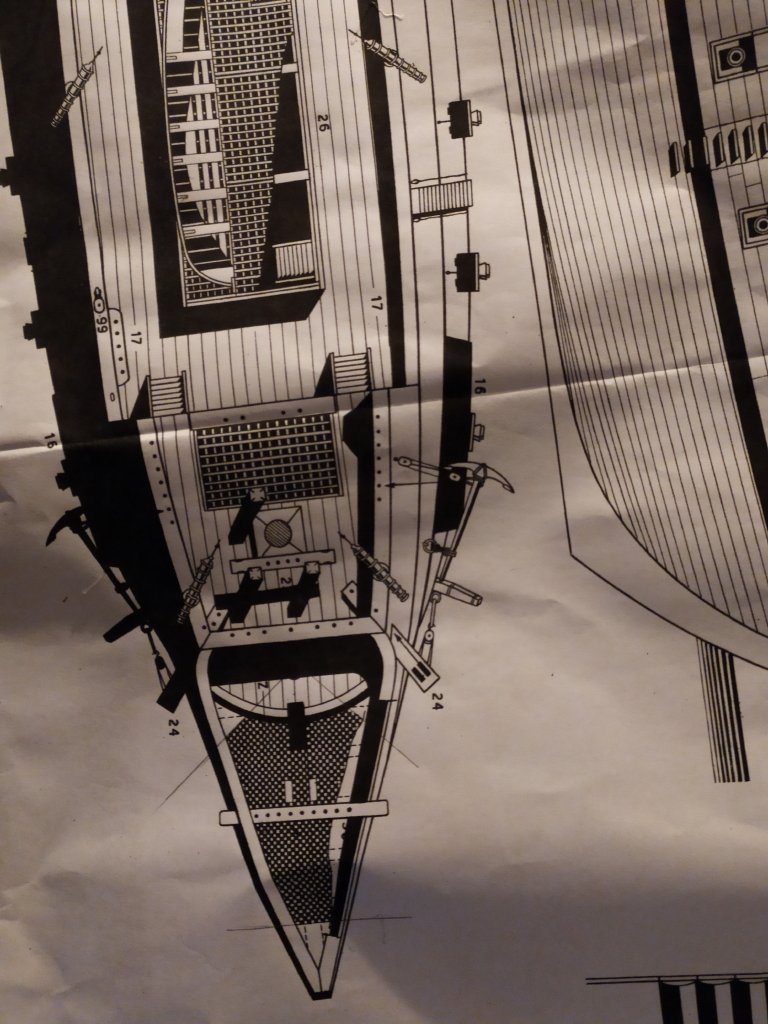
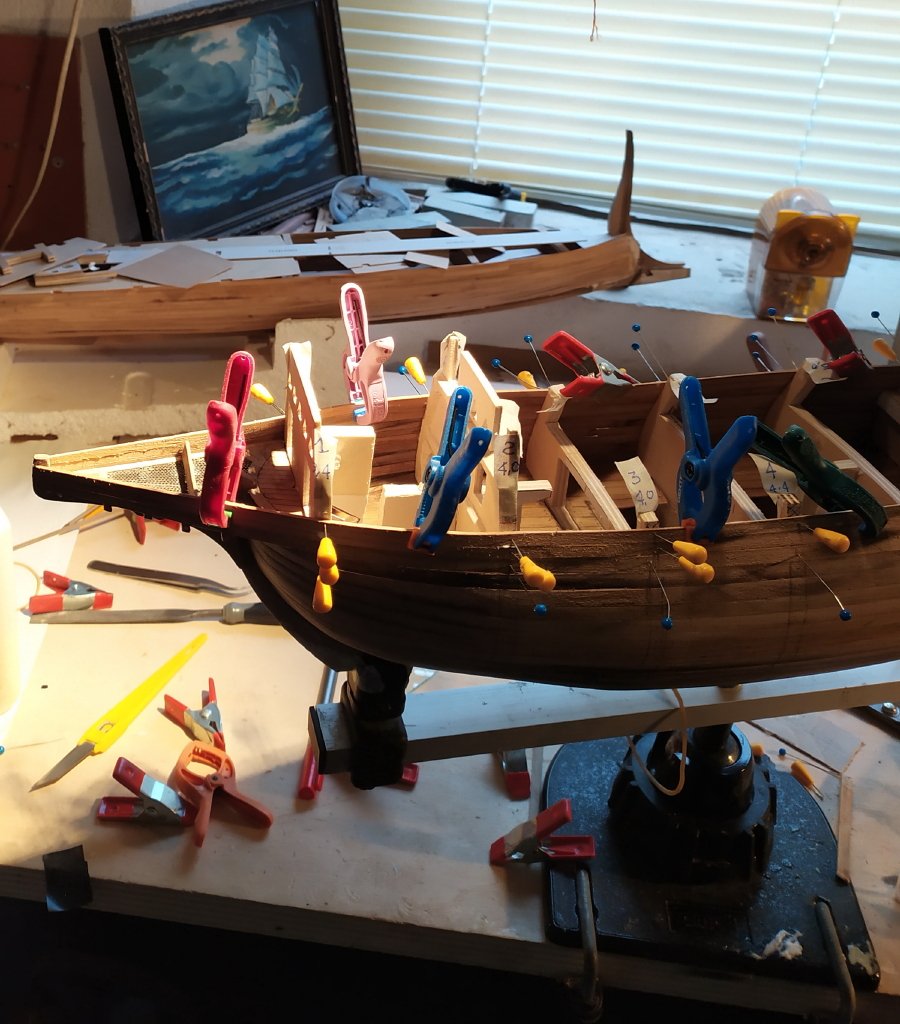
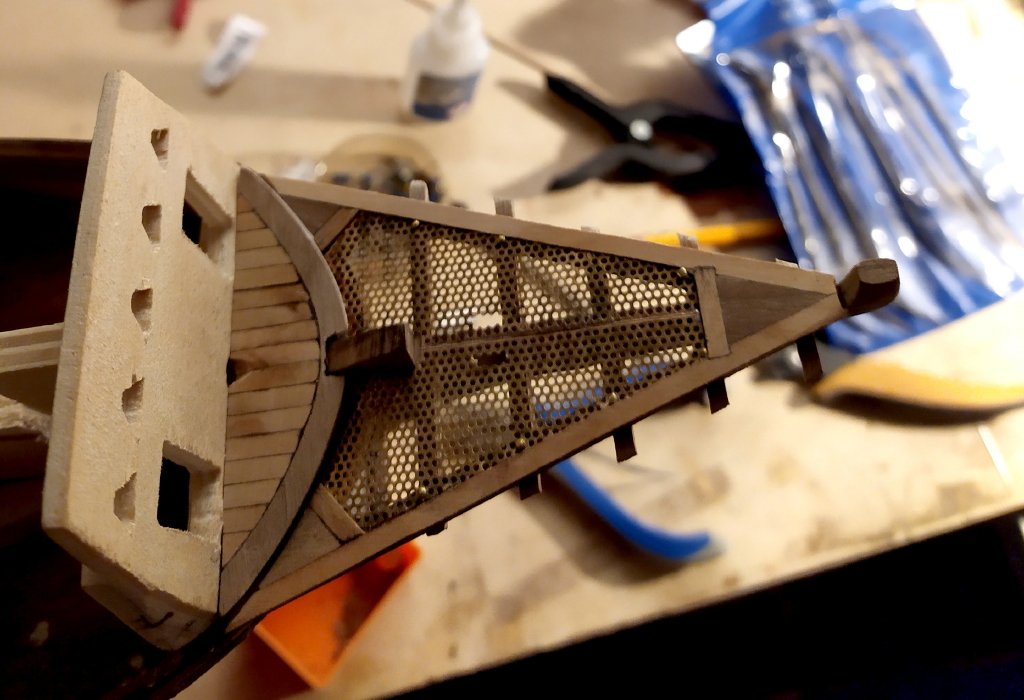
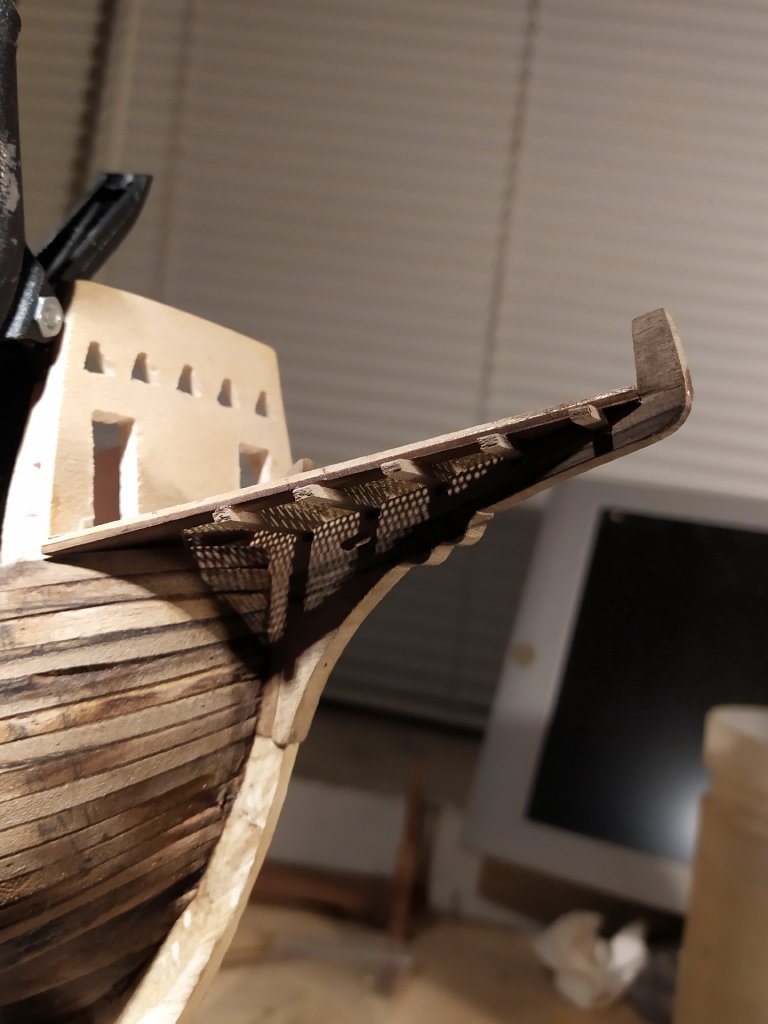
In the meantime the switch for the leds arrived, the work continues with the polishing of the strips, I have to do this because I want to put the guns on the battery deck, the project involves the use of "truncated" barrels fixed on the special blocks of wood, a condition that I do not like, I prefer to make complete guns, allowing you to see the interiors from the open gun doors, to do this I will have to "remove" the internal frames, making future processing very difficult !!! the "national" walnut is one of my favorite essences, I also had pear and apple trees both well seasoned, but once again the walnut won, as you can see the colors are very marked and in my opinion give a very "velvety look" "to the model, for now it has not been treated with any oil or paint, but even now the natural color appears to be very pleasant. This is the drawing relating to the detail of the bow where you can see the "grating" of the bridge and the part of the small bridge where the designer has brought back the part made with the "anti-slip" plate on other galleons of the period many times a " floorboard "in wood, but in this case perhaps the sheet metal allows to obtain a very reduced thickness which in the context appears more pleasant Finished this particular continuous with the realization of the first planking going up from the keel towards the upper decks trying to structurally reinforce the model to cut and mill the frames, allowing the vision of the interiors from the doors and hatches of the guns, for which I made a dozen strips decreasing the width according to the height of the frames and the profile of the sides which have a very accentuated curvature, due to the considerable height of the formwork, but as soon as the bridge of the cutting is finished, I tried to reinsert the small pieces of the 0,8mm birch plywood that would be the continuity of the battery deck or the upper deck of the housing that I had removed for the construction of the planking and I realized, after having been part of the first planking, that the room for maneuver is "very small", and this will make it more complicated to set up the interiors and mill the frames to try to transform them into ribs without causing damage, especially to the LEDs .. . the "easy" routes do not give the satisfaction as the "difficult" ones, let's hope so! see you next time black Wolf


-
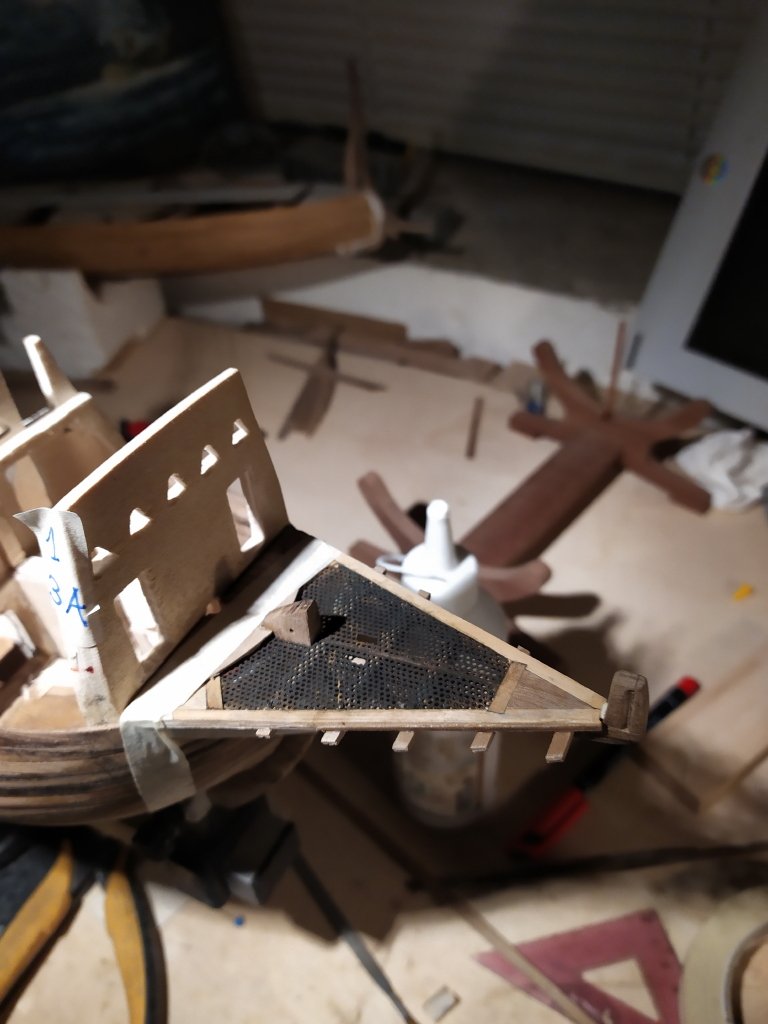
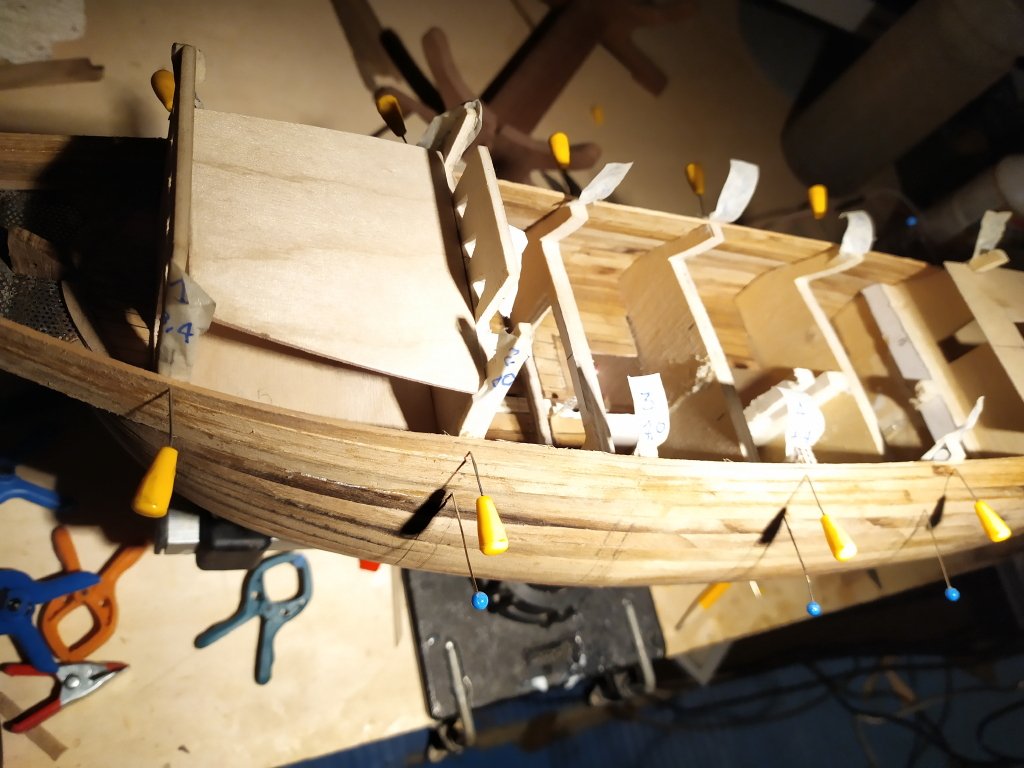
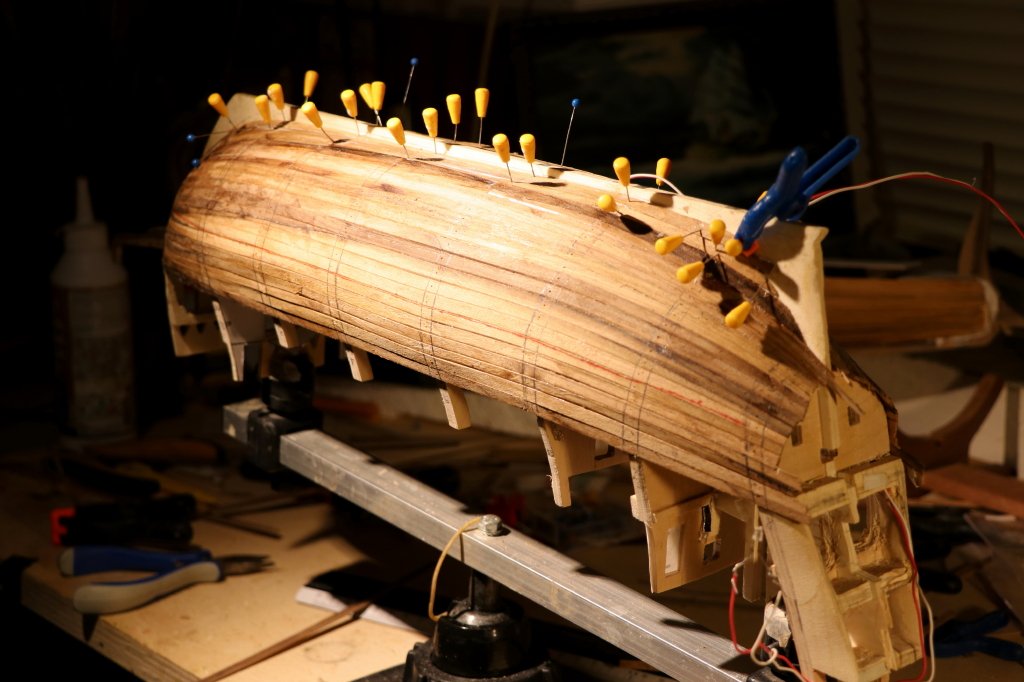
Thanking you for the appreciations, I update the build with the processing phases, I continued in the realization of the planking by cutting a few strips to easily fold the rib strips, I use an iron taking care not to stretch the wires of the lighting system the "red" staff is the drum bridge, a fundamental reference for the creation of gunports, the high and variable height of the sides of the galleon requires the creation of strips with a different height, so I choose another "national" walnut board I make a few strips, until I reach the cutwater, in this part there is a small bridge on which an anti-slip plate is placed, I thought that in a couple of hours I would have made it, I thought ... the "non-slip" slab should be metal resting on the deck and joists that are on the cut to make the anti-slip plate I used a brass plate that I welded along the edge in the center, I cut out the central part of the 1 mm plywood with which I had made the base of the bridge once the supports have been completed, the brass plate is fixed checking that the leds still work! the profile is finished, for now everything is ok! see you next time black Wolf

-
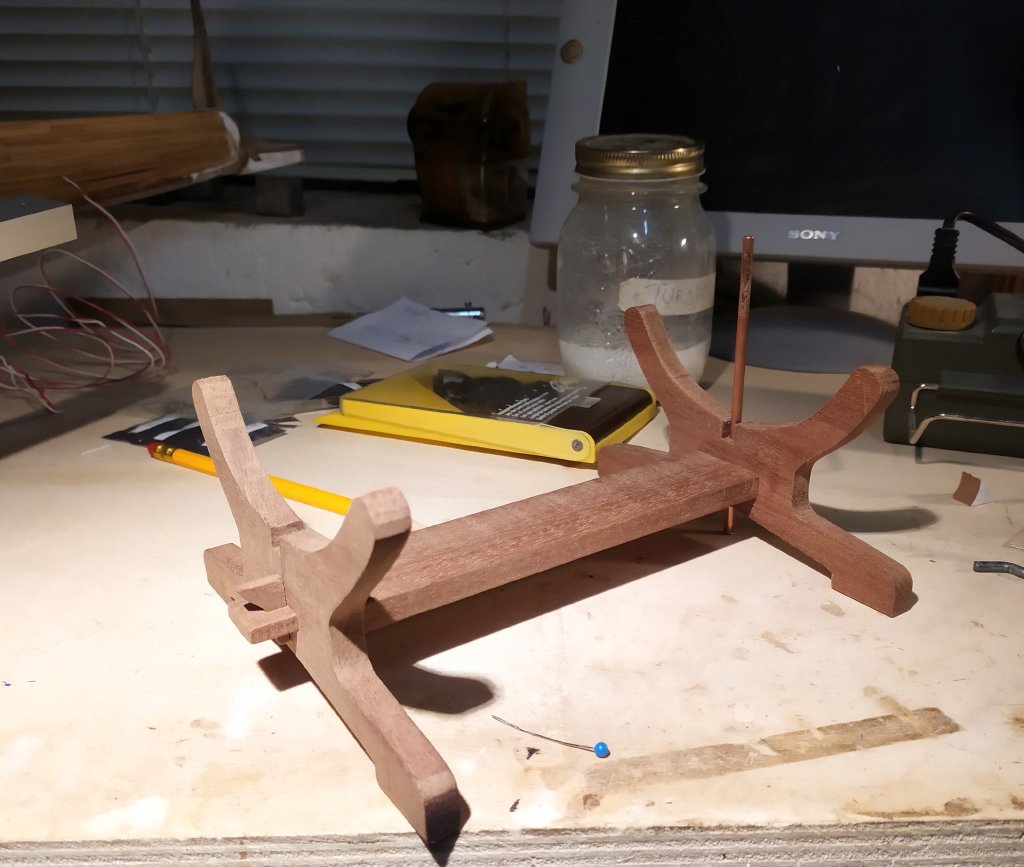
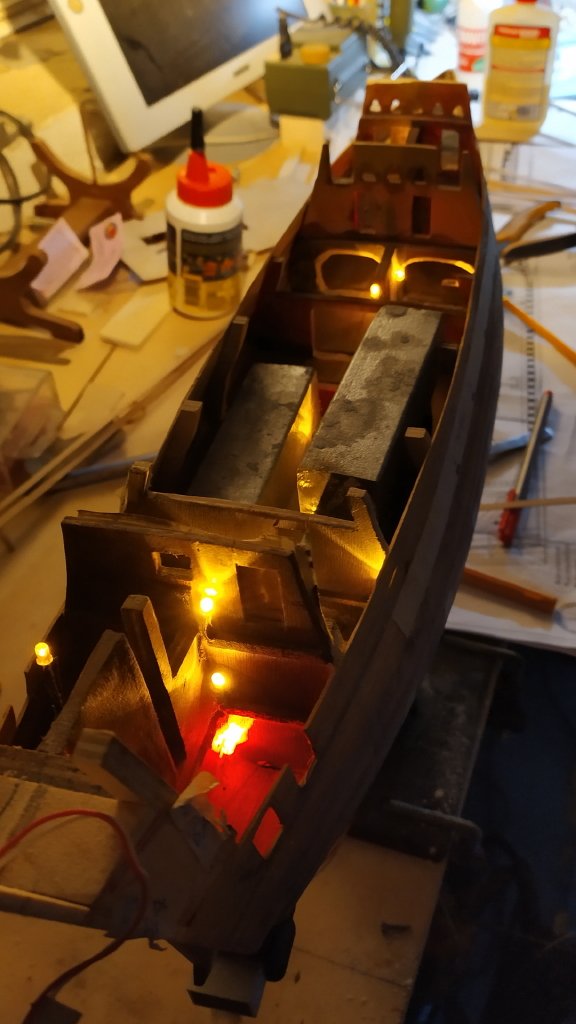
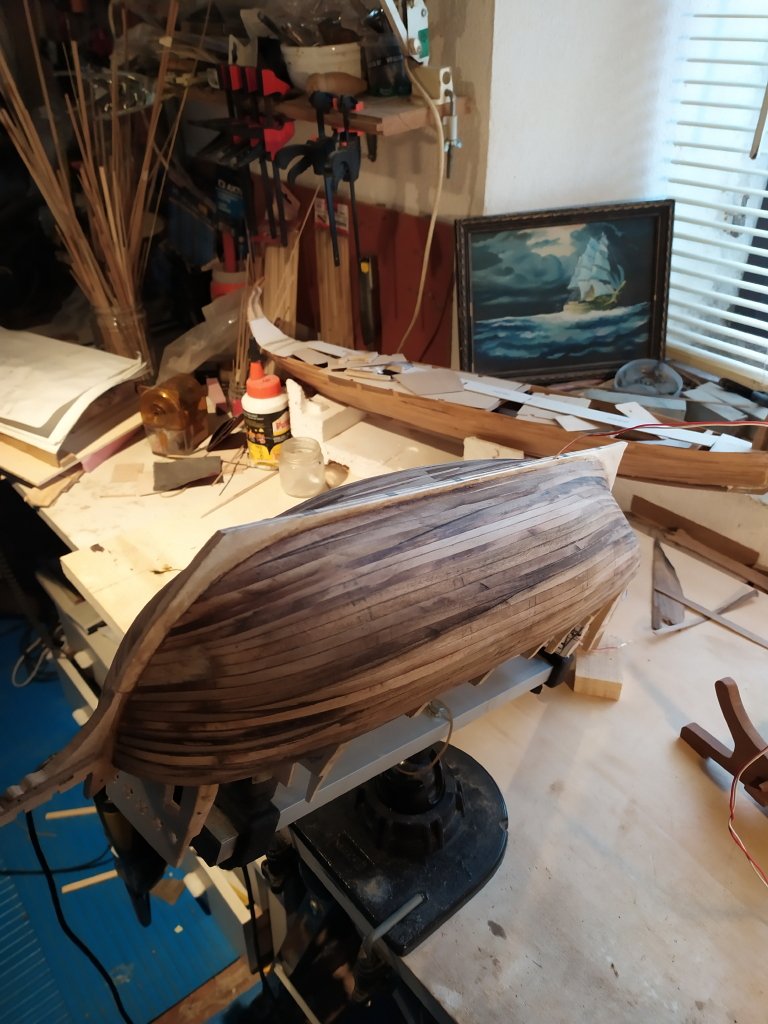
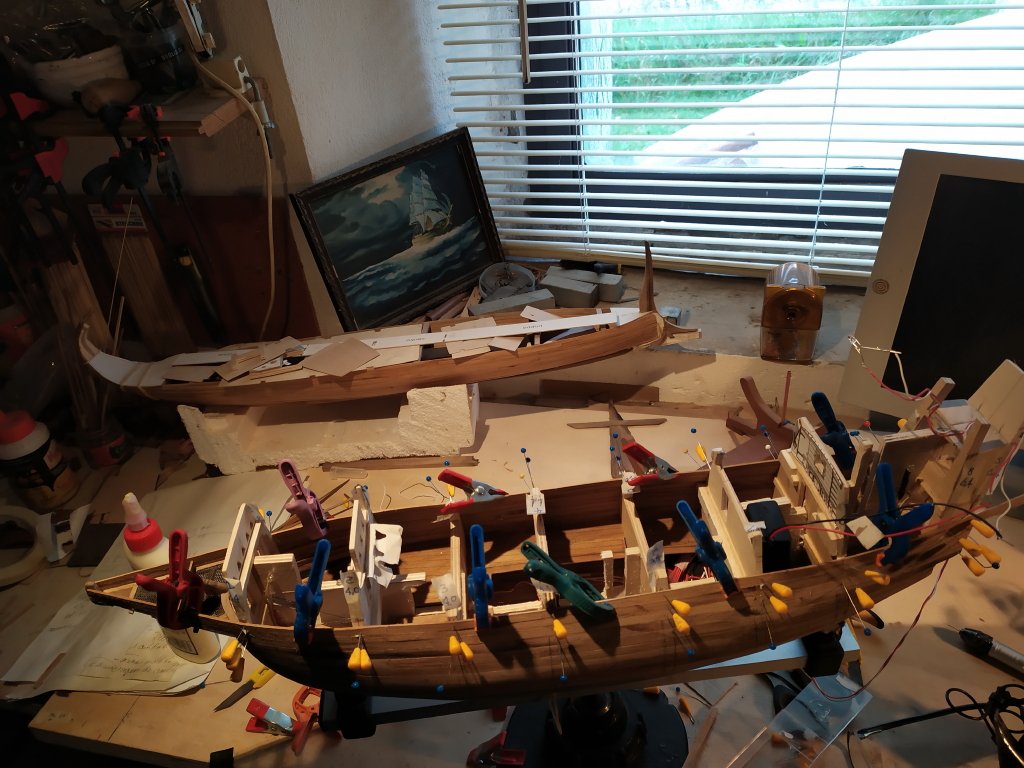
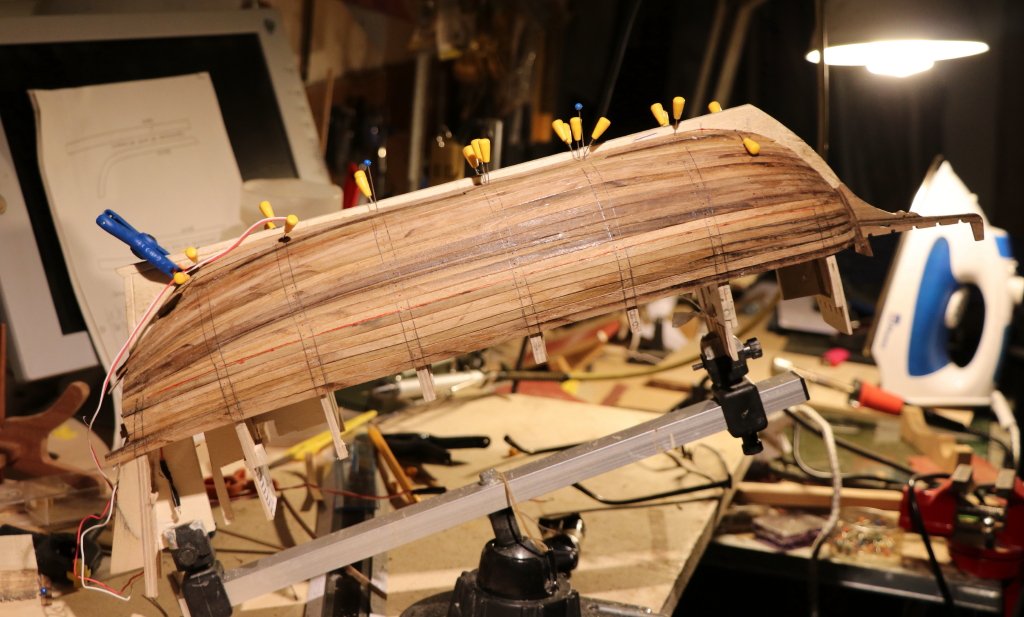
You're right Steven, Dudley's life is very fascinating as the "characteristics" that represent it, illegitimacy was one of the situations that prompted Sir Robert to change country, his stay in Livorno was fundamental both for him and for the city, as its constructions both in the architectural and nautical fields, as well as the restructuring of this model, I am carrying out the version prior to the restructuring of the ship that will take the name of "Livorno" as the city that hosted it. The preparation of the electrical system has caused some structural "changes" on the frames and various, I presume they are not finished yet. Unfortunately the mentality of taking only the "necessary" penalized me, that is, three flickering LEDs did not "light up", a couple for my fault another was defective, so I took back others, in practice the biggest expense is in shipping ... it was at the first let alone at the second .. however I decided to work on the model support, usually it is a piece that I do at the end, at least with the planking finished, but this time I decided to anticipate the times, because to bring the braid of the electrical system to the switch I have to switch from the support trying to make it as invisible as possible (we'll see ...) I have had a 1 cm thick mahogany board for a long time, it is not an essence that I use a lot, also because as a timber being very old it tends to chip in the cut and has lost its elasticity, so the use for the bases, I decided to make the one in the construction plans, which looks like a "fratina" (typical Tuscan dining table) with the typical joint on the tenon, once the wedge is removed it is disassembled, obviously it does not need to be glued, so I tried to make it by practicing a 4mm hole where there is the joint with the keel by inserting a copper tube into the hole in which the braid will pass that from the base (3cm) will then end at the switch always placed in the base outside the case (so I hope) I have finally finished the structure of the i.e. at least I can start the planking which becomes a fundamental element because I want to work on the frames bringing them back to a shape similar to the rib (...) what to say this project is stressing me, the more I go ahead the more I notice the "shortcomings" the part relating to the bridges is a drama not only did the designer forget to draw them, but in the relative part of the drum bridge with the joints with the frames, (with missing areas) full it creates many problems, so much so that the use of the truncated barrels for the guns screwed to black-painted plugs to make them less visible ("half-rods" with wooden plugs to screw them which I always consider very ugly and unsightly, especially in a galleon that has few cannons ... probably the fact that there we are also the construction plans relating to the "Livorno" will have determined for the version of the SGB prior to the restoration carried out by Dudley that I am carrying out, a condition of "carelessness and superficiality". Even the stay of the master is another element to "deepen" , in the plans it is reported as indicated in the drawing resting on the formwork (condition to say the least "anomalous" and not very compliant given the resultant of the load that should To put several kg of the resulting tension on the support point, it would be useful to see if even in the "Livorno" the forestay passes by leaning on the bulwark, in short, I am not very convinced of the "truthfulness" so it is not the max, however we go ahead, the photo of the SGB with the phase and neutral connectors of i.e. (reminds me of the electrical system at home ...) the stern frames and part of the keel in elevation will have to be removed, keeping the decks that can be opened to be able to mill, for this reason the planking will become a "holding" element a bit like in the triere, only that the sealing feature carried out by the tenon and mortise is made from the glue, distributed on the edge and from the few frames interested, let's hope well ... After the "special effects" some "old style" manual work, the planking, I made myself with the disc saw, a few walnut strips with a thickness of 1.5mm and a width of 6mm , a "width" that I usually do not use, I like the 4 / 5mm strip more, however the curves of the SGB are not very pronounced and then it is the first planking, the first strip was put on the edge of the bridge following the curvature, for the calculation of the strips I used the greater ordinate dividing by the width of the strips, the measurement of the ordinate: the support side of the strips, the measurement of the greater ordinate is 12 cm, so dividing the same for the width of the strips (6 mm) obtaining the quantity of the necessary strips: there are 20 (obviously the width of the strip is conditioned by the purpose of obtaining a precise quantity), each ordinate was measured and divided by 20 to determine how much it should be the width of the strips, obviously at the stern and bow ends the frames are much shorter, consequently the considerably smaller width goes from 6 mm on the main beam to 3mm on the frames of the stern and the at the bow, with intermediate width measurements on the adjacent frames, obviously always maintaining the usual 20 strips, the first batten flush with the bridge the workbench (for now it's pretty clean, it doesn't happen often!) the tapering of the strip is made on the basis of the "determined" widths and to avoid misalignments on the edges of the strips and for its entire length both on the upper and lower edge I have made a tapering inclined of about 45 ° to ensure that the edge of the the lower strip fits together with the upper one, on all the strips laid, maintaining a precise alignment, without "overhangs" obviously the inclination is not "perfectly continuous" to support the step on the edge on the belt scraper giving it the inclination to " eye ", after making the tapering of the width ,,, in addition to the edge I also passed the nails of the middle and index, I will do this pose only with the first planking, the second I will do it by putting the edges together without discarding them, I will also change the width of the strips to ensure that the edges of the strips of the first installation do not match with the latter, both to make the planking more robust and because it does not filter the light of the leds see you next time black Wolf

-
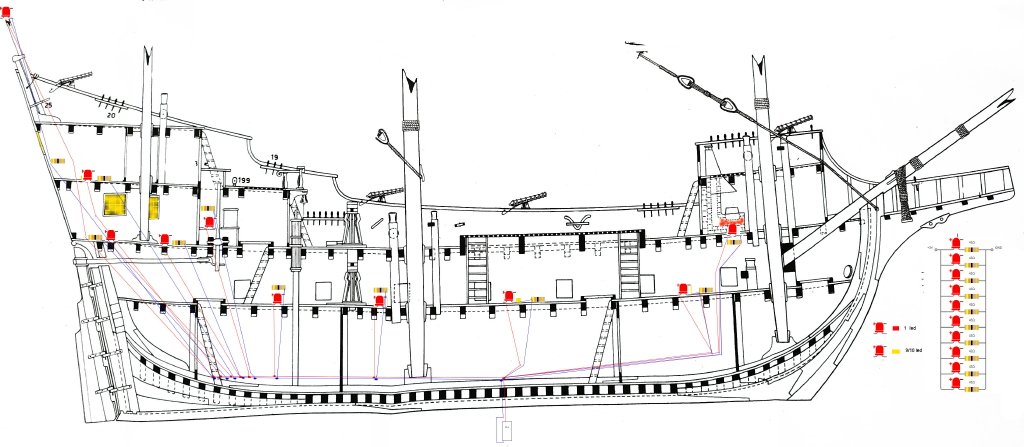
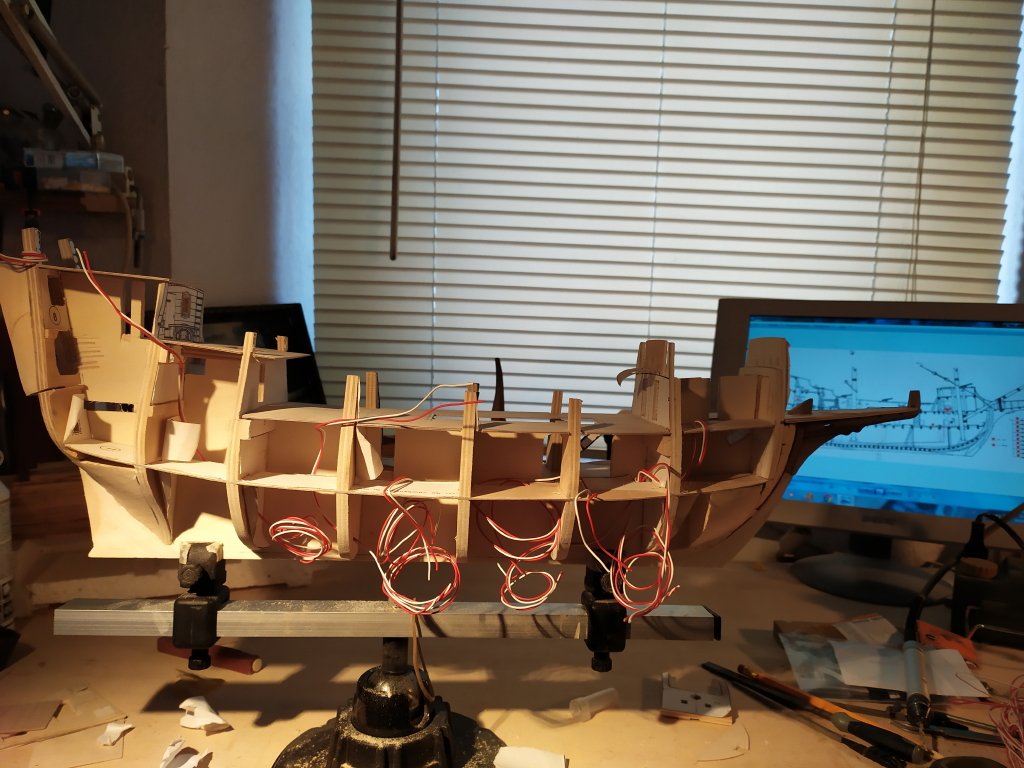
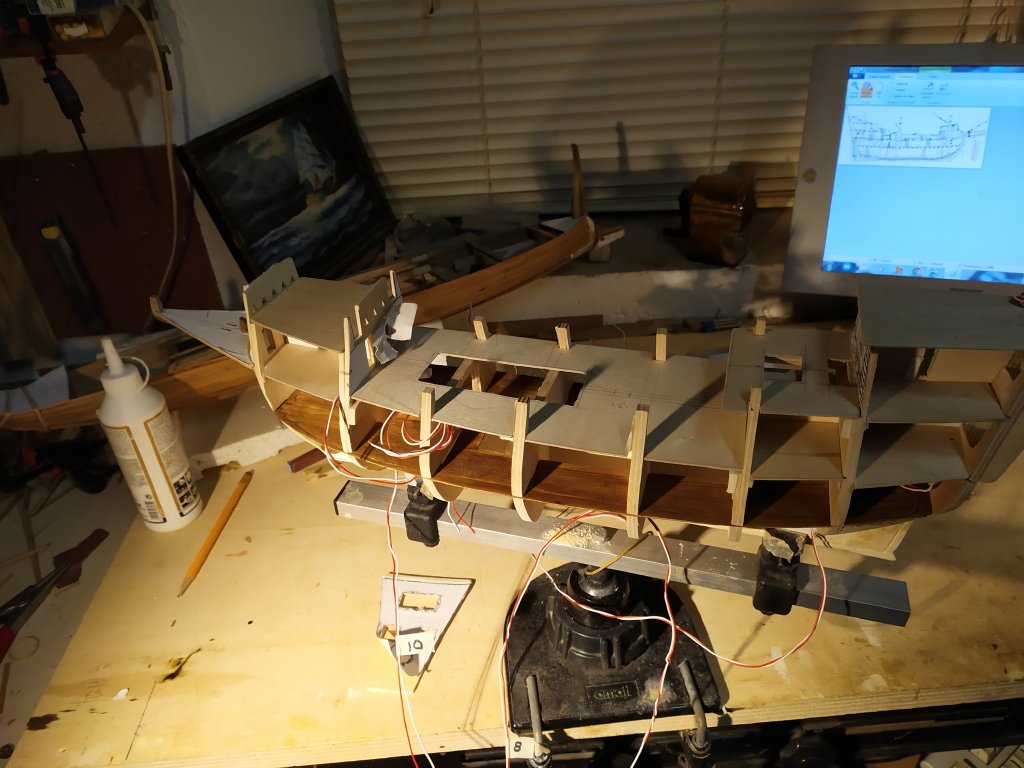
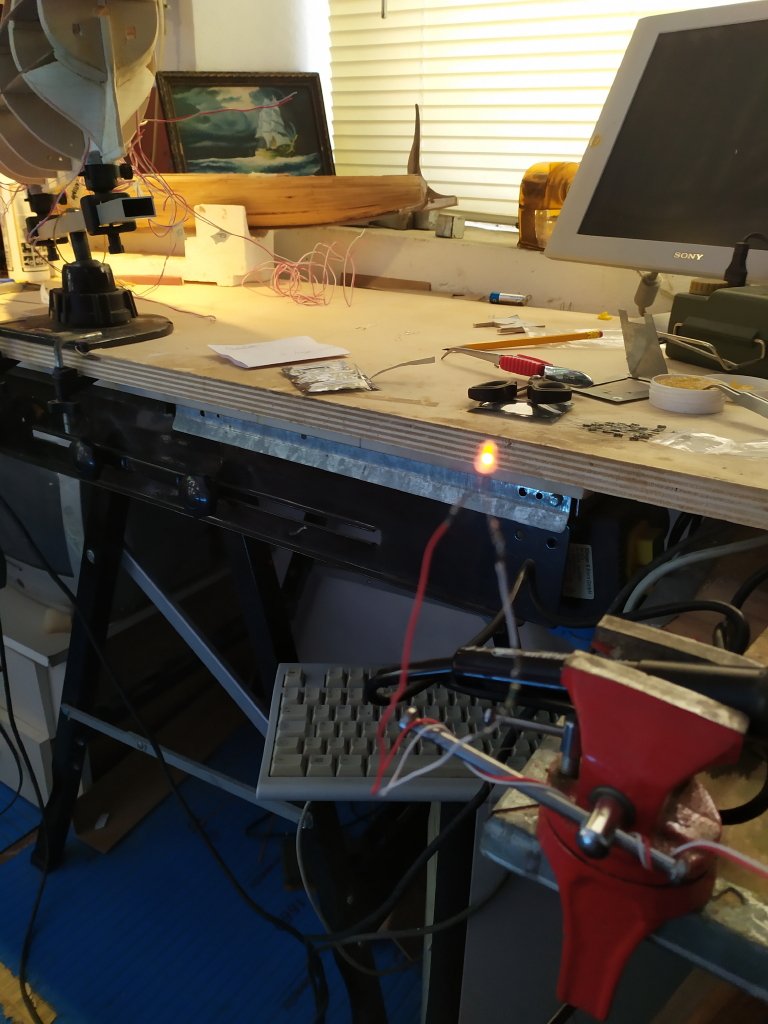
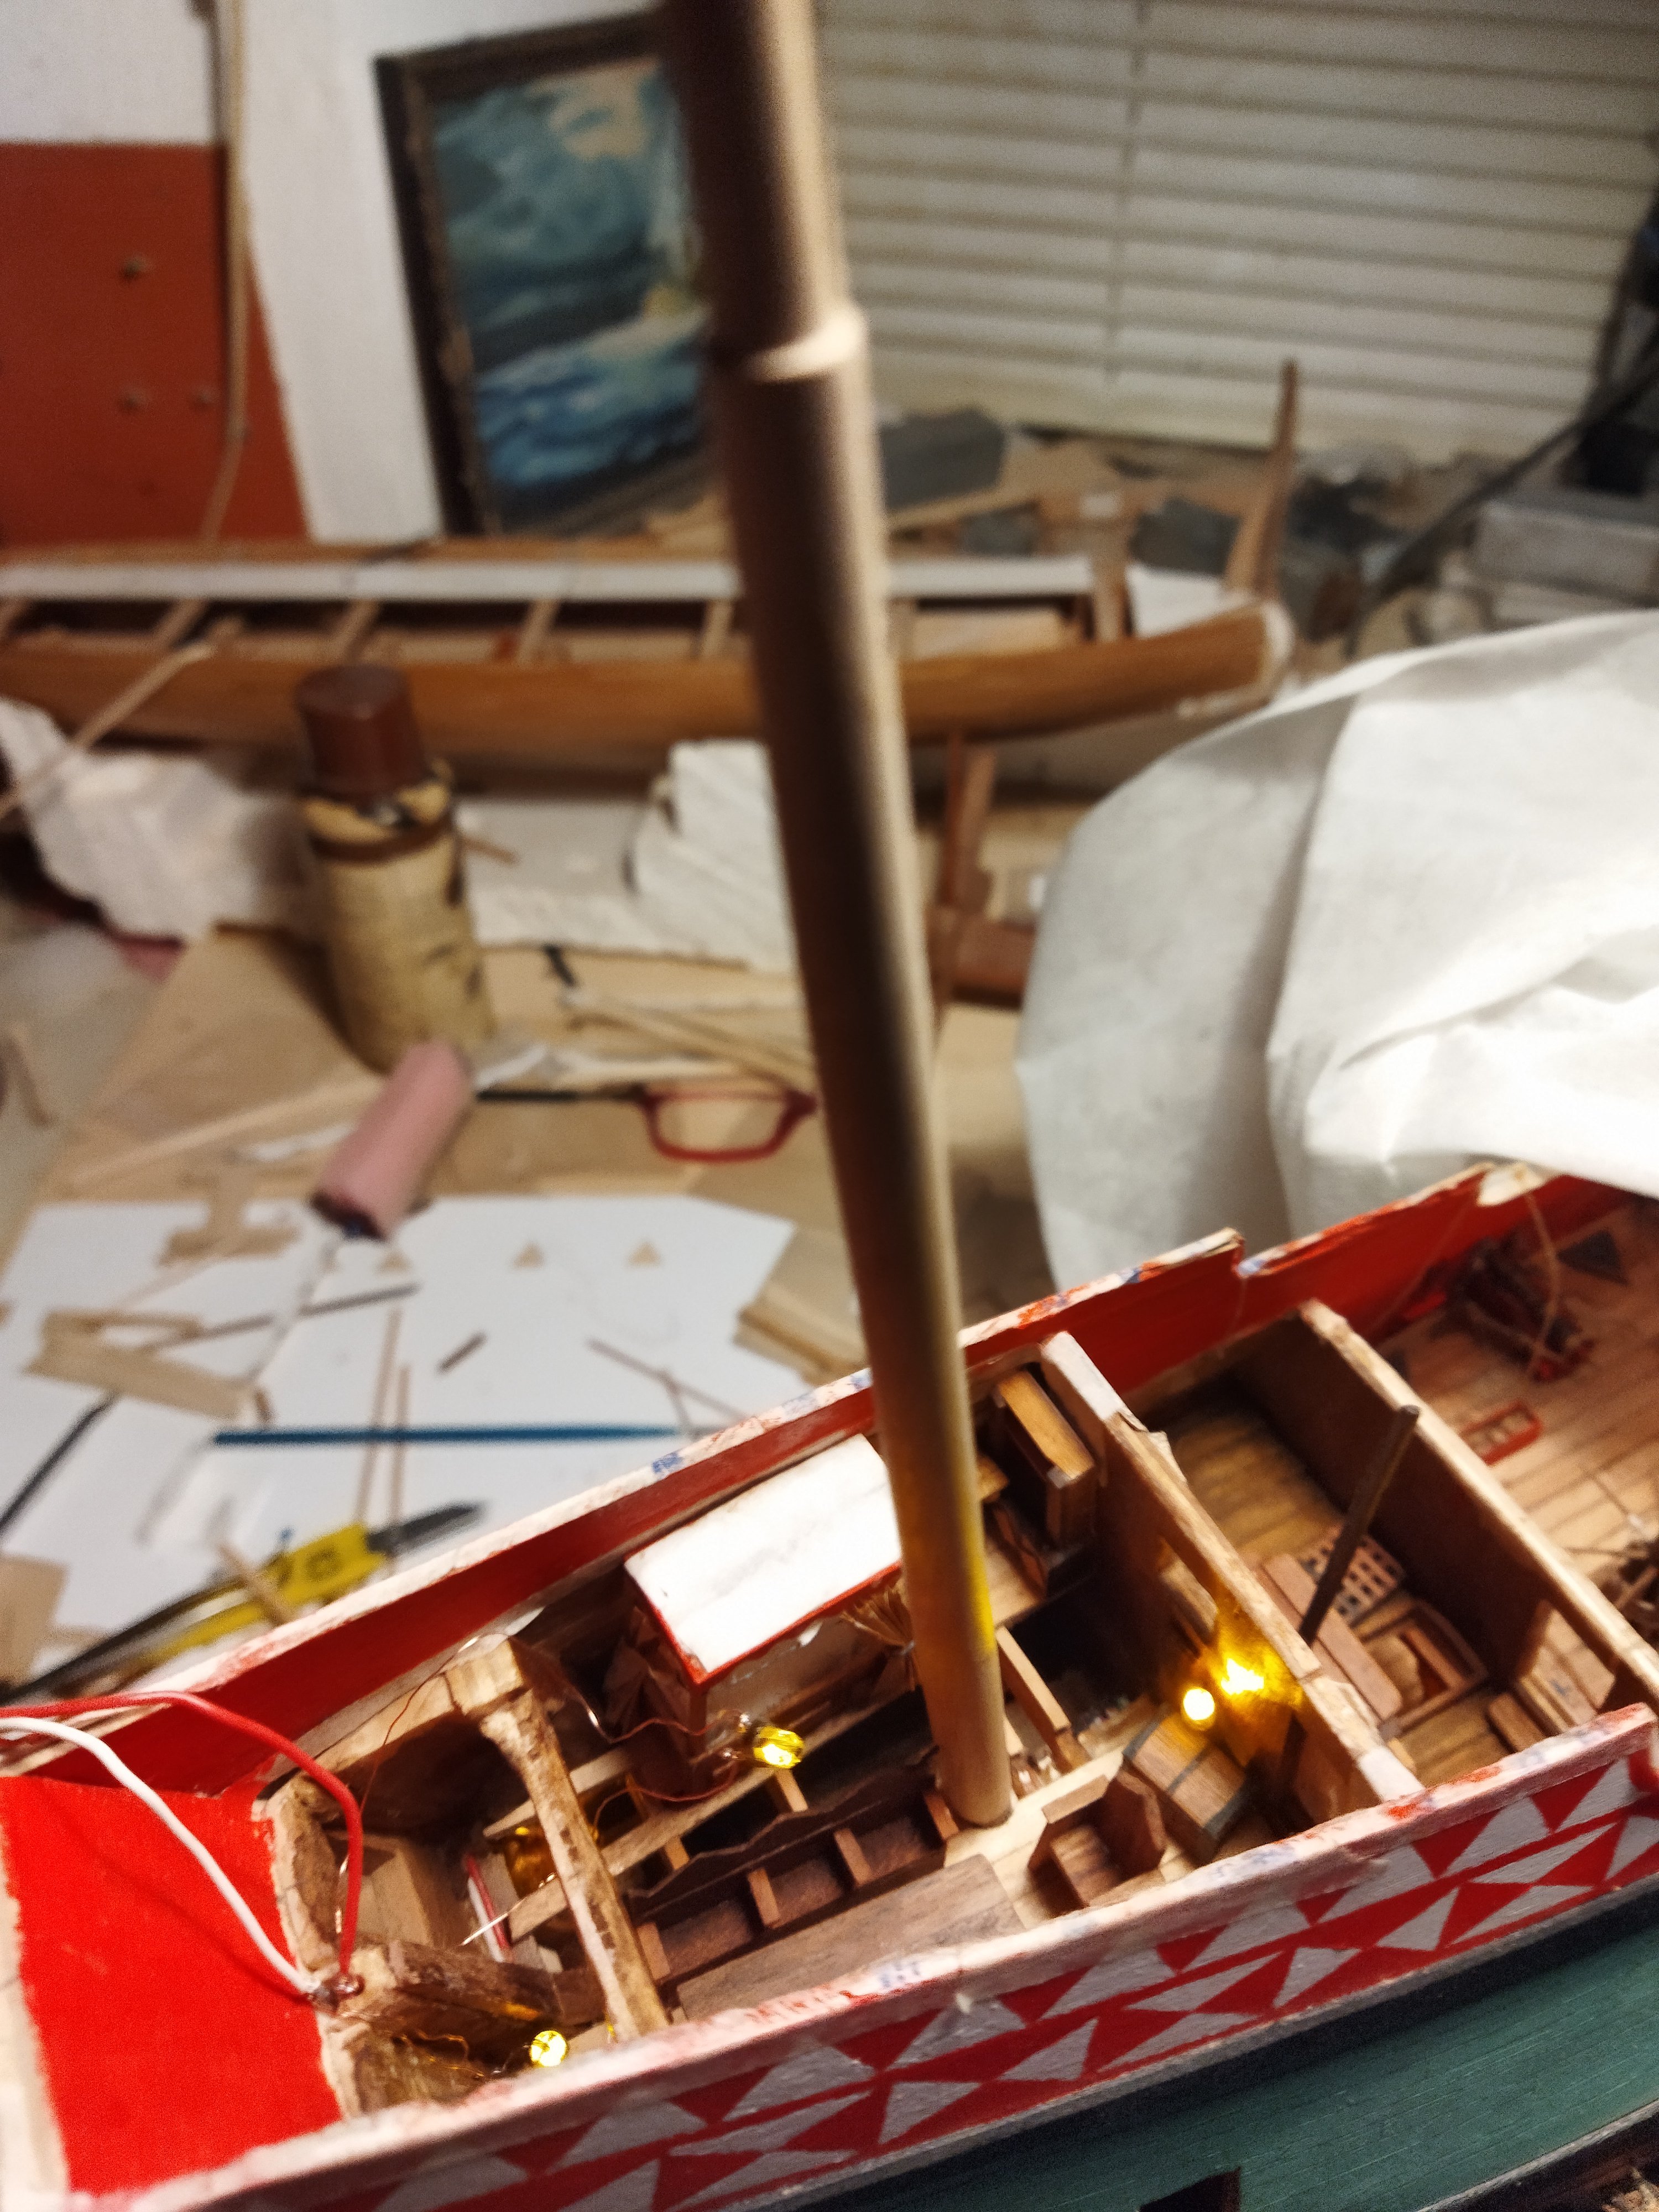
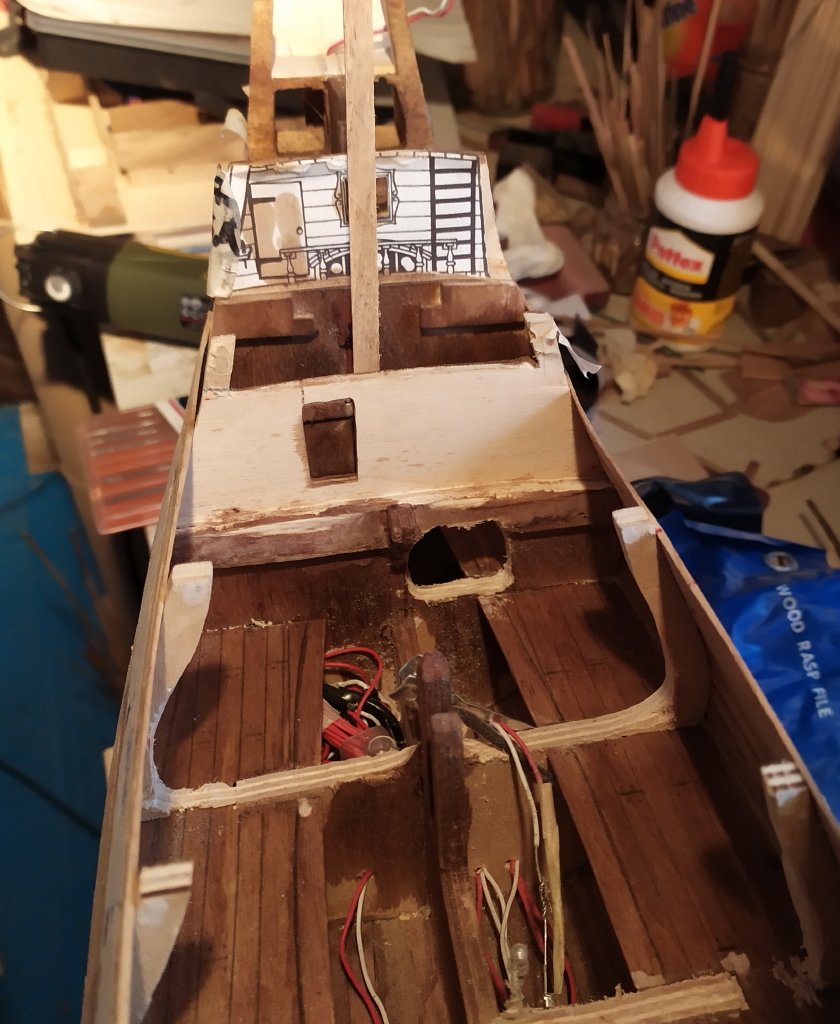
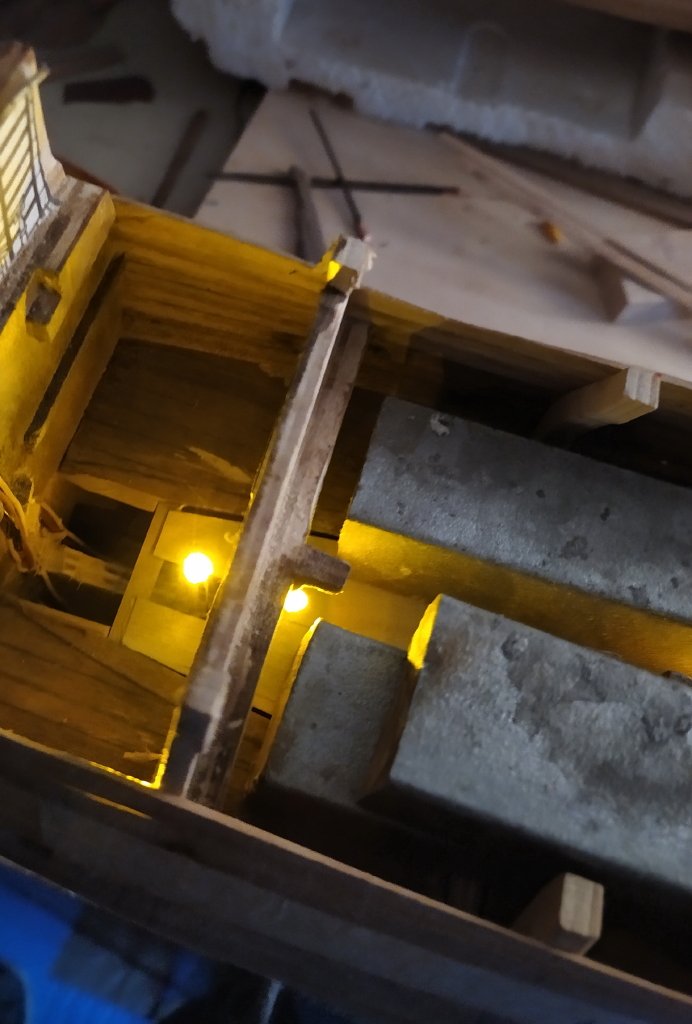
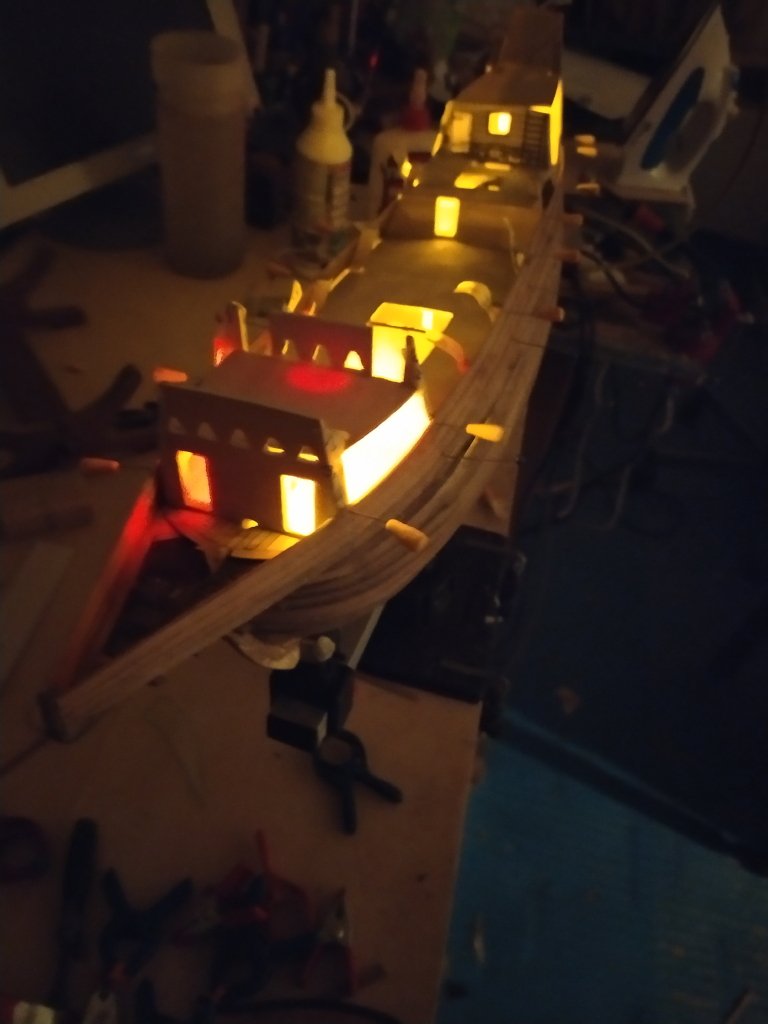
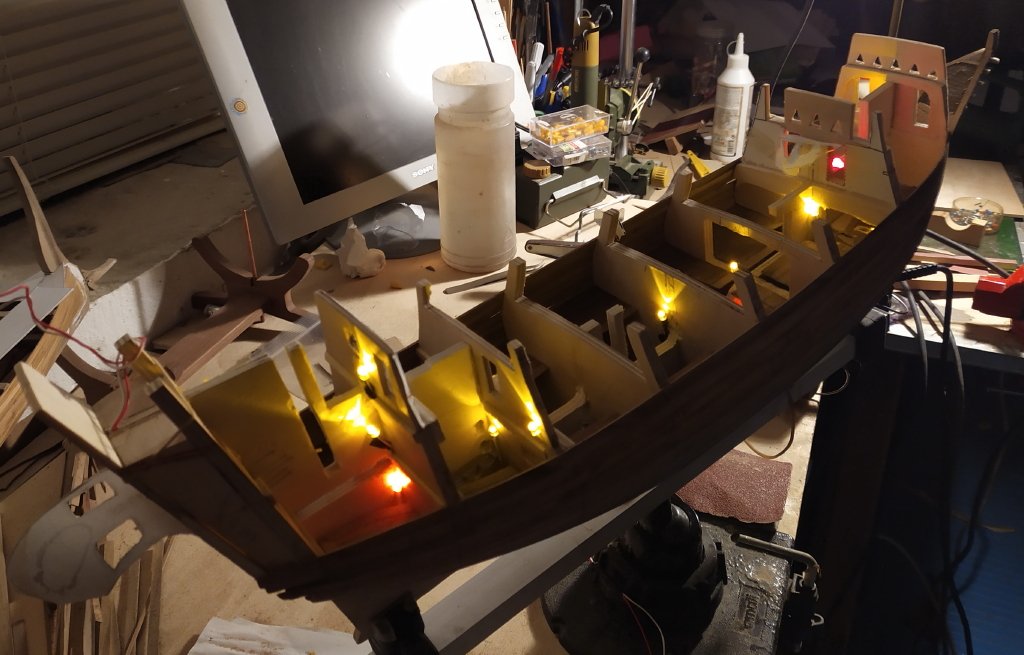
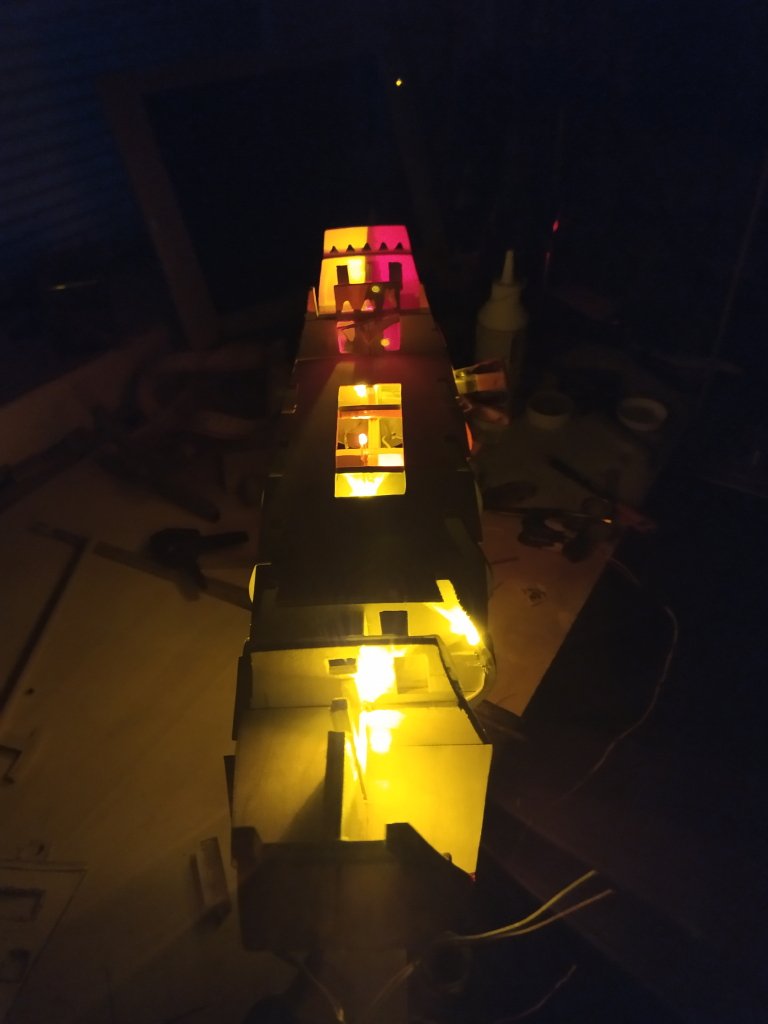
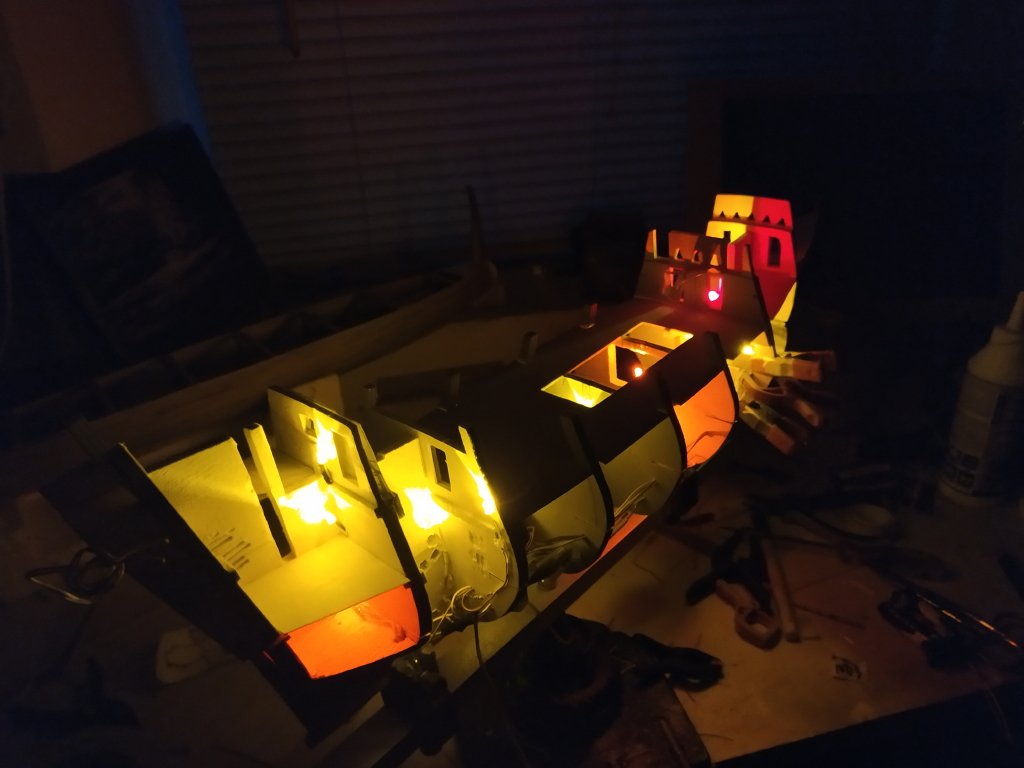
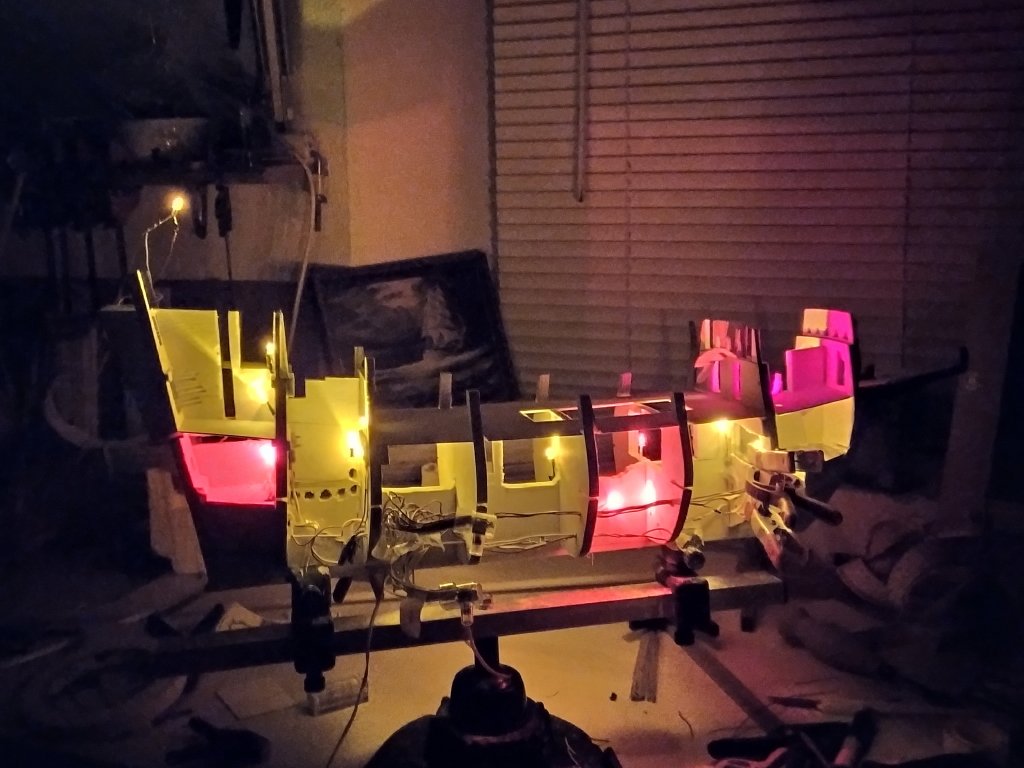
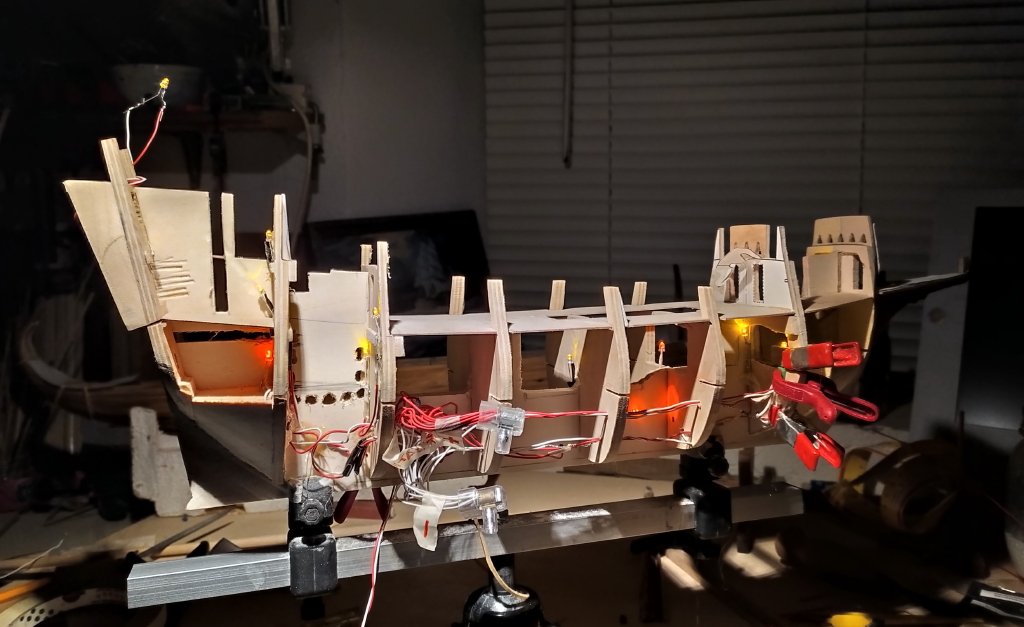
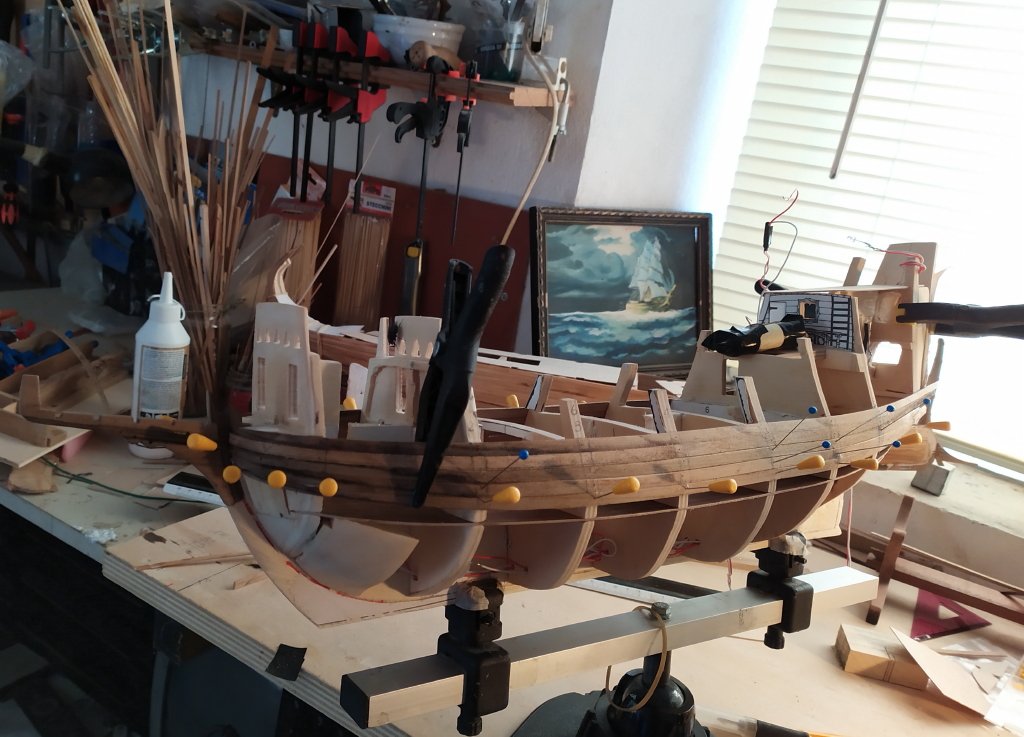
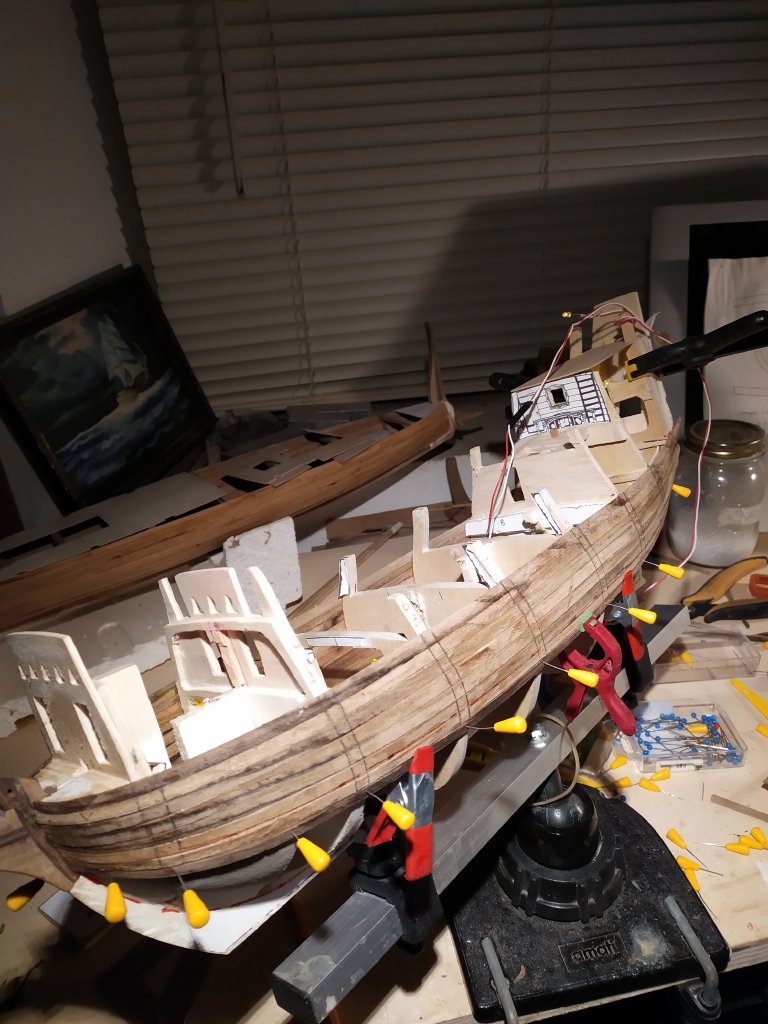
After arranging the bridges, I came up with the idea of creating the lighting system, I reported on the longitudinal plane the schematic of the system with the leds, the resistors, the path of the conductors, and the interconnections with the primary conductors ending at the battery (two 1.5 v. stylus) I will start to pass the electric wire (telephone braid) while I wait for the LEDs I bought online to arrive, for the realization of the lighting system, it is necessary to open some frames, and checking the operation of the leds before placing it, on the red conductor I connect the anode on the white the cathode and the 56 ohm resistor, a first view of the lighting that will be arranged later, the leds lights are the "flickering" ones that imitate the "candle" lighting I also build the base support which has the tube on one side inside the conductors that end at the switch will pass see you next time black Wolf