Richard Dunn
-
Posts
529 -
Joined
-
Last visited
Content Type
Profiles
Forums
Gallery
Events
Everything posted by Richard Dunn
-
 What's taken so long is it's very hard to do a forensic study of the ship when she is complete, but during the restoration we had all the planking off for quite a while as the planks needed conservation, and it enabled us to measure and document everything including deadwood parts and butt plates for planking. I did express to the publisher my dislike of having plans that vanish into the spine across pages so we have decided to also provide actual sheets as well in a folder as an additional product at 1/48.
 -
Hopefully better than those book's as it will all come from a 3d model it will all line up. It's something I have been dwelling on for years, but the chance only arrived 3 weeks ago and I grabbed it. I plan to do the usual sections and elevations but also renders of the views in colour as well. It's a first for this type of ship so it should be interesting
-
Just to let people know. I have signed a contract to write a book on her structure along the lines of an AOTS series which will be late next year but all this will be released then.
-
Currently sorting through Notes between James Henderson and David MacGregor, about the Melville offsets and the debates about the deck beam spacing
-
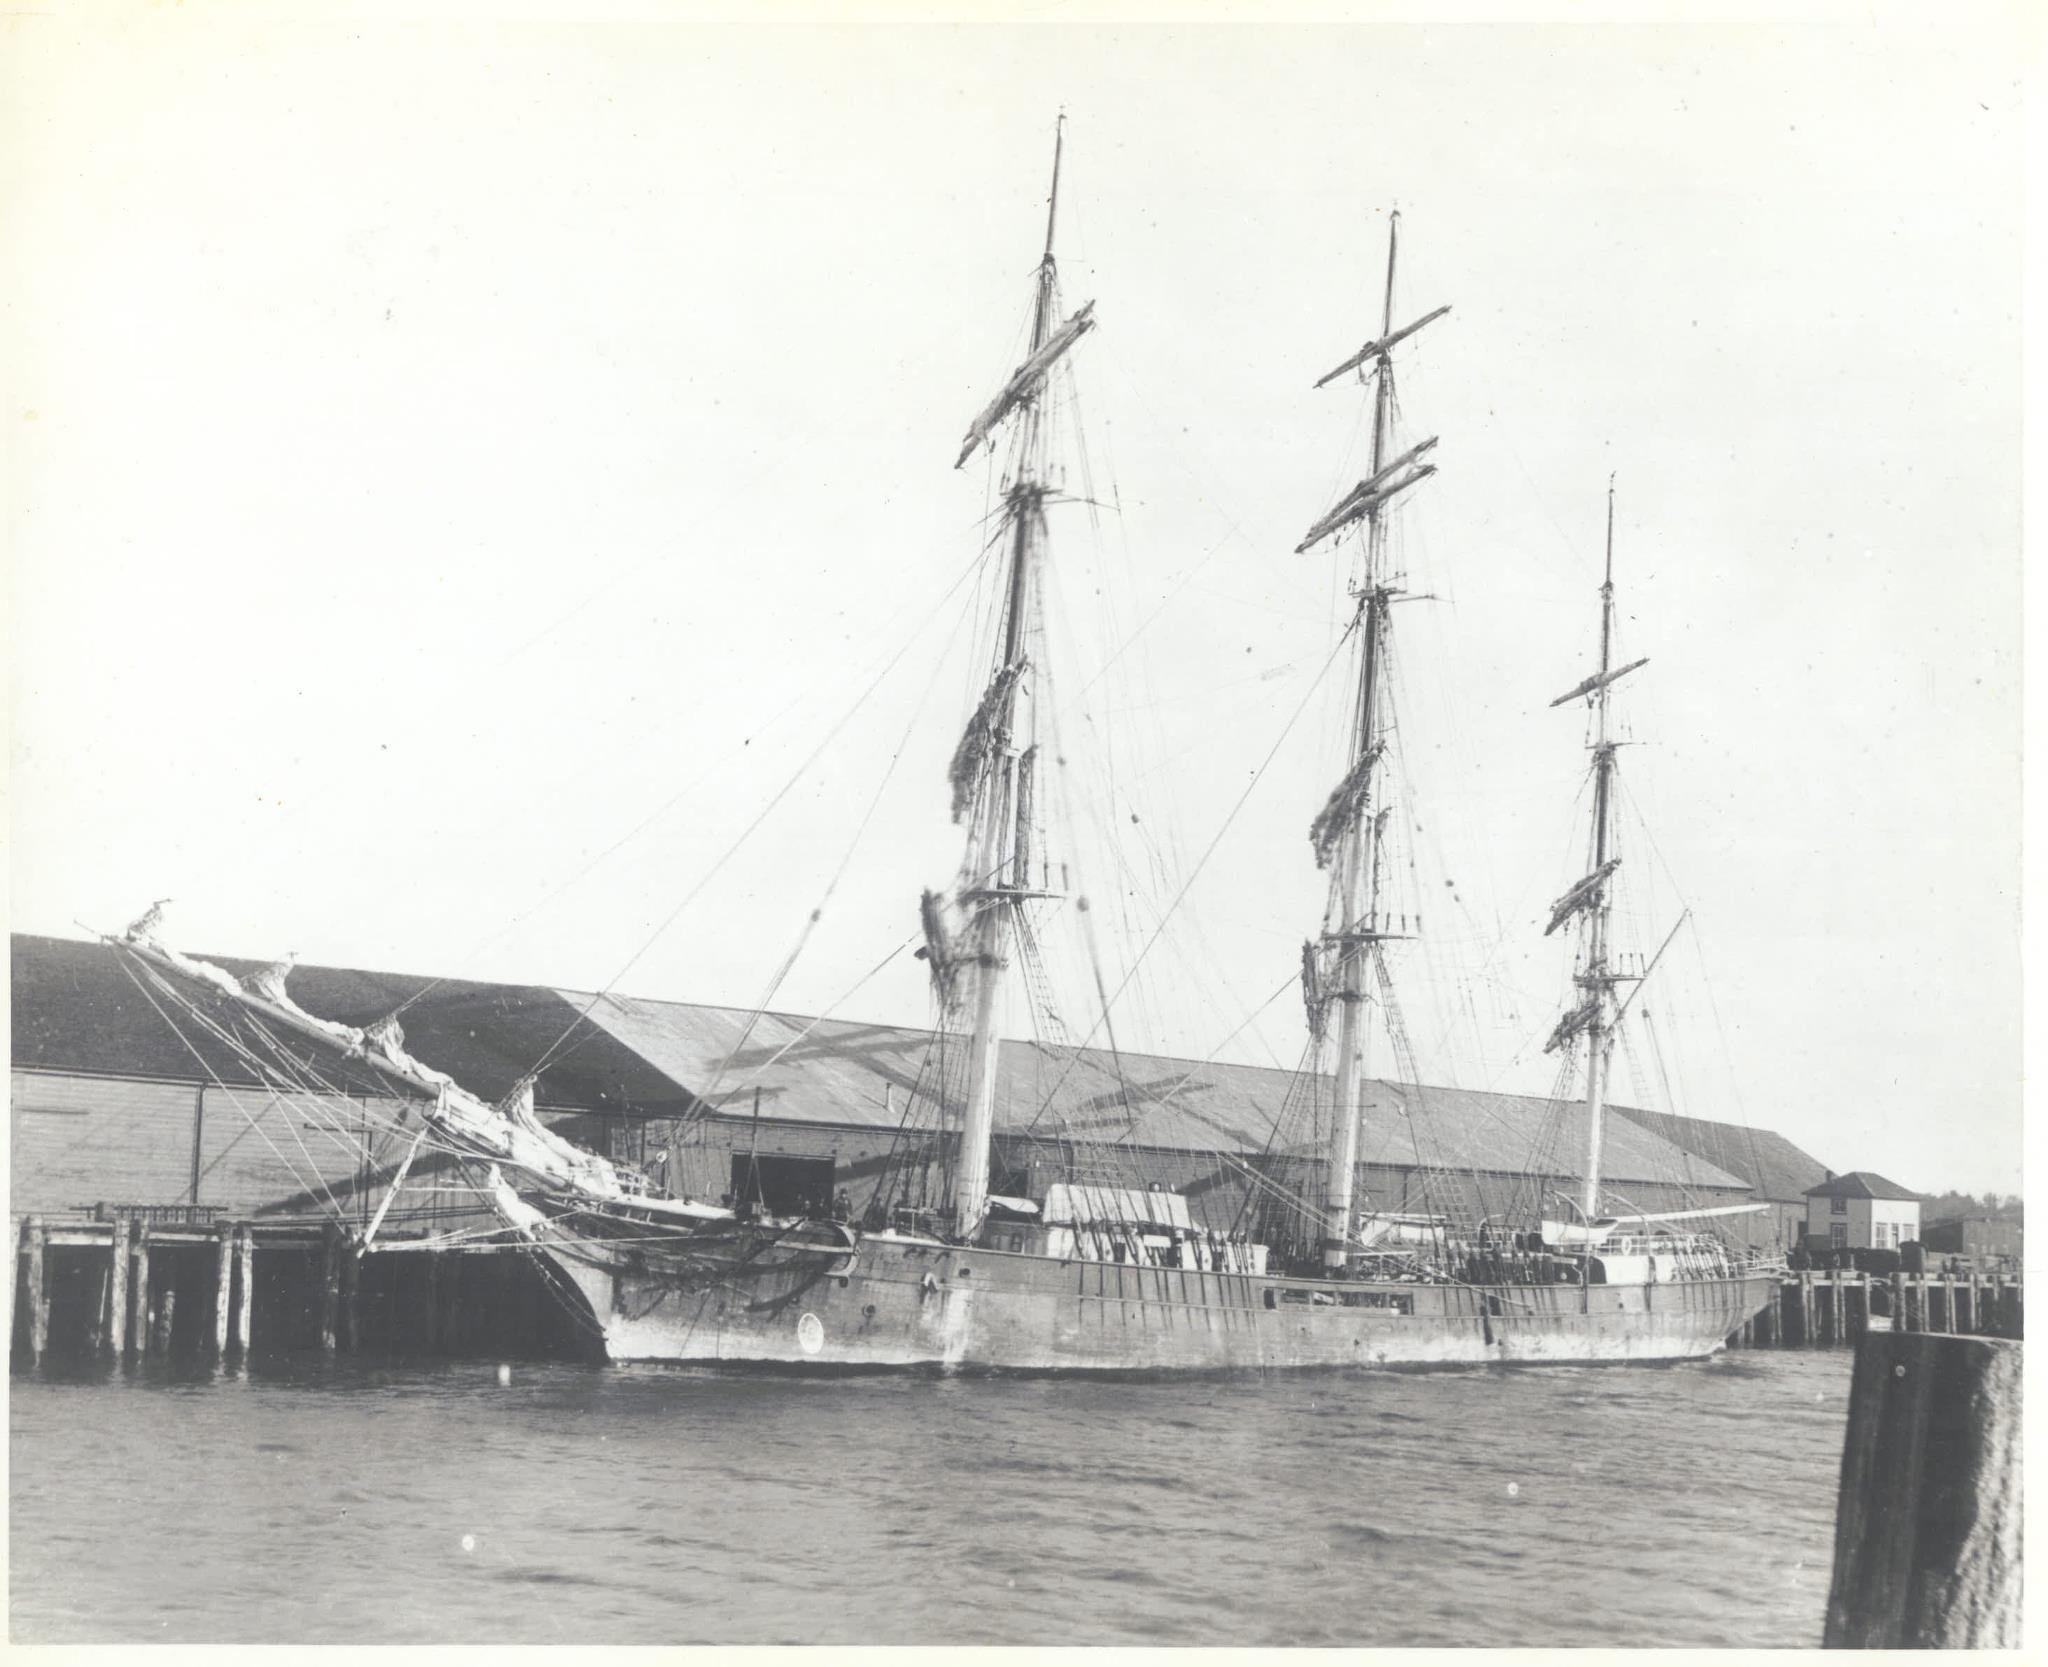
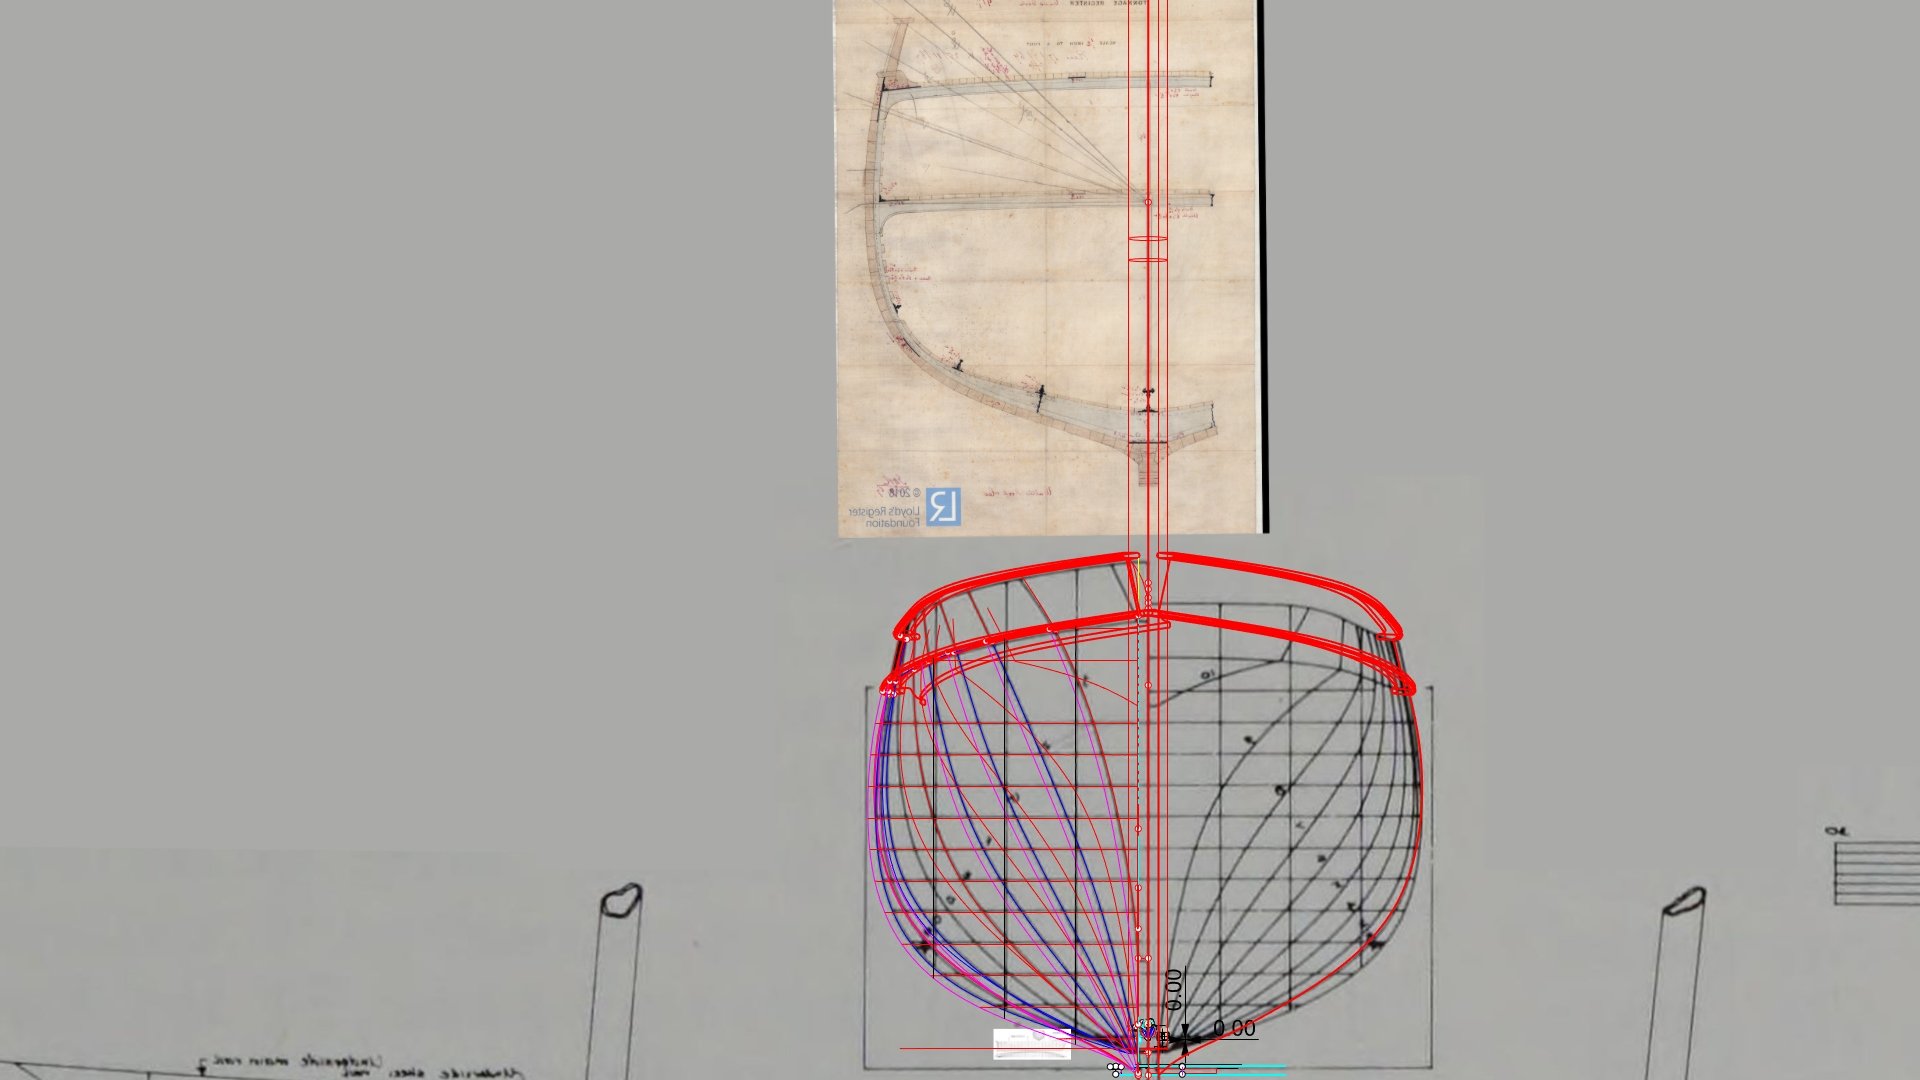
Having worked on the CS restoration and designing the kit based on her proper scanned lines, and all the research that got done in 2011 I would say I initially would have agreed with you, but now in the midst of this they are very different. they all look similar from a distance, but CS and Thrm are like chalk and cheese. Here are the main points. Lines are very different, Therm has much softer Bilge and much flatter aft run, entrance is duller then CS. The CS had Iron Bulwarks but Therm has wooden with wood stanchions, much like they way they were built in 1700,s Therm counter is a single plane of turn with no top rail running along the top of the main rail. Threm has only the 1 main cargo hatch midships. Therm has only one deckhouse forward. The Couchhouse roof on Therm is very unique and one of her most distinguishing features. The Rigging being fixed outside of Bulwarks on Therm as well. The headwork of Therm is very different to, as her trial boards do not go far aft of the rabbet line, not even to catheads. Her coppering is done quite differently as well, the neat goring strakes that CS has appears to have been dropped on Therm and the top-most line of coppering is cut to the waterline resulting in triangular tiles, that is very odd but only in one photo so may have been different every time depending who did the sheathing. As far as models go Therm is a MUCH easier option.
-
Here are a couple of nice big photos If I am wrong correct me, people, but as far as masting and fittings it's almost identical to Cutty Sark. Not spar dimensions but the crosstrees and hound and yard brackets etc all seem to be the same.

-
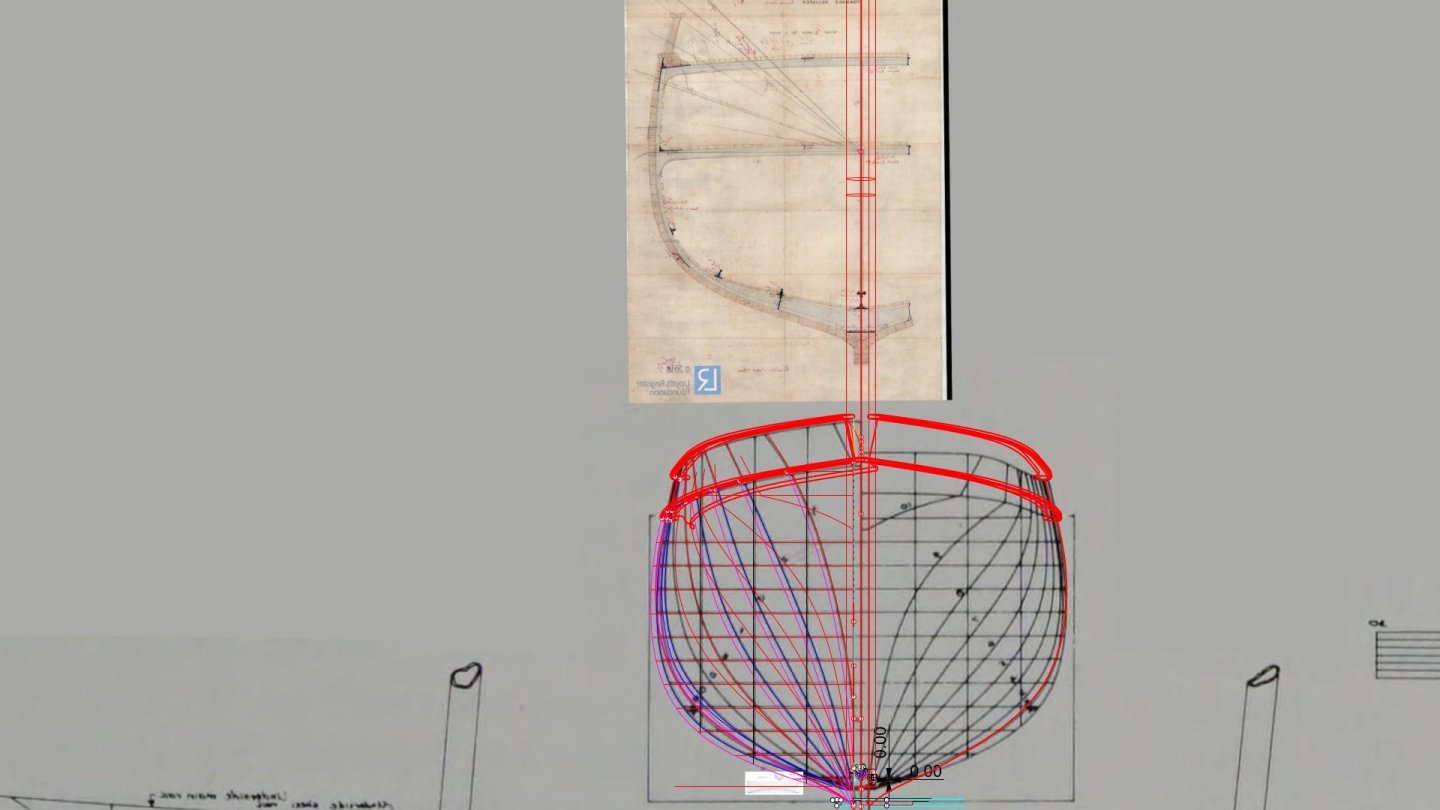
I have 3 sources of actual plans from the ship yard. The first set comes from Hall Russell & Co the builder and are in quite poor repair but readable The second are the offsets from james Henderson that were lofted from the shipyard, these are as built lines but marked to inside planking, this then requires the planking to be added on top which is not the same thickness so nice fun job. The third is the Lloyds Midship which is pretty close but not the final section. Then we have the Cyril Hume model in Sydney which was viewed by ex crew and given the tick of approval for accuracy in regards to deck layout and fittings. The Hall Russell & Co plans are not 100% accurate and I think an earlier iteration of her design as they feature an aft cargo hatch, als othe lines of the head do not line up with the as built offsets.
-
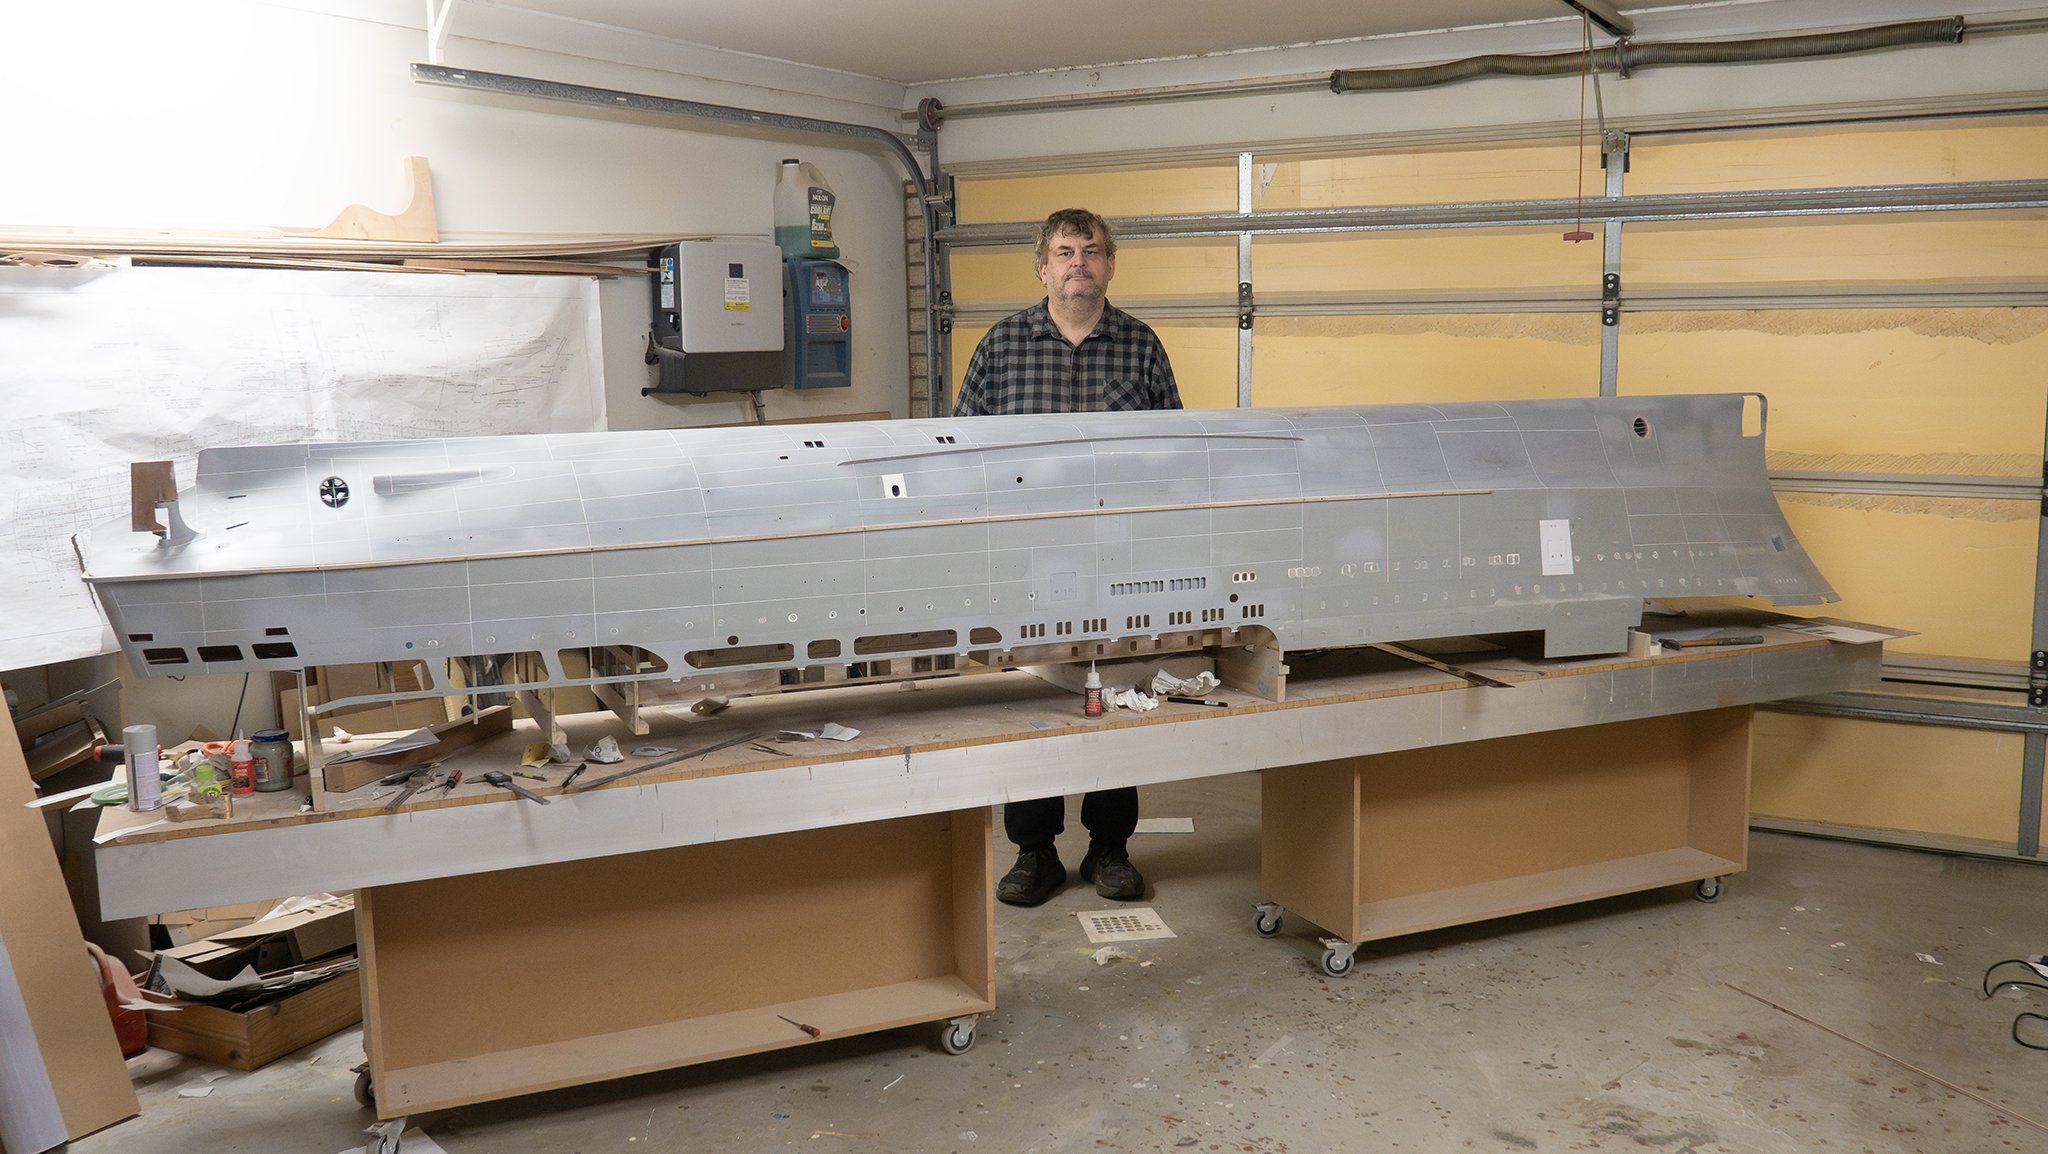
The total length is 6ft, the hull is .4.8ft I received a whole bunch of plans from the Aberdeen archive last night and am currently sorting out proposed designs from as built. It's an easy build compared to Cutty Sark and going to be more along the line of a solid keel with half-checked frames, and open tween deck, though from what I have read her tween deck was not laid.
-
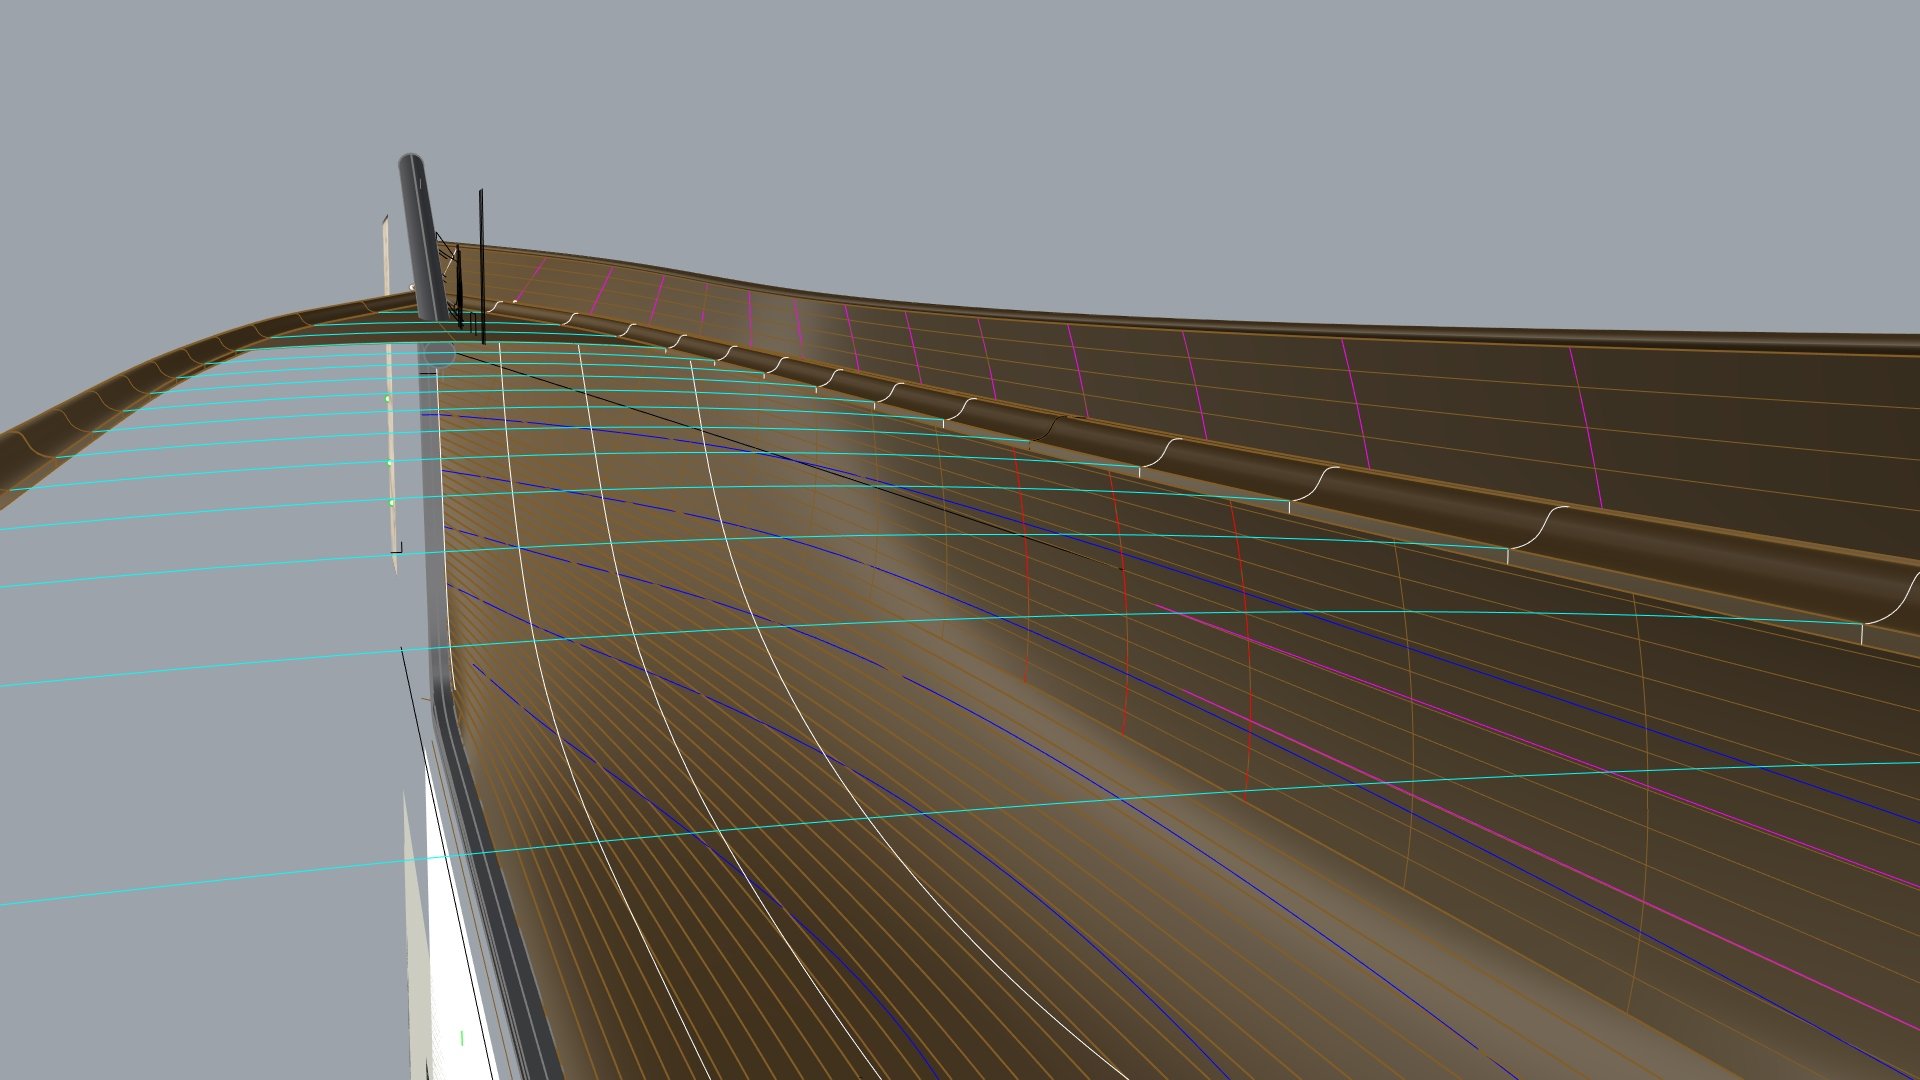
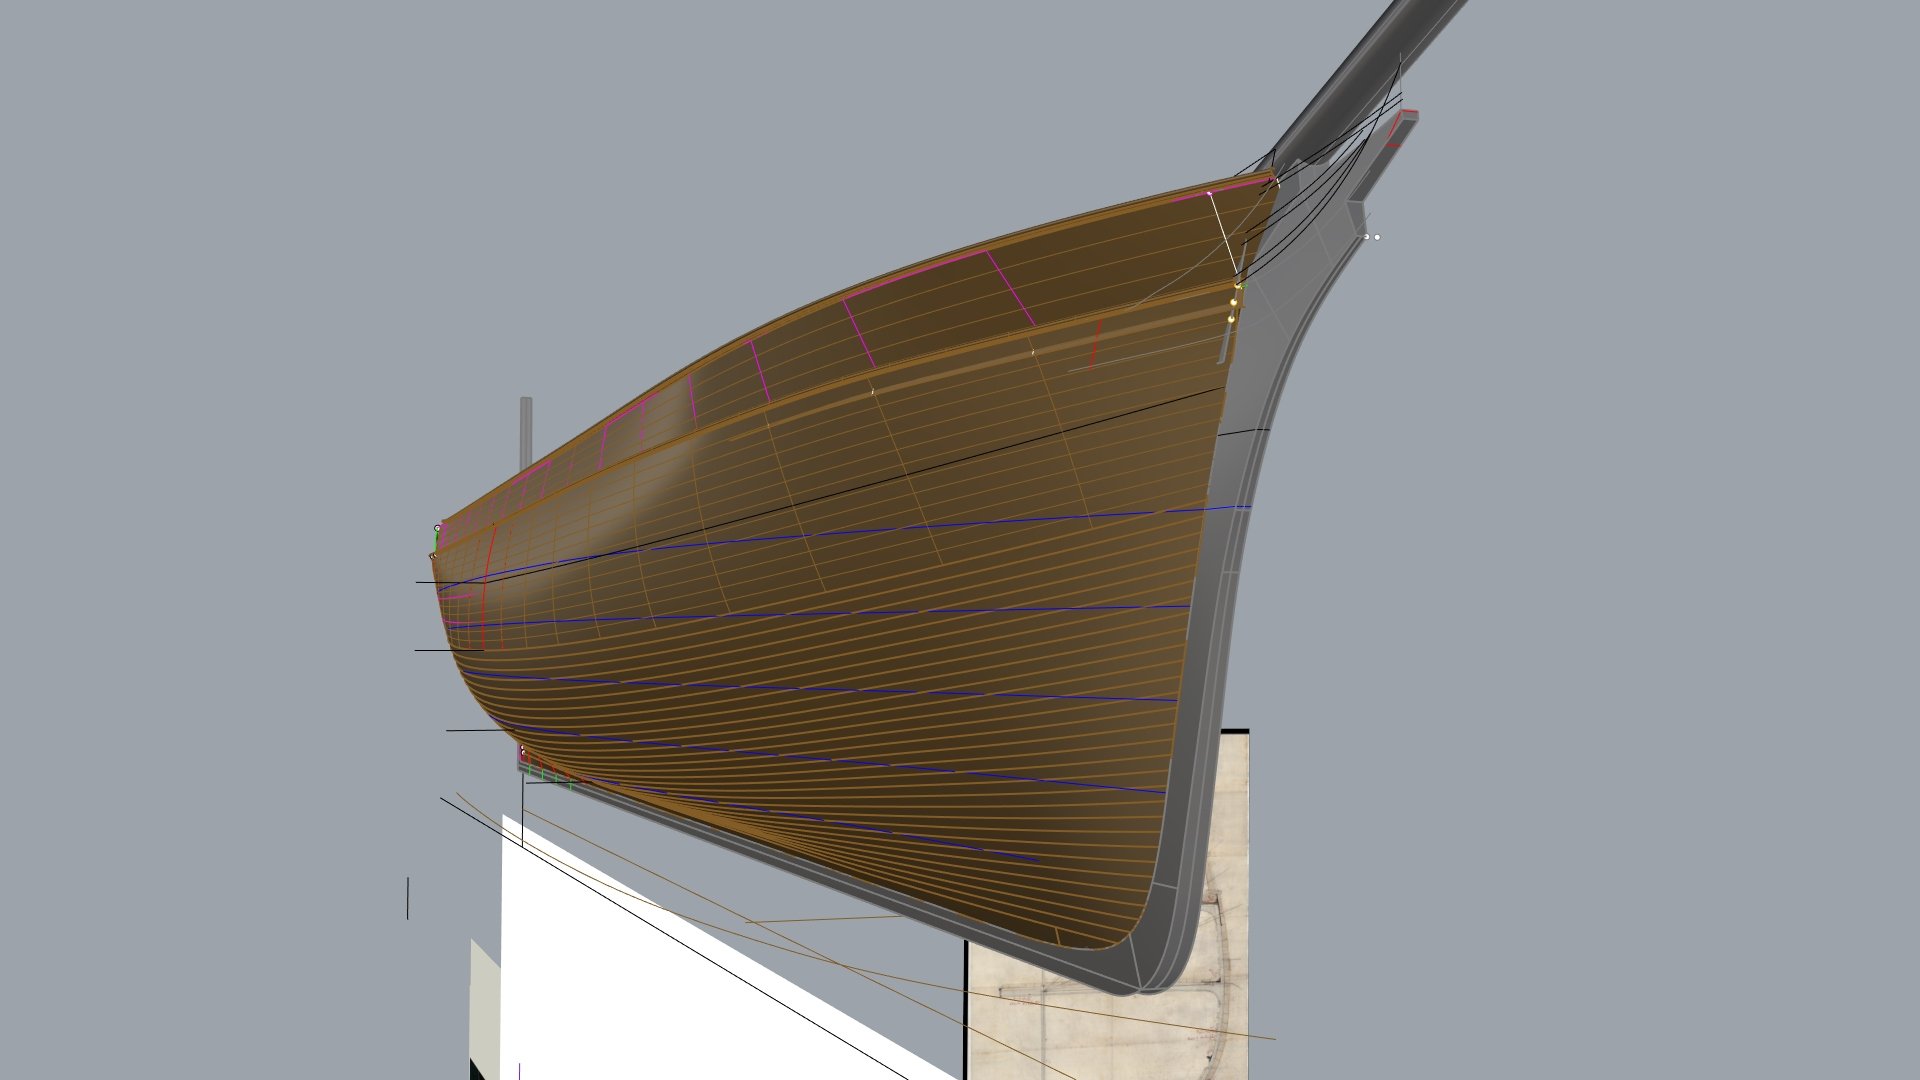
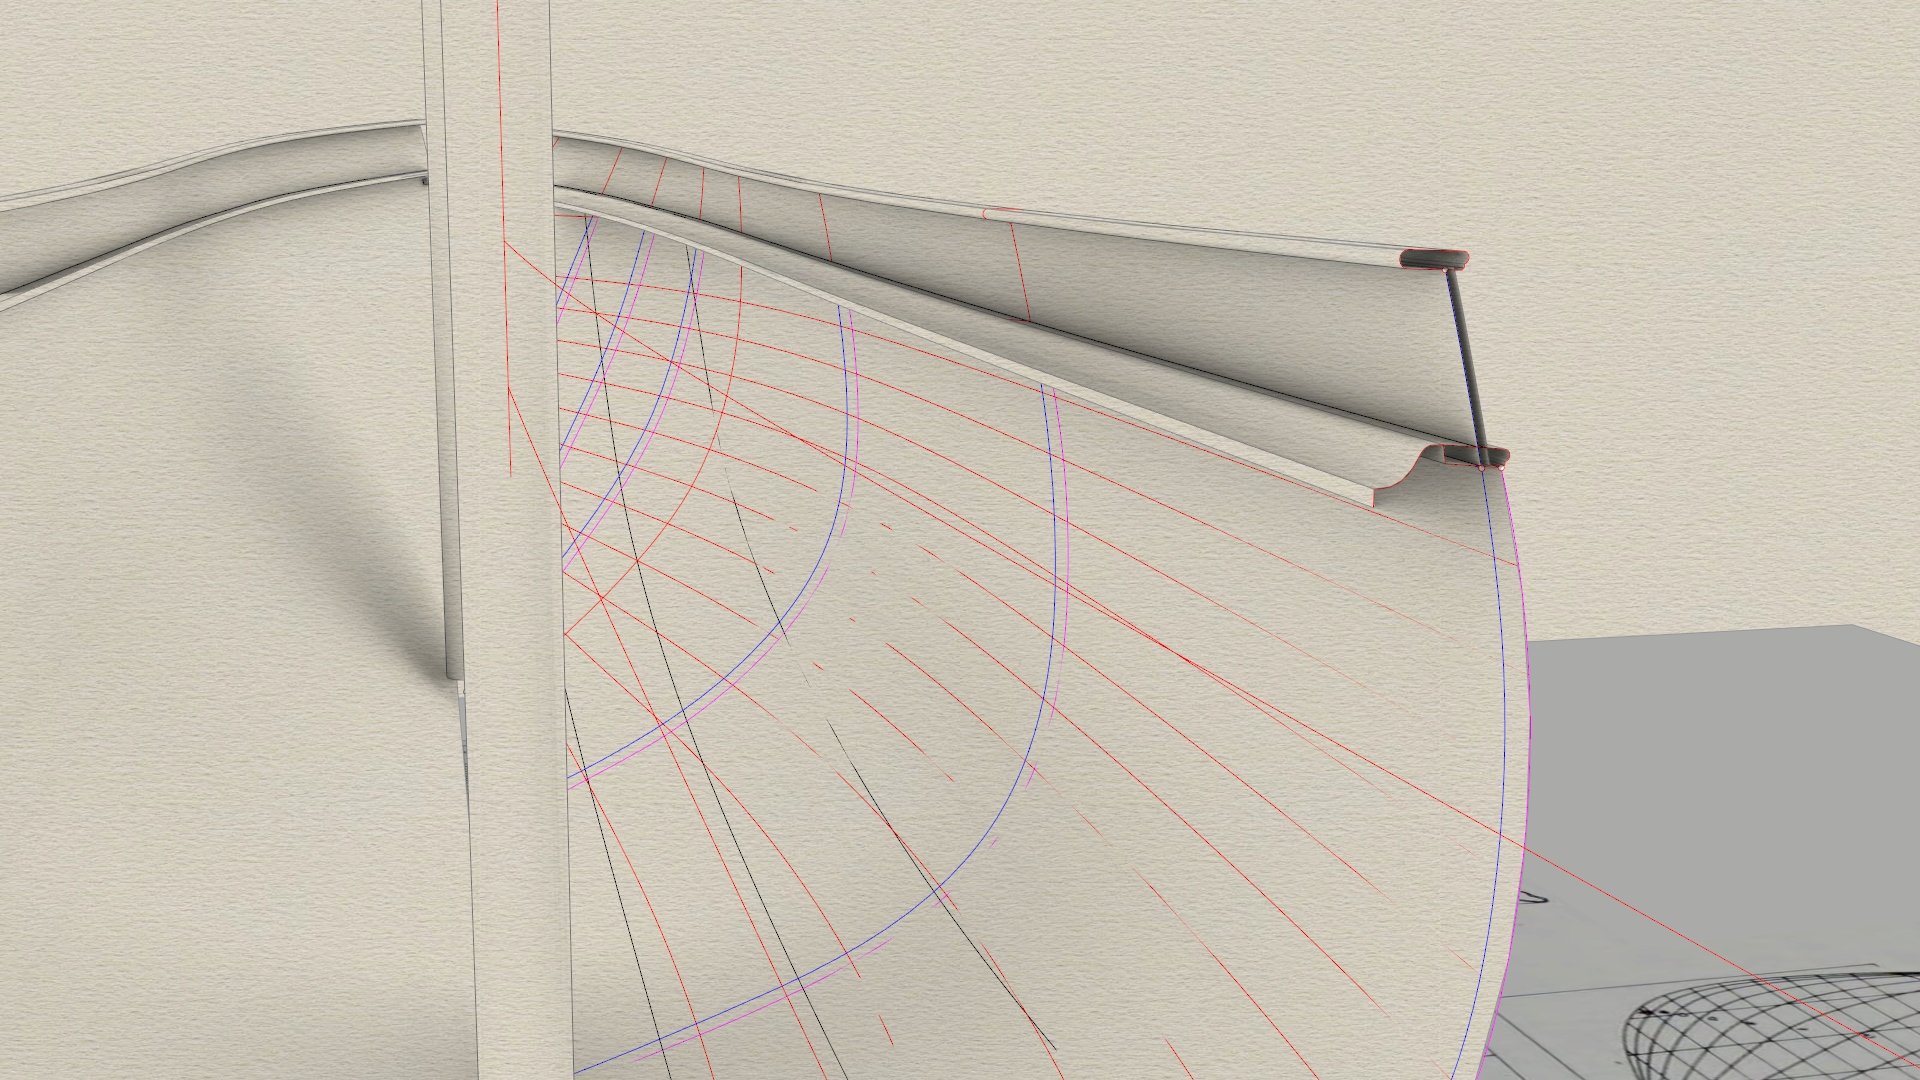
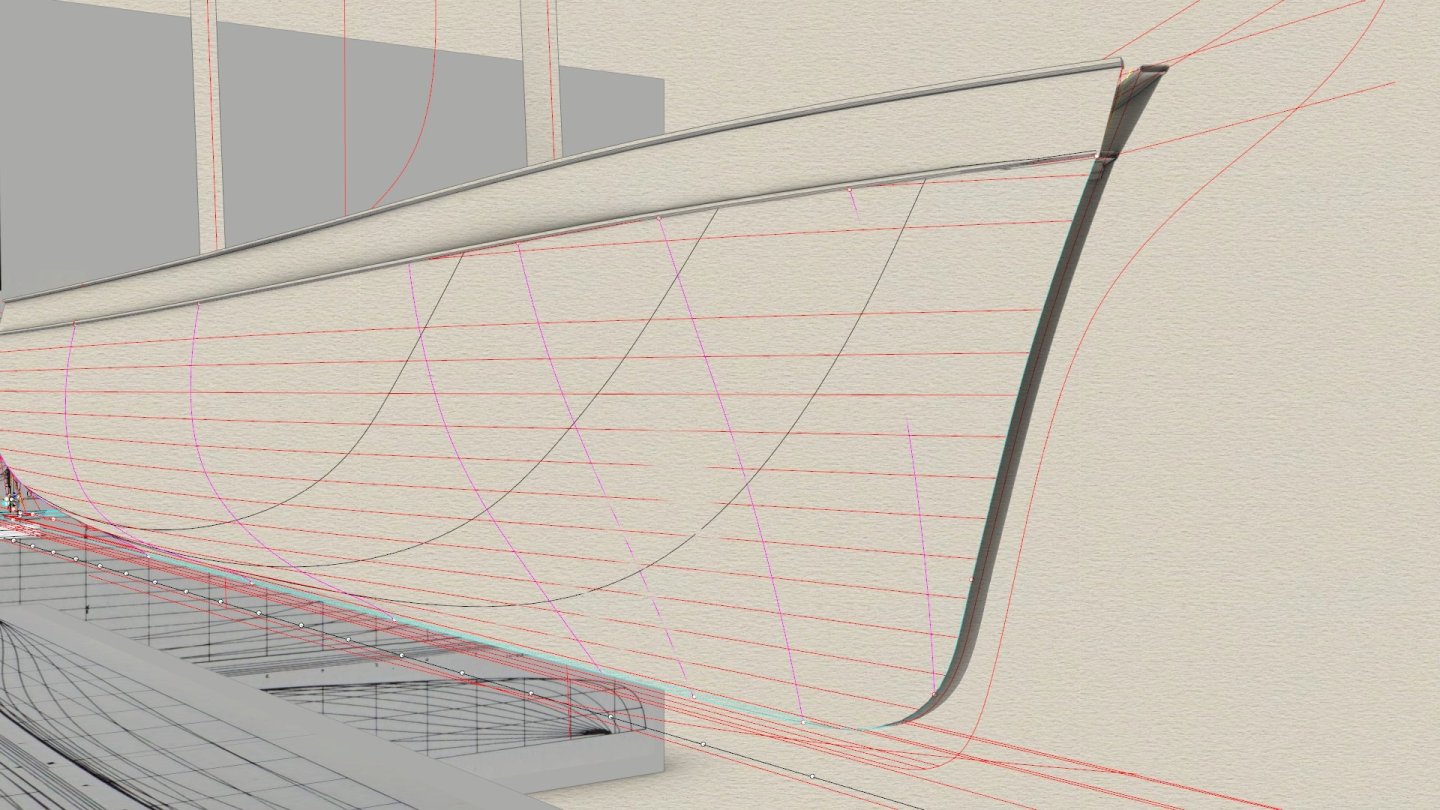
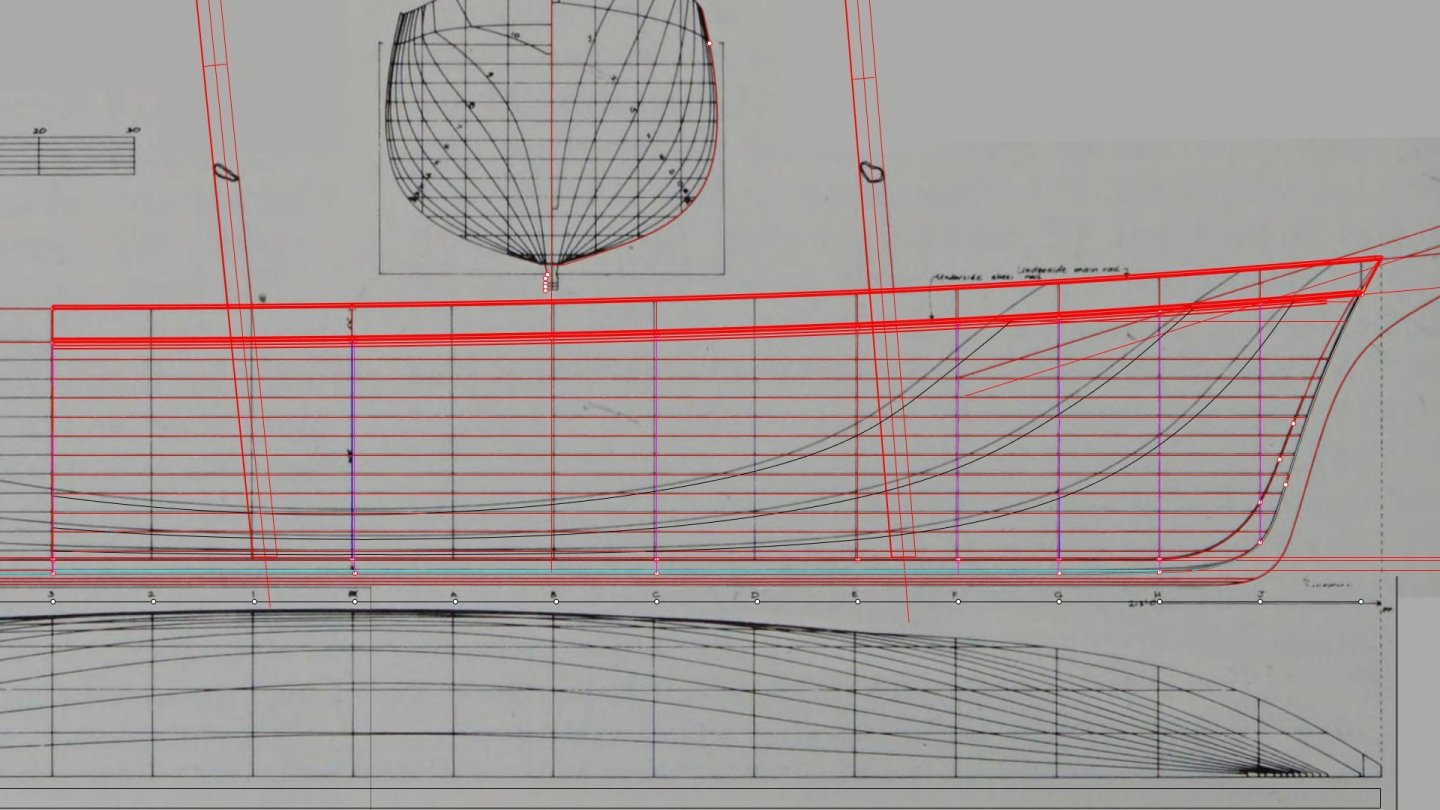
Forward Lines recreated from offsets. They are very different to Cutty Sark The blue sections are the moulded offsets The buttocks here are on the planking , but the plan is moulded so they don't line up in this view, and of course because Thermopylae had 6 inch planking over the middle 3/5ths of her girth tapering to 4.5 inch at sheer it throws out the lines a bit.

-
I have been able to source the original Walter Hood Offsets from a private collection and reconstruct the lines moulded. this of course, means inside planking so the tapered planking needs to be factored in, but I am excited to be able to produce this set of drawings finally.
-
Hi Some of you will remember my build of the 1/40 Cutty Sark Semi kit I did for a customer a couple of years back. It is possible I might be doing one for Thermopylae very soon on a "larger scale" but it's not defined yet. Would anyone be interested in this?, and if so, what scale? Please don't comment with scales like 1/96. I am considering providing patterns and CNC files to people so shipping is not an issue. Could I have an indication of interest for this please?. I am thinking 1/48 as a starting point and in the realm of $400-$500 Usd Thanks in advance.
-
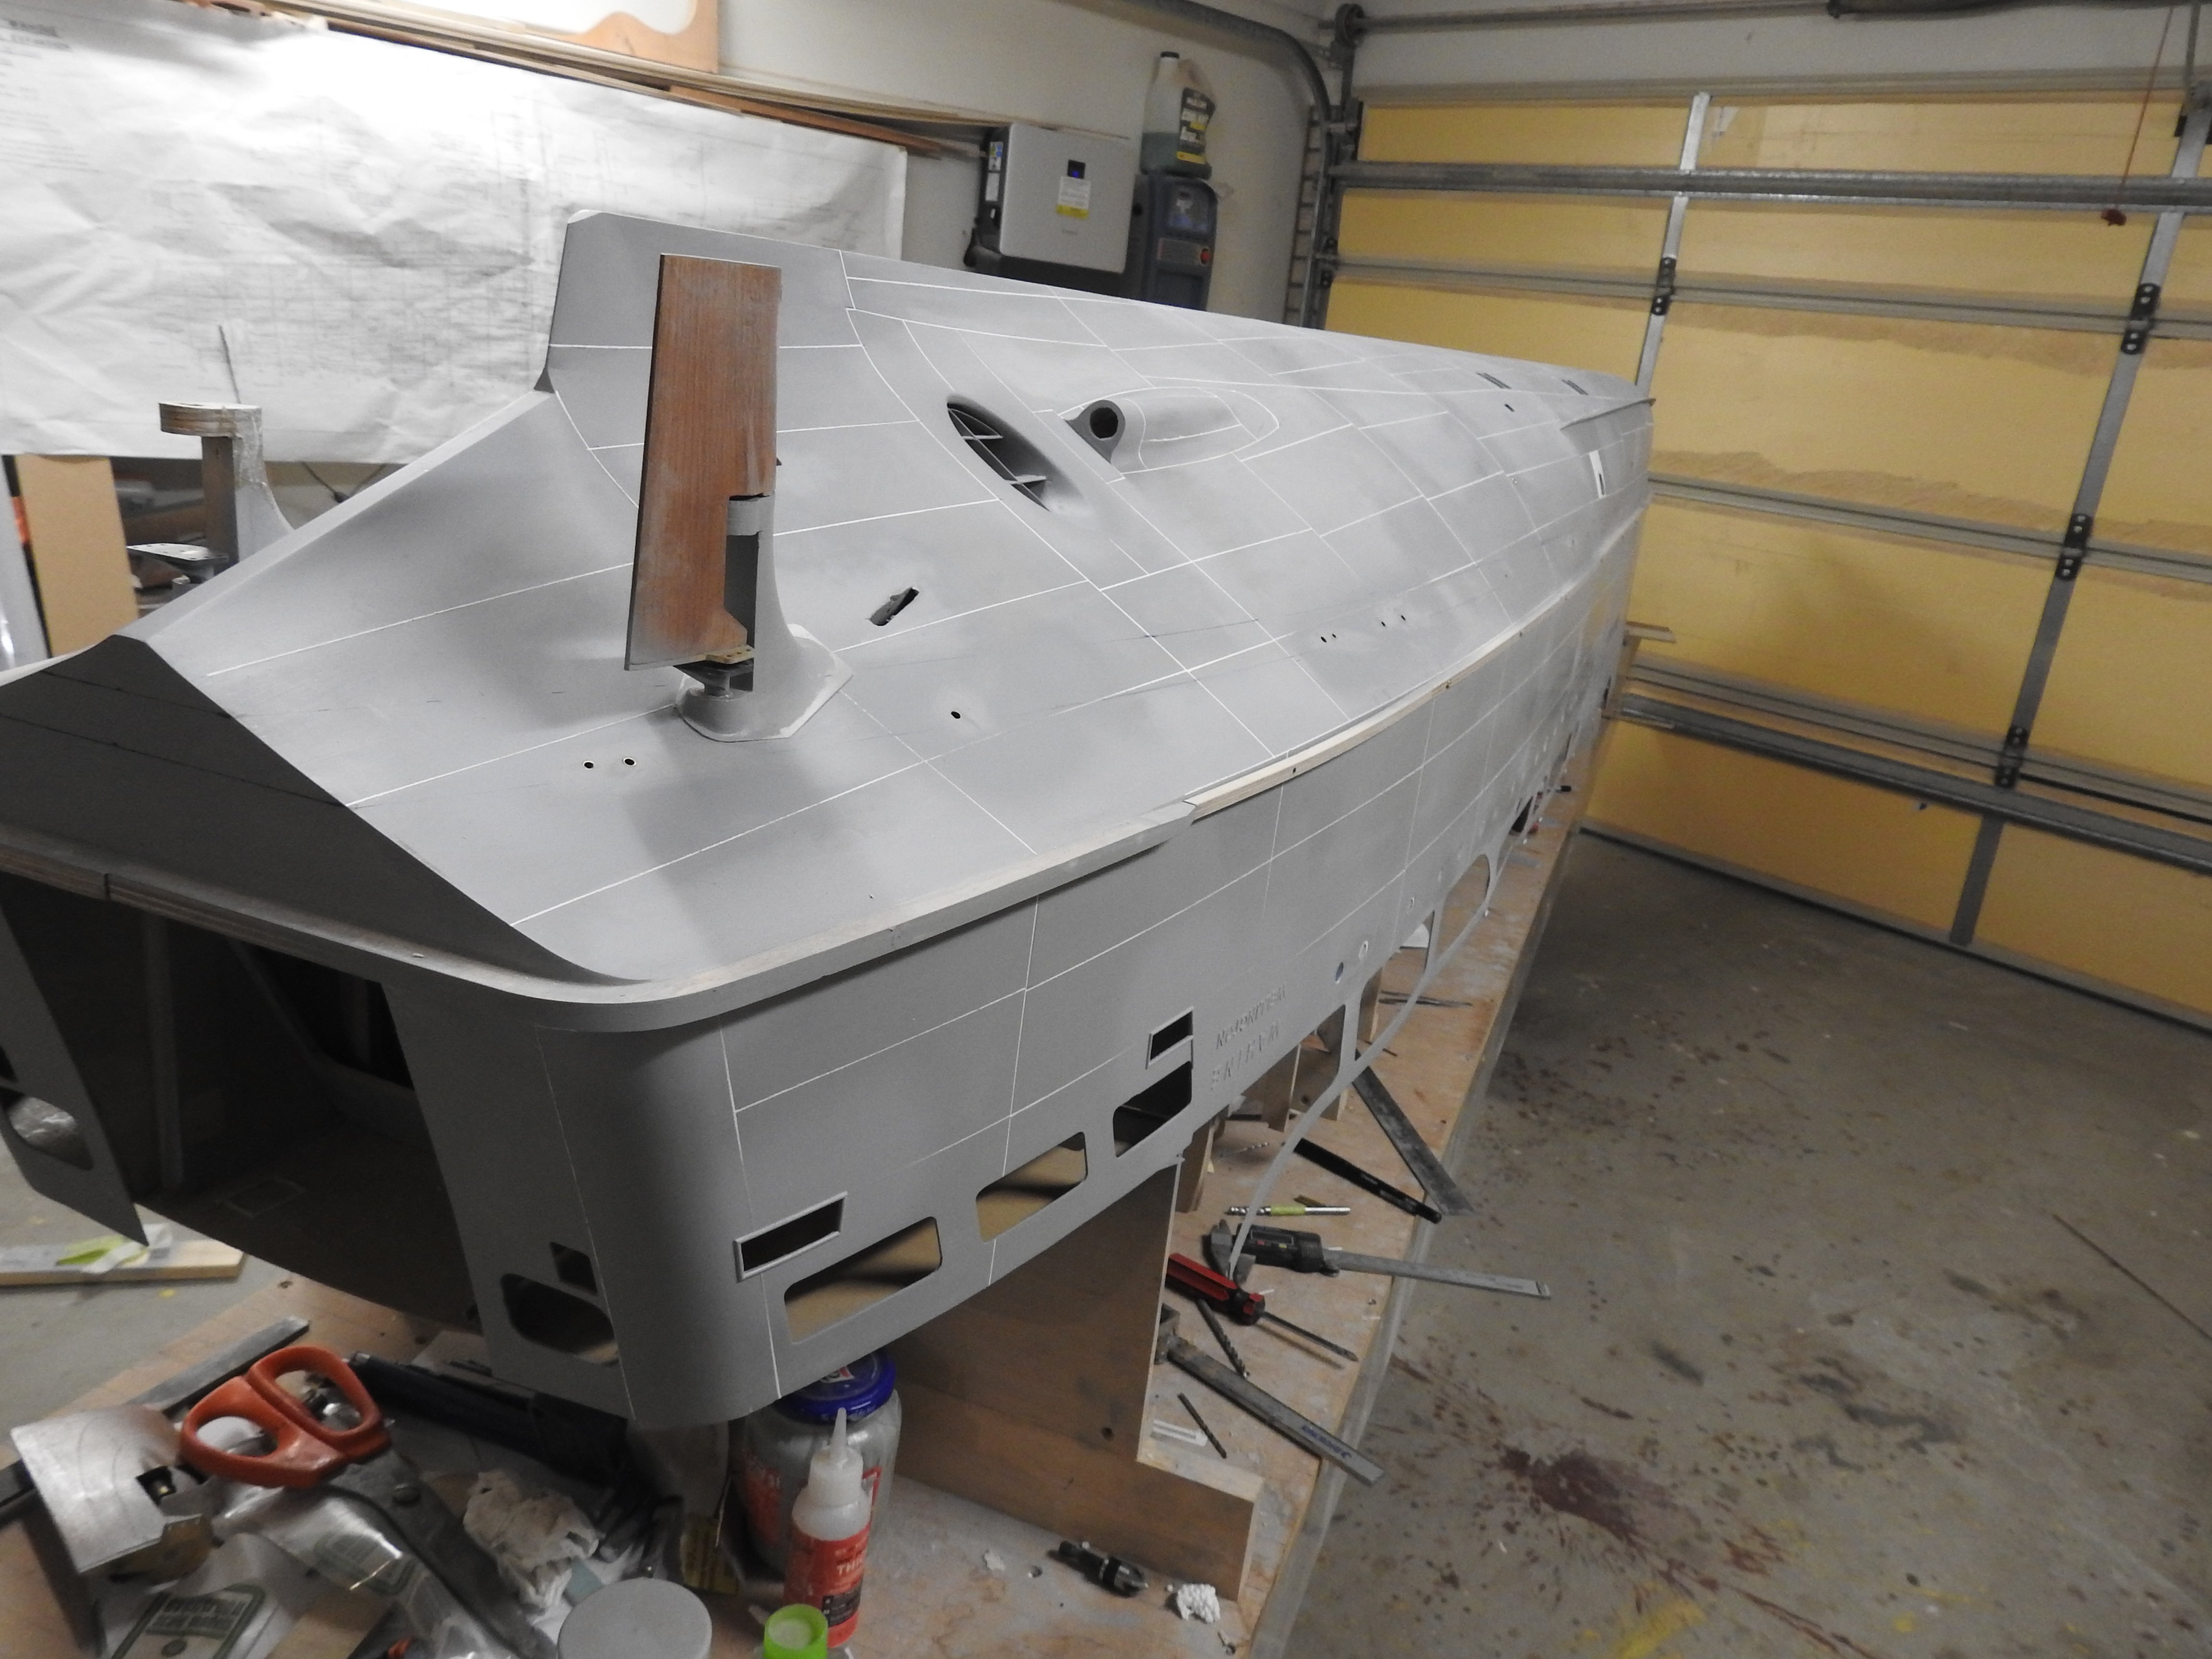
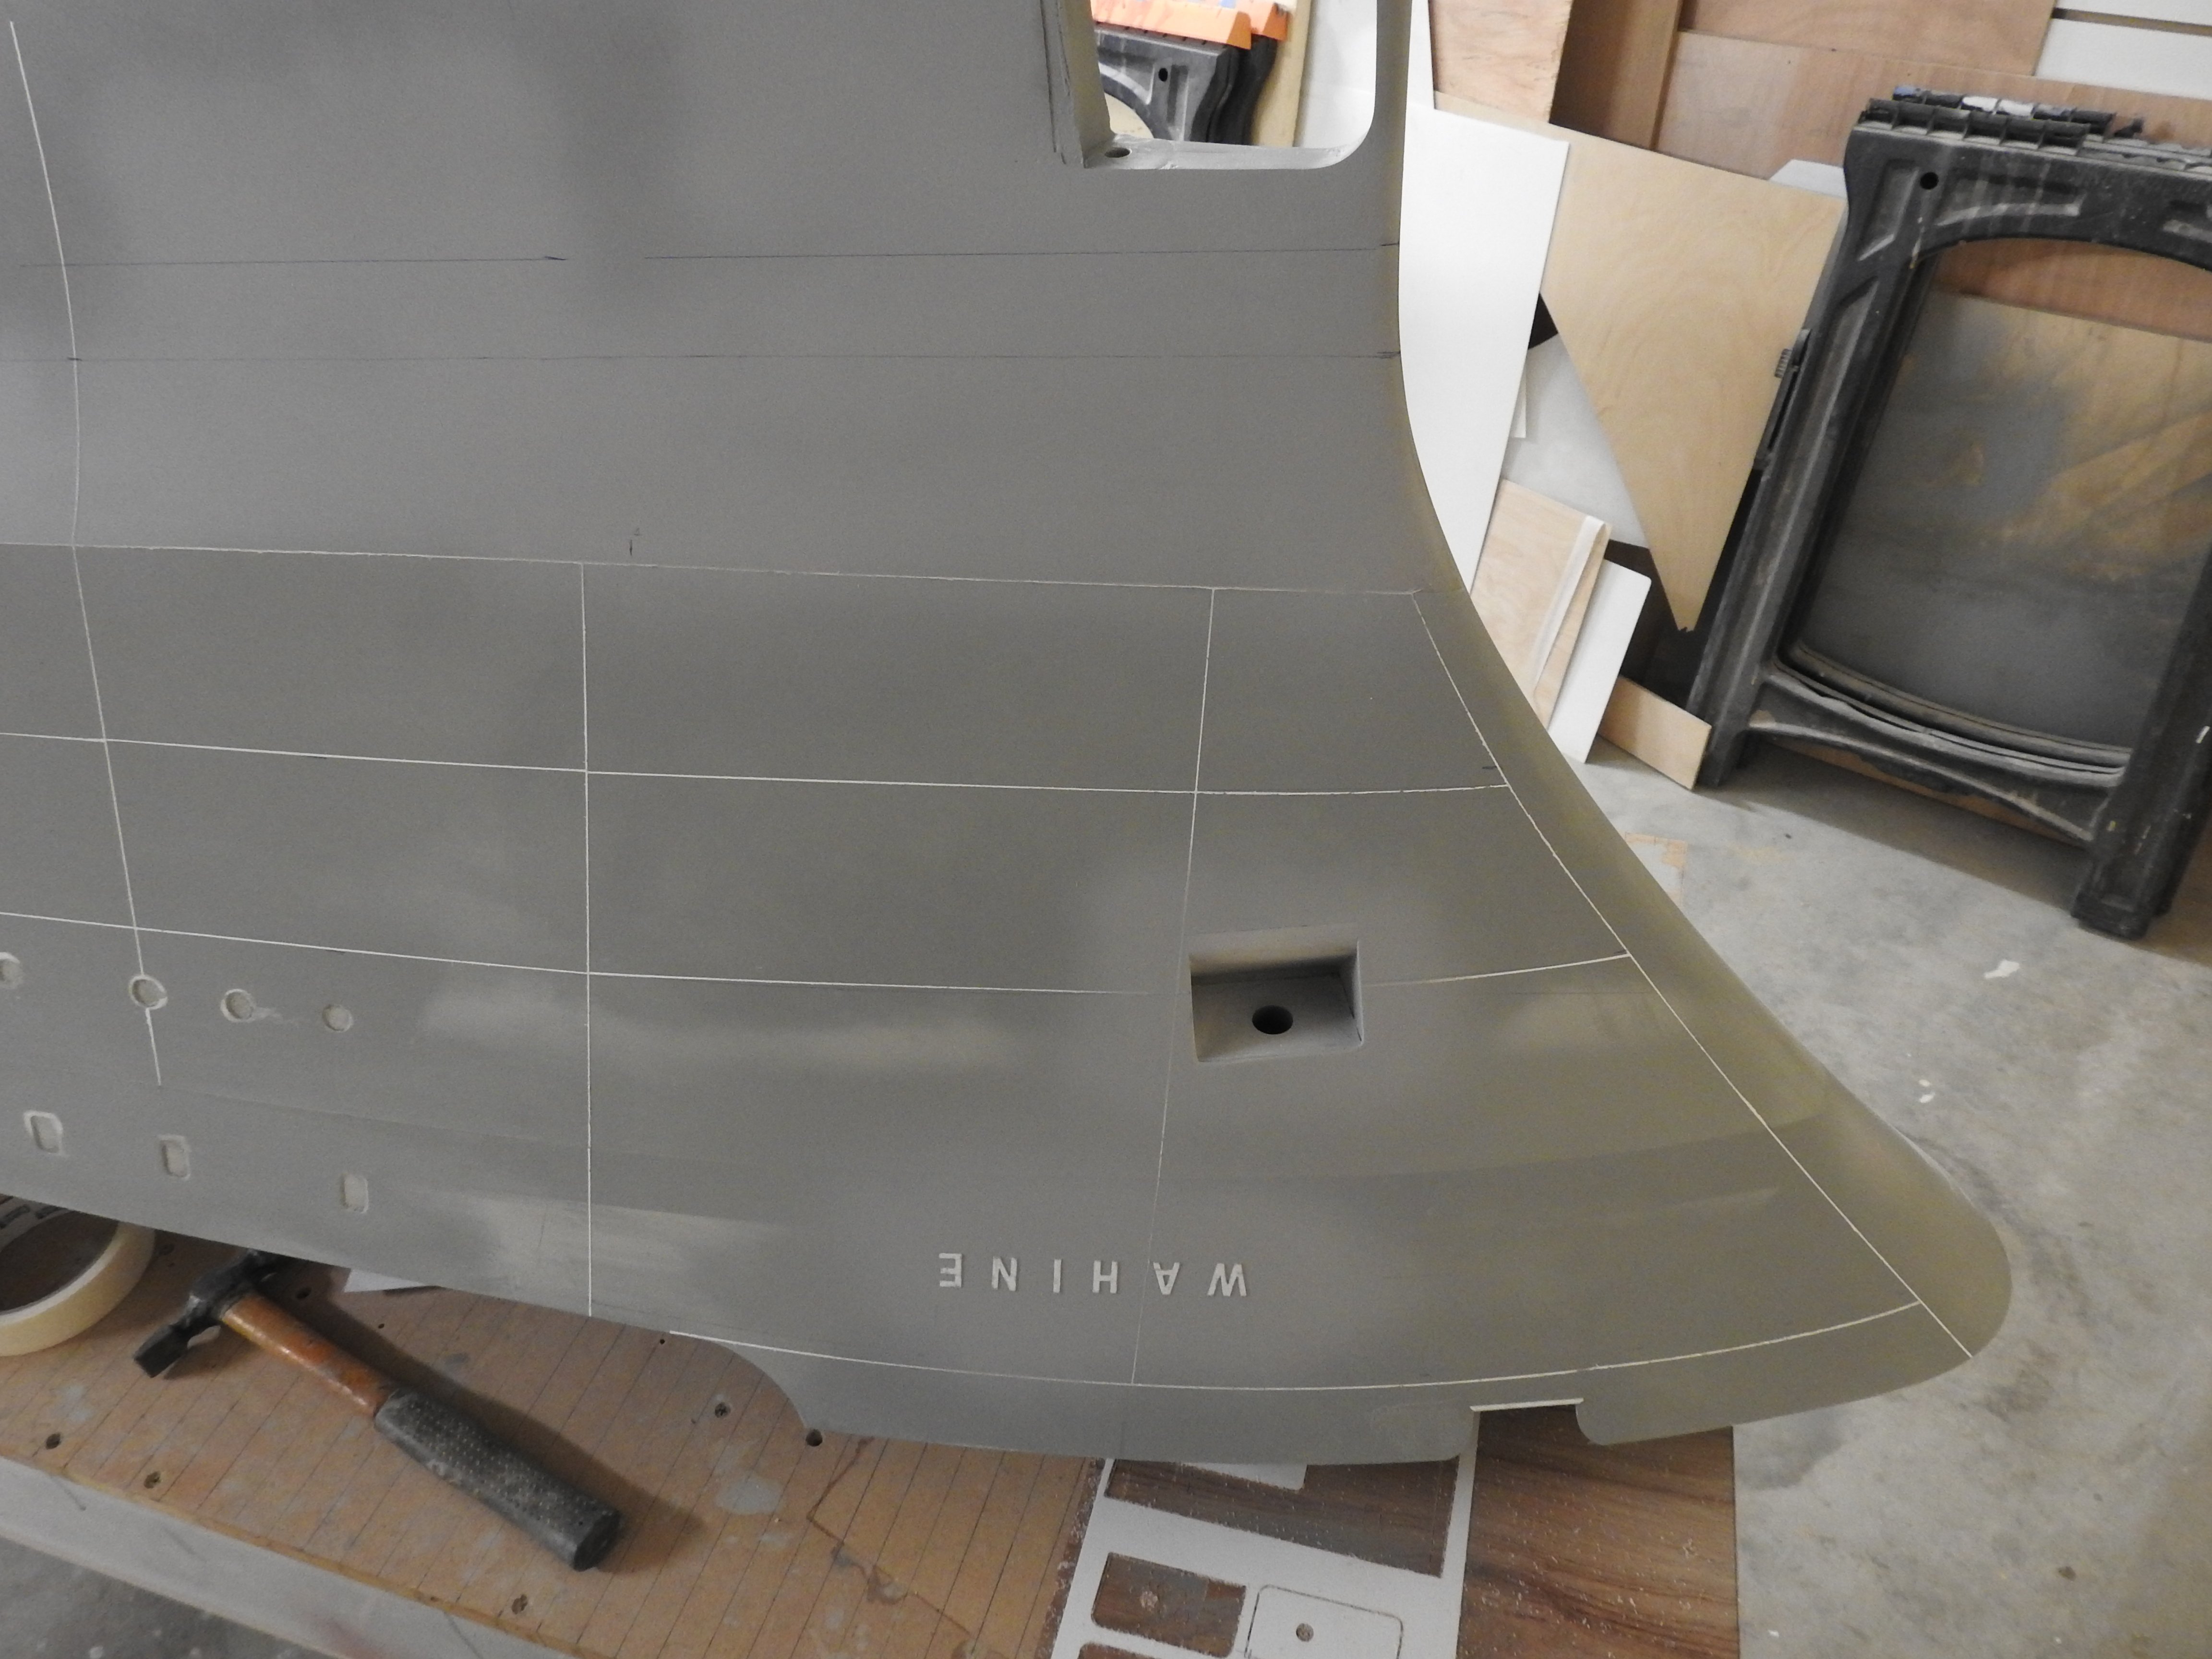
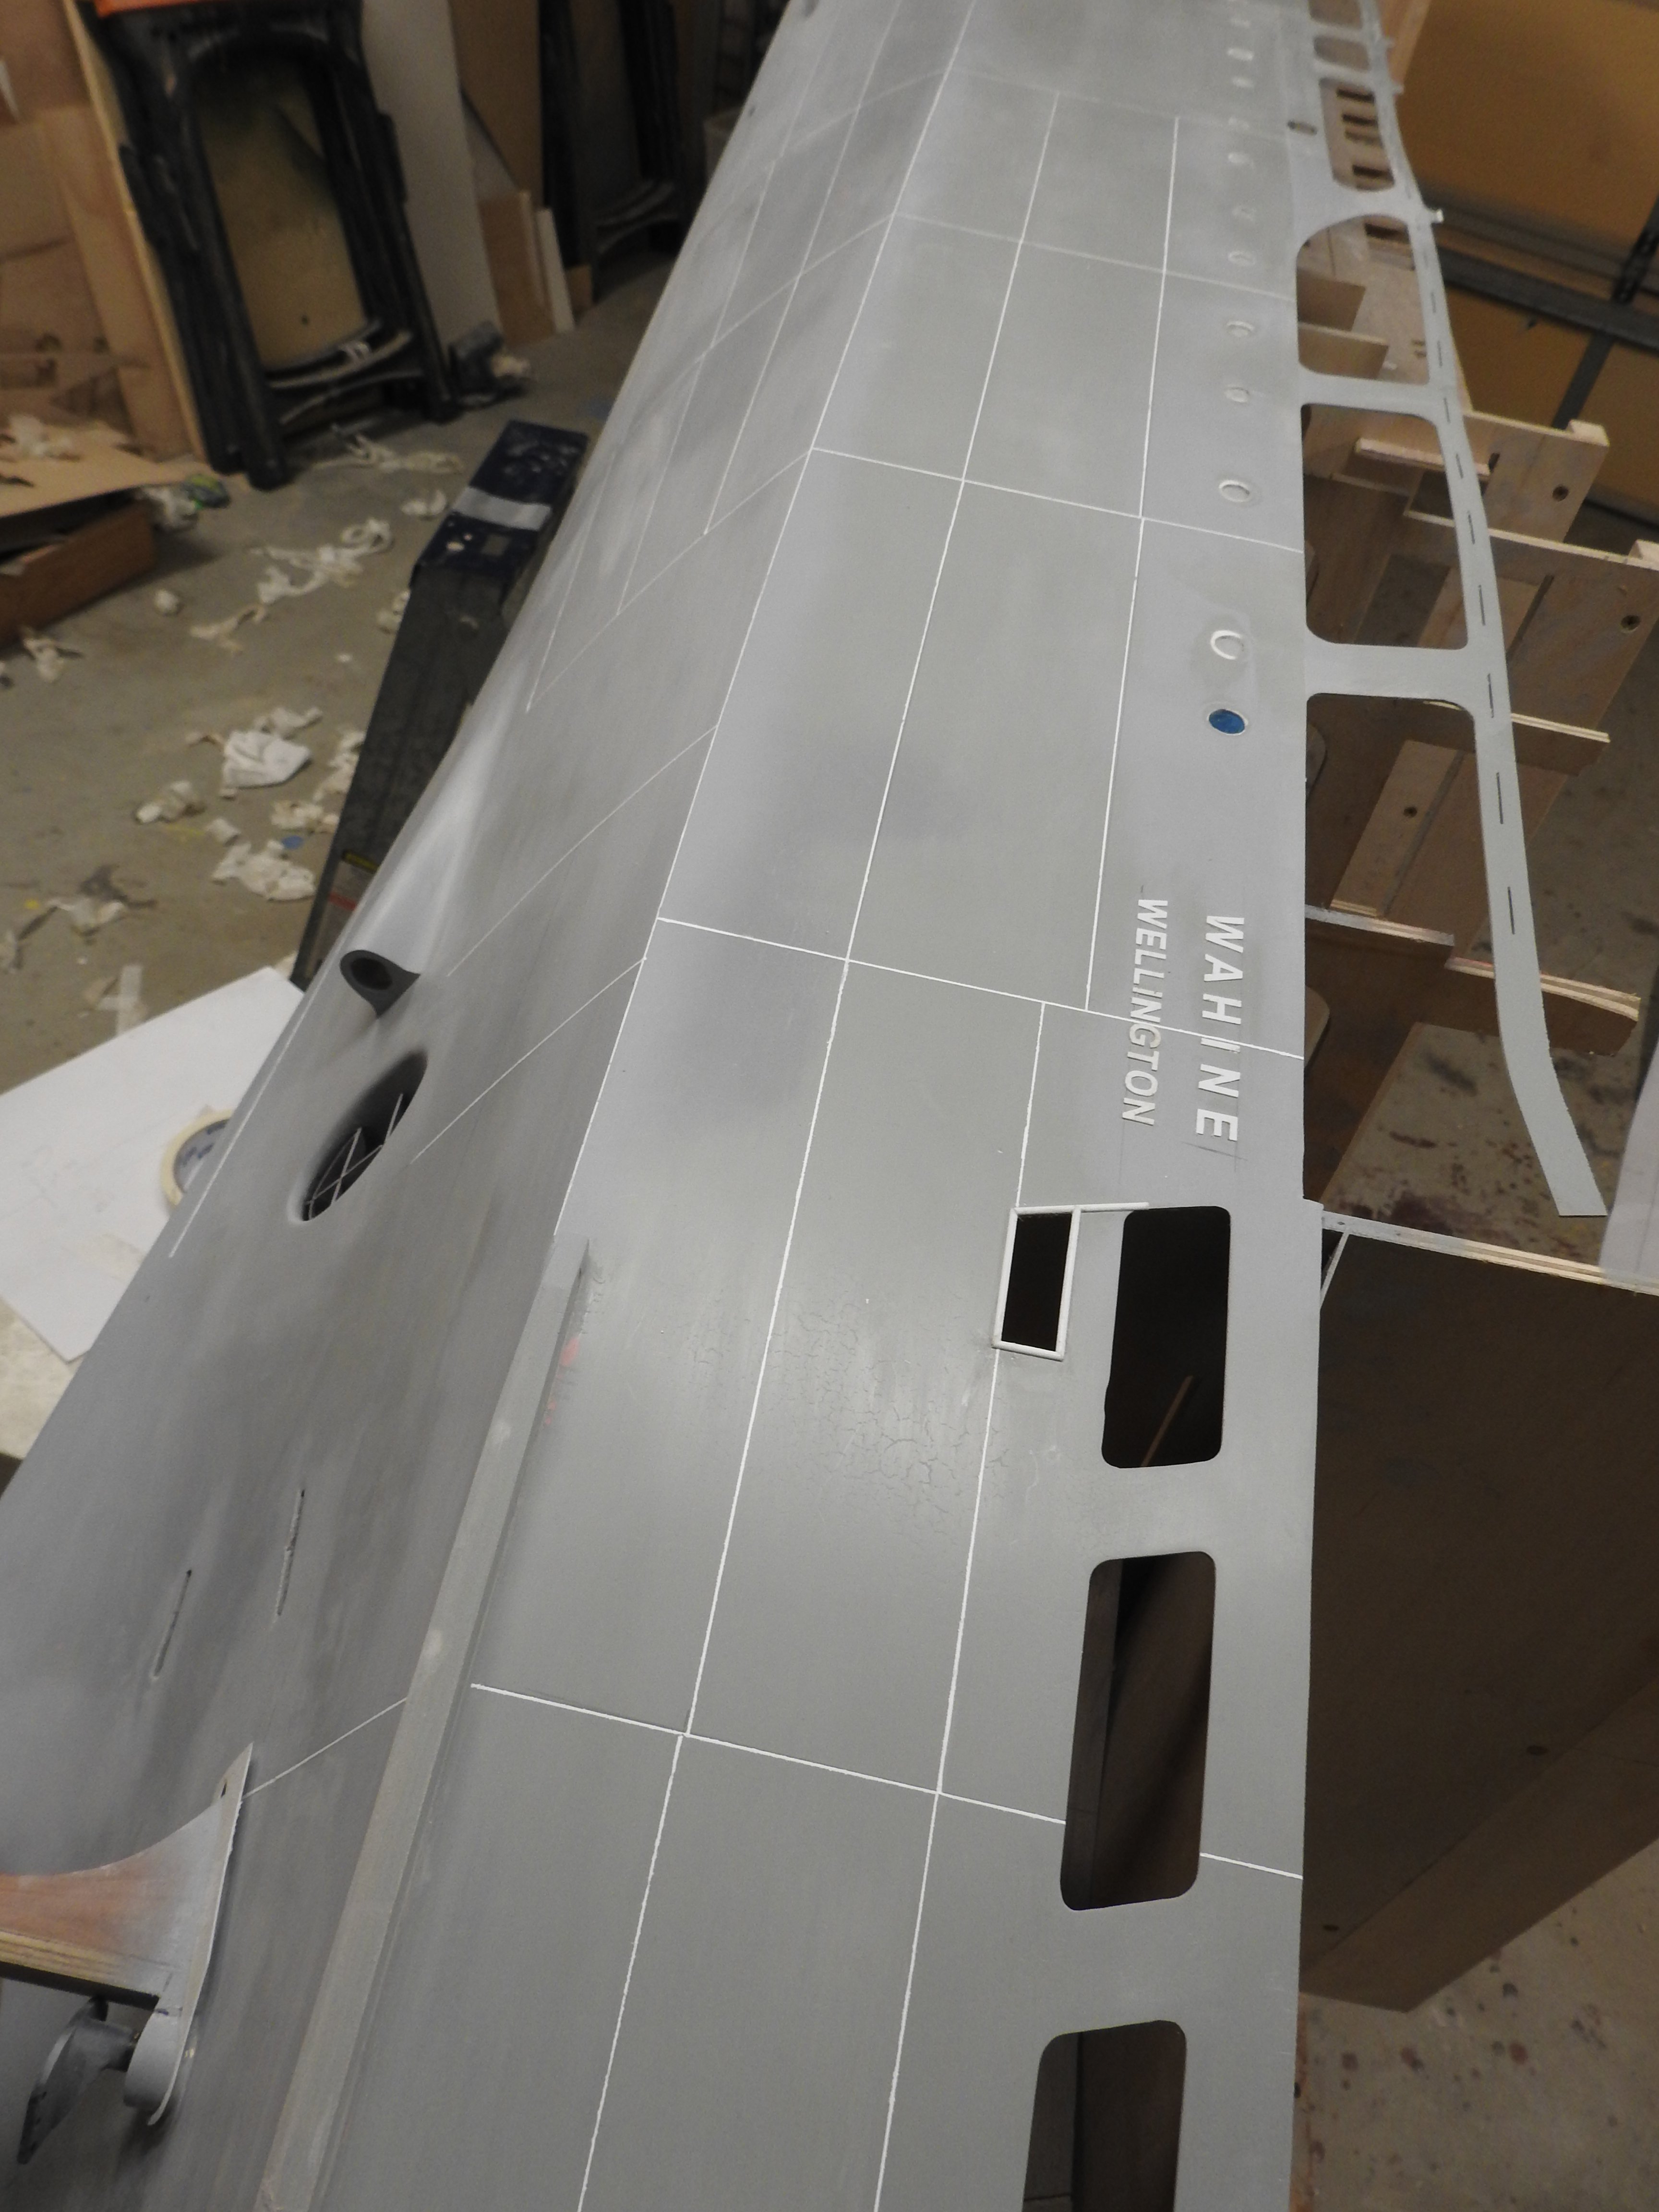
This puts the size in perspective, Scuppers and air filling vents being put in.


- 454 replies
-
- 10
-

-

-
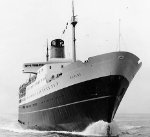
- Union Steamship Company
- Stepcraft 840
- (and 3 more)
-
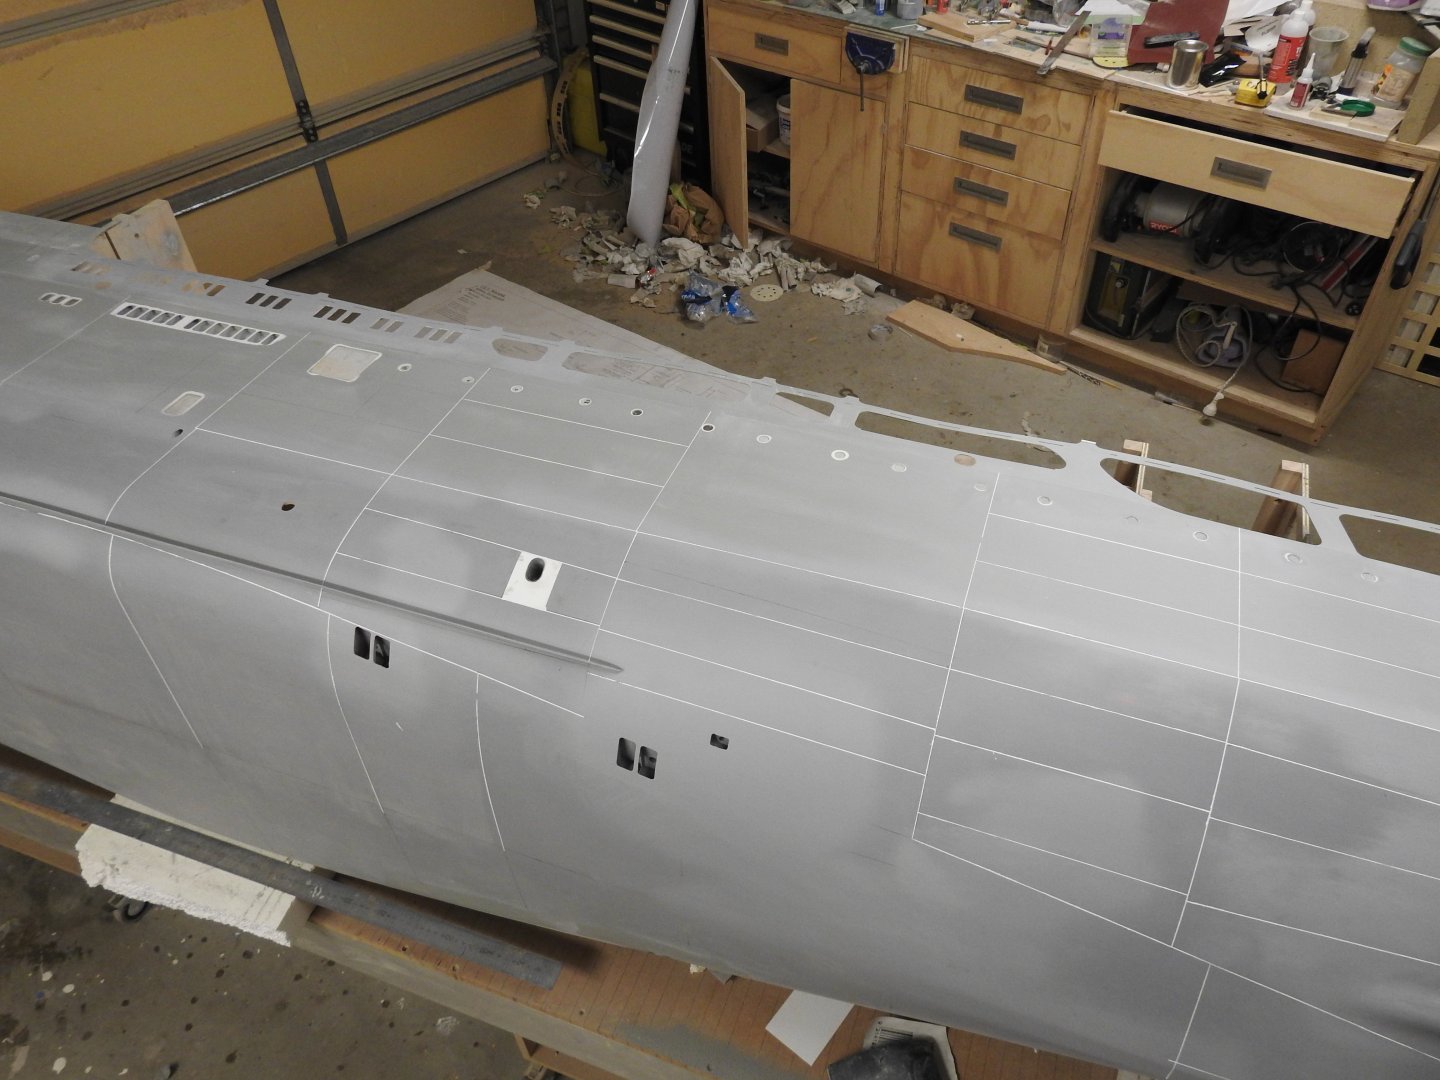
When you see it in person, it's big, but not that big. I have seen bigger, but it's just manageable to turn and handle alone.
-
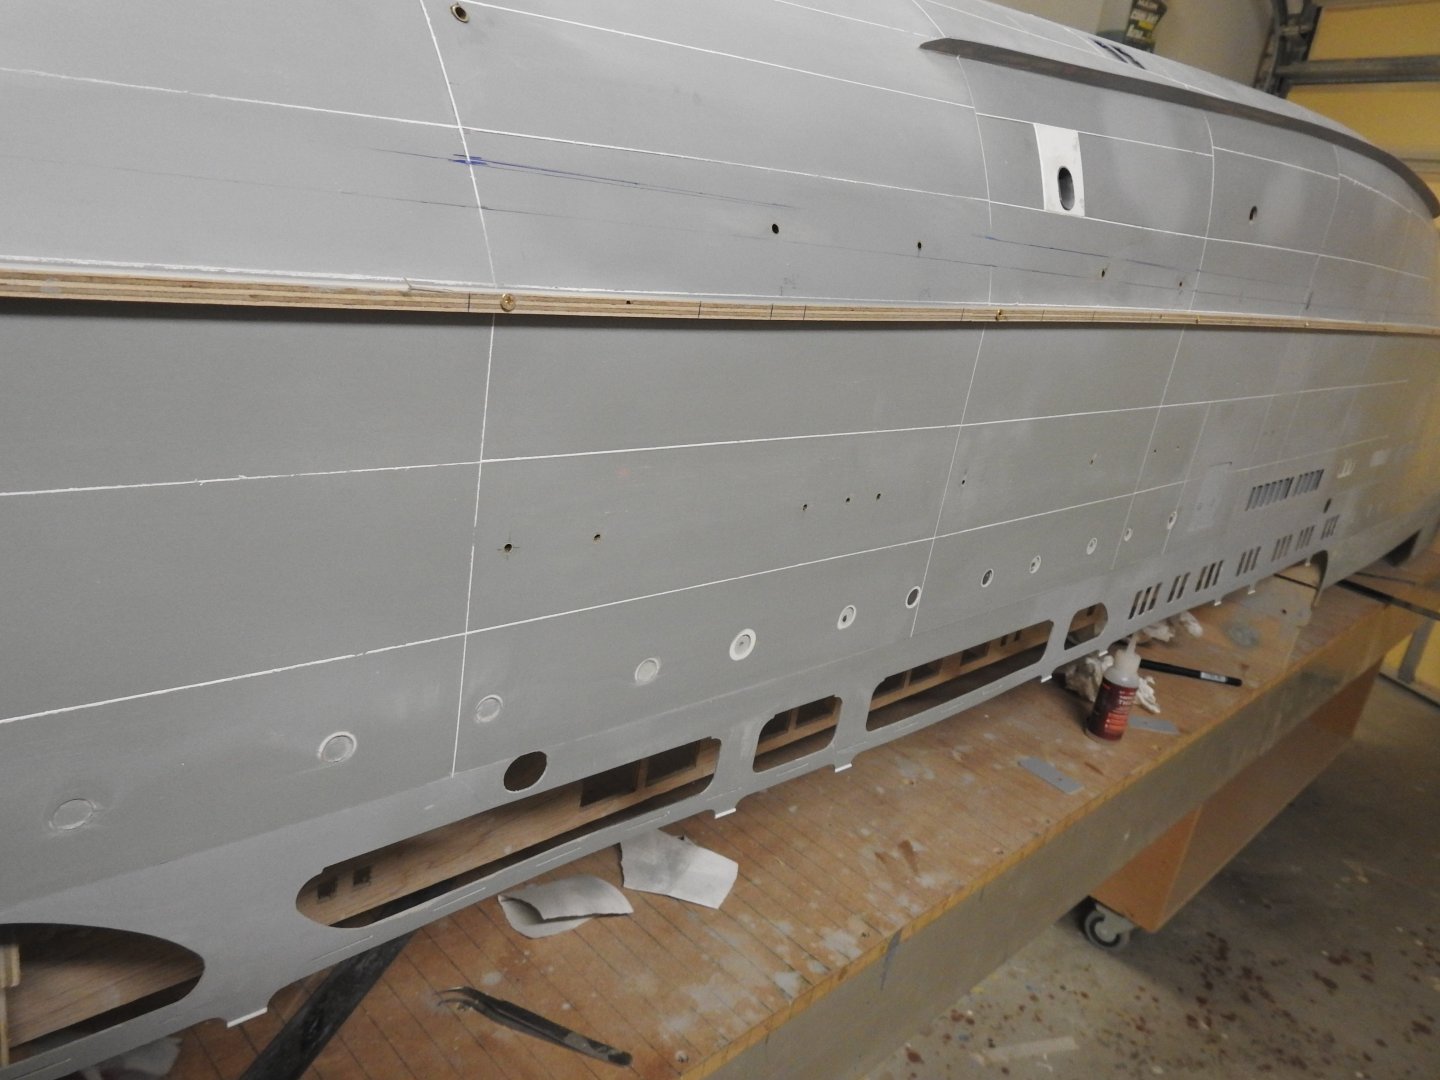
Well the plate distortion is not visible in primer as you need some gloss for it to show but the weld beads are nearly done and the hull is primed to 600 grit , the portholes are all masked at the moment, all the running gear is hooked up and the prop shafts and props are almost ready to install for good. Some superstructure elements are removed for now of course.


- 454 replies
-
- 10
-
-
-
- Union Steamship Company
- Stepcraft 840
- (and 3 more)
-
If I was to roughen 25mm of tube would it fully illuminate like a tube light? or would it just be a dimmer light with most being at the end?
-
Thanks but I don't need to know how to model them, I am a professional 3d modeller. just how to simulate a tube of light inside
-
I am hoping to start a disscussion on ways of building convincing working light types for larger scale models. I want to start with Flourescent tubes at 1/35, has anyone got any suggestions or experiance with making such thing? To be more specific is their a way to have a long skinny lightsource like a tube? or would it just have to be faked with the usual diodes?. Something along these lines
-
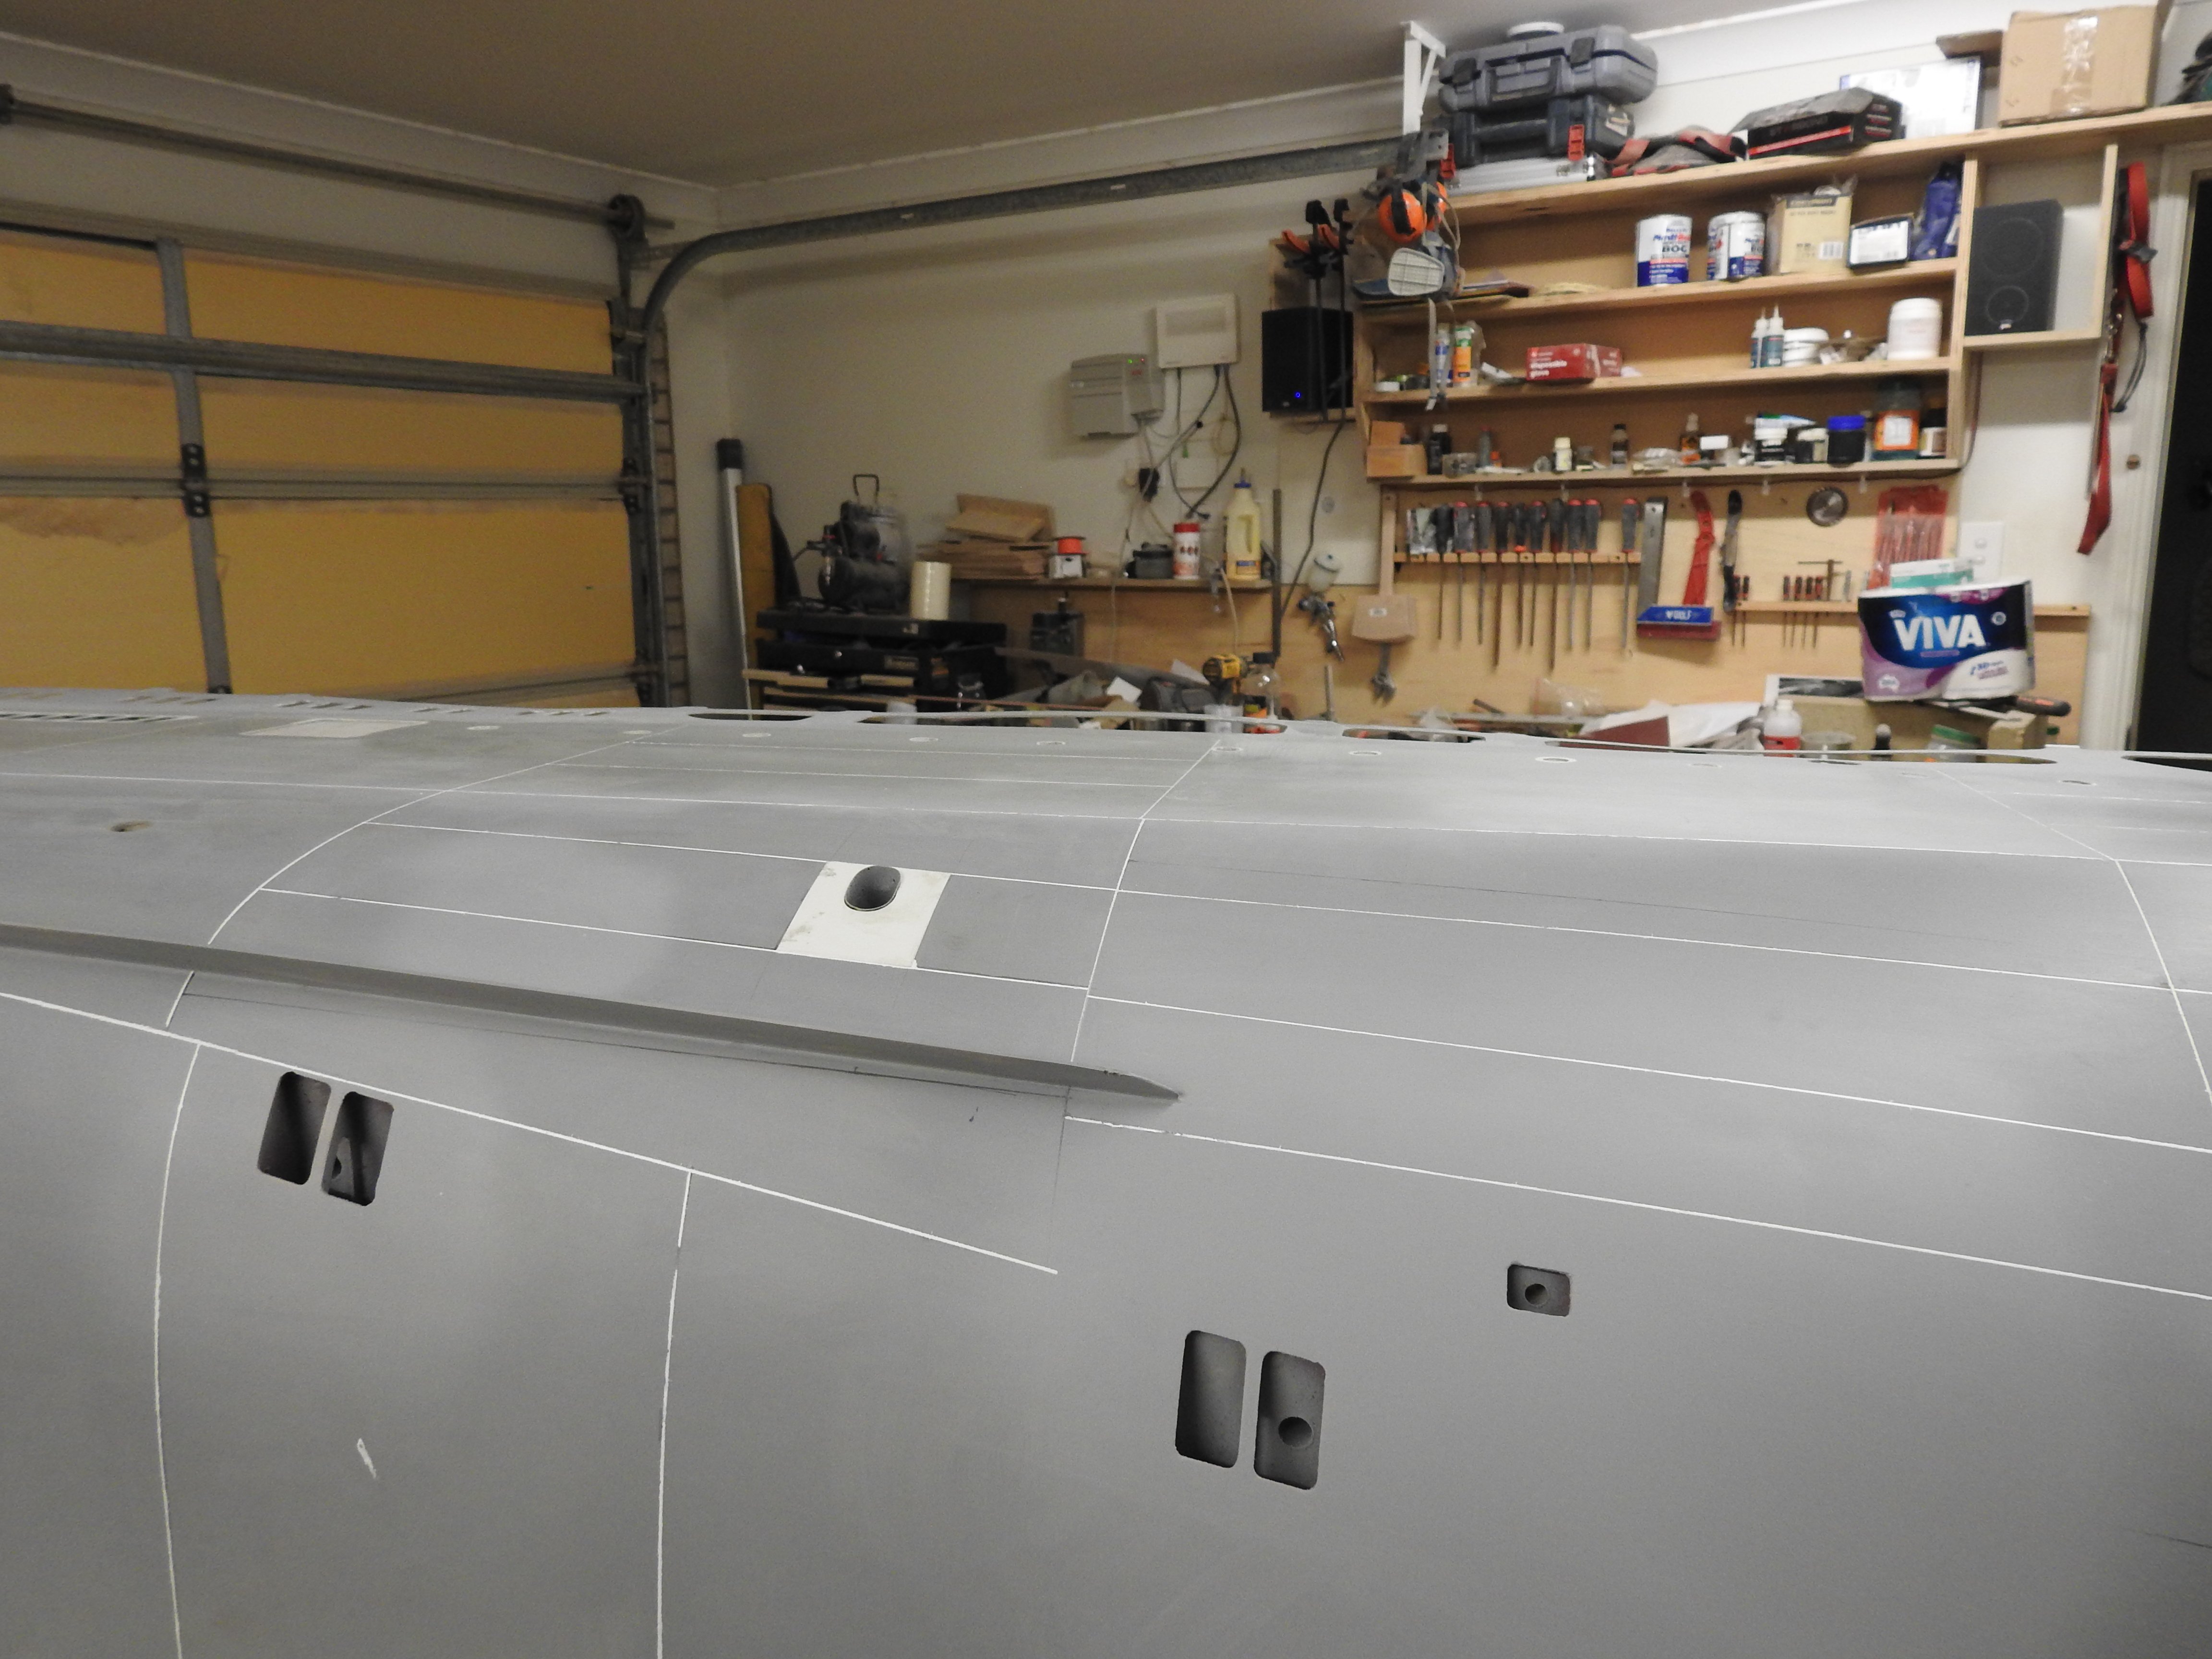
The model will have some big updates soon and is well and truely on track for a launch date on the 14th July,, exactly 60 years to the day as the launch of the real ship on July 14th 1965 All running gear is installed, thrusters, props, motors, rudders etc. just a few planks to address and some glassing and sealer/primer and we are good to go
- 454 replies
-
- 3
-
-
-
- Union Steamship Company
- Stepcraft 840
- (and 3 more)
-
I have started a facebook page for this 2 days ago as well, as it covers the history of the ship as much as the model. Feel free to join, it's public. This is because I have been getting inundated with new info lately from facebook as its obviously easier to find for non modellers. https://www.facebook.com/groups/586060487227286
-
This is resolved now thanks, I only need to repair this to the instruction standard, I worked on the real ships restoration so dont need to go to deep.
-
Because as I said this is a repair not a build and its a 30 year old model built by a relative, I cant alter it.
-
If anyone in Australia has these left over I need them for a repair I have been given after a parrot flew into it on the shelf(no case). 8 of the sails have split in half.
-
I have been given this model to repair, it fell a long way off a shelf and require the rigging instruction to help. If anyone could provide this it would be awesome. EDIT I may have found them if someone could confirm this is all of it for me https://cuttysarkdrydock.wordpress.com/2011/09/23/the-cutty-sark-rigging-sheets/
-
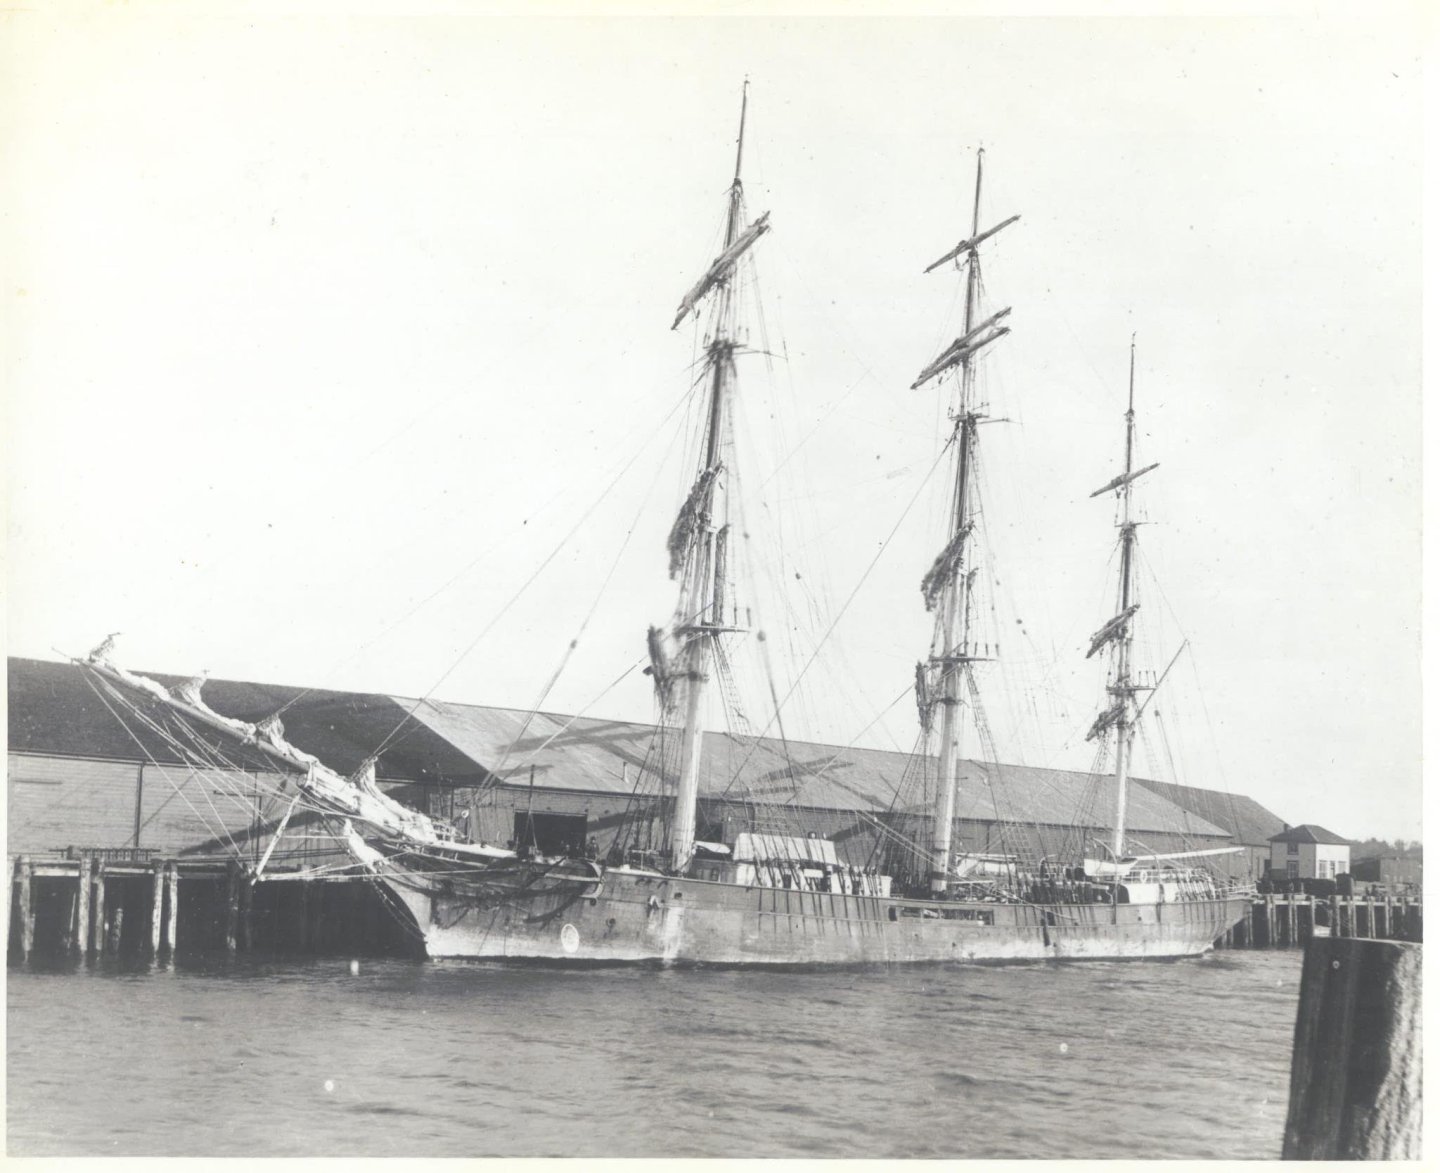
Nice build, and an interestng subject with lots of lovely drawings, the spirketting board being wider forward threw me on the deck plankng drawing.
- 490 replies
-
- 1
-
-
- minesweeper
- Cape
- (and 1 more)