HOLIDAY DONATION DRIVE - SUPPORT MSW - DO YOUR PART TO KEEP THIS GREAT FORUM GOING! (Only 20 donations so far - C'mon guys!)
×
Richard Dunn
-
Posts
529 -
Joined
-
Last visited
Content Type
Profiles
Forums
Gallery
Events
Everything posted by Richard Dunn
-
 Currently I am not planning to produce this at any other scale than 1/40, as I said at the start this was a request for a single client and I merely wanted to put it out into the community in case any others wanted it in this scale as well. To produce this even at 1/48 would involve having to completely redo the 3d model and start from scratch again, not only is it a huge amount of work but I would have to charge my time and make an already expensive semi kit simply too much for most people. I am happy to do it at 1/40 though, any request, for this please pm from now on as the prototype is finished now and client has the model. I do want a minimum number of orders to make this viable and this is not the only site I have done a build on for this particular project.
 -
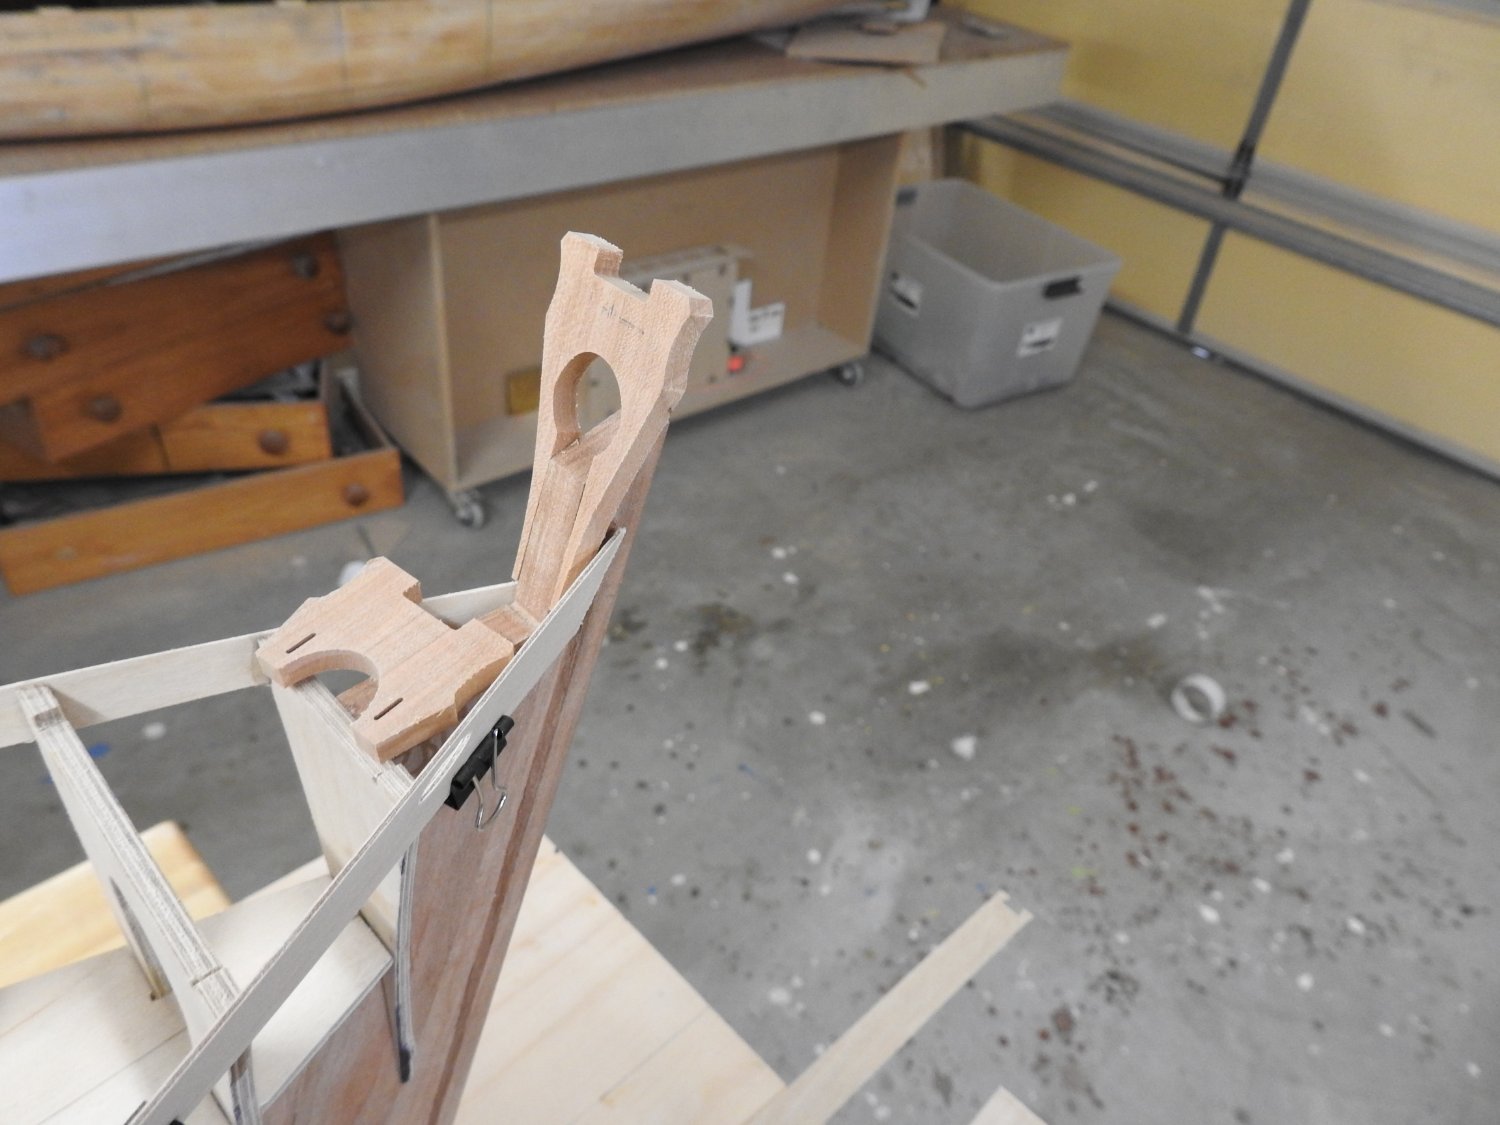
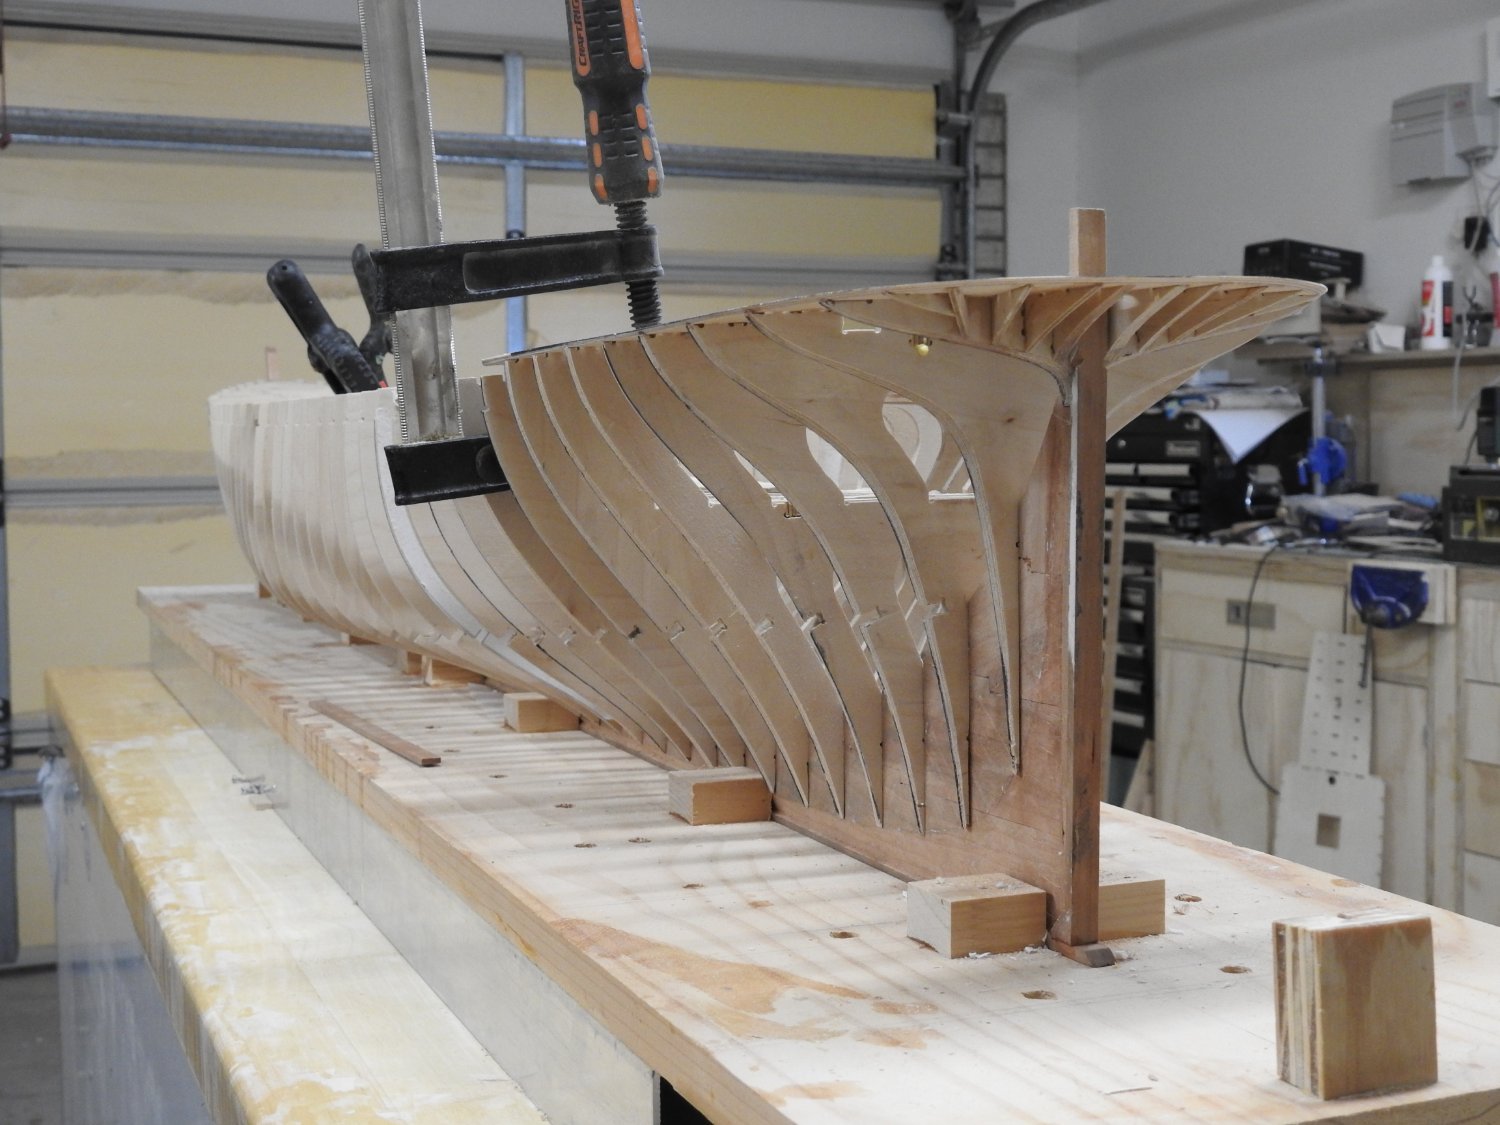
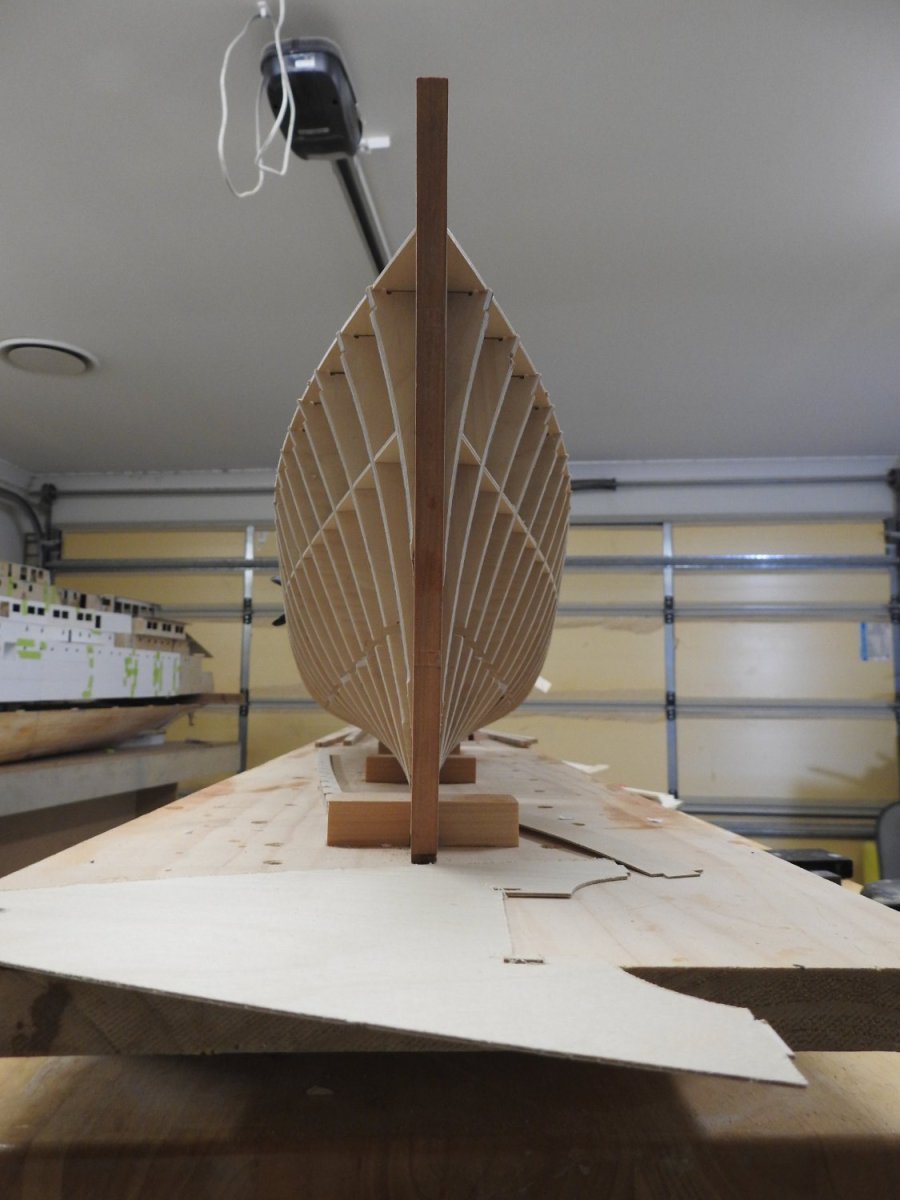
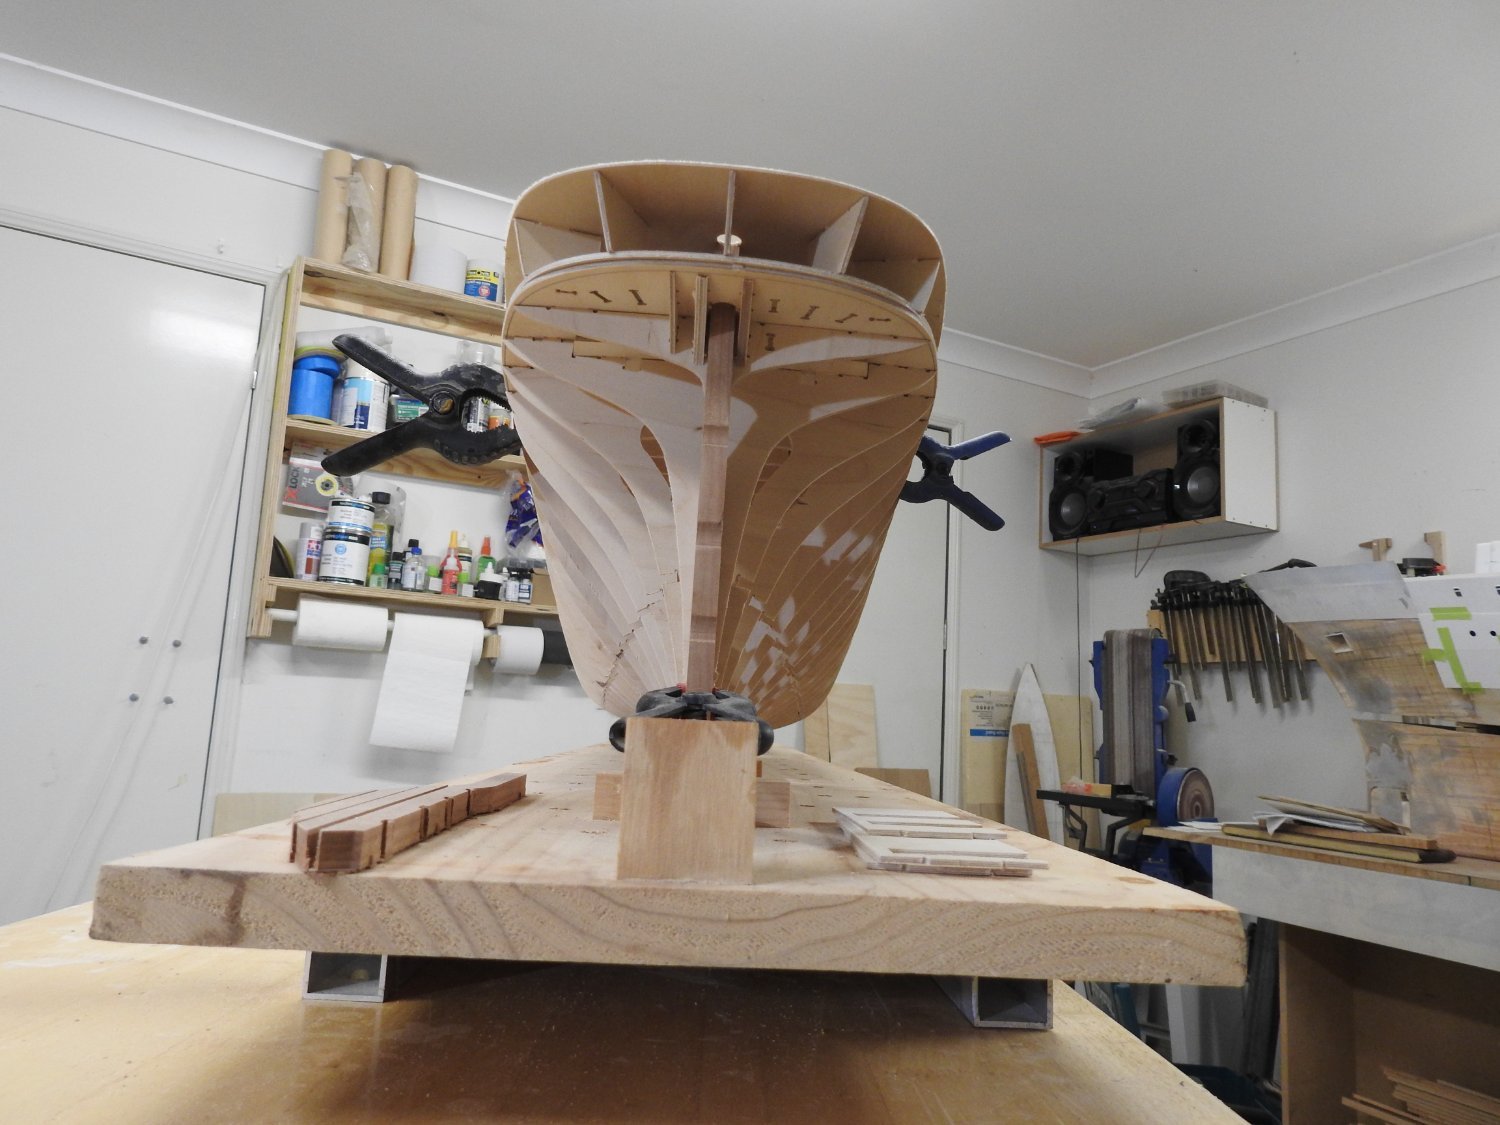
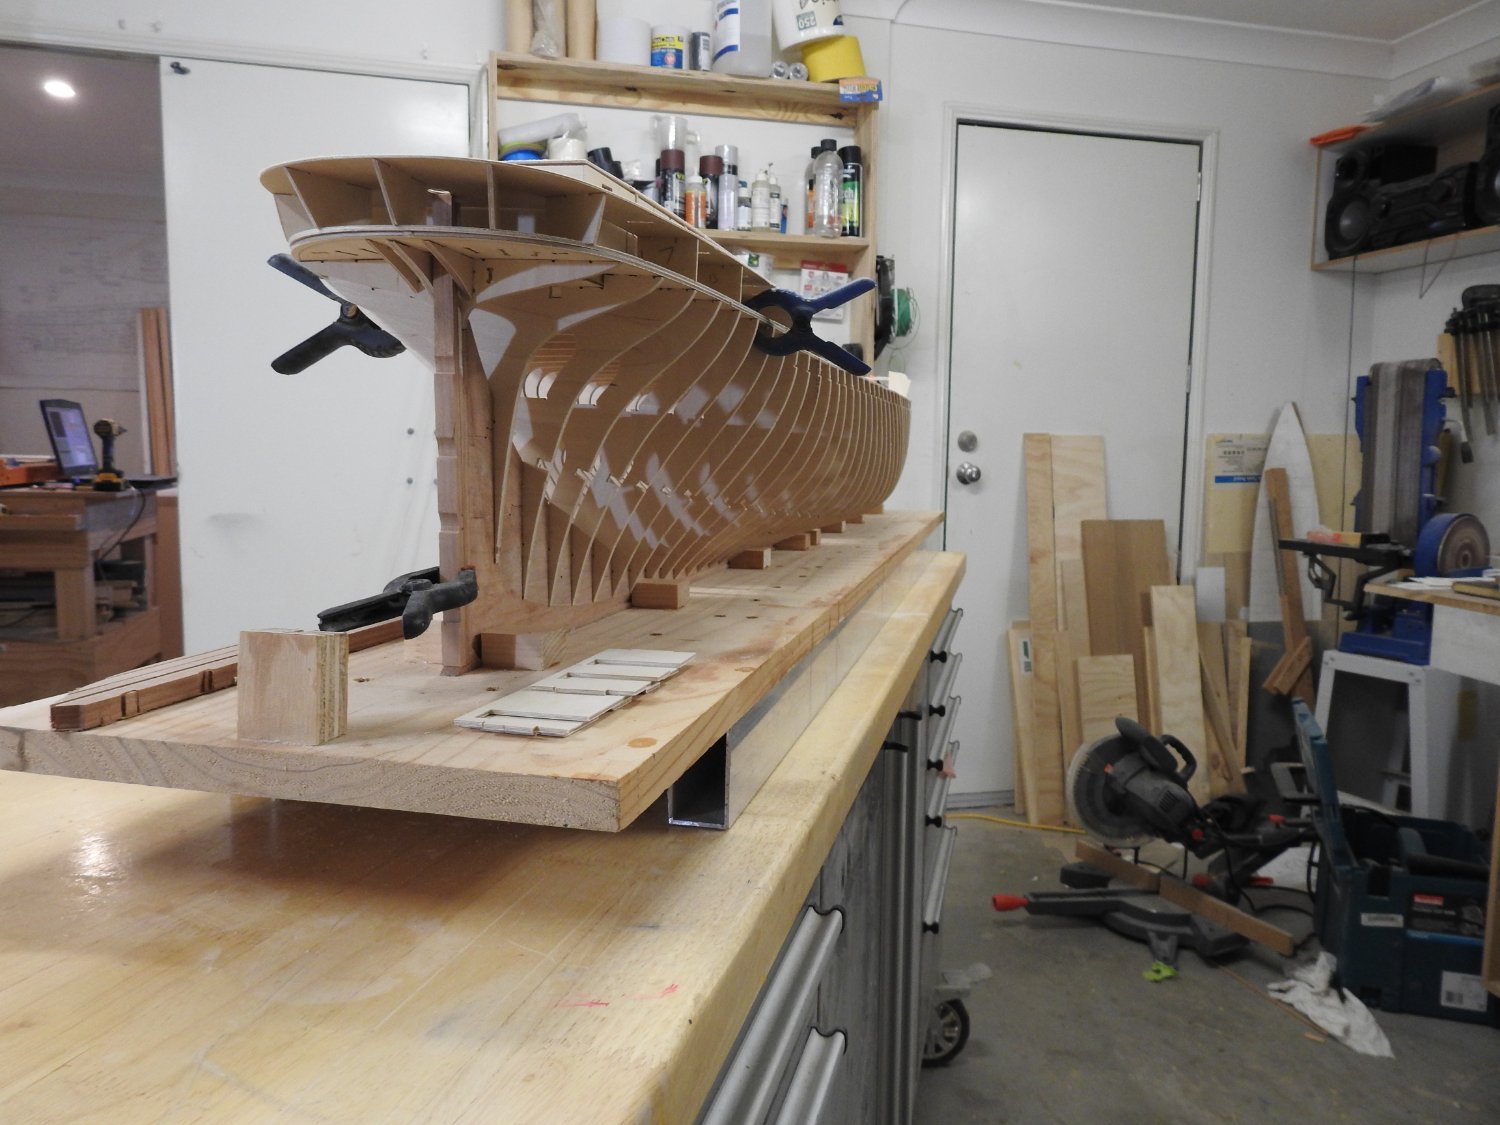
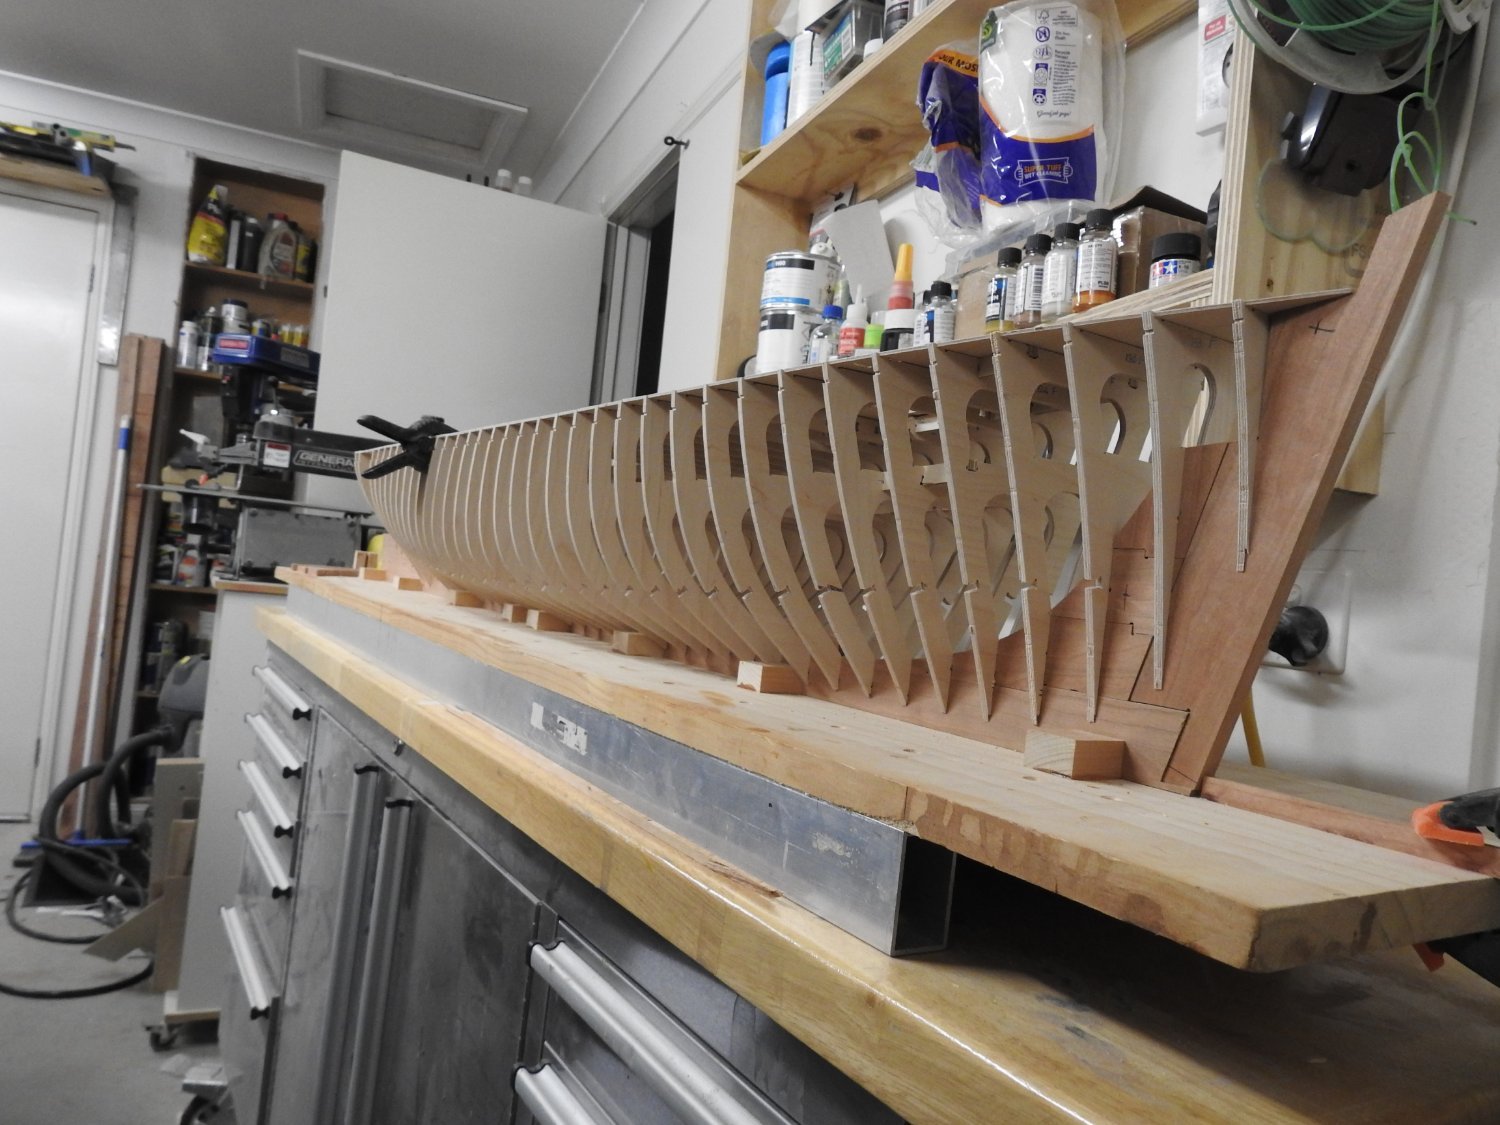
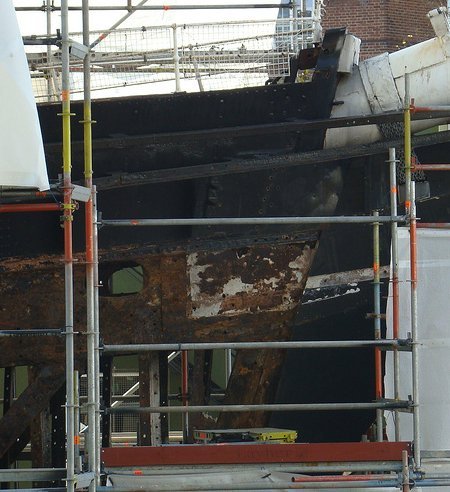
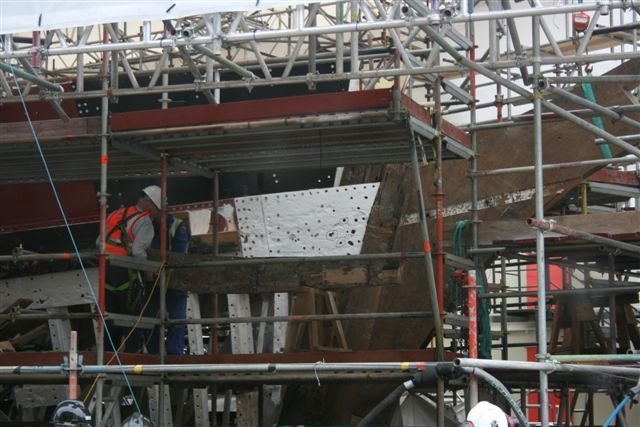
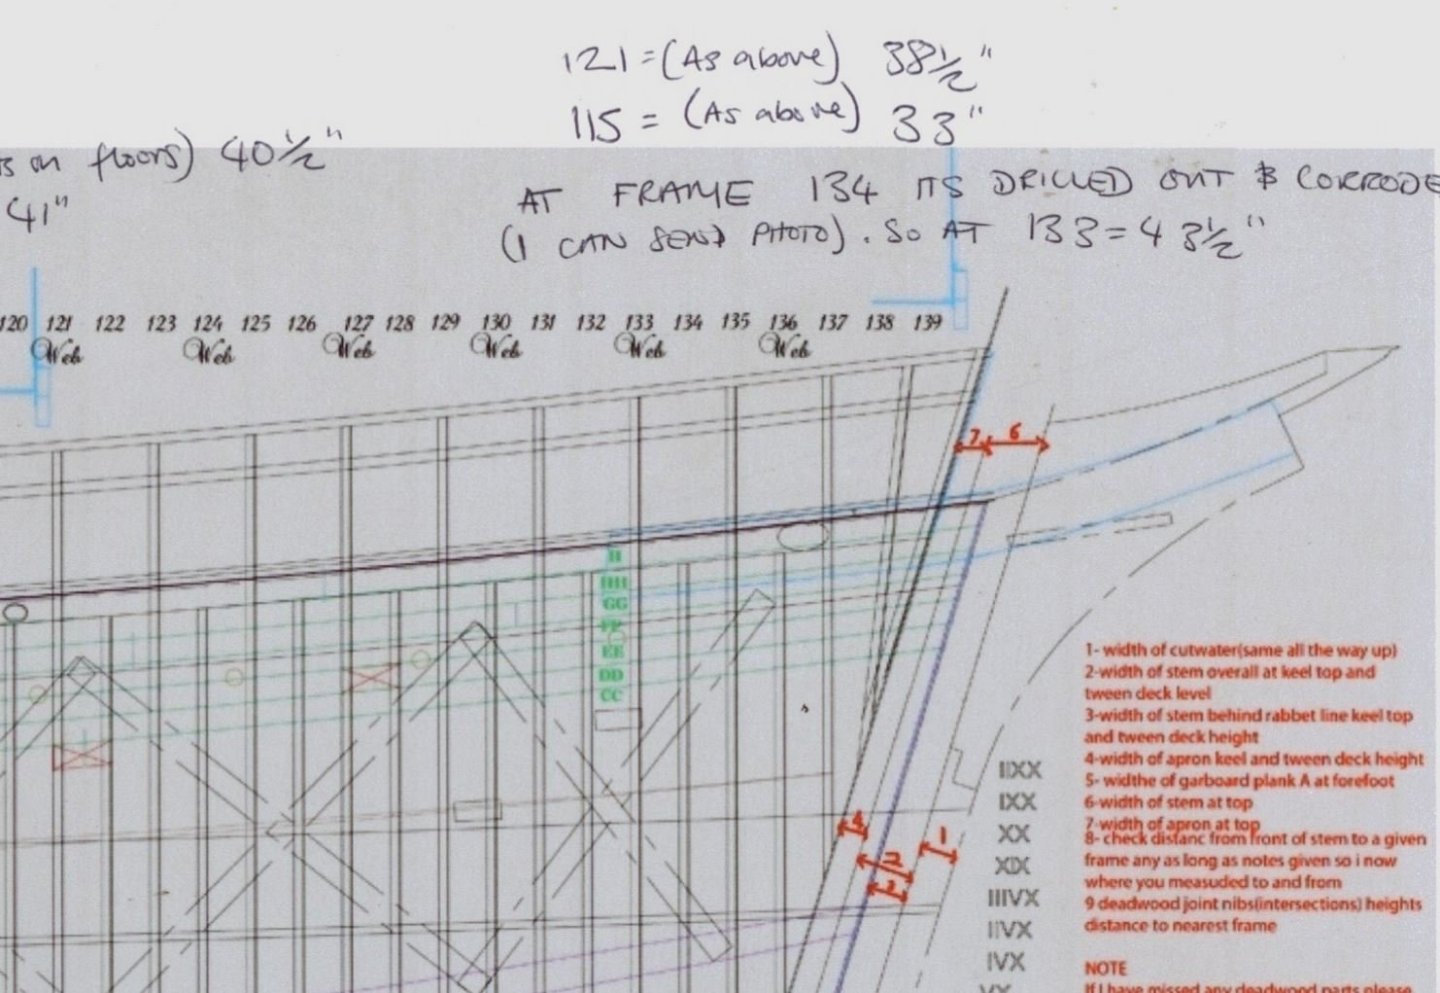
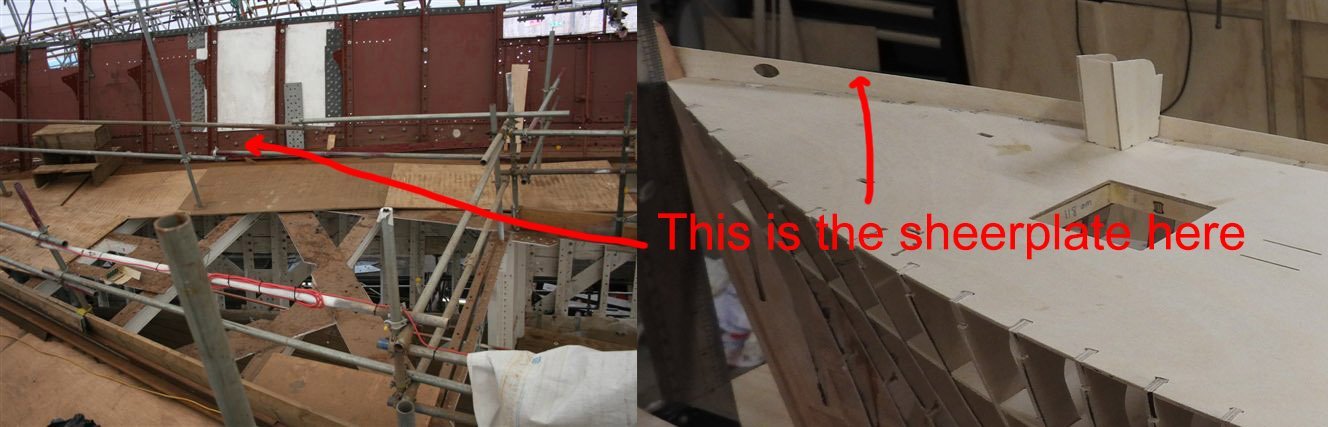
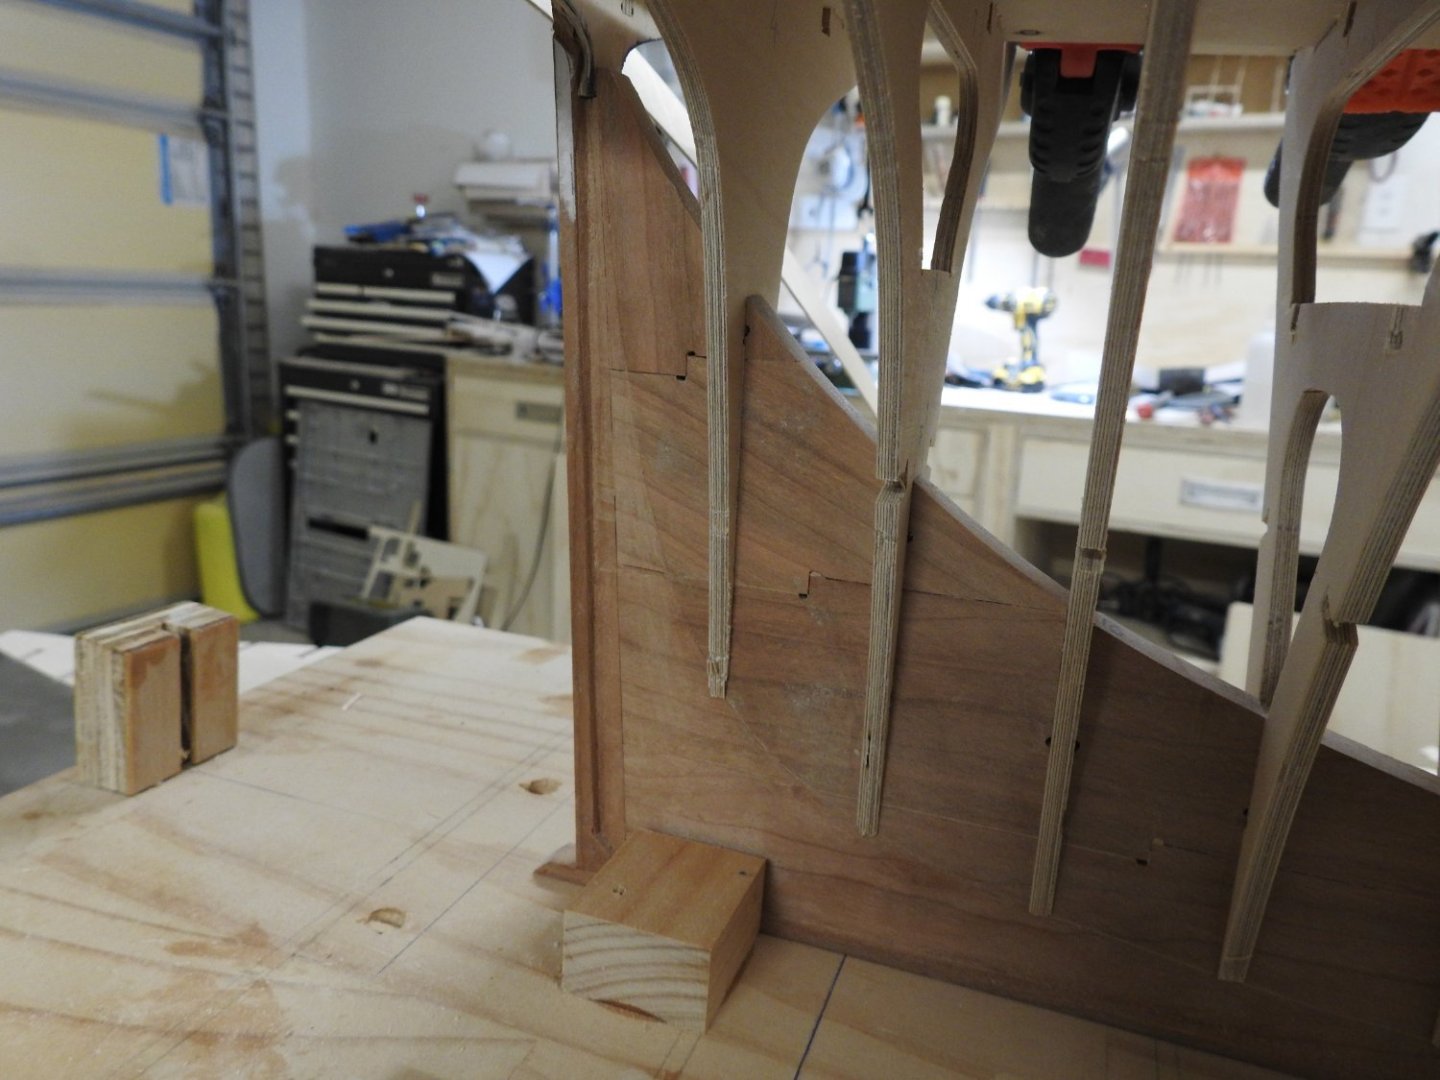
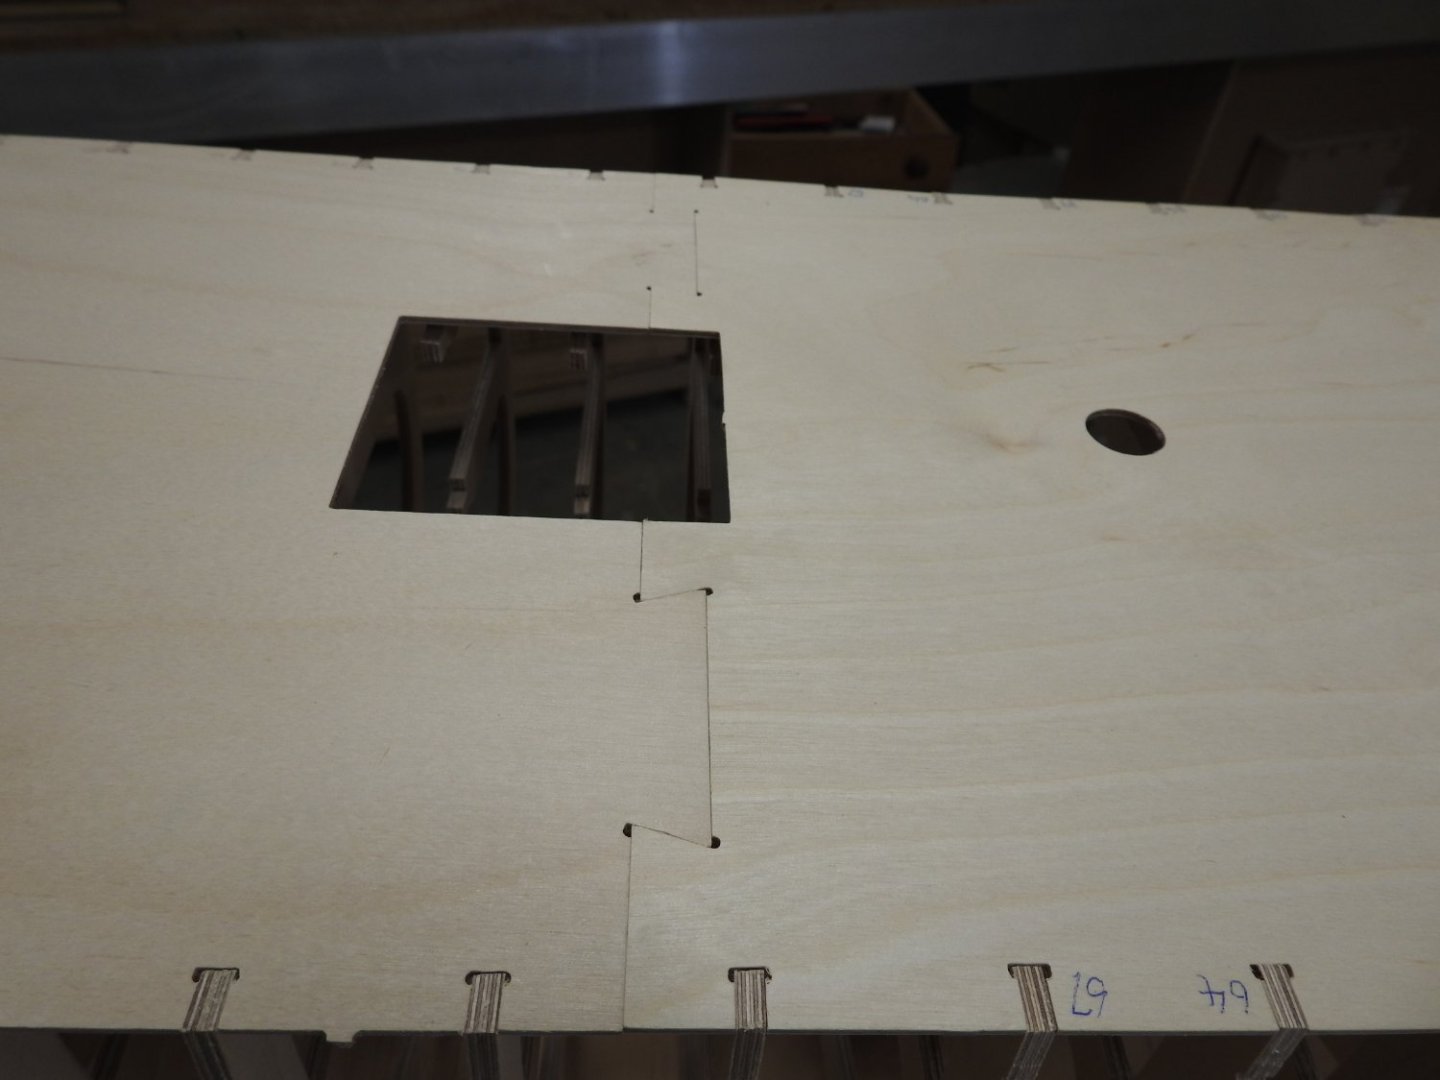
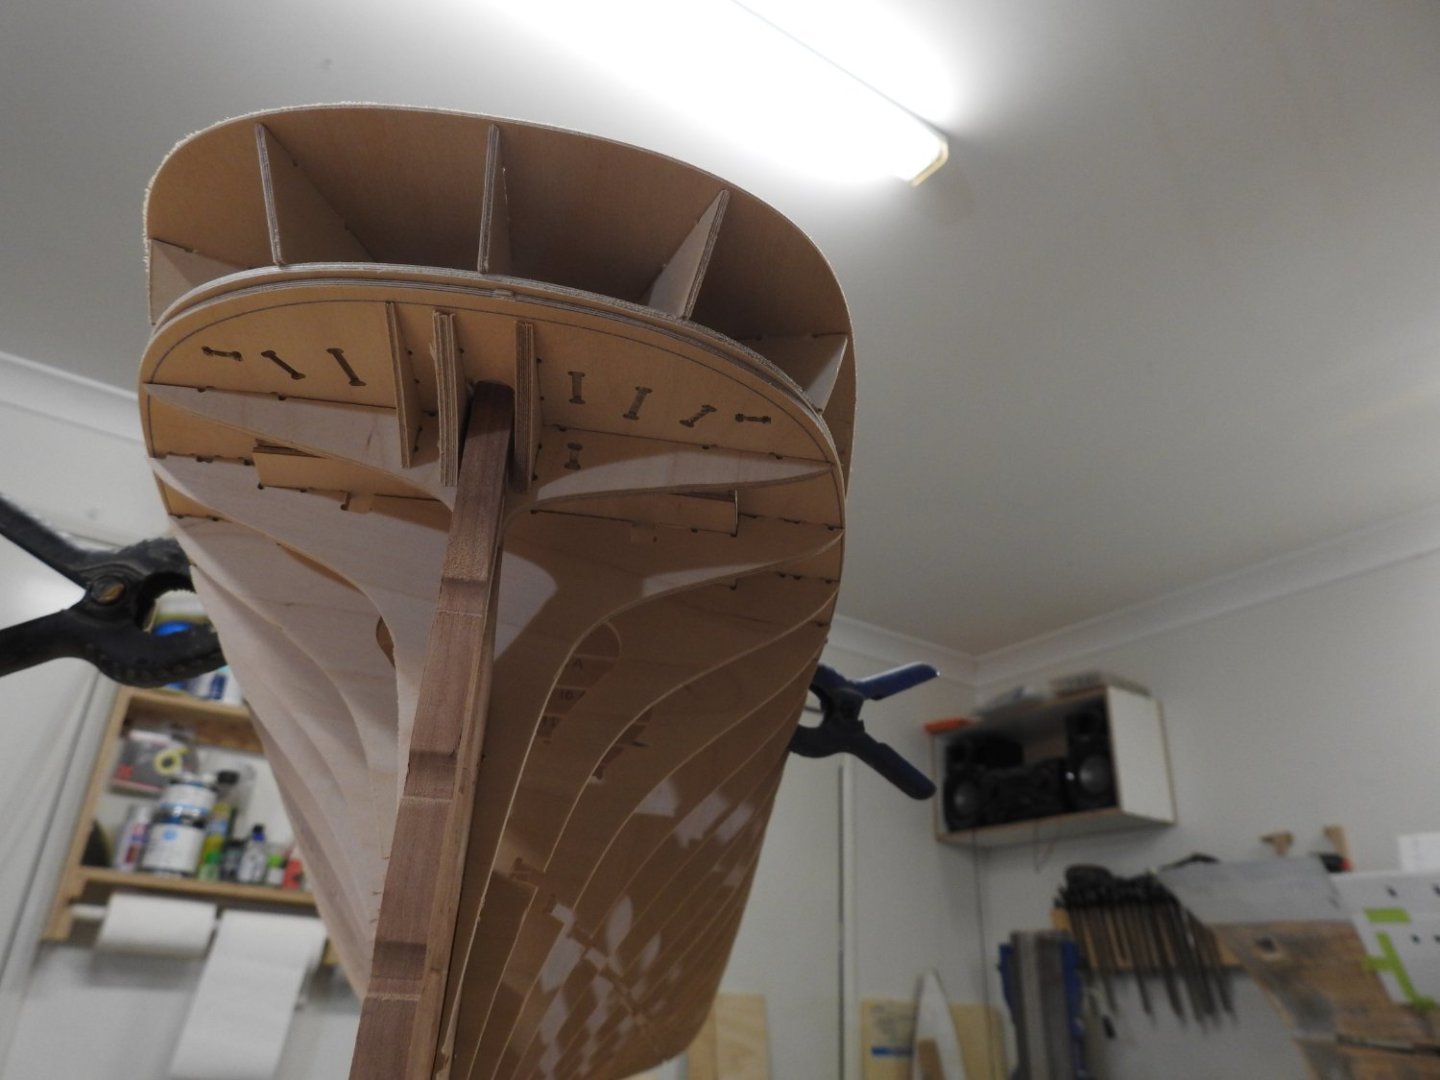
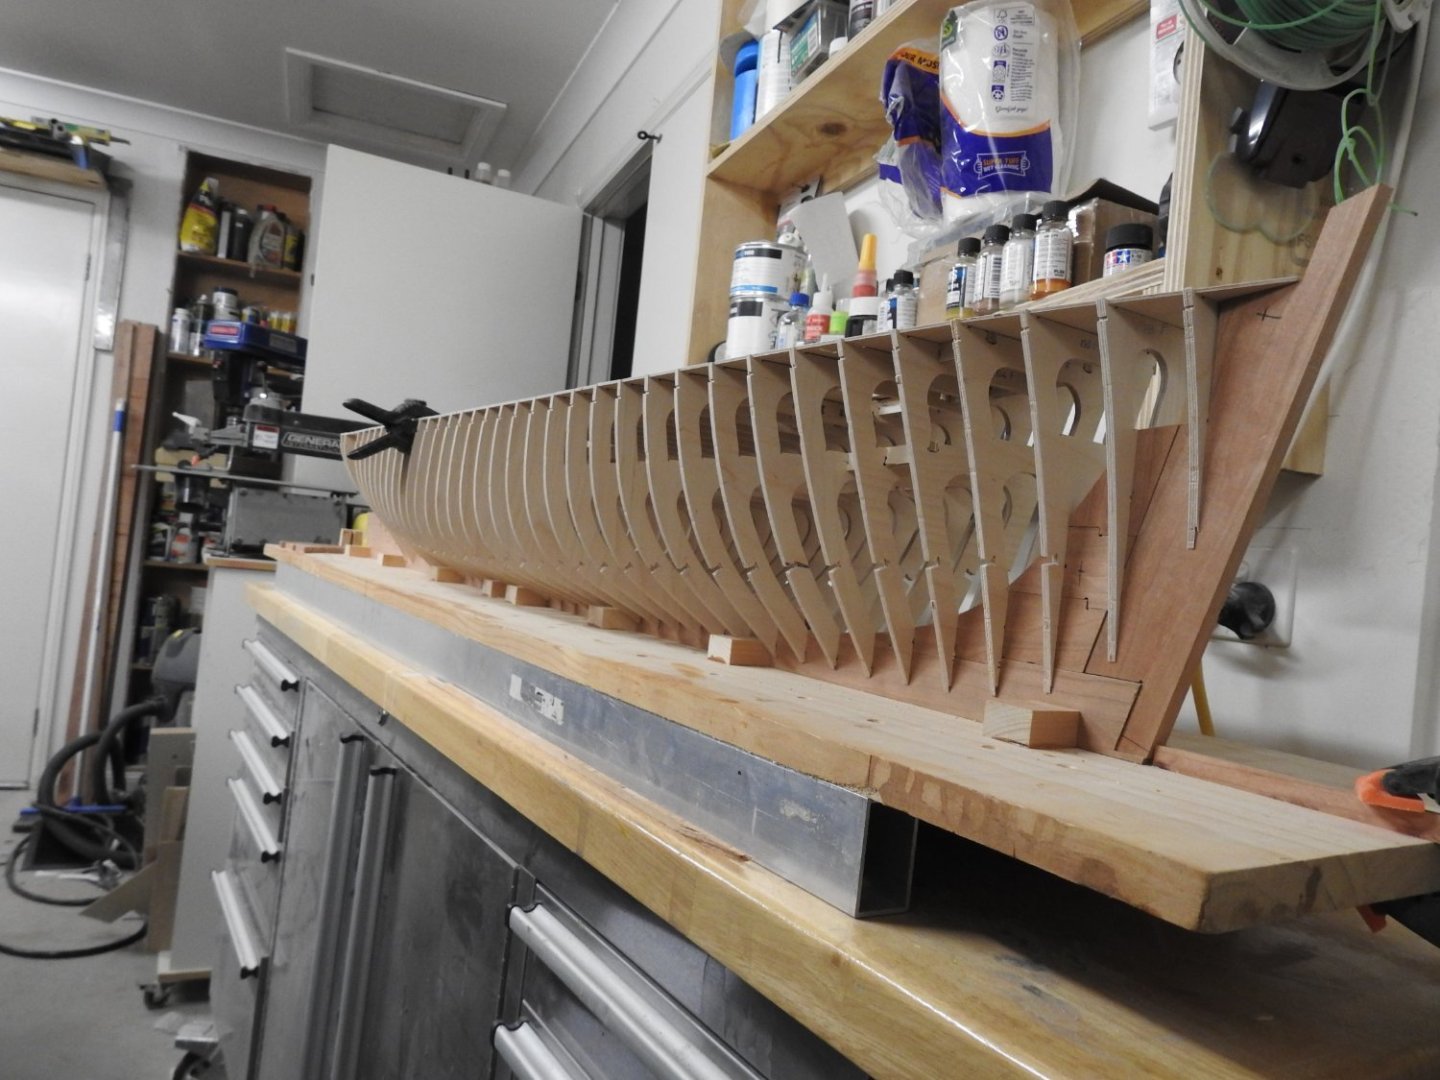
That's right. here is a picture to show it, the plate you see extending up is the centre of the knightheads, there is 8" of wood fore and aft of this, with the knightheads being 16" thick overall. In this profile picture the fore part is on so the aft half is missing, and the rabbet is clear as planking is off.. The second and third images the plate can be seen white and fixed to the back of the stempost, in fact it runs right down and becomes part of the keel assembly This image clearly shows the plate is lined up to the back of the stem. Here is a drawing partly done that was issued to site staff requesting measurements, the arrangement can be clearly seen, and the combined dimension 6 &7 is 2'2" horizontally from top of stems aft side. the plate is also 5.5" aft of the bearding line, not the rabbet the back one. It is 17.5" from the front of the actual knighthead to the front of the stempost and from the front of the knightheads to the line of the rabbet is 7.5" A foot note about the below drawing, the vertical double blue line on the stem is the rabbet line.


-
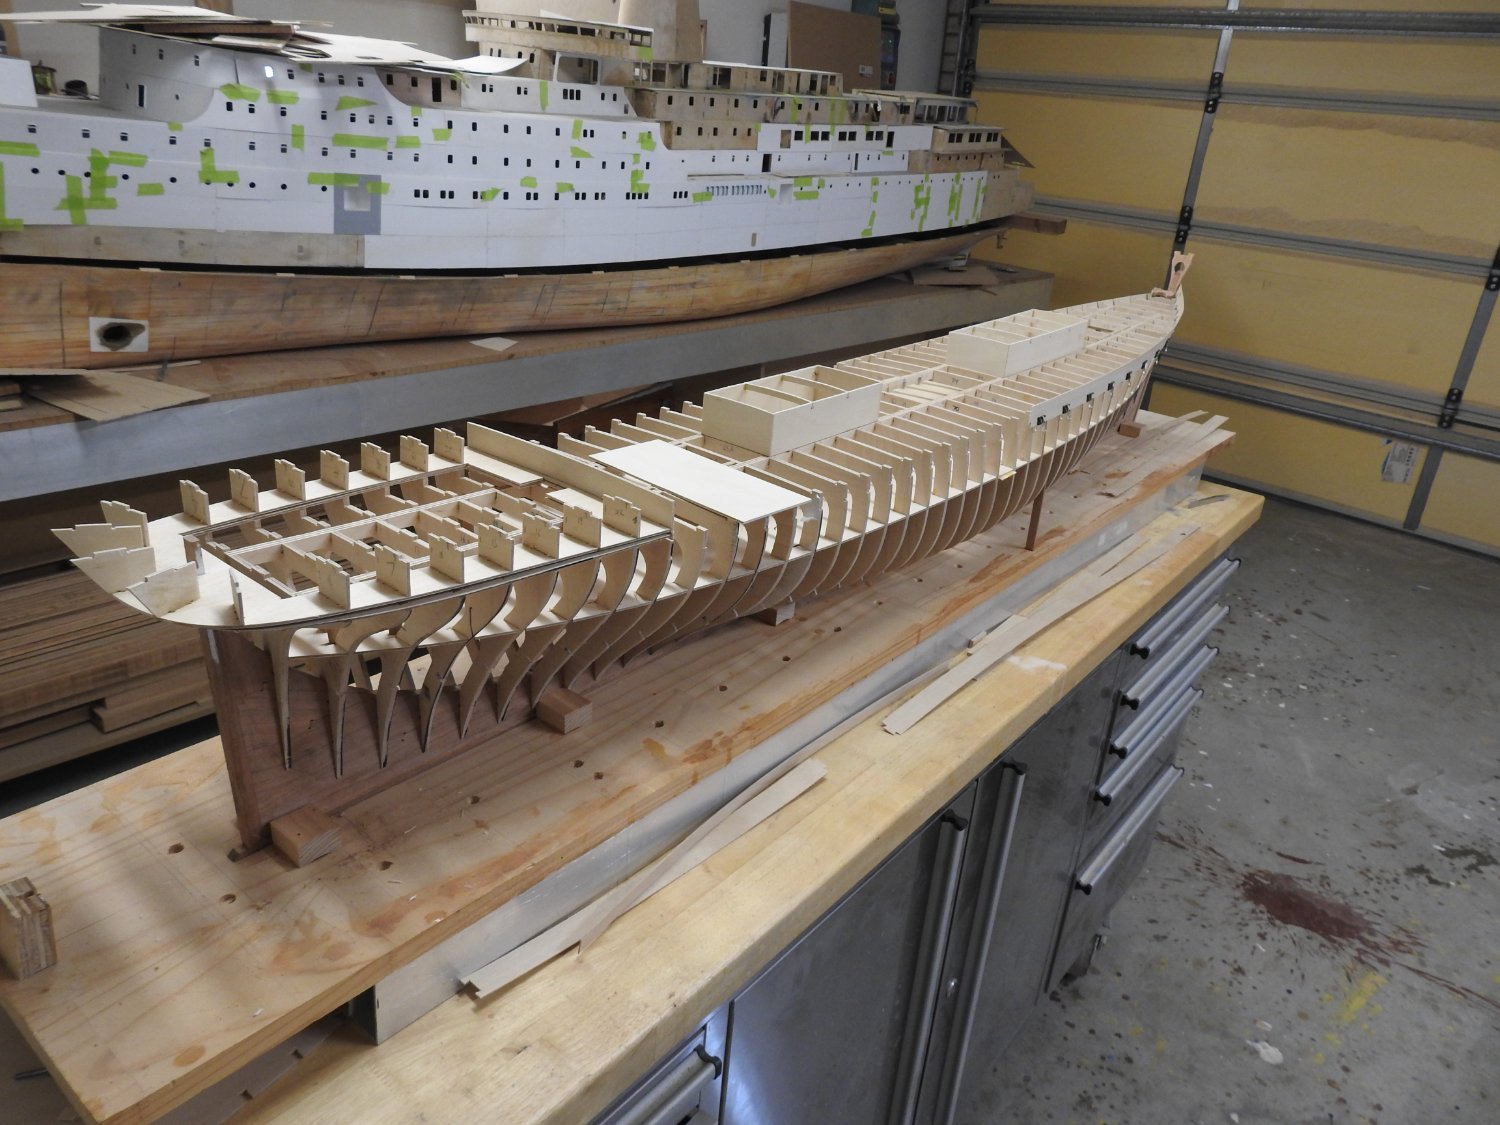
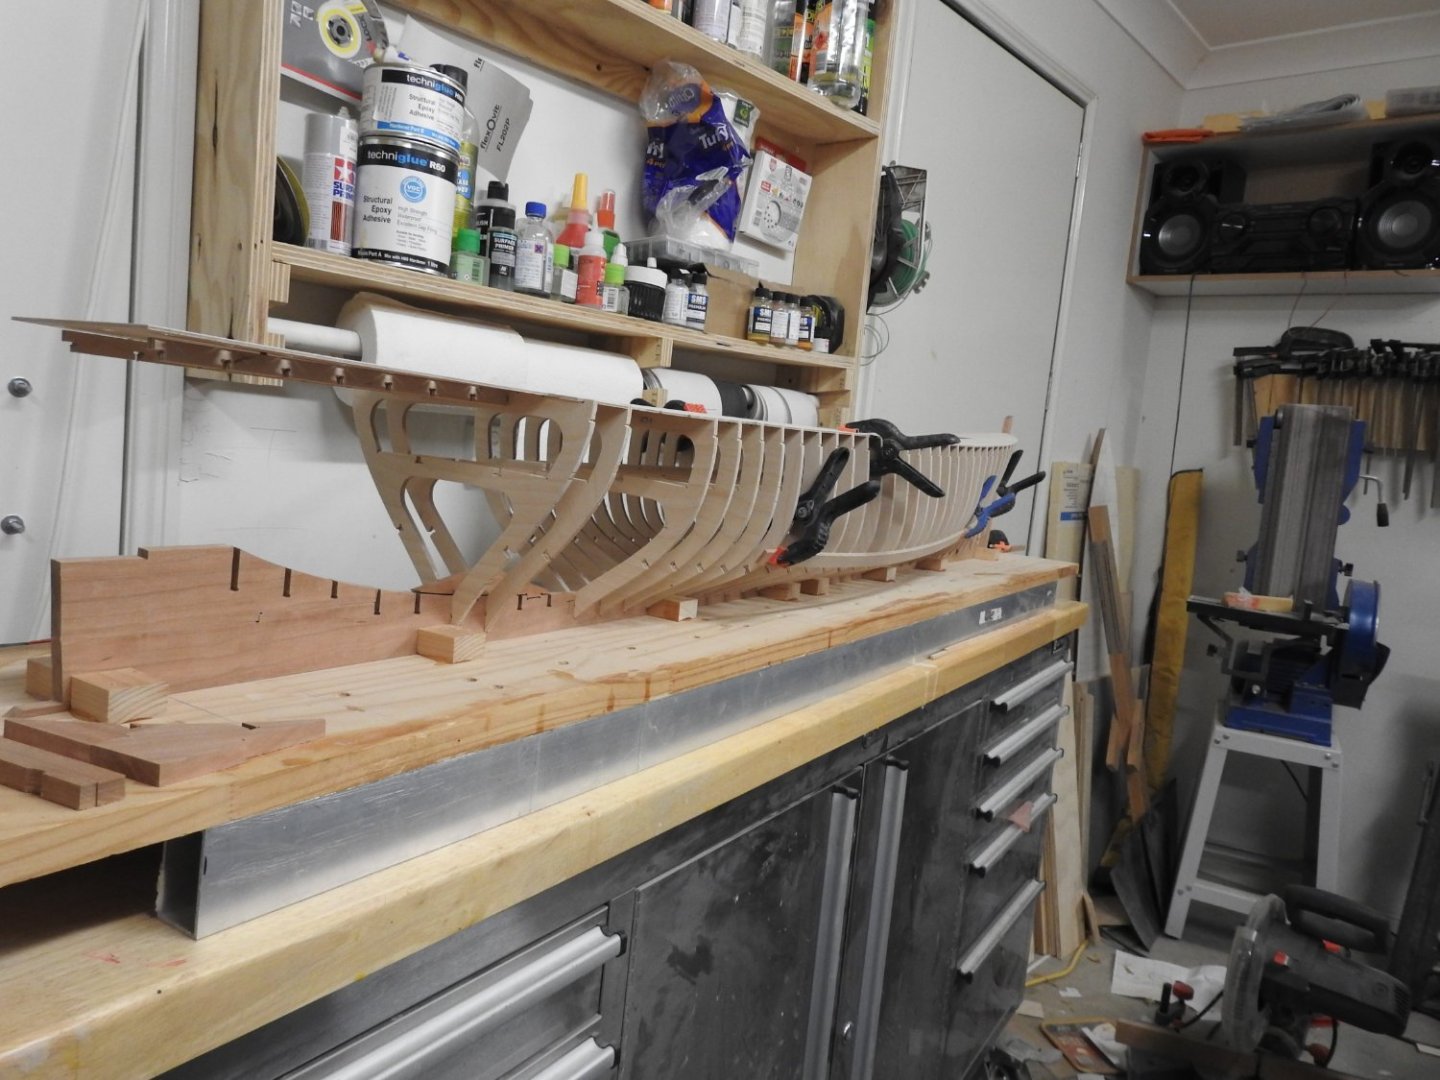
2125mm OA or just under 7 ft
-
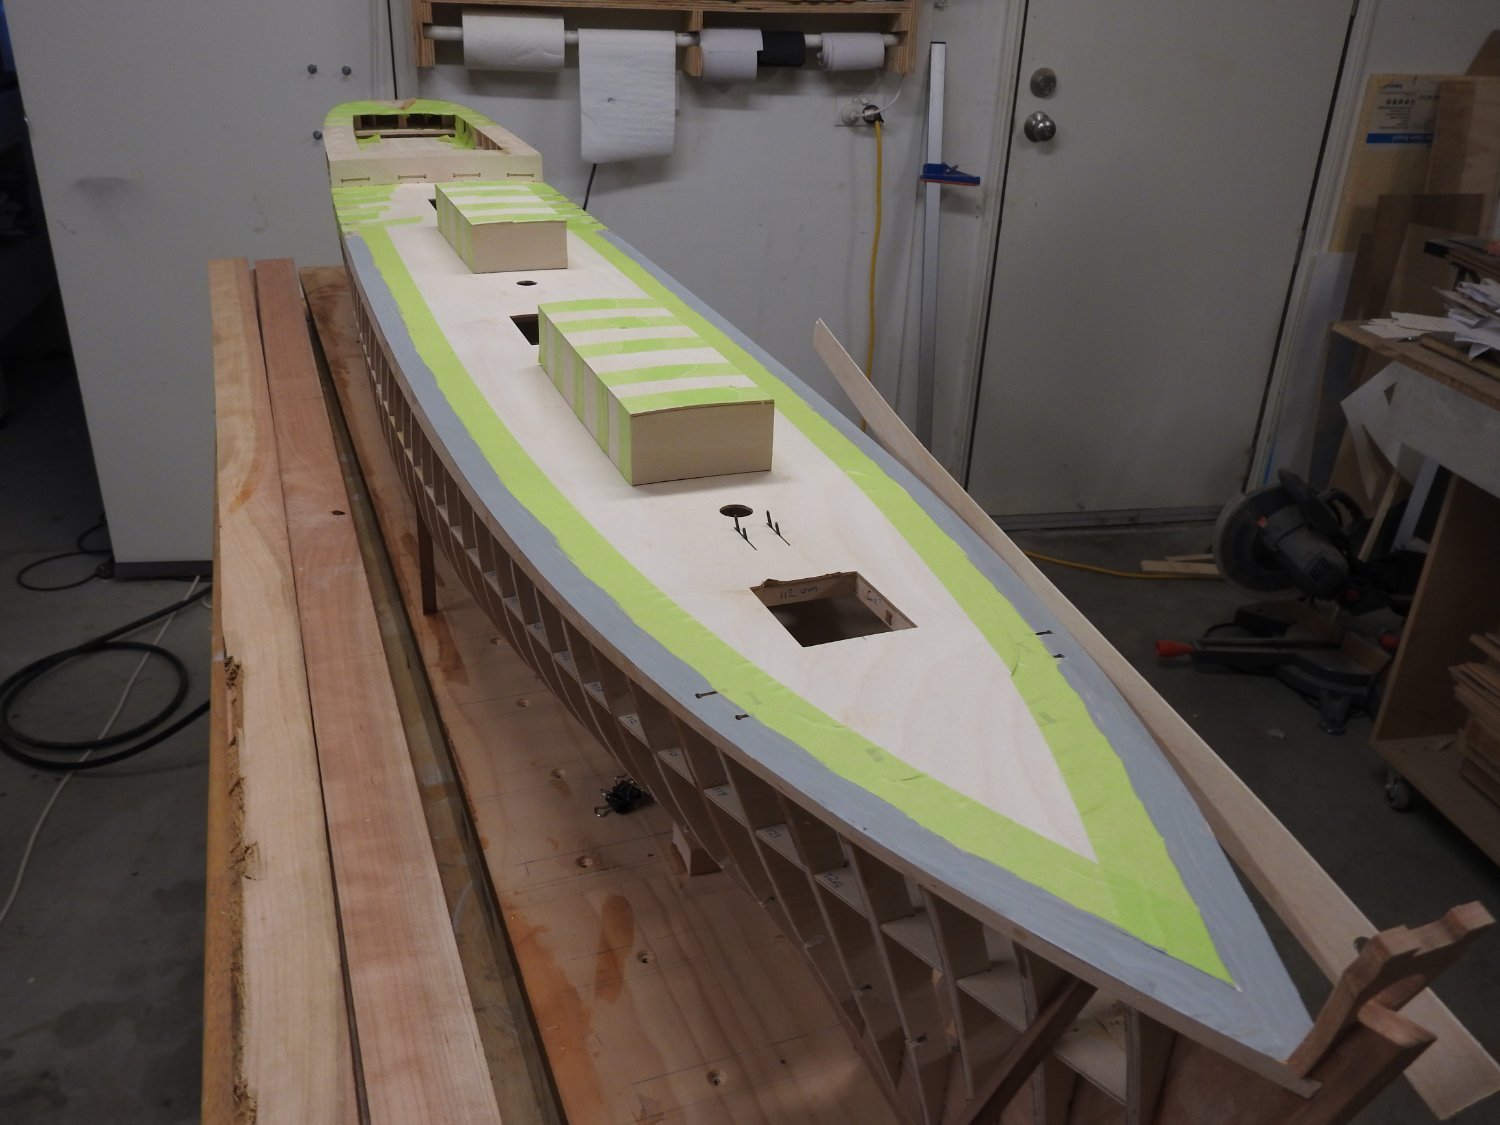
Back to work today to my full time job after Christmas so progress will slow down now. Stern finished, just a layer of 1mm ply to go on poop. Planking also cut ready for final sizing. This is structurally as far as the kit gets taken as far as parts for the hull excluding fittings. Still the bulwarks and hatch coamings to cut from .5mm ply.

-
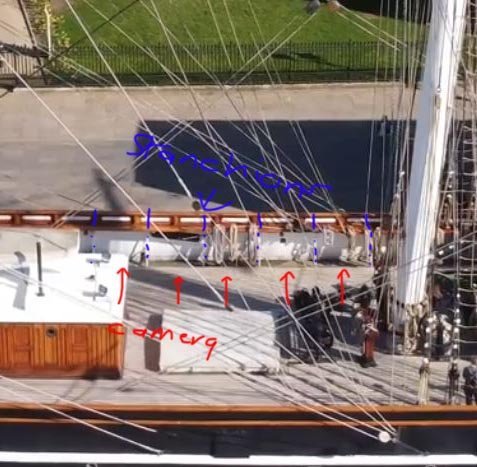
I have a request of somebody if they are interested. I need series of images taken onboard so anyone who is local and able to do this it would be of huge help to any modellers of Cutty Sark. What I want is to have a stitched image of the full length of her bulwarks. I can do the stitching in my software but need images taken all the way along from the heads to the ships wheel at the centres of the space between the stanchions. see image, standing where the red is between the stanchions, this image can be put up for anyone if wanted but its not been done and is really quite easy. I have a person I have asked privately as well who is going back soon but just in case he can't. It's about 35 images
-
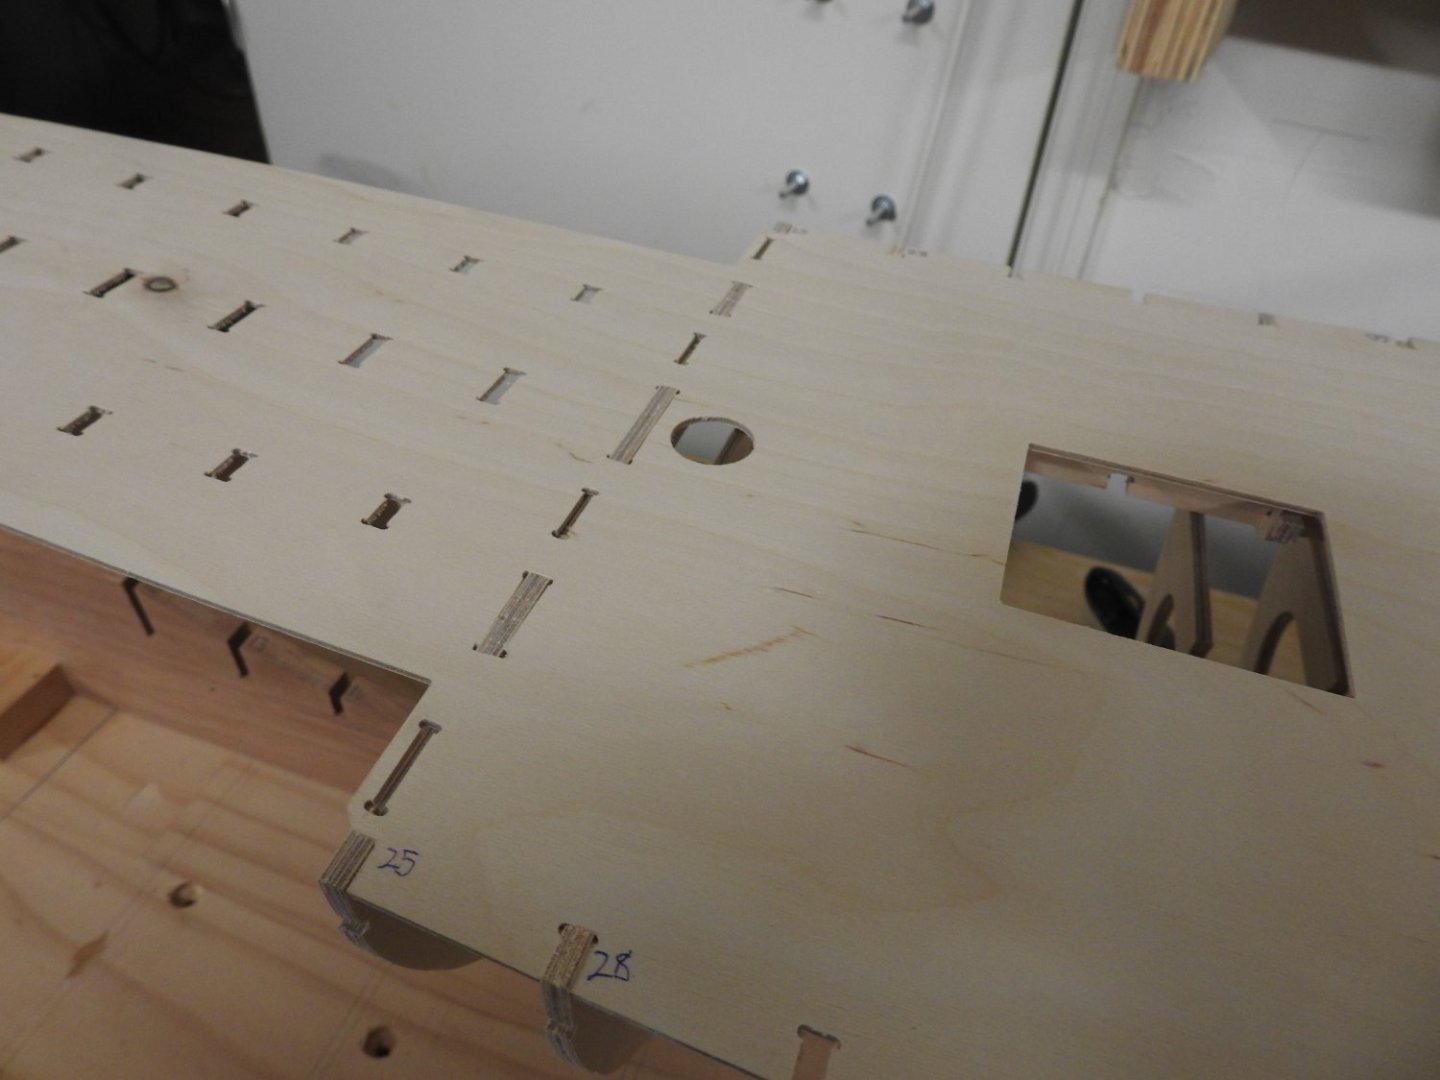
Decks glued down, Titebond on the beams and CA on the notches to get immediate hold down as it's hard to clamp. the frame notches and waterways are now sealed and primed ready for rubbing down, this way the sheerplate which stands proud will have a nice clean crisp corner. This is in case I don't do the cement filled waterway and leave it exposed. The counter glued on now to.
-
It depends on the job, sometimes I screw the board down and use tabs, sometimes vacuum table but on small parts like this the masking tape and CA trick A laser also will not do for my work as I need to build guitars and also a CNC with a router can carve things in 3d space which you can't do with a laser. Re size if you have a small table you can probably only cut one frame at a time, this means lots of wastage. with a sheet you can nest them all together and get 8-9 per sheet. But for a hobbyist or model builder I can understand not wanting a big one. Just we aware that they require a lot of maintenance time and make sure the table it sits on is solid and level
-
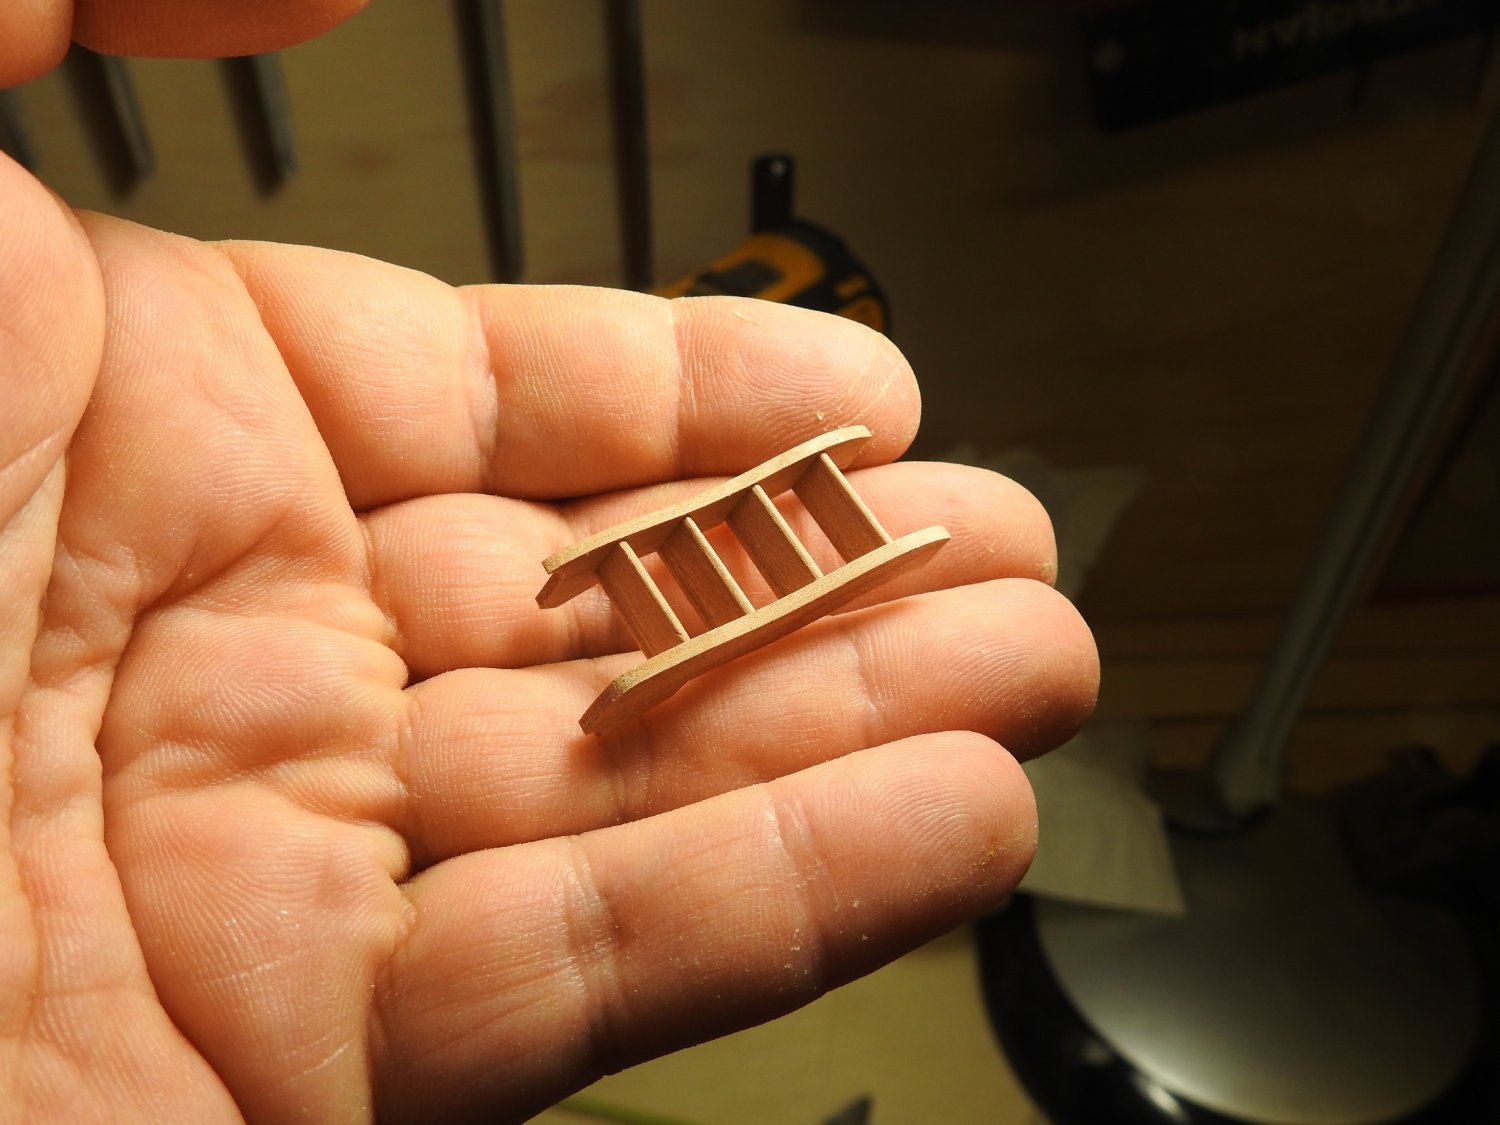
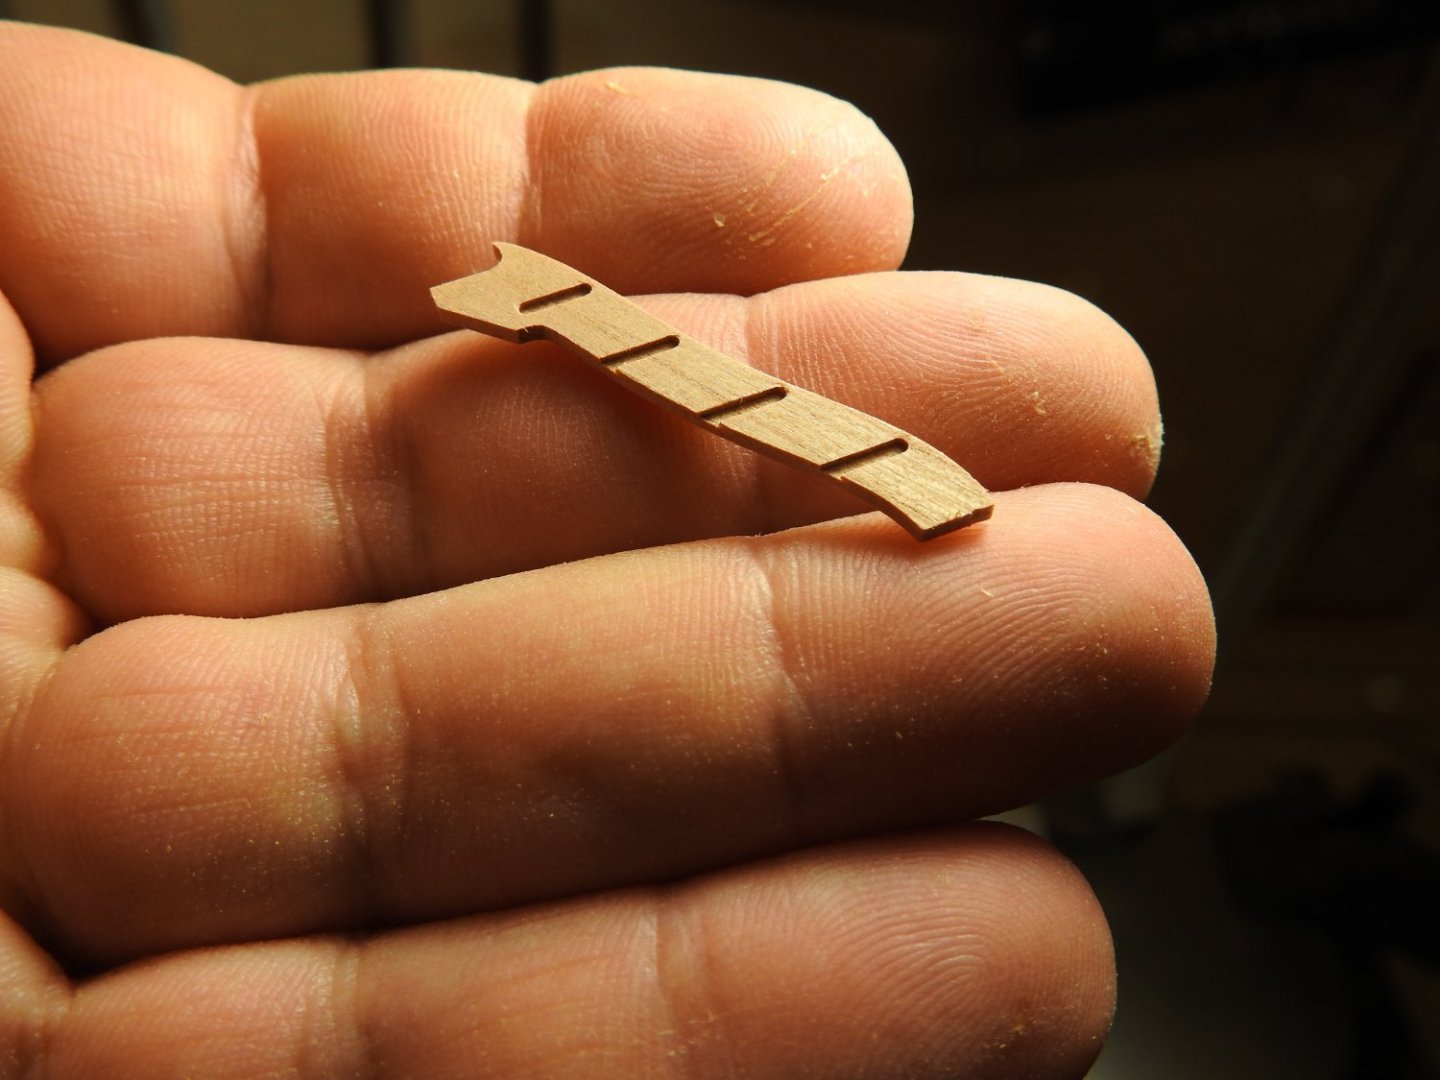
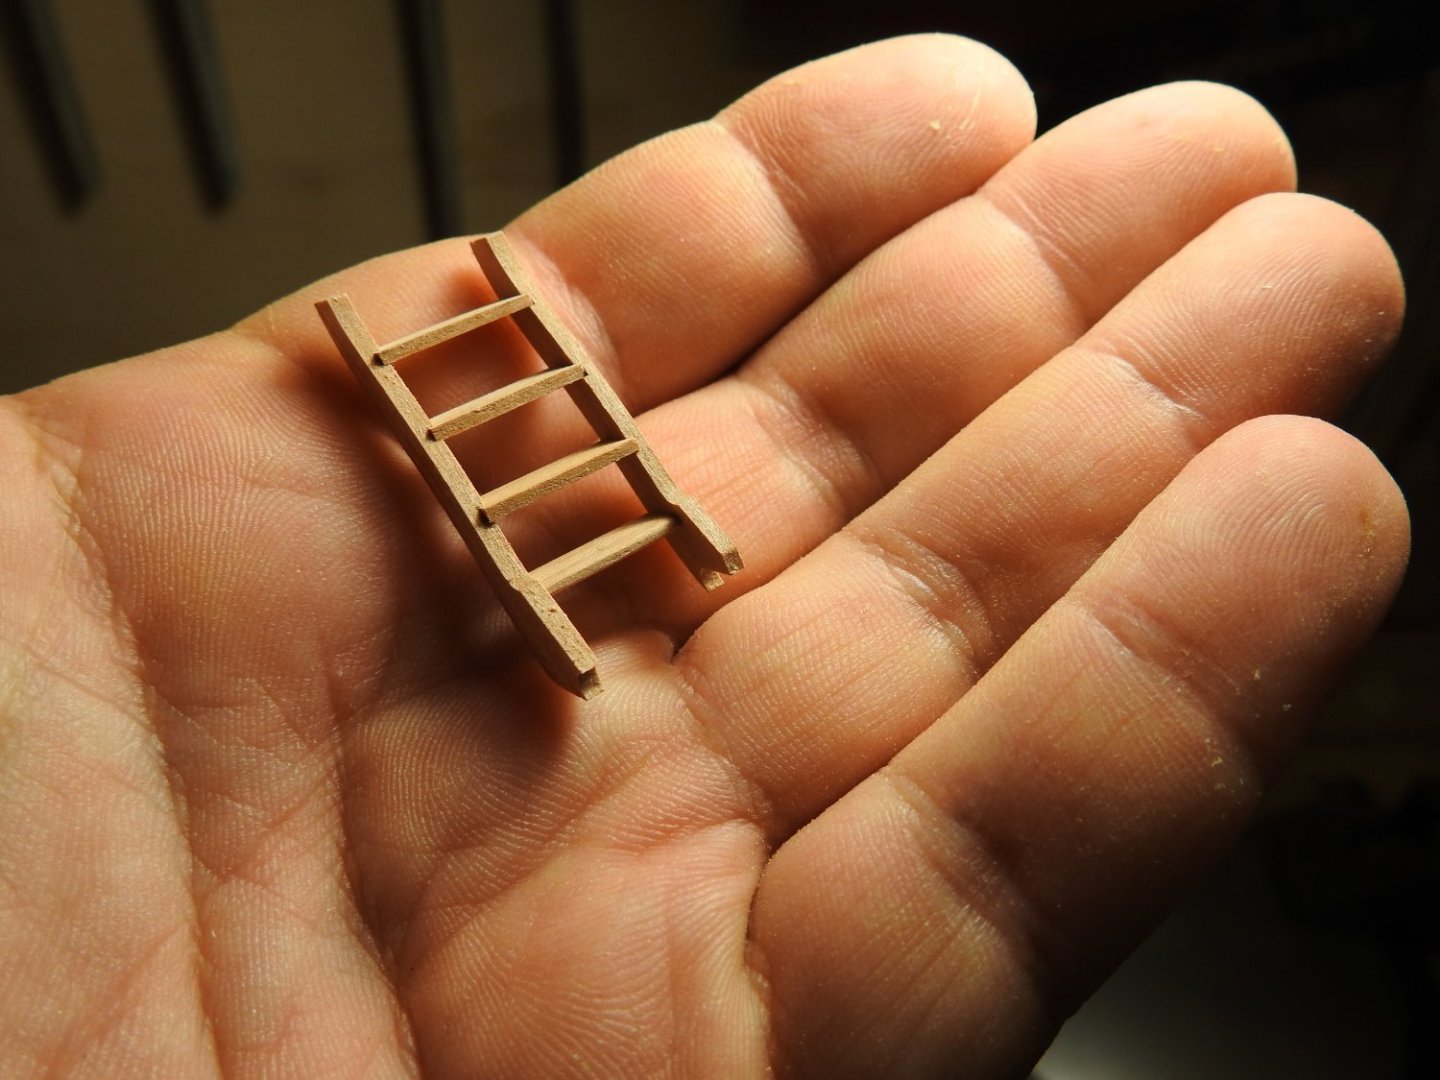
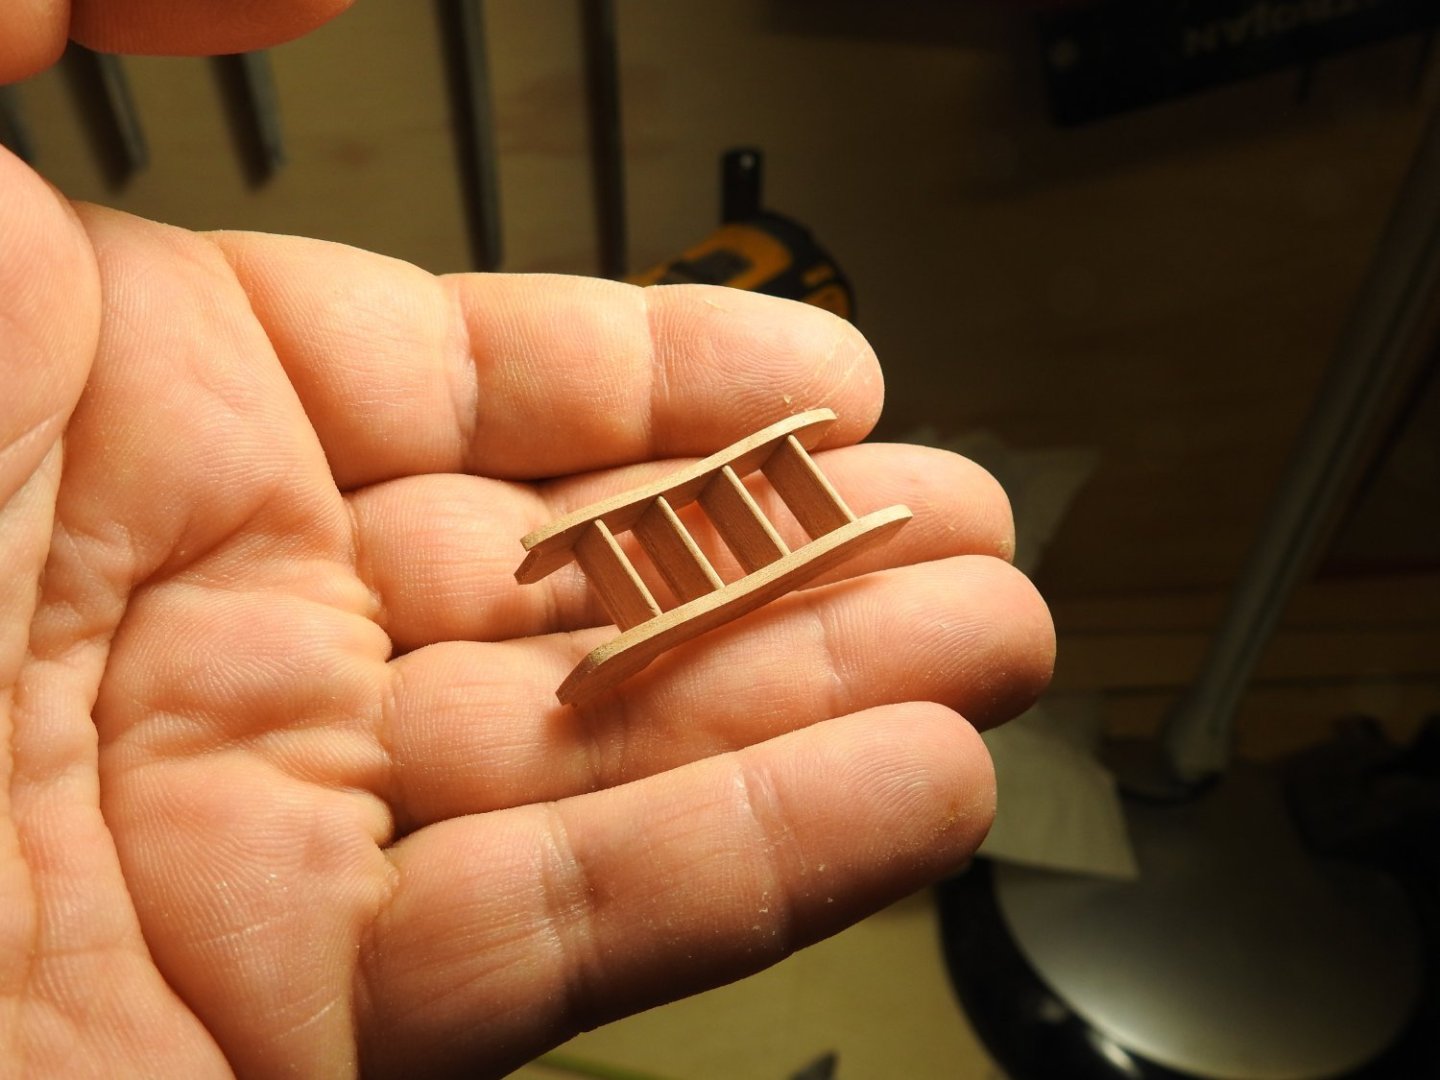
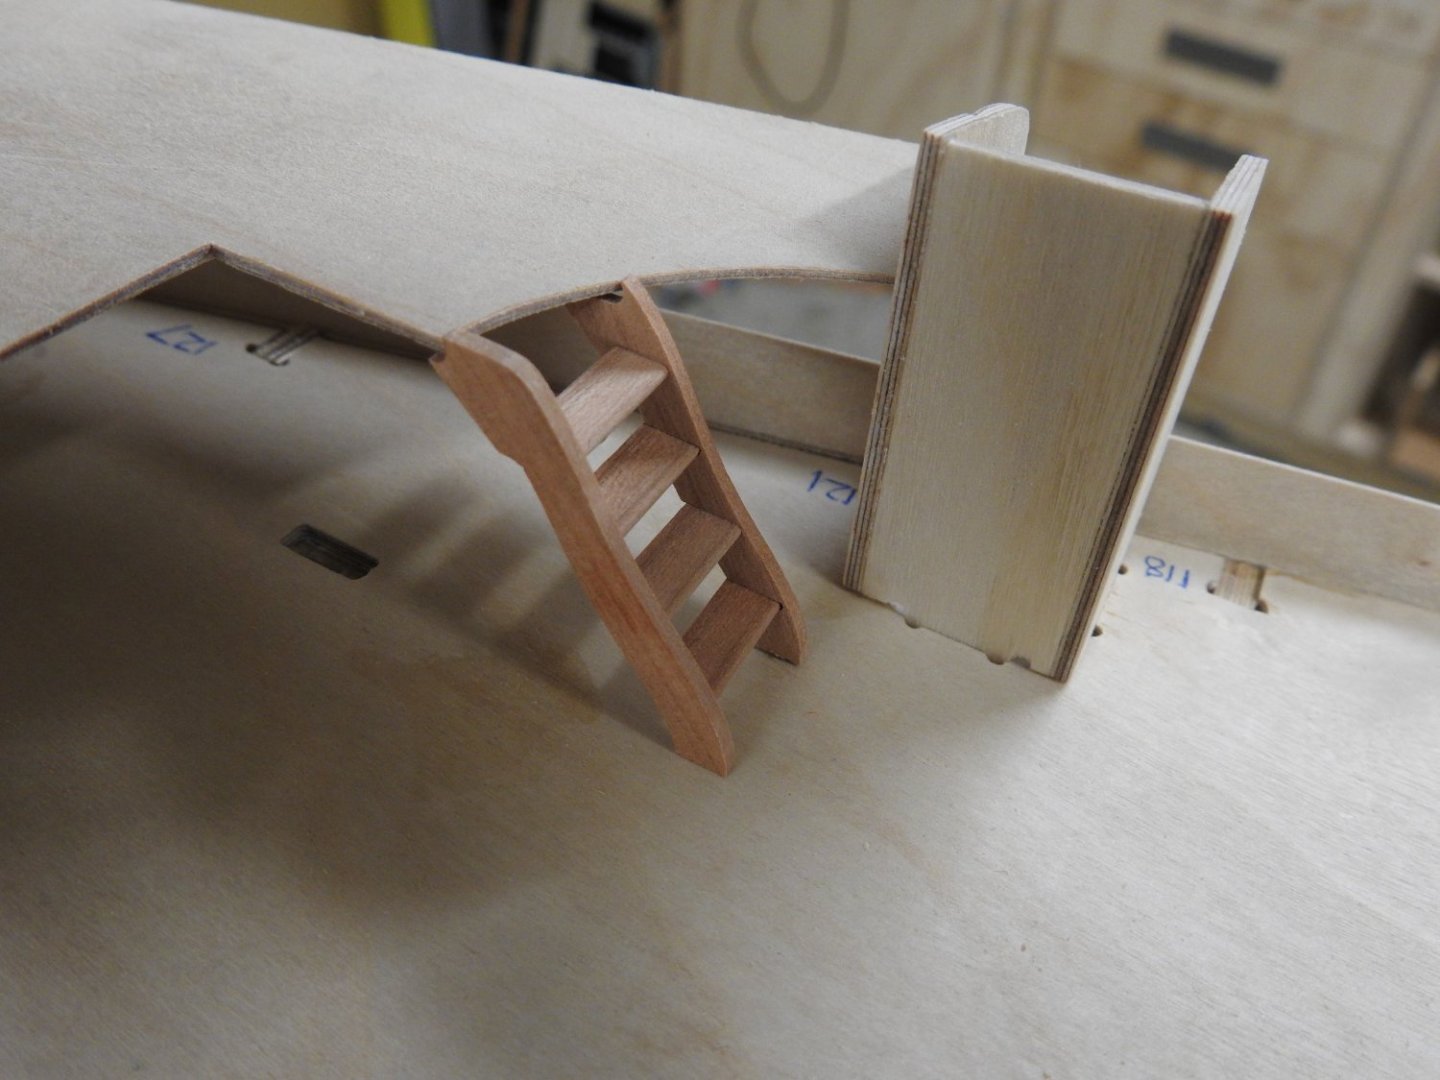
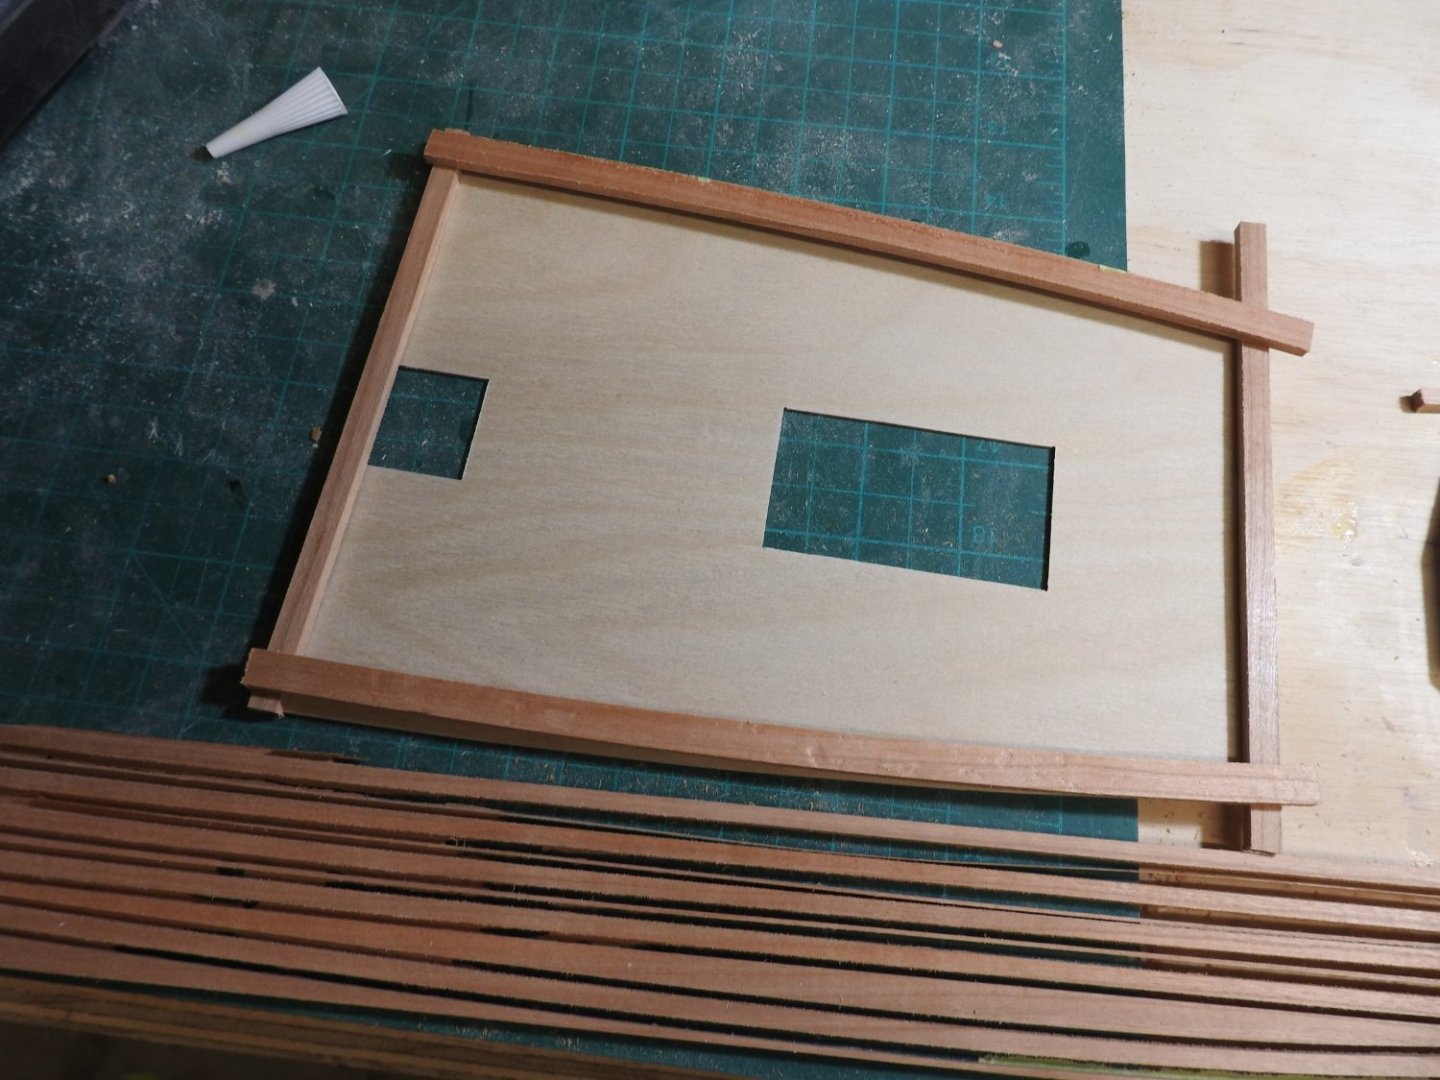
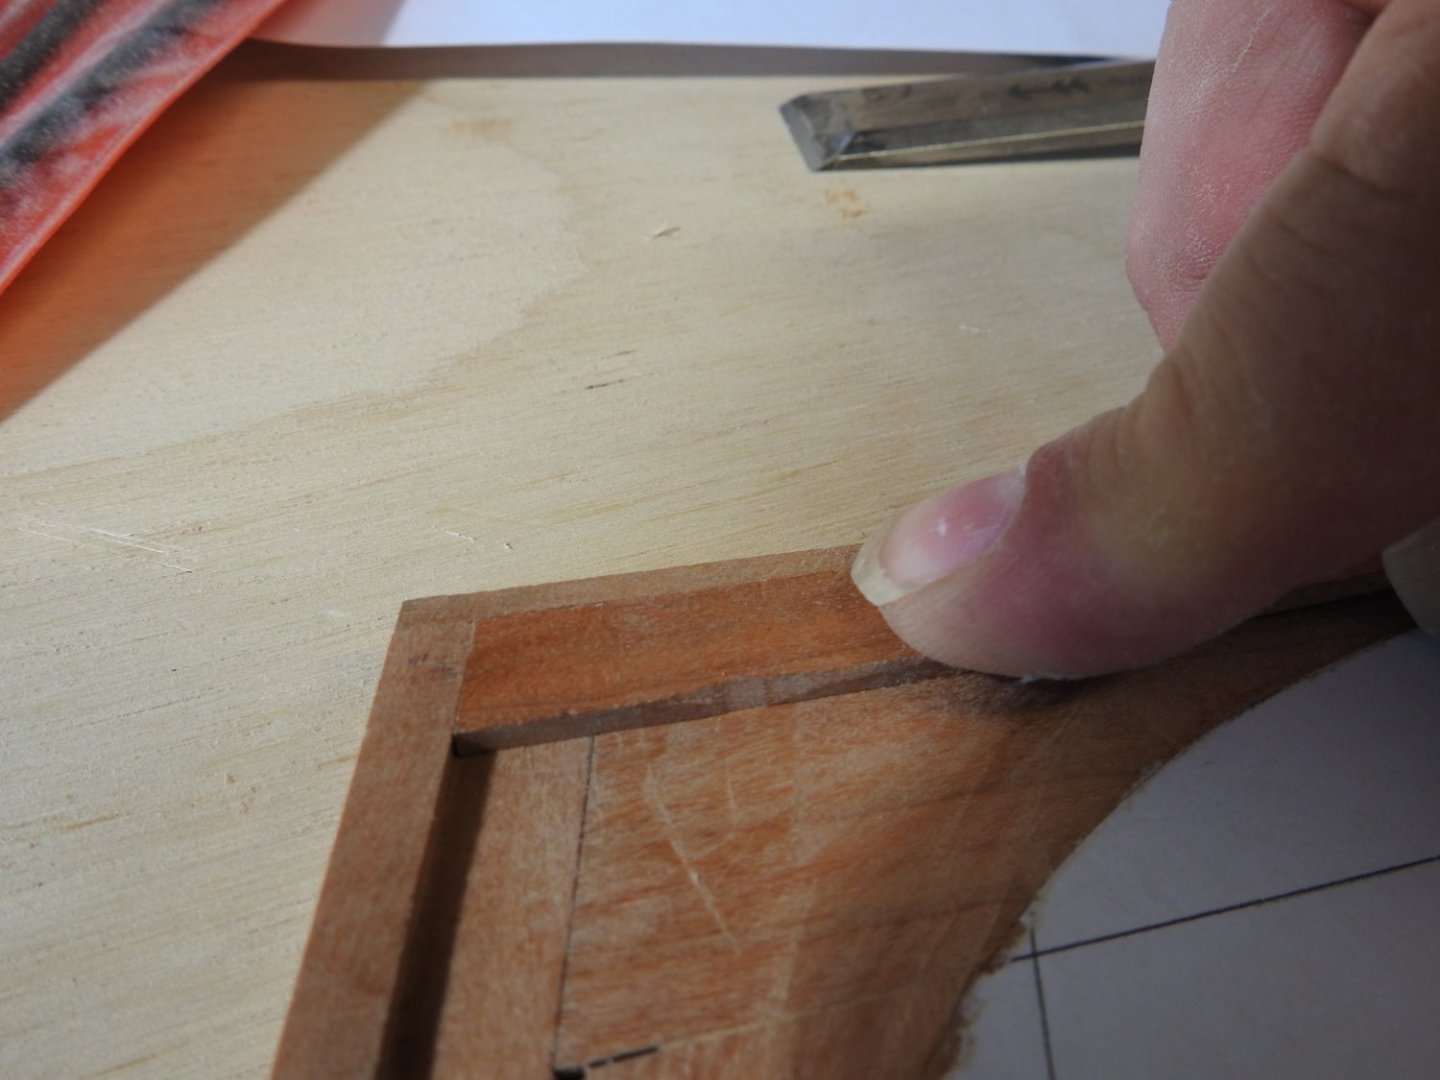
Here is the real test, exact scale made stair complete with mortised treads. The stringers (sides) are still too thick but other than that.
-
I run this but only because I need to do sheets and guitars otherwise the 450 is a good size. https://stepcraft.com.au/index.php?dispatch=products.view&product_id=1235
-
I will clean up and send another shot in 5 mins, it's a 1mm 2 edge flute endmill
-
Square Fife rails. I should have cleaned them up first, but they are pretty small.

-
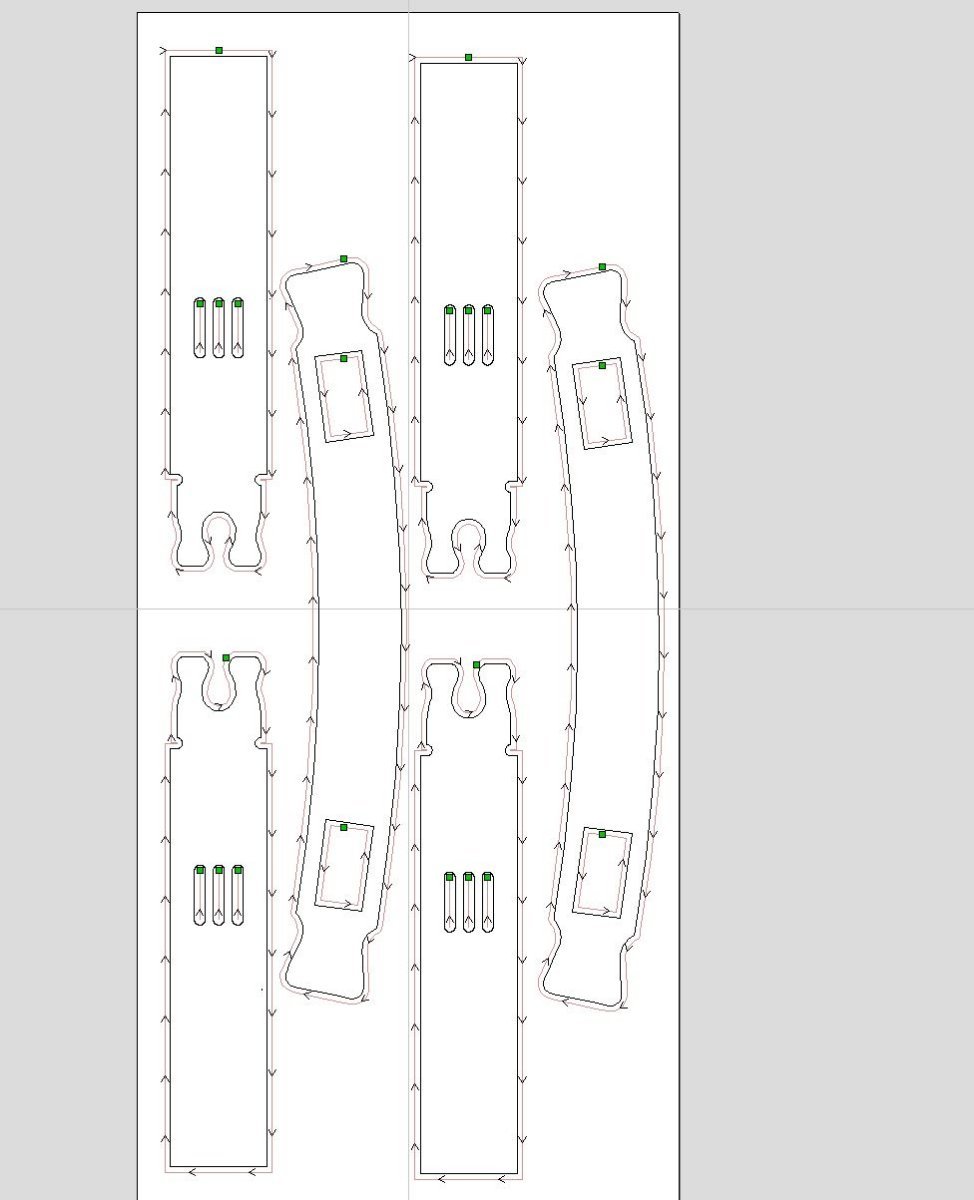
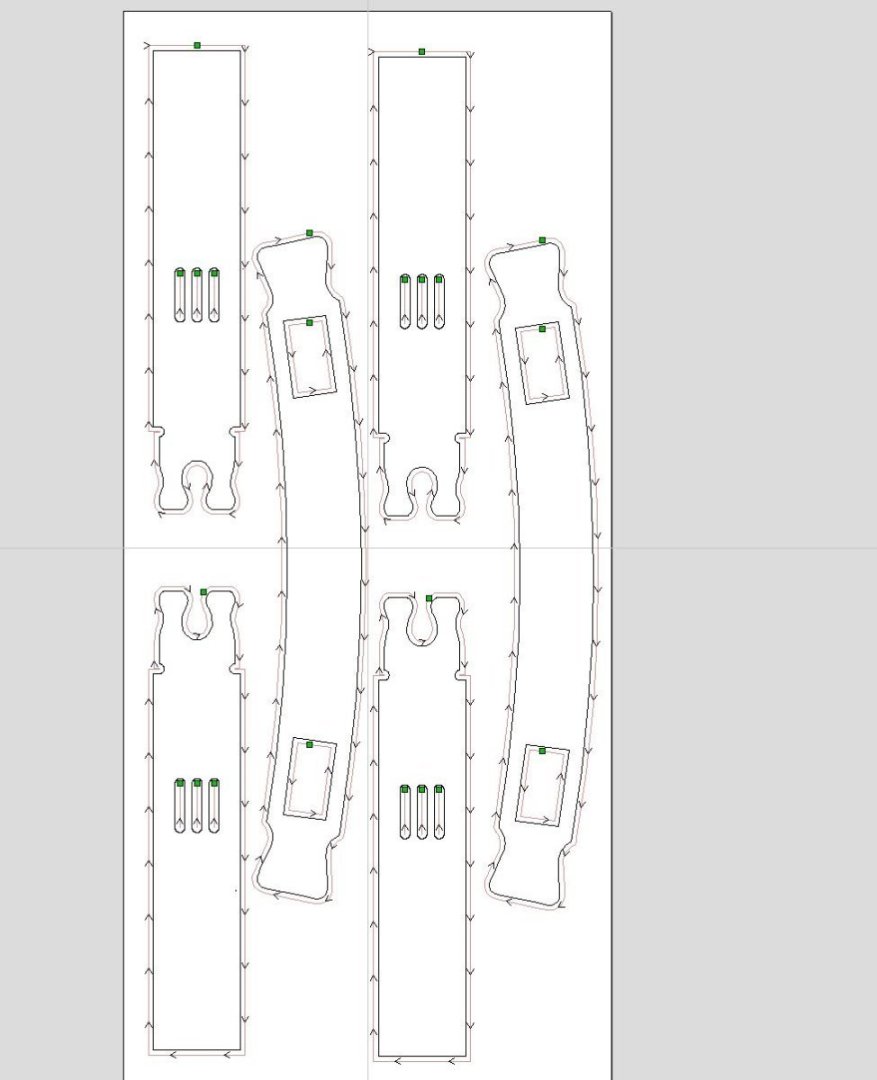
about to cut these.
-
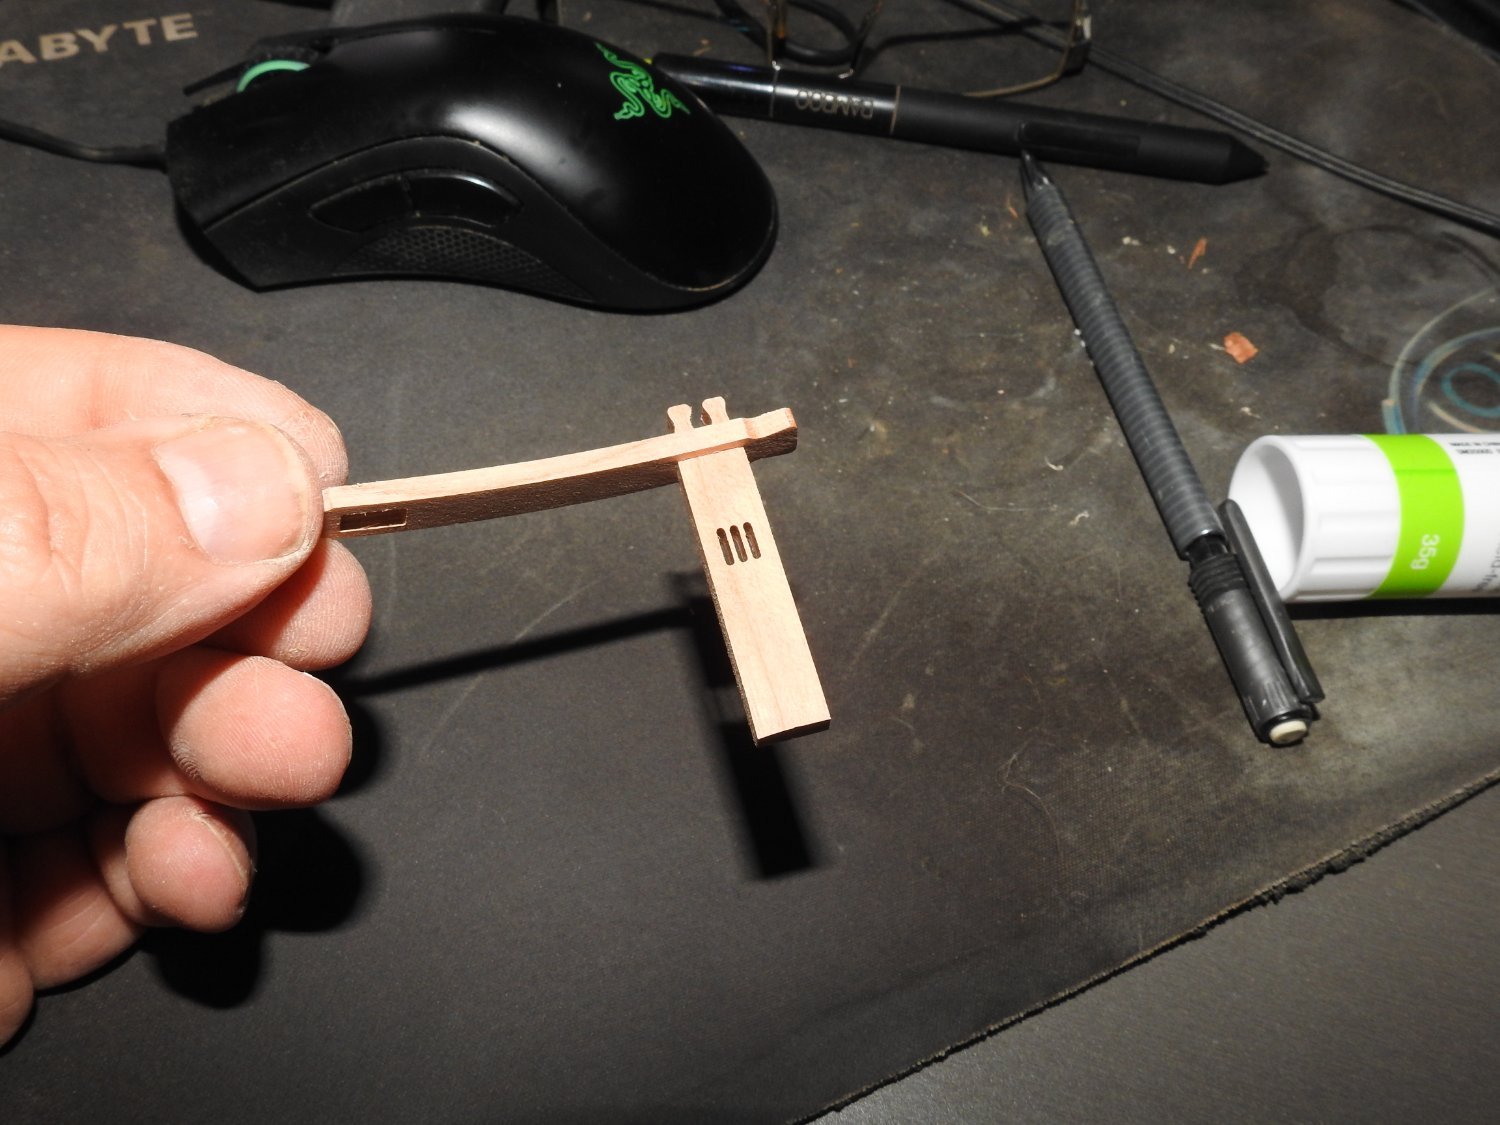
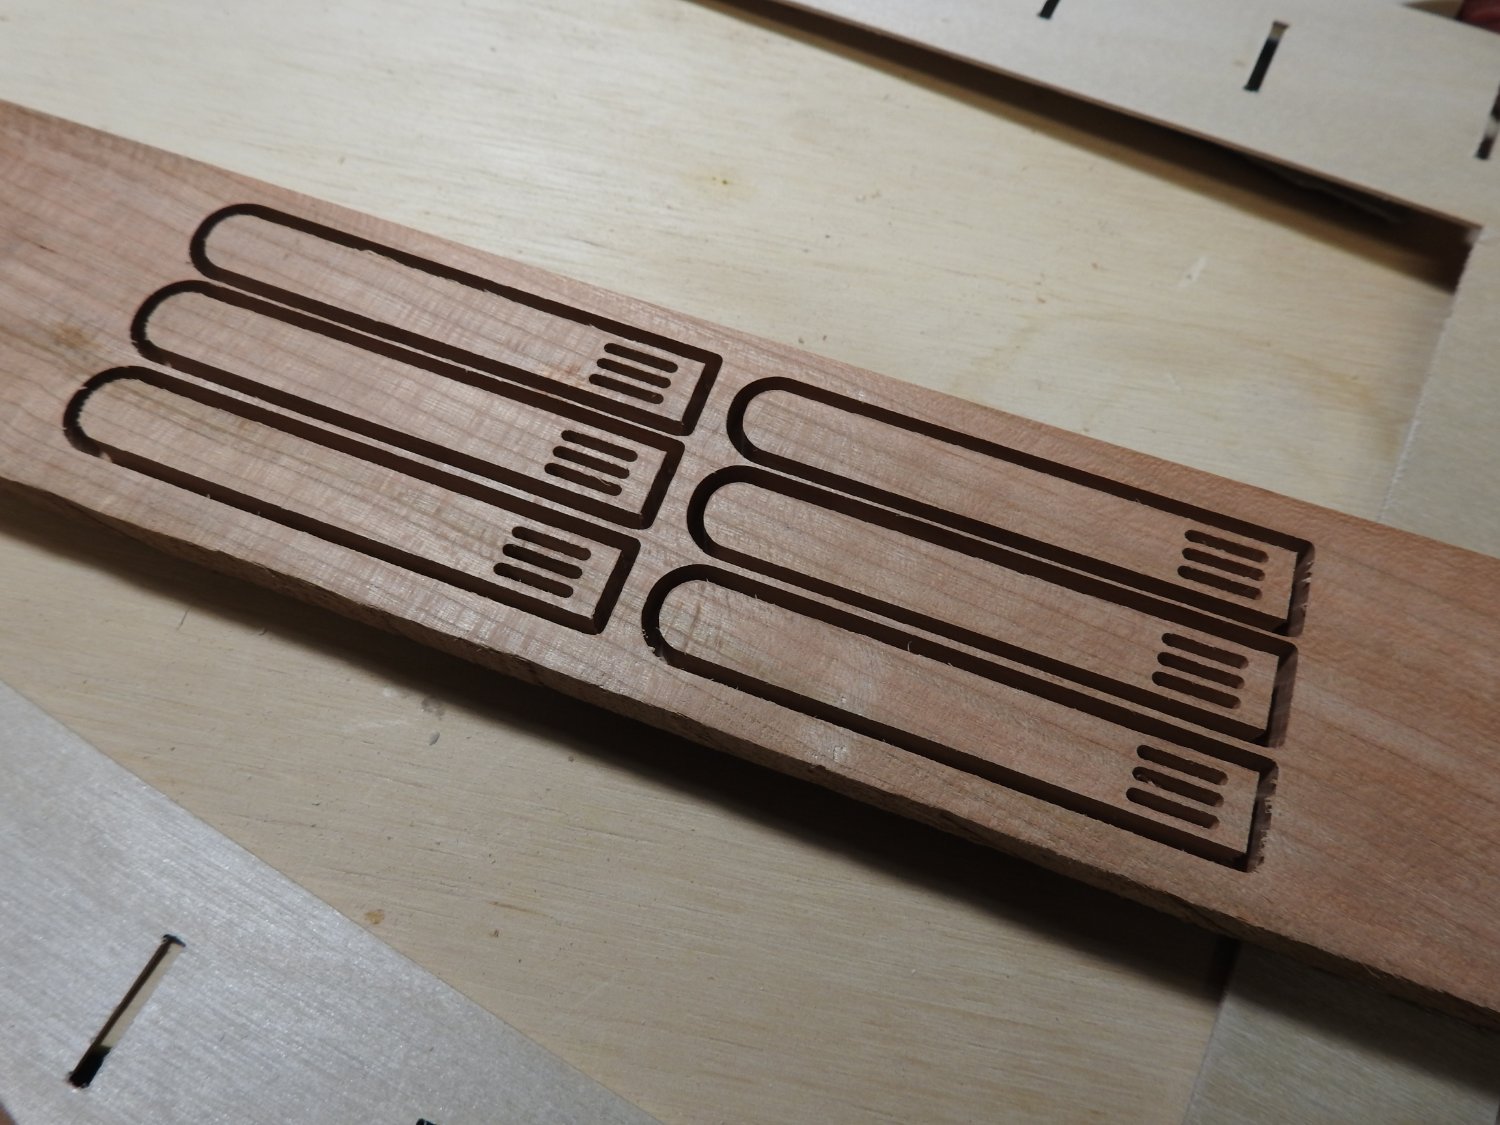
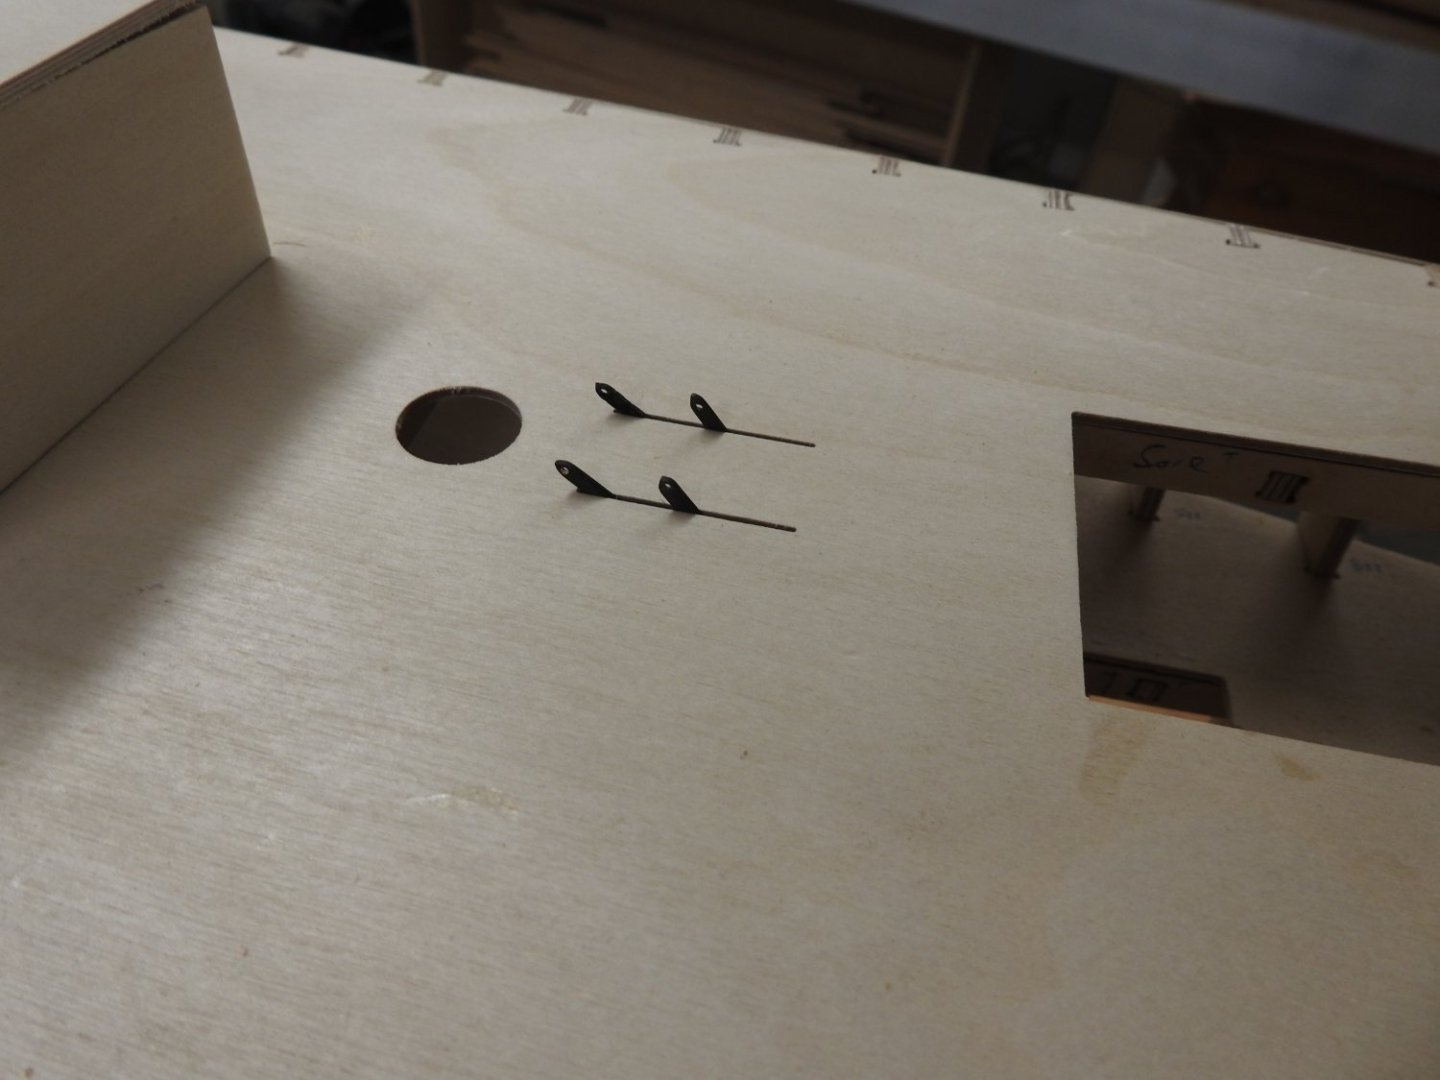
The mainstay lugs and the catheads.

-
I have 3 orders for this now already which I have started to machine, none of which are from this site unfortunately .
-
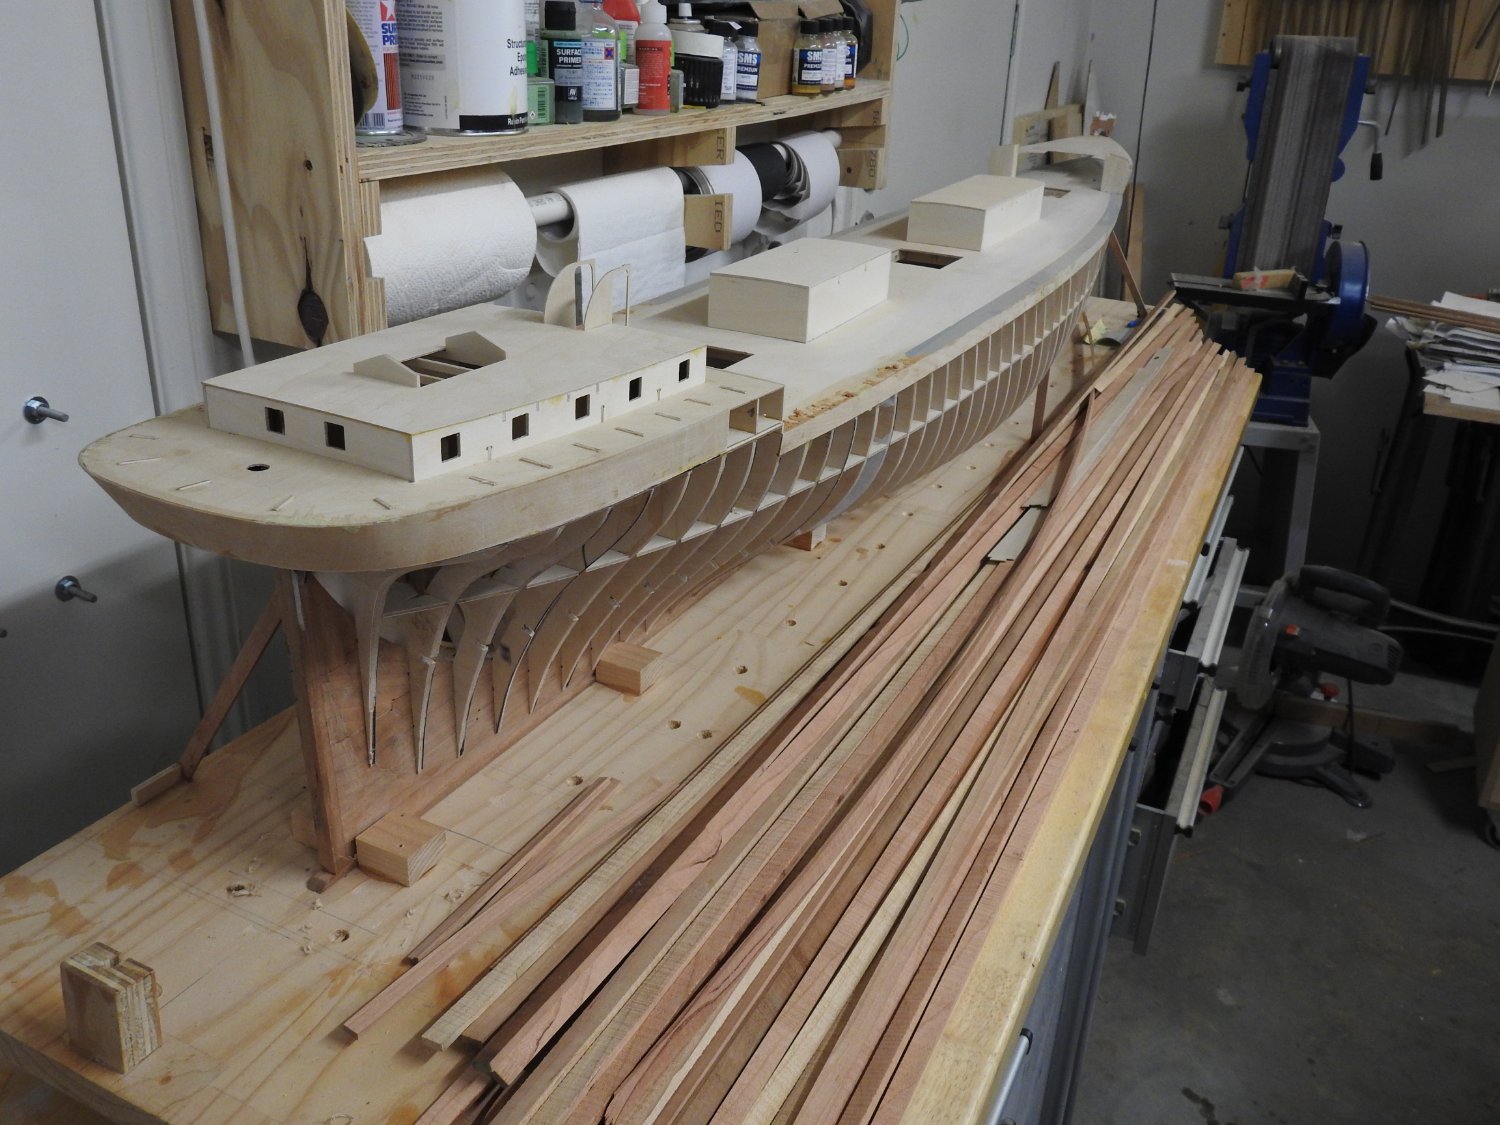
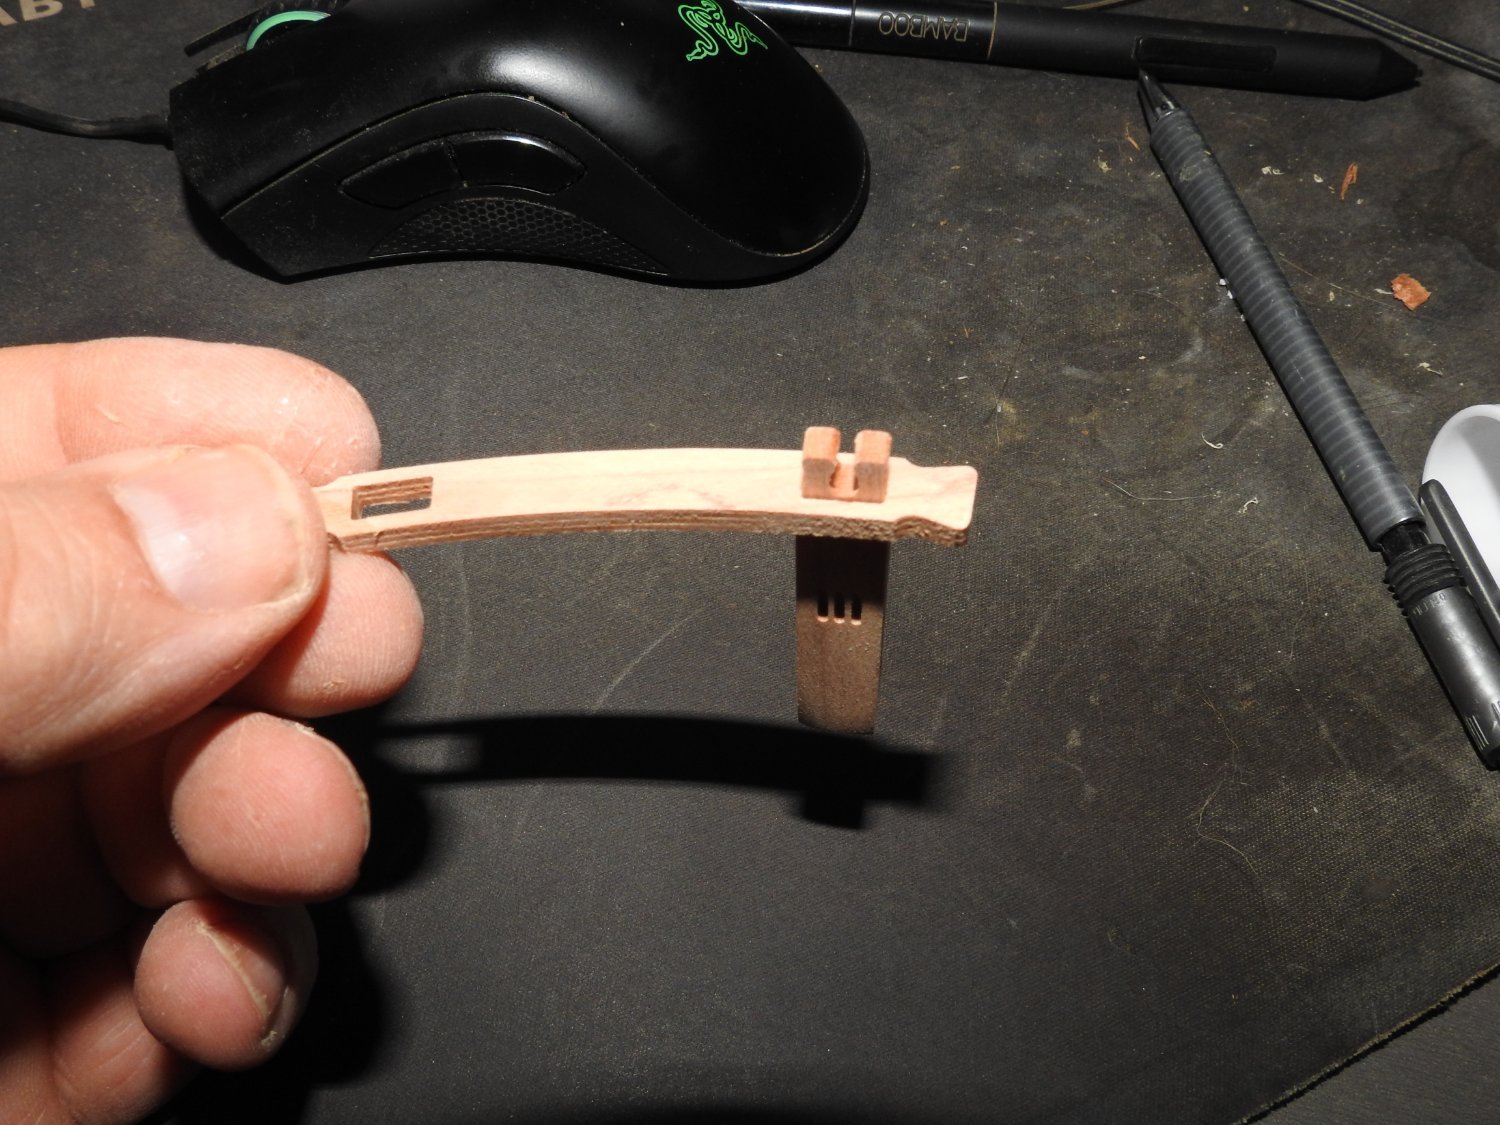
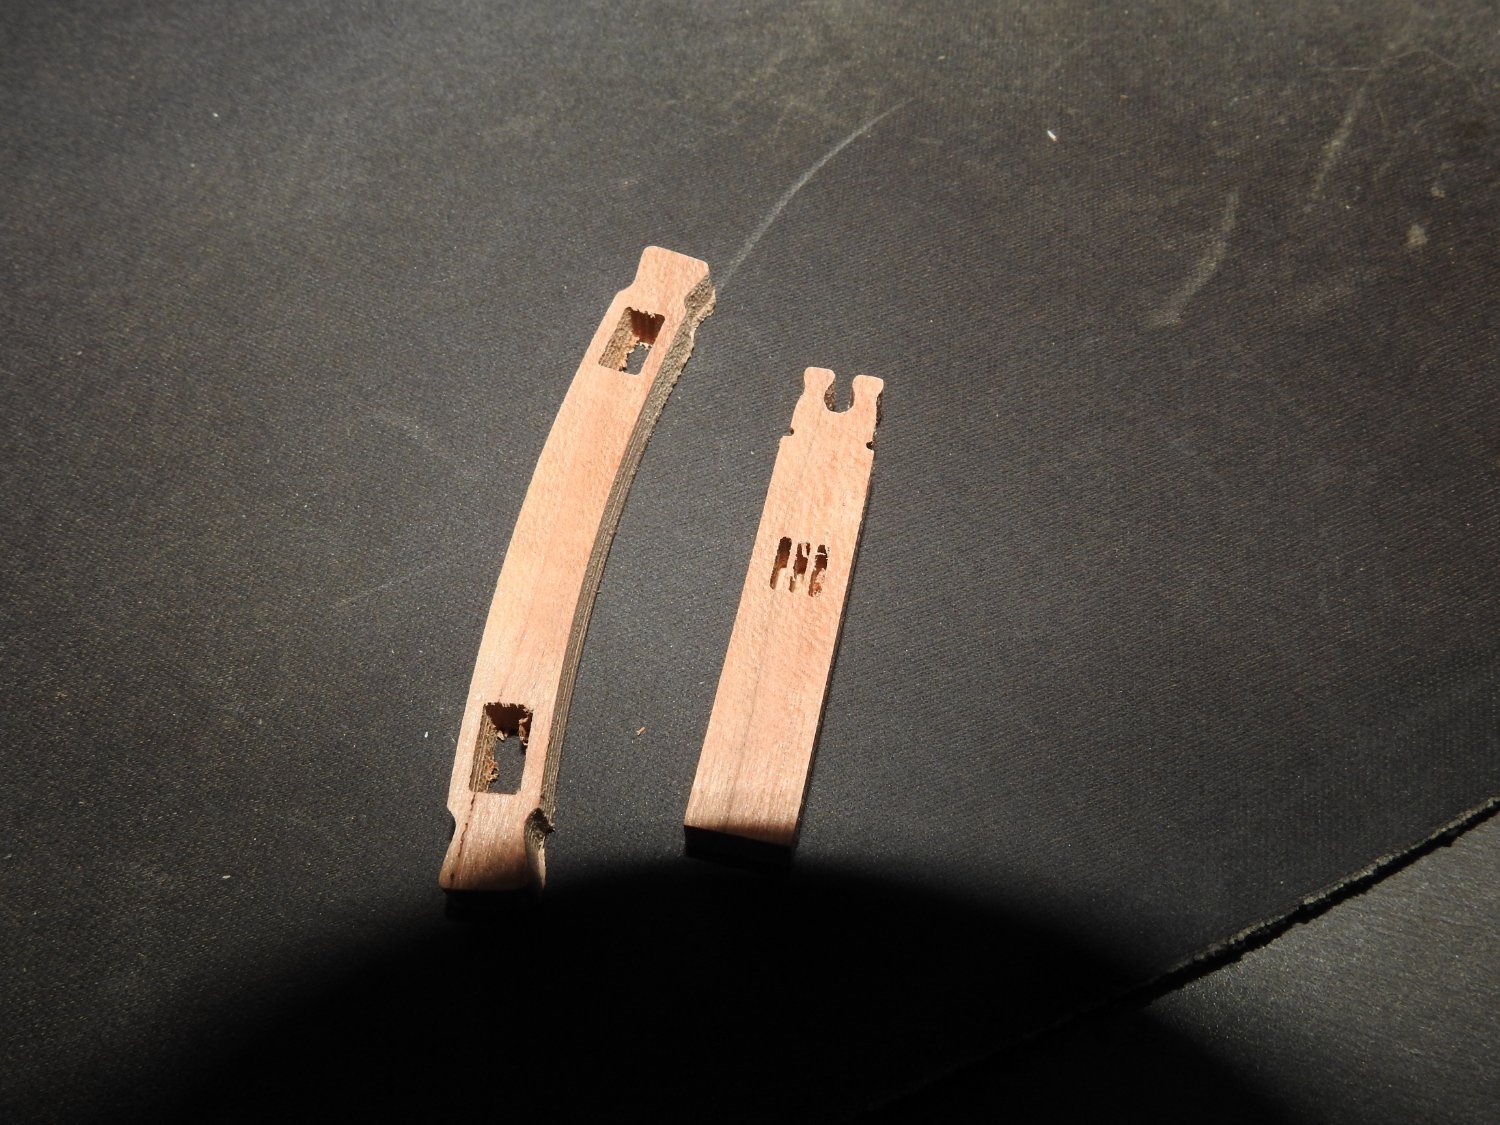
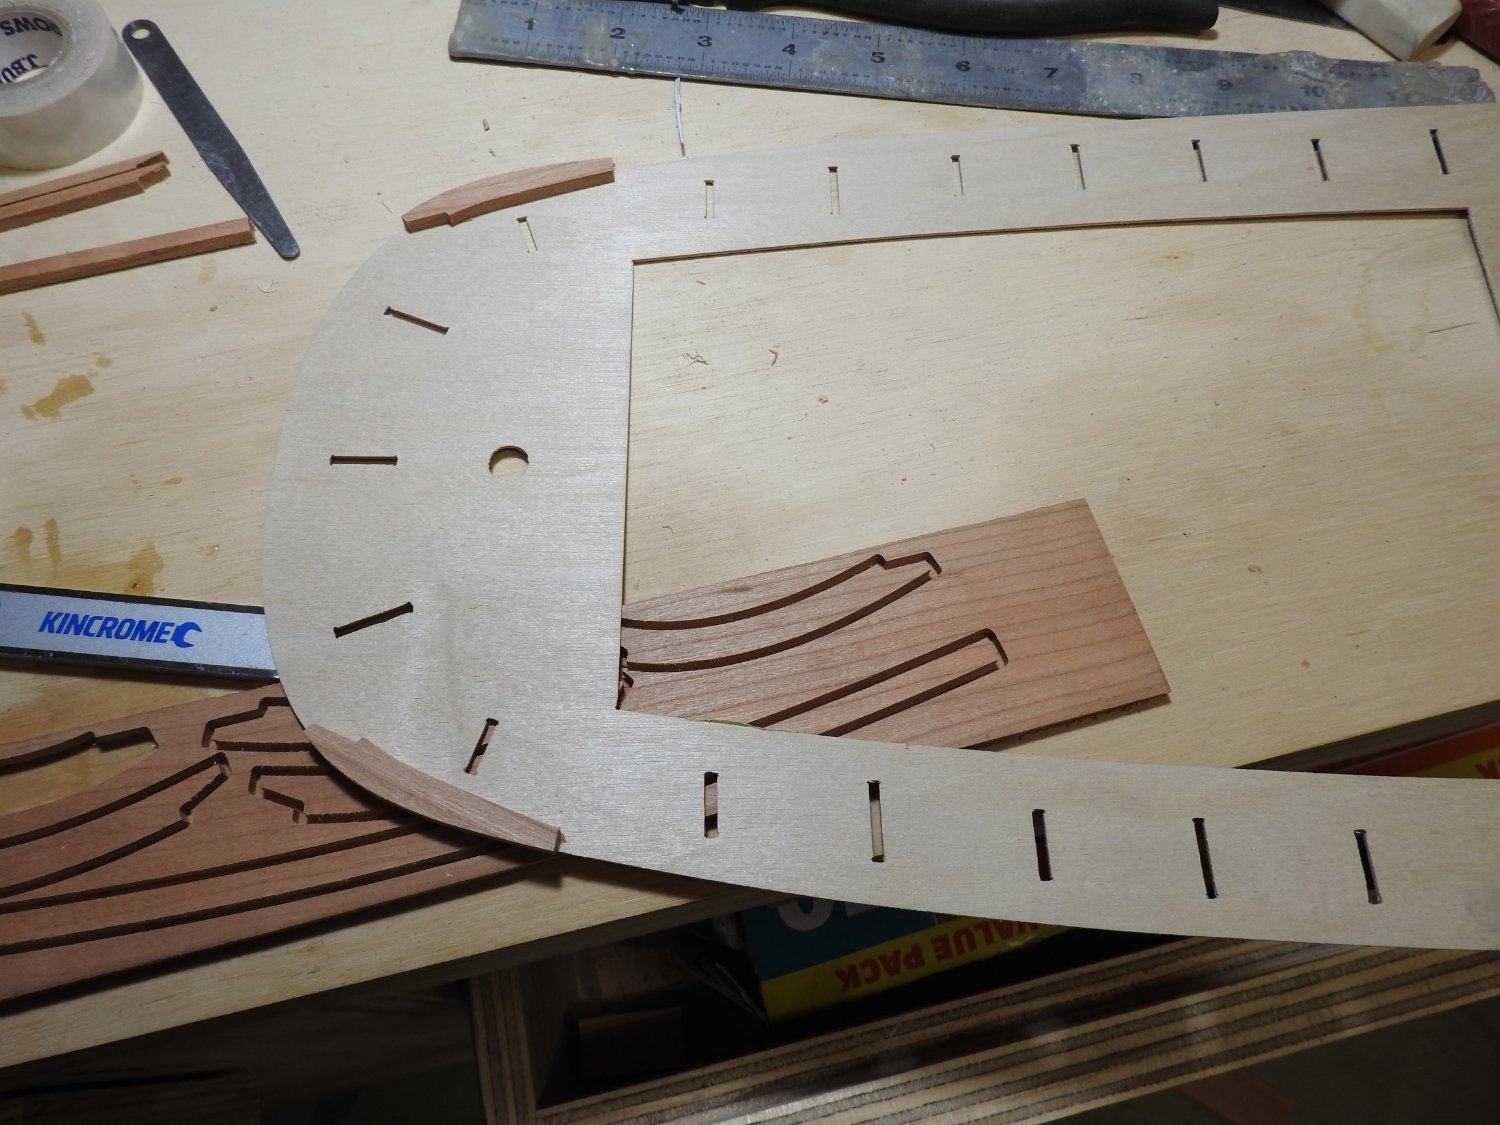
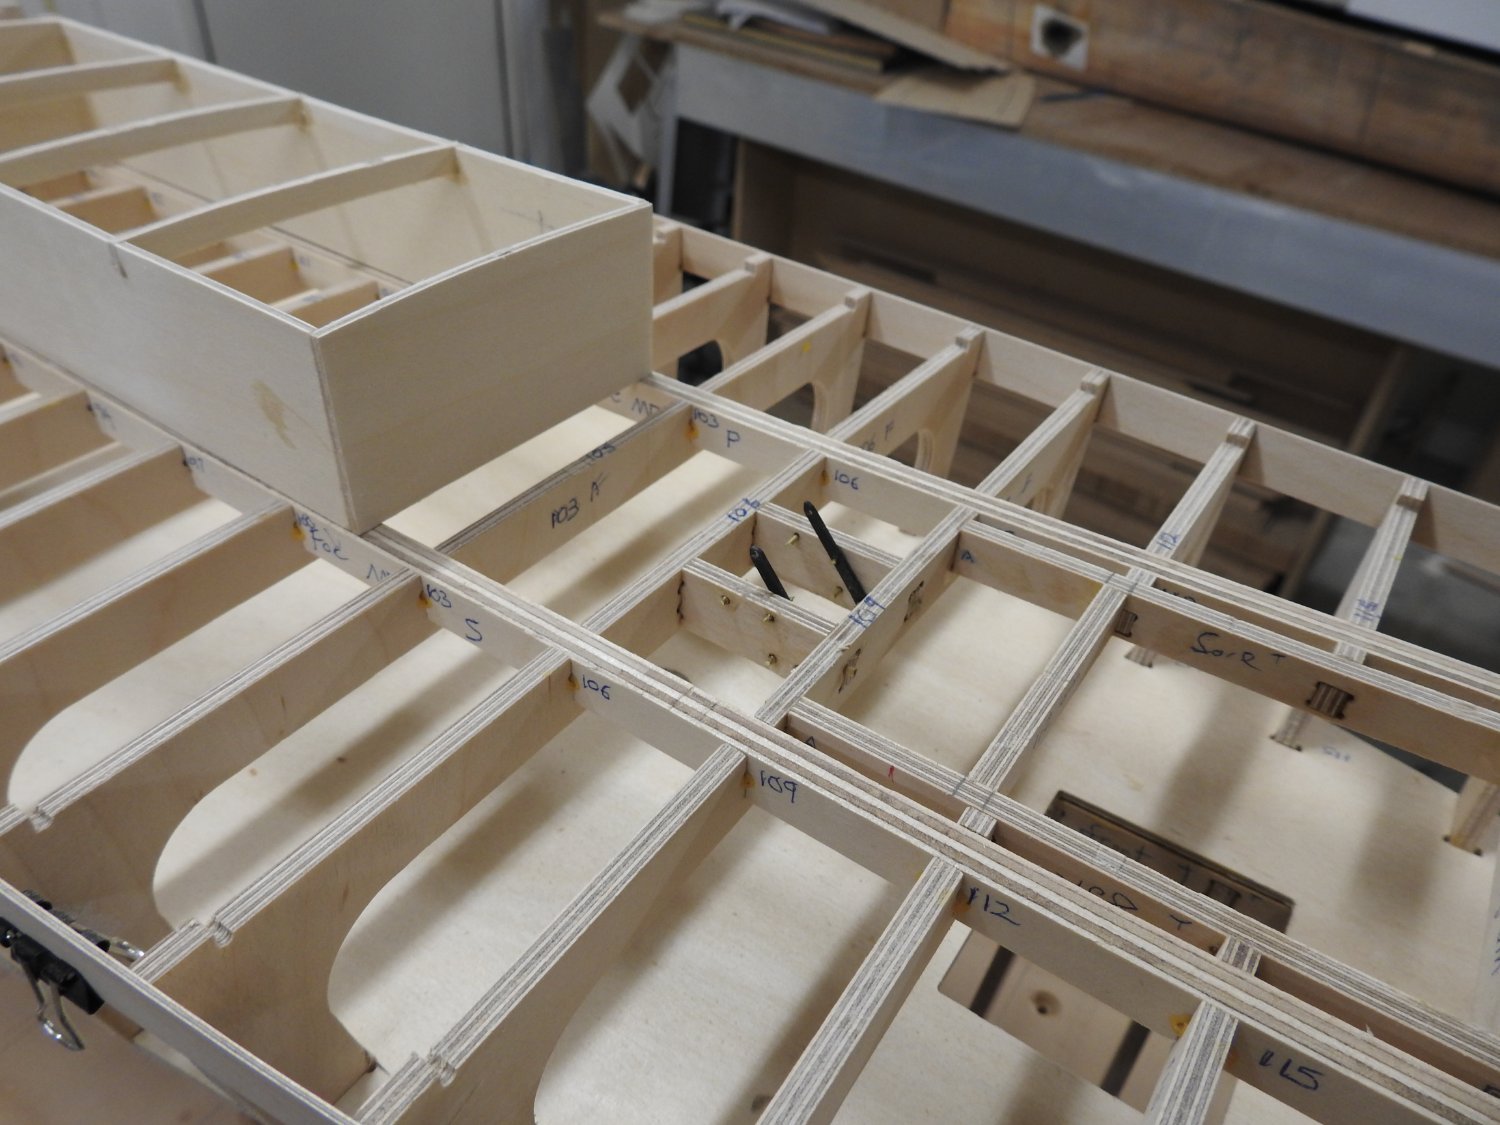
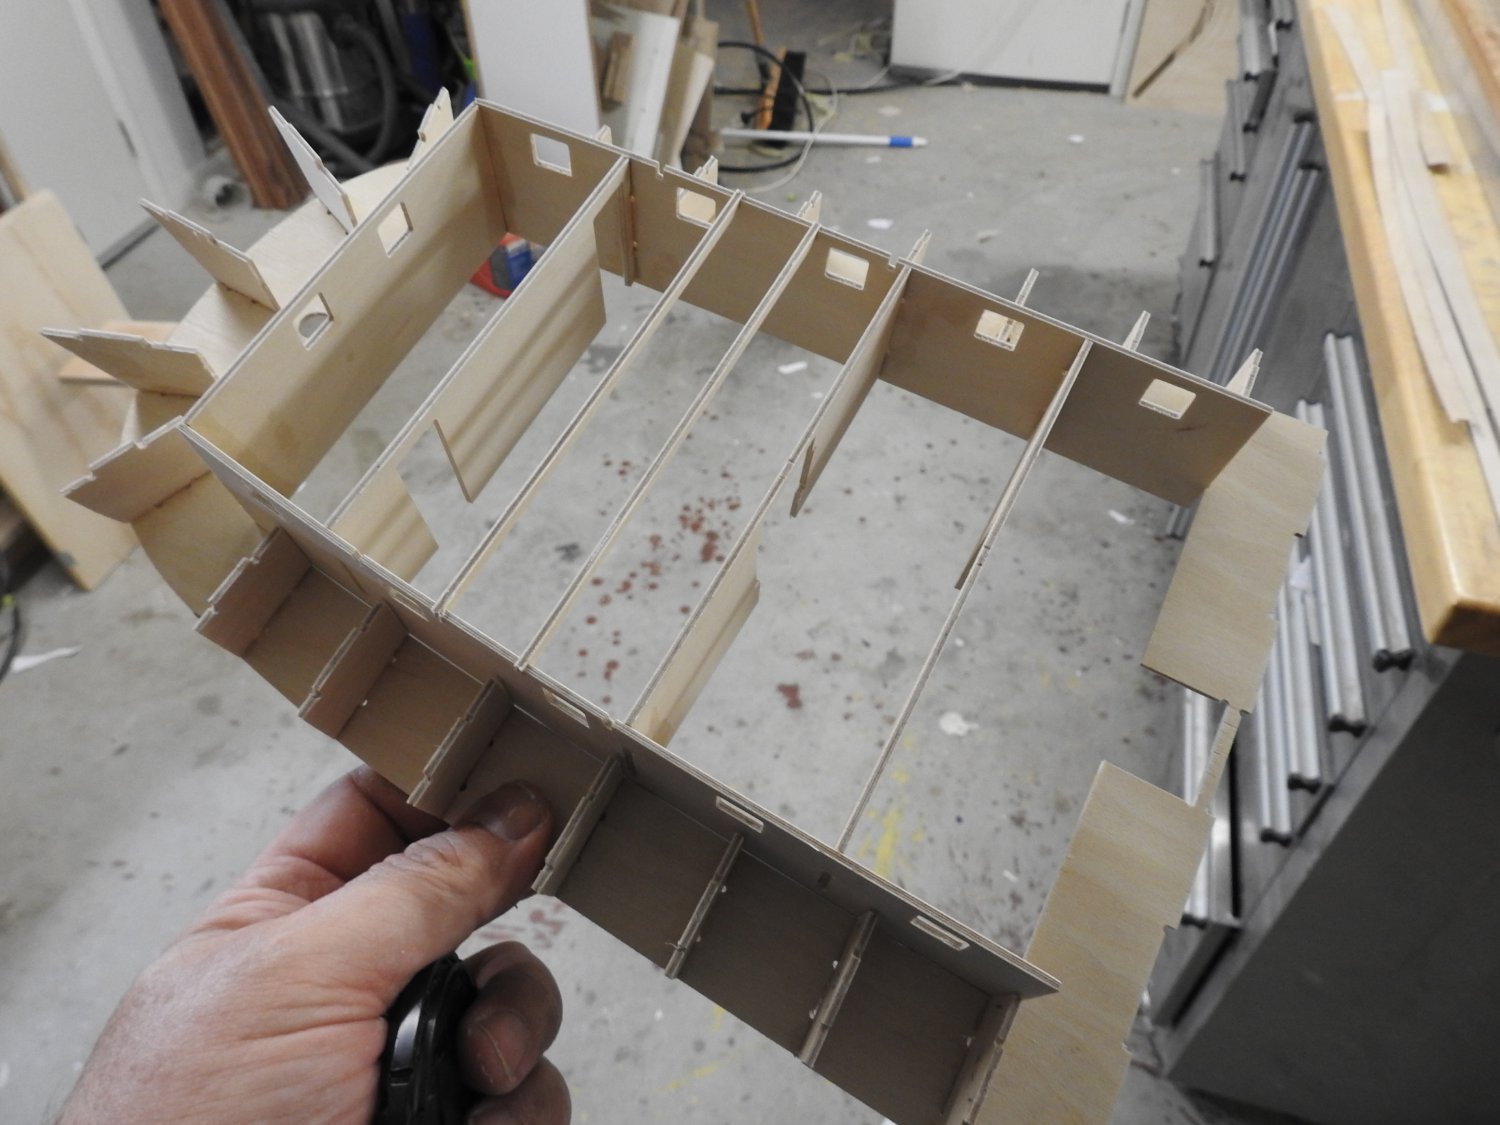
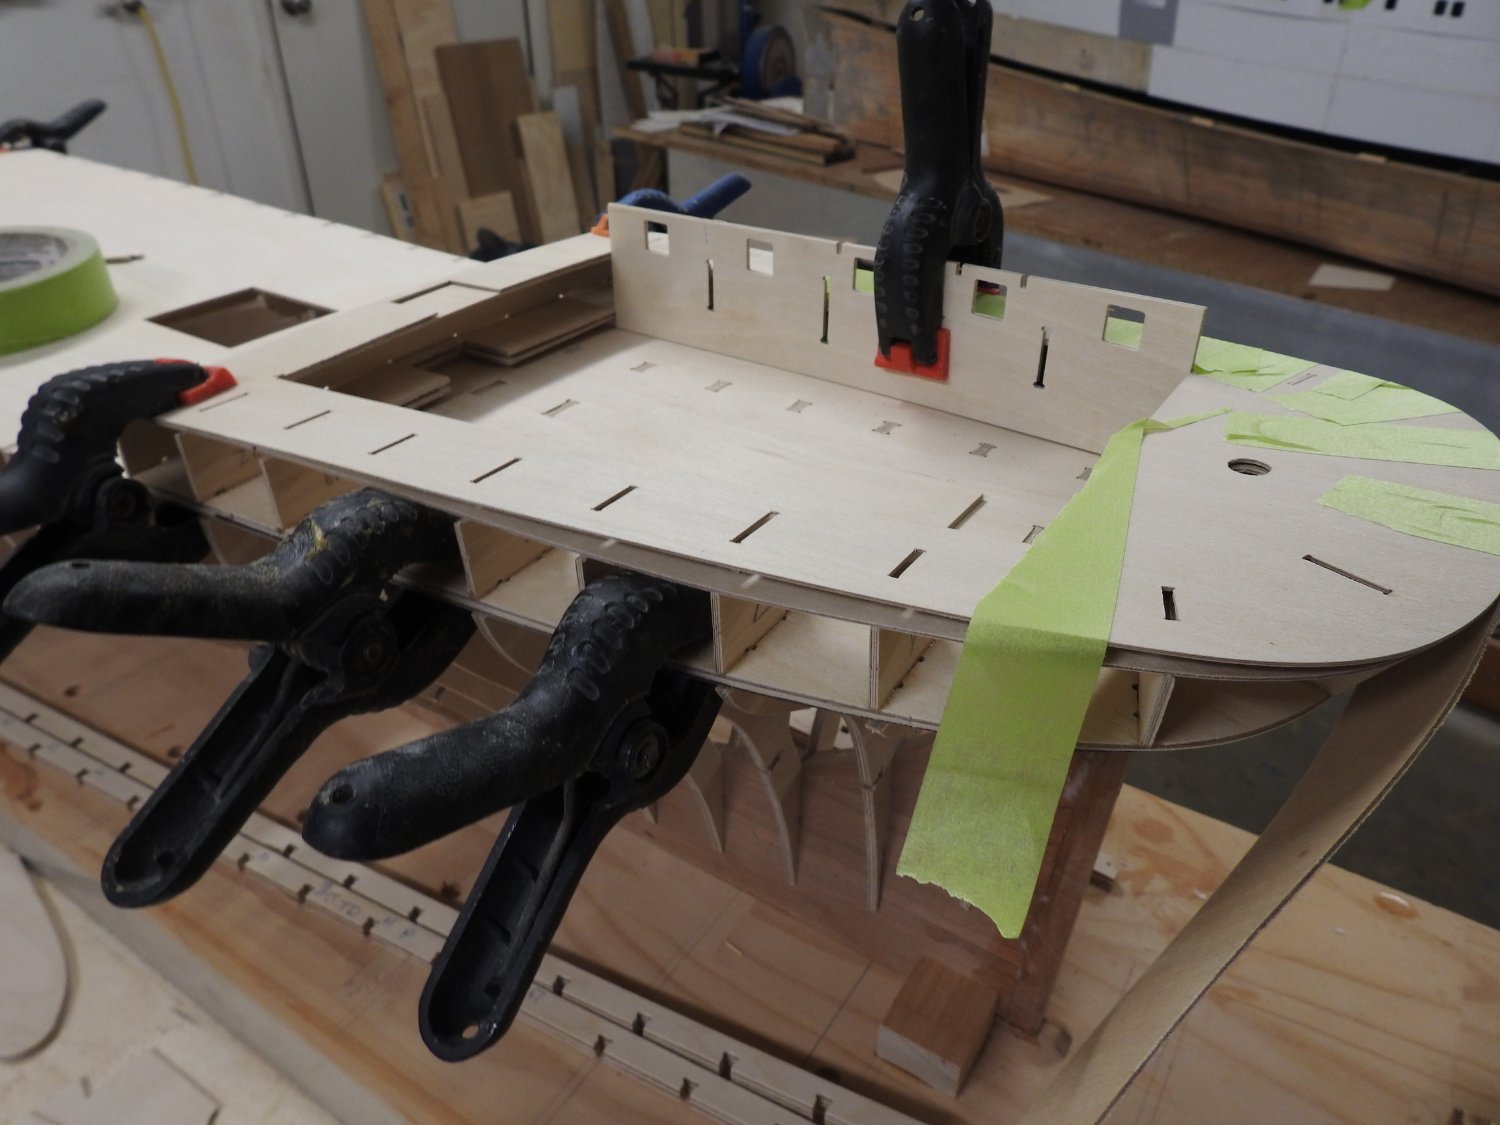
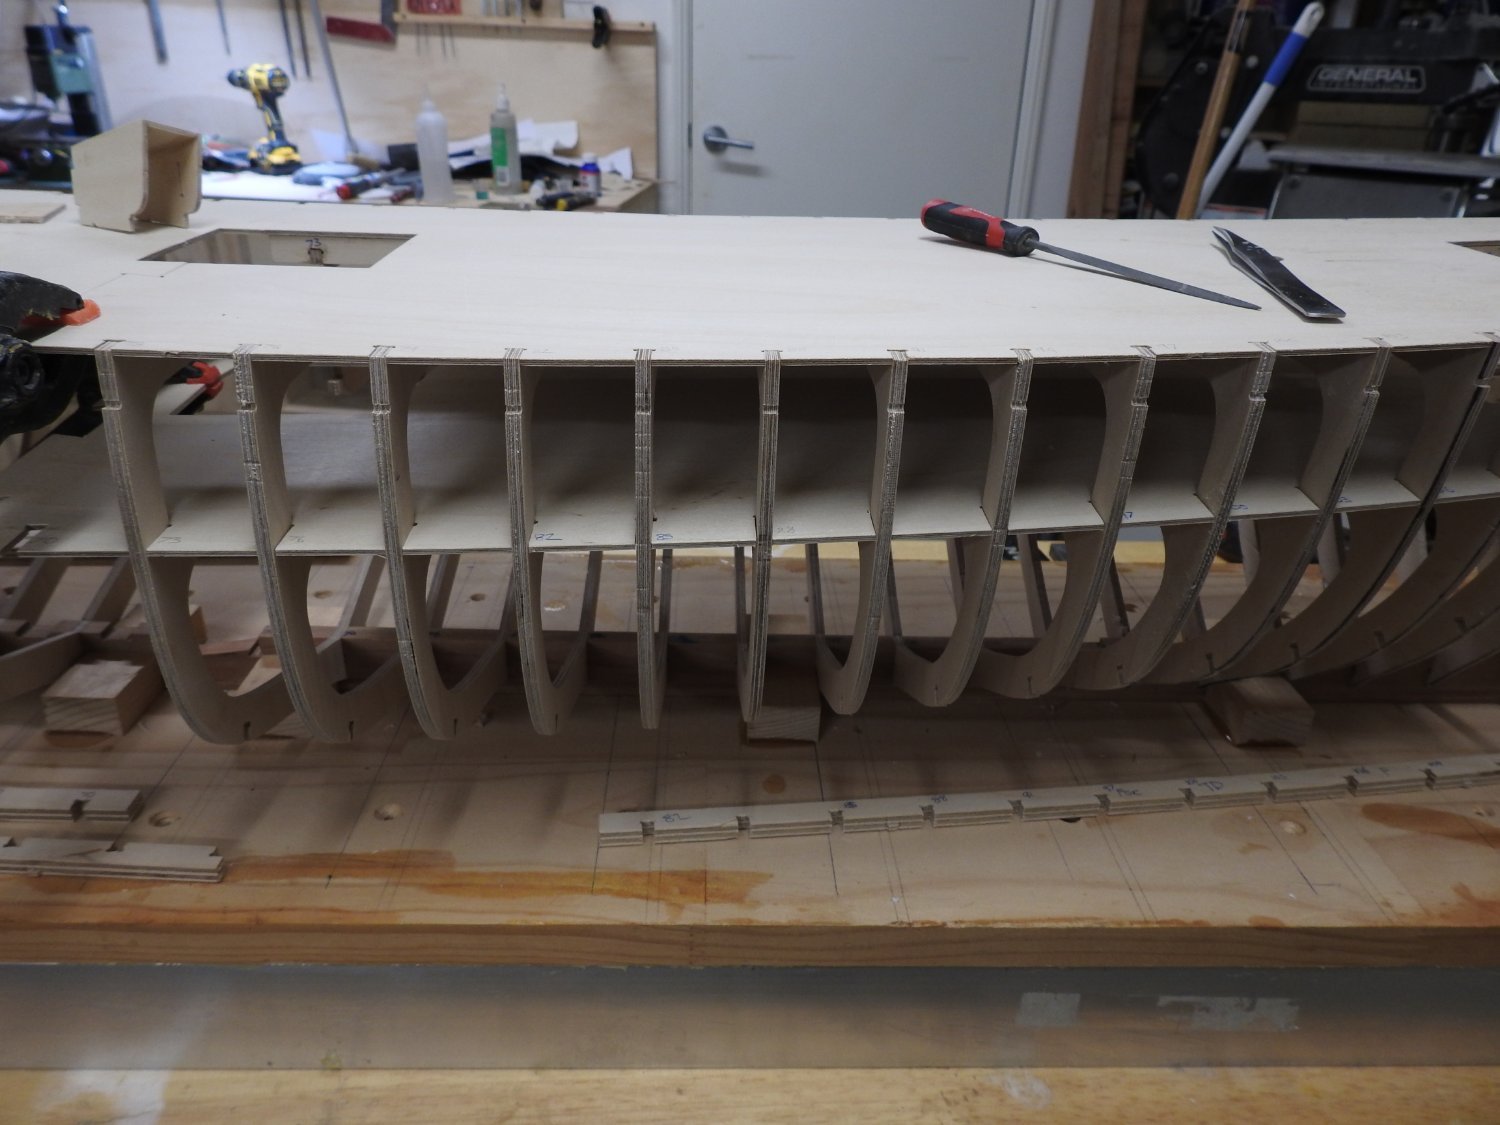
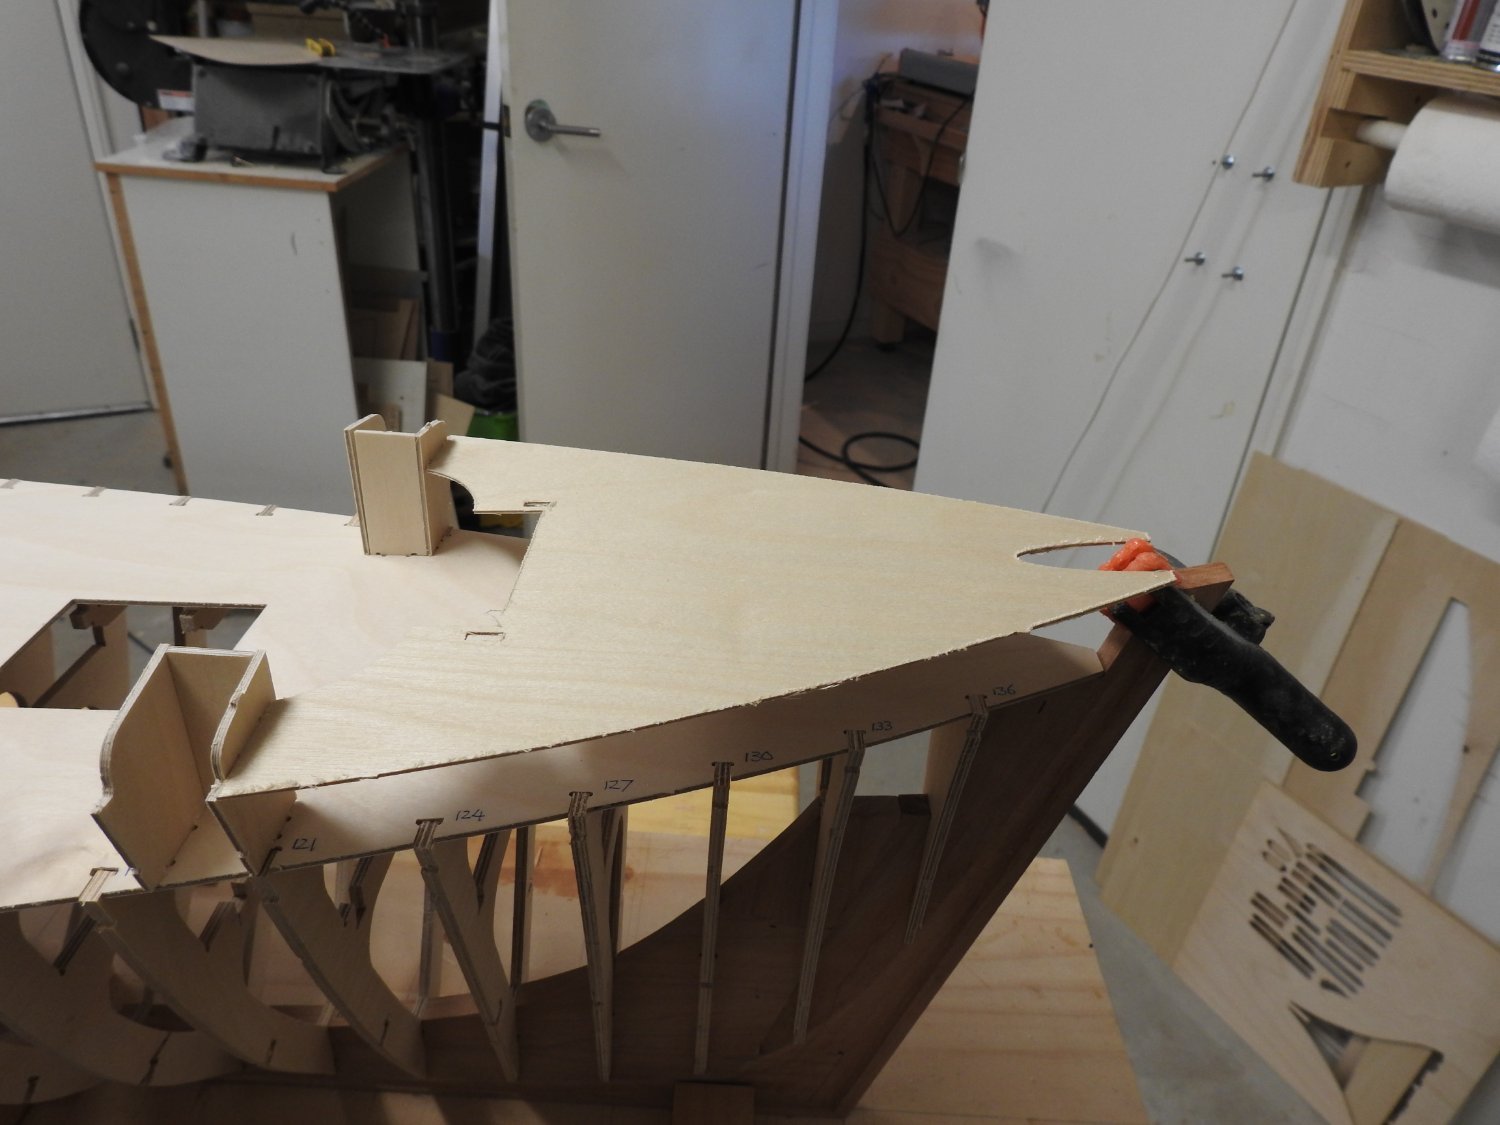
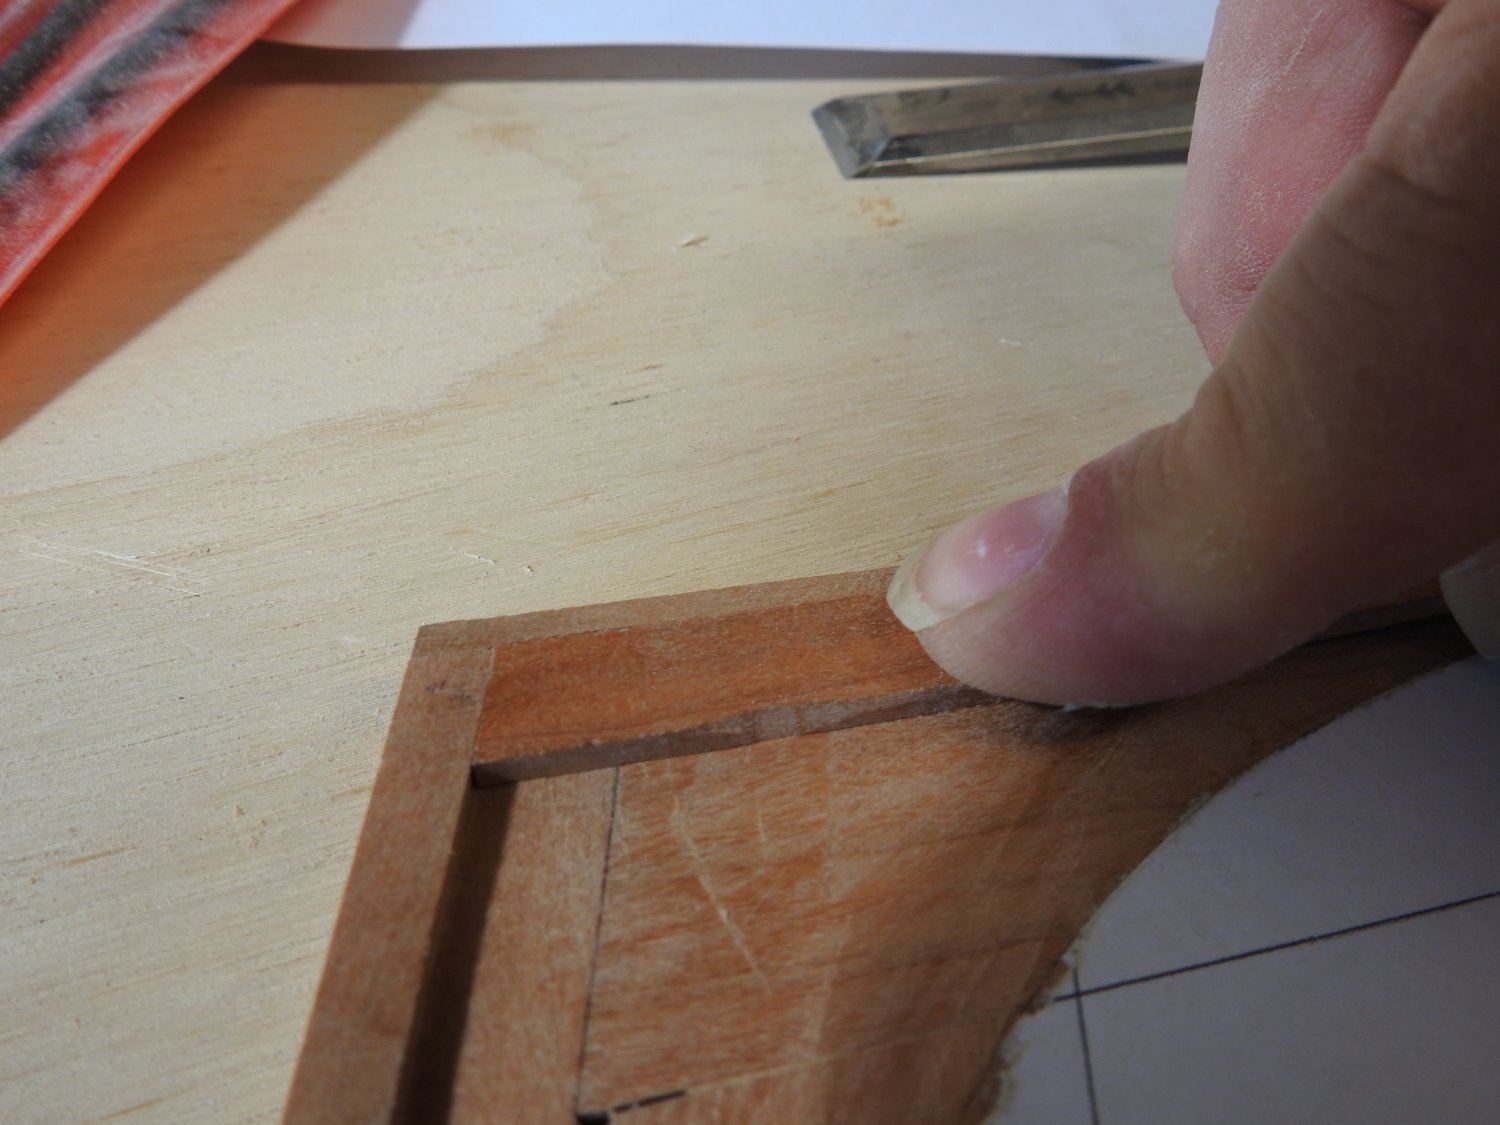
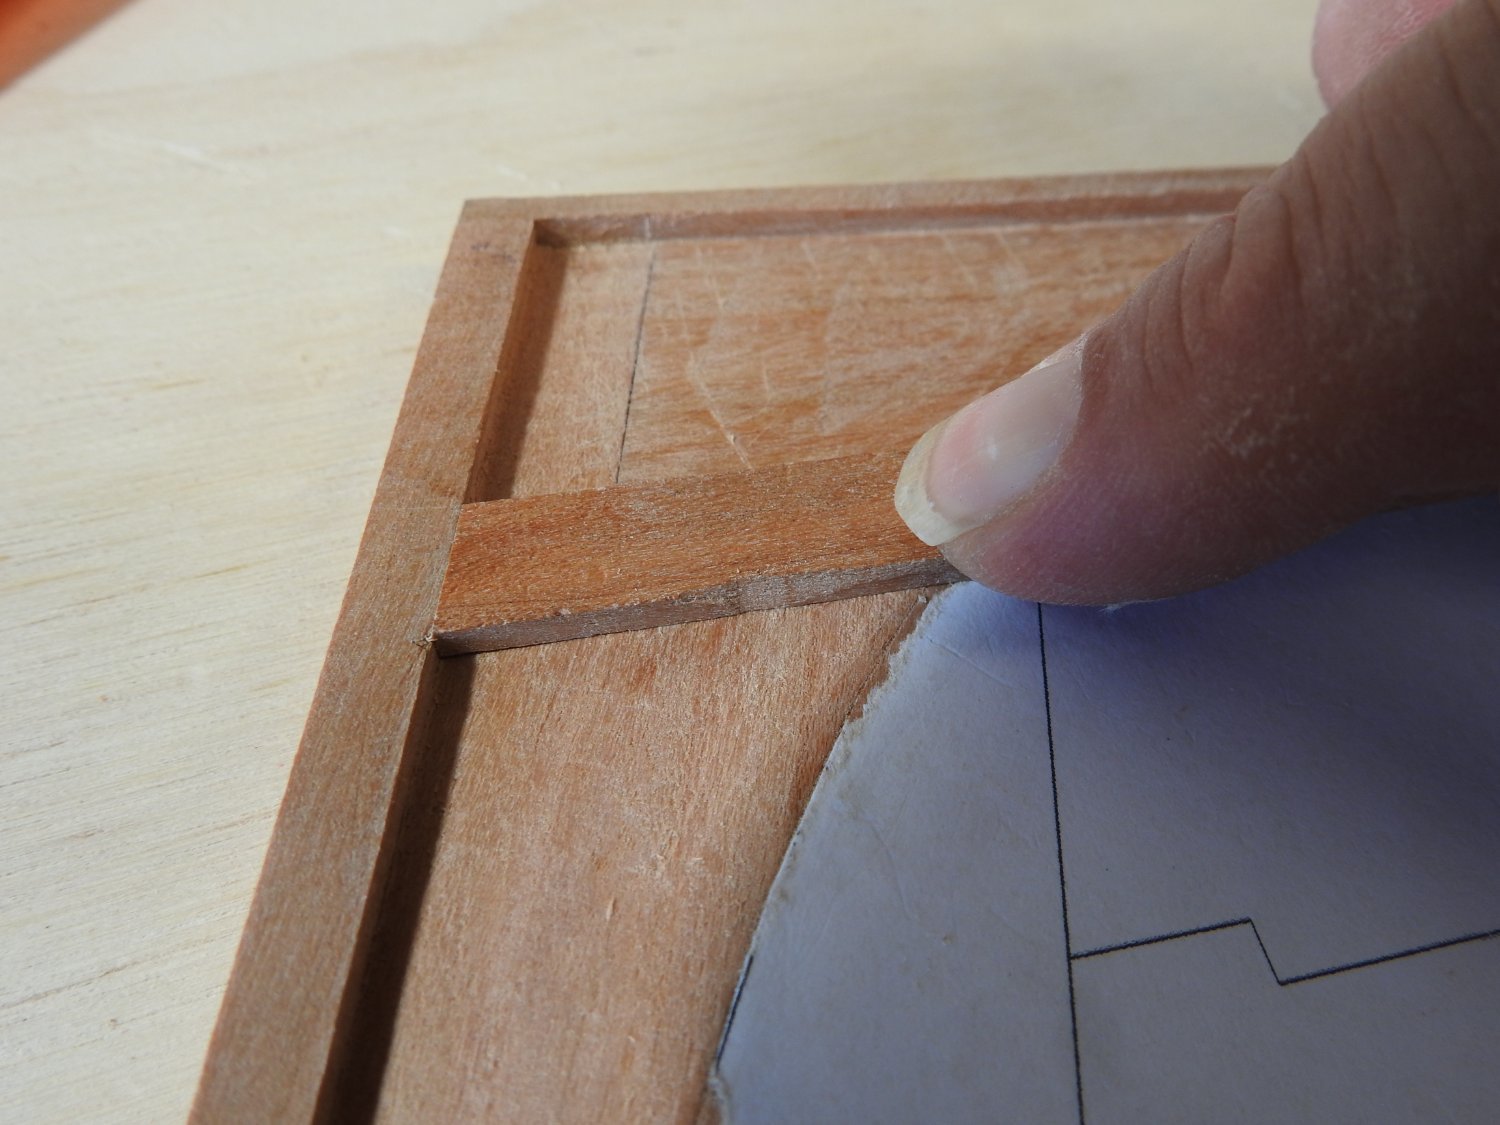
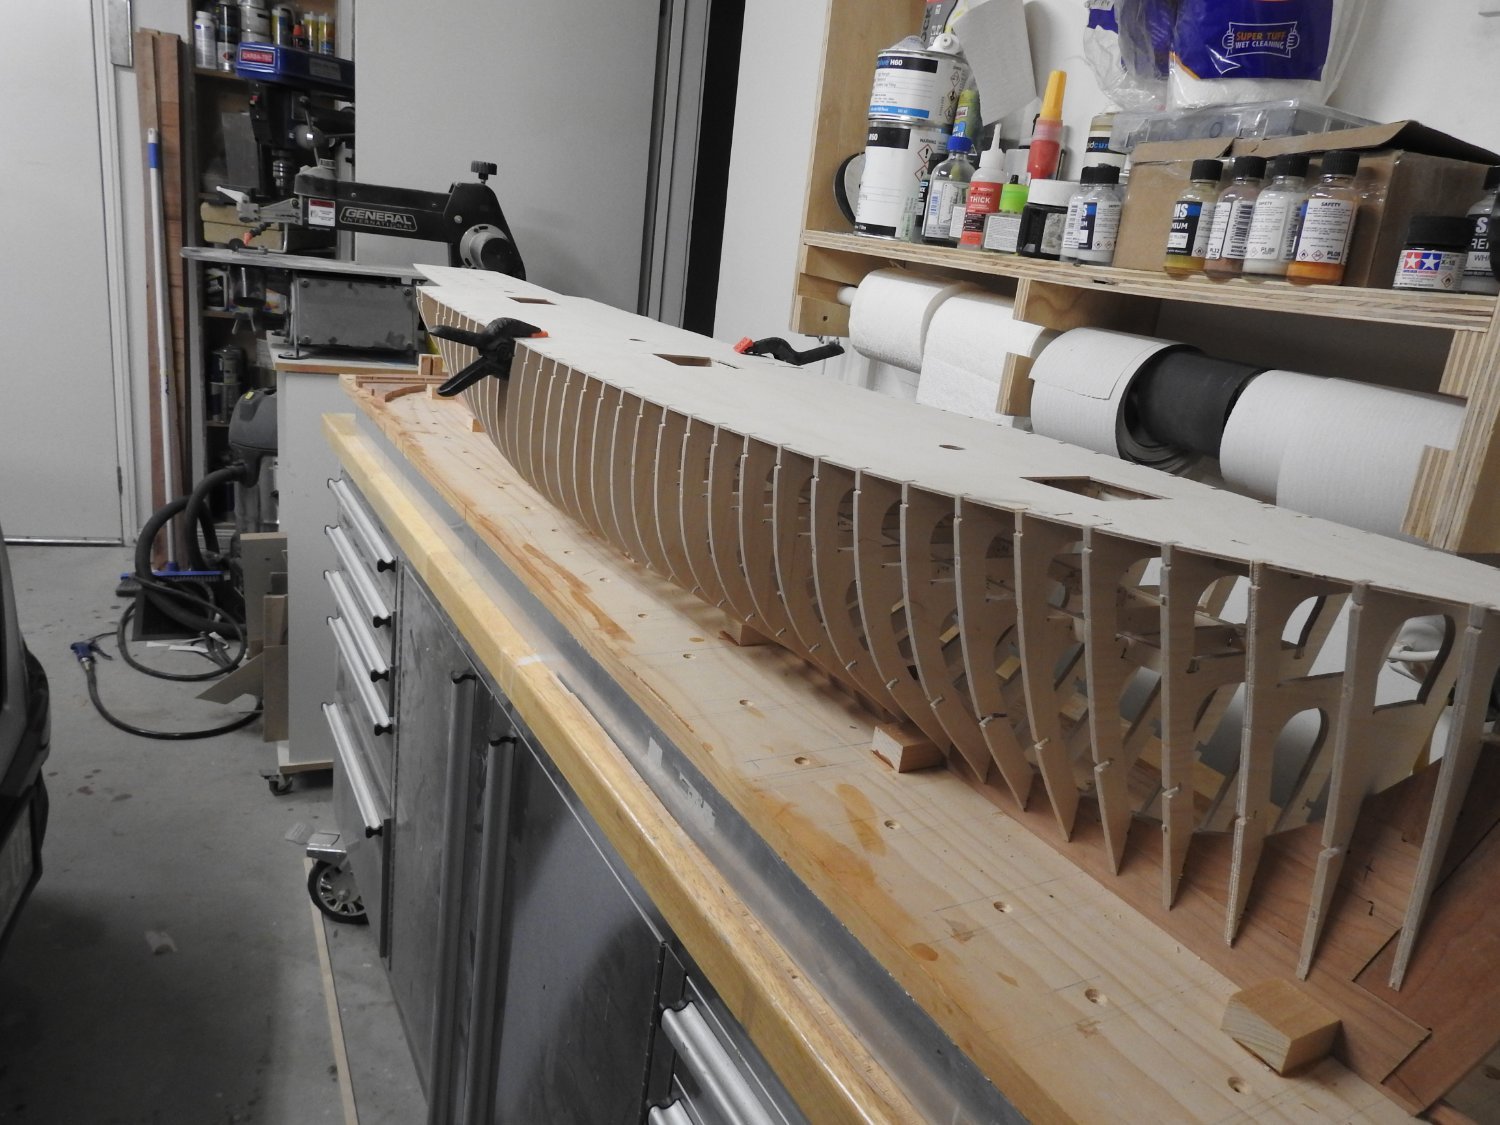
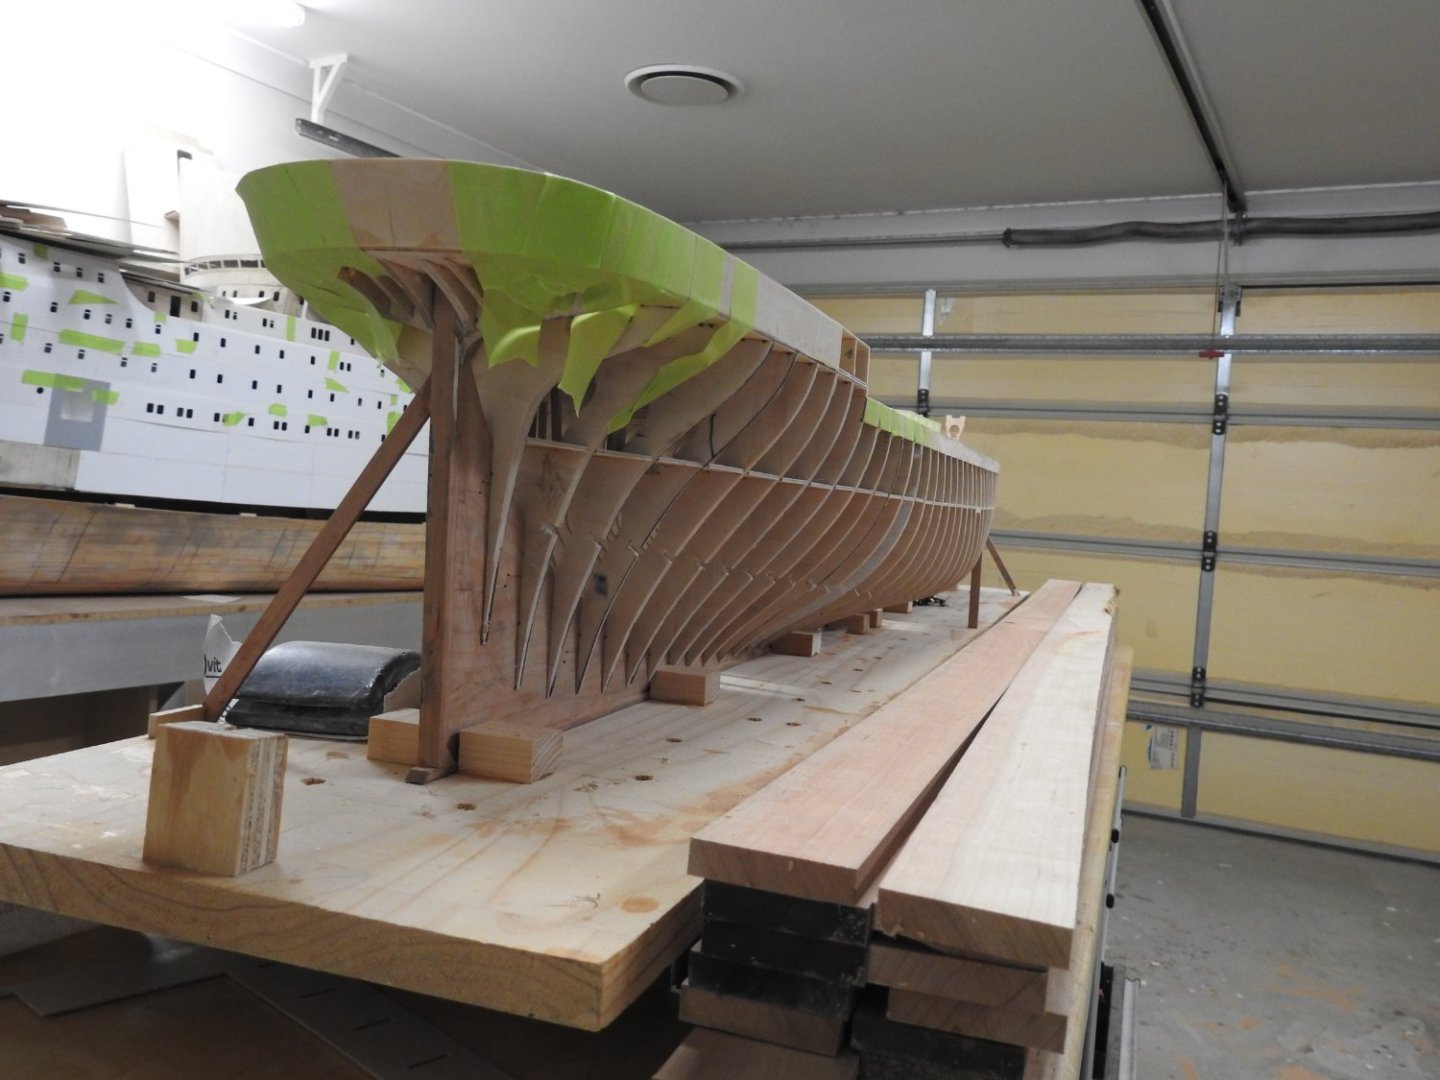
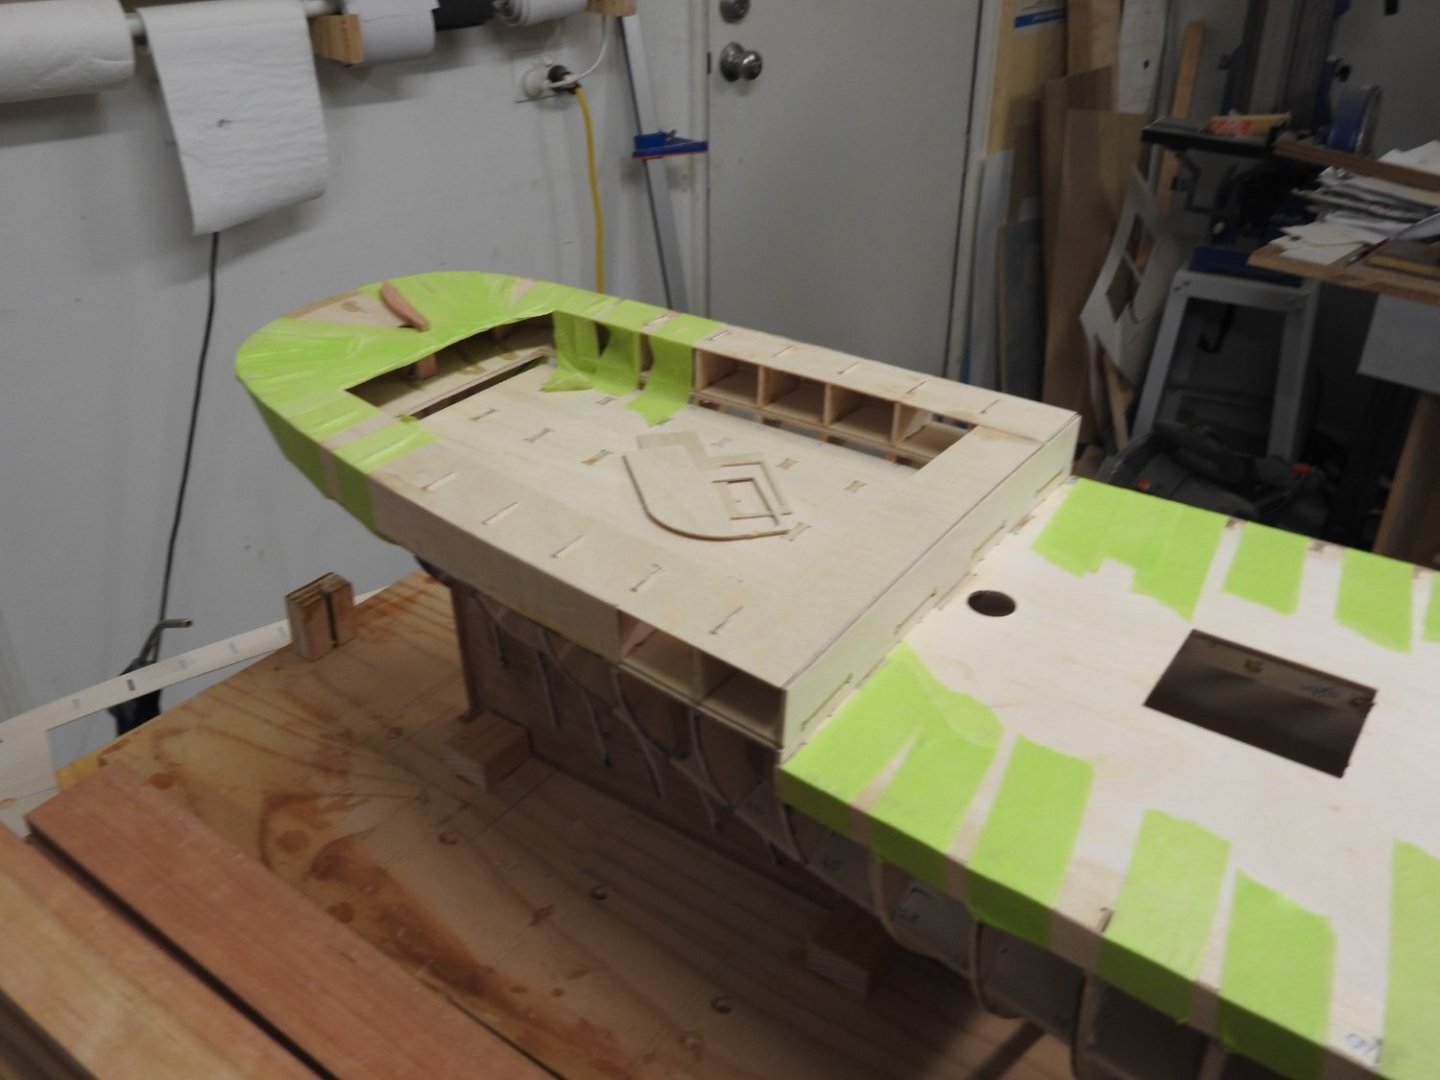
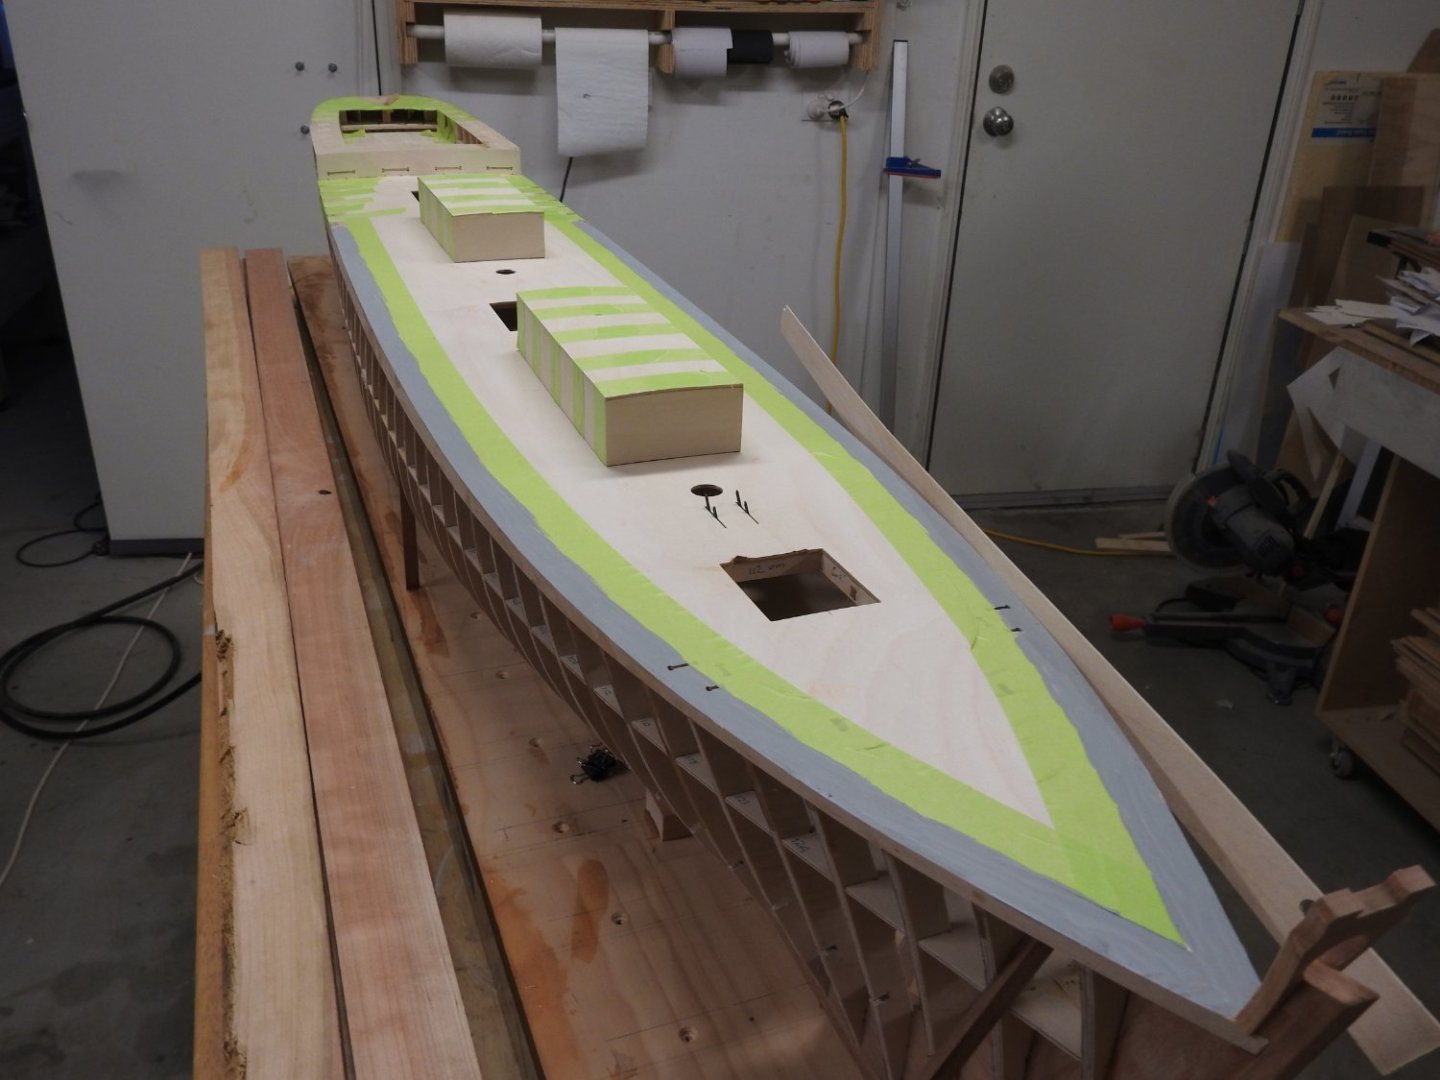
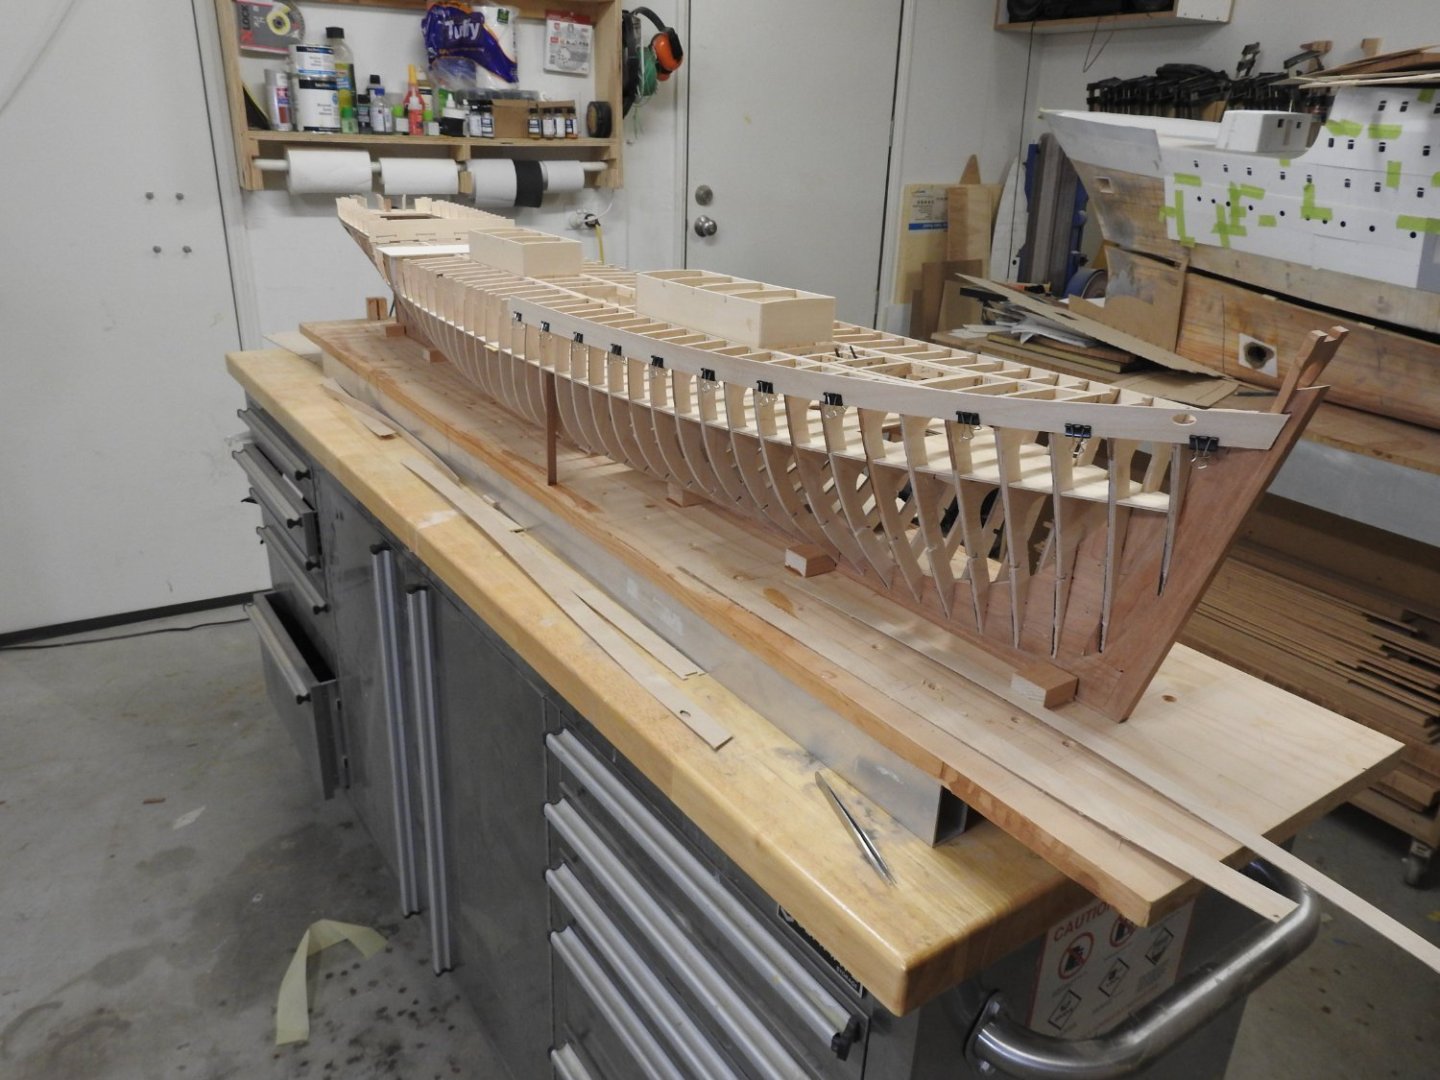
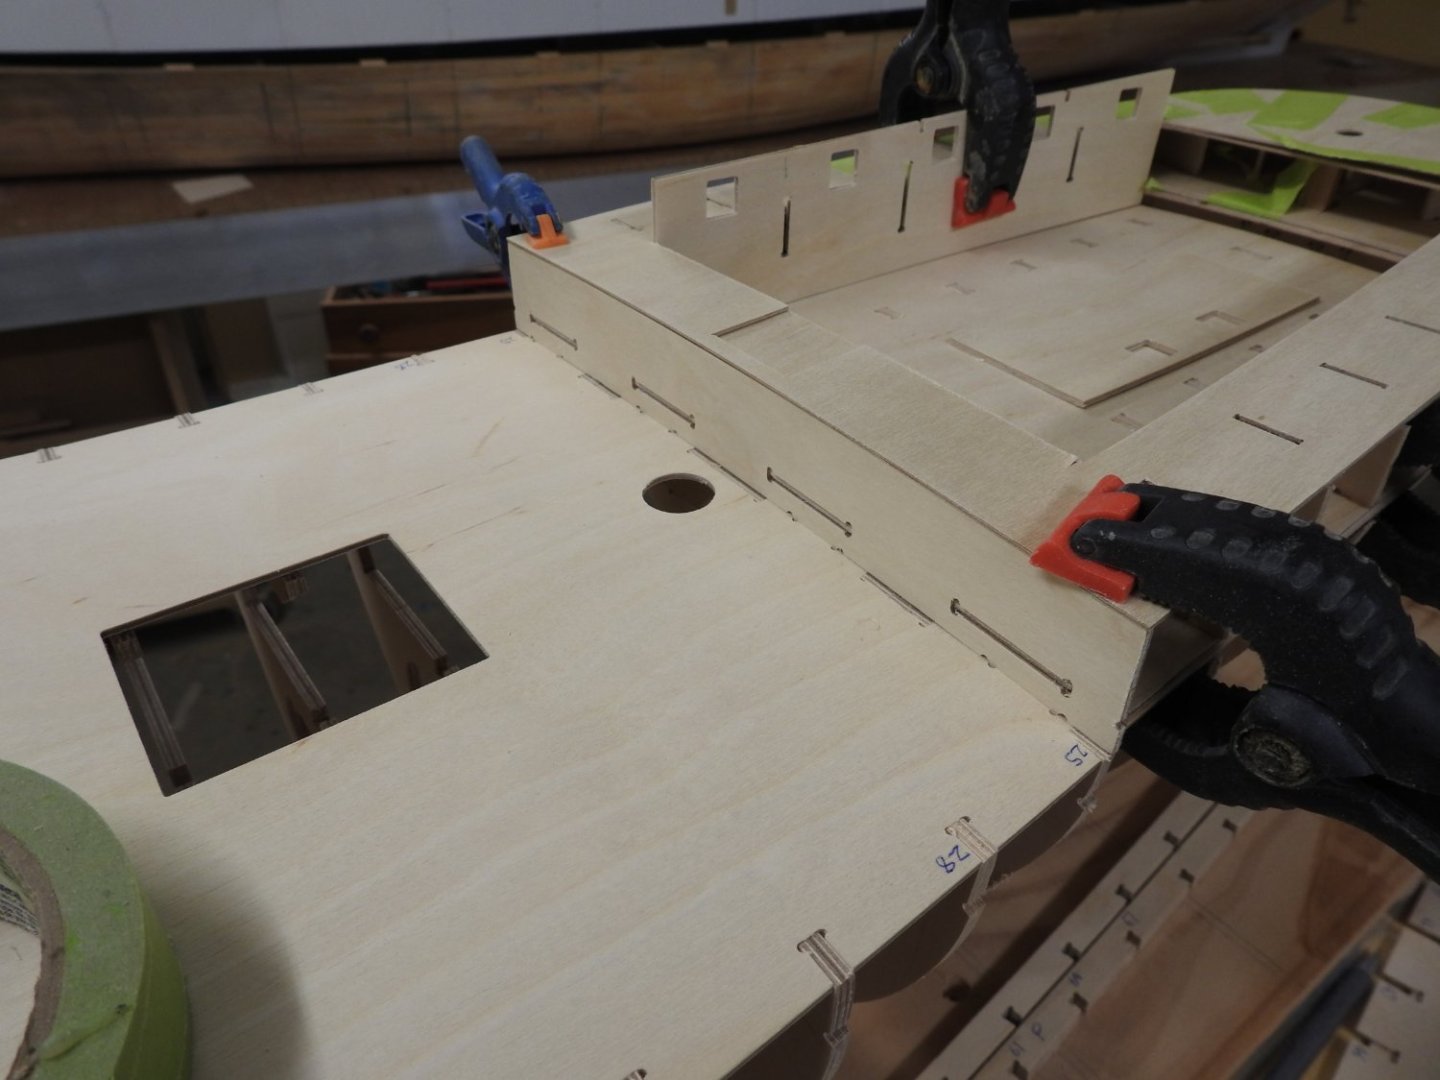
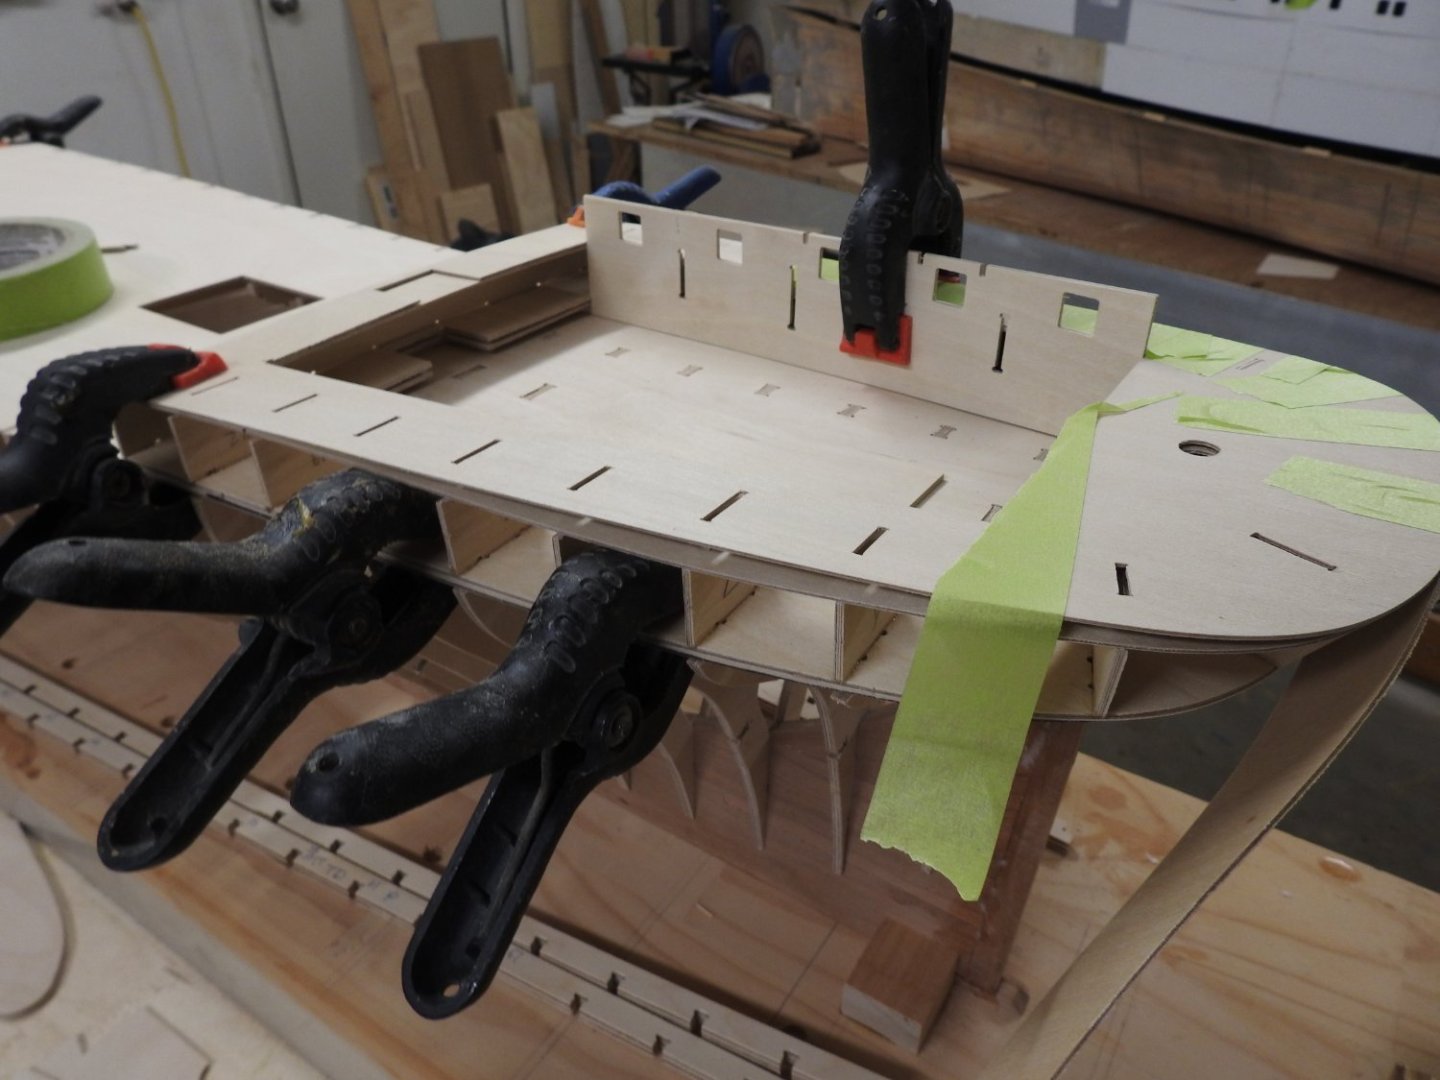
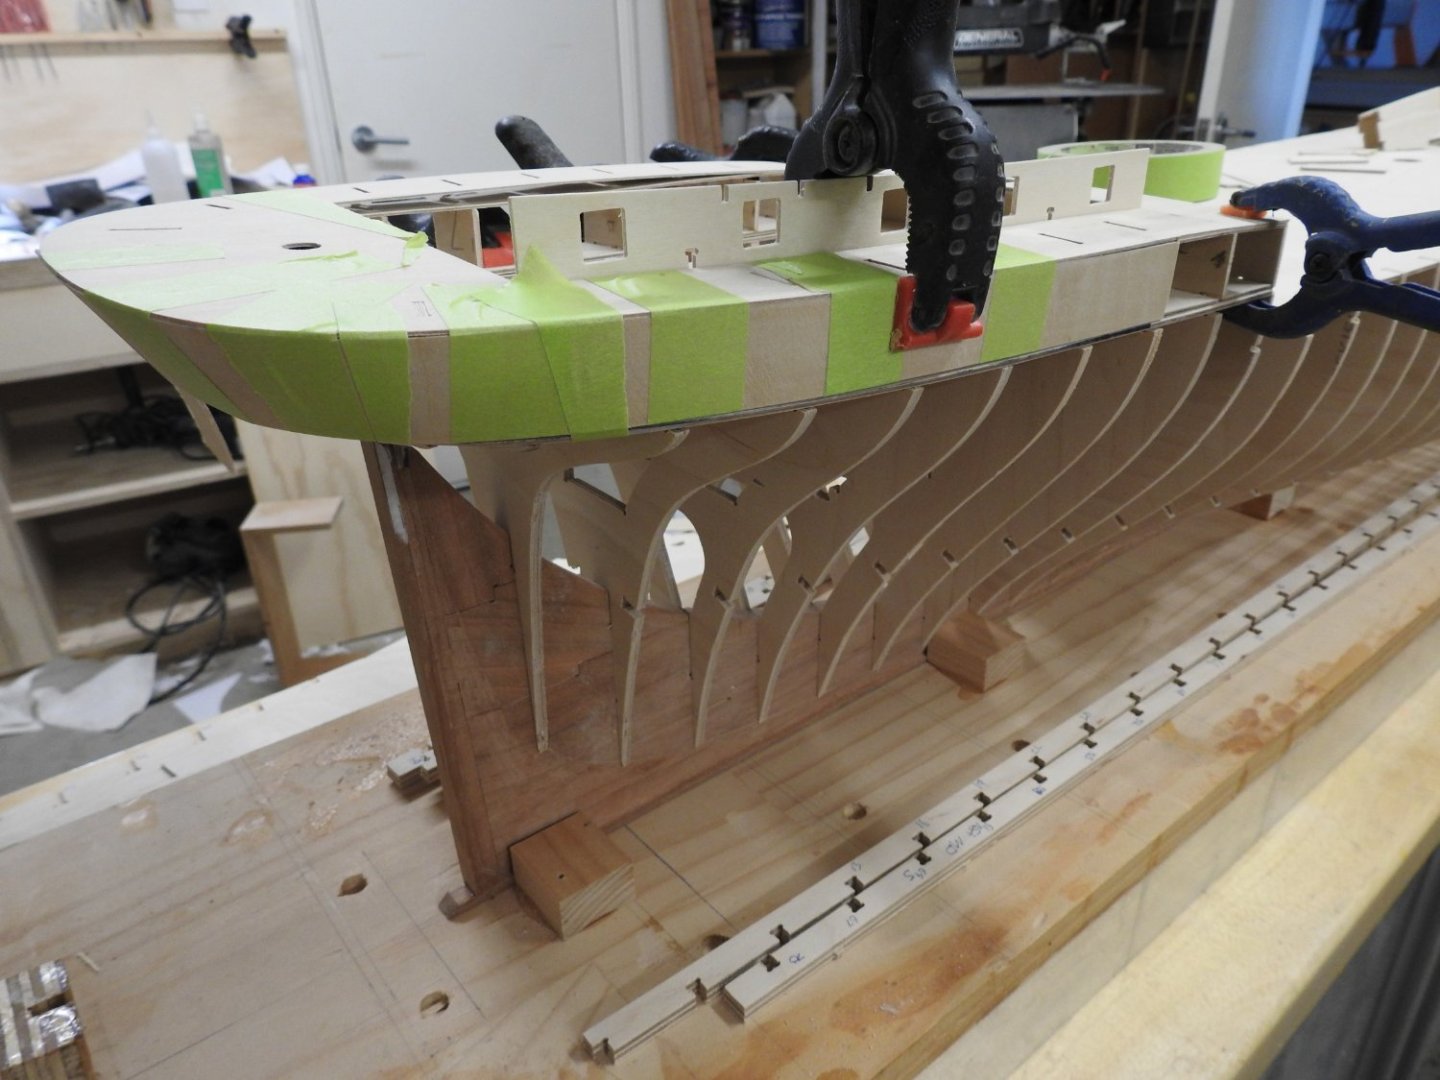
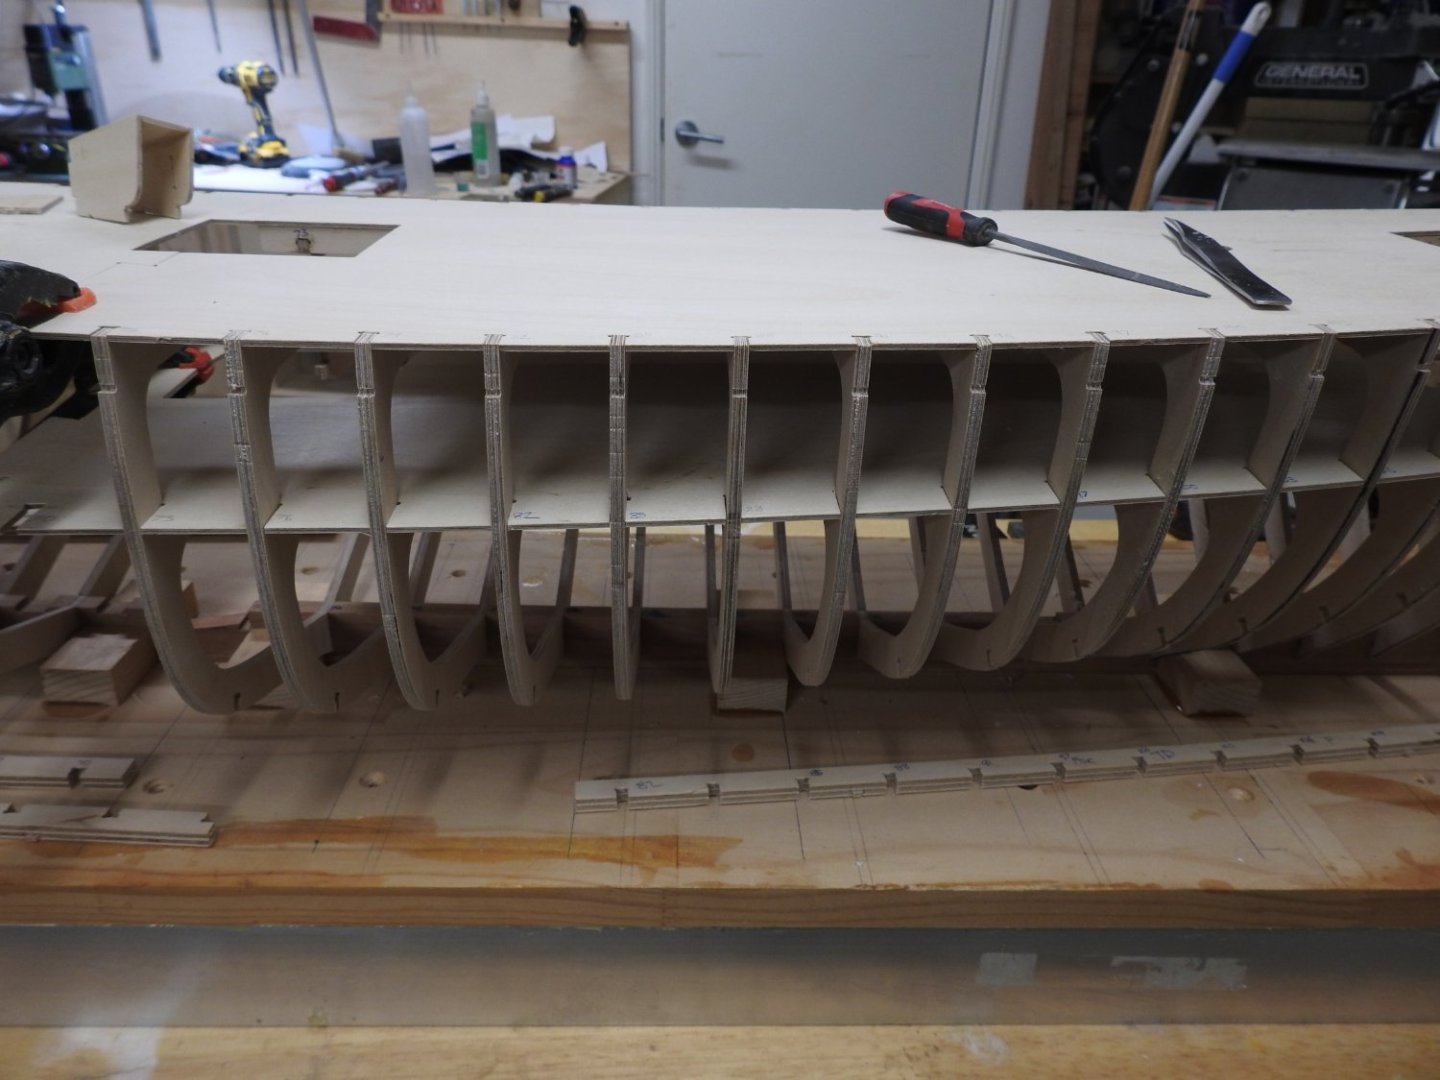
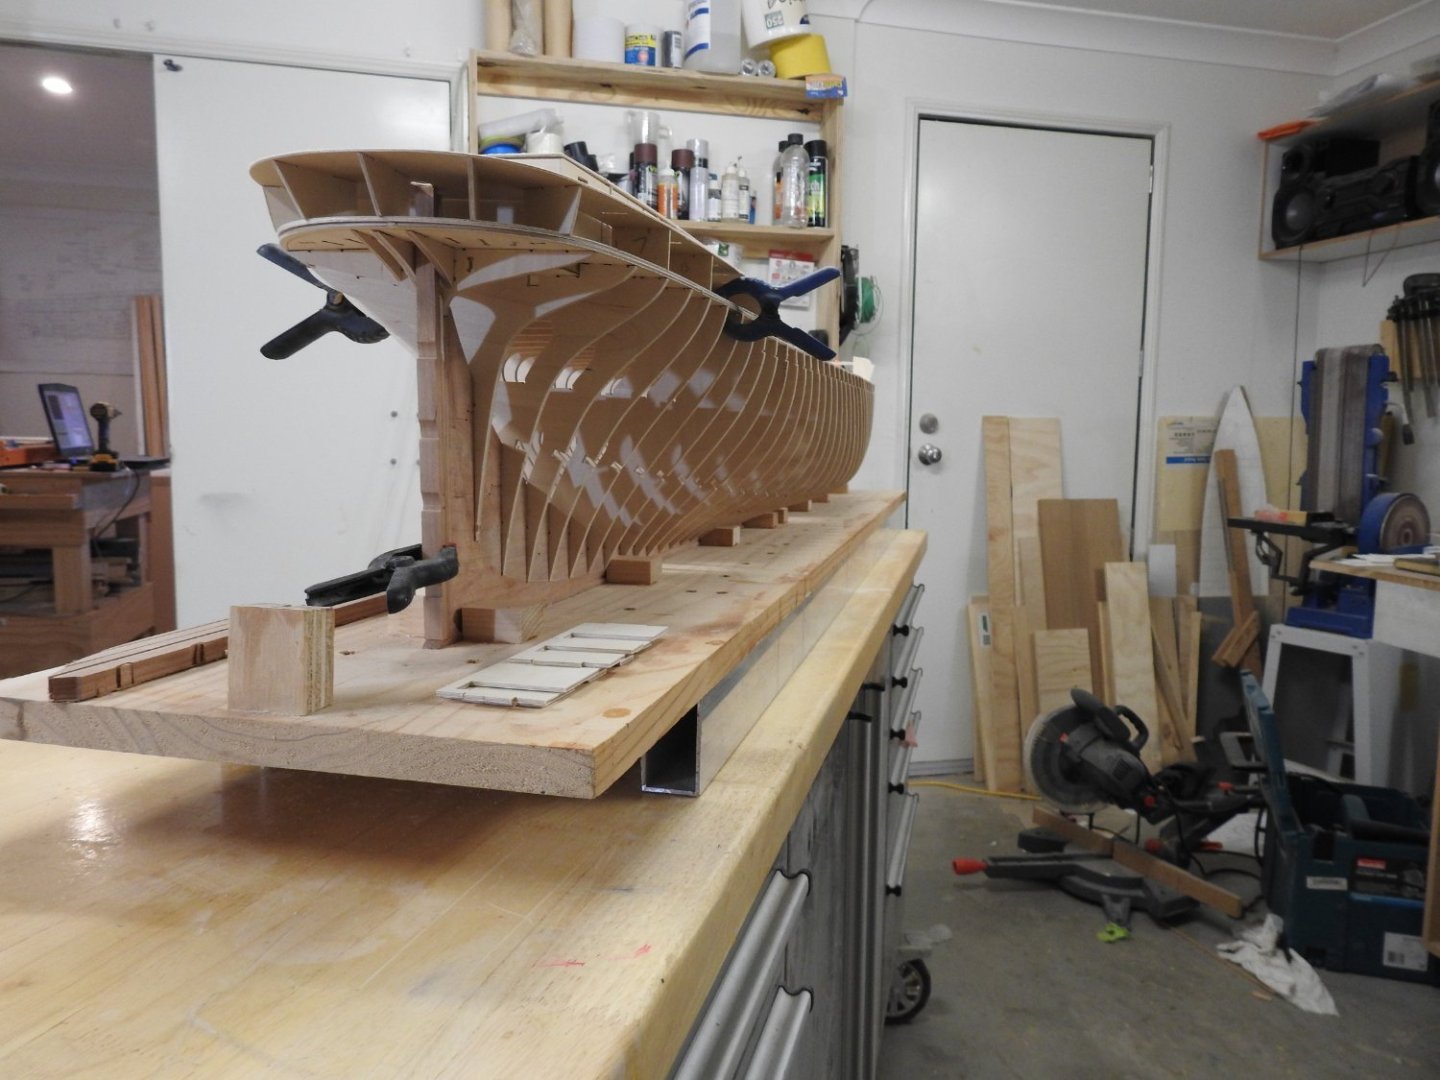
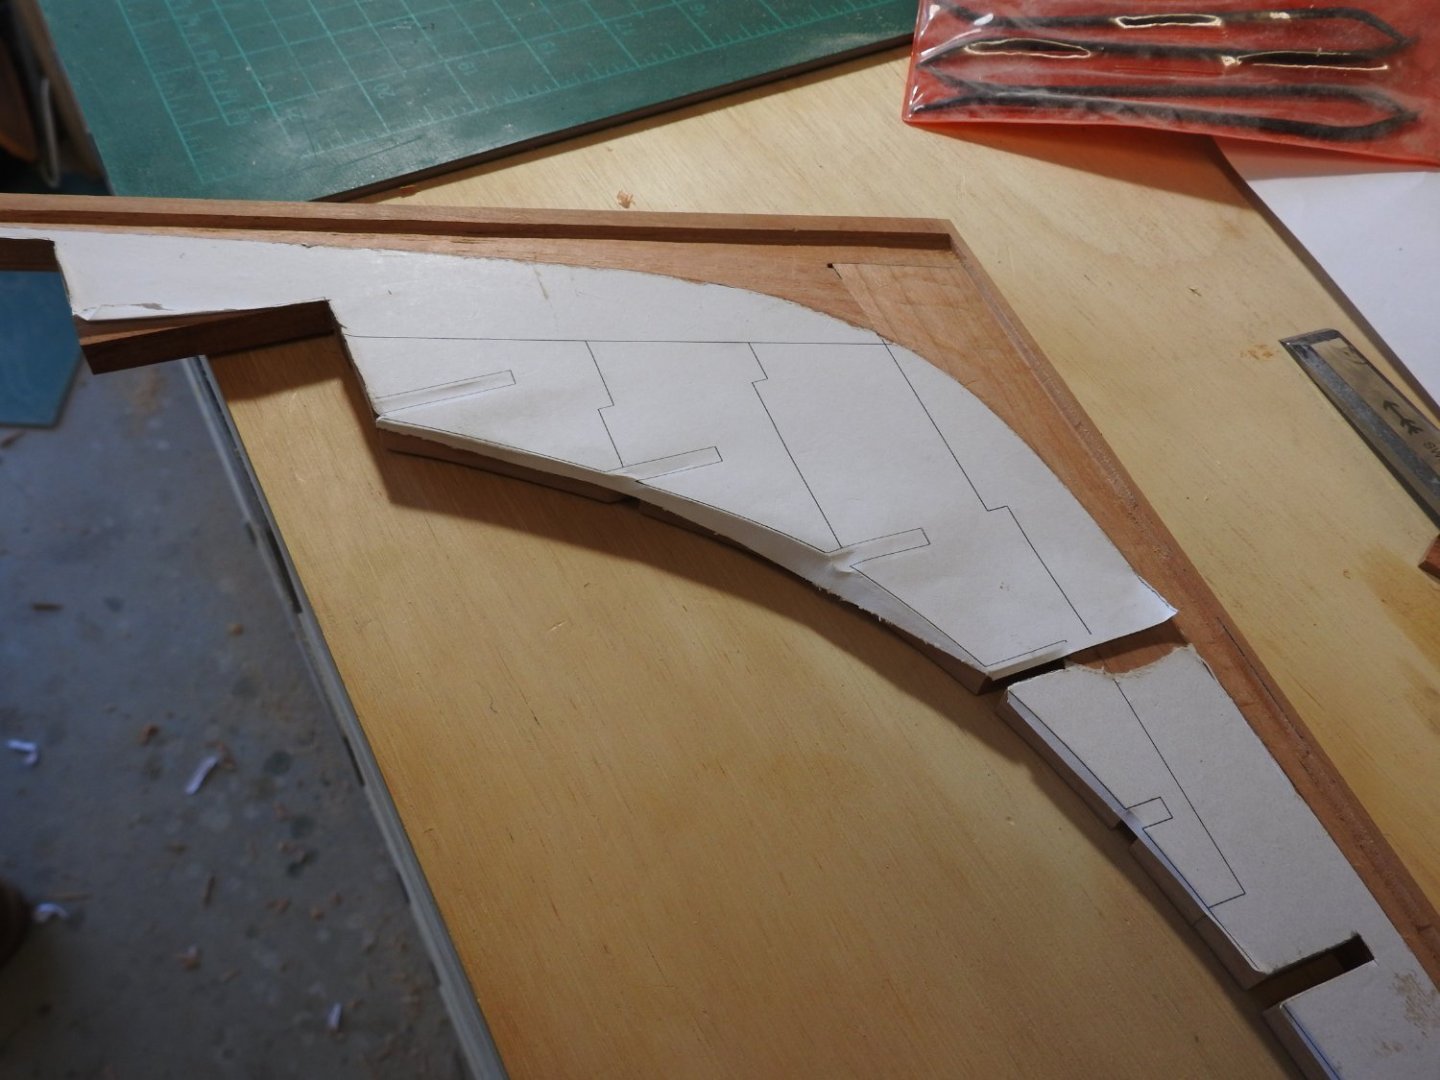
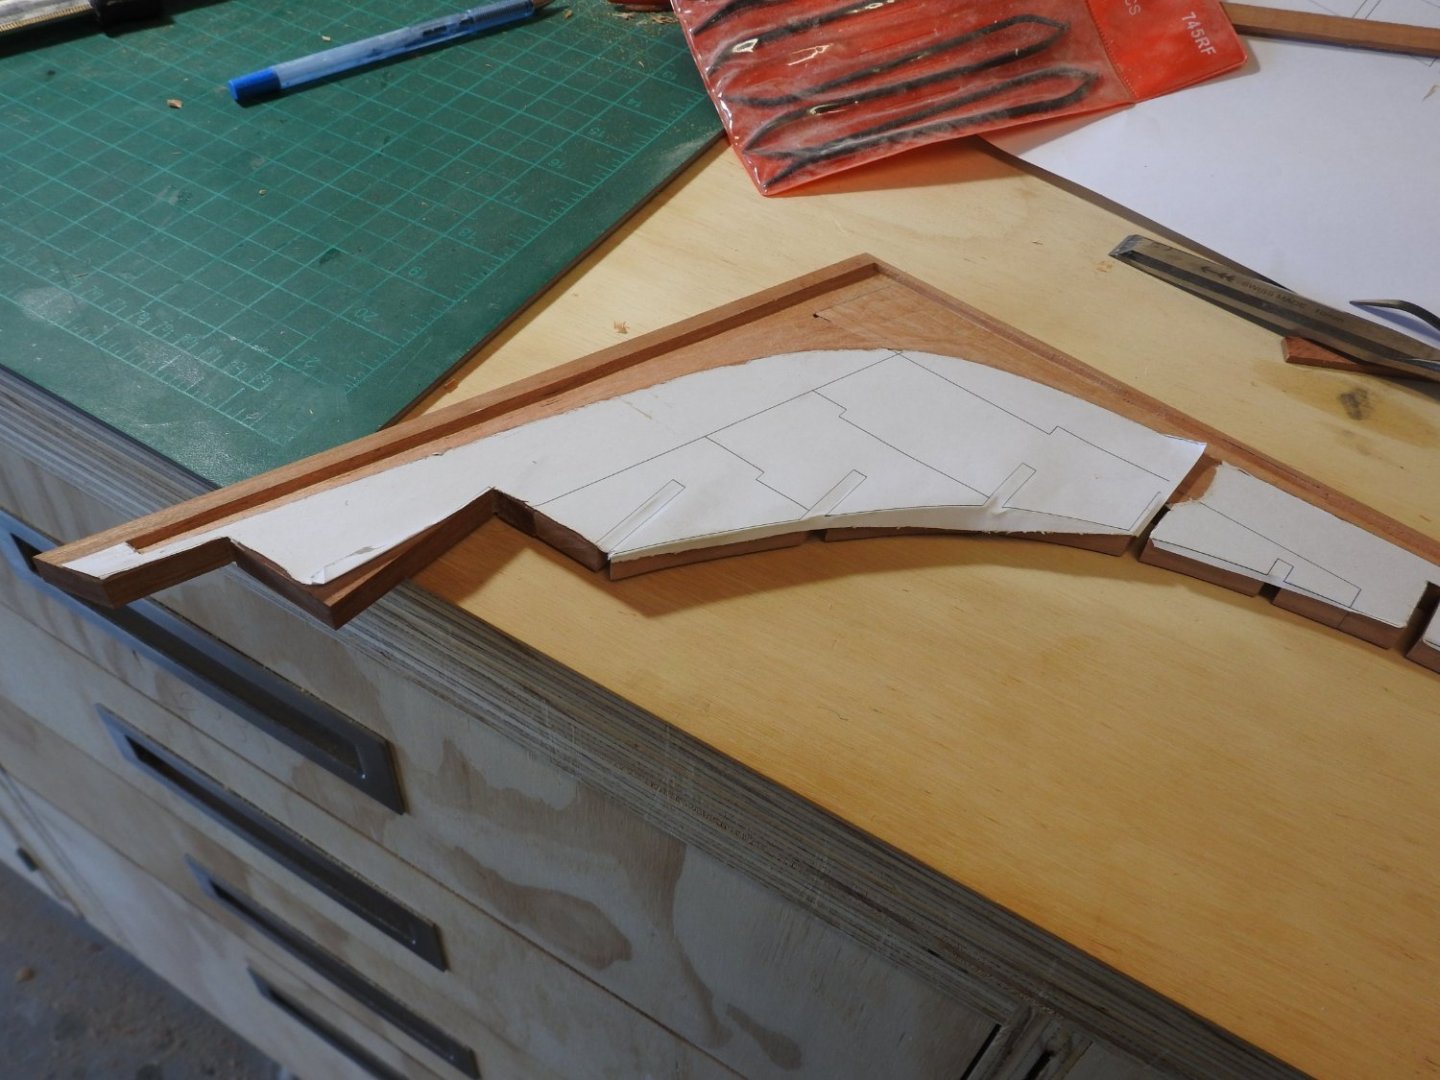
Some updates for the last few days. Tween decks were glued in and held down with 38mm prop jacks...sticks. The model is now structurally complete and I am cutting the details as far as I am going with CnC anyway. Deckhouse carcasses done, these sit in a bottom heavy base with dovetailed corners, on the agenda to cut today. Also the Sheerplate forward can be seen here from 1mm ply, their is a second layer behind which only goes to the deck height , the .5mm aluminium bulwarks are glued to the inside of this with a 4mm overlap representing accurately the ships construction The Sheerplate and how the Bulwark is attached to the inside, the height of the sheerplate above the deck stringer varies along her length and is one of the most important measurements I got as without it nothing would work The knightheads in the ship are built from 2 parts fore and aft of the keel plate extension which comes up the back of the apron and protrudes upwards, the knightheads do not sit in line with the stem or rabbet, though even the official Cutty Sark plans show this, an example of one of the many common mistakes with plans and models. Here the 2 parts are seen, they require a few bevels to be cut and the slots for the fore stay lugs can be seen on the aft half. These are not sitting low enough yet as the bevels on sides are not on and it will not pass behind the sheer plate yet. The aft half only goes down as far as the foredeck like on the ship. The margin planks for the Monkey Poop roof. the foreground are topgallant rails along the side of the ship Cutting the Poop margin planks that become the main rail. Fore deck break margins and topgallant rails. Note the the reduction in width of the topgallant rails from 9 to 6 inchs abaft the heads, these are spares but the actual have the scarf join cut. The foredeck is laminated from 2 layers of.4mm 3 ply over a jig to form the subtle sheer and camber so this requires no forcing to shape, it it housed in heads aft and knightheads forward, this means all the framing under the foredeck and breams can be done with styrene angles


-
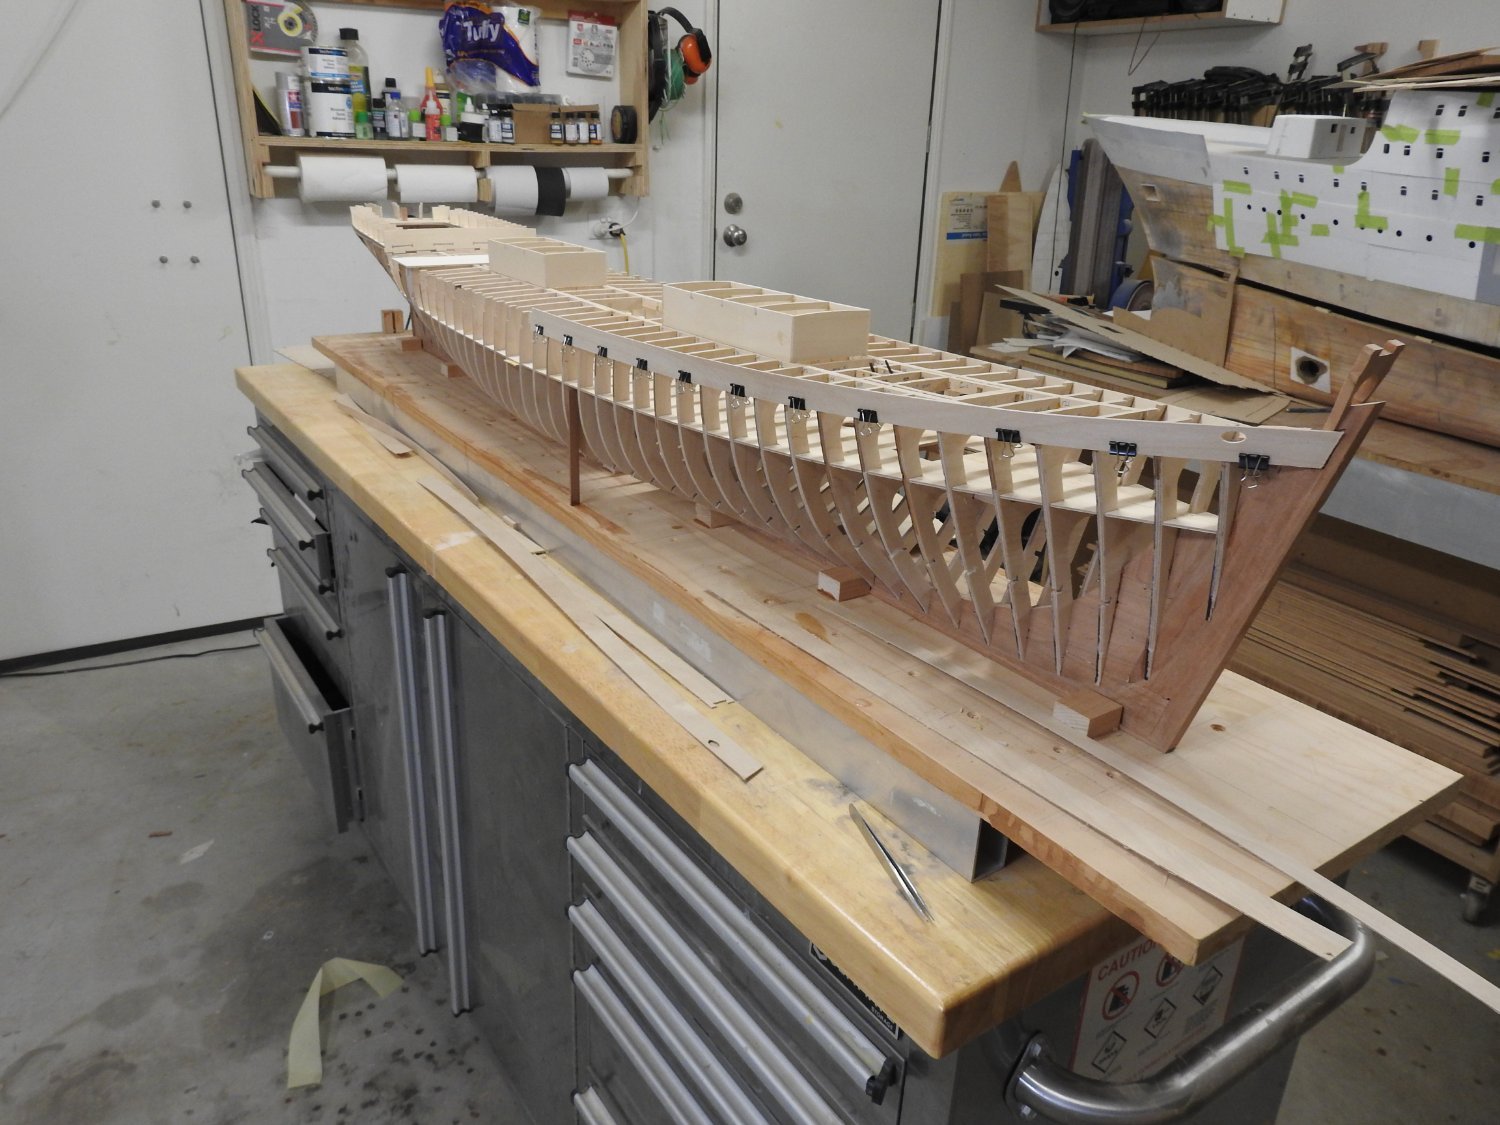
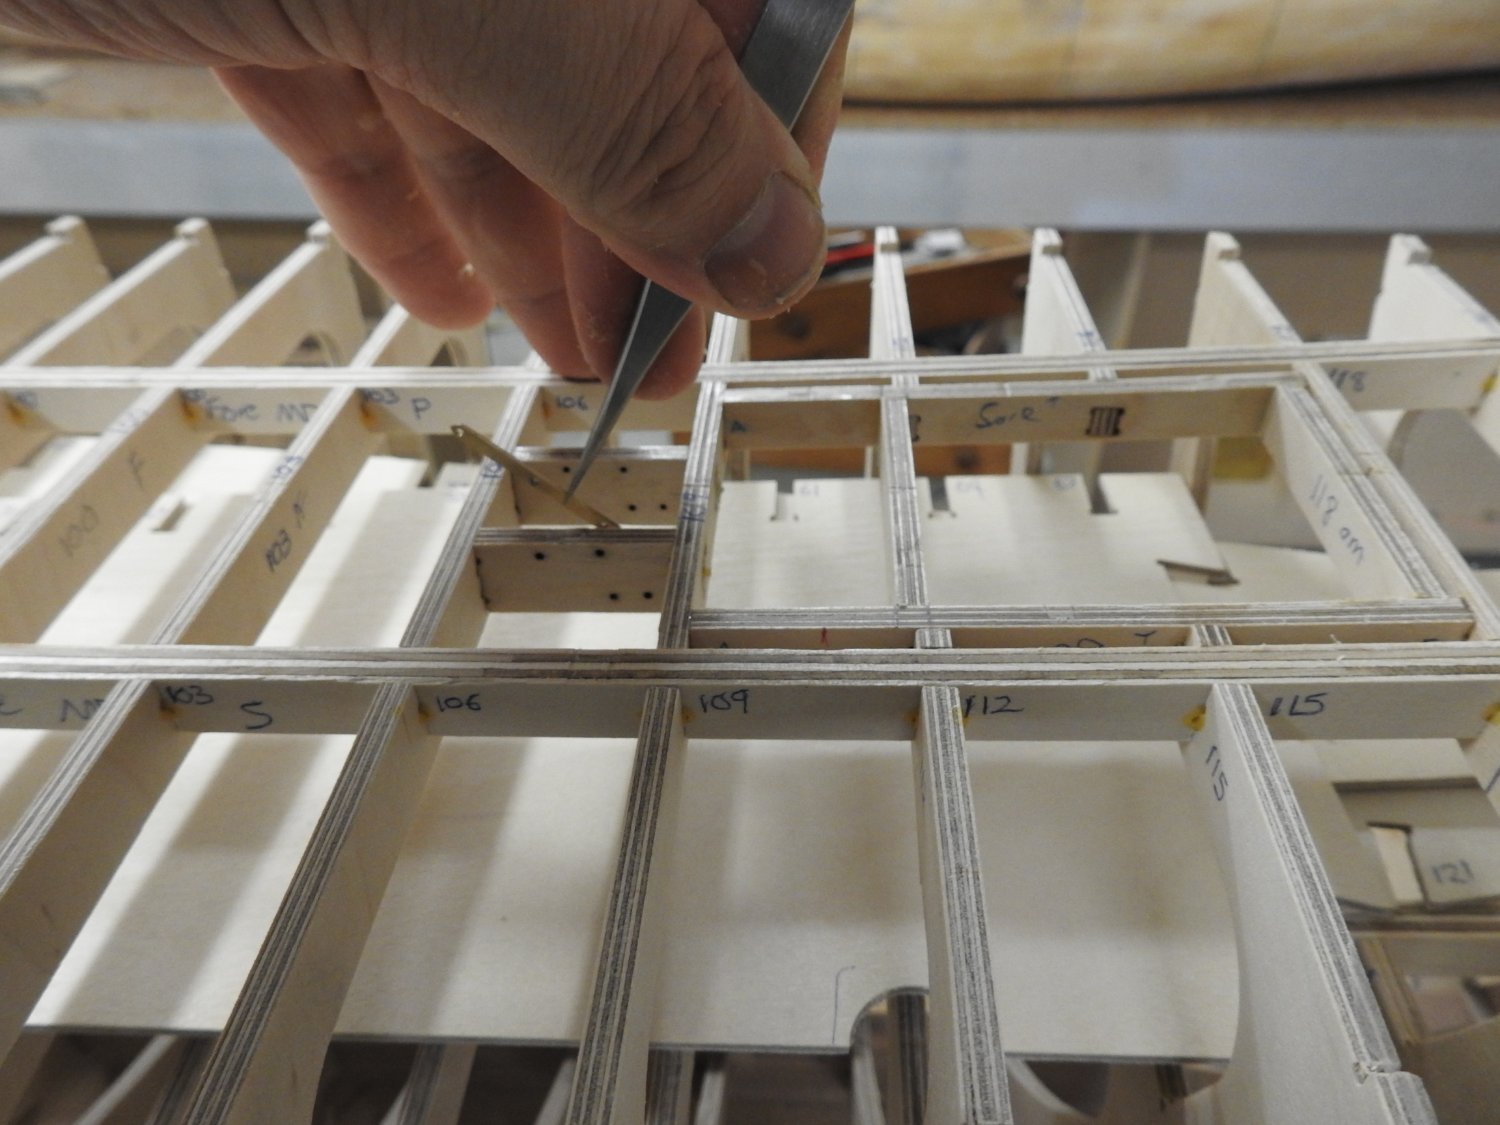
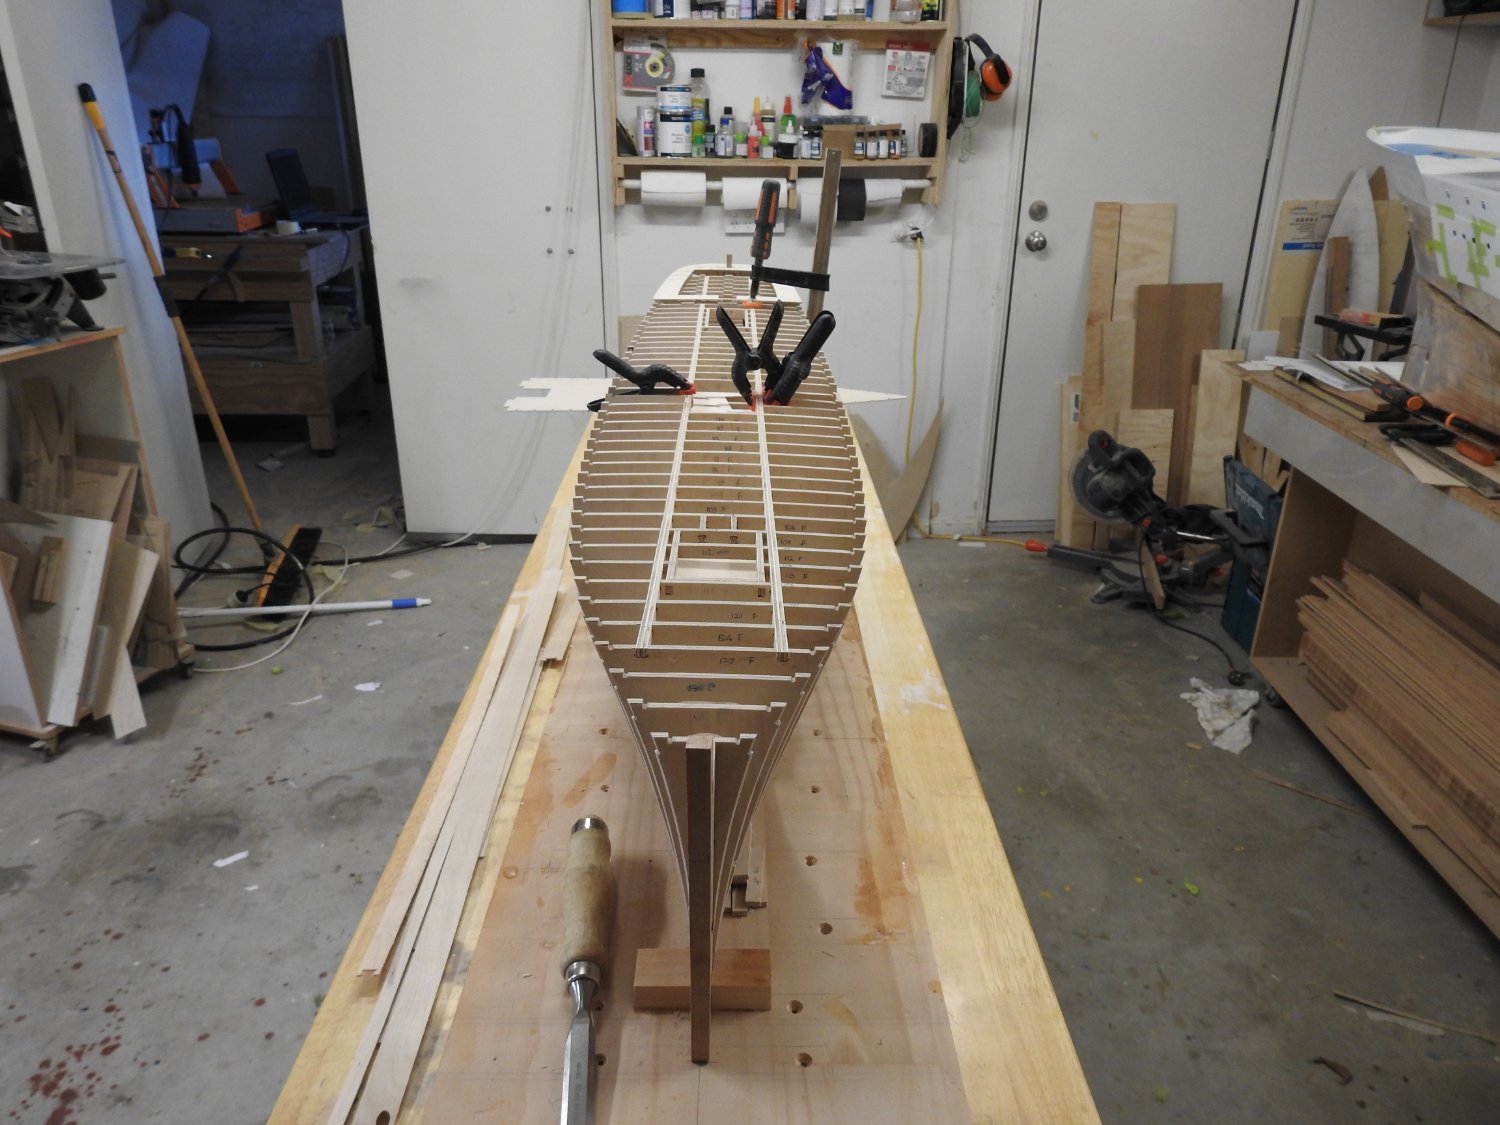
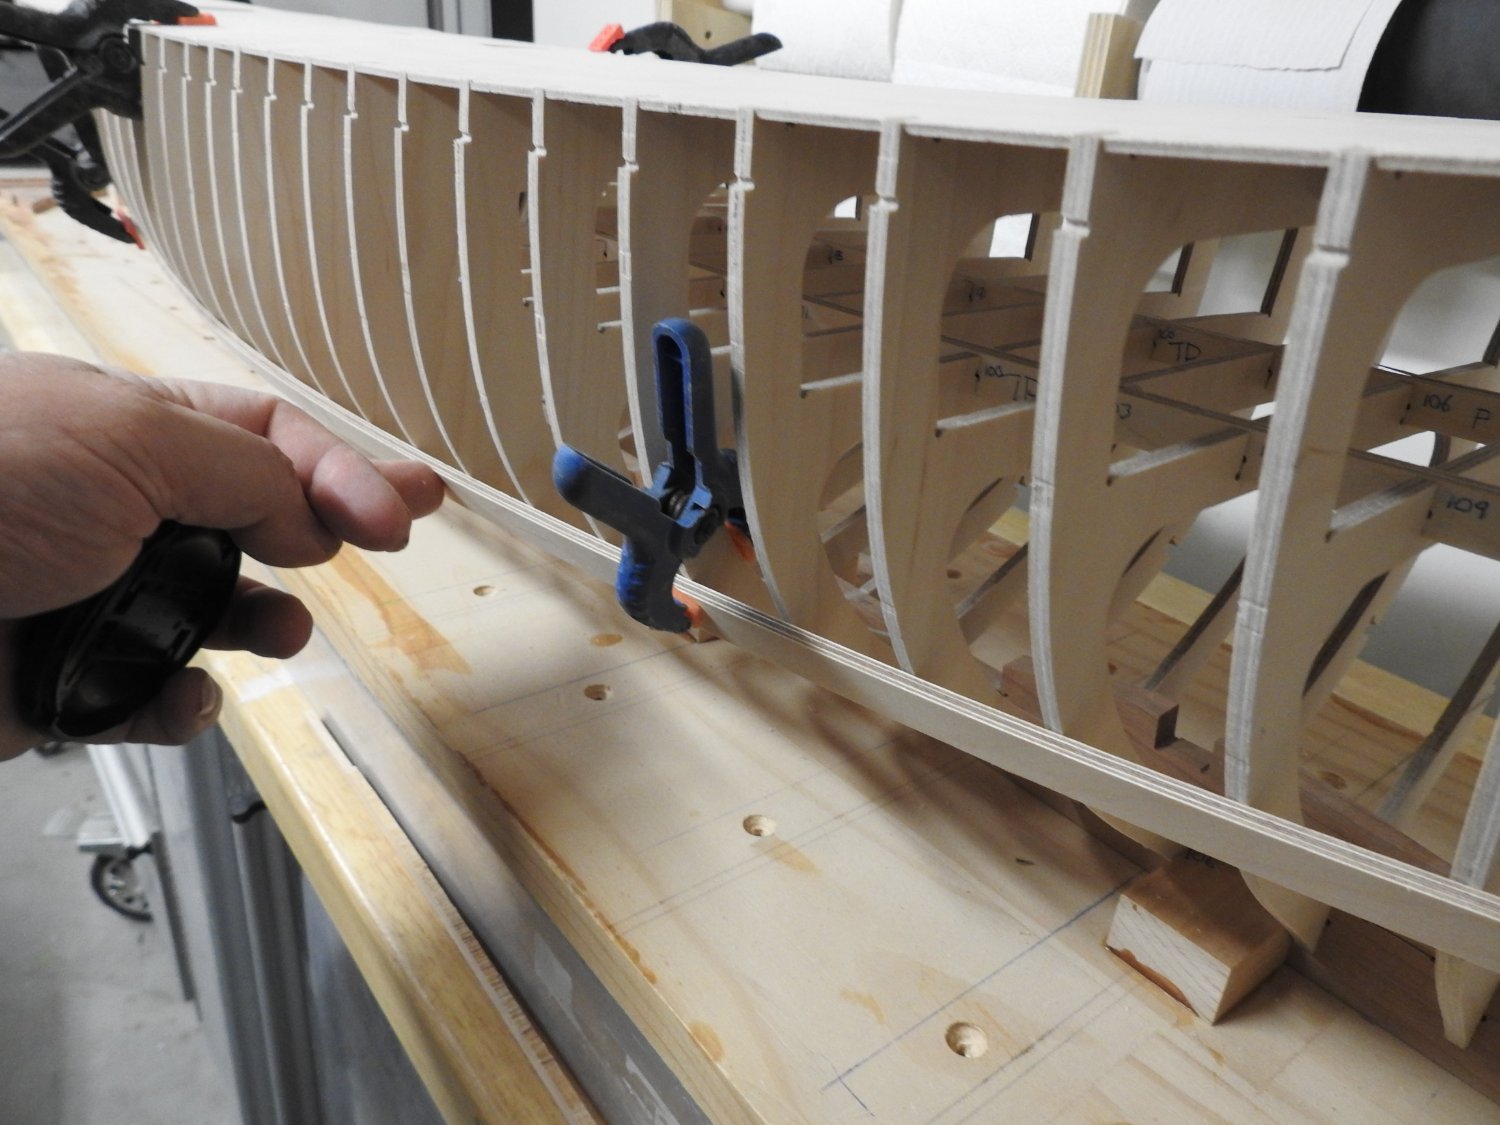
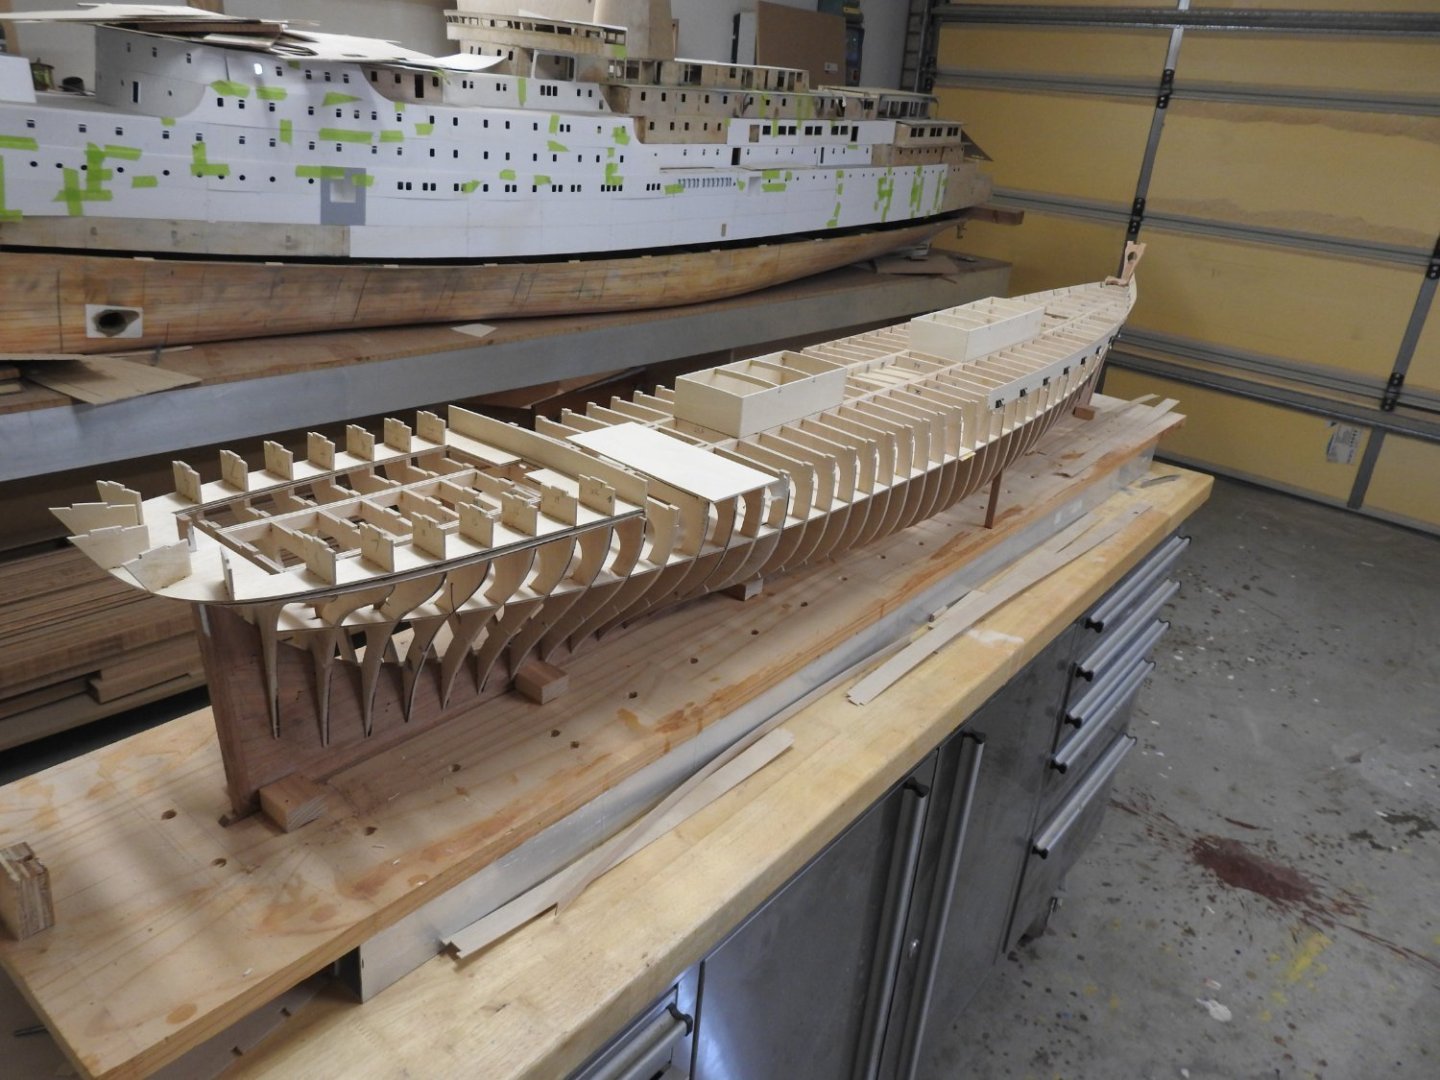
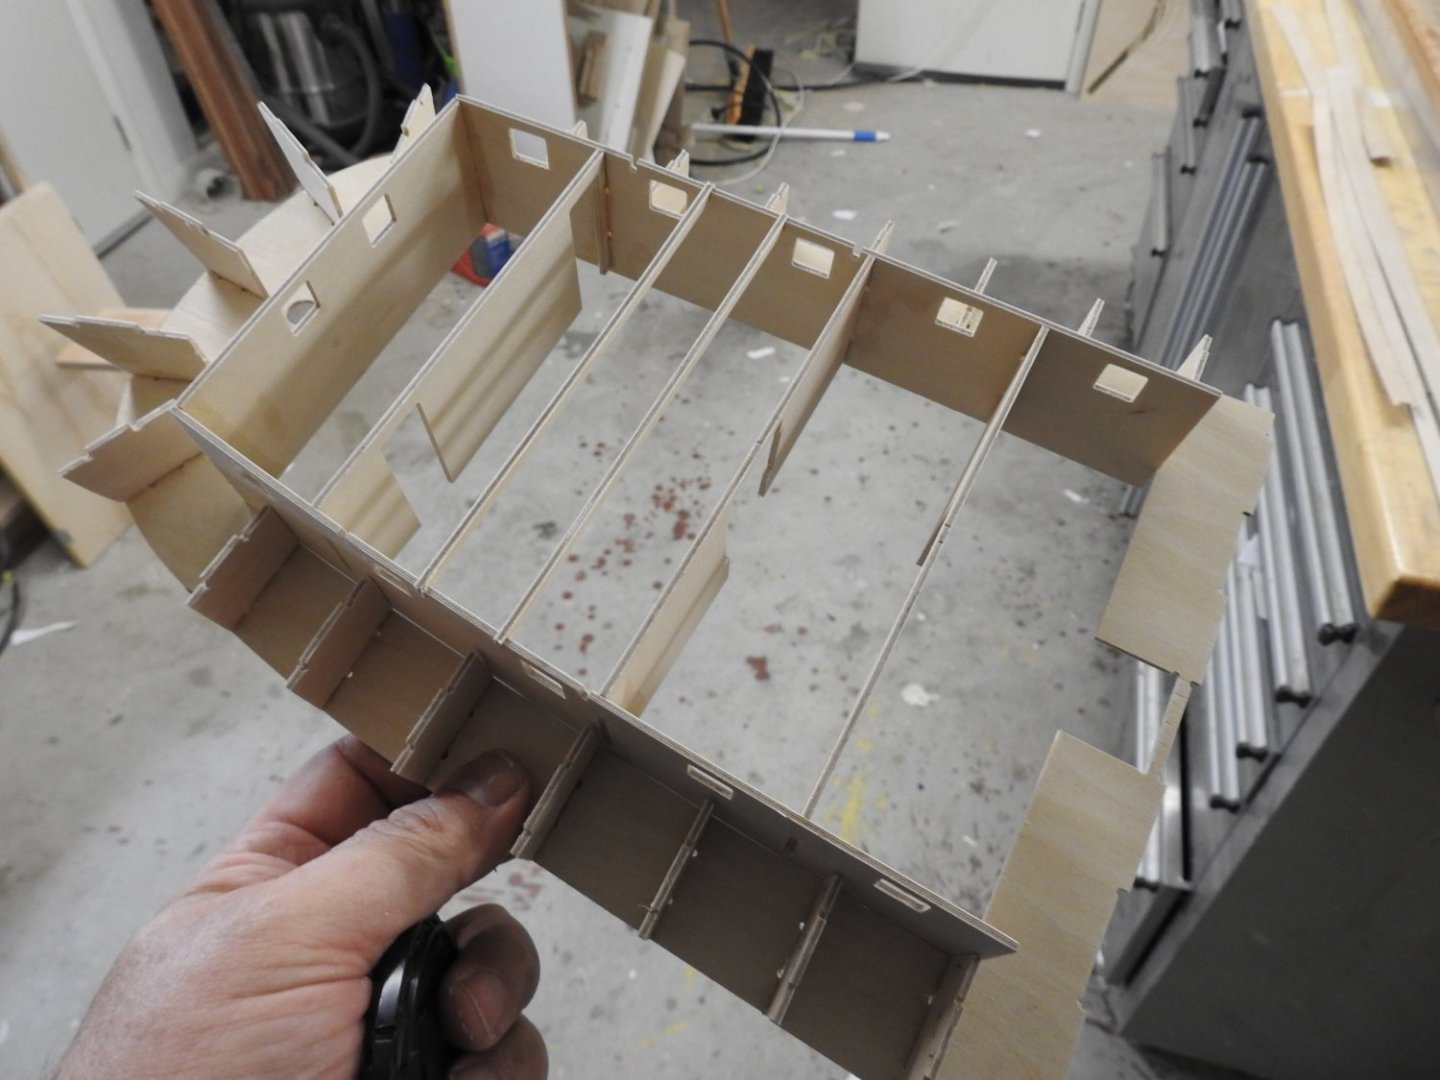
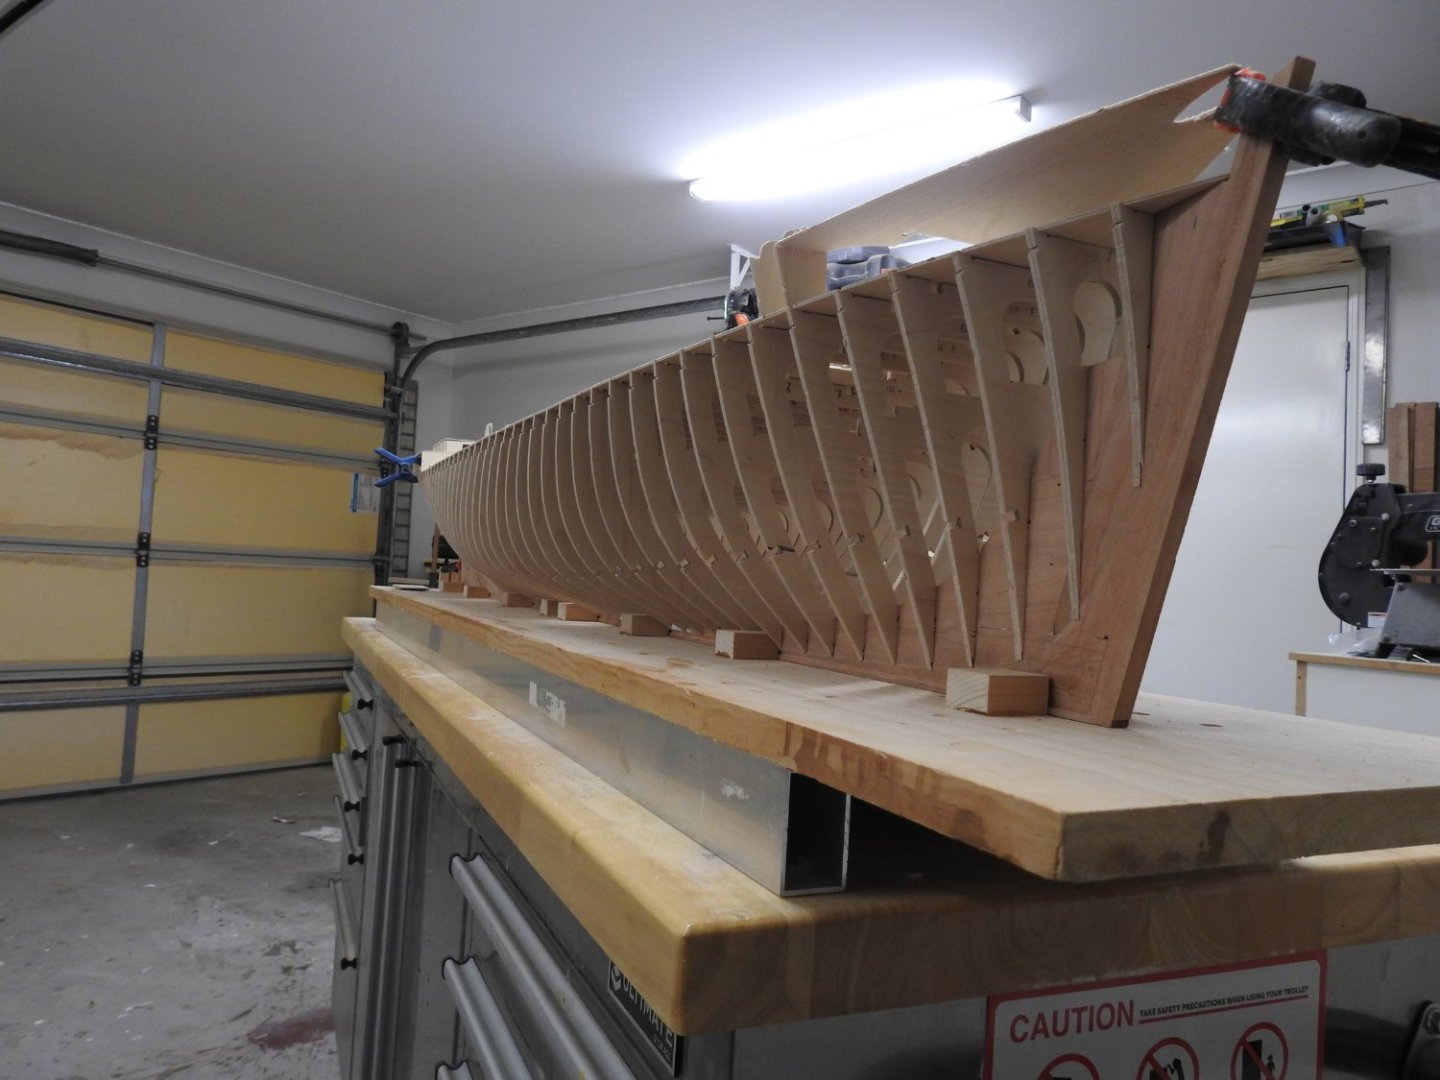
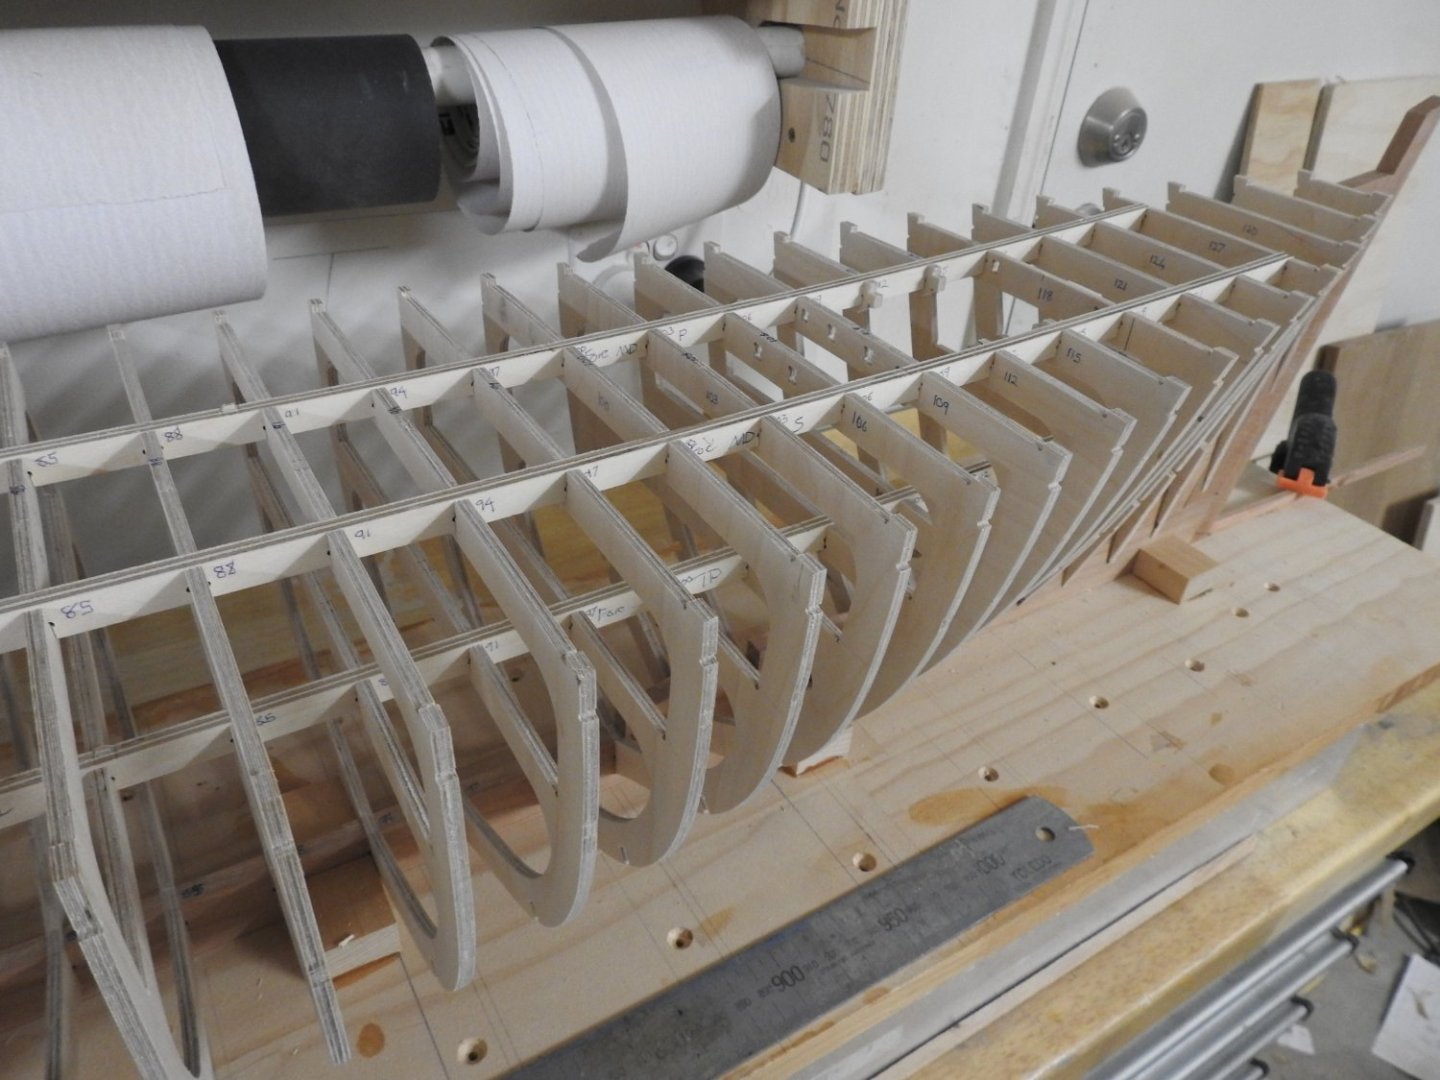
Frame complete The remaining work is to glue the Tween decks into place which are already inside the hull, and can be moved around to expose beams for gluing, which is a relief. Just the decks to glue, sheer plates to fix and bilge stringer to attach, the stem and sternpost will now be braced plumb and a few midship frames braced level before the decks go on. Note the frames are pre bevelled by gluing on patterns and filing, the ends of the fore frames can be seen where it runs out due to being too thin, these will be done when the hull getsa quick sand prior to planking. The Tween decks get held down with 38mm sticks as the Tween deck is parallel to the maindeck The counter perimeter is here seen clearly, and note how it is higher than the deck, this is to align it to the white moulding around the hull as it is higher than the deck, one of the things models normally cheat on for ease of build, even Longridge made this shortcut but it alters the design and look of the ship so this is as close to the ships structure as possible. The mainstay lugs, these get pinned to the carlings to take the strain of the Main stays. The Saloon being assemble inside the counter frames to keep its shape.


-
Not sure if the Pritt stick is the same thing I use but the sticks I use clean up with isopropyl Alcohol, I just spray it on leave it for 5 mins and it peels away, the rest wipes off with some on a paper towel. Flying Fish is right, they are water-based but I find IA easier as it dries quickly that's all. Chemical Entity CAS No. Proportion (to 100%) TWA(mg/m³) STEL(mg/kg) water 7732-18-5 60-65 Not set Not set 2-Pyrrolidinone, 1-ethenyl-, homopolymer 9003-39-8 20-25 Not set Not set 1,2,3-Propanetriol 1,2-Propanediol 56-81-5 57-55-6 3-7 3-7 10 Not set Octadecanoic acid, sodium salt Benzoic acid, 4-hydroxy-, butyl ester, sodium salt: Human health tier II assessment 822-16-2 3-7 Not set 1400 Not set 36457-20-2 0-0.06 Not set
-
While here I should update Tween deck dry fitted forward, deciding If I need to plank the seen parts. The photos always make it look bigger than it is, remember the frames are only 4mm 8 ply, note the tweezes and masking tape roll. Counter construction, as you can see the developed shape of the bulwark is pretty accurate, just taped in Stern rabbet

-
So does yours, still feeding off yours because I know what it will look like., lets see who gets planked first.....
-
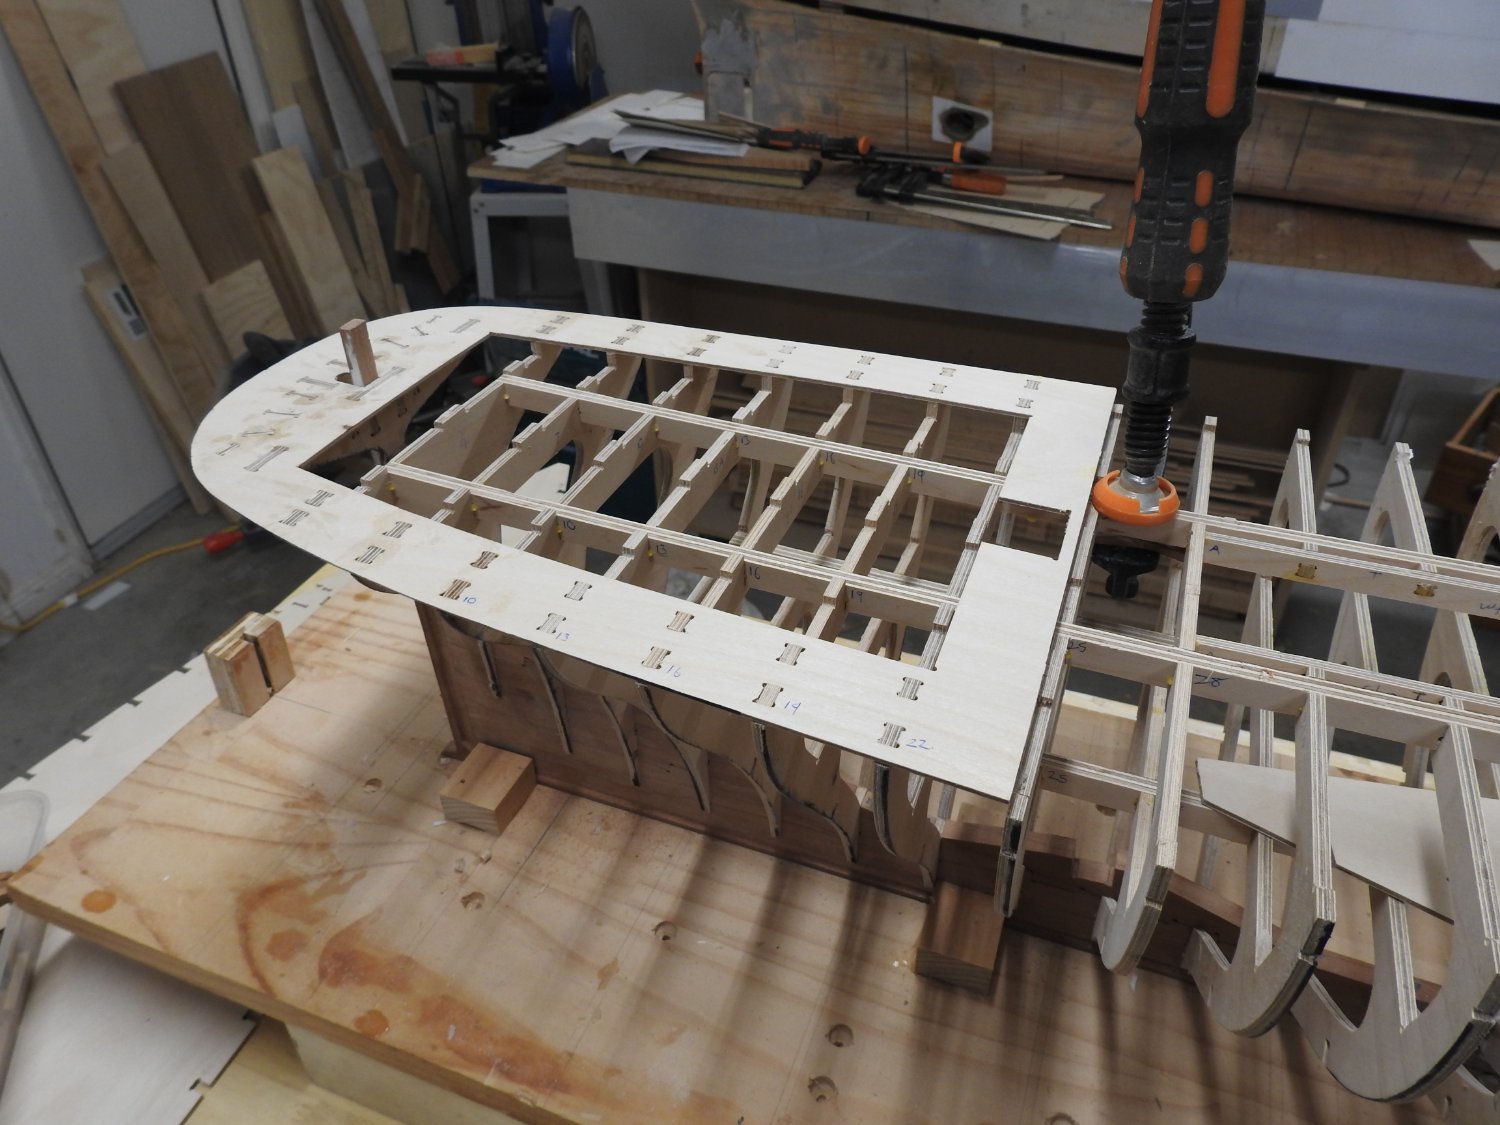
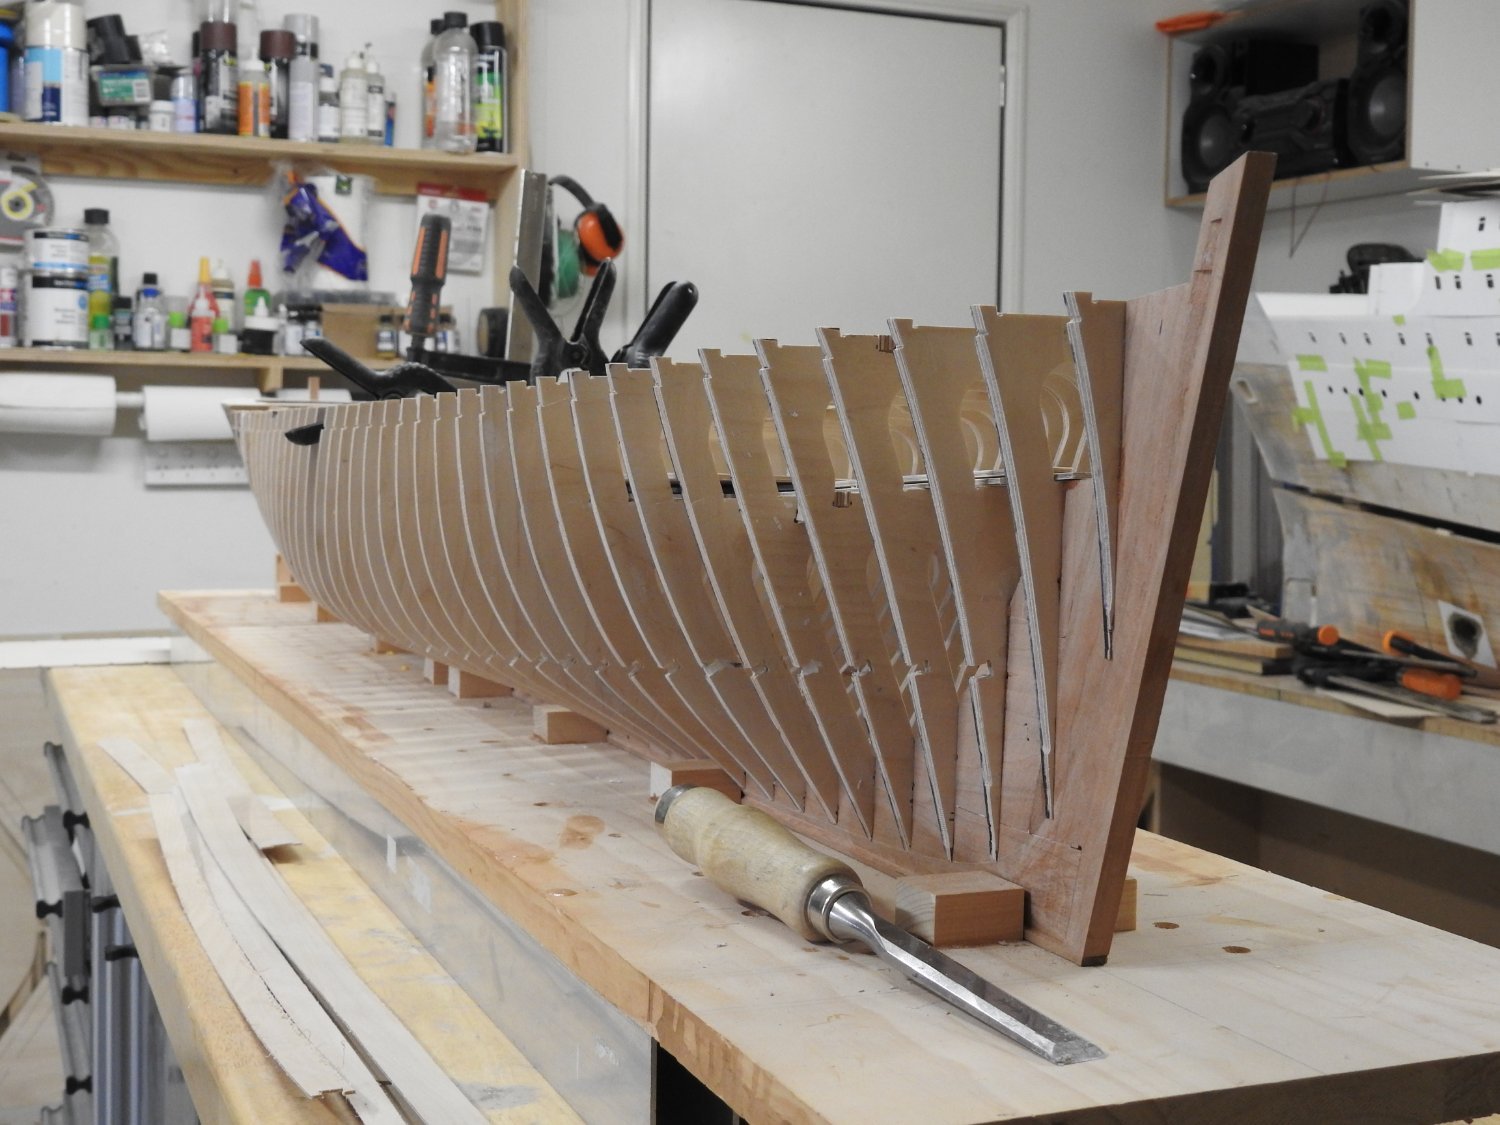
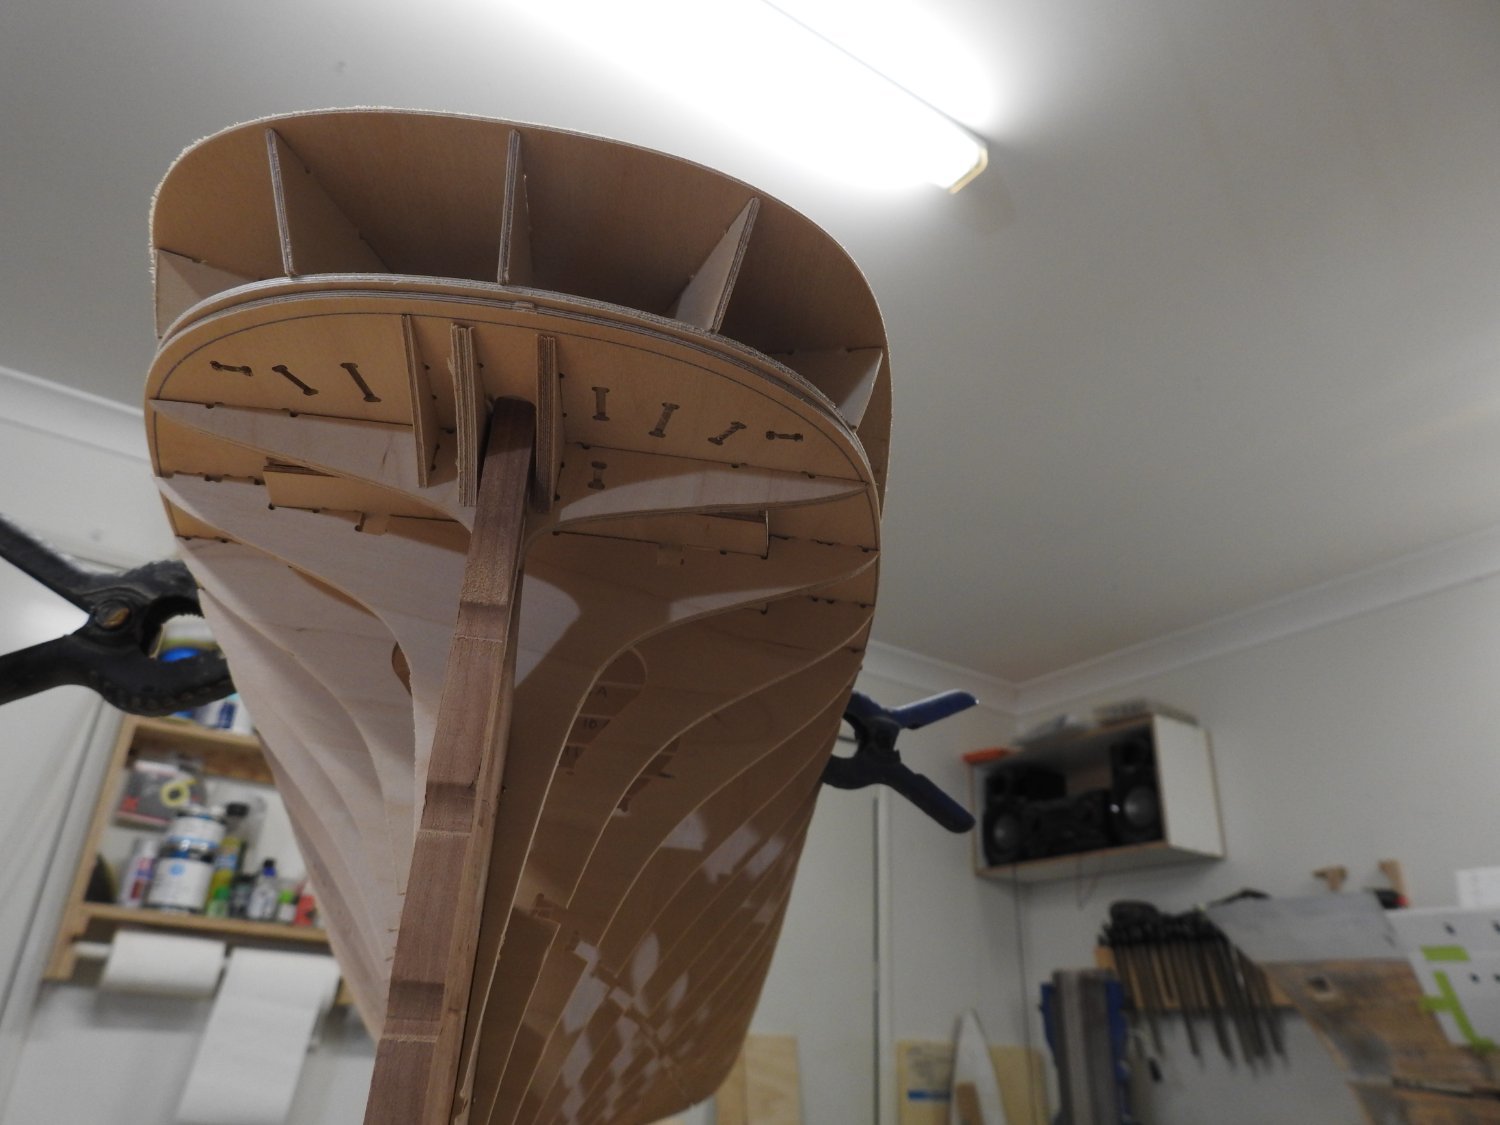
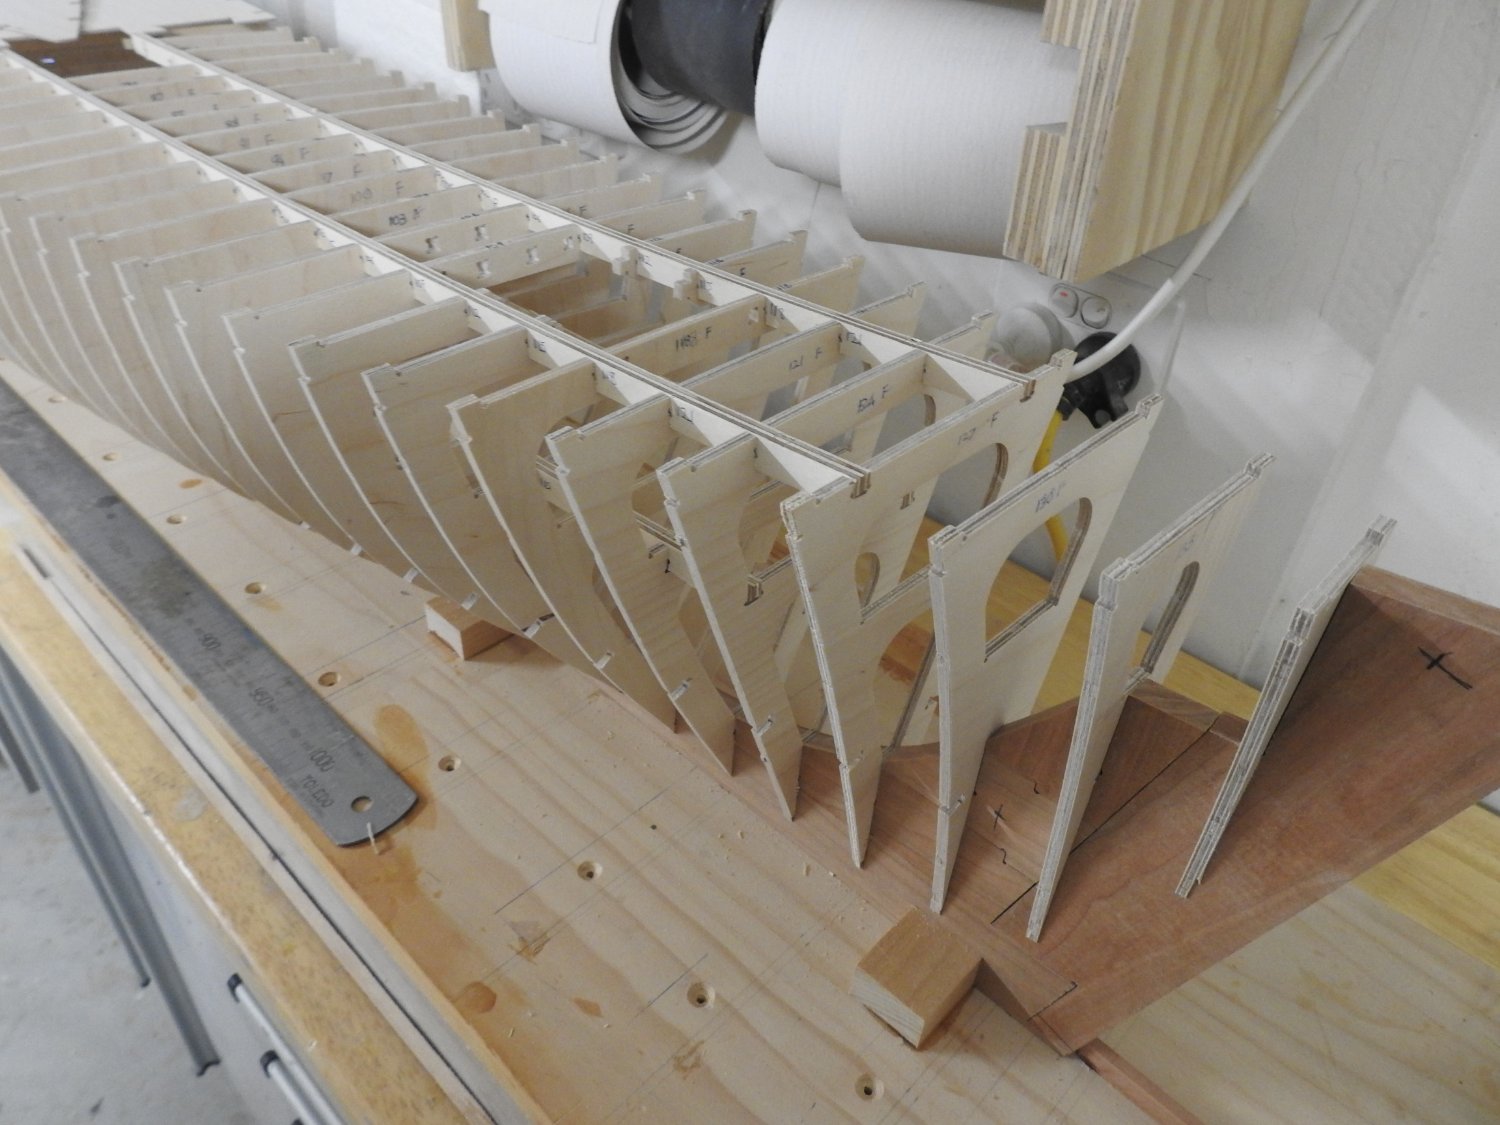
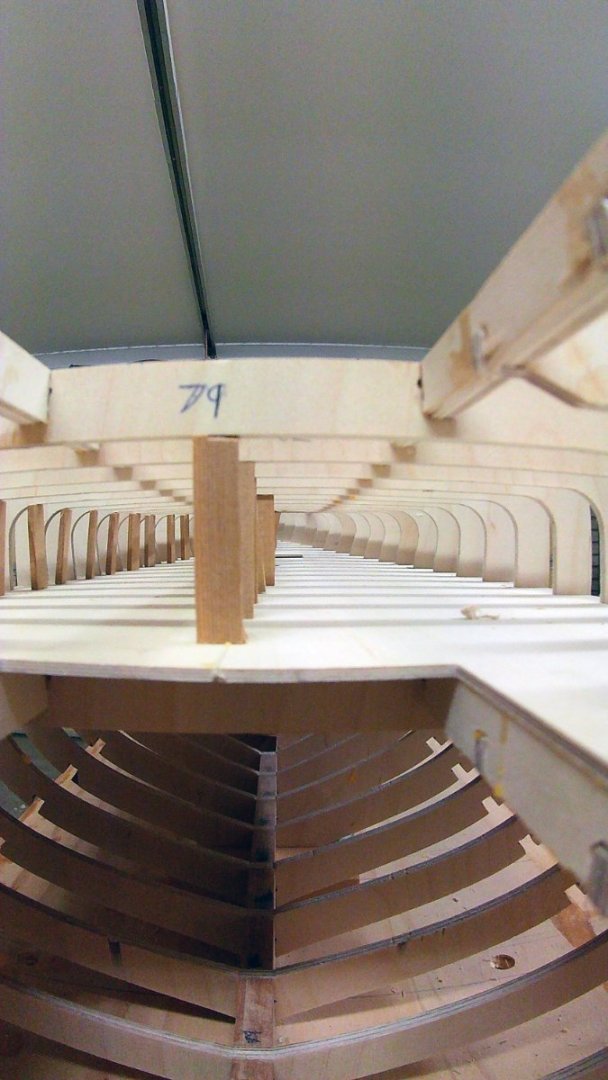
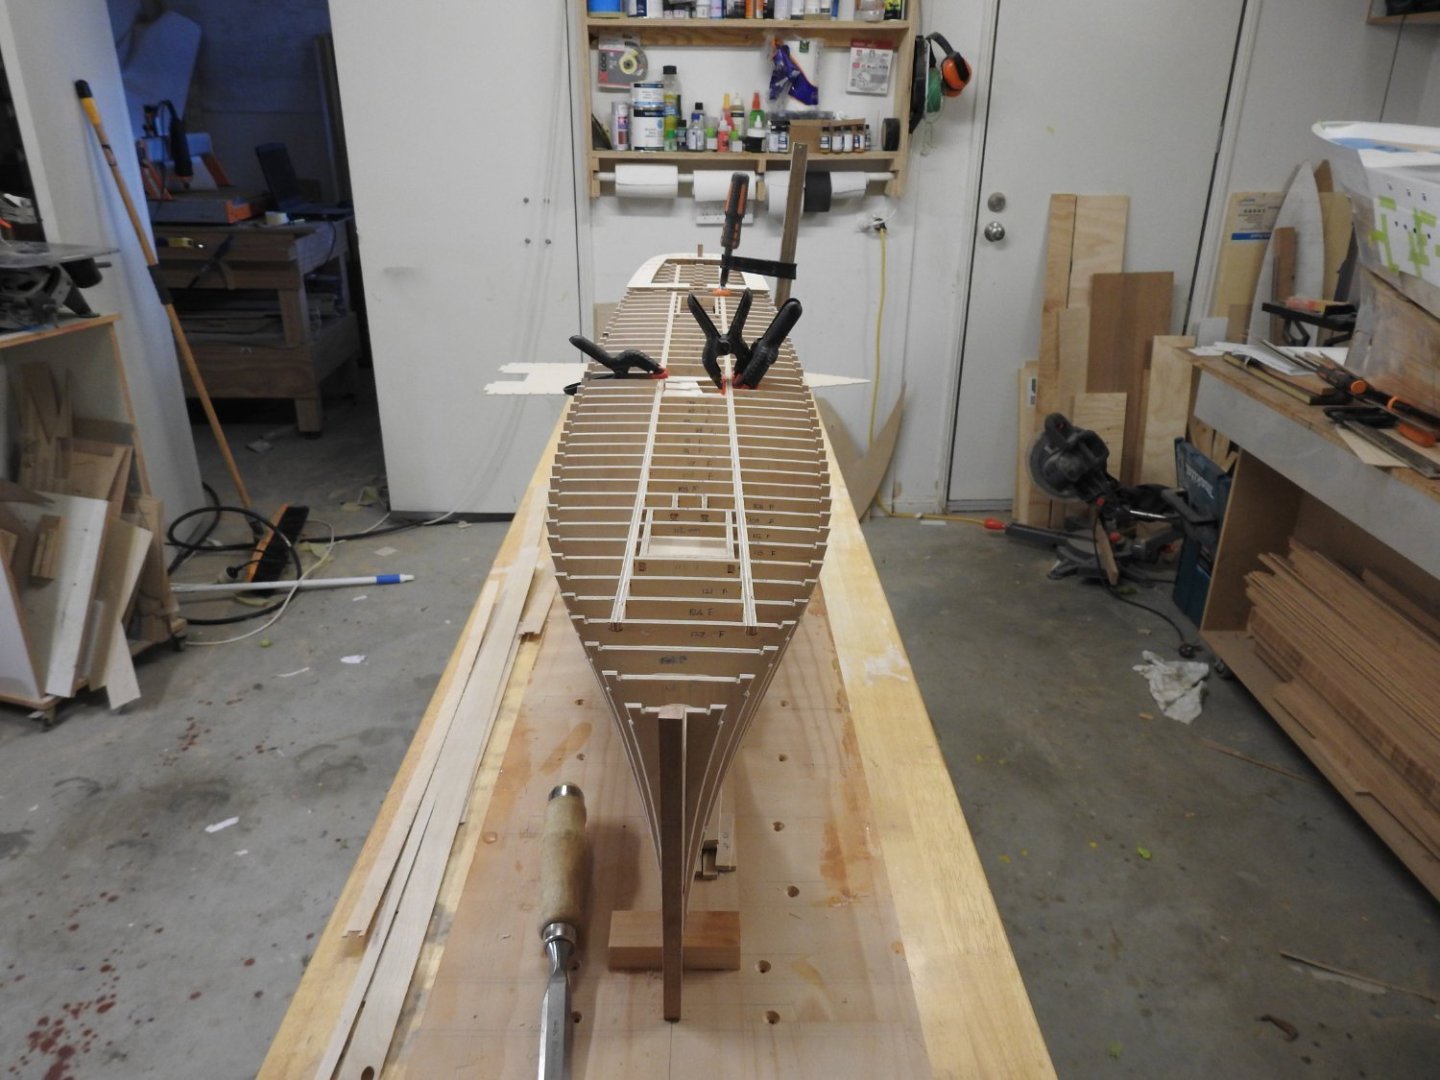
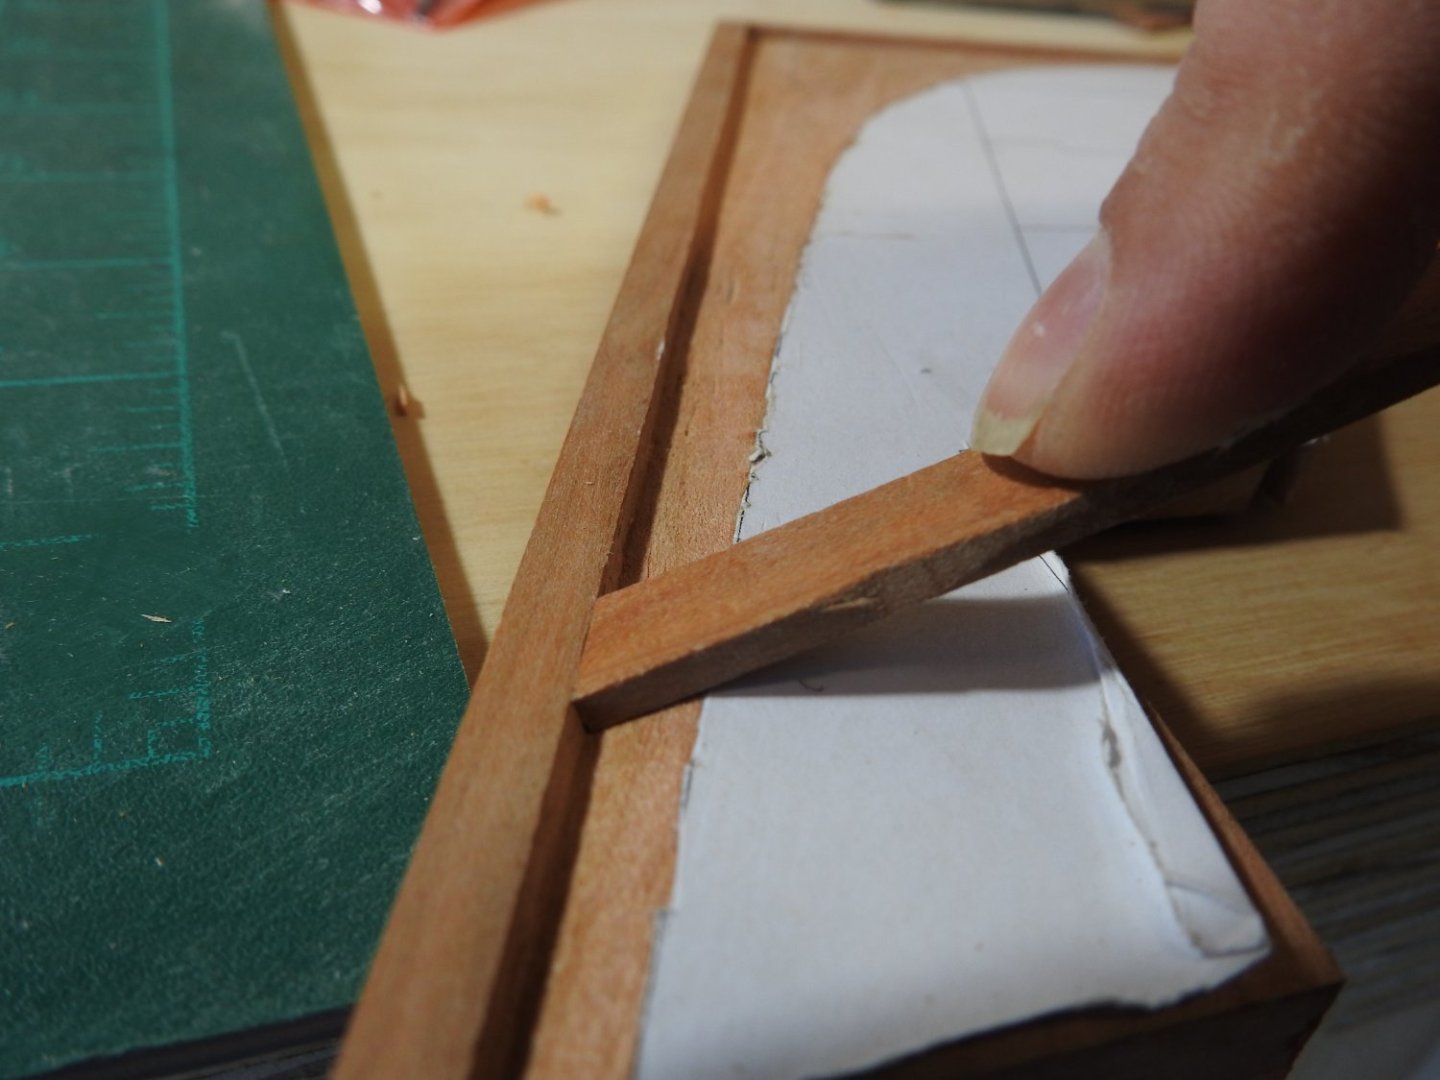
I can finally show a dry fitted frame almost complete. Of course this is all just leaning together right now and parts are missing but its the bulk. The Foredeck housed into the heads, the forward end gets housed into slots in the knightheads, leaving the underside clear for styrene framing as per the actual ship. Note this is a standin Fore deck the actual is laminated over a form from 2 layers of .4mm ply to make sure the camber and fore and aft sheer is in the deck and needs no force to shape. Details of the Poop construction. The slots for the counter cant frames. The variance in steps in the counter parts are deliberate and its designed to forma definite seat for the counter bulwark ply sheet so it sits in a rebate. A nice shot of the frames and Rabbet . The deck joints came up well, they hold themselves together dry..


-
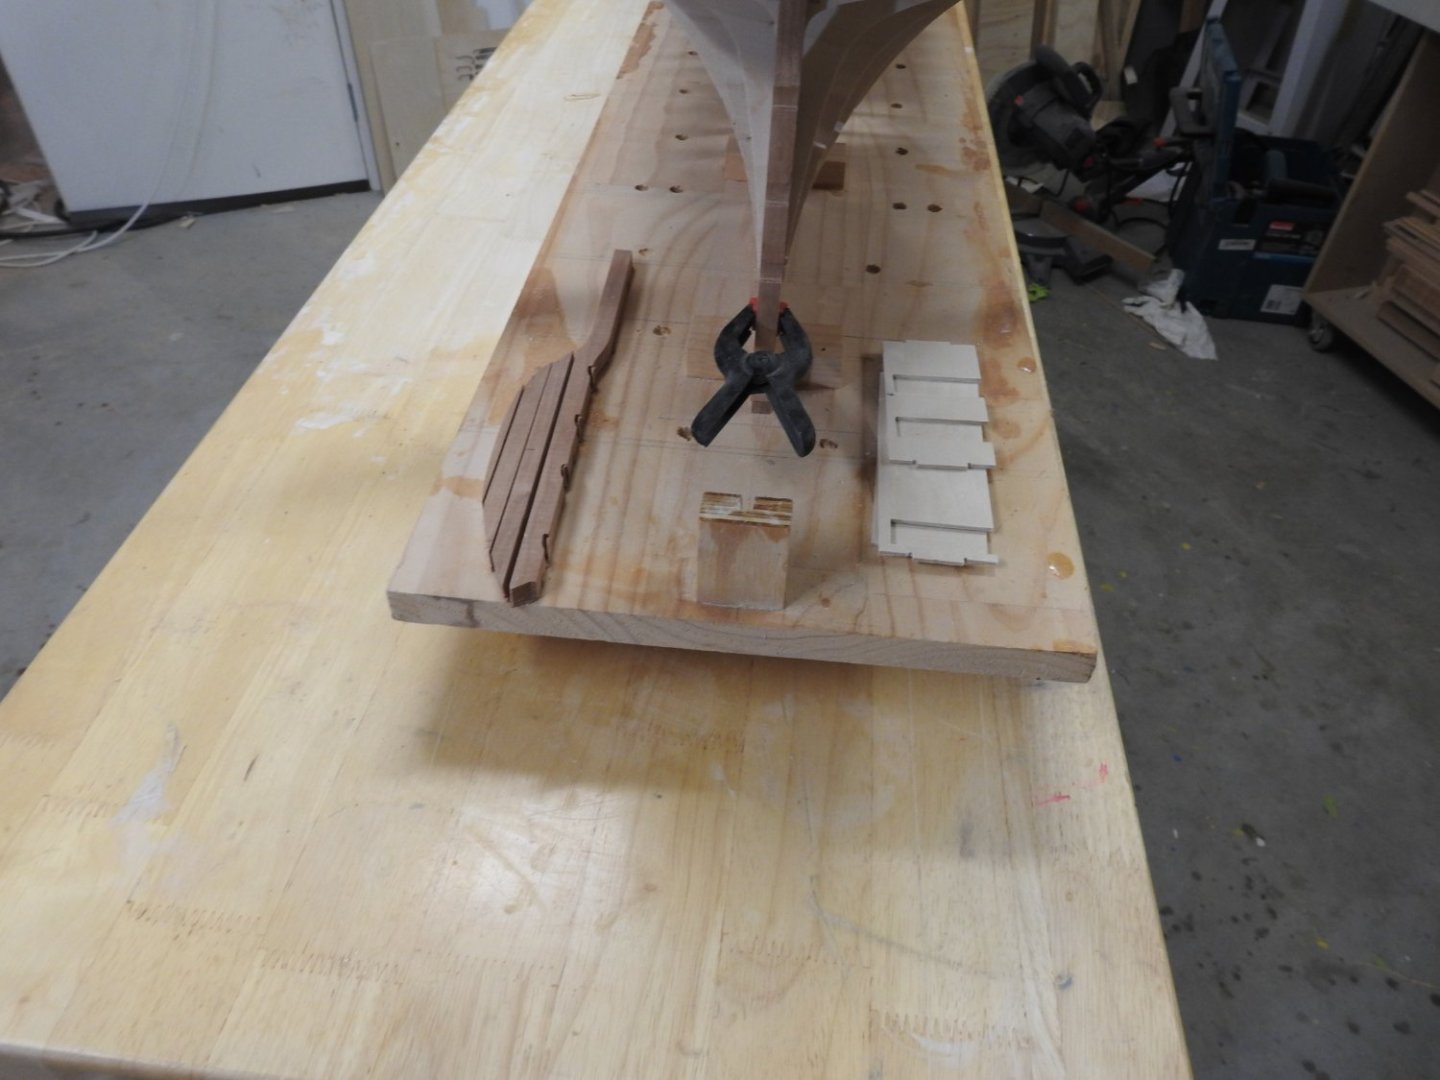
I had The build moved to here as I doubt I will get more than a handful of orders , currently 3 not including the client this is being designed for. Anyway I have started to hand carve the rabbet for the 3mm cherry planking. Riflers are being used to remove the high spots

-
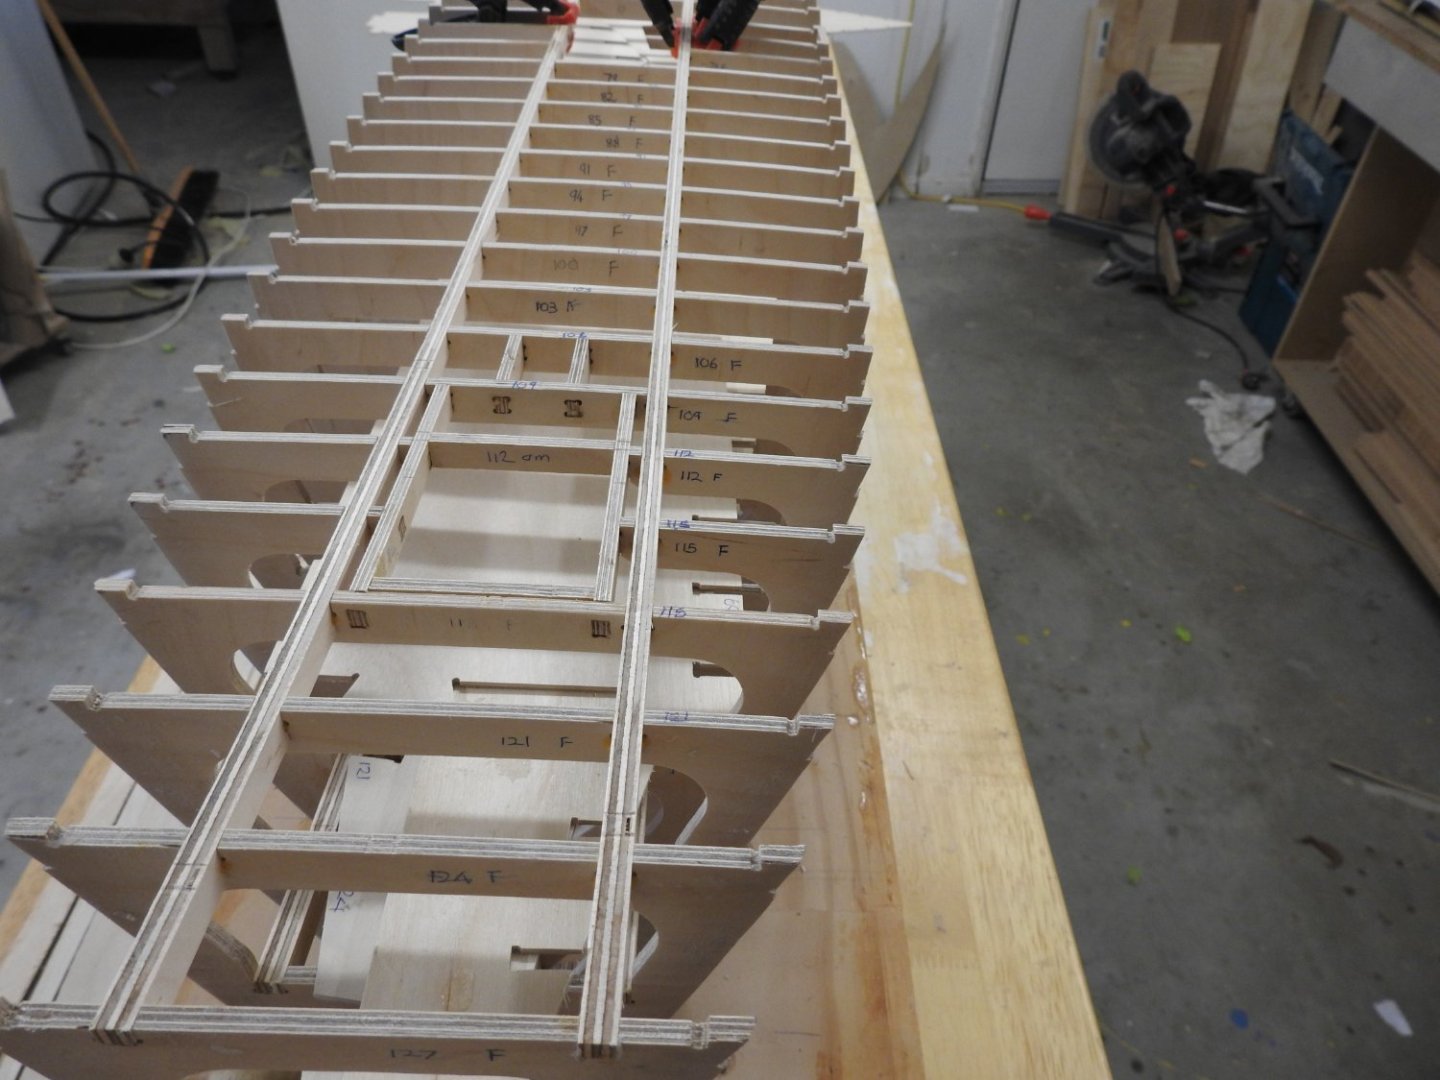
Fairness of frames Slots for break of poop


-
About that what I have planned for the Foredeck is to laminate the deck substrate with its camber out of 2 or 3 layers of .4mm ply over a form the after end is housed in the heads and its forward end in the knightheads and its sides rebated into the bottom of the main rail which becomes the margin plank, therefore the deck is strong and not needing to be supported by frames at all. this means styrene can be used to create the framing seen under. of course the samson posts and pillars will offer support though but the planking can be reduced in thickness to take up the thickness of the substrate. 2-3 layers of this .4mm 3 ply is very very stiff when laminated with epoxy, its surprising A couple more shots of the forward longitudinals fitted, keep in mind they need to be clamped down flush with beams. Also the hatch coamings are not fitted yet, I have not cut them yet.

-
Thank you, The aft end is even nicer, hopefully by the end of next weekend, Christmas day I will be able to carve the rabbet and assemble the frames for good.