HOLIDAY DONATION DRIVE - SUPPORT MSW - DO YOUR PART TO KEEP THIS GREAT FORUM GOING! (Only 20 donations so far - C'mon guys!)
×

Richard Dunn
-
Posts
529 -
Joined
-
Last visited
Content Type
Profiles
Forums
Gallery
Events
Everything posted by Richard Dunn
-
 less than week to go, any requests?
 -
Please see question above this last picture.
- 454 replies
-
- 1
-

-
- Union Steamship Company
- Stepcraft 840
- (and 3 more)
-
Well the hull and superstructure will be clad this weekend and I will be staring to think about the final outer platers made from .5mm ply. I want to ask the scratch builders watching this about their experience with painting, you have seen the size of this model but in paint regards I don't think that its a huge difference to how you approach it, I want to ask you guys for your opinions on how I should proceed with painting, things like do it in stages, paint plates before fitting or paint small areas as I go, things like that, Its something I don't have a lot of experience with so want to have a discussion about it to see what people think. I know how to use guns and airbrushes, that's not the issue but the actual process and flow is what I would like your experiances of.
- 454 replies
-
- 3
-
-
- Union Steamship Company
- Stepcraft 840
- (and 3 more)
-
The upper portion is only screwed on so it can be removed and bottom carved separately, not only that the running gear can be installed far more easily. The upper would be crushed by weight of bottom, its quite lightweight to help with stability
- 454 replies
-
- 4
-
-
- Union Steamship Company
- Stepcraft 840
- (and 3 more)
-
Thanks John Actually I have been fortunate to find some on Airtasker and our Jims mowing guy is awesome so Its more a case of do we go QBCC route and wait or just do it on our own at this point.
- 454 replies
-
- 2
-
-
- Union Steamship Company
- Stepcraft 840
- (and 3 more)
-
Been a slow week as we were getting some major landscaping done ready for Xmas and the 4 day job turned into 5 and even though they have only done 25% of the work they have torn up the contract and walked off leaving us with a heck of a mess. Today is first day back into it to take my mind off it. Starting to clad hull


- 454 replies
-
- 10
-
-

-
- Union Steamship Company
- Stepcraft 840
- (and 3 more)
-
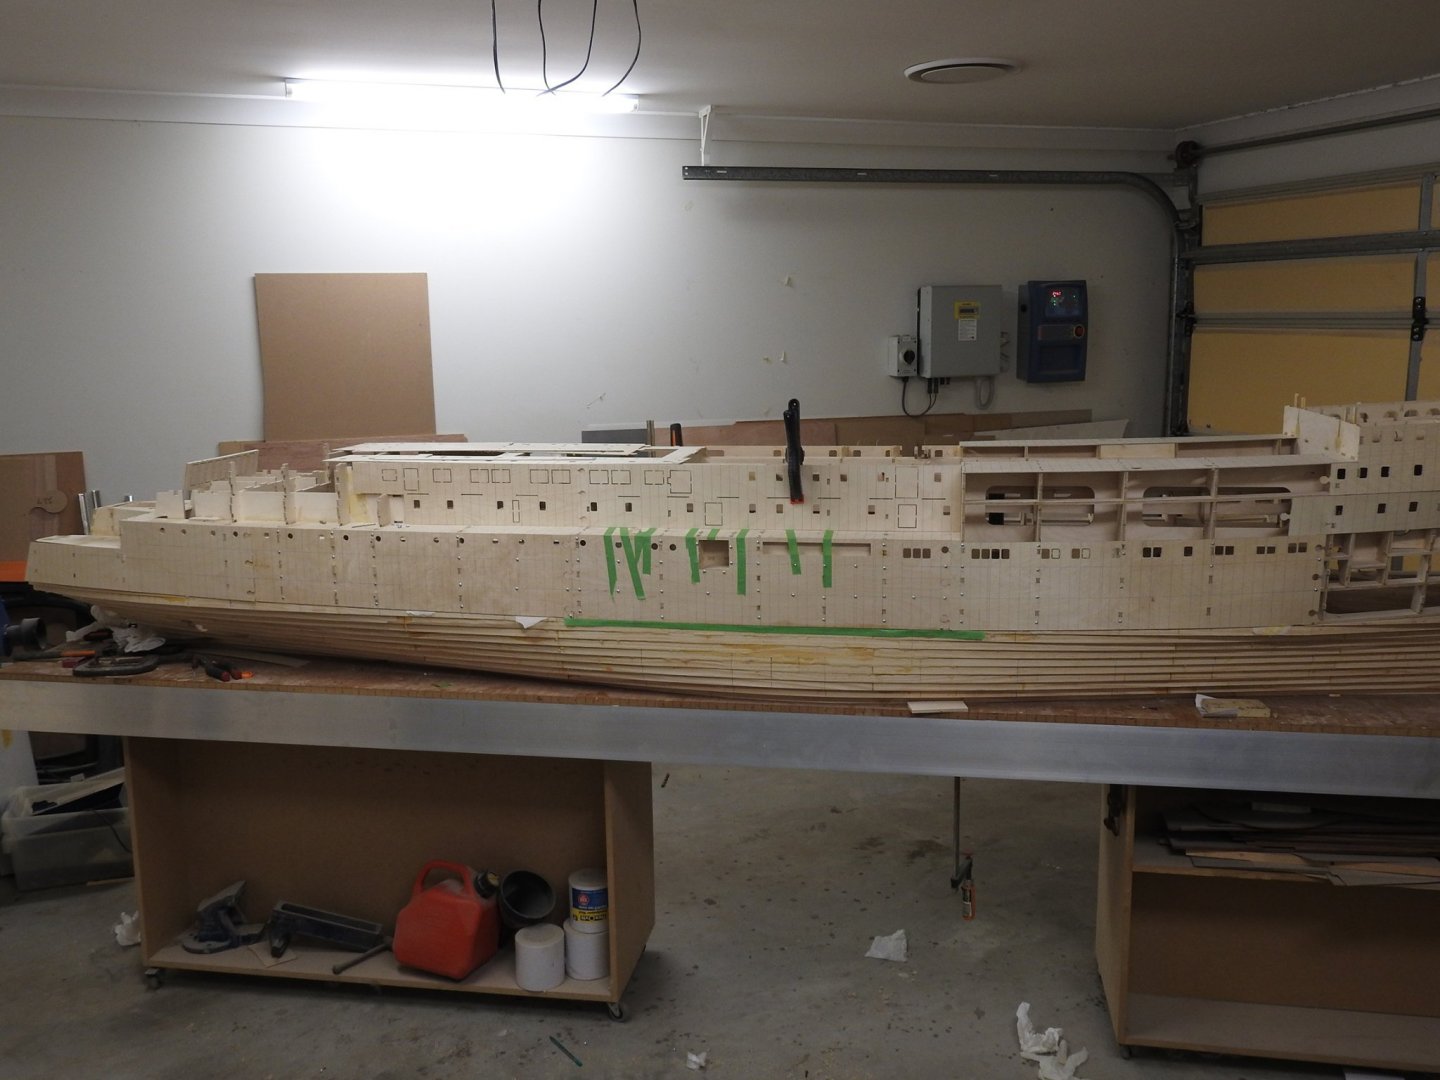
I found a webpage I have not seen before and found the answer on the balls. Going astern....I doubt they did this every time though surely
- 454 replies
-
- 3
-
-

-
- Union Steamship Company
- Stepcraft 840
- (and 3 more)
-
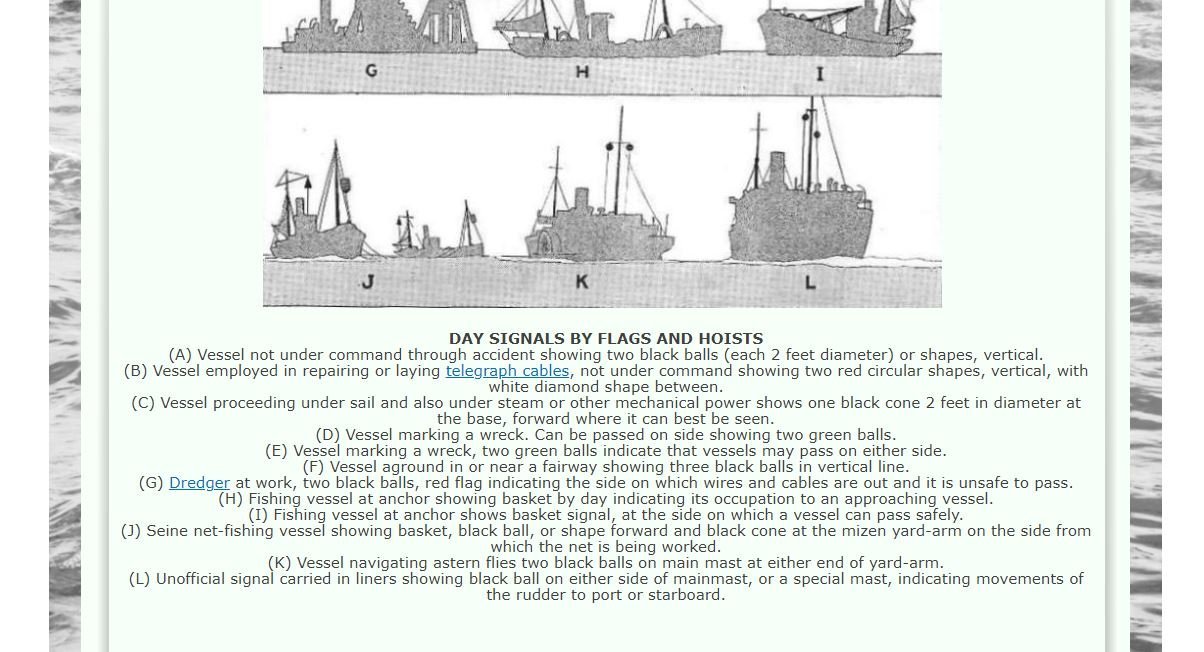
I can't show full image or copyright reasons but she is either slowly going aft or forward out of berth, no wake to see or thruster wash either, no anchor cables down. I have hundreds of images of her and only one with these up, I have many of her at berth and at anchor and none have balls... weird hey. They are always present on ship and sitting at base of mast between the splayed blades at base of mast ready to hoist.
- 454 replies
-
- 2
-
-
- Union Steamship Company
- Stepcraft 840
- (and 3 more)
-
I will be more specific about what I want to know. Where does rotation start?
- 454 replies
-
- 2
-
-
- Union Steamship Company
- Stepcraft 840
- (and 3 more)
-
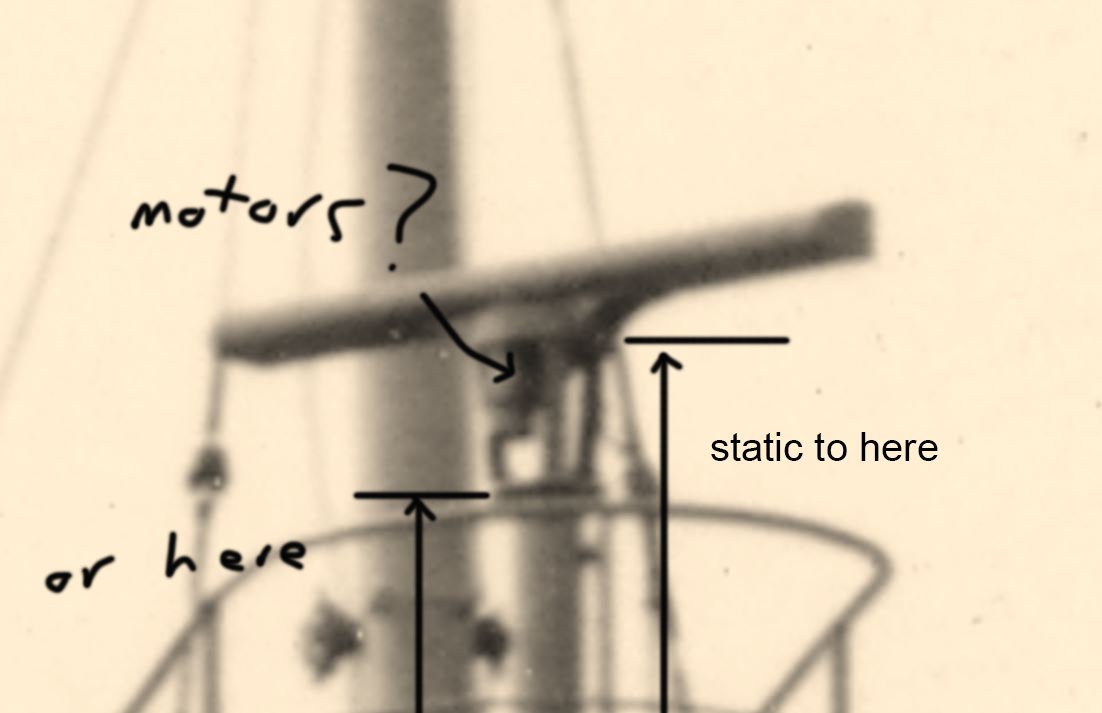
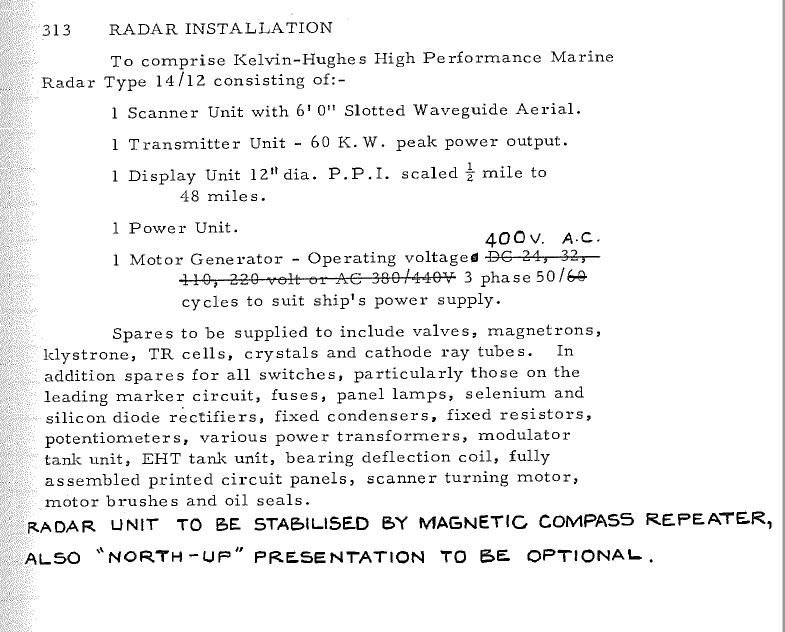
Thanks John Right I need some assistance for a couple of things. What do these balls on aft mast signal and when are they raised up the mast?. Secondly is anyone able to identify this radar? and if so have any clearer pics of it. Most radar equipment was Kelvin Hughes. the scanner I only have serial number 14064 Specification gives this.


- 454 replies
-
- 1
-
-
- Union Steamship Company
- Stepcraft 840
- (and 3 more)
-
Yes Brisbane time
-
OK now as you know times are going to be the hard part as we have Australia America and UK to consider and it seems the best time for all to meet is Australian time 6.00am this will be 8.00 pm in London and 3pm in Washington DC i reckon 4 hours is about the time and want to do it as soon as i knock off work so thinking the 23rd Dec Let me know how that works people. I start work at 6.00 am anyway so not a huge stretch
-
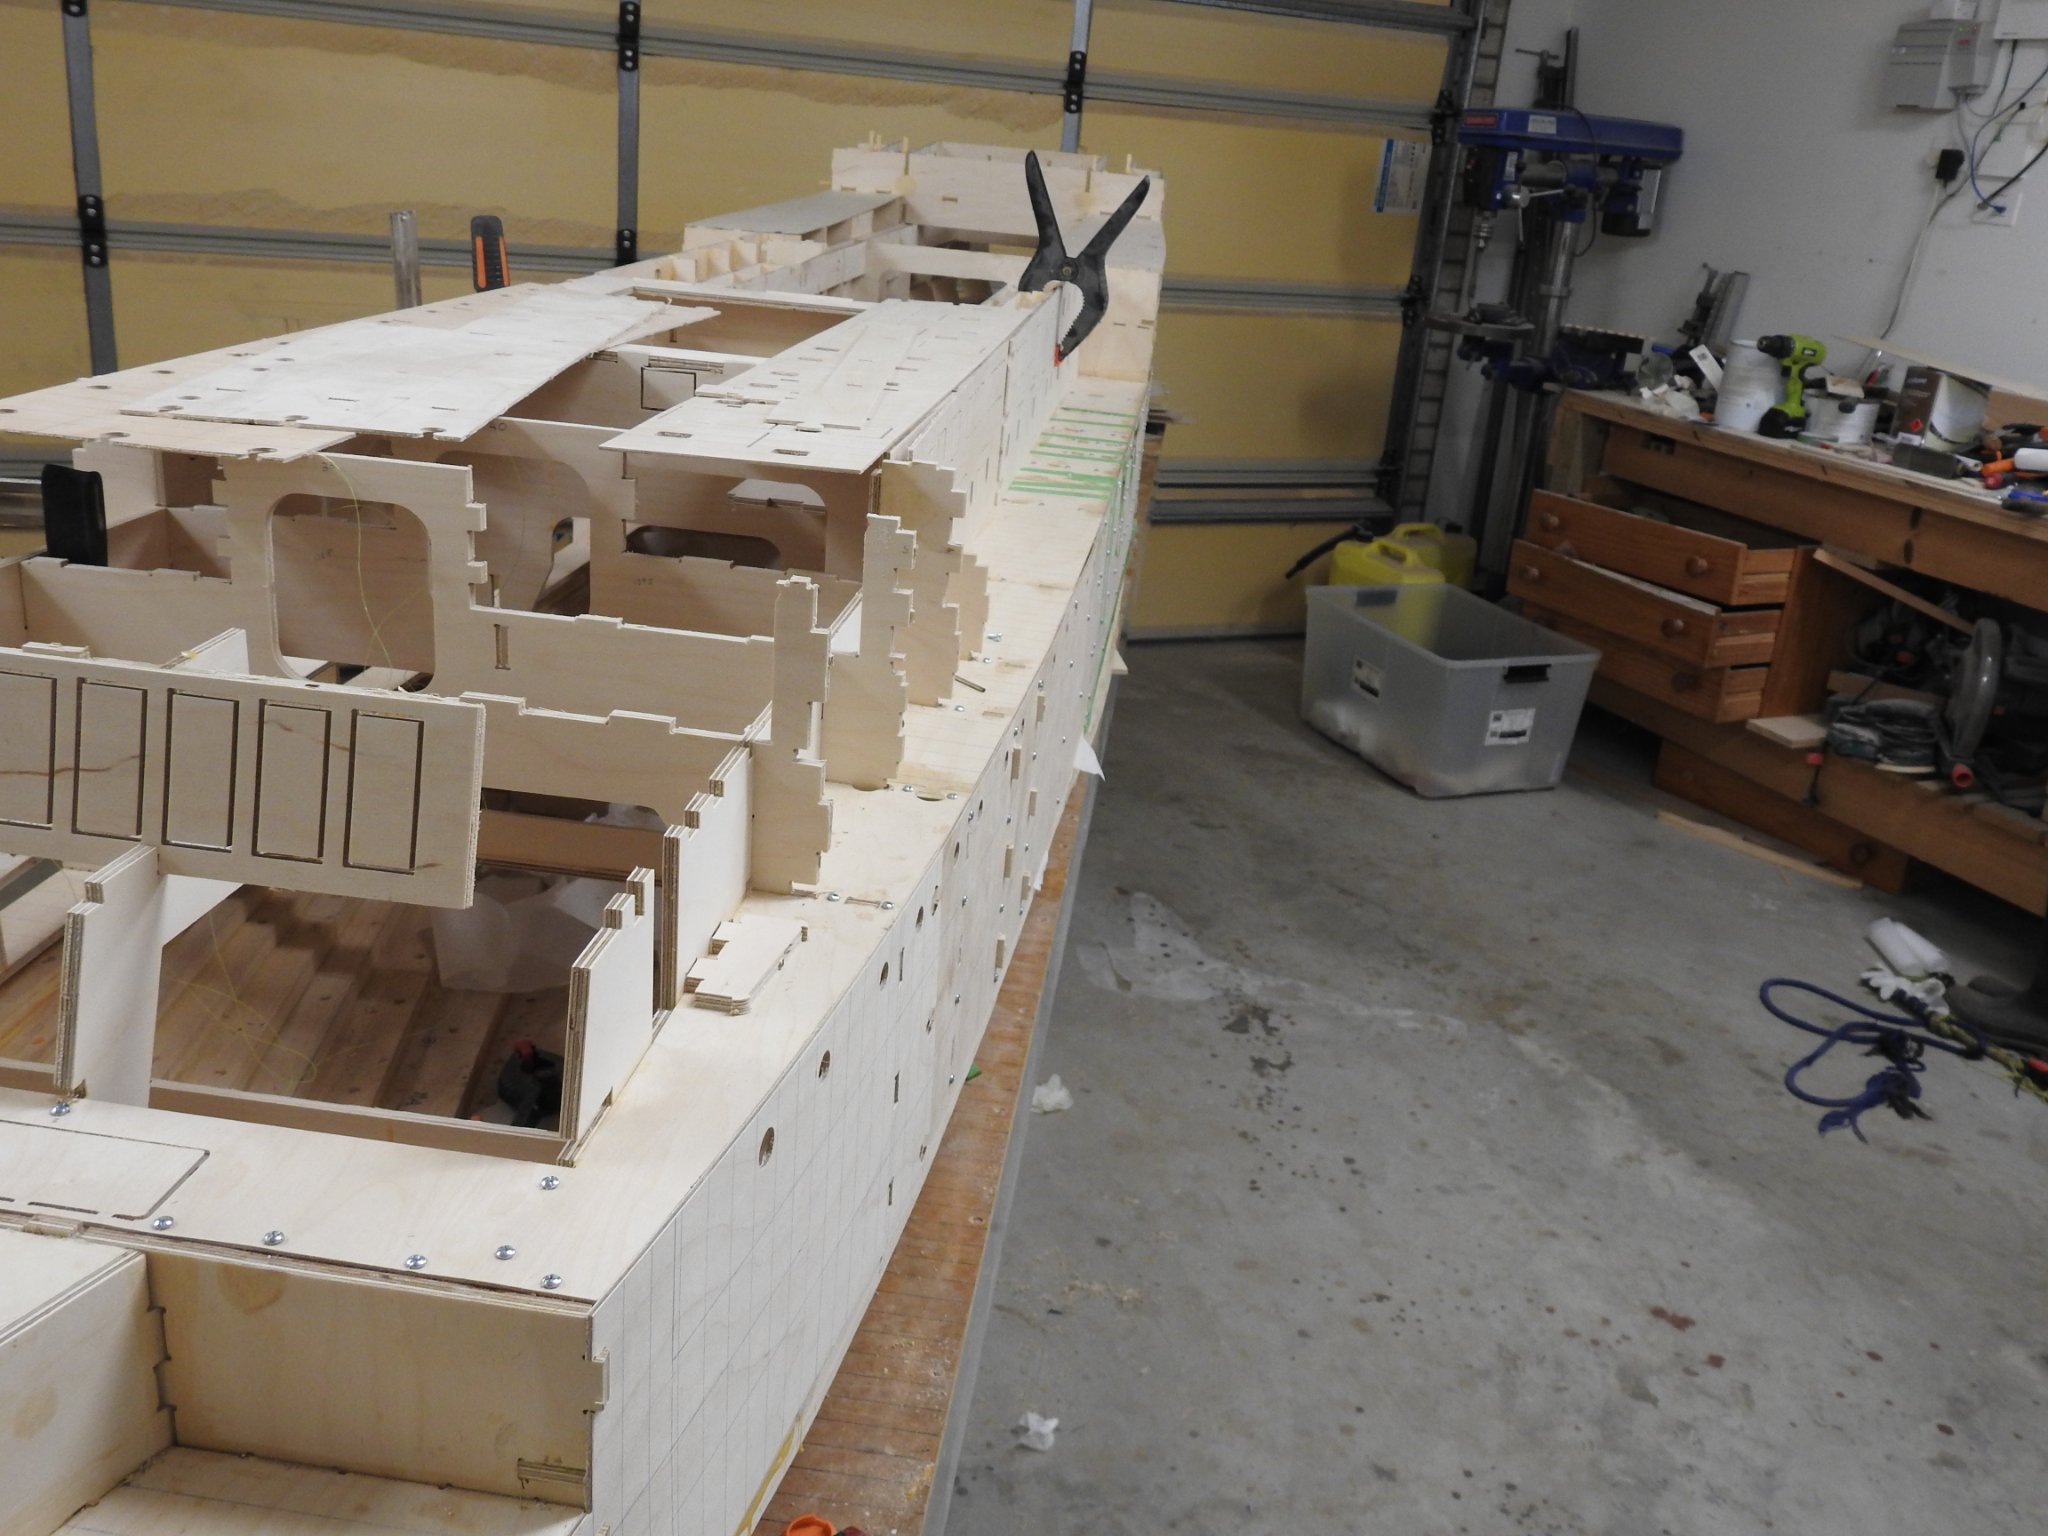
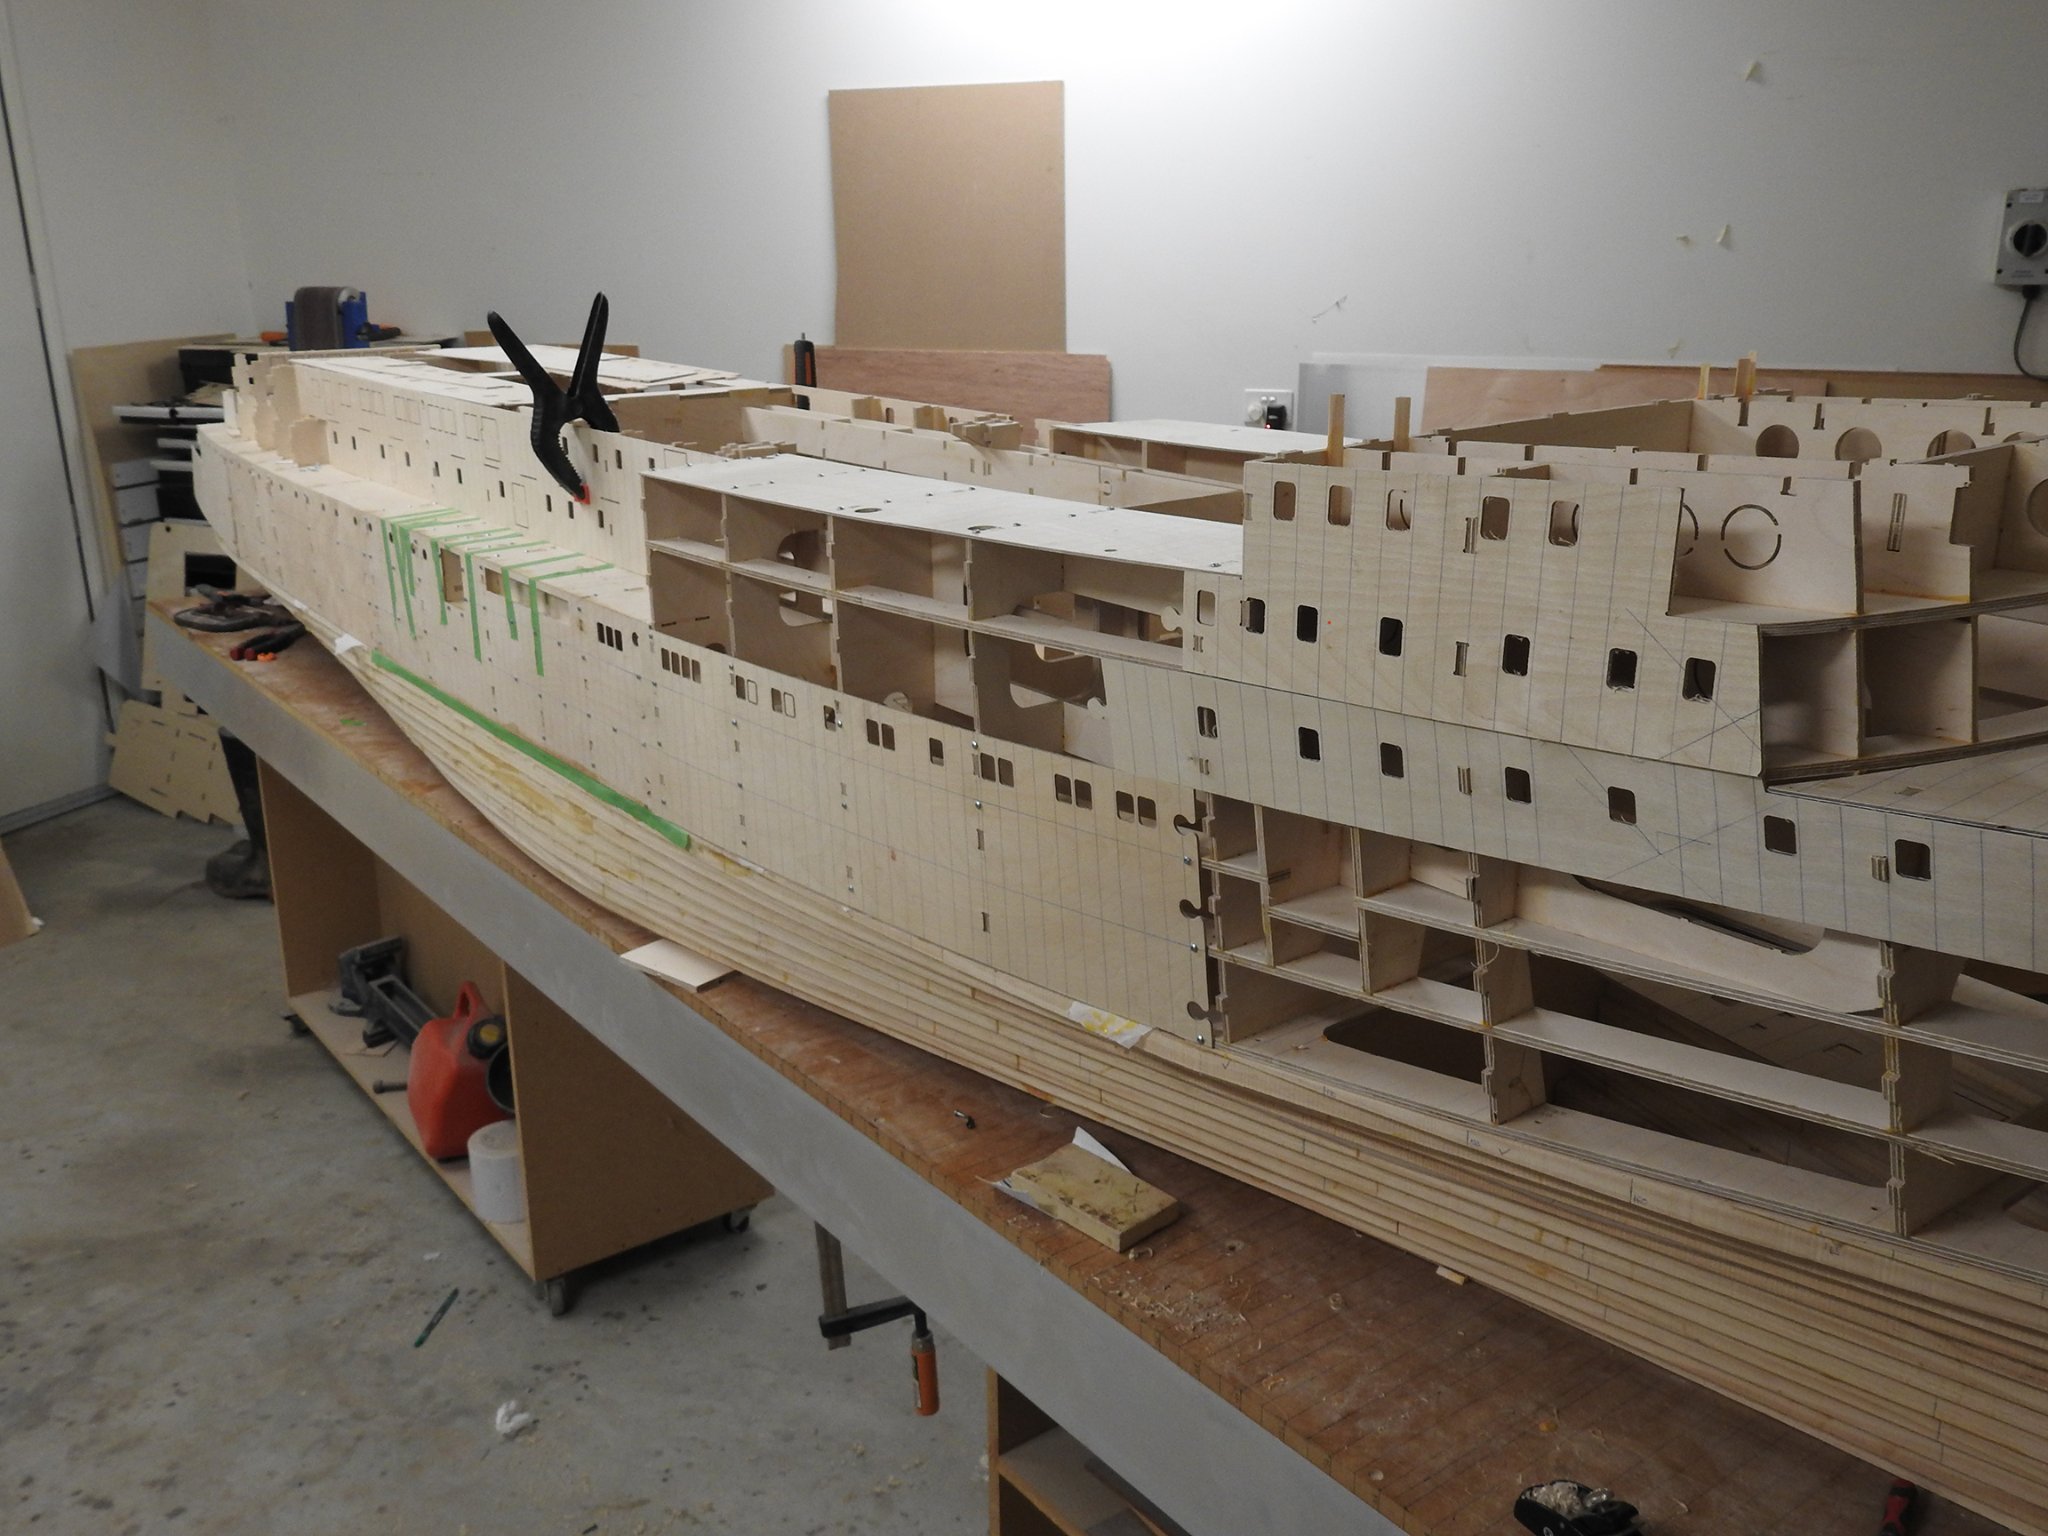
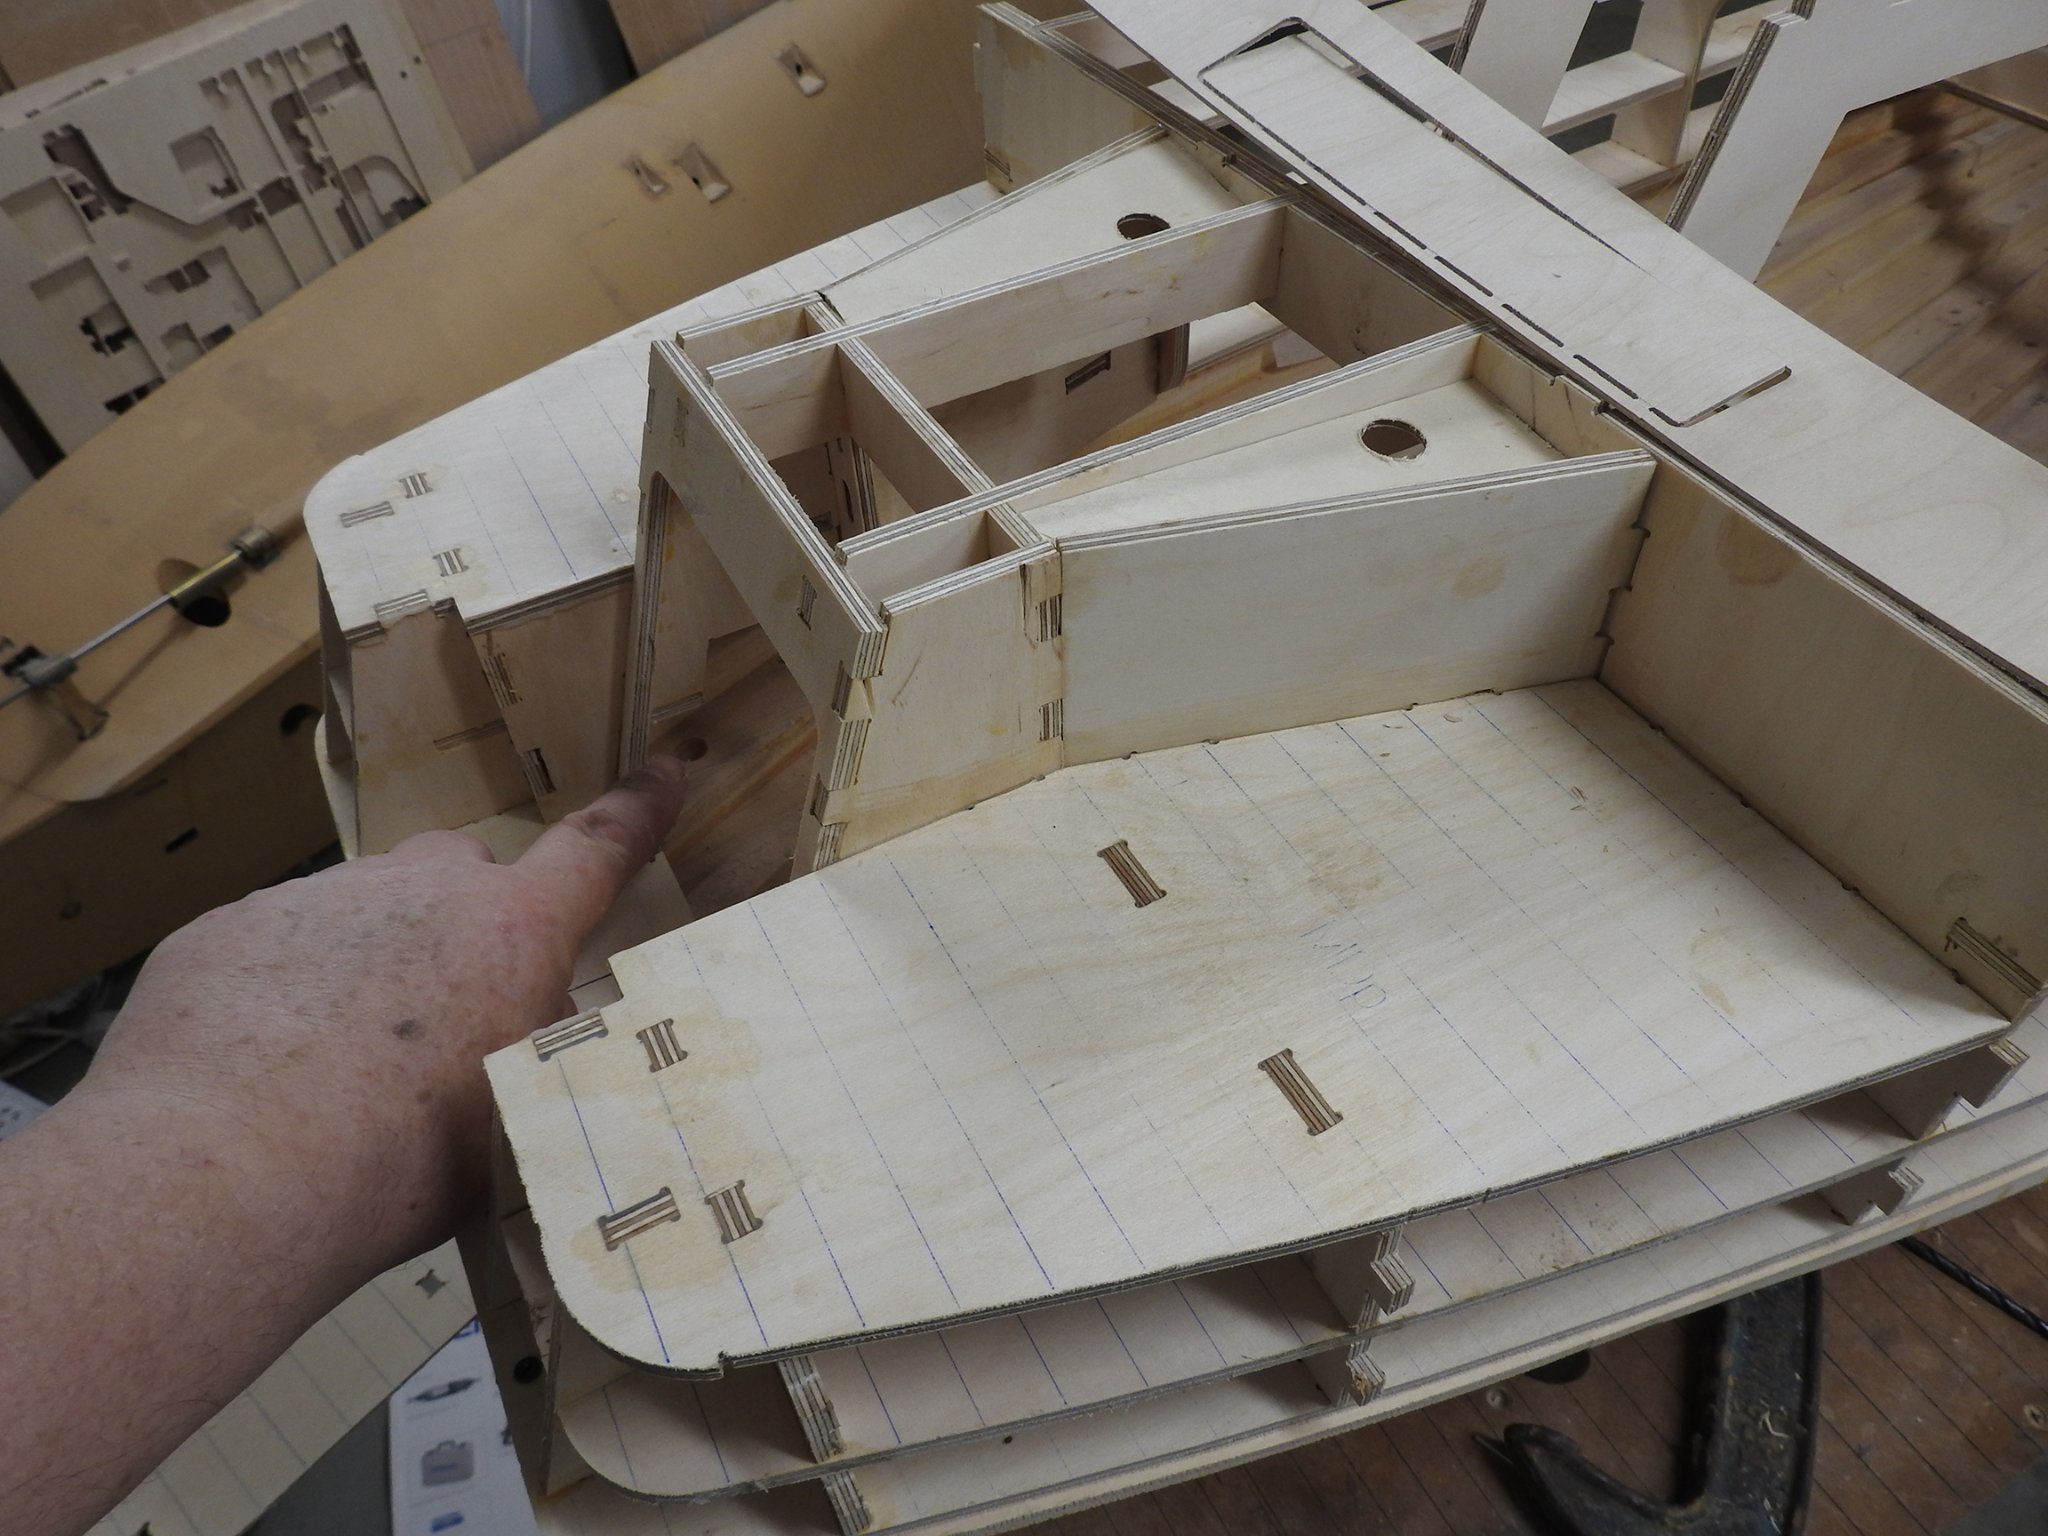
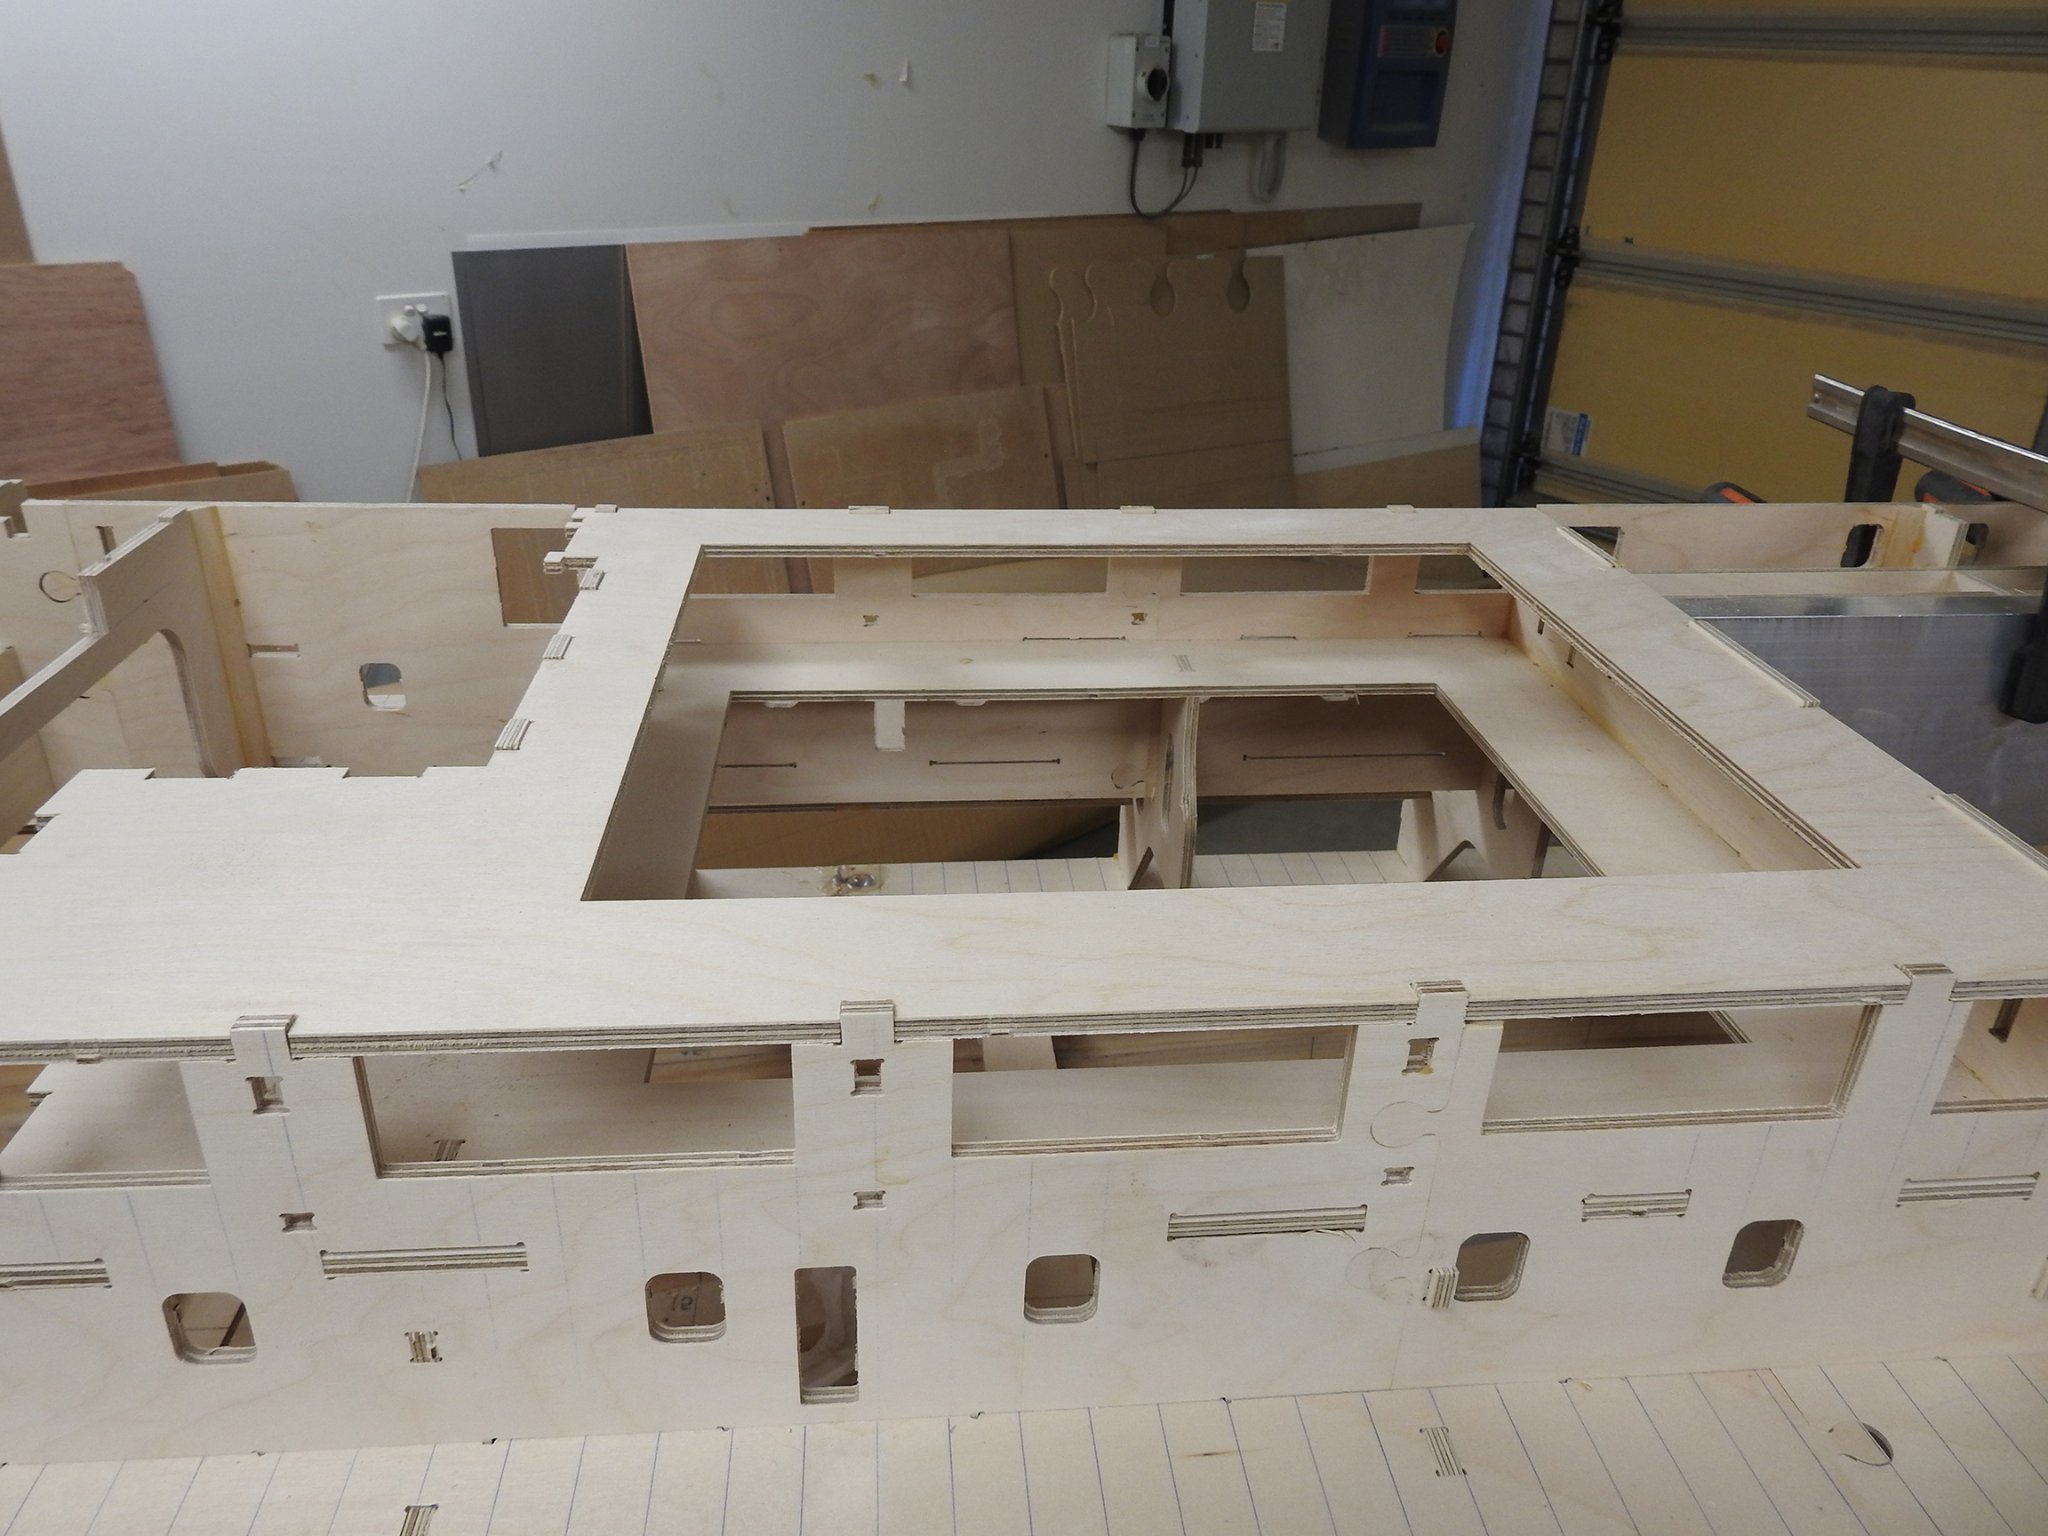
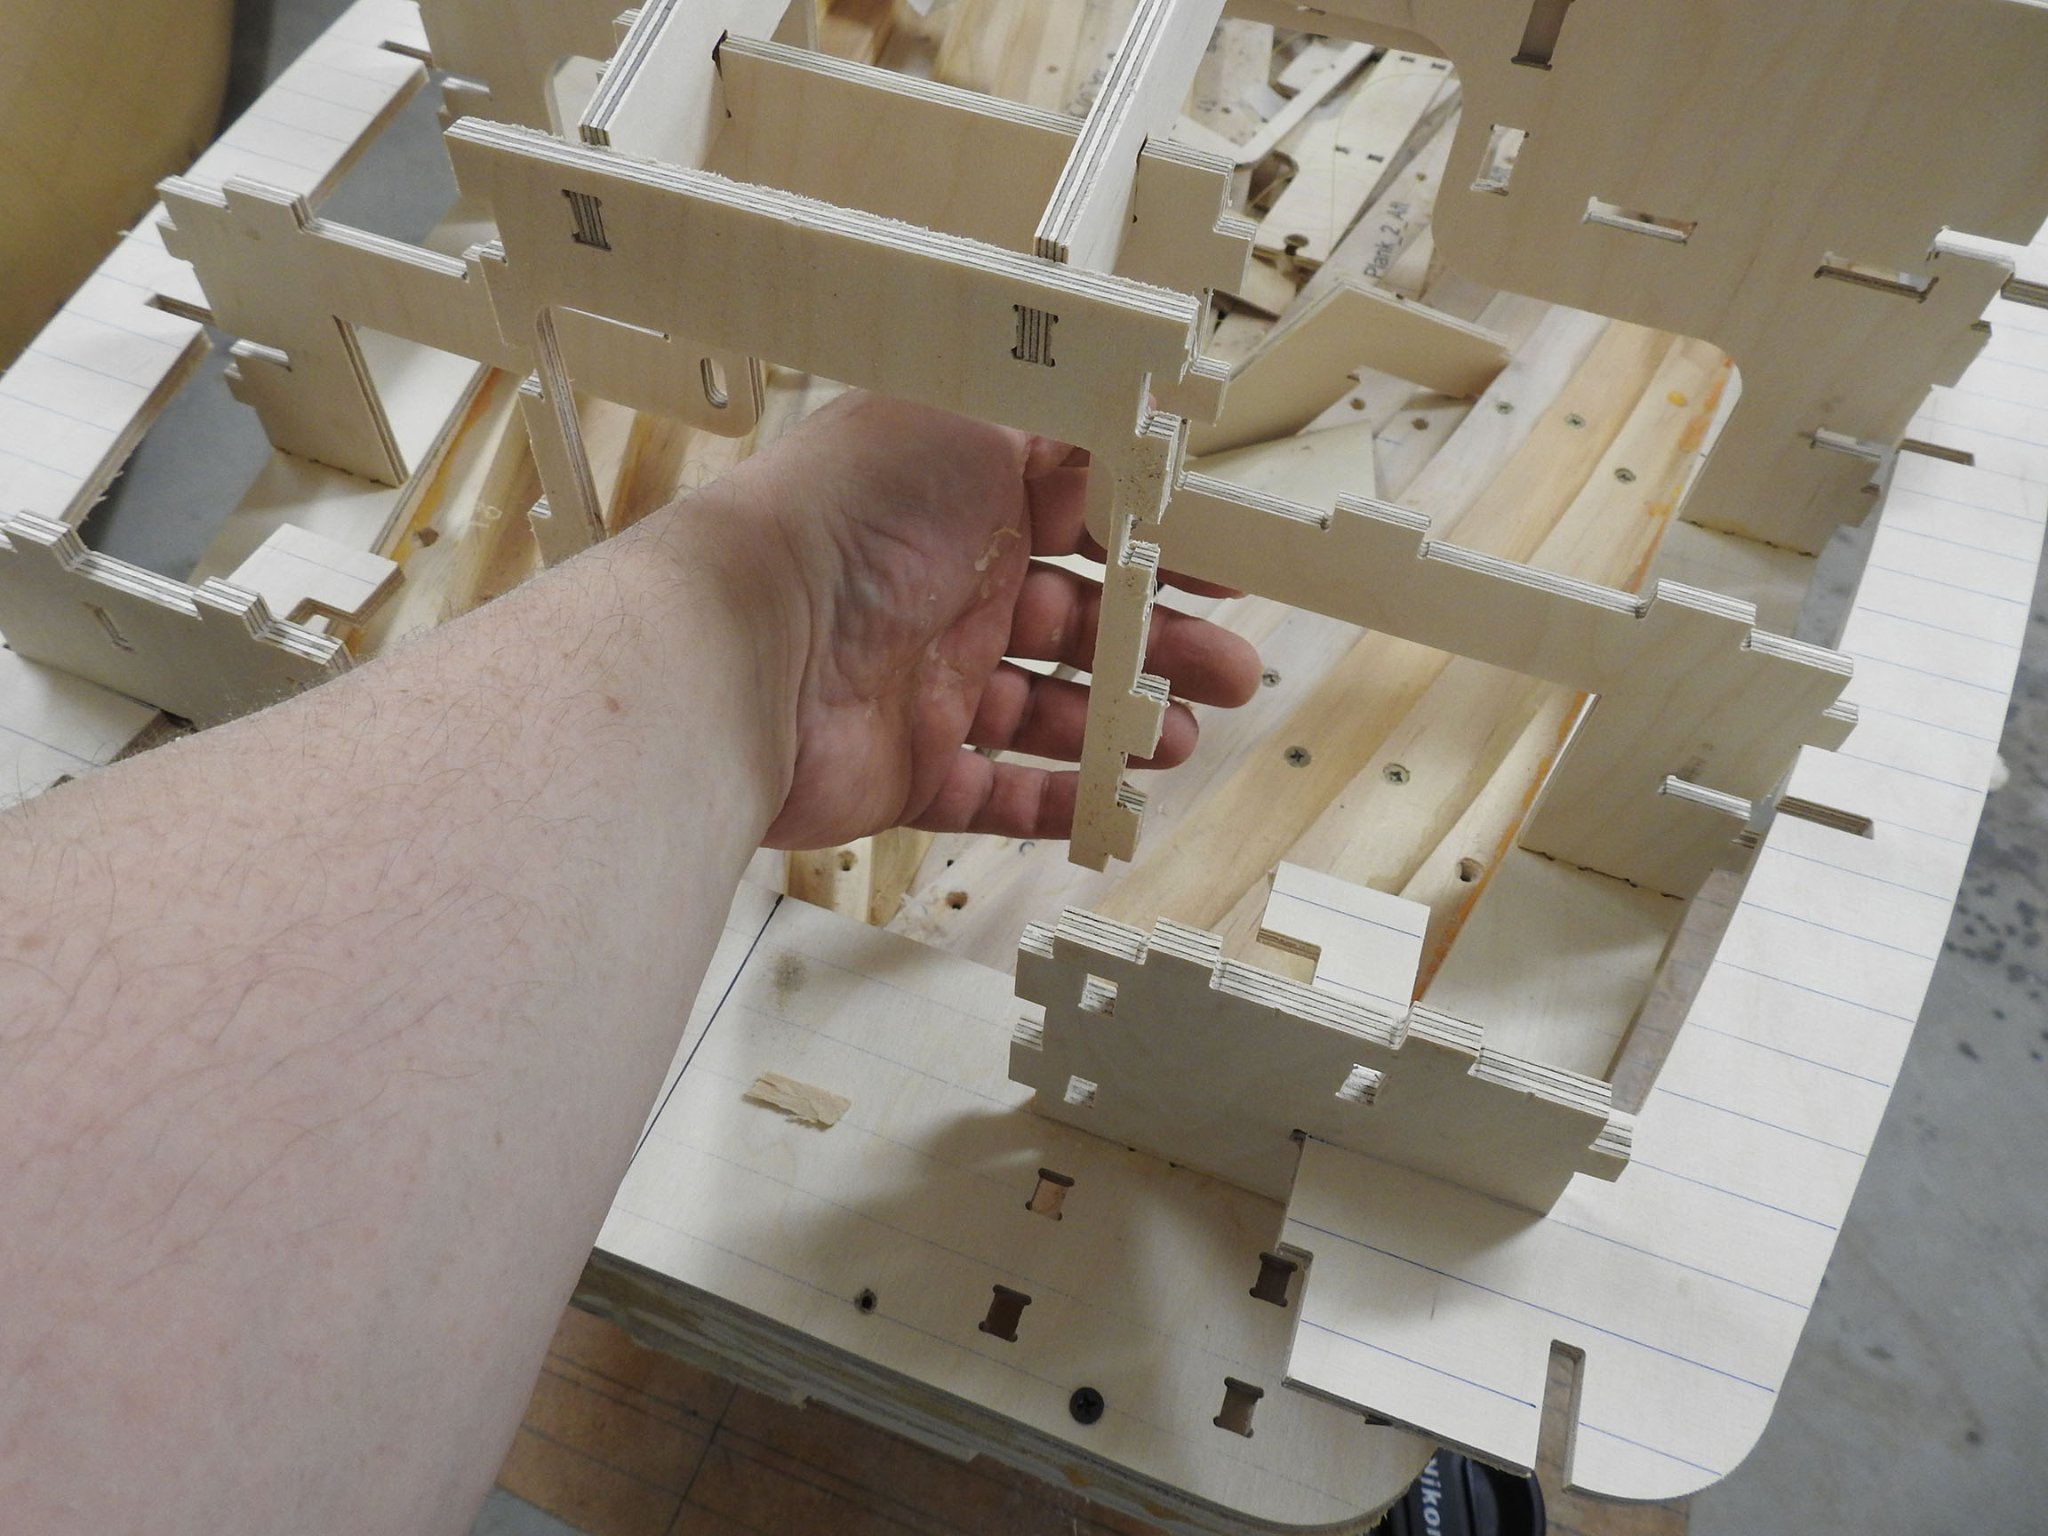
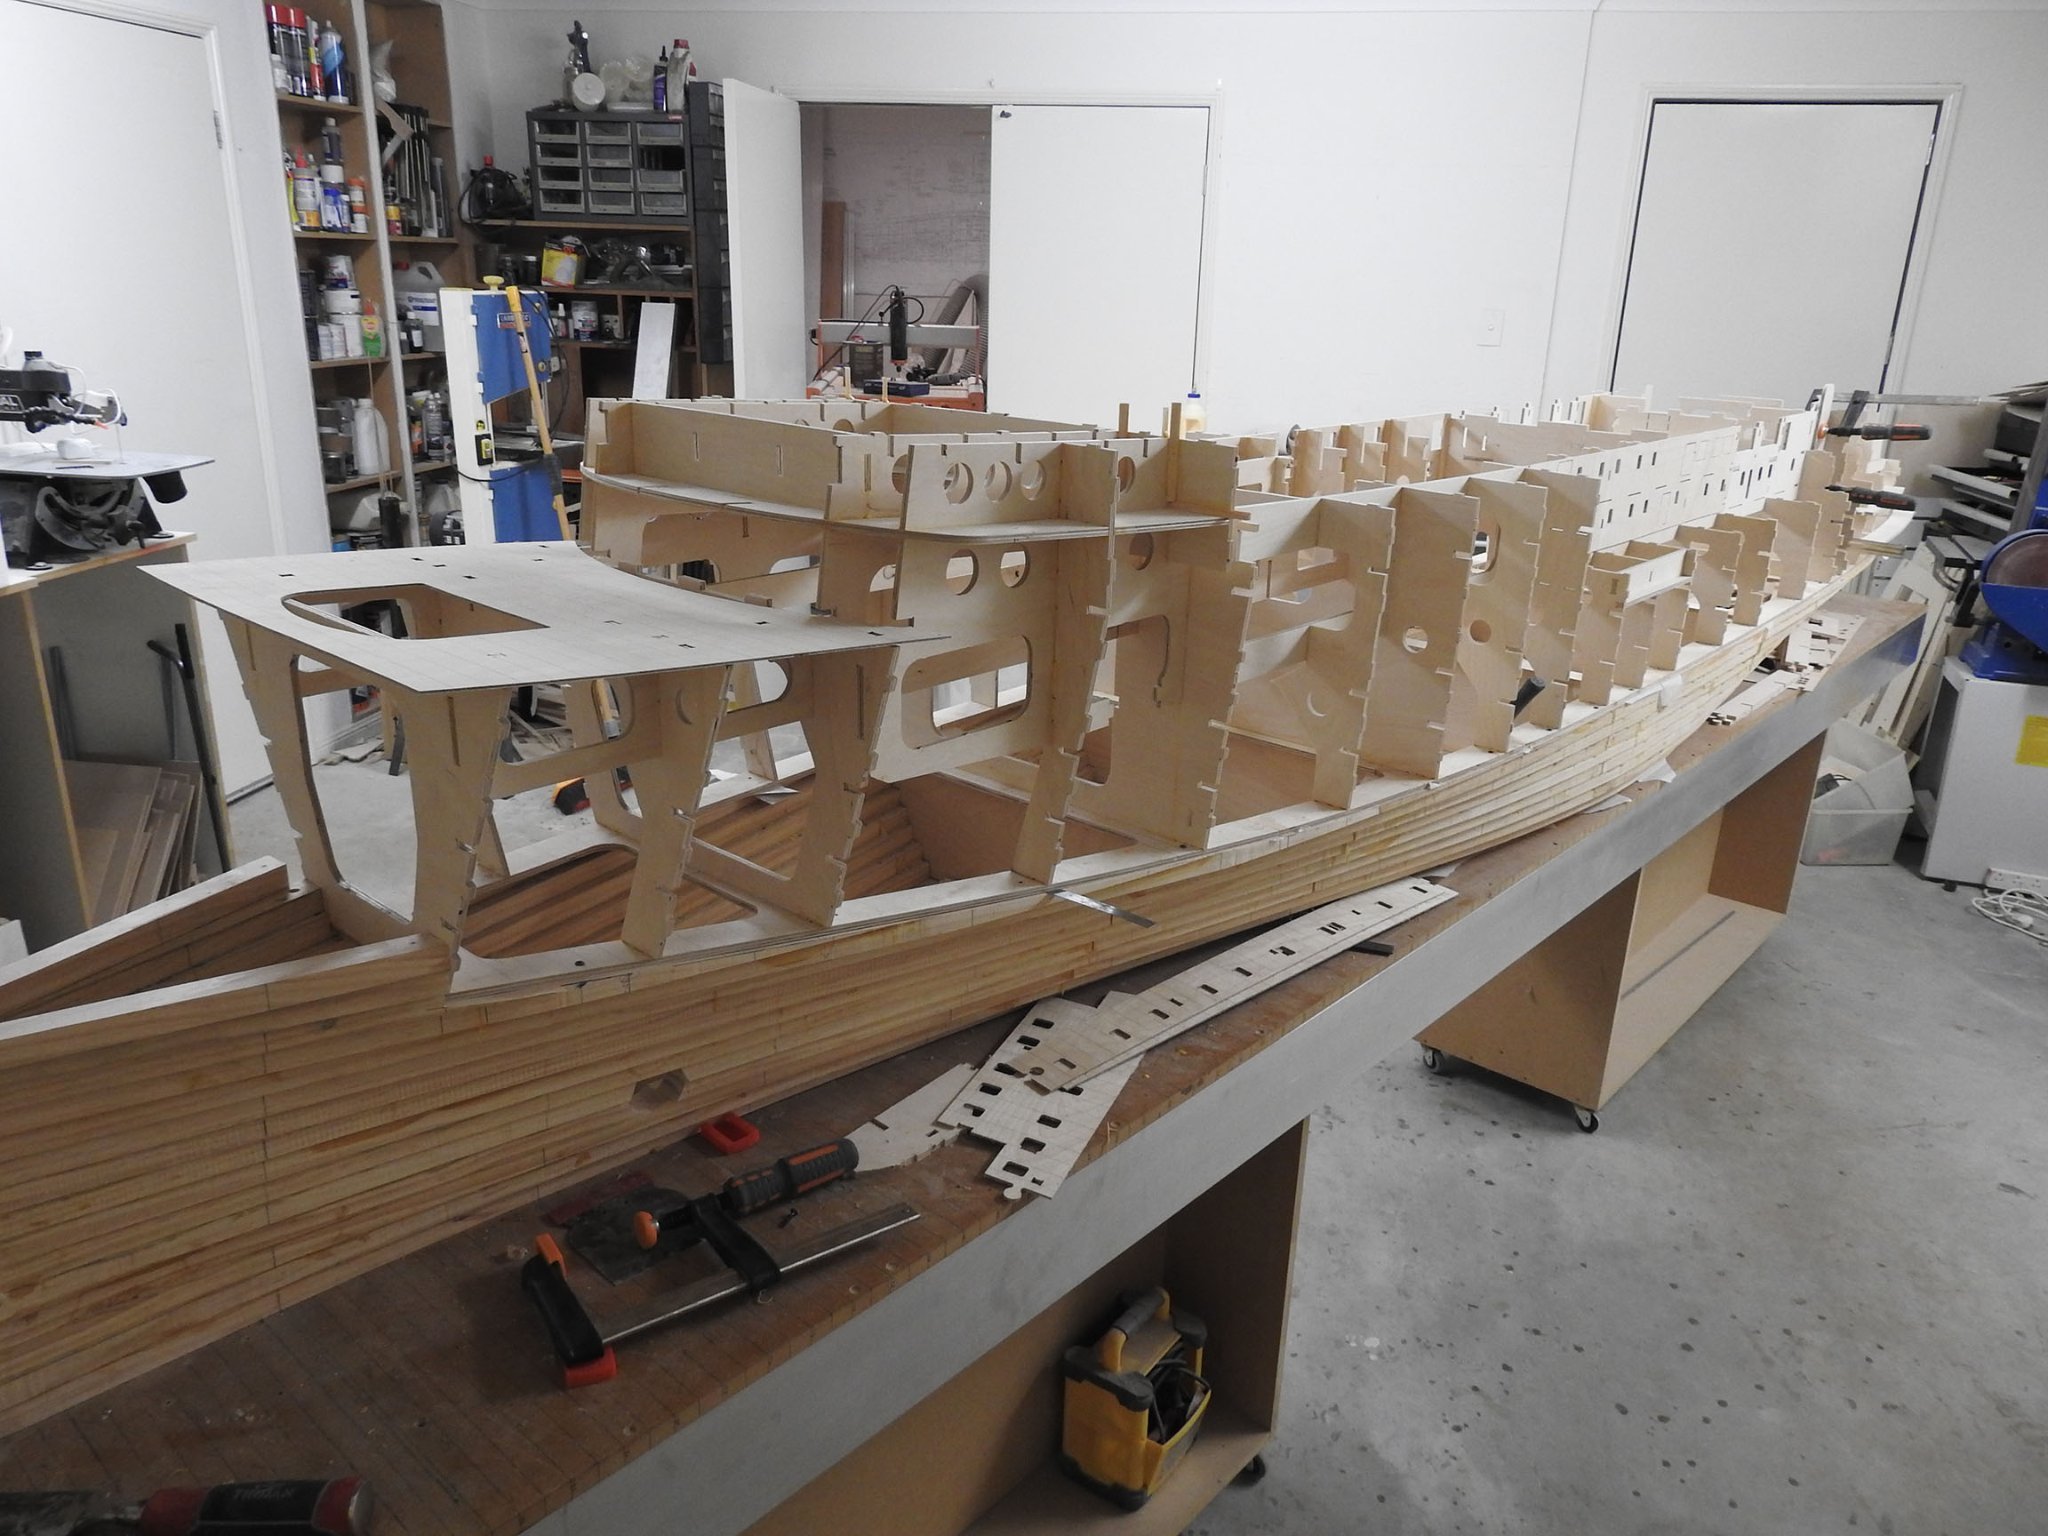
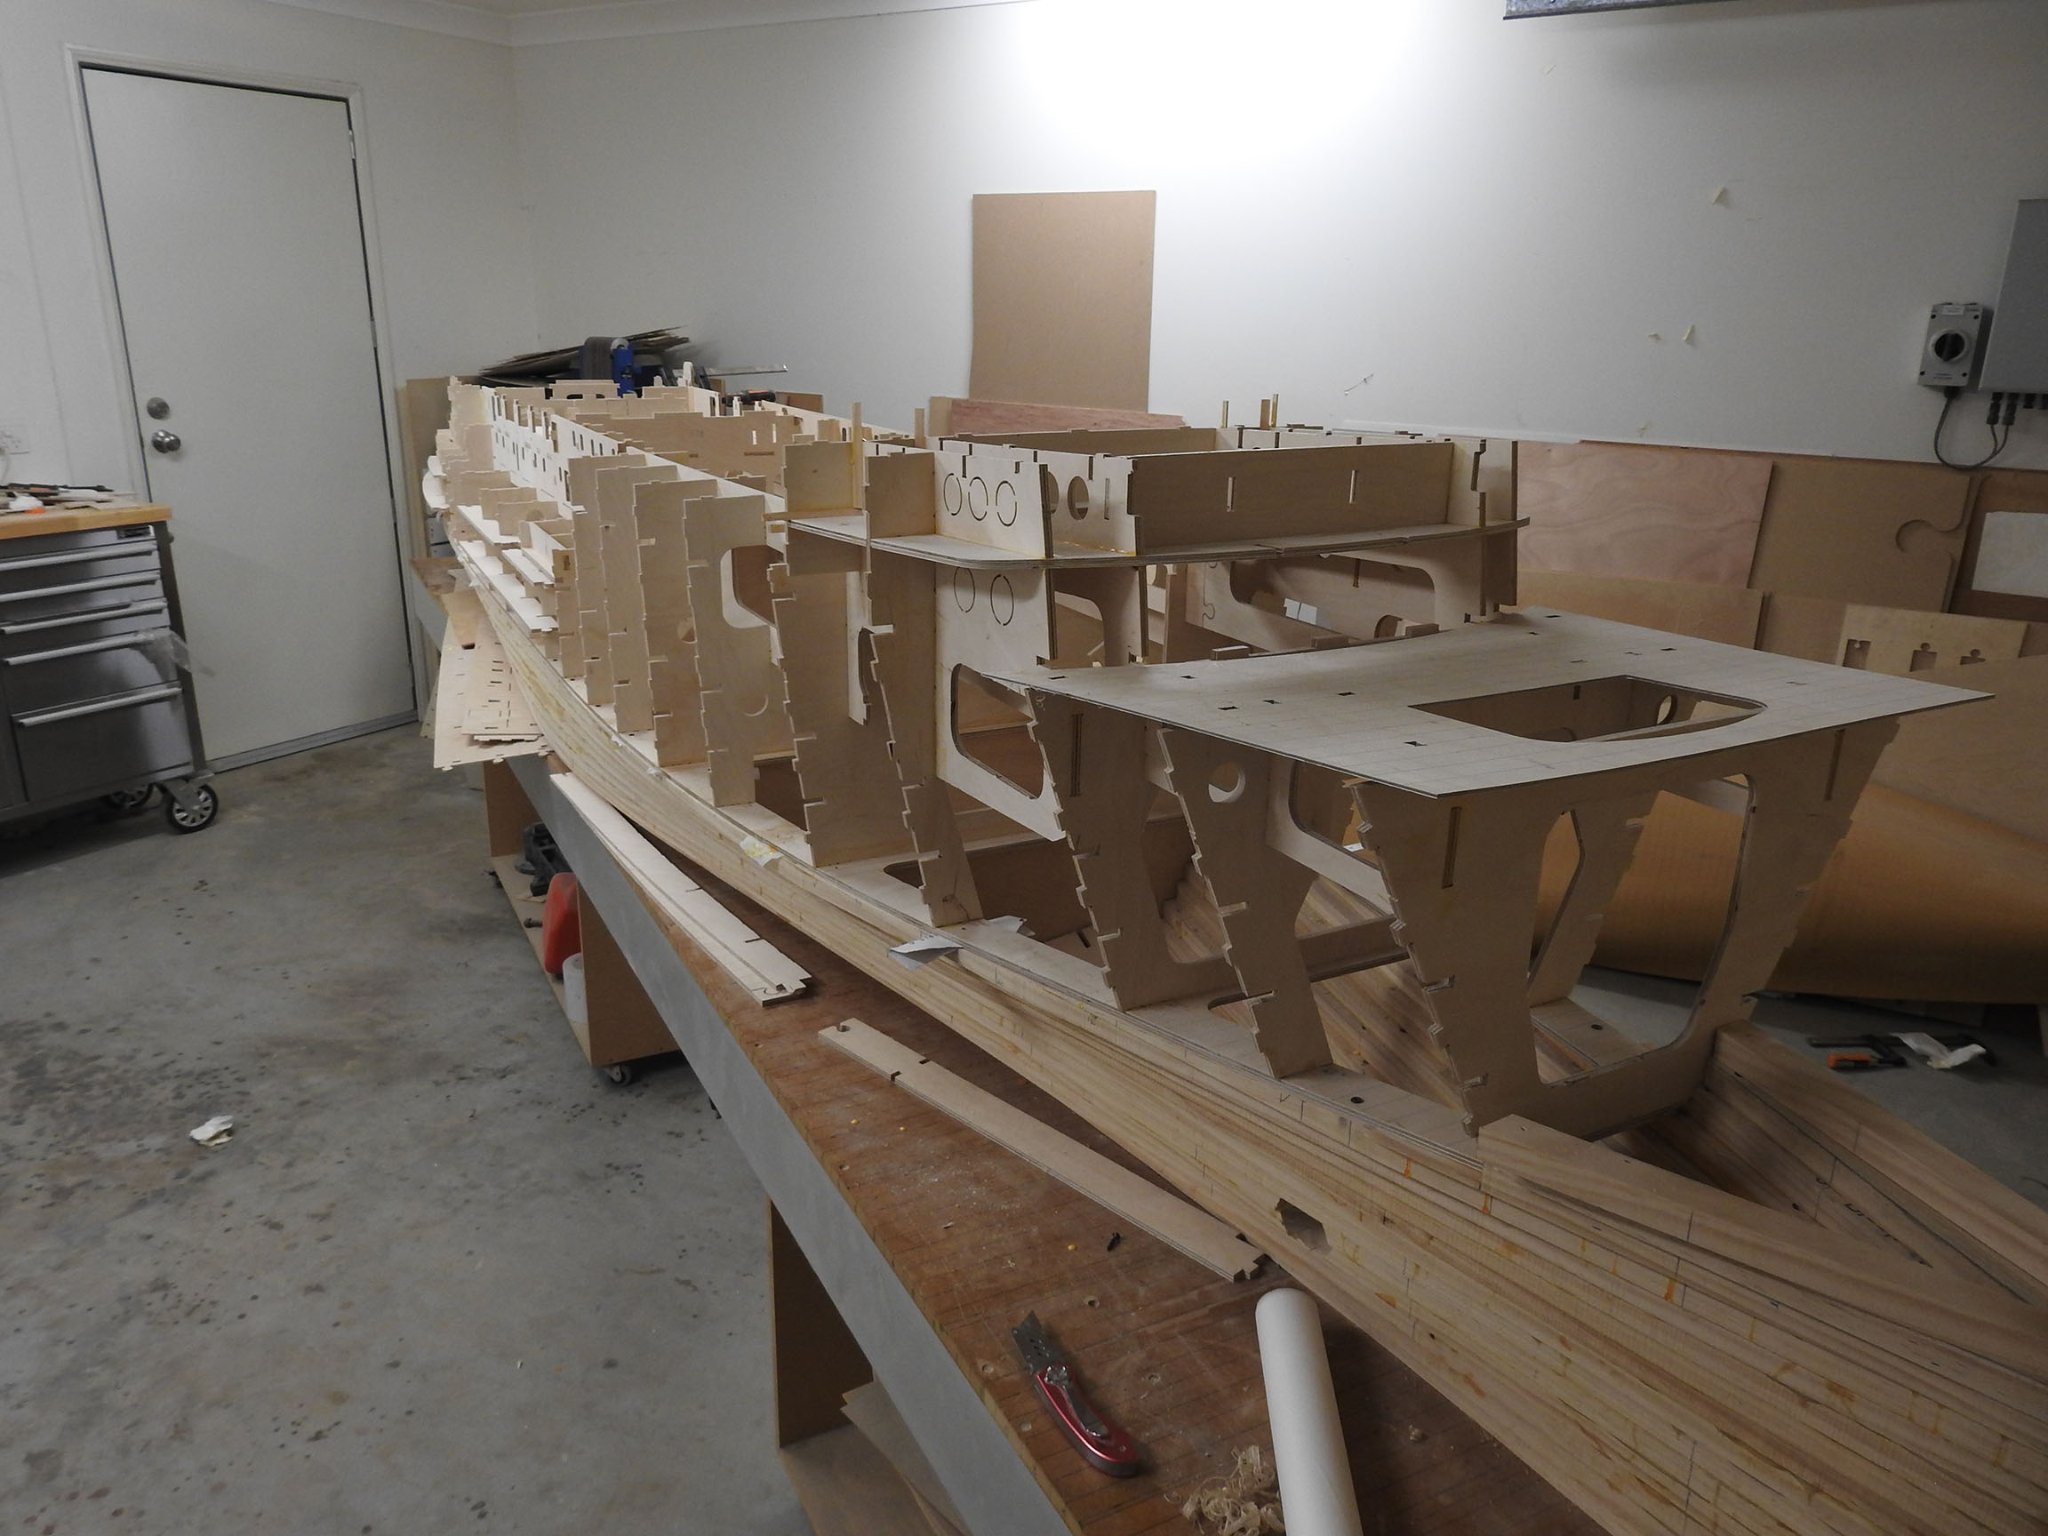
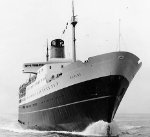
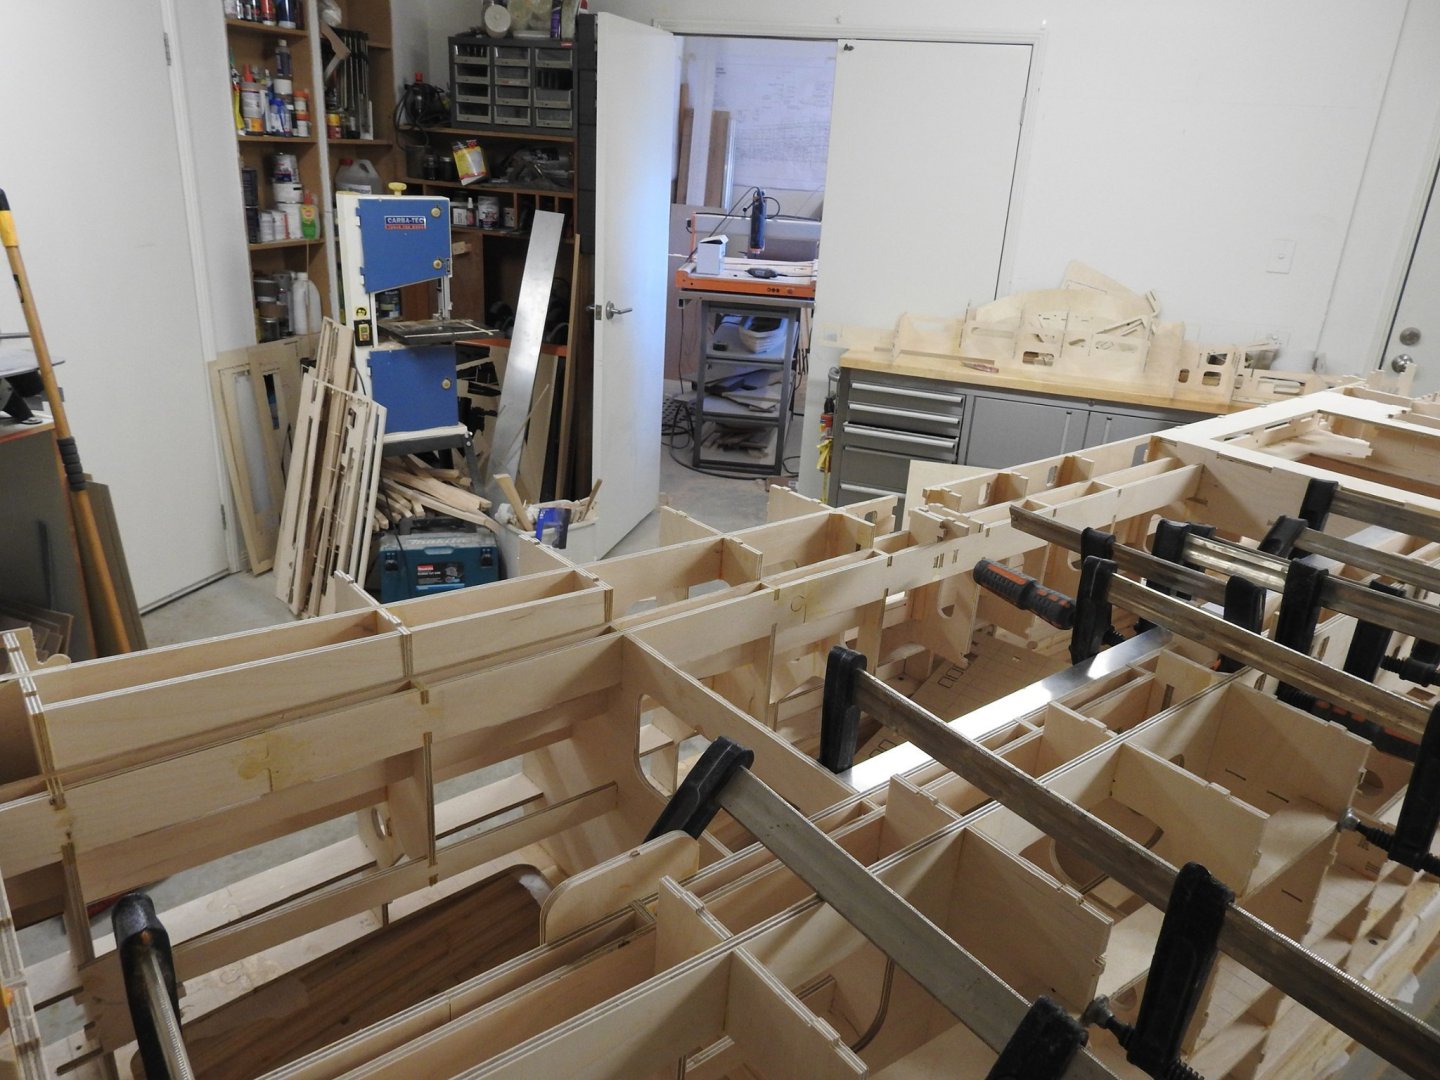
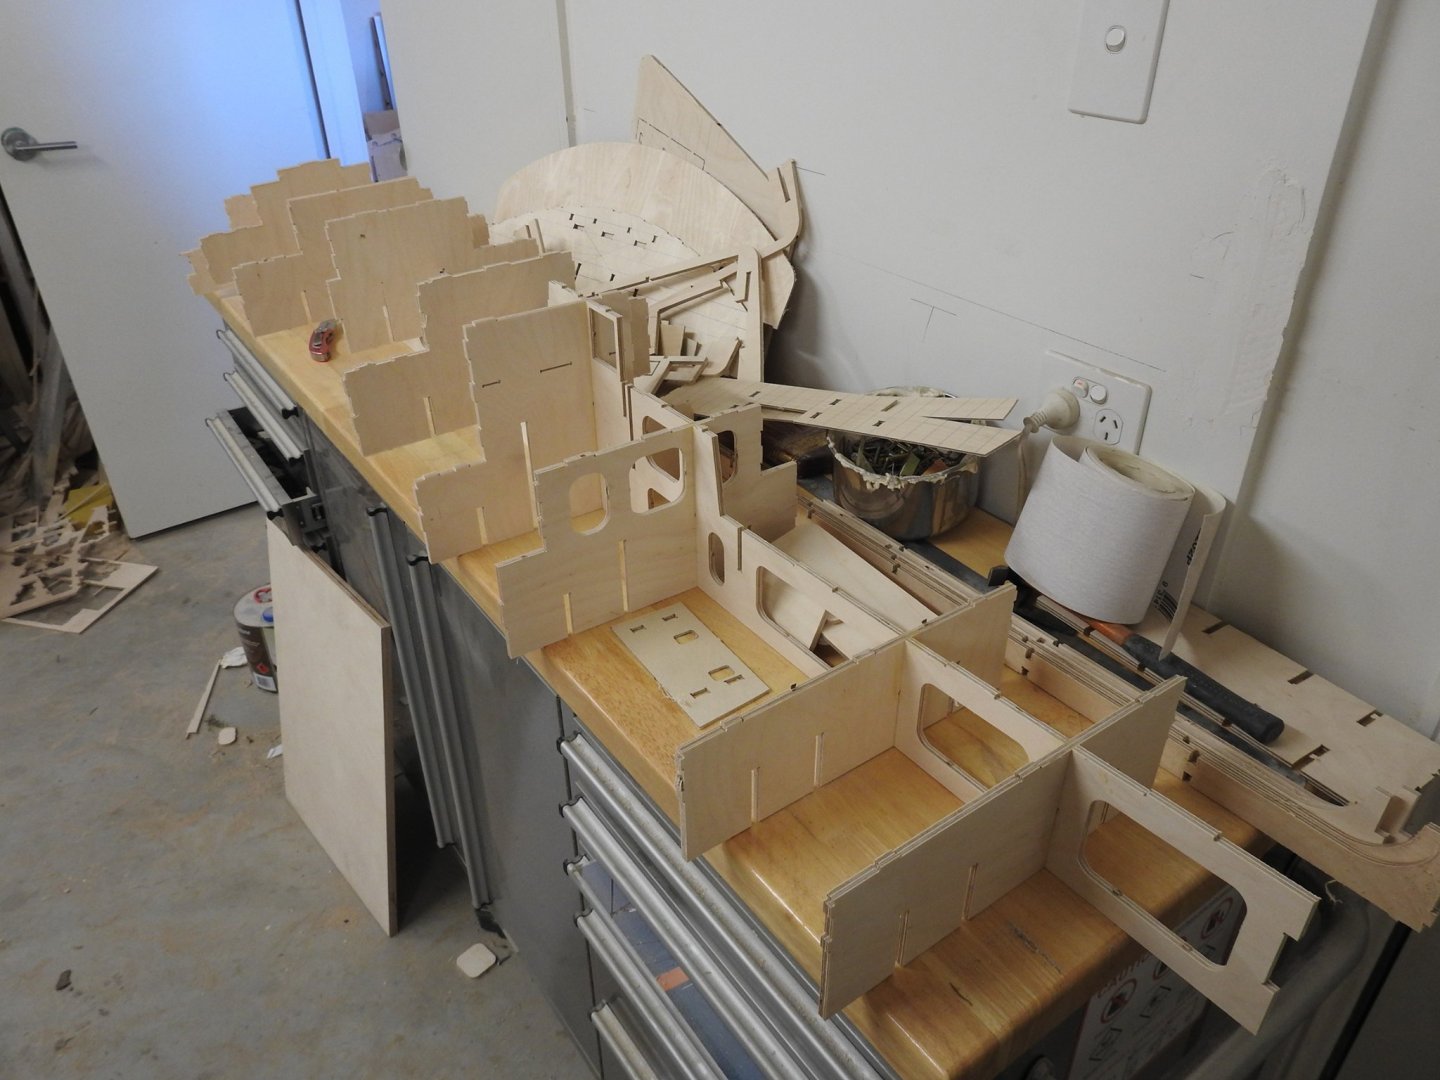
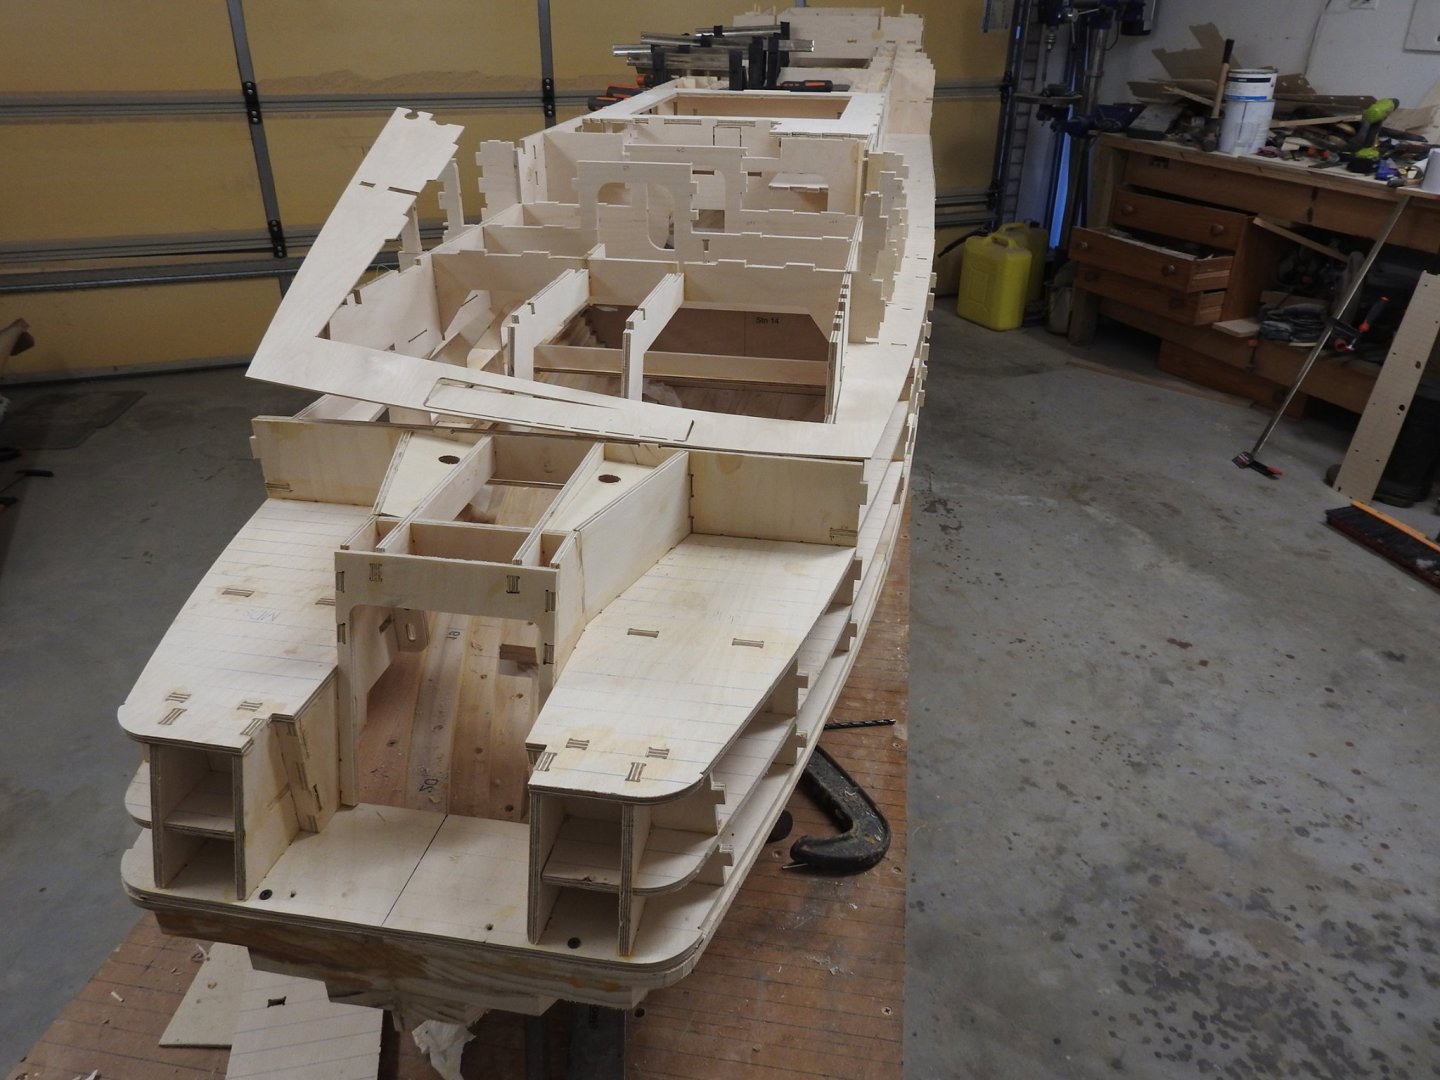
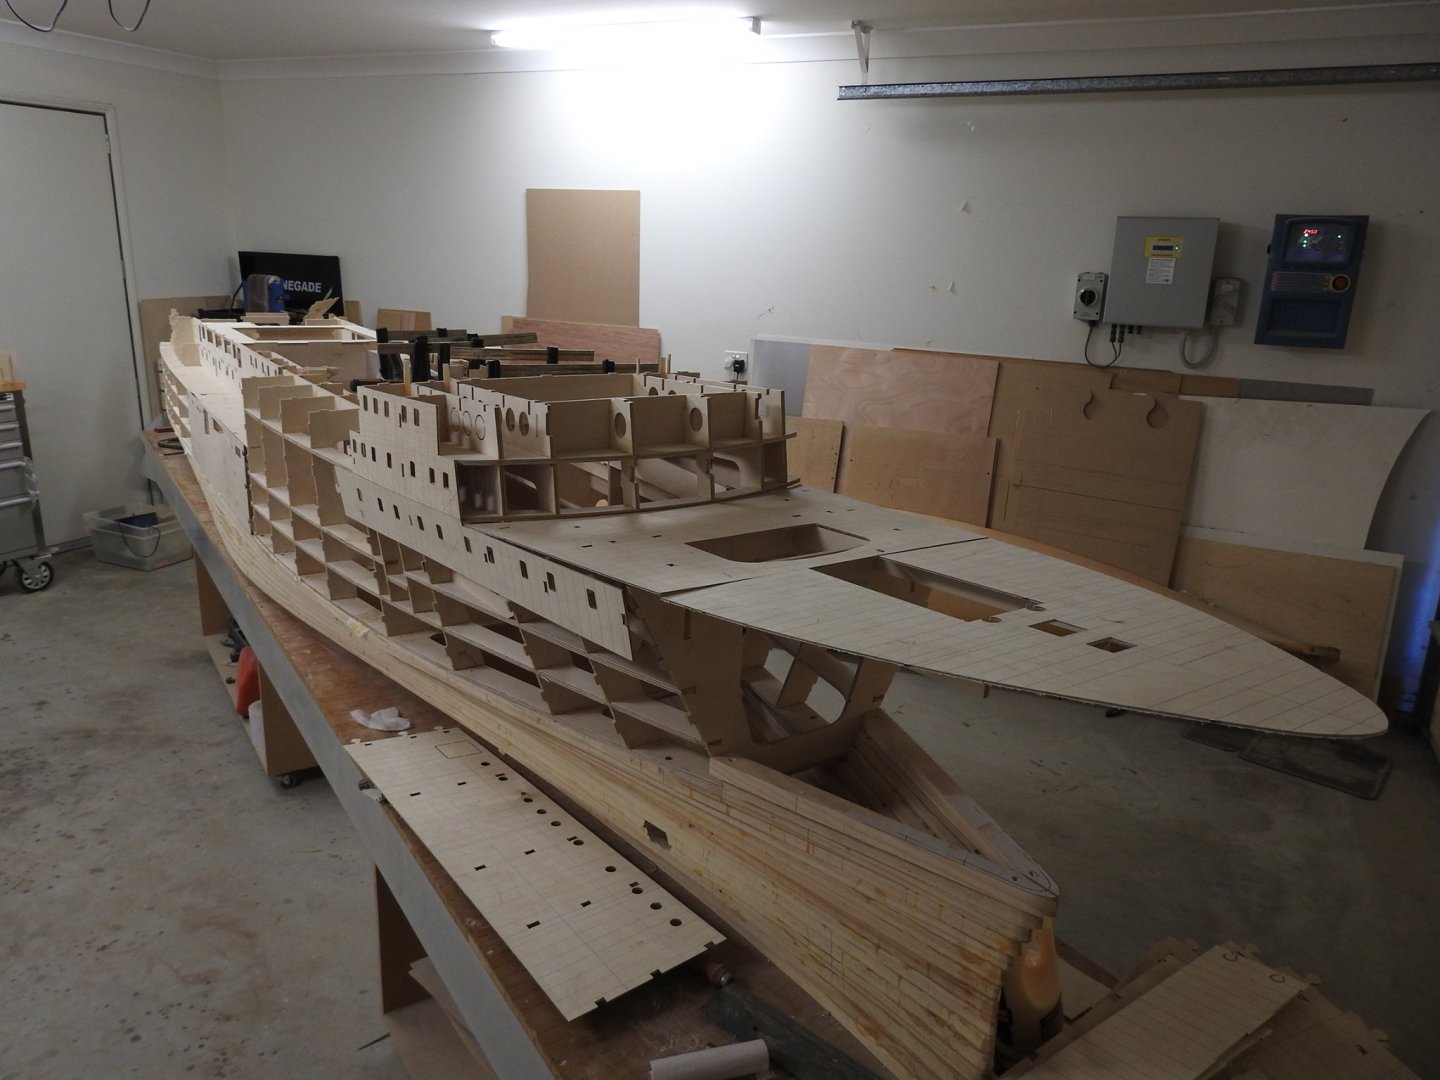
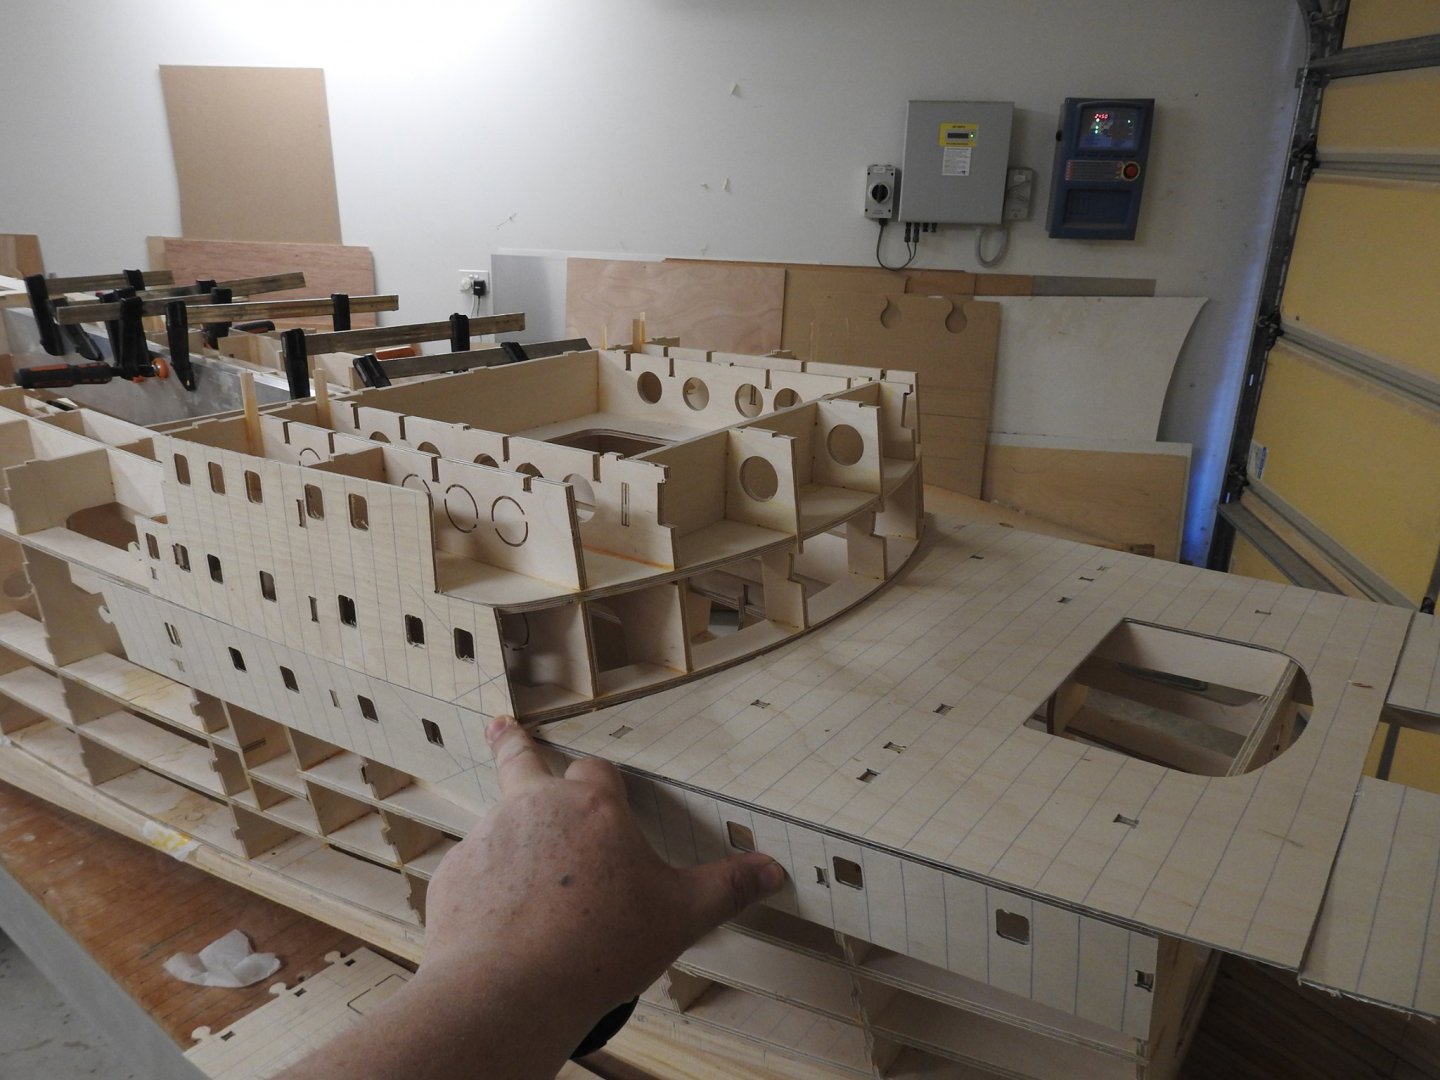
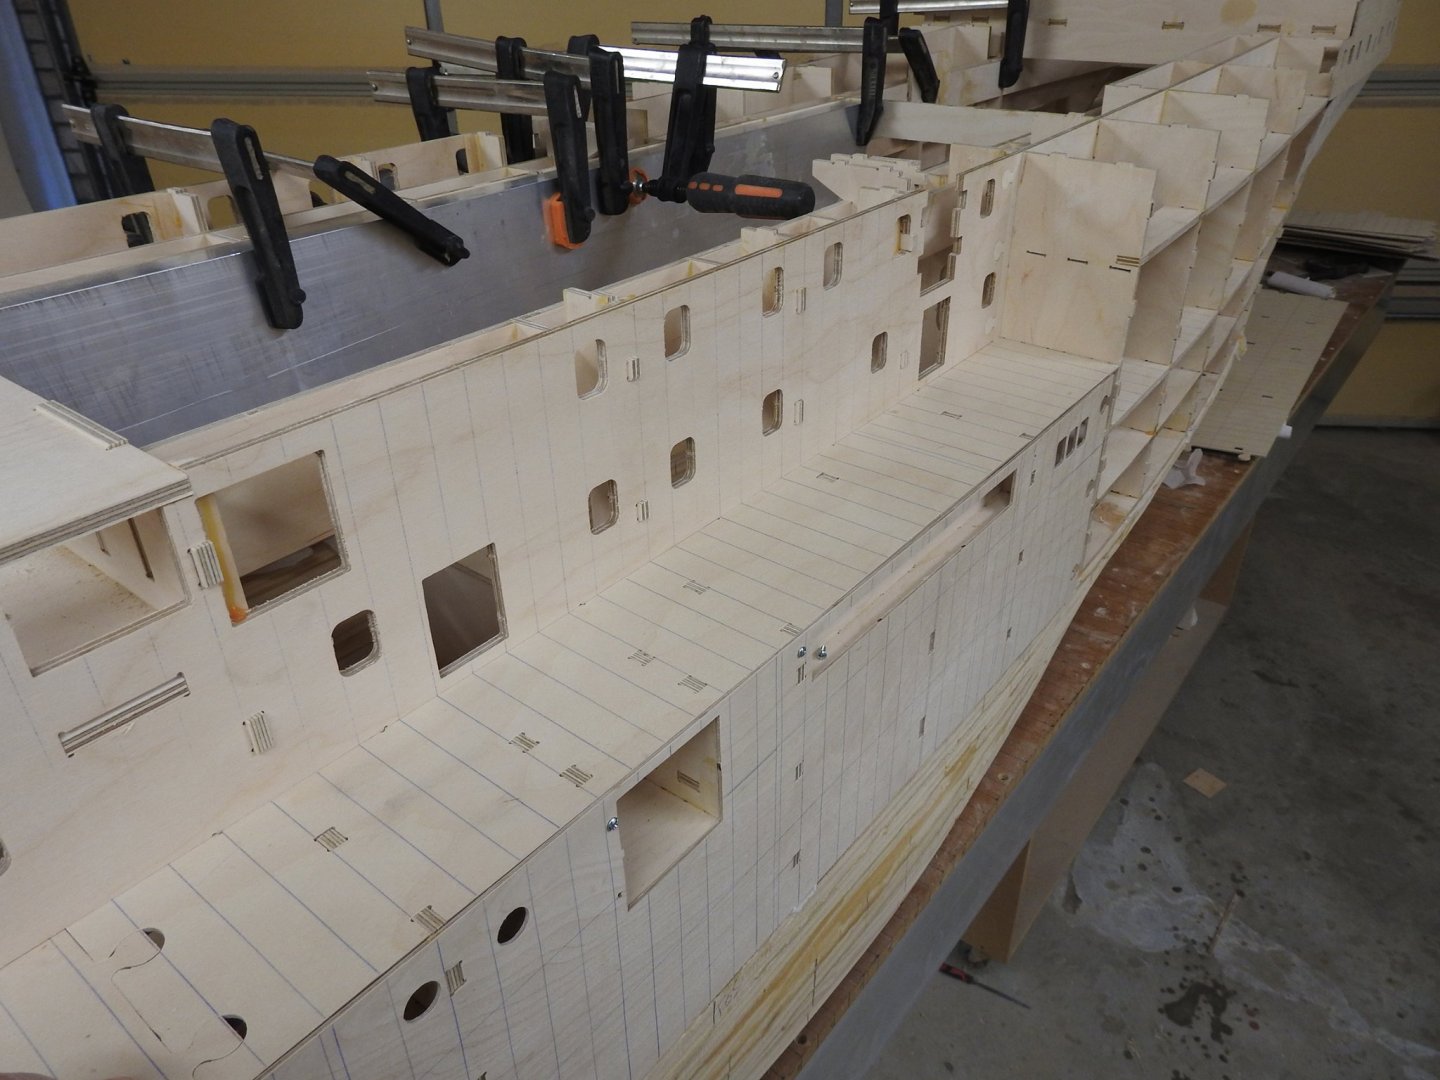
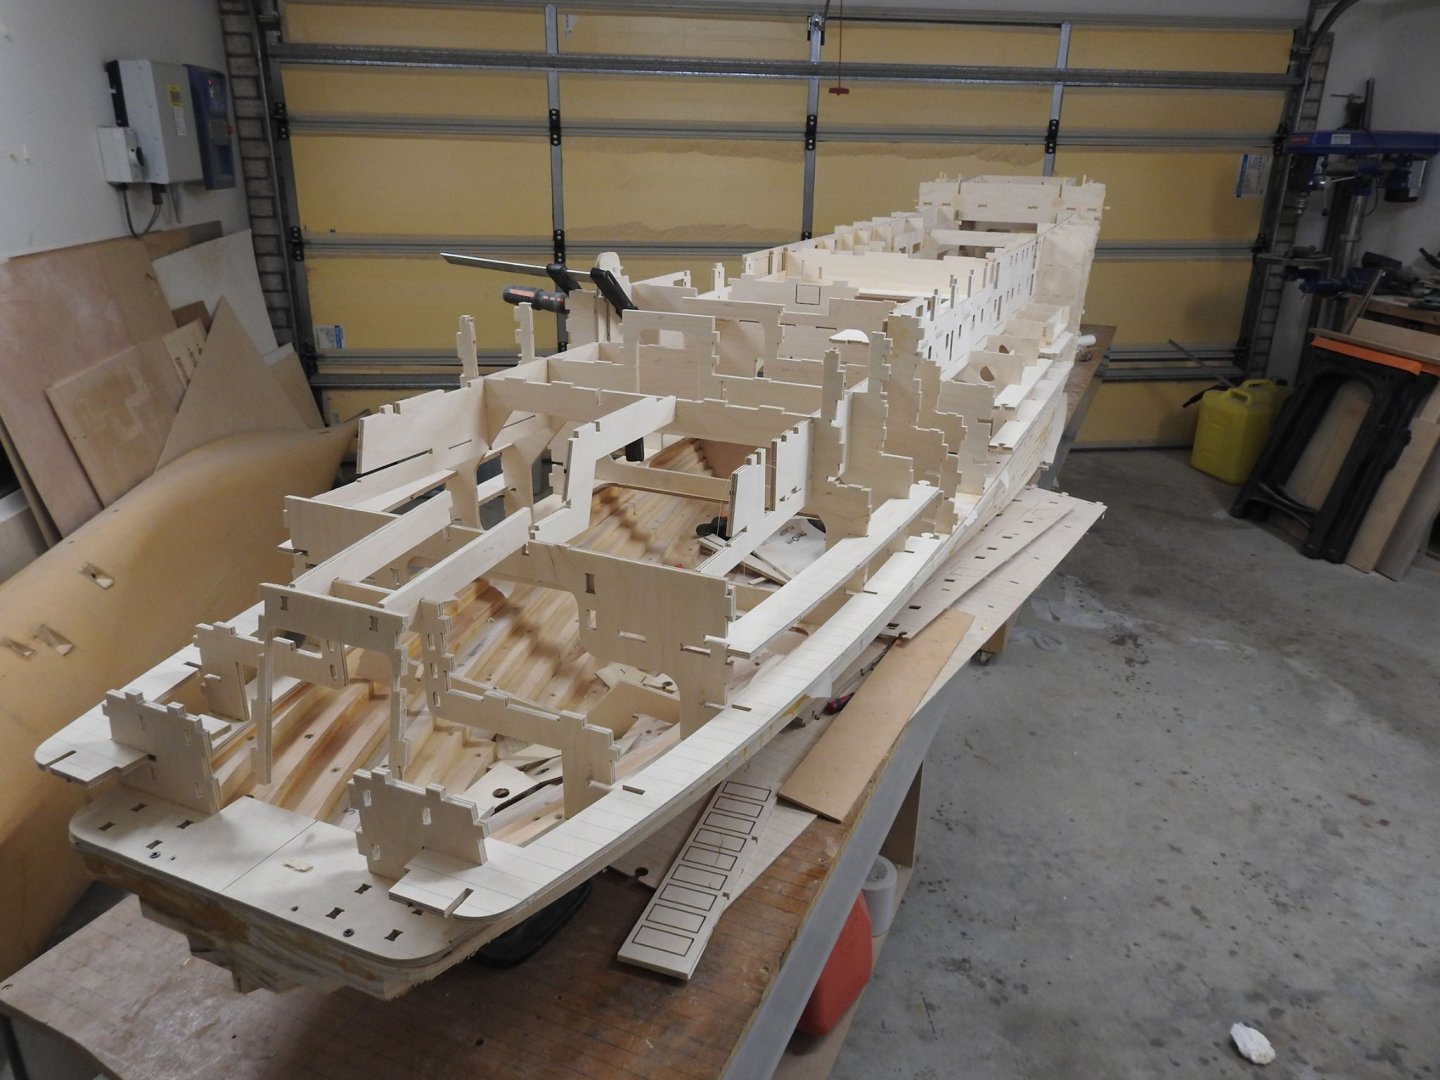
Ok here some updates as I near completion of the frame work of the hull and superstructure. View from the bow, showing the areas remaining to be built up with B&B lamination, the fan room and winch pad openings can be seen as well in the deck panel. Simon H if you are watching, now you can see how difficult access to the thruster is. This is the Midship Stbd showing the fit of the deck panels and side shell, there is still the 2mm to go on the superstructure side at top and of course then all gets the .4mm plating over everything. The gangway door and tonnage openings recess are clear here in side of hull. The missing bits on the puzzle joints on deck is just because the part did not quite fit on the CNC, but not wasting ply. This shows the incomplete fitted out smoke room space and the hatch to access engines in the middle. The stern fully framed and mooring decks fitted ready for plating in. In regard to access of the rudder mechanism through the stern door you can see the rudder penetration that I am pointing to. This shows the rubust structure that surrounds the "Lid"of the ship to keep it all straight. And finally the Lid being assembled on my other bench. The large arc shaped parts leaning against wall are the bridge floor and ceiling


- 454 replies
-
- 13
-
-
-
- Union Steamship Company
- Stepcraft 840
- (and 3 more)
-
Will post images tomorrow but am at step 14 (see page 2) right now
- 454 replies
-
- 1
-
-
- Union Steamship Company
- Stepcraft 840
- (and 3 more)
-
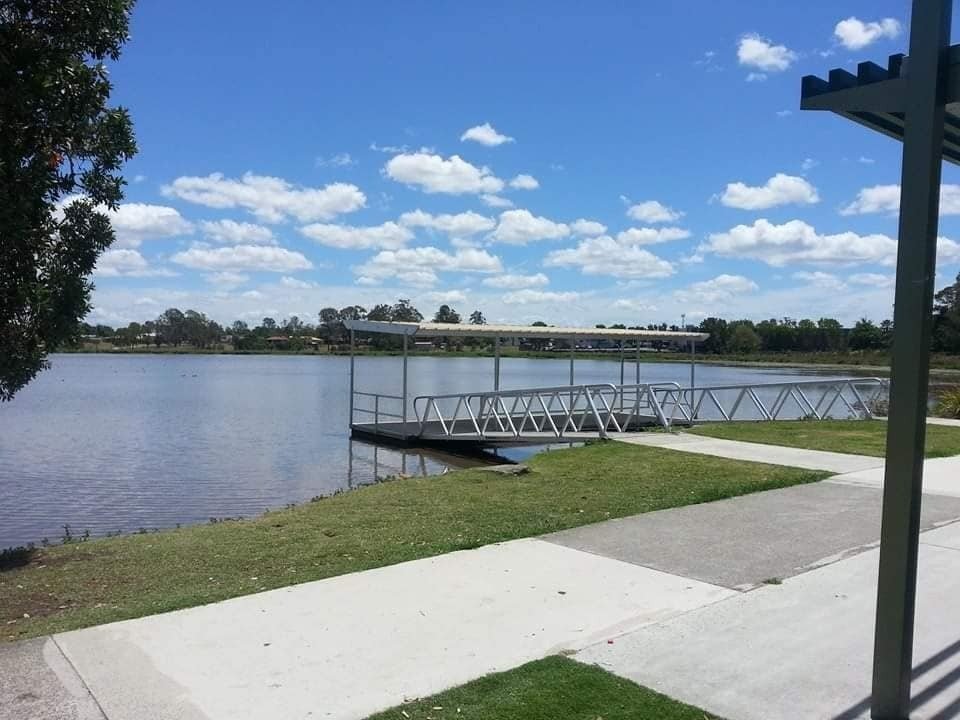
Sorry guys I missed the comments, yes that is the model boat club jetty, they have a clubhouse just out of shot of that image, no swimming, its pretty yuk This weekend cladding will commence frame is complete!!, Xmas has gone from assembly to plating of model. cant wait for that stage as it will look like a ship then.
- 454 replies
-
- 2
-
-
- Union Steamship Company
- Stepcraft 840
- (and 3 more)
-
Thanks Egilman So I will go into a bit more about what going to be covered, not all on the same model and indeed not even on full models but I might pull up some ones already done to demonstrate. I will however be going over the creation of a very well known hull that has about as many undesirable aspects that you can hope for. No as built plans, No printed as designed lines. Tapering planking thickness from garboard to sheer That being the Cutty Sark, it is a very very simple hull to model and has these unknowns to it that we can now solve due to drawings from the past and data collected from the restoration along with about 1300 photos , some I took while over on it and clearly illustrate the unknown aspects. So it will be a case of examining the midship section against the 5-6 that exist and verifying the correct one against photos of the frames and the scan and then using the correct lines to surface the hull and again fitting that faired against the scan. A lot of lines you see that look correct are not, as no doubt lots of people know already, and its not until you setup frames and start to bevel or plank you realise this and have to add/remove material from them and still get a lumpy hull, this will remove all of this and give you perfect lines and results every time, and the ability to develop frames anywhere you want at any thickness of material and be able to cut them as accurately as your woodwork skills allow. I have done this all before for work so it should be straight forward this time. The other aspects will be things like Chine hull creation with no joins so it can be edited as one surface, How to create a lines plan when you have no body plan. Planking layout, carvel and clinker Reading Shell Expansions and how to reconstruct in 3d space Developable and non developable surfaces and how to get true shape for panels How to section models with dynamic sections that update as you edit the hull fairing curves and surfaces Working with images in 3d space How to get heights and measurements of fittings and structure from photos accurately. How to get CAD onto your wood accurately and easily But if you have anything you want covered, even if you don't have cad skills I will see if I can answer it. Although you don't need 3d skills to watch this it will make more sense if you do but you will absolutely want to know how to read plans and lines properly, terms like rise of floor, deadrise, tumblehome, perpendiculars, strakes etc will not be covered and assumed a modeller will know this stuff already. I will probably end up doing this at night or early morning so will be half asleep. hence why I have to do this at Xmas so I don't compromise my day job by being too tired.
-
Yes I have used Orca but to be honest the only feature as a modeller that I really need from it is the updating sections, the rest of it is largely already part of Rhino it's just the tools are all put into the ORCA toolbar to make it easy. It is a great tool but for that one function it's too expensive and given this is targeting hobbyists, I doubt they will buy a plugin that cost more than Rhino itself does. I used to do Naval Architecture as a career as well building the prototypes to the client brief and nailing the look/functionality of the vessel prior to Lloyds involvement and even I would not buy it for that amount, its just too high priced for one function( for me that's the case) luckily my employers used to have that covered anyway but yes it's great. I will be showing a free alternative way of doing it.
-
Over the last few months I have been asked to do some training on how to take lines plans and take them to the point in 3d that sections can be checked, new frames cut, the plan can be checked and corrected for fairness and even things like planking and plating developed. I will be covering a lot more than this to, and will attempt to answer questions on the fly I am based in Australia so will try to make a time that suits as many as possible, but will record the lessons as well I am a professional 3d artist and qualified trainer with many years in marine modelling, not so much the math side of Naval Architecture but the creation of hull forms in 3d from old plans or scan data, even how to make a lines plan from deck views and profiles with no body plan. I will be running a free live workshop over the Xmas break using Zoom. 23rd Dec starting at 6.00am Brisbane time 4-5 hours This post is to allow people to ask questions about the workshop and express interest so I can gauge numbers. This post is not for discussion of other software if that is your goal I suggest starting a new topic, I will be showing the industry standard and it is the standard for good reason. I ask that you please keep this to questions about content and interest only thanks. I will be using the standard software for this work which is Rhinoceros 3D and although it is the ideal tool the lessons can be ported to other applications. This workshop will be using fairly basic concepts and not be over complicated, but I would suggest you are familiar with working in 3d in some way however if you want to learn this later by all means come along and see how it’s done and then decide later if it’s something to learn for you. Some of the topics covered include Re-drawing lines accurately Fairing curves and surfaces Build a usable hull surface that can be used to build an accurate model Develop frames, built up, ring and bulkhead Working with scan data How to determine number of frames, How to know if lines are accurate How to develop planking and tapers in advance How to get this data onto your wood accurately It will be several hours long with breaks A couple of members have already started practicing for this workshop I believe I will add more info as questions arise.
-
Re the trailer, going to get a Kayak trailer modified or a custom kayak one made to carry case, but will make it so it can also carry a kayak and probably one of those foldable trailers to so it takes up less room to store.
- 454 replies
-
- 3
-
-
- Union Steamship Company
- Stepcraft 840
- (and 3 more)
-
Oh and my local pond where it will sail.
- 454 replies
-
- 7
-
-
- Union Steamship Company
- Stepcraft 840
- (and 3 more)
-
We can still buy lead ingots here I know that much, half the weight balance will be batteries.
- 454 replies
-
- 3
-
-
- Union Steamship Company
- Stepcraft 840
- (and 3 more)
-
Yep custom trailer. Local Model club has a huge lake and only 2 kilometers away from home down quiet road. ballasted after water entry and displaced weight is 195kgs
- 454 replies
-
- 3
-
-
-
- Union Steamship Company
- Stepcraft 840
- (and 3 more)
-
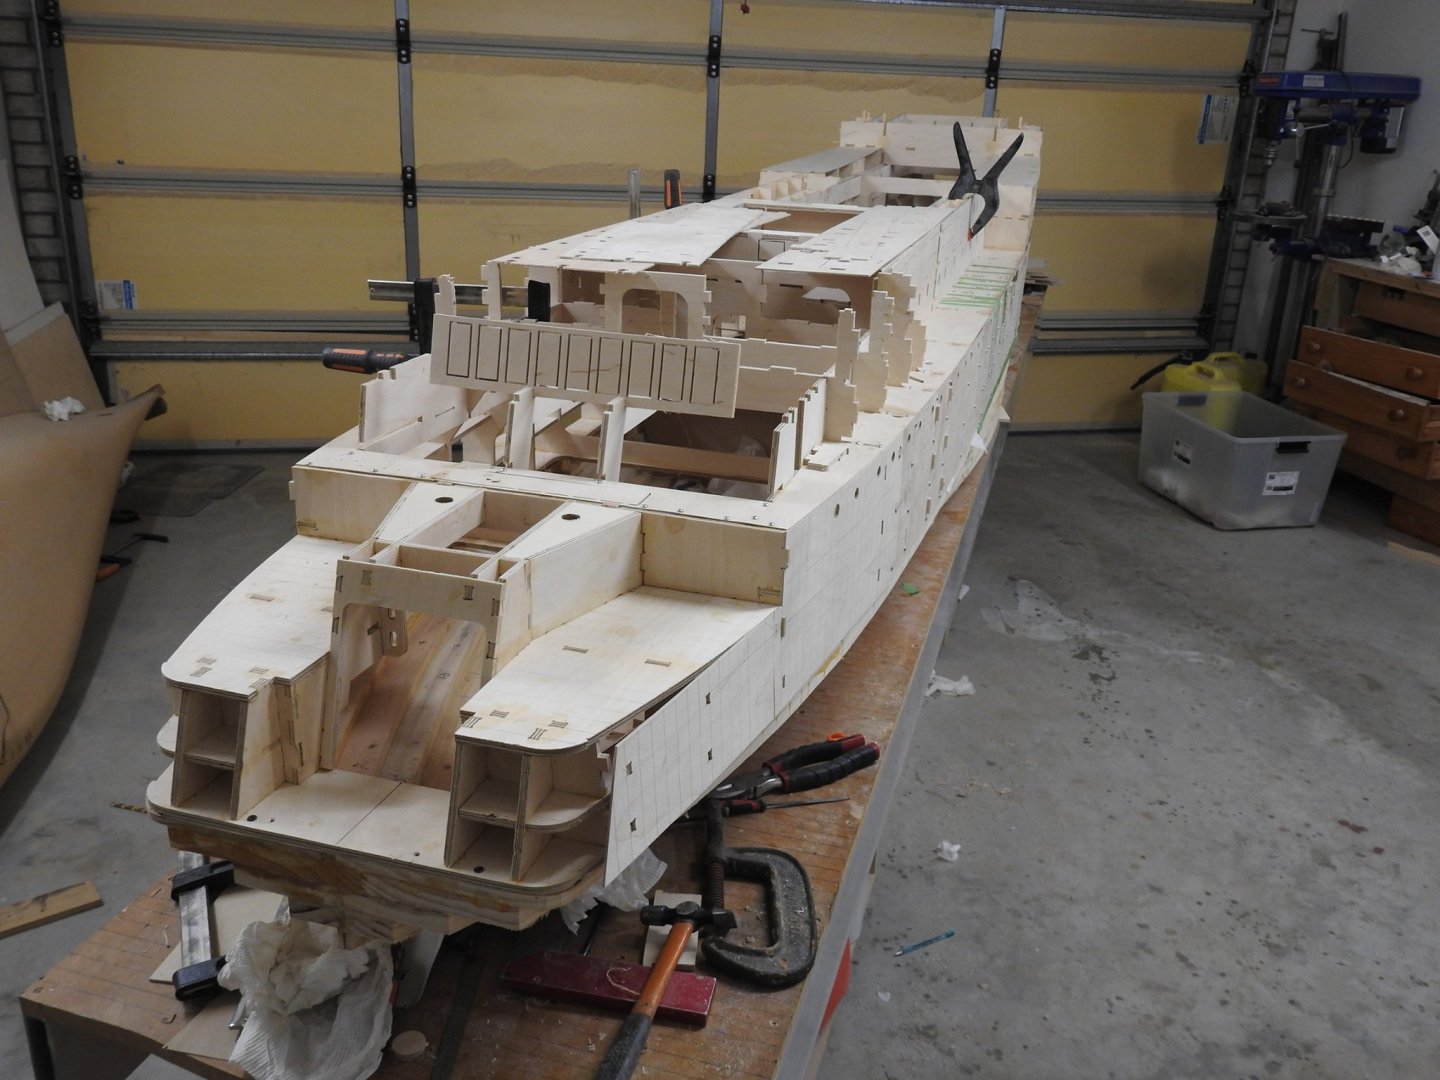
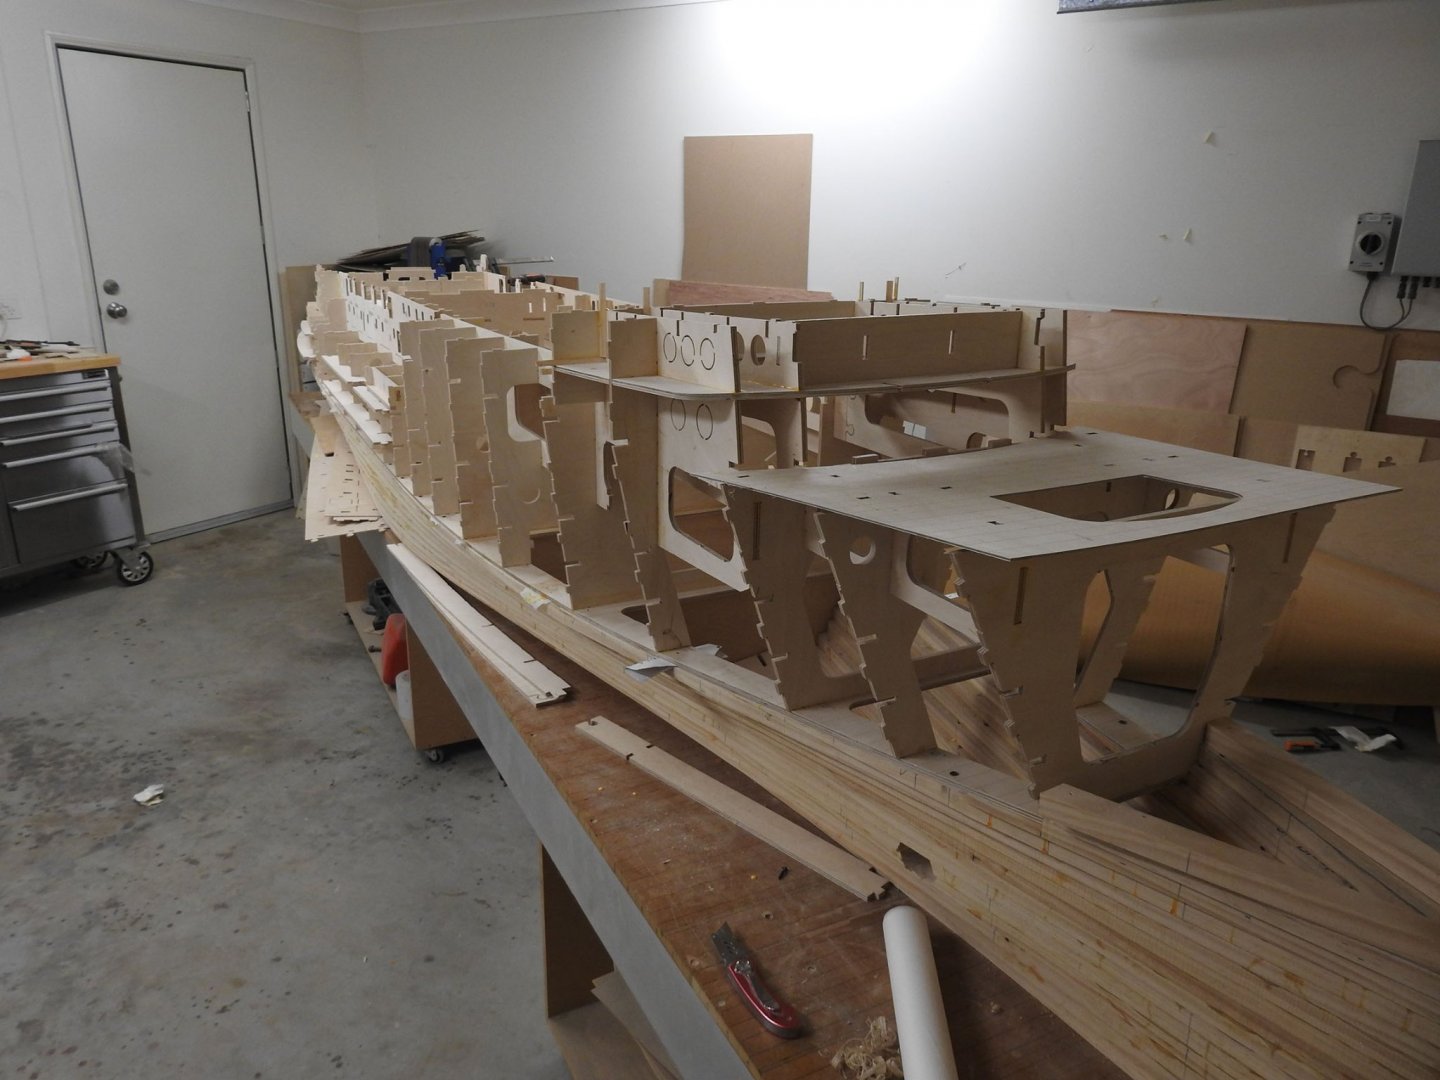
Progress, main framework complete, time for secondary frames and stringers now. hull stringers shown here on Stbd side are not pushed home, only sitting on to make sure I have them all. Plenty of hand room at stern door for working on rudder assembly


- 454 replies
-
- 9
-
-
- Union Steamship Company
- Stepcraft 840
- (and 3 more)
-
Awesome Kevin... And just for you here is a present to remind you.

- 454 replies
-
- 6
-
-
- Union Steamship Company
- Stepcraft 840
- (and 3 more)
-
@Kevin Yeah I get that all the time, "will you see it on the water" probably not but I am doing this as a museum quality model that happens to run. there is a good chance it will get bought and displayed somewhere given its fame, not that I am counting on it.
- 454 replies
-
- 1
-
-
- Union Steamship Company
- Stepcraft 840
- (and 3 more)