HOLIDAY DONATION DRIVE - SUPPORT MSW - DO YOUR PART TO KEEP THIS GREAT FORUM GOING! (Only 13 donations so far - C'mon guys!)
×
Richard Dunn
-
Posts
529 -
Joined
-
Last visited
Content Type
Profiles
Forums
Gallery
Events
Everything posted by Richard Dunn
-
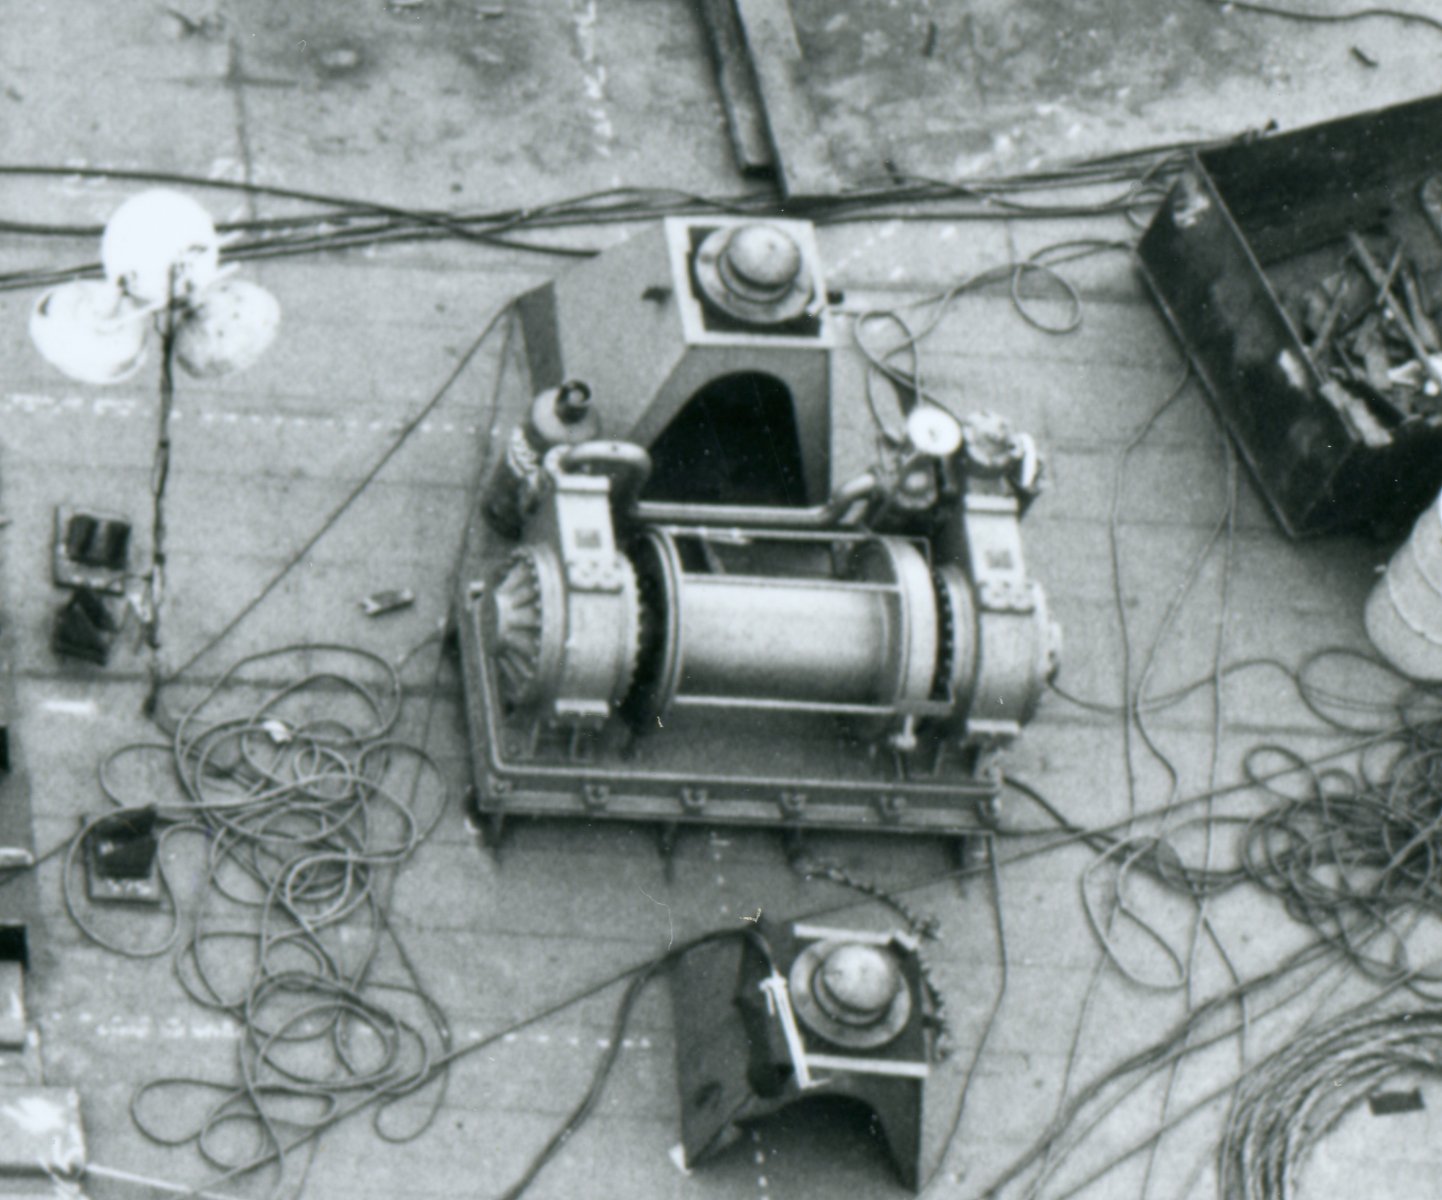
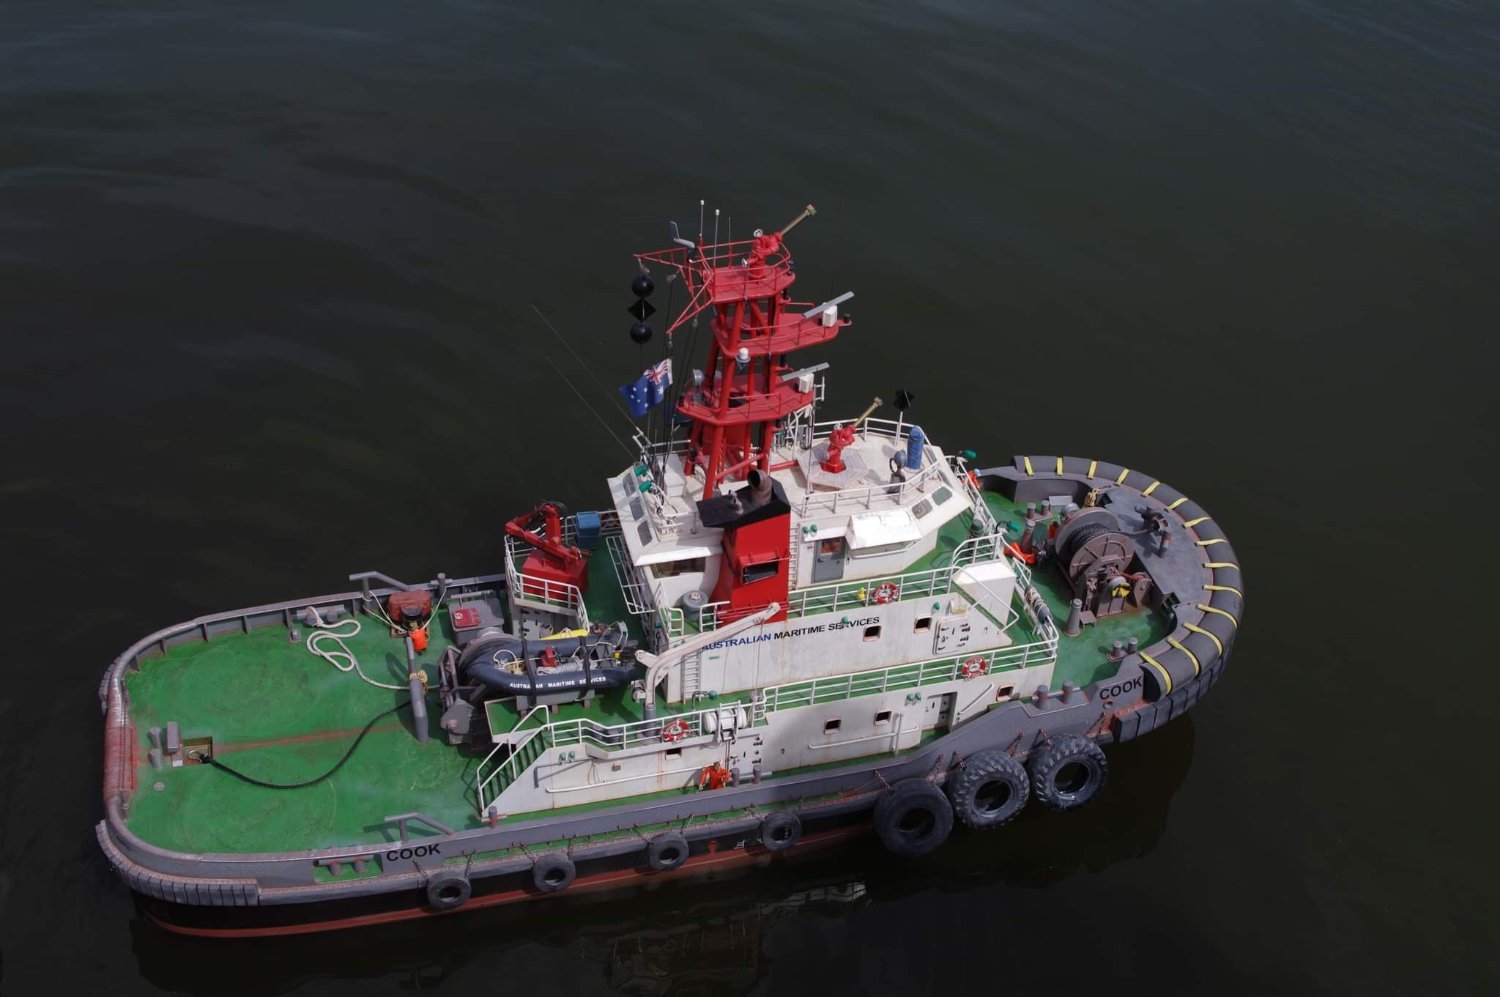
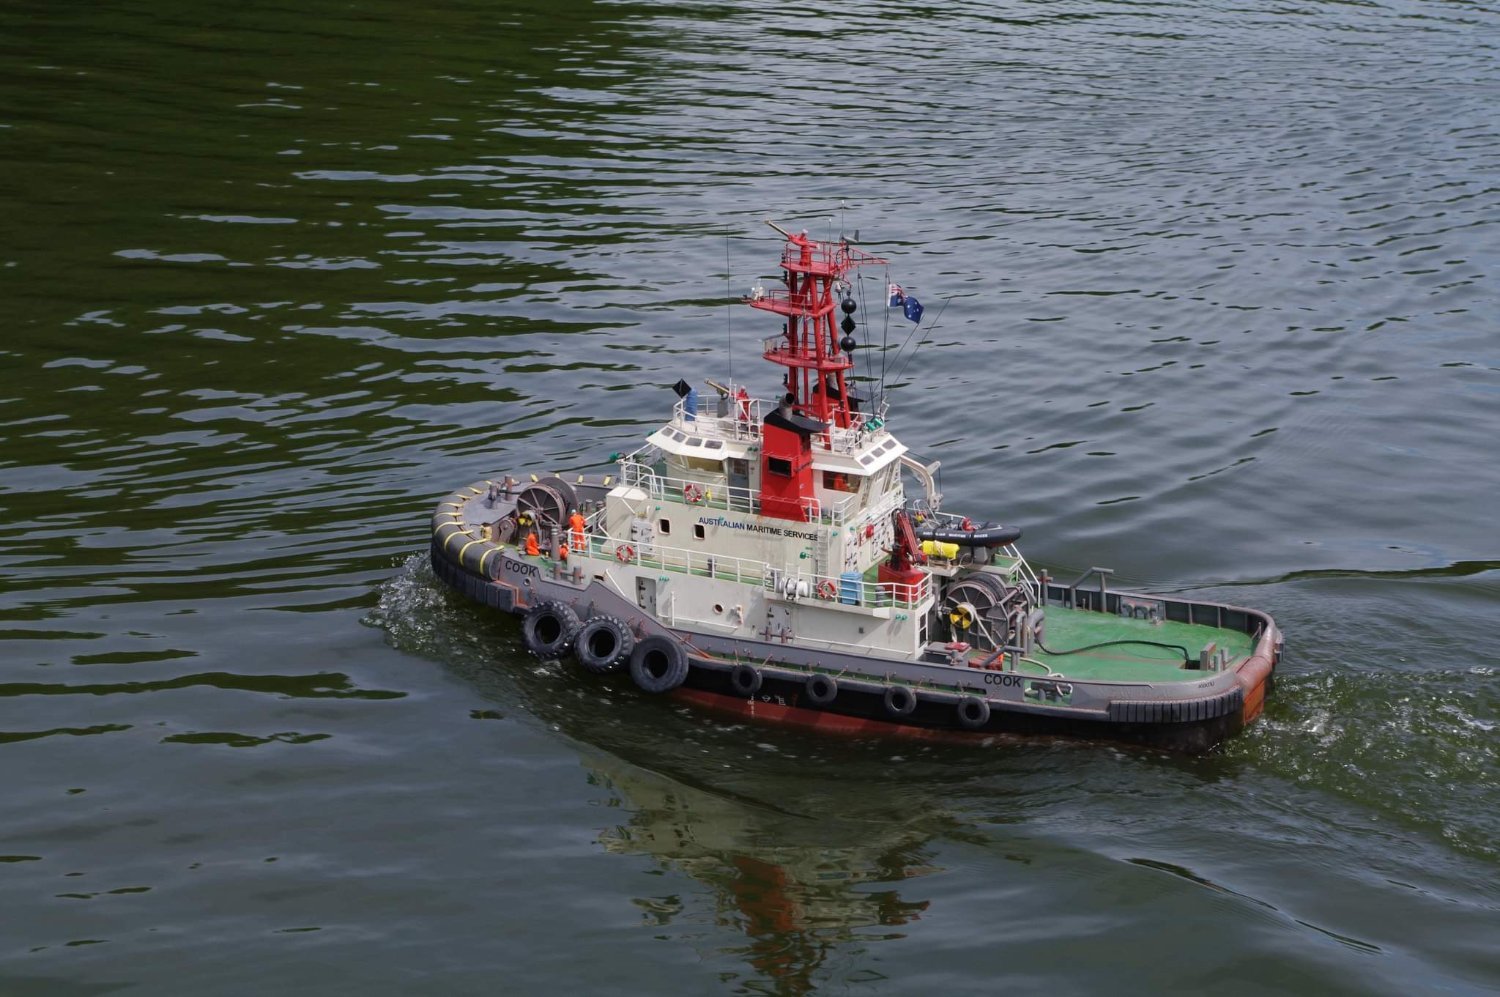
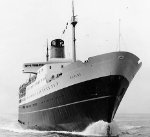
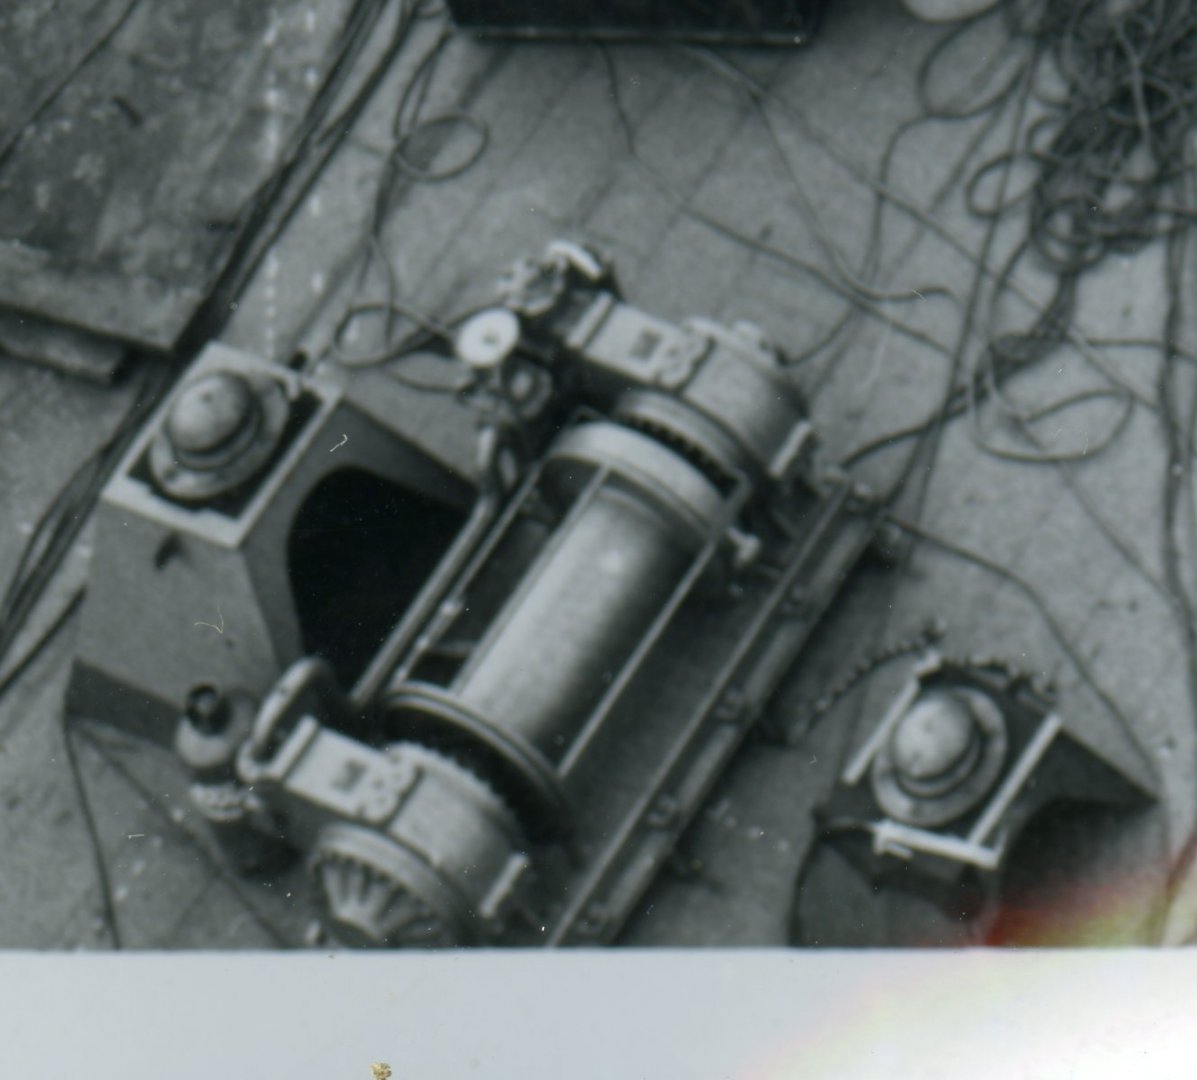
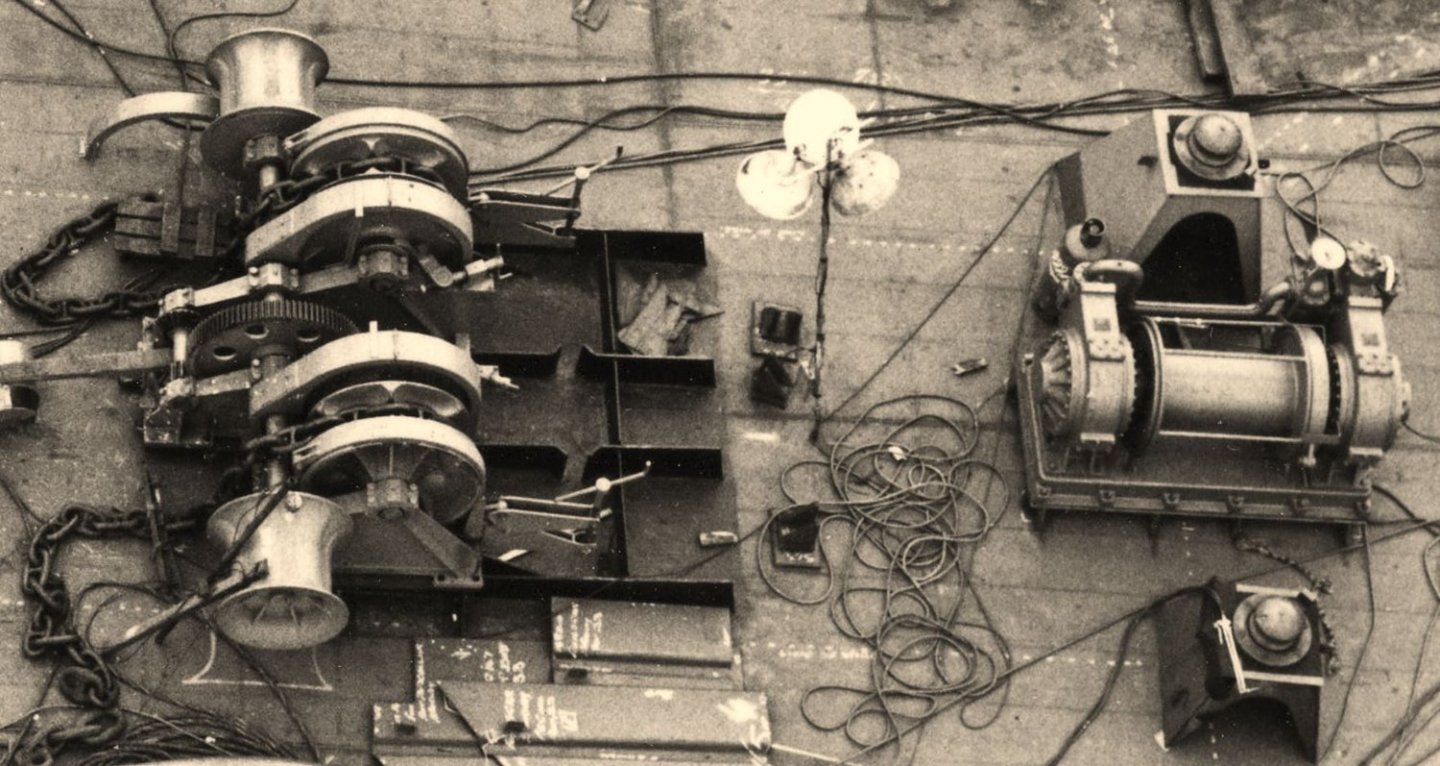
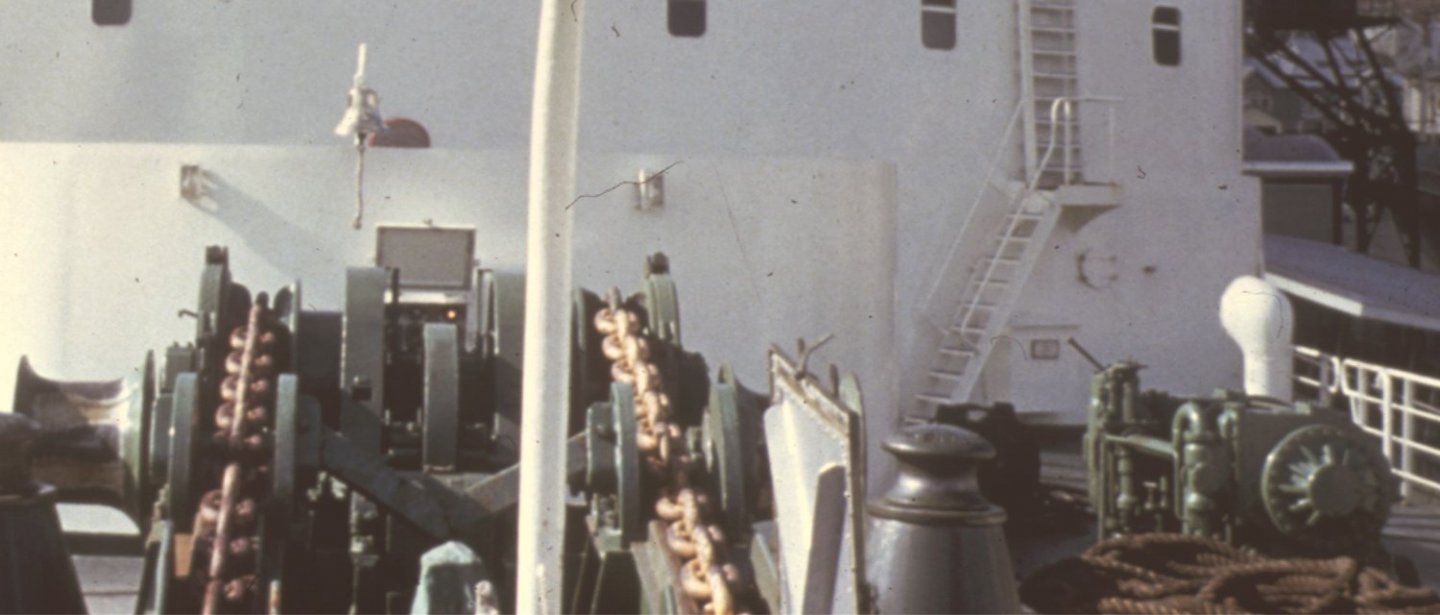
 I need to find more reference of a particular winch and windlass, in either photos or plans for my model The details I need are on the "plumbing of the 8 ton winches" Winch These are very hi res scans of part of a much bigger image of TEV Rangatira Seen here showing both. Same gear on TEV Rangatira I have partial plans of Windlass from the manufacturers archive but for steam conversion type. The 8 ton winch is a black hole apart from these photos.
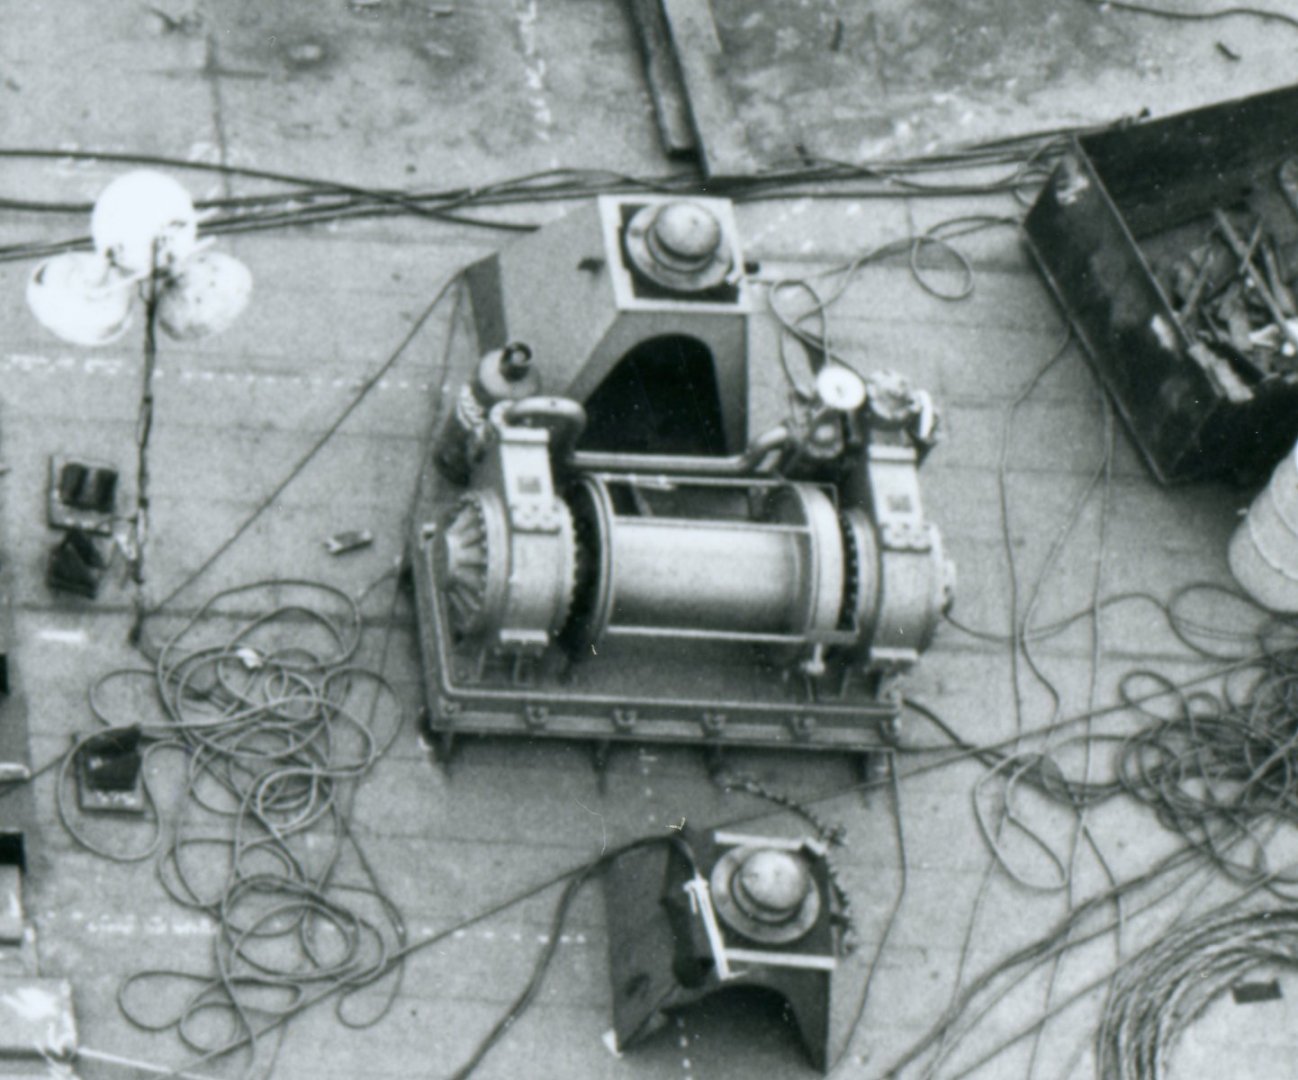

-
- 1
-

-
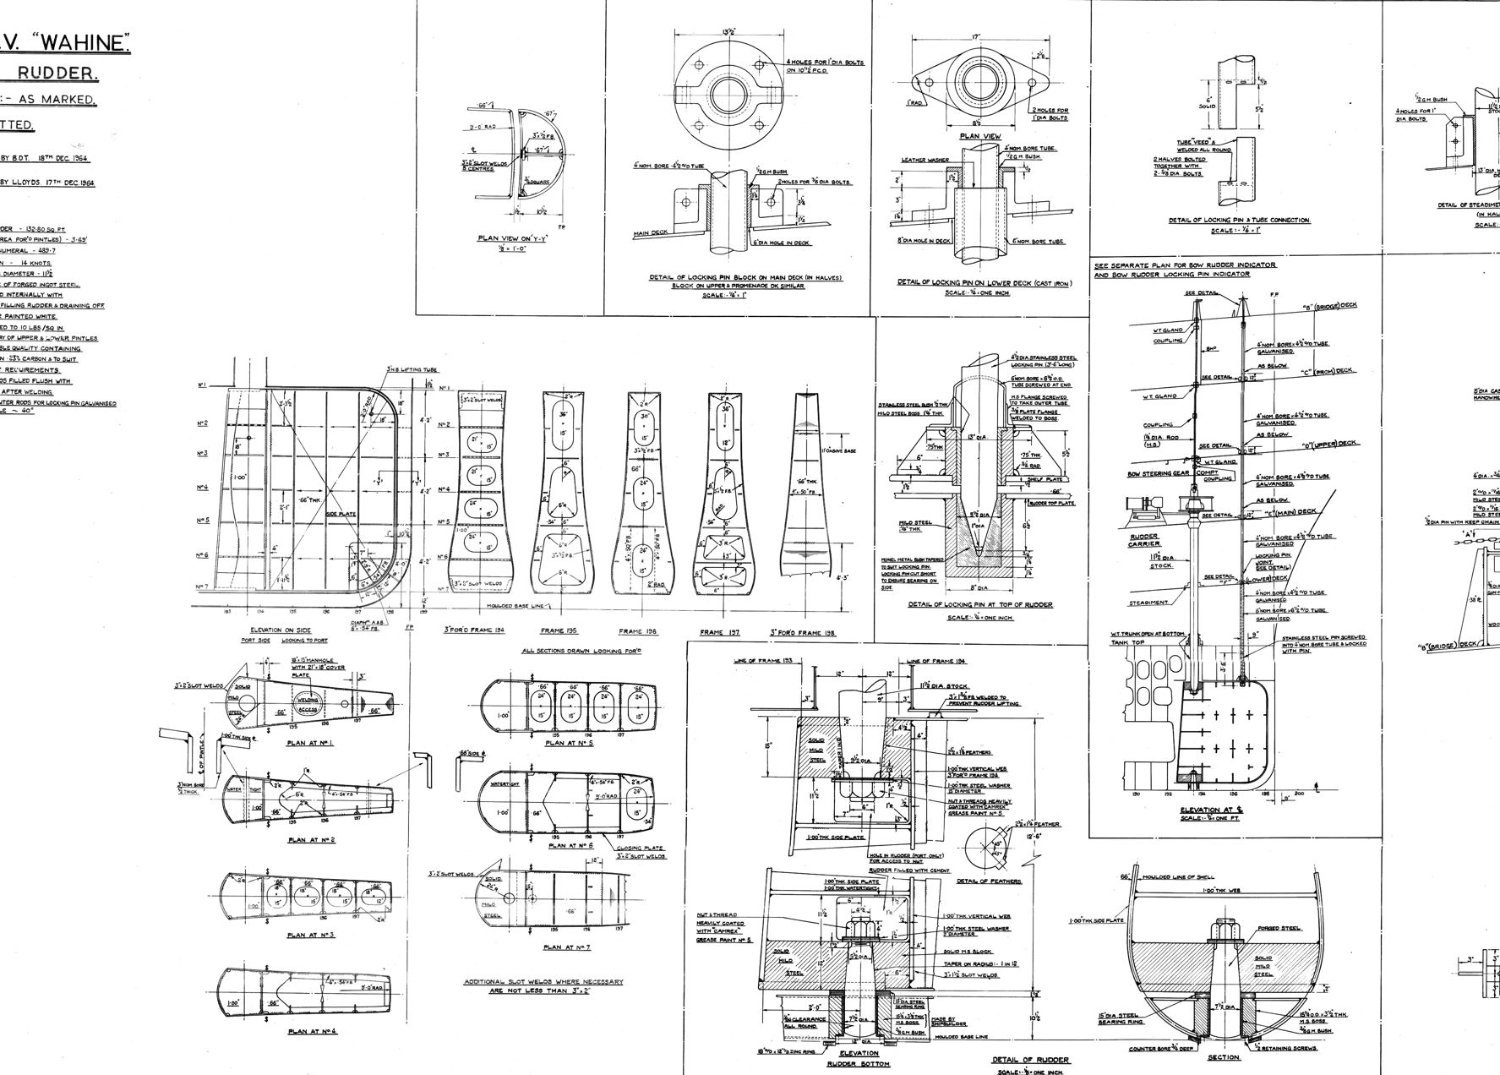
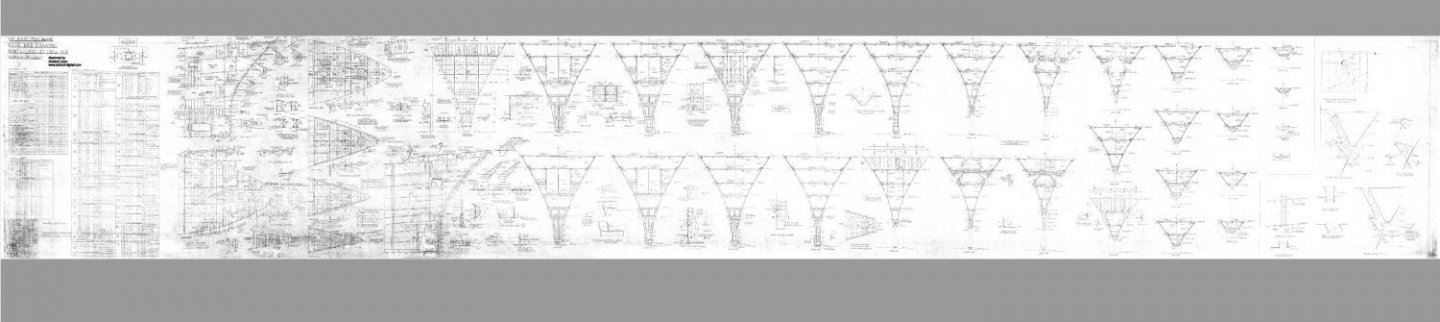
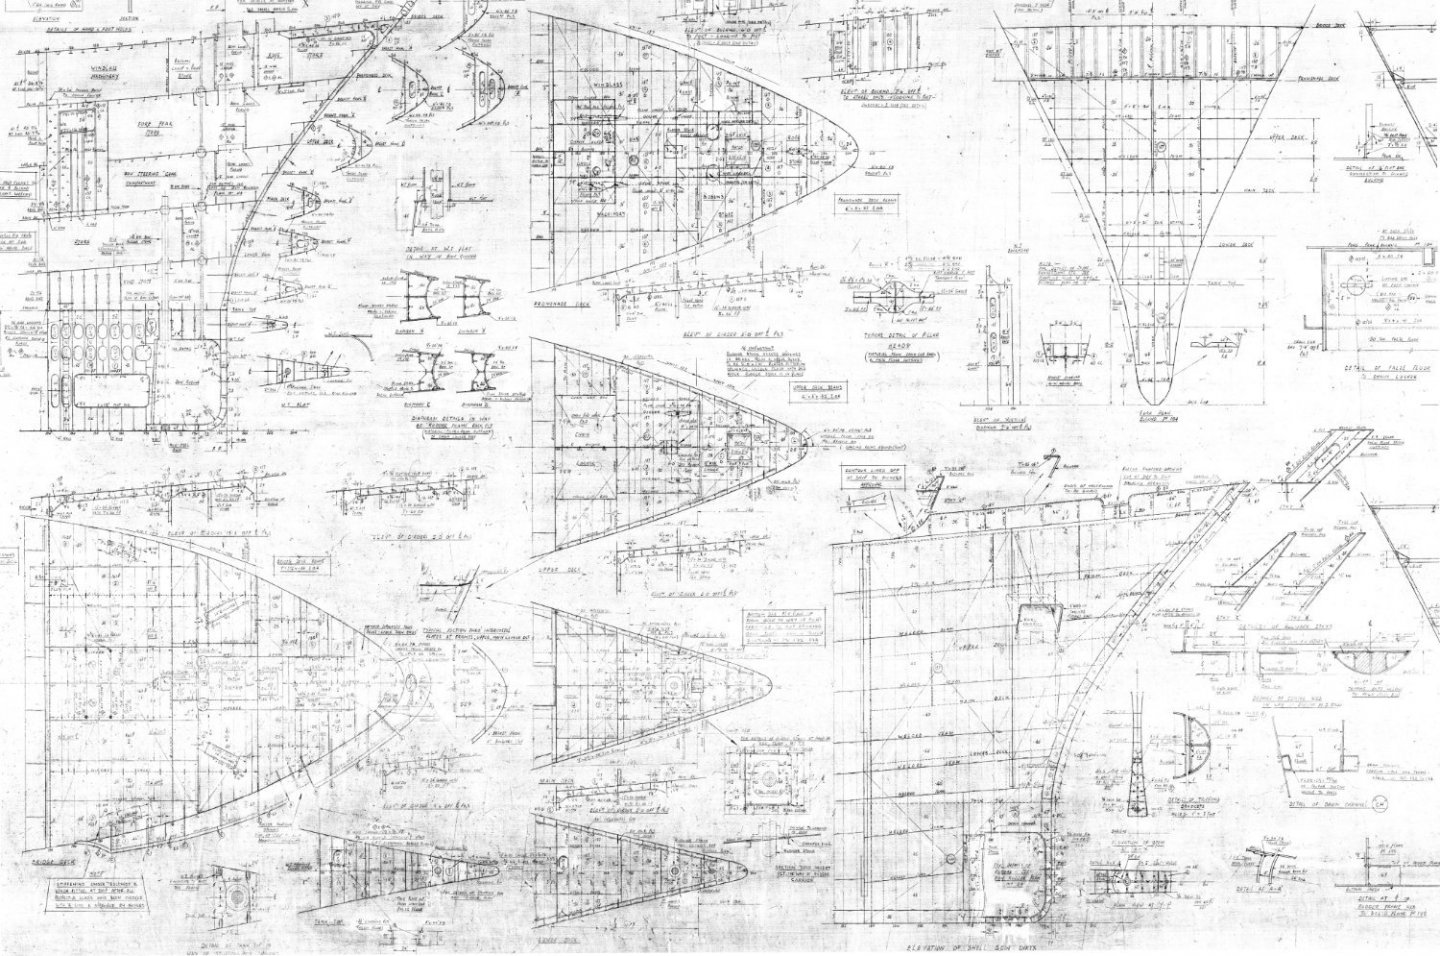
Yeah its not that uncommon in that period. Here is the plan. Also this plan is HUGE its 5 m long in reality and one of the hardest to read due to its condition, I had to restore it, I can read it but it was a challenge, you can see why the model is so accurate when you have all the units construction plans like this. A close-up, I left this large so you can save it and look at detail, not all model builders have seen plans like this for real.

- 454 replies
-
- 4
-
-

-
- Union Steamship Company
- Stepcraft 840
- (and 3 more)
-
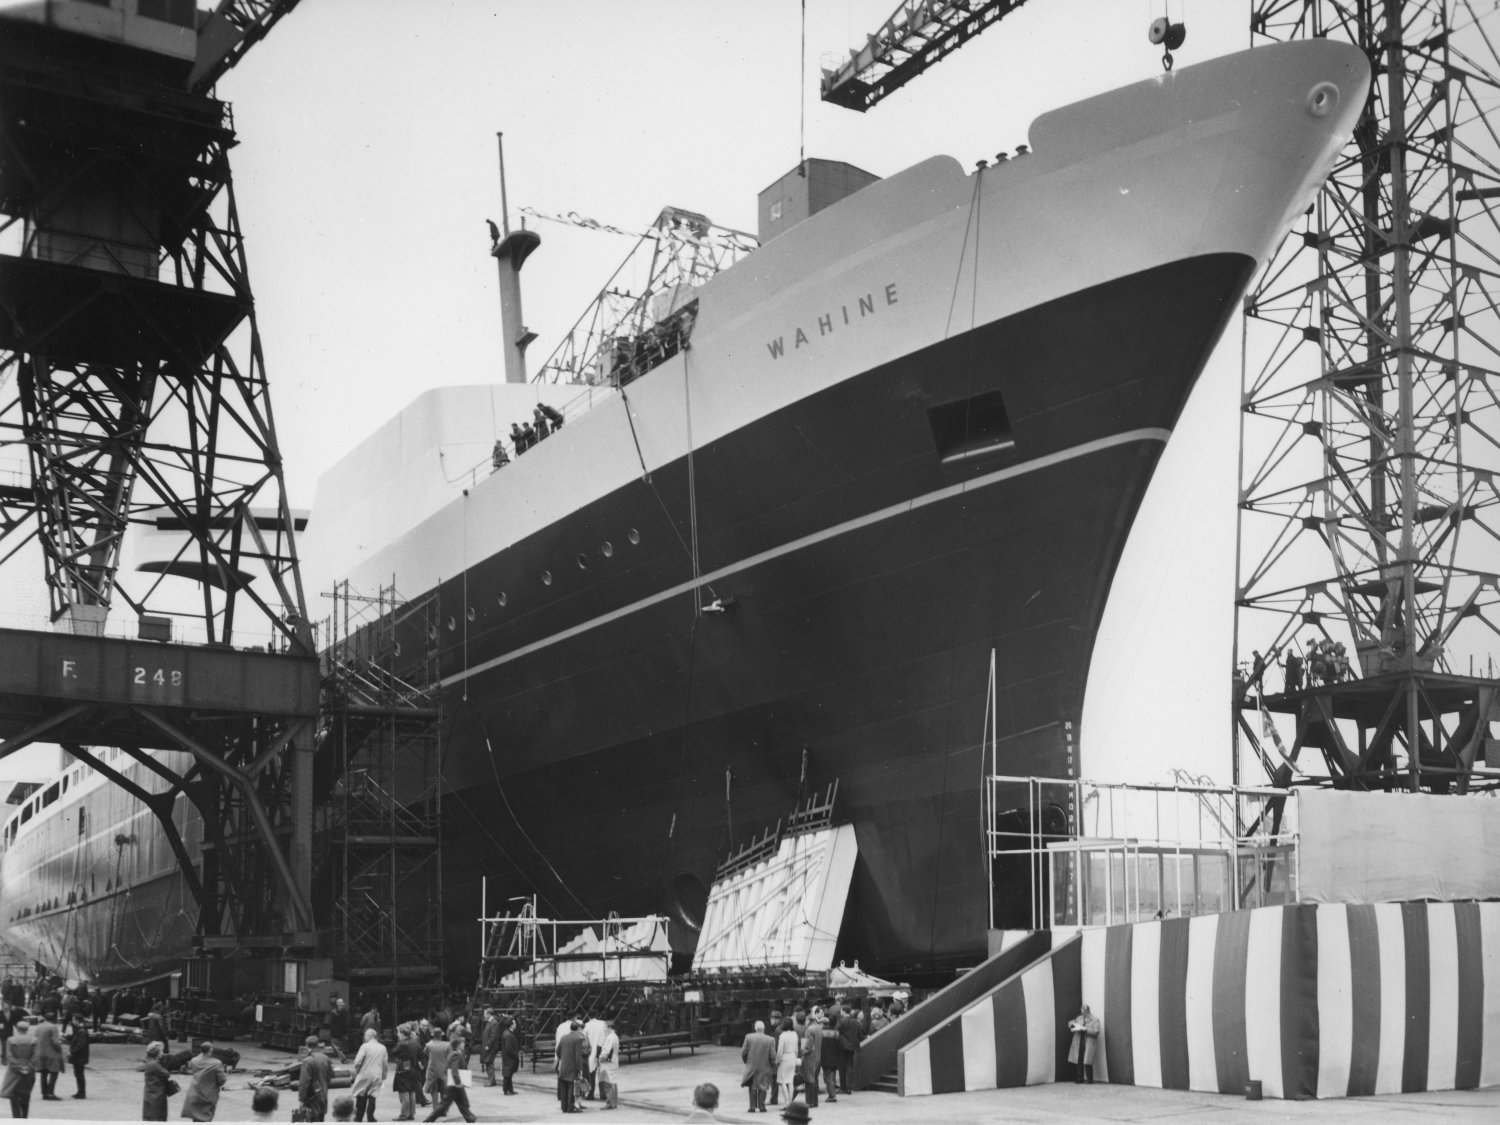
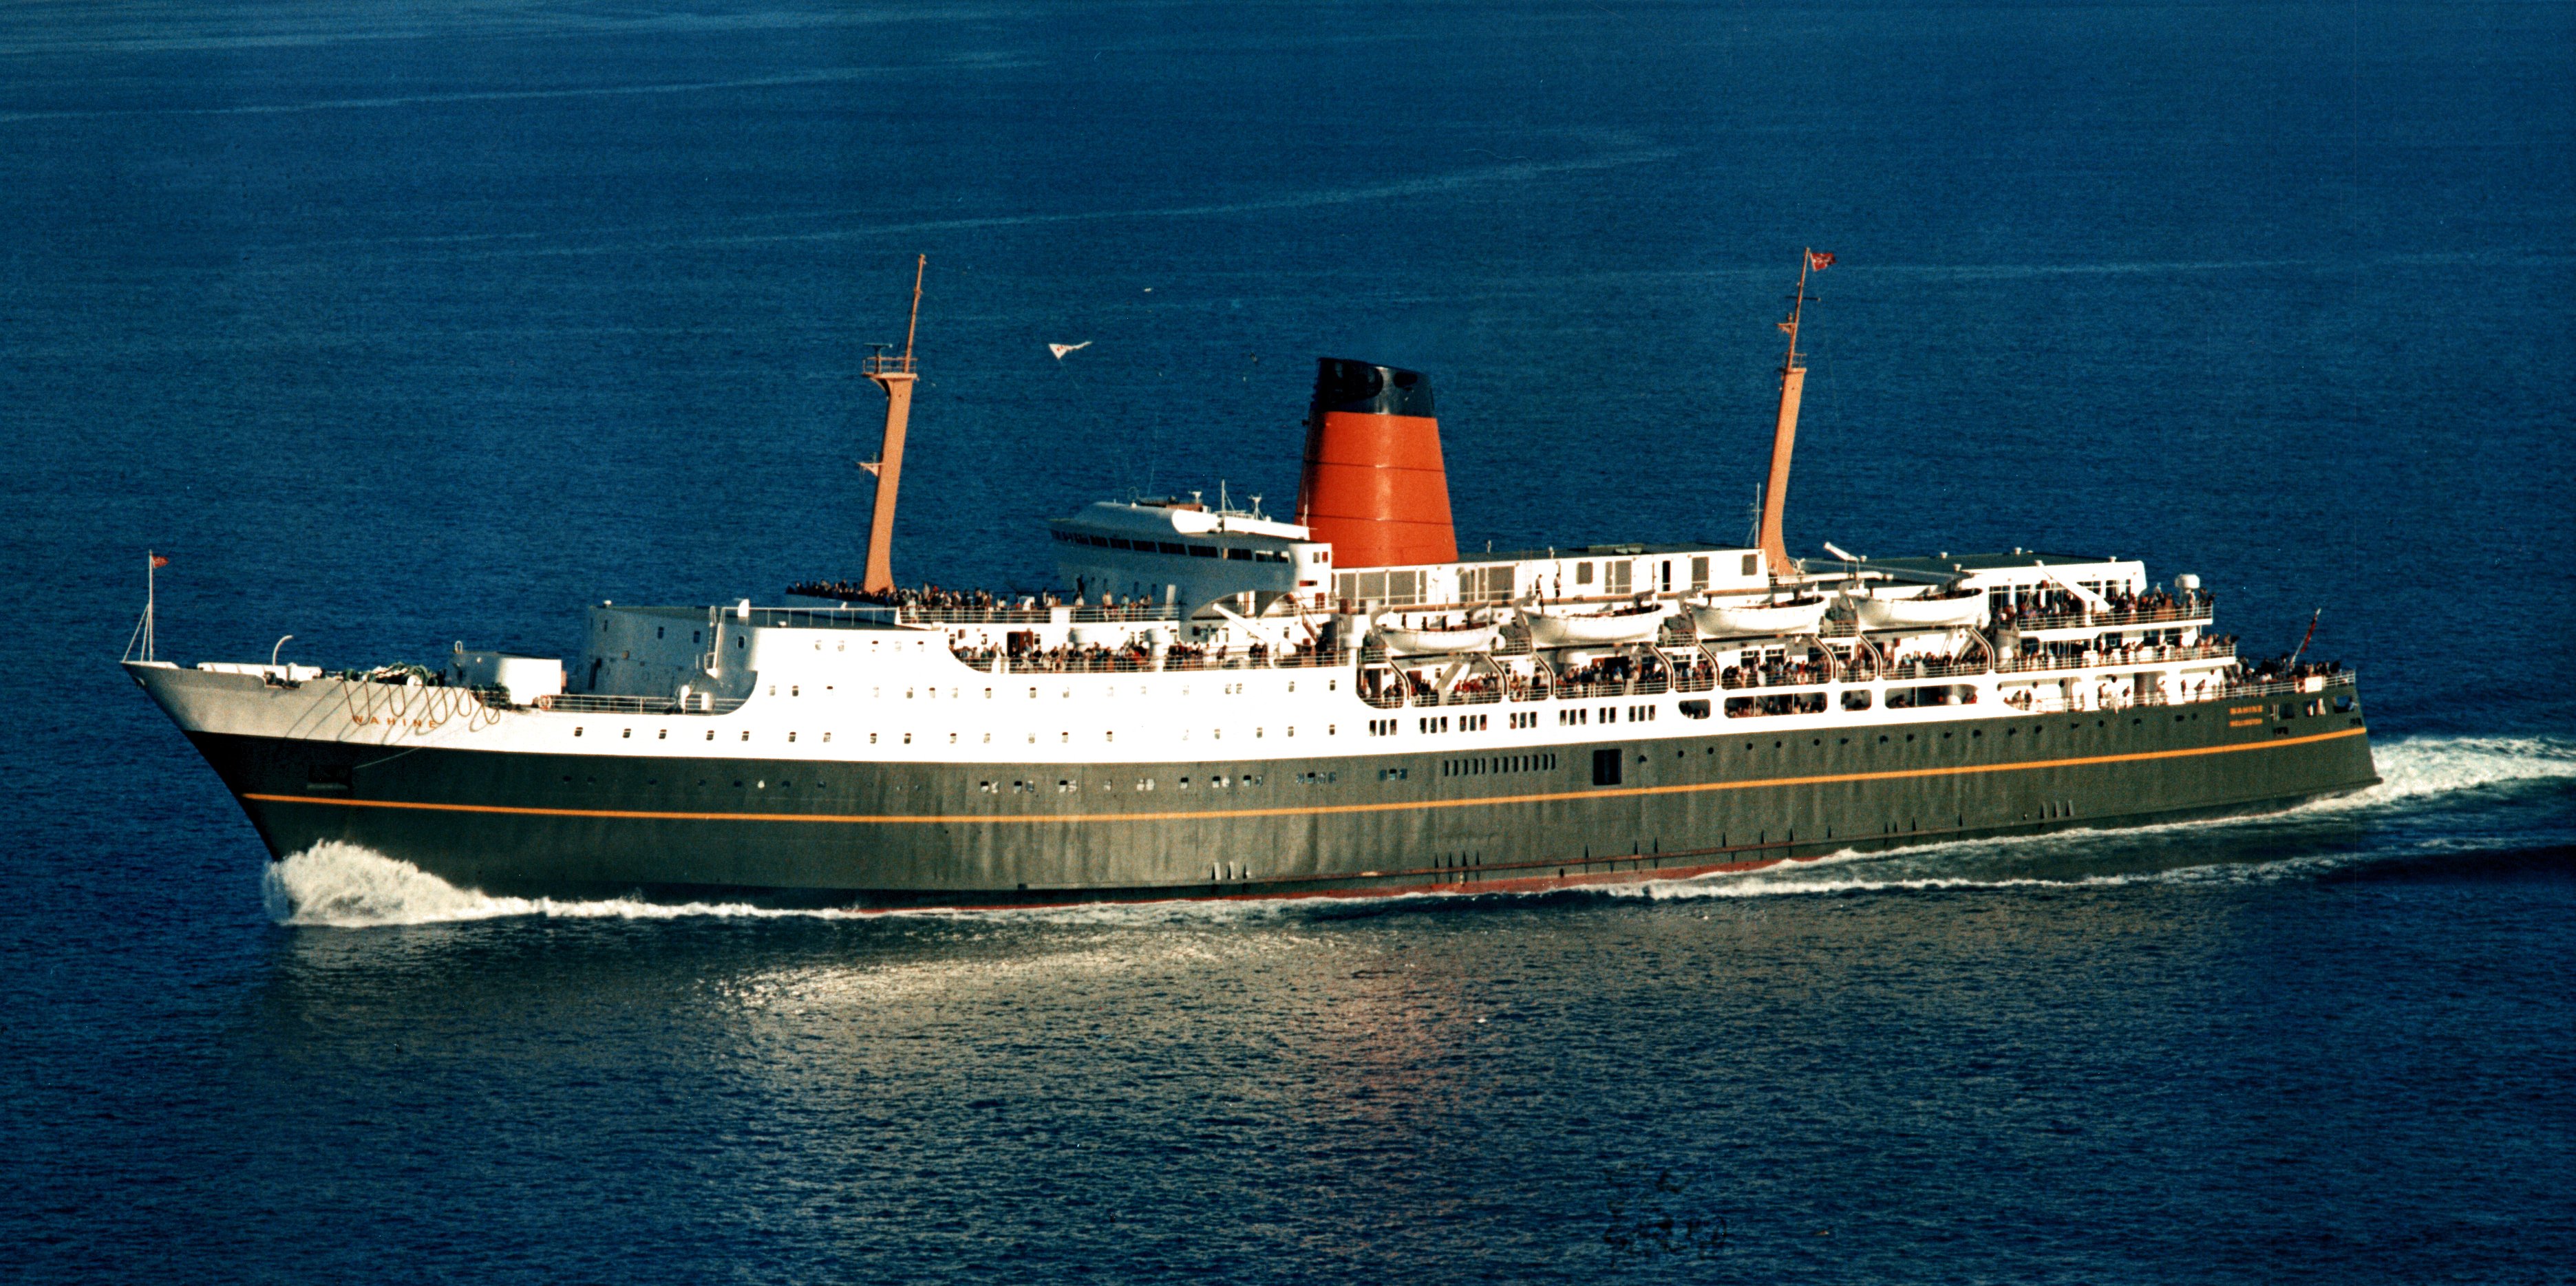
A shot of Wahine on launch day showing the gorgeous lines of the bow and the bow rudder.

- 454 replies
-
- 5
-
-
- Union Steamship Company
- Stepcraft 840
- (and 3 more)
-
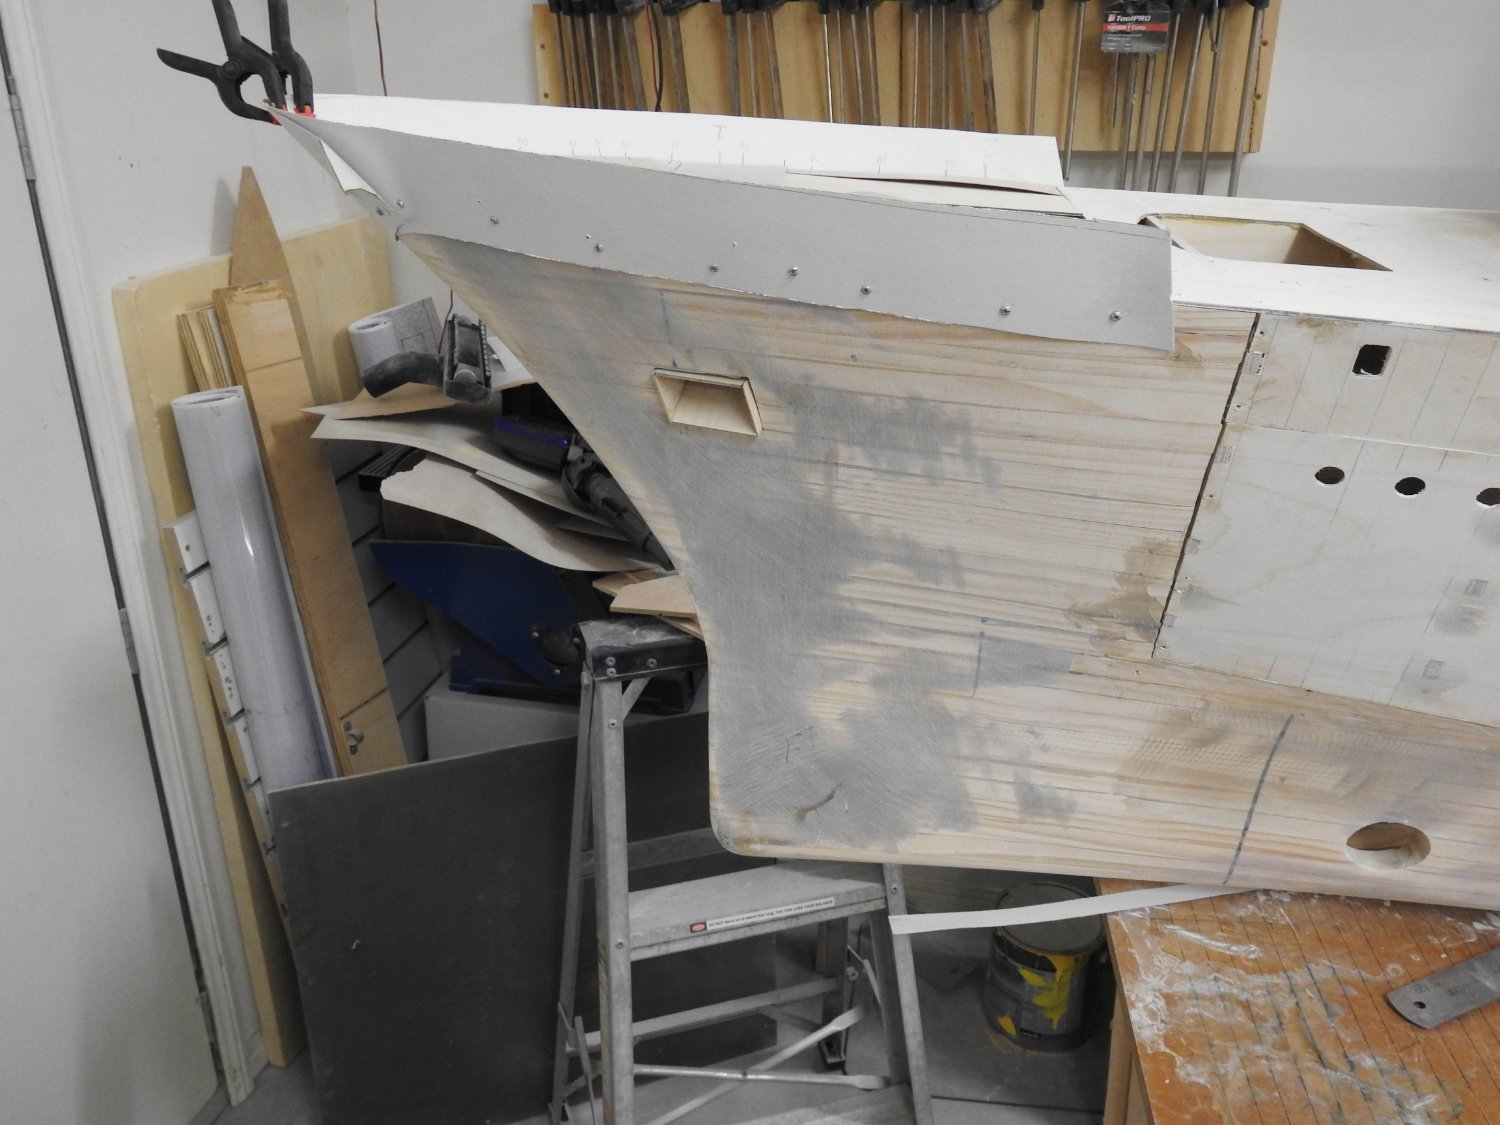
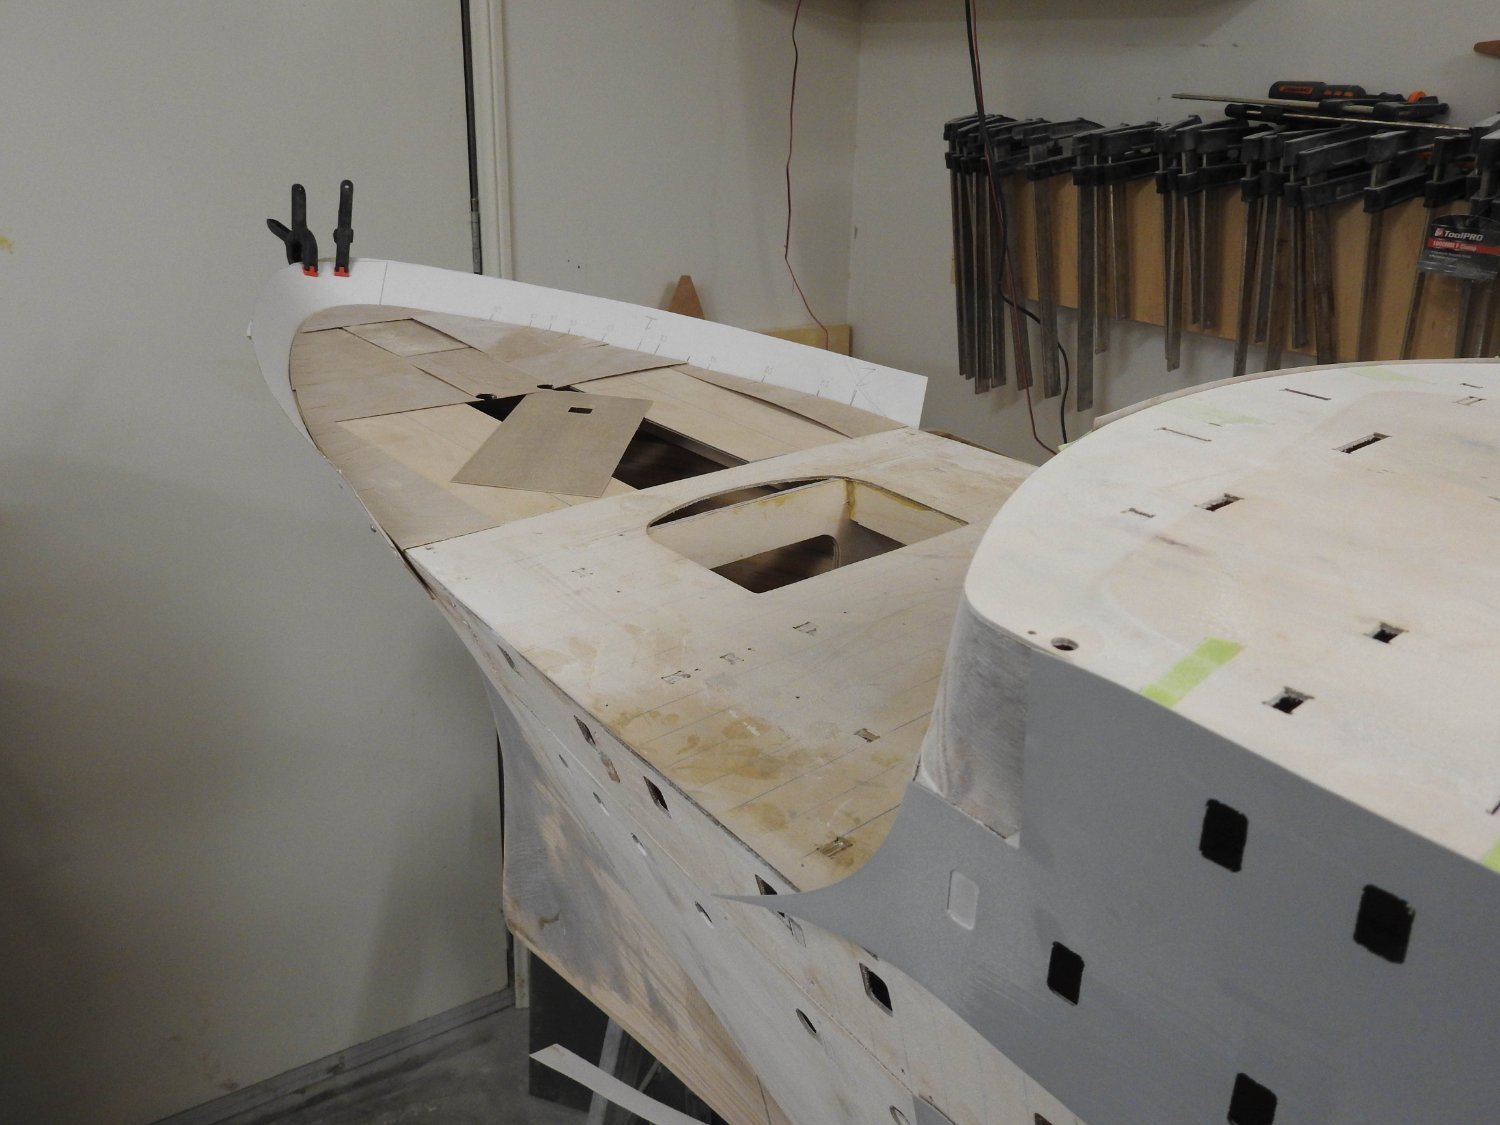
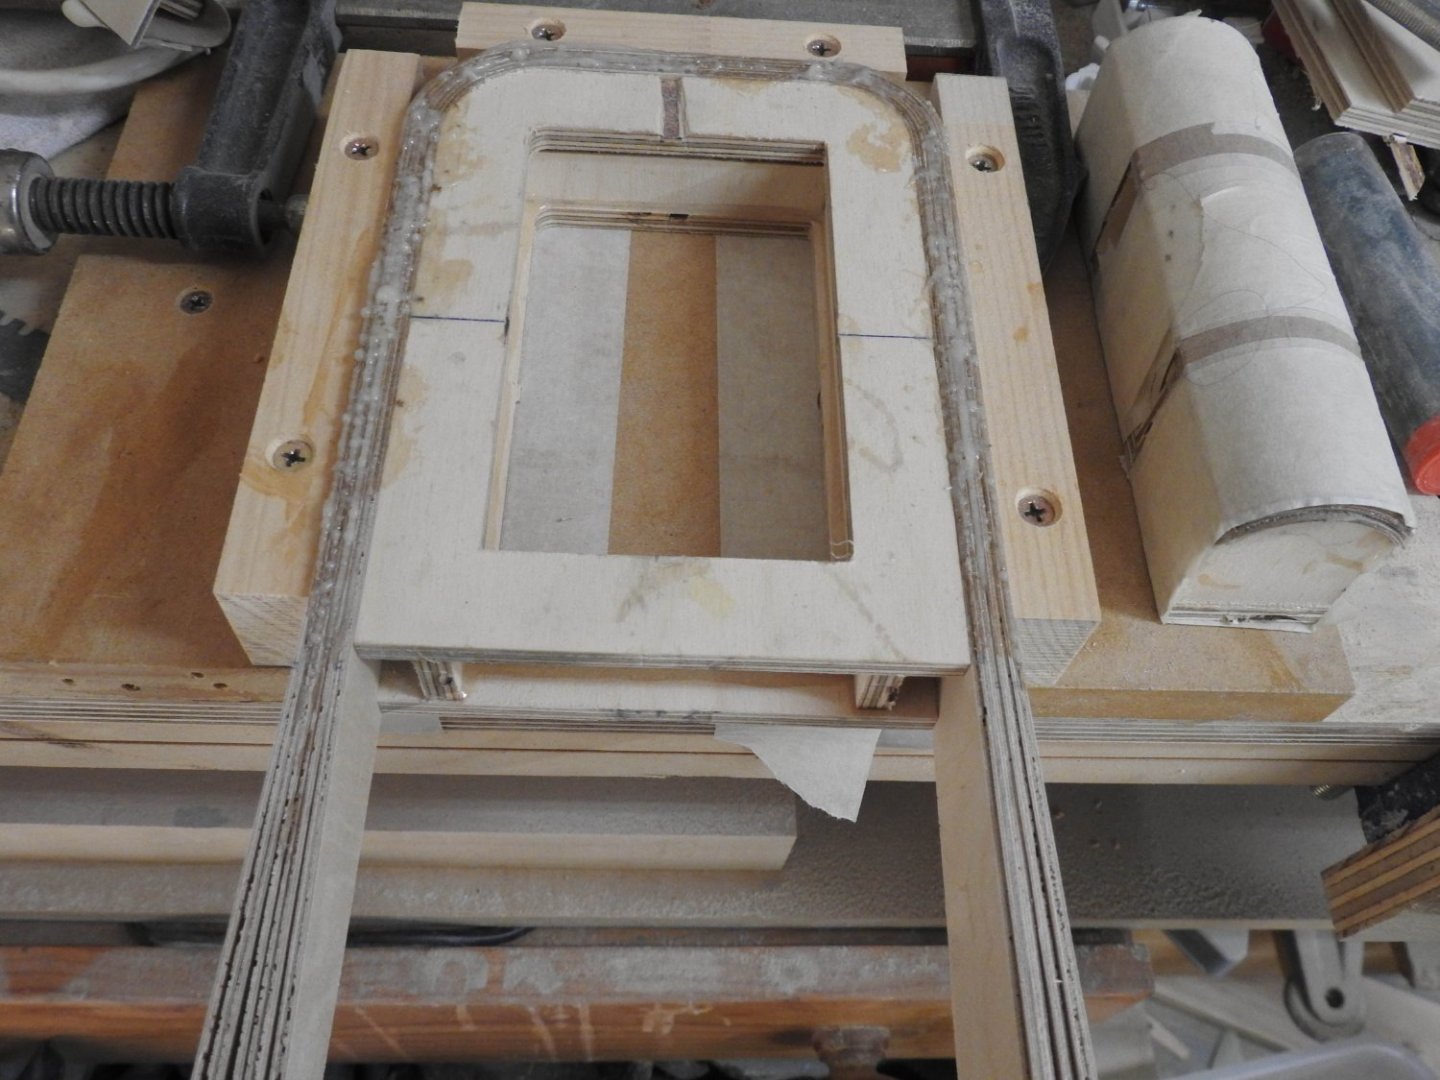
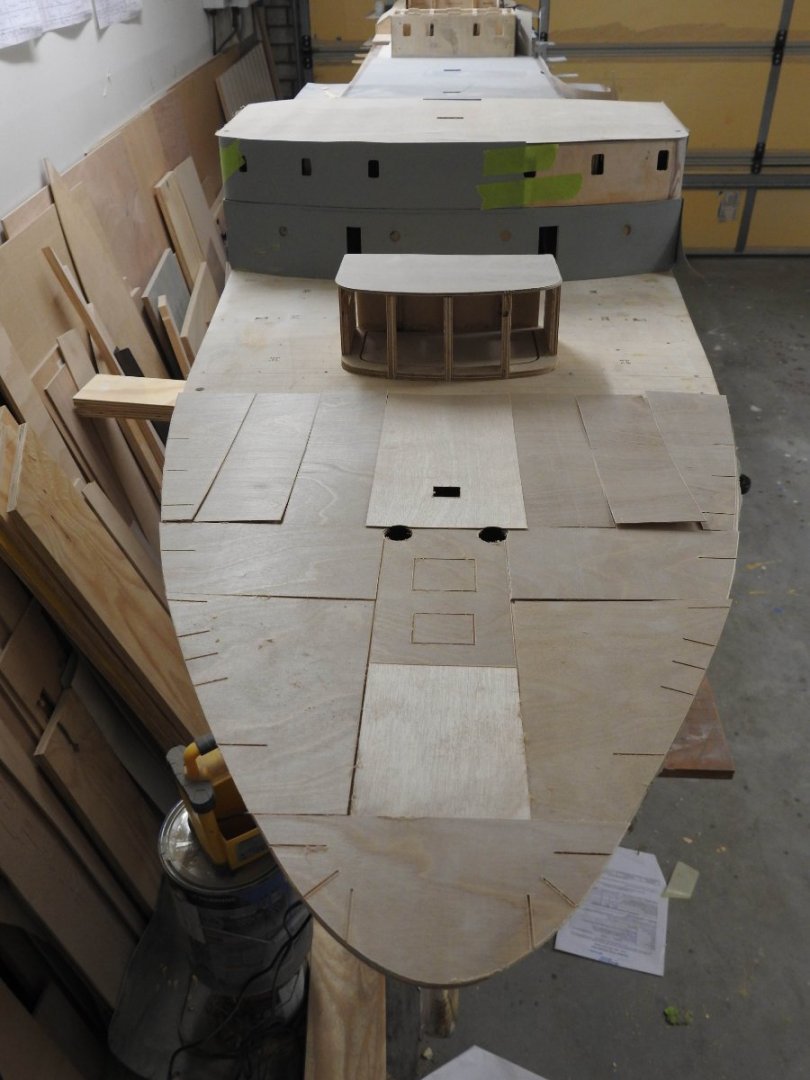
Some updates from yesterday. I always get excited when the bilge Keel and Bow Bulwark go on, it seems to define the hull in my eyes. The Bow rudder frame is laminated from 9 layers of .5mm ply, so VERY strong and rigid, next to it the radiused back wall of rudder space. now to cut the fore foot off the hull and build the rudder.


- 454 replies
-
- 7
-
-
- Union Steamship Company
- Stepcraft 840
- (and 3 more)
-
Guys its fine, I earn good money I don't blink at $500
- 454 replies
-
- 3
-
-
- Union Steamship Company
- Stepcraft 840
- (and 3 more)
-
The plan is to leave it at the clubhouse. It's only 18 bars
- 454 replies
-
- 2
-
-
- Union Steamship Company
- Stepcraft 840
- (and 3 more)
-
I only need 90kgs of lead but some of that is casting cost, I am happy with price no need to be a scrooge about it.
- 454 replies
-
- 2
-
-
- Union Steamship Company
- Stepcraft 840
- (and 3 more)
-
Lead is $2100 per ton here and copper just over $9000
- 454 replies
-
- 2
-
-
-
- Union Steamship Company
- Stepcraft 840
- (and 3 more)
-
I have done some think this morning and am considering dropping the water ballast in favour for lead. I need to stiffen the ship up and need to lower the CG and I can only do this with lead as it is 11 times heavier than water for the same volume. yes its $500 of lead but is the stability of the model worth it....YES
- 454 replies
-
- 2
-
-
- Union Steamship Company
- Stepcraft 840
- (and 3 more)
-
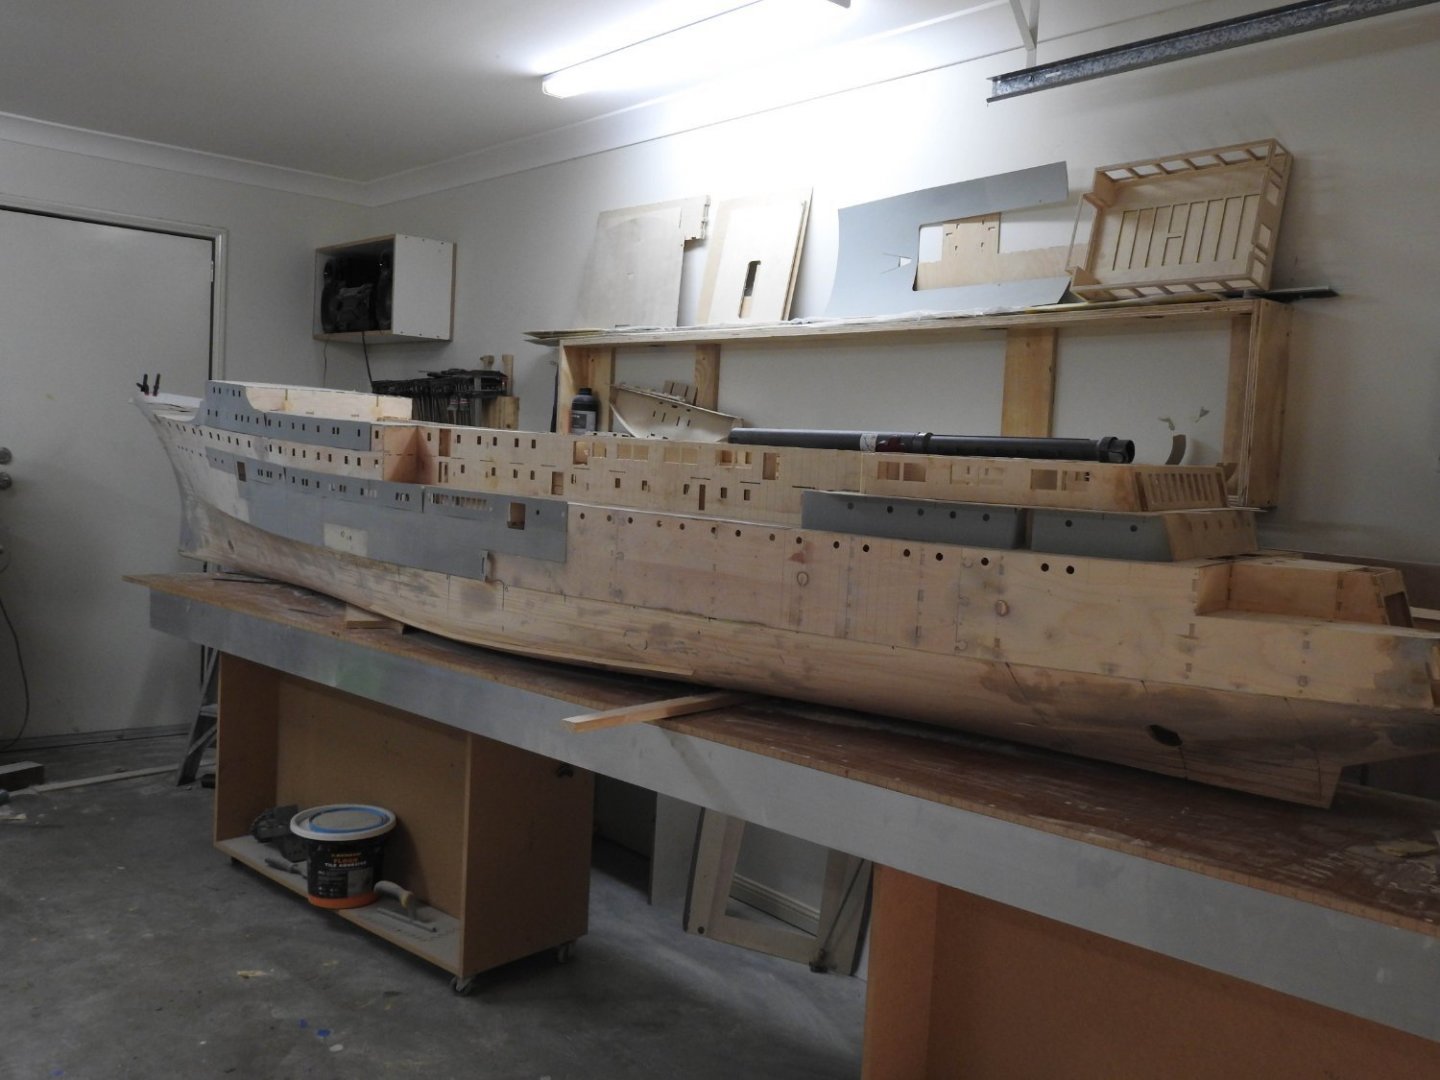
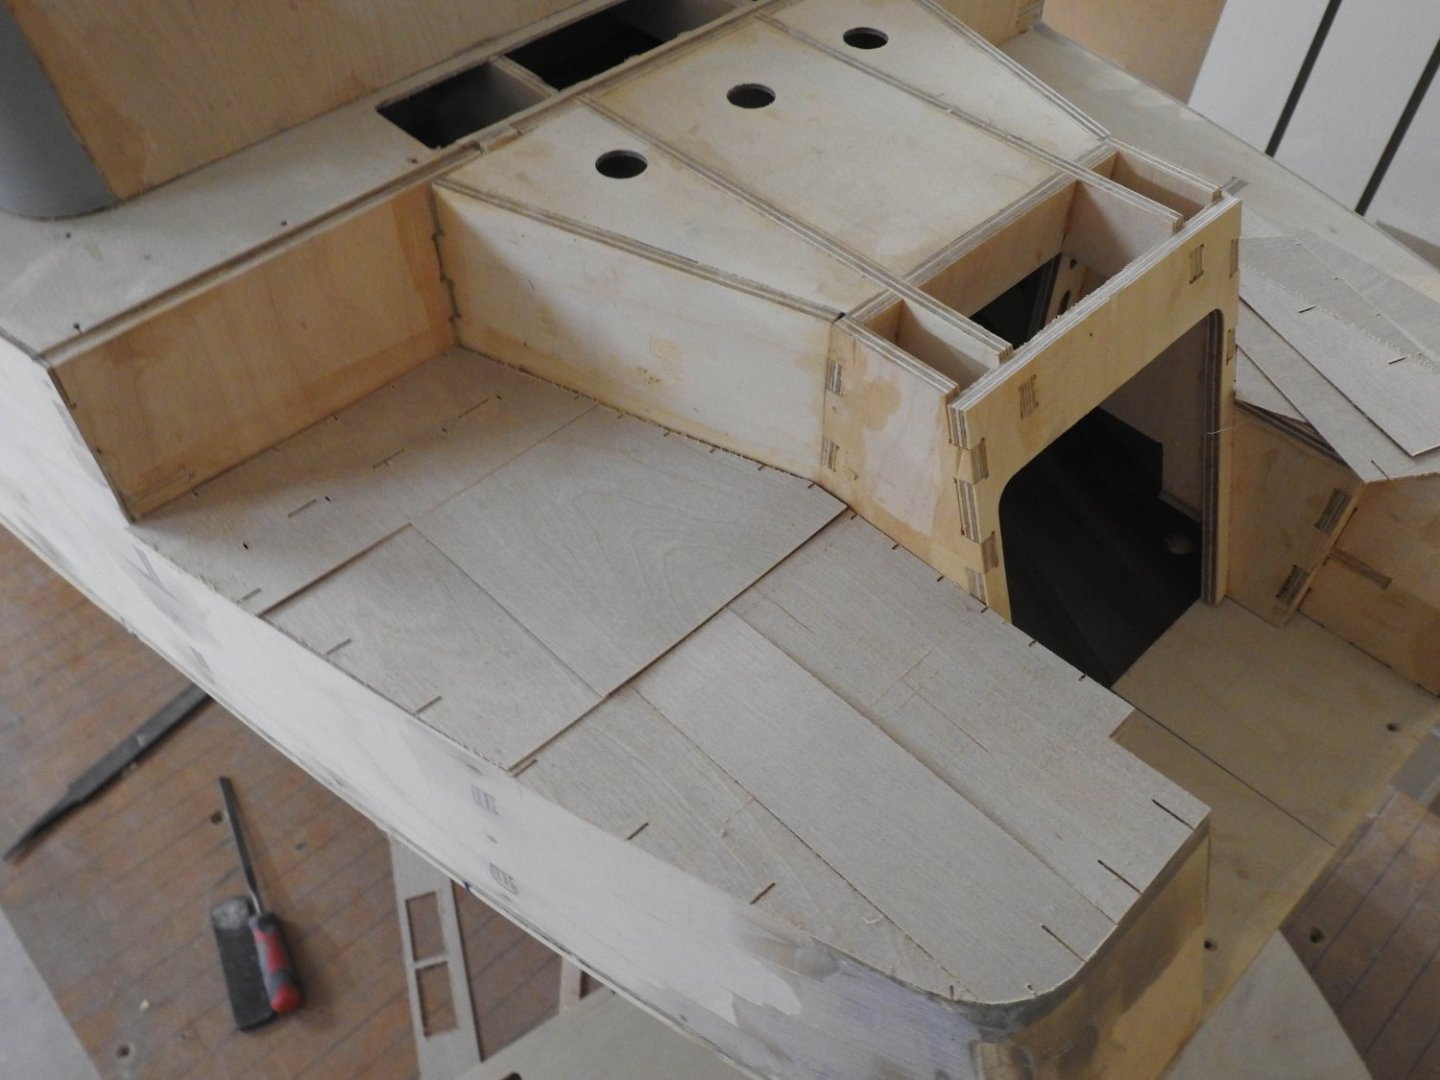
Next up is to do the bilge keel on the other side. I then have to laminate the frame for the bow rudder and have the arduous task of fitting and setting up the whole bow rudder arrangement. The lateral thrusters fore and aft have been fitted and are ready to be installed and I also have to make the rudder horns and rudders. The shaft bossing's will be made after I have built the engine mounts and glassed them into hull so I have the exact shaft centre inboard and a jig at rudders to keep the outboard centres, the A brackets carry very little load with my new design as the shaft which is nothing more than a 16mm dia 800mm long outer brass shaft with bronze bushes each end with the 8mm SS shaft carried through middle running from motor compartment all the way to the aft end of the A bracket. The A bracket just keeps it from vibrating but no longer needs to have bearings in it as it was last time. Then a large number of false discharges and intakes to do, about 160 2mm ones for various things like scuppers and valves and some larger ones that are 11mm for boiler intakes etc on ships side. once all this is done i can glue the topsides on and paint the lower hull in VHT red oxide. Question When making twin dagger type rudders does it matter if they are solid or should I make them from a frame and cover in 1mm ply? They are about 90mm deep and 55mm wide. Just not sure if light weight is an advantage with rudders given the servo etc. of course I could just make them from glassed balsa
- 454 replies
-
- 3
-
-
- Union Steamship Company
- Stepcraft 840
- (and 3 more)
-
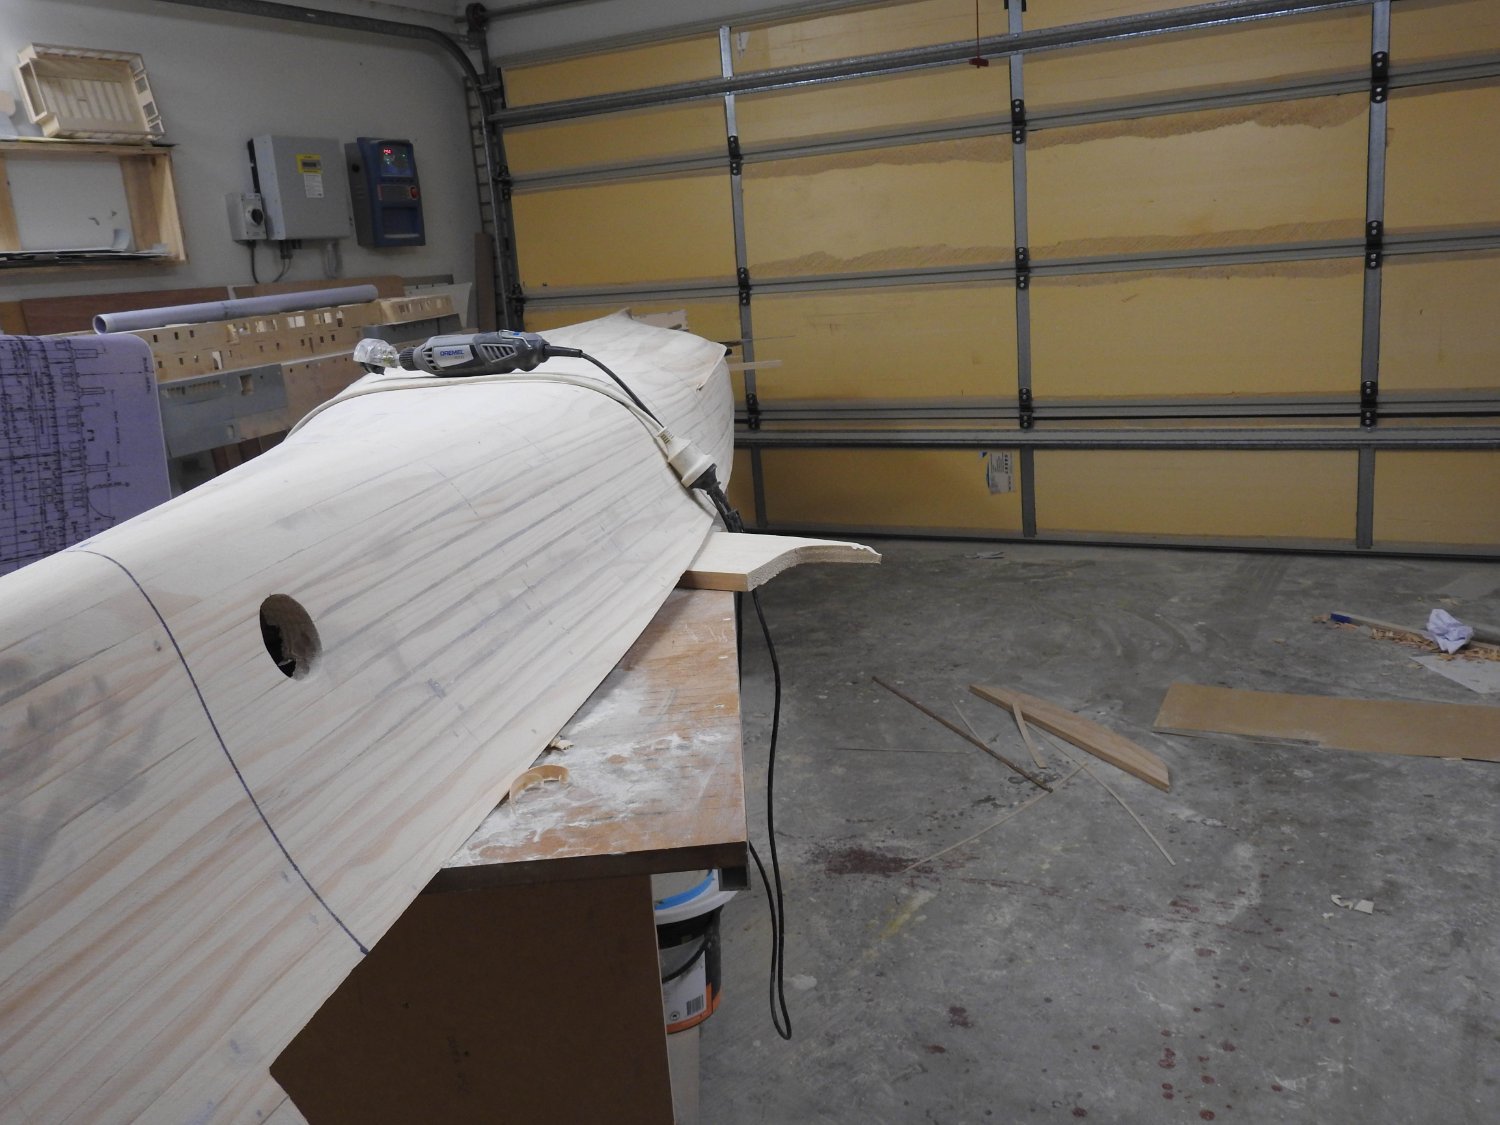
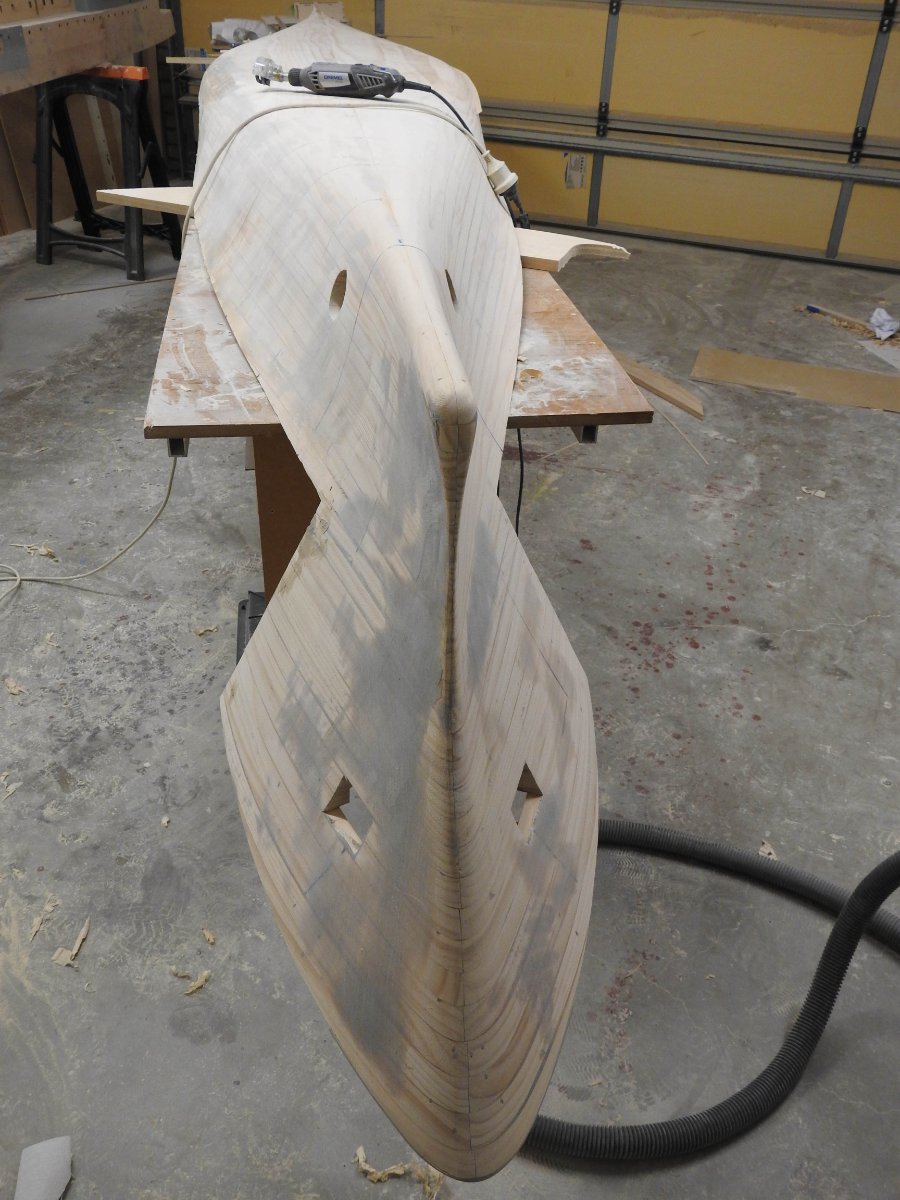
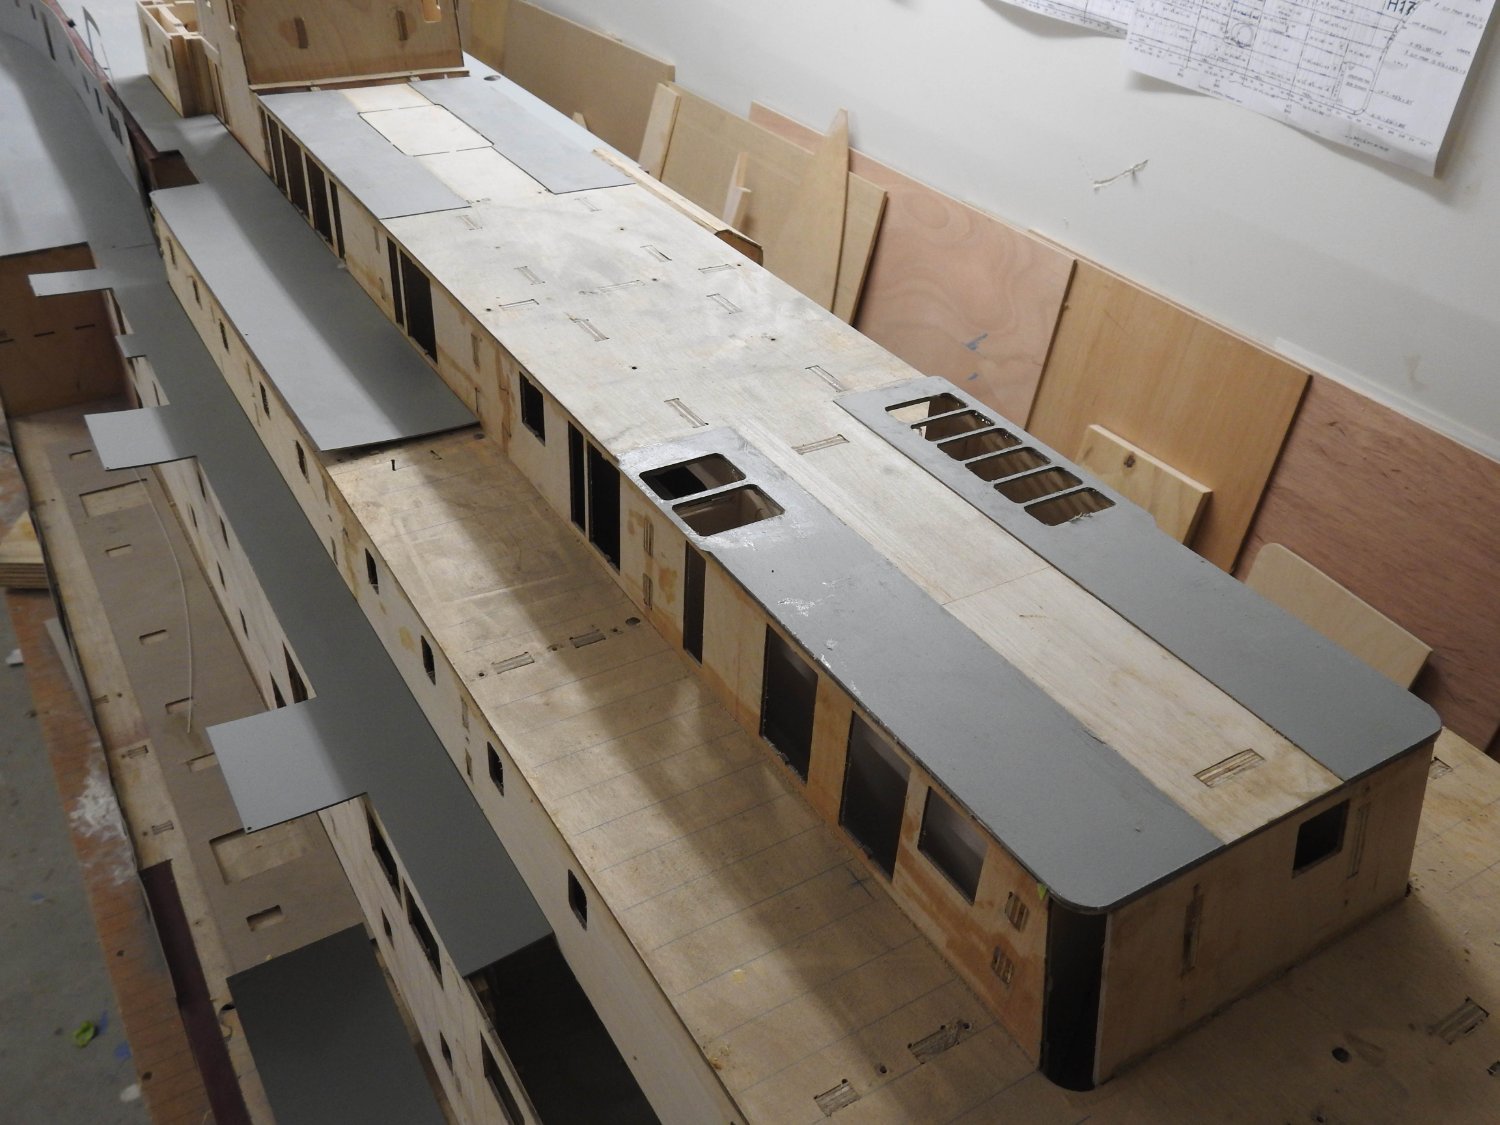
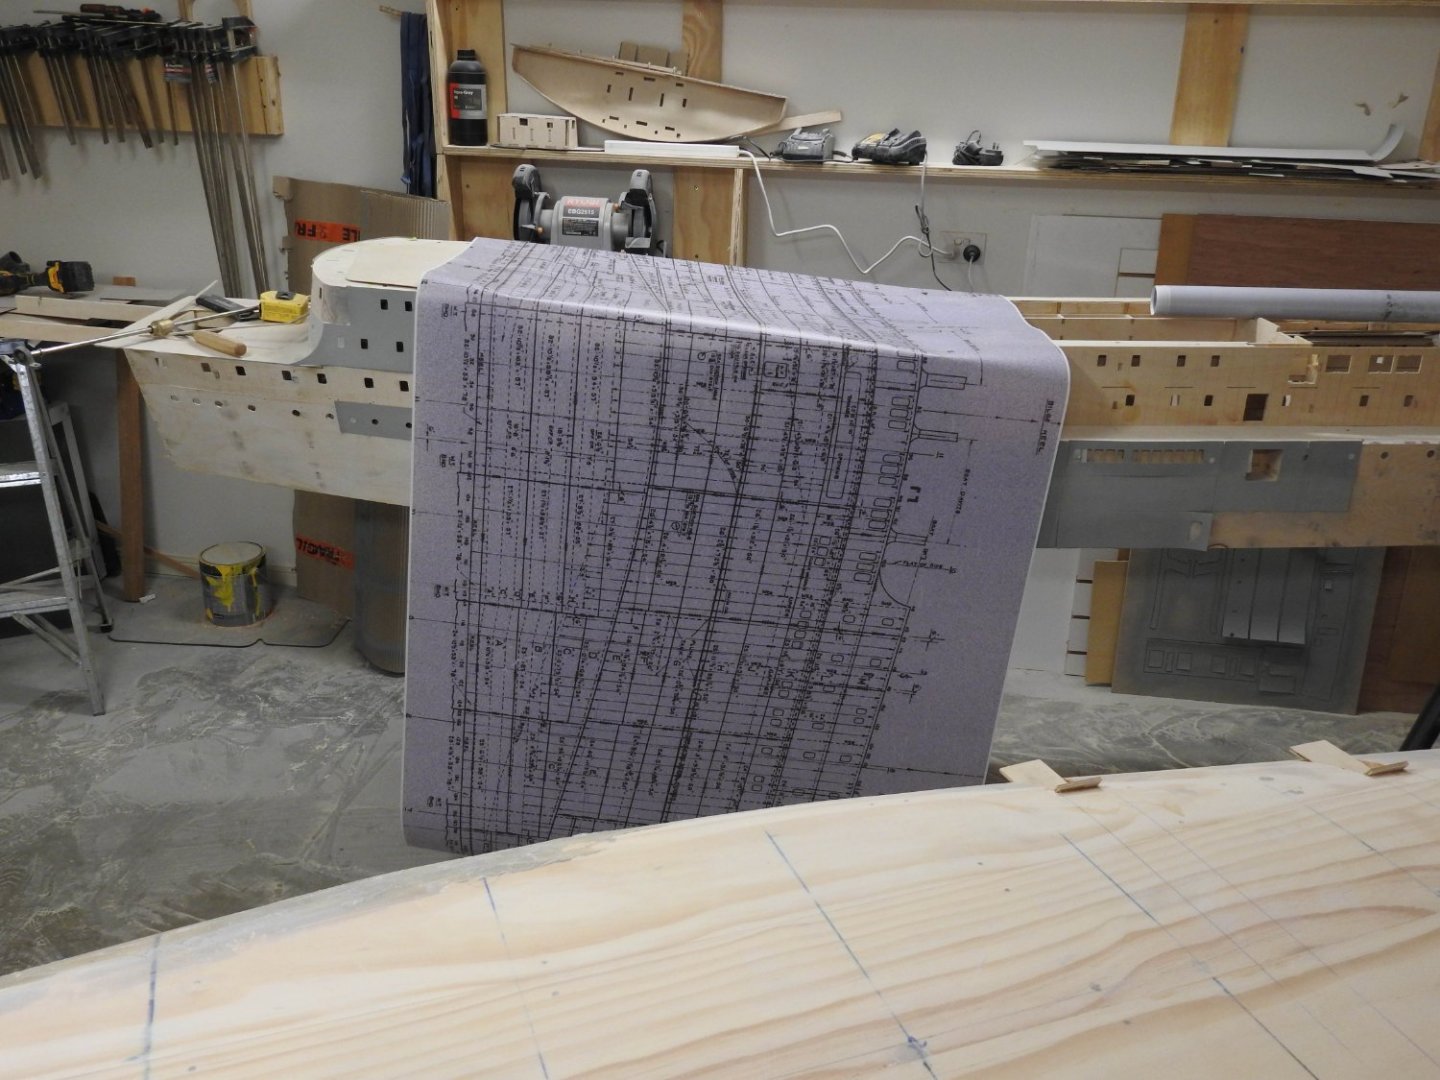
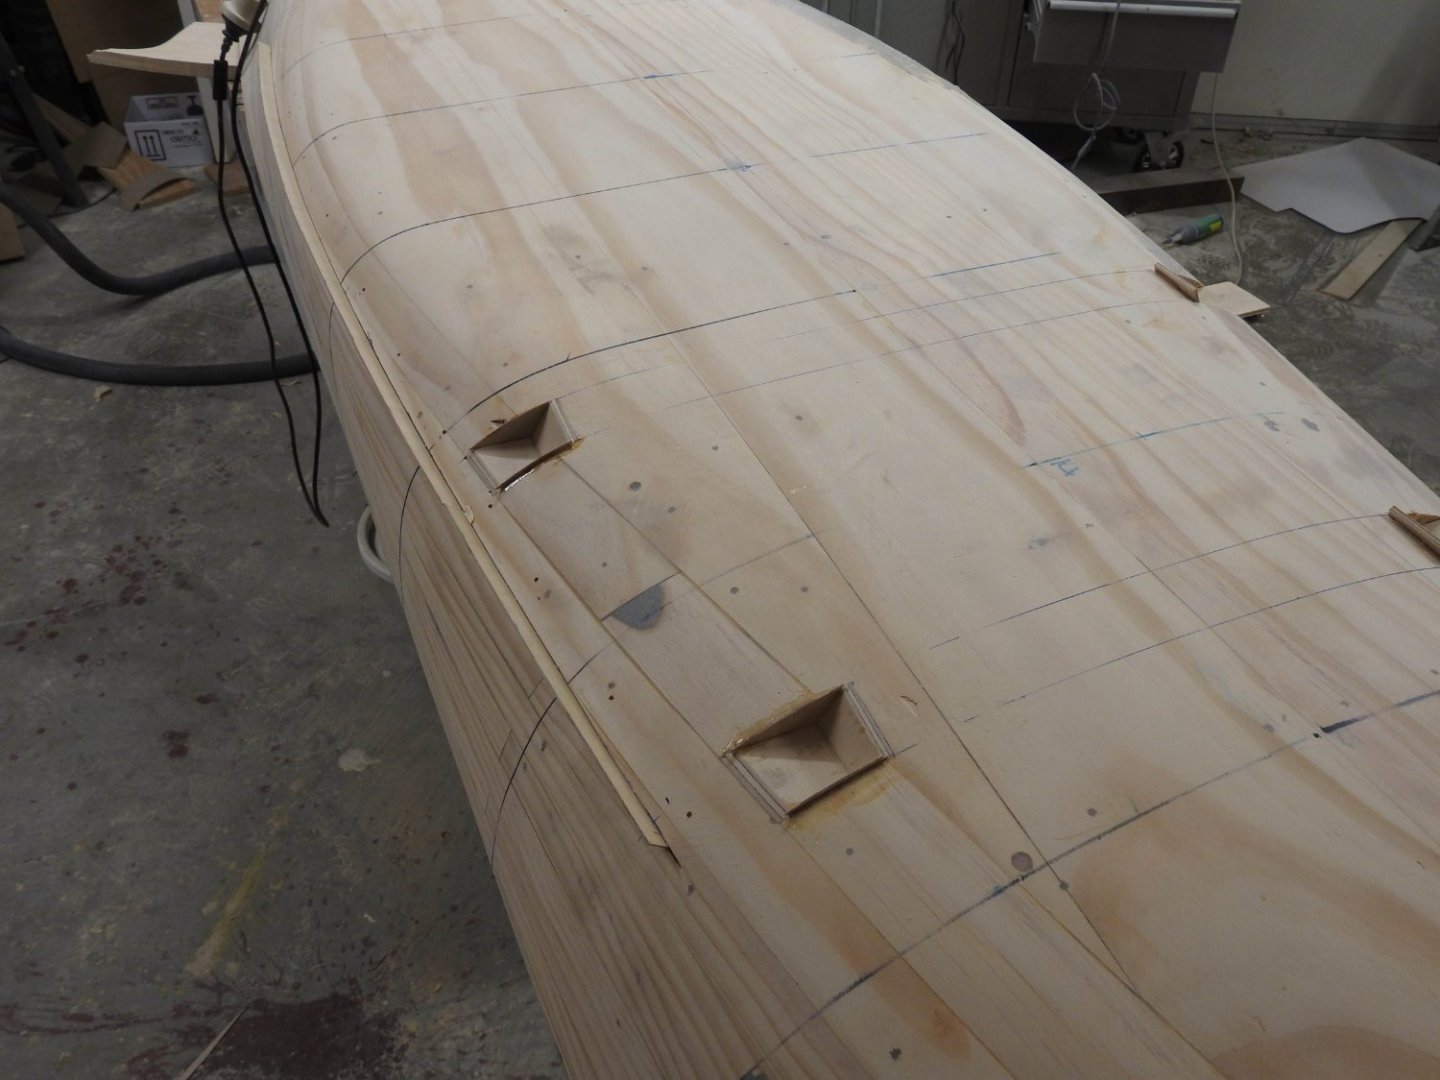
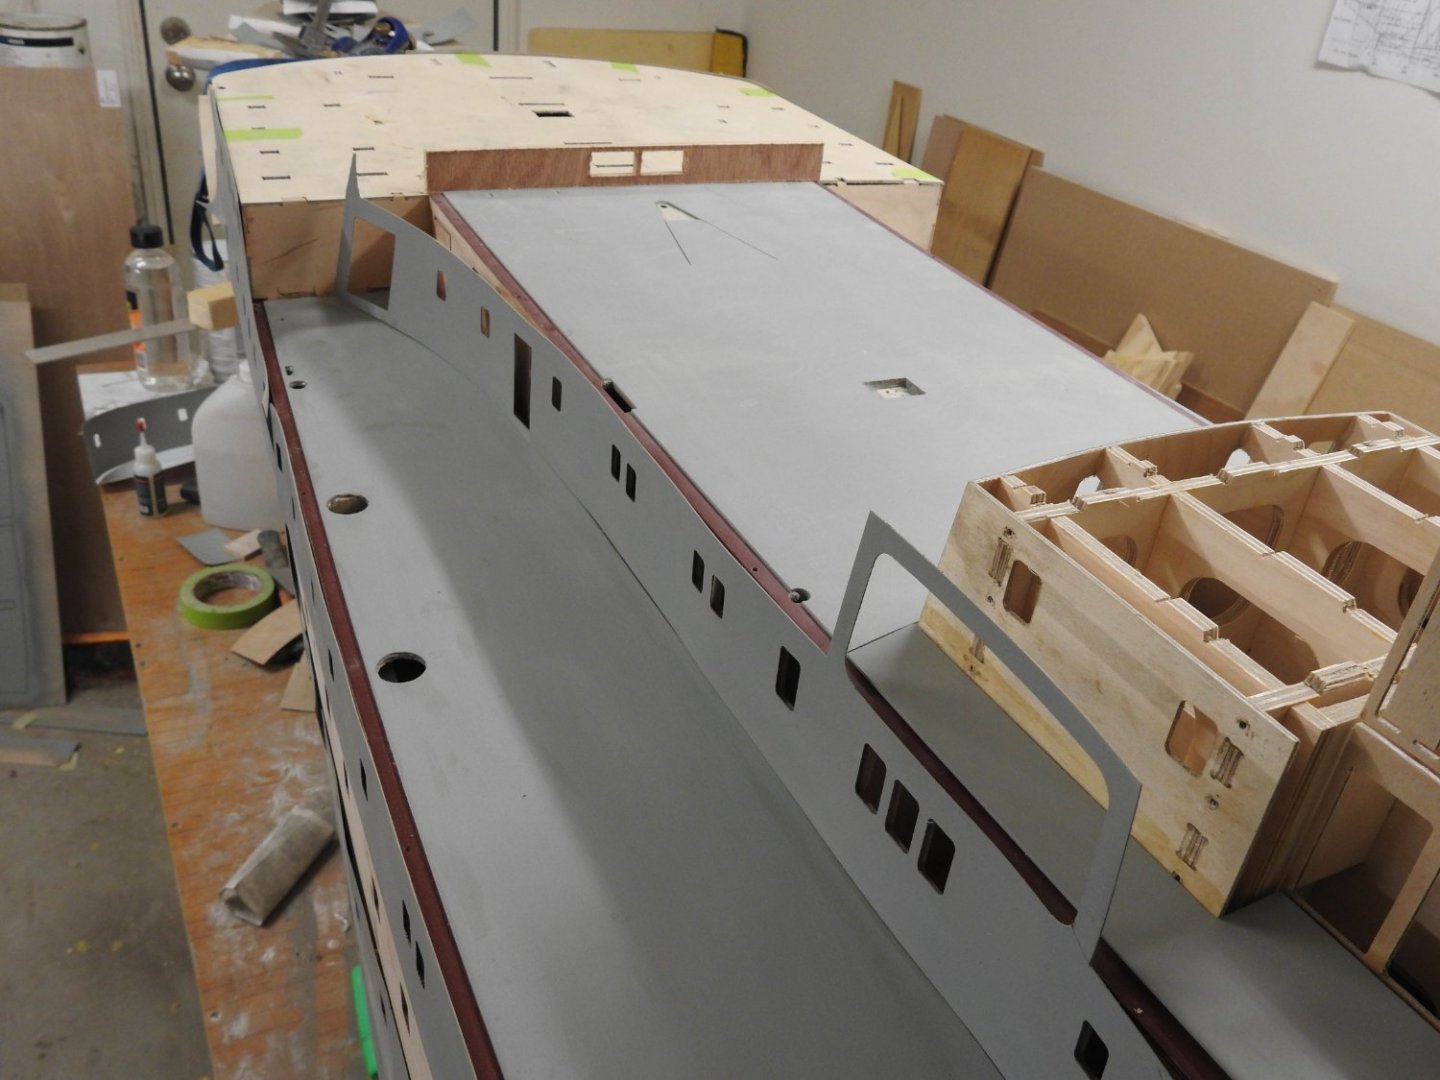
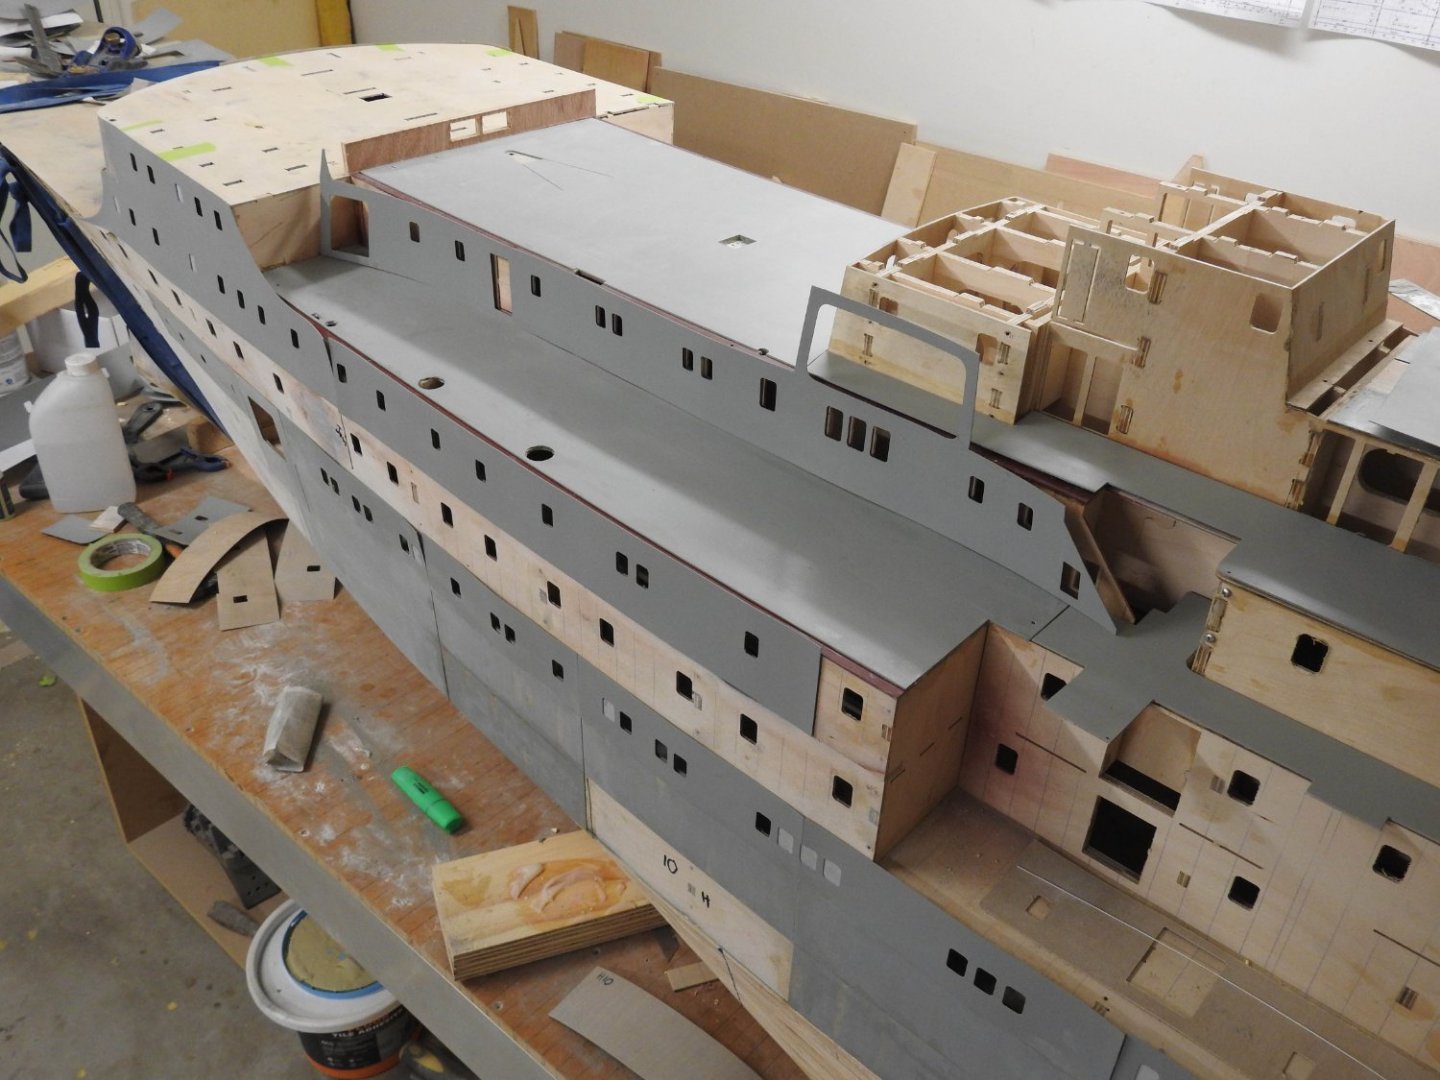
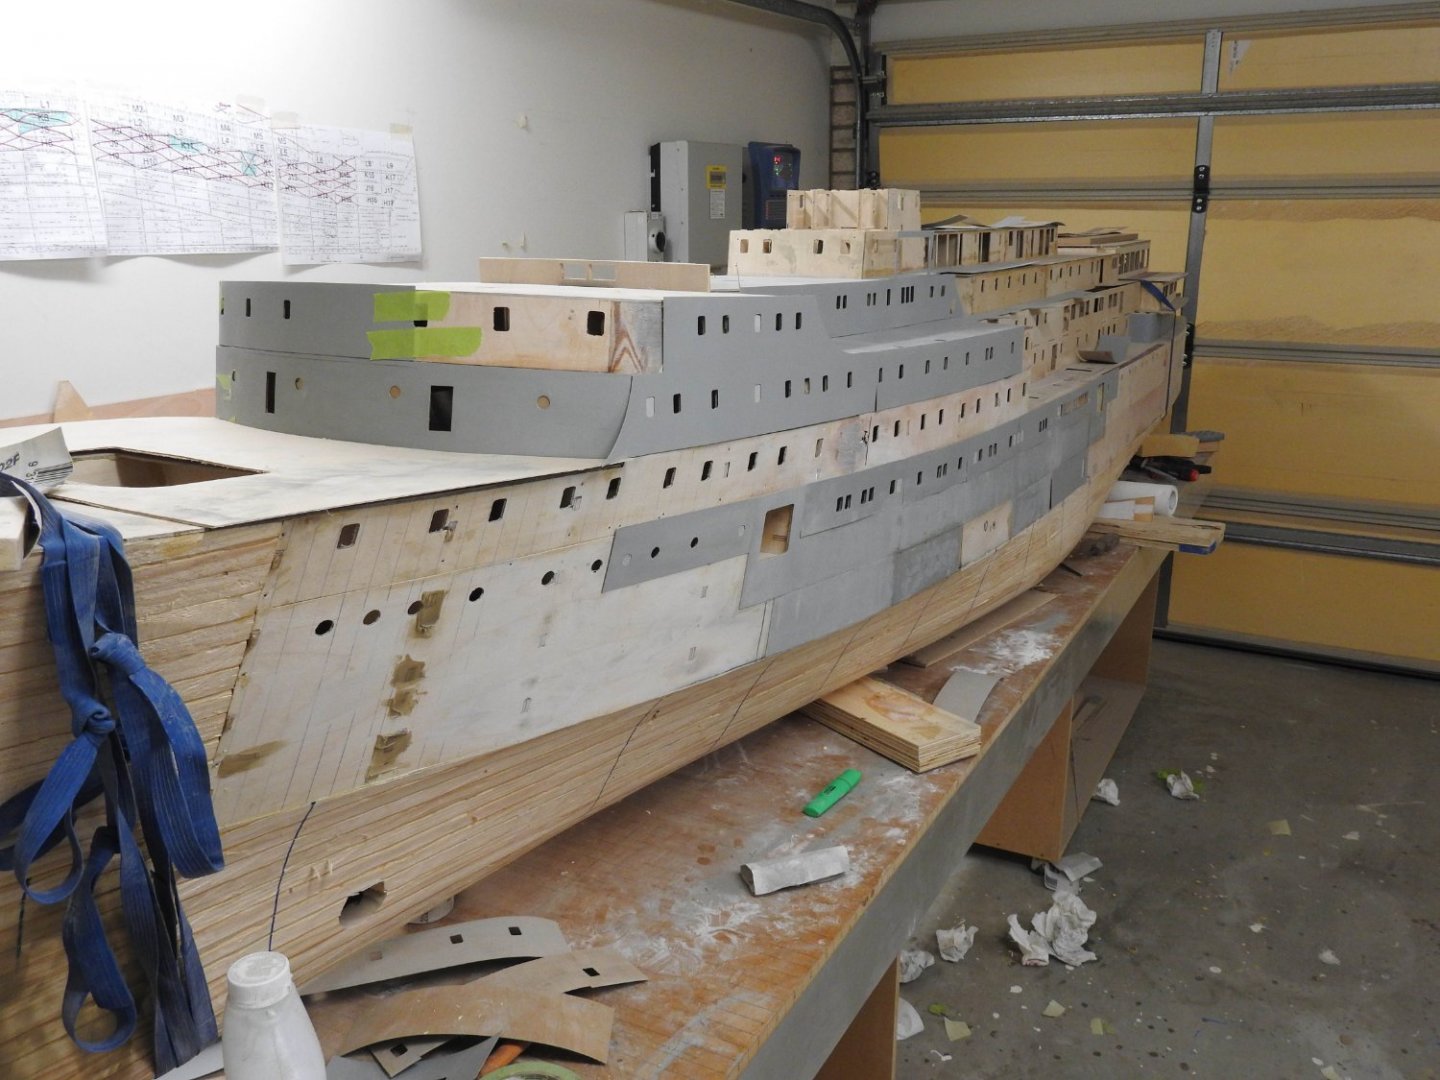
Getting the lower hull ready to laminate with glass. Seachests and bilge keel fitted. Hull finished and sanded ready for glass. Bilge keel is recessed 8mm into hull into a slot cut with saw attachment on Dremel and run along a batten screwed to hull. Grain run across width of Bilge Keel to keep it strong, it will also get 25 gram cloth glassed onto it. The most fussy thing here is getting the razor shape edge along the top where it flares out I don't want what should be a sharp edge to be at all round so feathered it out with scrapers etc. Full Size Shell Expansion to plot everything on shell, openings, discharges and weld beads.


- 454 replies
-
- 12
-
-
-
- Union Steamship Company
- Stepcraft 840
- (and 3 more)
-
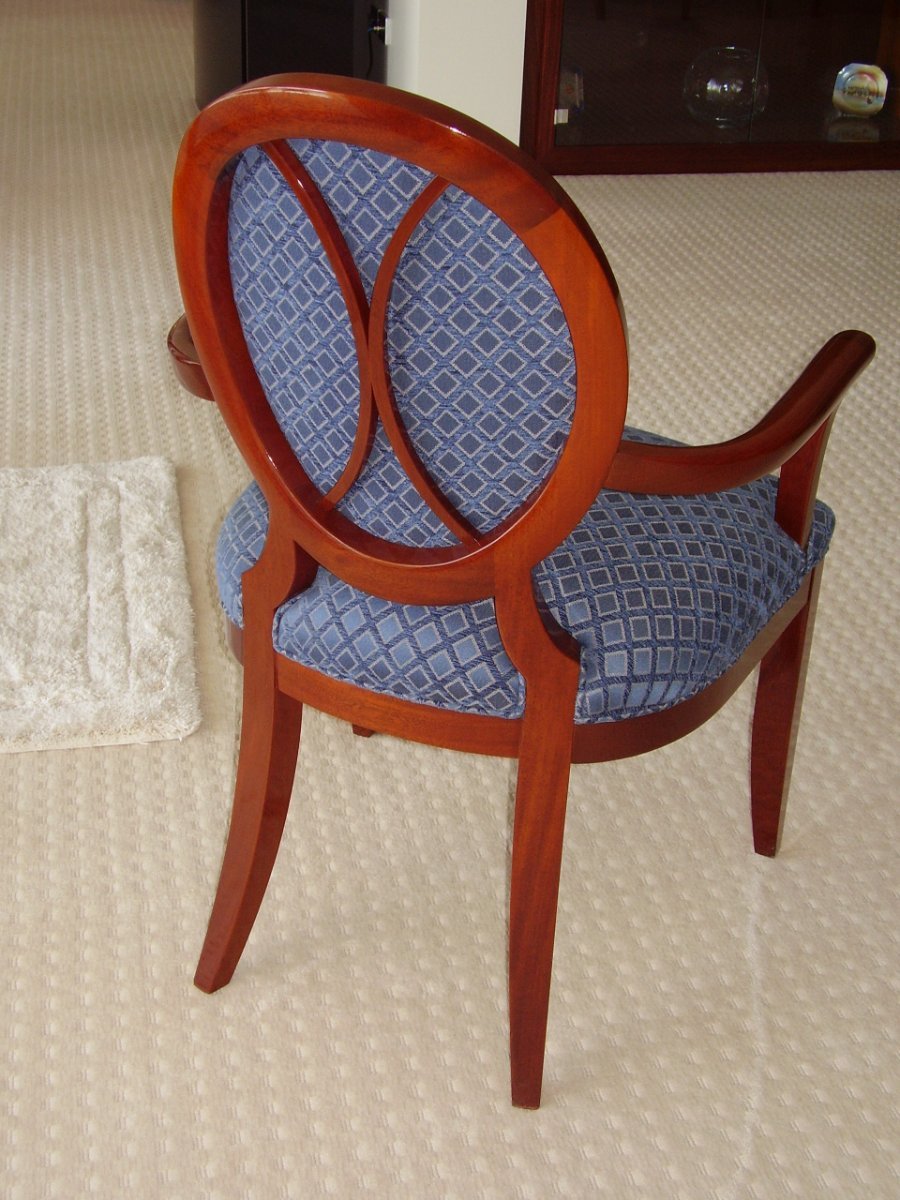
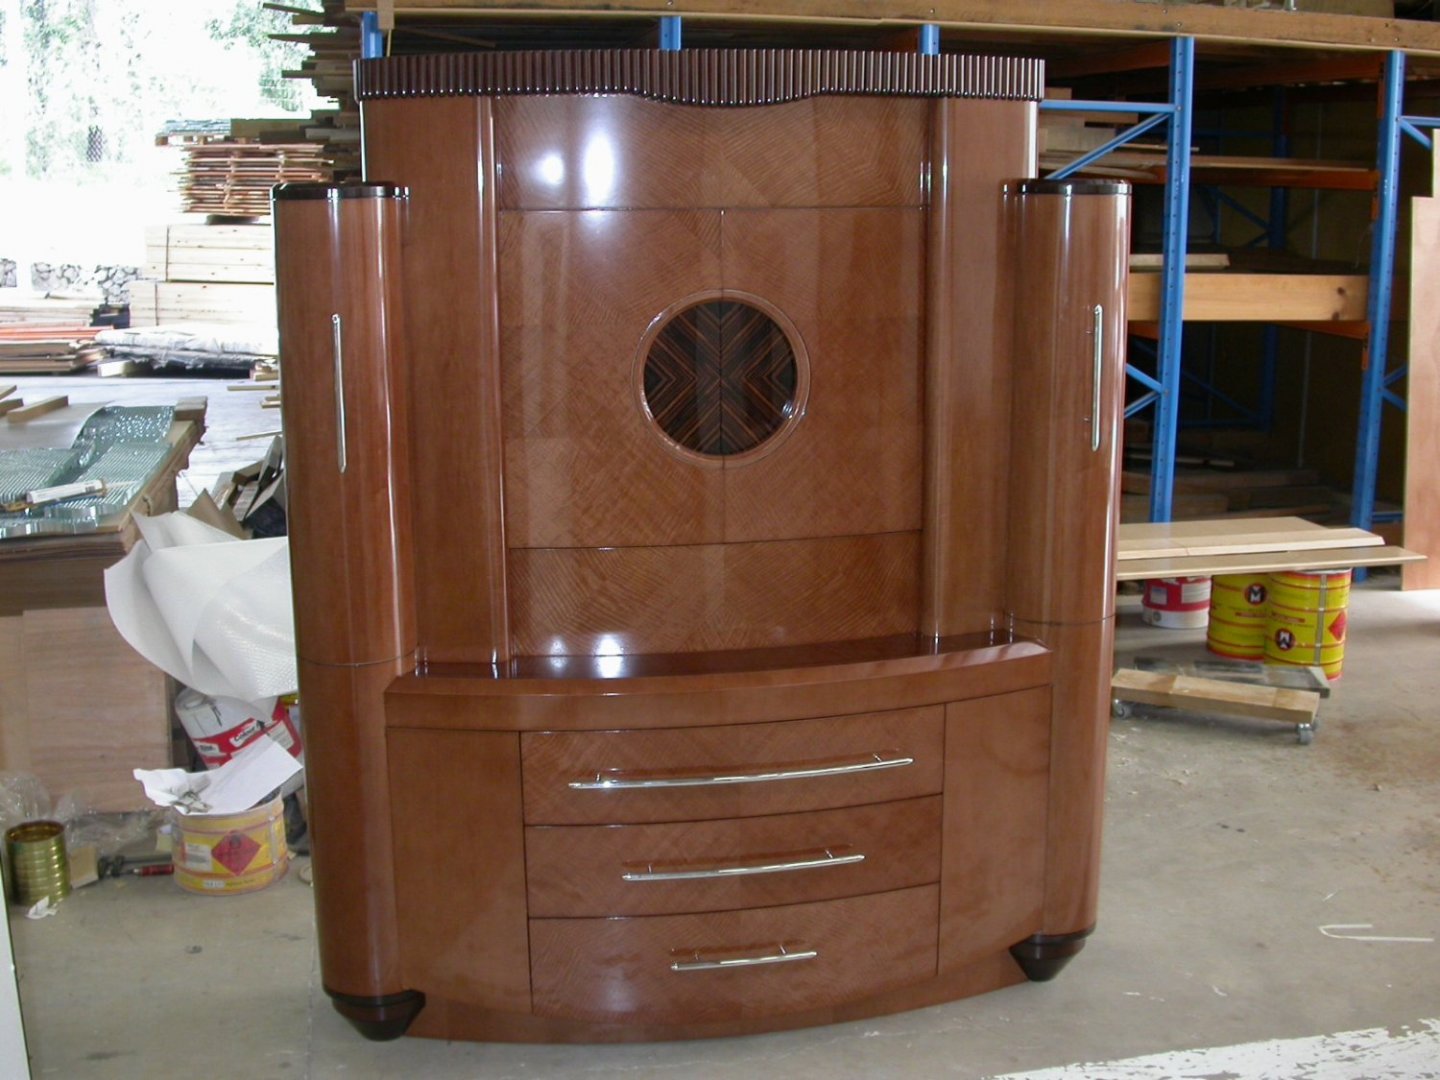
Ha, yeah I bet The answer is yes but its grown for the purpose of marine fitouts, many of the super yachts still use it although it's a 5mm veneer not solid so it goes further. Anyone can correct me if I am wrong but nowadays there are products to keep teak in good order instead of washing and scrubbing, and those that have it can afford to pay someone to look after it. The burmese teak is what they use nowadays still (Tectona Grandis). There is an alternative wood that has been used in place of it for several decades now and that is Iroko, its horrible stuff, we used some on a boat 20 years ago and its terrible to work, it also has dust that causes your throat to close, its very course grained and splintery stuff, it shares the oily nature of teak though which is why they use it. Mahogony depends what species, their are over 30 species of mahogany, but the one i think you are referring to is Brazilian mahogany or Swietenia Macrophylla its been the staple for guitar builders for centuries for necks and bodies. thier is also sepelle and many others which are still grown for the purpose but solid has become harder to get as veneer is seen as a better usage and less wasteful way of extracting the wood. In Australia we have a few identical looking timbers that are actually better, Queensland maple being the most common, its beautiful stuff and you cant tell the difference. here is a chair I made with it, as you can see it looks like Mahogony. Anyway I don't want to hijack this post.

- 19 replies
-
- 10
-
-
-
Painting the hull
Richard Dunn replied to Steve47's topic in Building, Framing, Planking and plating a ships hull and deck
I took a few close up photos of her in the 80's I will upload them for you, I have never used them -
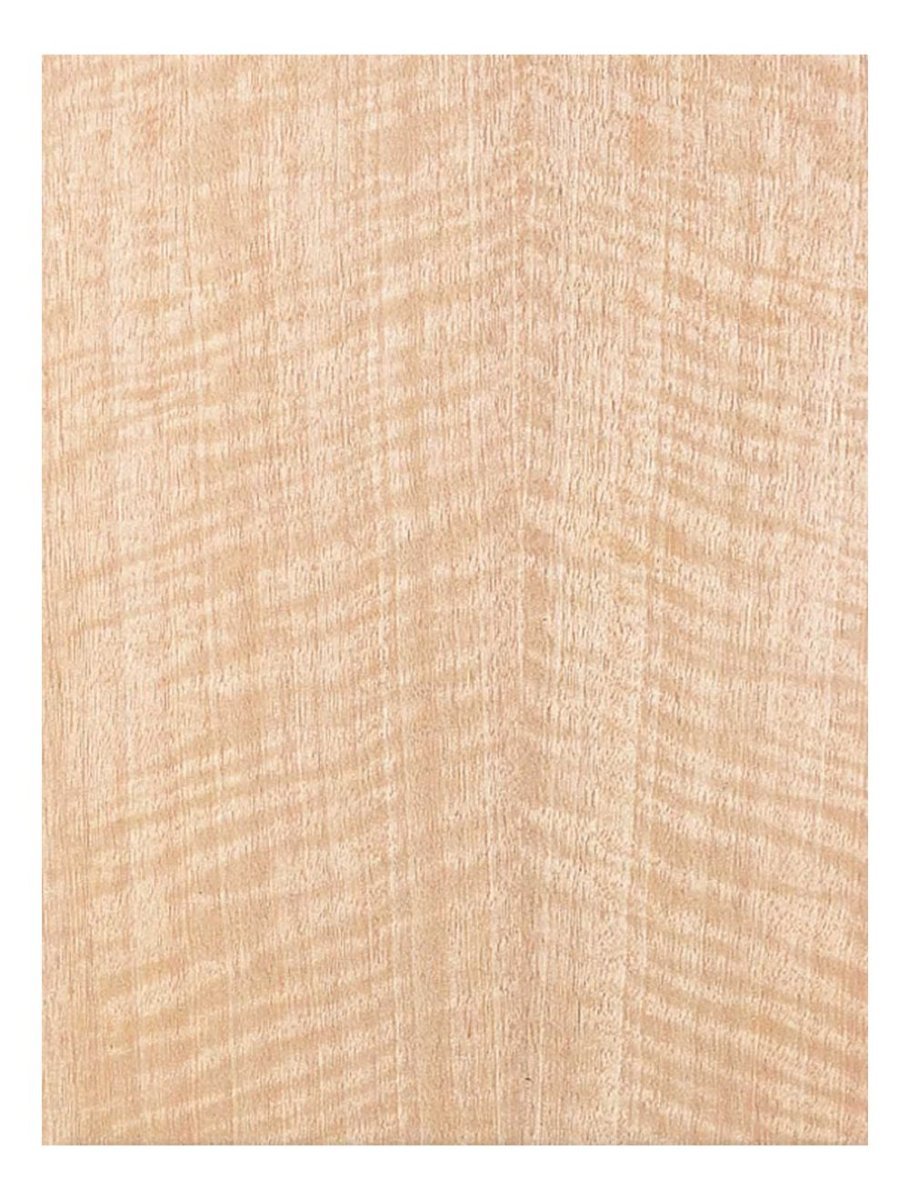
I quickly did this to illustrate the point. Teak at various stages except really old vs Anigre on right, you can see all the tones match up.

-
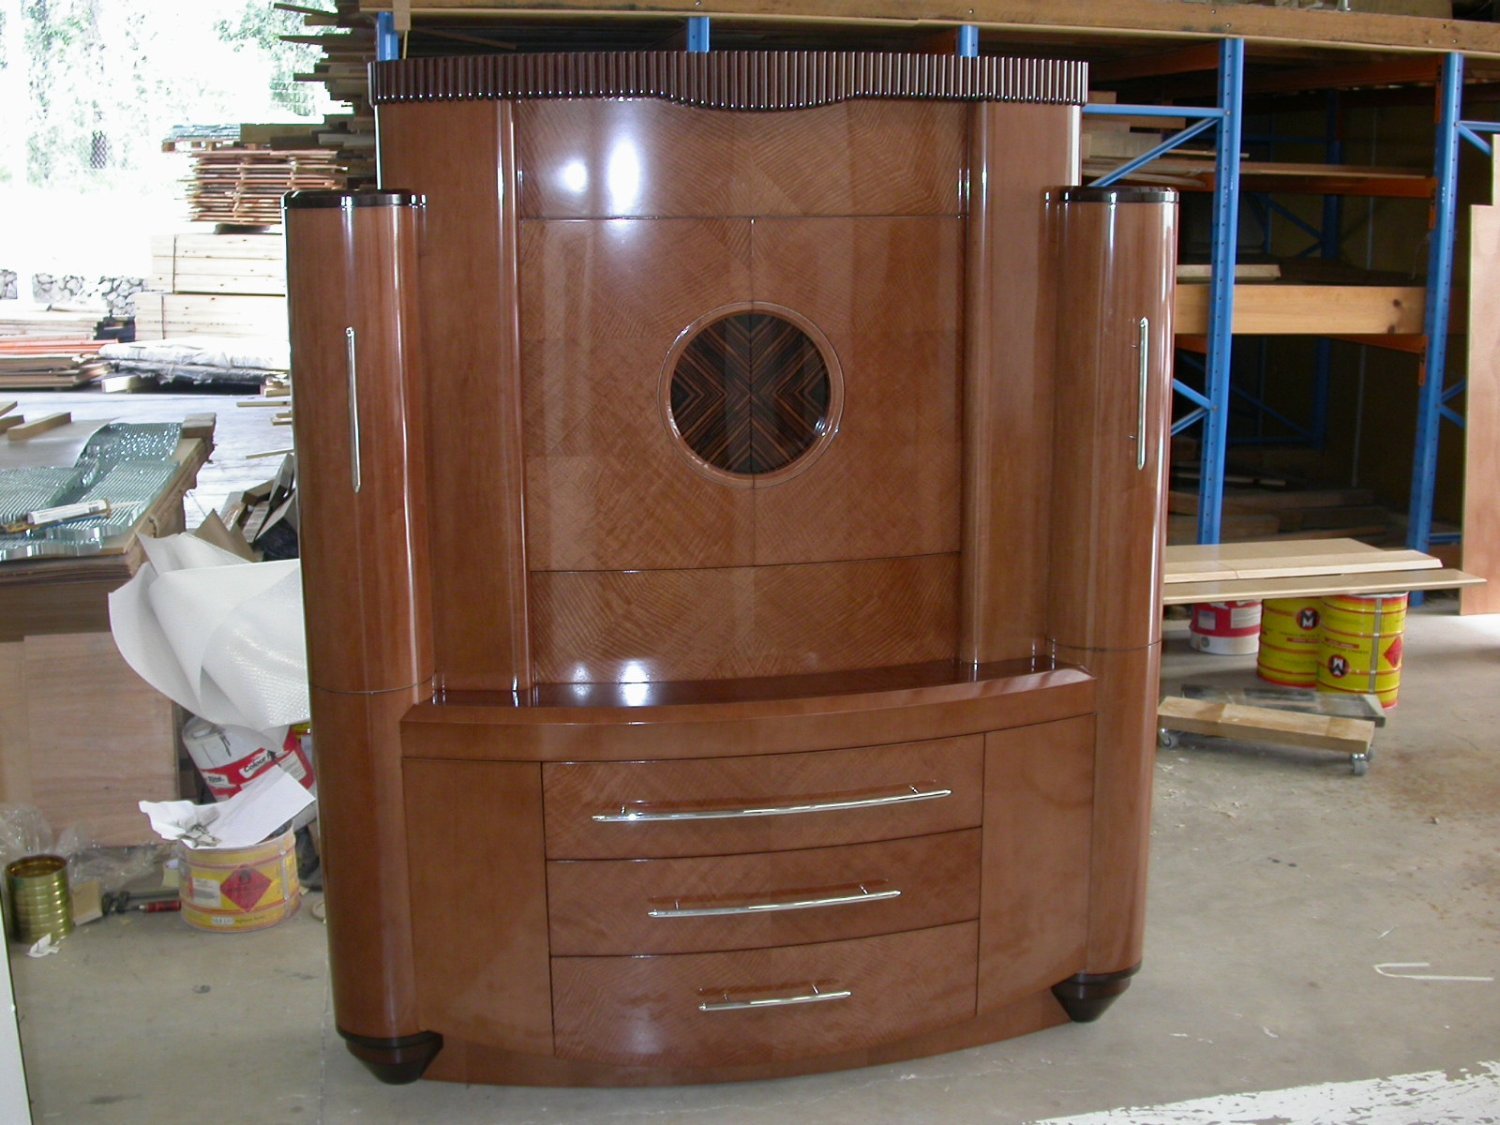
Dave_E I noticed you mention guitar making, I myself am a luthier to and use the figured boards for steel string and archtops, its very close to maple for carved backs. This is a piece I made years ago from a Super Yacht master bedroom and it is Anigre as well (veneer stained), showing this so you can see how versatile it is.
- 19 replies
-
- 11
-
-
-

-
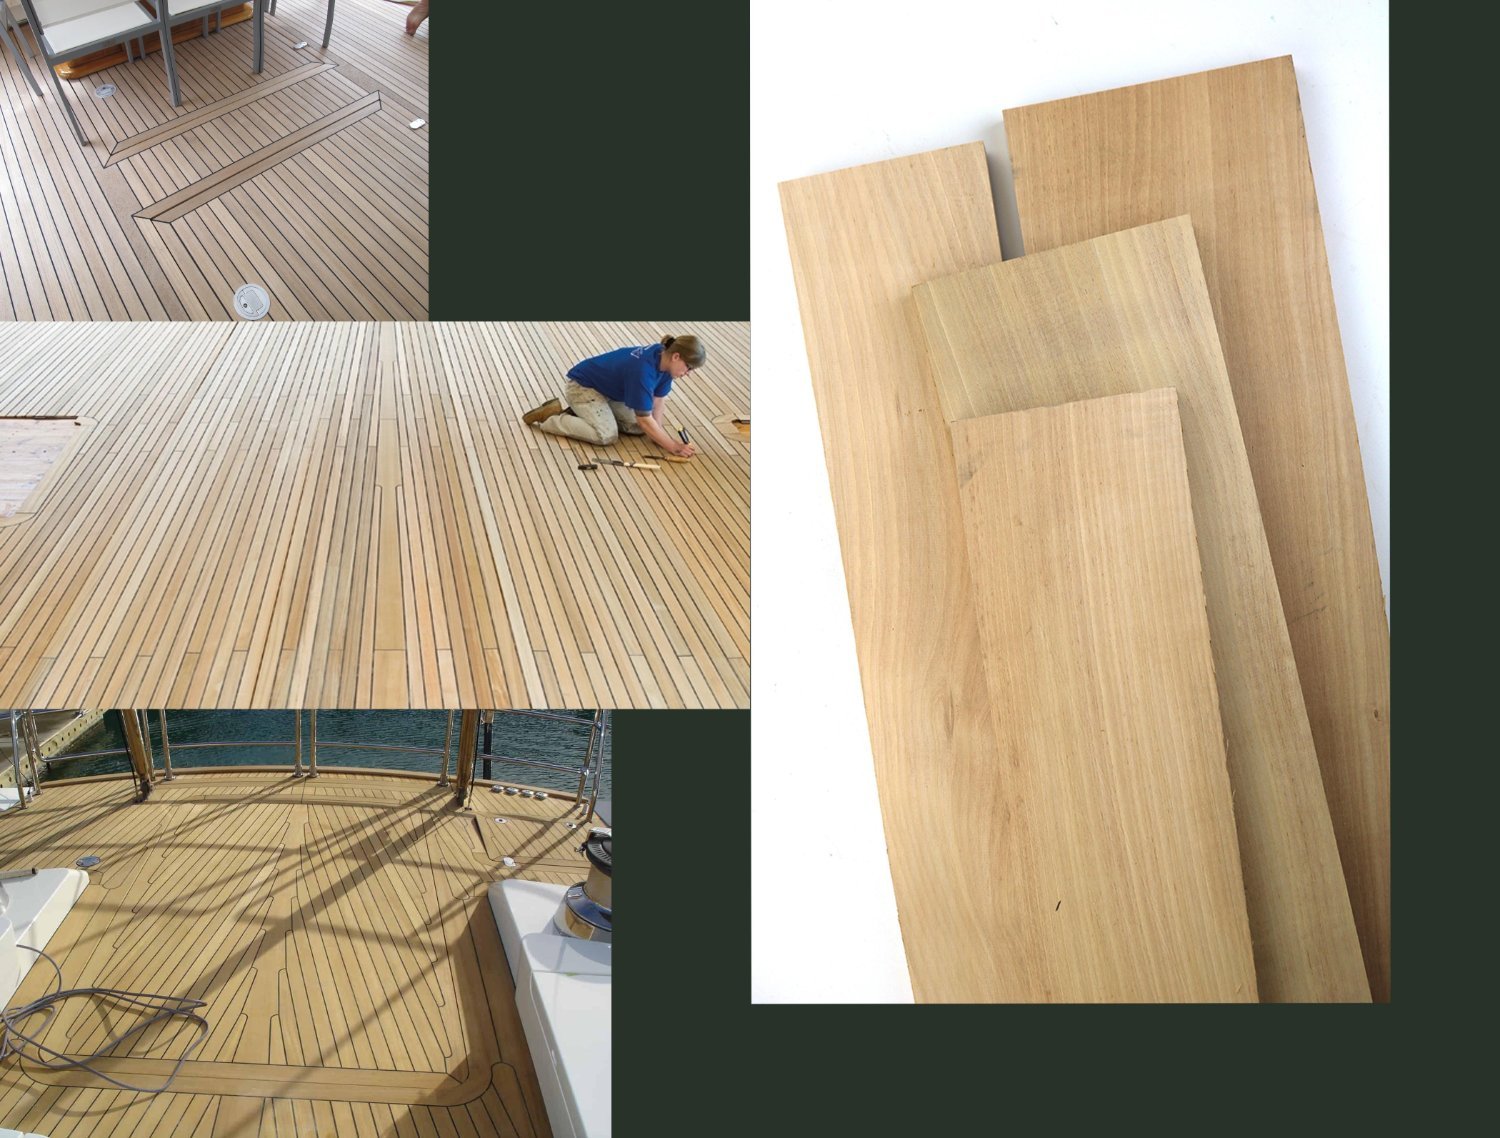
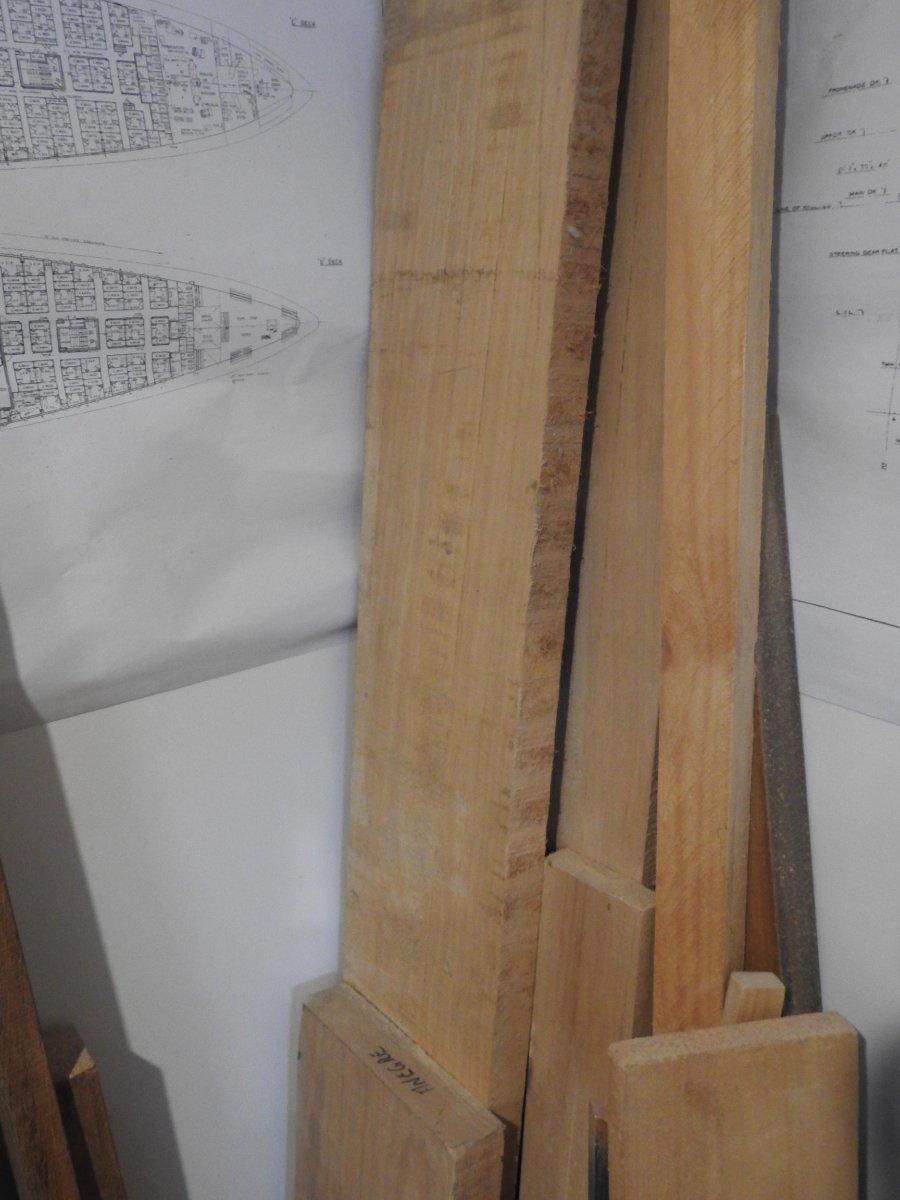
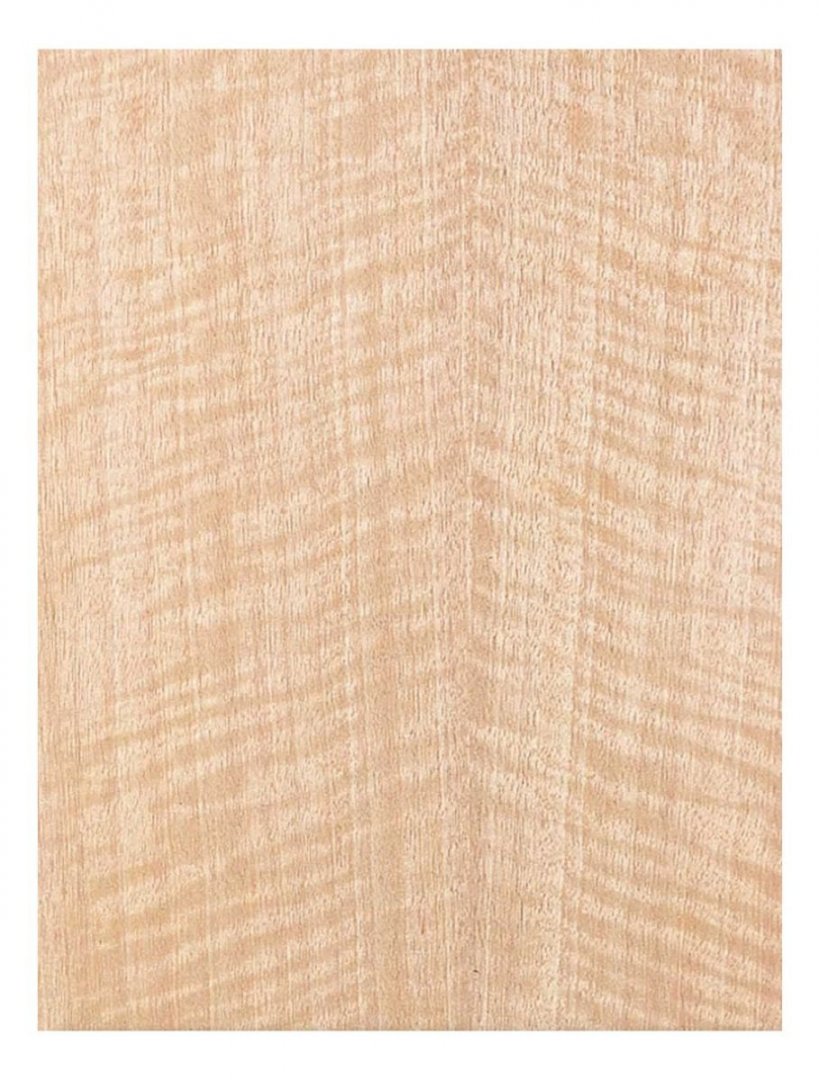
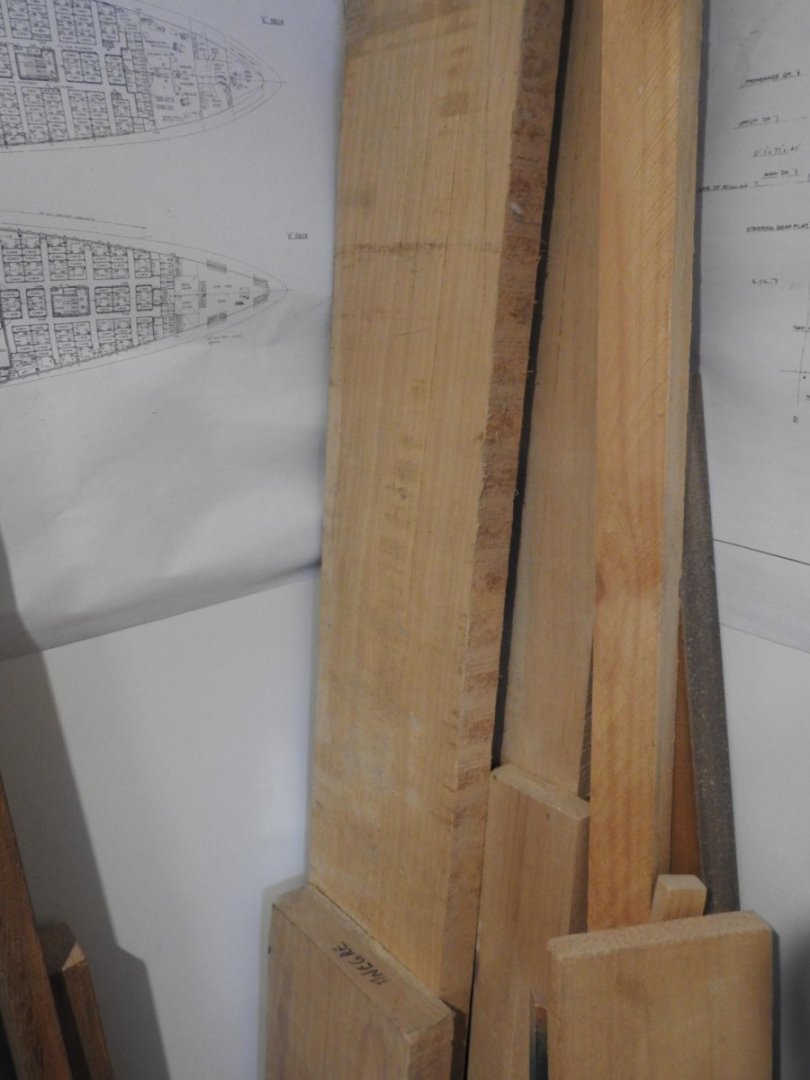
In regards to decking, if you can get Anigre which is an African Birch it is the closest timber to (worn) teak I have seen and has the qualities you need , fine grain, subtle variance in tone and sands/scrapes well. I have used it over the last 40 years in models and in furniture so have used it in a range of ways. It often has extensive figure which you want to avoid for models. It is available but hard to find. I purchased 6 x 2m lengths in 200 x 50mm planks a few years back just because it was there at the time. I suspect people reading this will go ,"I have never heard of this" but I can assure you all if you try it you will not go back, also its much cheaper than fruit wood. I am in Australia but pay $43.00per metre for 200 x 50mm quarter sawn. I will be using this and Cherry for 1/35 built up POF model I plan to start soon of Le Gros Ventre. I have to say that some of this timber also looks like Elm. Grain is close to American Cherry in nature and does not require pore filling as it's so fine Here you can see the subtle tonal changes and very teak like miniature grain. I found some in your neck of the woods. https://www.sierrafp.com/seattle/products/lumber/anigre/ http://www.edensaw.com/MainSite/Store1/StoreProducts/ProductDetail/6948 the back bottom is almost newish teak and the middle greyish one is a more bleached look, photos don't do it justice though Can also be pinkish My personal stash


-
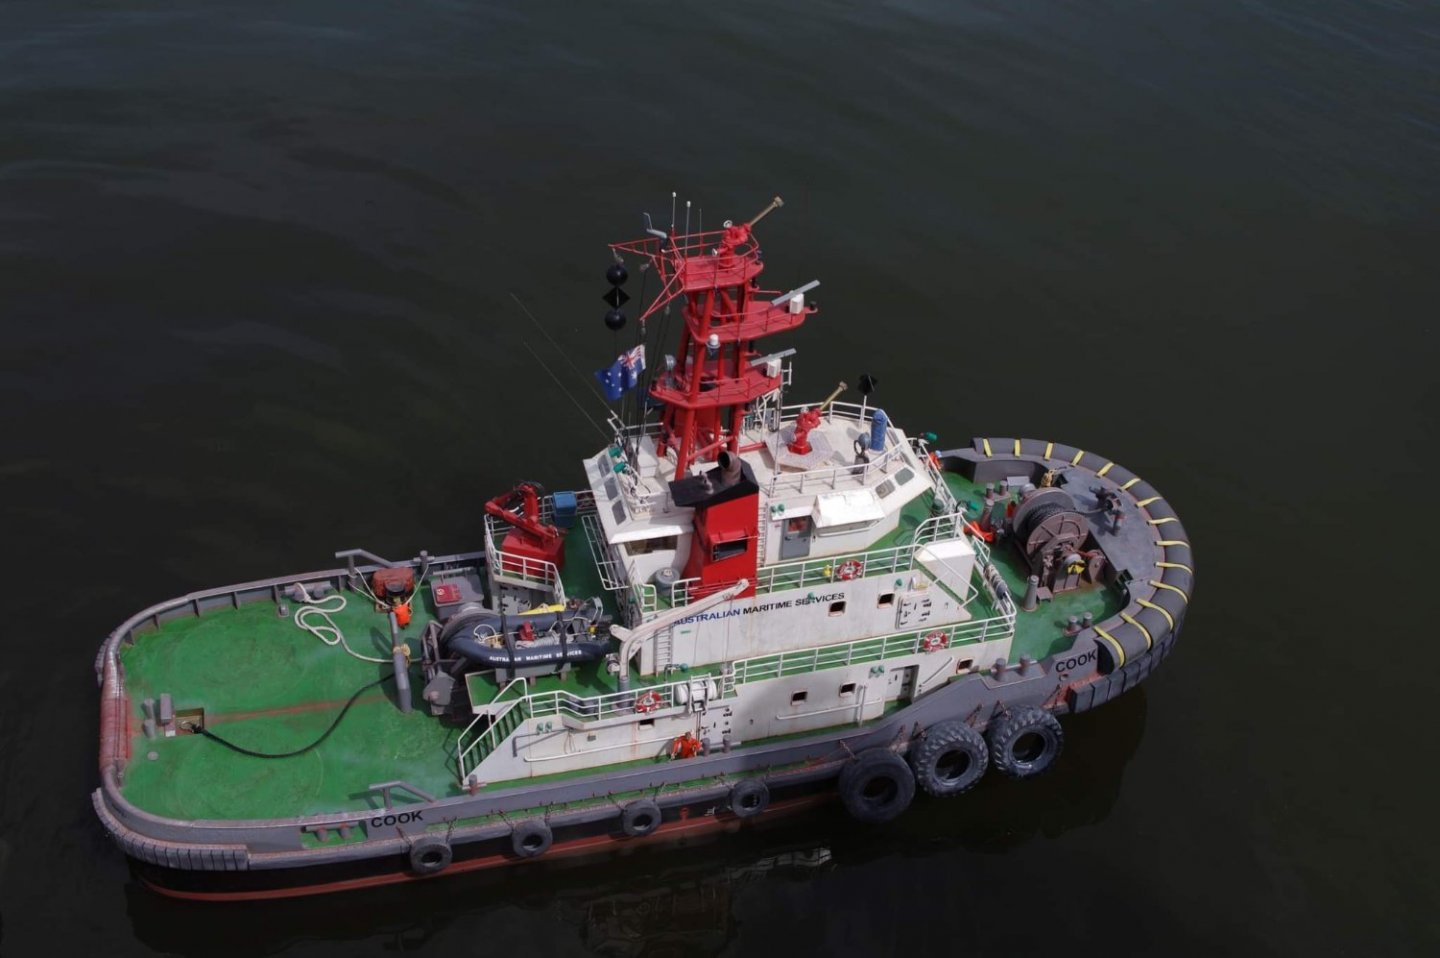
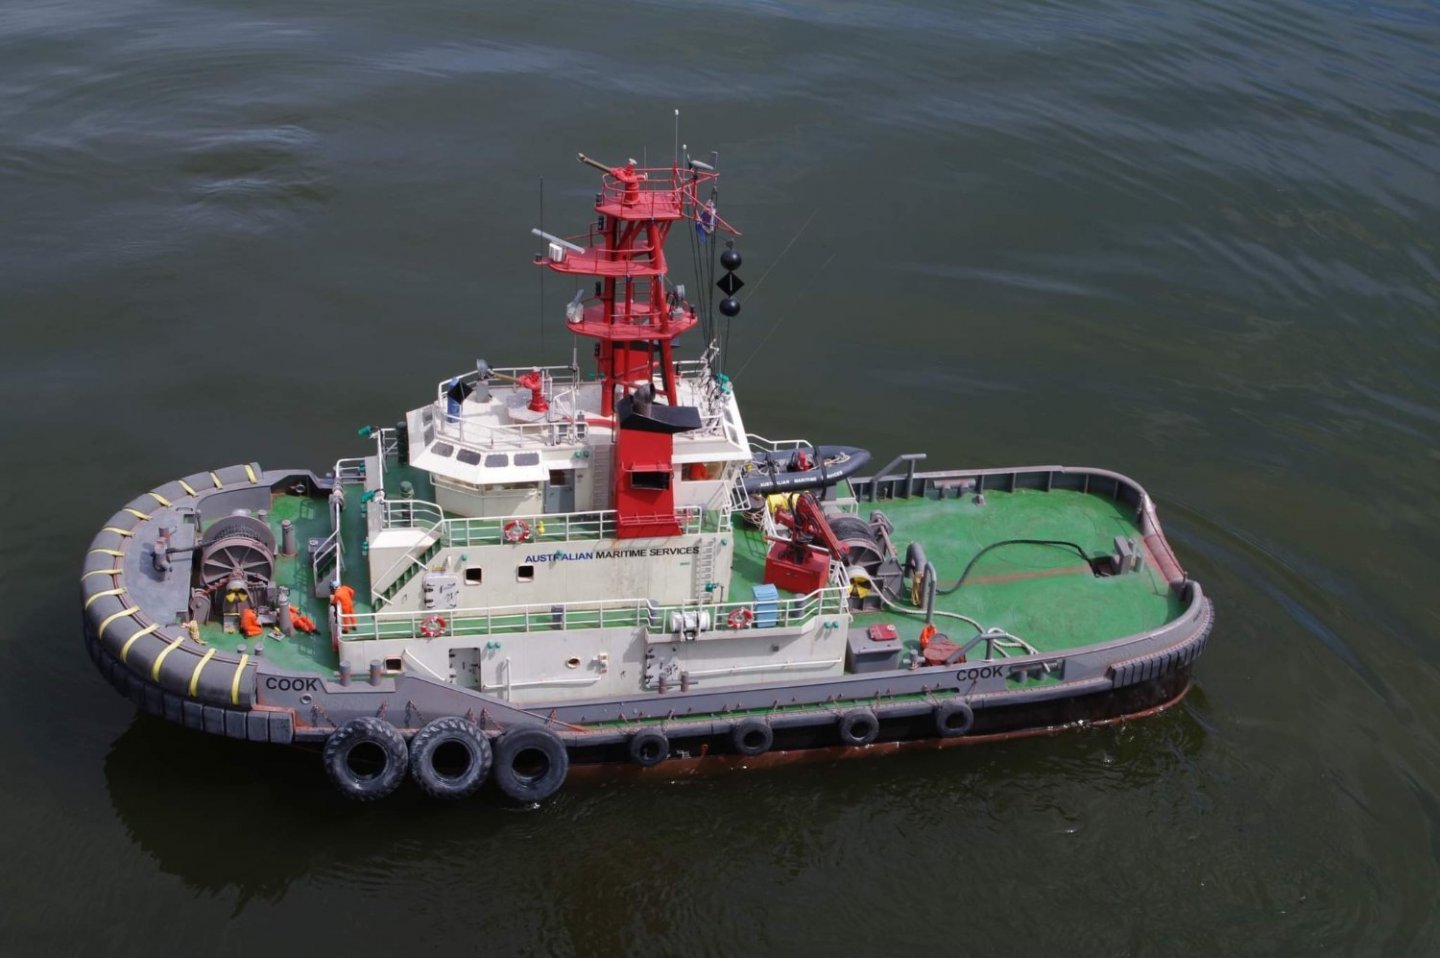
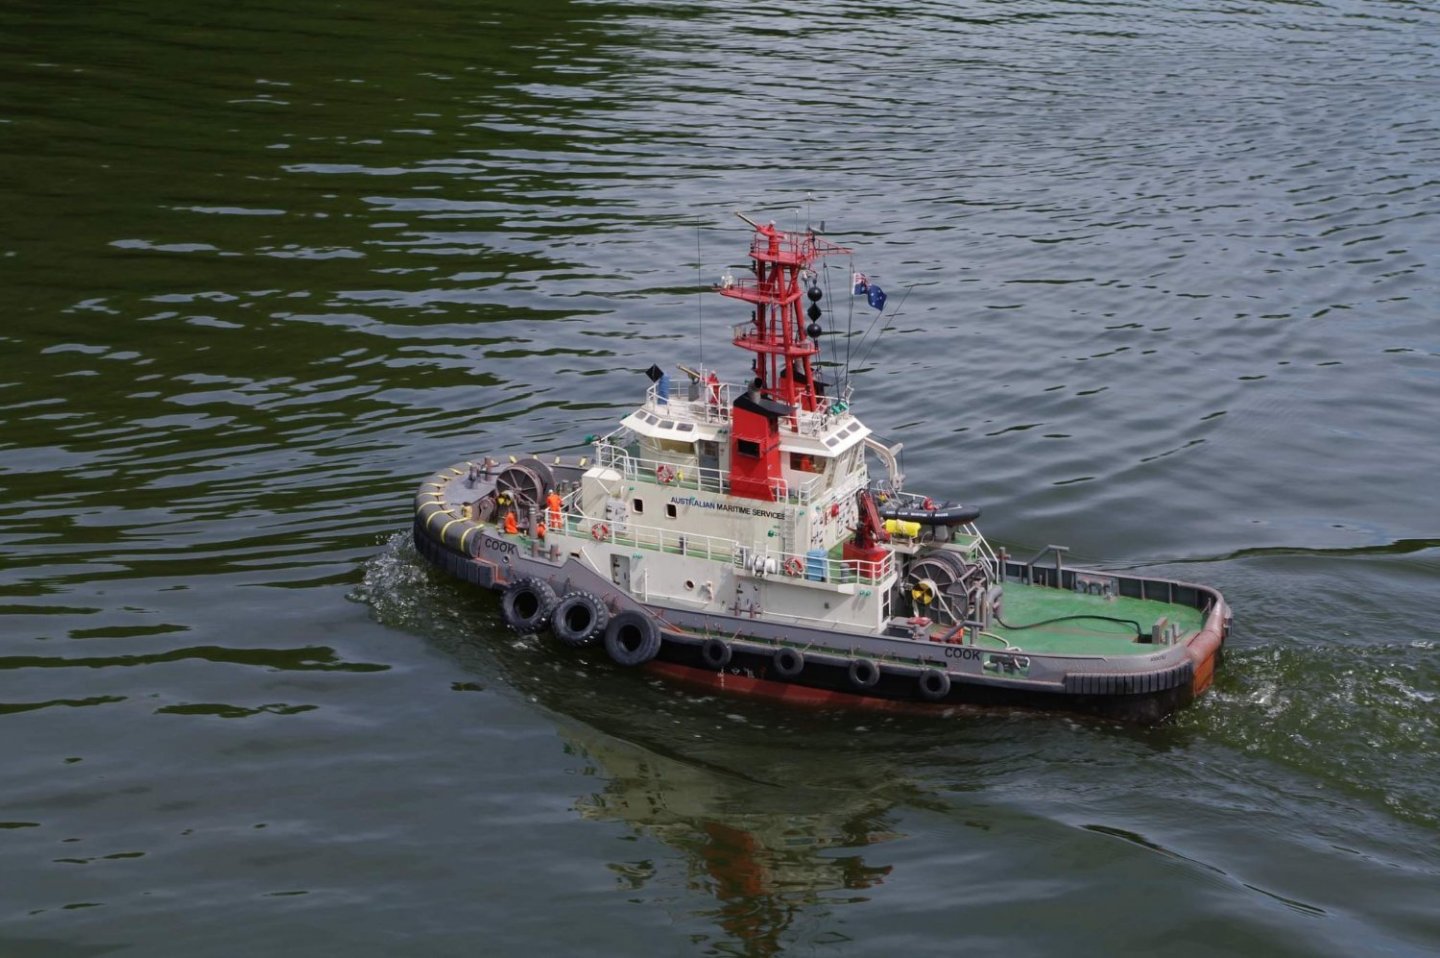
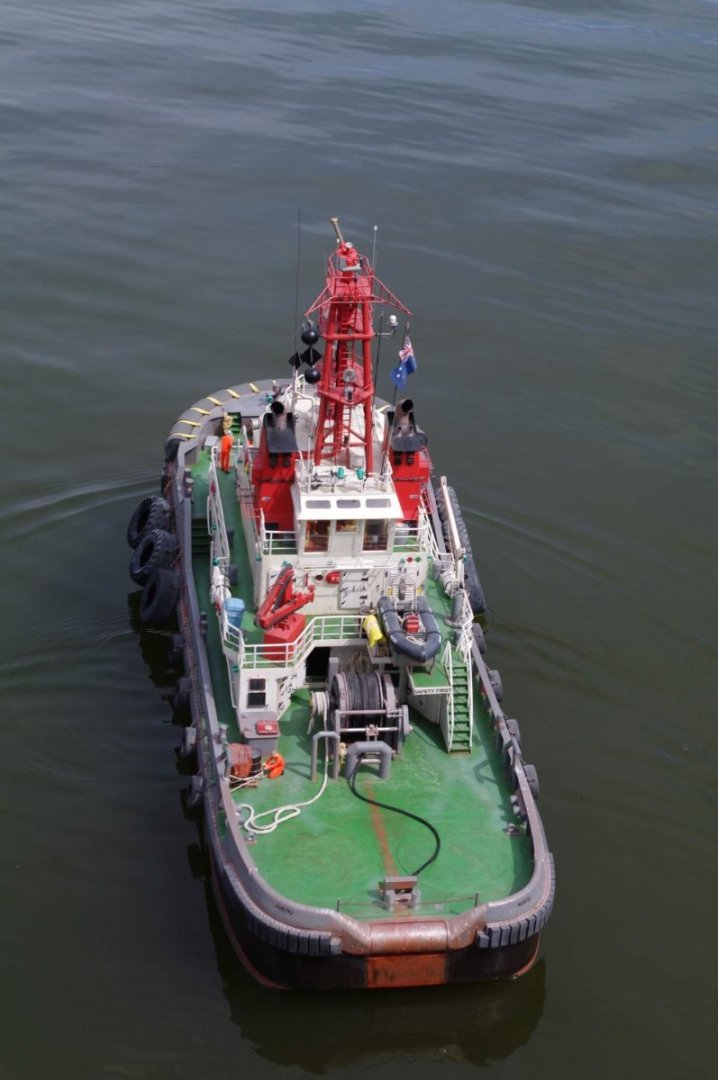
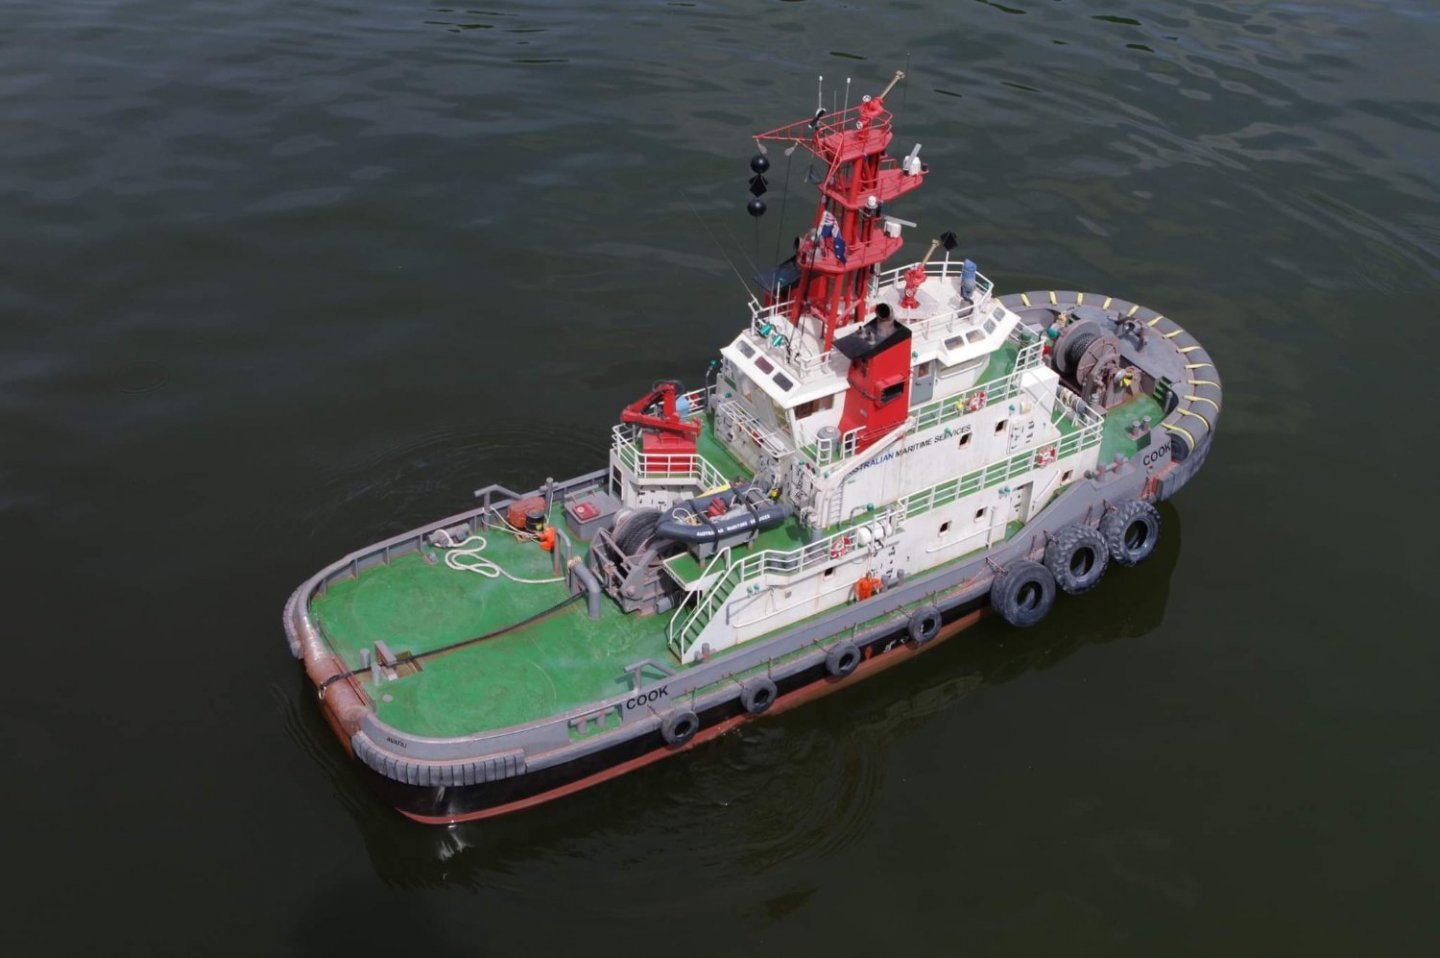
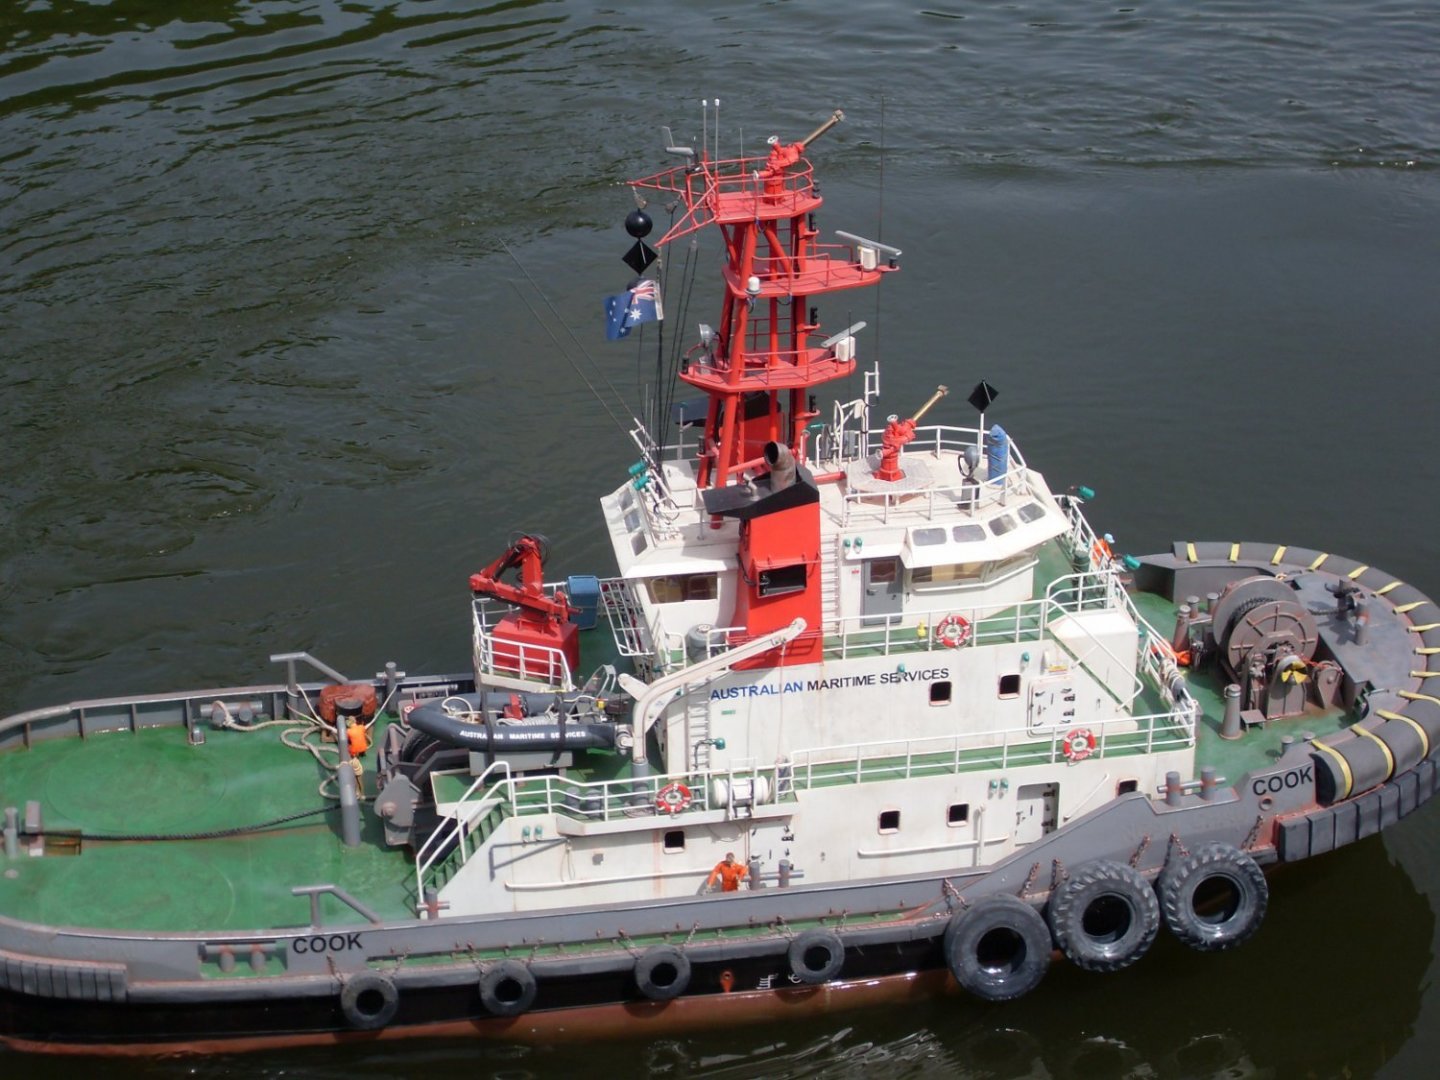
The response from the builder in regard to painting, I painted the tug some 10 years ago and it was my first attempt at weathering any of my models! (I just winged it). From what I remember I used all humbrol enamel paints, the green was no2 gloss , I brushed this on fairly thick with a hap hazard fashion so as not to leave the brush strokes going one way or the other, I didn’t want a gloss deck so on went a coat of satin cote again in a hap hazard fashion. A couple of washes one in a very weak black and one in a rusty colour. I dry brushed the areas I thought would have more wear with a light grey or light green I can’t remember. I didn’t do anything really fancy but I guess it come out okay! This was in no337 of marine modelling international April 2015

-
Update to this, I have heard from the current owner and the builder of this model and been given the explanation as to how the decks were done so well. Once I get permission I will upload info.
-
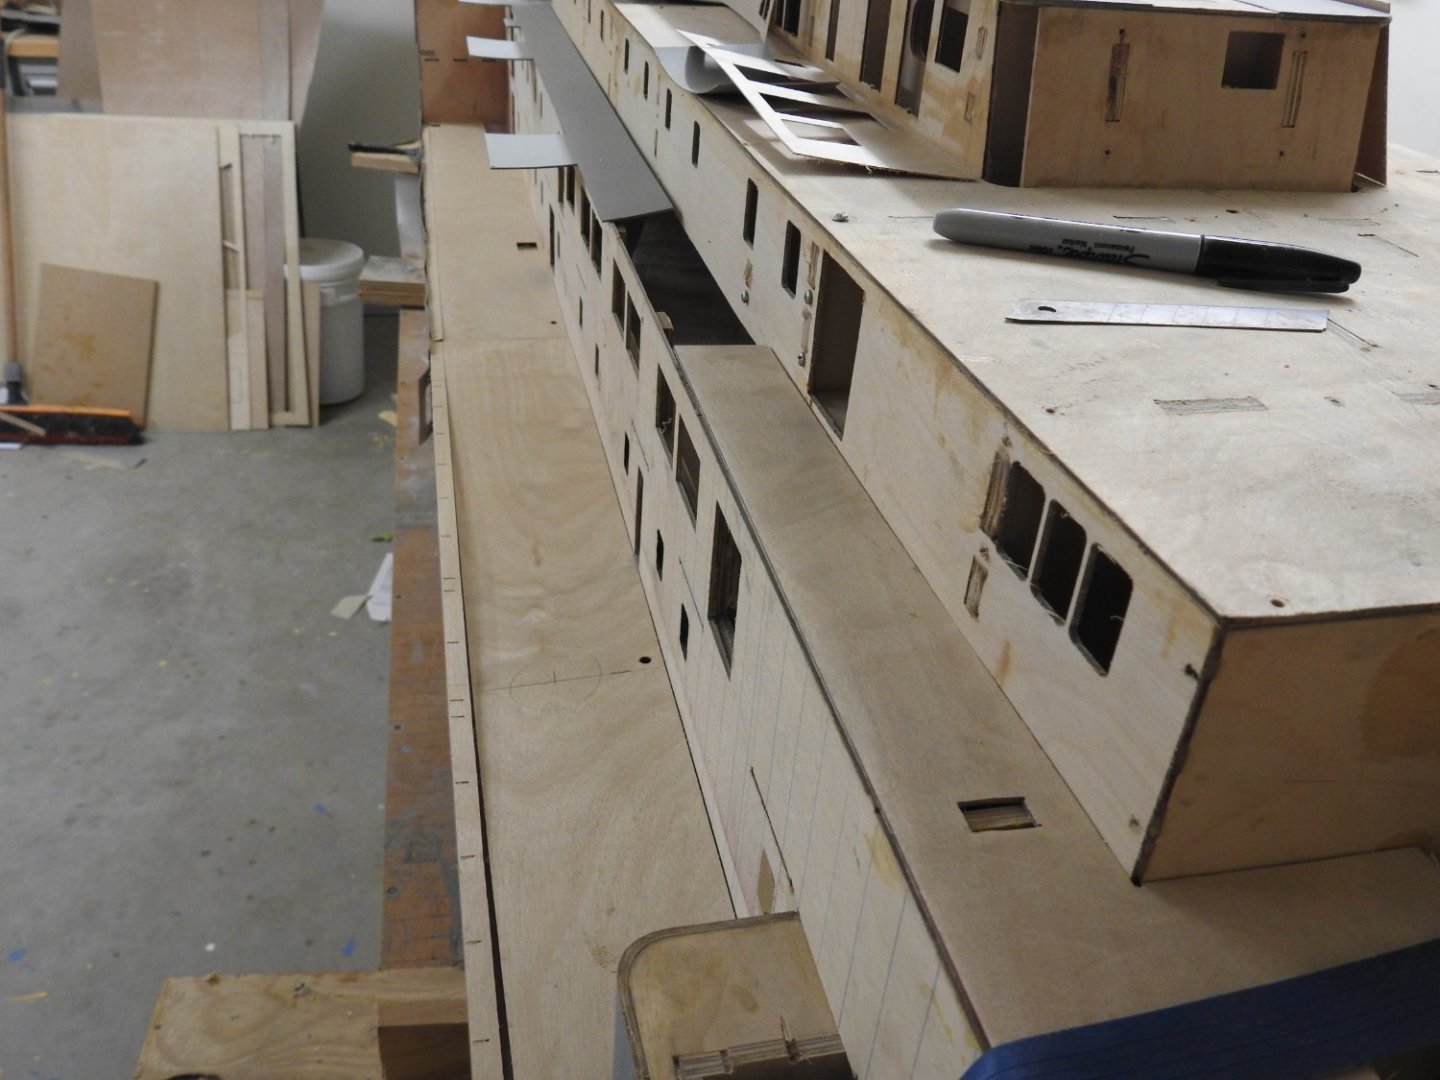
More plates to prime and fit, showing the slots to locate the framing and bulwark stays for the structure.
- 454 replies
-
- 9
-
-
- Union Steamship Company
- Stepcraft 840
- (and 3 more)
-
If you are referring to the main, poop and fore deck yes the camber is a constant curve through its length, its also a parabolic curve not an arc but the difference is not worth mentioning, except I just did............... the deck is developed through the centreline at its apex and the deck at the shell is whatever it is.
-
Not sure if this is of use to you Kevin but its built from the actual plans for the boats, I got them from the guy who did them for the restoration. Needless to say, it's a 3d model
- 444 replies
-
- 3
-
-
-
- Cutty Sark
- Revell
- (and 2 more)
-
No I had not, but it can't happen, the plates are glued on with a liberal layer of marine grade (5 min) epoxy, and prior to that the plates are soaked in Everdure which impregnates the wood plasticising it. Aside from that only topsides are plated. The effect will be over whole hull but bottom sides will be totally done in he sealer. Once I have a section complete I will airbrush prime the plates one more time to check for sanding scratches and blemishes, and remedy all that before sanding with 320 and doing the weld beads
- 454 replies
-
- 3
-
-
- Union Steamship Company
- Stepcraft 840
- (and 3 more)
-
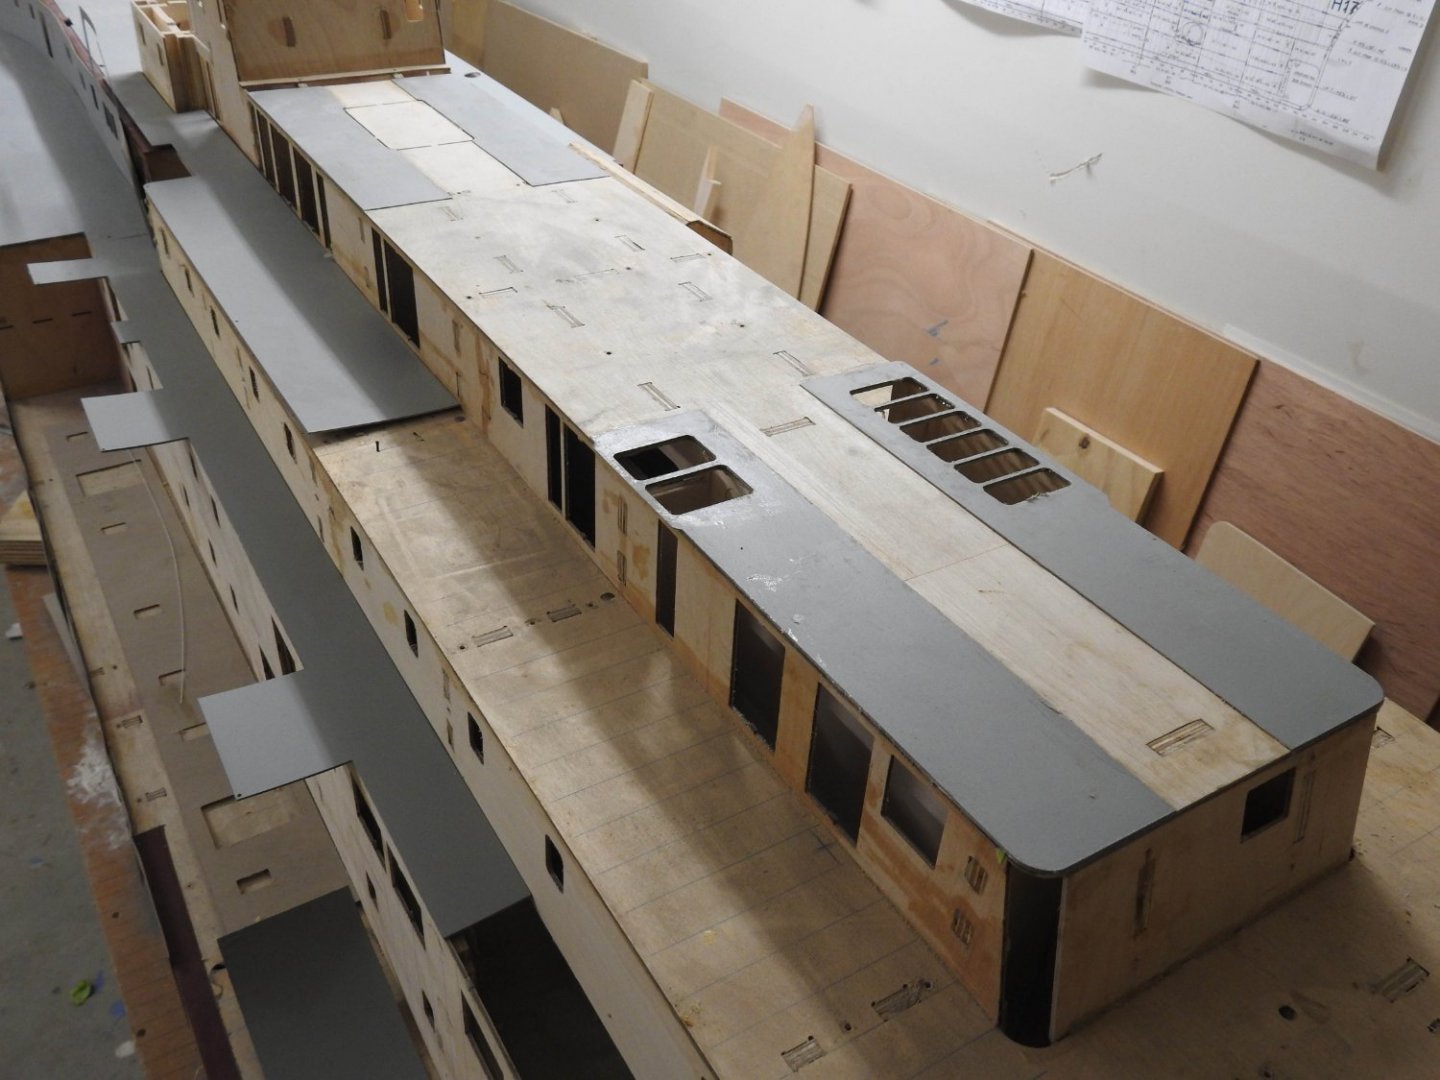
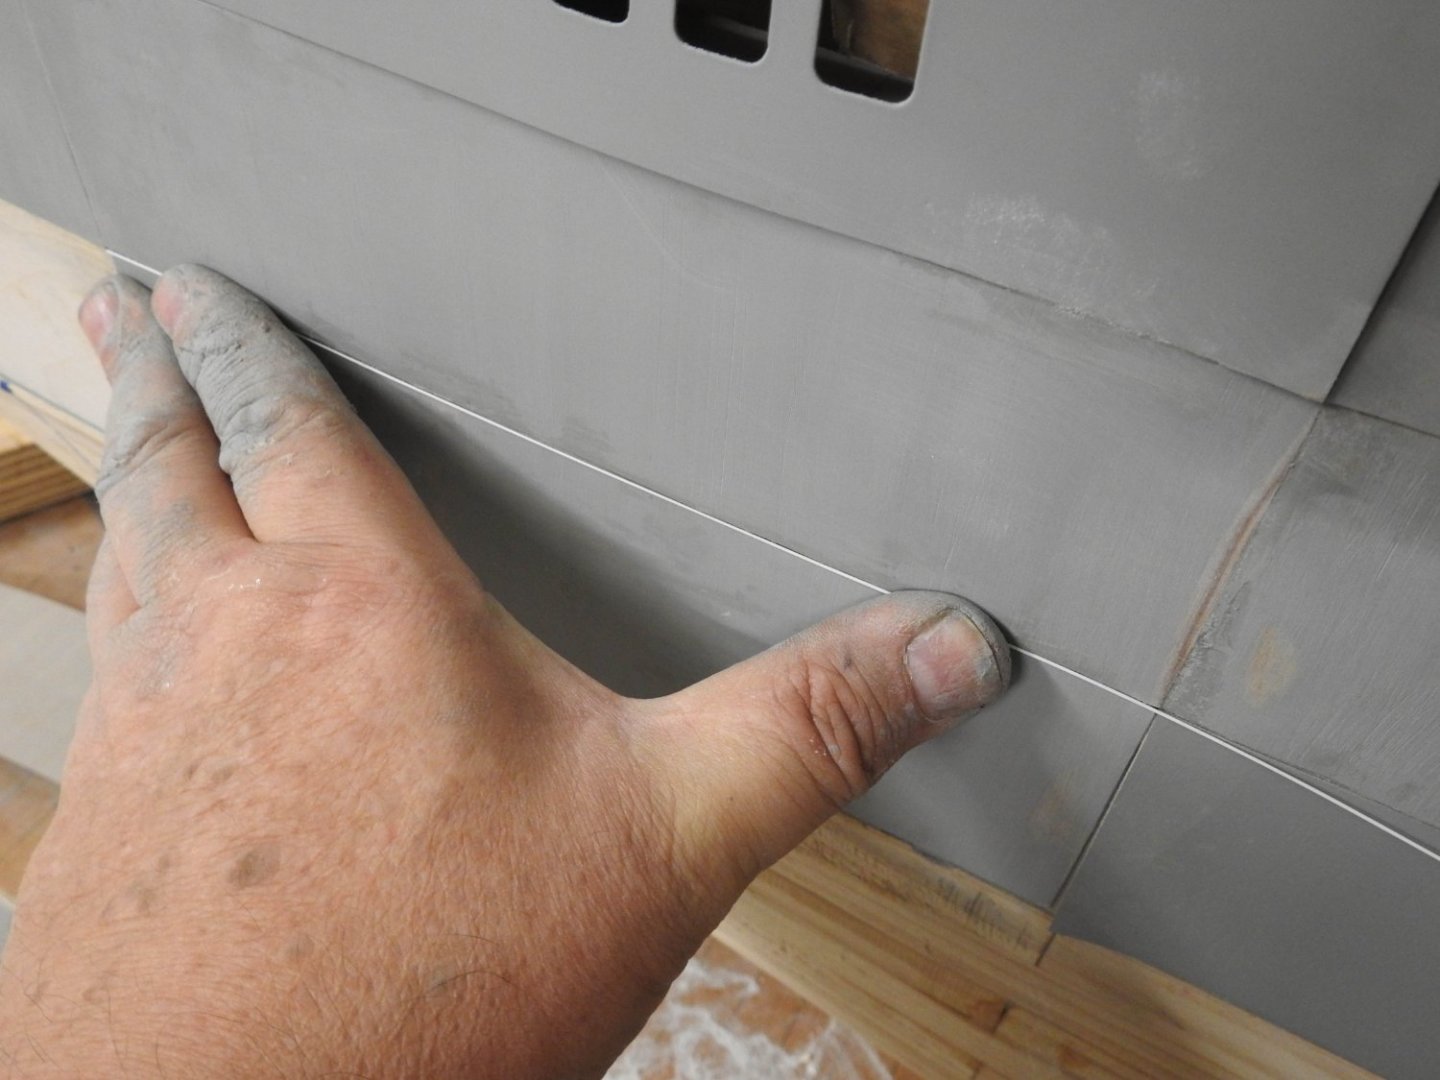
Thanks Keith, I hope my fittings and details are as good as yours. I finally can show the effect of the plating and seams....well sort of. It's a long job, made longer by the fact that the pressure switch on my compressor has died so have to wait a week before I can spray again. Hull plates, some glued, others temporarily taped. Weld seam, this will get widened when softened and rolled into groove. Deck panel glued down forming waterway, the 1mm thickness replicates the 1 1/2 Semprene deck. the mast base can be seen as well as the various vent holes. The 2mm holes in the waterways are the scupper positions. Plates on the Fan Room roof being glued, these have not been sanded for distortion yet..

- 454 replies
-
- 8
-
-
-
- Union Steamship Company
- Stepcraft 840
- (and 3 more)
-
The model belongs to Bournville Model Yacht and Power Boat Club, I have emailed them
-
I should add for future reference this is a decking called Semtek Semprene and it is a rubber paint applied over cork and is between 3/8 and 1-1/2 inch think, the shots above are from delivery voyage so not even that old, it faded very quickly.