HOLIDAY DONATION DRIVE - SUPPORT MSW - DO YOUR PART TO KEEP THIS GREAT FORUM GOING! (Only 20 donations so far - C'mon guys!)
×

Richard Dunn
-
Posts
529 -
Joined
-
Last visited
Content Type
Profiles
Forums
Gallery
Events
Everything posted by Richard Dunn
-
 Ok the deck beams are located at the web frames only, if you look at the photos I sent you of the hull with all the planking removed on the deck you will see how the main hatch is located between 2 deck beam spaces but the C Jordan plans show the web frame locations, its the same plan I used in the workshop.
- 444 replies
-
- 1
-

-
- Cutty Sark
- Revell
- (and 2 more)
-
I just checked and he has updated the older one. see here https://scaledecks.com/sailing-ships Also not sure if you know this but She was sheathed in Muntz metal not copper, Muntz is about 60% copper and 40% zinc but colour is closer to brass, if you are trying to be accurate you would want to mix a bit of Copper paint into Brass. The Sark as she is now is done in muntz but has a higher zinc content than older muntz so is a bit yellower than the old Muntz.
- 444 replies
-
- 3
-
-
- Cutty Sark
- Revell
- (and 2 more)
-
Have you considered using Scaledecks wooden decks? The rather long link is here. https://www.ebay.com/itm/222876236317?_trkparms=amclksrc%3DITM%26aid%3D1110006%26algo%3DHOMESPLICE.SIM%26ao%3D1%26asc%3D20201210111314%26meid%3Df90b4265f33542f5882eb8def39447f5%26pid%3D101195%26rk%3D1%26rkt%3D12%26sd%3D123616690939%26itm%3D222876236317%26pmt%3D1%26noa%3D0%26pg%3D2047675%26algv%3DSimplAMLv9PairwiseWebMskuAspectsV202110NoVariantSeed%26brand%3DRevell&_trksid=p2047675.c101195.m1851&amdata=cksum%3A222876236317f90b4265f33542f5882eb8def39447f5|enc%3AAQAGAAACEHxeNwGvxhbG4i%2B6Yg0%2Fb6cIW5Q98PGCtfKeijU4yGRR35tmtW5t4PaQz3GngeWecUz64dj77wEWnYdMgXGg3Udvd0OpaxtTCiDDZAVftMbHQen499A5tlEnQEu9uNwZAhLlyPobY6BKeE%2BpYywXRUU9hhvdHFhyvsZOM9%2BaxG%2BmYia60esDoeTdL0TMN3Kt%2FedavXza16vtQinXvMzXzjY5e1rHmJbSynA0vWVNUVlmYH5cypViuclGSHQ%2BFxvBGHlKc8NvA%2Bz69ljiK490b8gRm%2BI96zFQlzEHPS2xq5Q6L7oh1BlGhfCFp4kw%2F4qaG2O7DsV12%2FTIT2%2BZbfLpsQPLMfbhxguHBXeYIU1rB05tbXi3bCuCjGaPDZFtn9%2BpFX3CQwJjKIVlAOLsoITRNH%2BDuE92n%2B8Qqd6uhxl1bk0QTB40WZOgMN4j4TU3DVCT144d61M6BGTrwZgVE4pL9WeXIxnJQYYr7U5mTD41YPDXxCRI7P58eVen%2BjSlX30hKCIdK8CkP6i0e%2BCnI2F3FTwLOqPNCV%2BITJ7ZHEUysOVMDi%2BNO5gMu%2Bt%2Ff3wU7aNh0Ej4lZWXFaMuZmZRU8d6BFsvruTbVZeqR4X8tIBYEnsAjpDUHmZyBpHyG%2Fu30mFzOmvtAiR0mb2VMQGbHJp53p9CBs4FCm06kse%2BmvxEUbw2TSpwByv%2FqrGR%2Ft4n19Bw9w%3D%3D|ampid%3APL_CLK|clp%3A2047675&epid=603166947 Just a word though. like the plastic ones the wood ones are not accurate to scale, and roughly only half the number of planks are shown as well as plugs for fixing which look terrible and would not be seen at 1/96. The beam spacing for plank fixing is dictated by the main hatch and that should be exactly 2 spans long and 7 along forward deckhouse for example. its possible the printing has limitations for resolution but I have bought his 1/200 Titanic set and its awesome so it might be old and in need of upgrade I would ask for a custom deck, I can give you a proper deck plan of planking on deck if he is willing to do a new one and can laser print it for you. He is hard to get hold of though I have read.
- 444 replies
-
- 3
-
-
- Cutty Sark
- Revell
- (and 2 more)
-
Those are some interesting considerations, I think I will adhere to this but get it to a primed state and leave it at that. I do think it needs to be at that point so weld seams etc can be done and painted over.
- 454 replies
-
- 1
-
-
- Union Steamship Company
- Stepcraft 840
- (and 3 more)
-
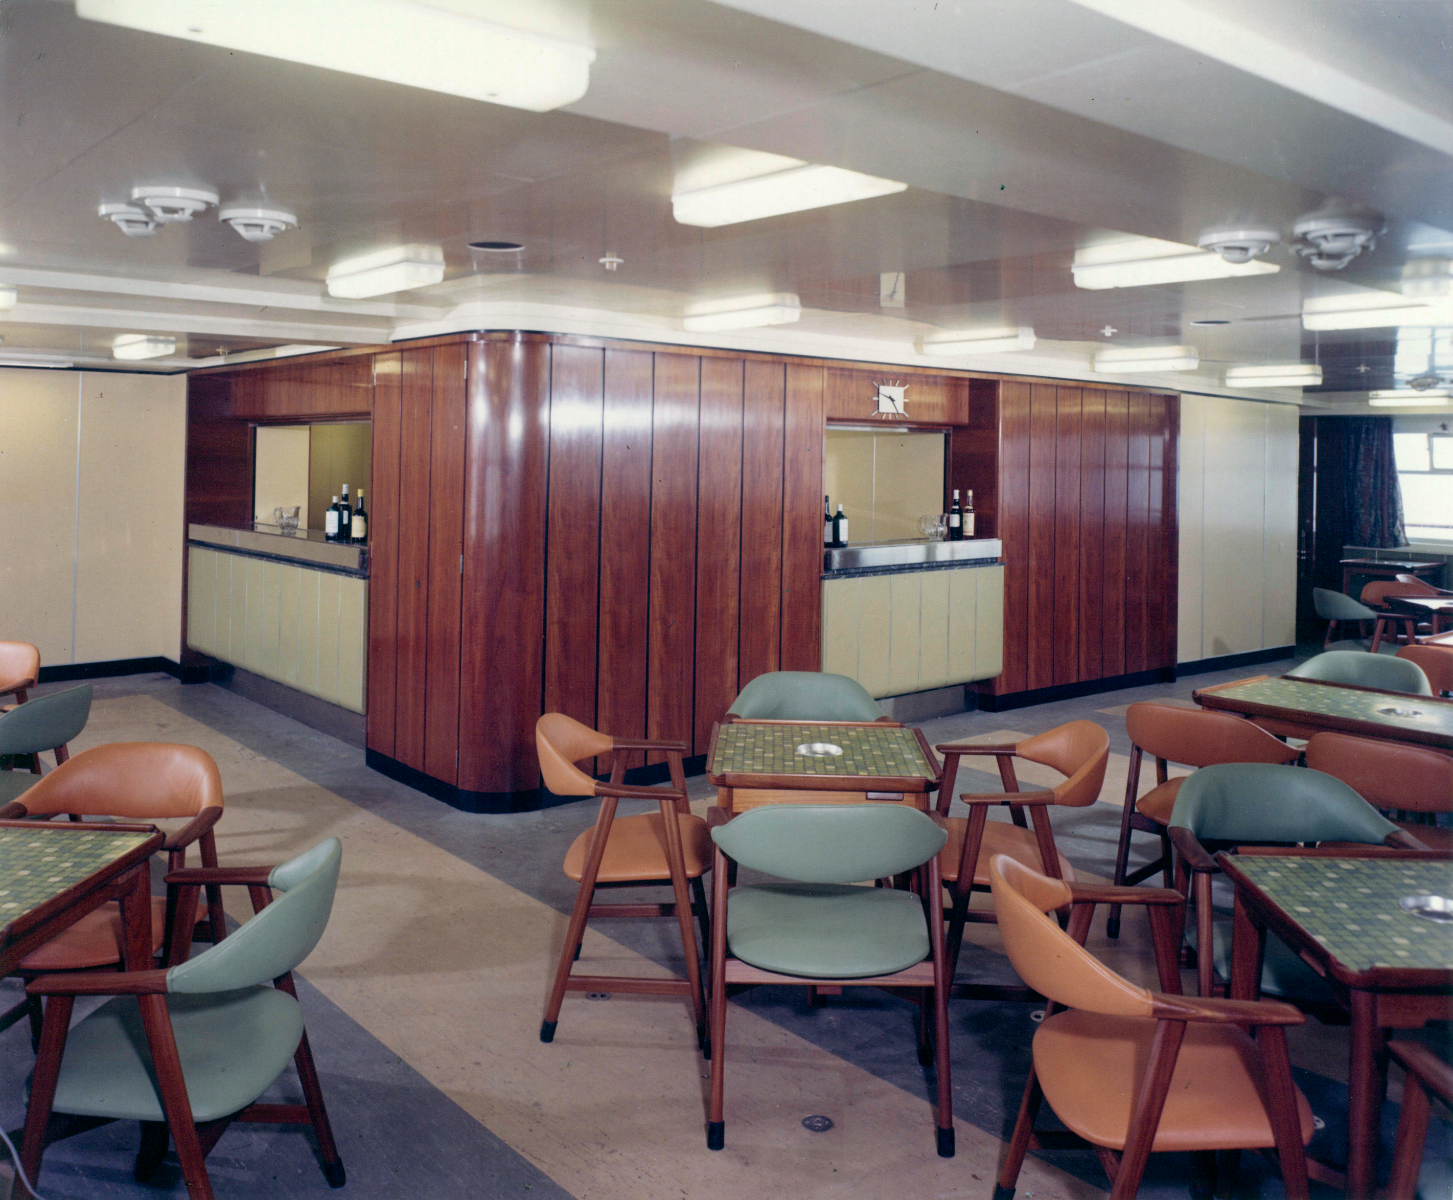
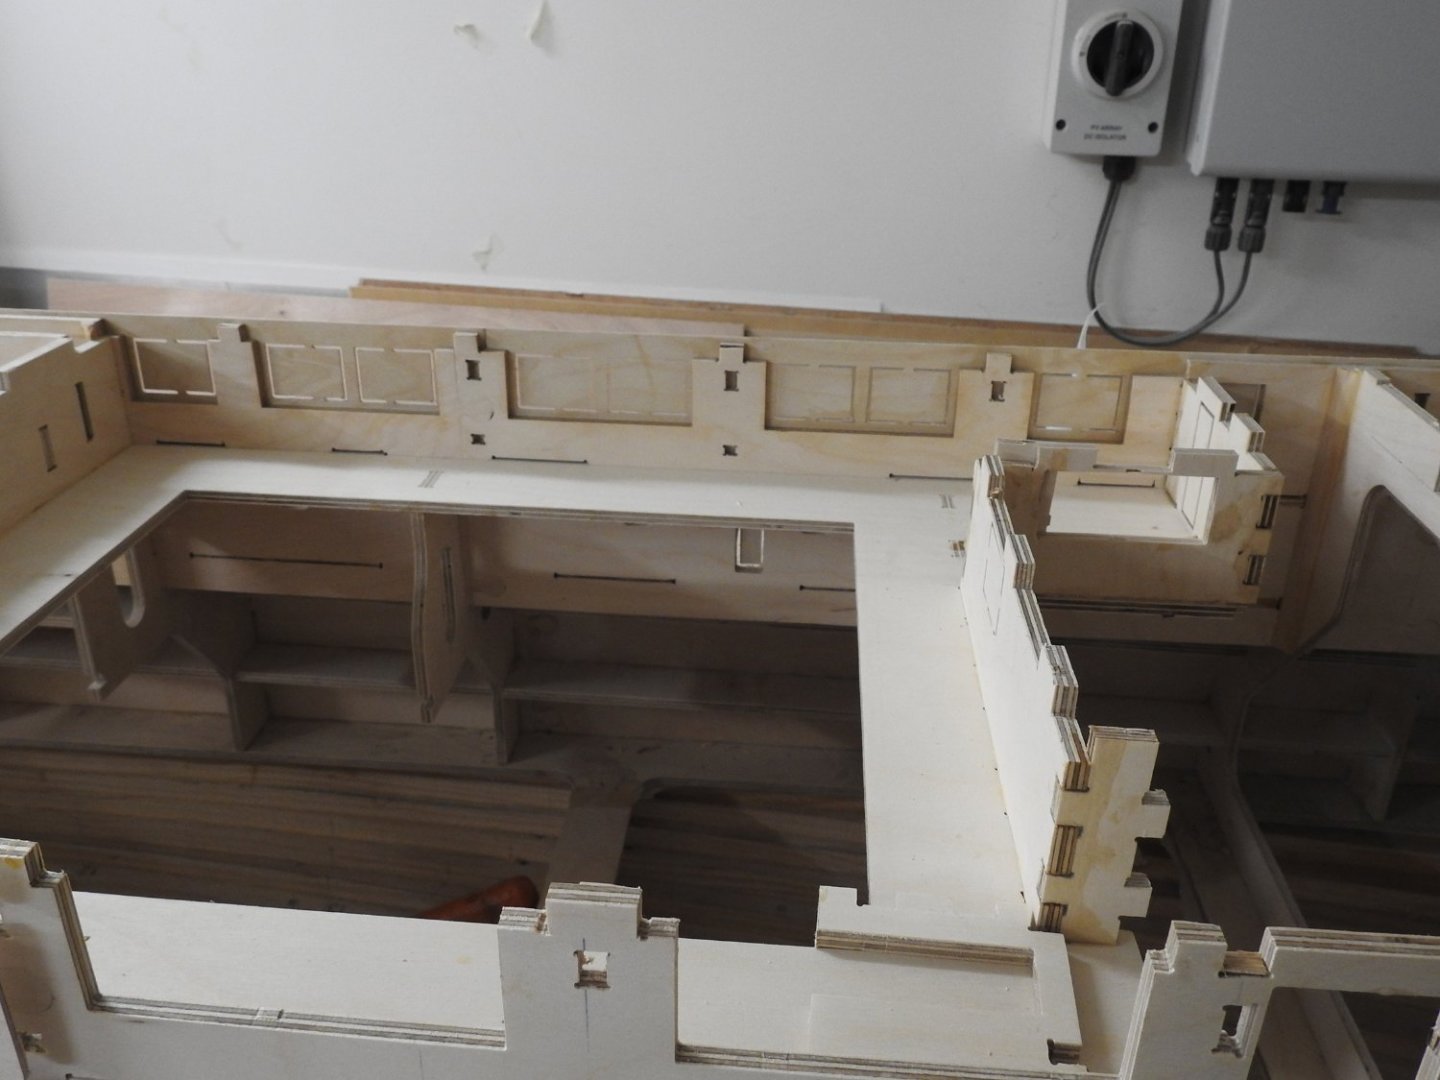
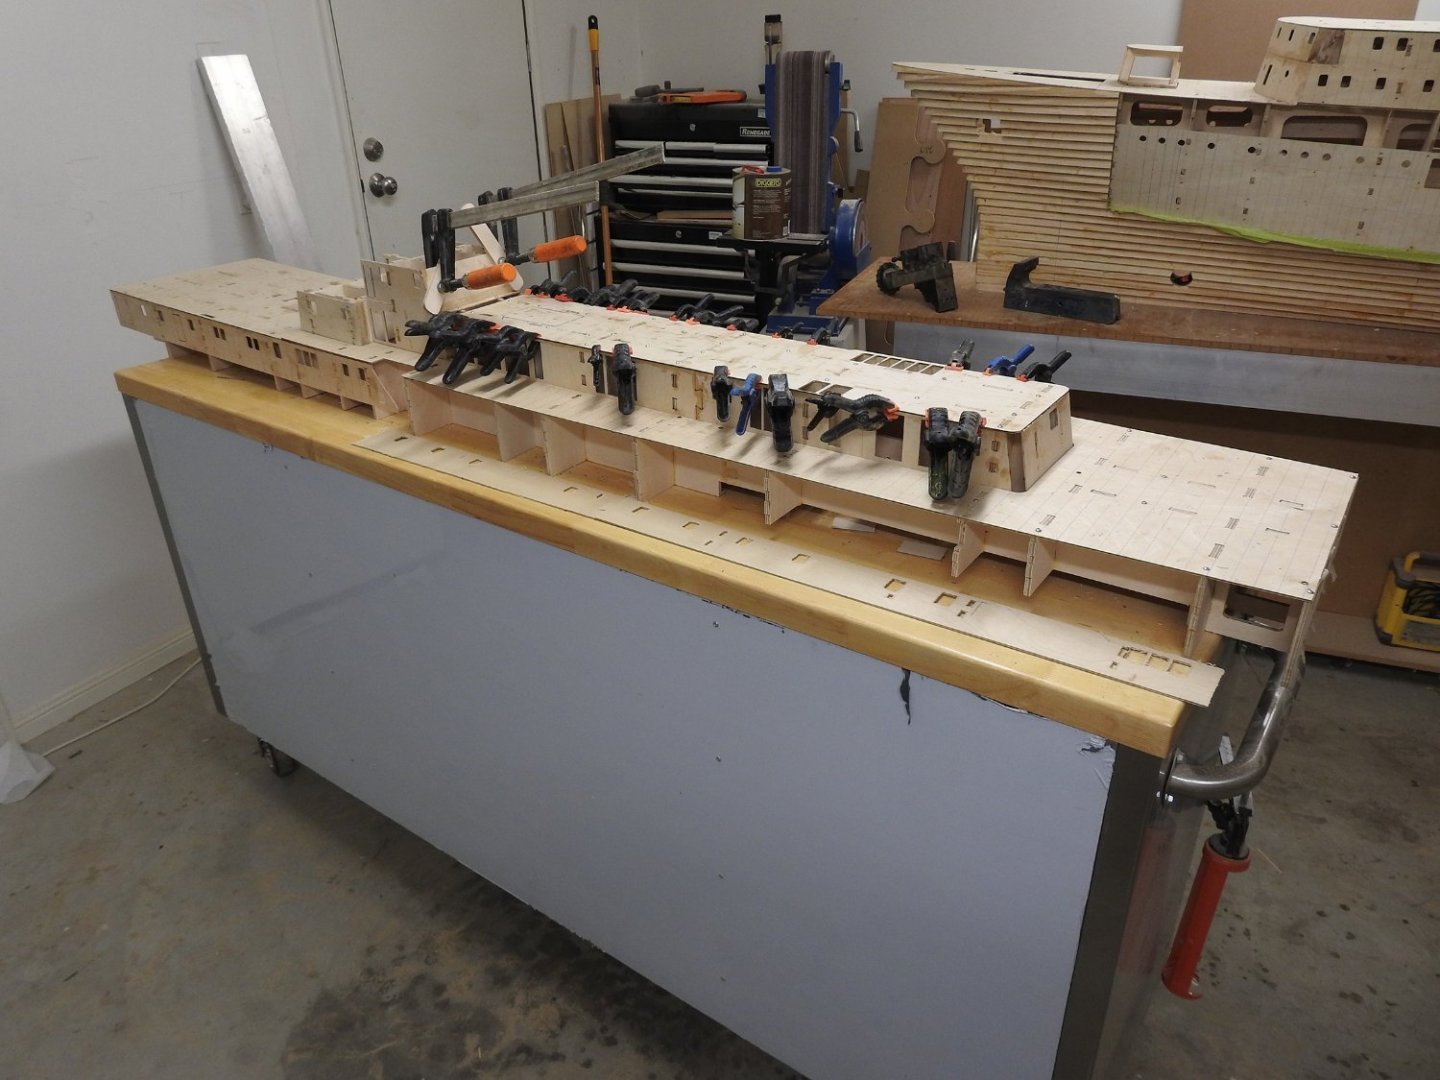
Some progress shots from today the smoke room and windows inside Lots of grills to make as you can see here on the fan rooms A lot of glue smear etc but you can see the joints all came up pretty tight given the size.


- 454 replies
-
- 8
-
-
- Union Steamship Company
- Stepcraft 840
- (and 3 more)
-
Guys there is only one file, the file is 4hr 40mins you can't watch it within Dropbox as might have limits. you need to download it.
-
Yes VLC is one that works, it may not on some PC's as you might not have the right Codecs but I am not responsible for that and have spent enough time on this already, it took me half a day to edit and render out the different versions. It is edited because if I did not you would be downloading 10GB.
-
Hi All, Here is the link to the Webinar I held on the 23rd December. This is for all of you who are after a copy and attended or anyone who was not able to attend. https://www.dropbox.com/s/nq8liinoh9e4gqf/Hull Form Basics in Rhino.mp4?dl=0 Regards Richard
-
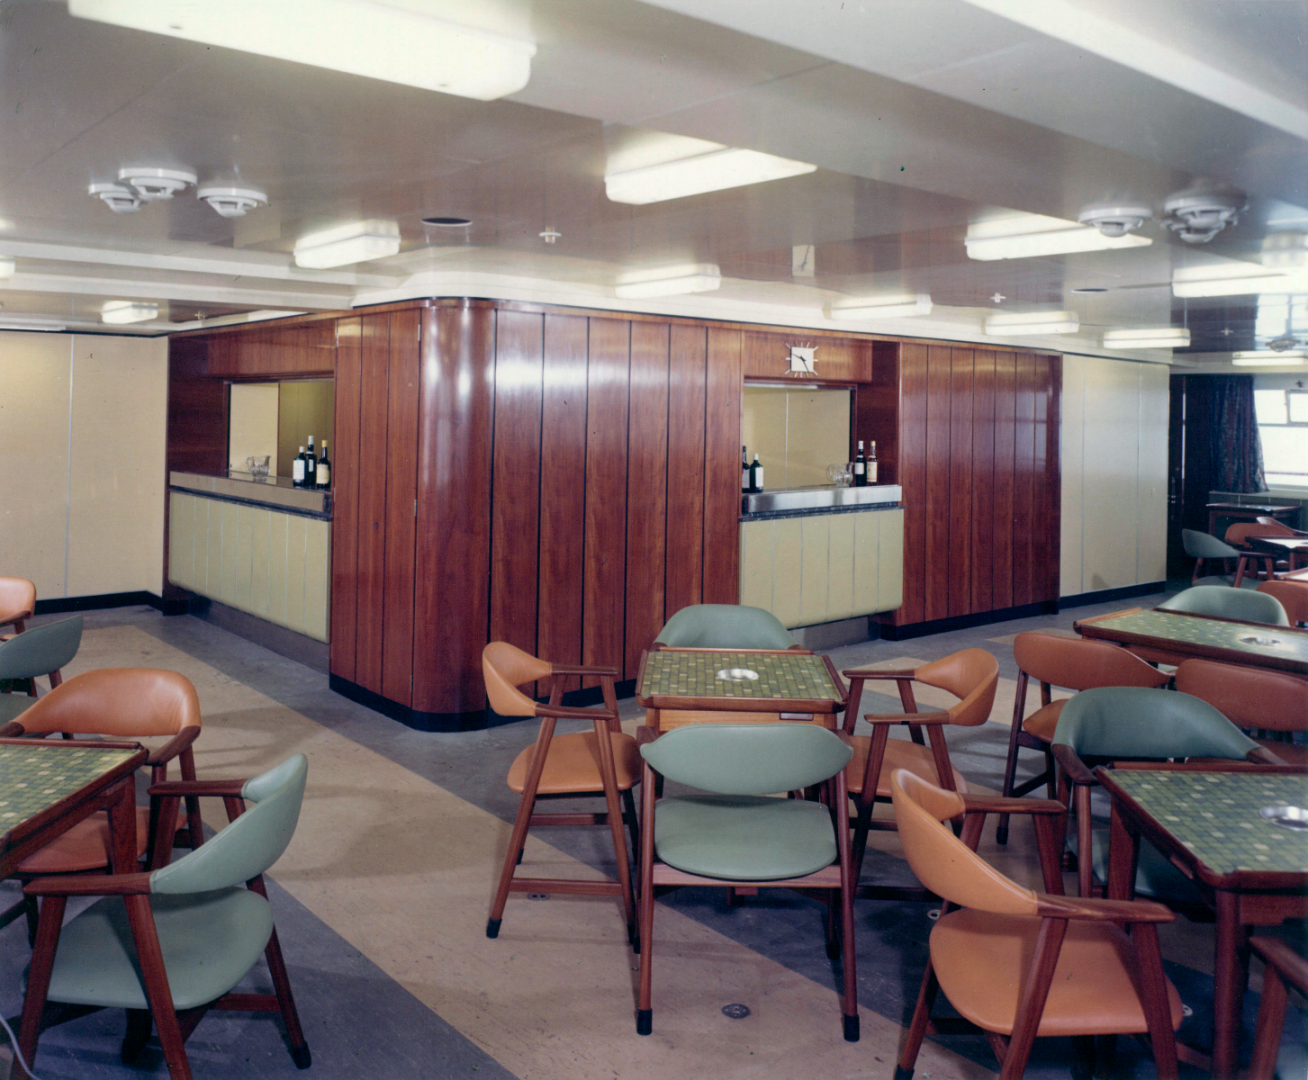
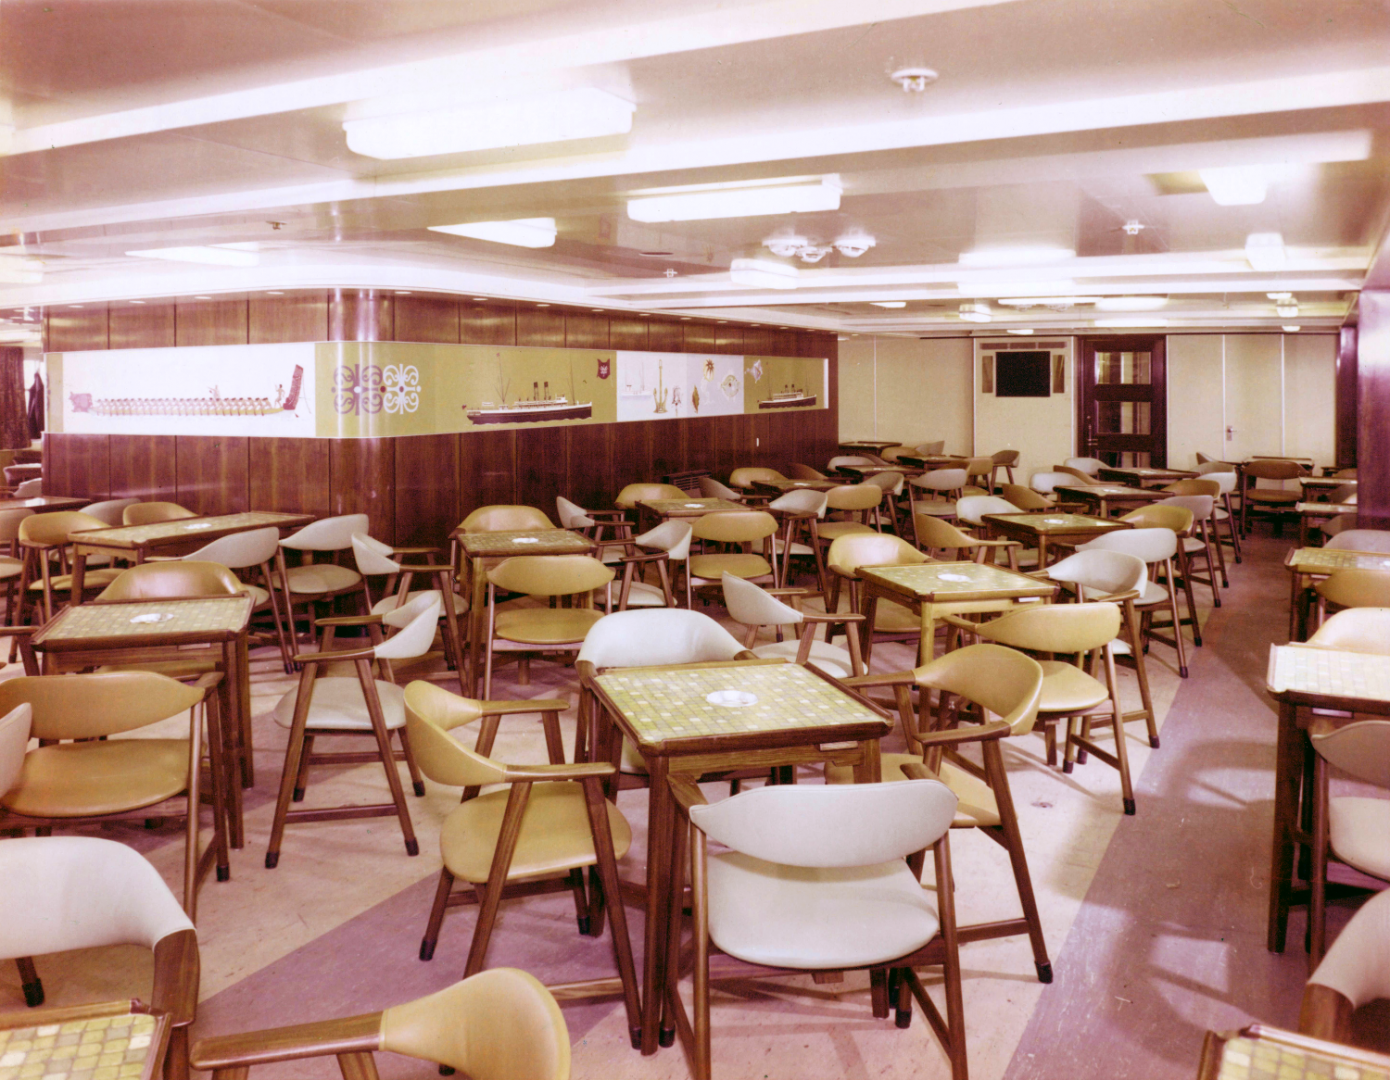
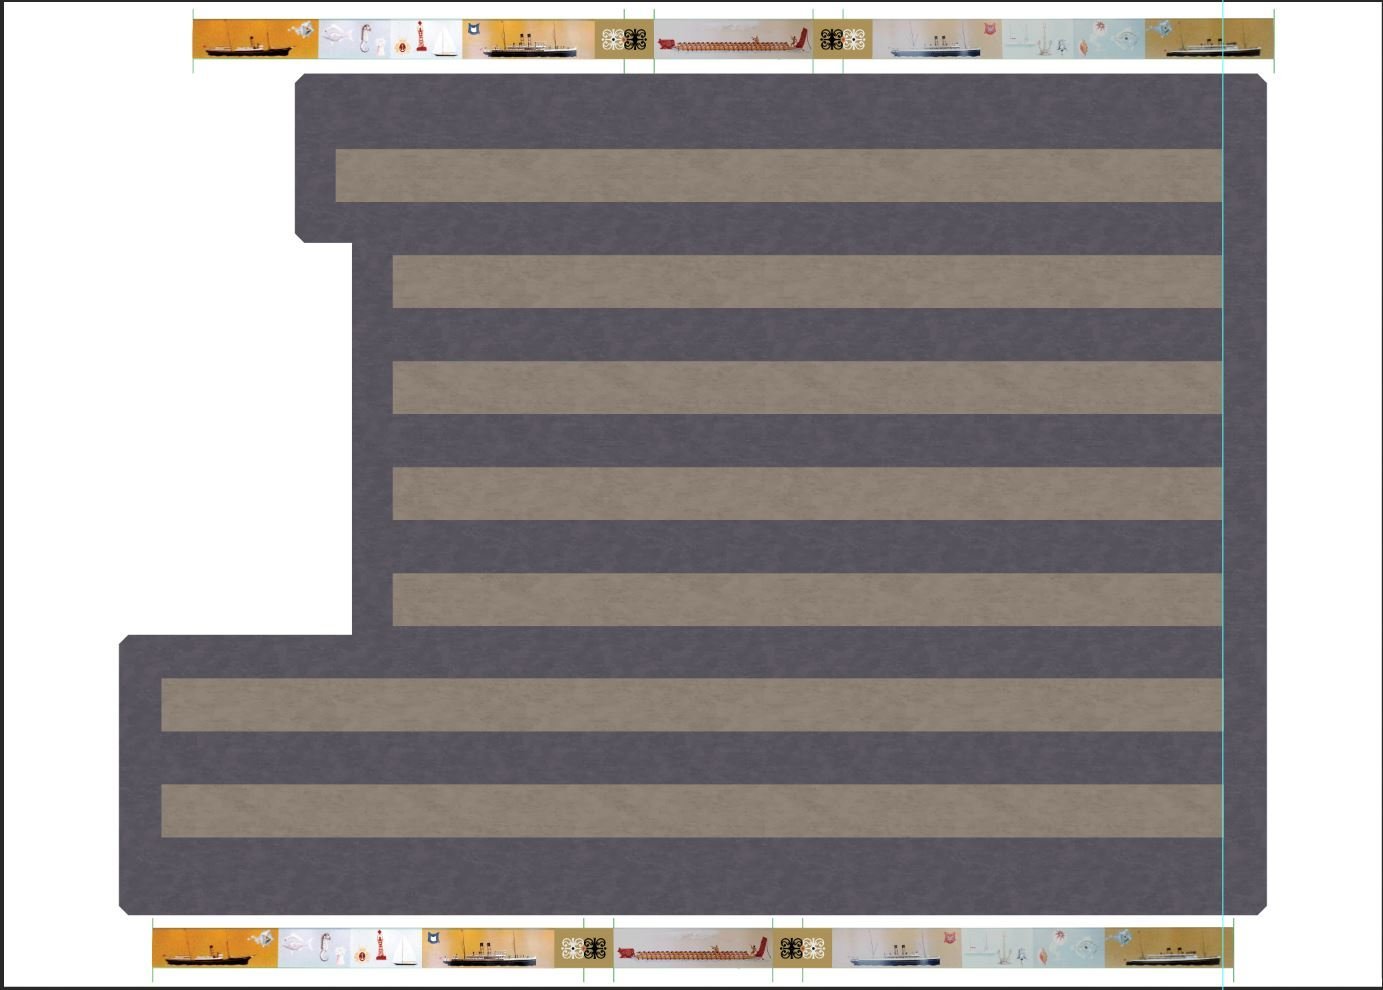
So the plan is to seal the plywood with Everdure to harden and protect the wood, sand it all properly flat. then paint areas like toespace and negative details in flat black and then glue the paper panels which have been prepared onto the model, then use thin strips of adhesive aluminium tape to do all the trims and then varnish. The panels are prepped by cutting from sheet running around edge with felt tip of matching colour and varnishing with picture satin varnish. The furniture will be all done on resin printer and painted with pins to fix into floor so it does not shake loose.
- 454 replies
-
- 6
-
-
- Union Steamship Company
- Stepcraft 840
- (and 3 more)
-
Above is the floor and murals from around the engine uptake casing, both seen here in photos. Sorry about res, I forgot to size down.
- 454 replies
-
- 5
-
-
- Union Steamship Company
- Stepcraft 840
- (and 3 more)
-
All done I have created the art for the different surfaces like formica, wood panelling and lino and lastly murals all printed and got the Micador spray as well to go.

- 454 replies
-
- 3
-
-
- Union Steamship Company
- Stepcraft 840
- (and 3 more)
-
I need some help I have to get some heavy paper printed with wood and linoleum patterns for the interior of some spaces, what ink is able to be sprayed with clear varnish without running?
-
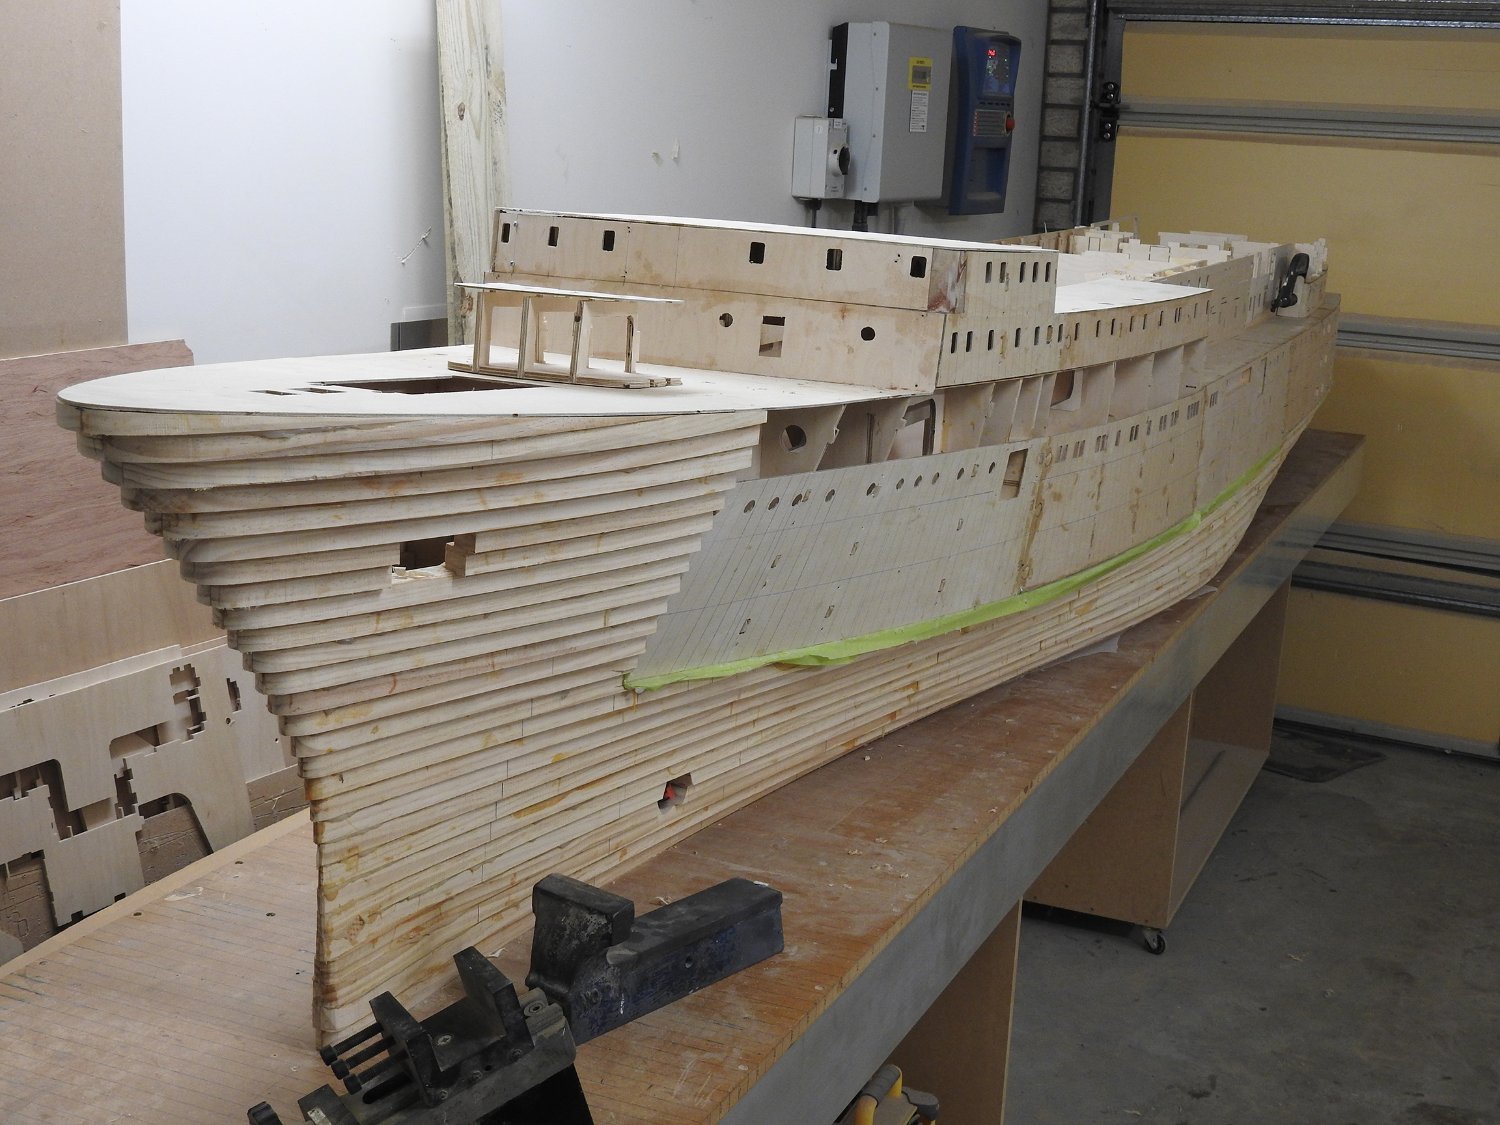
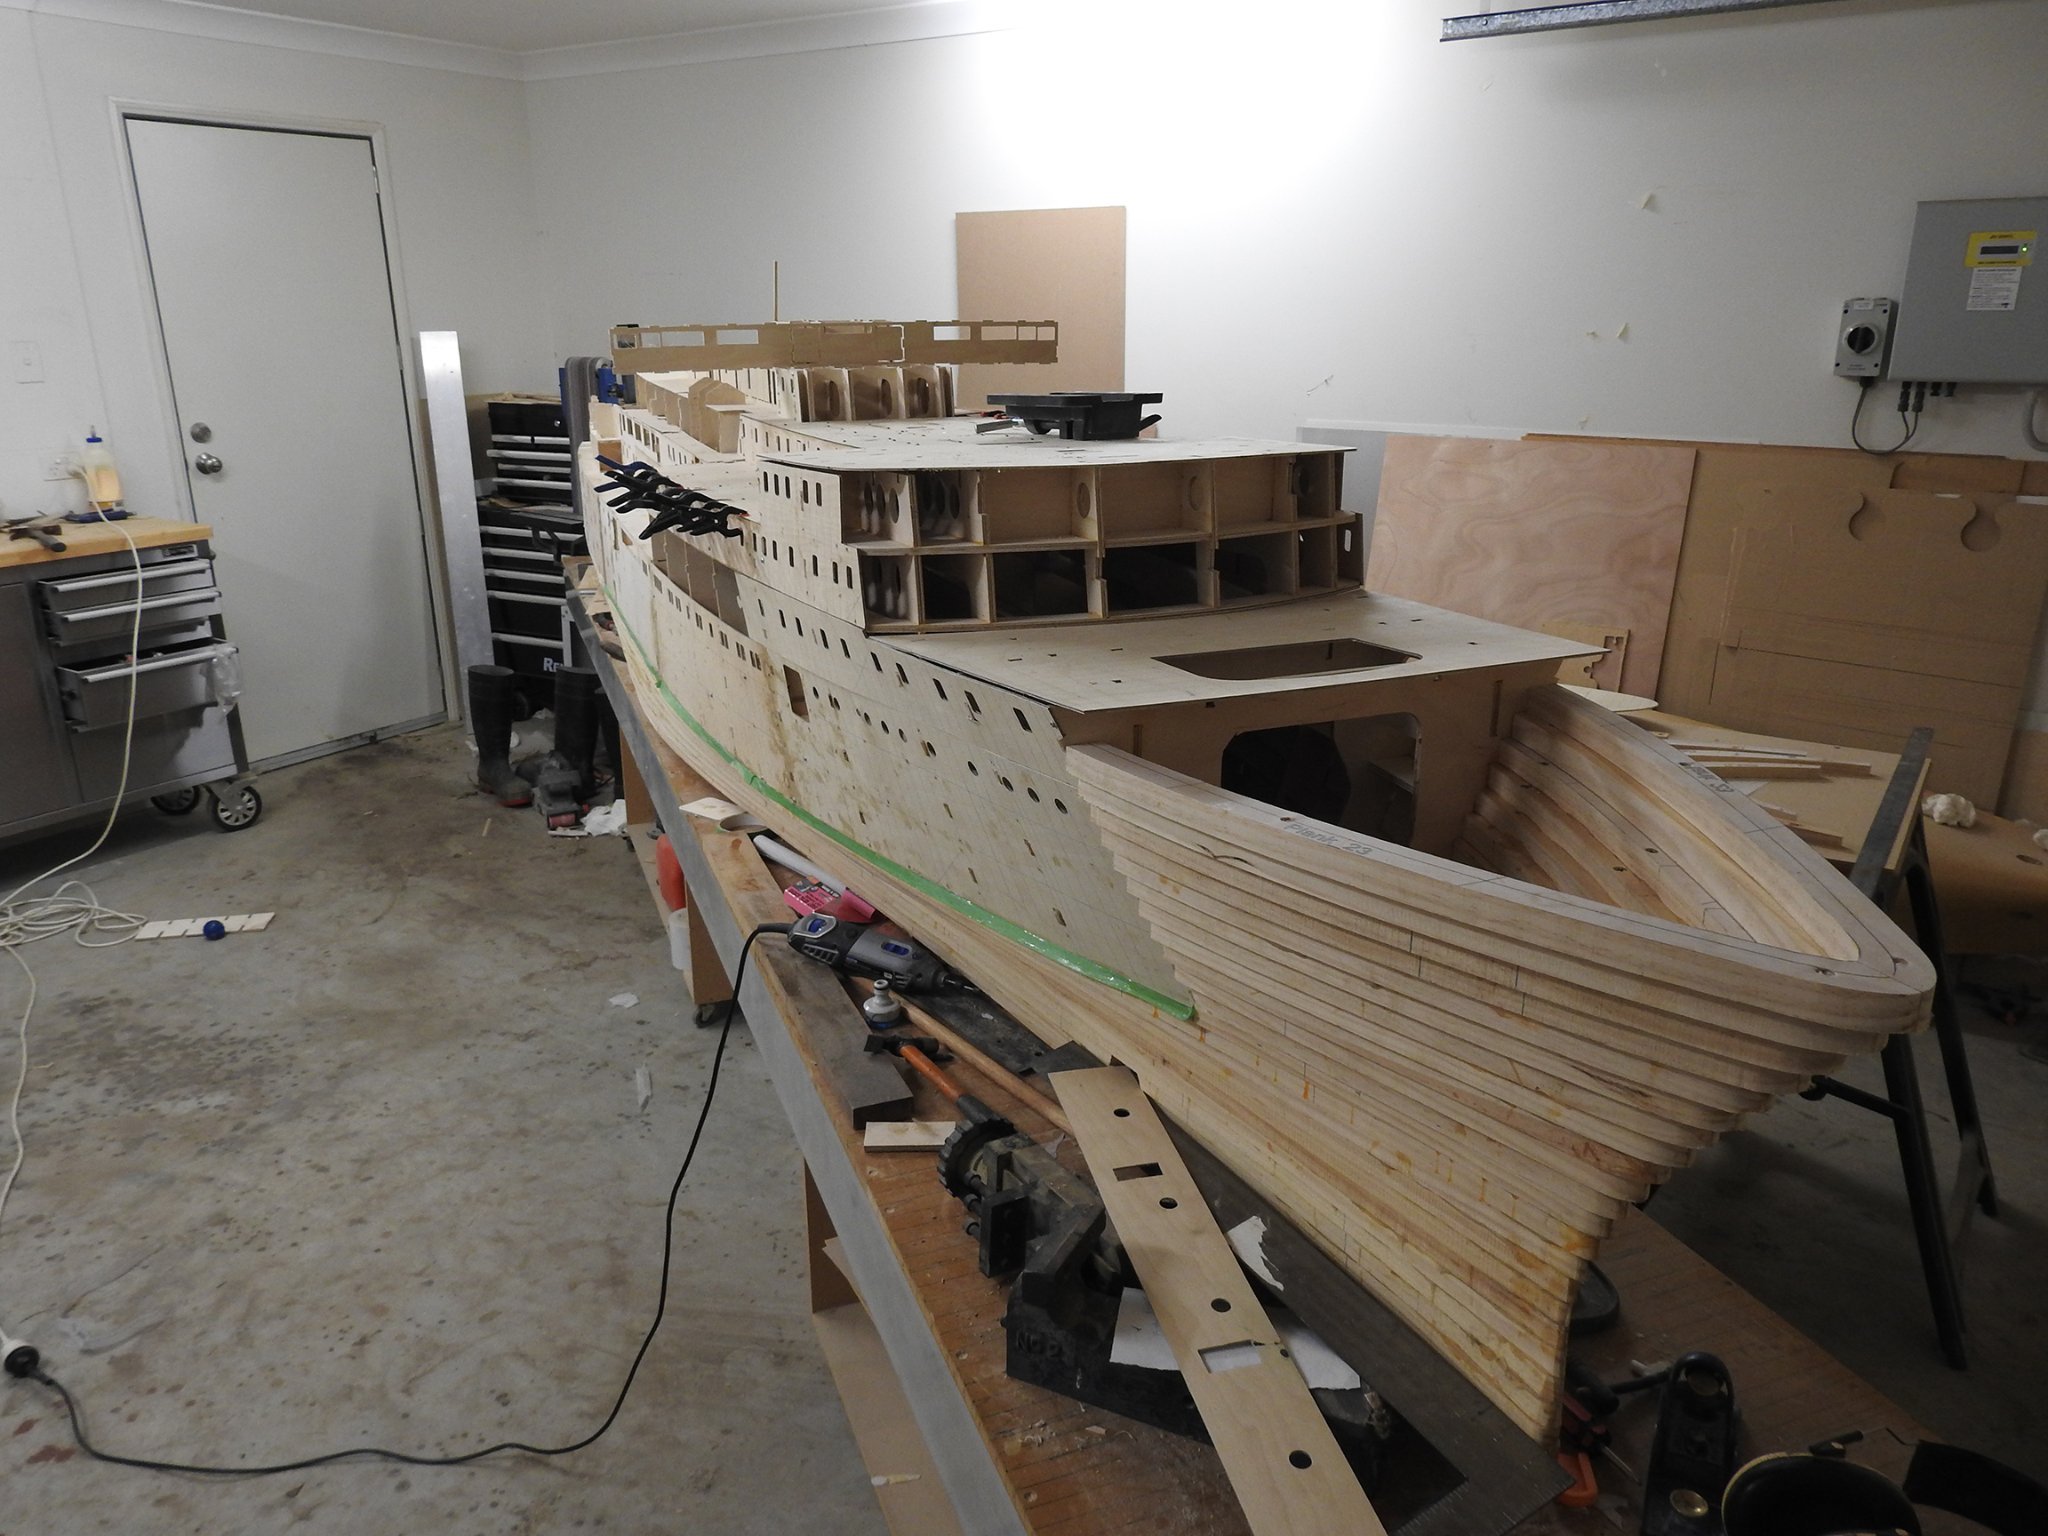
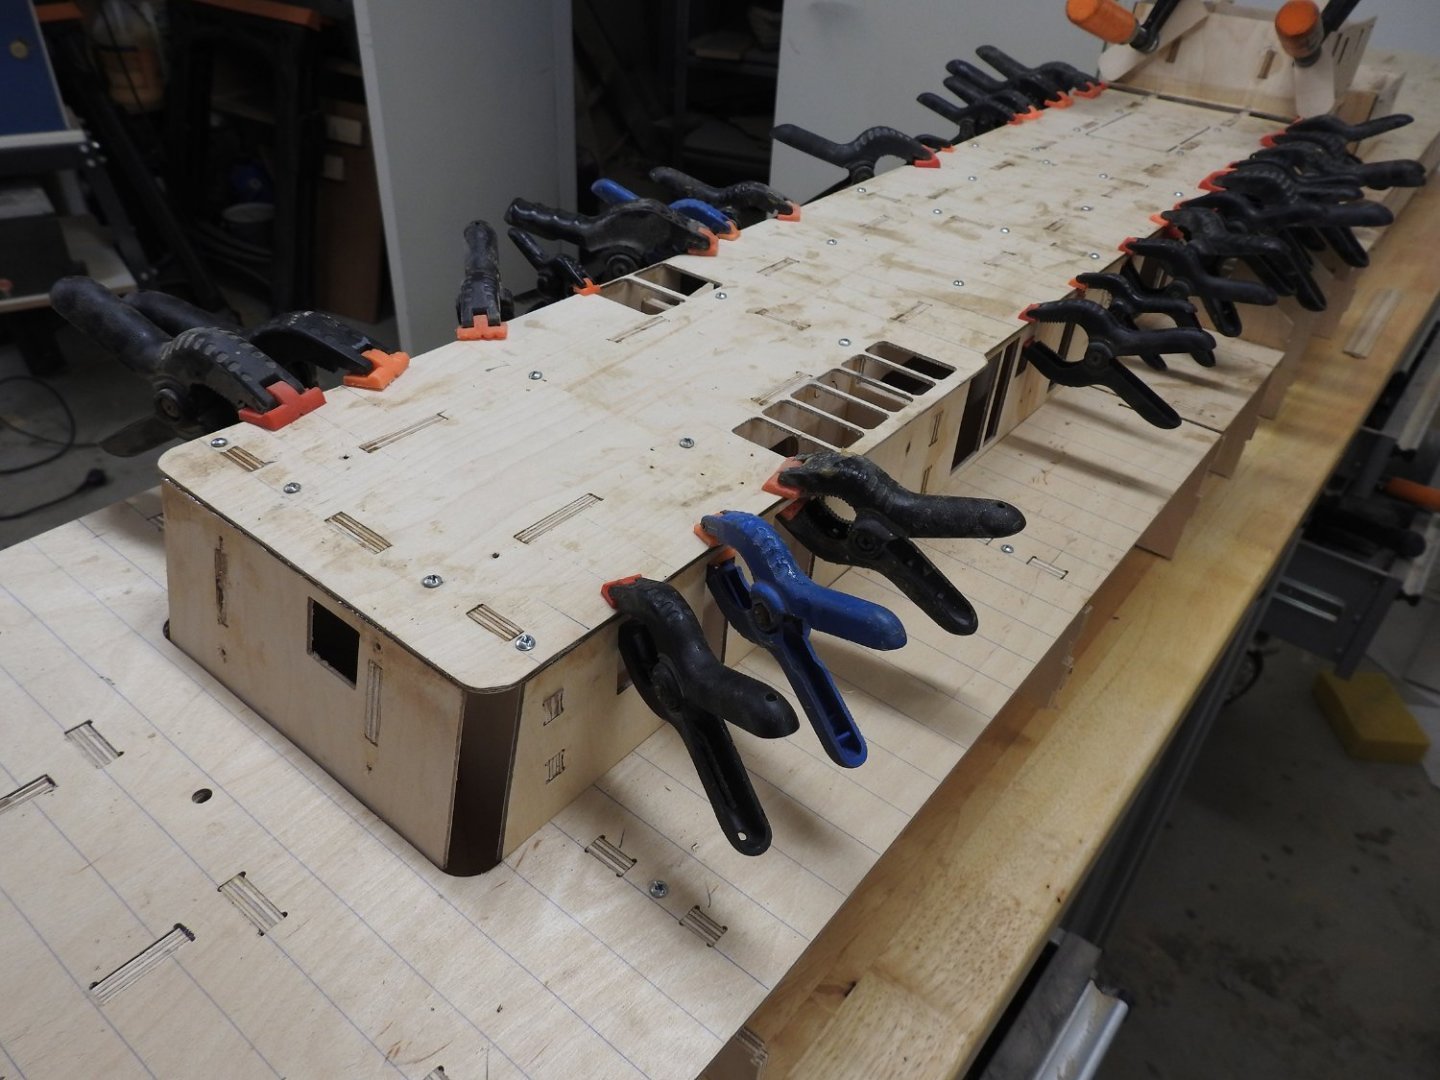
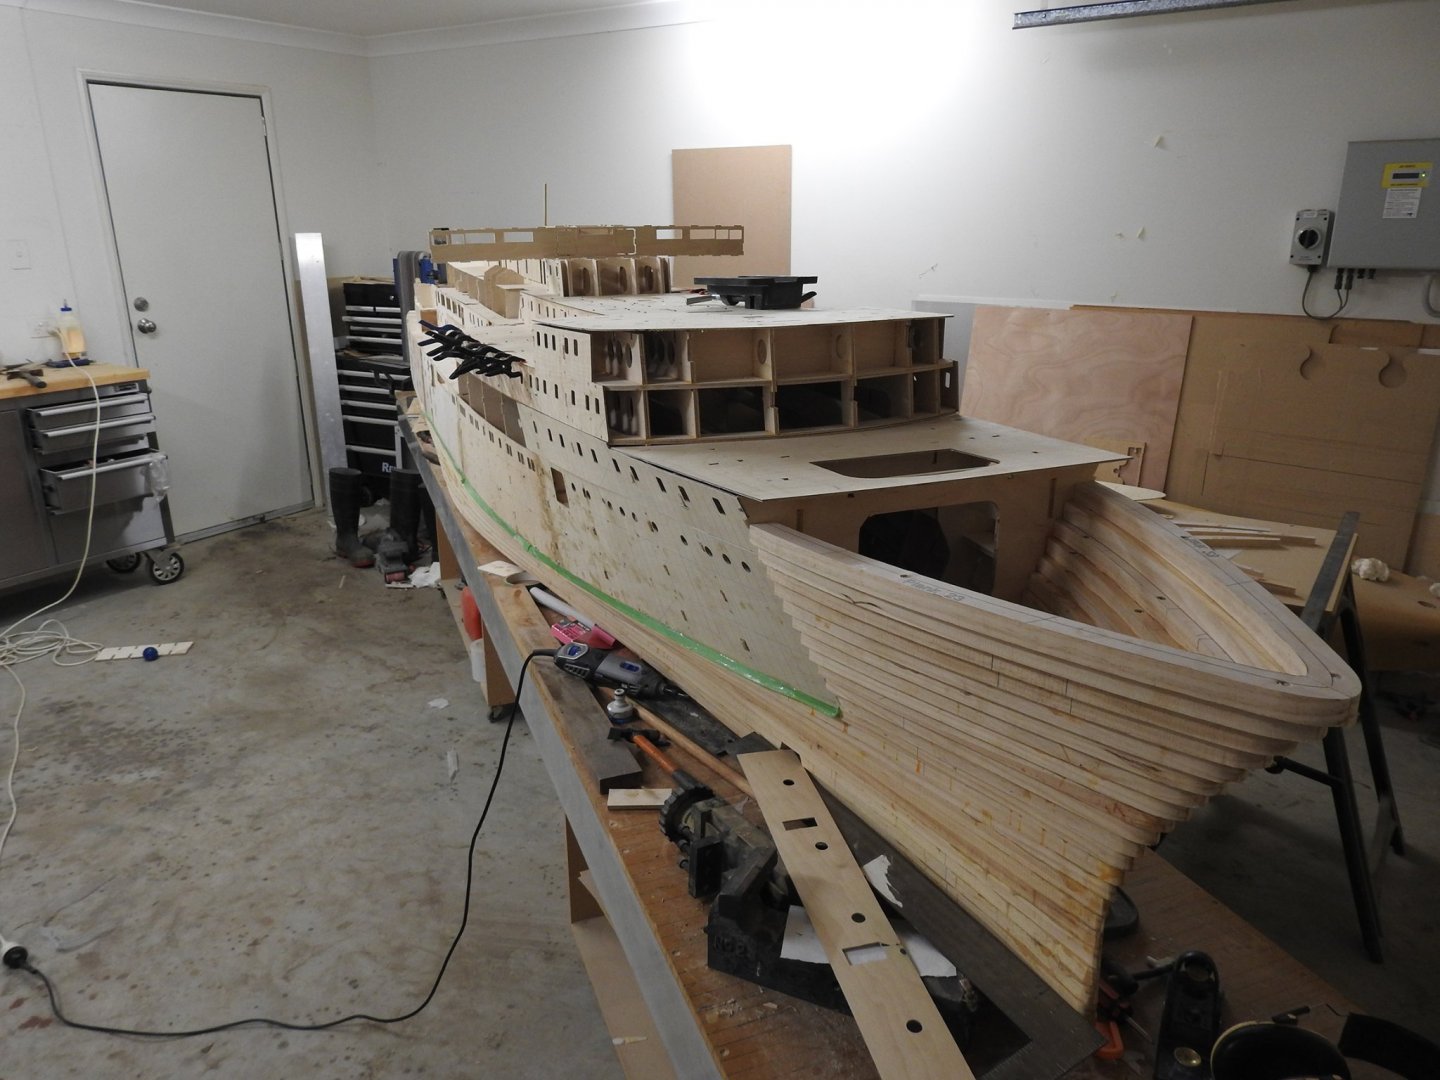
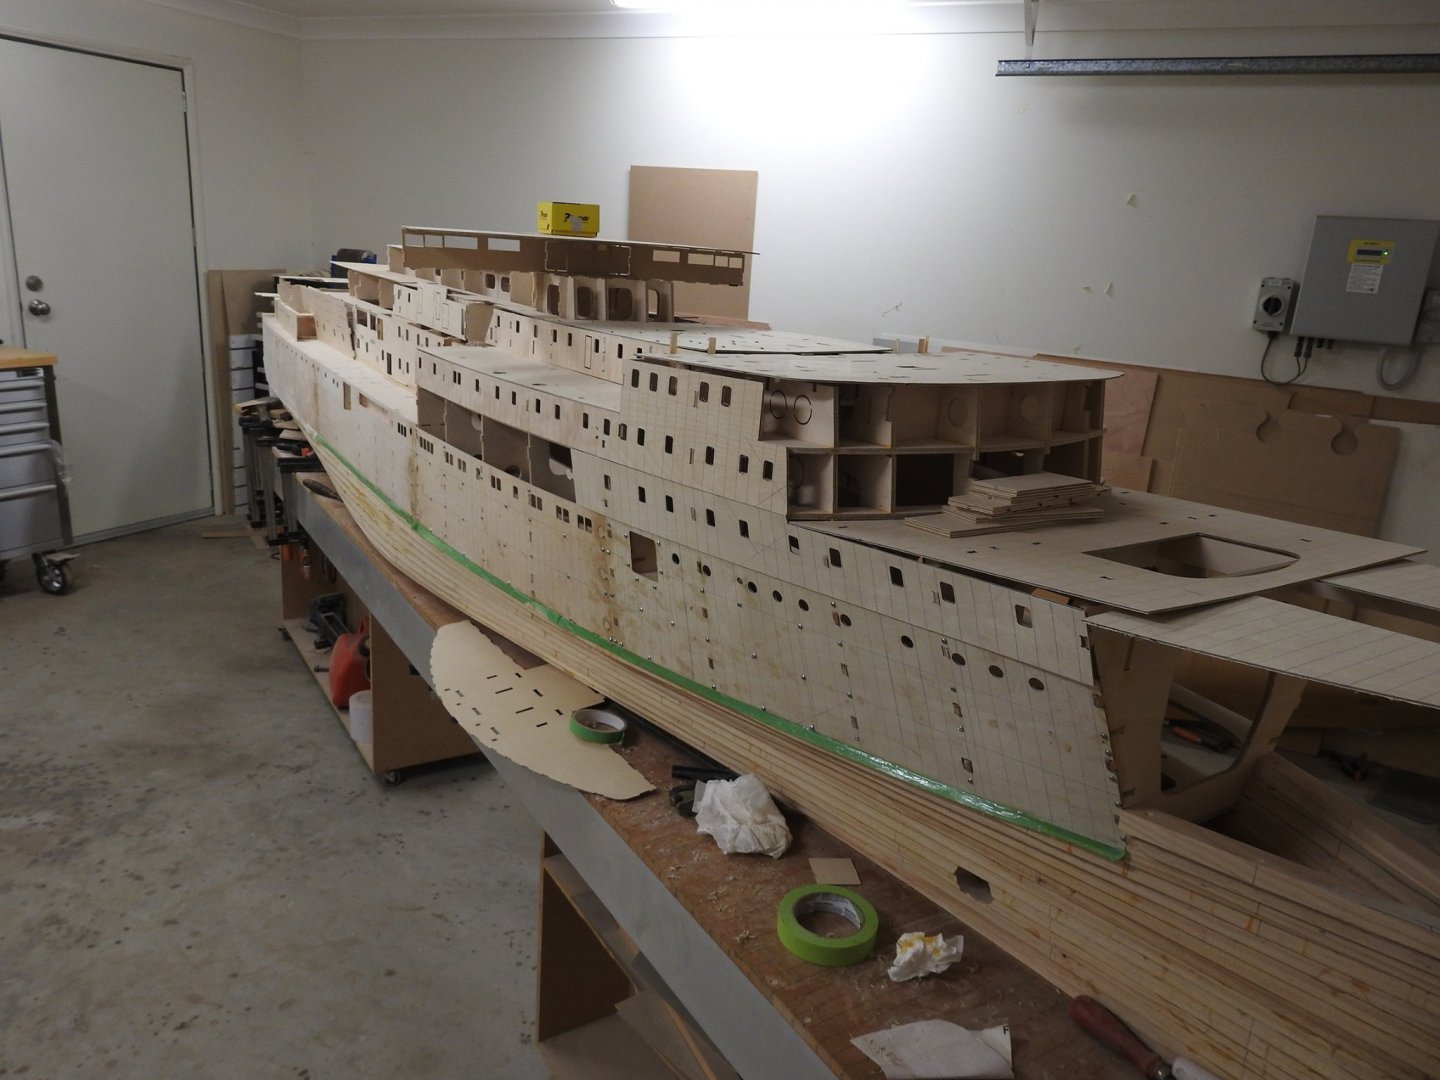
More parts glued on, bow end 85% done
- 454 replies
-
- 9
-

-
-
- Union Steamship Company
- Stepcraft 840
- (and 3 more)
-
Its ok, its all recorded ok, 2.5 gb worth and will edit it and upload.
-
15 mins to start, just having breakfast.
-
Thanks guys, its going to be hard work doing it so early but we will get there, I am not expecting anyone to follow along, that's why its being recorded. I will have to move at a good pace but will explain things as I go, just like the way we taught at Uni. But you will understand the logic of the process and how to apply it to different forms. I will stop every hour for 10 mins for coffee breaks to. just preparing the latest lines from Lloyds now for the example as they are seriously deformed
-
https://www.rhino3d.com/ Anyone can come as long as they click the link on the day at the time given. Also as Egilman said take note of date line to as I am in Australia
-
Guys someone has tried to log into the workshop 3-4 days out and as a result we have been bombarded with emails Please don't log into in yet.
-
That's no different to Cutty Sark lines really, this cutter was showing the hull including the skeg but anyway same thing.
-
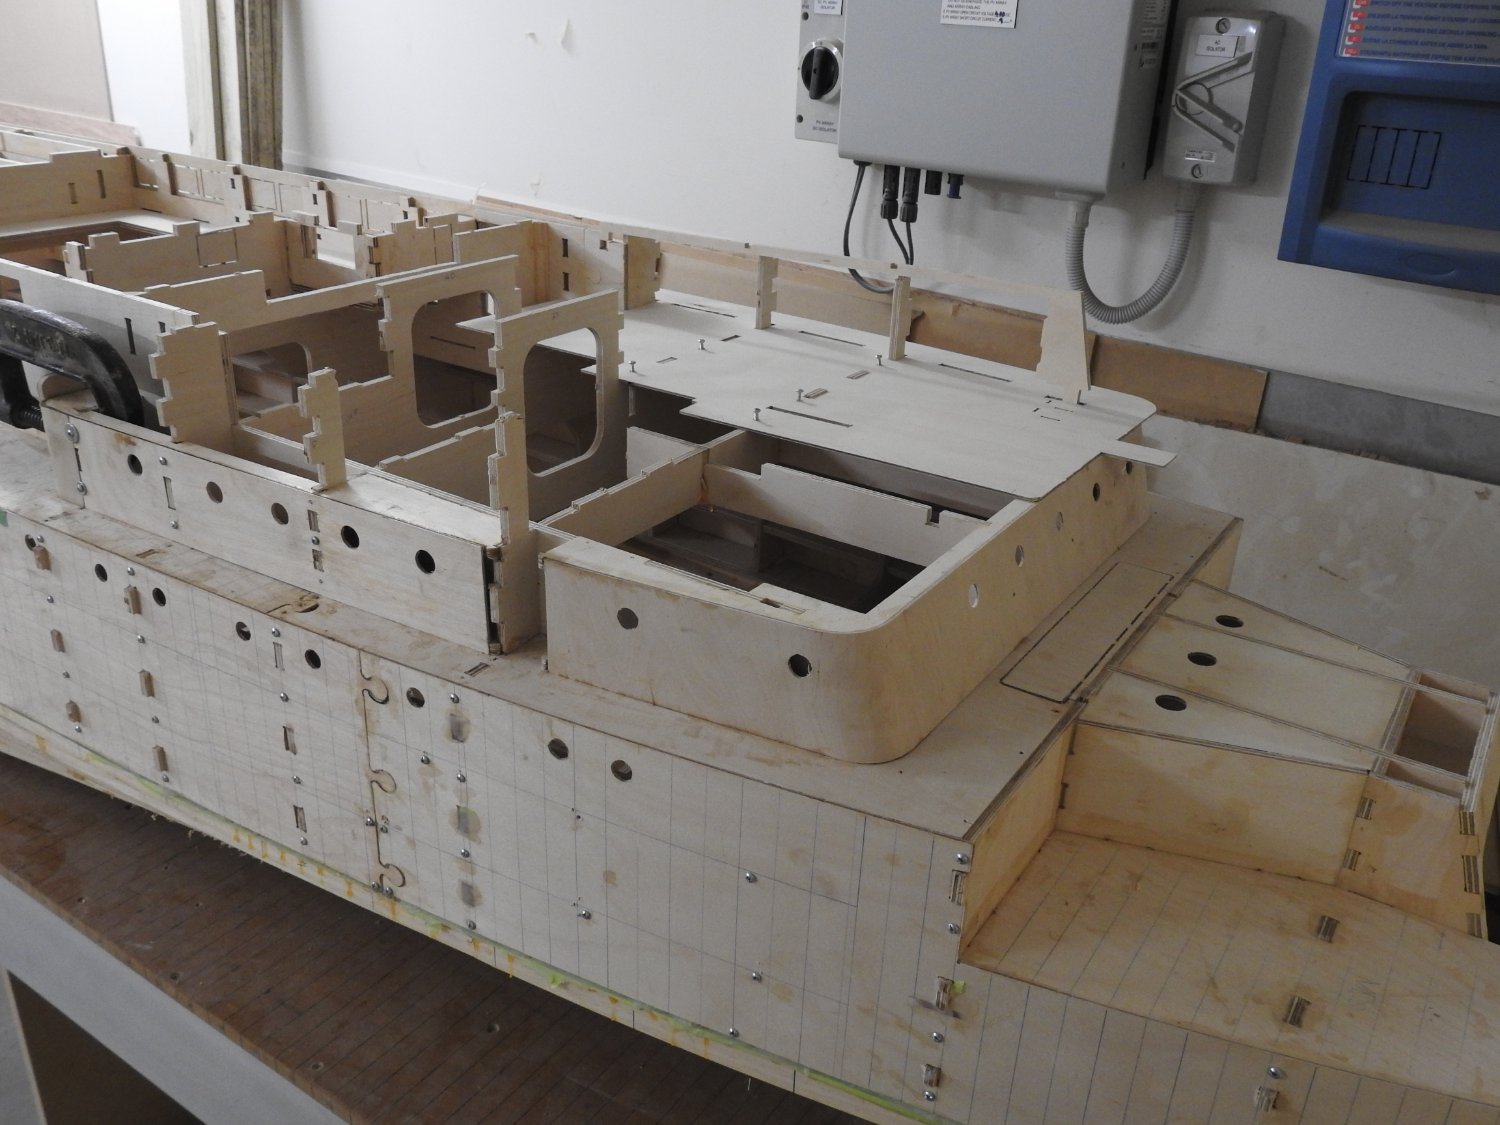
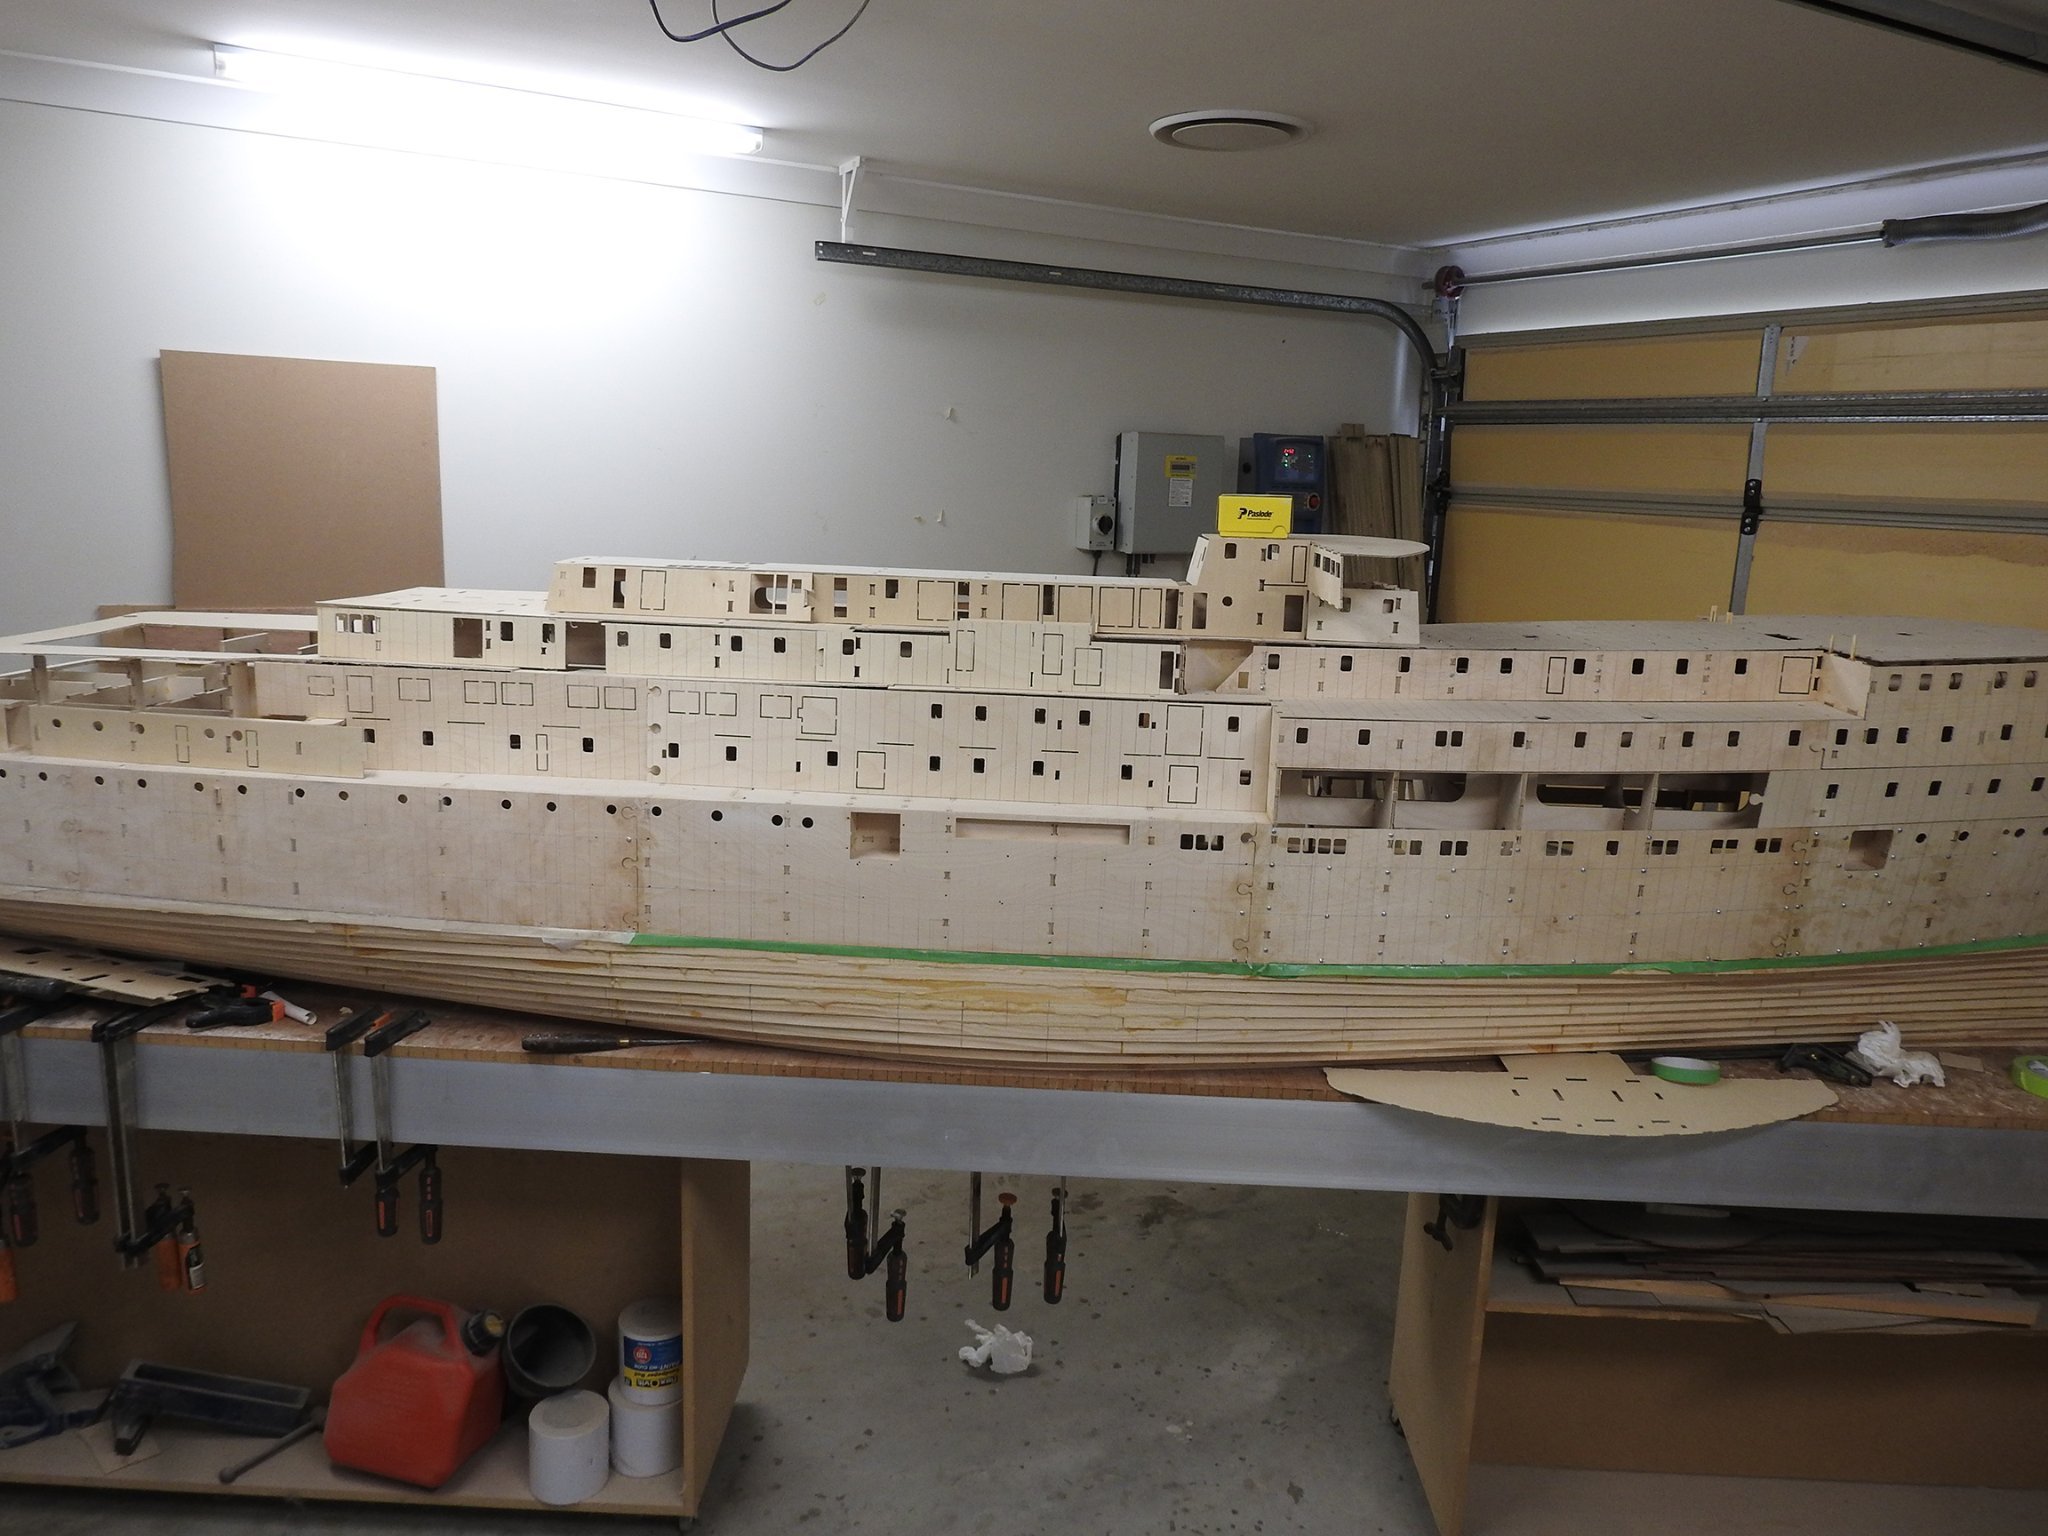
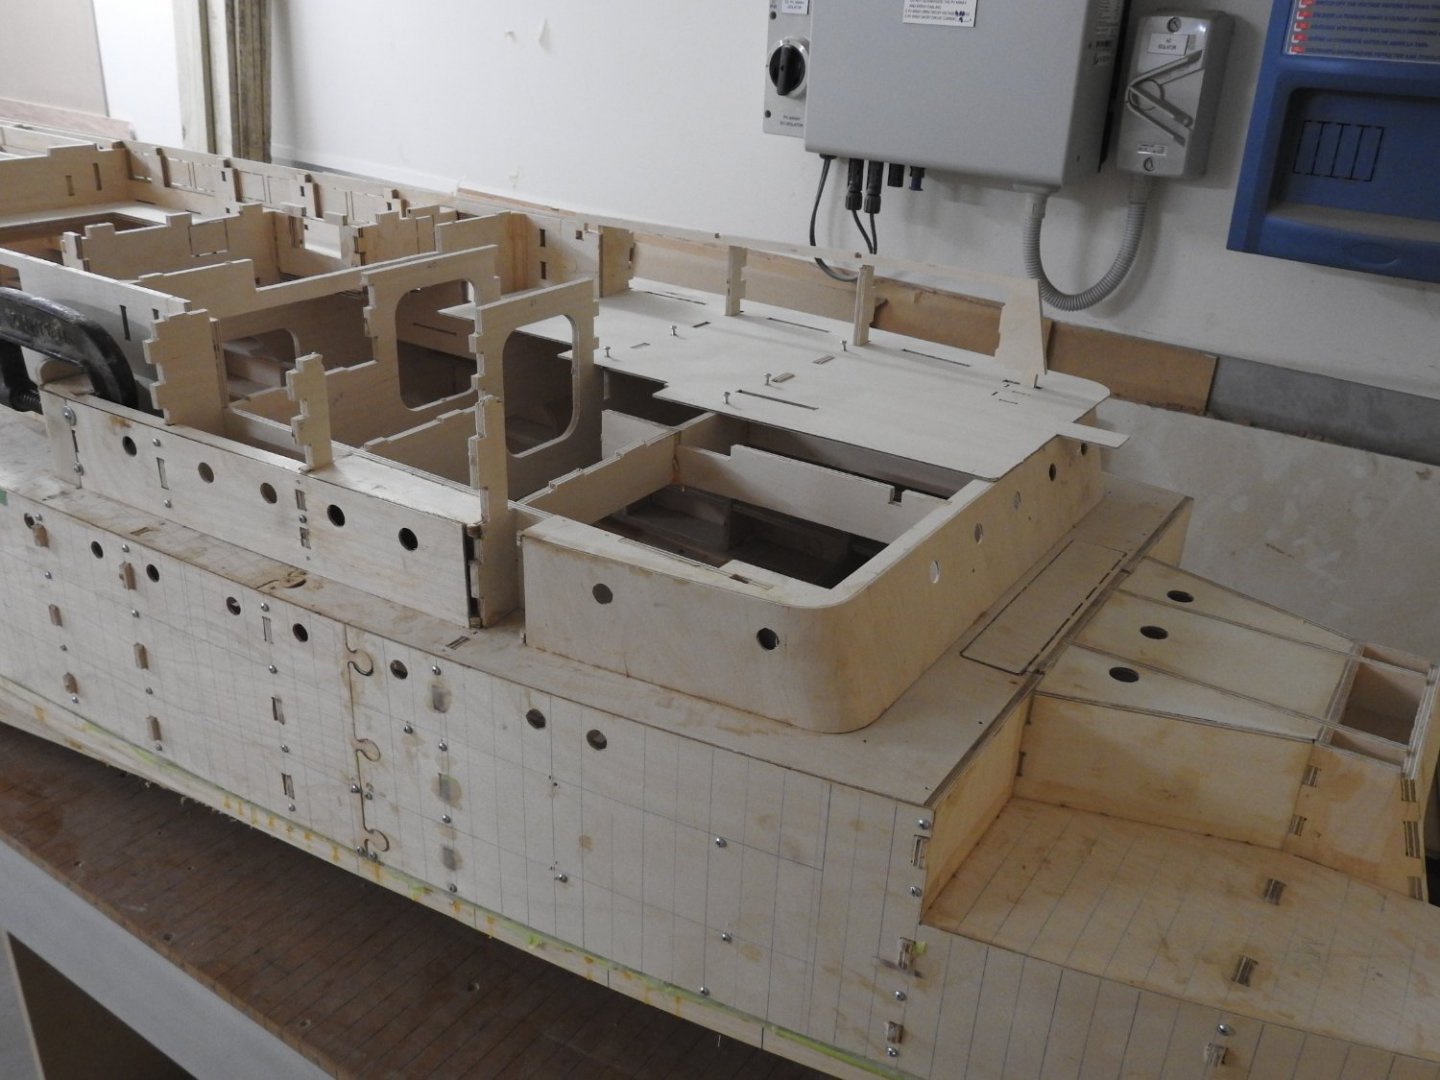
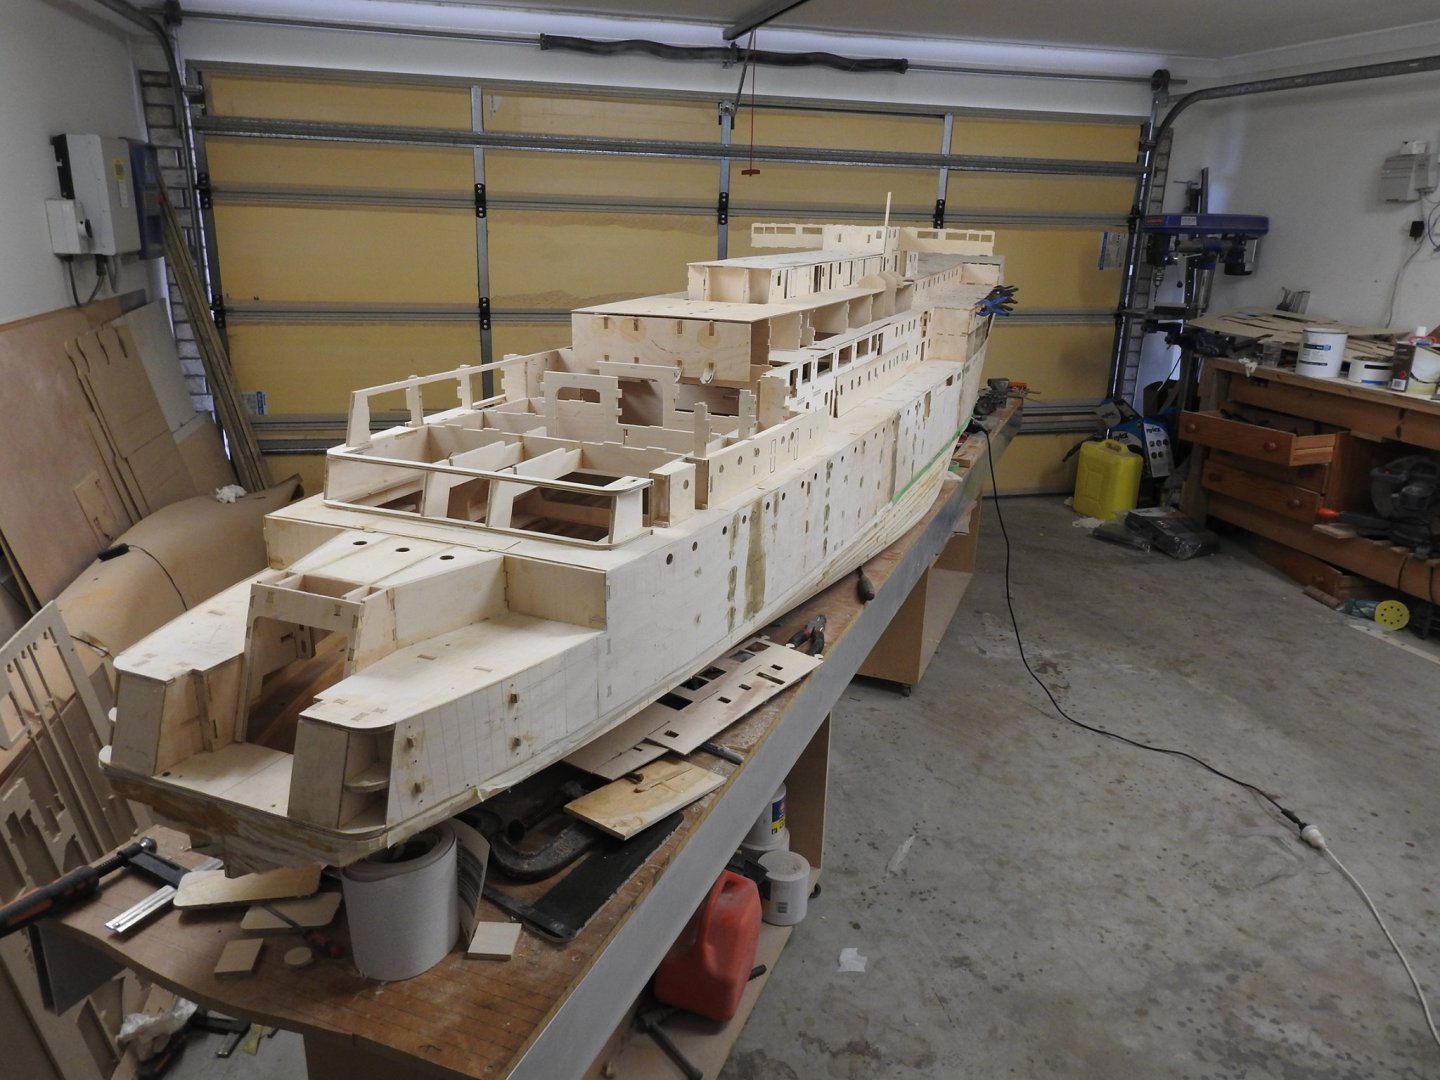
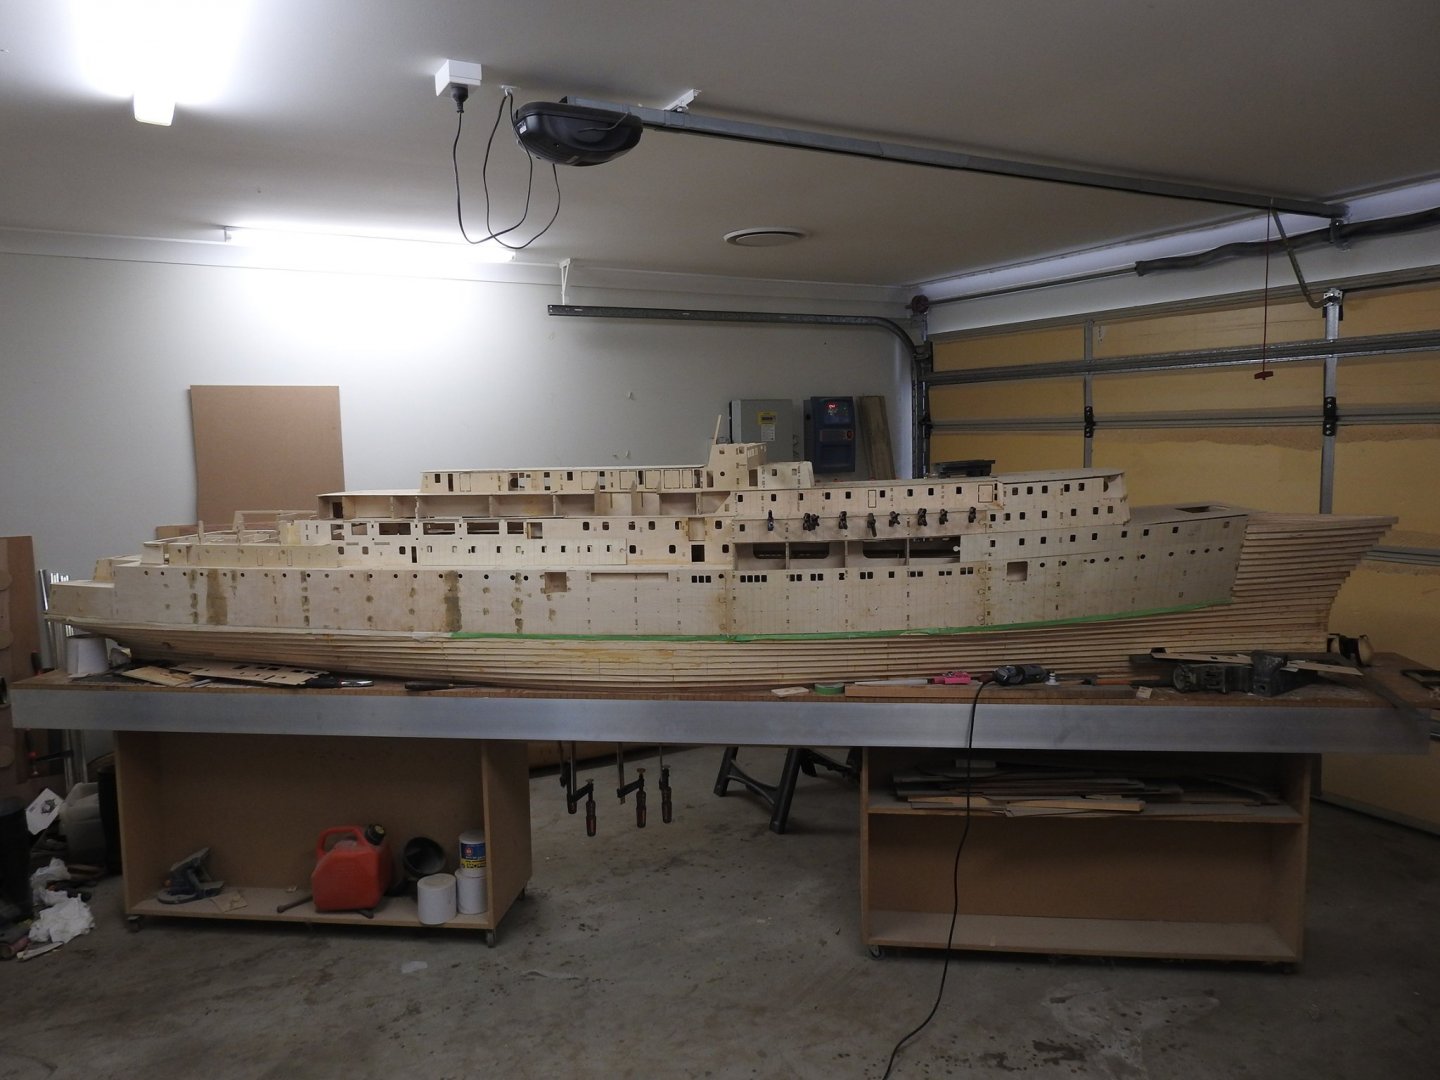
Thanks for the tip Roger, yeah I intend to finish most plates to primer base before fixing and applying weld bead. I was more hoping to get some advice from those with more experience than I on the actual painting order when it comes to topcoat, I was not very clear I am afraid, but wondering if it would be a crime to paint it in areas tat are completed to shell but not fitted out and then touch up once fittings are attached etc, I would think touch ups could actually make it more realistic really as ships are constantly re painted and touched up Well I have assembled the lid frame. or 3 upper levels of Superstructure , I have it just sitting in place, no its not seated yet and is crooked but could not resist leaning parts against it to get a sense of size and bulk. Keep in mind this is all just substrate and final ,5mm ply plating will be glued to this 2mm ply with actual opening sizes, ports etc are 1.5mm smaller all around than the holes you see here.

- 454 replies
-
- 6
-
-
-
- Union Steamship Company
- Stepcraft 840
- (and 3 more)
-
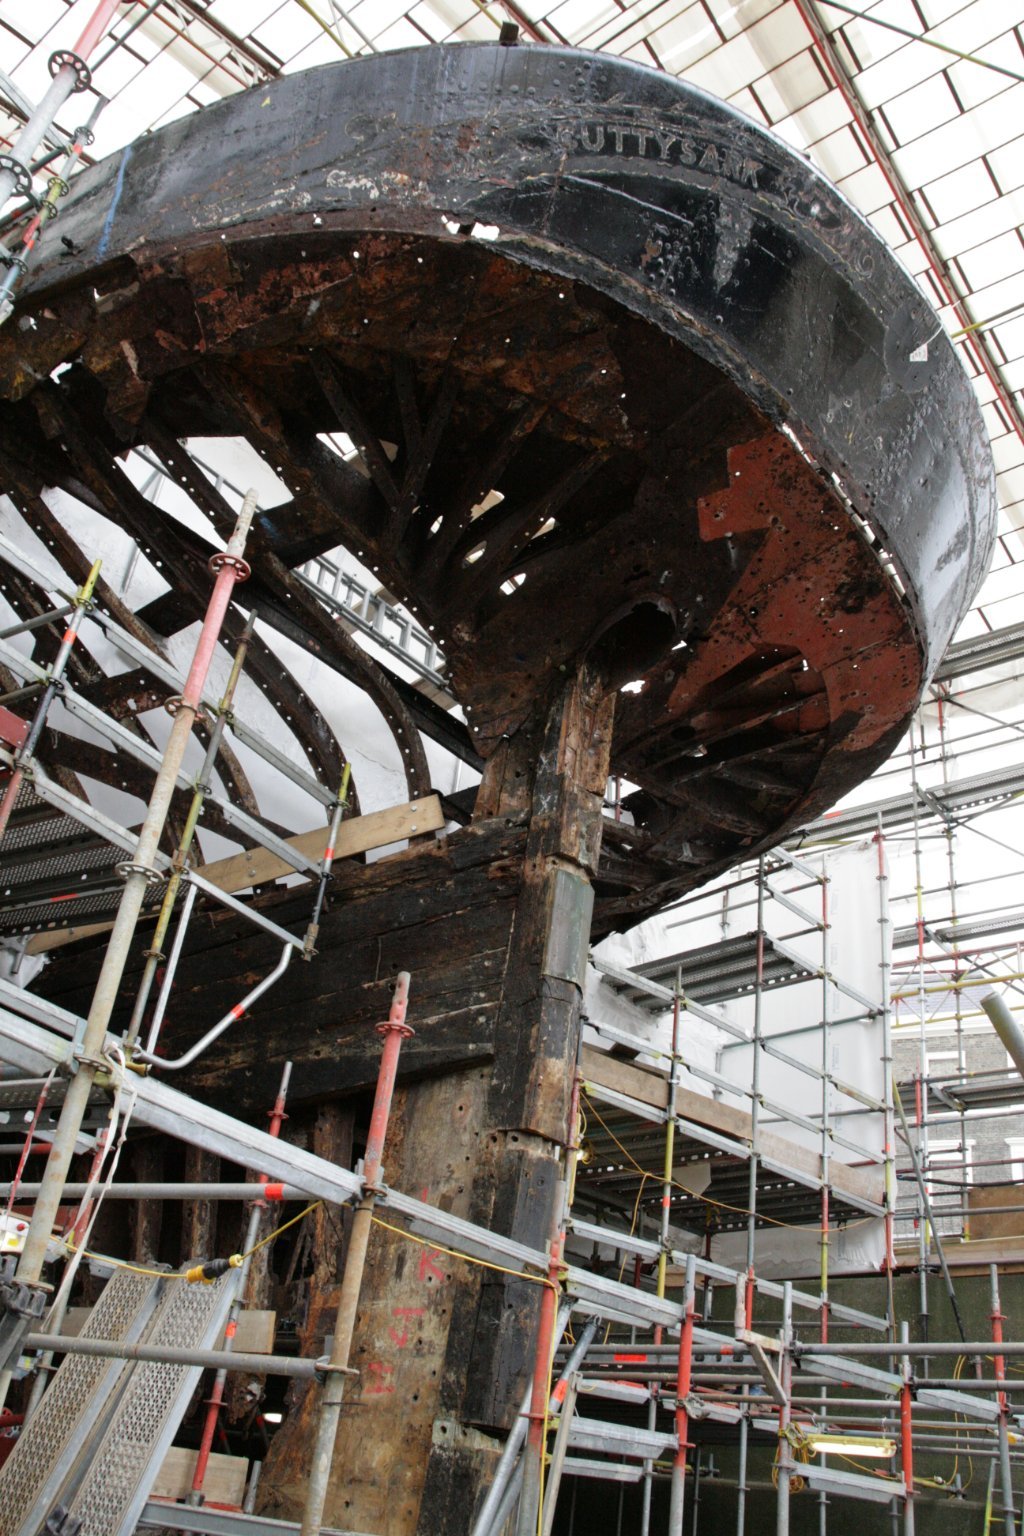
Also in this shot of Cutty Sark's aft end you can see the same situation happens which we will cover, the counter is nothing more than an elliptical extension of the transom built from cant frames as you can see here.

-
Do you mean like this sort of situation? where the sternpost becomes the counter, or in steel shipbuilding terms where the Oxter plate is.
-
Just click the link, you may have to install the app, I have disabled cameras but am recording.
-
Ok I will see what I can do LINK FOR WORKSHOP Topic: Ship Hull Form Modelling Time: Dec 23, 2021 06:00 AM Brisbane Join Zoom Meeting https://zoom.us/j/91567240651?pwd=T01tSUxhTk93c3ZwaVdtVGlLRGxuZz09 Meeting ID: 915 6724 0651 Passcode: 294366 One tap mobile +19294362866,,91567240651#,,,,*294366# US (New York) +12532158782,,91567240651#,,,,*294366# US (Tacoma) Dial by your location +1 929 436 2866 US (New York) +1 253 215 8782 US (Tacoma) +1 301 715 8592 US (Washington DC) +1 312 626 6799 US (Chicago) +1 346 248 7799 US (Houston) +1 669 900 6833 US (San Jose) +61 8 7150 1149 Australia +61 2 8015 6011 Australia +61 3 7018 2005 Australia +61 7 3185 3730 Australia +61 8 6119 3900 Australia Meeting ID: 915 6724 0651 Passcode: 294366 Find your local number: https://zoom.us/u/adYLlHnKlB
-
When I ask for requests, I mean has has anyone got any problems they want covered that have hindered them in their ship modelling journey as I can probably show how to overcome it. I will be recording it at my end anyway as well. @fnkershner Do you mean like my one in here