Check out our new MSW Sponsor Innocraftsman
×
Rock_From_Korea
-
Posts
302 -
Joined
-
Last visited
Content Type
Profiles
Forums
Gallery
Events
Everything posted by Rock_From_Korea
-
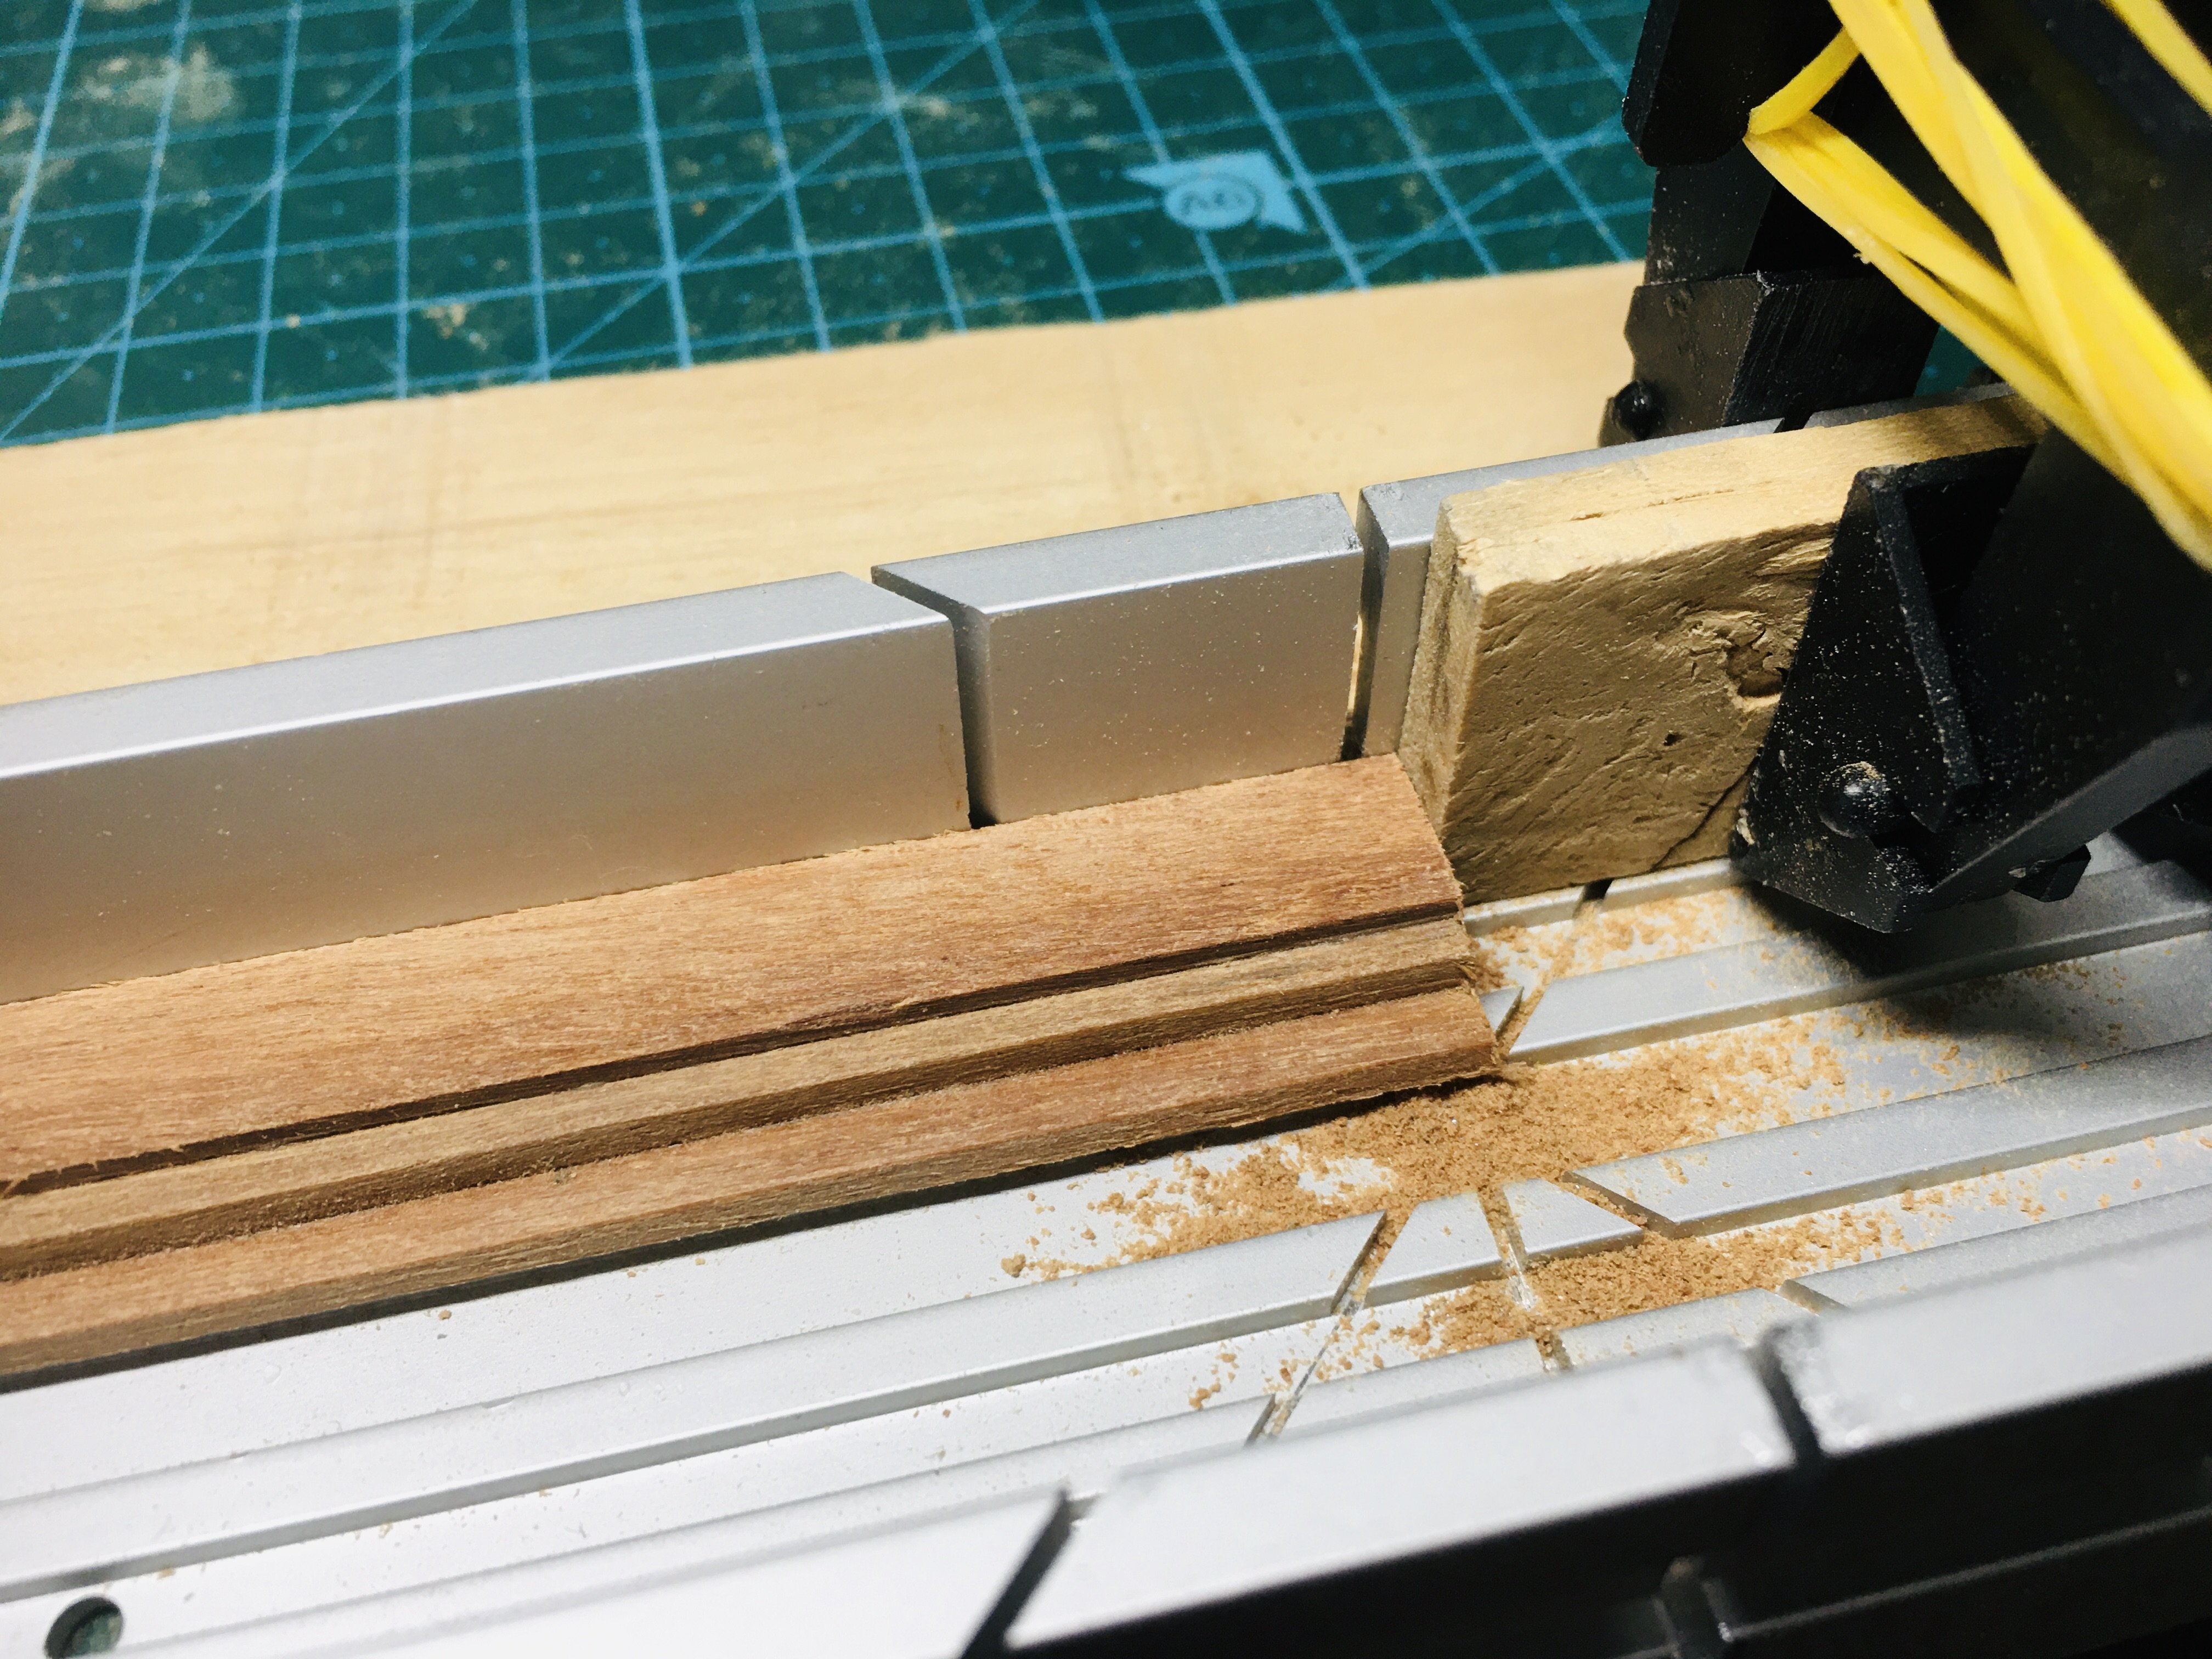
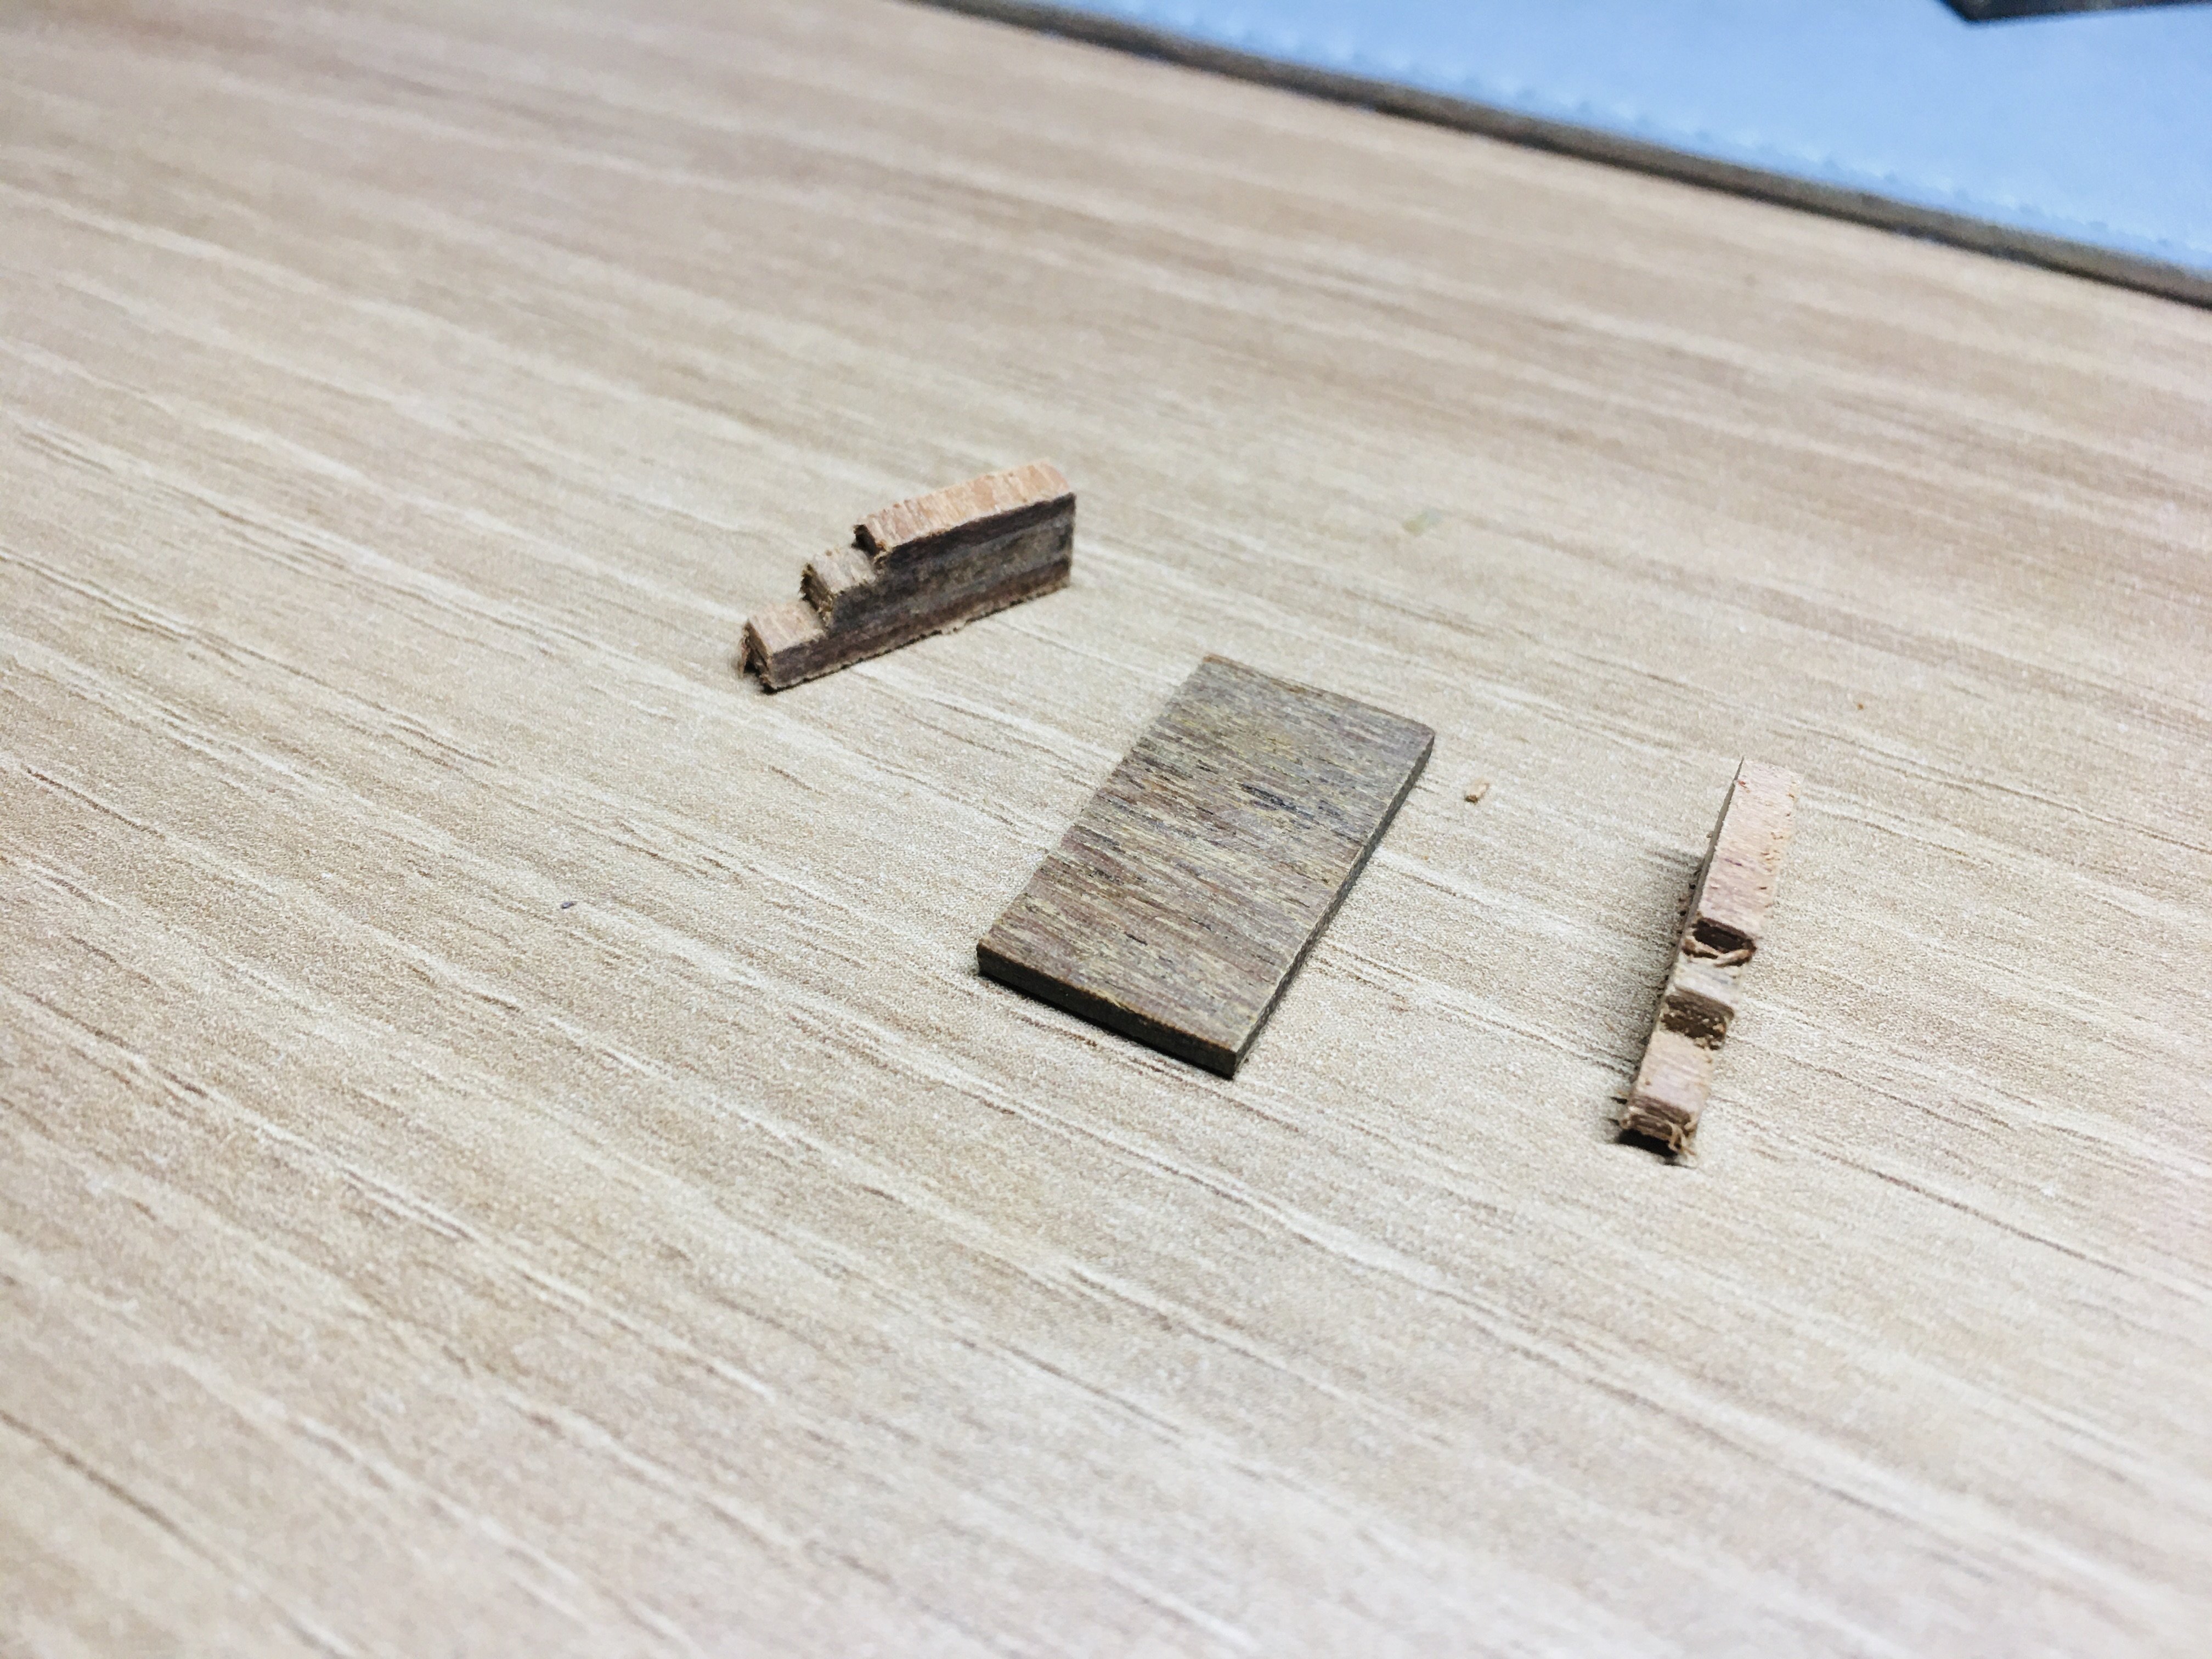
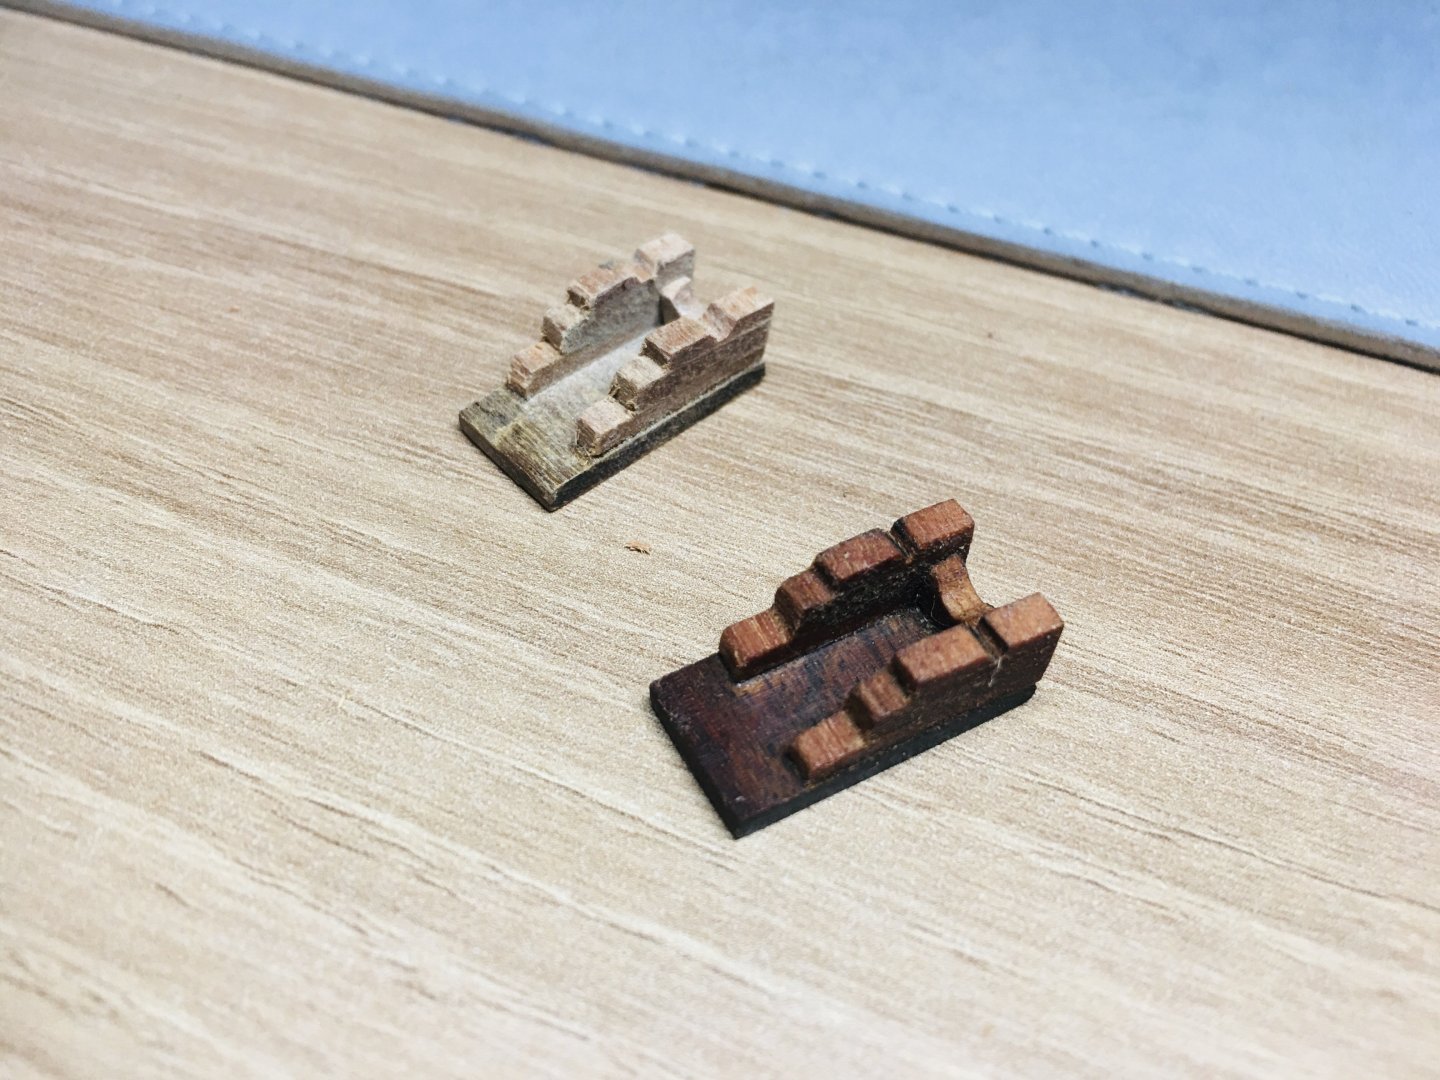
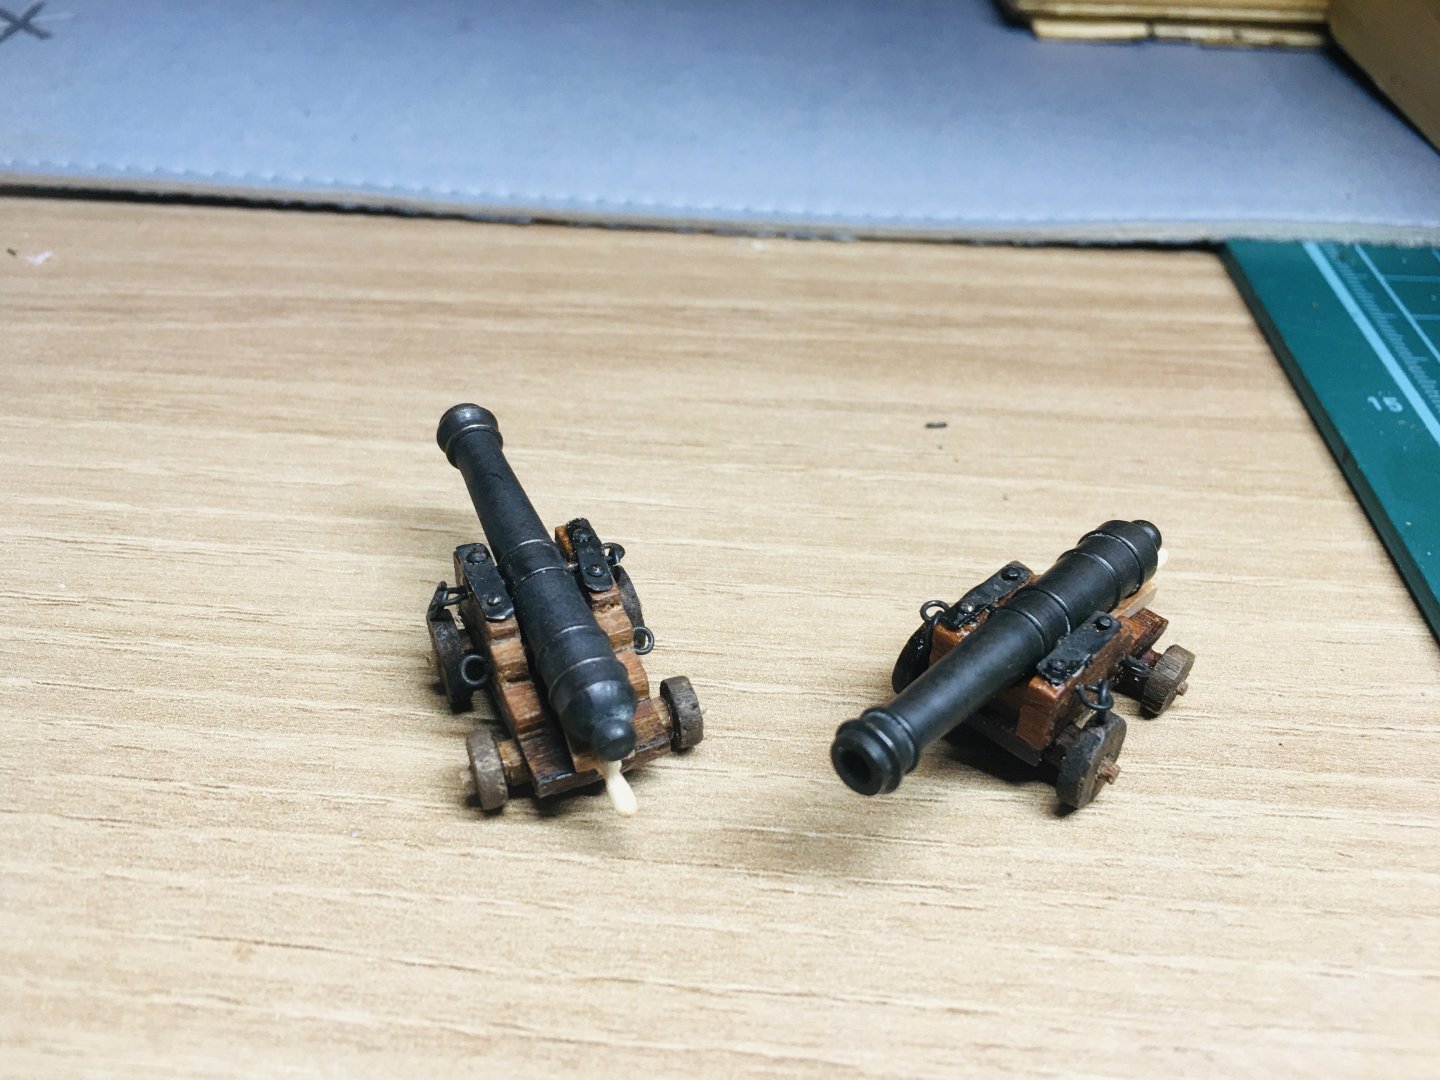
 Now the progress pictures - I took pictures only on the works where I applied different (from GH1) methods, styles and/or materials. I am applying darker colours in GH2 - the grating has been dyed with walnut colour (vs. no dye, light wood colour in GH1), gun port rims also dyed with walnut paint, cannon carriages also used darker wood with different methods (smaller). GH2 overall theme would be darker colour, less decorative painting, slimmer design and etc. My next interim report may also take some time as I plan to report only on those areas where GH2 differs considerably from GH1.
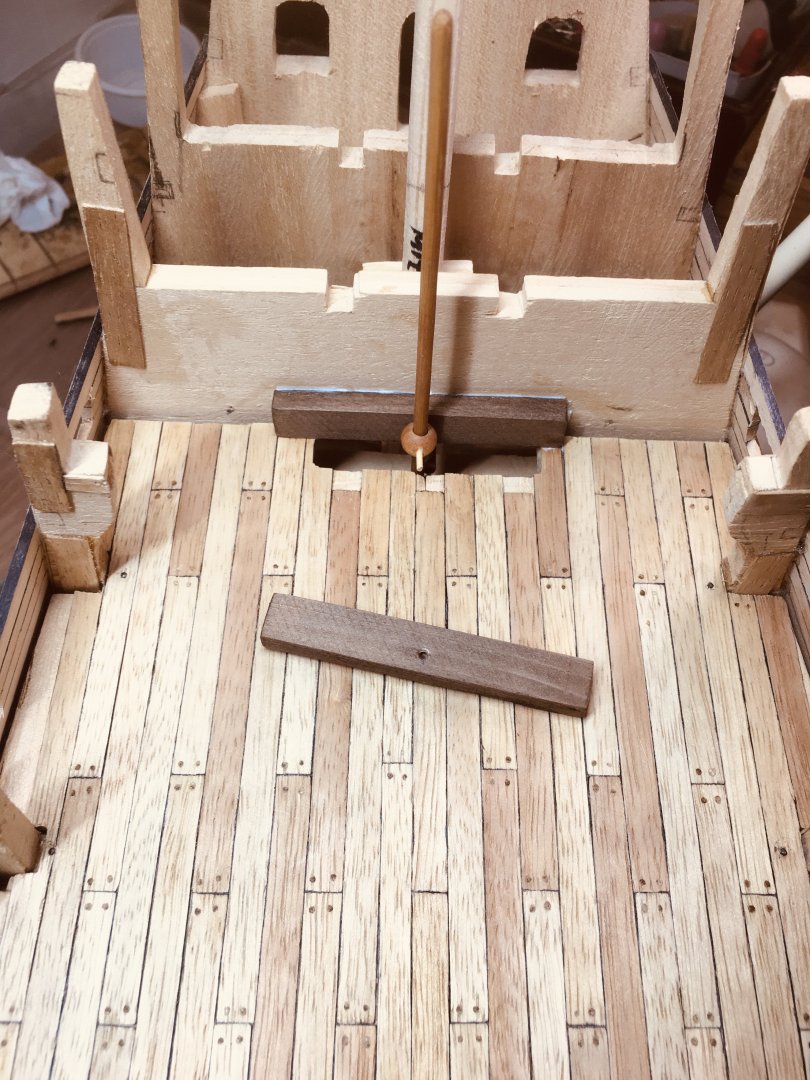


-
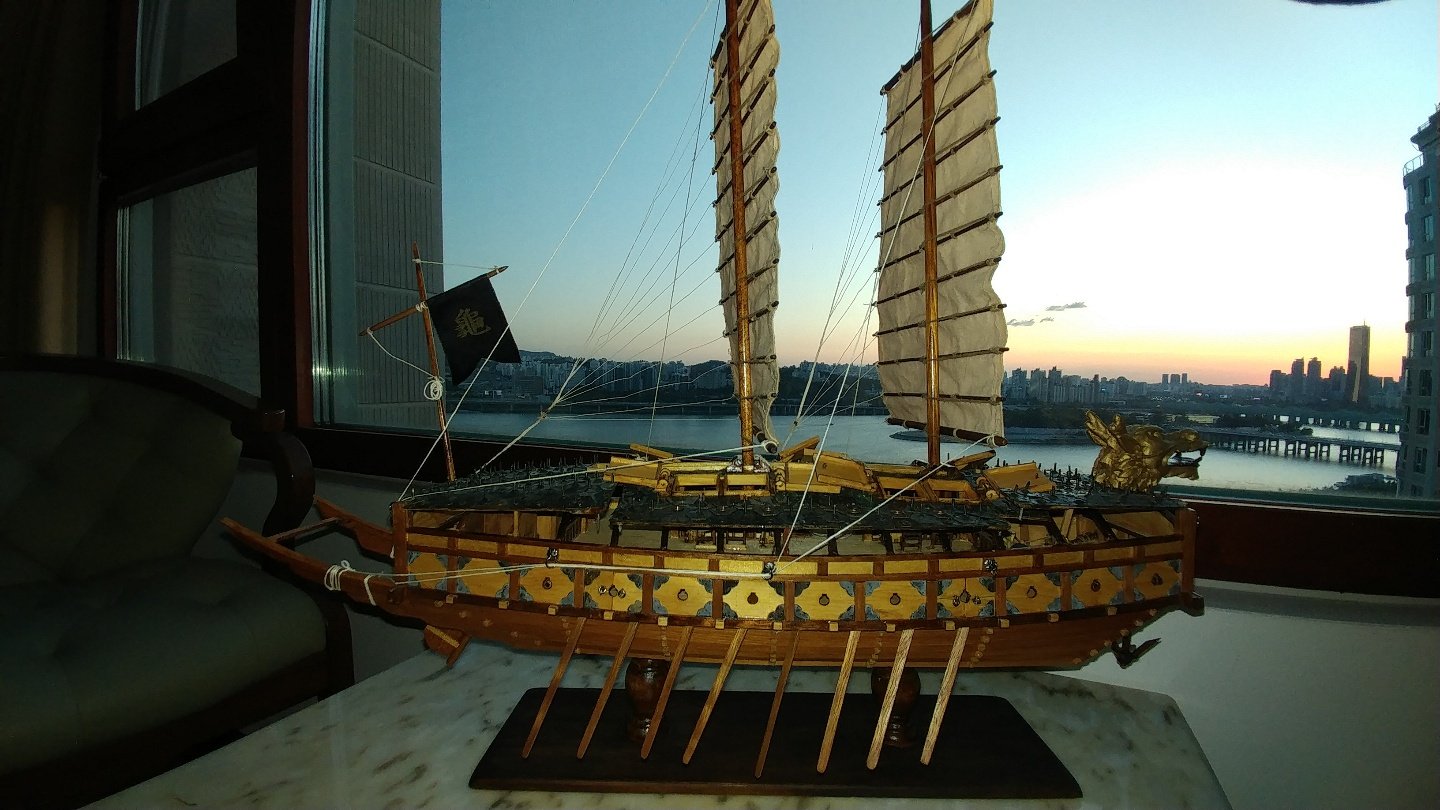
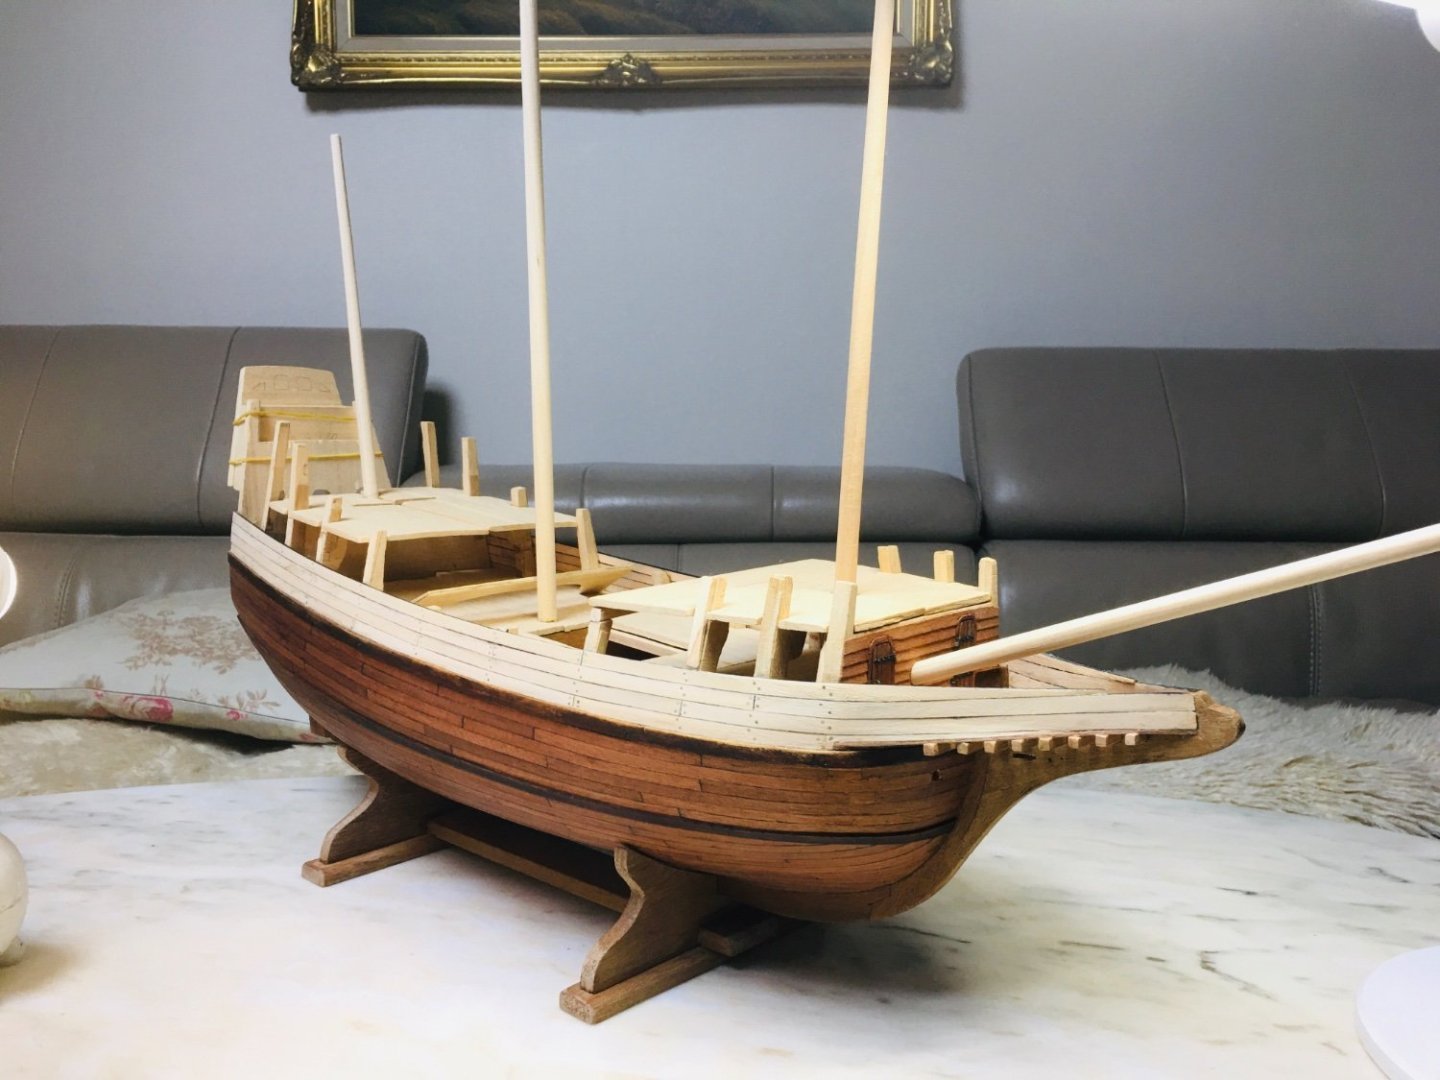
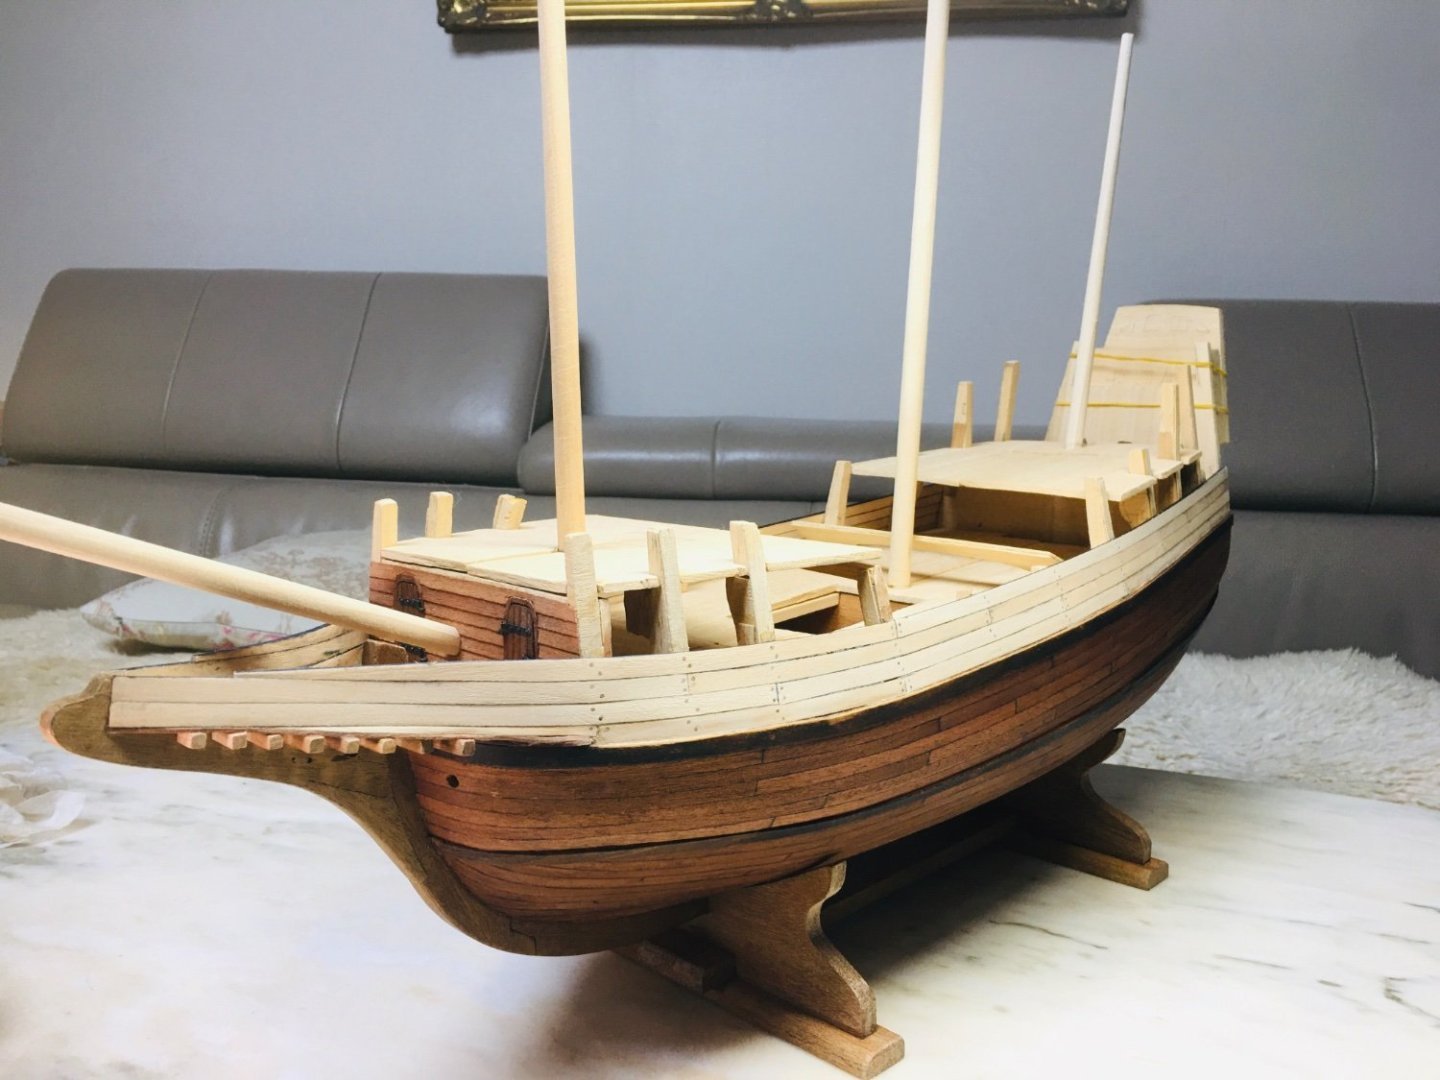
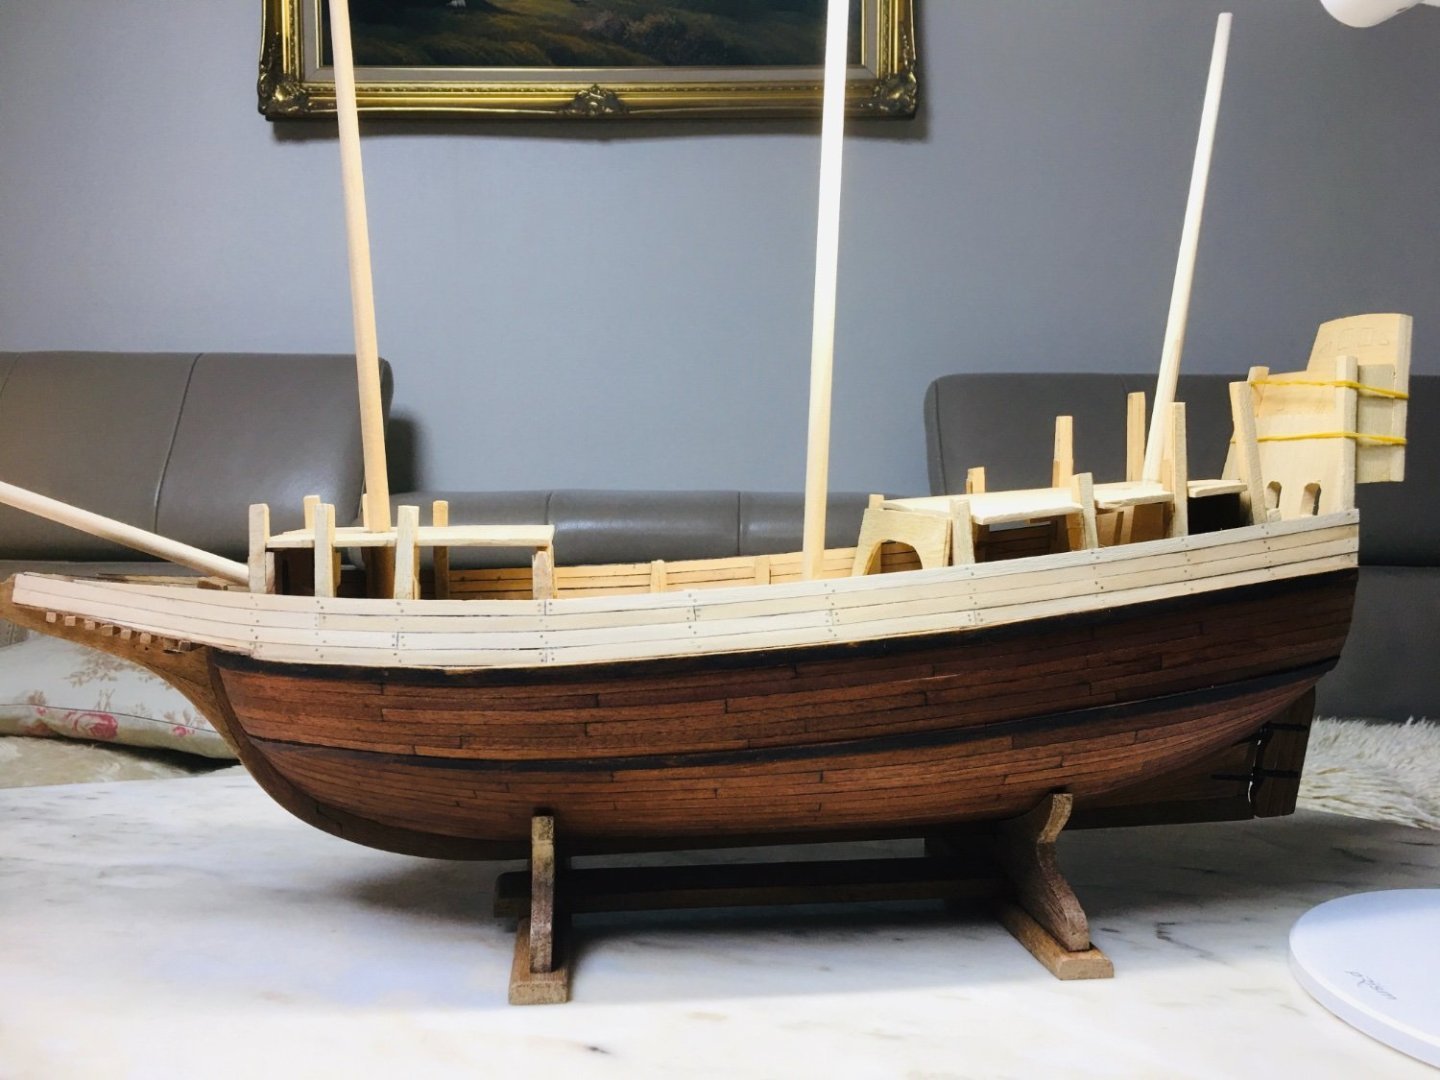
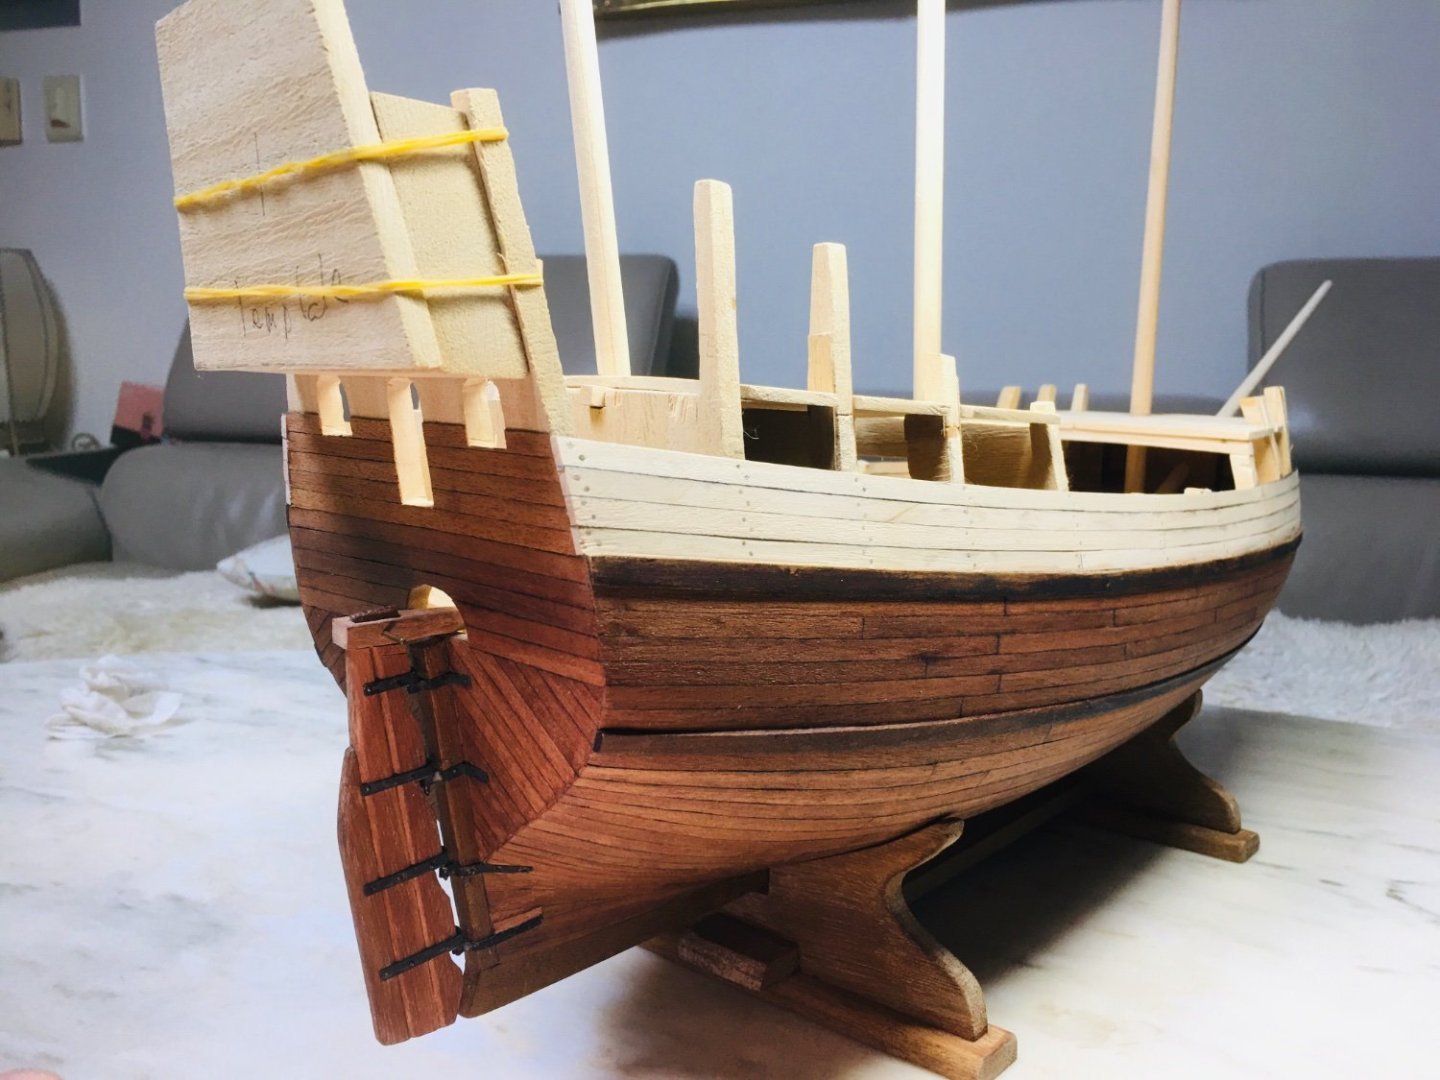
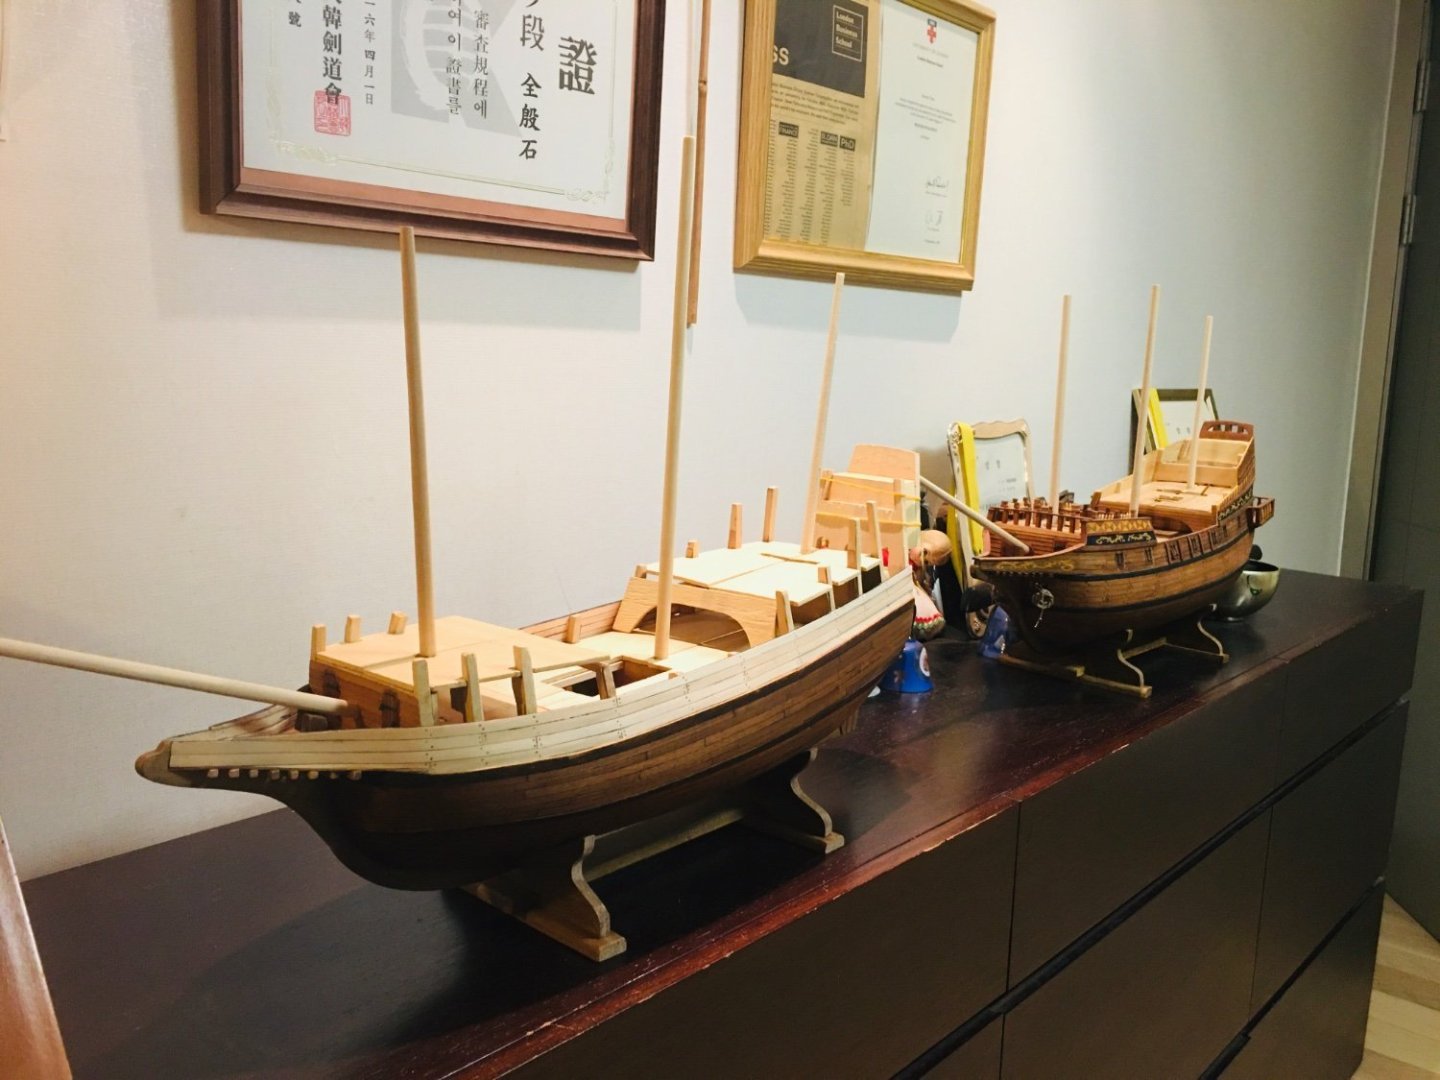
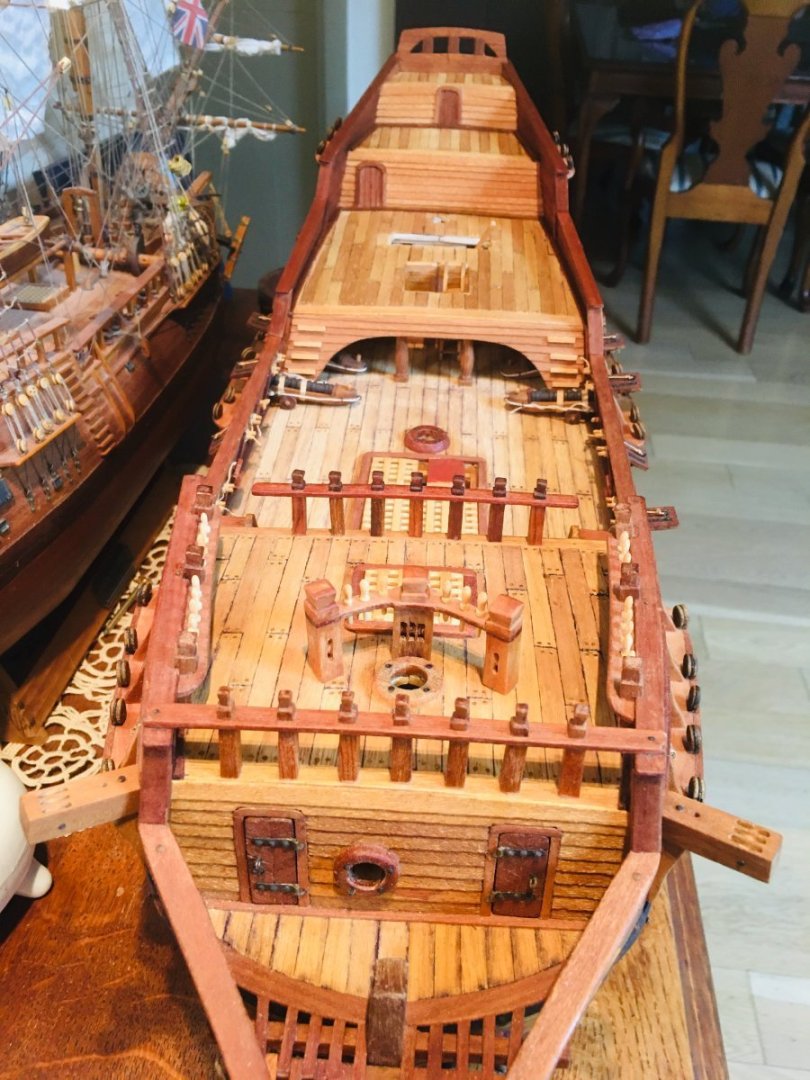
Hello All~ It has been really long since my last update on GH1. I have been working on GH2, but progress has been extremly slow as it has been quite a busy half year at work. I originally planned to post the progress report on GH2 at one go, with all the hull/deck related work finished. However, I think that would make my next progress report due sometime around the end of the year. Therfore, I decided to put forward an interim report on GH, just highlighting the different methods/styles that I am applying to GH2. First, the GH2 pictures that show the progress level before I began working on GH2 again at the beginning of this year. I have posted these pictures in this thread sometime in 2022 (I think). But, to make things easy for everyone (including myself), I am reposting here.
-
Roter Löwe 1597 by Ondras71
Rock_From_Korea replied to Ondras71's topic in - Build logs for subjects built 1501 - 1750
Looks amazing! -
Looking very hansome and authentic!!
-
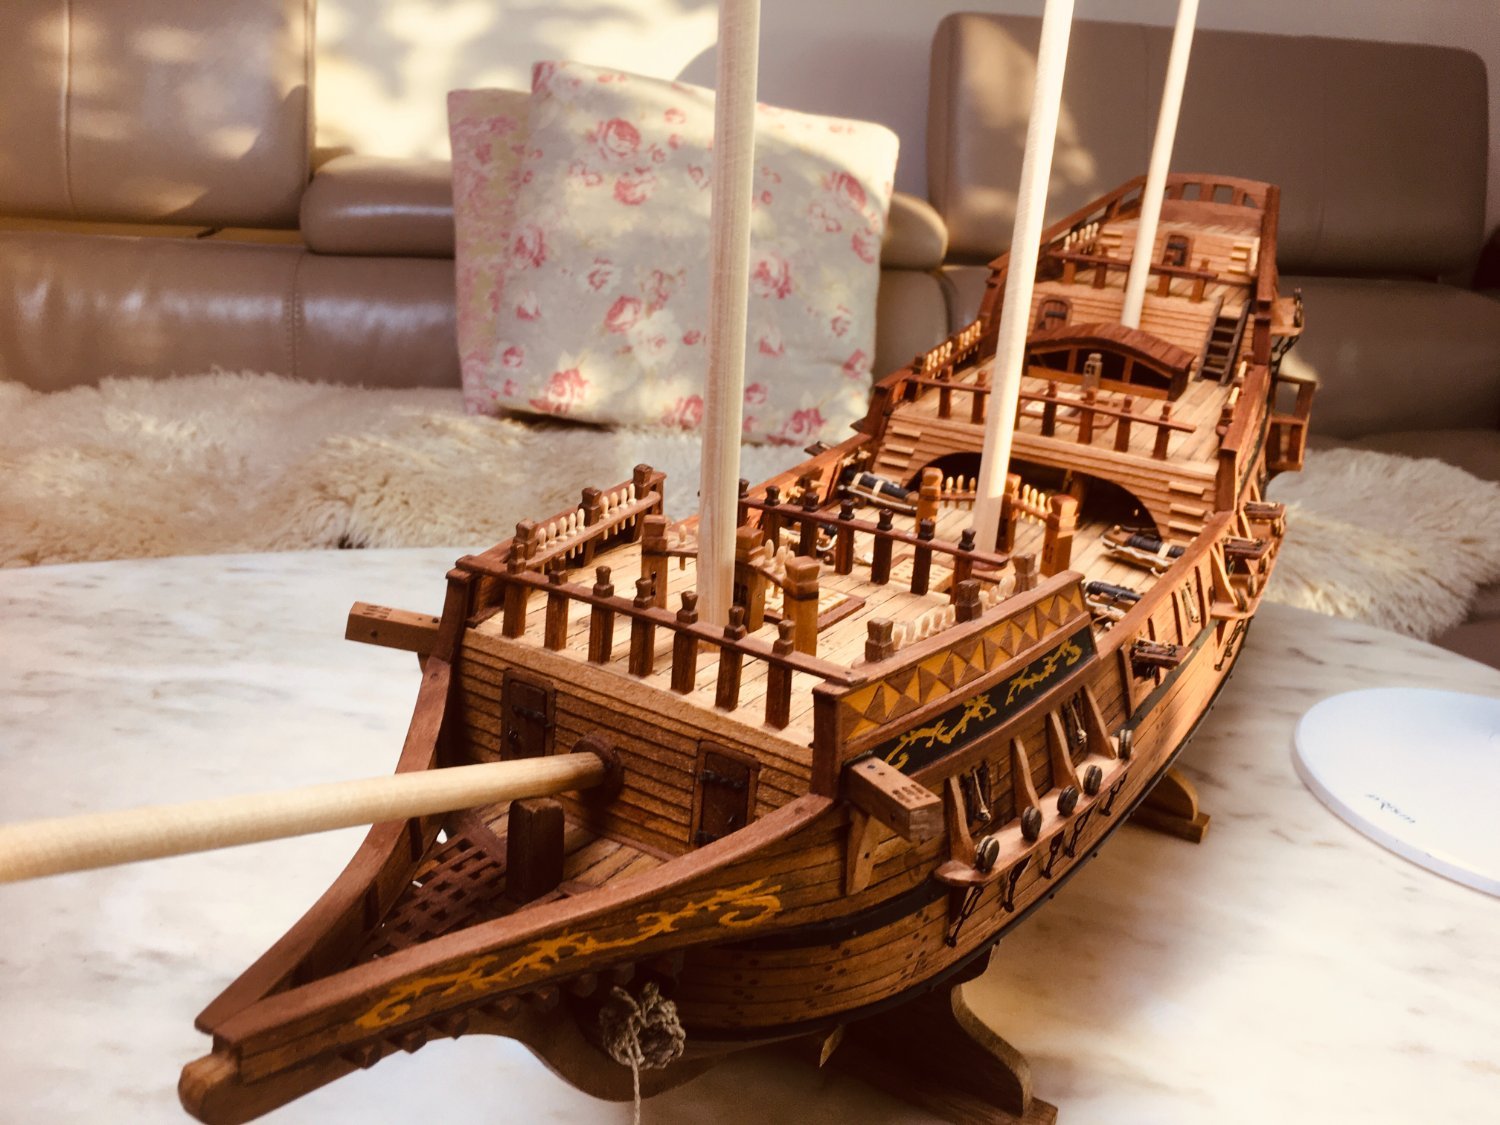
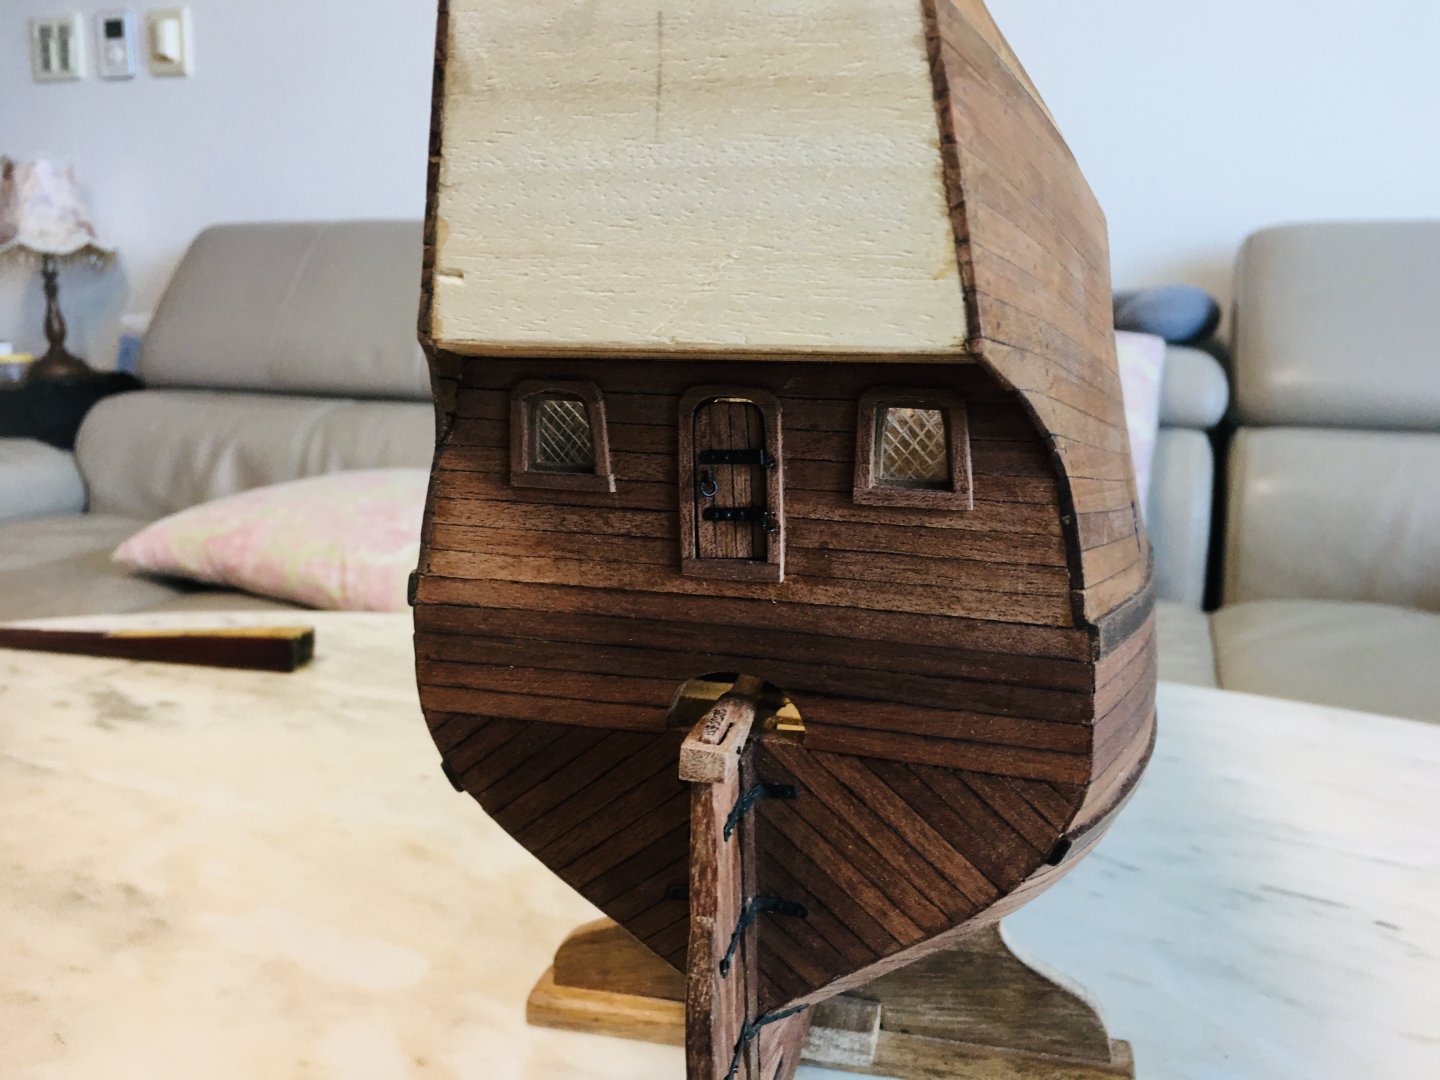
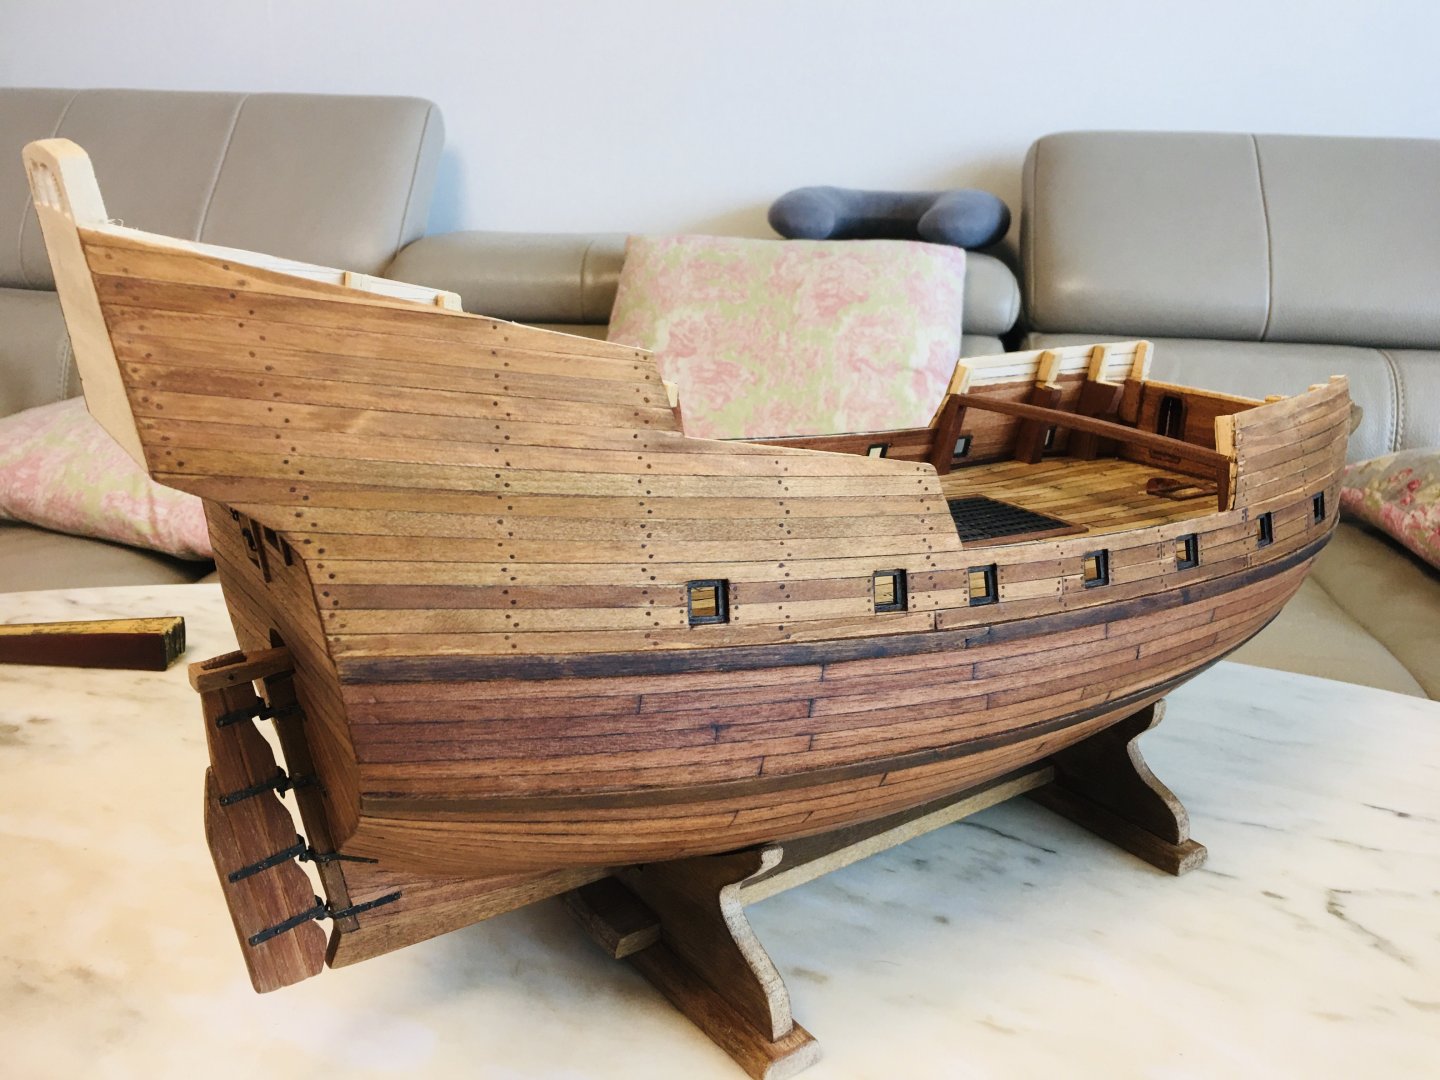
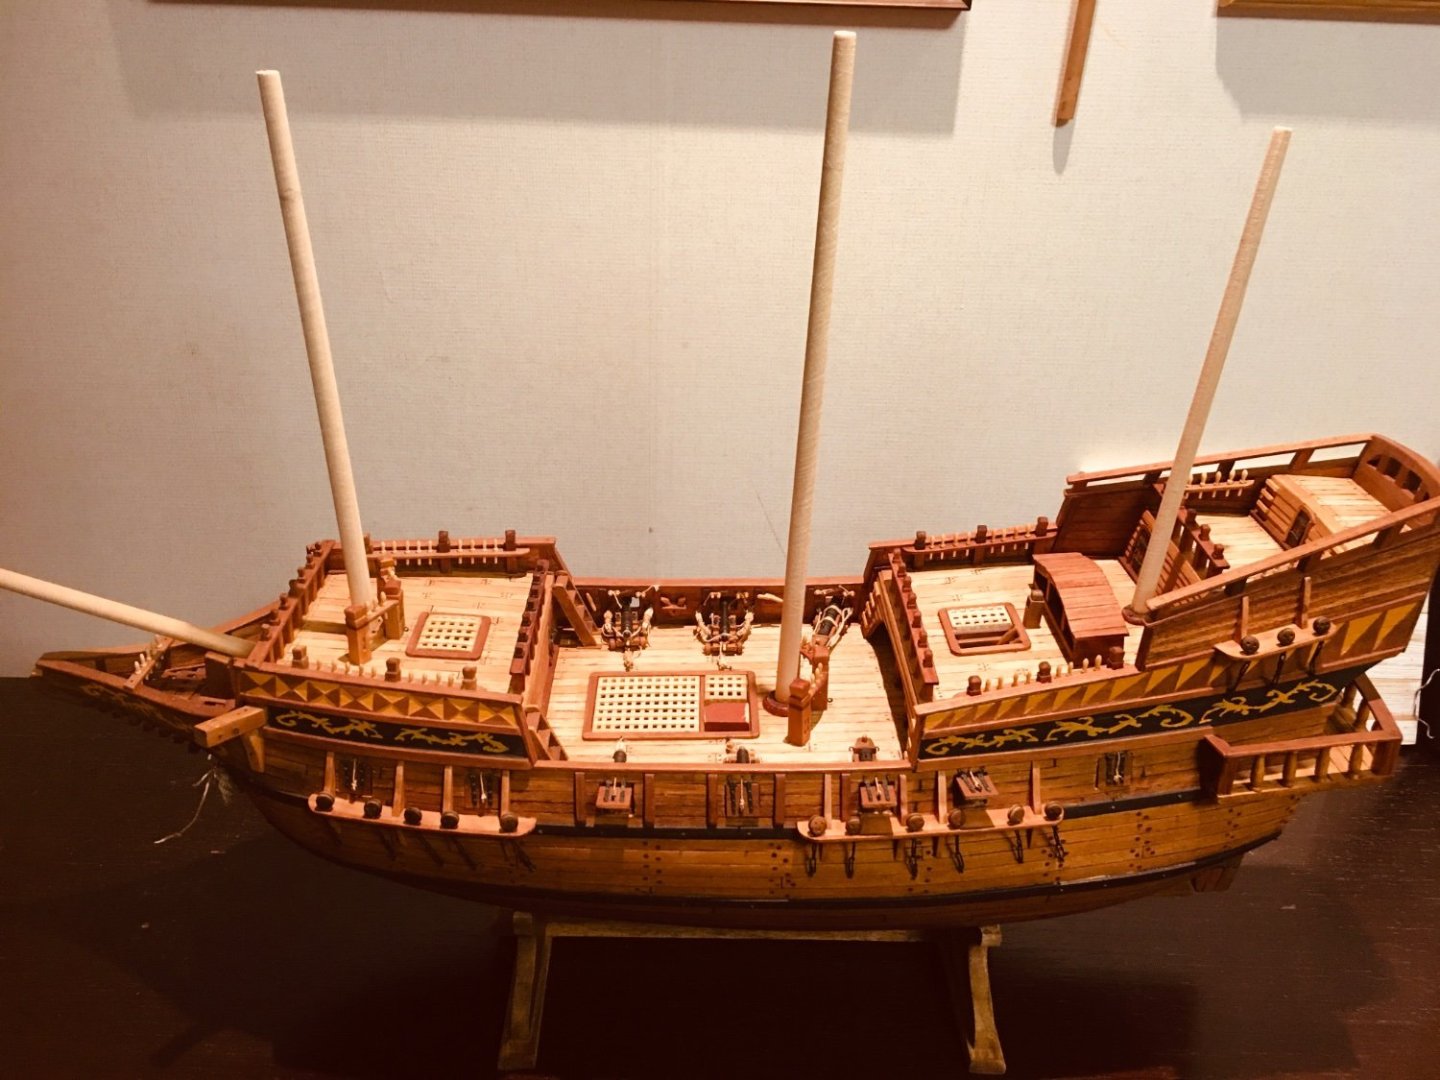
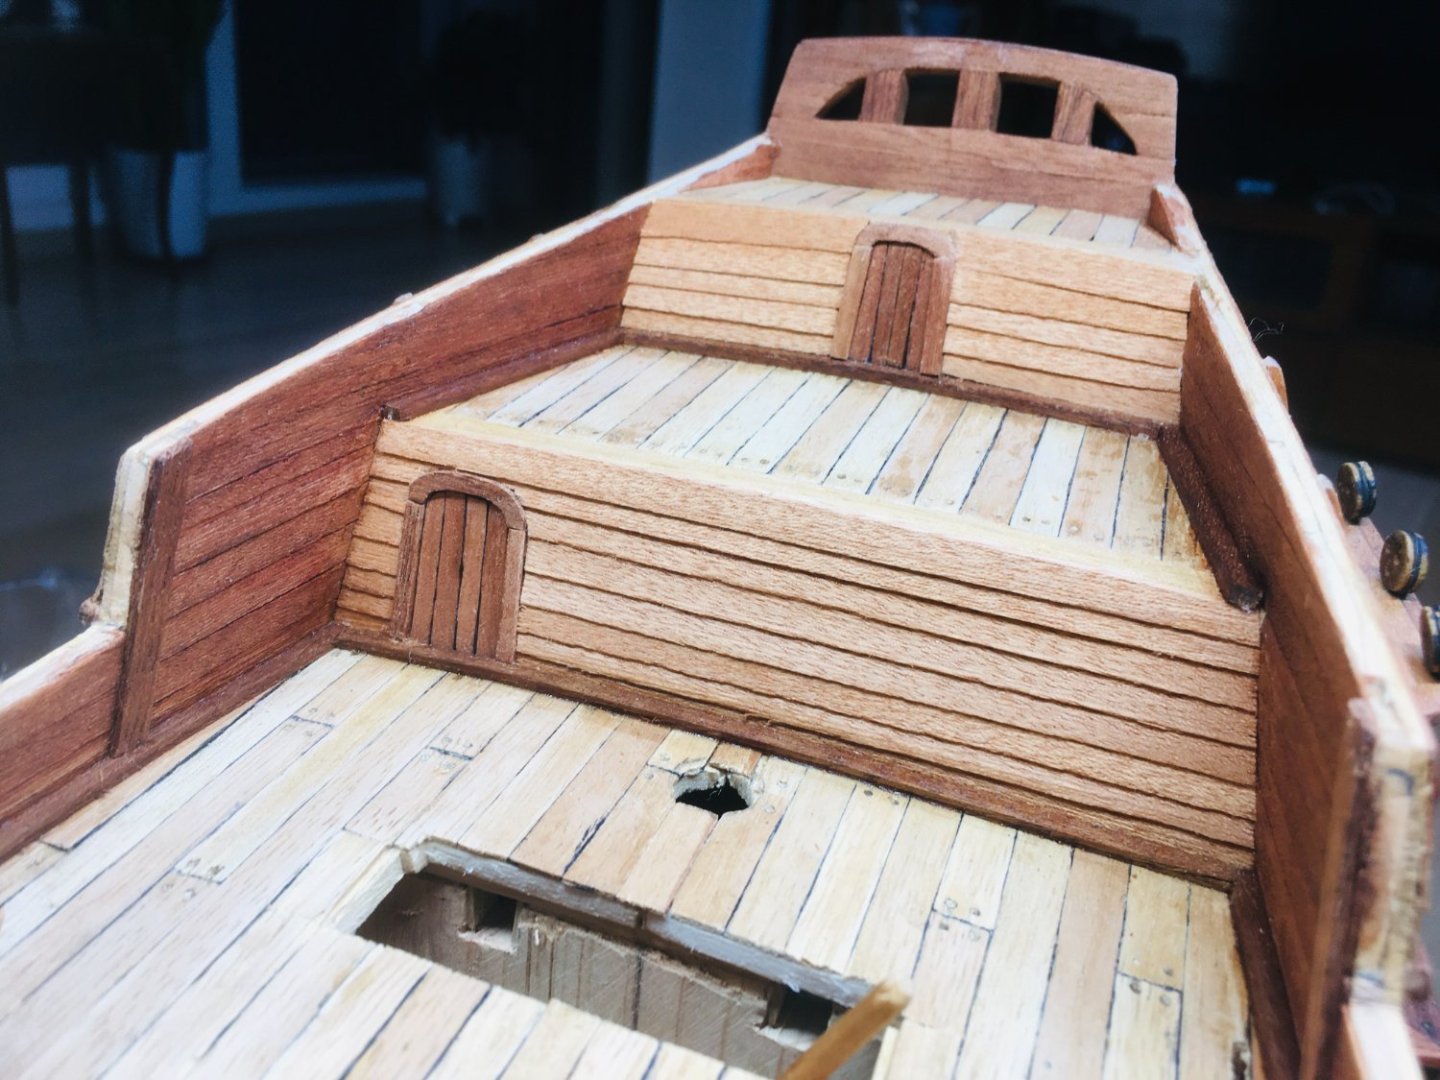
Happy New Year~! I have finished all the hull & deck related work last week. Instead of starting the mast & rigging work on GH1, I decided to work on GH2 for a while - plan to finish the hull & deck work on GH2 before resuming work on GH1. I plan to apply different style, deck configuration, colour schemes and etc for GH2. I will be posting the work on GH2 only on the areas that do not duplicate the previously posted work streams. Below are some pictures taken from the last hull & deck work on GH1. Also posted are some pictures with unfinished masts put in place.


-
Hi Robert~ Thanks for your comment! I blackened them chemically. I usually put the chemical in a small plastic holder and put it in a bigger container that has hot water in it. This way, the chemical process happens almost instantly and I can save time and the amount of chemical to be applied. Hope this clarifies~ Rock
-
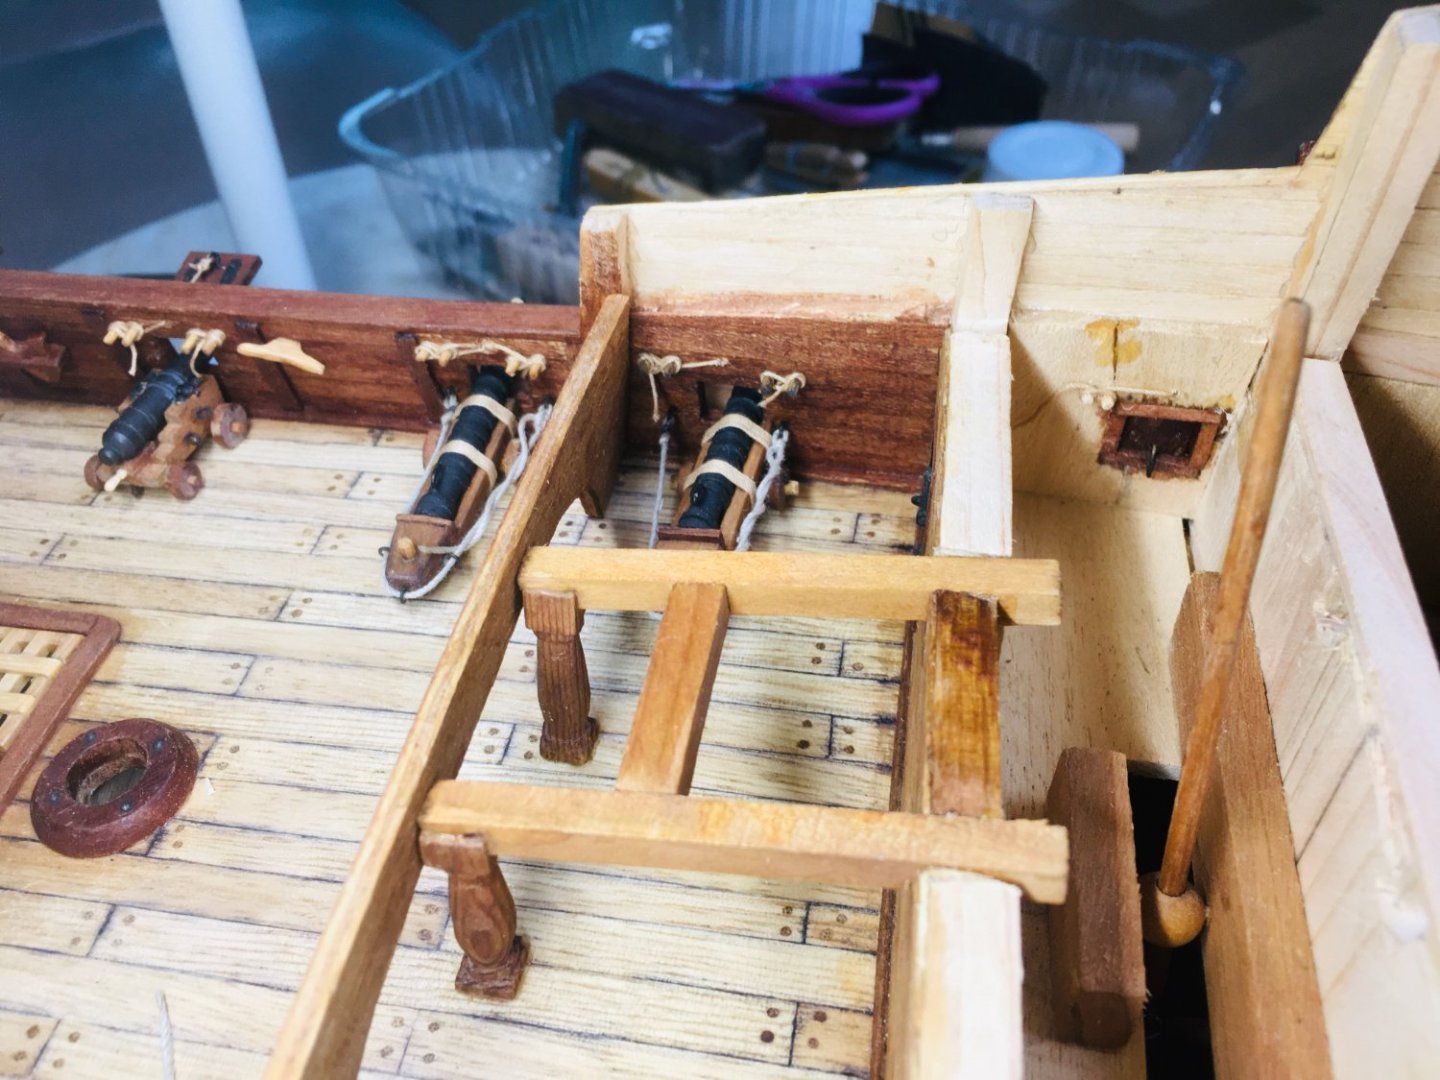
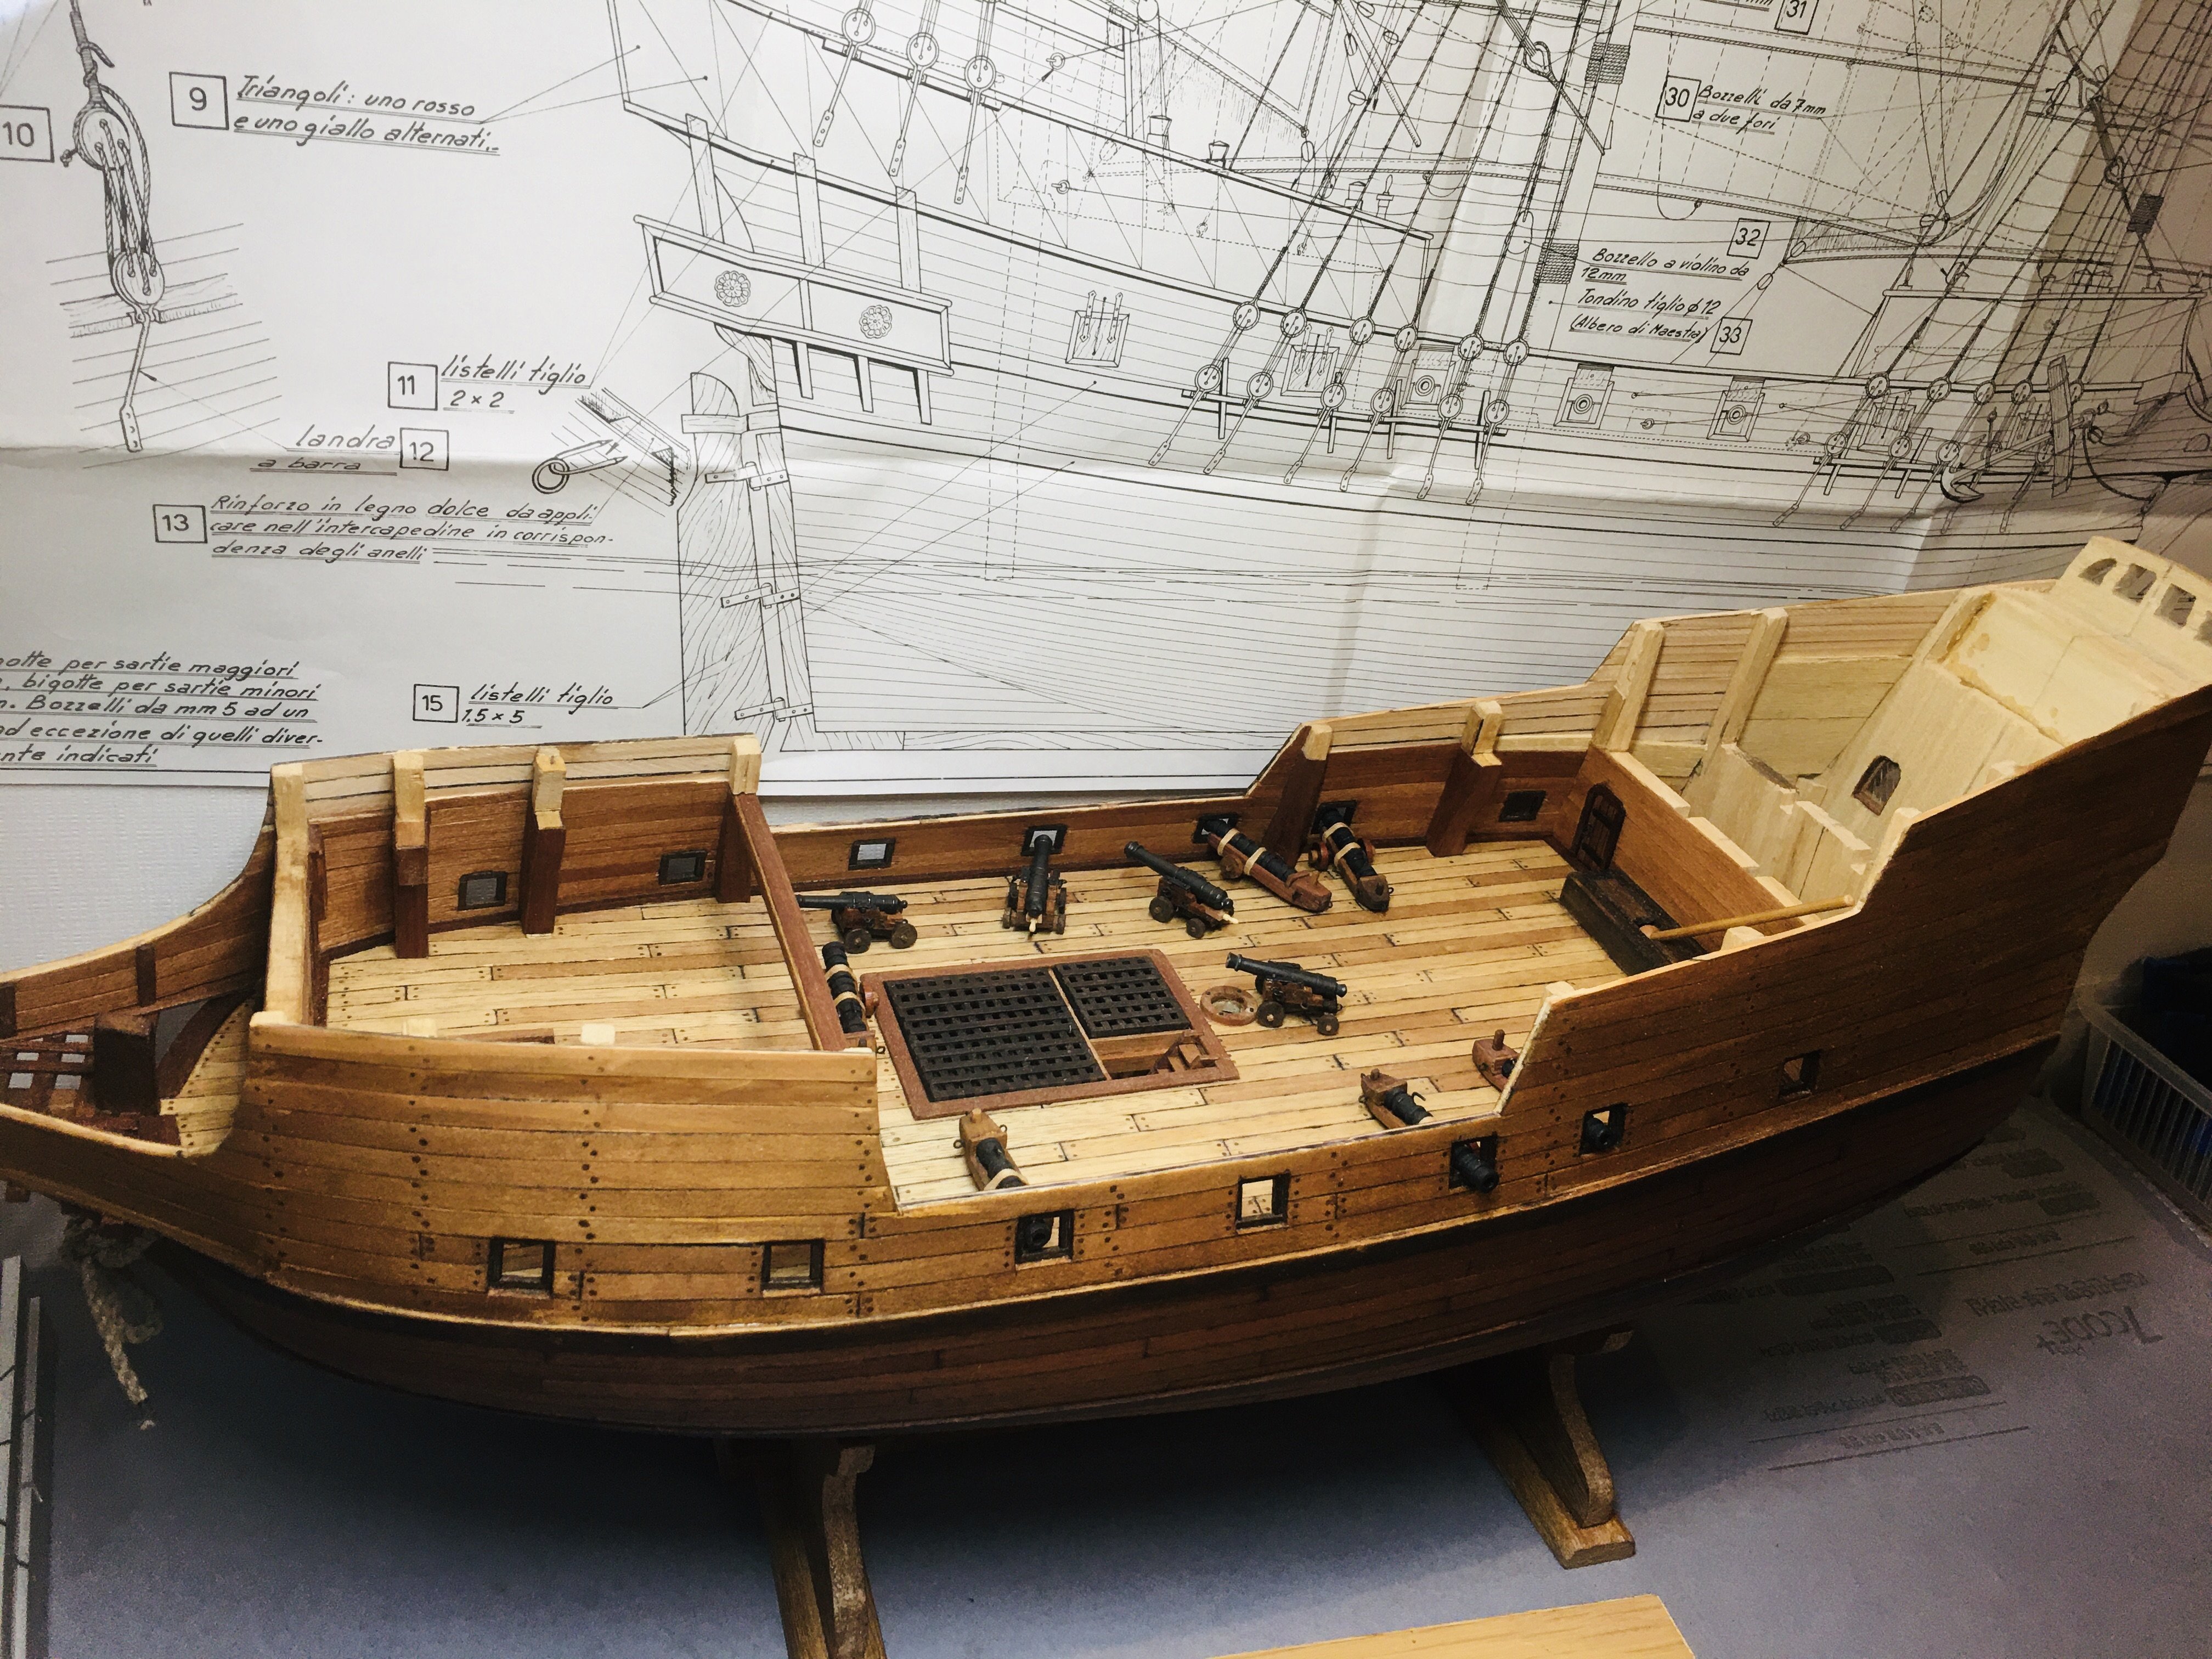
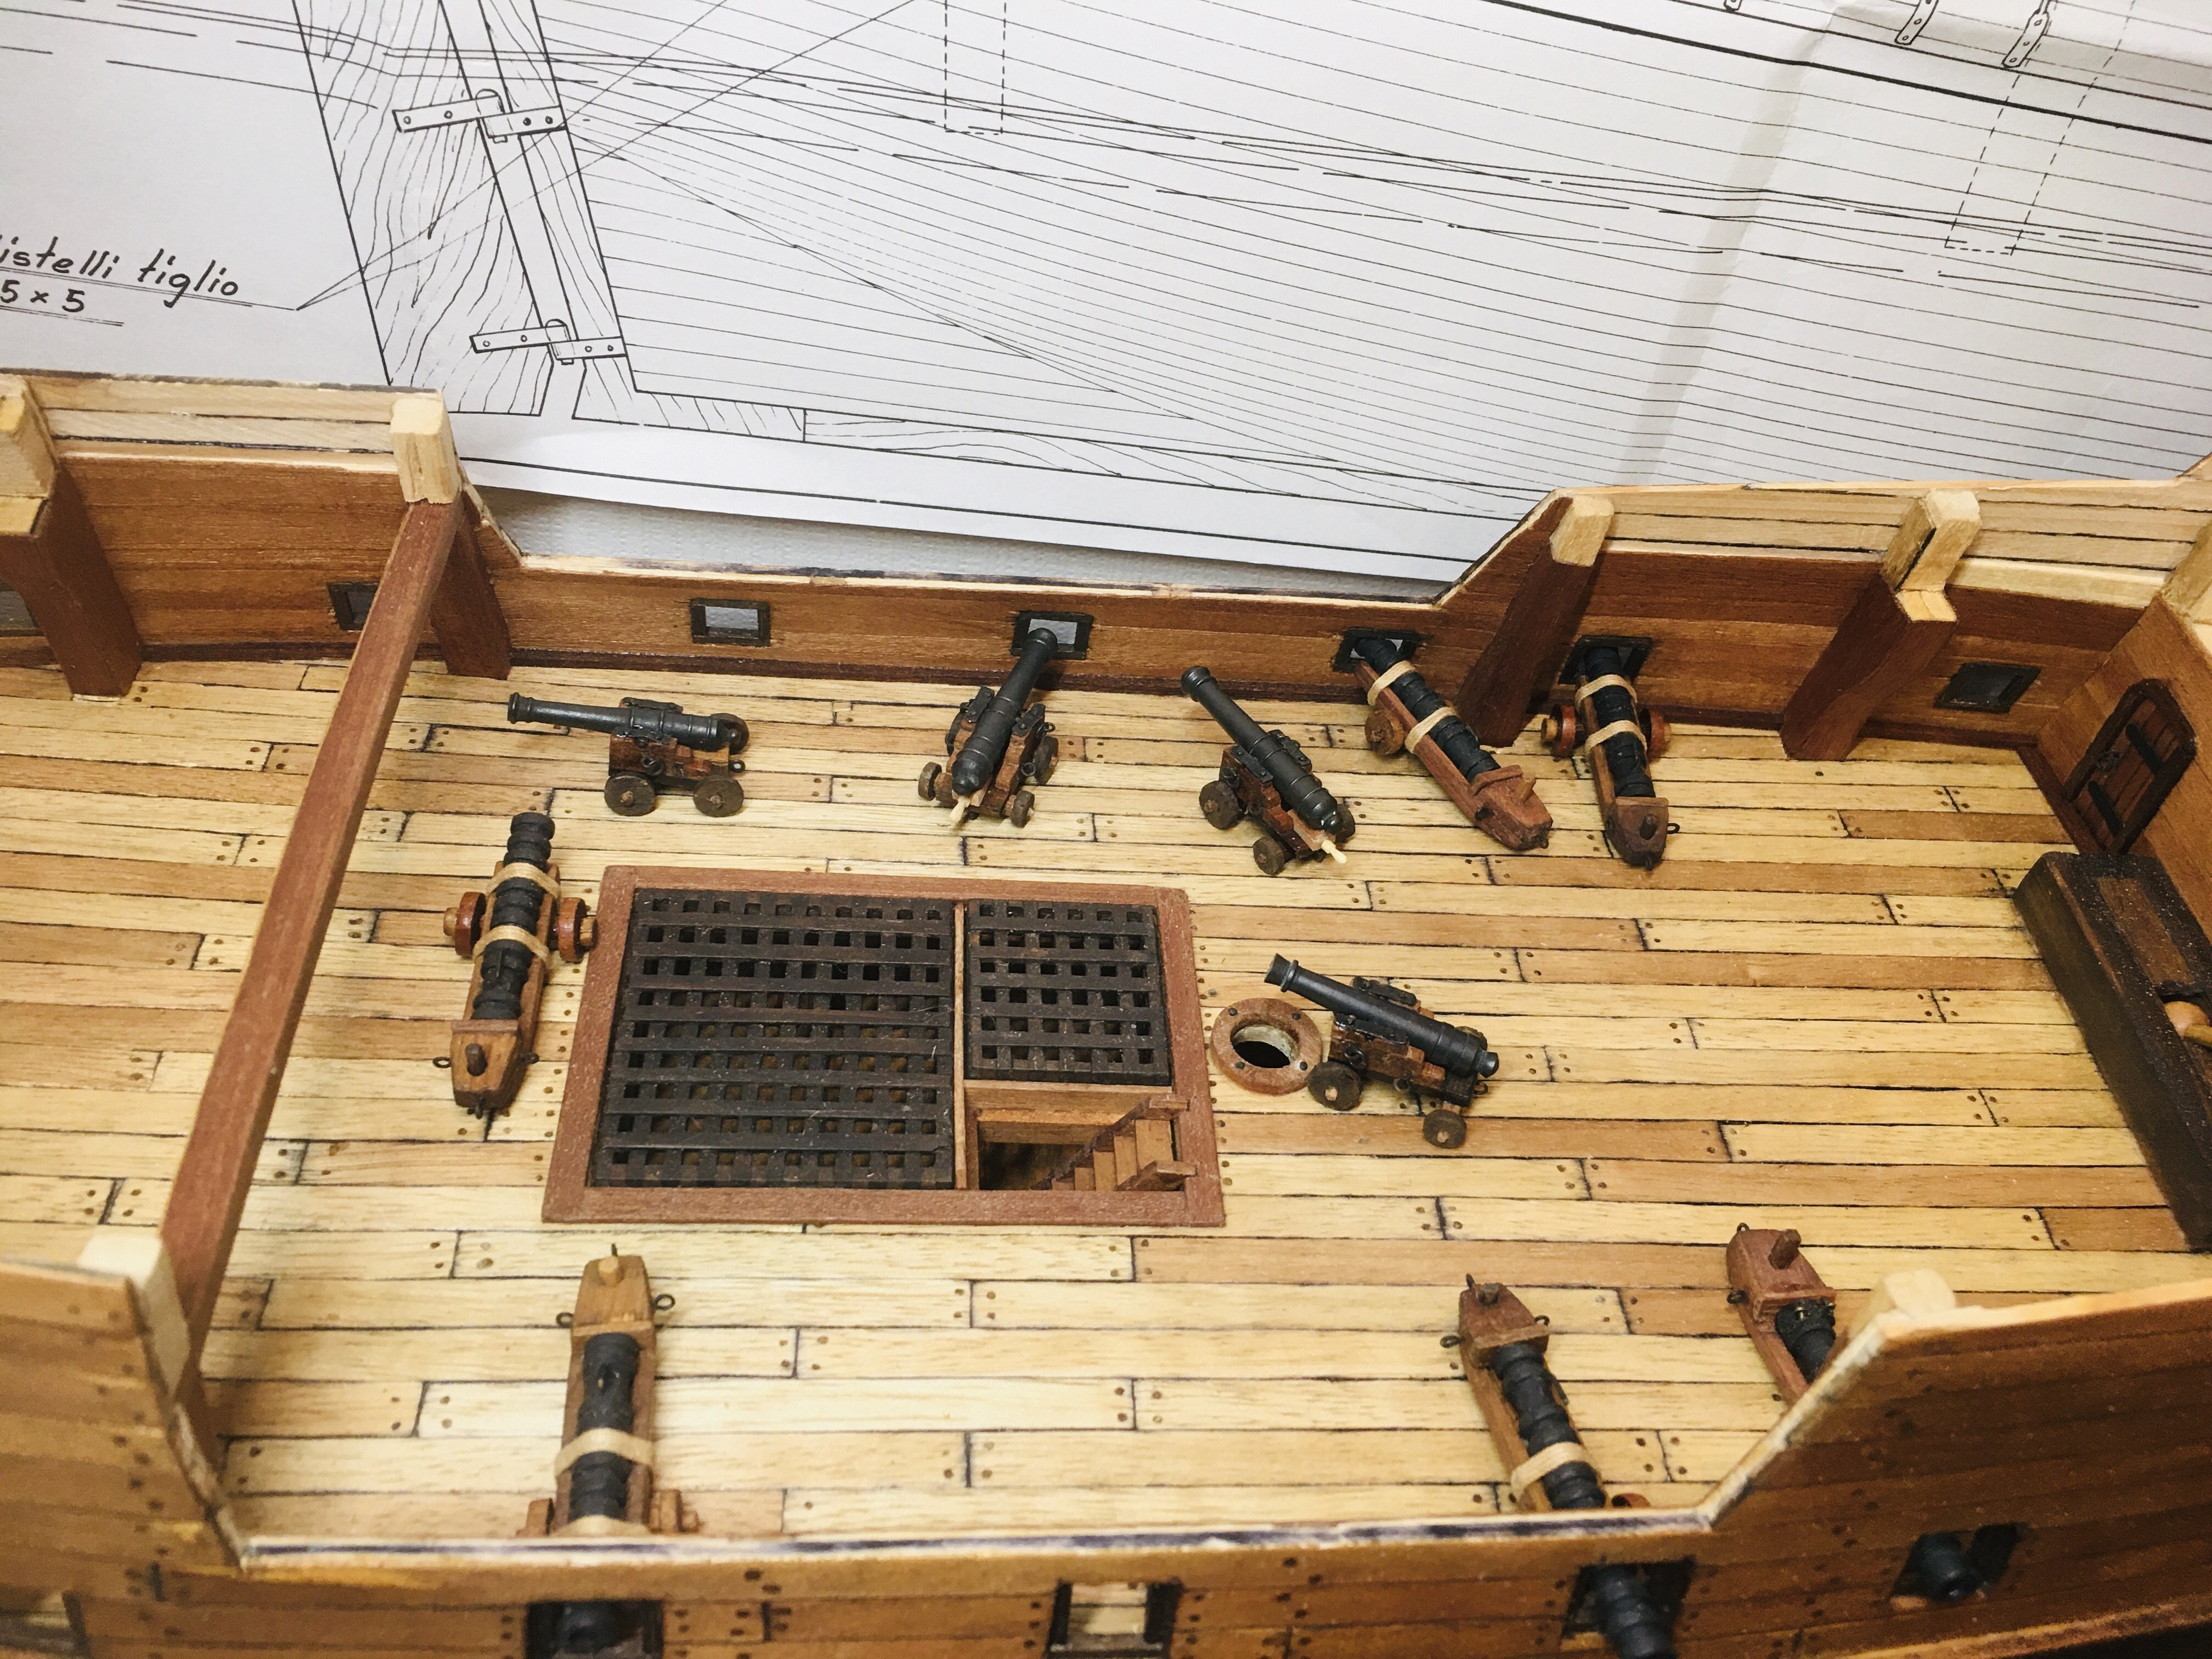
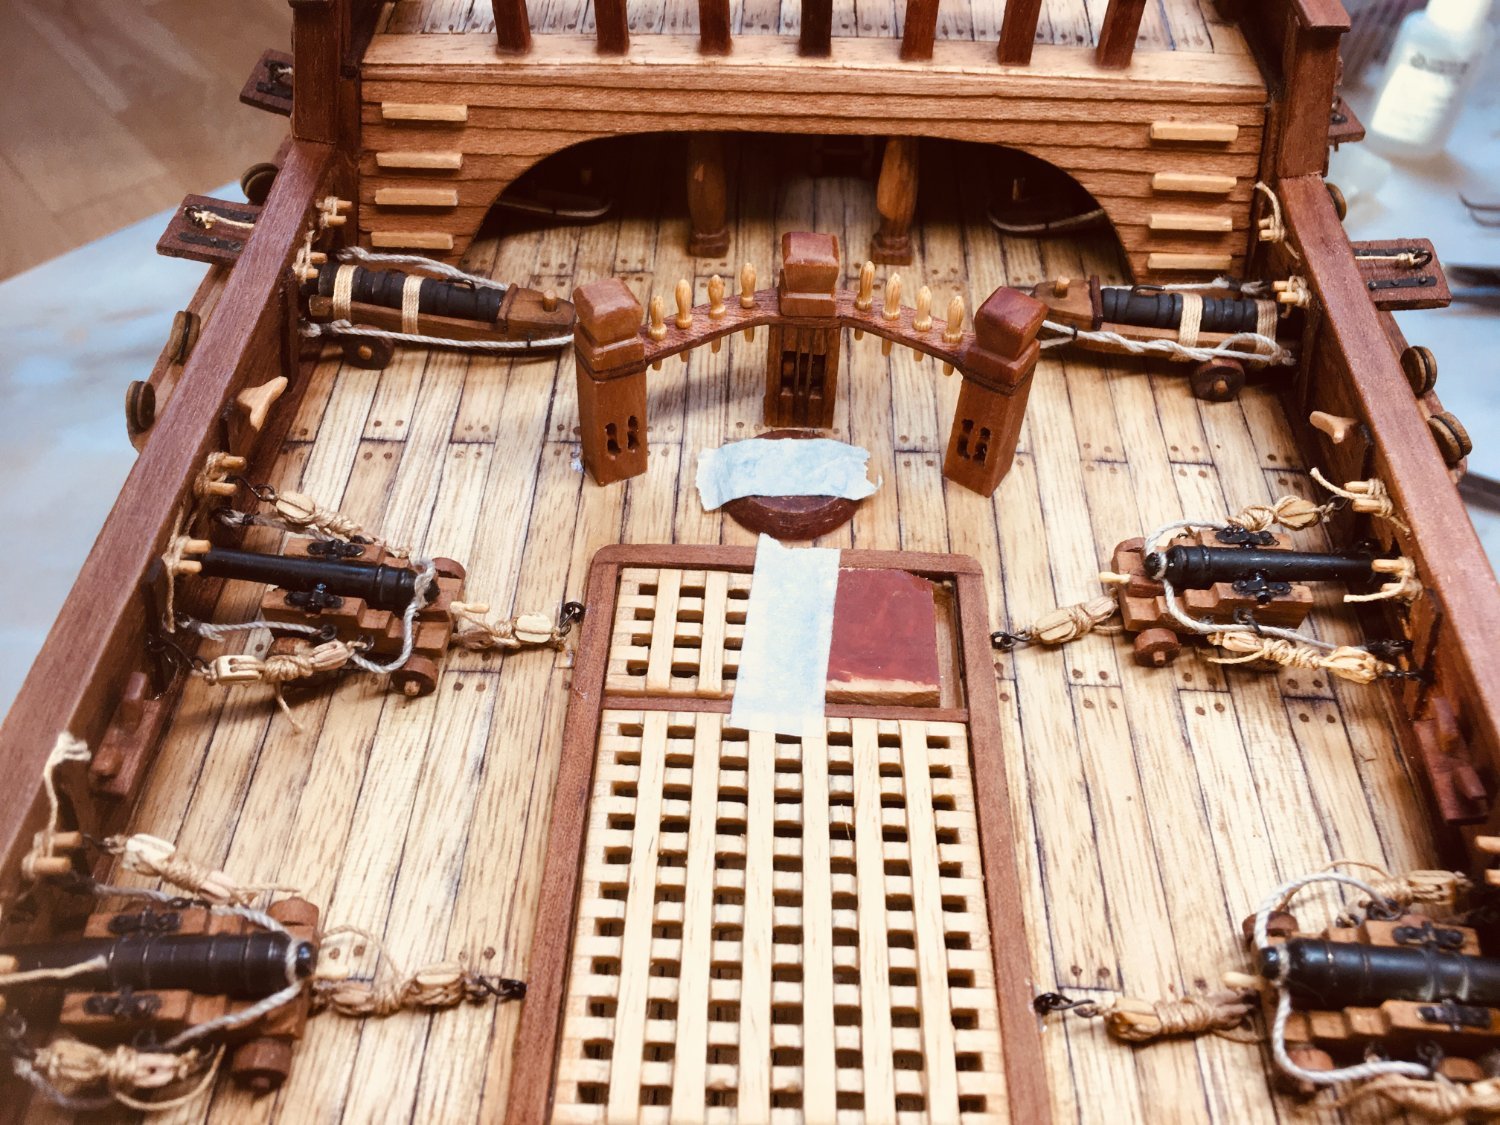
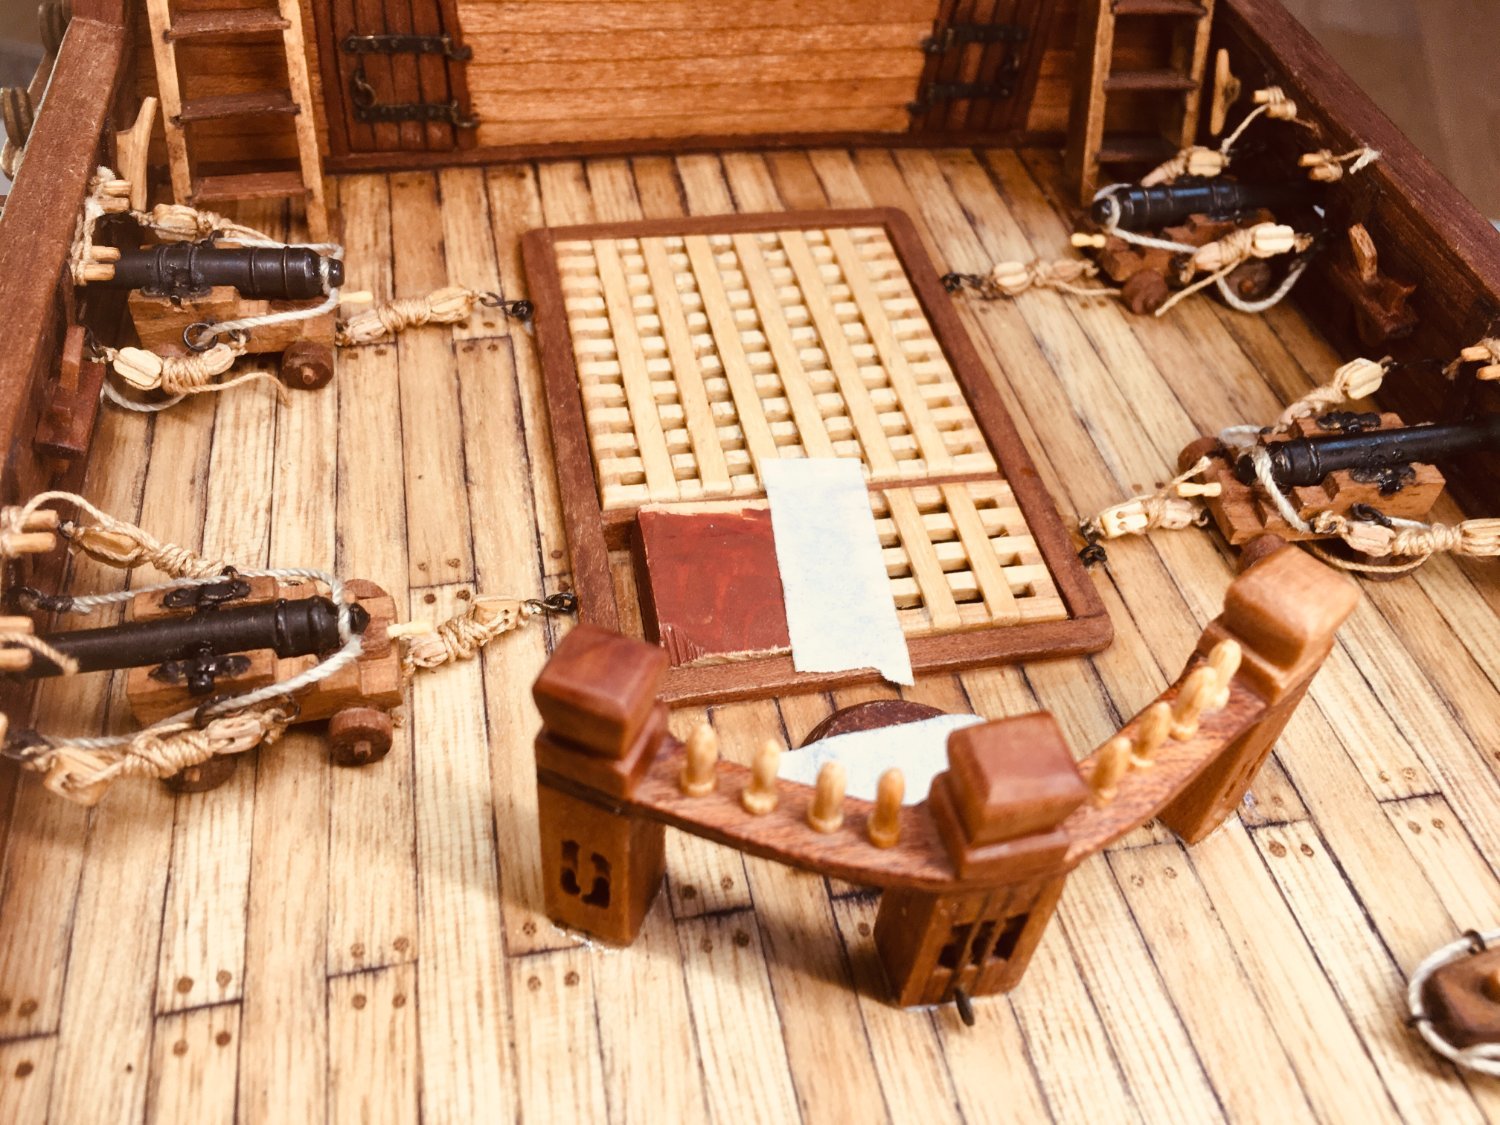
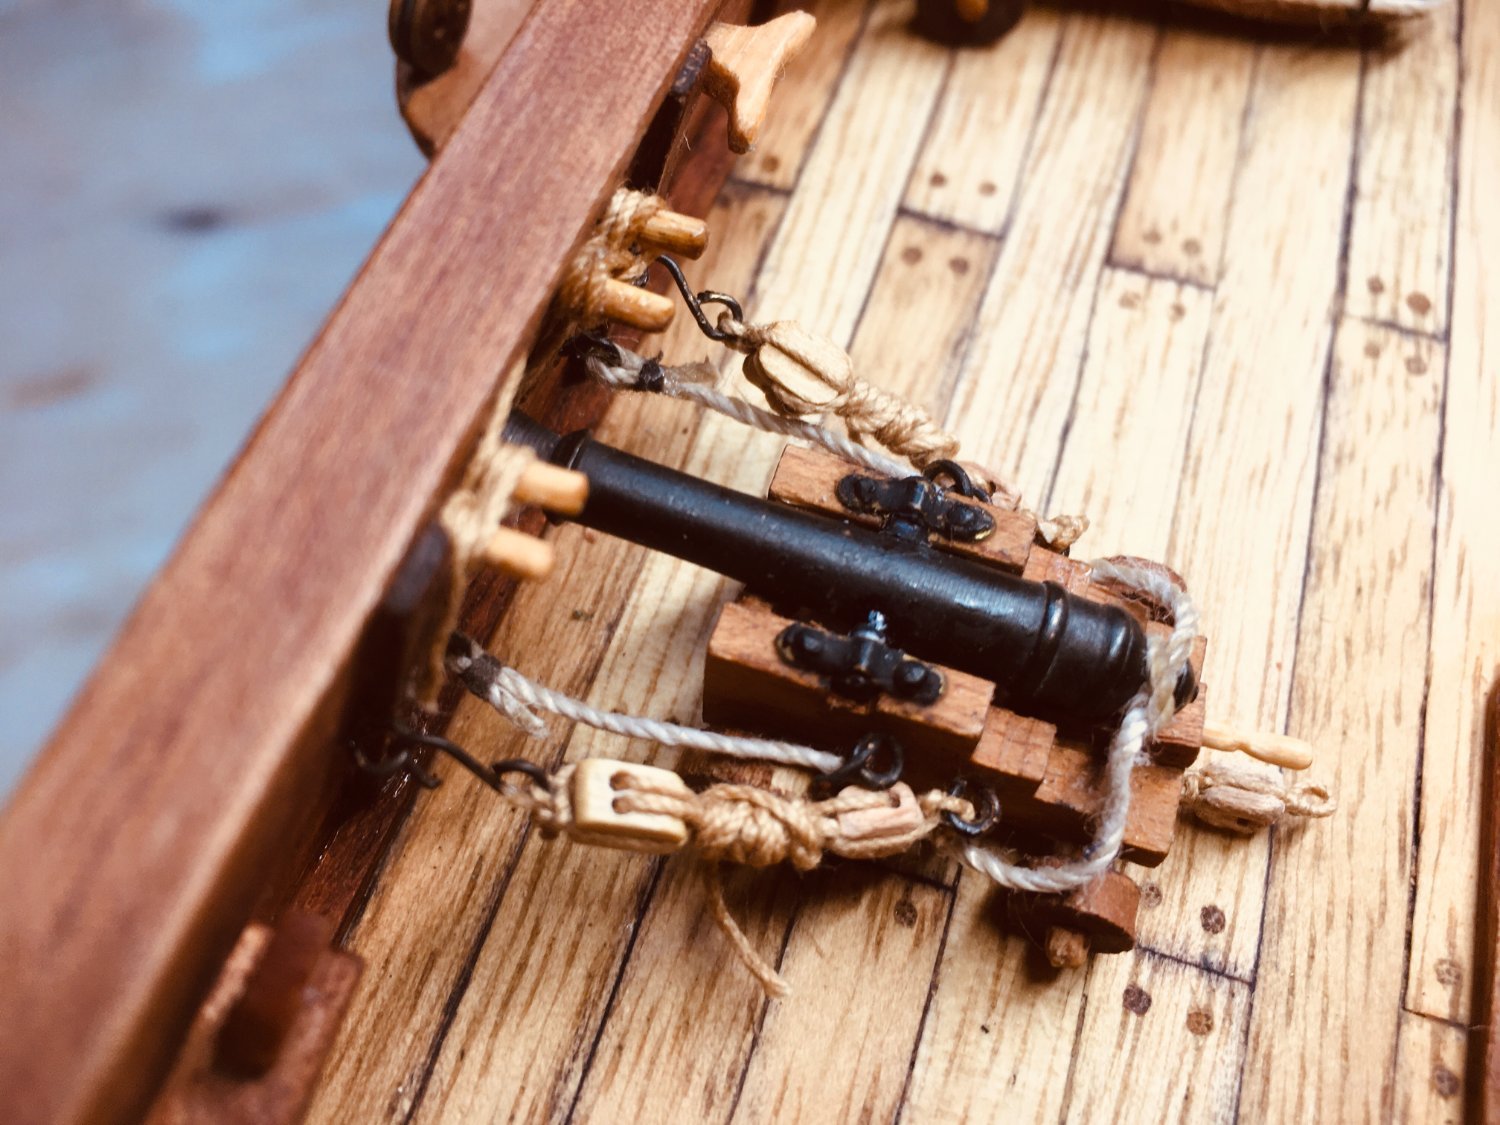
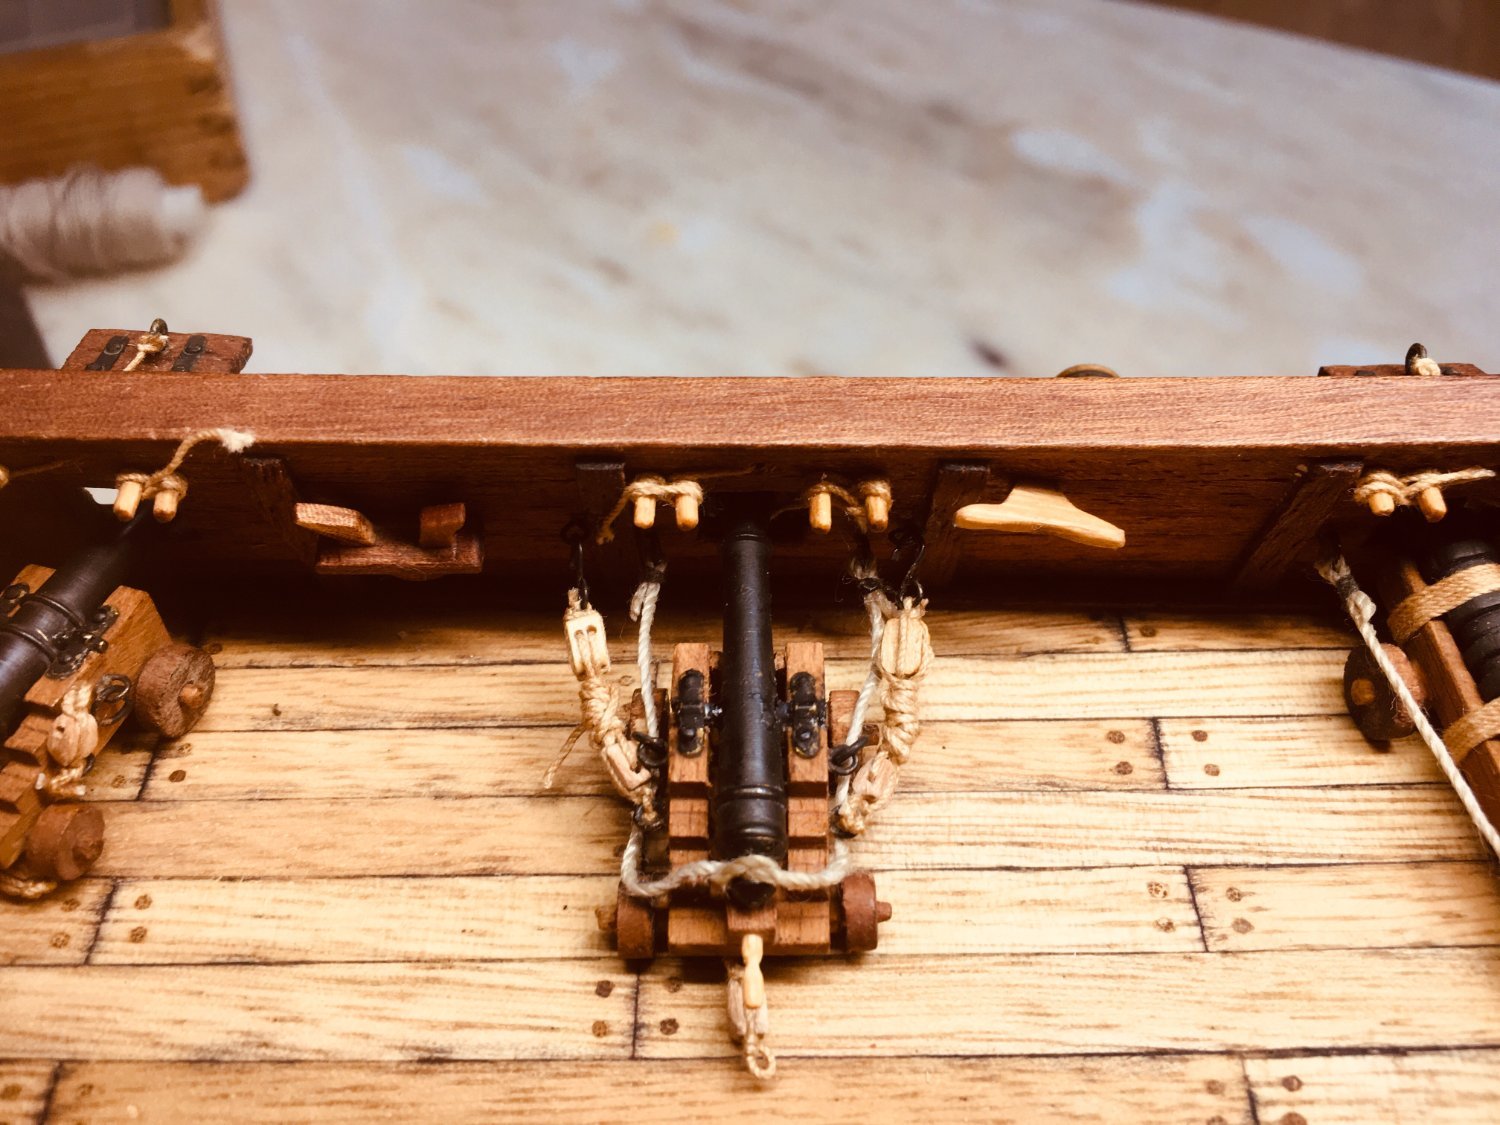
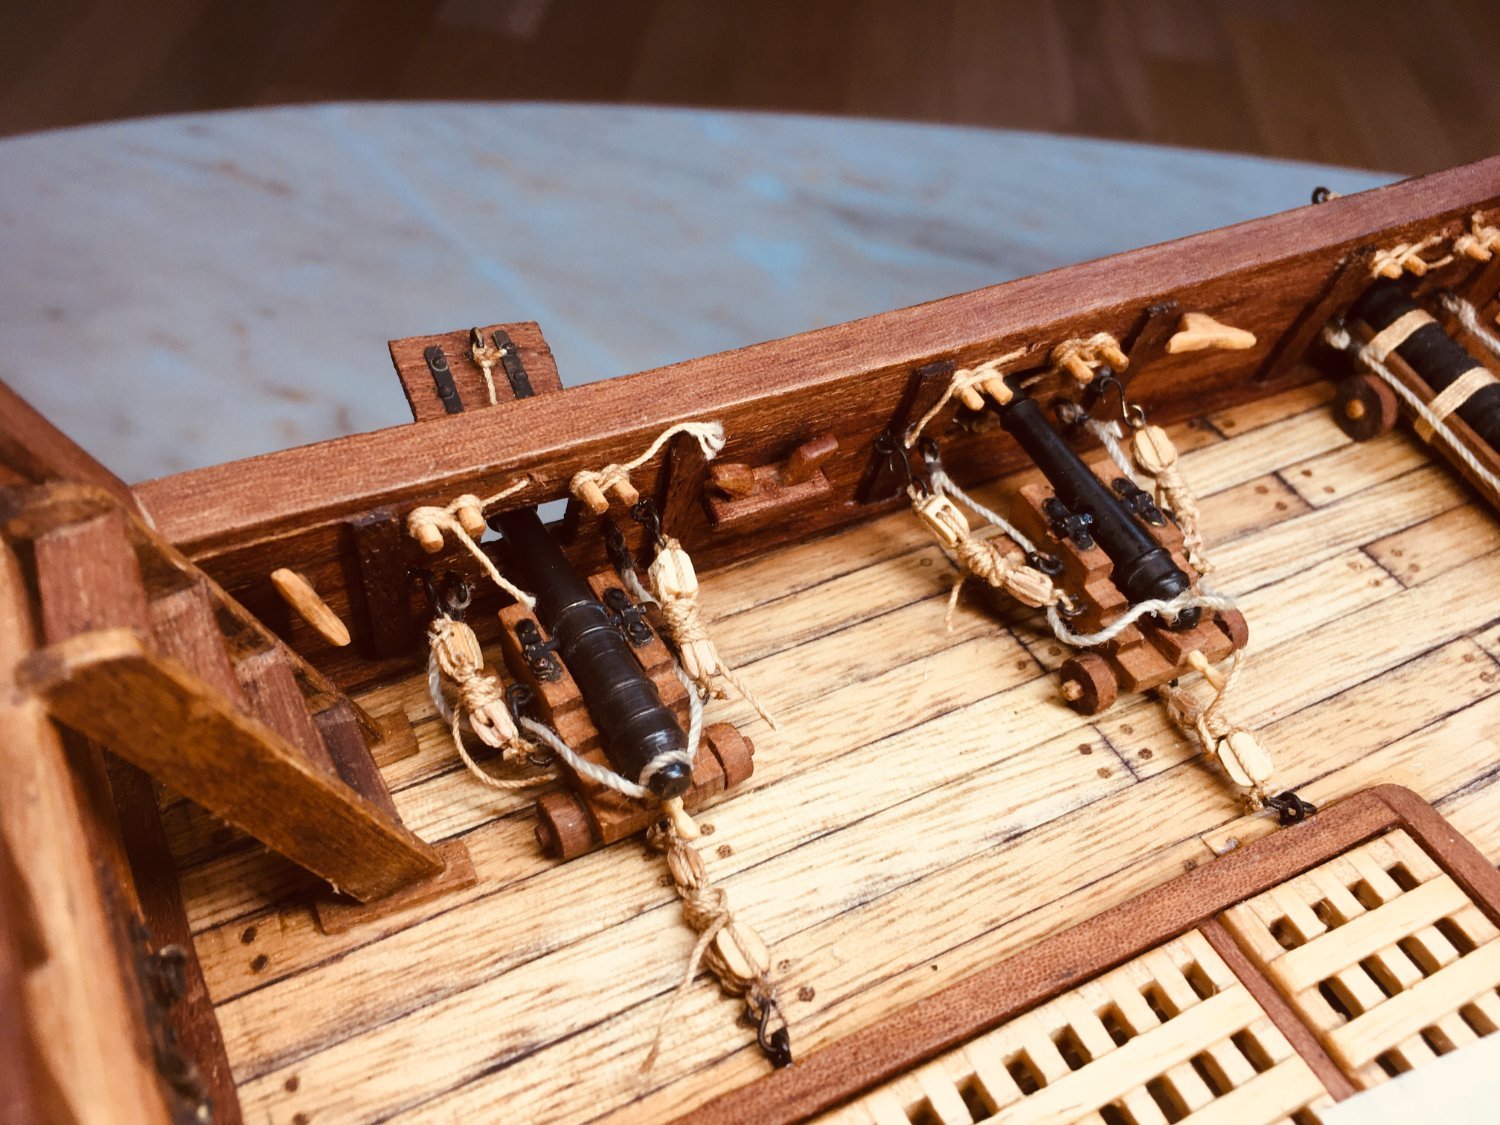
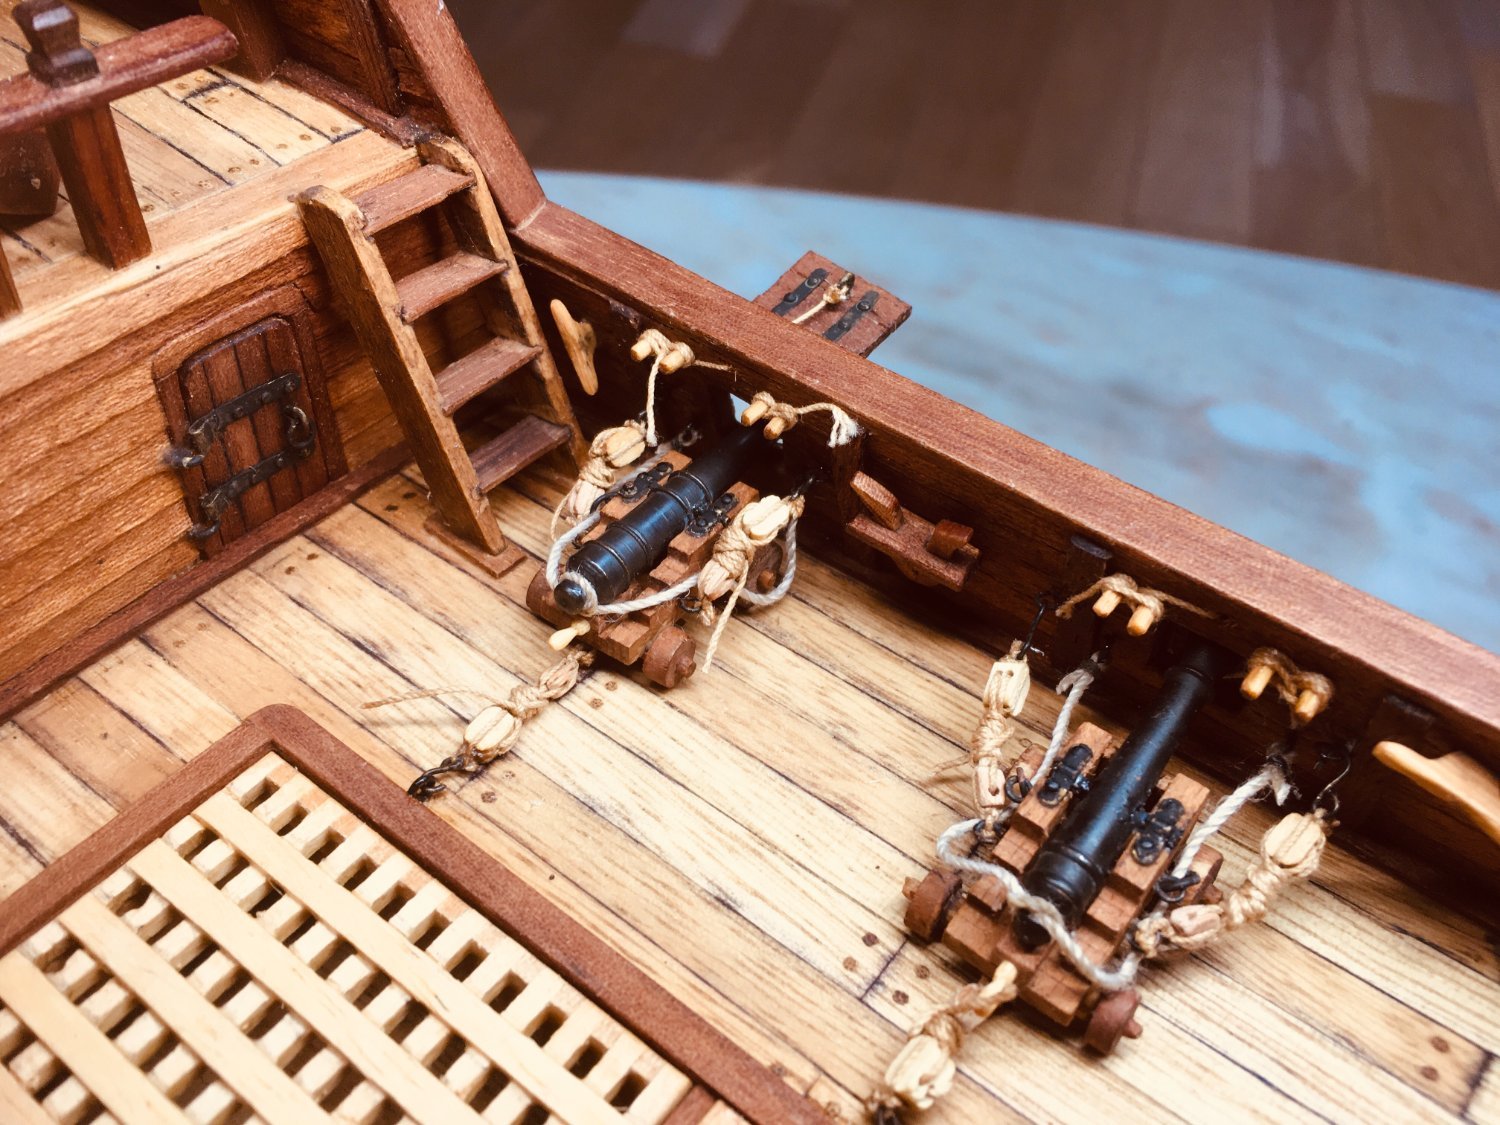
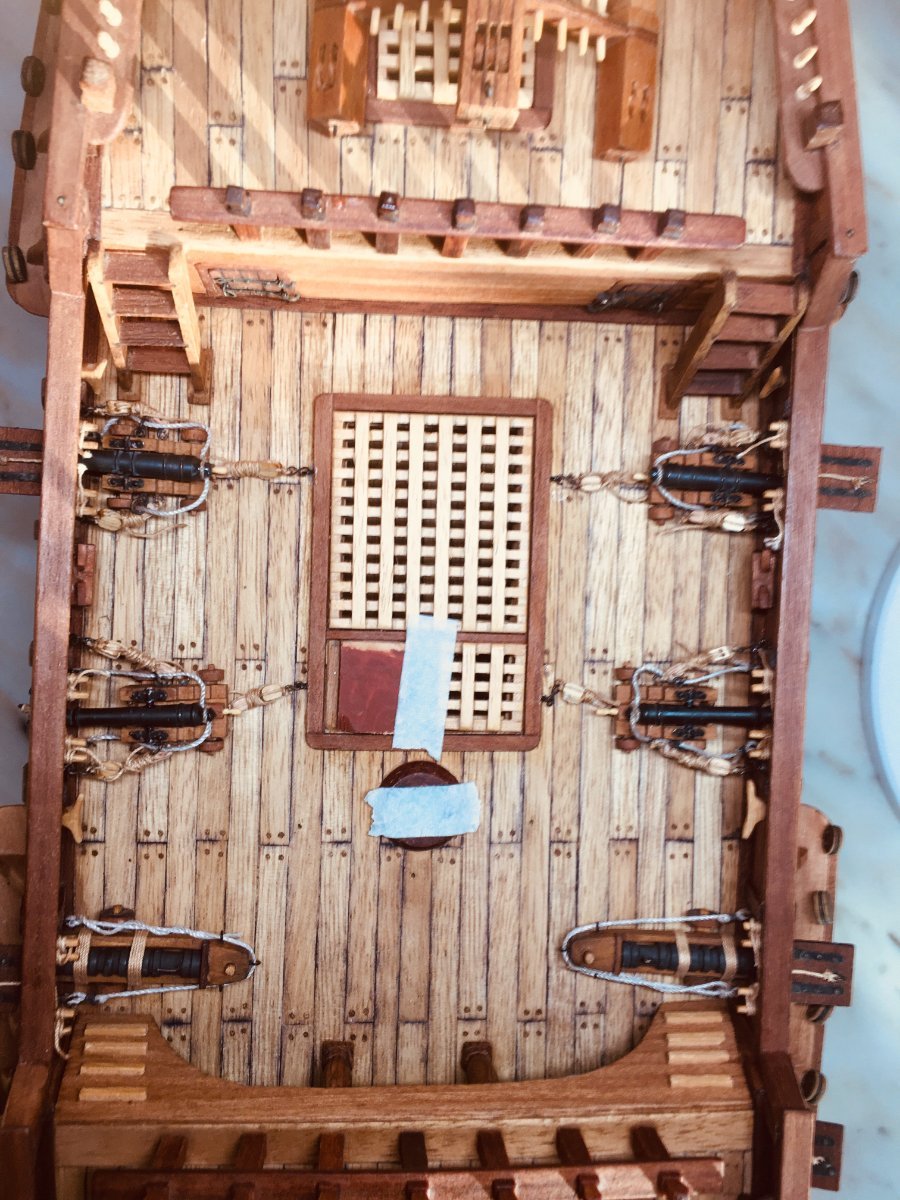
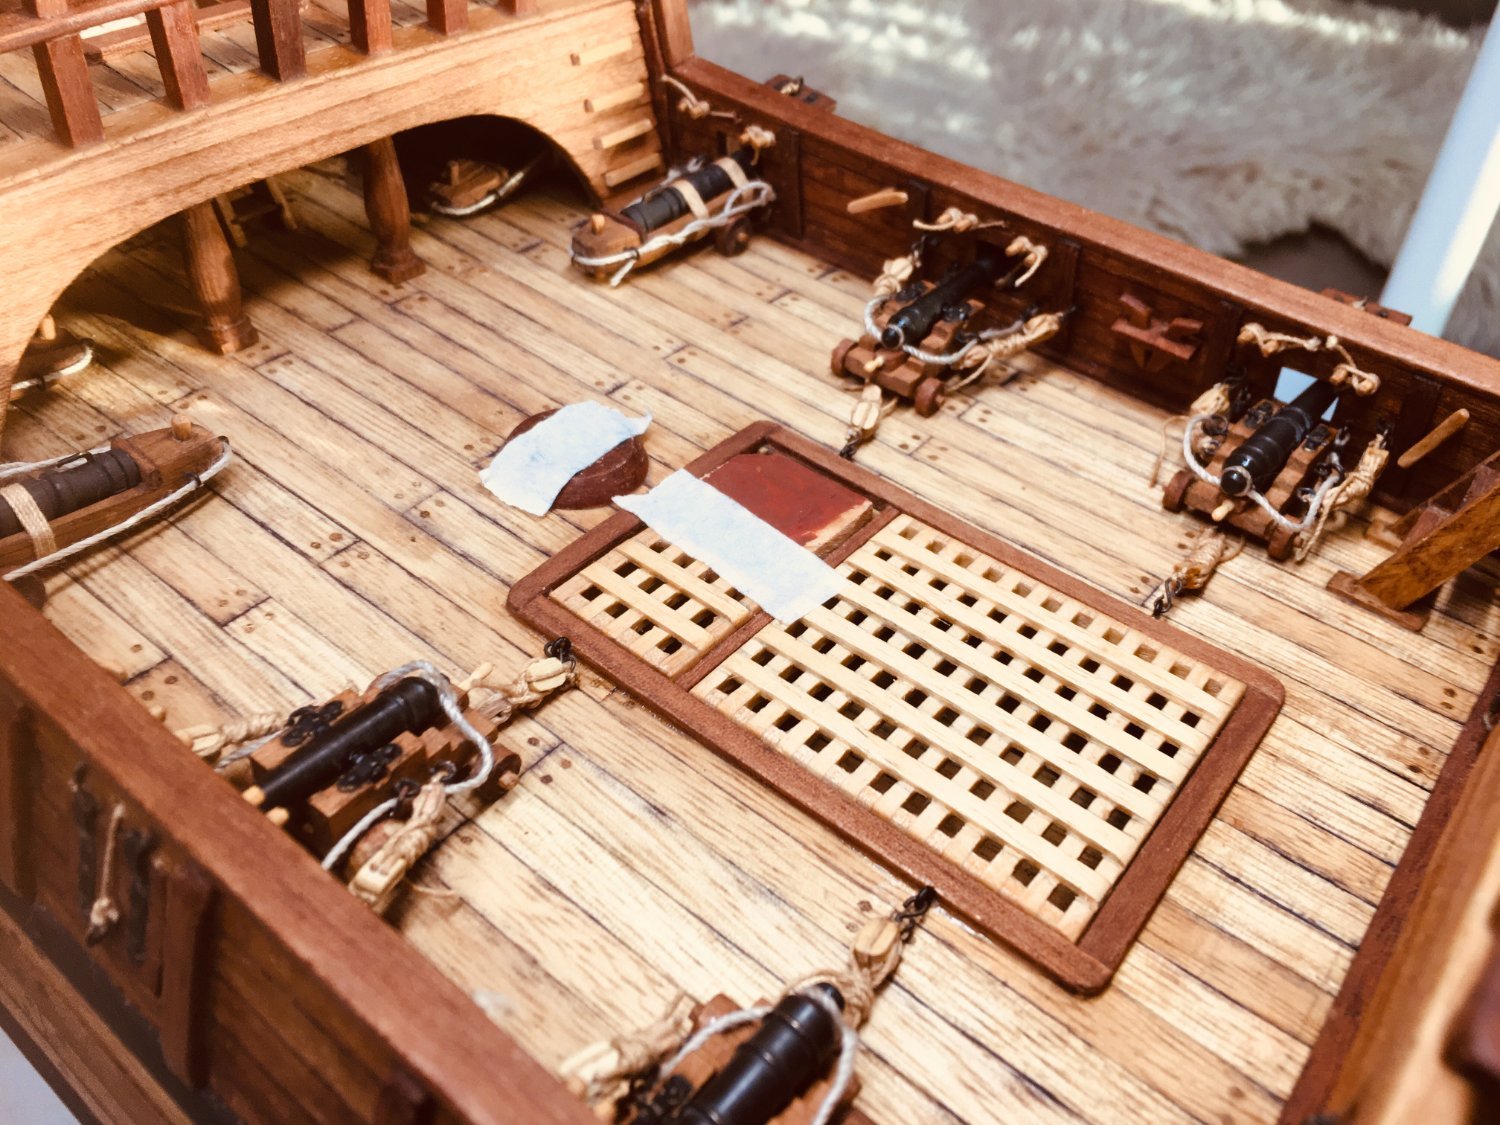
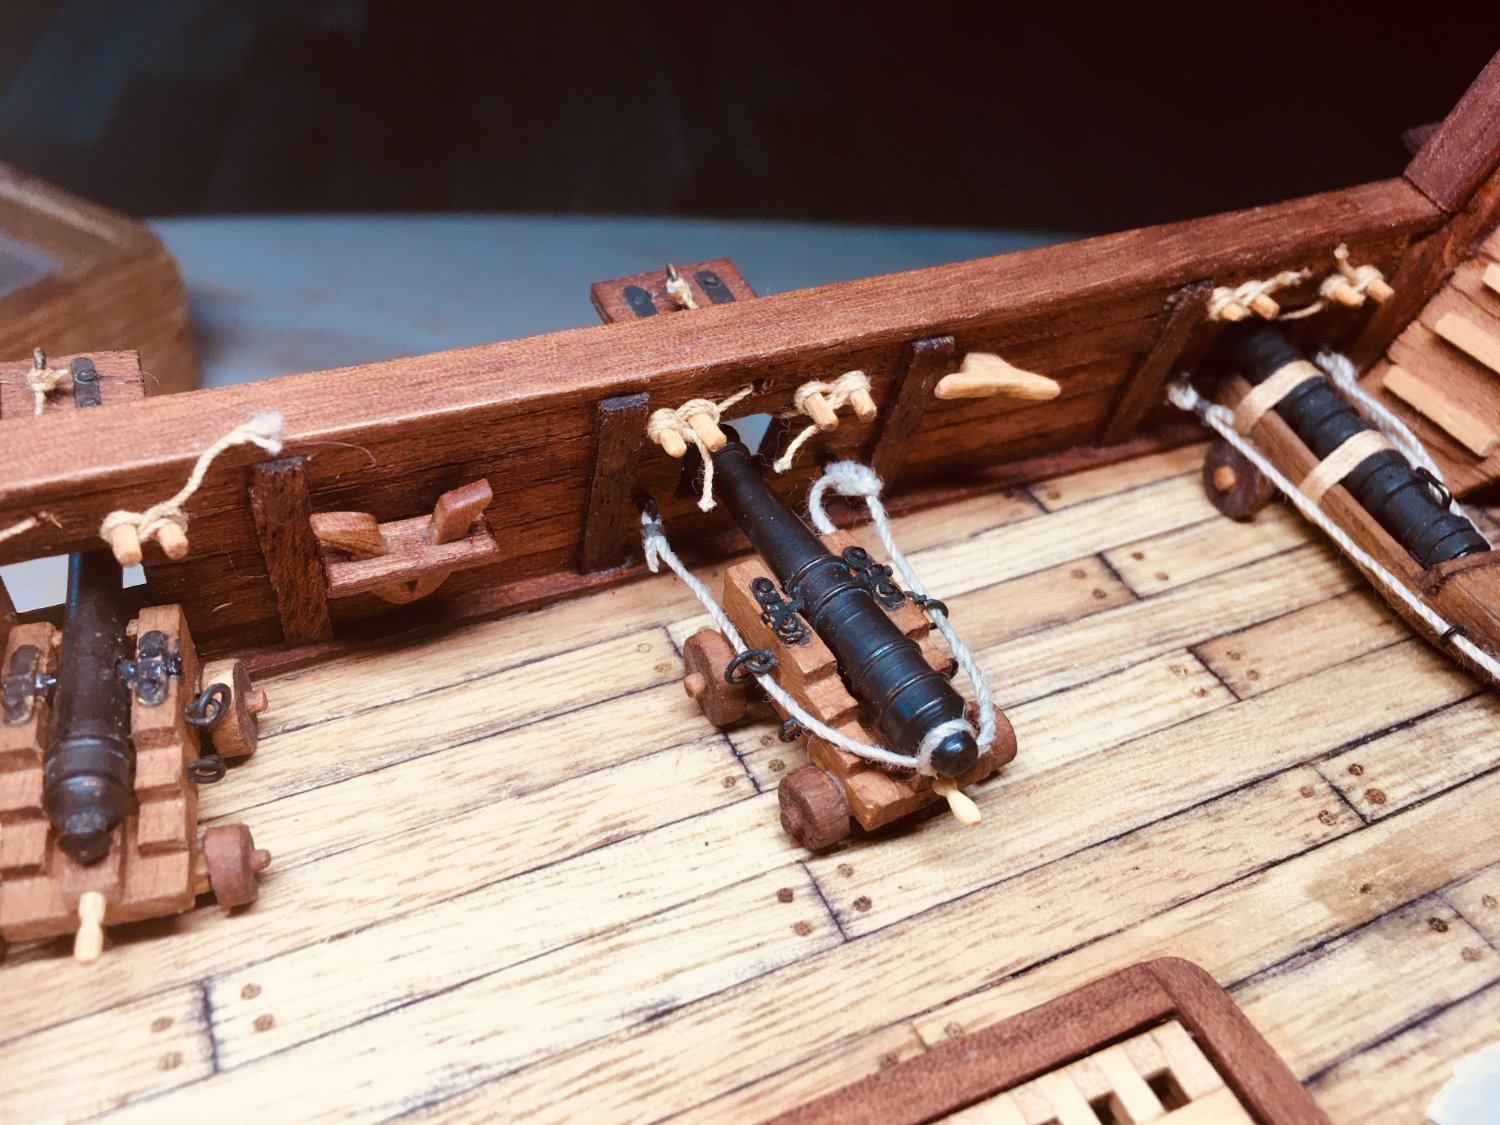
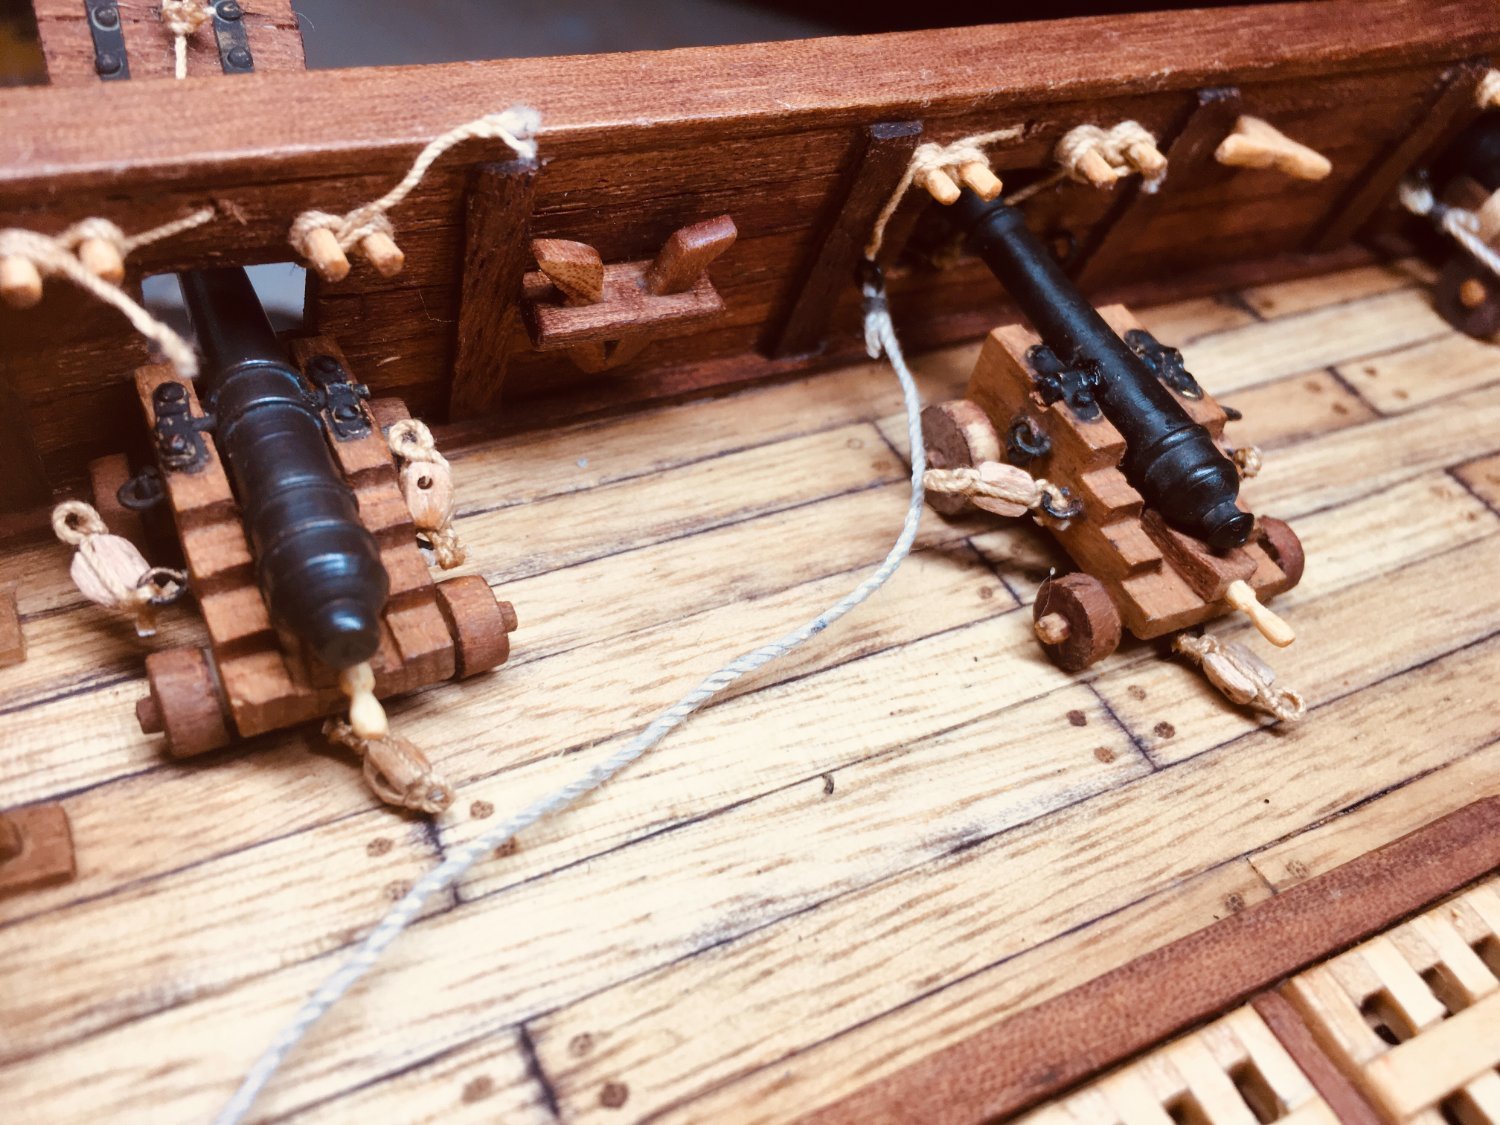
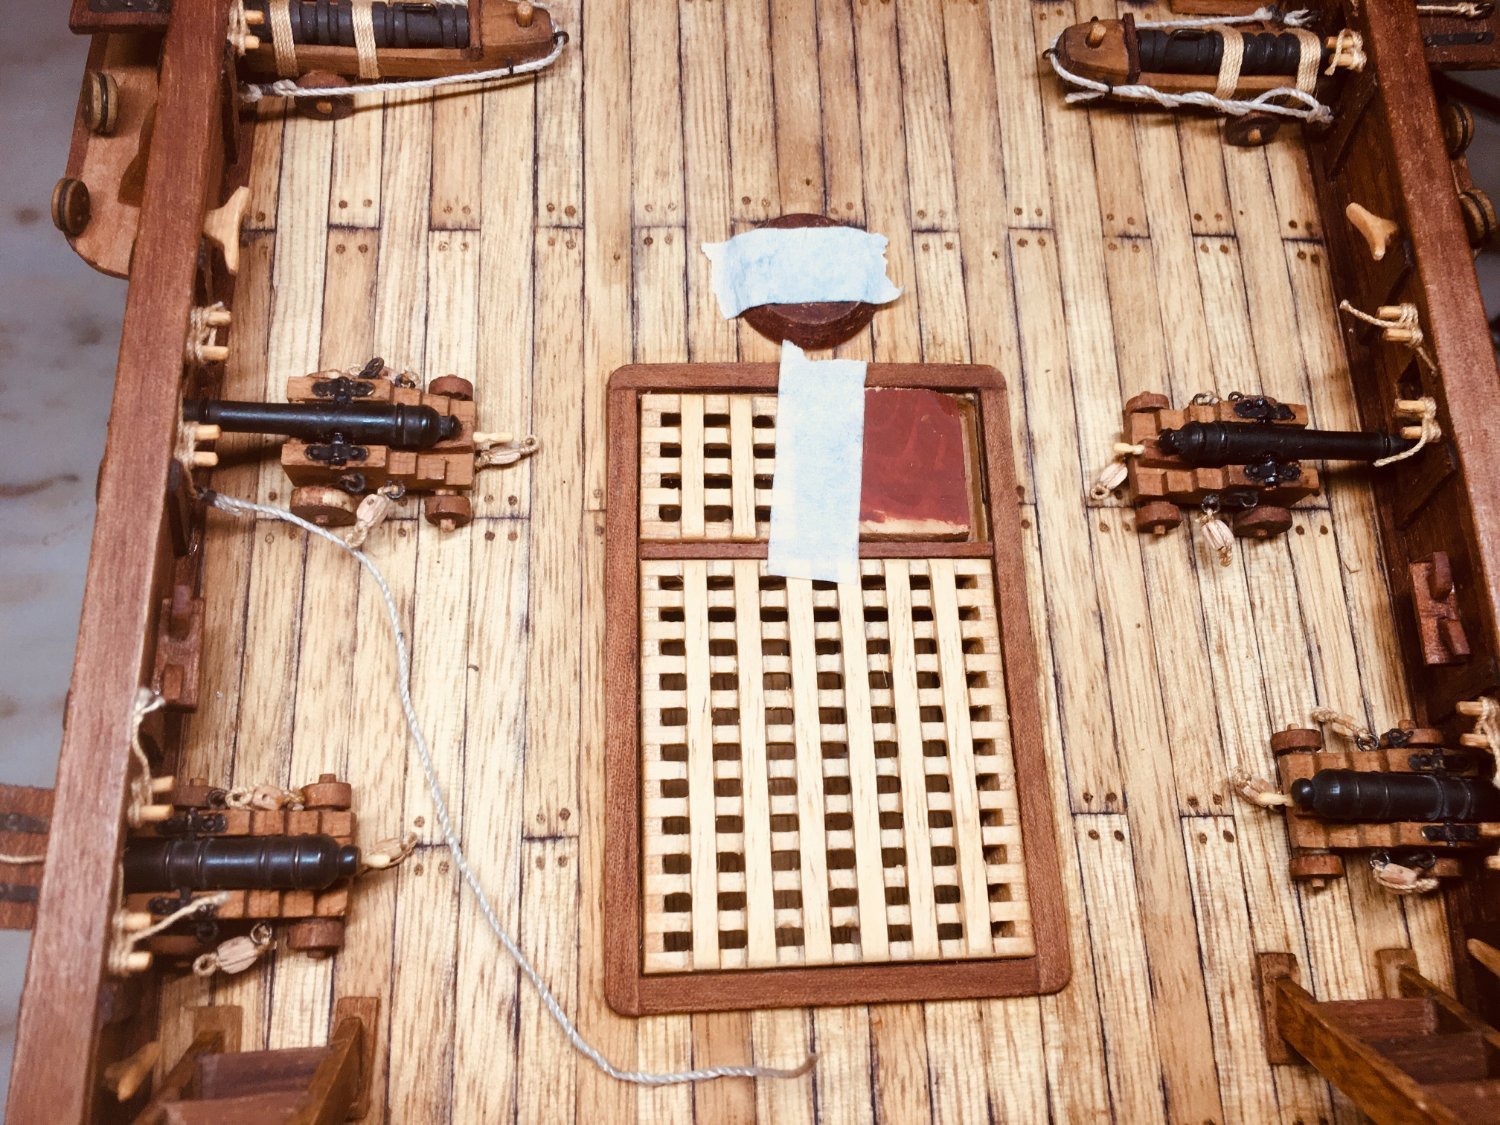
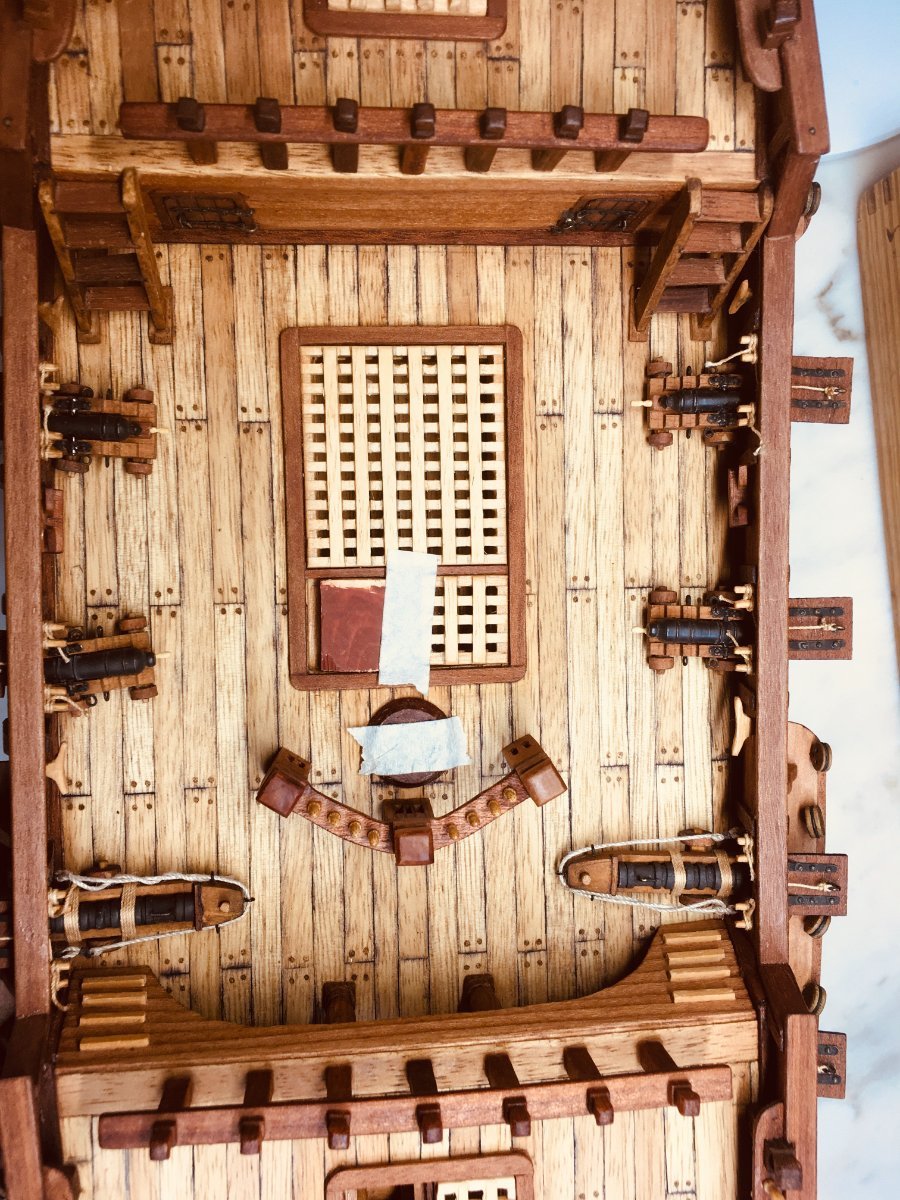
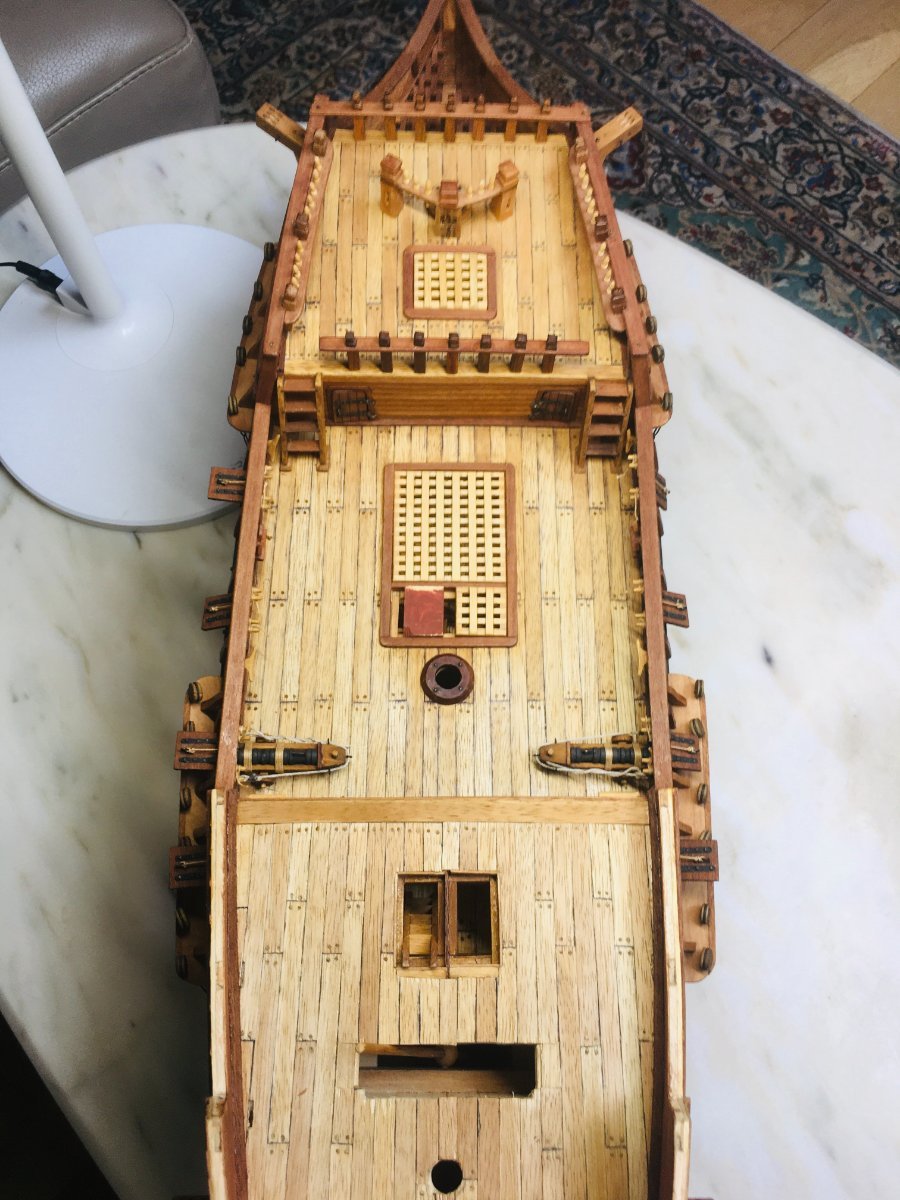
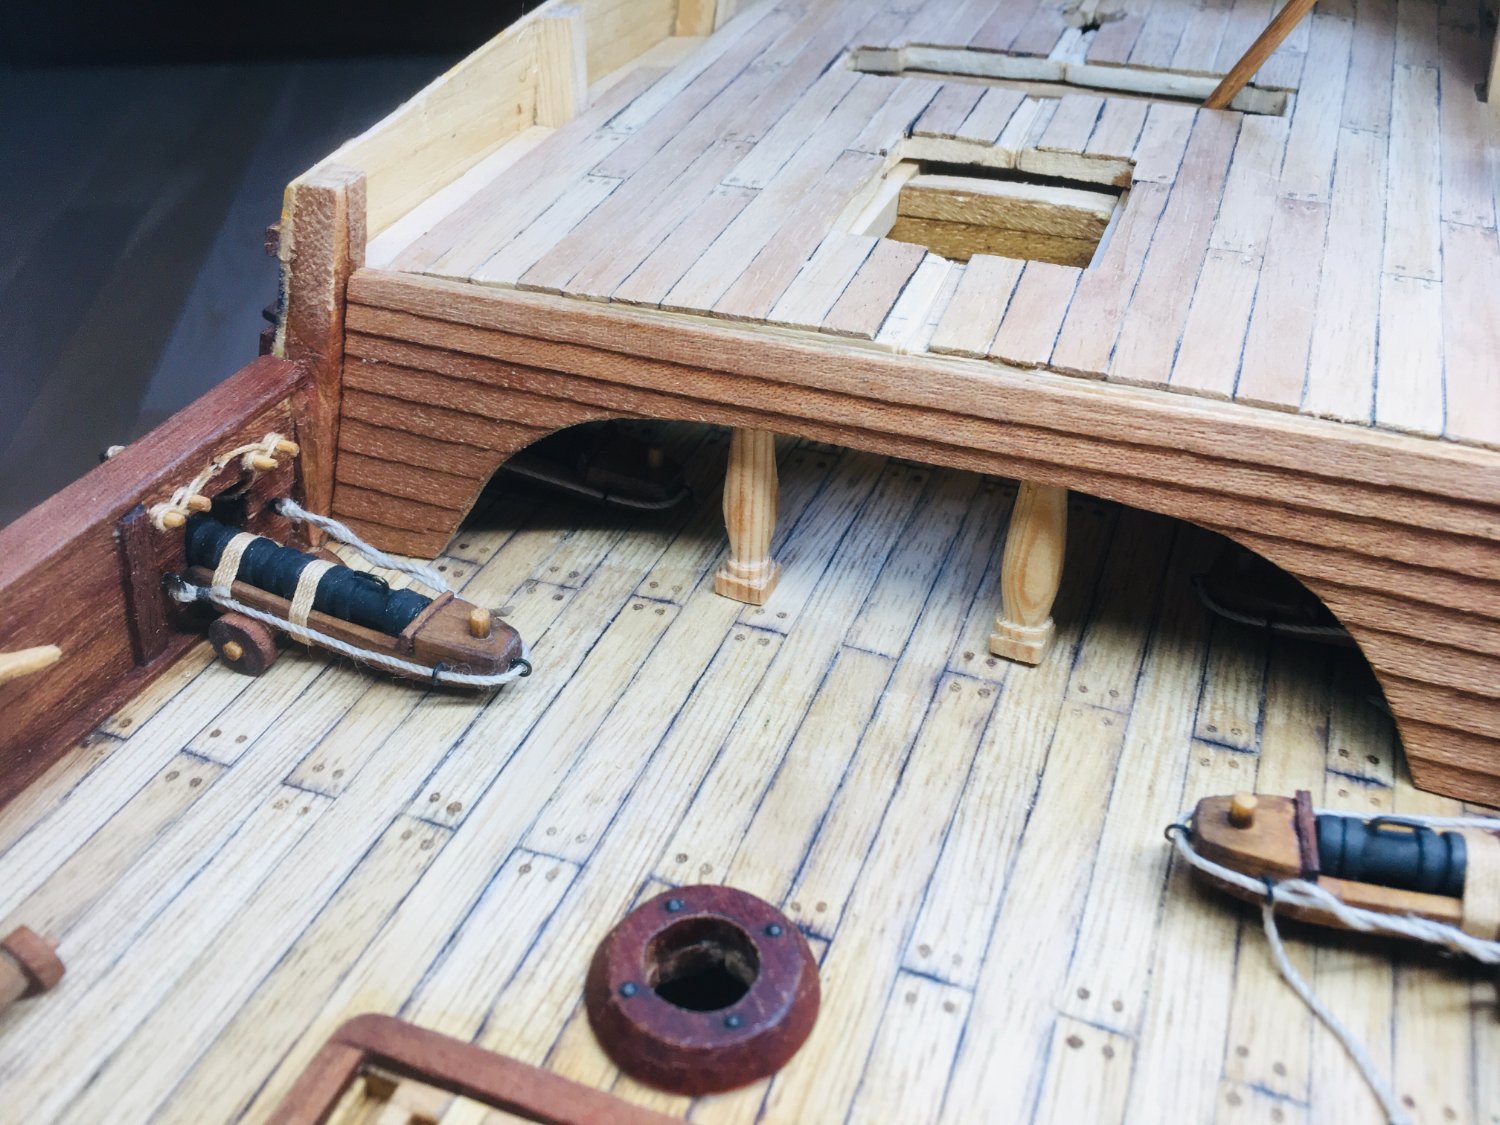
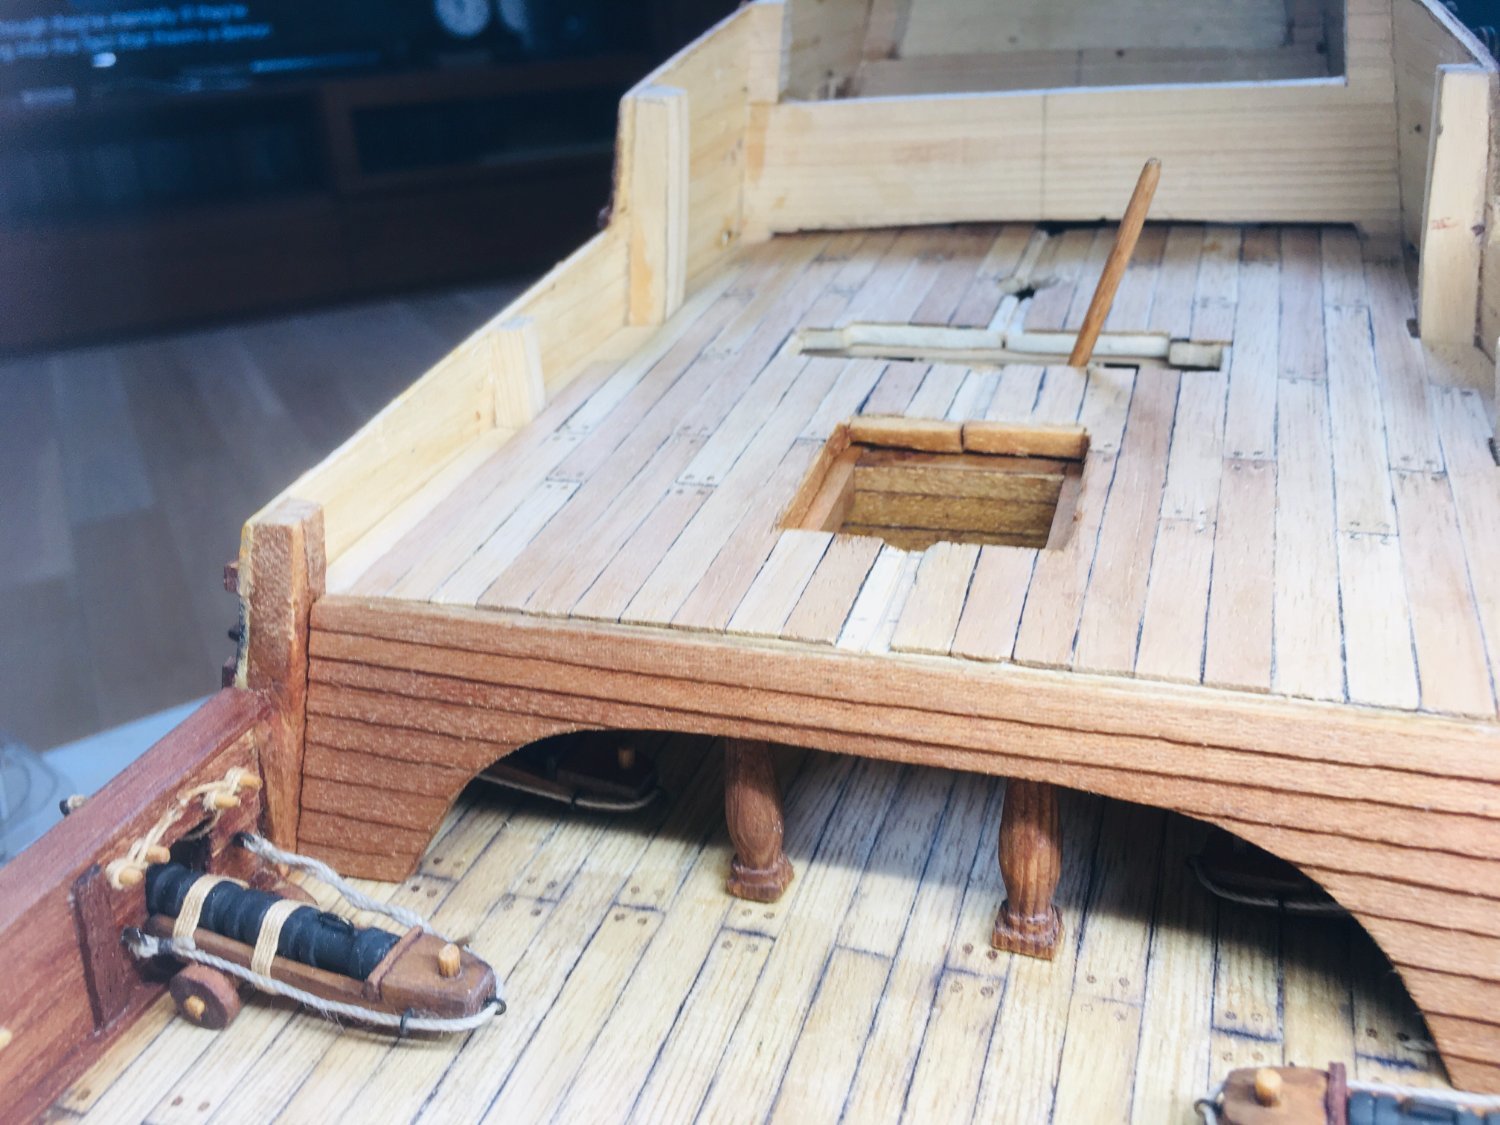
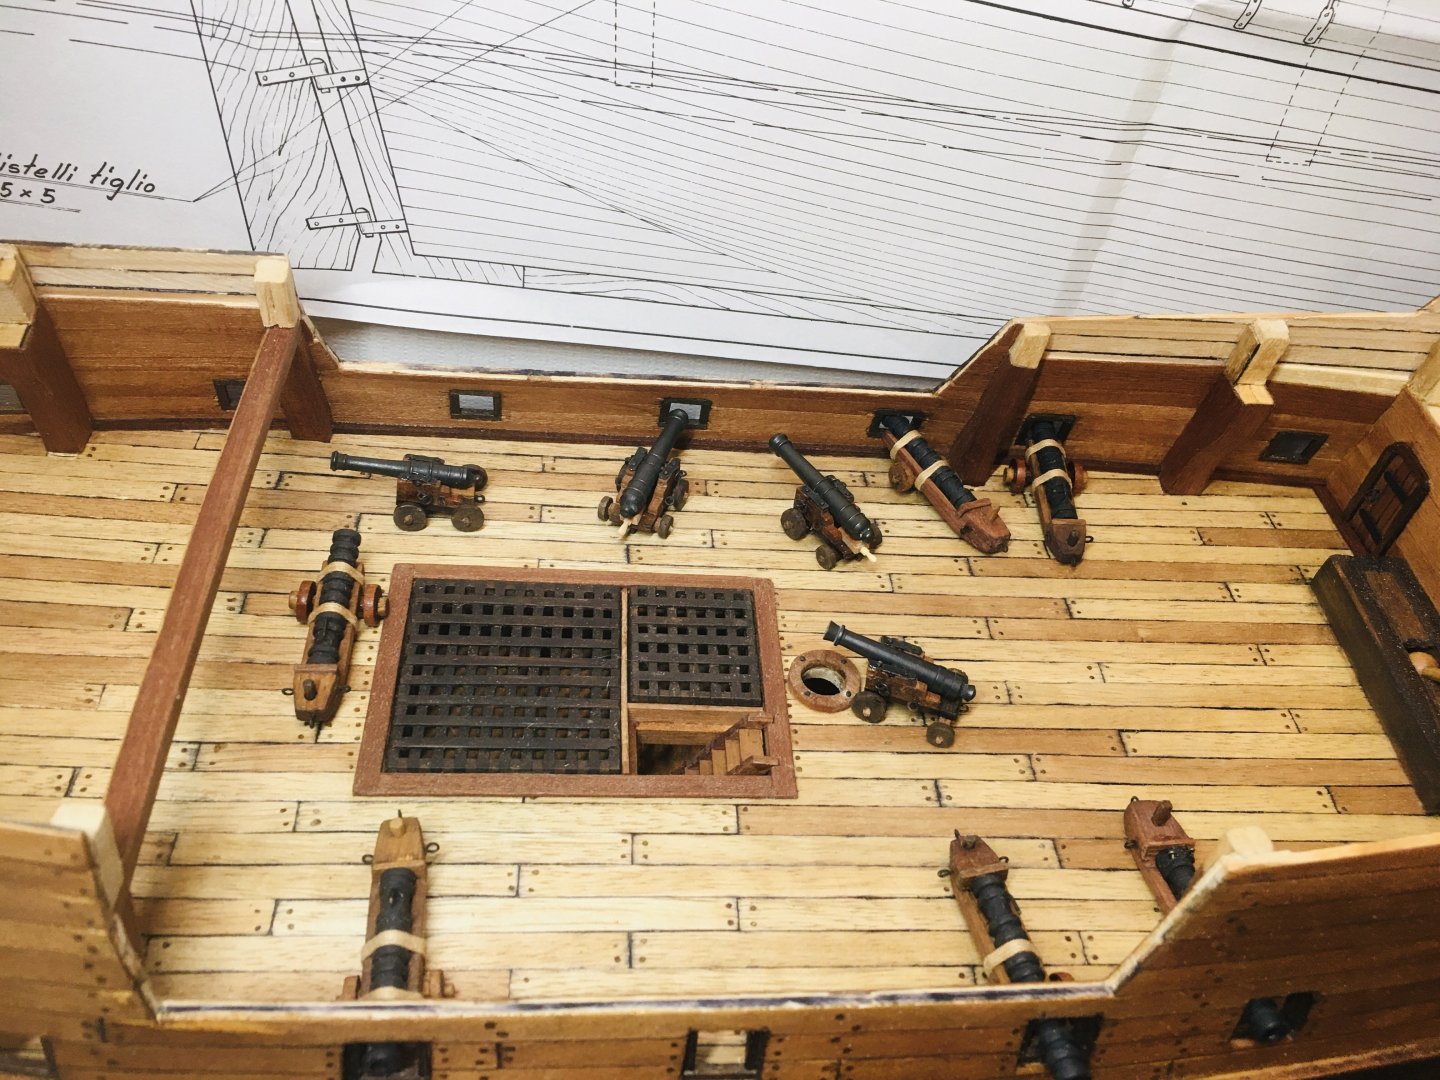
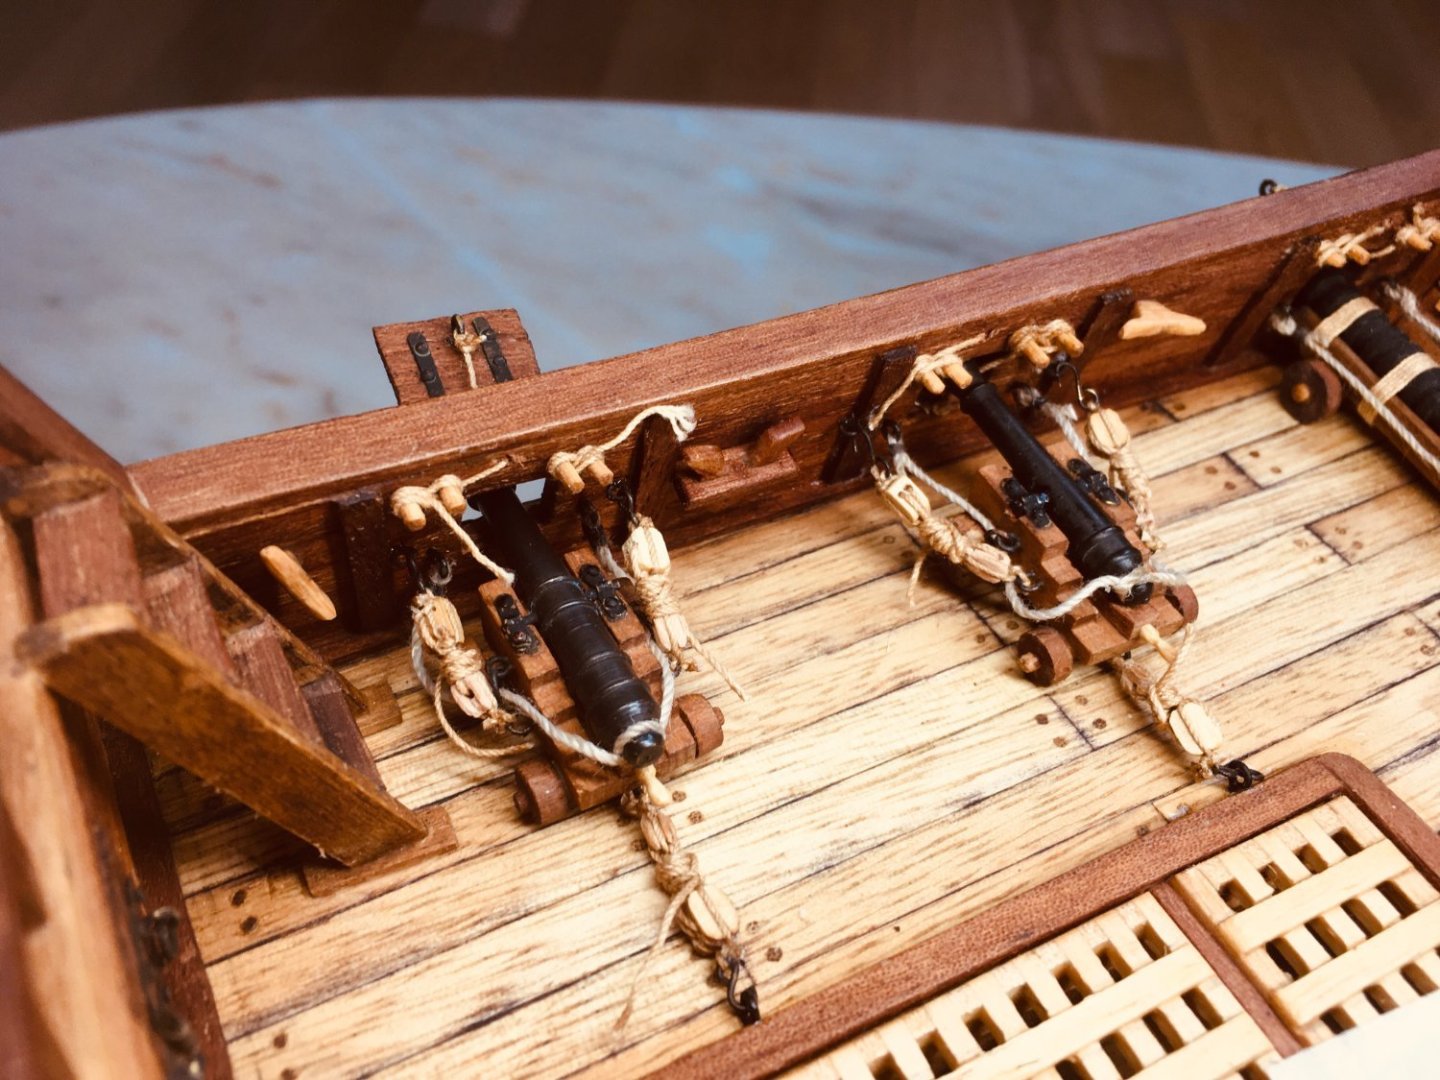
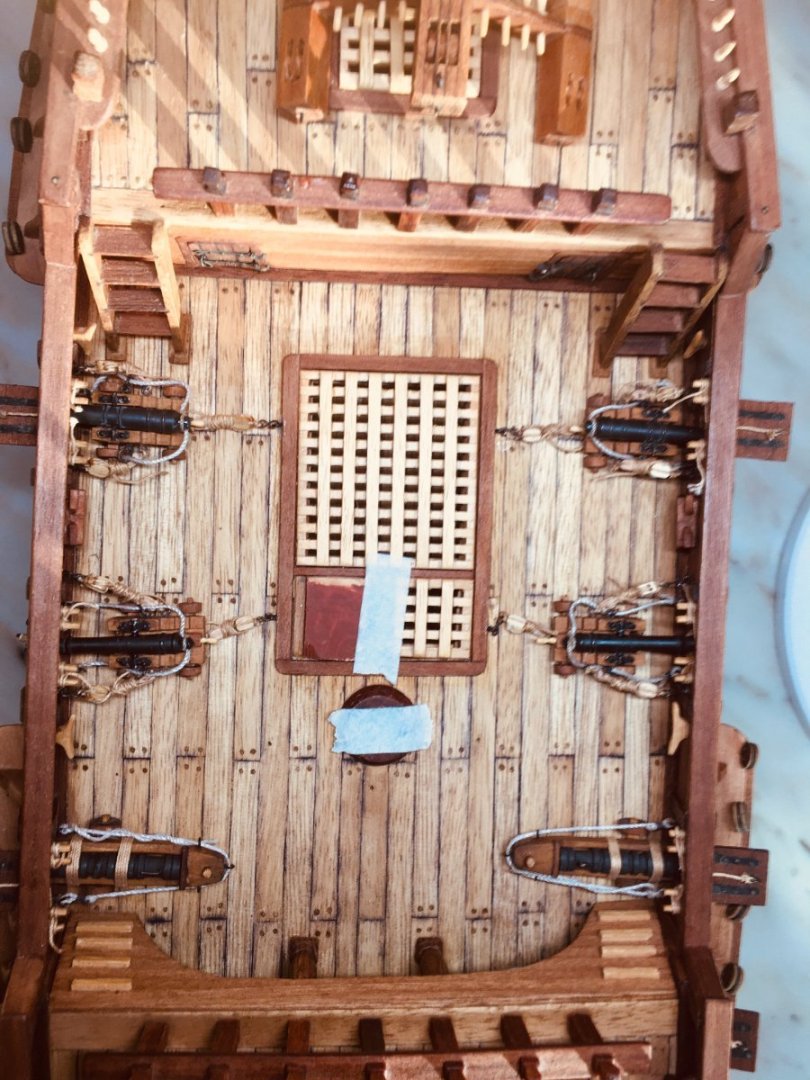
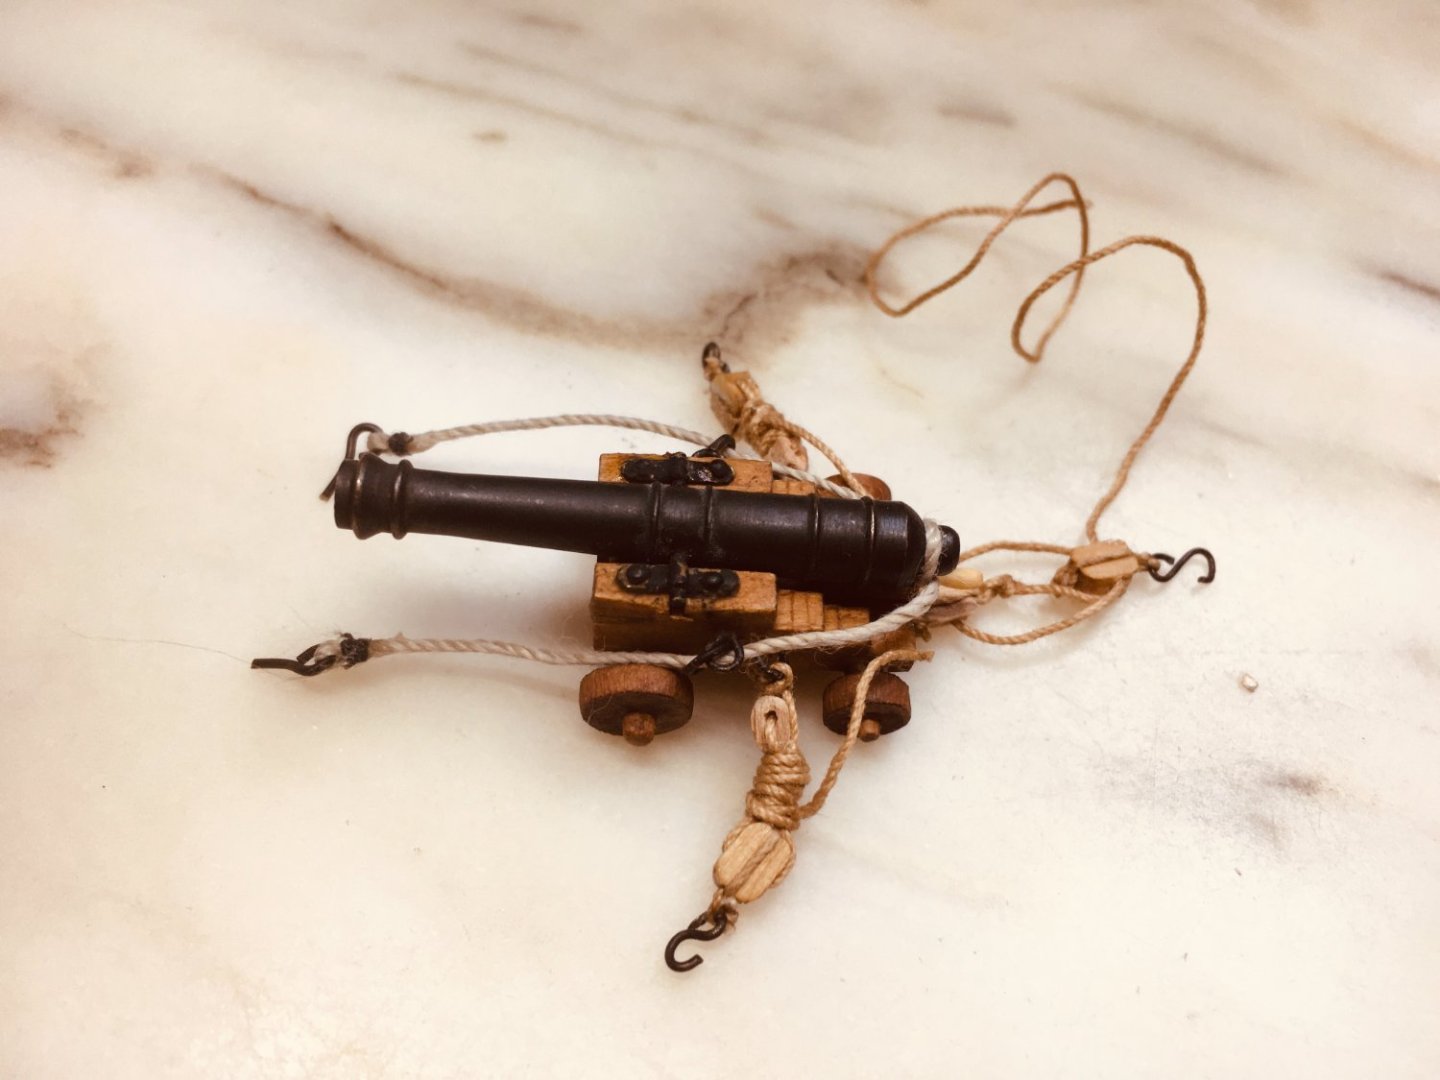
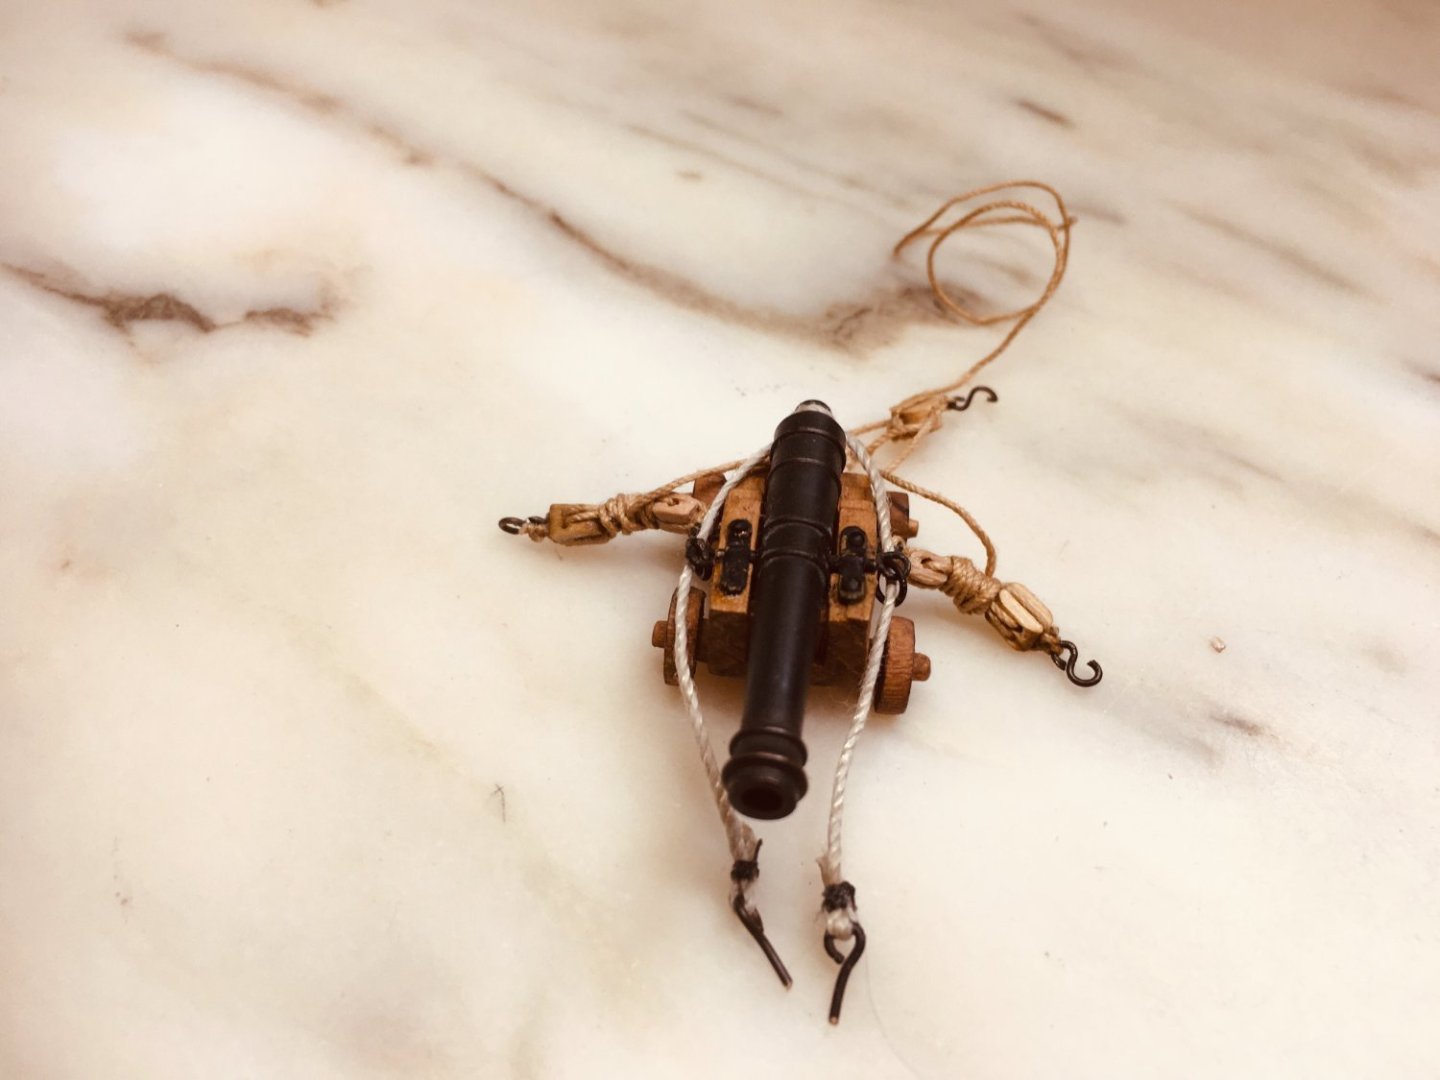
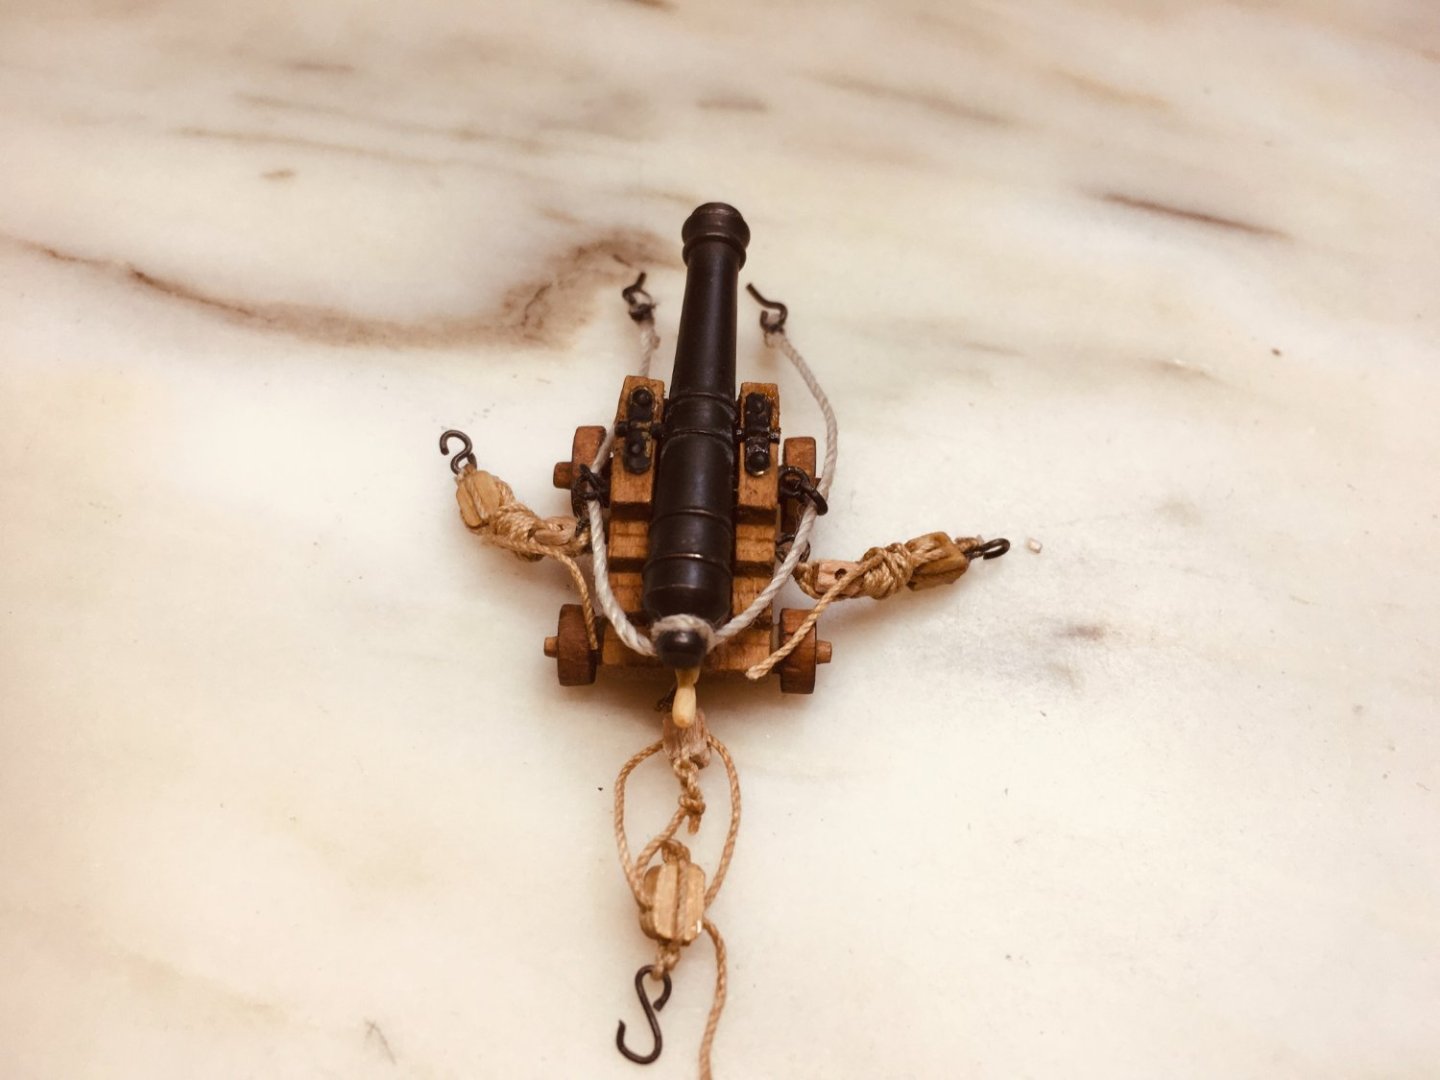
The cannons are all rigged and fixed in place.


-
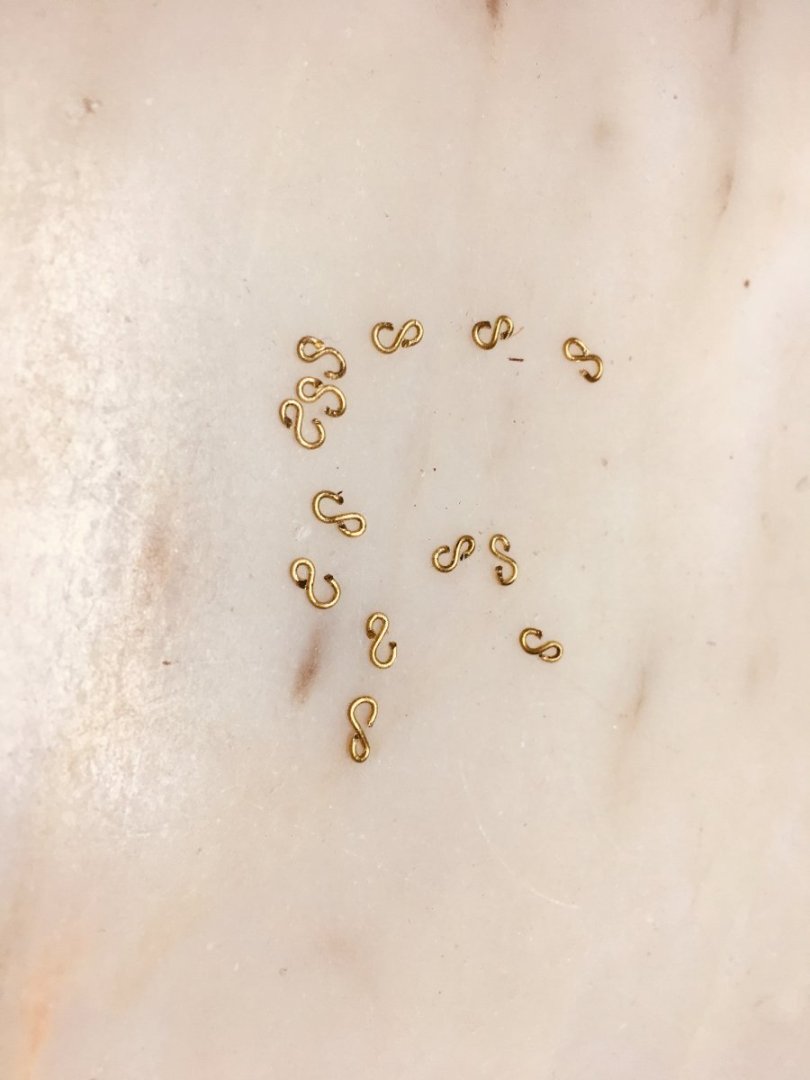
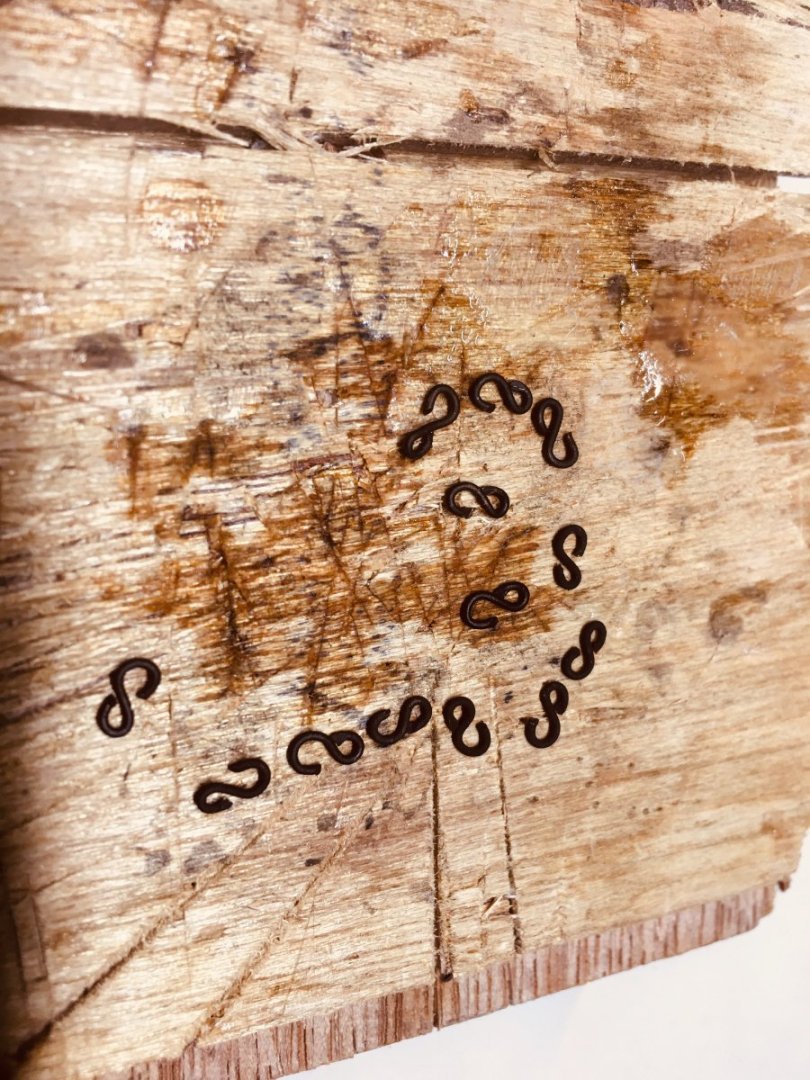
The cannon work begins with single blocks (without hooks) being attached and rigged to the cannon carriage. There will be no hooks attached to these single blocks as there are not enough space to have hooks on boths ends - won't have room for tight rigging. The double blocks that are connected to the inner hull wall and to the other end of the rigging have been constructed with hooks. The demi-culverins are installed in a slightly different configurations - 2 cannons fully deployed, 2 cannons on a stand-by positions.


-
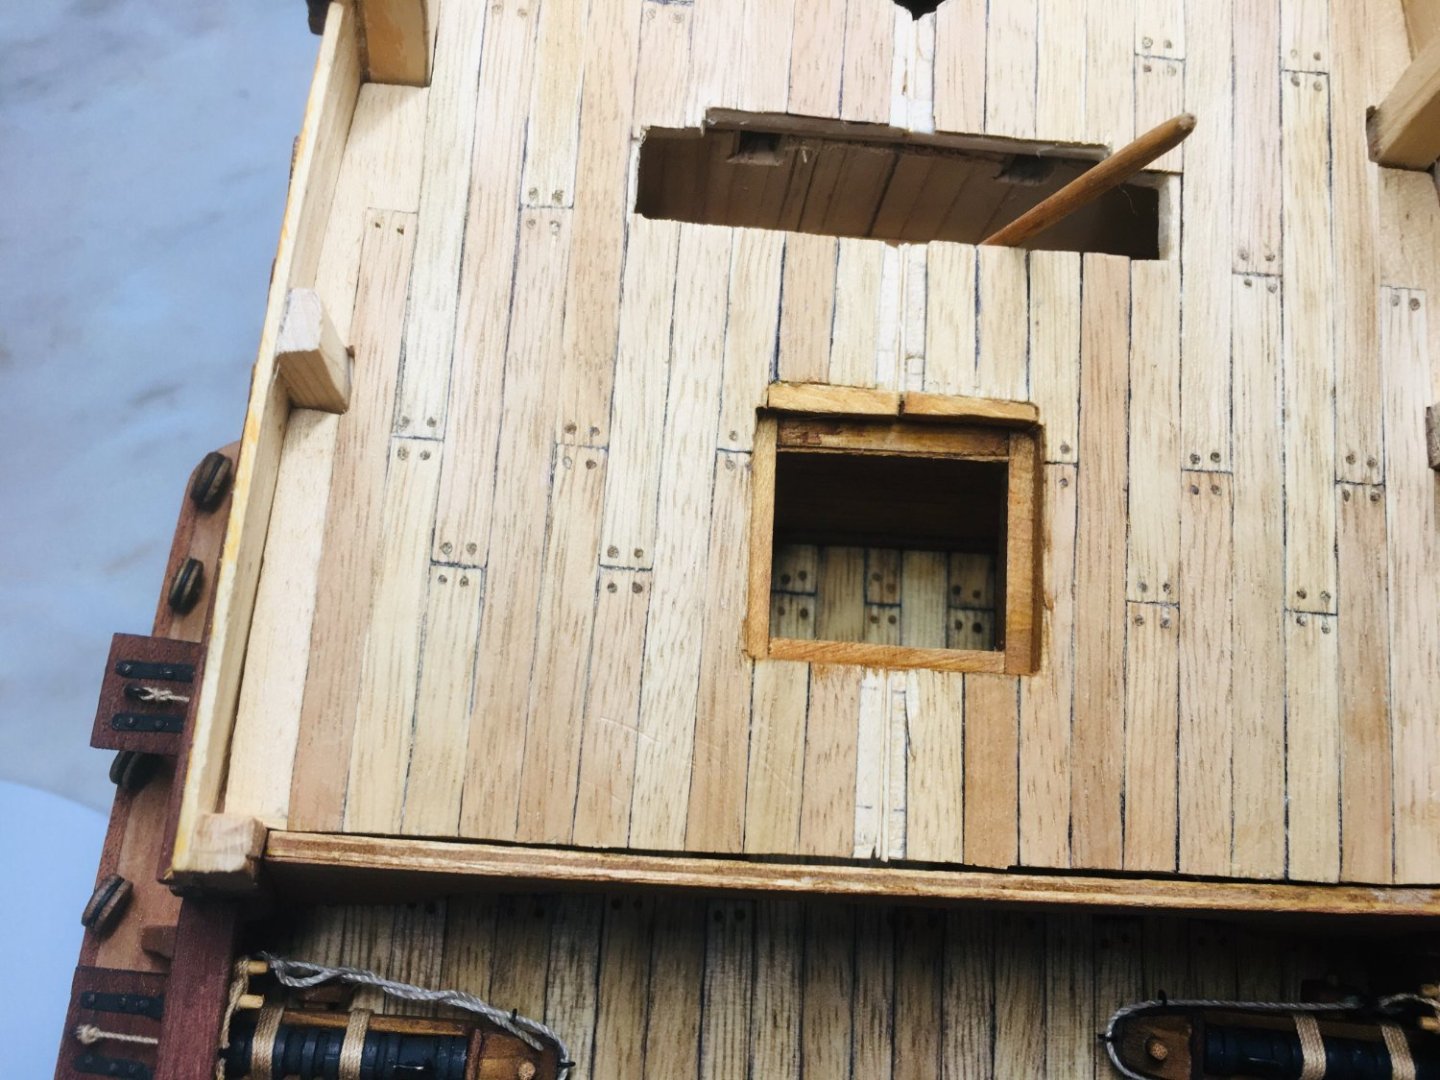
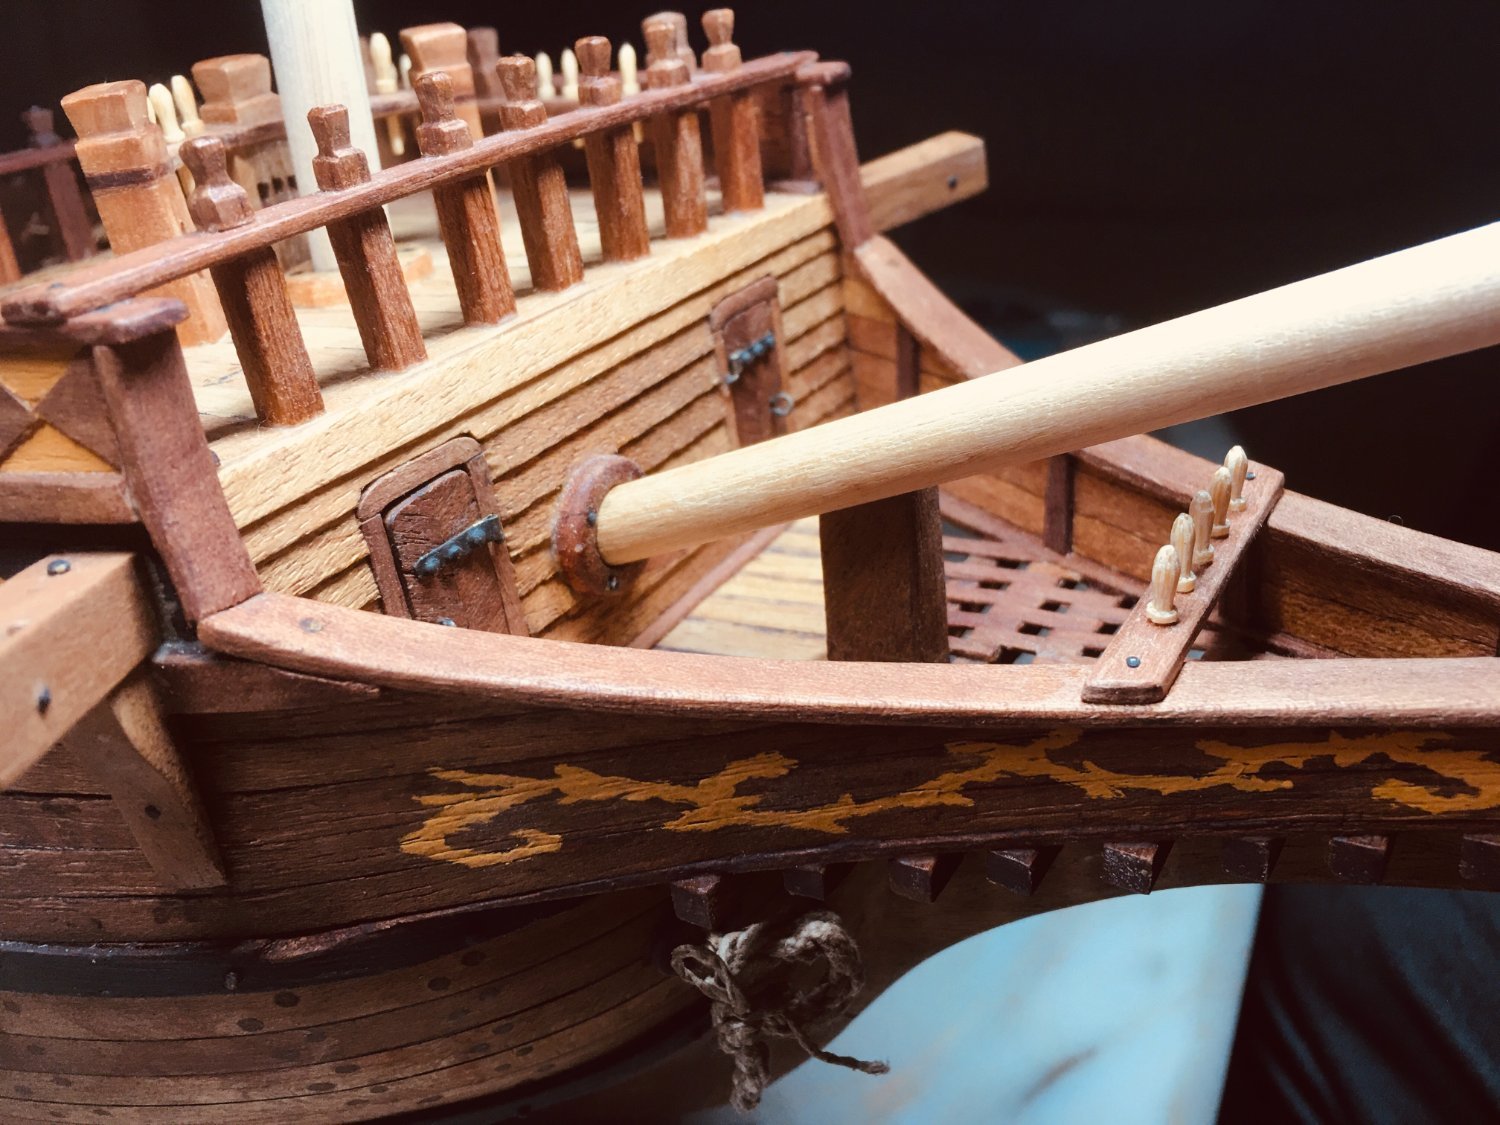
Hello shipmates! I am nearing the end of 1st phase (completion of hull structure) of the GH1 construction. The only areas left for the hull work are the installments of cannons and the main mast knighthead. I have included just a few pictures of the main mast knighthead as there were ample pictures presented during the fore mast knighthead construction. The main mast knightheads are not fixed to the deck as final fixing to the deck will be done after the cannons are all installed.


-
Thanks very much, Patrick!
-
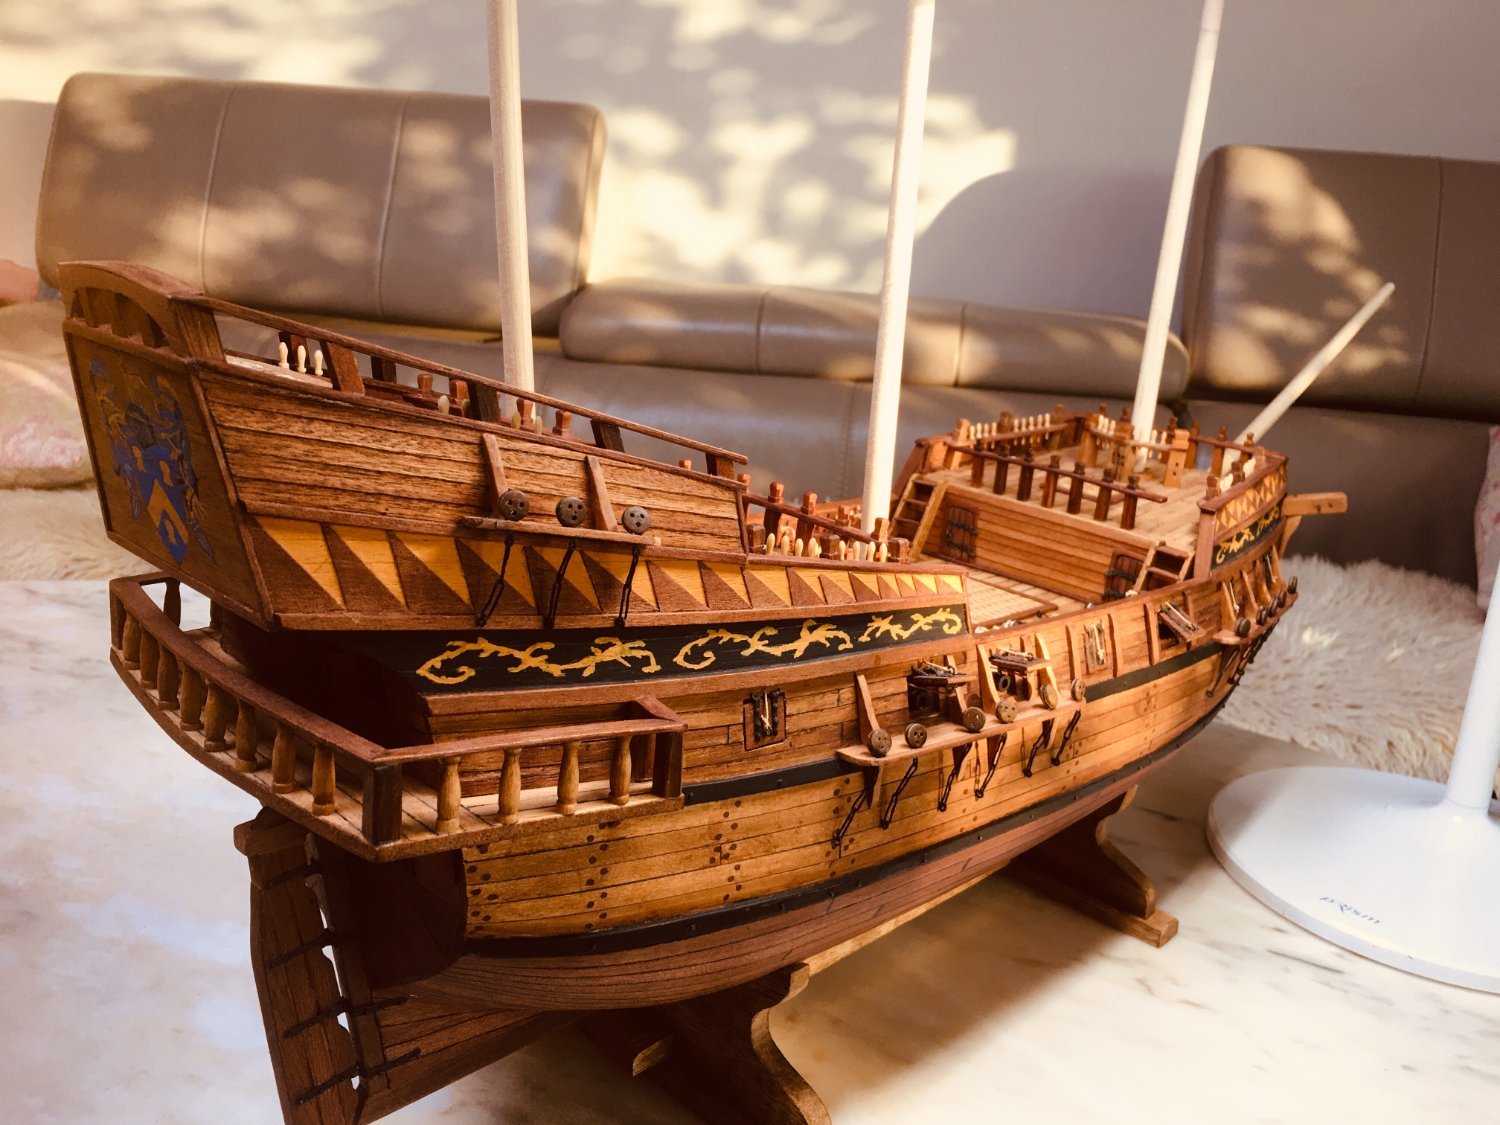
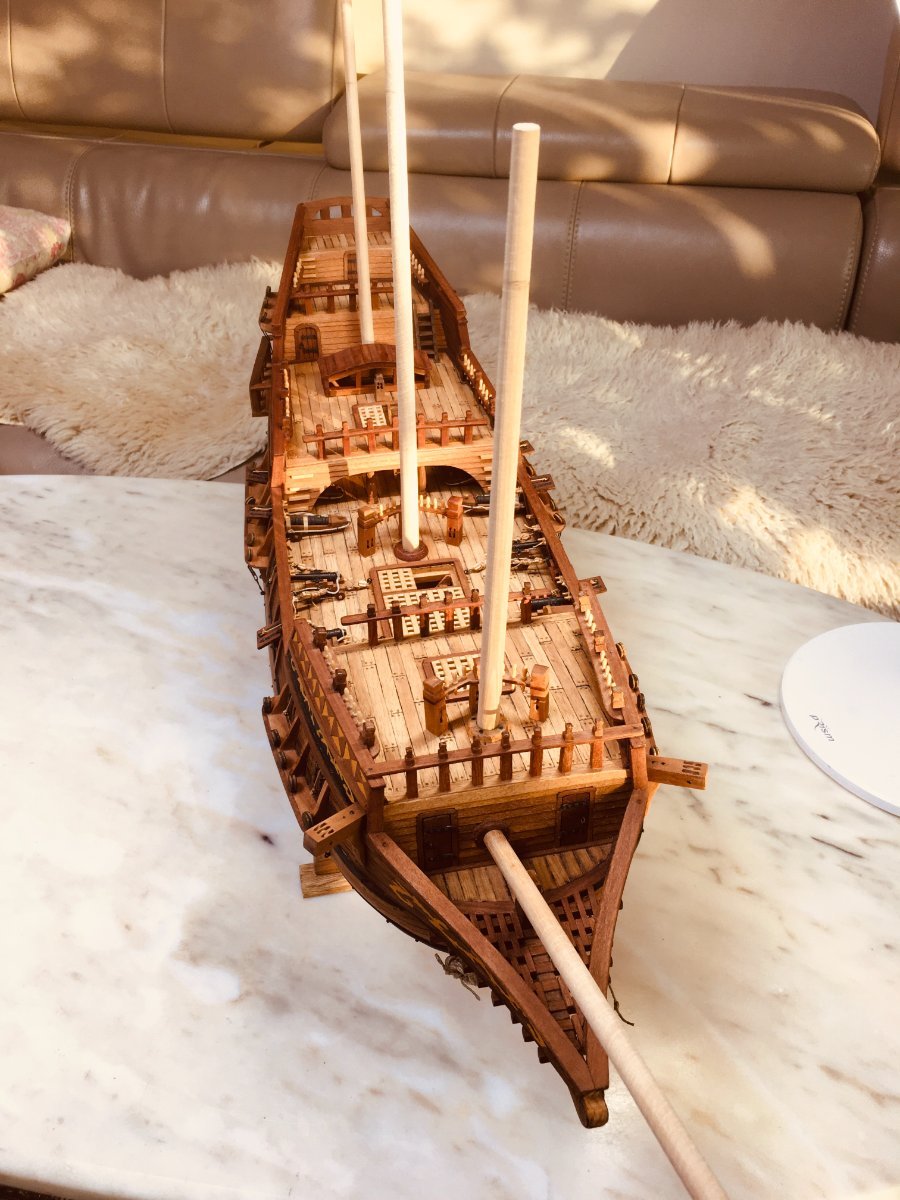
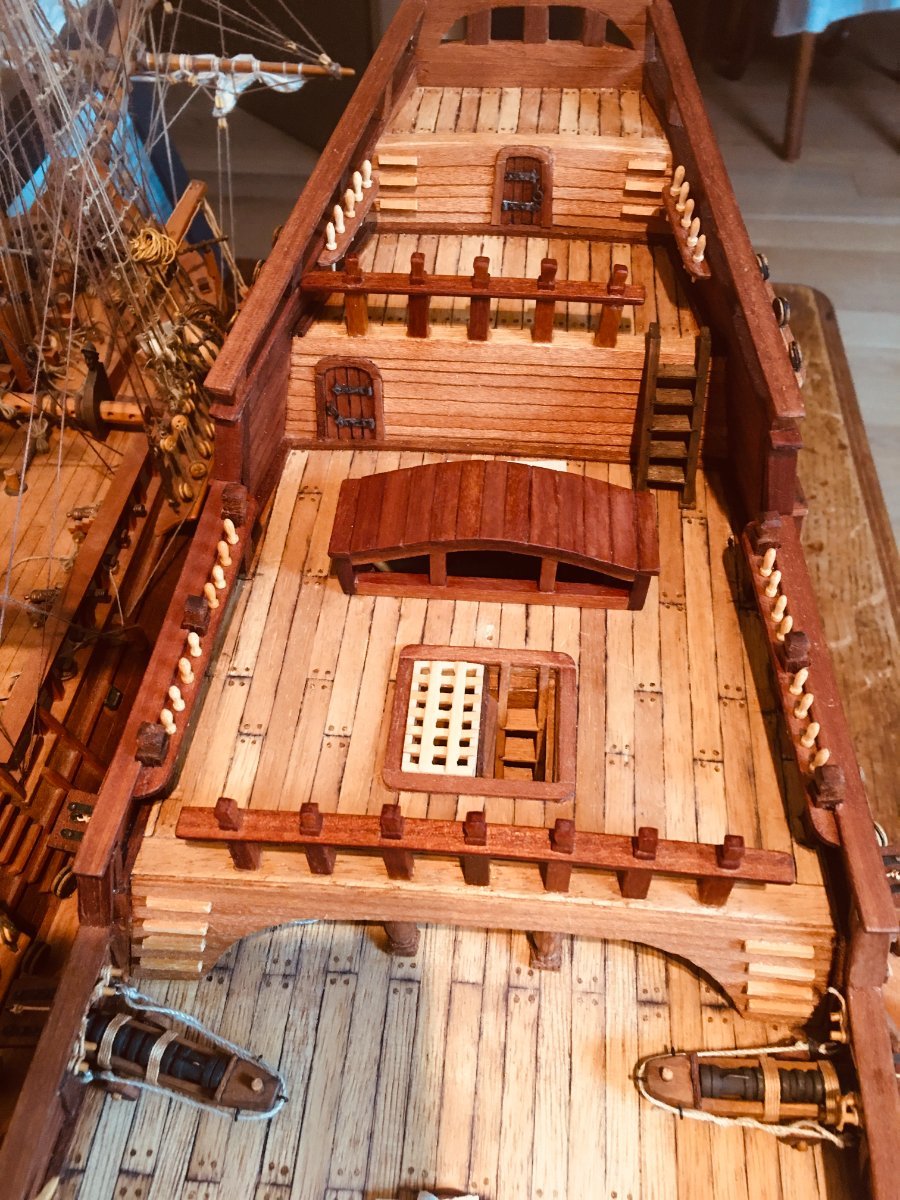
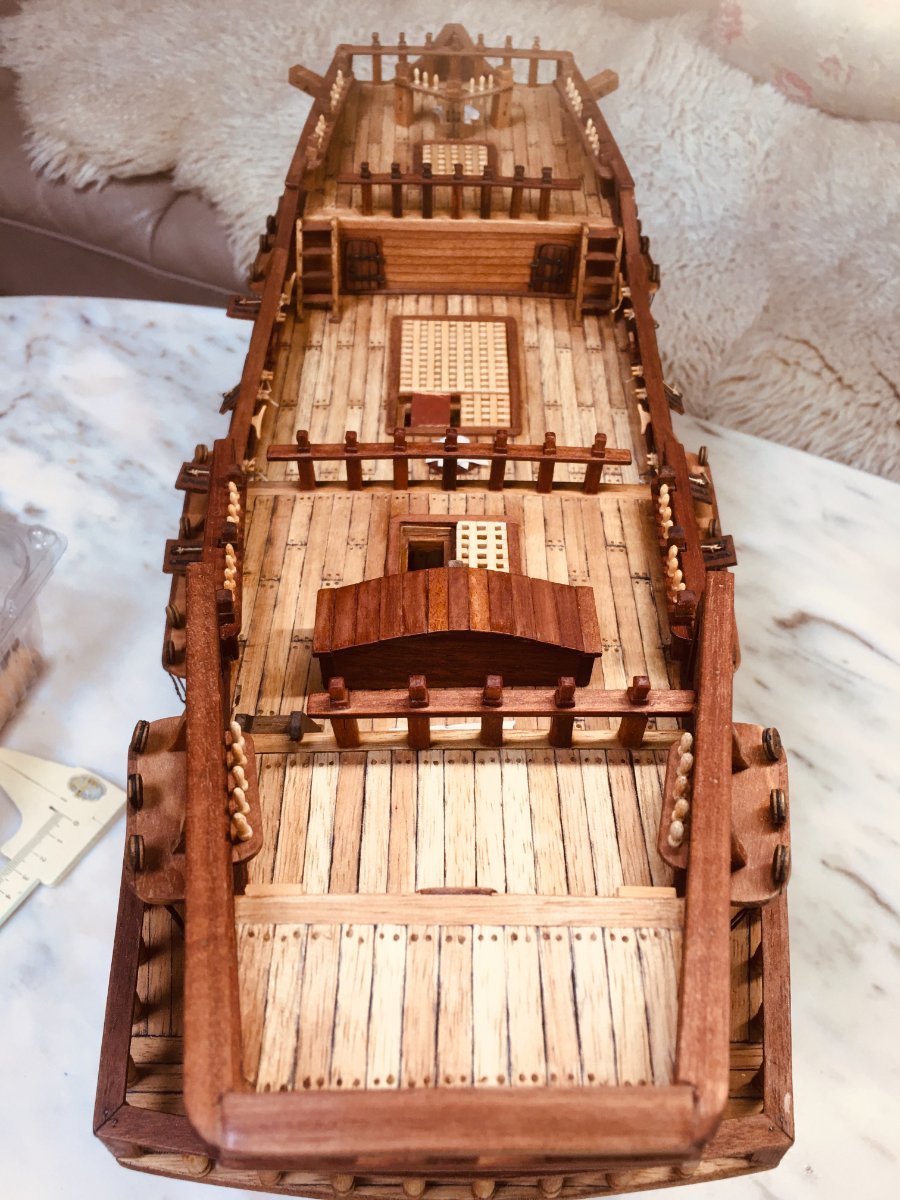
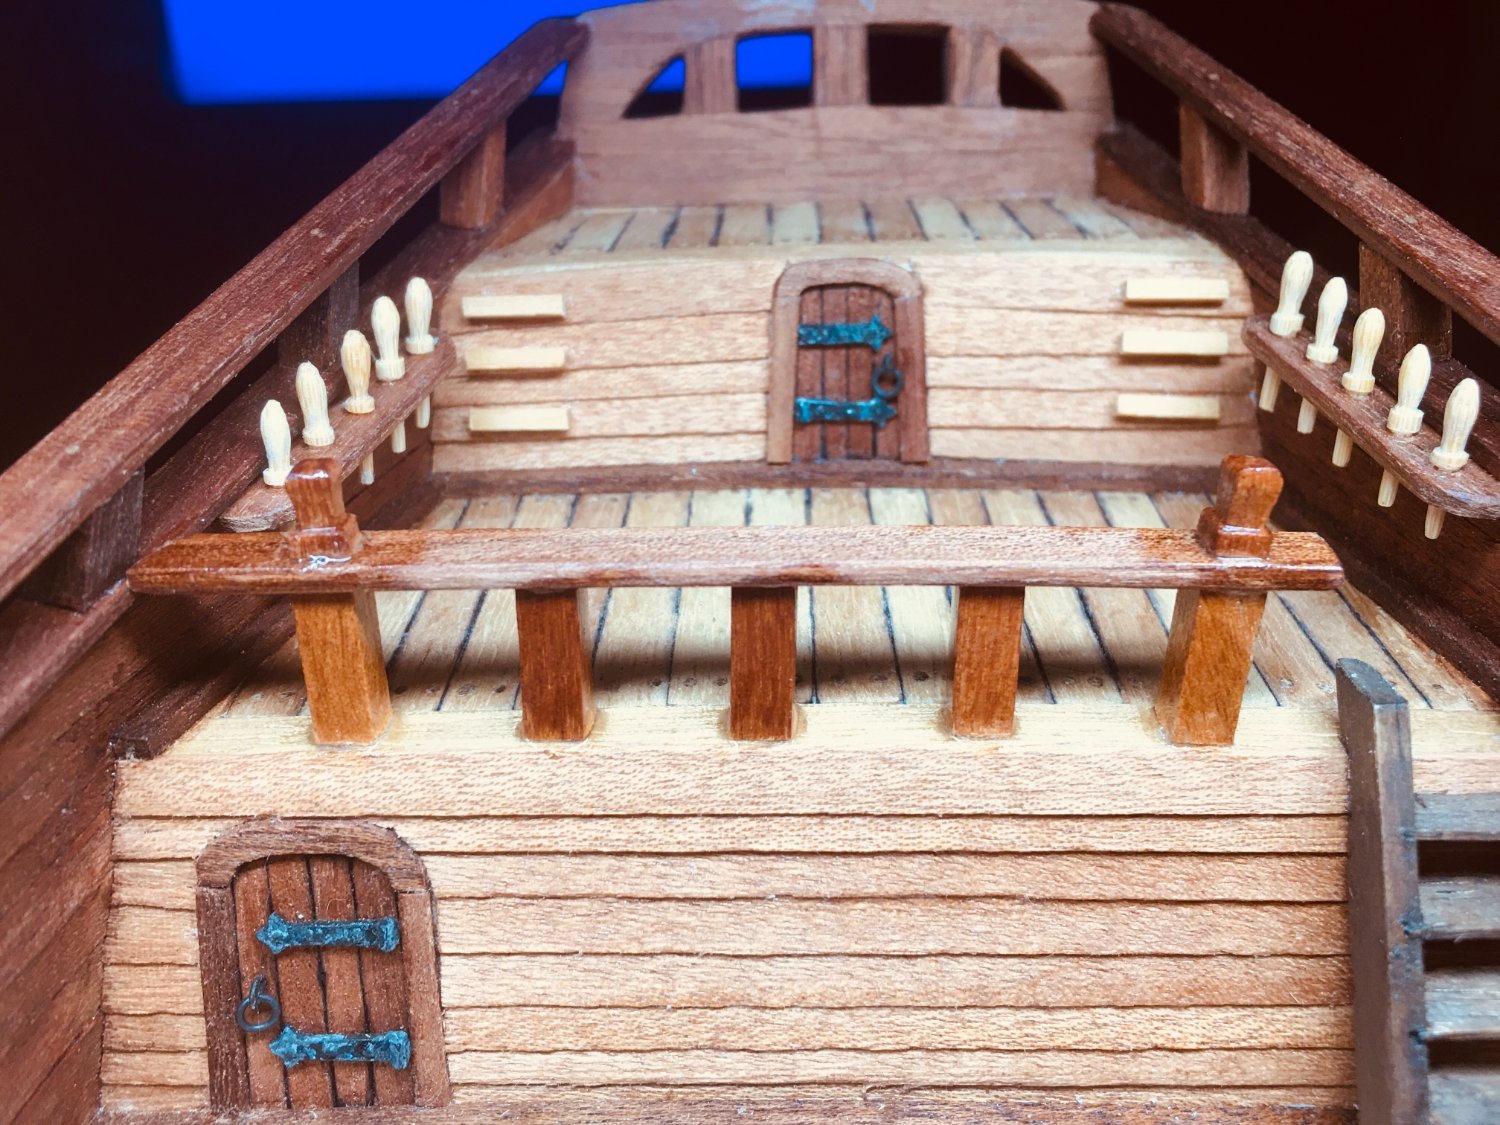
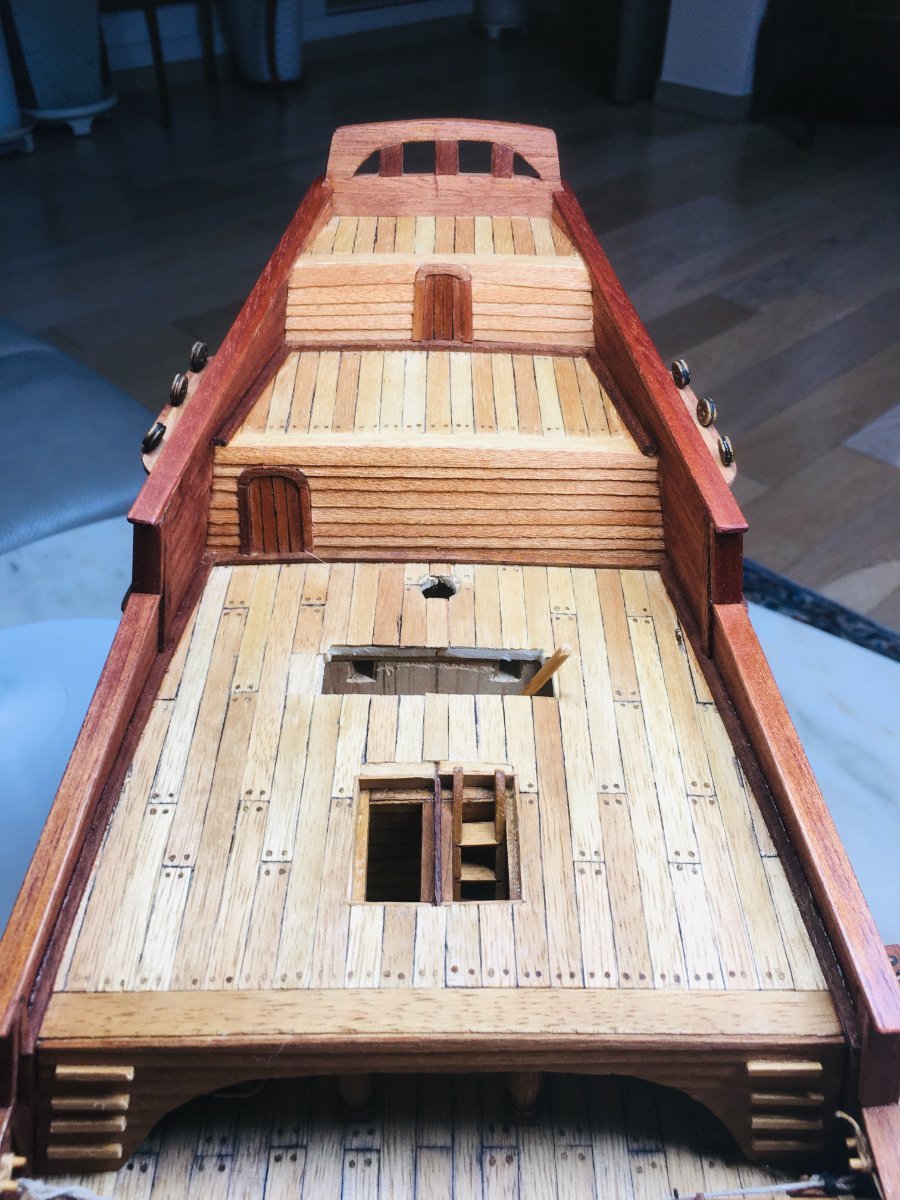
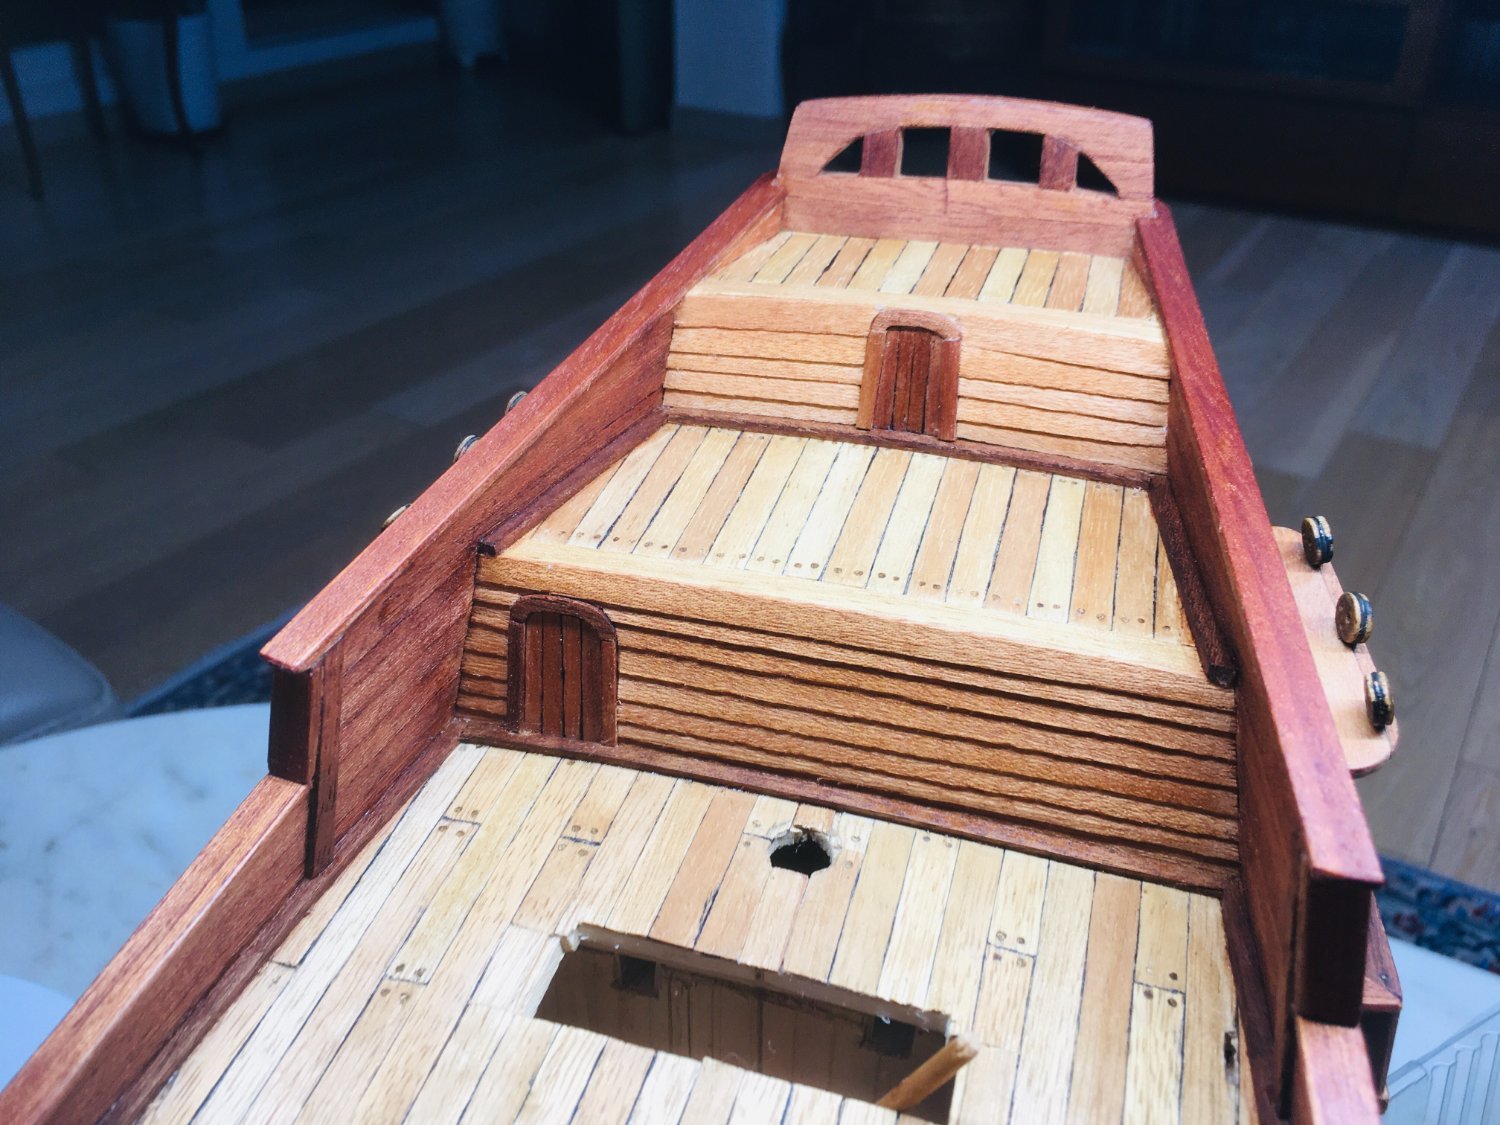
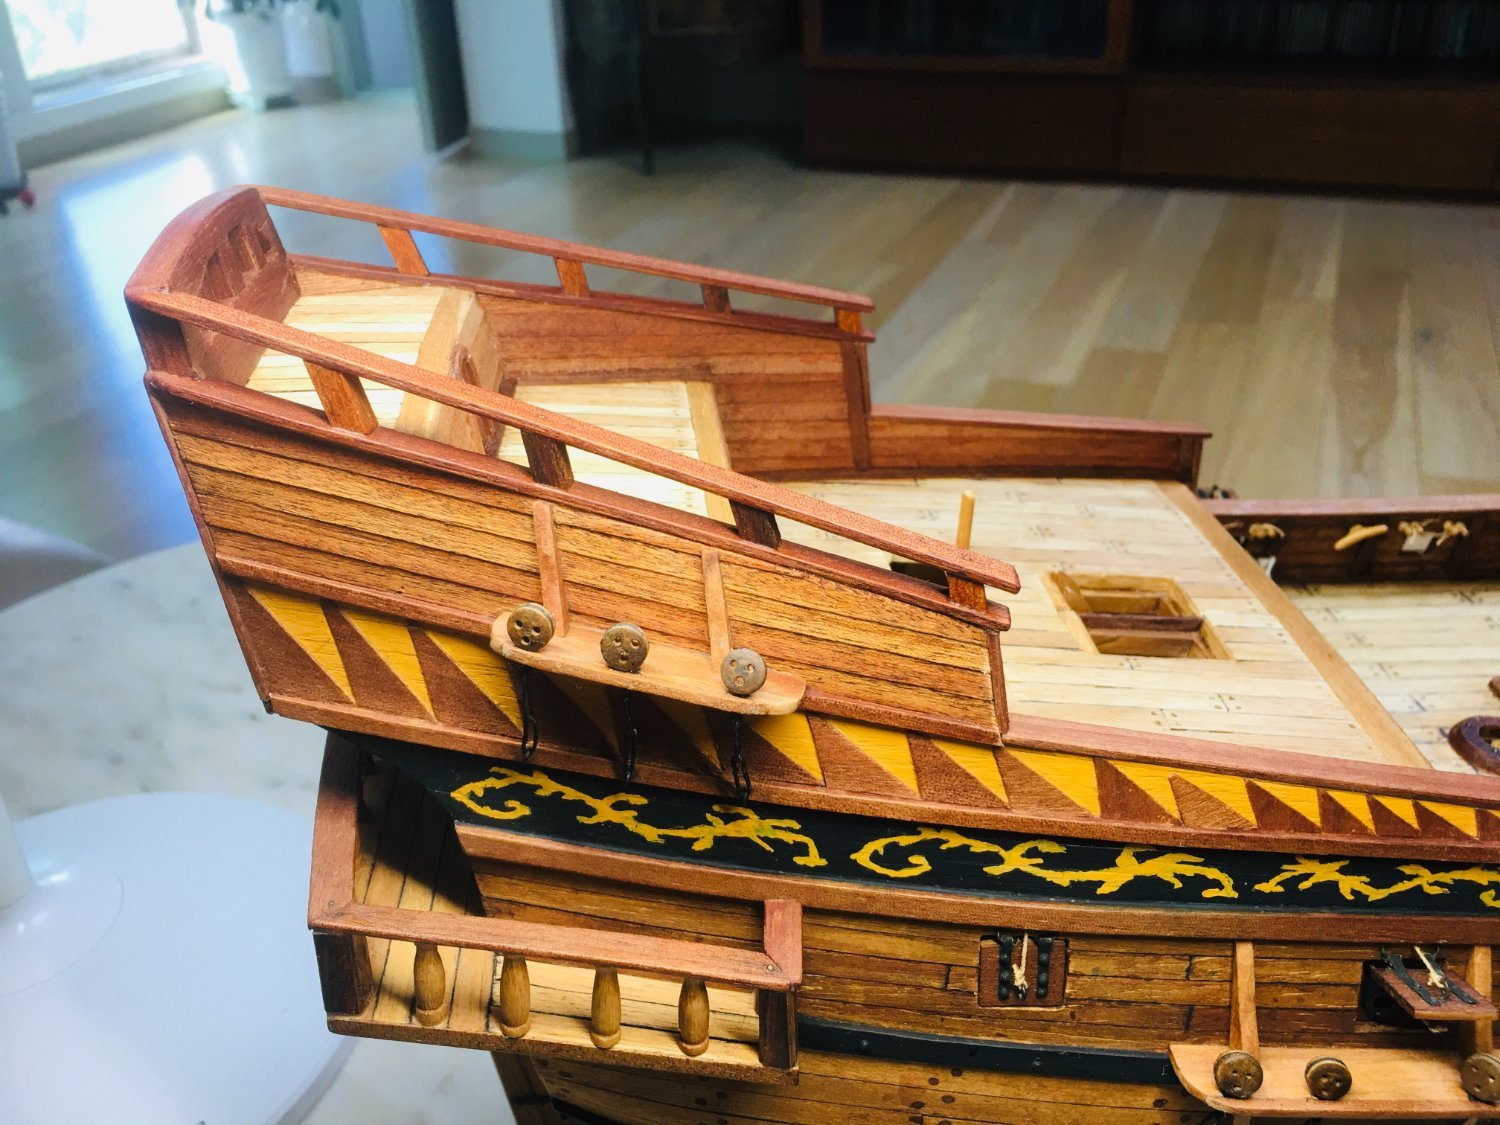
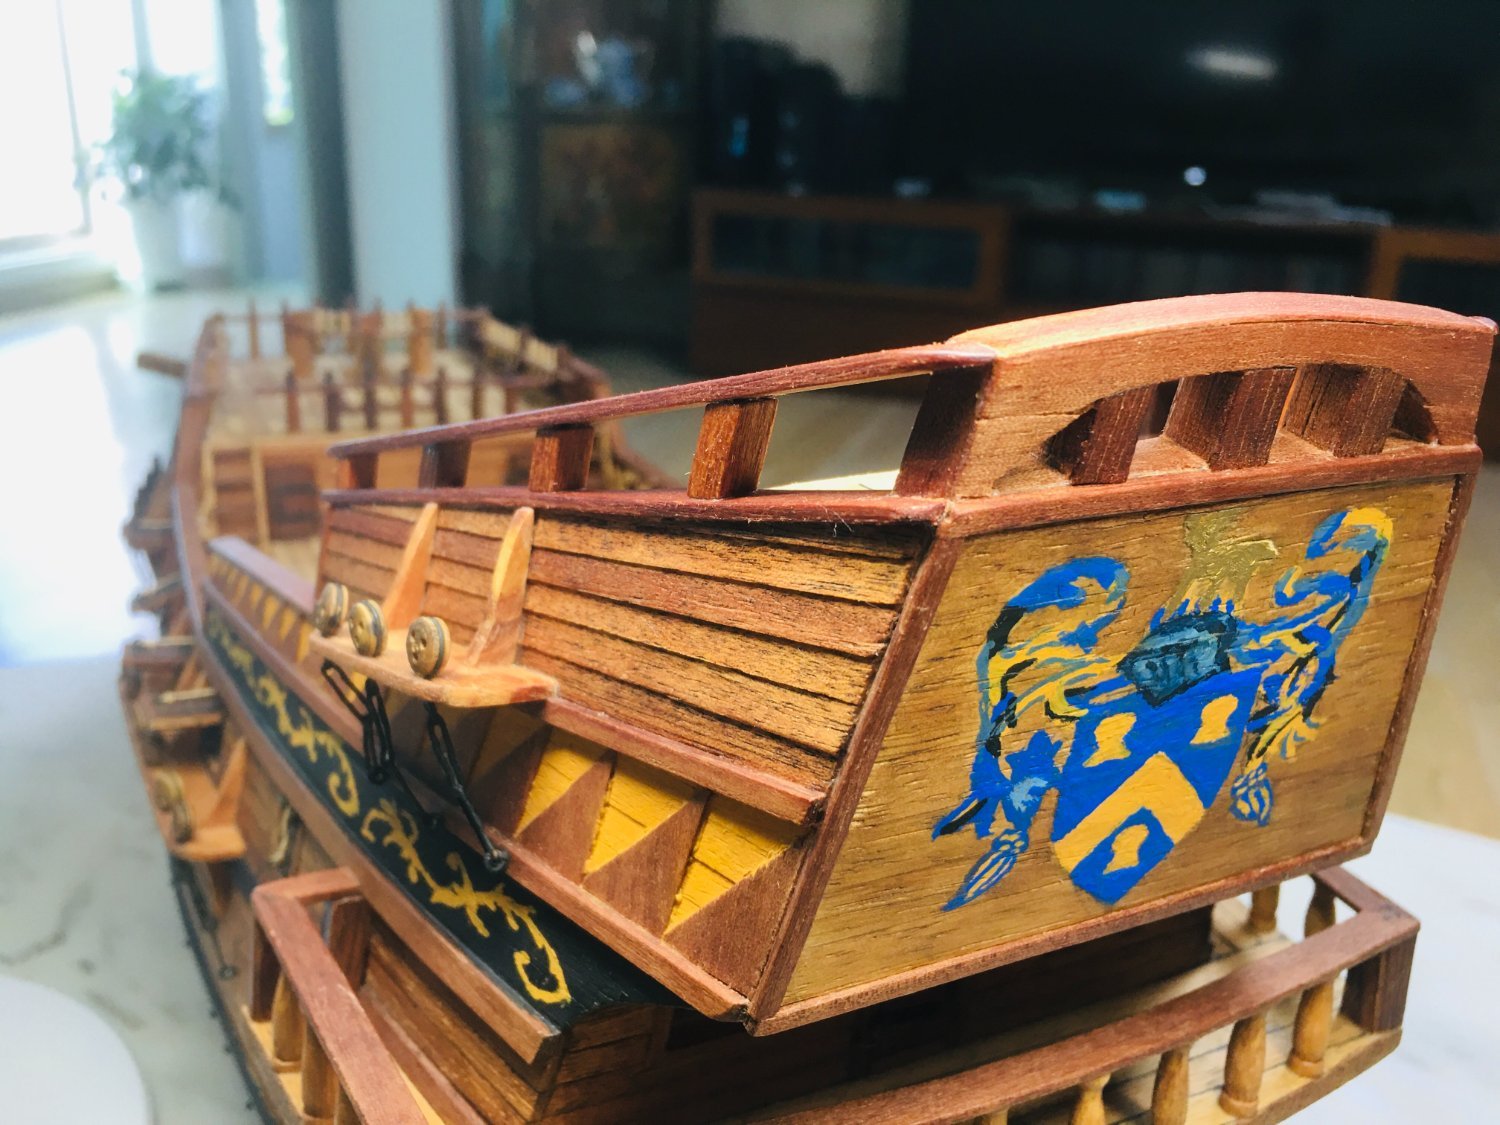
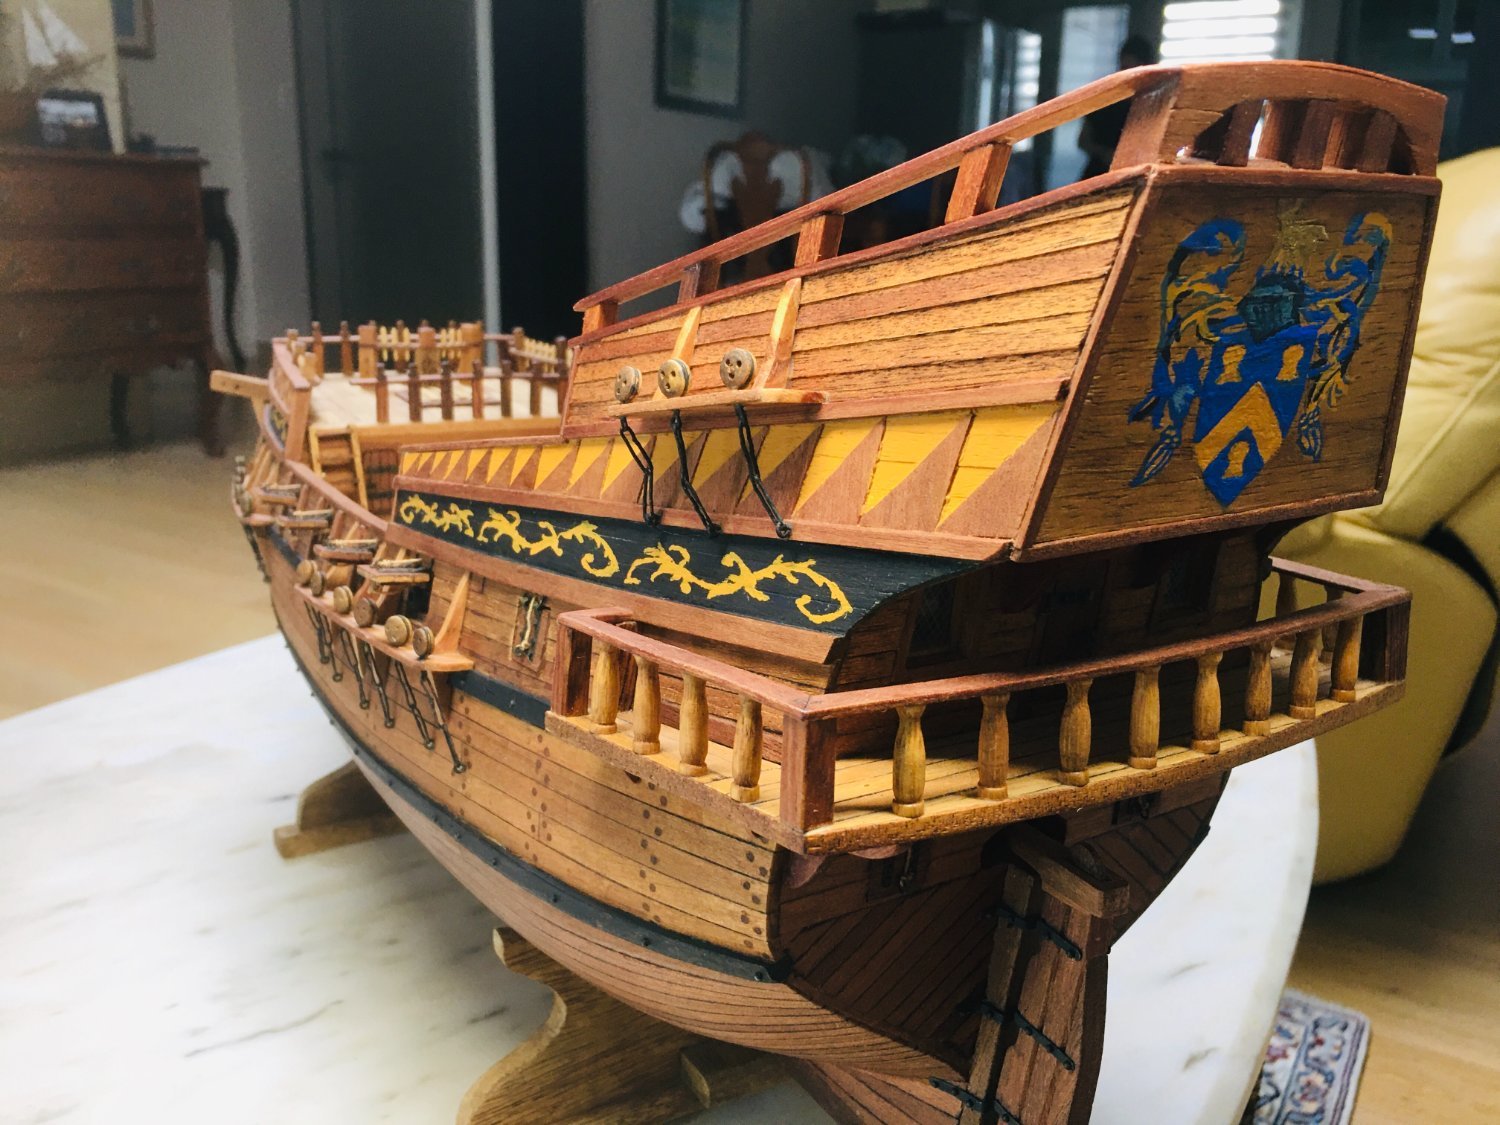
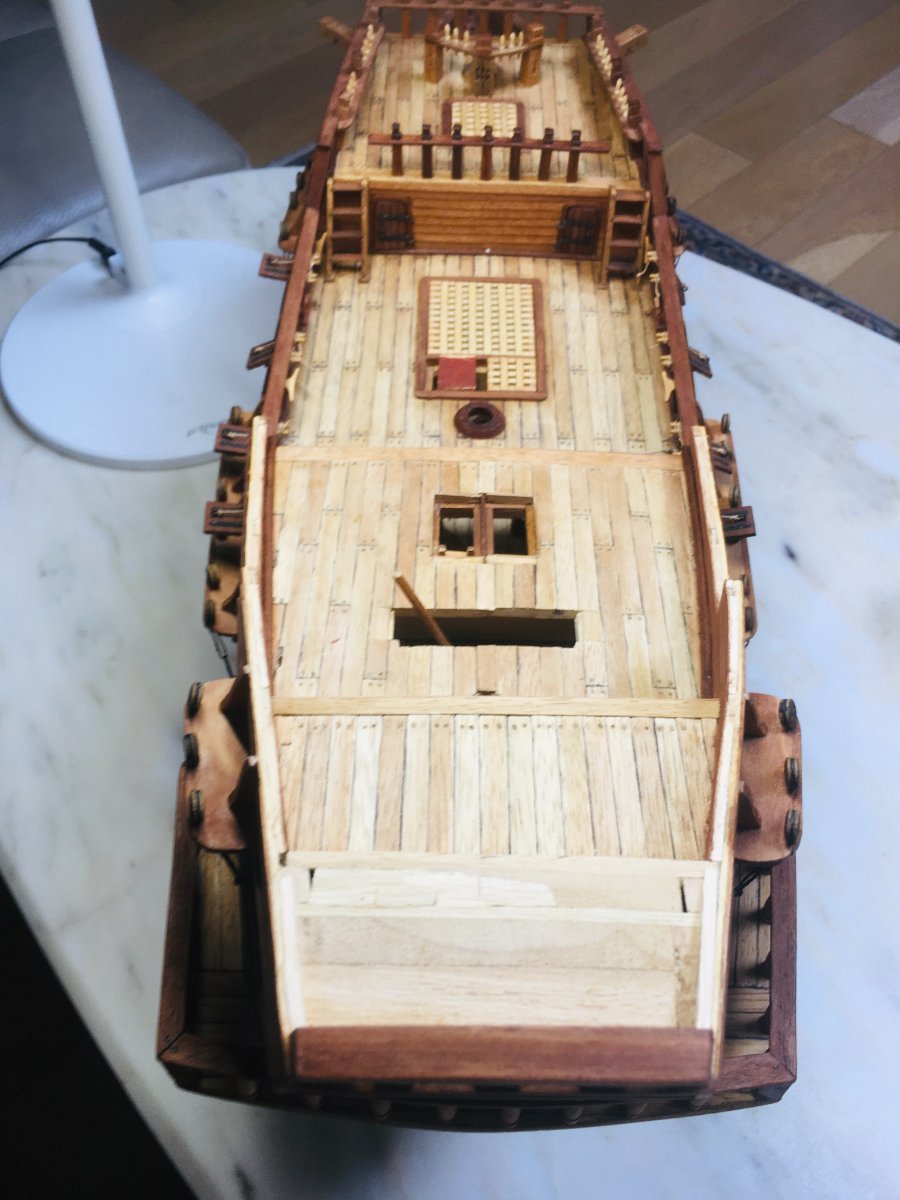
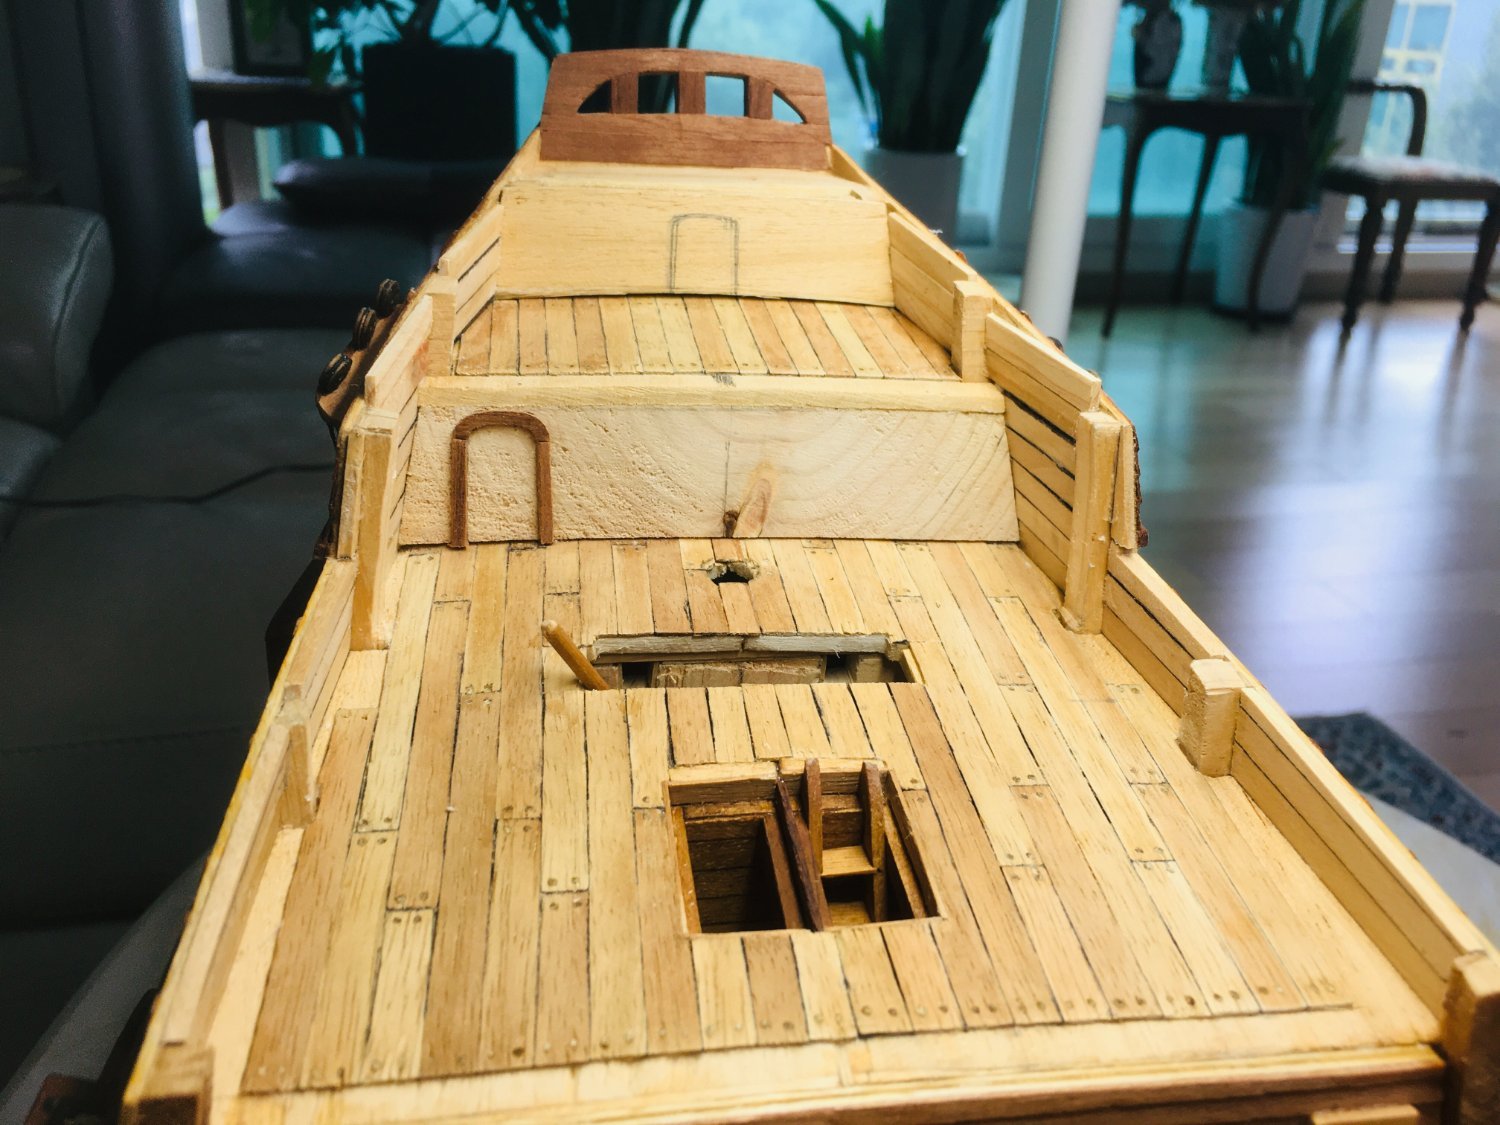
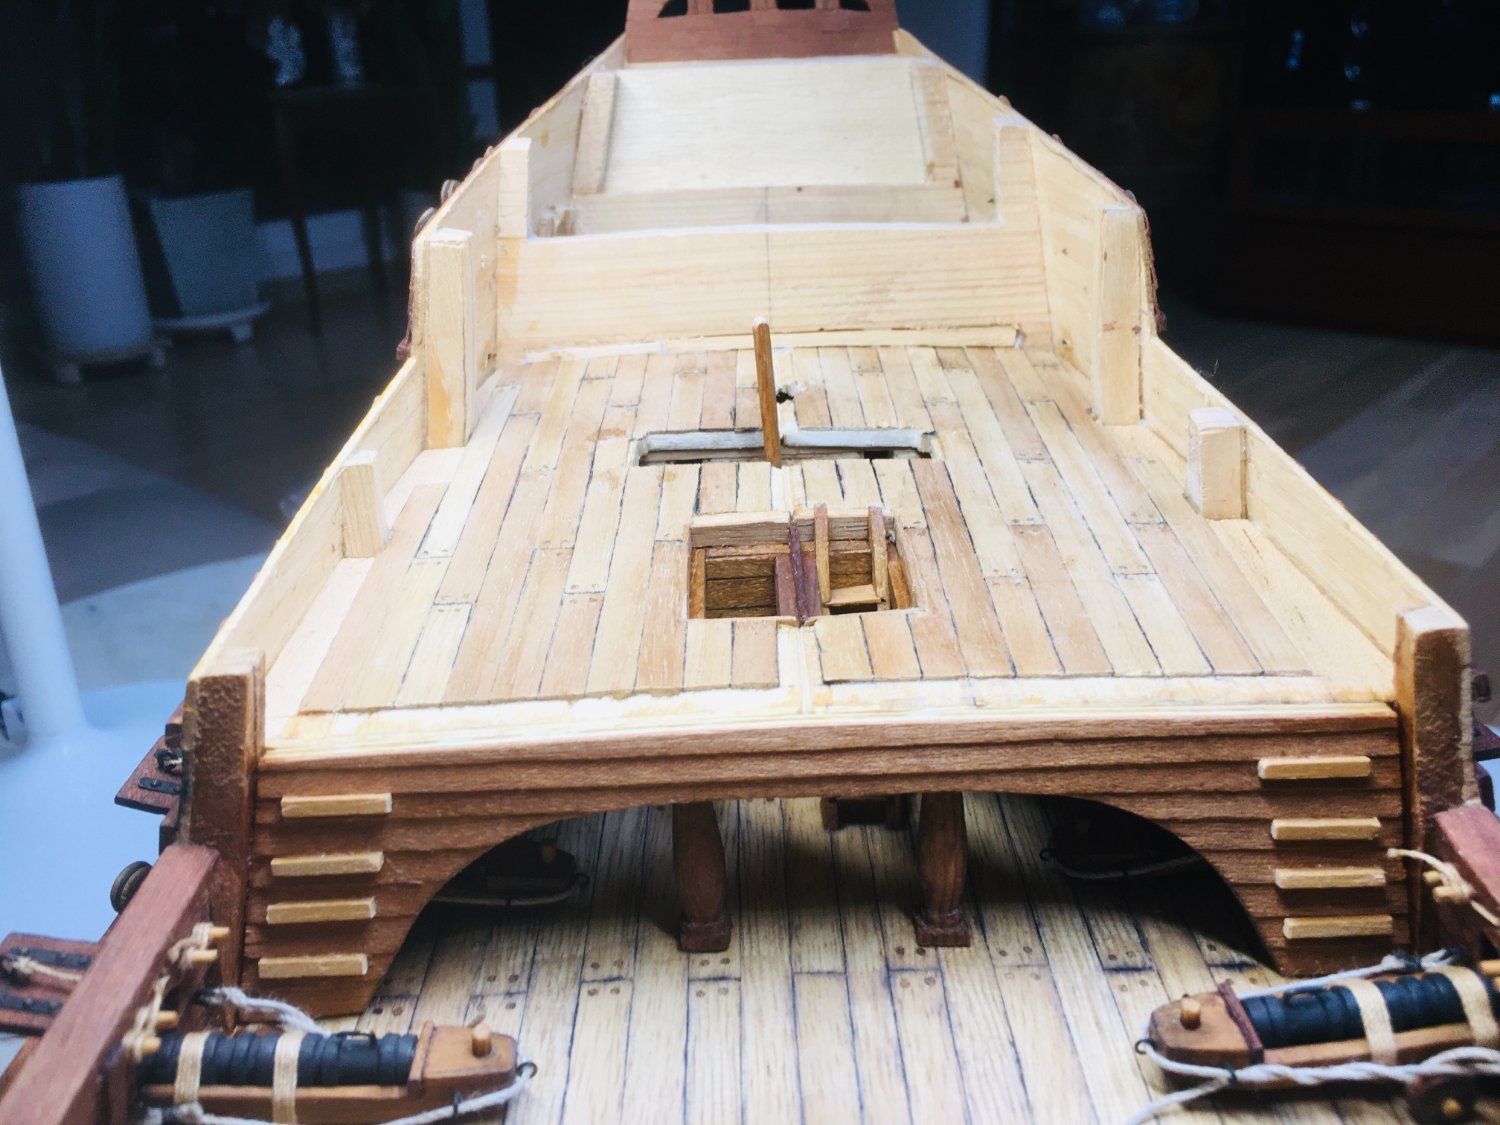
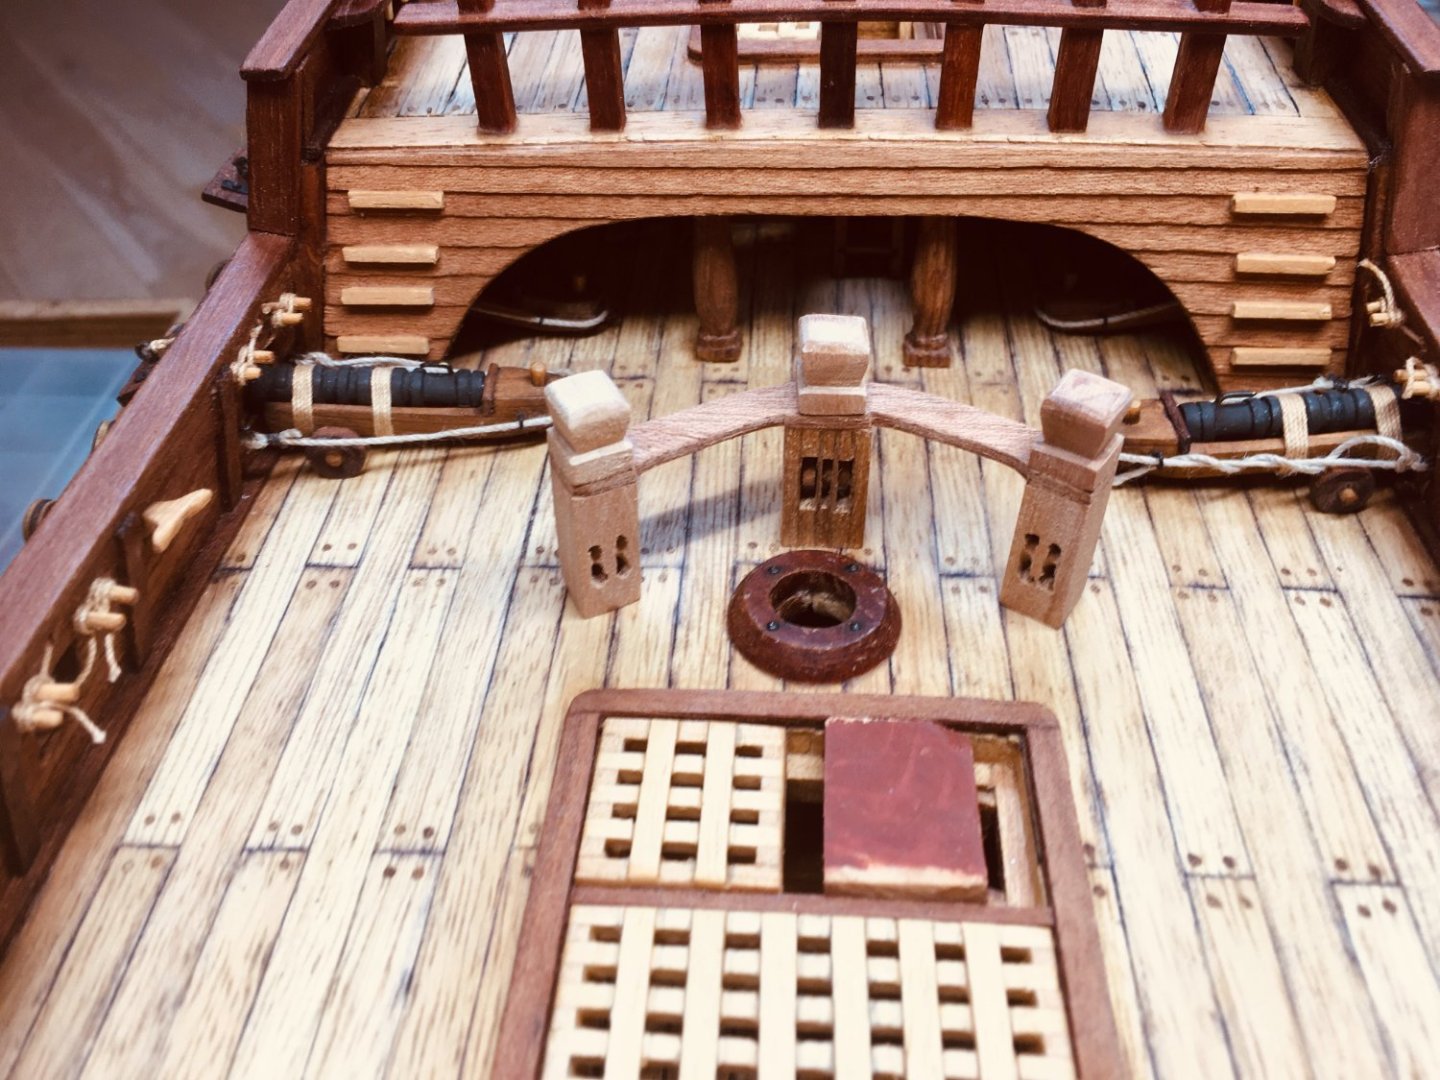
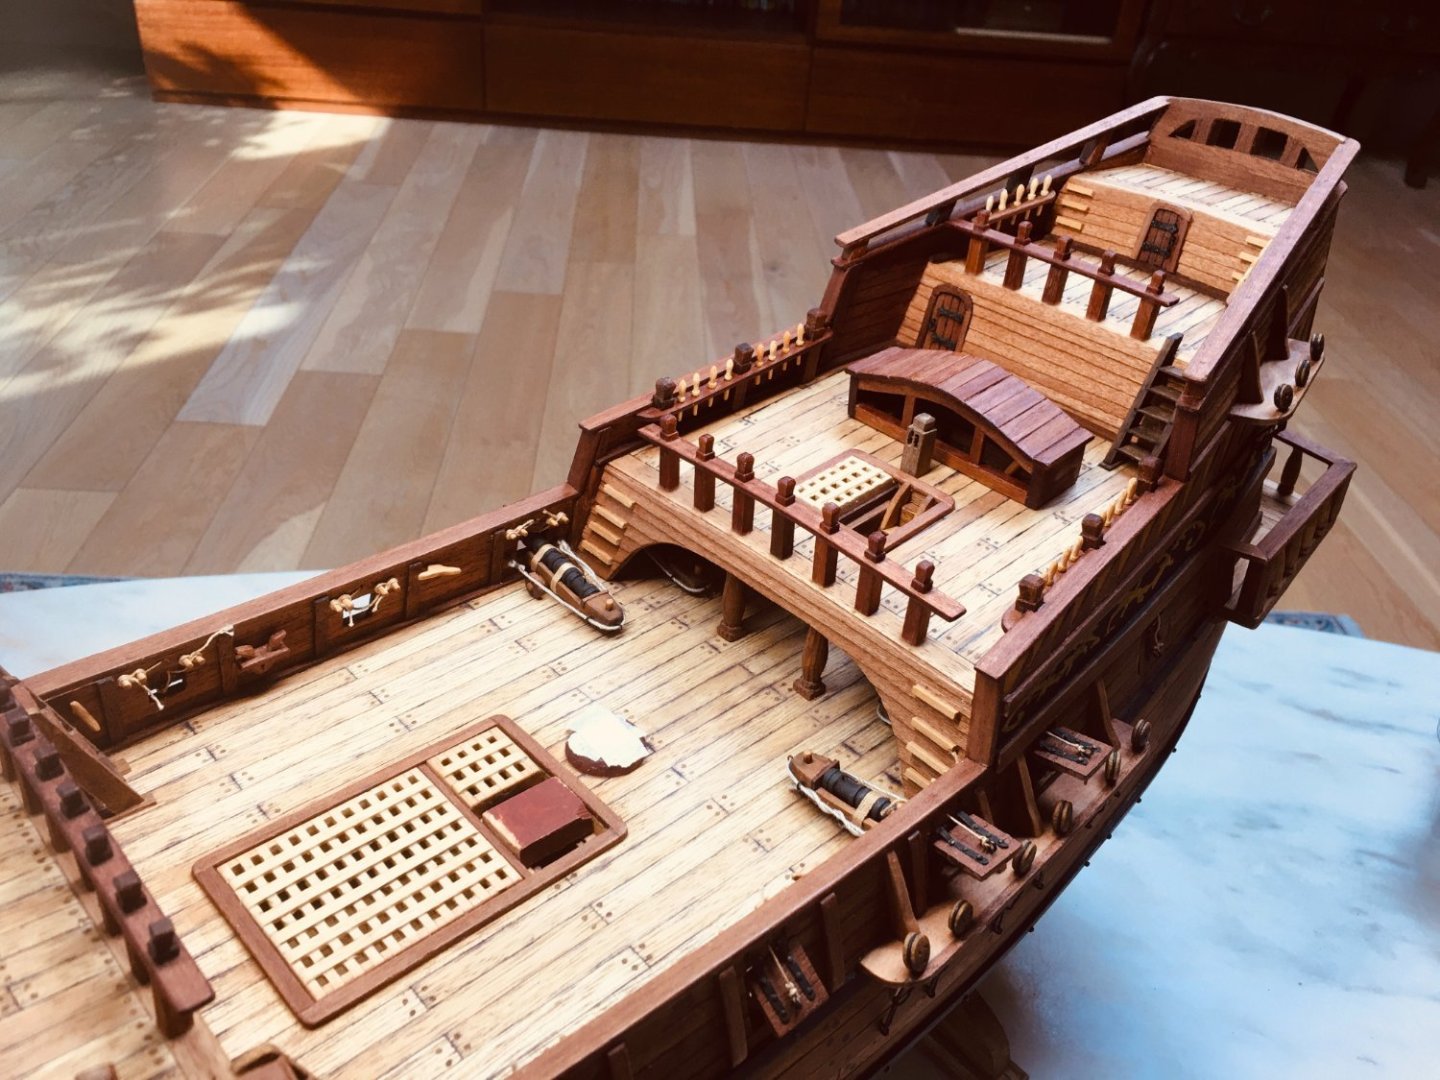
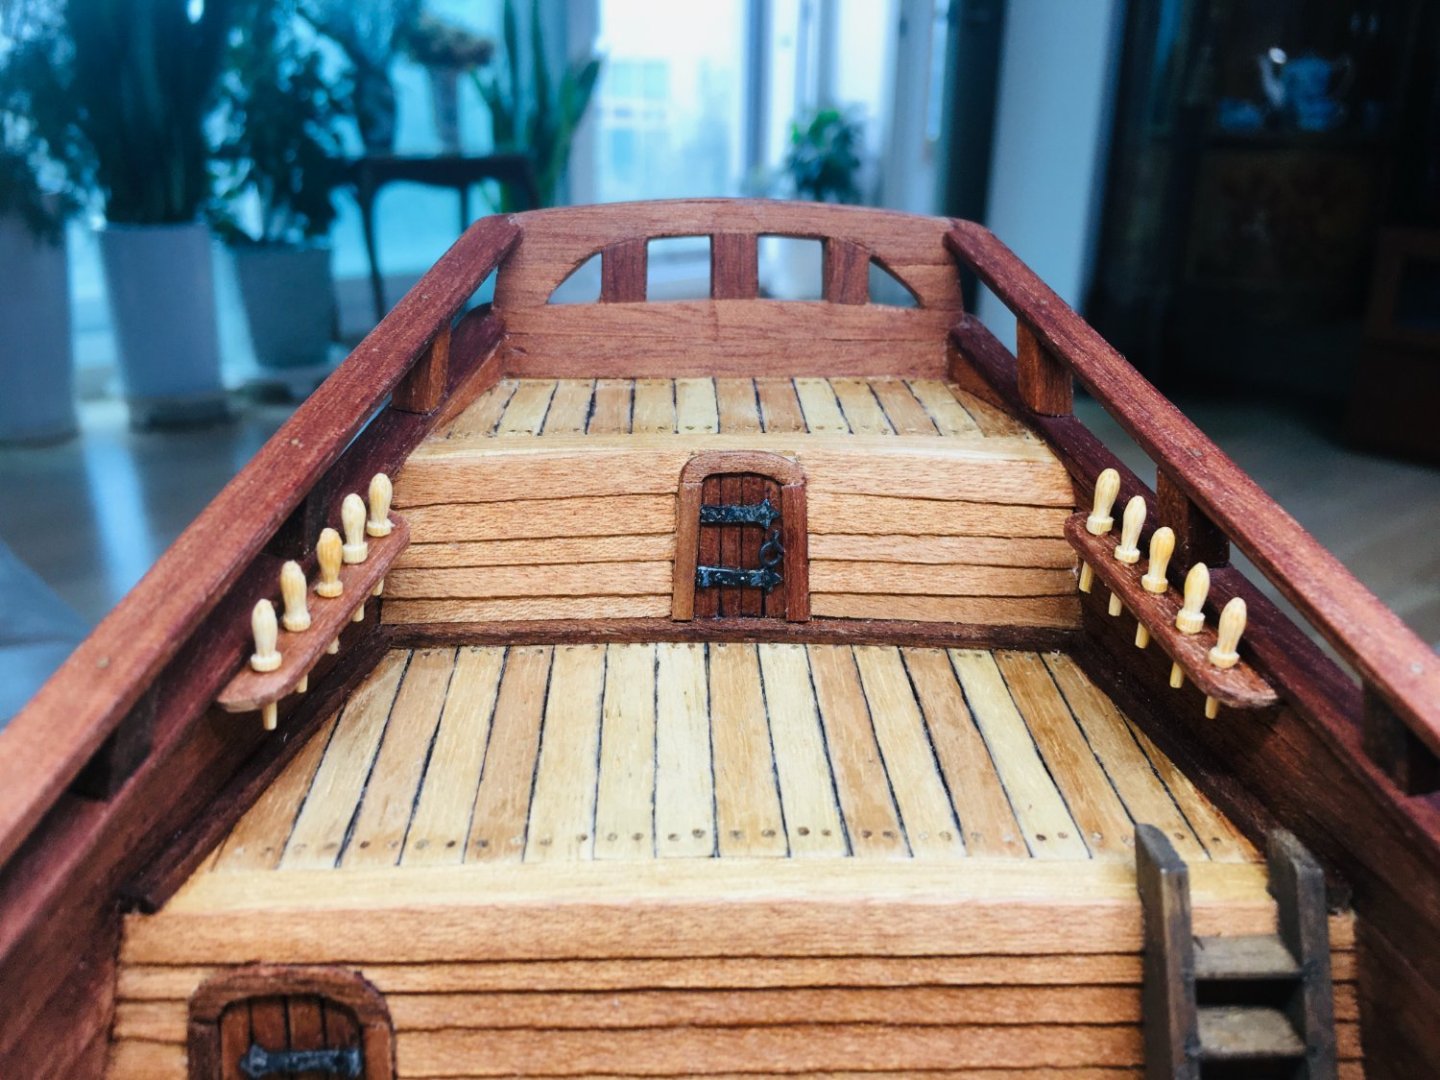
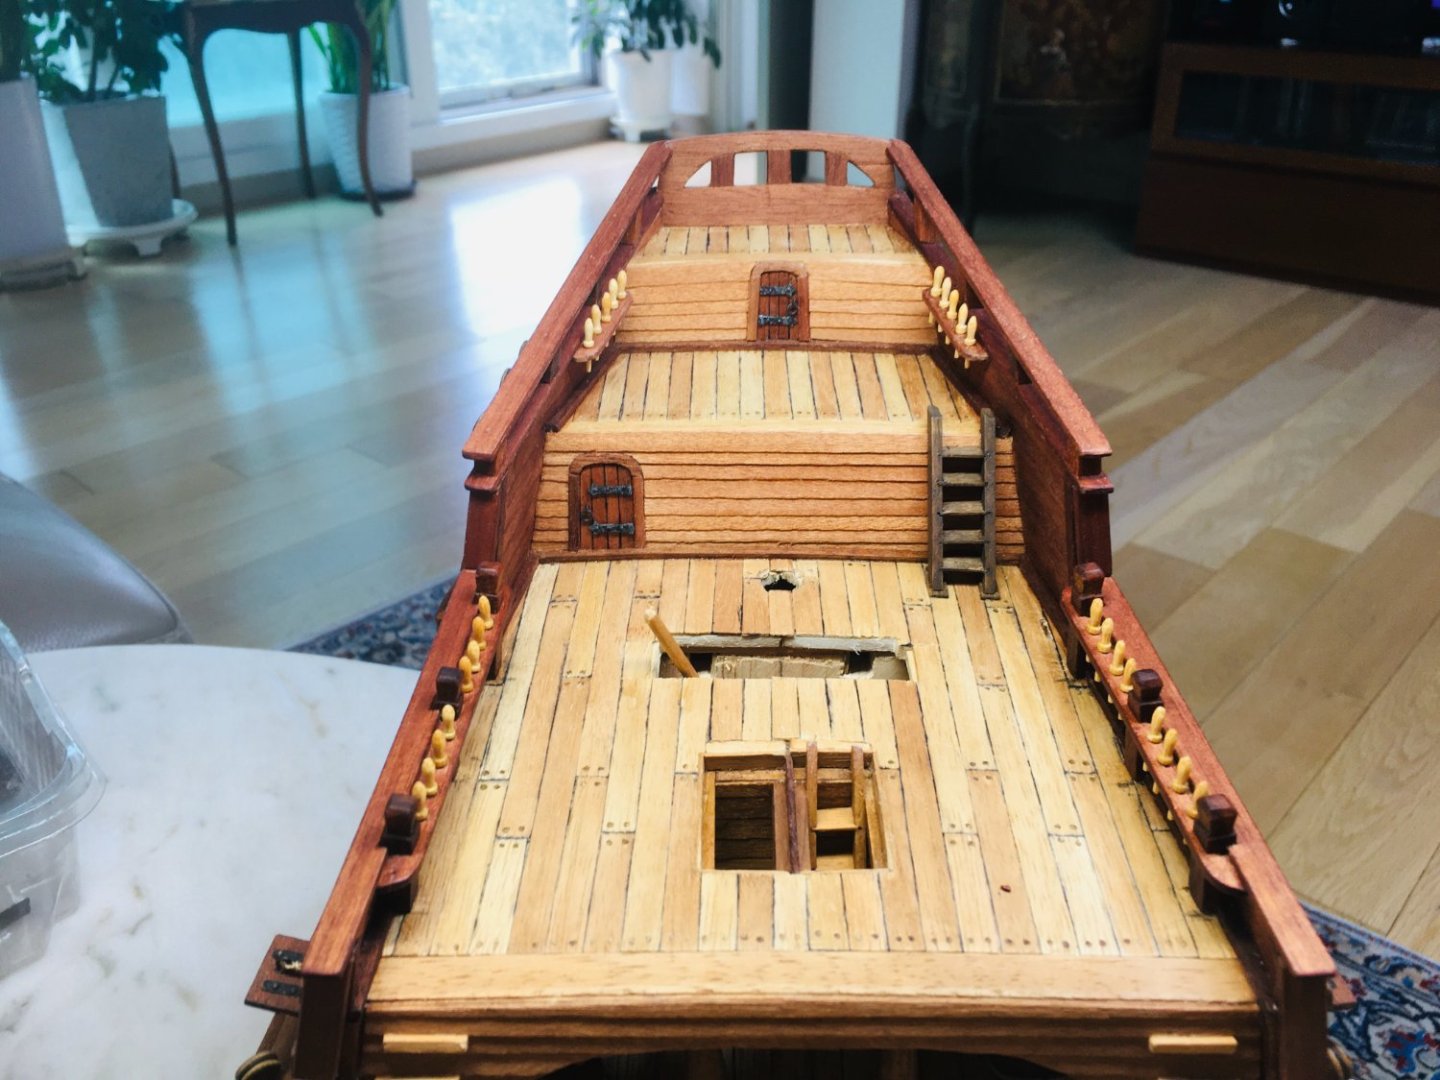
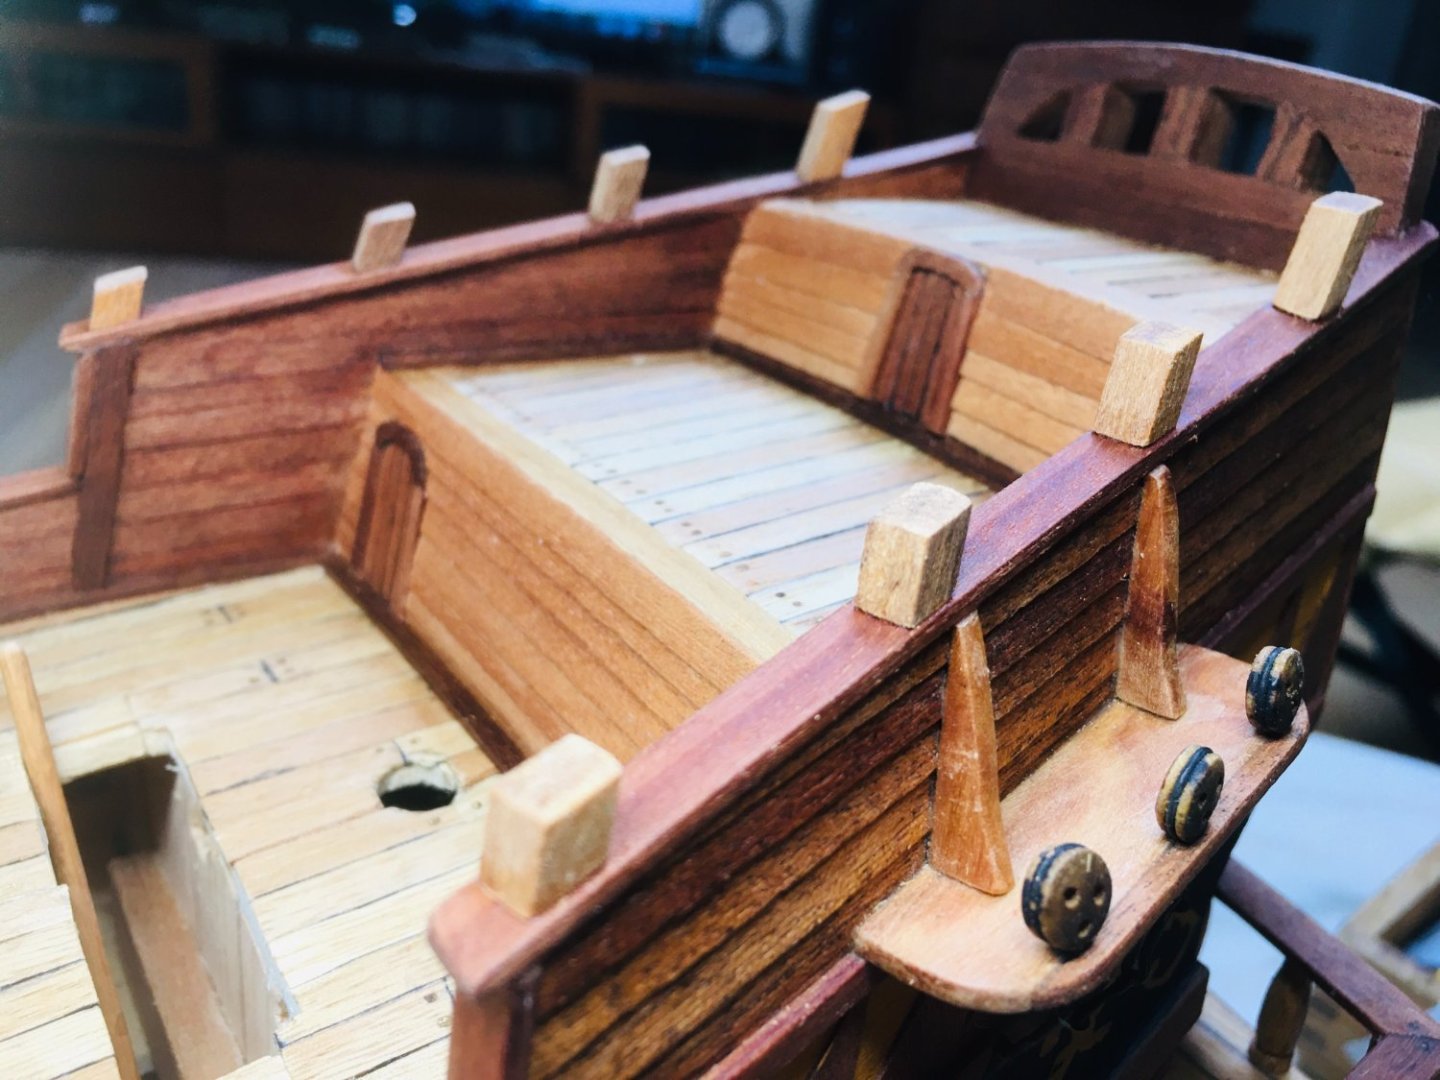
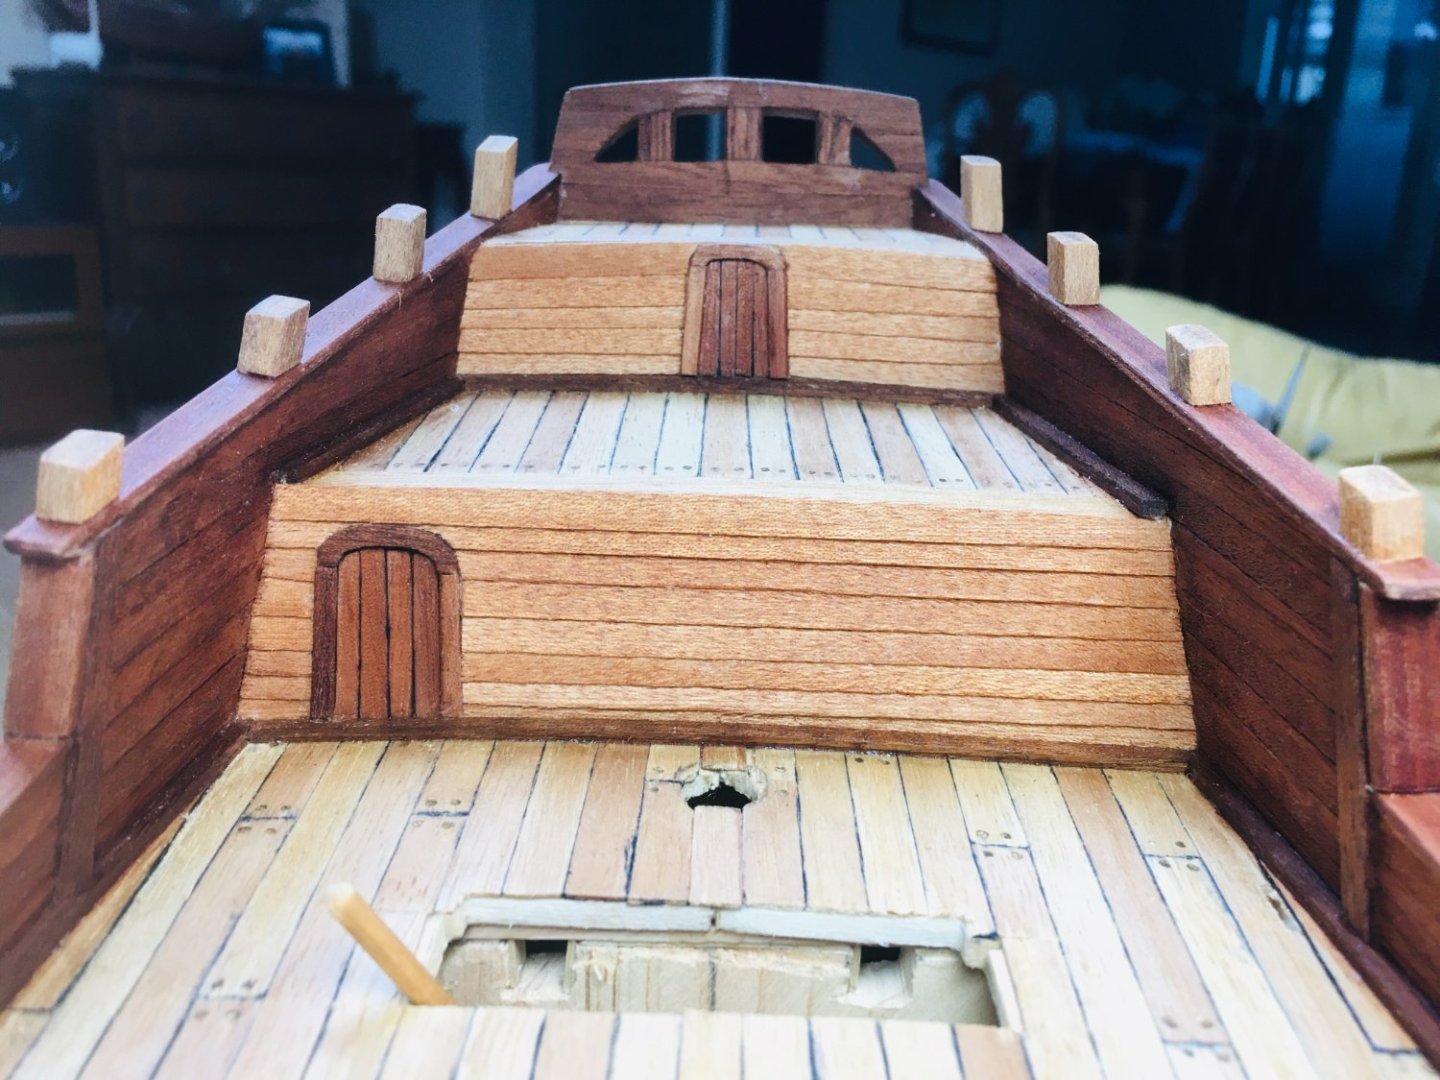
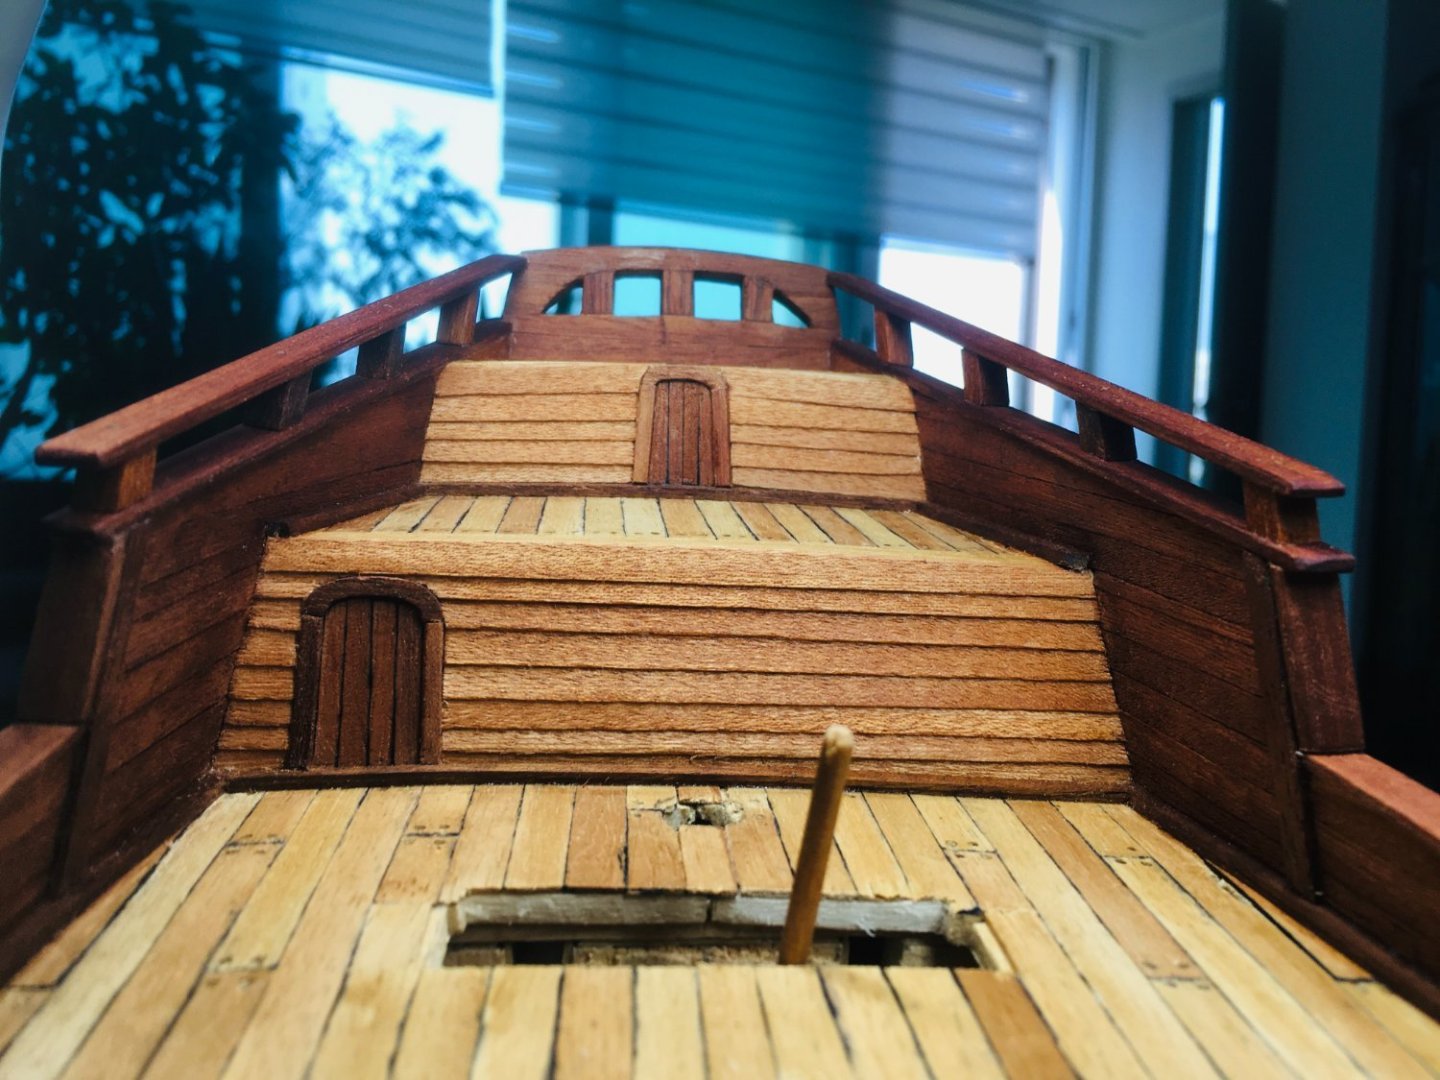
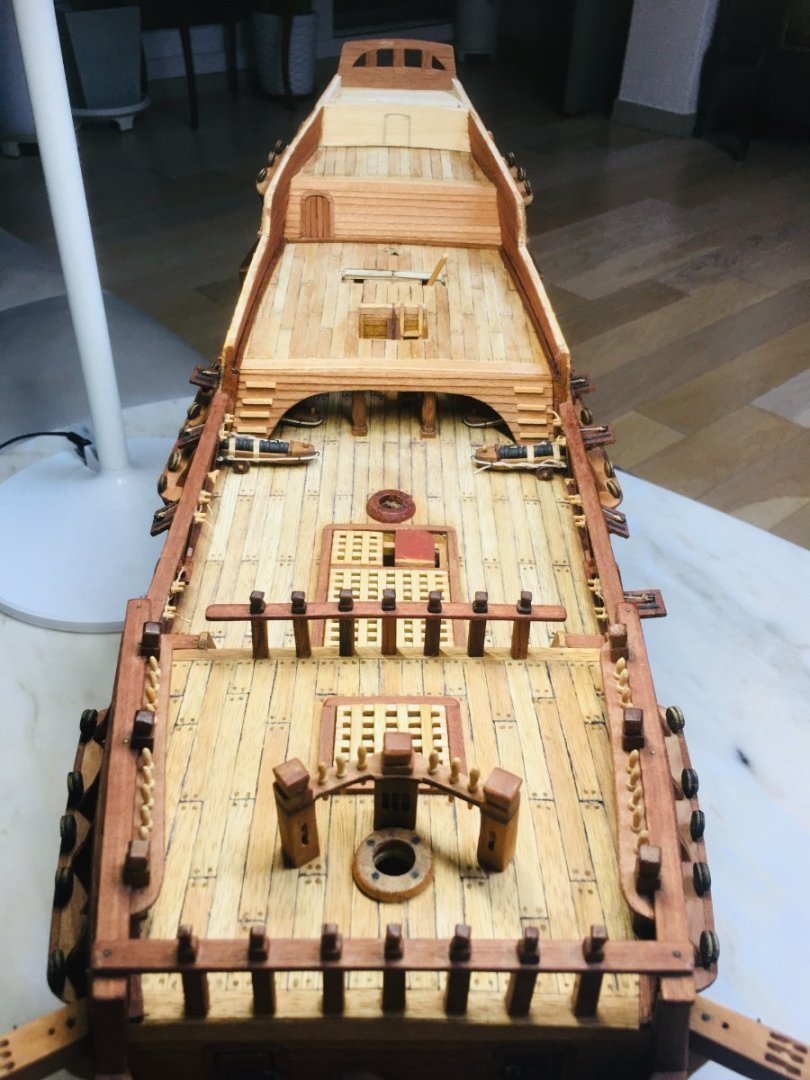
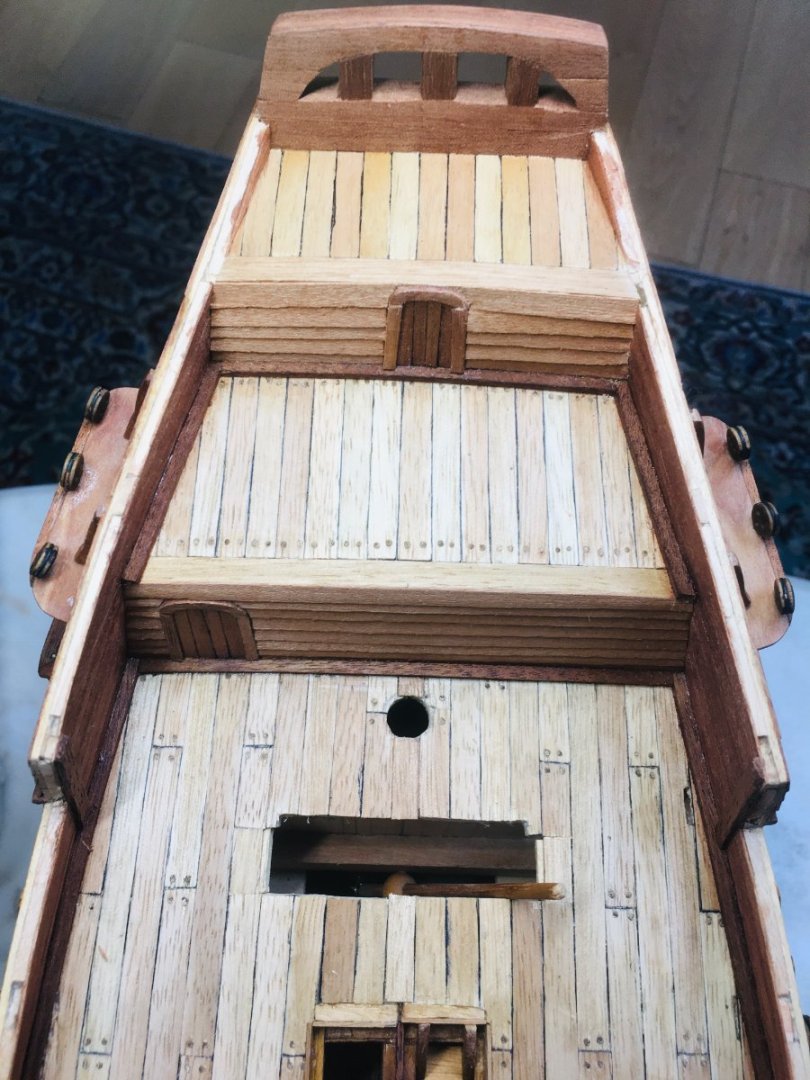
Overall view of the new additions on the quarterdeck & poop deck looks OK~ And some more additional works done. Finally, the overview of the whole ship with the recent additions.


-
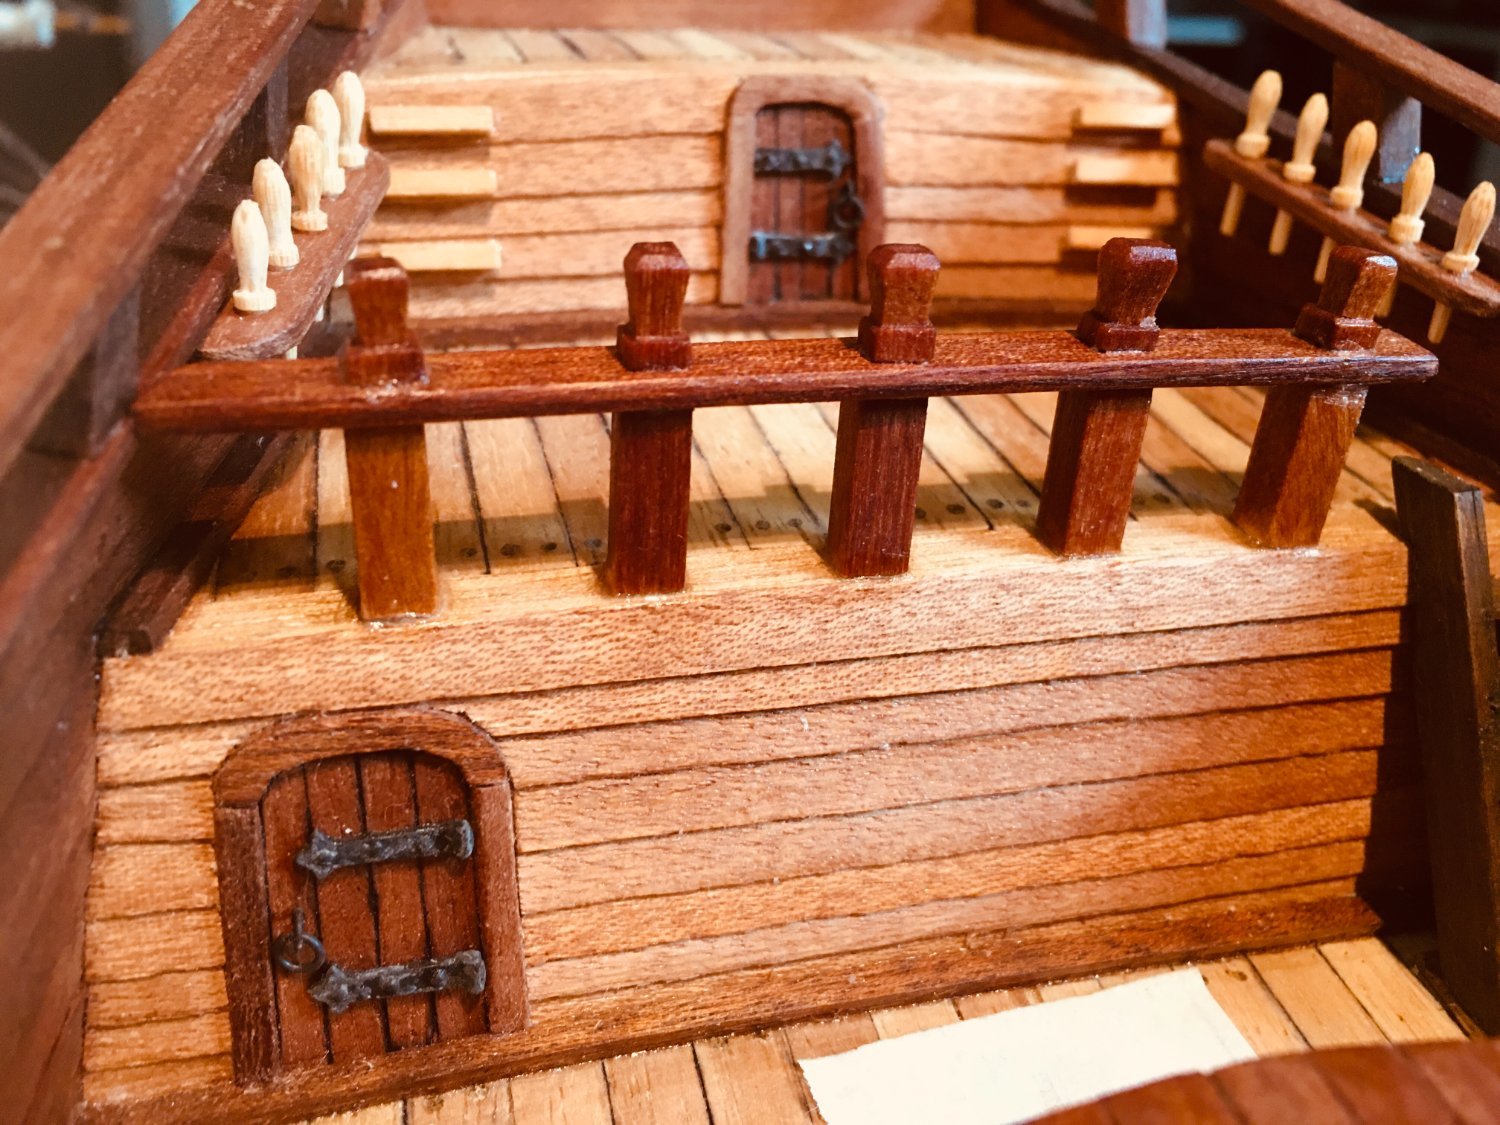
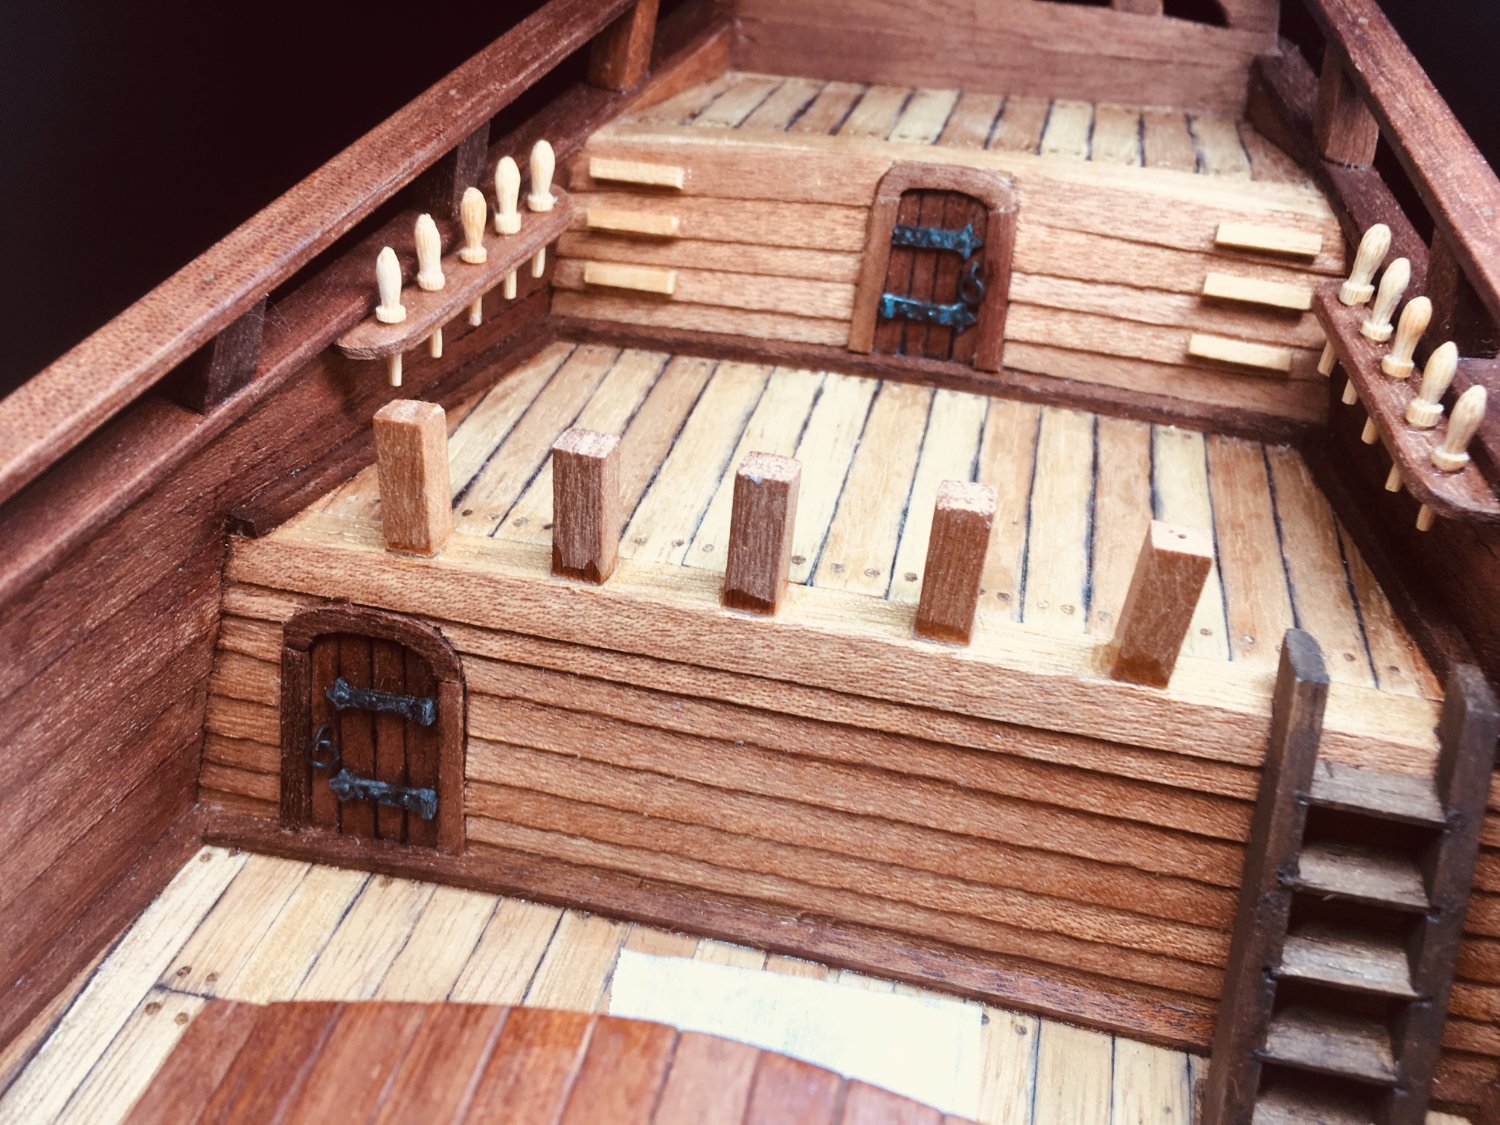
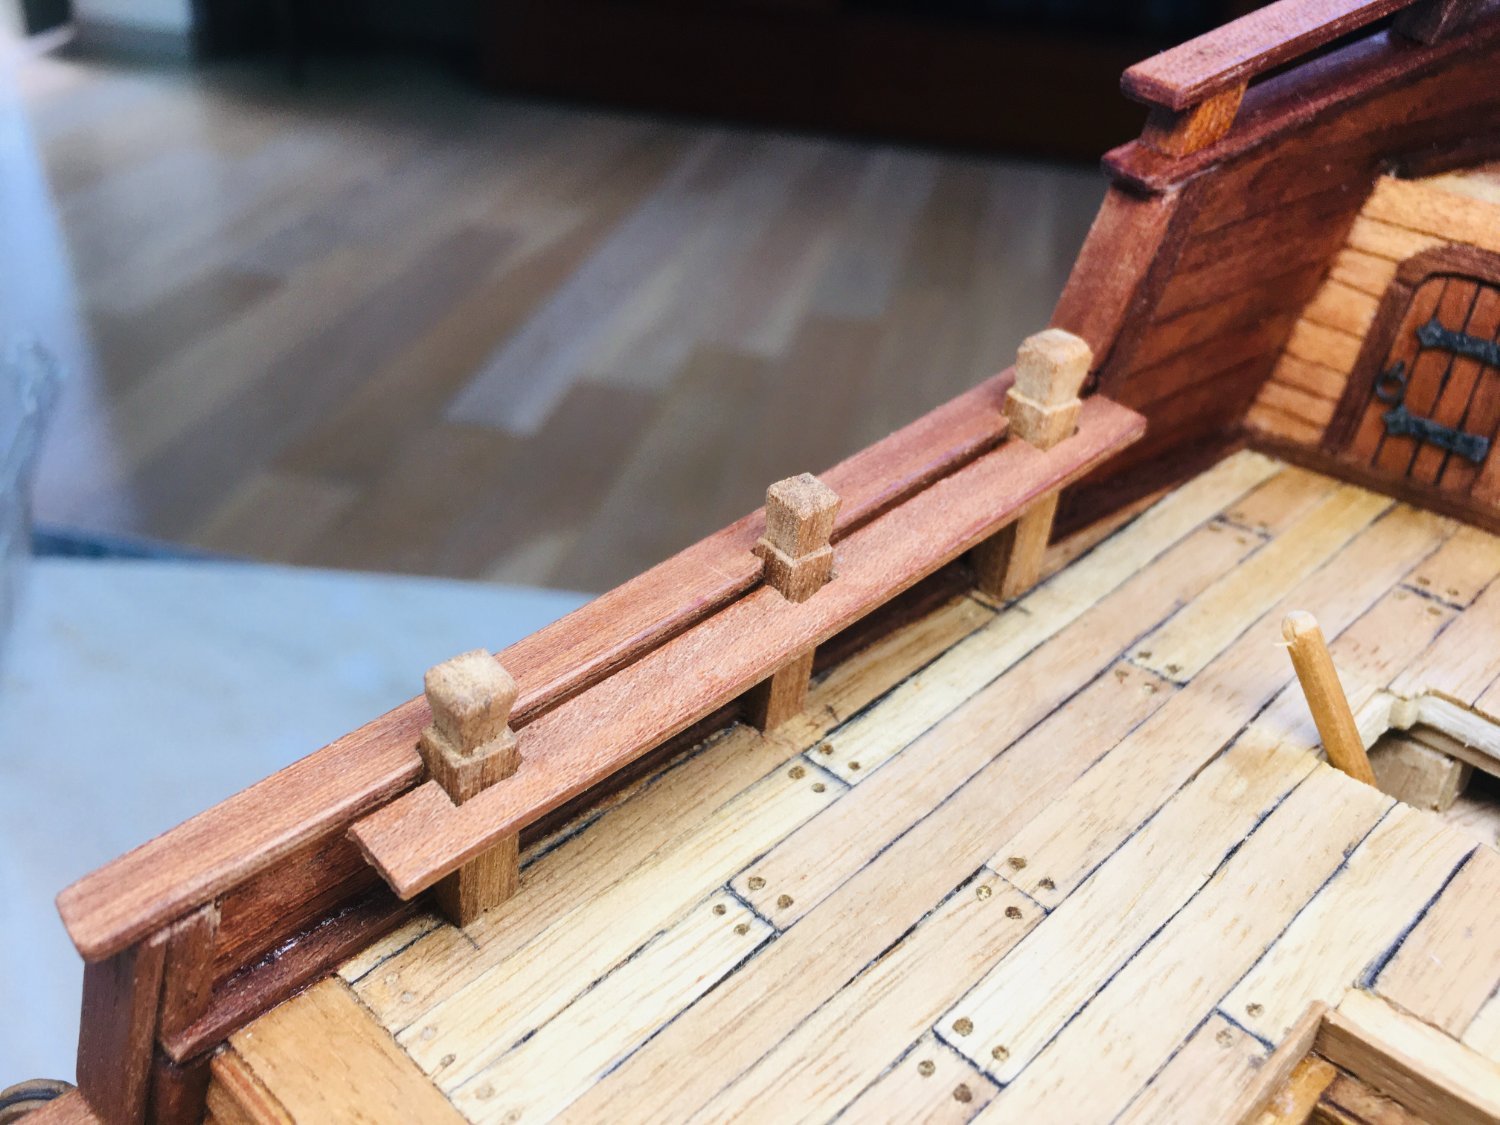
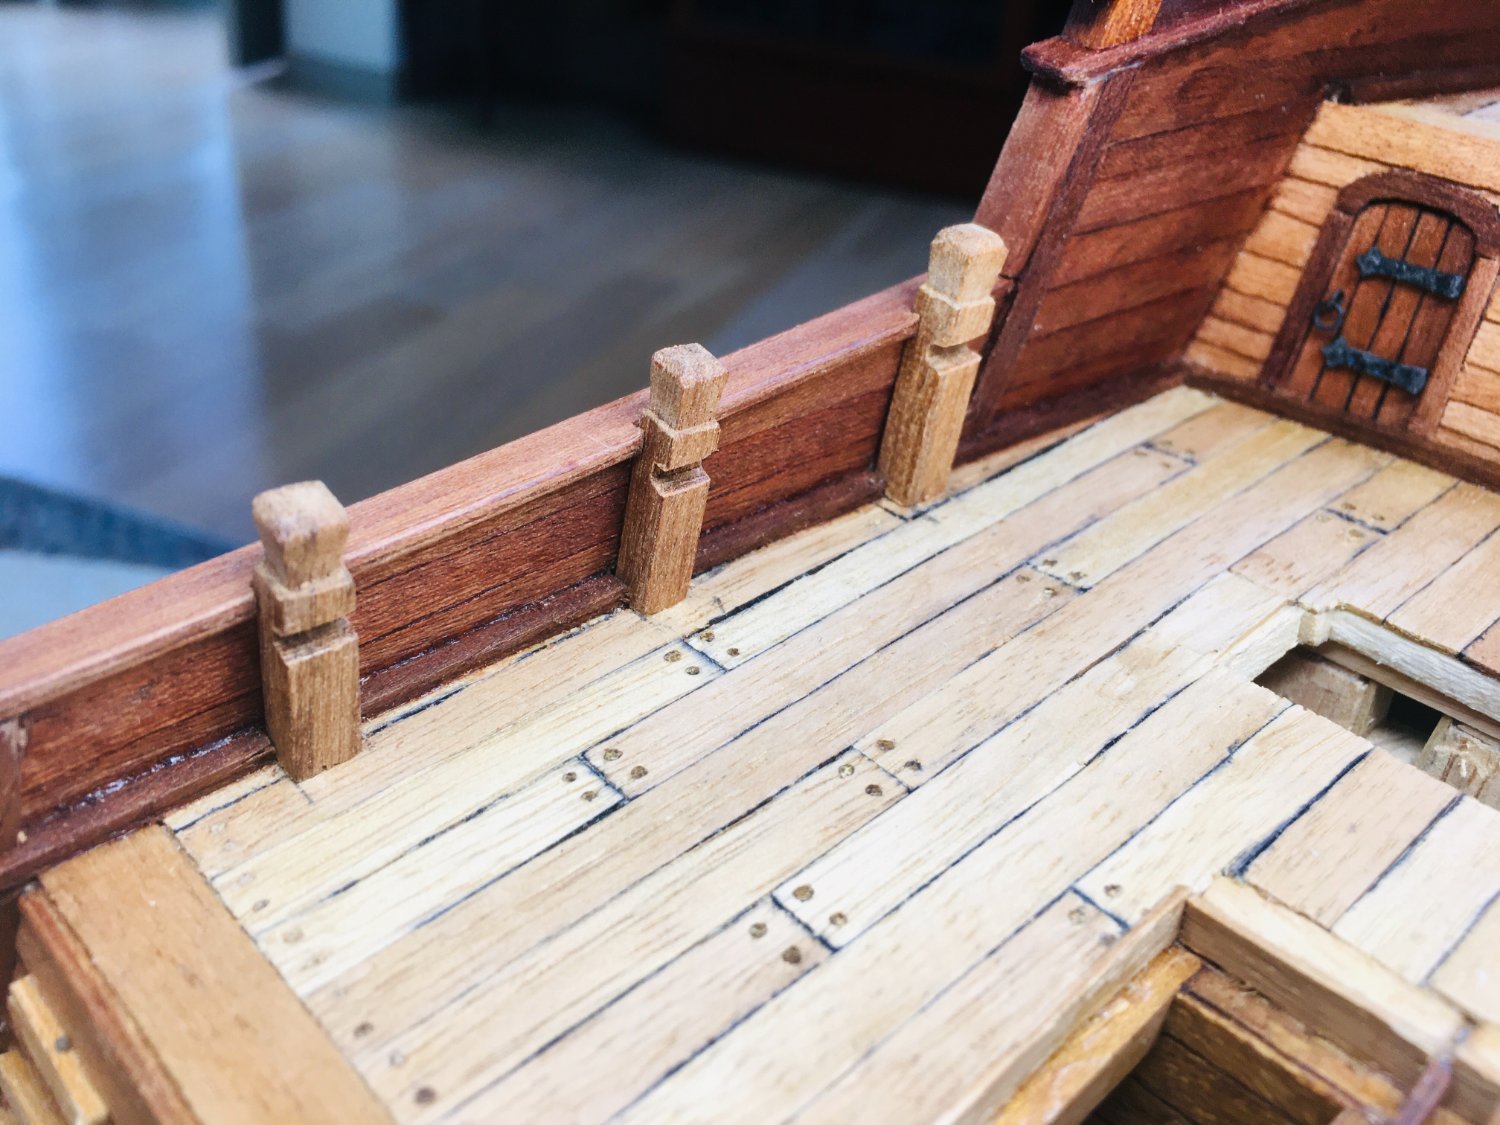
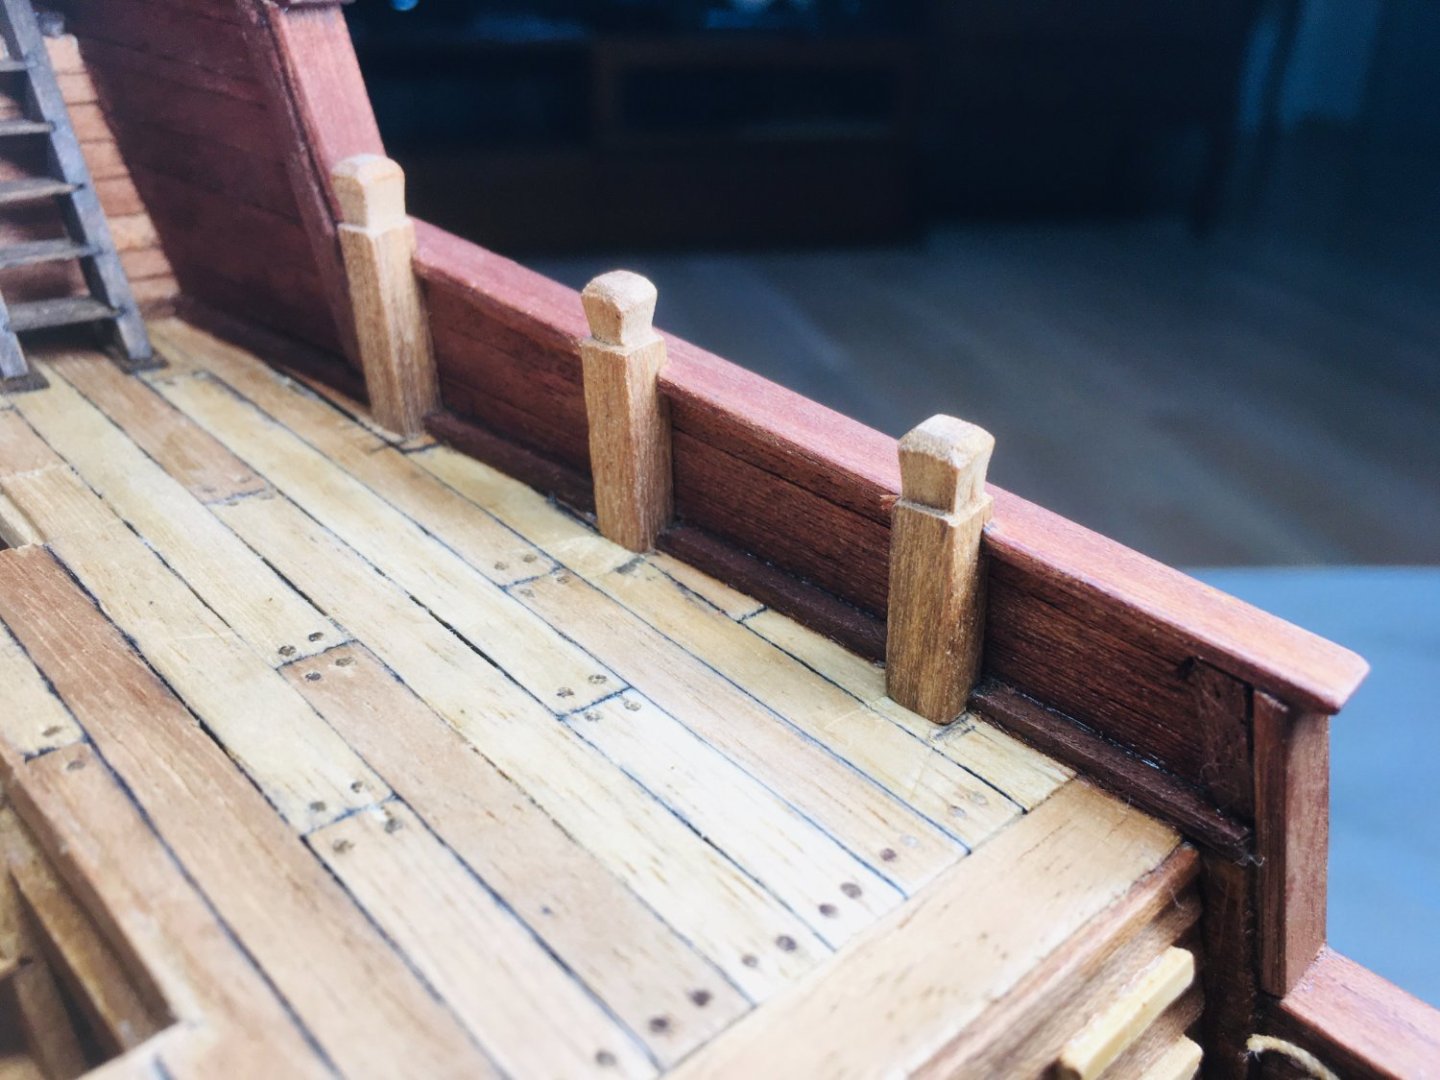
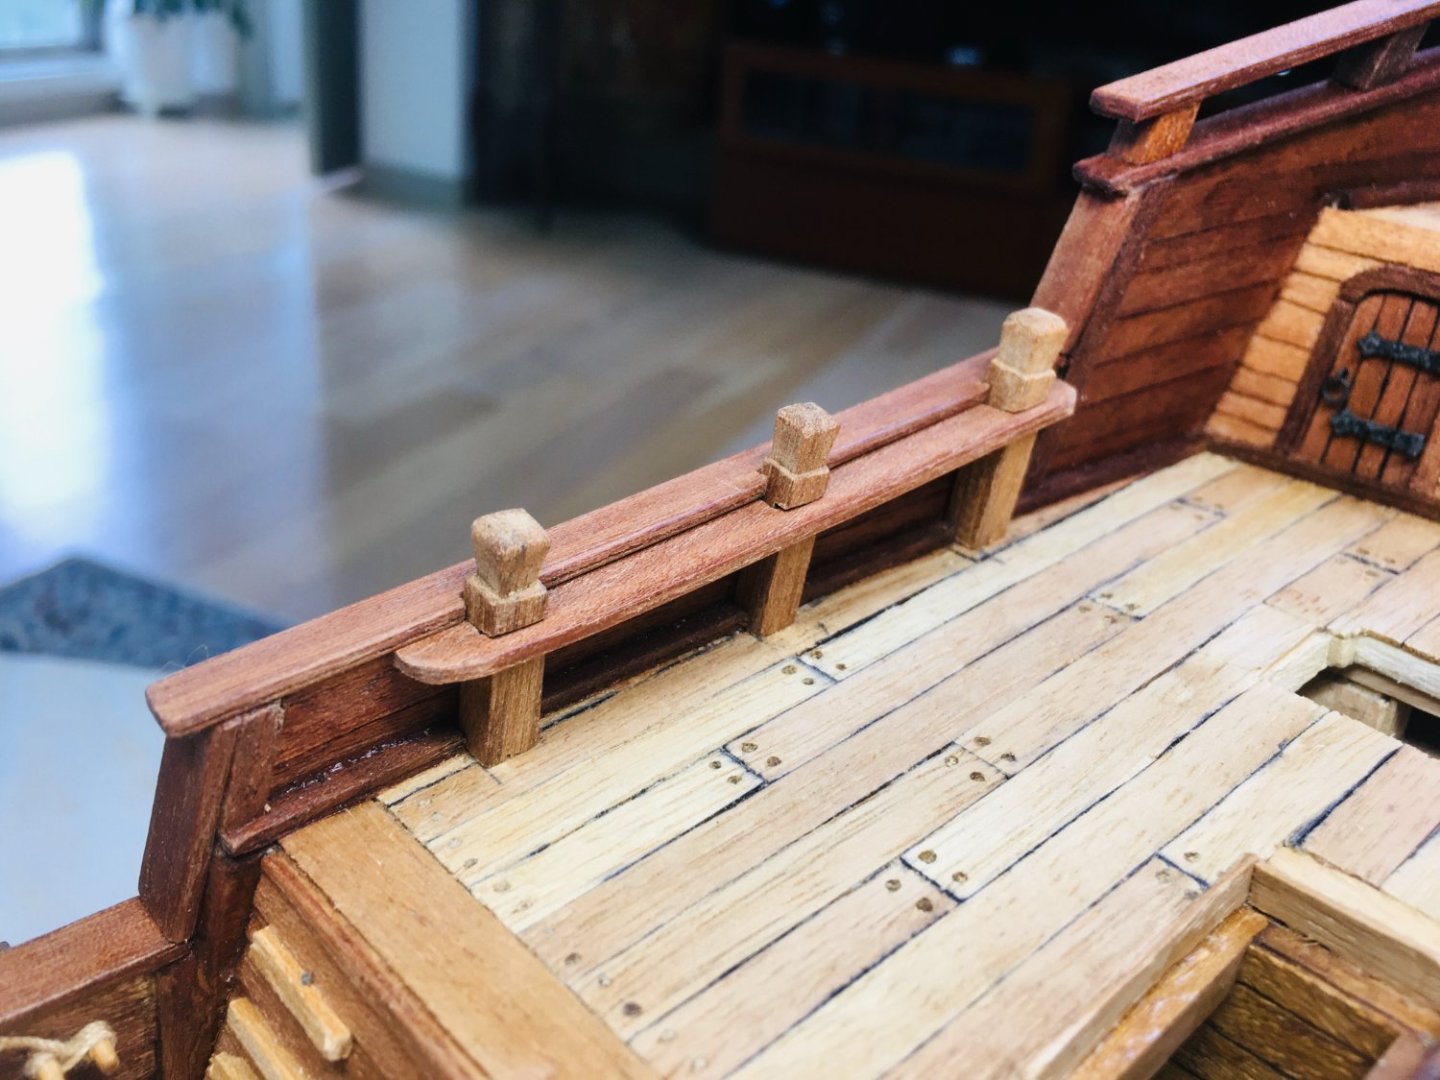
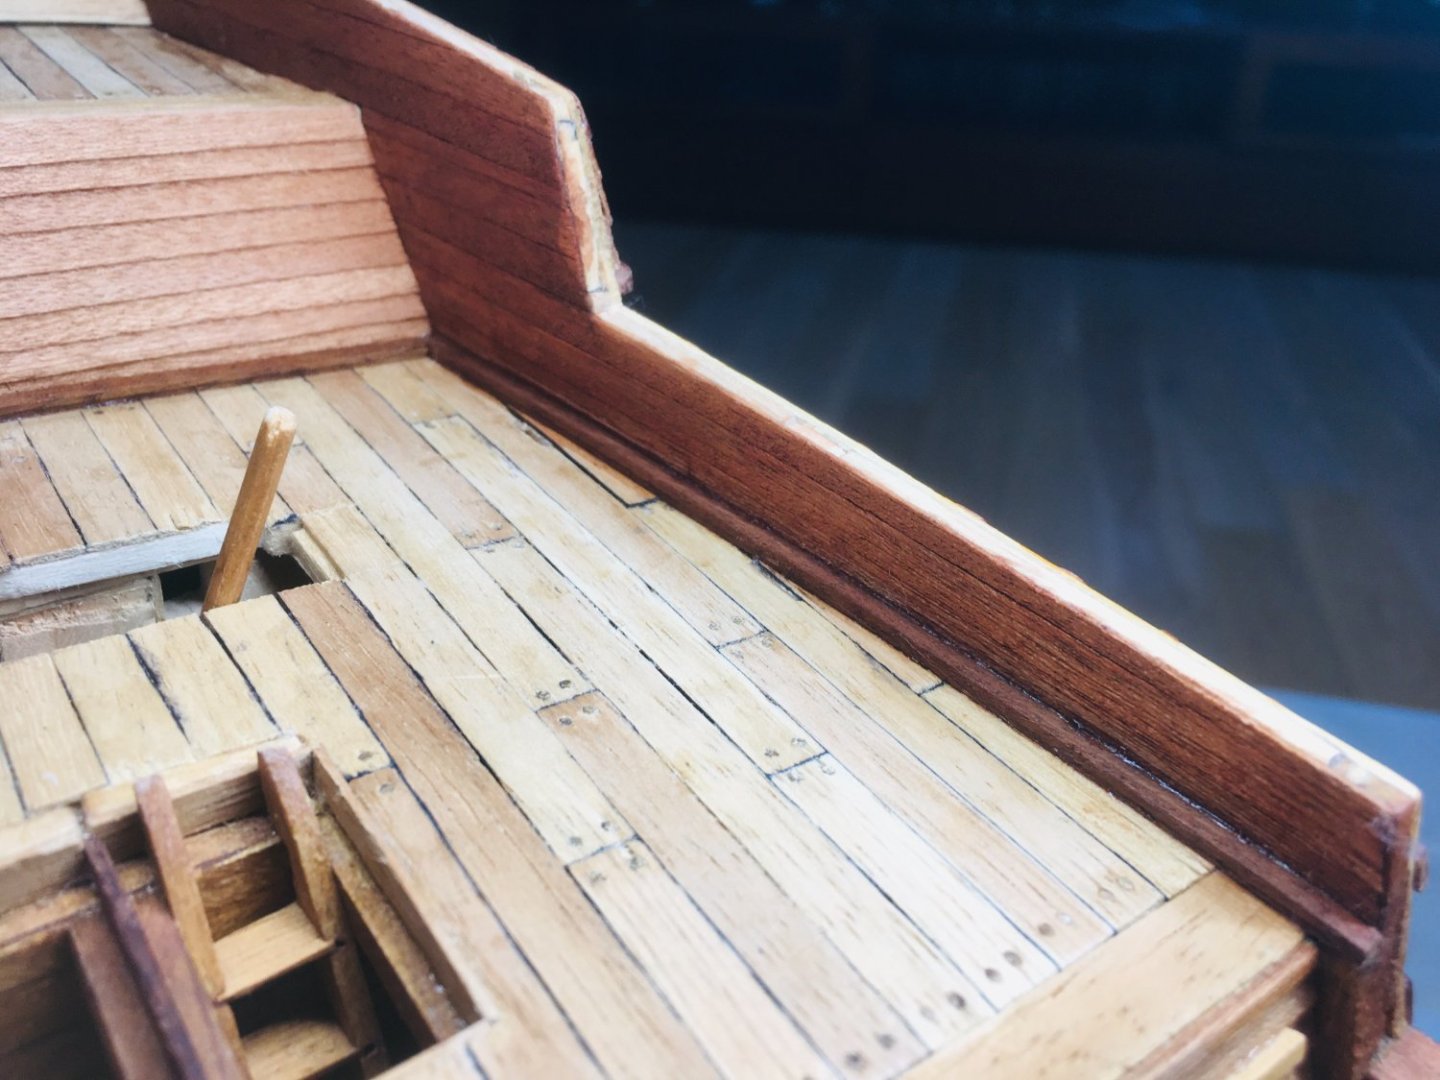
Hello shipmates~ Final work on the decks contuned...slowly. Installed the rails for the quarterdeck and poop deck. Below are the pictures taken during the process - very similar to the forcastle deck rail construction, so will keep comments short.


-
Thanks very much for your advise, Allan~ Much appreciated! BTW, I am not aware of the RMG site. If you could enlighten me a bit further on RMG site, it would be great! Thanks!
-
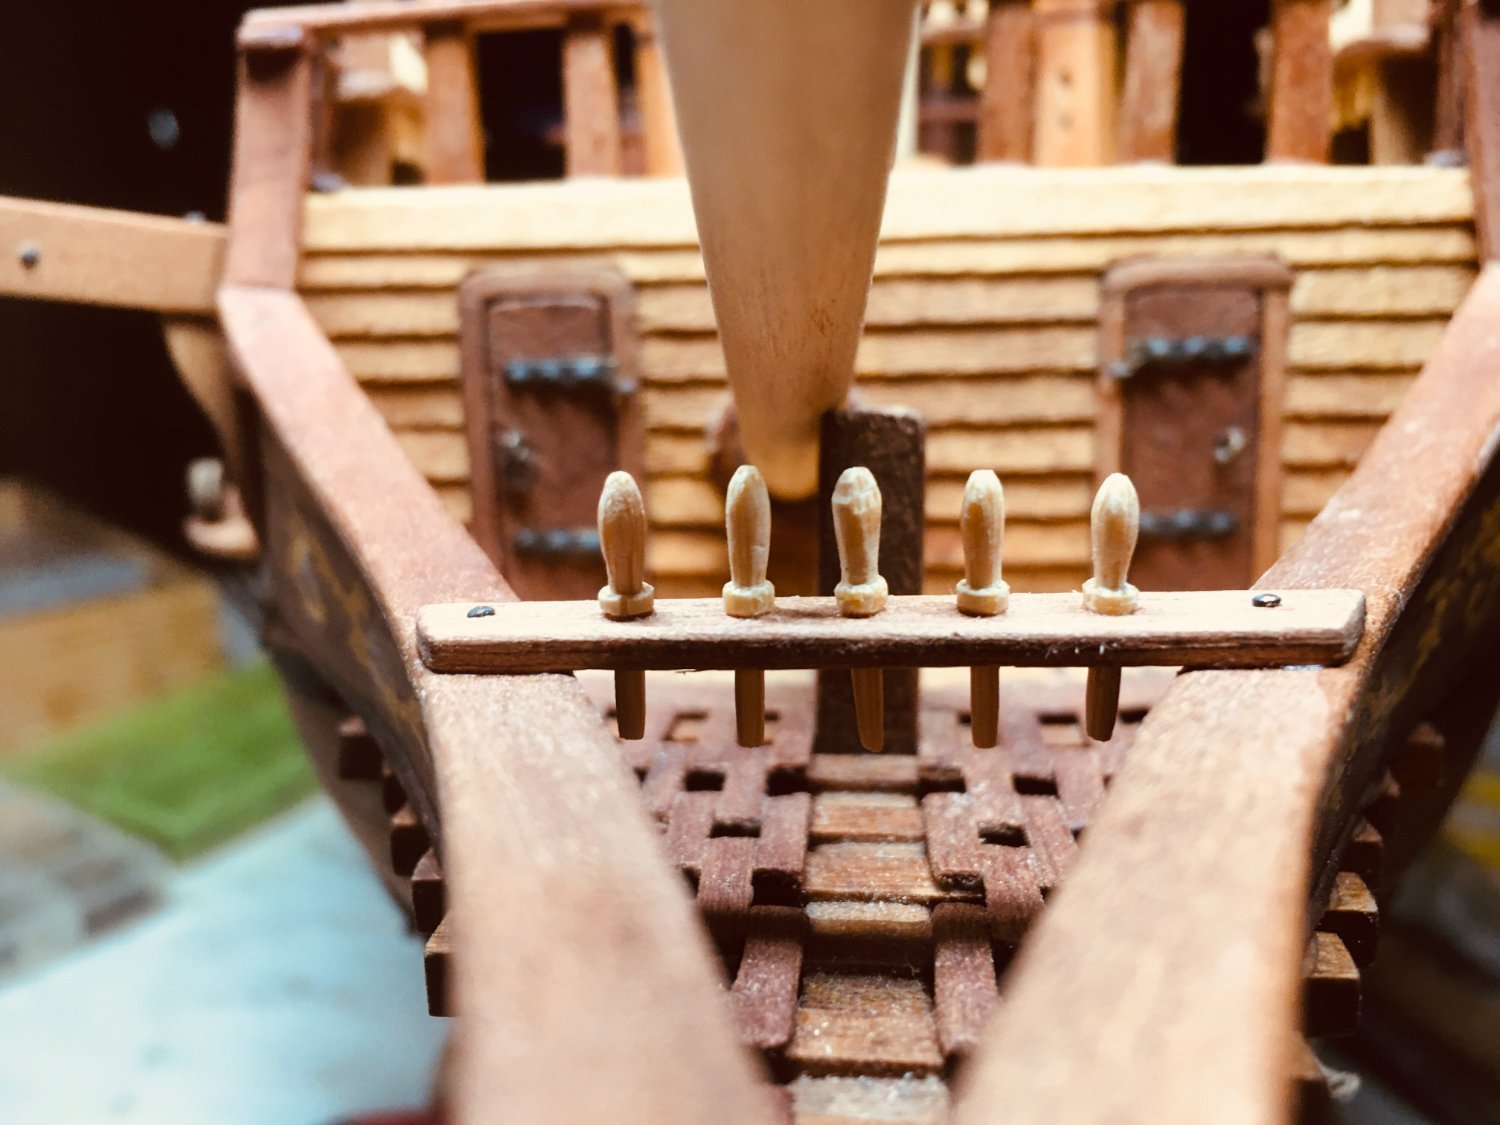
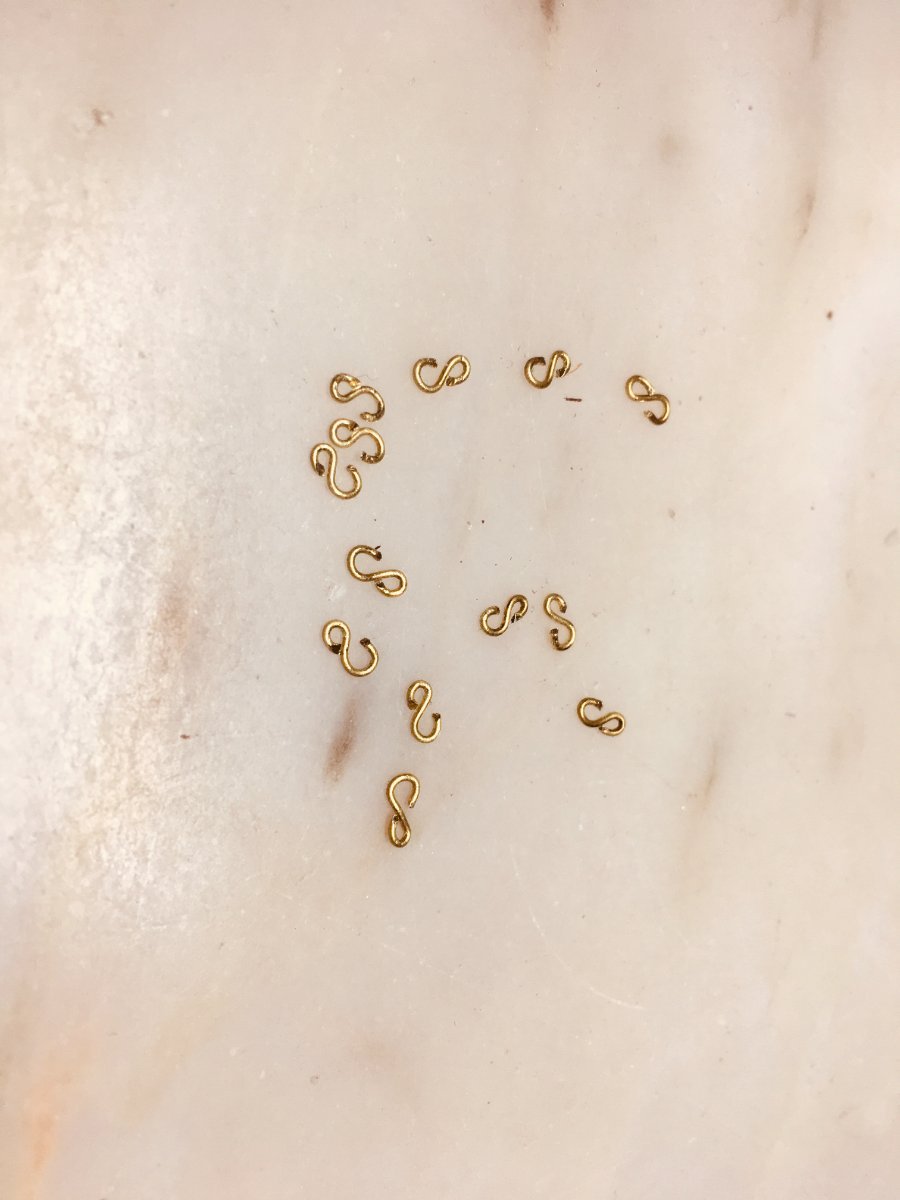
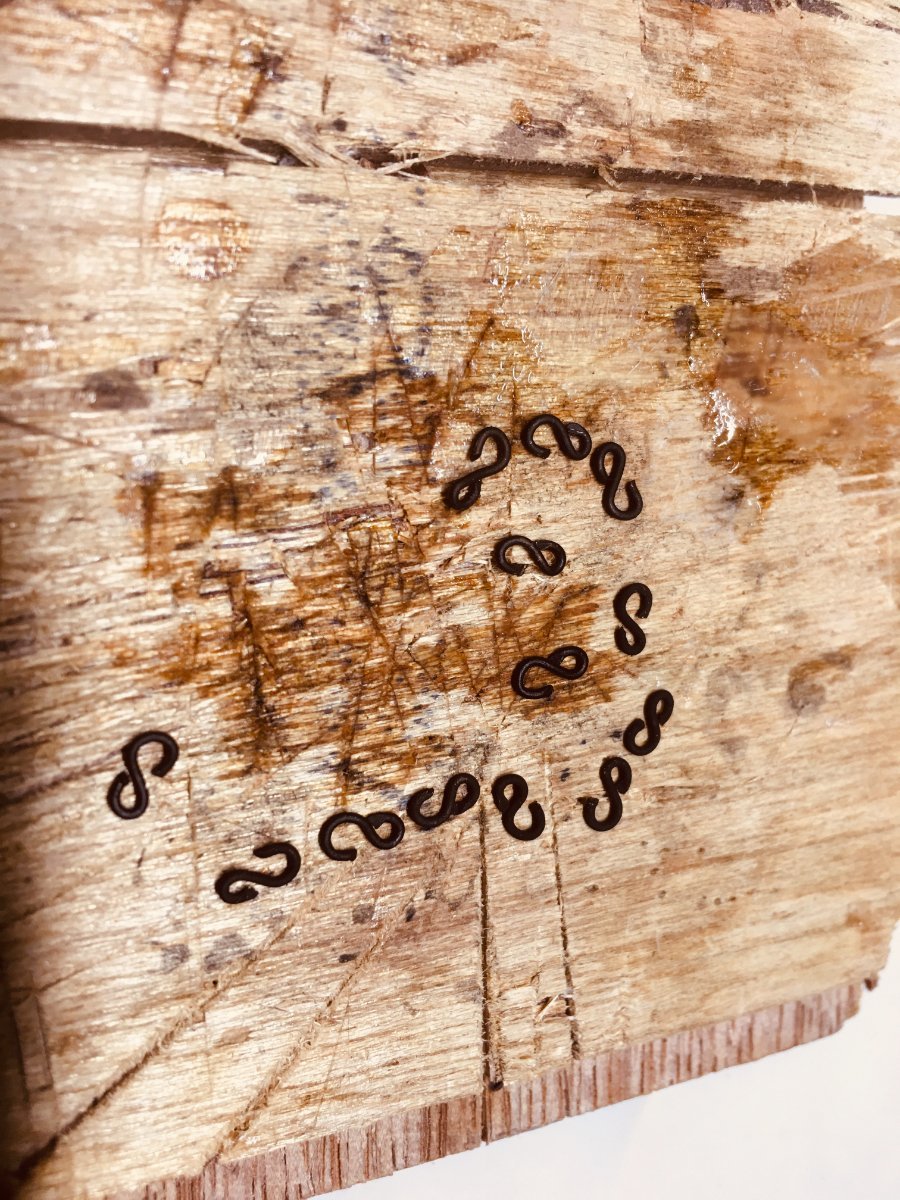
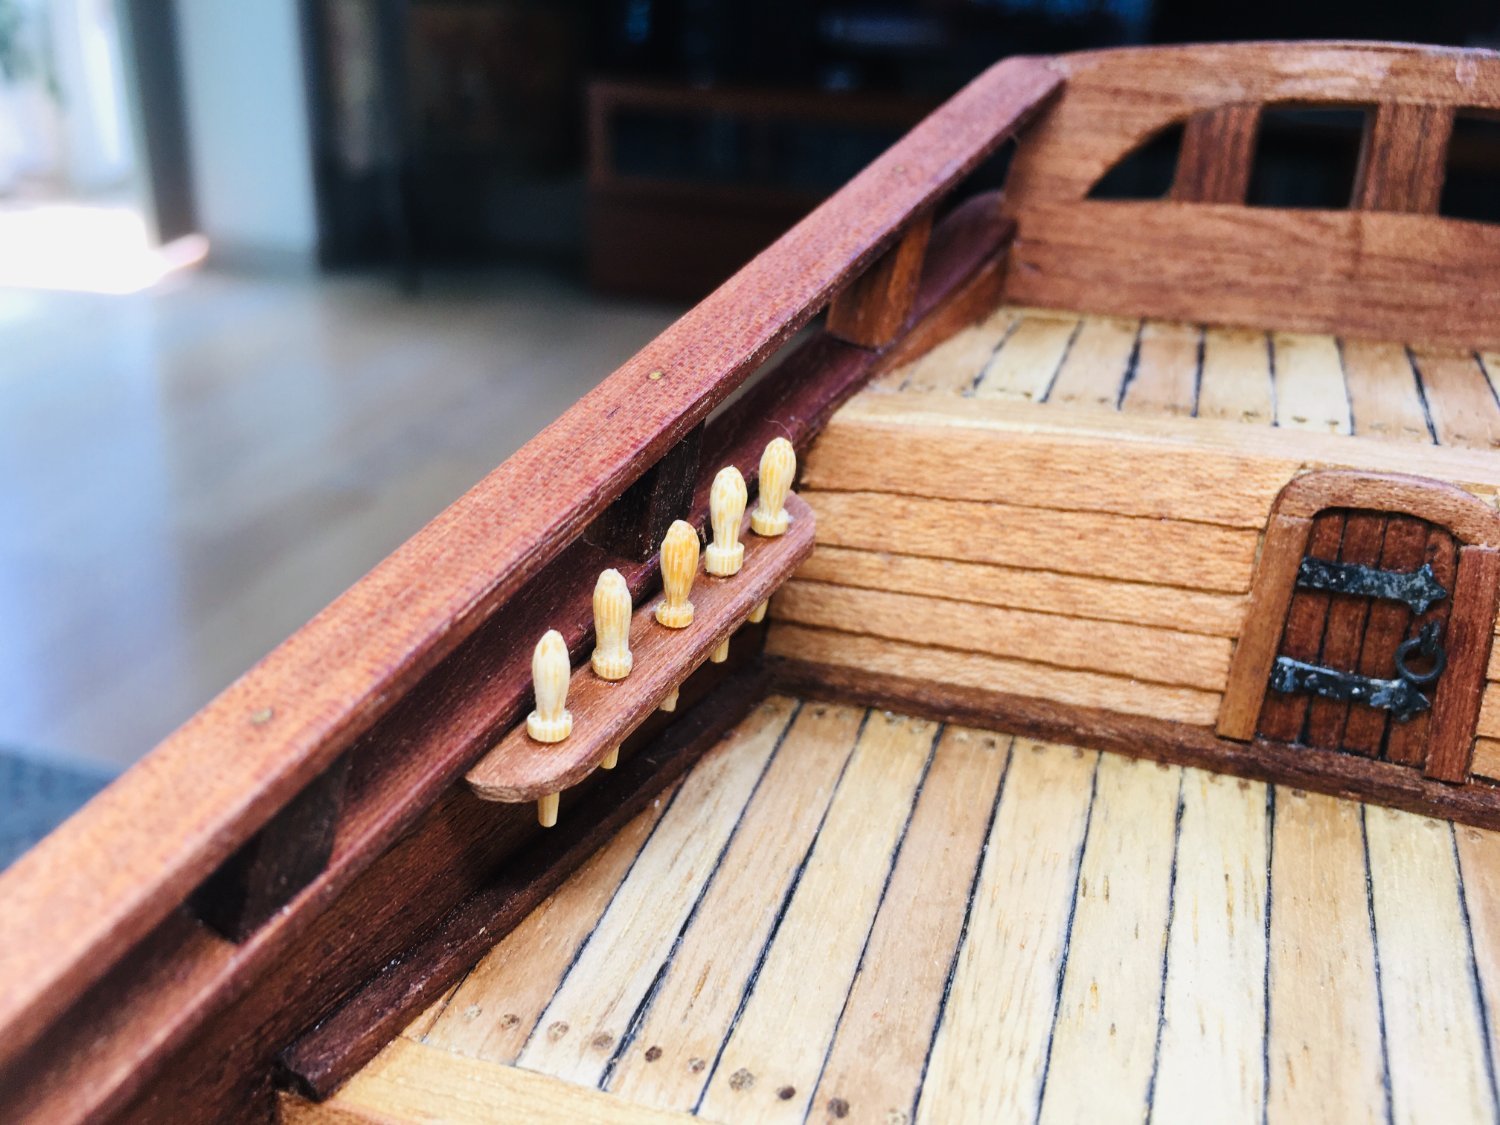
Hi Allan, I am sure that they did NOT use belaying pins during the 16th century! As I mentioned at the start of the belaying pin work in the forecastle area some time ago, I originally planned to use no belaying pins. However, looking at the sheer number of rigging that I need to do later, I decided to use some belaying pins. Just a bit of compromise between historical accuracy and ease of work on rigging. After trying this particular method for GH1 and if I figure out a way for tackling all the rigging without help from some belaying pins, I will definitely apply it to GH2 and beyond. Regards, Rock
-
Hi Robert~ Thanks very much for your kind words! It is indeed good to be back~ And I realized how we take for granted our health and well functioning body! Regards, Tock
-
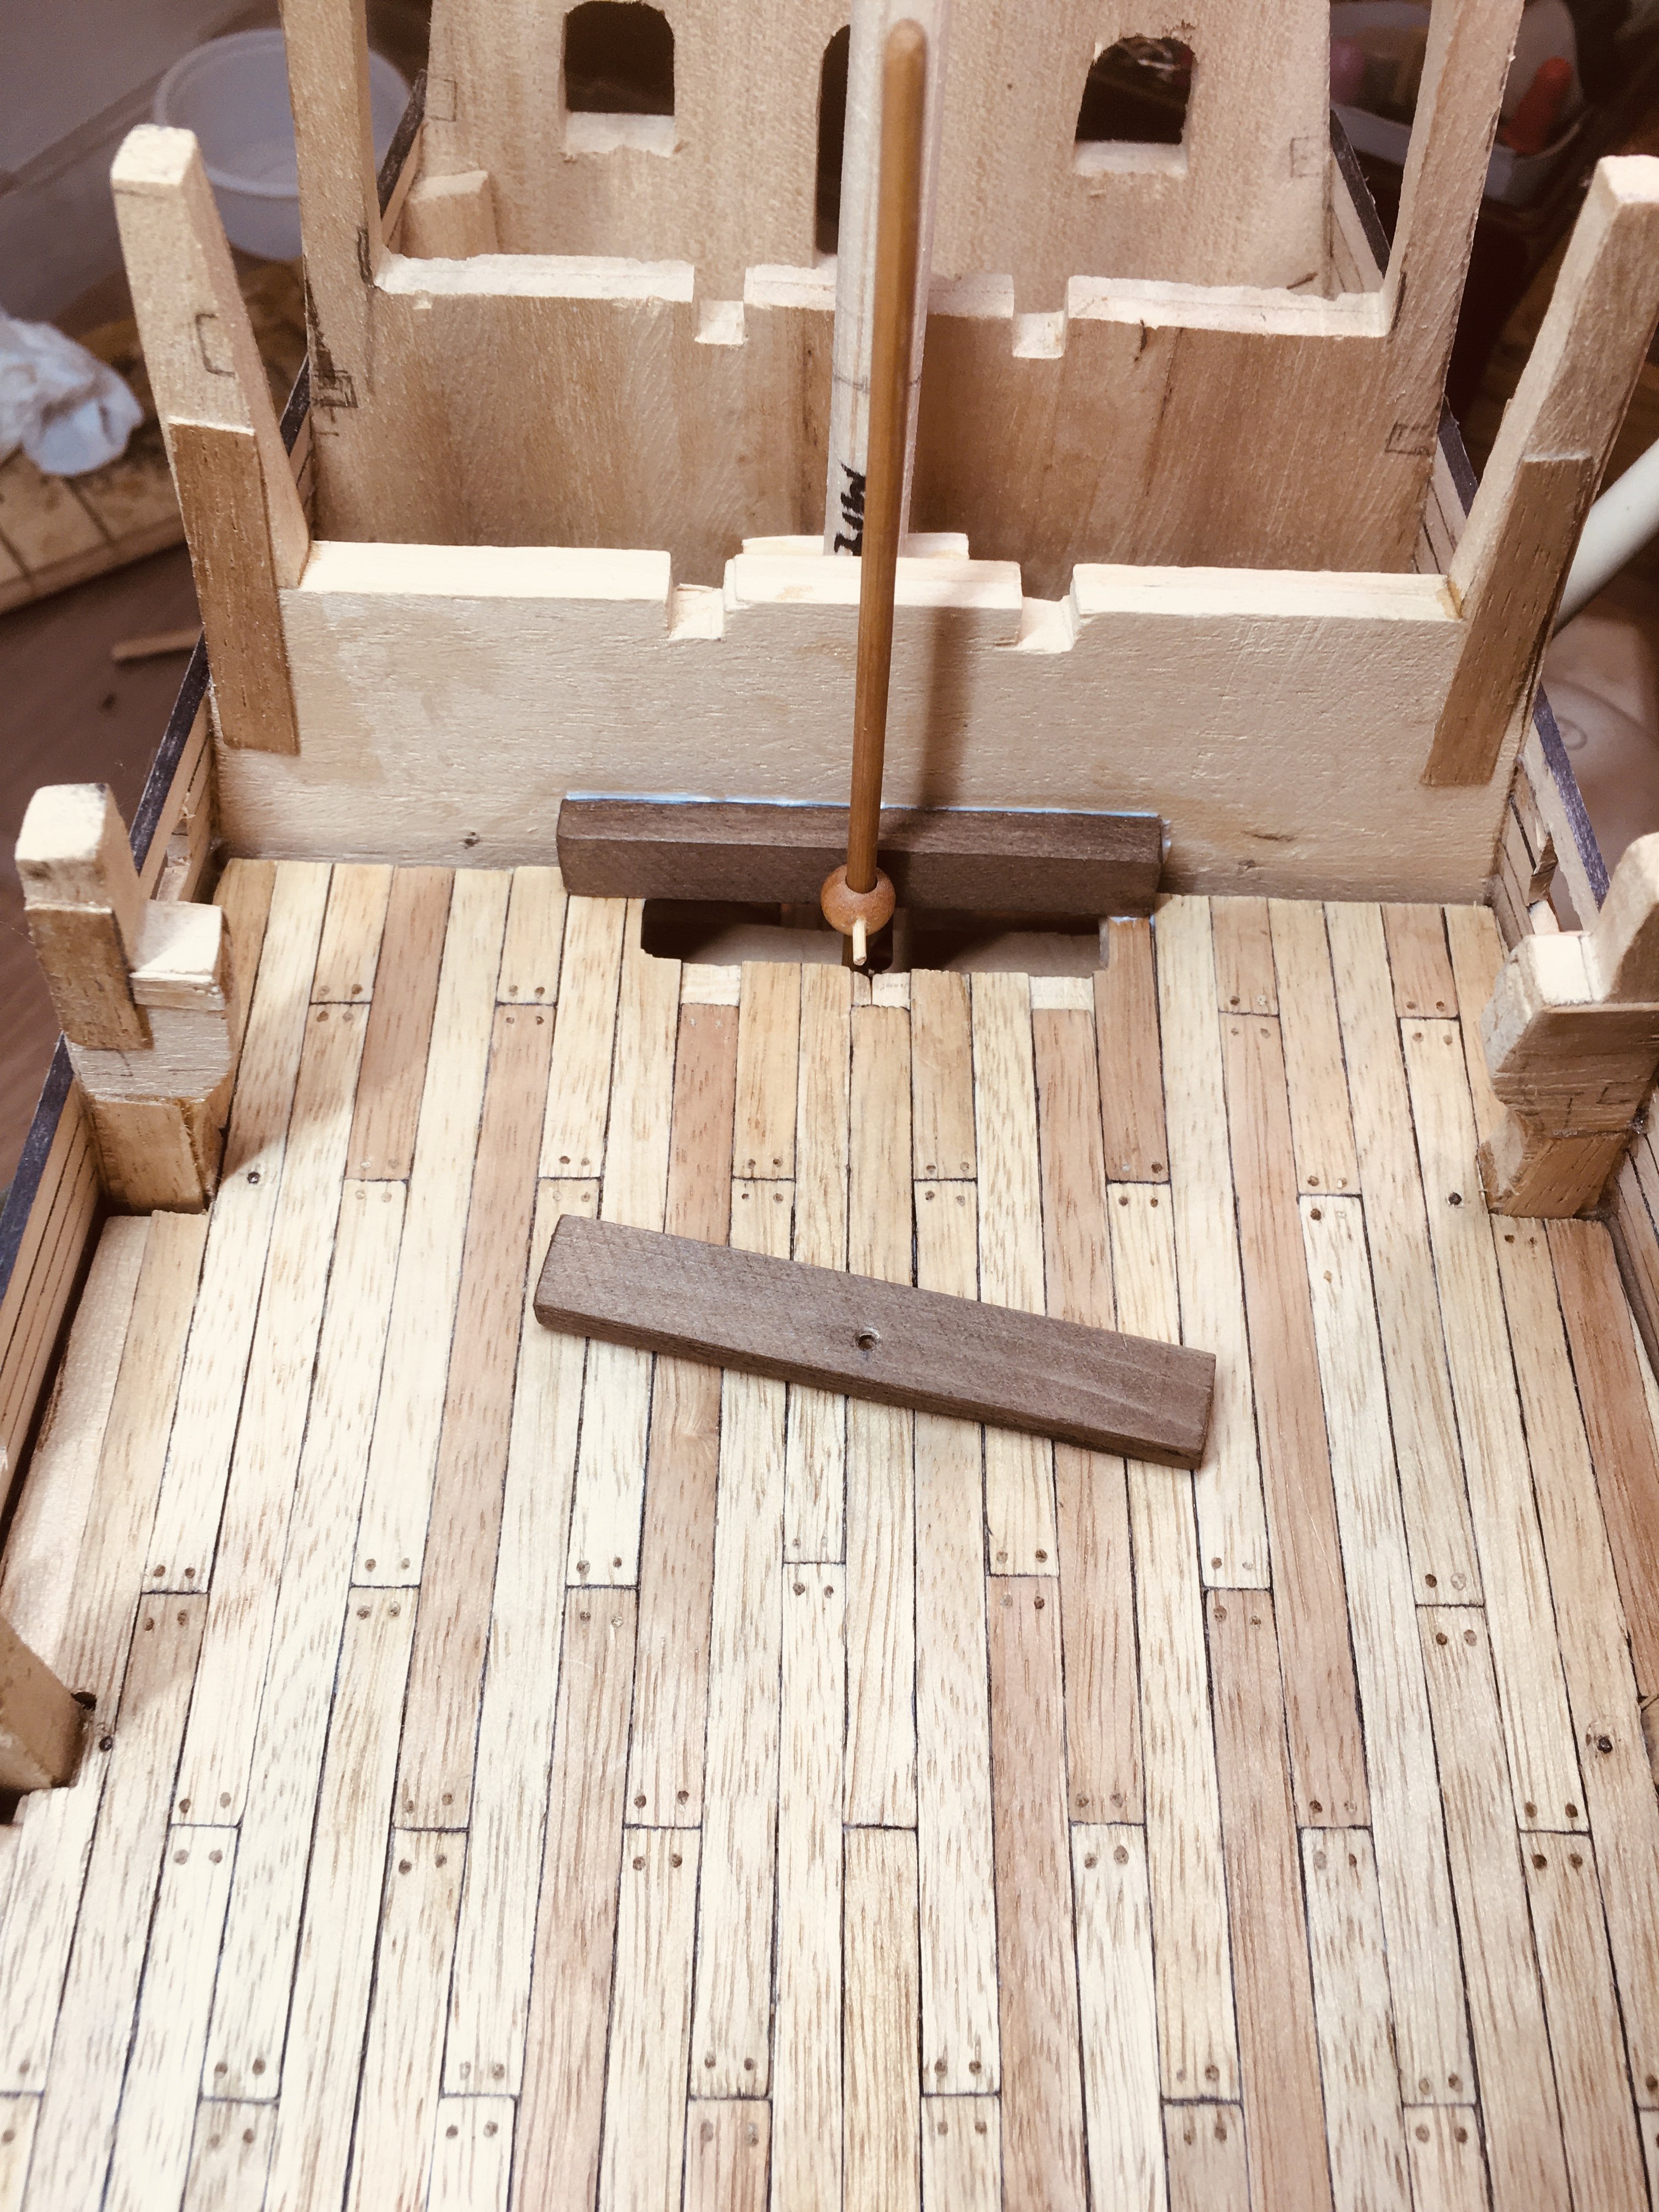
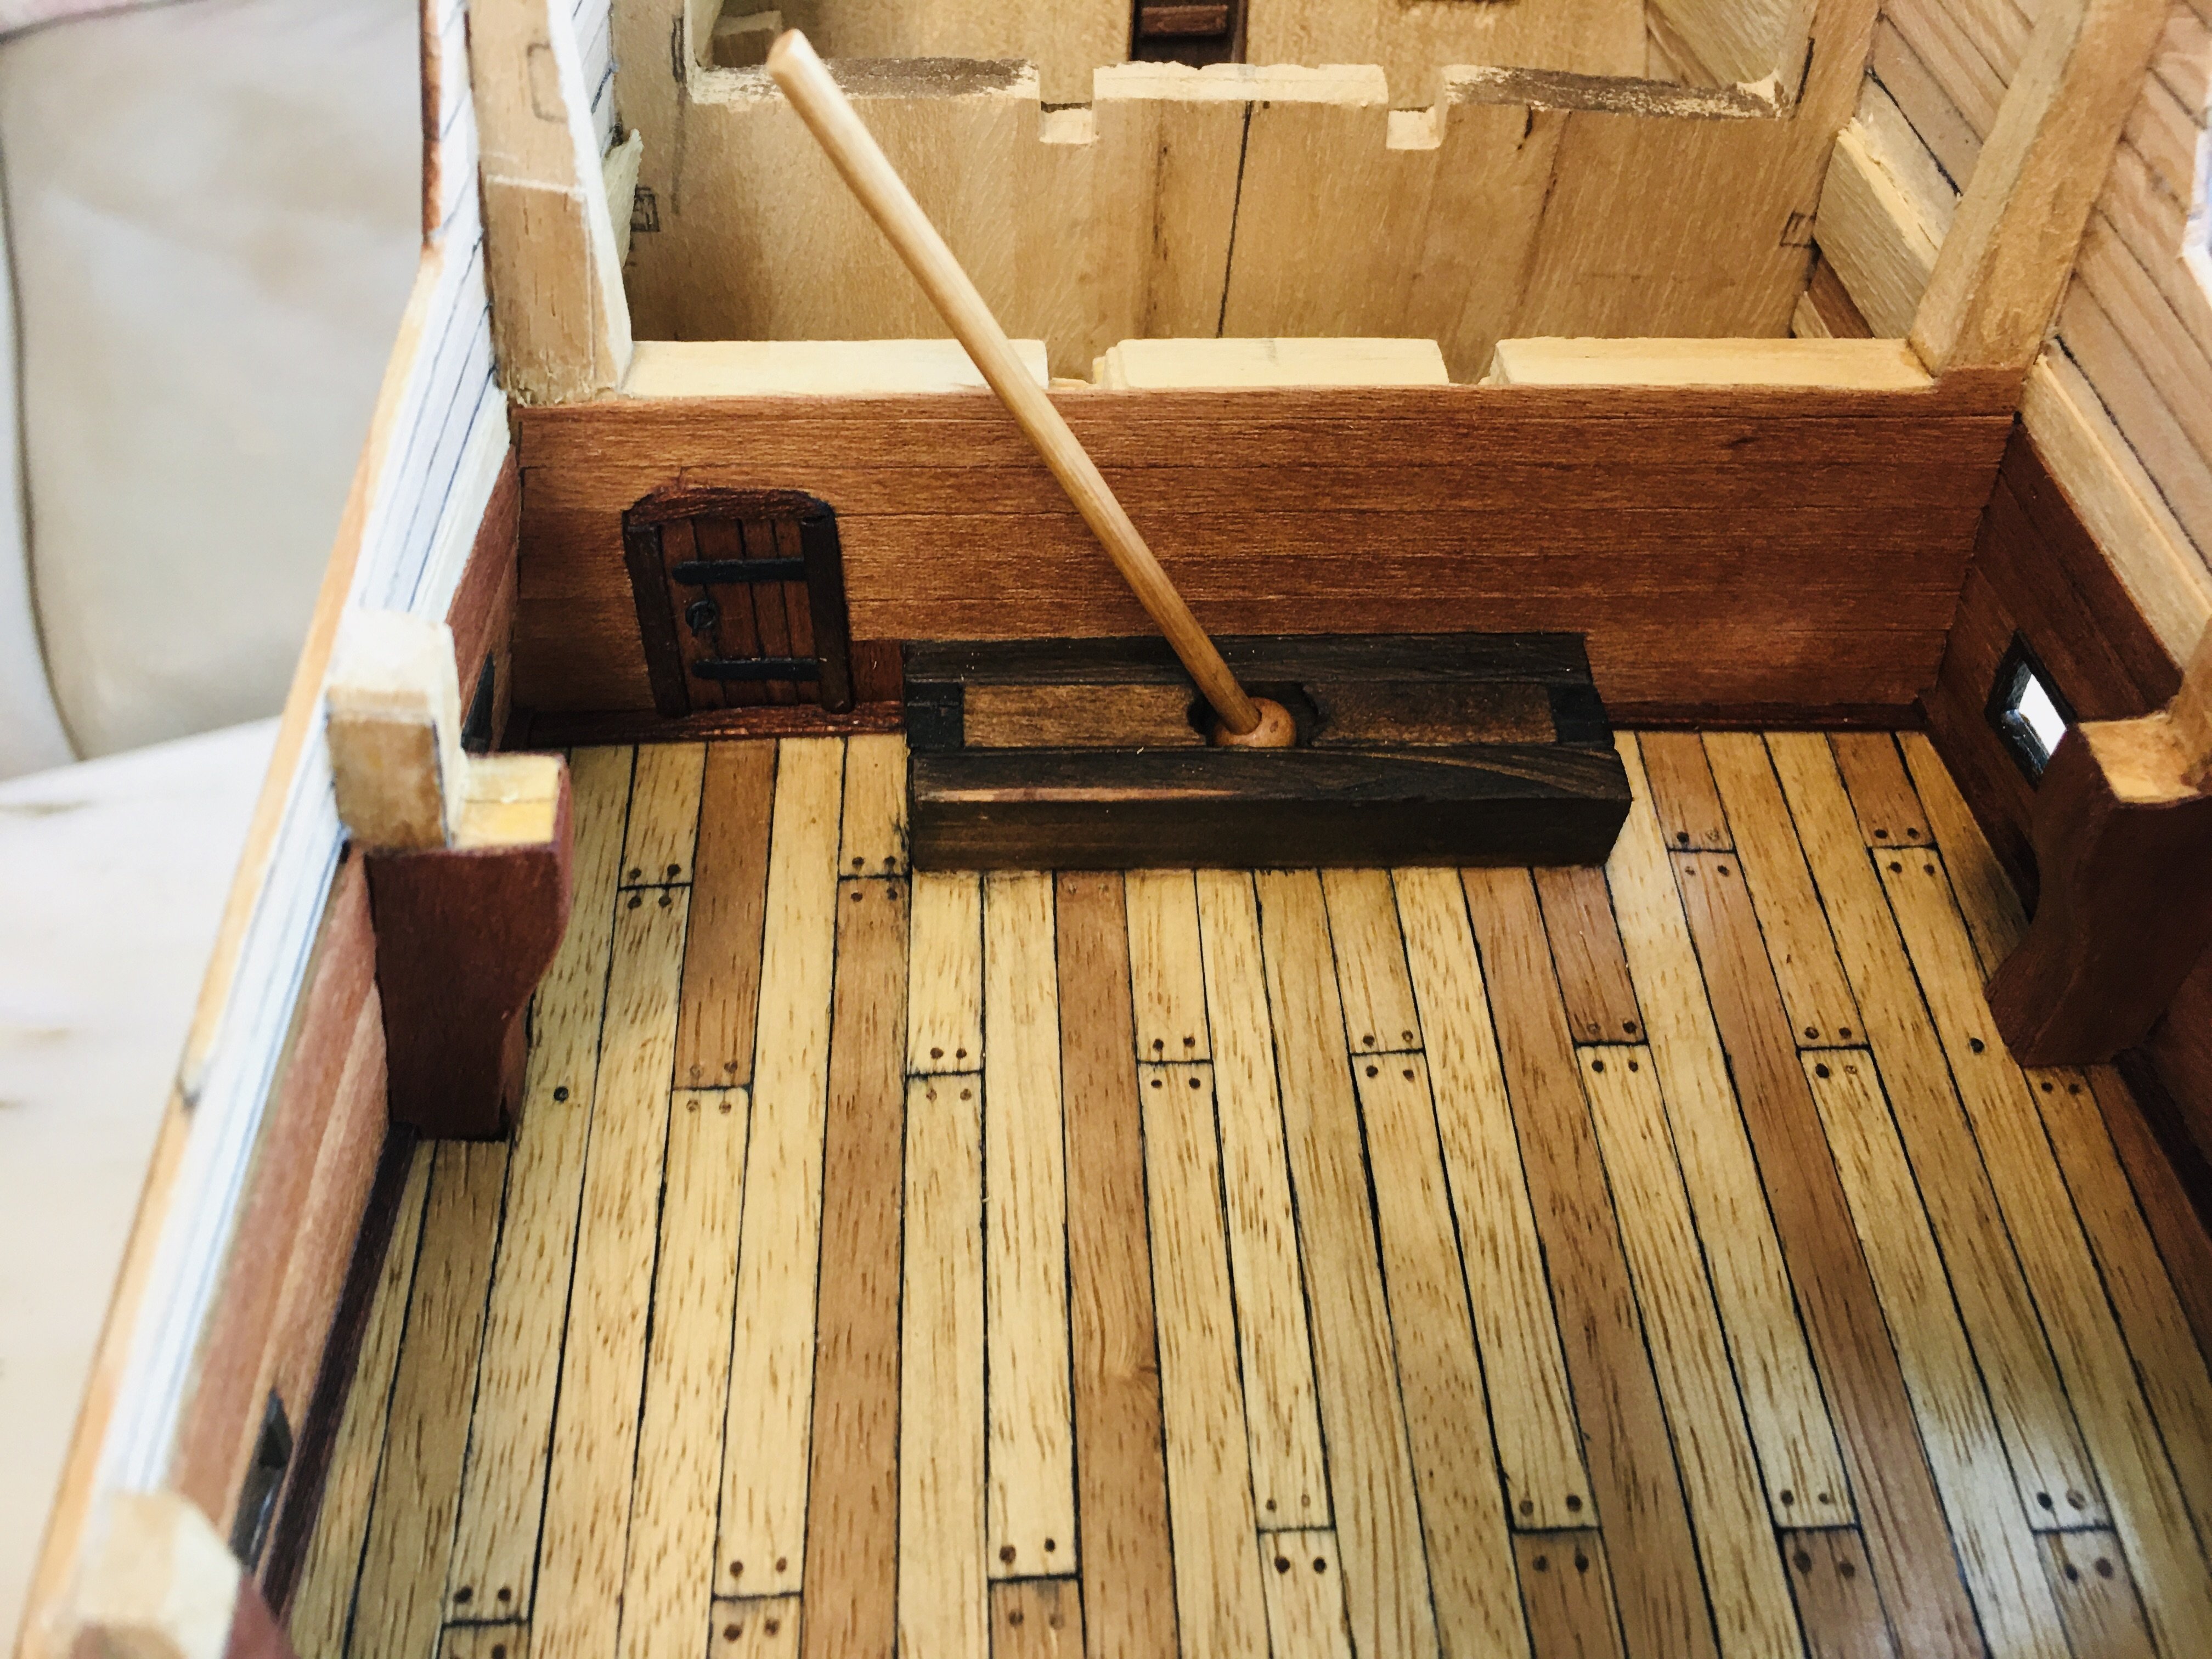
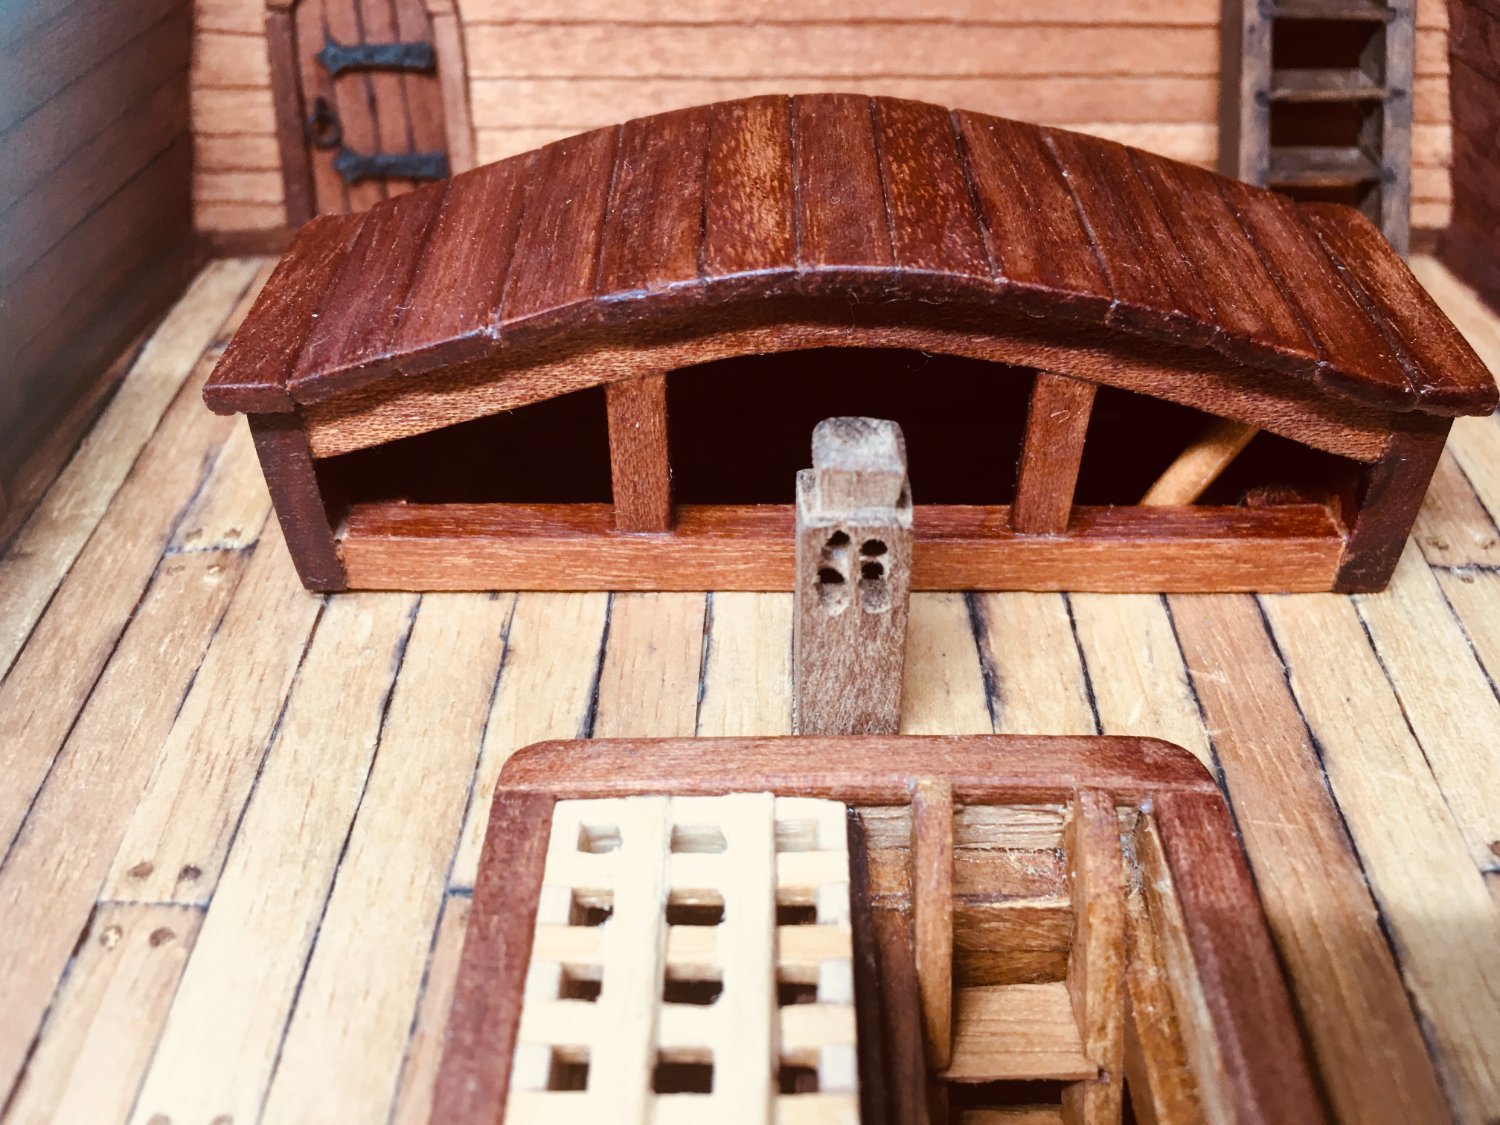
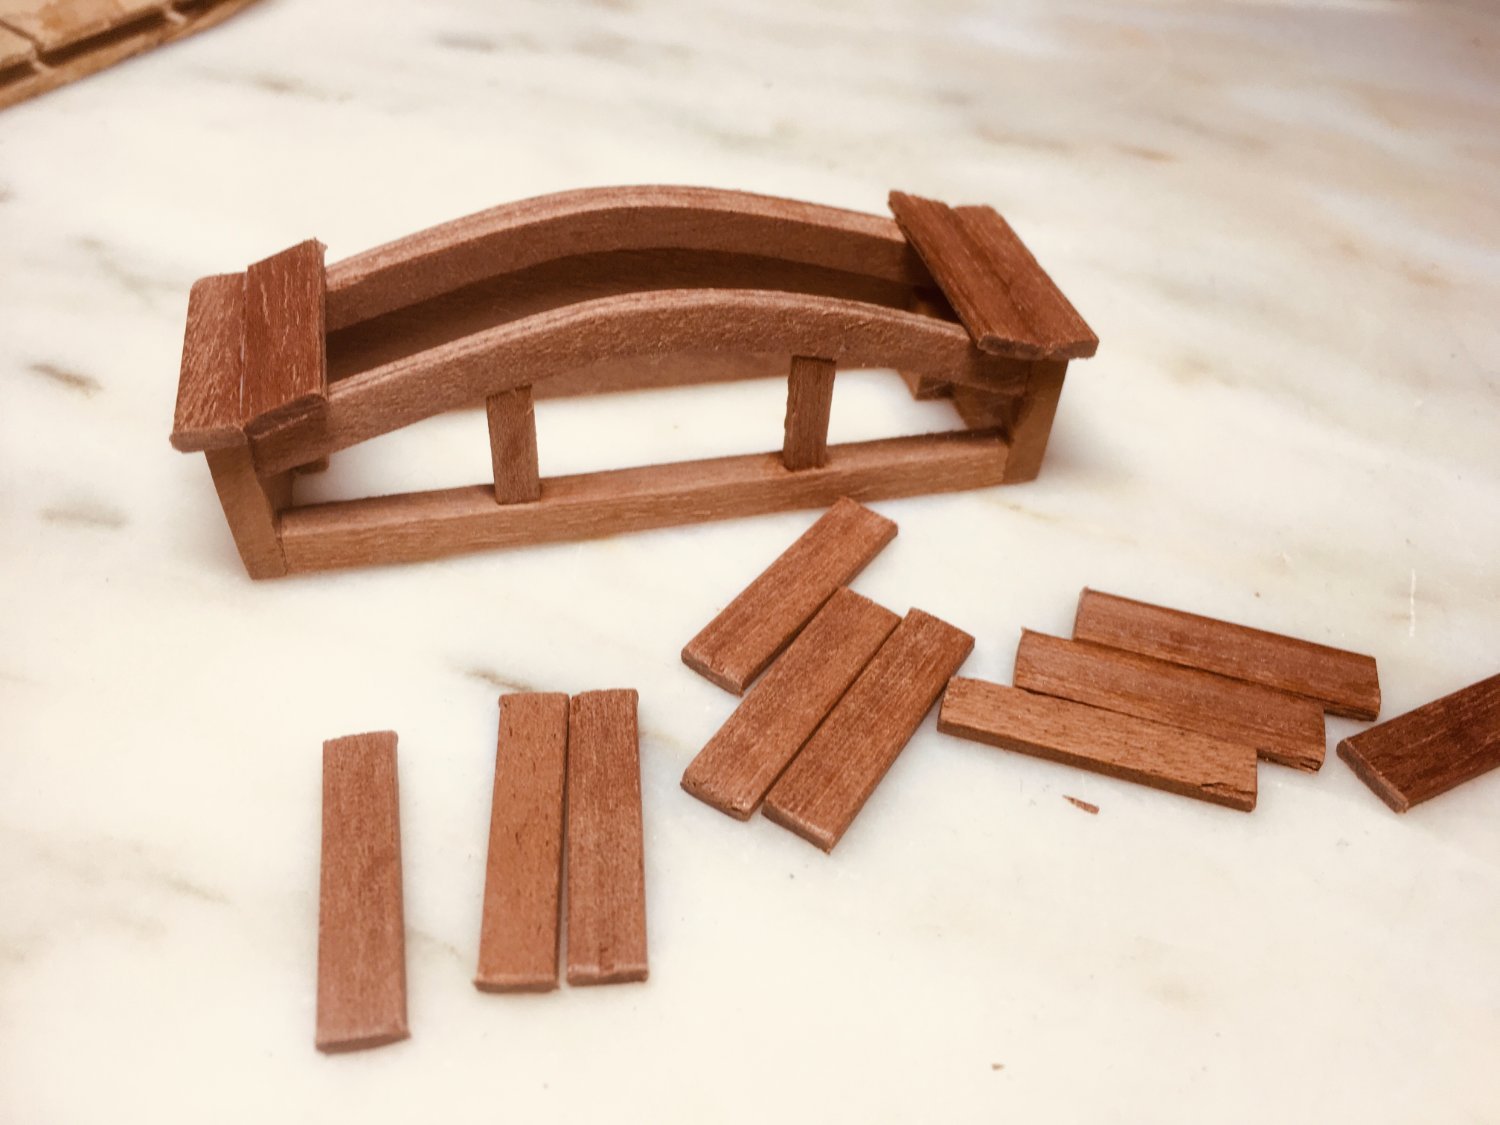
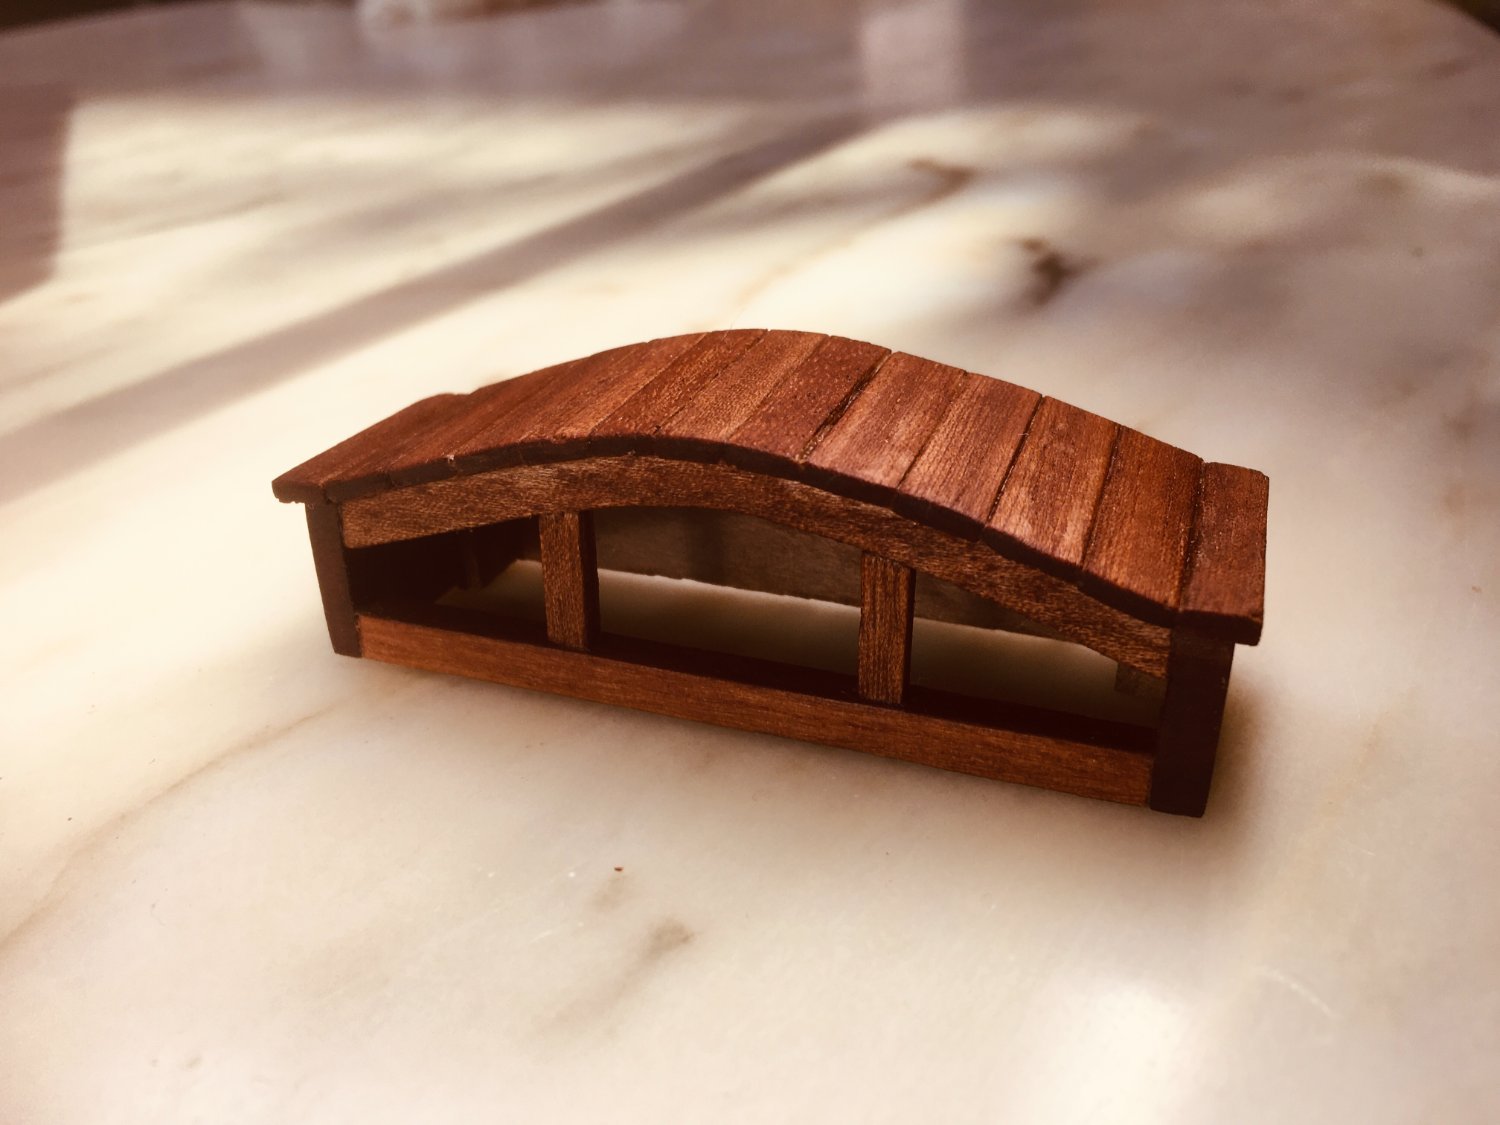
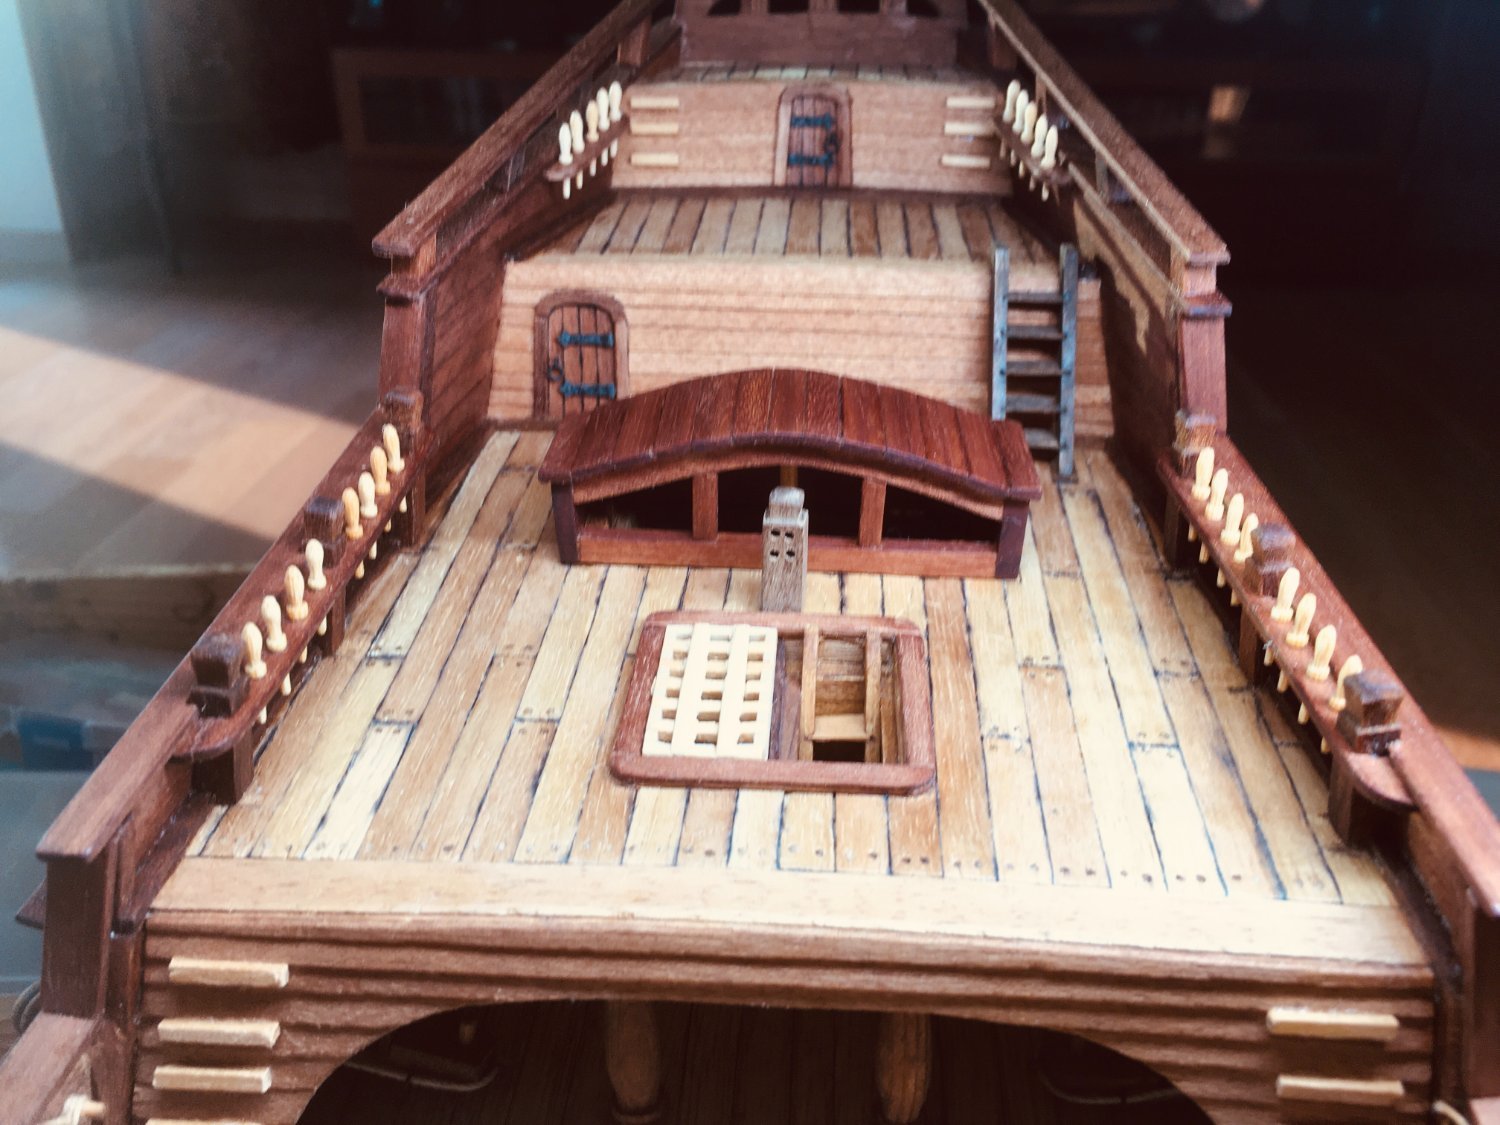
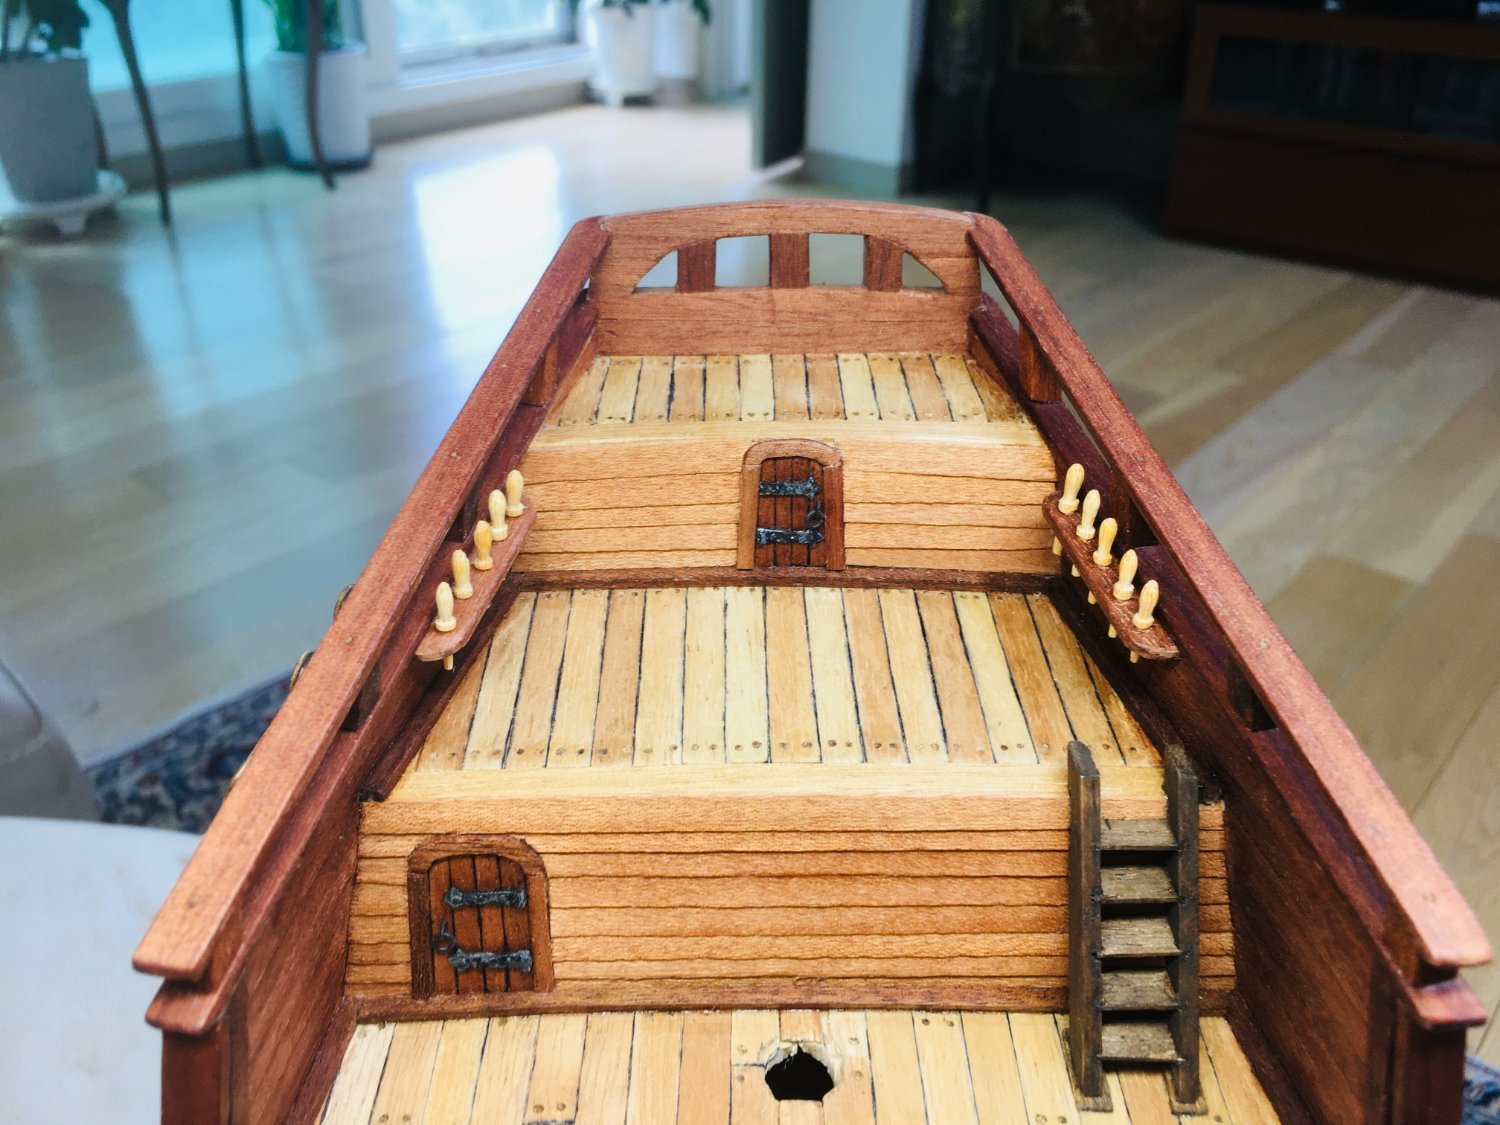
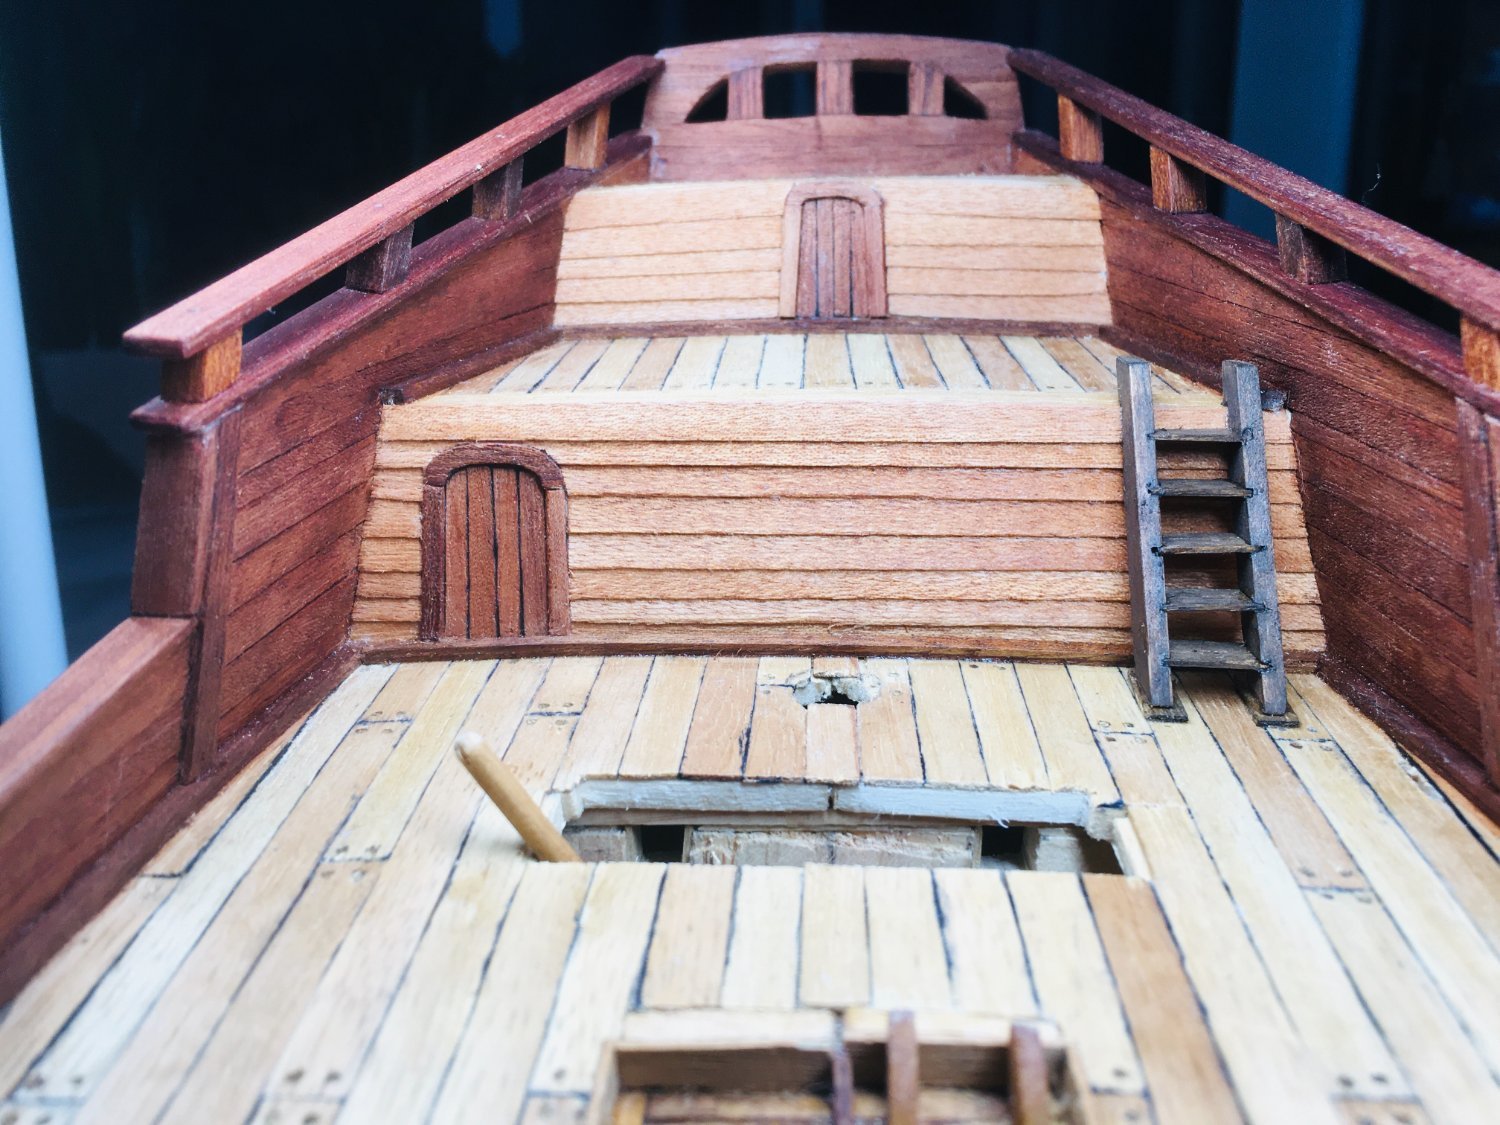
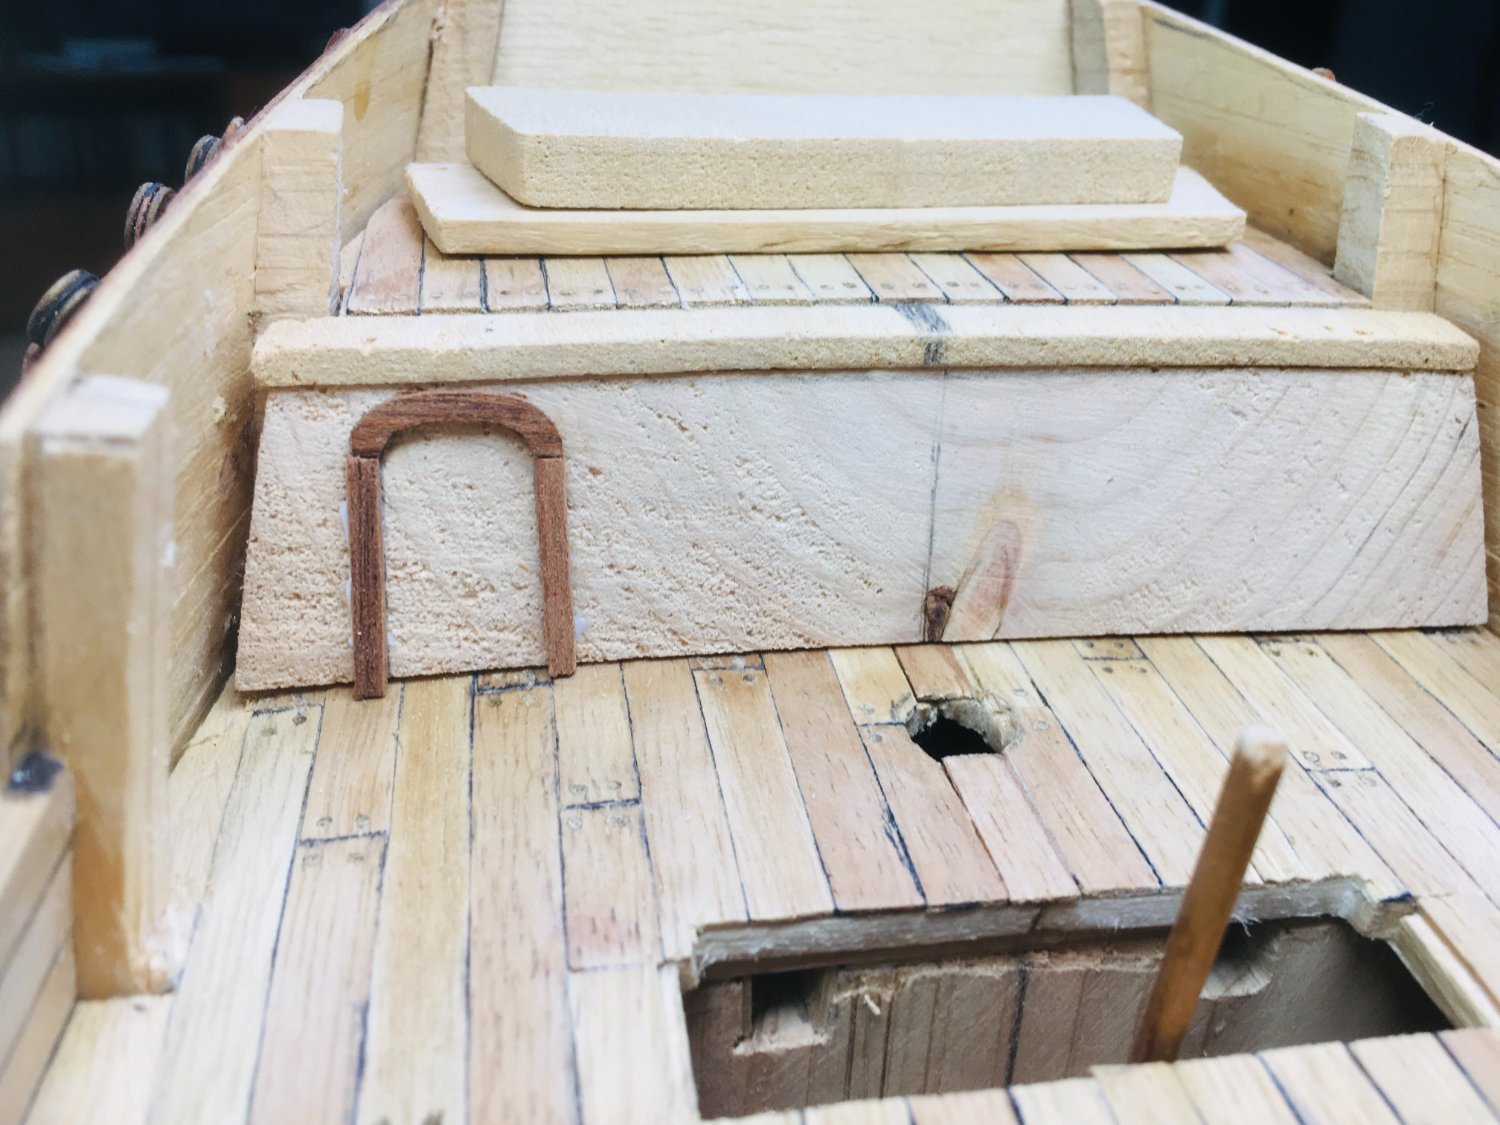
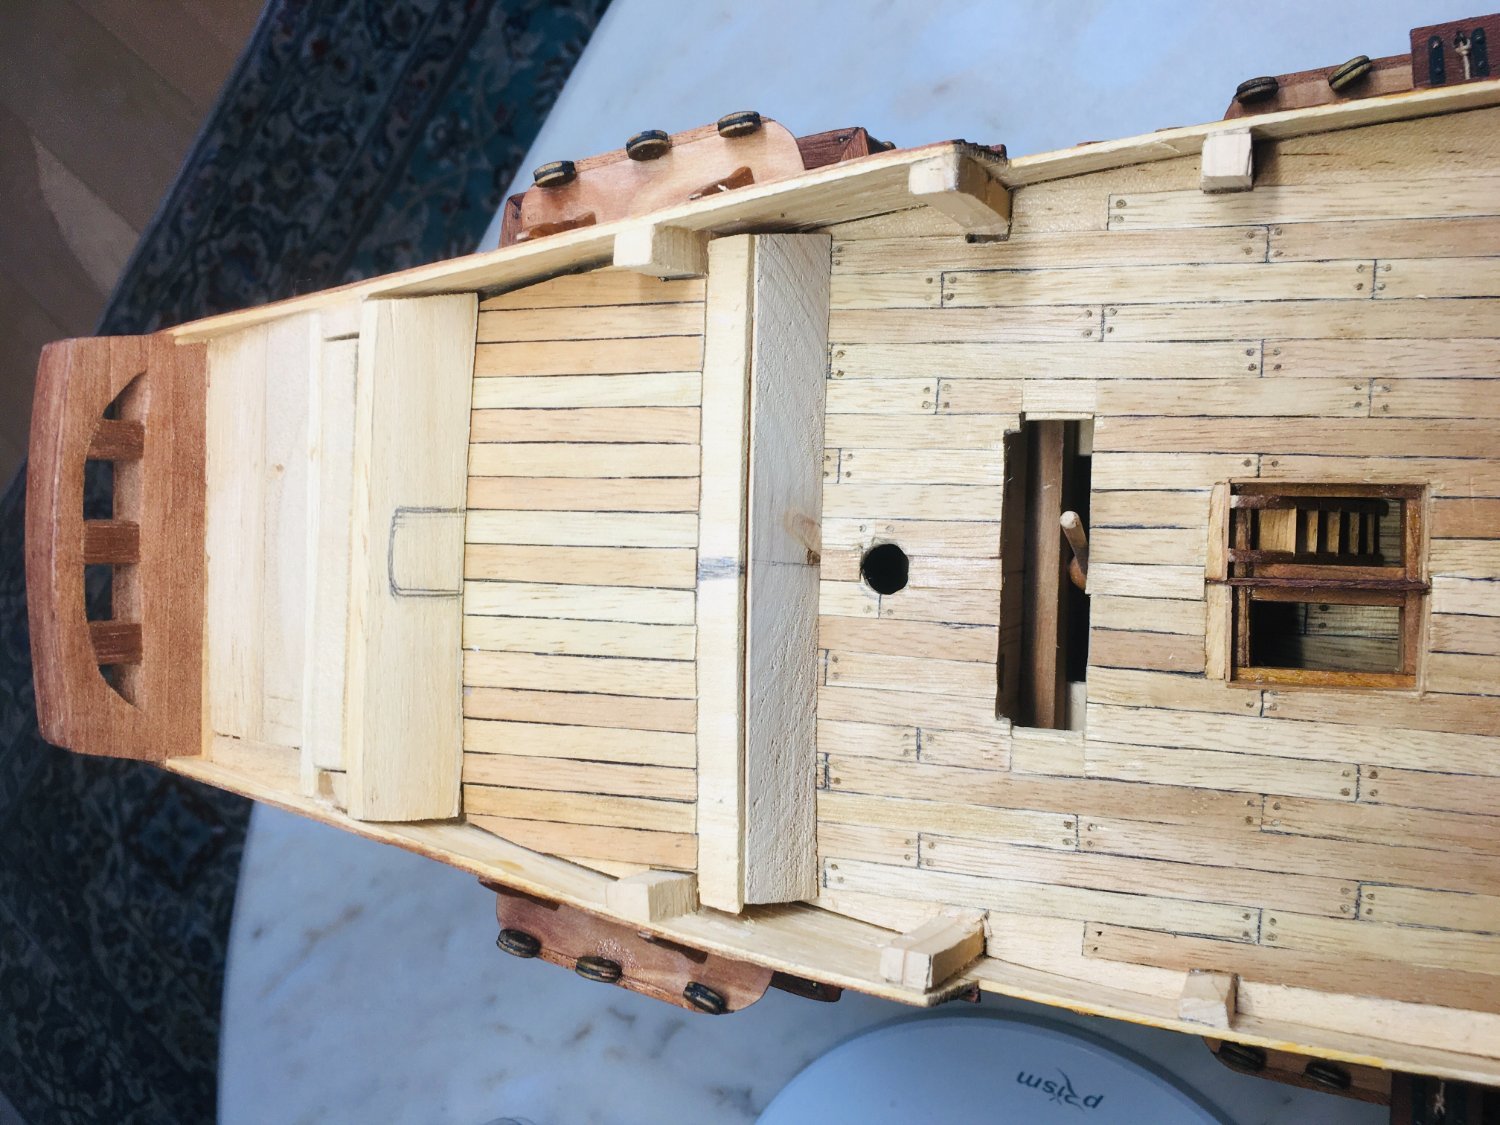
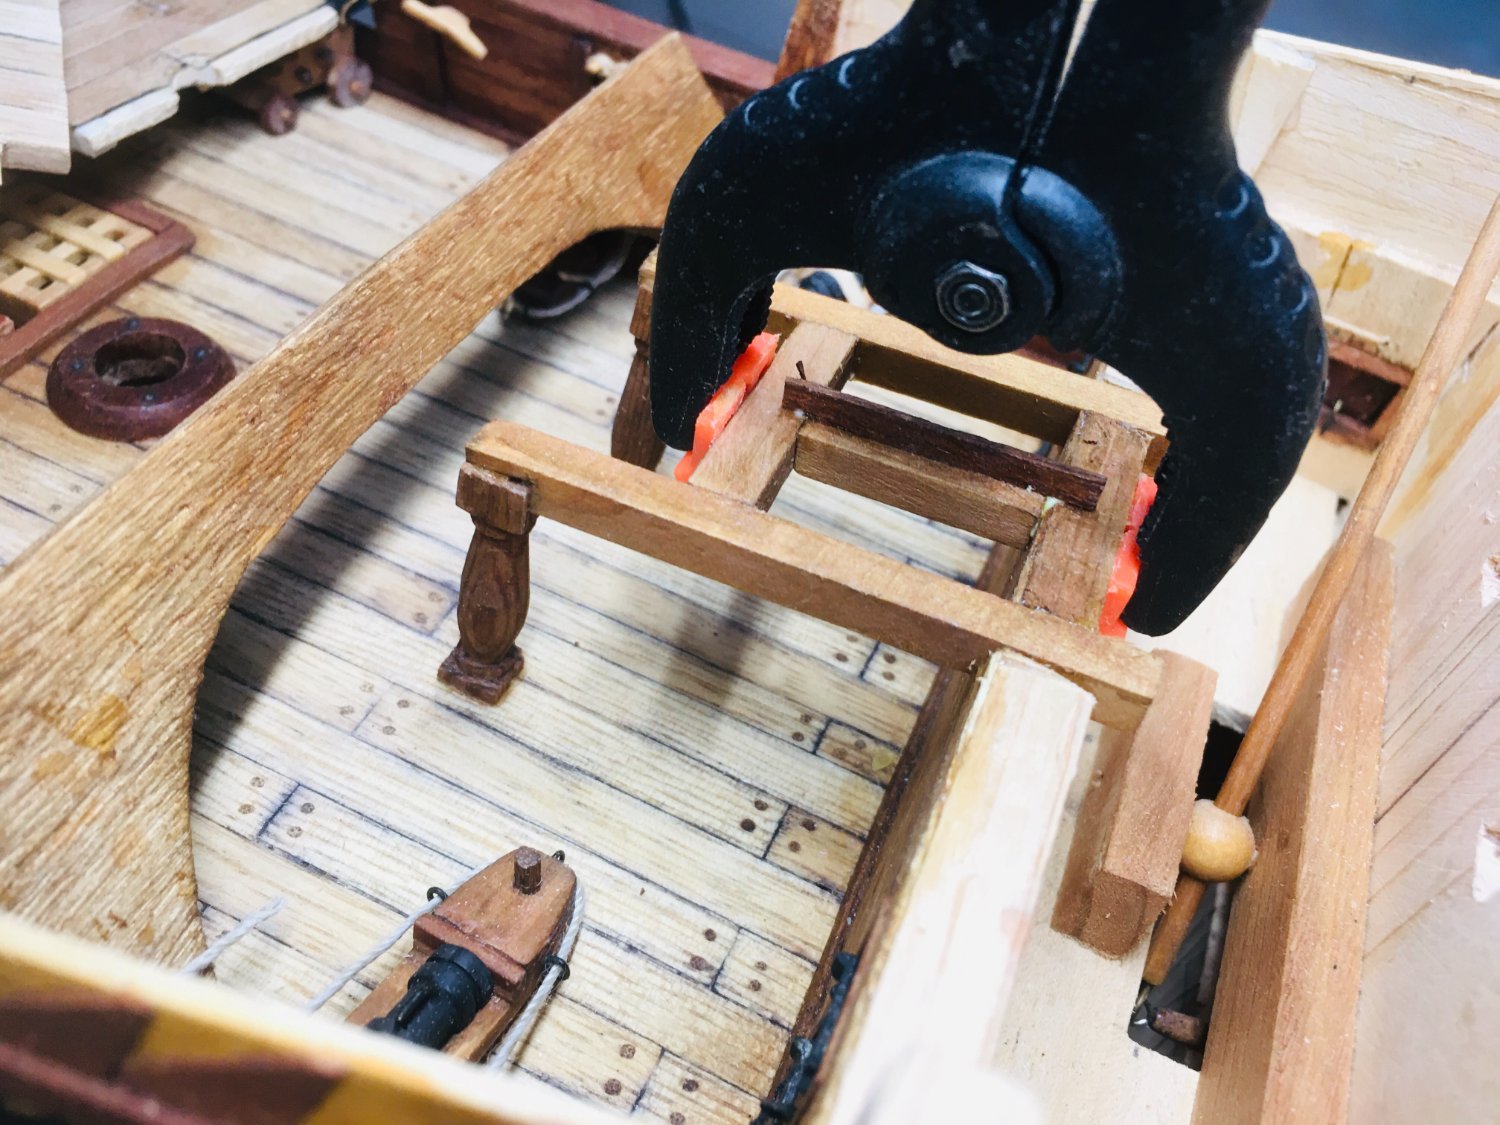
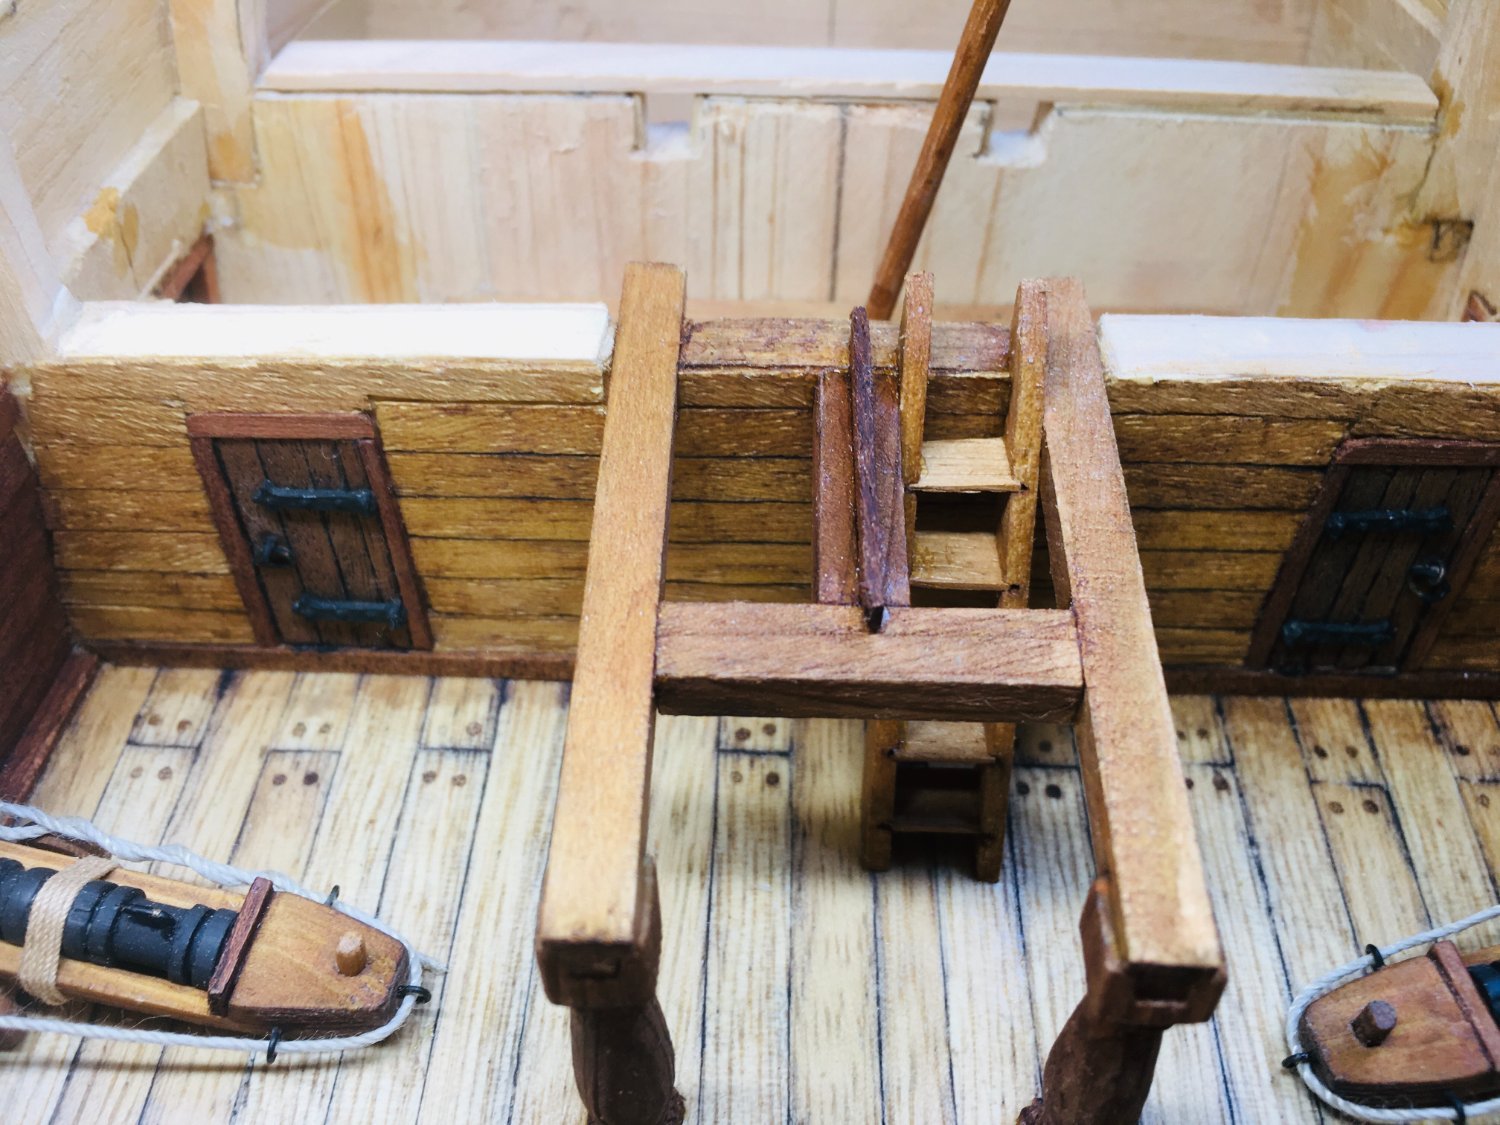
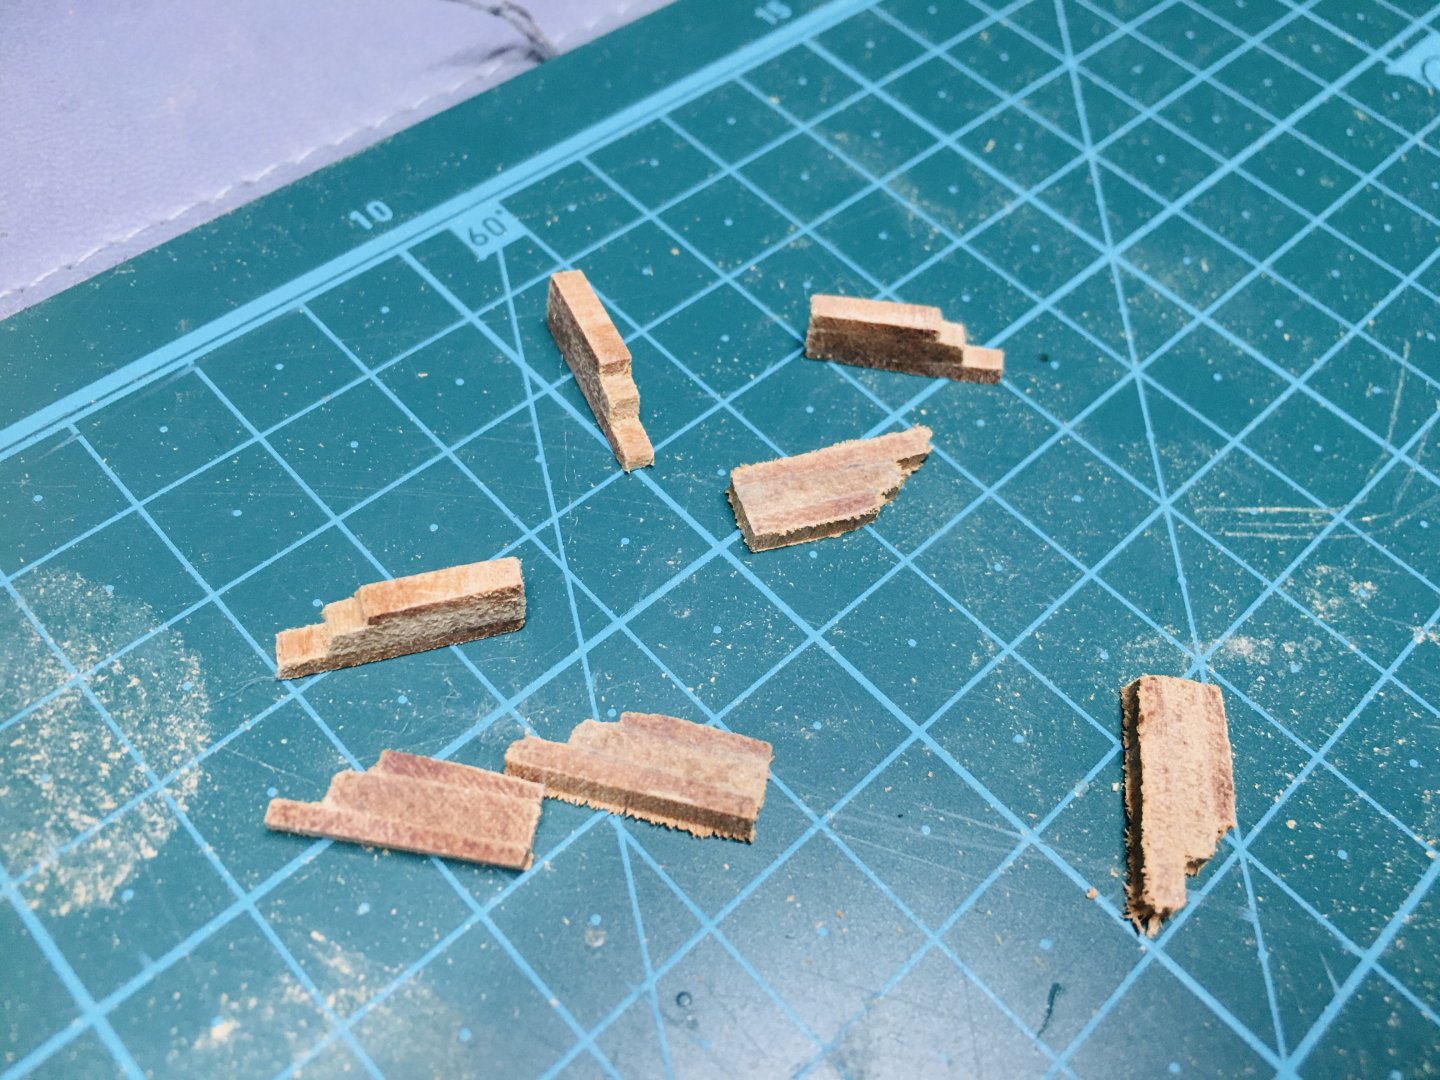
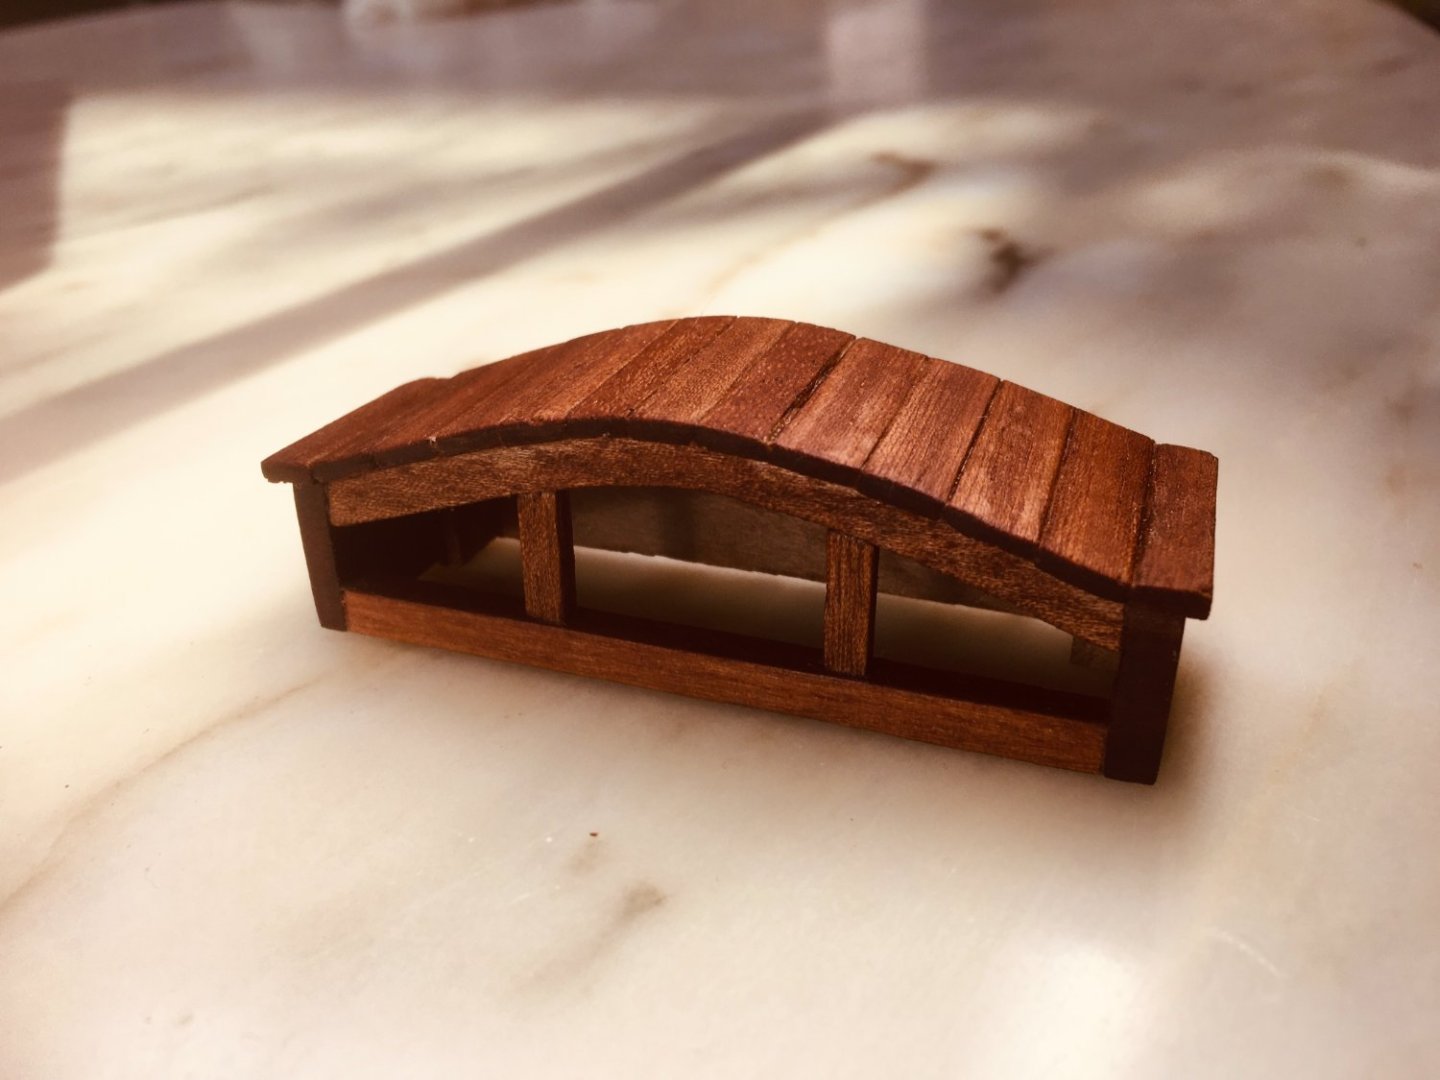
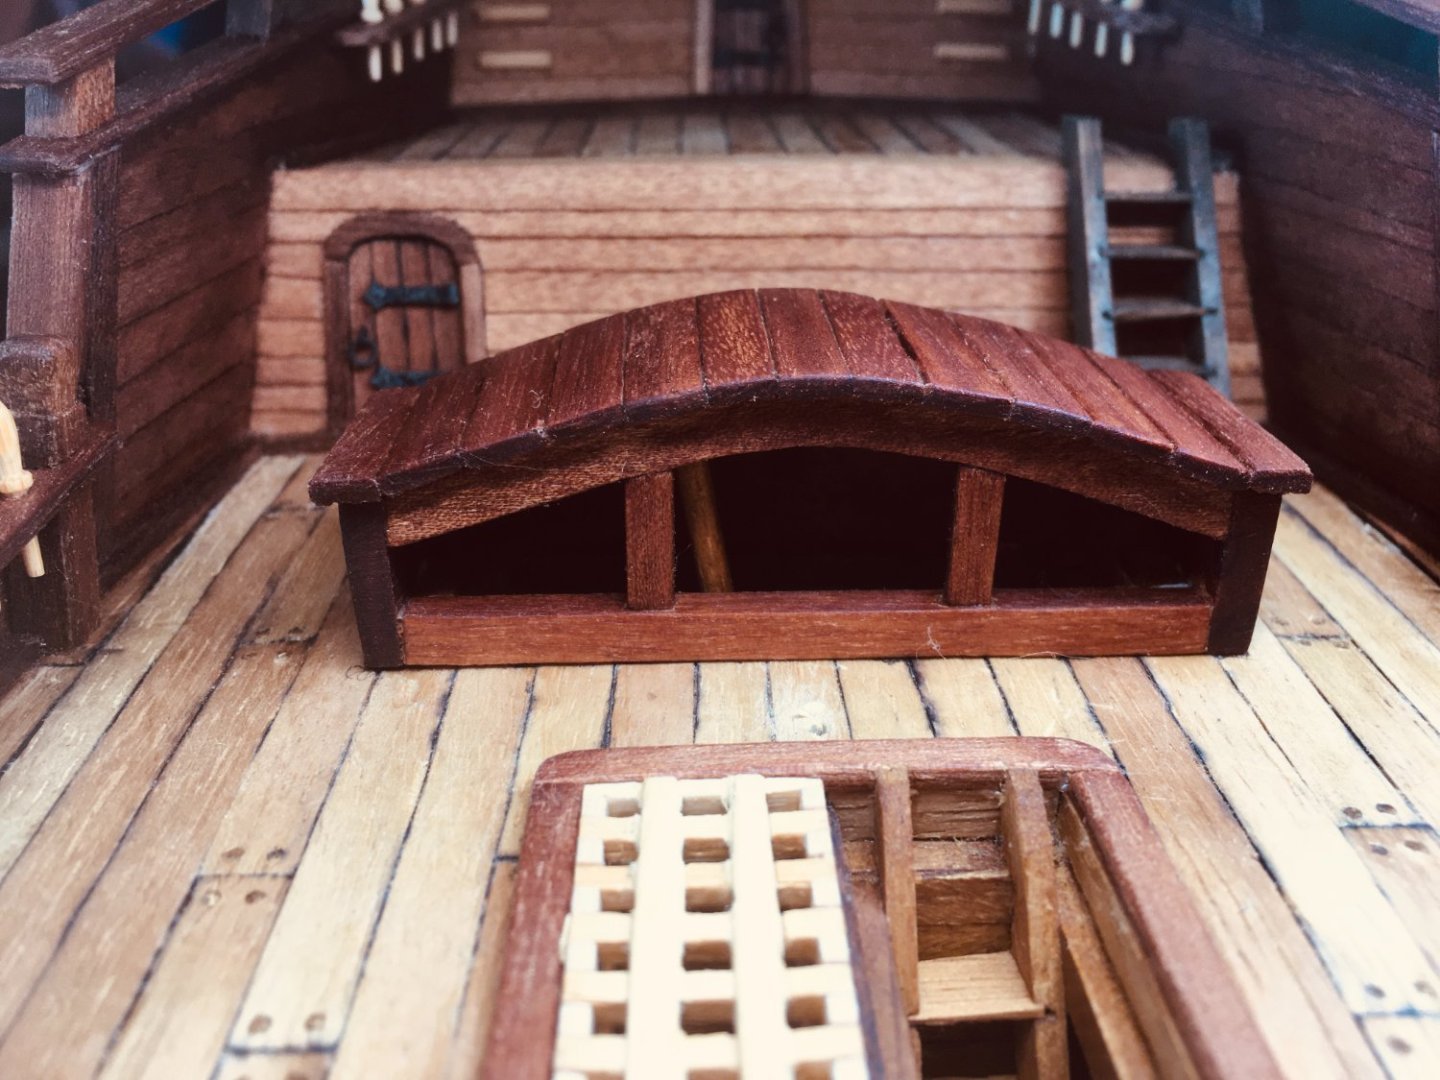
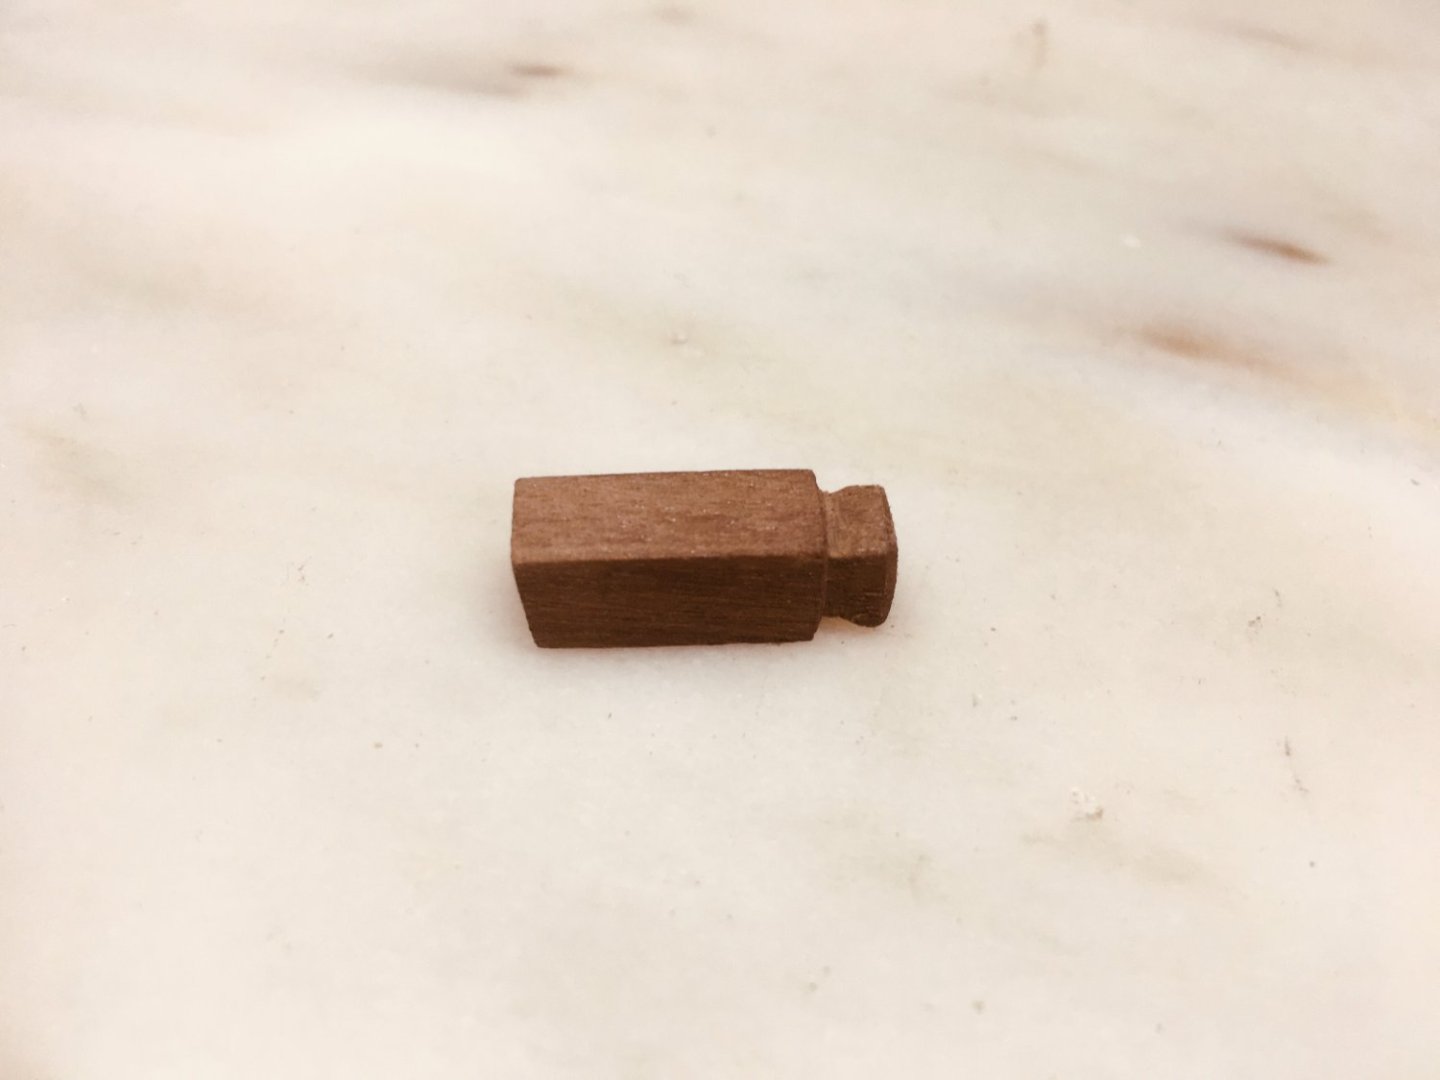
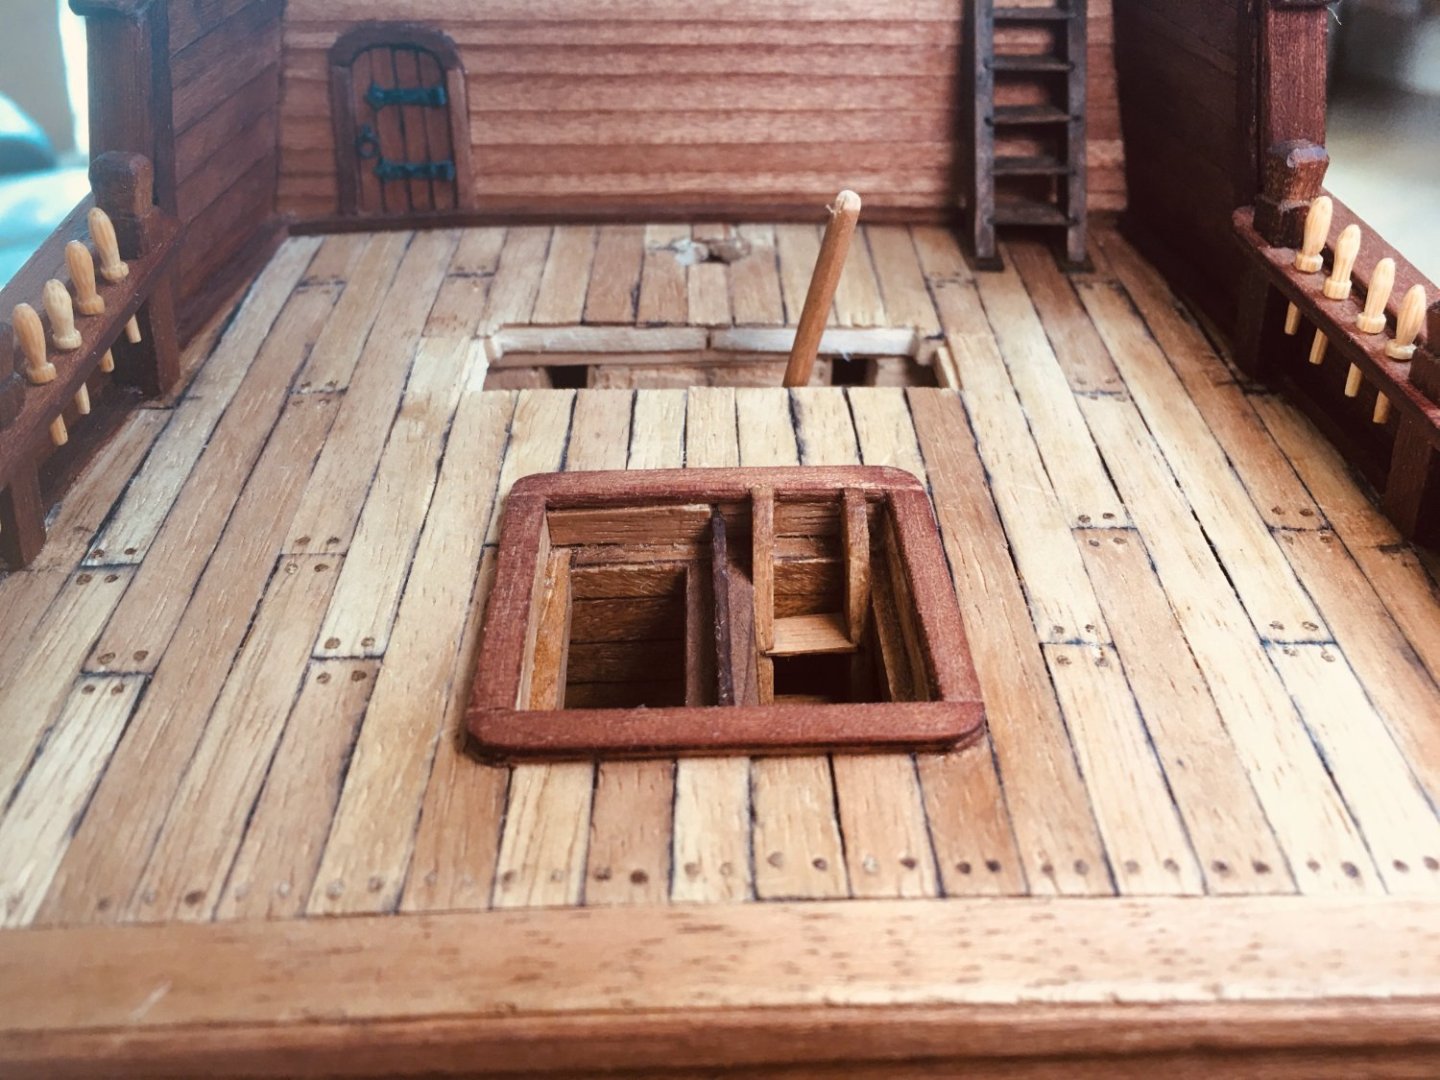
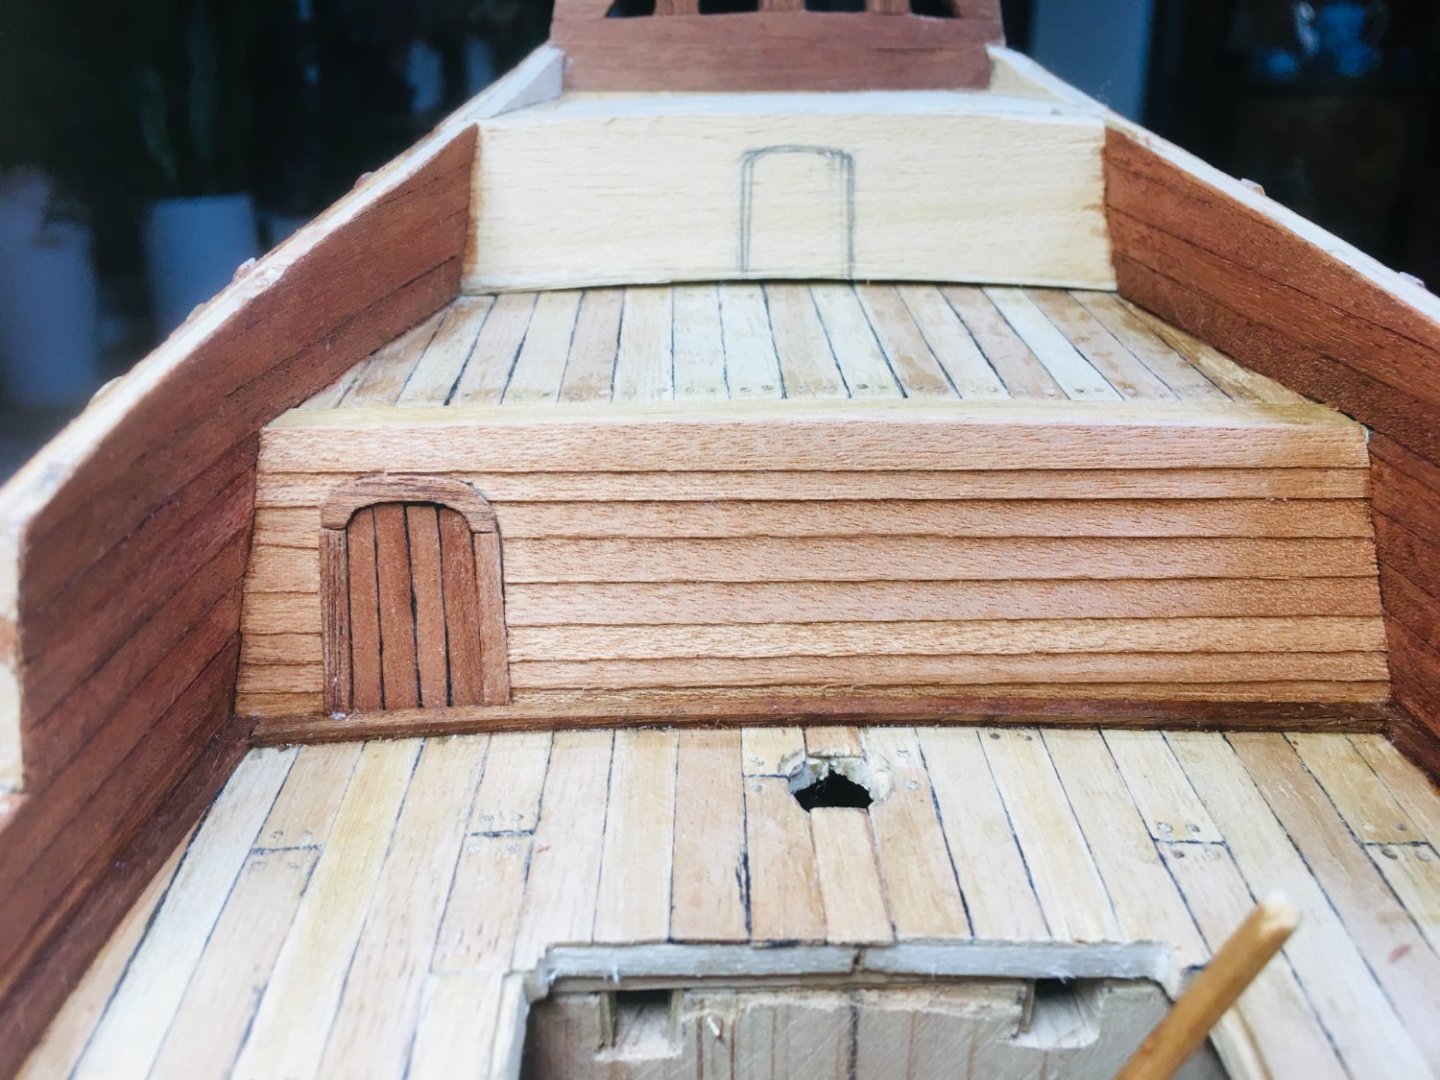
I still feel a little bit clumsy with my left index finger. And as such, work is not as satisfactory as before. Anyway, for the whipstaff house, I just chose a simple (but robust) design. The end result is kind of cute and quite strong structurally. Below are the photos on this endeavor. The whipstaff house is not attached yet to the deck as I will need some space to work on the mizzen mast area and etc.


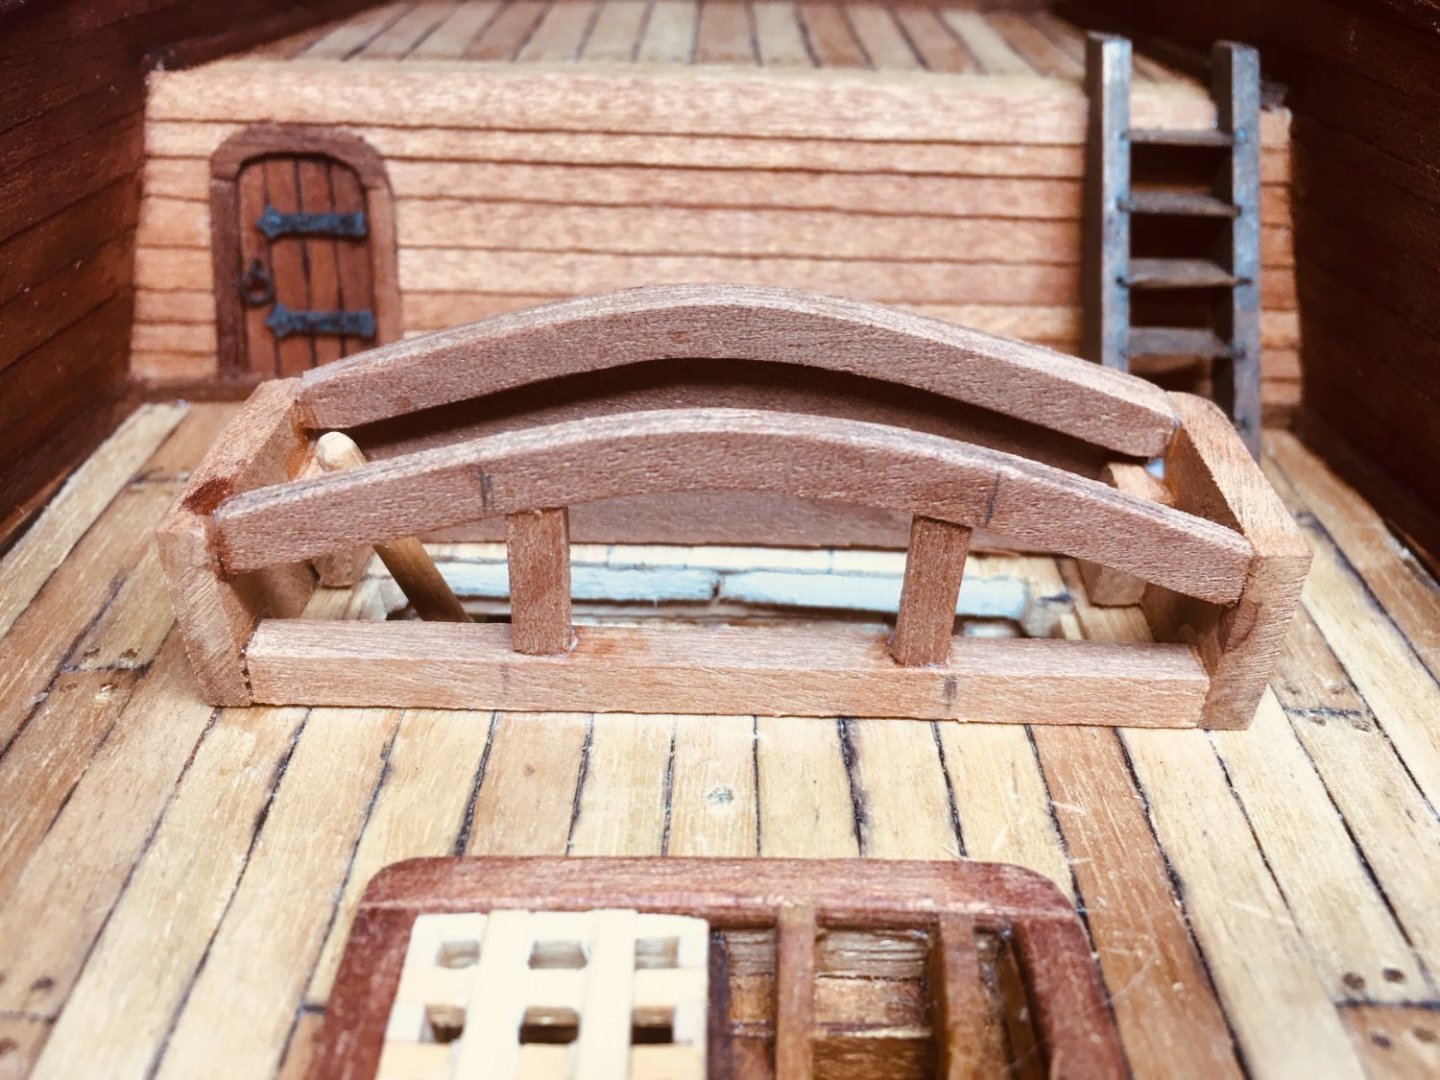


-
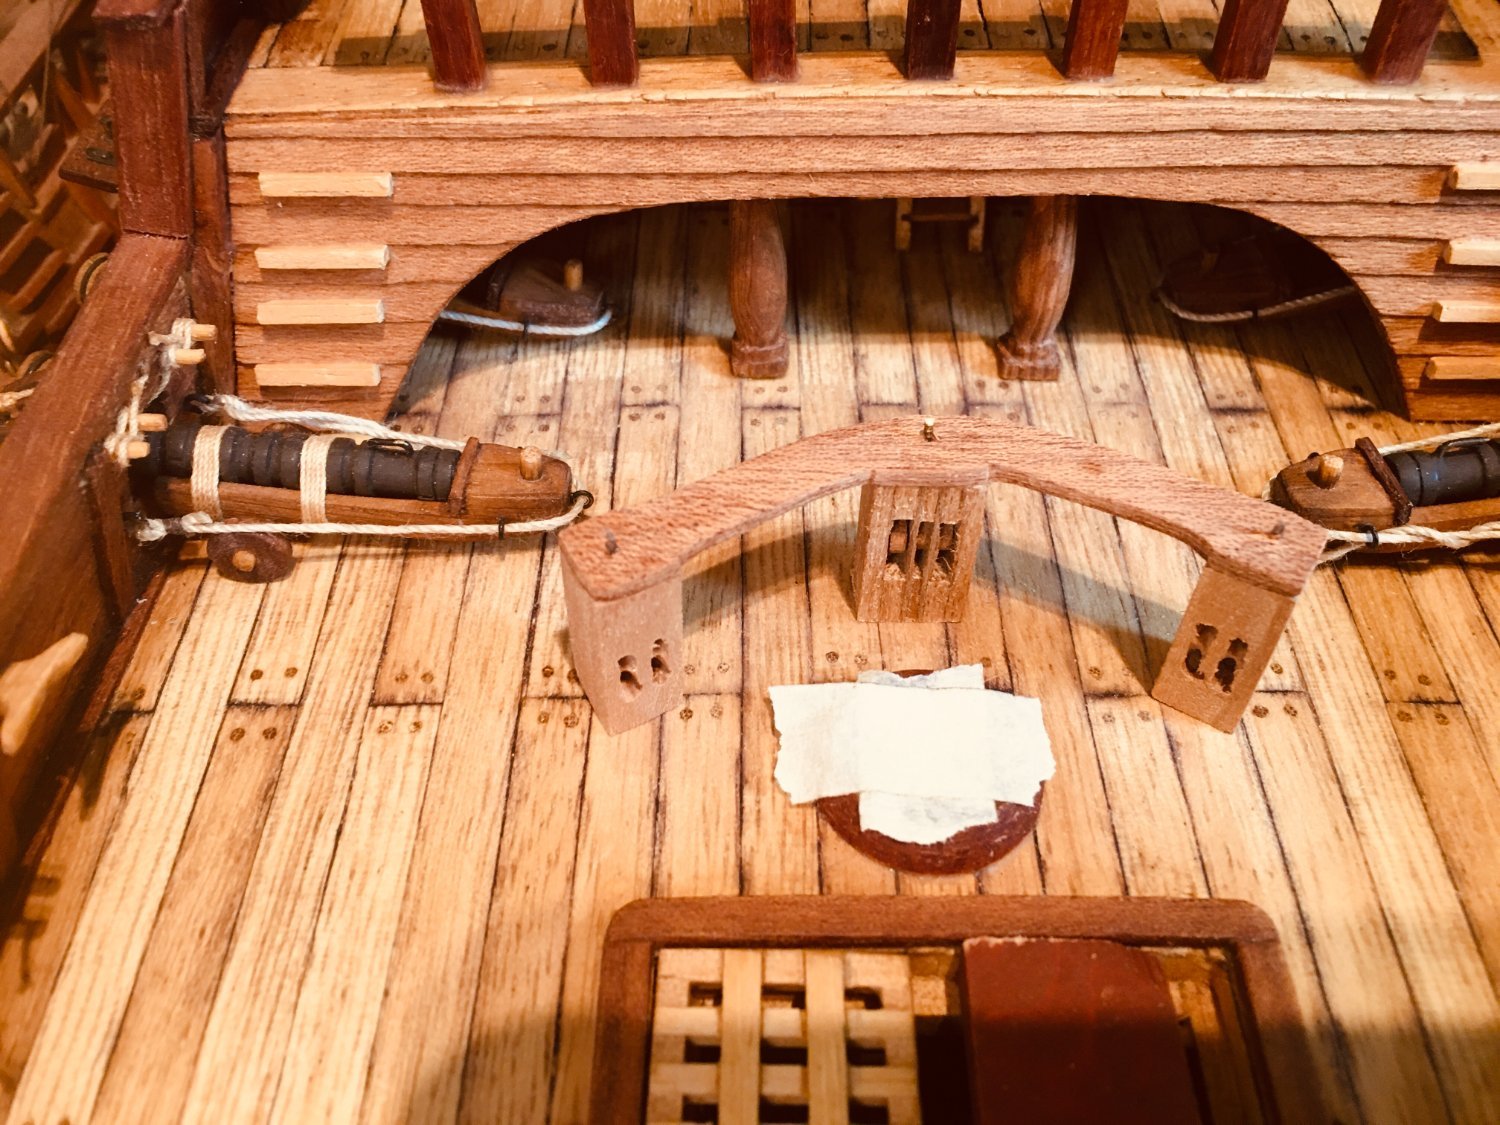
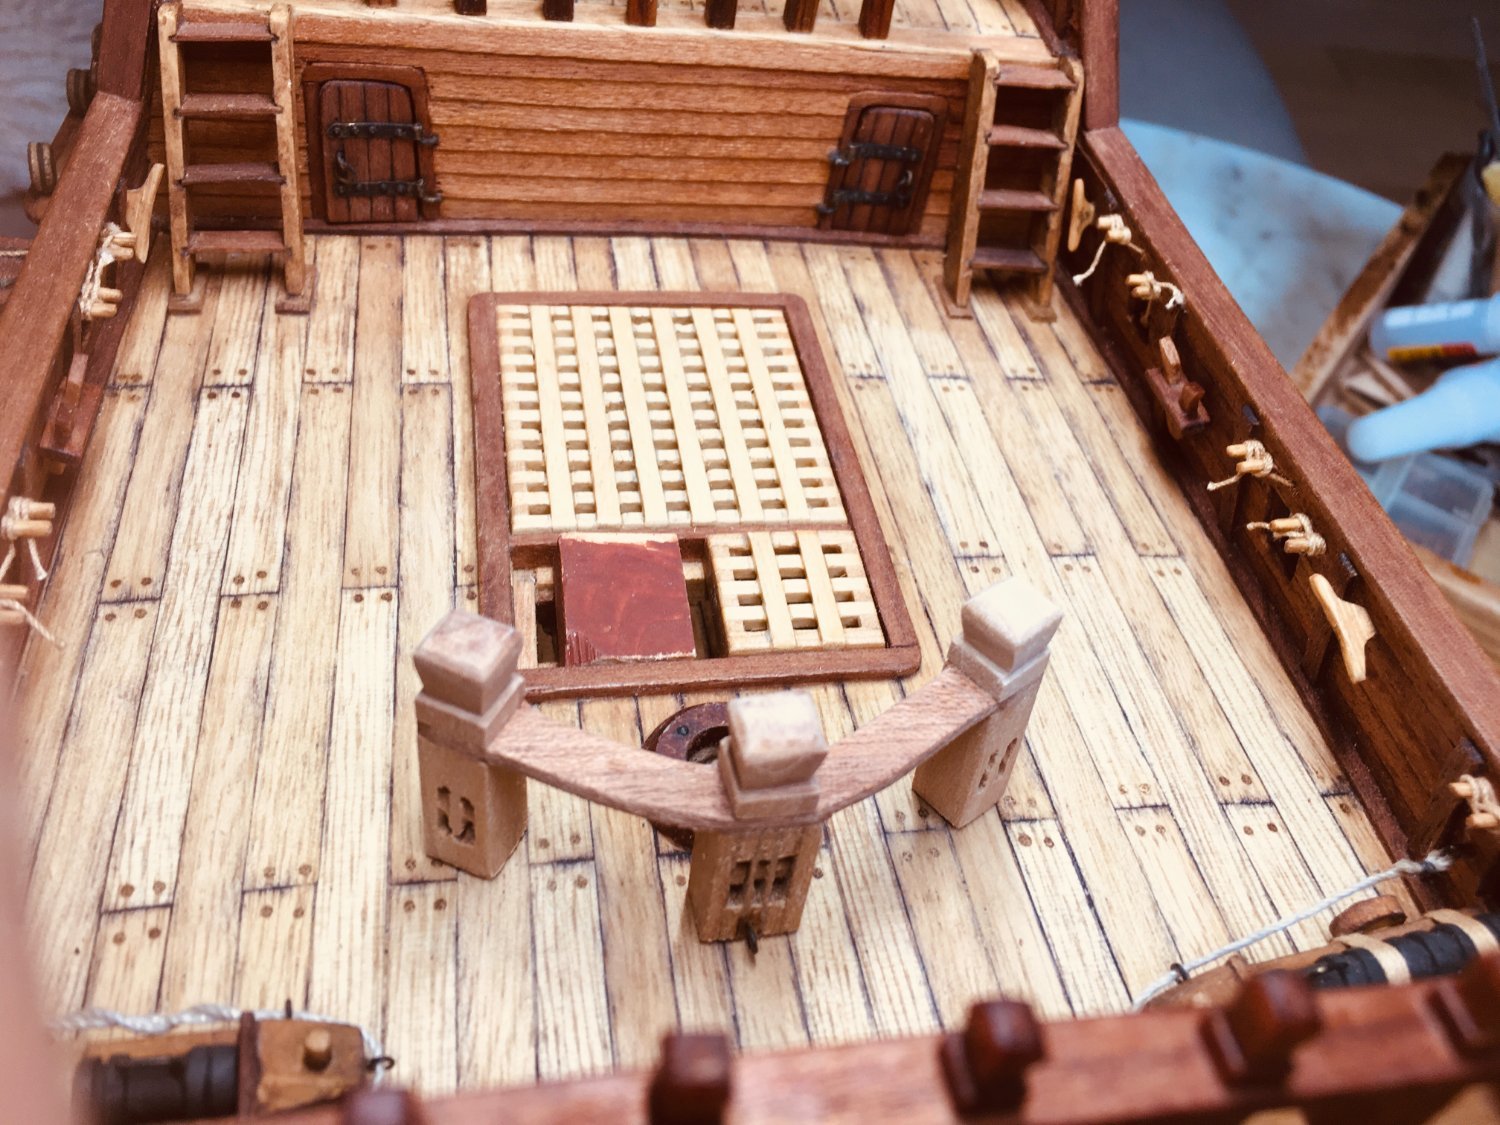
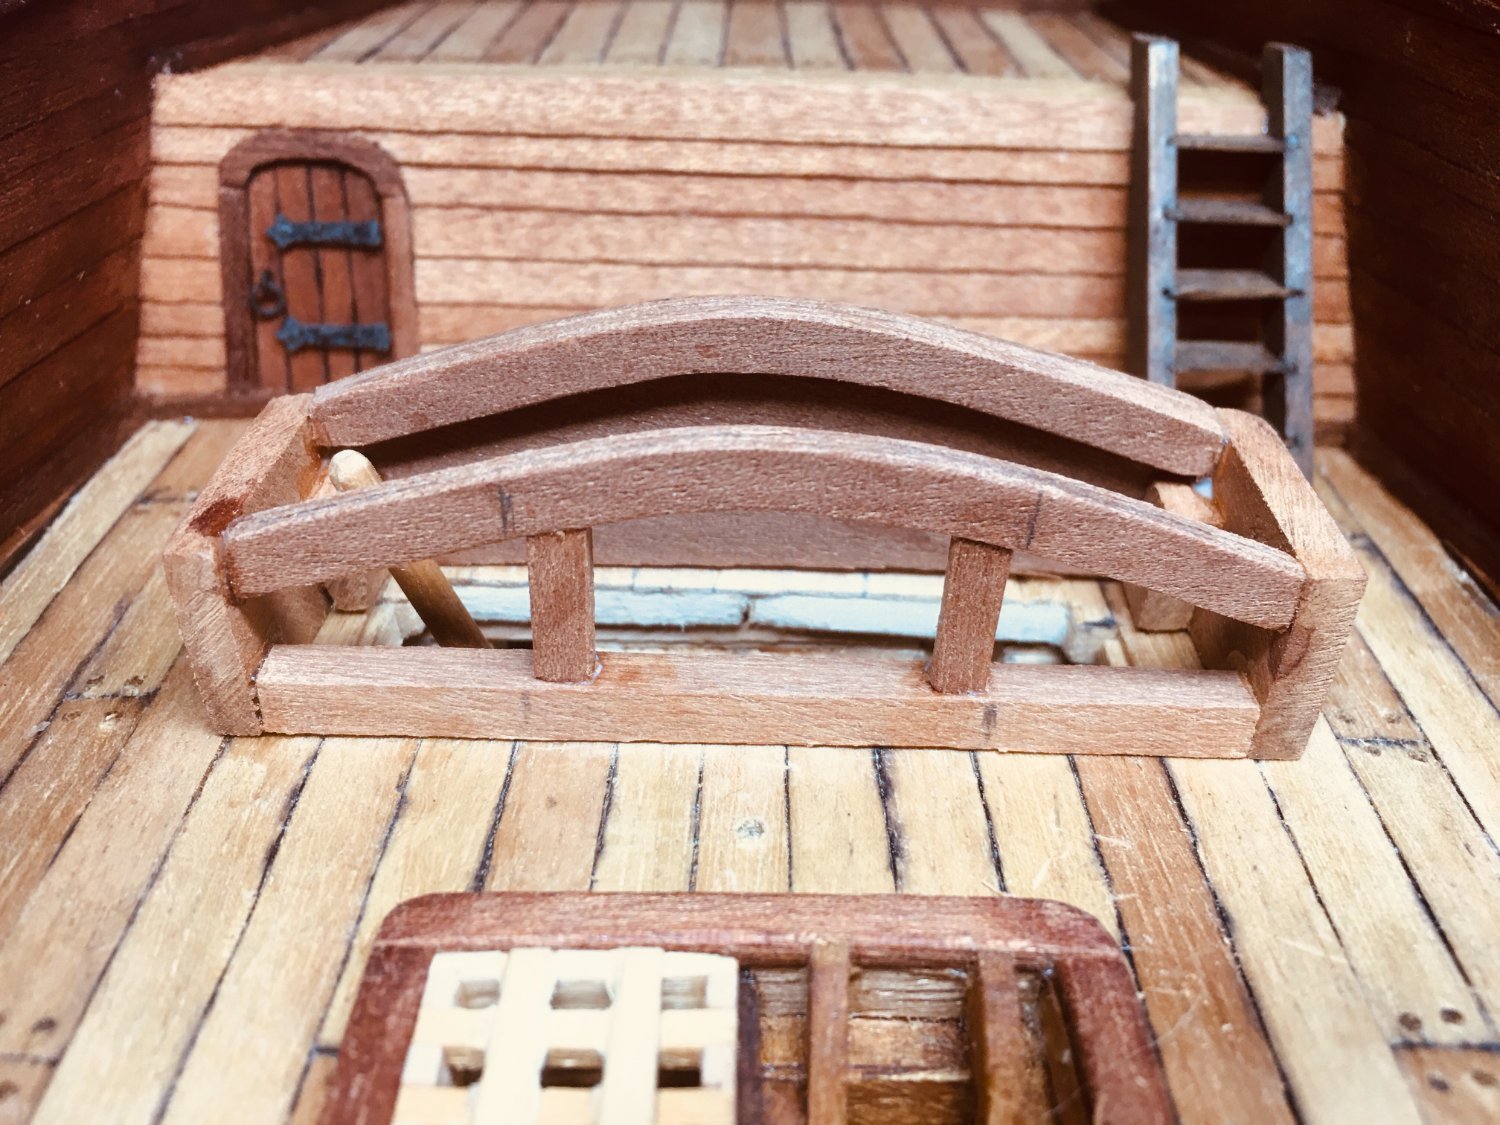
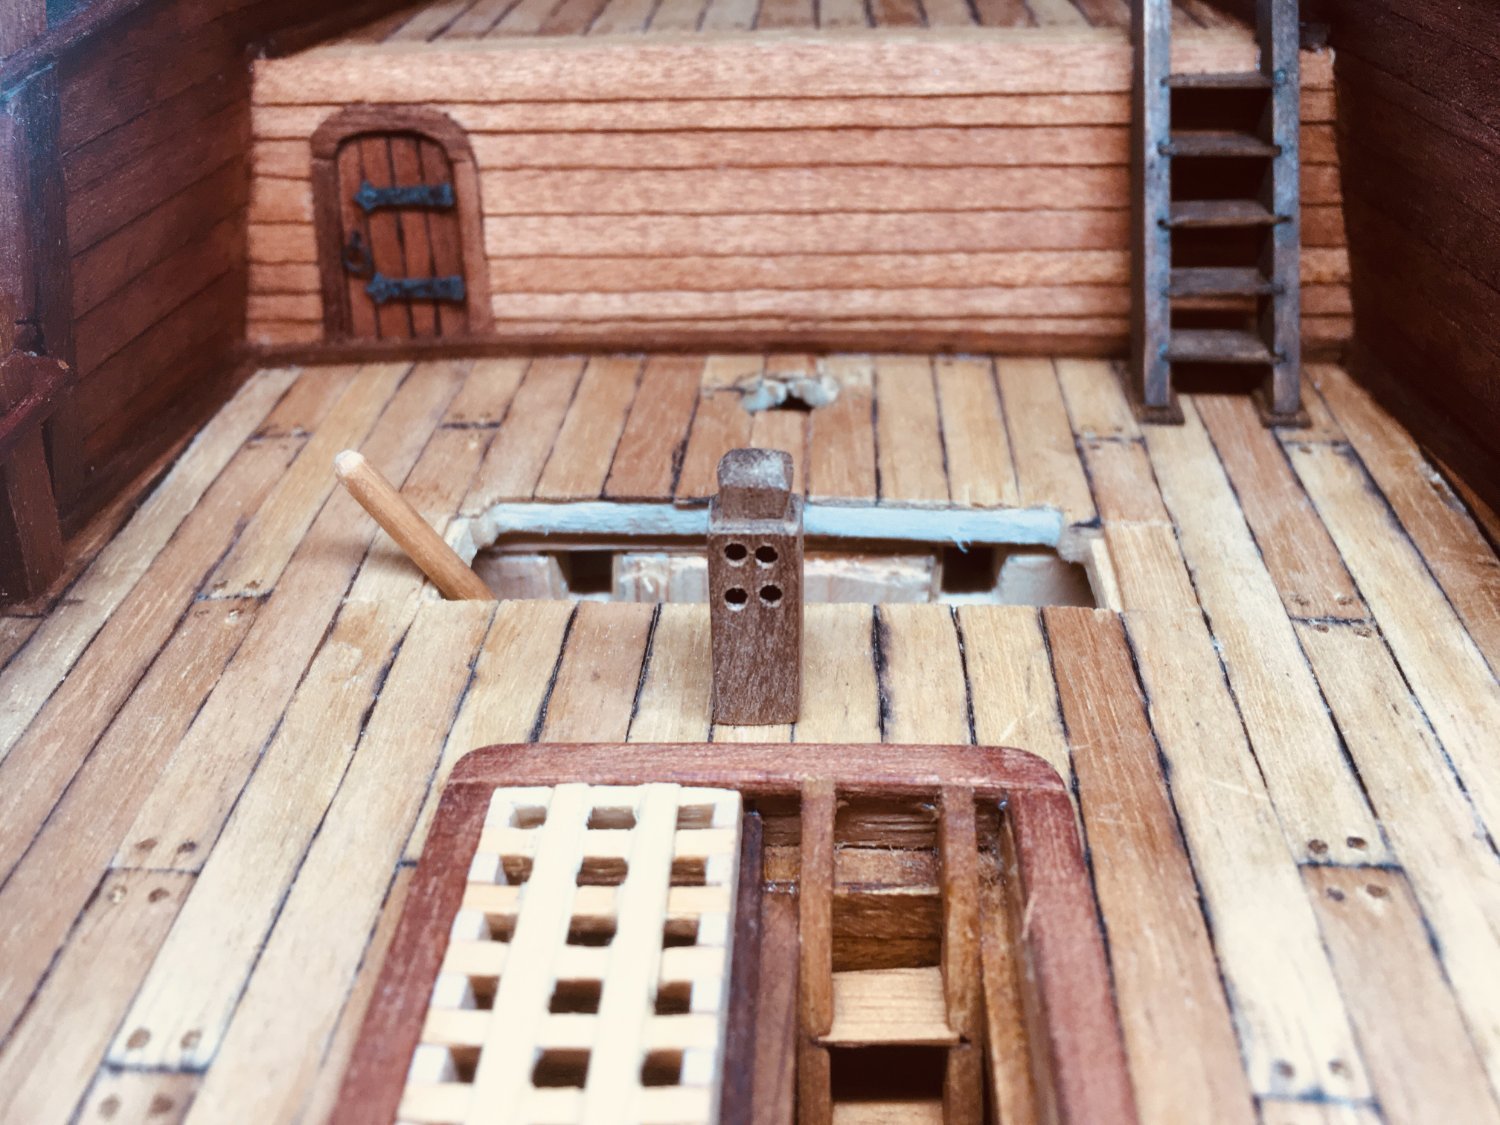
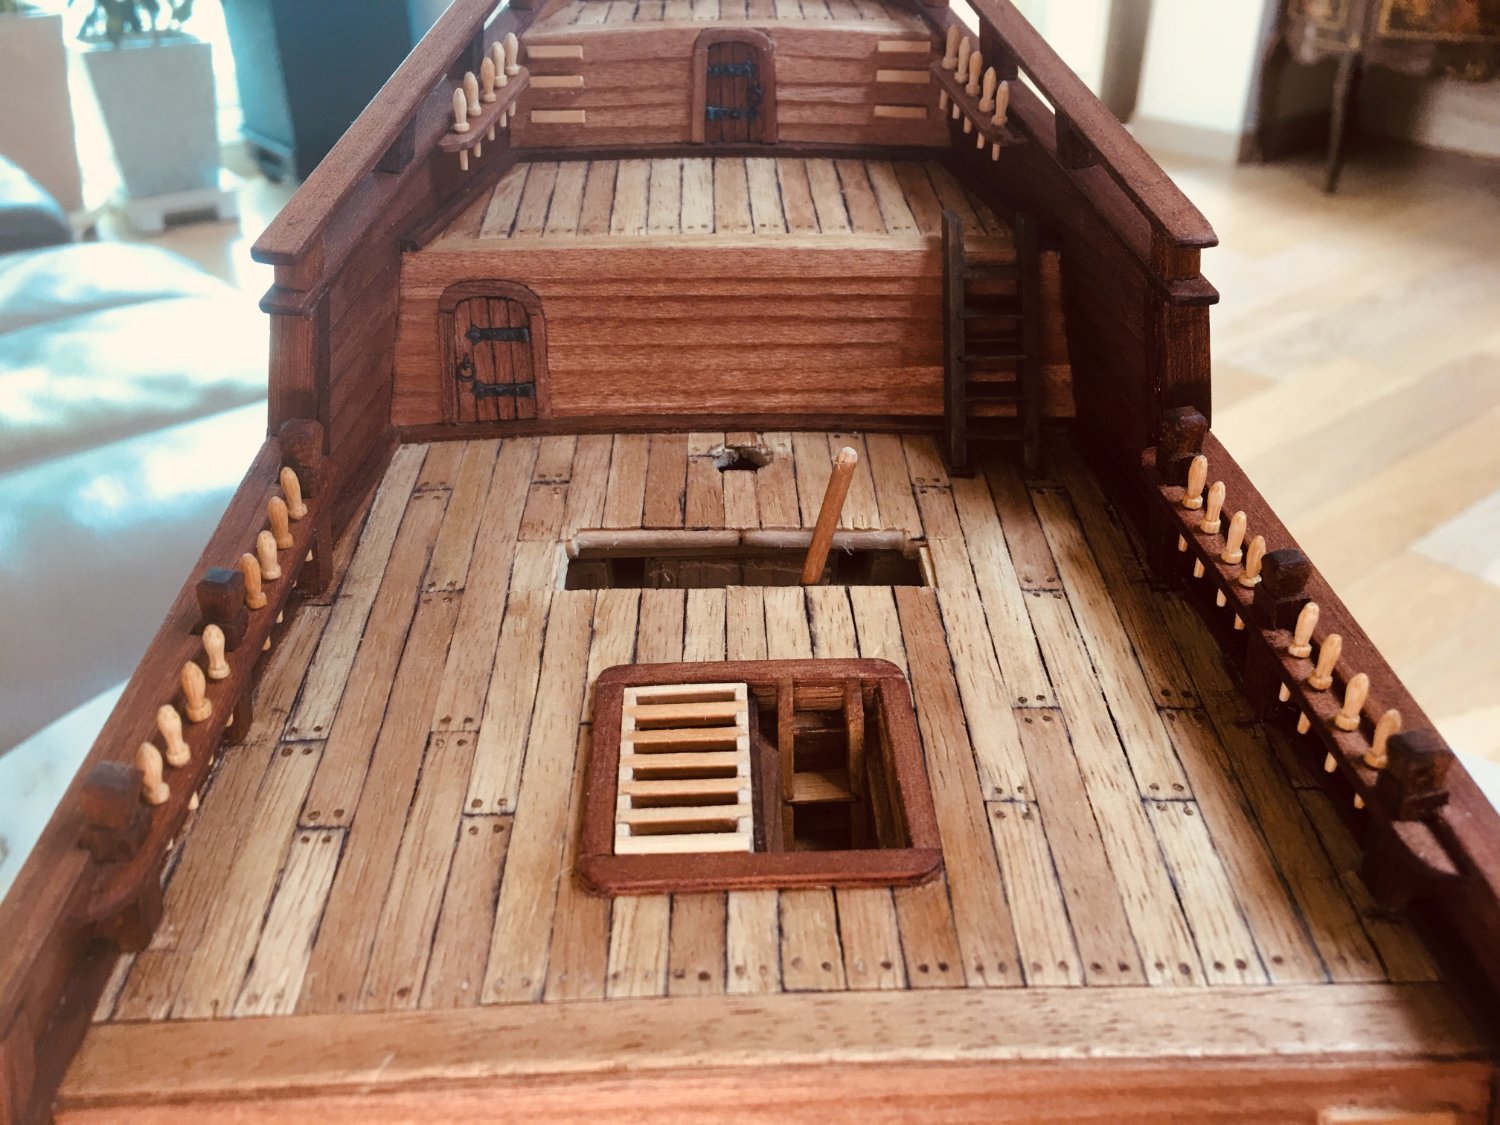
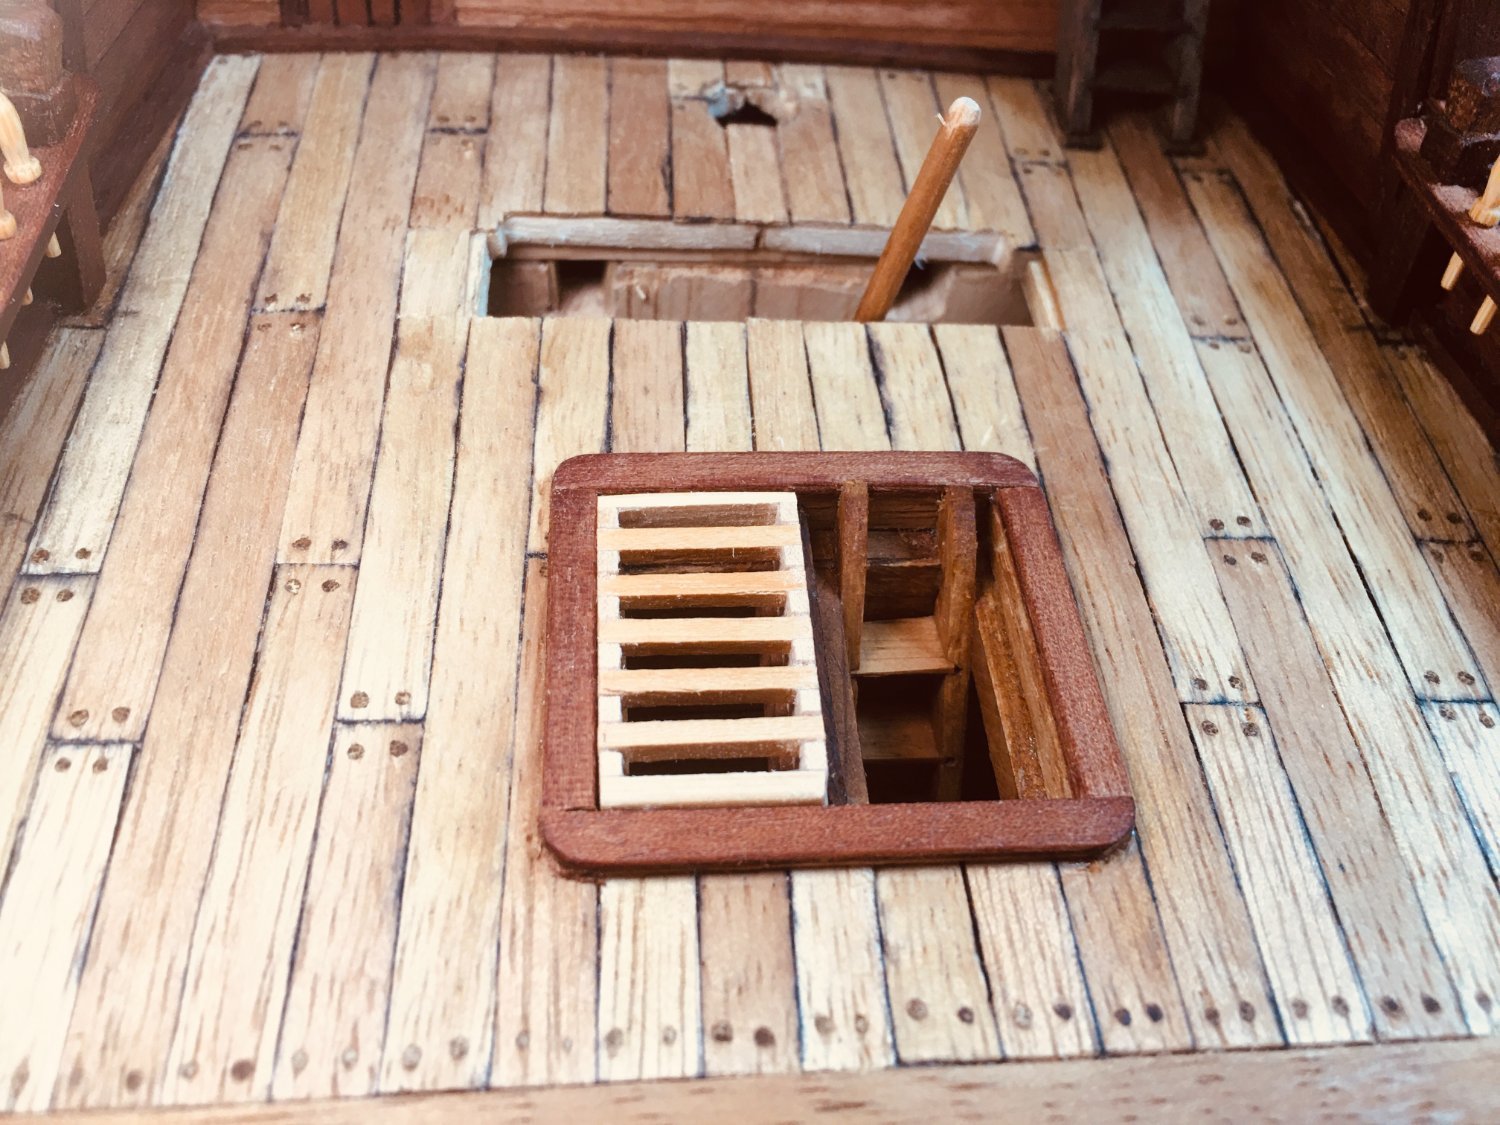
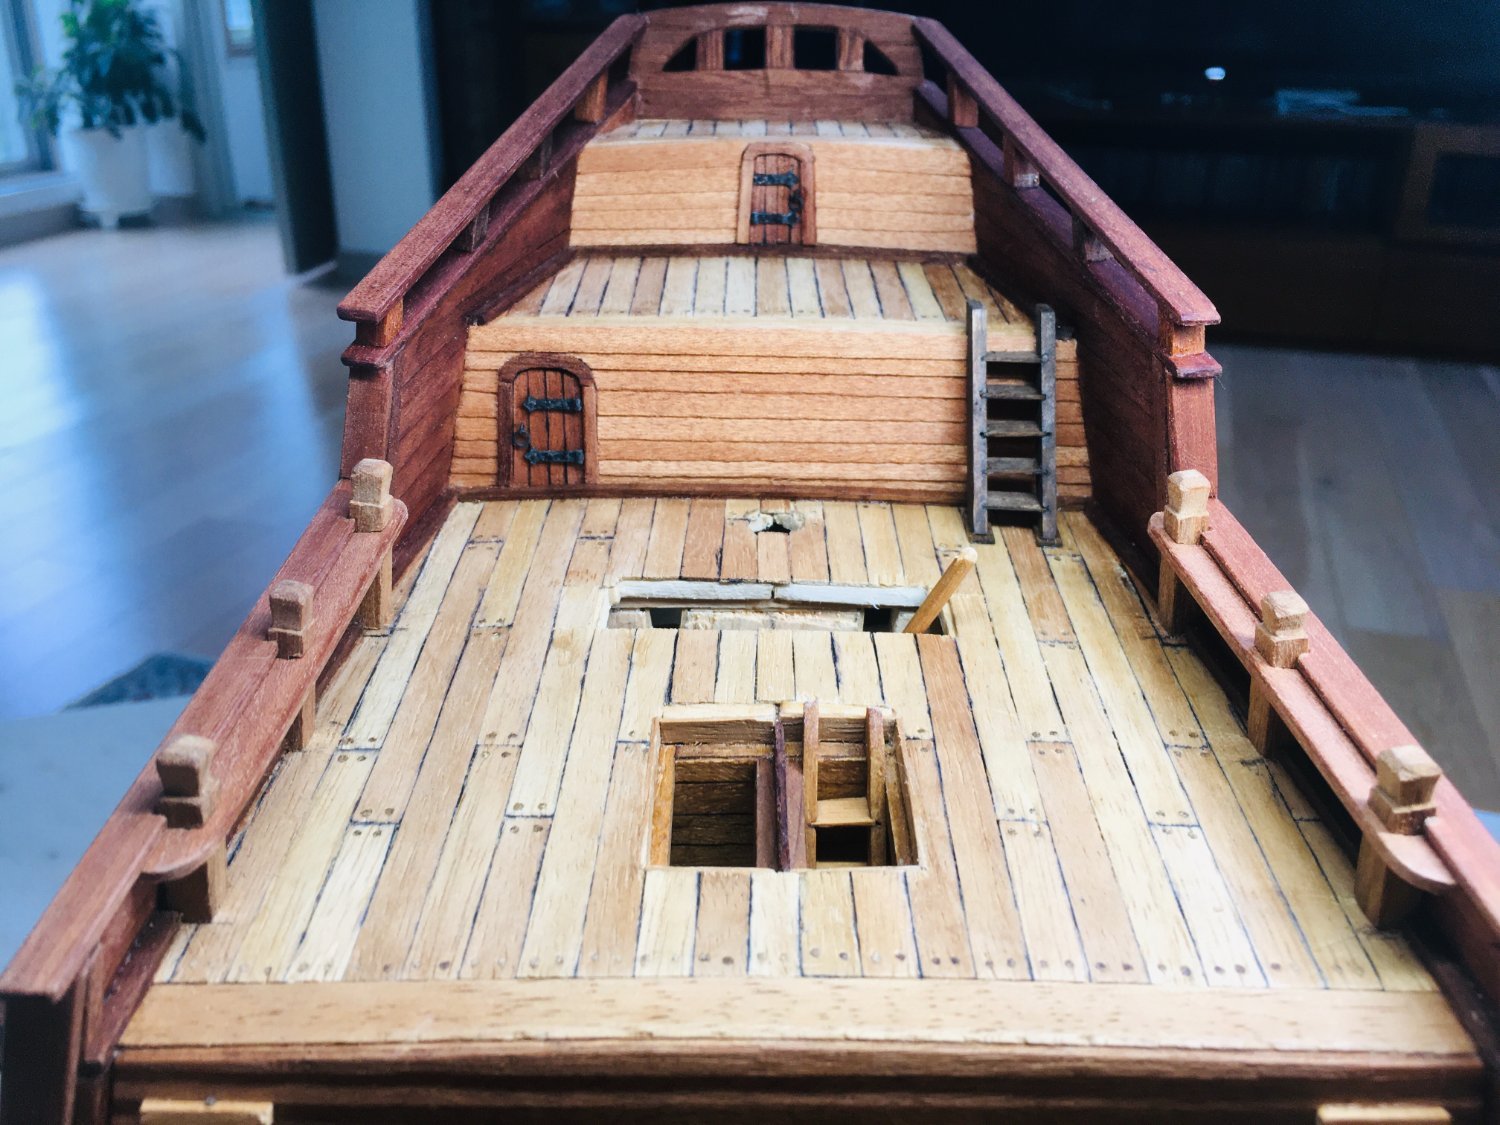
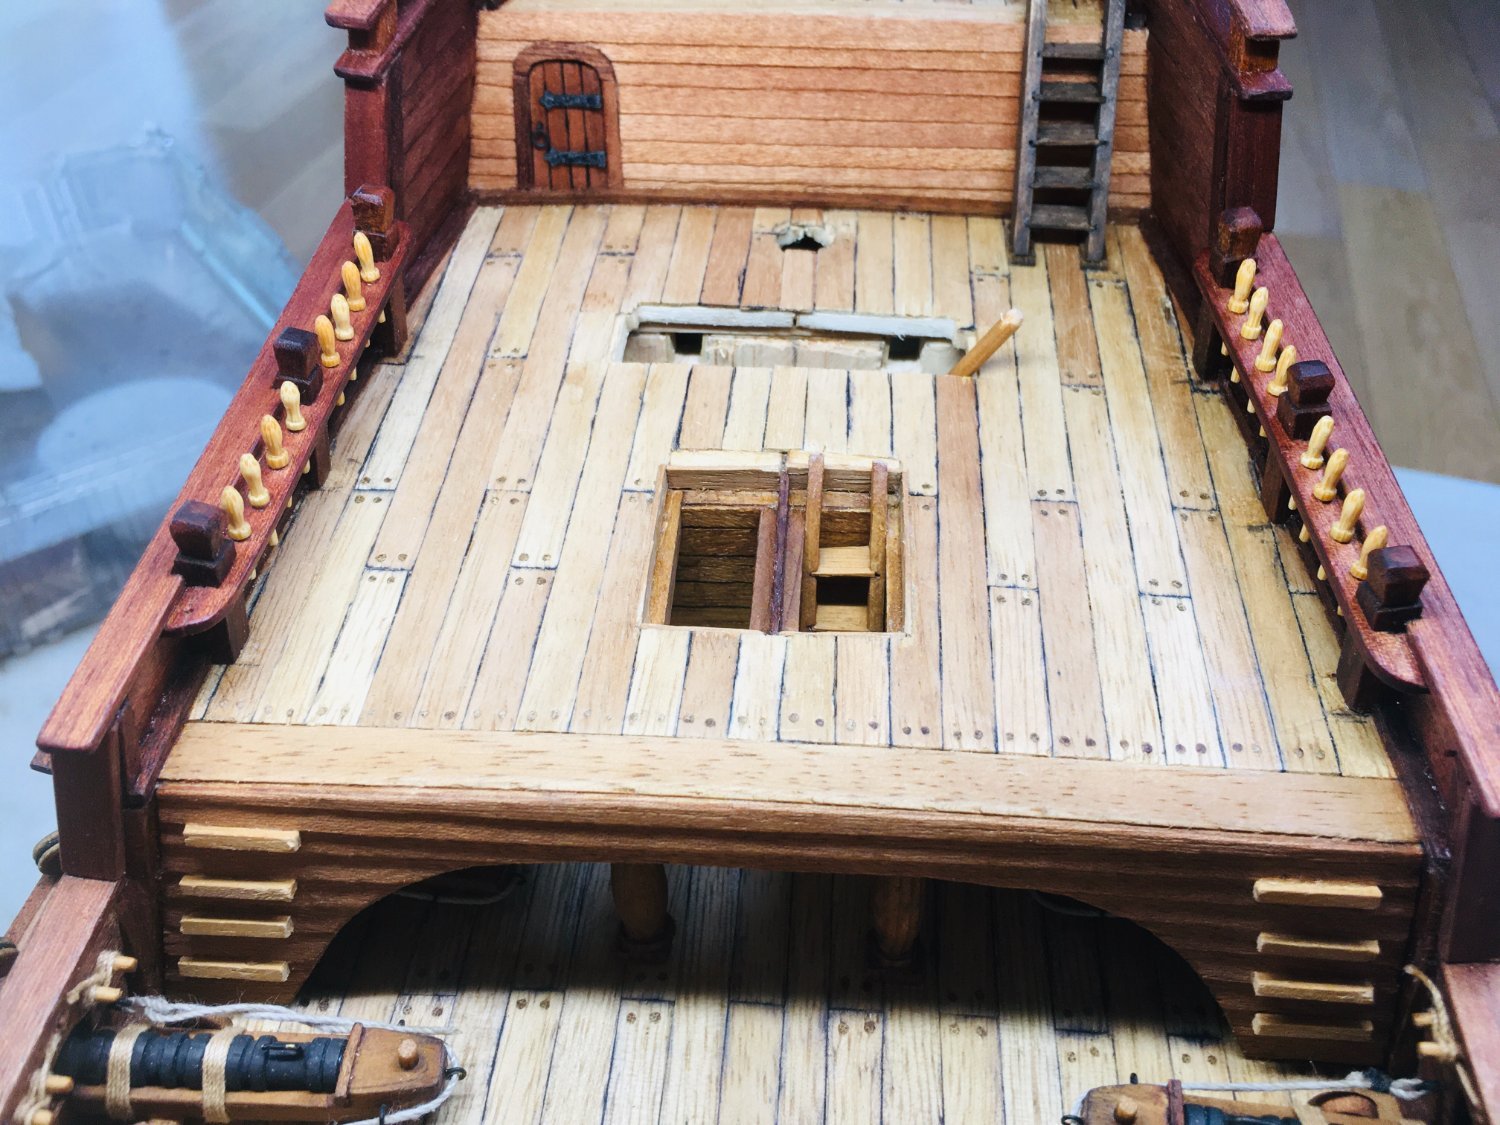
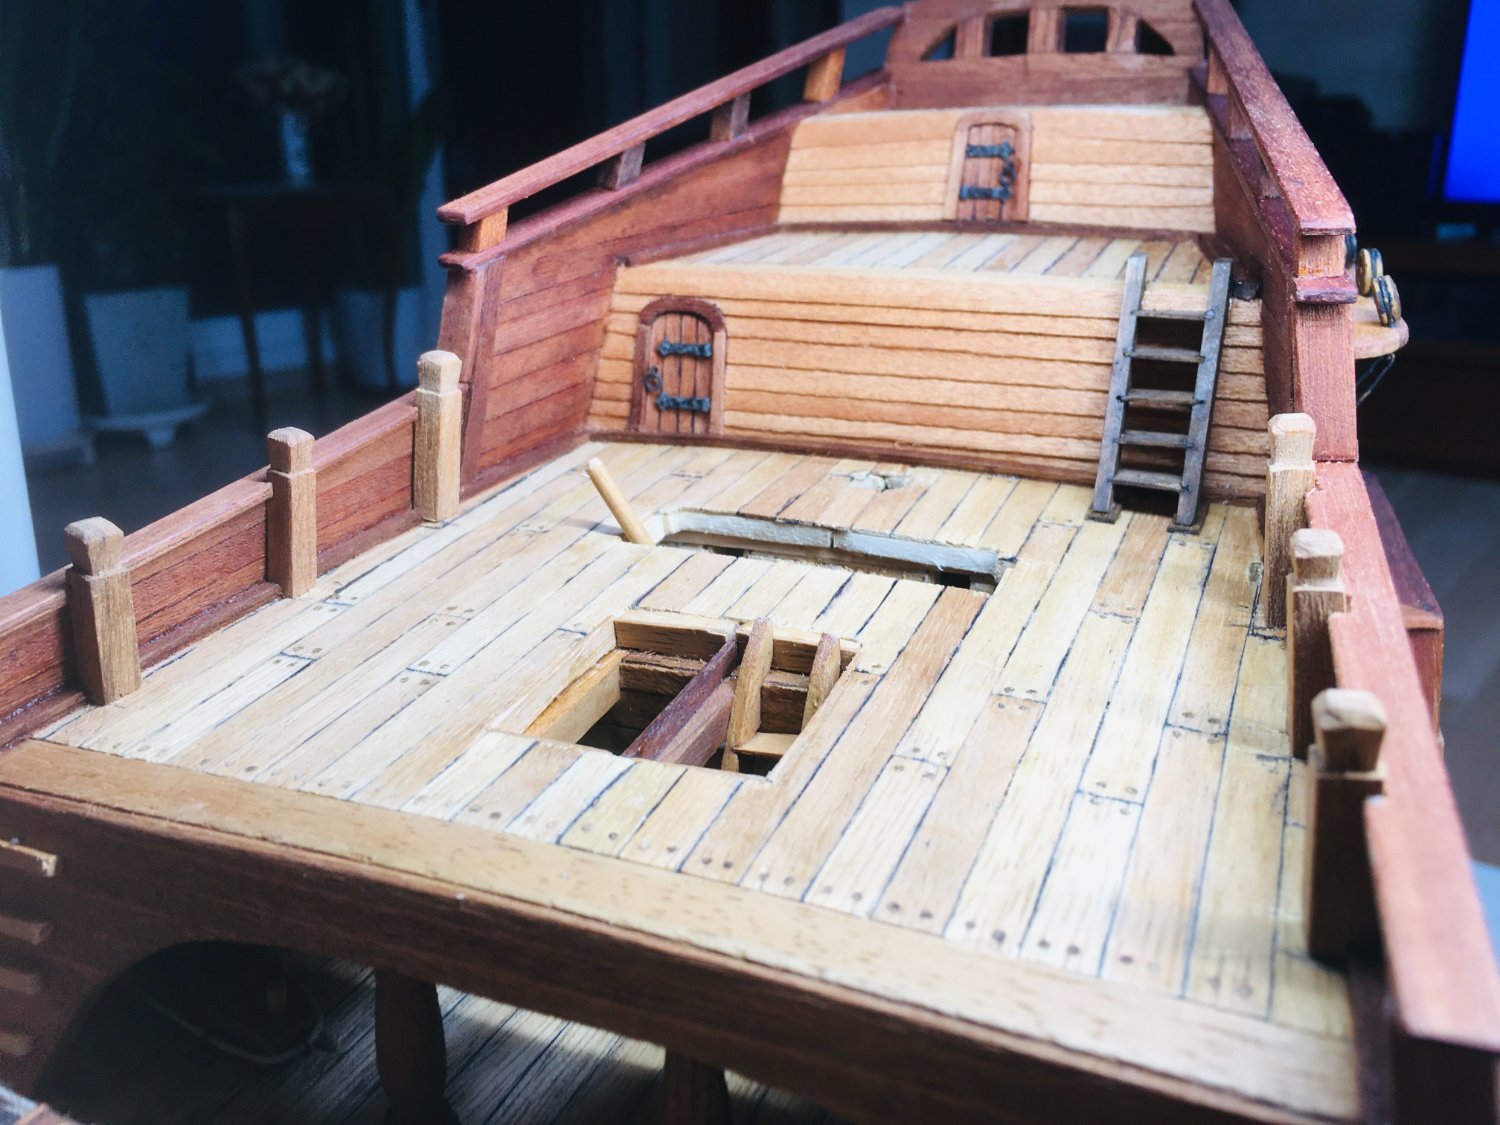
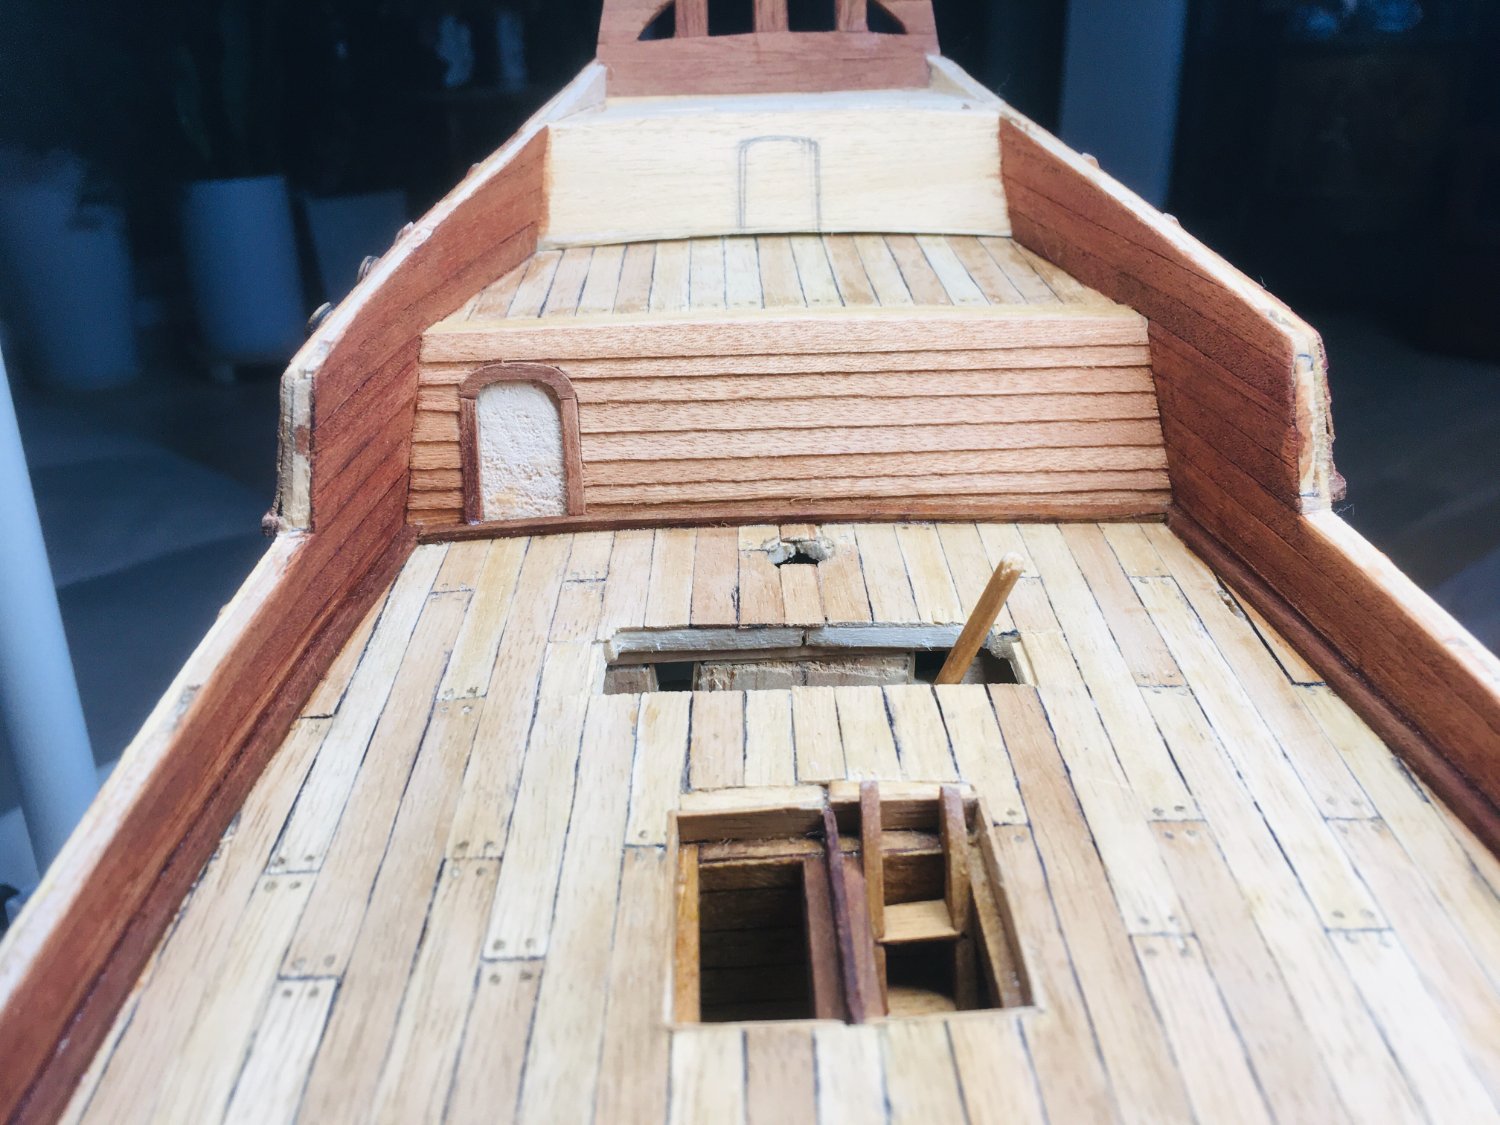
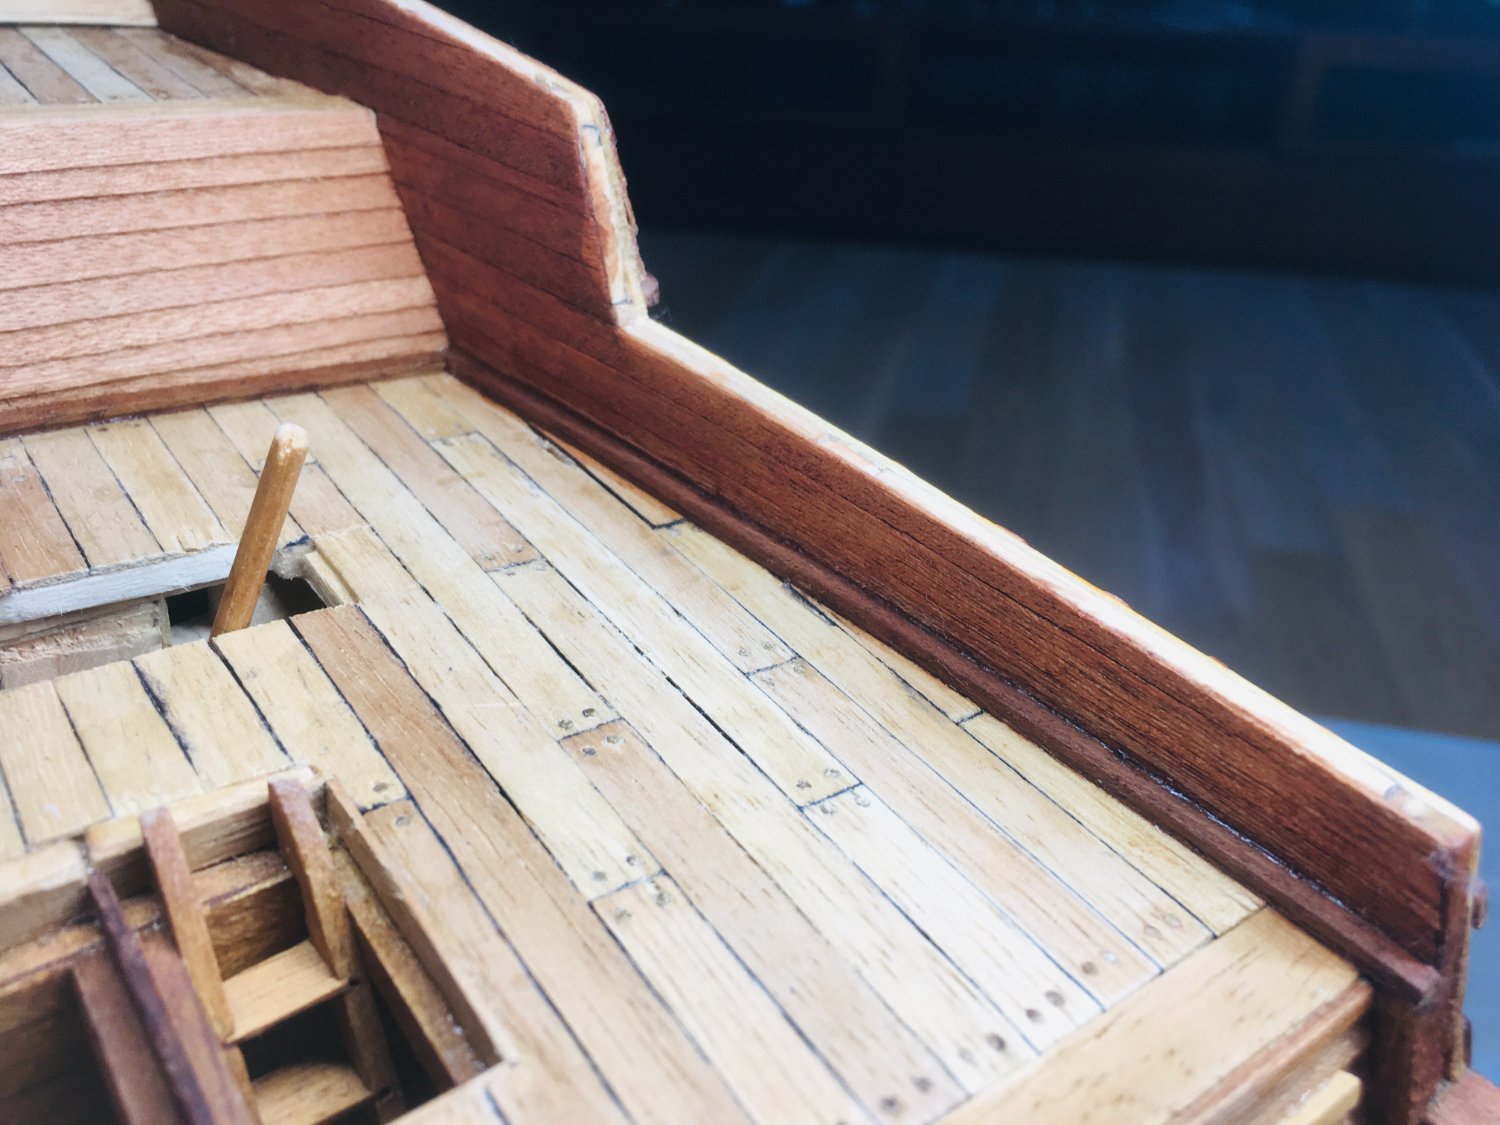
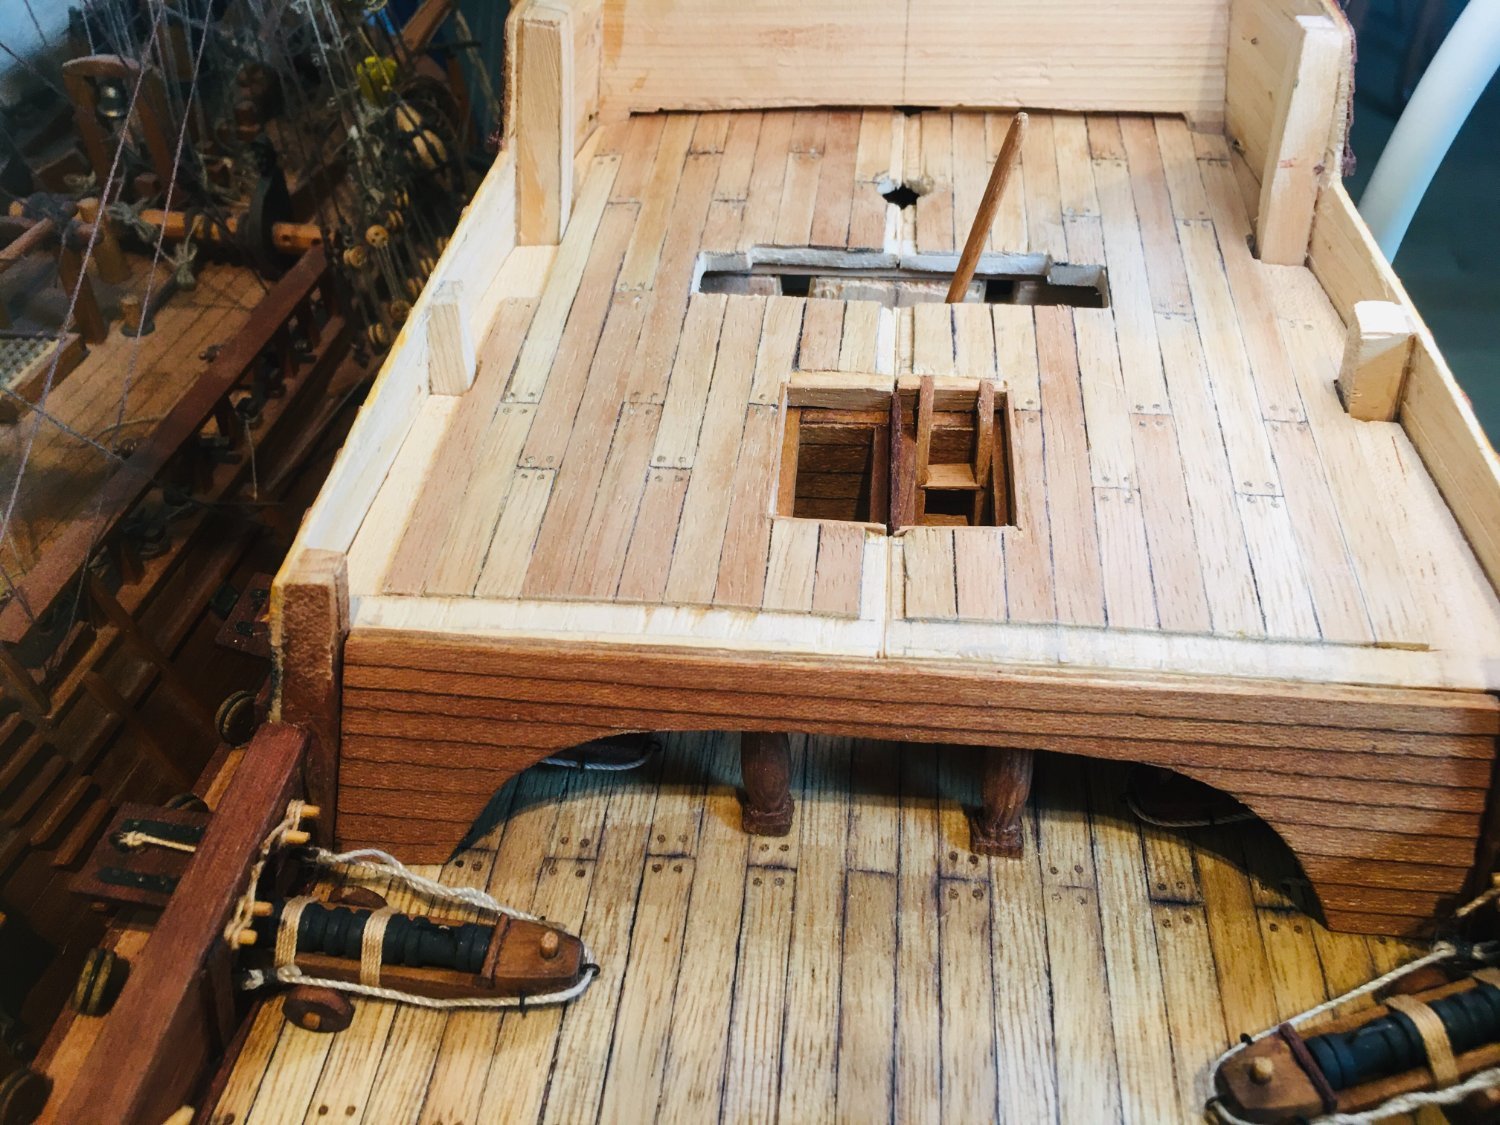
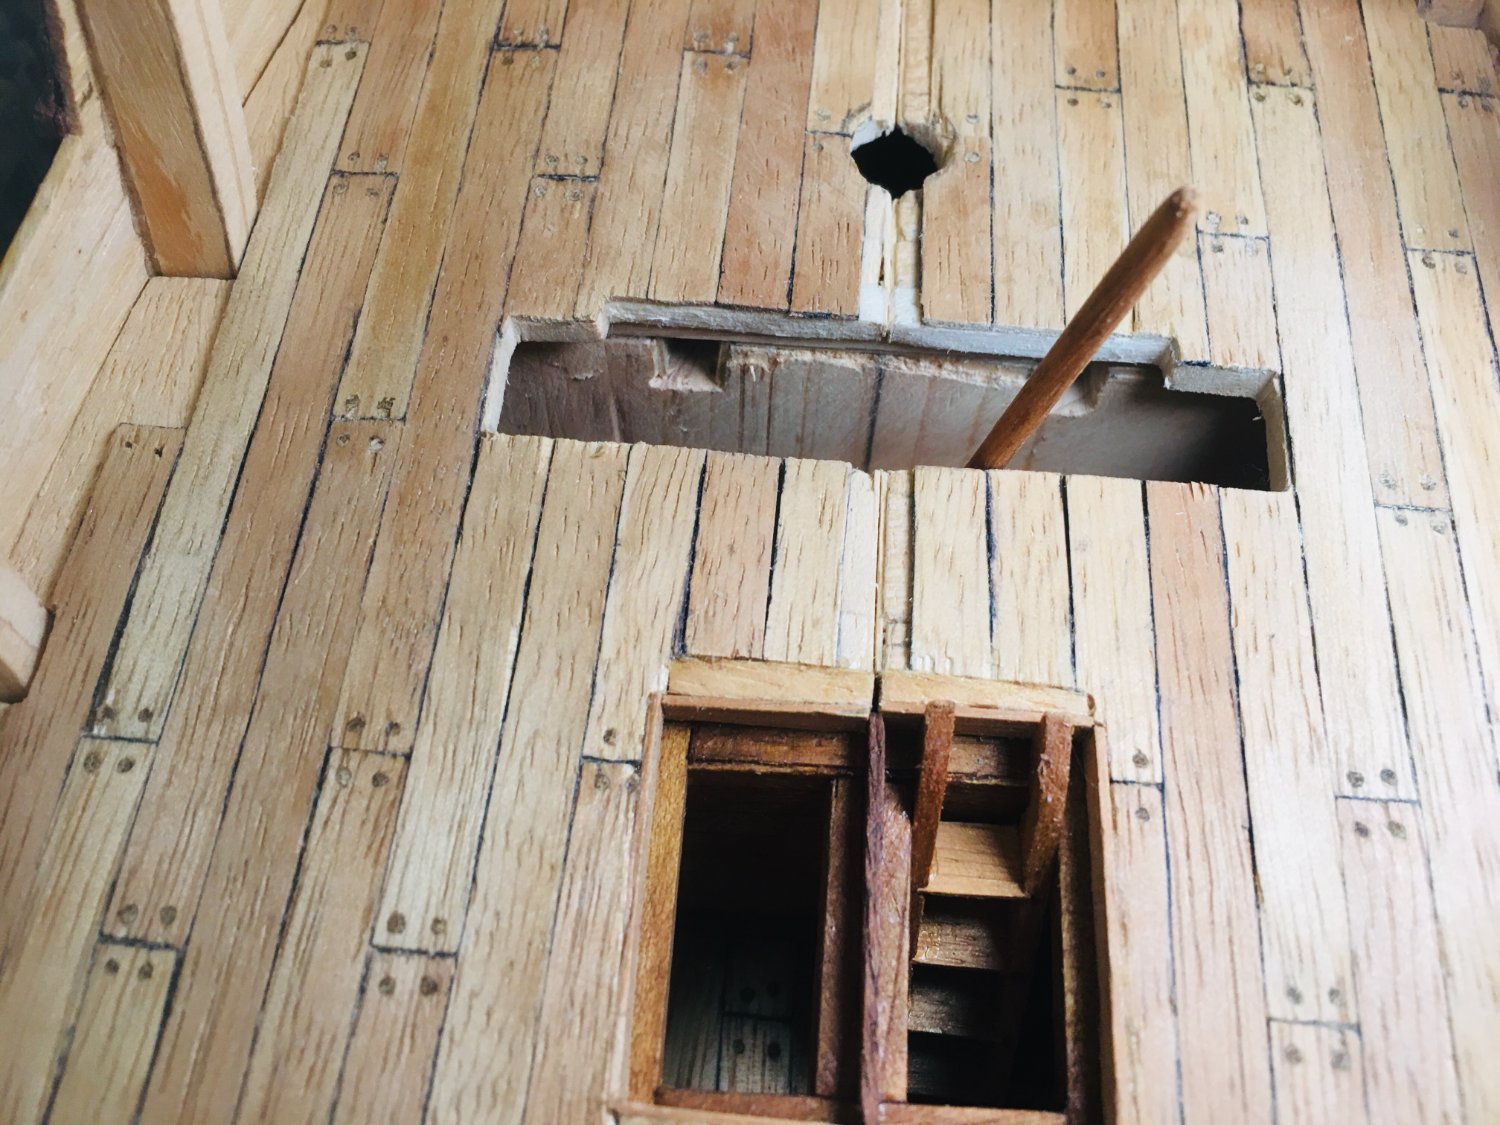
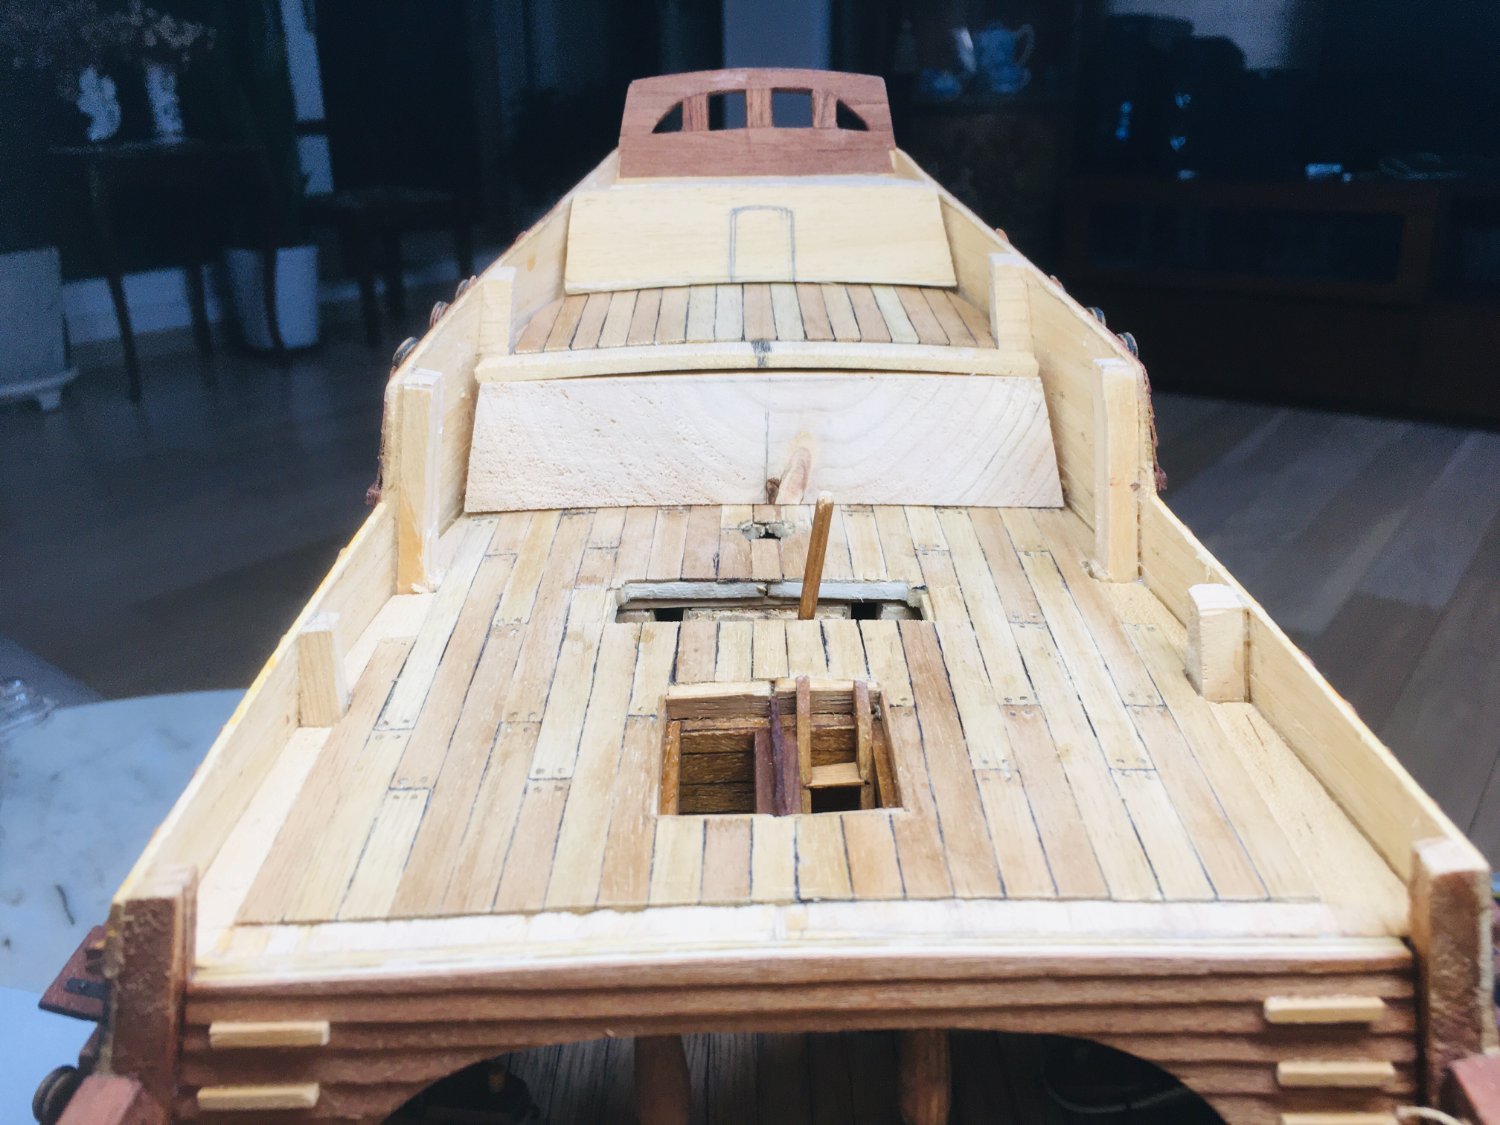
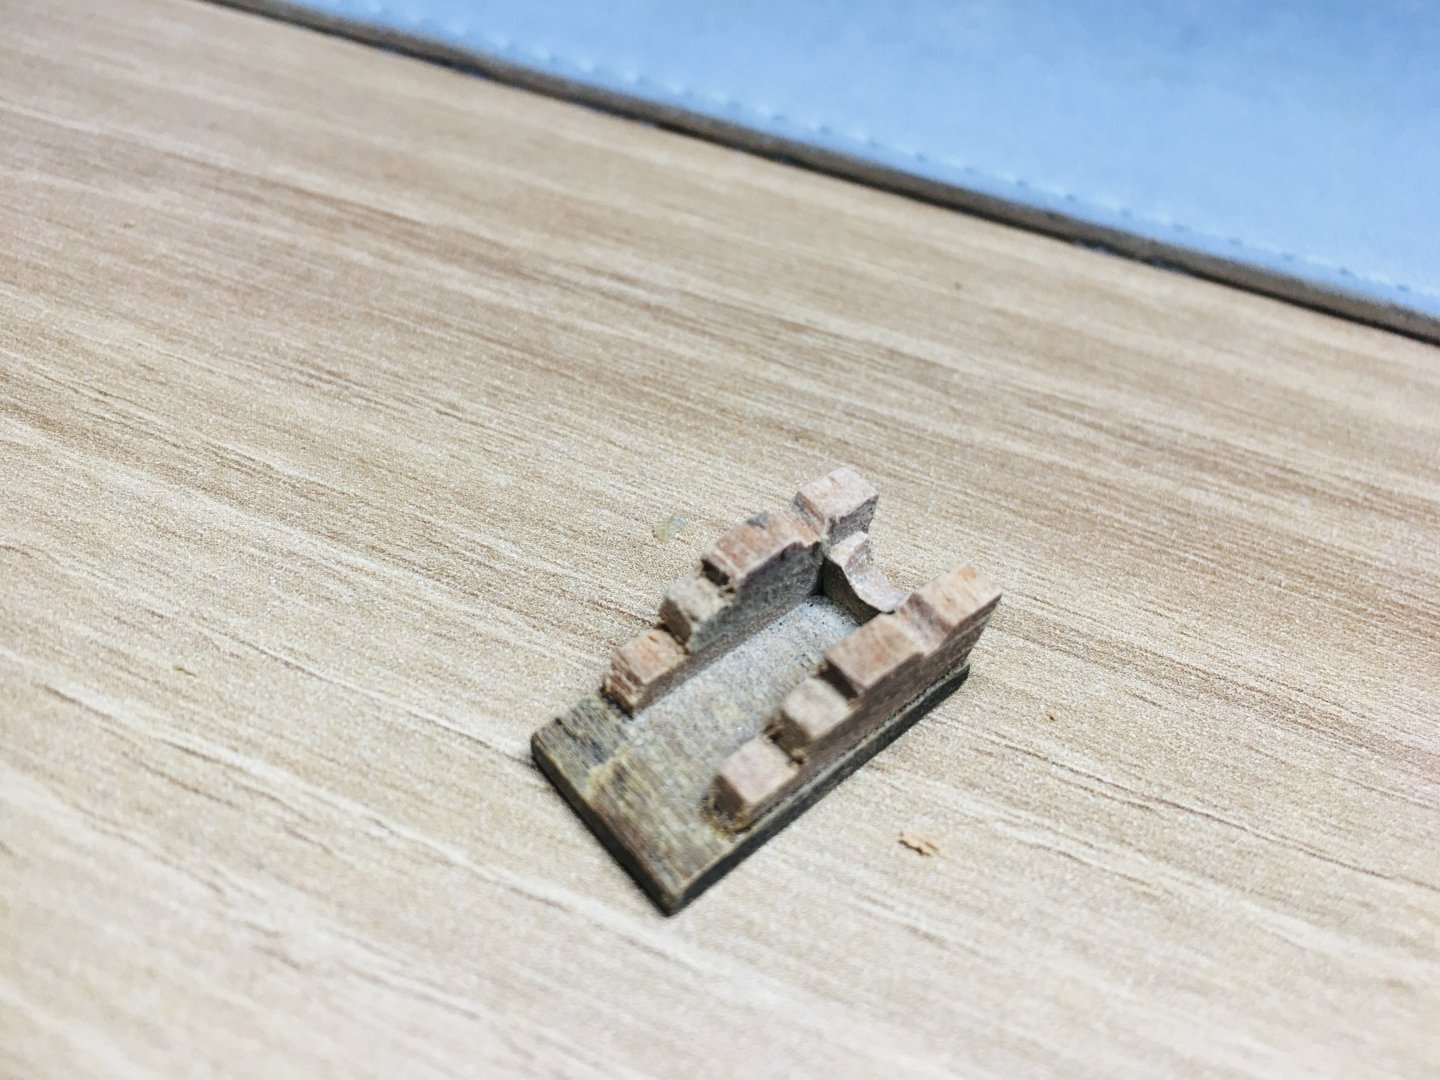
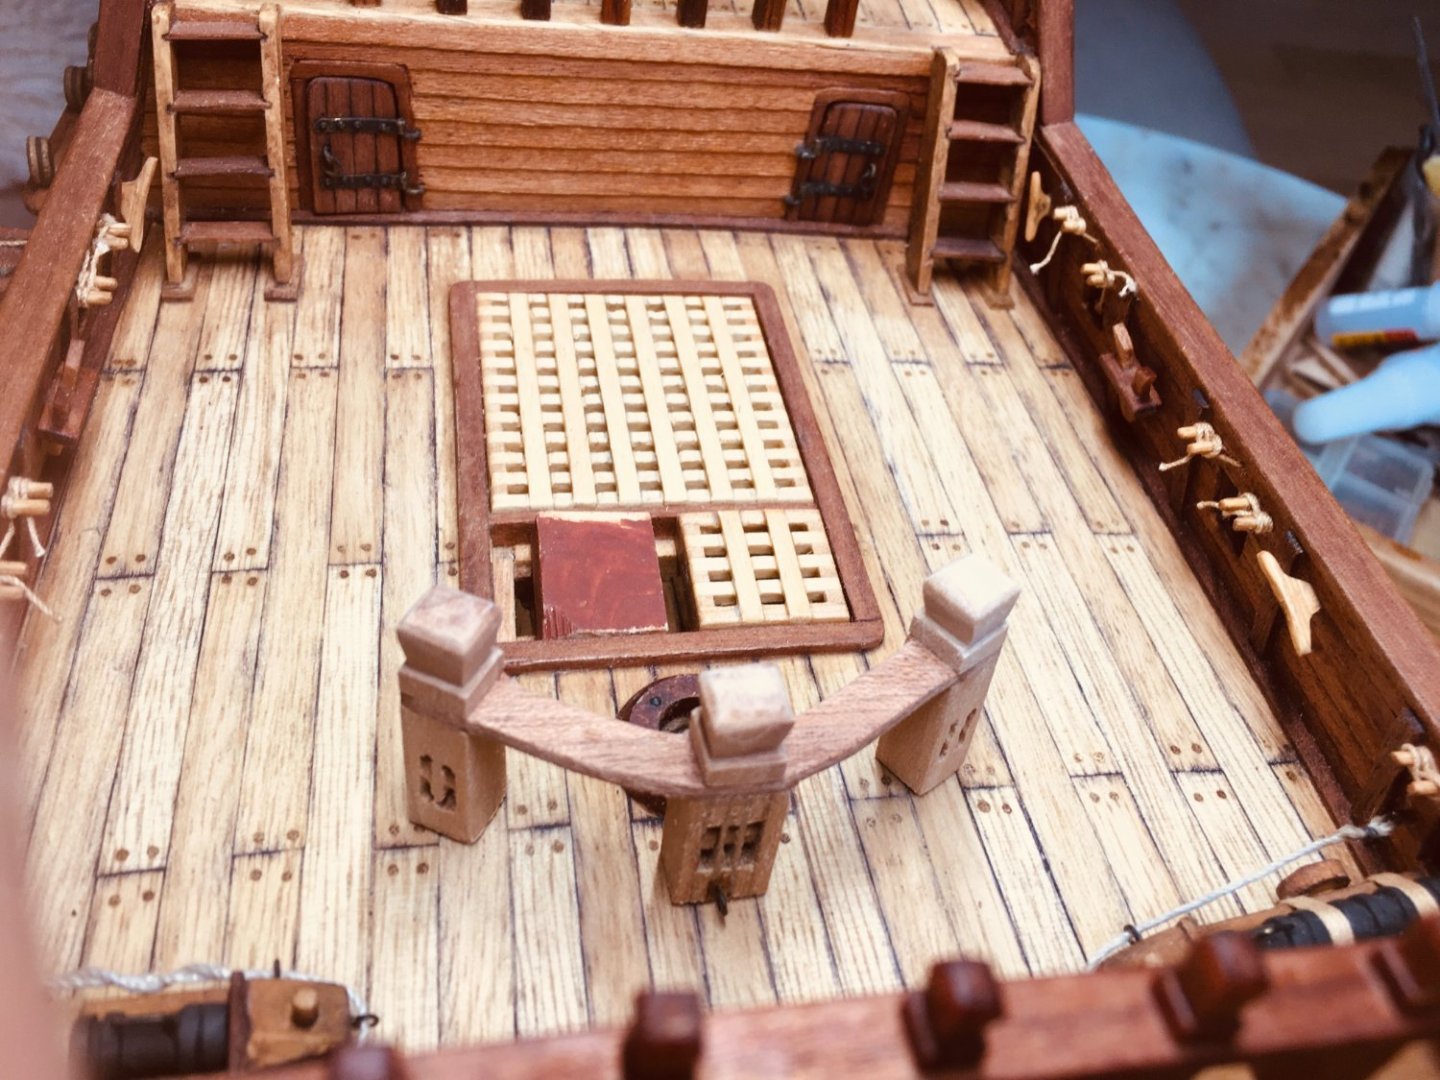
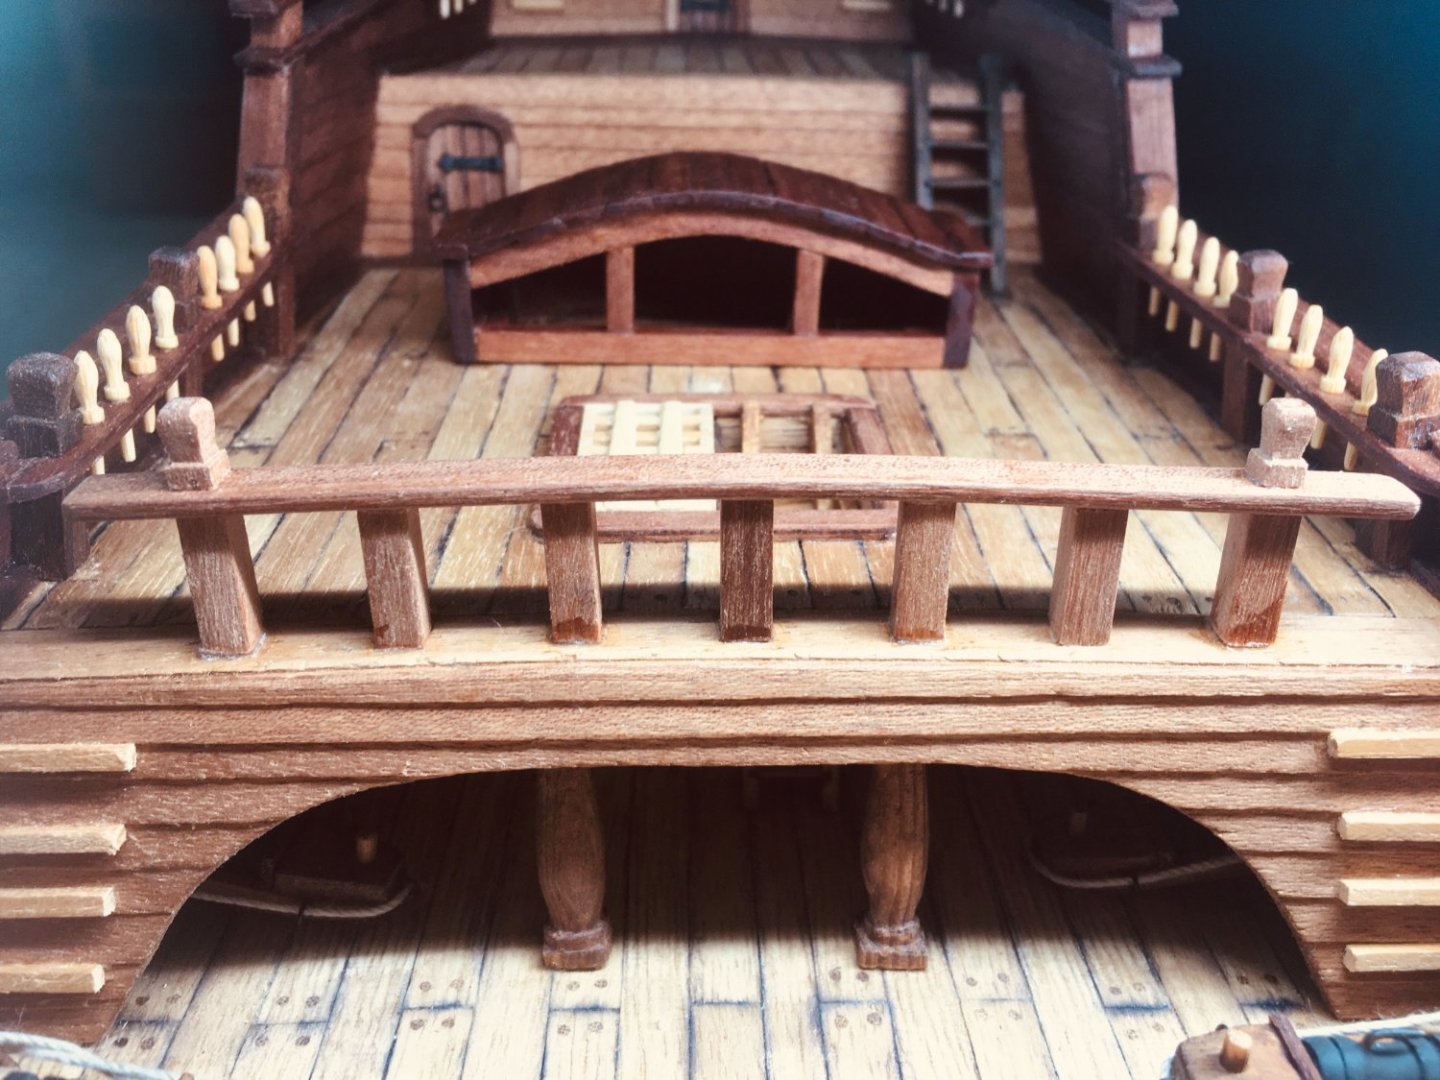
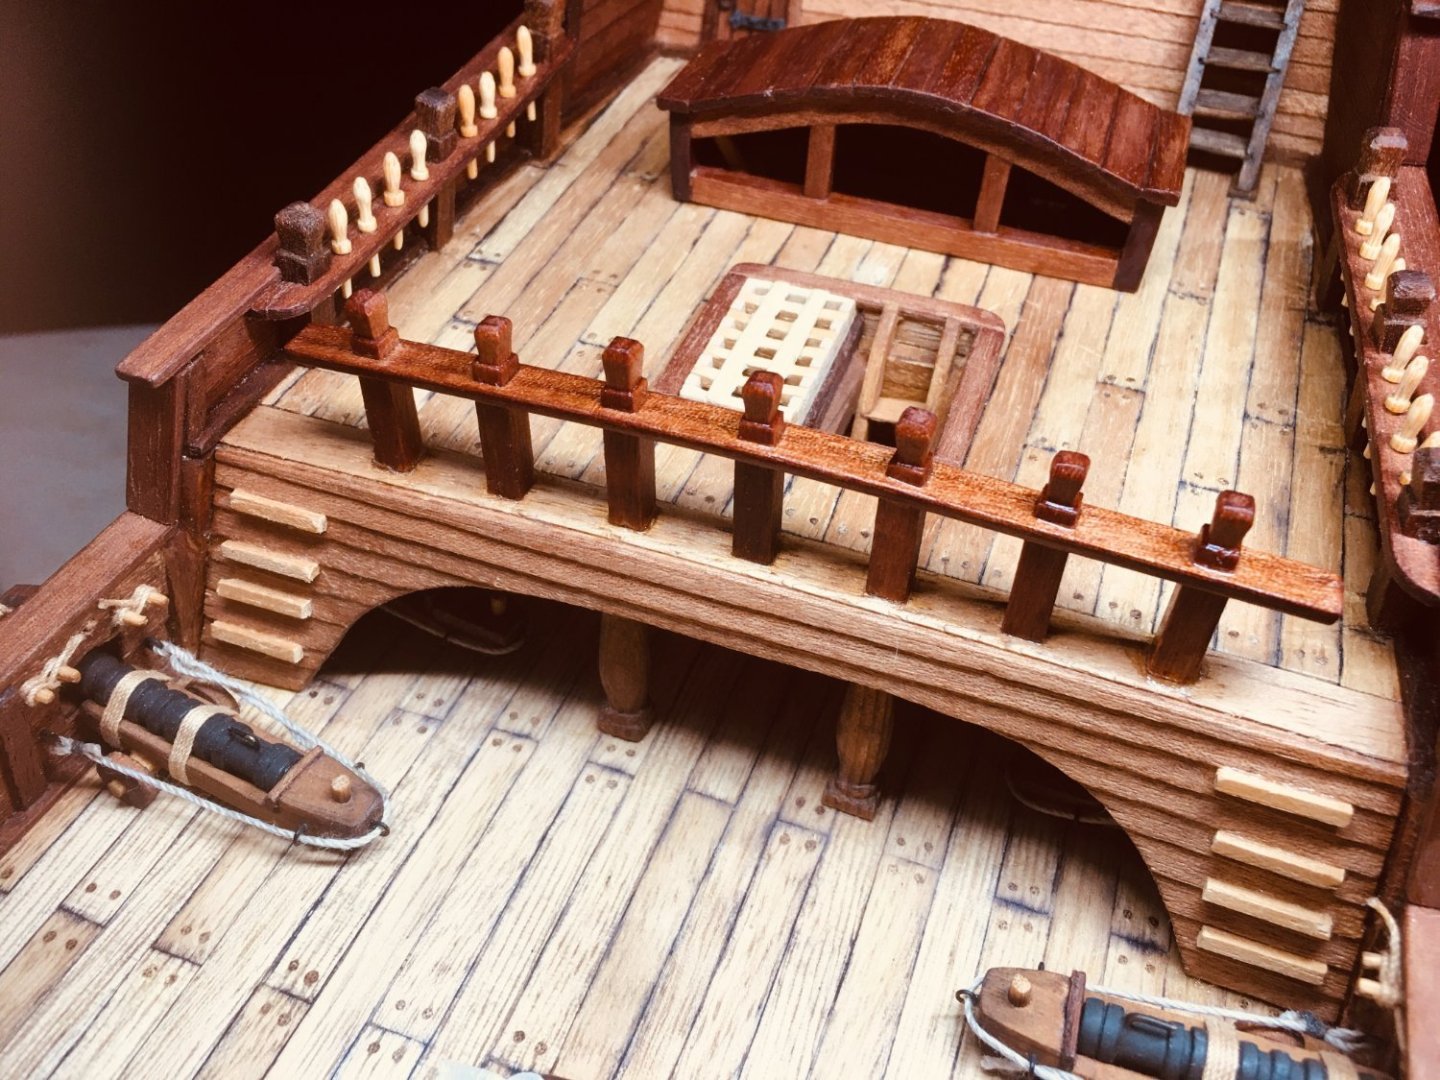
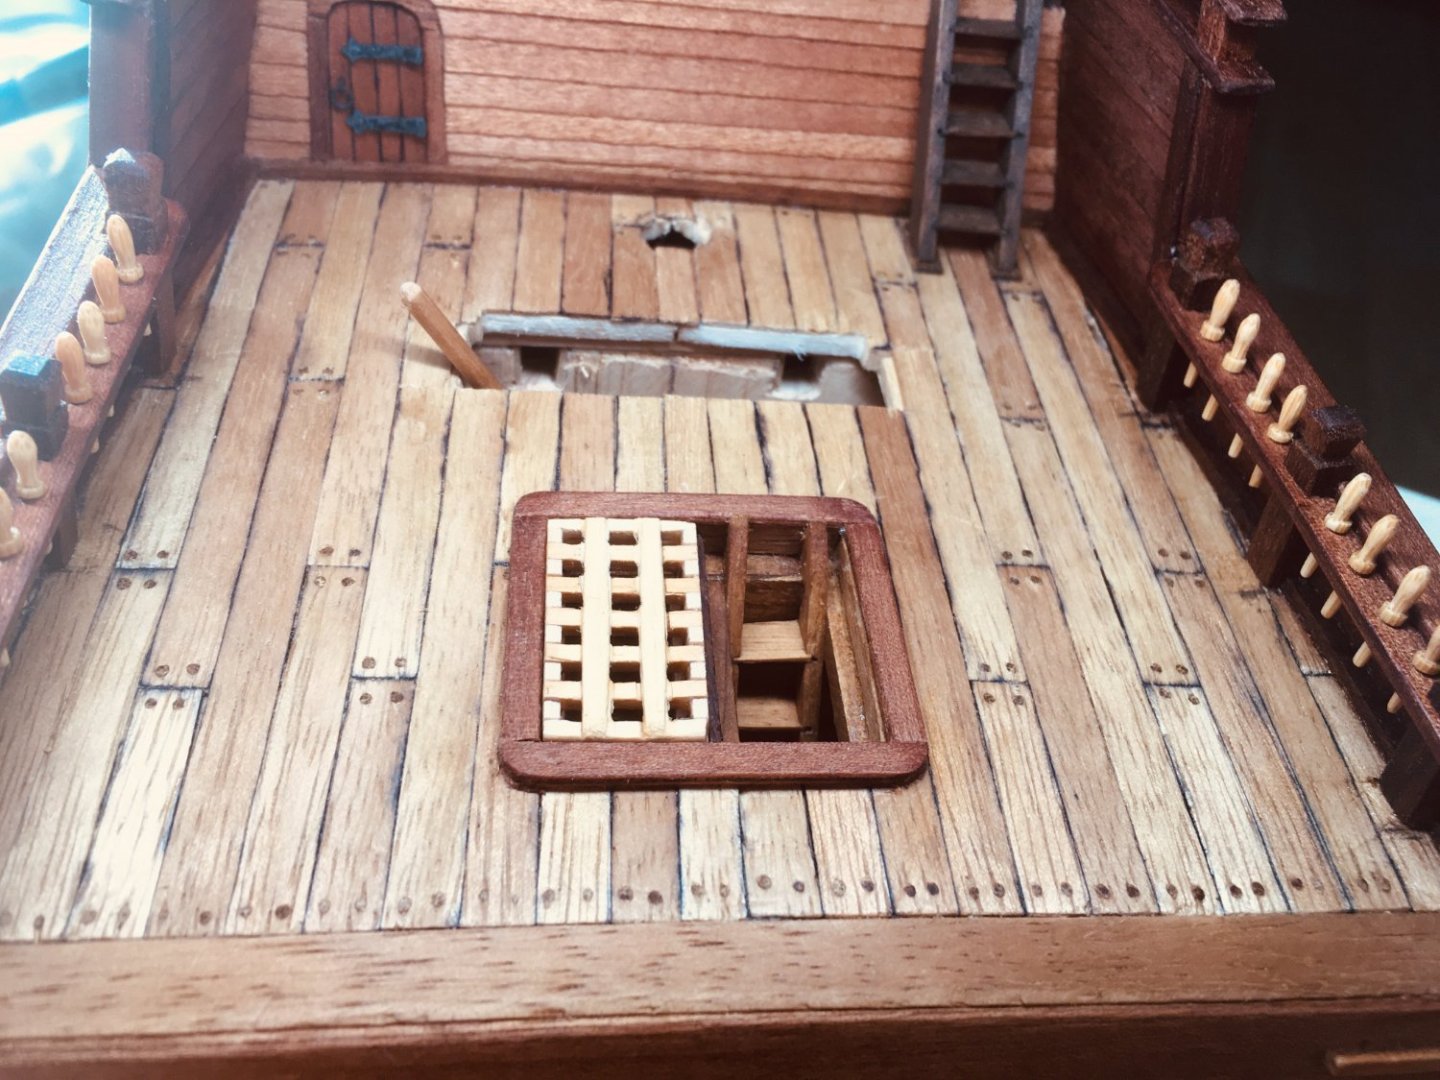
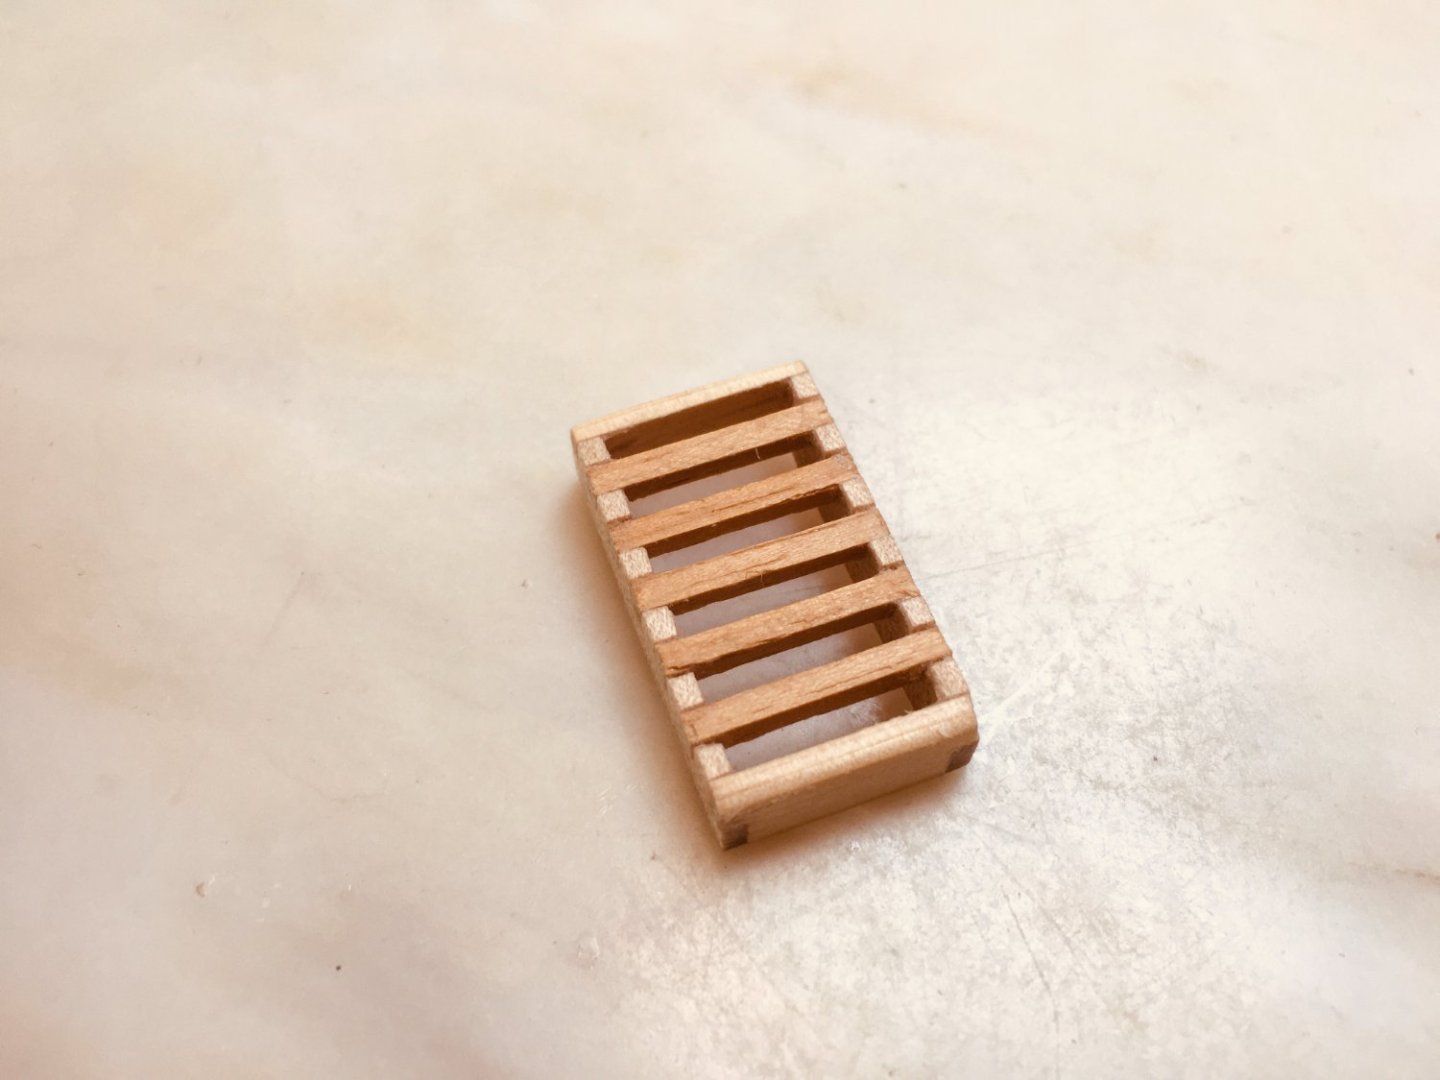
Continuing on grating and some work on the quarterdeck knighthead(? not sure if this is the right jargon). My beloved IKEA drill is broken..... So, until I get a new IKEA drill (I intend to get another IKEA drill!), some work that requires drill will need to wait - some refinement to be done later on the quaterdeck knighthead(?).


-
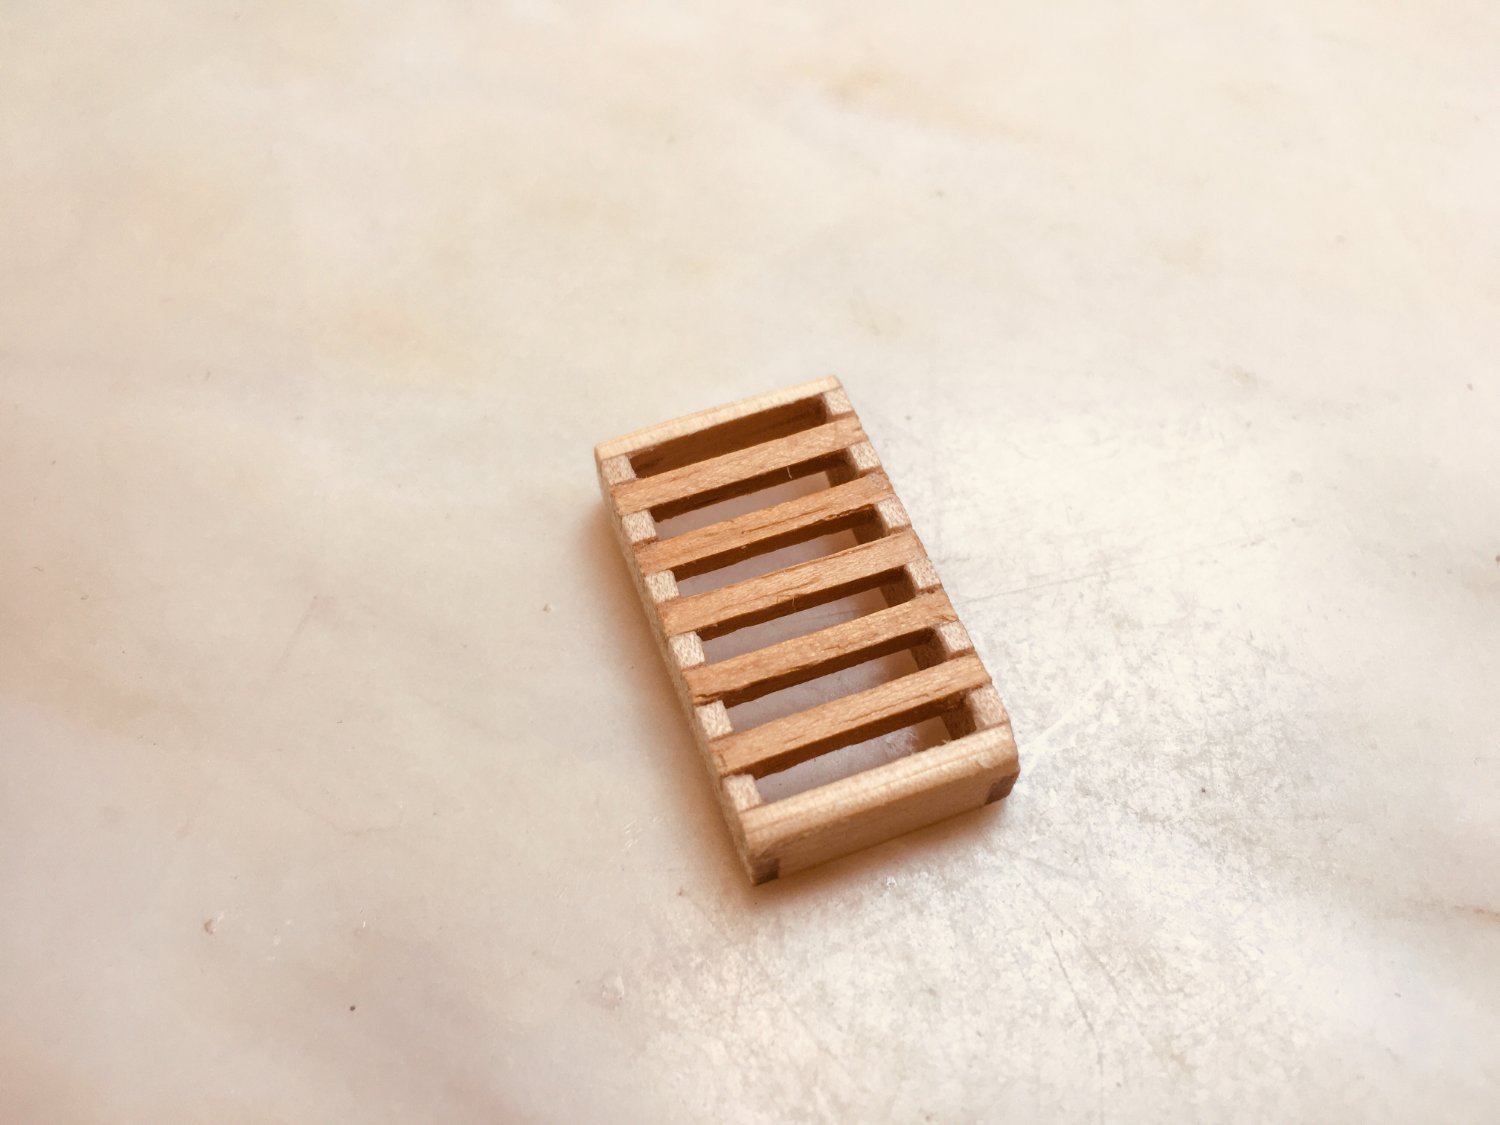
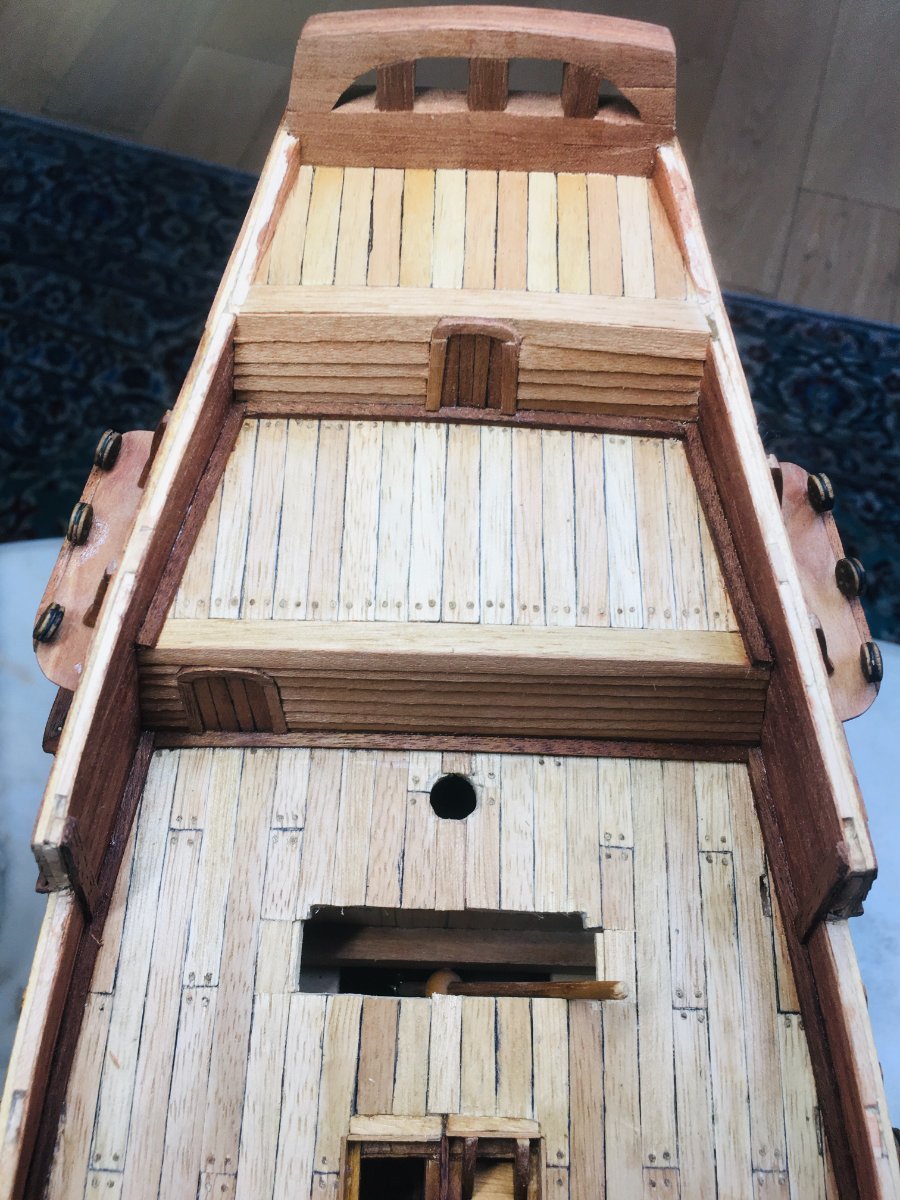
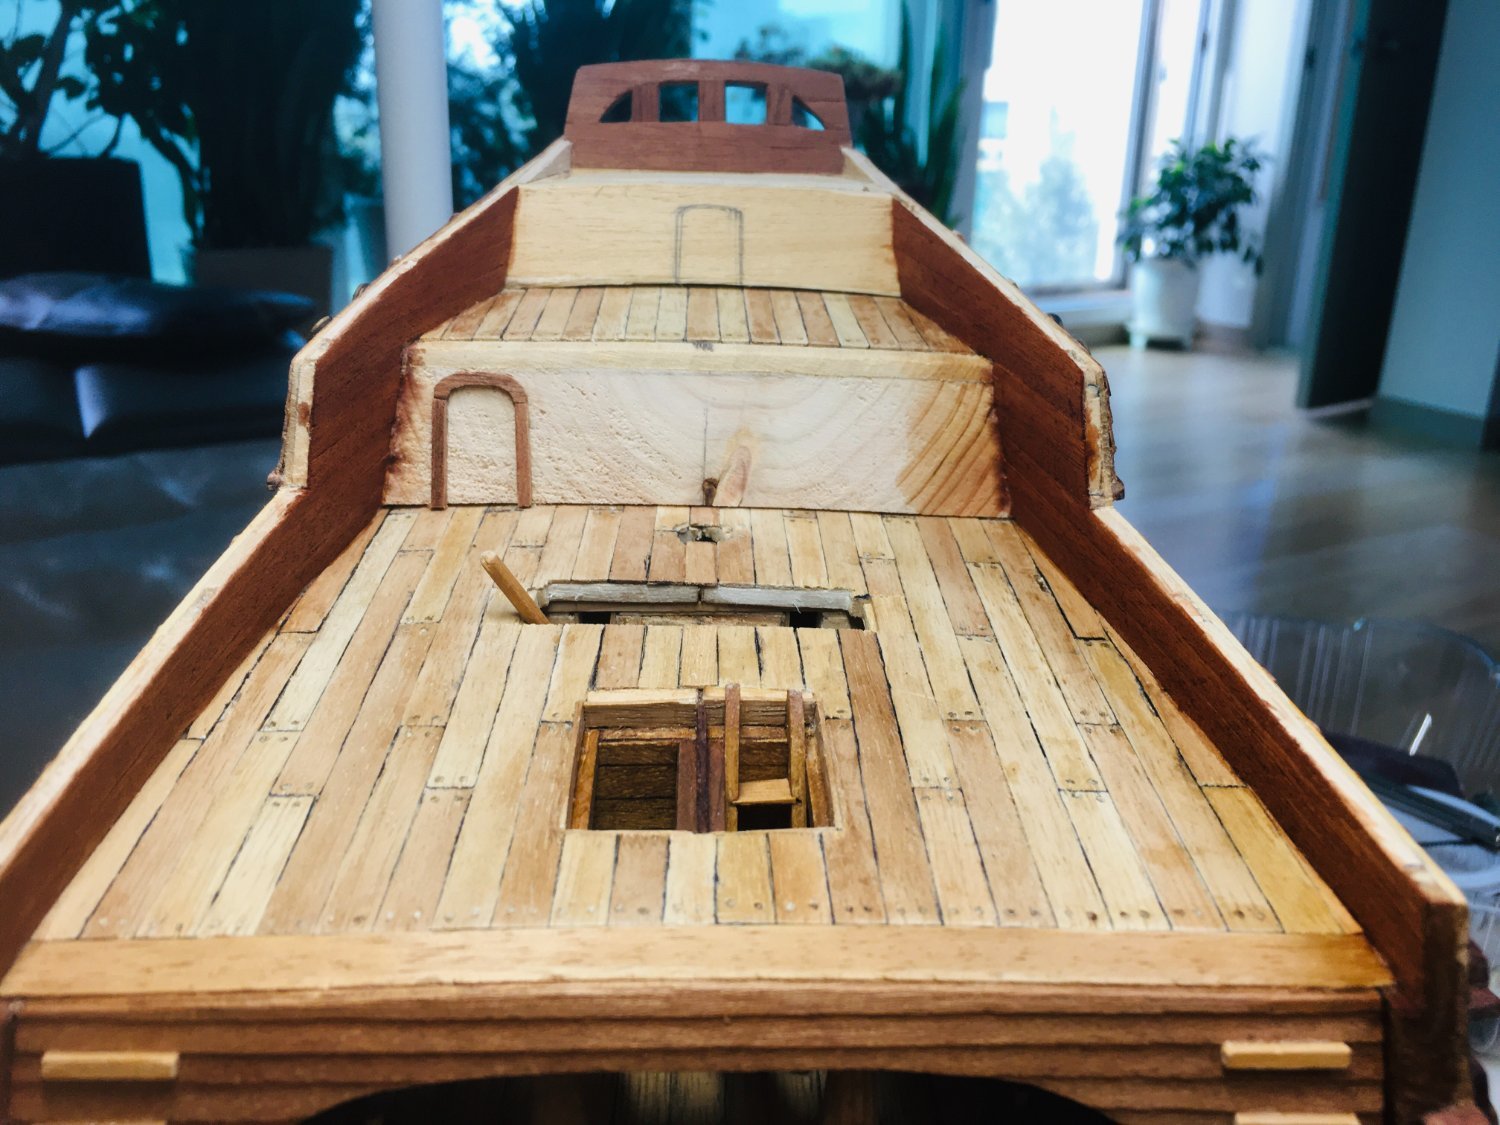
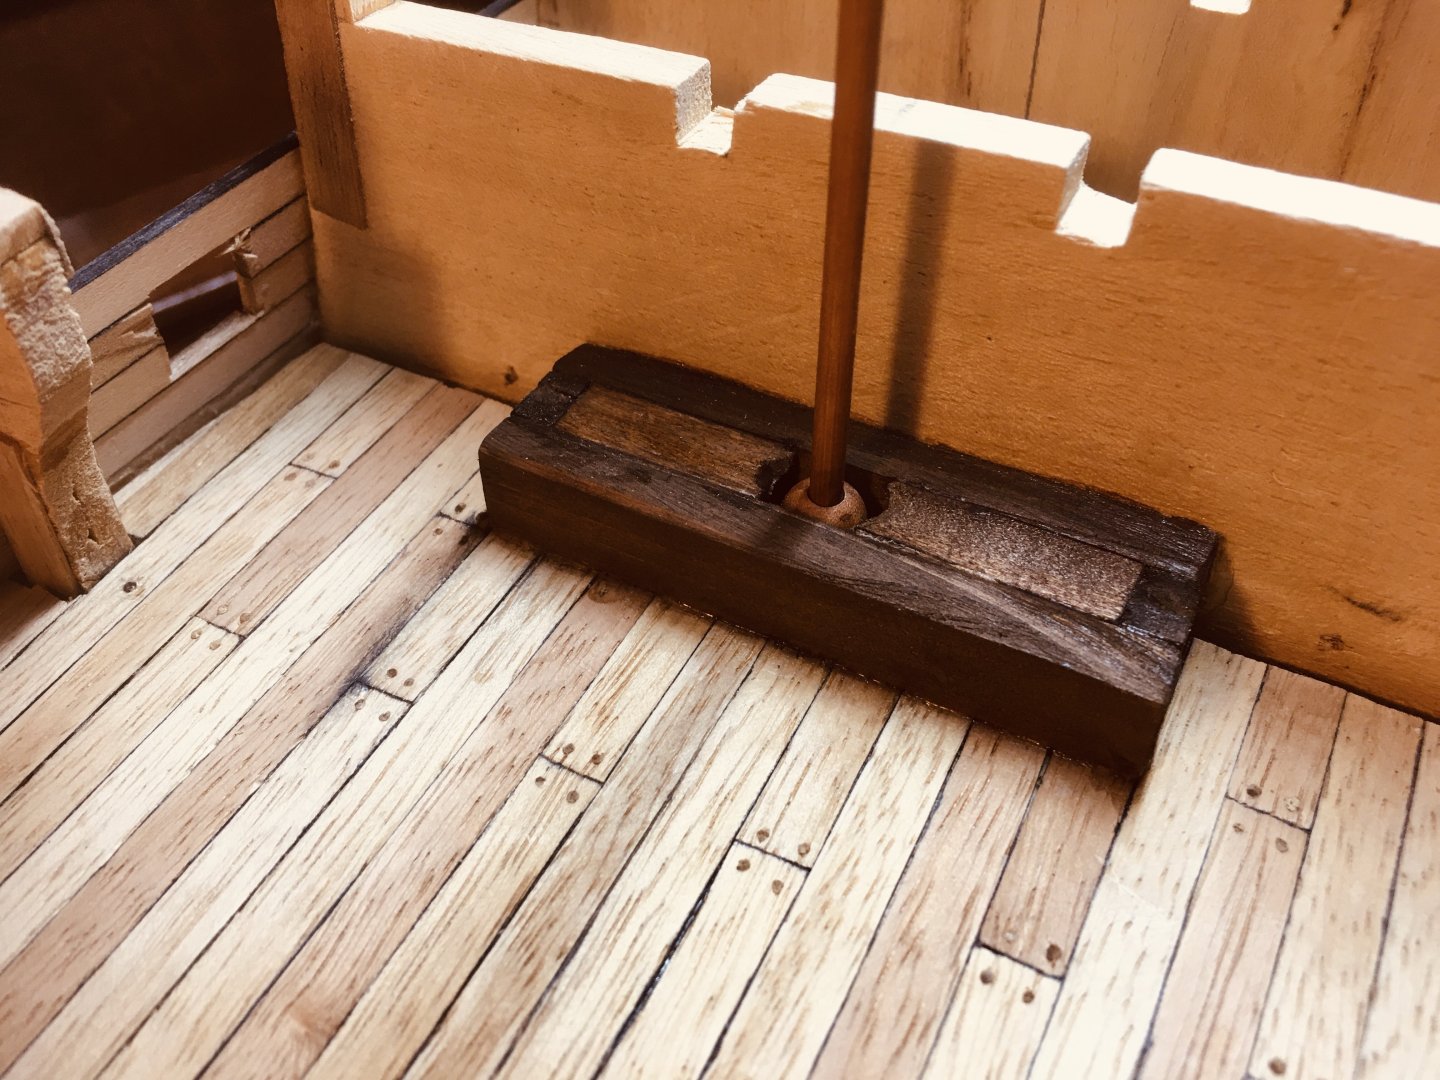
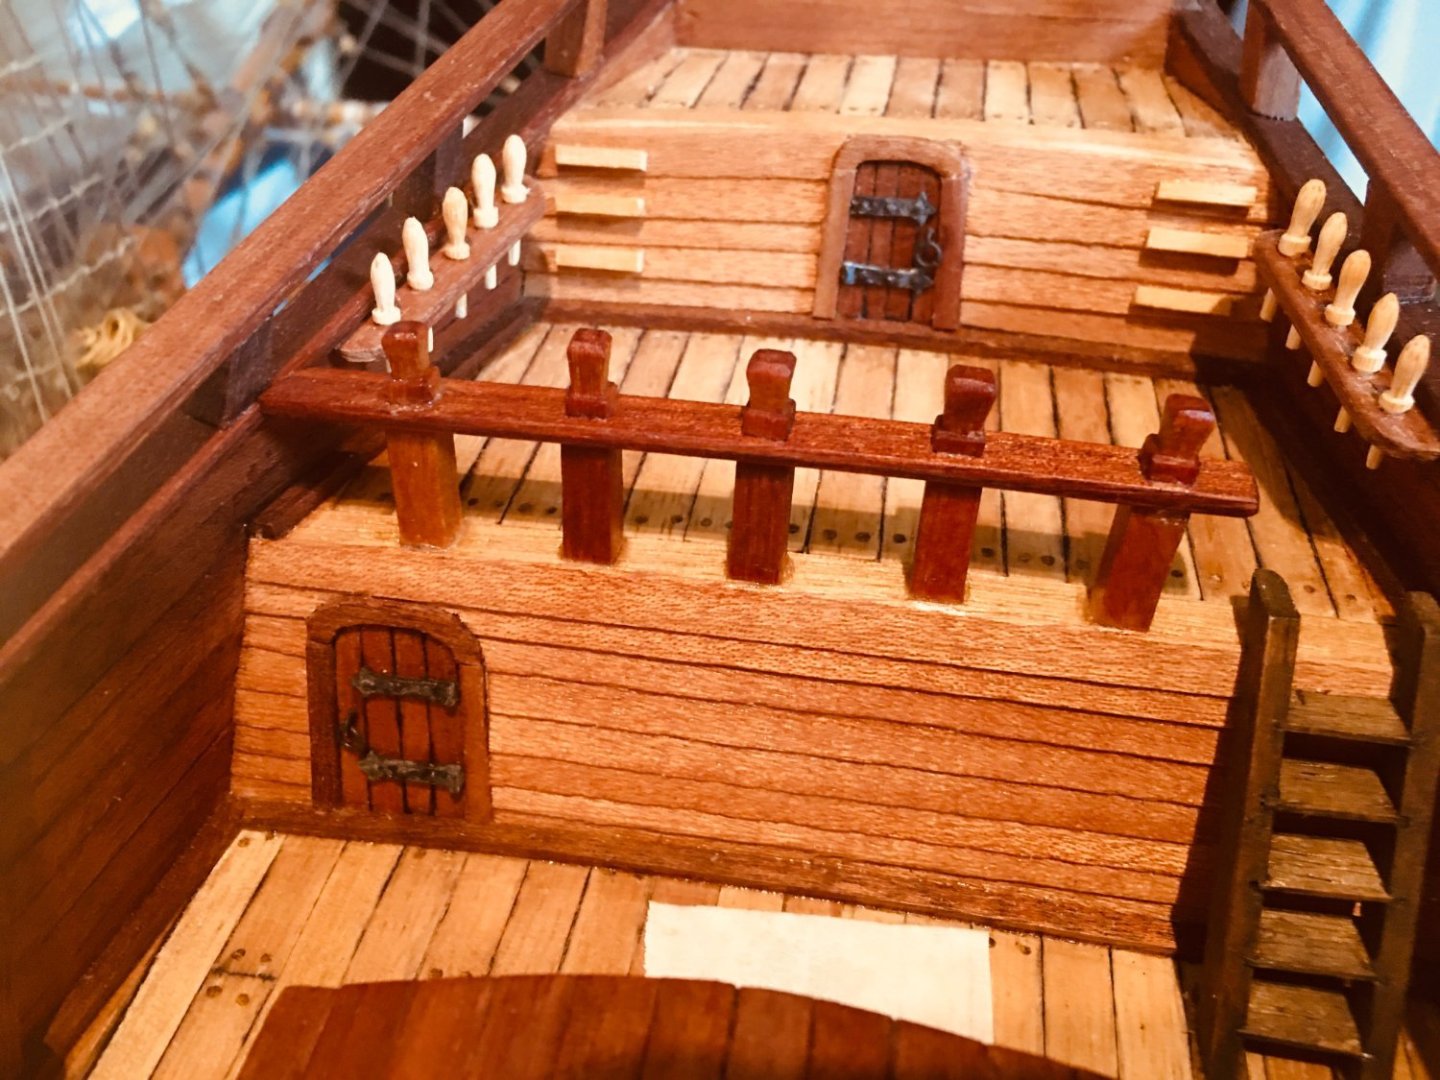
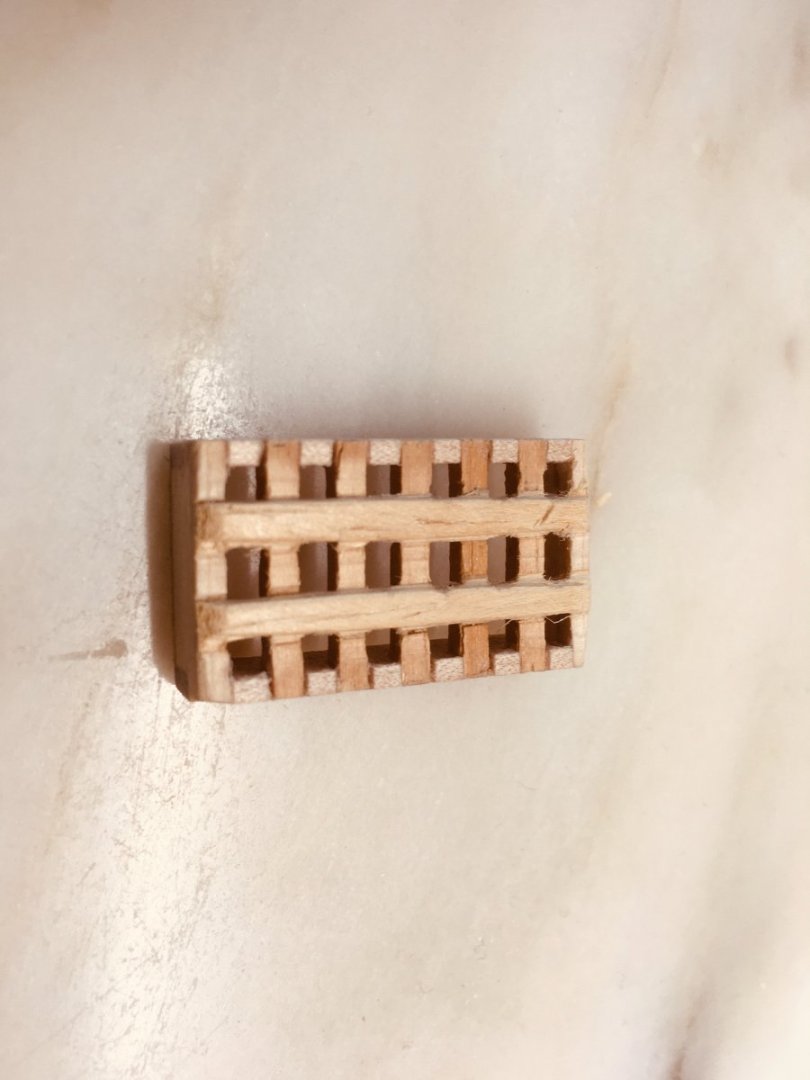
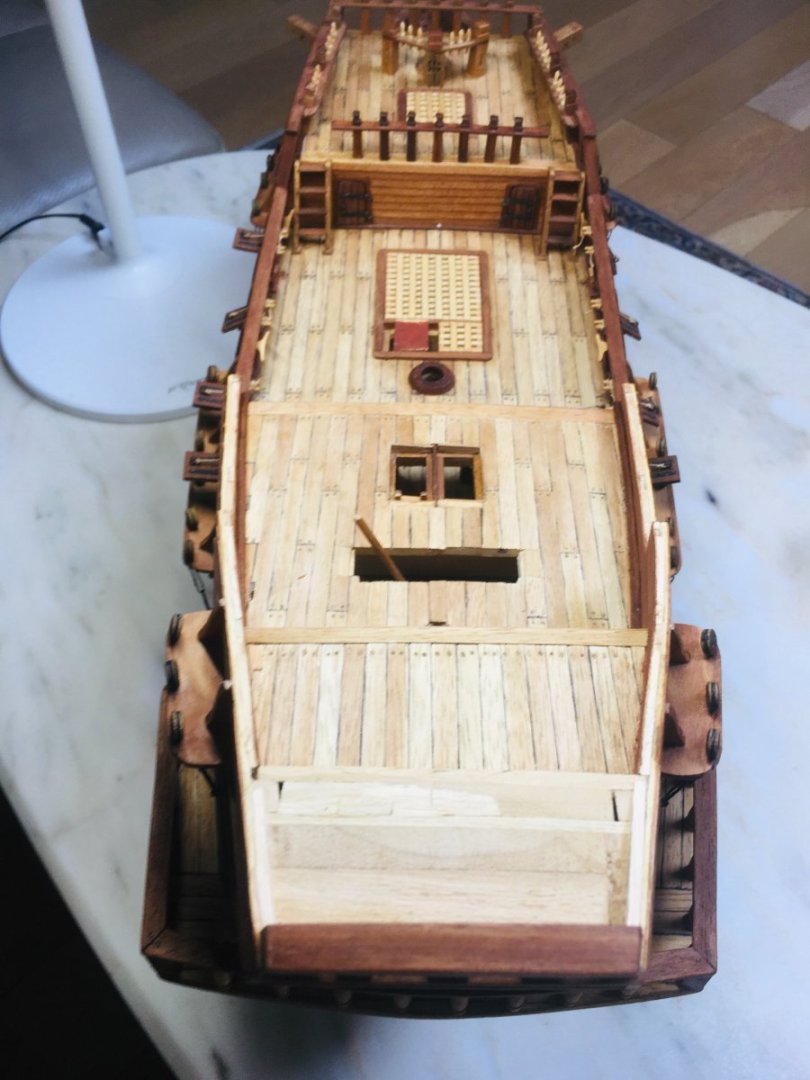
Hello All~ It's been a long time since my last update! I had to take time off from the shipyard due to minor injury on my left hand. Now fully functional again~ So, I have restarted on where I left off. Continuing on the quaterdeck grating and whipstaff house. First, below are some pictures on the quarterdeck grating.
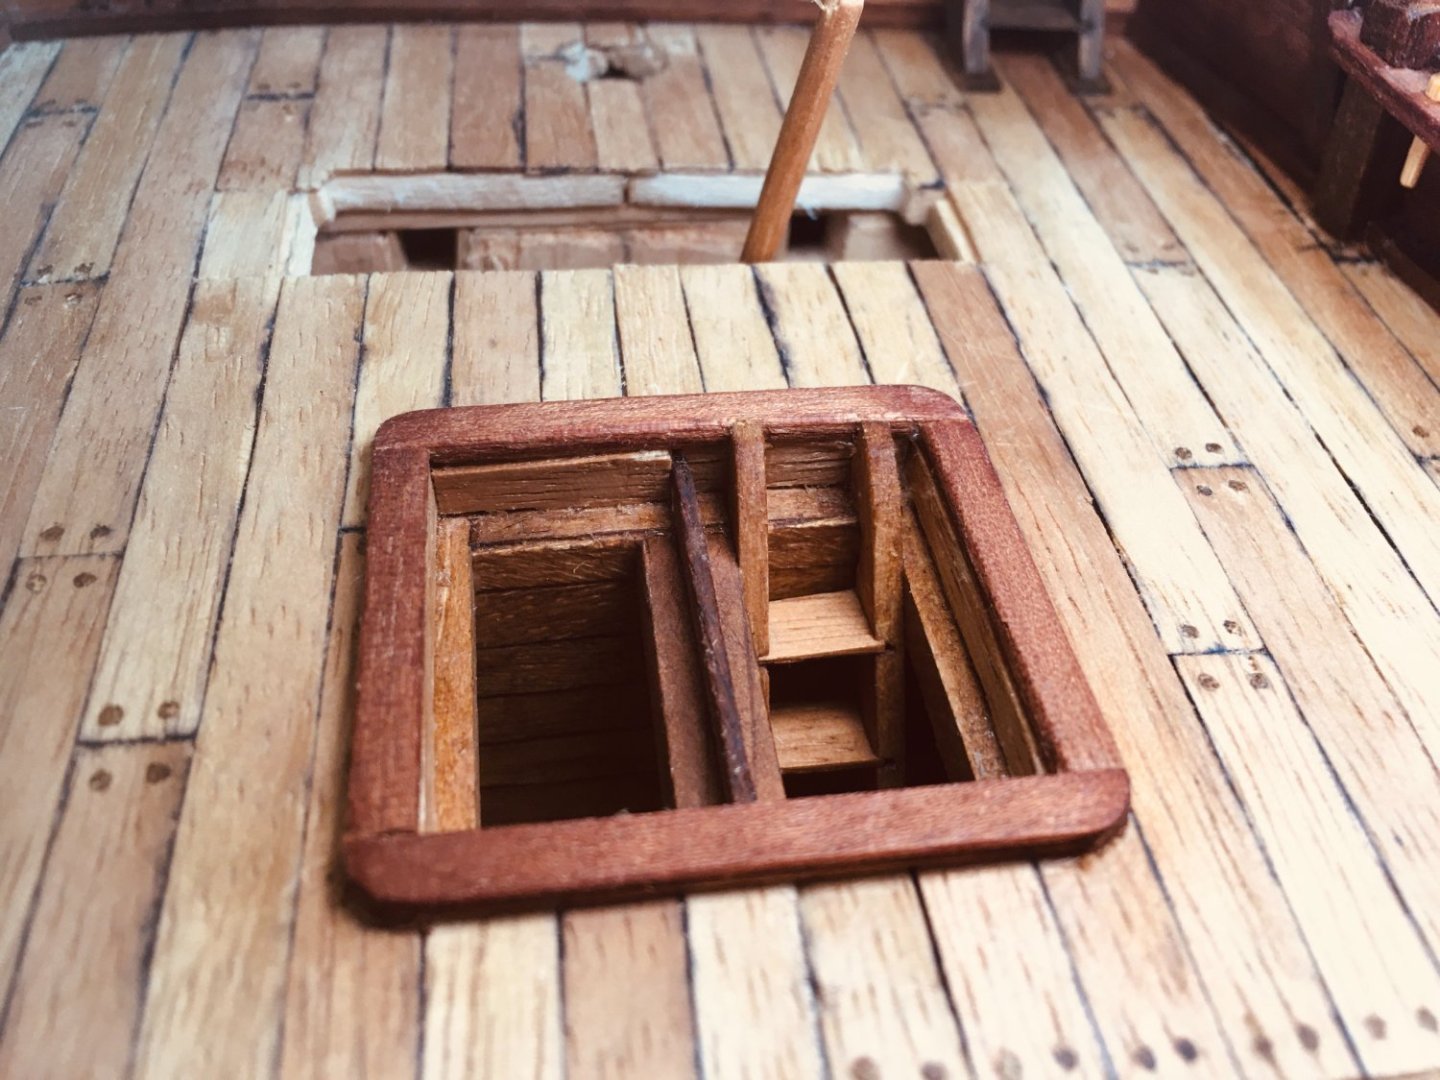


-
More progress pictures...


-
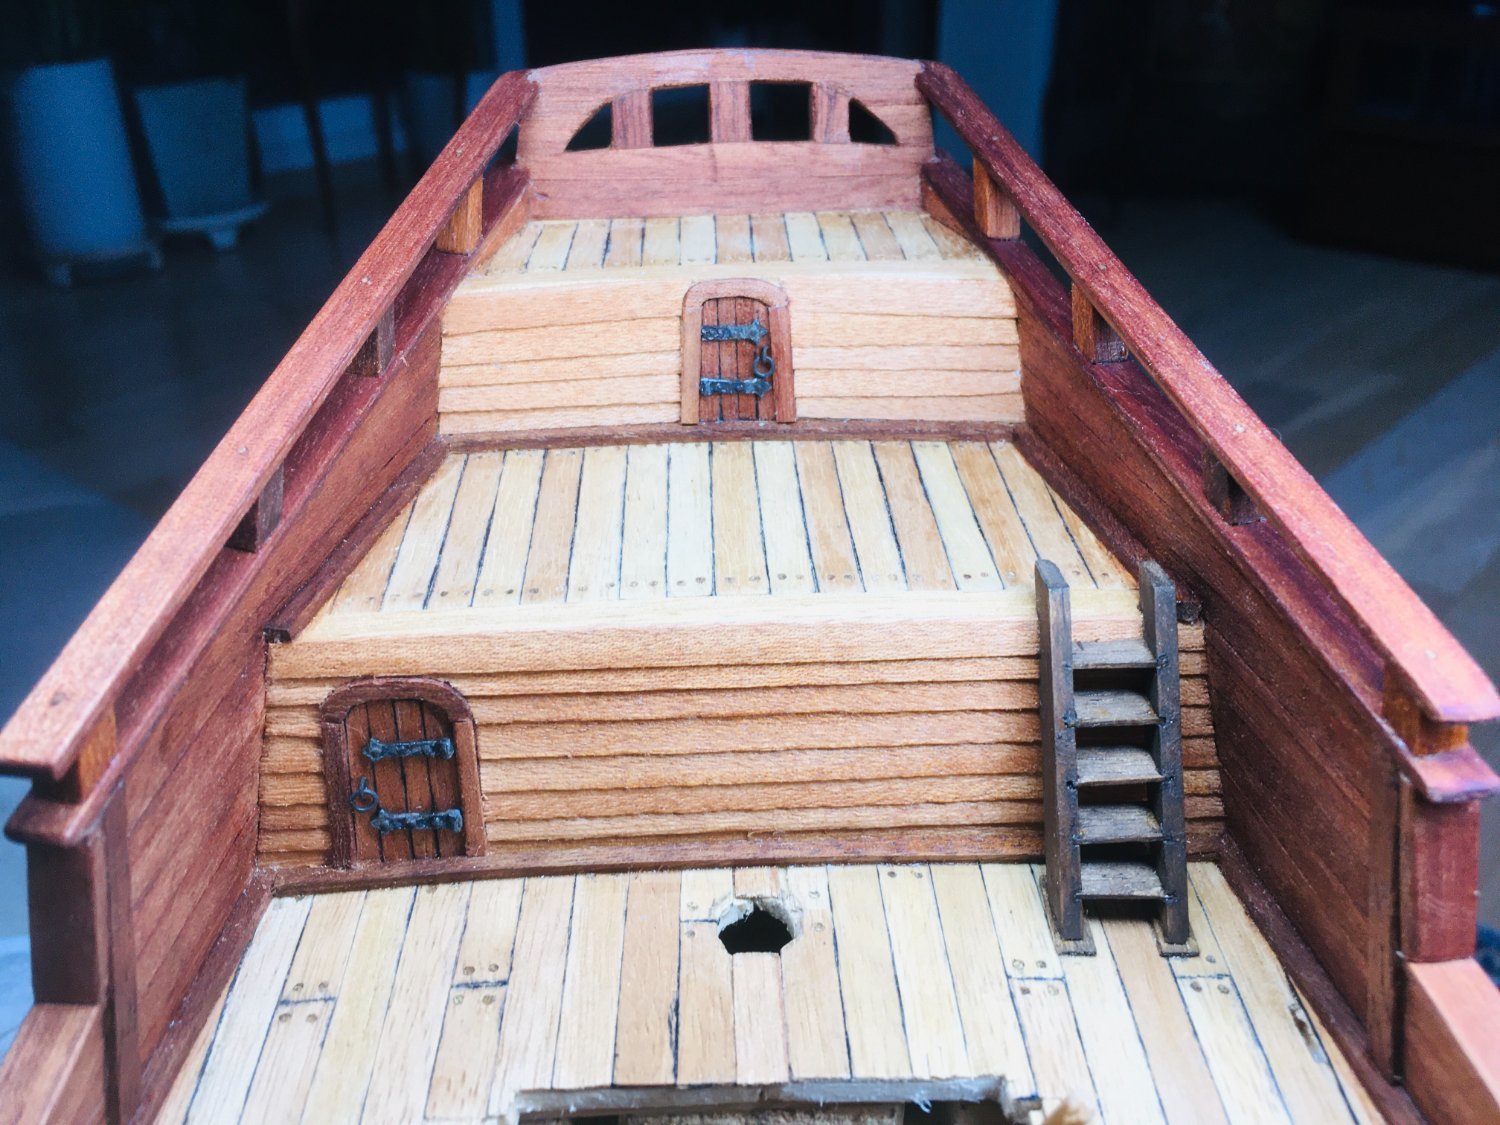
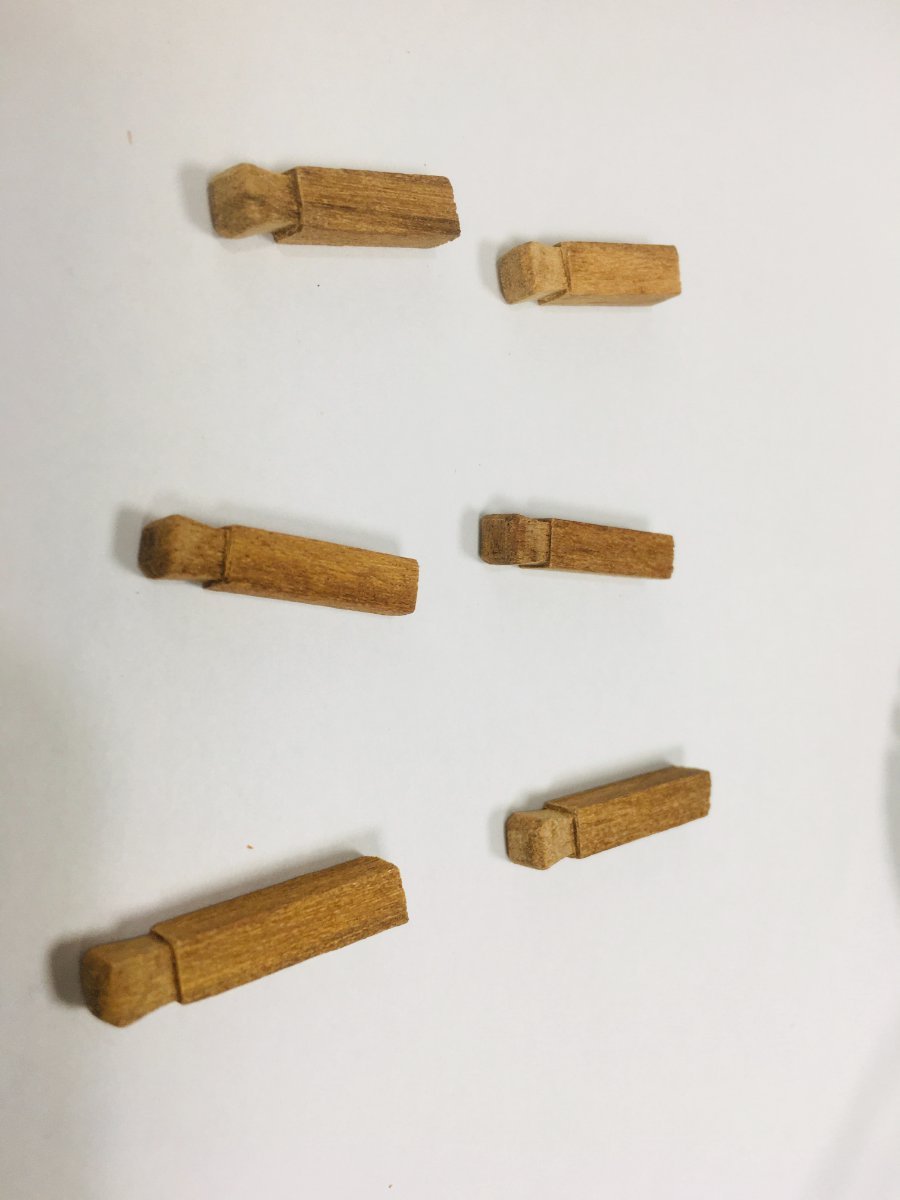
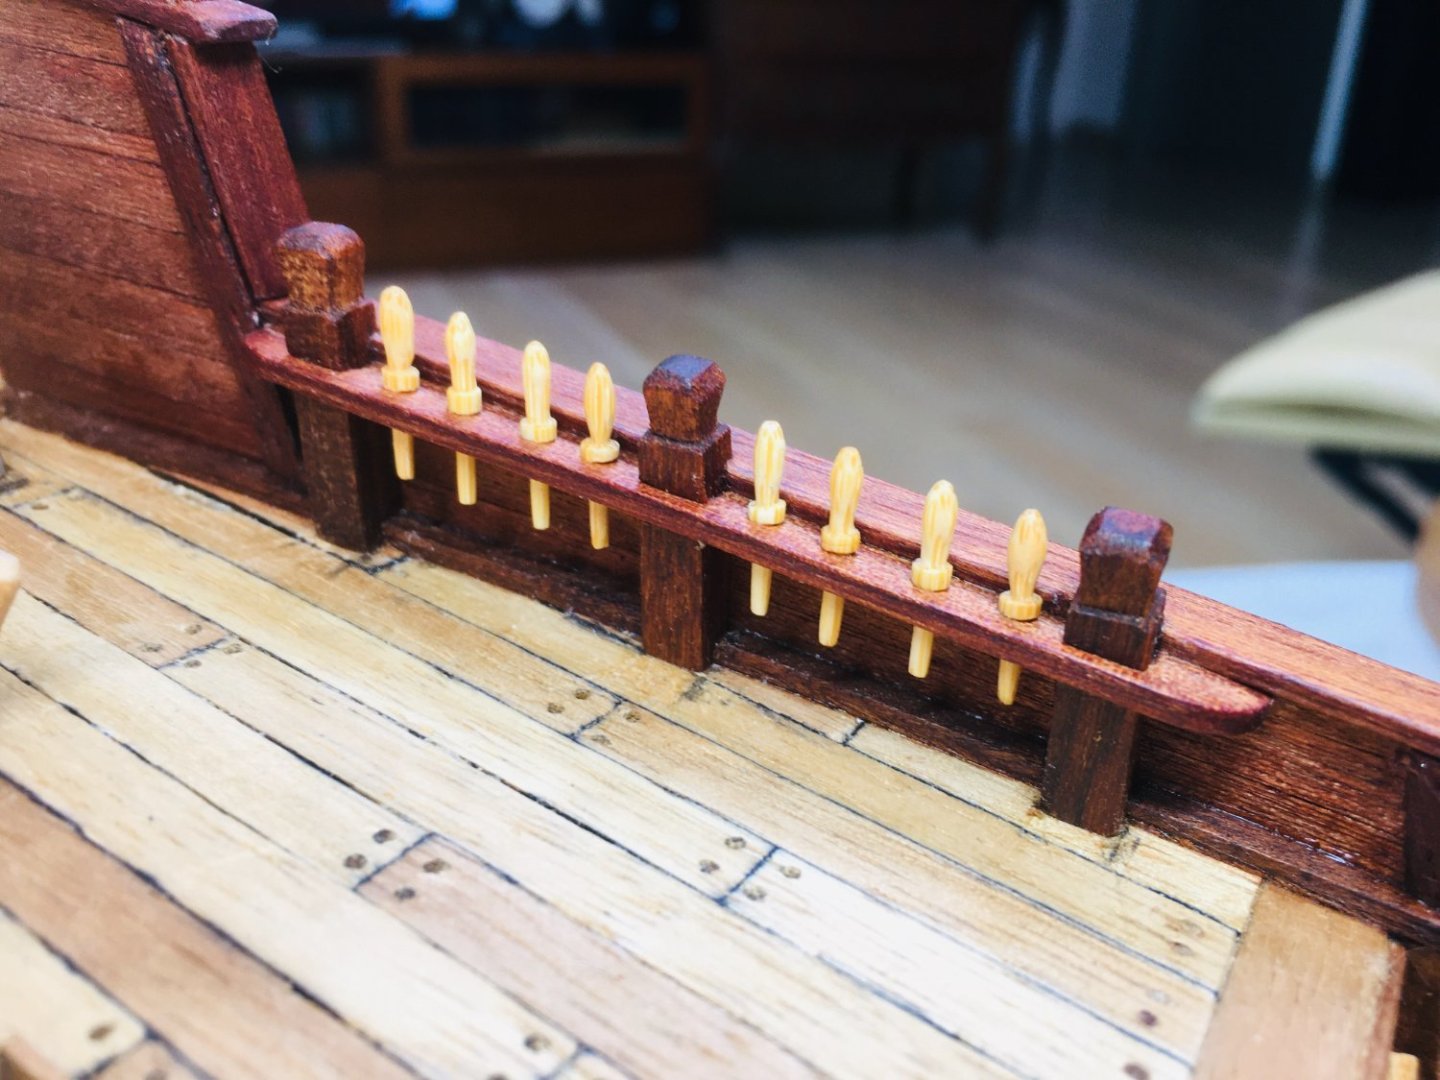
Hi all~ It's been a while since my last visit - have been tied up with something. Anyway, work on the upper decks continued. I tried walnut color stain for the ladder and it tuned out quite OK. Belaying pin racks are once again done using decommisioned hard wood chopsticks. Below are some progress pictures.


-
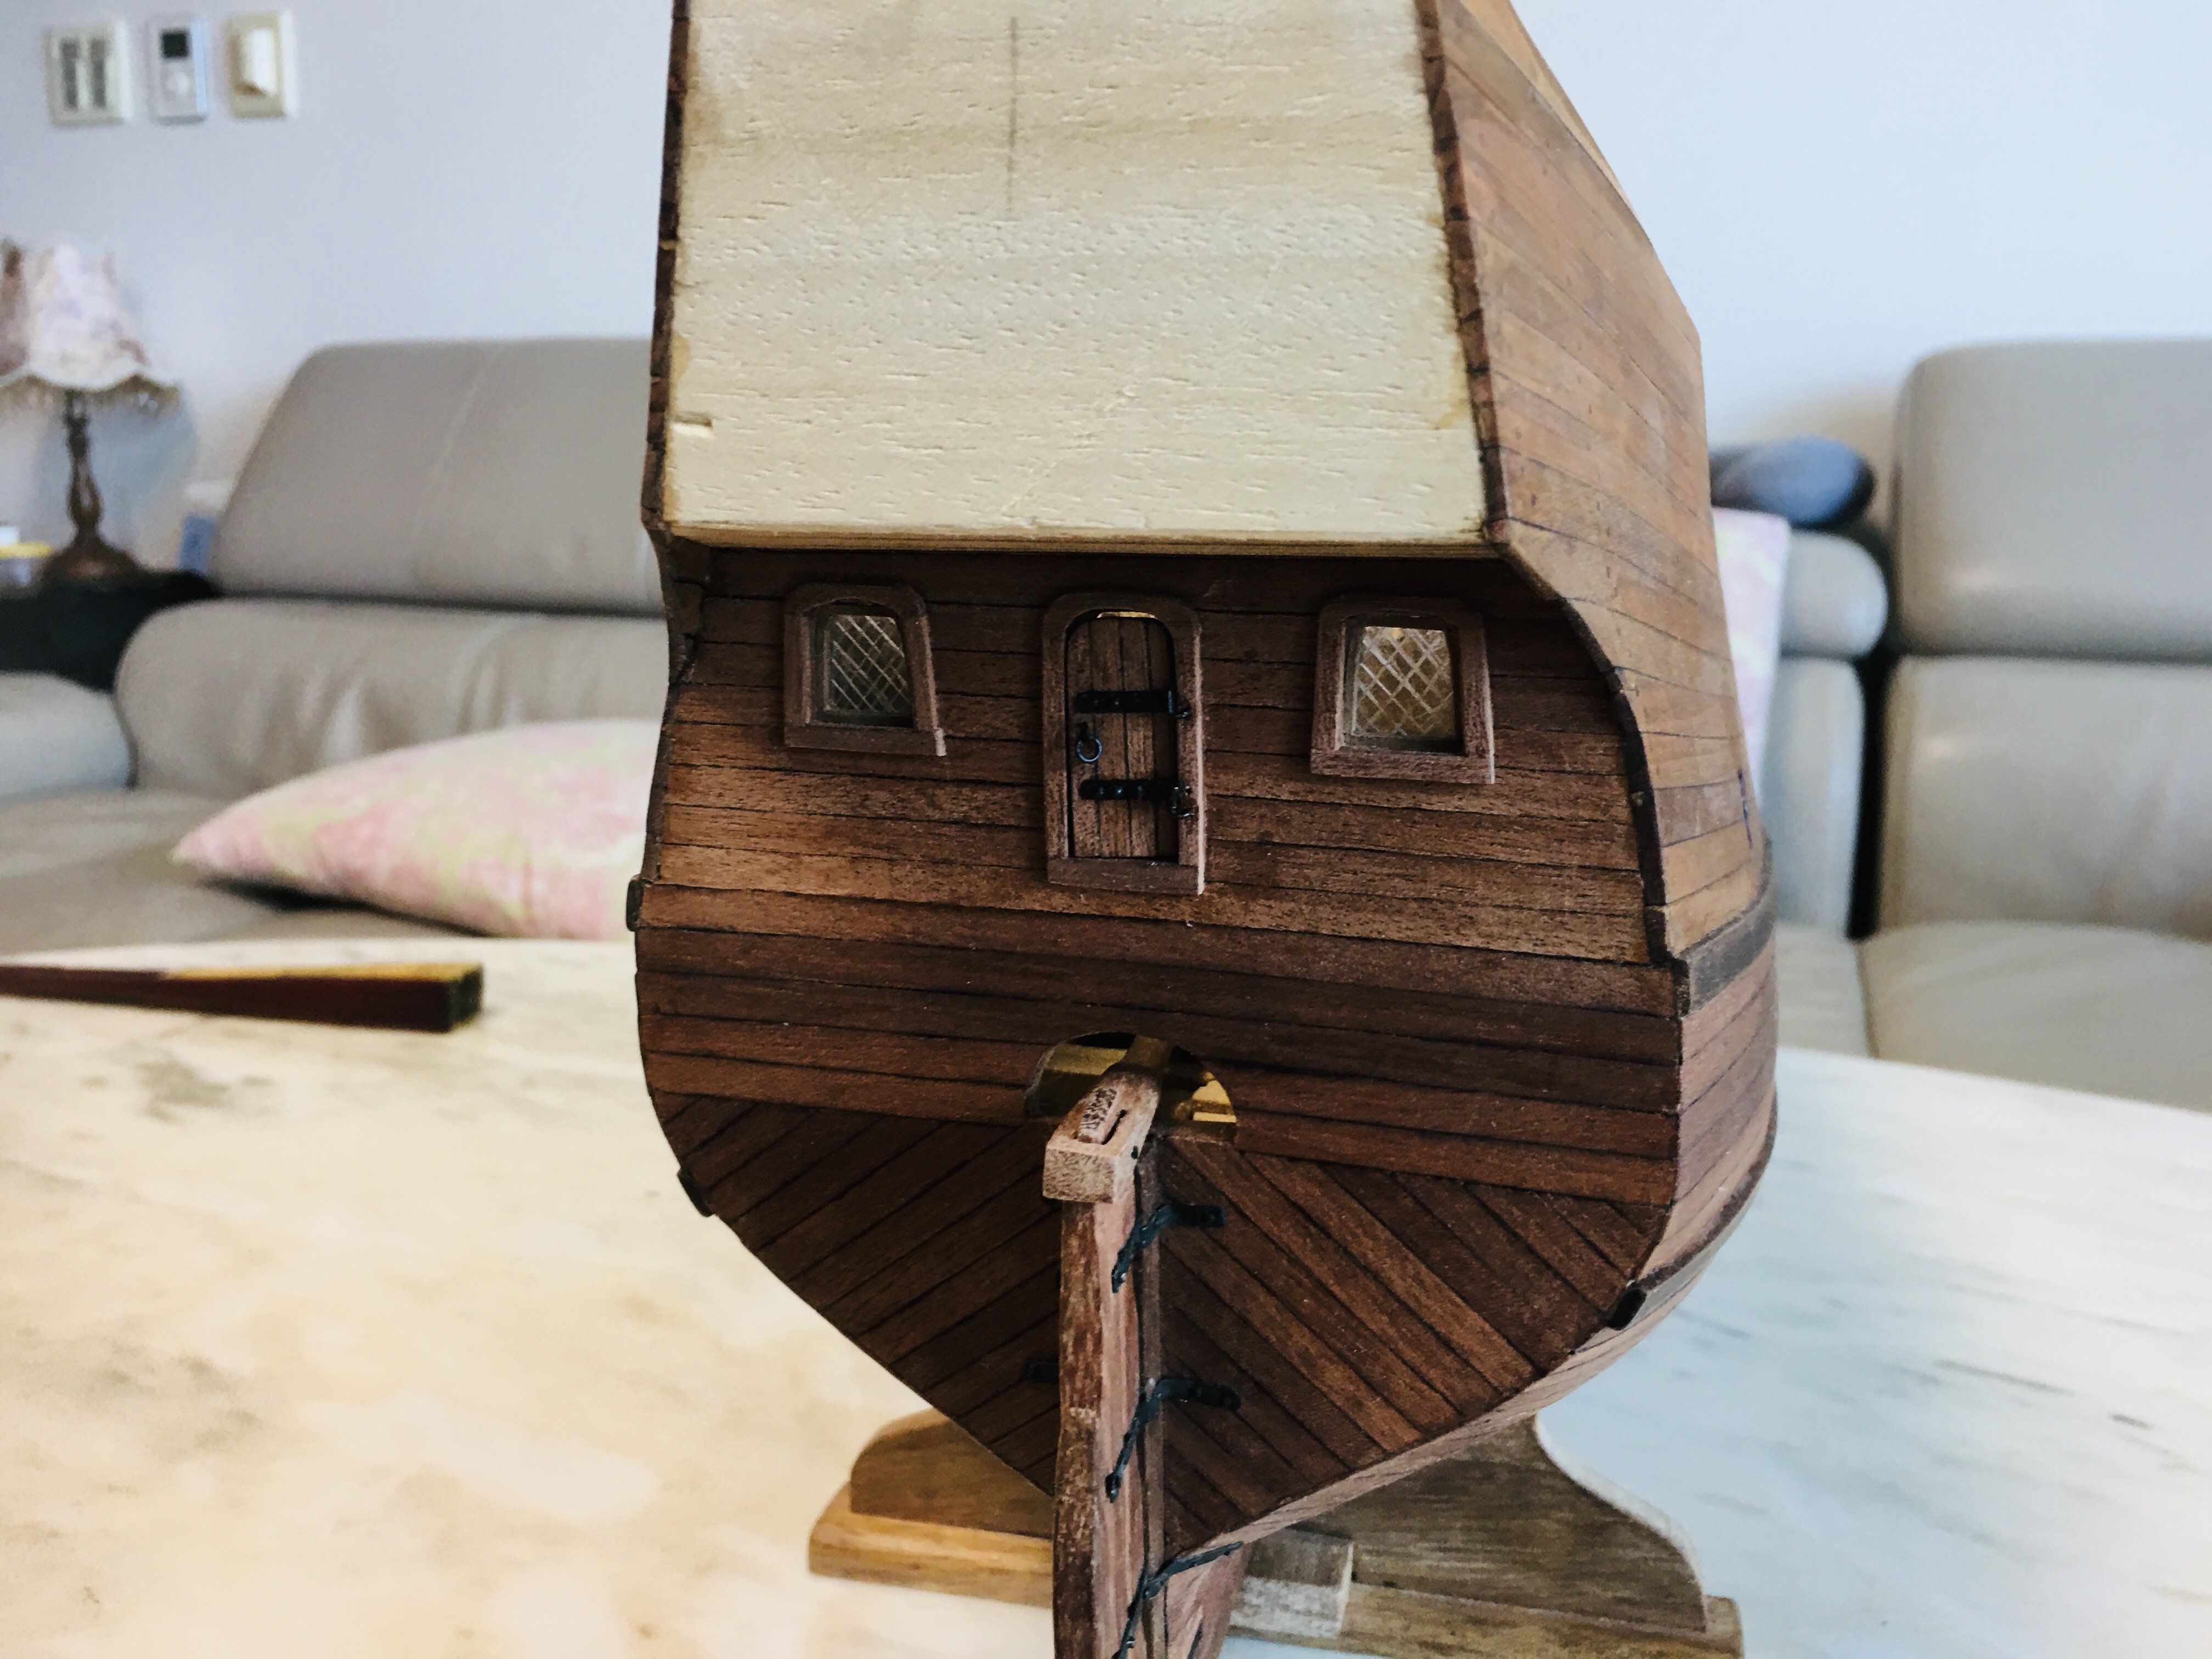
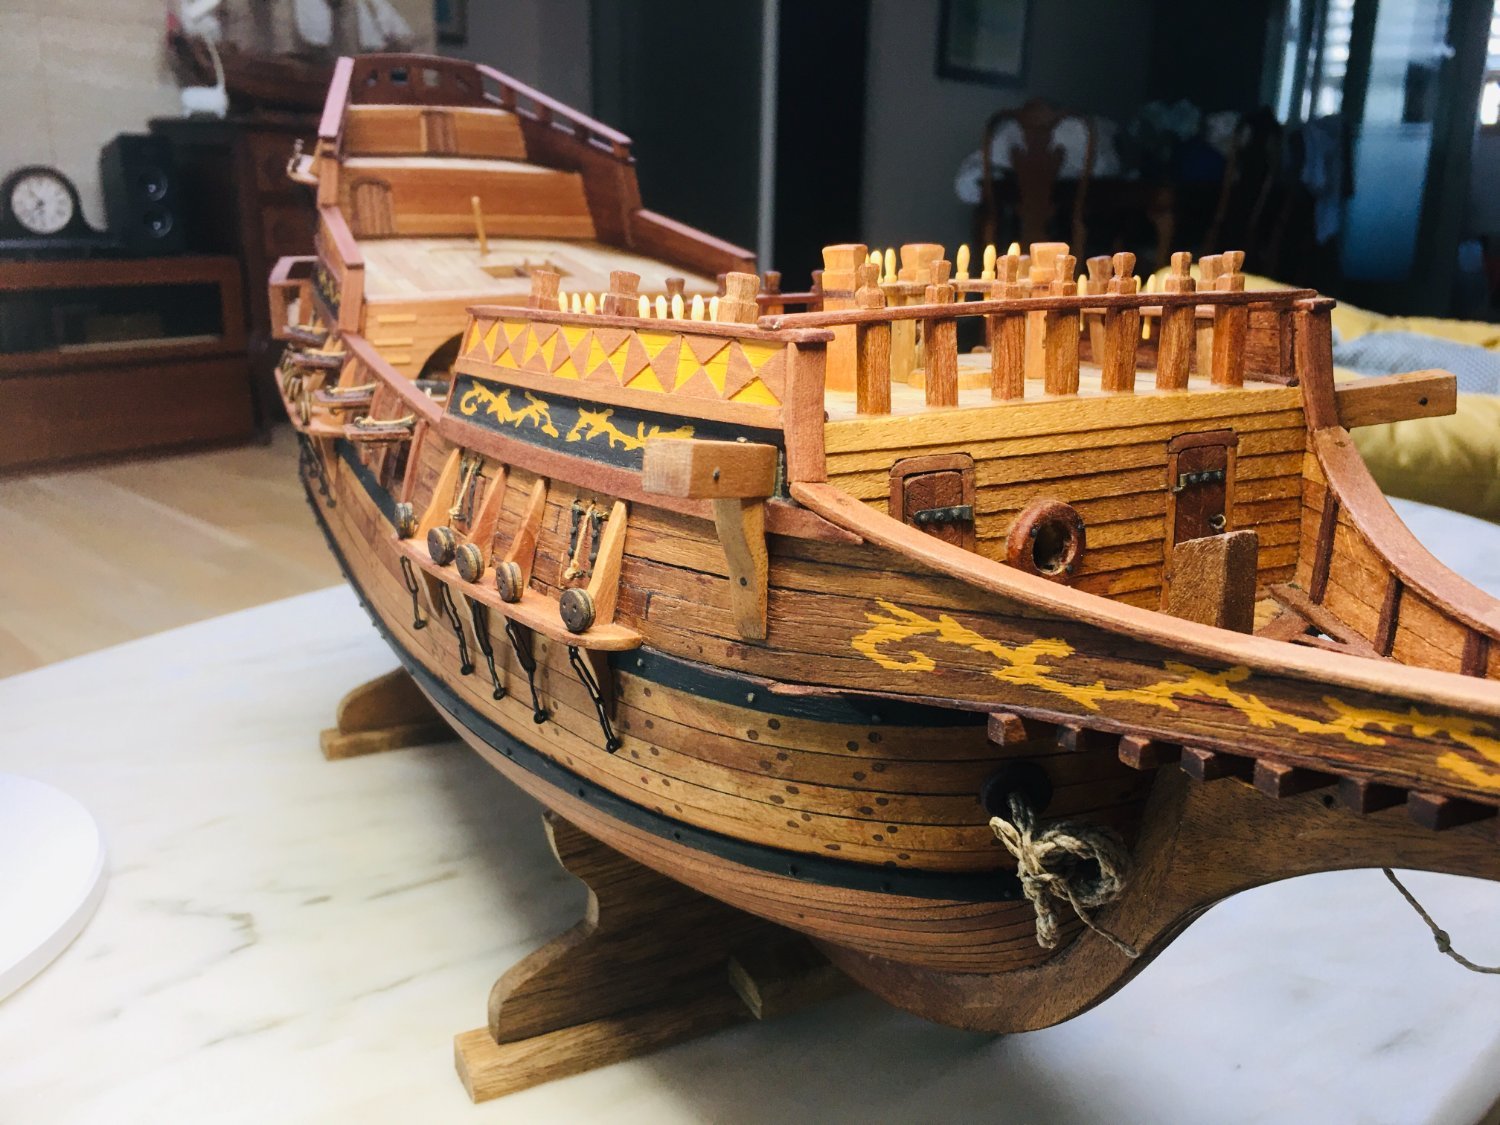
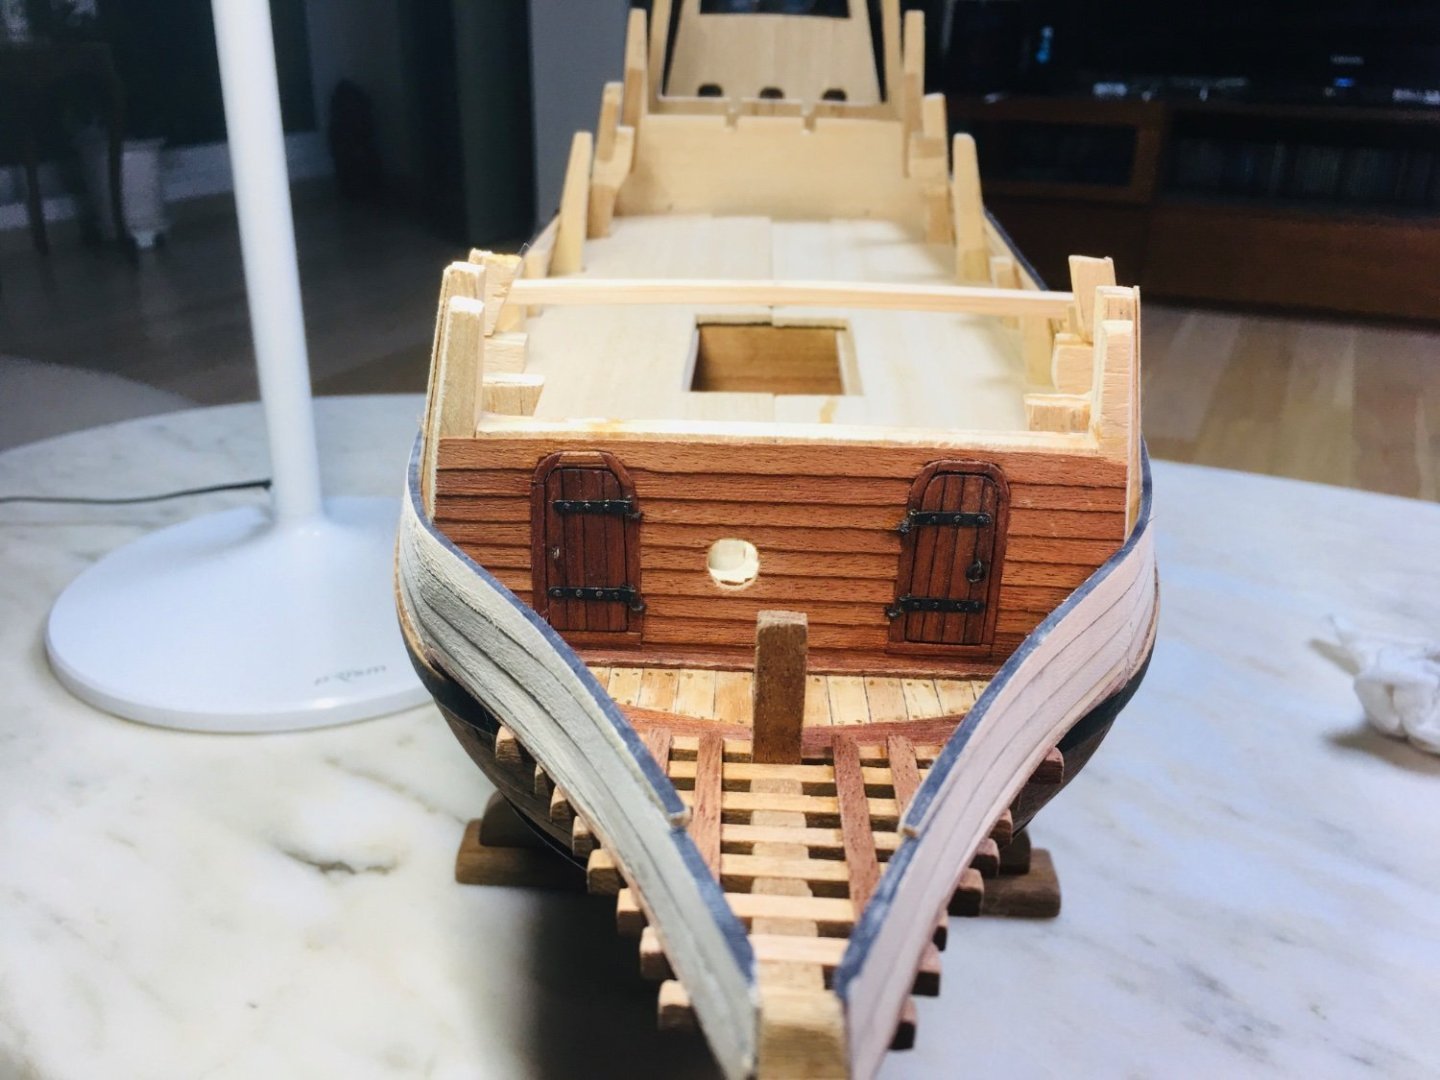
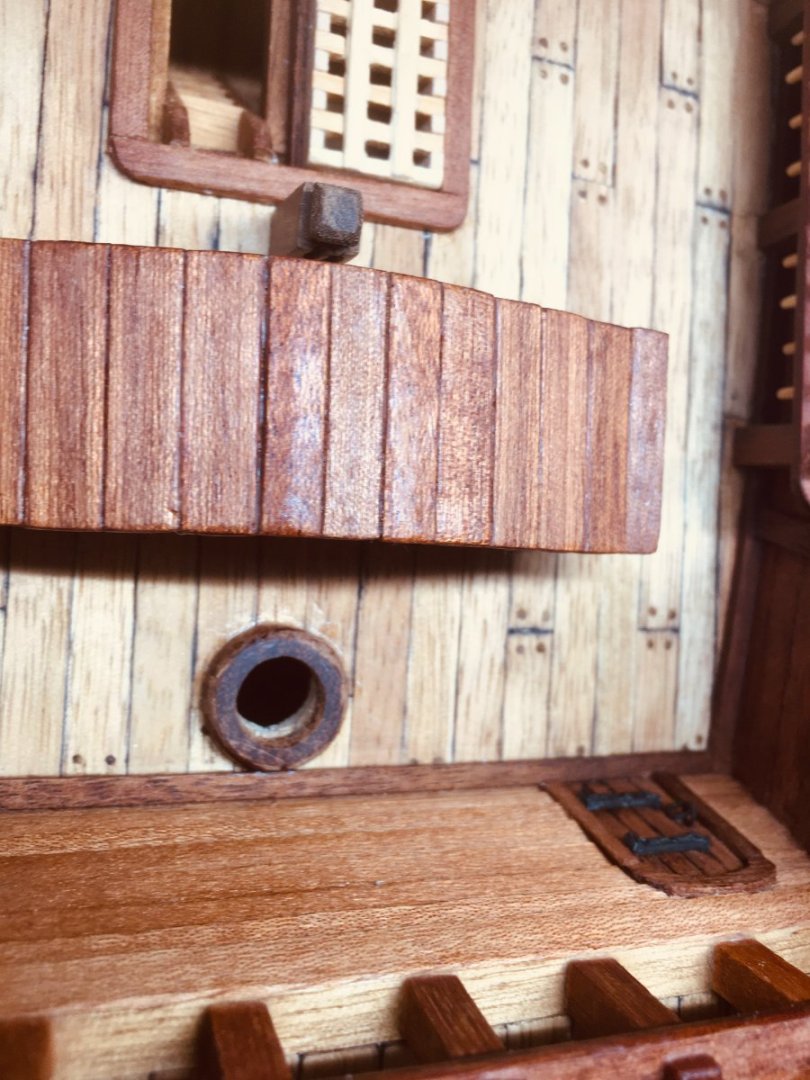
And finally, I put the rails in place. So, work on hull itself (or outer hull) seems to be pretty much done. Next will be the works vis-a-vis filling in the inside of the decks with various structures as well as cannons. Still long way to go until I can finally begin with masts and rigging.


-
Some more pictues~


-
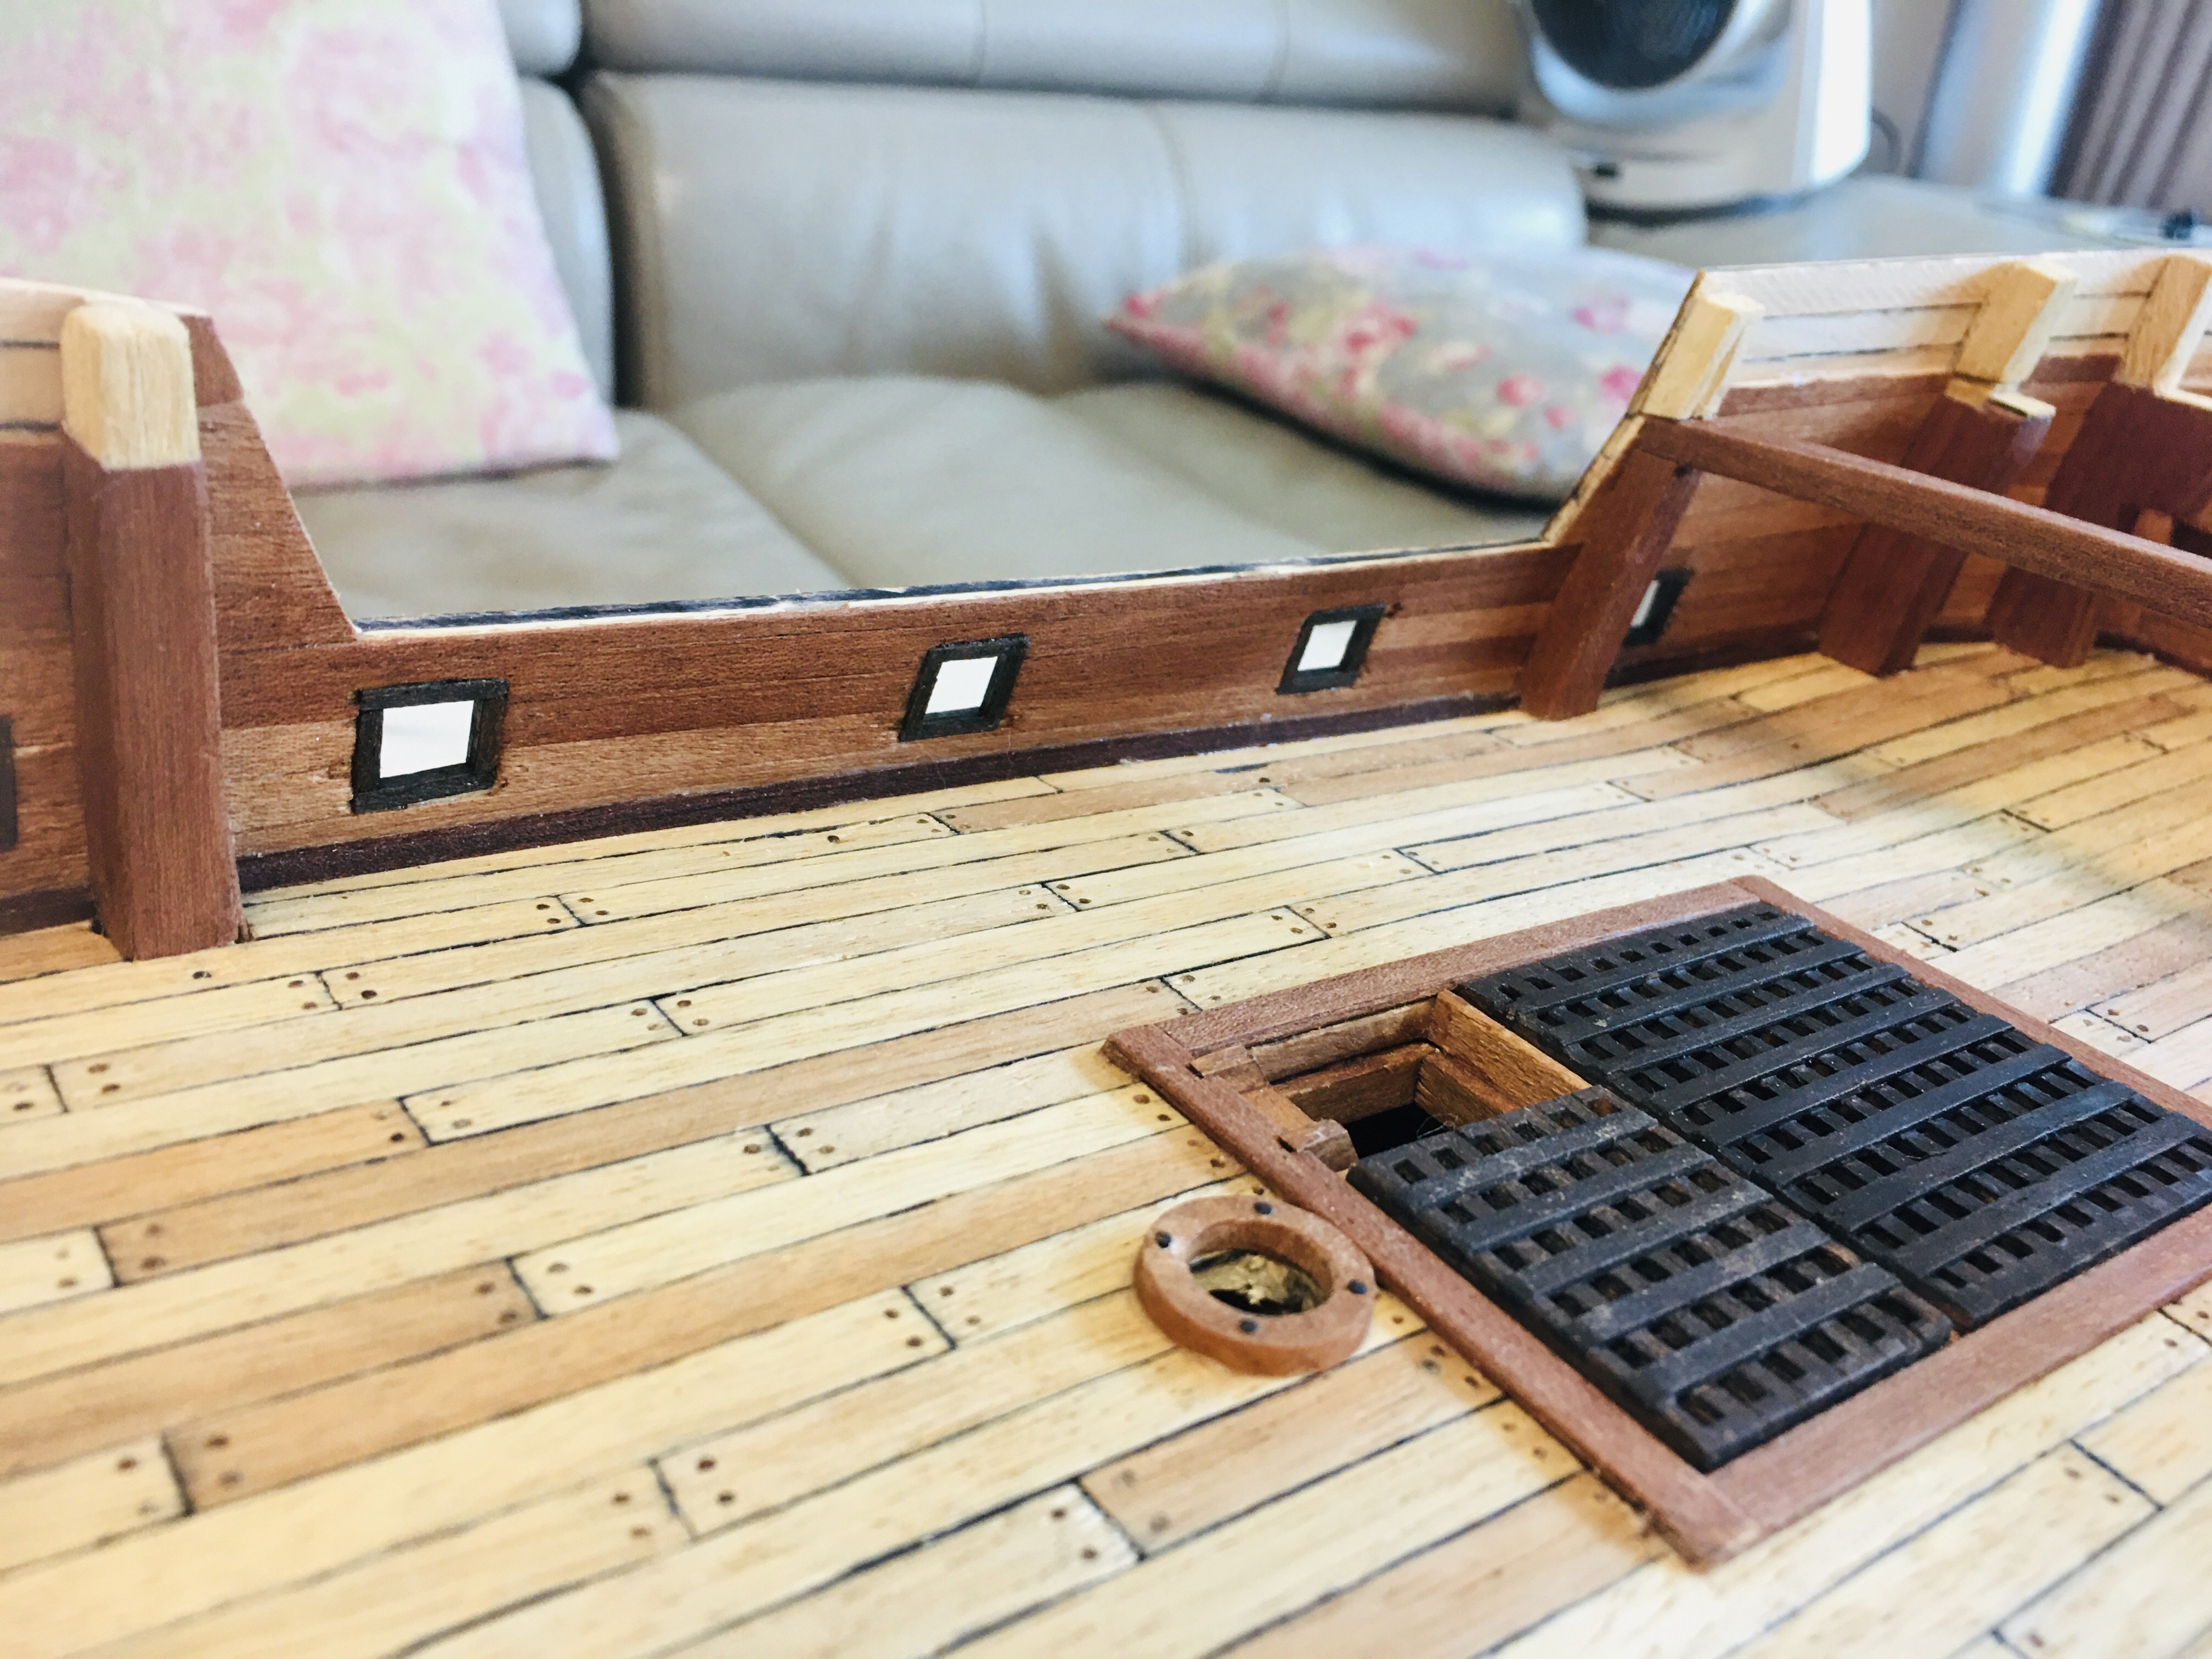
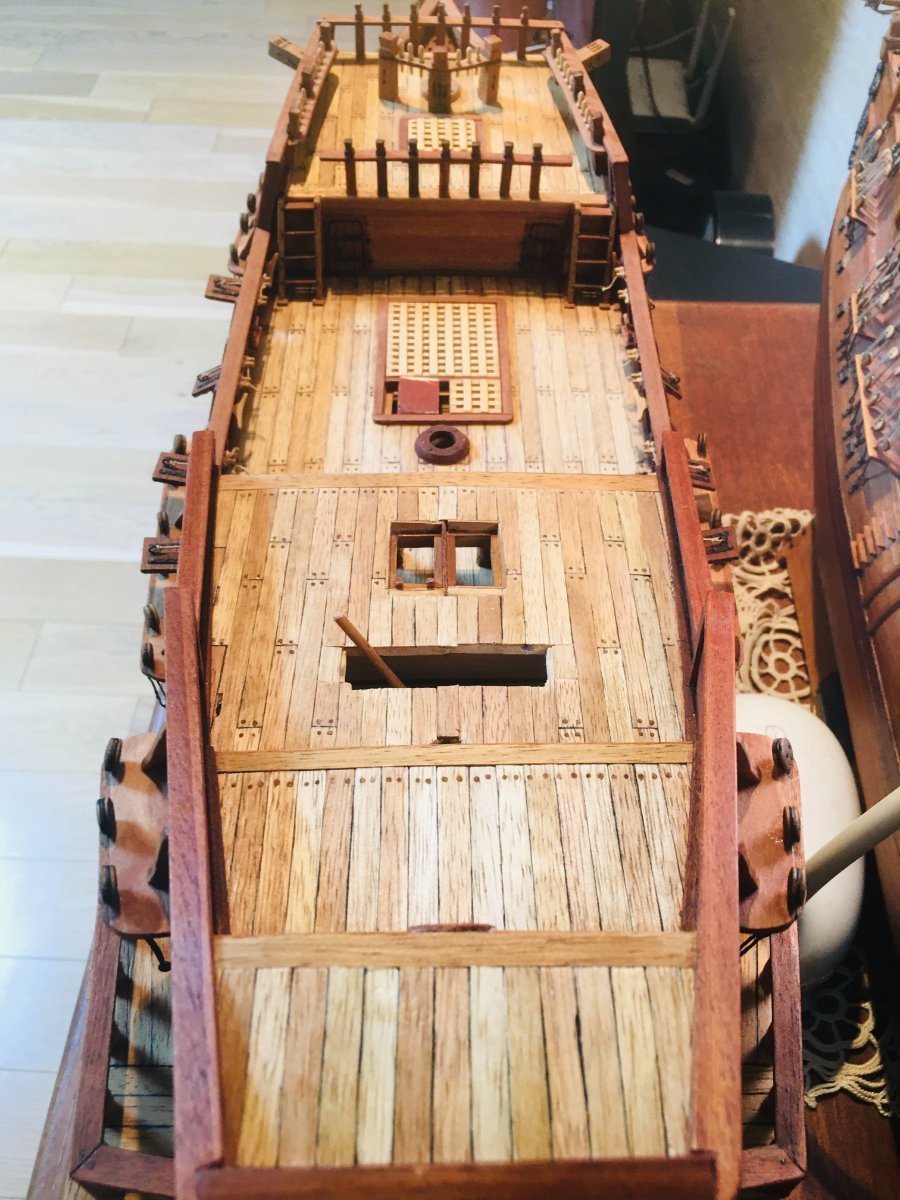
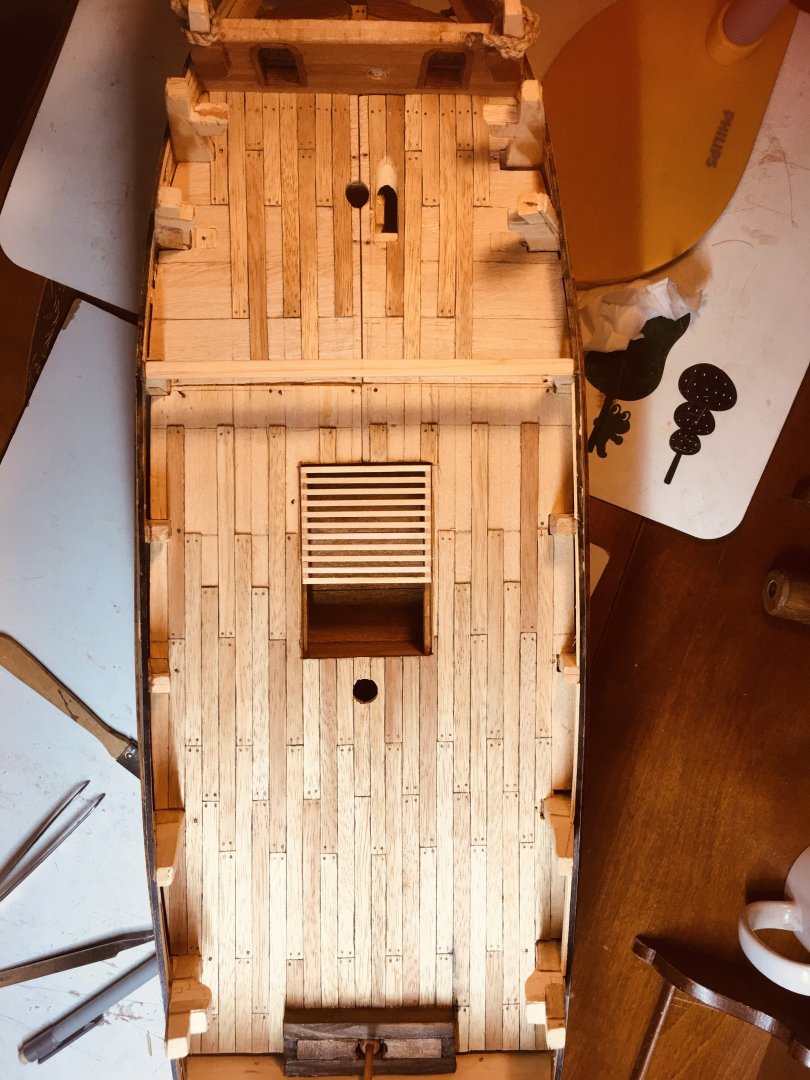
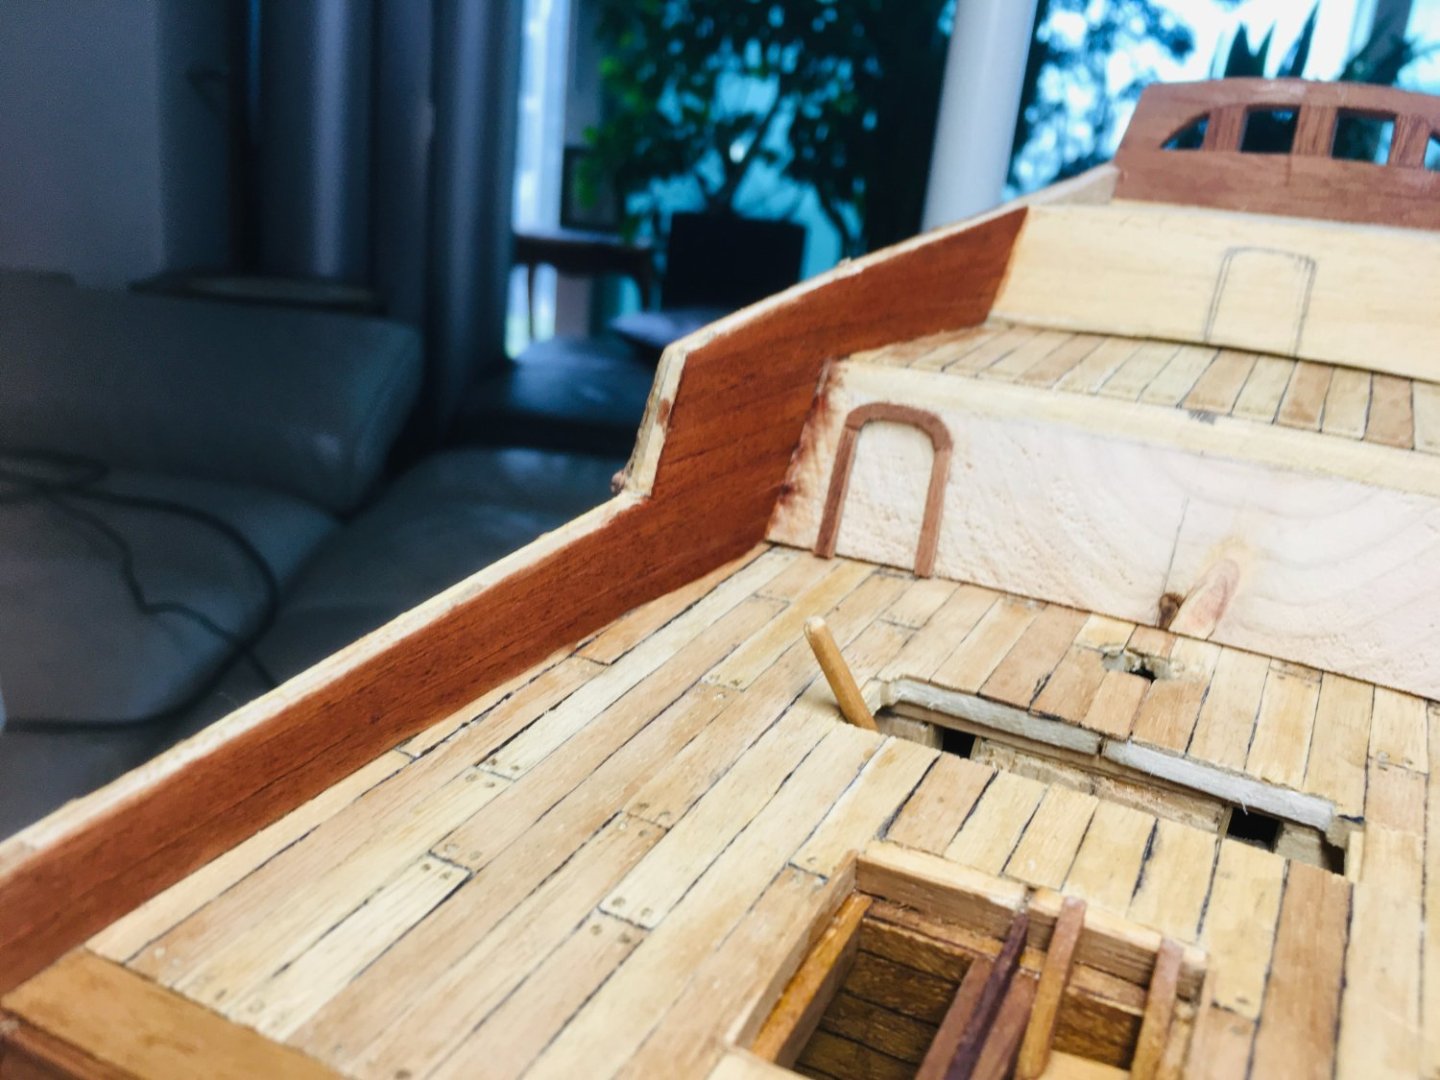
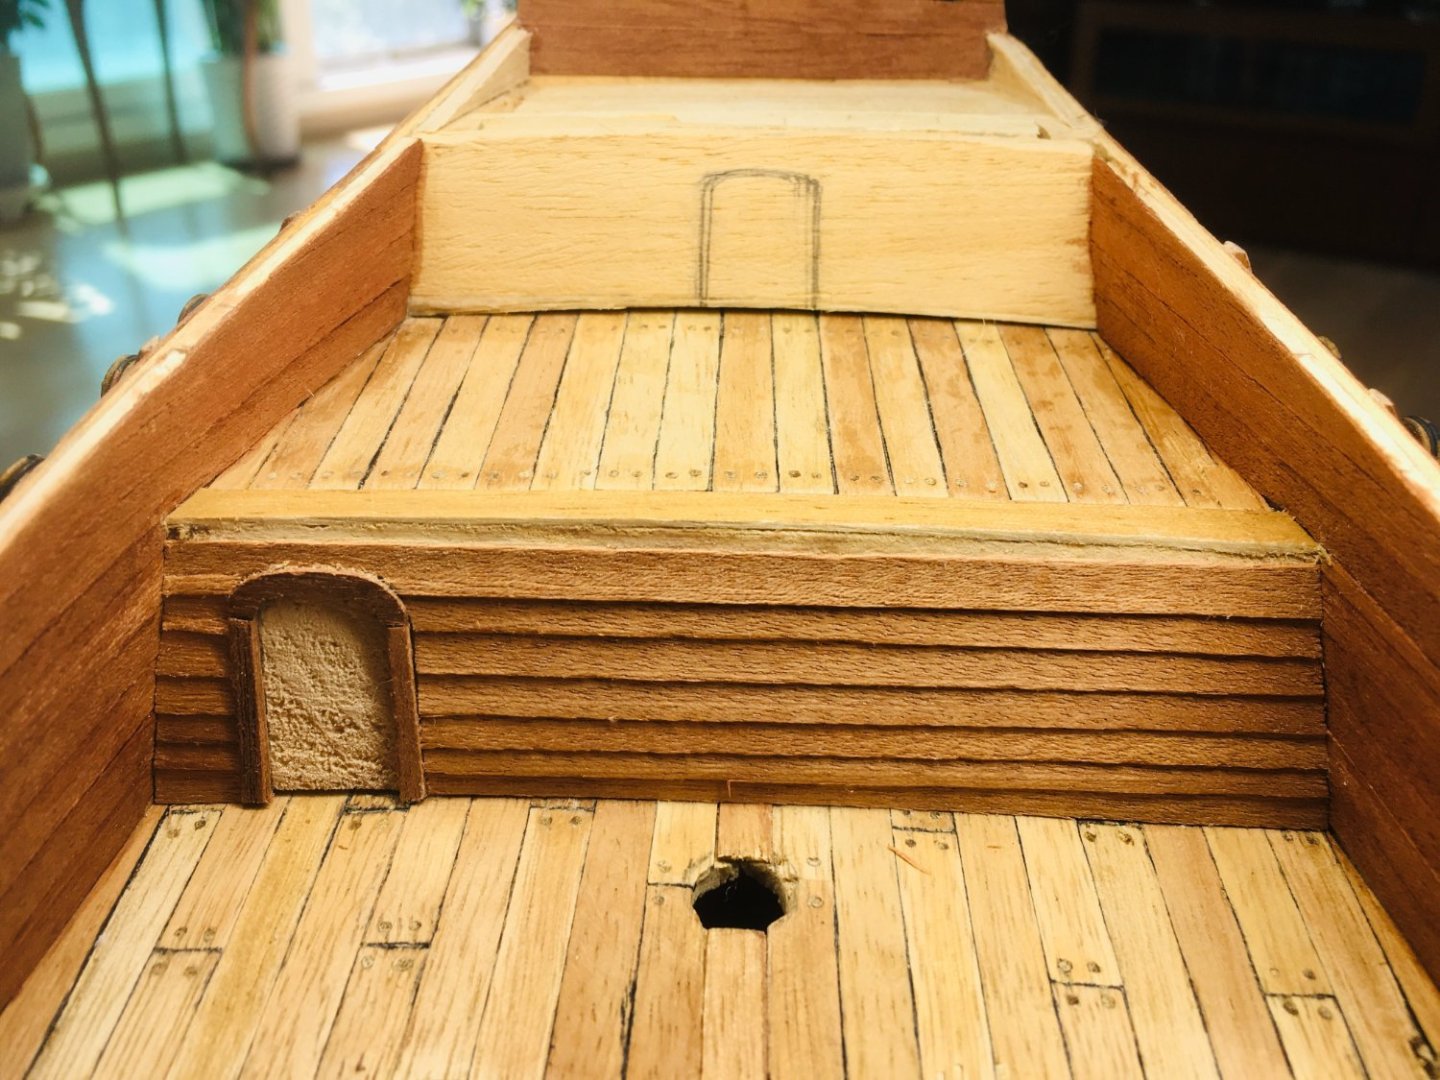
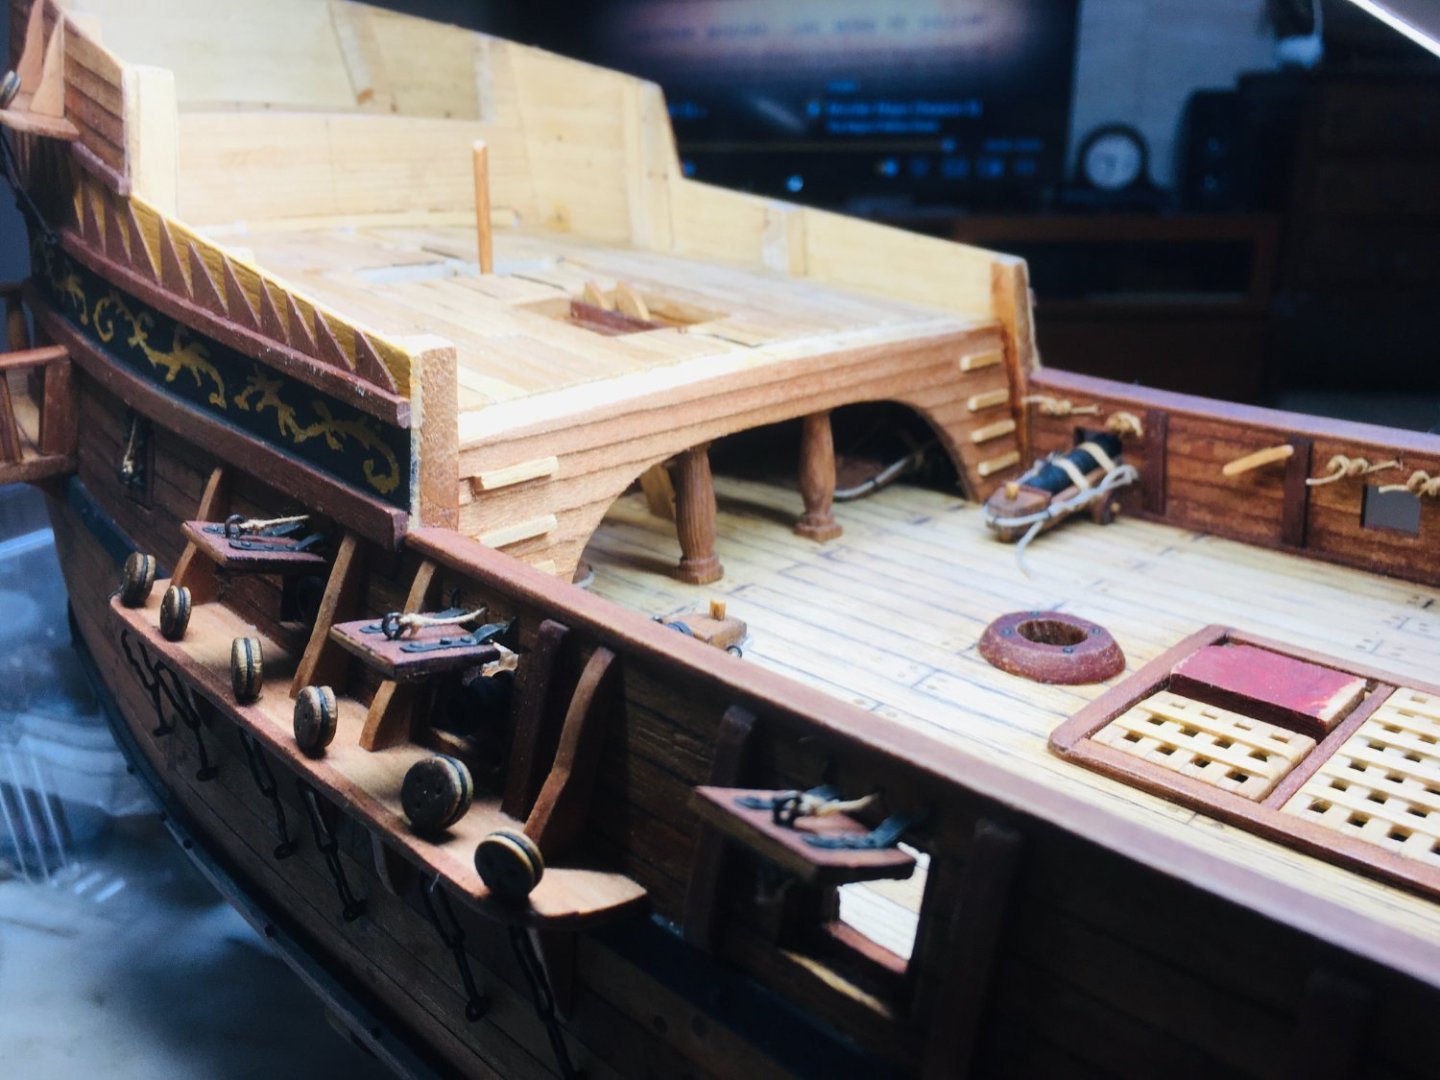
Hi All~ Work continued on the final deckwork in the quatredeck and poop deck areas. Just generic stuff, so nothing much to comment or to explain. Below are the latest work stream pictures.


-
Finalizing the initial quarterdeck work - glueing things in place, installing additional features..etc. Also, the poop deck area construction begins..


-
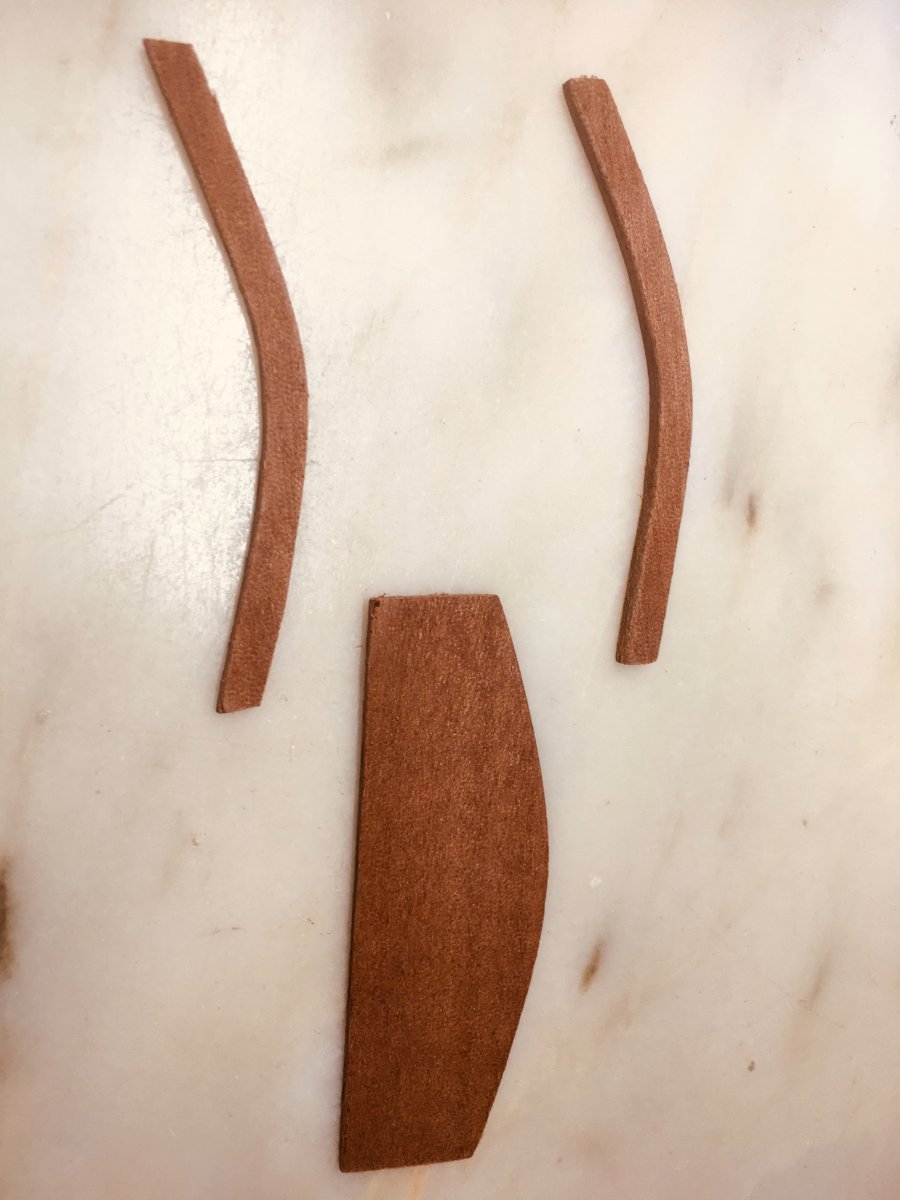
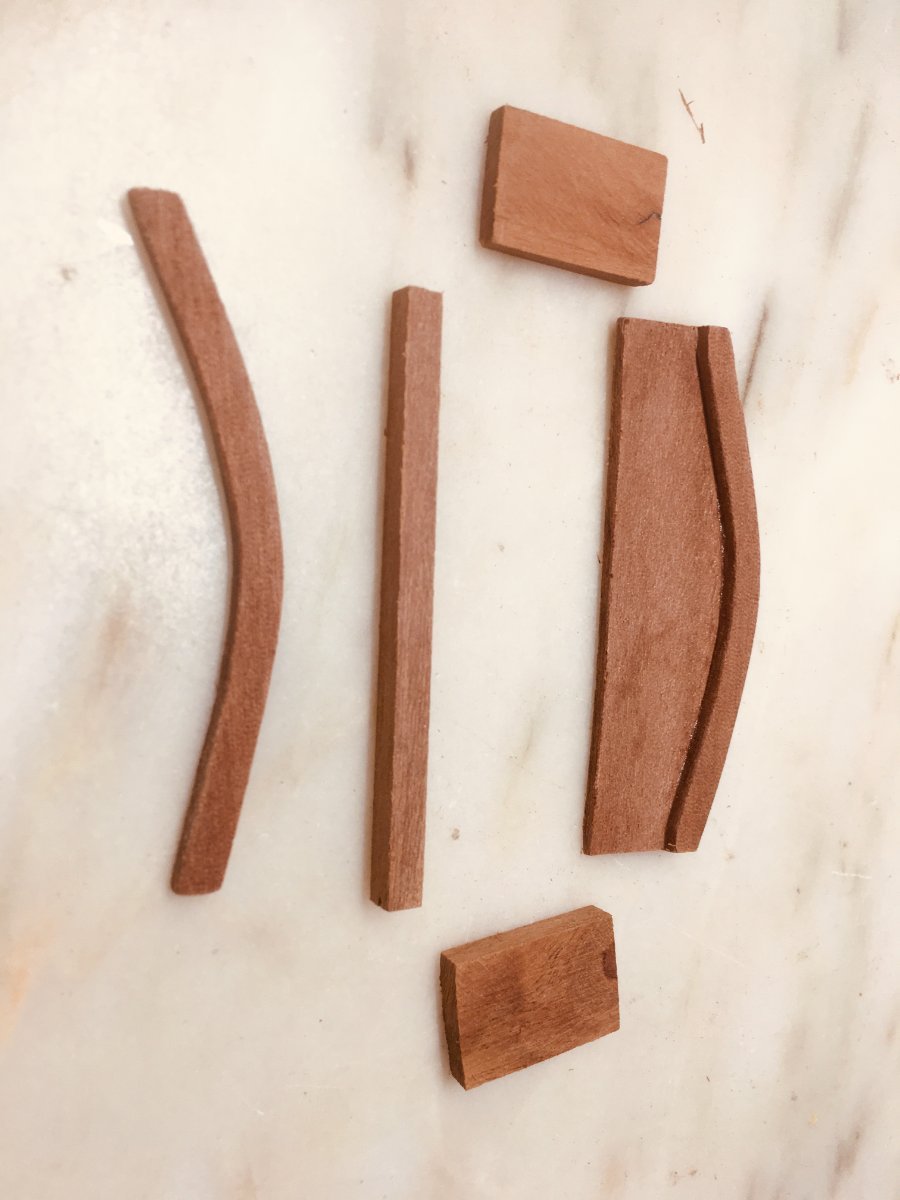
Work on the quarterdeck continues...dyeing the pillars and support beams, making and installing a ladder,