


JLong
-
Posts
77 -
Joined
-
Last visited
Content Type
Profiles
Forums
Gallery
Events
Posts posted by JLong
-
-
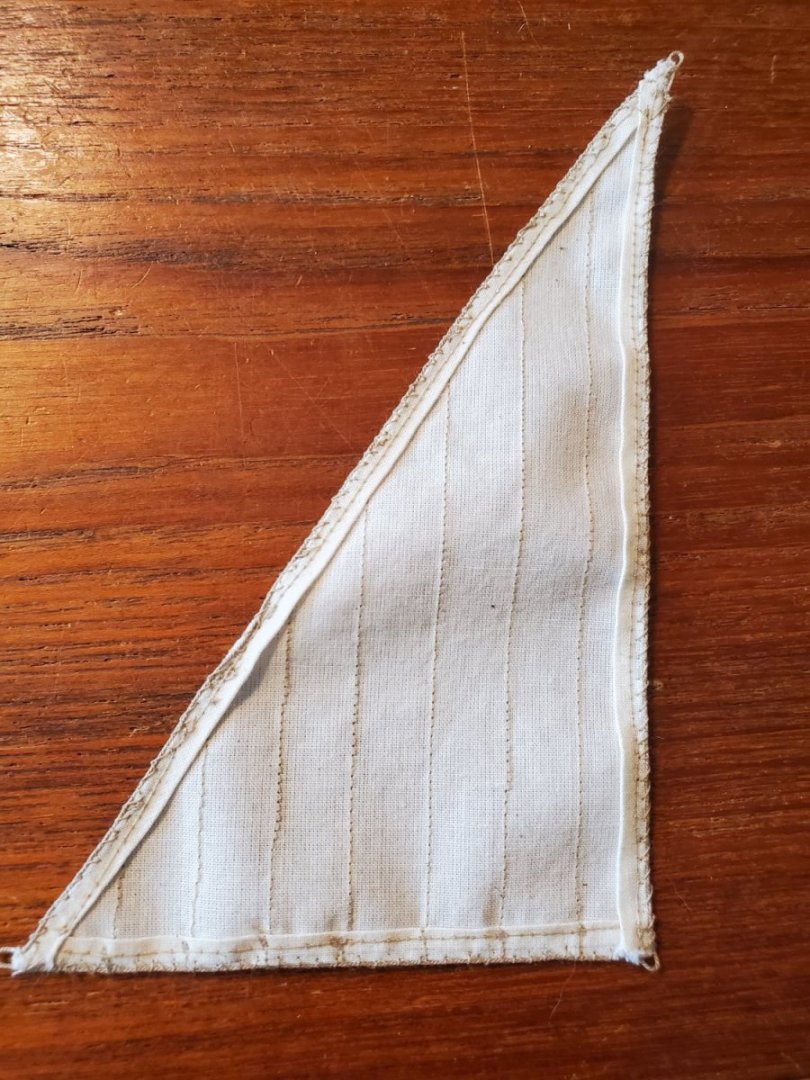
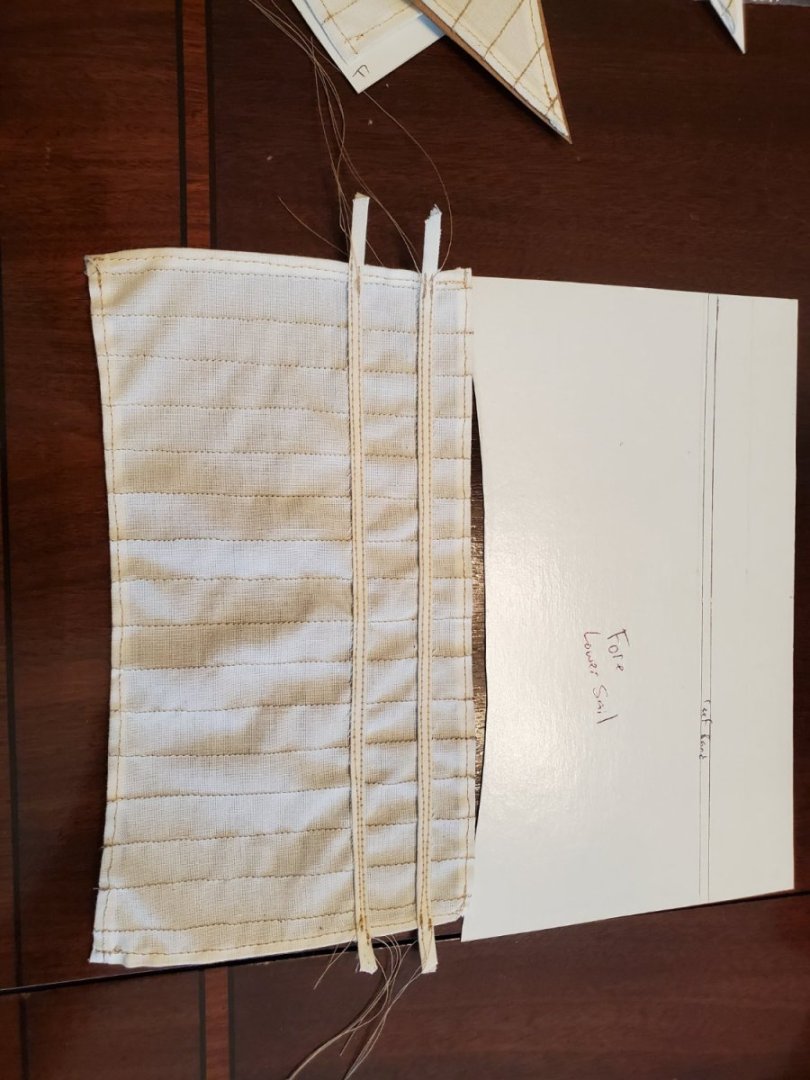
Continued Sail Progress...
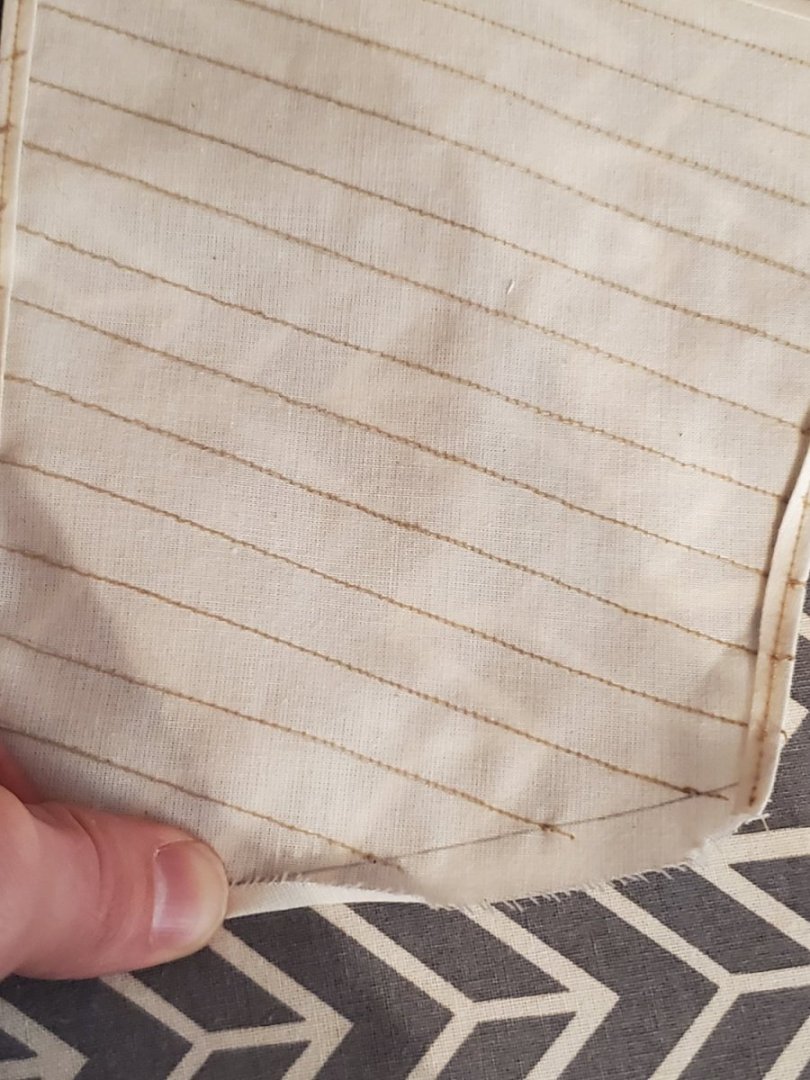
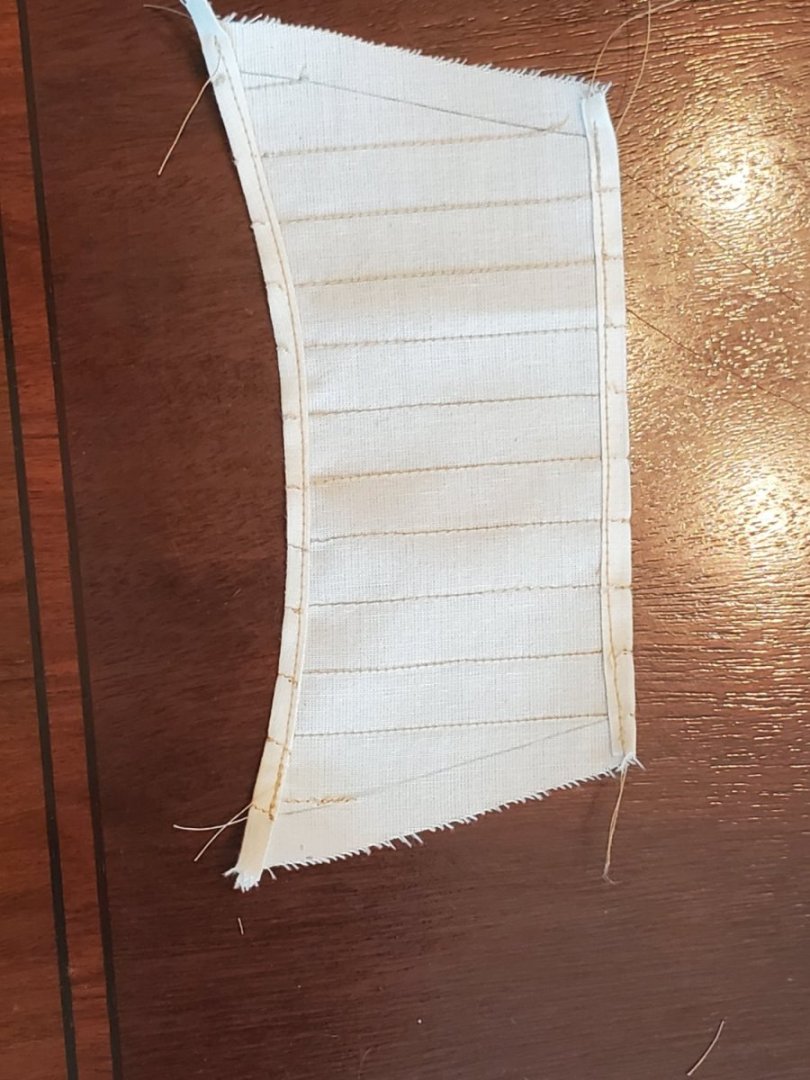
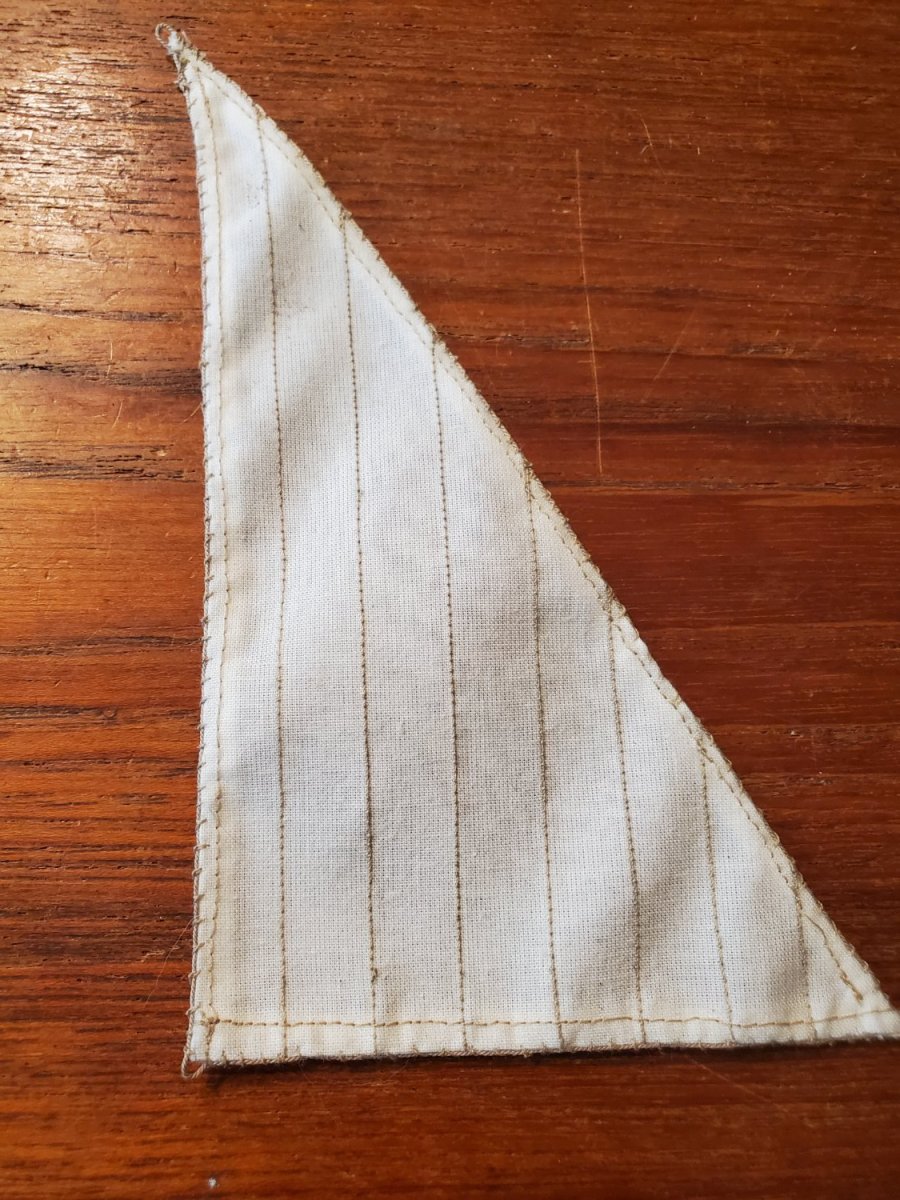
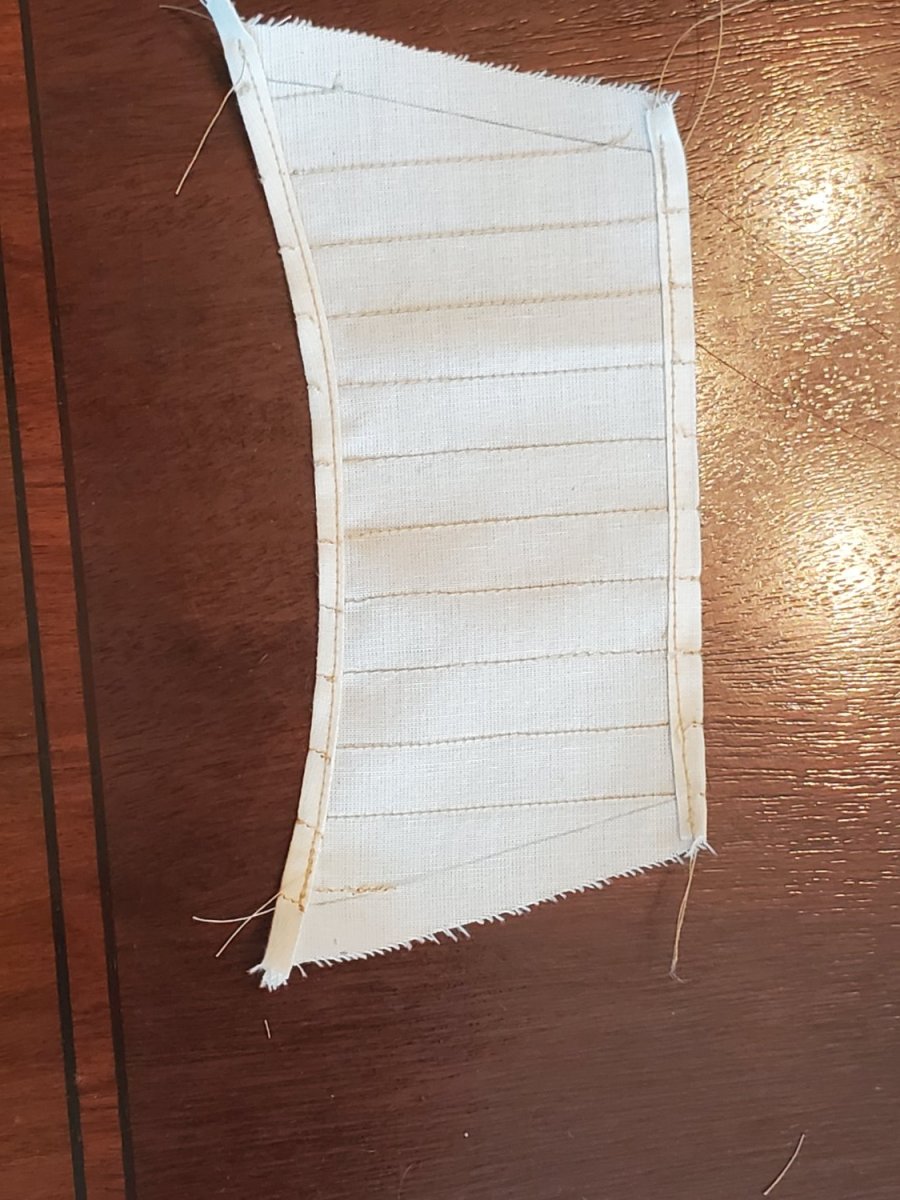
I finished my first ''real'' sail! One of the stay sails, complete with cringles.

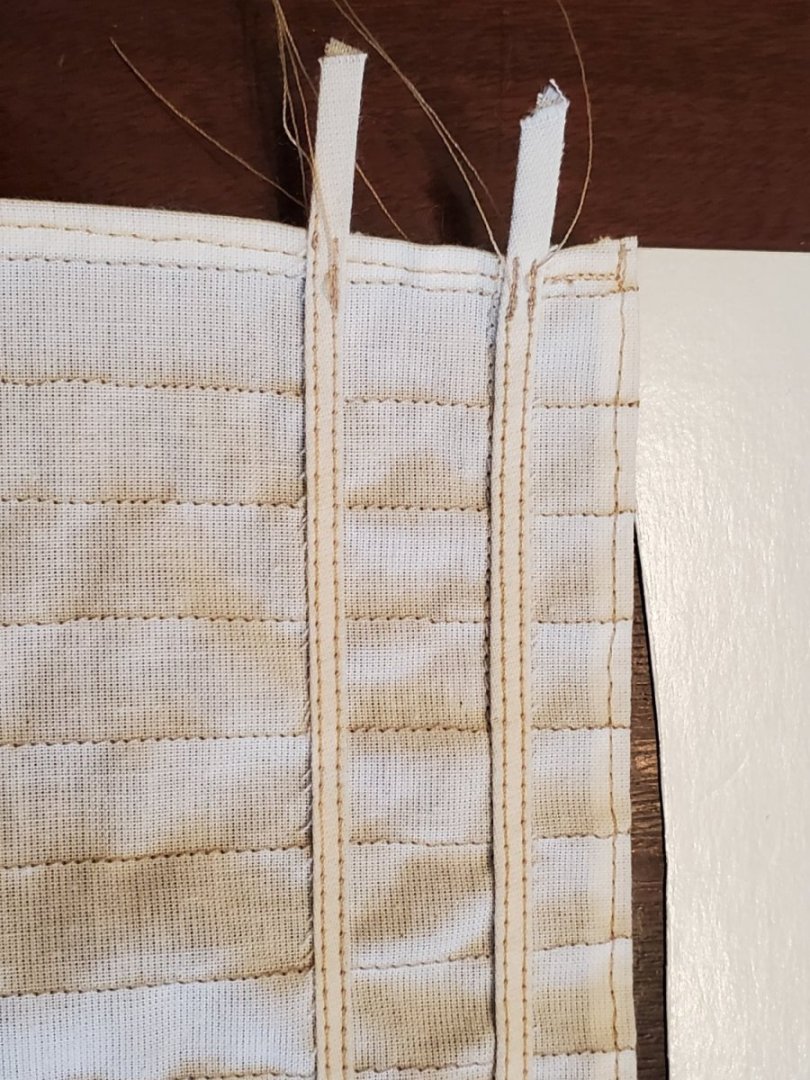
The port/aft end of the sail is a little messy. The tabling looks big, but it was as small as we could manage in this scale. Since I'm planning on ultimately displaying this looking at the starboard side, the port side will be facing away. The starboard side is my ''good side''.
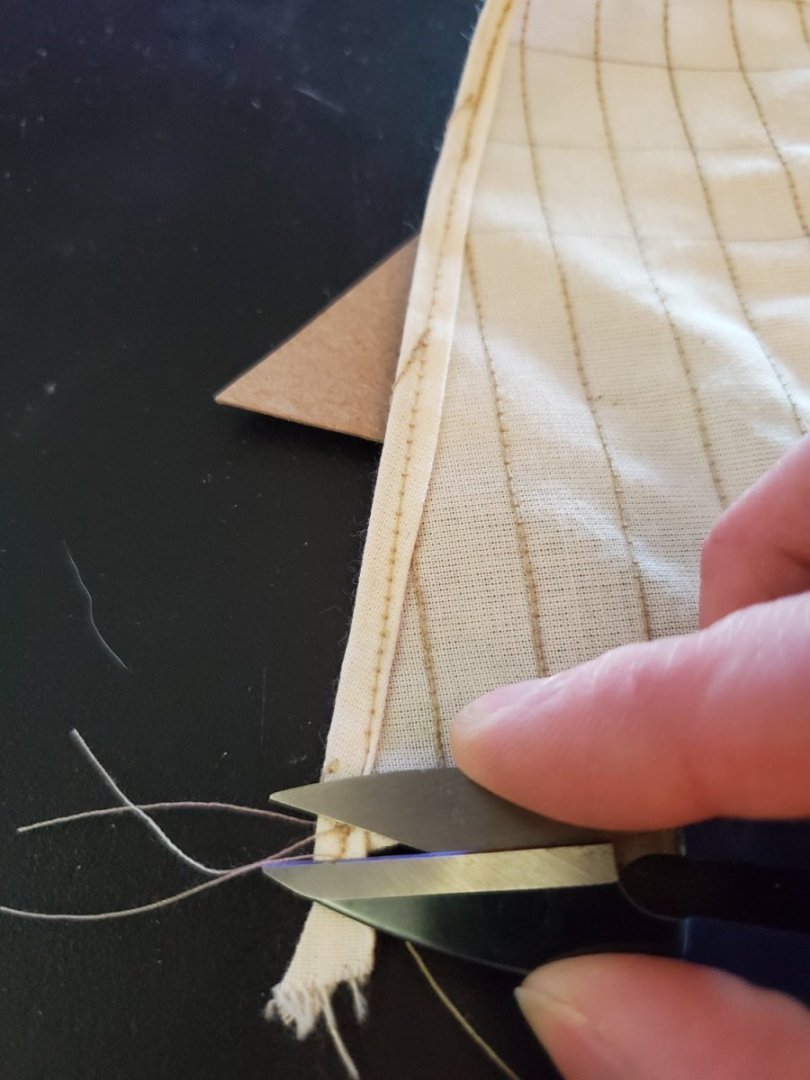
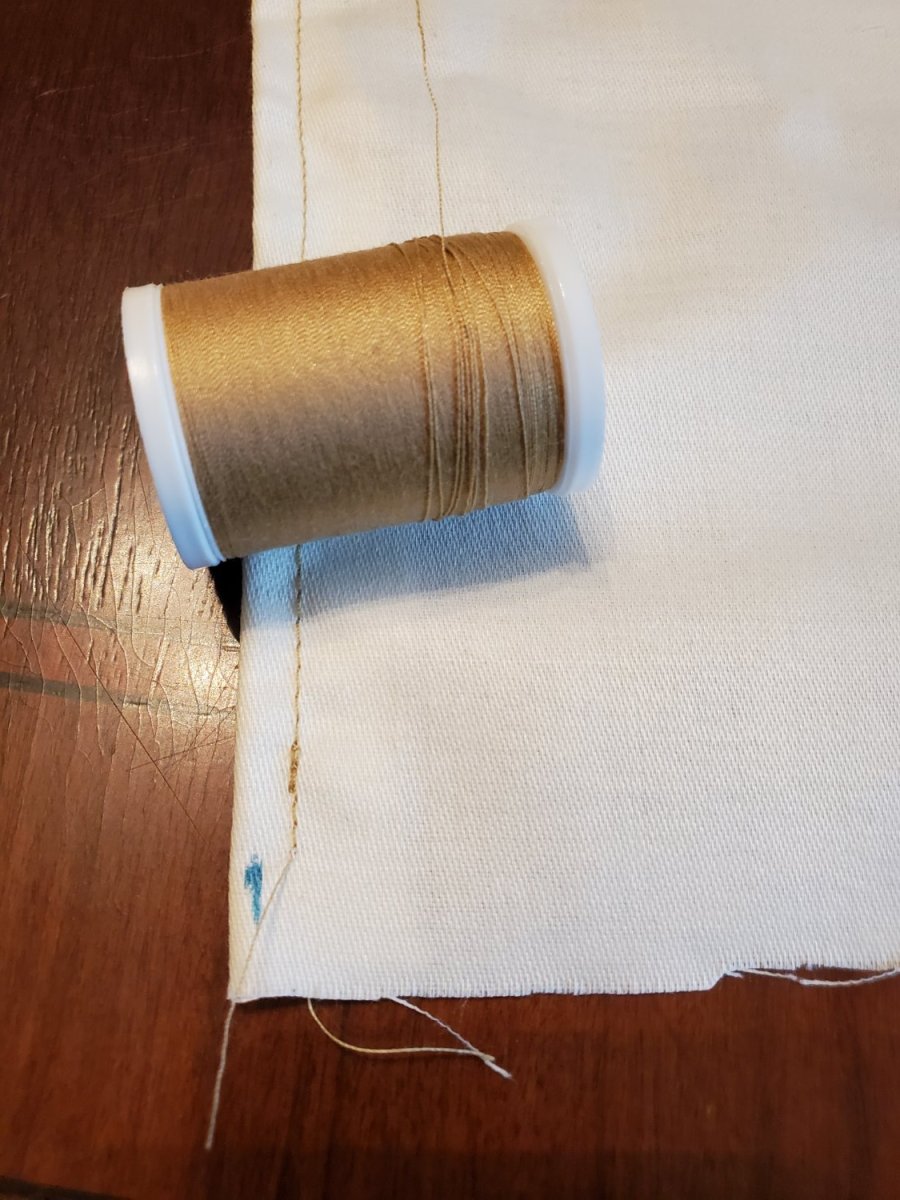
I had to make sure I had enough .025in rope to go all the way around, plus cringles. Here at the end, the rope overlaps a little bit, with some extra left over. I just trimmed it close once I finished.

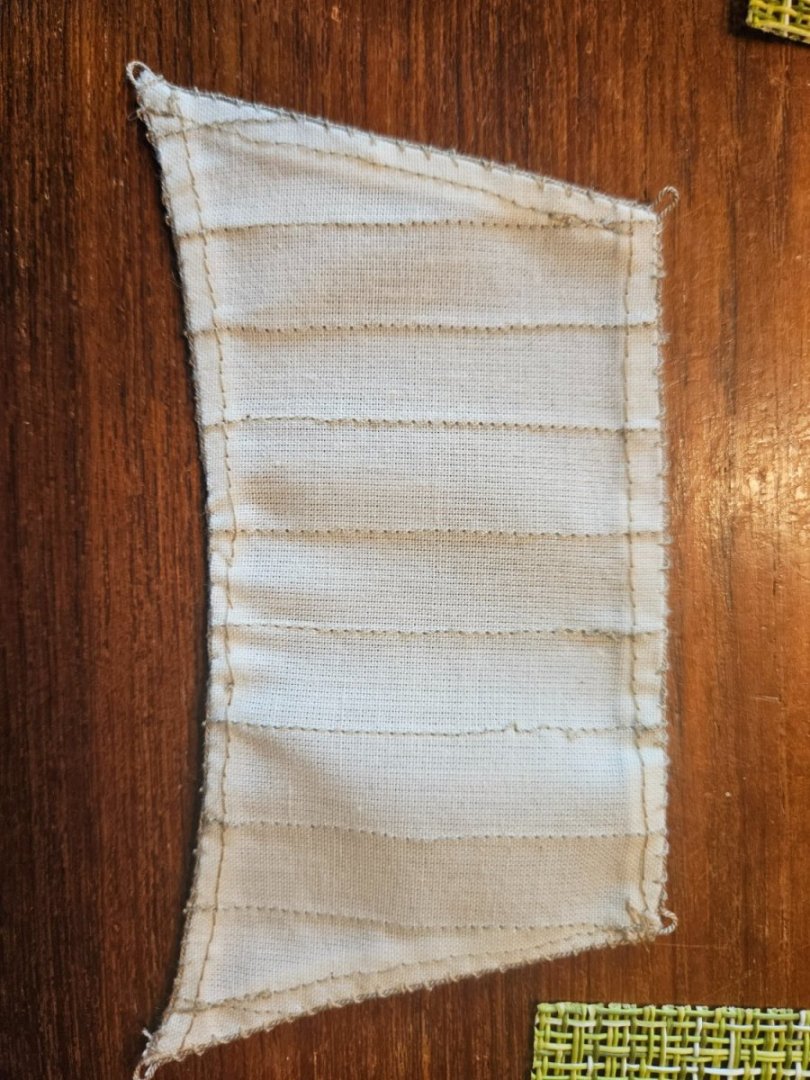
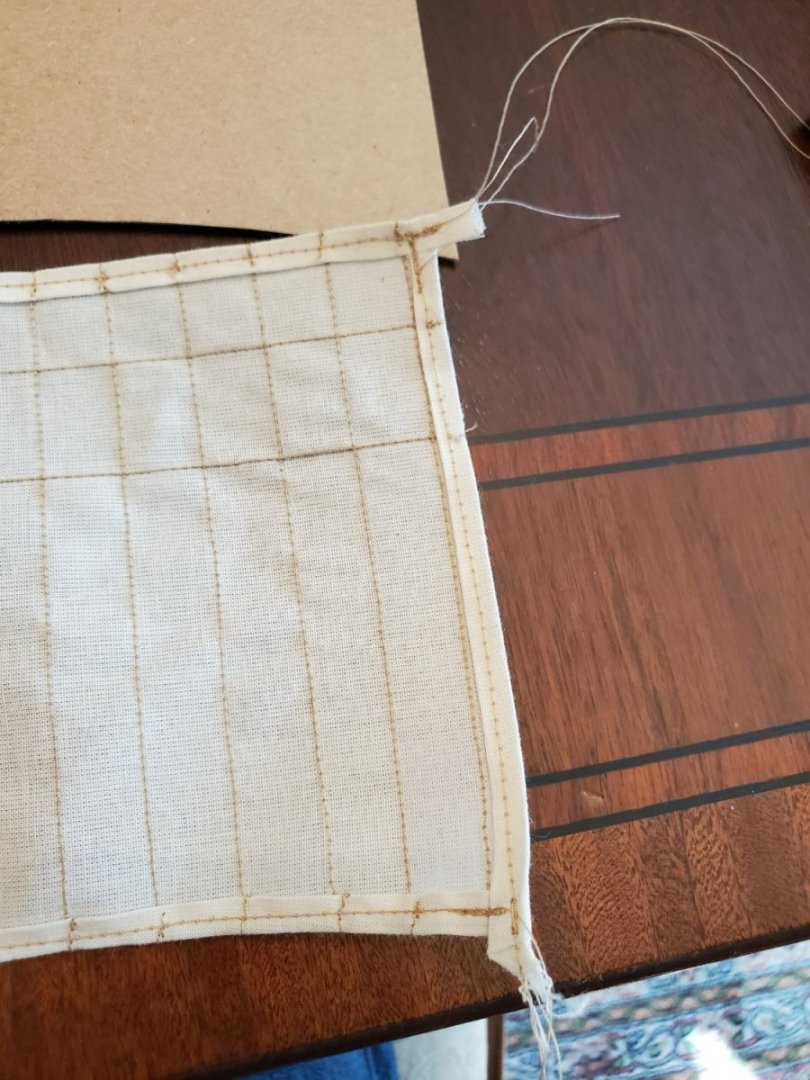
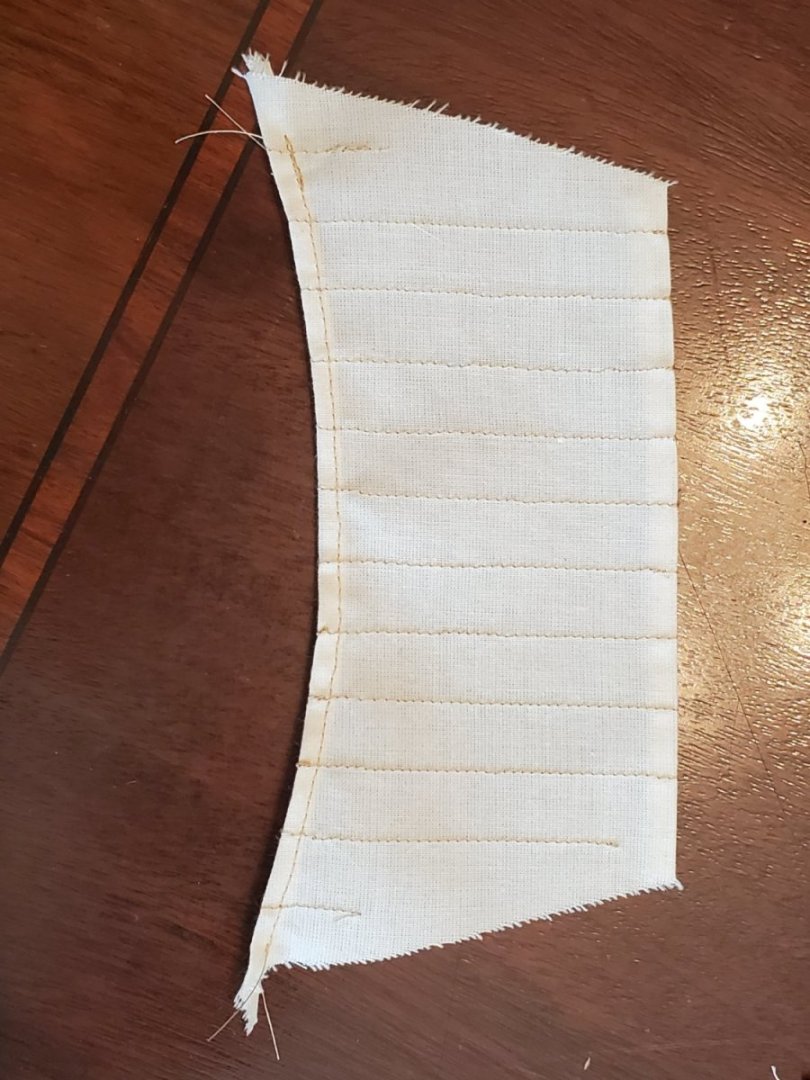
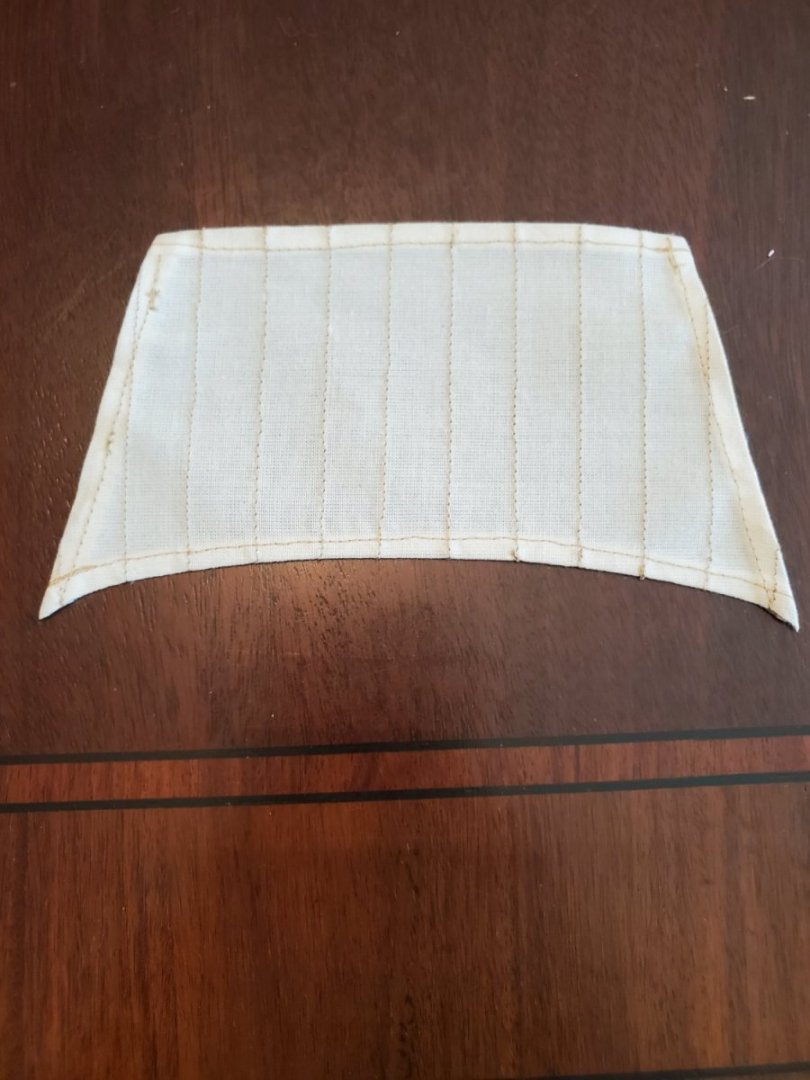
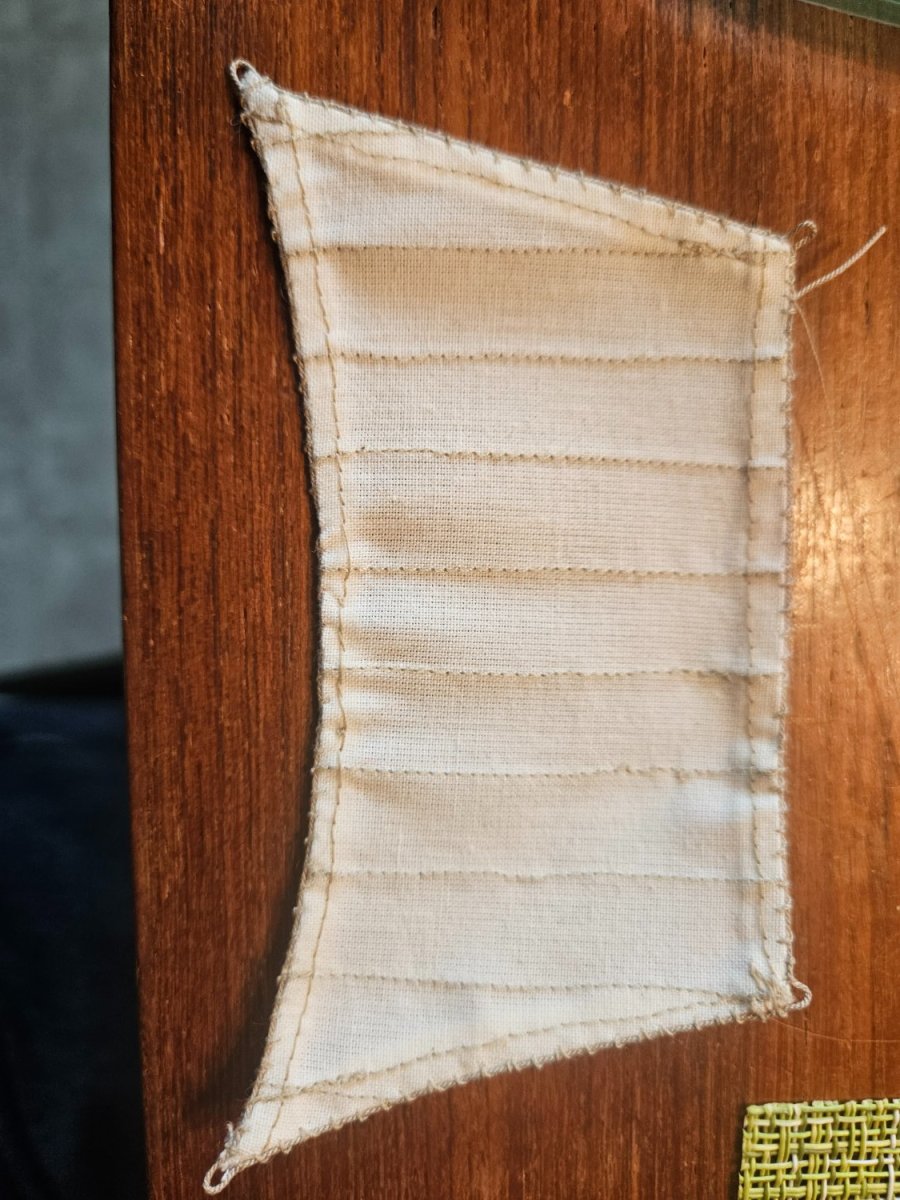
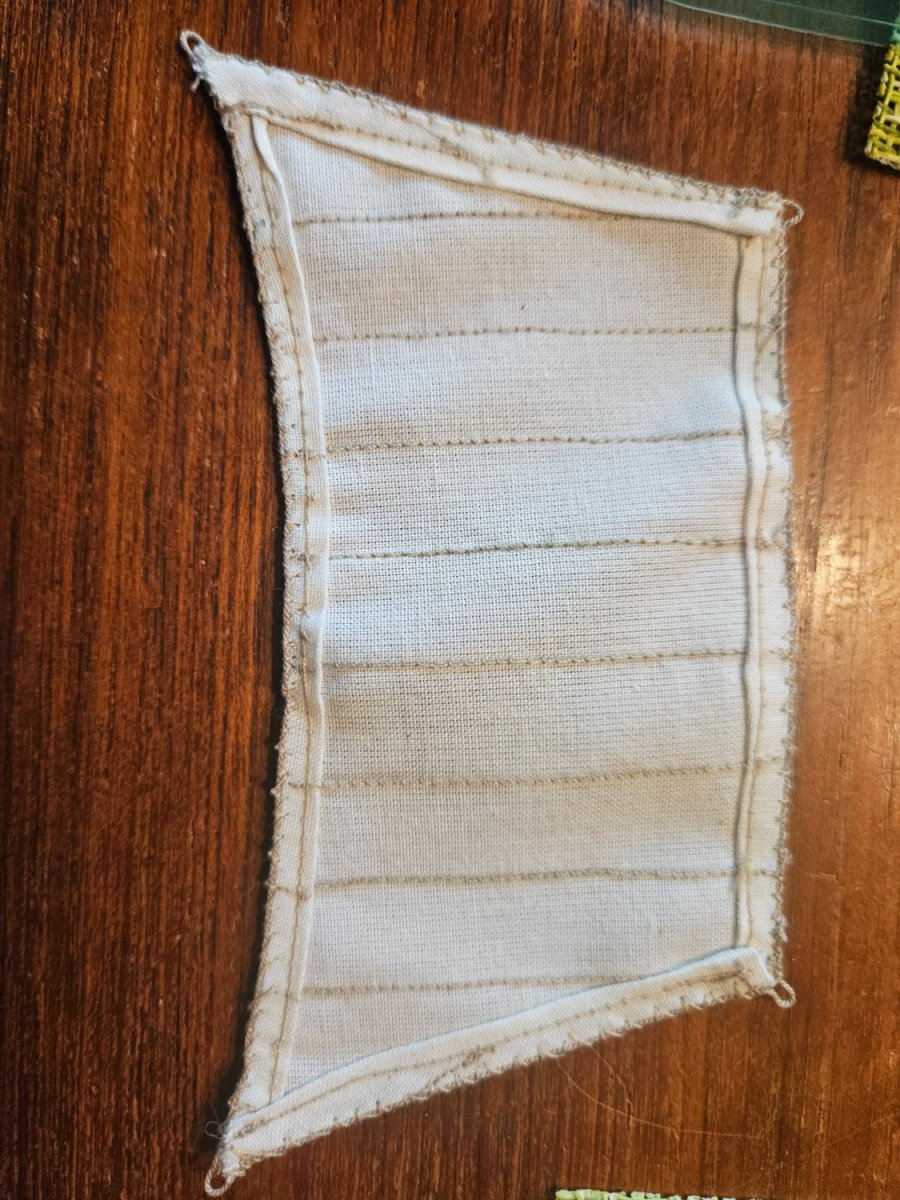
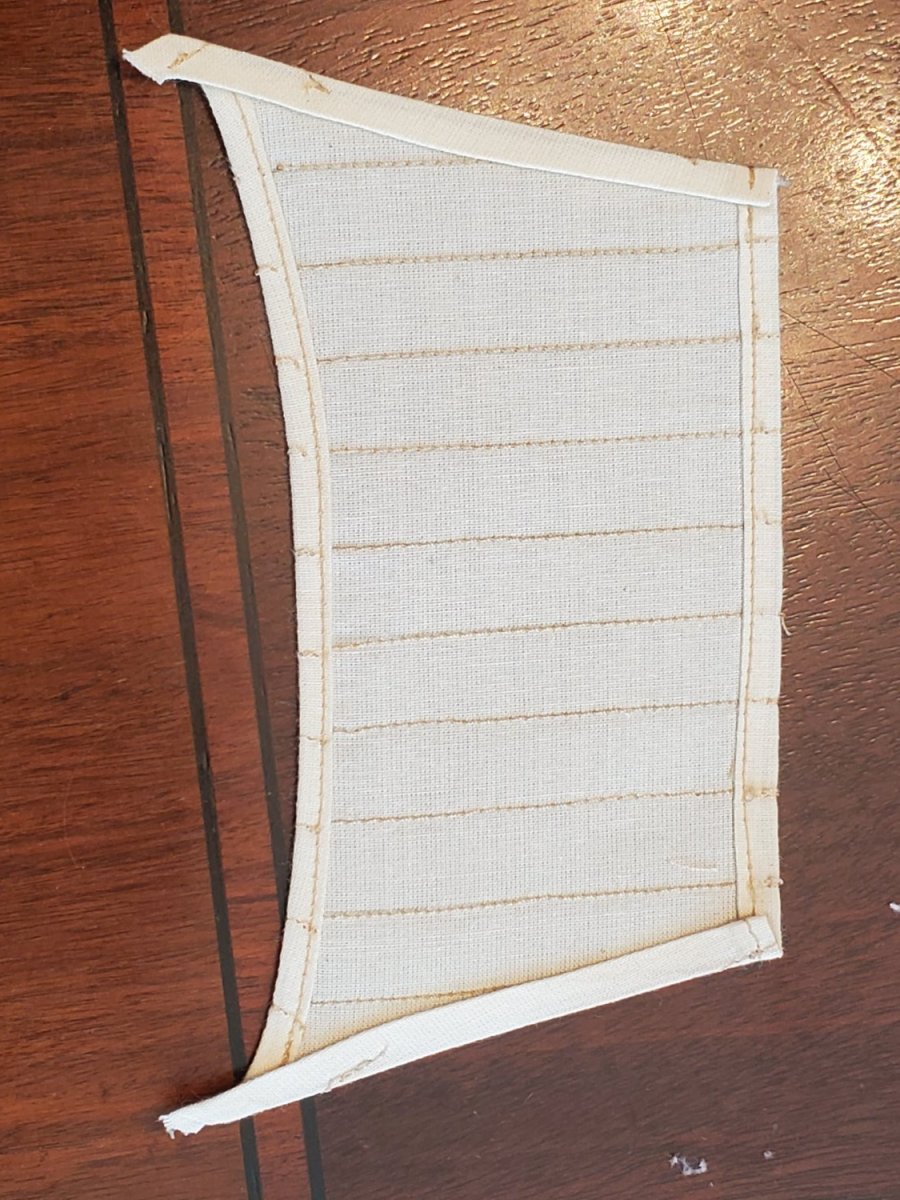
So this is the Fore Topgallant sail, finished. So much sewing!!!
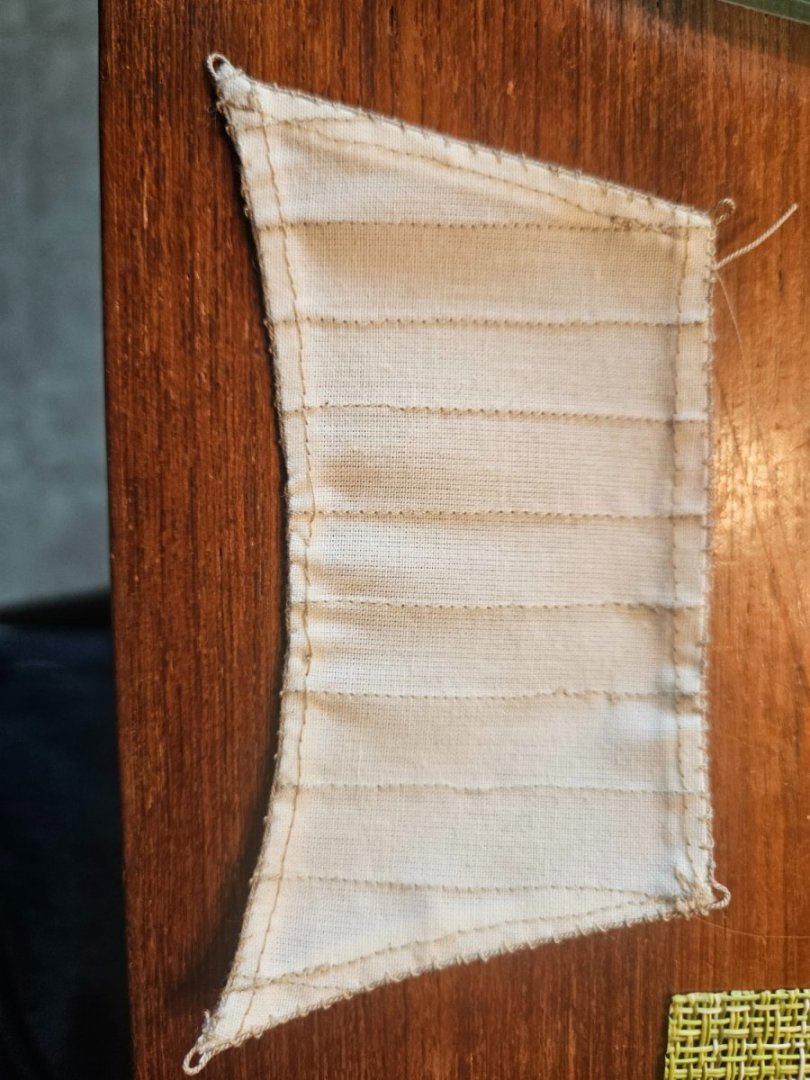
Again, the aft side isn't quite as pretty, but its progress. I'm happy with progress.

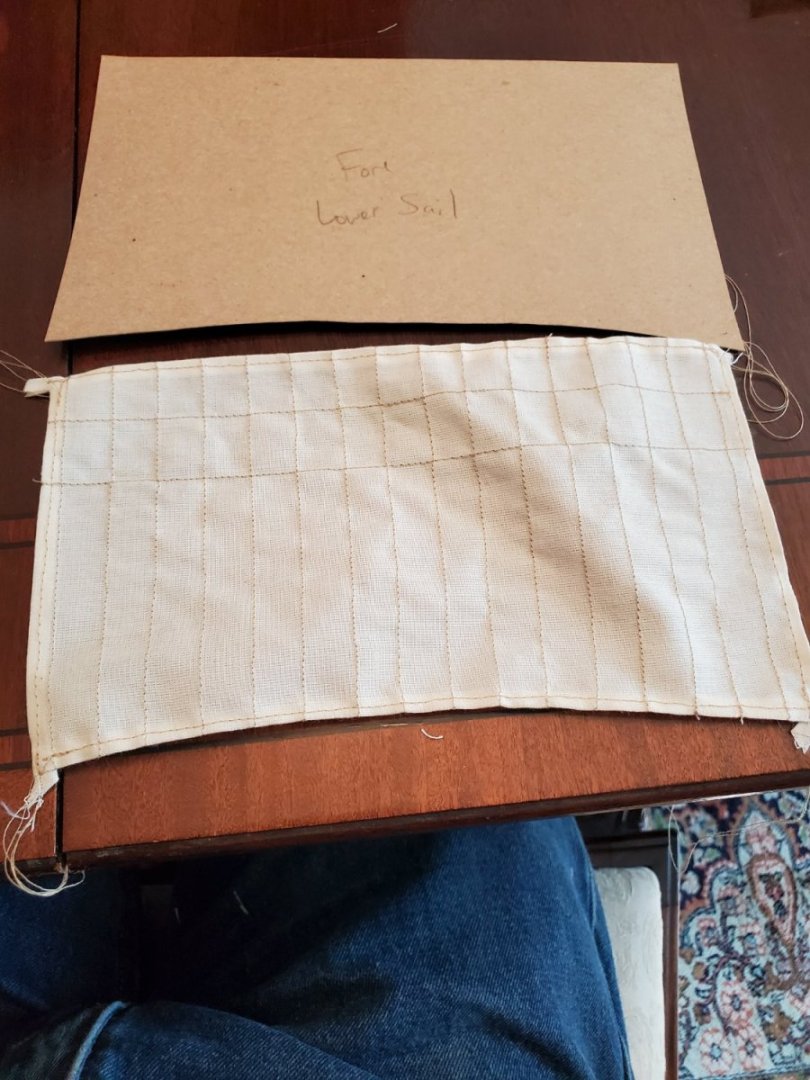
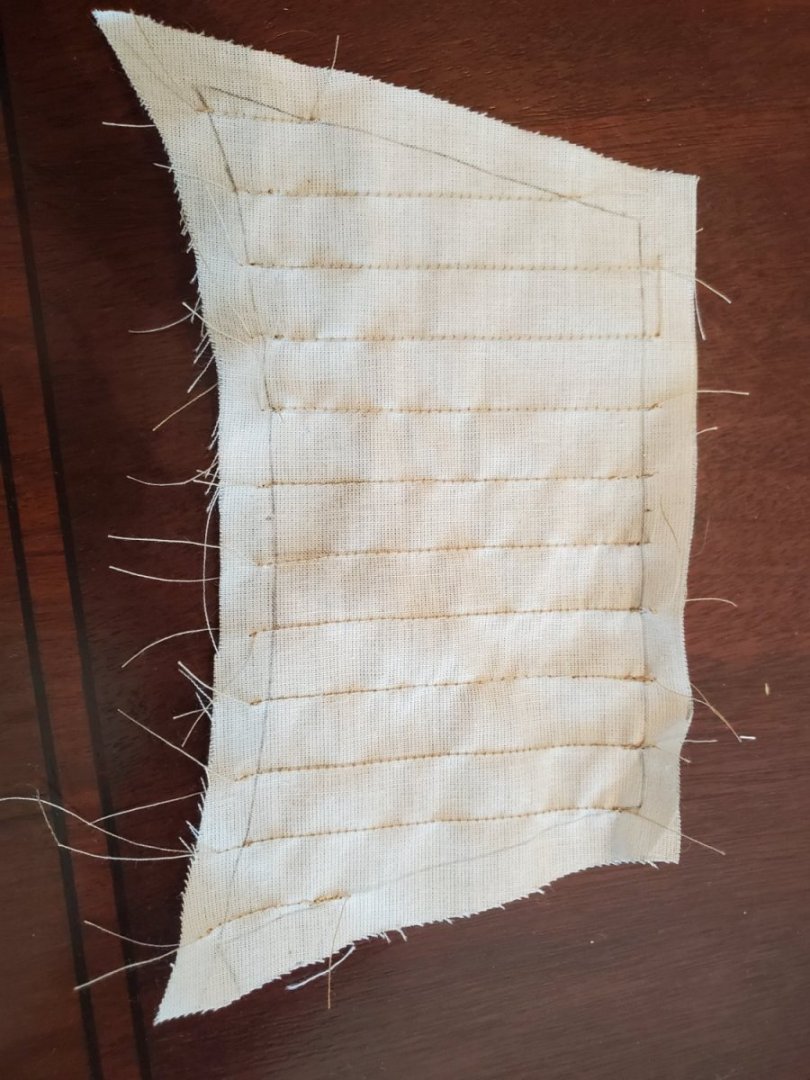
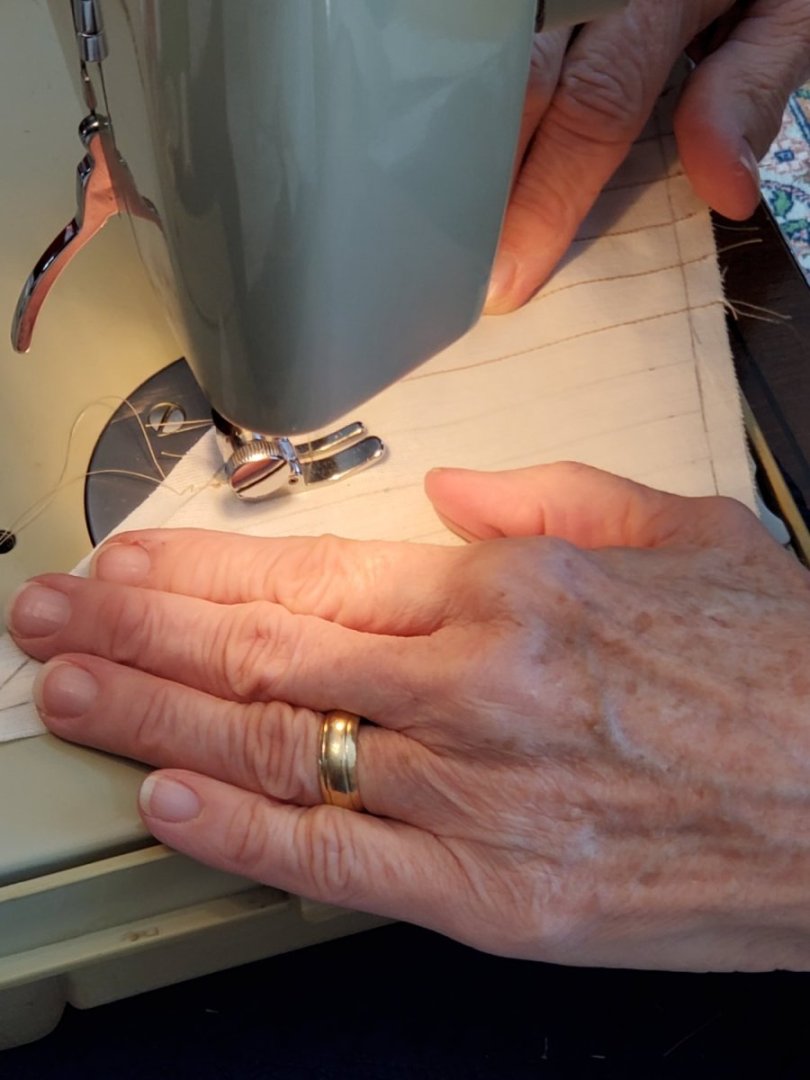
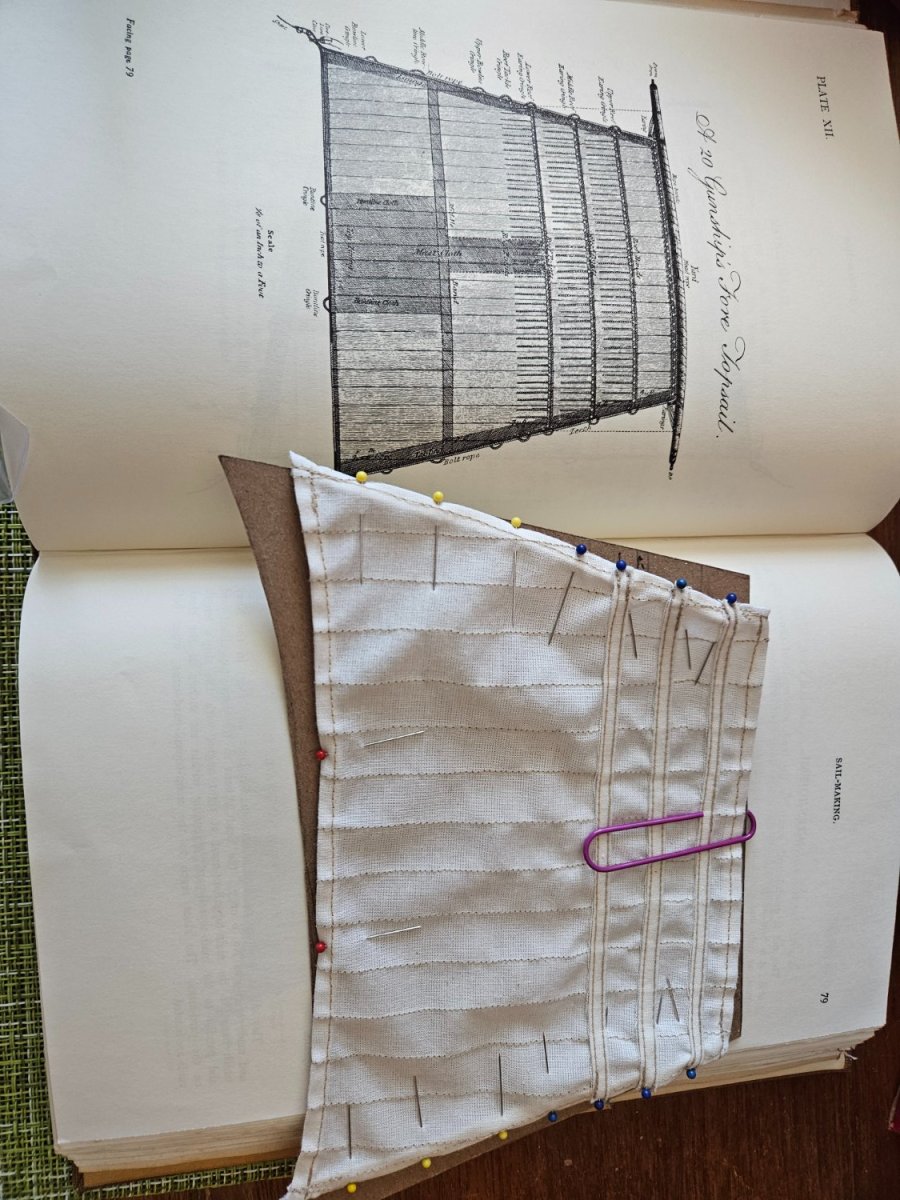
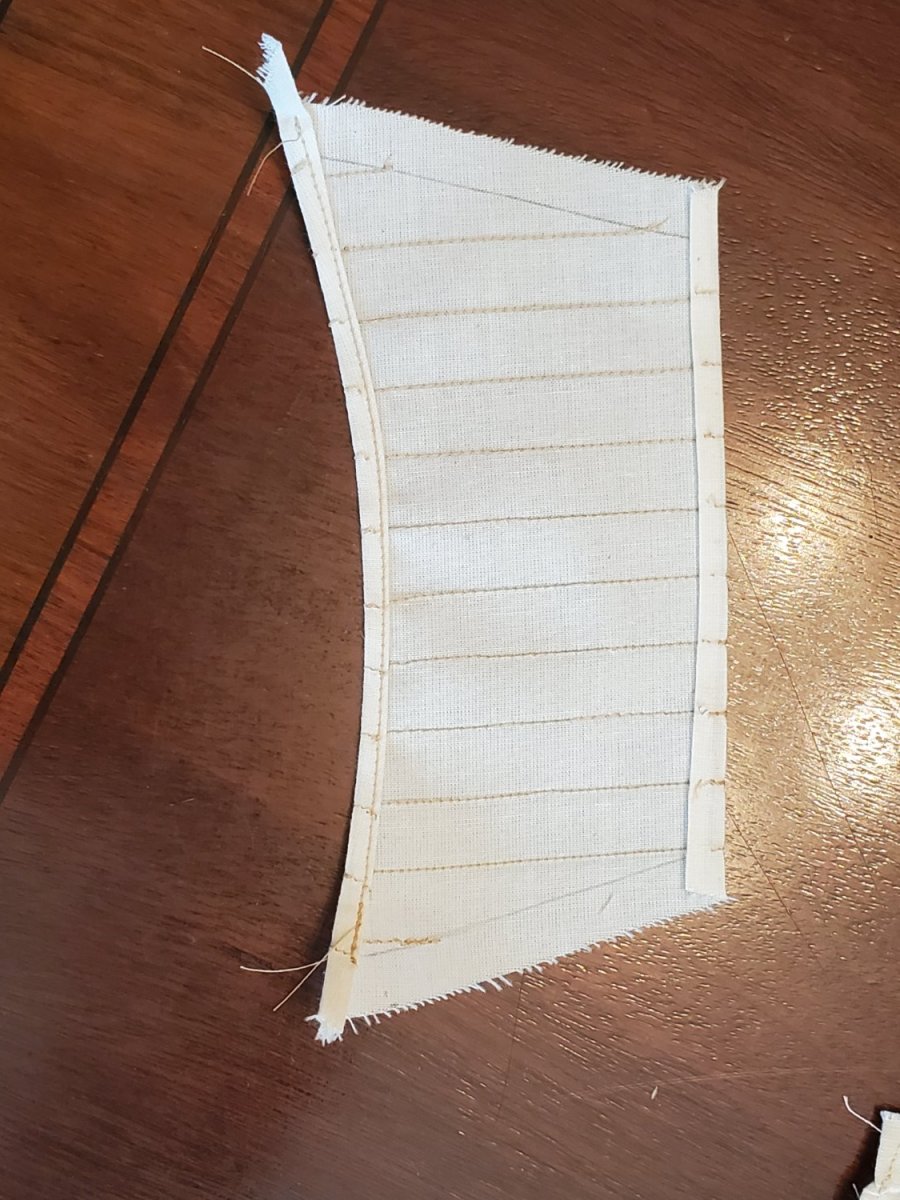
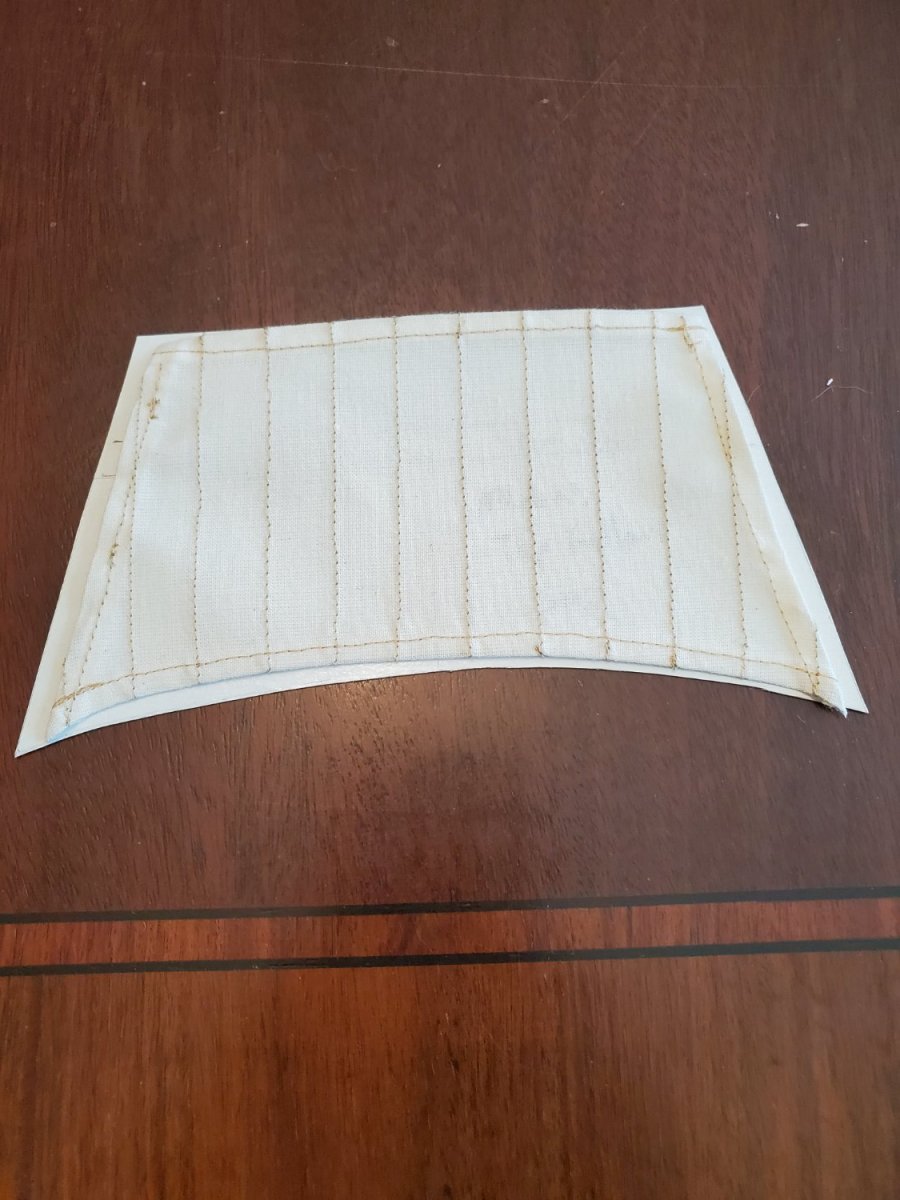
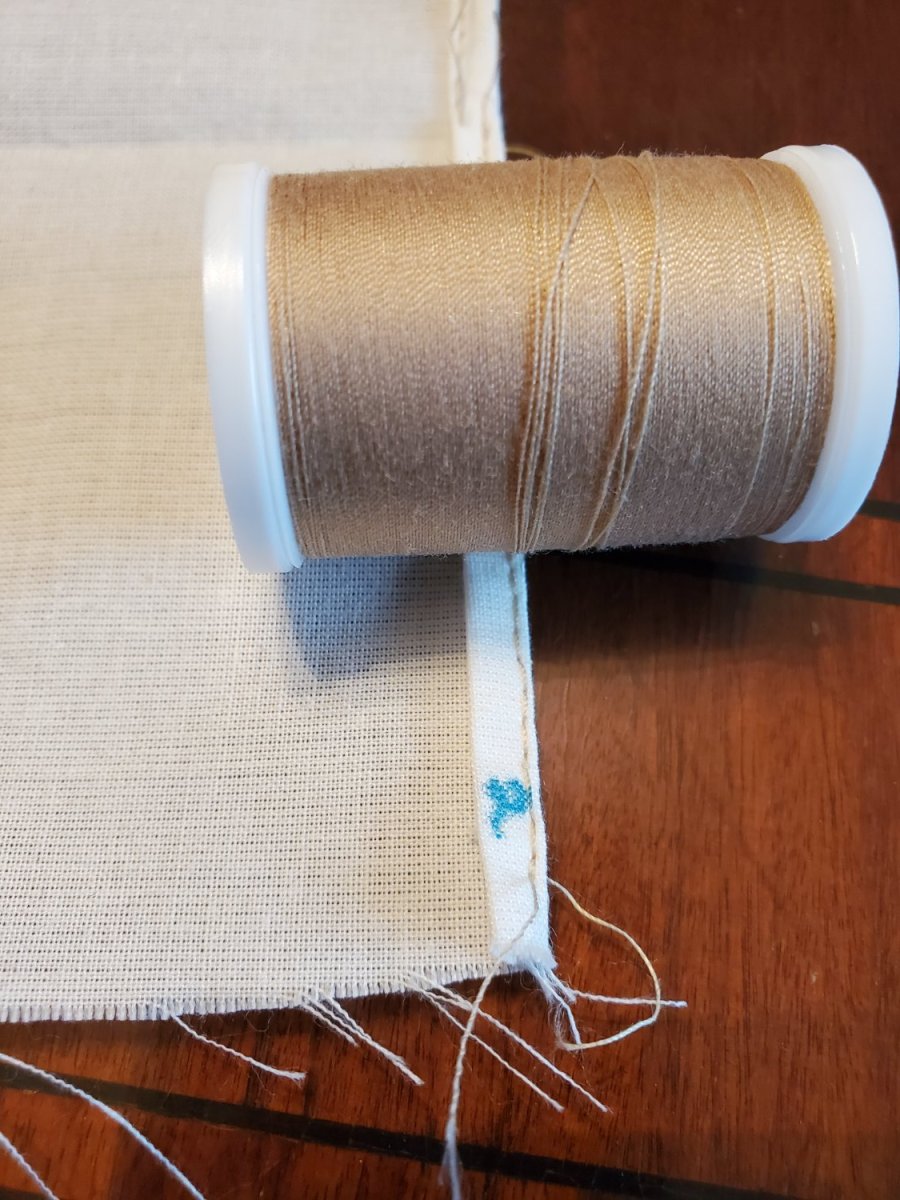
The Fore Topsail was next. This one had the most cringles.
To make my life easier, I used colored pins to mark where the corner cringles, bowline cringles, reef band cringles, buntline cringles, and reef pendant cringles are located, according to Steel's. I didn't include a middle band, buntline cloth, middle cloth or top lining on my sail. Its meant for when the sail is half worn in Merchant Service, and extra sewing I didn't want to spend time on for this build.

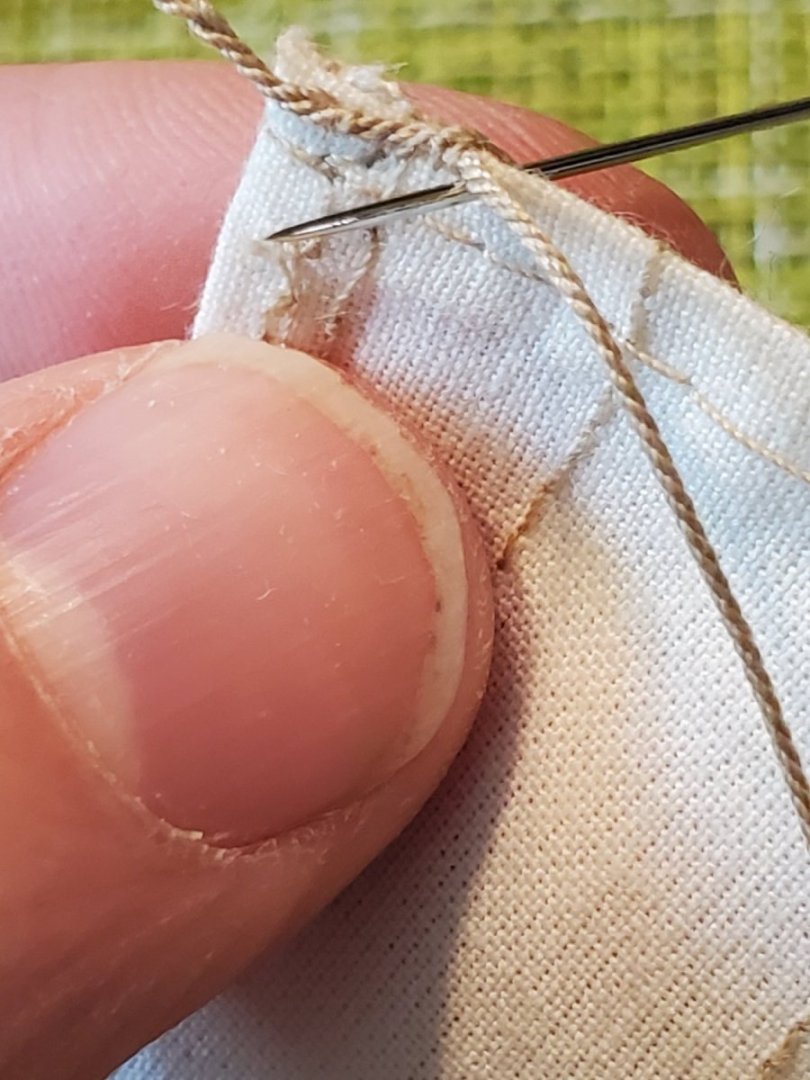
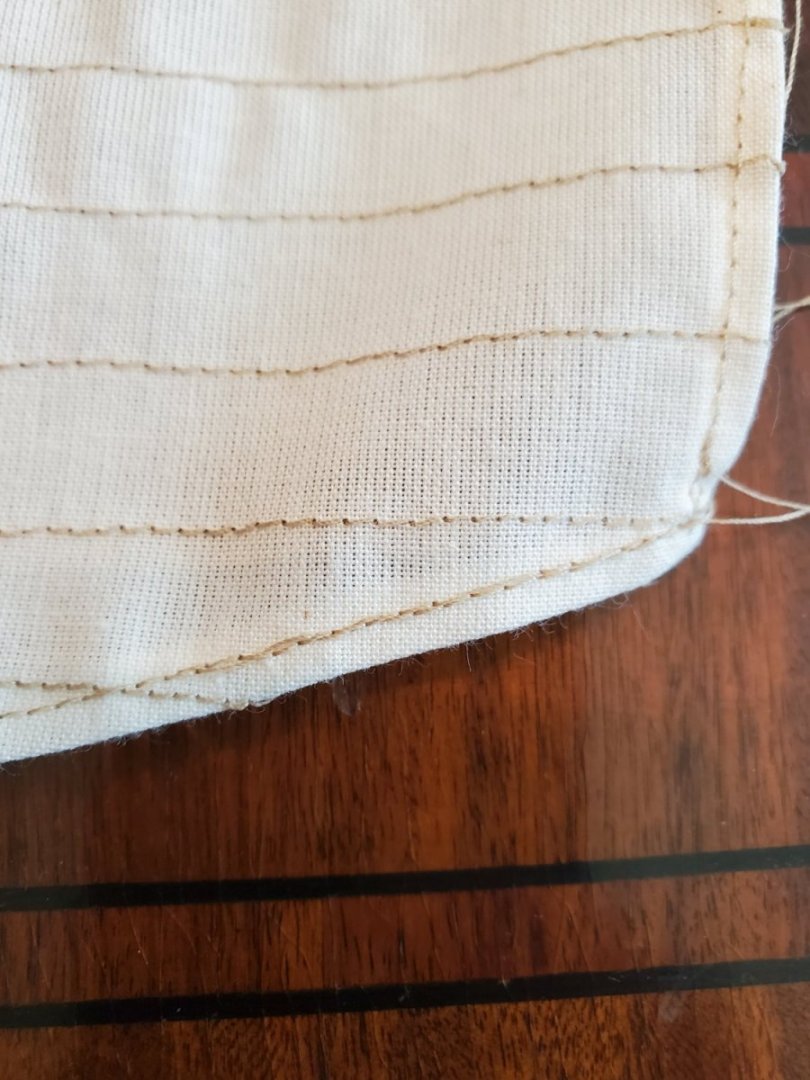
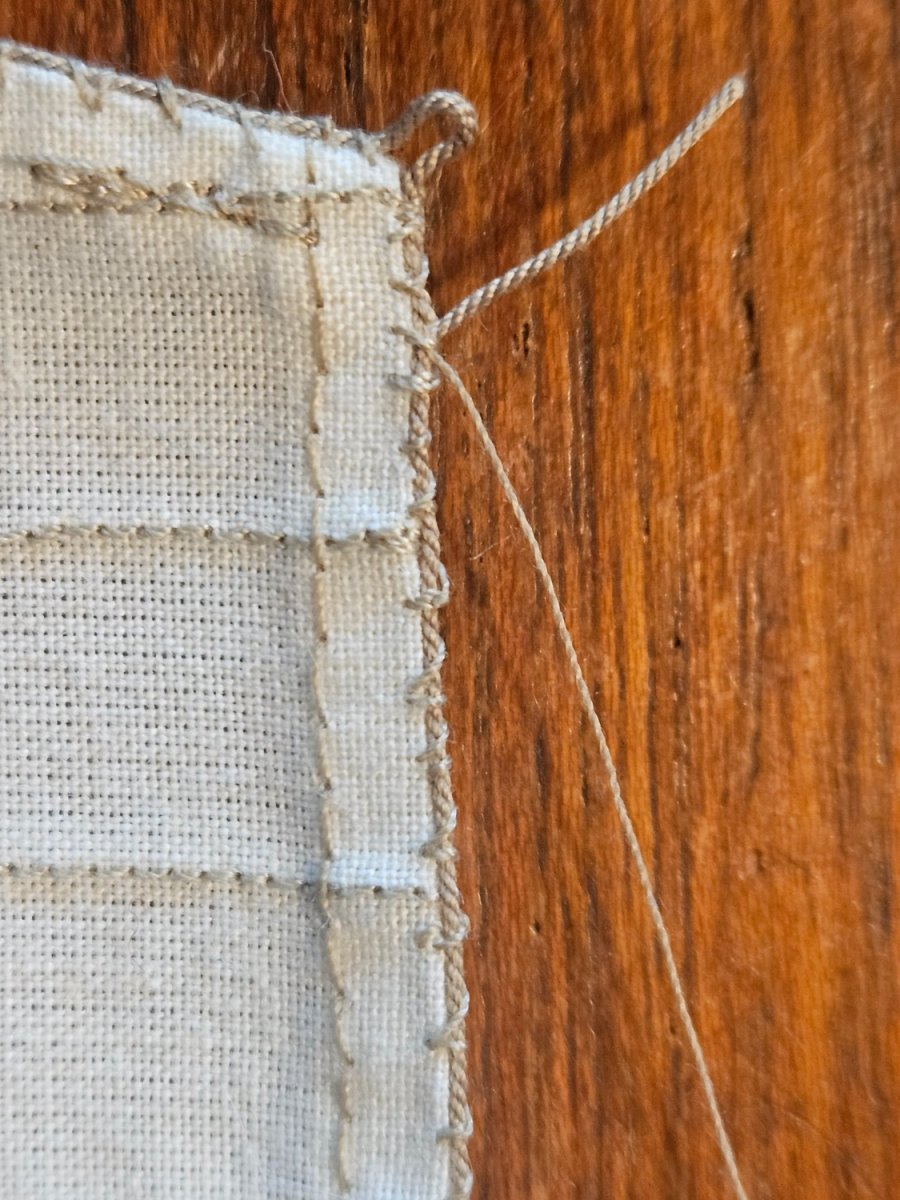
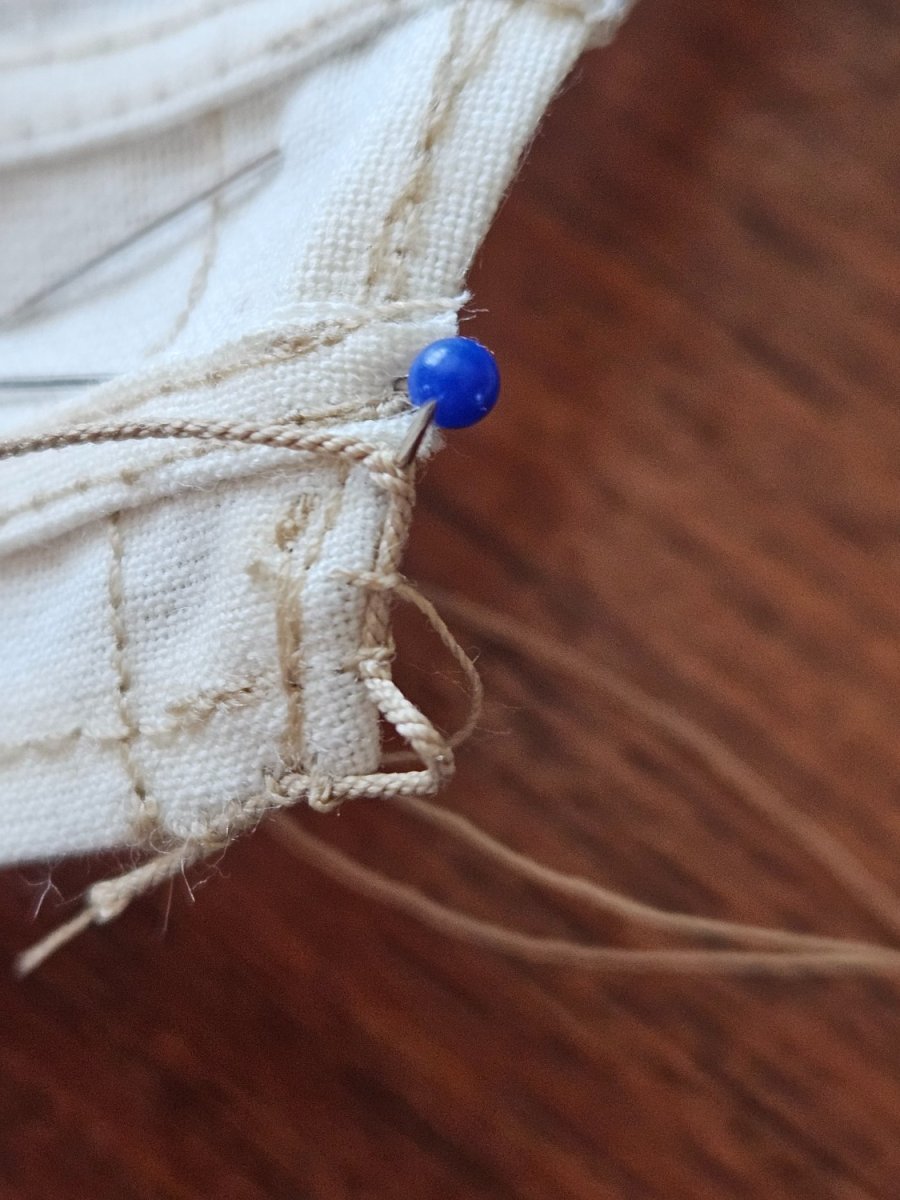
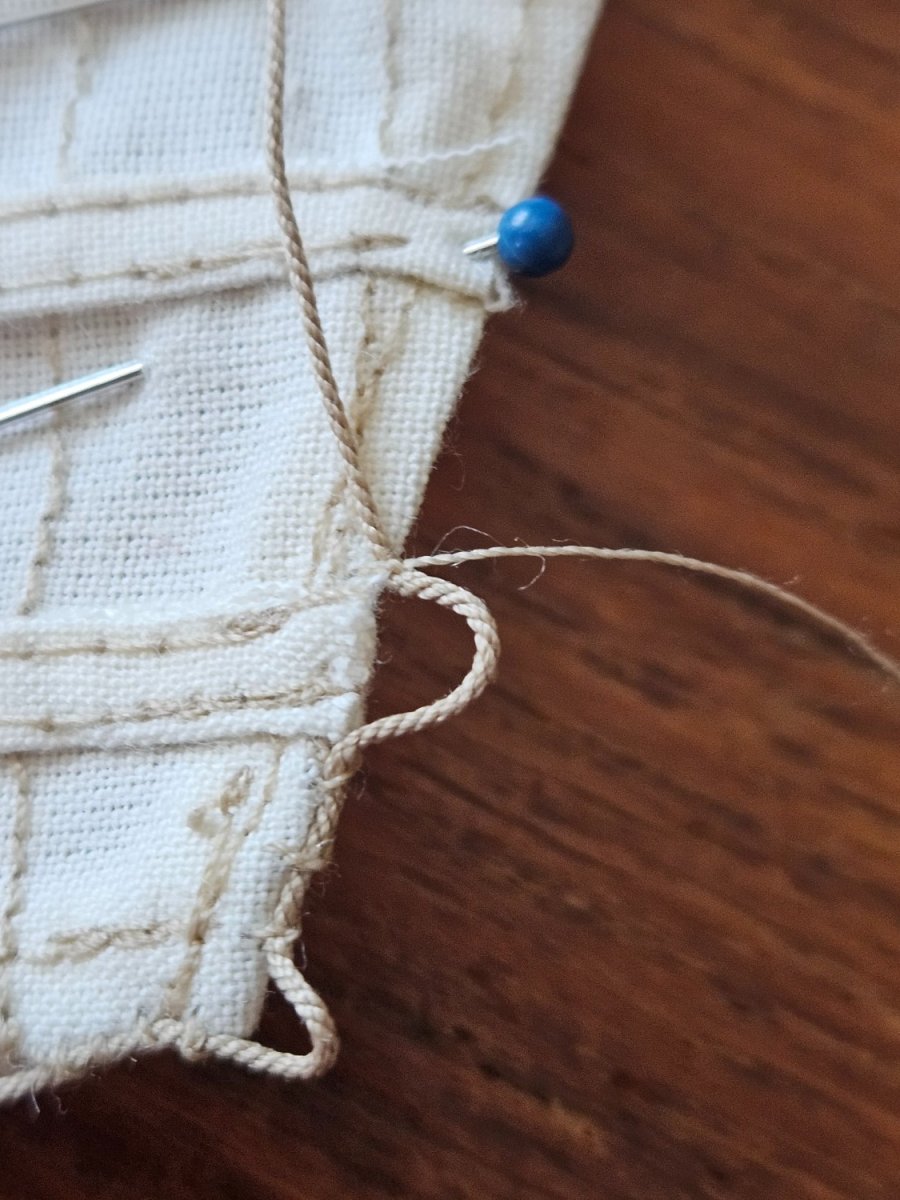
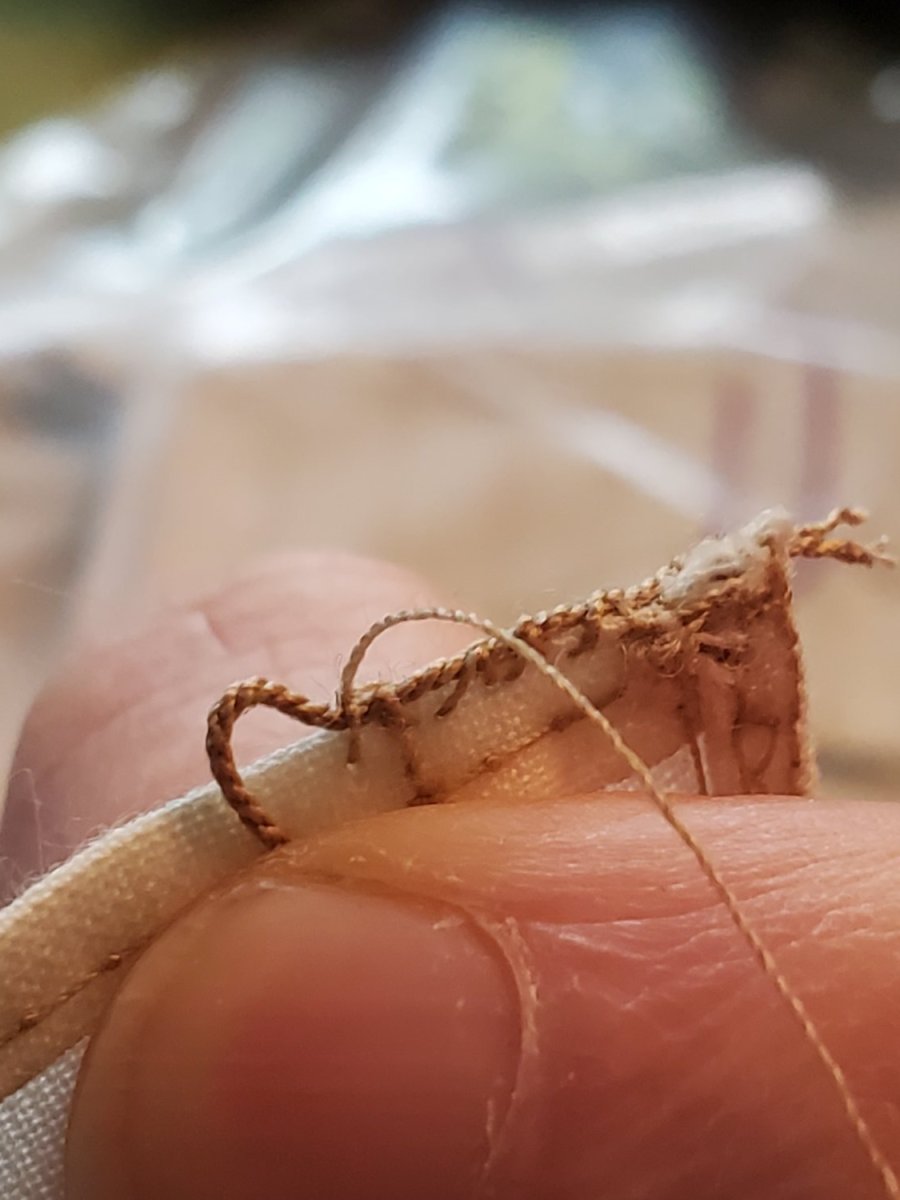
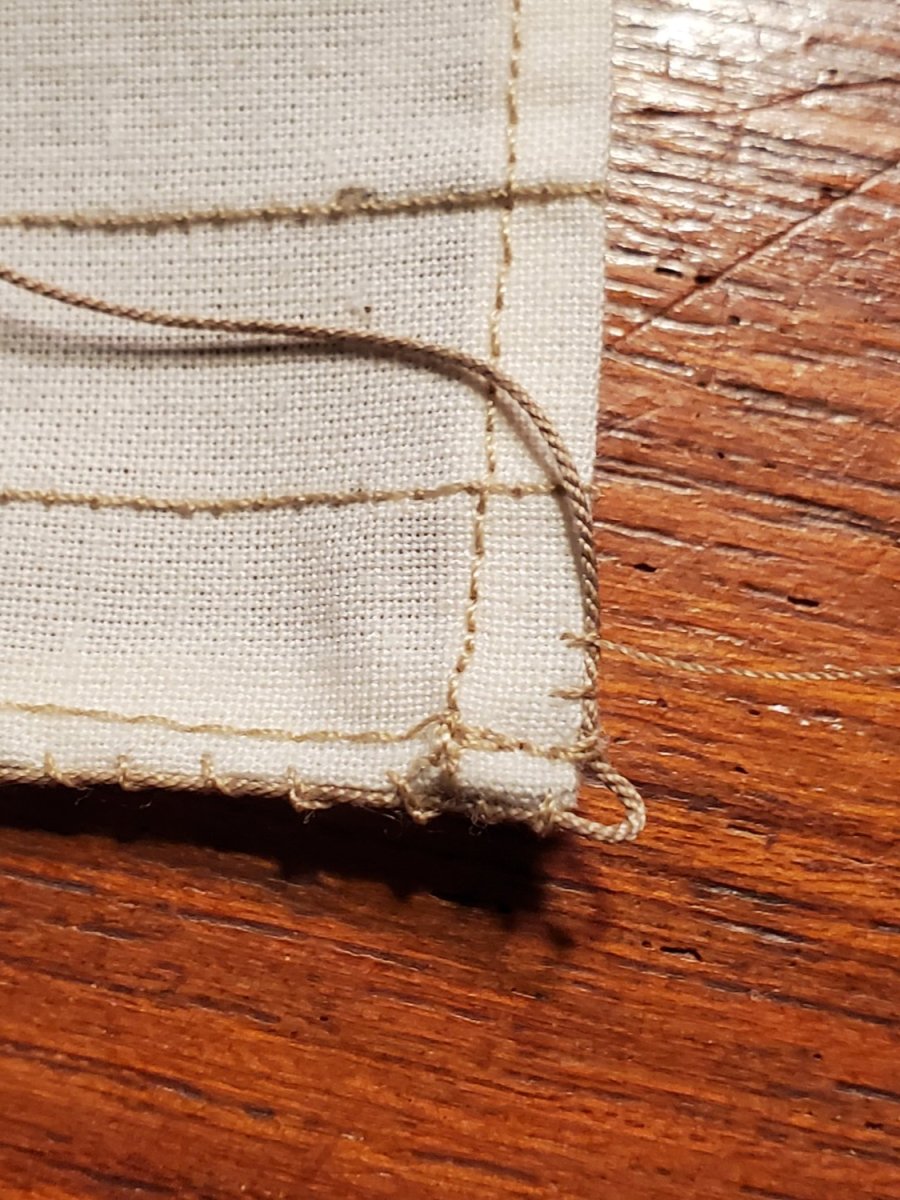
As with before, at the cringle, I'd sew through the bolt rope, then loop and through for a secure stitch.
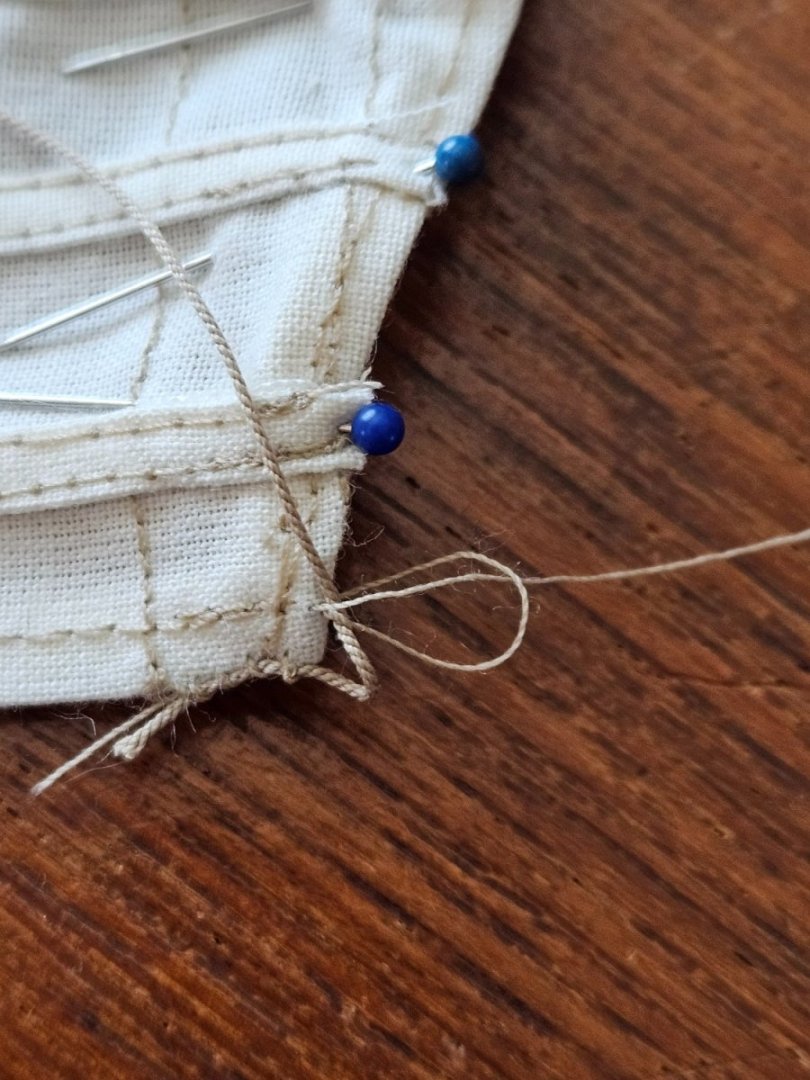
You can see the needle poking through the rope before it got looped.

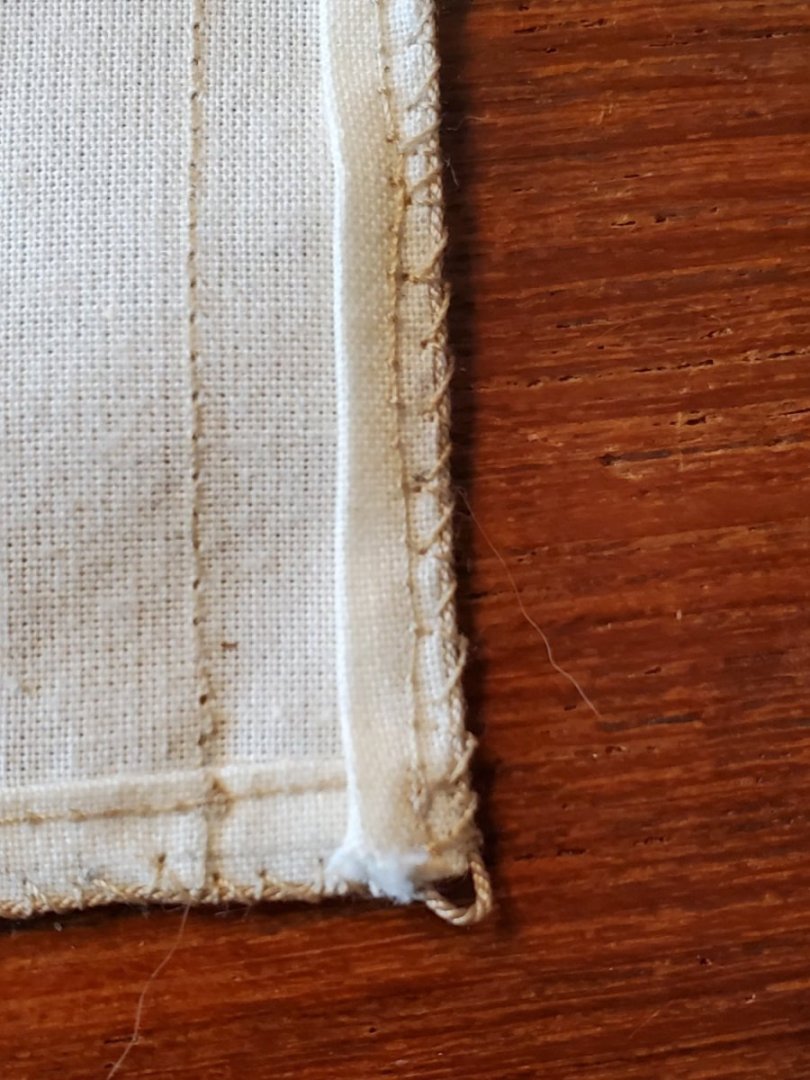
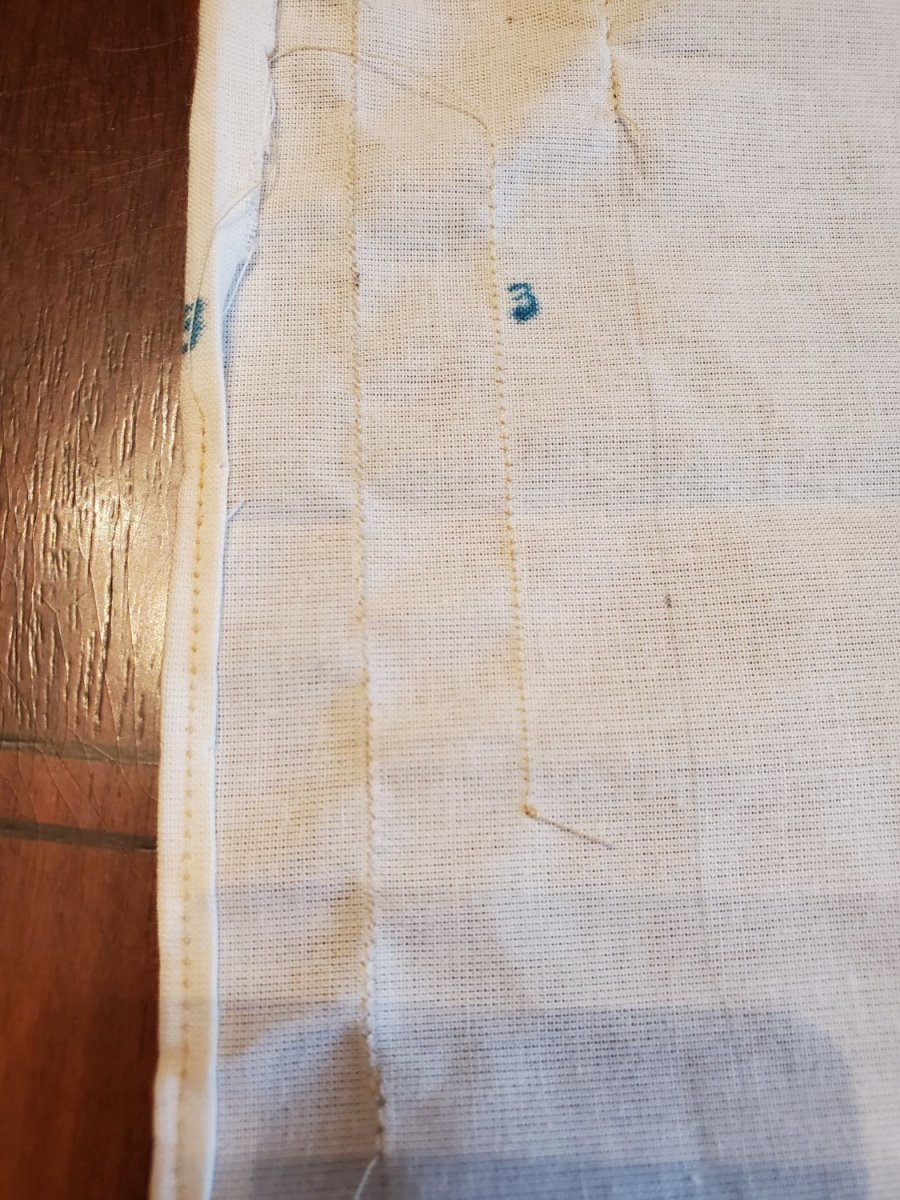
I'd go around the reef band, and sew through the rope on the other side. Then just continue on.....and on.....and on...

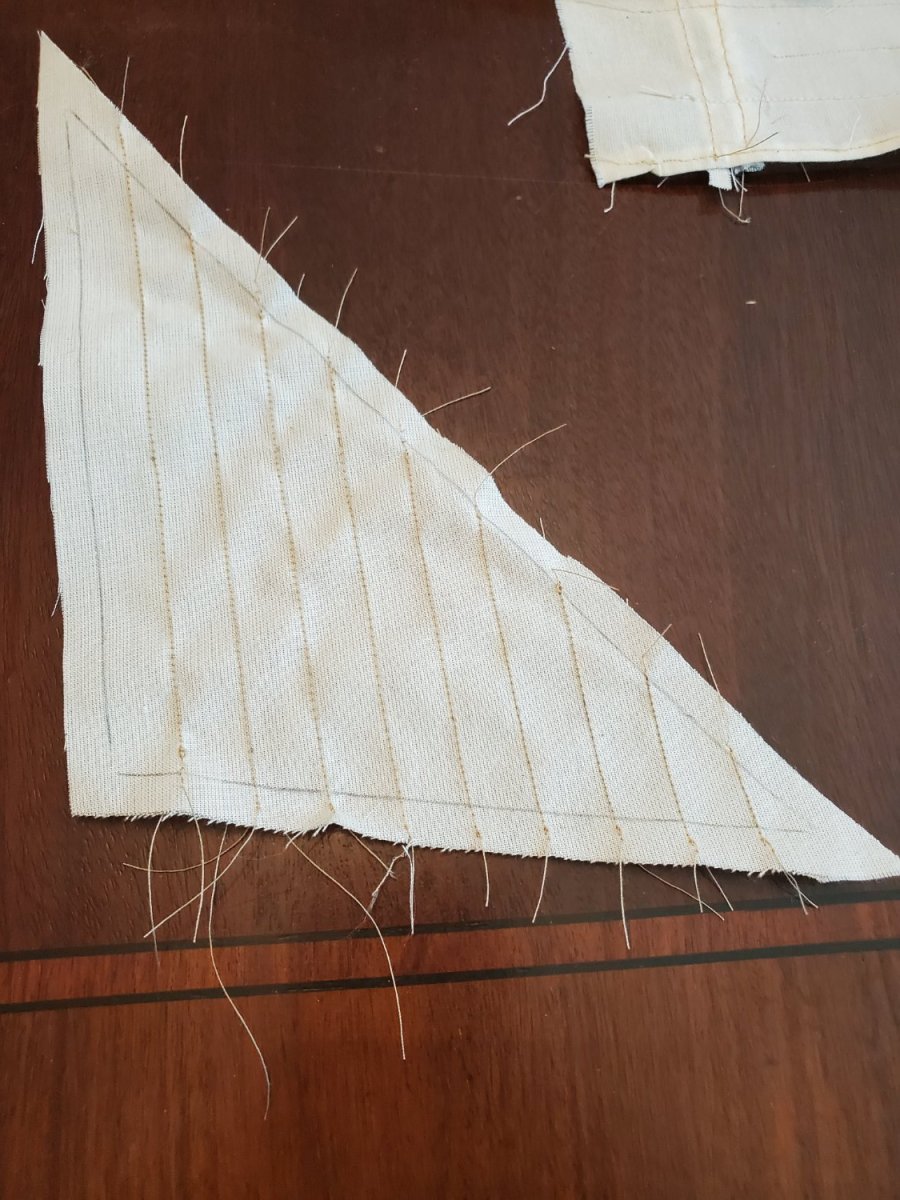
This is as far as I've gotten so far. I am halfway done the Fore Topsail. There's a lot of cringles to do.
As the weeks progress, and time allows, I will continue to sew the bolt ropes on each sail. As soon as they're done, I'm ready to start rigging them to the masts and yards!
I'll be setting 'sail' soon! Thanks for reading.
- Jason -
-
Sail progress on Fair American Model Ship.
Its been a month, and I'm happy to say all the sails have been sewn up! Machine sewn that is. The reef bands were a little tricky, since they were so narrow. Keeping them straight, while sewing proved difficult, since the band liked to walk as it was sewn, but we got it done. Keeping them pressed in my music book worked well, they held shape nicely.

One row of stitches down the middle didn't look right, and on the Rogers Model, the reef bands had two rows of stitches each. Obviously its a bigger scale model, so there's more room, but I liked the look, and they turned out nice.
I followed Steel's for guidance of reef band number and placement per sail. This Fore Course needed two bands, not one as per the TallShips printout I had.
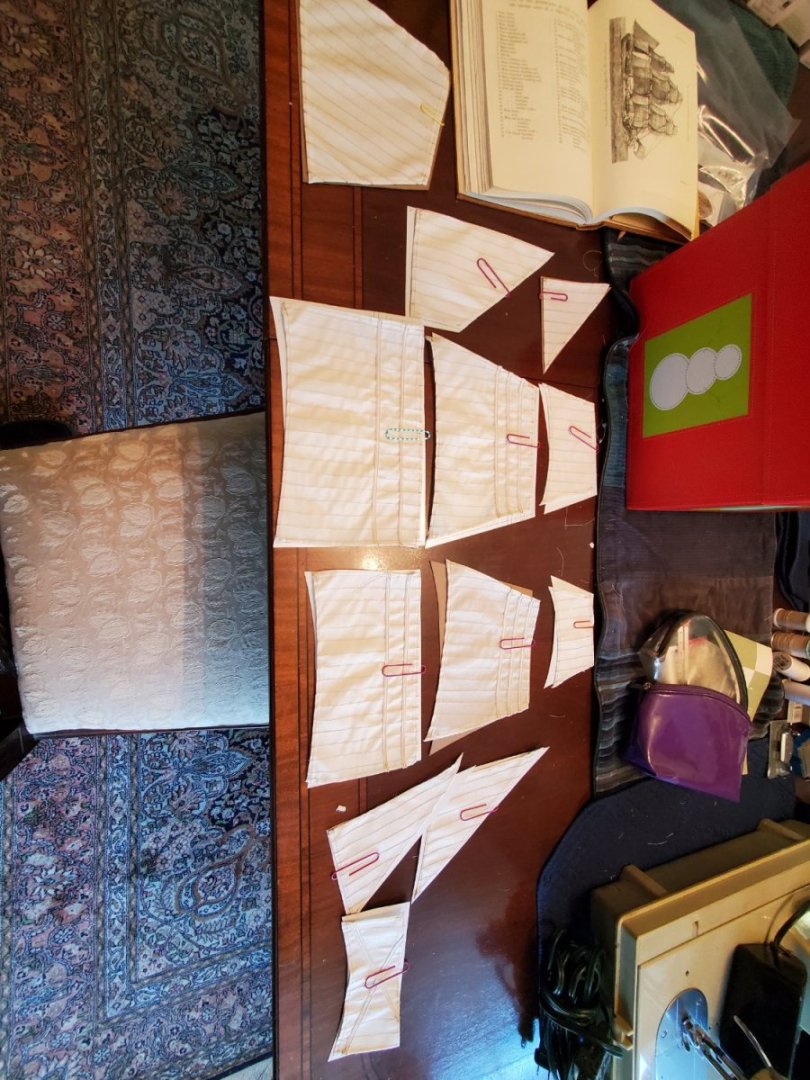
After they were all 'banded', I laid them all out - you can kind of see the shape of the ship in there.
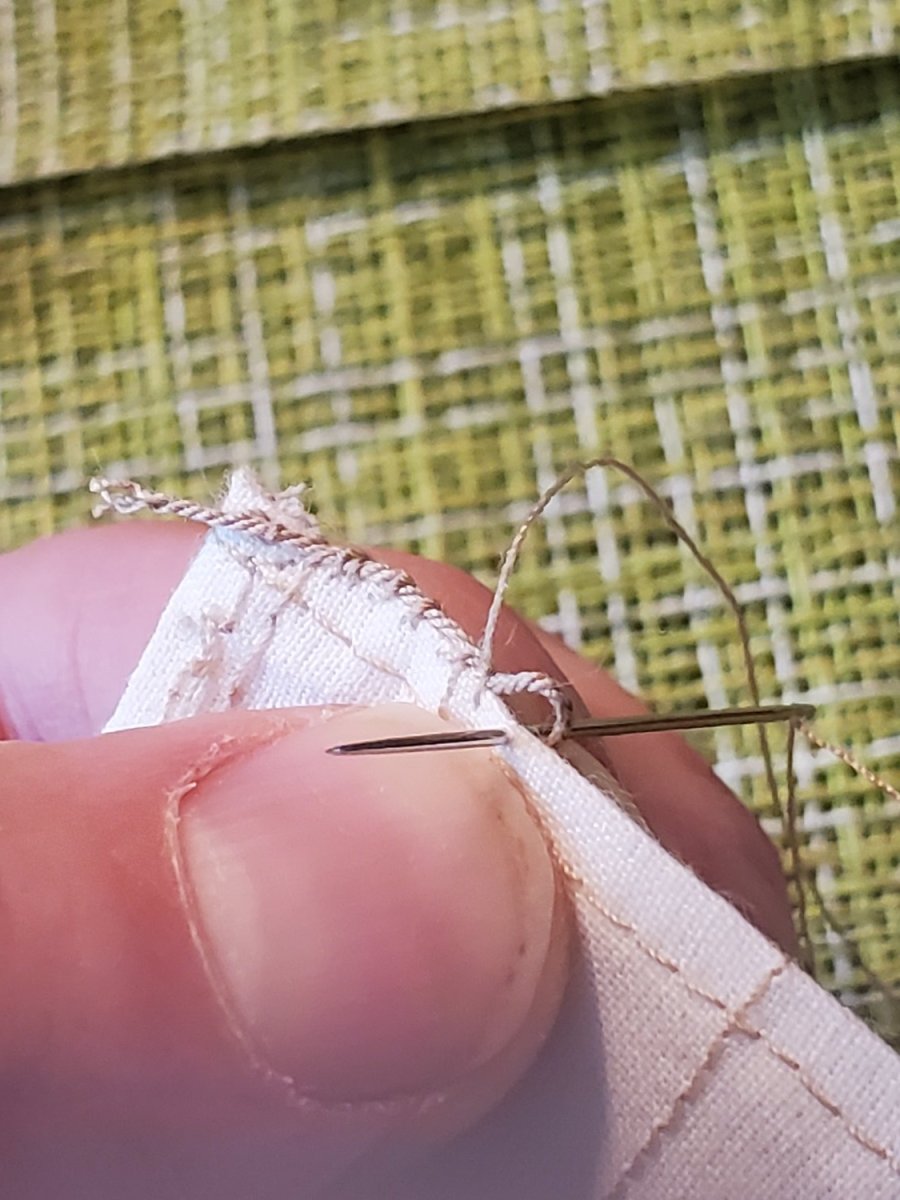
The next thing needing done, was (hand) sewing on the bolt rope. This is also used to create the cringles. Obviously I have years of experience sewing bolt ropes, so I knew just what to do. So I started with a tiny test sail we used for practice. Basically I'd whip stitch under the rope, near the very edge of the sail....
Go over and under again, then under the loop to create a knot. Then continued along the length in equal spaces
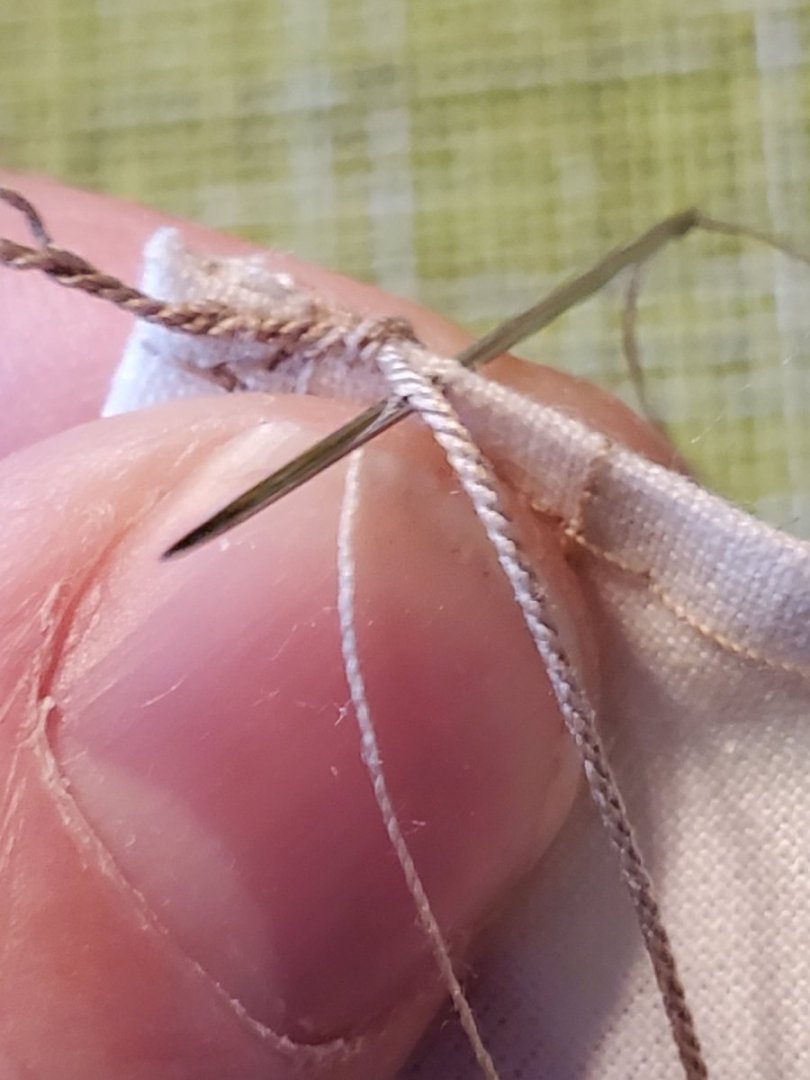
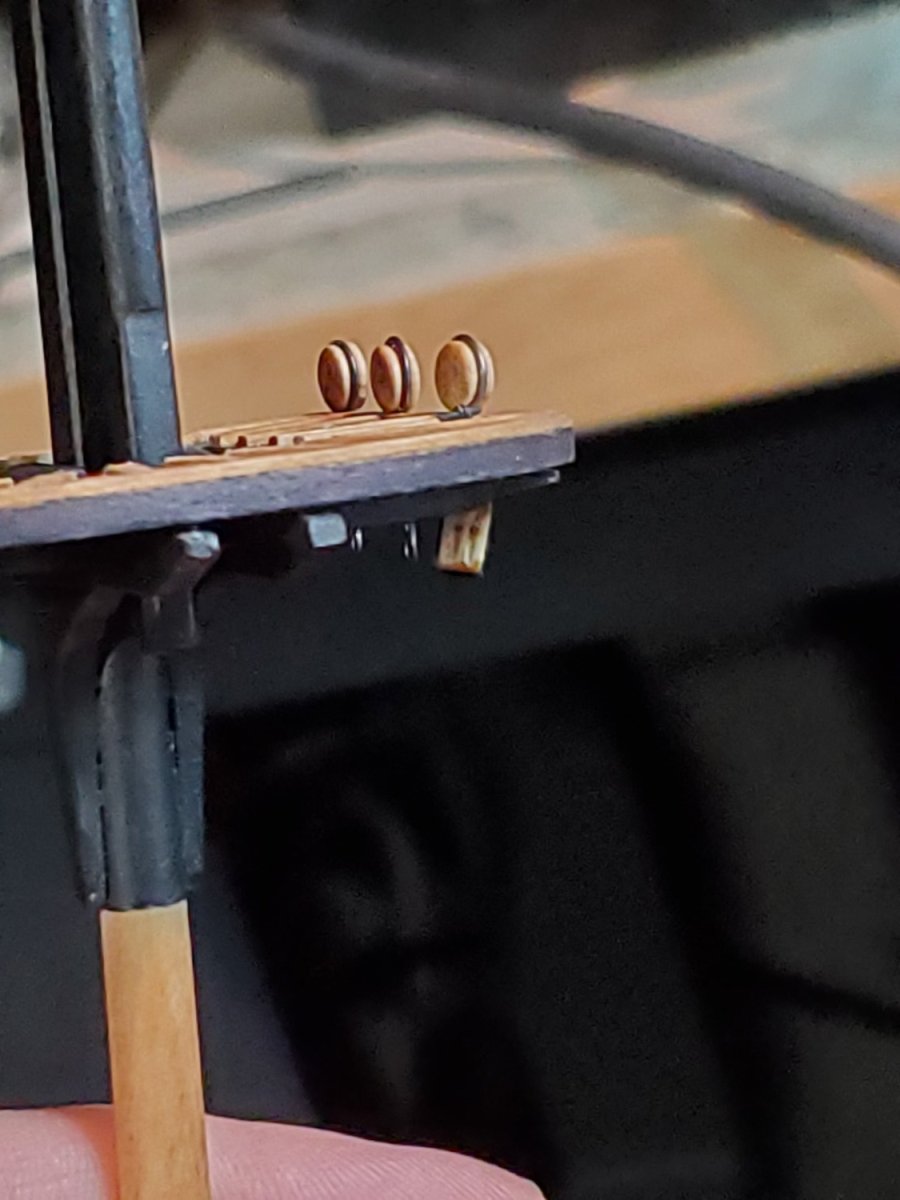
I also practiced creating a cringle. I'd hold the rope with my thumb...

Then sew through the rope and sail, and make another stitch

Its not bad for a practice, and I got more proficient as I went along
Originally, the rope would 'lean' fore or aft of the edge. I wanted it on the very edge. So I found that keeping the unsewn rope on the fore side, while starting the stitch from the aft side, resulted in the rope staying right on the edge.

So I kept going. It looked pretty neat, in the end, so I was happy with it. I found it ironic that the dinning room table, which had ample light, had green loose woven placemats nearby.

I managed to do pretty well with the corner cringle too. At the head of the sail, this cringle is called an earing.

Hand sewing takes a LONG TIME. Once I started with the real sails, I didn't change my stitch spacing, but BOY is it tedious now.
Now to get started....
- Jason -
-
-
Somewhat smooth sailing with sail making on the Fair American Model ship...
As time has allowed, Jane and I have , well mostly Jane has made significant progress with sewing all the sails with me. I've kept referring to Steel's along the way, trying to be somewhat representative of sizing and shapes.
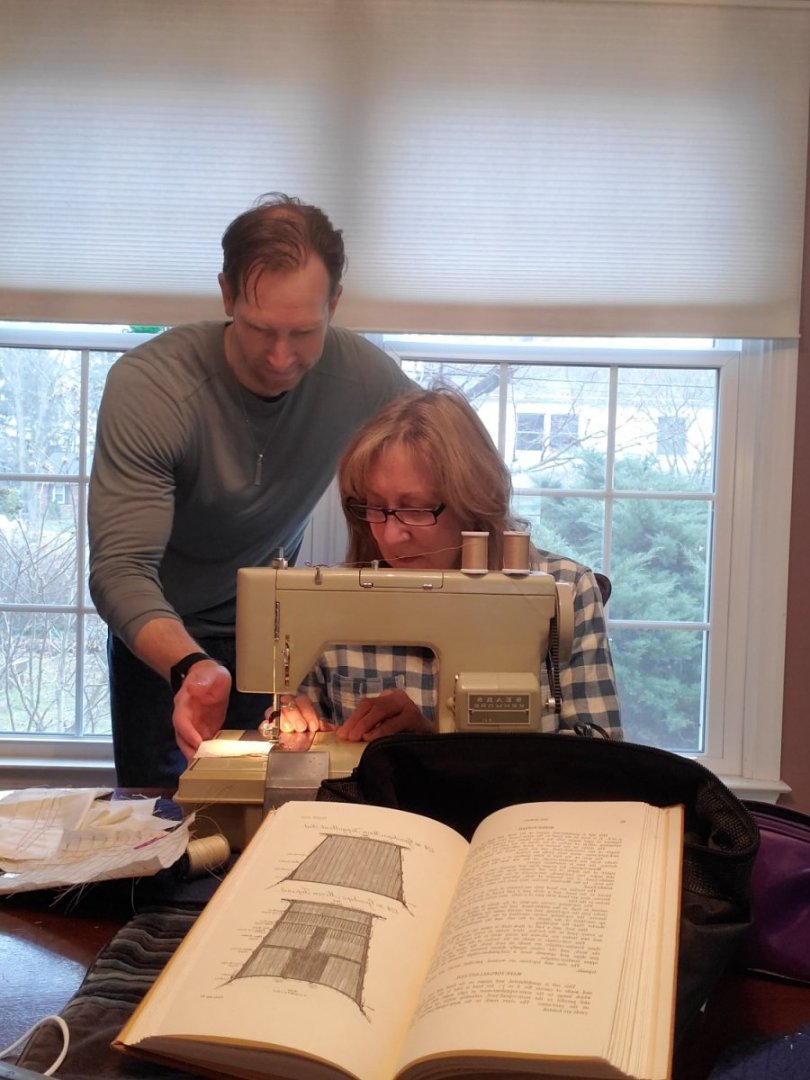
She spent the last week sewing all the seam lines on all the sails - tedious work, but she did beautifully. We kept each sail with the cardboard stencil so we knew which was which.

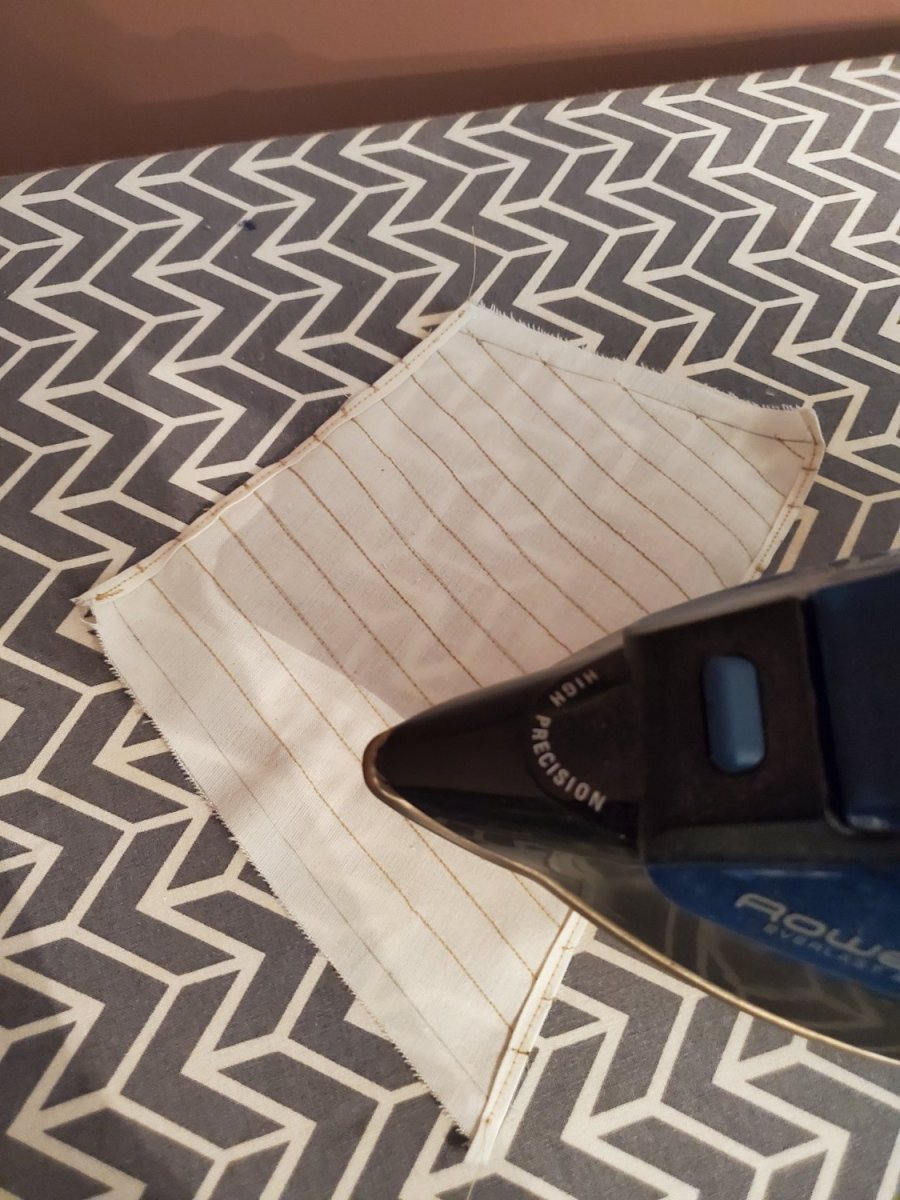
After the seams were sewn, I'd hand fold the tabling(s), which was really difficult at times with trying to keep them neat and small.
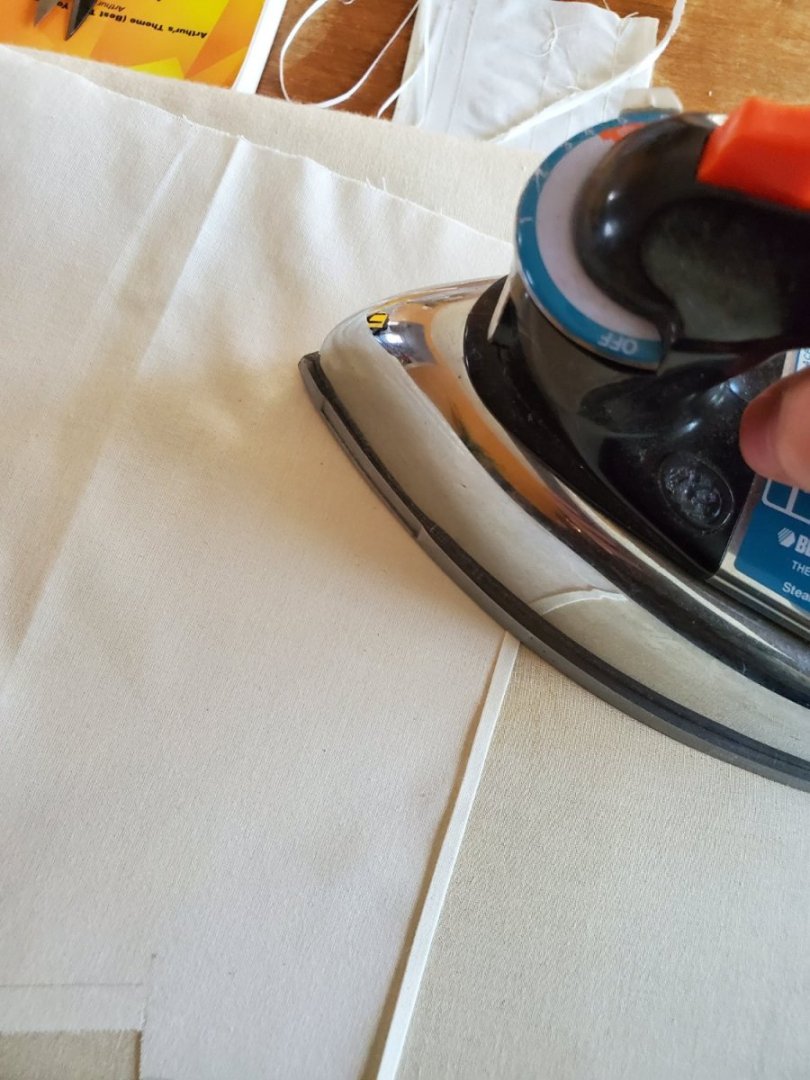
Afterwards, I'd iron the folded tabling, then hand it over to be sewn - literally hot-off-the-iron.

Folding over previous tabling proved challenging, especially on the old sewing machine. I wasn't really sure how to terminate them, exactly, so they turned out a little mashed, but acceptable. You definitely have to watch out for the 'flying nernies' as she said.
The end result is quite attractive.

For some of the leech side tablings, I tried to cut and fold the ends flush with the head/foot tabling. With angled sails, this doesn't always work. But with some, like this top sail's top corner, it was very 'neat'.
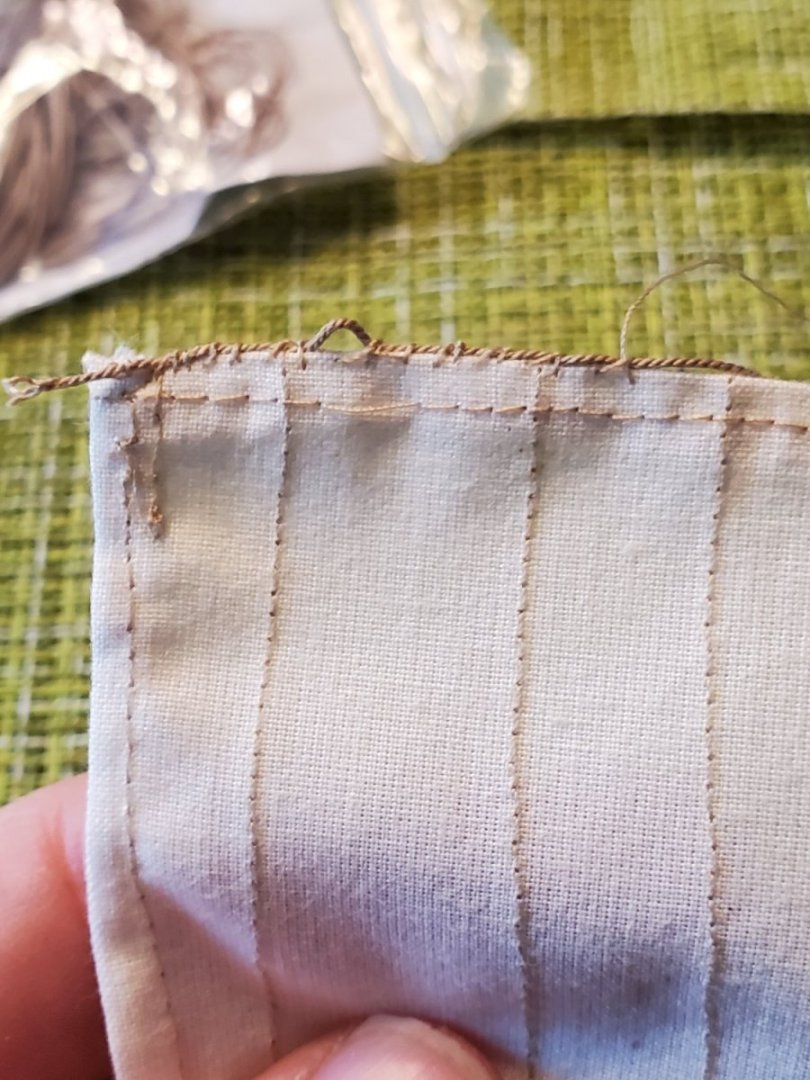
Another issue that kept coming up, was missing stitches. If you look closely, between the first and second reef band lines, on the right table, there's one missing stitch. We don't know why this happens, but some had to be cut and resewn. It was very frustrating, and unavoidable, in some cases.
But we kept trucking along, and got them all done.
In fixing missed stitches, Jane was so skilled that she was able to sew over existing stitches, to where they blend in. You can barely see it!
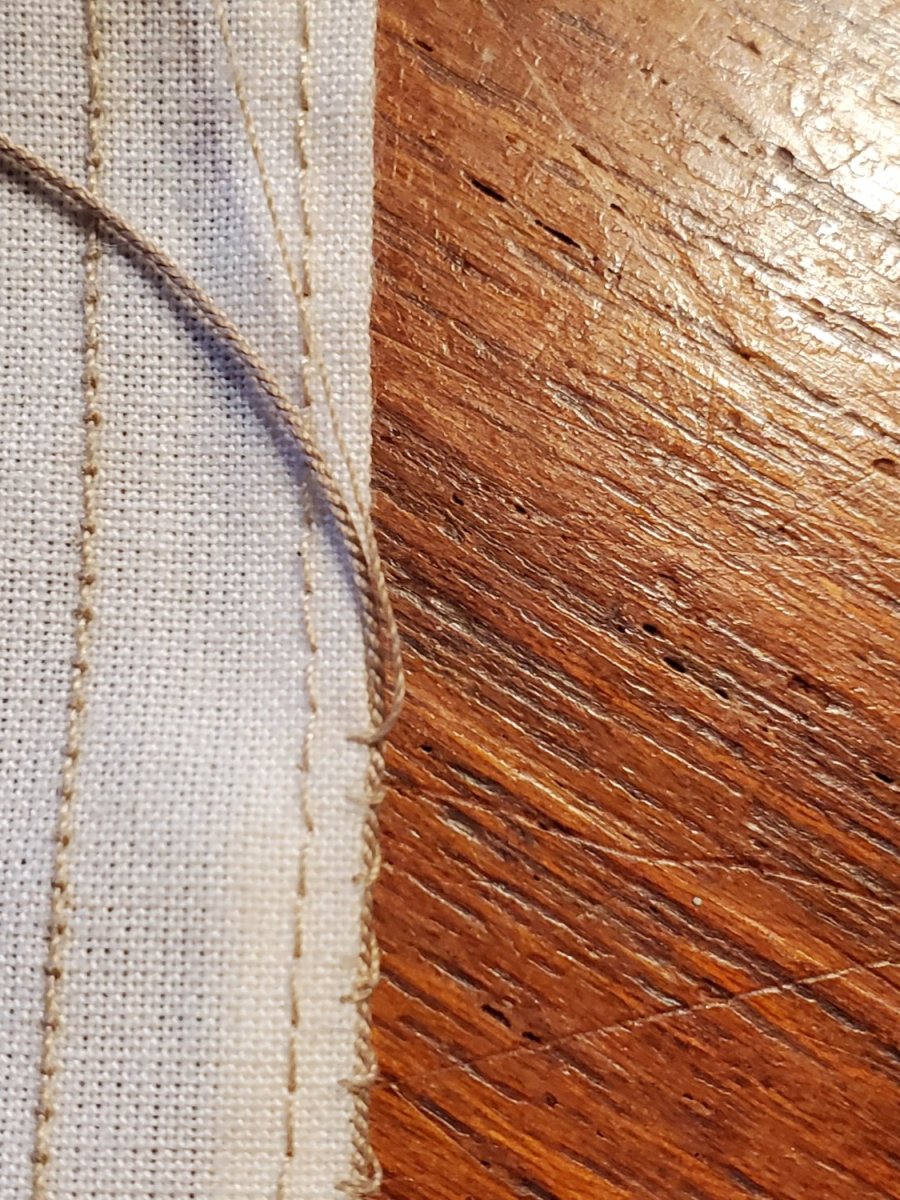
After each sail was sewn, I'd trim all the ends with rigging scissors as close as possible. Some of them had to be hand stitched to close the ends, but not many.
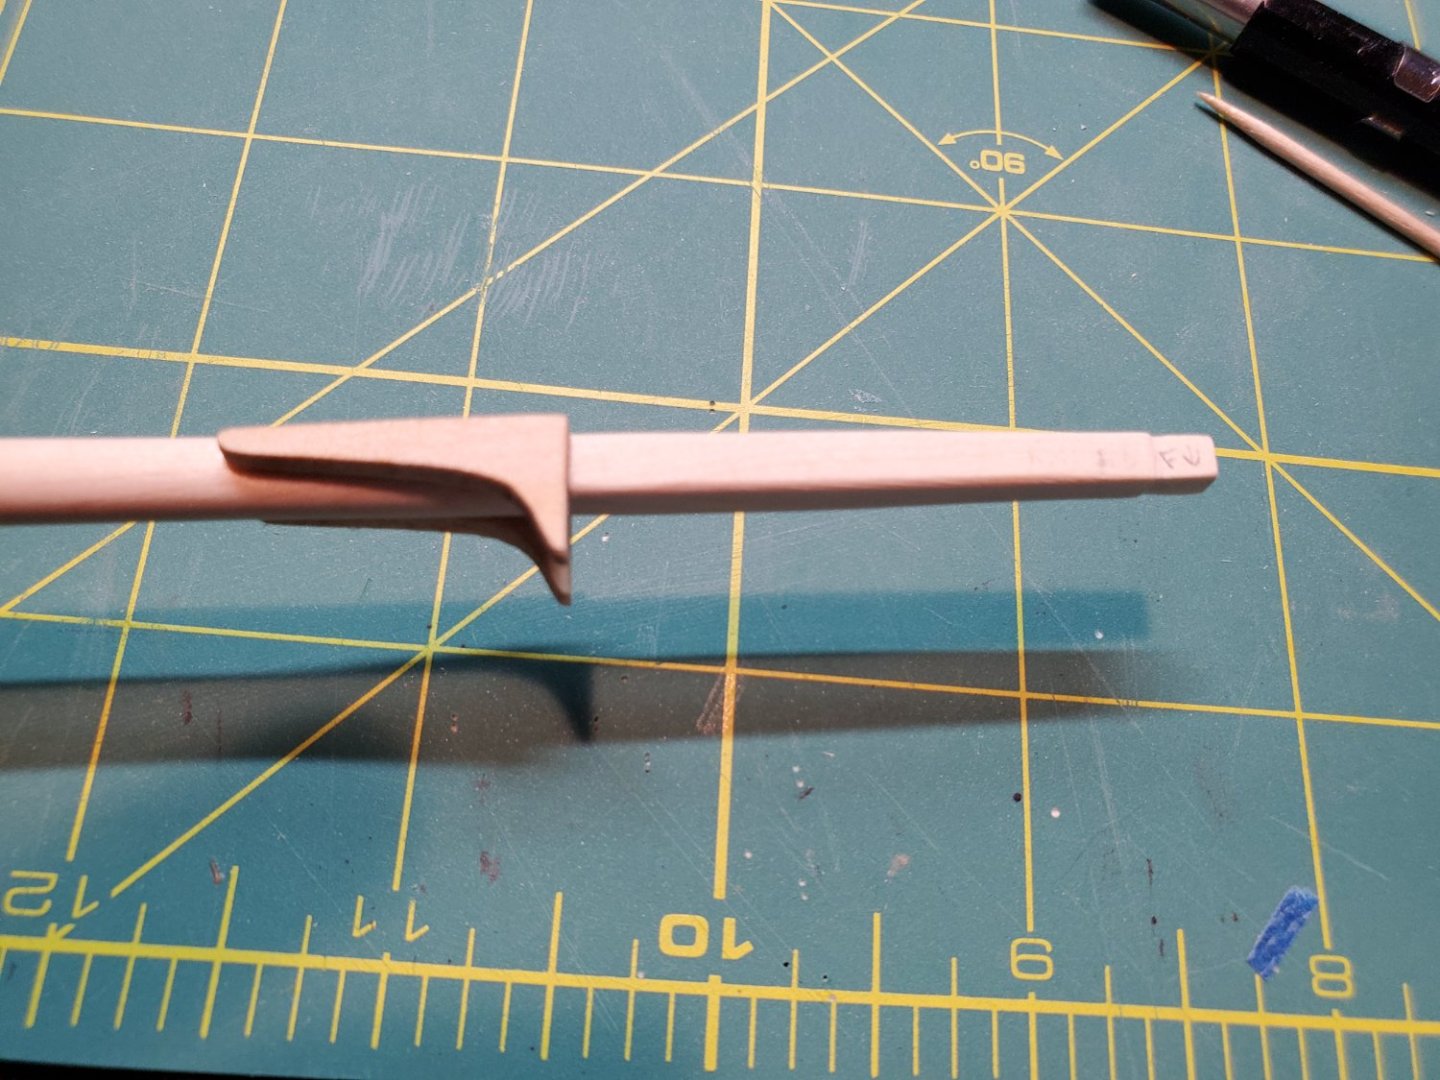
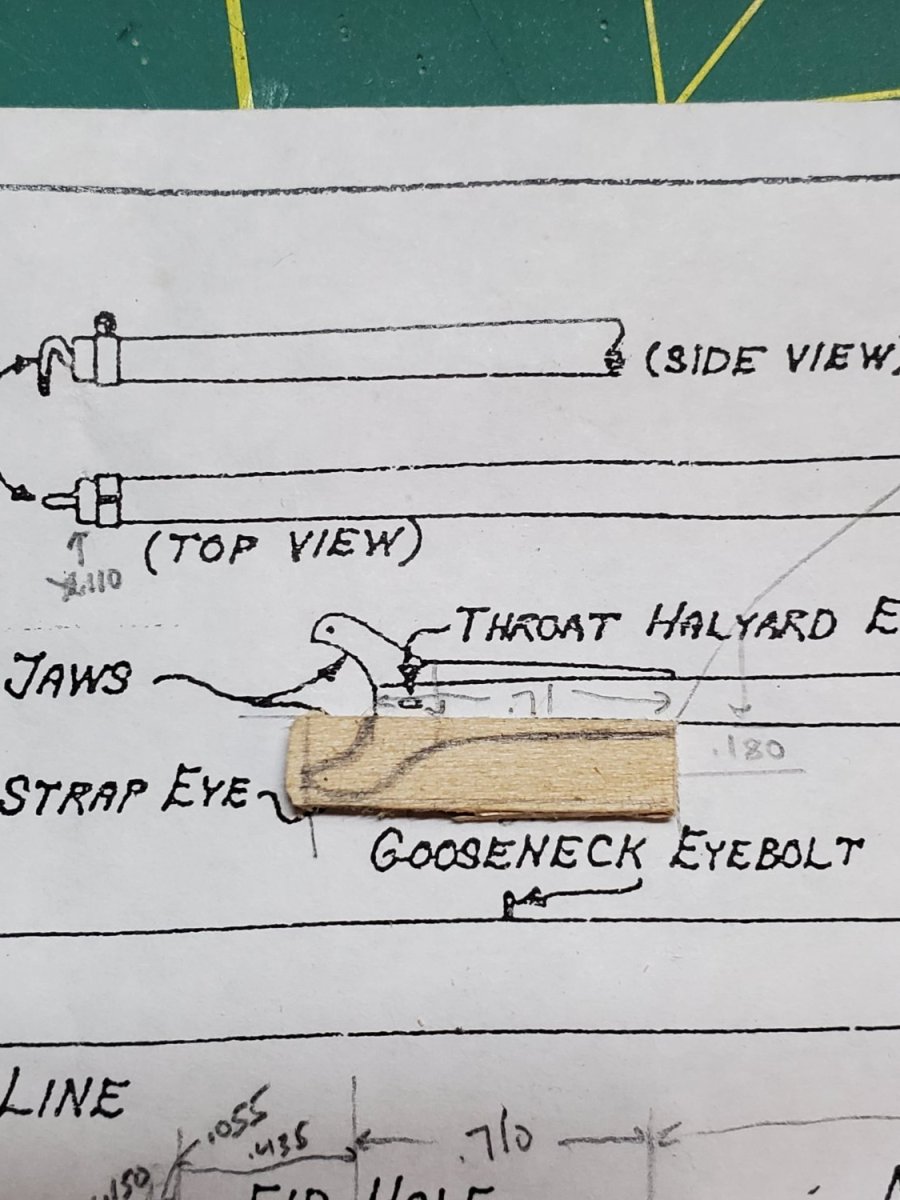
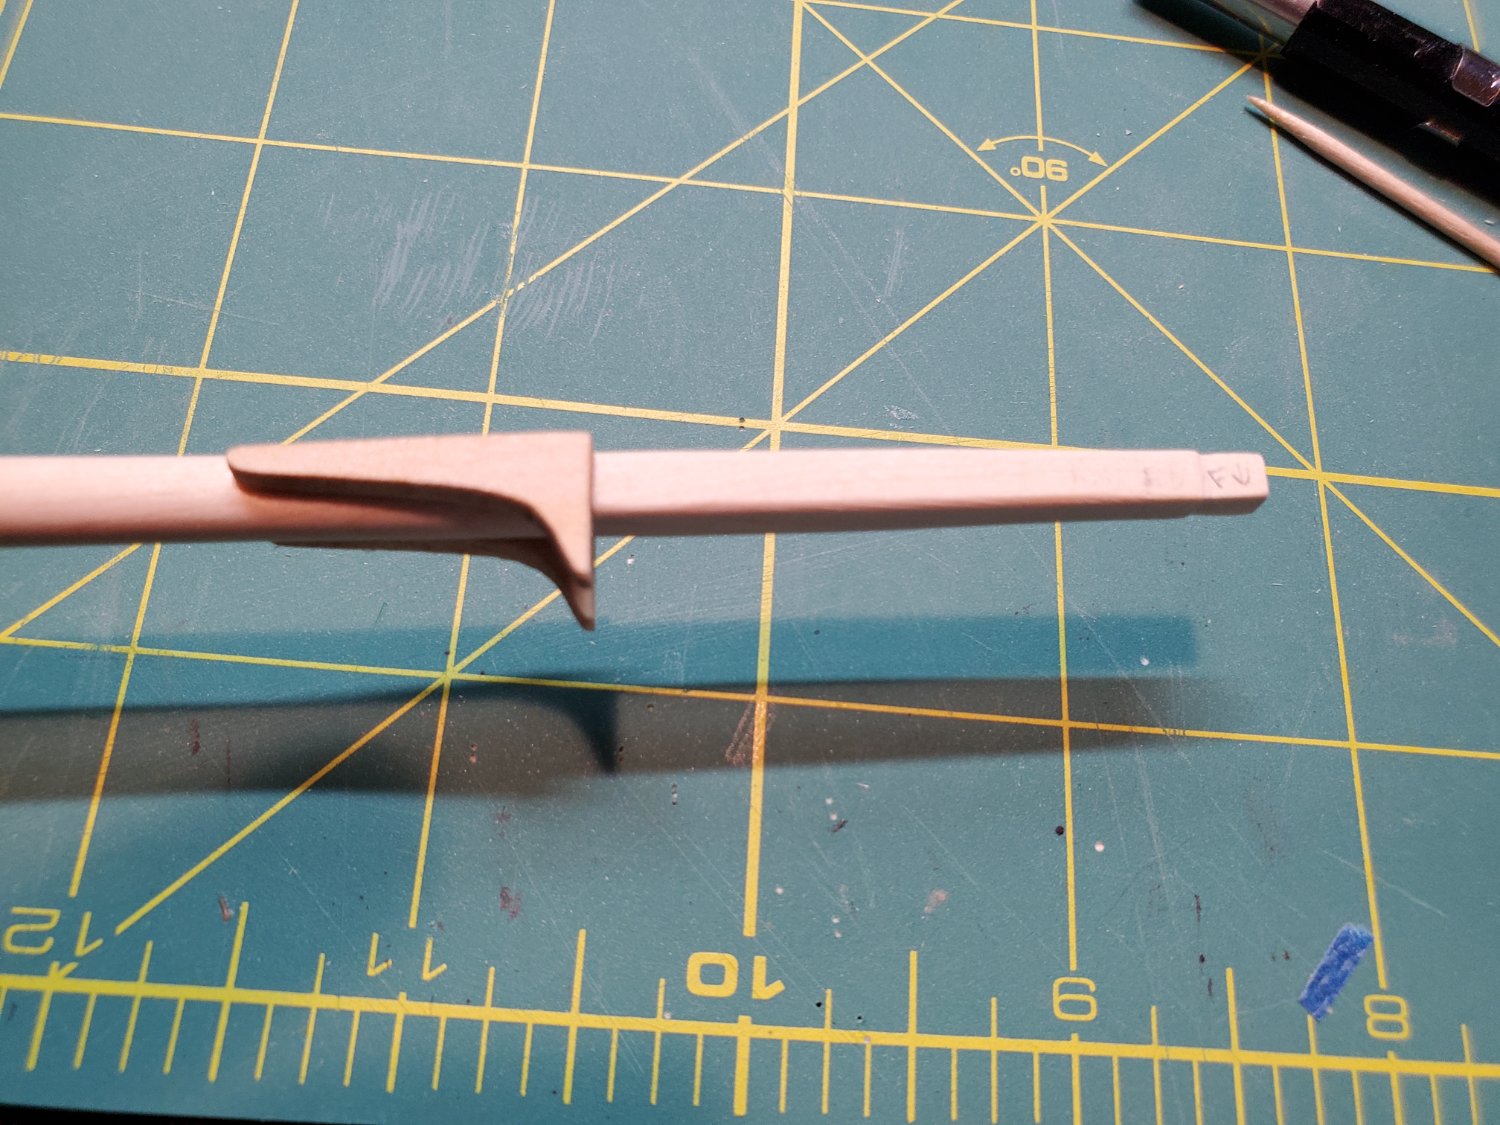
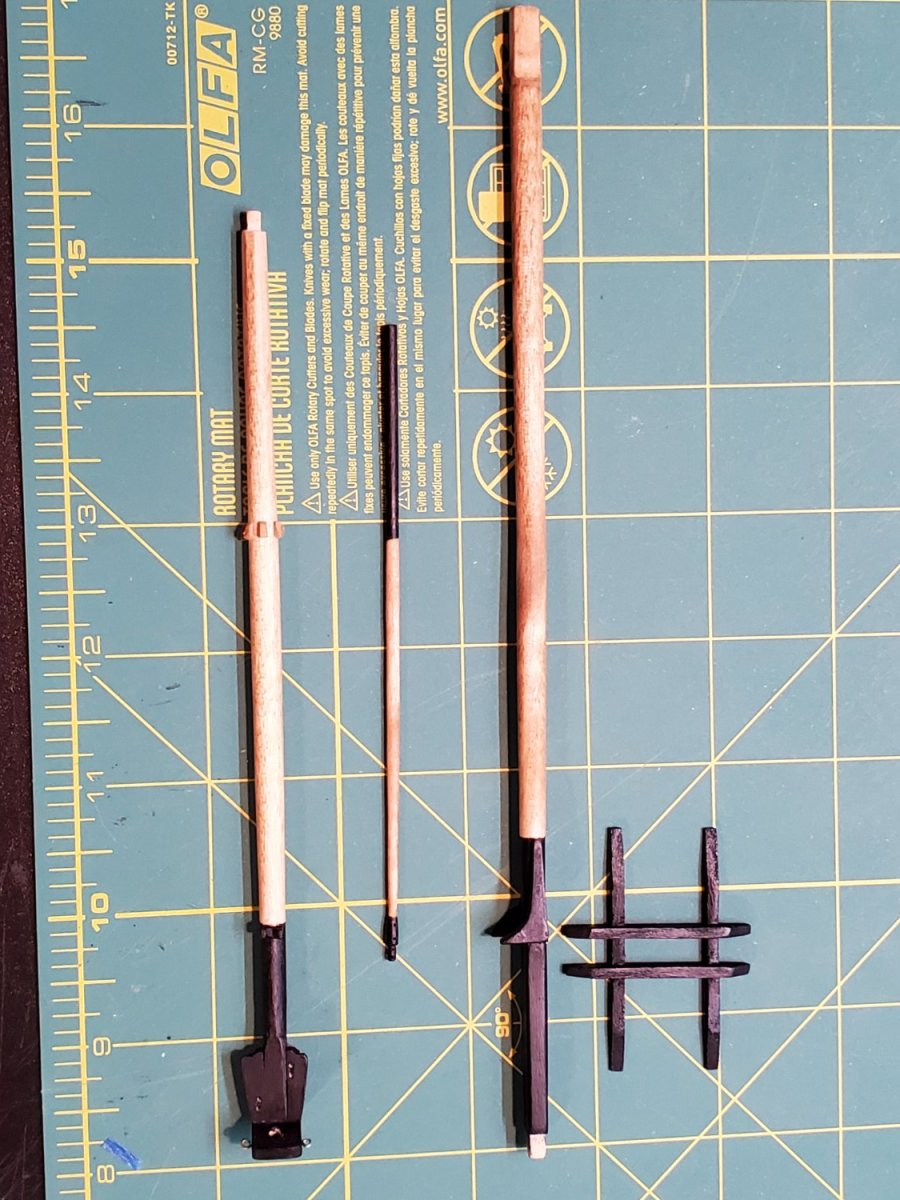
I even had some time to work on the Main Boom and Gaff. I kind of had to eyeball the jaws for the Gaff. I left the tapered end thick, then once it was glued, I sanded it down to a smooth taper
They turned out okay, for the most part.
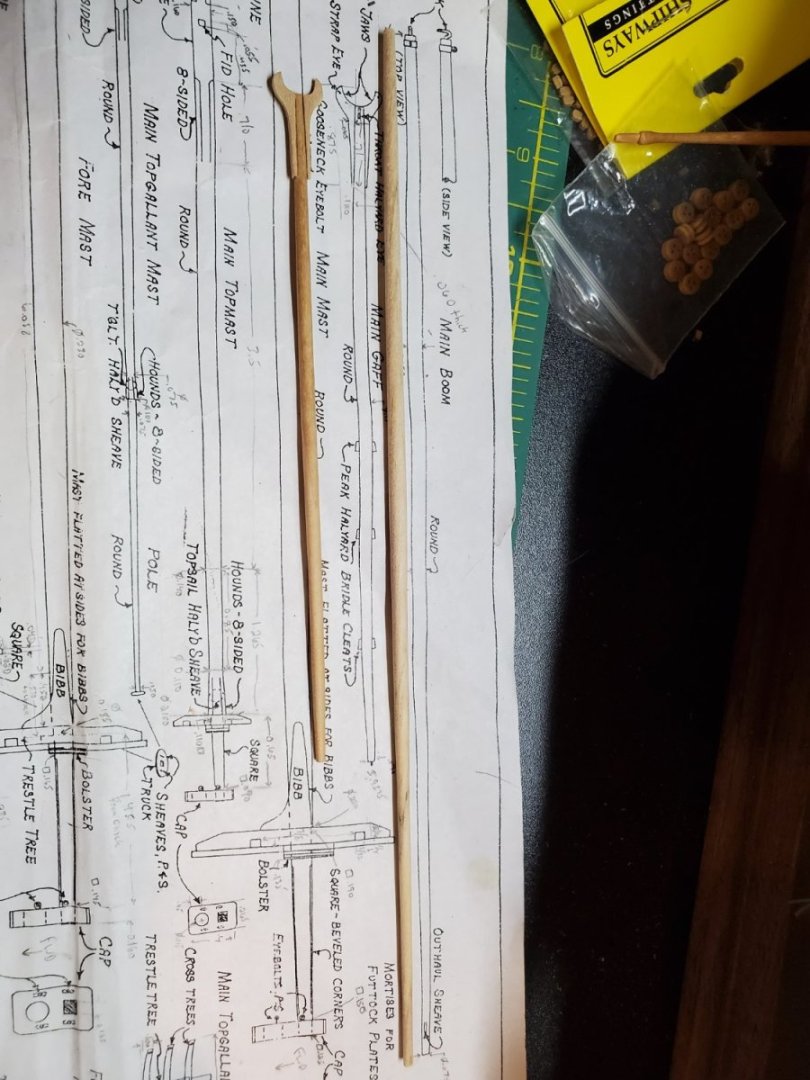
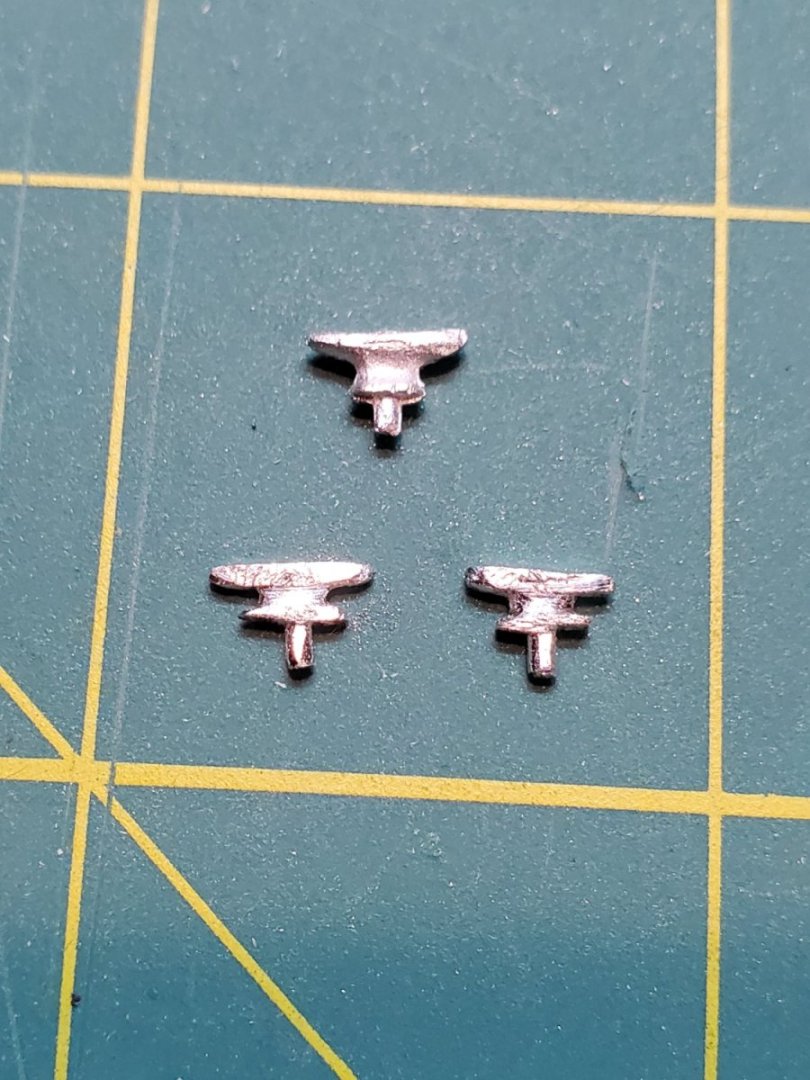
The cleats were a little tricky, as small as they were, but I got it done.

After they were glued on, I also filed them down a little bit so they weren't so bulky. I still need to stain them, eventually, but that'll be another day.

The only thing that remains on the sails is the reef bands, and sewing the bolt ropes on, and creating cringles. Then I'll be able to start rigging them to the yards.
Seeing the final product, or close to it, with the sails has been very rewarding. It took some time to plan, but was worth it.
Not sure if any of this is best/good practice for sail making, but hope this gives other modelers an idea of an approach anyway.
More progress hopefully soon!
- Jason -
-
On 2/18/2024 at 10:44 PM, chuckthedragon said:
Jason you're doing a great job! For your first ship you're really going all in. Good on you! Couple of thoughts, though you're probably well beyond this. I don't know how you are stropping your blocks, but some black thread works wonders. I use a thicker black thread and attach thread to the blocks with Gorilla gel CA. Also, again probably too late, consider getting some aftermarket blocks from Syren or Model Shipways. You've done such great work that the blocks that came with the kit don't do you justice.
Hi Chuck. Thanks for all the kind words. I wanted to challenge myself with this build, and LITERALLY learn the ropes, so I'm doing as much as I can, and test my skills.
Regarding the stropping, you can see from Dec 12, 2023 post, I use black rope (either .012 or .018). With hooks, I'll typically overhand knot the hook, CA Glue it to the top of the block so it's tacked. Then wrap the rope around the bottom and overhand knot again, pulling in opposite directions so it's neat (Dec 12 post). CA Glue, let it dry, then snip super close with rigging scissors. Hope that makes sense.
I do wish the block quality was better yes. Syren blocks are really nice, but I won't change type mid-build at this point. I did buy all Syren ropes though - they are really high quality. Next build I'll get better blocks, or a better kit.
I appreciate you following along so far!
-Jason-
-
Some sail making progress on the Fair American:
After last time, sewing sails was postponed 2 weeks, as my (retired) mother in law was busy. It was worth the wait.
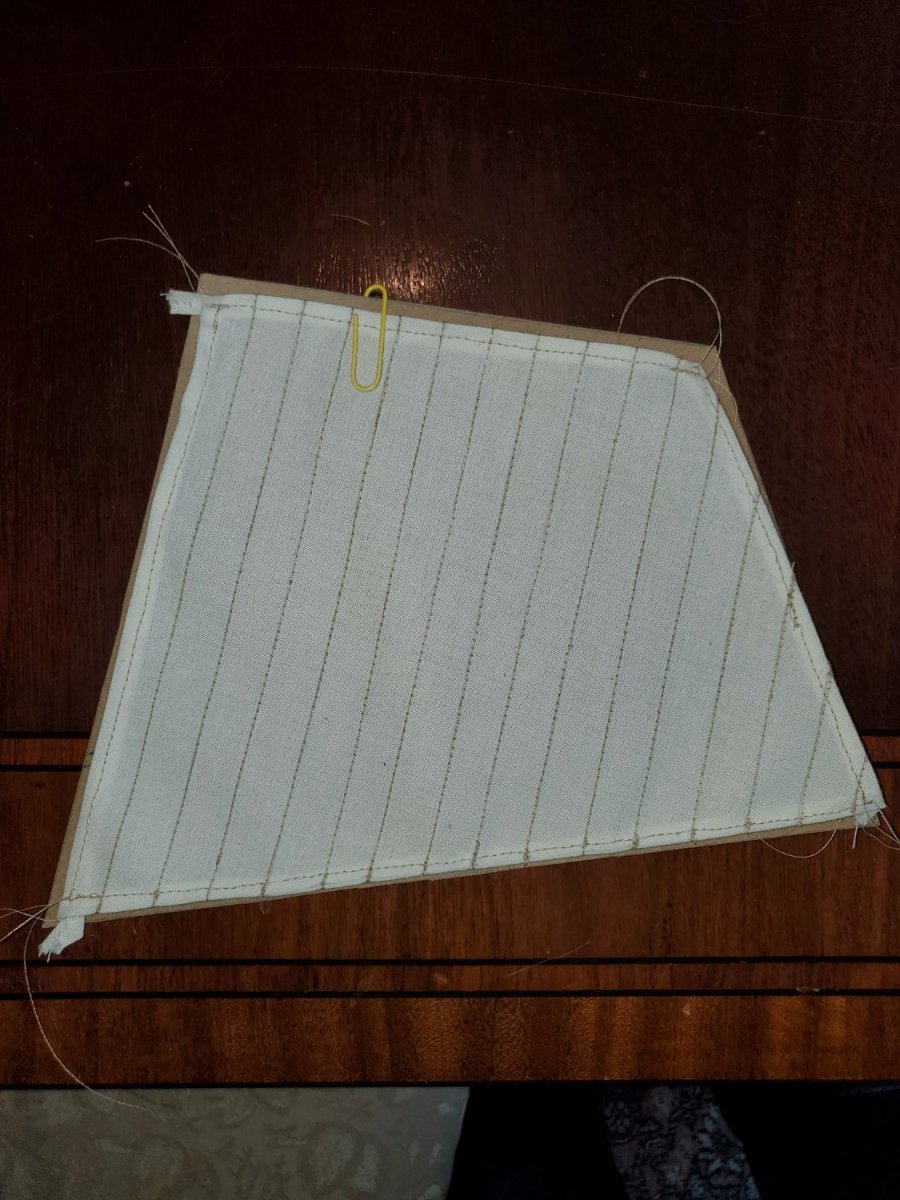
With each sail cut out, I made light pencil marks showing where to sew the seams. These were spaced apart 0.5in, which is scaled 2ft, as dictated in Steel's Sail making section. The thread will cover up the pencil marks, so I'm not too worried about it showing up.
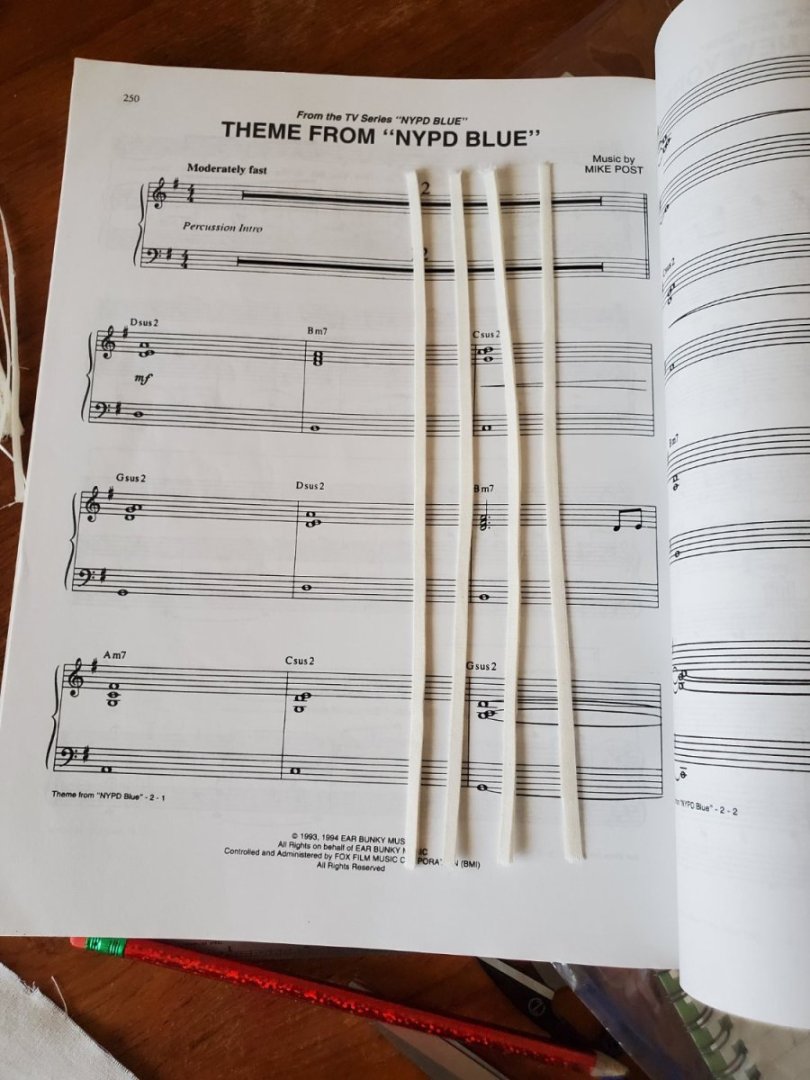
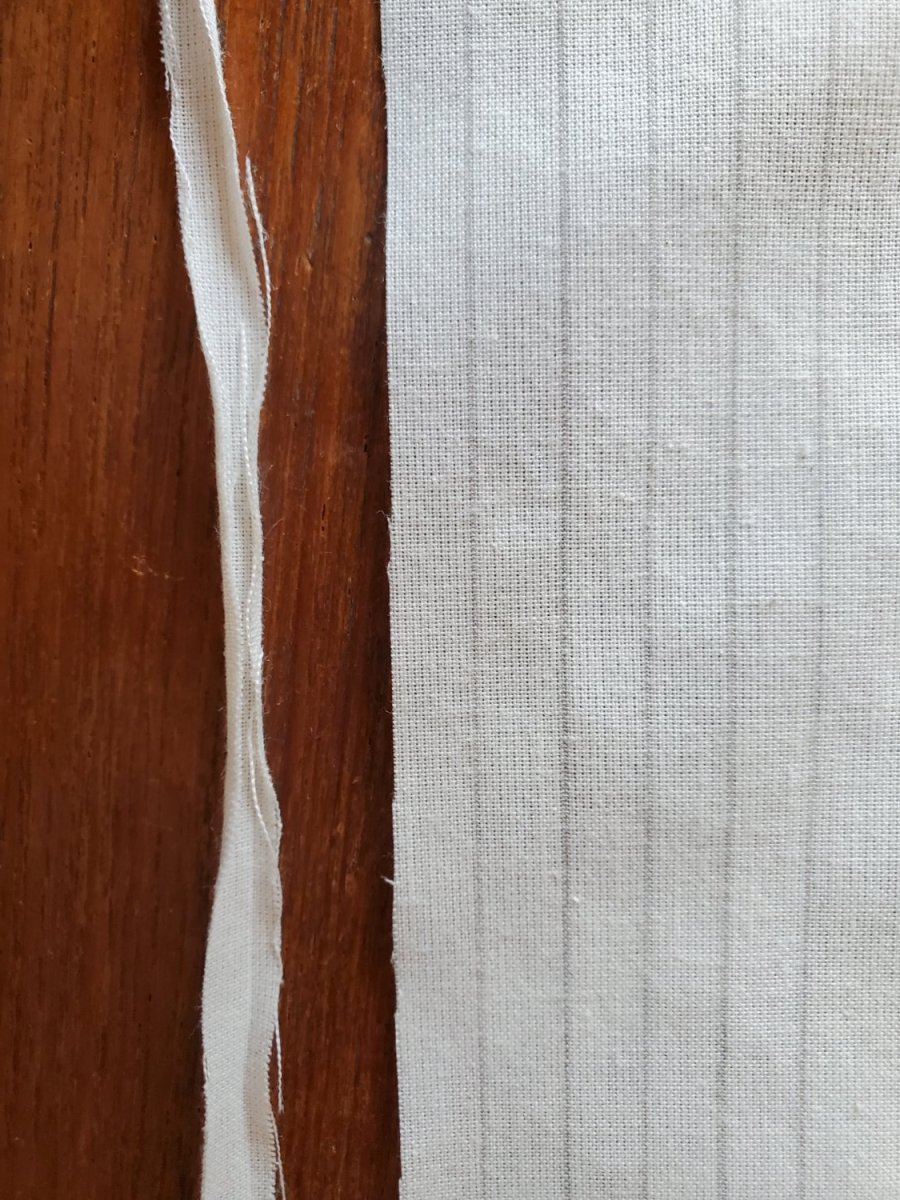
Bottom and Top sails have reef bands. Acccording to Steel's, they are to be 1/3 width of canvas. For practical/folding ability, I targeted 3/16" wide. This fabric is NOT easy to use, and folding them over 2x to prevent unraveling was a nightmare. It got all twisted and rolled, instead of folded. I was going to use the Iron to flatten, but I couldn't even get to that point.

I thought that folding along the weave direction wasn't going to work, so I tried cutting them out from an angle, so the weave would stay more intact (see the angled line I cut). It didn't help. the pieces are just too narrow to handle. Very frustrating.

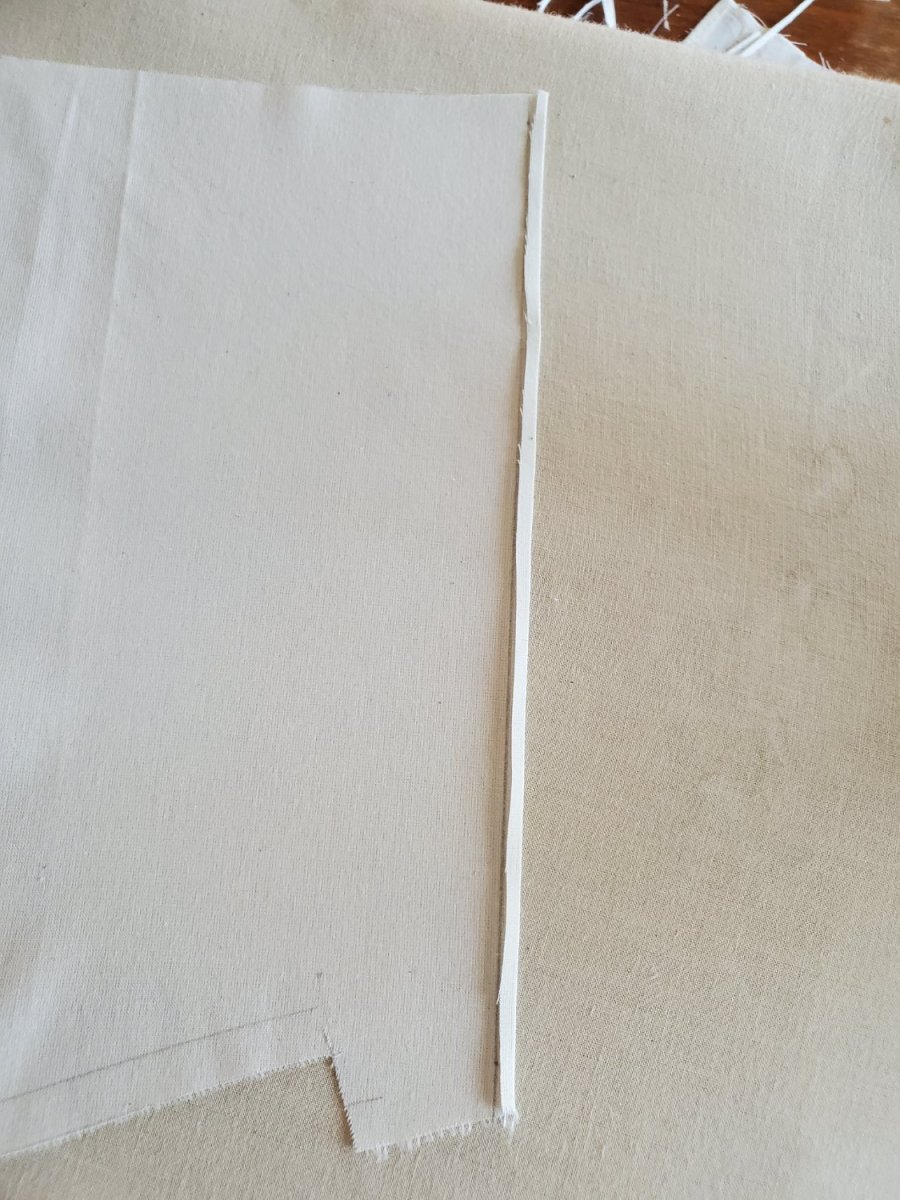
So then I thought, well I need more 'substantial' material to fold with. So I didn't cut the strip free, just folded over 1x....

Then ironed it. Then folded again, ironed again. THIS WORKED! Afterwards, I just cut along the second fold - worked great. I just needed something to 'hold onto'.
I took the cut reef bands, and placed them in between the pages of a big music book. I play piano, so this is apparently the page I turned too. They'll stay flat and protected until I'm ready for them.
Now for the more fun stuff. Please note: I have no idea what I'm doing - really just trial and error and ''yeah that'll work''. Bob Hunt's practicum on Sail Making is helpful, but I really wish there were more pictures.
Anyway after careful consideration, I decided on a medium tan thread, as the sewing thread for the sails. In hindsight, I probably should have gone with the next lighter shade, but I'll live with it - No turning back now!
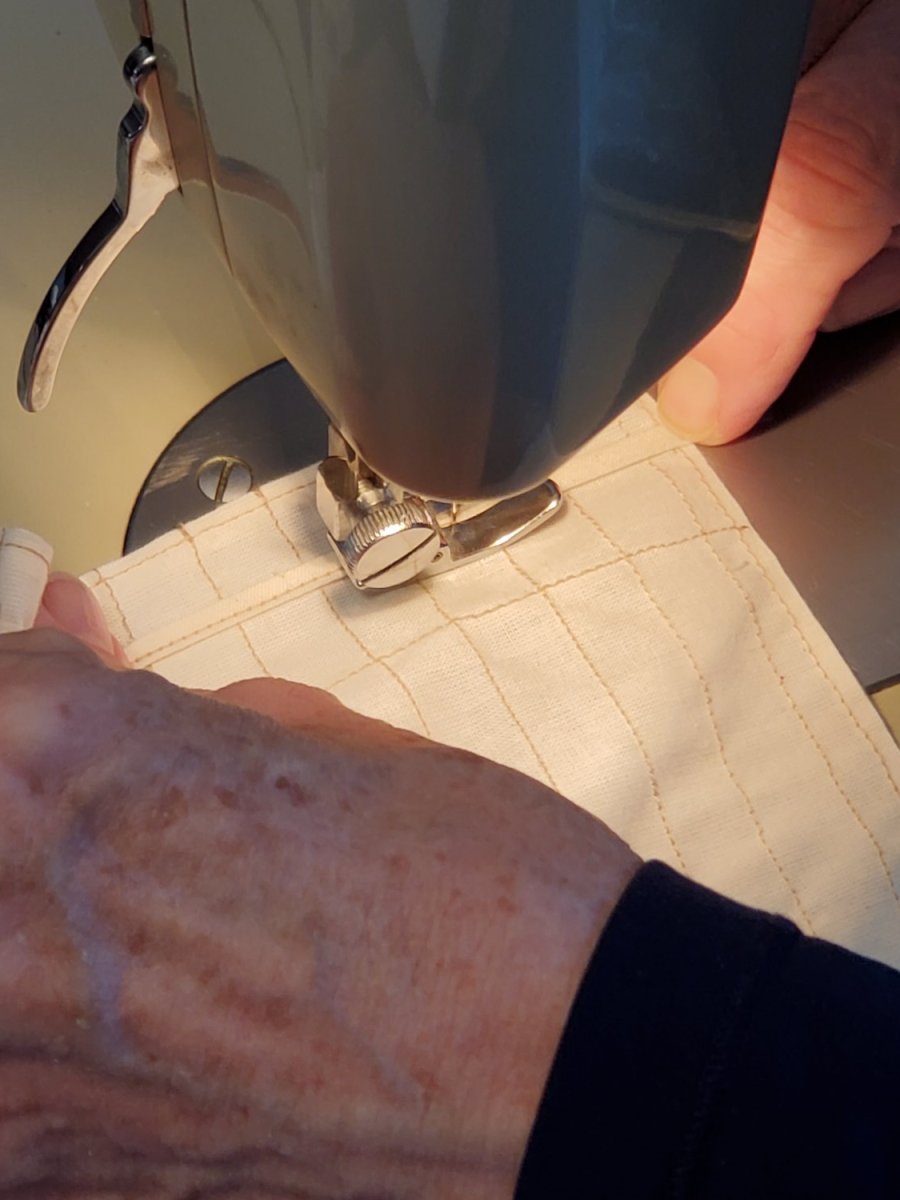
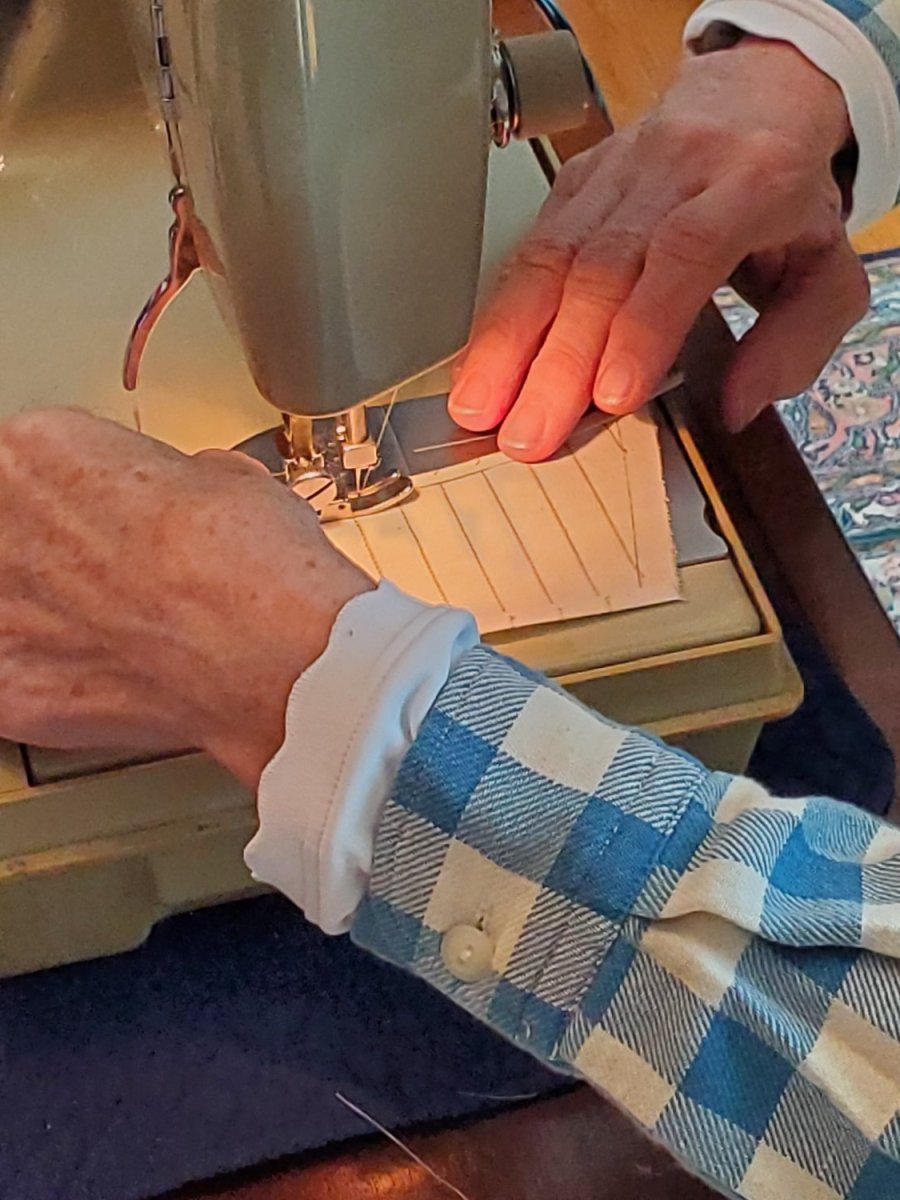
My mother-in-law started with the vertical seams first, following my pencil lines as a guide. We played with the settings for the tension, stitch, and 'that spool up on top' (12, 7, 2, respectively)
You can see the master at work tabling the ends

This first Main Topsail had a generous curve on the foot. Folding and ironing this tabling was a challenge. We discussed folding/ironing all 4 tabling ends was not easy to sew - to many layers at once. So we did the head and foot first, then I folded and ironed the leeches afterwards.
Note - Nowhere in my research, or in Steel's, did I find which way the tabling should face: fore or aft. My brain says aft, but I wish I could know for sure. The Rogers model LOOKS LIKE the tabling is aft, but I really can't tell. The reef bands do go on the fore side, so those will be sewn last.

Here's the 'fore' side of the sail, with tabling facing aft.
Here's the head tabling sewn - it looks pretty good. It was hard for her to stay close to the edge of the seam without the stitch walking over the edge. Thus, it's not perfectly straight. Beginning and ending the stitch was very difficult. The material likes to snag in the sewing machine. We had to make adjustments for start/end to get it right, with a couple reverse stitches to keep the thread from unraveling.
After the head and foot were sewn, the leeches were next. I left the folds long, so she had something to grab onto, then trimmed later.

The final sewn sail ended up being slightly smaller than the carboard stencil at-scale. There's some material puckering and my folding wasn't perfect.
When the sail is rigged, it will be bent to the yard anyway, so thank God it didn't end up bigger!

I think it looks pretty good, considering first sail, first time, first material, first ship. Most of the credit goes to Jane, but we made a good team.
We worked on one of the Jib Sails next -
This was about as far as we got yesterday....

We spent ~1hr deciding on the plan, 1hr with a practice sail/seam, and 1hr of real sail sewing. I'm going to go back later in the week to make more progress. She sews, I fold and iron, she sews some more.
We haven't sewn on the bolt rope yet - that'll be at the end once they're all tabled, and the reef bands are on.
Hopefully more progress in the coming weeks.
Enjoy your week
- Jason -
-
Progress on the Sails for Fair American...
After putting this off for a while now, I decided I needed to bite the bullet and finally work on the sails. I can't do much progress with rigging without them, so it's time.
My mother-in-law graciously offered to help with the sewing machine and stitching expertise, which I'll go into more next post.
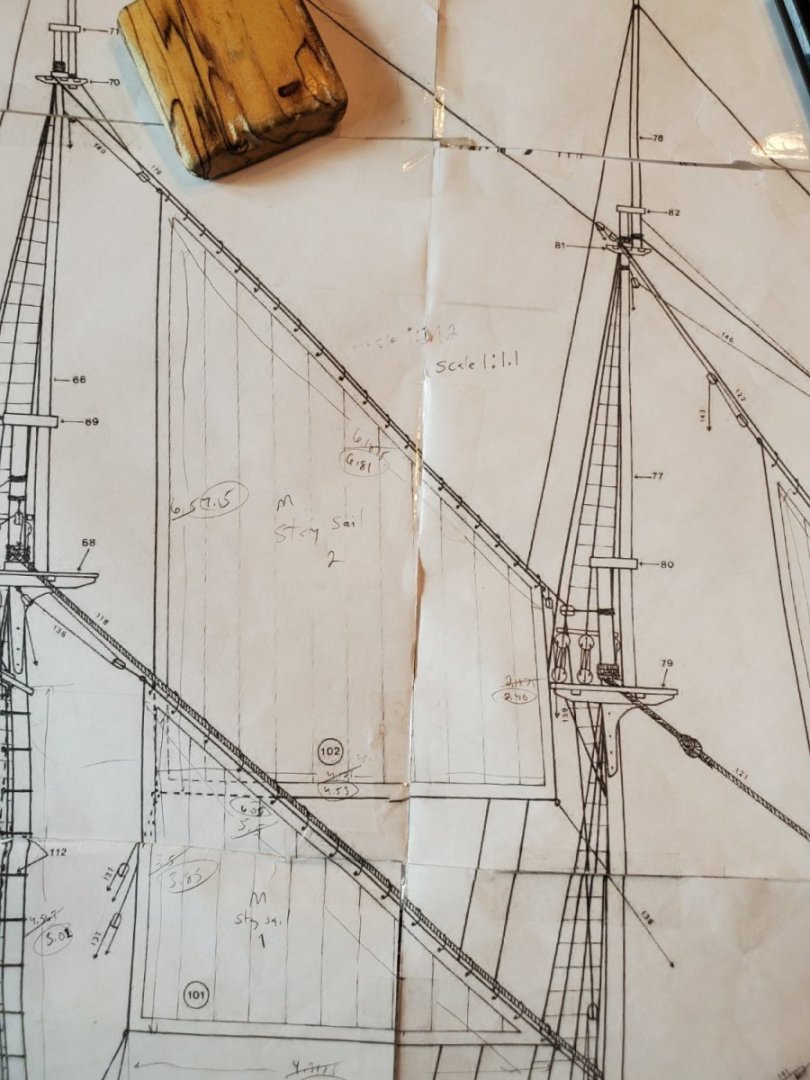
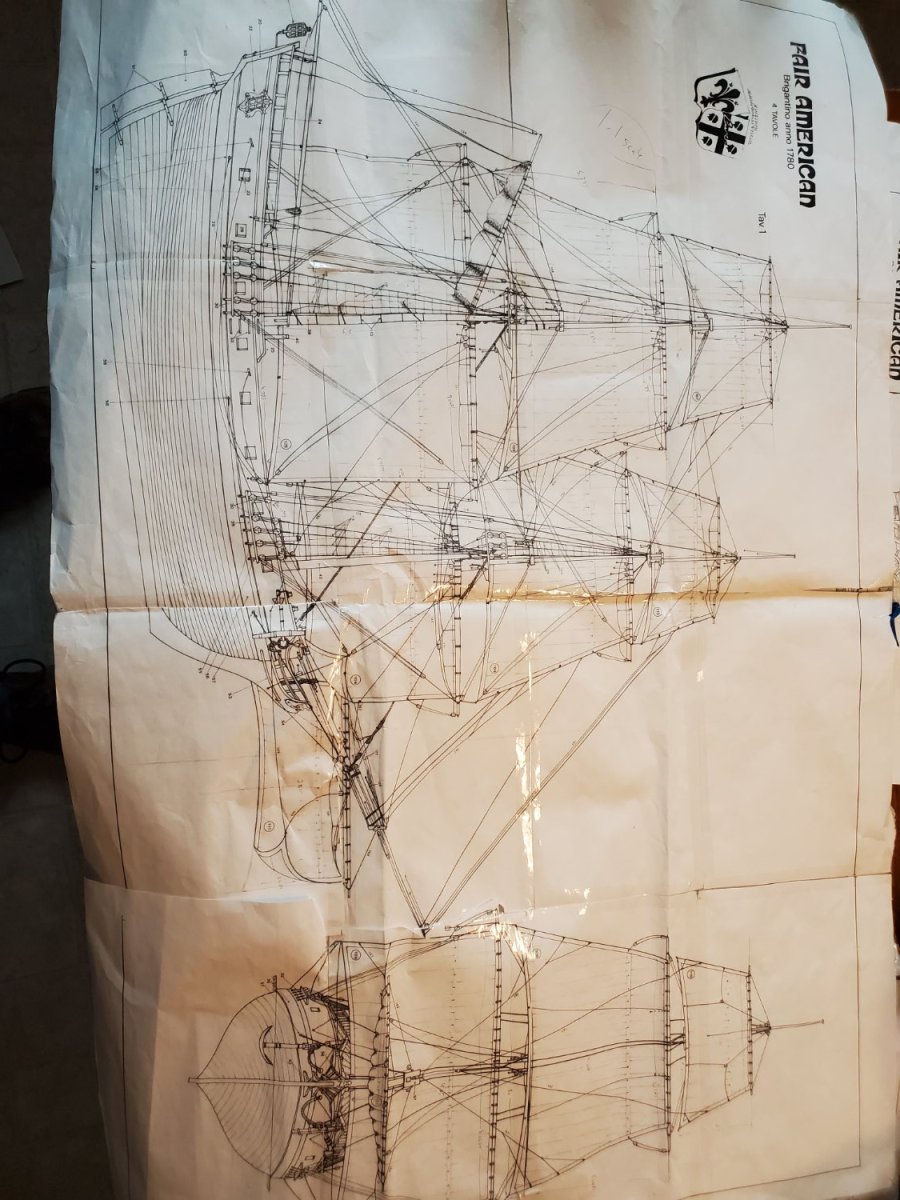
First, I took all the rigged plans I downloaded and taped together from https://www.shipmodell.com/index_files/0PLAN1C.html, to see if they were even close to scale to the actual yards. Some were, some weren't.
This pages' sails were really close to my model (1:48), at least lining up the yards to the page. So I took the measurements from here, to start...

But this view, (stay sails, and gaff/boom sails), were not in scale, for some reason. They were 1:1.12, so I measured, then calculated the 1:1 size, and circled that number.
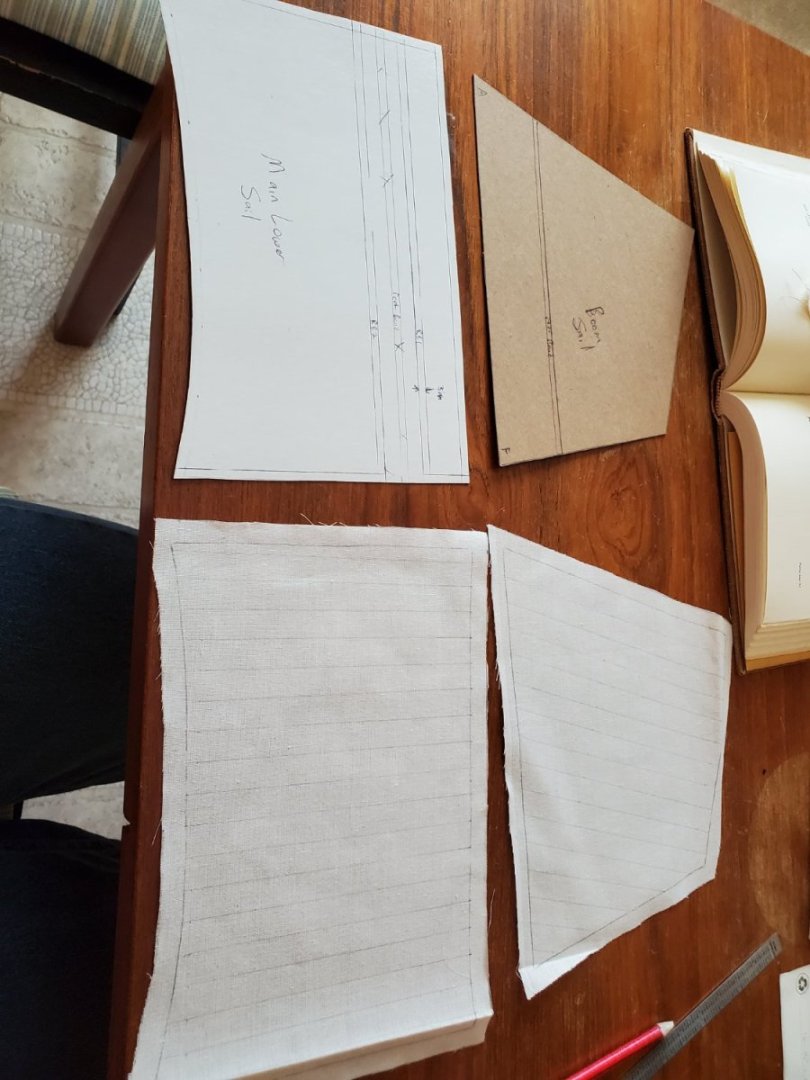
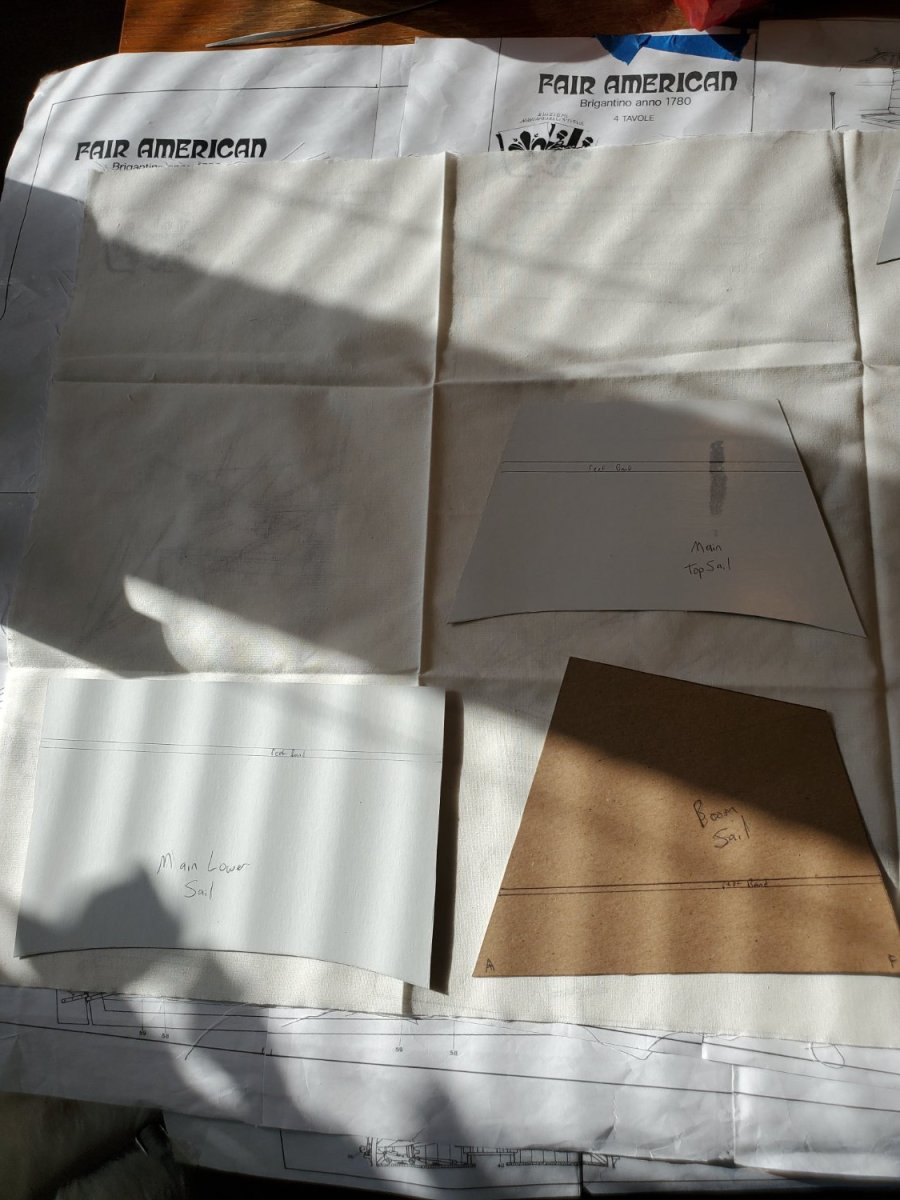
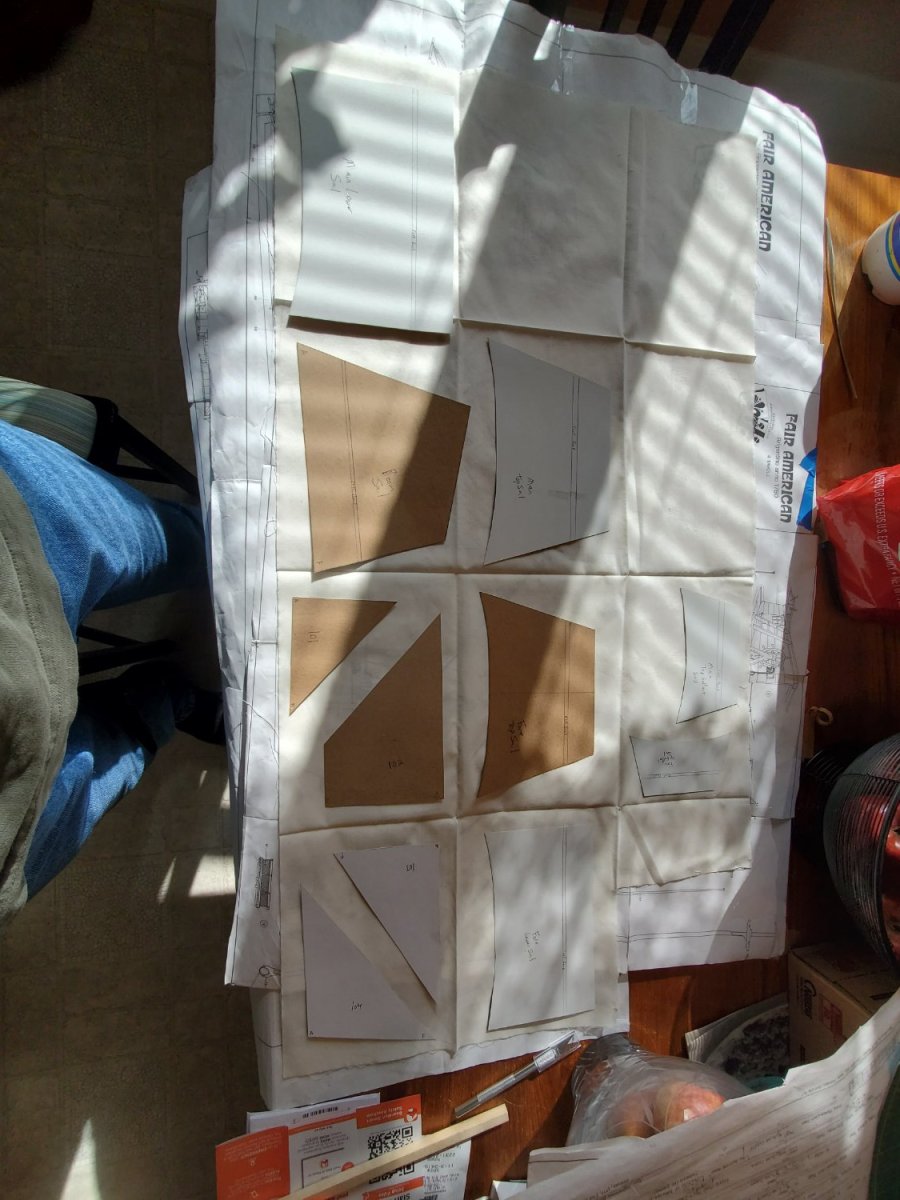
From there, I laid out the sail cloth I purchased from ModelShipways on the dinning room table. Its a big piece of fabric.
With the measurements in hand, I made cardboard stencils to scale. It was a sunny day, so shadows were abundant, sorry.

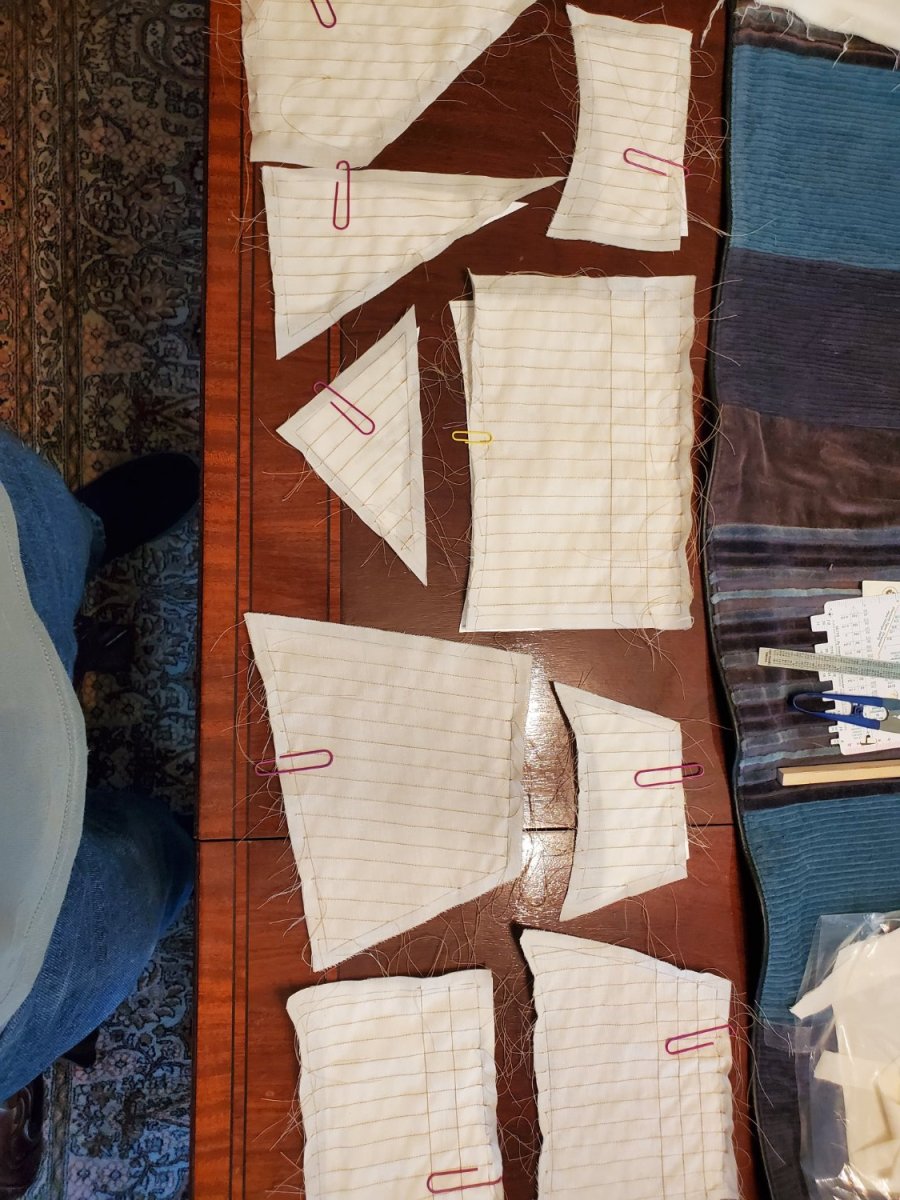
After all the stencils were made and cut, I arranged them on the sheet so they all fit. I made sure to allow extra material in between for tabling (seams).
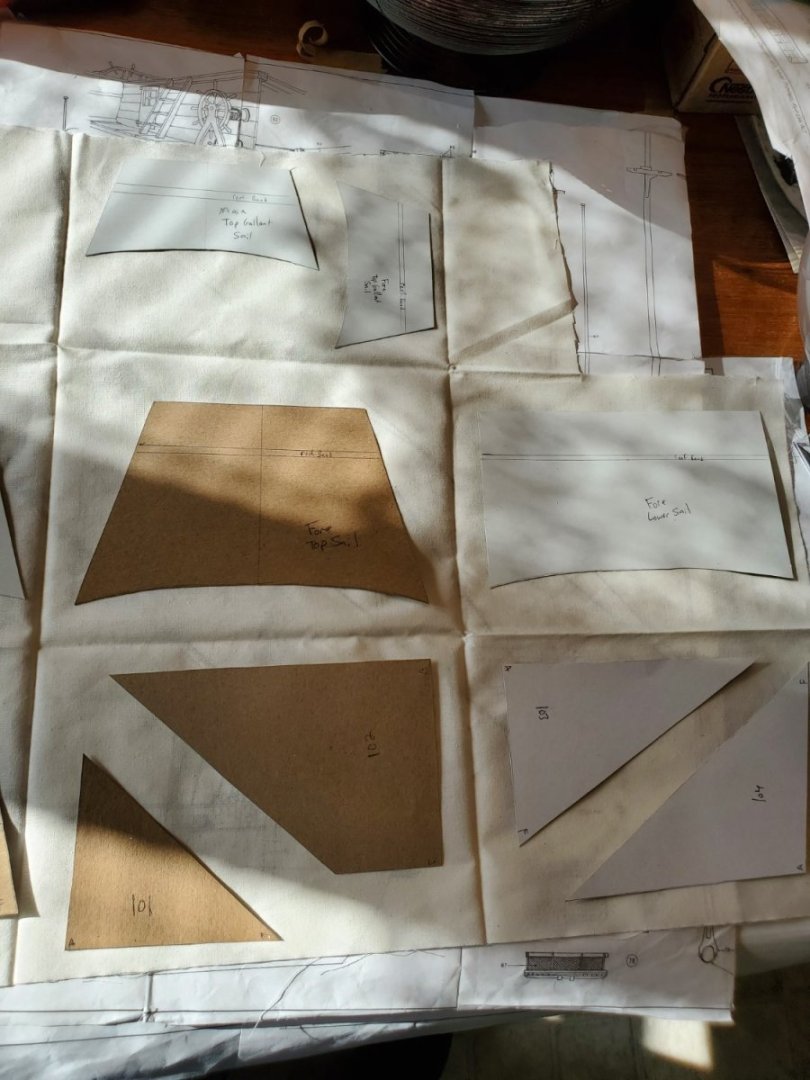
Here's all of them laid out. There's extra material in the top corner for reef bands, middle bands, and linings, as necessary.

After studying Steel's for a while, and looking at Bob Hunt's practicum from Lauck Street Shipyard on Sail making, I came to the decision to make 3/16" wide tabling. Any smaller than this is going to be really hard to handle and fold. The Fair American in the Annapolis Naval museum is 1:32 scale, so those sails' tabling was probably more manageable, I would imagine. For this smaller scale model I have, I'm happy with 3/16" as a first attempt. It'll do nicely for Jason's personal museum quality workmanship.
Note, the offset for tabling is actually 3/8", since I'll be folding over the edges before sewing, so they look large. now
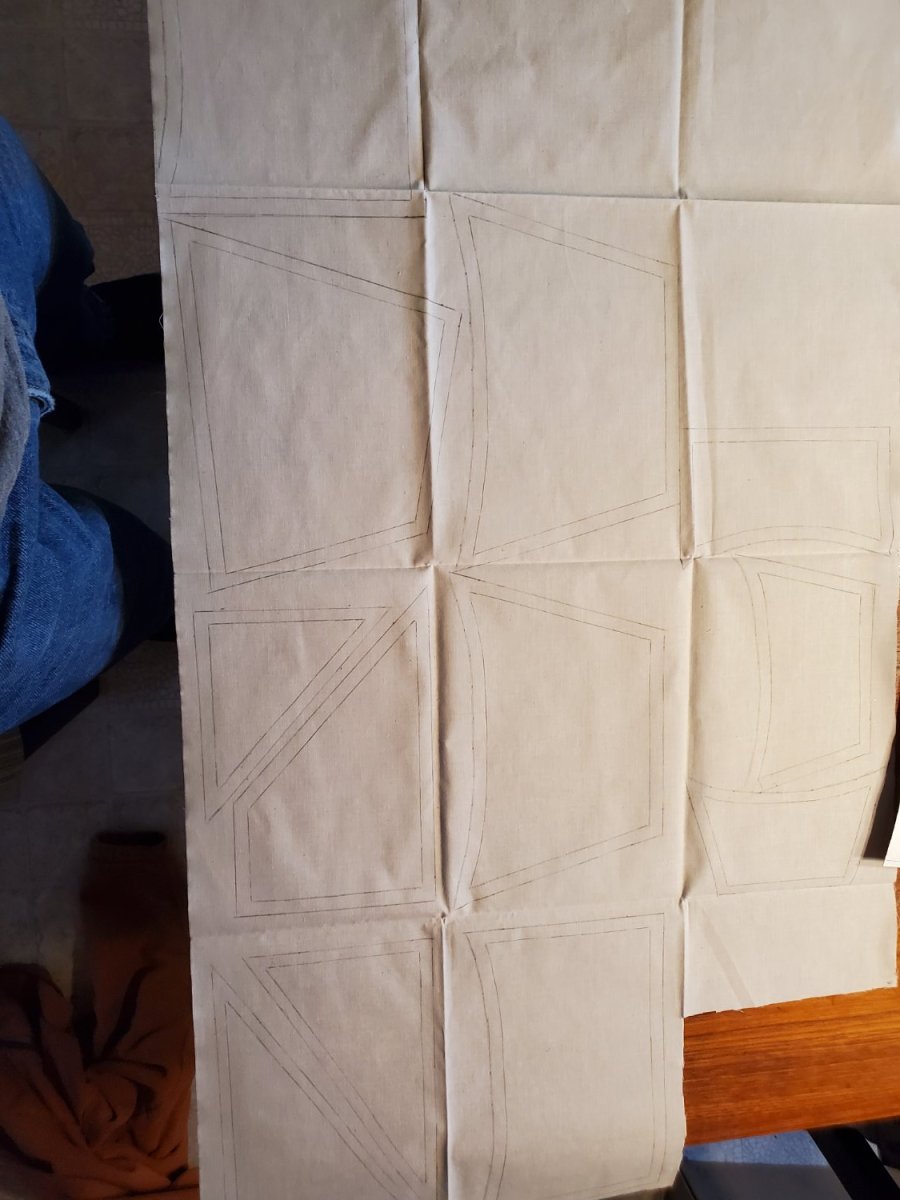
I traced the edges of the stiff stencil with pencil. I tried to erase a mistake, but that started to leave eraser debris in the fabric, and picking it out started to fray, so I have to be really careful not to shred it or get it dirty.

Pictures are lacking from here on out. At my mother-in-laws, I wasn't focused on taking quality pictures, but more on her sewing skill which was impressive.
This first 'tan' thread was a little too dark for my taste, and it's supposed to match the rigging line color (picture absent).

#2 tan was pretty darn close to the right shade. (bad picture again). But I wanted to see #3 the lightest shade too....

#3, the lightest tan was a little too light. It blended very well, much like the Naval Museum model sails' does, but just a little too light.
Also, I measured out 9/16" spaced seams for this stitch, to get an idea of how it looks seamed. It's too wide; not sure how I came up with 9/16". Later seams were 1/2" apart which looked better. And since Steels mentioned ~2ft wide canvas used on sails, my model is 1ft = 1/4", that makes 1/2" between seams.
All these are just test/practice pieces so far. Only trying to get an idea of how the stitching/color/sizing looks and feels before the real thing.
Also practiced ironing the material after stitching to see if it helped the wrinkles. I might keep them in, for a more authentic look.

I'll spend this week planning out order of operations (seams 1st, then reef bands, then leech tabling, then head/foot tabling). Then I can draw some faint pencil marks to guide my wonderfully helpful seamstress to where the stitching goes.
I might have some actual sails ready next weekend, if things go to plan!!!
More progress soon. Thanks for reading
- Jason -
-
Progress on the Fair American Model Ship:
Again, very overdue, but progress nonetheless...
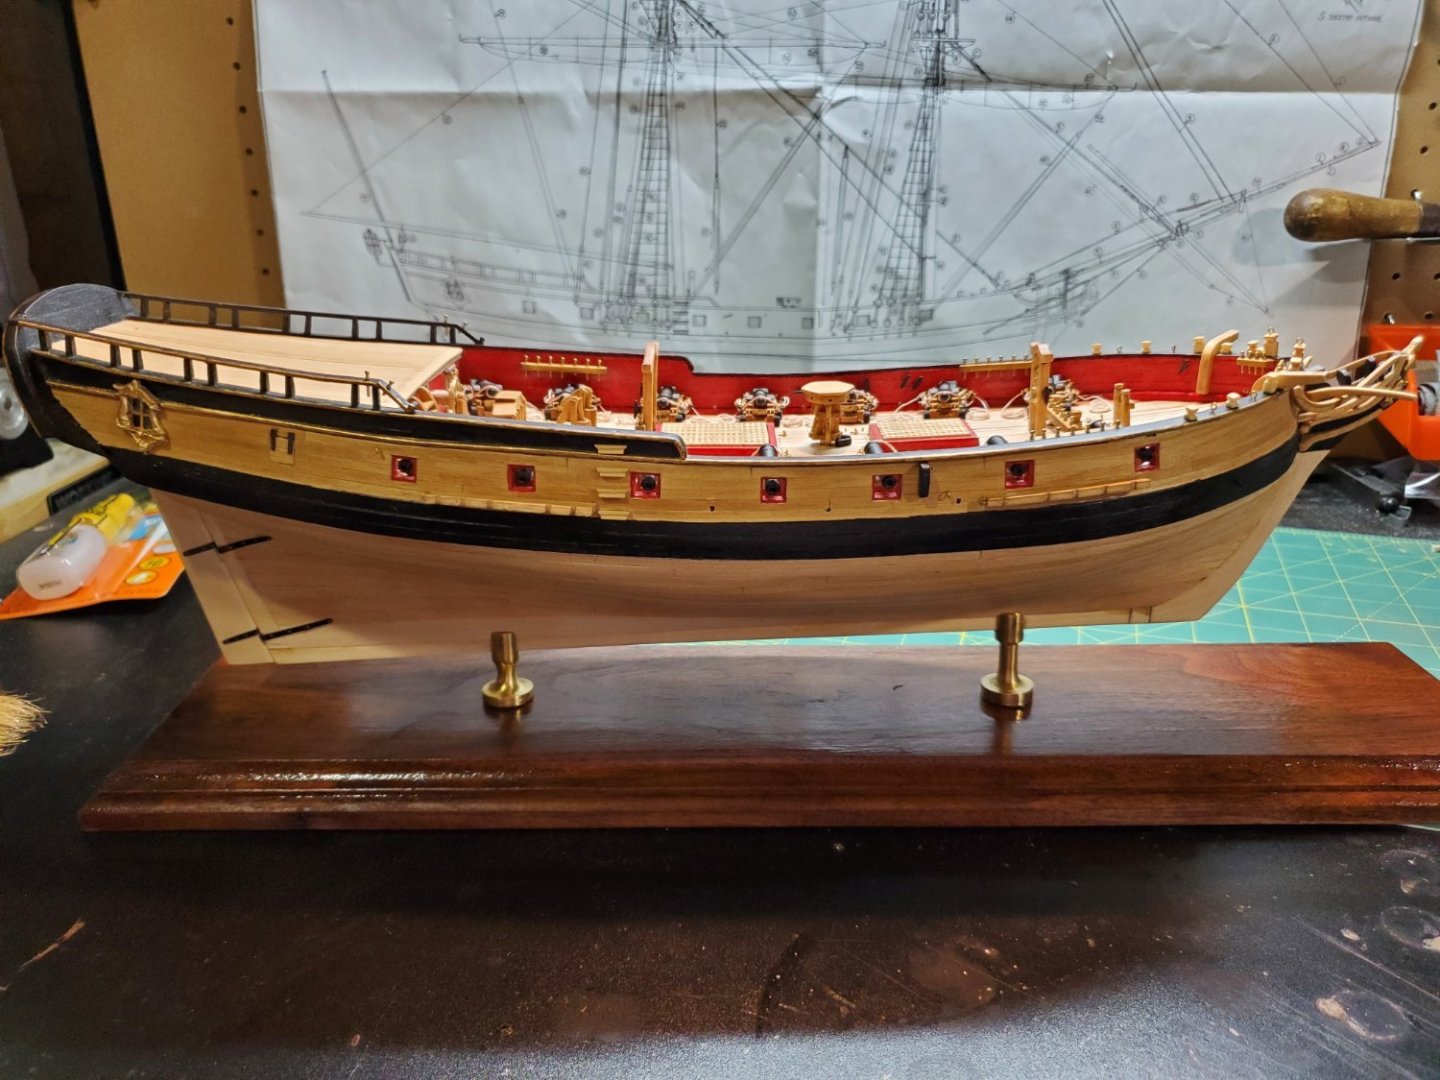
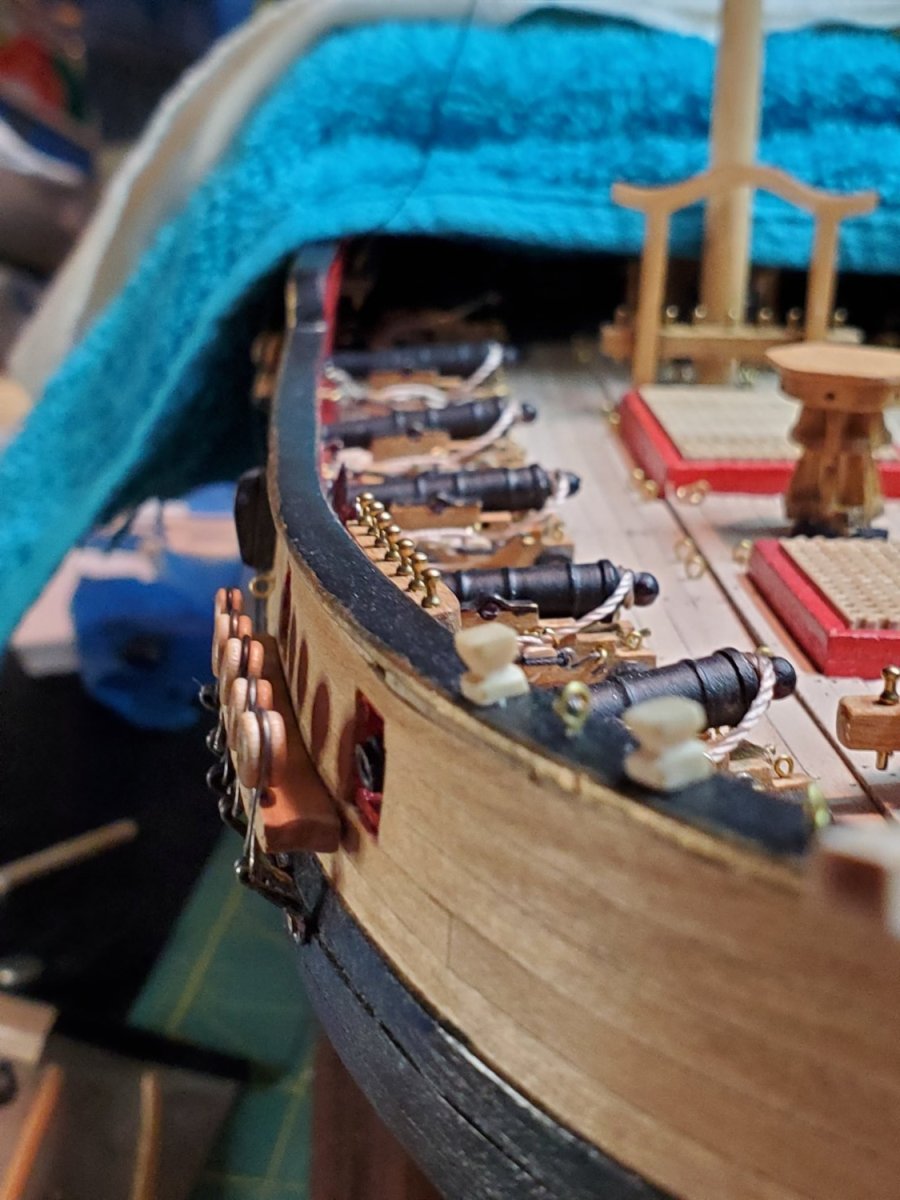
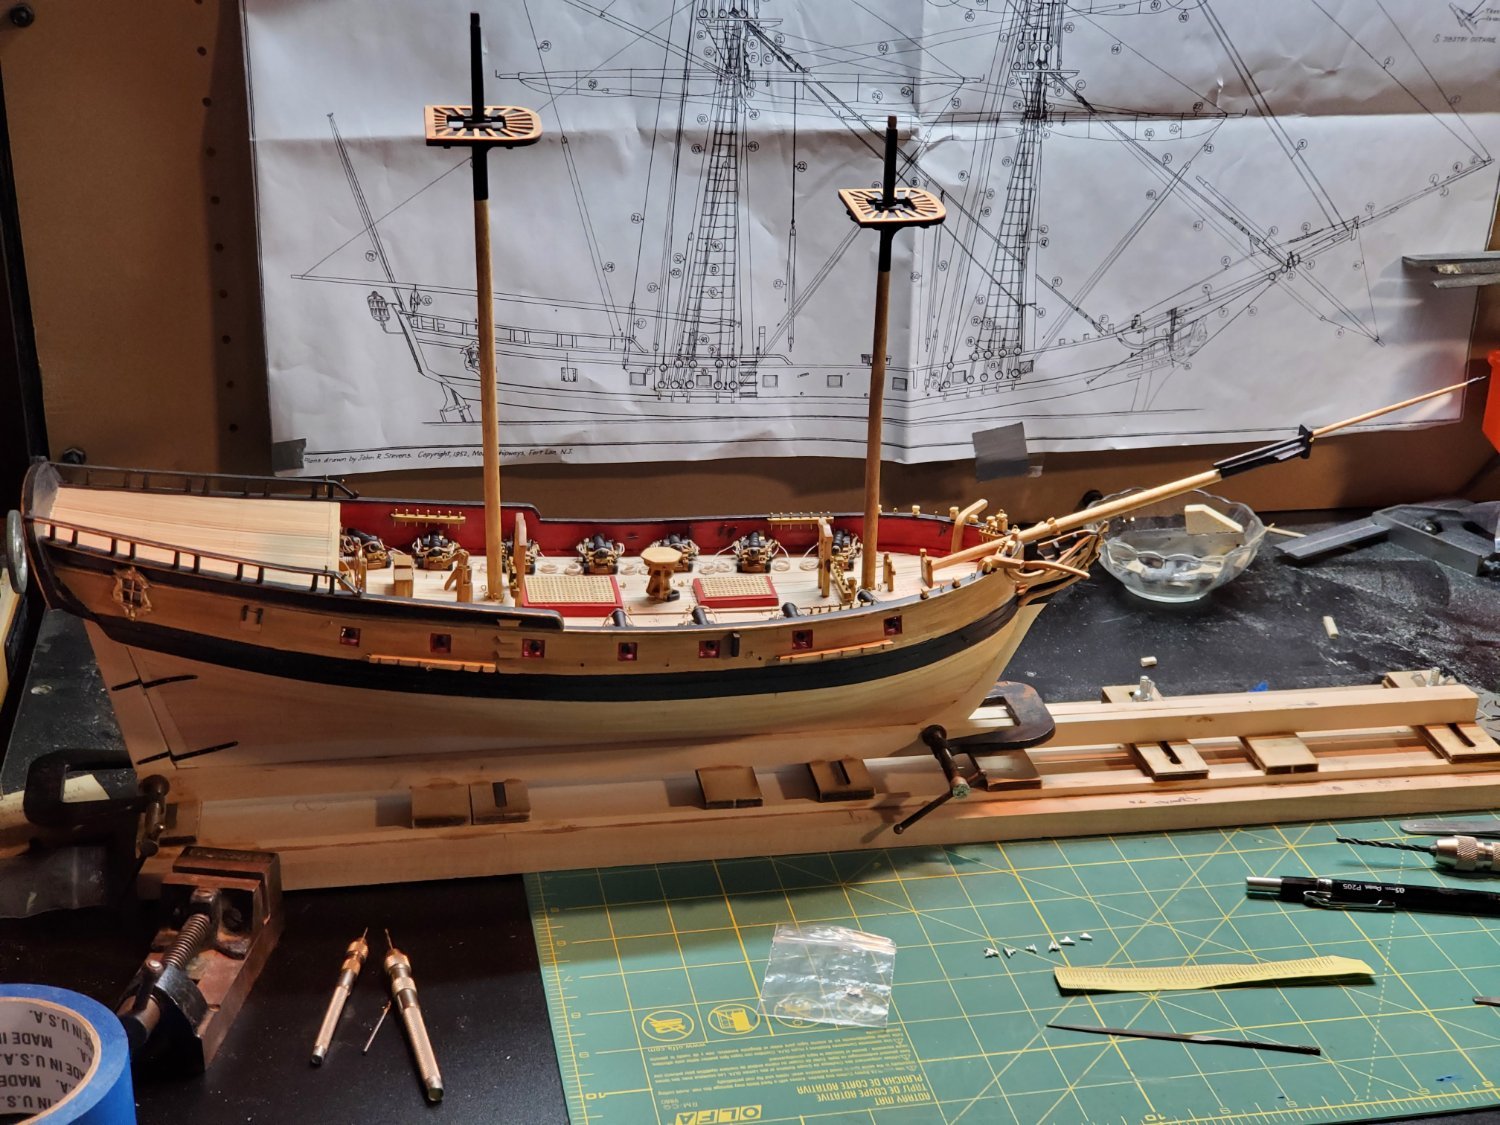
I got all the deadeyes and chain plates mounted. Got them as straight as possible and raked with the masts.
I made sure to line up each deadeye as parallel as possible, before gluing the channel cap. There was a lot of re-working and re-bending chain plates to get them all to look right.

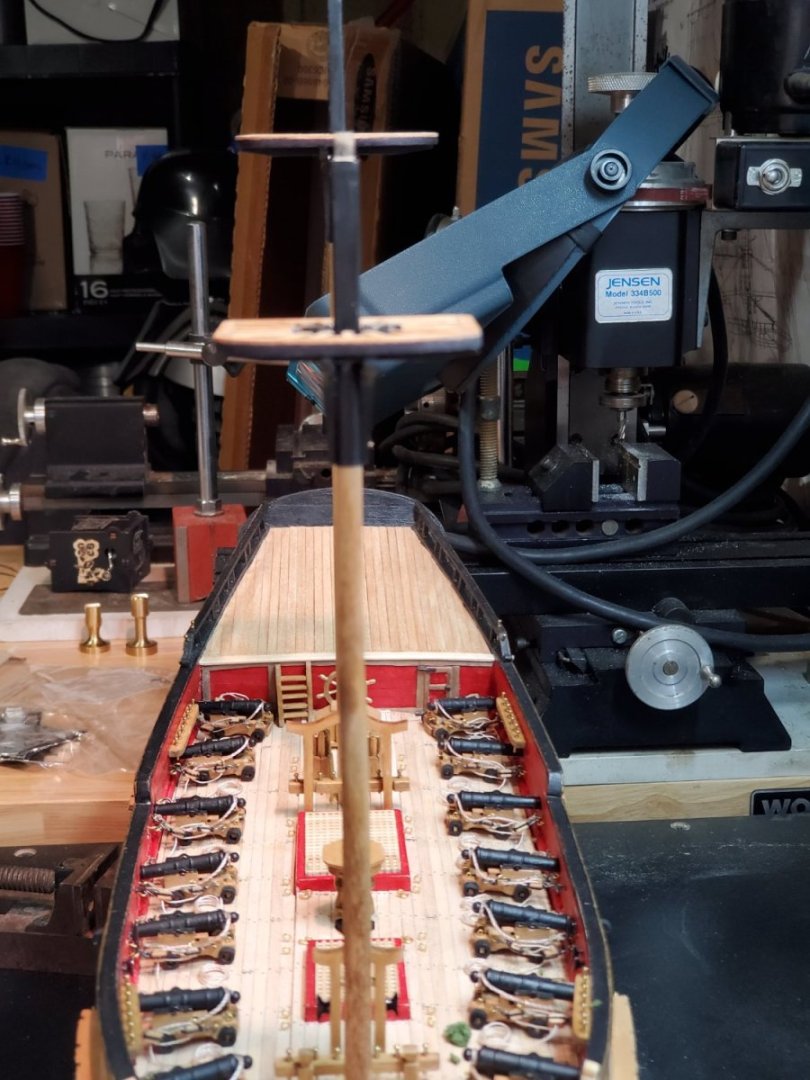
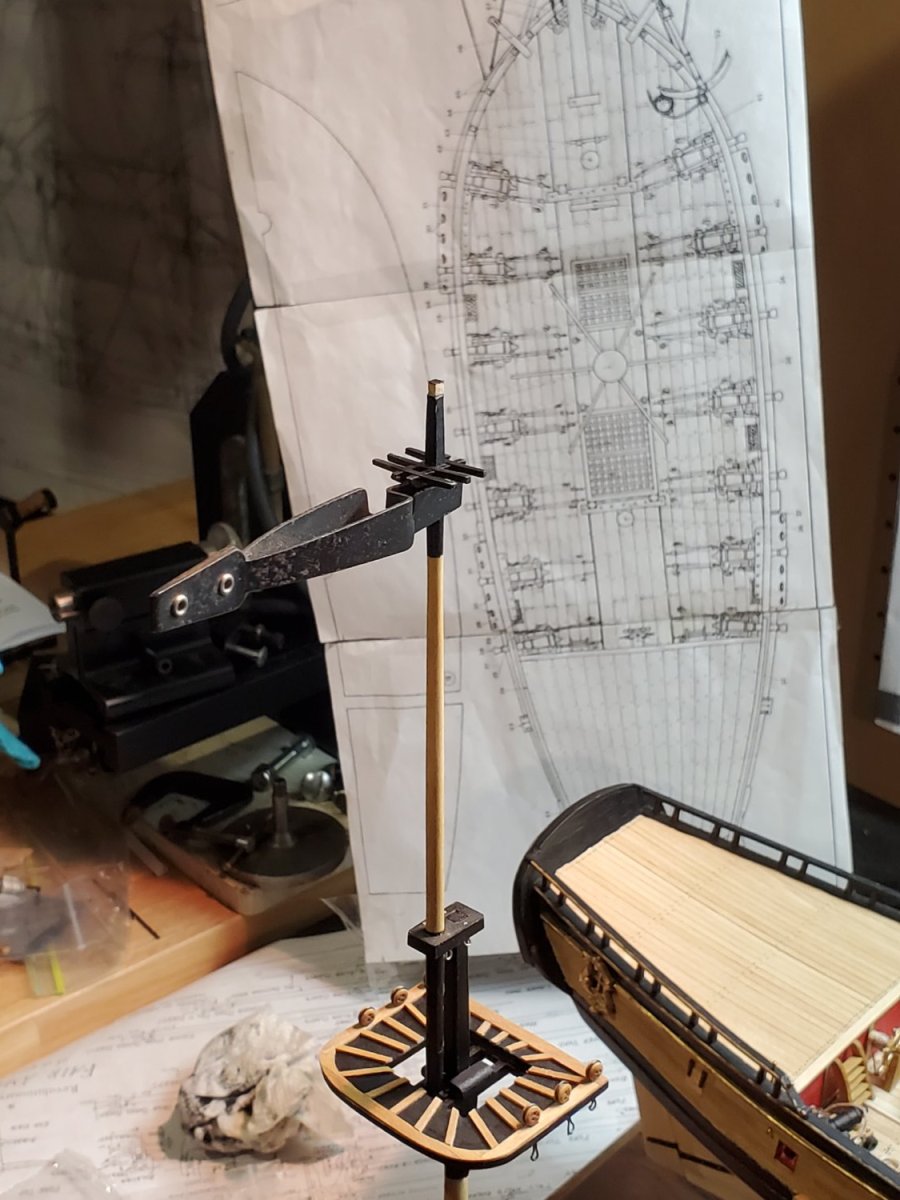
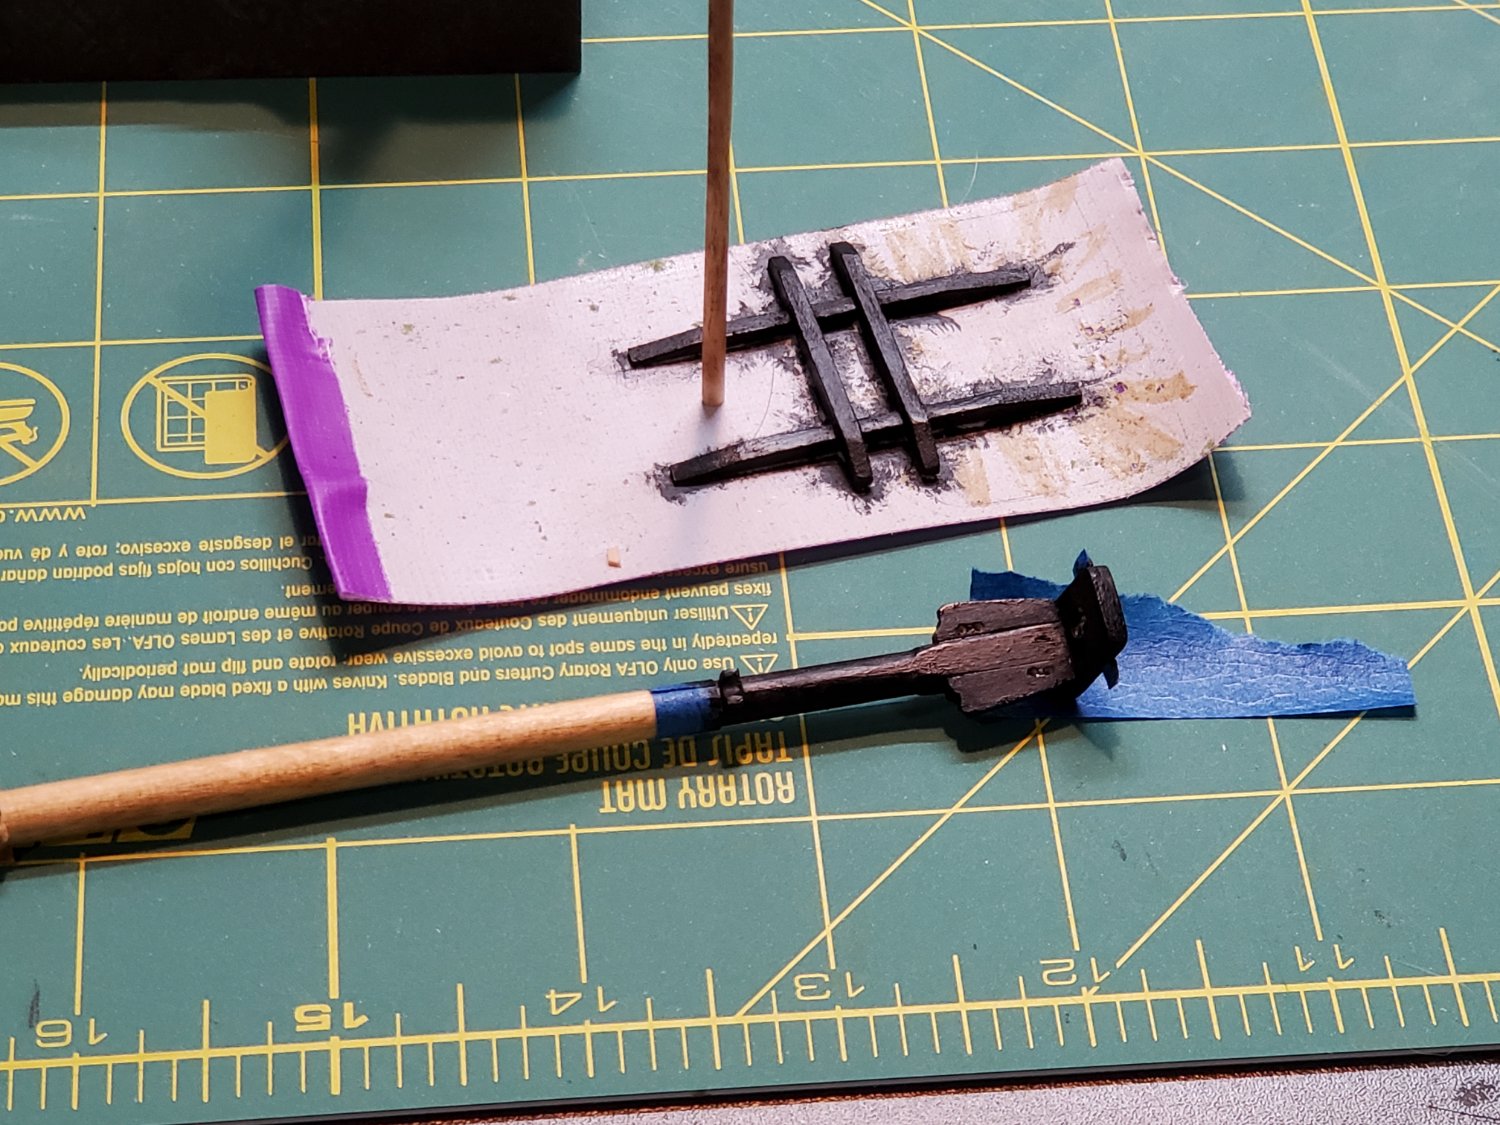
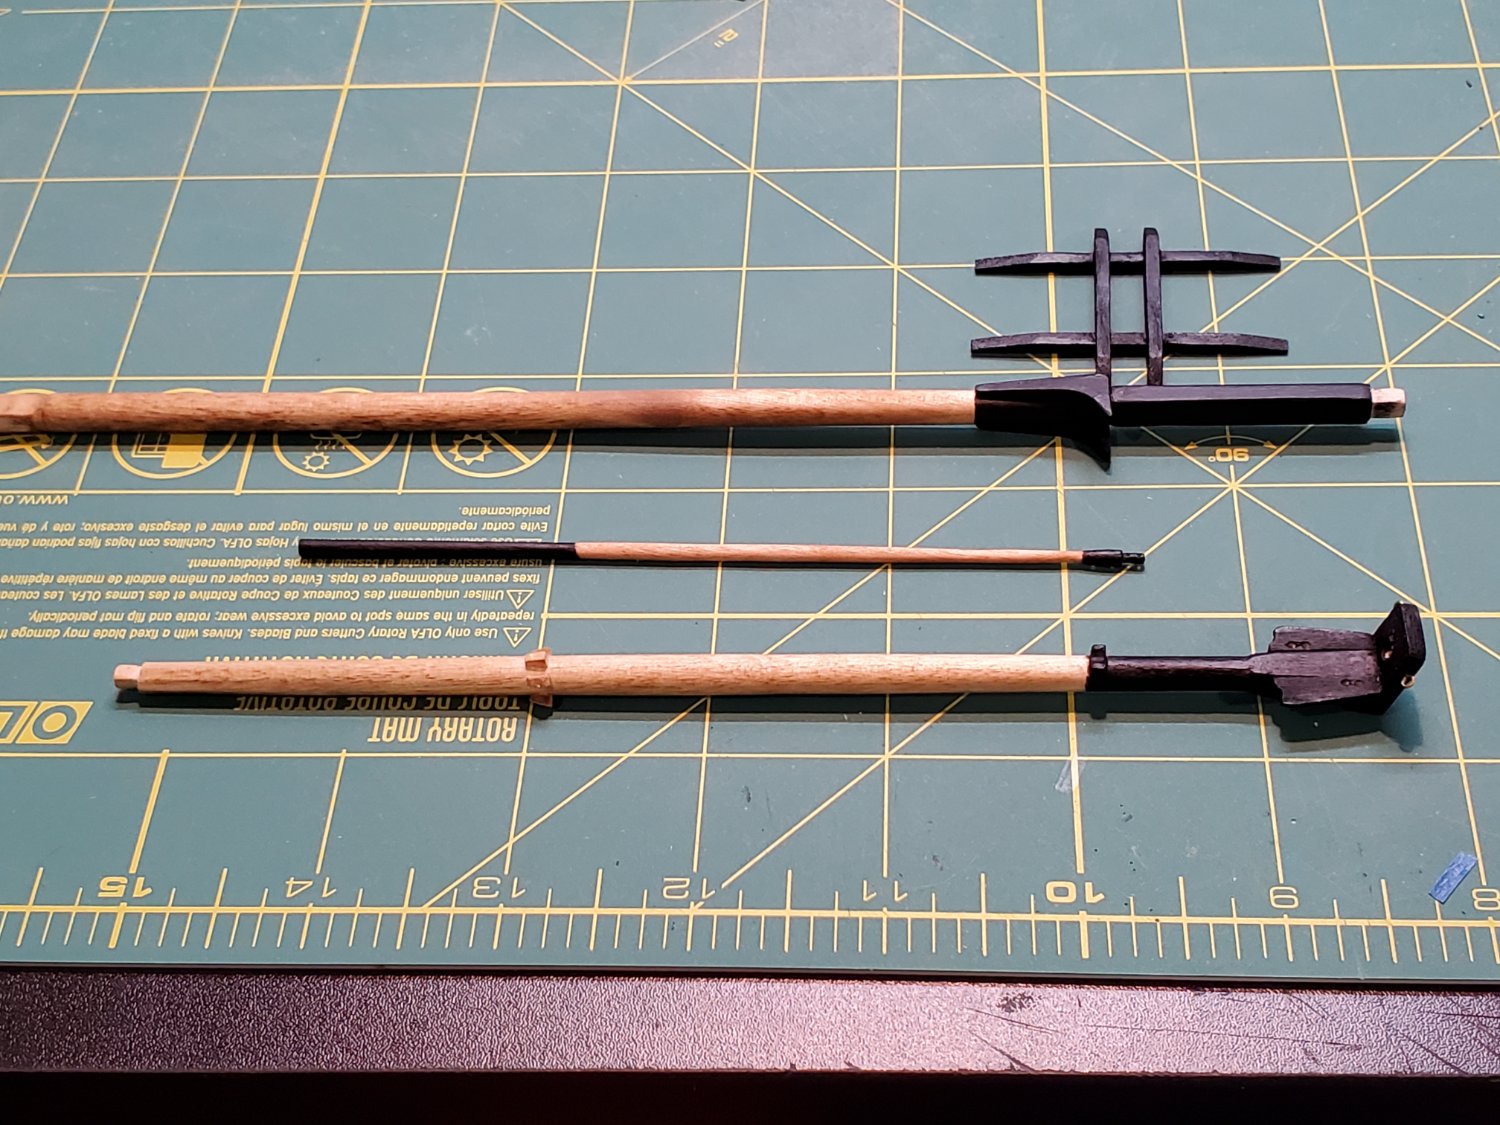
While this was happening, I rigged up a little ''stain-sling'' to help hold the yard while I stained them. It was just two rope loops hung from two helping hands, with the yard in the middle. The Roger's model has the yards black, and the studding yards stained, but I'm staining the main yards in my model.
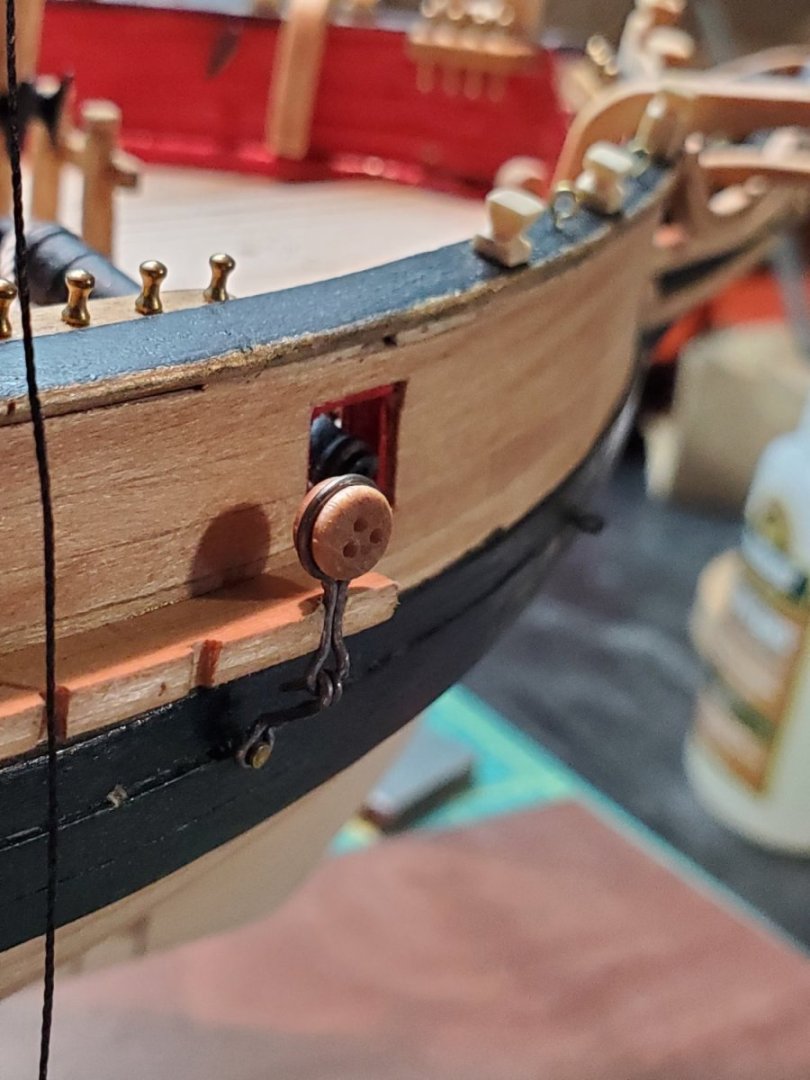
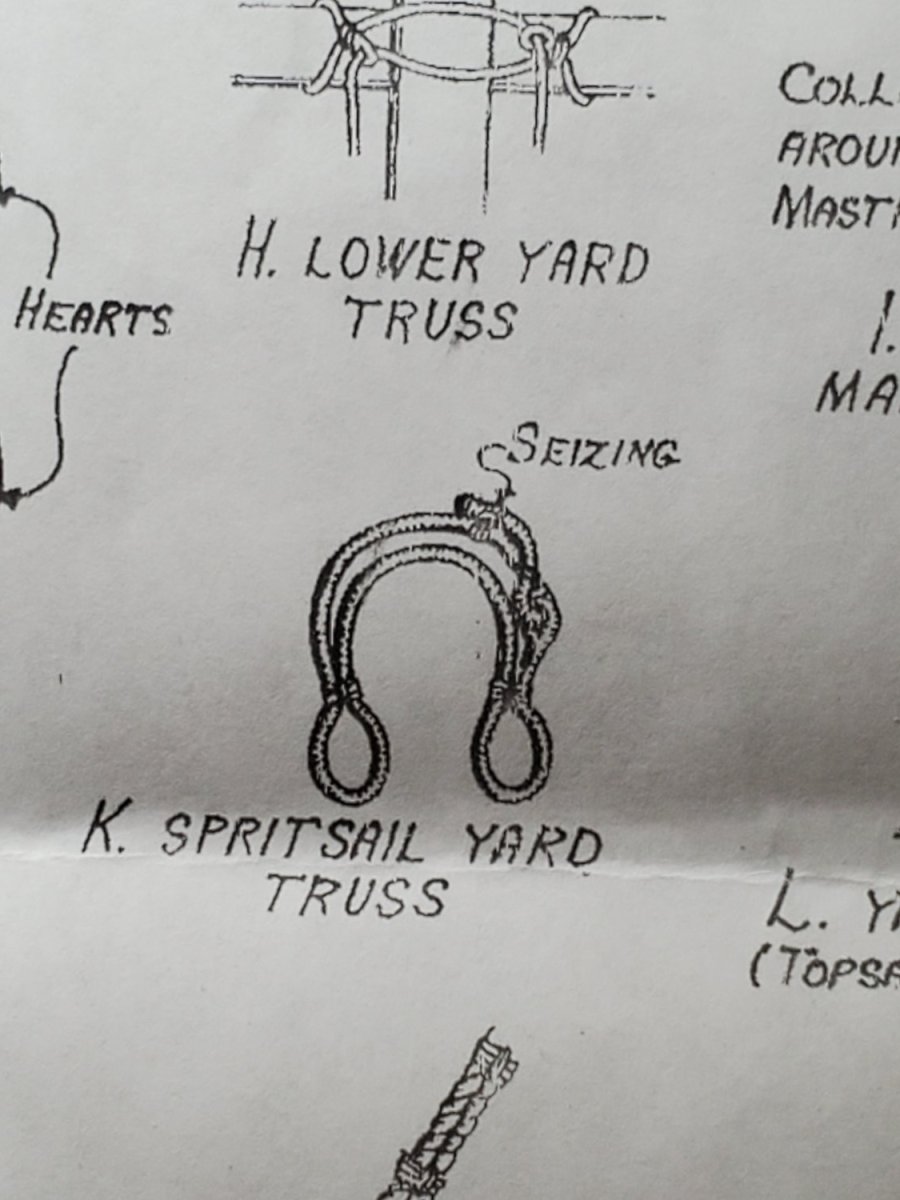
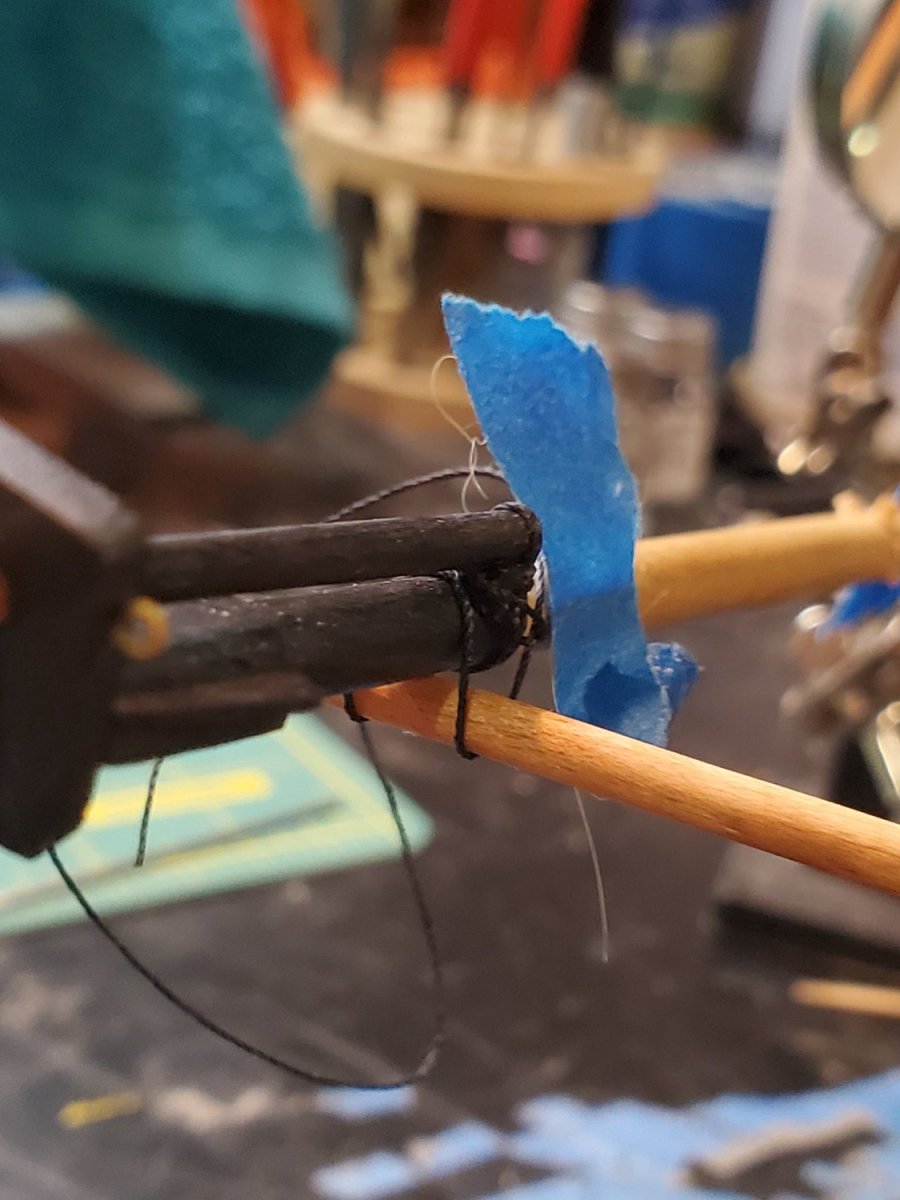
Now was time to do some actual rigging, starting with the Spritsail Yard Truss. No instruction on how to start/stop this thing, so I made up my own method.

I wrapped rope around the Sprit sail yard P&S, then blue taped it to the Bowsprit. Tied a knot on one end as a makeshift ''loop'', and fed under Jib boom.

Then I semi-seized the loops tight on P&S sides with fine thread
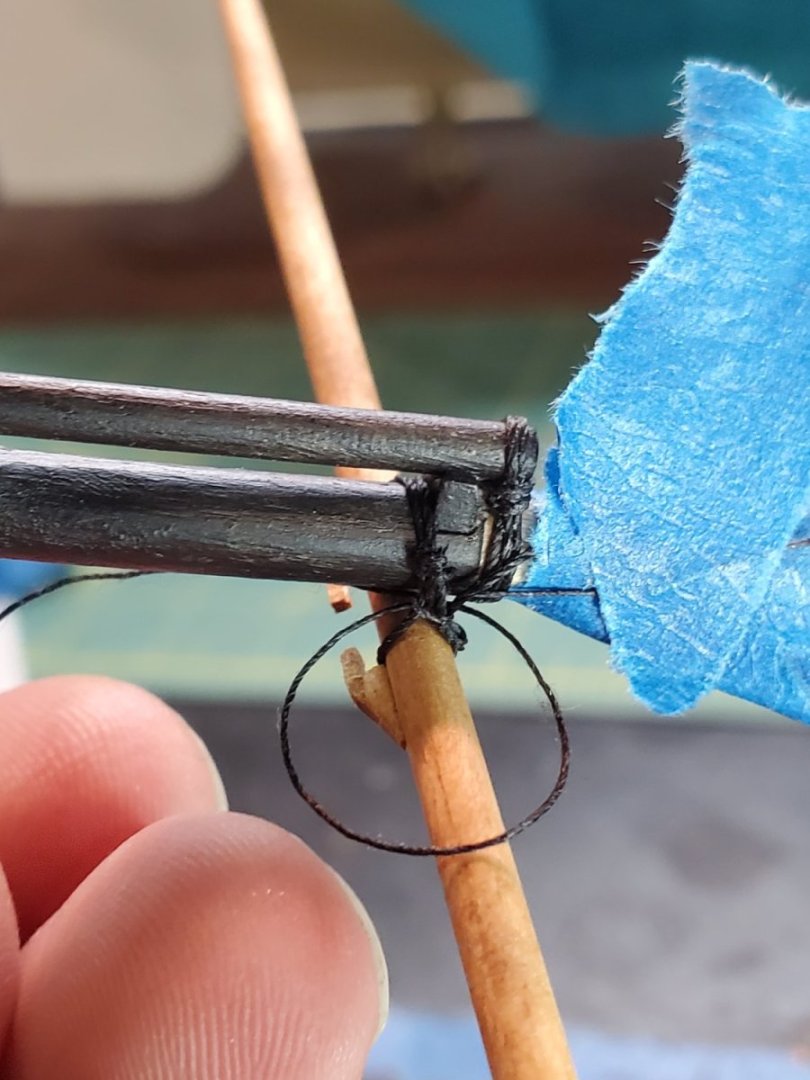
Then pulled it tight, and snipped the ends close. The final knot/seizing on the opposite side was just a hidden square knot. I didn't know how else to terminate it.
That's about as neat as I can make it.

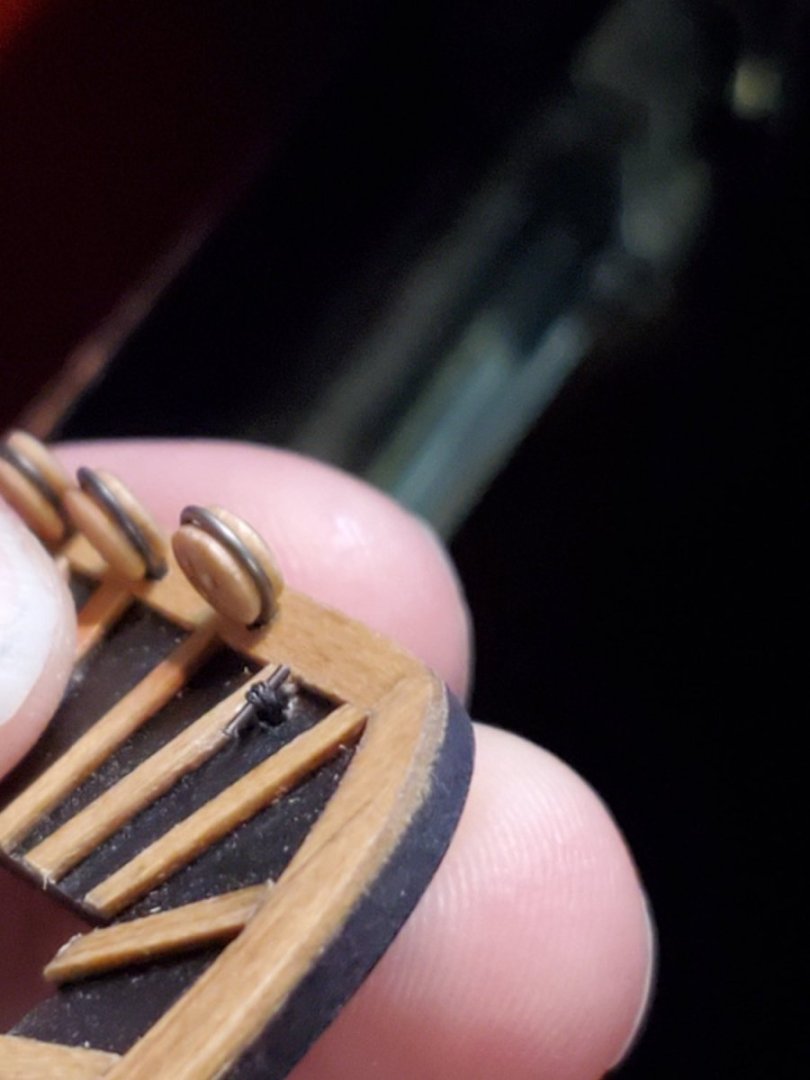
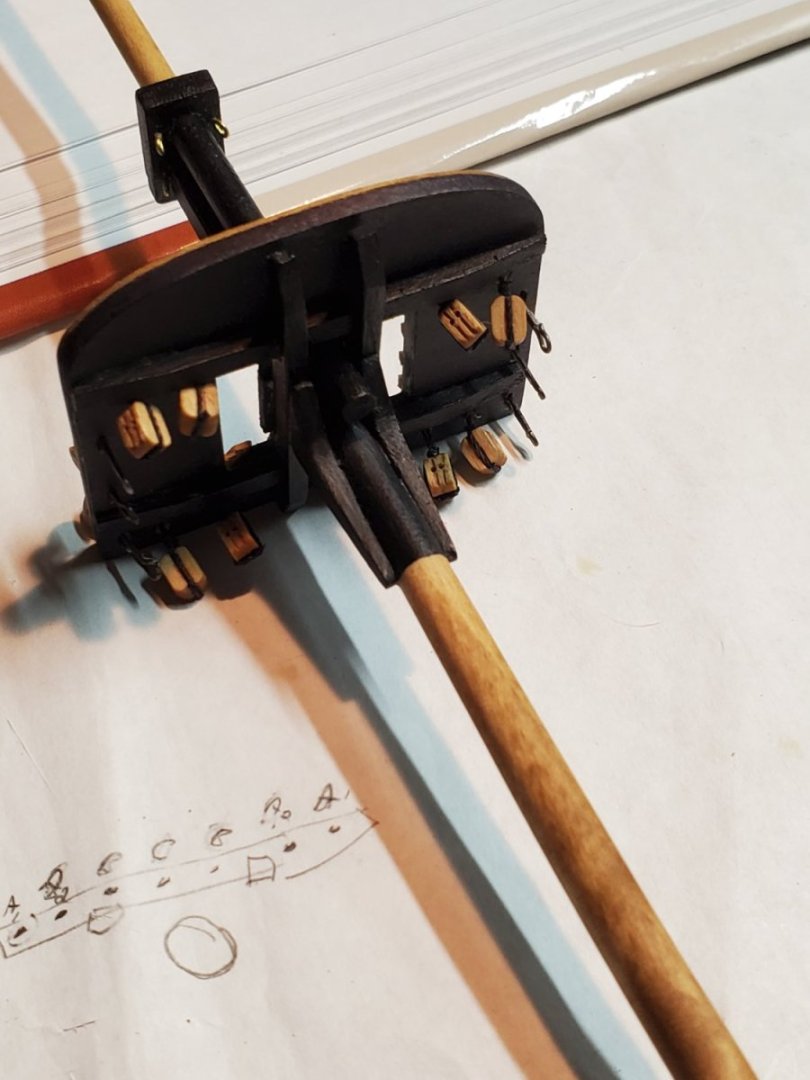
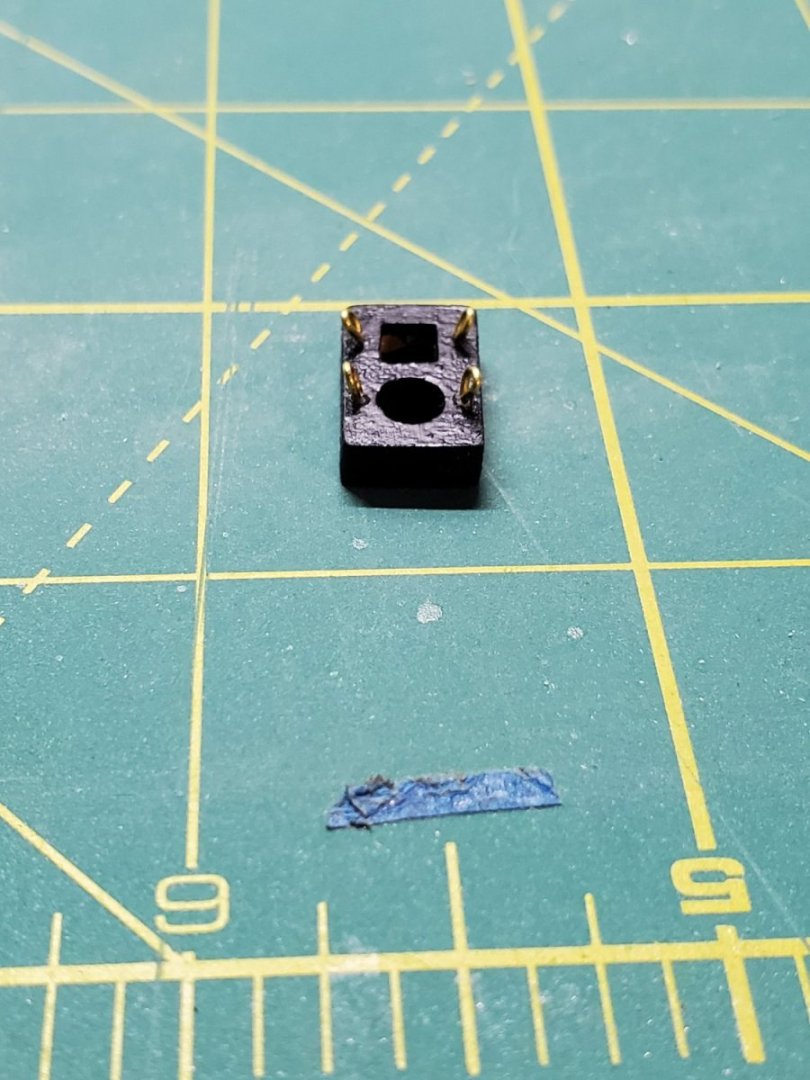
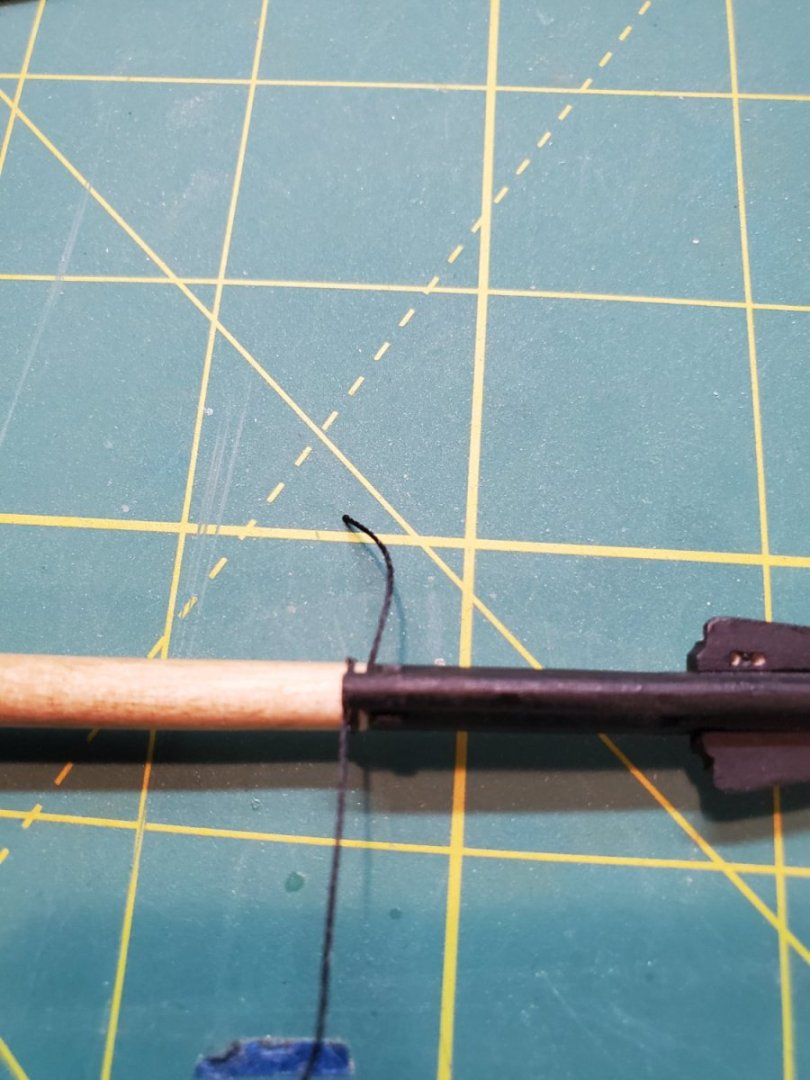
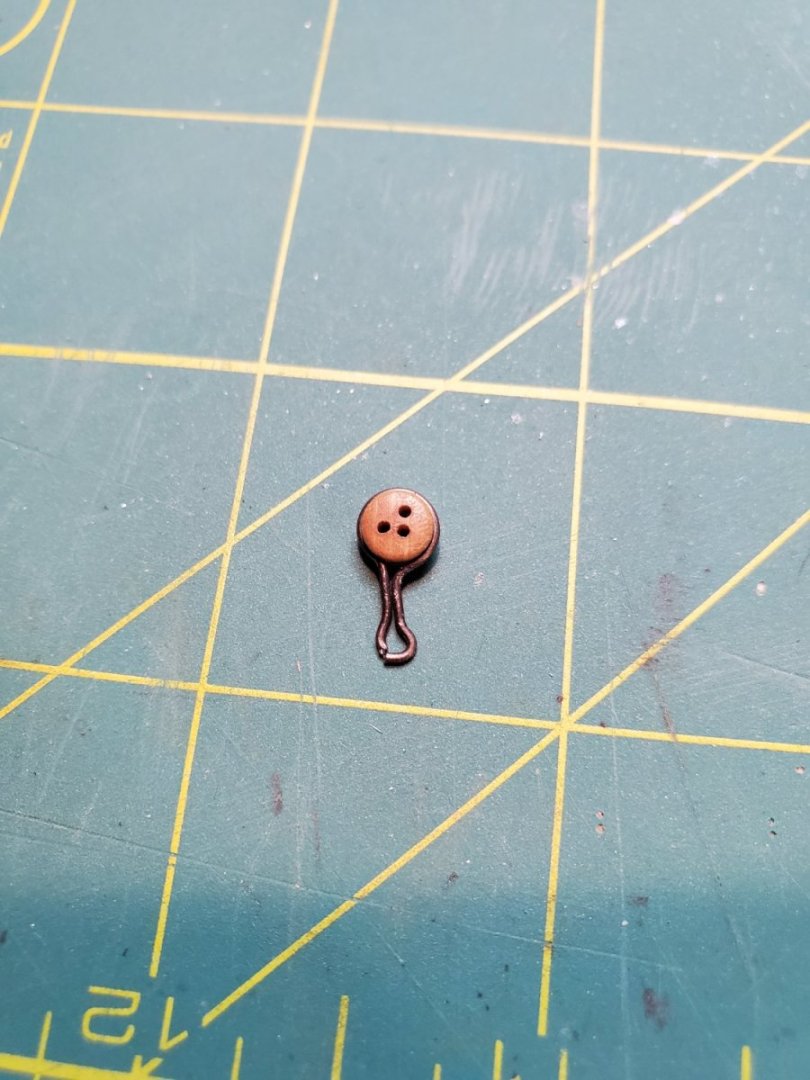
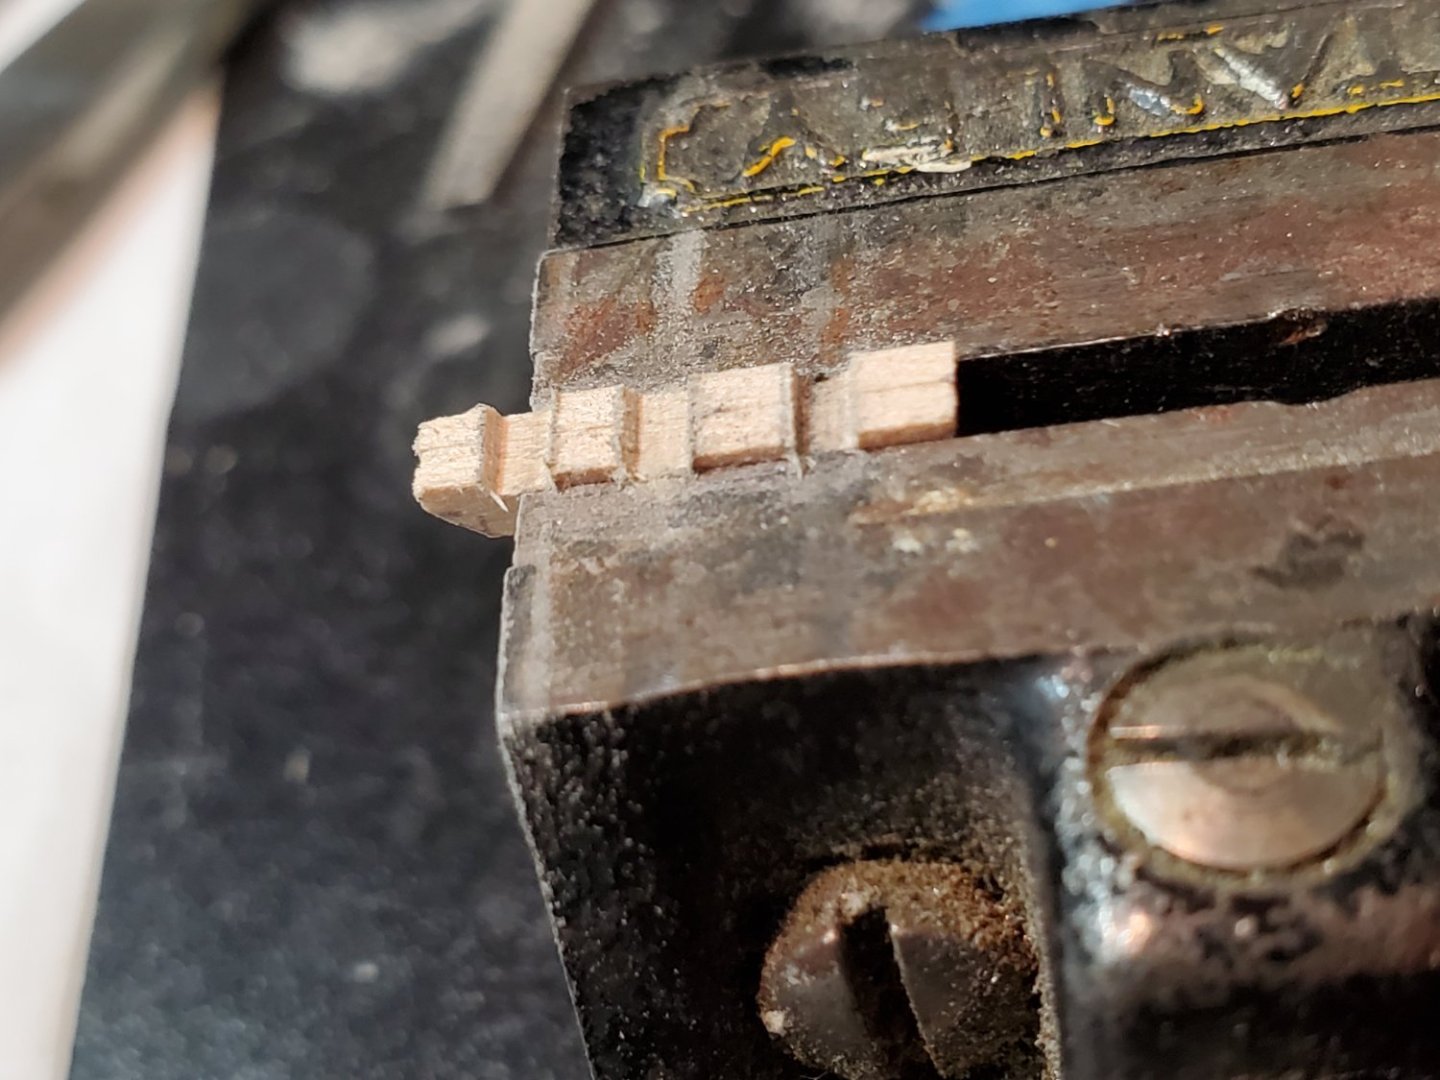
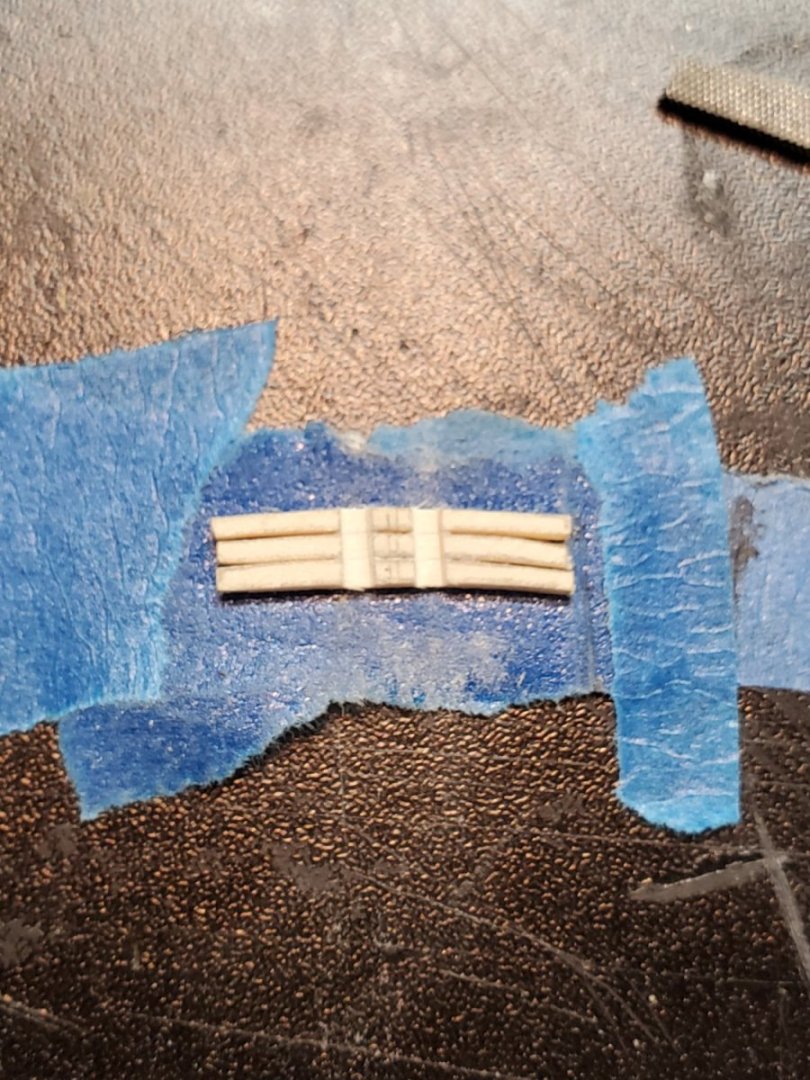
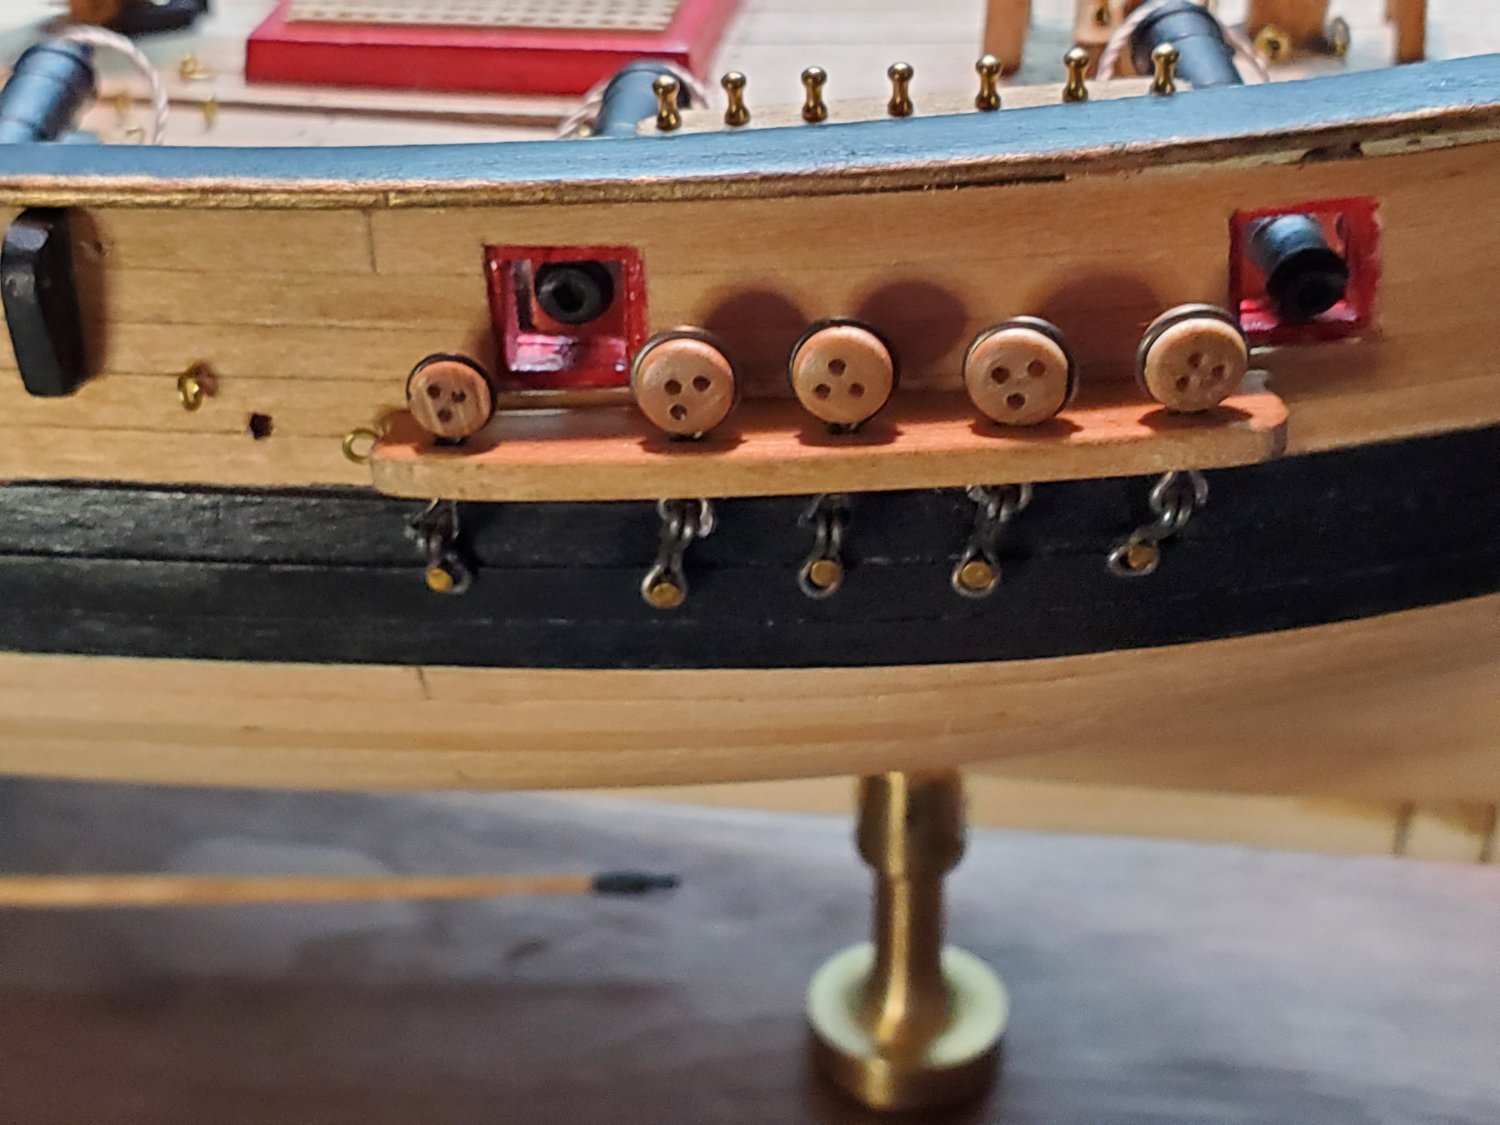
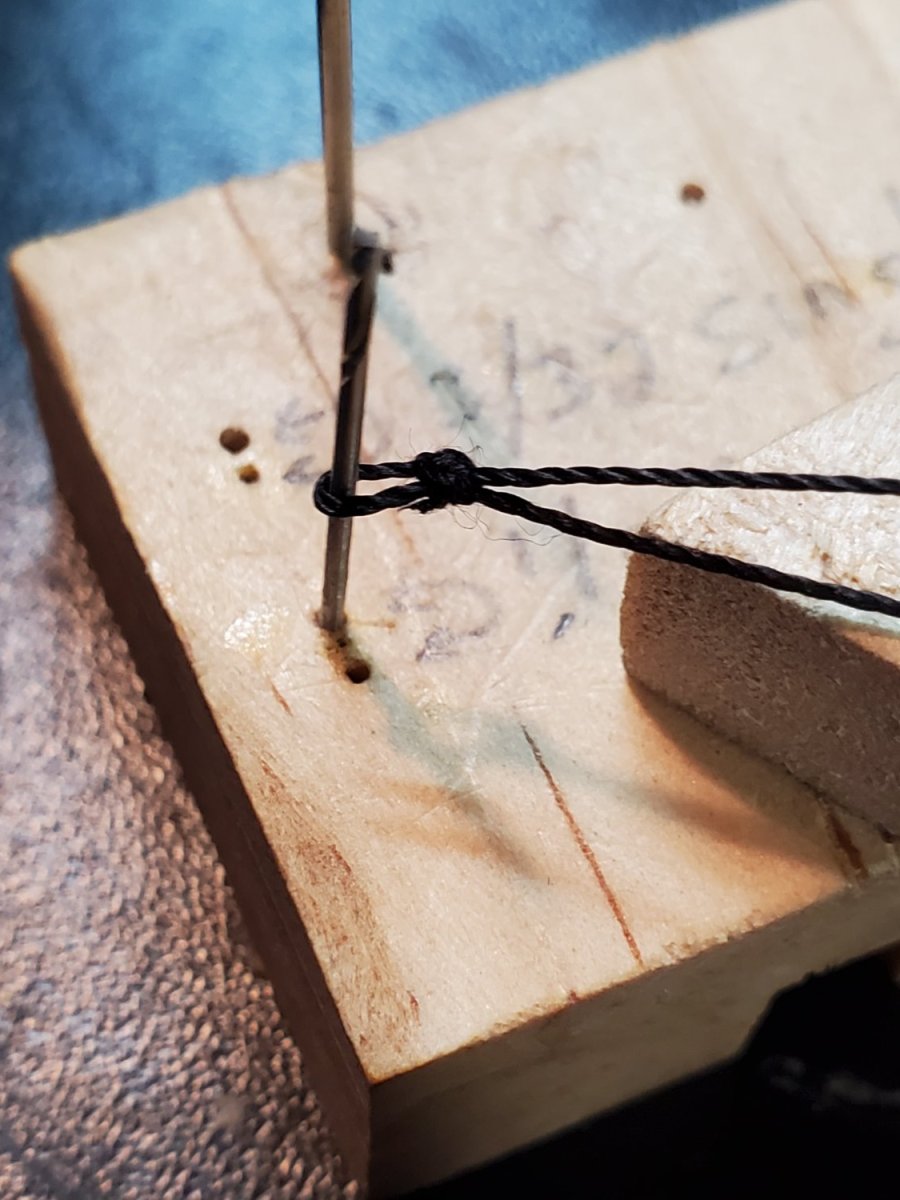
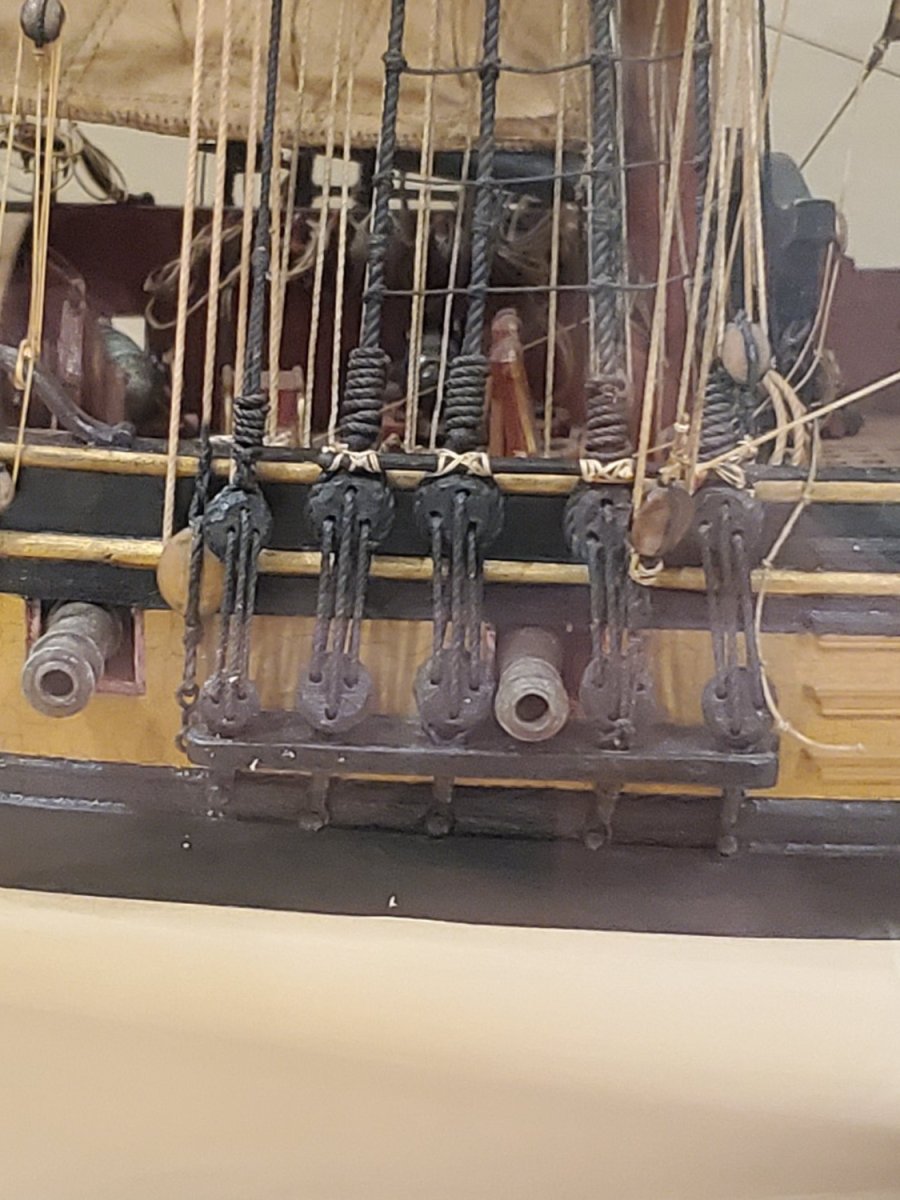
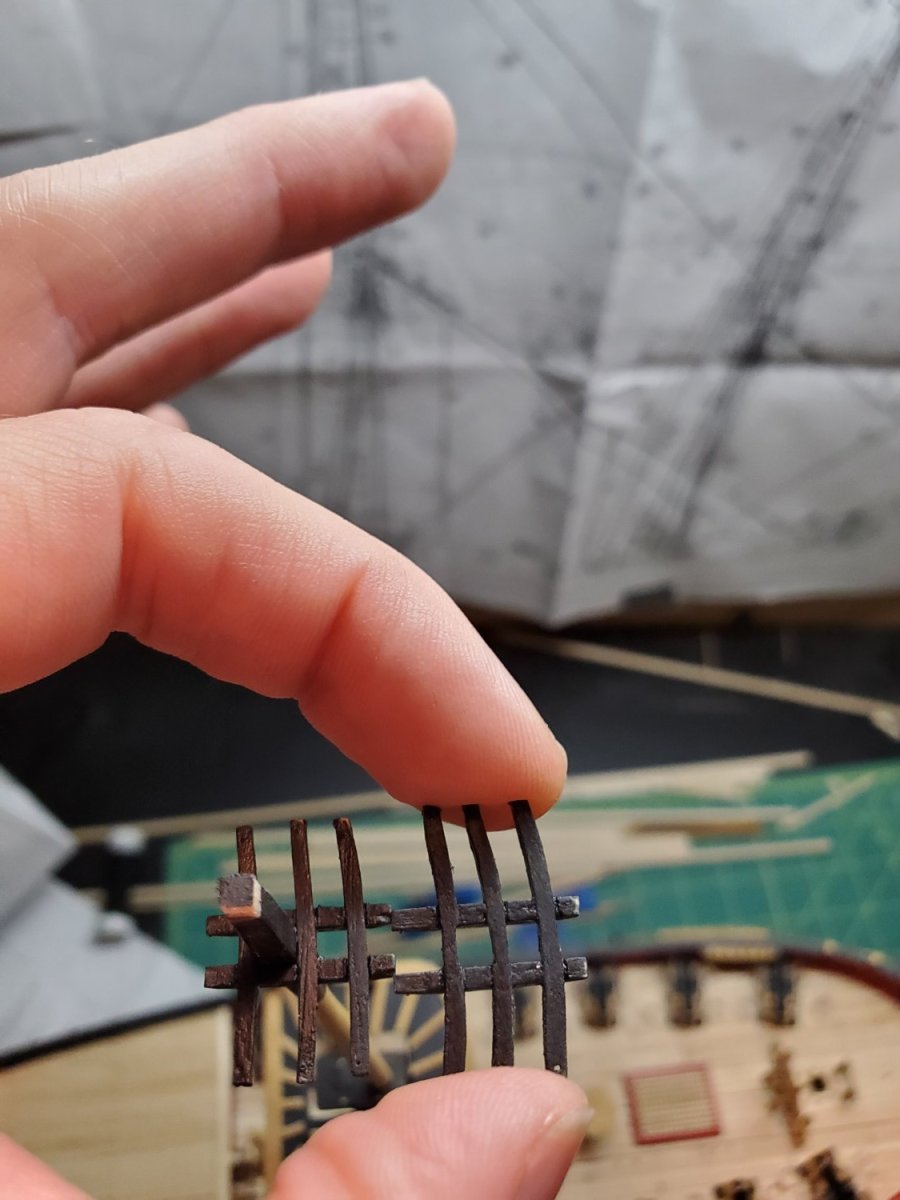
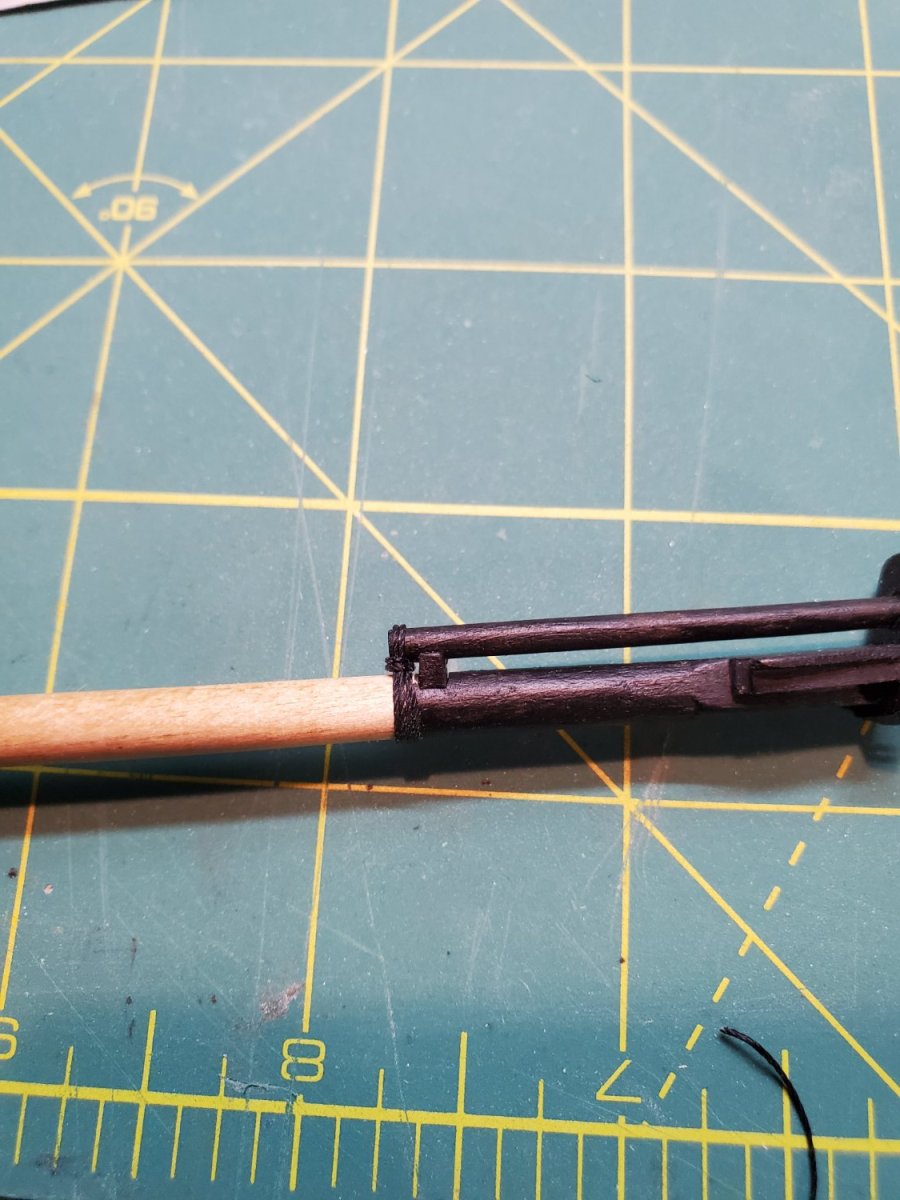
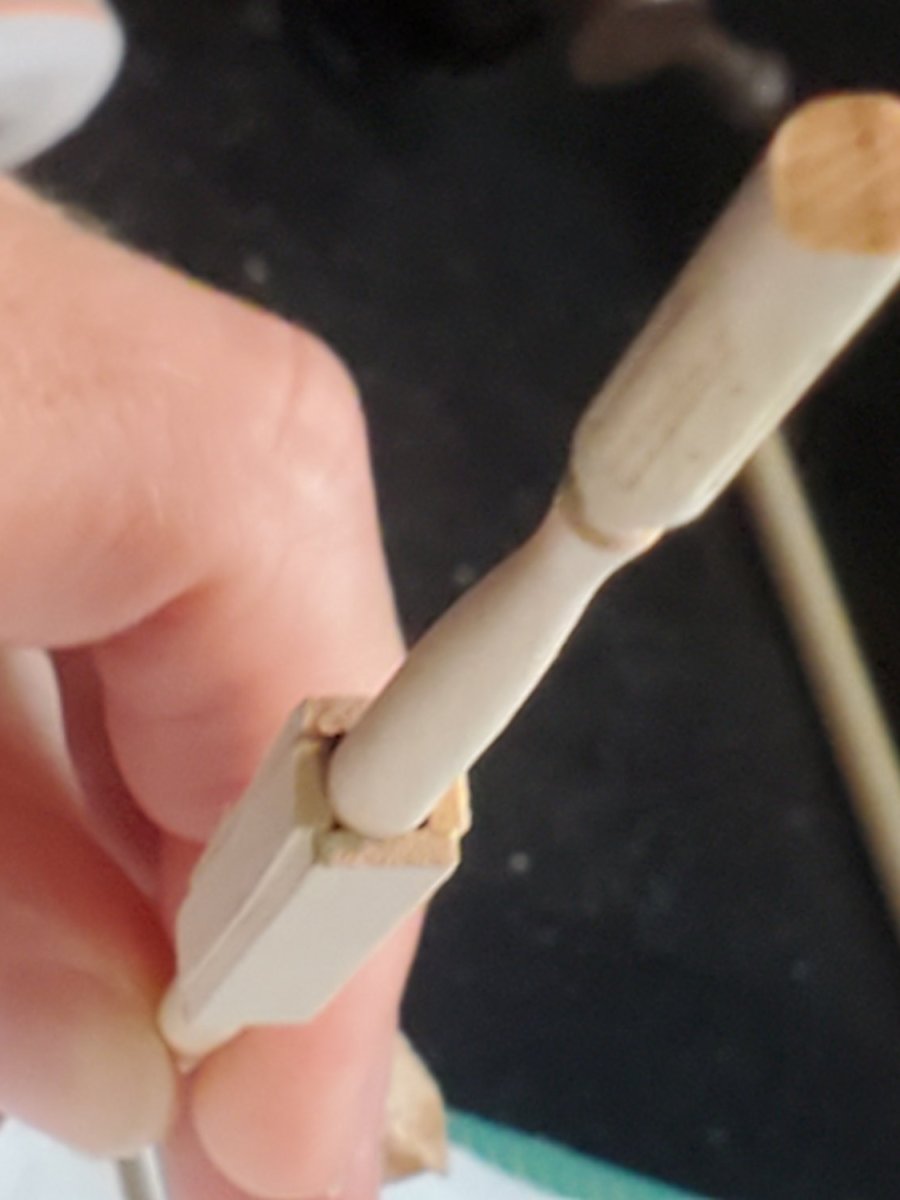
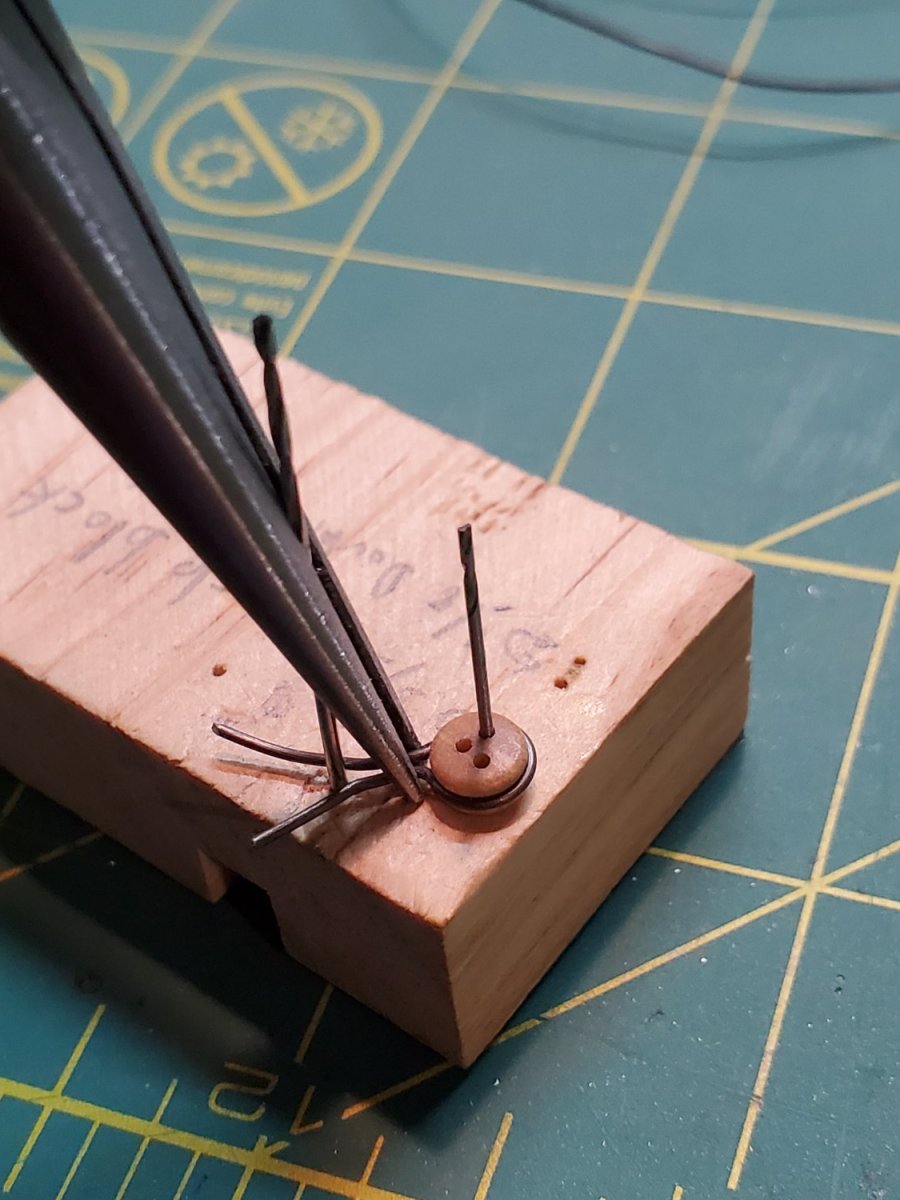
After the Spritsail Yard Truss, I moved onto making double blocks for the leechline, buntlines, and Spritsail yard braces. I took some .012in black rope and made a tight loop around an old drill bit and taped the ends back. Then I could tie two knots to form an upper loop that will feed in the mast top later on.
I did not feel confident in my ability to splice a loop on itself with this size rope. A knotted loop is more my style right now.
And snipped close.

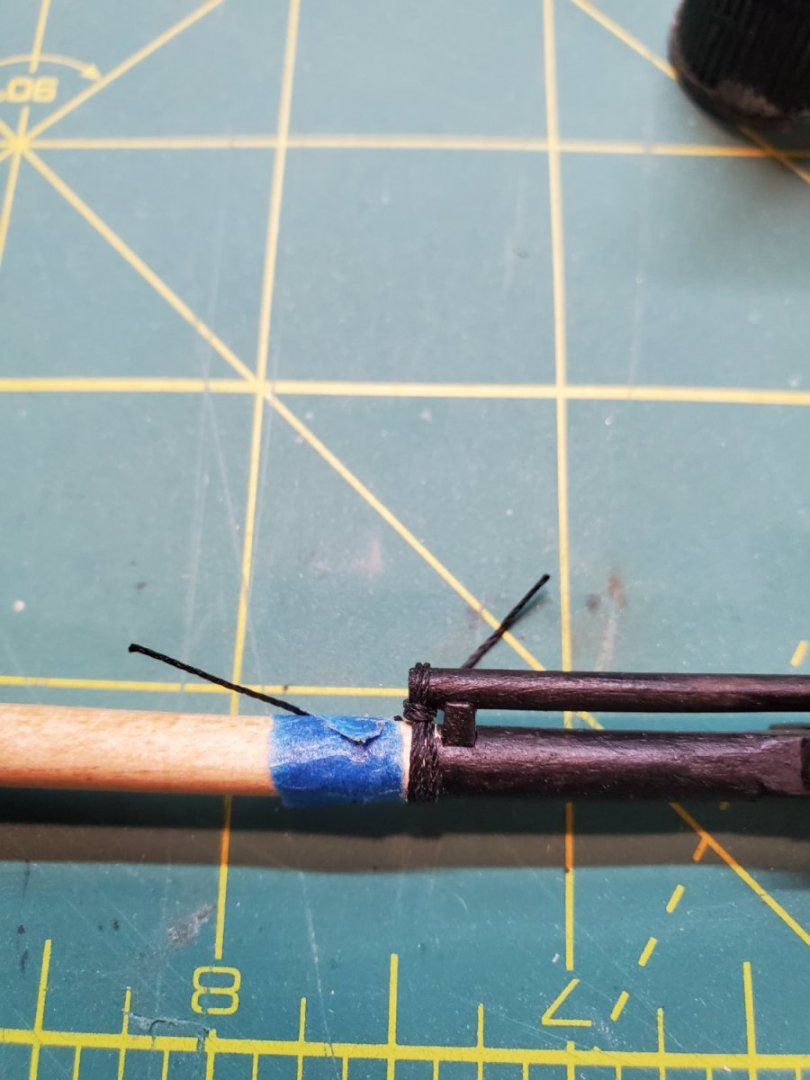
I glue/tacked the knot to the top of a 5/32in double block, and then knotted the bottom with an overhand. I did this with cannon blocks too, and it worked well, but tedious.
the 1/8in blocks were just too small to ''hang'' from the top well enough to access, so I used 5/32in.
Glued and snipped close again, and it looks alright to me.
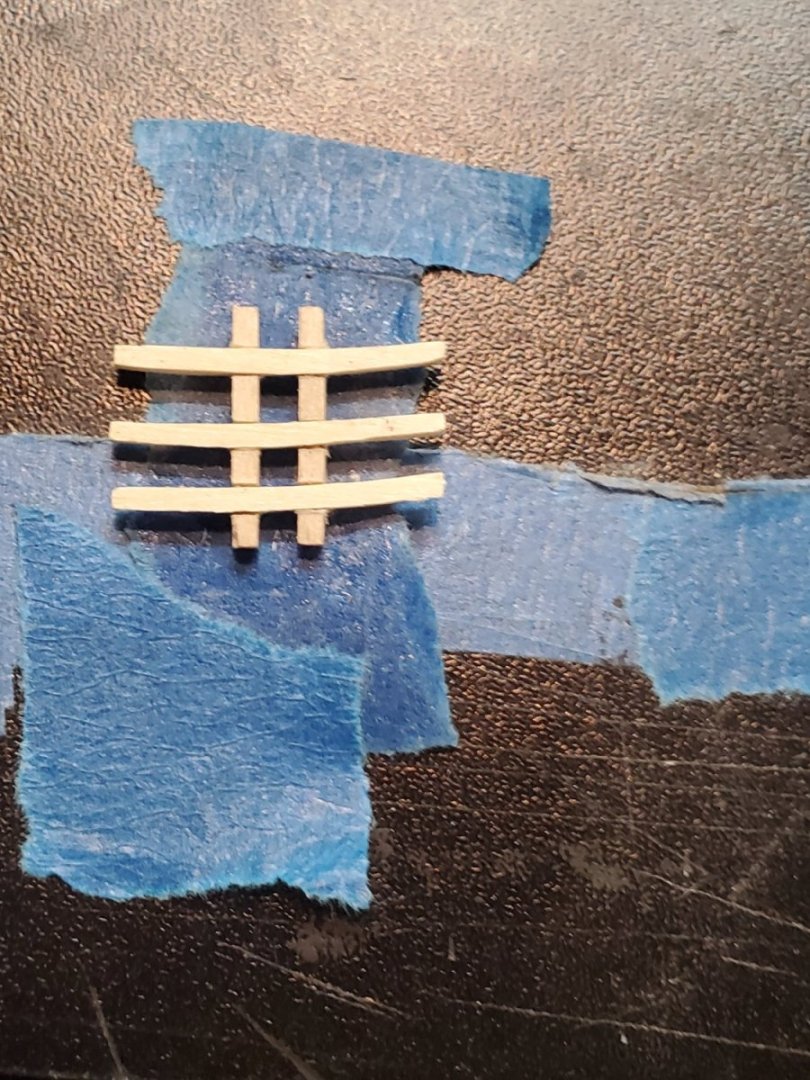
According to Petersson, this is how these blocks will attach to the top. My instructions were useless, as well as the rigging plan. I'm following this approach.
I'm going to reeve ropes for leech, bunt and stays similarly, but make educated guesses for my own model as I get there. I was hoping the Roger's model would make it more clear, but again - difficult to see exact pin assignments through glass.
Petersson also shows blocks fore and aft, so that lines come up and over the yard, then down to their pins without getting tangled. The Rogers model also showed this detail, so I'm doing the same thing here.
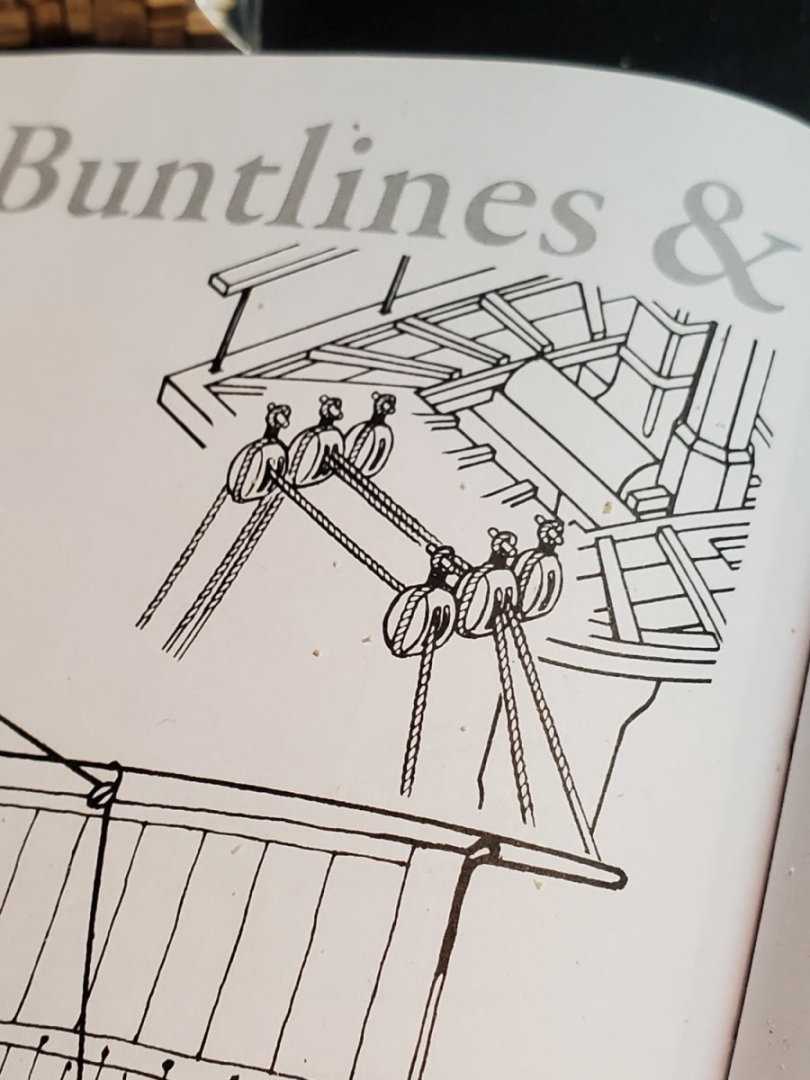
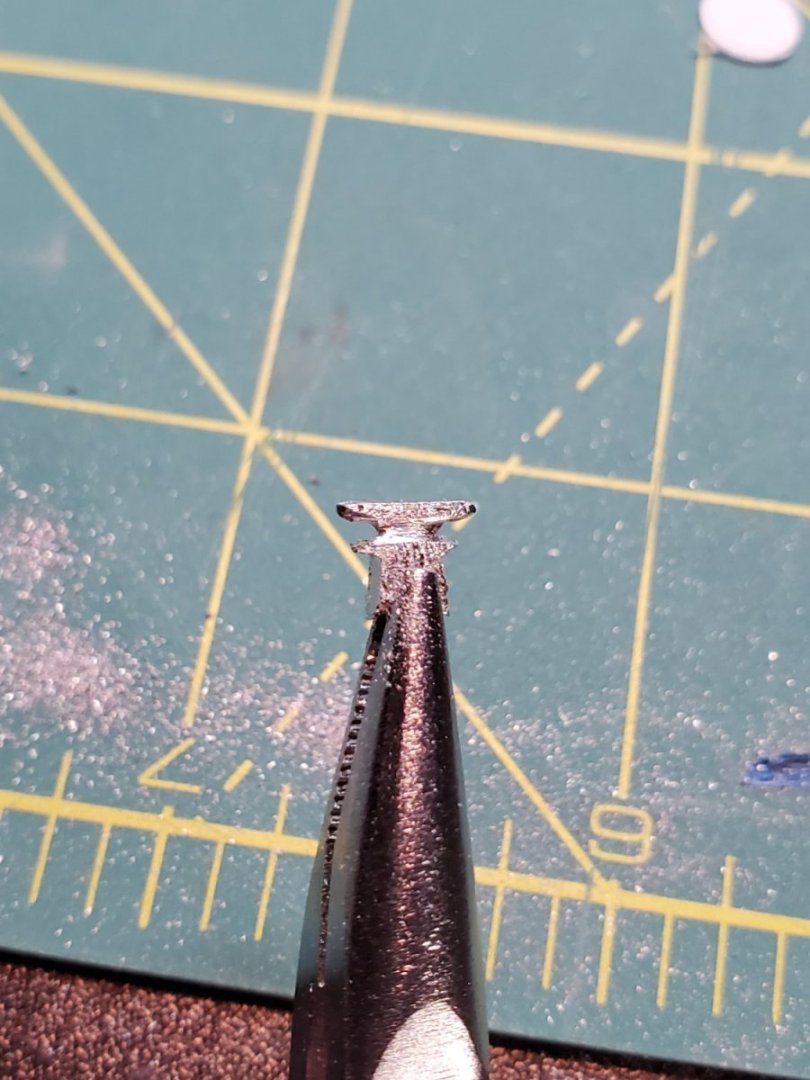
Drilled some block-loop-holes in the top, and snipped some .012 annealed wire, and glued in place.
The block hangs pretty well - just accessible.

I now have two blocks fore and aft, and port and starboard. I'm doing all of this with the mast detached from the deck. I haven't stepped it yet. Once it's permanently fastened to the deck, I'll never be able to access the underside again. I'm trying to do everything I can before I can't 'reach' anymore.
I'm sure I'm doing the rigging wrong, but without any help from the instruction manual, I'm doing what I can.
If other modelers have recommendations for HOW they learned to do blocks, or start rigging, I would be eager to learn.
I'll keep plugging away at the main mast blocks next, the same as the fore mast ones.
More progress soon.
- Jason -
-
Very long overdue update on Fair American
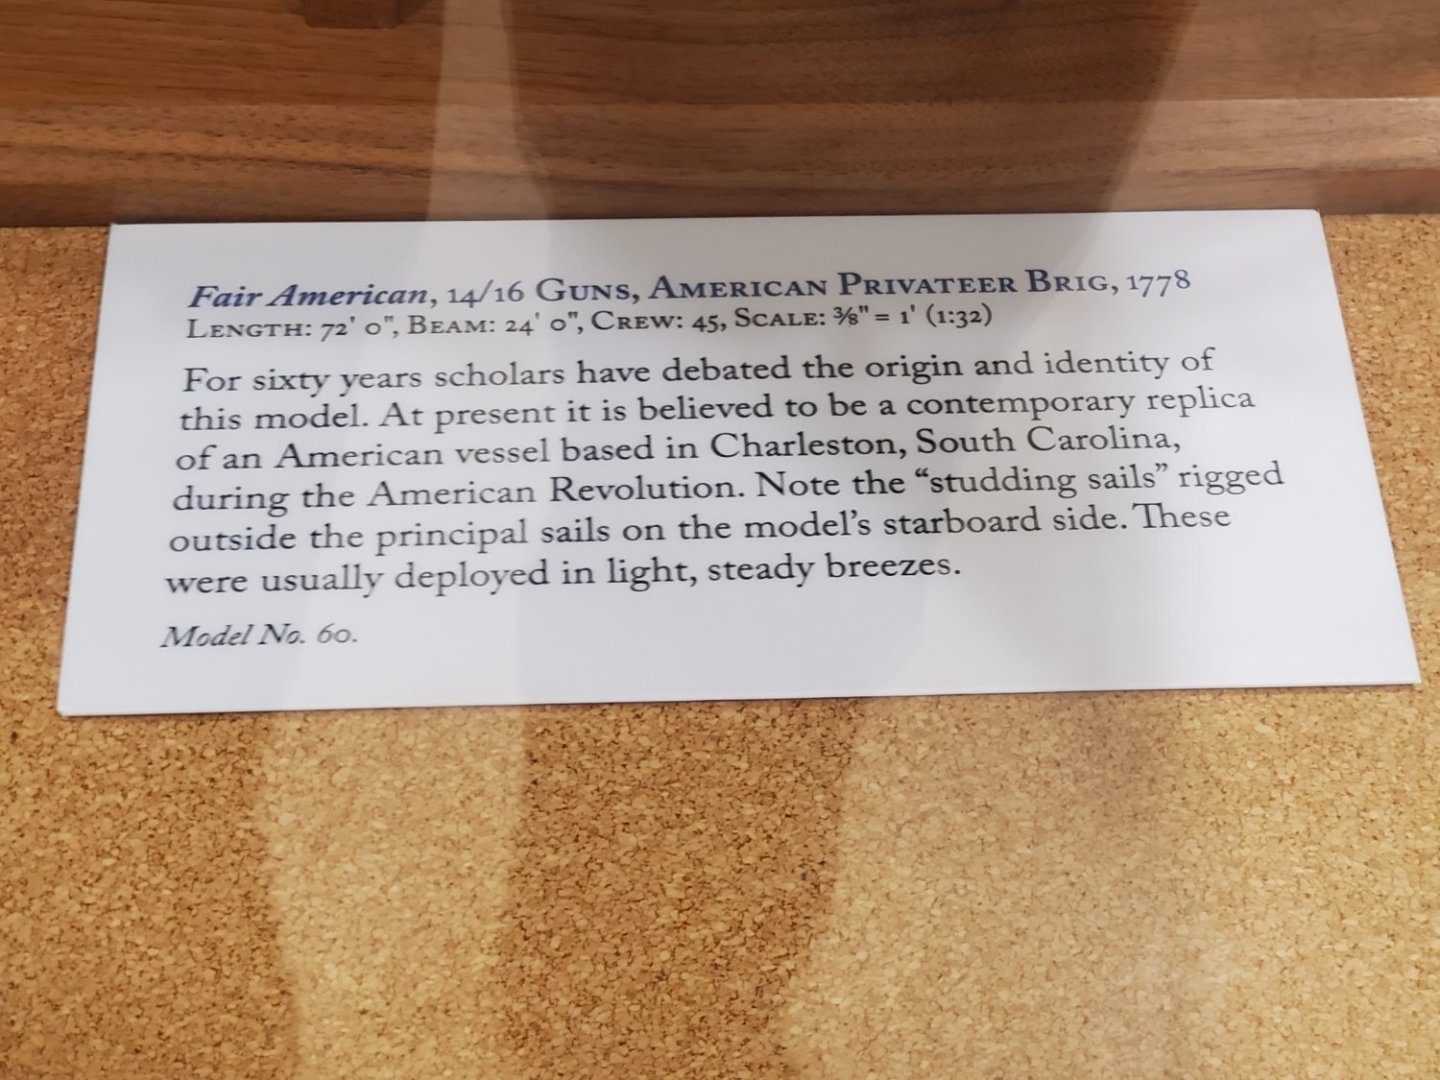
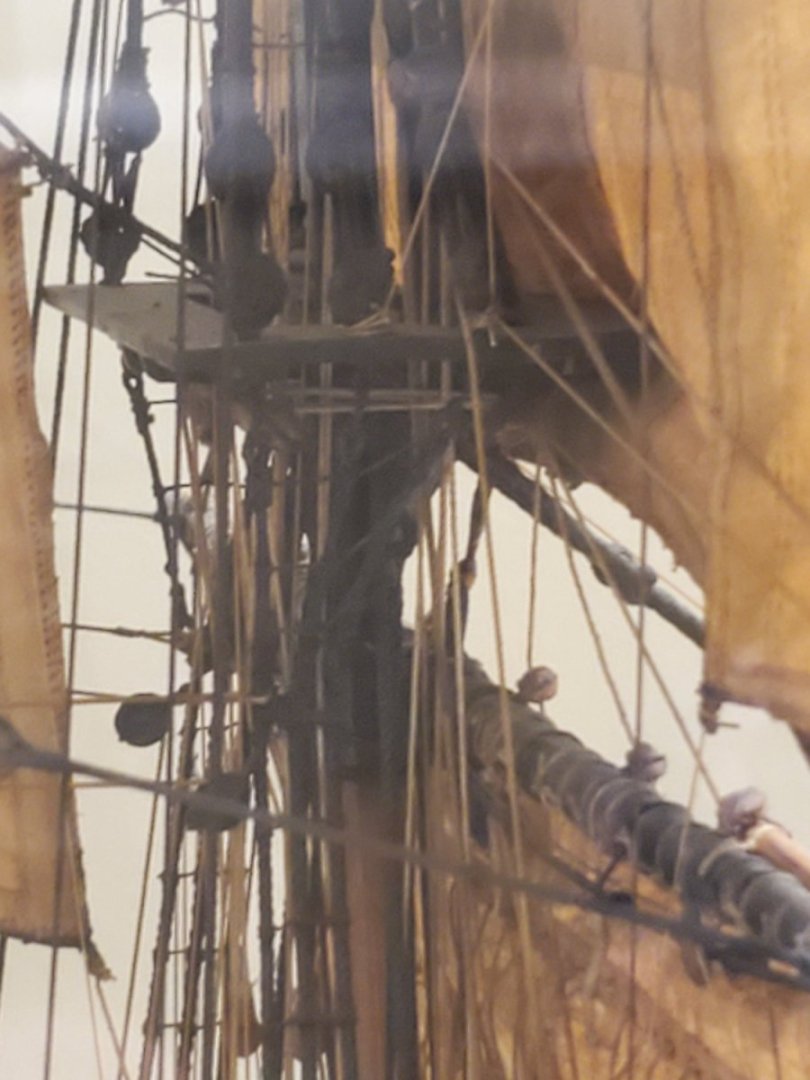
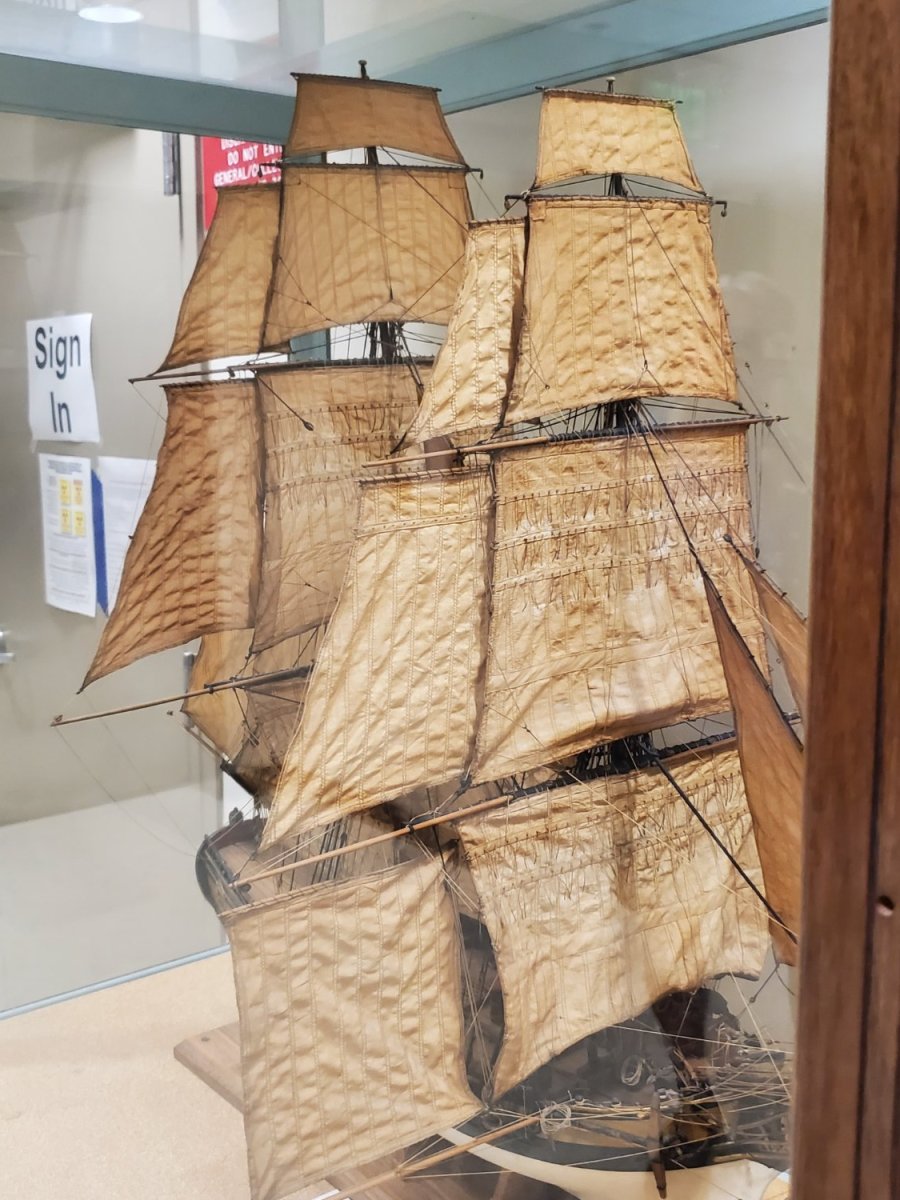
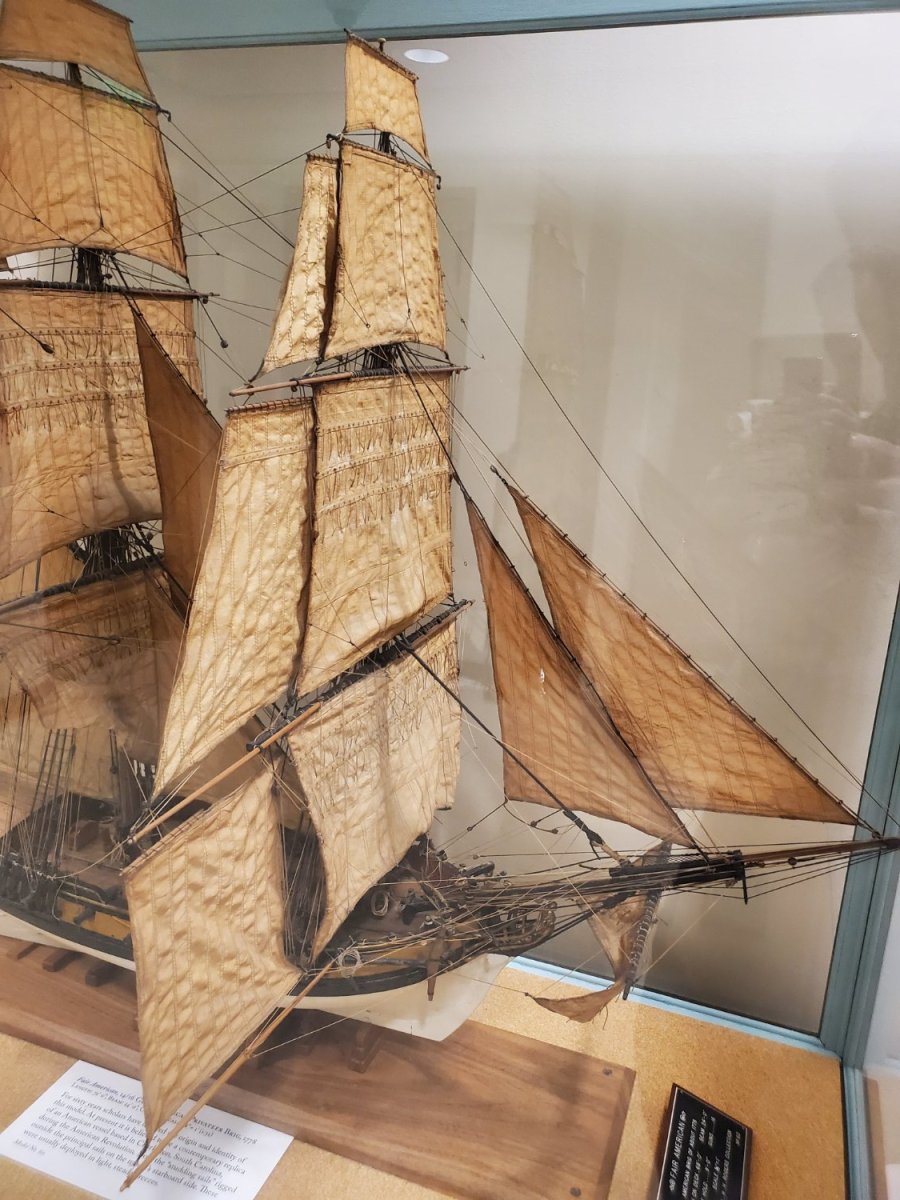
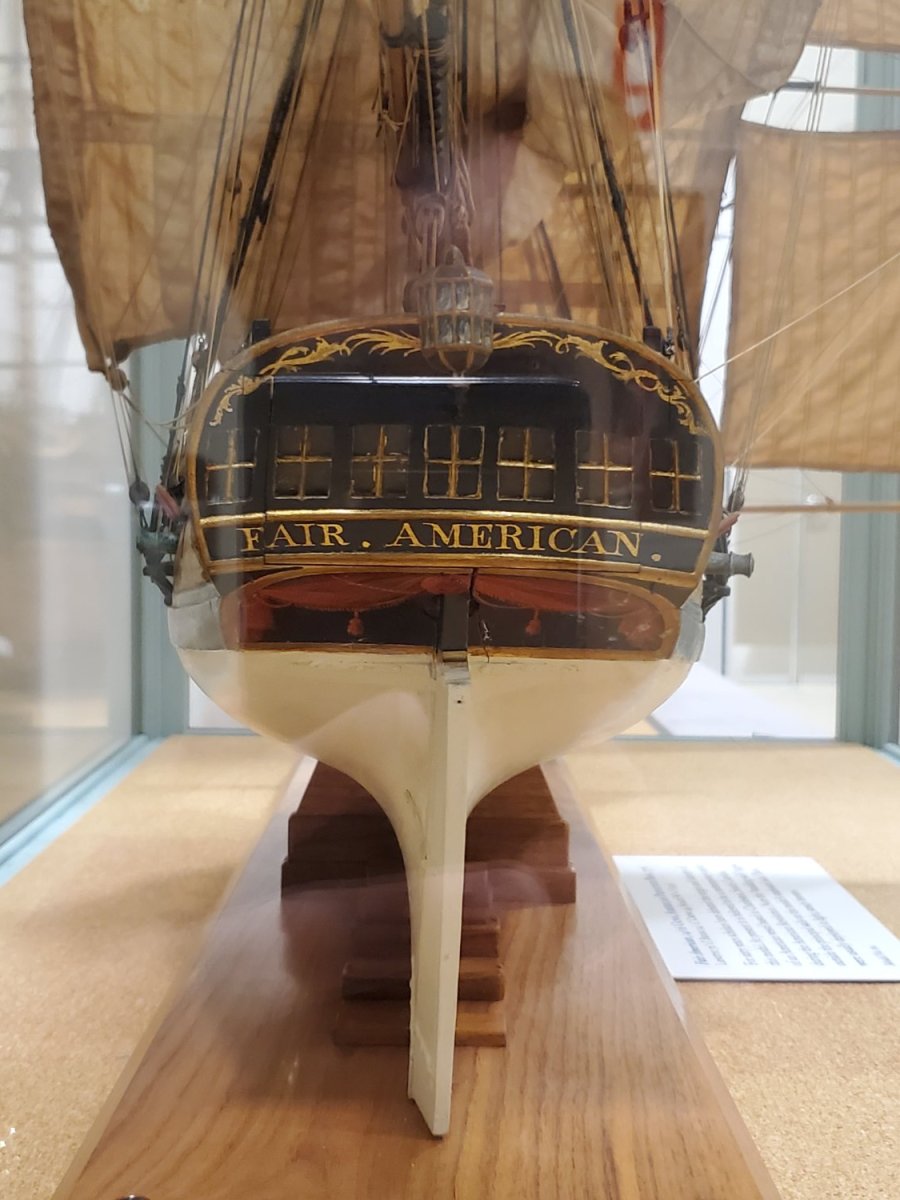
Few months ago, fellow model ship buddy CiscoH and I went to the Annapolis Naval Ship Museum. The Fair American from the Rogers collection was supposedly located there. First 40min looking around, no Fair American. After asking one of the workers there, she mentioned it was not on display, but up in the Restoration Room. She kindly took us up the private elevator to see it. It was an amazing model. Fully rigged with sails, including studding sails. The only draw back was that it was in a poorly lit area, and inside a glass case - reflections prevented good shots with my phone. This was a 1:32 scale model, so much larger than the kit I'm building from Model Shipways
My primary goal was to document the rigging, to use on my own model. I didn't take many overall pictures, sorry.
The folllowing pictures are NOT my model. They are of the Rogers Collection Model only
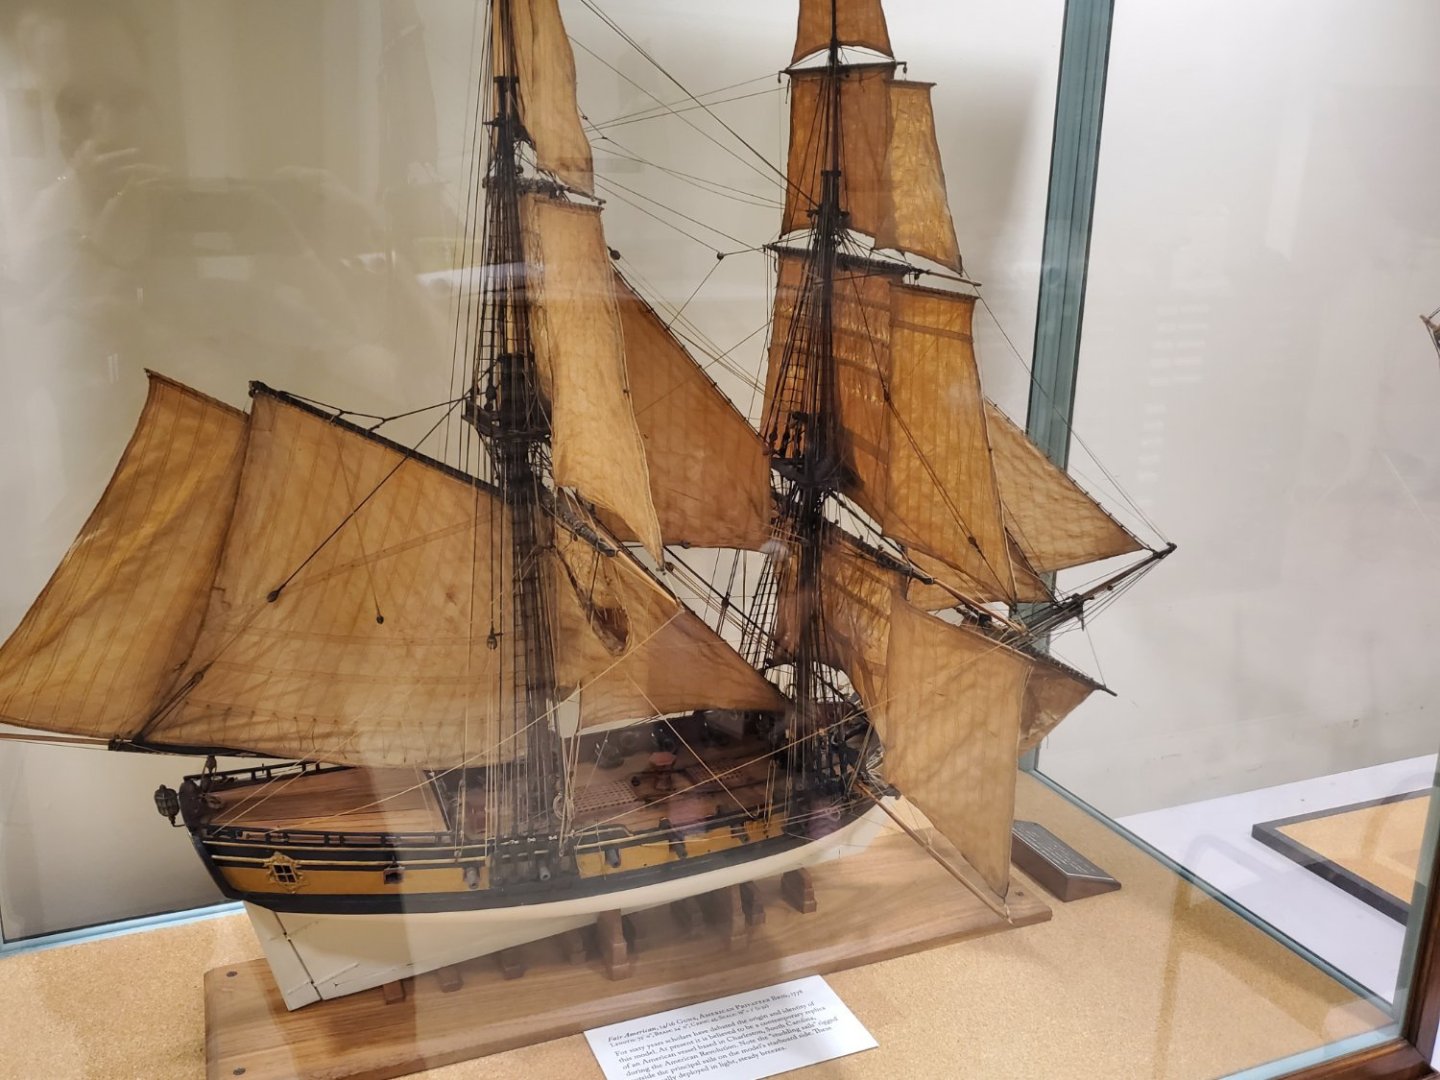

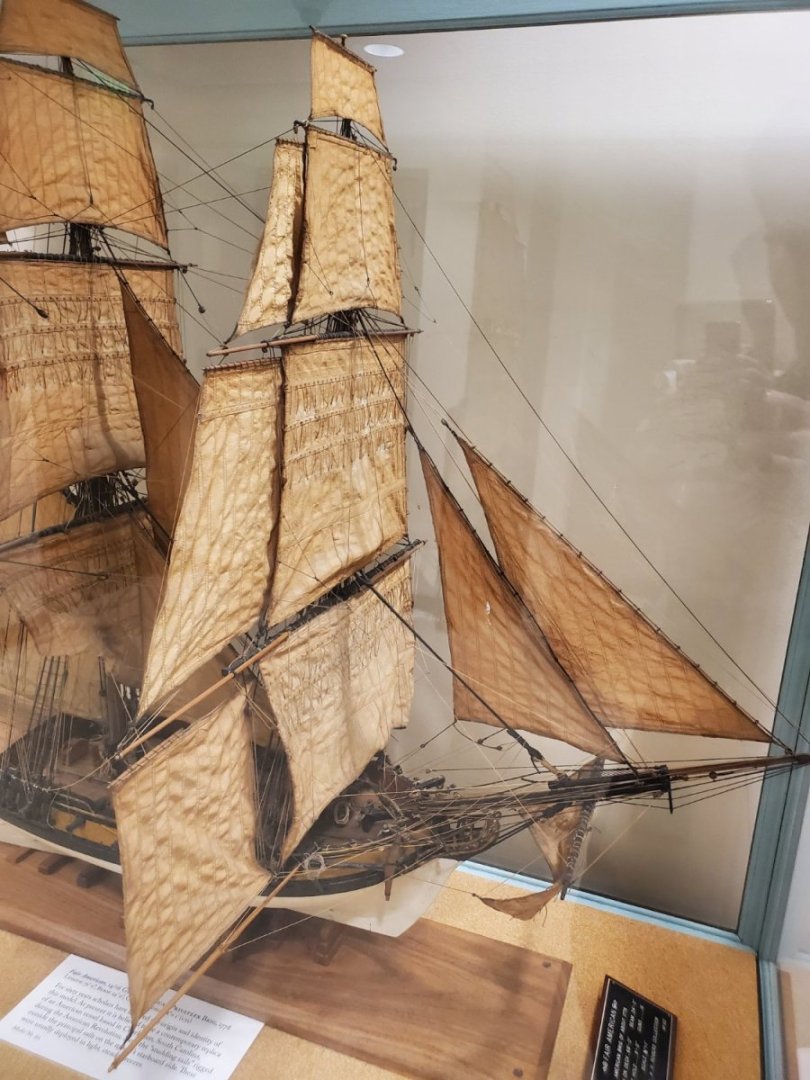
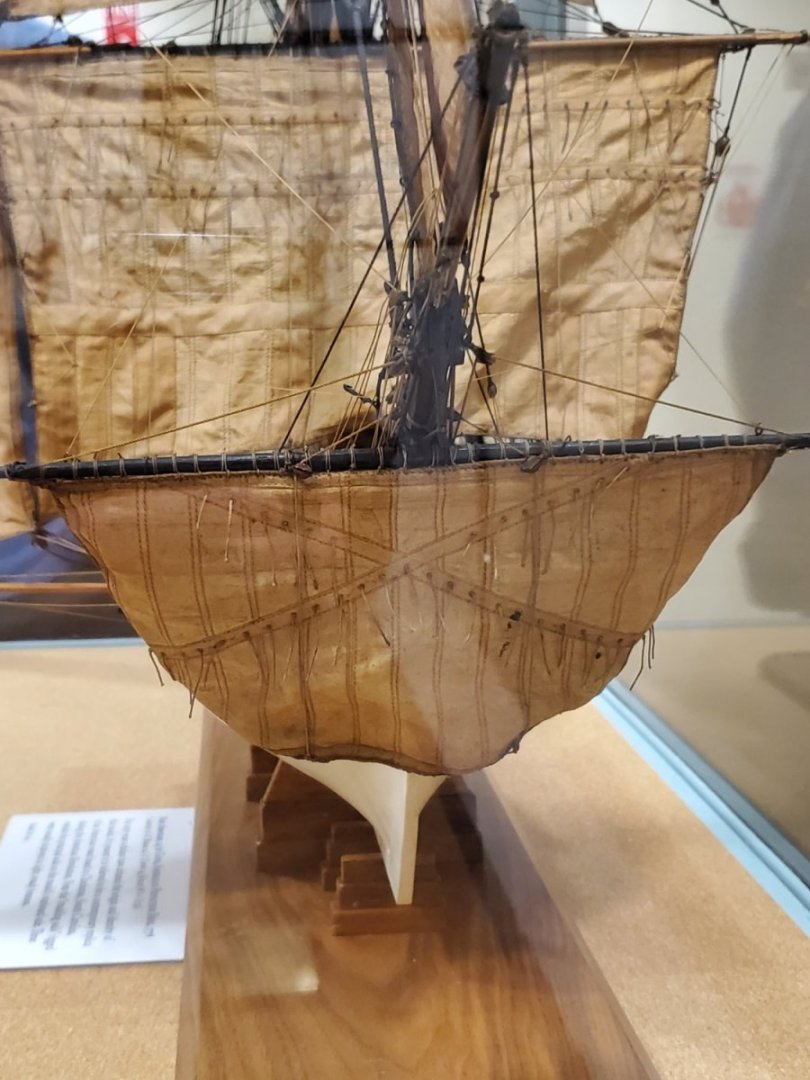


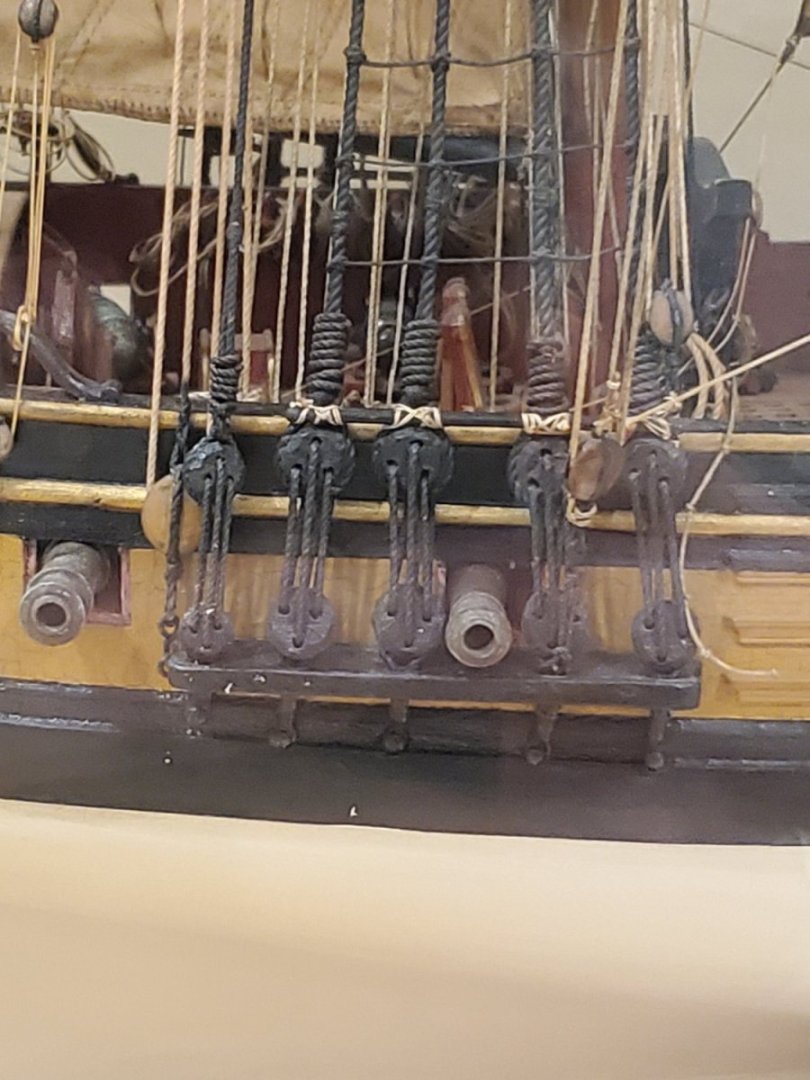

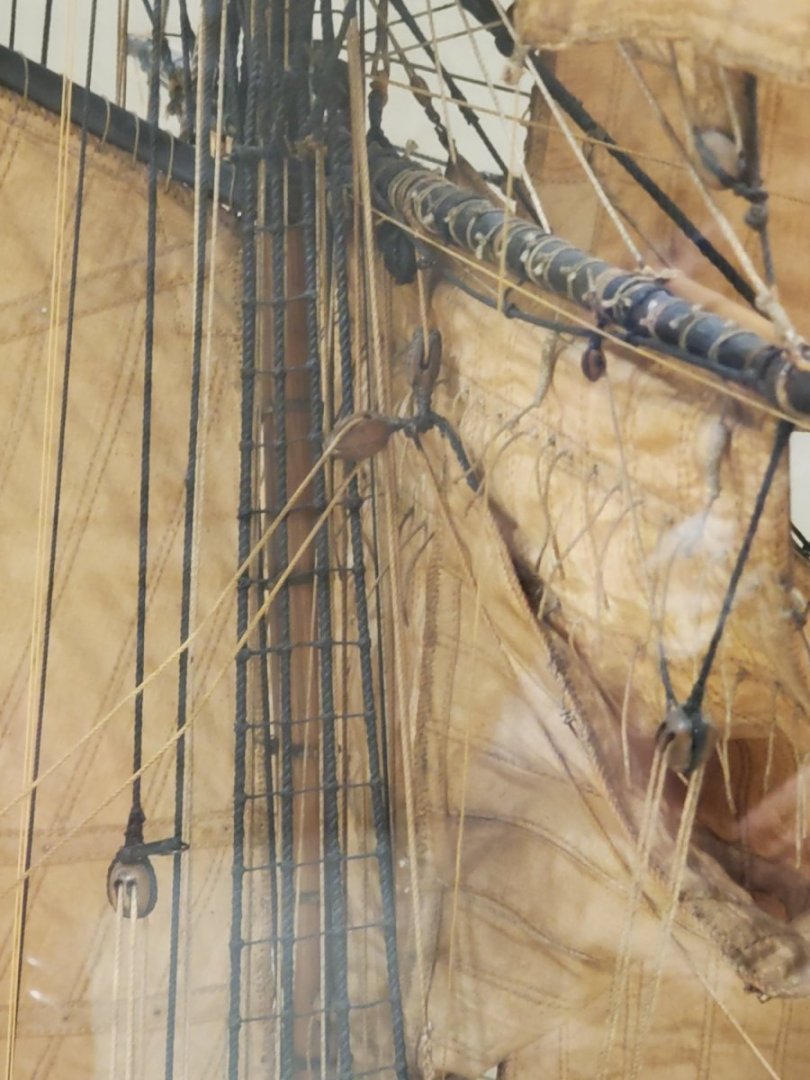

The detail on the sails was incredible with amazing stitch work. There was a lot of black on the model - hard to see exactly where things were rigged, especially with the glare. I wish I had taken more wider pictures, but this is what I got with Cisco and her waiting patiently for me to snap pictures. I didn't want to impose too long. There were several other pictures I took, but not included here.
I won't be putting studding sails on my model, but seeing how/where some things were rigged and attached gave me a lot of insight for my own model.
I'll be updating my own Fair American tomorrow, hopefully. I have made progress, but with holidays, birthdays, anniversaries and weddings, it was hard to find time to do much.
Thanks for reading
- Jason -
-
Fair American progress update:
Lot has happened in September - turned 40, got Covid, missed the Admiralty workshop, brother's bachelor party and still had time to do some work on the ship!
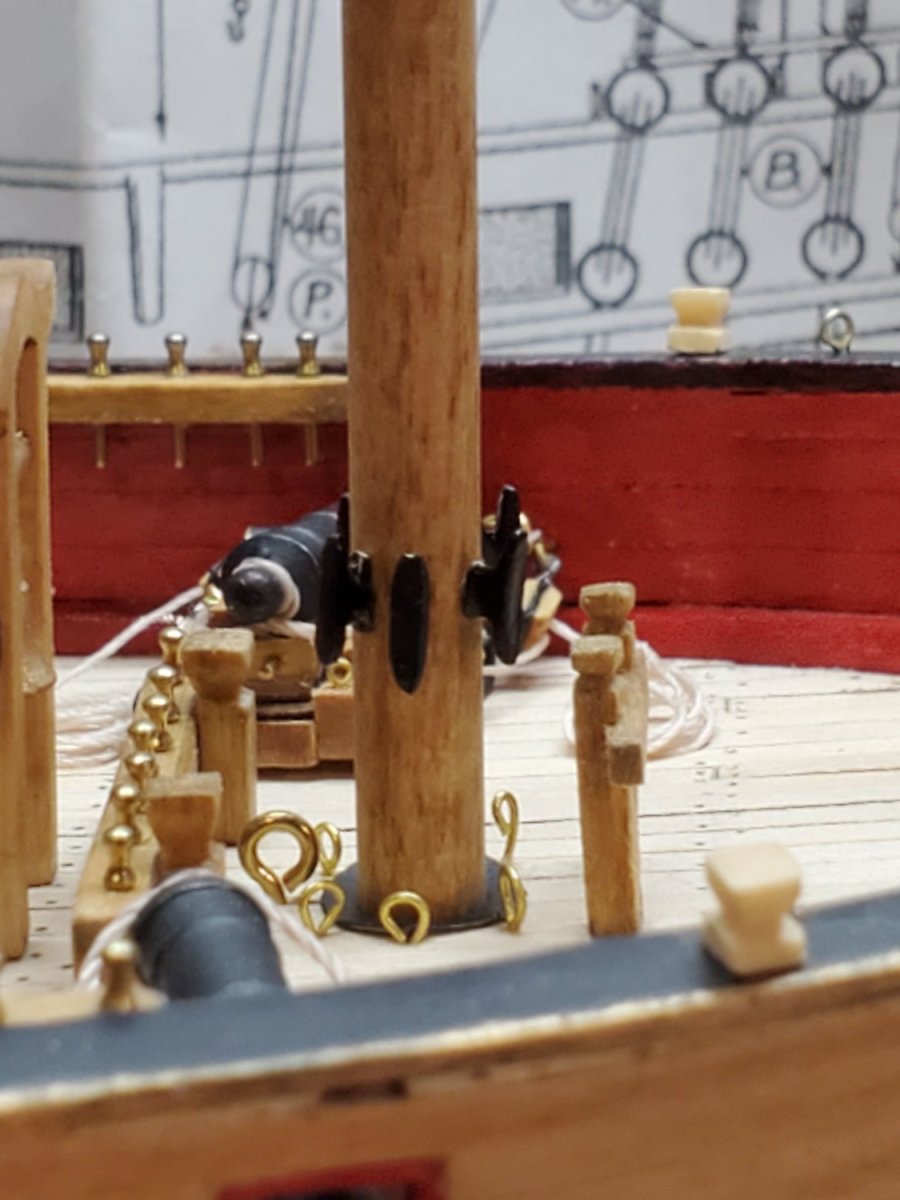
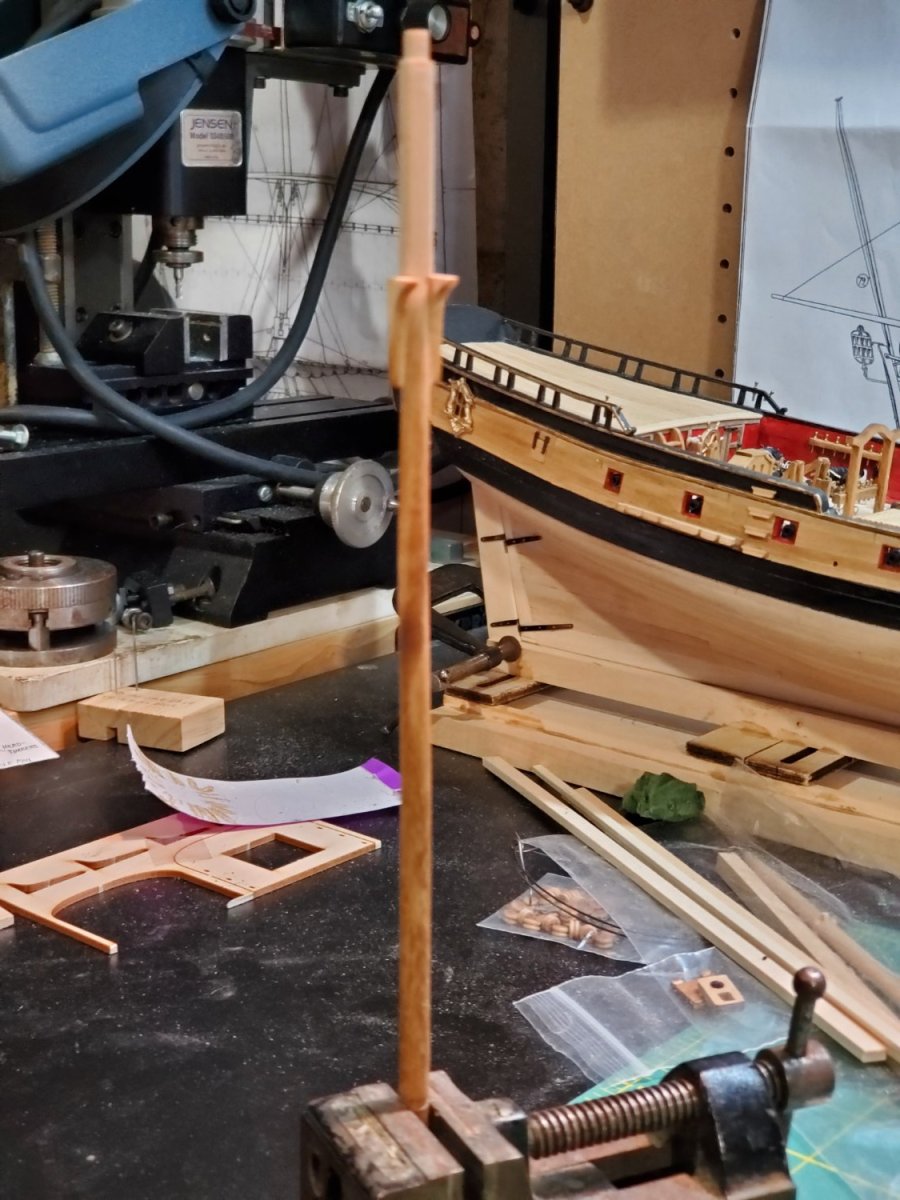
For the mast tops, started adding eyebolts in place. Also started making plans/drawings for where various blocks will go to (not shown).
Had to bend the eyes out slightly, so they could be accessed near the mast.
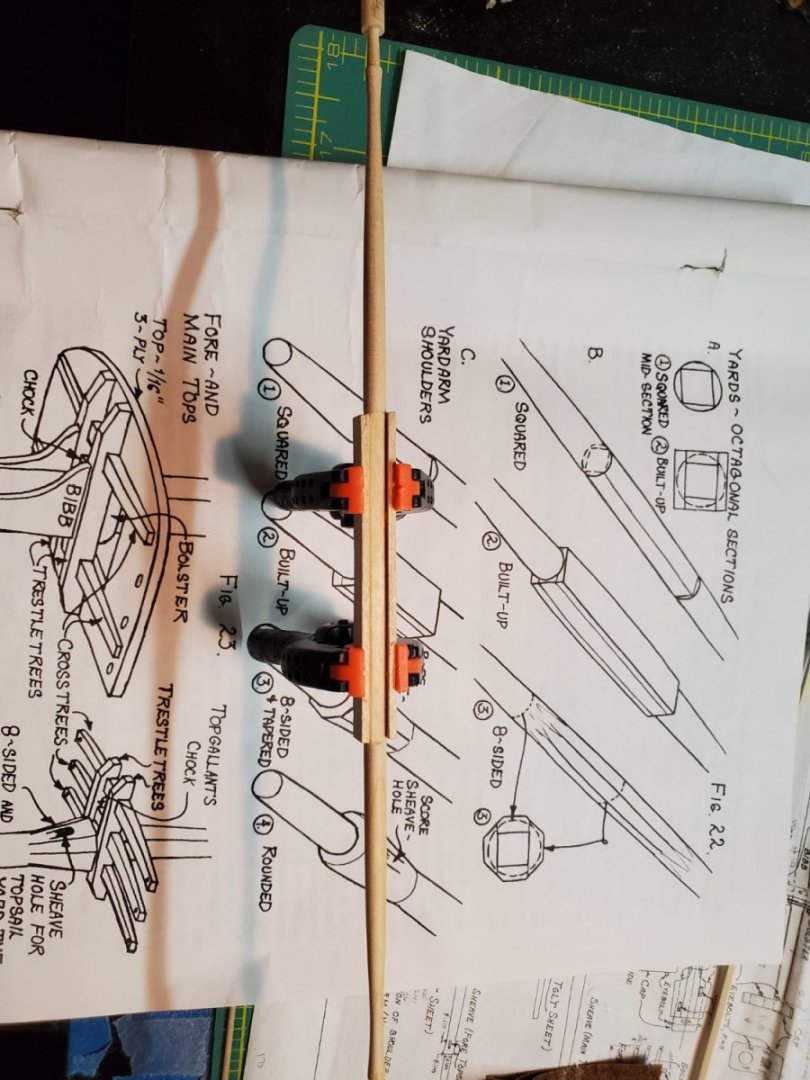
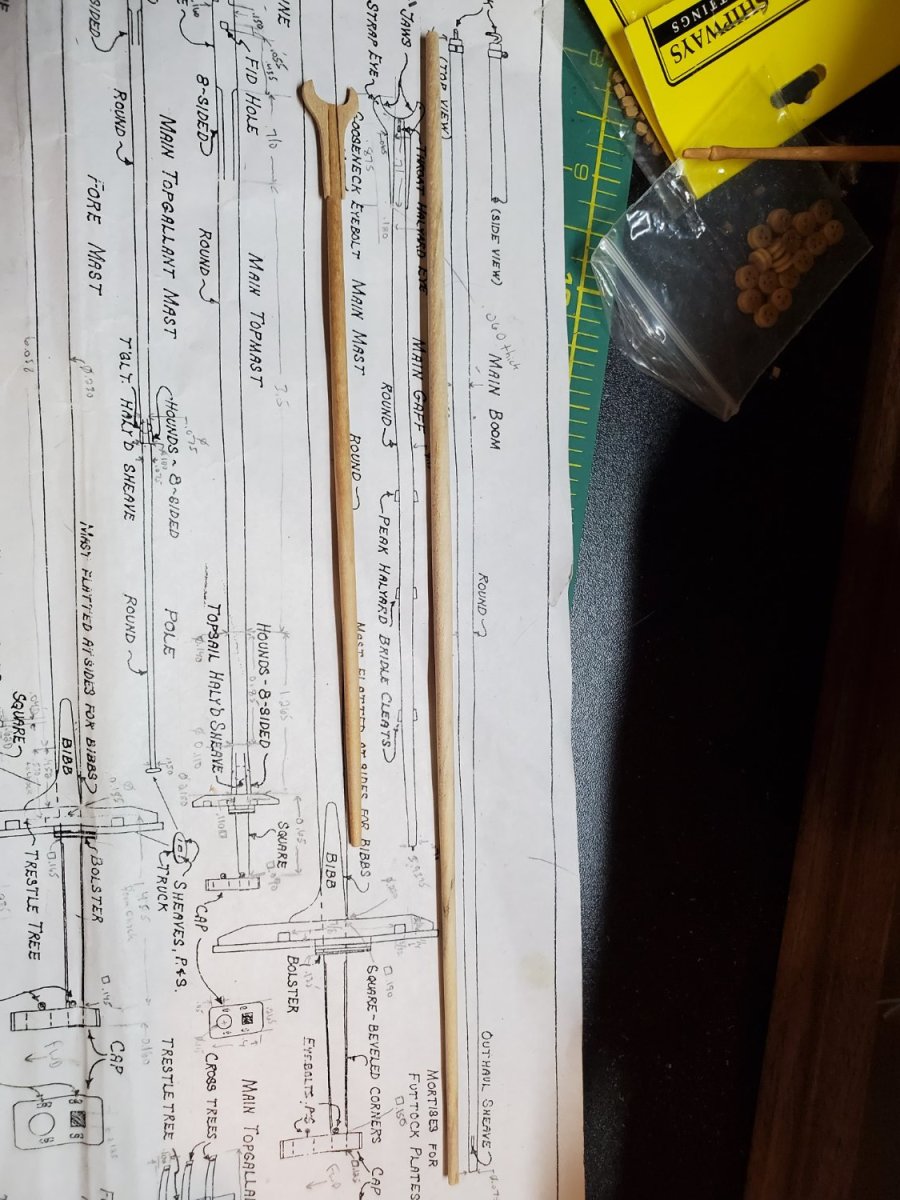
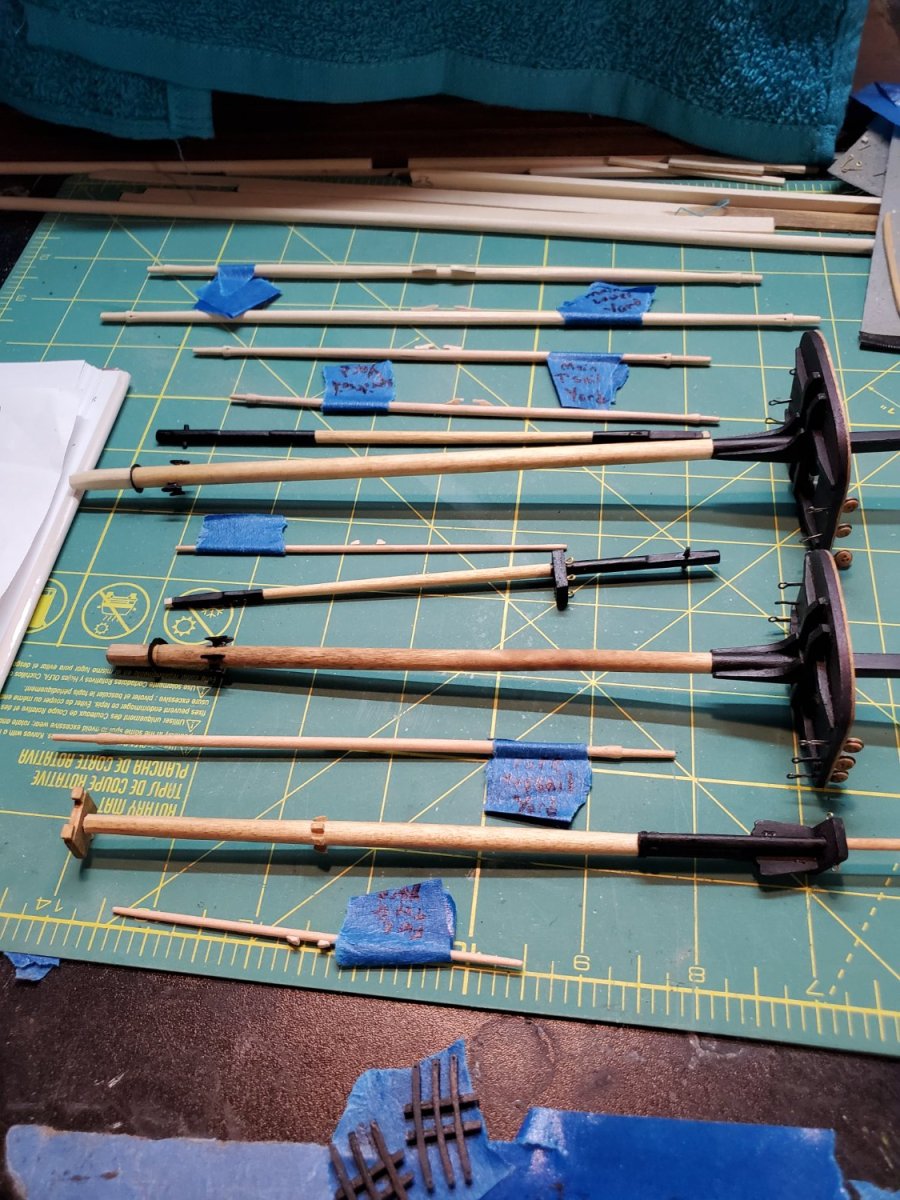
Almost done all the yards too. I like the fine details of the yard shapes - they've been fun to turn on the lathe.

The yards are supposed to be black, via the plans. I'm debating whether I want to stain them instead. I think that black will hide all the great detail, but I'm still not decided.
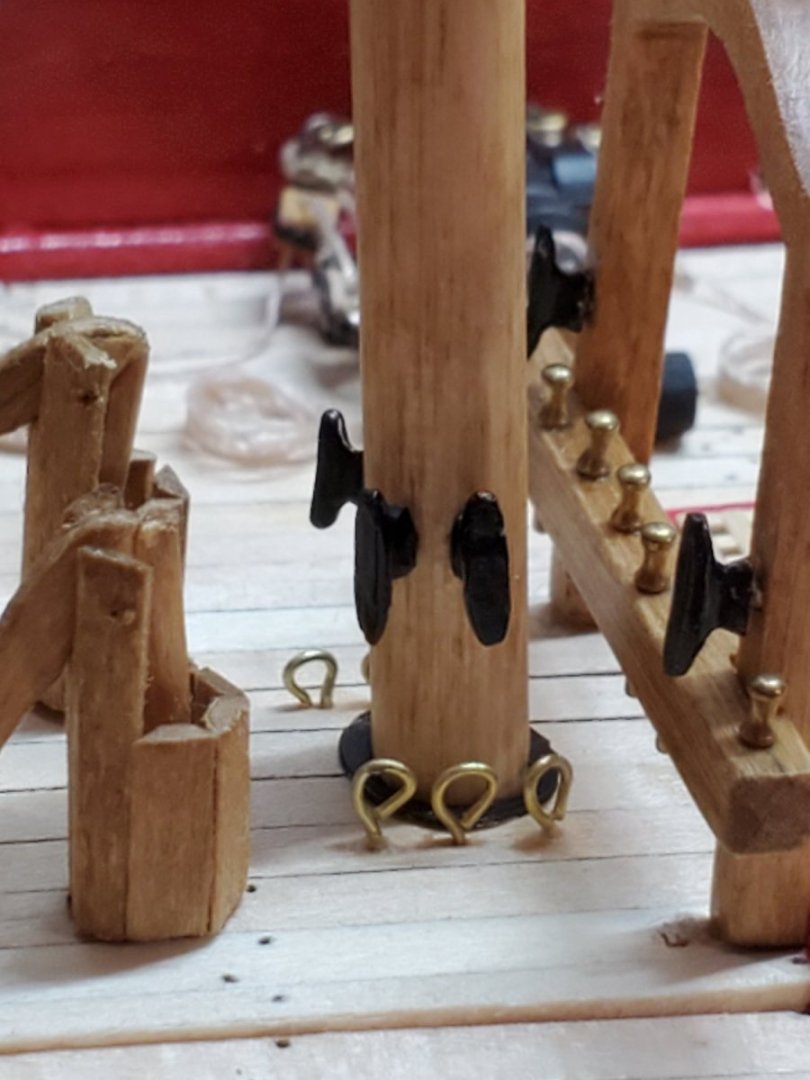
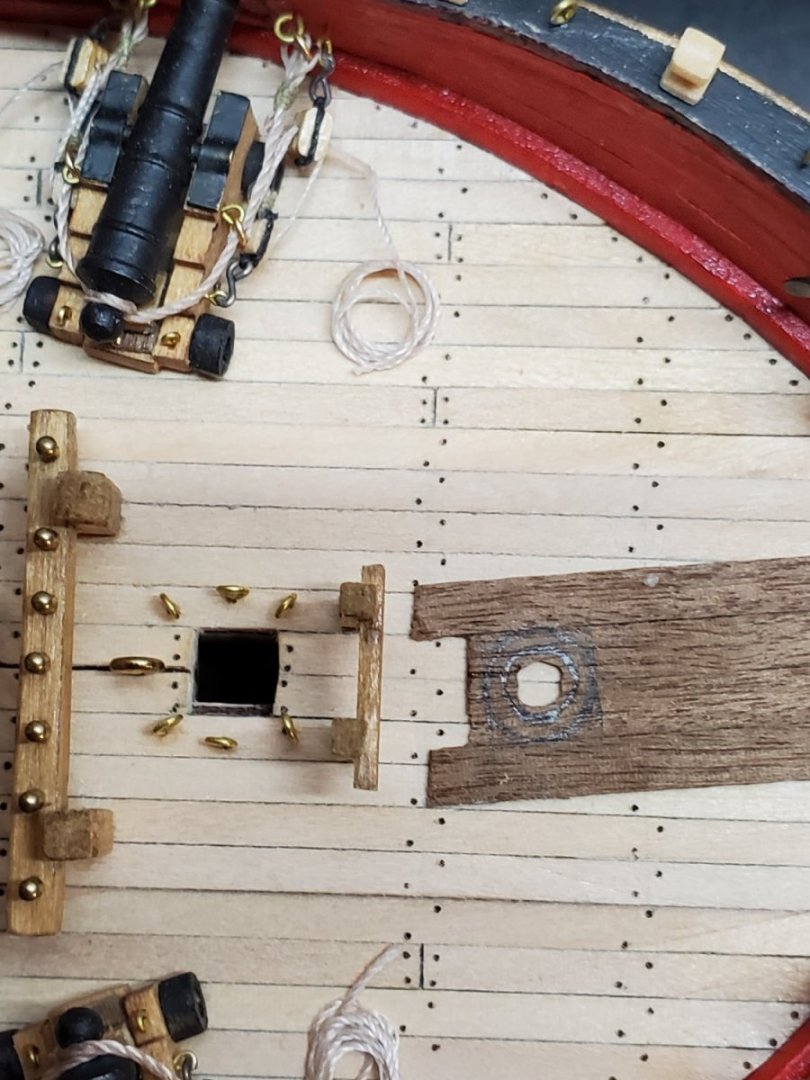
I'm moving onto setting the rake angle for the chain plates/deadeyes next. Before that, I need the rake of the masts to be correct. I needed to add little shims in the deck hole to offset the heel of the mast correctly. You can see the little piece on the left side.
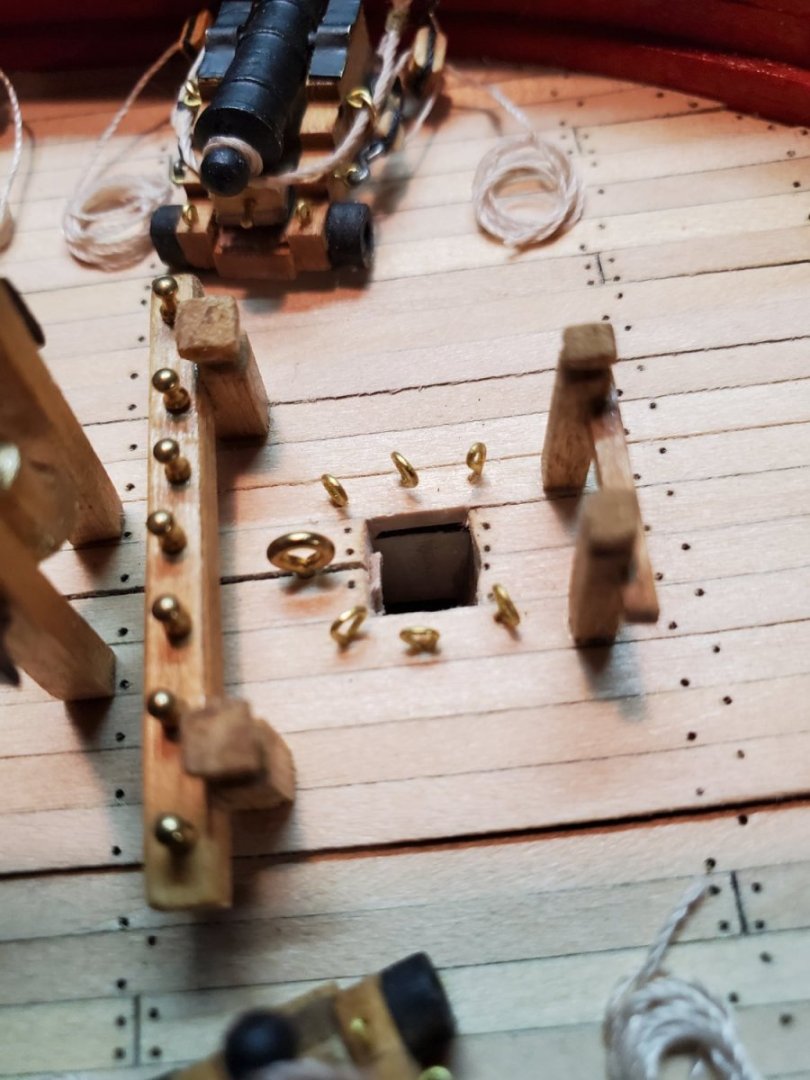
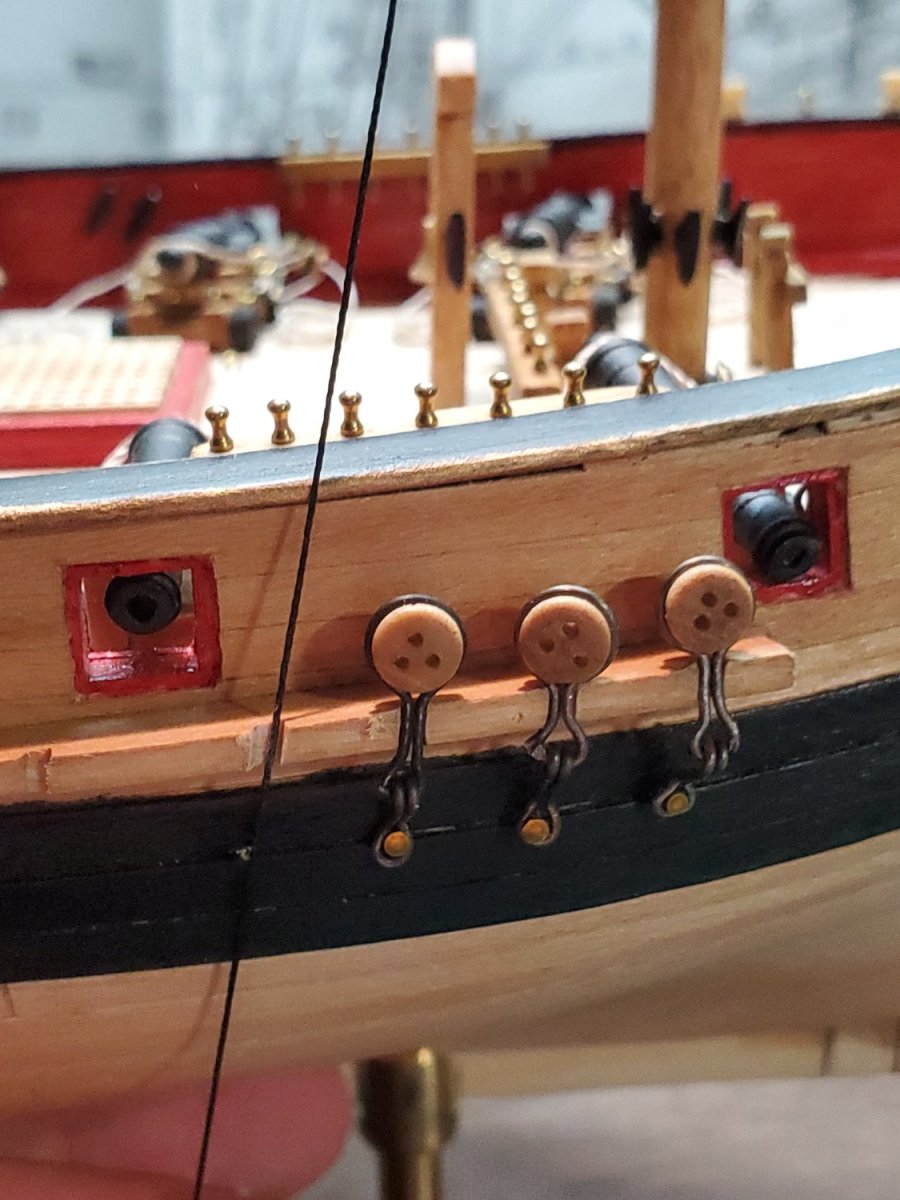
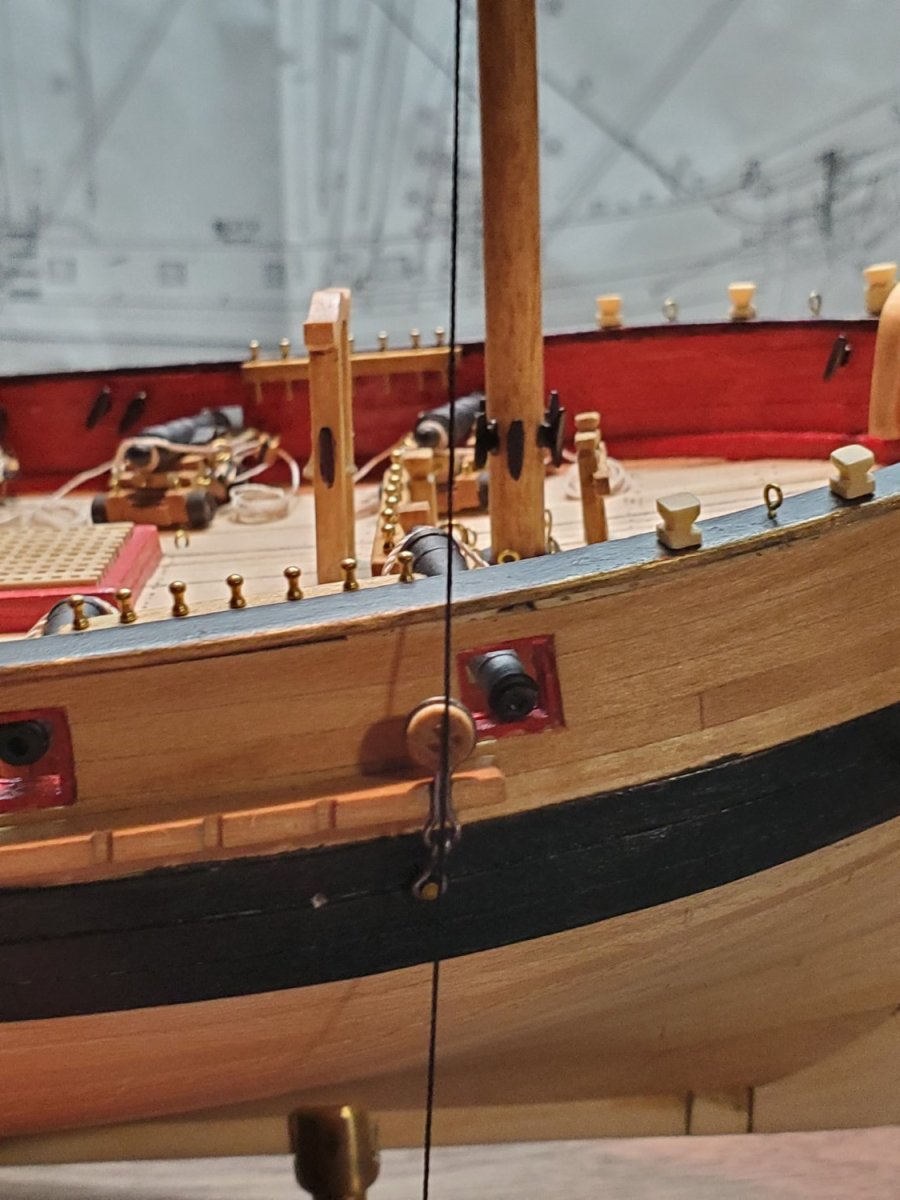
According to the plans, I can use taut string to approximate the angle needed for the chain plates. I'm drilling a hole at the bottom of the black strake where the plate will be pinned.

After the pin hole, I can place the deadeye in. About as aligned as I can do.
I made mine a little differently, as you can see. The instructions call for a metal strip that isn't available anymore. I pre-measured dimensions from the channel to the black strake, to come up with my hook and loop design for the chain plates. I did have to make some adjustments, but they fit pretty darn nice. I'm really happy with how they turned out!
I also got the top mast and tops glued to the masts. I needed a reverse grip tweezer to hold it straight while the glue dried. The fit was just a little loose.

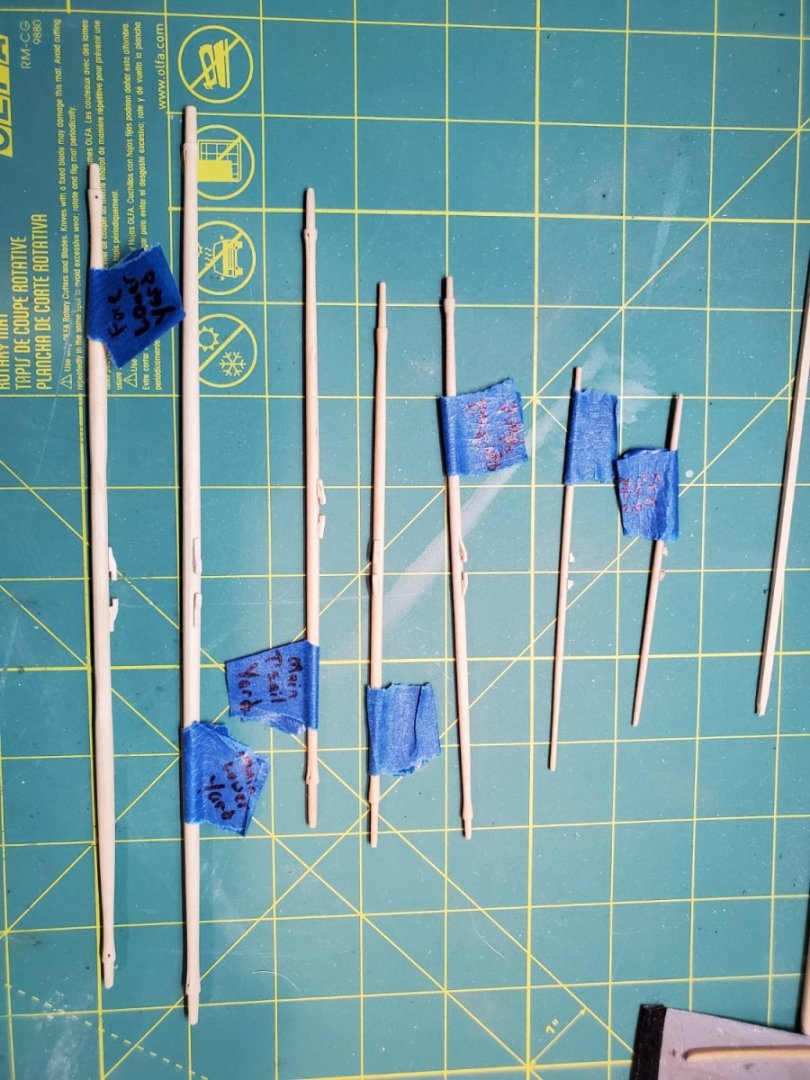
Of course nothing is perfect - especially for me. The Fore and Main tops are NOT the same size. And obviously I grabbed the black one, instead of the black one and now the Fore top is glued to the Main mast. The one in my fingers is the Main Mast top, its just slightly wider than the Fore. I'm going to live with it, but now everyone knows - always label things - like I did for the yards in blue painters tape. Another learning moment.

So that's all for now. I'm going to keep chugging away at the chain plates and maybe I'll have the masts glued/stepped next time!!!!
Have a great week,
- Jason -
-
-
Time for an update on Fair American Model ship.
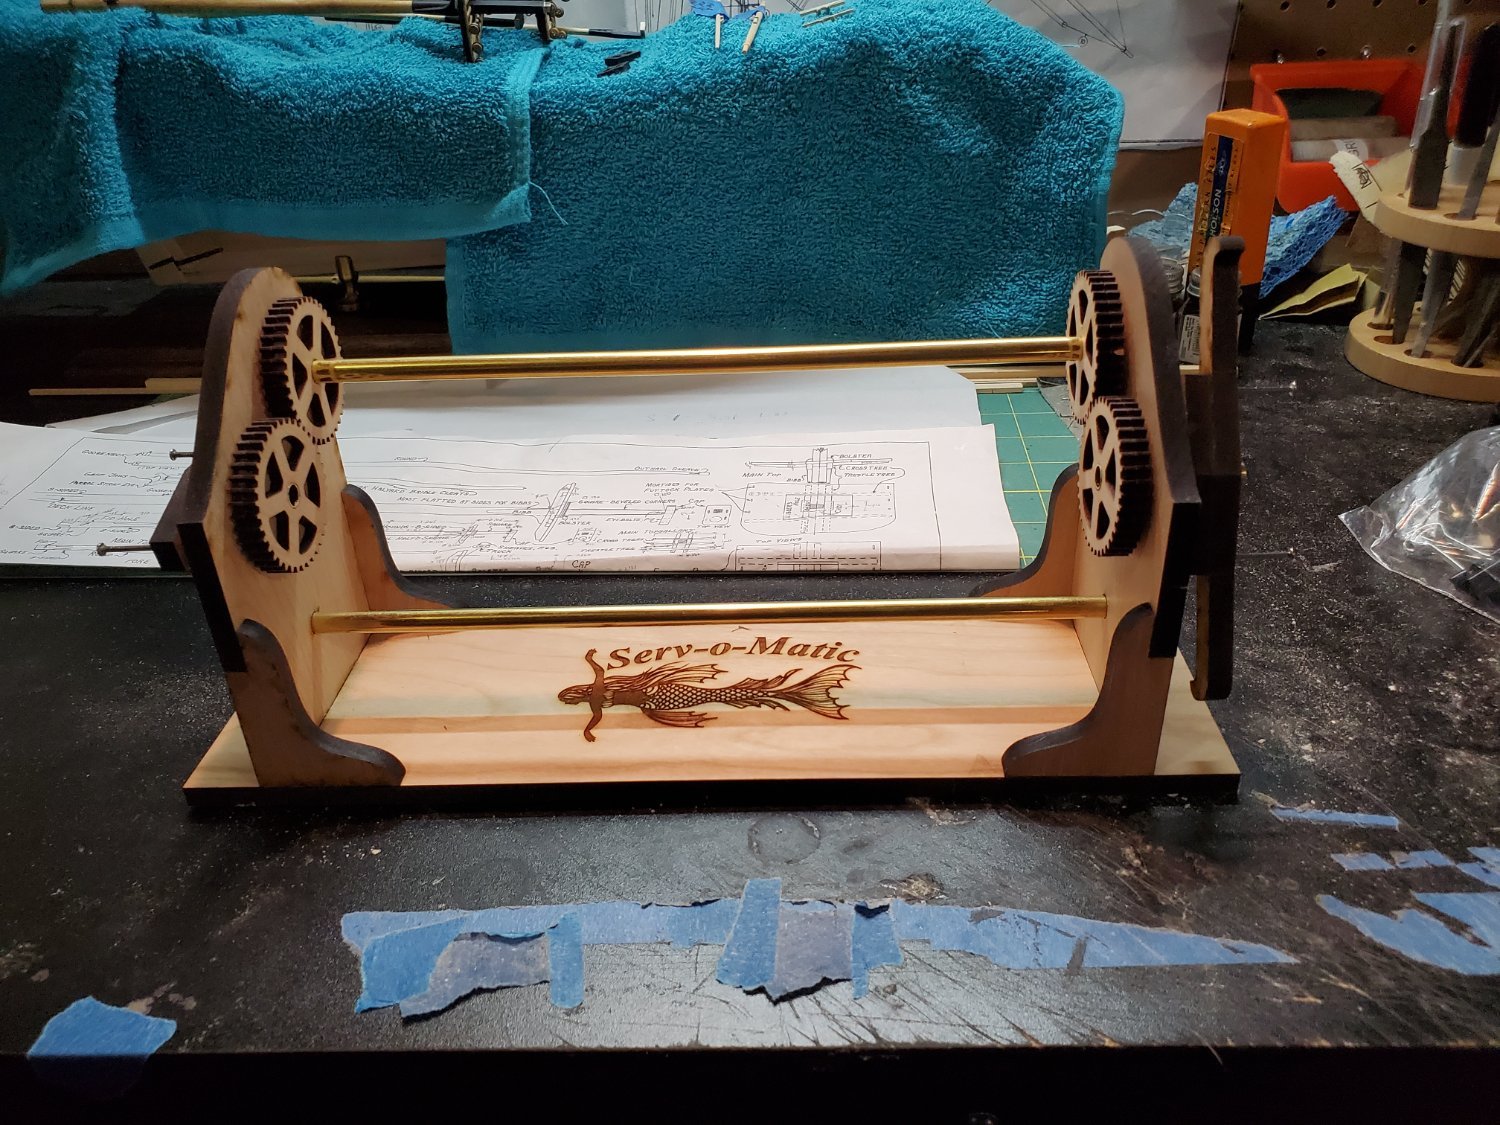
Back in July, I ordered a selection of rope from Syrenshipmodelcompany.com, as well as the Serv-o-matic. I'm excited to start serving ropes soon.

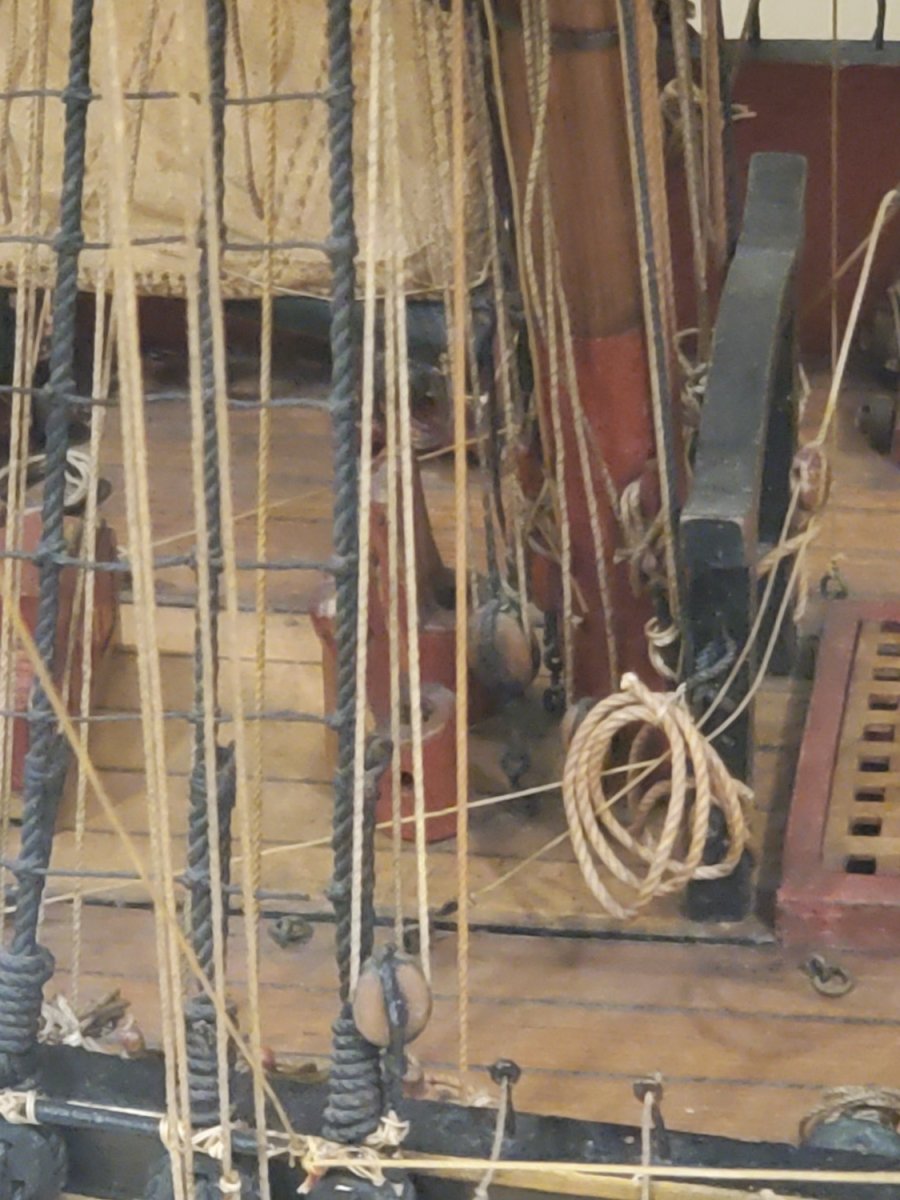
One first bit of rigging I did, was the tiny gammoning wrap for the Spritsail. Neither the plans nor instructions describe HOW to do this, just a picture of it having been done. So I wrapped some .012in black rope around the Bowsprit and tacked with glue, I guess...
Then taped one end with painters tape, and made a few more loops. I hadn't left much Spritsail overhanging the saddle, so I really had to wedge it in there. Then made a few wraps, as you can see...
Added one clove hitch tucked inside, then trimmed the edges tight. Dab of CA glue here and there to secure it. I didn't want it ever unraveling... Looks pretty 'neat' to me.

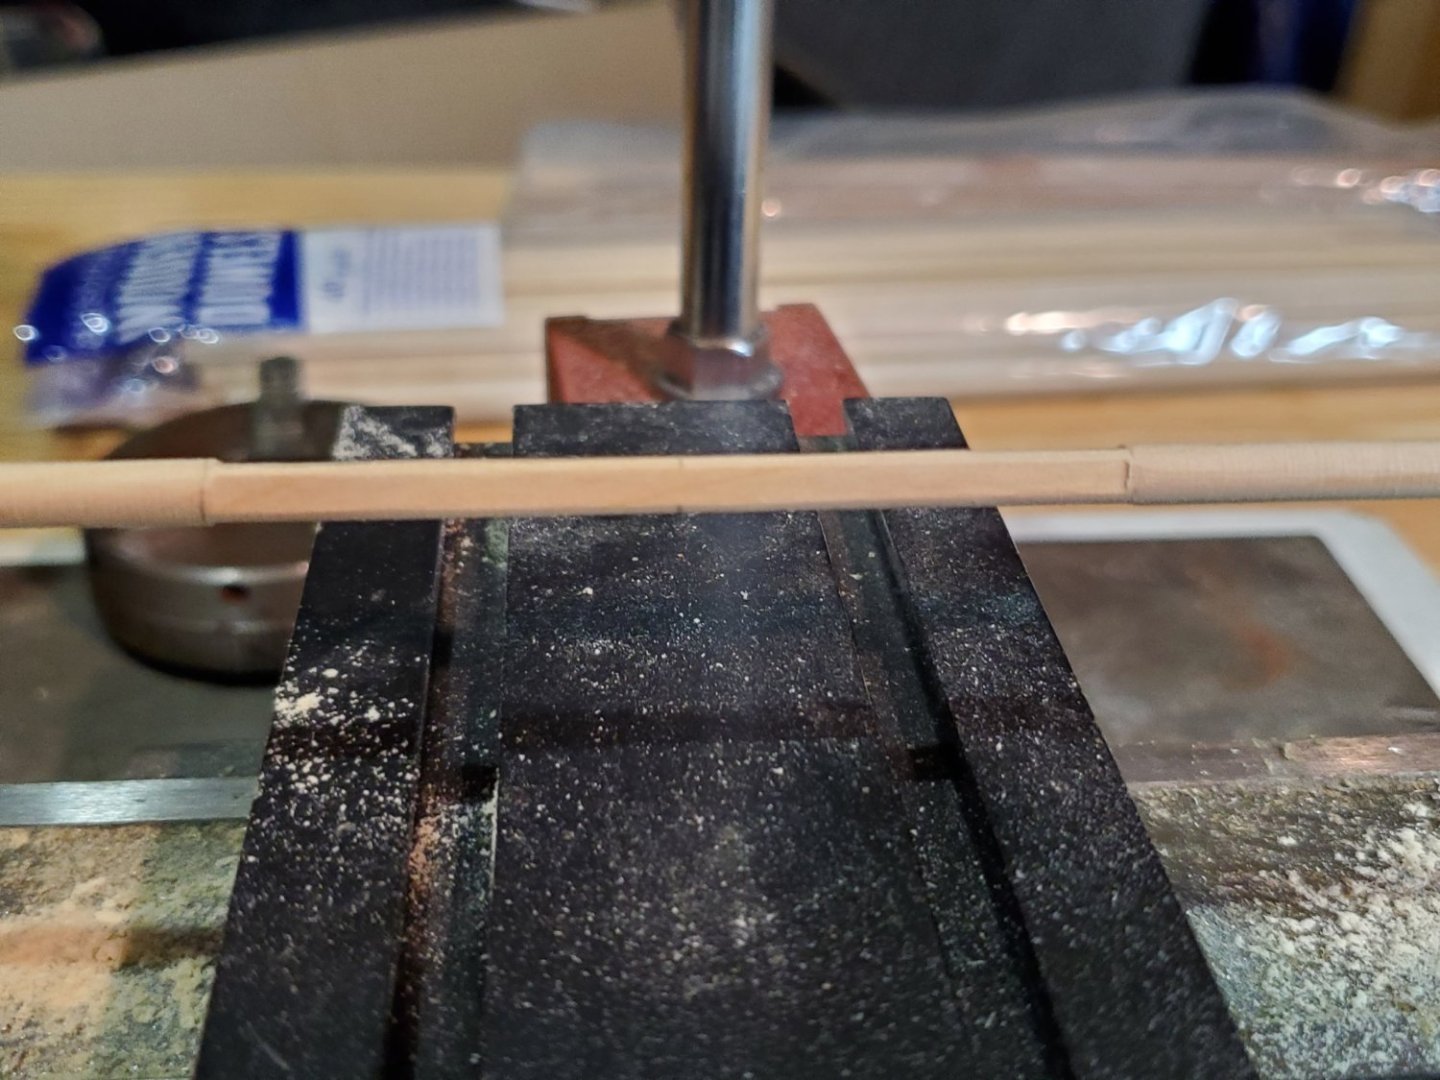
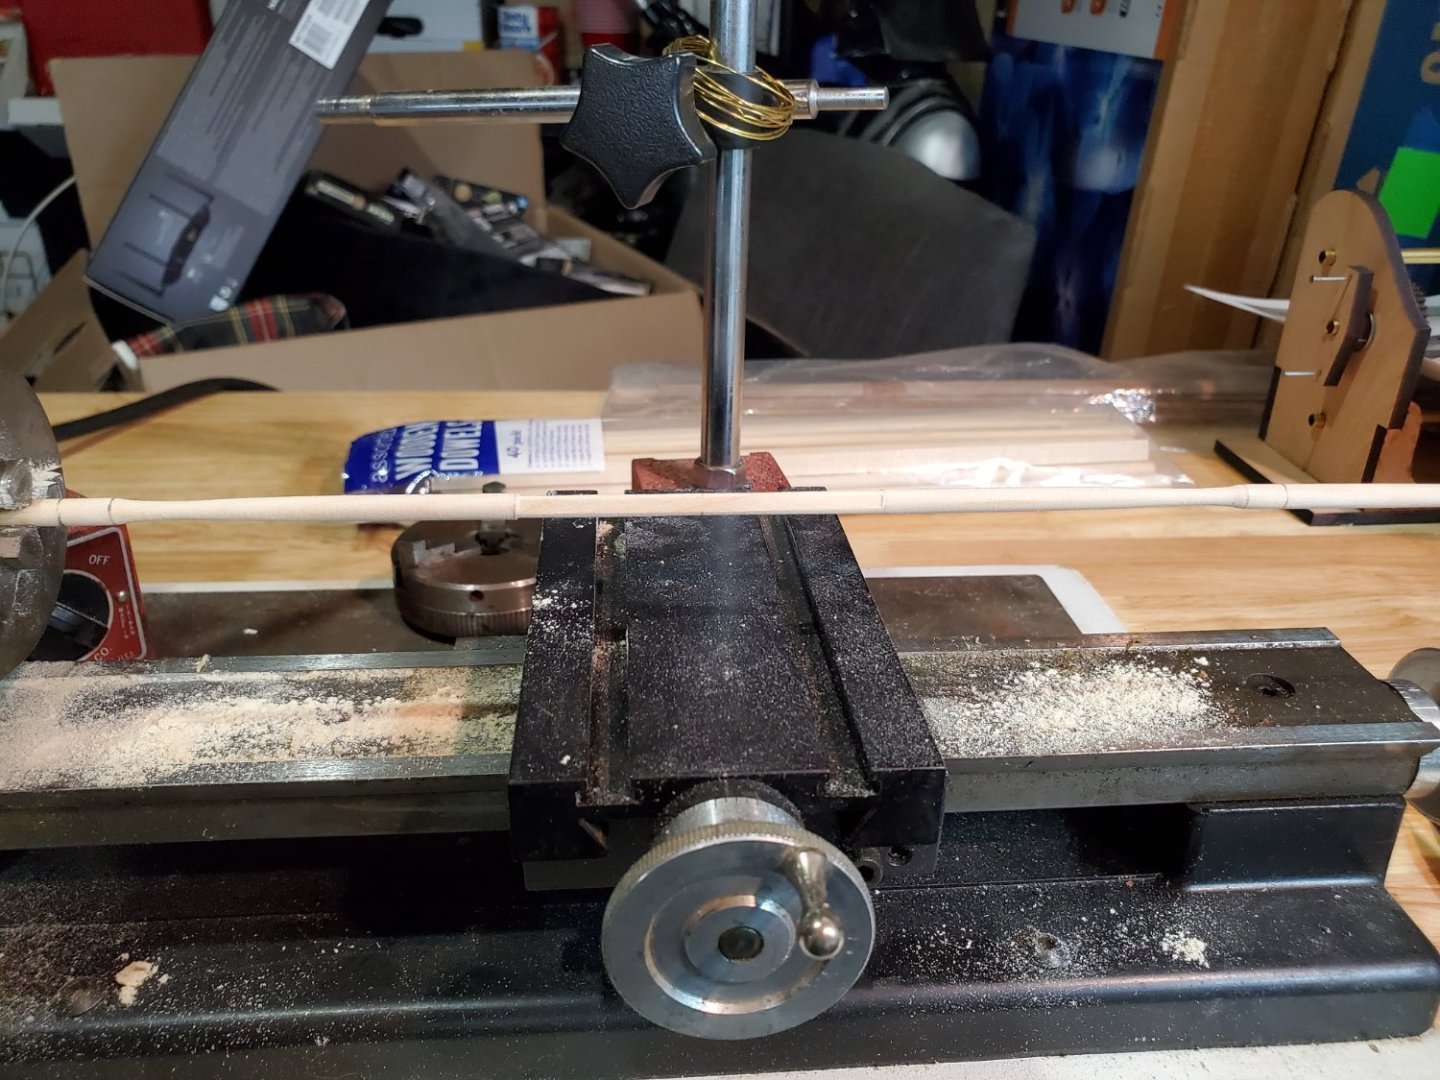
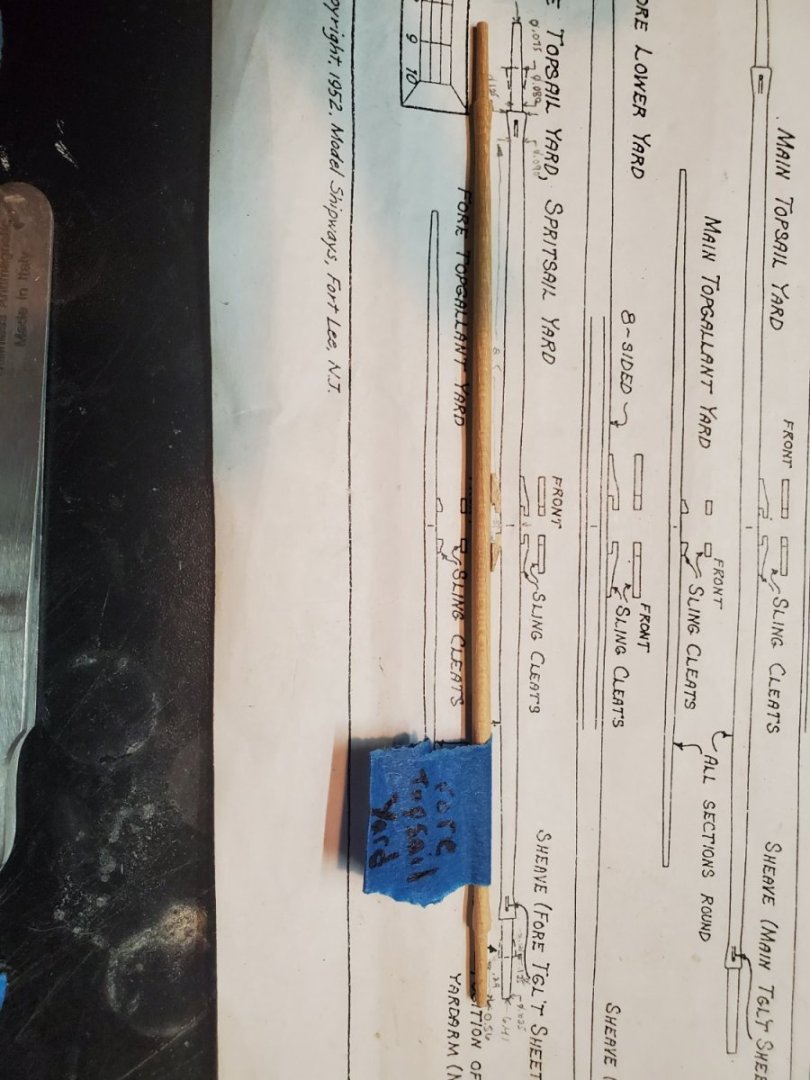
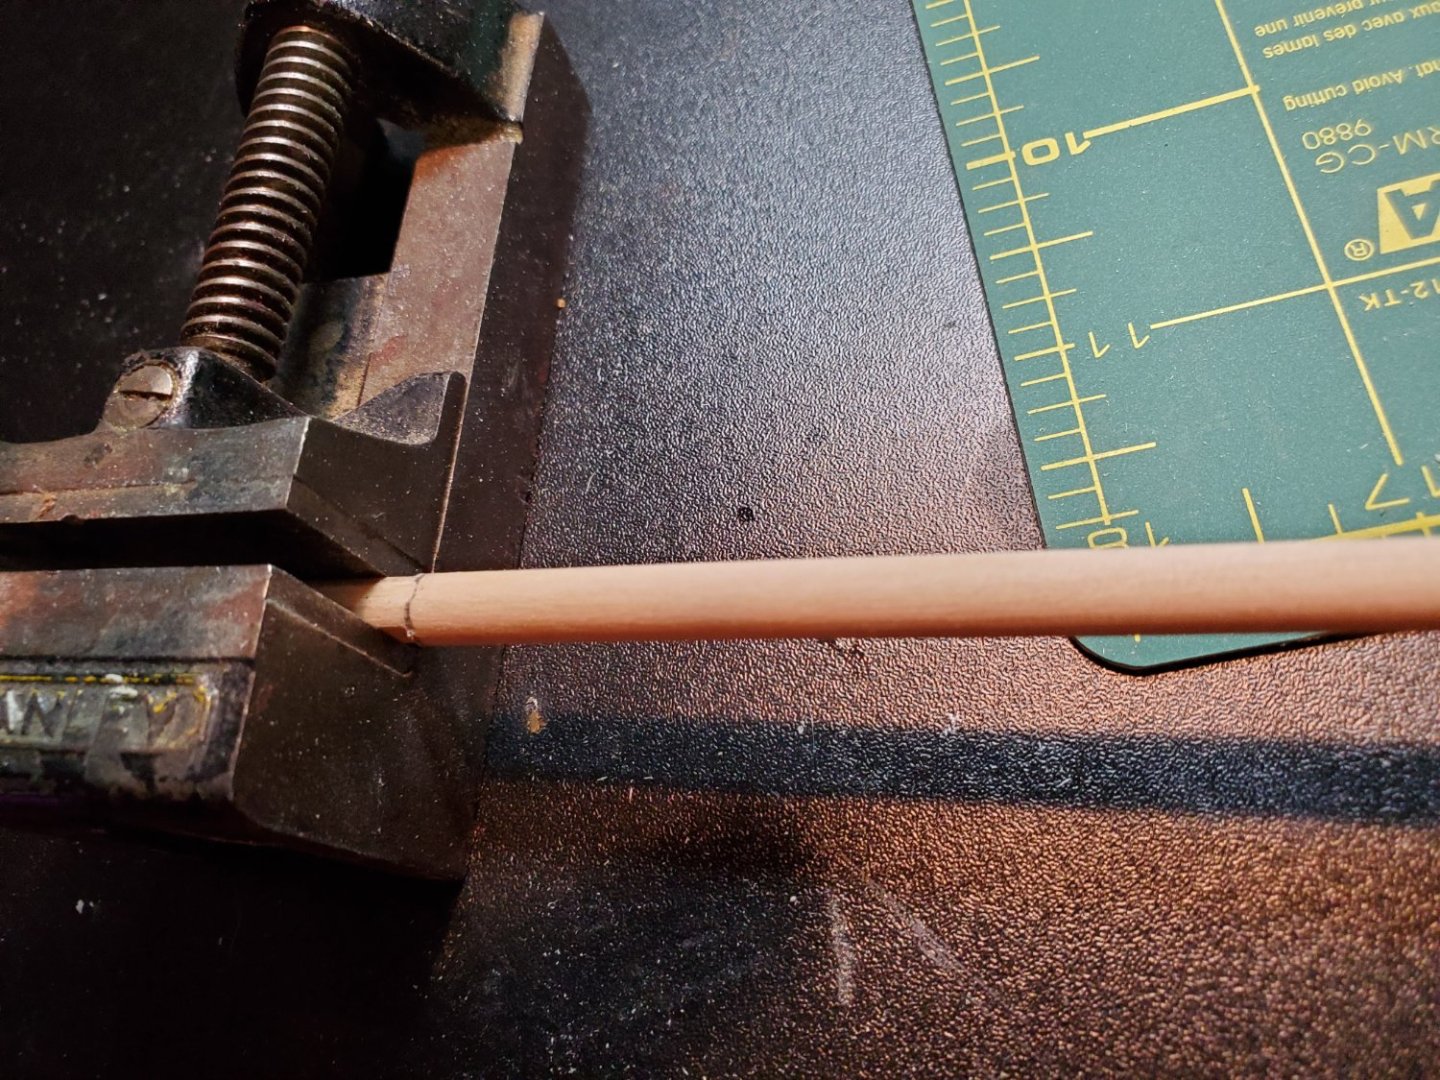
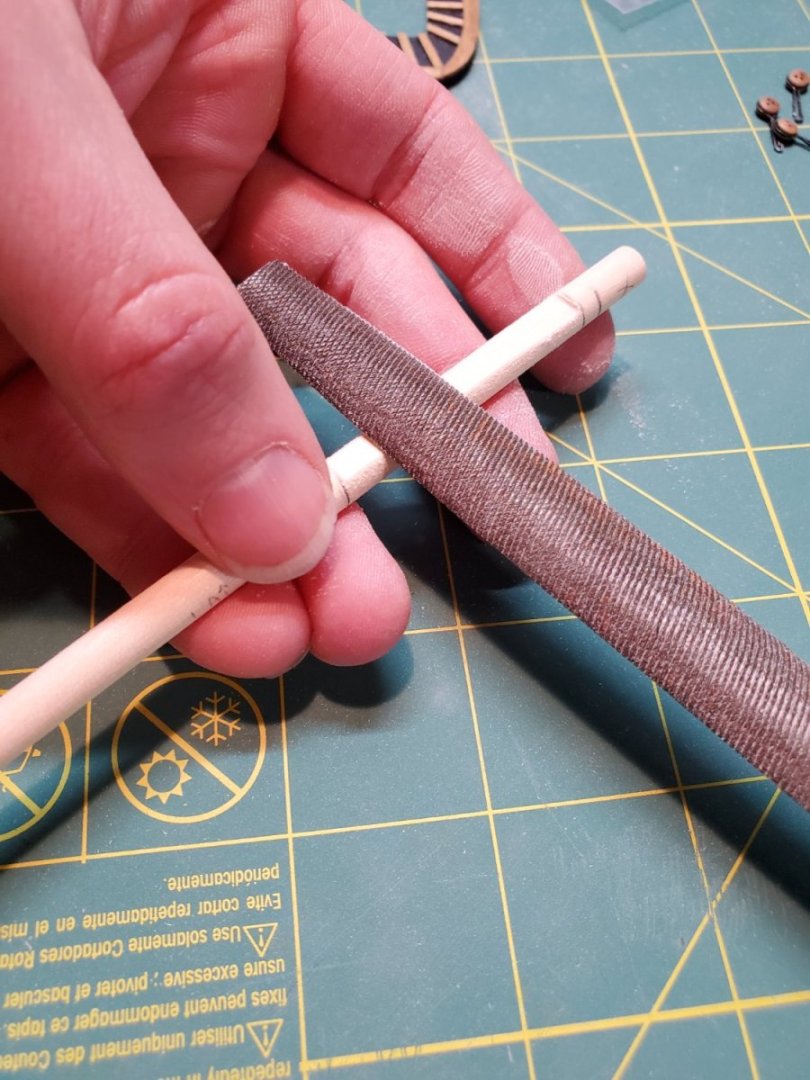
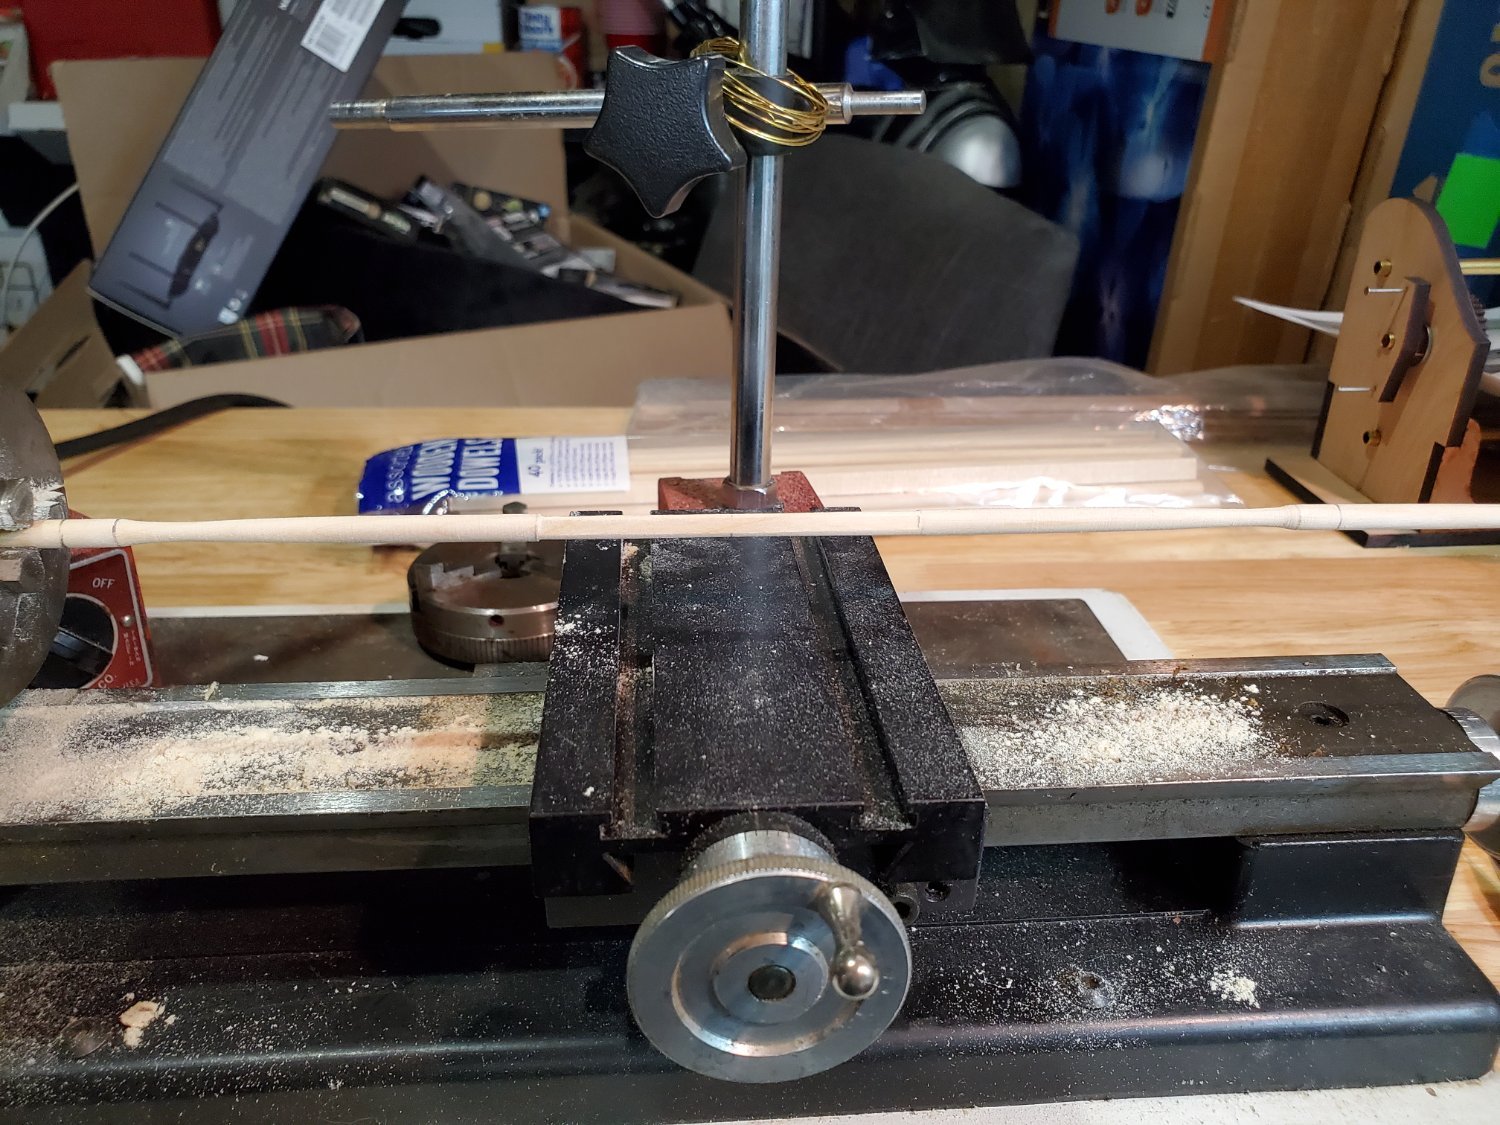
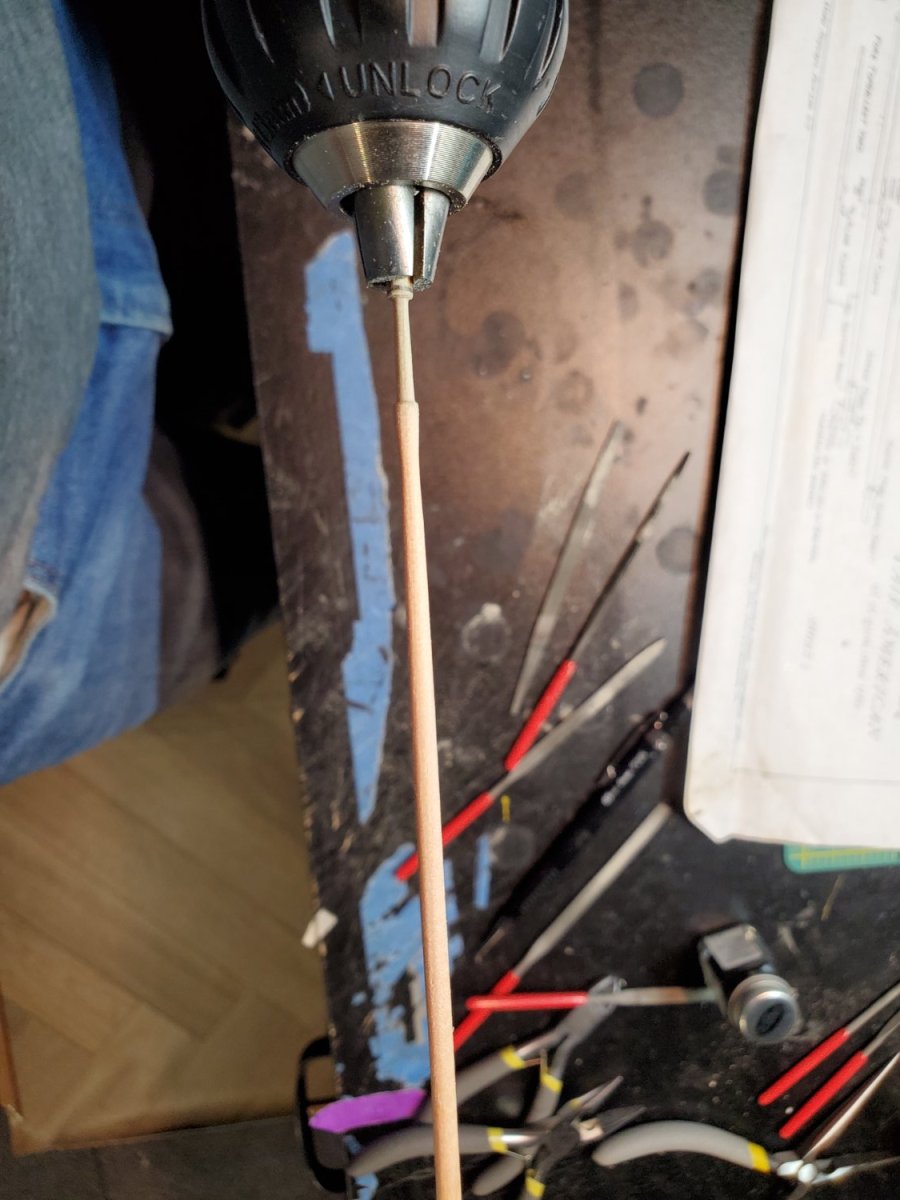
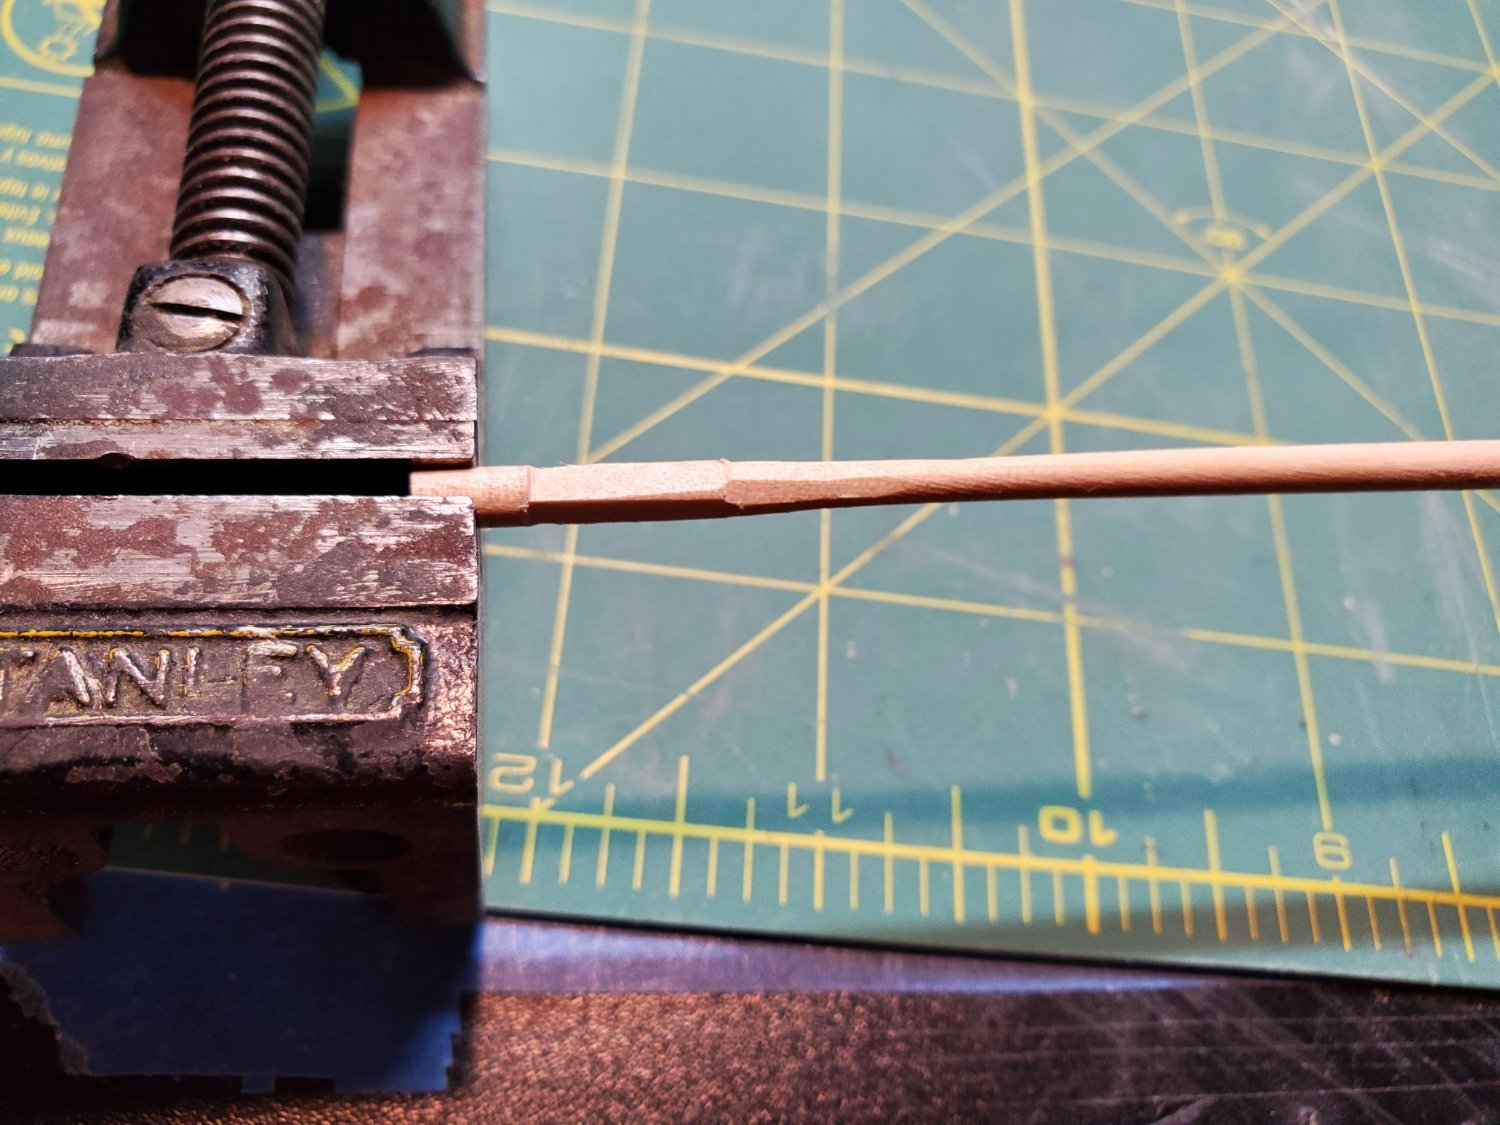
After battling with the hand drill for 5min at a time to shape the yards, I went back to the lathe. I know I don't have a spindle on the opposite end to keep the yard straight, but I minimize the wobbling as best I can during chucking and using low speeds. Most of the time I'm using low grit sand paper to shape it, which is taking a while. I'm reluctant to use the turning tools, because I don't want to go too deep and ruin it. So, slow and steady as she goes....
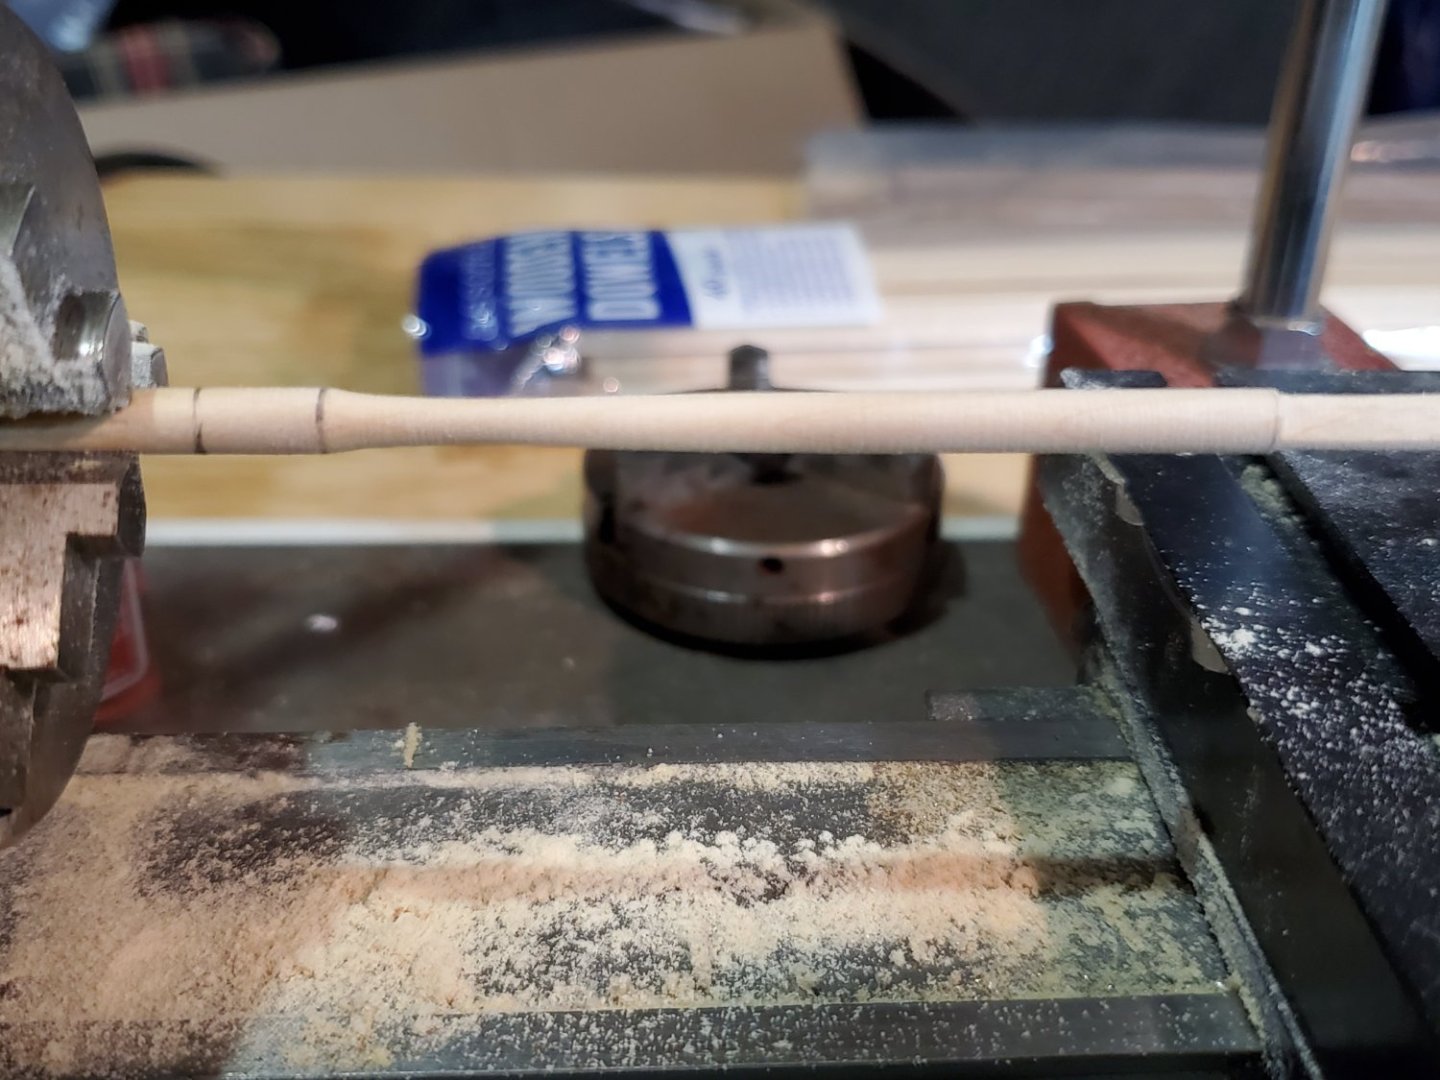
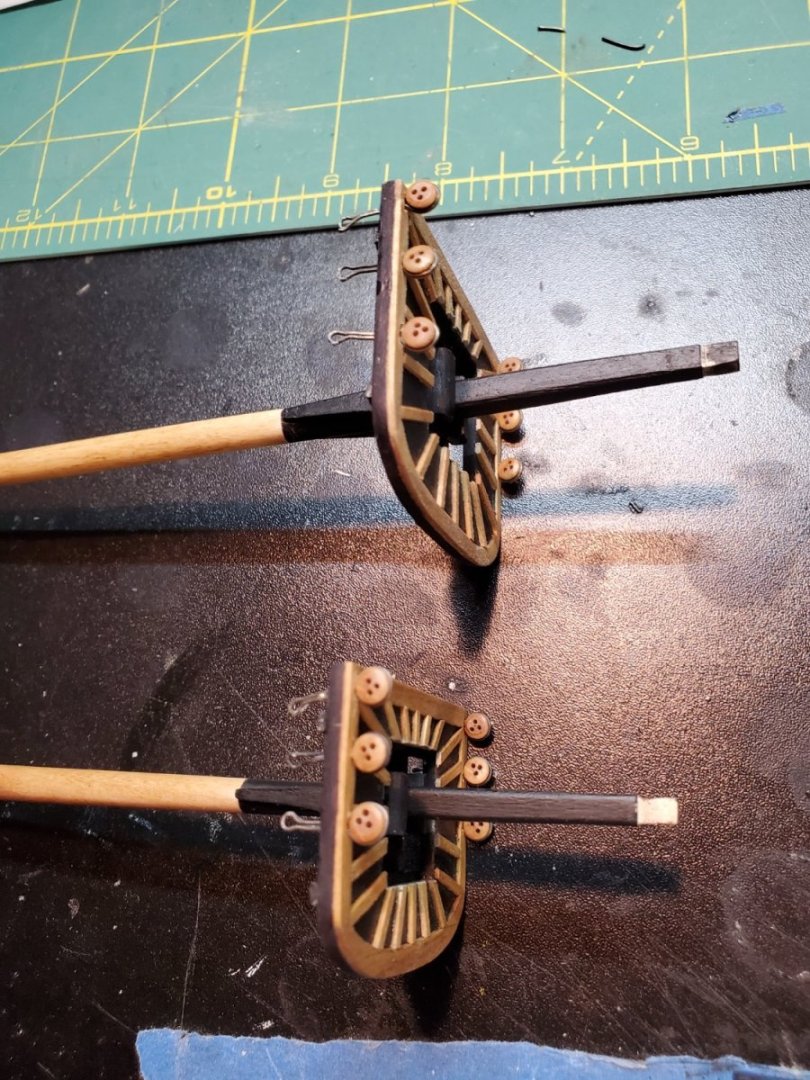
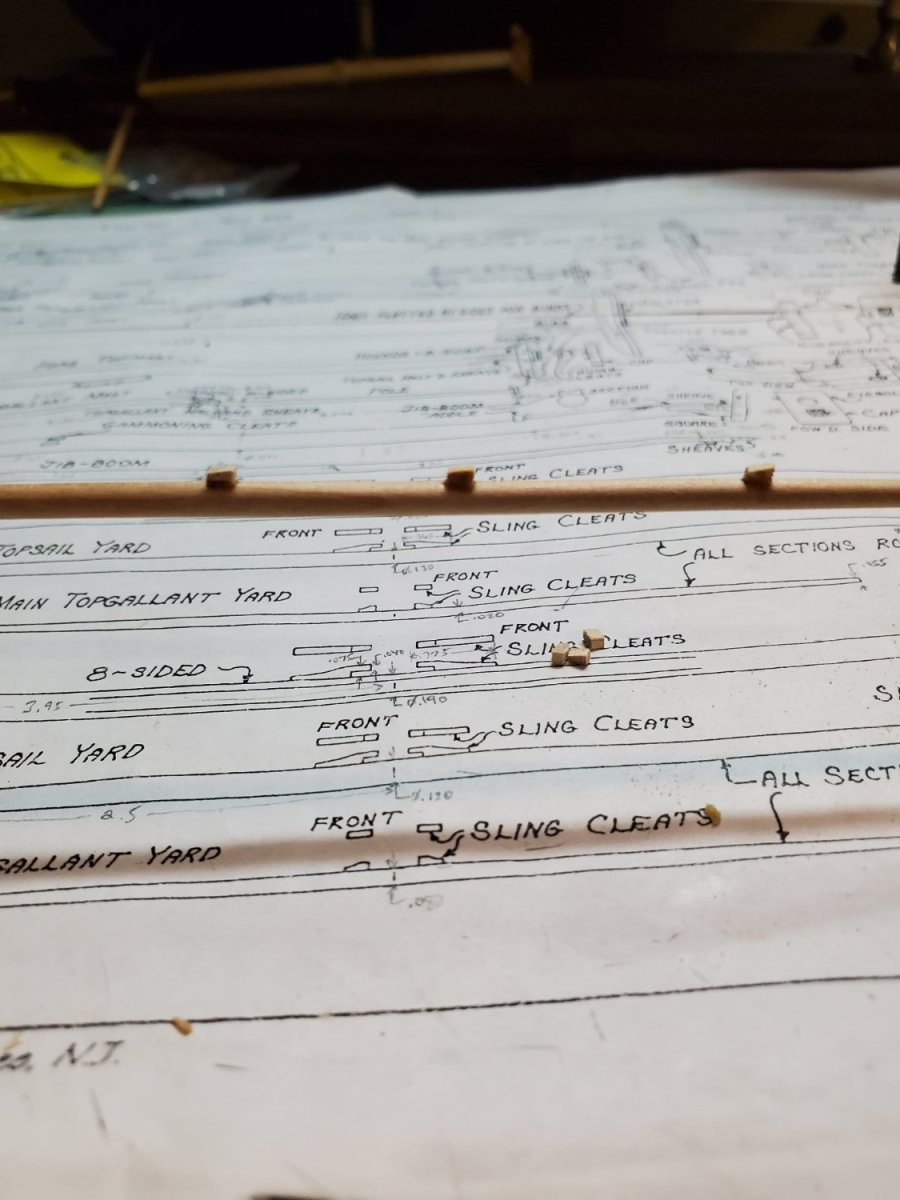
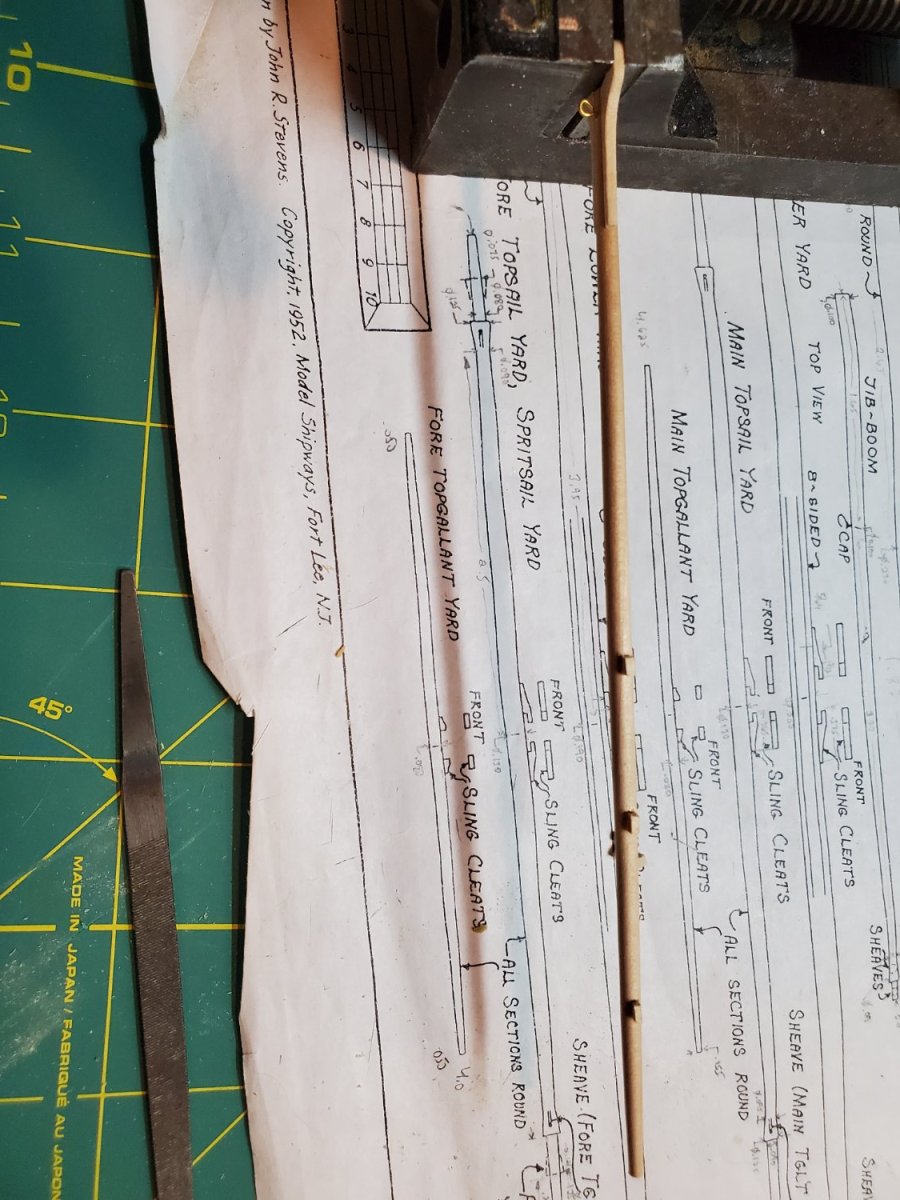
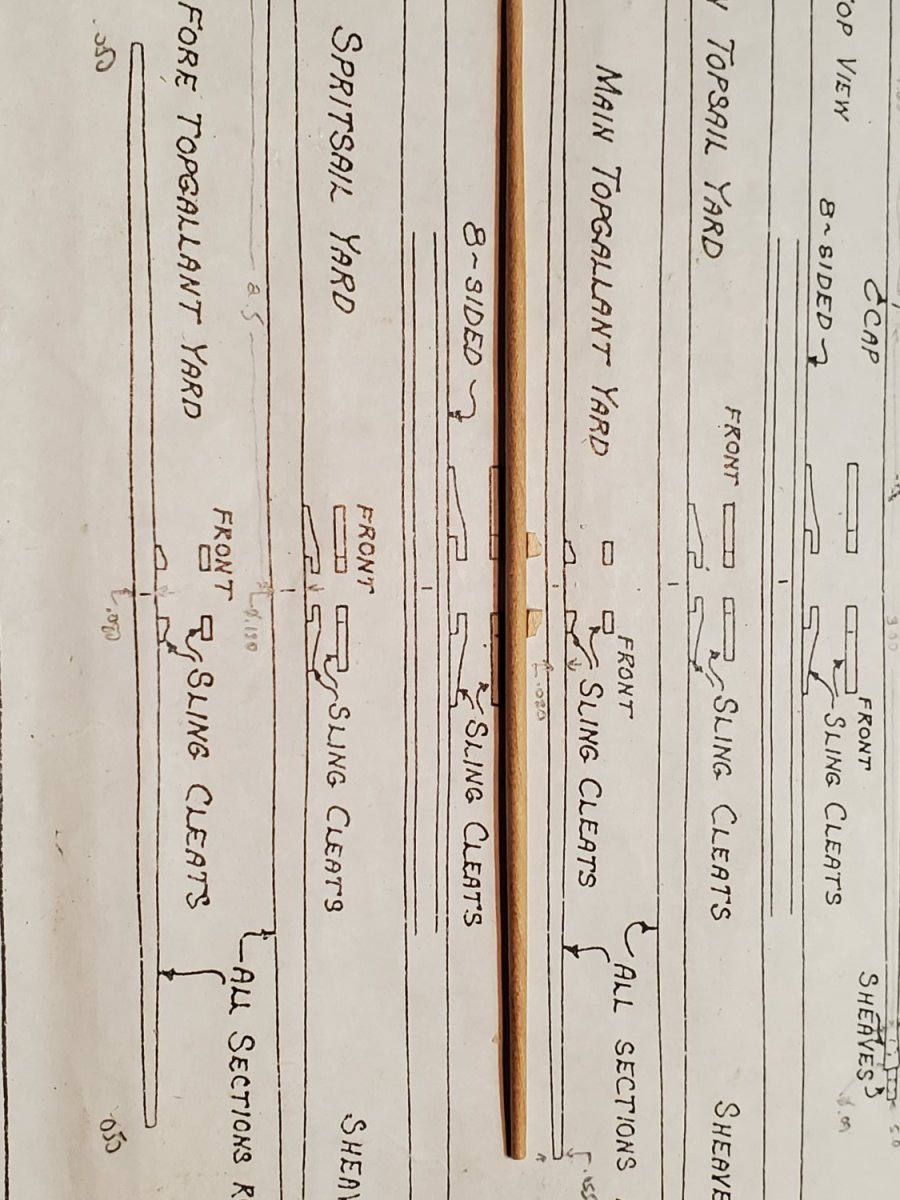
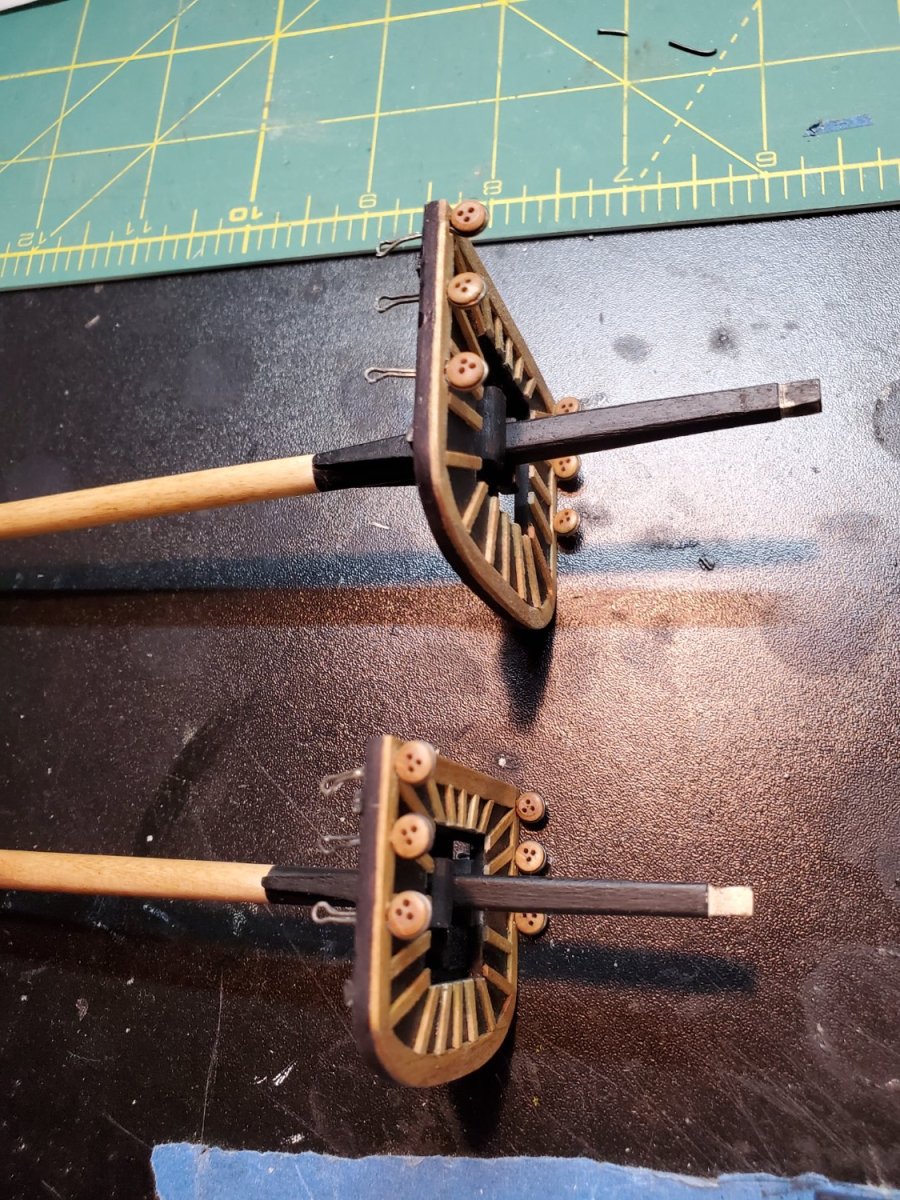
I've managed to complete a few yards now, such as the Main Topgallant Yard below, and Main Topsail Yards
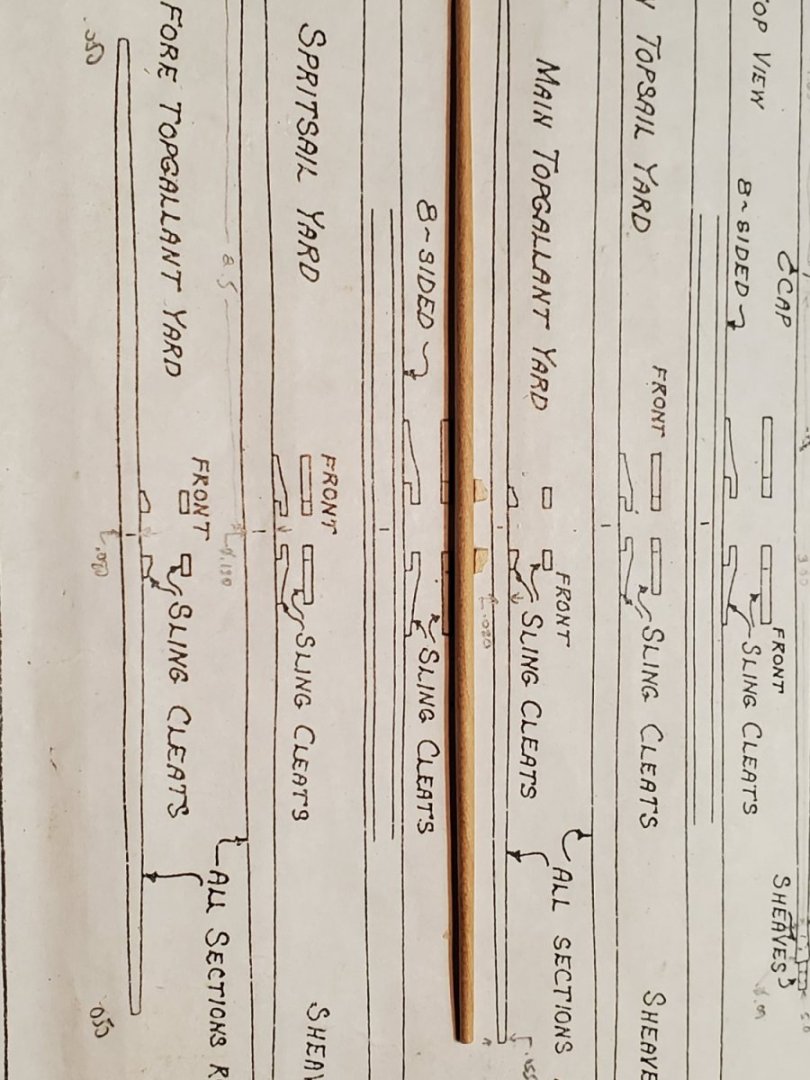
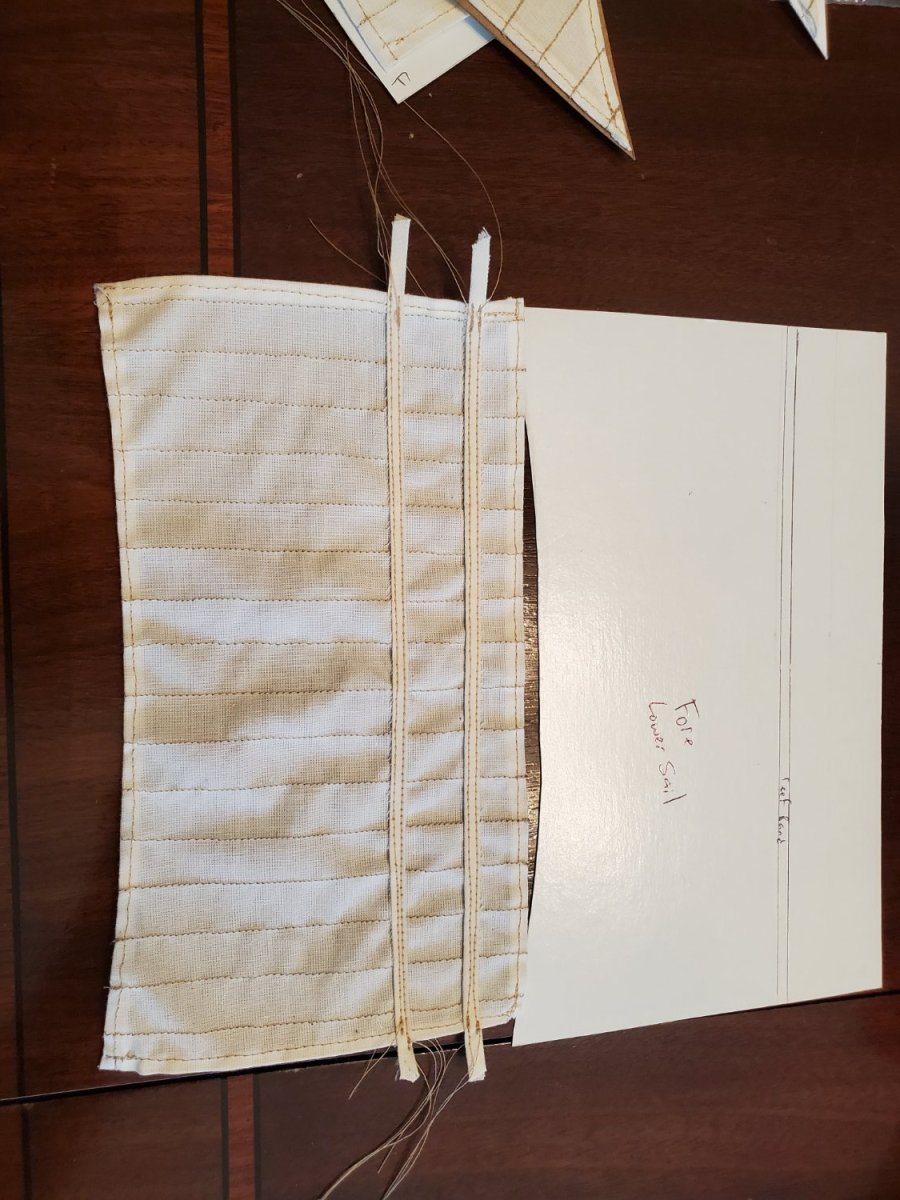
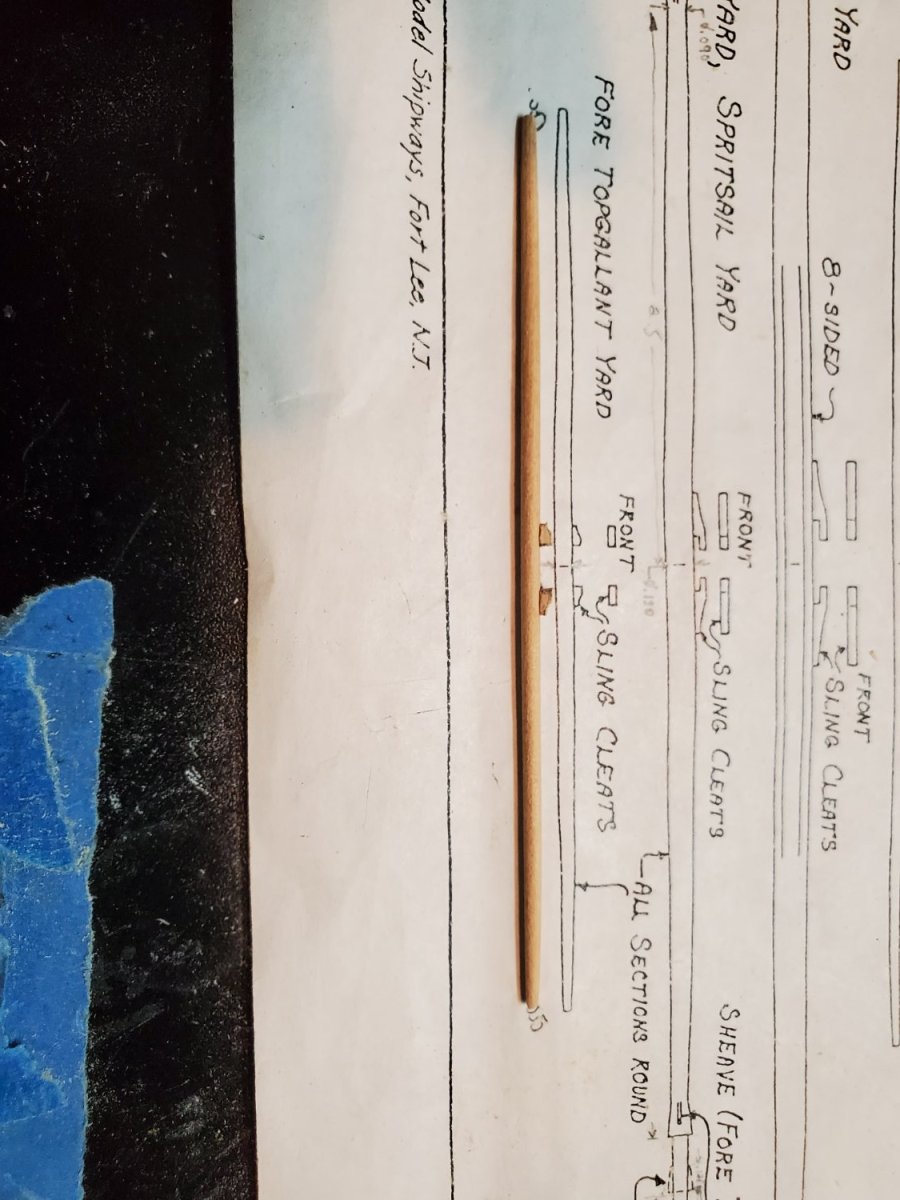
Working on the Fore Lower Yard, the instructions say to add blocks to the middle, then shape to 8-sided geometry from there. This was because the diameter in the middle is just under spec. So I started with filing flats for the blocks to go in:
Then glue the blocks as per the instructions...
But I didn't file the center down far enough, and so the blocks have a small gap. Right where the 8-side corners are going. Not good.

When I tried to file it down, the blocks shredded, since they're so close to size and the notches weren't deep enough. Really not good.
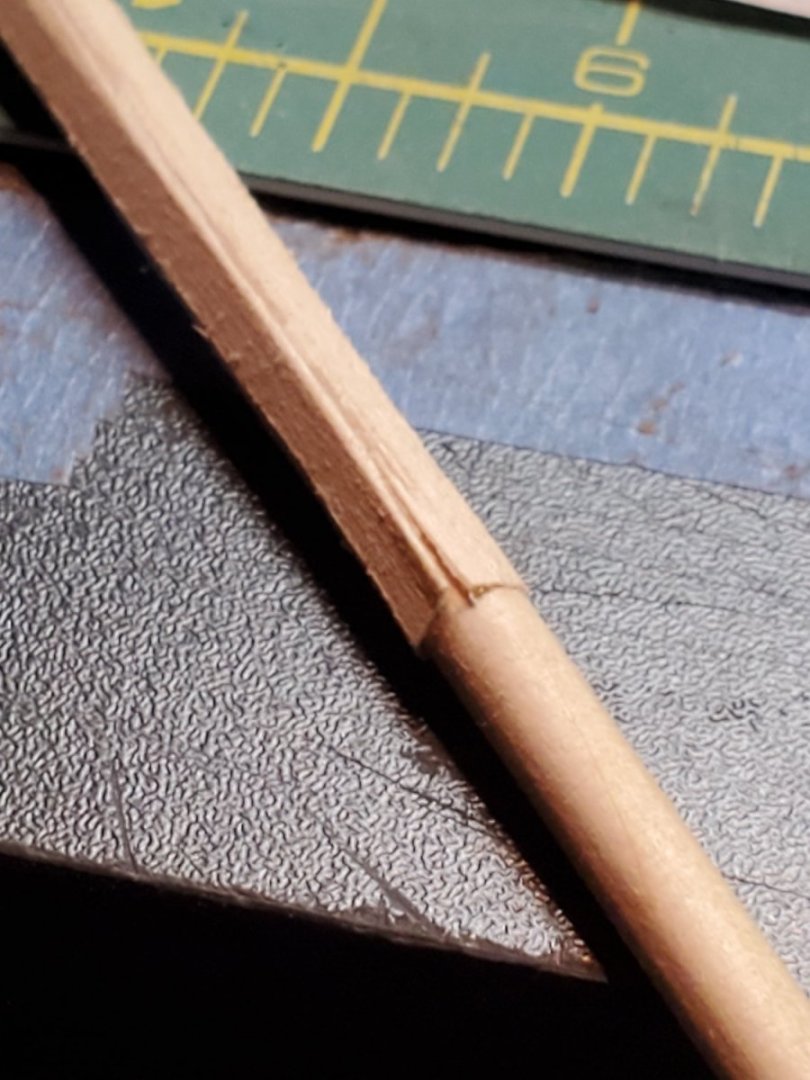
So, I decided not to remake the entire spar, and I simply filed the middle 8-sided section a little undersized. I'll live with it. The ends turned out a little short, but the overall length was correct. I think I was too conservative during the shaping, not wanting to cut off too much too soon, and risk the whole shaft wobbling in the lathe.
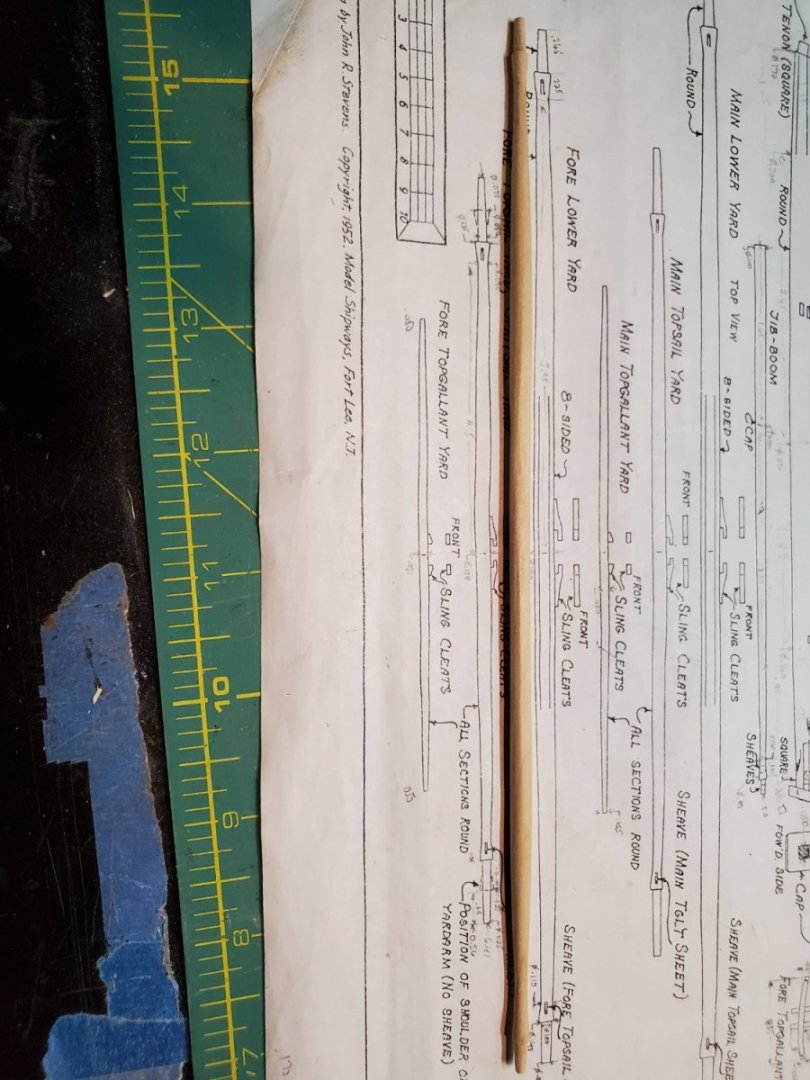
I'm now moving on to the Main Lower Yard, and I won't attempt the same 8-sided build up again. I'll just make it a little undersized. I should be done the rest of the yards soon too. The lathe surprising goes much faster than 5min spurts on the hand drill. Who knew?
I also had a week off last week, so I was able to dedicate more time to the build
Have a good week, all!
- Jason -
-
-
Making slow headway on the Fair American Model Ship
The summer has been full of activity, and my progress has been on/off. I wish I had posted a little sooner. I did, however have a great time making beer and hanging out at Cisco's house, recently. Trying not to drown in the pool by his kids was tough - I could have brought the Fair American and rigged up a few mini-cannons to fire, but I'm not sure it would actually float, which wouldn't have fought any kid-armada off at all.
'Kidding'' aside, I was able to stain the base with MinWax Puritan Pine. It almost looks professional - almost!

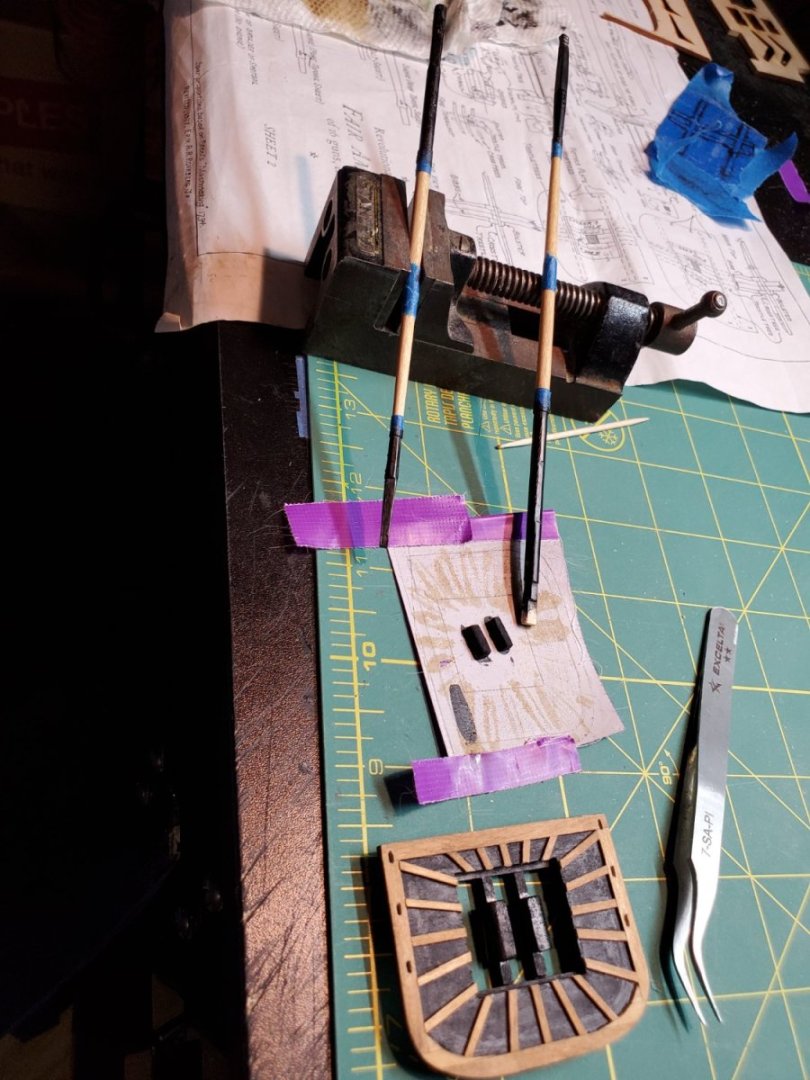
I went back to work on all the chain plates and futtock plates for the deadeyes. As with a much earlier post, I made a jig to hold the deadeye in place, then used fine tip needle nose pliers to pinch the wire-plate to shape, and wrapped around the pin. Afterwards I could trim the excess to leave a satisfactory chain/futtock plate.

This was similar to the method described in the instructions, but I'm still deciding whether to solder and file the flat. I might just leave it.
I had to file the cutouts for the deadeyes in the tops to make the plates fit. That was tedious, but I got it done.
In between that work, I would intermittently work on the yards. The lathe I have is really small, so i couldn't chuck both sides the way I wanted to. I resorted to the hand drill. It took a lot of chuck-centering, but it wasn't too bad. Using files takes a really long time before the battery goes. Coarse sand paper sometimes turns faster, but burns my fingers just as fast. It also doesn't help that I'm a perfectionist, trying to get within 0.005in diameters. I wonder why it takes so long?!?!

I got the Fore Topsail Yard and Fore Topgallant Yards done this way.

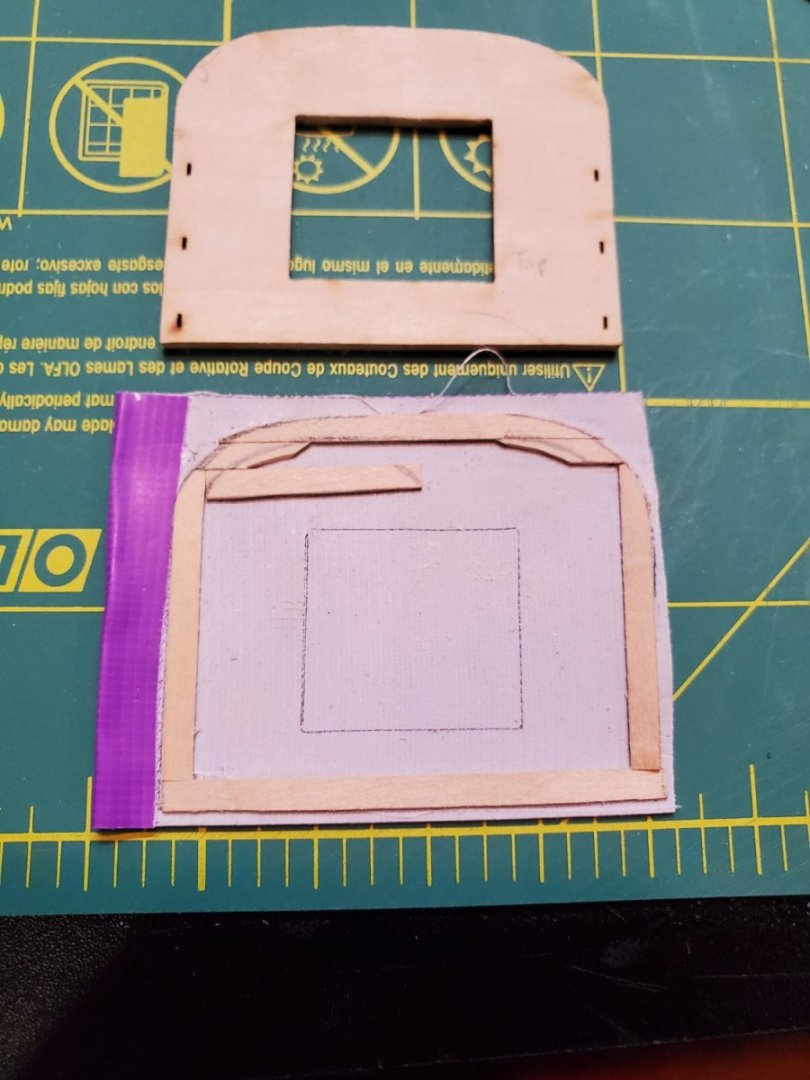
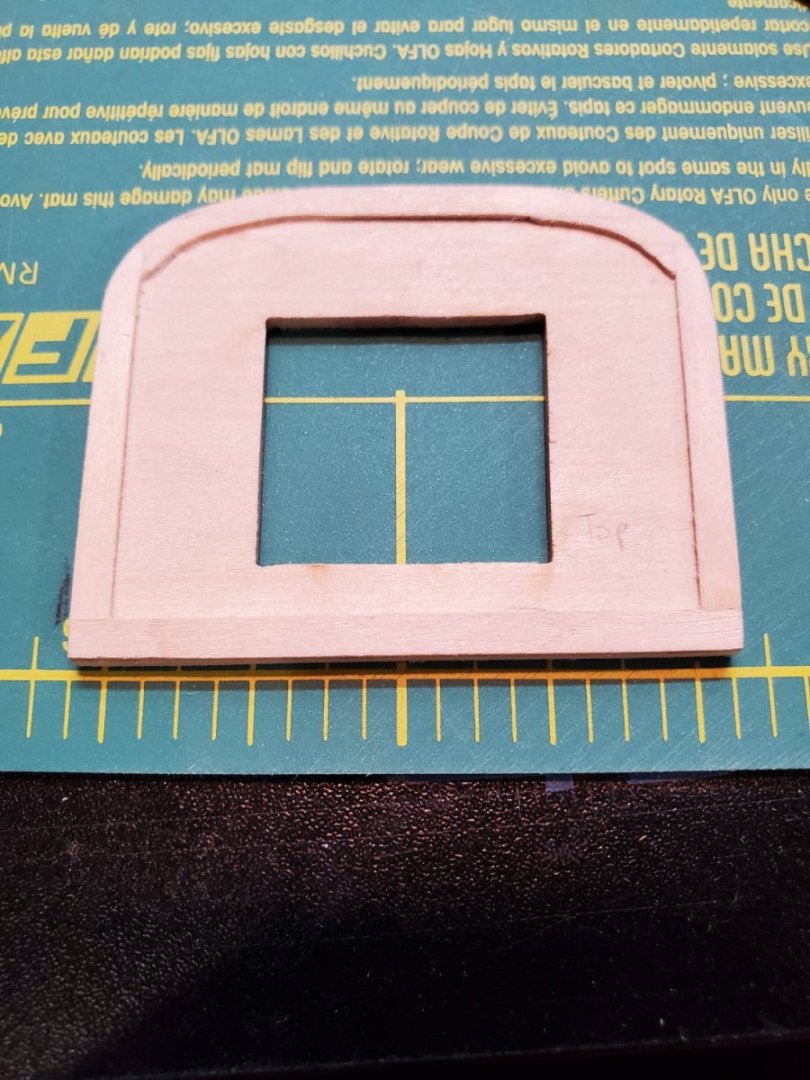
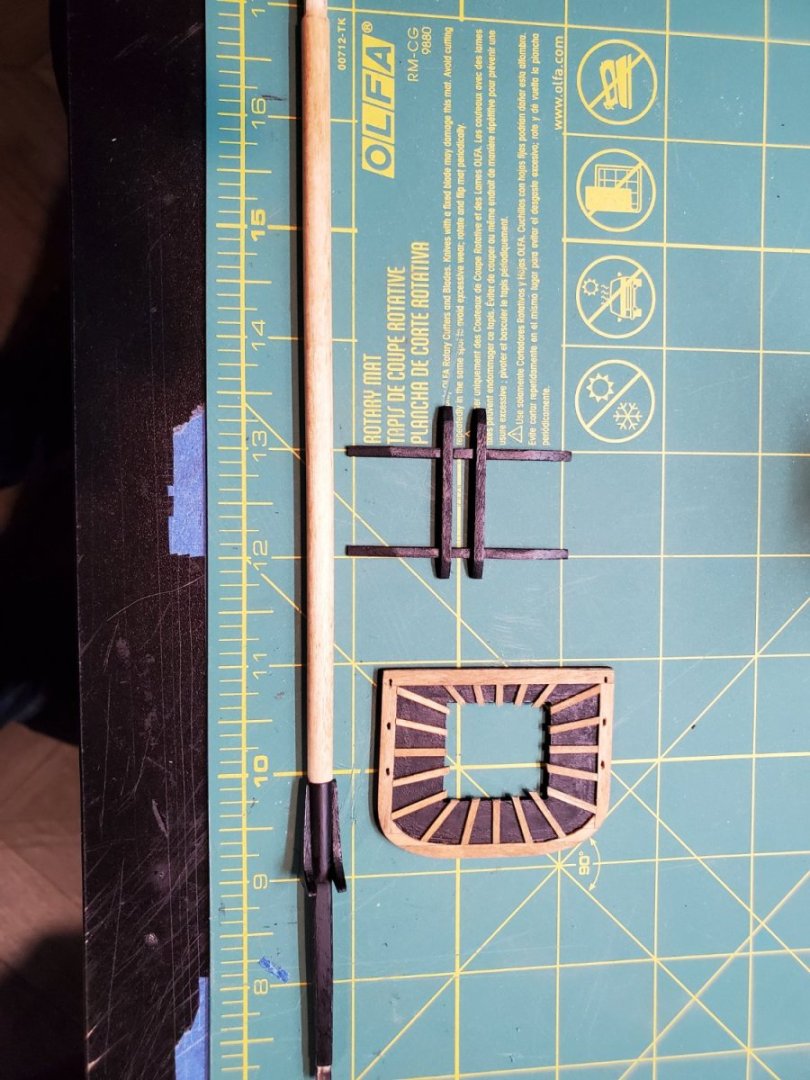
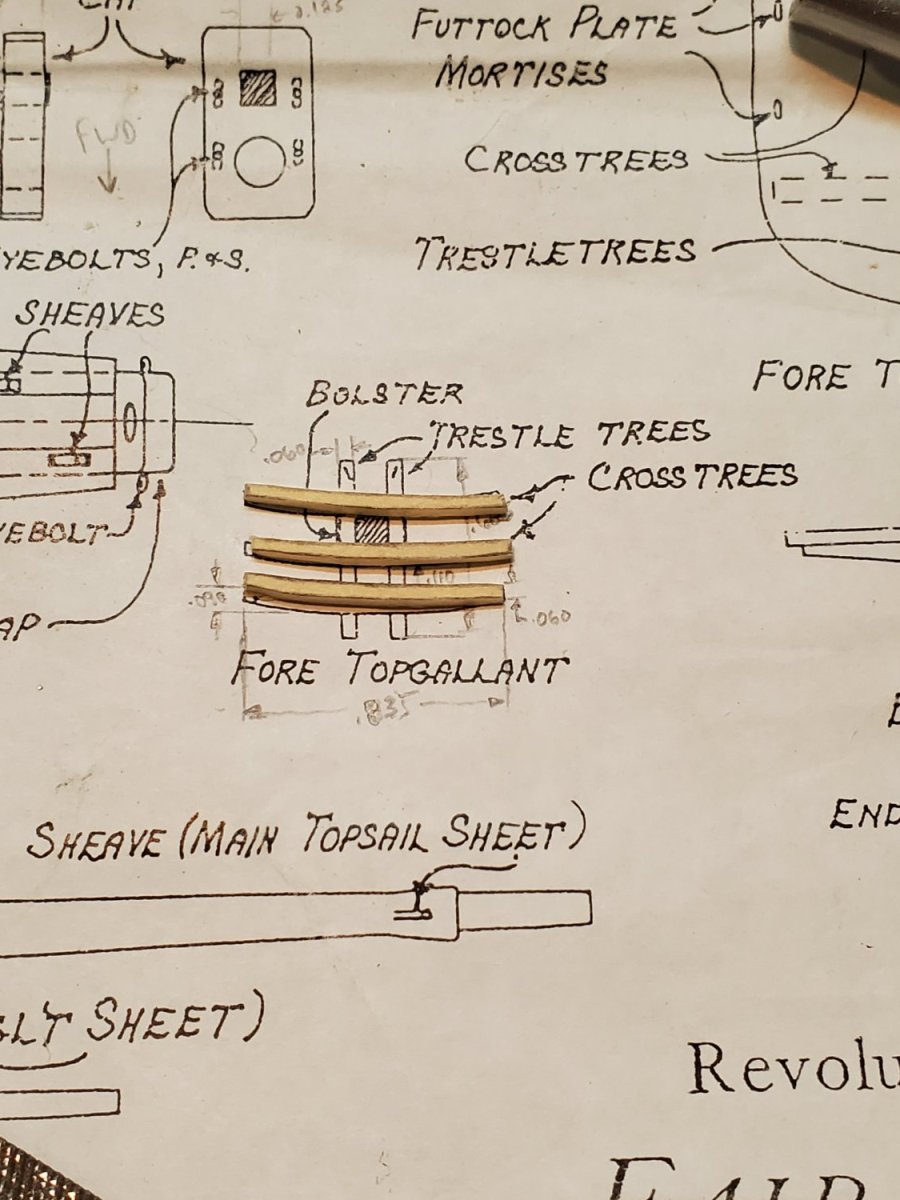
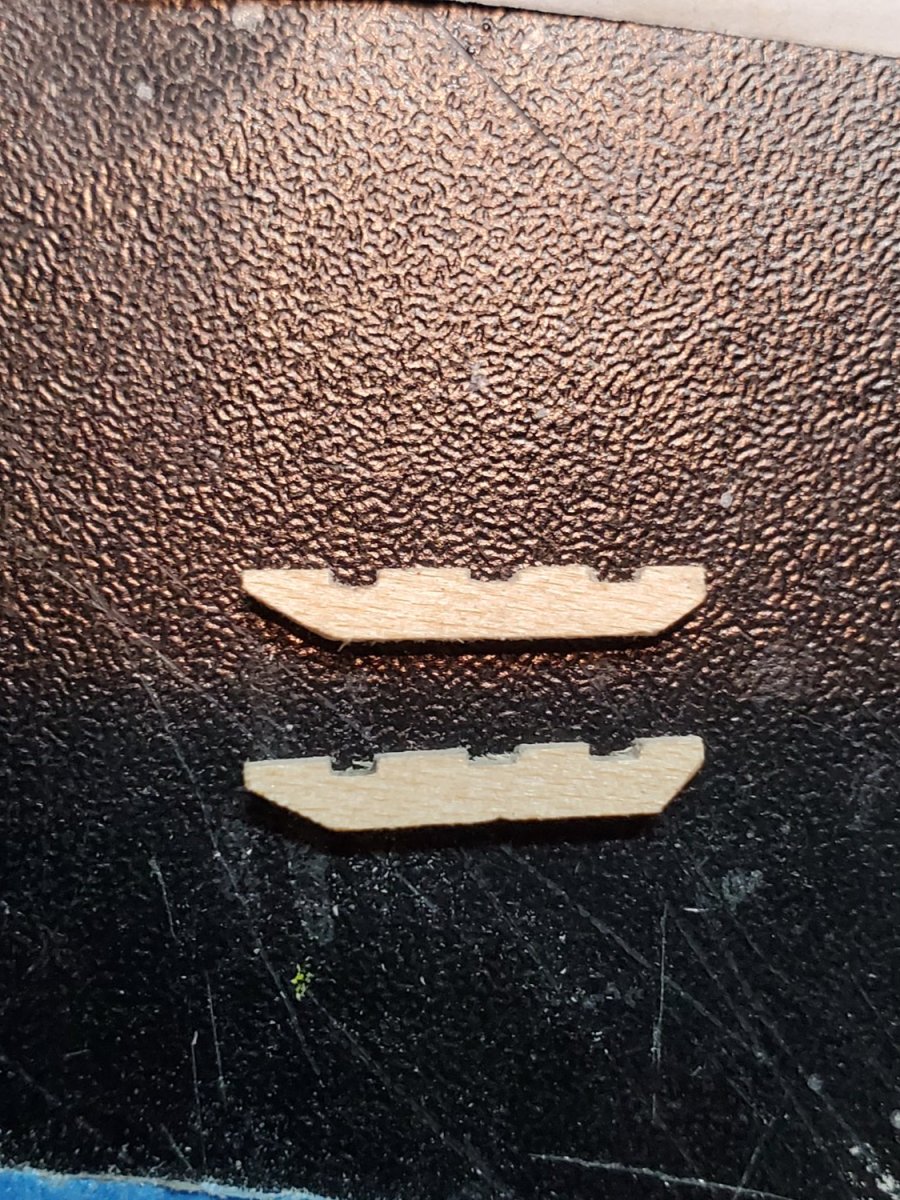
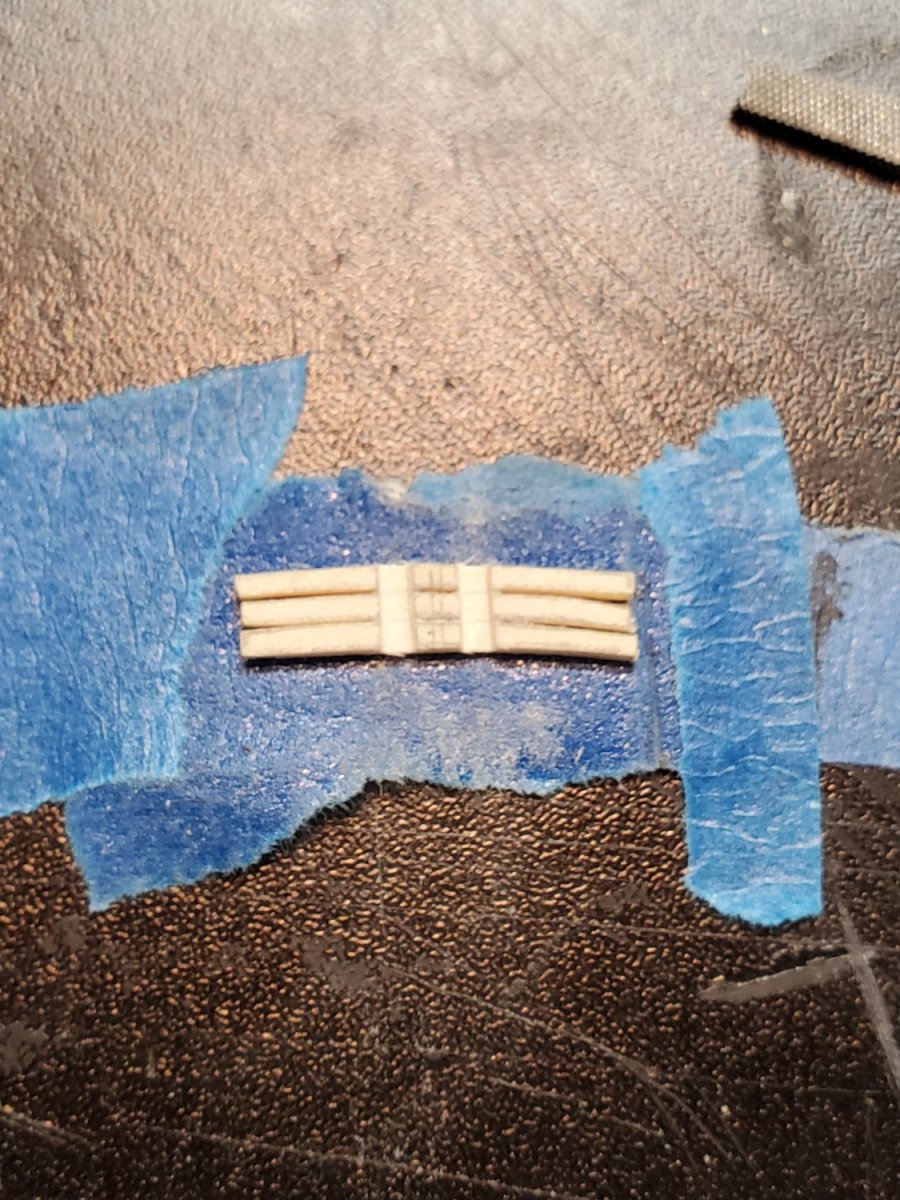
I also worked on the Fore and Main Topgallant trestletrees and cross trees. These were simply sawn to shape, to get the curves.
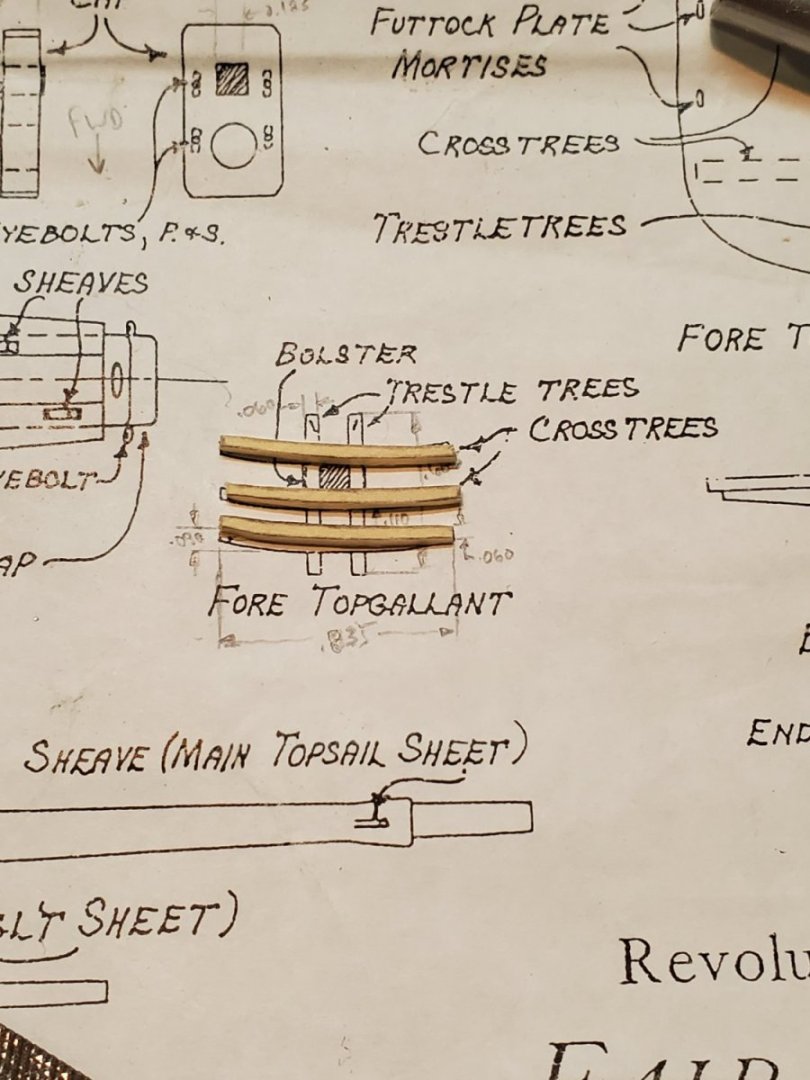
Notches cut in both Trestletrees and Crosstrees done on the vice, which provided a nice edge to file down to.

Nothing perfect, but they're done. Upside down painters tape works really nice for lining things up for sanding/filing/gluing.
I continue to work on the rest of the yards, as time allows. Hopefully I won't burn out the drill, trying to turn them all down, but we'll see.
Have a great week!
- Jason -
-
Progress on the Fair American model ship:
Yet again, long time blogging progress. This month (May) has been sluggish. Primarily because the new Legend of Zelda: Tears of the Kingdom video game came out, and I've been playing non-stop for weeks.
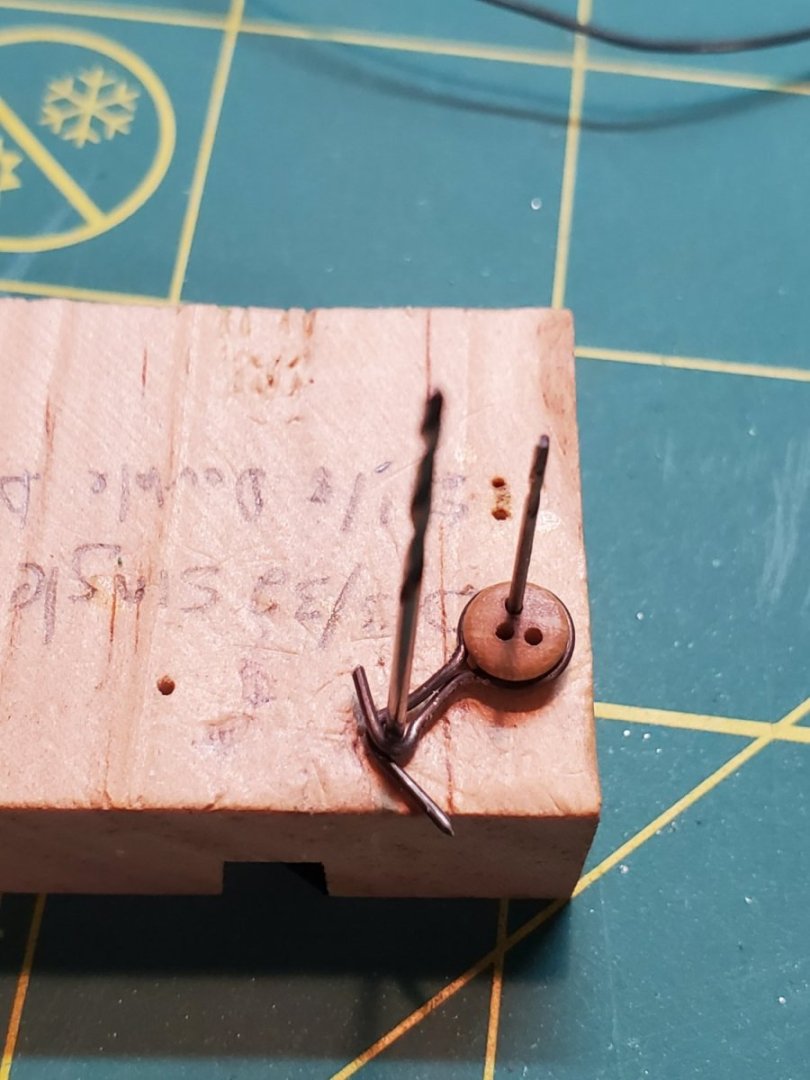
But anyhow, I found out I was 2 cleats short in my kit, and I needed them for the masts. First I tried shaping them from scrap wood, and because they're so small, they basically shredded in my hands. Fortunately I had some leftover casting, that I never used, since I made my deck furniture in wood pieces. So I cut a piece from the binnacle, and used my jewelers files to shape it.
The top cleat is the real cast one, and the bottom two are the ones I made by hand. They were fun, and I'm proud they turned out even close to shape!
They got painted black then installed on the masts. Masts are not glued yet.

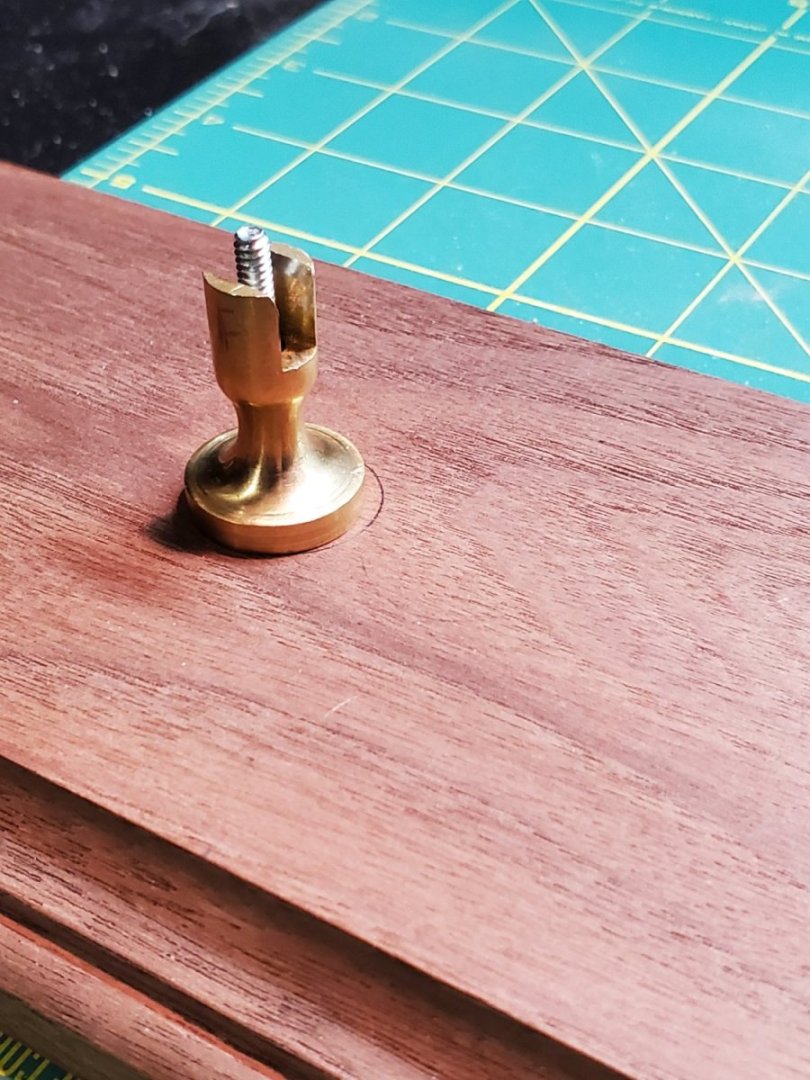
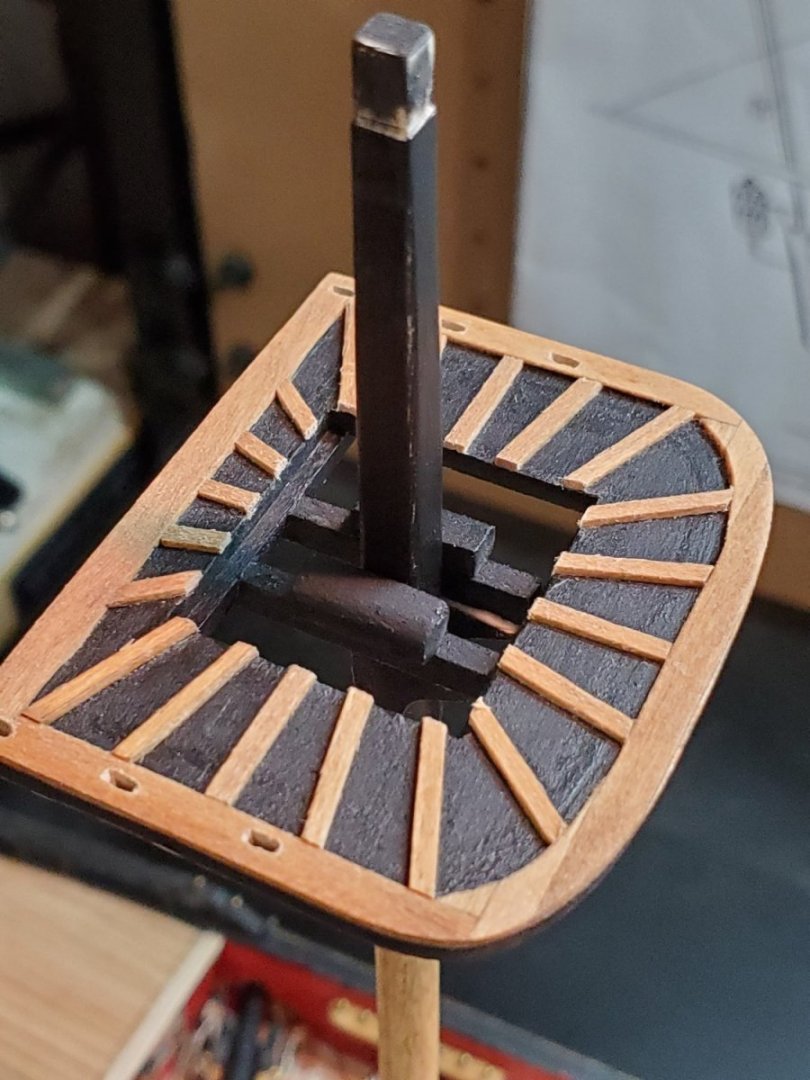
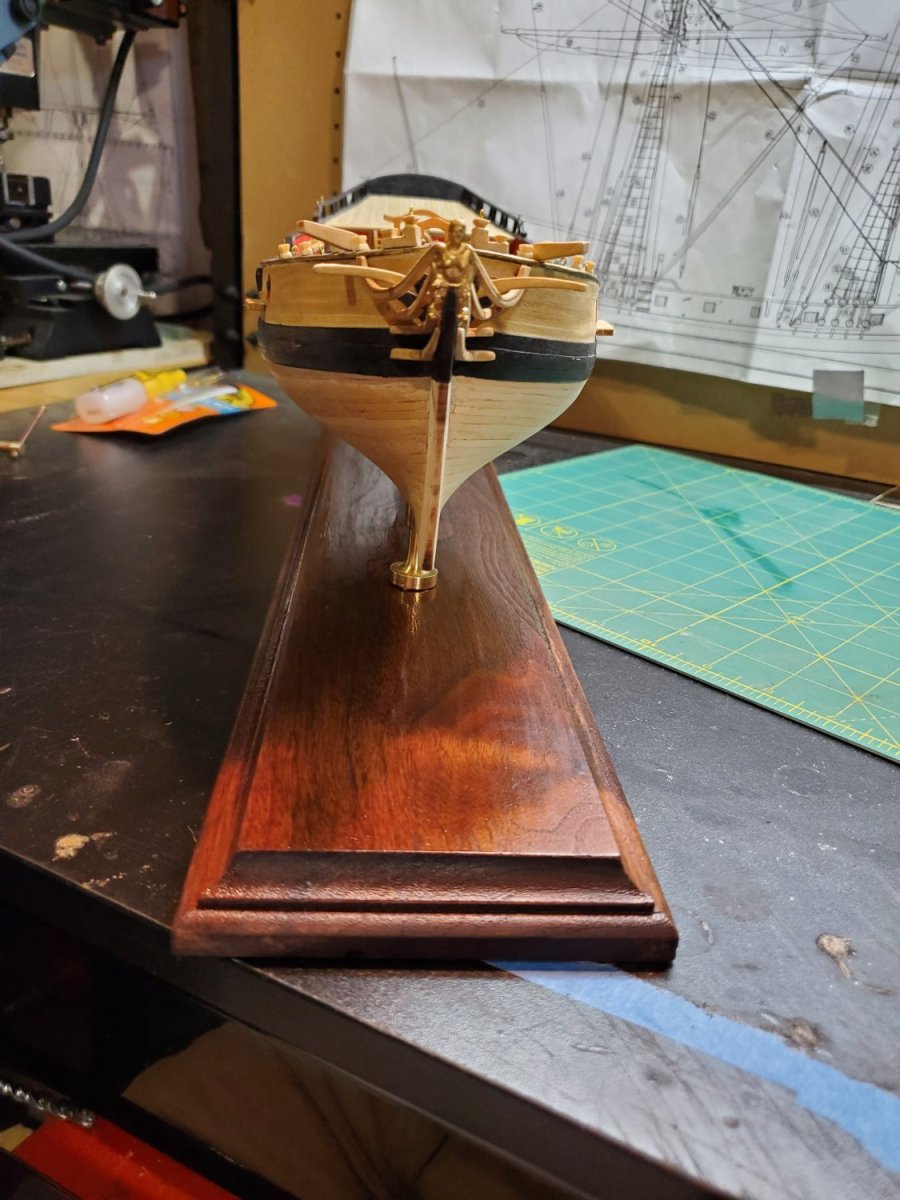
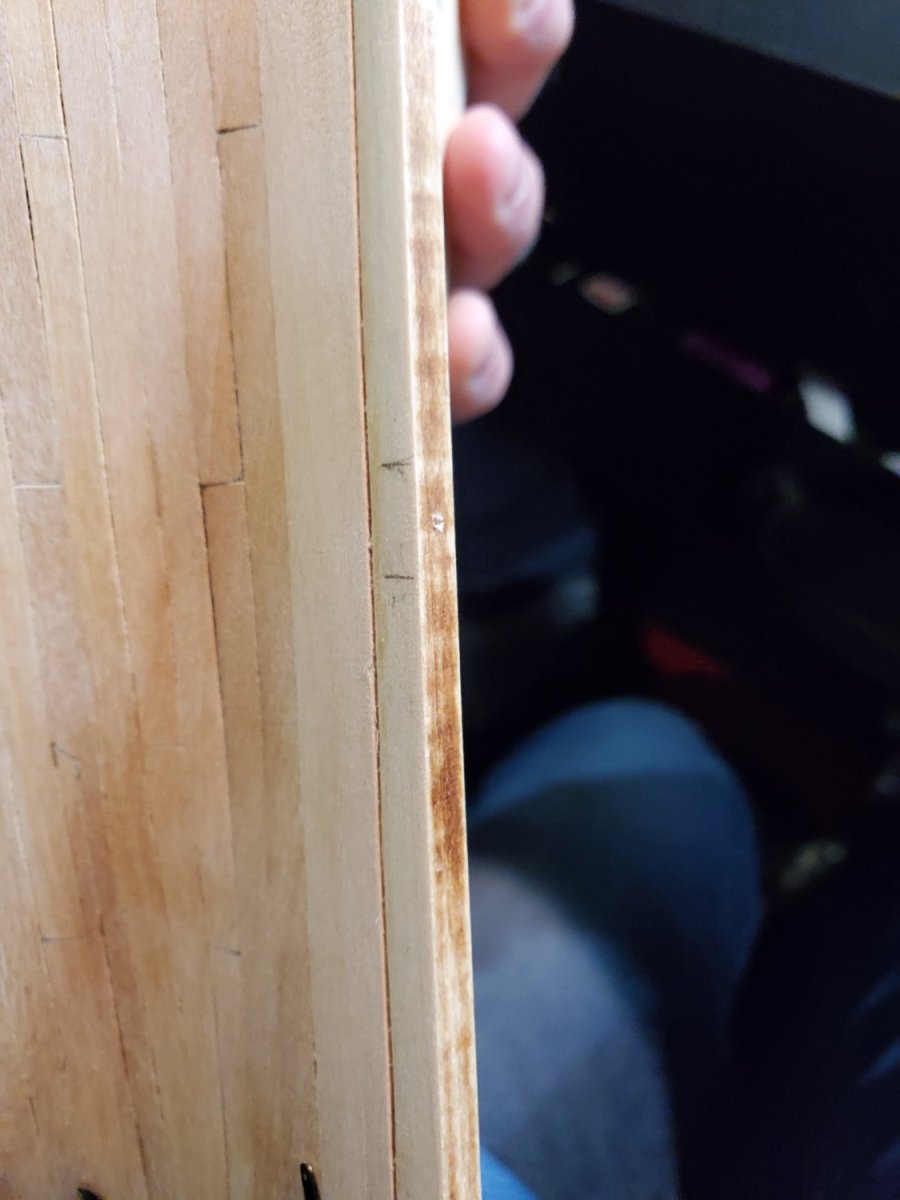
I decided it was time to mount the model (extremely late, I know). With all the progress I've made, I had nowhere to grab, except like this. I'd hold in one hand, and flip the entire model over. Then use pin vise to drill the holes, smallest to largest, hoping they were straight.

I'd made pencil marks on either side of the stand-off so I'd know where to drill. Keeping the drill straight was really difficult, obviously.

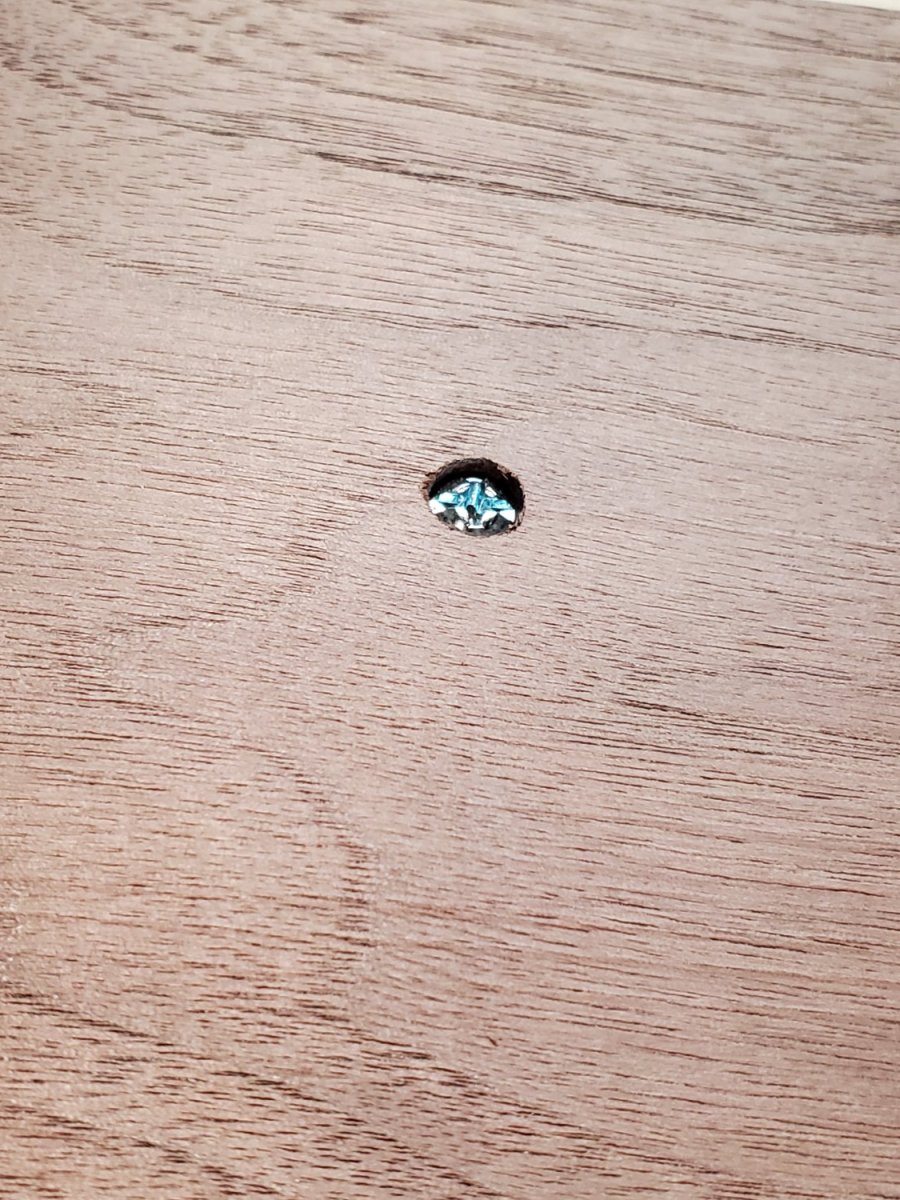
I didn't want the screw to split the keel, so I went with a 6-32x2in machine screw. After the tap drill was used, I took the screw and drove it into the keel a little ways, to pre-start the threads.
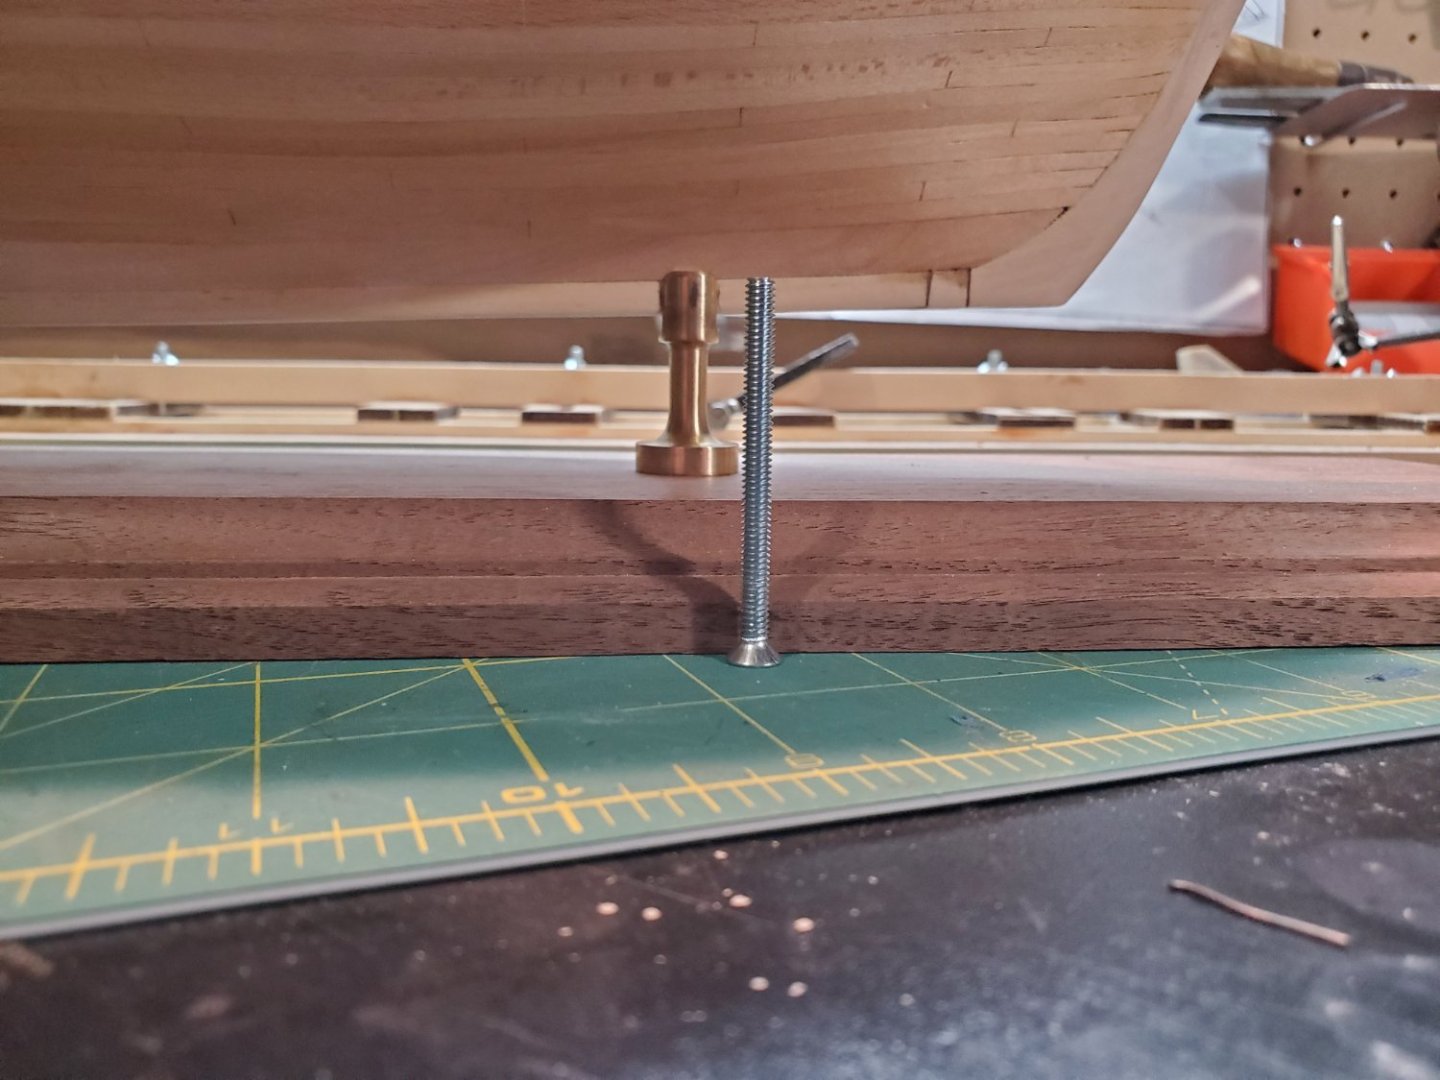
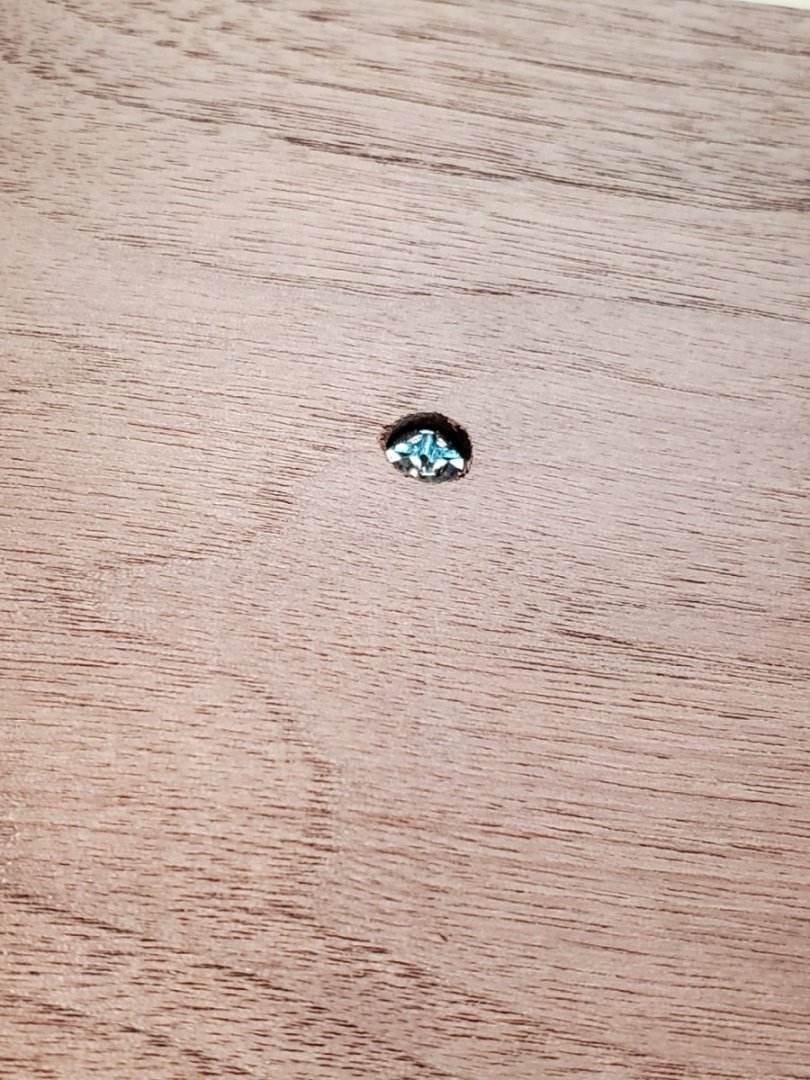
I also counterbored the hole in the bottom so the head would be just a little under-flush.
Marked the front of the stand-off with a pencil ''F'' to indicate the orientation. I had already pre-chamfered the corners so it wouldn't gouge the wood when it finally mounted. The screw is just a little proud, so it won't bury in the keel too far.
I carefully placed the model in the stand-offs and hung one end of the baseboard over the edge of the bench. Then I could reach the screw from underneath. I got both screws in with little problem. Then I got into trouble, BIG trouble. The model was WAY WAY tilted. I was careful with drilling everything. But it wasn't enough. I think any small off axis drilling, causes larger effects when you mount it. I did everything I could think off to counteract the tilt, to no avail. I stepped away for 2 days for Zelda to cool my nerves, and not wreck my ship in frustration.
The only idea I had was to shim under the stand-offs with scrap wood. I didn't have any washers thin enough to use. This is not what I wanted to do, but I needed to move on, and I felt good about the sturdiness of the screws to the baseboard and keel. You can see the little shim underneath.
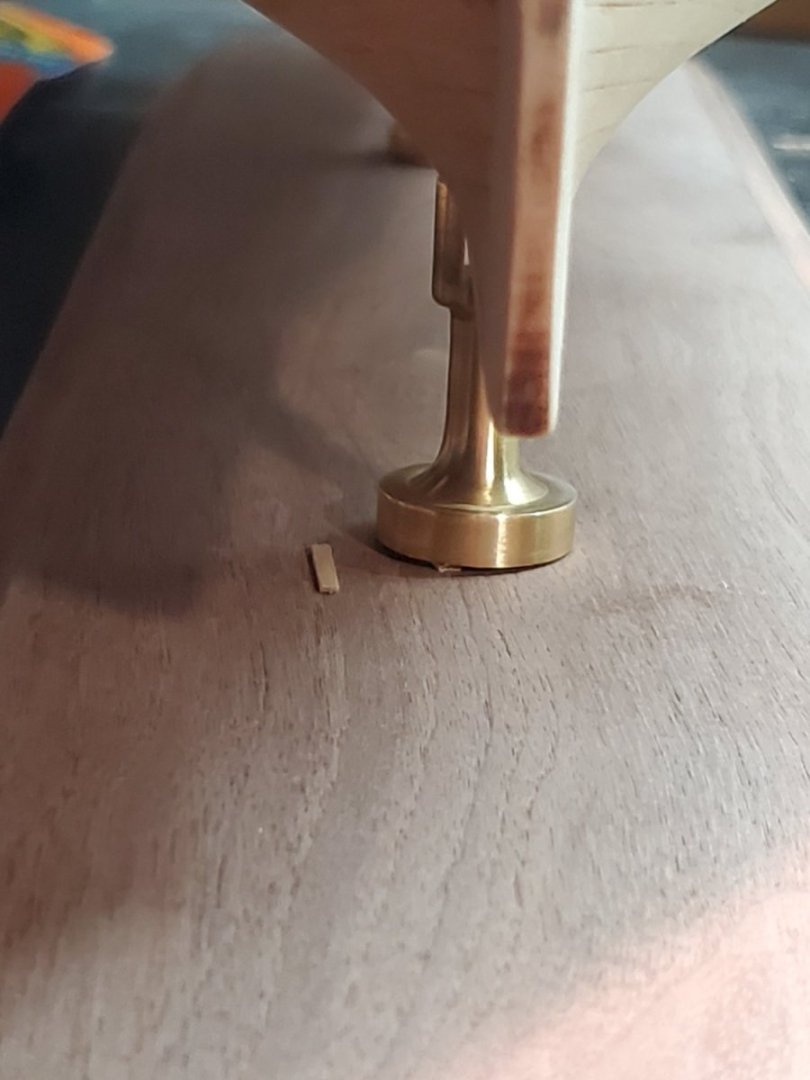
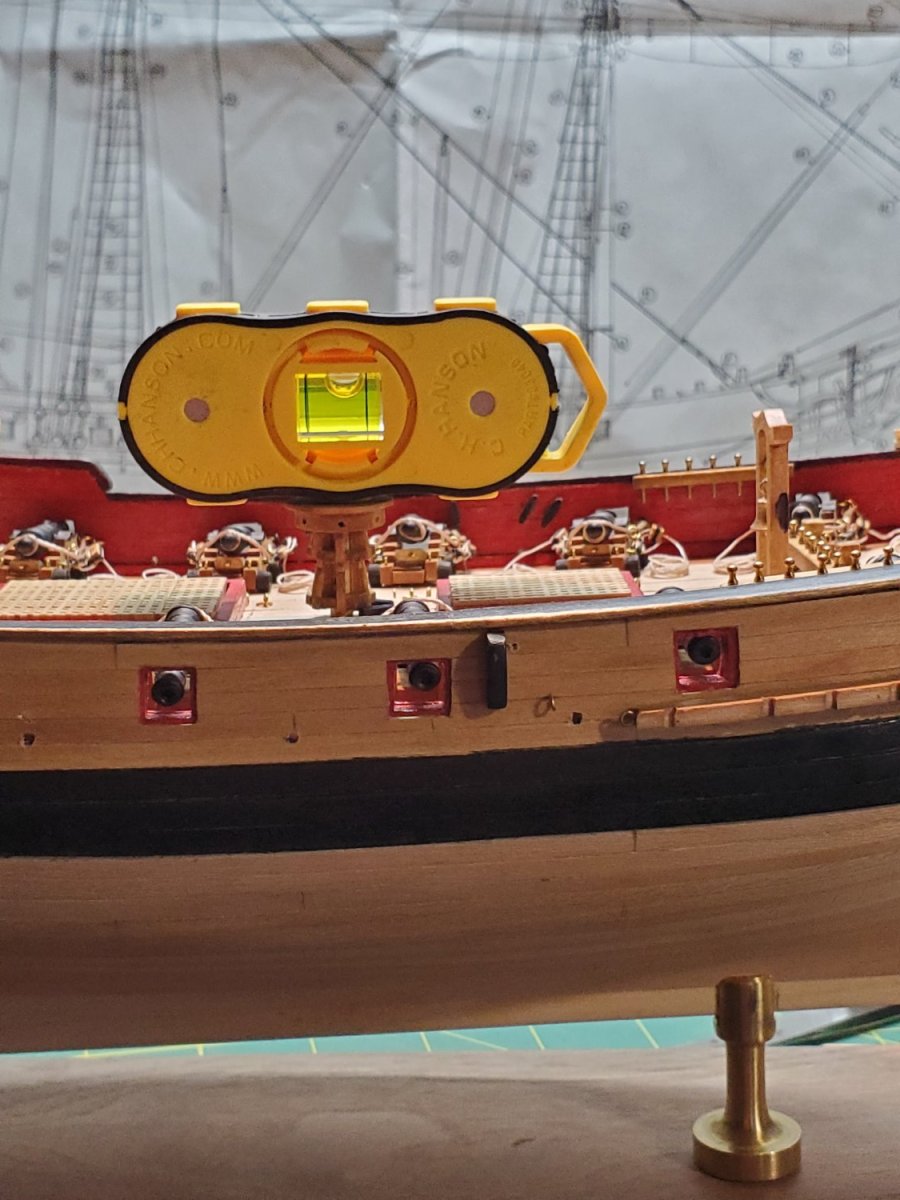
Fortunately it worked. As close as I am willing to accept. I don't want to ruin the model, or worse risk dropping it to try more fixes. Its ''within'' level, and I can sleep again.

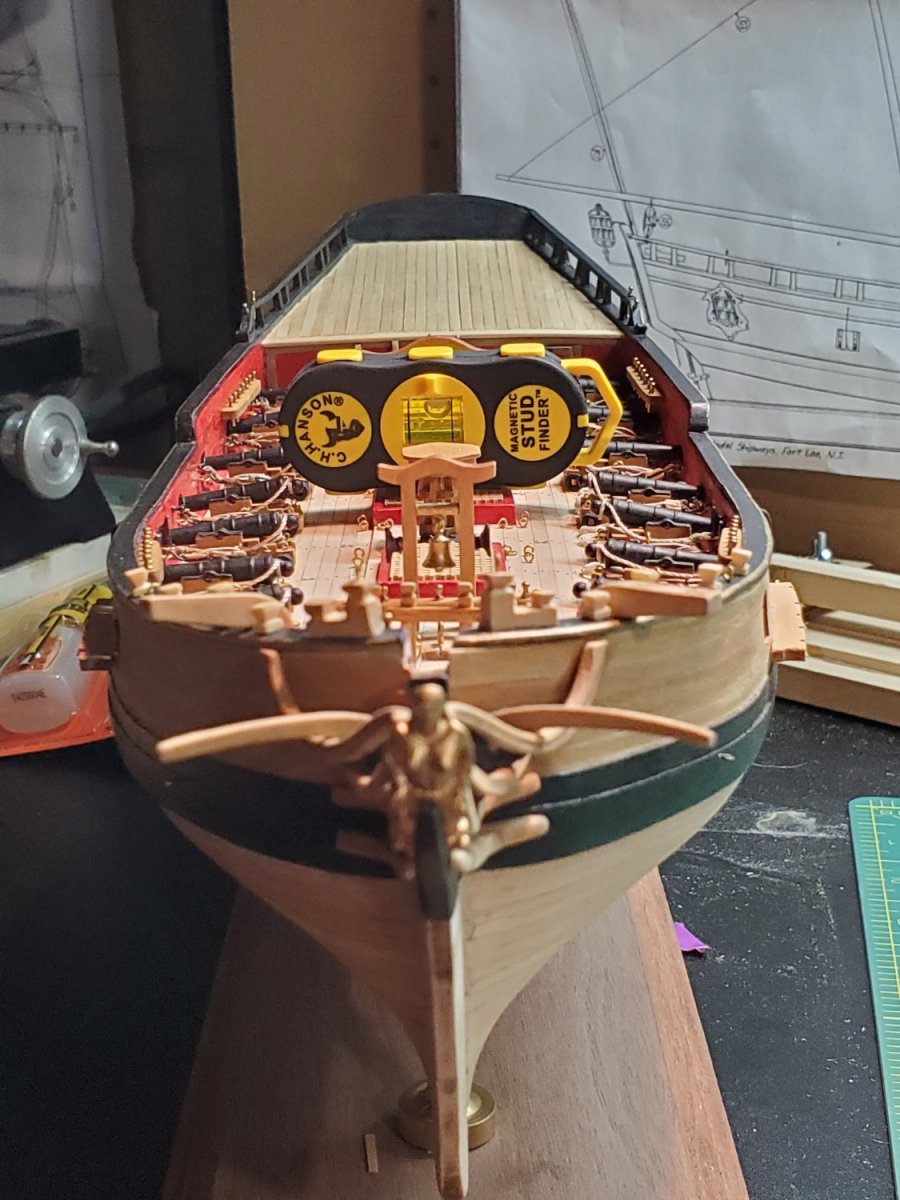
Again, I'm using the Capstan as the middle reference point. It may not be dead level to the model, but it's what I can use as a check. It's about mid-ship anyway.

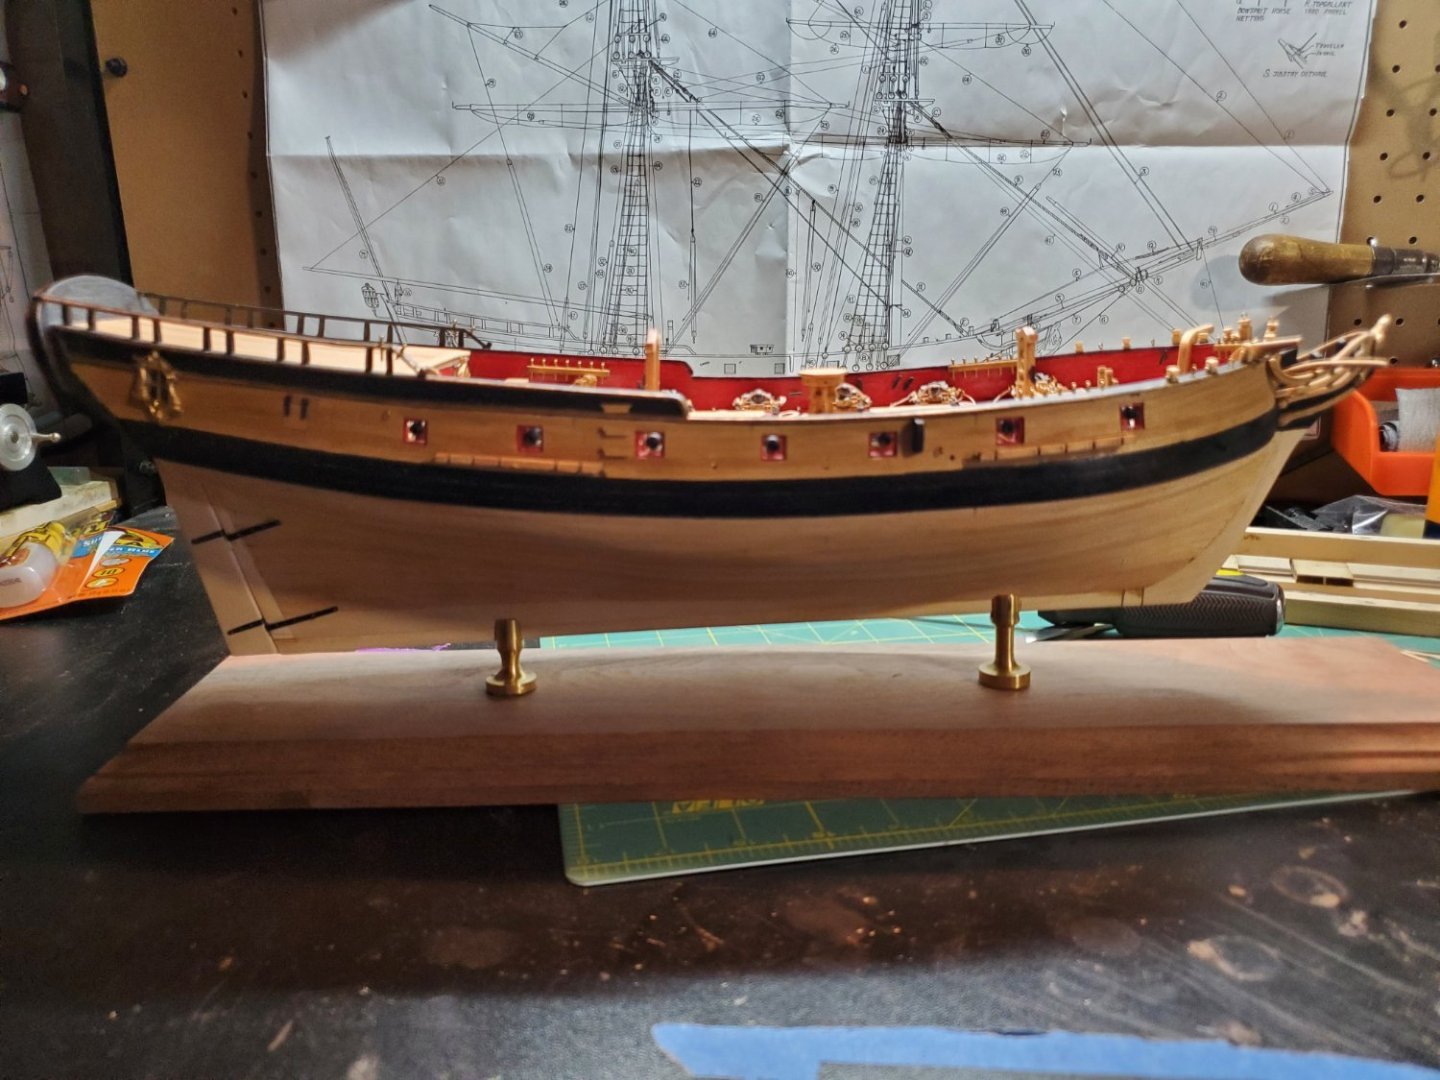
So there she is - mounted! Finally.
I'll be working on the deadeyes for the tops next, getting them installed with other block before finally mounting the masts. What a month for me. Zelda and near-miss shipwrecks.
Probably more progress next month!
- Jason -
-
Thanks for the kind words, Chuck. I plan on doing full rigging, with sails. Its ambitious for a first build, but I like a challenge.
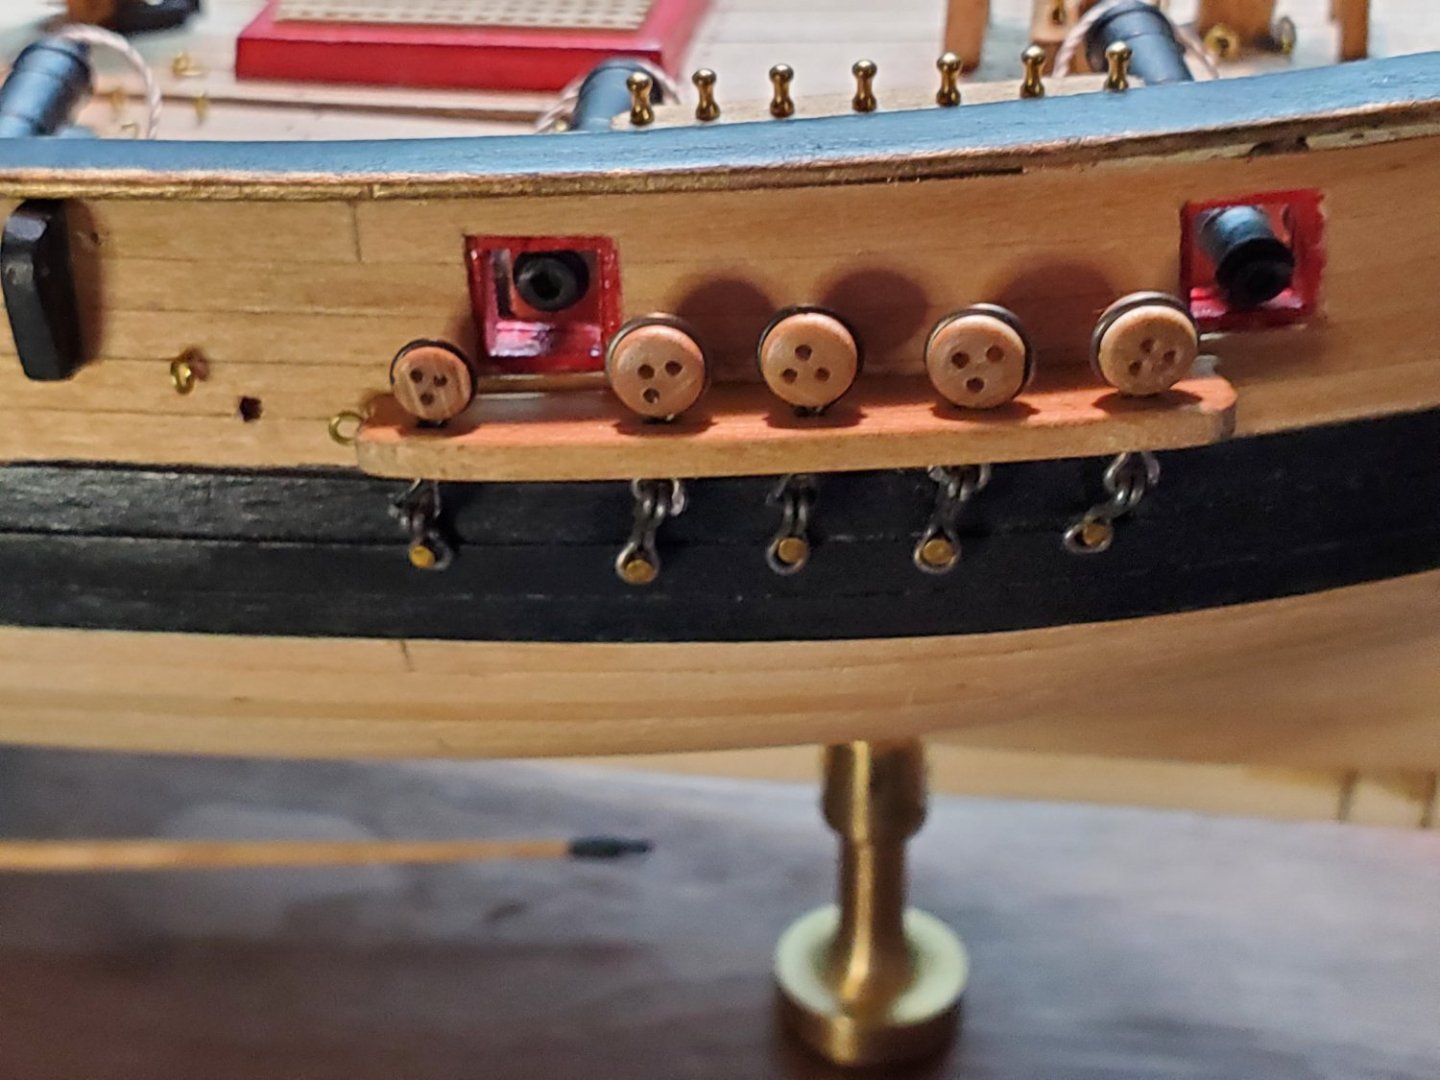
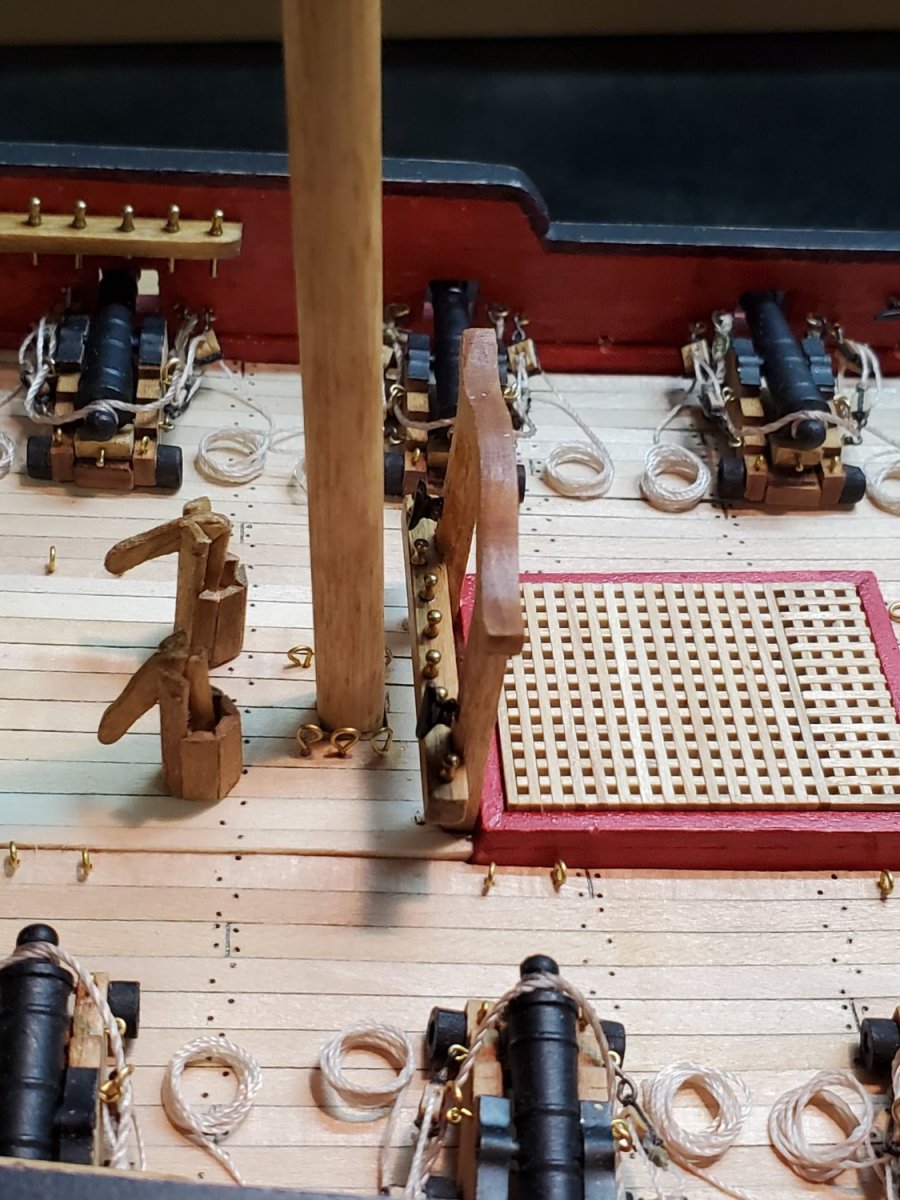
The rigging ''plans'' are already a challenge to understand. I like your suggestion of the shroud cleats; its also why I added pins to the bitts, to provide appropriate belaying points.
I'll keep rigging along....
- CiscoH, Dave_E and Knocklouder
-
 3
3
-
Overdue progress on the Fair American Model Ship:
As always, my progress is slow, but steady. I'm determined to finish this year.
Most of the work has been on the masts, both Main and Fore. I'm committed to shaping the spars as close to the plans as I can manage. It's slow going, of course to shape the masts: tapering down, then blending to 8-sided, then square tapered towards the top, etc. Using the vice and clamping a sacrificial end, filing, then rotating 90deg to index the sides has been working well. This is the Main Topmast, in progress.

As you can see, I use the calipers to measure the feature sizes, then do my best to make the mast to shape, accordingly. You won't see the detail as much once the ship is fully rigged, but I like the detail. I was pretty proud of this work.

The upper end of the top mast, again I make lots of measurements. I wasn't going to attempt to put a small wheel in there for the sheave, so I just drilled 2 holes to simulate it, and carve out rounded edges.

Once everything is finely sanded to 1500grit, it gets stained with MinWax Golden Oak and painted flat black. I try to do everything in batches, while the paint brush is out. According to the instructions, most everything is supposed to be black. The color scheme I'm using is from other modelers like Rafine, who's craftsmanship is incredible.
Another thing I was able to do, was move the Bitts farther away from the main mast hole. If you remember a while back, I mounted the Bitts too close, and the mast was basically going to be touching. I took my time to work the glue loose, and re-drilled the pin holes on the deck. If you look closely you can see the previous holes just peeking out. Very happy I was able to move this without incident.

The Main Top turned out really nice. You can see all the jigsaw pieces of trim I had to use to build the rounded end.
The Bibbs on the Main Mast weren't perfectly perpendicular to the square bottom that goes in the deck. So in order to glue it straight, I temporarily wedged the Mast in the deck, and looked down from the top to align it. A little of the top/port Bibb can be seen under the trestle tree. I'll live with it. I have yet to put the chock in, I need to stare at the plans some more to get it right.

Both Fore and Main tops look pretty straight to each other, looking from the bow.
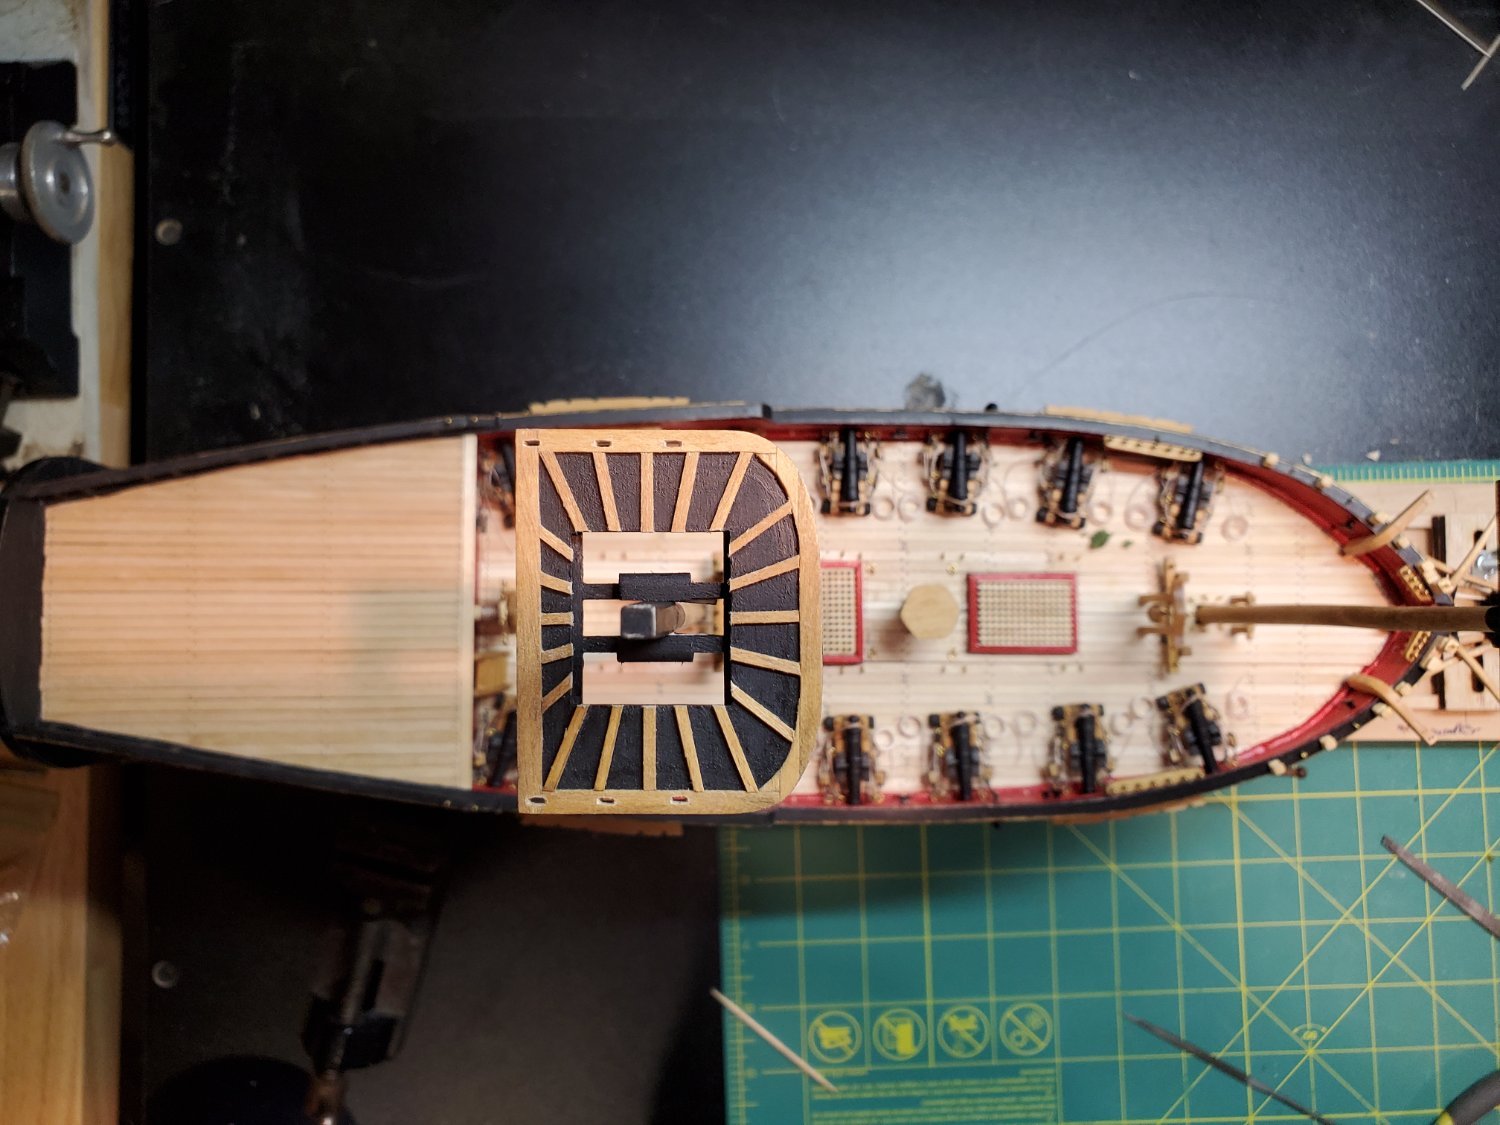
So this is where I'm at now. No masts are glued in, only placed for appearances. Its really starting to look good

I still need to mount this on its final base board, instead of clamped in my ''dry dock''. I have been putting off this part, because I don't want to mess it up.
The ship is really coming together well now. I'm excited to start rigging this thing.
Hope you enjoy reading my progress
- Jason -
-
On 3/9/2023 at 8:51 AM, chuckthedragon said:
Good morning!
I hear you about the frustration on the chains! Mine came out a bit uneven, but I could live with it. I'm working on moving pictures from my phone to my computer. I thought I would be able to post some and hour ago, but I sent myself full sized images which my computer refused to download. I have since gone back and sent usable reduced sized images. Which look like they finally made it through the interweb!
She absolutely loved it! Her sisters are all jealous!
Chuck, that's a beautiful model. I like that you used white on a section below the whales, and left the remainder stained wood. Looks sharp!
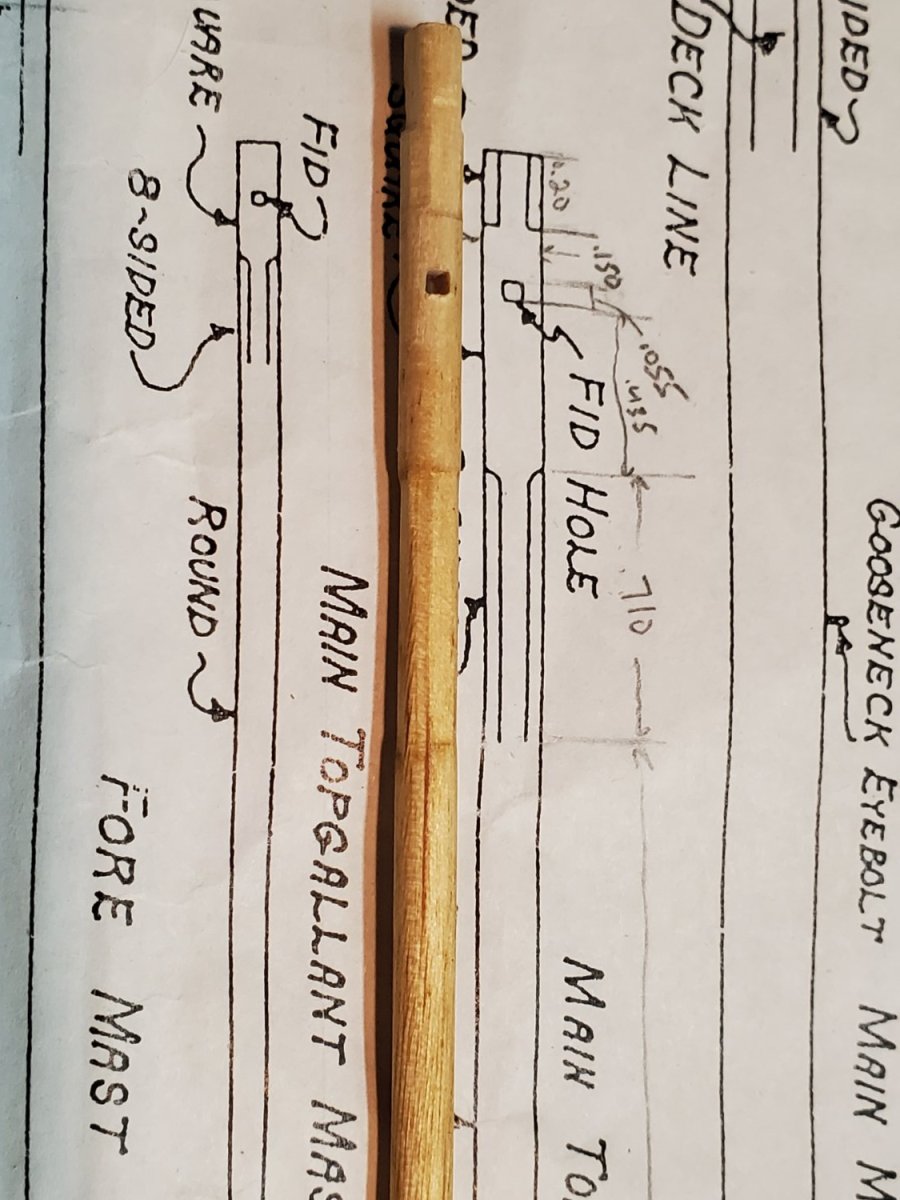
I'm currently working on the tops. (AKA picking at, as time allows). Trying to determine if the Fid rests on the chocks, or the bottom of the top mast rests on the chock(s) - the instructions are not super clear.
Hope to have another update and pics soon.
Thanks for sharing the pictures of your FA - its gorgeous
- ERS Rich, Ryland Craze, Dave_E and 1 other
-
4
-
Nice work on the planning, Cisco! I spent a similar amount of time preparing mine.
From that yellow planking book from MS, it can get complicated with rules, lengths, size, etc. I think each modeler's approach to planking is interesting and unique. I like how you penciled the layout on hull, before laying any planks. Smart!
Jason
- robert952, CiscoH, Ryland Craze and 1 other
-
4
-
Happy to hear you picked it back up! The deadeye chains are only half completed so far- I moved to the masts since I got frustrated with them. Getting the lengths consistent is a challenge.
I'd love to see pictures of your completed build.How does your wife feel about the christening in her honor?
-
Thanks guys for the kind words.
My plan is to finish the model this year. It's already been 4yrs - I'd like to move onto another model; likely one for my mother.
- Dave_E, Kenneth Powell and CiscoH
-
3
-
Finally making more headway on the Fair American model ship.
After so much time sitting waiting for the masts to be finished, the model has been gathering dust like crazy. I've been blowing it around as I'm working - that didn't help. I bought a keyboard duster can, and got what dust I could off the model, then covered it with a cloth until I'm ready to progress.

Working on the main mast now, I think I've come up with a pretty good method of shaping it. I start with filing the flats on the bottom of the mast, to sit in the deck. I keep that section long. Then I can clamp it in the vice, and I now have a way to orient the spar as I'm shaping it. I can tilt the vice 90deg to form the square sections, and rotate my flats 180deg to get all sides.
Now that it's oriented, I support the end with my fingers and file the flats to shape. It's slow going, but I want it to be even and symmetrical, so it's worth the time. However, my hand cramps after a short while, so I take breaks. I was lucky I had a week off on vacation, I could dedicate blocks of time to finish the whole mast and top in a week.
The main top was larger than the fore top, so for the ''trim'' I had to use several 1/32" pieces to make the shape. It would have been better to have a sheet to work from, but I'm doing things the hard way, apparently. This isn't what is shown on the plans, but I like the look, so I'm doing it. The upside down duct tape works nice to hold things in position for tracing.
Hard to see, but the finished product looks good. Lot of sanding to get the blended curve just right. After staining, it'll look like I knew what I was doing! Almost.
Next came the cross and trestle trees. These were fun. I made sure they didn't overhang the top, like it had on the fore top. I drew a little F on the front so I knew which way was which. I made that mistake once, I wasn't about to do it again.

I got the Bibbs glued on next. You can see on the end of the mast I drew an F --> to indicate which was front facing. That was the mistake I mentioned from the fore mast.
The ribs for the top came next. Again, the tape worked well for orienting and locating everything. I stained the top, mast and ribs all at once. You can see the individual 1/32" pieces used to build the trim on the top - tricky little pieces, but turned out nice.

Once I got a few coats of flat black paint on there, it's looking pretty sweet! Again, I've left the ribs long on the inside of the top. I'll sand them flush later.
I'm starting on the top masts next. Its much of the same process of flatting, and sanding I've done so far. We'll see how long that takes me.
Hope you find this FAIR'ly interesting to read ;-)
- Jason -
- Oldsalt1950, Ghost029, Dave_E and 4 others
-
7
-
Cisco, this is where the fun begins. I tried to use the lumber provided from MSW to build the planking bands, but they didn't lay well as described in the yellow book for me. I like your tape method, actually.
The garboard strake is just ''wider'', typically 1.5x a regular plank. The rest above the garboard can be regular width. Your approach of using one long plank, wetting it and clamping it to shape, then cutting the butts in after it's glued for the appearance is exactly what I did too. Just don't cut all the way through, or the plank may pop out. How are you going to determine the plank butt separation? The yellow book has a nice set of rules to go by, but I had to modify a lot to make them ''work''.
You've got a fine model going. keep up the great work - it'll be in ship-shape in no time 😉
- Jason -
-
Long overdue progress on the Fair American Model Ship:
January was another busy month for me, so not a ton of progress this time. I got the Foremast completed, though I'm not 100% happy with it. The square cross section at the top was undersized, so there wasn't much flattening to do for the Bibbs. I also filed a flat for the bottom of the mast to seat into the square hole in the deck - this will keep it straight and aligned.
I was finally ready to stain it, before any painting. I used 800, then 1500 grit sanding pads to get it smooth as I could, rubbing in the direction of the grain. I blotted and wiped MinWax Golden Oak stain, just one coat. The knot in the mast was pretty dark - I should have used the pre-stain first. But hey, it's character! The camera on my phone wouldn't focus on the mast, so it's blurry.

After constructing and gluing the cross and trestle trees, they got painted. Along with the fore end of the Bowsprit. Painters tape worked nicely to get a clean line for painting.

The Bowsprit stained really nicely. After all the flat black paint was dry, the result so far looks sharp!

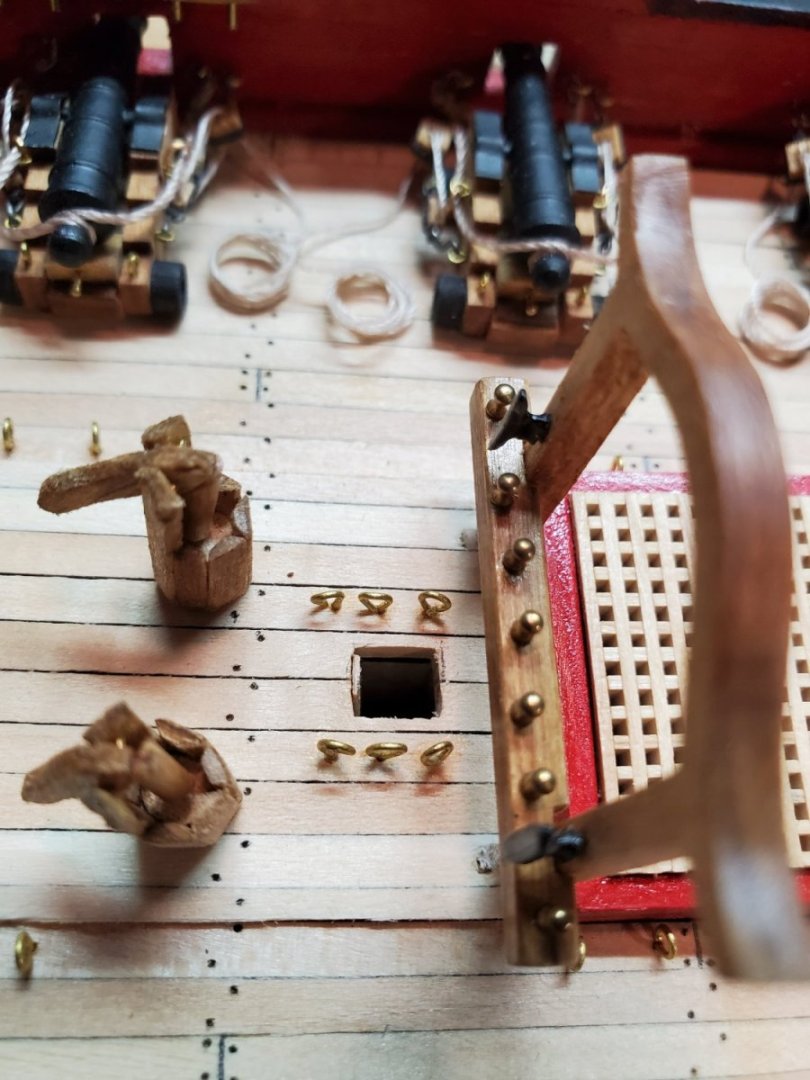
For the eyebolts surrounding the fore mast hole, they're way too close. I made them to scale as per the plans - I should have spaced them farther apart. Not sure why the plans don't show it, but I've seen most modelers put some round, black mast ''seat'' on the deck - what is that called? Anyways, There's no room for it on my model.
I thought I'd get clever, and make a really thin one out of glued planks of 1/32" Walnut. I thought I could slip it in there - it's not going to fit. It's too flimsy and keeps splitting. I'm not sure what to do.

What I tried, was to rip out the eyebolts and move them out - bad idea. I had a grip on one with needle nose pliers, and it let go and I dropped the point on the deck - now there's a dent. I'm lucky nothing else broke too, but I can't erase it. It isn't visible unless you're looking for it - but I know its there (no picture). I'm going to leave the eyebolts where they are - its safer that way.
I had the chance a few weeks back to visit Cisco at his home - he's got a ton of modeling books and sundries and Legos! I had the pleasure of seeing his work space, along with a gorgeous cabinet he made himself to hold all the fine chisels - really beautiful work! I hope to get back again soon.
Thanks for the pack of dowels too, already picking through them for the Main Mast.
Hope to have more progress soon.
Thanks for reading
- Jason -


Fair American by JLong - Model Shipways - 1:48
in - Kit build logs for subjects built from 1751 - 1800
Posted
More Sail progress on the Fair American:
I was able to sew several more sails in the last few weeks. The Main Topsail had a lot of cringles to do with the bolt rope, but I got it done.
Cringles have turned out well, just very tedious.
Another one was the Main Course, the biggest sail. This took some time. Again, I didn't add Buntline bands or Middle bands: I'm happy with the detail I've done on the sails thus far.
Repeating the cringle technique again: Sew through the rope itself....
Then loop around and through near the same spot....
Through that loop for a knot....
...and pull tight. Again, not sure of the best technique, but I feel this is a nice secure way of making the cringle.
Another detail I'm adding is the Reef Points - the little dangling ropes from each reef band. There's two per piece of canvas, so I'll follow that from Steel's.
I'm using the same sewing thread I've been using. Anything else is too out-of-scale looking to me, and I've got lots of it. Now how to attach it so they don't fall out?
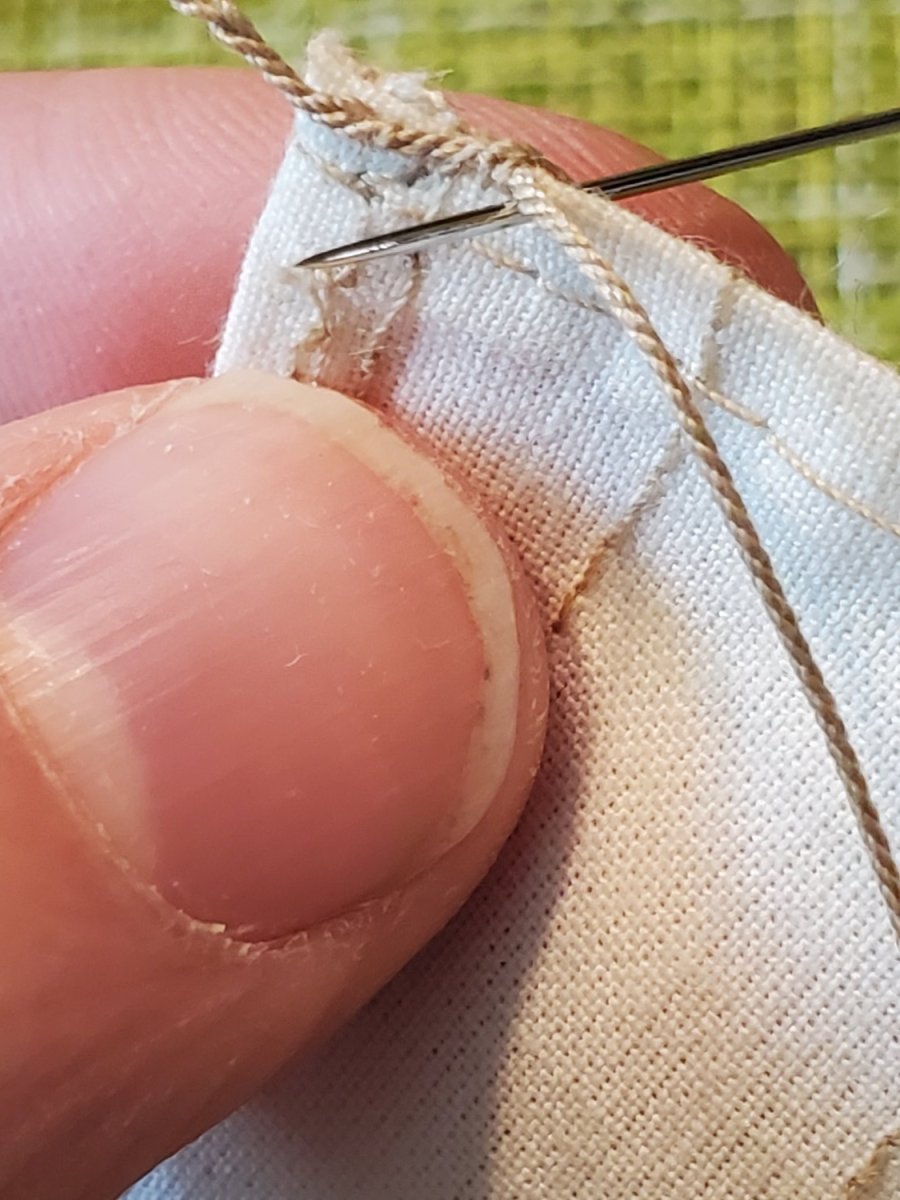
I decided to make a two-knot design, at the end of the thread. Making the knots as close together as I could. That way, they'll hold each other from falling out fore or aft from the sail - I hope.
I'd push the needle through the reef band, until I got to the first knot. Then gently popped just one through, until the fore knot was against the reef band. Then I trimmed the thread just above the lower band, to look like how Steel's drawing shows.
On the aft side, I just trimmed the thread above the knot.
There's a lot of these! As I went along, obviously they didn't hang very satisfactorily. They tend to cris-cross each other, looking messy. Straightening them by hand really didn't help.
But for this Main Topsail, I just got them all done and trimmed. Phew!
Now to help them look dangled, I blotted a small amount of diluted white glue over the thread with a small brush, then pressed it down to help it 'tack'. It sort of worked, but not completely (forgot to take picture of the tacked reef points).
I'm almost half done all the sails. The reef points will take time on all the bands too, but I'm making progress.
We'll see how many I complete by next update, but I'm on vacation next week in Cancun so I doubt I'll do much until I'm back and more sunburned.
Have a great week!
- Jason -