mrangus
-
Posts
232 -
Joined
-
Last visited
Content Type
Profiles
Forums
Gallery
Events
Everything posted by mrangus
-
 Well after careful consideration and looking quite a bit at the model, I've decided to replace the current rigging rope with a lighter and slightly thicker one. the issue I'm having is that I think the rope is a little thin, and it's very hard to see! At the end, I want to be able to see the rigging. So I've ordered Chuck's tan rope one size bigger, which still fits through the sheaves, and going to re-rig the model with that. lots of extra work but I think in the end it will look better.
- 389 replies
-
- 3
-

-
- scottish maid
- artesania latina
- (and 1 more)
-
Thanks Jesse - been going slowly but I'm in the final stretch now.... I'm going to pass on the sails. Your work convinced me that I should save for another day.... I'm anxious to finish now.
- 389 replies
-
- 2
-
-
- scottish maid
- artesania latina
- (and 1 more)
-
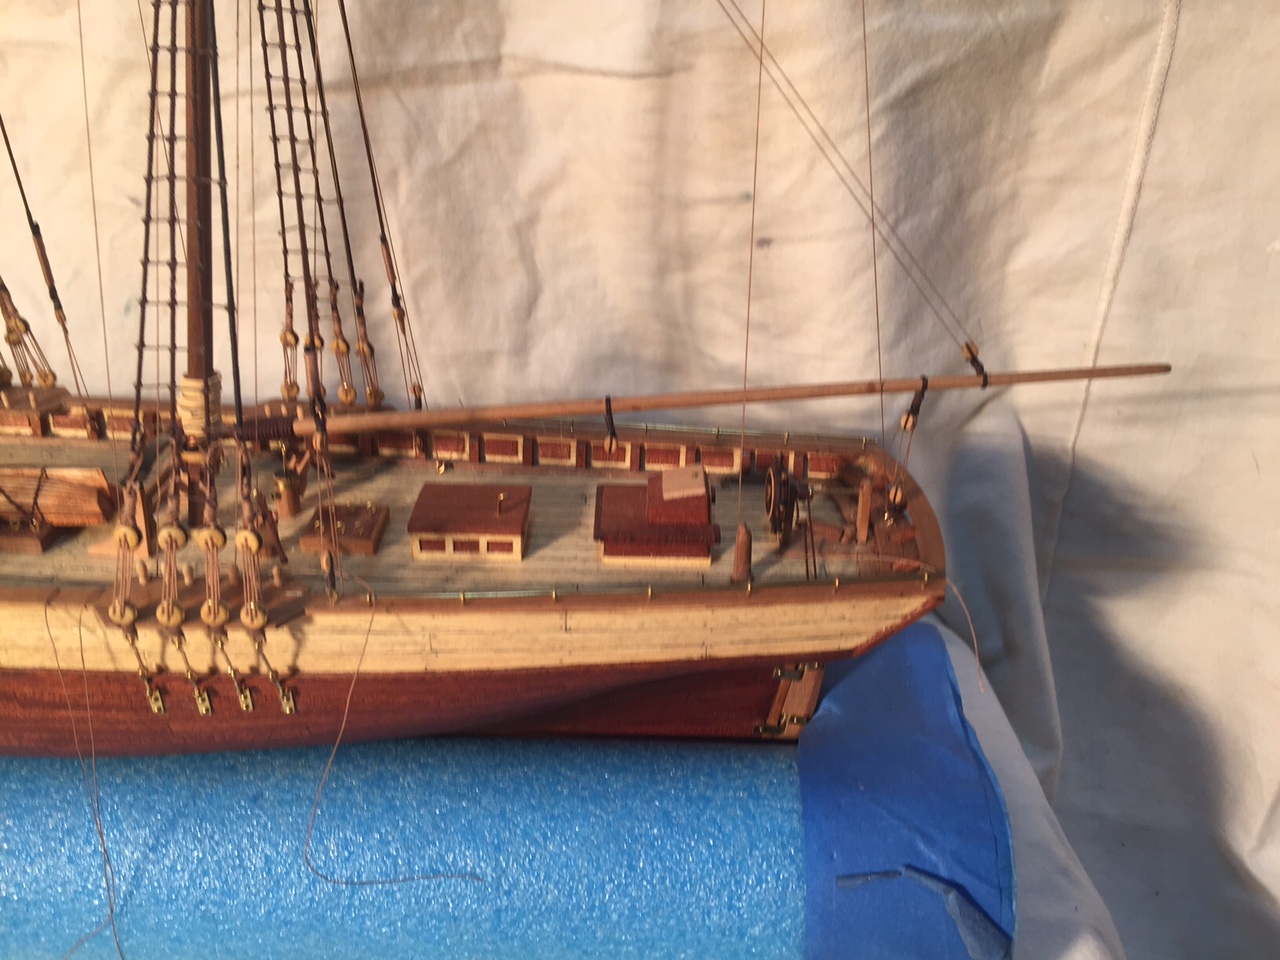
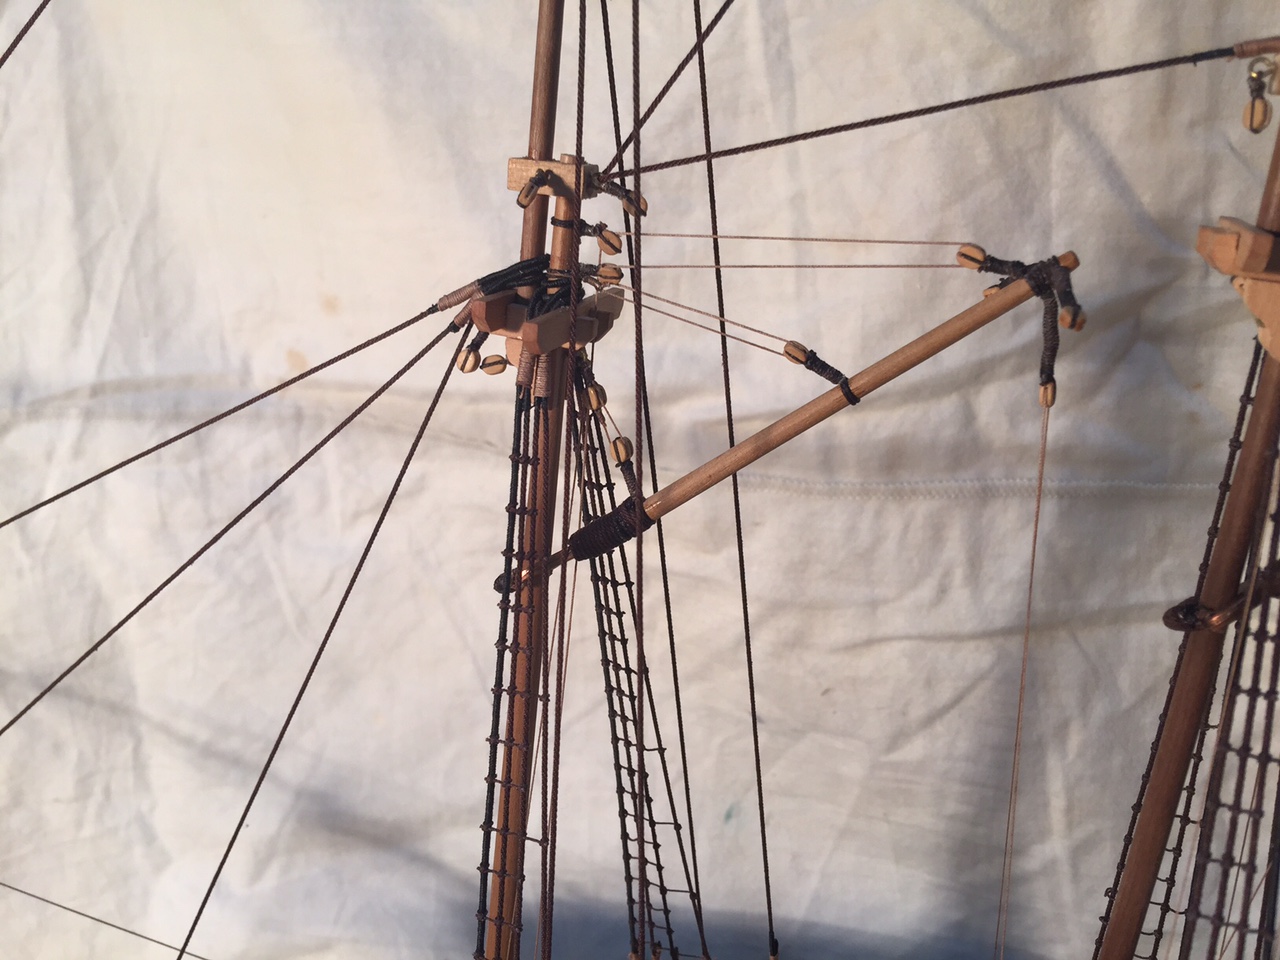
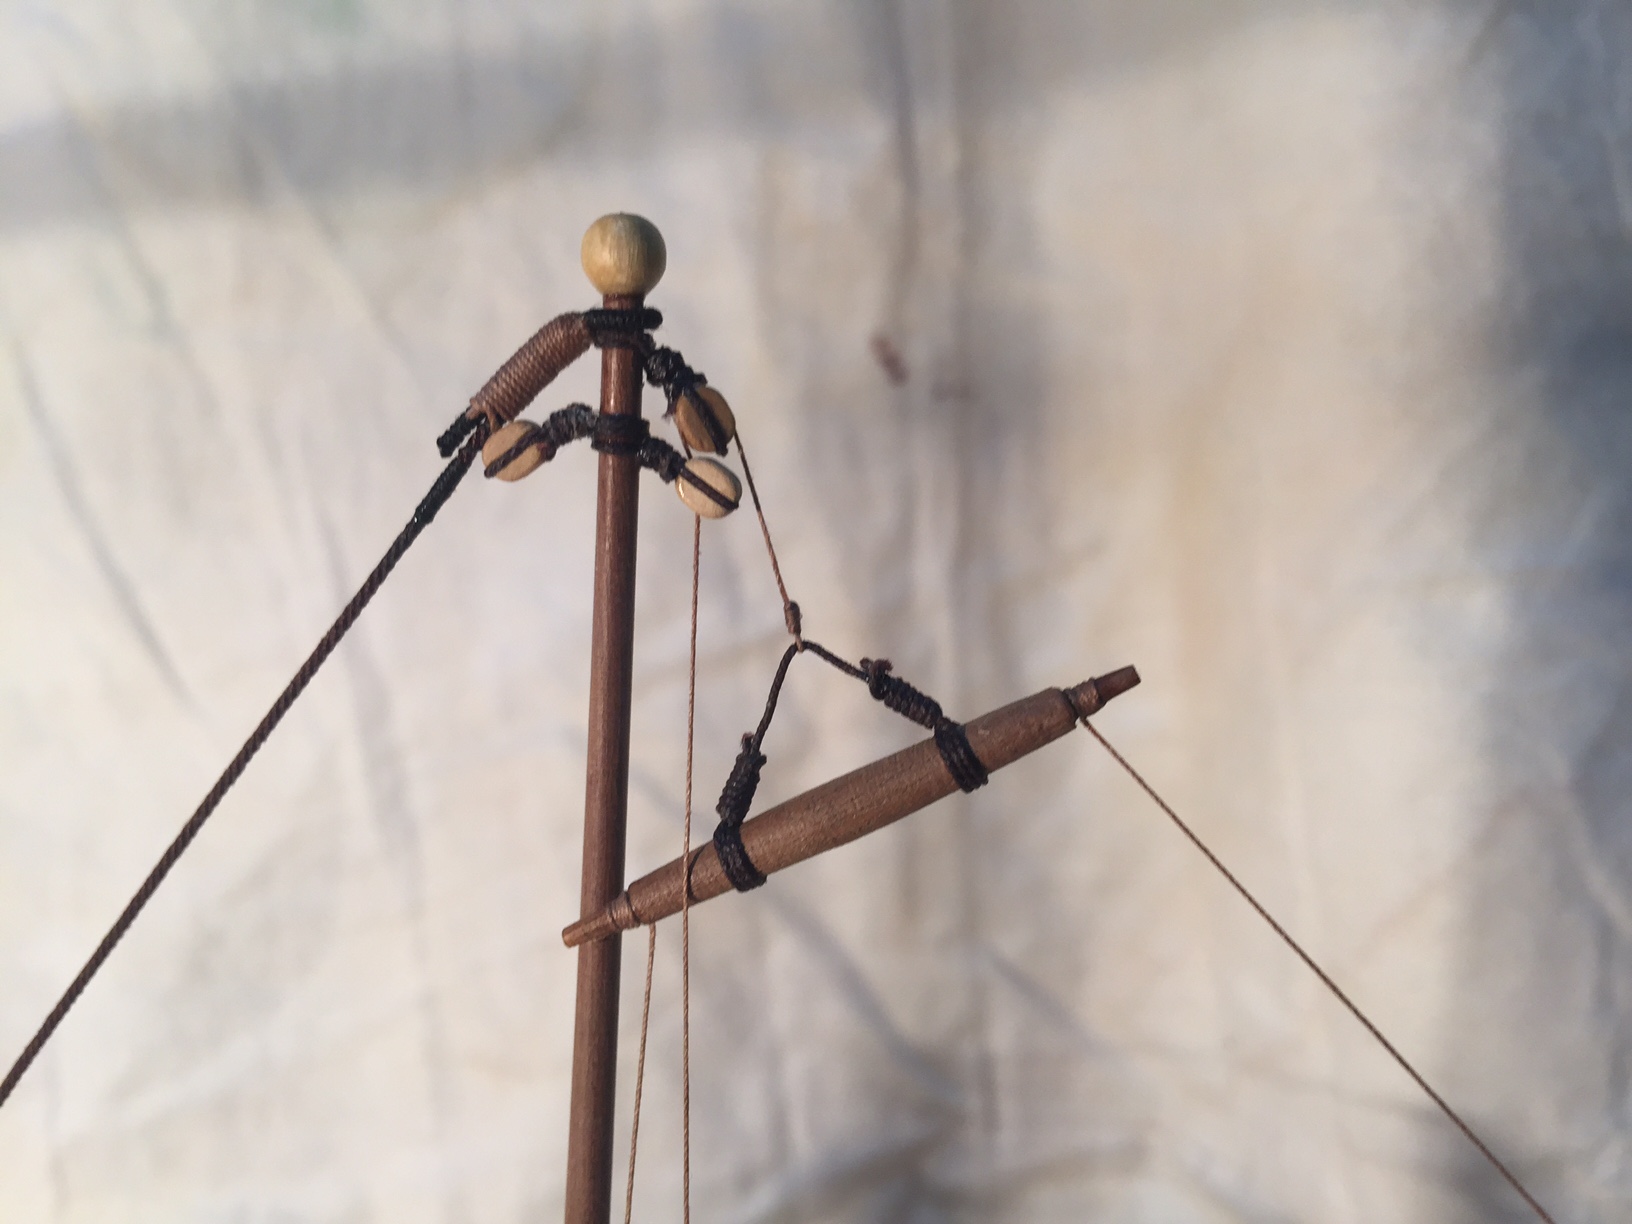
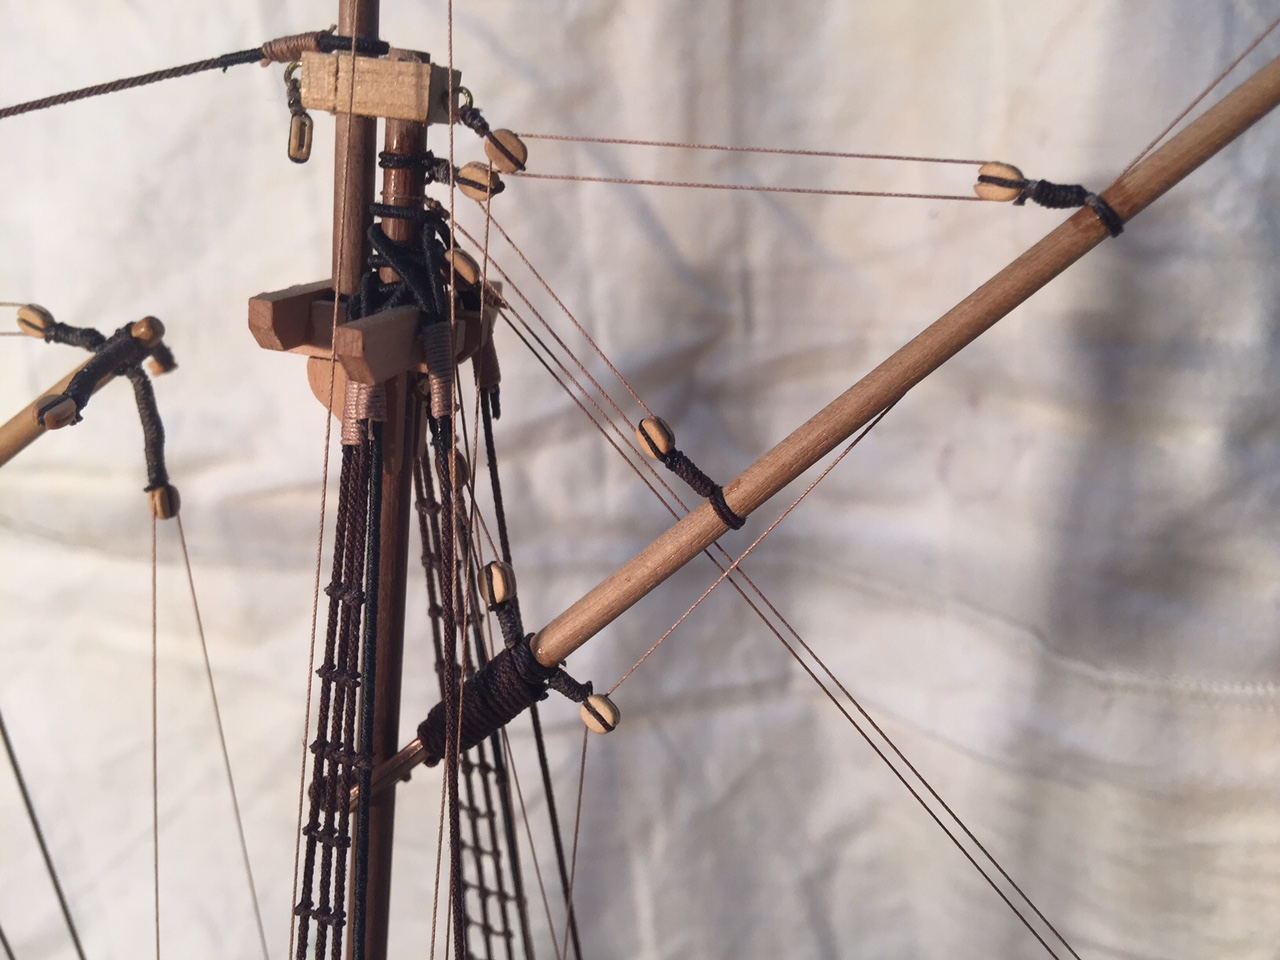
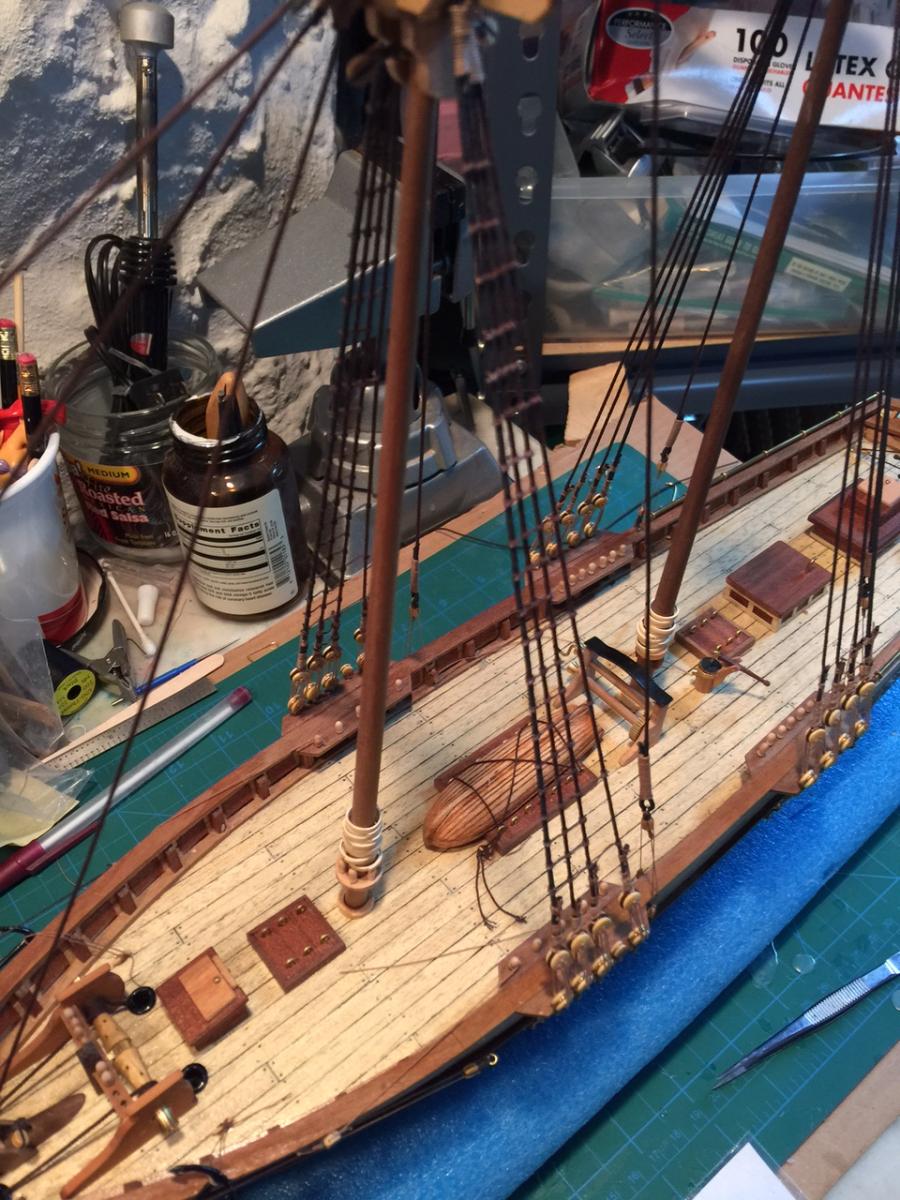
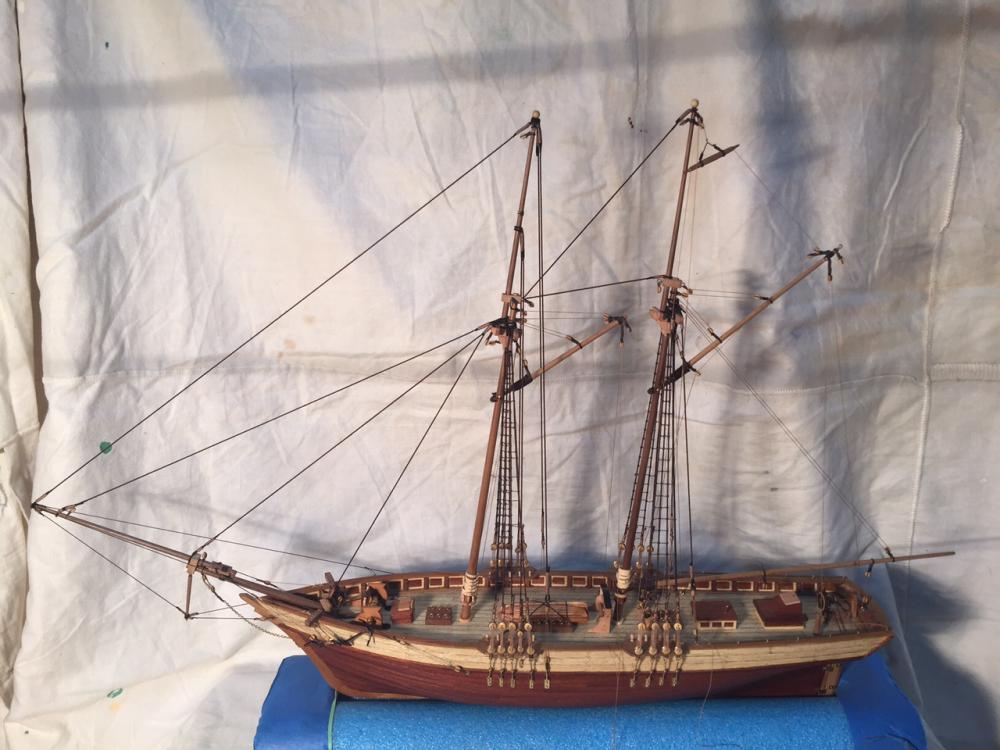
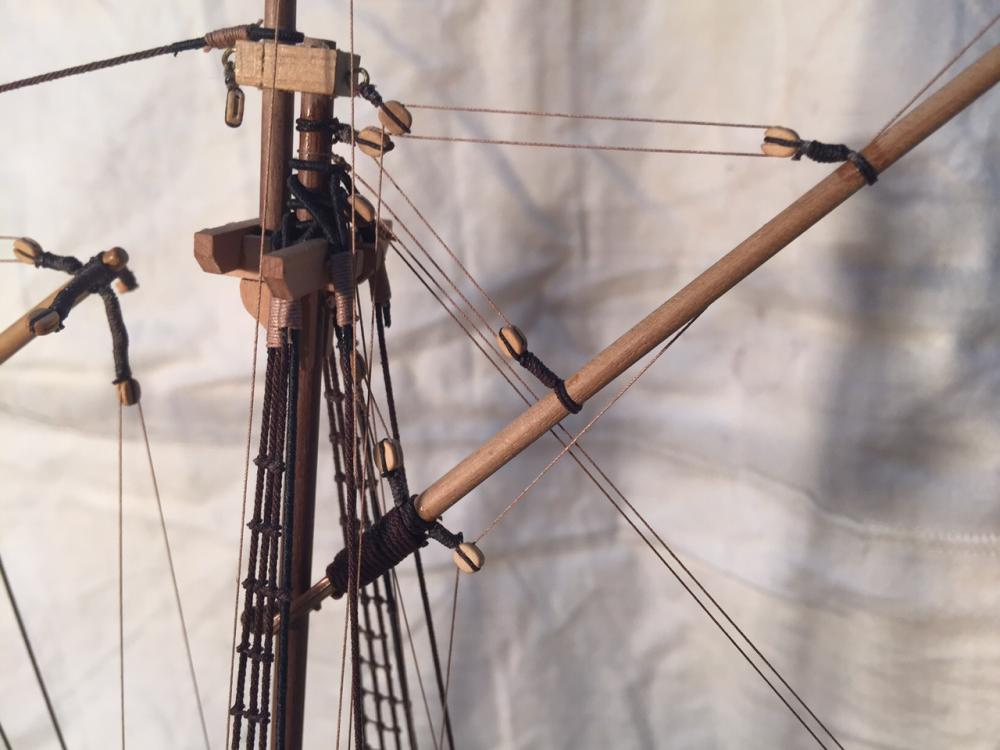
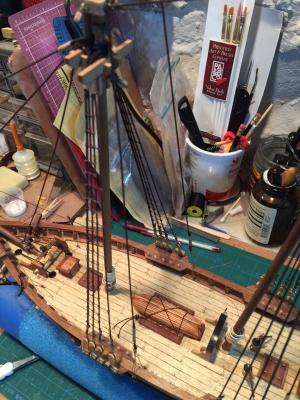
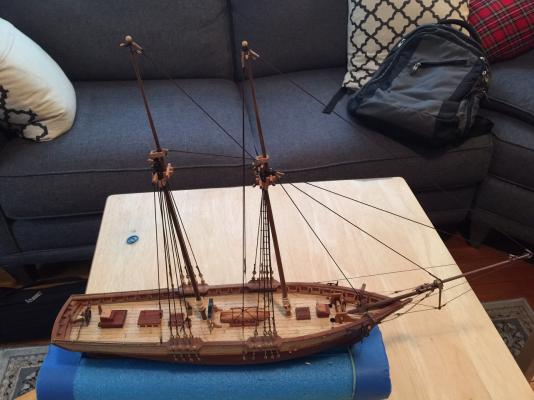
It's been quite a while since I last posted, but I have been making progress, albeit more slowly than I have in the past. Mostly rigging, which is tricky business, and I end up re-doing much of what I put together a second time. At this point, I just have the yards to install, and then lots of clean-up. I don't think I'm going to put sails on this first ship, maybe I'll change my mind once the rigging is finished but we will see. See pics of progress:
- 389 replies
-
- 8
-
-
- scottish maid
- artesania latina
- (and 1 more)
-
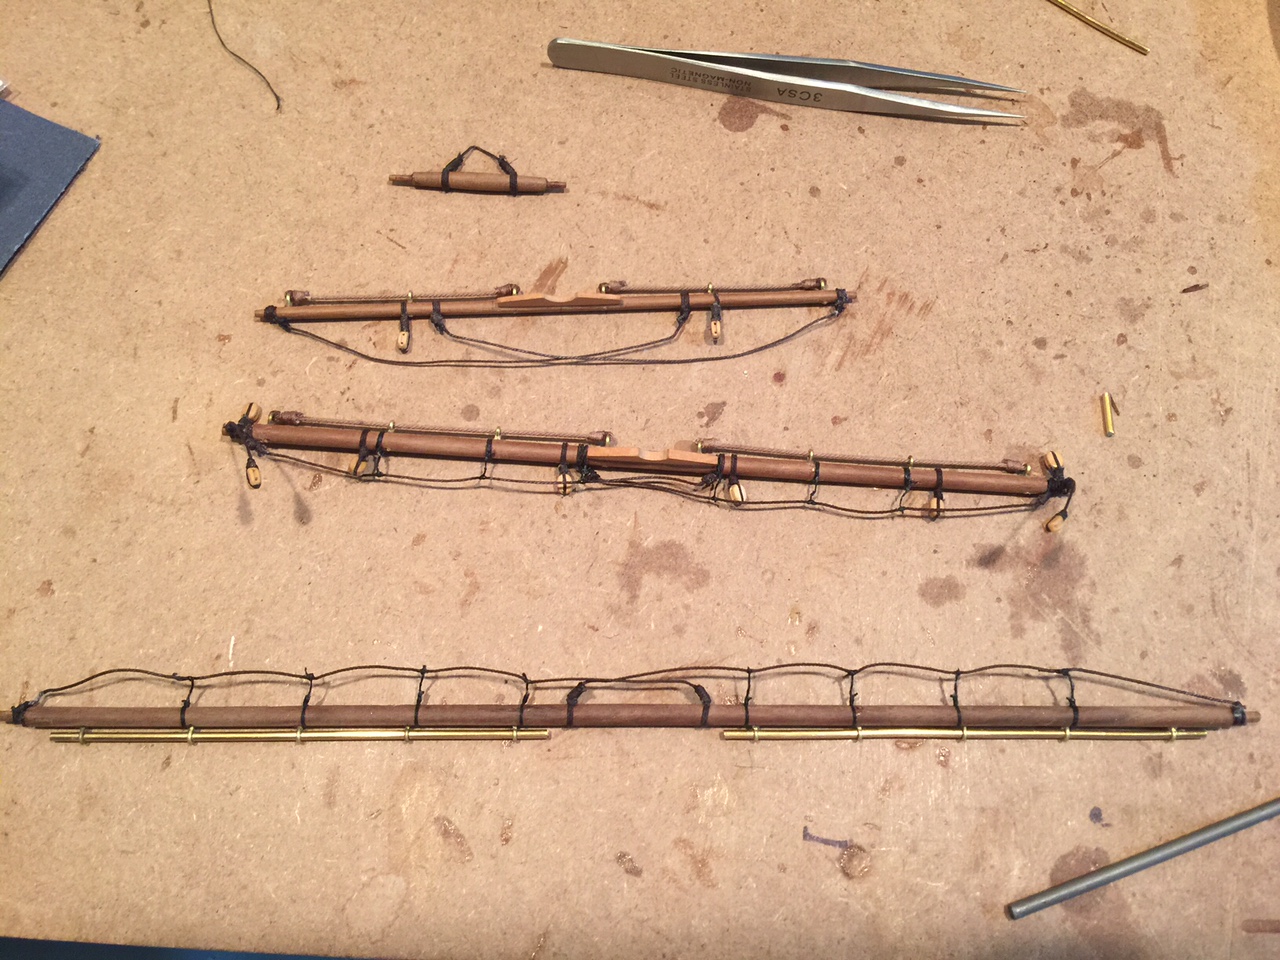
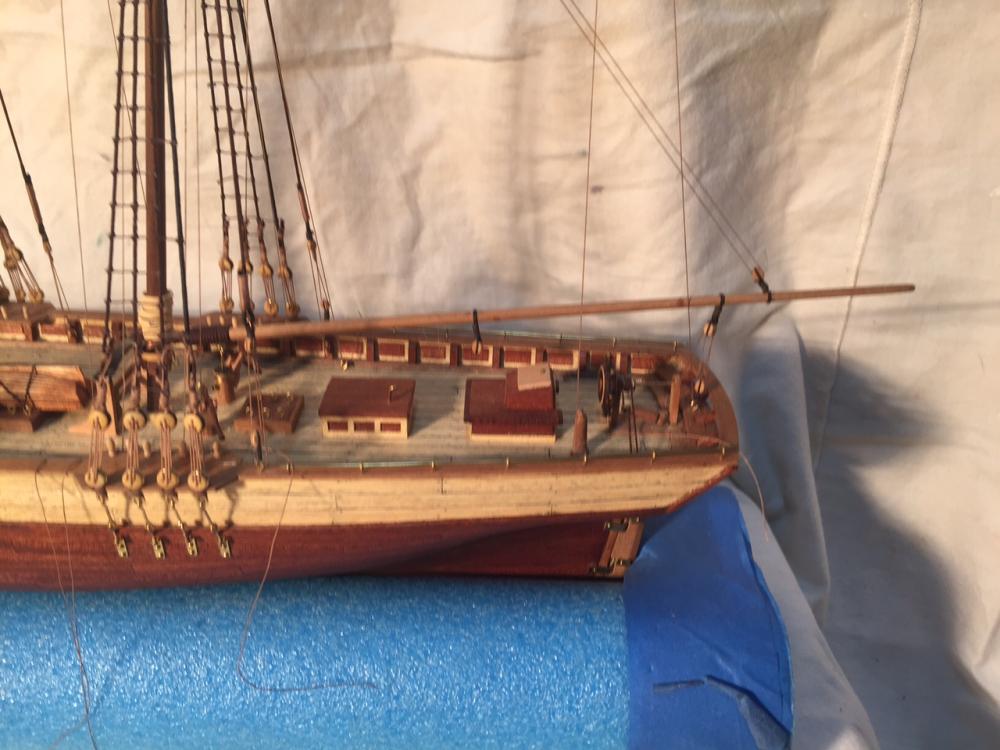
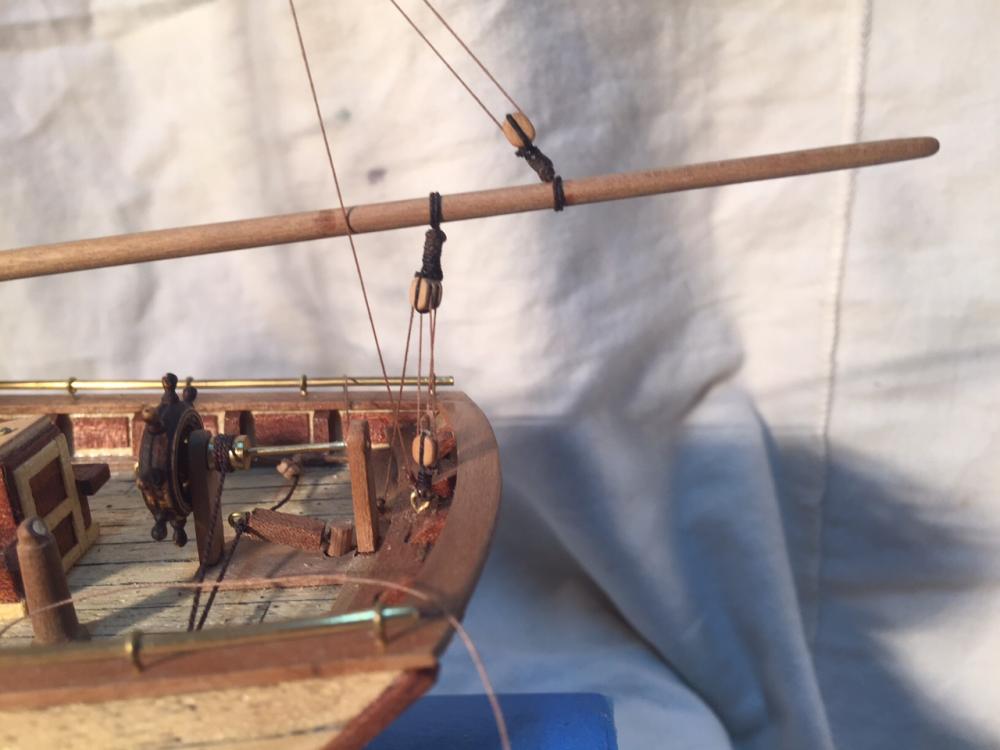
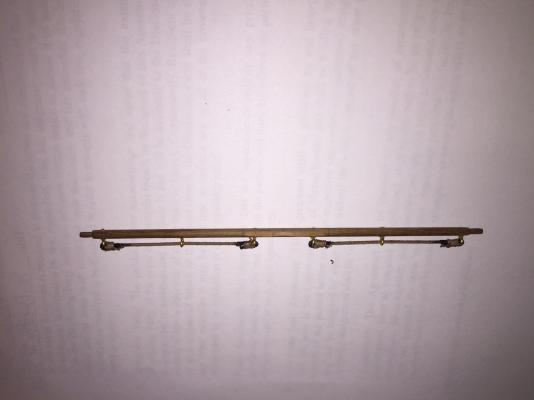
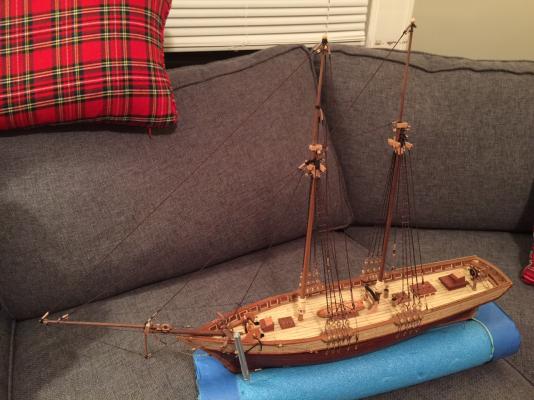
More progress. Have been going slow as I've been involved in a various activities unrelated to this project. I'm getting really close to putting it all together - Yards all done except the lower yard. If you look closely, I put a brass rail on the lower yard and I like the look. I plan on keeping the rope on the upper yards. I completed the foot ropes with stirrups, which was quite challenging until I got a routine down. Used #6 fishing line for the stirrup lines. I've gotten really good at tying the blocks to the yards. I have the process down to about 10-15 minutes to each block (without rushing). Made the executive decision to spurn sails on this boat. I just don't have it in me, and want to be able to see the rigging. Will save that part of modeling for another project. Pictures posted....

- 389 replies
-
- 8
-
-
- scottish maid
- artesania latina
- (and 1 more)
-
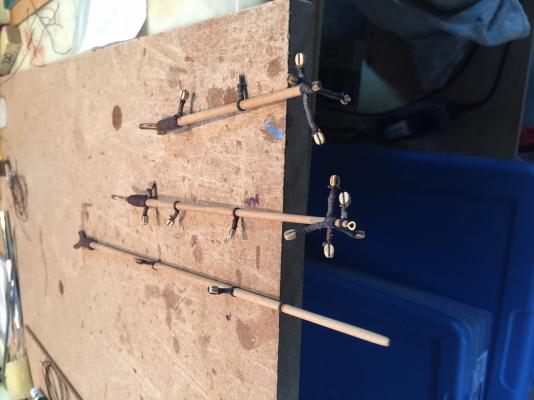
I've attached footropes to one of the yards. I only need to add the stirrups - I know that some use wire for those, but was thinking of using rope. Thoughts? Also - anyone know if the lower yard have jackstays as well? or just the upper two yards?
- 389 replies
-
- 5
-
-
- scottish maid
- artesania latina
- (and 1 more)
-
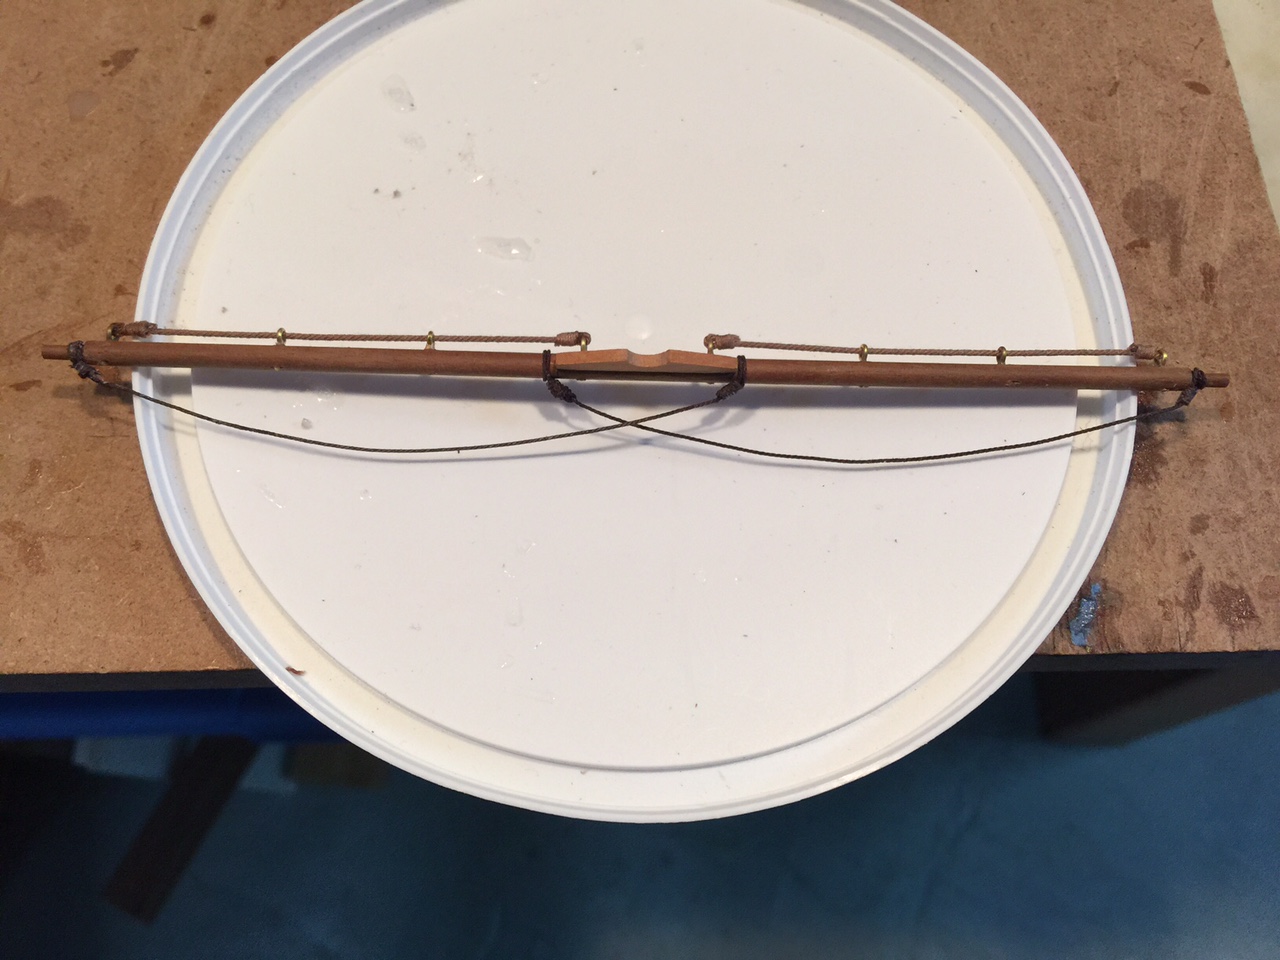
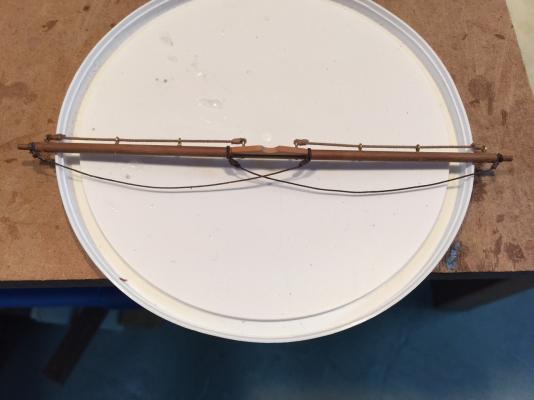
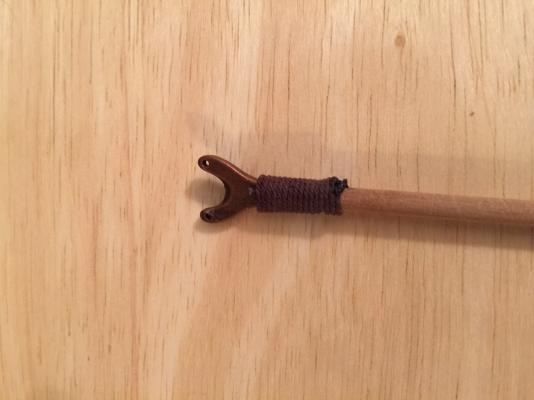
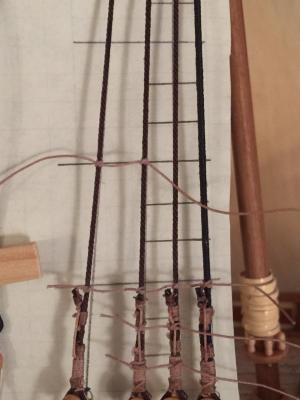
Here's a version that doesn't serve the ends - I think I like this better because the line looks straighter. I also tried running the rope over the eye ring, but there was too much bend in the jackstay. Will re-fit the smaller yard....
- 389 replies
-
- 9
-
-
- scottish maid
- artesania latina
- (and 1 more)
-
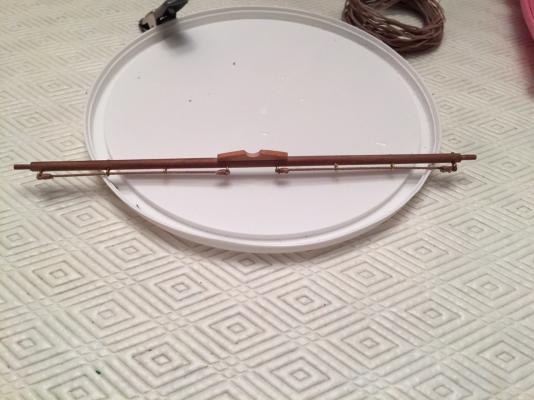
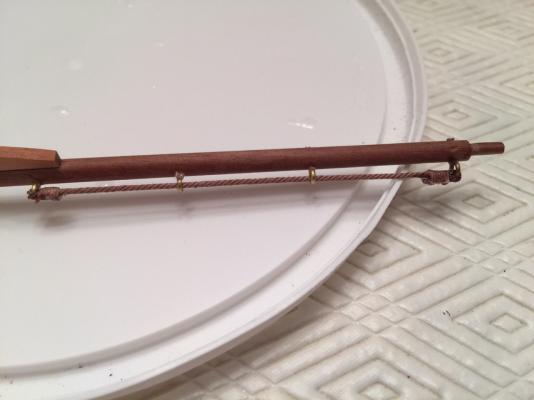
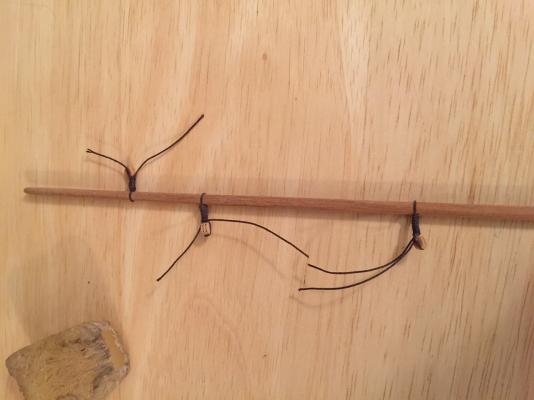
Here's my first attempt at the jackstays... Not sure if I should do without serving the ends, might be neater. Will try that way on second yard and see how it looks.
- 389 replies
-
- 4
-
-
- scottish maid
- artesania latina
- (and 1 more)
-
Thanks gents! I'm feeling the desire to finish. Still not sure what to do about sails....
- 389 replies
-
- 3
-
-
- scottish maid
- artesania latina
- (and 1 more)
-
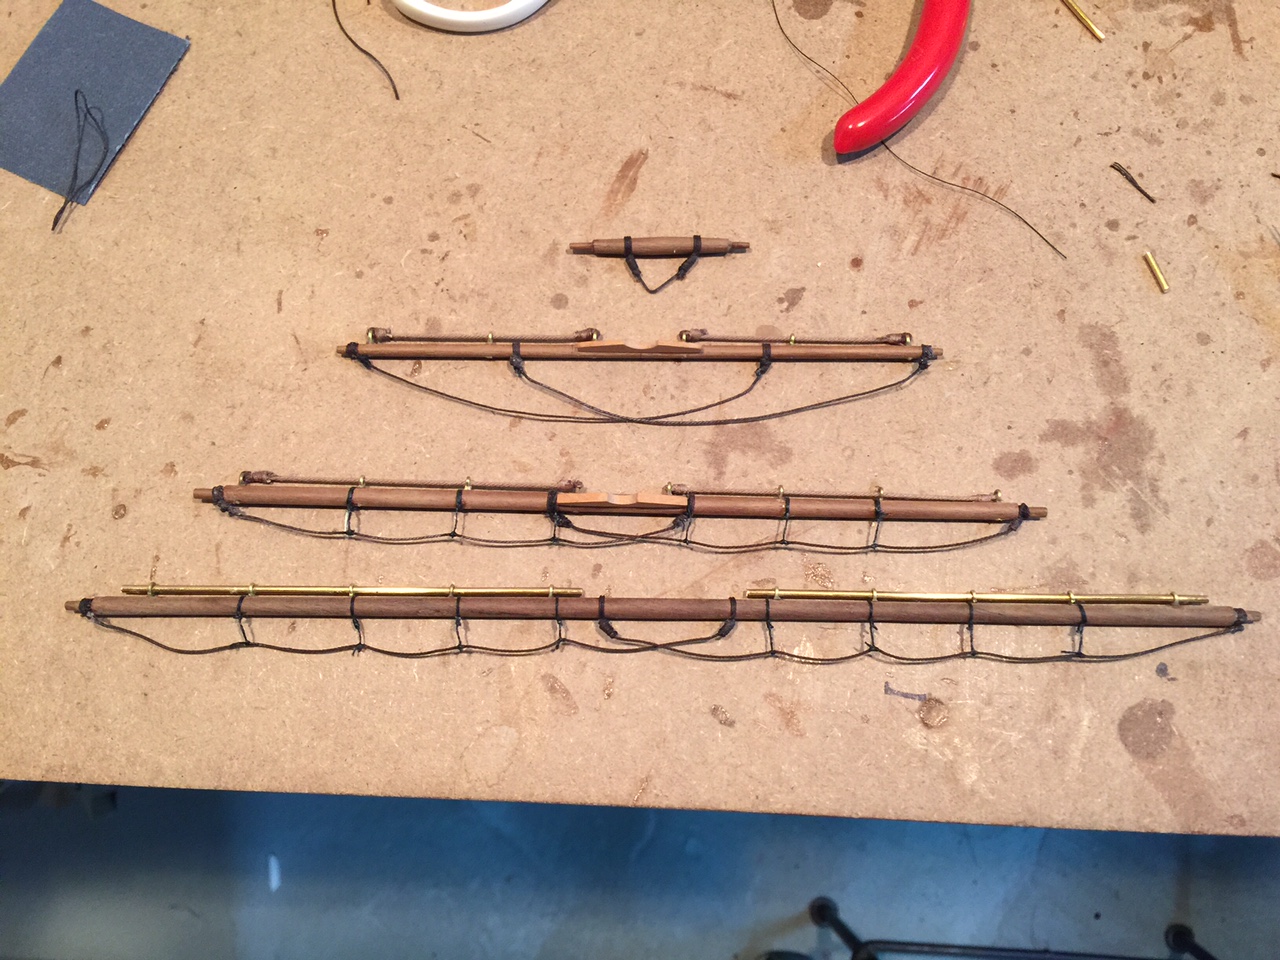
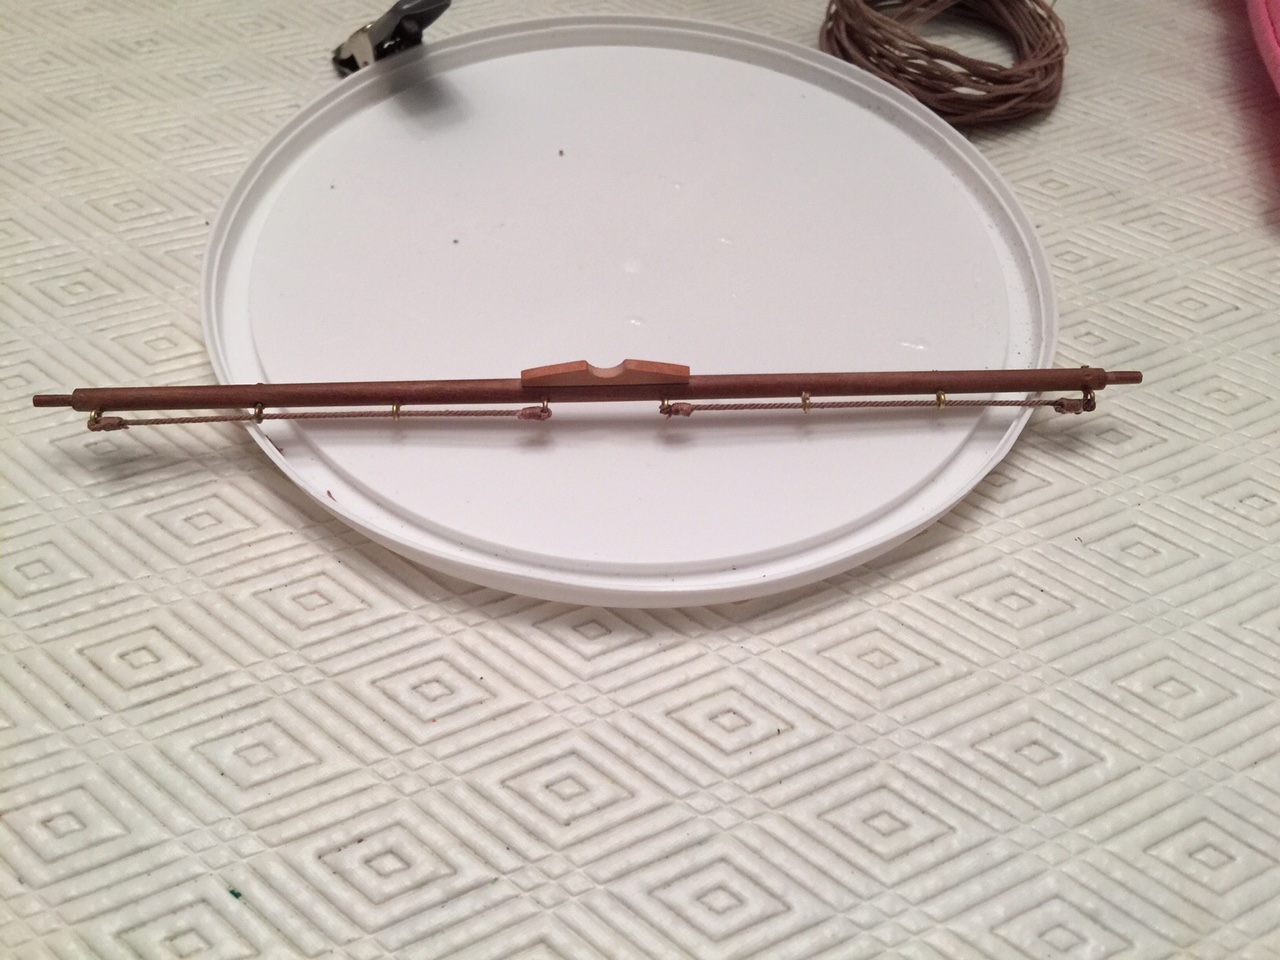
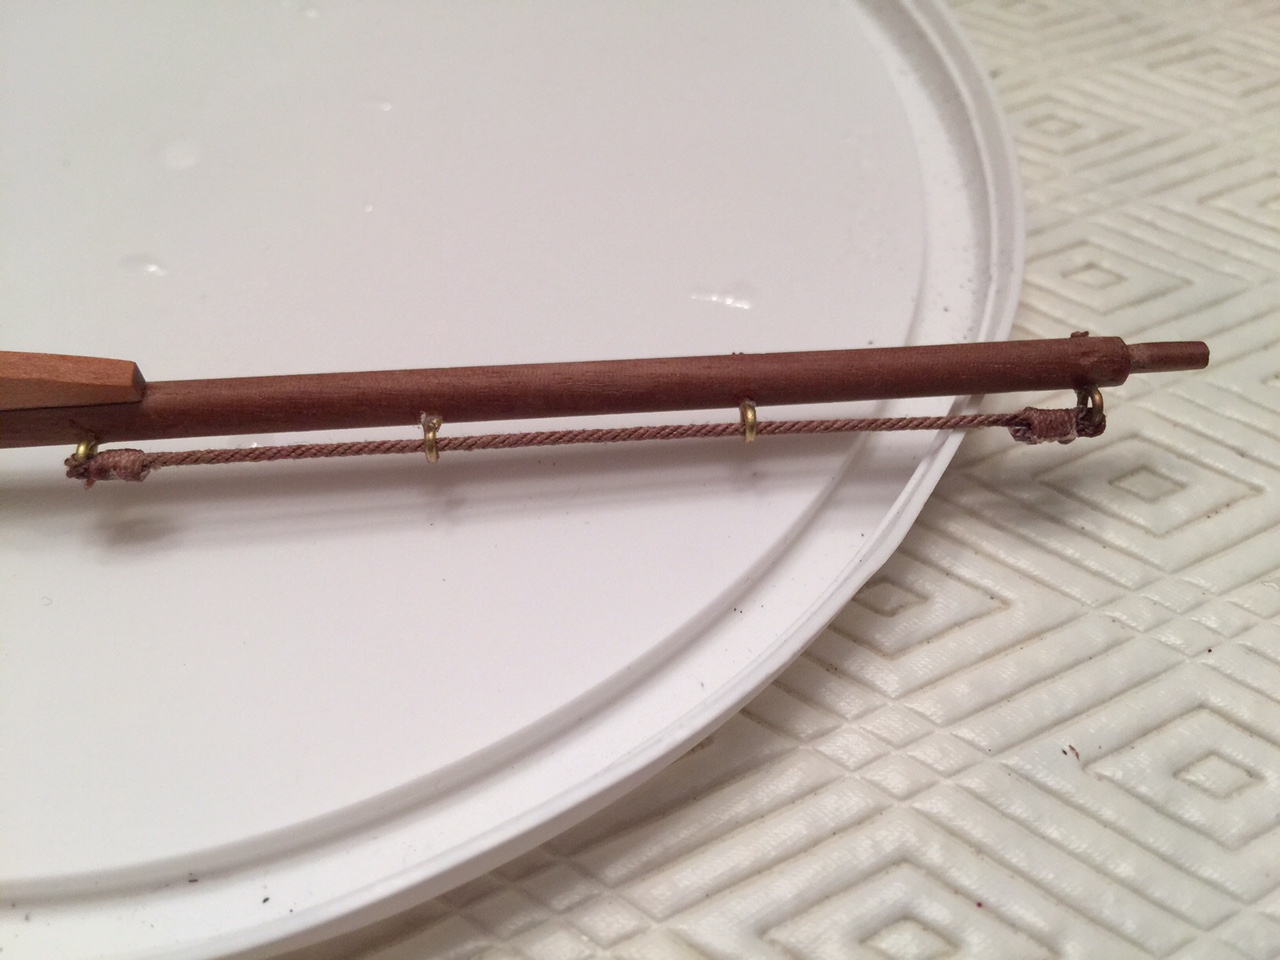
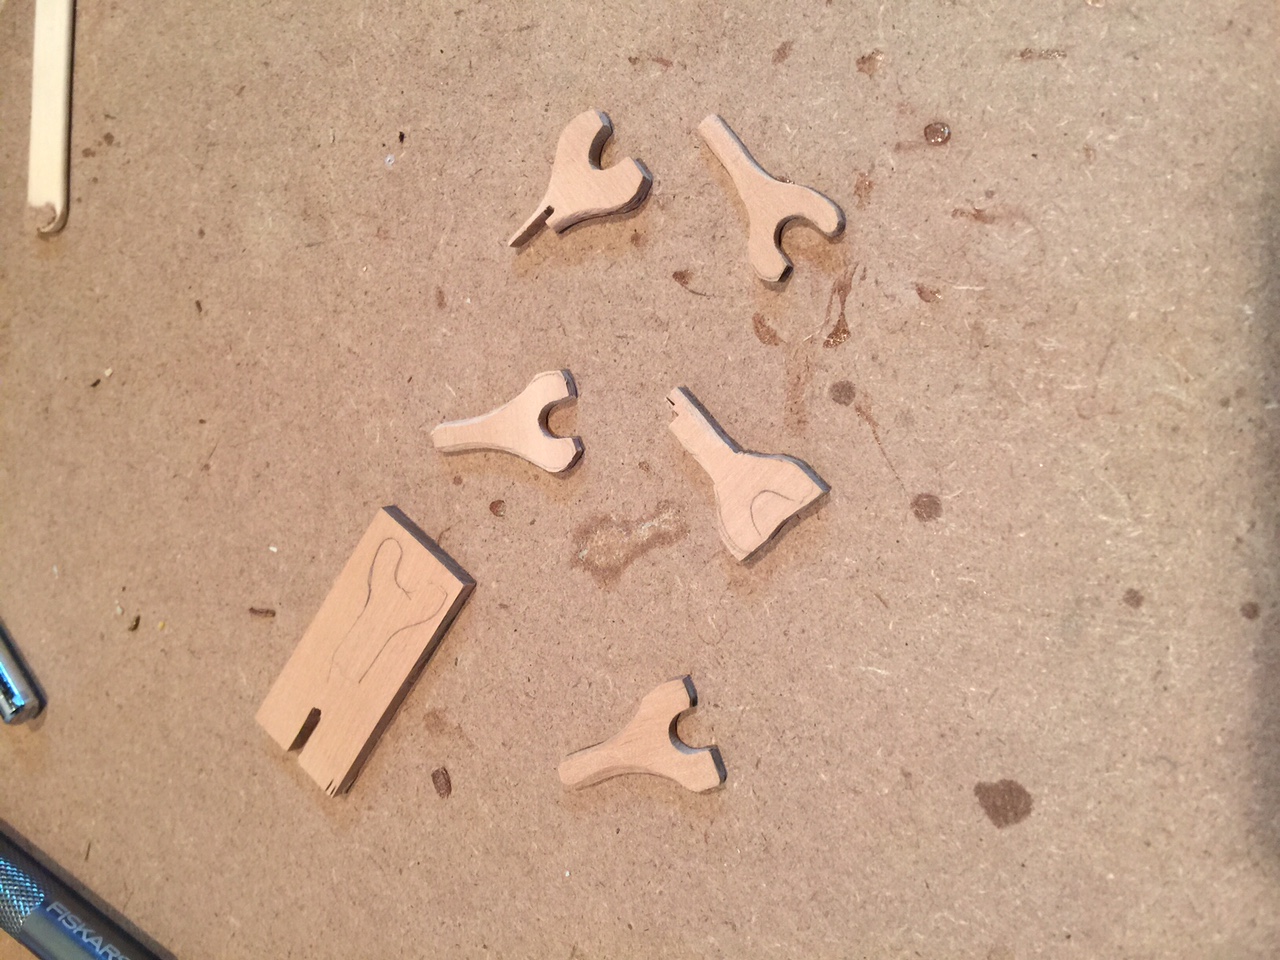
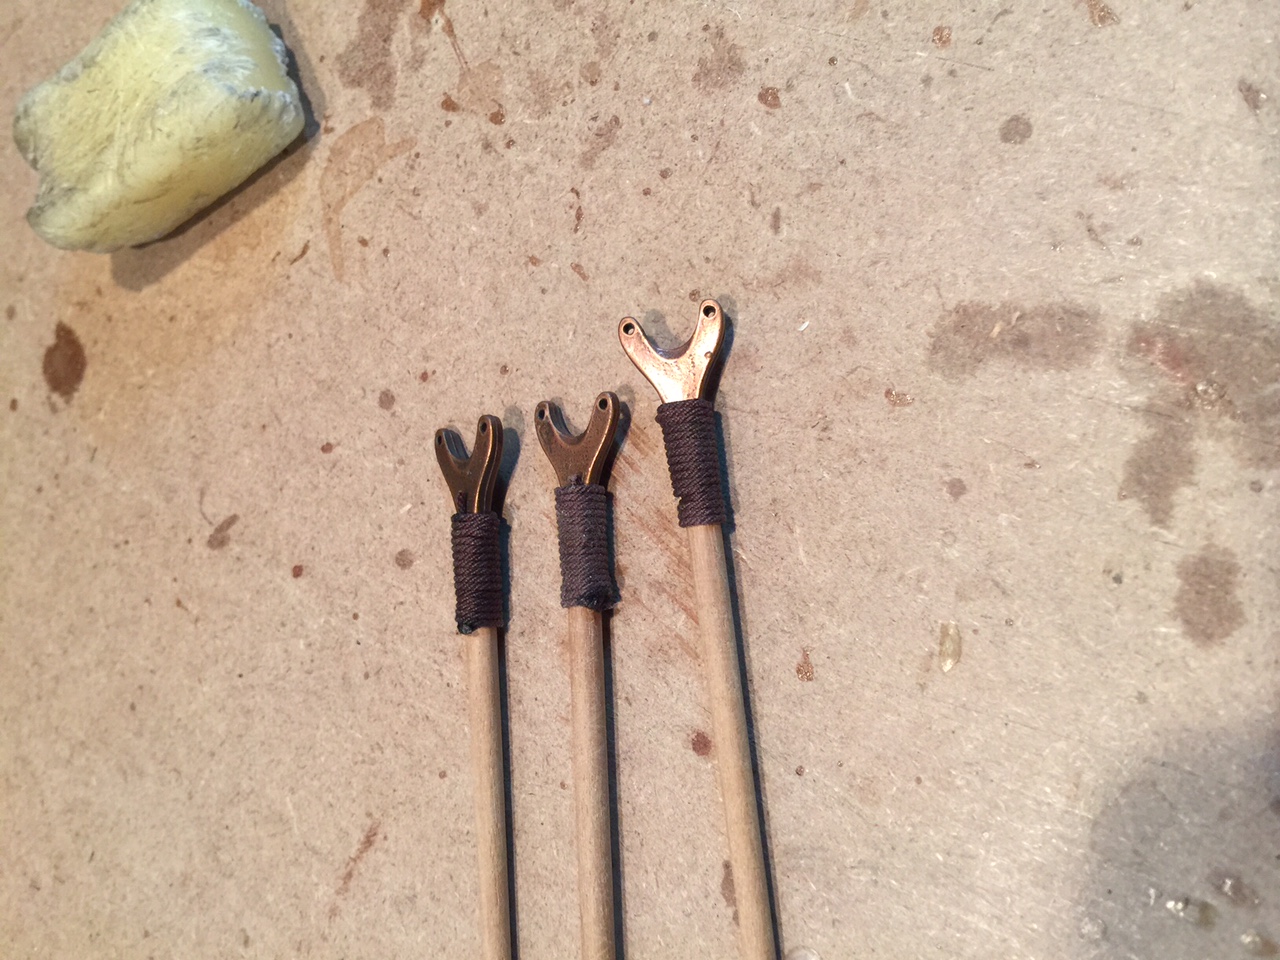
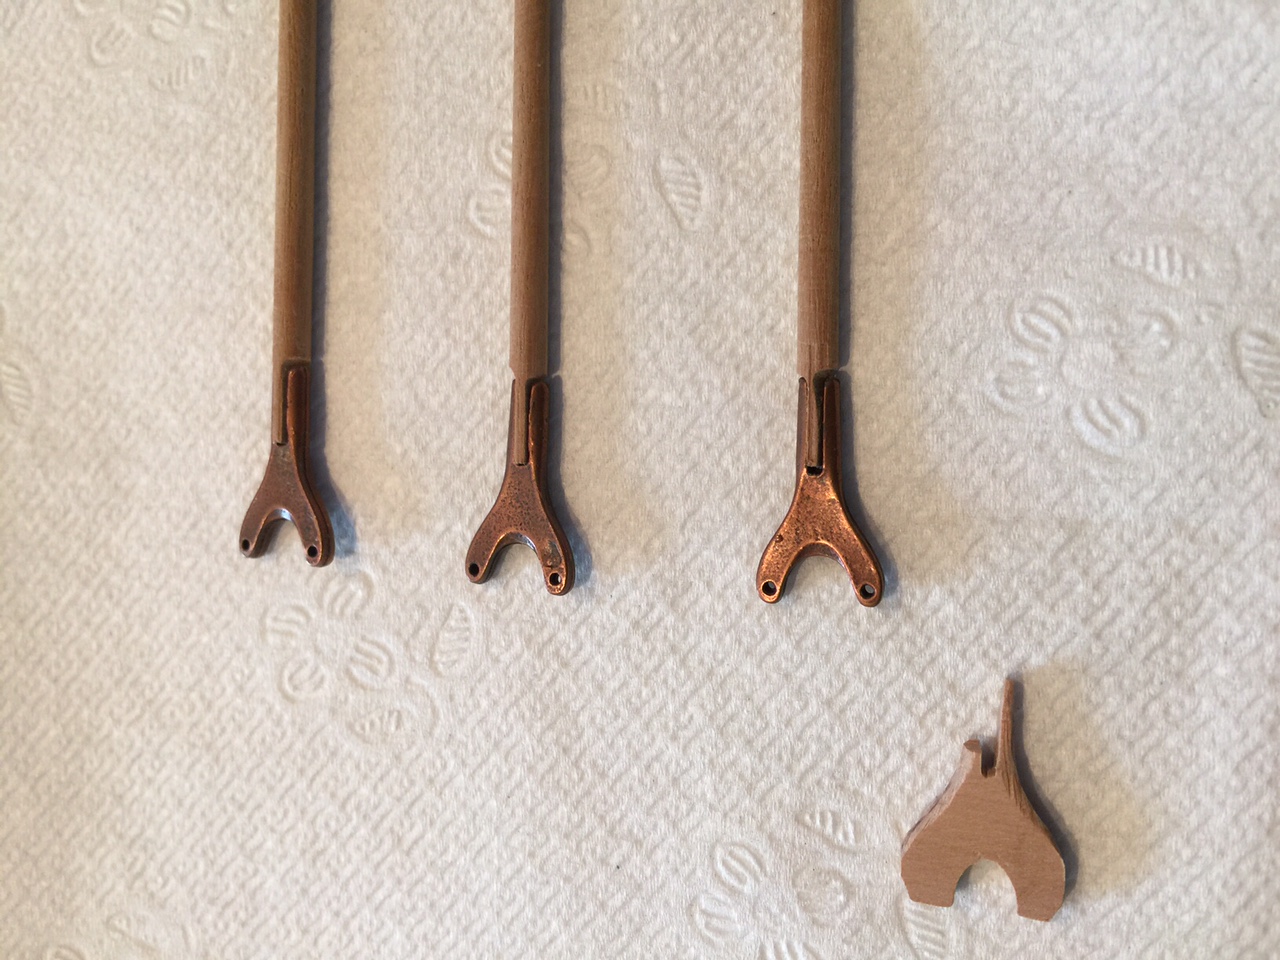
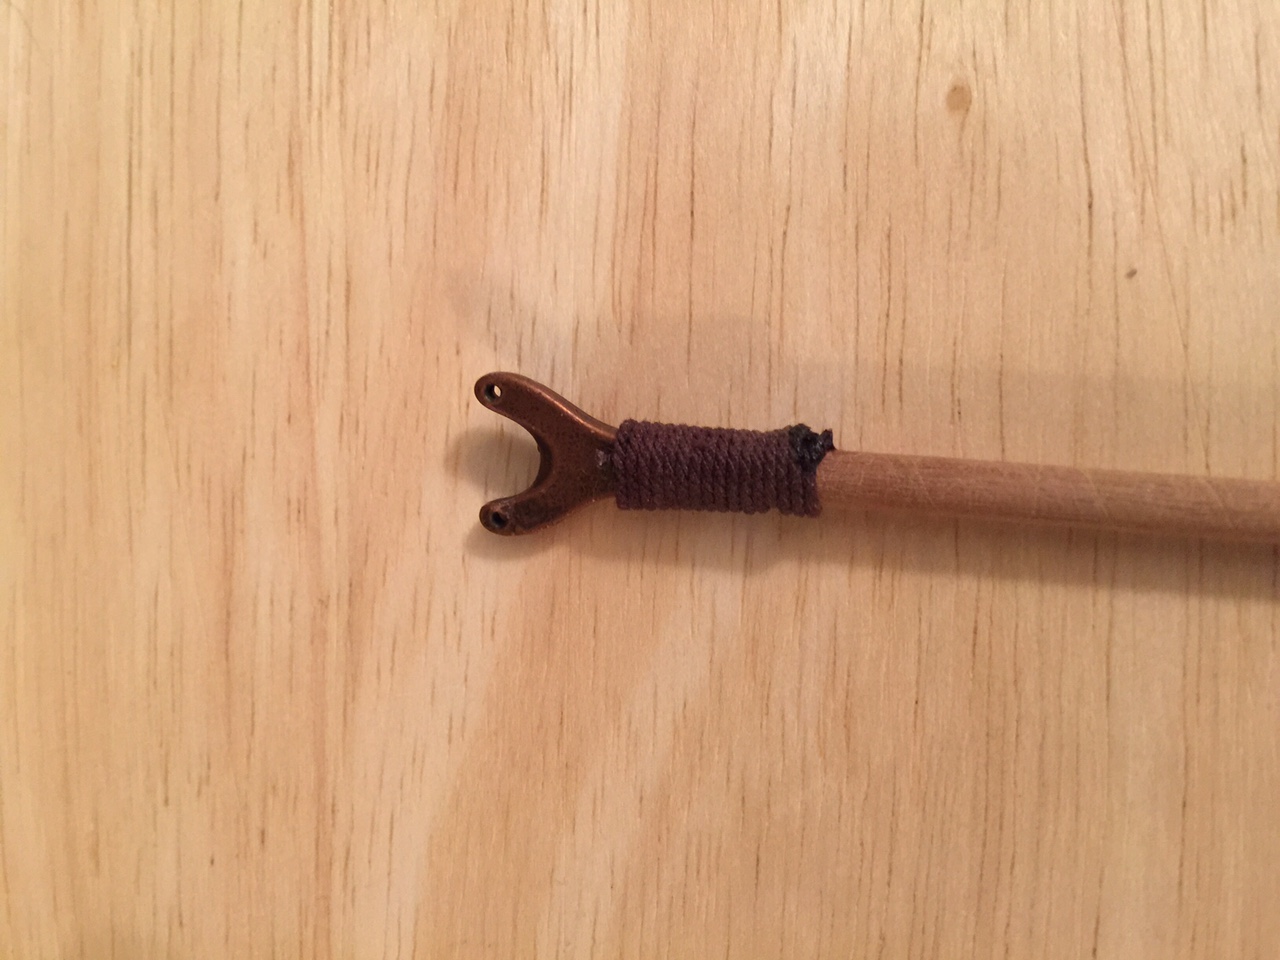
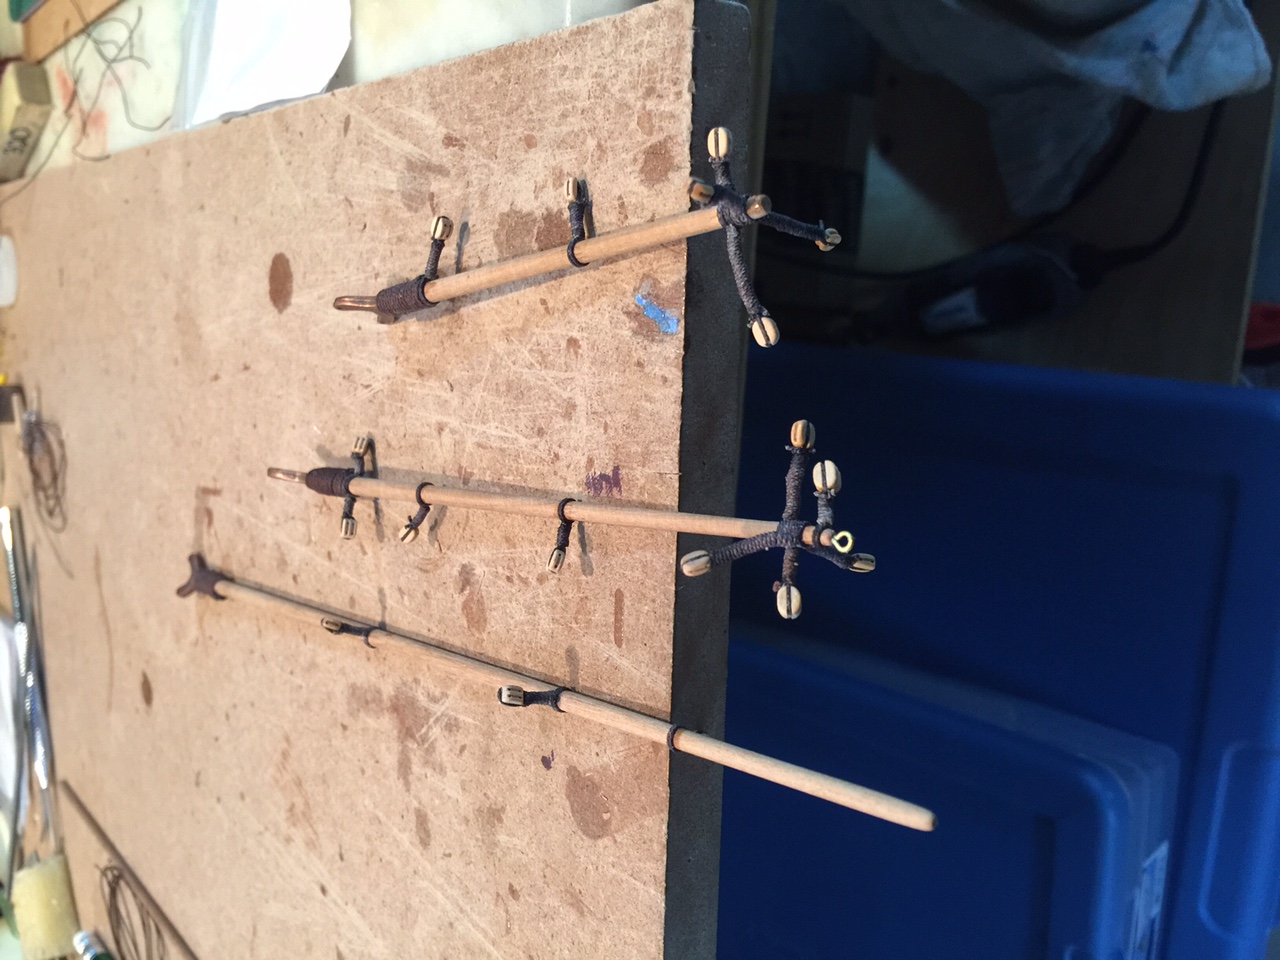
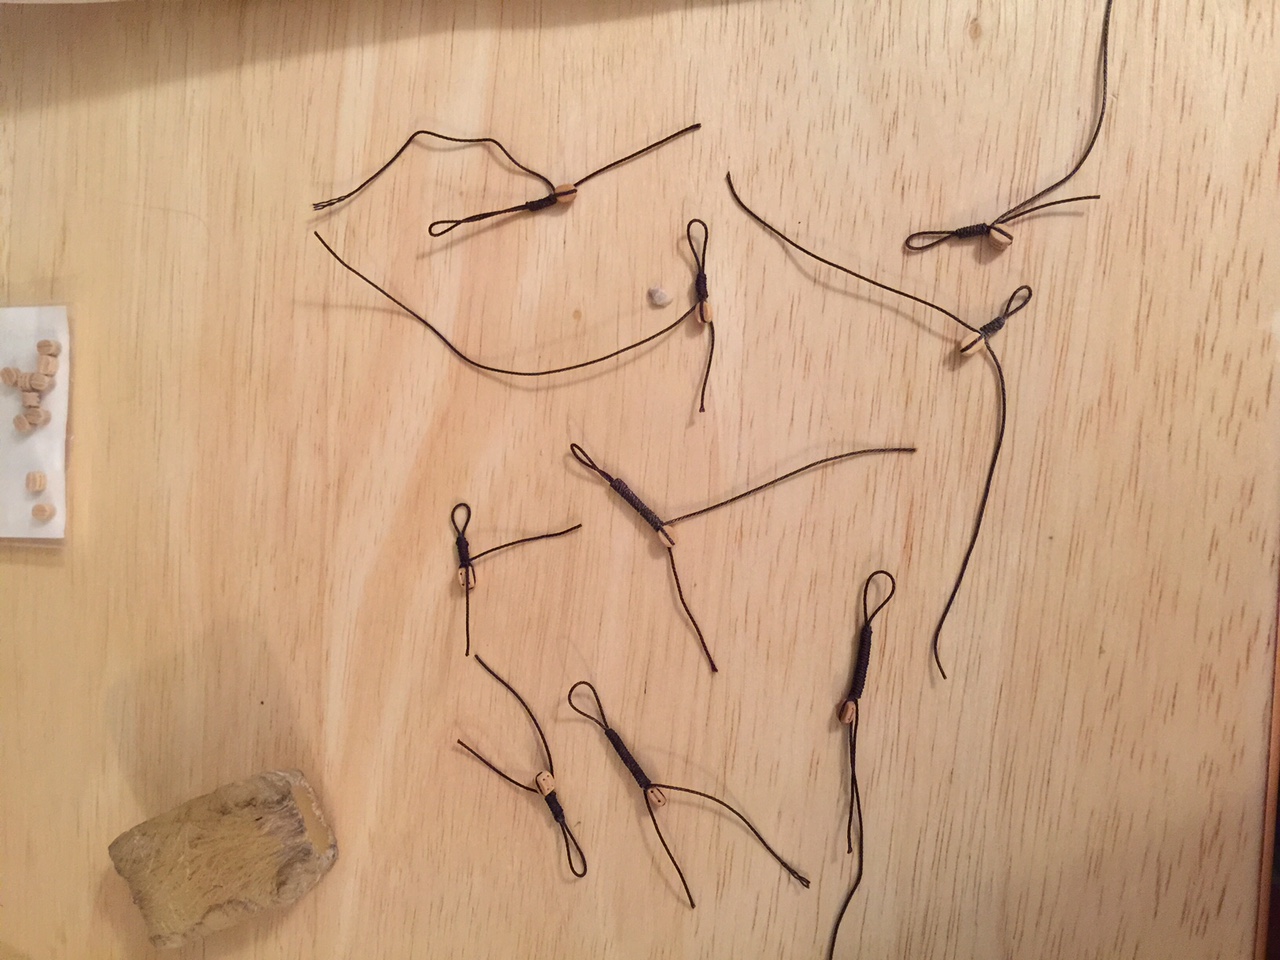
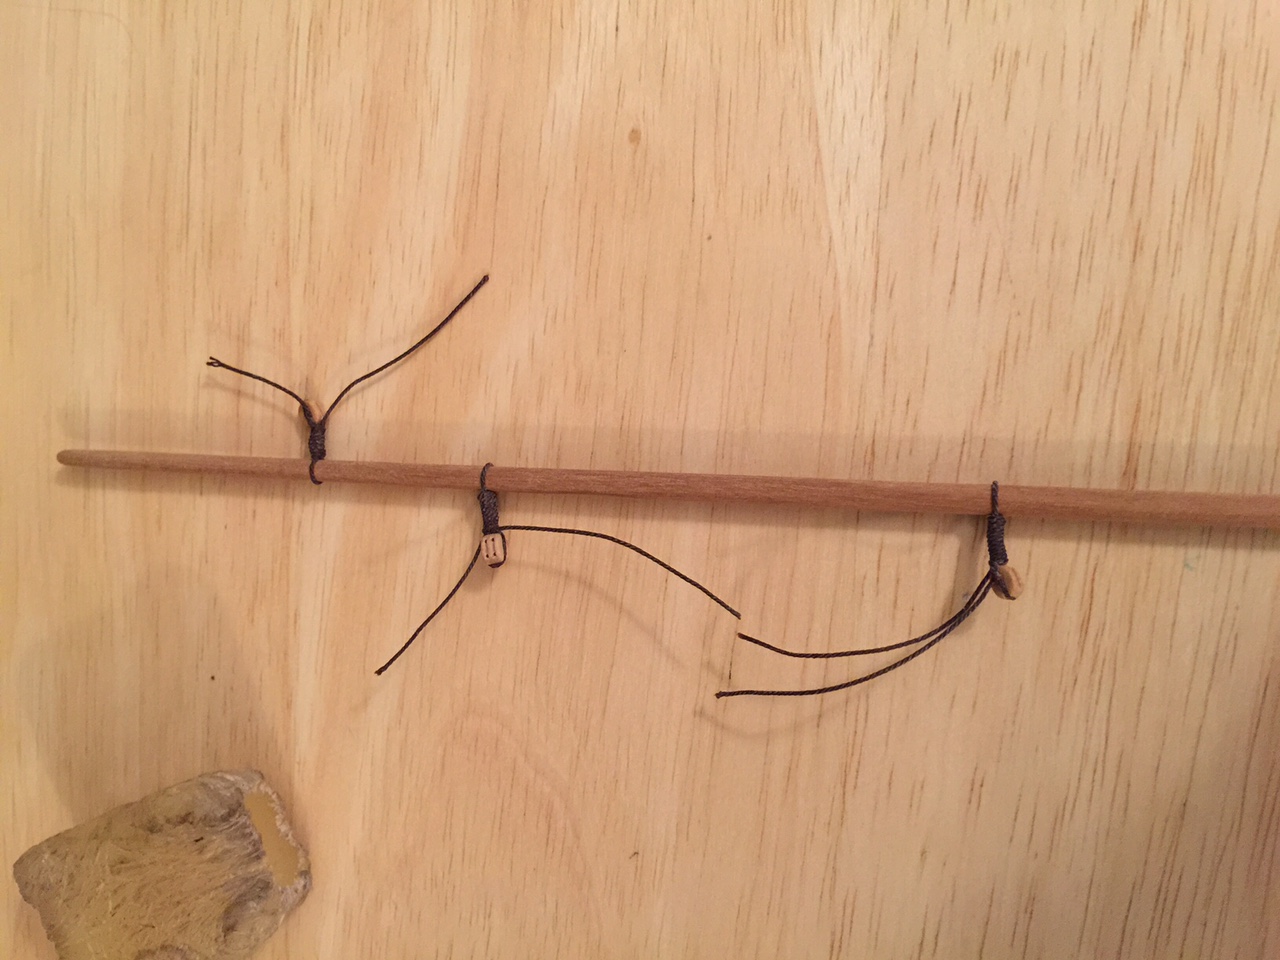
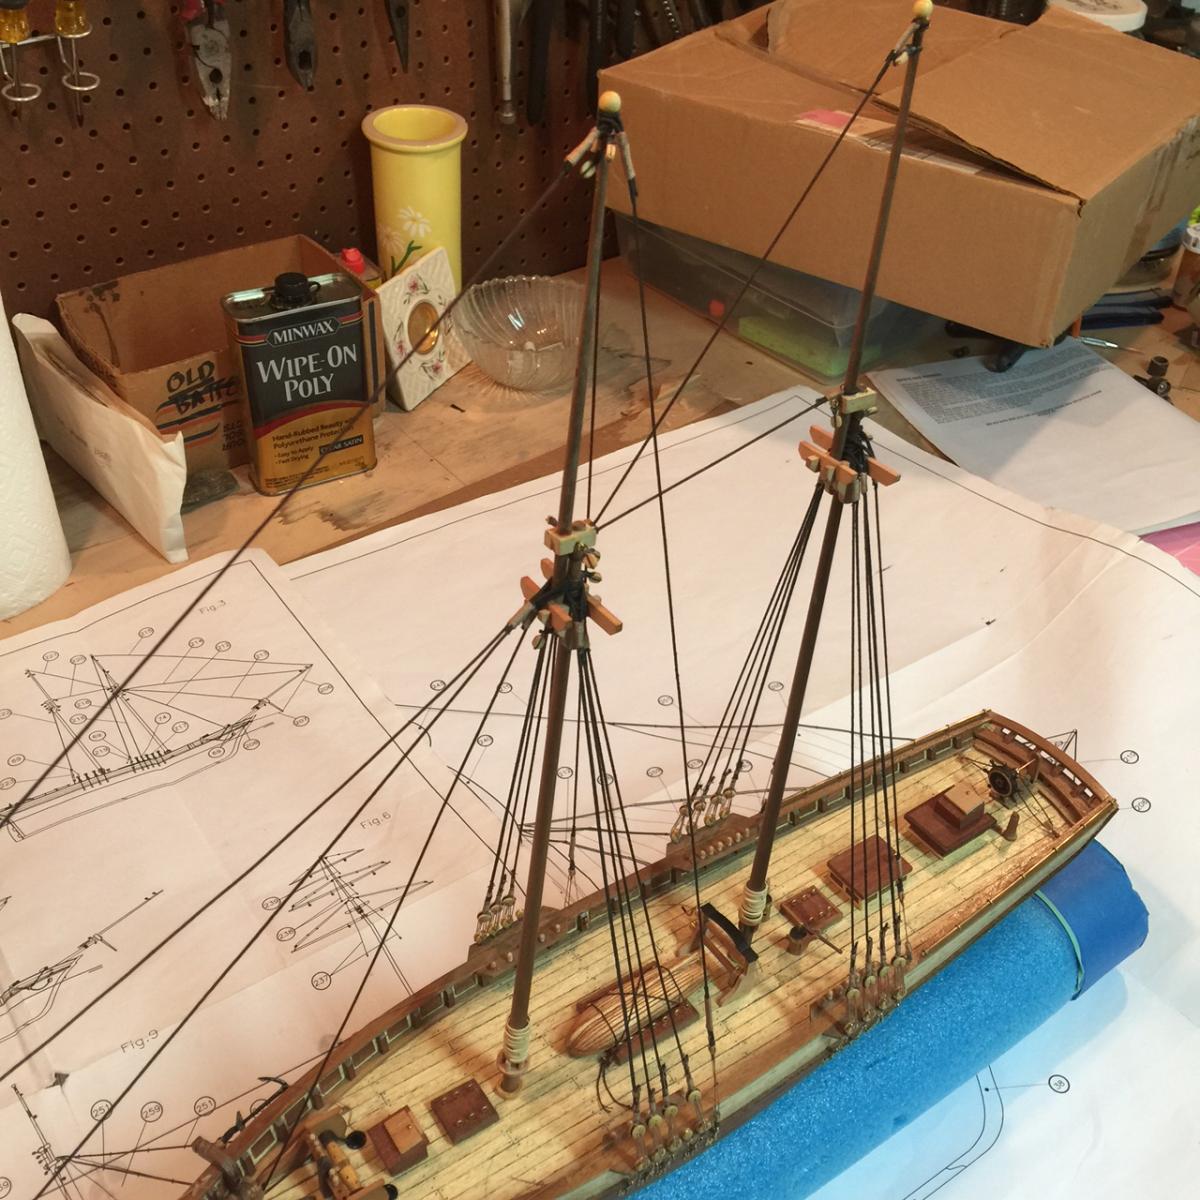
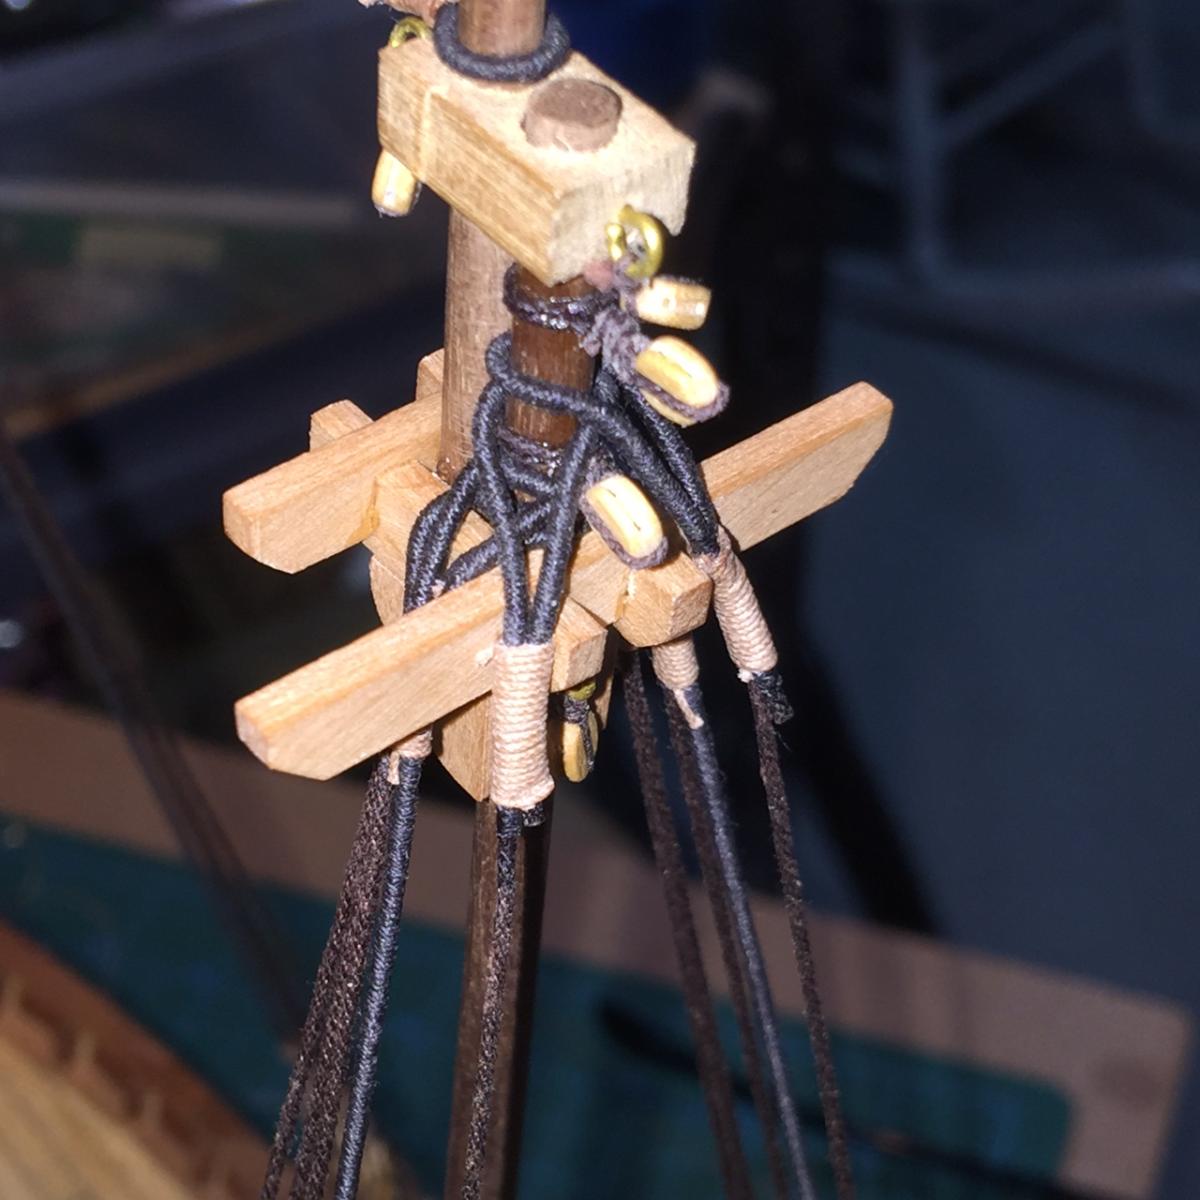
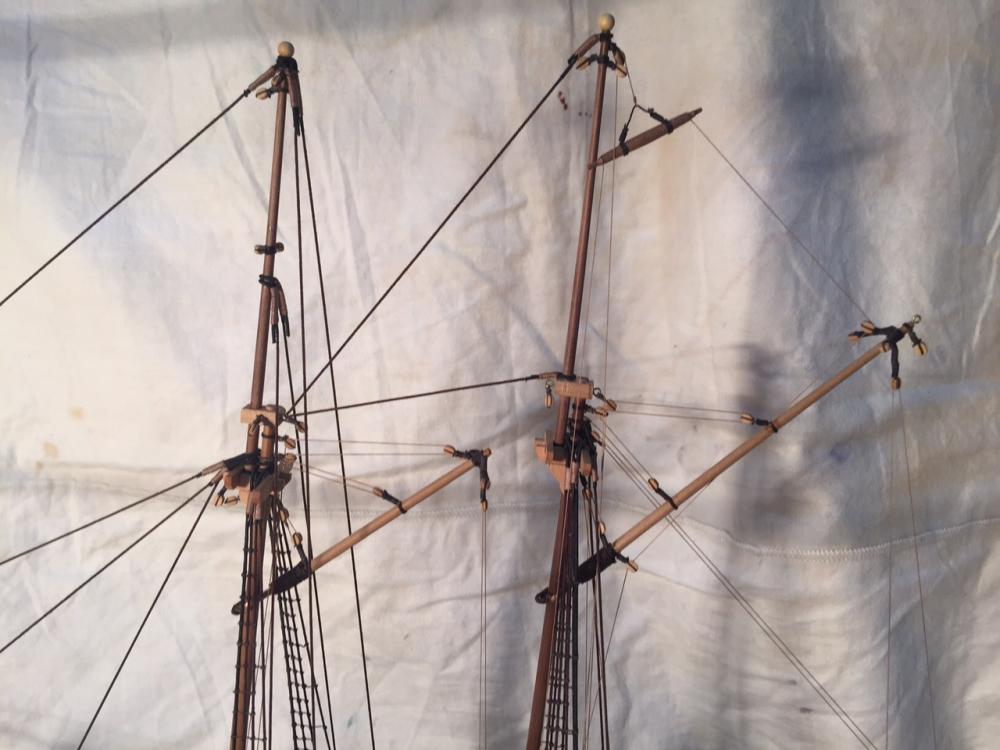
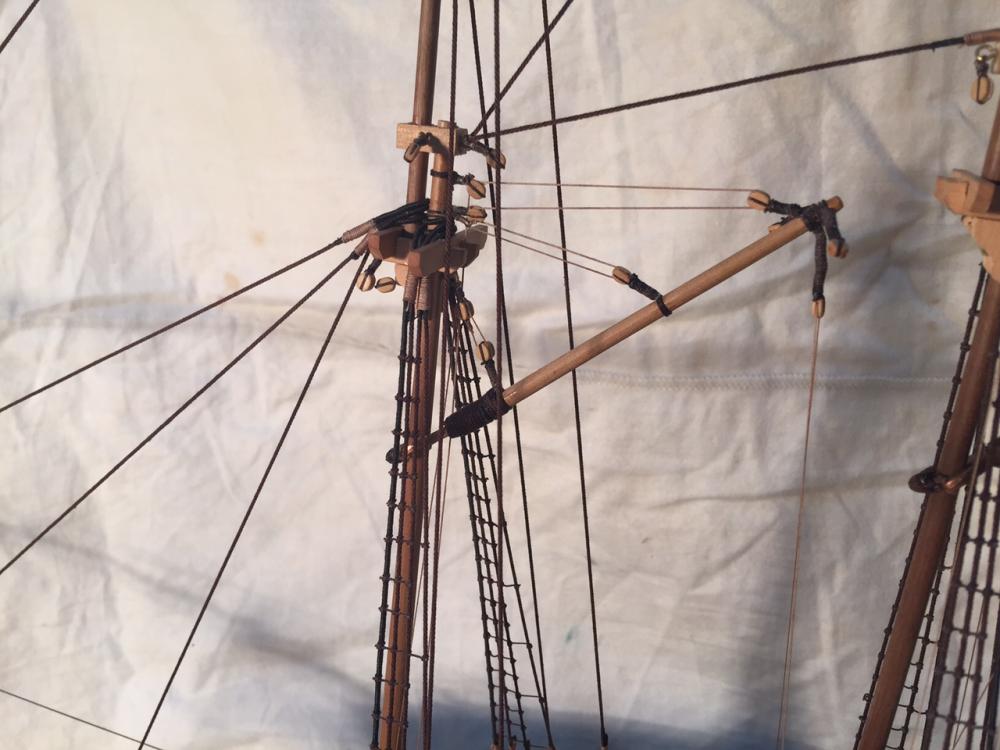
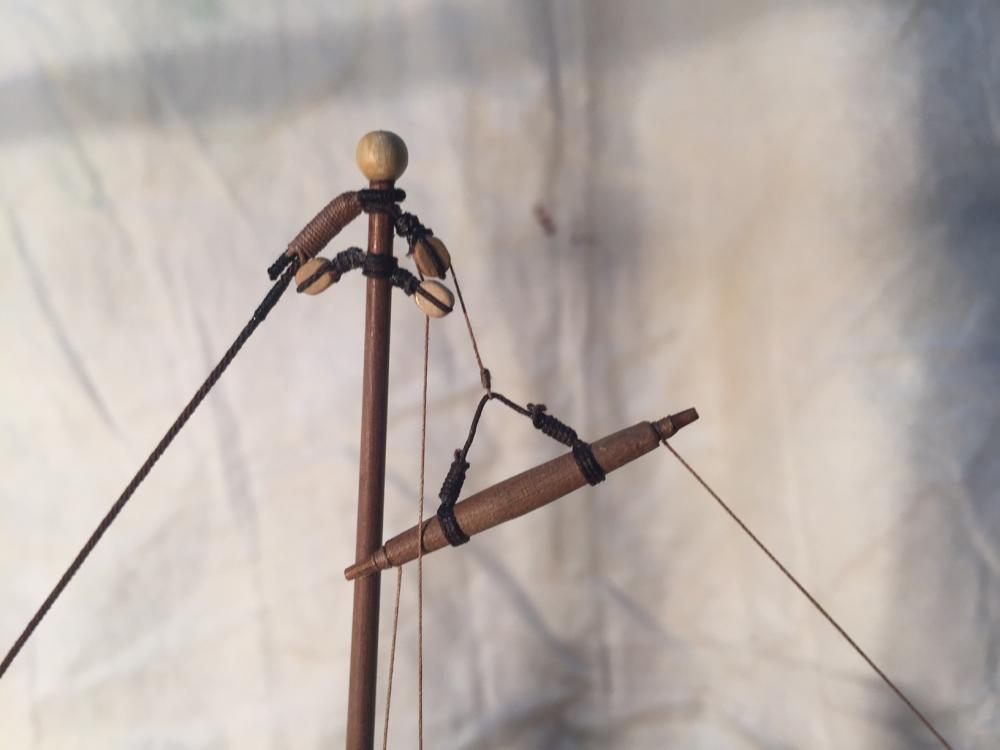
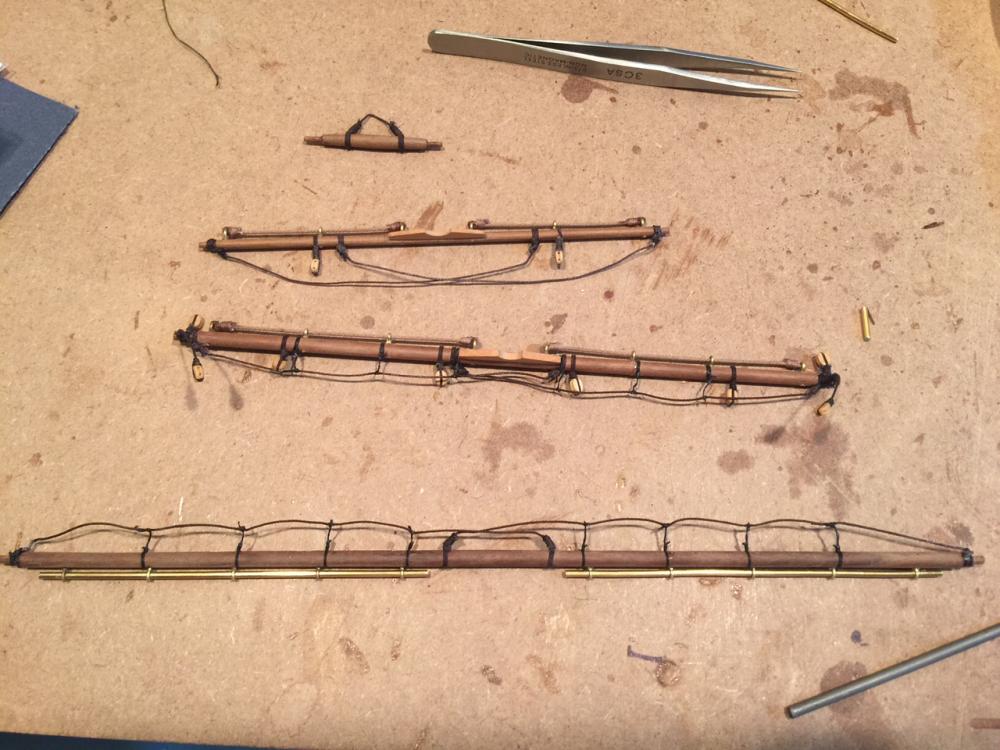
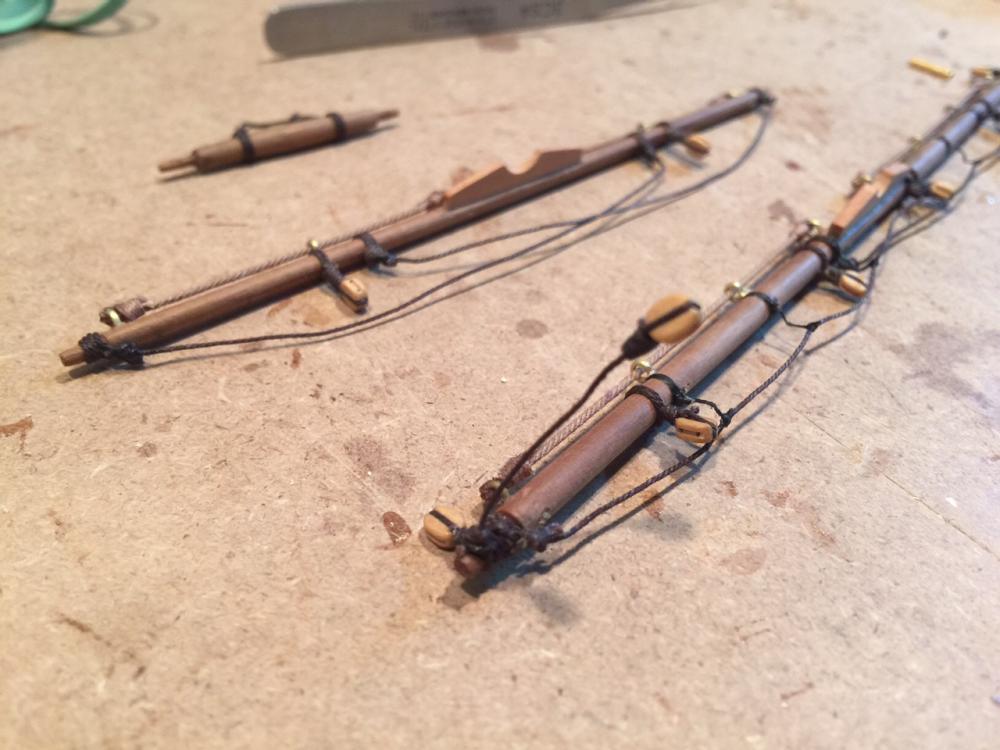
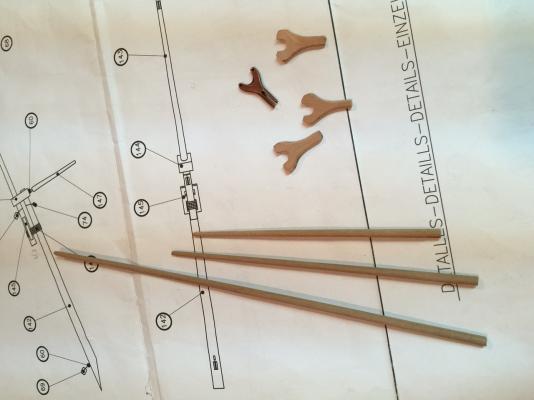
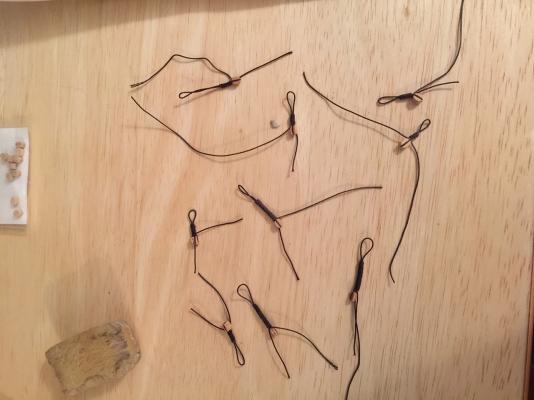
Well I had planned on taking a few weeks break after my milestone... which turned into a couple of months. So I've been slowly working on the yards/boom/etc in prep for the final push to put it all together. Here's where I've gotten. As you can see I tried to create the goosenecks (like Jesse did) and after many attempts, some of which you see below, I abandoned the effort. I decided to put on rope jackstays - I liked the look of Jesse's jackstays, and thought I'd try something a little different. I have the small yard's loops in place, will serve the ends and rig like other ropes to fixed points. Why change what works. I'm still at odds with the sails. I keep thinking I'll furl most of the sails and have one or two sails unfurled. But which ones? I have no idea how that actually works on a ship. I'm sure 'it depends' but any guidance would be greatly appreciated.


- 389 replies
-
- 8
-
-
- scottish maid
- artesania latina
- (and 1 more)
-
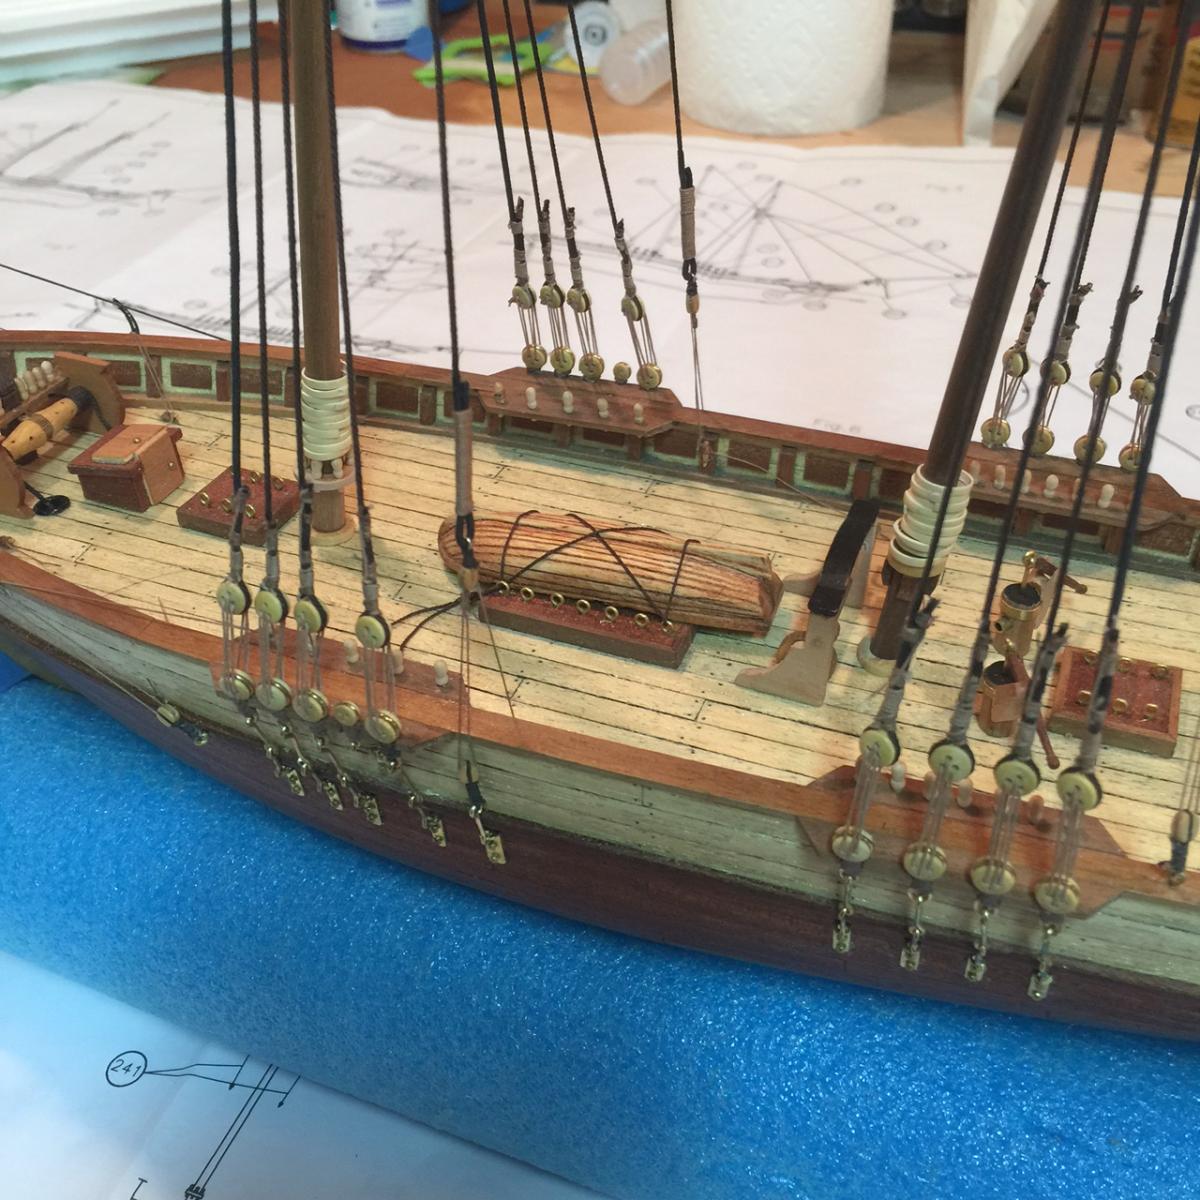
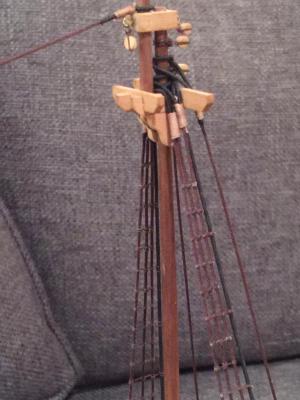
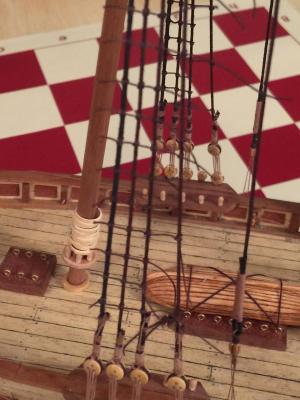
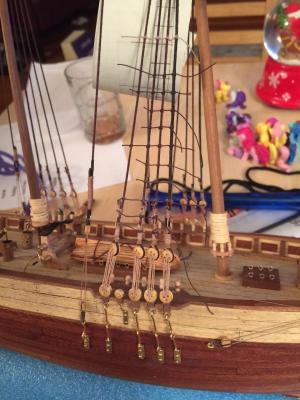
Well after several weeks of patience, I've completed the ratlines. Well almost. I have to finish the ratlne steps that are near the ends of the shrouds - two each on the remaining three. And the good news is I finally had enough rope. Sorry Chuck... This is a bit of a milestone so I'm happy. Took a bit longer than expected (as always). Well onward and upward, now I can concentrate on yards and booms. Still trying to figure out the sail configuration... I also have a lot of detail/cleanup work to do - rope coiling, fixing/finishing small stuff... but will enjoy this milestone for a day and then move forward.

- 389 replies
-
- 11
-
-
- scottish maid
- artesania latina
- (and 1 more)
-
Nice detail work Jesse. Looks nice even under the unforgiving photo lens....
- 1,306 replies
-
- 7
-
-
- syren
- model shipways
- (and 1 more)
-
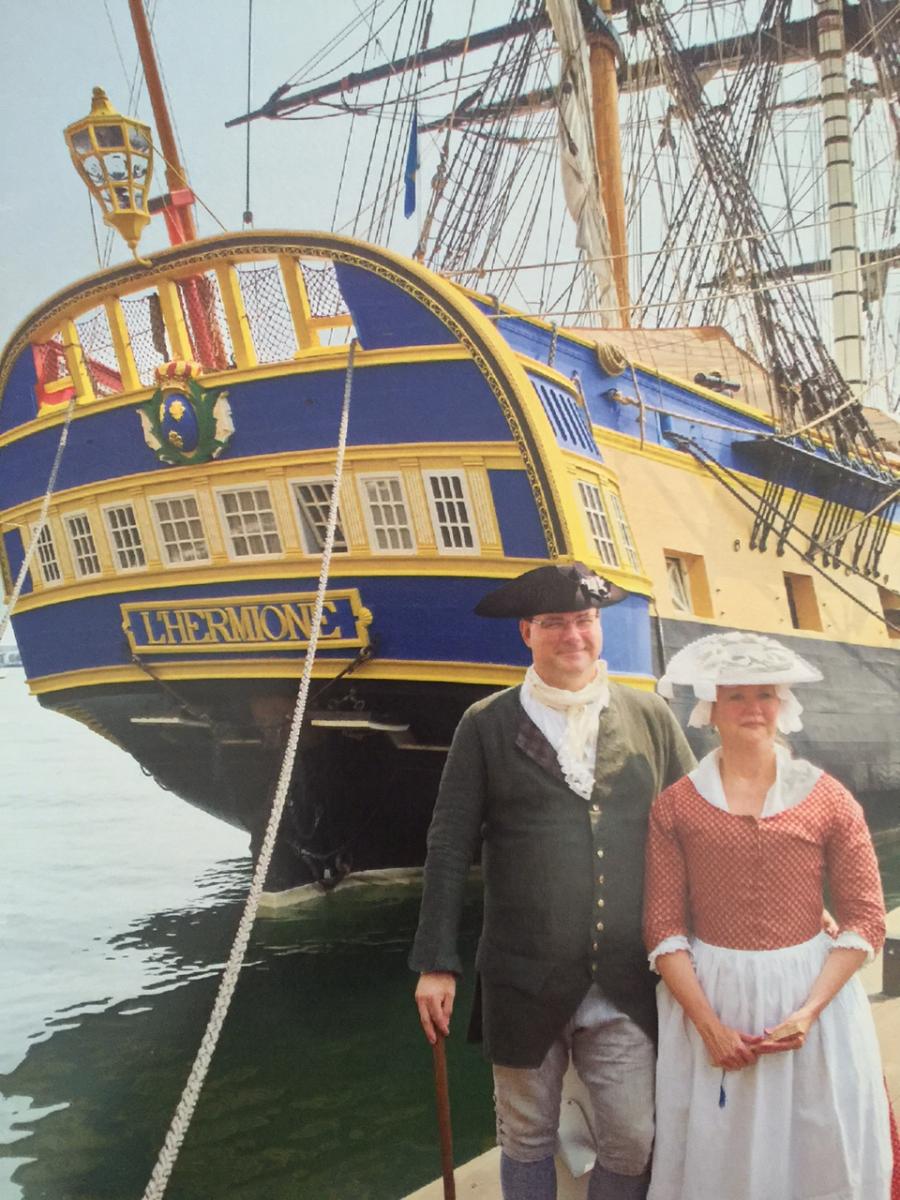
Thanks guys.... I hope so George. It's definitely a test of patience. Elijah, I laughed when I read your comment - you're right - the best use of that skill is when I build another boat! Below is my sister's Christmas card - they visited L'Hermione in period dress which surprised/delighted the crew.

- 389 replies
-
- 6
-
-
- scottish maid
- artesania latina
- (and 1 more)
-
Matt, thanks for sharing - exactly my question. I still have a ways to go before getting to the sails but thinking about it and doing some reading nonetheless. Trimmed up the ratlines on second set of shrouds. Half way there....

- 389 replies
-
- 5
-
-
- scottish maid
- artesania latina
- (and 1 more)
-
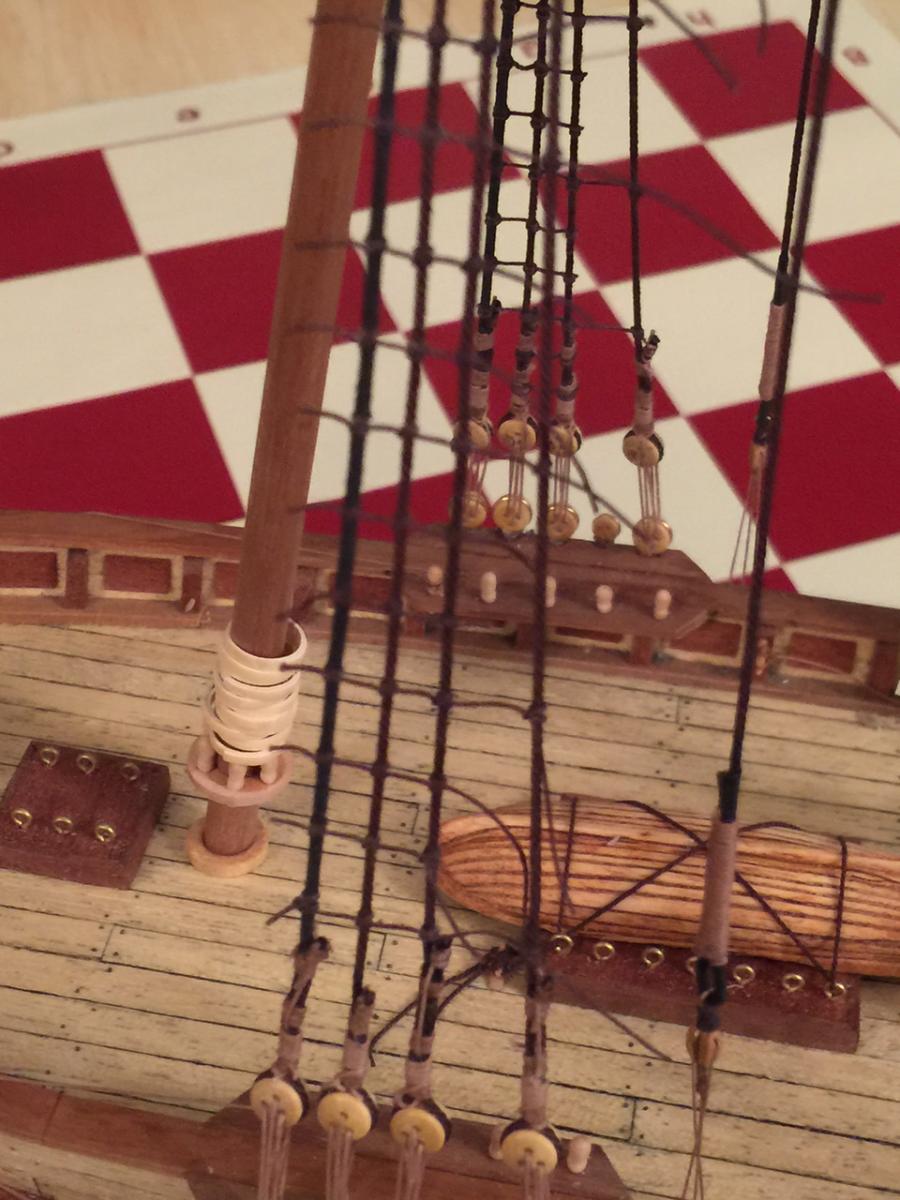
Two down, two to go... Working on the ratlines while watching a little football and studying some chess. Slowly getting there. I'm really good at clove hitches now.

- 389 replies
-
- 6
-
-
- scottish maid
- artesania latina
- (and 1 more)
-
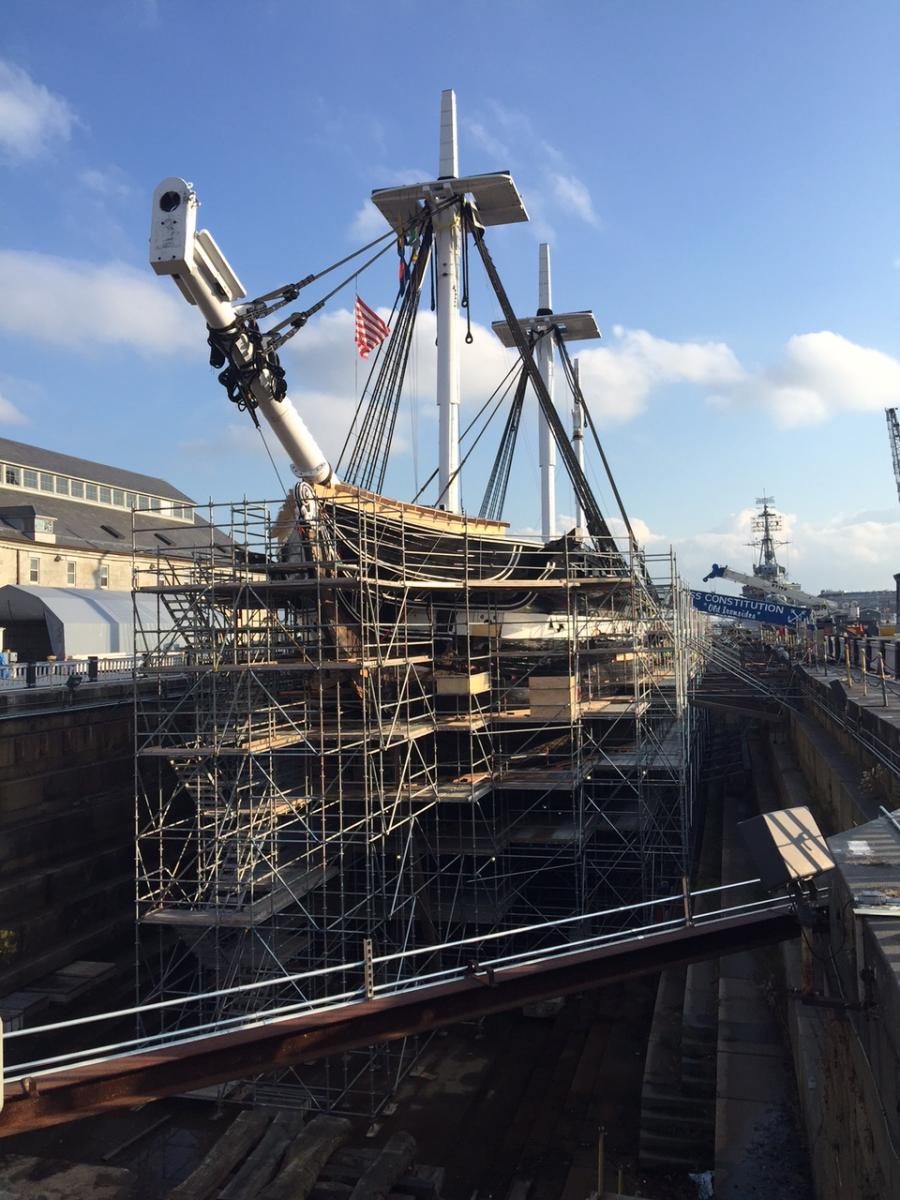
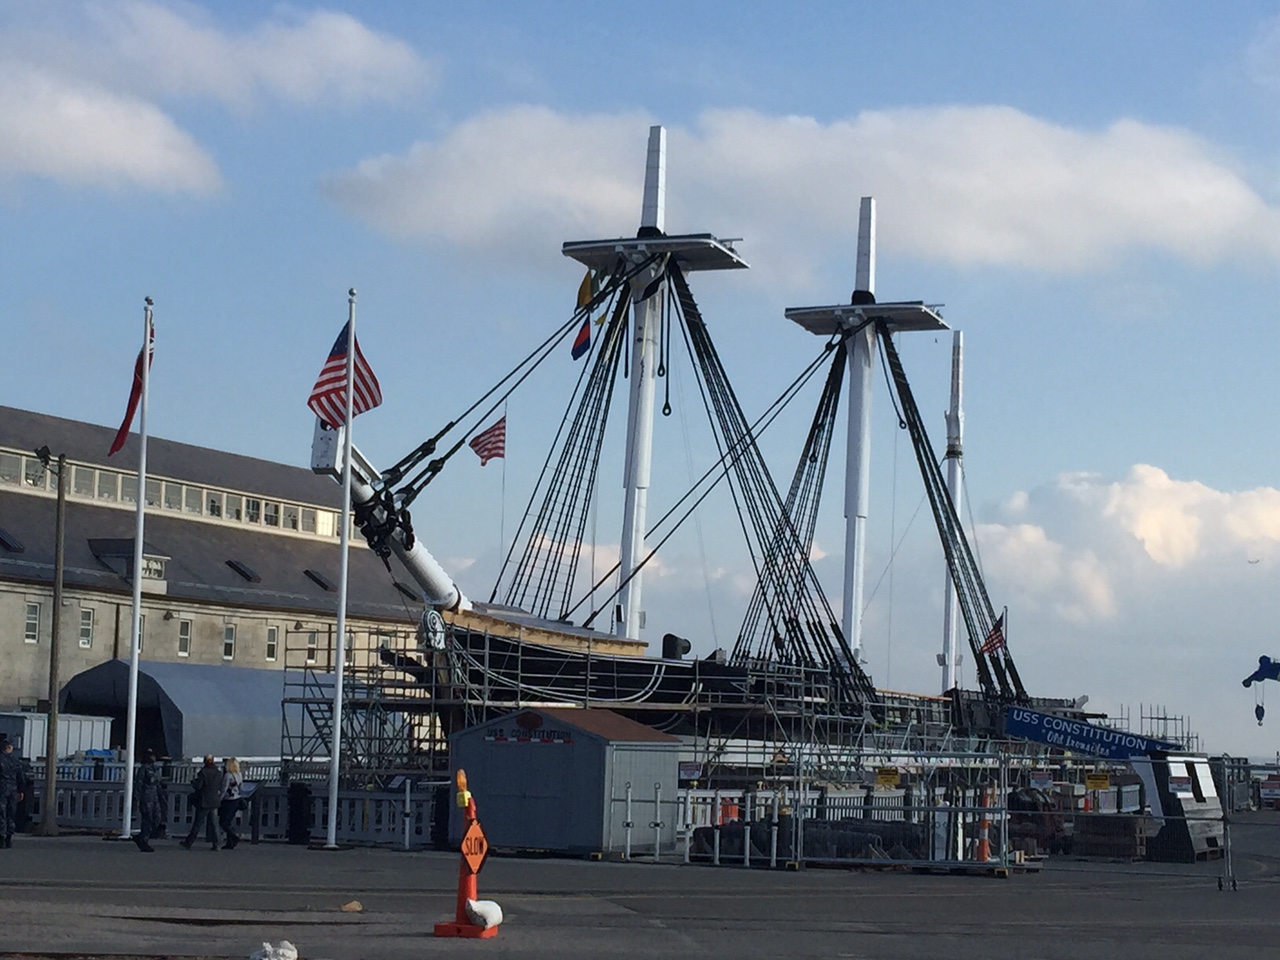
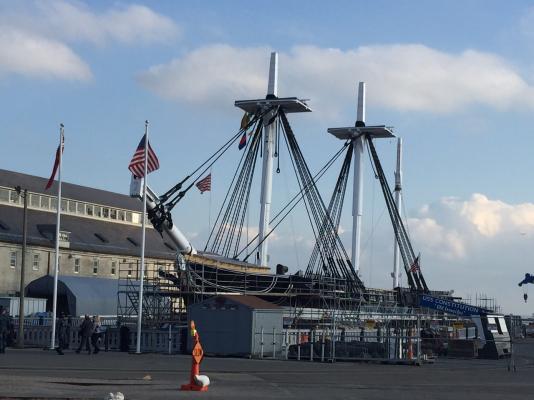
Thanks guys! with all this great weather we've been having in Boston I was able to get on my bicycle and ride down to the Constitution. Check out current state of the work being done... Some models look more put together than the real deal!

- 389 replies
-
- 6
-
-
- scottish maid
- artesania latina
- (and 1 more)
-
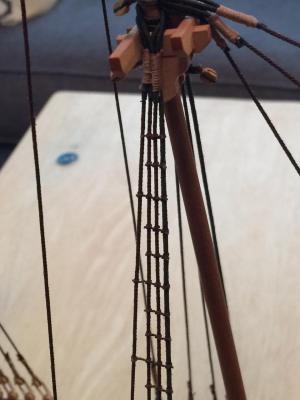
First of four complete... Now that I have the process down, it's really not that hard. Just takes a bit of time... and lots of patience...

- 389 replies
-
- 7
-
-
- scottish maid
- artesania latina
- (and 1 more)
-
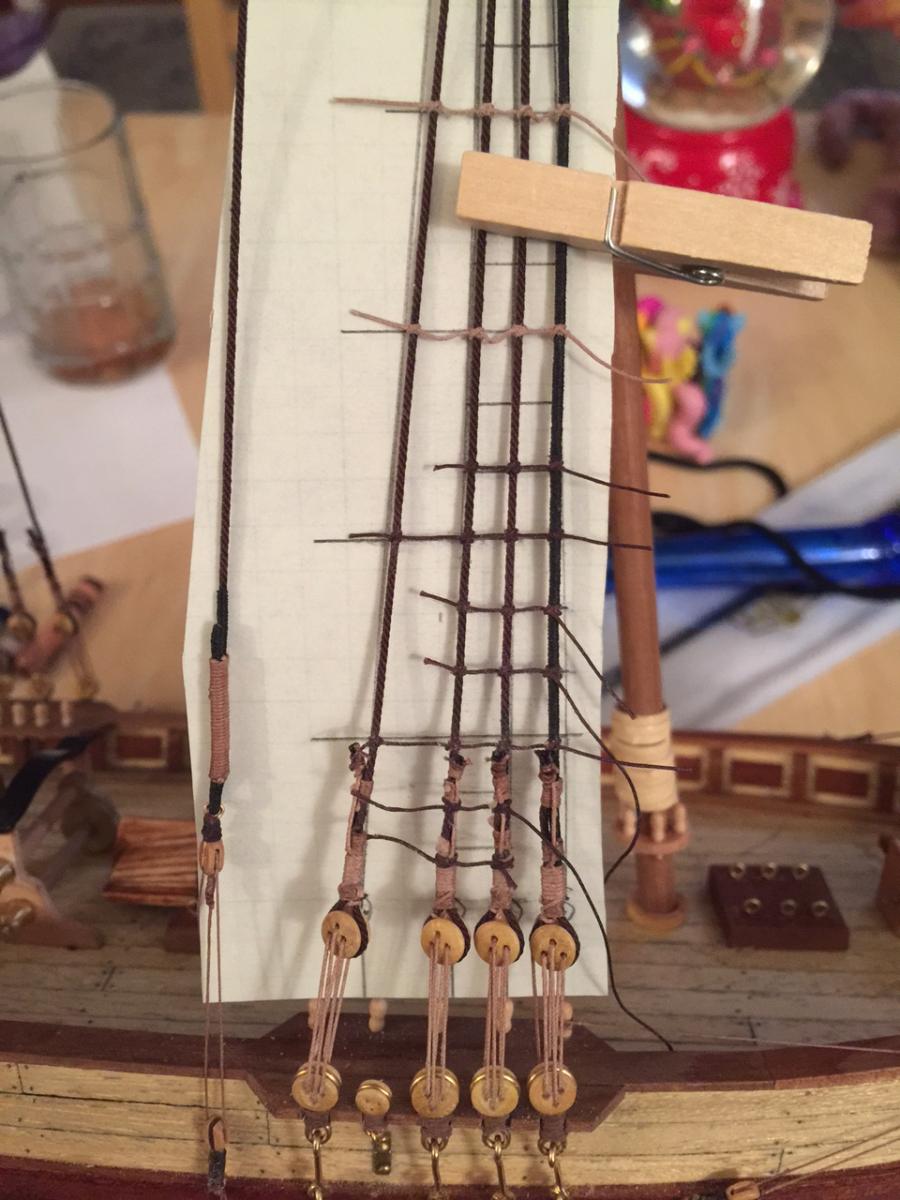
Starting the ratlines... This takes longer than I thought. Initially I was going to use light brown rope for the ratlines that extend all the way over to the last shroud, and use the darker brown rope for the shorter ratlines, but when I got the trial onto the shrouds, I didn't really like it afterall... so I had to pull the light brown ratlines back off, and re-do with the darker line. One other to-do I left off my list is to build a stand. I'm still using the temp stand made out of two noodles taped together, and my daughter is still on me for cutting up one of her noodles. Oh well... Here's what I have:

- 389 replies
-
- 7
-
-
- scottish maid
- artesania latina
- (and 1 more)
-
Ken I will be taking great interest in your build as I am considering the Constitution for my next model. I'm on rigging for my current model and think I'll be ready for something more advanced. Also - I live about 6 miles away from the real Constitution and so it's about a 1/2 hr bike ride to get there from my house -very easy to get there to see how it actually looks. Your modeling skills are exceptional and I look forward to seeing how this comes along! All the best, Robb
-
Thanks again gents. Elijah - sometimes I feel like I'm almost there... and then I survey what needs to be done and put any thoughts away that I might be close to finishing.... Here's my current checklist: - complete the ratlines (this takes time!) - tighten up some of the stays - begin on the yards. I need to read up on them - I like Jesse's approach with the stunsail boom - figure out what the sail configuration will be. Which leads to another interesting question. When ships are sailing with some of their sails furled... which sails are being used? Is there an order of sails that are employed from 'no-sails' to under full-sail ?
- 389 replies
-
- 4
-
-
- scottish maid
- artesania latina
- (and 1 more)
-
Matt this looks great, you've passed me! It must've taken forever to serve all those lines.... makes it look super.
-
Jesse just caught up to your build, looking great, the colors look outstanding. I really like the look of the treenails - very authentic looking.
- 1,306 replies
-
- 7
-
-
- syren
- model shipways
- (and 1 more)
-
Thanks Dave regarding the shroud serving. Chuck's server machine was a great investment! I've gotten so much mileage out of it. If I ever build another boat I think I might try to create my own rope.... Jesse - thanks for the comment. I'm starting to think about the yards and having to put them together. Did it take you a long time to construct yours the way you did? They look great - and I'm thinking of building similar to yours but furling some of the sails. I still have to get through the ratlines however I think that's going to take a while.
- 389 replies
-
- 3
-
-
- scottish maid
- artesania latina
- (and 1 more)
-
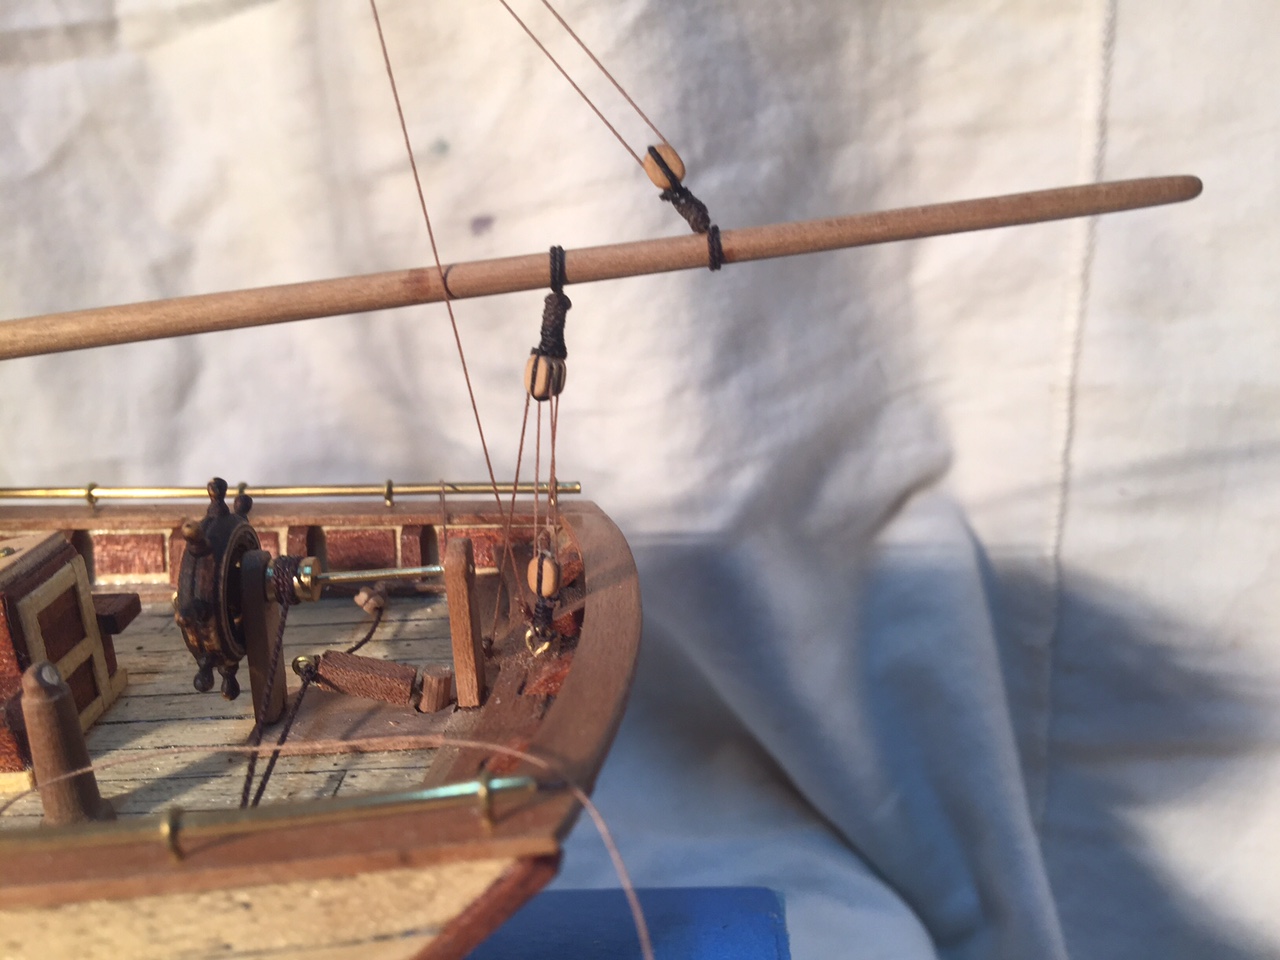
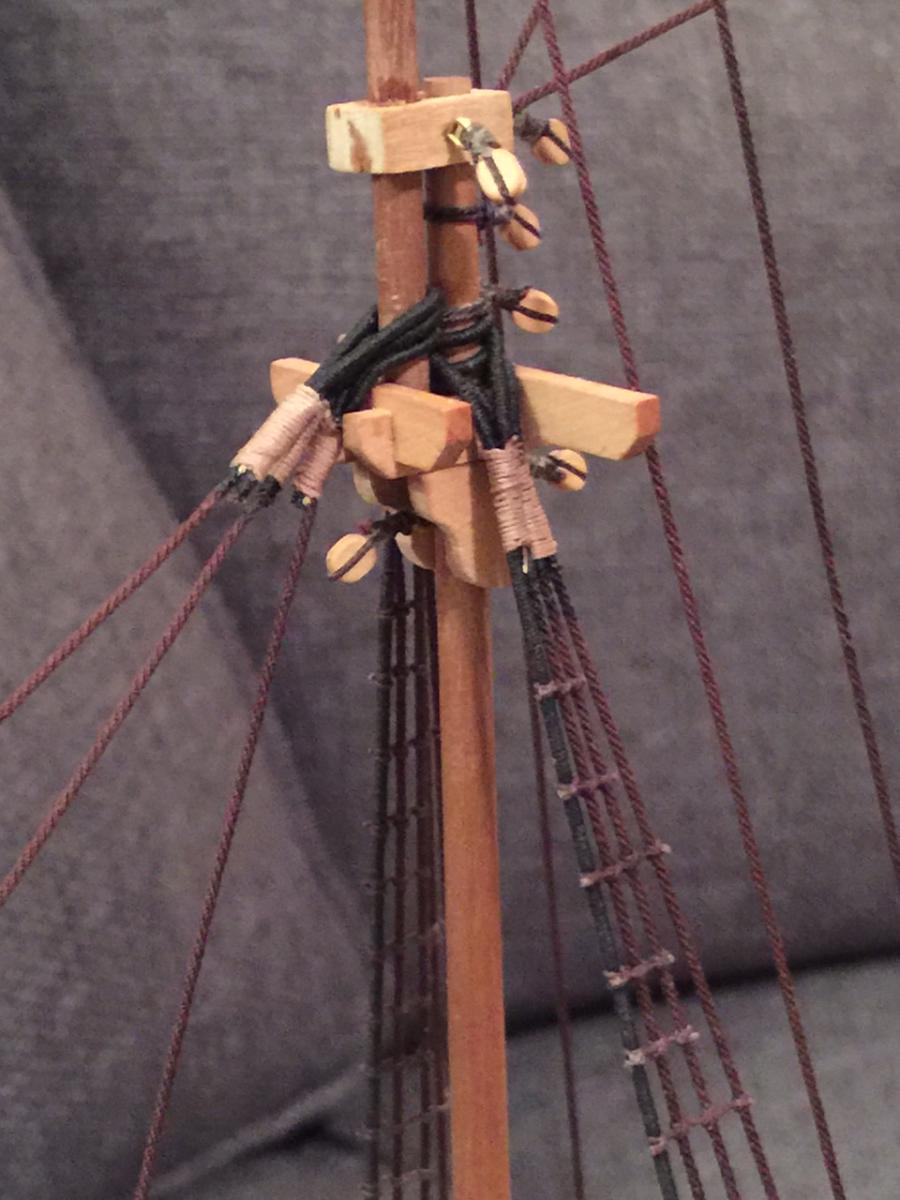
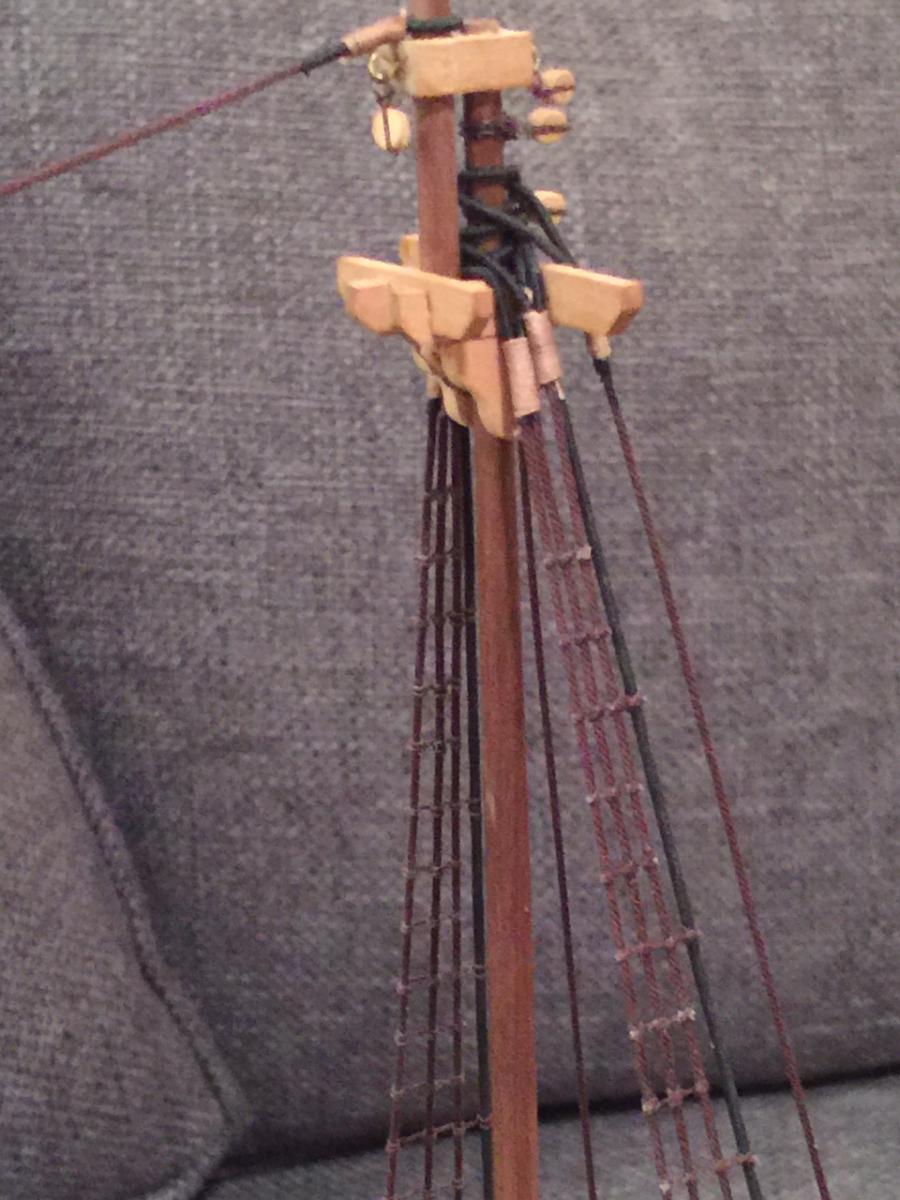
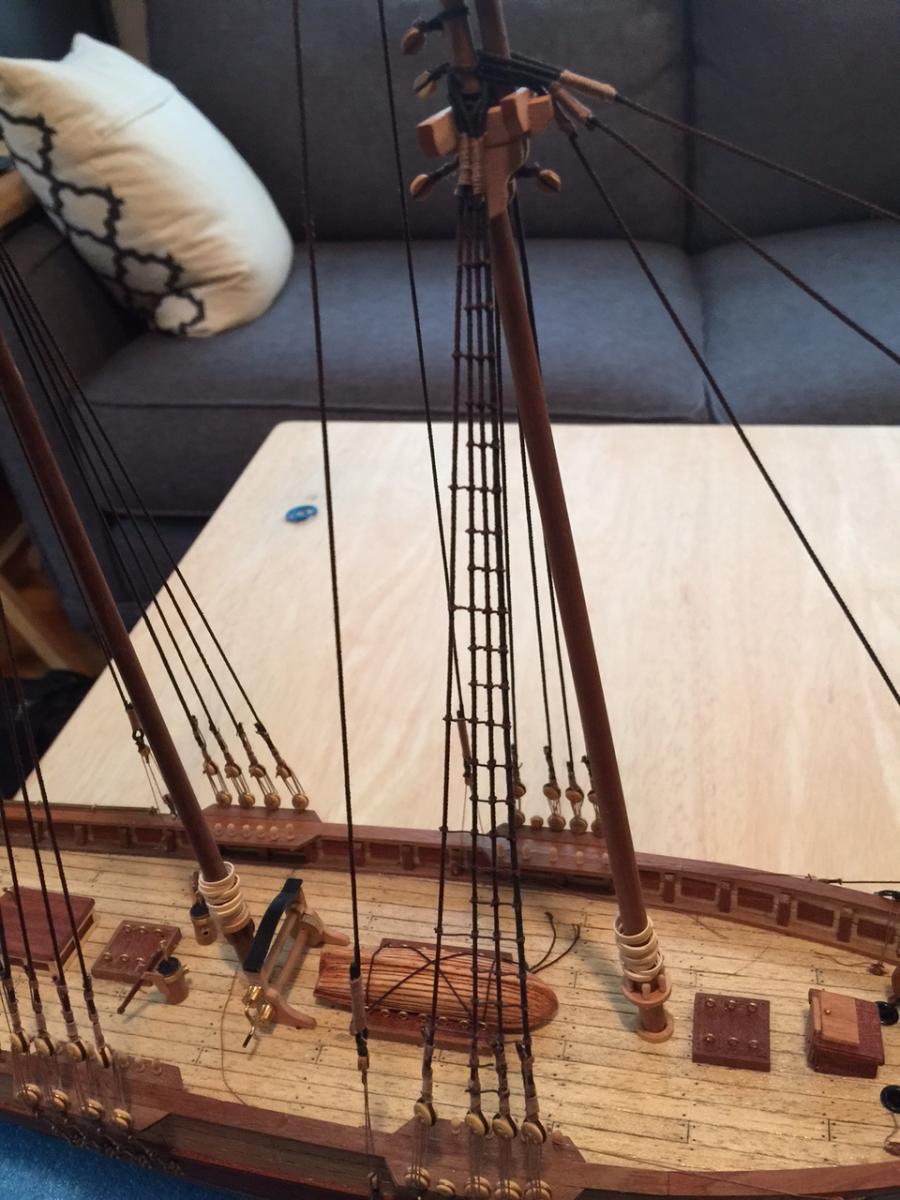
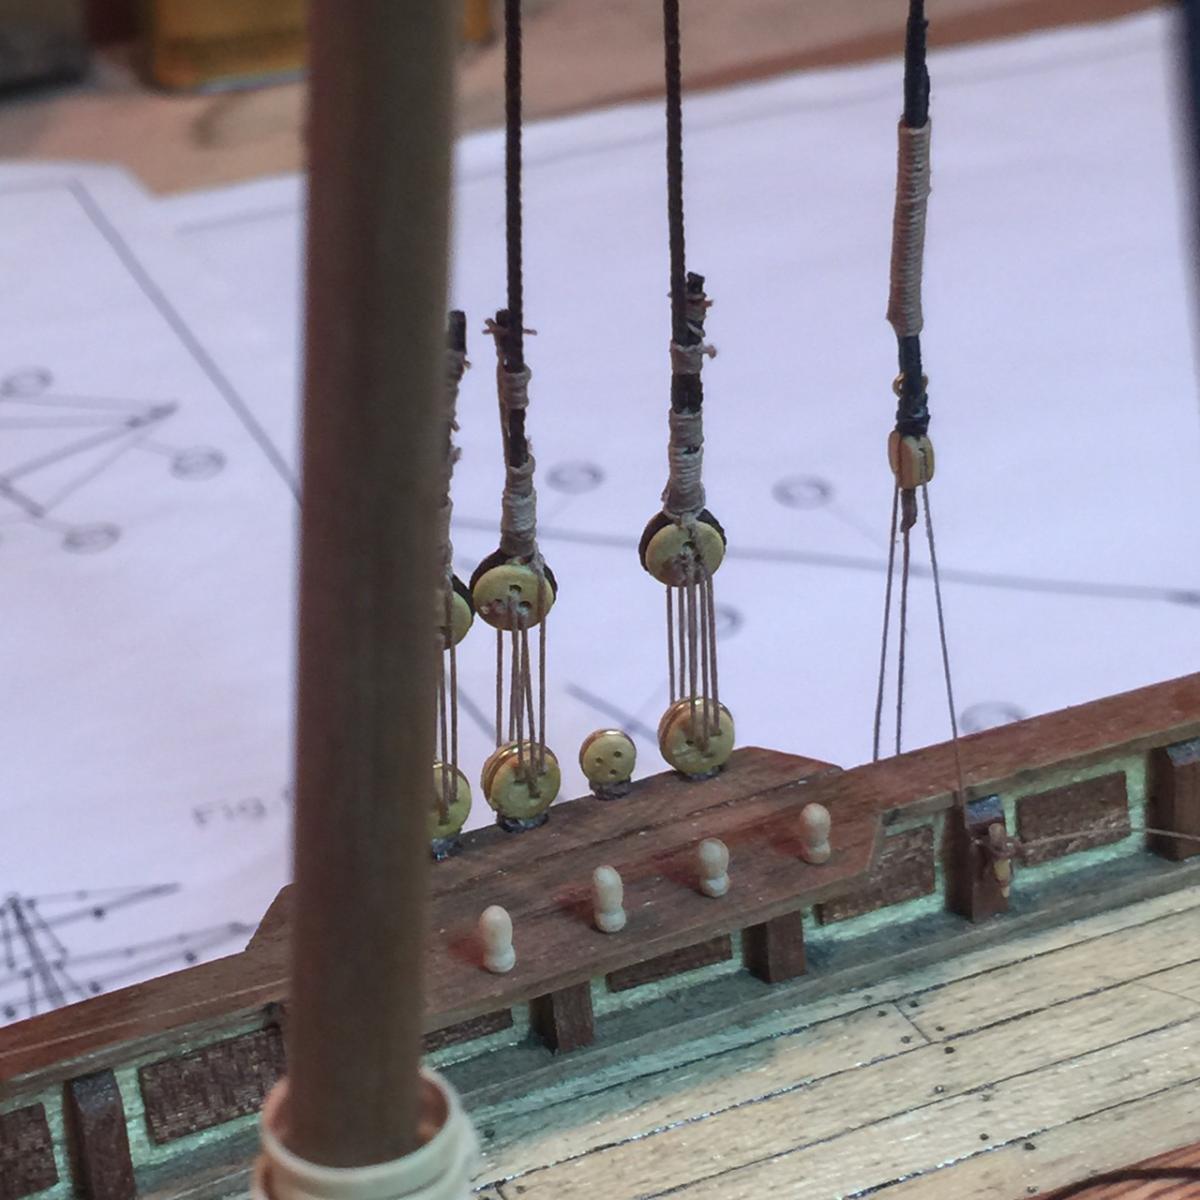
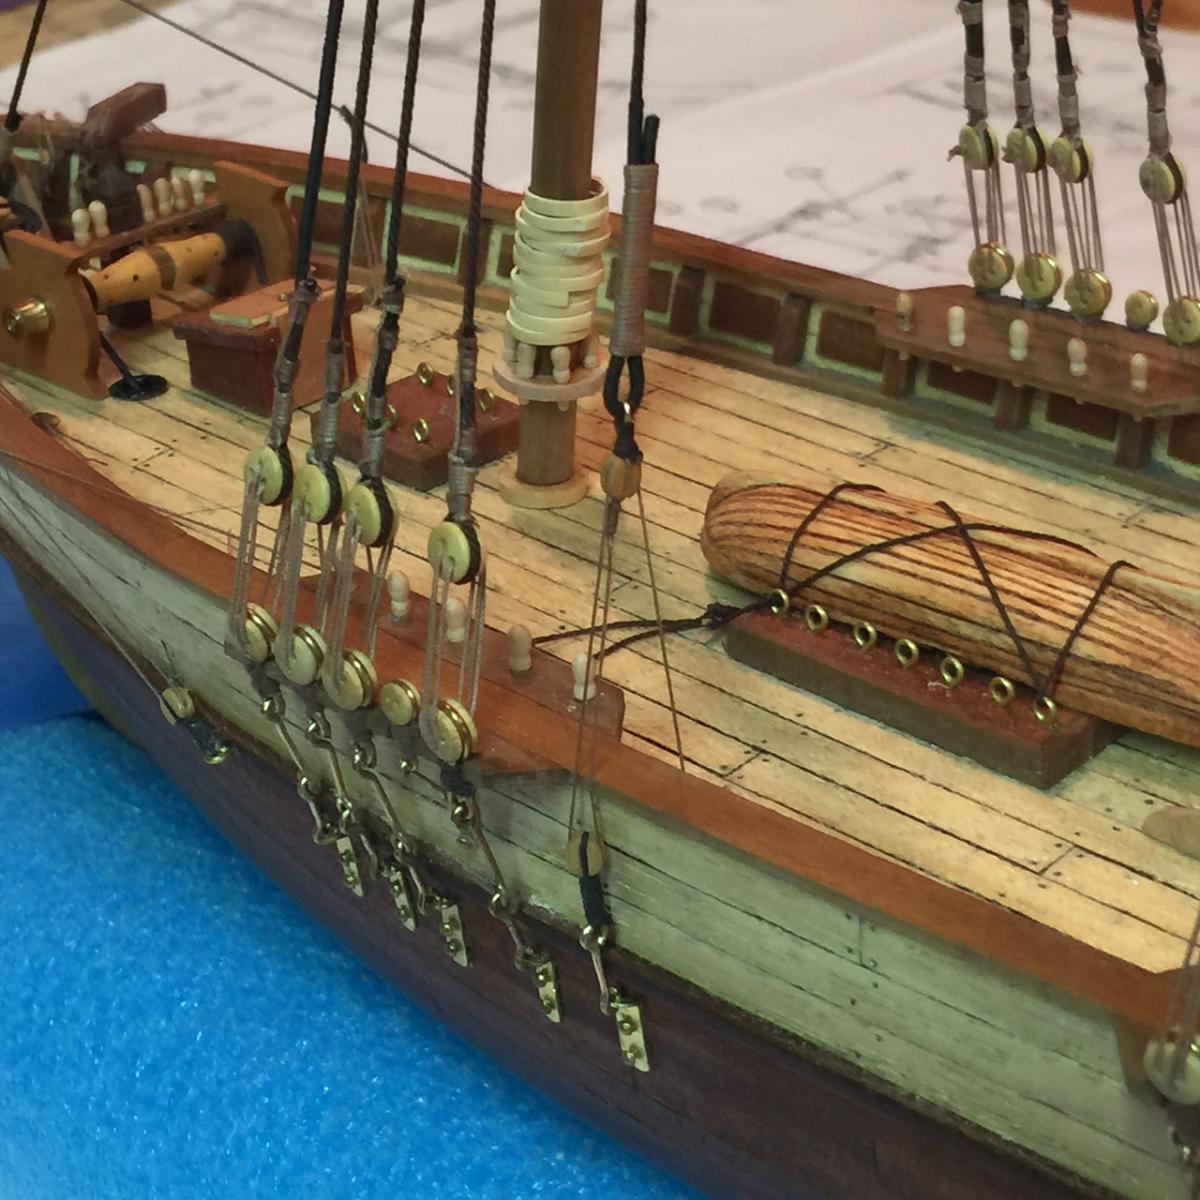
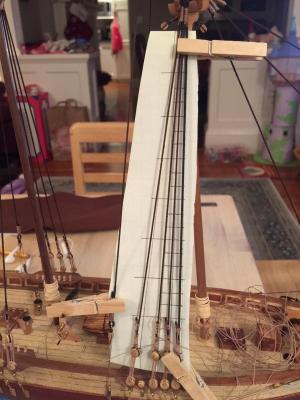
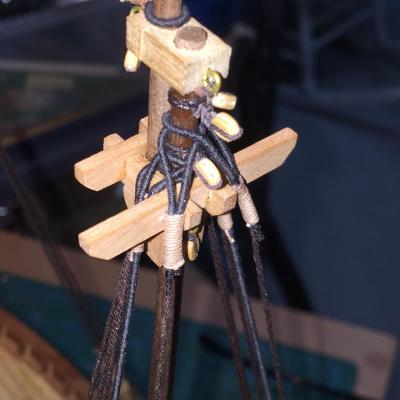
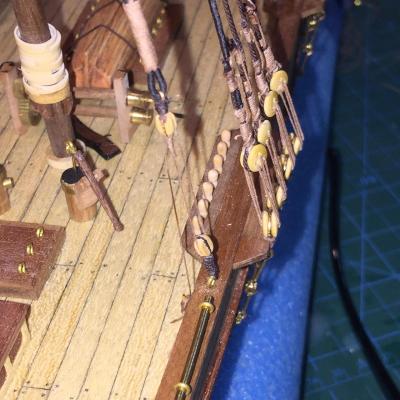
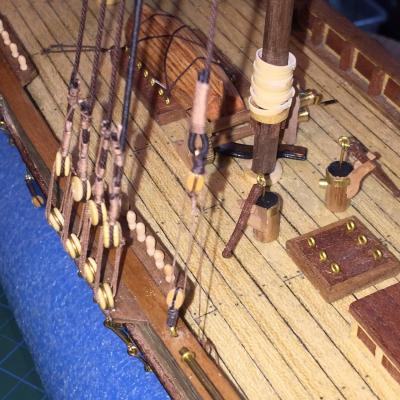
Thanks gents. here's how it looks on the ship... next will be foremast backstays, then the dreaded.... ratlines. I've been concerned about them for a while now.... And when I was looking at the pictures, I see that I knocked off the top of the windlass... will have to re-glue that back on. Boy pics with flash show all the bad stuff. no more flashes!

- 389 replies
-
- 8
-
-
- scottish maid
- artesania latina
- (and 1 more)