MORE HANDBOOKS ARE ON THEIR WAY! We will let you know when they get here.
×


mrangus
-
Posts
232 -
Joined
-
Last visited
Content Type
Profiles
Forums
Gallery
Events
Everything posted by mrangus
-
 Thanks all for your kind words. He was my first dog so it was special. I hope to get back in the swing of the model soon - I ran out of rigging rope and had to order more.
- 389 replies
-
- 2
-

-
- scottish maid
- artesania latina
- (and 1 more)
-
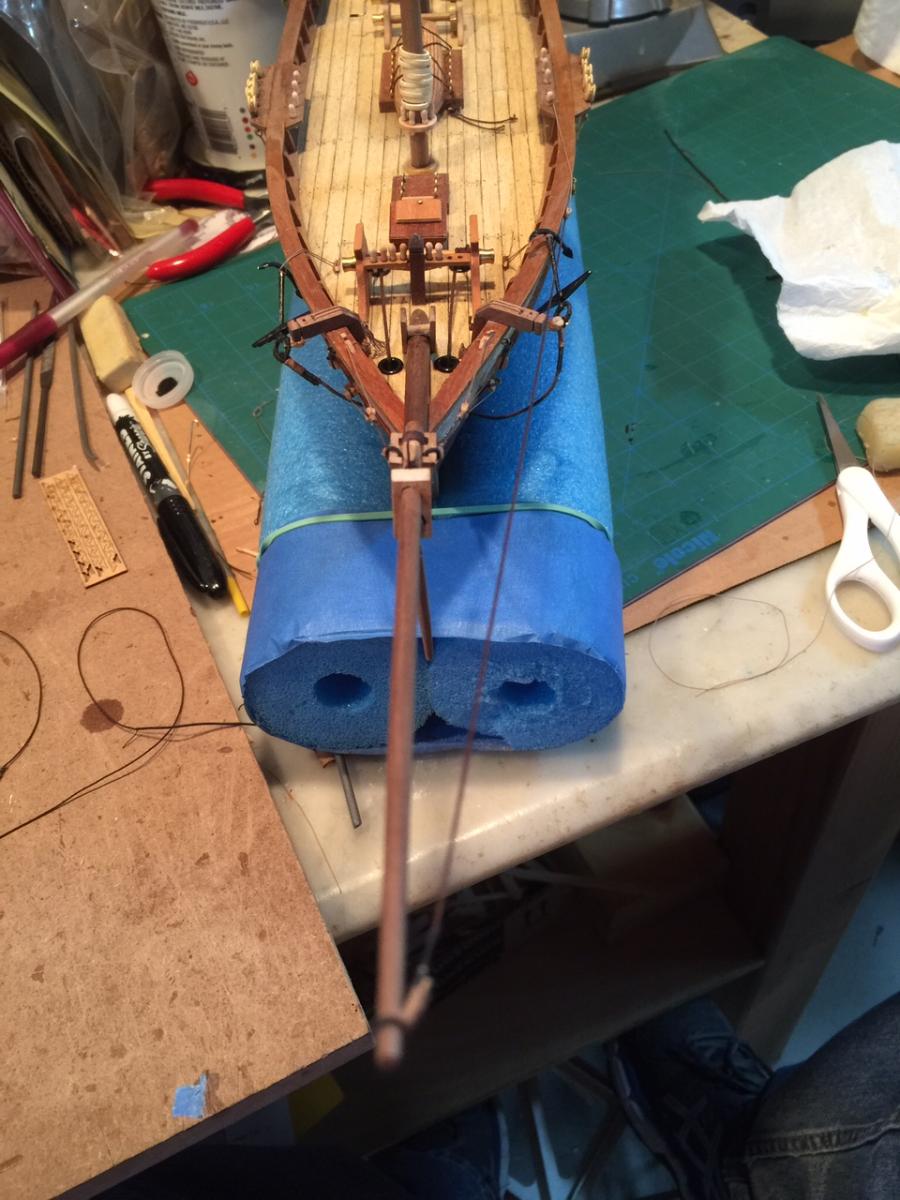
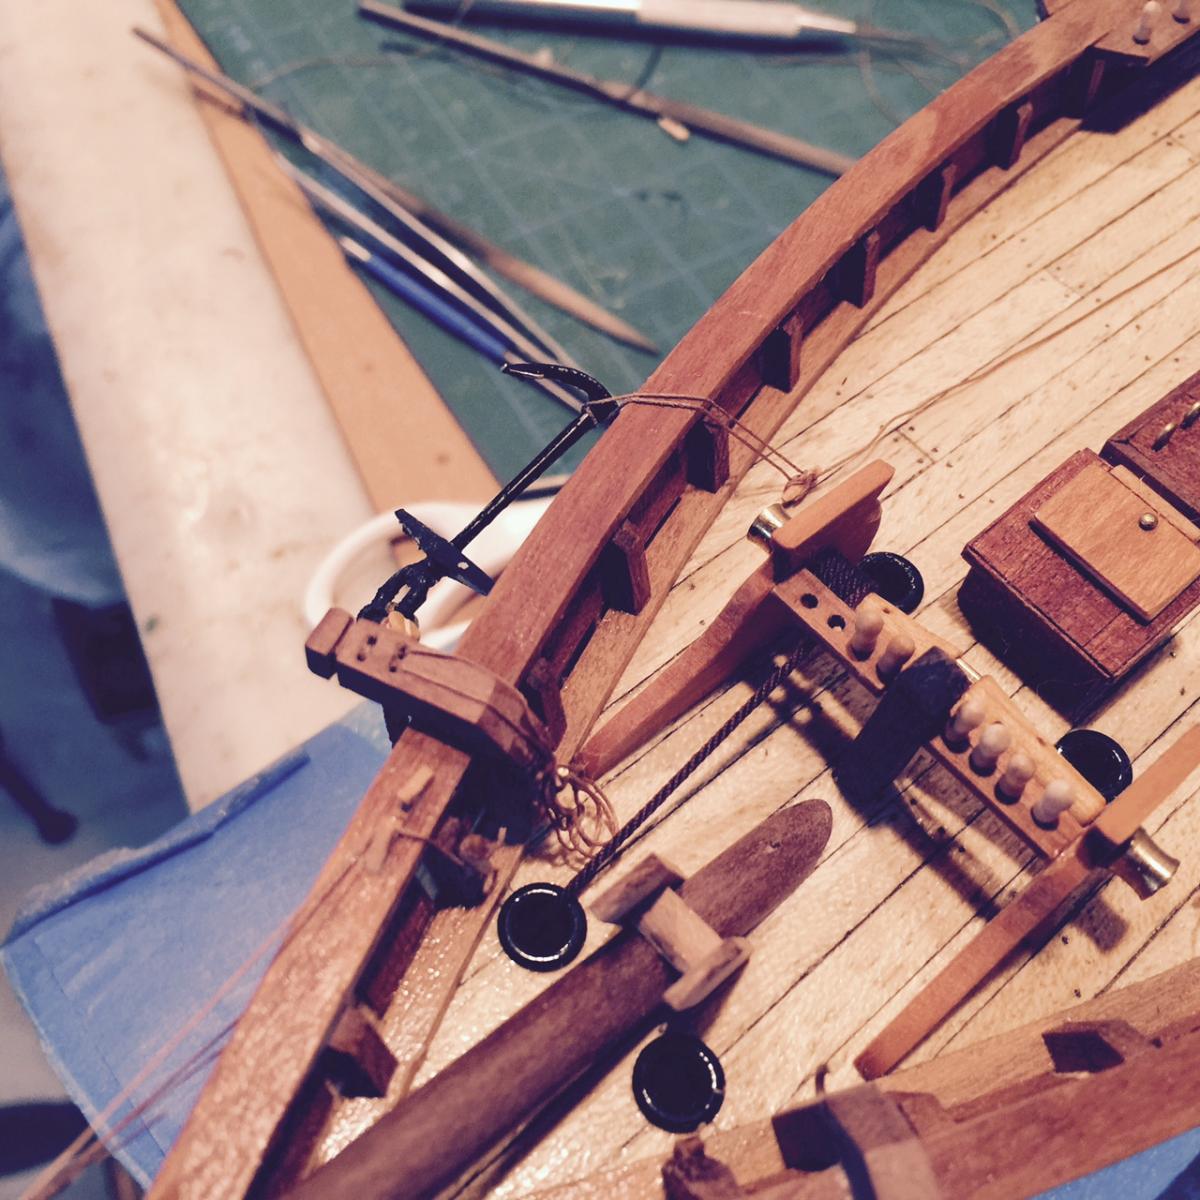
Well I've been away and busy with work... also a bit of bad news, we had to put Angus down last weekend, he was 12 1/2 and a good dog but it was time. I started up again on the rigging, and of course ran into problems. Rigging is definitely a test of patience. I've finished the anchors and started on the bowsprit rigging....


- 389 replies
-
- 8
-
-
- scottish maid
- artesania latina
- (and 1 more)
-
Thanks Matt and Jesse. Jesse glad I could give something back, I'd be lost without your blog.
- 389 replies
-
- 3
-
-
- scottish maid
- artesania latina
- (and 1 more)
-
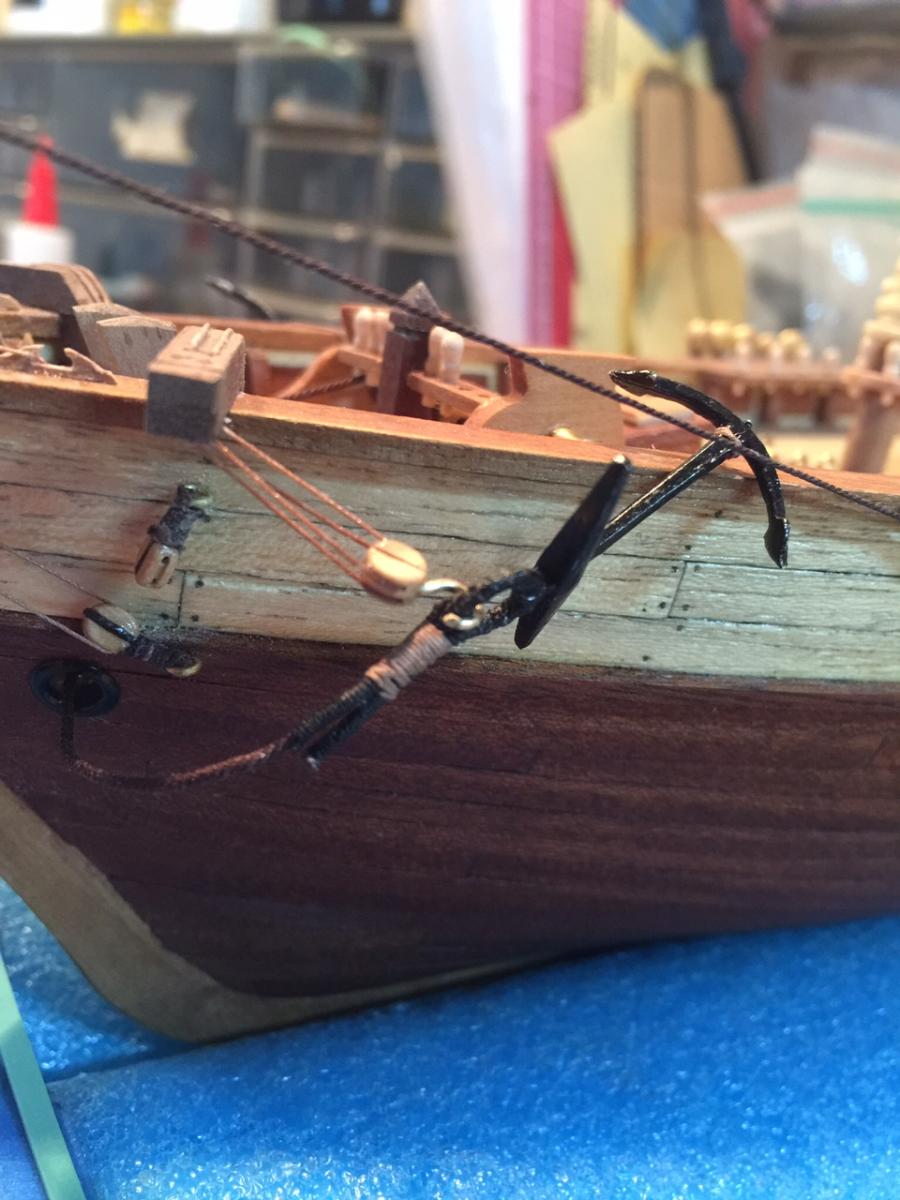
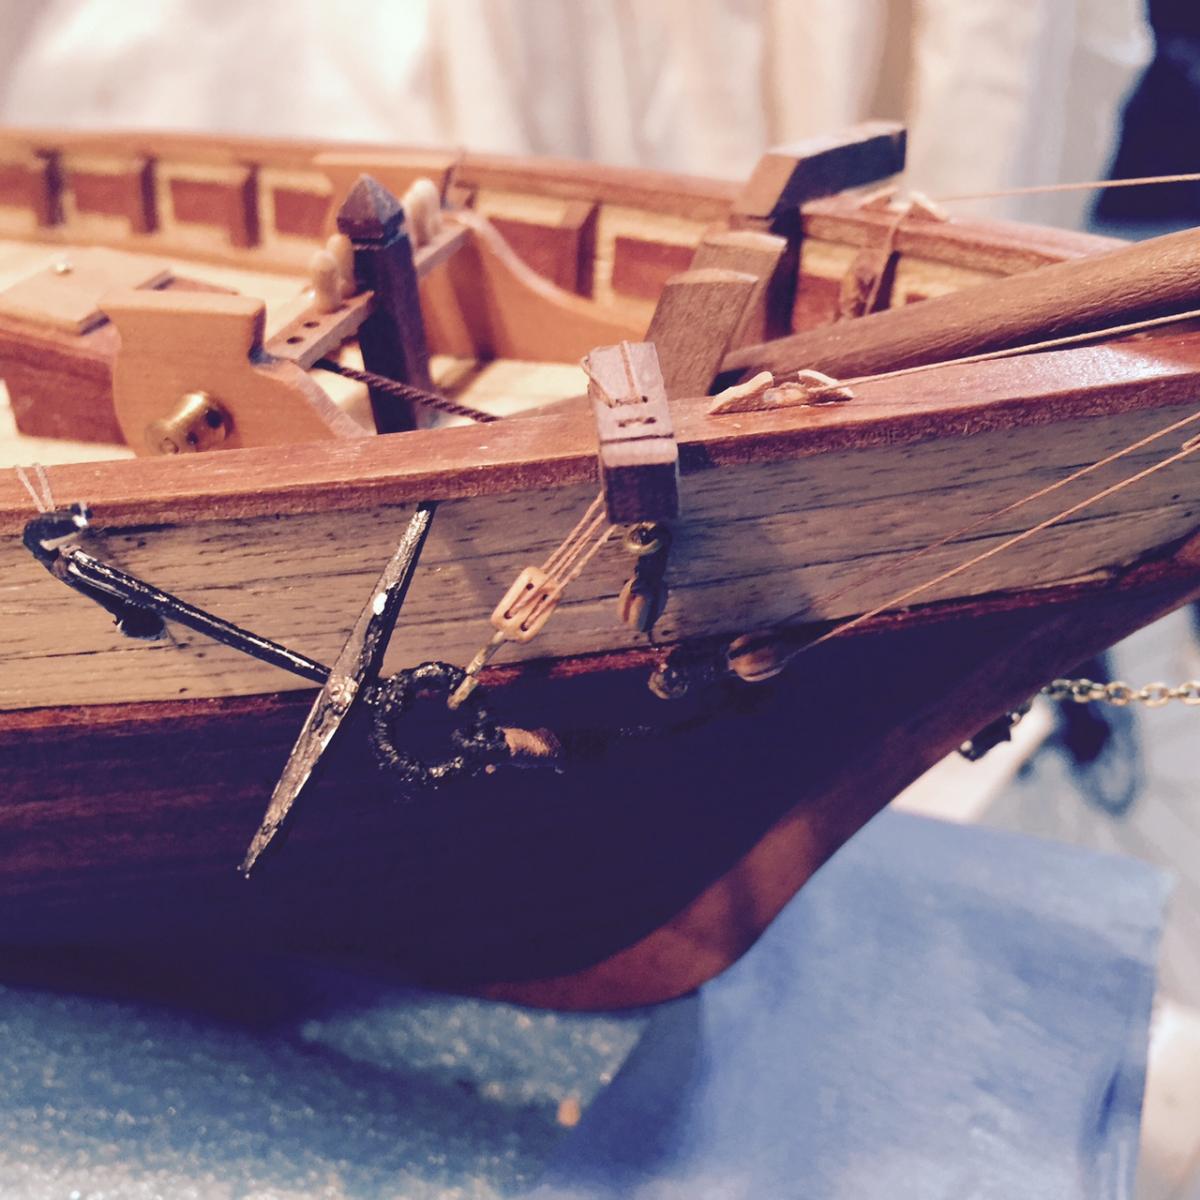
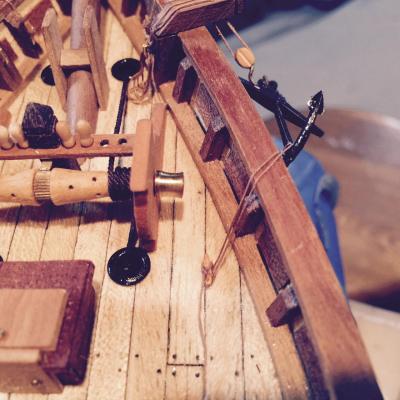
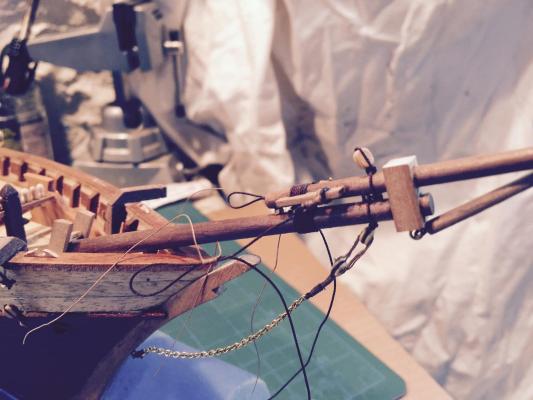
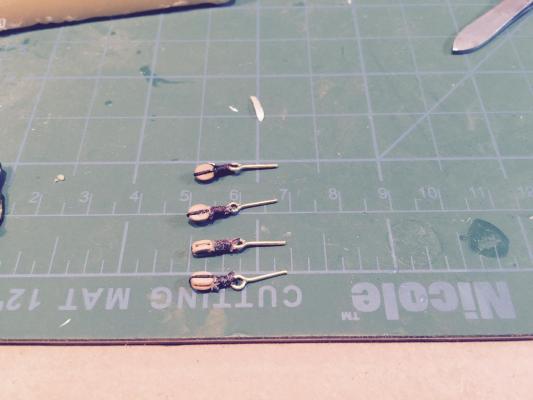
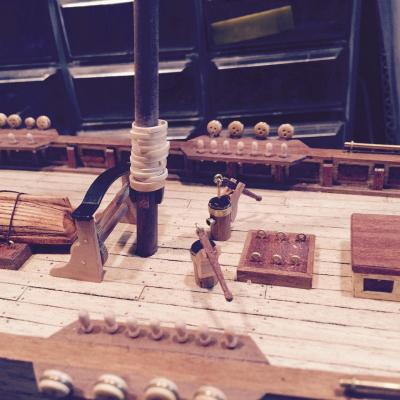
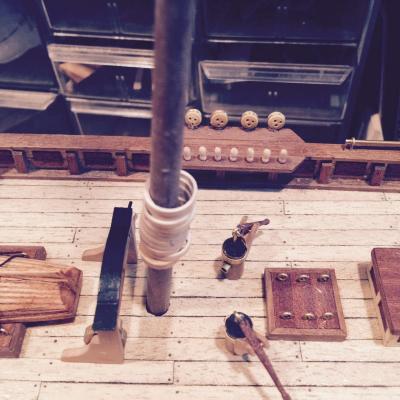
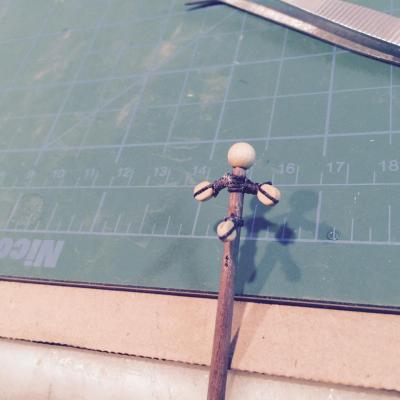
Here's the anchor in place. I put a cleat on the deck for tying down the anchor as opposed to having a ring. Also put the hook into the double block which looks more realistic than it tied to the anchor.


- 389 replies
-
- 8
-
-
- scottish maid
- artesania latina
- (and 1 more)
-
Thanks Jesse. Well I wrapped the Anchor ring like you did with rope and like the look. I also plugged a hook into the double anchor - I found a few pics online that showed examples. Should have pics in the next few days.
- 389 replies
-
- 3
-
-
- scottish maid
- artesania latina
- (and 1 more)
-
Thanks George and Matt for the comments. George - I agree rigging can be very challenging - but I found second time I did everything, it all made a little more sense. And I got the work done a lot quicker. Matt, I'm sure you will exceed your expectations if your work thus far is any indication of how the rigging will turn out. Jesse - if you're reading this, there's one picture (on the 20th page of your blog) that helped me understand clearly how the bowsprit was rigged. Thanks! One question for you - did it bother you that the double block (used to hoist the anchor) was tied to the anchor ring? It makes no sense to me - I would think it would be hooked onto the anchor in some fashion. otherwise when the anchor is dropped, the lines have to come out of the block... I don't get it.
- 389 replies
-
- 3
-
-
- scottish maid
- artesania latina
- (and 1 more)
-
Augie, looks great as always. I've referred to this build many times. May I ask - who is Jeff whom you get your wood from? Thx Robb
- 2,191 replies
-
- 1
-
-
- confederacy
- Model Shipways
- (and 1 more)
-
looks great Nigel. Definitely an upgrade to the first edition of the boat. Nice work with the oars too - must have used really fine sandpaper to get so smooth.
- 270 replies
-
- 1
-
-
- red dragon
- artesania latina
- (and 1 more)
-
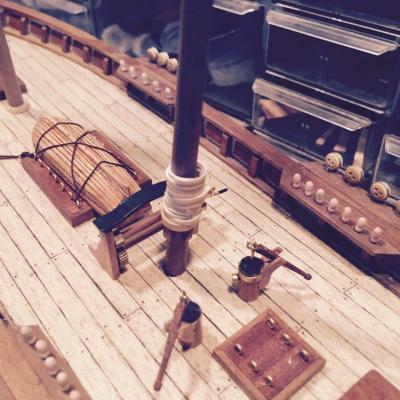
And here we are with rigging fixed. That cost me about 2 1/2 hours.... One question/thought on the anchor setup. In the model instructions, the picture of the anchor up has the anchor ring tied to the double block used for hoisting. It doen't make sense. Wouldn't some kind of hook be used to get the anchor once coming out of the water after hoisted up? What does that look like?


- 389 replies
-
- 5
-
-
- scottish maid
- artesania latina
- (and 1 more)
-
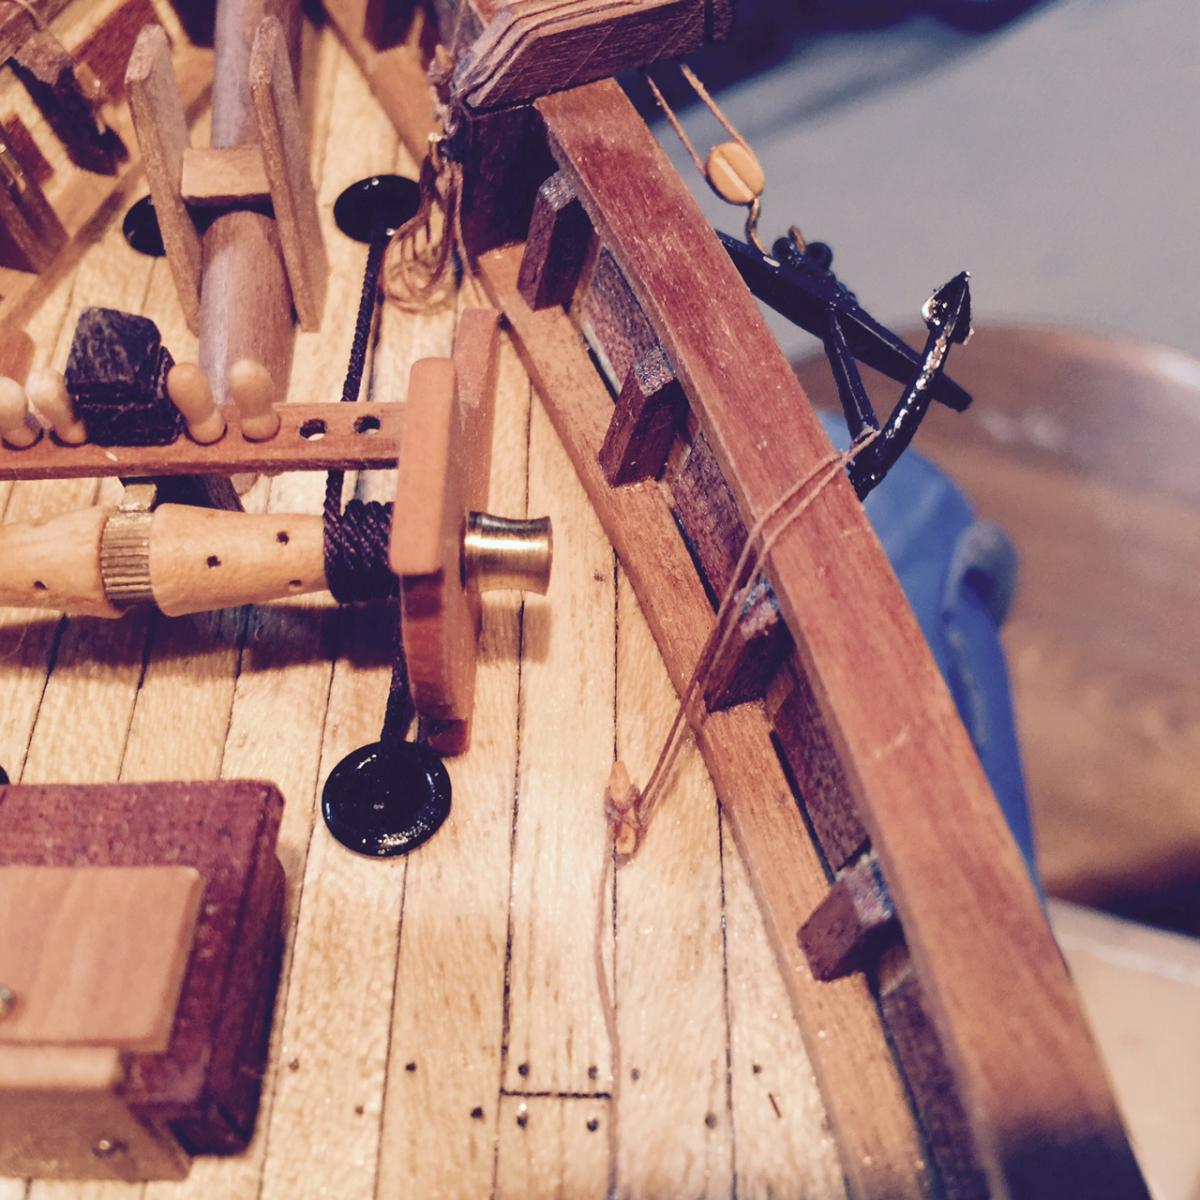
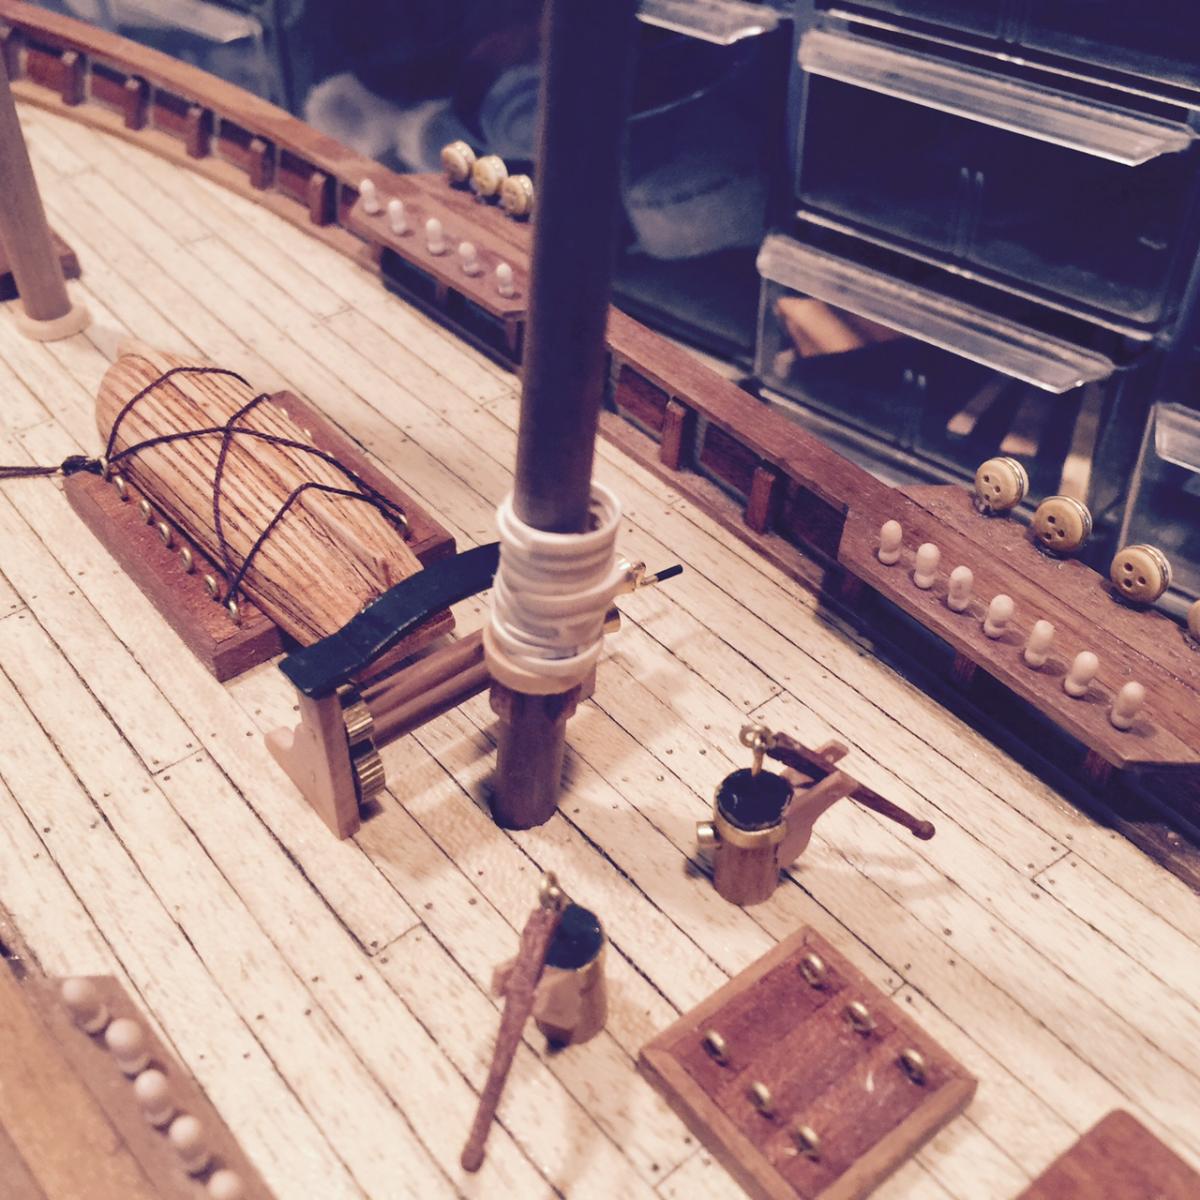
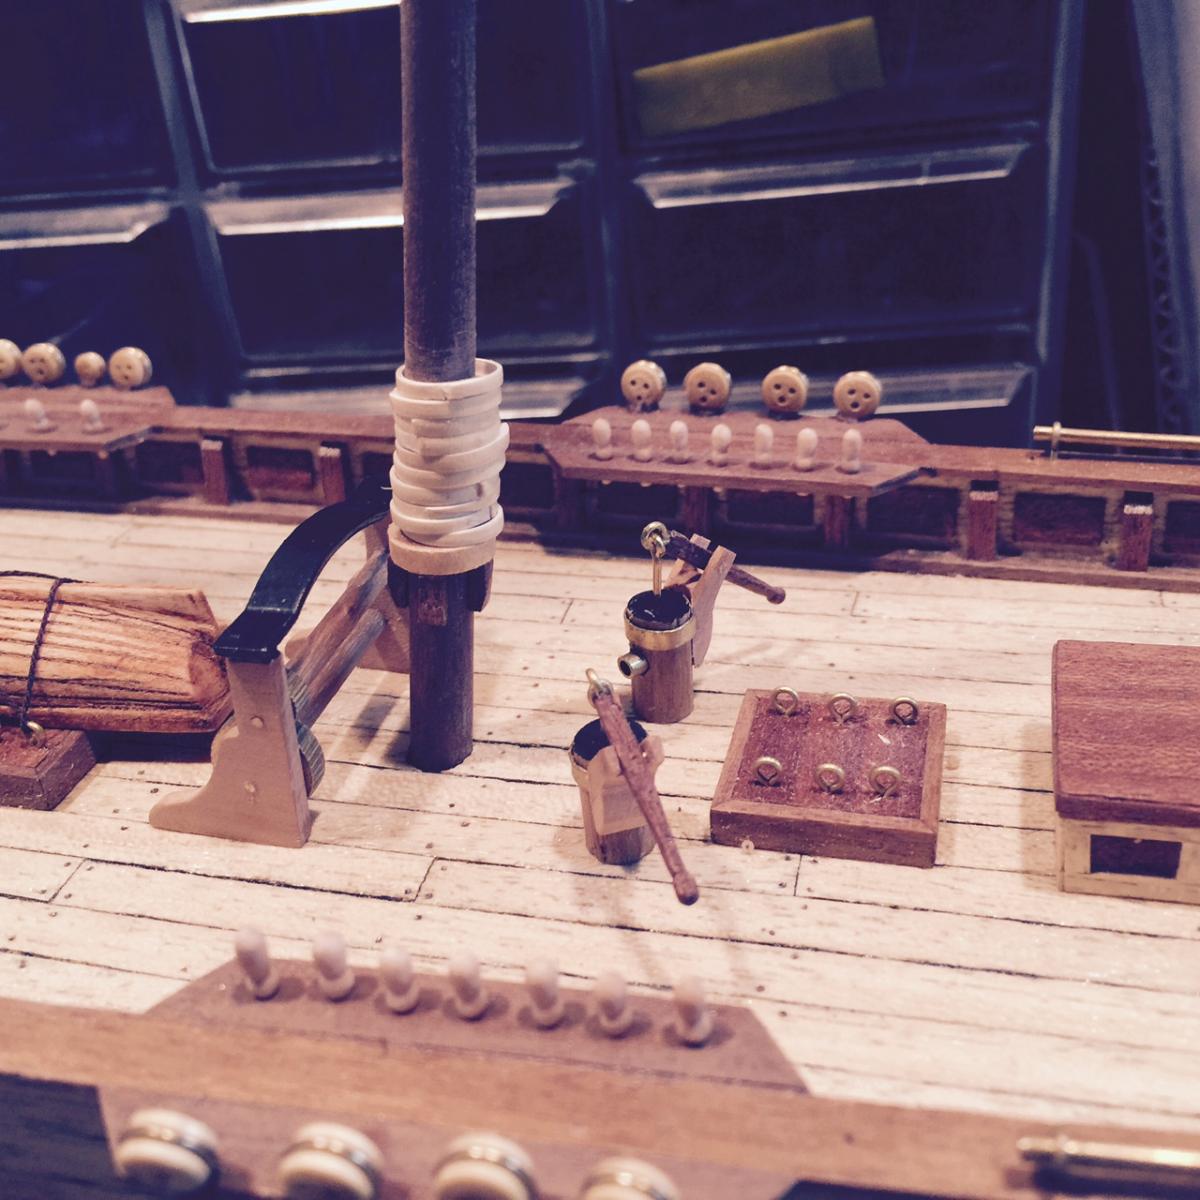
Rigging is challenging. Especially when you don't know what you're doing. I've taken many back/forward steps this week though I haven't had much time to work on the ship. But it's been lesson learned after lesson learned.... I splurged for Chuck's serving machine. The device is great - it's amazing how quickly a rope can be served and looking good. Much less intimidating now to serve all the ends of the lines etc and comes out looking real nice. The challenge I ran into was seizing lines that were served. It's a bit trickier because the seizing line doesn't slide up/down the rope being seized very nicely. It's like trying to move a string over a screw. After several agonizingly frustrating tries to seize the bowsprit rigging line, I got it. The rest of the rigging went a little easier, just tricky working with such fine lines. I had put cleats in the ship to tie down the running lines, and ran through the blocks, looked pretty good! I had made one error on the starboard side, where I forgot to tie the running line to the block - but I found a workaround... I tied a knot in the running line and threaded it through the lower sheave hole on the block. But then I took a picture looking at the bow of the boat and realized that portside used the wrong anchor block attached to the boat. So.... after all that work... I cut it all off and started over. Rigging is challenging.
- 389 replies
-
- 2
-
-
- scottish maid
- artesania latina
- (and 1 more)
-
Looks good Nigel, I like the platform fits well with the boat.
- 270 replies
-
- 2
-
-
- red dragon
- artesania latina
- (and 1 more)
-
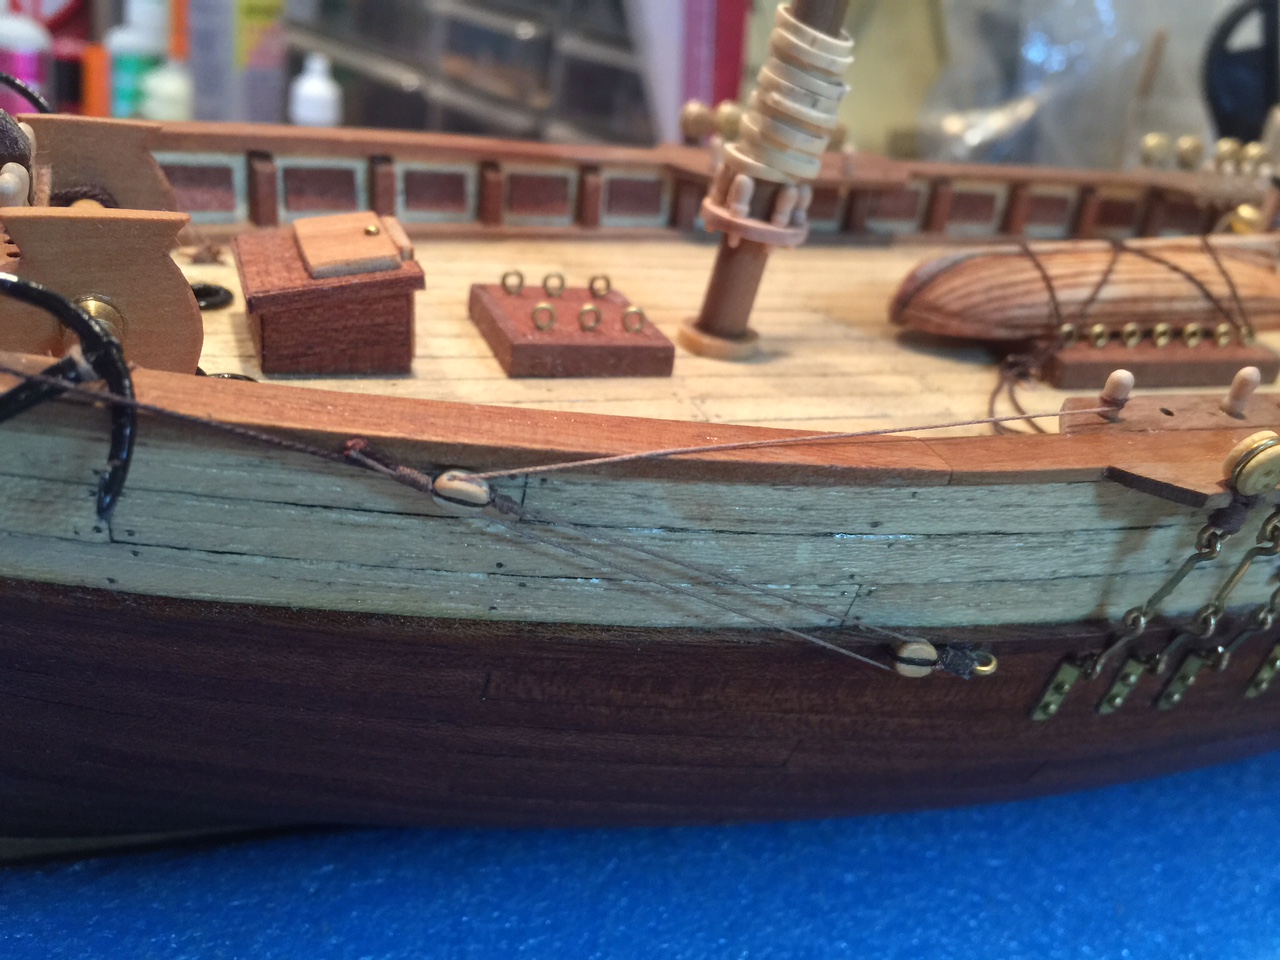
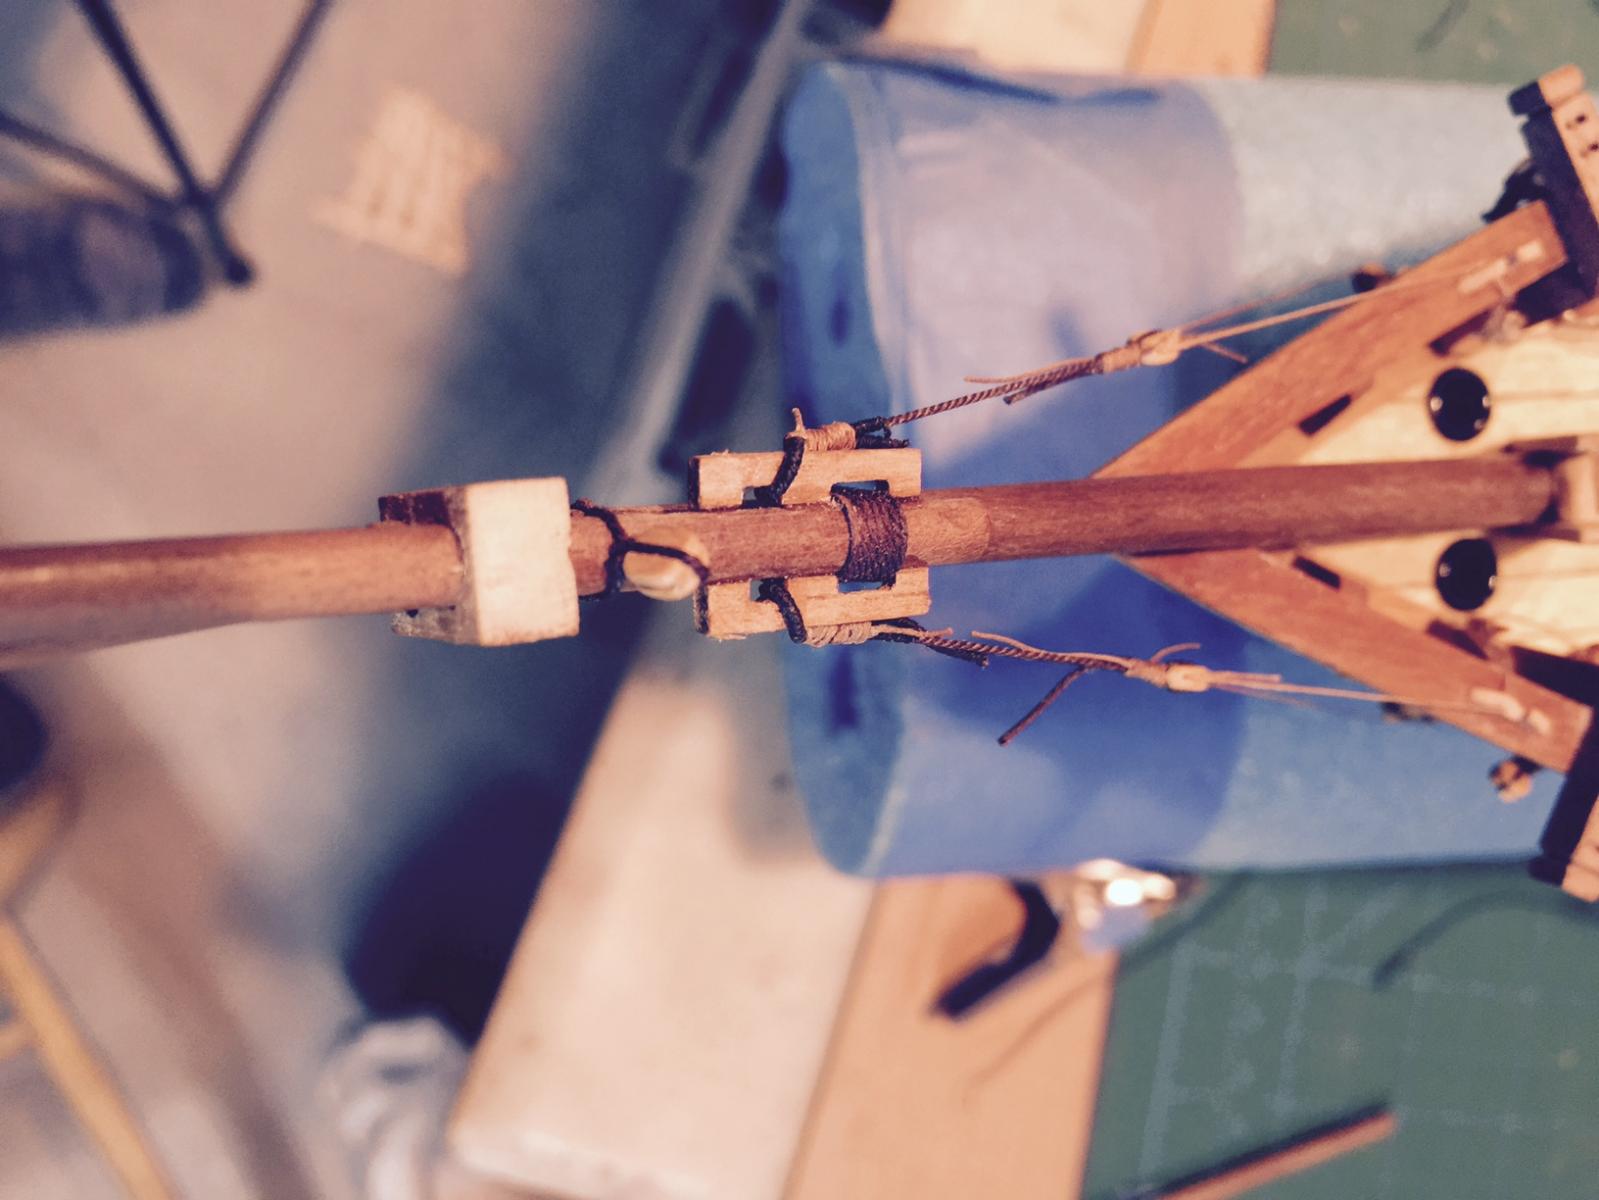
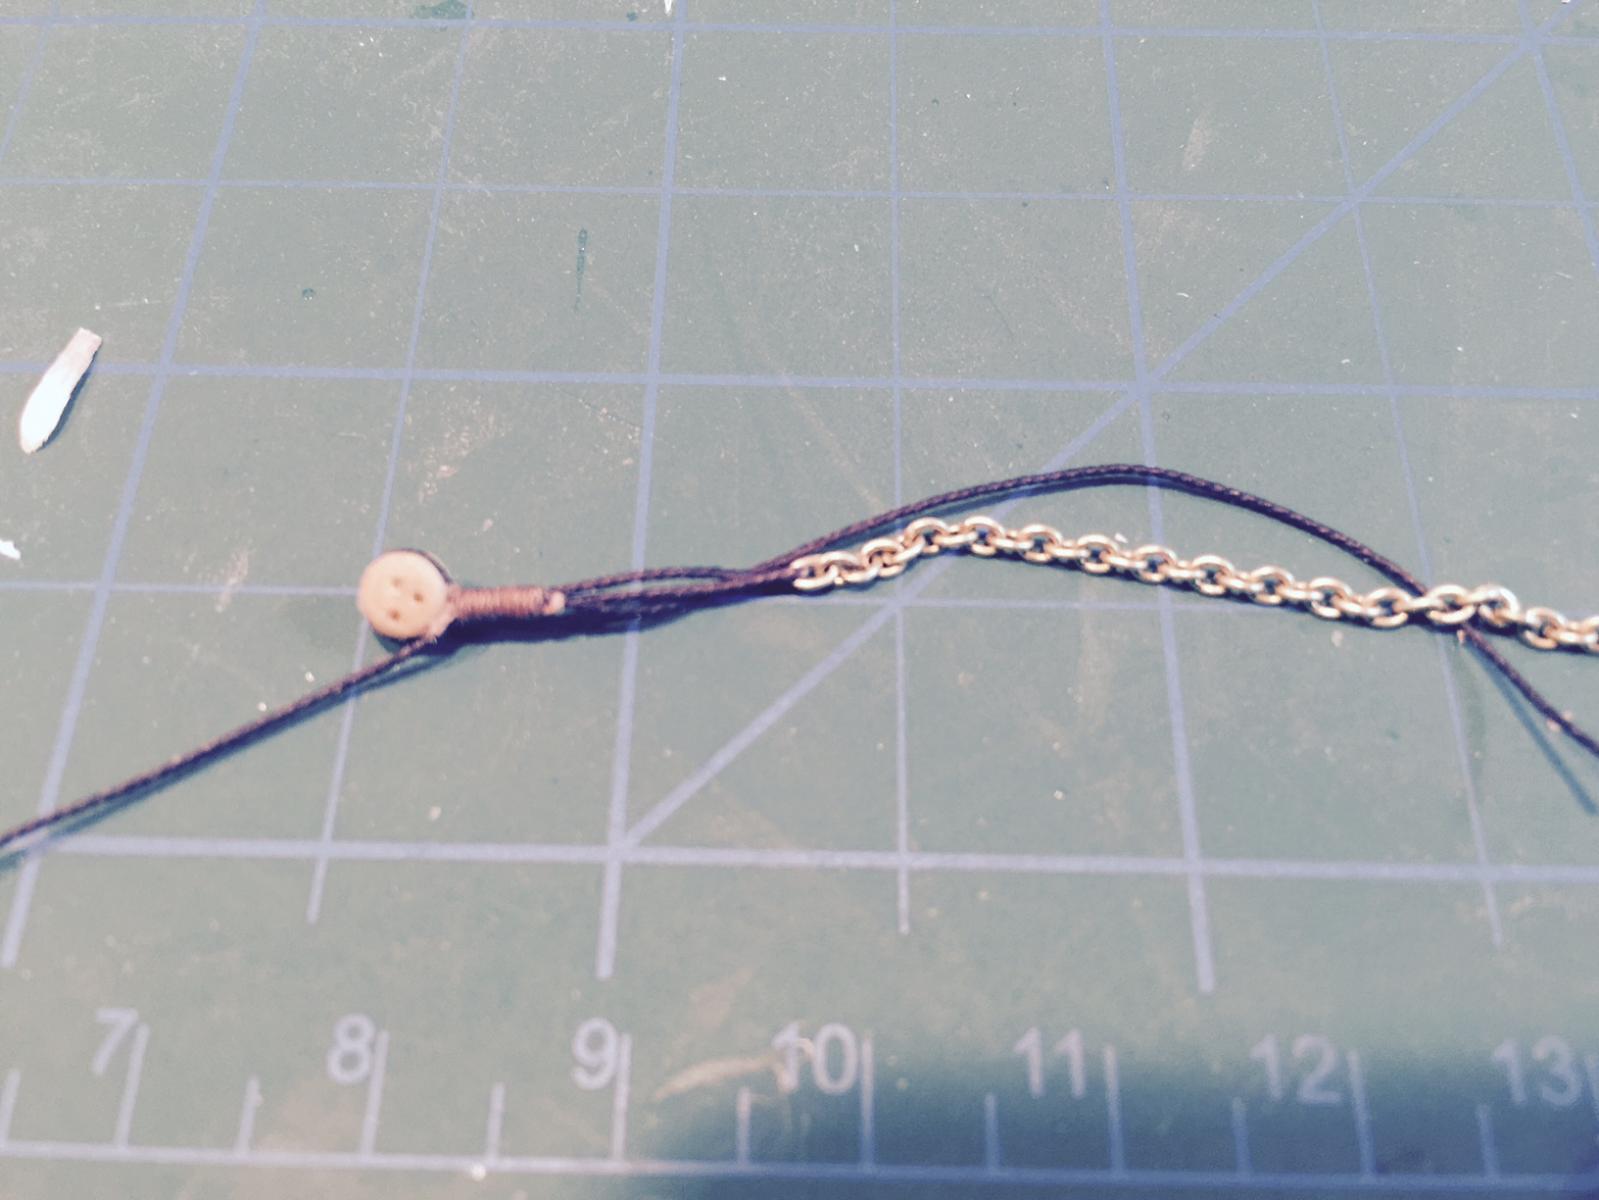
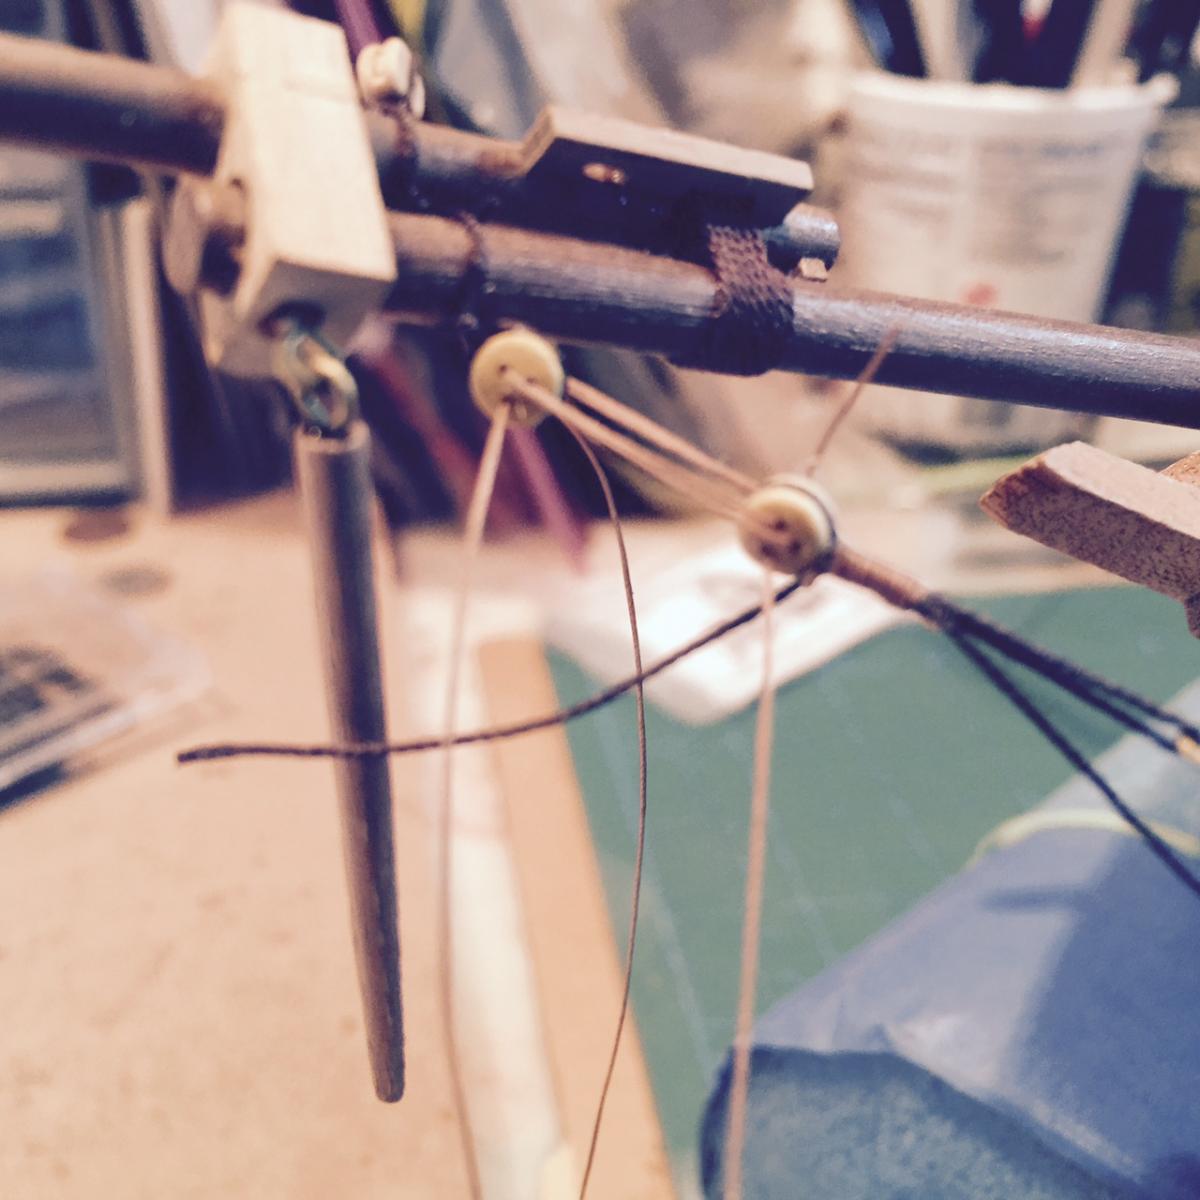
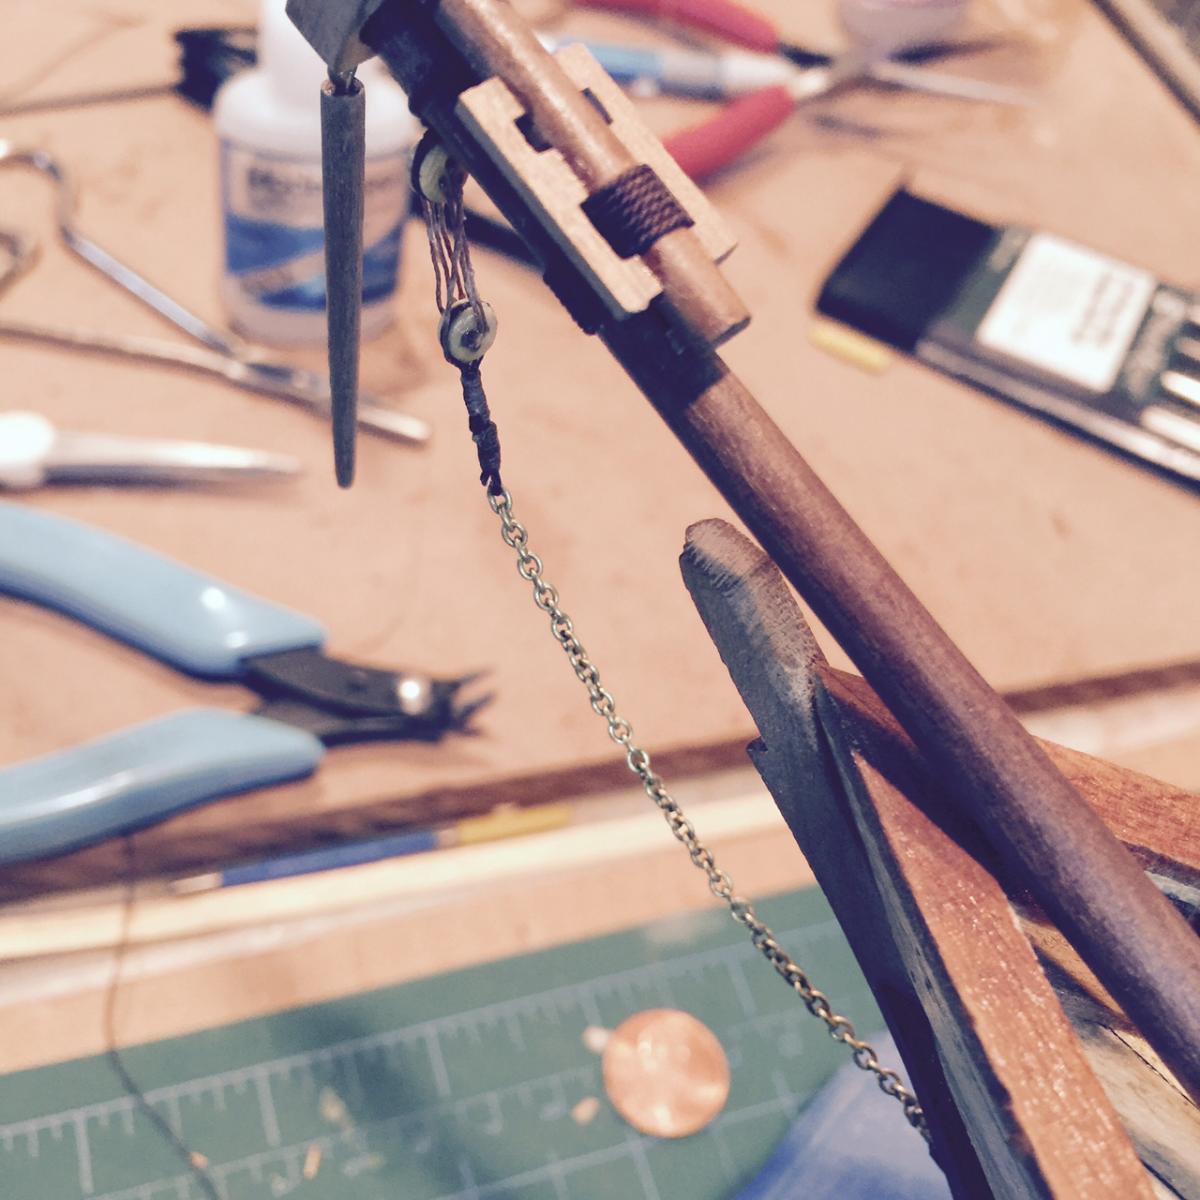
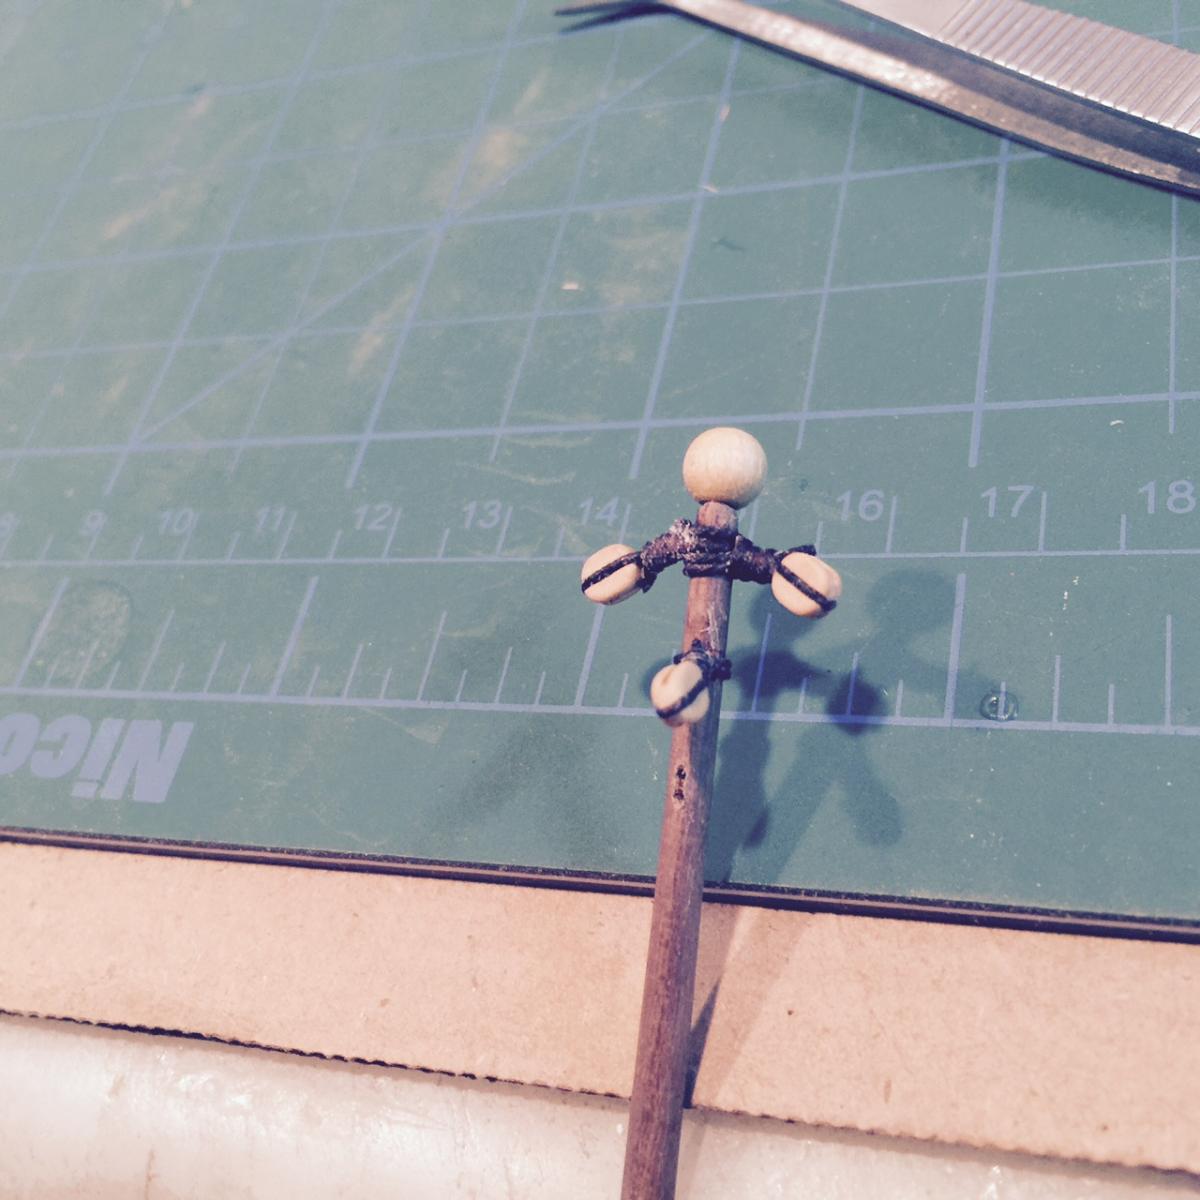
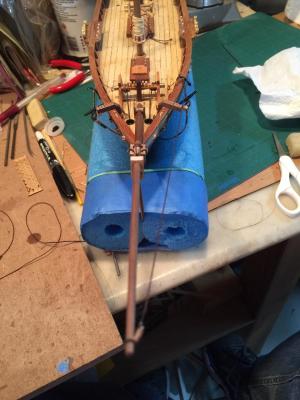
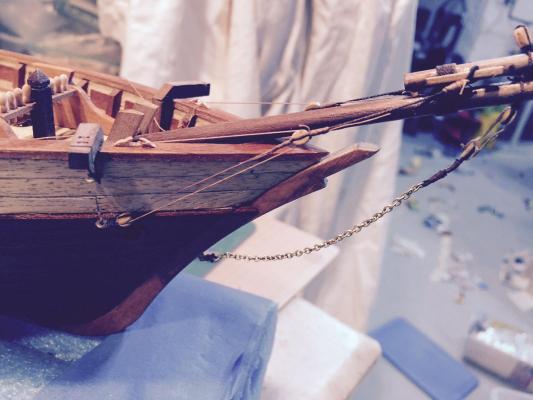
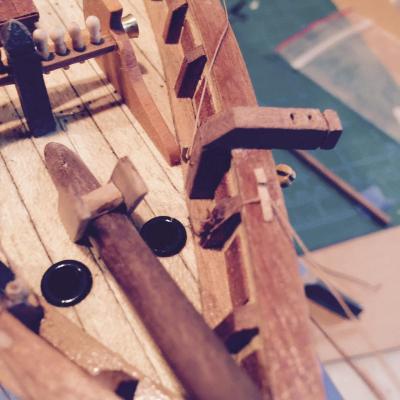
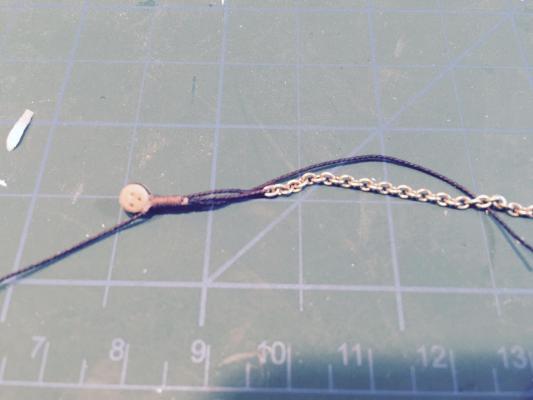
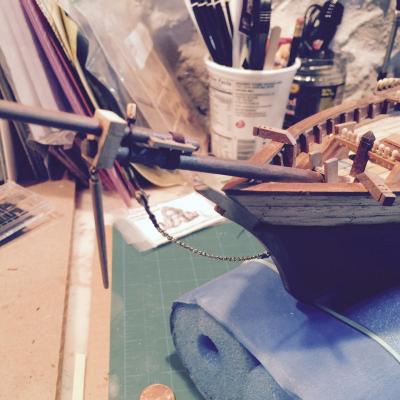
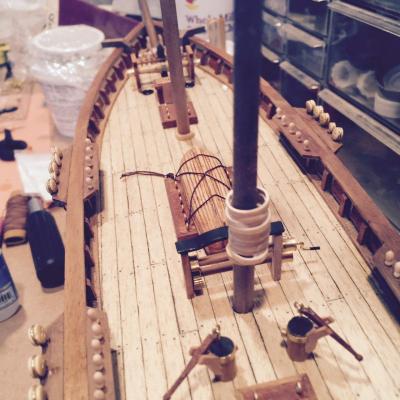
Started on the rigging - worked on the bowsprit first. I did the chain first, and then created the blocks for the bowsprit stays that are attached to the hull just below the catheads. Don't have a clear understanding yet how it works but I'll cheat and look at other builds (i.e. Jesse's). Creating the seizing for the deadeye at the end of the chain was interesting. I created a lovely seizing (below) and then realized I had to move it down to wrap the end of the lanyard. It didn't come out the way I hoped but I think it looks ok. I added some quick dry CA and got a pretty good simulation of the bend of the rope and lanyard due to the chain weight. I think I'll leave as-is.


- 389 replies
-
- 7
-
-
- scottish maid
- artesania latina
- (and 1 more)
-
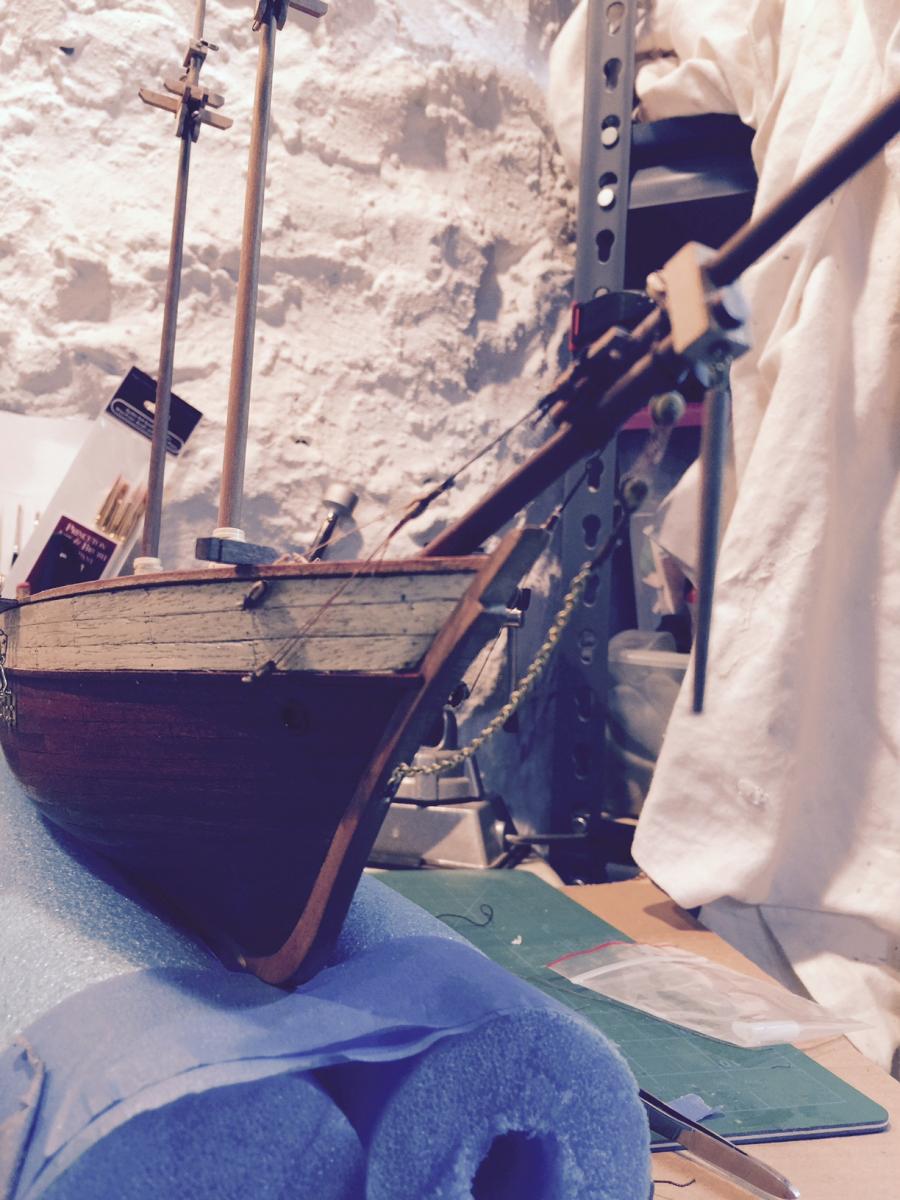
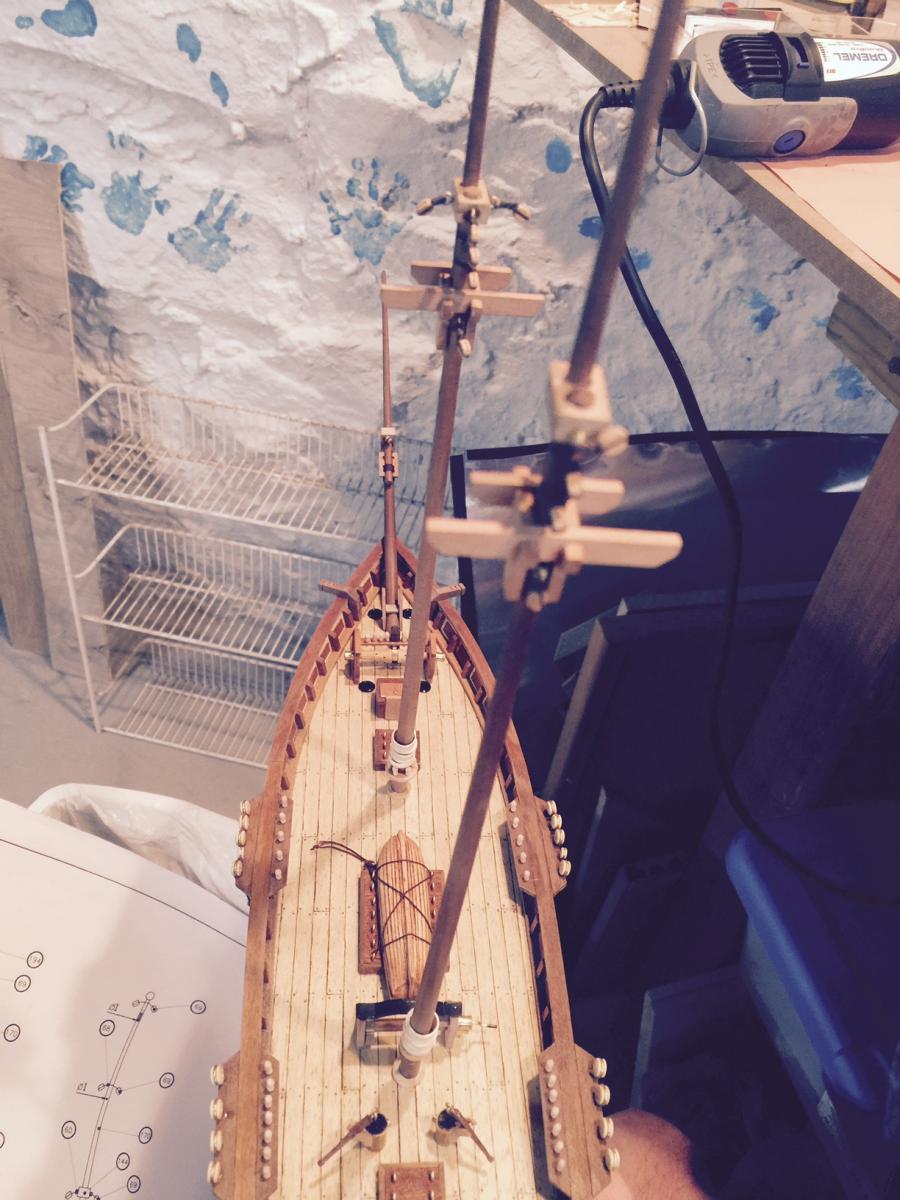
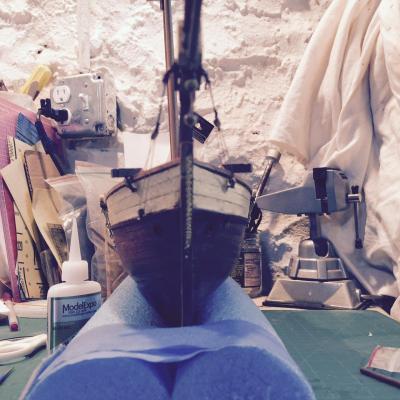
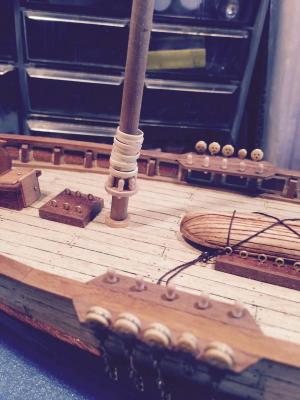
And here are a couple of pictures of the masts on the boat...

- 389 replies
-
- 6
-
-
- scottish maid
- artesania latina
- (and 1 more)
-
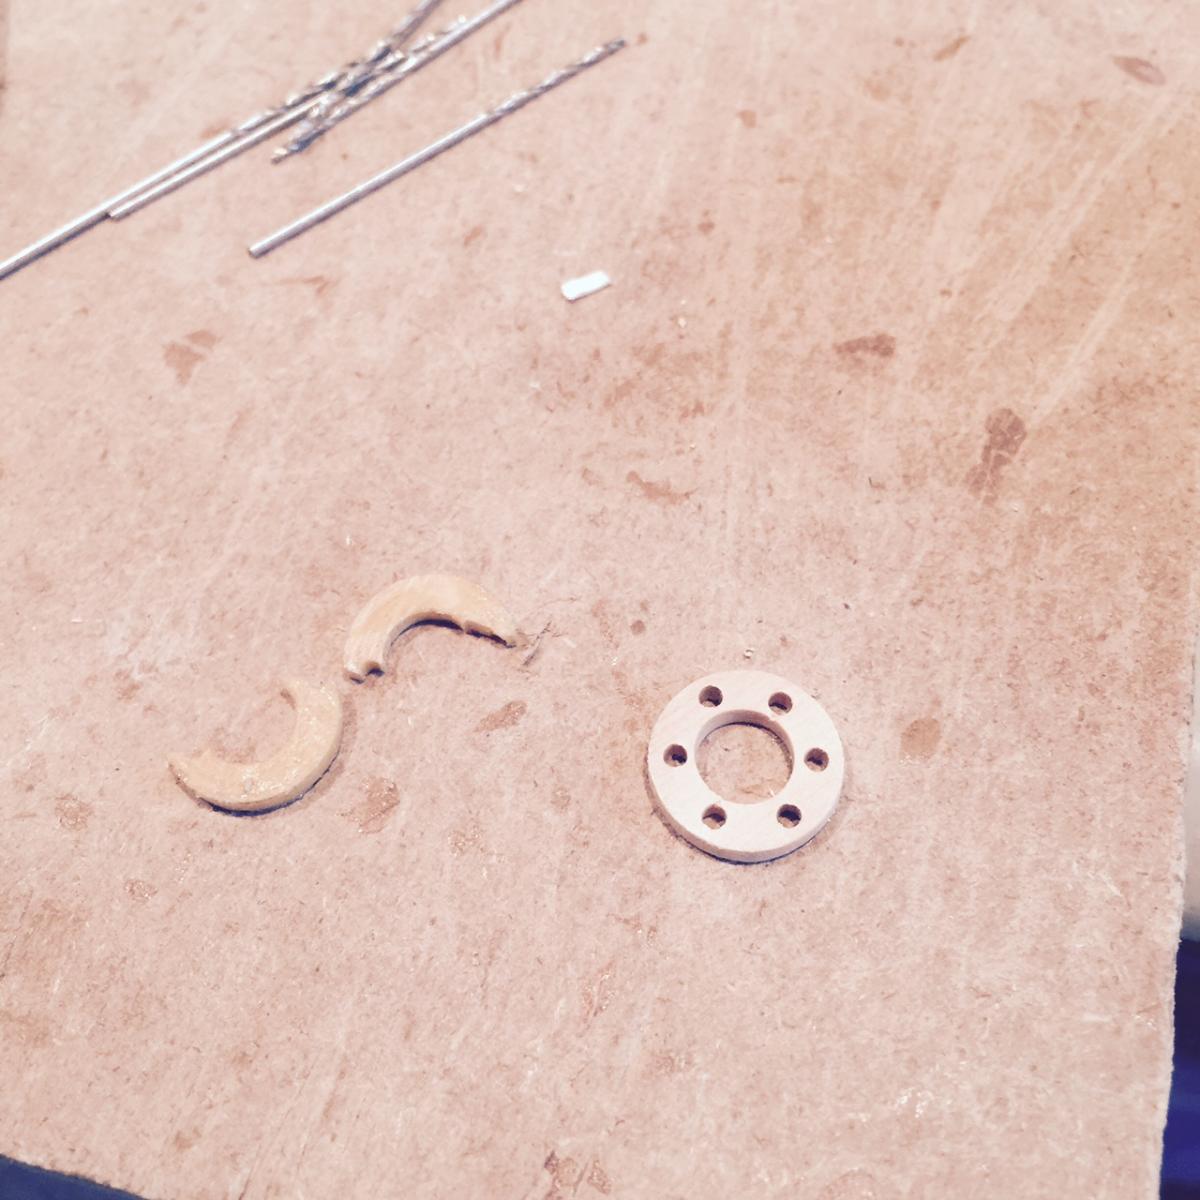
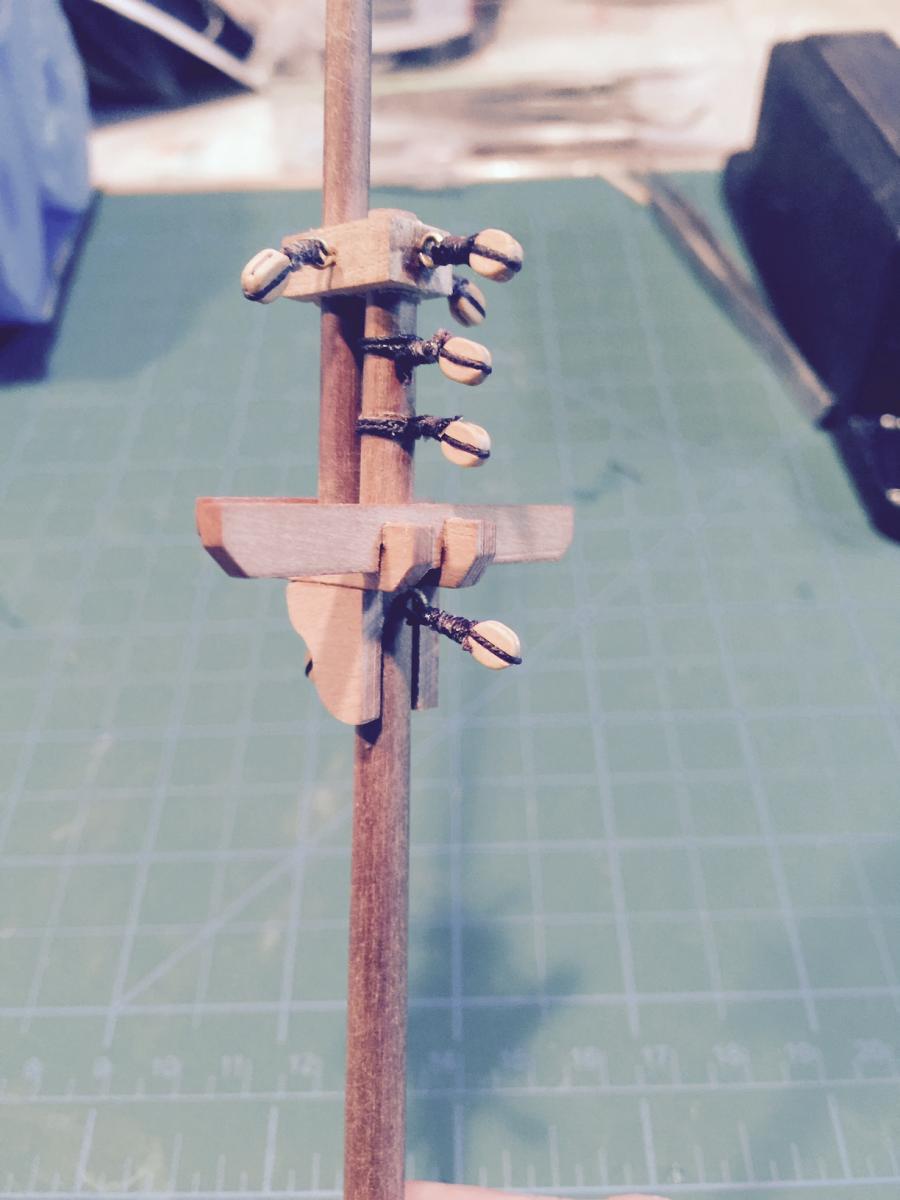
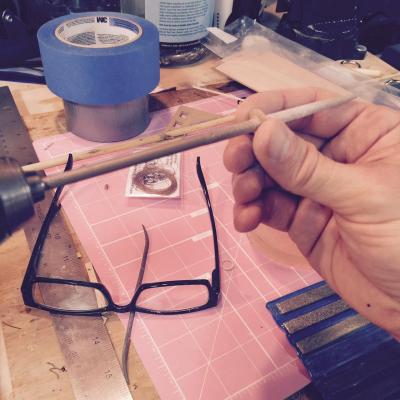
Thanks George and Matt for the helpful advice. For the foremast pin ring I decided to construct by hand - and while it's not mill-perfect, I'm happy enough with it. Looks good now on the ship... I took my round file and put into the Poor Man's Lathe to use as a sander for the inside of the ring and it worked great! Was able to shape the contours to the mast pretty quickly. I took a picture... So now the masts are on!! I get to finally start the real rigging process. Yikes. One last point/question. I ordered some of Chuck's cleats and was thinking of using them instead of the bolt rings for securing rope to the ship. There are several locations on the ship (deck, gunwale) where they just use a bolt, and I think a cleat would be more appropriate. Thoughts?


- 389 replies
-
- 4
-
-
- scottish maid
- artesania latina
- (and 1 more)
-
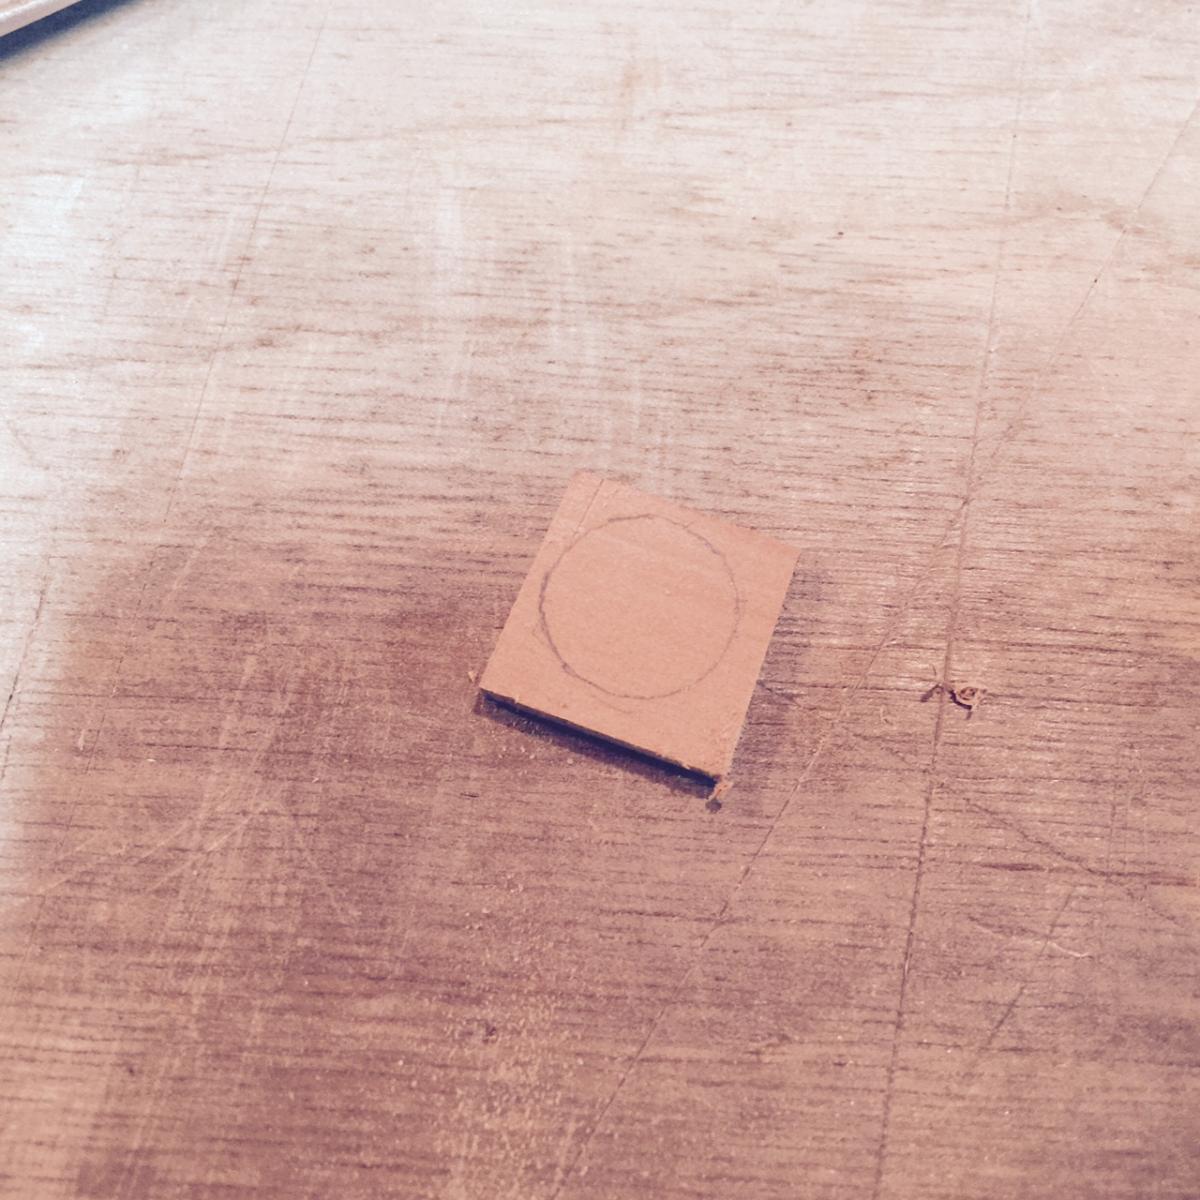
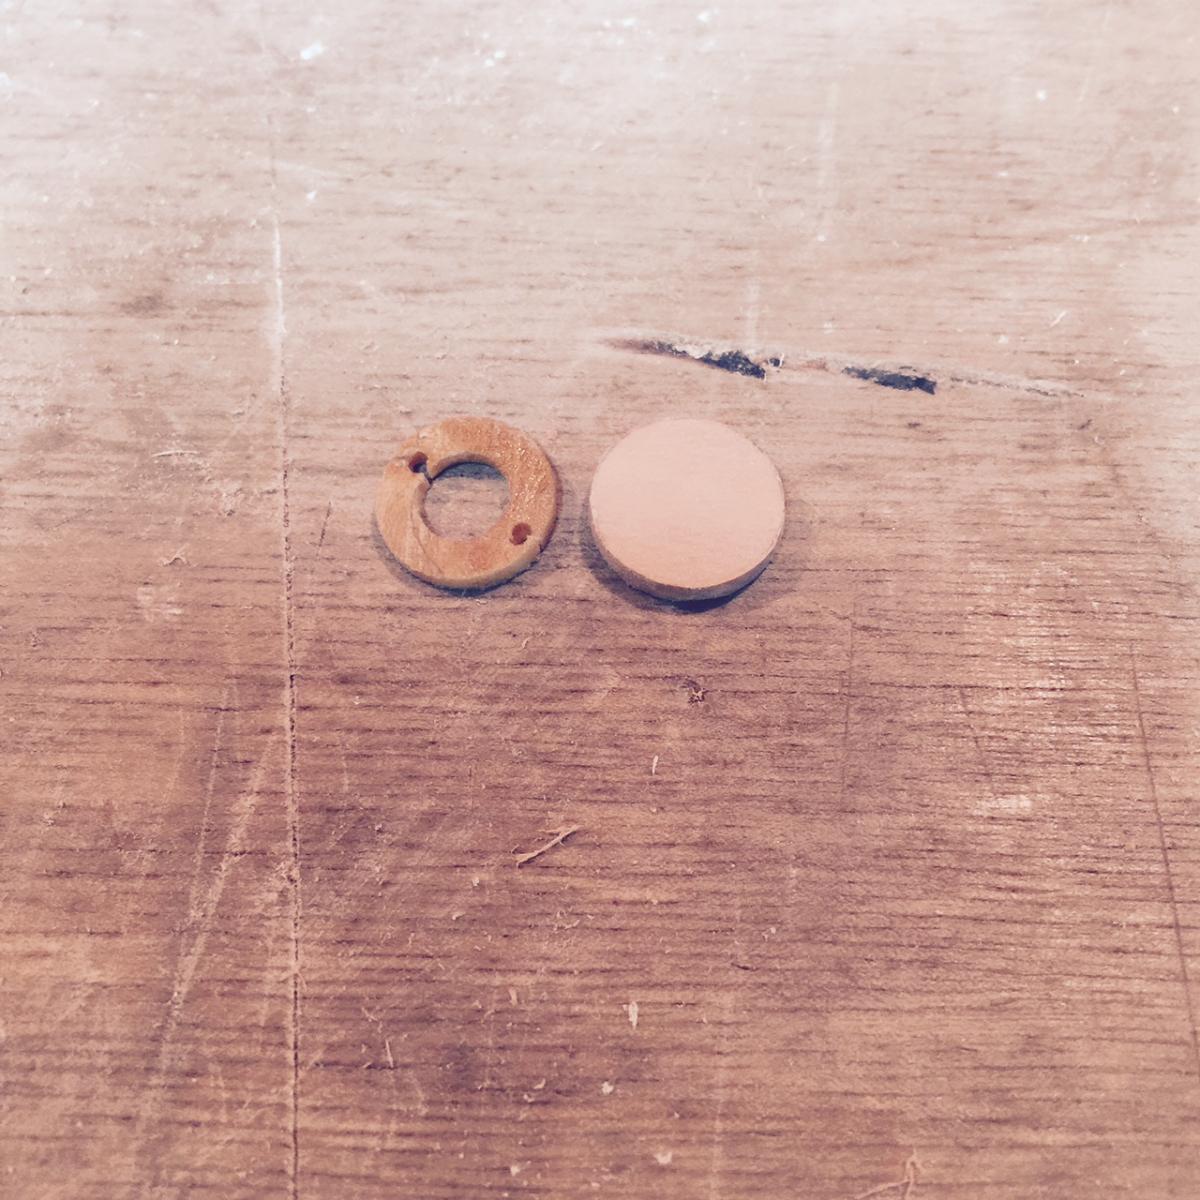
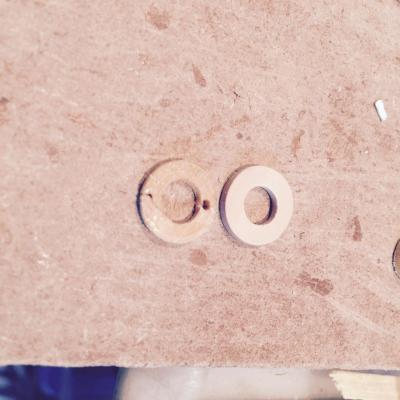
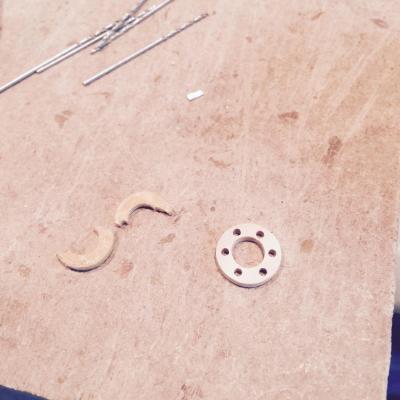
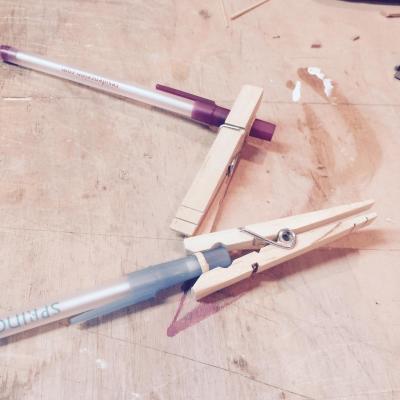
Very helpful everyone! Thank you all for the practical insight! I'm convinced now that I don't need to glue - use the rigging as it should be to hold the masts proper. I've run into another small issue - the belay ring that goes on the main mast snapped when I was drilling the belay holes. Cheap wood... I'm going to use pear and also make just a wee bit wider. But my issue is - how do I create the round ring? A hole drill? is there another way? all I have for power tools are standard garage stuff plus dremel. Sanding down a circle by hand seems a bit precarious but may have to go for it if I can't think of another way. Looking for ideas to supplement my own.....
- 389 replies
-
- 2
-
-
- scottish maid
- artesania latina
- (and 1 more)
-
ok so I've updated, I like and I glued the boom support on - so the mast hoops are here to stay. I also made them thinner - doing some math at 50:1, I thought they need to be approx. 1.5mm which looks good. Next is foremast and then I can finally get going on rigging! do I glue the masts down? Epoxy? also I'm contemplating sails, but I want to show rigging - is furling sails easy/hard and worth it?
- 389 replies
-
- 4
-
-
- scottish maid
- artesania latina
- (and 1 more)
-
really cool design Nigel. Patience and fortitude pay off....
- 270 replies
-
- 1
-
-
- red dragon
- artesania latina
- (and 1 more)
-
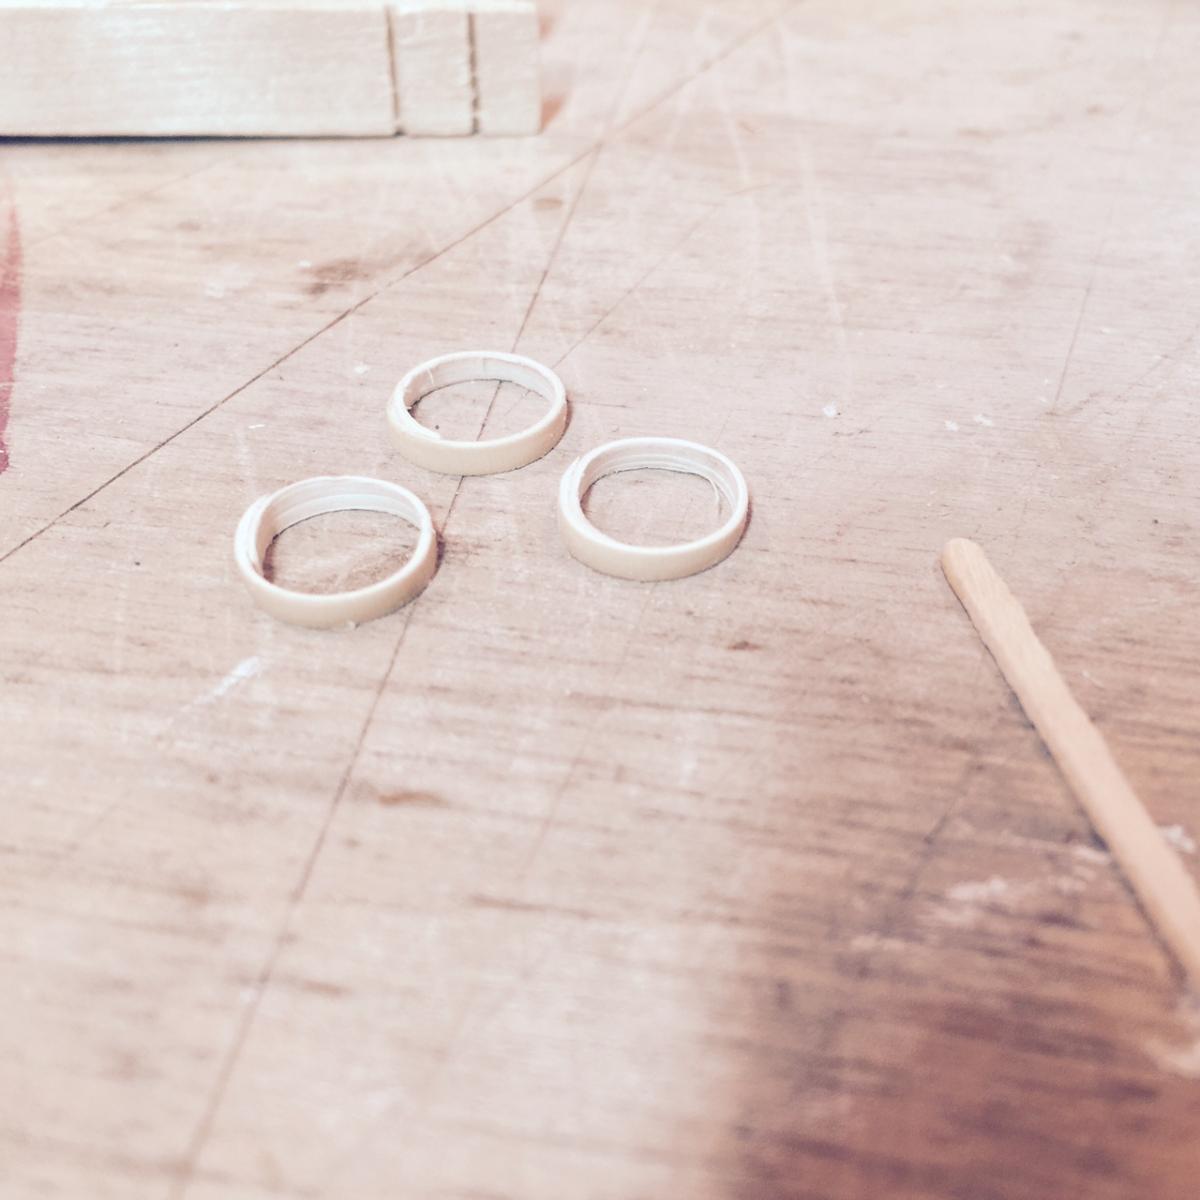
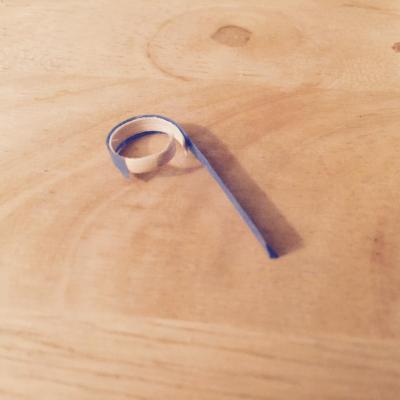
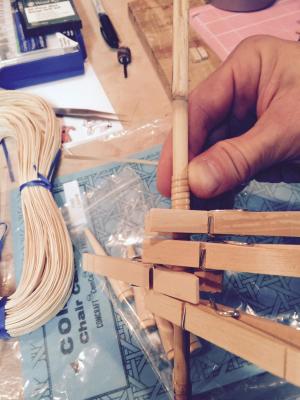
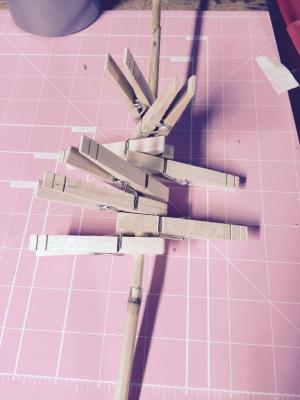
Don, Dave, Jack, Jesse, Brian and George - thanks for the input! I am convinced they are a little on the large size so I've rebuilt them on a slightly smaller scale - plus I changed my approach to the gluing which I've detailed below in a few pics. I came up with a good process to create the hoops. after cutting the wound cane to have about 1/4 of the diameter overlap, I filed down one of the ends to taper the end. This will bet the inside overlap. Then I put a piece of tape on about half the hoop, with extra hanging off the end that will be the outside overlap. I put glue (wood glue) on the overlap and use the tape to pull tight (forming a nicer hoop than using the clothes pins) and wrap around. I made another 22 hoops hopefully that will be enough.

- 389 replies
-
- 7
-
-
- scottish maid
- artesania latina
- (and 1 more)
-
I think they're too big. inside diameter is ~9.5mm whereas mast is 6mm at base tapered to 4mm at crosstrees. I think they should be ~8mm inner diameter? Thoughts? I don't want to glue the boom support before I get these right.
- 389 replies
-
- 3
-
-
- scottish maid
- artesania latina
- (and 1 more)
-
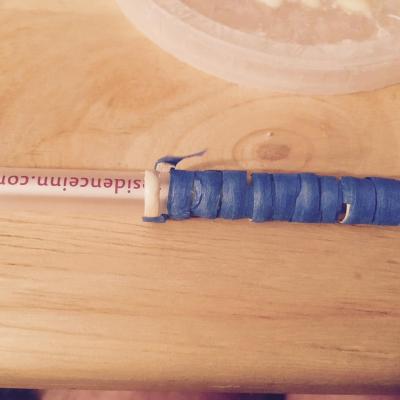
Thanks gents, I cannot take credit for the idea as it's all been done before... Scoot deserves all the credit, I will add to his comment. I'm trying to guesstimate how thick the bands should be. I've sanded down (the material sands very easily) to current pic, and looking at some real images and eyeballing, I think I have to narrow a bit further but not too much.
- 389 replies
-
- 1
-
-
- scottish maid
- artesania latina
- (and 1 more)
-
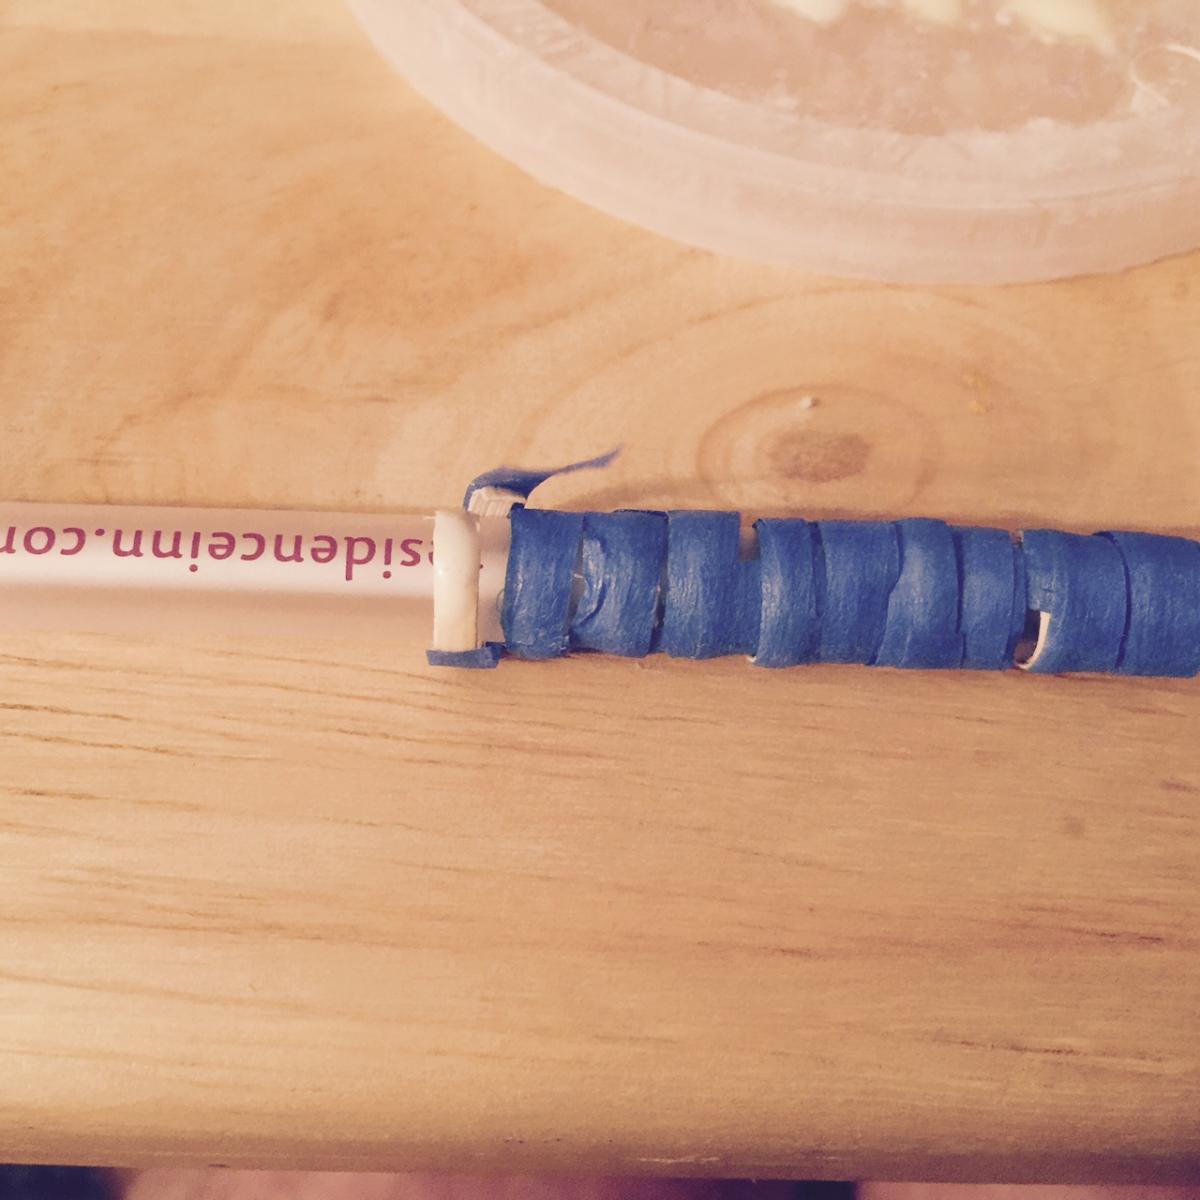
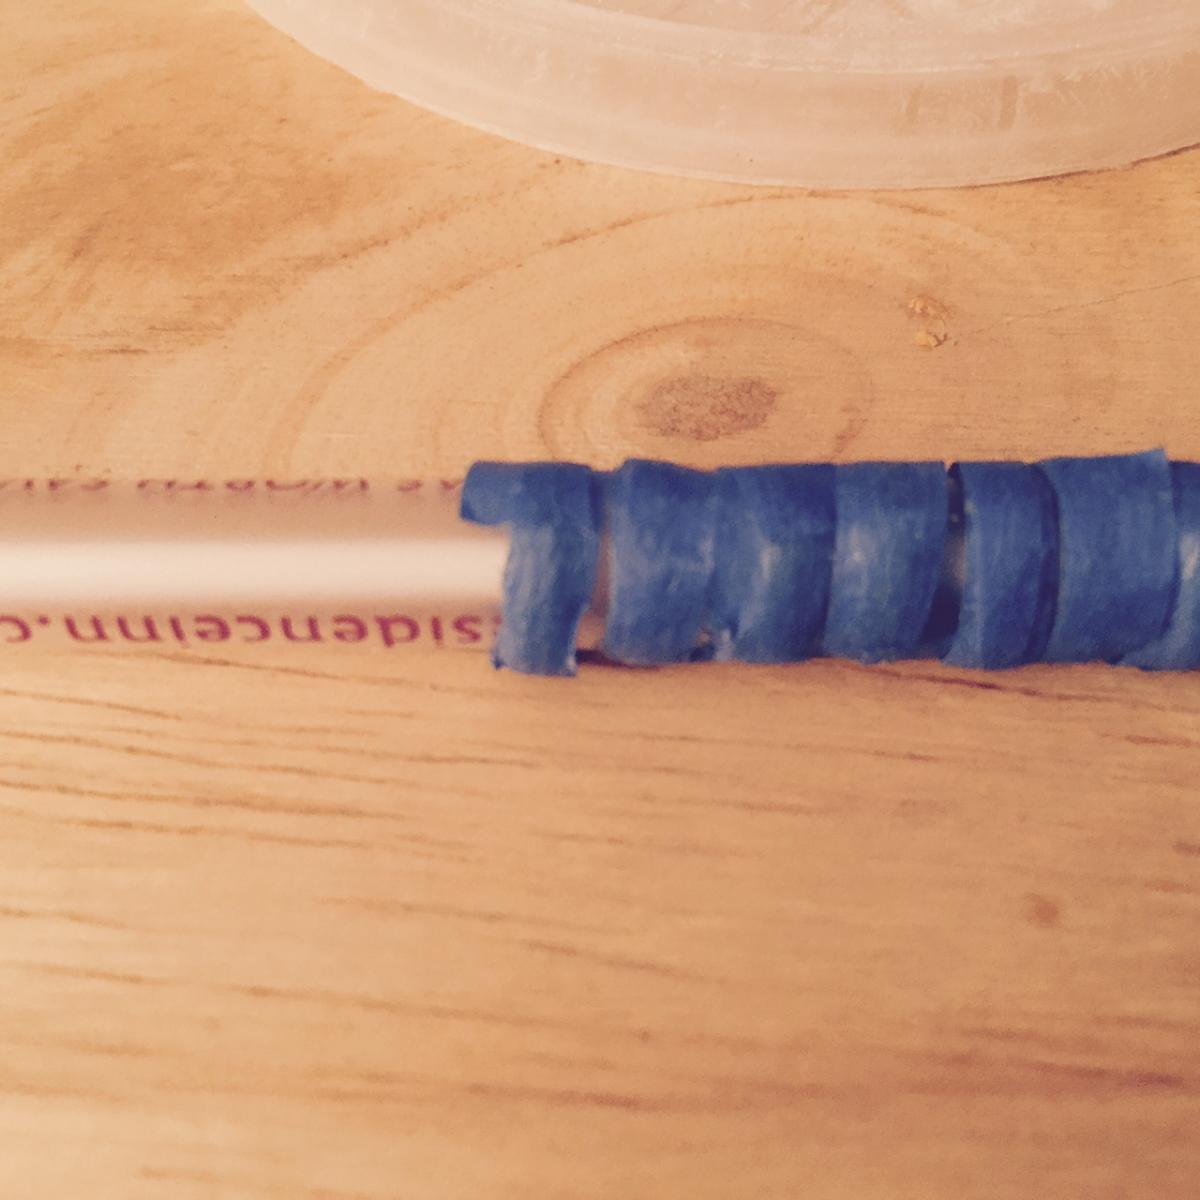
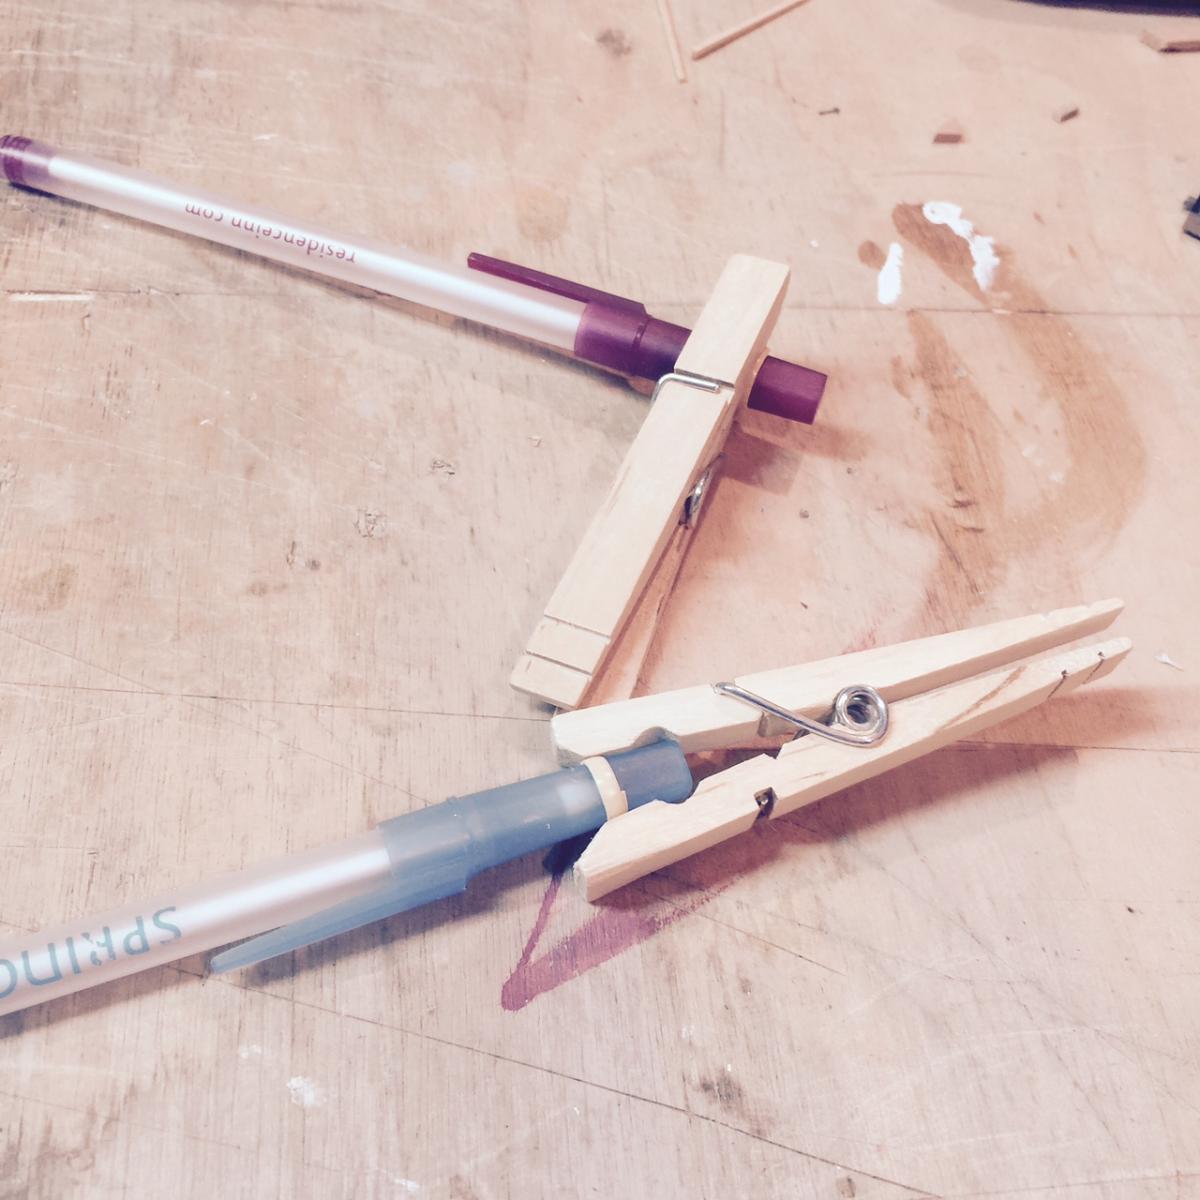
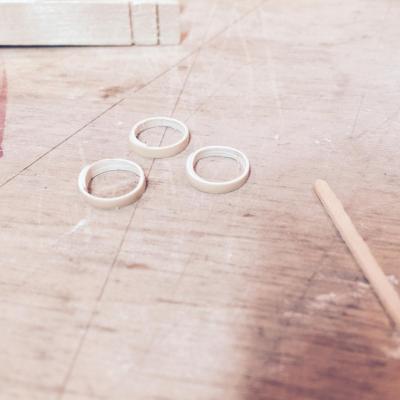
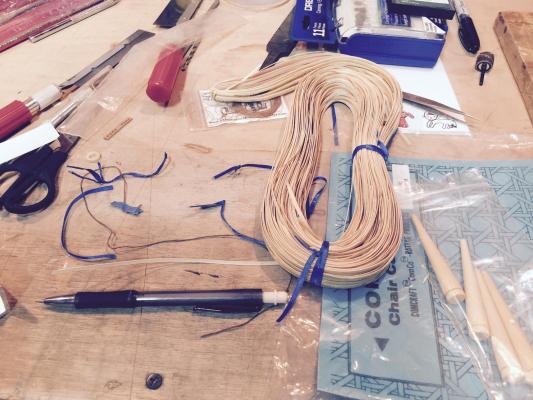
Thanks Jack. For the intial idea of creating mast hoops I came up with the idea when walking my dog by the river. The reeds there looked to be about the size of the hoops so I gathered a few and brought them back to try. They *almost* worked - but there were two issues. First, the reeds were very brittle and difficult to cut by hand, they kept splintering, especially with the narrow cuts I was trying to make. Second, the reeds were just a wee bit small - the end rings could get around the masts, but too snug for a hoop, and trying to sand/file the inside was not working. The second try was ordering some, and I was not satisfied with what came. So the third try is coming along well. I have created a few hoops that I'm satisfied with, so I will go into production mode this weekend time permitting (I'm playing in a chess tournament on Saturday and daughter birthday party Sunday) it turns out that the pen cap is the right size for the hoops, so I'll need to gather a number of pens for this effort. The ship plans show 10 hoops for one mast and 8 for another (Jesse, did you find that worked for you?) I also finished the last of the mast blocks - so this is really exciting! I have almost all the pieces together for the masts to be hoisted so that means I'll be able to begin on the standing rigging. Yikes! That's where I'm really in the dark. I am planning on following Chuck's practicum (loosely) in getting the masts secured and then proceed with shrouds. The one concern I want to keep aware of is how to avoid rigging getting loose from pulling and adjustments. That's my biggest concern with the shrouds.

- 389 replies
-
- 6
-
-
- scottish maid
- artesania latina
- (and 1 more)
-
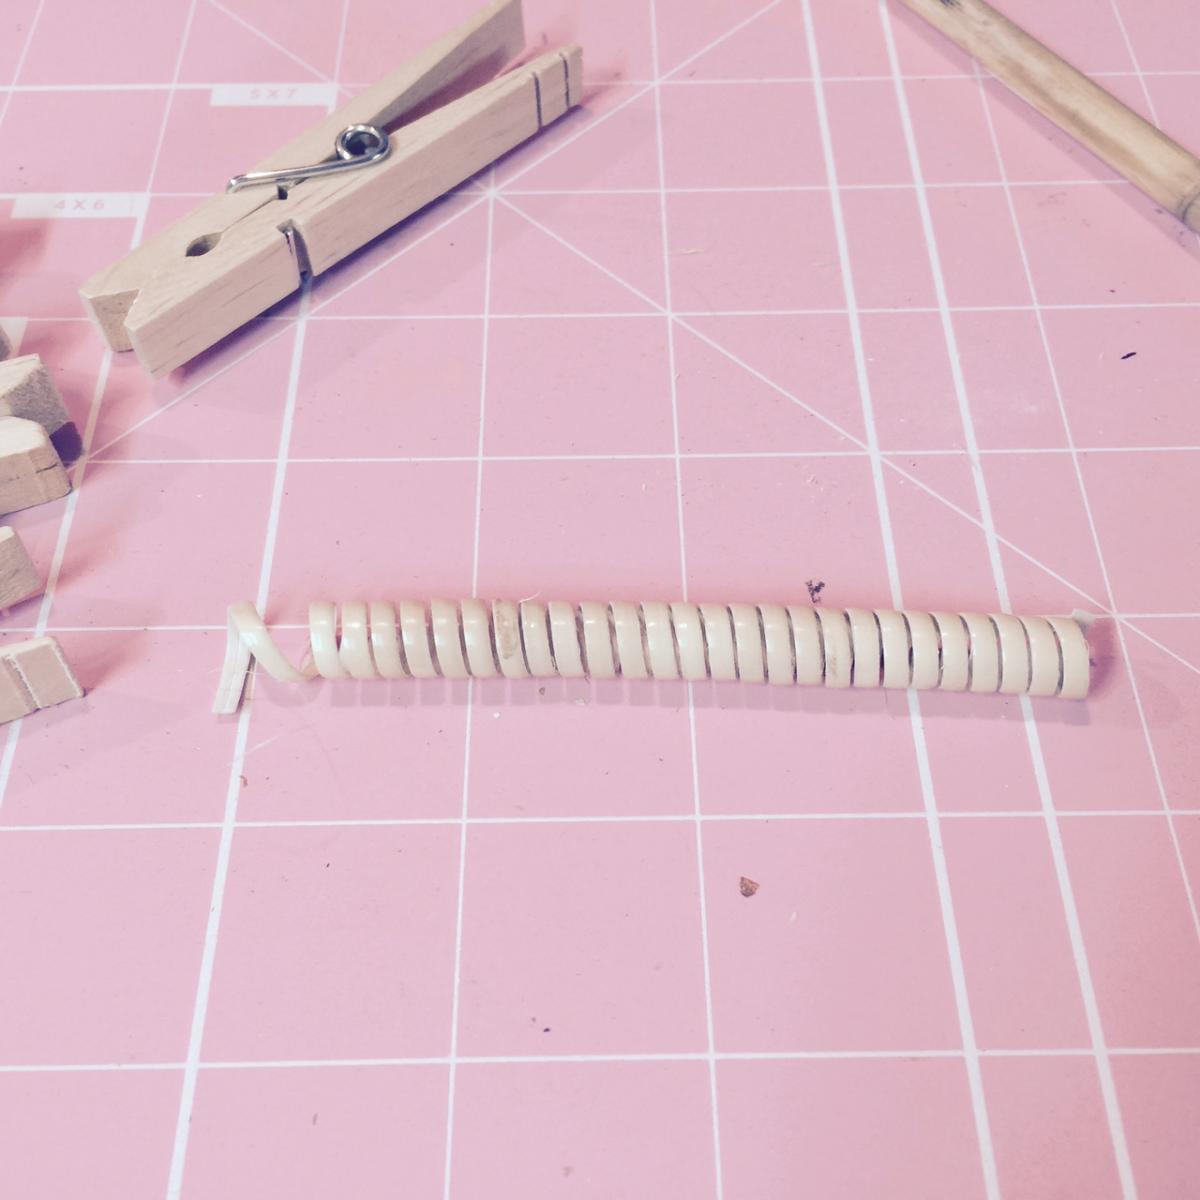
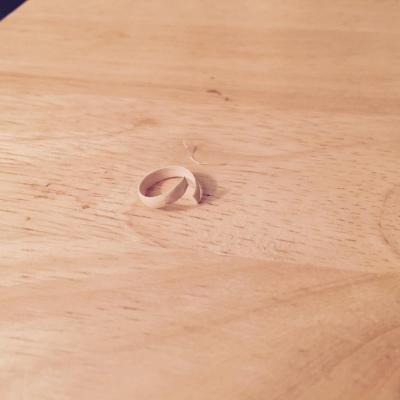
Made some minor progress. Also prepped the cane for making the mast hoops. I saw an example of how cane for chairs can be used and thought I'd give it a try. I don't like the metal hoops the kit provided, and I purchased some from Blue Jacket but don't like them either. So... on to the third idea. Soaked a strip for a few hours, and then wrapped tightly around the reeds I collected for attempt #1. Will let dry for a day.

- 389 replies
-
- 6
-
-
- scottish maid
- artesania latina
- (and 1 more)
-
Looks great Matt, very authentic. The wood looks old and weathered. I like the caps - very nicely done. Rigging will be a breeze for you....