MORE HANDBOOKS ARE ON THEIR WAY! We will let you know when they get here.
×


ted99
-
Posts
235 -
Joined
-
Last visited
Content Type
Profiles
Forums
Gallery
Events
Everything posted by ted99
-
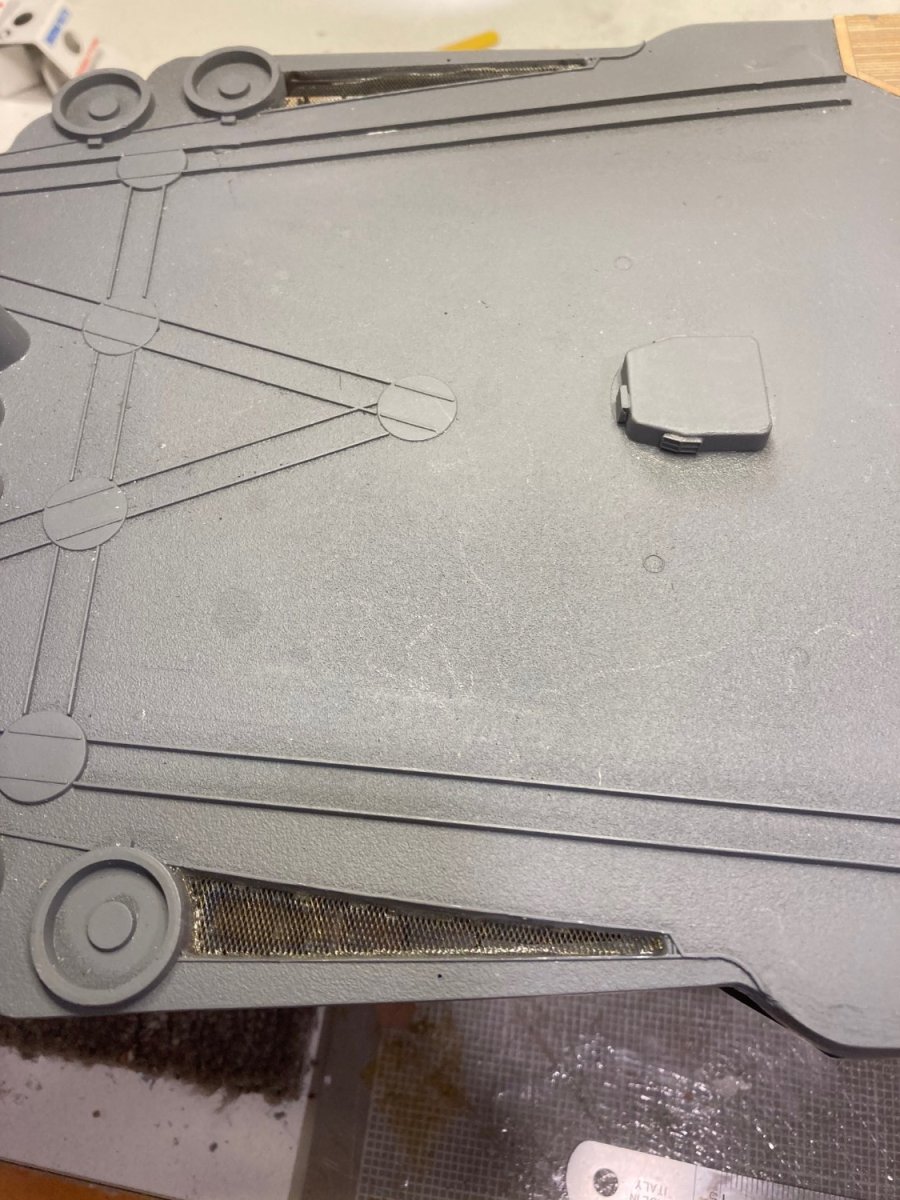
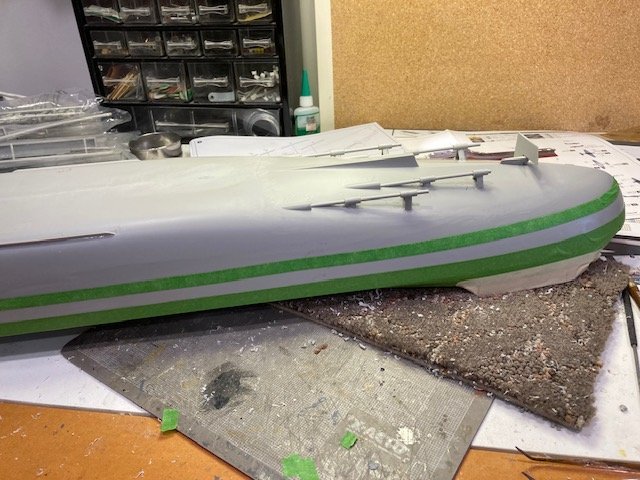
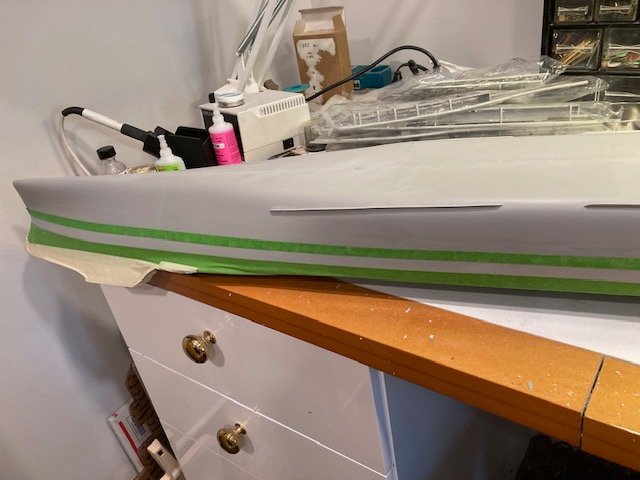
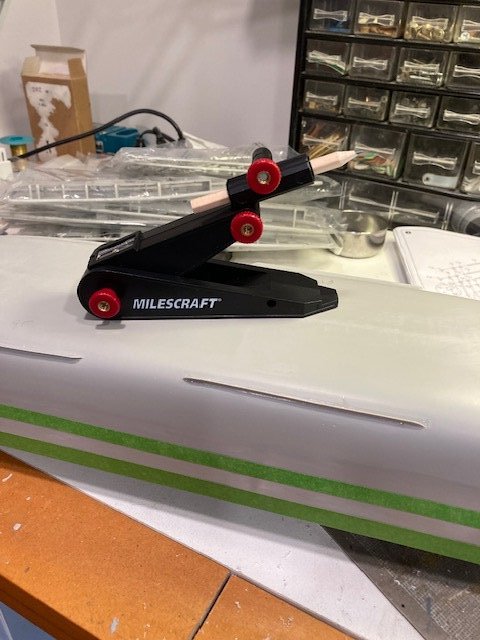
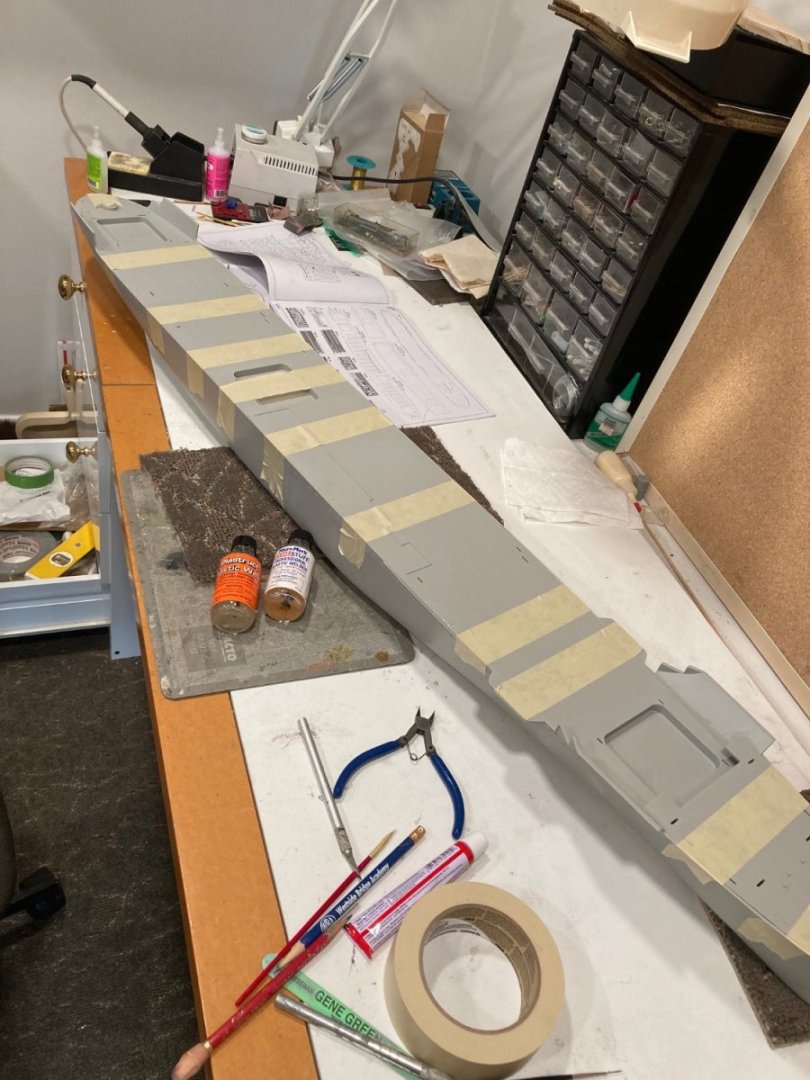
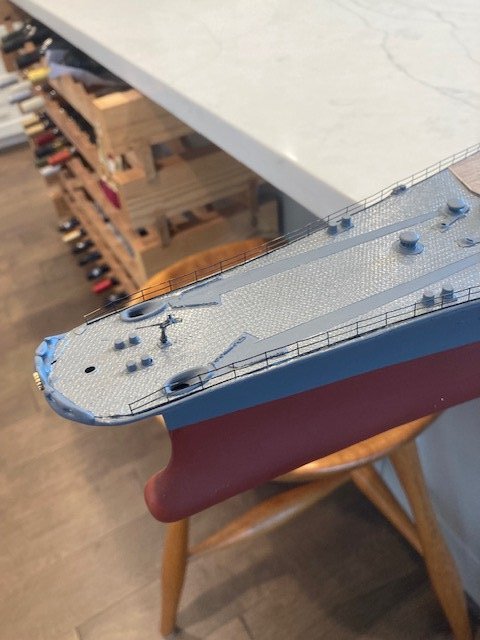
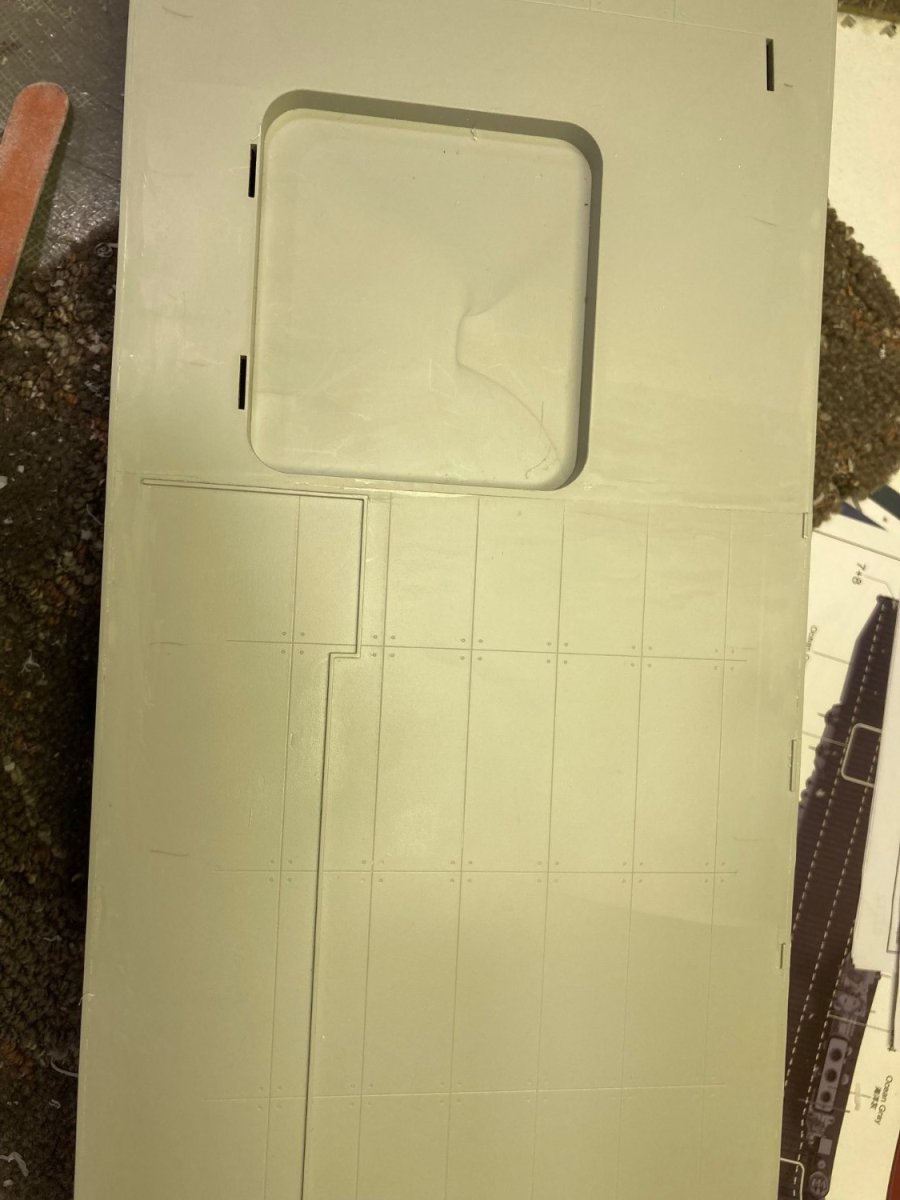
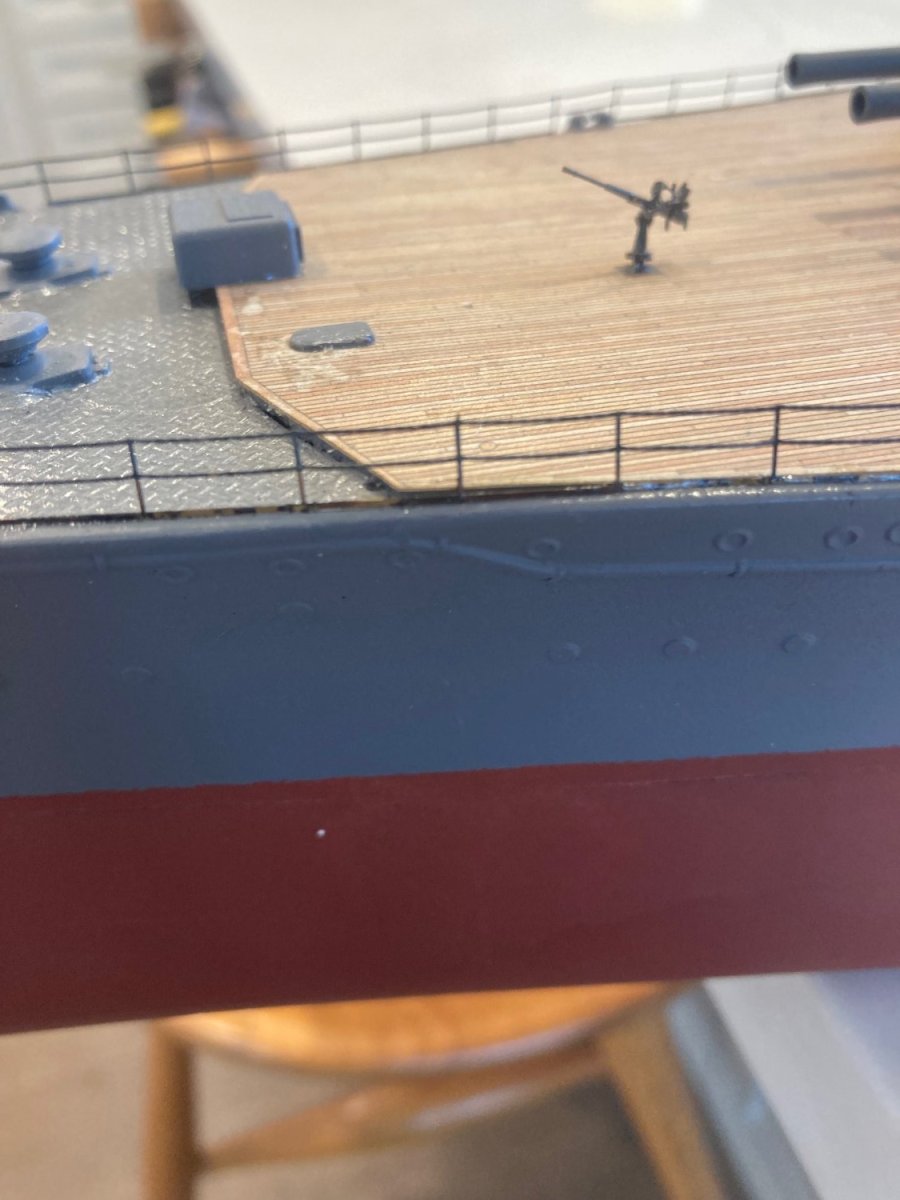
An illustration on how good the Trumpeter hull/deck join has been. No filler necessary, except for a small area at the bow. The Midwest Model video has the builder adding styrene sheets to the hull sides to give the impression of hull plating. I agree that the lack of plate details in the model makes for too "flat" a surface on the hull sides and I also wish that Trumpeter had included panel detail in the casting. However, I think the styrene sheet is too thick. I've put on 10mm-wide masking tape in alternate bands and will spray a thick coating of primer on the unmasked parts to make up a little extra thickness. Hopefully, once the tape is removed, and after a color coat, there will be some nice panel edges. Before the color coat, I'll scribe vertical lines in a brick pattern on the alternate bands to complete the illusion of plating. I brushed a coat of micro-flat on the tape edges to minimize bleed thru (and also add a little thickness). We'll see. I pictured the Milescraft "ScribeTec" which I used for penciling in the lines to align the masking tape. What a joy this little device is, compared to my previous method of getting the correct height by stacking CD sleeves or books/magazines as a pencil rest.


- 154 replies
-
- 6
-

-
- Enterprise
- Trumpeter
- (and 1 more)
-
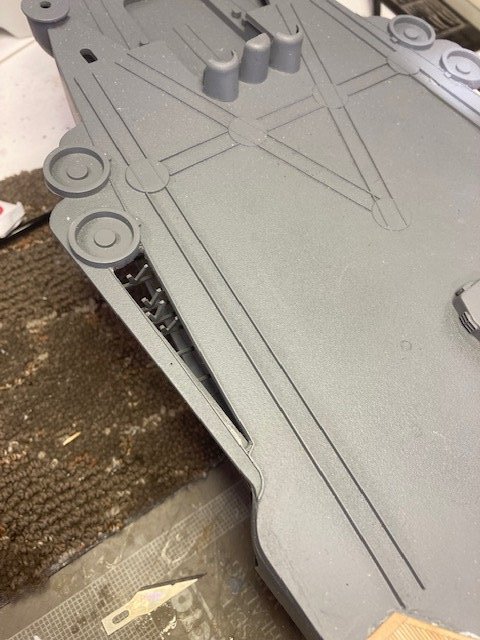
I had to use clamps to get the Nichimo Yamato's hull in alignment with the decks. Very heavy plastic and warped, either thru age or lousy casting. Tape would never have done it. This is my first Trumpeter build and I'm very impressed with the precision of the castings. From pictures, it looks like the Trumpeter/MRC Yamato and the Titanic have very extensive internal bracing, which CV-6 does not have. Running improvements? But, the Enterprise is a very narrow hull, compared to the battleships, and perhaps extensive bracing is not necessary--certainly wasn't for me. I guess the narrow carrier hulls were a legacy of their Cruiser beginnings--and that airplanes weigh a lot less than heavy armor and 16" gun turrets.
- 154 replies
-
- 2
-
-
- Enterprise
- Trumpeter
- (and 1 more)
-
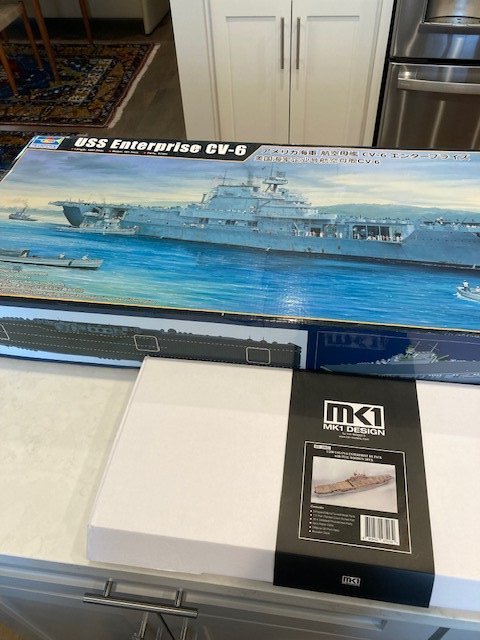
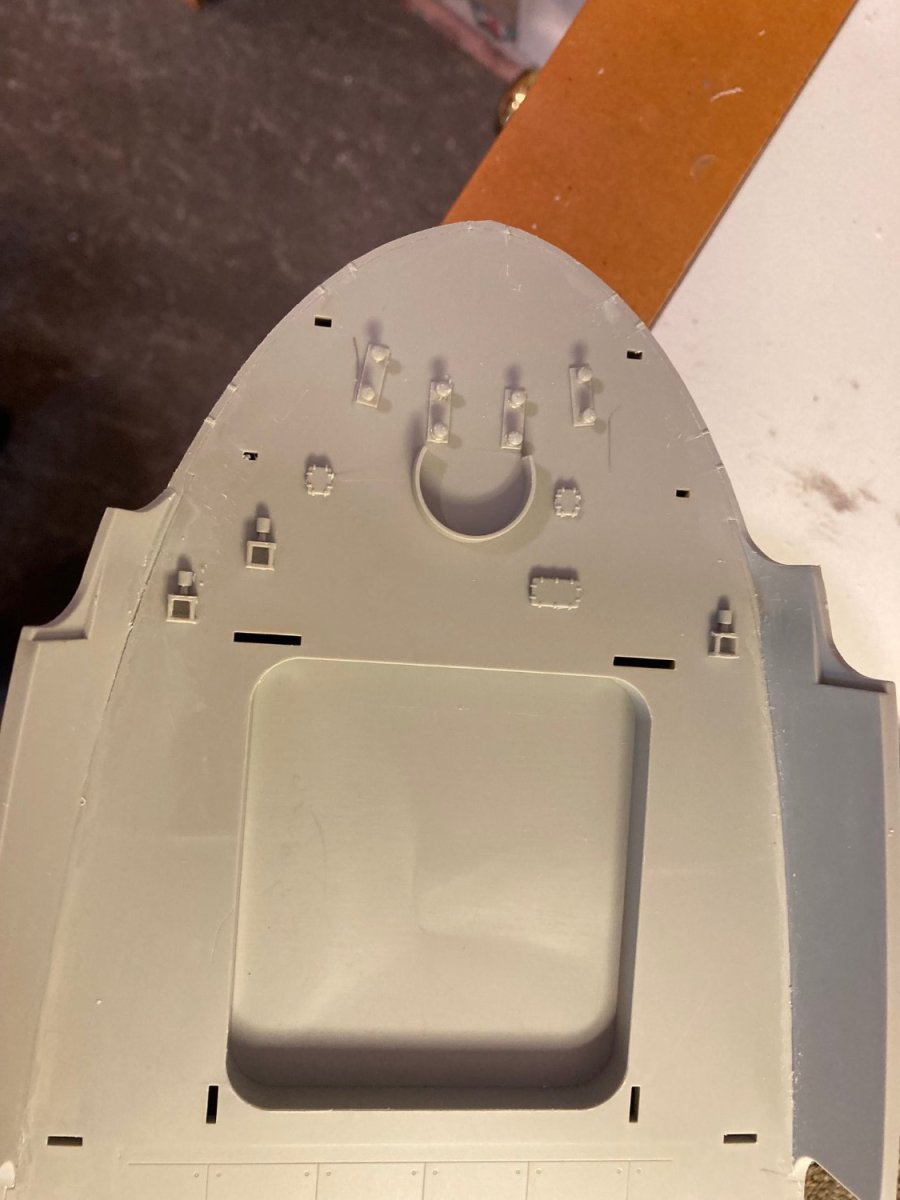
Next in my set of major WW II Combatants. Started with Bismarck, then Yamato. After Enterprise is done, it'll be capped off with USS Missouri. Dobbed in a pair of Subs for good measure. All in 1:200. Except for the Amati Bismarck they are all plastic because that's the only available kits in 1:200 scale. Looked through all the build logs for another 1:200 CV-6 and found none. I'll skip unboxing as I did find videos on Youtube from Midwest Model Shop and the first three are excellent "unboxing" descriptions. Episodes 4 and 5 start the building process, and will continue. I selected the KA-Models detail set with full wooden deck over the Pontos set because it seems to be more aligned with my skill set. According to the Midwest video, the Pontos set has a lot more PE, is finer scale brass, and does not have 3-D printed small caliber guns. After struggling with the PE from Fujimi for the Yamato (very fine brass and gobs of little bitty pieces), I am going with the KA set. I am not going to chase absolute accuracy or any particular date, but am just going to build it as it comes in the kit. I am also going to please myself by painting it a traditional peacetime gray and use the natural wood decks because I like the looks best. If I were a better modeler, I would chase those ideals, but I'm not. To start, I've attached the hanger deck to the hull at the outset. I've learned that getting a good hull to deck join with minimal need for filling gaps requires some brute strength pressing hull sides in and the deck pieces down. I'm doing that before I put anything else on the hull and deck. In looking over the instructions from Trumpeter, I could not see any reason why I shouldn't do this. If one does appear later, I'll be sure to mention it so that future builders can benefit from my experience--one of the main reasons for a build log, I think. Unlike the Amati Bismarck, which has a detailed step-by-step set of instructions, the Trumpeter instructions show which pieces fit where, but there is no "assembly" instructions, per se. Photos show how I have used masking tape to do an initial fabrication before gluing. More hand-pressing together is needed as the joints are glued. After a day of curing, I'll remove the tape and put solvent glue down the previously-covered joints. A note about solvent glue. I show "The Same Stuff" from Micro-Mark and a bottle of "Plastruct" Even though the Plastruct is about the only solvent that works on ABS plastic, it does a very good job on Styrene as well. It is actually a stronger solvent than the MM stuff and better for the hull/deck join in my opinion. It's too hot for small pieces, though.
- 154 replies
-
- 11
-
-
- Enterprise
- Trumpeter
- (and 1 more)
-
Sell the Nichimo. I notice that the prices in eBay are coming down--probably because of the availability of the Trumpeter kit. I'd value the Nichimo kit at about half of the Trumpeter/MRC kit.
-
Sorry to be so late in responding--busy with Yamato. My instruction book says do the first layer of planking before the deck.
-
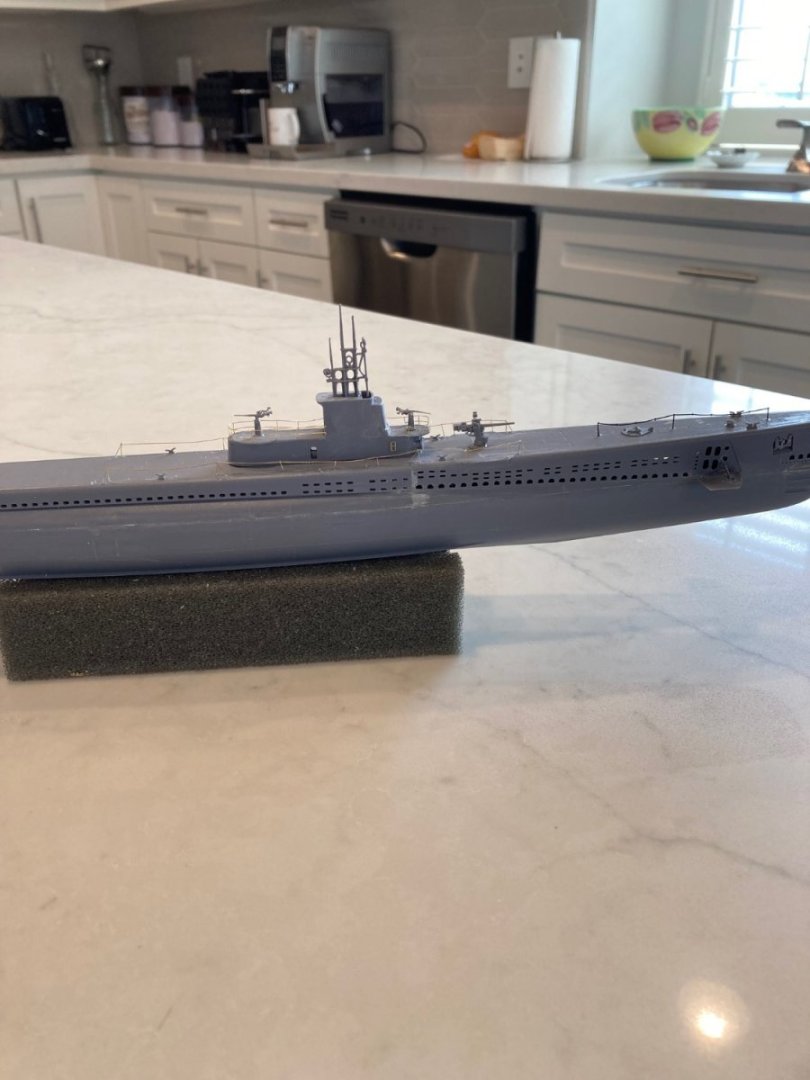
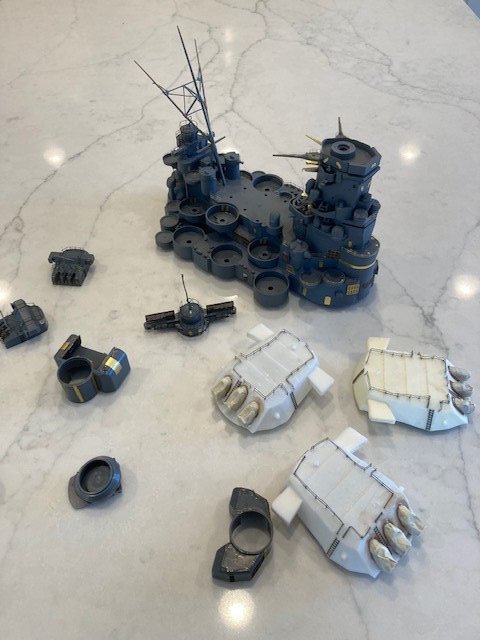
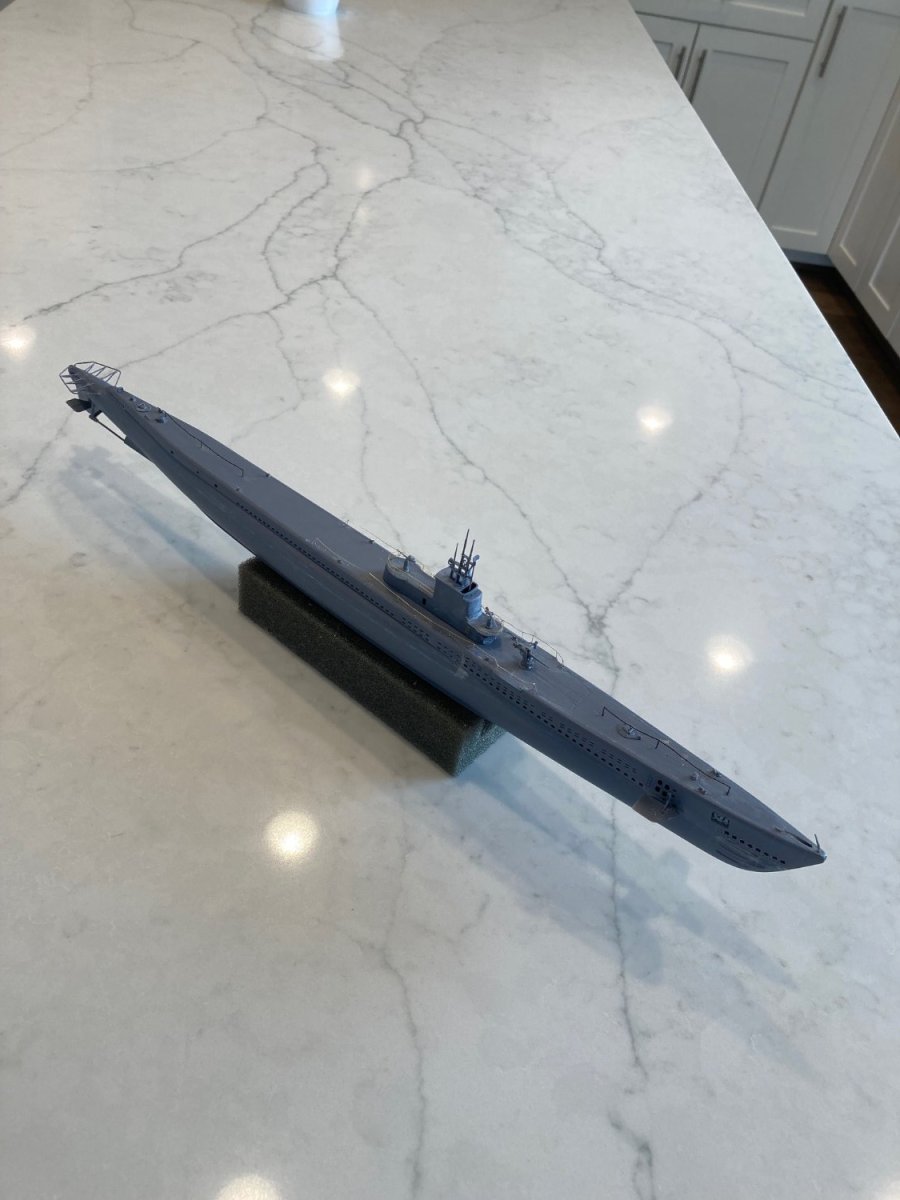
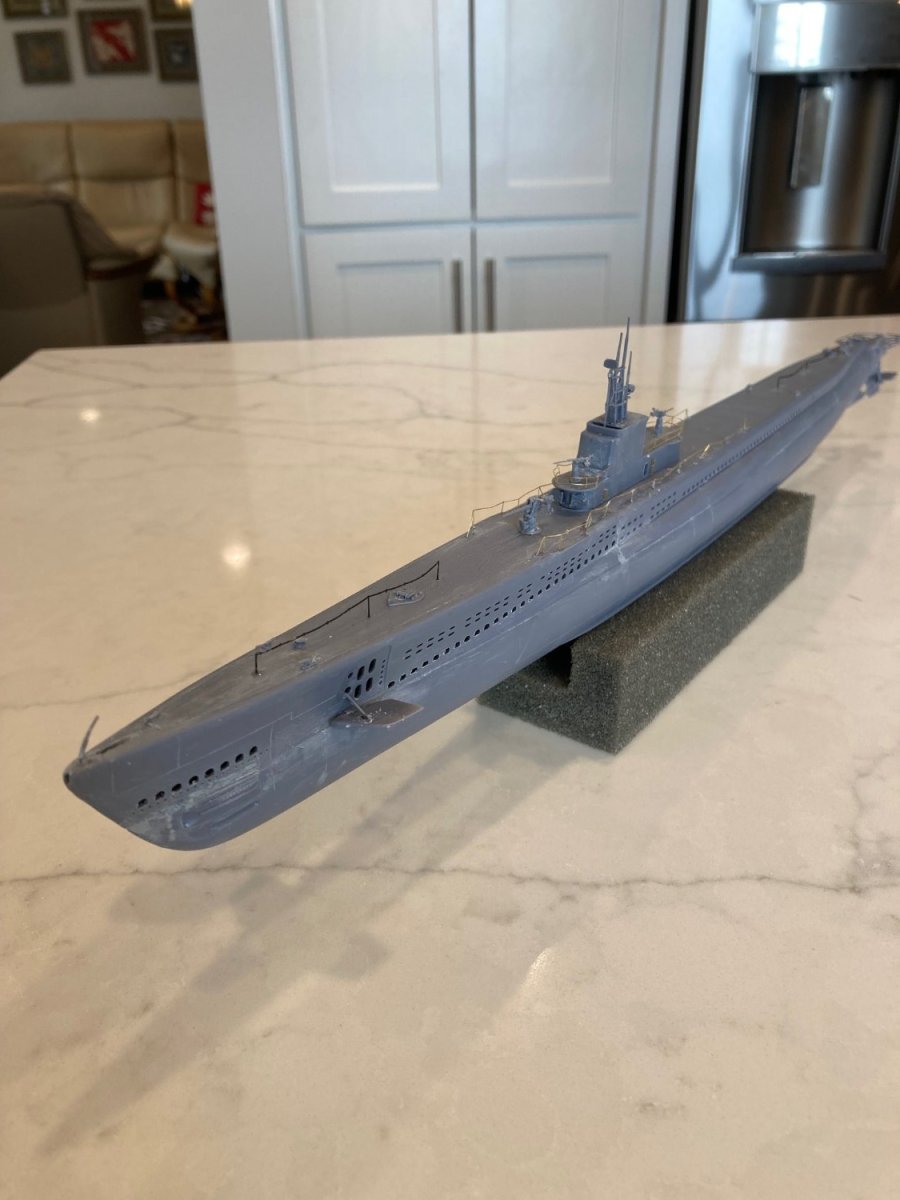
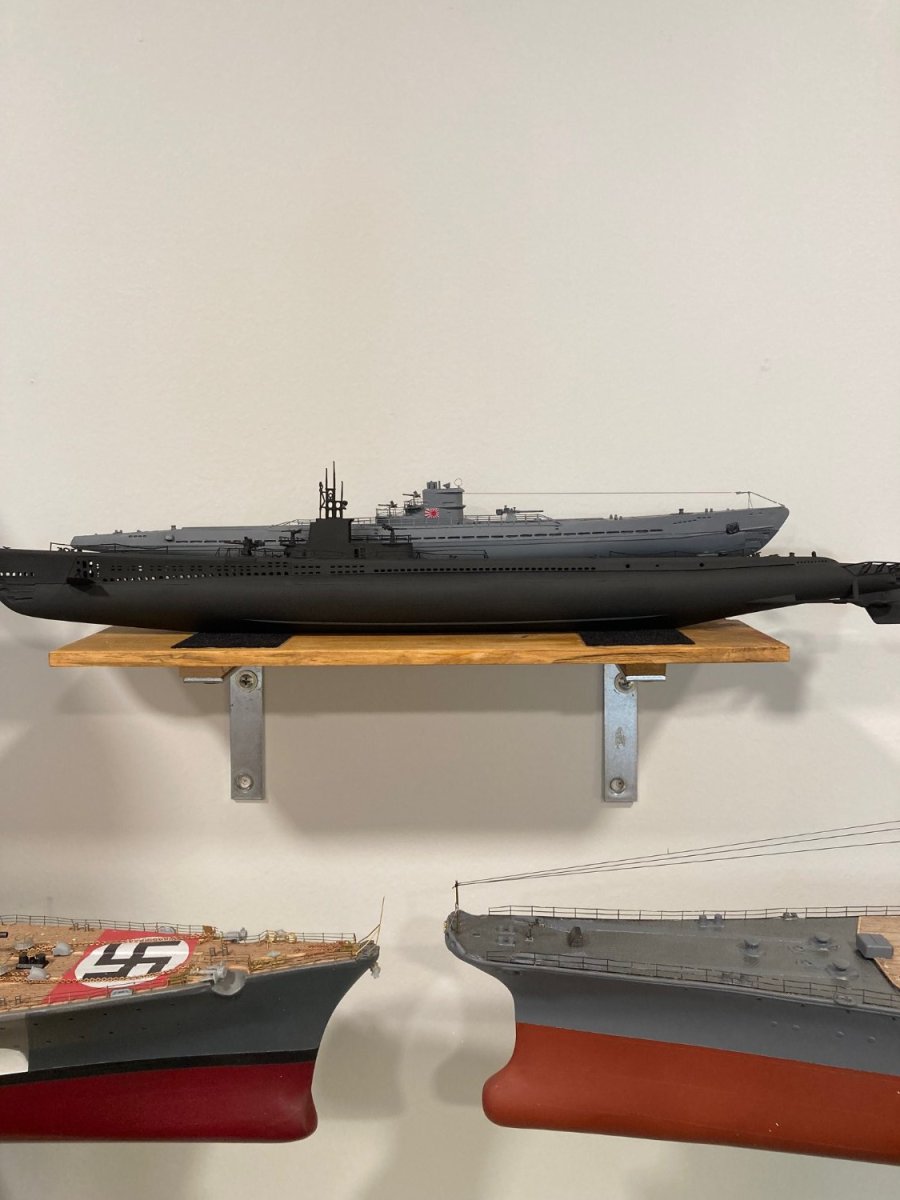
Both subs now completed. The RIICH USS Gato did not require any kit-bashing. Came with PE railings. Quality of the injection molding is very good, also. This could have been a Trumpeter kit in some earlier incarnation. Much better than the MiniHobbyModels U-Boat U-511/Ro500. Research says Fleet boats were flat black. Added the IJN flag to the Ro 500 conning tower, as shown in pictures of it. A few views of Gato before painting and of the two in their display position showing relative size between them and the battleships. This completes this log and preparations are underway for USS Enterprise, CV-6.


-
Thanks to all for the compliments. Rod--I will do the Enterprise CV-6 next and a build log. Experience says that this will take about a year to complete. "Tain't a Hobby if you hurry". I will probably not do a build log for the Missouri as there are several of these and I will benefit from all of them. I'm sticking the two subs as an appendix to Yamato as they really don't warrant a build log and they are part of my WW II "set". When I went through the six-month Sub School in 1965, the end had a two-week cruise on the USS Dogfish, SS-350 (Balao-Class), where we practiced diving and firing torpedo's. On my turn as Conning Officer, I fired one 21" steam fish and one wire-guided electric fish. MOT for both. We students worked our way through all the diving stations and firing stations, in turn. It had the WW II-era analog Torpedo Data Computer which required three officers to man the data input stations. As I recall, there were about five of us on the "Dogboat" and my hot-bunk was in the forward torpedo room next to a torpedo. This was in the early days of Nuclear Subs and old Fleet Boats were the school boats. After another year in Nuclear Power School, I reported to USS Pargo, SSN-650. It had a modern (for then) computer-based TDC. It's living quarters (for a crew almost twice as big) were a five-star hotel compared to the Fleet Subs. So, my experience spanned from the Fleet Boats to a Nuclear Fast Attack Boat. I retired from NASA in 1997 and a person I worked closely with had been Orville Wright's driver when he came to Washington for meetings at the old NACA. Now, THAT's a span of history, as we were just starting work on the Space Station.
-
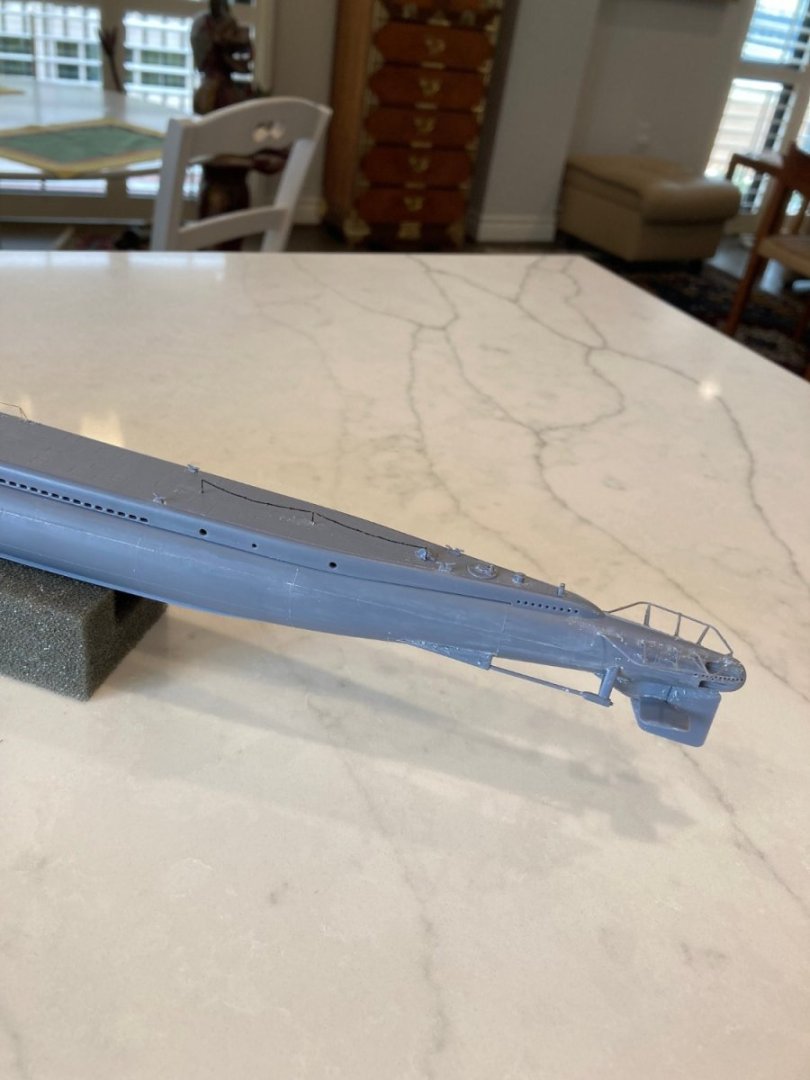
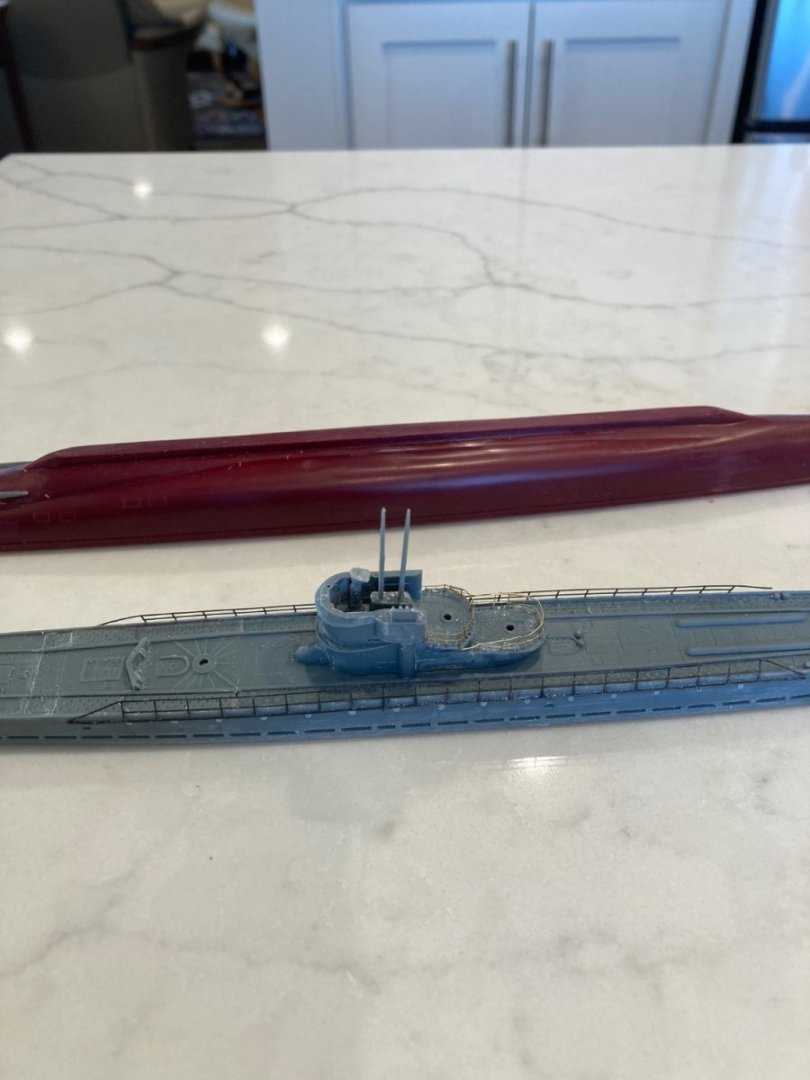
Well, that's one done. These subs go quickly. When researching the colors for U-511, I found that it was sold to the Japanese Navy on 16 Sept '43 and was re-designated as R0-500 of the IJN. Participated in Coral Sea and Leyte Gulf battles. Surrendered in Aug 45 and subsequently scuttled. So, I have a "Japanese" sub and a US Fleet sub. Something I didn't know is the size difference between the German U-boats and US Fleet subs. Picture shows the completed U-511/Ro500 (Type IX9-C)and the hull of SS-212, USS Gato. Size difference is very apparent. Both are 1:200.


-
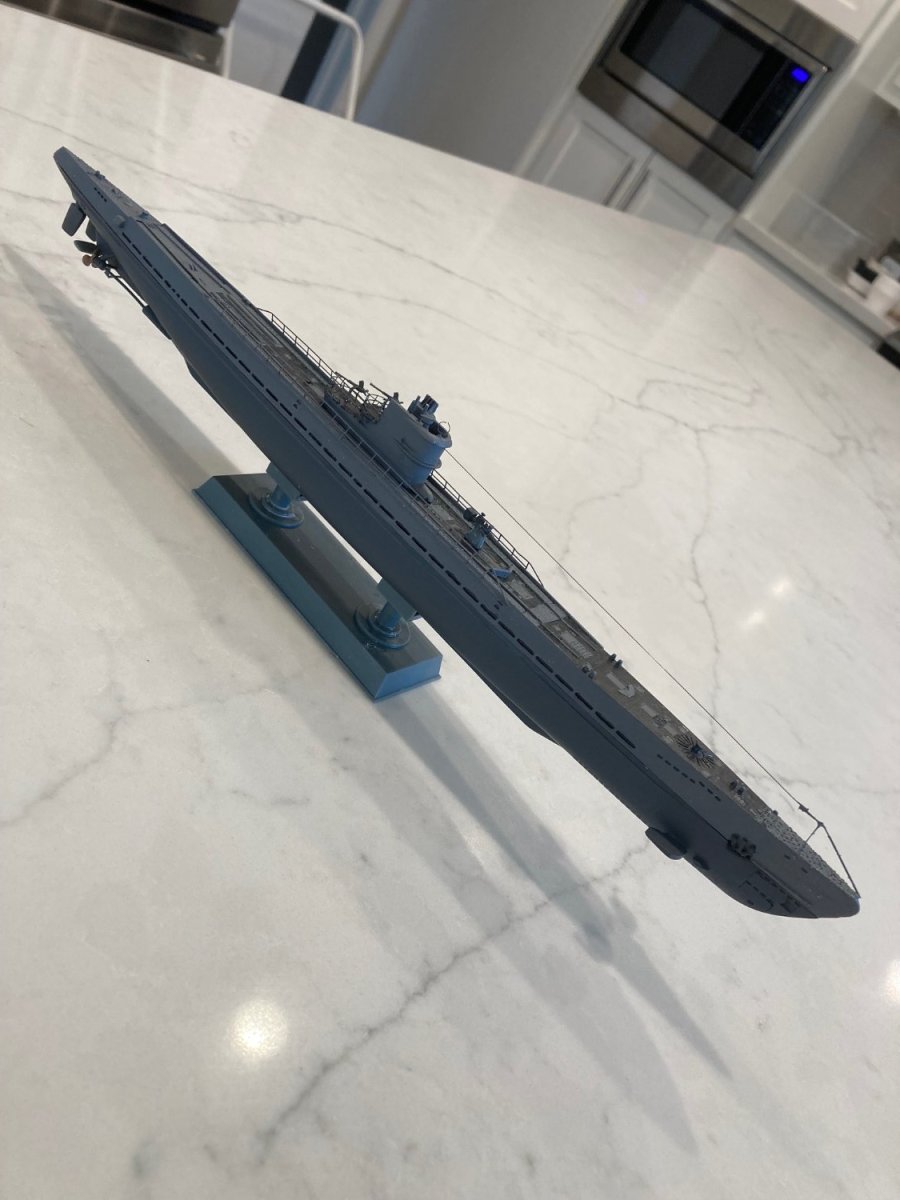
The German Type IX C, U-511, MiniHobby Models 1:200 ready for painting. A little kit-bashing by replacing the gross injection molded handrails with left-over Yamato PE brass, plus a few small bits. Not much here, so this was fast. I'll use the Yamato 25mm single AA guns from Yamato in place of the poor ones in the kit. Guns to go on after hull painting.

-
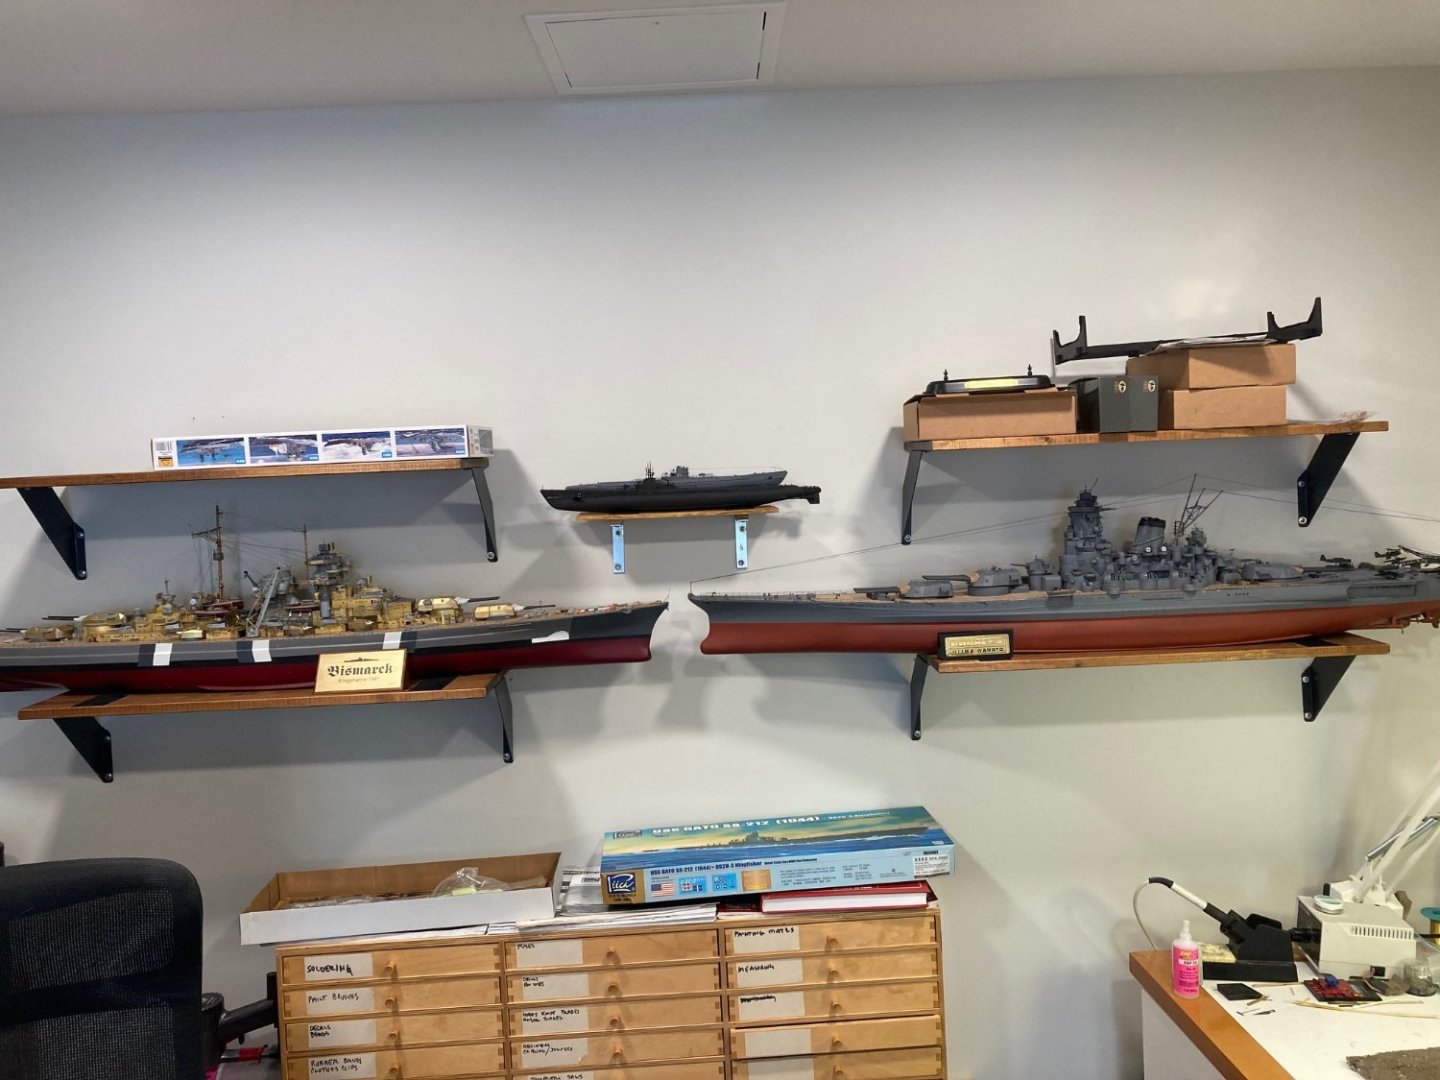
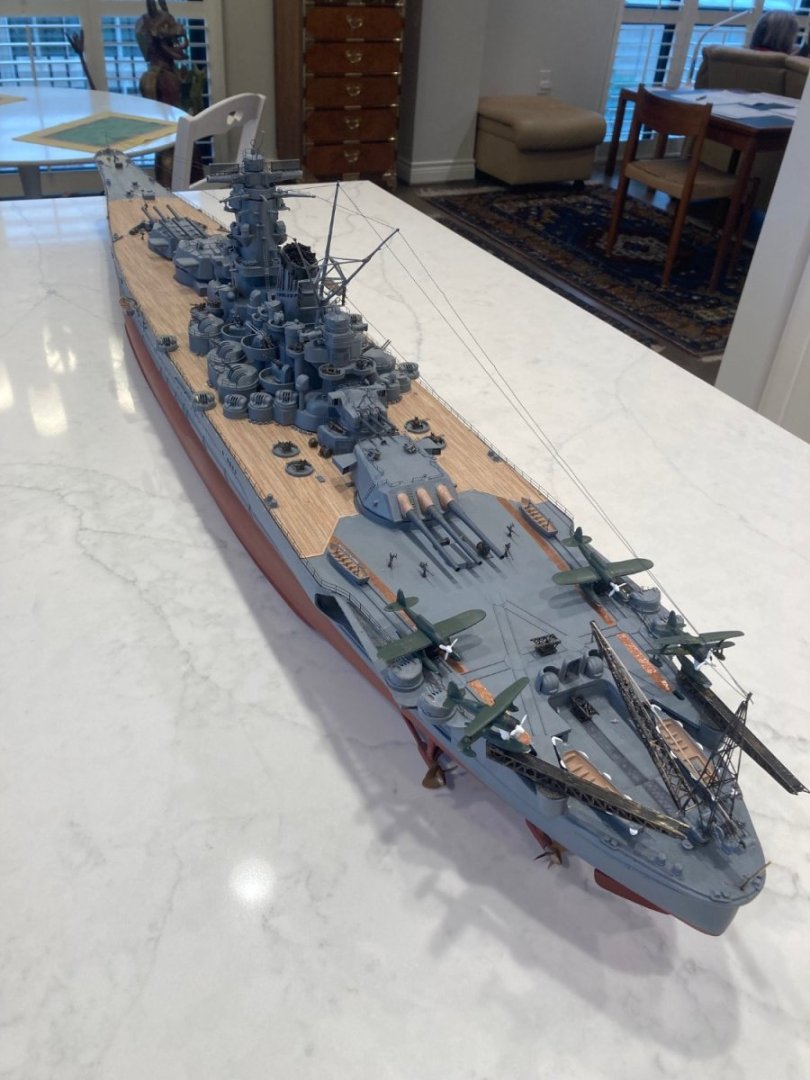
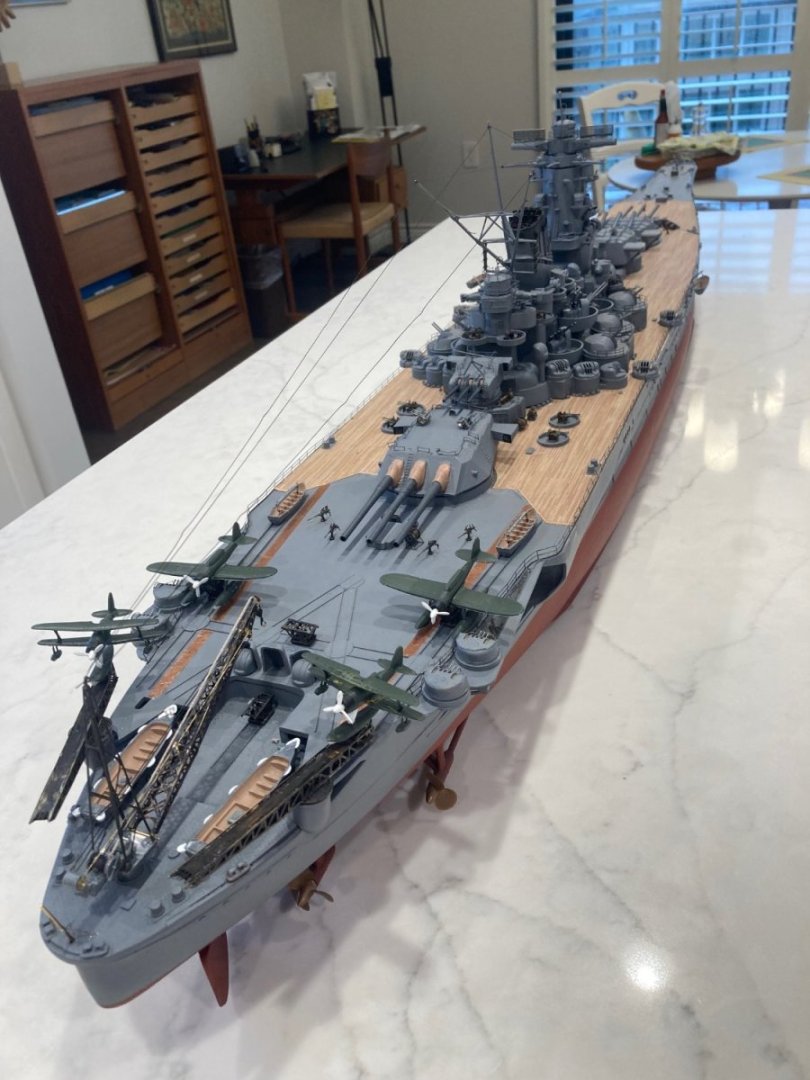
What's next? I built the Amati 1:200 Bismarck because I wanted something different from the PoF wooden sailing ship models I had built in the past and really liked the 1:200 size. During the construction, I came on the idea of building a set in 1:200 scale of the "best" WW II battleships of the various combatants. I eliminated the British, French and Italian combatants because they were all second-rate to the best and settled on Bismarck, Yamato and Missouri. Farther along in my building of Yamato, I decided that I needed to do a model of the major combatant that replaced the battleship--the fleet carrier. So, I purchased the Trumpeter USS Enterprise, CV-6; to make up a set of 4. Then, after reading the history of Yamato, it seemed like I should add the combatant that actually did the most in sinking the Capitol ships--the submarine. One could argue that Carrier Air did a lot of sinking, but it seems like there was always an assist from the subs. Carrier air set them on fire, but the actual sinking seemed due to the subs. The choice in 1:200 scale is very limited and I was only able to find USS Gato, SS-212 and the German Type IX C. I've pictured my display wall and the two shelves waiting for Enterprise and Missouri are there above Bismarck and Yamato. In the center is the little shelf that will show the two subs. The wooden Bismarck was 1:200 and that set my scale "set". None of my other candidates were available in wood. There are some long-discontinued Bluejacket Shipcrafters WW II combatants made in wood, but they were all 1:98 scale and nearly impossible to find, so plastic it was. Had I known that this was the path I would take at the outset, 1:350 would have been a far better scale to have selected. The Tamiya 1:350 Bismarck seems to be excellent, with lots of aftermarket details; and Trumpeter seems to have a good selection in 1:350. So, next up will be the subs. No PE detail parts kits for them. After that, it'll be Enterprise, with Missouri last of all. At my advanced age, it will really be "all".
- 95 replies
-
- 13
-
-
OK. I am declaring completion. I'll do the anchors and chains later, when I get some more JAX Flemish gray to color them without paint build-up. The rigging is very incomplete, but "A" is not terribly helpful on this aspect and the Nichimo instructions are totally absent on this subject. I'm also missing a set of boat davits (it was a "used" kit), so I could only put on one pair, instead of two. Closing thoughts: I remain convinced that if one is doing a fine scale model, the Gallery/Trumpeter 1:200 is a MUCH better choice as a starting place. As I have constructed this model, a number of detail parts have come on the market. In particular, the Bunker line of 3D printed armament details. I've only seen pictures, but they seem to be fabulous in their detail. I am of mixed feelings on these parts. They are truly museum quality and could be practically perfect, but is this a hobbyists' model making? I got a lot of satisfaction assembling PE 25 mm guns--but they don't look even close to the photos I see of the Bunker parts. In some aspects, this dilemma is part and parcel of the "Plastic v. wood" model debate. How much are we willing to delegate to a mold-making or 3D printer v. our wood and PE-shaping skills. After doing the Amati Bismarck's hull, I decided that I didn't need to do another plank on frame hull and the injection molding hull was just fine. I also think that, if they had been available, I would have loved to have the Bunker blast bags and barrels to replace the Nichimo parts that were severely compromised by the "motorizing". This is a question for each hobbyist to reconcile for themselves. As to this Nichimo kit, it's possible to buy a lot of detail parts, but some of them are overkill for the quality of the basic kit. I suggest the "Gold Medal Models" PE sheets for the superstructure and decking details. A wood deck is good. The Bunker blast bags and barrels for the main and secondary armament are also perfect. Beyond that, it's probably overkill. The hull requires the addition of internal bracing.


-
As it was intended, it's an excellent kit--for R/C standoff scale. I think you are doing the right thing by using 4 motors, eliminating the gearbox. The gearbox does a good job of one motor and opposite rotation of the two sides of the props. But it's noisy and will probably end up with excessive wear because of lack of lubrication. With individual motors, you can have a lot more flexibility. If you decide that you are not interested in rotating turrets I suggest that you look at the new blast bags and barrels that fit the kit turrets. The turrets themselves are good enough, but too many sacrifices were made in aid of animation. The thing that gave me the most trouble with motorizing a model was articulating the rudders. Your selection of parts and the ample room inside the hull will make this much easier, but I would suggest fixing the aux rudders in place at the straight ahead position. Articulating them is overkill and not necessary for operation. I suspect that this is what was done on the real vessel. One step up from the kit's fittings are the two Gold Medal Models PE sets for the railings, radar masts and aft deck details and I think they would be a good addition to an RC version. More than that would be overkill. Up to you about the "wood" decking add-on. I'm sure it can be waterproofed with a liberal application of matte clear and it really improves the appearance of the model--perhaps the single most important item for improvement. Don't forget adding internal bracing. The screw arrangement used to make the deck removable for internal equipment is very flimsy and won't stand a chance of lasting without substantial internal bracing. You may also find it useful to put bracing on the underside outer edges of the removable decks to prevent warping. You will probably find that there is some warping of the unsupported hull--I did. Use the bracing to get the screw holes in the hull to line up with the screw holes in the deck. This will probably be the single most difficult thing you undertake in motorizing the model--it will all be scratch work. It'll be fun, I'm sure.
-
She was on her way there from Ft Lauderdale on Apr 15. Should be there by now. I looked at videos of the Great Lakes itinerary and it looked very good. Viking has added two Mississippi river boats, but I'd go to Great Lakes WAY before the Mississippi river. Because of the Jones Act, Viking has to have an all-US crew on their Mississippi boats. I have a neighbor who recently finished their "Lower Mississippi" cruise and was very disappointed in the service. Because Viking's Great Lakes cruises terminate in a Canadian port, the Jones Act does not apply and Viking is able to keep their Norwegian Deck Officers and "international" service staff--which were wonderful on my ship (Octantis).
-
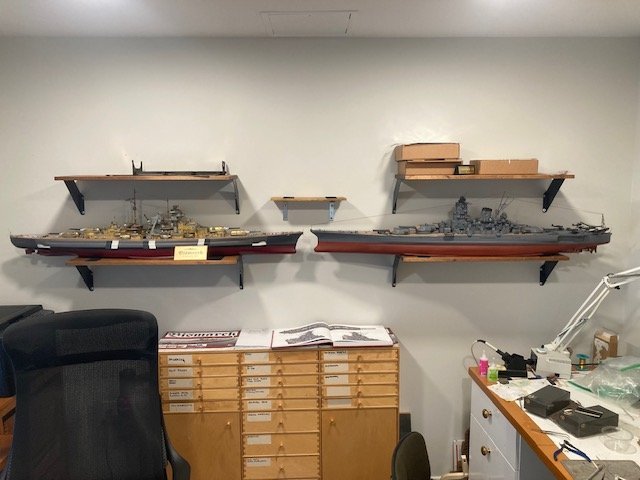
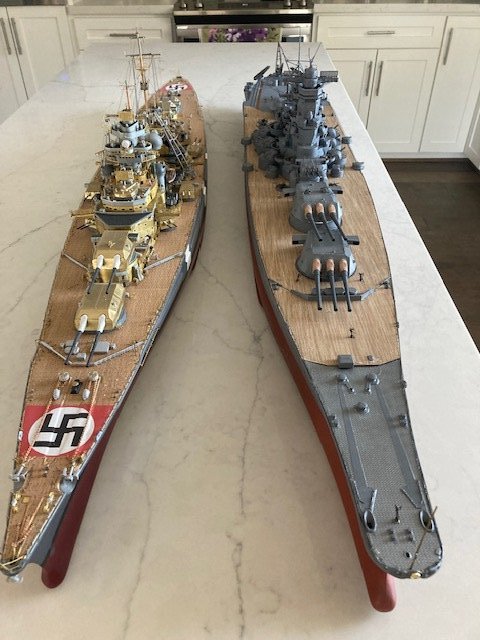
Back from the cruise. Learned something new about the Viking ship. It's one of 2 Viking "Expedition" liners: 665 ft long, 77 ft beam (sized to fit the Great Lakes locks), 378 pax and max speed of 16 knots. The interesting thing is that it's propulsion system is a pair of stern nacelles (like those under an airplane wing) with the screw in the "tractor" position. Diesel electric and it frequently cruised at 15 knots. The Chief Engineer told me that the tractor position of the screws resulted in about 6% greater efficiency because the screws were in "free" water, rather than behind a prop fairing. The props were variable pitch and the nacelles rotated for steering in lieu of rudders. The ship had completed the "summer" season in the Antarctic and was repositioning from Tierra del Fuego around the Horn and to the Great Lakes via the West coast of S America through the Panama Canal to East coast of USA. We got off in Ft Lauderdale on the day of the floods to find the FLL airport under 2' of water. Getting home to Houston was an adventure. Resuming work on Yamato. It's just bits and pieces, now. I had to move my two models to make room for some work in the ceiling of my "shop" and while they were down, I set them side by side to illustrate the difference between Bismarck and Yamato. They are lined up with bows at the same point. You can see that there is little difference in length or draft. The big difference is in beam.

-
Just a quick shot of the kit airplanes. Color scheme from "A", but the yellow edges of the wings were beyond my Floquil yellow paint. Too thin. I have problems getting yellow paint to come anywhere close to "one-coat" coverage. I'm not going to attempt to color the canopies--beyond my skill level. I think the Trumpeter approach of casting the aircraft in clear plastic is a good approach. One can simply mask the canopies before painting. I'll find out with my next large kit, as it will be a Trumpeter. No decals with this old partially-assembled kit, so I'll have to find another source for the 1:200 meatballs. Next will be to attach the launch/transport carriages to the planes, attach hose reels and do the boat davits. Unfortunately, there do not appear to be any brass substitutes for the kit's plastic davits. There will be a 6-8 week hiatus on construction. Wife and I are leaving tomorrow on a 5-week cruise from BA, around the Cape, up the West Coast of S America, thru the Panama Canal, thru the Caribbean and end at Ft Lauderdale. A "repositioning" cruise for Viking's Antarctic "Expedition" ship from the South to the North.

-
Thanks, Yves. I think that the new Trumpeter kit you have is a far, far better place from which to start, now that it's available. I keep following 1:200 Yamato listings on eBay and I'm amazed that most of the listings for the Nichimo kit are still in the $600 range. Given all the pieces one has to purchase, in addition to the basic kit, to have a decent static scale model, the price should be more than $200 less than the MRC/Trumpeter kit. For any modeler considering a 1:200 Yamato (and I highly recommend it as a very imposing model) using the Nichimo kit as a base, I recommend the following items as the most cost effective - A scale wood deck - The complete Gold Medal Models PE set (at least 3 sheets) - The Tom's Model Works Hose reel set - The following items from the Chinese vendors on eBay: The 3D printed 25mm single and triple AA guns, the 3D printed large caliber double AA guns, the 3D printed blast bags and barrels for the main and secondary guns Unless you have watchmaker-level skills with PE Brass, the Fujimi replacement superstructure and PE brass is overkill and way too good for the Nichimo hull. You will still need the Gold Medal Models PE sheets, as there are a lot of parts in there (like railings, crane and catapaults) that Fujimi doesn't do.
-
Just did the railings and some of the flight deck. It was a real pleasure with the railings. Gold Medal Models PE. Fit the hull perfectly and matched the hogback sheer line. The bottom rail is the same height as the wood decking, so when attached, it looks like there is a steel strap at the edge of the planking--just like the real thing. I asked the question earlier about tarnishing the copper strip I'm using for the vinyl walkway--the best method I found was to leave it outside in the Houston air for two weeks. Started the tarnishing just fine (lol). railing was treated with the "Brass Black" in my first attempt to get a non-paint grey. Too black, and it's not a chemical bond--color flakes off. Still think Flemish grey is the way to go, but expensive.


-
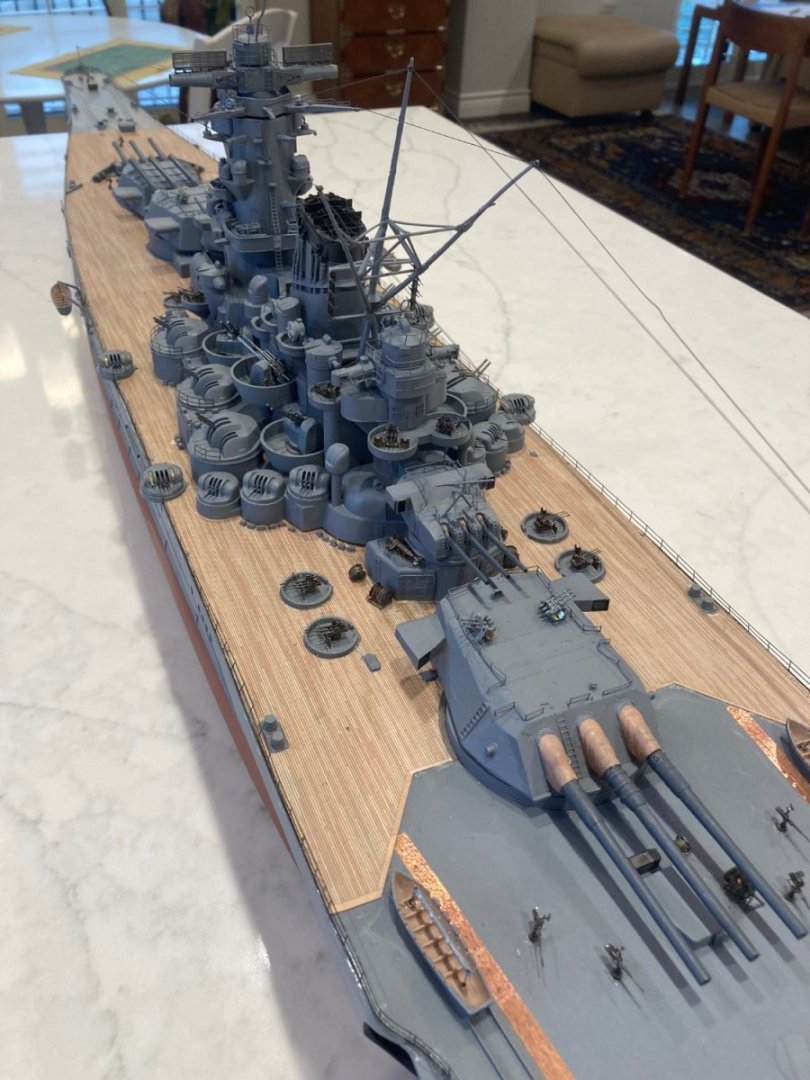
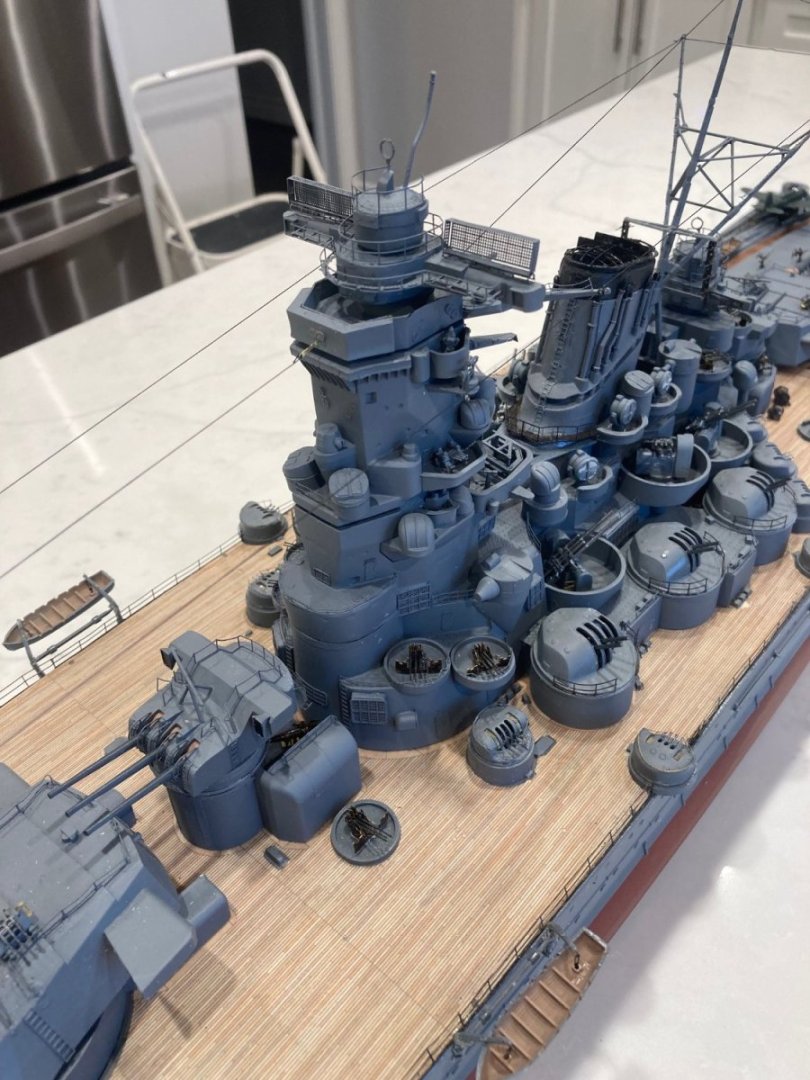
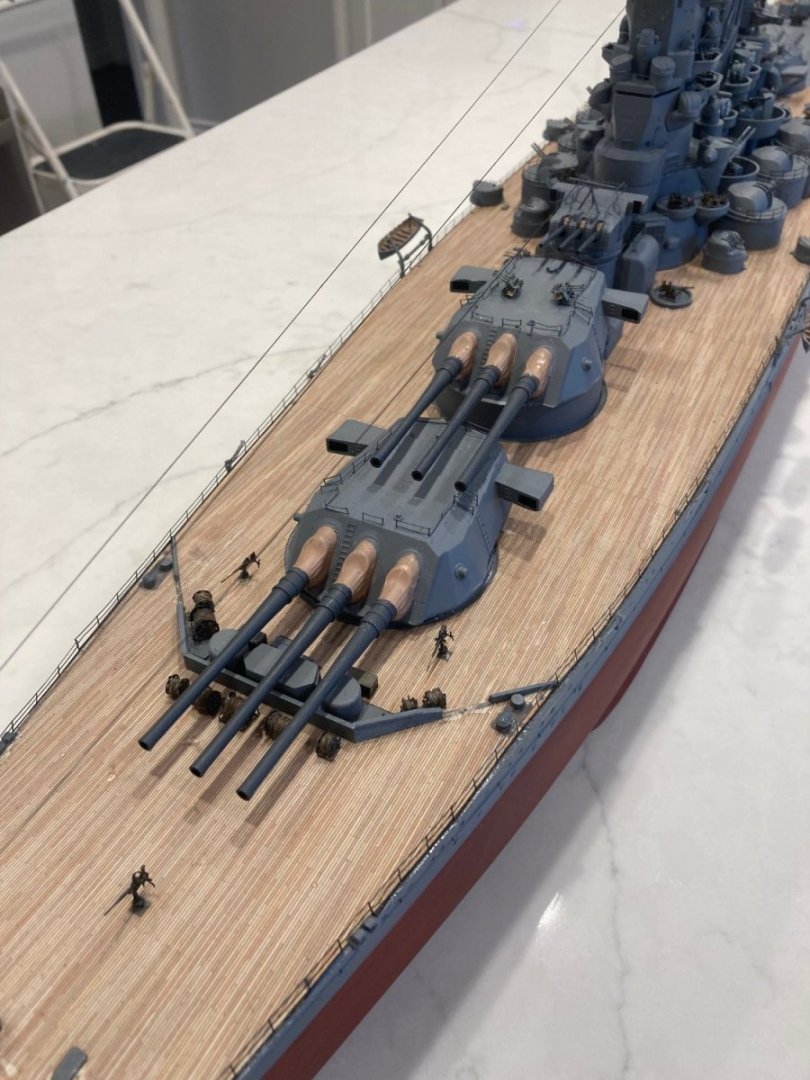
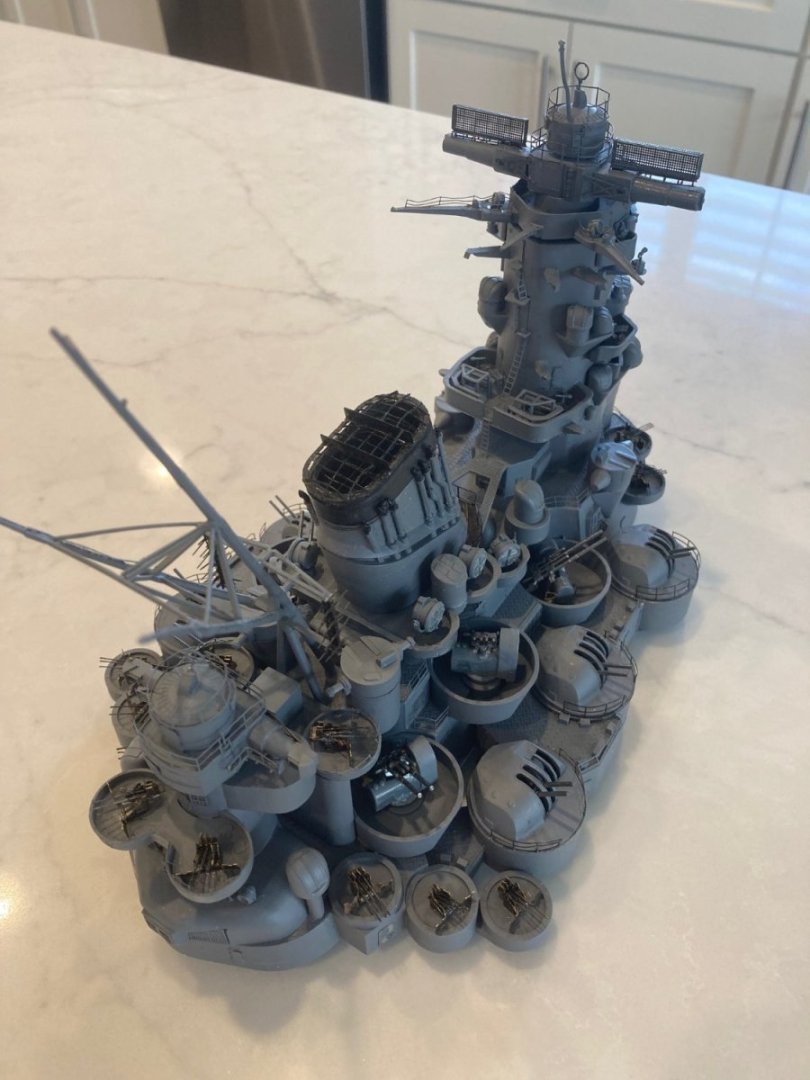
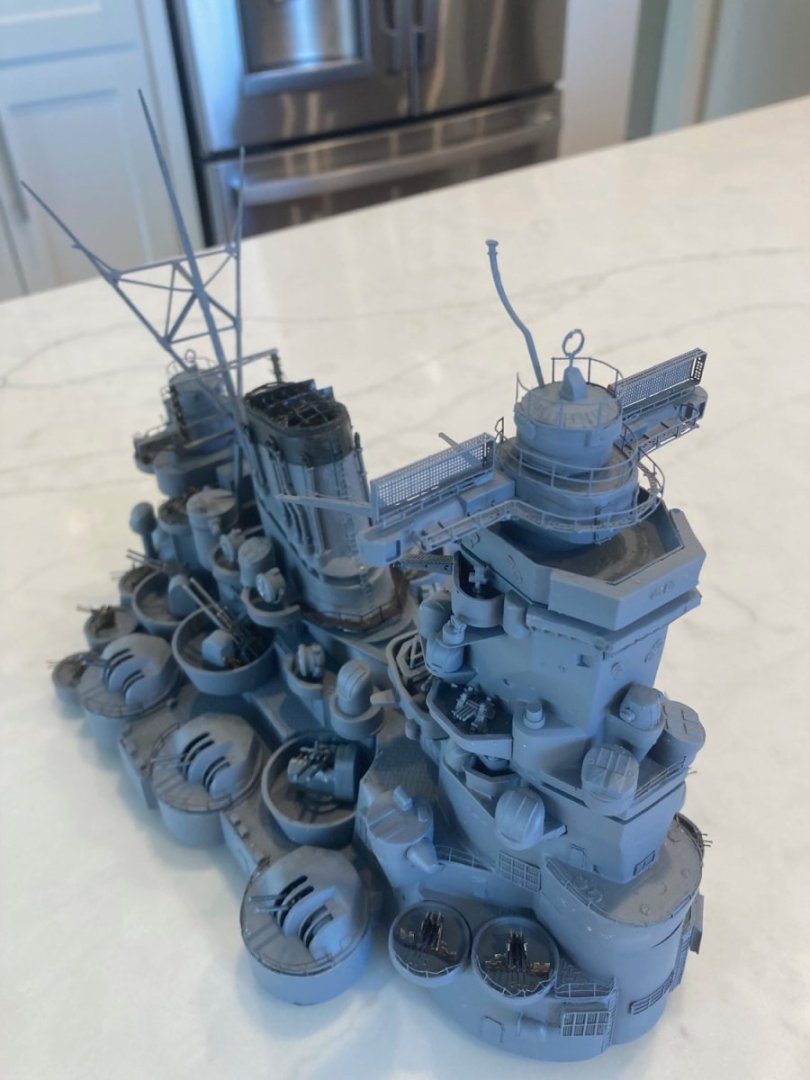
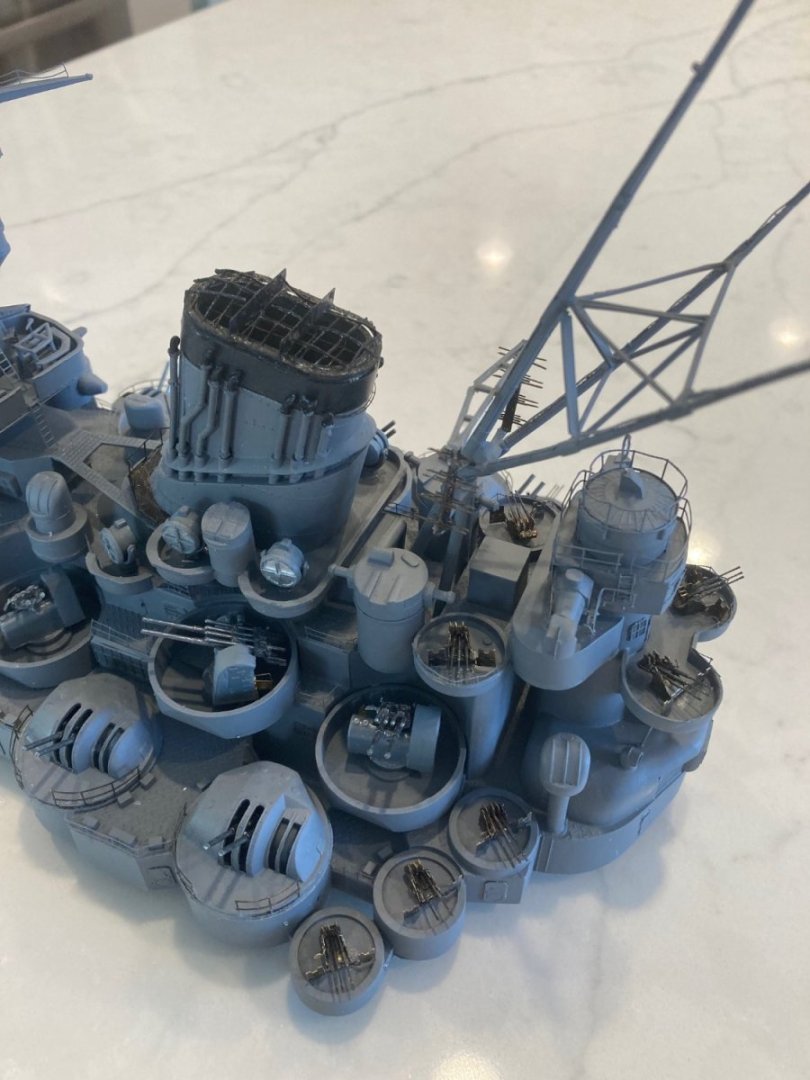
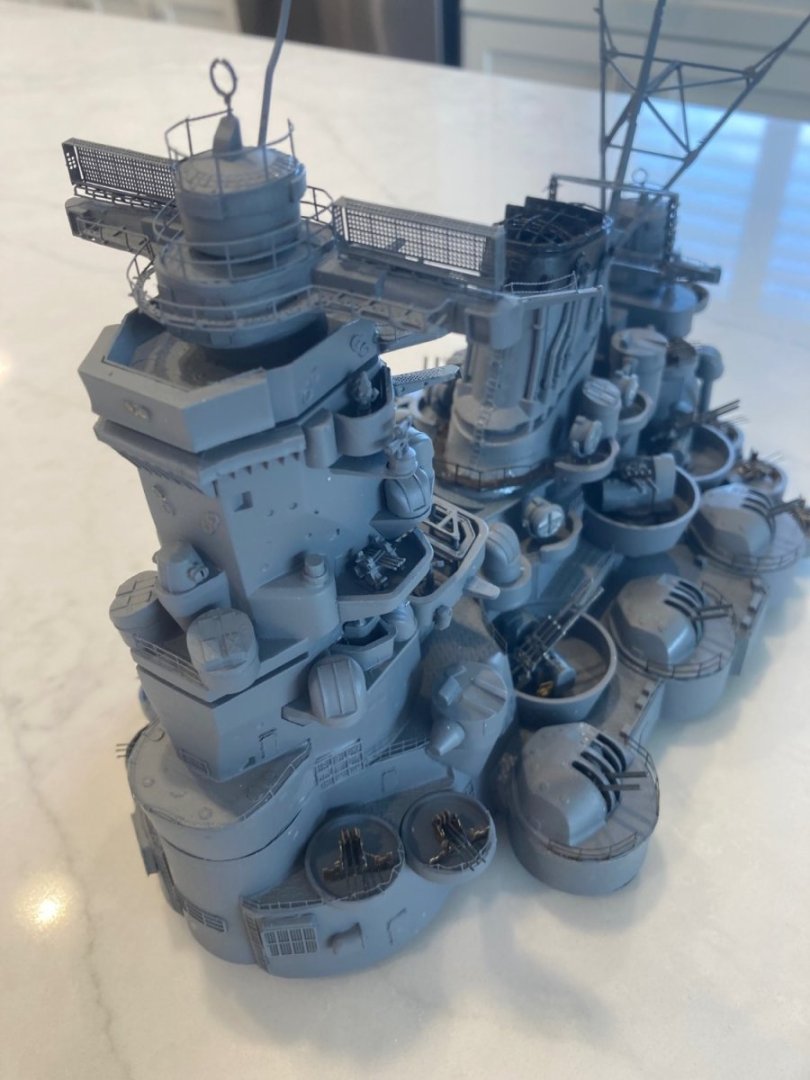
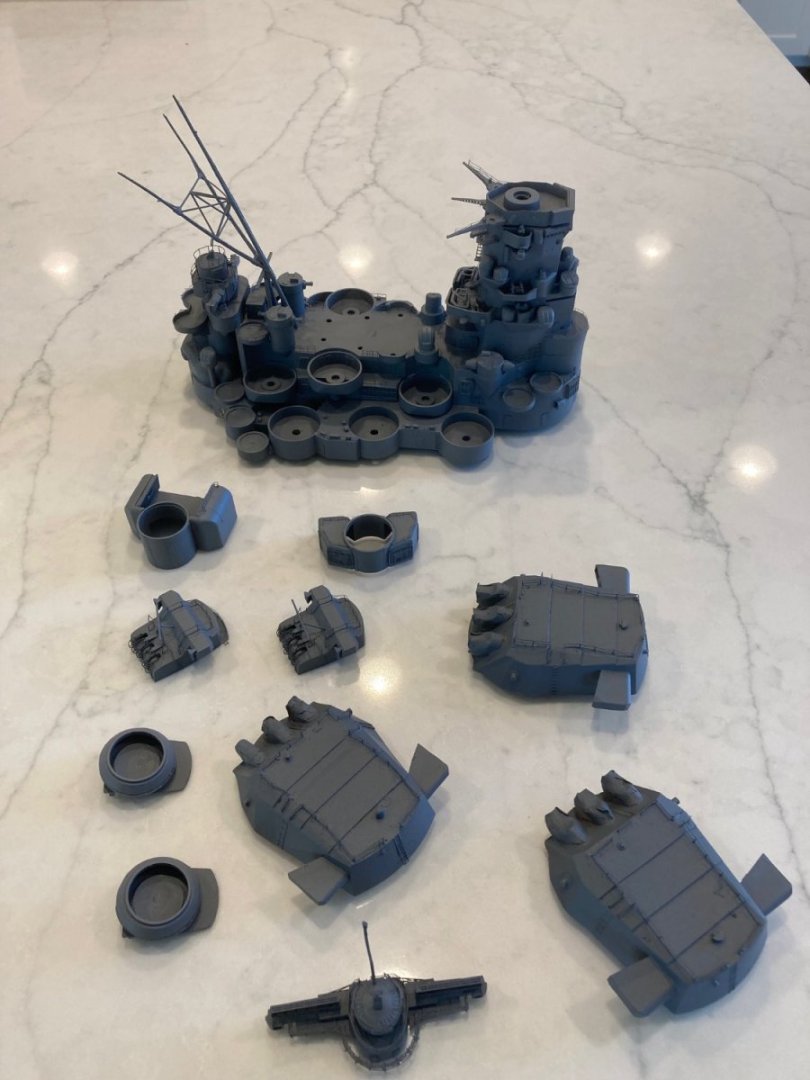
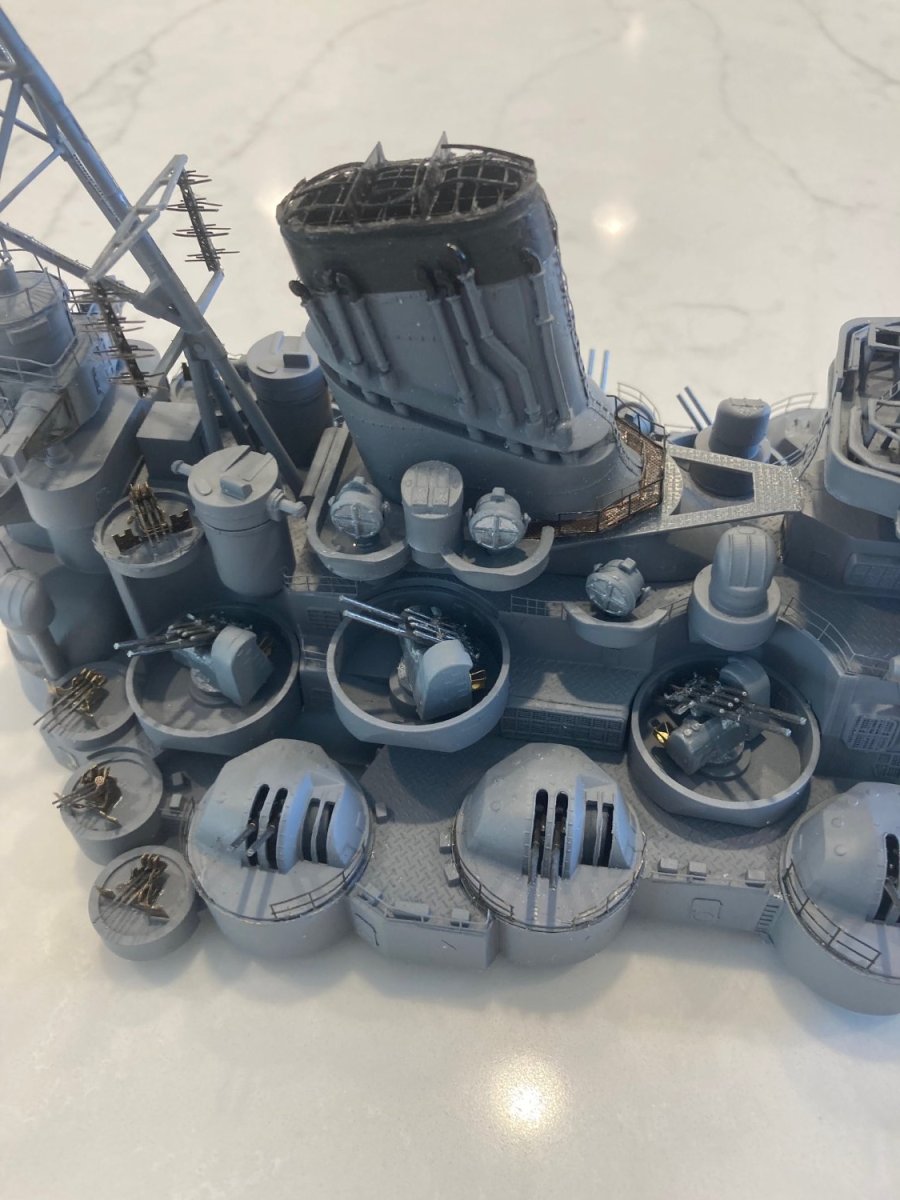
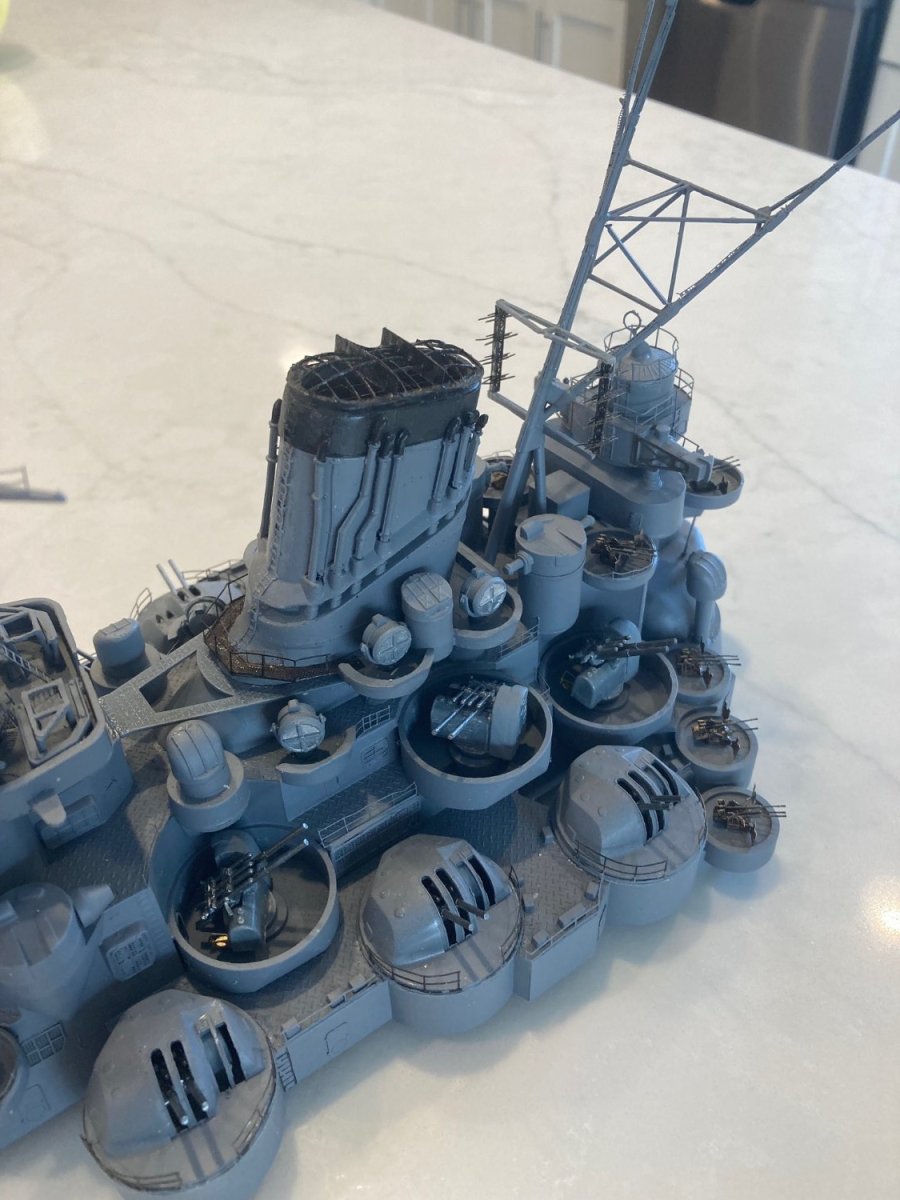
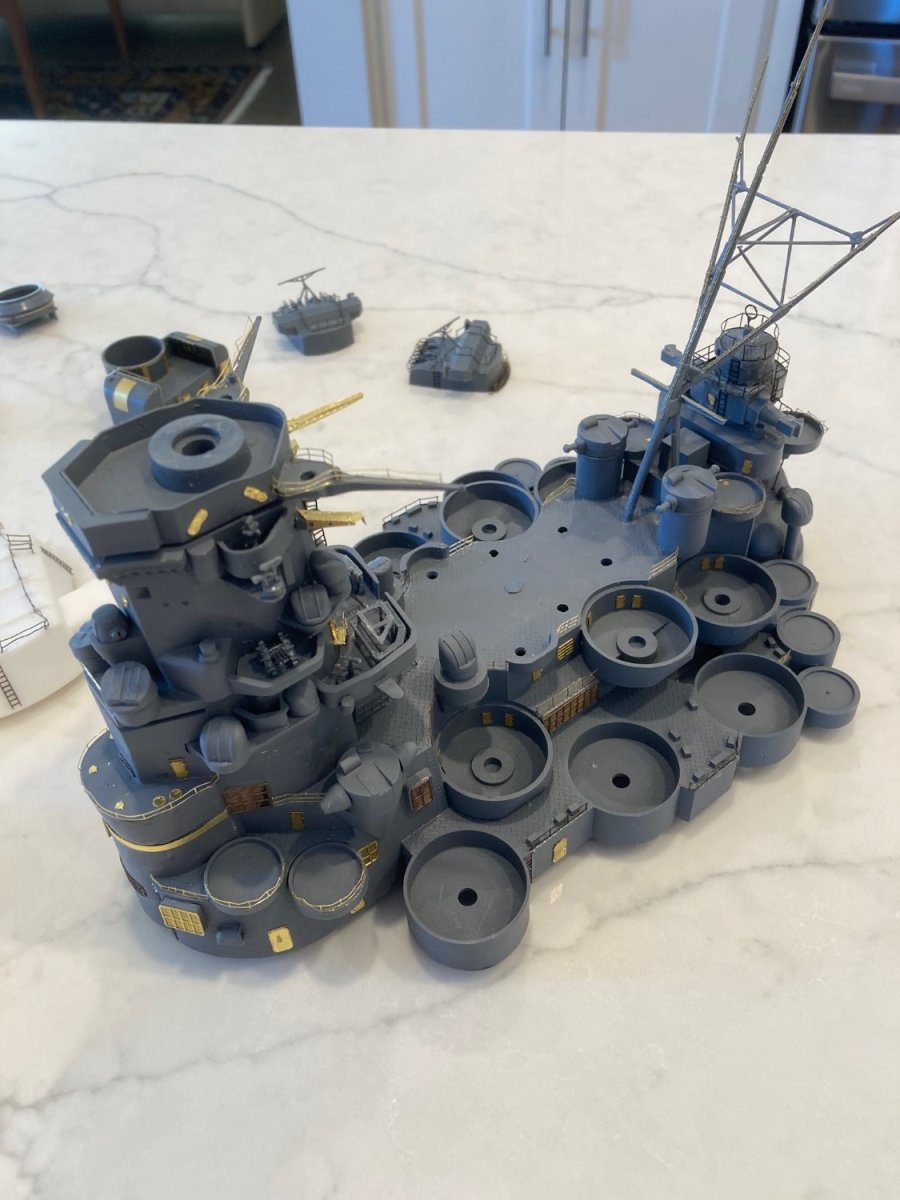
Central superstructure more or less complete. Interesting vis a vis Bismarck, Missouri, et. al. Apparently the back blast from the 18" guns was expected to be so severe that everything was consolidated in one central structure that could be tightly closed up. I also note that all the AA guns at the deck level are enclosed, apparently for the same reason. The six "open" 25 mm triple AA guns at the after end of the superstructure were just sitting there. I've since replaced them with the correct enclosed turrets. In case I never mentioned it before, the Nichimo model seems to be the 1945 version of Yamato, which had a lot of differences to the early Yamato in the AA gun deployment. Back to the main hull, next, to complete the rear hanger deck area.


-
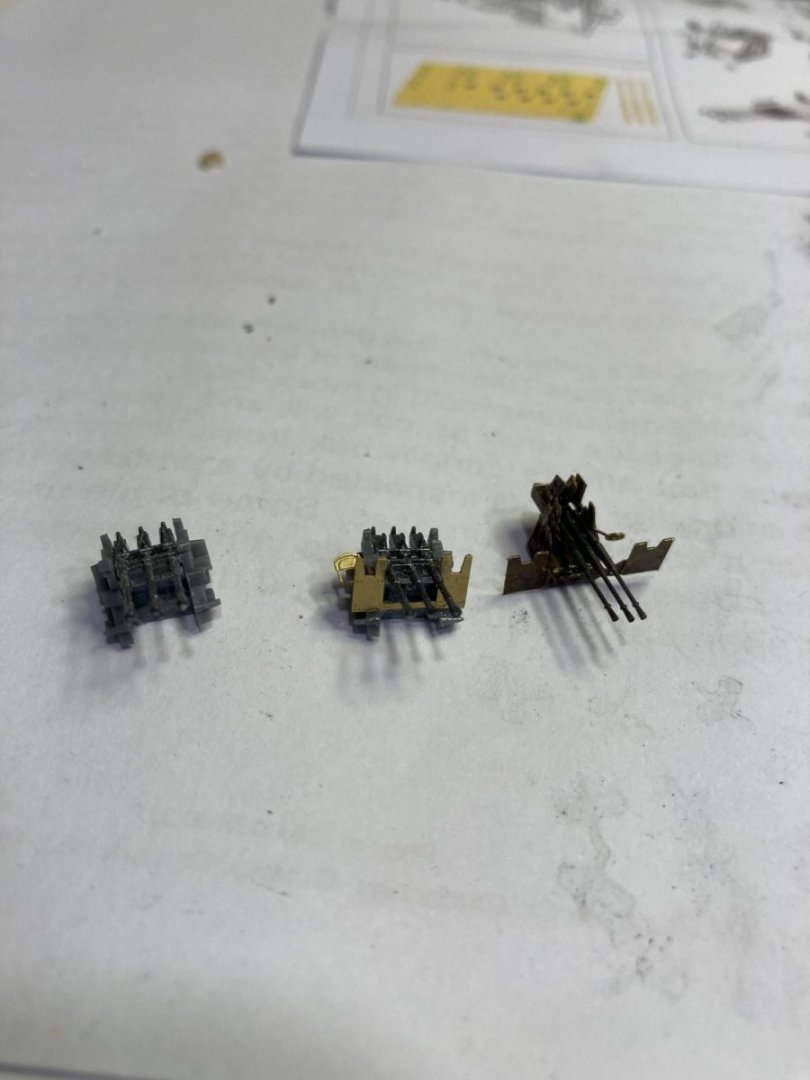
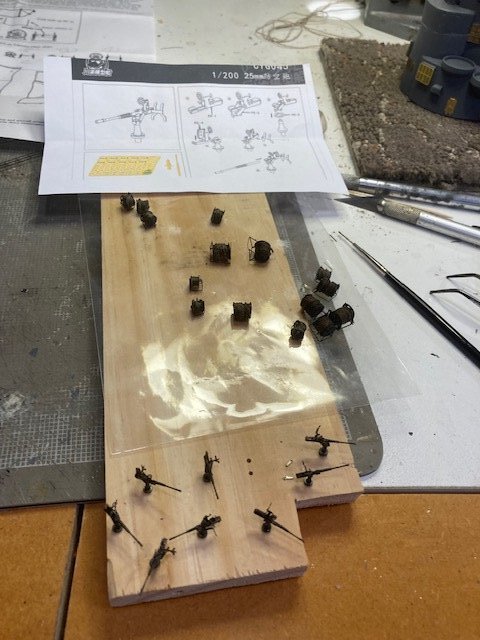
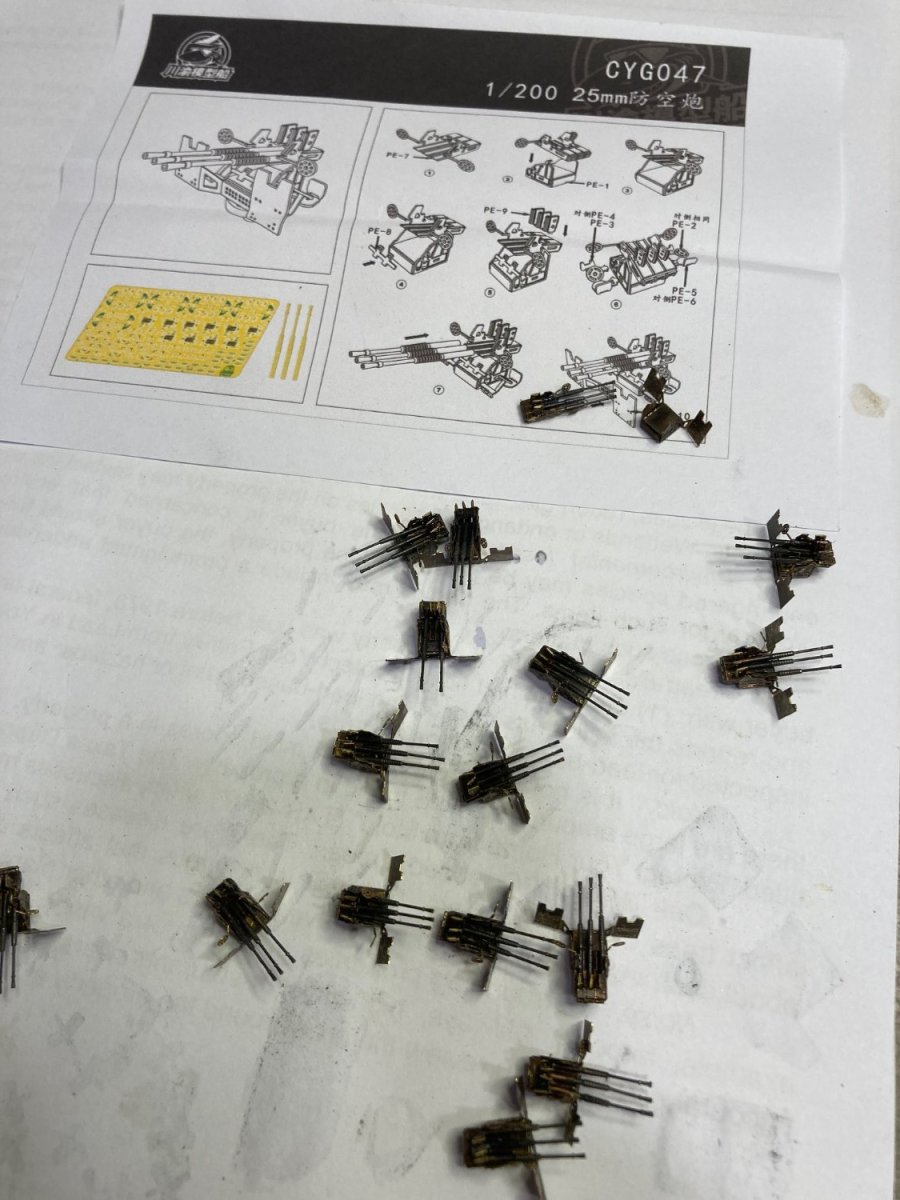
Thanks, Rod. The Flemish Grey has worked well if I remove the PE brass from the sheet before dipping in the (rather expensive) Jax chemical. It works much better on brass parts like gun barrels than sheet brass--probably because of some manufacturing residue on the brass sheets. Haven't found the best method for cleaning the PE sheets, yet. Continued assembling the triple 25mm AA guns from a Chinese e-Bay source. These completely exhaust my skills and require working through a magnifying glass. I've attached a photo of 16 of them assembled as far as I can go. A second photo shows the Nichimo part as per the kit, one with as much of the Fujimi PE detail as I could attach, and one of the assembled from PE Chinese source. Note that some of the included details from the e-Bay kit were not used. Things like foot pedals and gunner seats. They require watch-maker skills I just don't have. A side note. A "new" Chinese seller of 1:200 Yamato parts appeared today on e-Bay with some fascinating parts. They are barrels and blast bags for the Nichimo turrets, fully assembled single and triple 25mm AA guns and the "double" large caliber AA guns. They are "printed" from computer files and appear to be absolutely detailed to a degree I have never seen. They appear to be truly museum quality. The Nichimo gun turrets are excellent, but the barrel detail is completely subjugated to motorization. These new pieces substitute for the poor Nichimo parts completely. For a couple of hundred dollars, you can have a complete gun set that takes second place to nothing. I'm too far along to do this, now. Also, e-Bay now has a reissue of the Gold Medal Models "second" sheet of PE parts for the Yamato. The original vendor sold his masks to another manufacturer a year ago and the second sheet, which has a lot of rear deck detail, was unavailable. It is now. Once again, I'm too far along to add these details, but I would have snapped them up at the outset. My observation is that these two sheets of 1:200 Yamato details from Gold Medal Models are the best way to go for builders of the Nichimo kit. The Fujimi PE details are far more detailed, but intended for the Fujimi superstructure parts--plus they are far more detailed than my modeling skills will accommodate. The GMM PE is for the Nichimo kit parts and the level of detail is more suited to my skill level

-
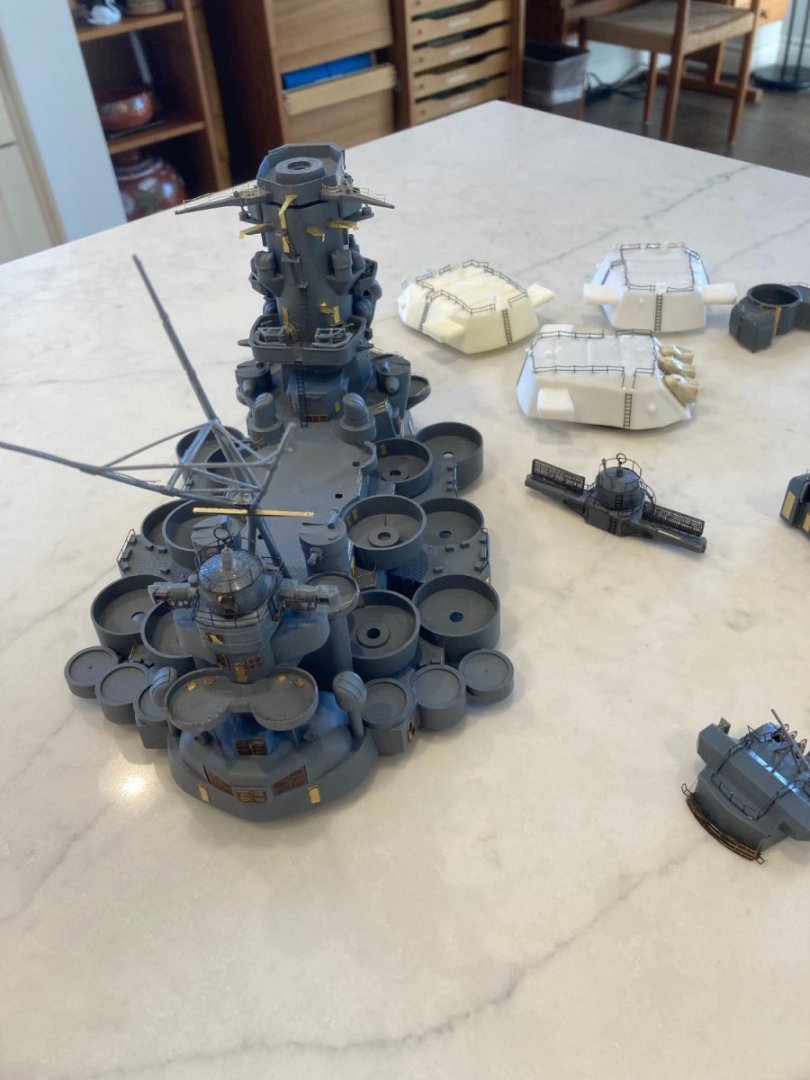
Done as much of the Fujimi PE as I am going to do on the superstructure. Picture shows the various pieces. It is a sunny day and little wind for my balcony "paint booth" so I got out the old rattlecan and painted them. I'll let the paint harden off while I work on the PE triple AA guns--all 18 of them.


- 95 replies
-
- 10
-
-

-
Been diverted by setting up Atmos in my TV room. Picture of some parts after use of Jax Flemish Gray. Note. Not so successful when doing whole sheets. Seem to need to remove parts from the brass sheet. This stuff works great on Stainless Steel, too. Ask my kitchen sink how I know.
-
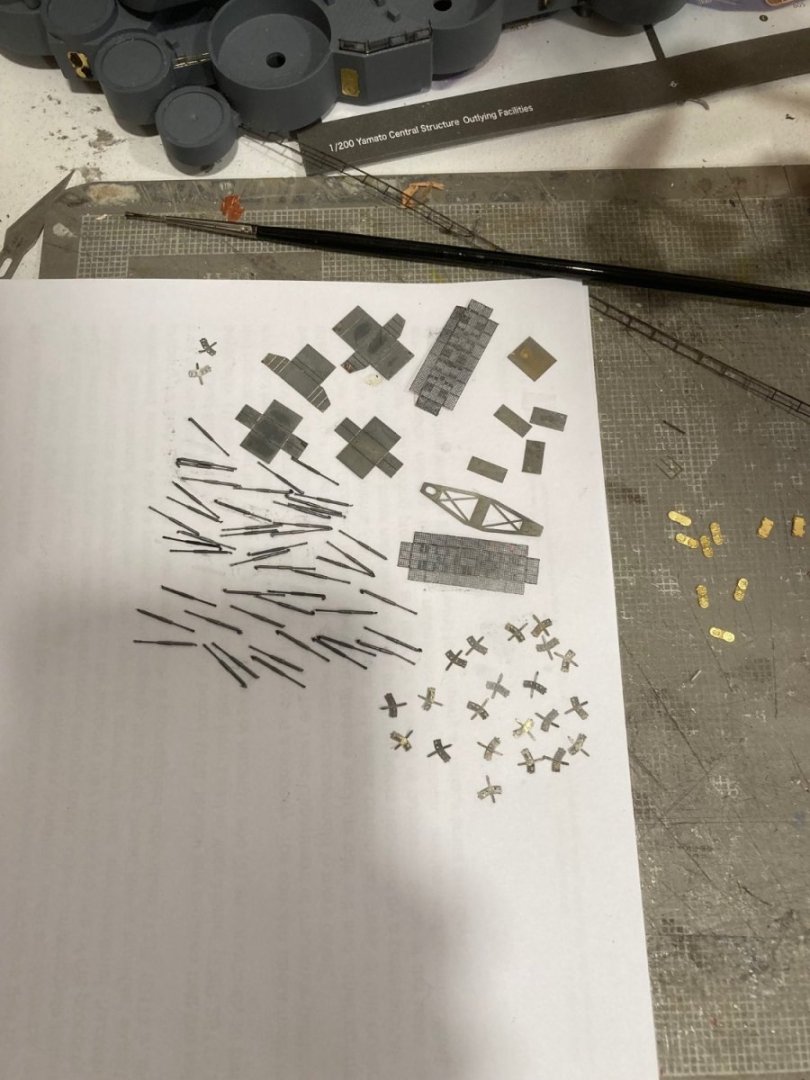
One thing that has done a lot to improve my assembly of the little things is to find ways to make up for not having a third hand in the middle of my forehead. I have found that the little cups for CA really need to be kept from skidding around. Micromark has a holder for their little red cups, but I've found that it's difficult to reuse the micro mark cups after the CA sets. The CA sticks to the red cups. I found some clear plastic cups on the Walmart site for holding eye makeup adhesive that releases the cured CA very easily. I'm using the shown tool to hold the cups still. It also lets me tilt the cup slightly allowing me to put less CA in the cup and still get a "load" on the applicator tool.
-
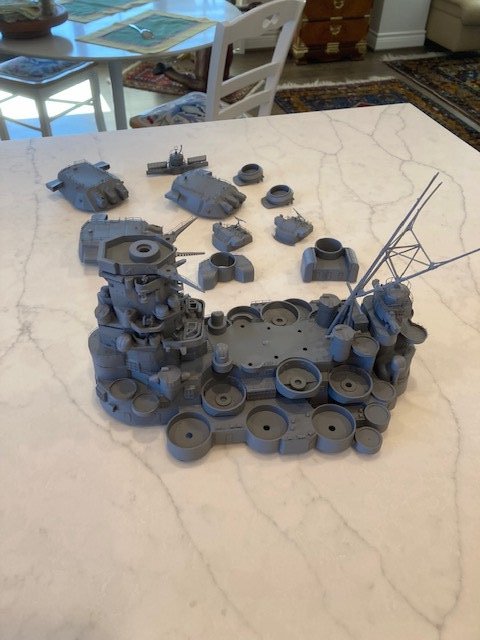
The paravanes from the Fujimi PE #201 (Central Structure) package. Much better than the plastic pieces in the kit. These Fujimi PE sets are fantastic for detail, but as I have mentioned before, they are for the Fujimi plastic superstructure parts rather than the Nichimo kit parts--and they are different. Many of these PE parts are VERY small and exceed my skill level, but those that I can use are really good. For instance, the hatches all are in two sections with a hatch surround that is bent over behind the actual hatch (which as hinge and handle details) giving a third dimention. The paravanes were colored with my initial go at "Brass Black", which is too black plus it really is not a tightly adhered chemical coating. It tends to rub off with handling. The Flemish grey is a much better color AND it seems to be an actual substrate on the brass which does not rub off. It can be scratched, though. I'm about to begin the PE details on the central superstructure--of which there are many--and I'll be some time at this before another post.
-
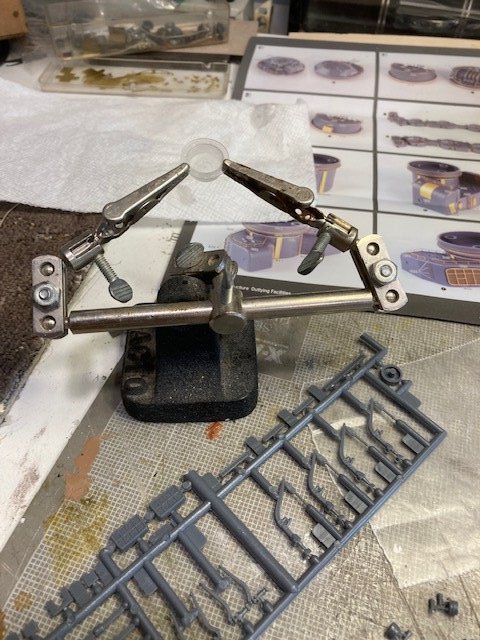
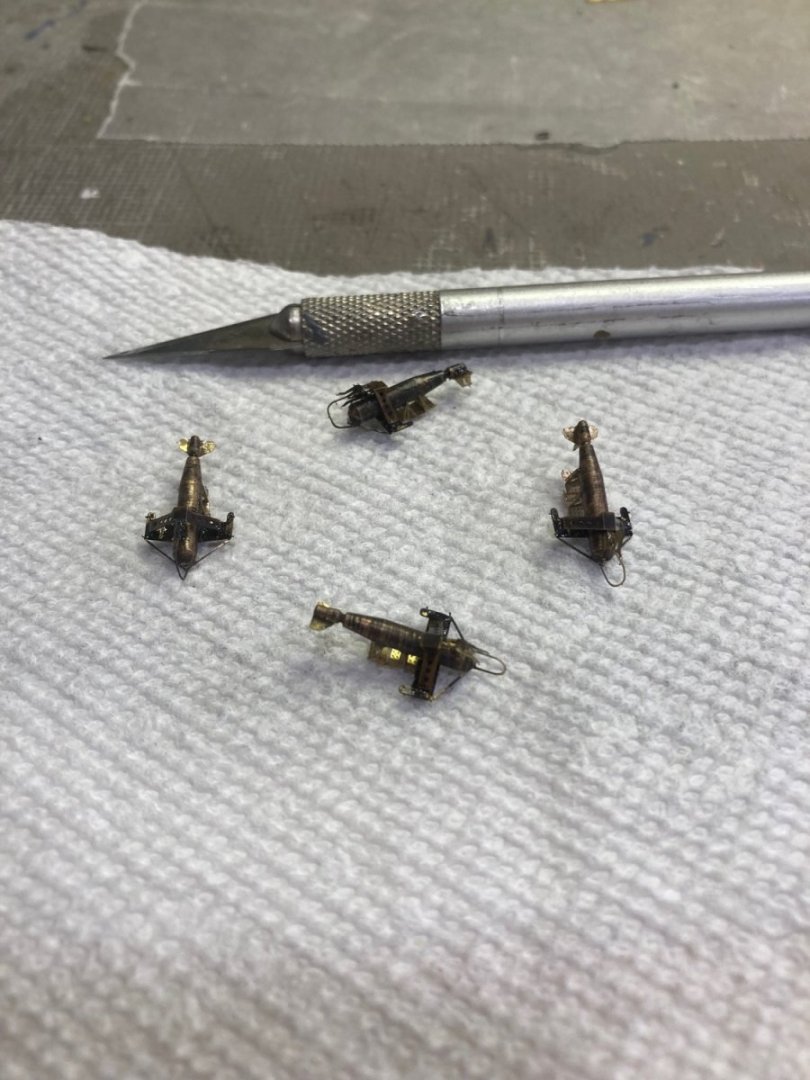
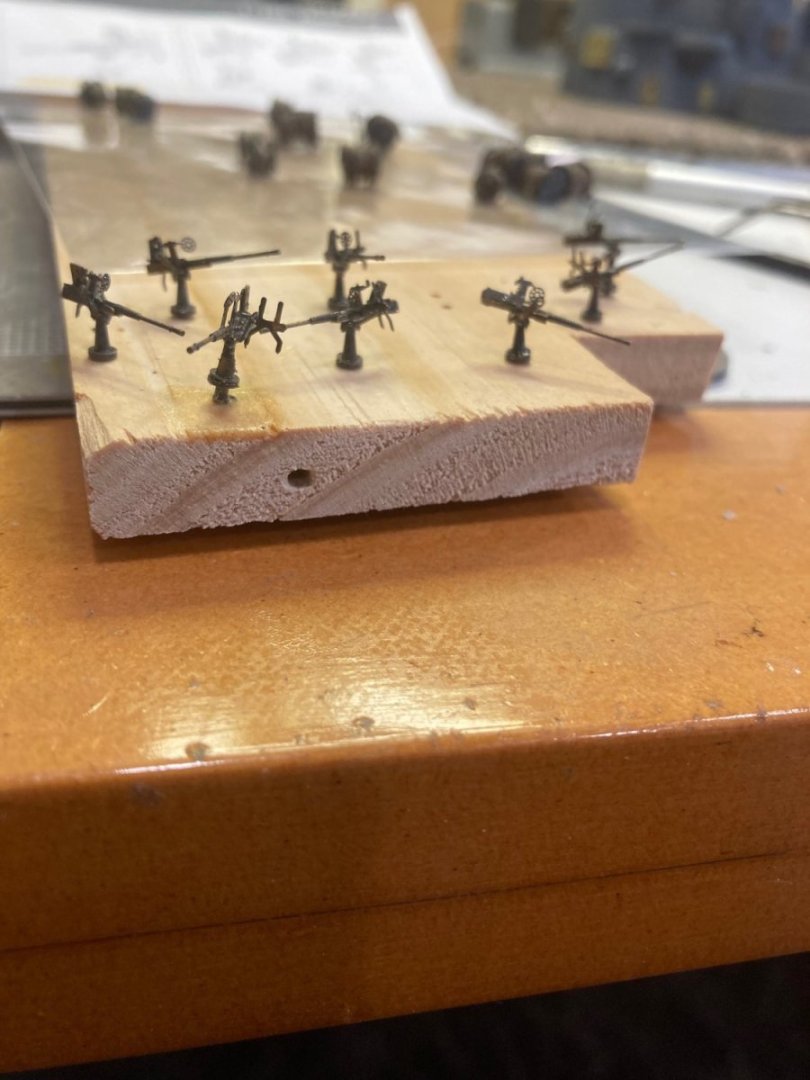
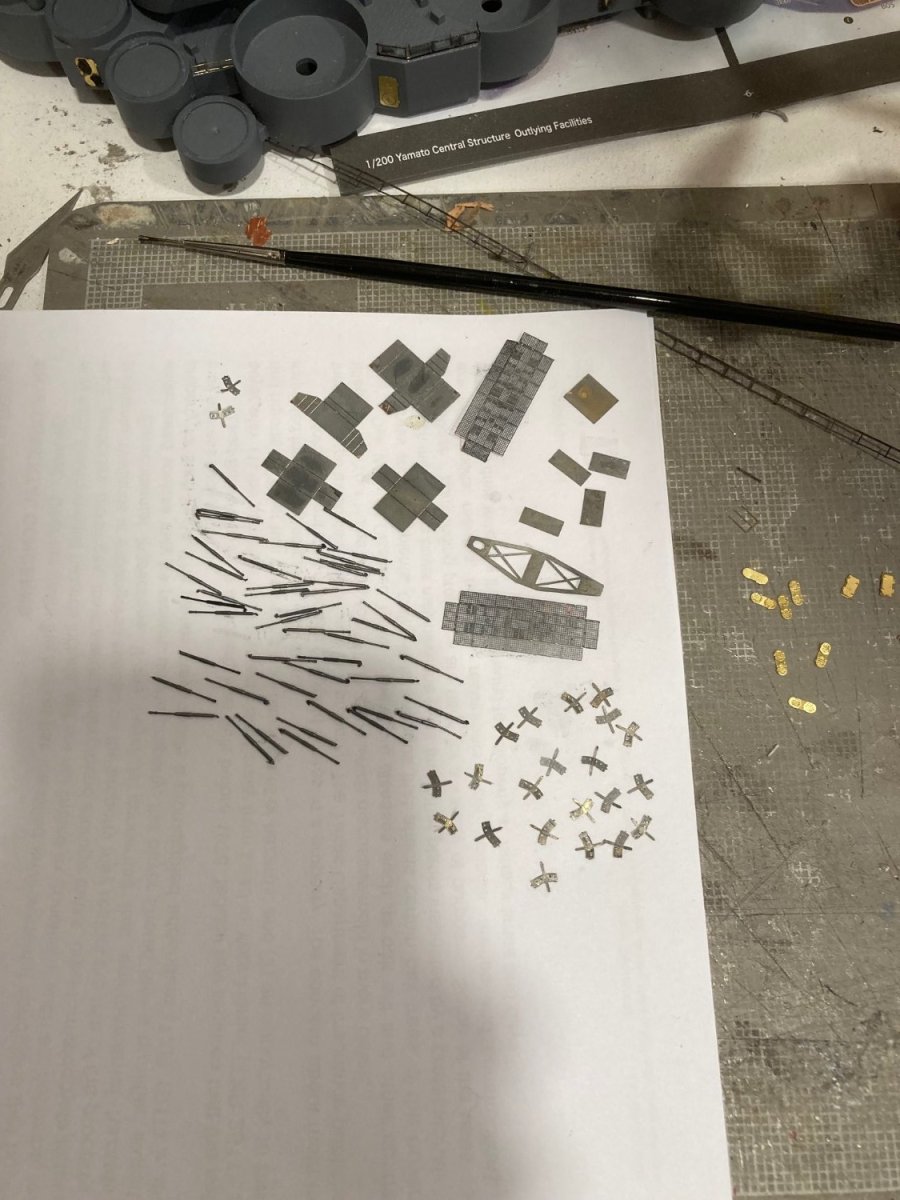
Decided to do a little test on not painting fine details. I used the Flemish grey to color the frames for the Tom's Modelworks hose reels and the single 25mm AA guns from one of the Chinese vendors on eBay. The coloring came out to be a beautiful soft grey (note that the 25mm gun PE sheet had a clear sheet of plastic on both sides that had to be removed). The pictures show the post-coloring PE sheets and the second two the assembled pieces. No painting will be necessary and no attendant paint build up. I could not have assembled the 25mm guns a few months ago, but my assembly techniques continue to improve. Note that the "carpet monster" ate some of the magazines supposed to be on the breech mechanism. I doubt that the magazines were loaded until the guns were about to be used, anyway. I highly recommend the PE detail sets for the MK 96? single and triple AA guns that one can get on eBay. These guns are in very prominent positions on the model and well worth the effort over the plastic pieces in the Nichimo kit, if you don't load them up with paint that obscures details. I've just ordered a set of the triples. I had some reservations when I ordered the singles back before I started construction because of doubts I could actually assemble them.
.thumb.jpg.7c527dee00ae1735a318b66738cdff00.jpg)
-
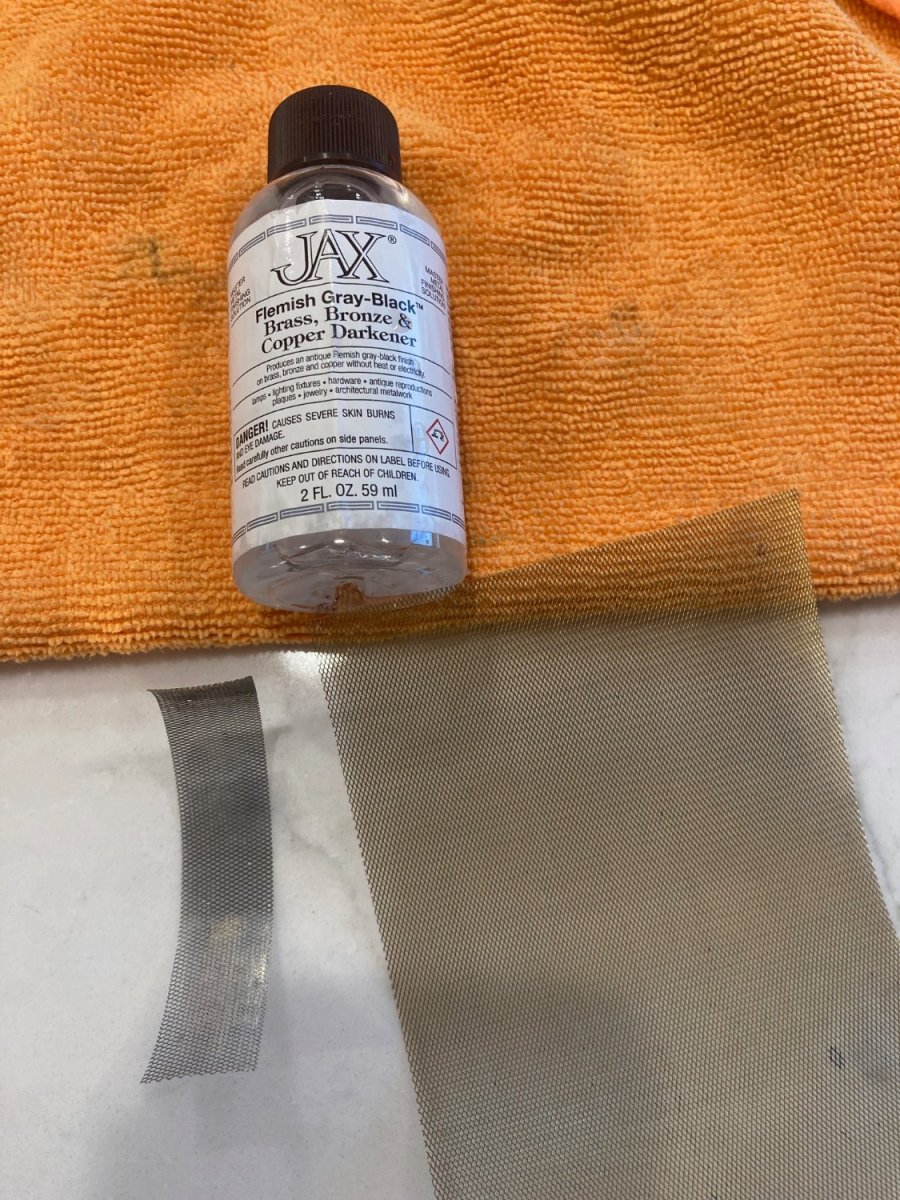
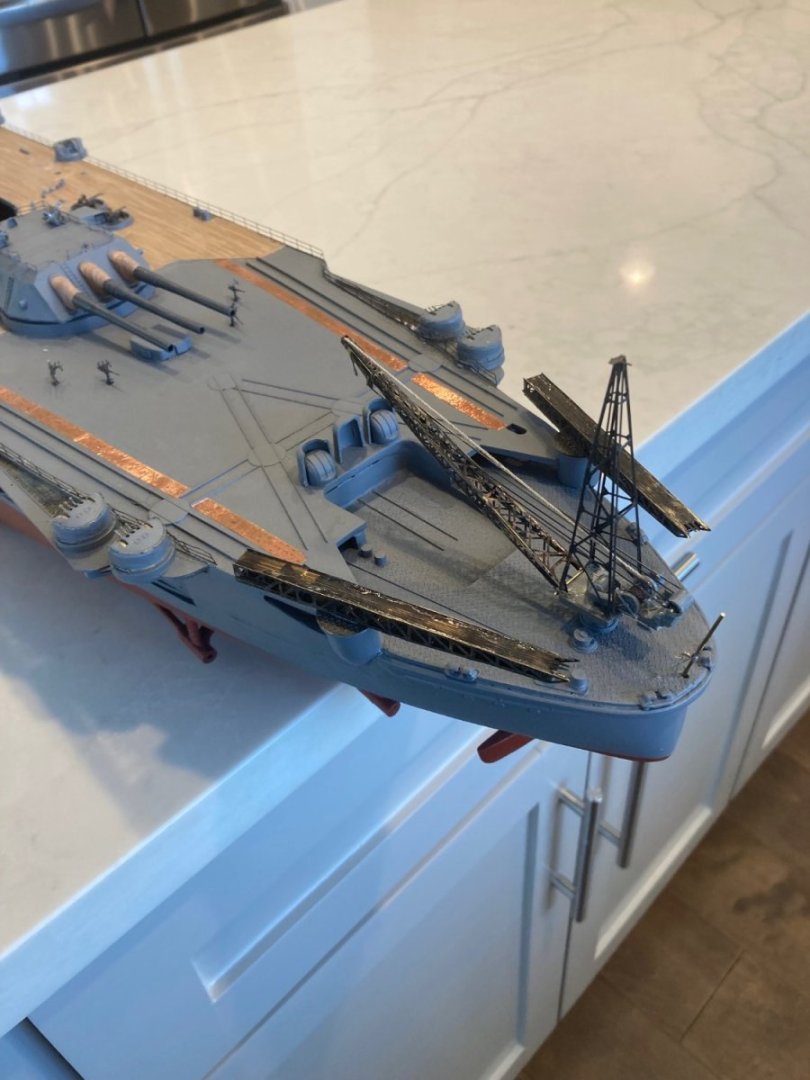
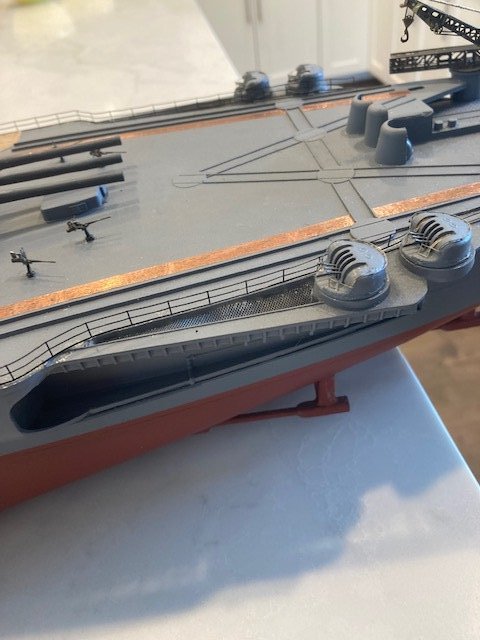
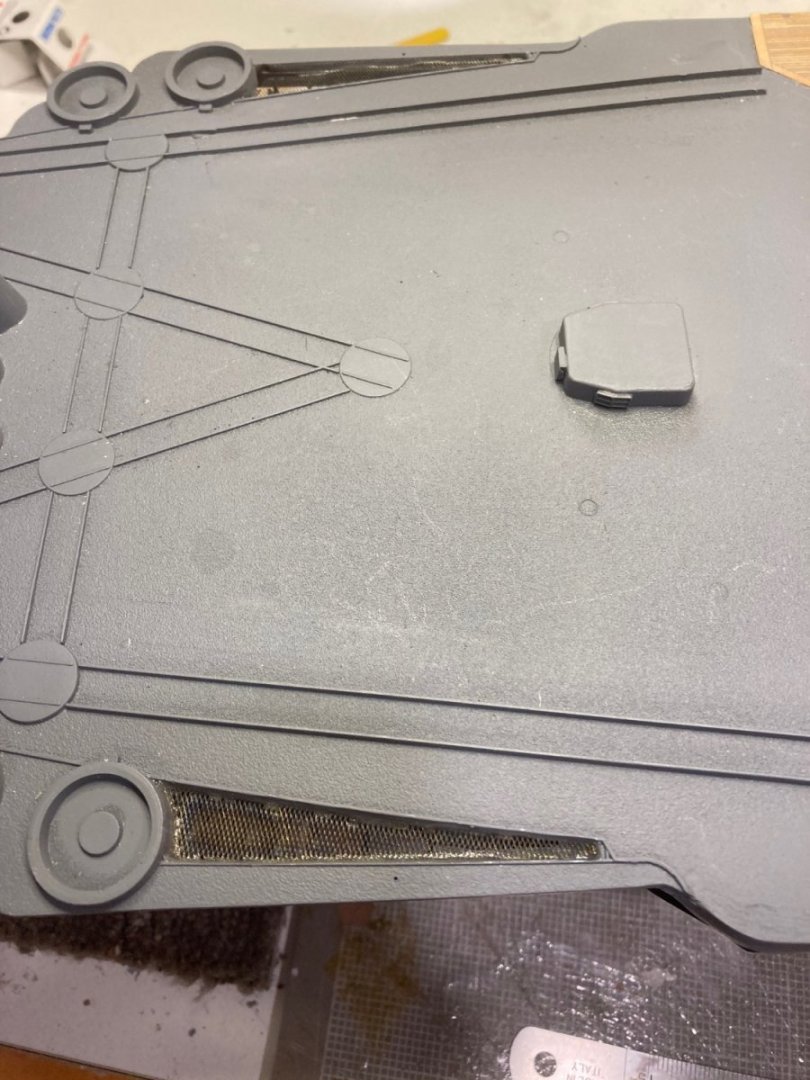
At the sides of the flight deck there are ventilation panels which the Nichimo kit simulates with a rather crude corrugation. I cut this out and replaced it with some brass screen wire of a very fine gauge (model RR supplies). I also found a chemical treatment that produced "Gray" on brass. It is "Flemish Gray". It is more expensive than "bress black" but does produce a more usable color. It is less expensive in larger bottles. I started out doing a whole sheet of PE with the brass black, but some experience says that it would be smarter to limit the use of this chemical treatment to PE pieces that will stand apart from the main structure, such as cranes, truss structures such as aircraft launchers, railings next to wooden decks and radar antennas. If the PE is part of a superstructure that you are going to spray later, one may as well paint the PE at the same time--things like hatches. But, if you are going to wait until the end to put PE railing next to wooden decks, where it's not possible to spray gray paint without masking the wooden deck, I think that pre-coloring the railings chemically with gray could be a way to go. For best results, however, one needs to immerse the PE parts in a bath of the Flemish Gray chemical to get the most even results. I'm going to try this method on my next model--probably Enterprise (CV-6). The second picture shows the chemical, the brass mesh sheet, and the colored piece after chemical treatment and before I cut out the inserts for the flight deck. The mesh is transparent so that the support structures below the flight deck show through. Paint "might" have greatly obscured this.


.jpg.f3209c217516279a9218dabcea39b9a8.jpg)