


Jared Grady
-
Posts
17 -
Joined
-
Last visited
Content Type
Profiles
Forums
Gallery
Events
Posts posted by Jared Grady
-
-
On 12/26/2021 at 7:57 AM, Dave_E said:
Excellent Start!
You’re way beyond “start” actually. 😀 Did you make all the filler blocks to aid in the first planking? Do the instructions say anything about this or is the a model ship builders trick?
Thanks Dave. The instructions say to use filler blocks for one set of bulkheads on the bow and stern but most of the builders who have done this one have recommended doing filler blocks for the first 2-3 bulkheads to aide in the planking process. The pack of balsa wood blocks I bought had plenty of material to do three sections at both the bow and stern.
- USNCHief013107, Oldsalt1950, Dave_E and 1 other
-
 4
4
-
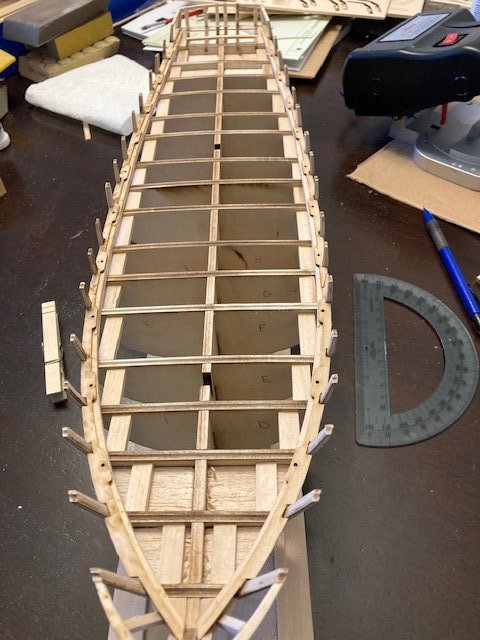
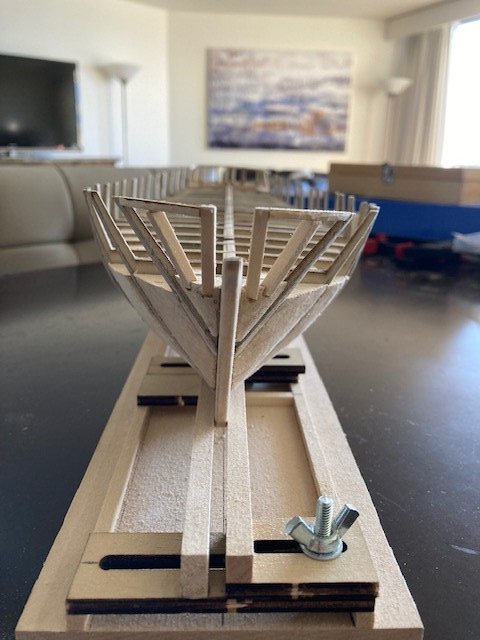
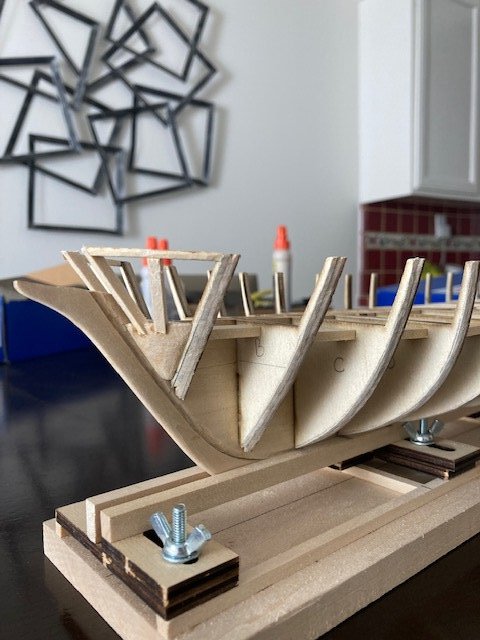
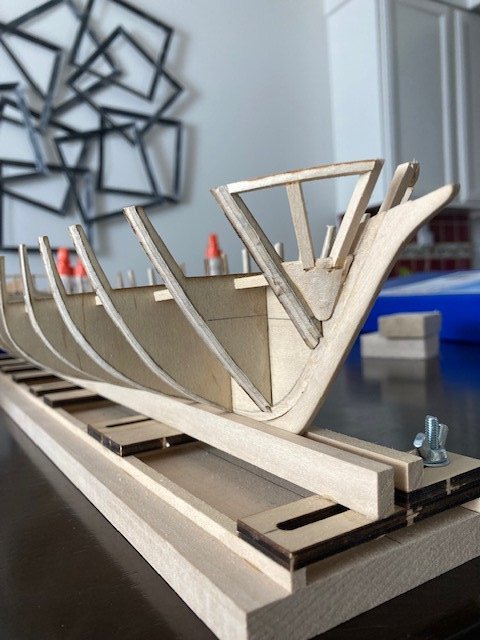
Well, it's been a few months but I finally got back to working on the Niagara. I sanded down the bow and stern bulkhead fillers a little more and they are now aligned much better to the natural flow of the hull. I think I have them about where I want them to be but will double check it again once I get to the hull planking stage of the build. I installed the planksheer and the waterway this week. As others have noted in their build logs, the forward planksheer pieces have too shallow of a curve and don't quite reach the bulkhead timbers in a few places. I glued some scrap pieces of planking from a previous build to the outside edge in the problem areas to fur it out a bit, then beveled and sanded the outside edge so it would fit flush to the bulkhead timbers.
The next thing I need to do is add some additional scrap wood to the outside edge of the waterway so that it's flush in line with the outside edge of the bulkhead timbers. I've also been debating on how I want to approach the scrap wood pieces that need to be added to the sides of the mast slots. I've decided I'm just going to glue the scraps flush to the sides of the keel as is, which will effectively create rectangular mast slots. Then when it's time to carve the masts, I'll carve the bottom inch into a rectangular notch that matches the slot.
- Tom E, Oldsalt1950, GrandpaPhil and 5 others
-
8
-
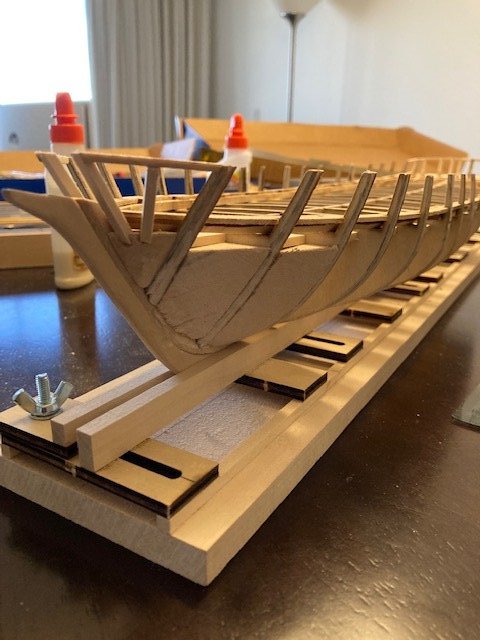
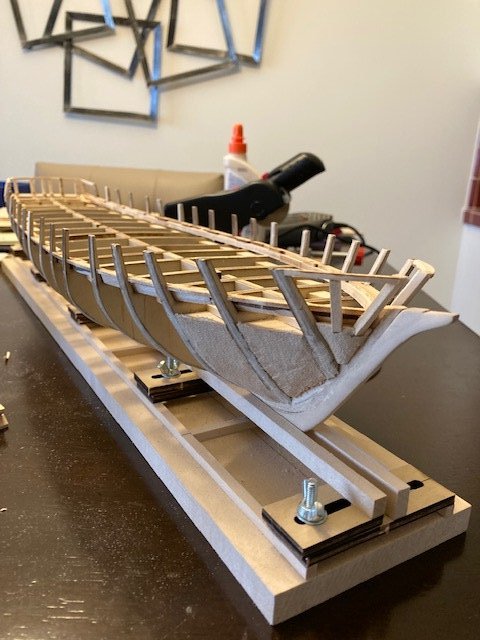
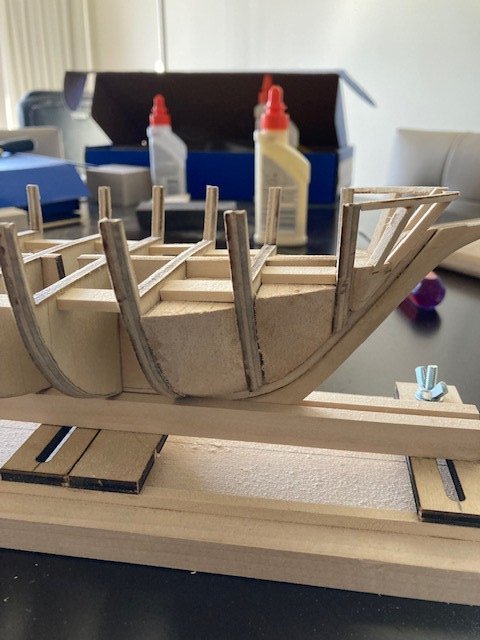
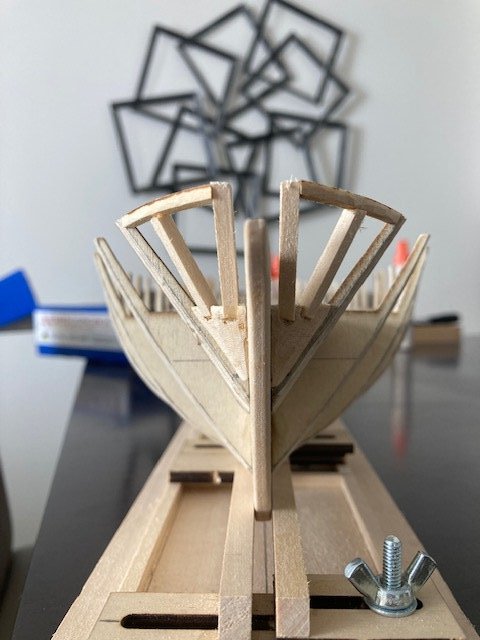
I finished up the rest of the fillers for the bow this morning. I'm still noticing some high spots on them and a couple spots on the stern ones that need more sanding. But I already put the dremel away and vacuumed up the saw dust from the kitchen table. I live in an apartment in Los Angeles so don't have a dedicated workshop unfortunately. I'll go back to those next time I need to do some sanding.

-
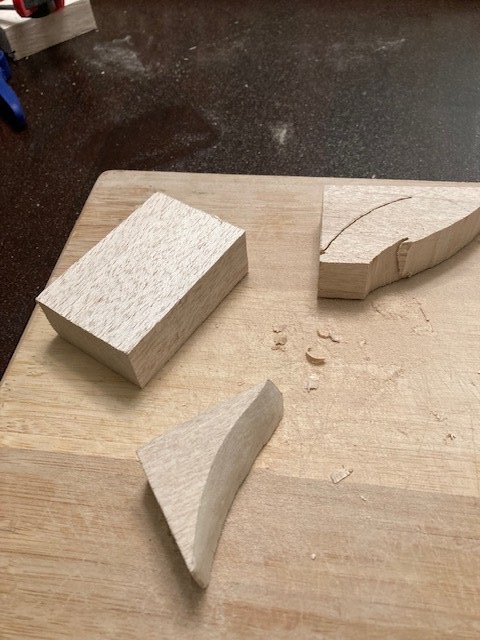
I made and installed the additional stern filler blocks. I decided to fill out two additional spaces between bulkheads. I made these fillers from balsa blocks and started by trimming the block down to the width of the space and cutting the rough shape with my coping saw. I then used the sanding drum on my dremel to shape it to the curvature of the hull. I noticed a high spot on the last one on the port side after I glued it in but was able to sand it down a little more with the dremel to correct it. The balsa wodo was much easier to work with than the bass wood that came with the kit. I plan to use the same technique to do two spaces at the bow next.


- Duanelaker, CiscoH, Cathead and 4 others
-
7
-
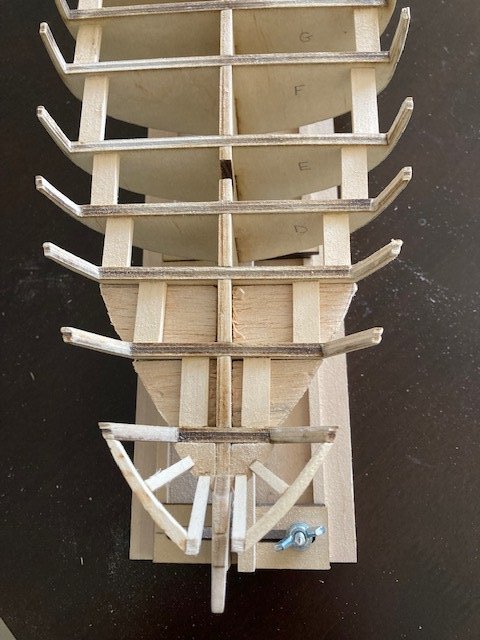
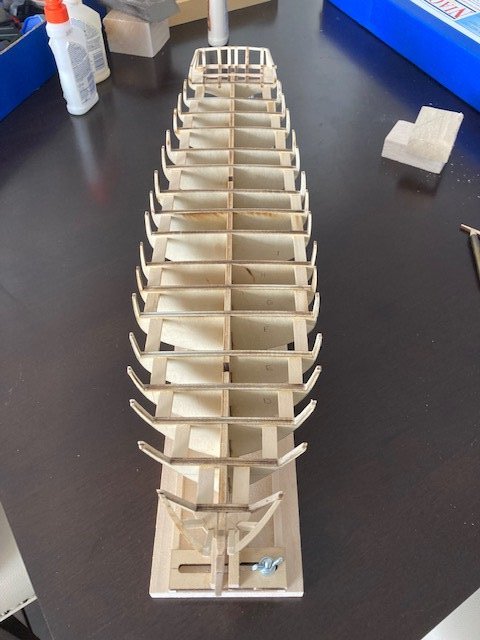
So far I've assembled the keel, cut the rabbet, and installed the bulkheads. I've also installed the bow and stern blocks, worked on the transom framing as well as the knightheads and forward timberheads. I've seen several people recommend adding additional filler blocks between the last couple of bow and stern bulkheads so I'm planning to work on that next.


-
Good morning - I decided to get into model ship building during the pandemic when everything was shut down. I completed the 18th Century Armed Longboat by Model Shipways, and now I've decided to try my hand at the Niagara. I wish I had discovered the site earlier as I've seen a ton of great info and build logs here that would have helped me avoid some issues on the Armed Longboat. I'm a few steps into the Niagara already so I apologize for starting the build log a bit late.
- David Lester, GrandpaPhil, ccoyle and 2 others
-
5
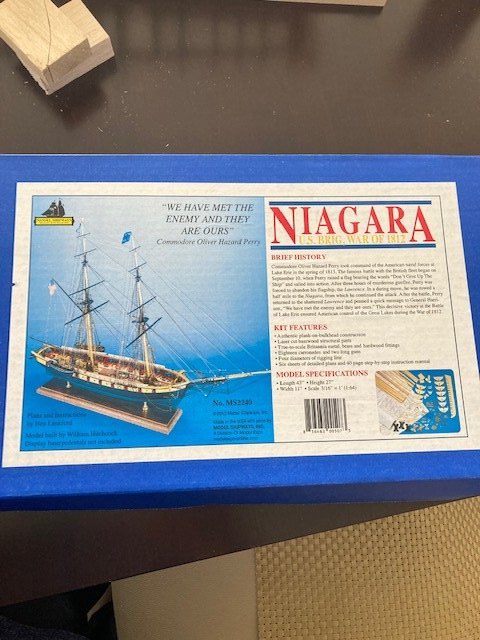
USS Niagara by Jared Grady - Model Shipways - 1:64
in - Kit build logs for subjects built from 1801 - 1850
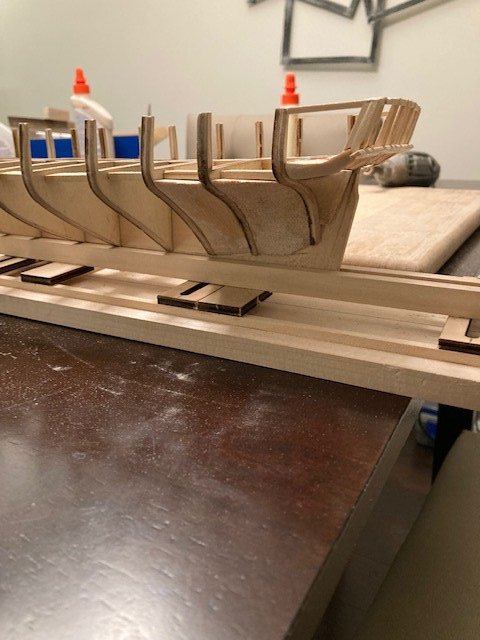
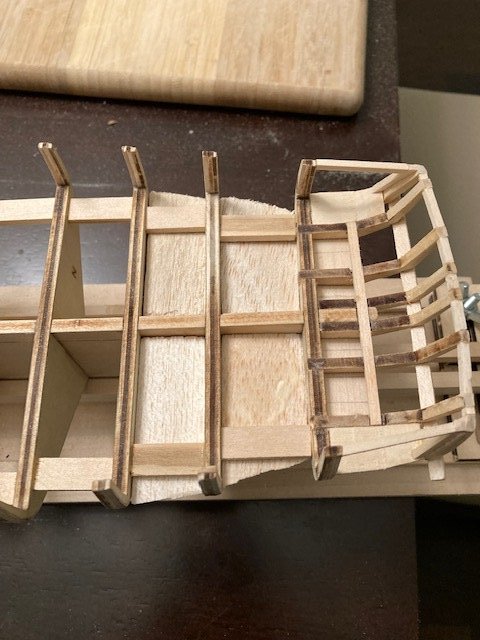
Posted · Edited by Jared Grady
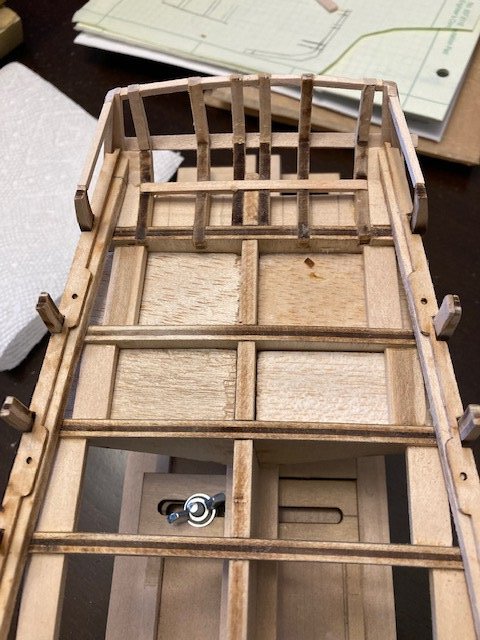
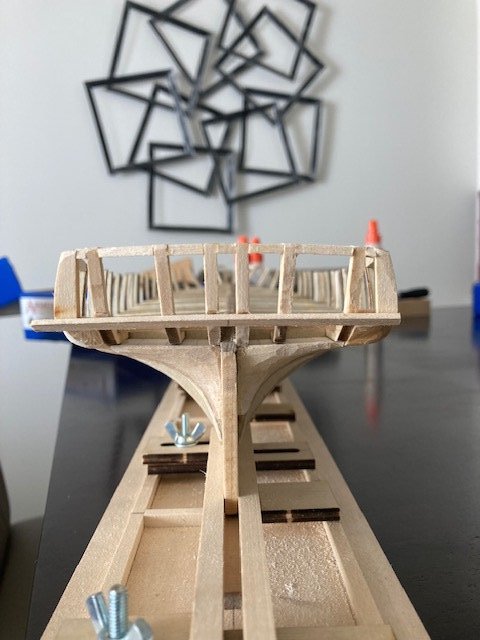
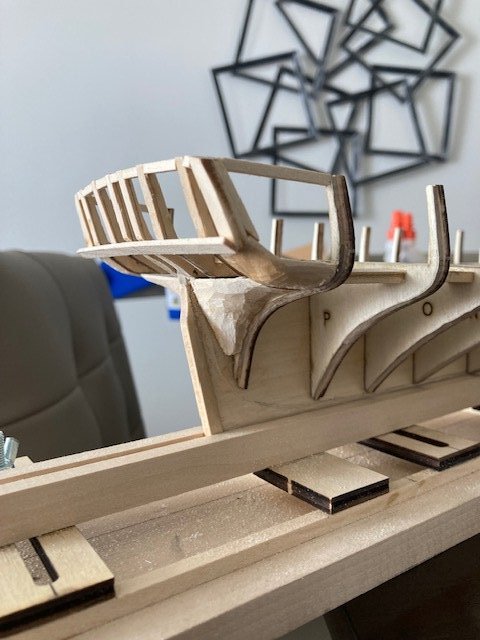
I finally had some free time to get back to the Niagara build. I had to add some small pieces of wood to the top of all of the top of all the timberheads to get them up to the correct height and I then installed the main rail. I decided to go ahead and make the cutouts for the catheads as I installed the chock rail. I skipped drilling the holes for the chock rail for the rigging for now. I've seen in other modeler's build logs where they waited until later in the build to decide on the number and placement of the holes so I'm going to take that approach. Finally, I got most of the framing done for the gun and sweep ports on the starboard side. I haven't done the forward gunport closest to the bow yet. The bow curvature is making that one a little more complex so I need to think through how to approach that a little more. The plans aren't completely clear on how to frame it. The plans show the framing done at an angle relative to the timberheads but I think that might just be the result of trying to show a 3-dimensional object on a 2-dimensional drawing.