SUBaron
-
Posts
197 -
Joined
-
Last visited
Content Type
Profiles
Forums
Gallery
Events
Everything posted by SUBaron
-
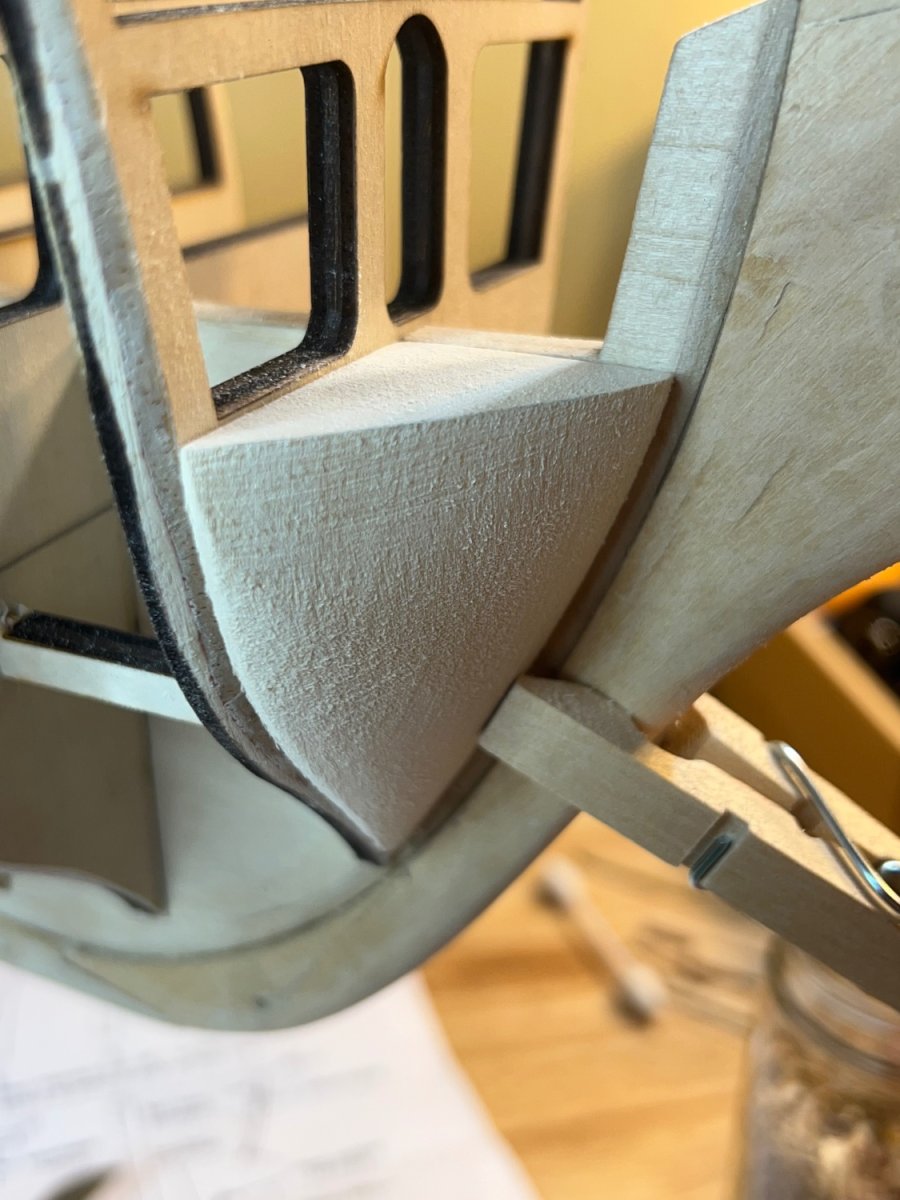
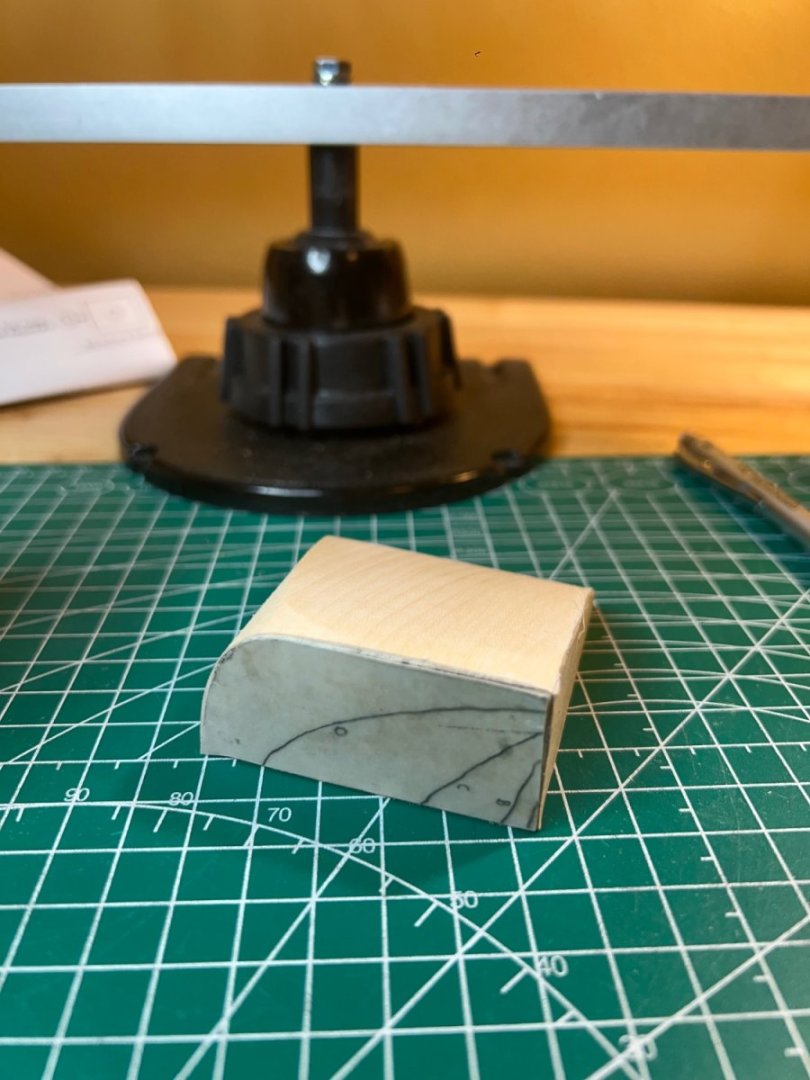
I decided to forego the heavy sanding and went with a cutting blade. It was much faster and pleasant. It’s not a skill I get to use much, so it was fun. I should’ve done all of them this way. A bit more shaping, especially to the bearding line, and the blocks will be complete.


-
1 bow block @ about 98% complete. I’m going to move on to the port side block now. As Geoff M pointed out, the going is faster after learning from the stern fillers. I utilize my rasp more, and the templates much more, making frequent pencil marks to guide the shaping. A word of advice - do not attempt to get some quick work done before guests arrive but after bourbon has begun. The block hit my belt sander and flew clear across the garage. After the second time I decided to call it quits for the night 😂

-
Thanks Geoff - you’re right - these bow fillers are faster and easier! Appreciate the kind words :)
-
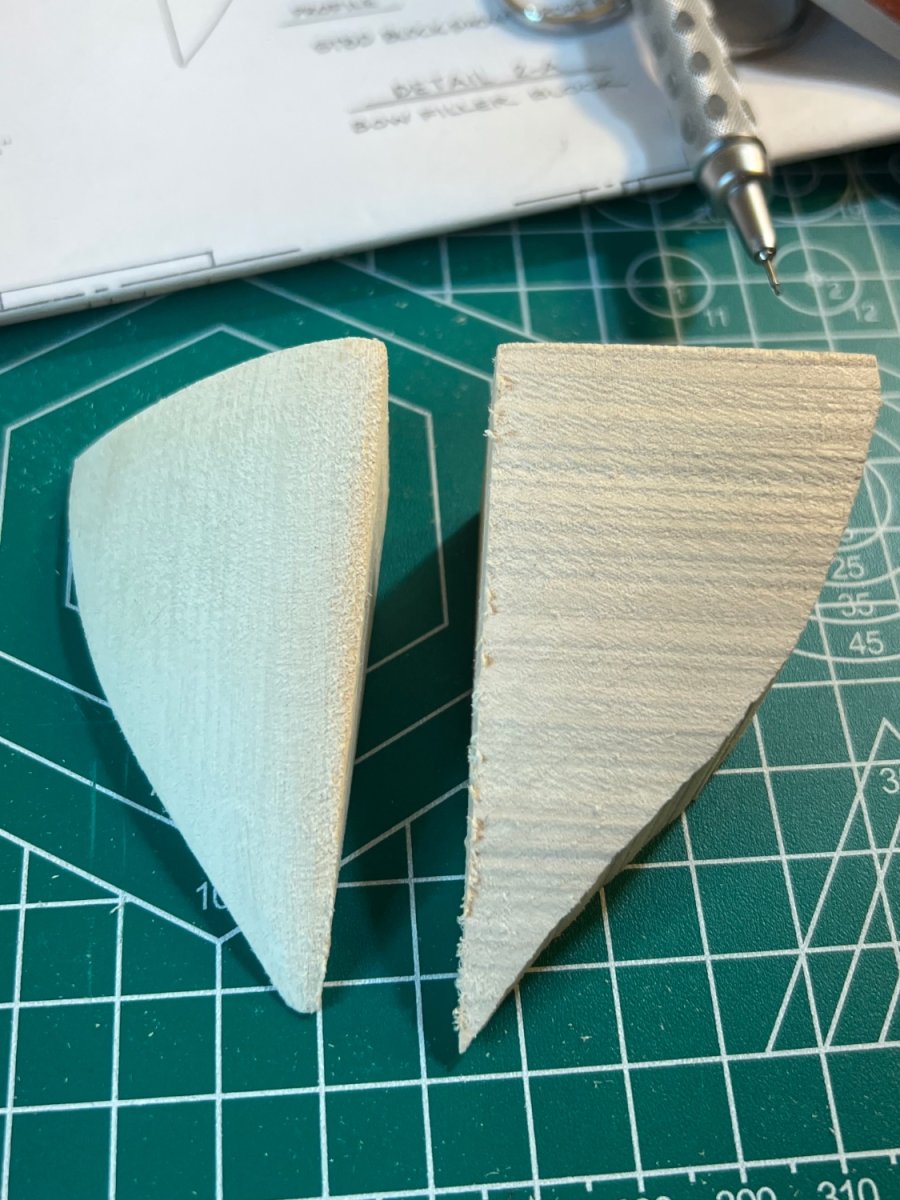
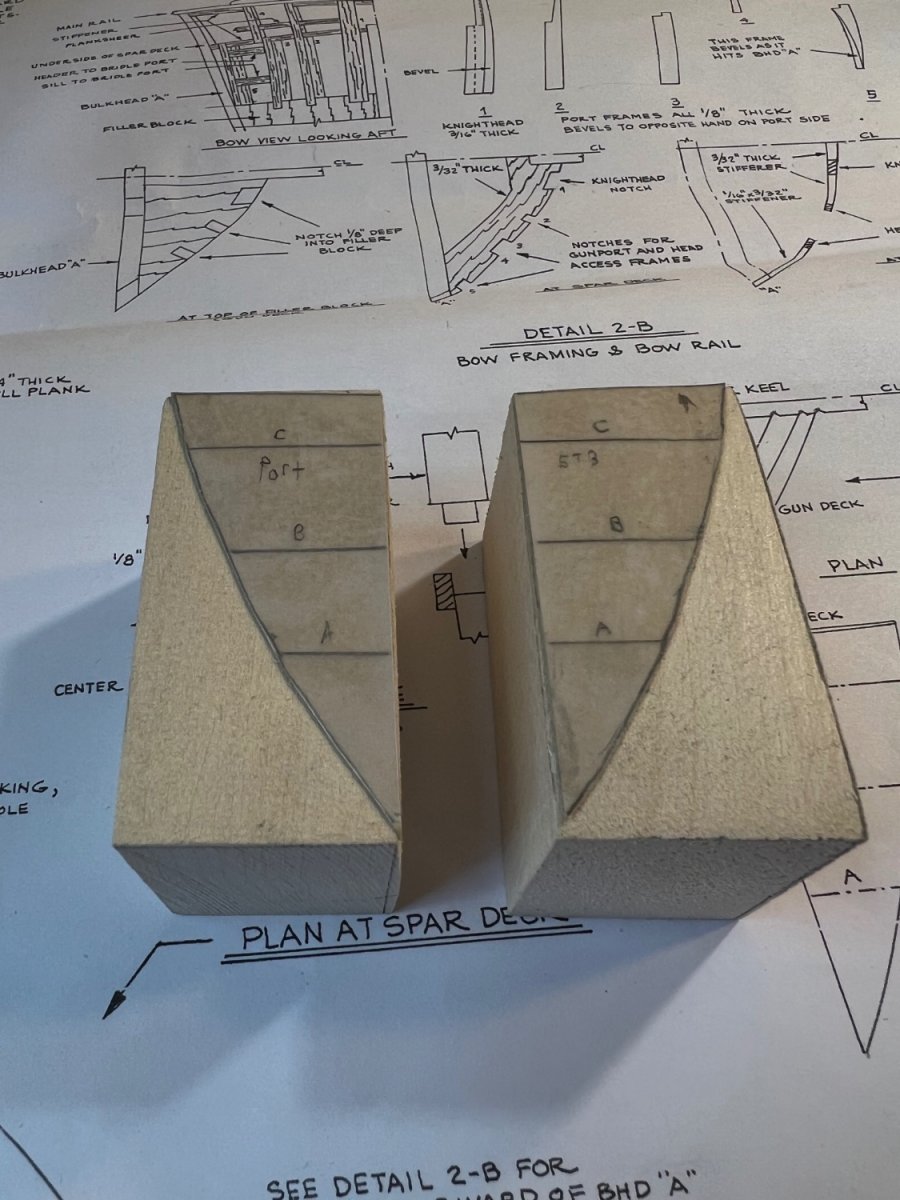
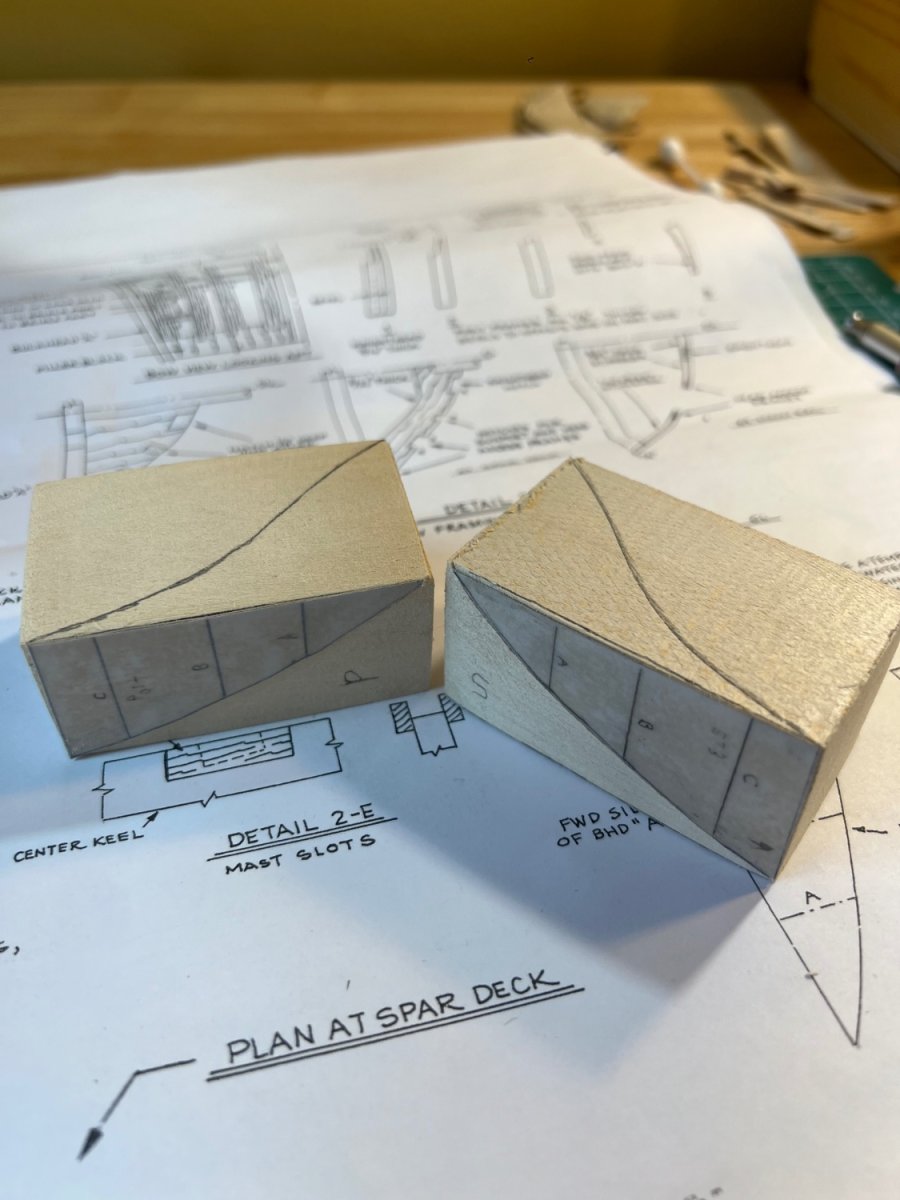
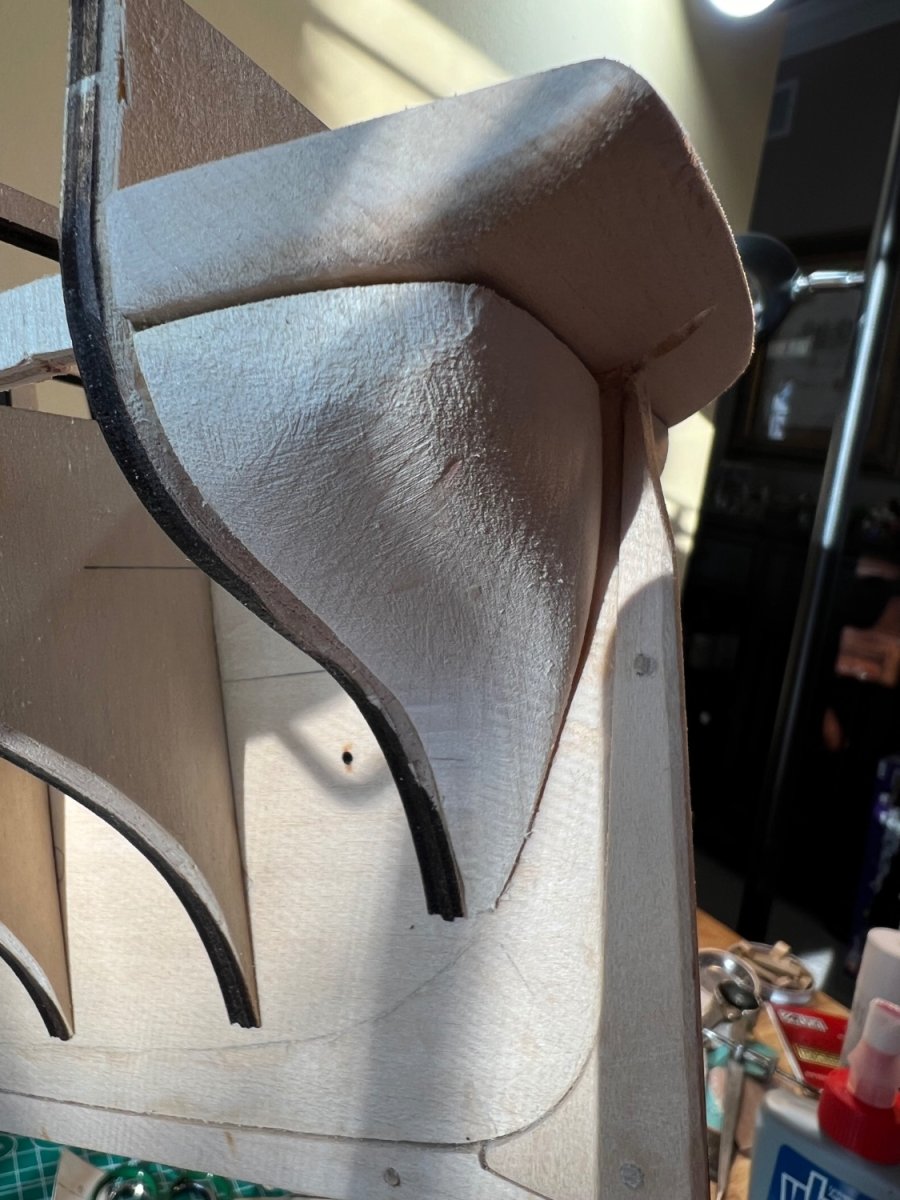
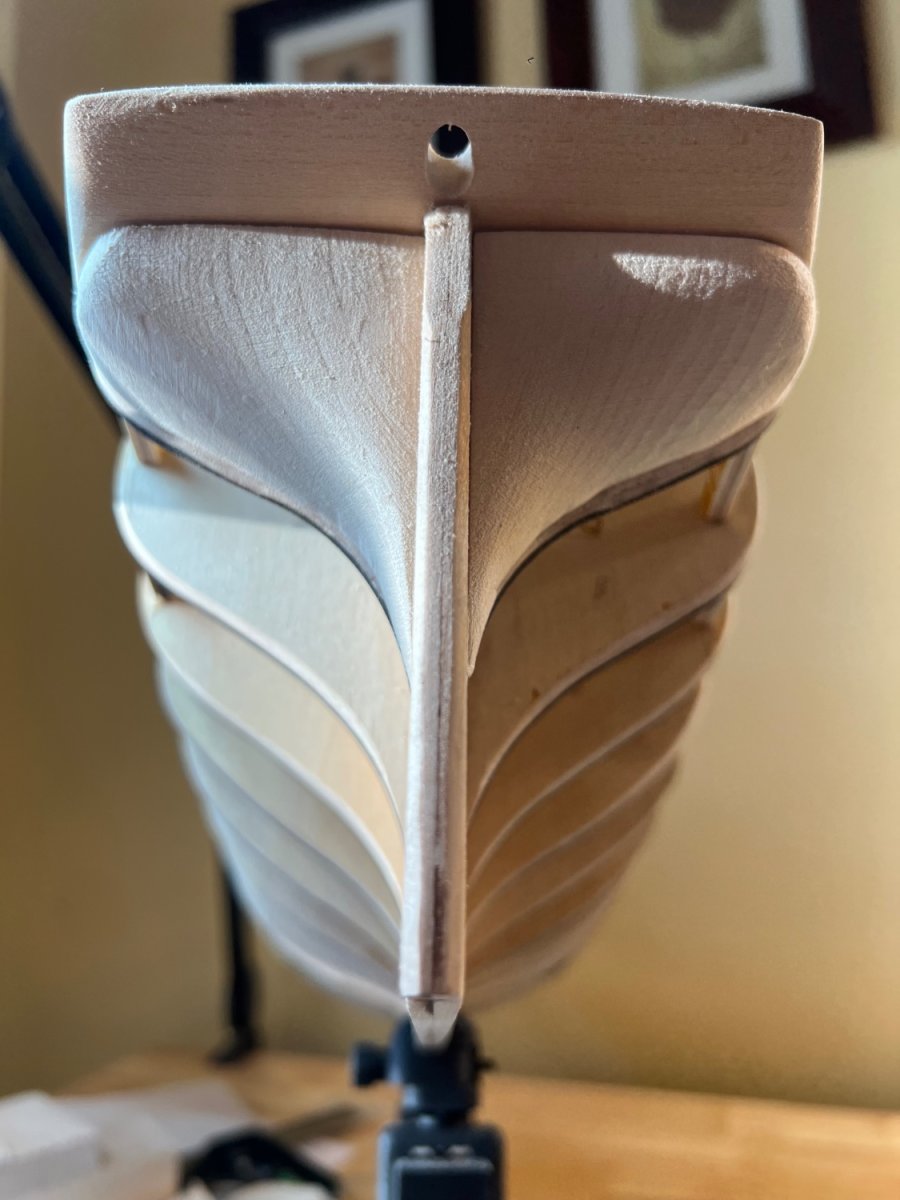
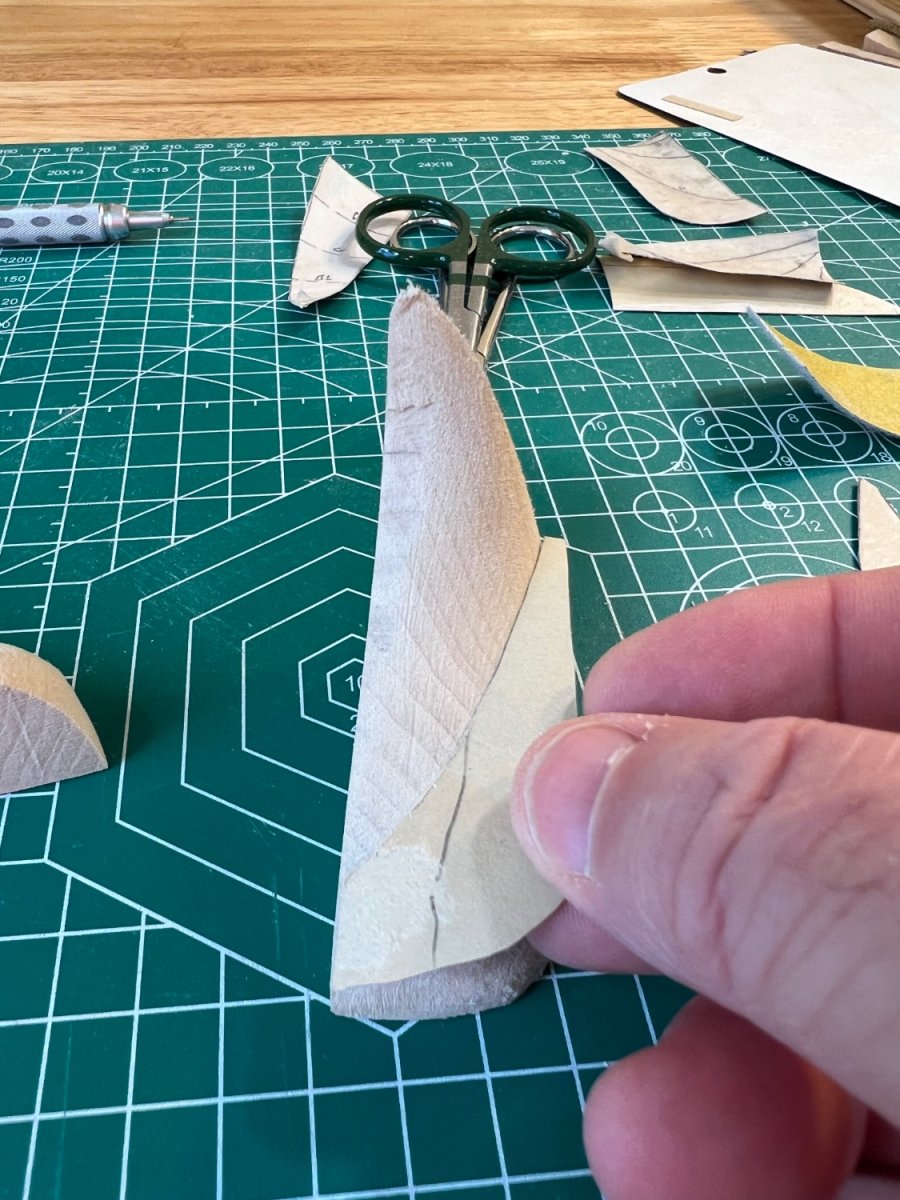
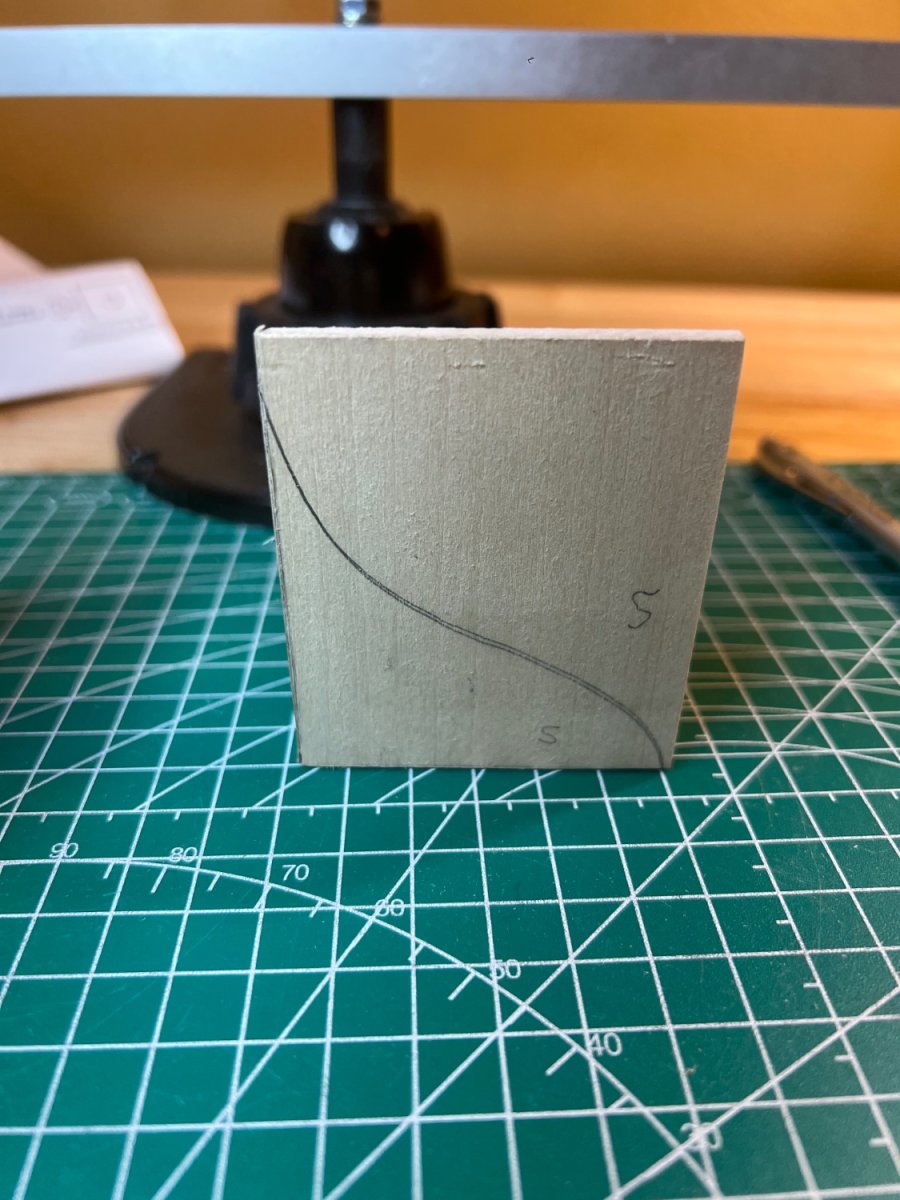
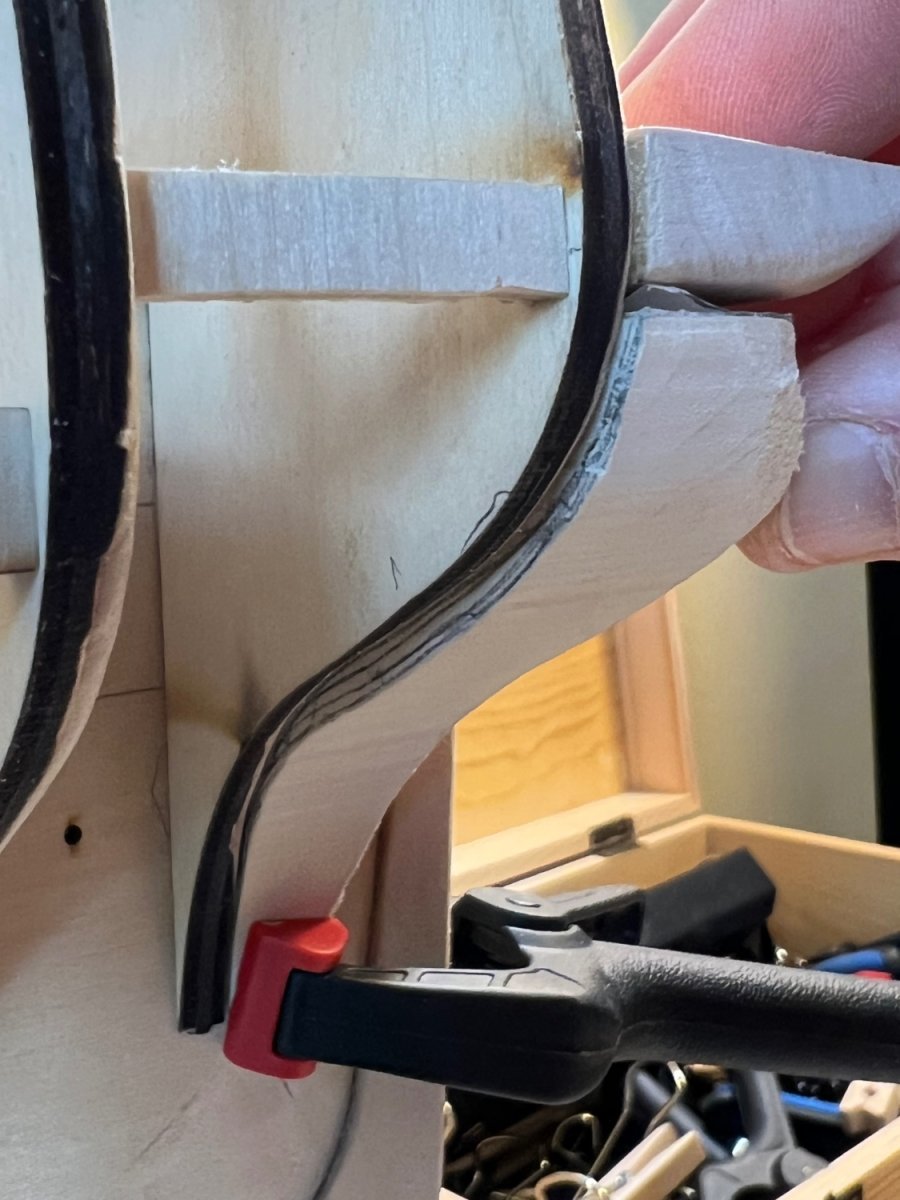
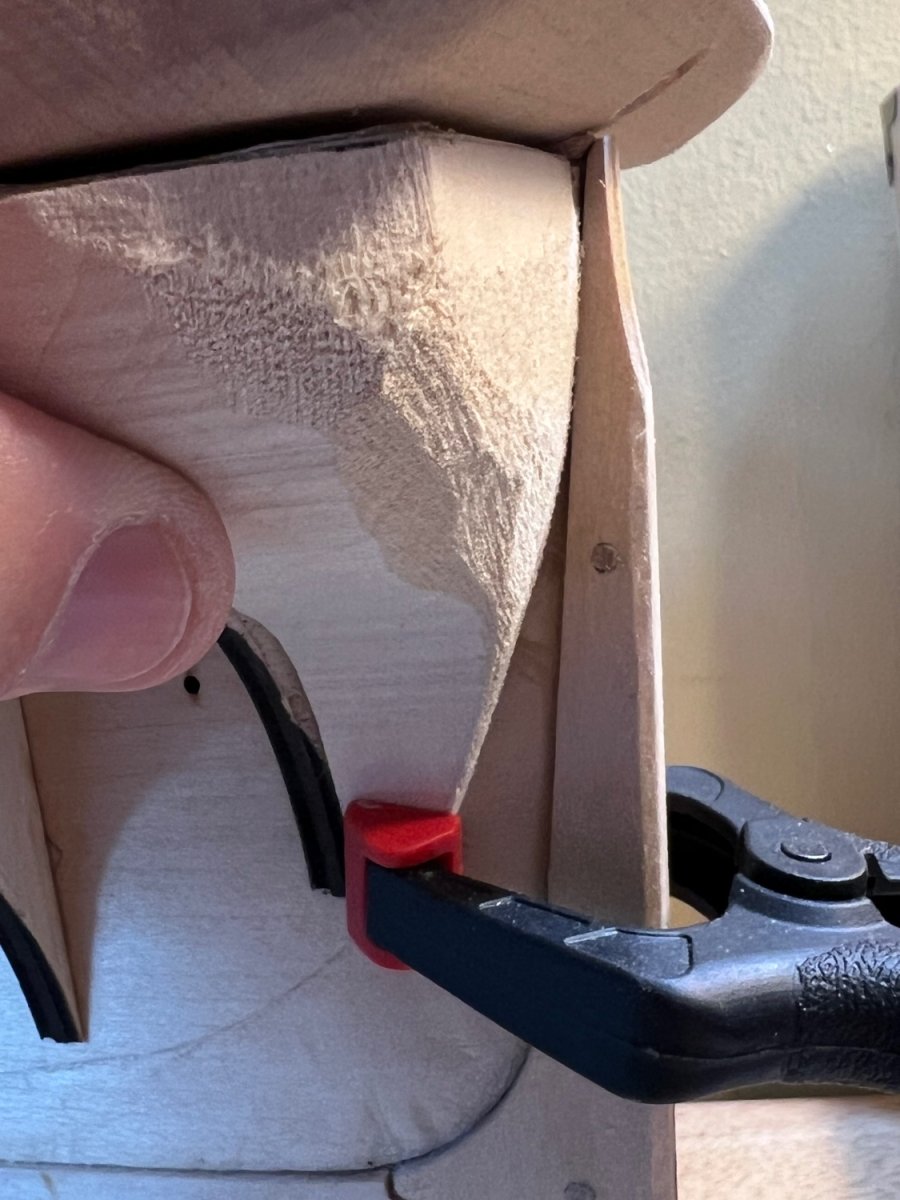
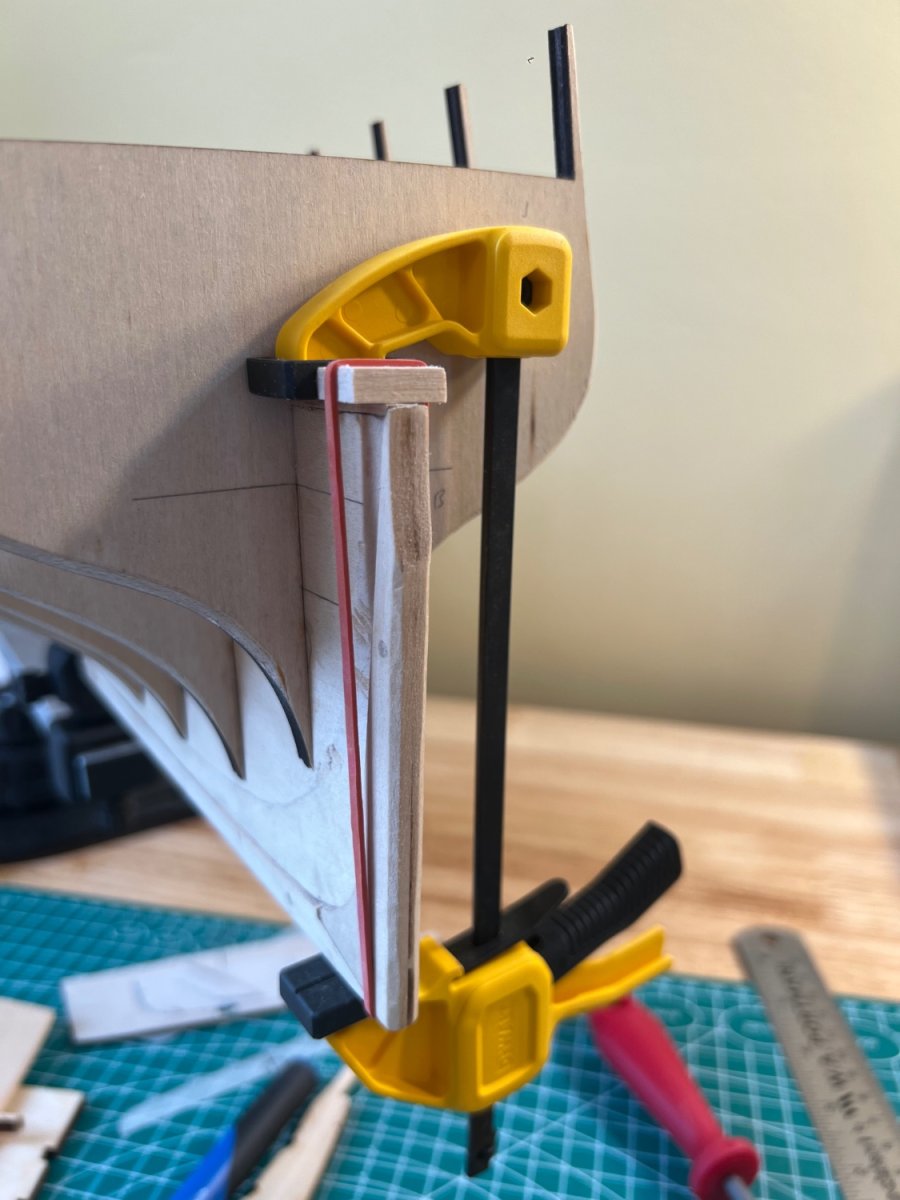
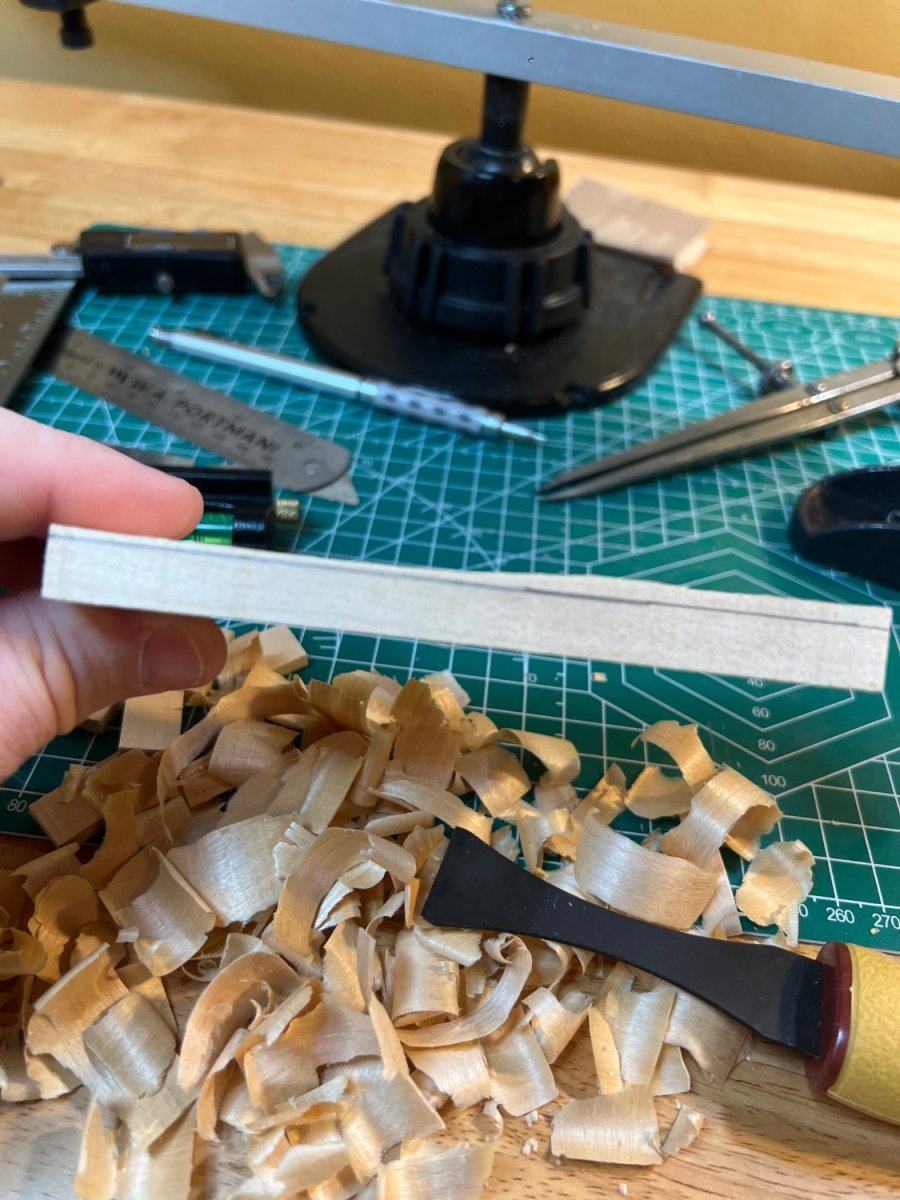
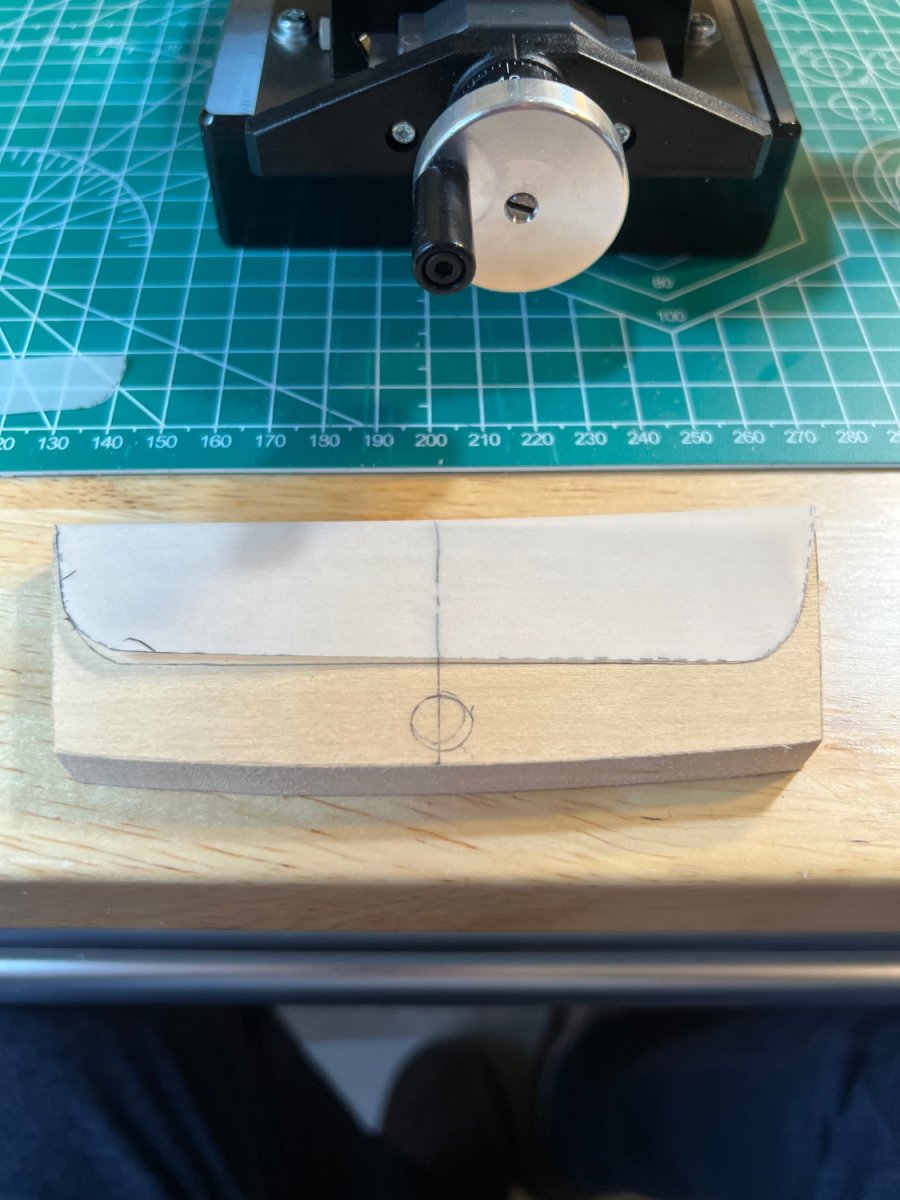
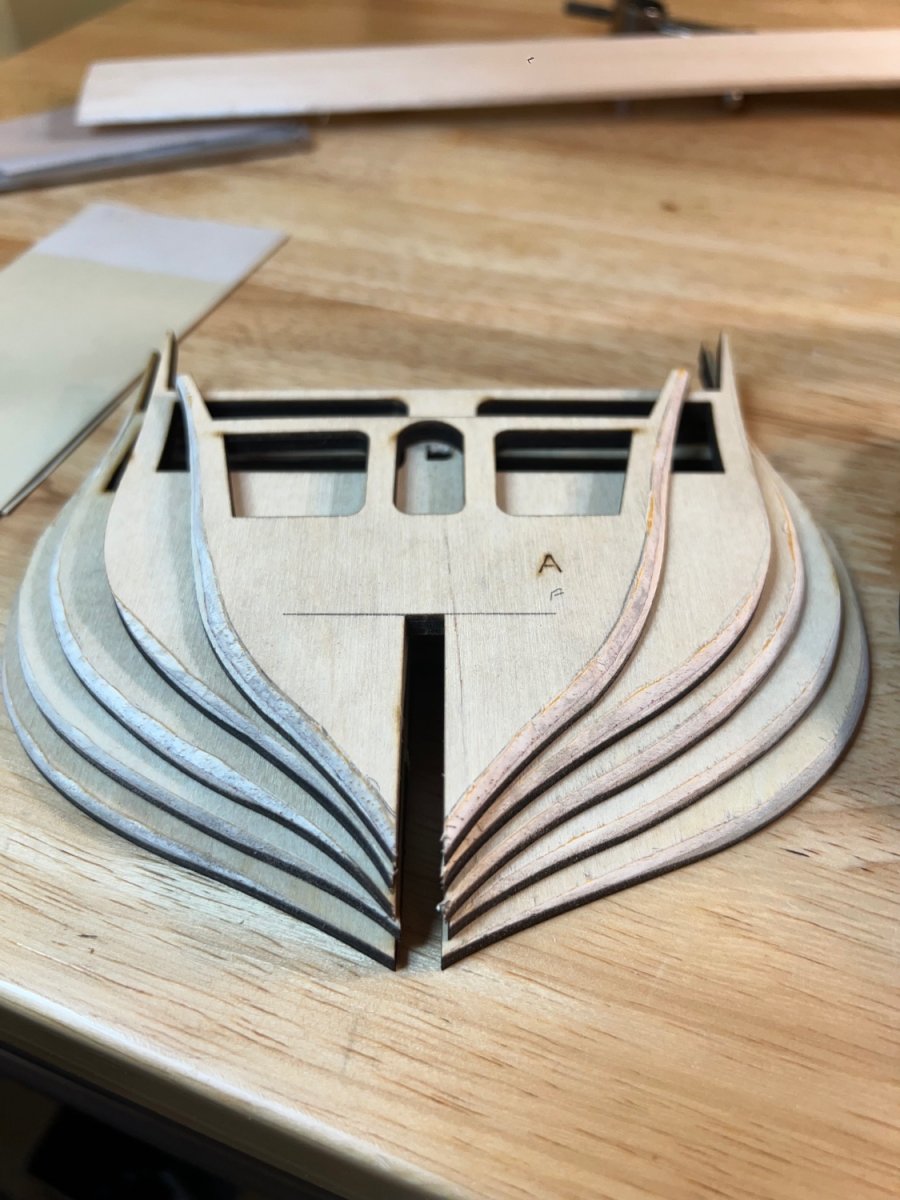
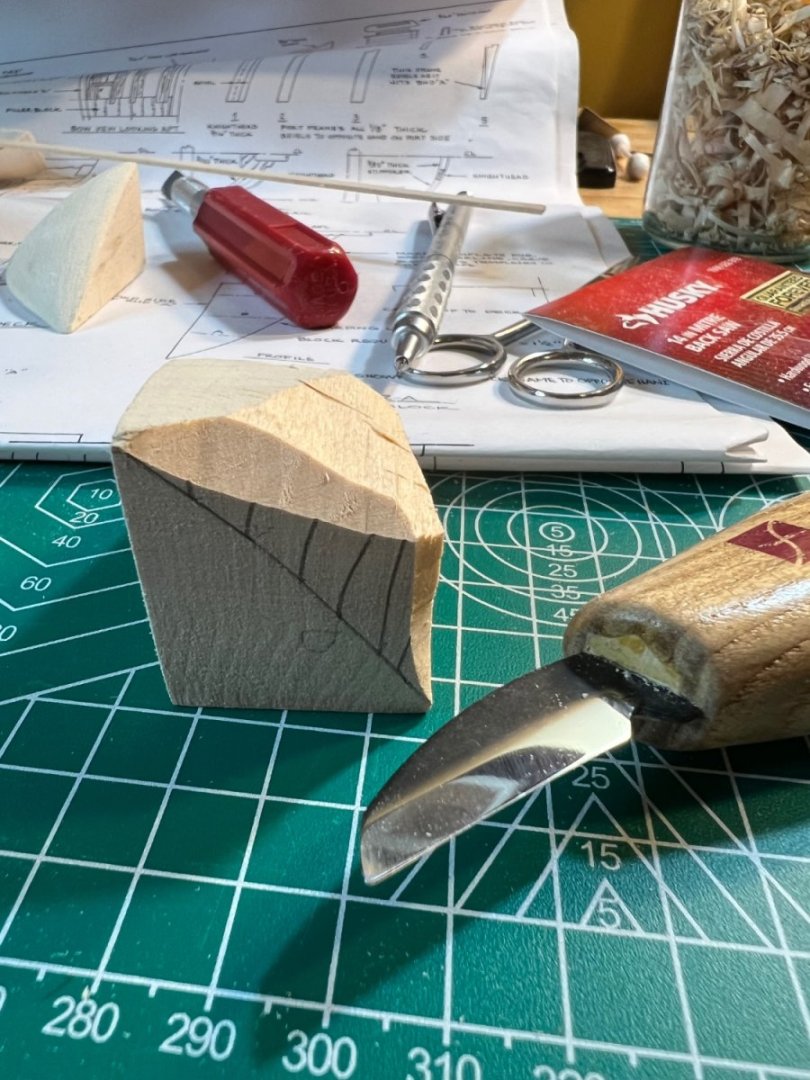
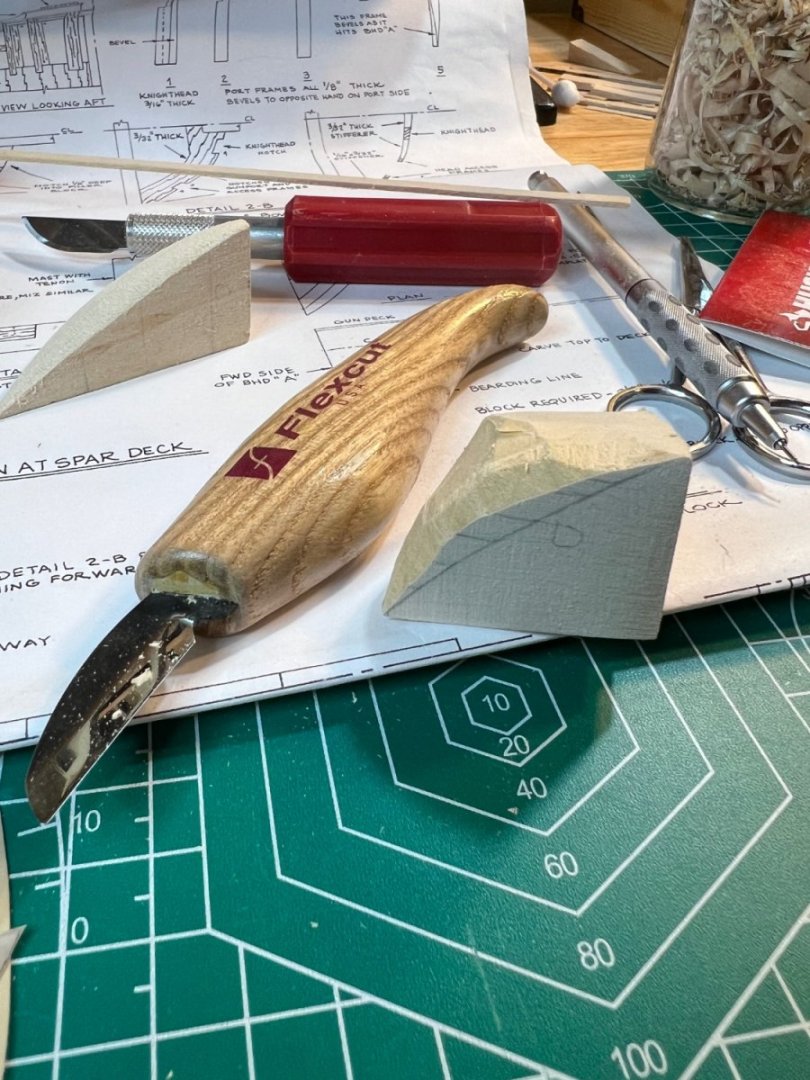
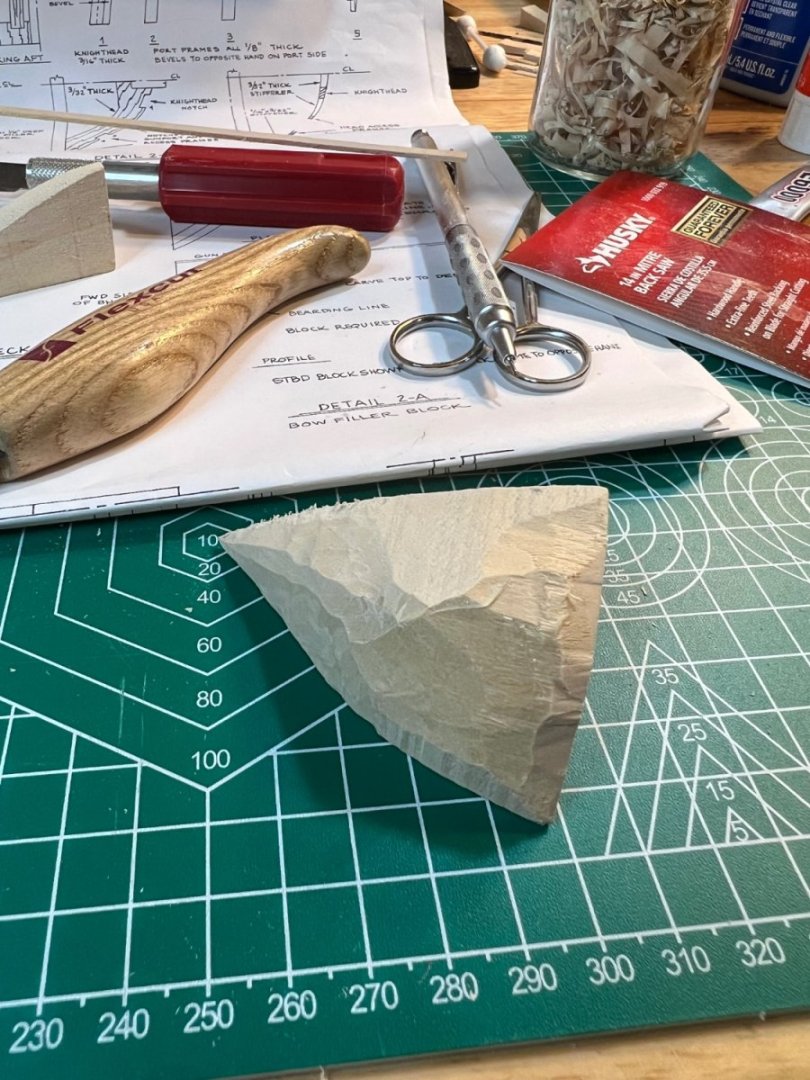
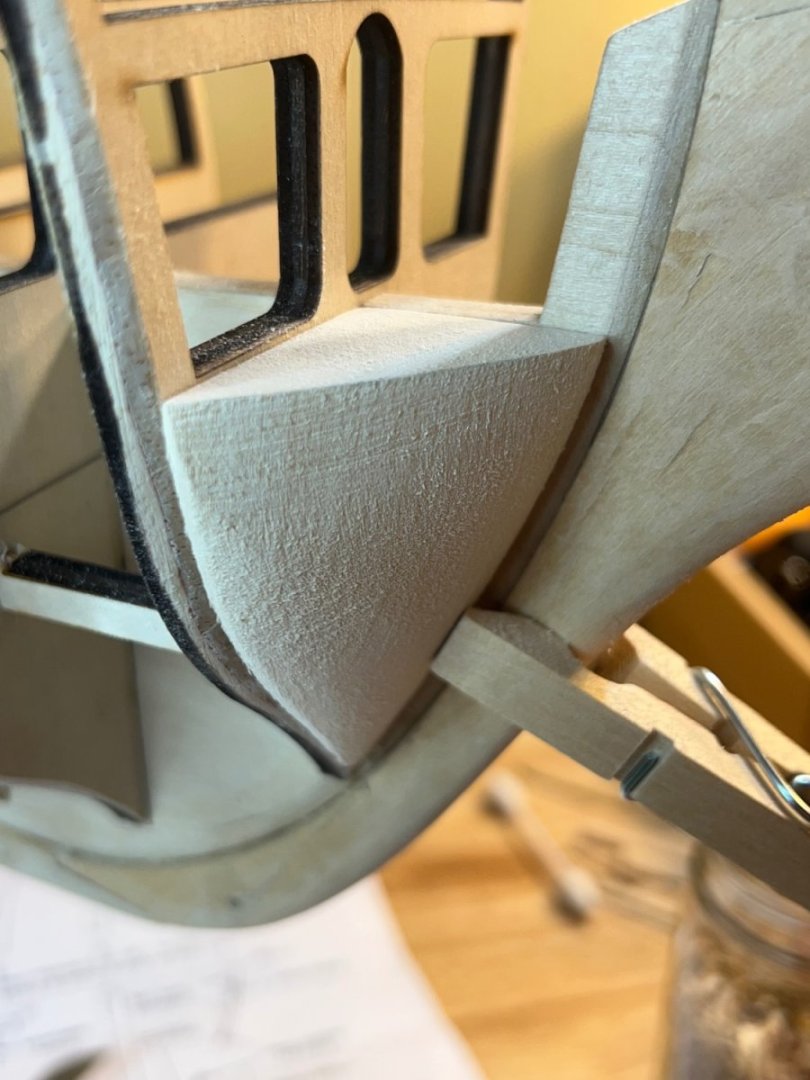
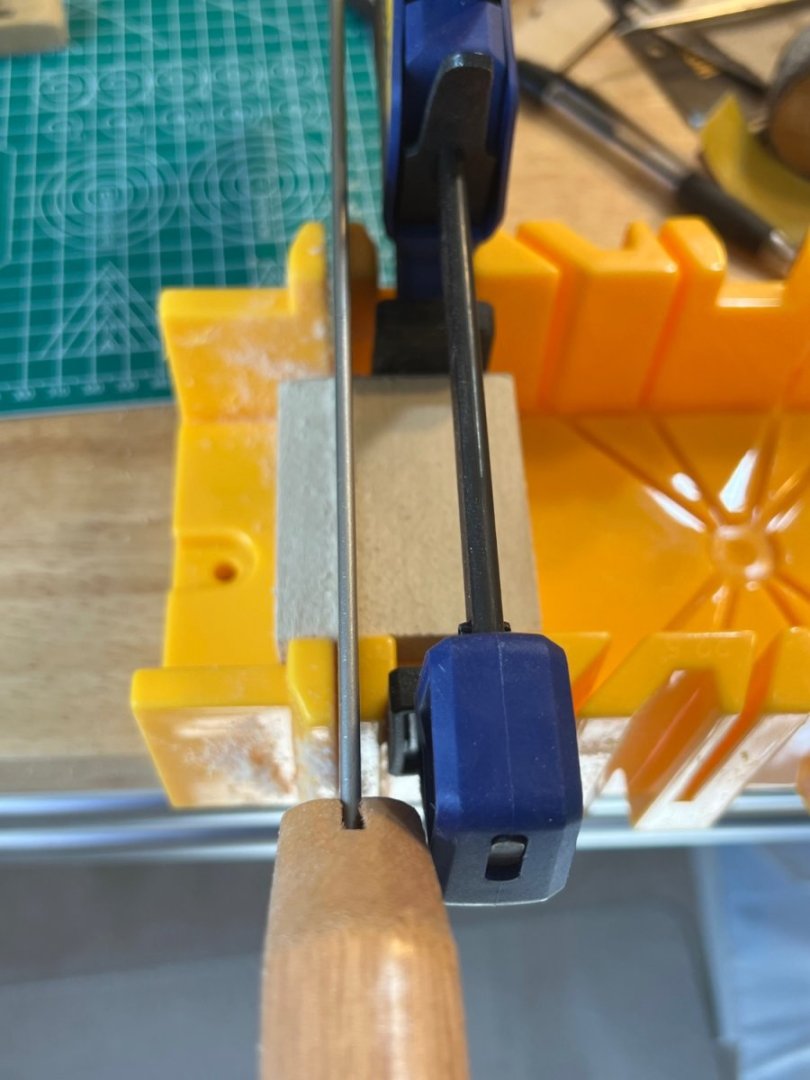
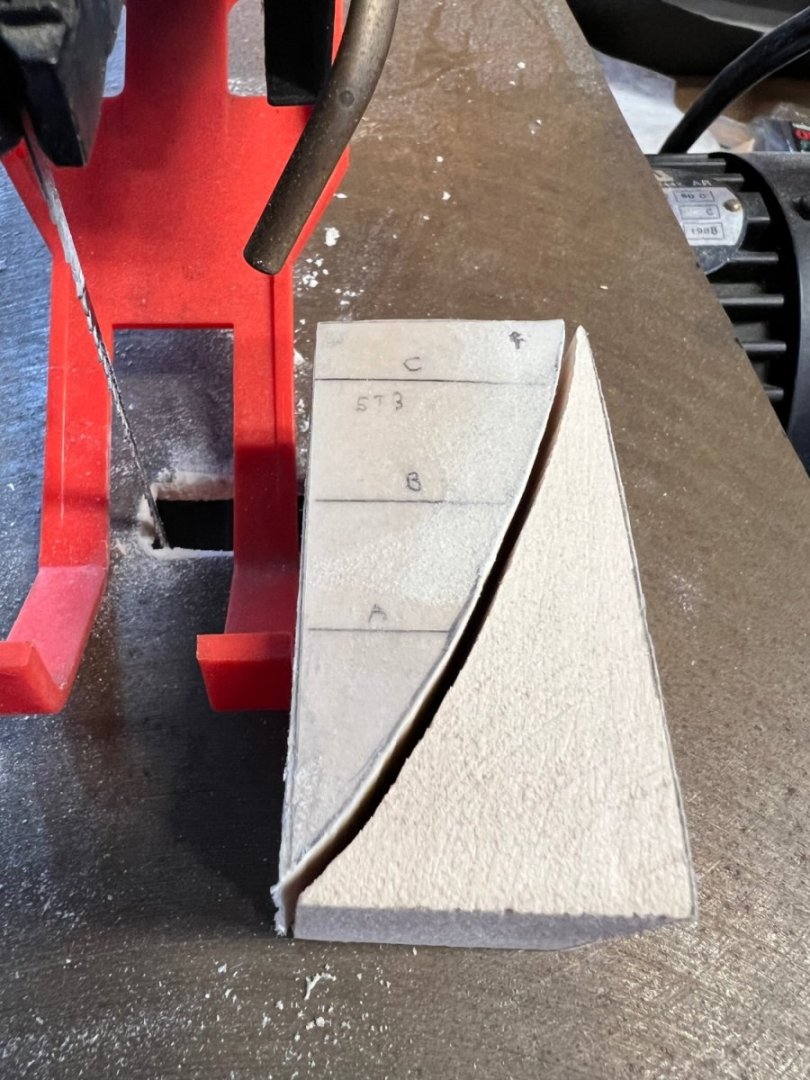
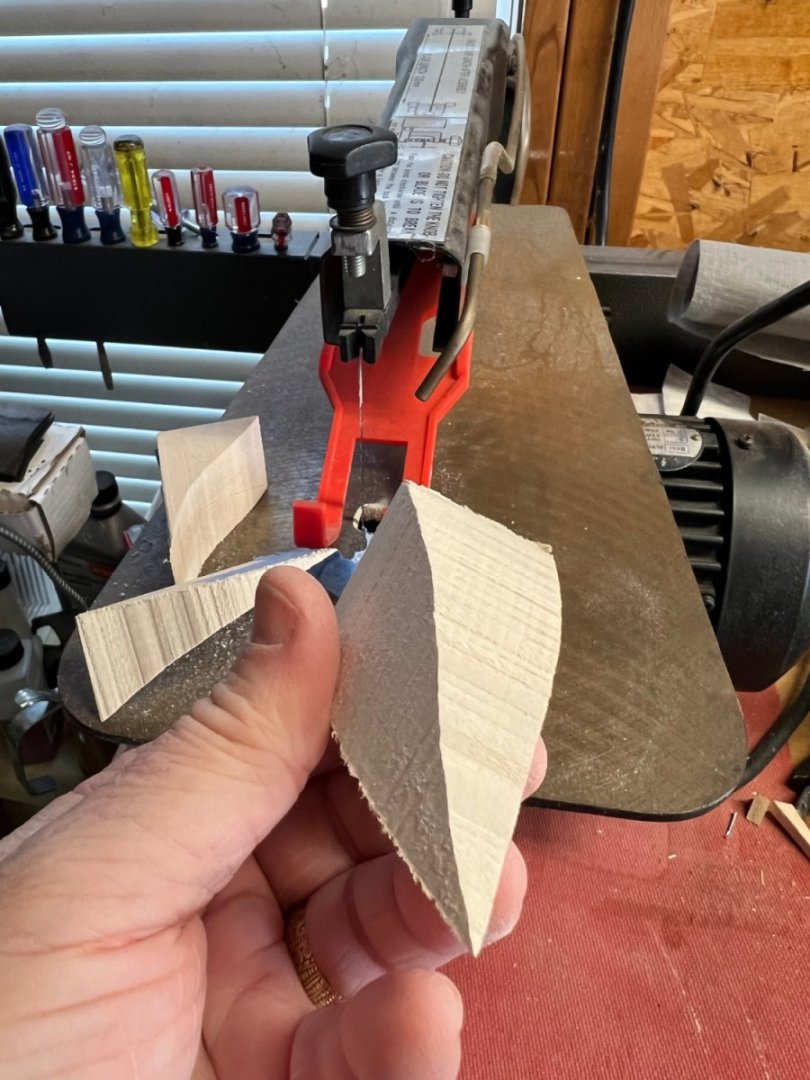
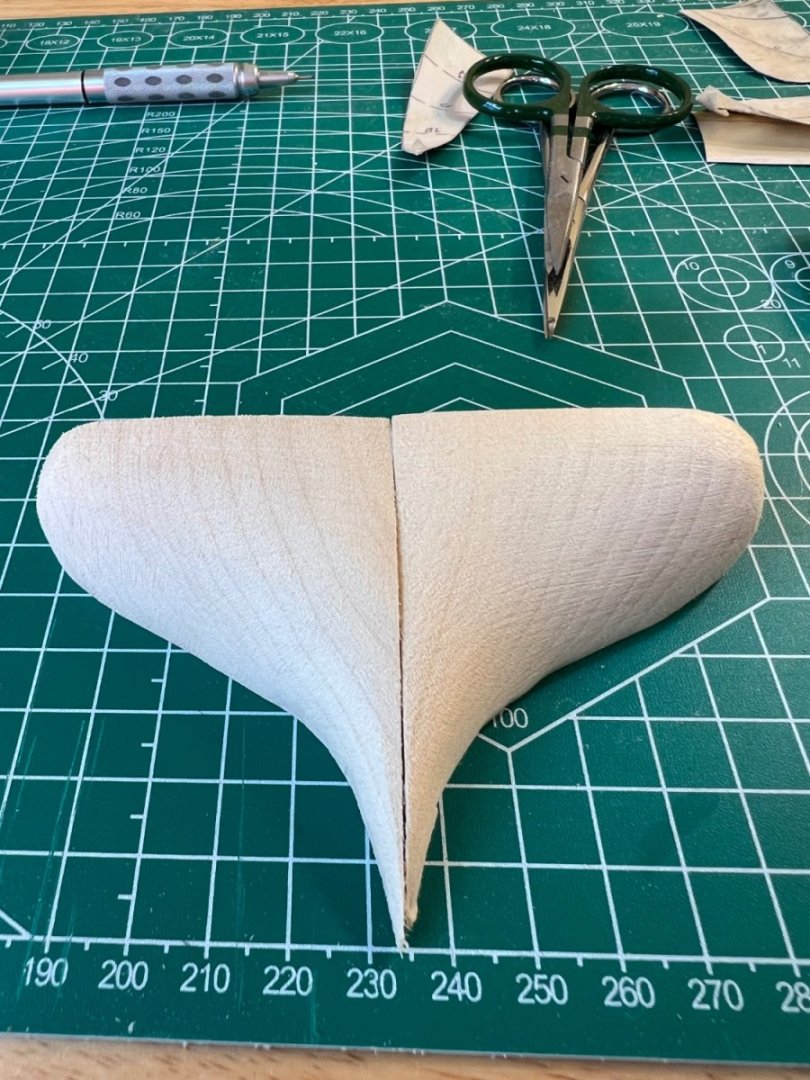
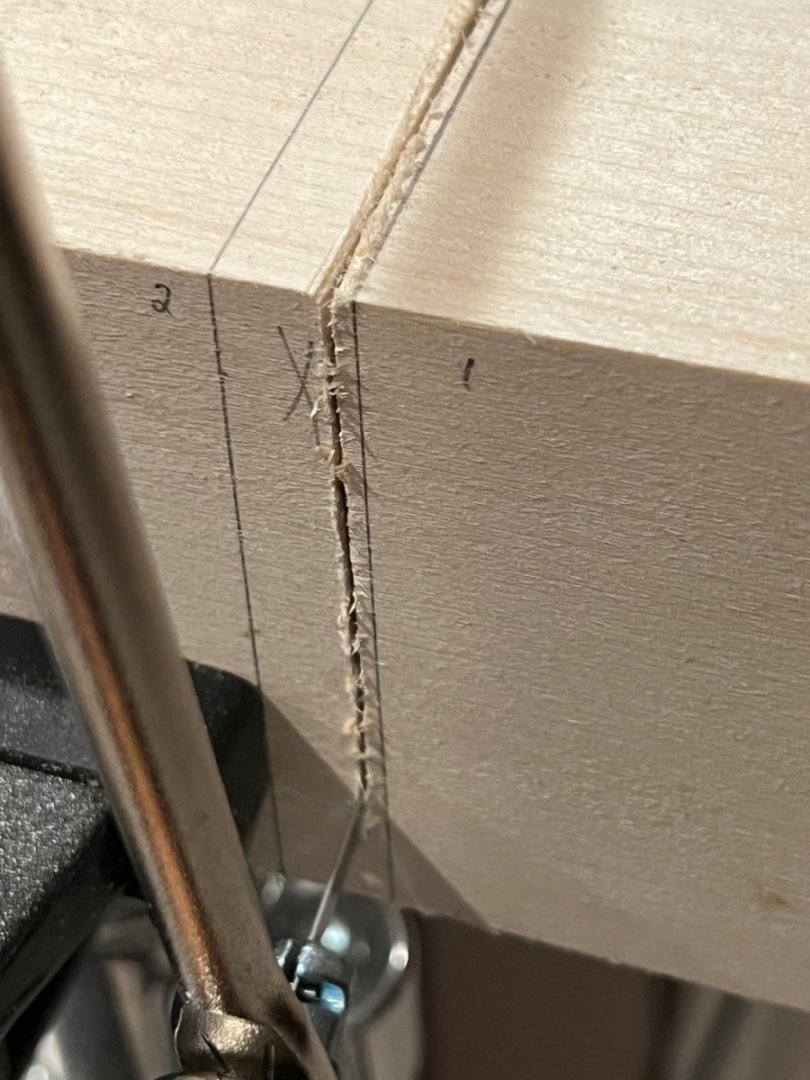
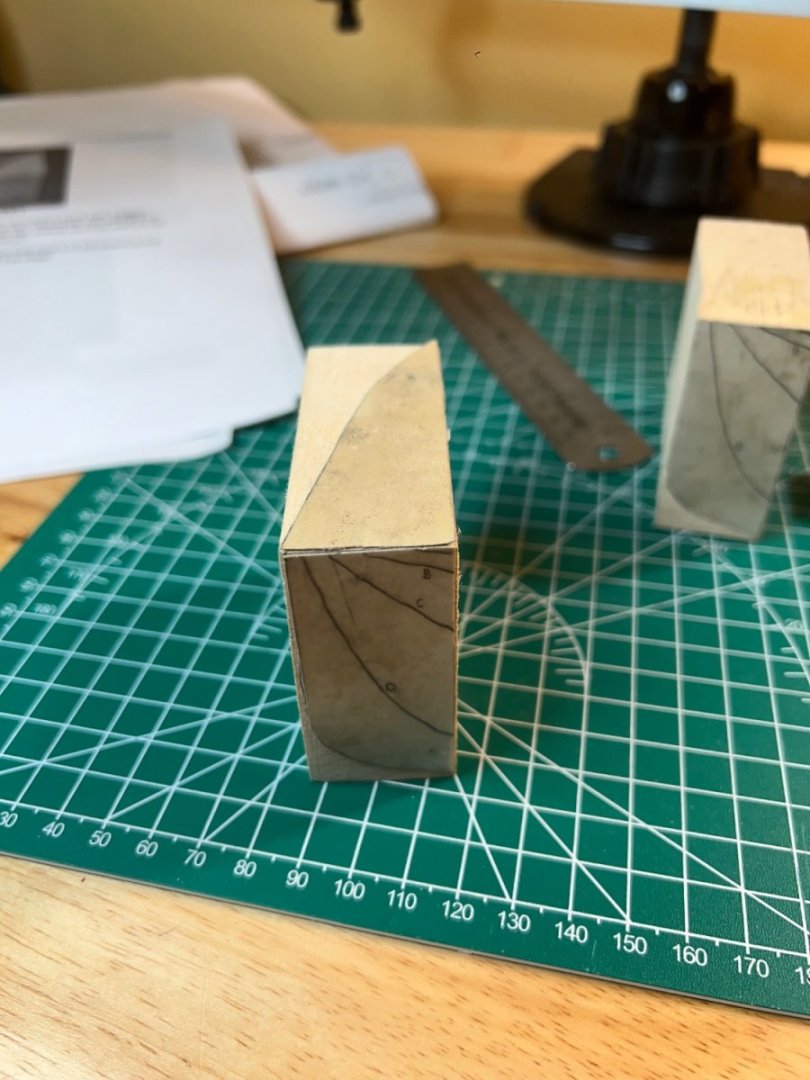
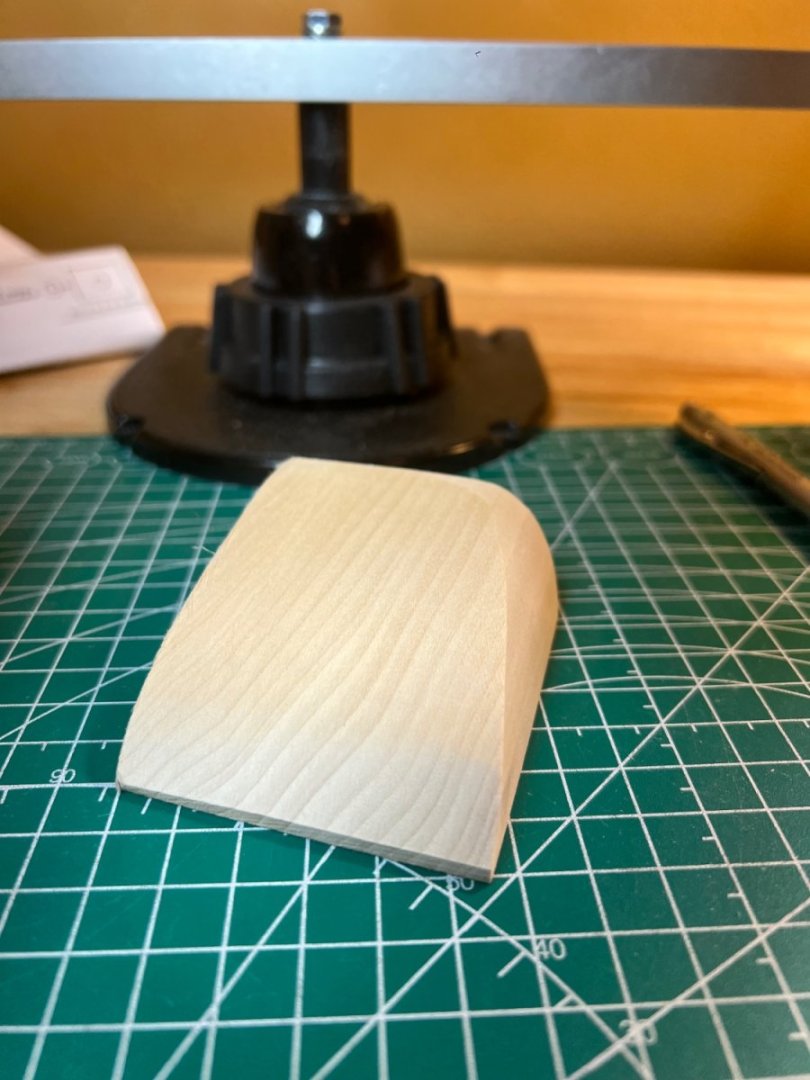
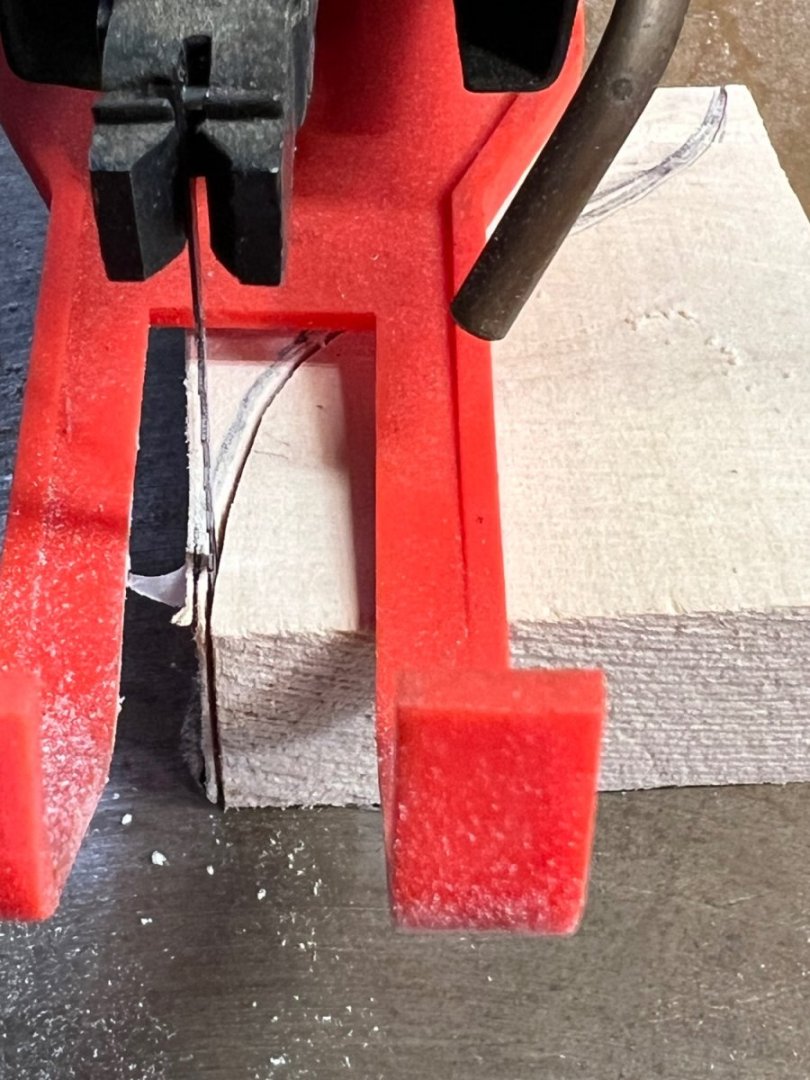
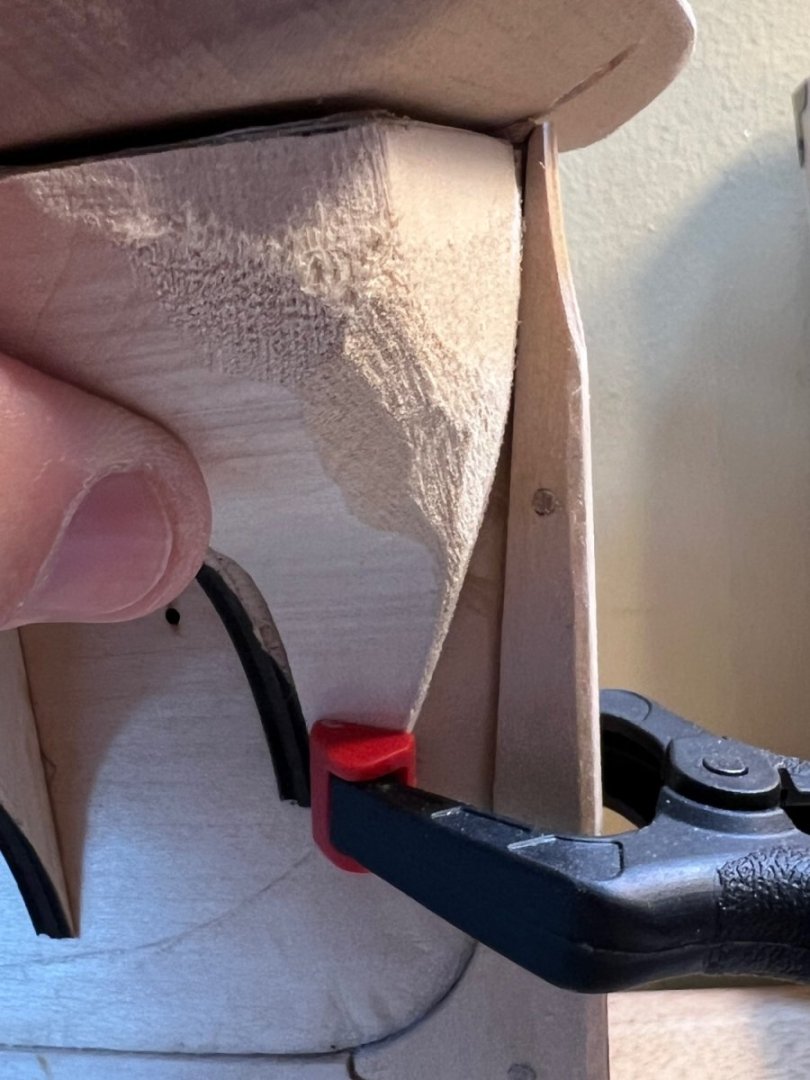
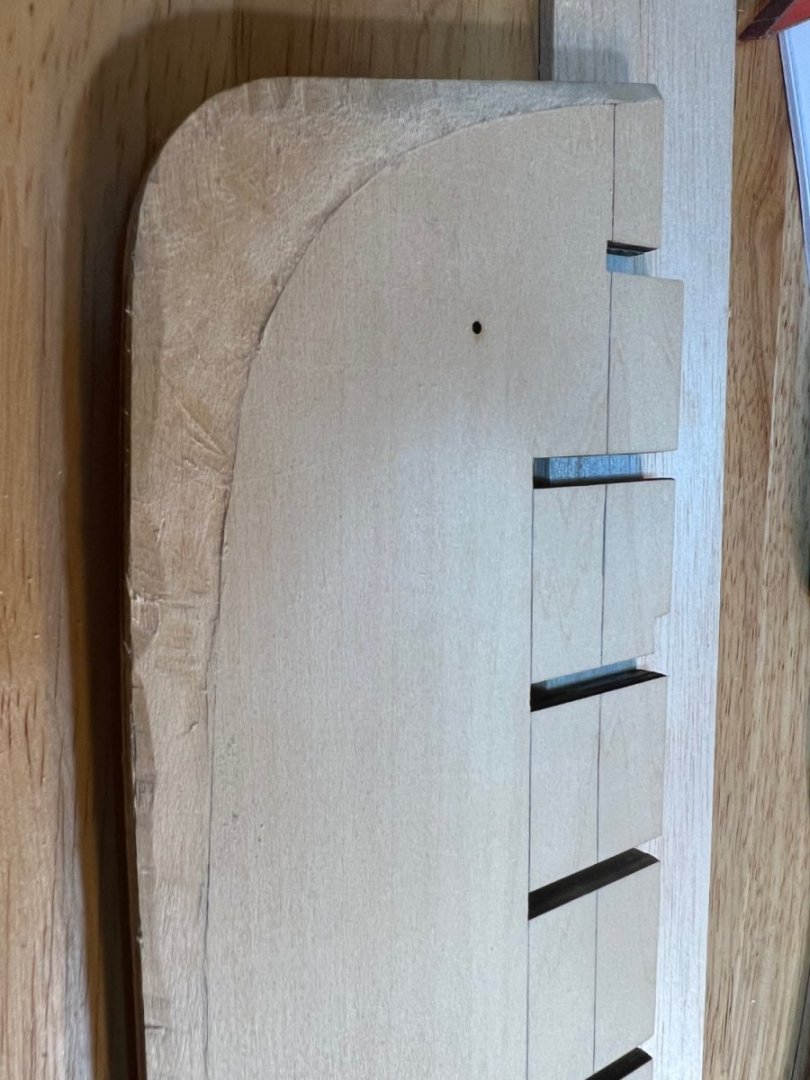
Bow Filler Blocks The forward/bow filler blocks are, so far, much easier than the stern blocks. The sheet plans contain 2 templates for the blocks - the bearding line shape and 4 levels of depth/profile templates. After struggling through my stern blocks with a coping saw, I bought a rudimentary miter saw setup and made short work of the 2 2 1/2” bow blocks. Once the blocks were less than 2 thick, I was able to use my scroll saw. Although a belt sander would probably have worked, I recommend the scroll saw. The following pics are the steps up to the finished rough cut. Due to the simple angles involved, it looks like a lot of trimming will be necessary, but to a much simpler form than the stern blocks. We shall see!


-
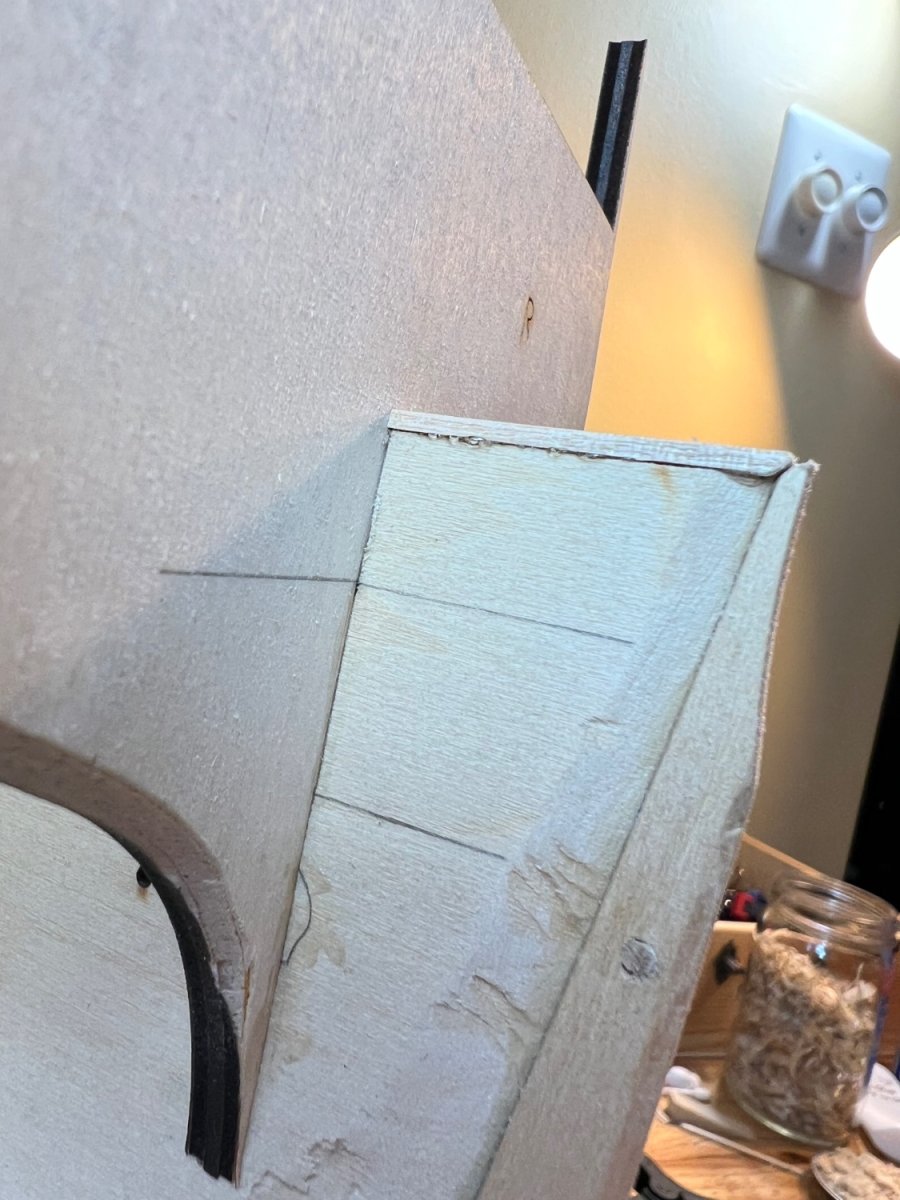
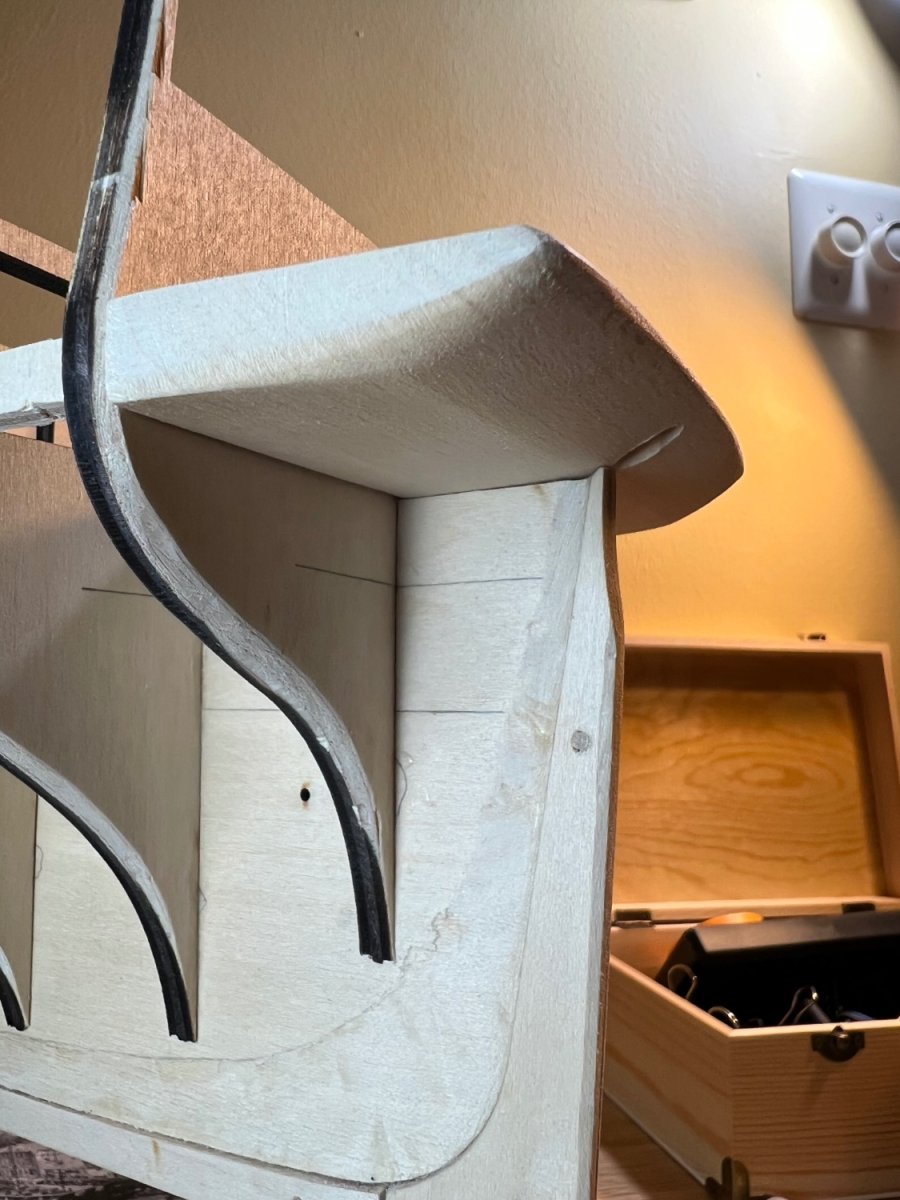
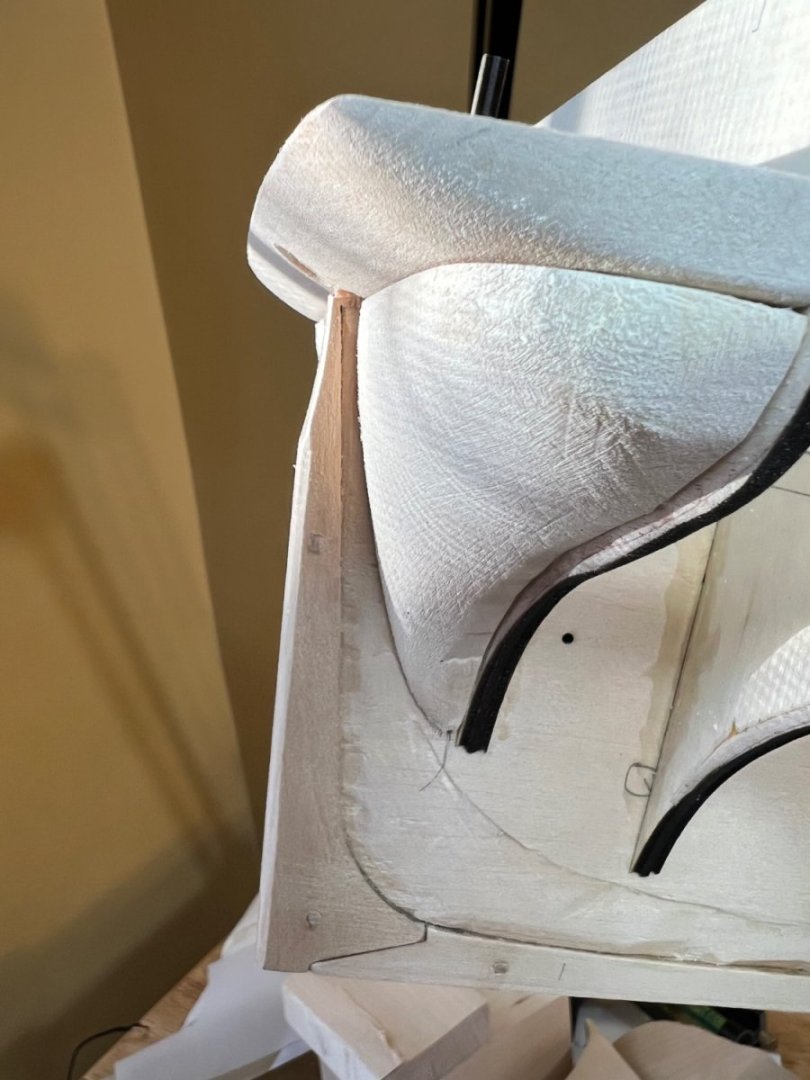
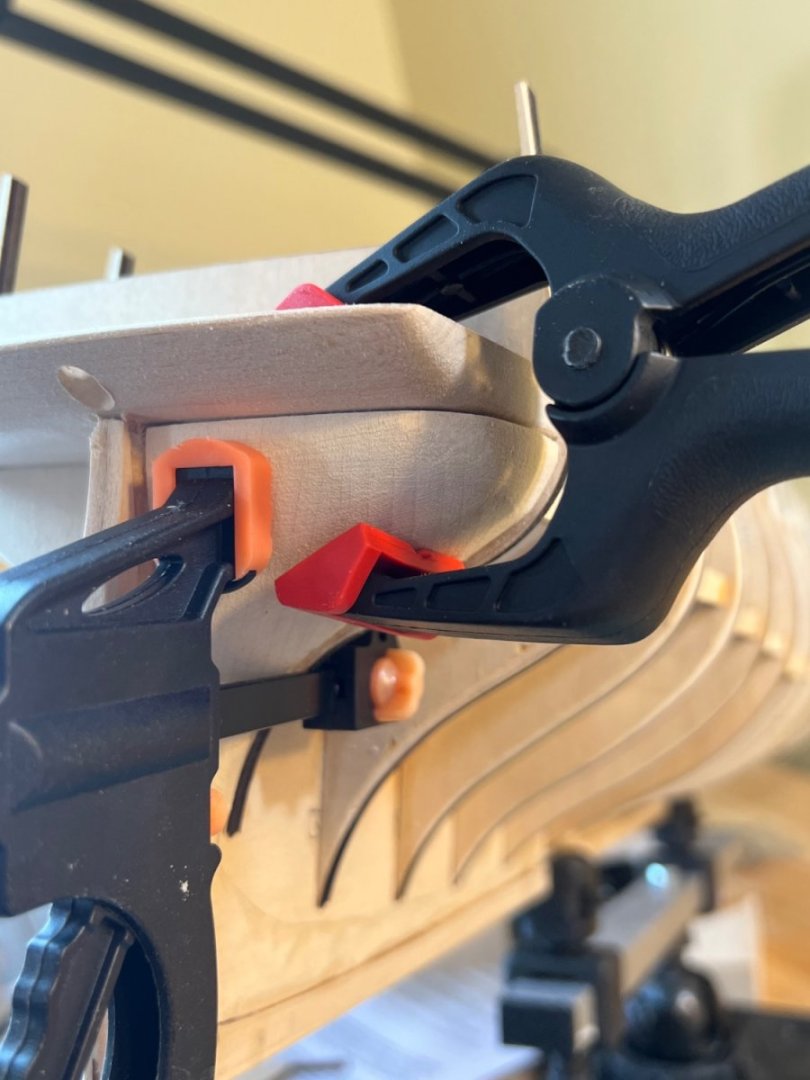
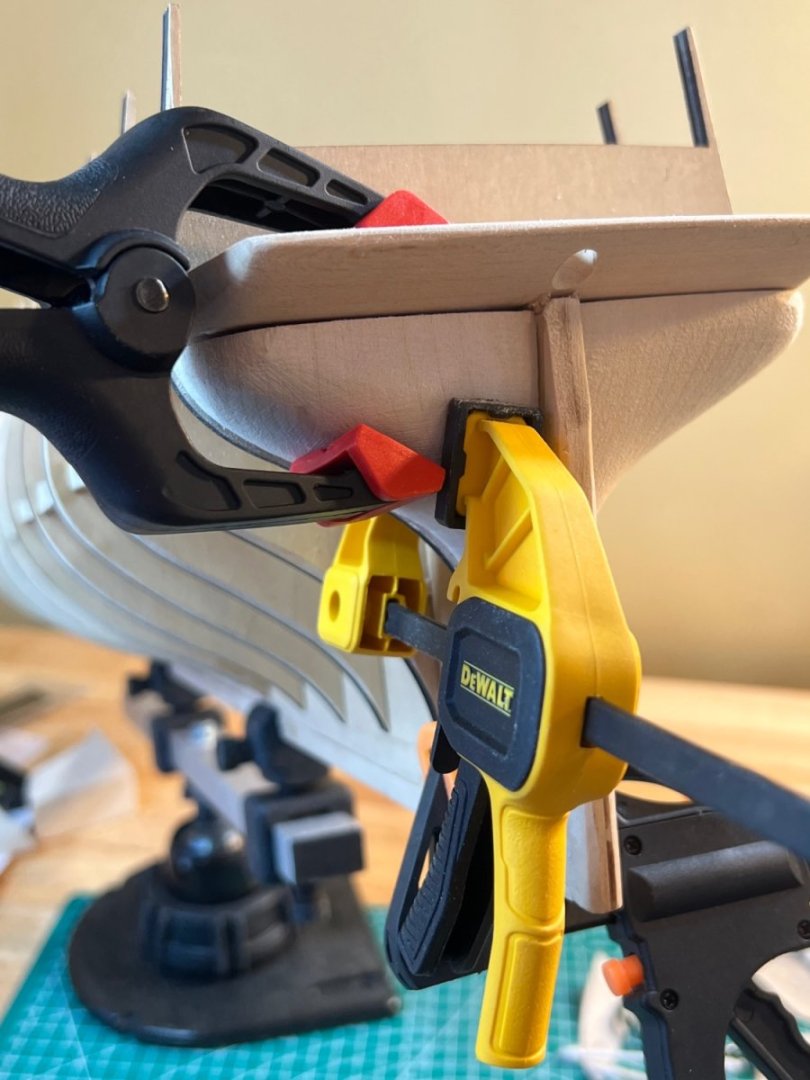
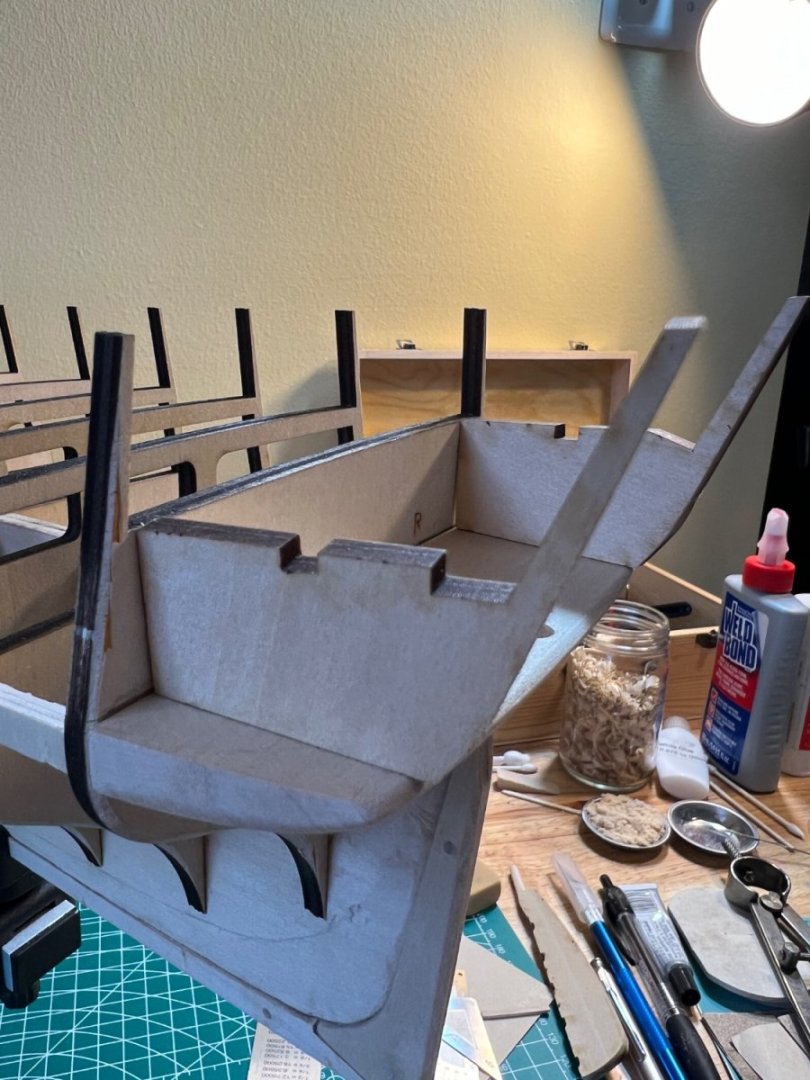
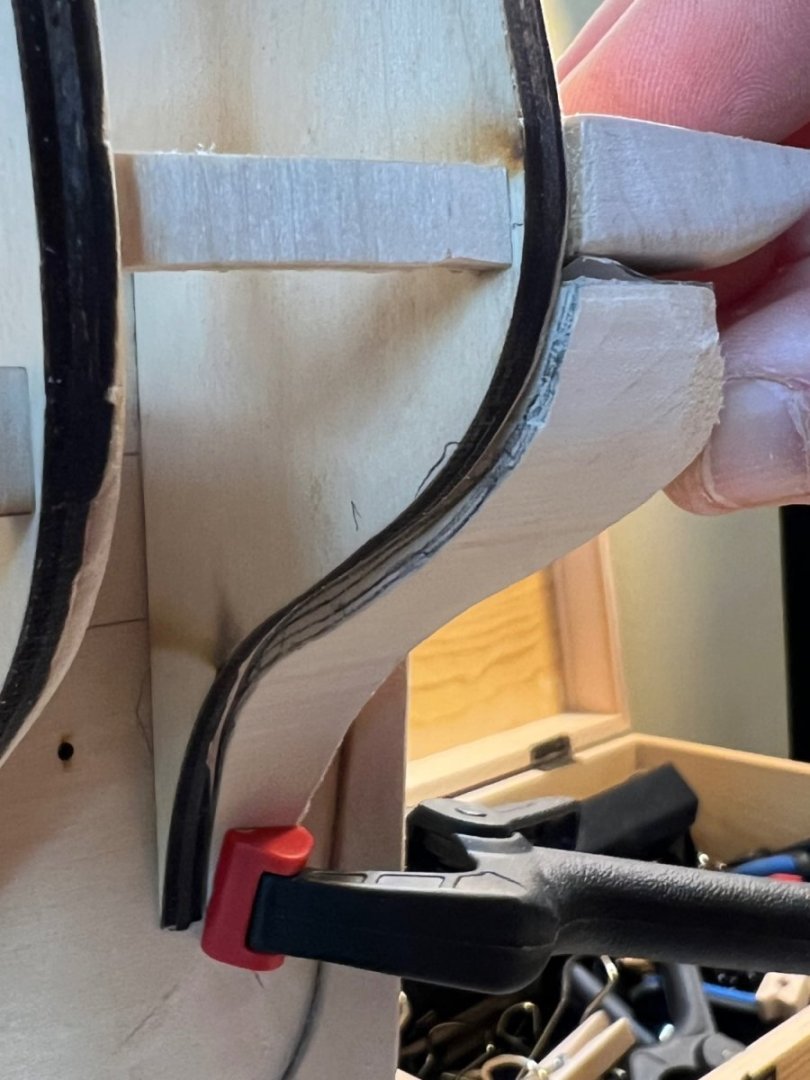
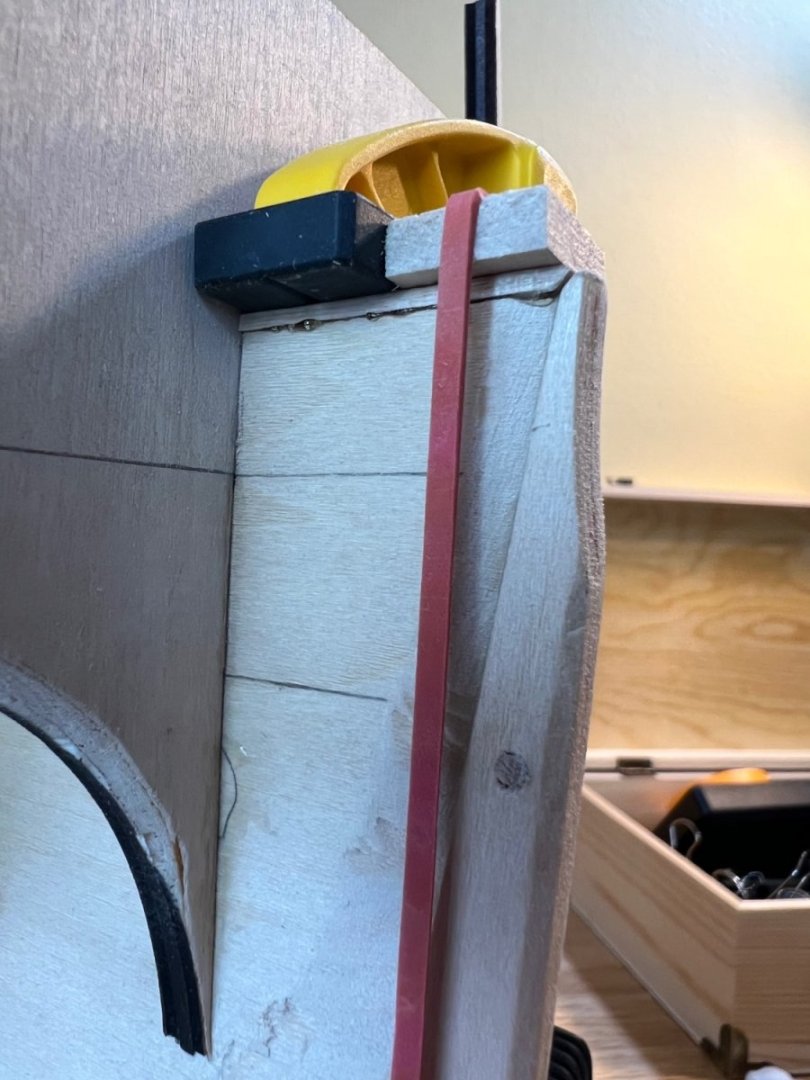
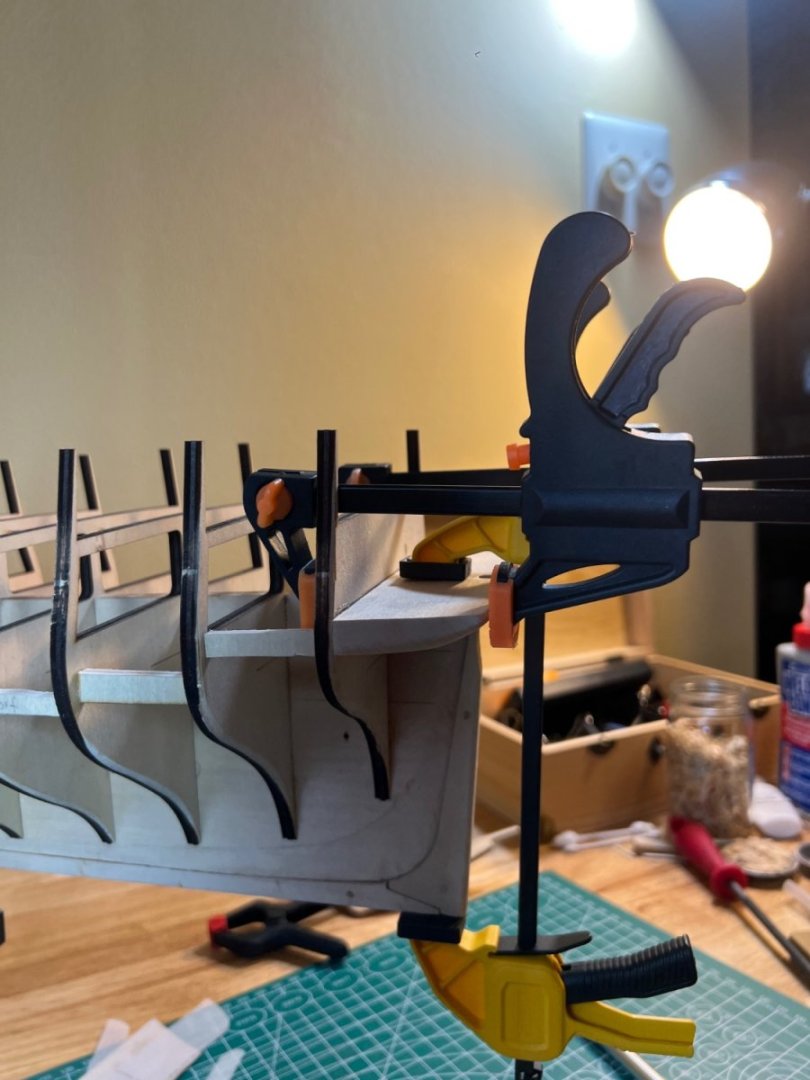
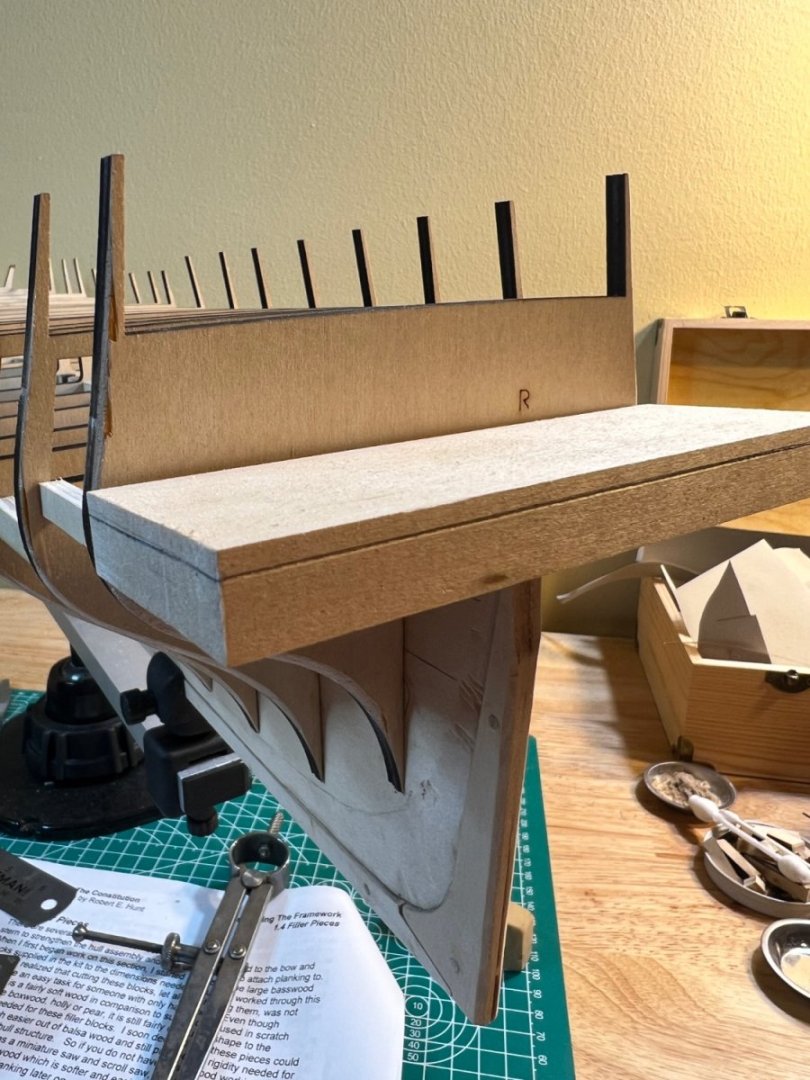
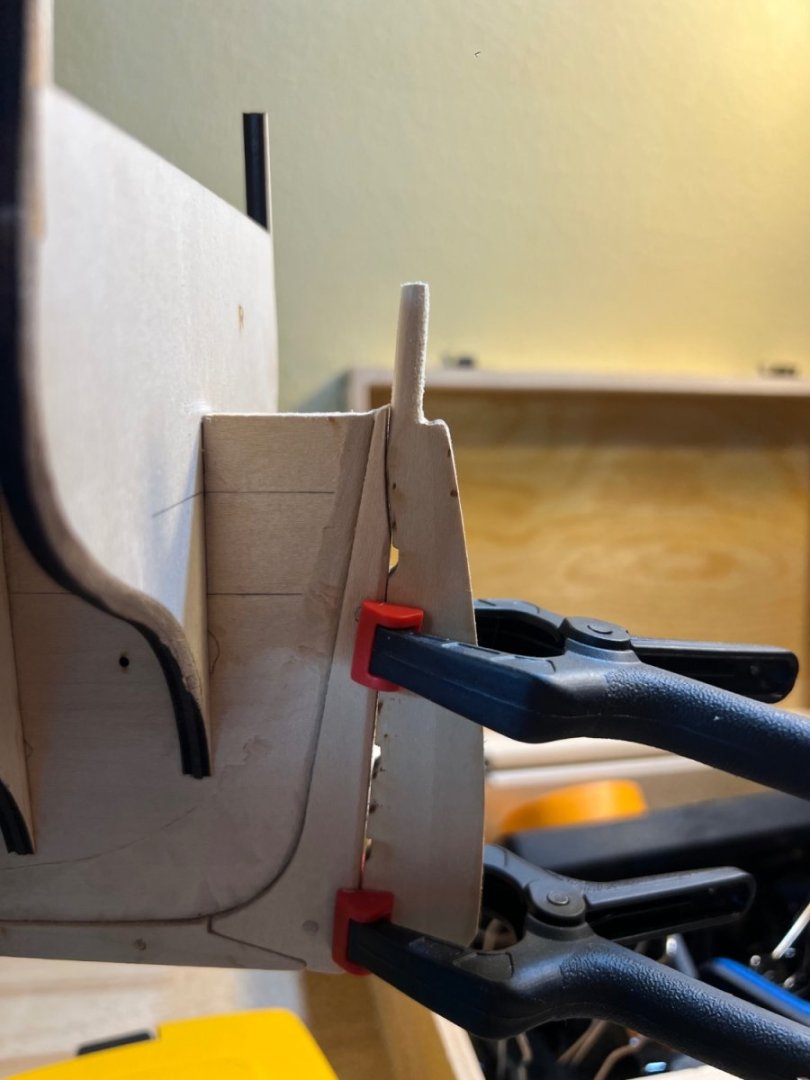
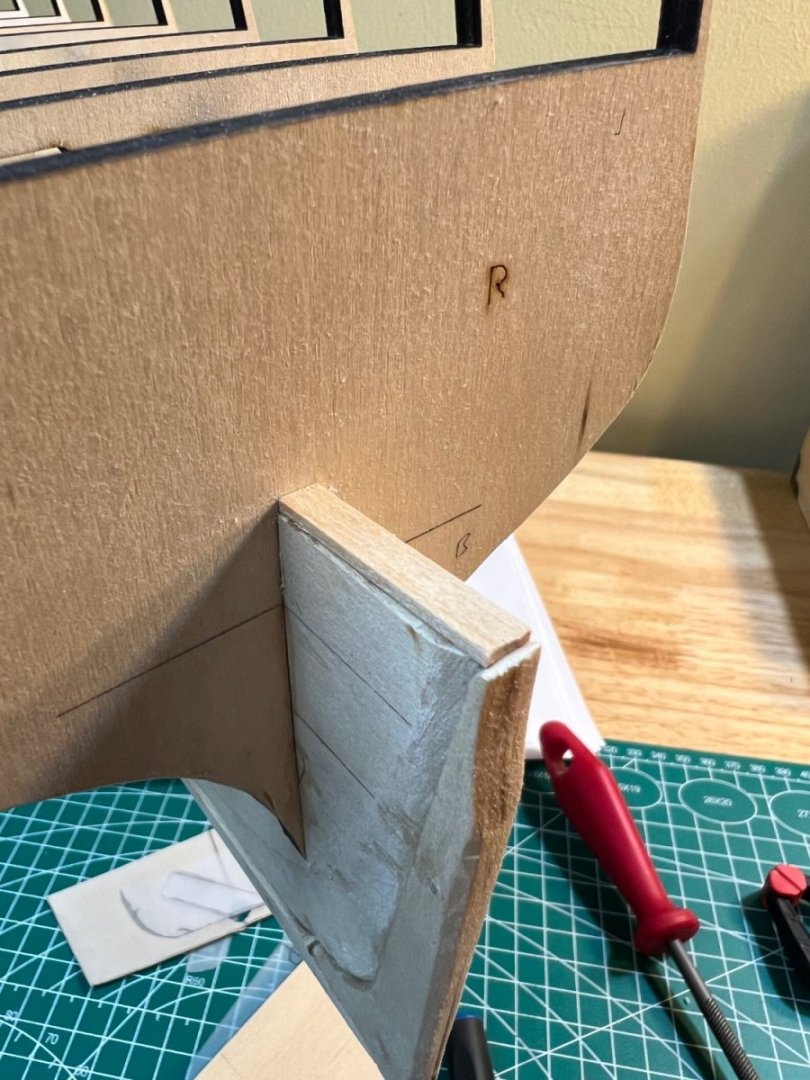
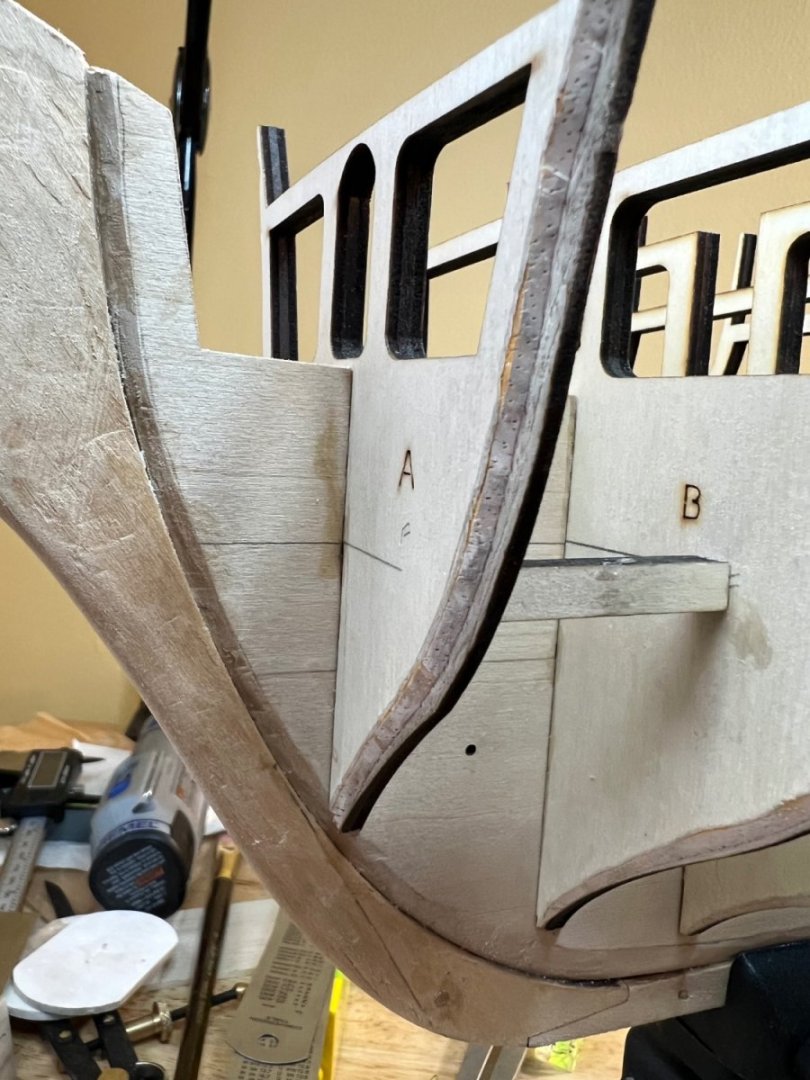
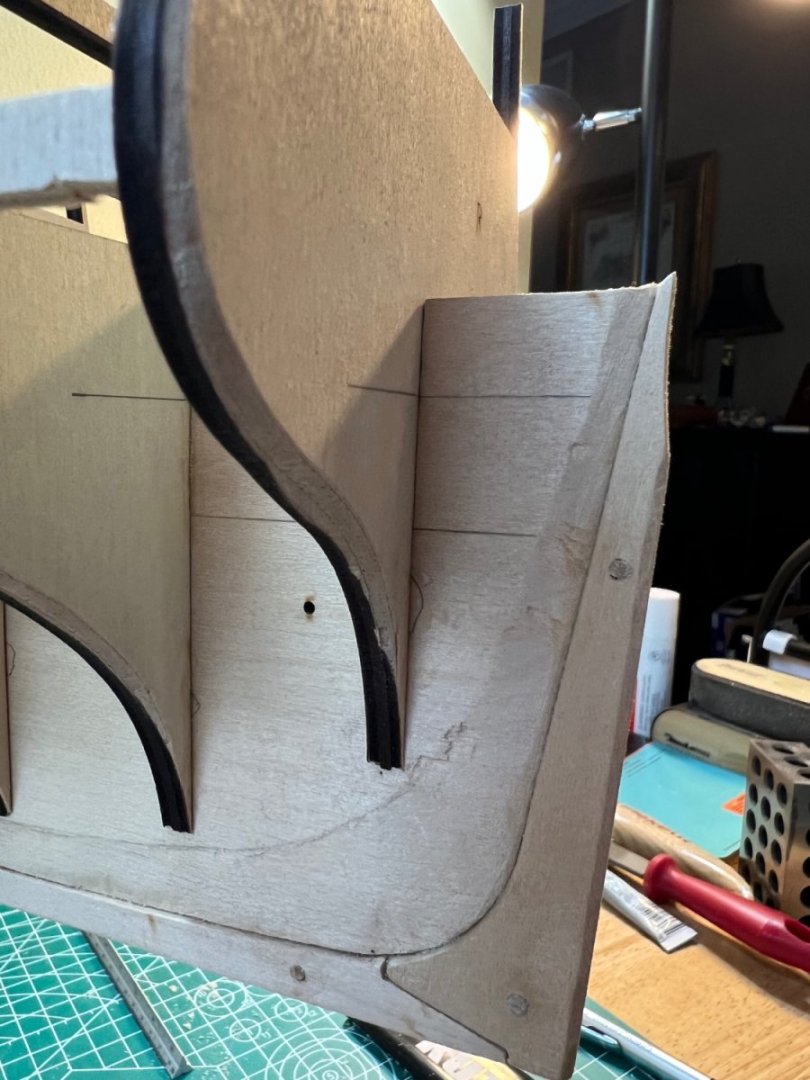
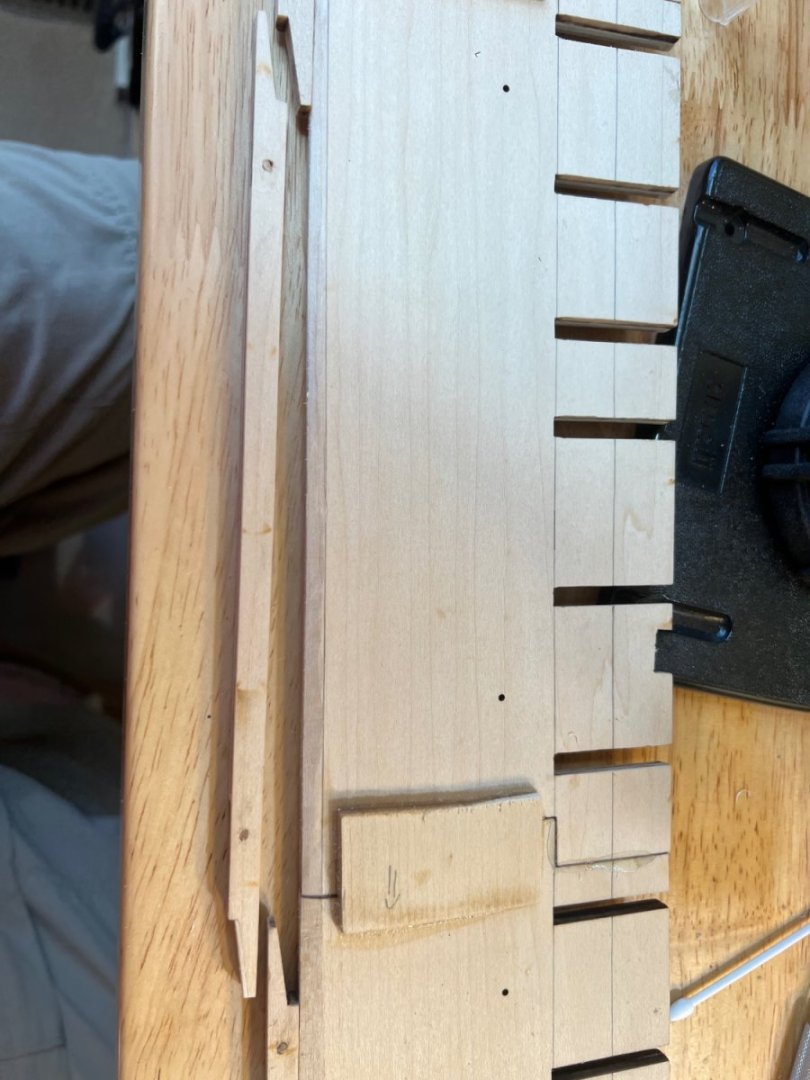
Stern Filler Blocks - final considerations. Shape until a plank width gap exists between the block and the rabbet. The blocks should follow the shape of the Bearding Line. Shape to slightly less than bulwark R, leaving just a bit for final shaping when planking. If you over cut, you can add a shim, but I think it’s easier to spot sand when necessary. Be sure to dry fit the blocks prior to glueing. I clamped in place and placed a plank all around the block to the rabbet. I found a few small but impactful epoxy drips under the counter that were causing fitment issues and needed to be removed. Also, the shim I added to the counter had to be trimmed to fully extend the rabbet line. After viewing other builds, I slightly rounded the top outer edge of the blocks to allow for planks to be tapered and “tucked” under the counter. It still allows for a squared fit if preferred. I’ll decide what looks best when I get there.


-
Thanks Jon - The irony is that by the time I finished refining with 400 grit sandpaper - they looked beautiful! Yet they won’t be seen again after planking 🤷♂️ I did end up scuffing them with 80 grit for better plank purchase. I’m off to an inauspicious start on the bow fillers. I made some bad measurements on Super Bowl Sunday and no longer have enough left of the block for two, 2 1/2 inch pieces 😂.
-
I’m very surprised at how much shaping the stern filler blocks needed. I followed the advice of several of you - and after utilizing my rasp and all of my block sanders, I finally shaped the blocks to the templates. My prior issue with the templates was because my initial blocks were so far off shape that it seemed I was utilizing the templates incorrectly. I think I sanded off 1/4 to 1/3 of the original cut shape. I glued the blocks with wood glue (I’ll add the final stern block pics after they dry)

-
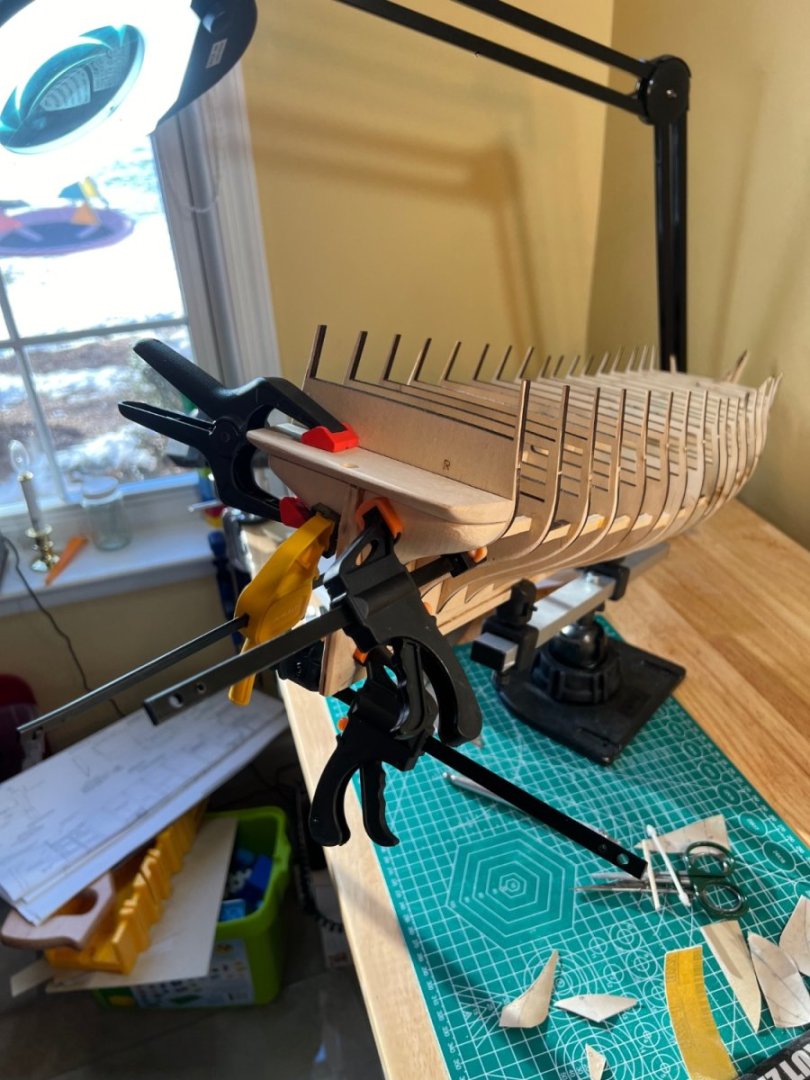
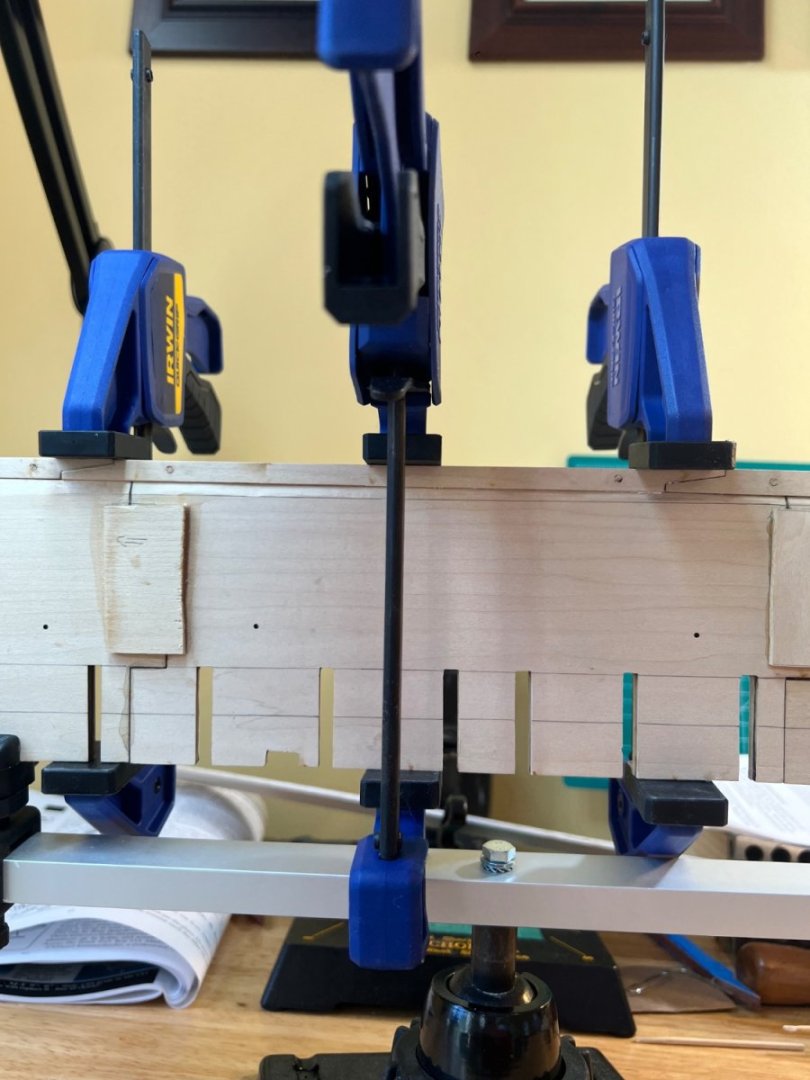
Stern Filler Blocks The filler blocks have given me some issues, mainly due to my tools/equipment. I realized that my Scroll Saw maxed out at about 1 3/4", so I had to make several cuts to the 2x2x6 block provided for the fillers, with a Coping Saw (of course, I didn't have one, so off to the store). Between the Coping Saw and my Belt/Disk Sander, I was able to get to the approximate shape I needed for fine tuning. However, I'm having difficulty now determing when to finish shaping to achieve the proper angle to the rabbet. The Plans and Practicum discuss using the scale provided in the plans, but I don't think I'm doing it right. The fillers took a lot more hand sanding than I expected. I'm going to shape some more, then dry fit a plank. I can use a Dremmel sander for more fine tuning later. I added a picture below of the counter with temporary transom frames to show the importance of reducing the counter to 11/32 to provide a flush transoms/bulwark transition. I’ll add the finer tuned fillers shortly.


-
Geoff - Sound advice! -Andre
-
Thanks Rich - I've been following your build and enjoy it. Nice work! -Andre
-
Thanks mtbediz - I've been following your build log and find it helpful and enjoy your work. At this point I couldn't imagine undertaking a scratch build, but you do learn so much as you progress. Thanks for dropping by! -Andre
-
Hi Jon - The reason for reducing the counter thickness becomes apparent in the last paragraph on Pg 26 when it states that the distance from the counter to the top of bulkhead R should be 1". I also found it in the subsequent Summary. Not having as much experience as you (or seemingly most folks around here), I read and try to follow the practicum more closely than most I suspect. I find the Summary sections to be especially helpful as they highlight the main efforts that should have been completed (with a handy little box to check). -Andre
-
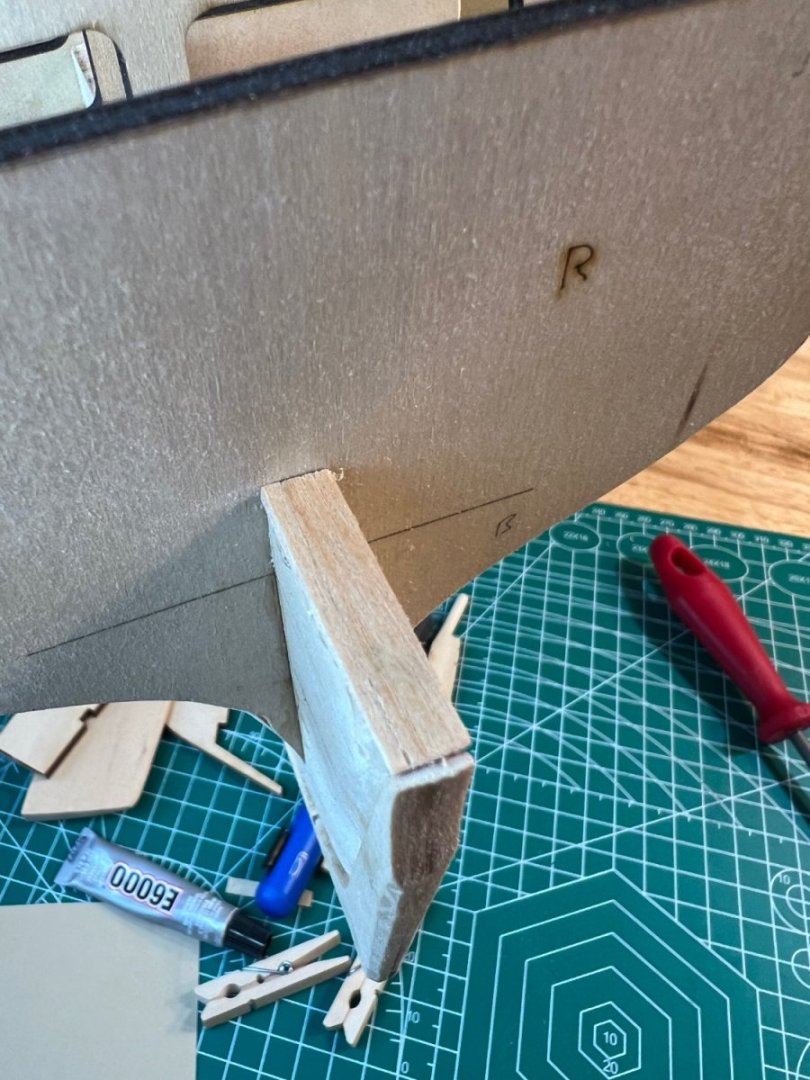
After consulting with Bob Hunt, I’ve decided to solve my counter problem by adding a shim to the center keel. The counter now sits 1” below the top of Bulwark R. I made it out of some scrap planks from my Swift build. I temporarily secured the counter, placed 2 transom frames (1 on each end), and confirmed 1” to the bulwark. I drew a reference line, then secured the counter with E6000 adhesive. The counter is now permanently attached. Moving on to the stern filler blocks.


-
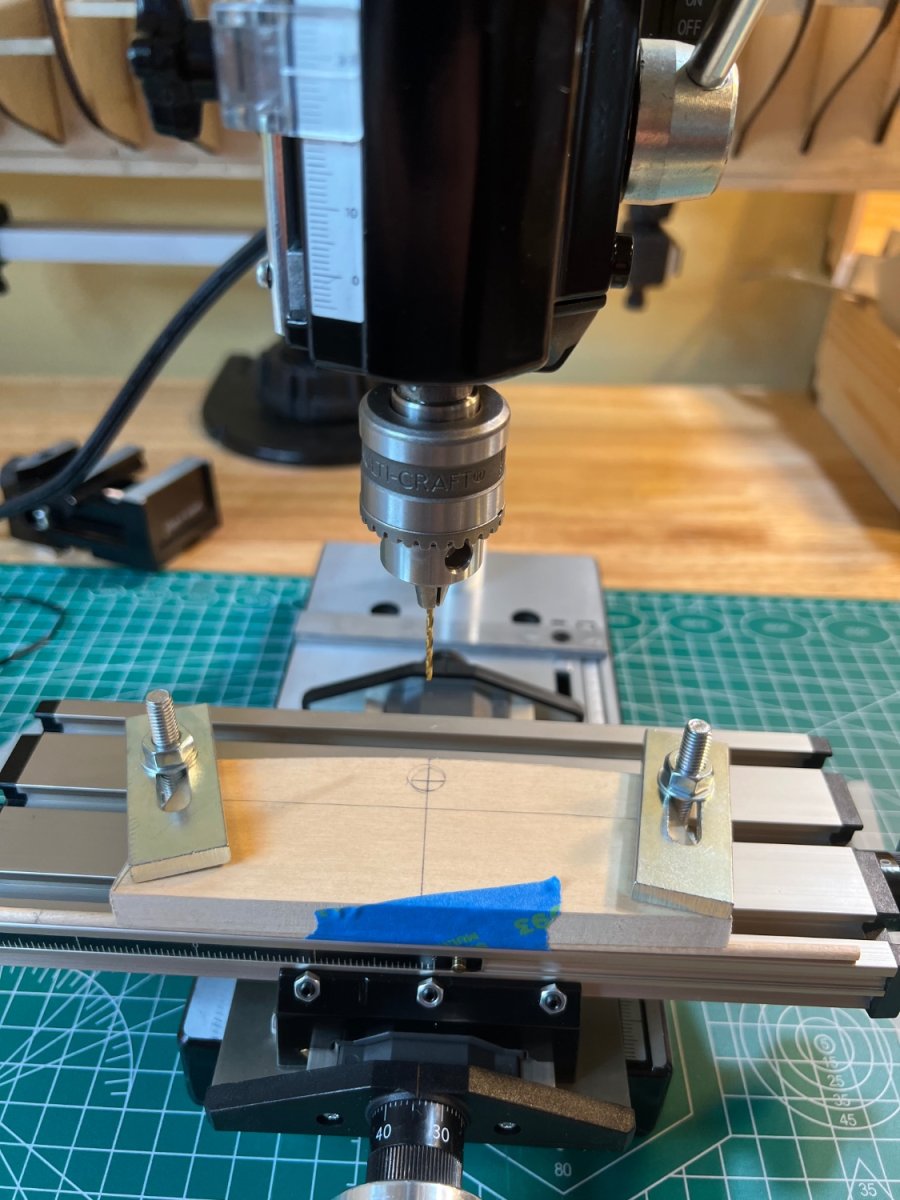
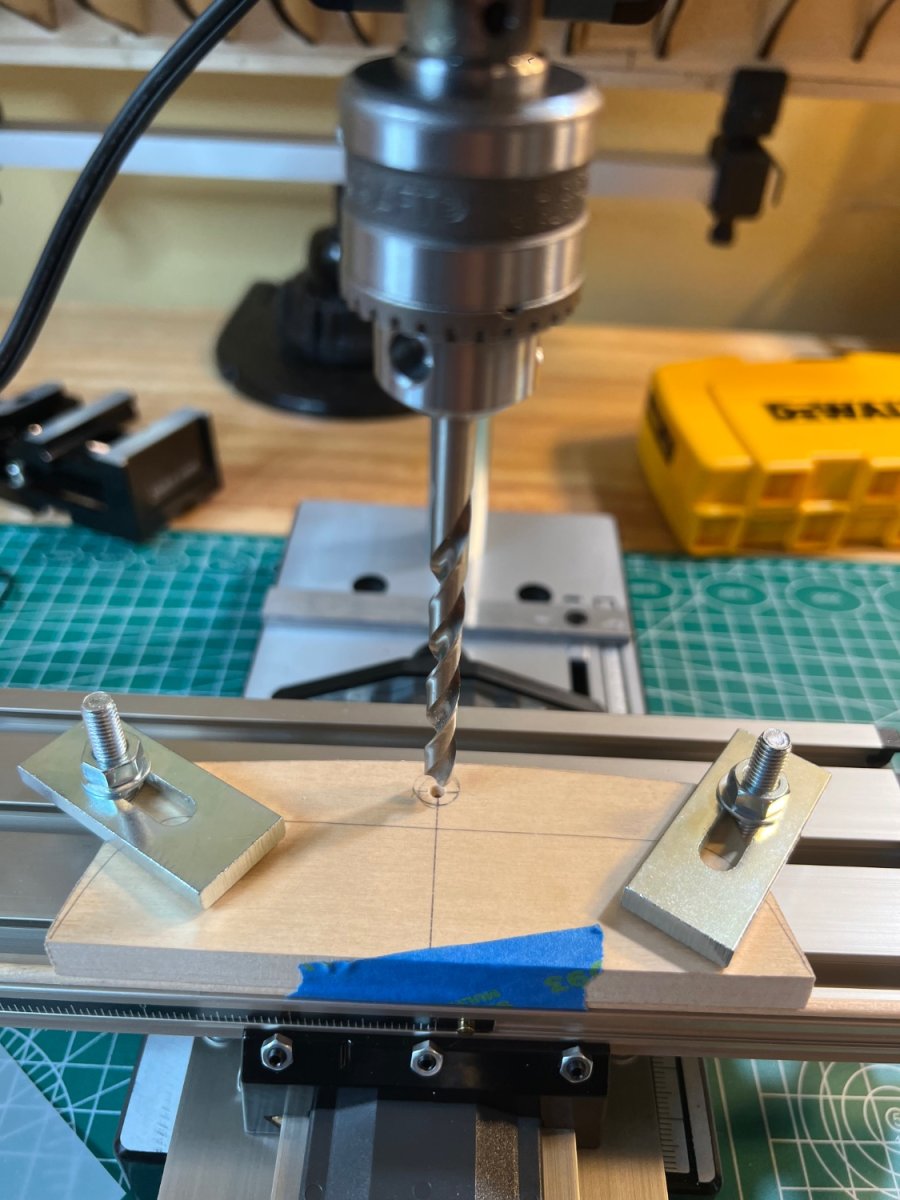
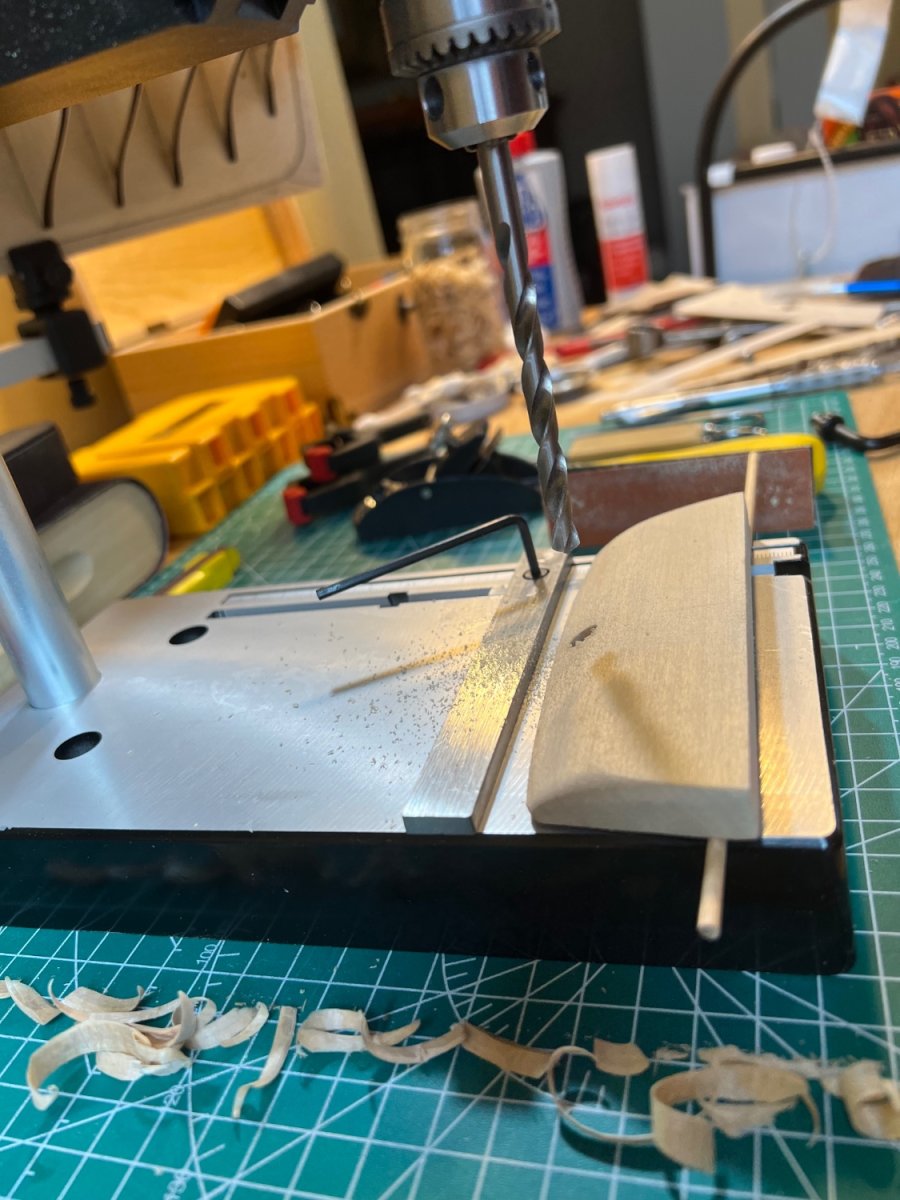
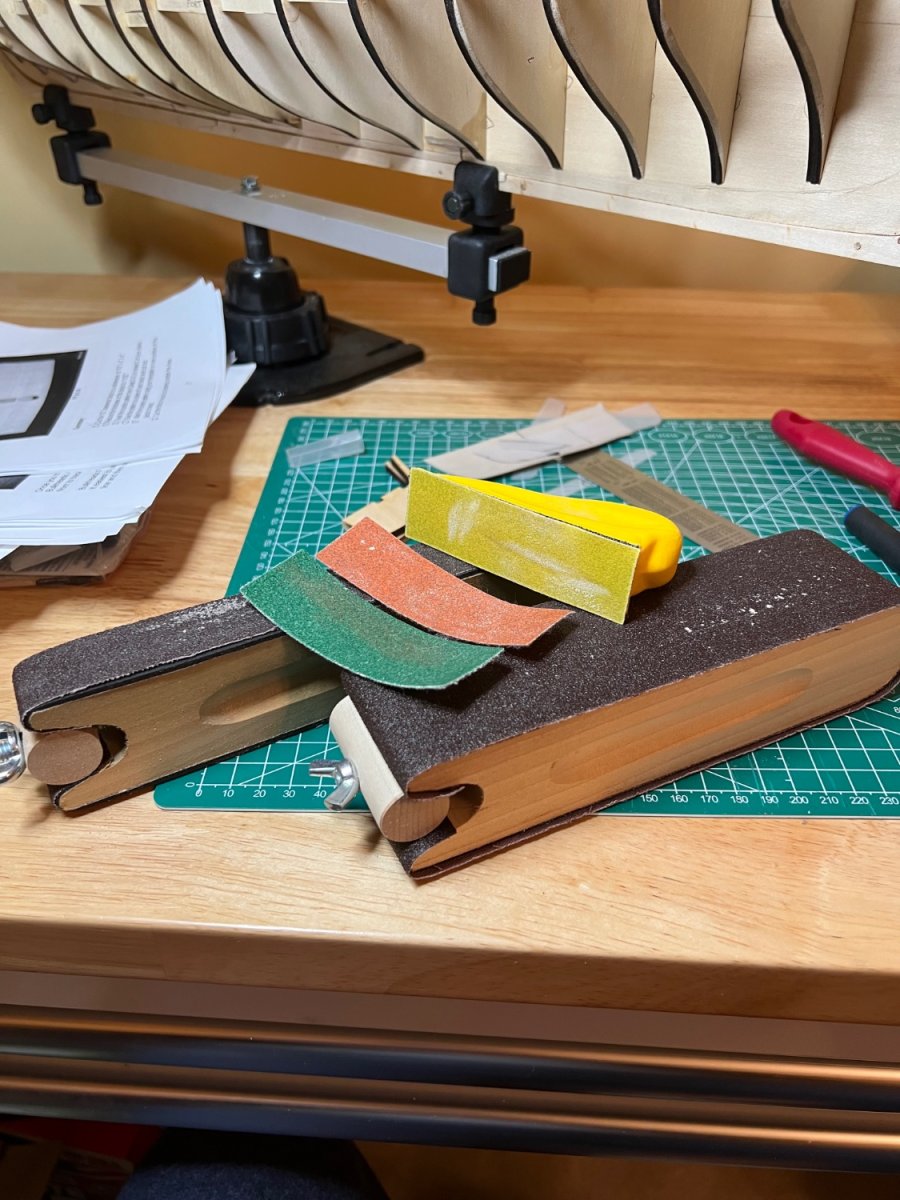
The Counter I had some minor issues with figuring out the counter from the Practicum. What I needed was to some good pics. JSGerson's pictures were particularly helpful and I referred to them often. [Note: As I progress with Mr. Hunt's Practicum, I've found that his way of teaching and my way of learning differ. This is compounded by the pictures being of somewhat older/lower quality, making it difficult to confirm his direction on angles, bevels, etc. I'm the first to offer that this is likely because Mr. Hunt is teaching at/to a higher level, and I'm a solid rookie.] After drawing the lines needed to shape the counter, I utilized a curved cutting blade, a belt sander, and 80grit sandpaper for the initial rough shaping. I finished with a micro plane, and numerous hand sanders. Including a handy little Yellow one that comes with pre-cut strips of 80, 120 and 220 grit strips with Velcro for easy interchanging. As I was working on this, Micro-Mark was nice enough to have a sale on a hobby drill press, so I used that to drill the hole. I pre-drilled it with a small (approx) 1.6mm bit, then moved up to a little under the recommended size (I believe it was 5/16"). I utilized Jon Gerson's method of taping a small dowel to the opposite side of the drill hole to achieve the necessary angle. I did not however, have the same success, and I ended up having to shape the hole using the drill and a round file. Initially, it completely skipped my mind that it I likely should round the rudder stem. Square things don't often turn well in round holes. Lesson learned. After shaping the rudder stem it worked fine, albeit with a somewhat larger hole than necessary. I'm ready to glue the counter but am concerned that I don't have a good right angle between my counter and Bulwark R. It's close, but I'm not sure how much reshaping I want to do to achieve 90 degrees. Also, I have slightly less than 1" from the top of my counter to the top of Bulwark R (where the planks will lie). The Practicum states that this is very important. I could achieve this with adding a shim to the center keel portion that supports the counter (the shim is loosely placed, shown in the last picture), thus raising the entire counter to the necessary height, or I could add shims to the transom frames later on. I'm leaning toward the latter, but for no good reason, so any thoughts would be appreciated.


-
Thanks Peter and Jon. I appreciate you providing some other Constitution resources. Jon, I have your build bookmarked because, being a strongly visual learner, I find your pictures particularly helpful.
-
Thanks Geoff!
-
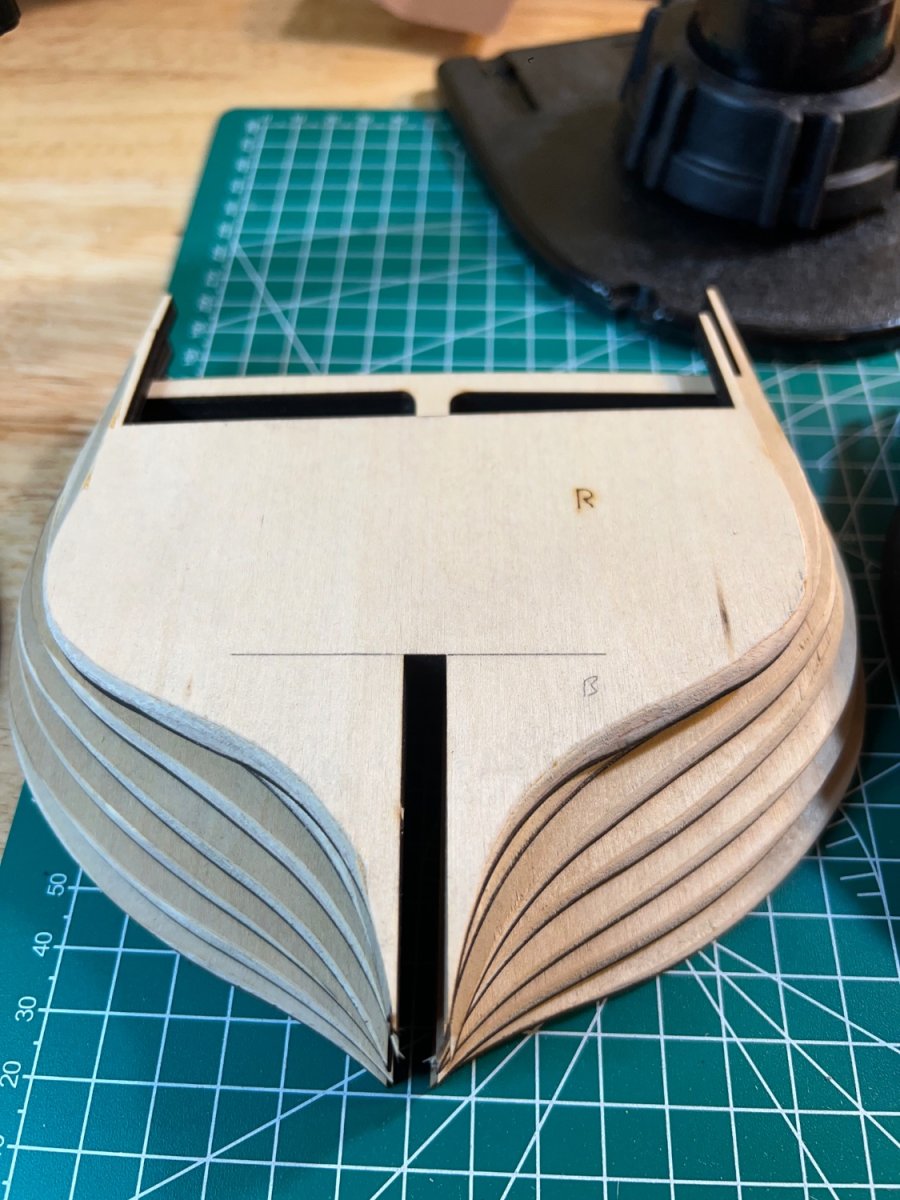
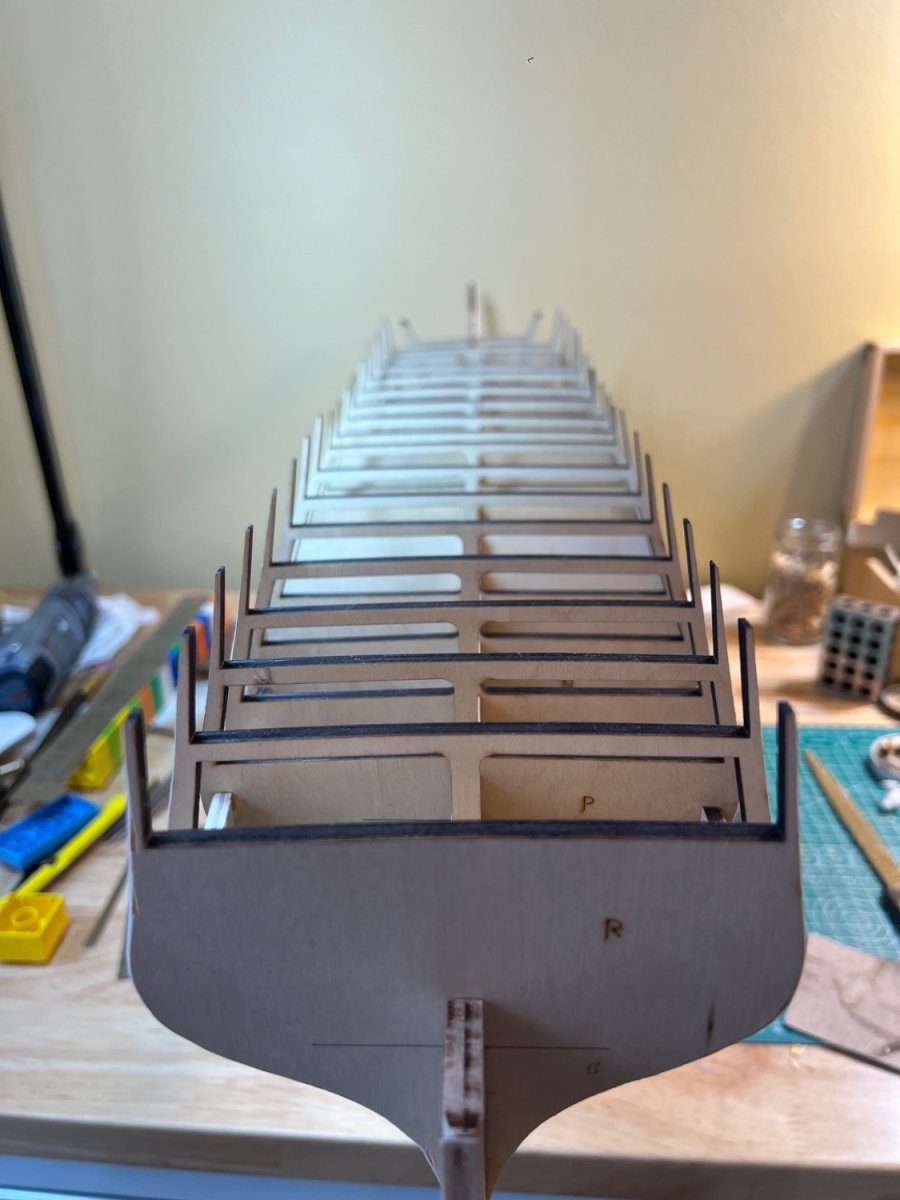
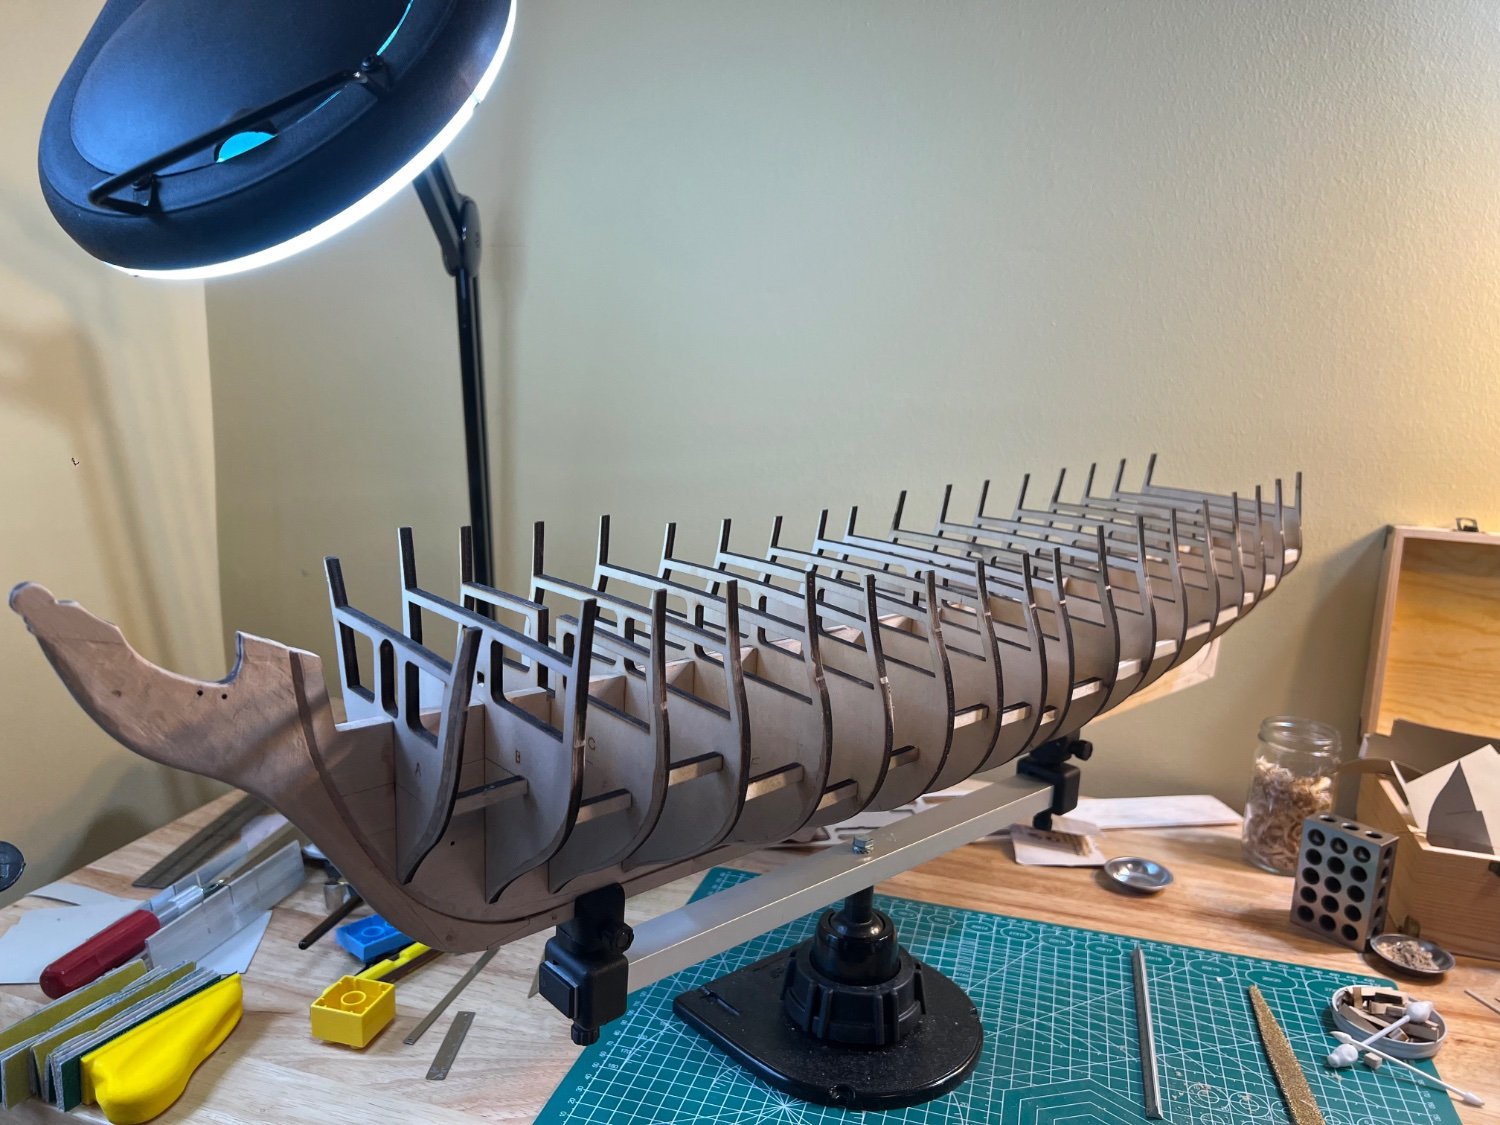
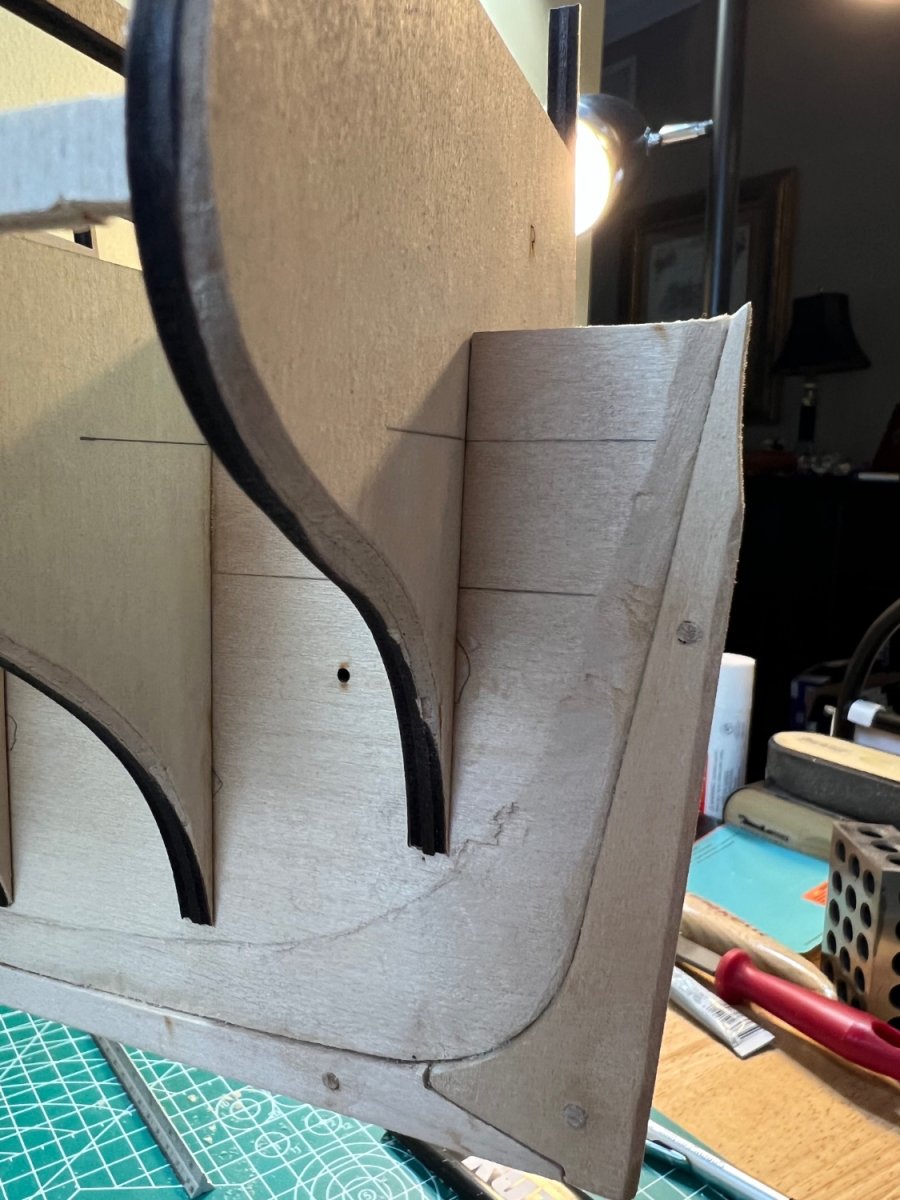
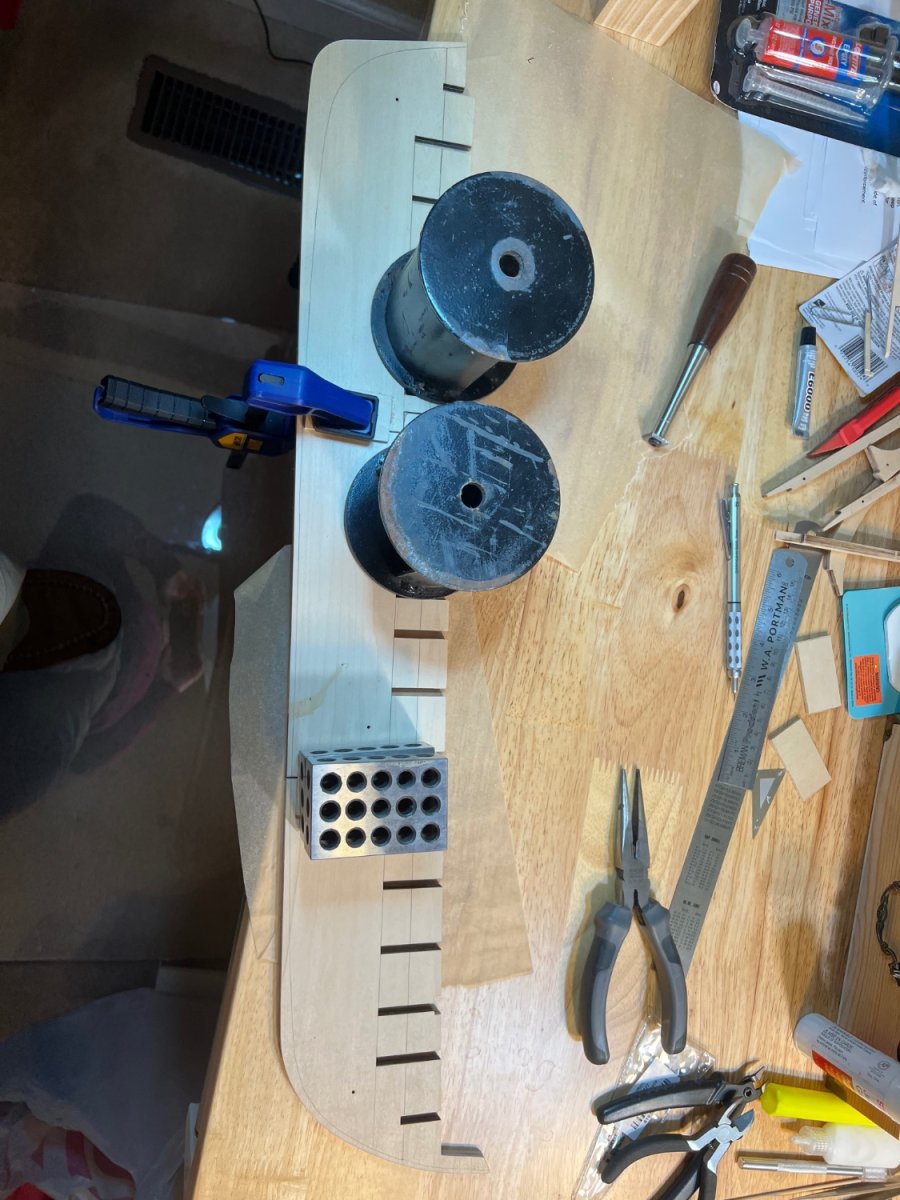
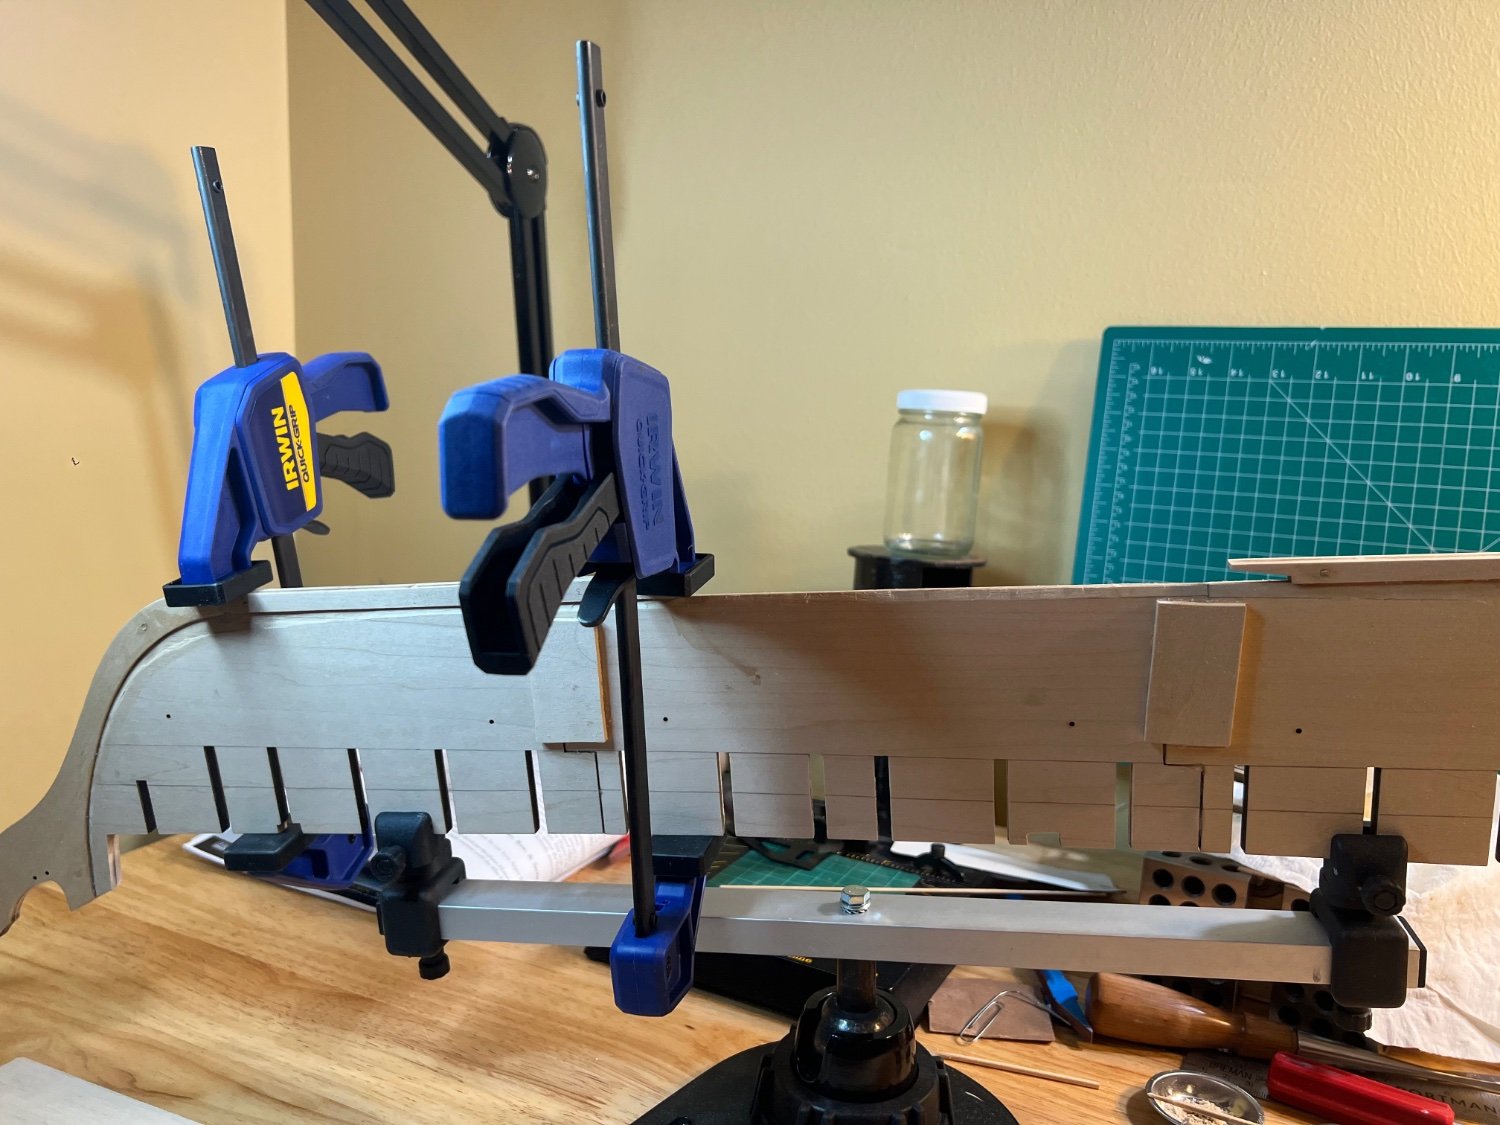
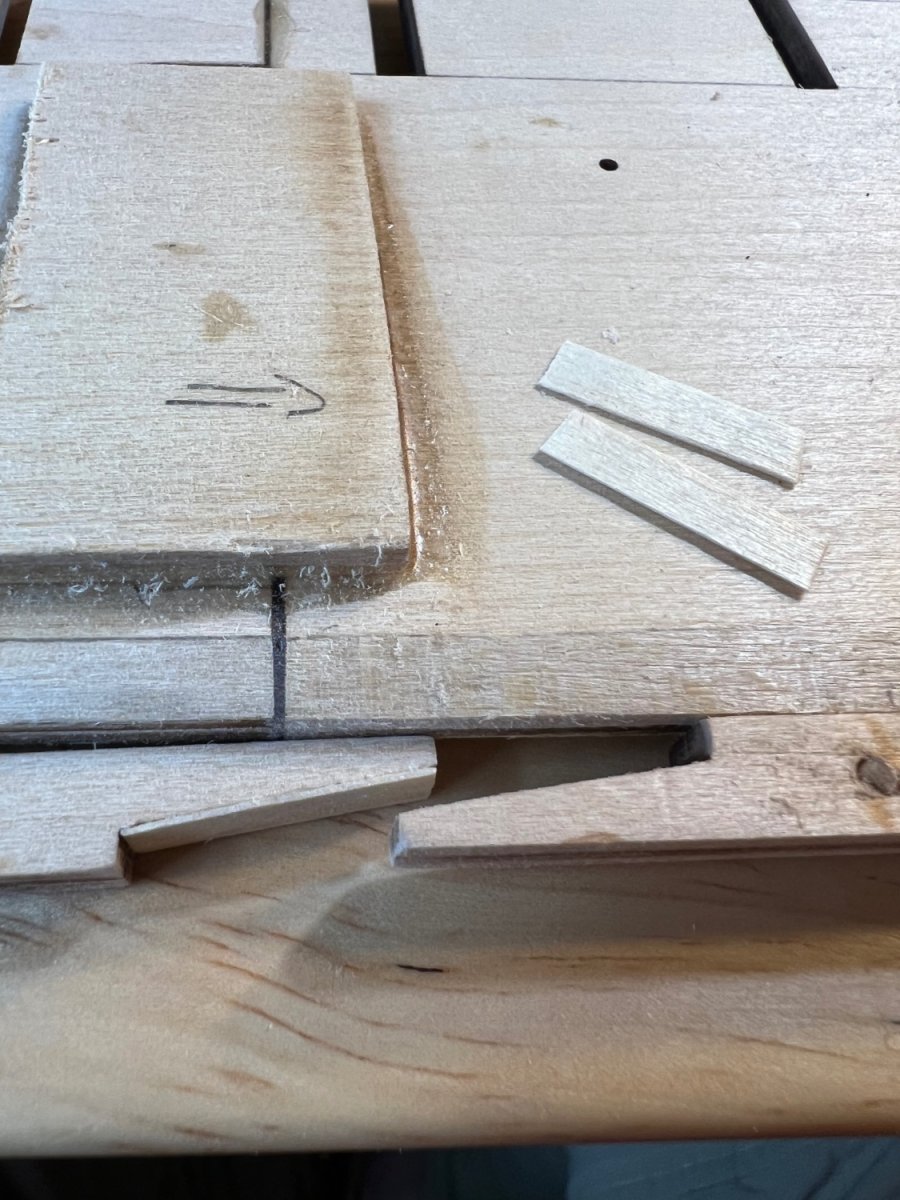
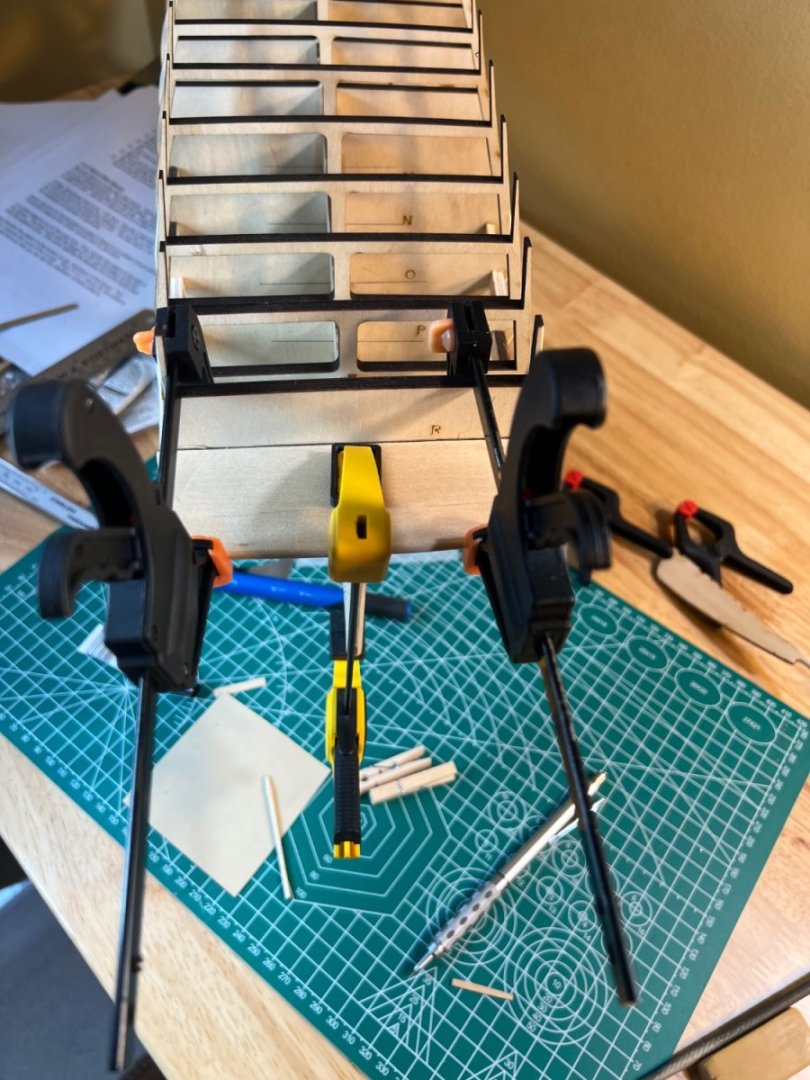
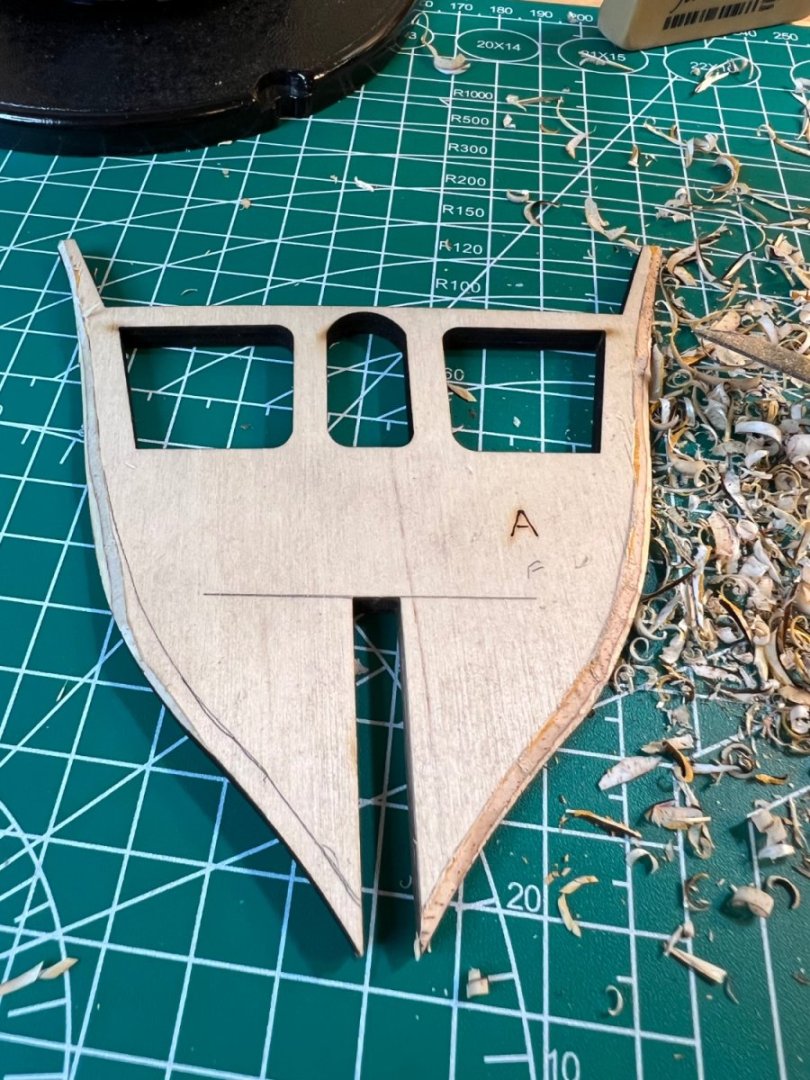
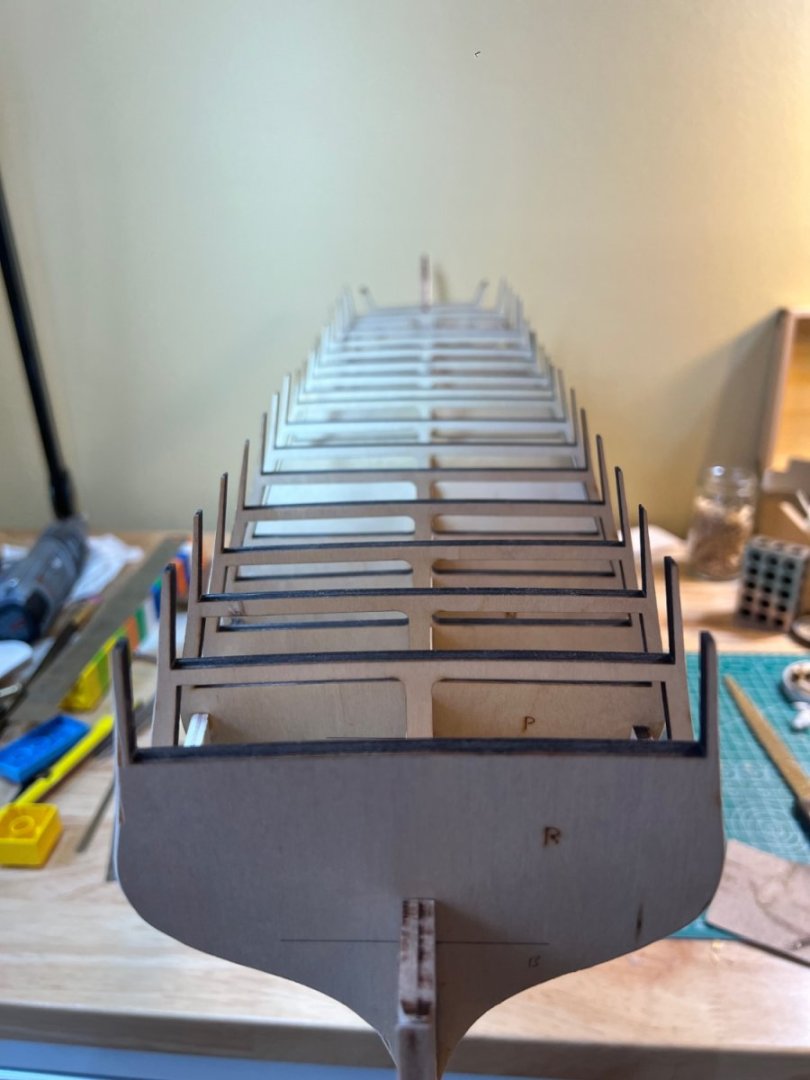
Bulkhead preparation presented the first serious challenges, mainly because I wasn't patient enough. The bulkheads require some beveling. I traced the bevel from the kit plan sheets, transferred them to the bulkheads and beveled them with a rounded hand blade. As I was testing the fit of the bulkheads, I realized that one of my keel sections (created by gluing 2, 1/8" halves), was slightly askew. This required extensive sanding of the 6 narrow bulkhead slots in the section - an effort that proved difficult. I used an inappropriate hand file and snapped one of the keel/bulkhead tabs. After some quick research, I found a 6" warding hand rasp (by Kutzall) was perfect for removing a somewhat significant amount of material in a delicate area (the Dremel was too aggressive). Bulkhead Assembly. Two of my 1/32" basswood keel reinforcements were slightly impairing a bulkhead. I was able to make quick work of that with a Dremel attachment (note: use a facemask or the fine dust is not pleasant). There are 18 bulkheads and the fitment process was a bit tedious after the 5th or 6th one. However, this is a critical area. I found it best to check the fitment to a snug tolerance of every bulkhead, before gluing them in. Epoxy didn't work because it was too thick, making it difficult to align the brittle bulkheads to the reference lines, so I after the first two, I switched to Weldbond. Note: I noticed that several of my bulkheads began to unglue and split (they are made of a pressed wood) needing remediation with glue (applied with a needle applicator and clamped). After applying bulkhead A with epoxy, I noticed visually that it was off a bit. Even though the alignment testing doesn't show much of an issue, I suspect this will cause me some issues later when I prepare the bow framing. Lastly, the kit plan sheet showed an optional 3/16 x 3/16 bulkhead strut for rigidity. I cut those from the scrap-wood shell of the bulkheads. Best practices: Prepare all bulkheads in advance before gluing a single one (unless you are very comfortable with your brand of epoxy, use a strong glue instead). This includes aligning the bulkhead reference lines, preparing the fit to a 45 degree angle to the center keel, and laying a straight ruler along the bulkheads to adjust for gaps before gluing. Minimal gaps can be addressed later with shims or sanding.


-
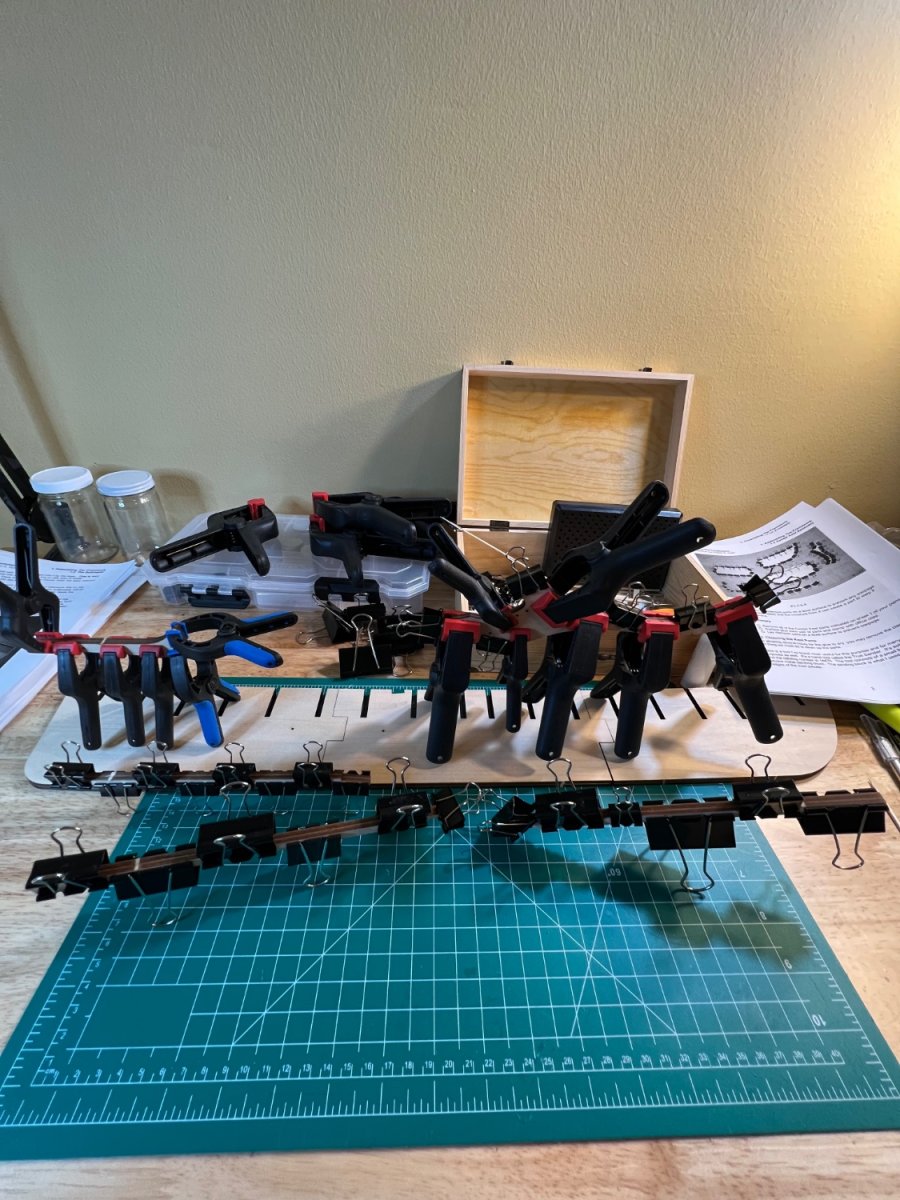
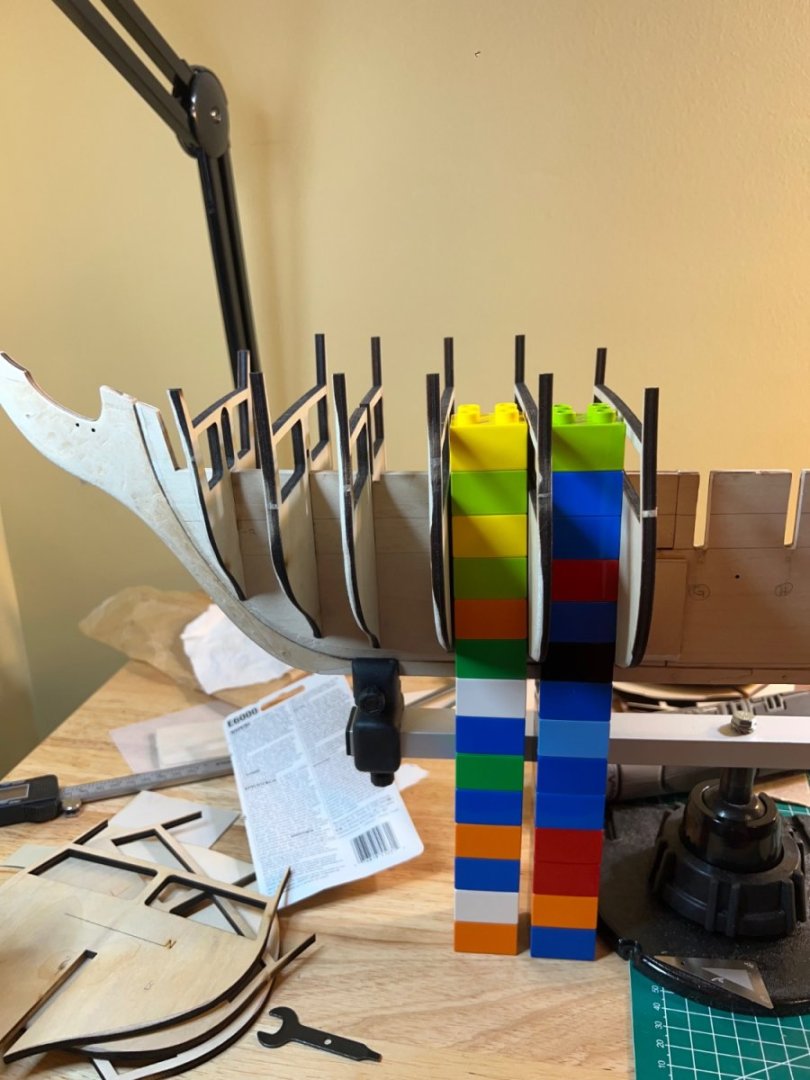
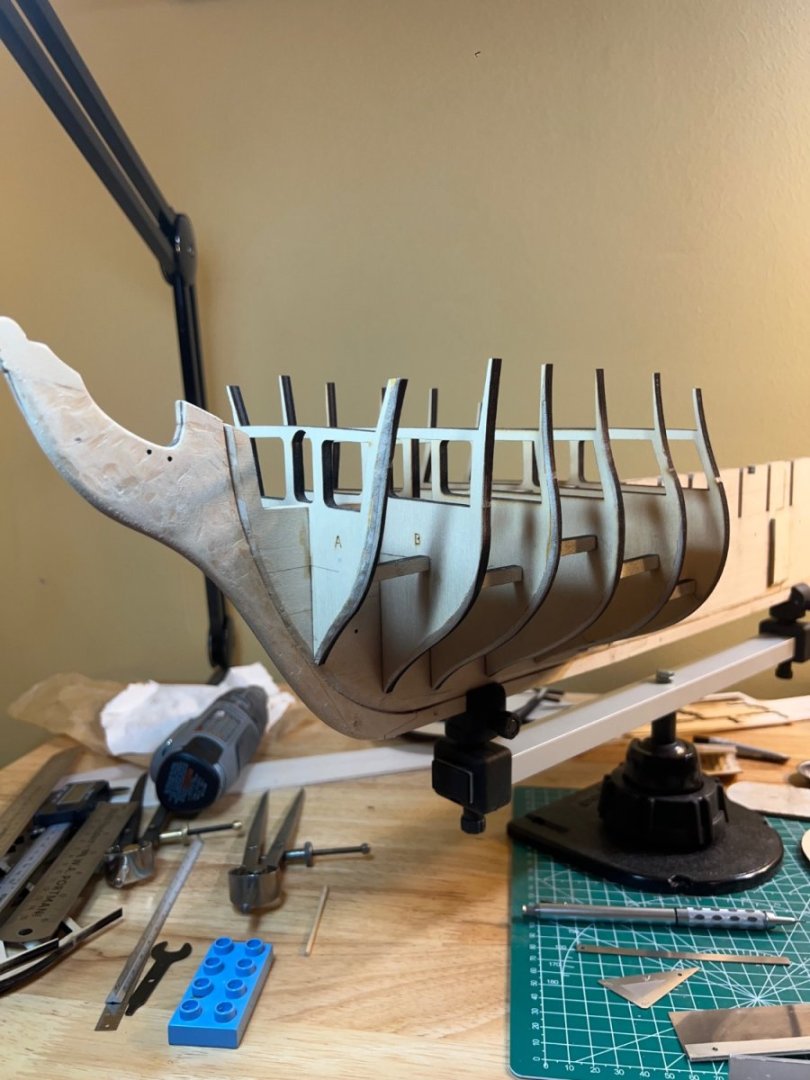
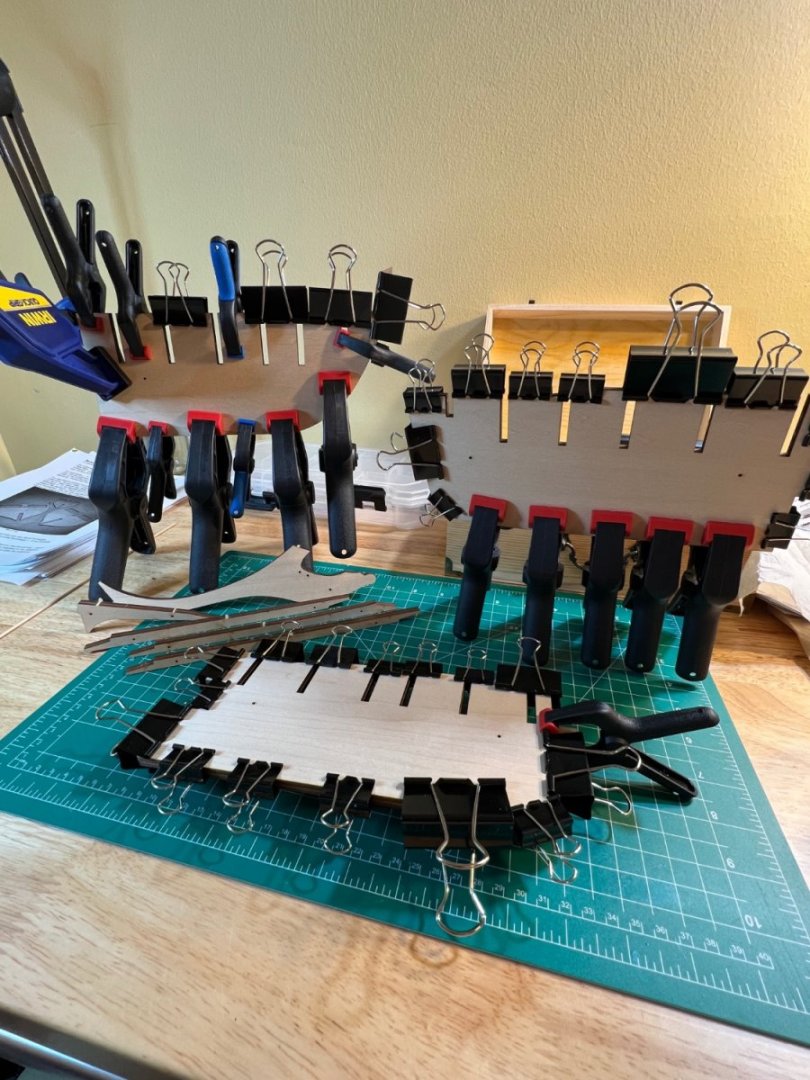
Assembly of the Center Keel Set is straightforward. The set is assembled by gluing a number of 1/8" thick laser cut parts which must be glued together to create 1/4" thick sections. I glued 1/32" basswood strips (leftovers from my Swift Build) to both sides of the Center Keel sections, to reinforce the joint. I utilized nearly my entire cache of clips, clamps and weights to keep the set parts from warping as the glue dried. I chose to use 5 minute epoxy very sparingly, and mostly utilized Weldbond wood glue. I transferred the reference, bearding, bulkhead and beveling lines from the plan sheets using tracing paper and heavy card stock. I primarily used a rounded curved blade and sandpaper for bearding and to cut the rabbet. Attaching the Stem, Sternpost and Keel is also fairly straightforward. The practicum advised to attach the stem and sternpost to the center keel first, then shape, fit and glue the middle keel section. This was a fun process with few challenges. However, be sure to complete a tight fitment before, and as assembling the section. I had to utilize numerous grains of sandpaper to attain the tolerances I wanted (I wanted to limit the use of fill later on). I needed to utilize a shim to the final keel joint. Remember that this assembly will bear the weight of the model, so be sure to achieve the best true surface contacts for gluing. One note - I wanted to utilize dowels to reinforce this section to the Center Keel, however, I don't have a drill press and didn't want to rely on a pin/hand drill because there is very little room for error and I didn't want to weaken the section by drilling errant holes. I may need to address this dowel issue later when determining what type of stand to utilize for the model.


-
Thanks Geoff! I've been perusing your build log - you've done a magnificent job so far and I will no doubt learn a lot from you. Beginning my modeling journey with the Swift was more important than I could have imagined. I'm looking forward to the challenges of the Connie - Thanks for the welcome note!
-
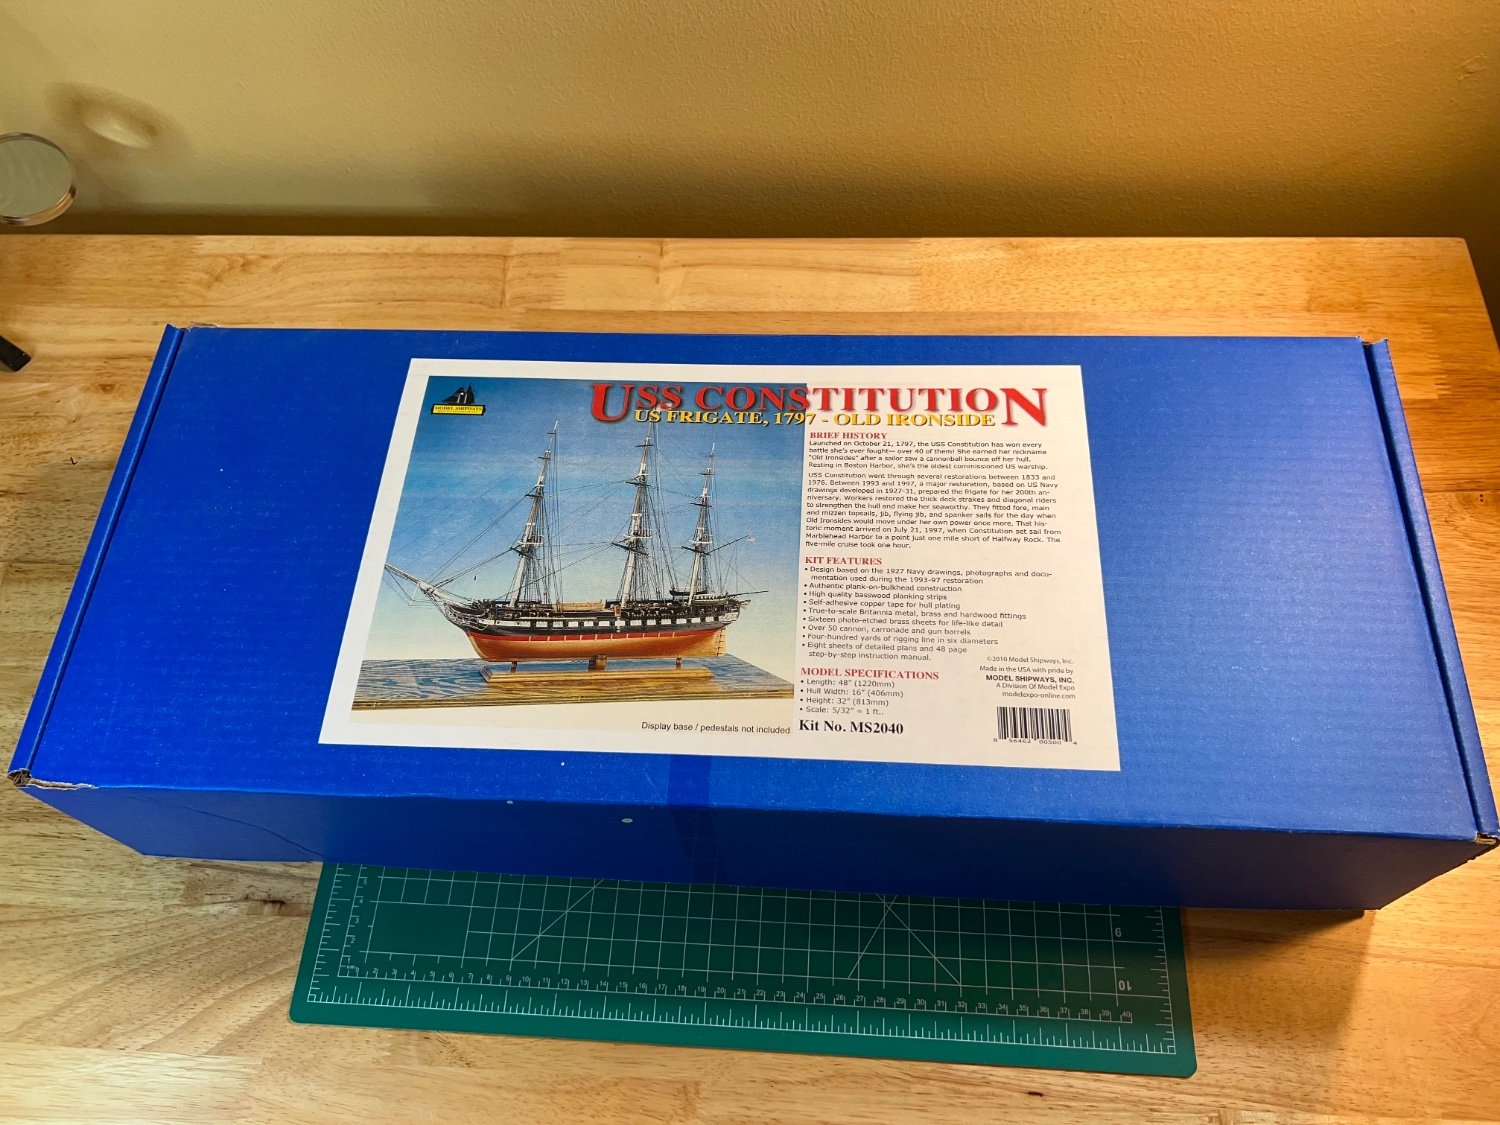
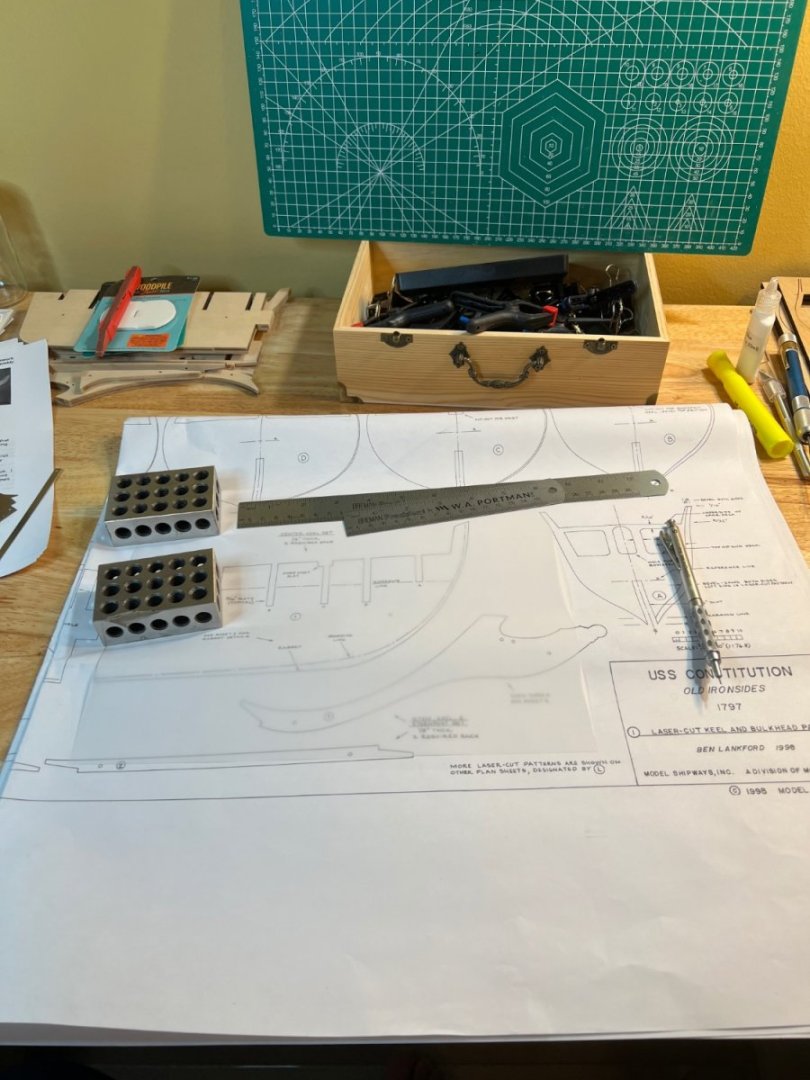
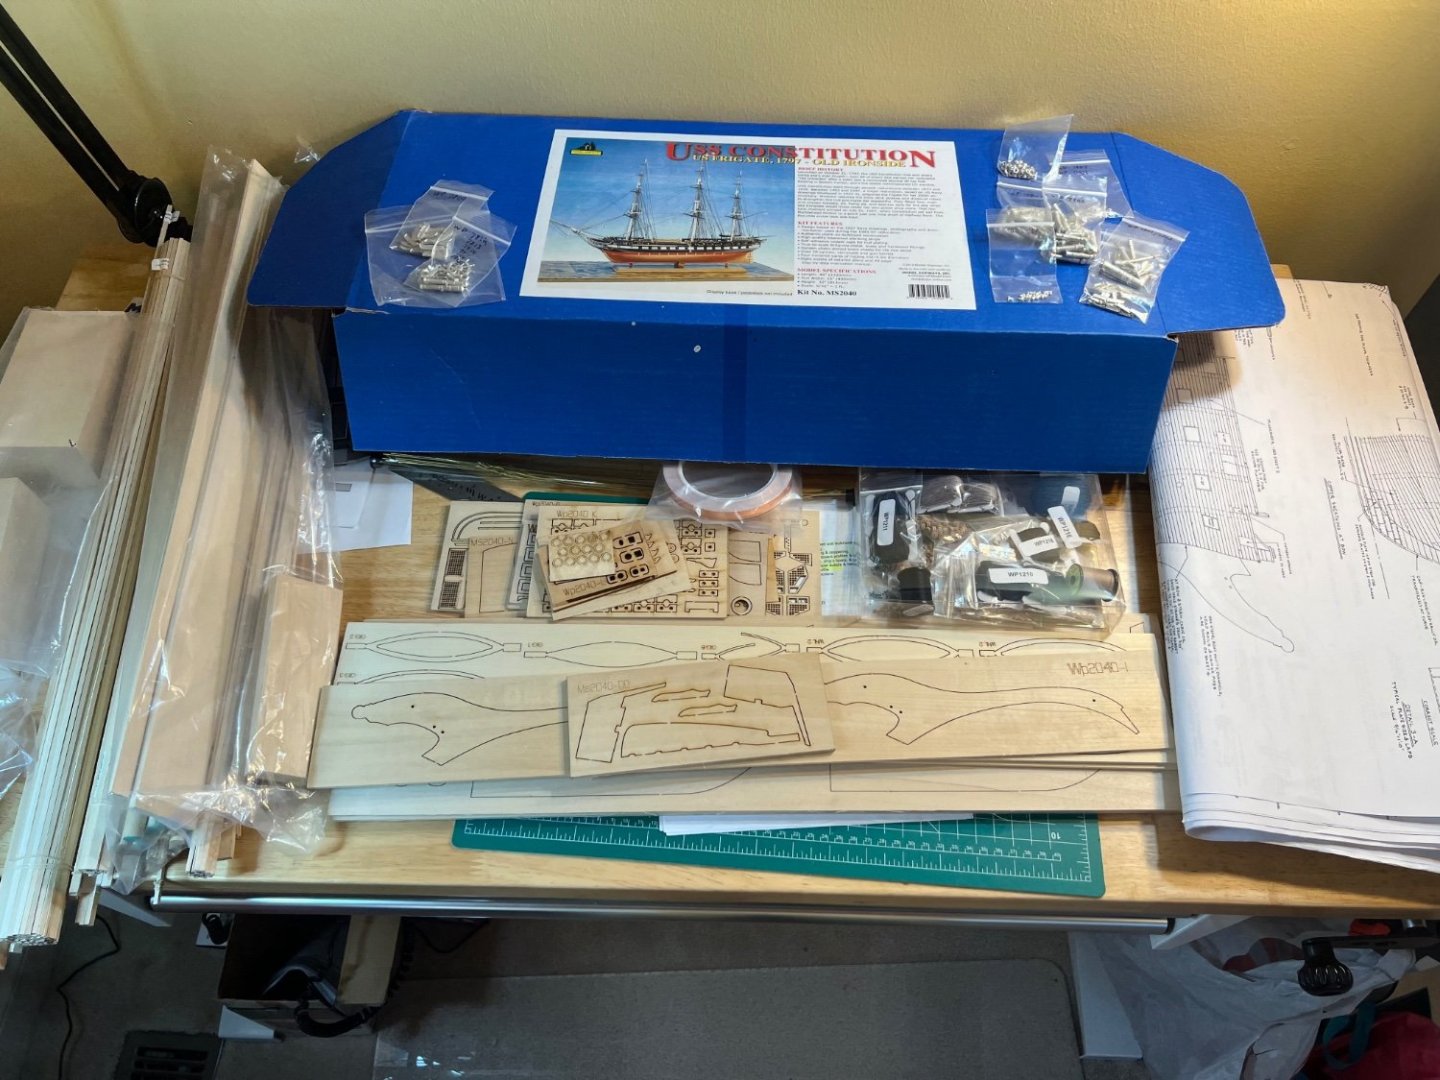
Welcome to my USS Constitution build log. This is my second wooden ship model. I completed the Artesania Latina 1808 Swift model a little over a year ago (which just reminded me to close out that build log). My first attempt was going to be this USS Constitution (1:76 MS2040) kit. Fortunately it was backordered (Christmas gift from my pop), because after previewing the somewhat limited pages of instructions available online - I realized that the build would need to be based almost entirely on the 8 or so architect style giant plan sheets. That was out of my league, so I thought it prudent to start with something a bit easier. I chose the Swift 1805. Having completed the Swift, I took some months to complete a "Mayberry Street Miniatures" doll house project with my daughter. And then it was time to begin the Constitution. To set the stage, I am an extremely novice woodworker. I had gotten in a bit over my head with my Swift project (especially the rigging), but was quickly able to work my way out of any problems with a lot of thought, creativity, and help from the great modelers on this site. For me, this hobby is a series of challenges to be solved, often requiring the learning of a new skill - and new tools 🙂. This build log will be of most interest to newer modelers, but may offer a few chuckles or familiar memories for the old(er) salts. Given the complexity of the model, the sparse instructive guide, and the 8 detailed build sheets, I chose to follow Bob Hunt's practicum (fancy term for instructions). I ordered Mr Hunt's "Sophomore Course: USF Constitution" (a CD with 12 Chapters), with a photo CD add on (about 1,000 pictures of all stages of the build). The practicum was exactly what I needed, unfortunately, it didn't contain anything pertaining to masting and rigging. So if you think you'll need help with anything above the deck, you should consider ordering Mr. Hunt's "Sophomore Course: USF Constitution, Masting & Rigging" (6 chapters and an additional photo CD). I've printed the first 3 chapters so that I'm able to look ahead. I also refer often to the sheet plans, as well as the supplied kit guide. The kit itself is chock full of goodies. Though I'm a bit surprised at how small some of the cannons and rigging parts are - they seem to be significantly below scale. I inventoried the entire kit for parts, but found the effort to be surprisingly helpful in familiarizing myself with nautical terminology. I'm not going to provide a run-through of the kit, but suffice it to say, I found it worth the money (even though it was a gift!). There are very few things you can buy today that will provide years of challenge, entertainment, and a beautiful result for under $600 (retirement is a long ways off, so I'm working on this after work, and between sports and school events). I'll be updating as time permits, which means my updates will usually be backfilling my progress. I look forward to any comments and suggestions! Cheers! Andre
-
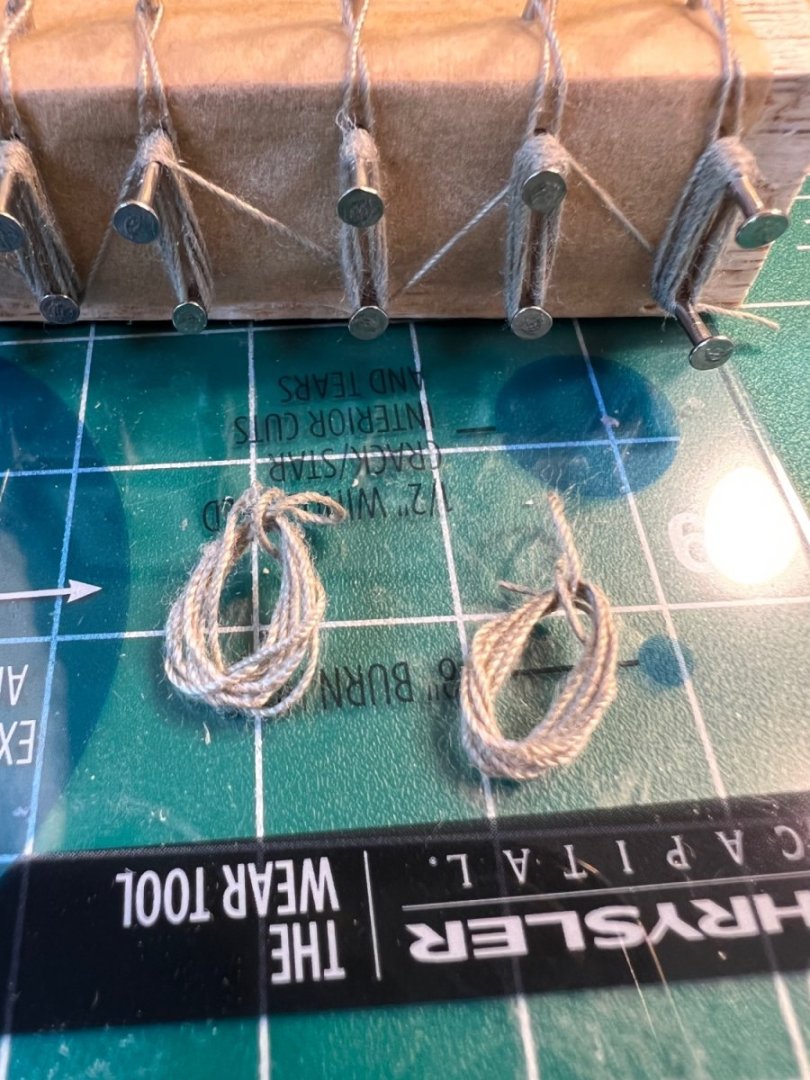
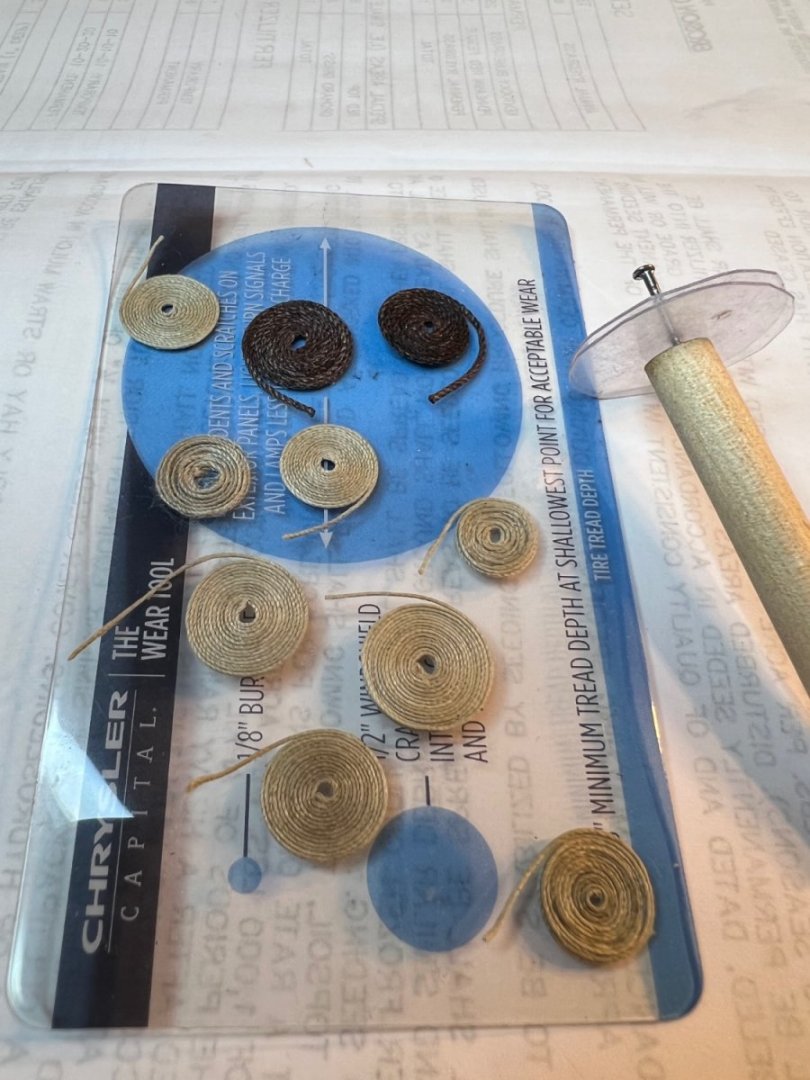
I decided to mix the coils with some hanks. I like them a little on the disheveled side. The jig worked great.
- 111 replies
-
- 2
-

-
- Swift
- Artesania Latina
- (and 3 more)
-
Fo some reason, I’m really dragging out the final touches… Rope coils are complete. I made a little plastic jig/coiler that I saw on this site - I cant recall whose it was to give them credit. It’s very useful and made the coils a breeze.
- 111 replies
-
- 5
-
-
- Swift
- Artesania Latina
- (and 3 more)
-
Great ideas @Oldsalt1950. I forgot about using the spare parts! What an oversight. Glad I asked and thanks! I totally agree with you regarding the coils. I’ll have to see if I can fashion some belaying pins. Looks like I may not be almost done after all! 😂
- 111 replies
-
- 2
-
-
- Swift
- Artesania Latina
- (and 3 more)