HOLIDAY DONATION DRIVE - SUPPORT MSW - DO YOUR PART TO KEEP THIS GREAT FORUM GOING! (Only 44 donations so far out of 49,000 members - C'mon guys!)
×


homer
-
Posts
133 -
Joined
-
Last visited
Content Type
Profiles
Forums
Gallery
Events
Everything posted by homer
-
 I have a question and hope one of our members has an answer!!! ... I'm beginning to give some thought to the display case I will build for the C W Morgan. I want to build a glass case with thin "brass" edging. They are available for purchase from display case builders and are VERY EXPENSIVE. Like many of our members, we take pride in building everything ourself. My question is where can I purchase the "brass" angle strips?? I want them to be thin and approx. 3/8 to 1/4" wide on the sides. I know there must be a company out there that supplies the cabinet builders, but for the life of me, I can't find a supply company or place to purchase the brass strips??? PLEASE... can anyone help???? Thanks. Ron
 -
I know that reviewing pics sometimes helps me determine how I might go about the next build process. We're getting ready to head off to the San Diego Wild Animal Park for the day... so I will do away with the description and throw up some build pics for your reference.


- 56 replies
-
- 5
-

-
- Charles W Morgan
- Whaling Bark
- (and 1 more)
-
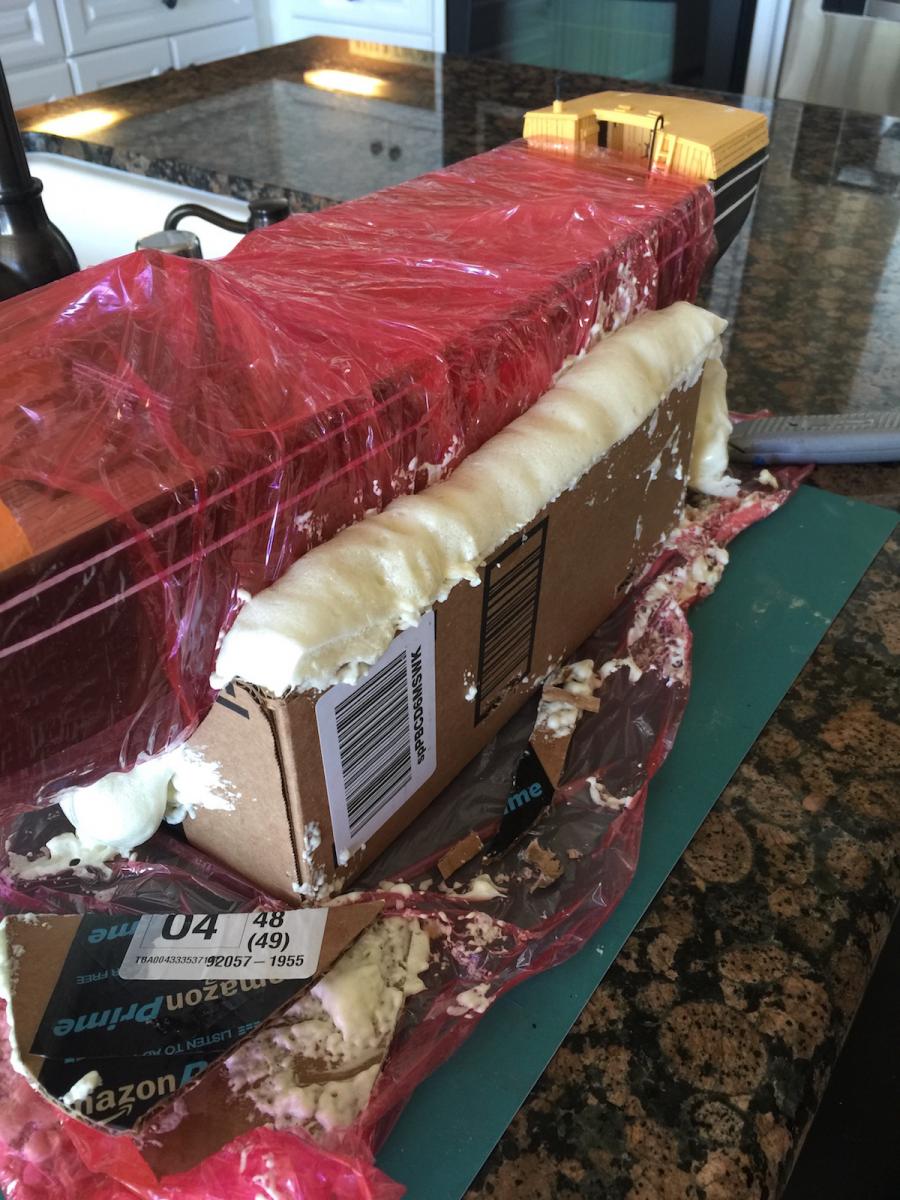
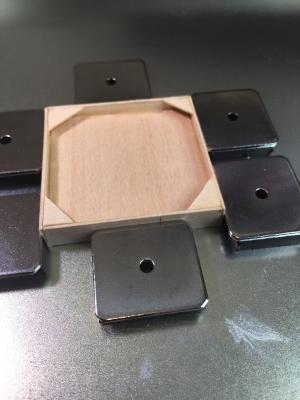
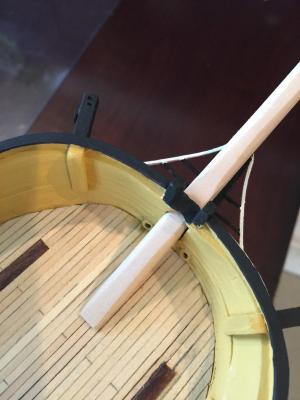
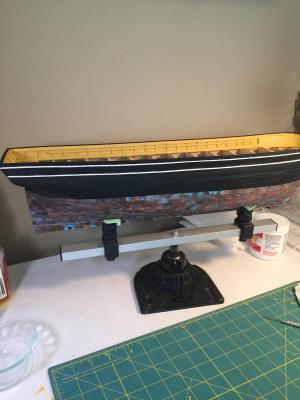
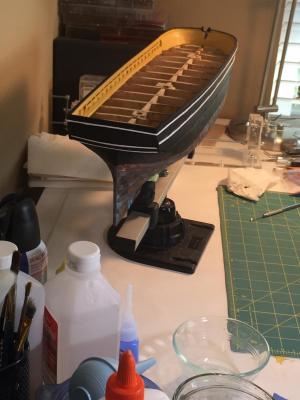
I almost forgot ... a few weeks ago someone was talking about making a more sturdy working stand for the ship while under construction. I initially made my finished display stand shortly after coppering the hull. But, during construction I tend to drip this and that and scratch it all up. Usually, I just refinish it after the build and before the ship is placed in it's display cabinet that I build. But this new working stand idea intrigued me. I took an old show box and cut it down to size opening the ends to a half circle. Then wrapped the ship in shrink wrap or plastic wrap so it doesn't get anything on it. I then set the ship on the box and shot that expanding foam, you can buy at Home Depot, into the corners. It filled it all the way up and after it hardens I trimmed it down and now have a perfect fitting stand!


- 56 replies
-
- 7
-
-
- Charles W Morgan
- Whaling Bark
- (and 1 more)
-
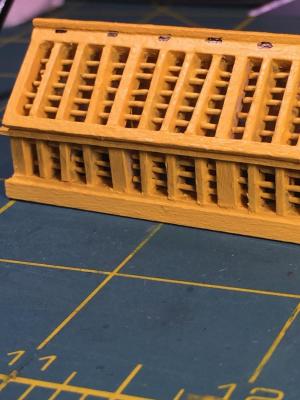
If I recall, before I started building the Shelter / Boat Bearer, I placed the Upper and Lower Channels being careful to place a slightly wider lower channel that while in line with the upper channel, has off set holes for the angle of the channel plates. Apparently, I still have to learn how to place pics so they are in order once uploaded. They seem to want to go into their own order. Maybe there's a way to edit the order???


- 56 replies
-
- 3
-
-
- Charles W Morgan
- Whaling Bark
- (and 1 more)
-
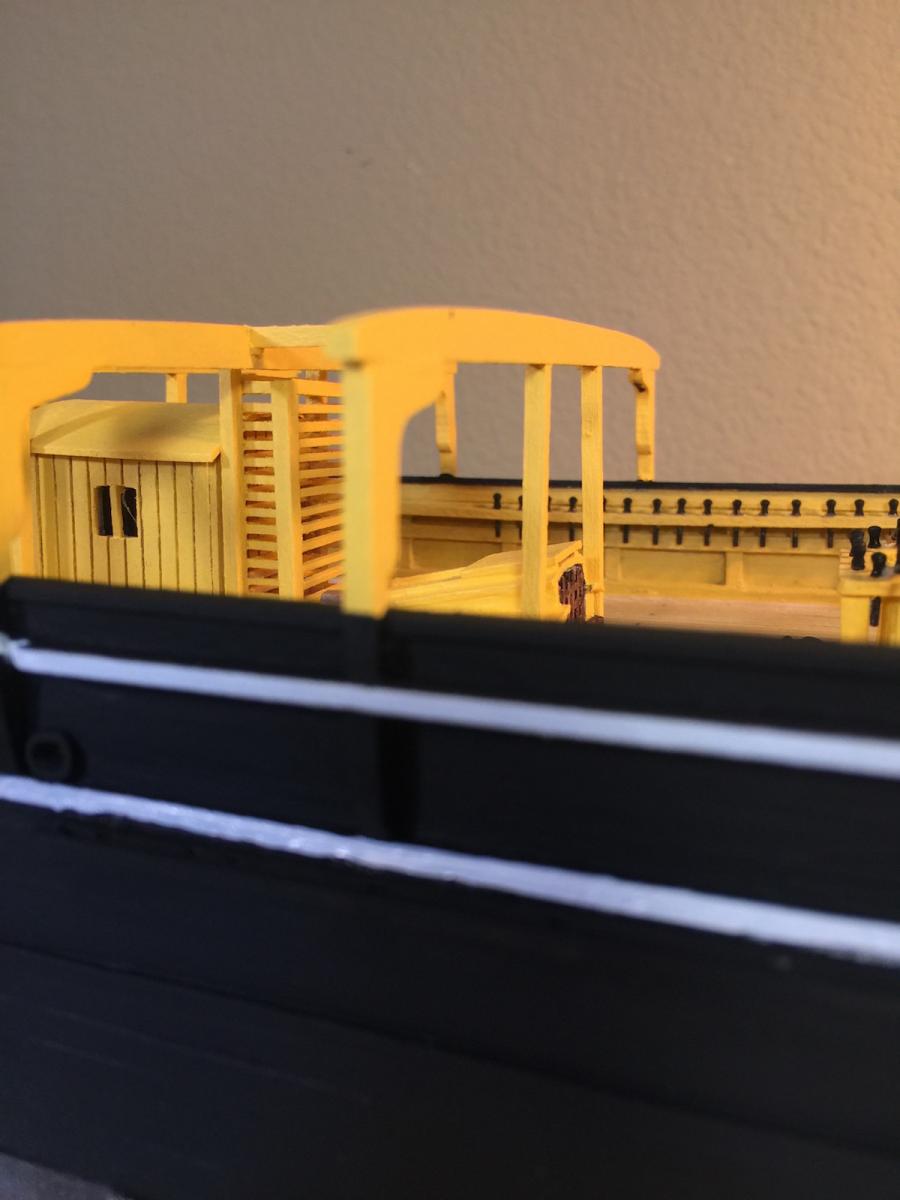
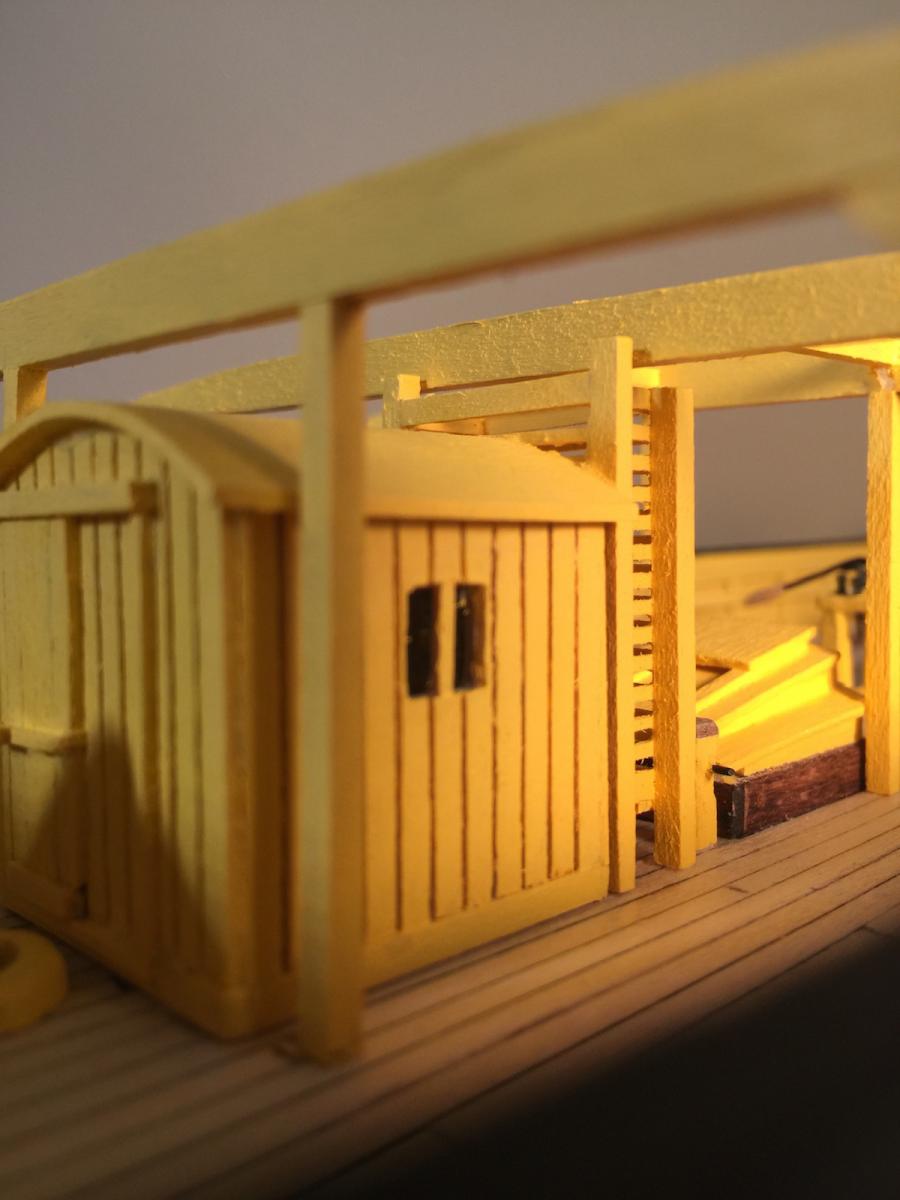
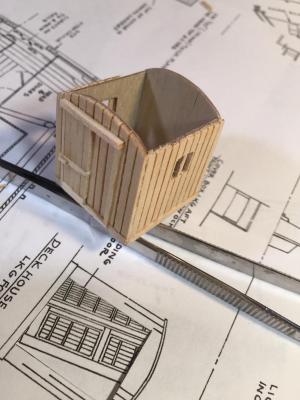
I then placed the Skylight, and began building the Deck House. Before attaching them I did a test fit of the Mizzen Mast and Spider Band because they sit very close and I wanted to make sure there wouldn't be a problem down the line. Seems you always have to think a half dozen steps ahead.


- 56 replies
-
- 5
-
-
- Charles W Morgan
- Whaling Bark
- (and 1 more)
-
Bruce, your work is superb. I'm currently working on the upper and lower channels. However, still well behind both you and John. I really like your figurines and have been keeping an eye out. I think they are about "S" gage size? For my Bounty, if I recall I bought some plastic german tank guys and filed and painted them to become sailors! I'm still working on deck structures but wanted to set the channels in place before I finish building the deck covers. Take care. Ron
-
HI John, sounds like you had a great vacation! I just read Lester's approach to protect and hold the ship during construction. Sounds like a great idea and I just might try it this weekend! I haven't been able to spend much time on my build due to a multitude of reasons. Still looking forward to using the lathe. I should probably set it up just to make sure it works. Anyway, sorry about your scratch. But there isn't anything that can't be fixed. It will just take some time and patience. I think you should very carefully cut out the damaged plates and replace them. Hopefully you still have some copper that's been laying around and tarnished at the same rate. Even if not, it will all blend in eventually. I usually bust something when I pull my hand out of the build too fast!!! Can't tell you how many times I've done that.
- 2,250 replies
-
- 4
-
-
- model shipways
- Charles W Morgan
- (and 1 more)
-
John, I did think about that and planned on waiting to glue it down until I got the hurricane house and overhang in place. I've also considered taking part of the sky light apart and replace the crooked piece. But, with that in the risk of destroying the rest of it. So, i'm going to just set it aside for a little while and we'll see how it pans out!! Thank again for helping with the Proxxon order!
-
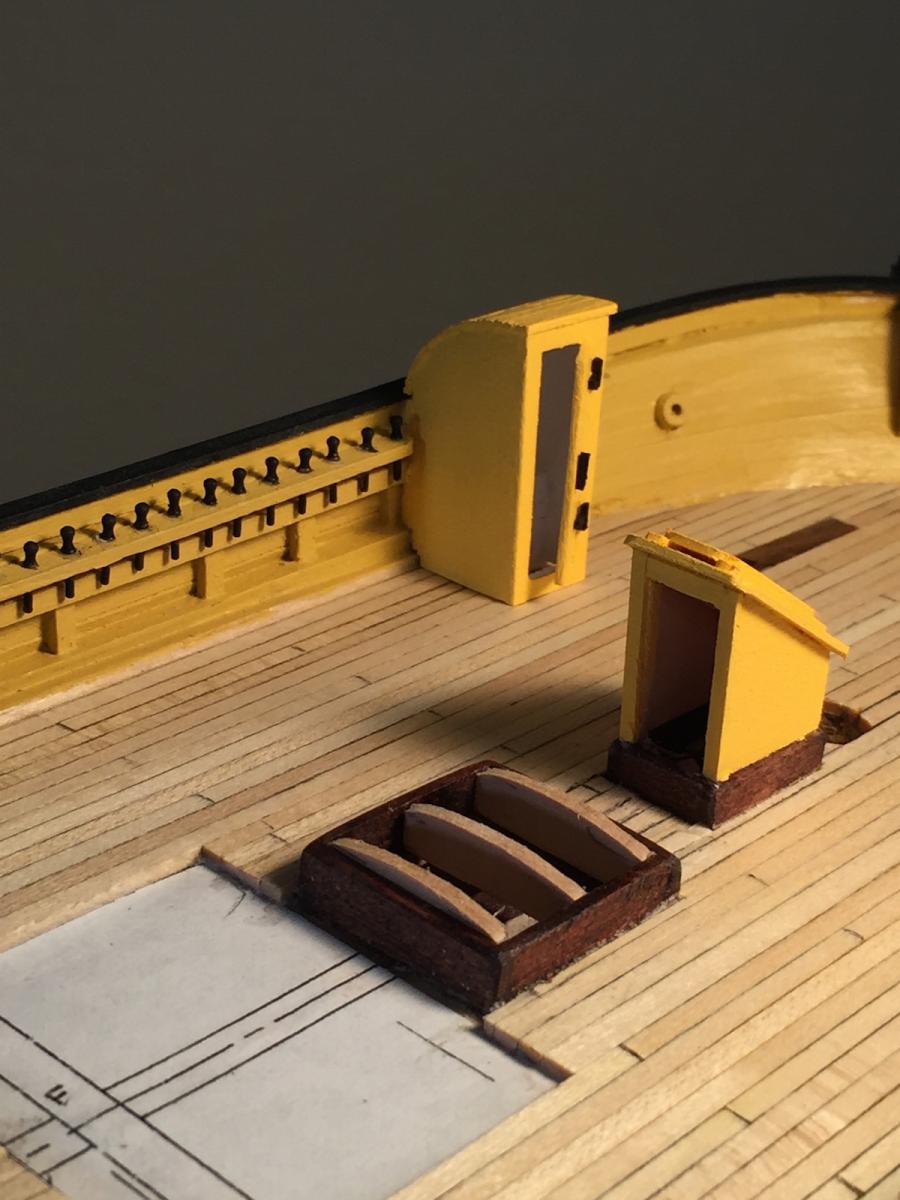
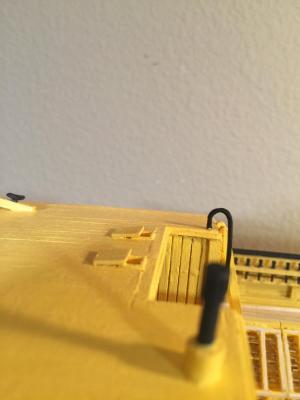
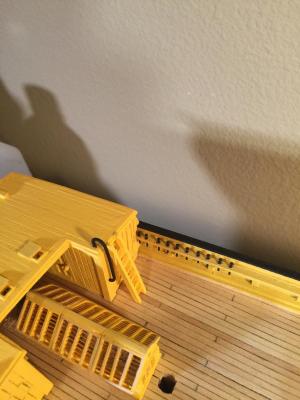
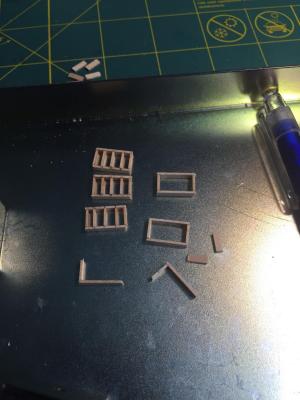
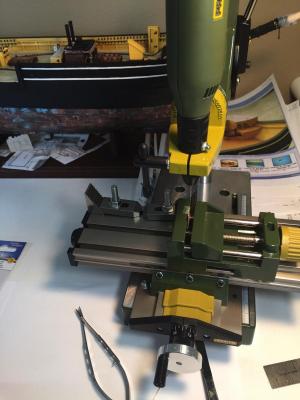
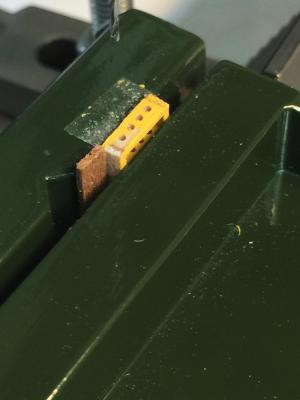
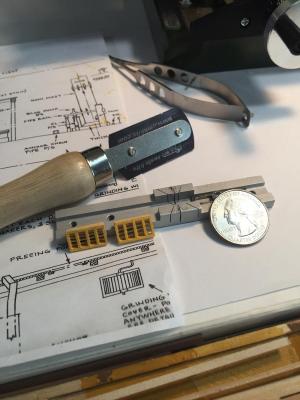
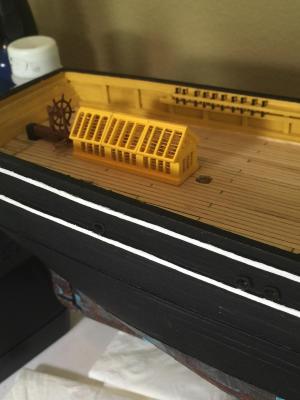
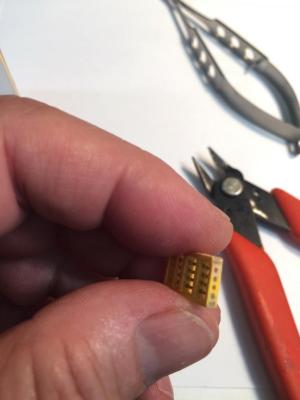
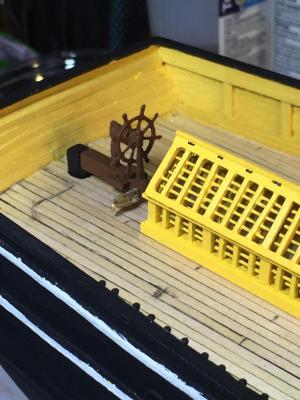
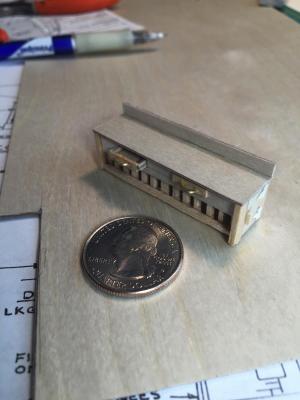
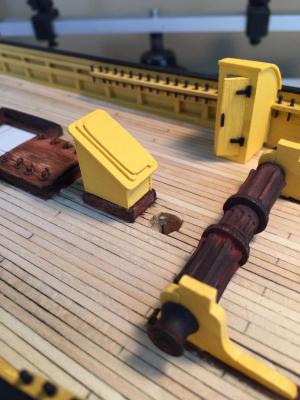
Then I started on the Sky Light. Admittedly I struggled with this and was sort of happy with the end result. Fortunately I didn't glue it down onto the deck. The more I looked at it I realized it was out of scale and I just wasn't happy with the brass wire / rods. It looked sloppy to me. So, I tried several different ways to accomplish the build. There are pis in other build logs but none that really showed how they built it. My third try I decided I would build the panels separate then set it into the Proxxon X/Y and utilizing the vice to hold the panel as I drilled the holes all the way through. But first I painted the panel and then drilled it. I know the plans call for the rods to be yellow but I wanted to keep them brass. The whole thing went together well until I sat back and looked at it and one of the top panels is not straight. At this point I'm fairly frustrated and have to decide if I will use it. It's just sitting on the deck and not glued down at this time. I then installed the rudder and steering wheel assembly. I'll post pics of where I'm at below. I may start on the deck houses and think further about the sky light!! I'll post pics of the first one and the one I just finished. The last pic in the series below is the first one I built. Also wanted to add... the Proxxon tools sure work well. In fact, I just ordered the Proxxon lathe from John who sells Proxxon tools. He has a web site and his email contact is " texxn5@gmail.com ". He is building the same ship and his web site details his entire build. It's been a great reference for me and he's a pretty nice guy. He put a special combo deal together for me!
- 56 replies
-
- 6
-
-
- Charles W Morgan
- Whaling Bark
- (and 1 more)
-
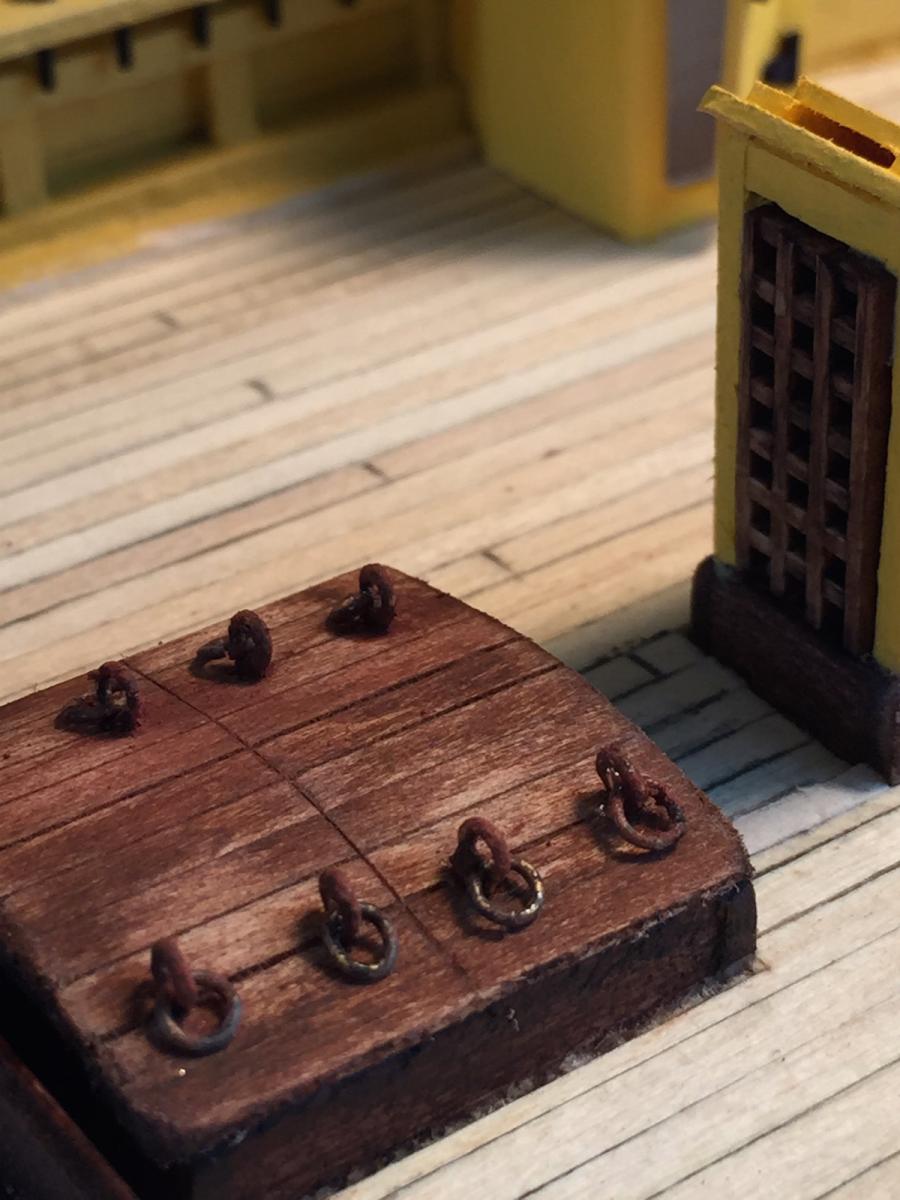
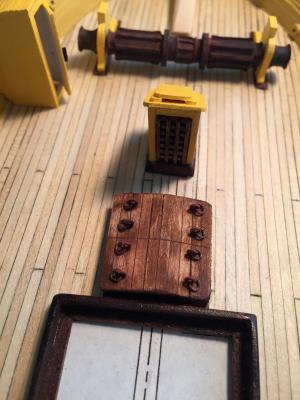
Then I started working on the Main Hatch, the chain Bitt and the Fife Rail etc. One of the two metal bilge pumps was broken in the package before I opened it. I know ModelExpo would replace it but I decided to use part of it, solder on another piece then mount it onto the pad below the fife rail. I just went to upload the pics of this and realize I didn't take any pics!! I will snap a few and upload them shortly!
- 56 replies
-
- 3
-
-
- Charles W Morgan
- Whaling Bark
- (and 1 more)
-
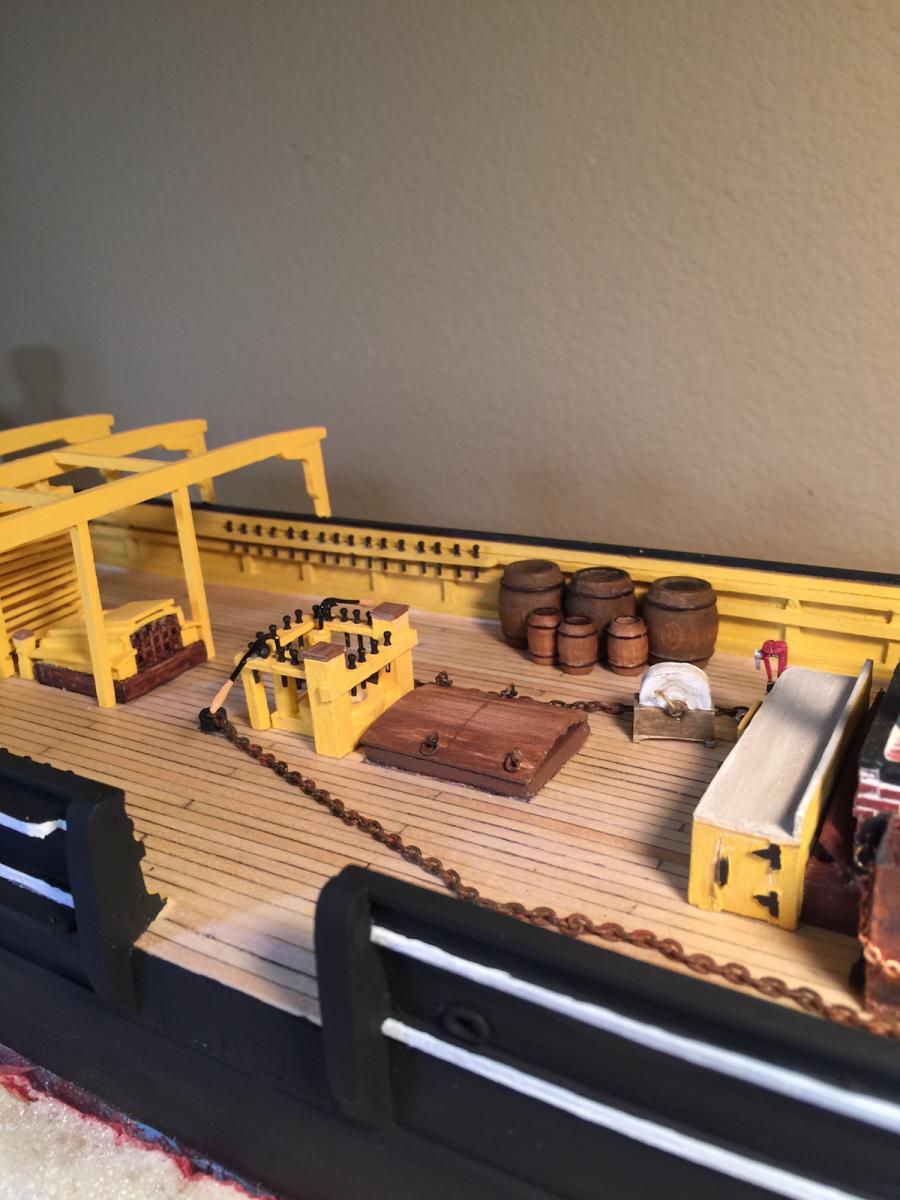
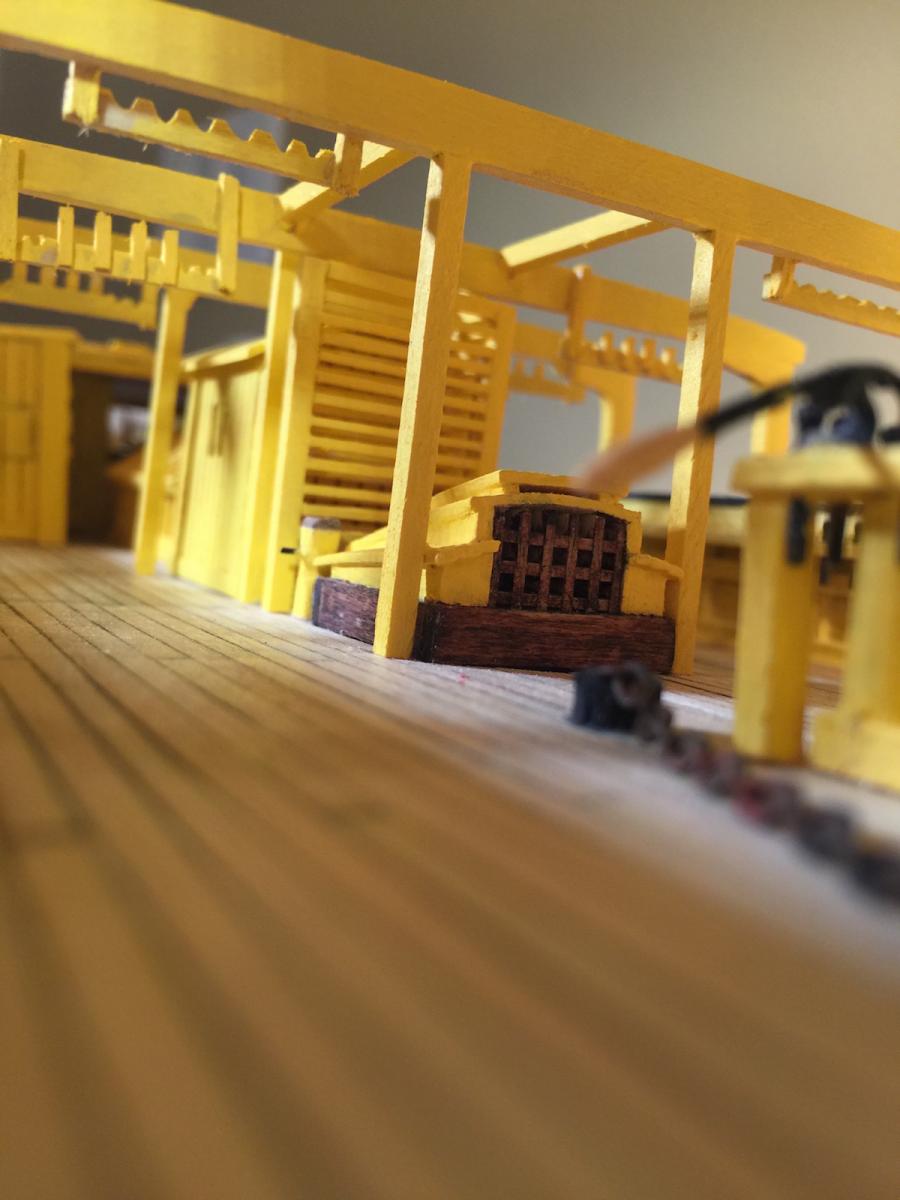
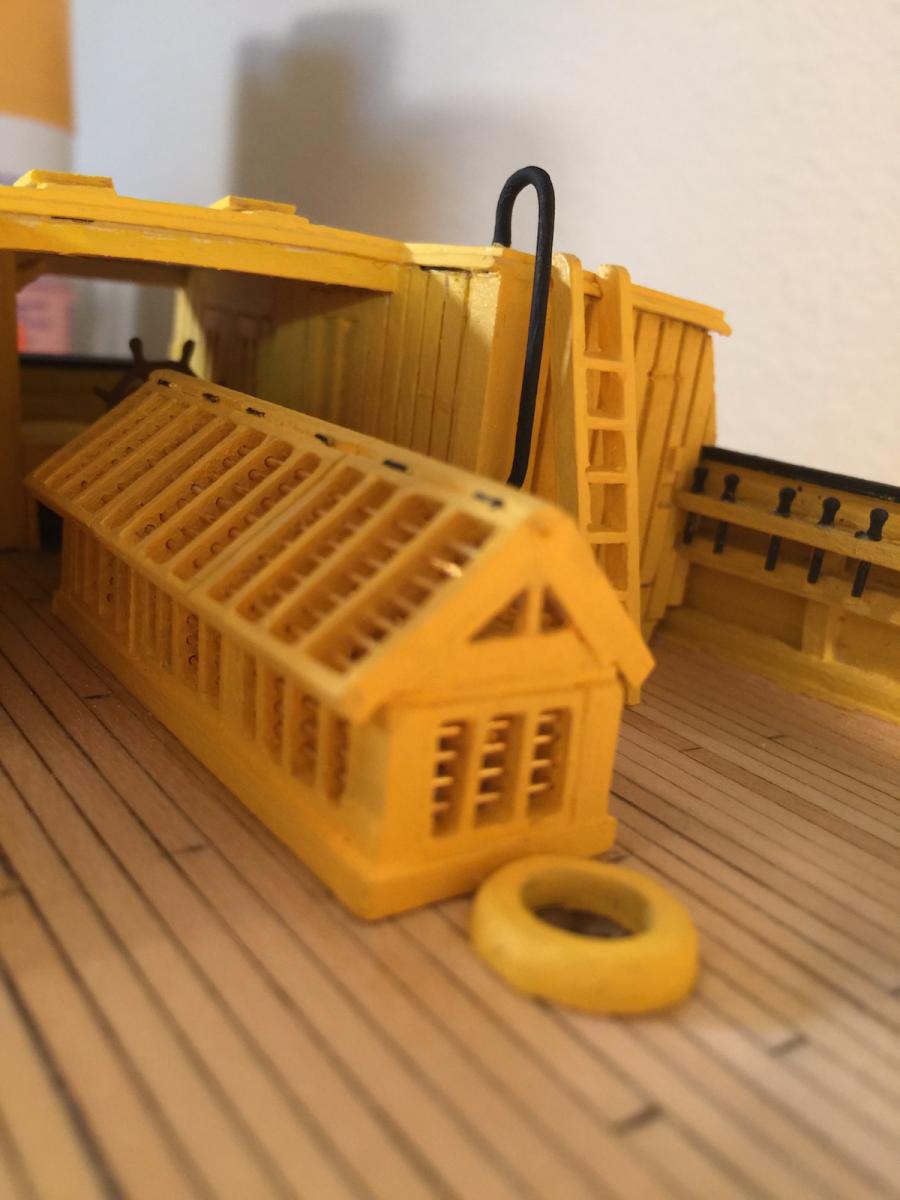
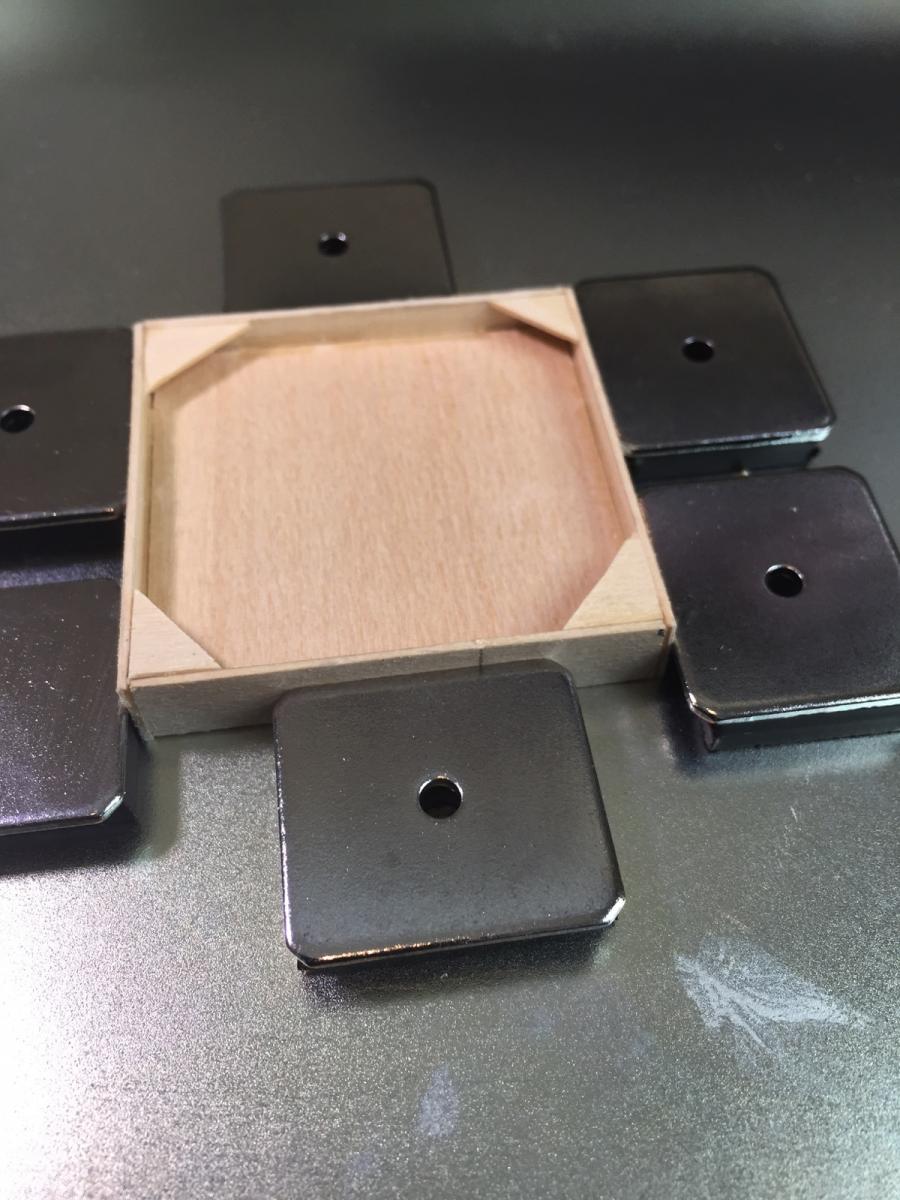
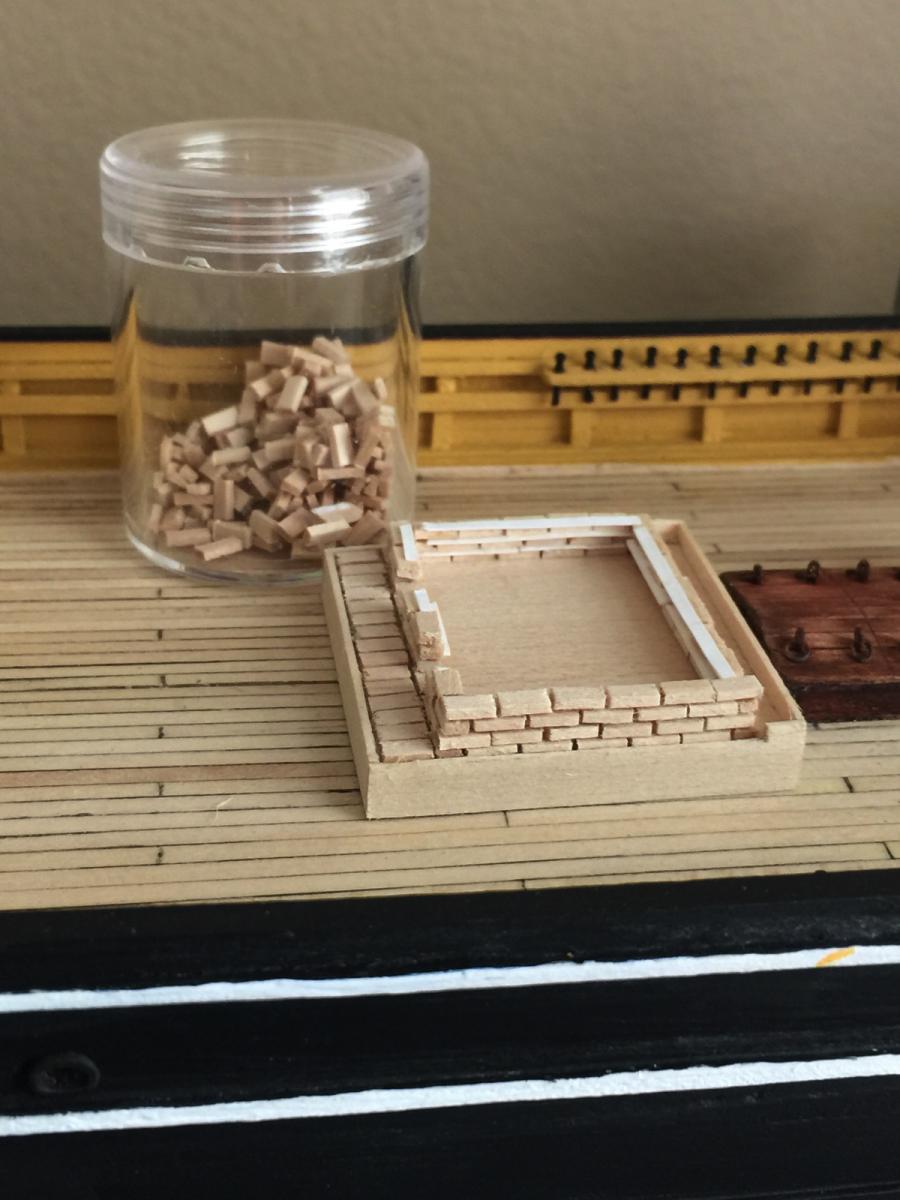
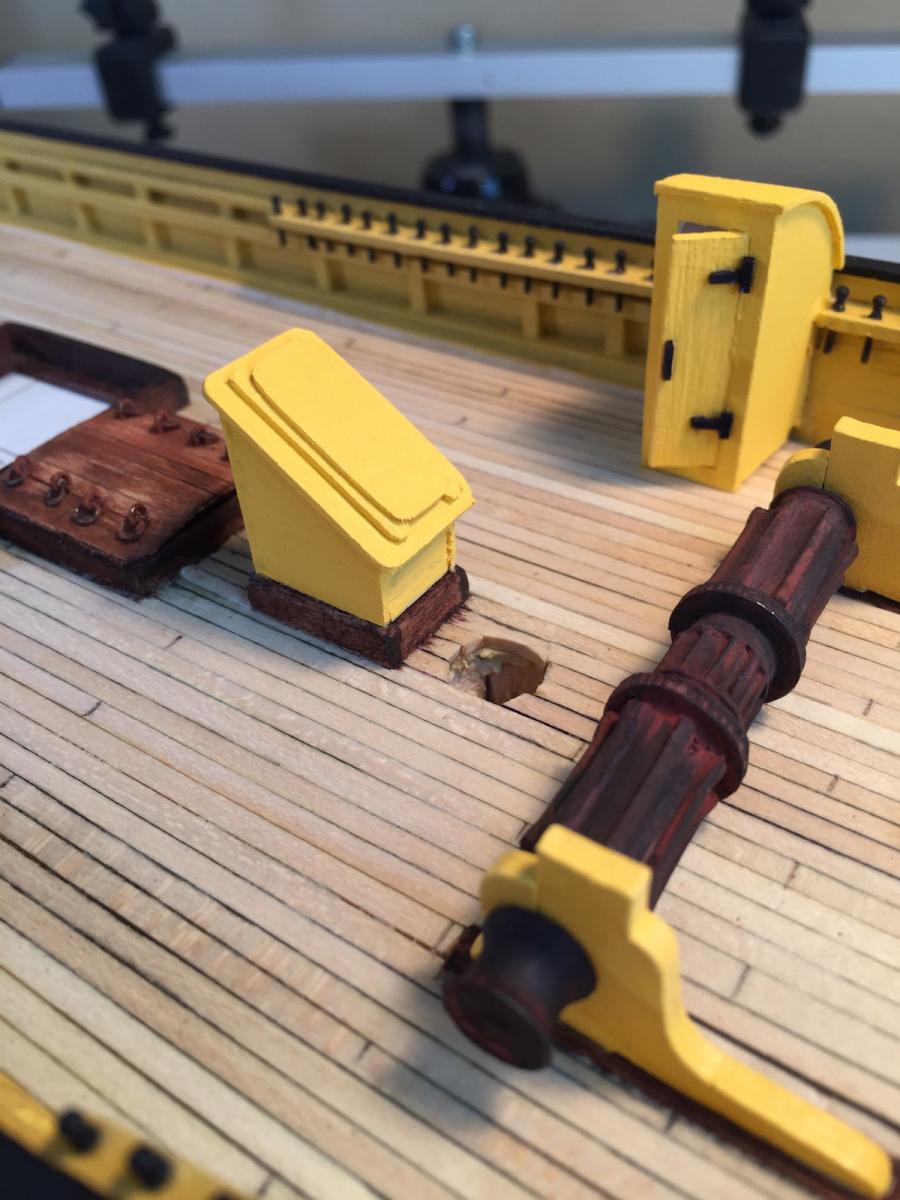
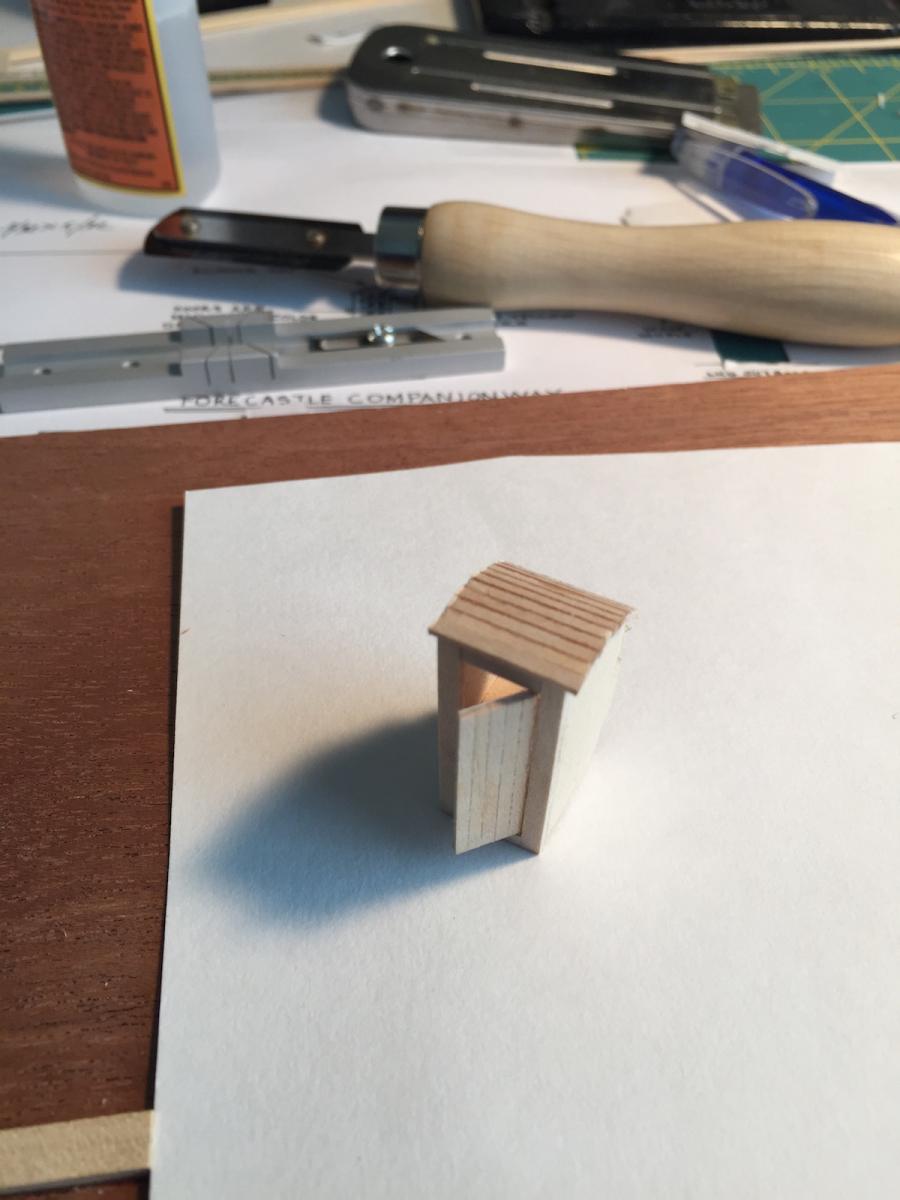
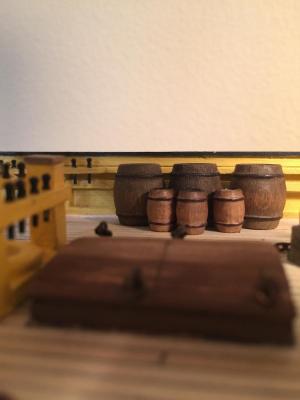
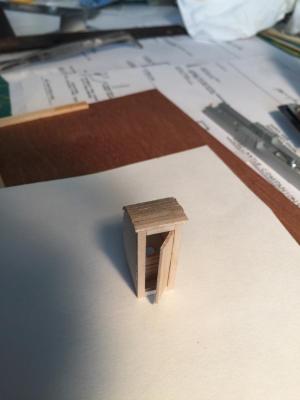
Moving on, I built the work bench, chicken coop and the duck / water pen. I did end up cutting off one of the handles on the grinding stone. I also attached the vice to the work bench but don't ask me why I painted it Red! I also thought it would look better if I made one of the work bench drawers in the open position. I'll post these pics below:
- 56 replies
-
- 6
-
-
- Charles W Morgan
- Whaling Bark
- (and 1 more)
-
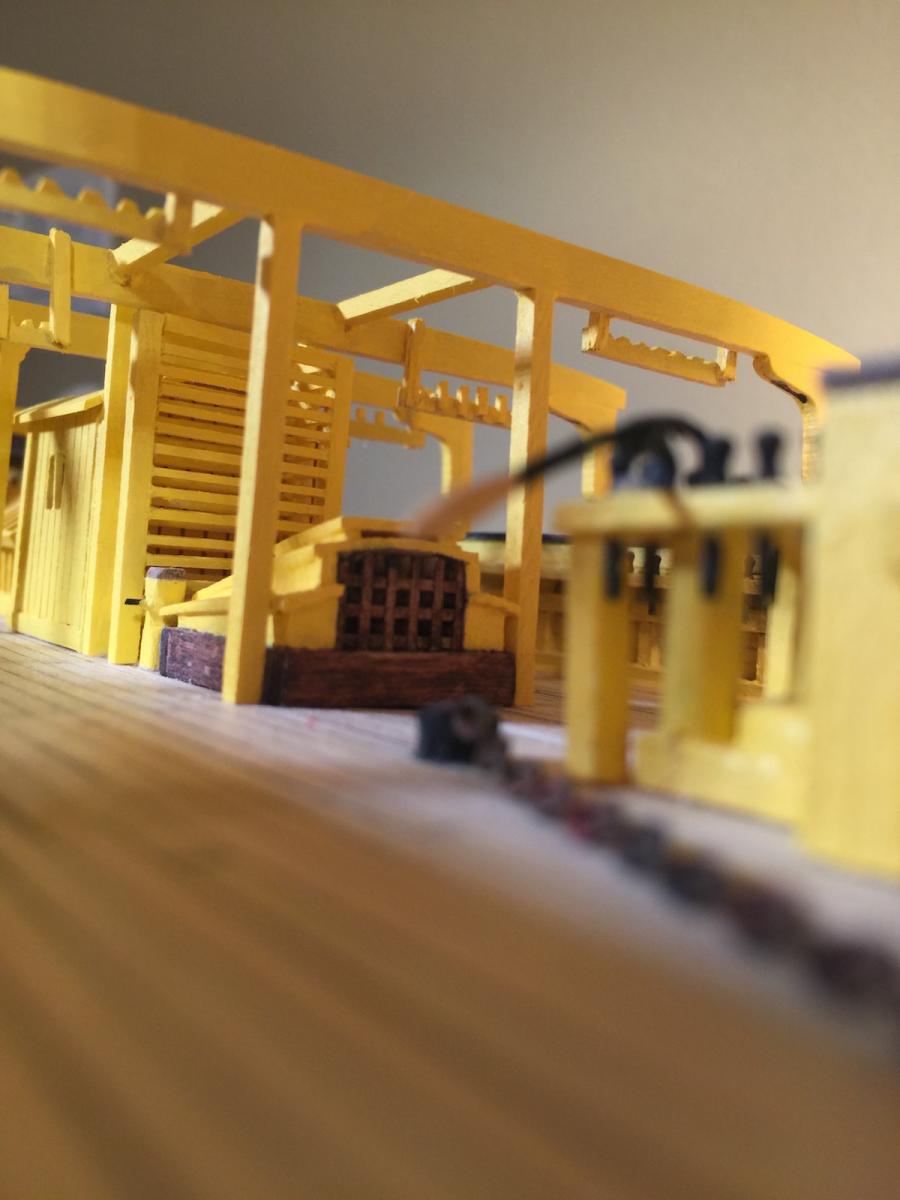
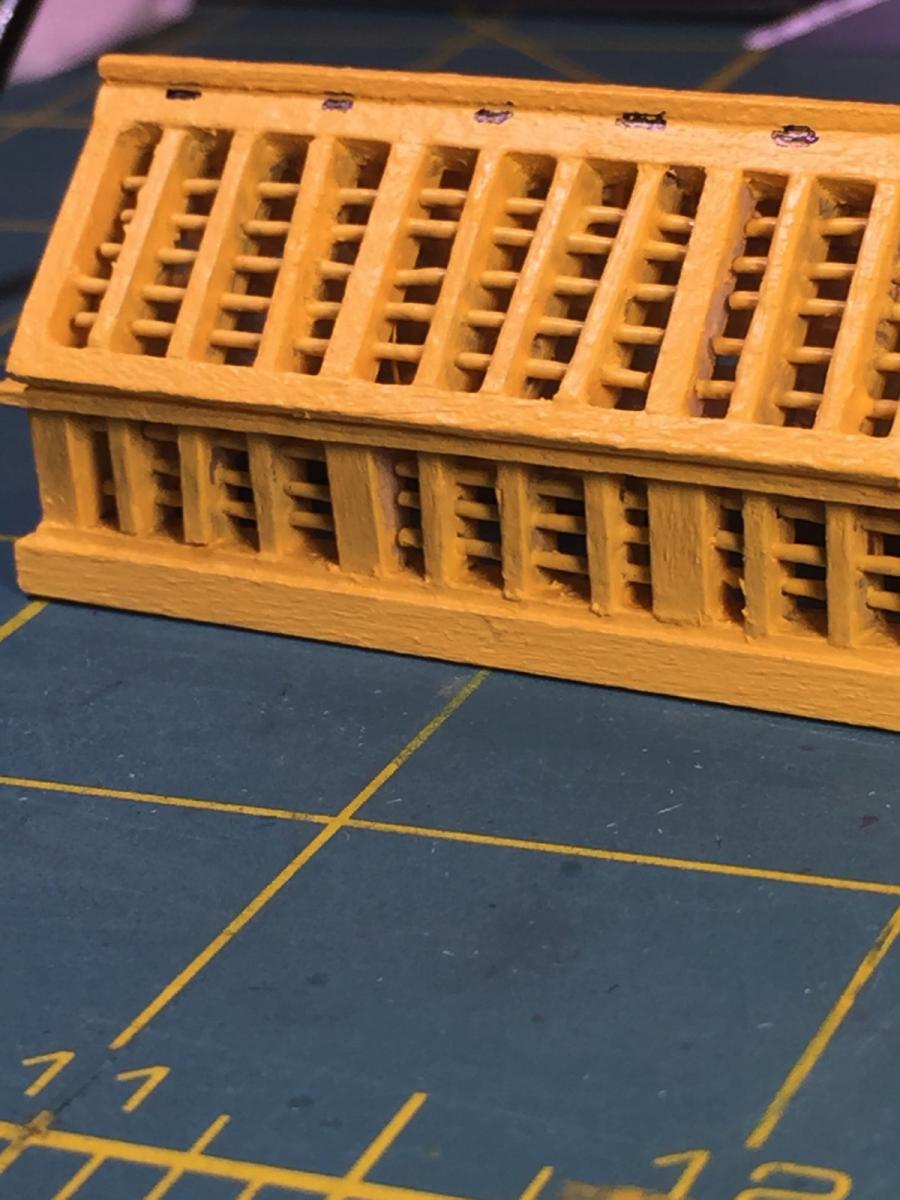
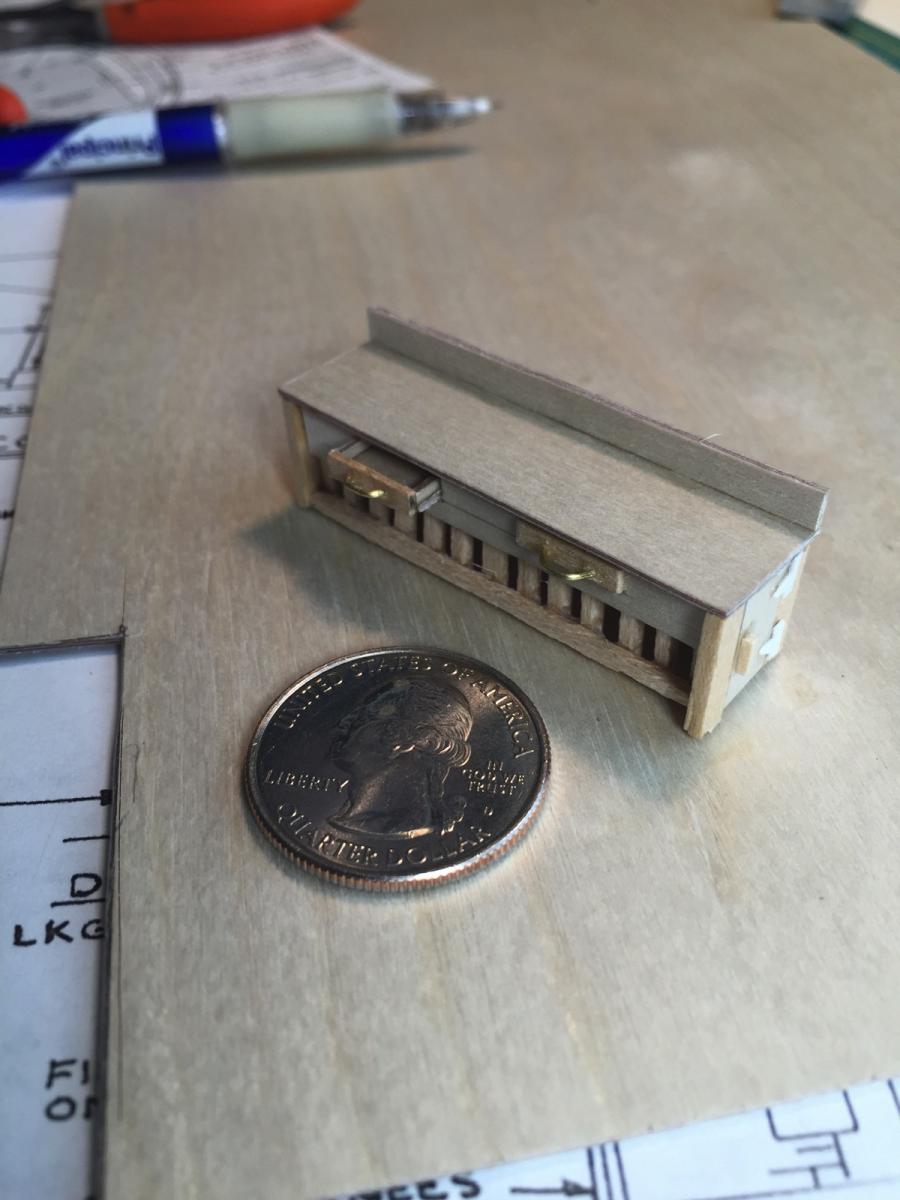
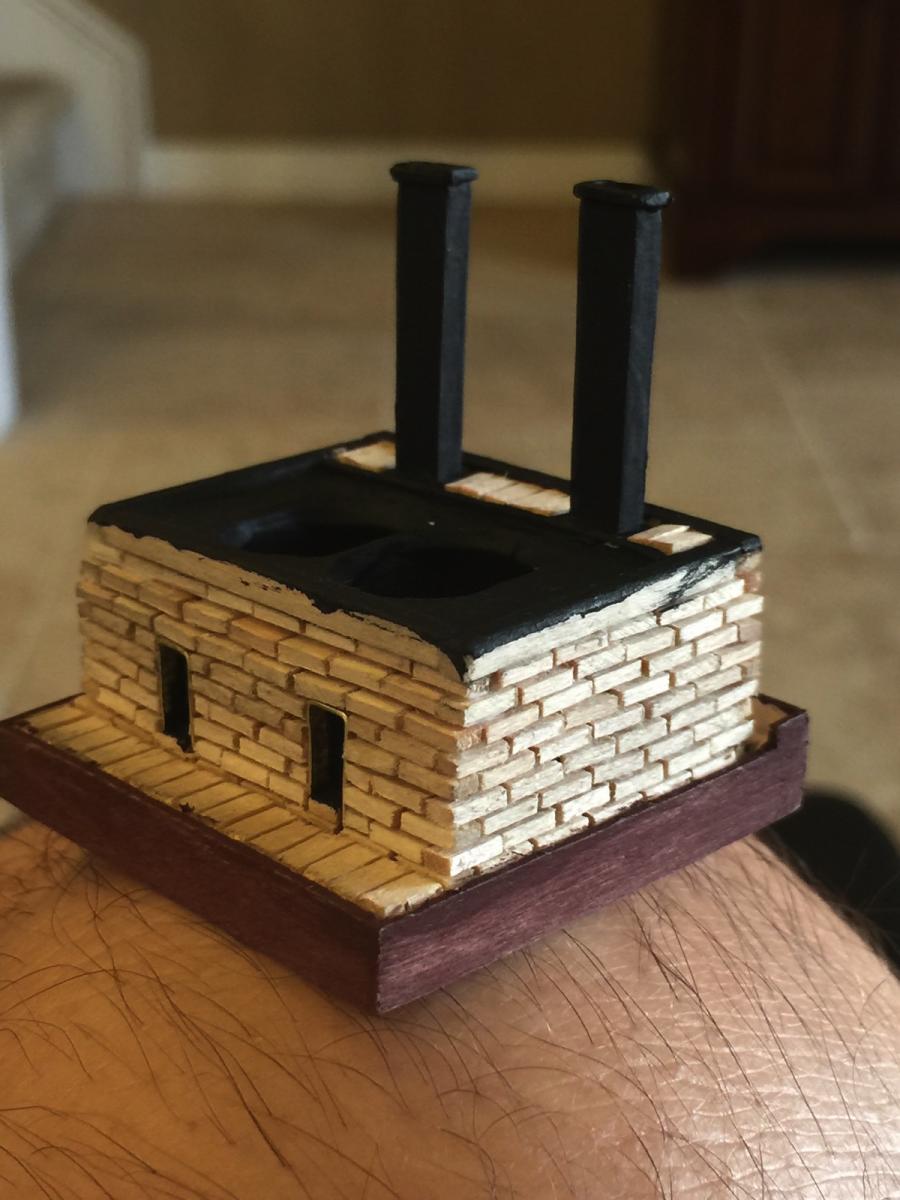
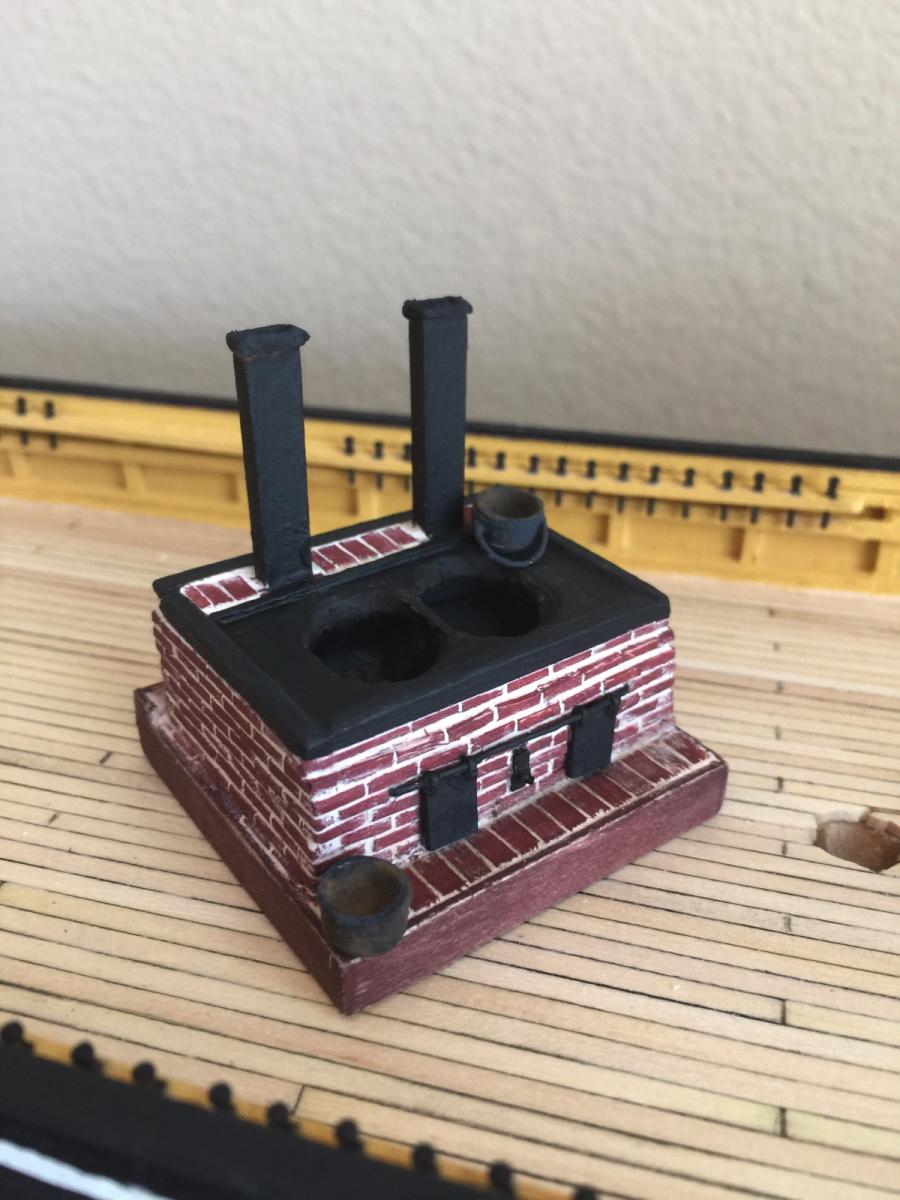
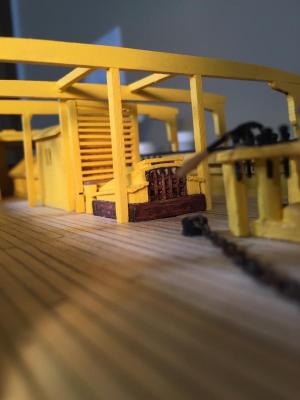
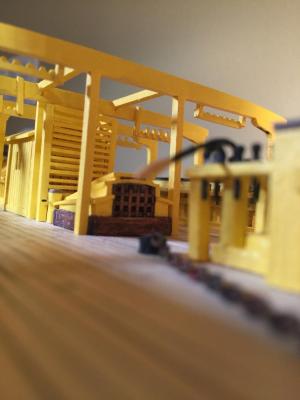
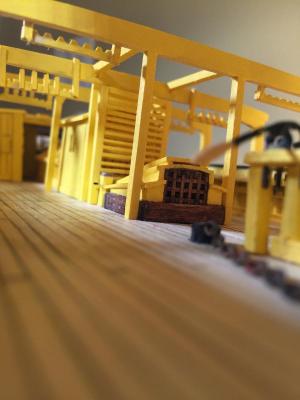
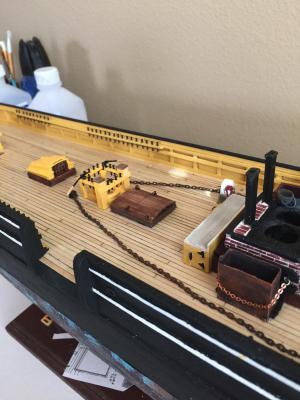
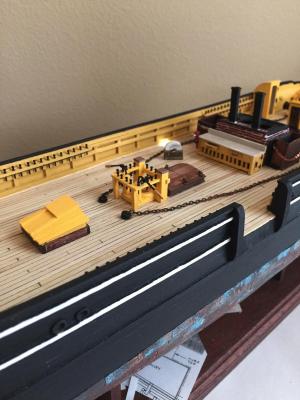
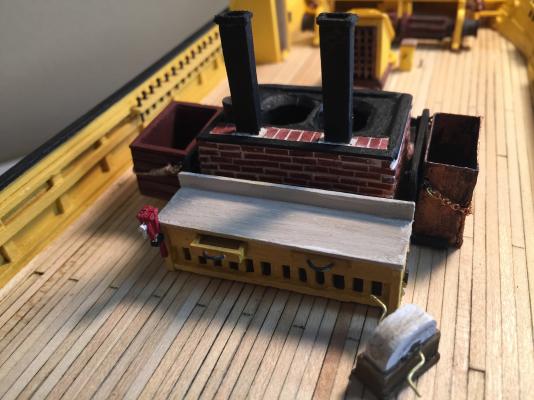
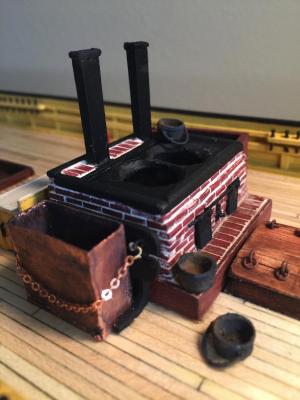
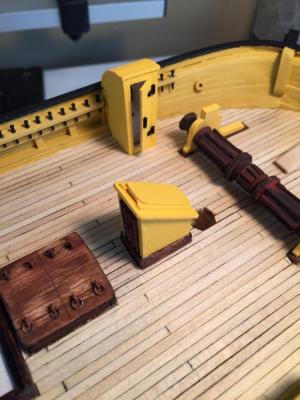
I've been able to spend a little time on the build in the evenings. I completed the Tri -Works, Cooling Tank and Scrap Hopper. Didn't have any copper sheeting to make the cooling tank so I used card stock and painted it copper color and then used some aging powder to give it a bit of a dirty look. I need to change the chain attachment that is seen in the picture as it doesn't go well. I'll post my build pics of these below:


- 56 replies
-
- 7
-
-
- Charles W Morgan
- Whaling Bark
- (and 1 more)
-
Looking good John! I can't wait until I get to this point (prob in another 6 to 12 months!!!). I worked on the rudder today and will probably remake the sky light. I'll upload some pics to bring mine up to date. Take care. Ron
- 2,250 replies
-
- 3
-
-
- model shipways
- Charles W Morgan
- (and 1 more)
-
Thanks John! I made my way around it too. I should upload a few more pics of my build to date. Take care. Ron
-
Hi Bruce, Please accept my compliments on a wonderful build. I reference your uploads and John's pretty often as I'm behind you on my build. Yesterday I installed the rudder and today working on the steering wheel, associated blocks and the other items with the wheel. I already built the sky light and may use it but it got a tad taller than it should be. So it's off scale and I'm hoping to build another after the "x" / "Y" table for the drill press arrives. The fine brass wire that came with the kit doesn't work well and I ended up using some very thin eyelets shafts after cutting off the eyelet! But, even the smallest I could find was still a bit too large. I'm not sure where I can find a thinner more stable rod. I've looked on-line and haven't found one small enough. Anyway, I really like your figures and will add some to my build as I did with my Bounty build. Good luck on your exam and keep posting as you all show me the way!!!! Take care. Ron
-
Hi John, I constantly look at your web site as a resource and guidance. Currently I'm struggling with the anchor deck and wondering if the planks rest upon the bowsprit? Also, I don't like the way my windlass break pump gadget came out! Where did you get the small square/rectangle piping? I haven't found it on-line and no local hobby shops, just Michael's and don't think they have it!
-
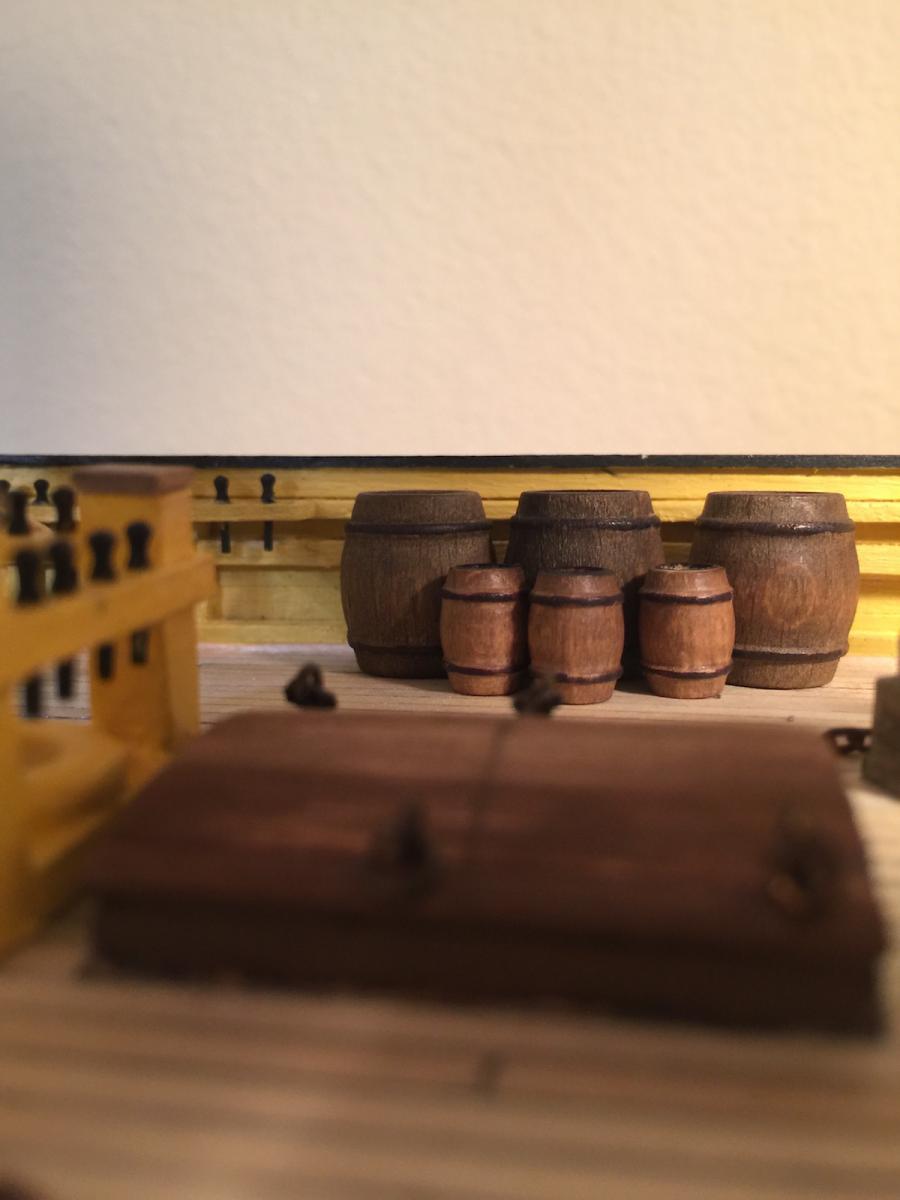
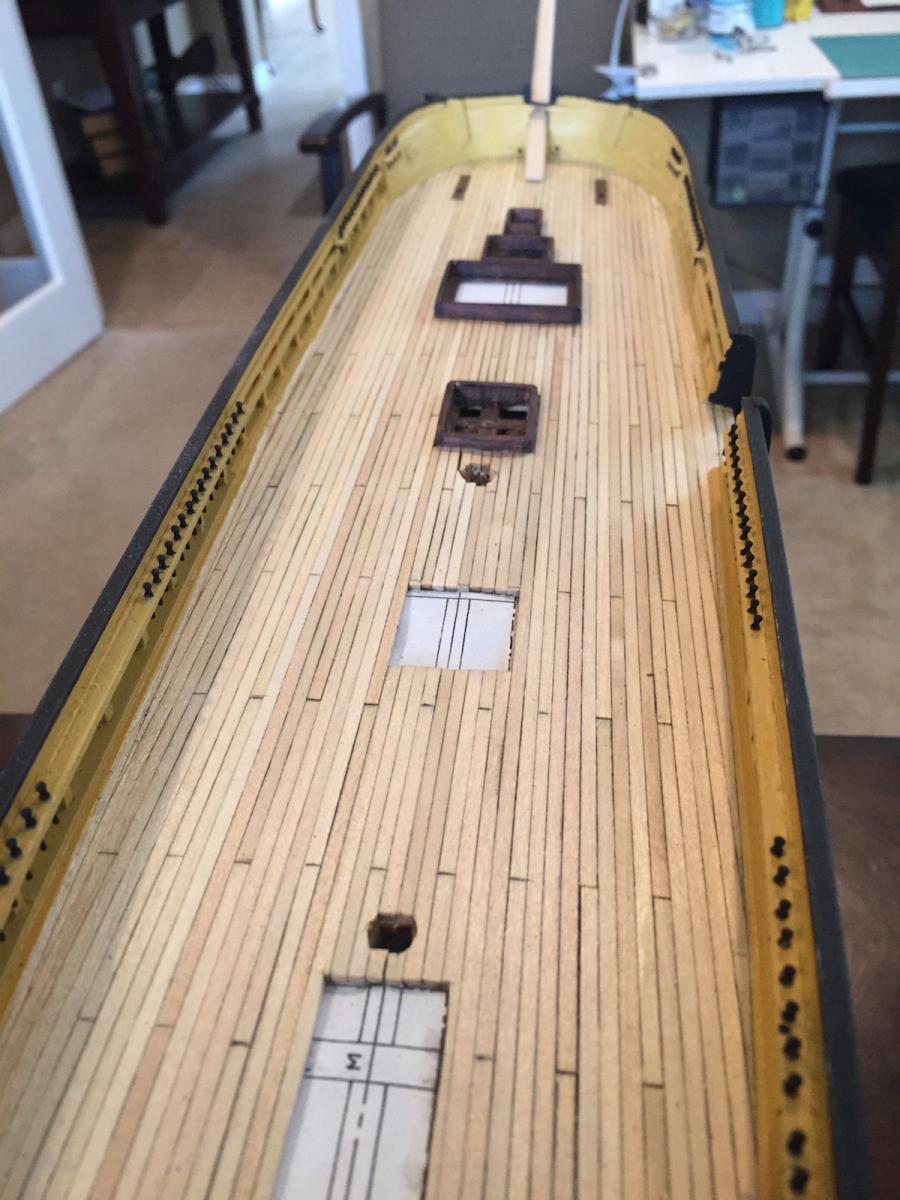
I've been moving a bit slow on the Morgan build and haven't been able to give it as much time as I'd like. I've laid the deck planks, installed the pin rails and pins, cheek knees, head rails, billet head and have begun working on the deck fittings and the bowsprit. I will upload pics of the work completed to date.


- 56 replies
-
- 11
-
-
- Charles W Morgan
- Whaling Bark
- (and 1 more)
-
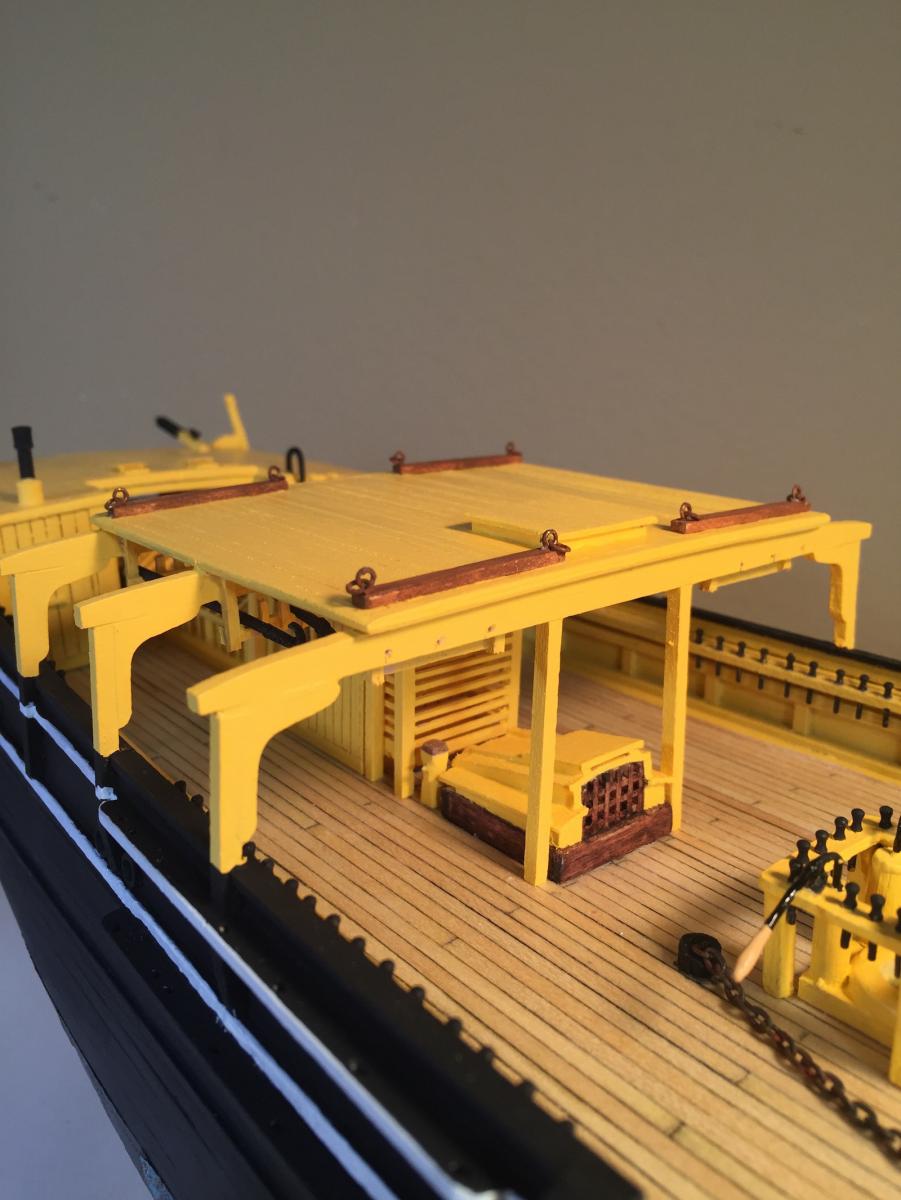
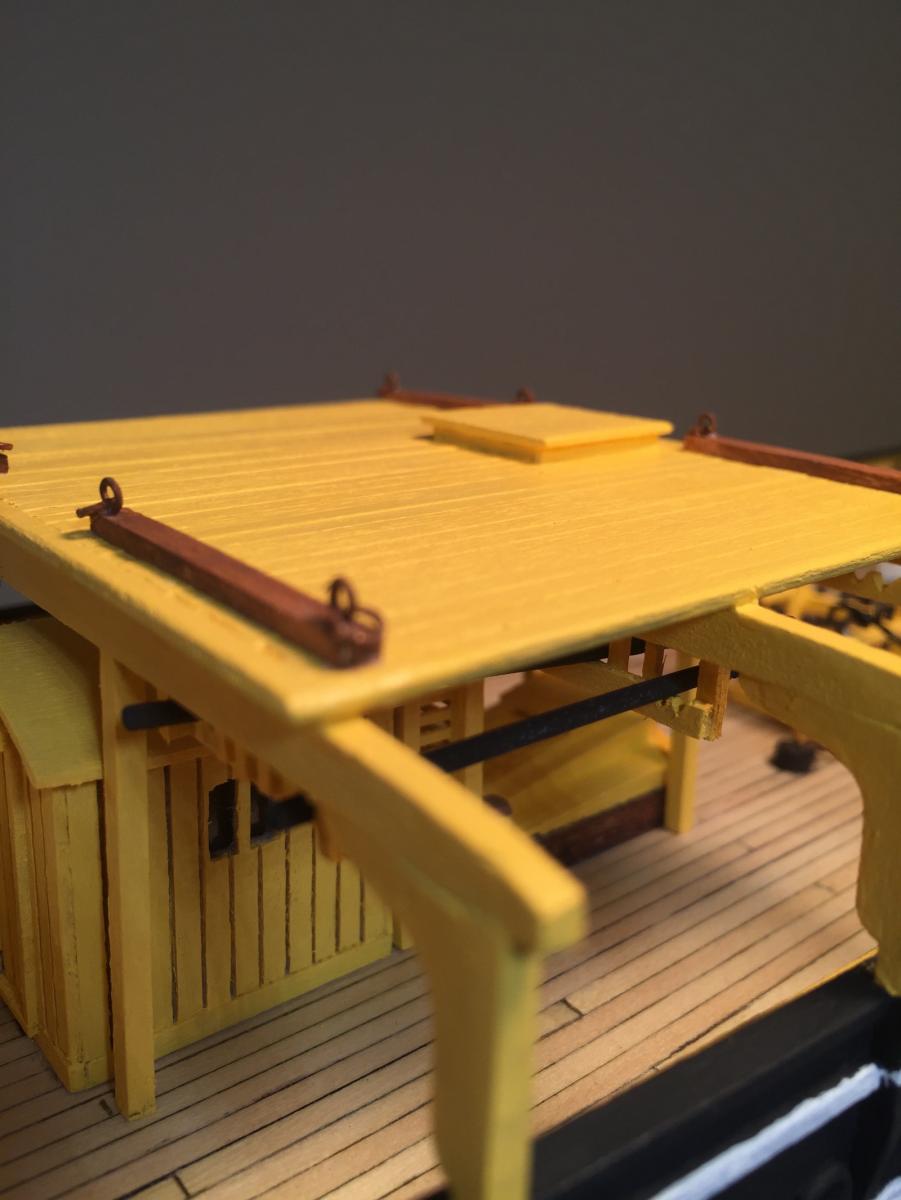
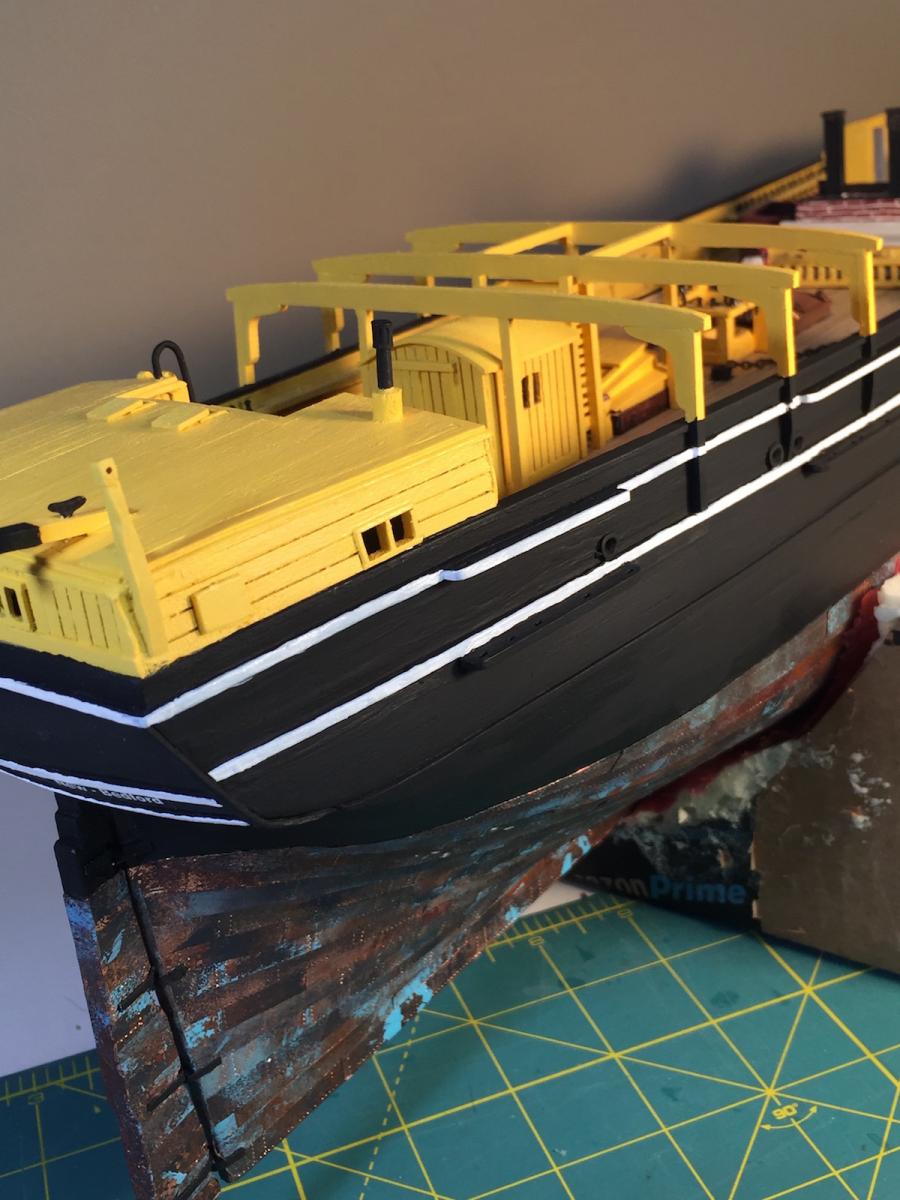
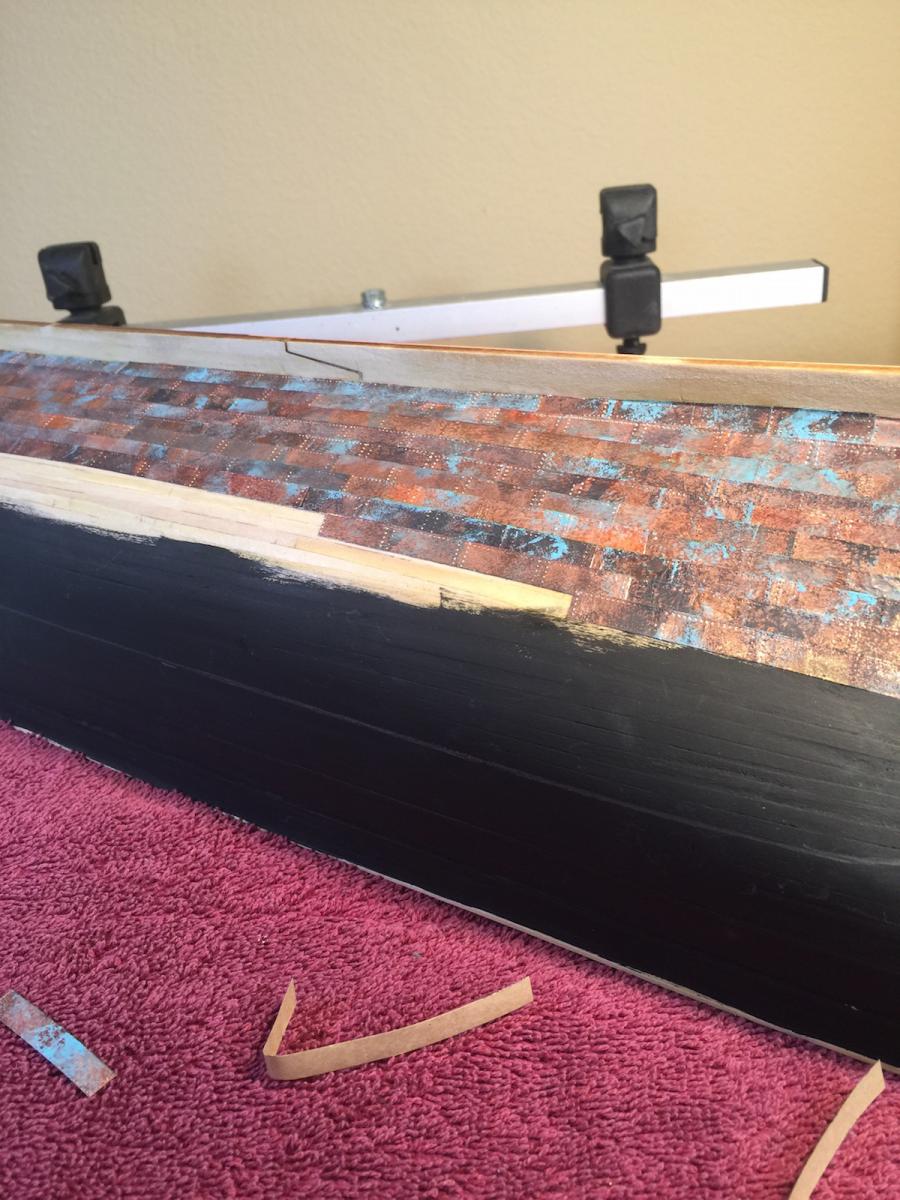
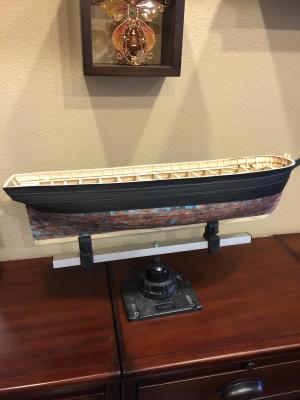
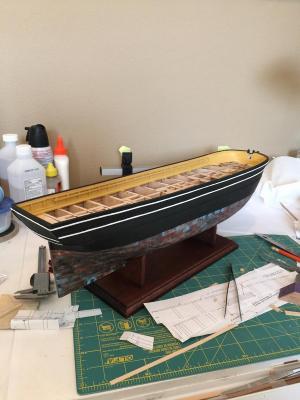
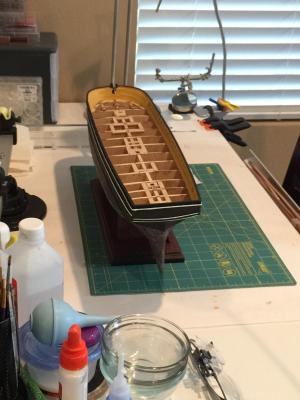
It's been a while since my last upload. Lots of things going on at home and I haven't been able to spend a whole lot of time on the ship. But here and there I squeeze in an hour or so. I was able to spend half of today working on it and have some pics to share. I finished with the copper plates and painted the balance of the hull black. I then sprayed a matte finish on it. Then I finished up most of the outside part of the stern and painted it. I then finished installing the Waterway and Ceiling Planks. Admittedly, I struggled with the Ceiling Planks and had to use a little filler. I then installed the Log Rail and Top Gallant Rail. Again, I painted the exterior black. I then installed the Lashing Rail and decided to paint the inside now so I wouldn't have to tape off or make a mess after planking the interior. Today I worked on the supports that will go under the coamings for the Hatches, Skylight, Steerage companion, Tryworks and Forecastle. I also installed the deck insert for the Windlass. If I recall, the width of the scrap wood used for the supports was about 1/4" wide. I'll see if I can upload the pics to this work:

- 56 replies
-
- 6
-
-
- Charles W Morgan
- Whaling Bark
- (and 1 more)
-
It's been a while since my last upload. Lots of things going on at home and I haven't been able to spend a whole lot of time on the ship. But here and there I squeeze in an hour or so. I was able to spend half of today working on it and have some pics to share. I finished with the copper plates and painted the balance of the hull black. I then sprayed a matte finish on it. Then I finished up most of the outside part of the stern and painted it. I then finished installing the Waterway and Ceiling Planks. Admittedly, I struggled with the Ceiling Planks and had to use a little filler. I then installed the Log Rail and Top Gallant Rail. Again, I painted the exterior black. I then installed the Lashing Rail and decided to paint the inside now so I wouldn't have to tape off or make a mess after planking the interior. Today I worked on the supports that will go under the coamings for the Hatches, Skylight, Steerage companion, Tryworks and Forecastle. I also installed the deck insert for the Windlass. If I recall, the width of the scrap wood used for the supports was about 1/4" wide. I'll see if I can upload the pics to this work:
- 56 replies
-
- 1
-
-
- Charles W Morgan
- Whaling Bark
- (and 1 more)
-
Beautiful work Bruce. I'm still working on mine and need to upload into my build log. I spent most of today working on the ship. Admittedly I had to set it aside for six weeks or so. It's just been so busy here and I haven't been able to give her the attention she deserves.
- 245 replies
-
- 1
-
-
- model shipways
- Finished
- (and 1 more)
-
Actually John... I was referring to my current build on the Charles Morgan!!!
-
Hi John, good to hear from you. I have found your site indispensable! I refer to it all the time. Usually zooming in on something you've done that I'm working on. You are way ahead of me but this is a good thing! I get to follow a great ship builder and get insight about ways to accomplish a task. I just got my serving machine from Alexey. I've only practiced with it briefly. I'll need to get much better before I get to rigging. I still have to finish plating and then start some deck work. I keep looking at the Proxen tools and have wanted to get a lathe for a long time. How much do you have vested in yours??? I've been using my drill press and folding sandpaper and squeezing it until I get the shape and size needed. A little hot on the fingers and sometimes they snap.. then I do!!!!! Taker care. Ron
-
I've been keeping an eye on your build and have used your comments and uploads to assist me with the build of my Charles Morgan! I like what you have been doing and your build site!!! Wish I could afford some of those tools. I'd like to get the lathe but with all the attachments .....Yikes!!! I've been using my large drill press as I squeeze sandpaper around the dowel. Ron
- 2,250 replies
-
- 2
-
-
- model shipways
- Charles W Morgan
- (and 1 more)
-
Using the "Chopper"
homer replied to jdiven's topic in Building, Framing, Planking and plating a ships hull and deck
I was looking at getting one. I won't now. I bought a hand held chop thingy and it does the same thing as described ... it doesn't cut with a clean edge. I don't use it too much. -
Mine (Syren) arrived a few days ago! But, it's in dry dock for now. It will be another year (I think) before I'm done with the Charles Morgan. I got a good buy at Model Expo with no shipping, almost half off the kit and it was a special buy that came with the kit's paints. Although, they forgot to send the paints. Nothing a quick e-mail to Frank at Model Expo didn't clear up. They're already in the mail! I've got about half dozen ships in dry dock. I retire in three years or so and look forward to spending more time with the builds. I've got a long way to go but I can see my skill set has gotten better with each kit. I'll be watching your build. Have fun! Ron