HOLIDAY DONATION DRIVE - SUPPORT MSW - DO YOUR PART TO KEEP THIS GREAT FORUM GOING! (Only 44 donations so far out of 49,000 members - C'mon guys!)
×


homer
-
Posts
133 -
Joined
-
Last visited
Content Type
Profiles
Forums
Gallery
Events
Everything posted by homer
-
 HI Mike, I just happened upon your build. I can't wait to see how the stains have worked for you. I'm still learning and the Morgan has been the most challenging build for me. I regret not installing mounting nuts so that I could mount the ship with pedestals. I will on my next build! Hope everything is okay. It's been since Feb. since your last update. I'll have to check your build to see if you have been working more on the Victory. Best regards. Ron
 -
Yup. I just looked and I'm going to have the same problem with davit and lashing posts placement. So frustrating.
-
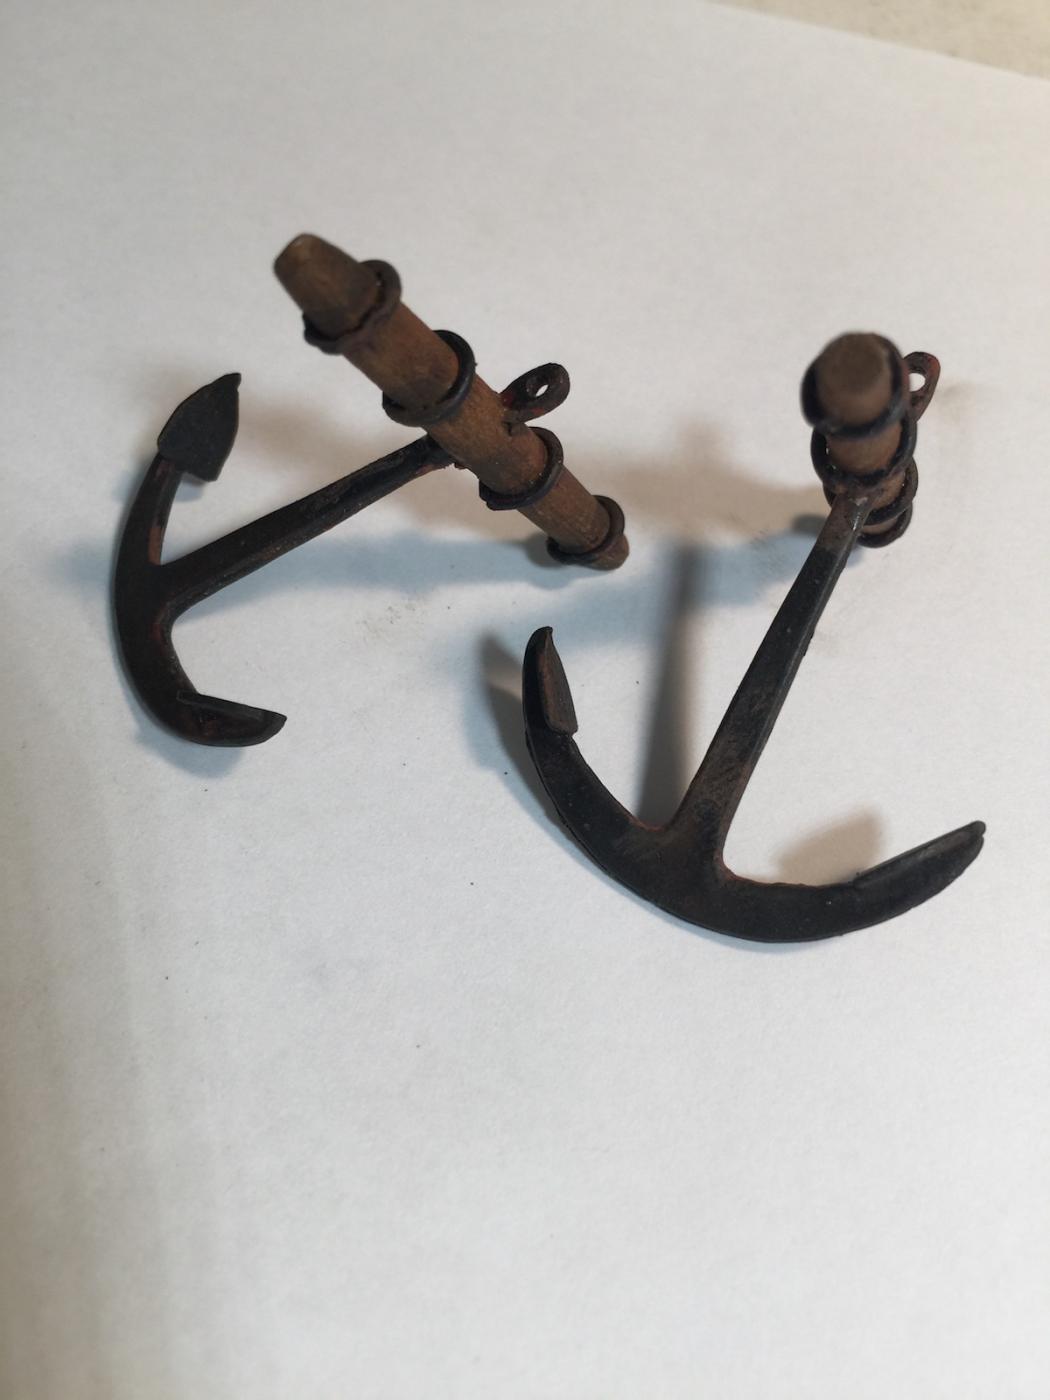
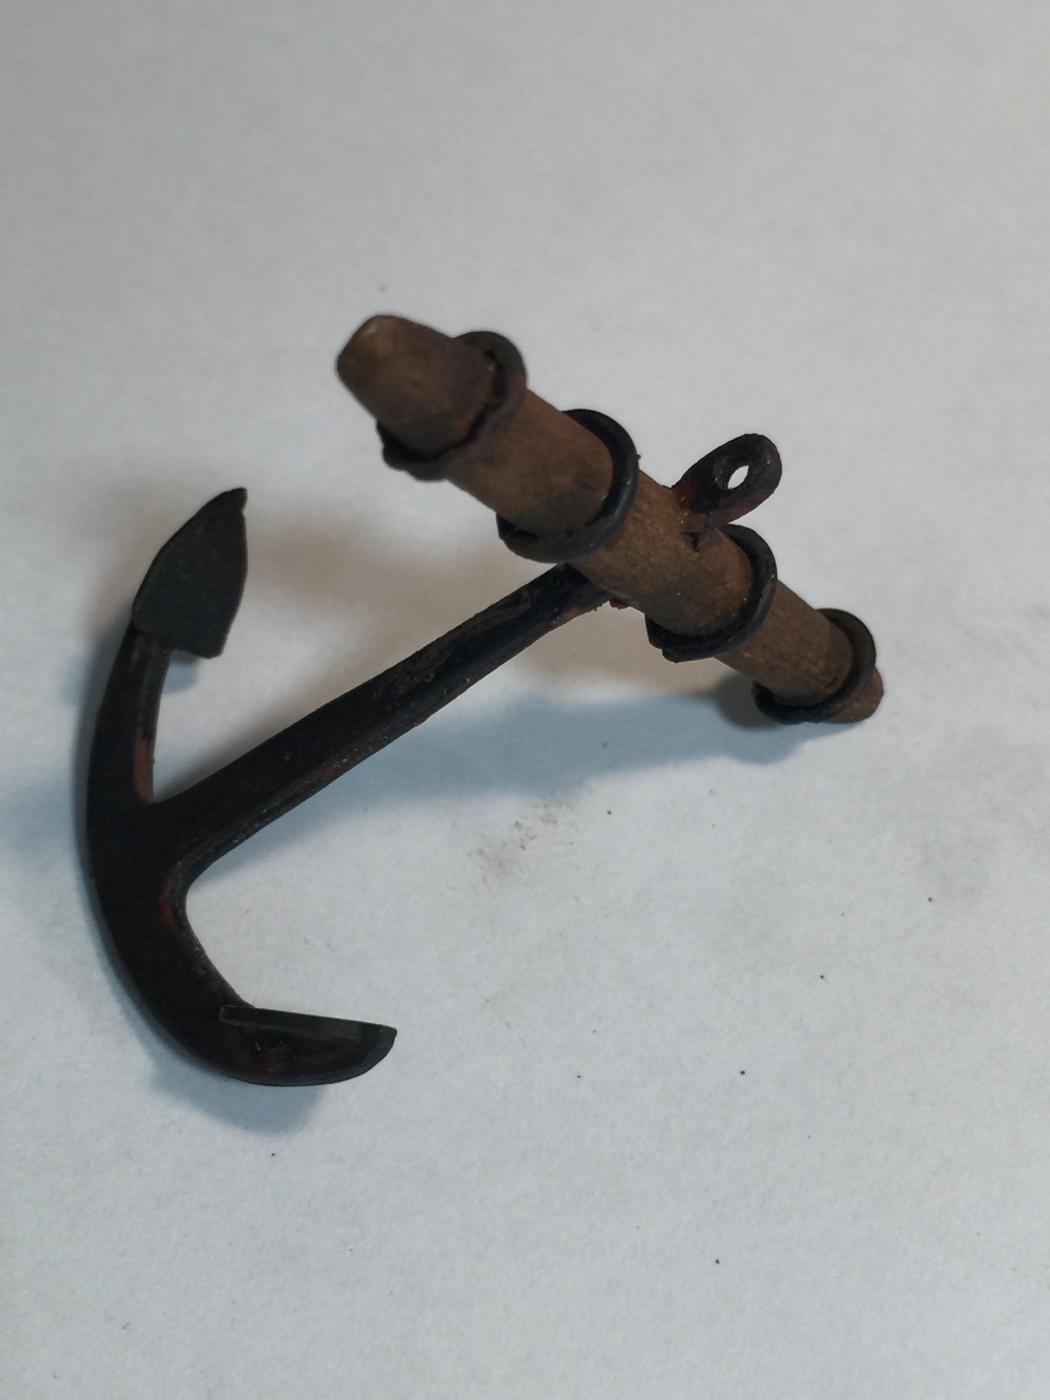
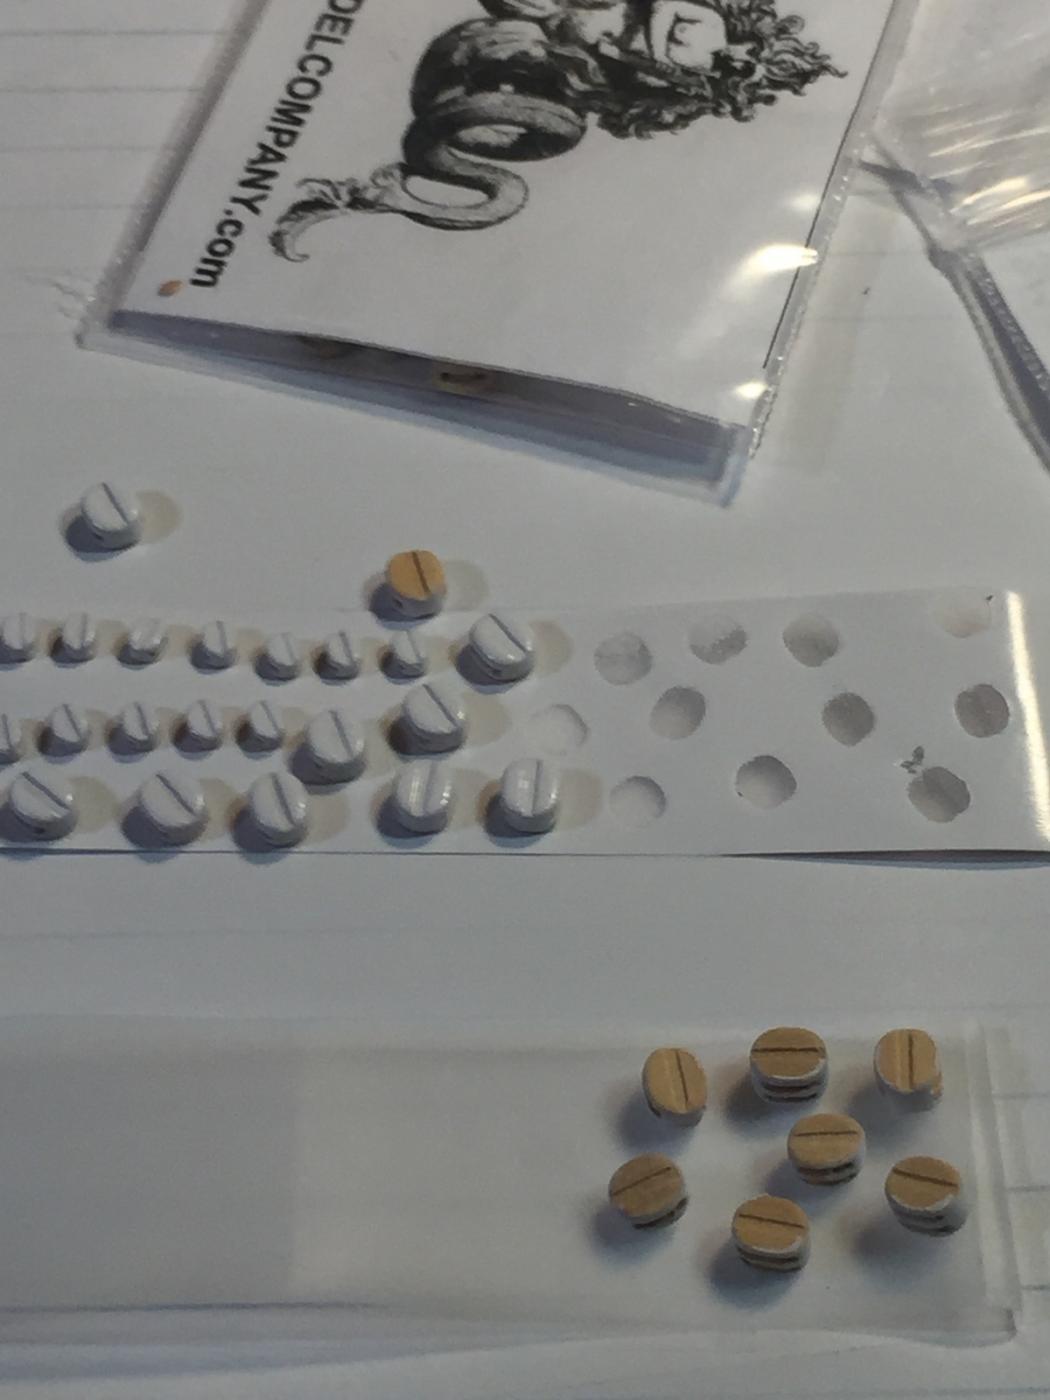
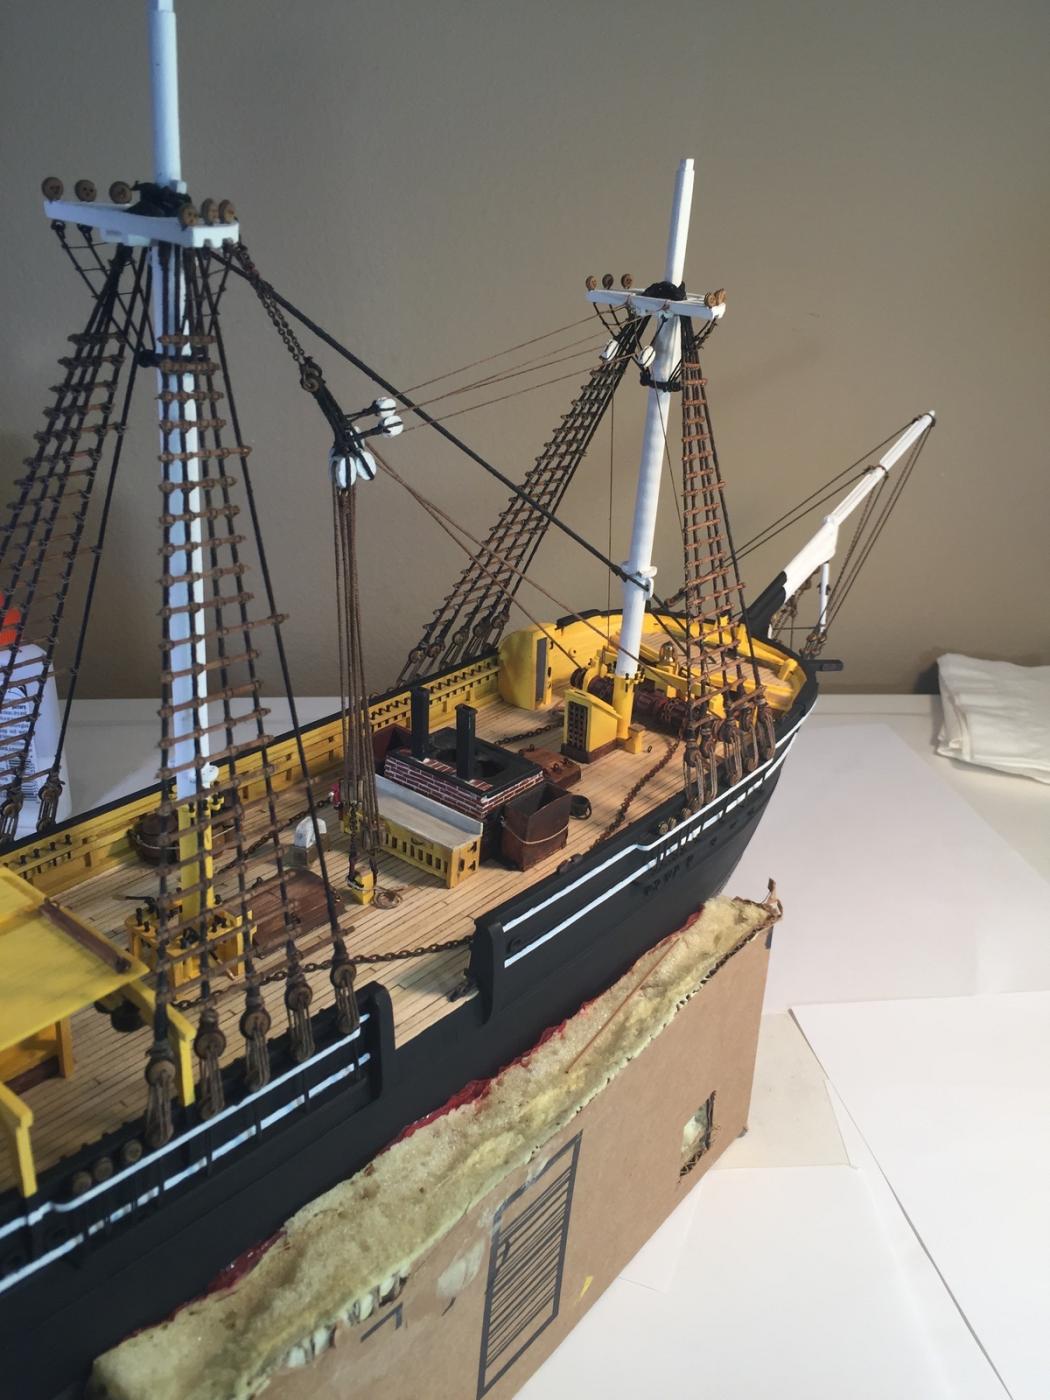
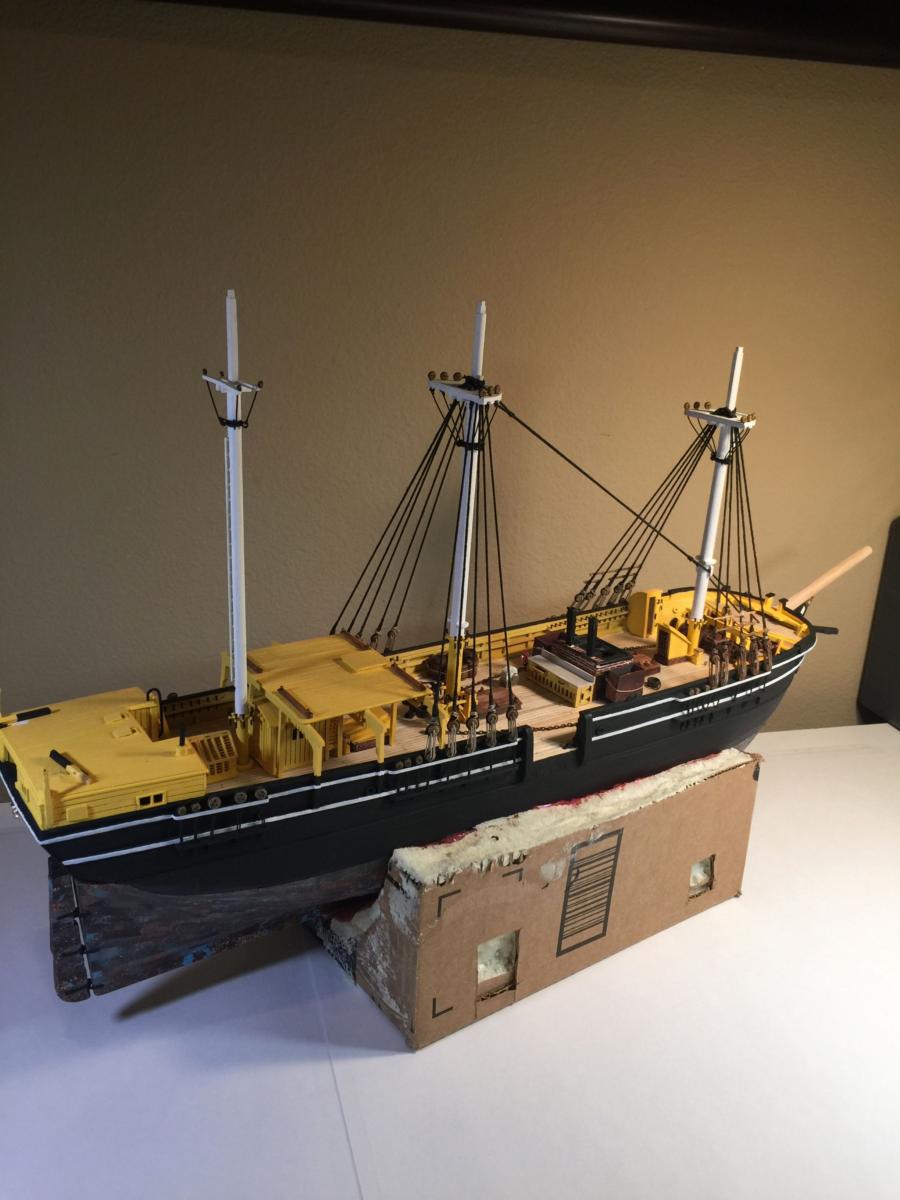
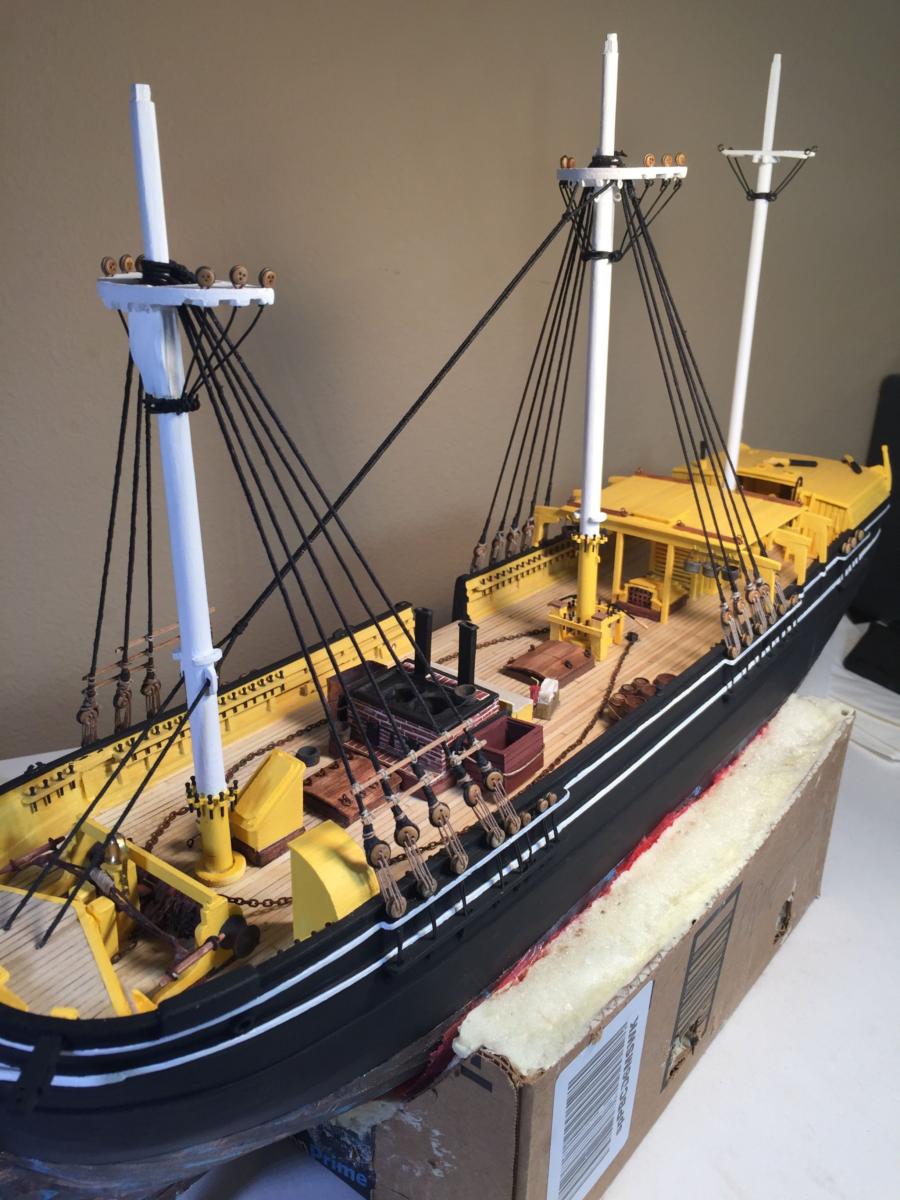
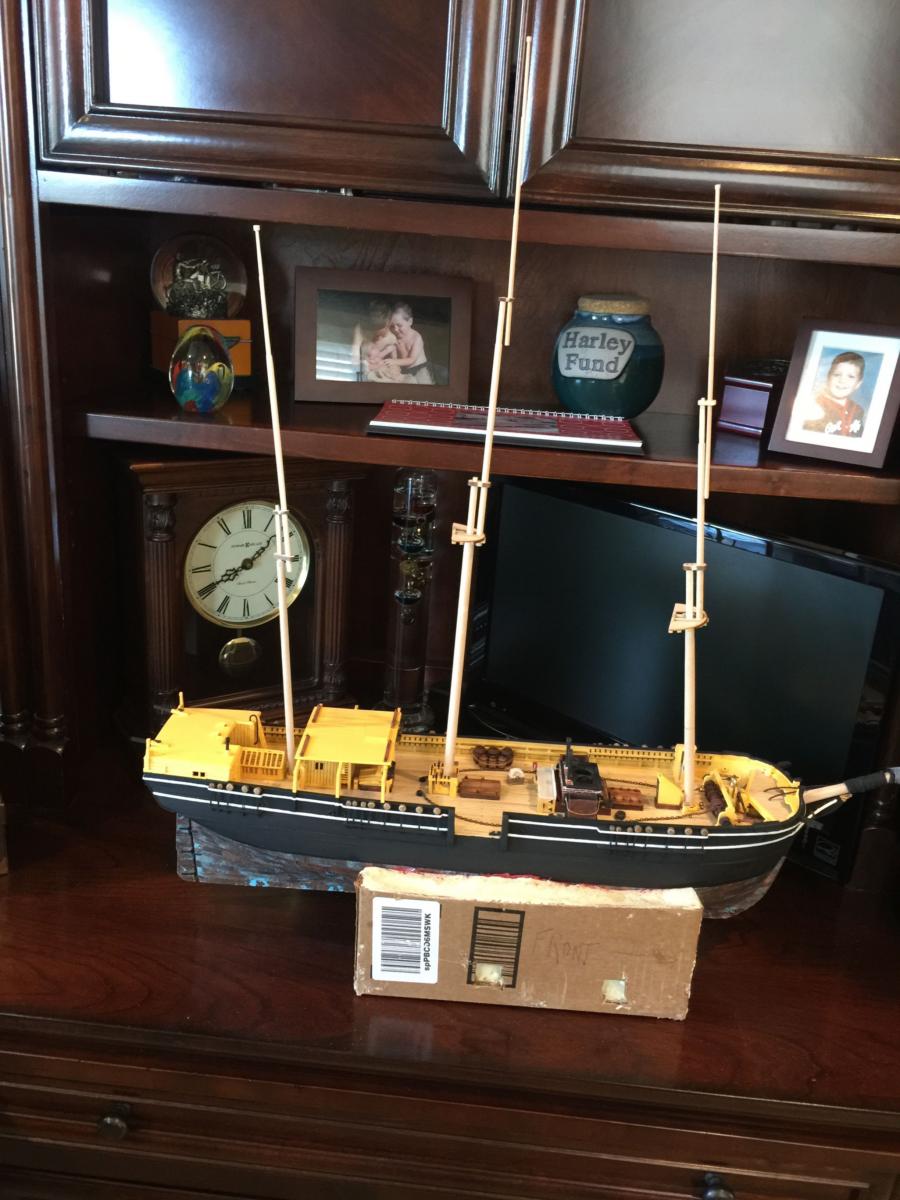
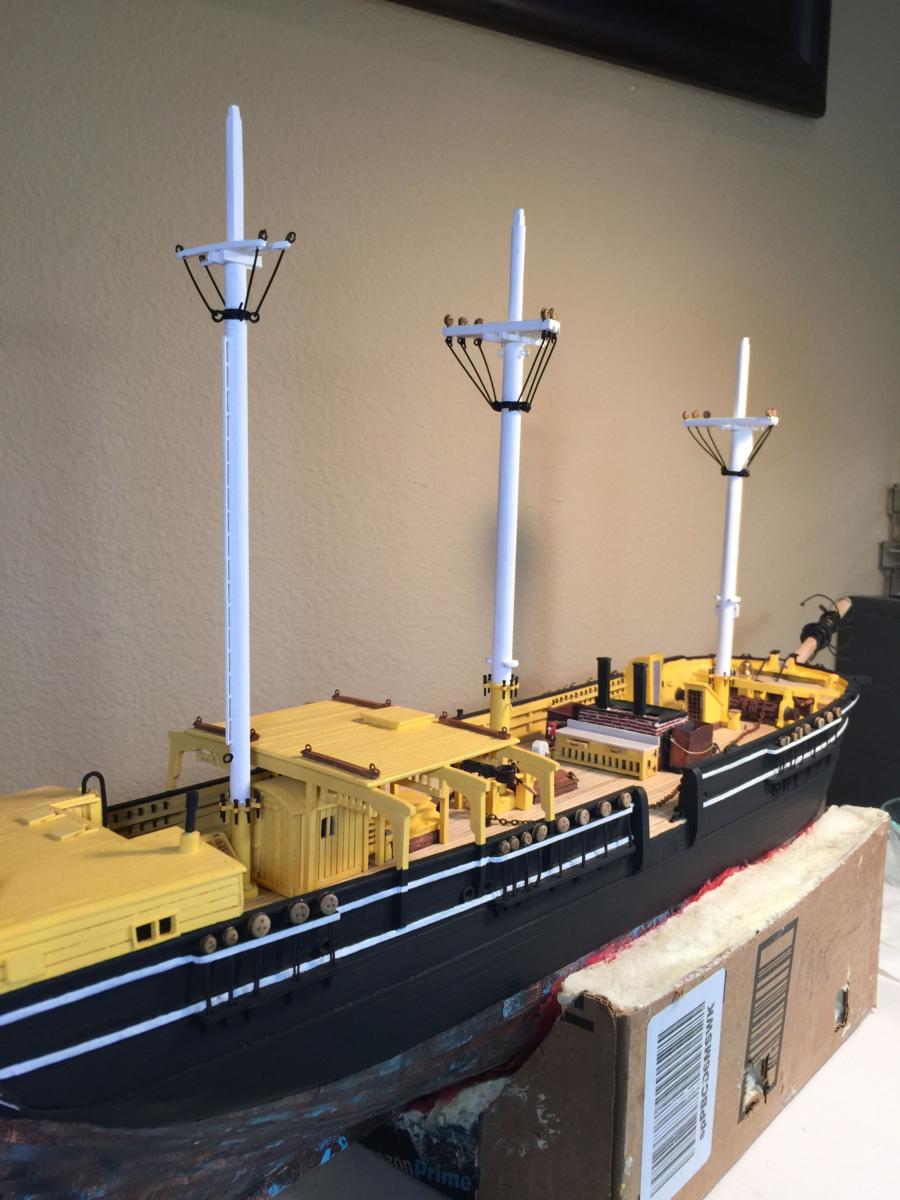
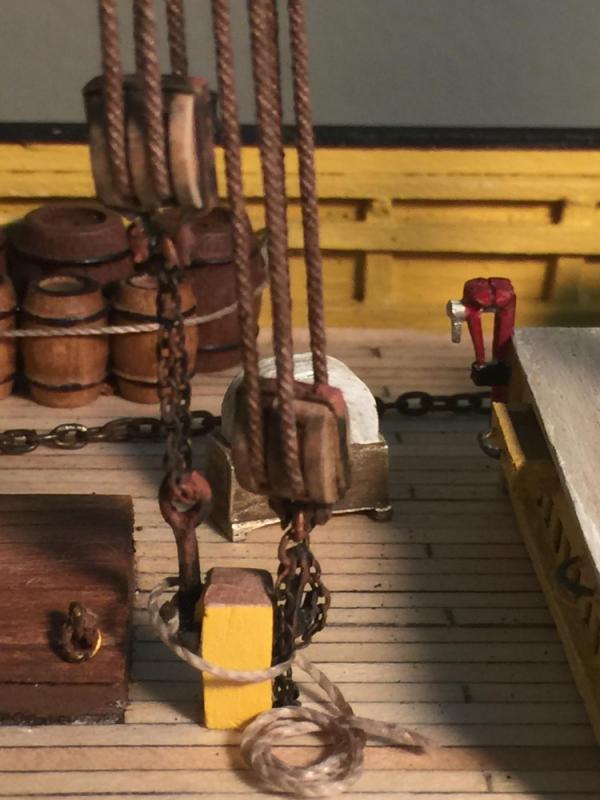
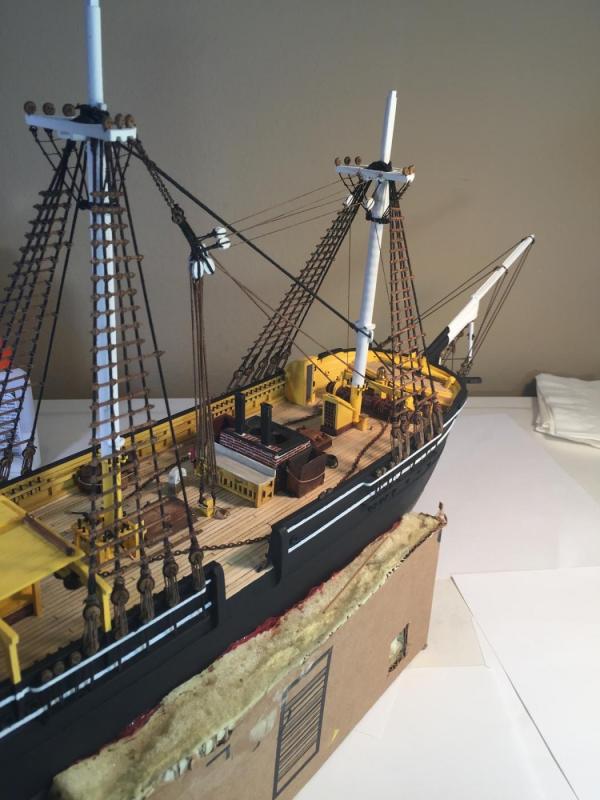
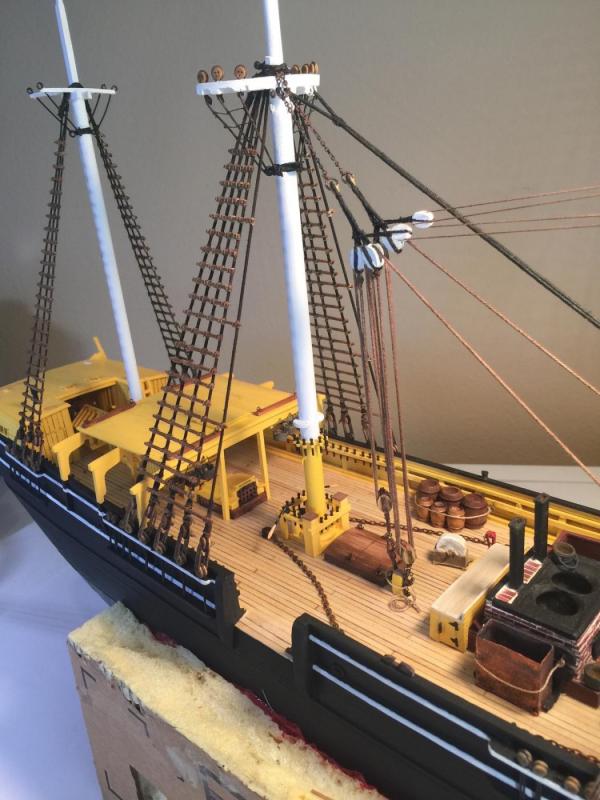
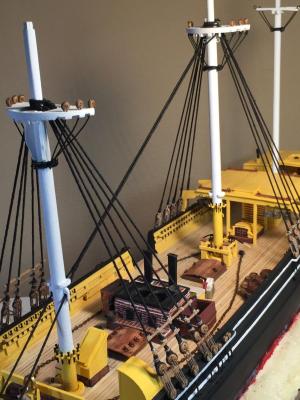
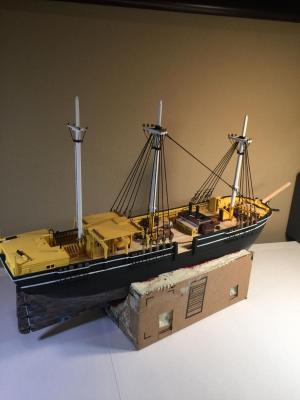
I haven't had a lot of time to dedicate to the Morgan build lately so she's moving along slowly. I had to hold off building the bow sprit because of the lack of building space and my ability to break things during the build. You know, two steps forward...one step back! I'll upload some pics of the last work I've done on her. I should have swept or vacuumed the deck of build debris before taking the pics. But it's been a long time since I uploaded so maybe looking at the pics will help others.

- 56 replies
-
- 4
-

-
- Charles W Morgan
- Whaling Bark
- (and 1 more)
-
Bruce, you are doing a great job! Pics are beautiful.
-
Chuck, I am always amazed looking at your work. You truly are talented. Thanks for everything you do!!
- 1,051 replies
-
- 3
-
-
- cheerful
- Syren Ship Model Company
- (and 1 more)
-
17 more months for me Bruce, then I will also retire!
-
Willem Barentsz by ceestoorn - FINISHED
homer replied to ceestoorn's topic in - Build logs for subjects built 1501 - 1750
My compliments. Very nice work. -
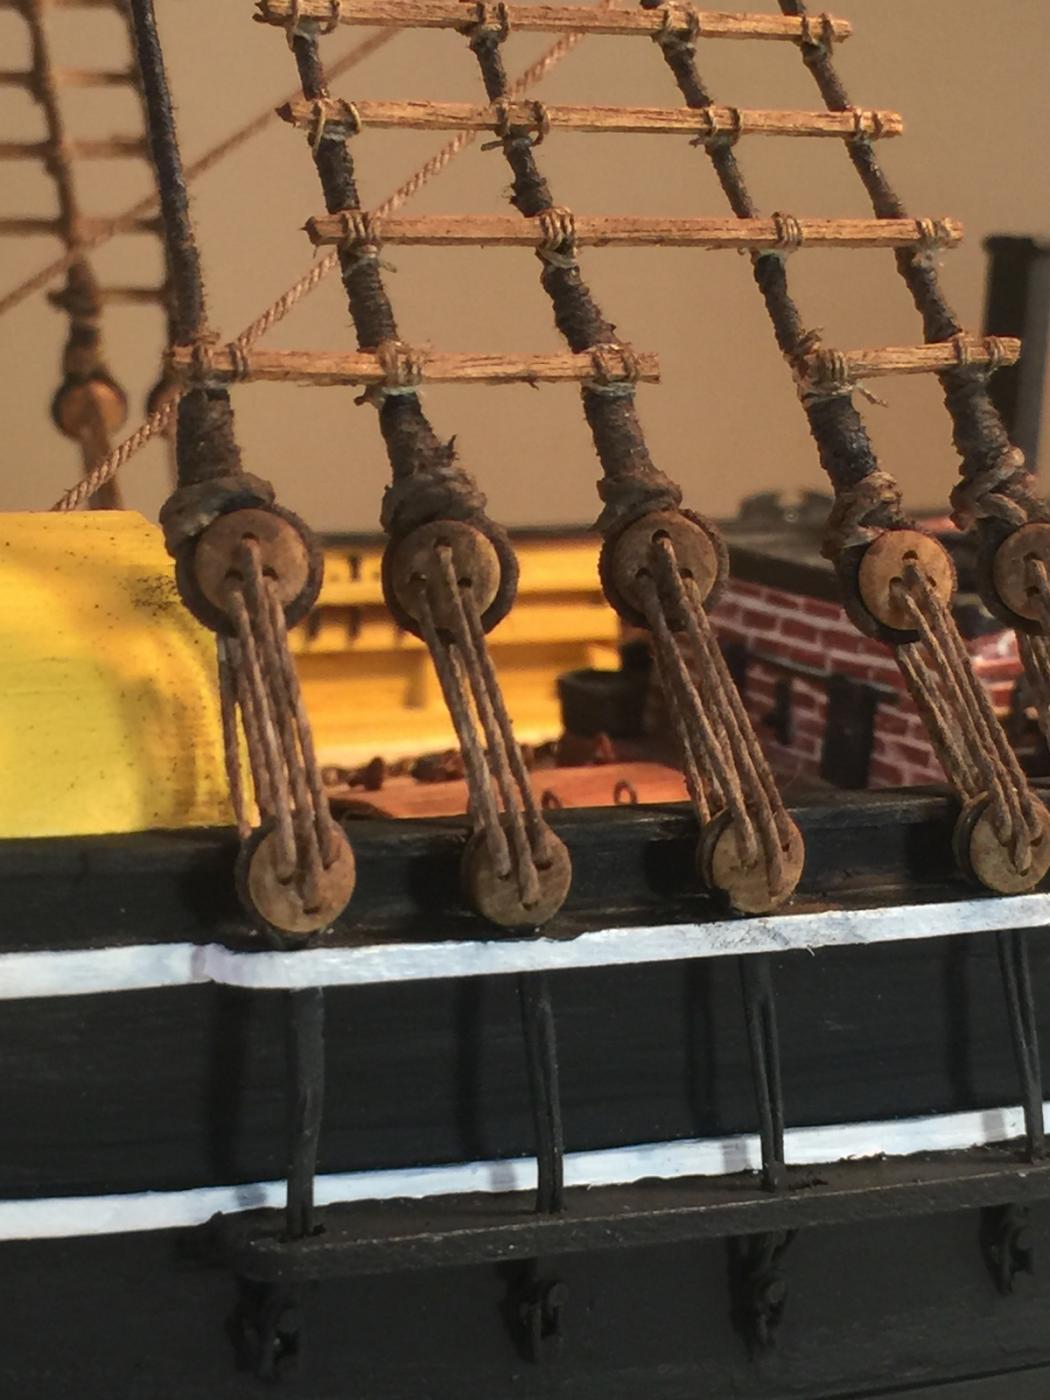
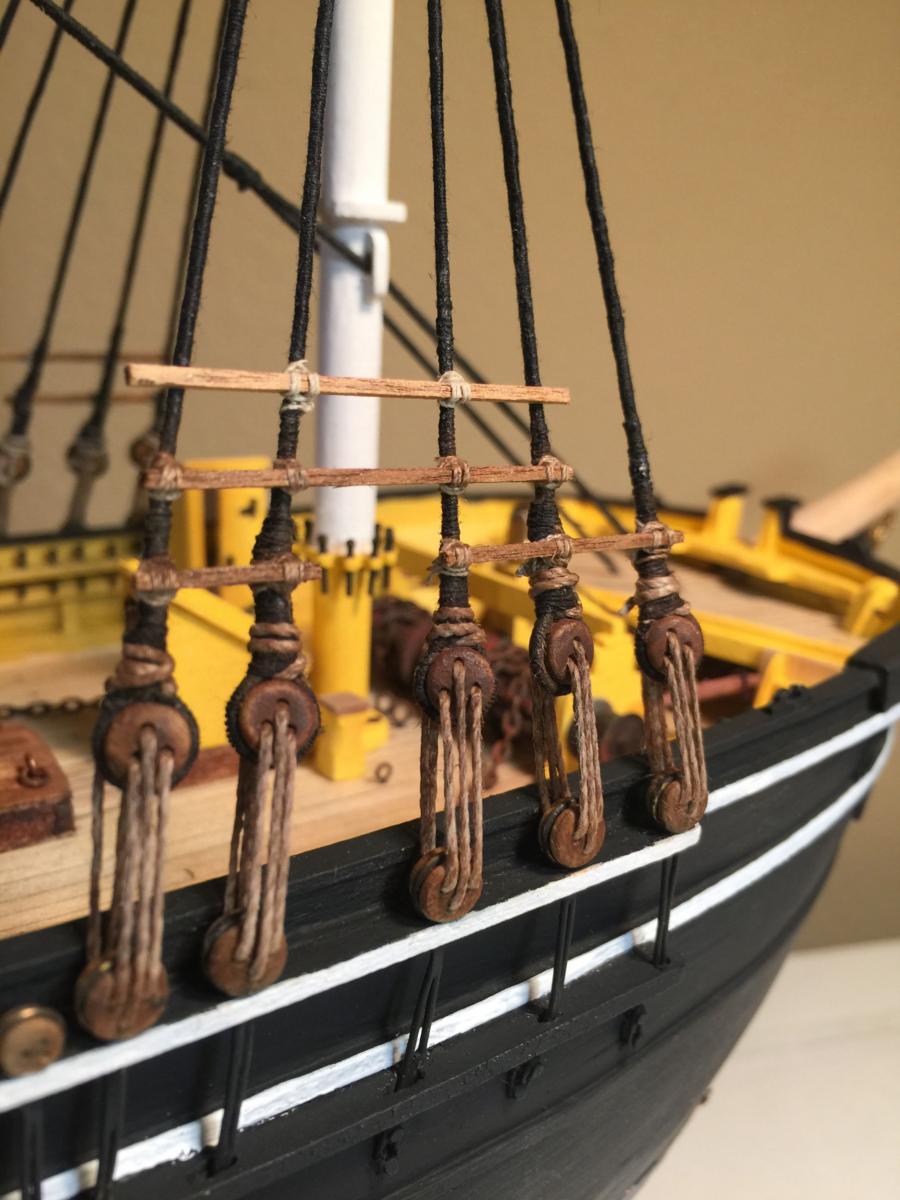
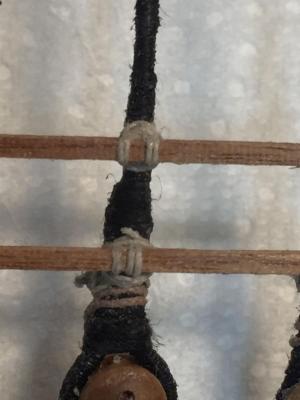
A single pic of my rat board knots. Still have a lot of knots to tie!

- 56 replies
-
- 3
-
-
- Charles W Morgan
- Whaling Bark
- (and 1 more)
-
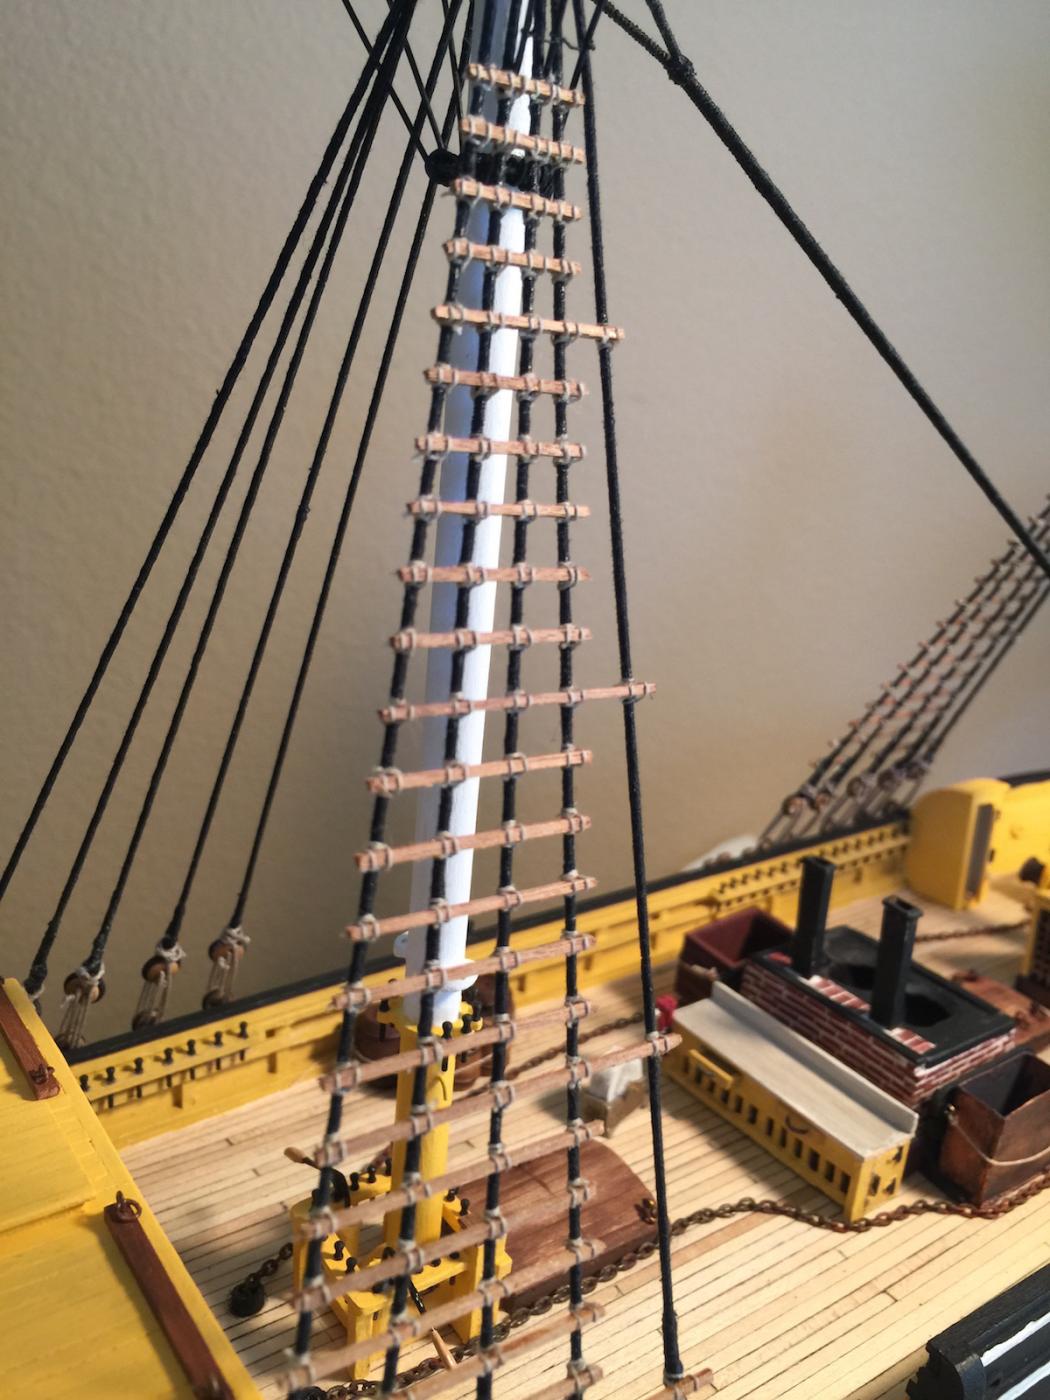
Dang it! After looking at your beautiful work I just realized that I installed the long rat board on the Main Mast the same spacing as on the Foremast. Not sure how I missed that. It's been such a tedious process that I may end up leaving them alone. Darn-it!!
-
Bruce, nice work! I too am working on the rat board knots and about 3/4 done. I'll upload my pics when I finish the task. But wanted to compliment you.Take care. Ron
-
Hollowneck, Ps....Happy Birthday!!!
-
Hollowneck / Ron your ship display platforms are absolutely beautiful! I looked at your gallery and was very impressed. You are very talented. I'm currently working on the CW Morgan and plan on doing some inlay work when I make the display board - still some time off. If you ever made notations on your display board build process I'd love to see them. Take care. Homer/Ron
-
Making Shackles my way…
homer replied to Thanasis's topic in Metal Work, Soldering and Metal Fittings
Thank you for the great tutorial! Great minds think alike ... Wefalck! -
Looking great Bruce! I also bought Syren blocks for the ship but haven't rigged the blubber tackle yet. I've been moving rather slowly on the ship the last few months. Take care. Ron
- 245 replies
-
- 1
-
-
- model shipways
- Finished
- (and 1 more)
-
You wil no doubt get answers from some very talented builders on this site. Personally, I've never used glass as a scraper. I've used metal scrapers on large wood projects but the only thing close to that is using single edged razor blades as a scraper. I have done that. a bit. But, I typically use different sand papers and 0000 still wool before applying a stain, sealer or clear coat. Hope that helps.
-
I had sent you a personal message some time back congratulating you on such a beautiful build. I just wanted to say it again on the NRG site. I should be getting back to my build soon and like Bruce, will be relying heavily upon your build as I go. Again, just beautiful.
- 2,250 replies
-
- 2
-
-
- model shipways
- Charles W Morgan
- (and 1 more)
-
Very nice job Bruce! I set the ship aside for a little while as I have been building cabinets for the garage. I'm just about done if I don't build any more! Then, back to the Morgan.
- 245 replies
-
- 1
-
-
- model shipways
- Finished
- (and 1 more)
-
Thanks Scoot! Since uploading the pics I've gotten a little side tracked. I want to build some cabinets in the garage and have been working on those plans. But will indeed order some brass for the case. Thank you again for the details. Ron
-
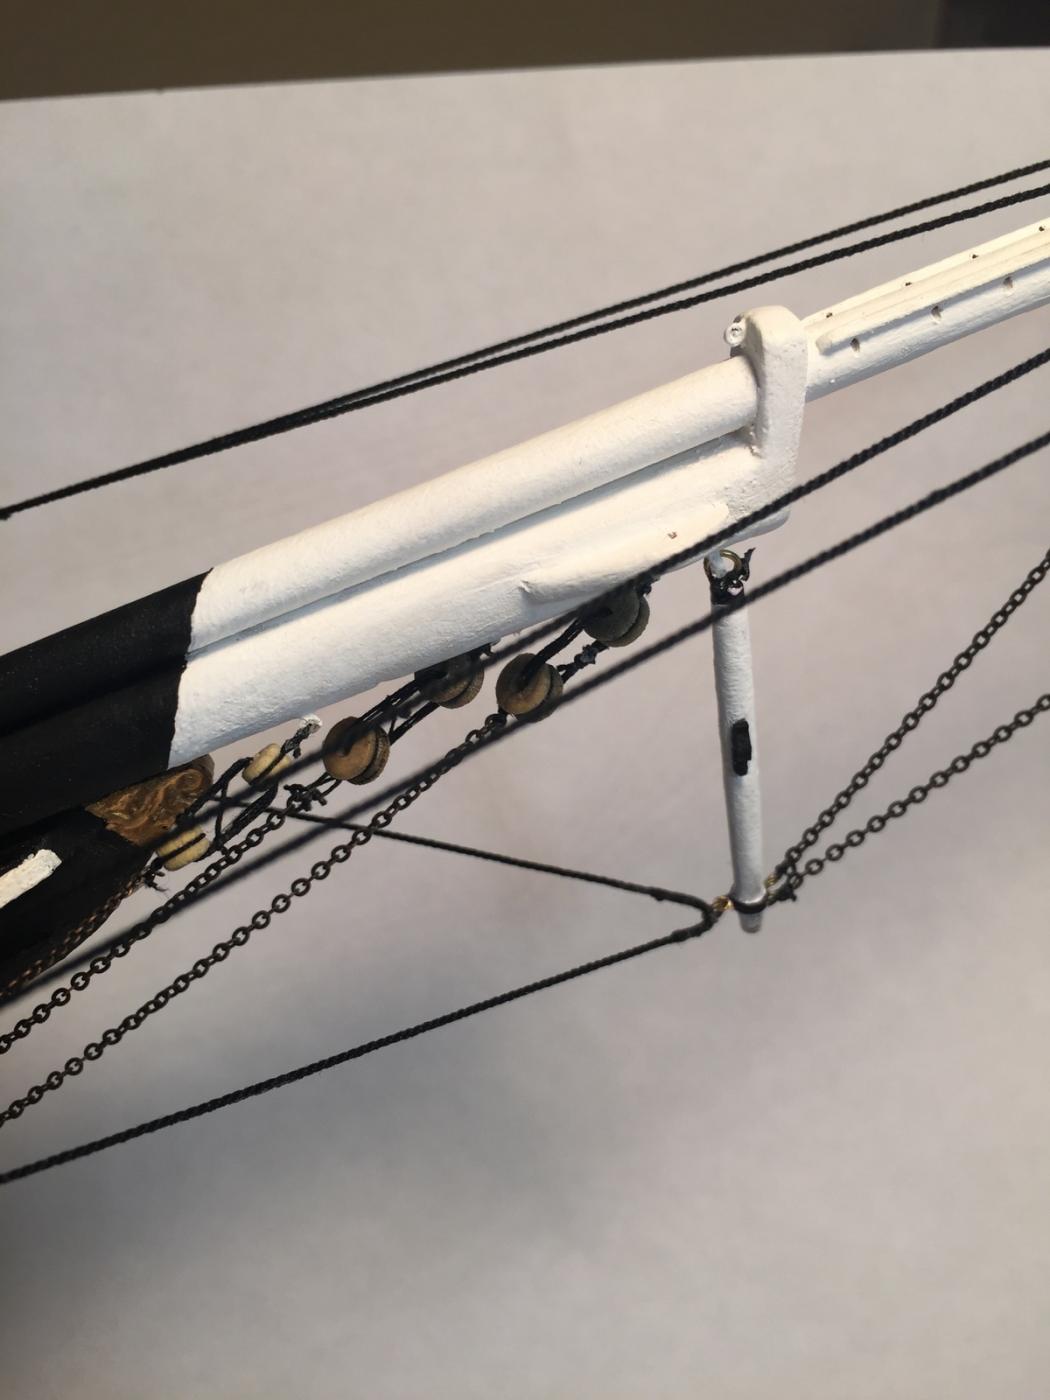
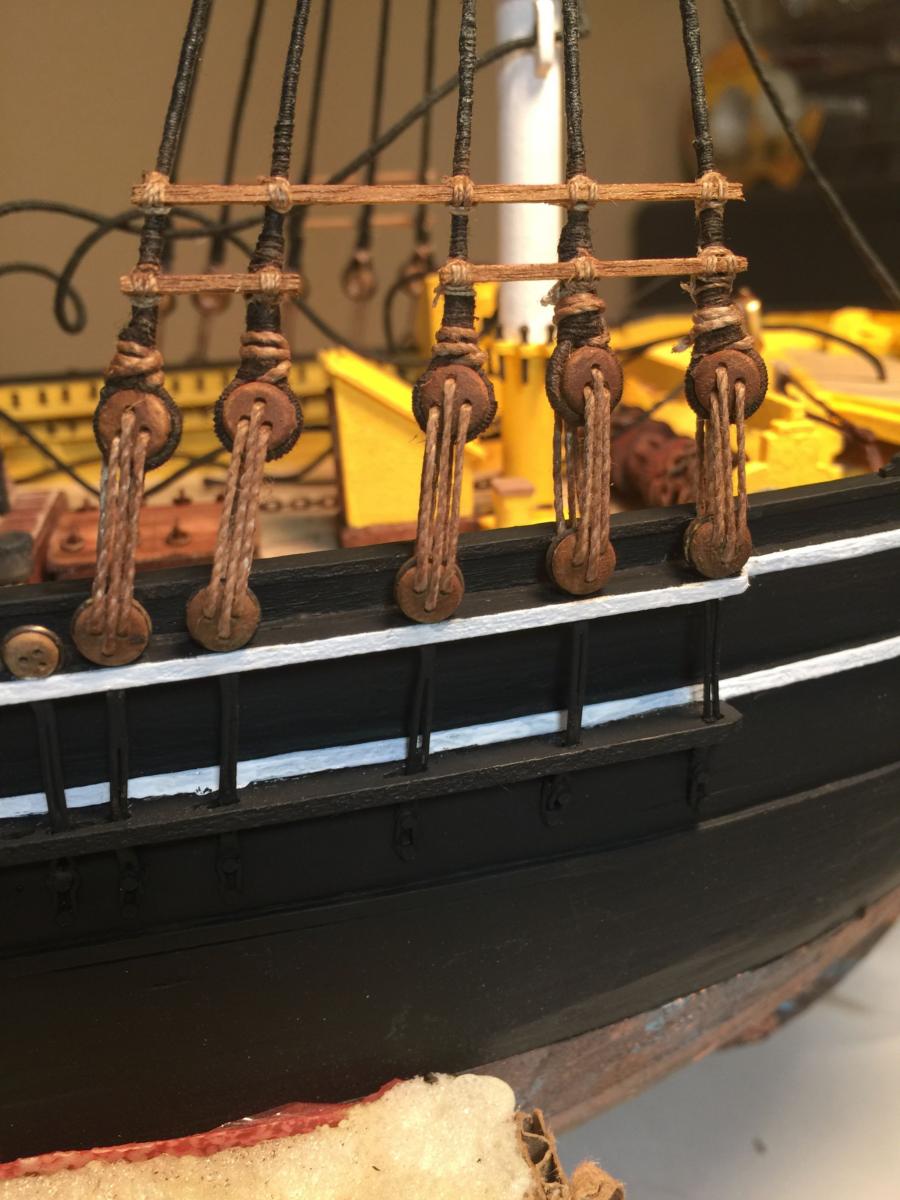
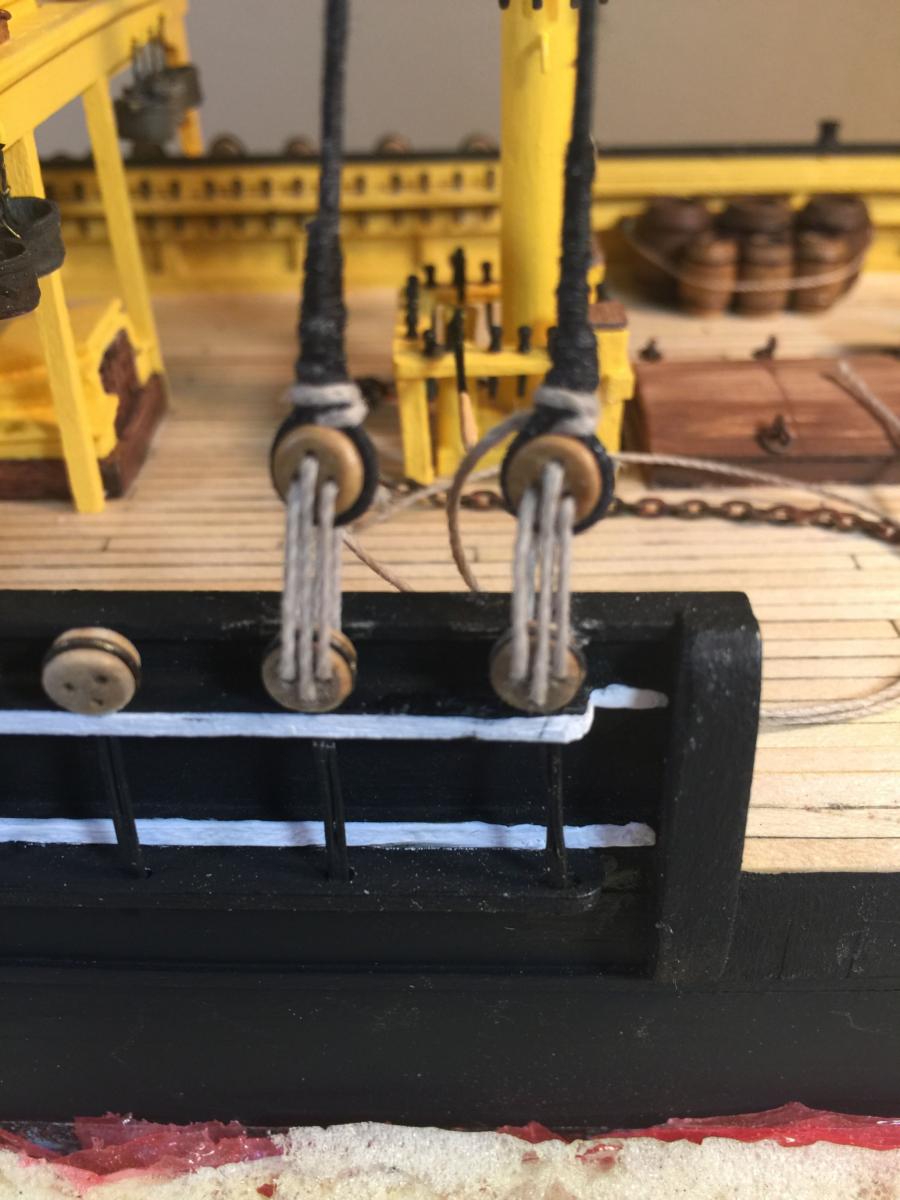
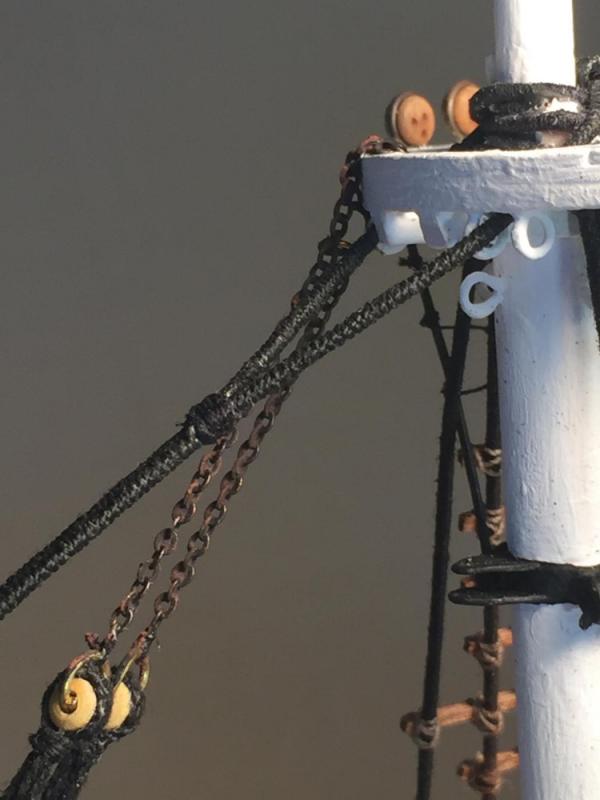
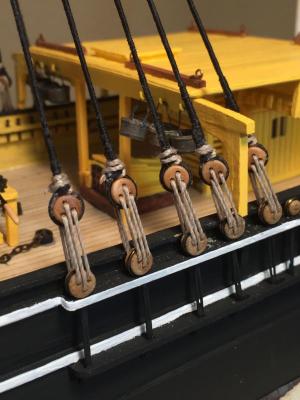
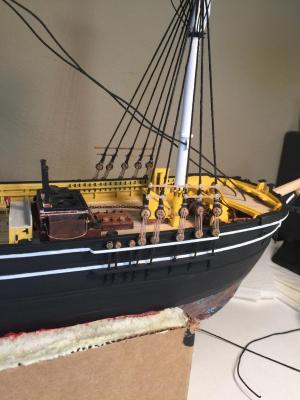
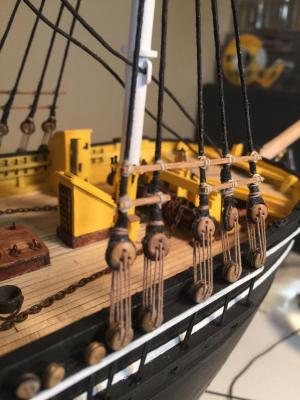
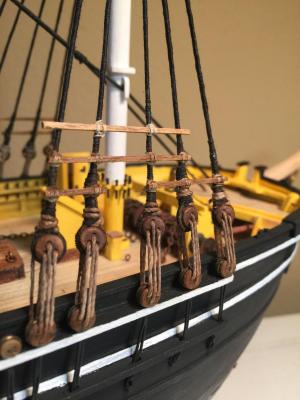
So, I should probably upload some of the completed served shroud lines with attached deadeyes. I ran the completed shroud lines around the masts and through the Fore and Main Tops down to the lower attached deadeyes. Then what I do is cut off a length of lanyard. I tie a knot at one end and I harden the tip of the other end with CA. Once hardened I cut a sharp angle on the thread so I can "thread" it through the deadeyes by hand. Once the deadeyes are all rigged up, using tweezers I pull the line taught getting the deadeyes in line and making sure the masts are all straight. While I didn't see this done on pics of the real Morgan (so not sure why I actually did this) but I pull the line up behind the deadeye and push it through the top of the deadeye and served line to the front. I then wrap it around the shroud and use a cow hitch to tie it off. I put a tiny drop of white glue on the knot (drys clear and doesn't crack like CA) that will hold all in place. And, if you mess up or want to change something... like I did, you can pull things apart without destroying everything! After I installed my lanyards I kept looking at pics that John took of the Morgan. I personally felt like I used too thin of line for the lanyards. I kept looking at how they tied the line off above the deadeye (cow hitch) and it just looked like fairly thick rope. So, I decided to remove all the lanyards and use a thicker twine that I had laying around. I like the way it looks but retrospectively, it now may be just a tad too thick!. Oh well. Then I really got a wild hair and decided to use some of that Doc O'Brien's Dusting Powders to give the deadeyes and lanyards some character. As you may recall, I aged much of the deck items and wanted to also do something with the deadeyes and lanyards. So far I only did this to the Foremast lanyards and also a few of the ratline boards )I added a couple just for fun even though I'm not really at that step). I was also able to practice a bit tying the ratline boards. So anyway, the jury is still out on the powder/ aging stuff. I might try to wash some of it off but do want some light aging...maybe just not as much as I have added. I'm open to suggestions!


- 56 replies
-
- 7
-
-
- Charles W Morgan
- Whaling Bark
- (and 1 more)
-
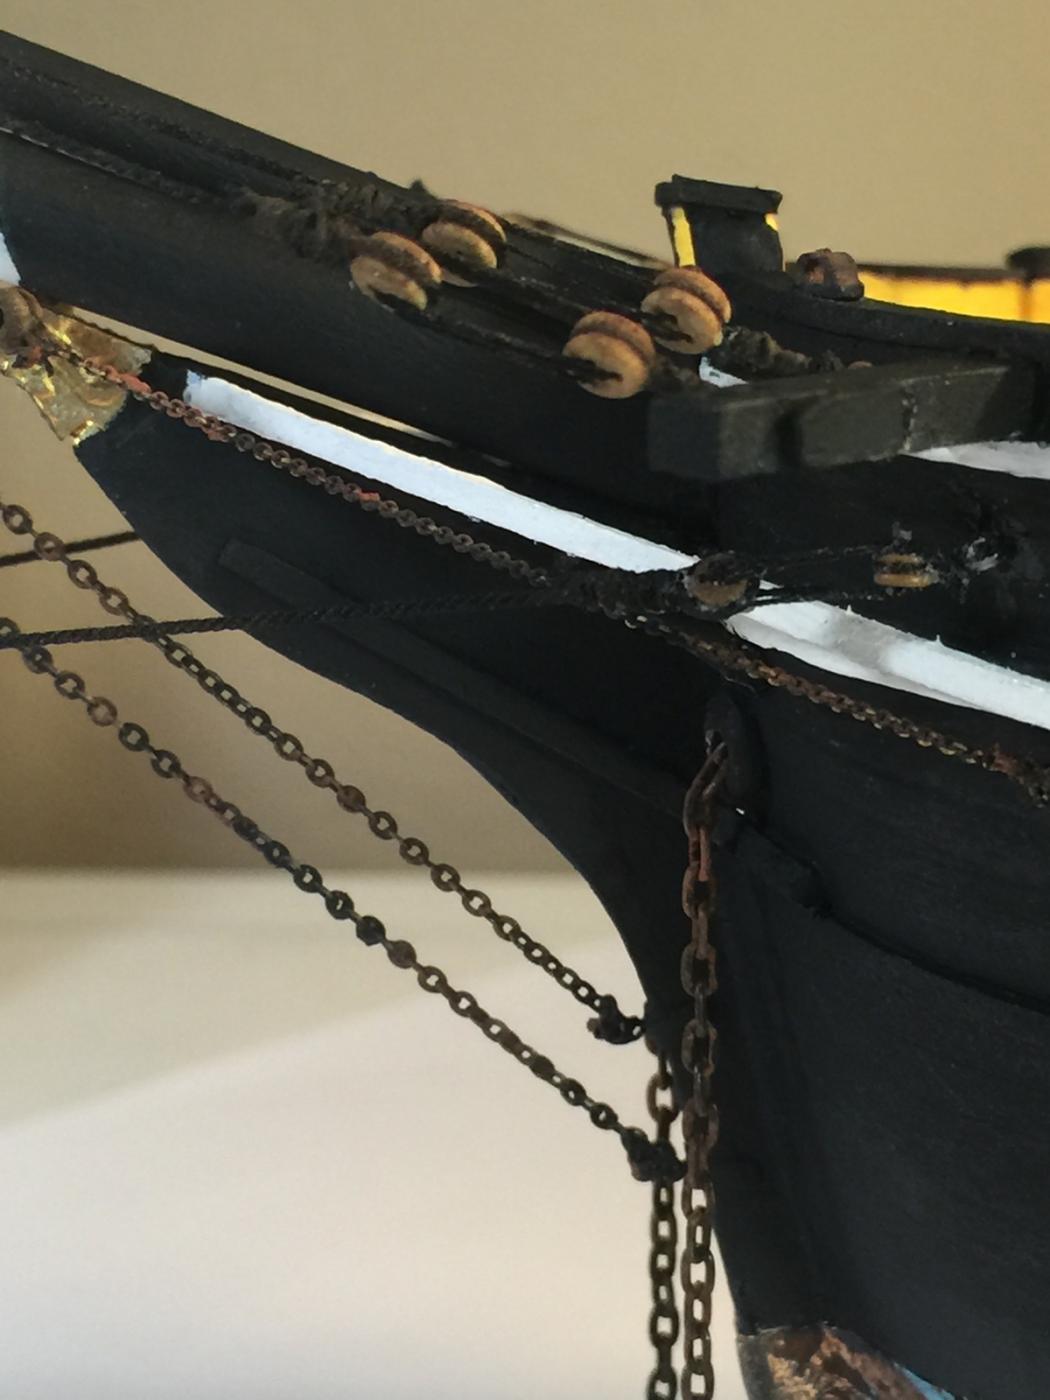
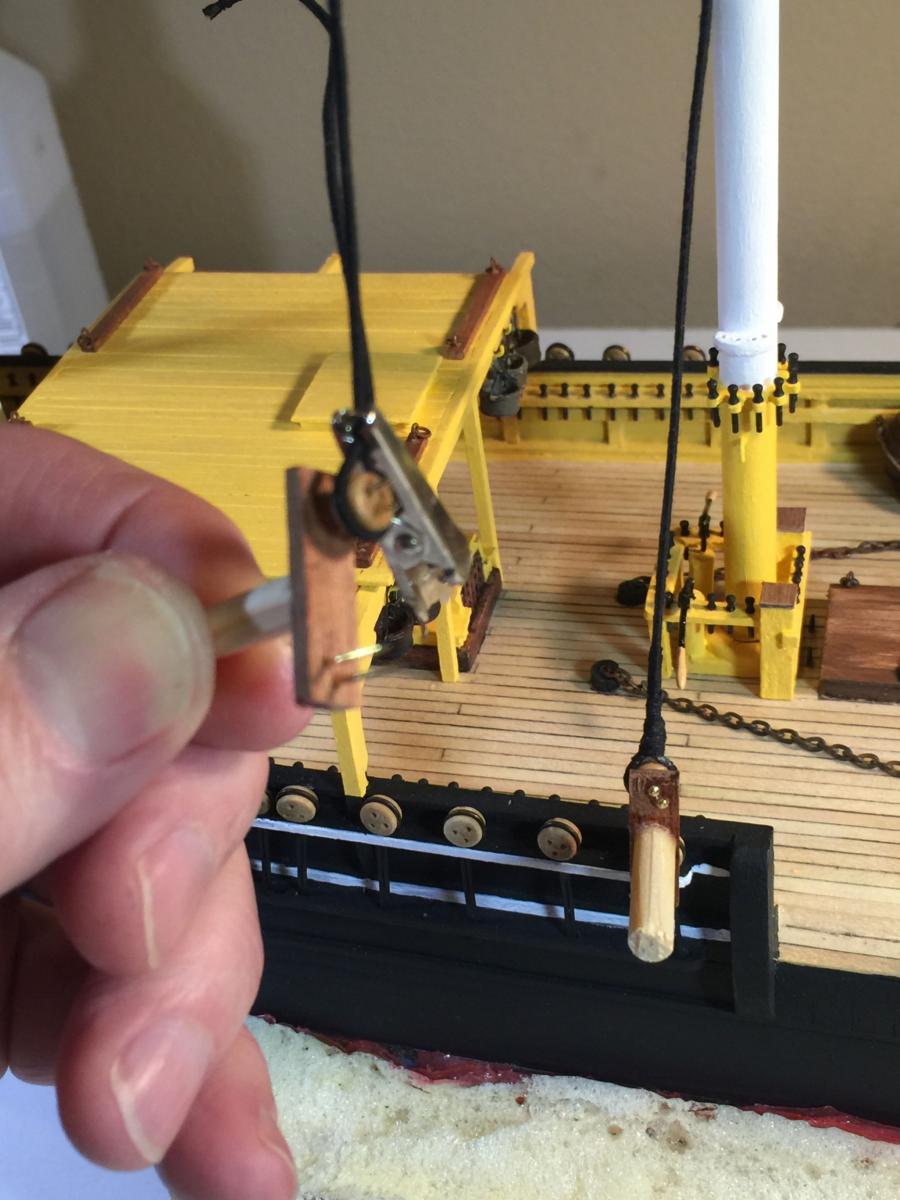
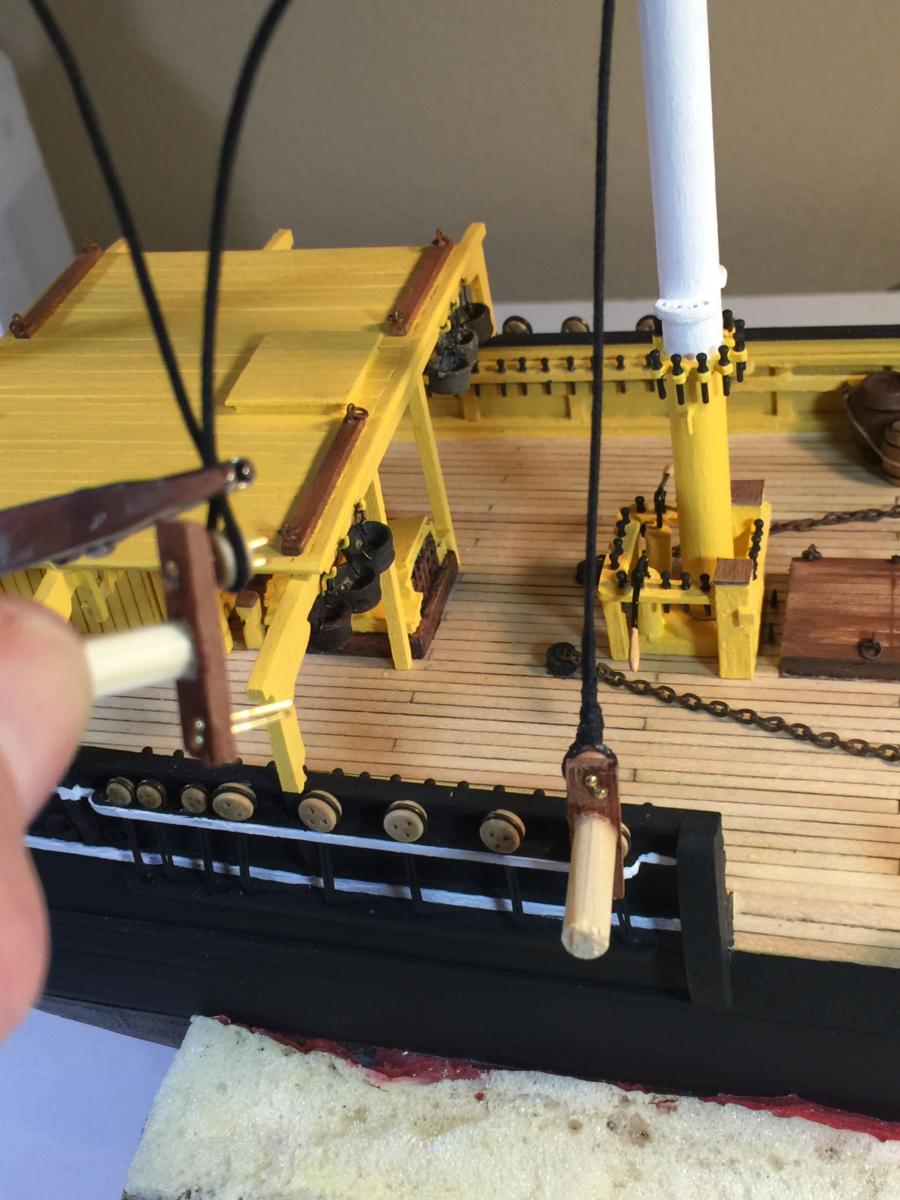
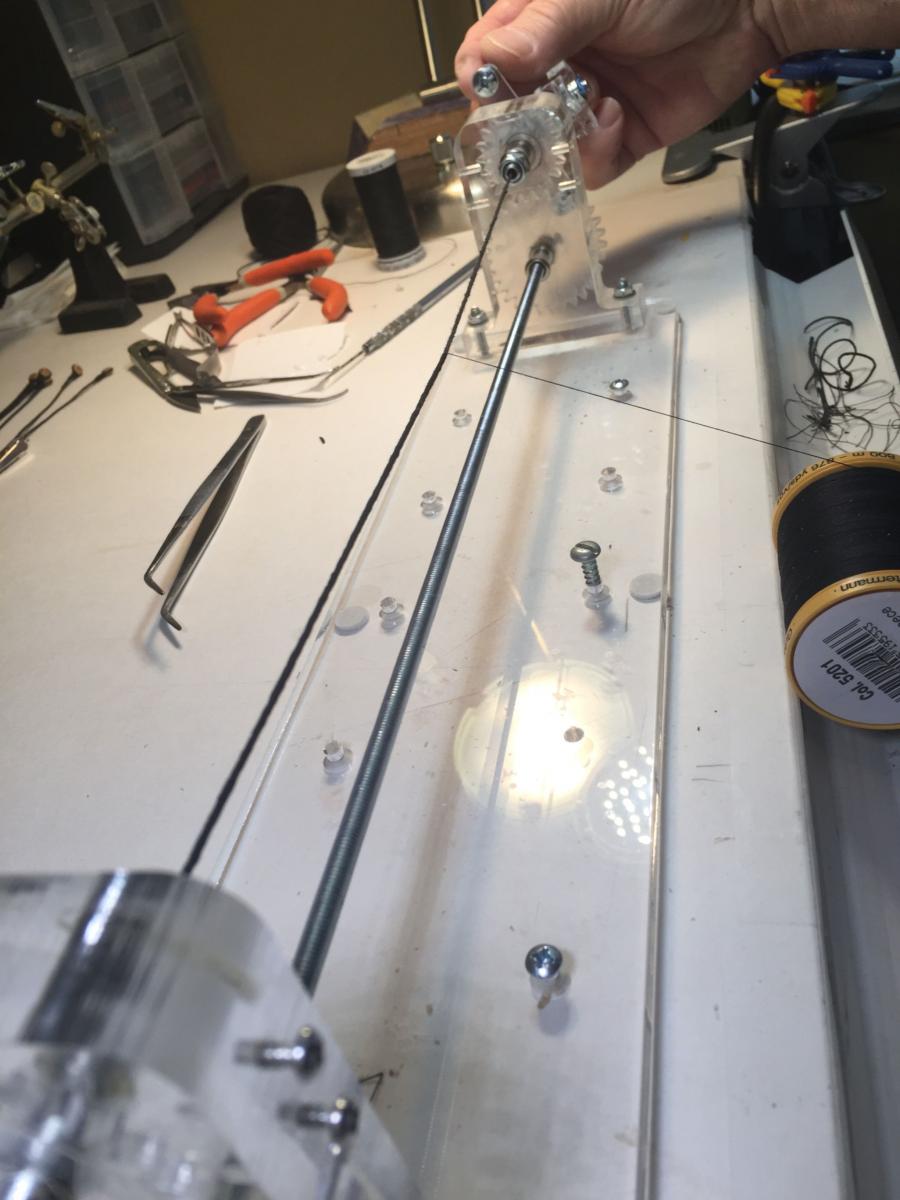
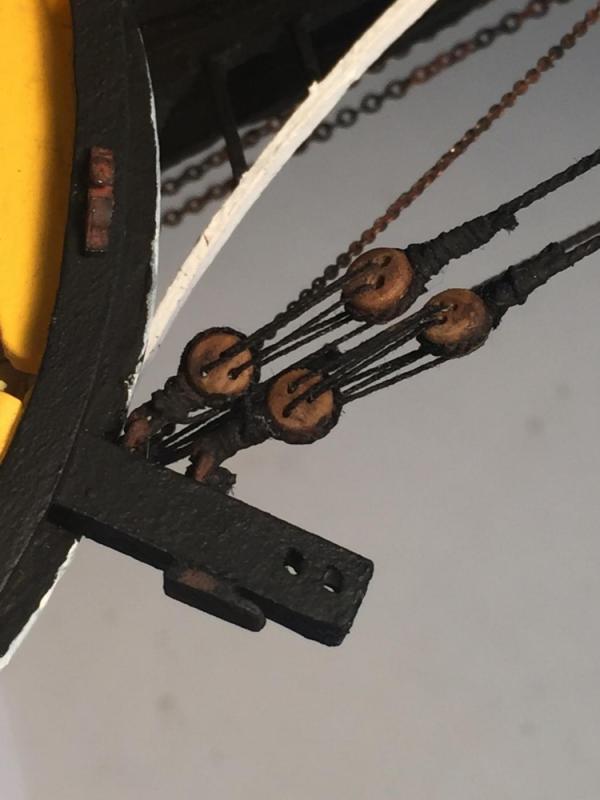
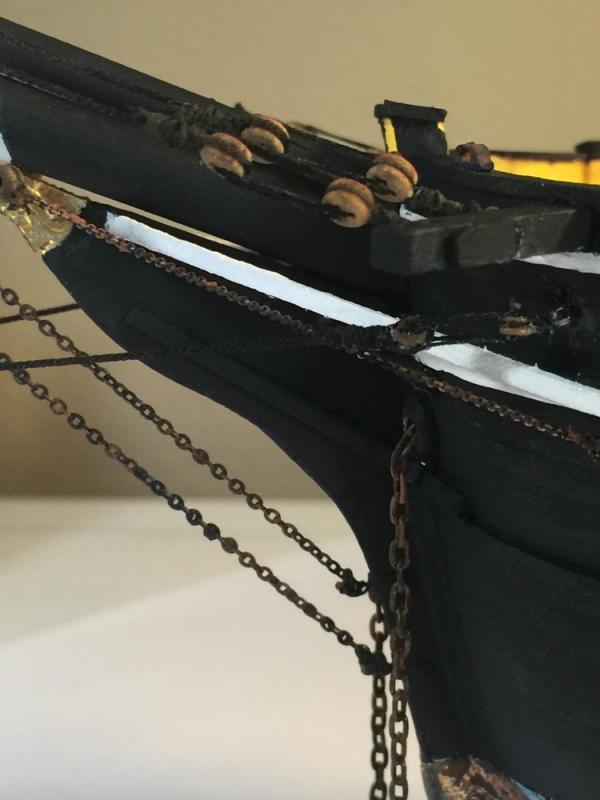
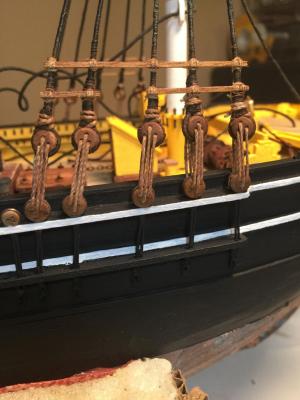
Next I began attaching the deadeye to one end of the served shroud line. I do know that some model ship builders attach the pre-served line to the deadeye and then begin serving it along with the rest of the shroud line. But, I wanted my deadeyes to have "served" line wrapped around them. So I attached the line after serving it. I would place the served shroud line around the deadeye pulling it up about 5 to 7mm past. I would use an alligator clip to hold it in place and then take a thin piece of thread and tie it in place just to hold its position. Then I would attach it back on the serving machine to serve over the now attached deadeye and double shroud line. I would cut part of the extra line if there were too much left. Here's a HINT that I didn't figure out until nearly done with the shroud lines on the Foremast and Main mast... when you wrap the shroud line around the deadeye, tie it off "behind" the shroud line, kind of a twist in the line so the extra part is not to the side. Why, because when you do the final serve / attach the deadeye you don't want the shroud to look too thick just above the deadeye. If you pull the line behind and then do the final serving, your shroud will appear narrow. Obviously, when you overlap the deadeye you're going to have double the line. If you place it and tie it off behind the shroud before you do the final serving, it will look much better. Hope I explained this without making it real confusing! I'm kind of tired and probably not articulating this very well. Here are some pics of my unfortunate too thick shrouds just above the deadeyes. I suppose if you wrapped the deadeye with unserved line you wouldn't have this problem. But, you better be really precise when doing the same on the other side. I wanted my deadeyes to be somewhat in line. I made a jig with pins that will attach to the lower deadeye fixed to the chain plate and hold the top deadeye in established place so I can pull the shroud line taught around the upper deadeye before attaching it in place. I then remove it and return it to the serving machine for the final wrap. I've seen this done several ways so you have to let me know if I'm doing it wrong!


- 56 replies
-
- 4
-
-
- Charles W Morgan
- Whaling Bark
- (and 1 more)
-
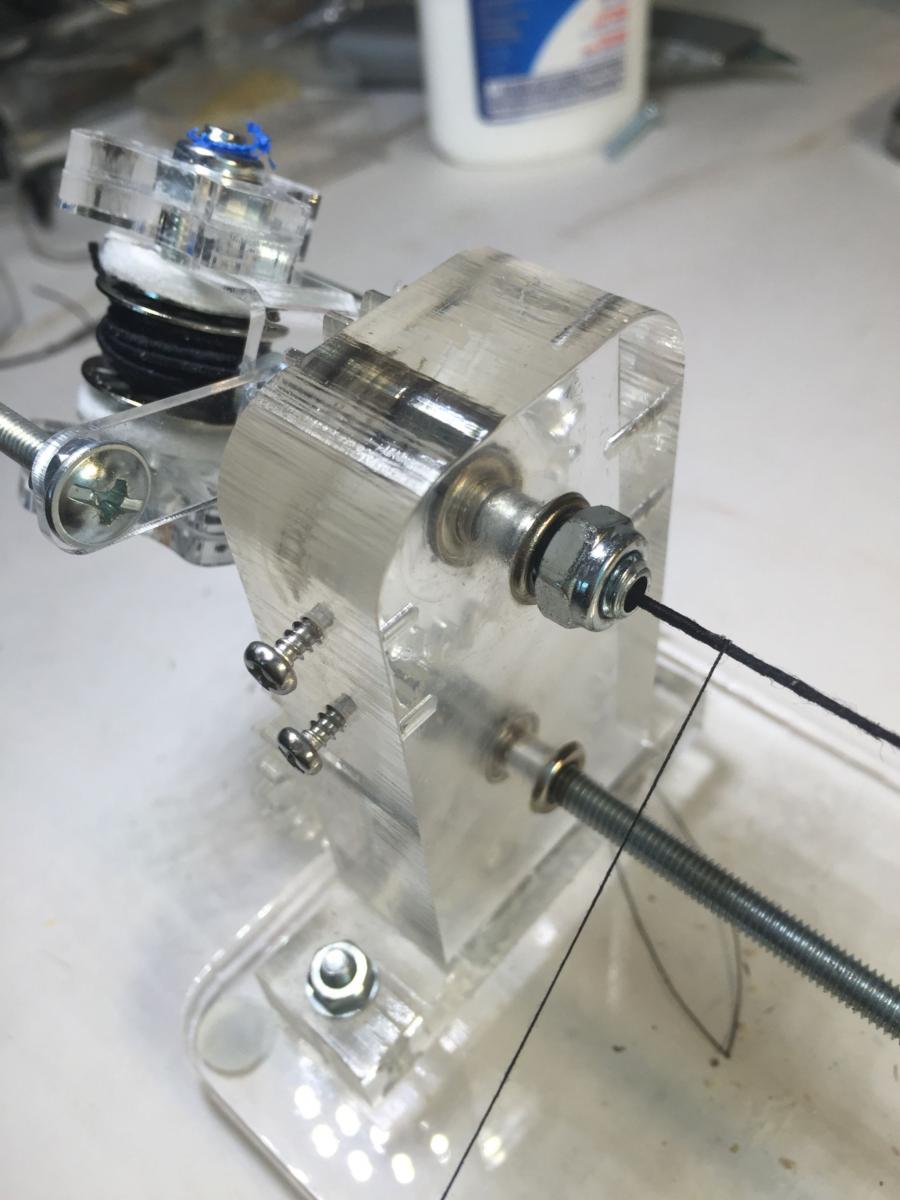
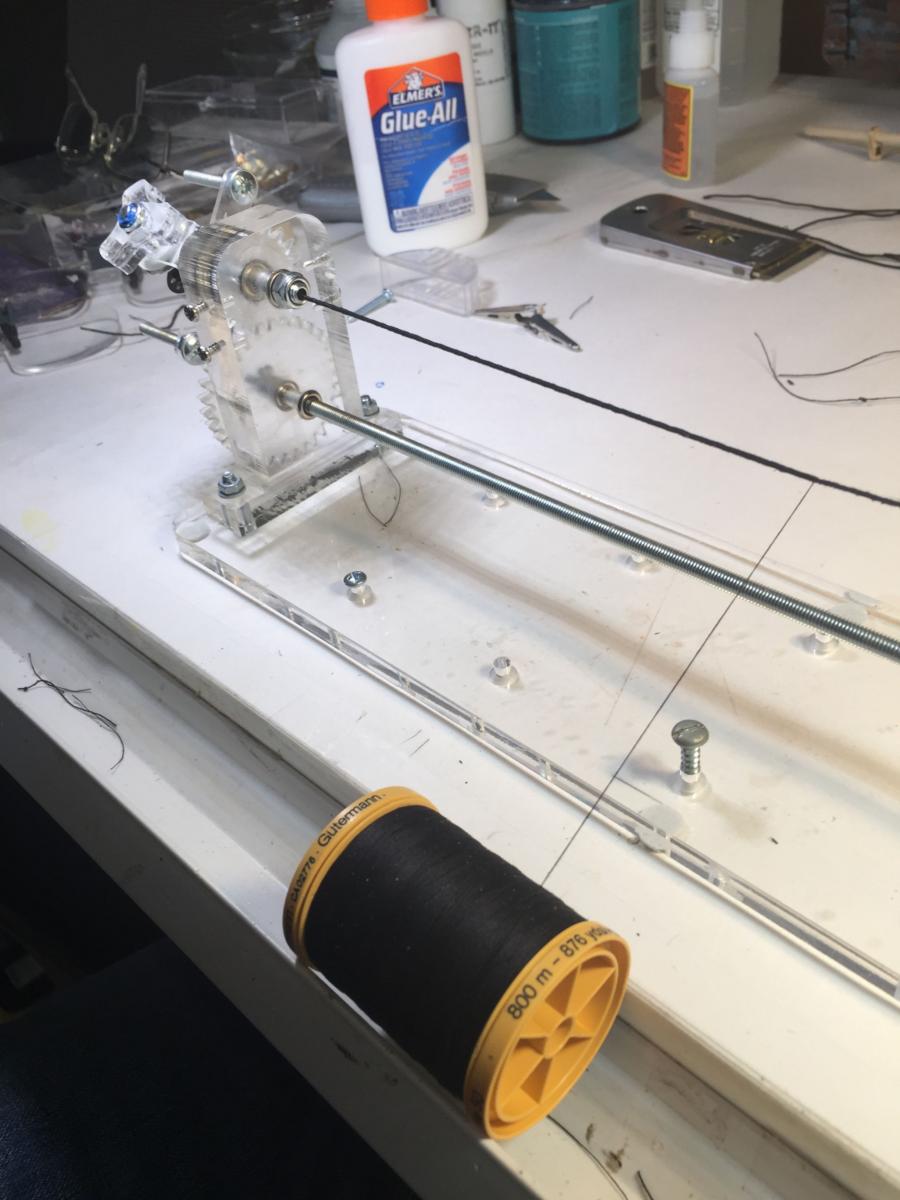
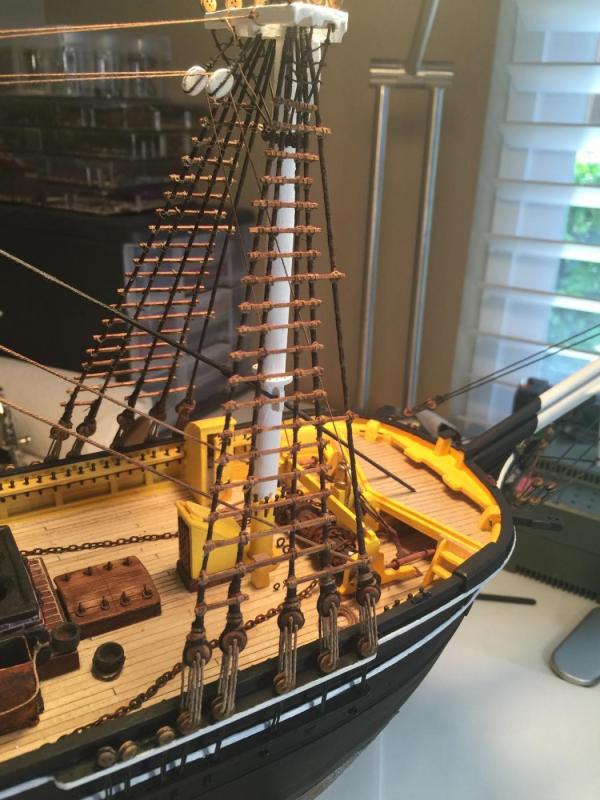
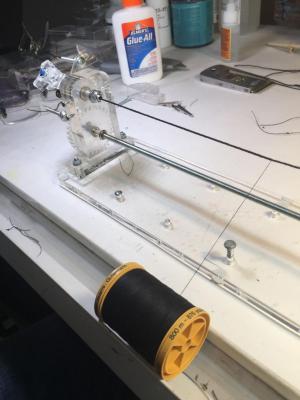
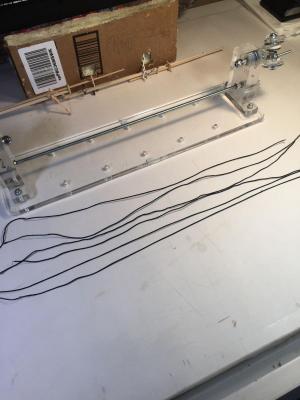
Next I started serving the Foremast and Main mast shrouds. I did purchase the electrical ad-on to the serving machine but since it was my first time using it I wanted to turn it by hand to get the feel for it. I'm not sure if what I did was a no-no but after threading the thin cotton line onto the pre-served shroud line I brushed a very light white glue watered down onto the pre-served shroud before turning it. I did this just in case I goofed up while turning the machine, the line wouldn't come unwound. It seemed to work very well for me and when the time came to adjust the length of the served line, it never came unwound. I should add that it also remained pretty soft and easy to handle and bend / loop. Here are a few pics of that:


- 56 replies
-
- 2
-
-
- Charles W Morgan
- Whaling Bark
- (and 1 more)
-
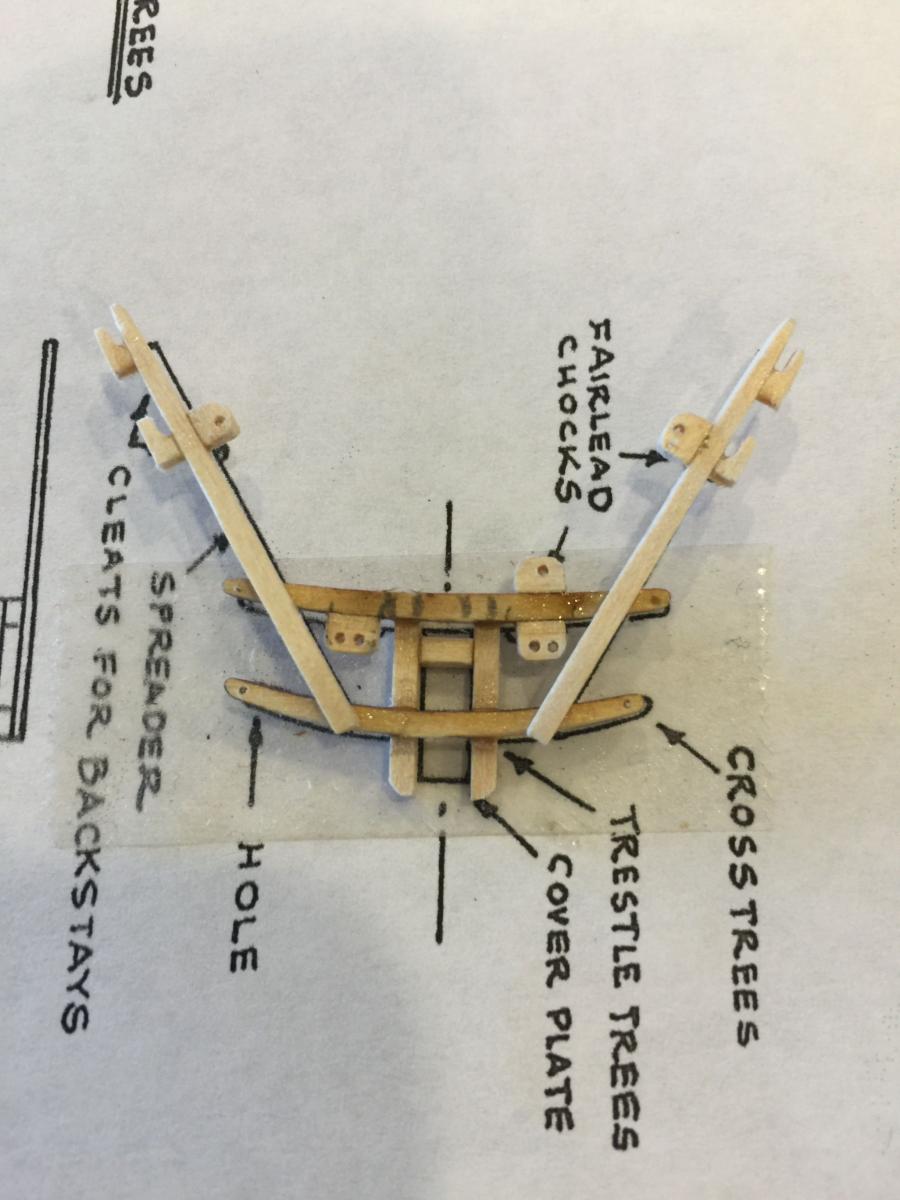
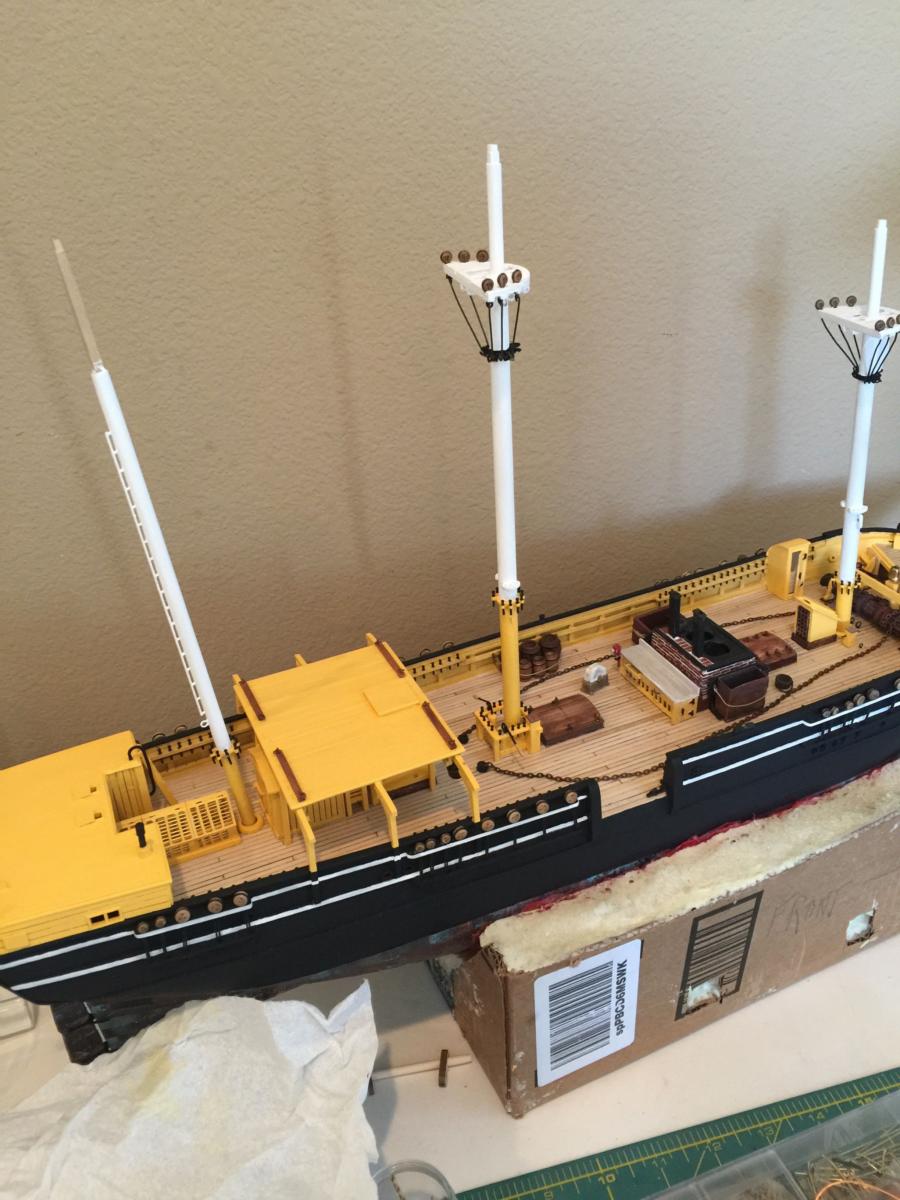
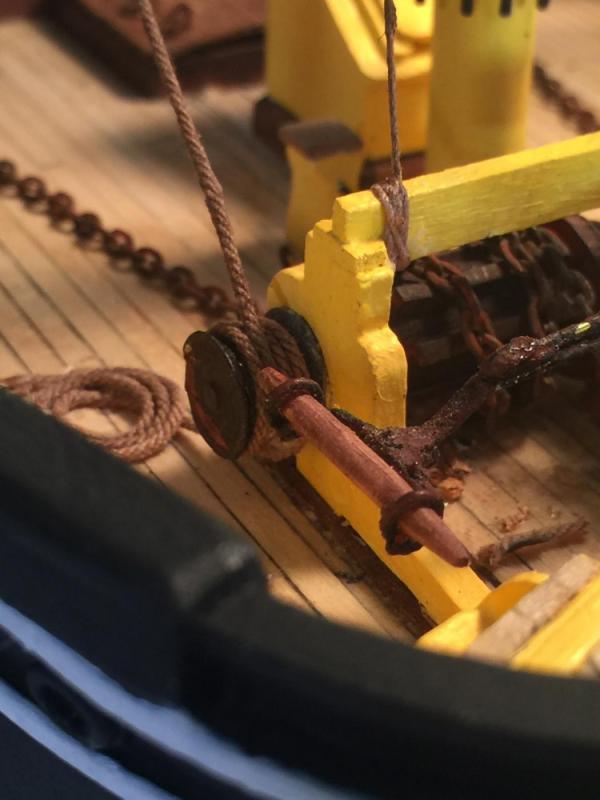
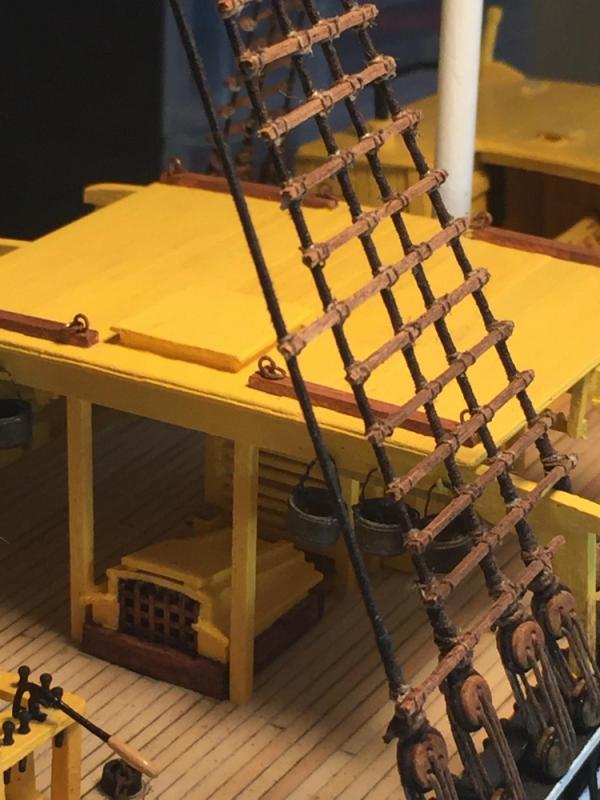
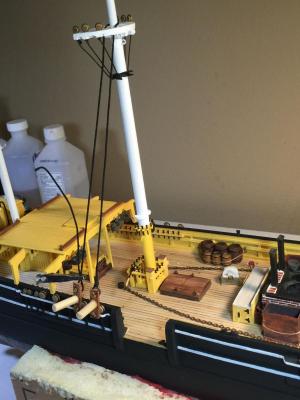
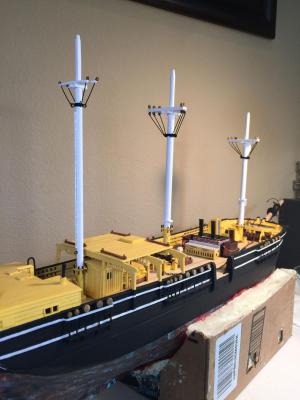
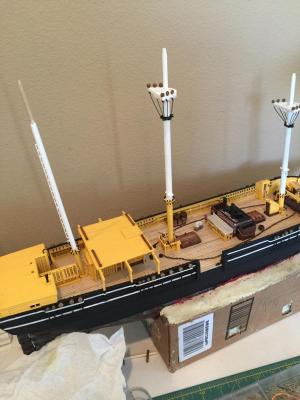
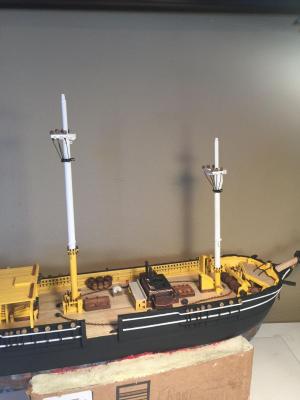
It looks like my last uploads were of the deck housings and shelter cover. I've constructed the foremast, main mast and mizzen but have only completed, painted and installed the lower first sections. Hopefully I took some build pics of these. I take a lot of pics and then have to name them and change them from 1-2 meg to something around 500 to 700K so they are easy to upload into the NRG site. Of note, the metal spider bands were a bit loose on the Foremast and Main Mast. I added / glued very thin shims and then sanded them down so they aren't too noticeable. At John's recommendation I used a business card tried down and painted for the futtock band. I took tin snips and cut the truss iron piece from a piece of tin. Then installed and painted it. Before I go any further I'll see if I can find / post some pics of this work. I just found a few pics and guess what... I forgot to install the cheeks on the Main Mast! Guess I know what the next thing I'll be doing. Ron


- 56 replies
-
- 5
-
-
- Charles W Morgan
- Whaling Bark
- (and 1 more)
-
Hi Scoot, I just checked out your build. Doing a great job! You also have an awesome shop area. I'm going to retire in two years at (62) but until then am using a small hobby desk tucked in the corner of my office. I travel for work so for the last twenty plus years my employer, Principal Financial has me work from a dedicated home based office. I see you know John. He's a very nice person and has answered a lot of questions for me and has also been a good source for some Proxxon equipment. My favorite tool is that X/Y table and drill machine. Well, I need to upload some more build pics of my Morgan and maybe I'll do that now!!! Take care and thanks for the info on the brass edging. Ron
-
Richard and Scoot, THANK YOU!!!!! That's exactly what I was looking for. :-) Scoot, What method did you use to cut your angles? I have a nice Dewalt Chop Saw... or did you cut by hand with mitre?? I'll check out those links but how did you attach / glue the brass to your plexiglass???