HOLIDAY DONATION DRIVE - SUPPORT MSW - DO YOUR PART TO KEEP THIS GREAT FORUM GOING!
×

DB789
-
Posts
427 -
Joined
-
Last visited
Content Type
Profiles
Forums
Gallery
Events
Everything posted by DB789
-
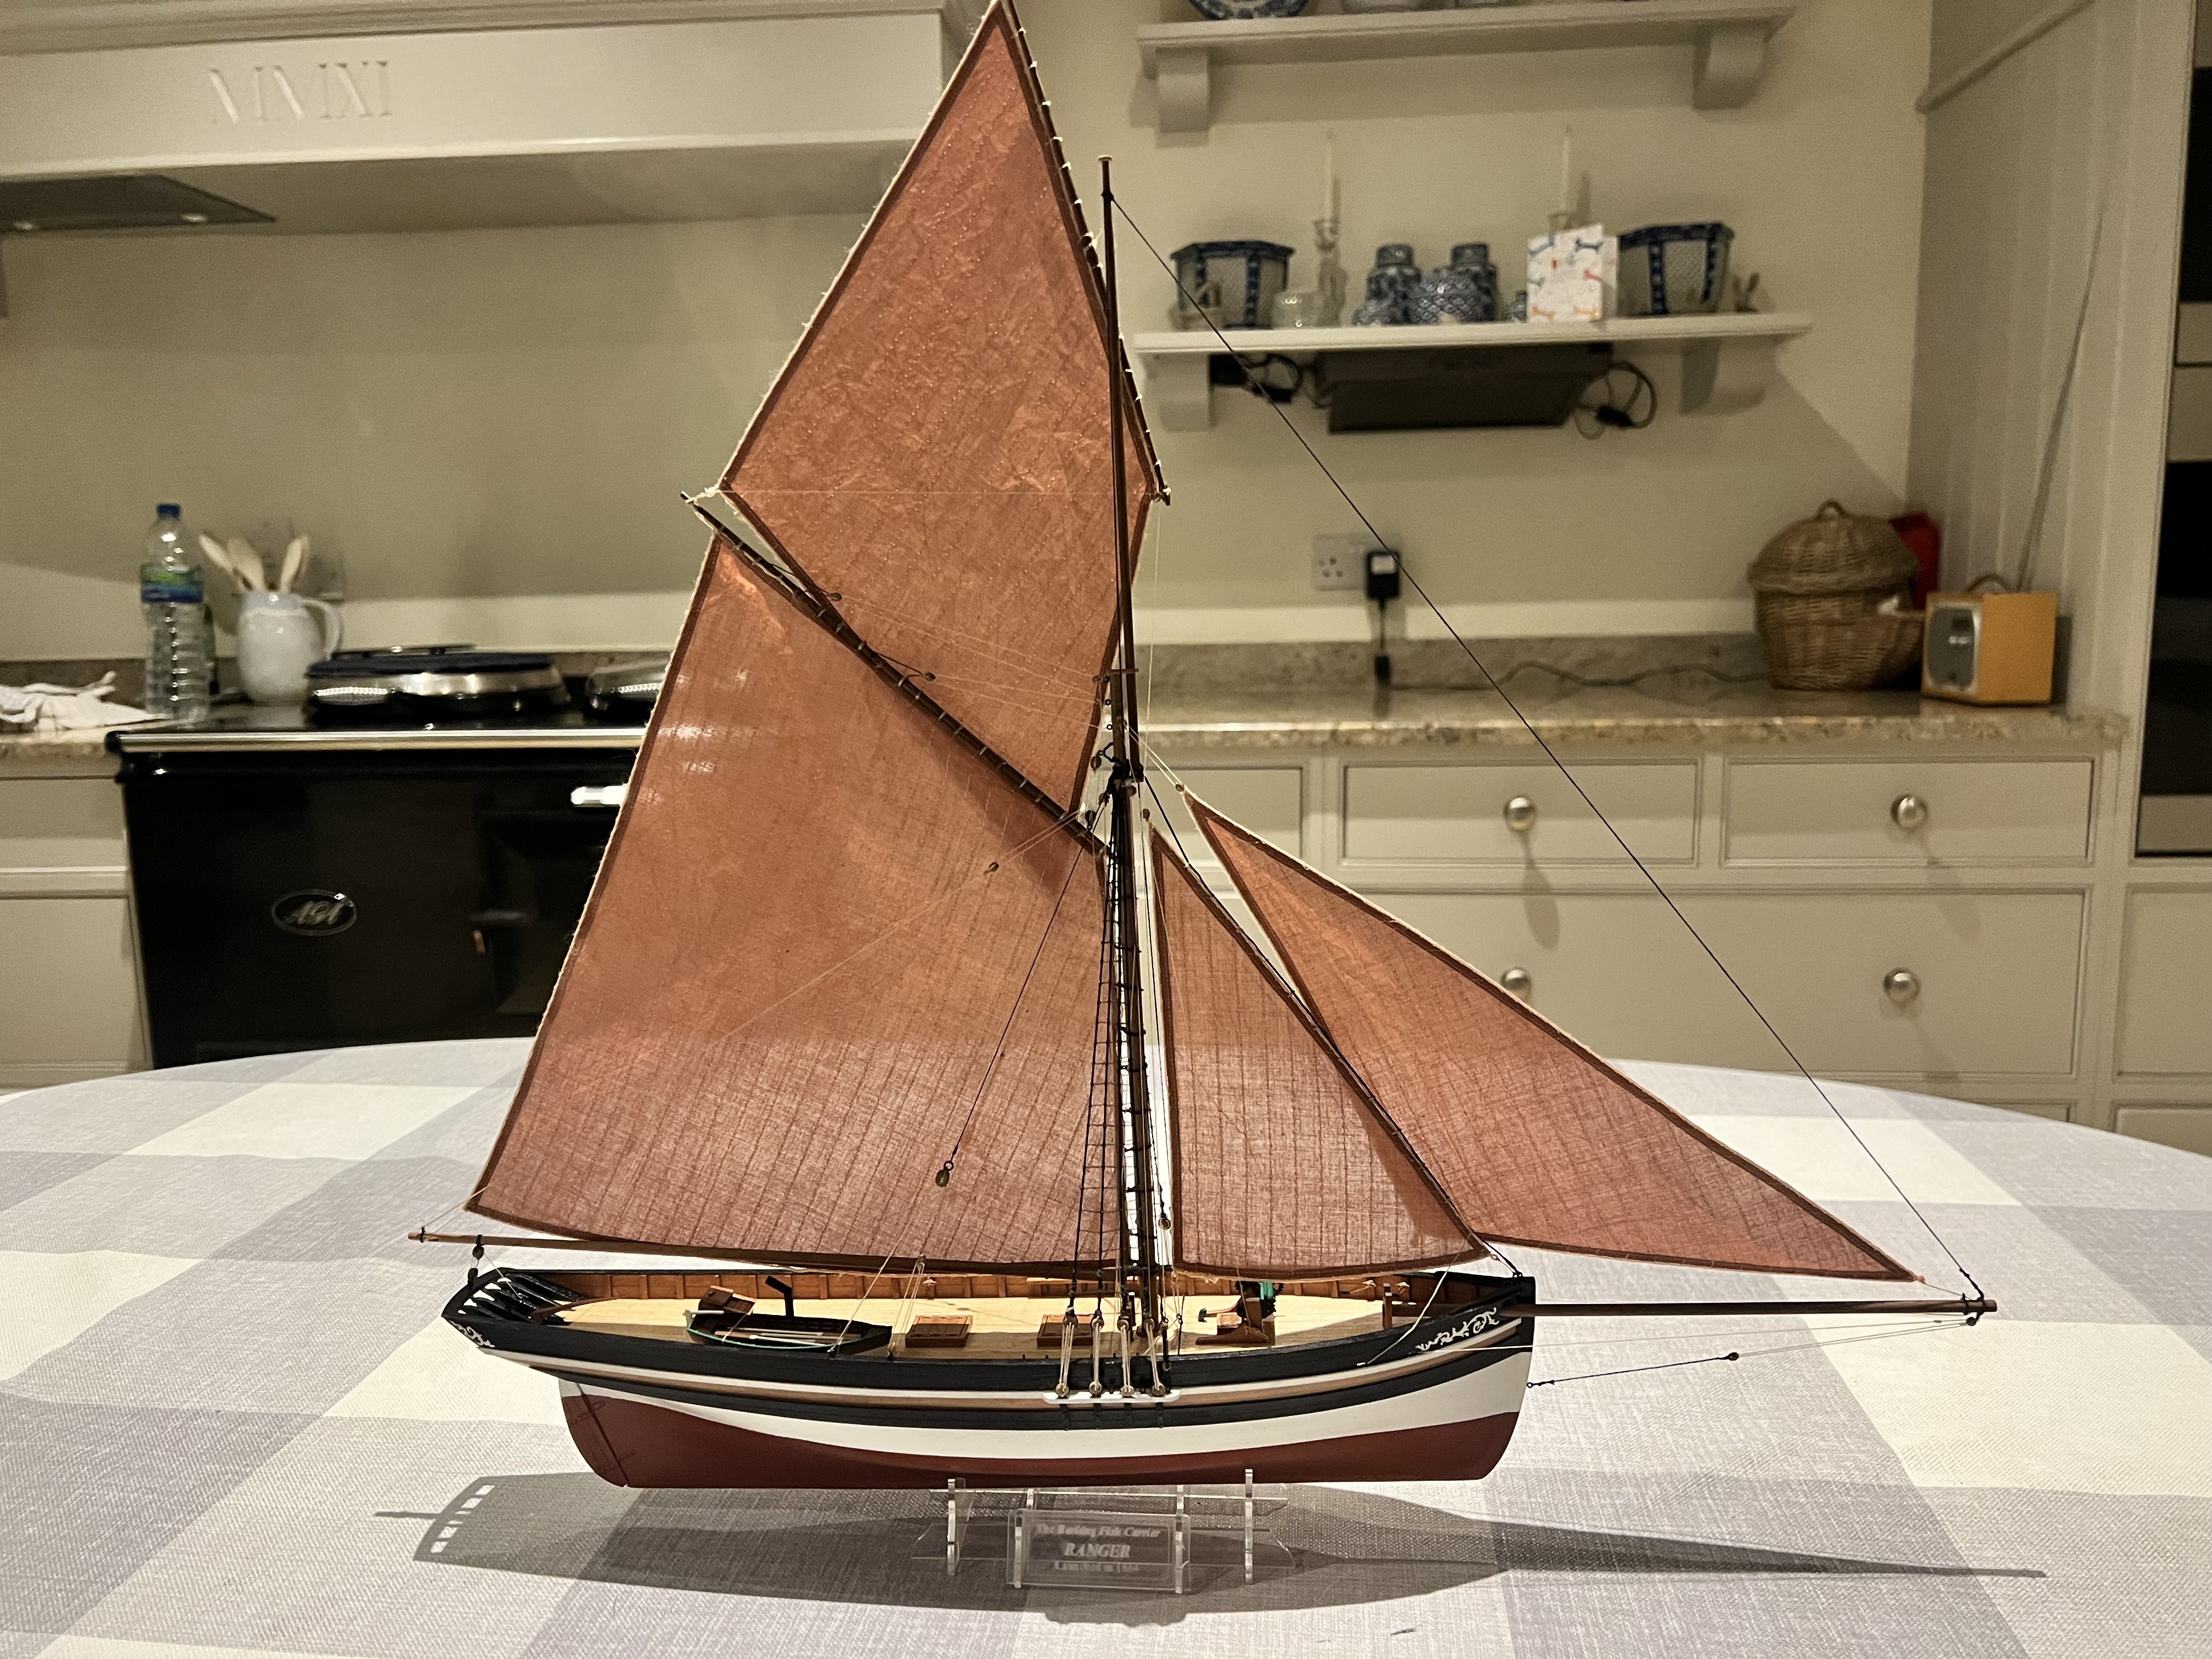
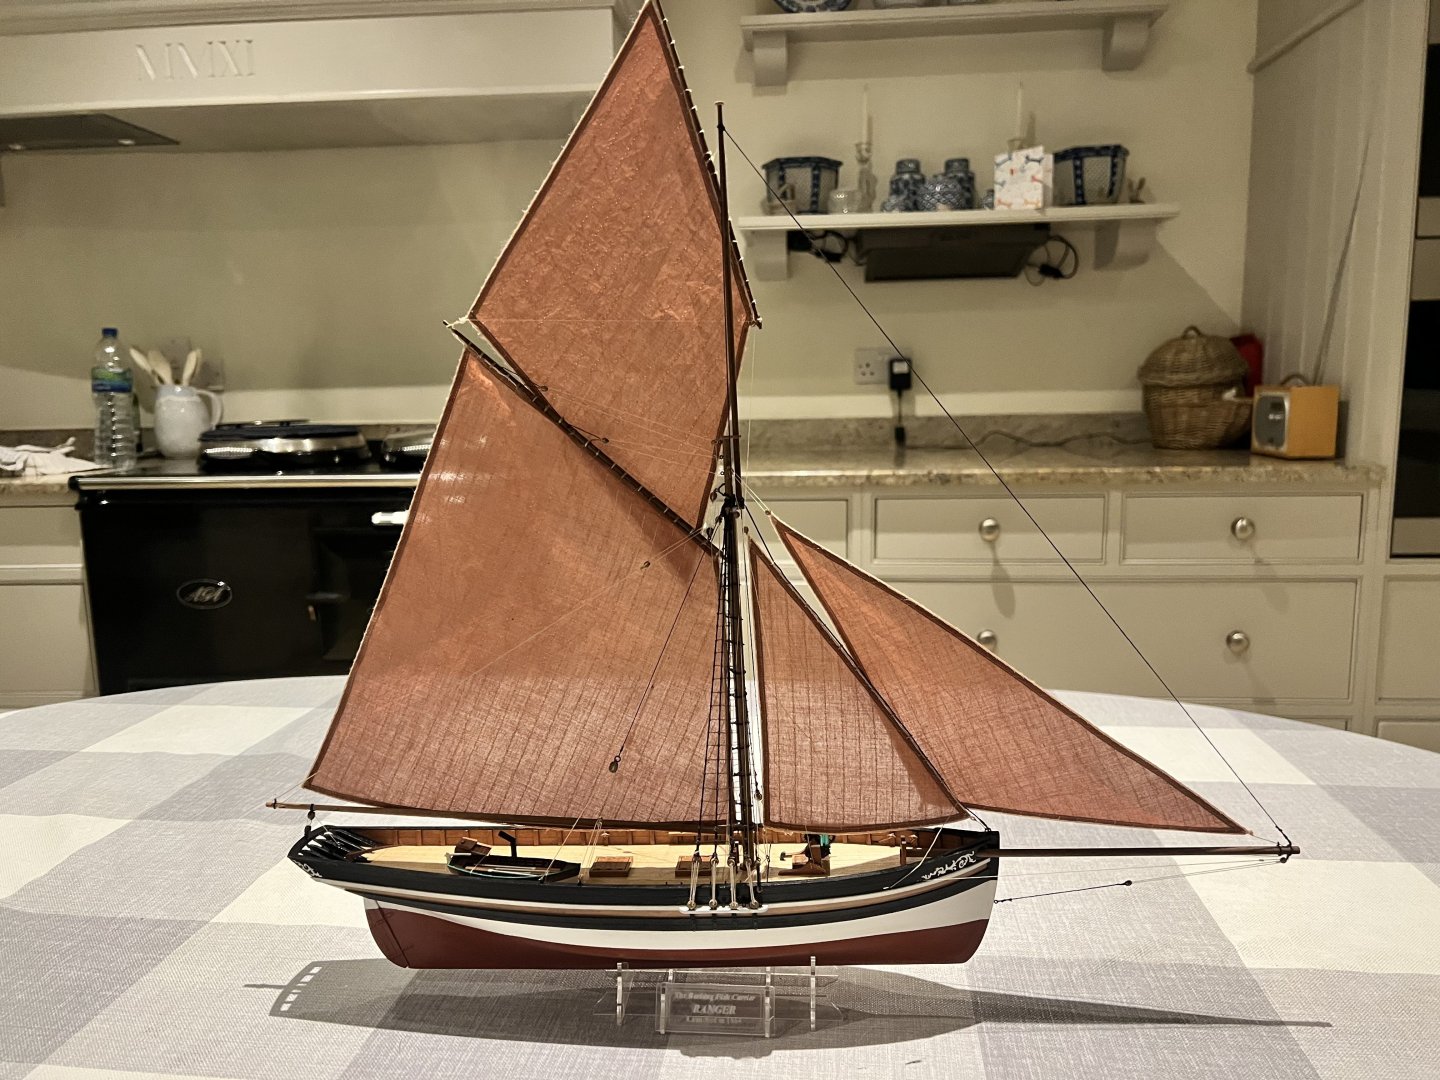
 Ranger was the sixth and last of my fishing boats, so the dying was more by feel rather than measuring out exact amounts of dye. I used the RIT liquid dyes. This is the tan one, scarlet from the same range. https://www.ritdye.com/products/tan/ I think that the sails are made of linen. I experimented a lot on old T-shirts but the cotton fabric and weave made a big difference to the end colour, so they weren’t very useful. These experiments are all in my Nisha build log, link below. Broadly I followed the instructions and timings in this RIT Dye video for the tan but adjusted the strengths. It came out a bit drab and brown so I mixed up some scarlet and as an experiment put the sails in that for max two mins, maybe less. https://www.youtube.com/watch?v=wL6NFLL8NI0 I can’t give you more accurate guidance than stronger than the instructions say on tan and weaker on scarlet. You’ll just have to judge it. Sorry I can’t give you better guidance! Your build is looking great so far.
- 133 replies
-
- 2
-

-
- Ranger
- vanguard models
- (and 1 more)
-
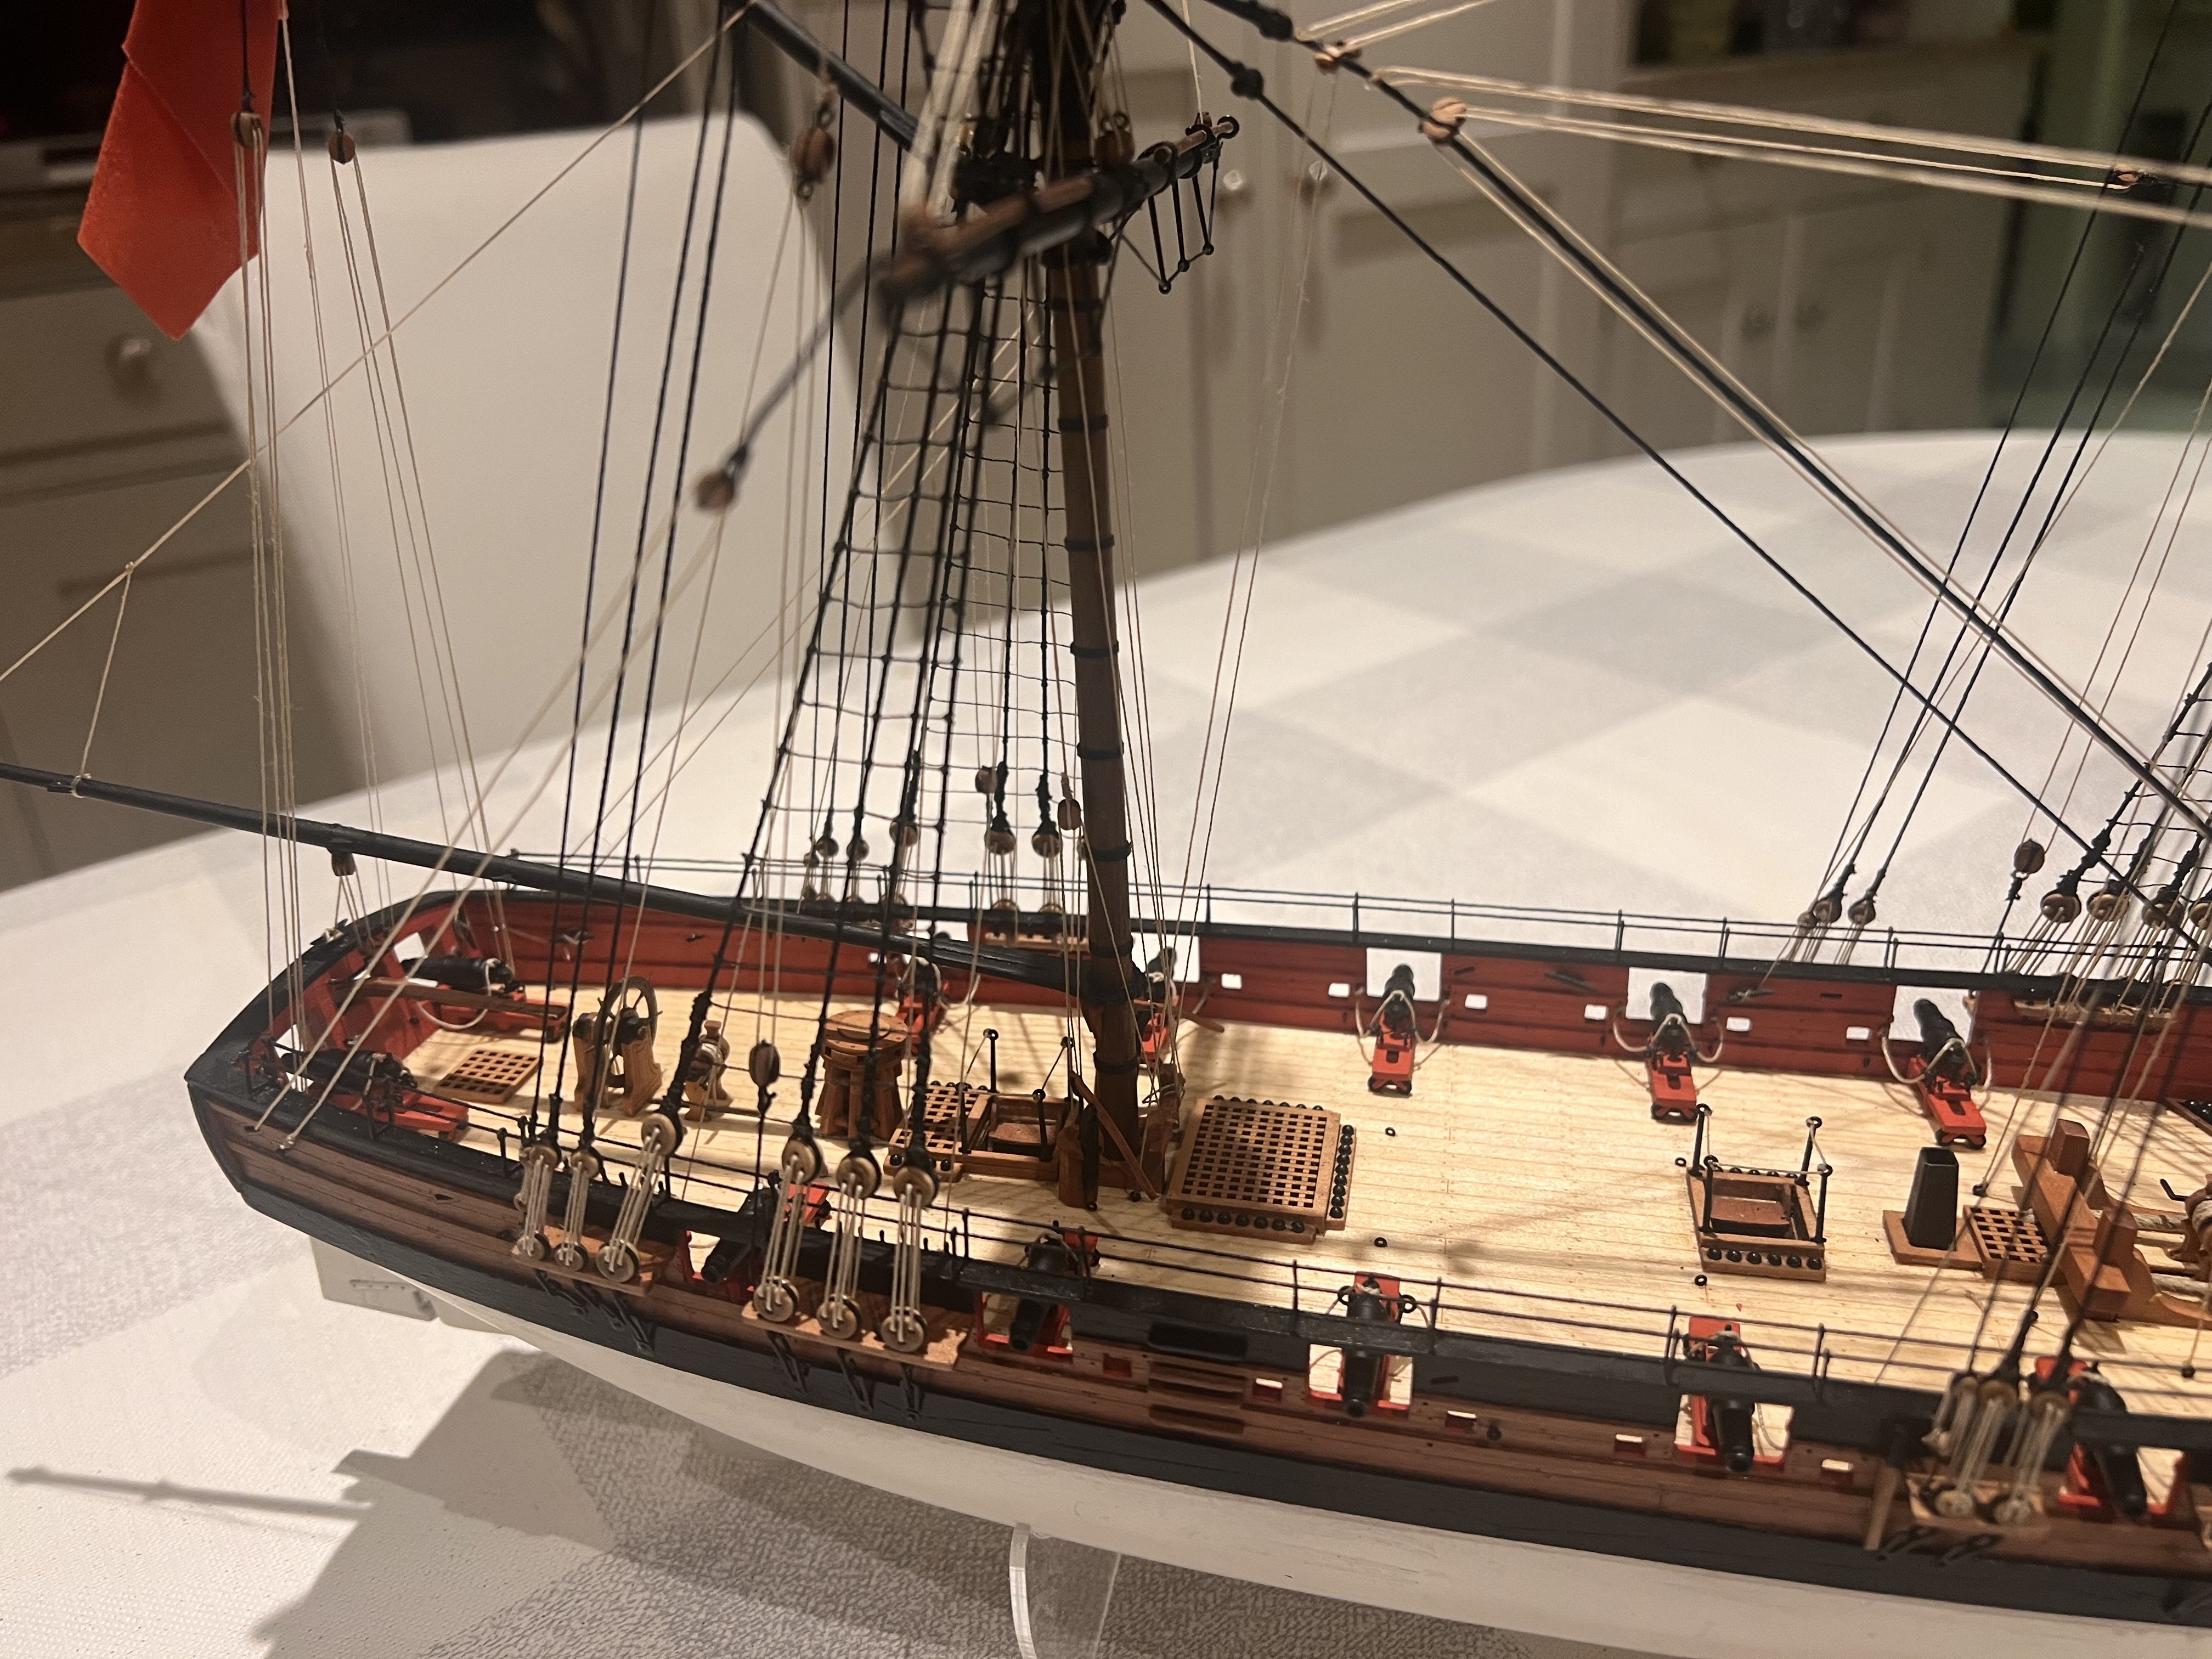
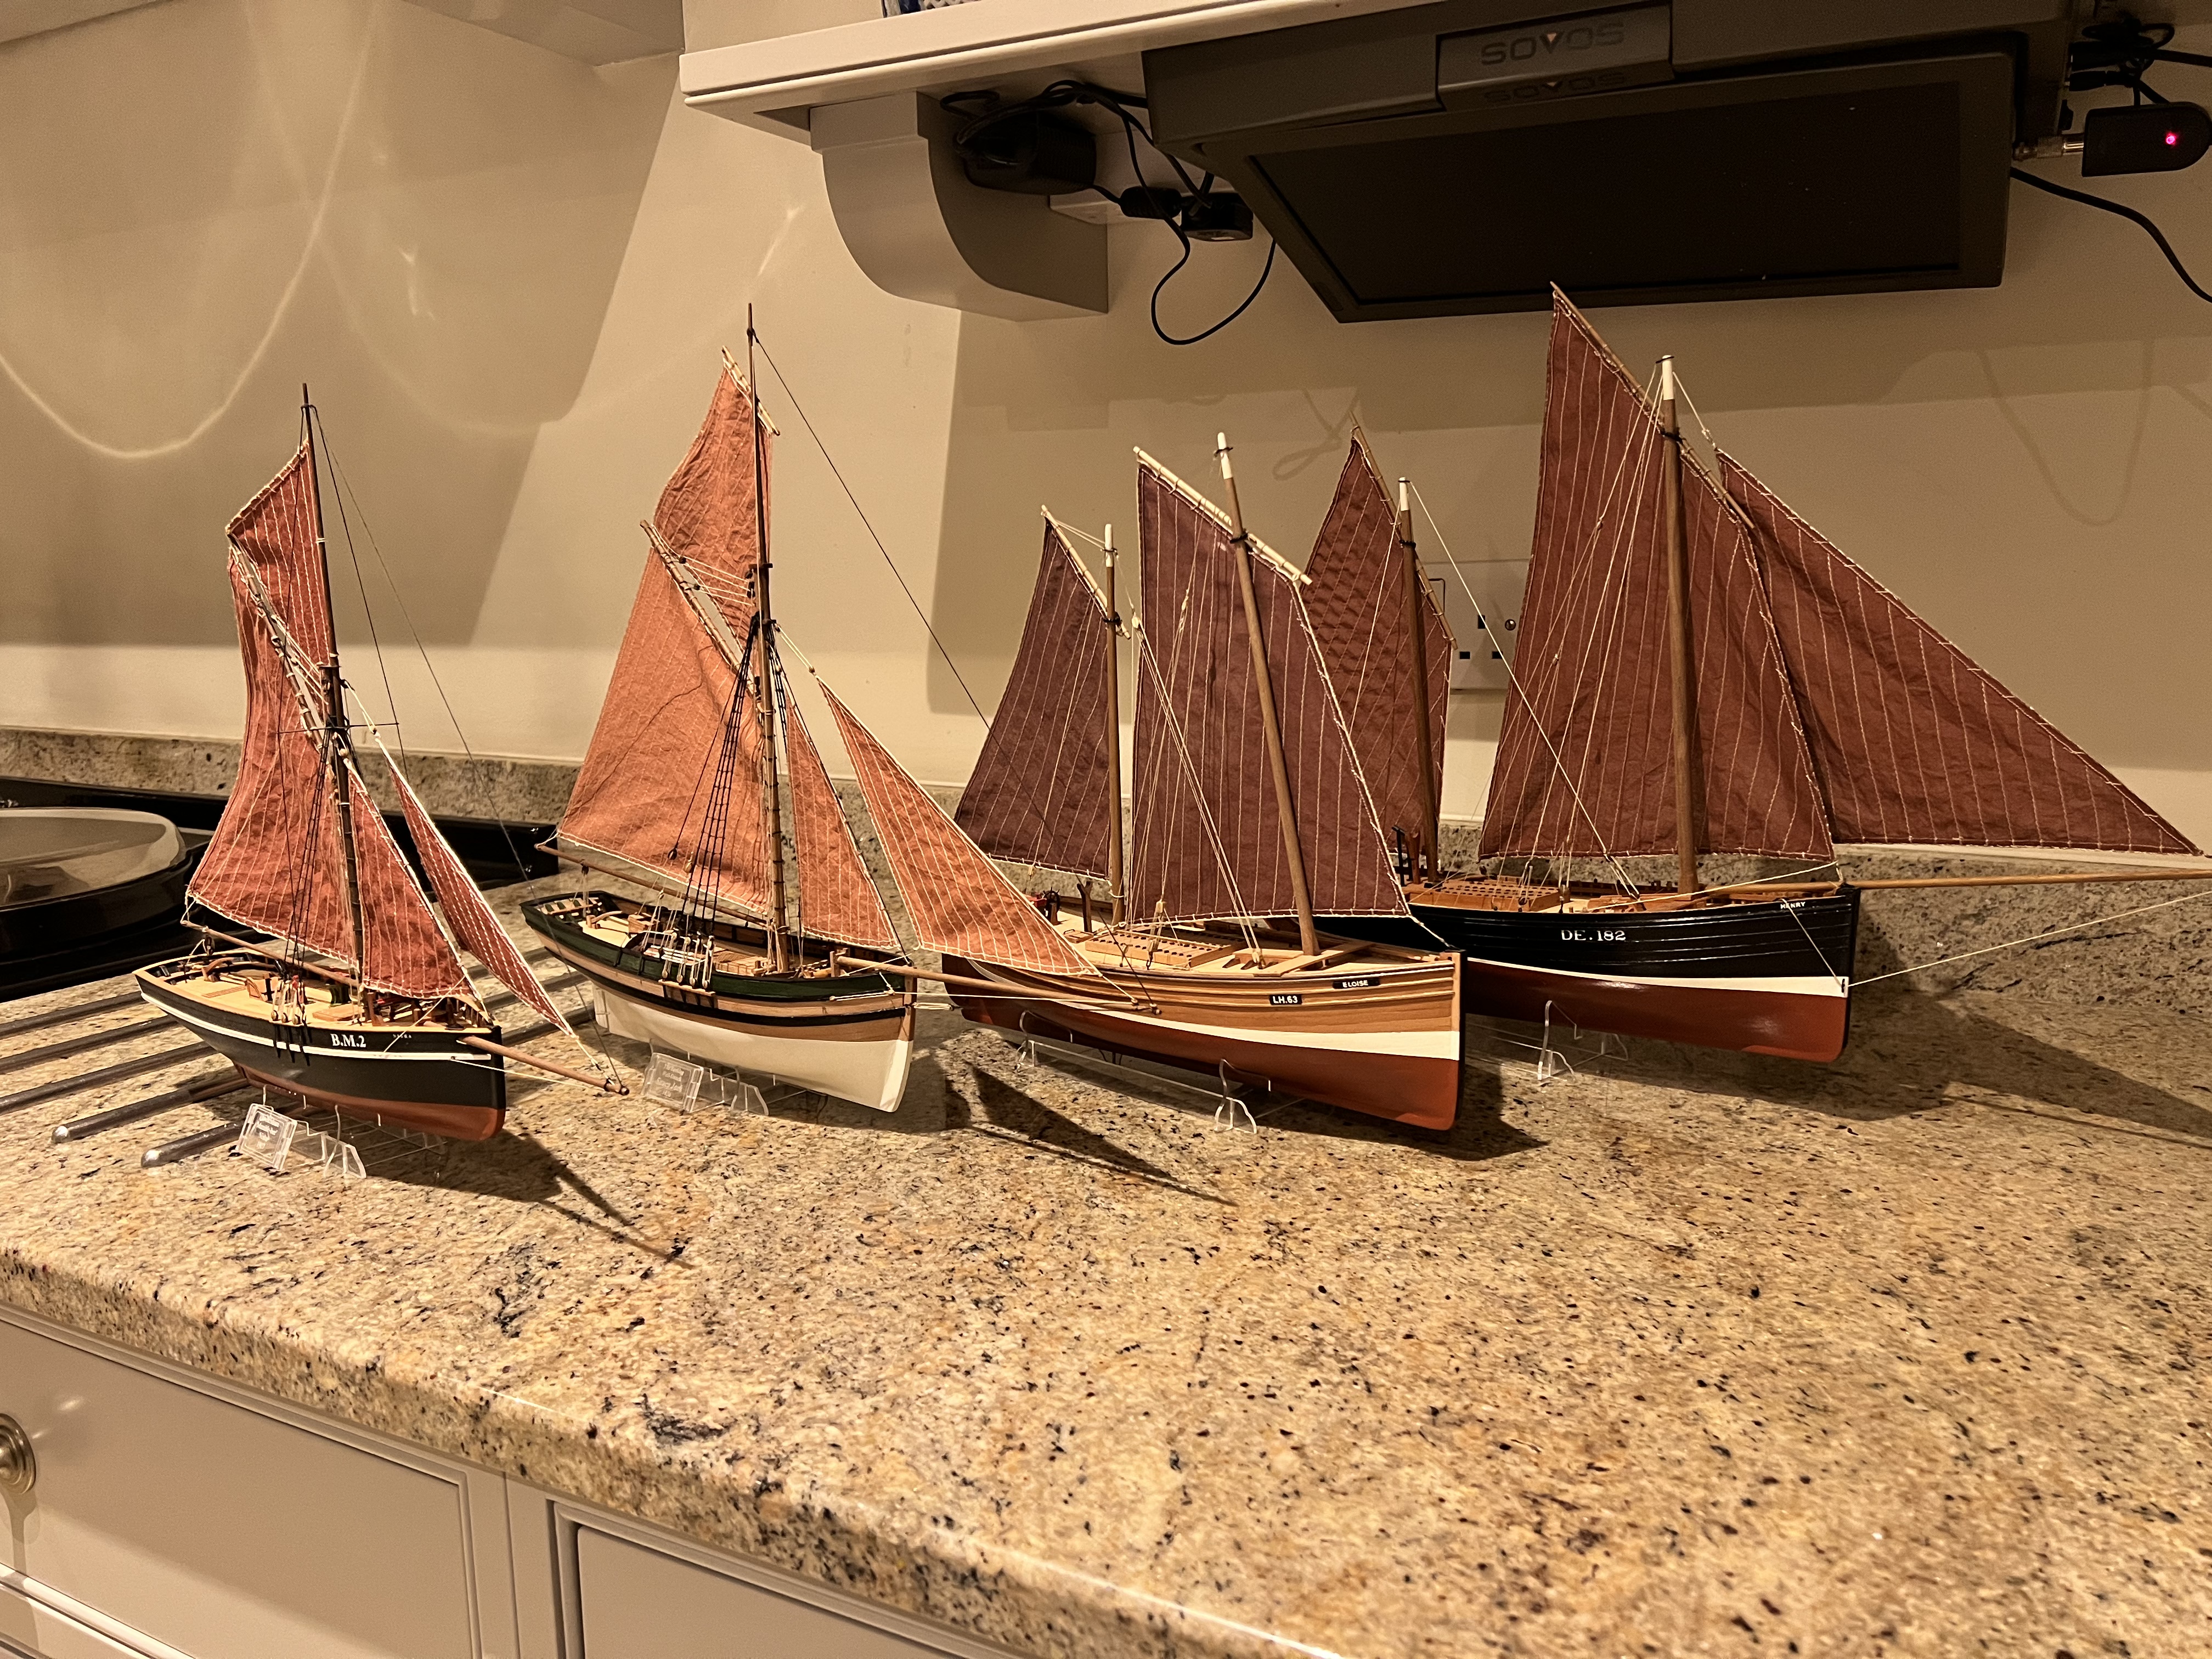
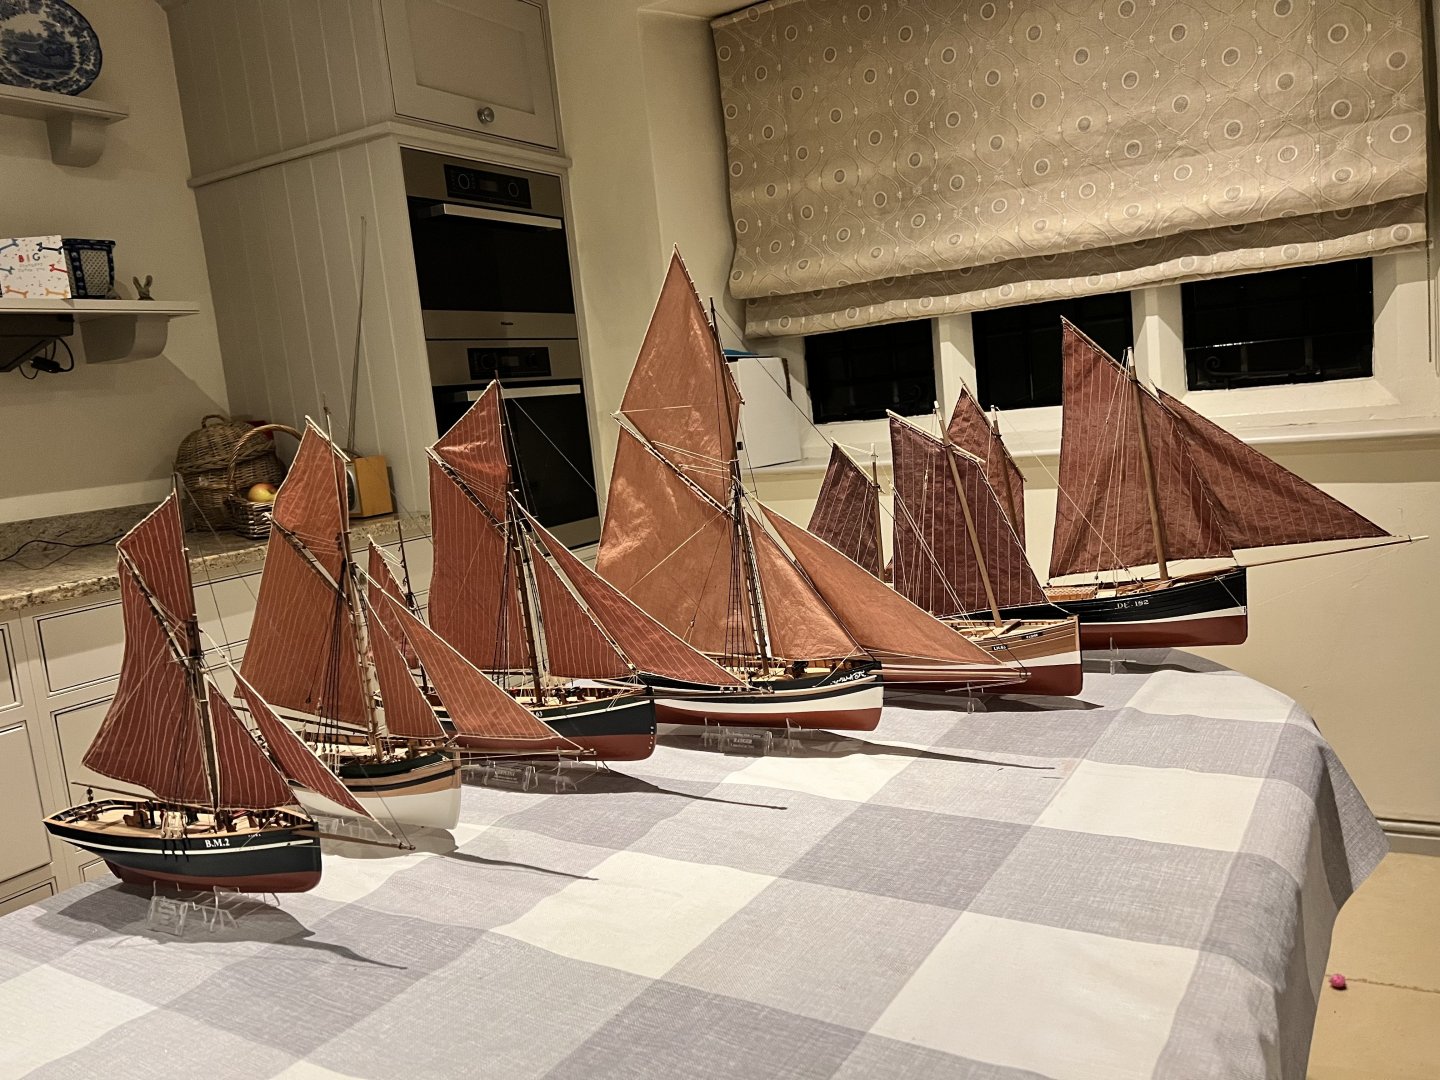
Have fun with this one. I really enjoyed building her, she’s very straightforward and an imposing model when complete due to her tall mast and huge sail area relative to the other Vanguard fishing boats. She’s currently sitting pride of place on my mantelpiece. Sail colour is entirely a matter of personal choice, I have almost the full range across the six fishing boats, I think I like the ‘rust’ colour achieved on Ranger the best, partly because it doesn’t contrast too much with the white seams / thread running across the sail that doesn’t absorb the dye so the overall effect is less striped.
- 133 replies
-
- 8
-
-

-
- Ranger
- vanguard models
- (and 1 more)
-
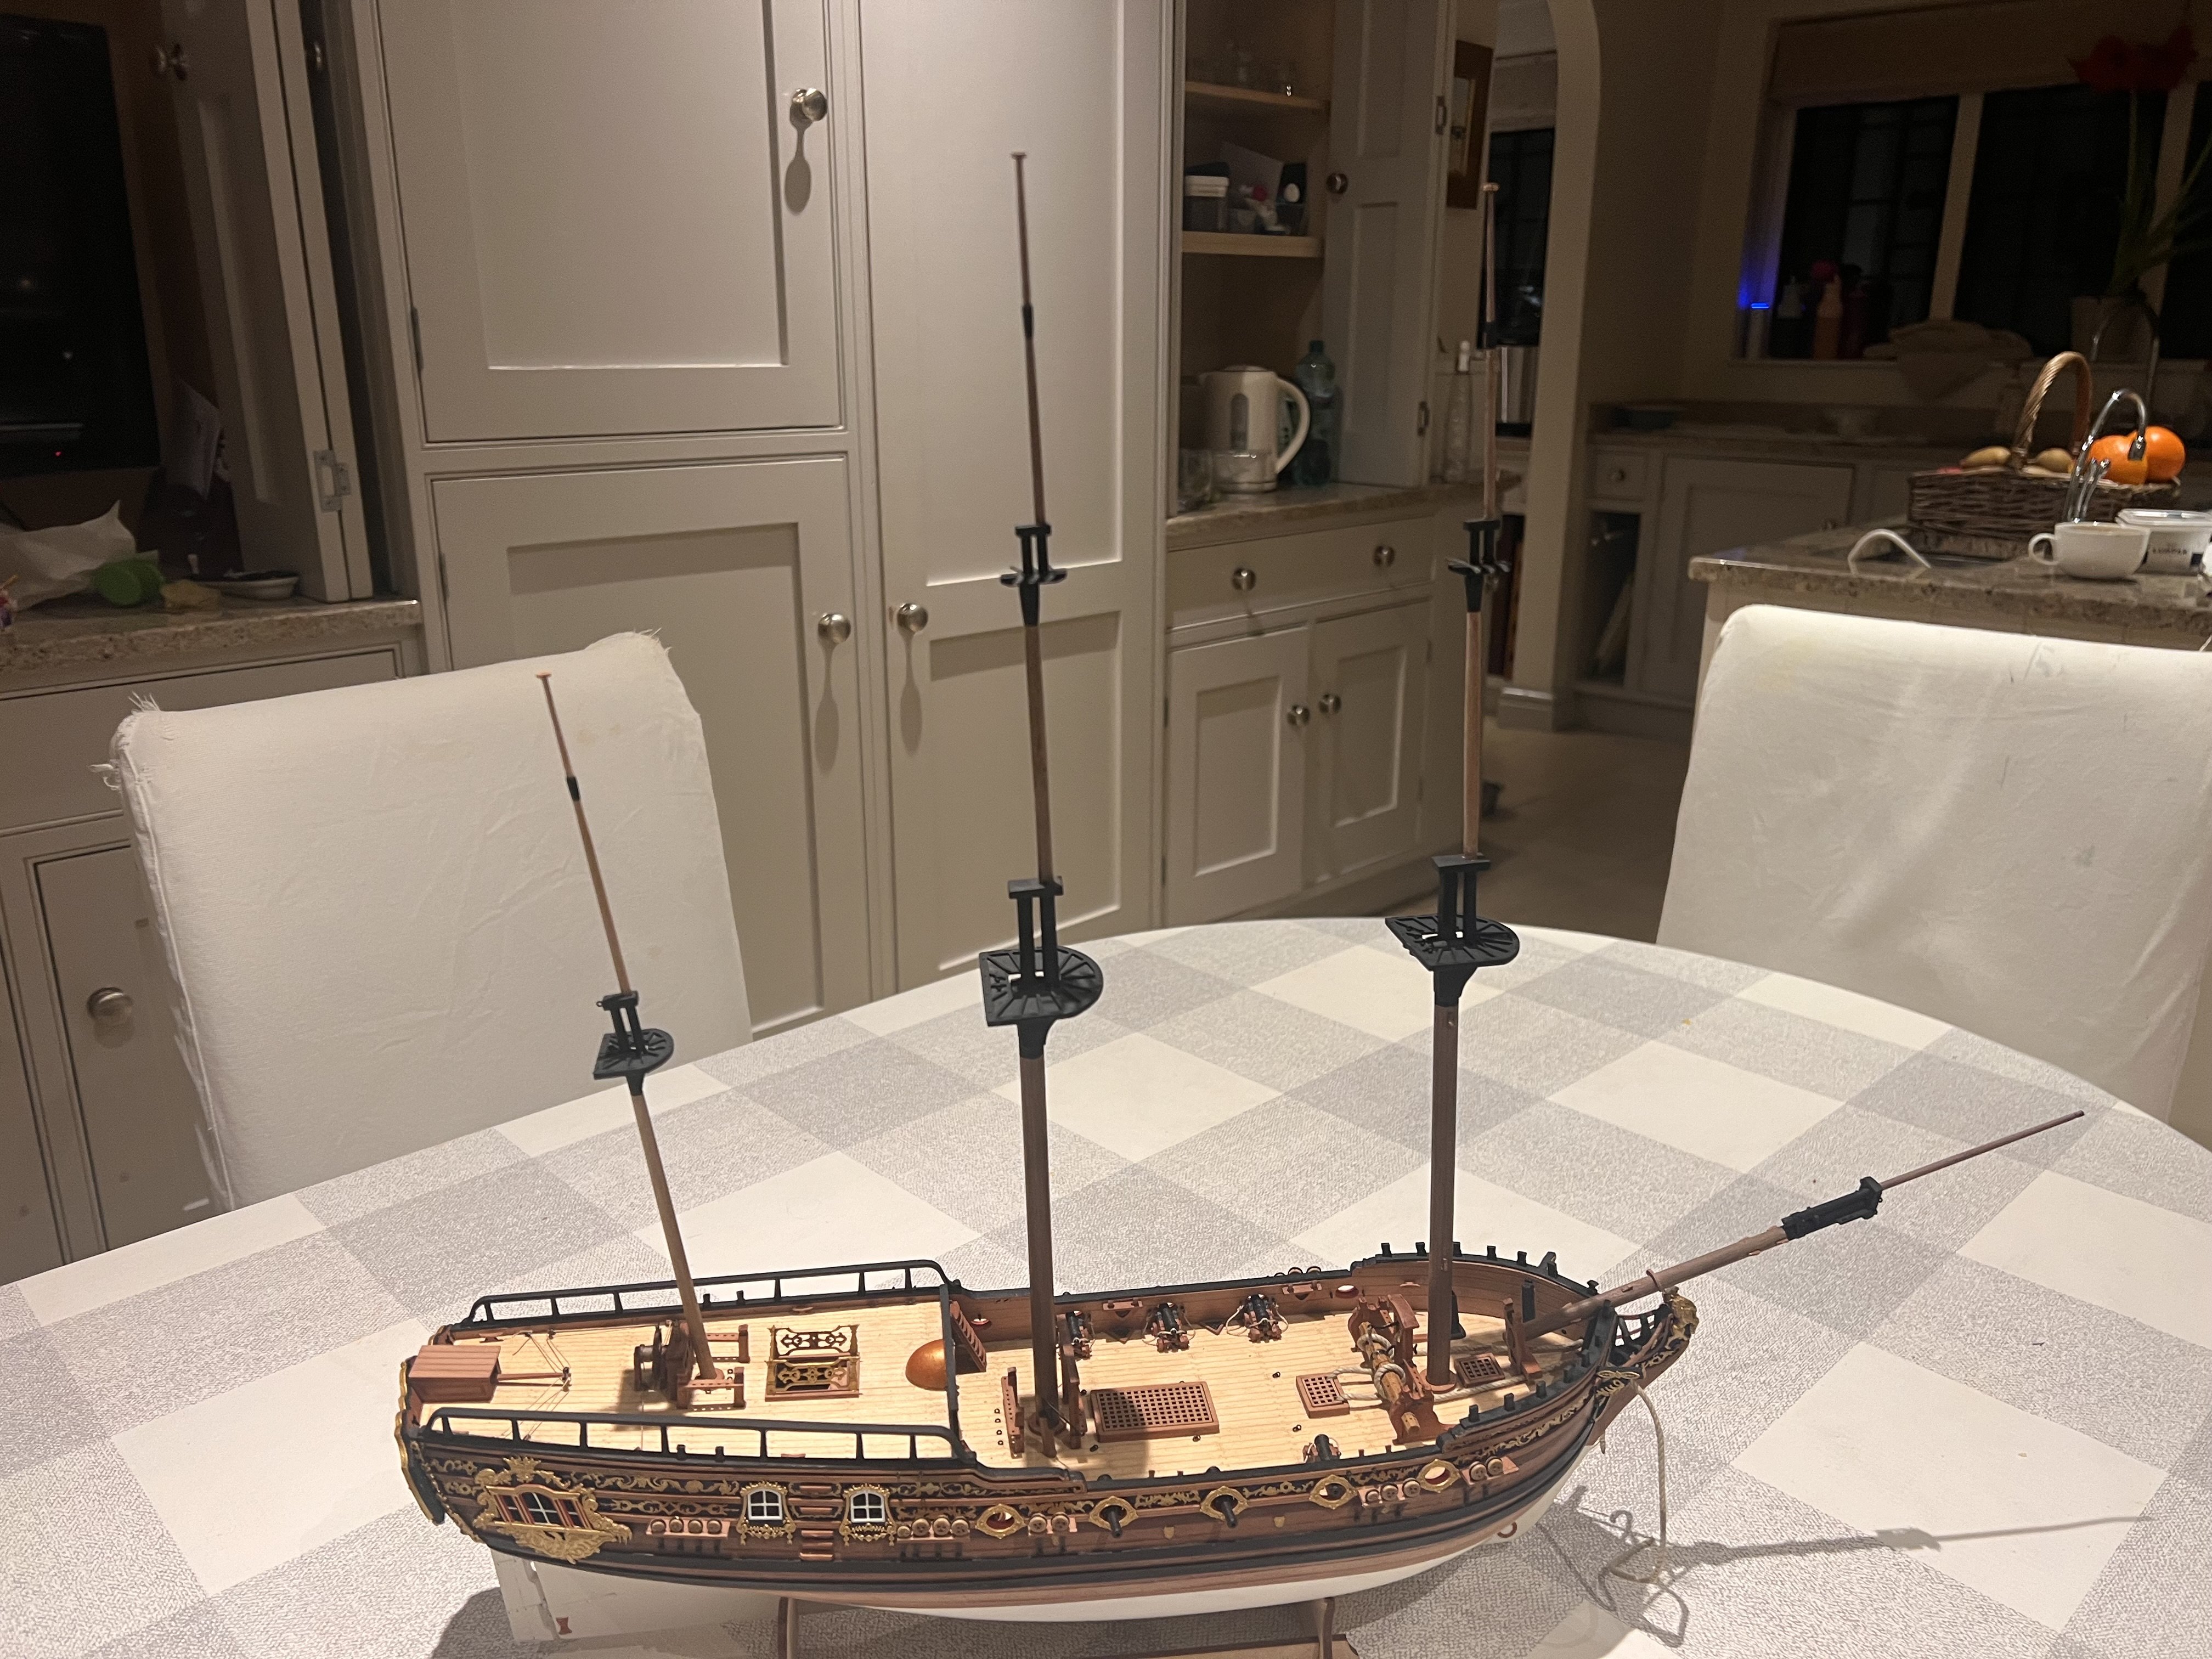
Thanks Andrew, Life has been busy and DoK is progressing, albeit at a near glacial rate. Fitted the anchor rope, had to enlarge the hawse holes to get the rope through. The woodwork on her masts and bowsprit is complete although they still need fittings and woldings added. In the meantime I was given Vanguard’s Sherbourne for Christmas which given her small size I’ll probably build between DoK and Speedy. Thanks for all the likes, apologies for the slow progress.


- 36 replies
-
- 12
-
-
-
- Duchess of Kingston
- Vanguard Models
- (and 1 more)
-
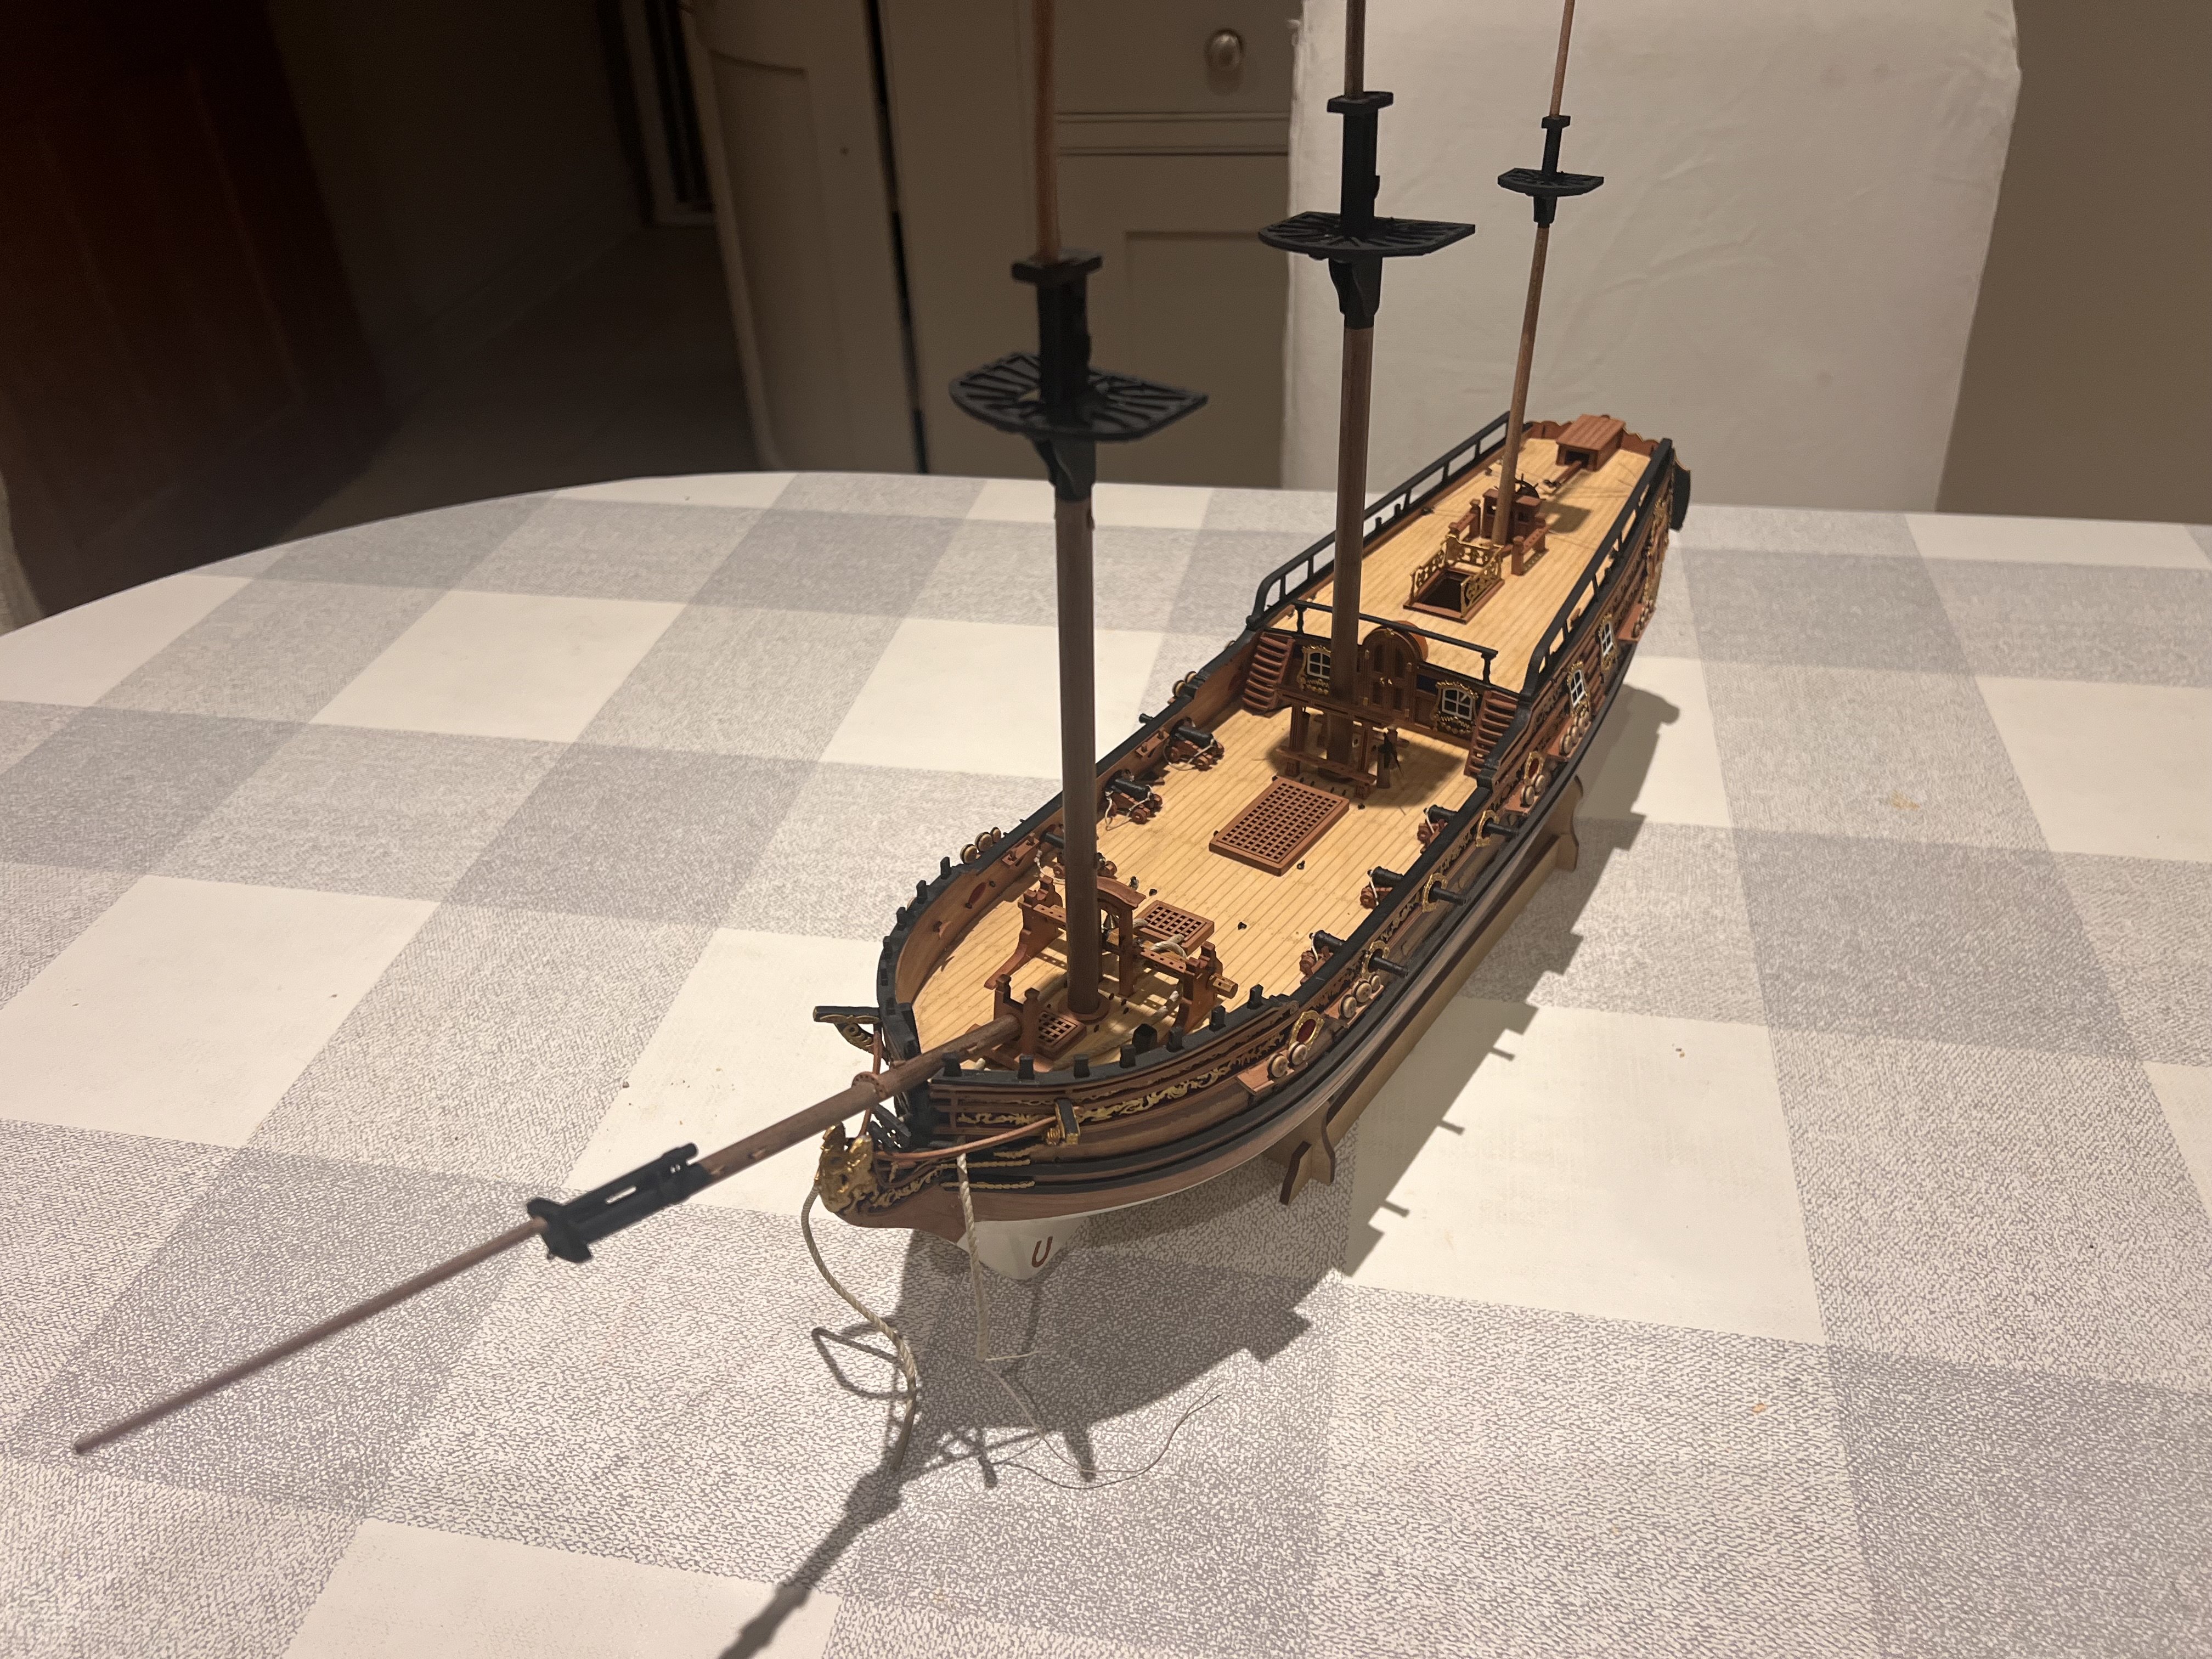
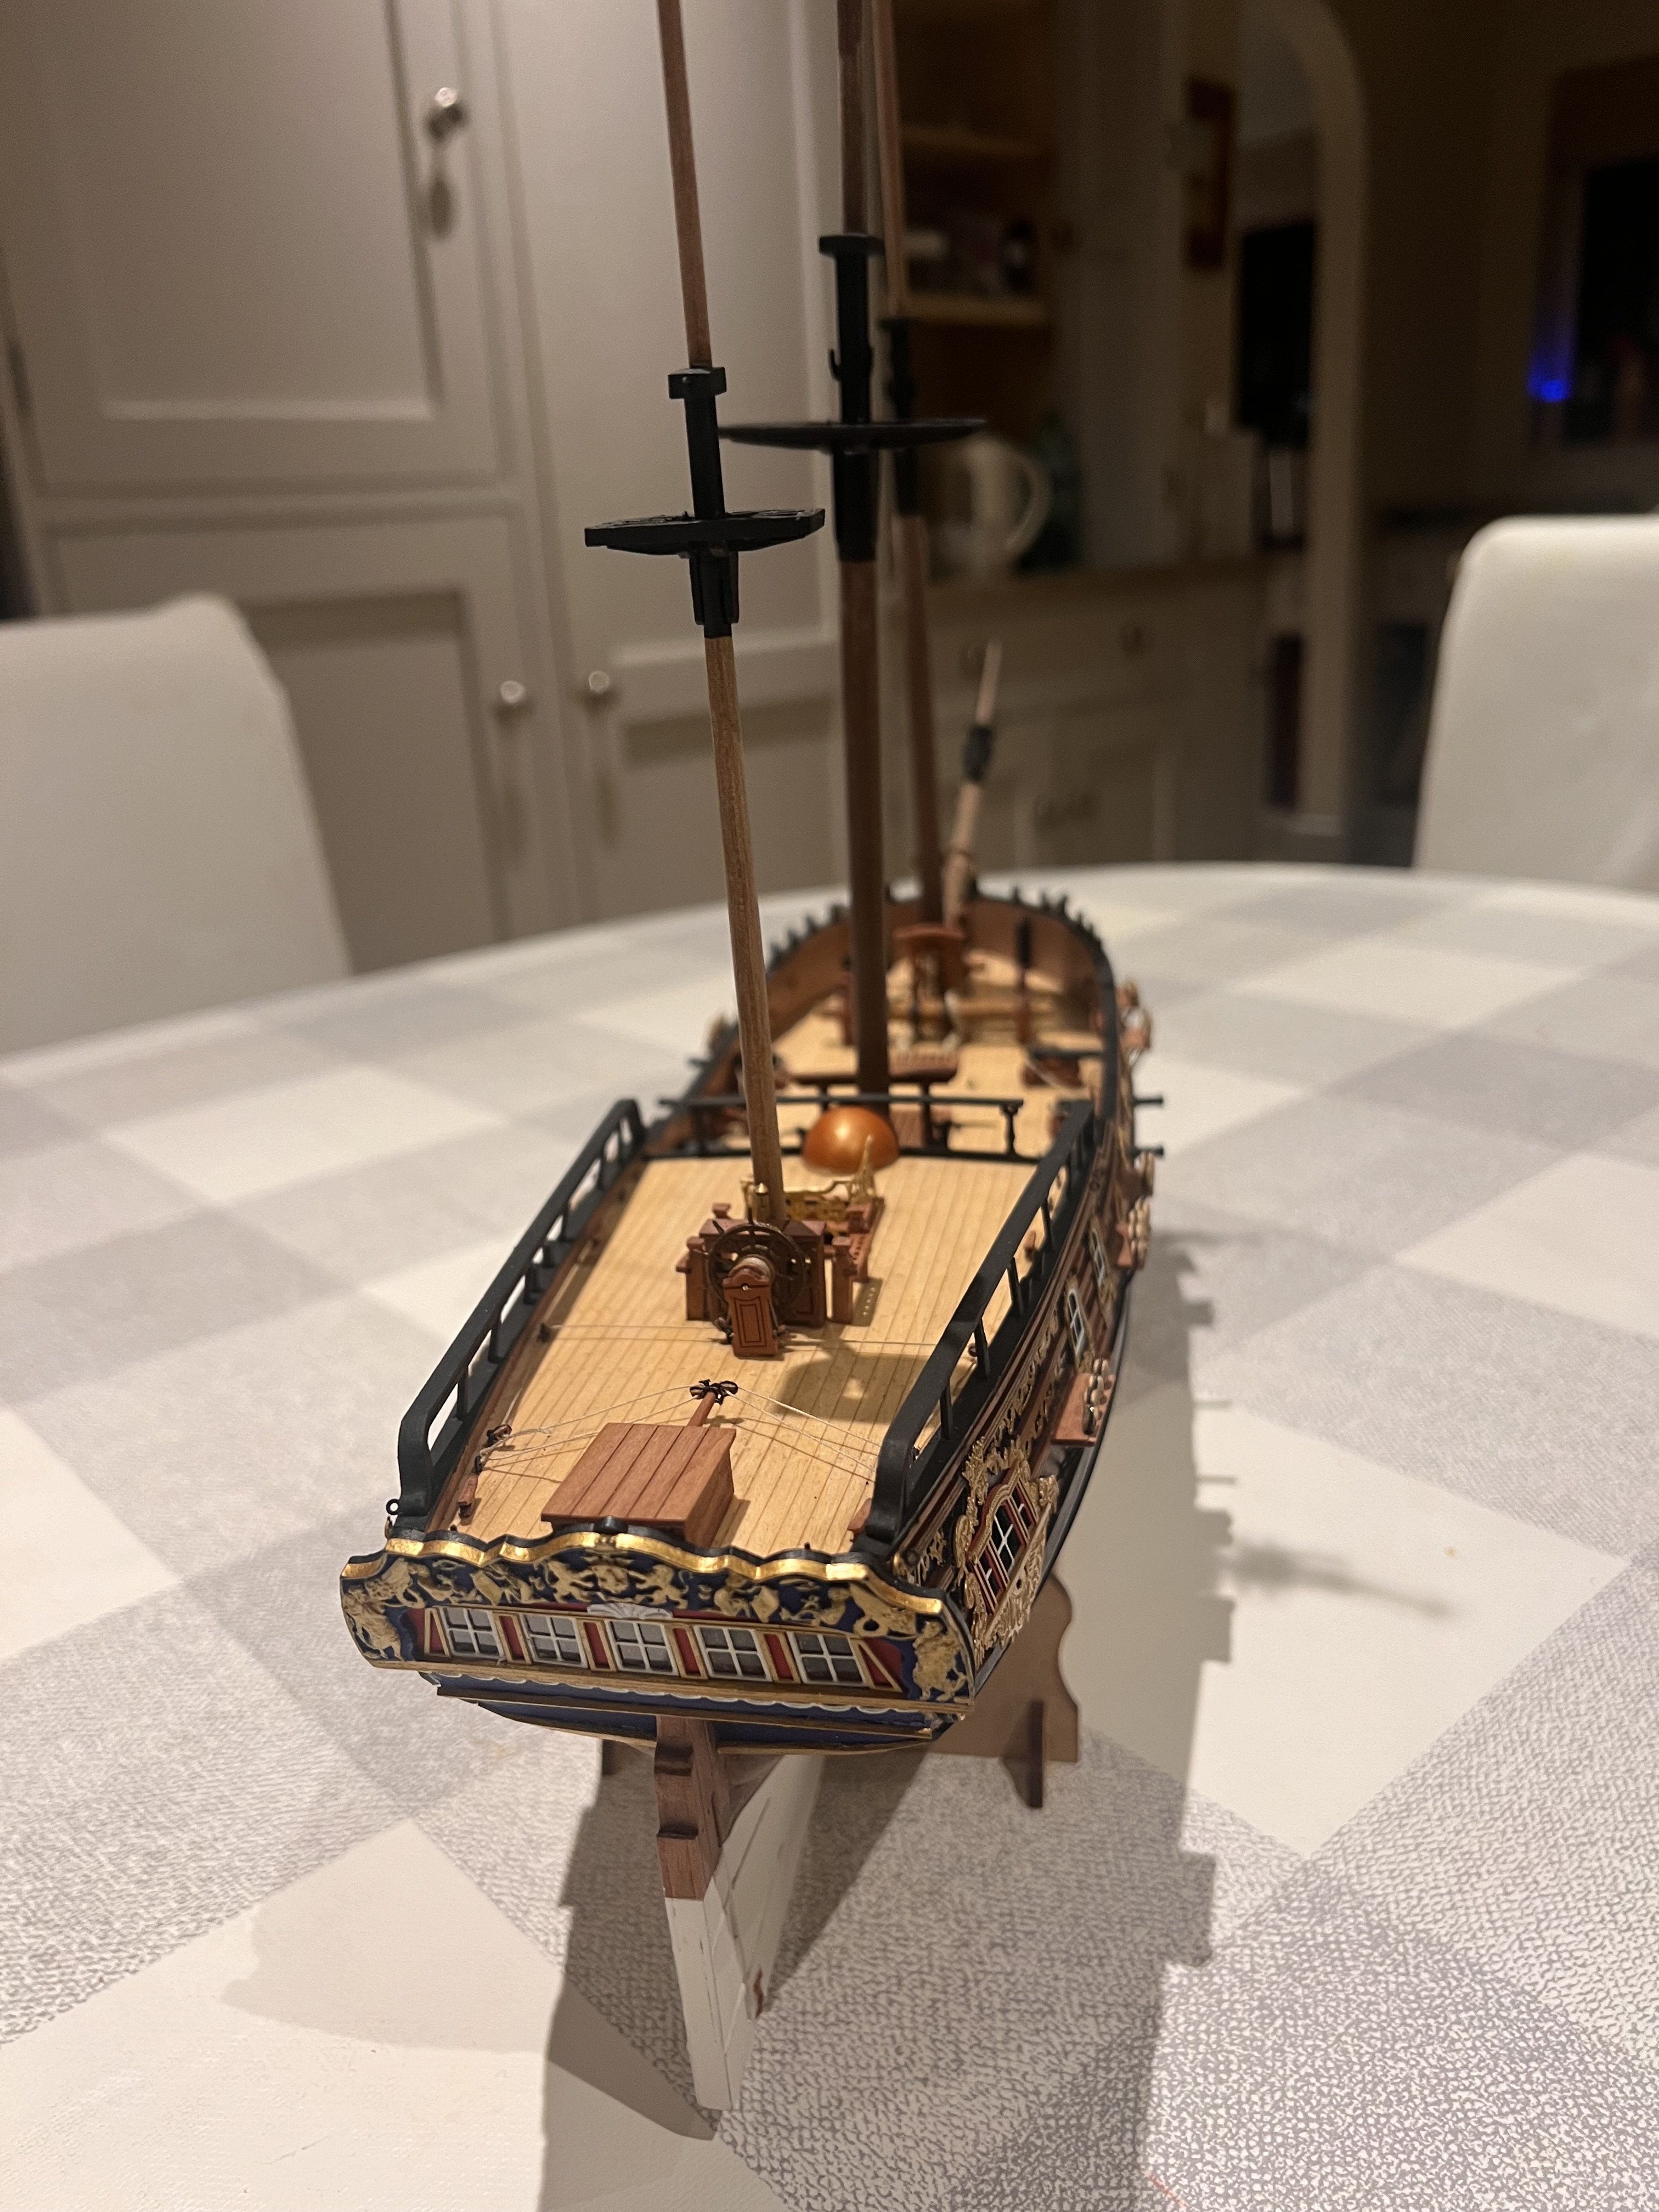
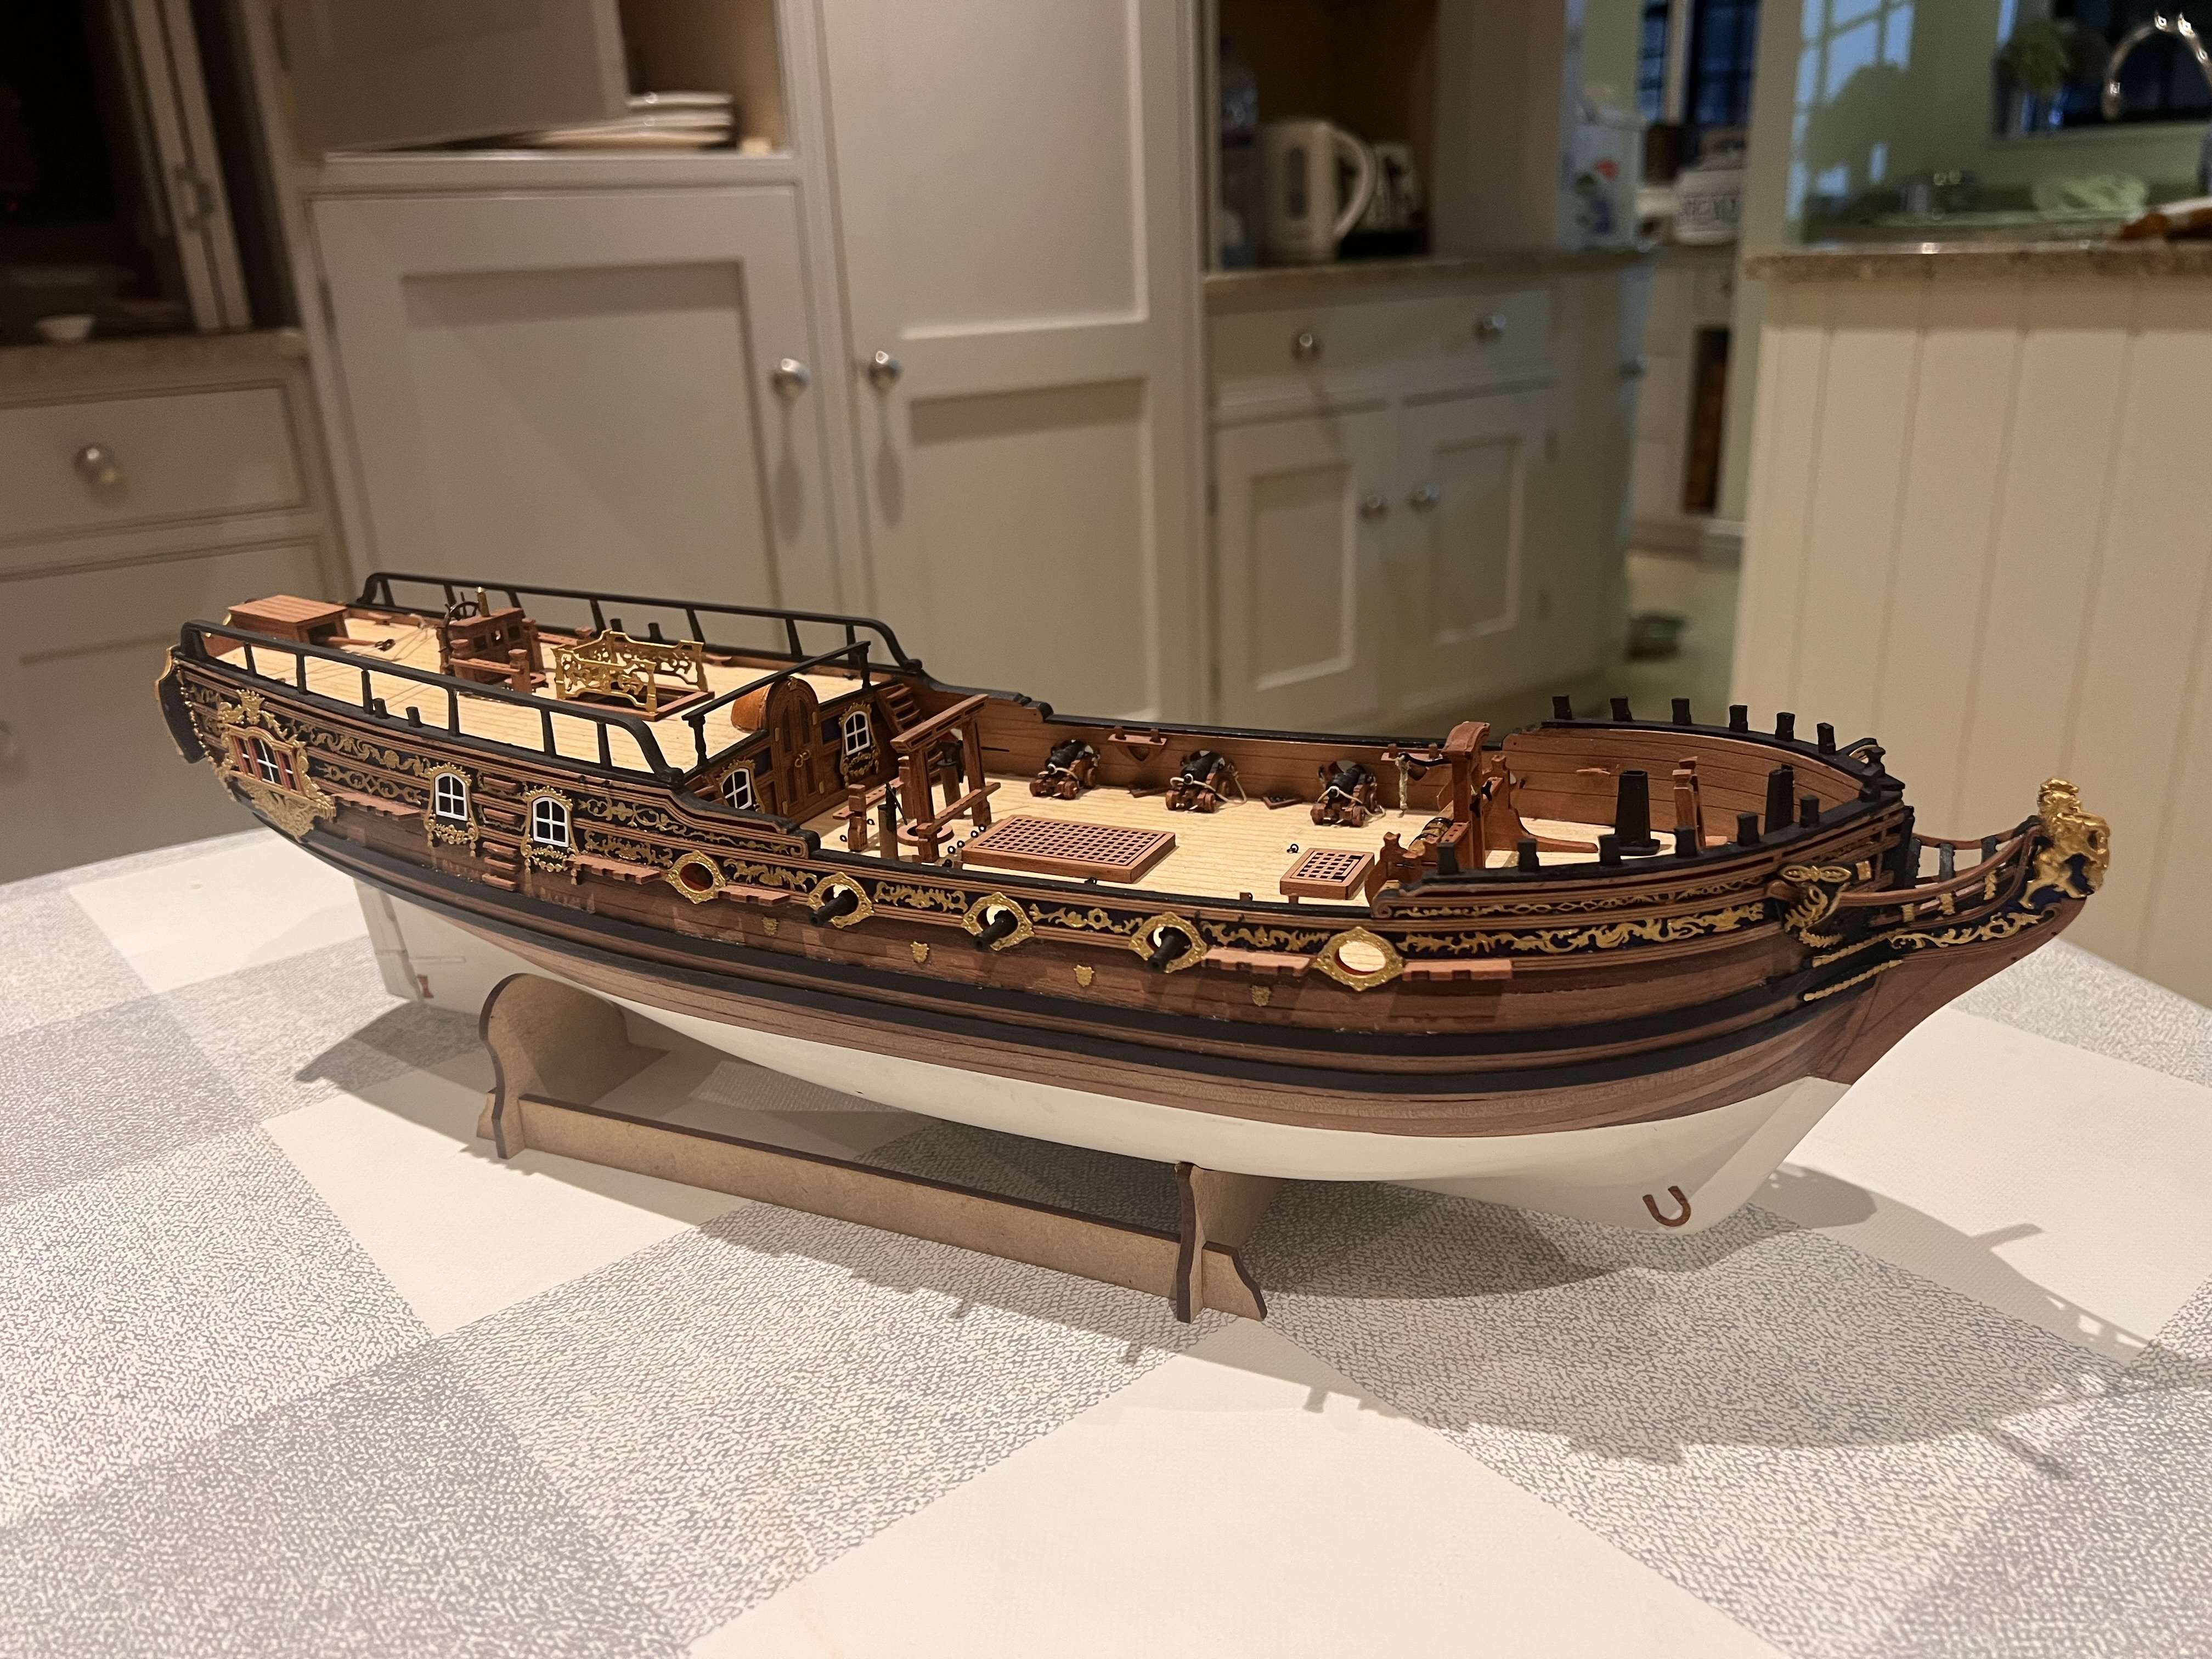
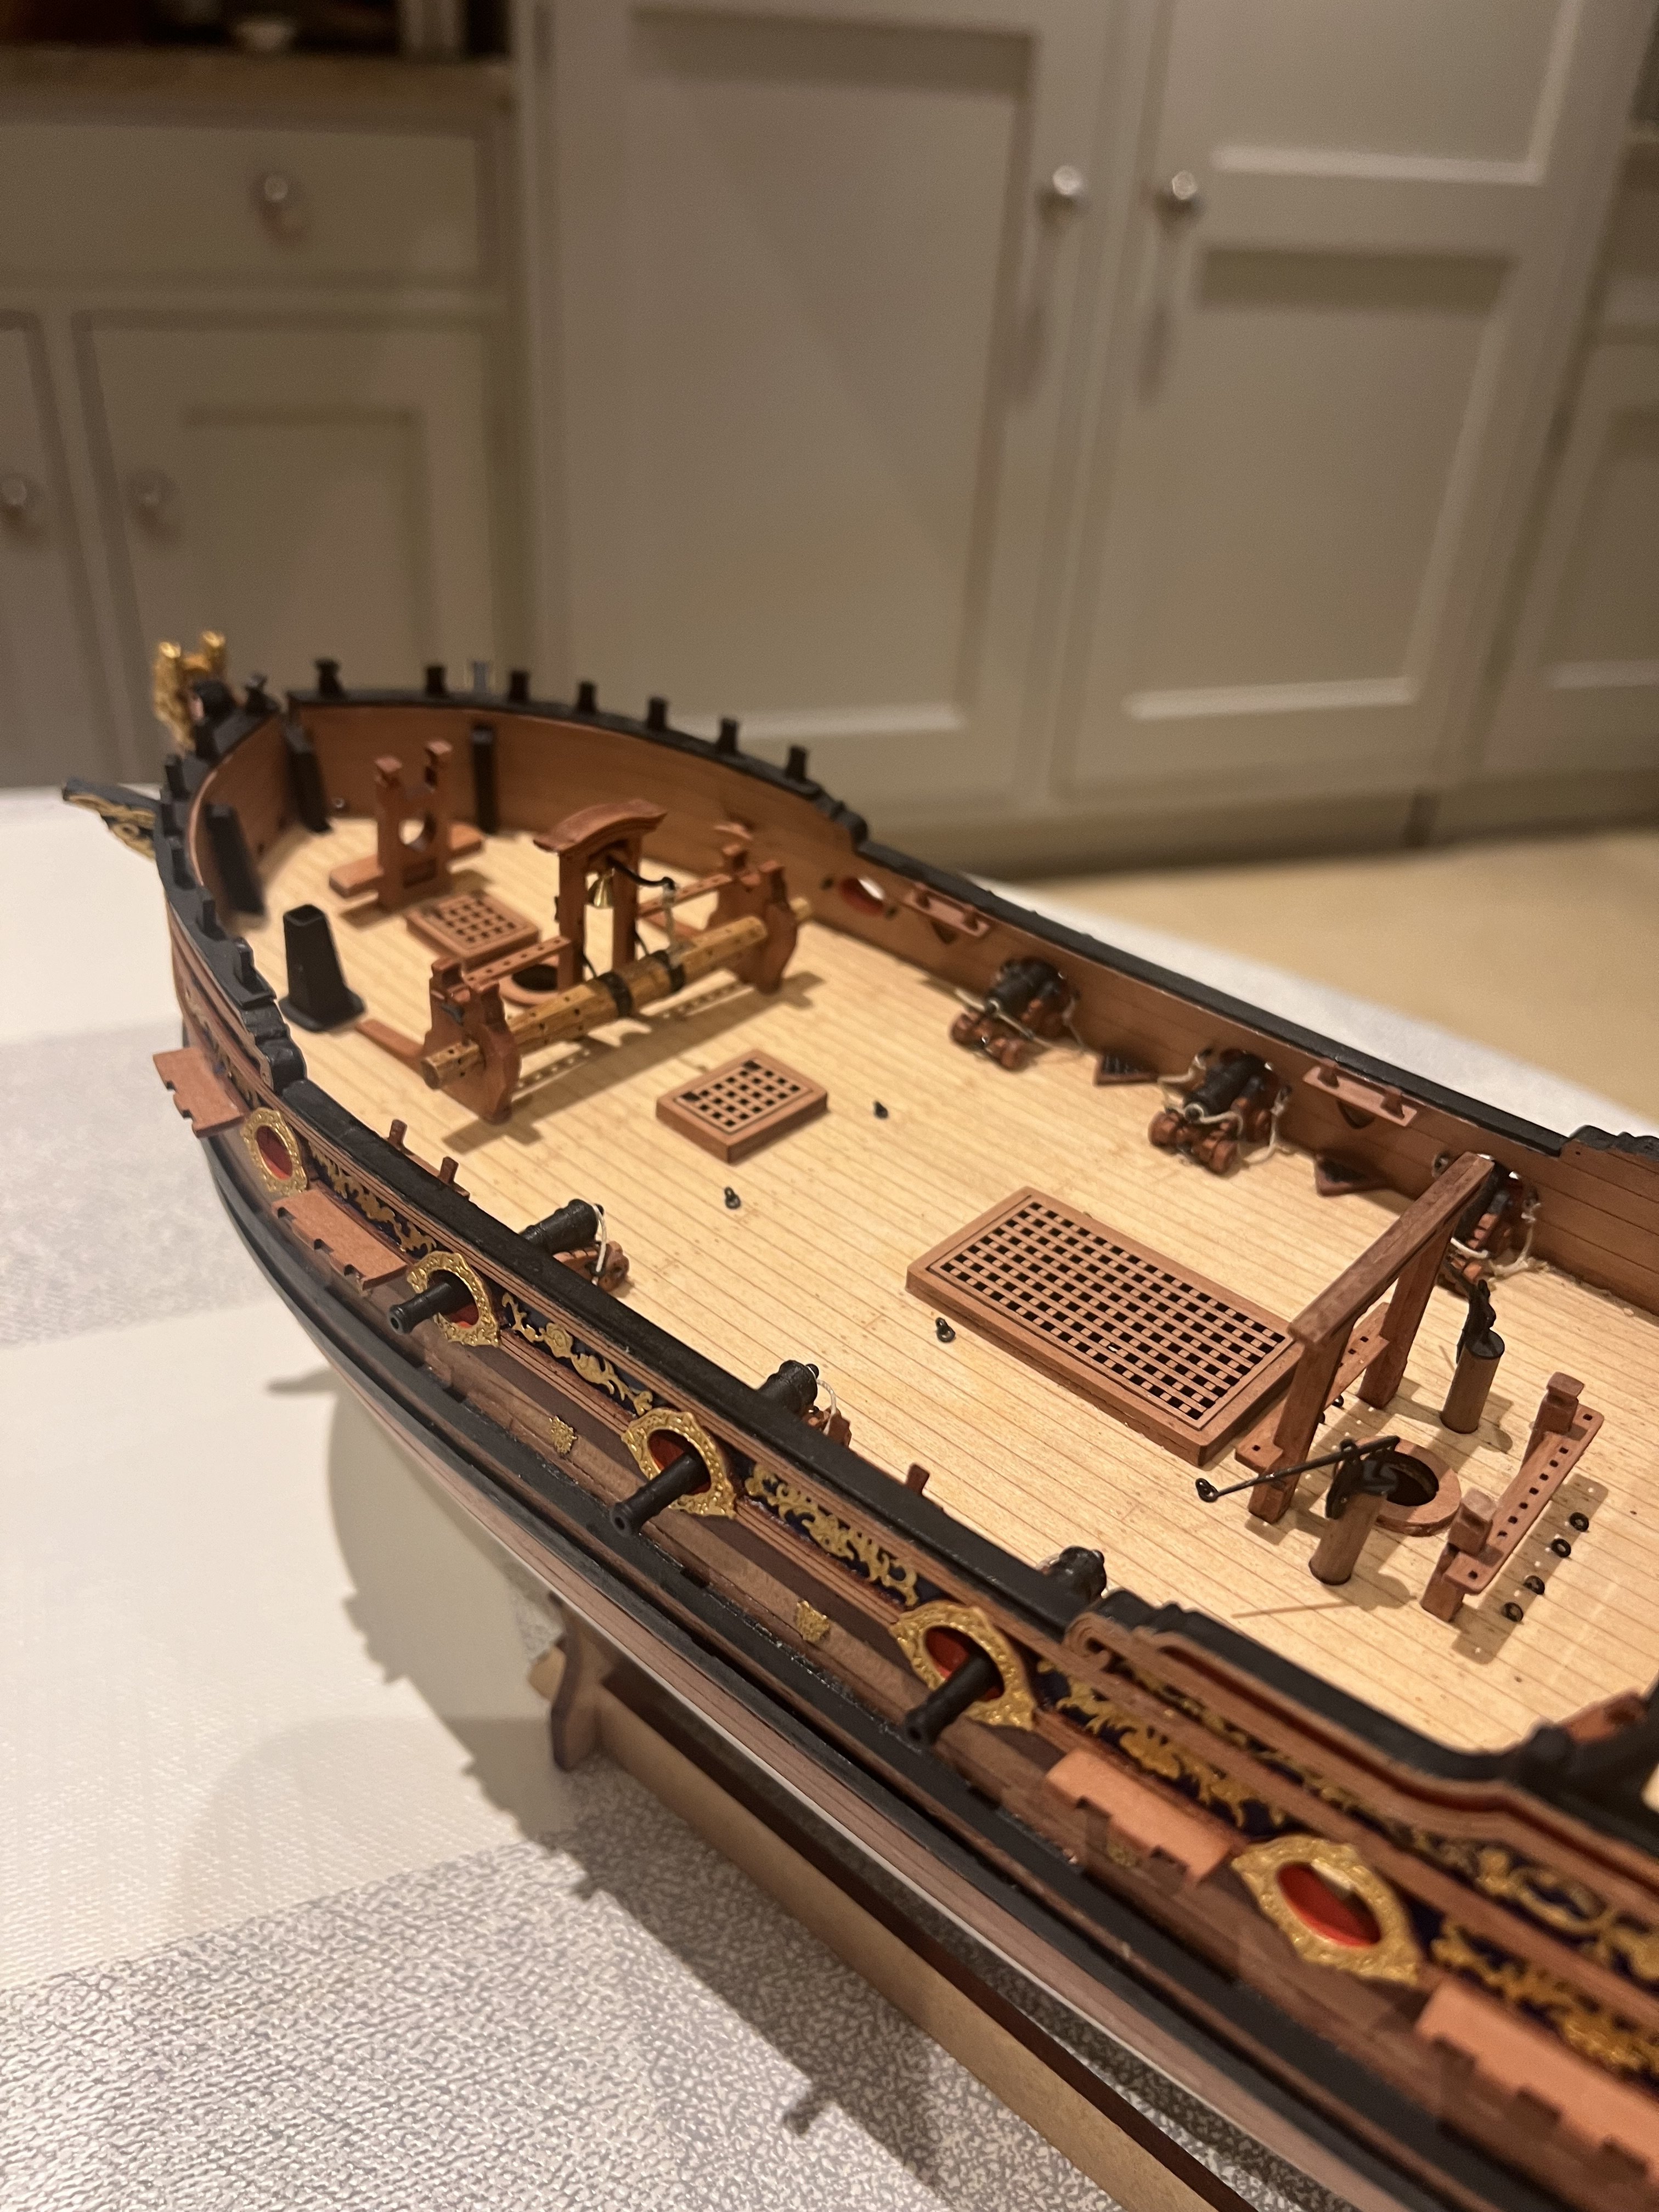
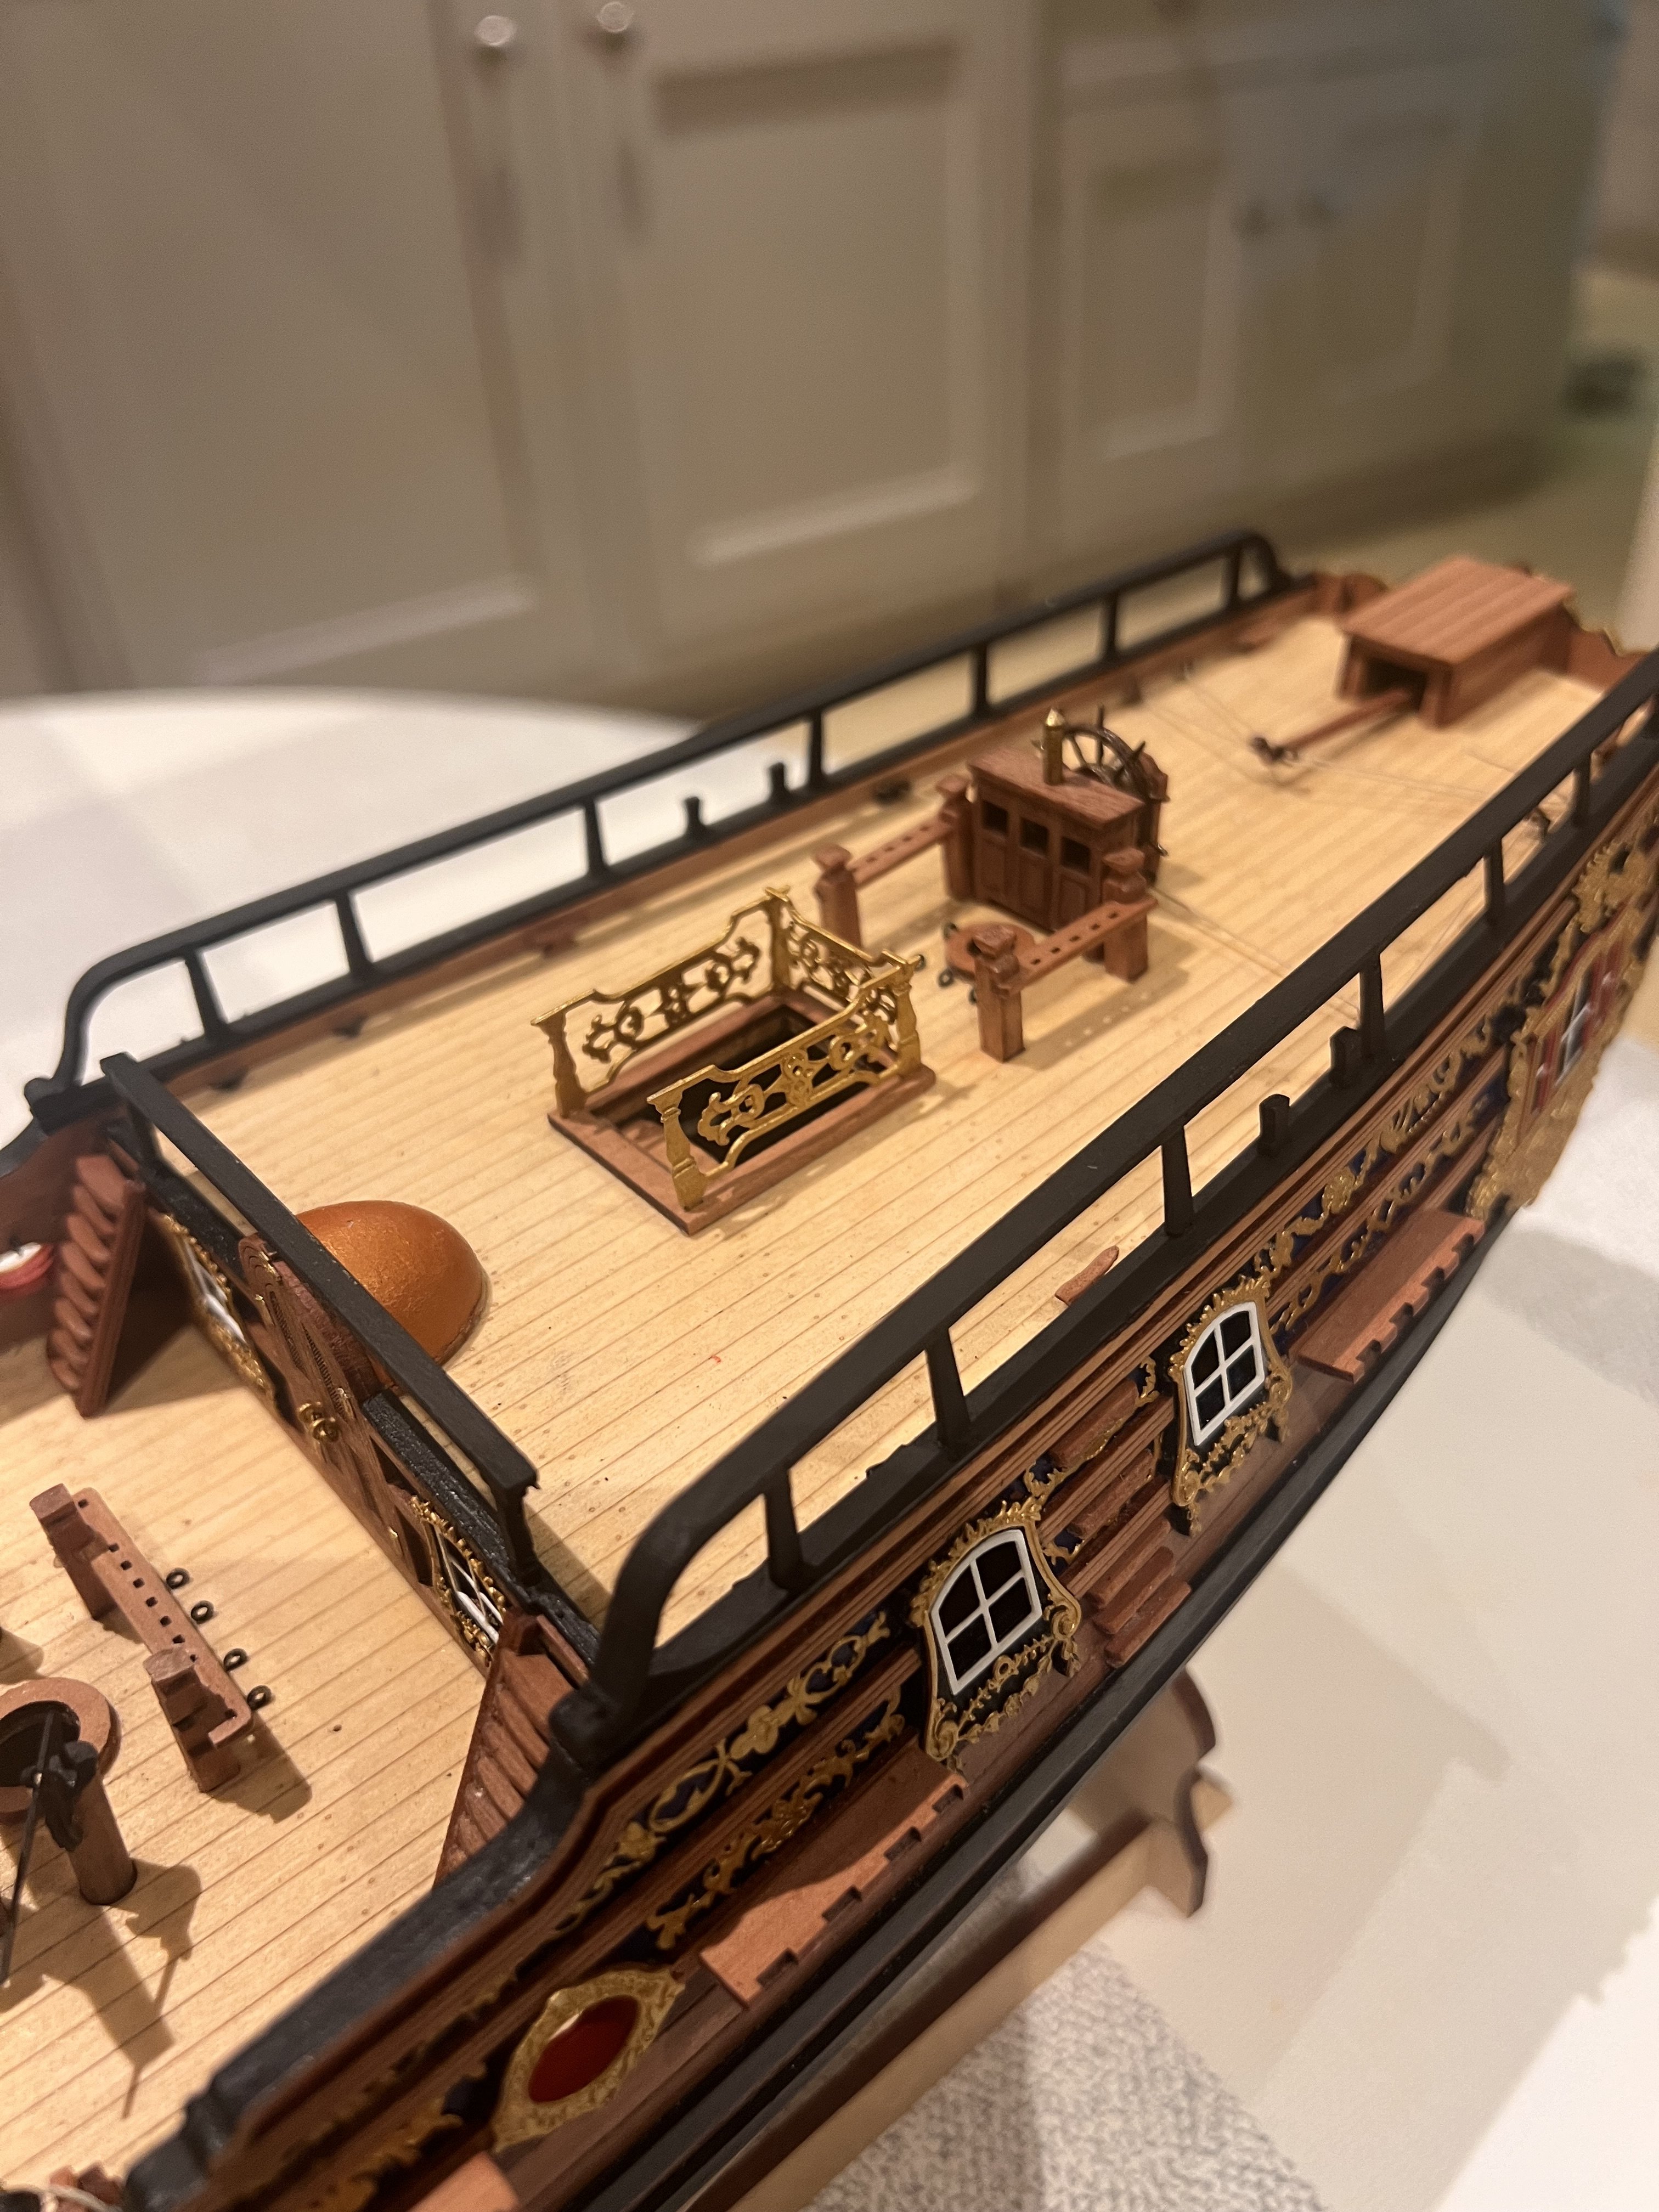
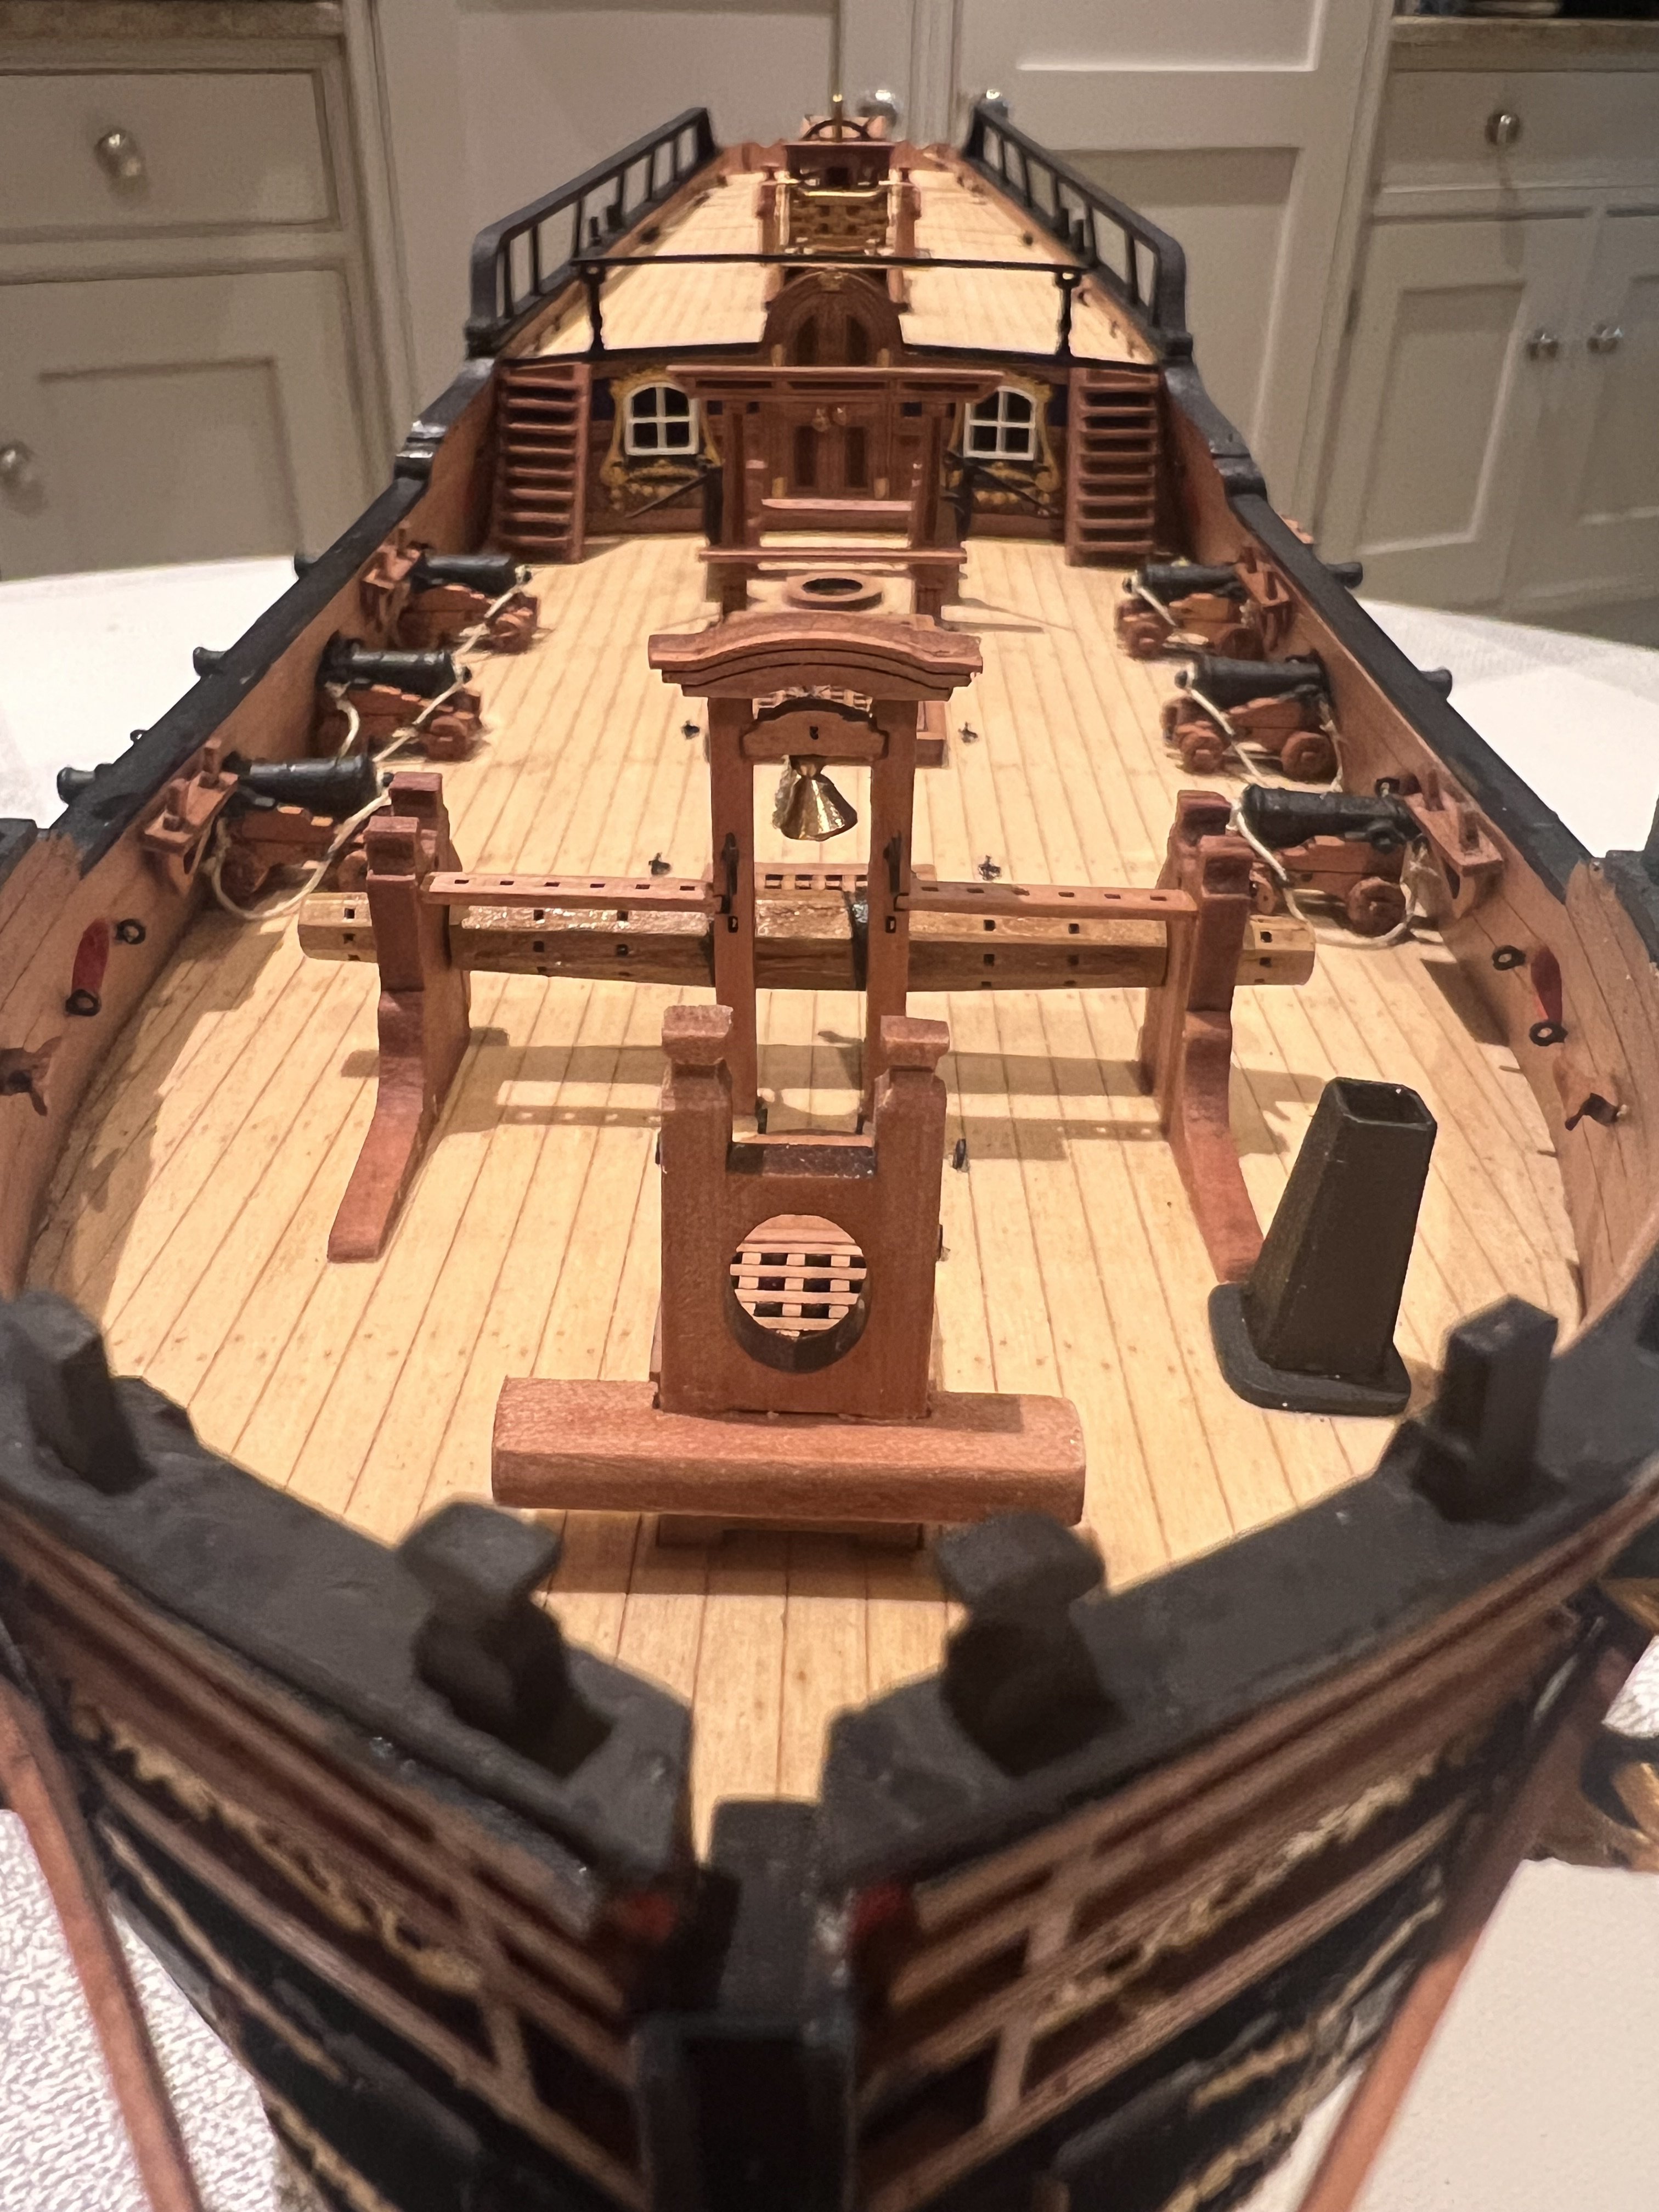
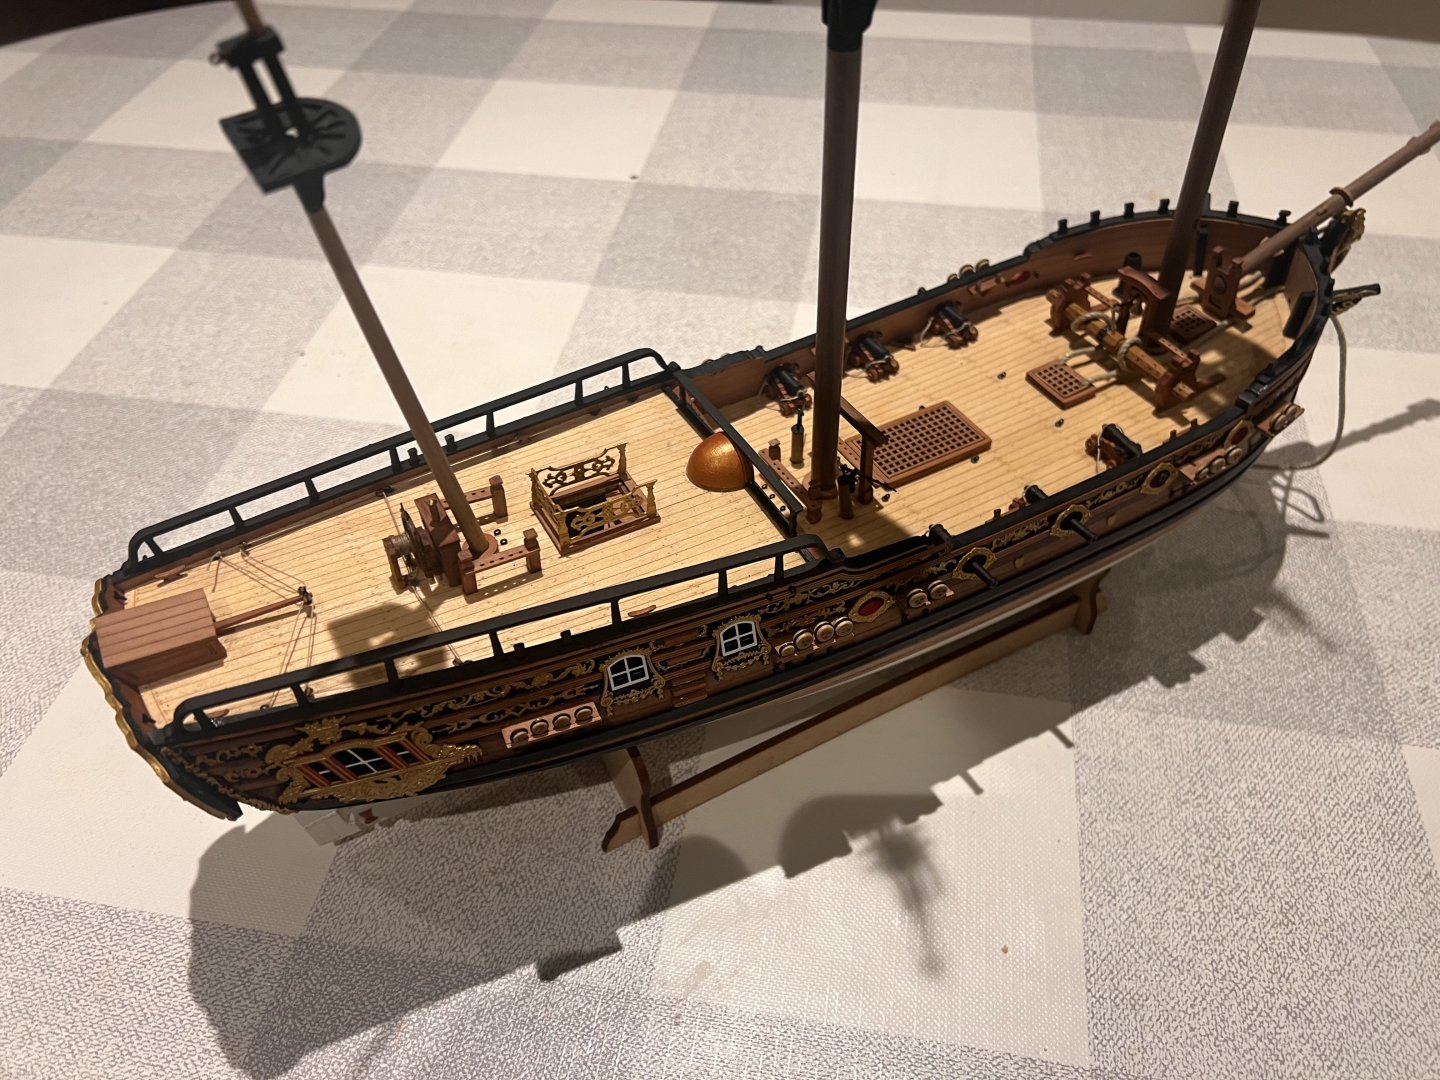
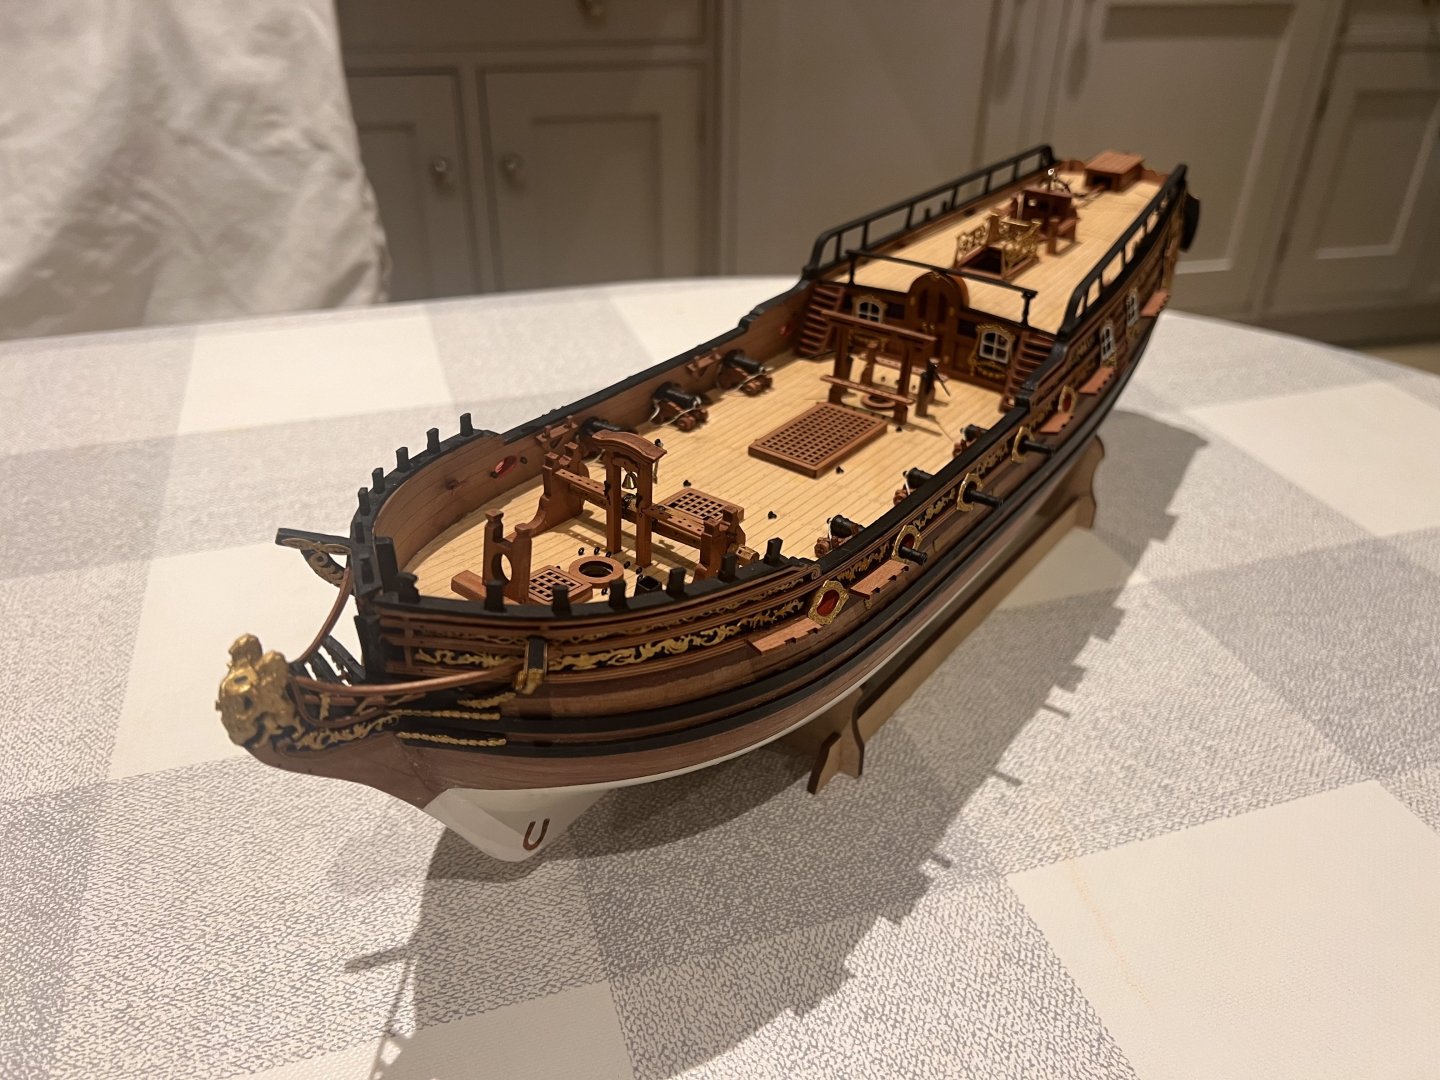
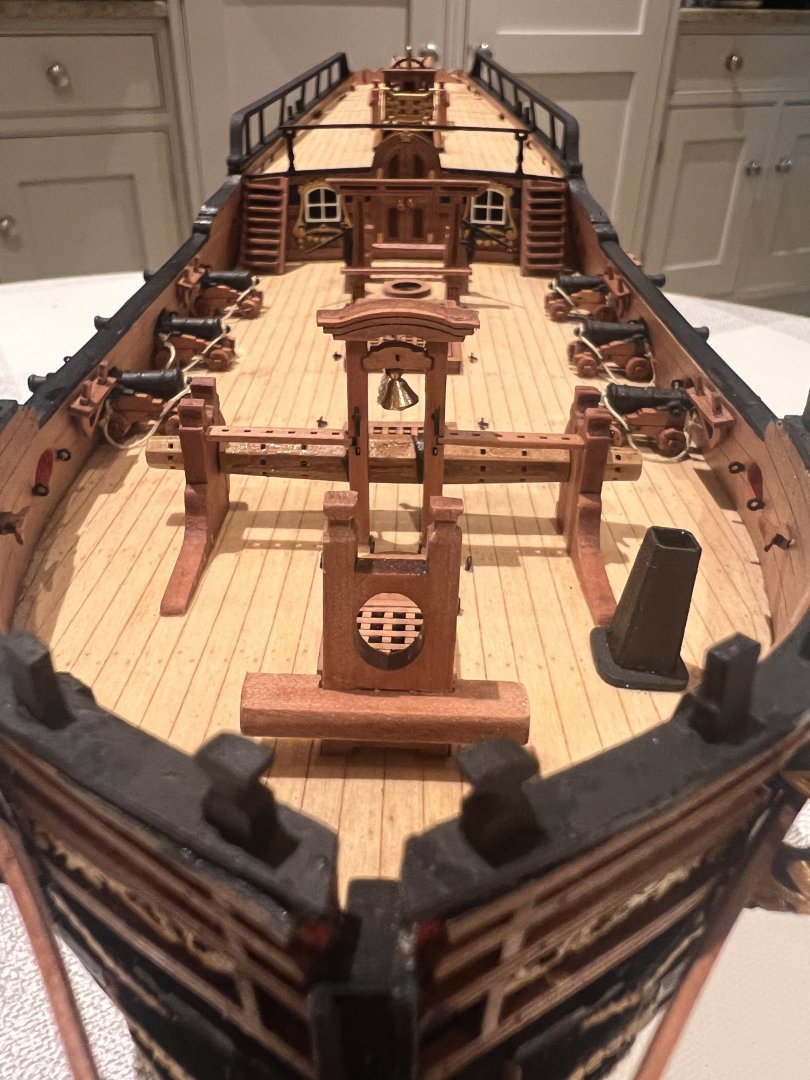
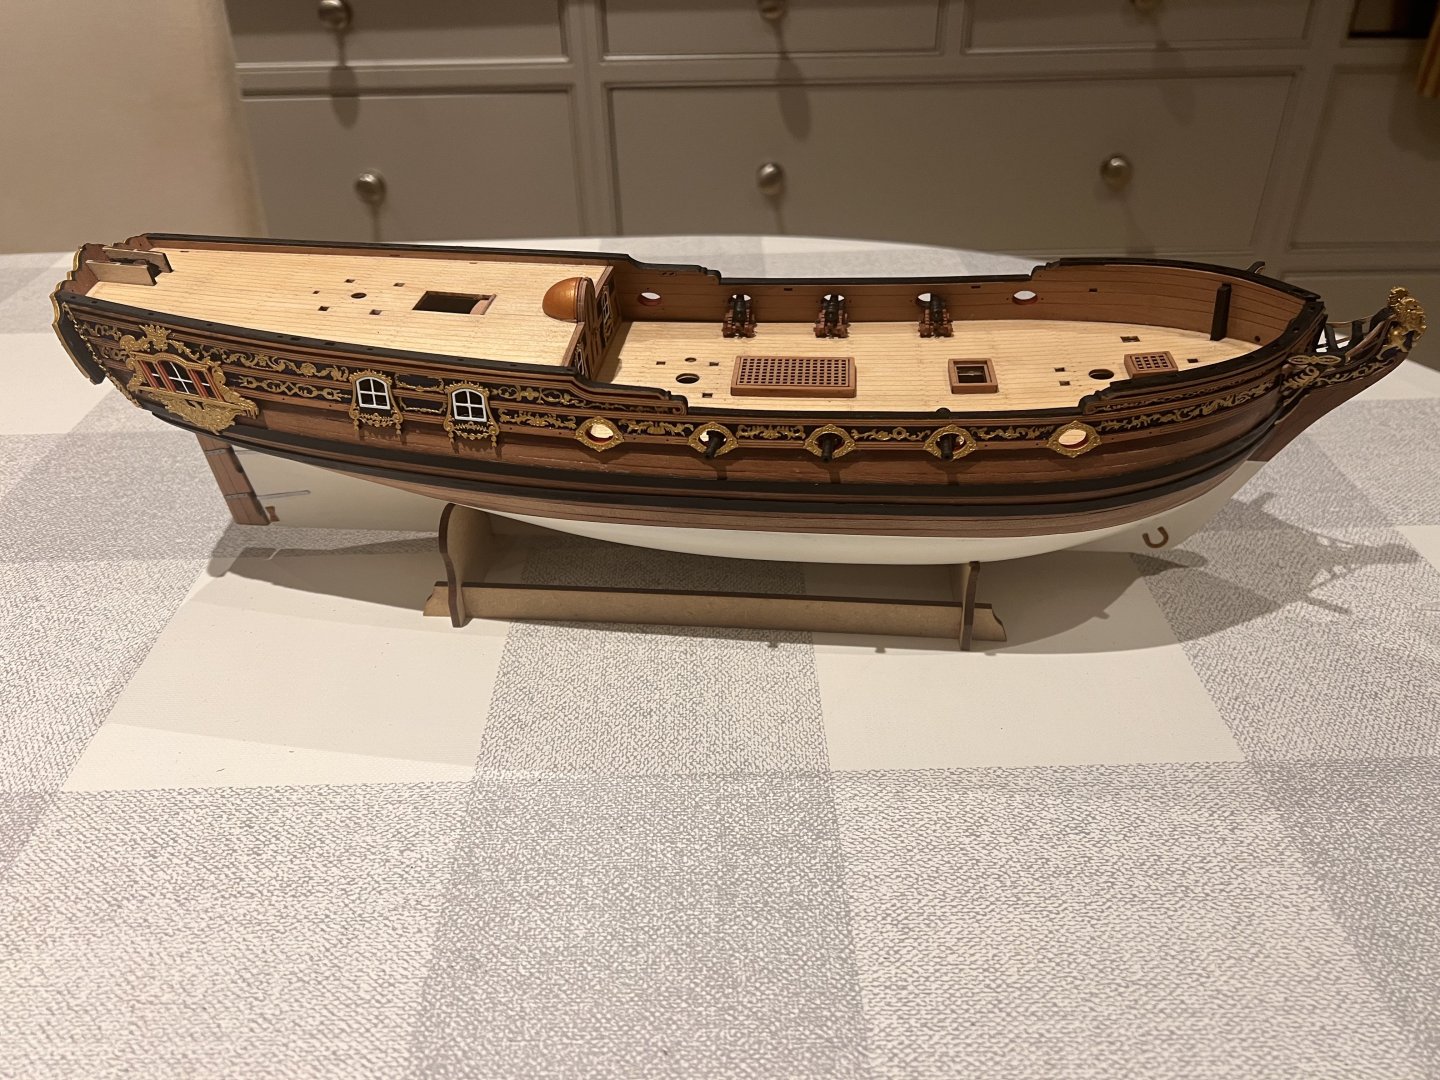
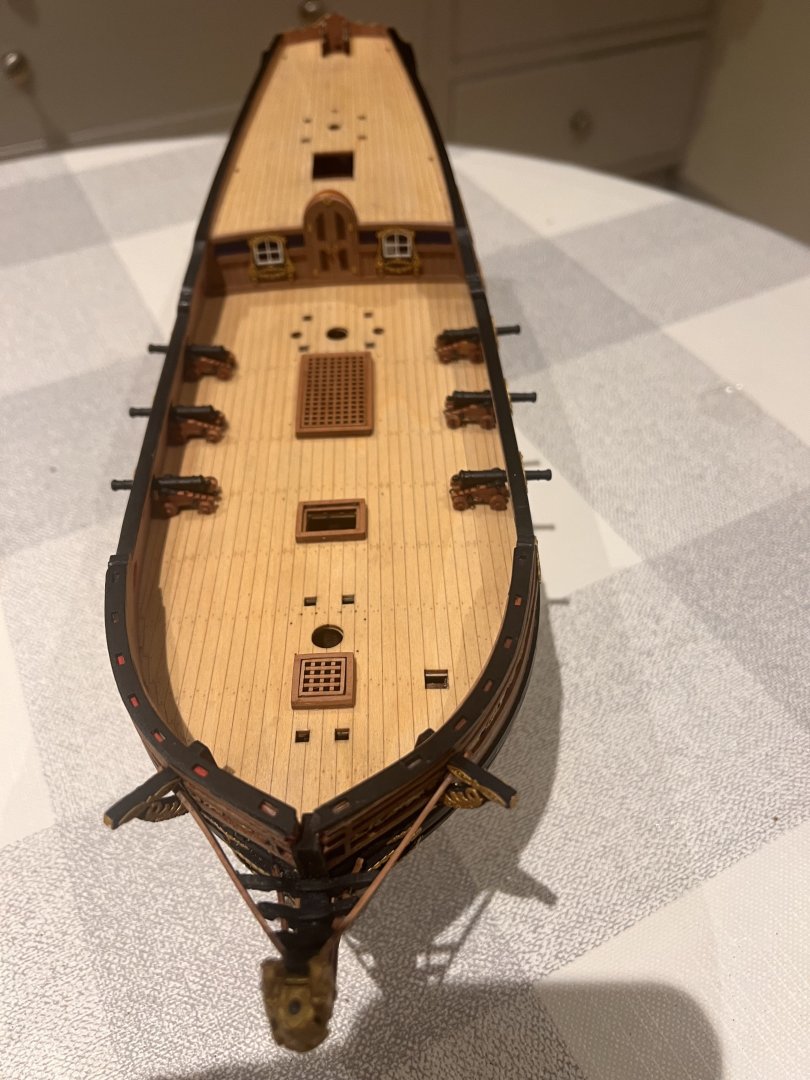
Thanks Bob. DoK’s hull is now mostly complete and fitted out. All that is remaining are a few eyebolts, chainplates and the outer edge of the channels, belaying pins, and the figurehead’s knight’s head which I’ll leave off until the bowsprit is fitted. The deck furniture is pretty straightforward and well designed - as usual for Vanguard and produce a stunning boat. The use of PE to decorate the hull on this kit is hugely impressive. My only variance from the instructions has been adding breech ropes to the cannons. The biggest challenge for me was the rails on either side of the poop deck. The stanchions are very fragile and part of the same piece of wood as the centre section of the railing. This means that the wood grain runs across the stanchion and they snap really easily. Luckily Chris has already thought of this and provided a spare set of stanchions (kudos to Chris for foreseeing this potential weakness for clumsy builders like me!). Nonetheless, I found it quite fiddly to get all the stanchions fitted and aligned. Not sure that they are, but they’ll have to do. Overall, building DoK’s hull has been rewarding and tested my ability a bit further than on previous builds, which is great and what I was looking for. Vanguard classify this as an “experienced” kit compared to Adder and Grecian which are “amateur”. This feels about right even before rigging, she’s certainly a step up in terms of complexity but still exceptionally well designed and very manageable. The big challenge ahead for me will be the rigging of my first ship-rigged vessel.


- 36 replies
-
- 17
-
-
- Duchess of Kingston
- Vanguard Models
- (and 1 more)
-
That’s a wonderful Speedy, I love the sails. She’s my next build, but won’t be as good as yours!
- 144 replies
-
- 2
-
-
- HMS Speedy
- Vanguard Models
- (and 1 more)
-
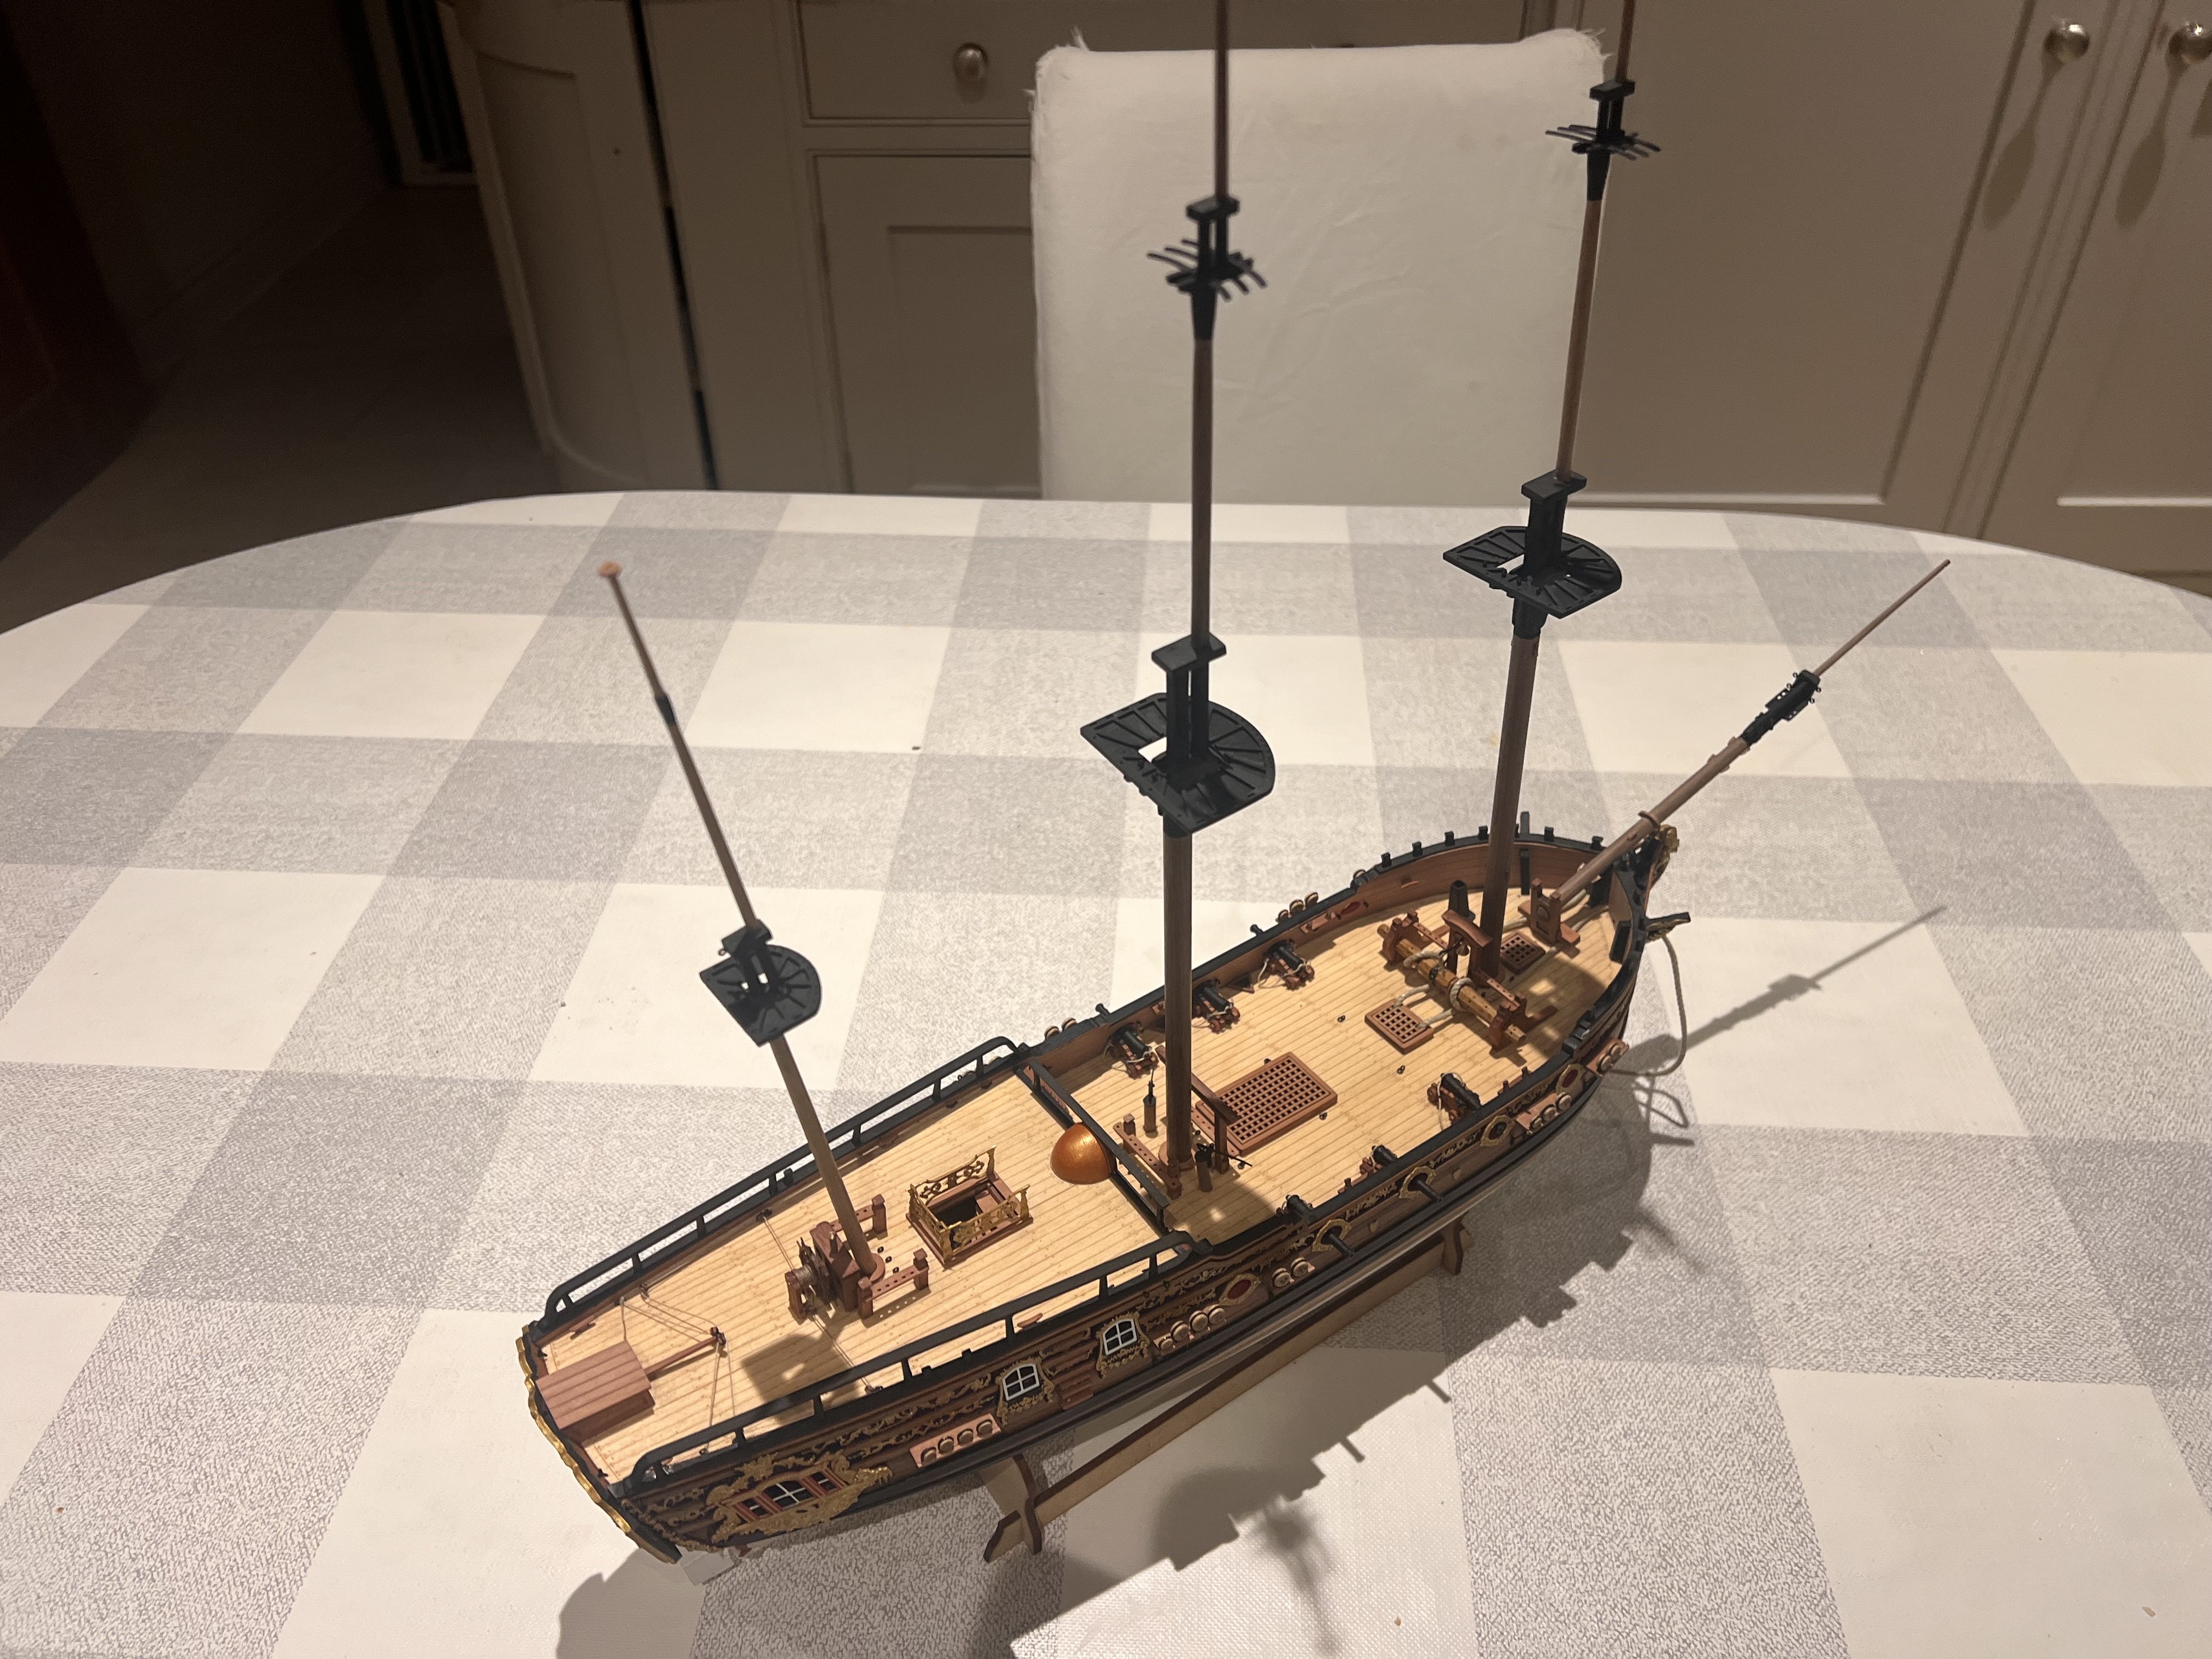
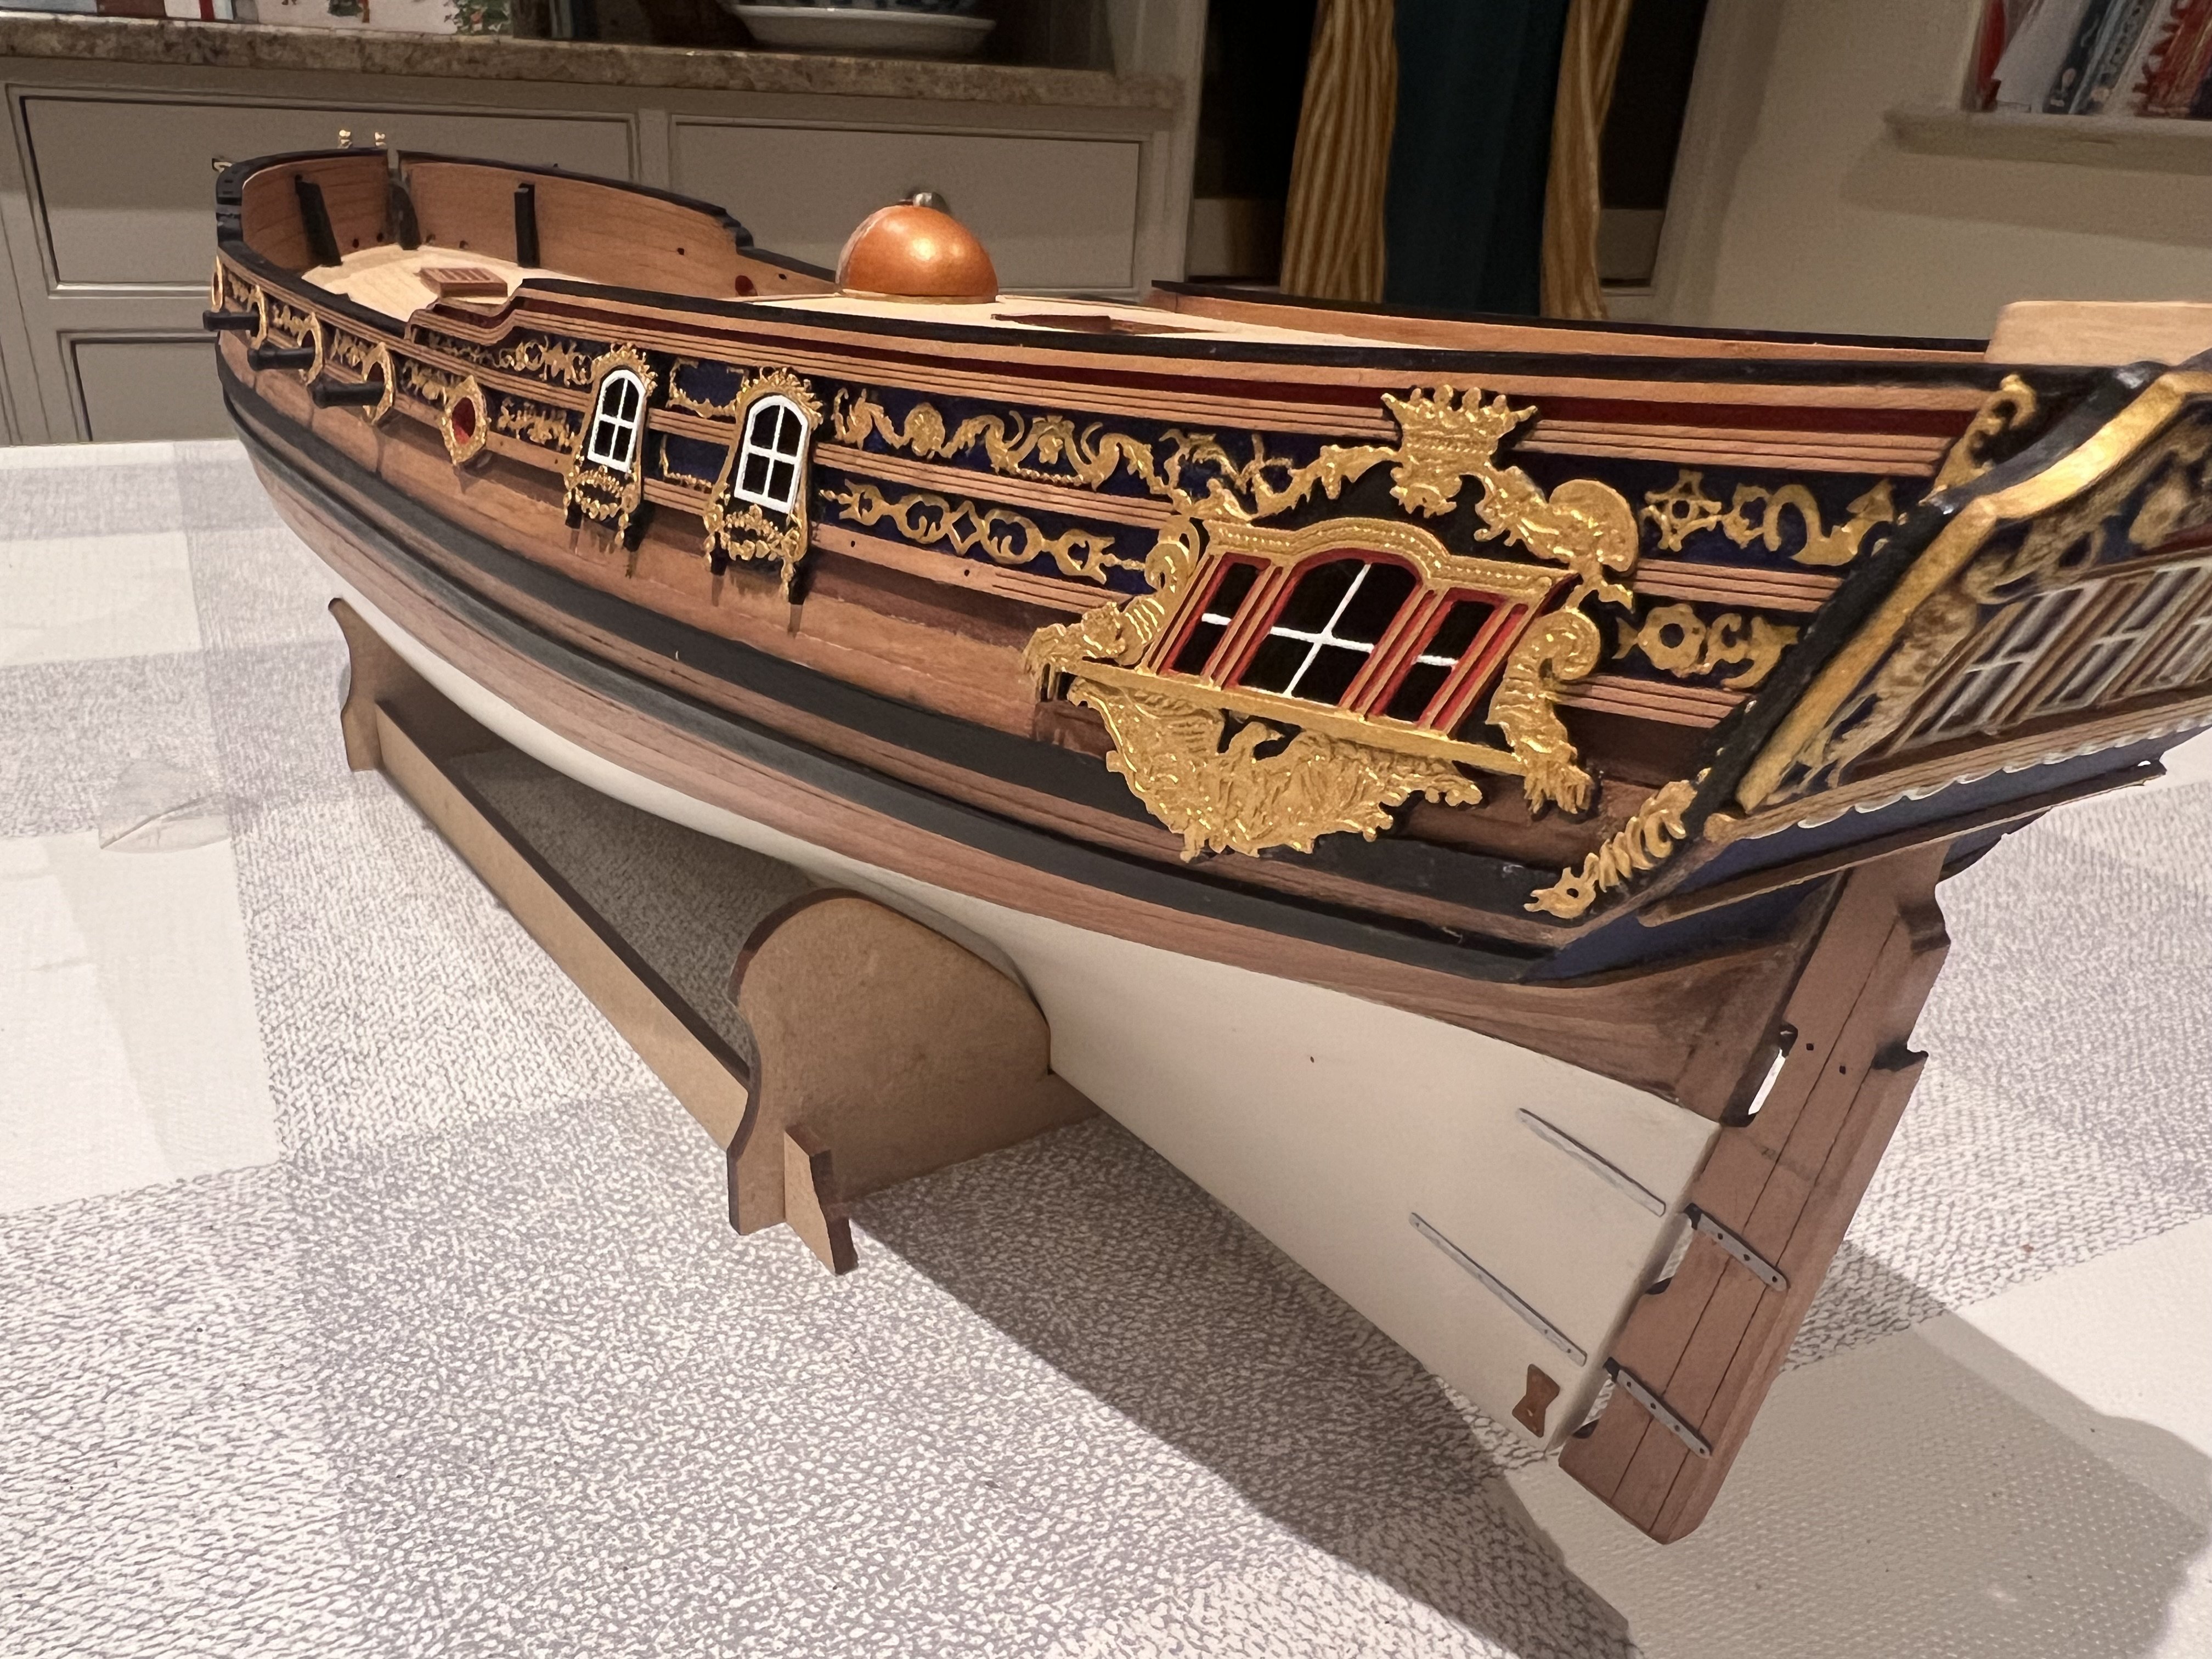
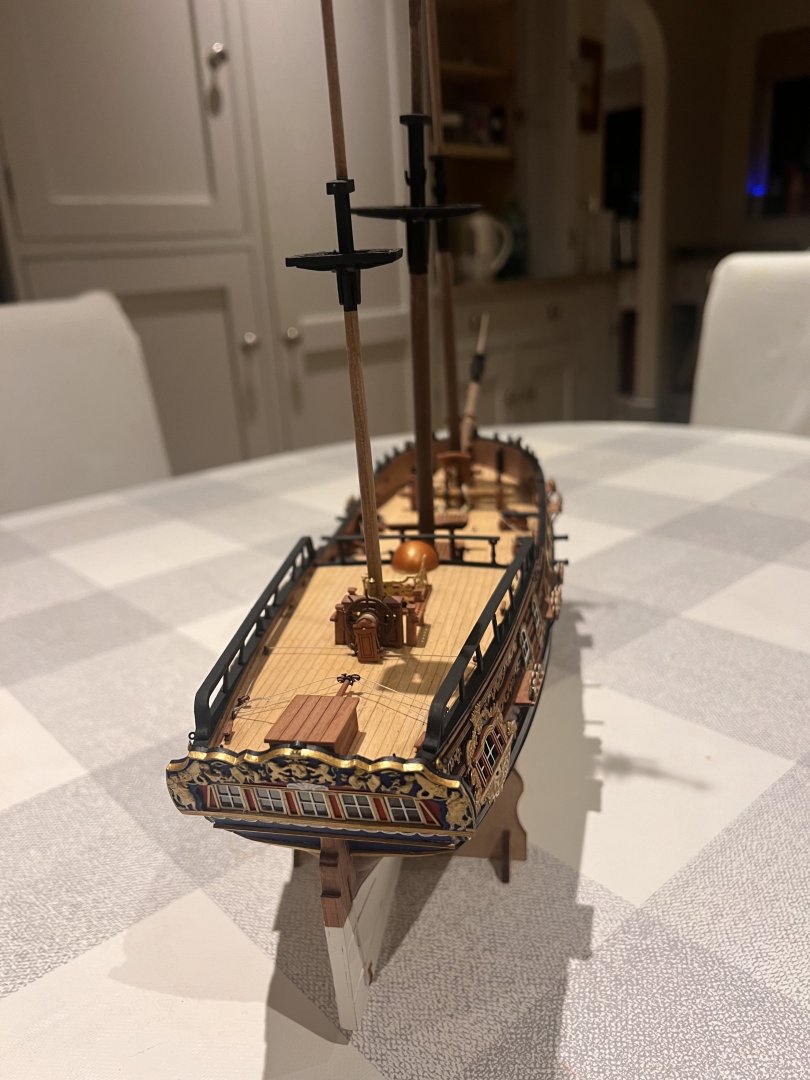
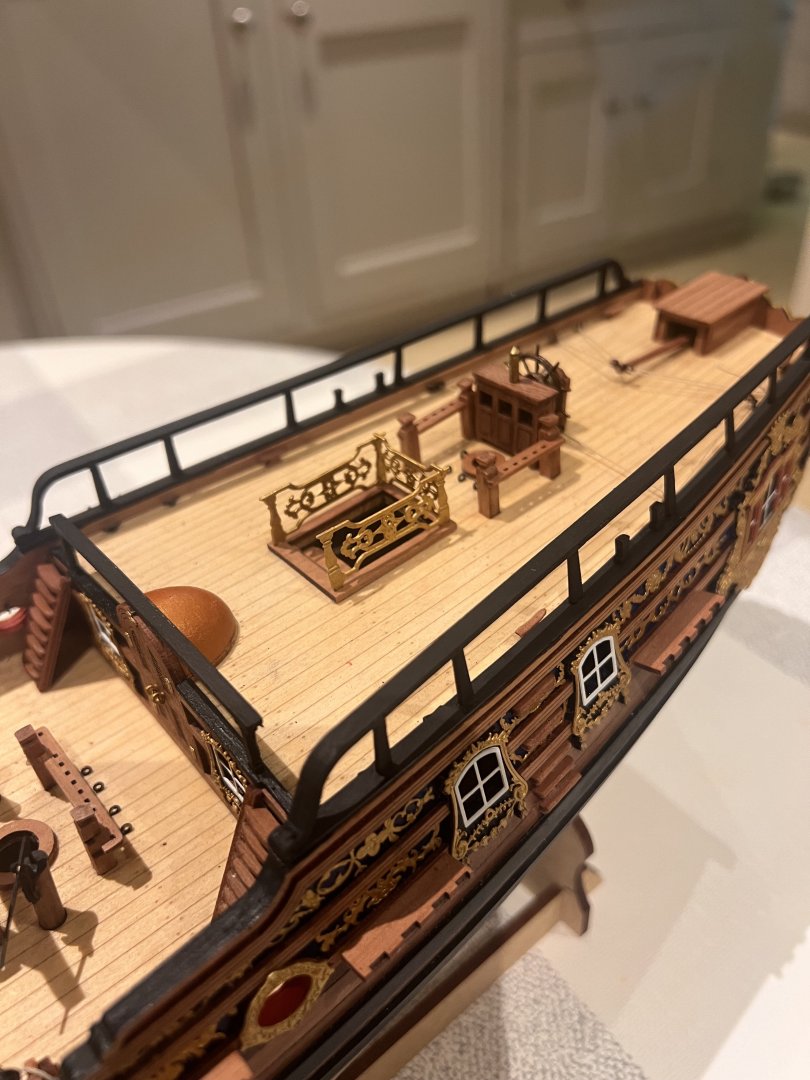
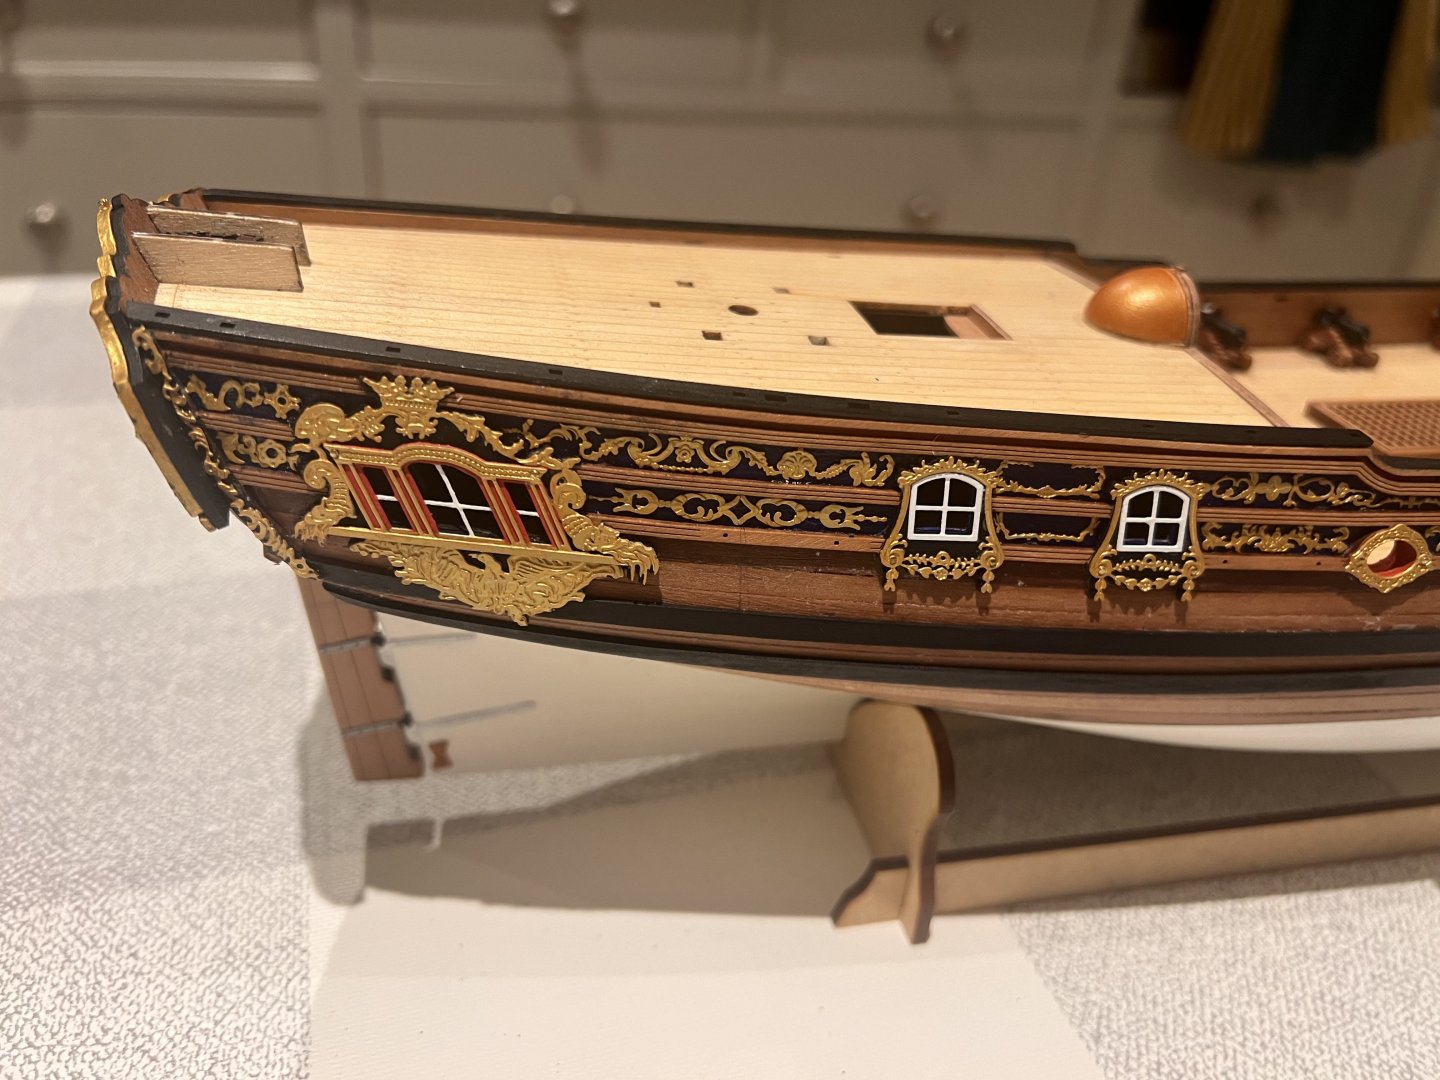
More progress. The main change since last time has been the fitting of the PE decoration which simulates intricate engravings on the model and looks great. I had planned and tried to use the Klear polish method to attach these but it didn’t seem to work, I thought the problem was that my polish had been open over a year since I built Alert and needed it last - but I now understand that the problem was the method I used. For instructions on how to do this properly I refer you to Glenn’s excellent Alert build log. Wish I’d not rushed and realised this before - using CA as I have is inevitably less tidy. The copper canopy isn’t permanently fixed to the hull yet. Nor are the cannons. DoK’s cannons are Vanguard’s old style of cannon carriage with separate PE capsquares. I didn’t fancy my chances bending these to fit so instead I ordered six new cannon carriages with integrated wooden (similar to those on Grecian, Adder and the newer versions of Alert and Speedy) from Chris. I’ll add breachropes later. The acetate in the stern windows does look a touch grubby so I’ve decided to go for the no glass option in the remaining windows. For the two highly decorative windows on the port and starboard quarter I’ve painted the frames inside black so it’s not just a view of MDF frames. I’ve no idea what it’s called but the “basket” at the bow has been the hardest part of this build so far. As for other logs, I’ve had to file the excess on the base and rear of the figurehead to fit. I’ve left the knight’s head off the figurehead for now as there are several reports of the plume being broken off during the build. I’ll add it back just before fitting the bowsprit. The three gratings/ hatches on the main deck are glued in place, as is the spiral staircase aft - this is a superb piece of design by Chris and exceptionally easy to assemble and install. Next a few more bits of PE, finish the rudder, add side steps and channels, then more deck fittings.

- 36 replies
-
- 8
-
-
- Duchess of Kingston
- Vanguard Models
- (and 1 more)
-
The two luggers, Zulu and Fifie, are very different from the other four fishing boats. If it were down to me I’d probably build Erycina or Ranger with the second being Zulu. But much of it being personal choice.
- 25 replies
-
- 1
-
-
- Ranger
- Vanguard Models
- (and 1 more)
-
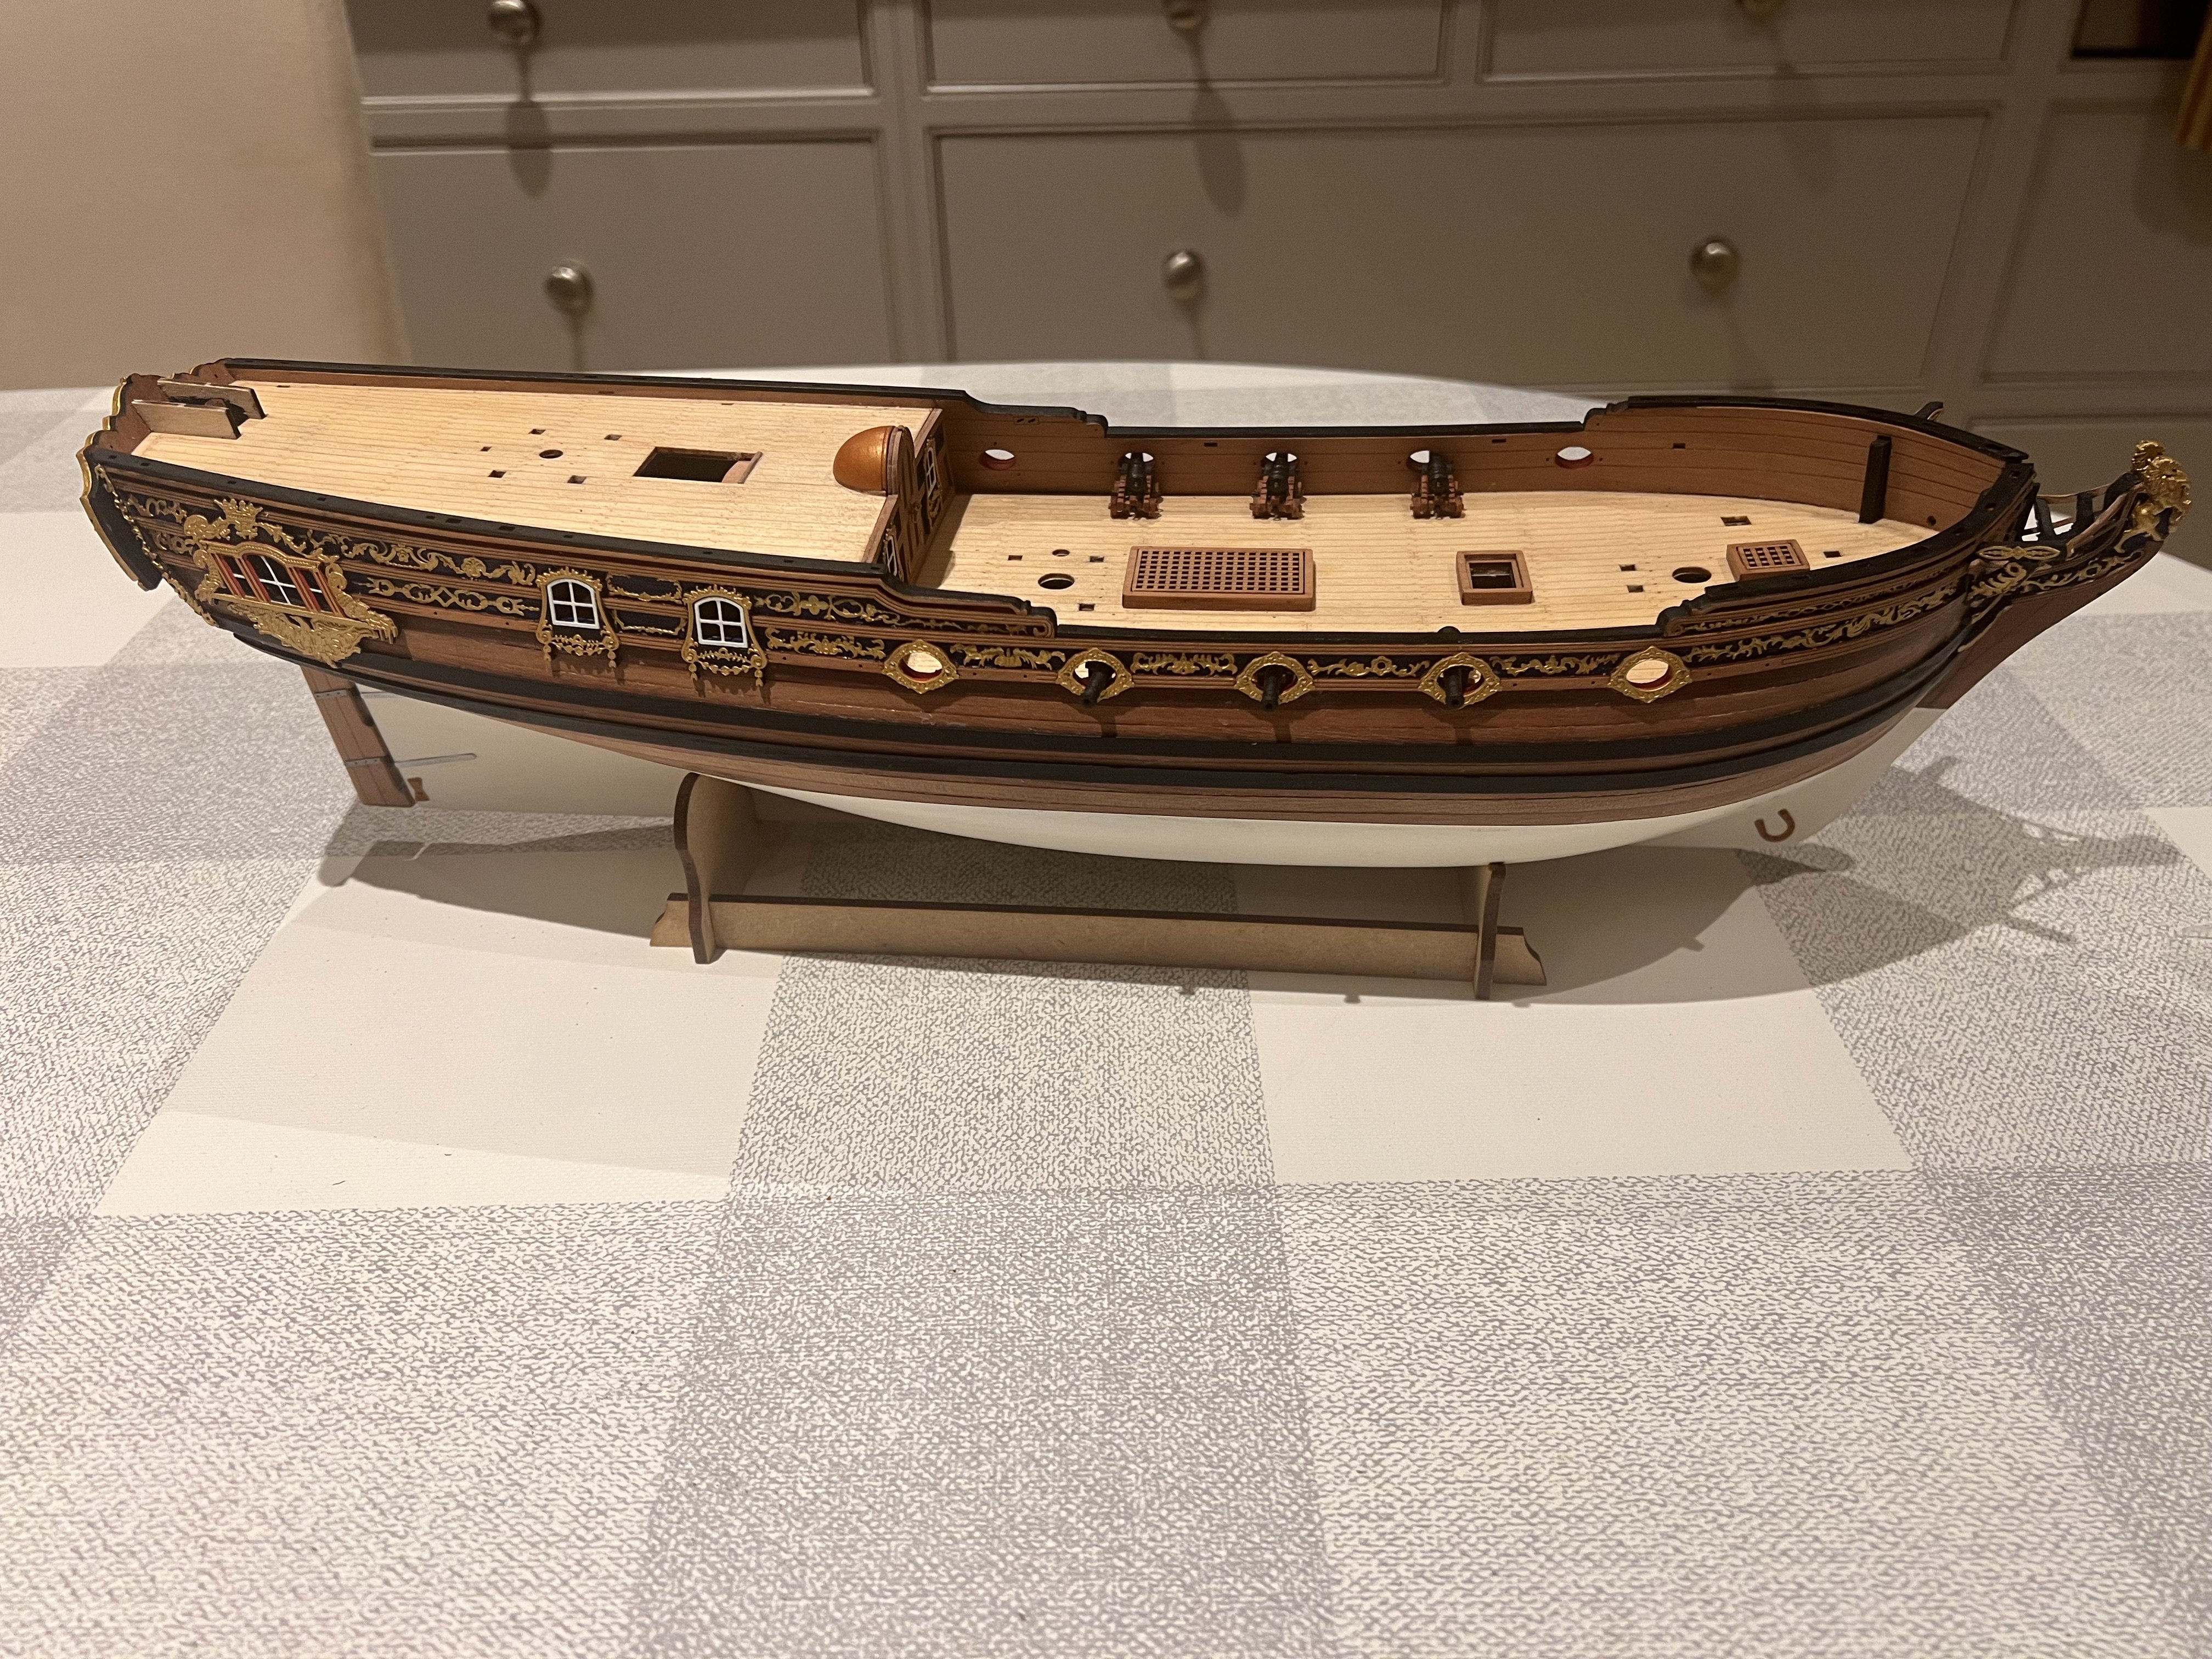
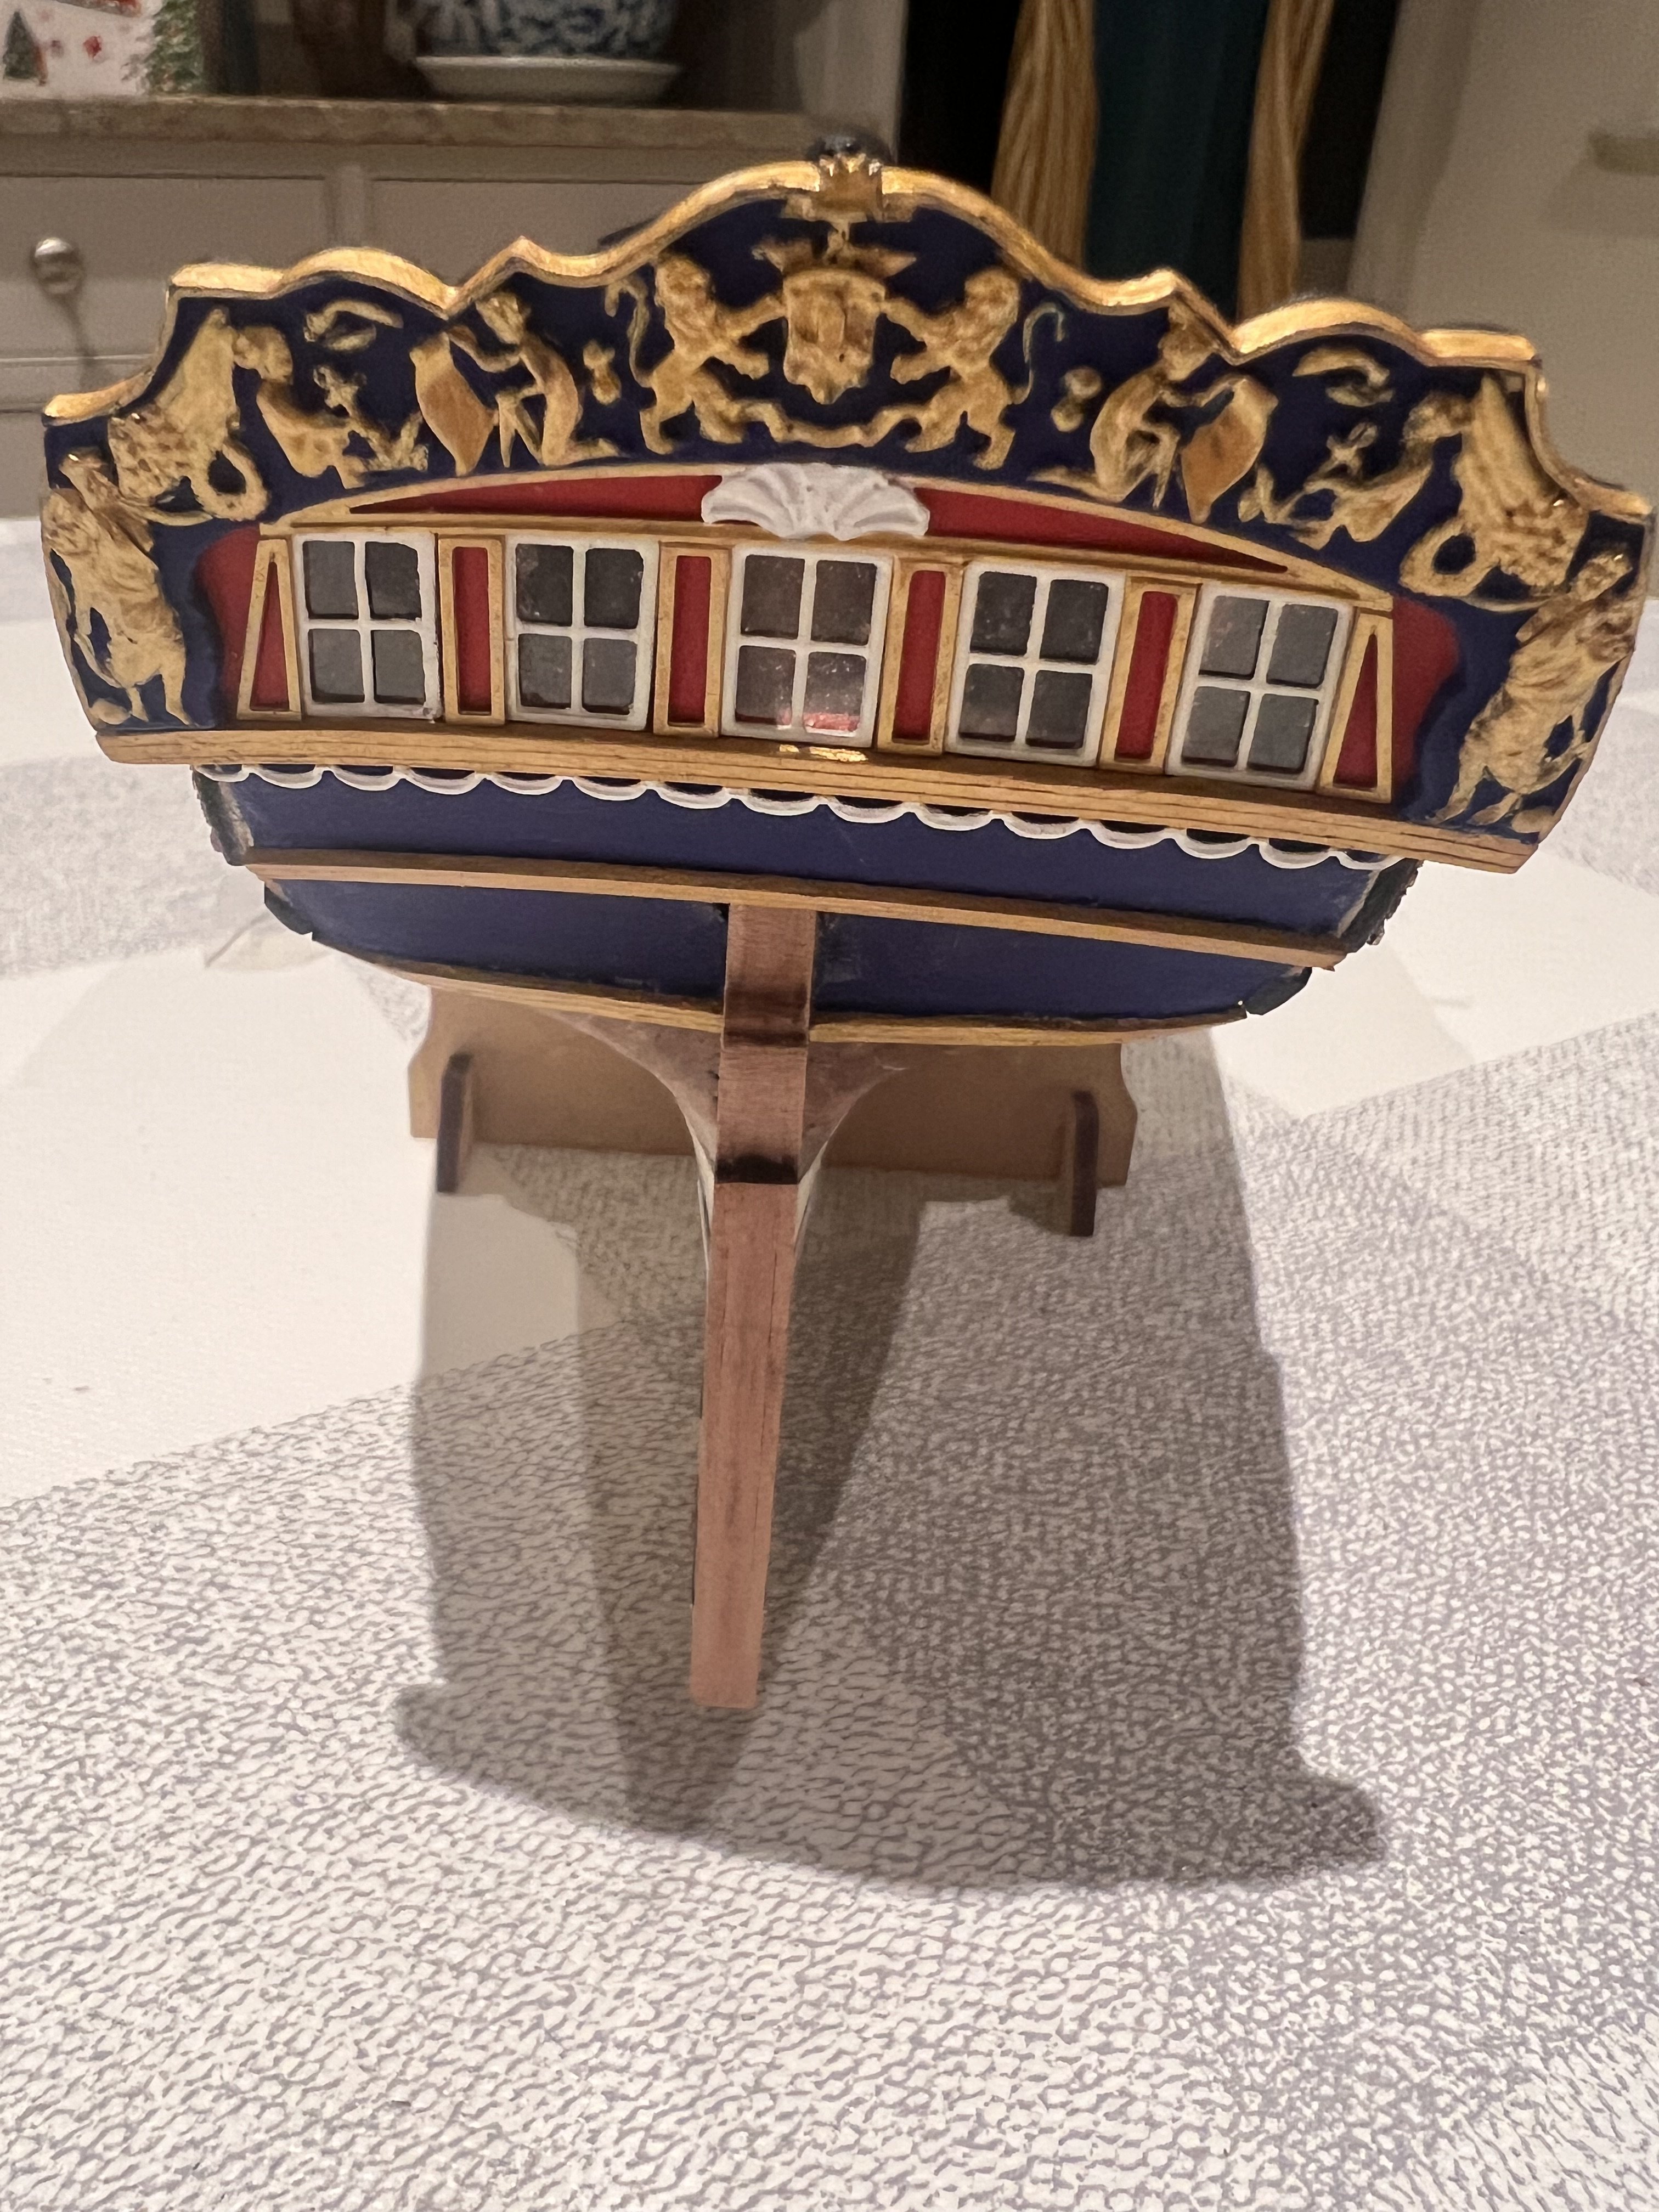
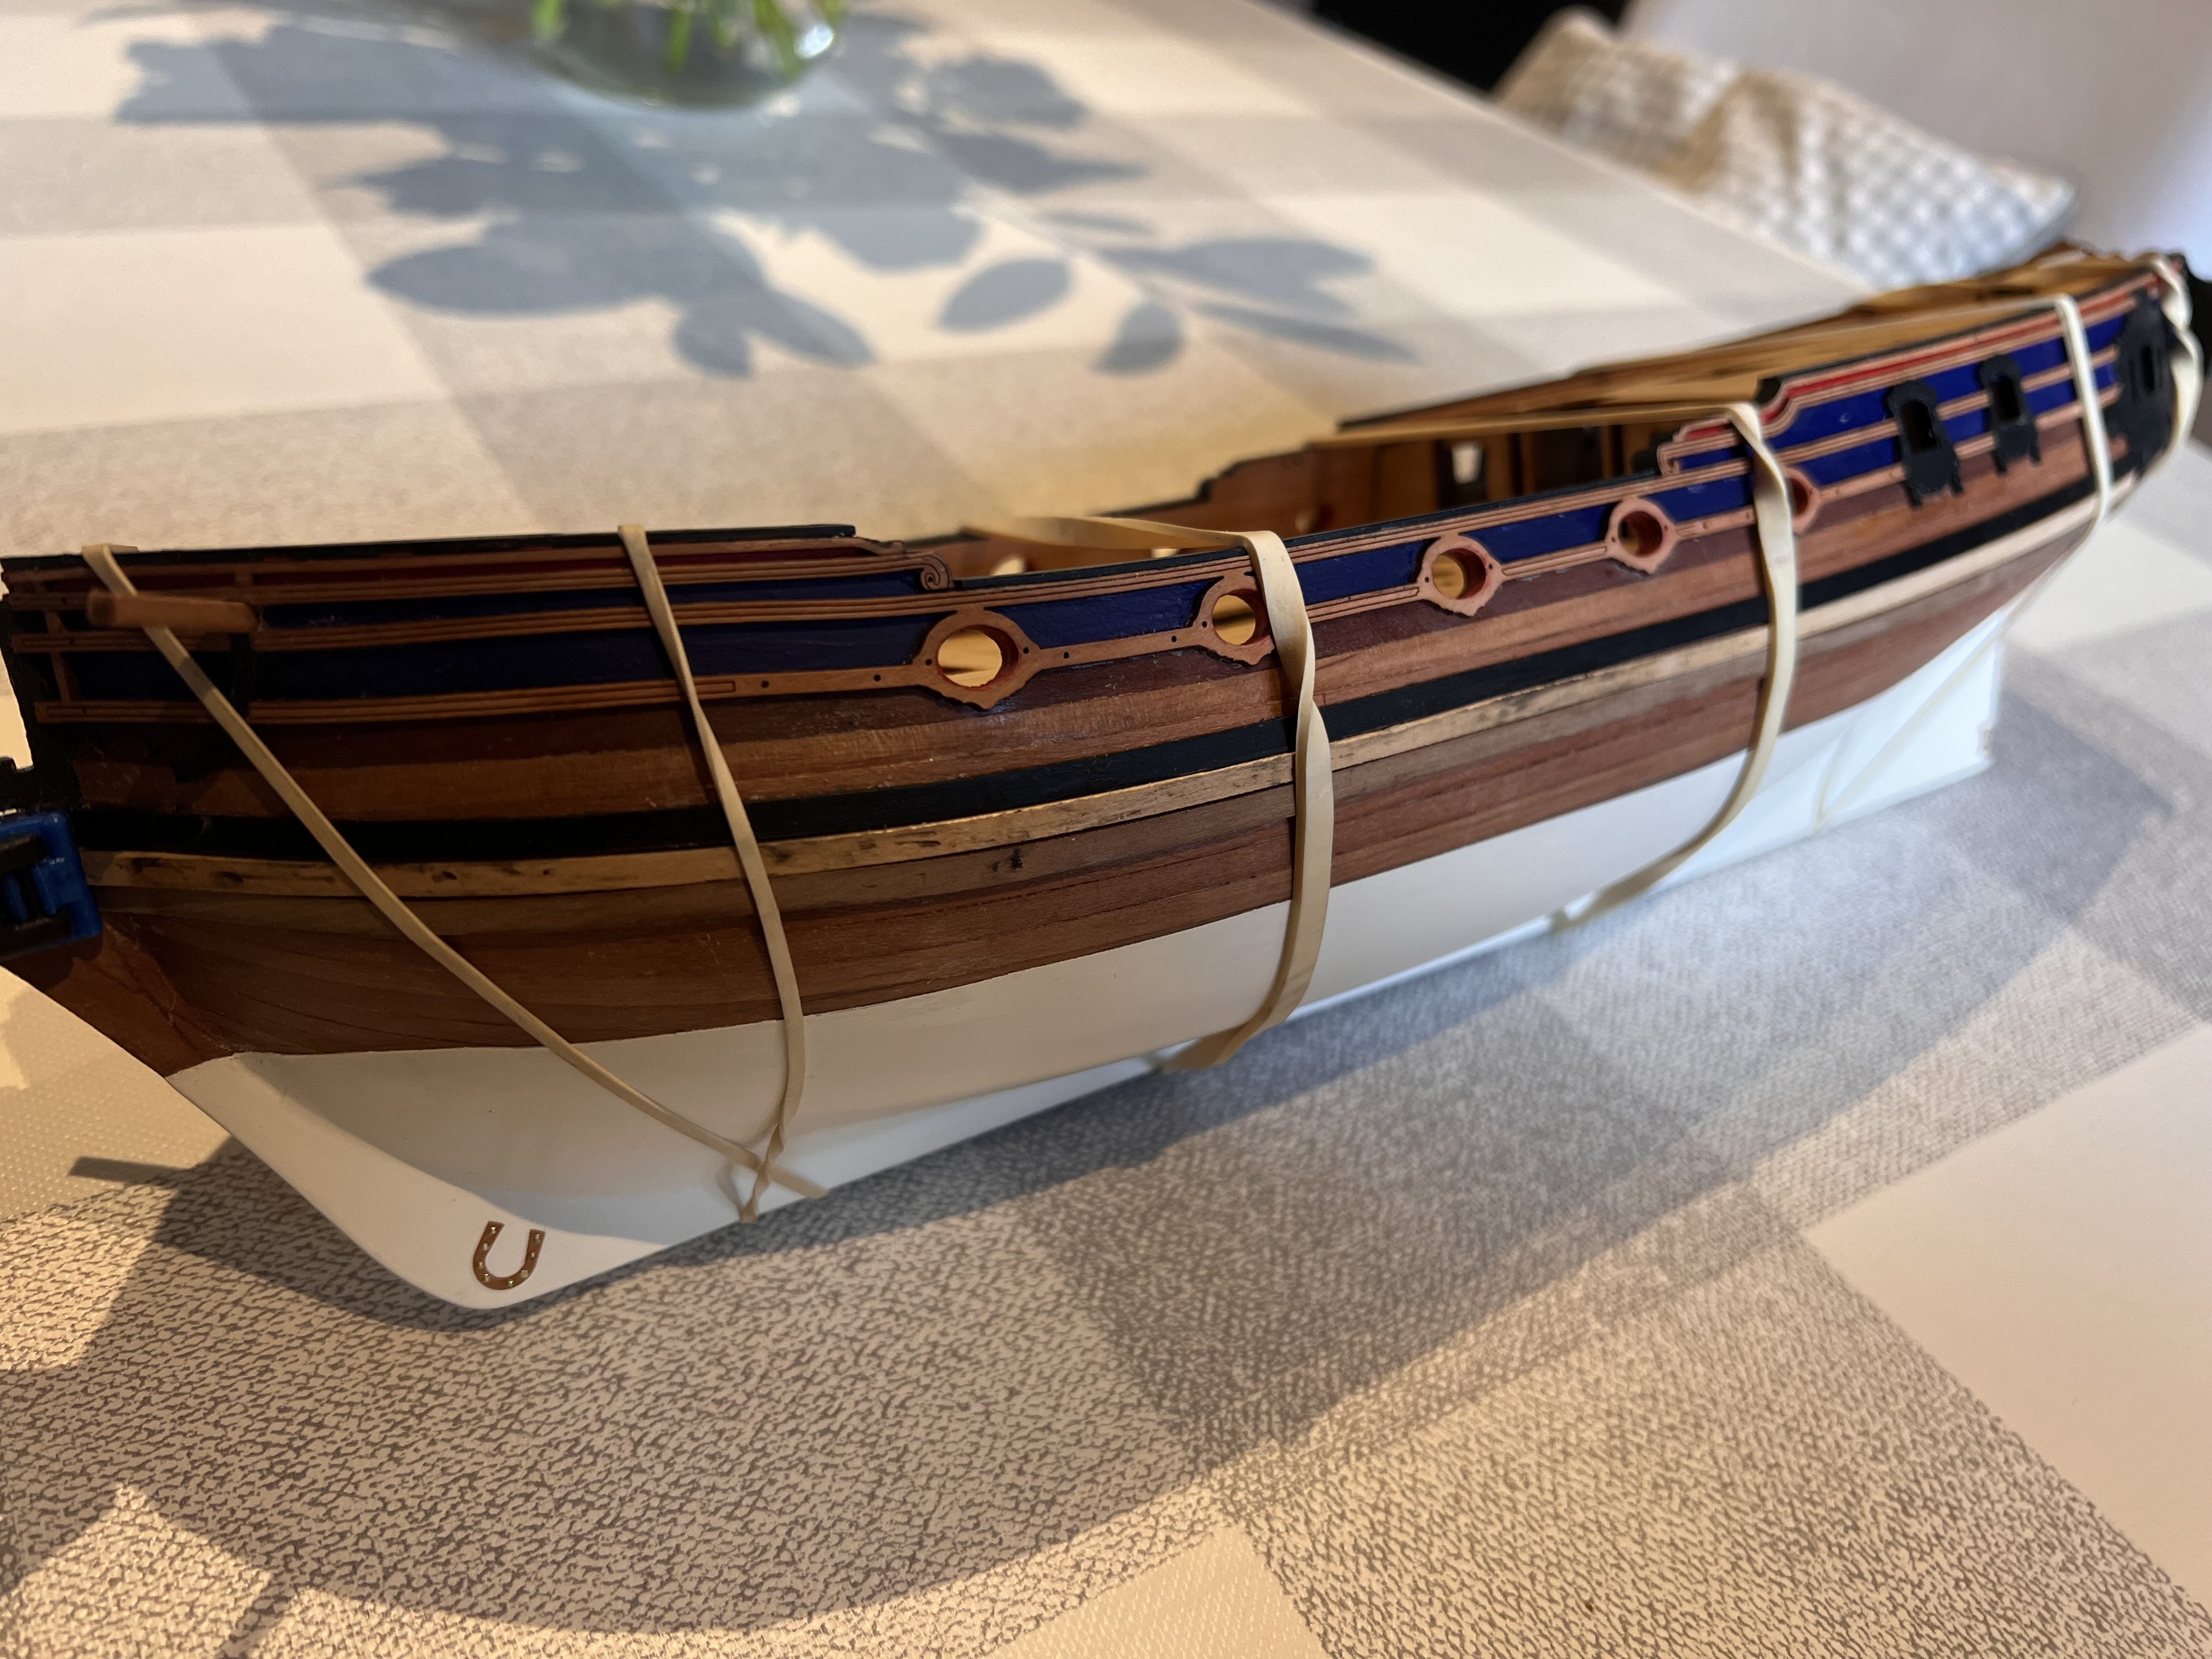
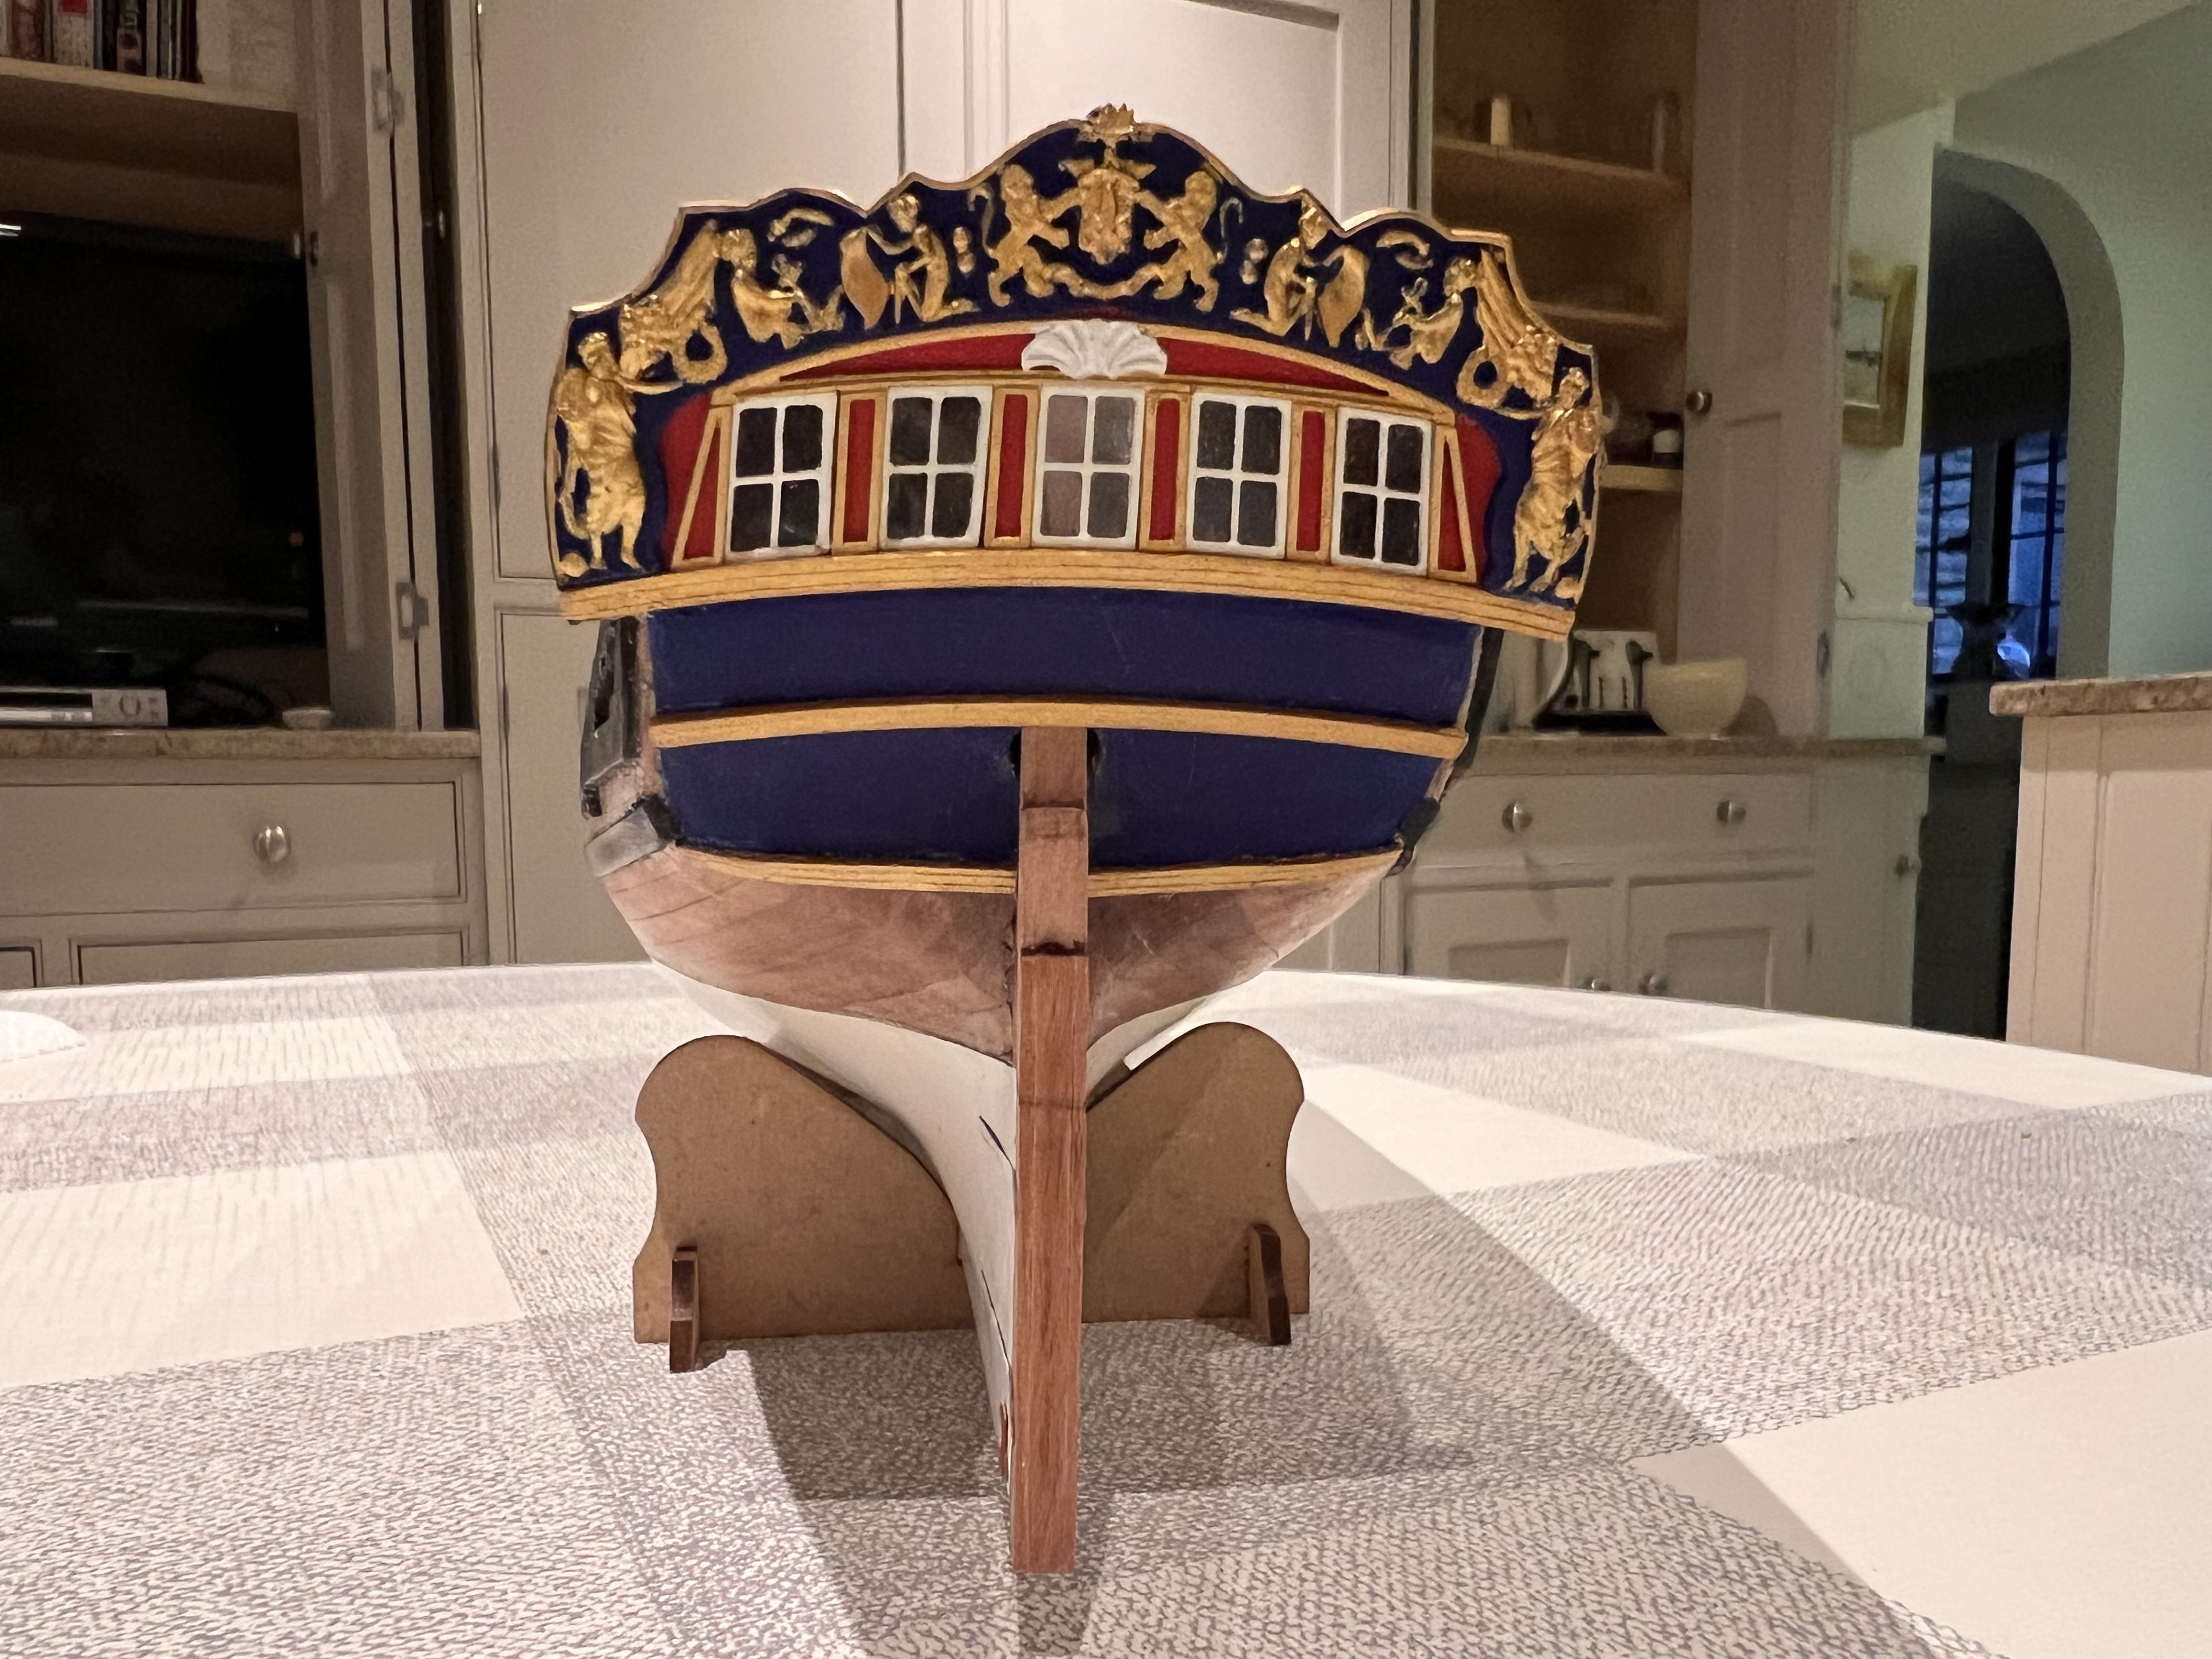
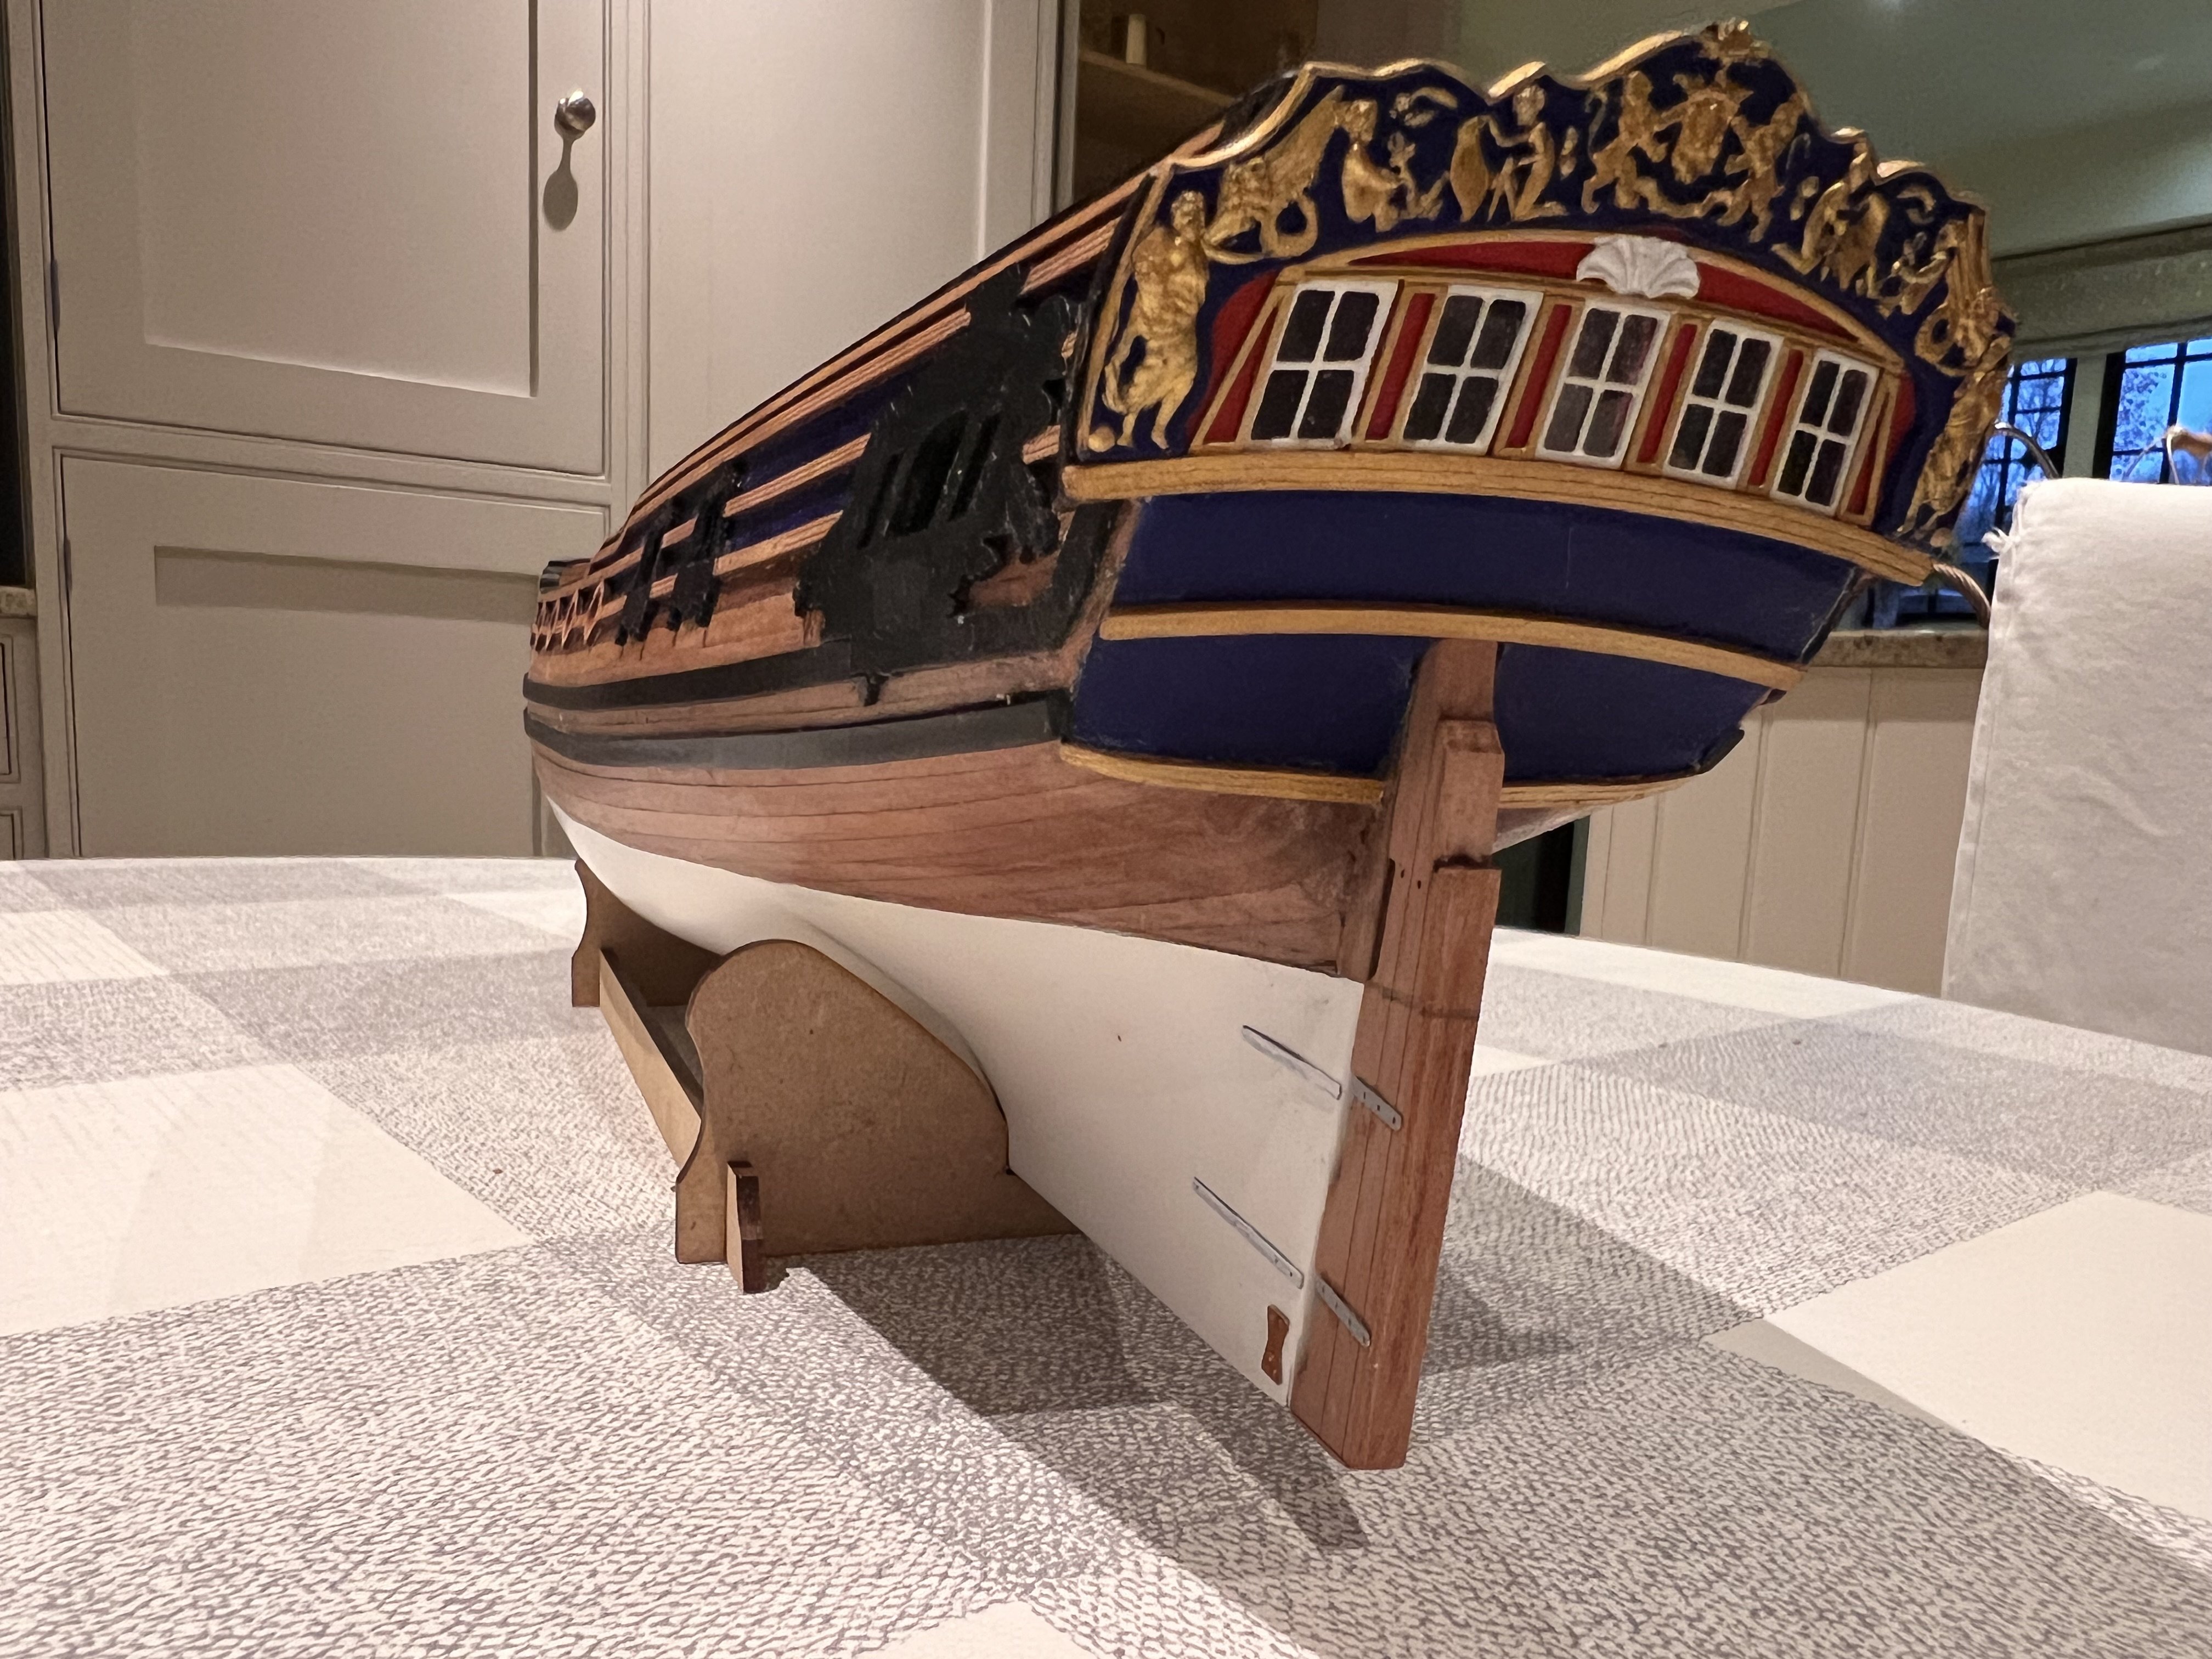
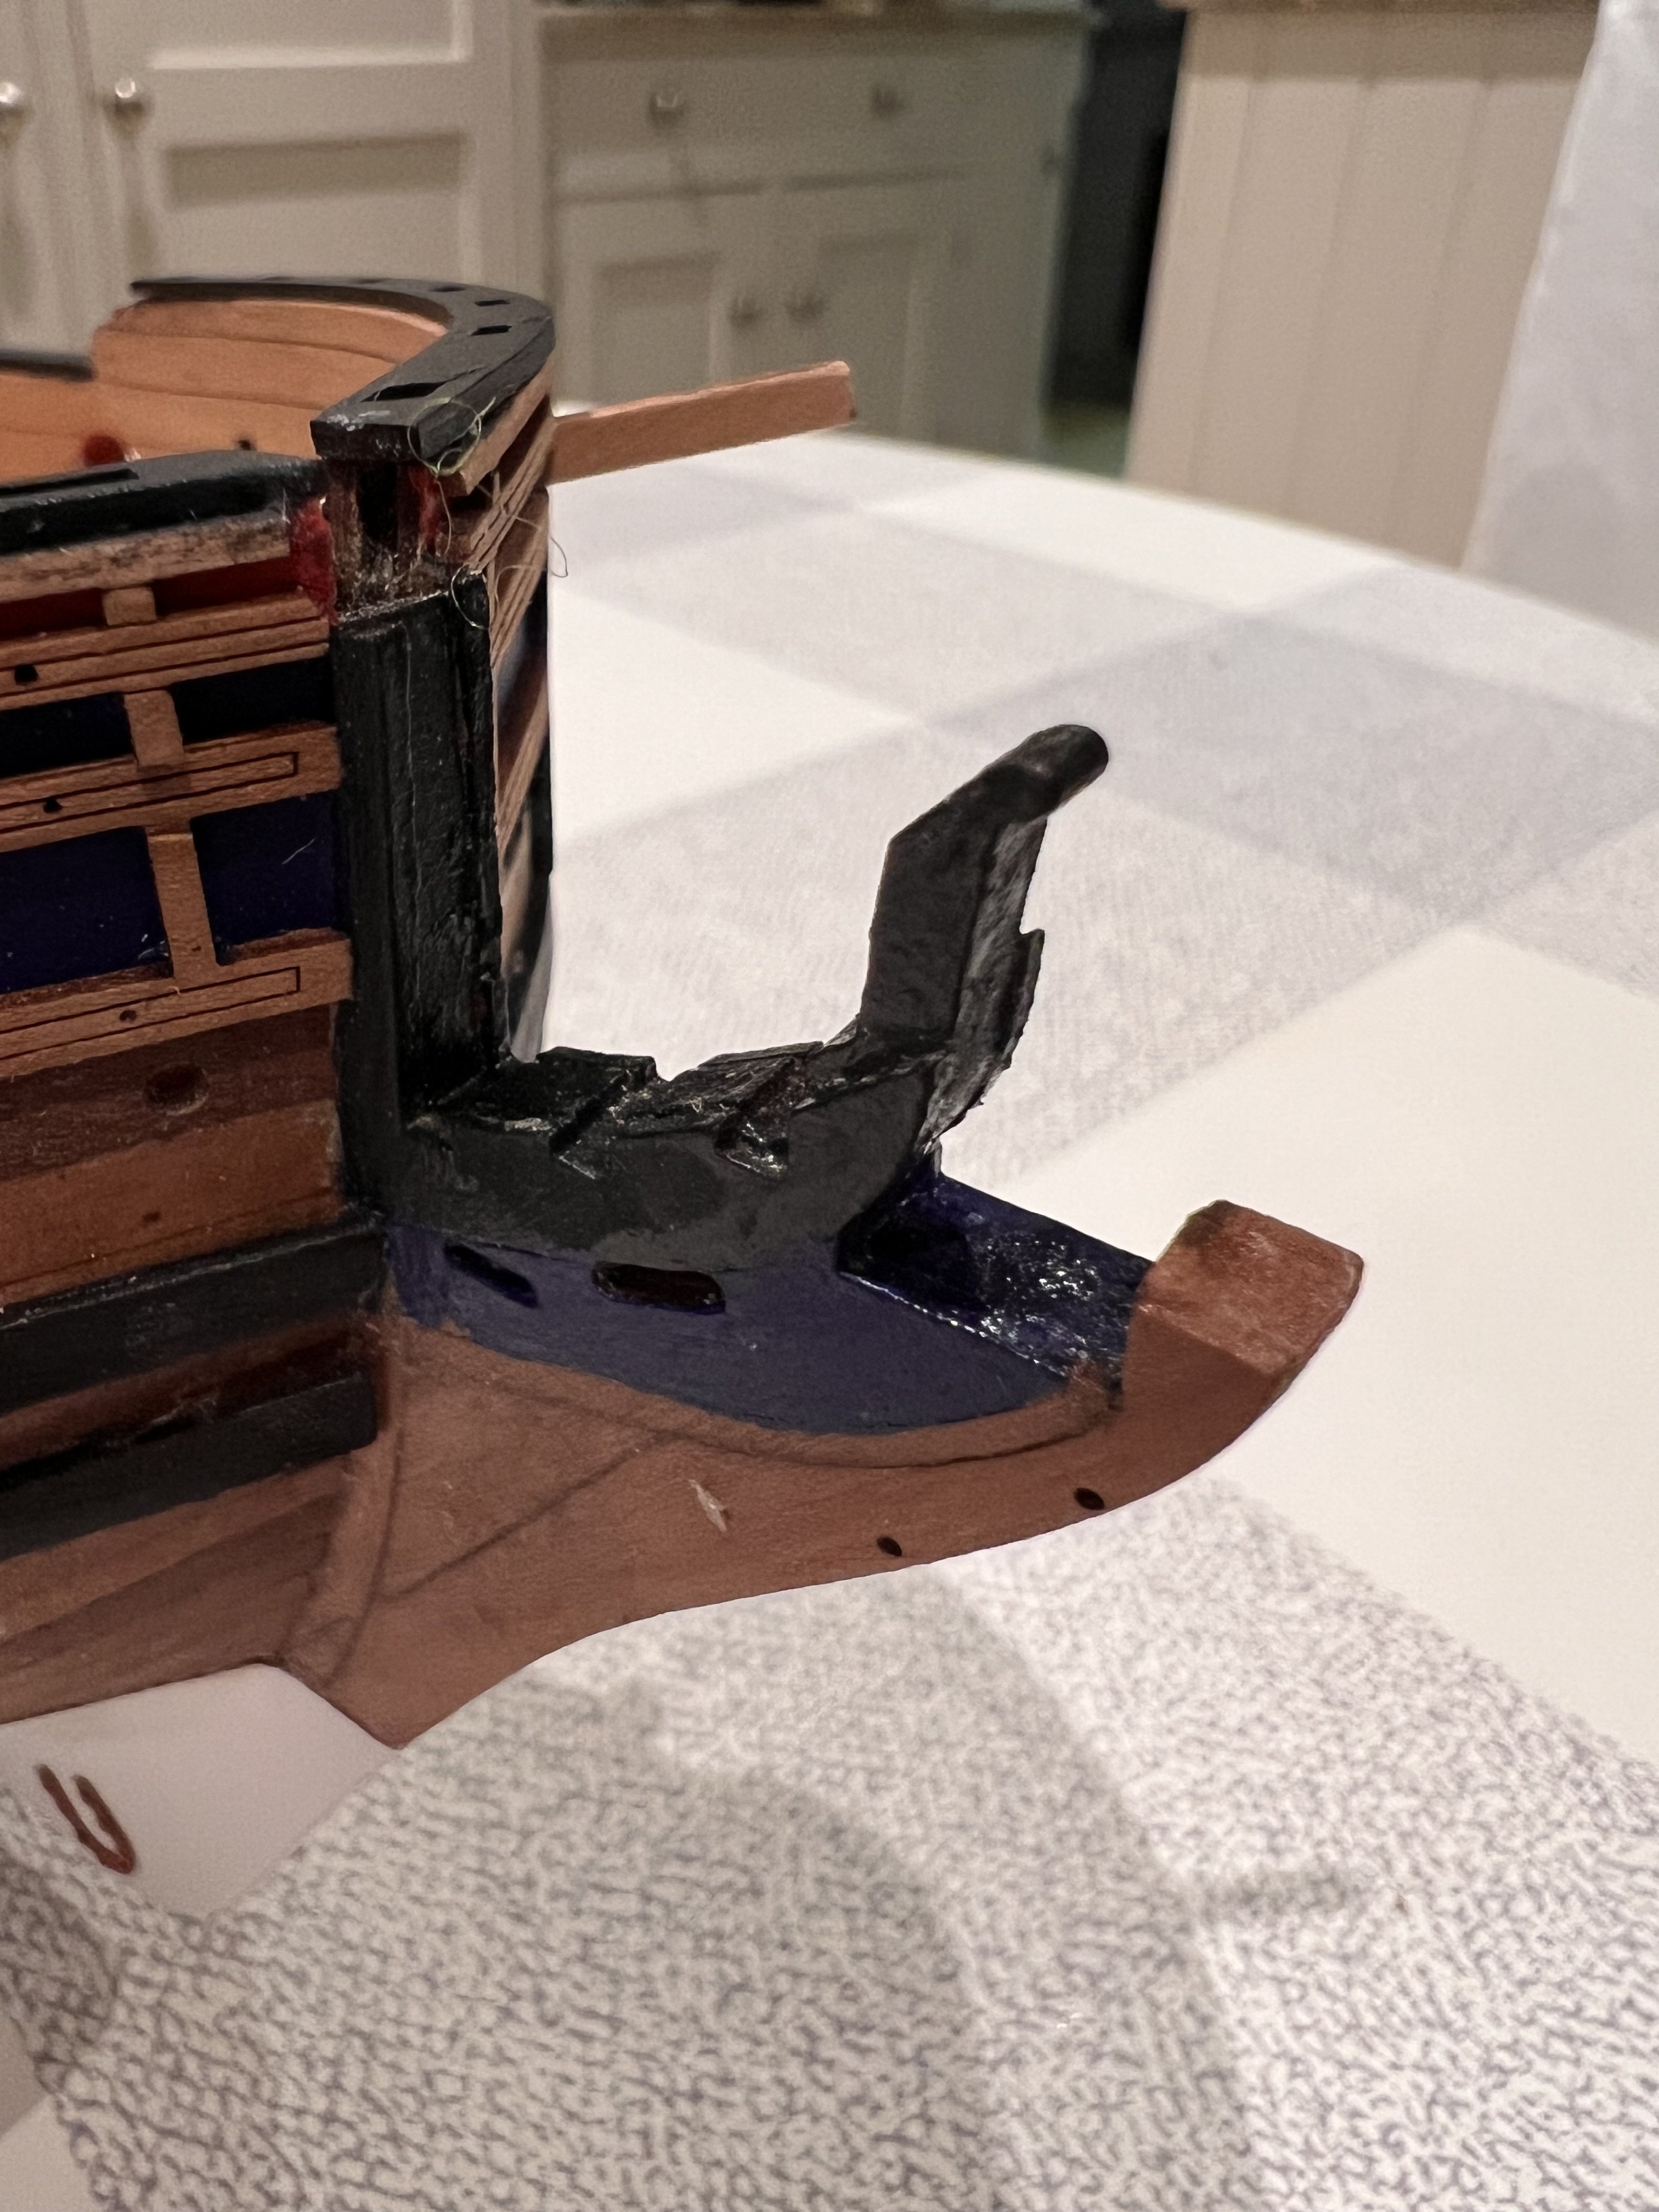
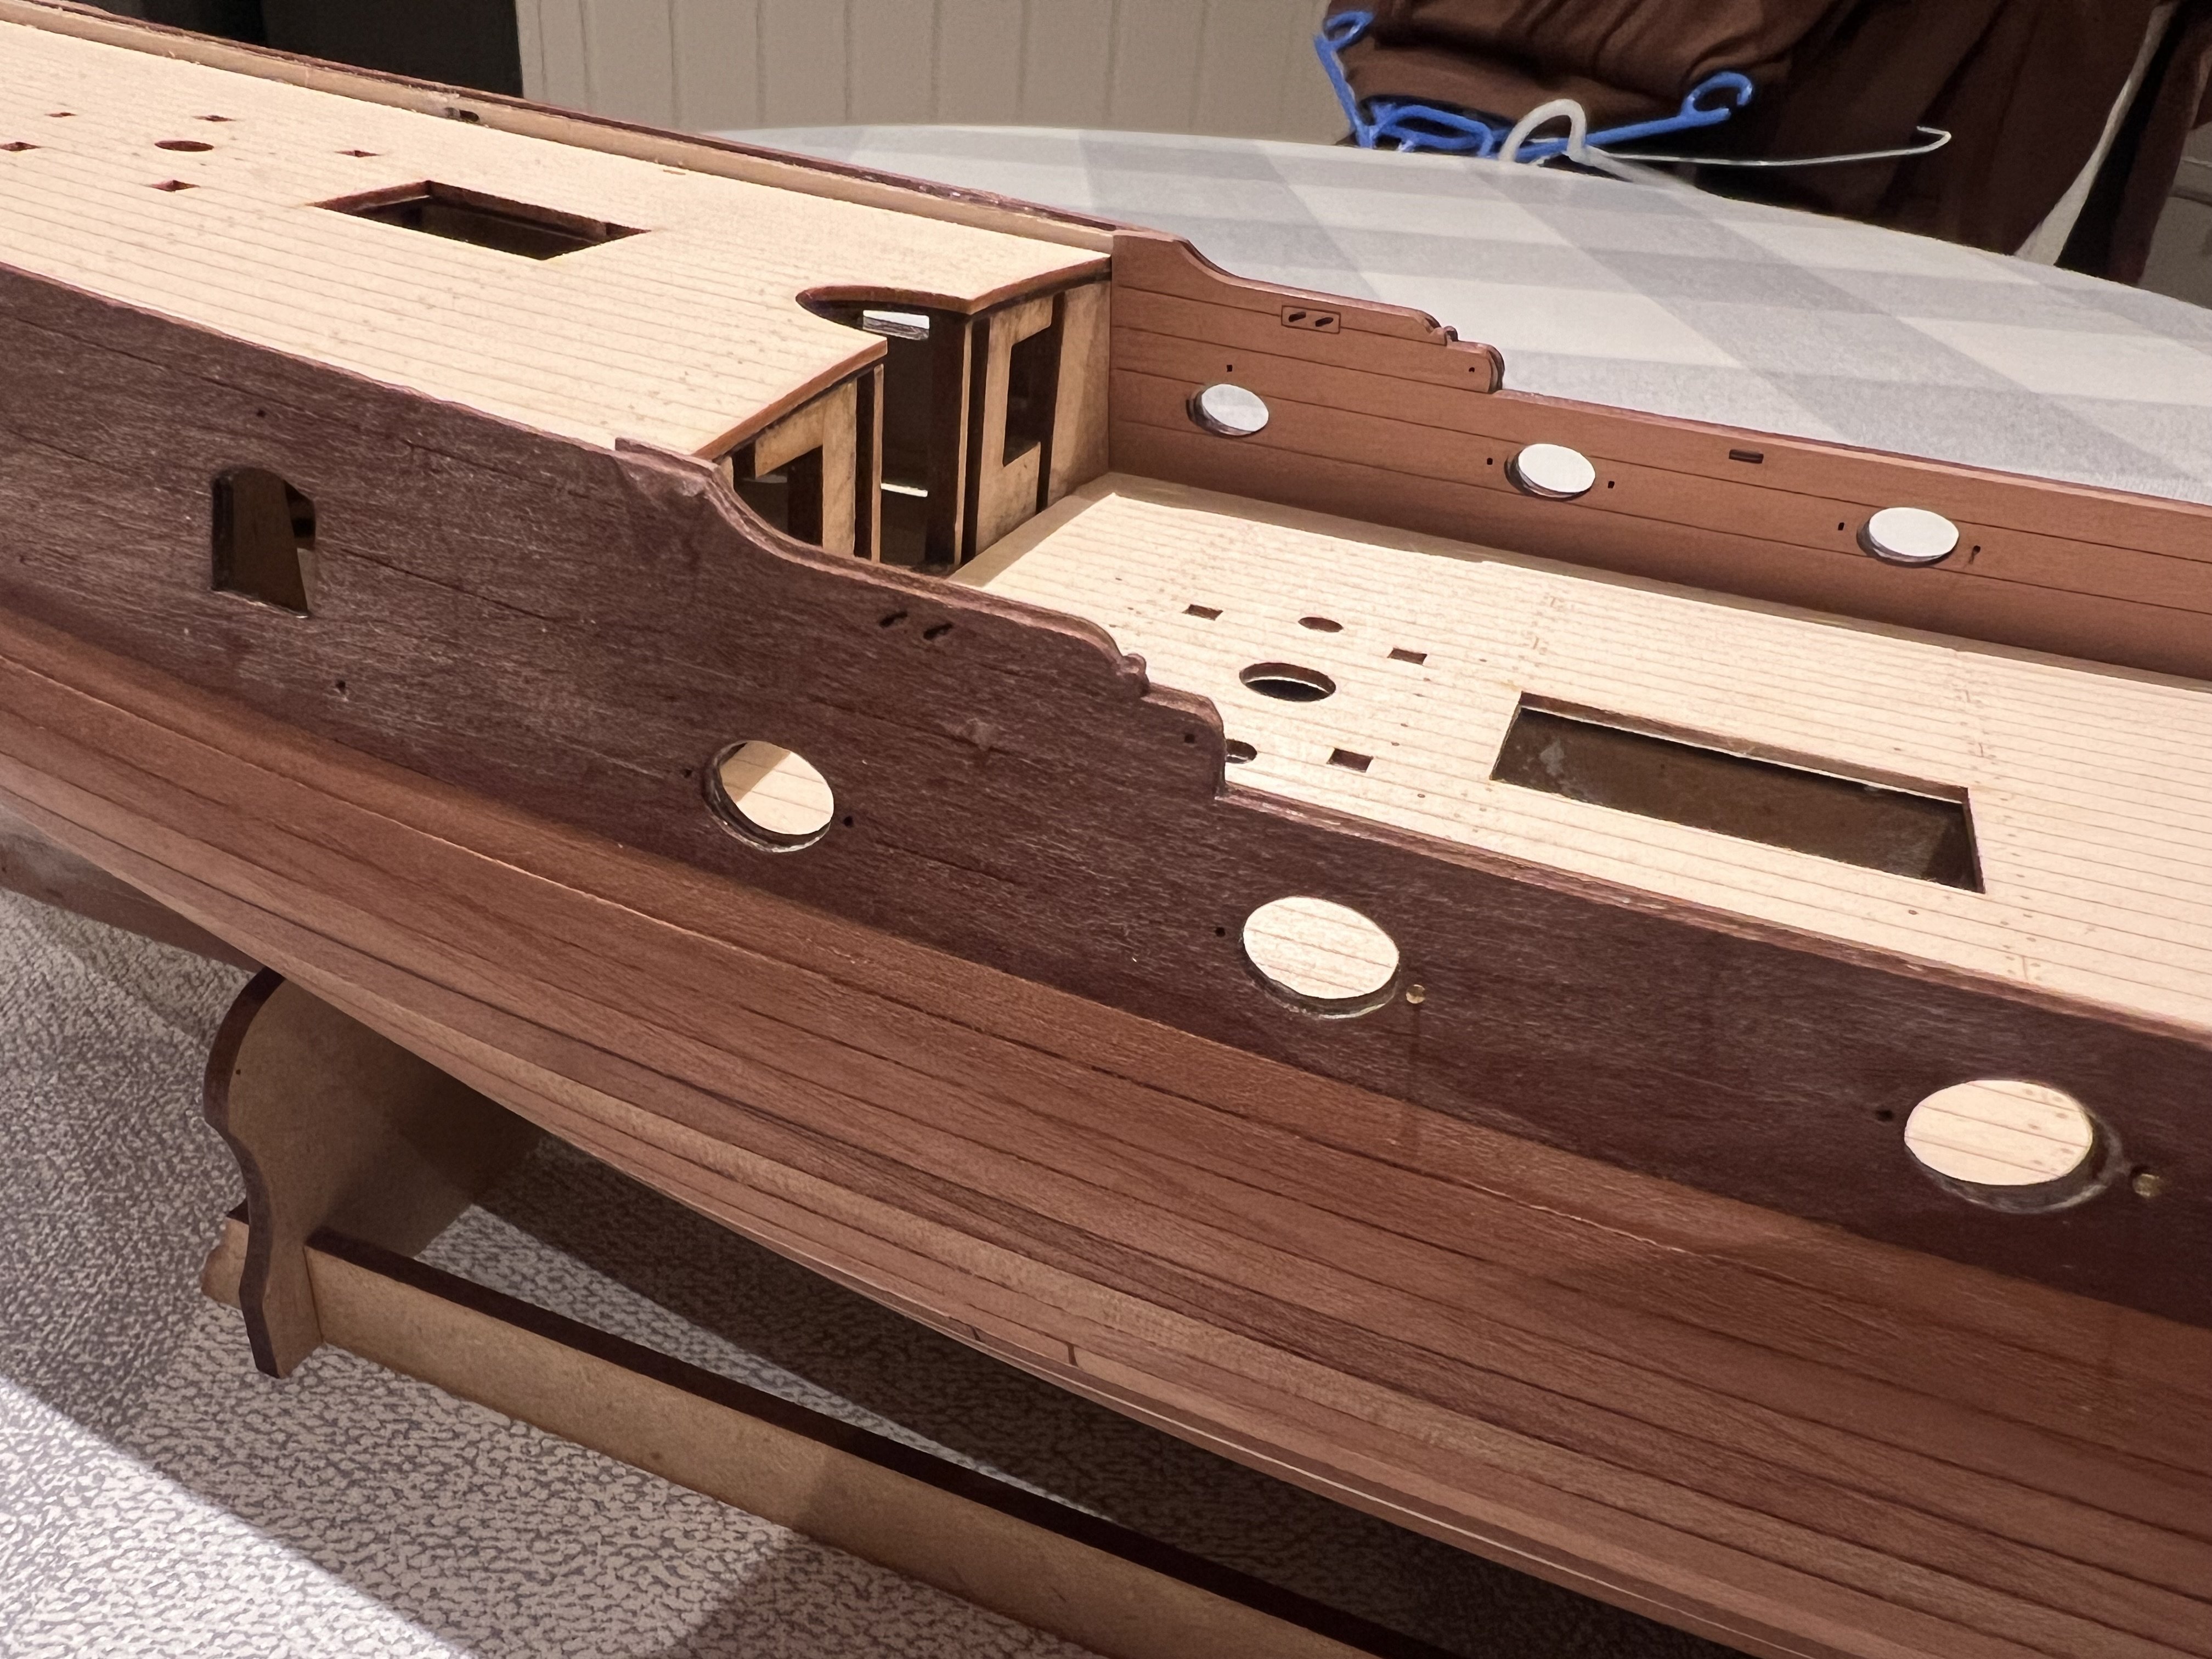
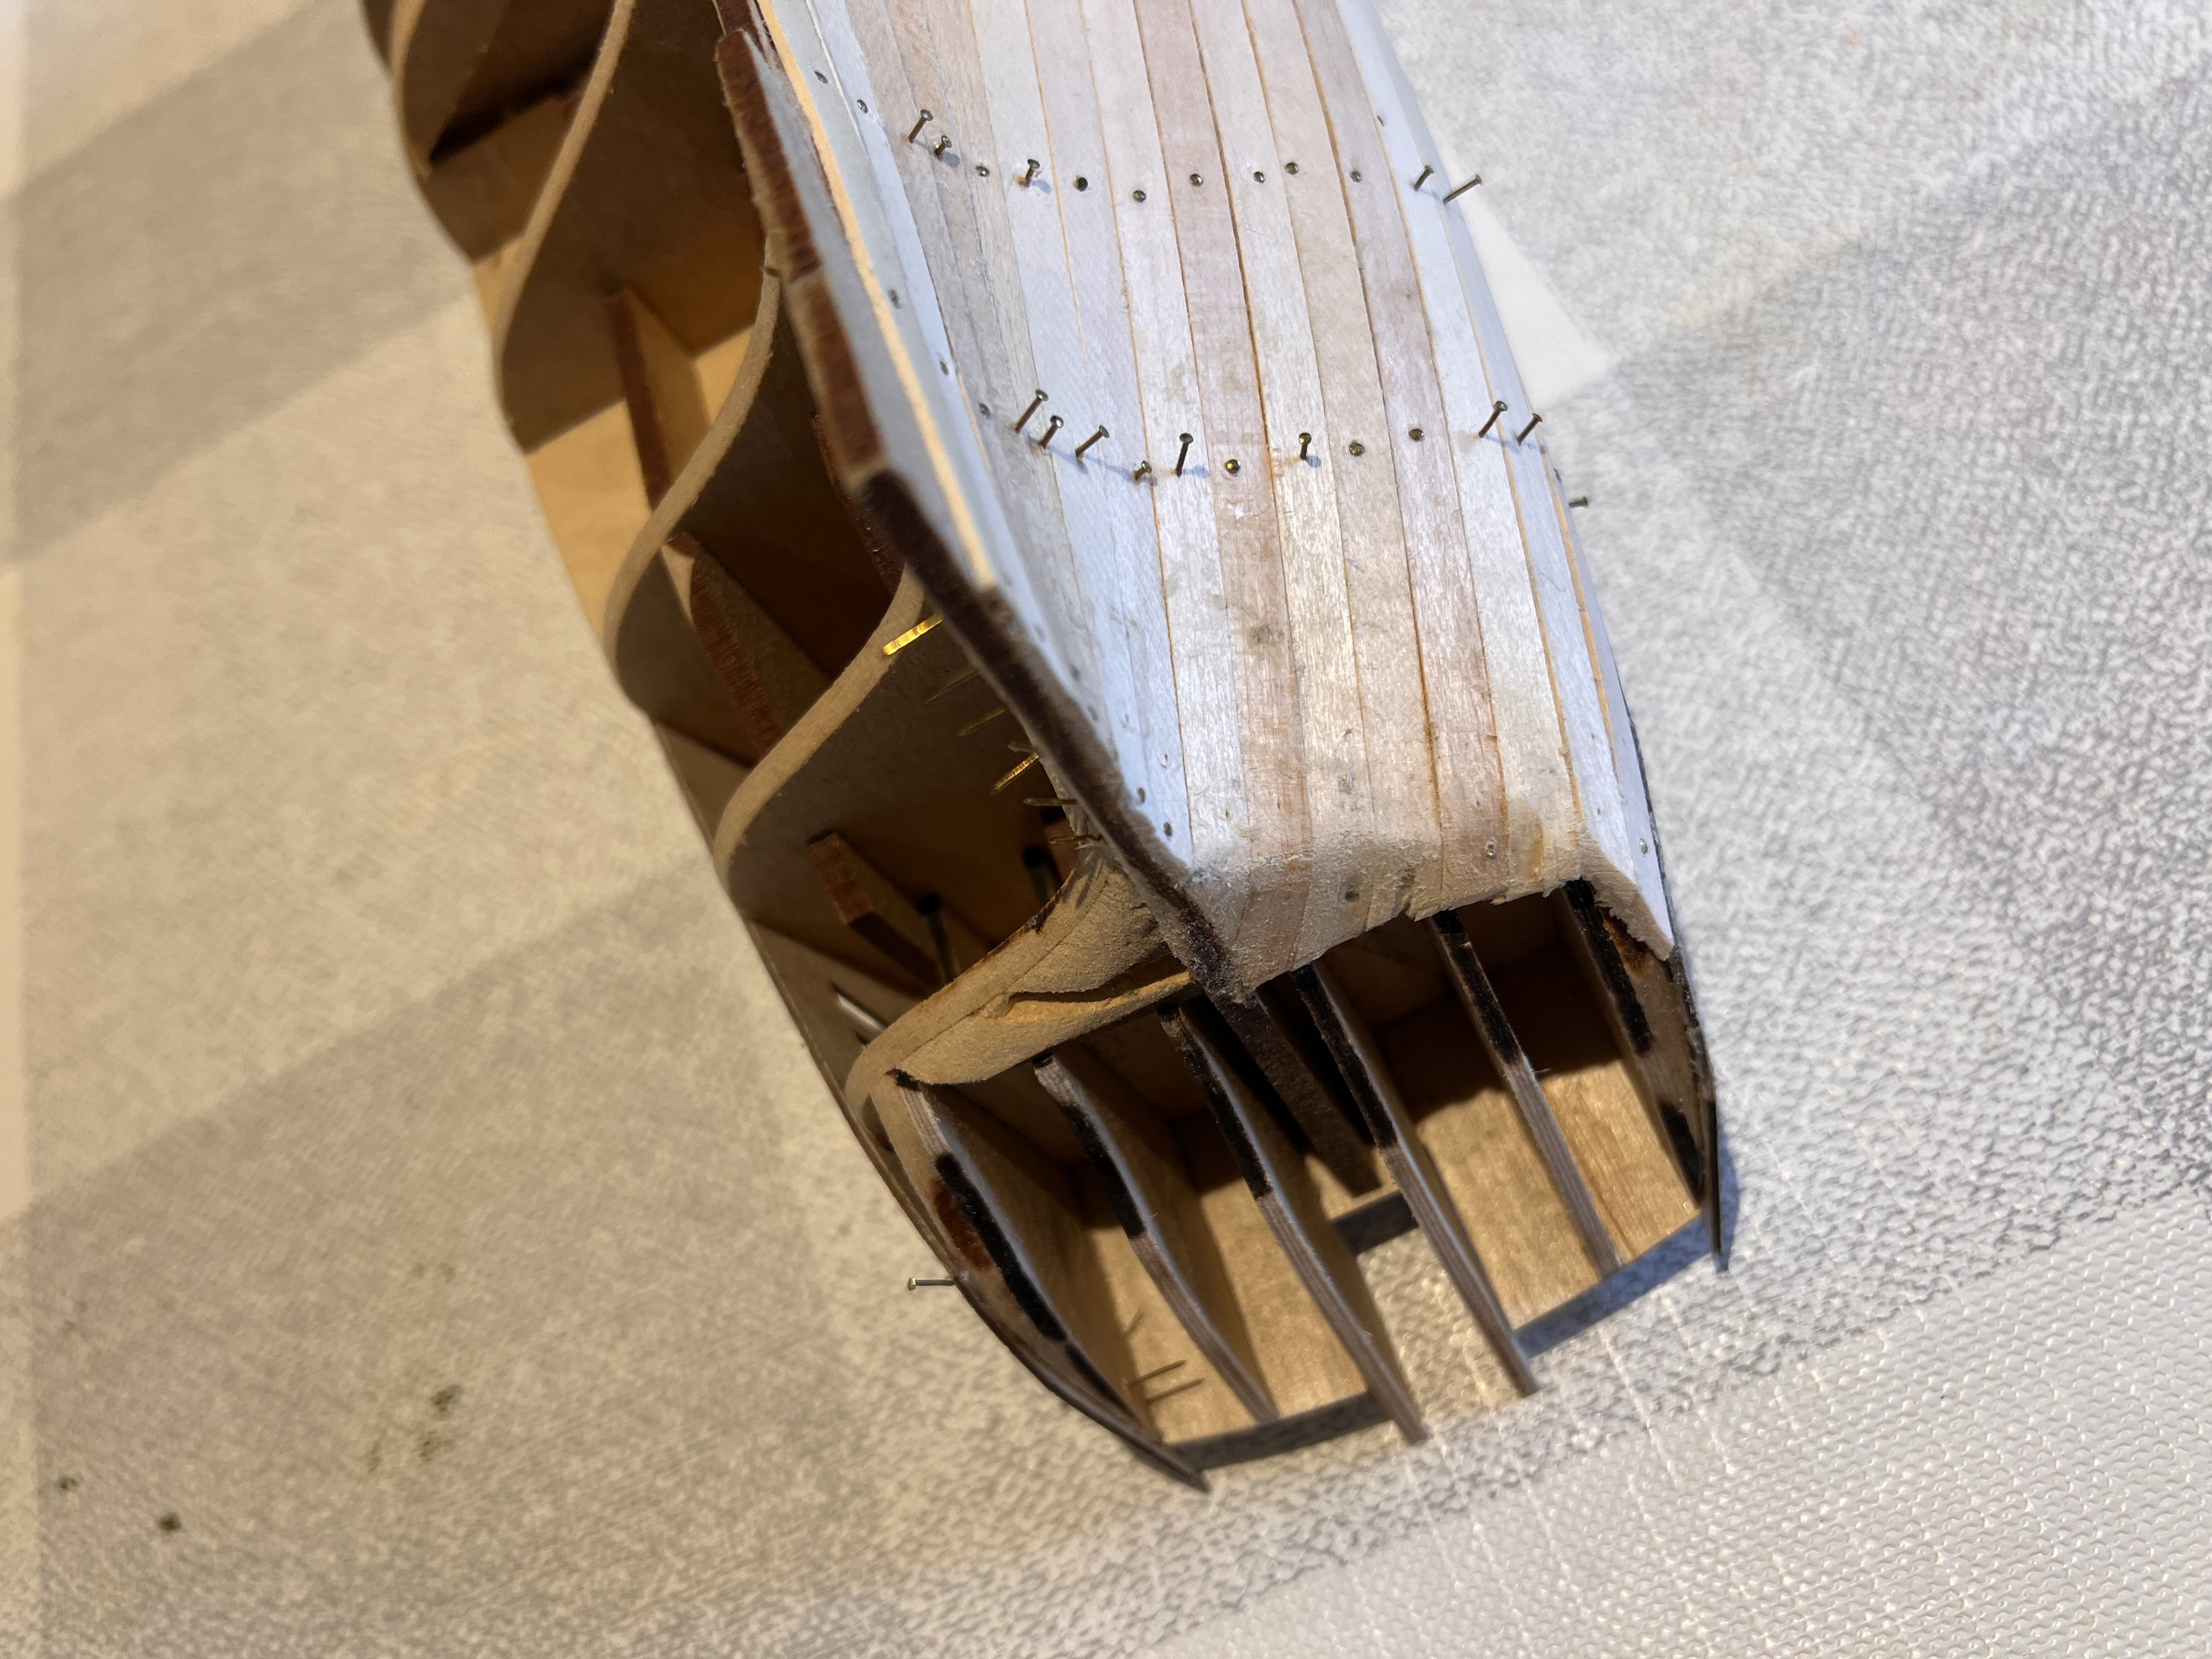
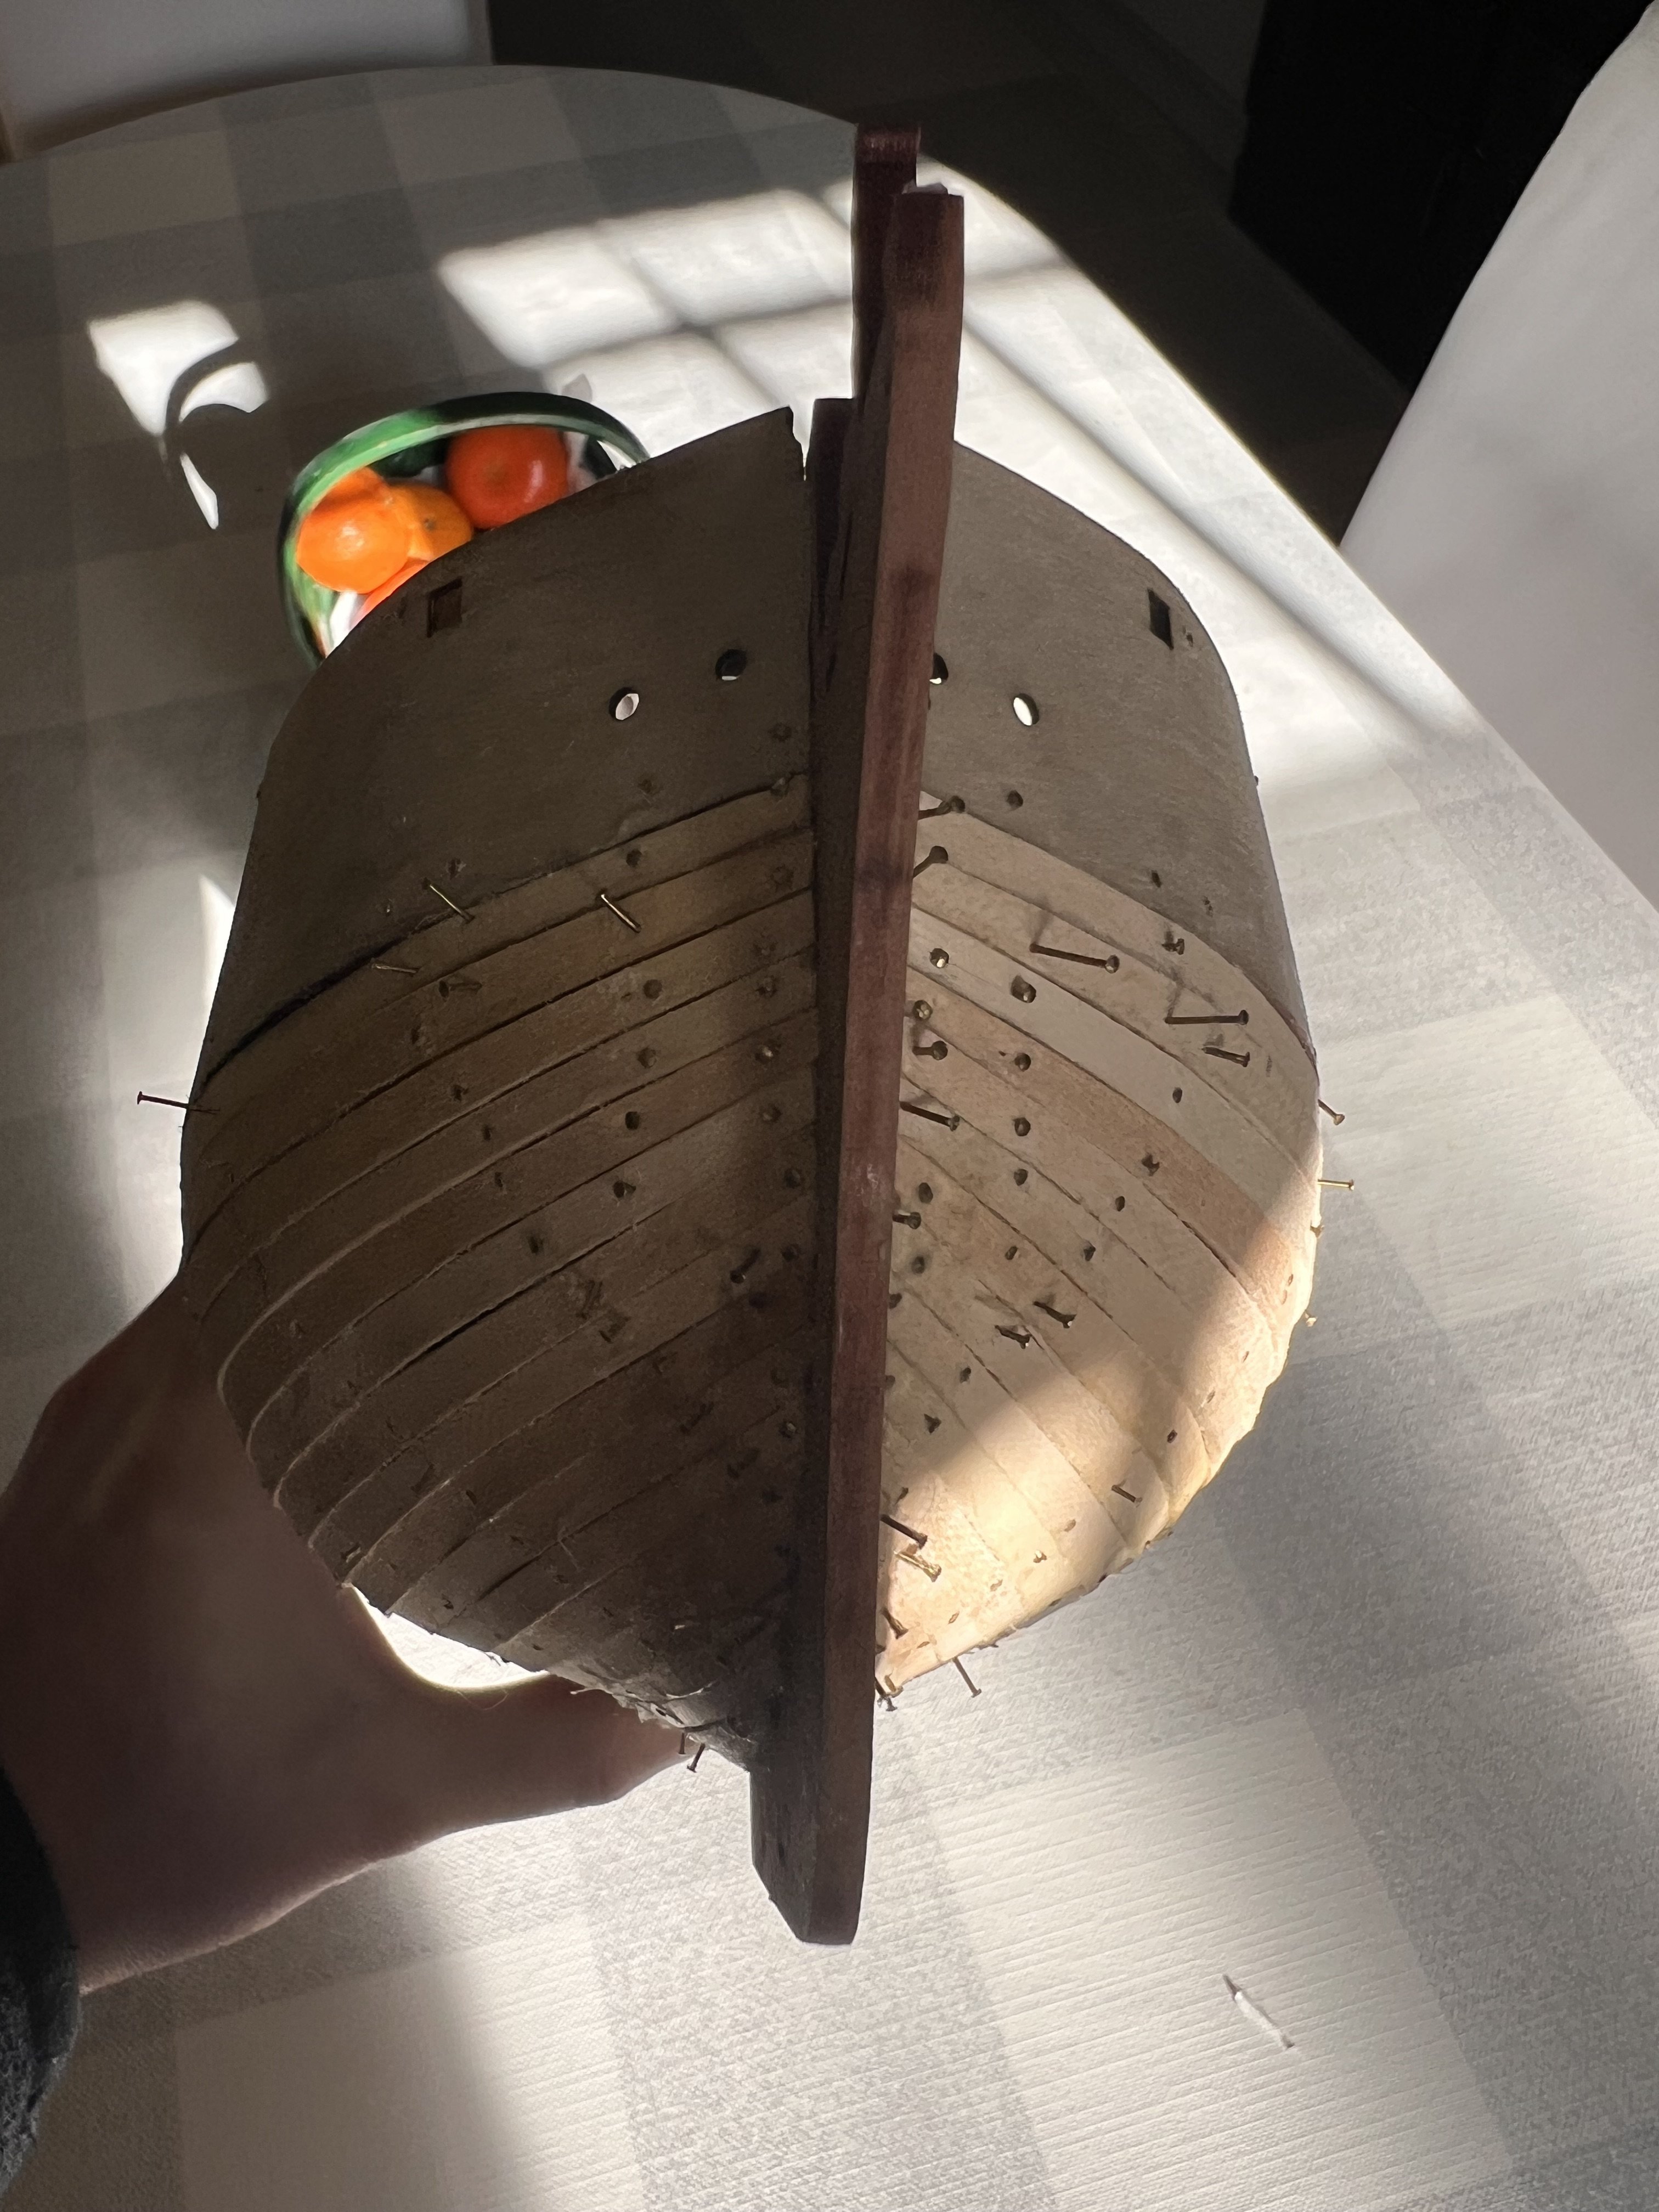
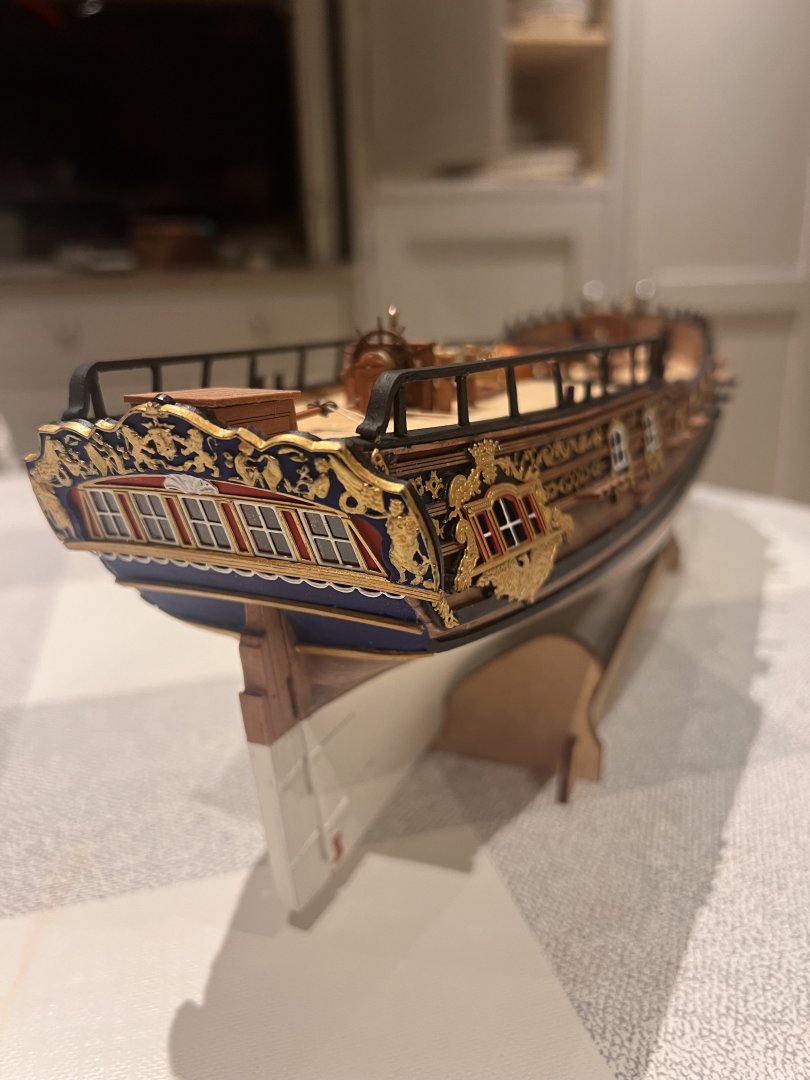
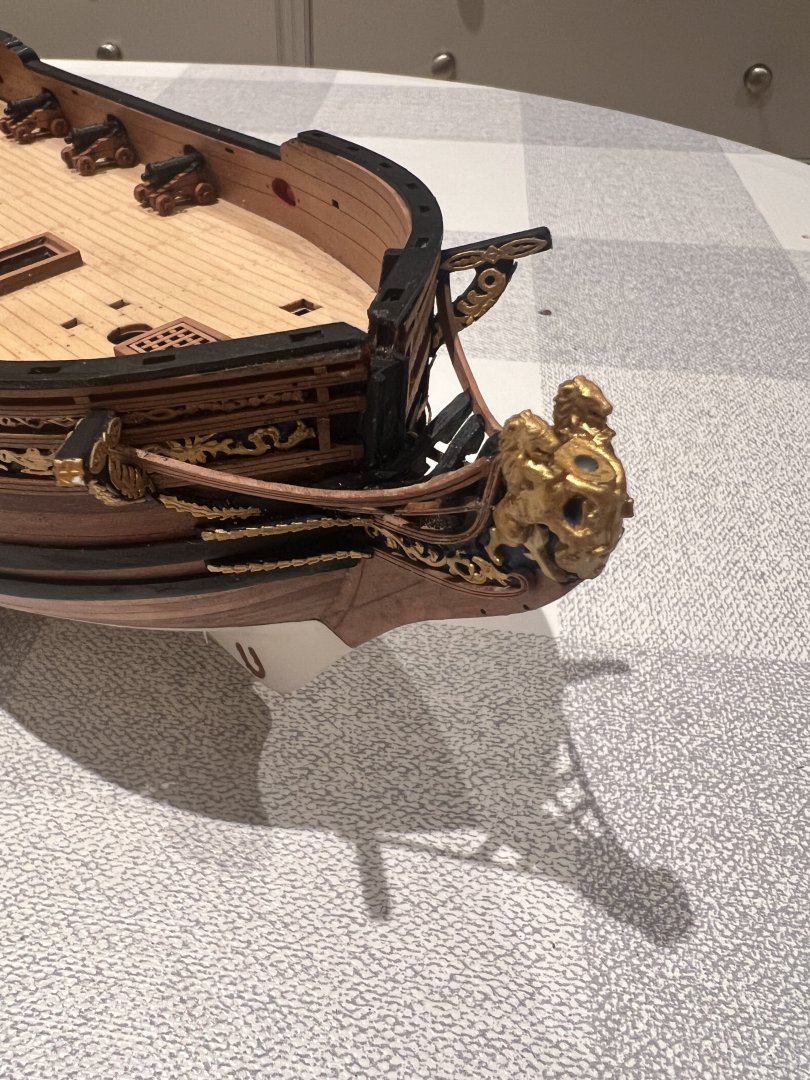
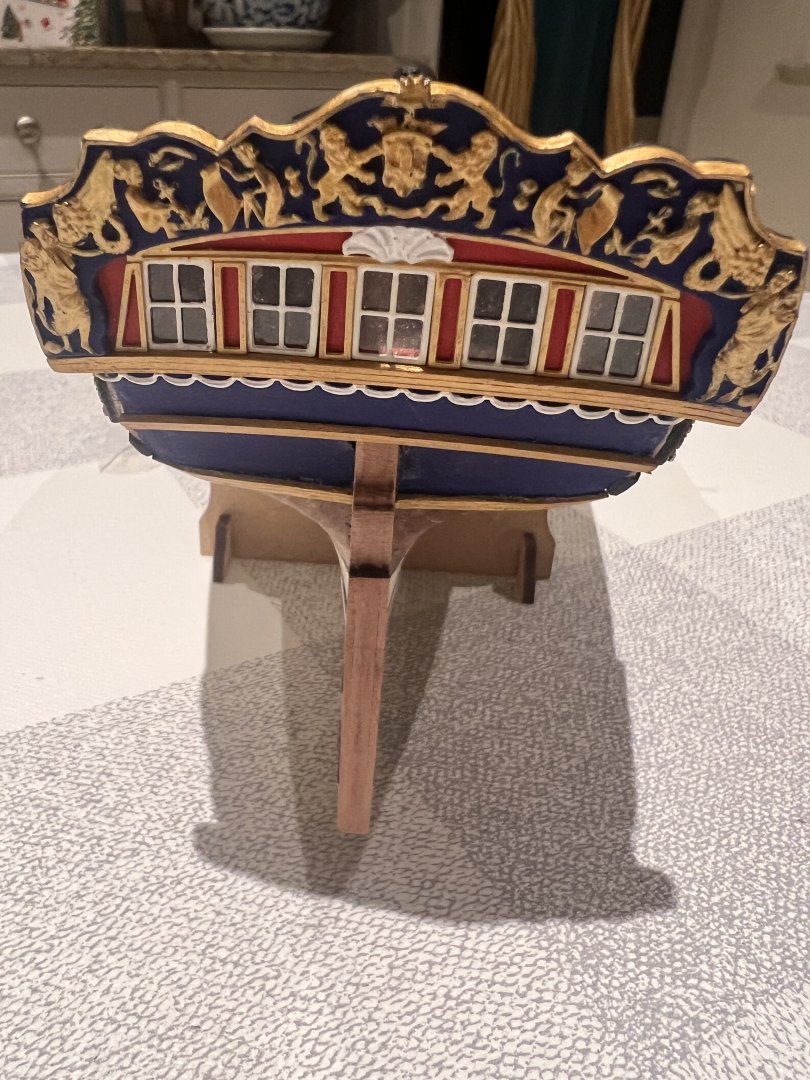
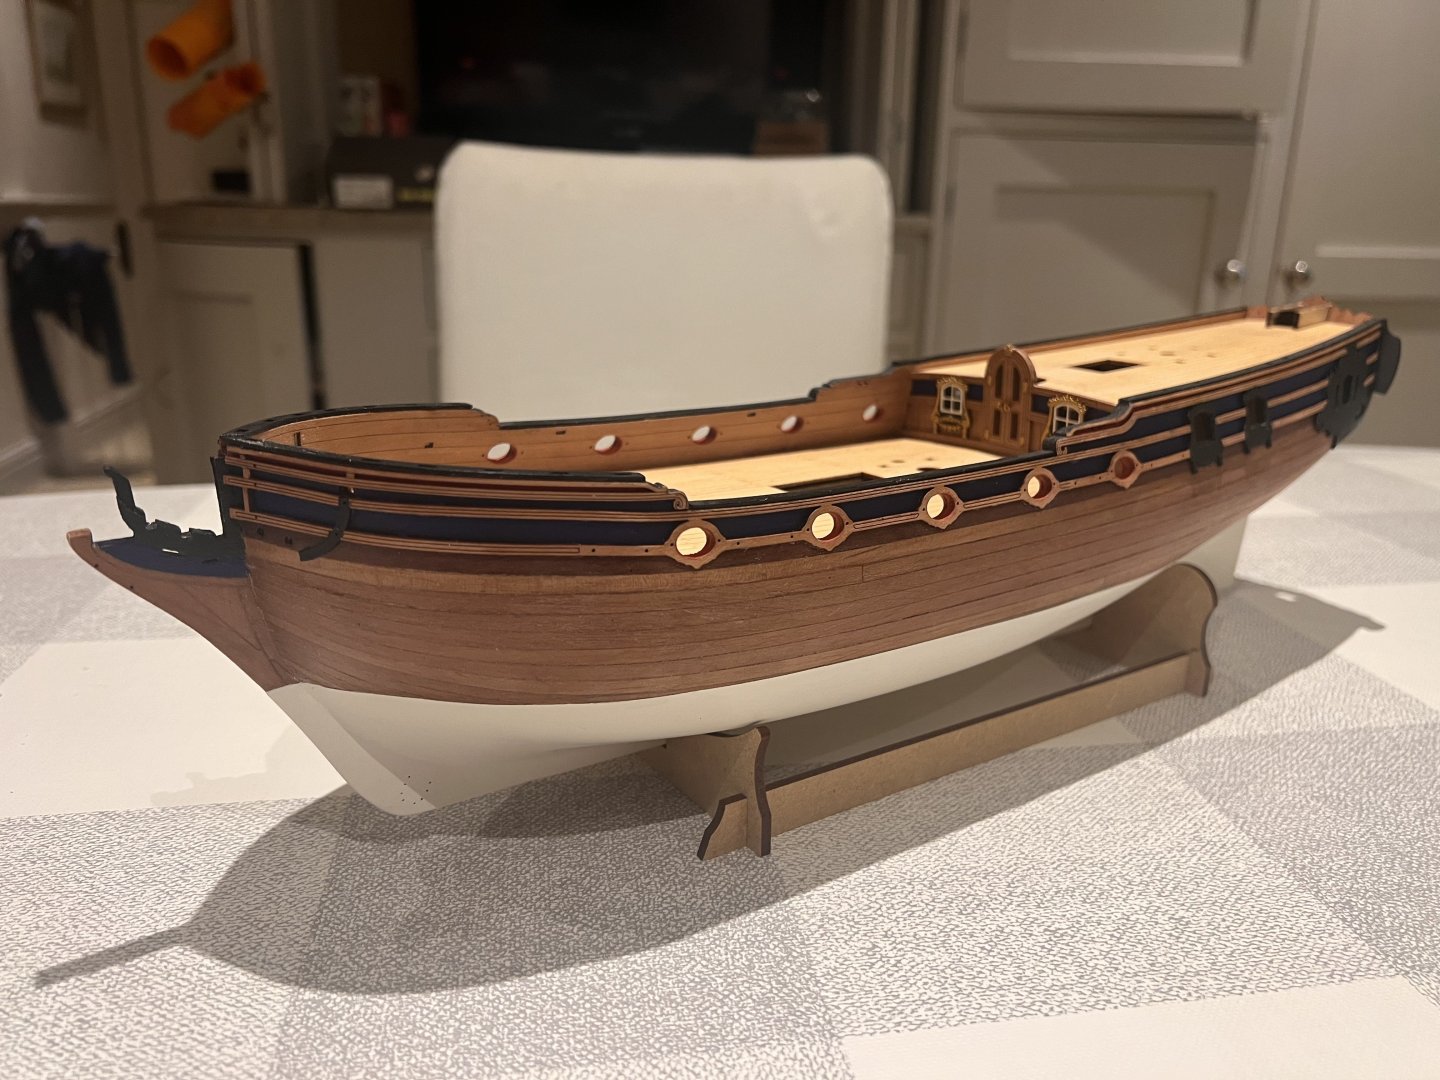
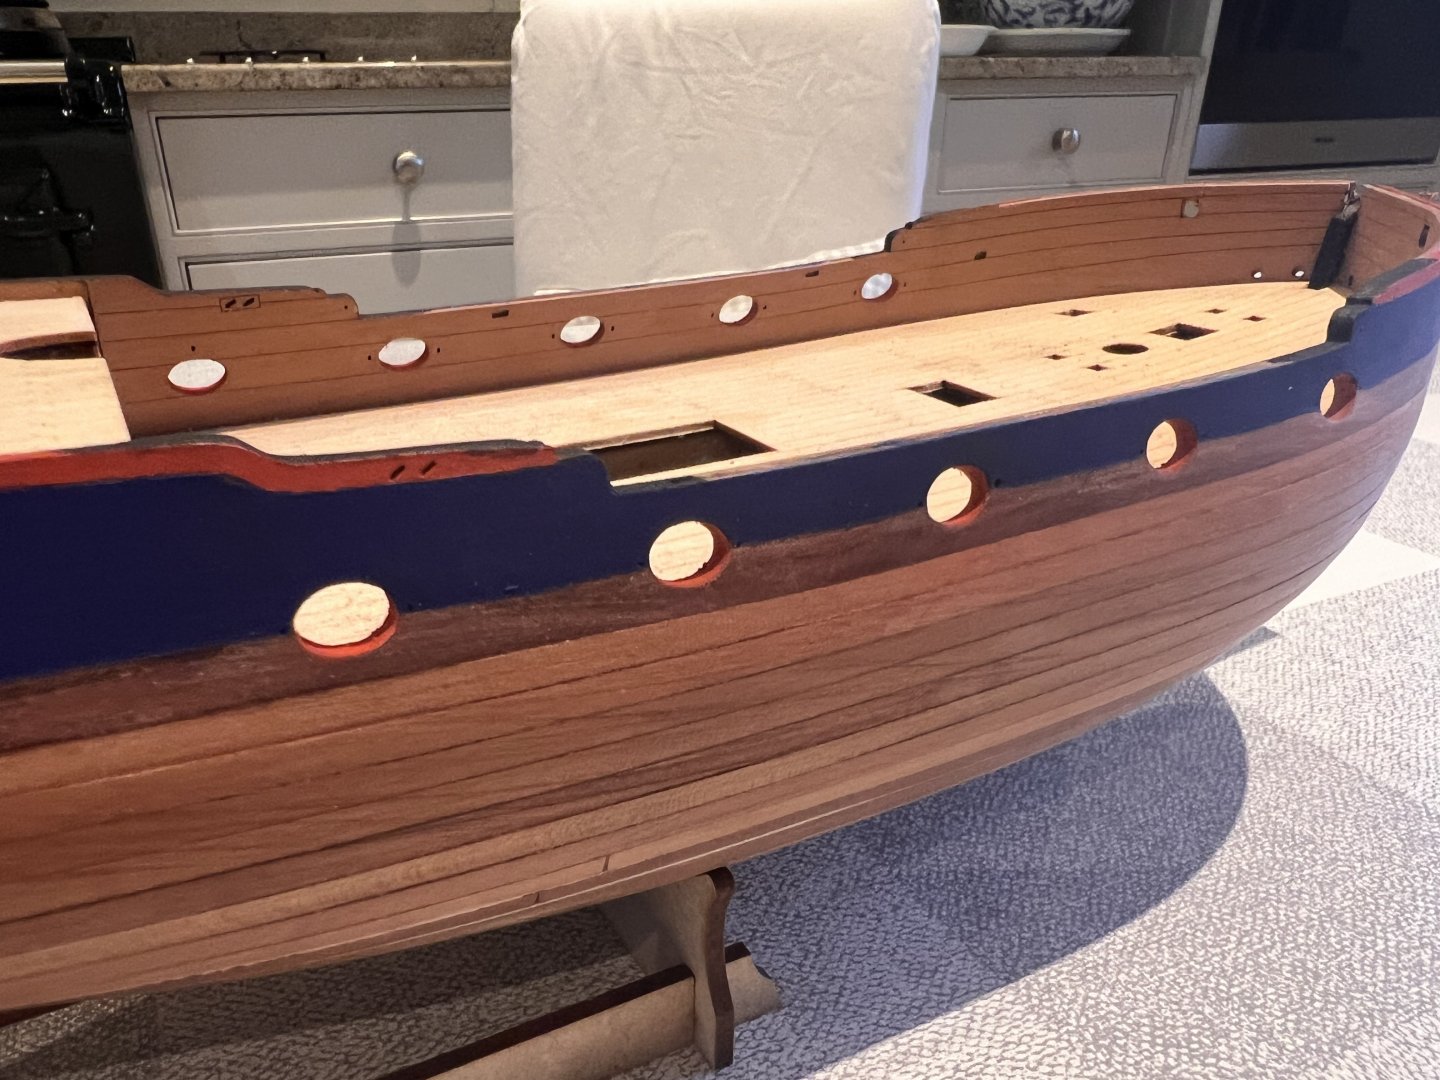
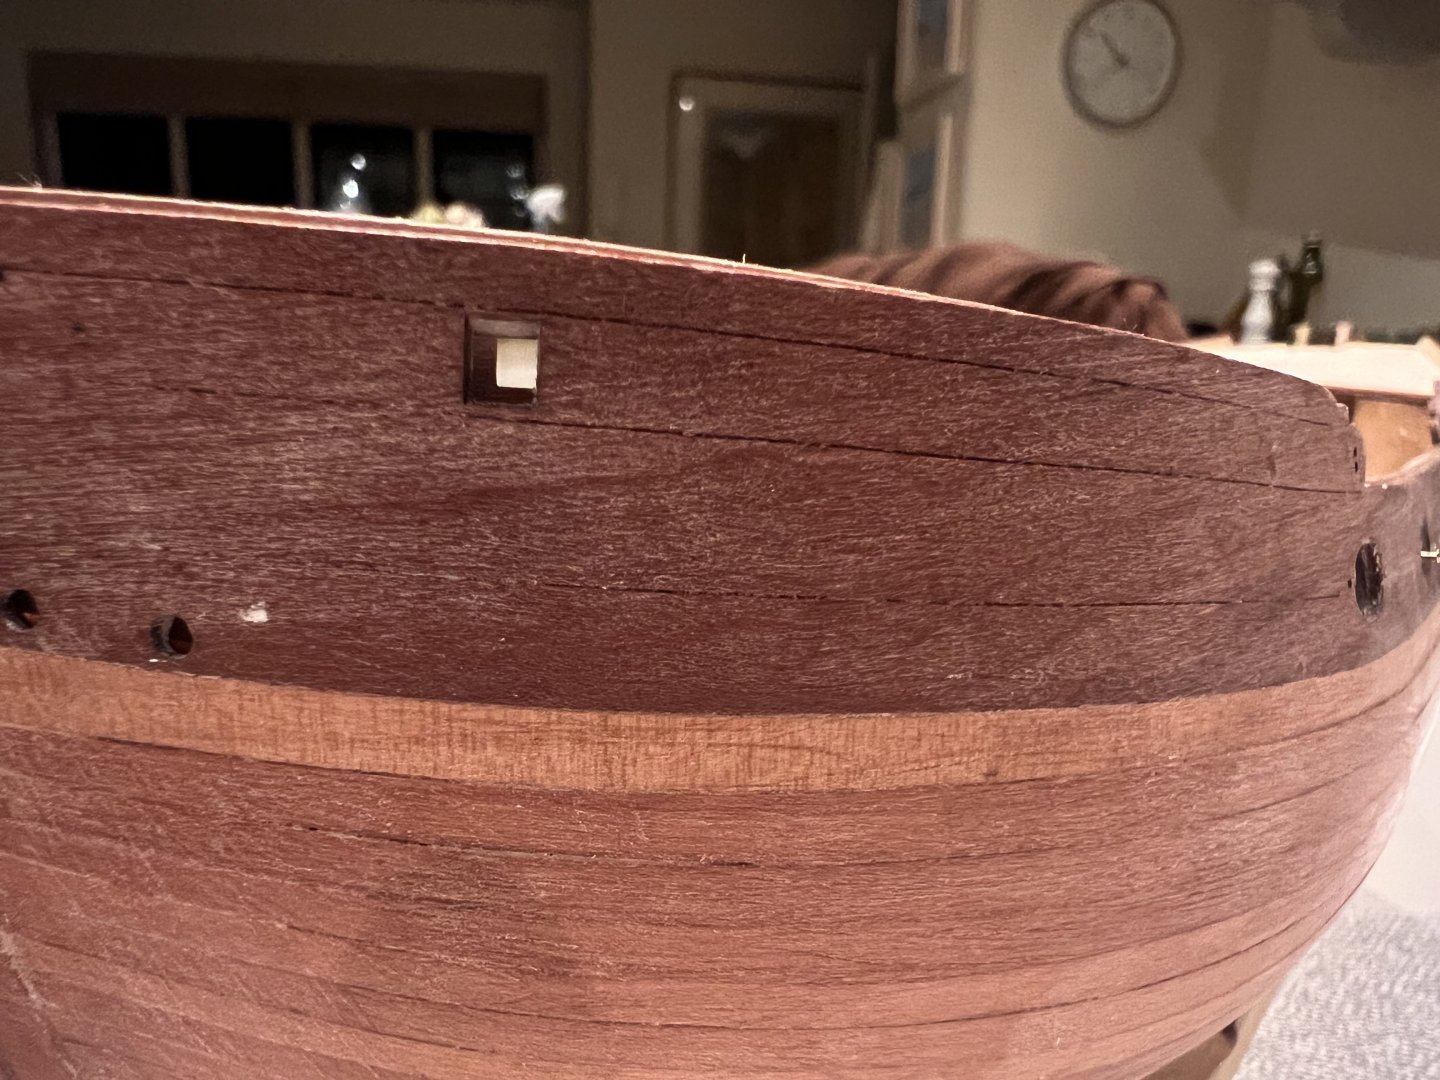
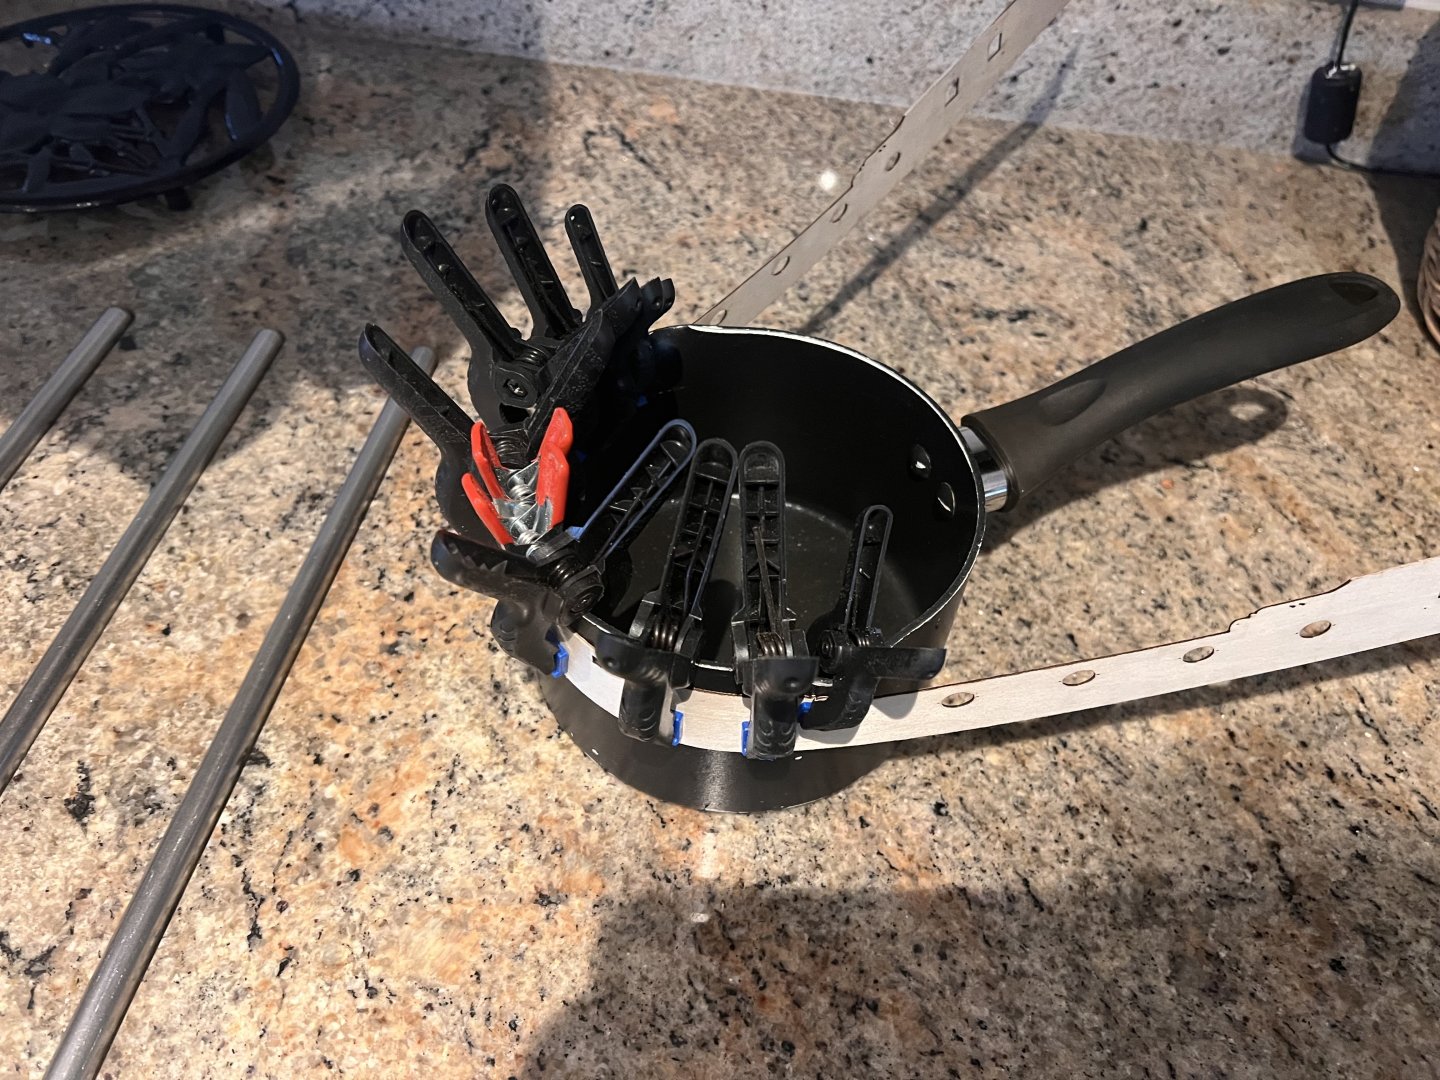
Progress update. Next the gunwales and side railings. The wood of the side rails, like the outer bulwark was very dark compared to the rest of the kit. I checked with Chris who explained that with kits with so many different pear sheets such as this it is almost impossible for him to ensure colour consistency across all the sheets - this makes complete sense. He very kindly agreed to let me buy a lighter version of these sheets which I used for the railings and should give more colour continuity between the outside of the hull and inboard. The gunwales were fitted first, then the railings soaked and clamped to dry. On the aft of the hull I used elastic bands not clamps. After 48 hours to dry the railings were glued on. The stern was shaped and the stern board fitted. I found fitting the wales quite tricky. I don’t have spreader clamps and resorted to elastic bands to hold the soaked wales in place whilst they dried. The upper wale was fitted first then painted black then glued. To position the lower wale I followed the excellent advice in the instructions and cut a lime plank to 3mm width and used it as a spacer. Elastic bands were needed to hold these in place. Stern decoration was added. The rudder is temporarily fitted but needs to come off to be painted. This kit’s decoration looks amazing and is so clever with the upper area a piece of 3D printed resin that can be soaked in just boiled water and then bent to match the shape of the slightly curved sternboard. I used the AK gold paint that Chris supplies in his Vanguard paint set which looks super. I struggled to find a good solution for glazing the windows. This kit needs something for the stern windows and the aft most windows on each side as there’s no stern cabin in there just structural MDF pieces which I have painted black. I tried Krystal Klear to create a film, but it was too lumpy and uneven making the glass look much too thick. In the end I used cut outs of clear acetate sheet which get grubby whilst being fitted and doesn’t look ideal. Any suggestions welcome, I’d like a better glazing solution when I come to build Sphinx 2 or 3 kits in the future (definitely Speedy and likely Harpy first) I noticed that at some point I’d damaged the bow area. The spike on the bow (I’m sure it has a name but I don’t know what it is) had lost the outer veneer on both sides. I’d painted over where the damage was as I hadn’t realised that it was damaged. I’ll need to do some simple surgery based on the plans to replace the missing wood on each side.


- 36 replies
-
- 12
-
-
- Duchess of Kingston
- Vanguard Models
- (and 1 more)
-
Glenn, such a pity. Your Adder was looking great. Be very sad not to repair her, although all your reasons do make complete sense. I like the tubing idea.
-
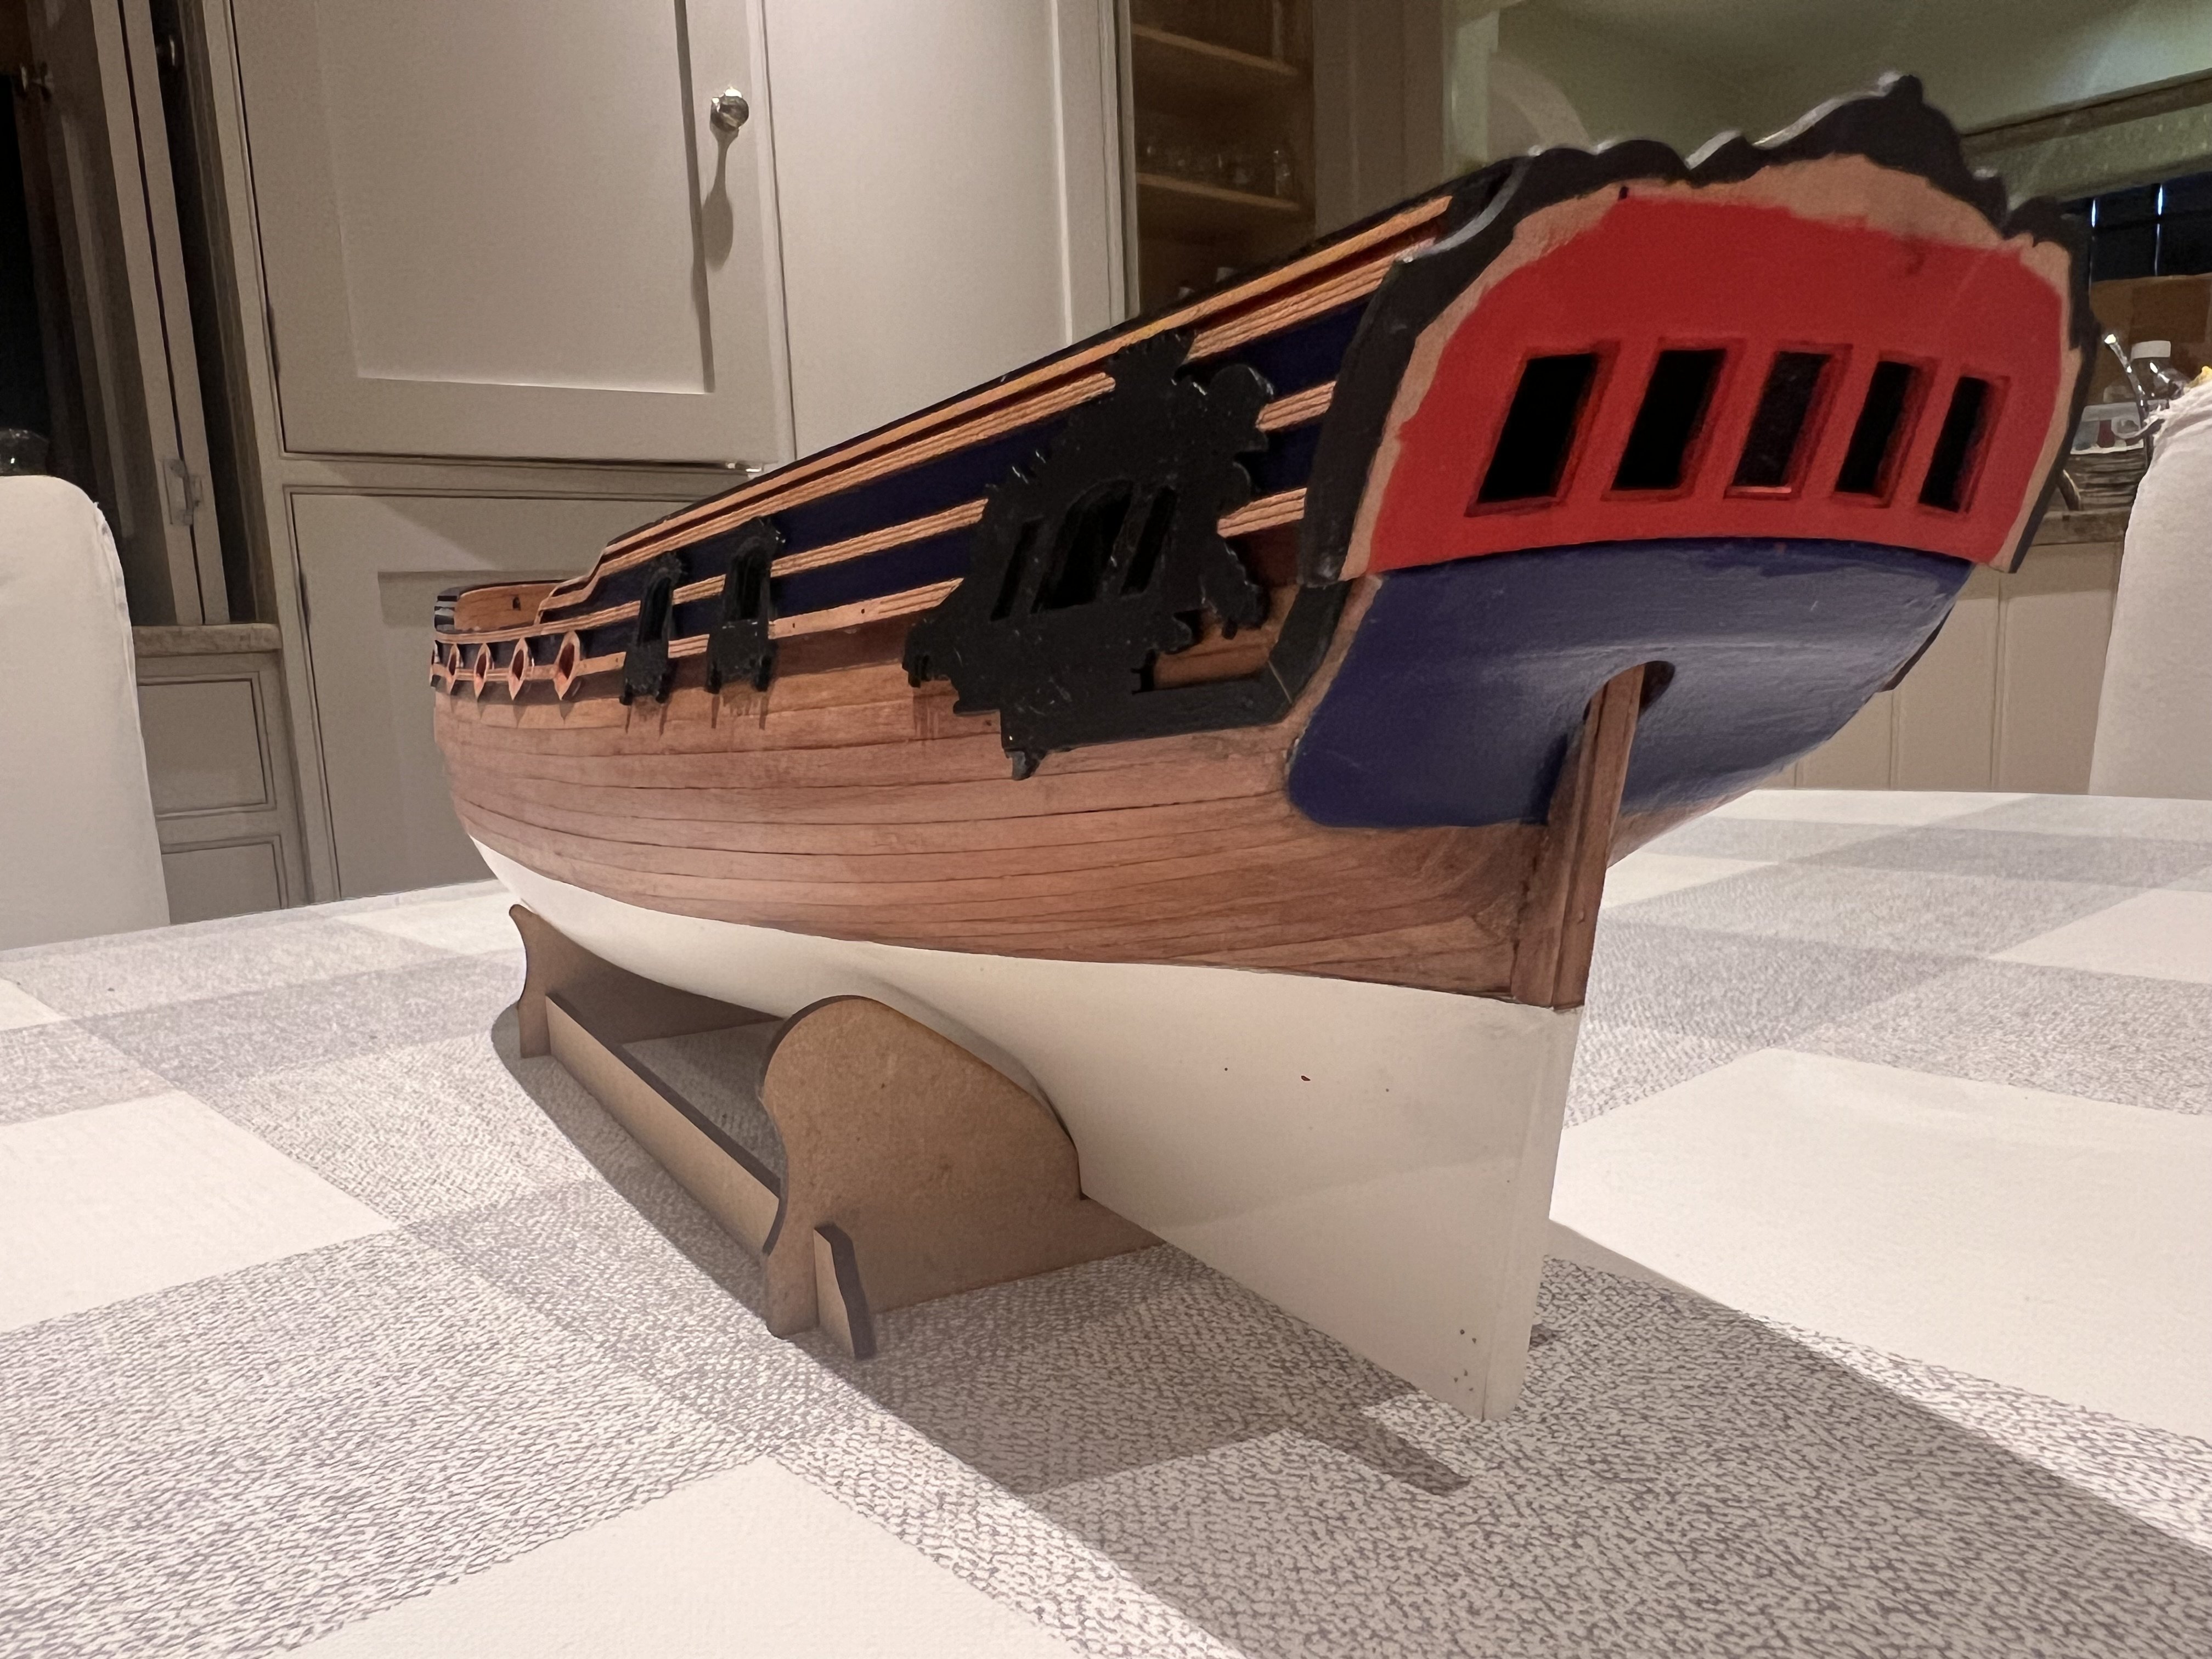
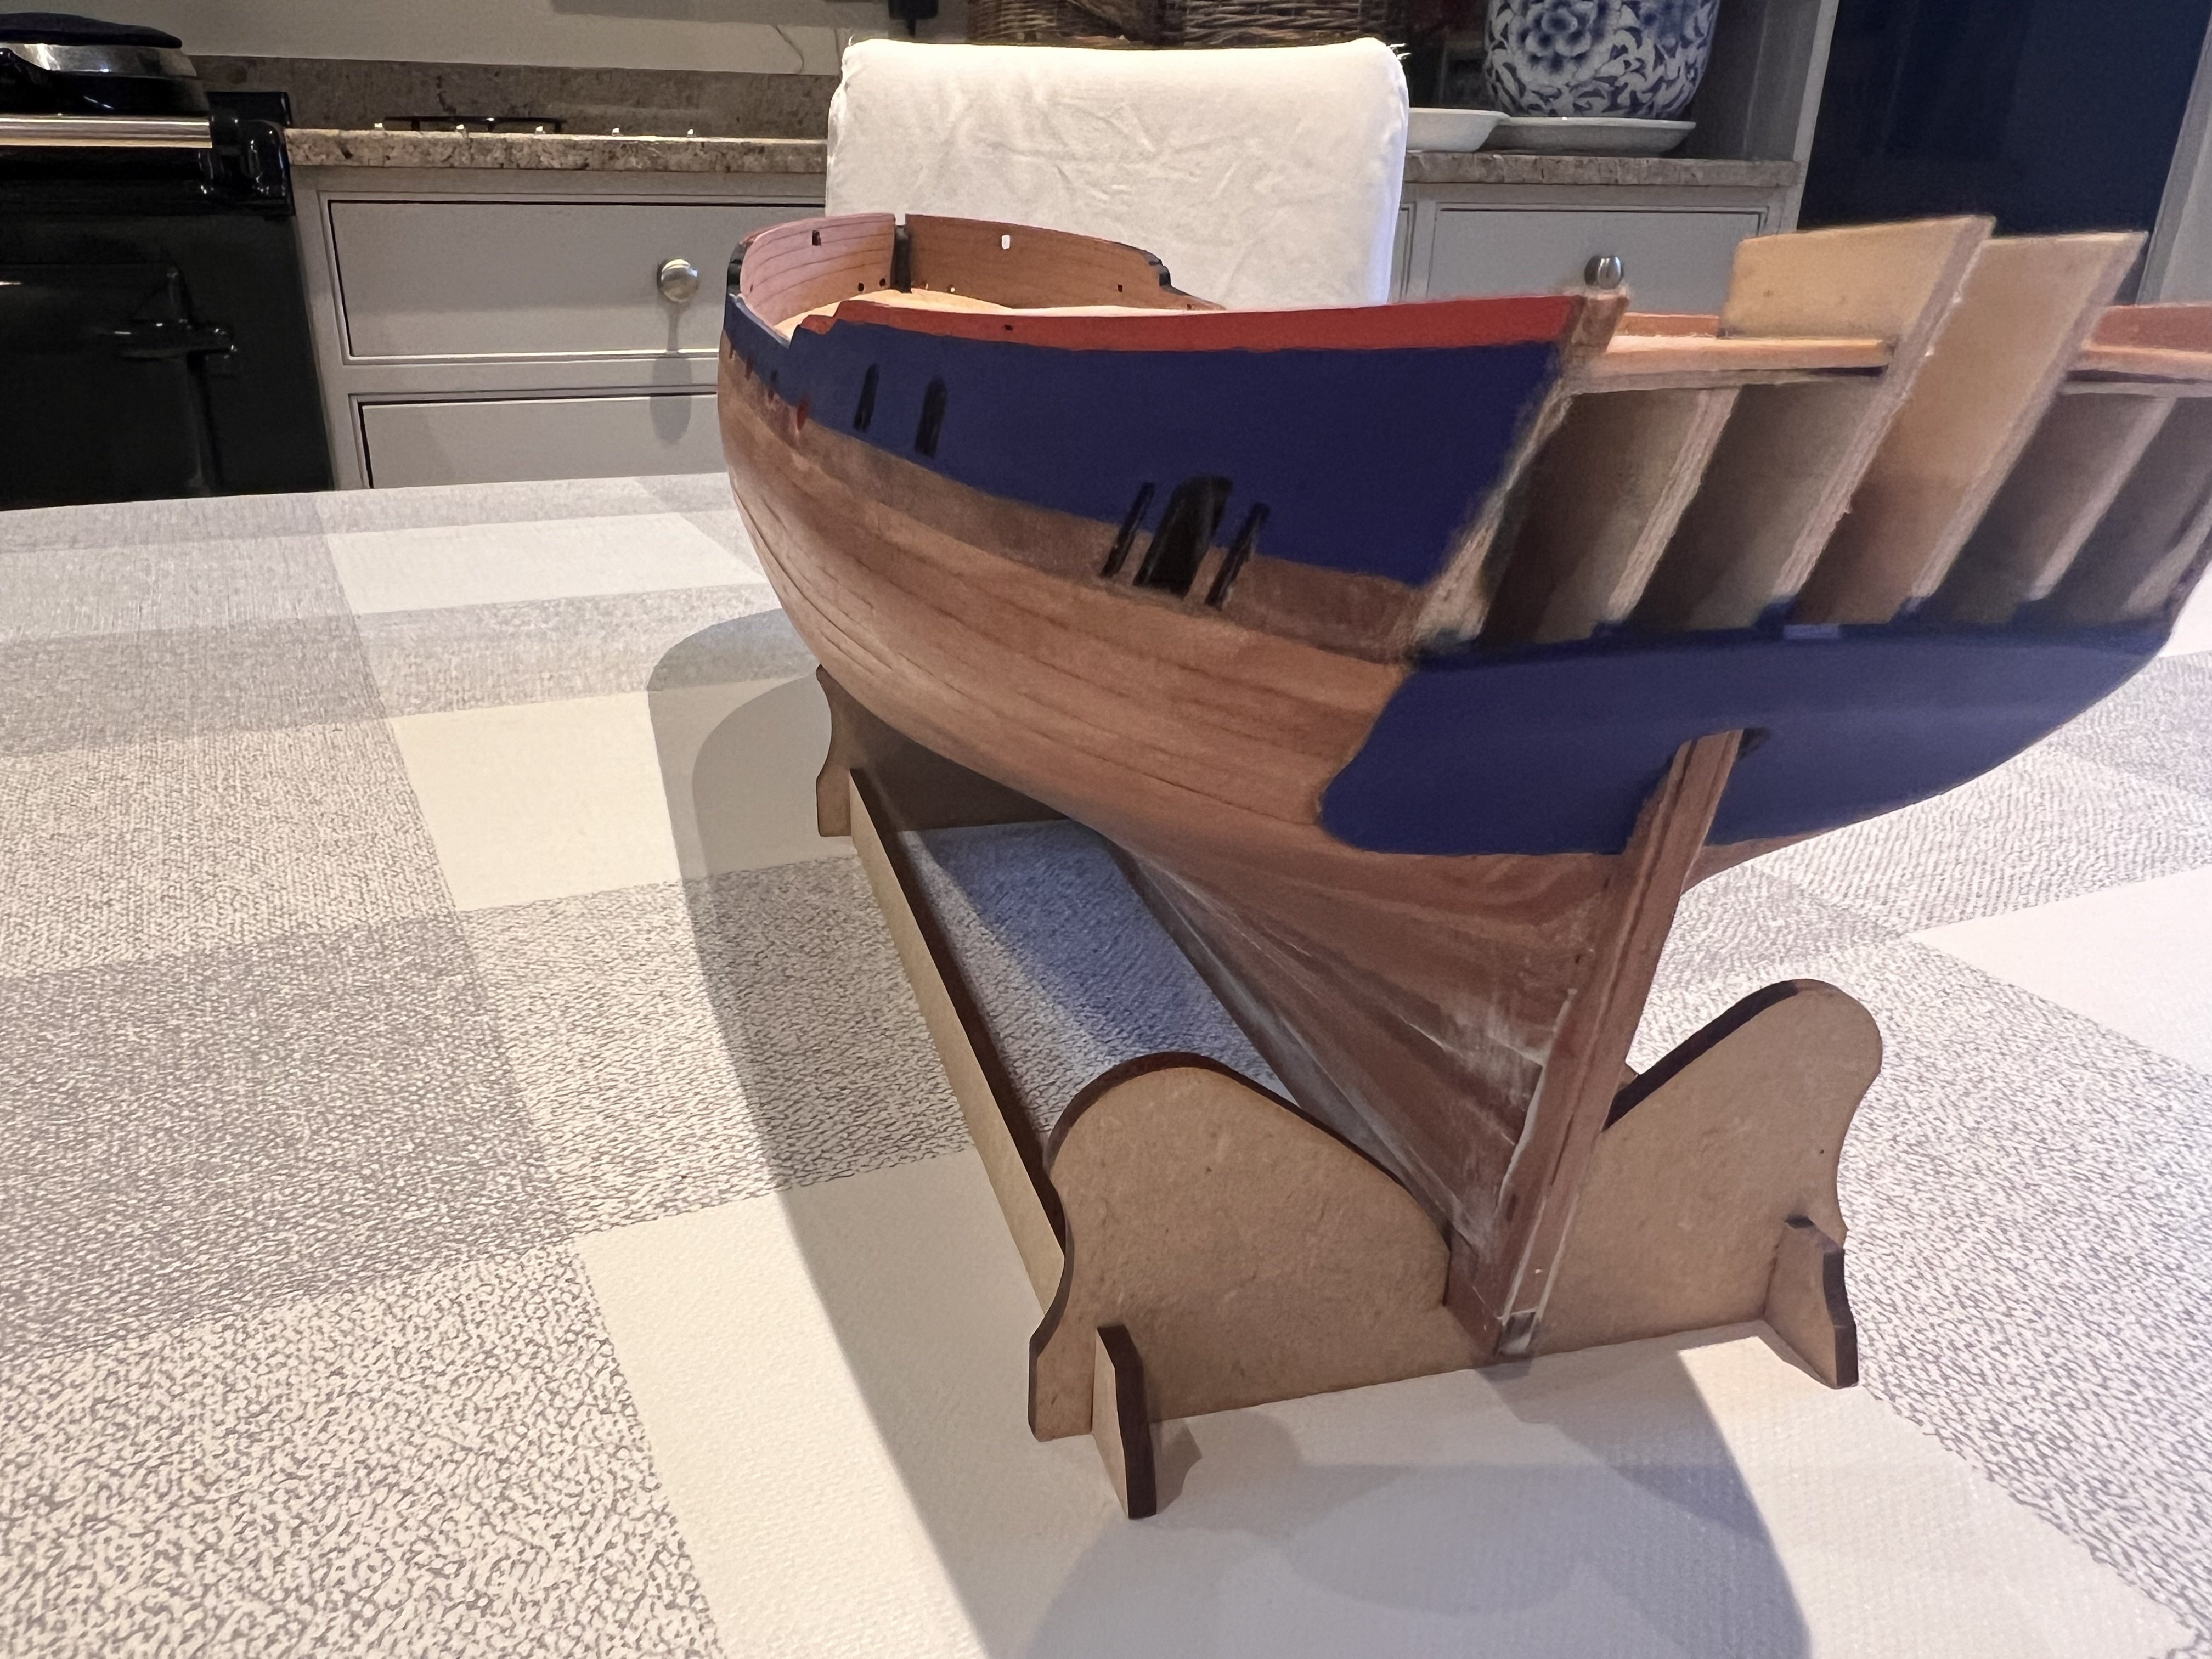
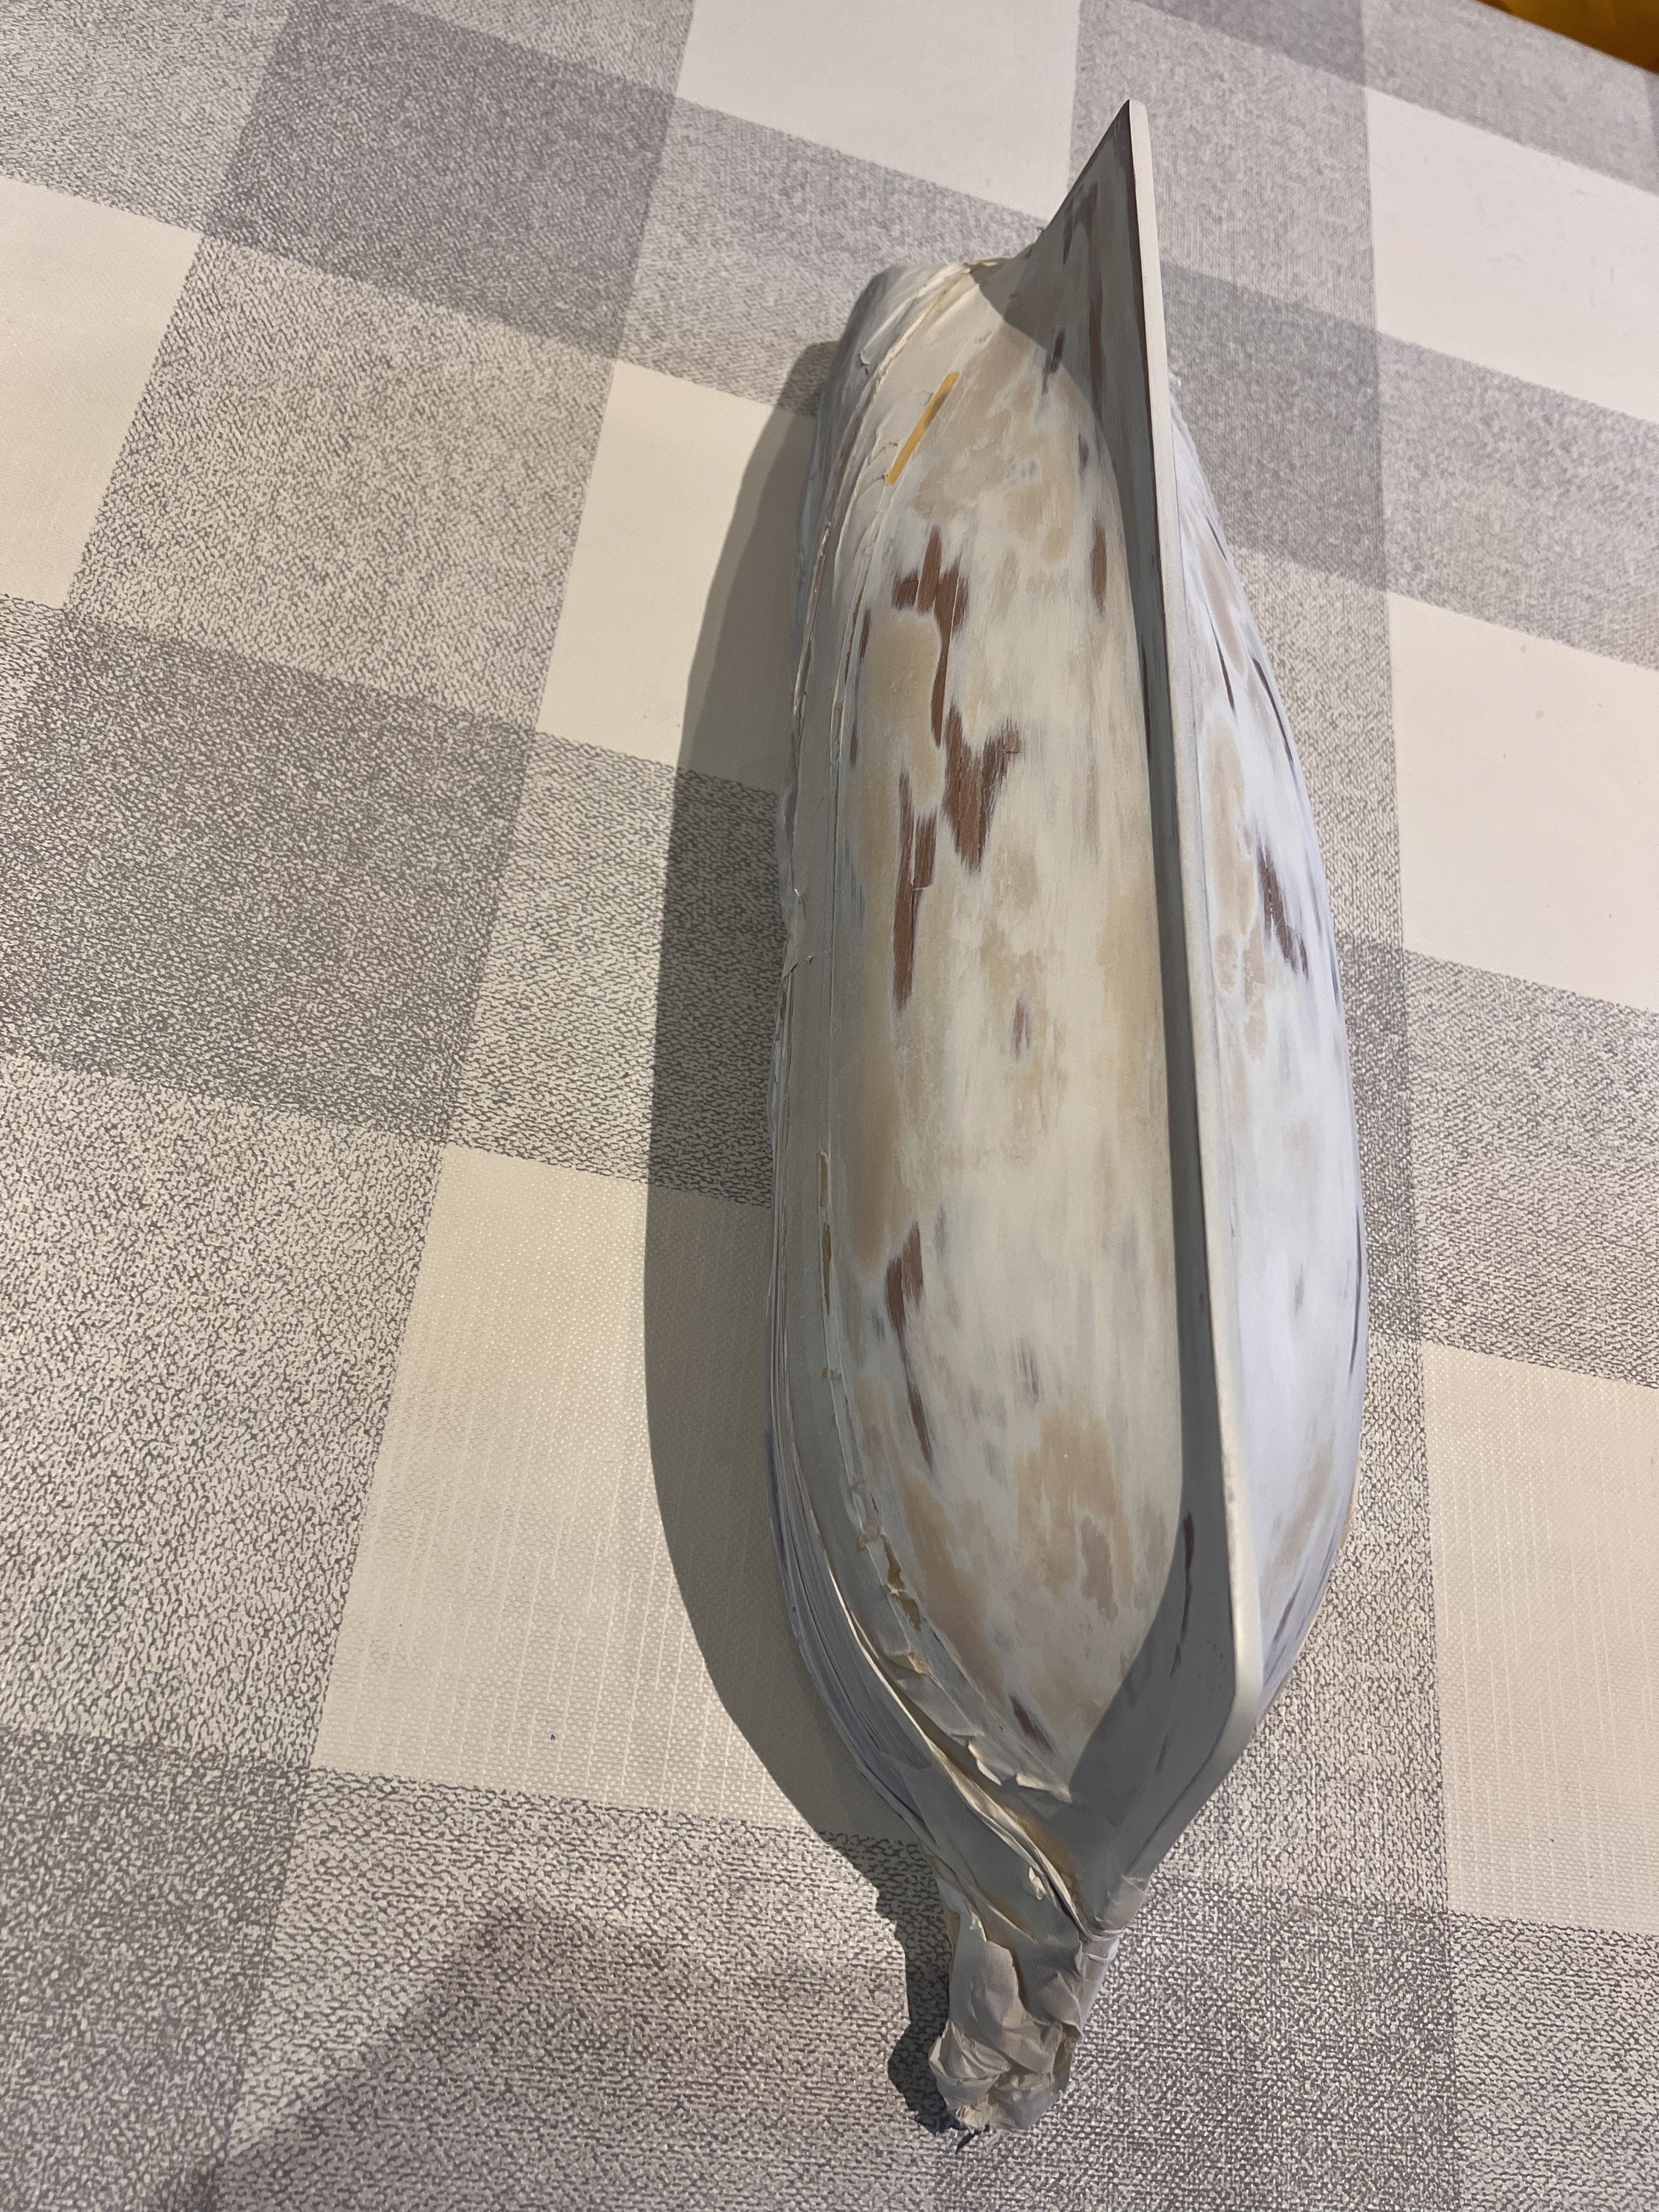
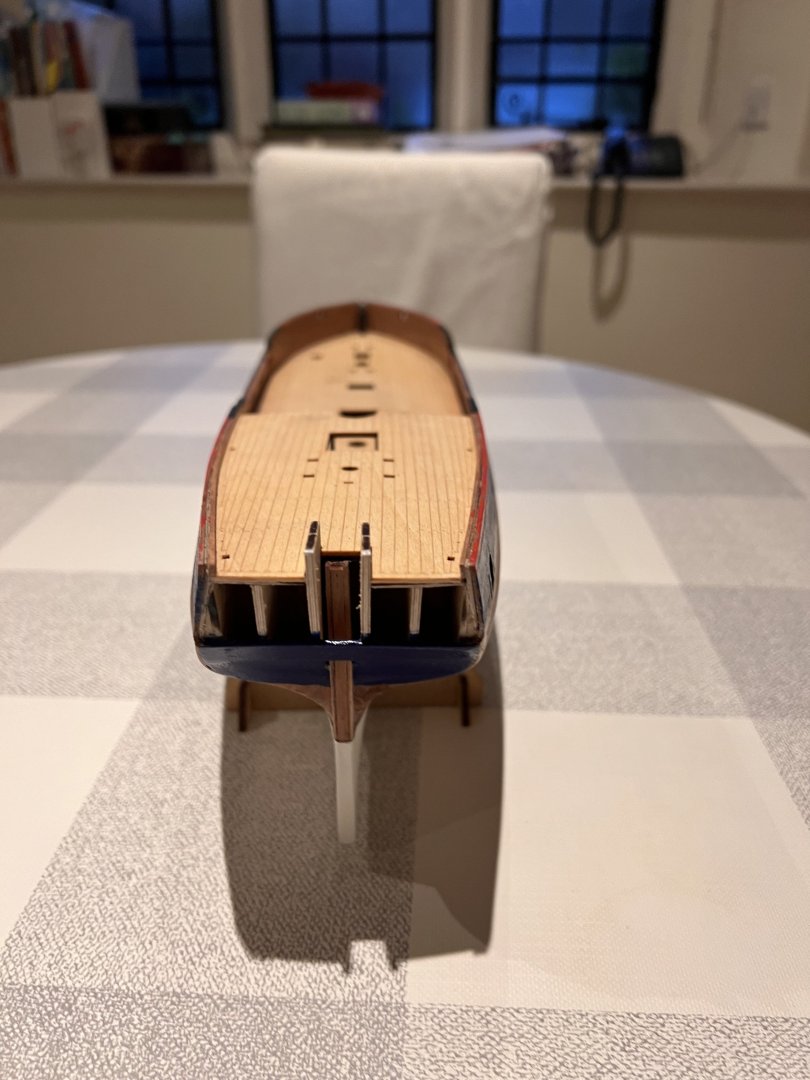
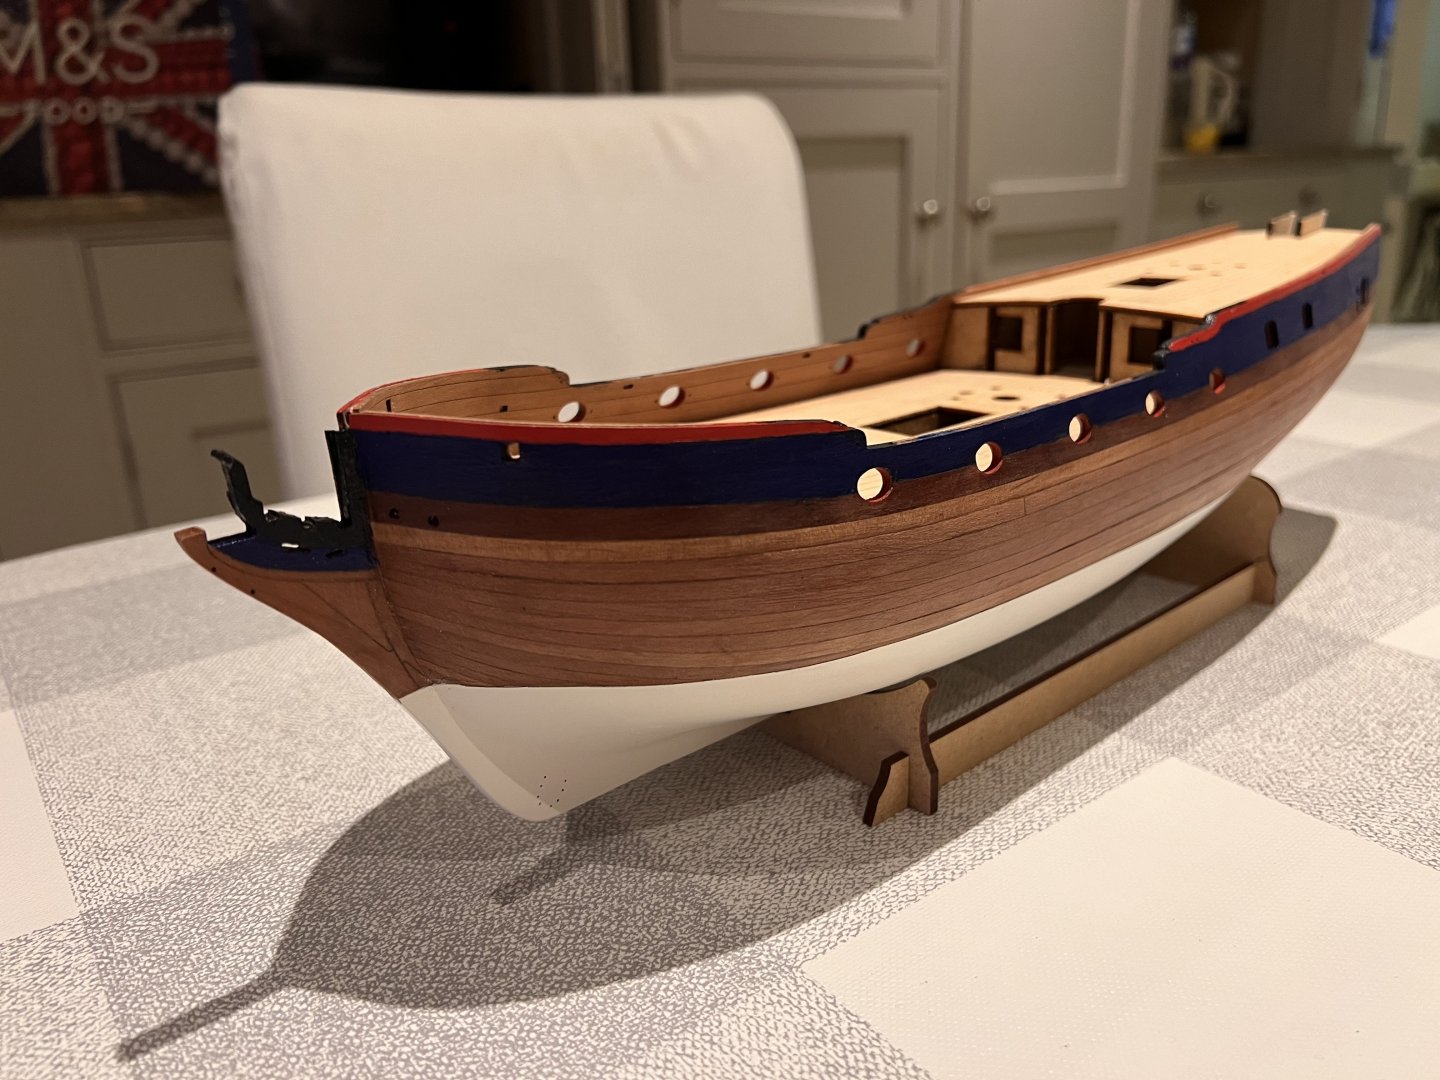
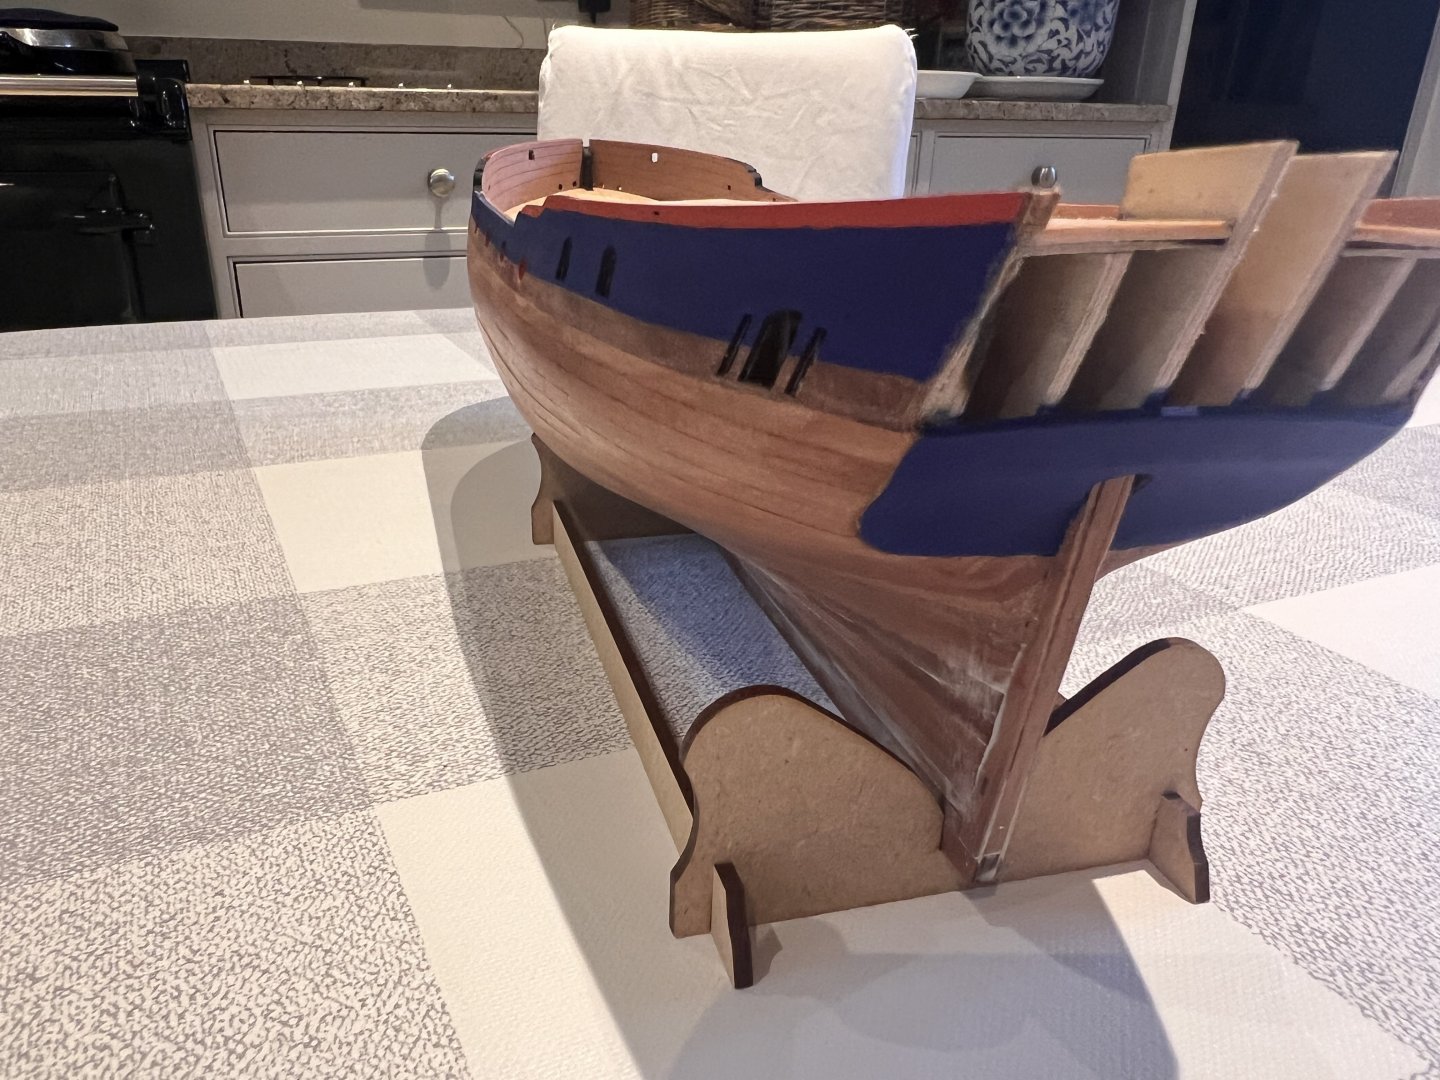
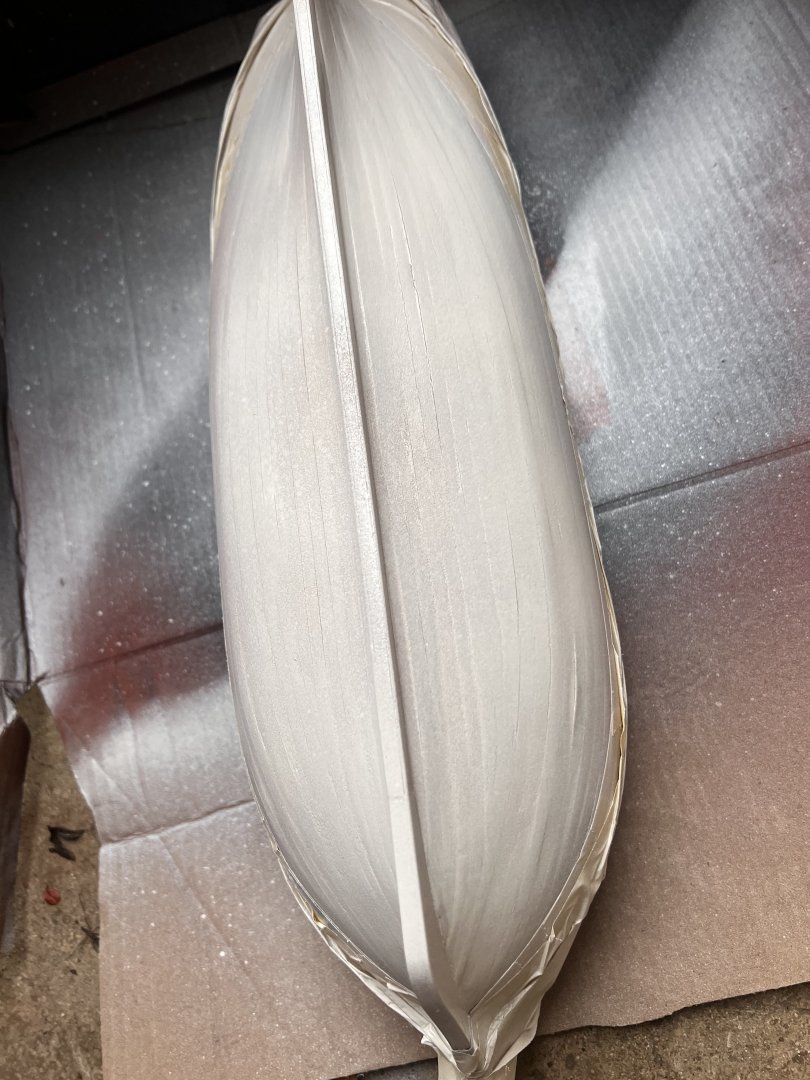
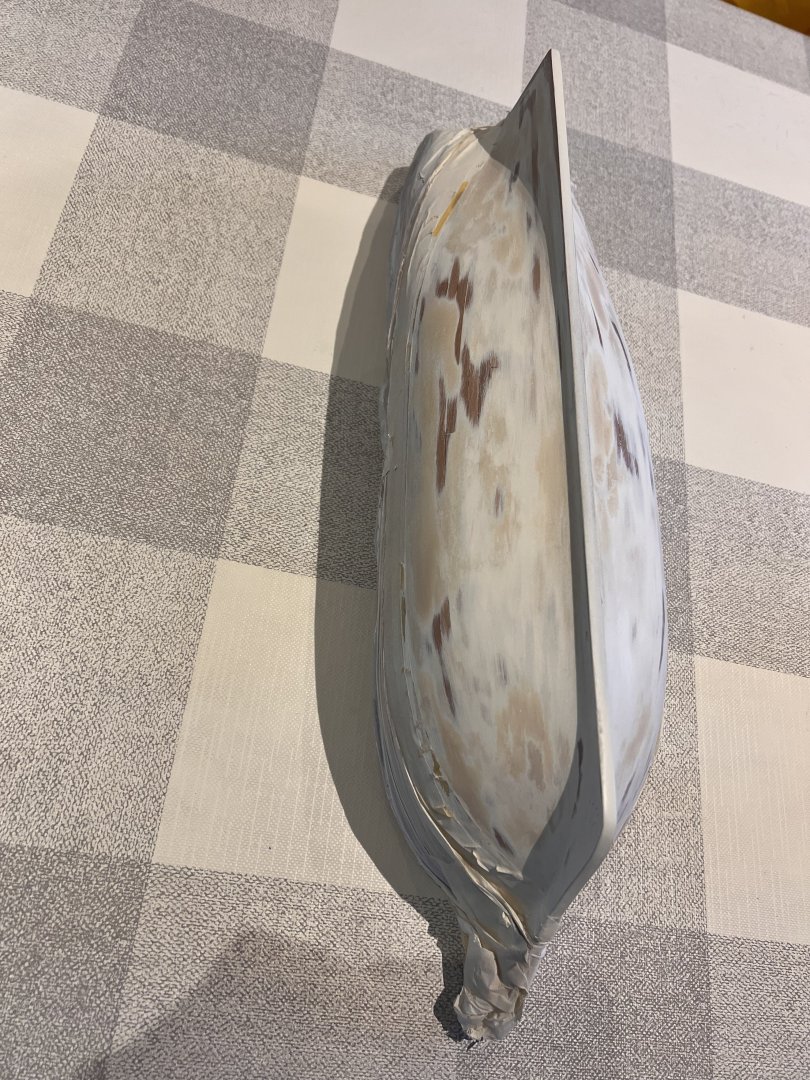
I’ve been a bit neglectful of this log of late. My apologies. Not sure I’m adding much on DoK as so many more experienced and better builders have already written excellent logs. Started some filler on the lower hull and painted the bulwarks blue and red. These are the colours from the Vanguard paints set. The imperial blue works well, but the red which is intended and ideal for the red inside the bulwarks on warships is too chalky and not rich enough for this decorative colouring. Then started the fill, paint, sand and repeat cycle for the lower hull. Going from this… …and this… … to many layers later. This.
- 36 replies
-
- 16
-
-
- Duchess of Kingston
- Vanguard Models
- (and 1 more)
-
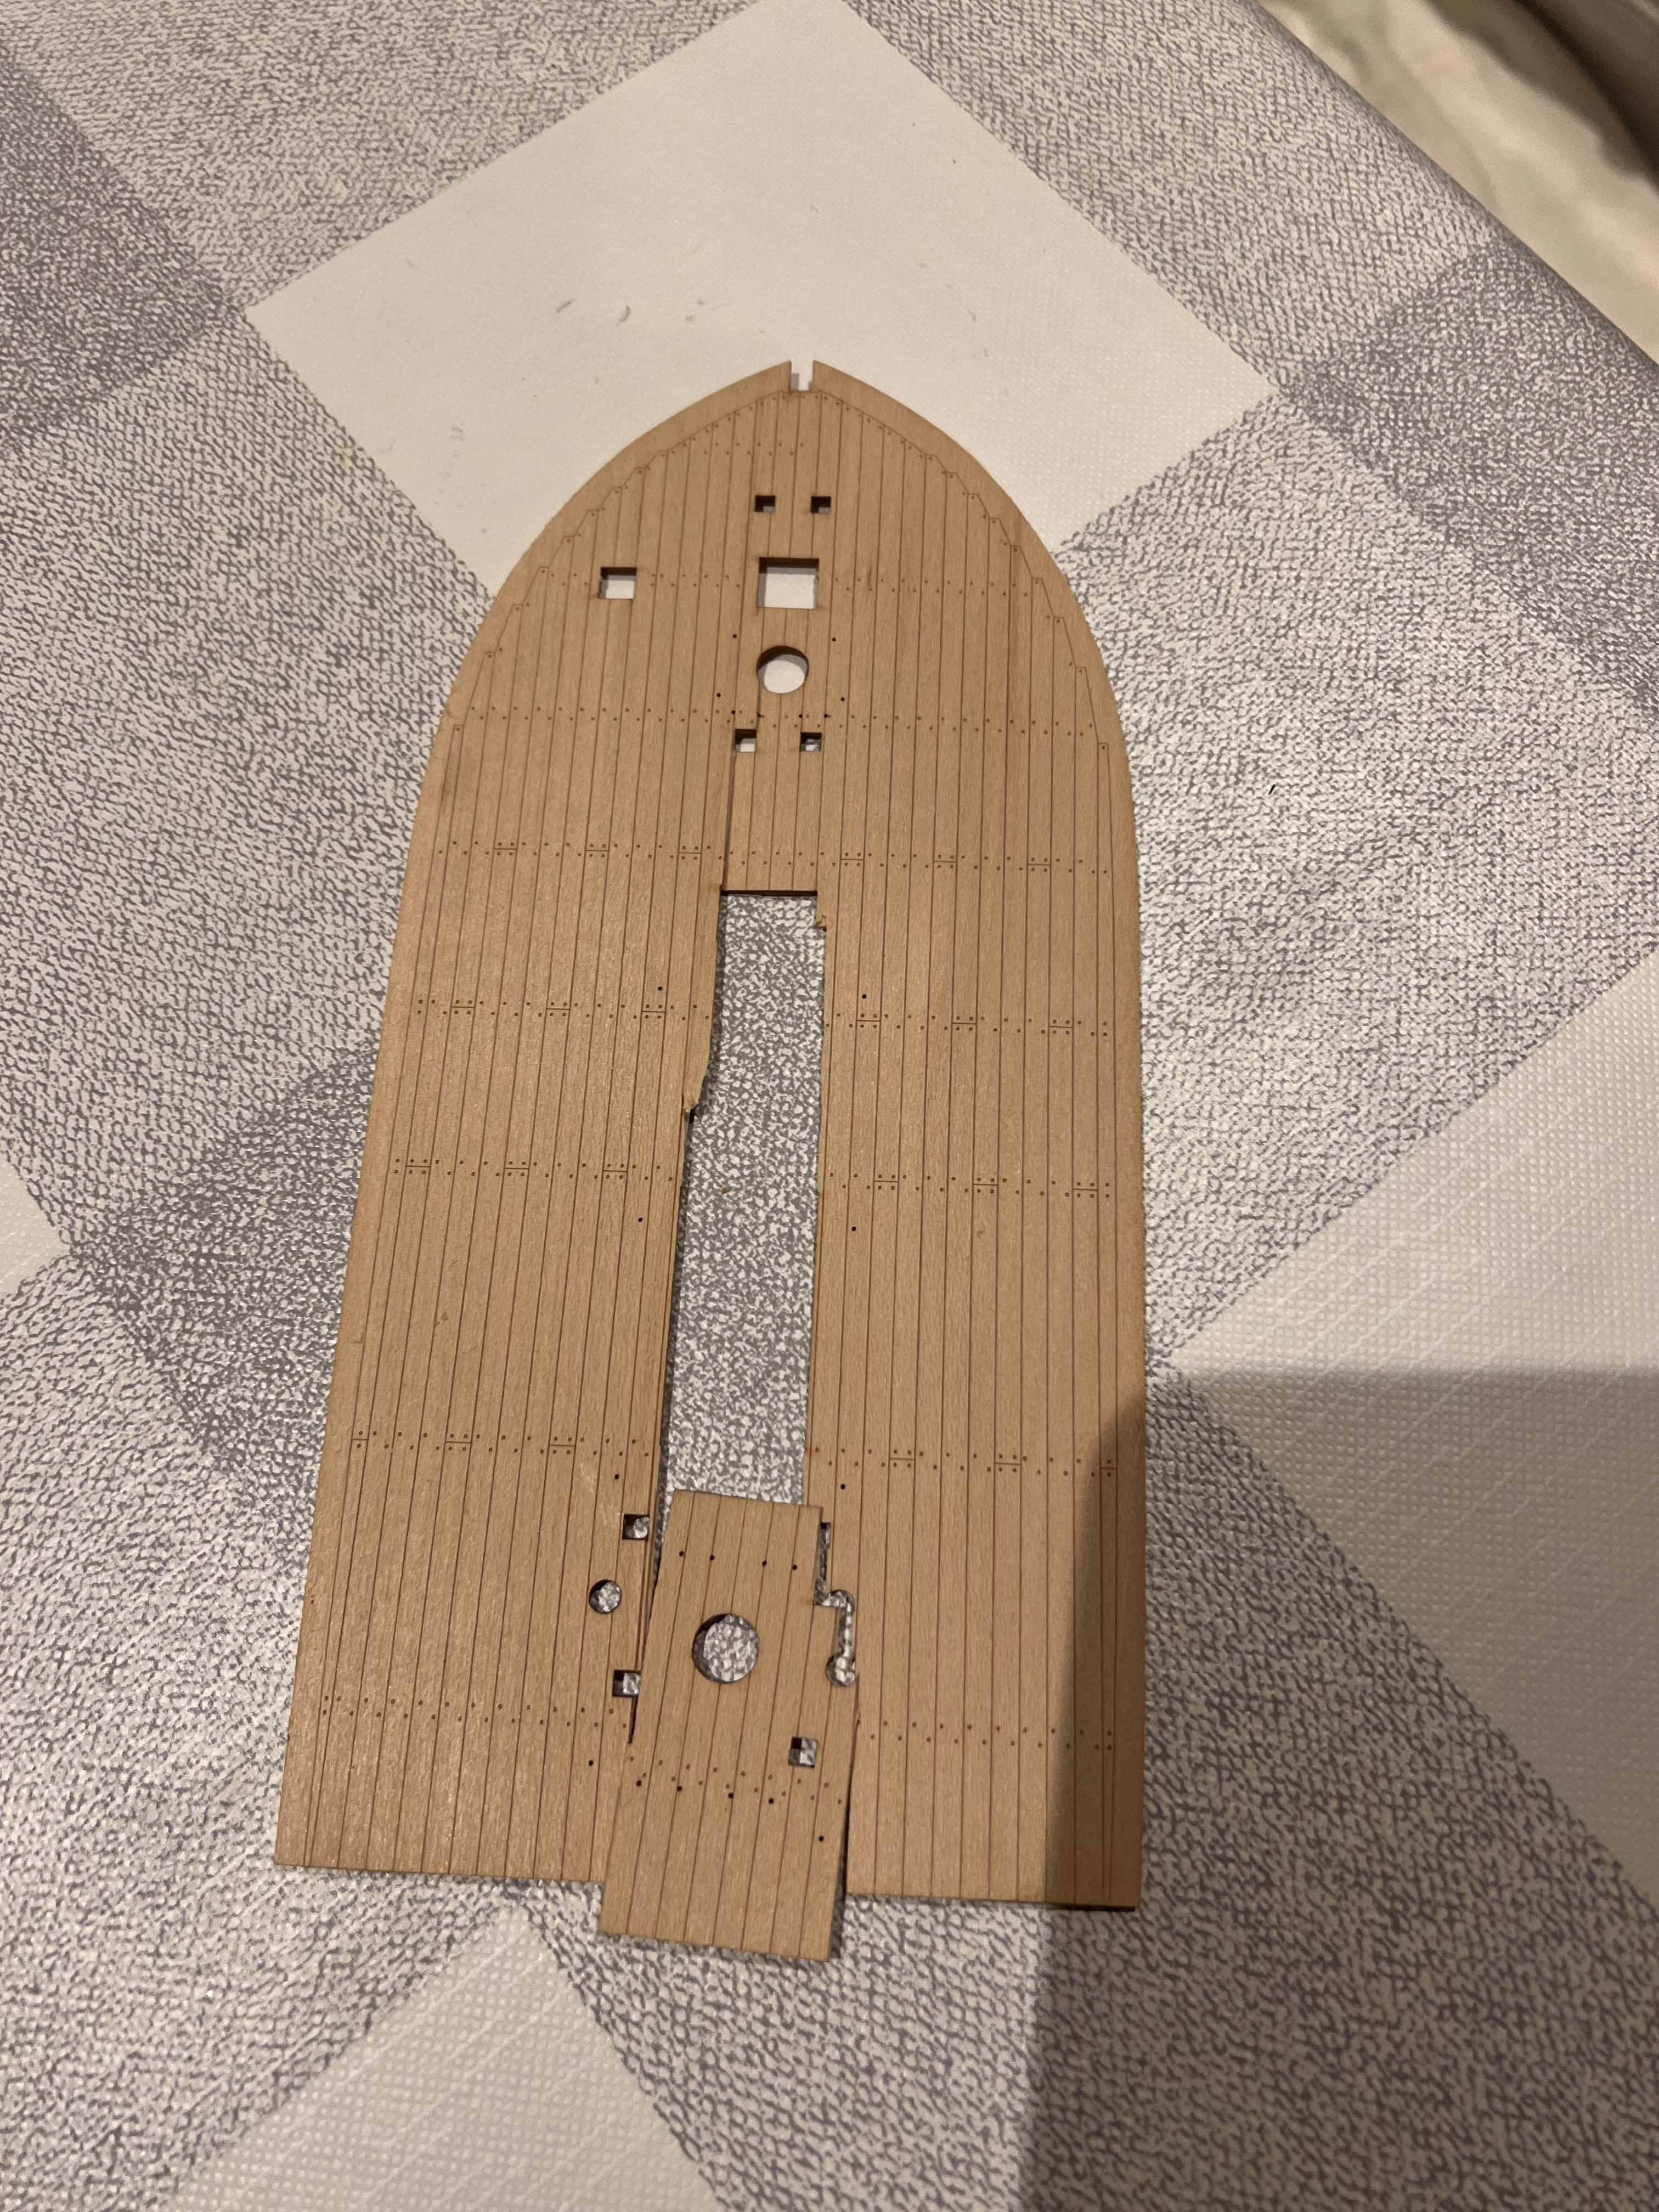
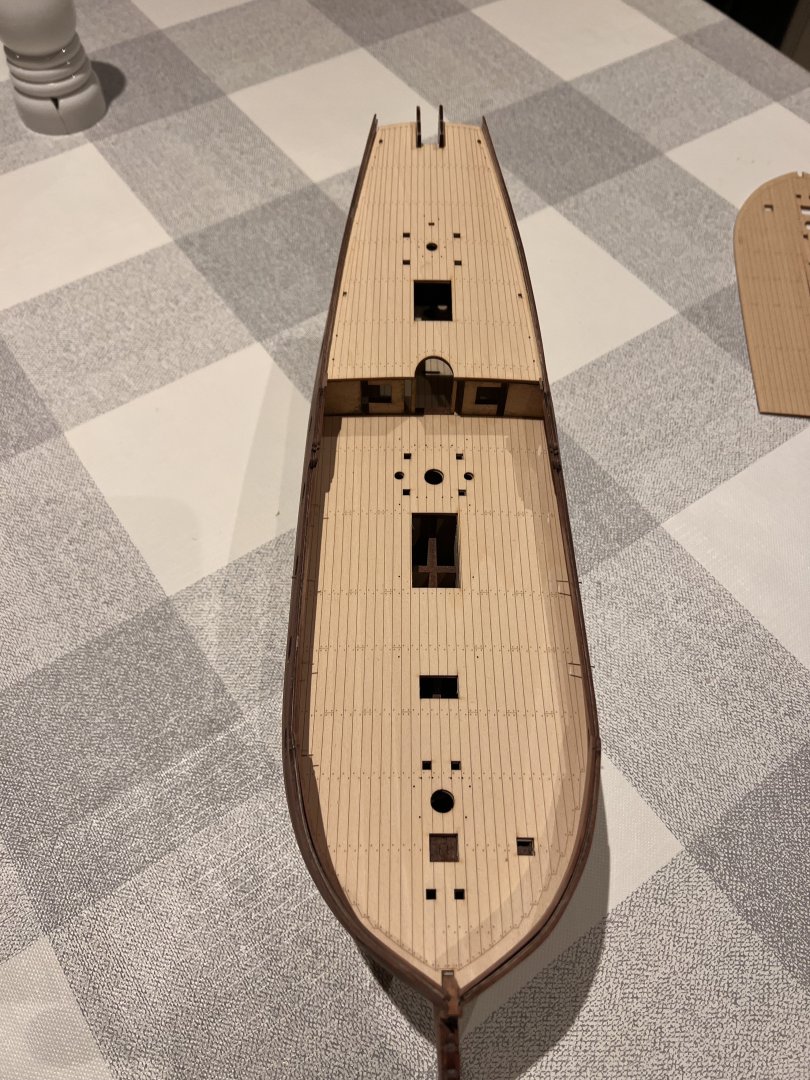
Inner bulwarks are soaked and clamped to dry. I had a bit of a mishap with the engraved deck, entirely my fault. There’s significant tumblehome towards the top of the bulkheads so the deck needs bending to fit. It also needs a little sanding to fit properly, after multiple trial fits the deck split. I tried to fit it with glue and tape over the gap, but the gap reopened and in trying to remove the deck it splintered and broke. I emailed Chris to order a replacement - which arrived in the post the following morning - now that’s amazing customer service…. Thanks Chris, hugely appreciated. New deck went on carefully and cleanly. The next small challenge was fitting the inner bulwarks. I soaked these as per the instructions and allowed to dry for three days. I wish that I hadn’t soaked them as they now don’t fit the inside of the bulwarks precisely. There’s extra length on the bow end of these that can be removed, but they’re also too tall at bow and their aft end. I couldn’t use pins to align them either as only some holes lined up. Careful sanding of the bottom of the bulwarks and they fit much better. I’ve started filling below the waterline, but still need paint, filling and sanding alternately to get the hull smooth.


- 36 replies
-
- 8
-
-
- Duchess of Kingston
- Vanguard Models
- (and 1 more)
-
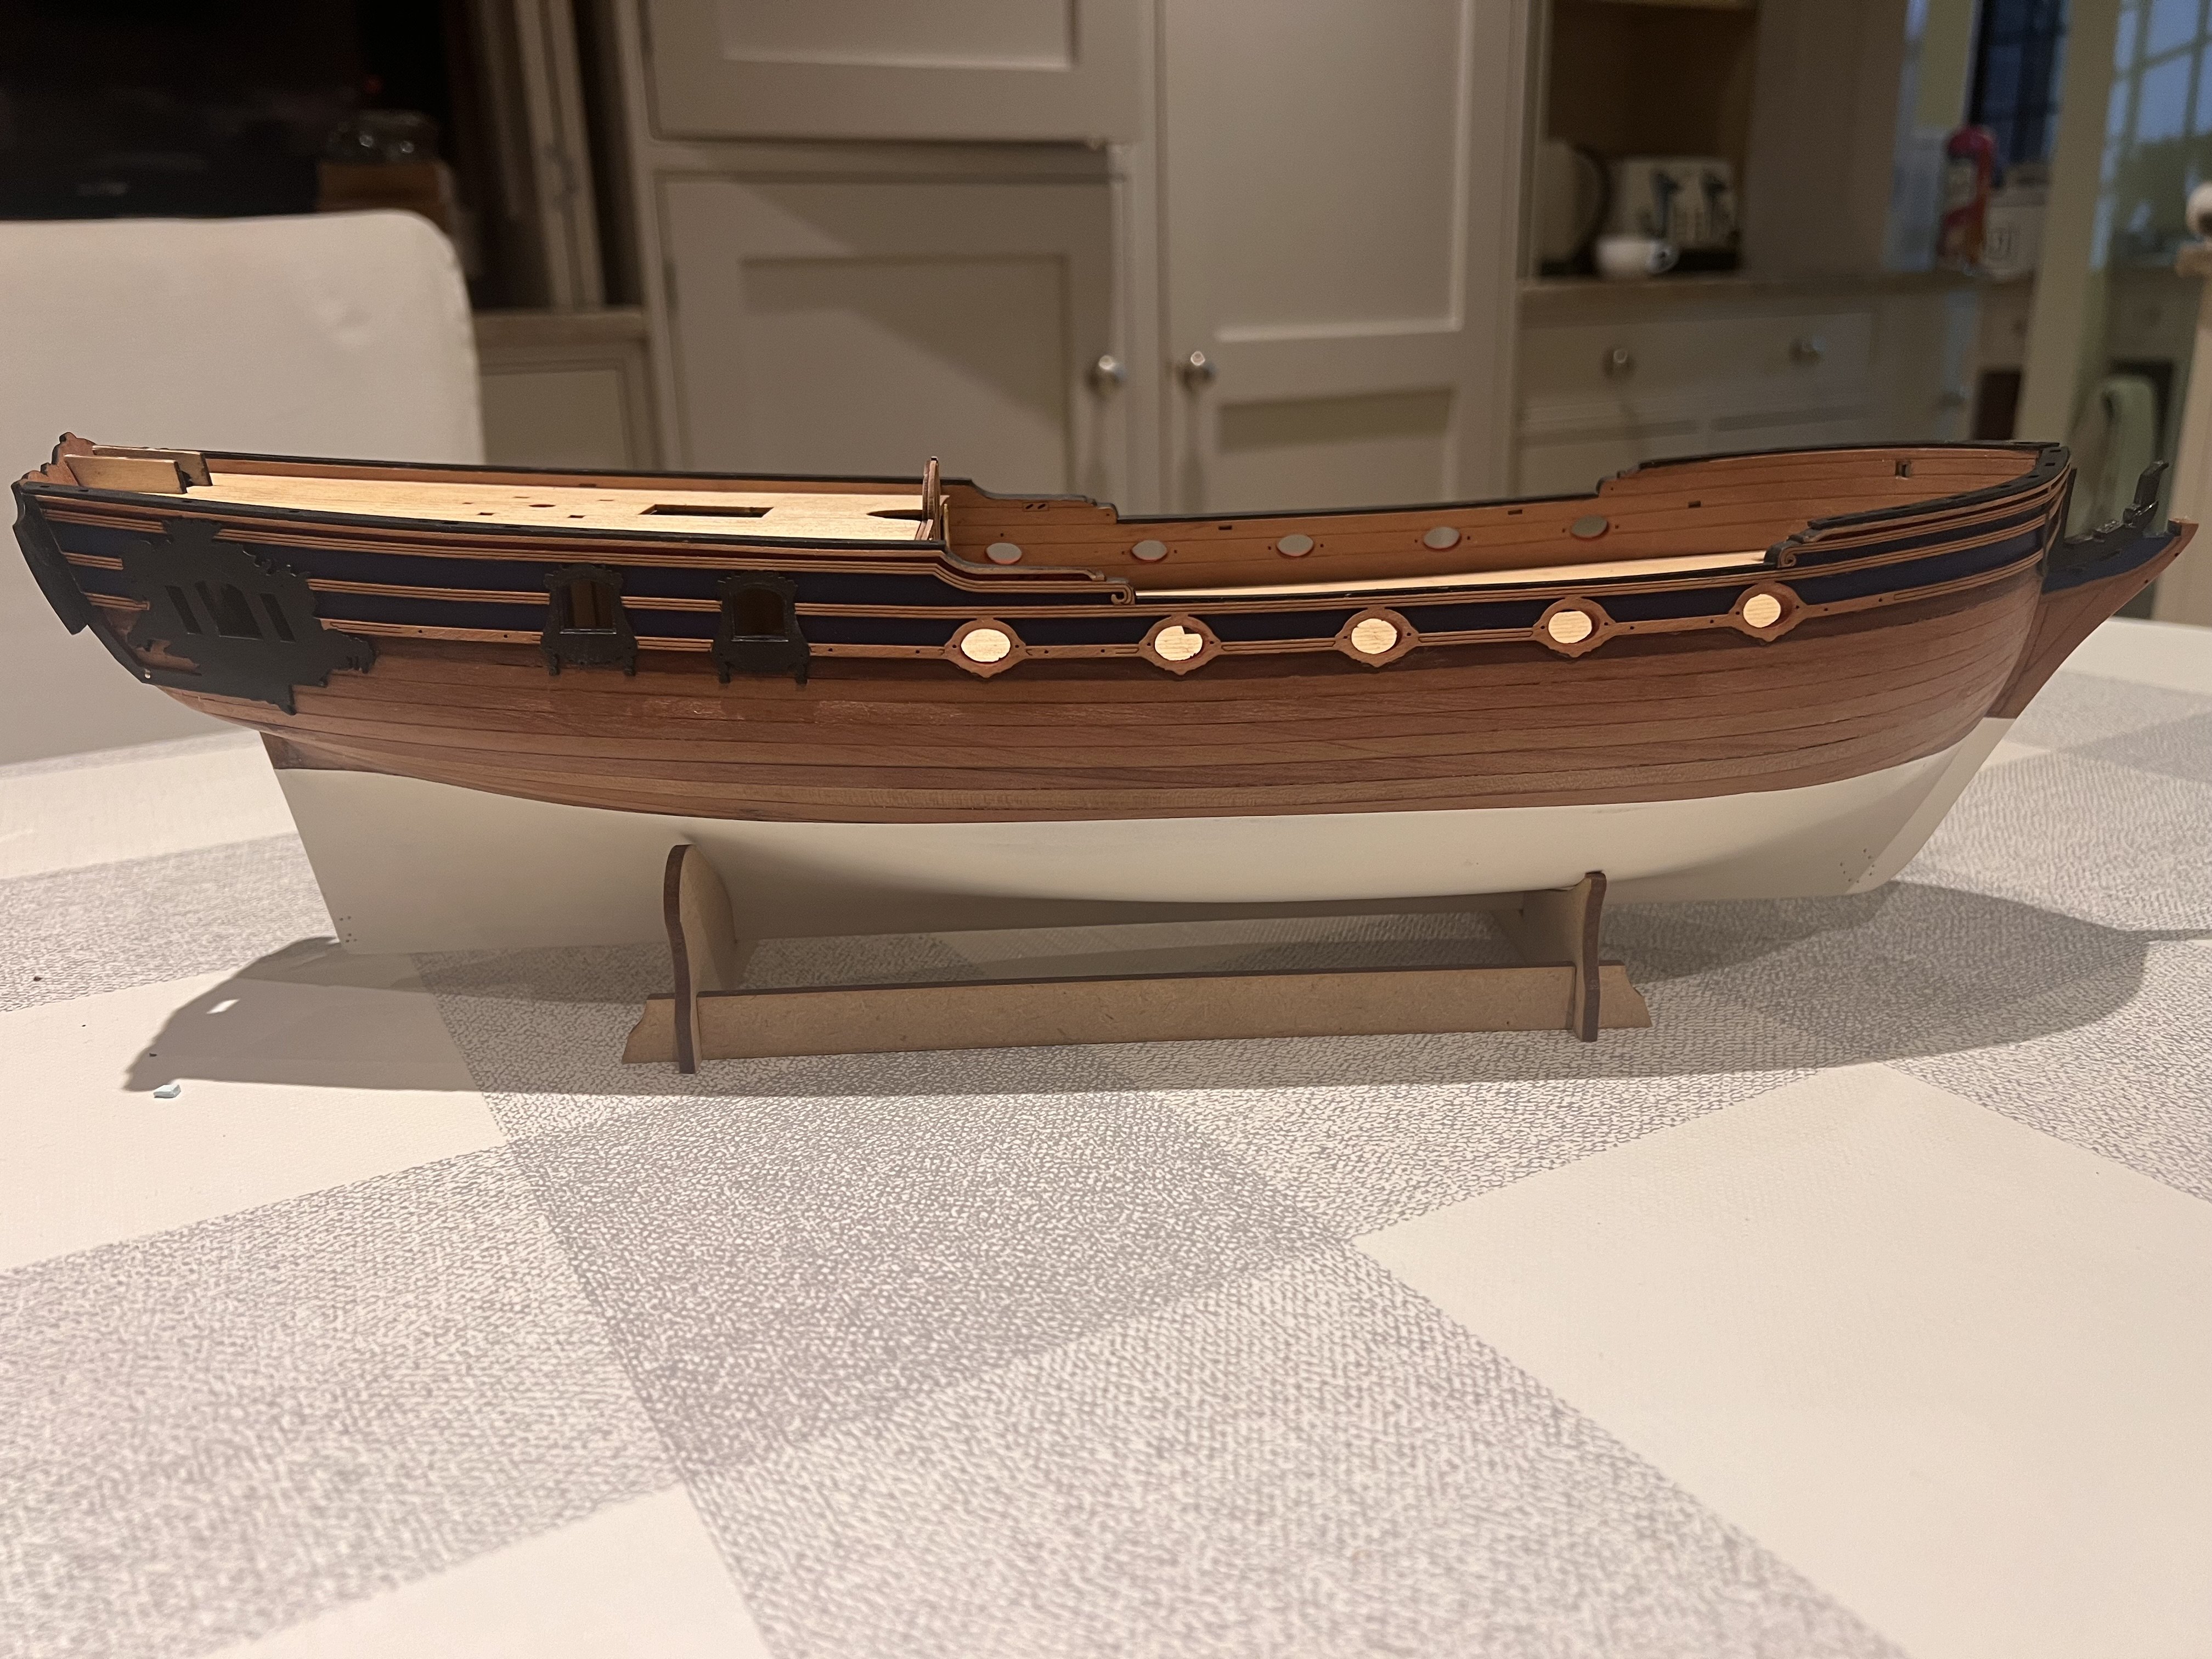
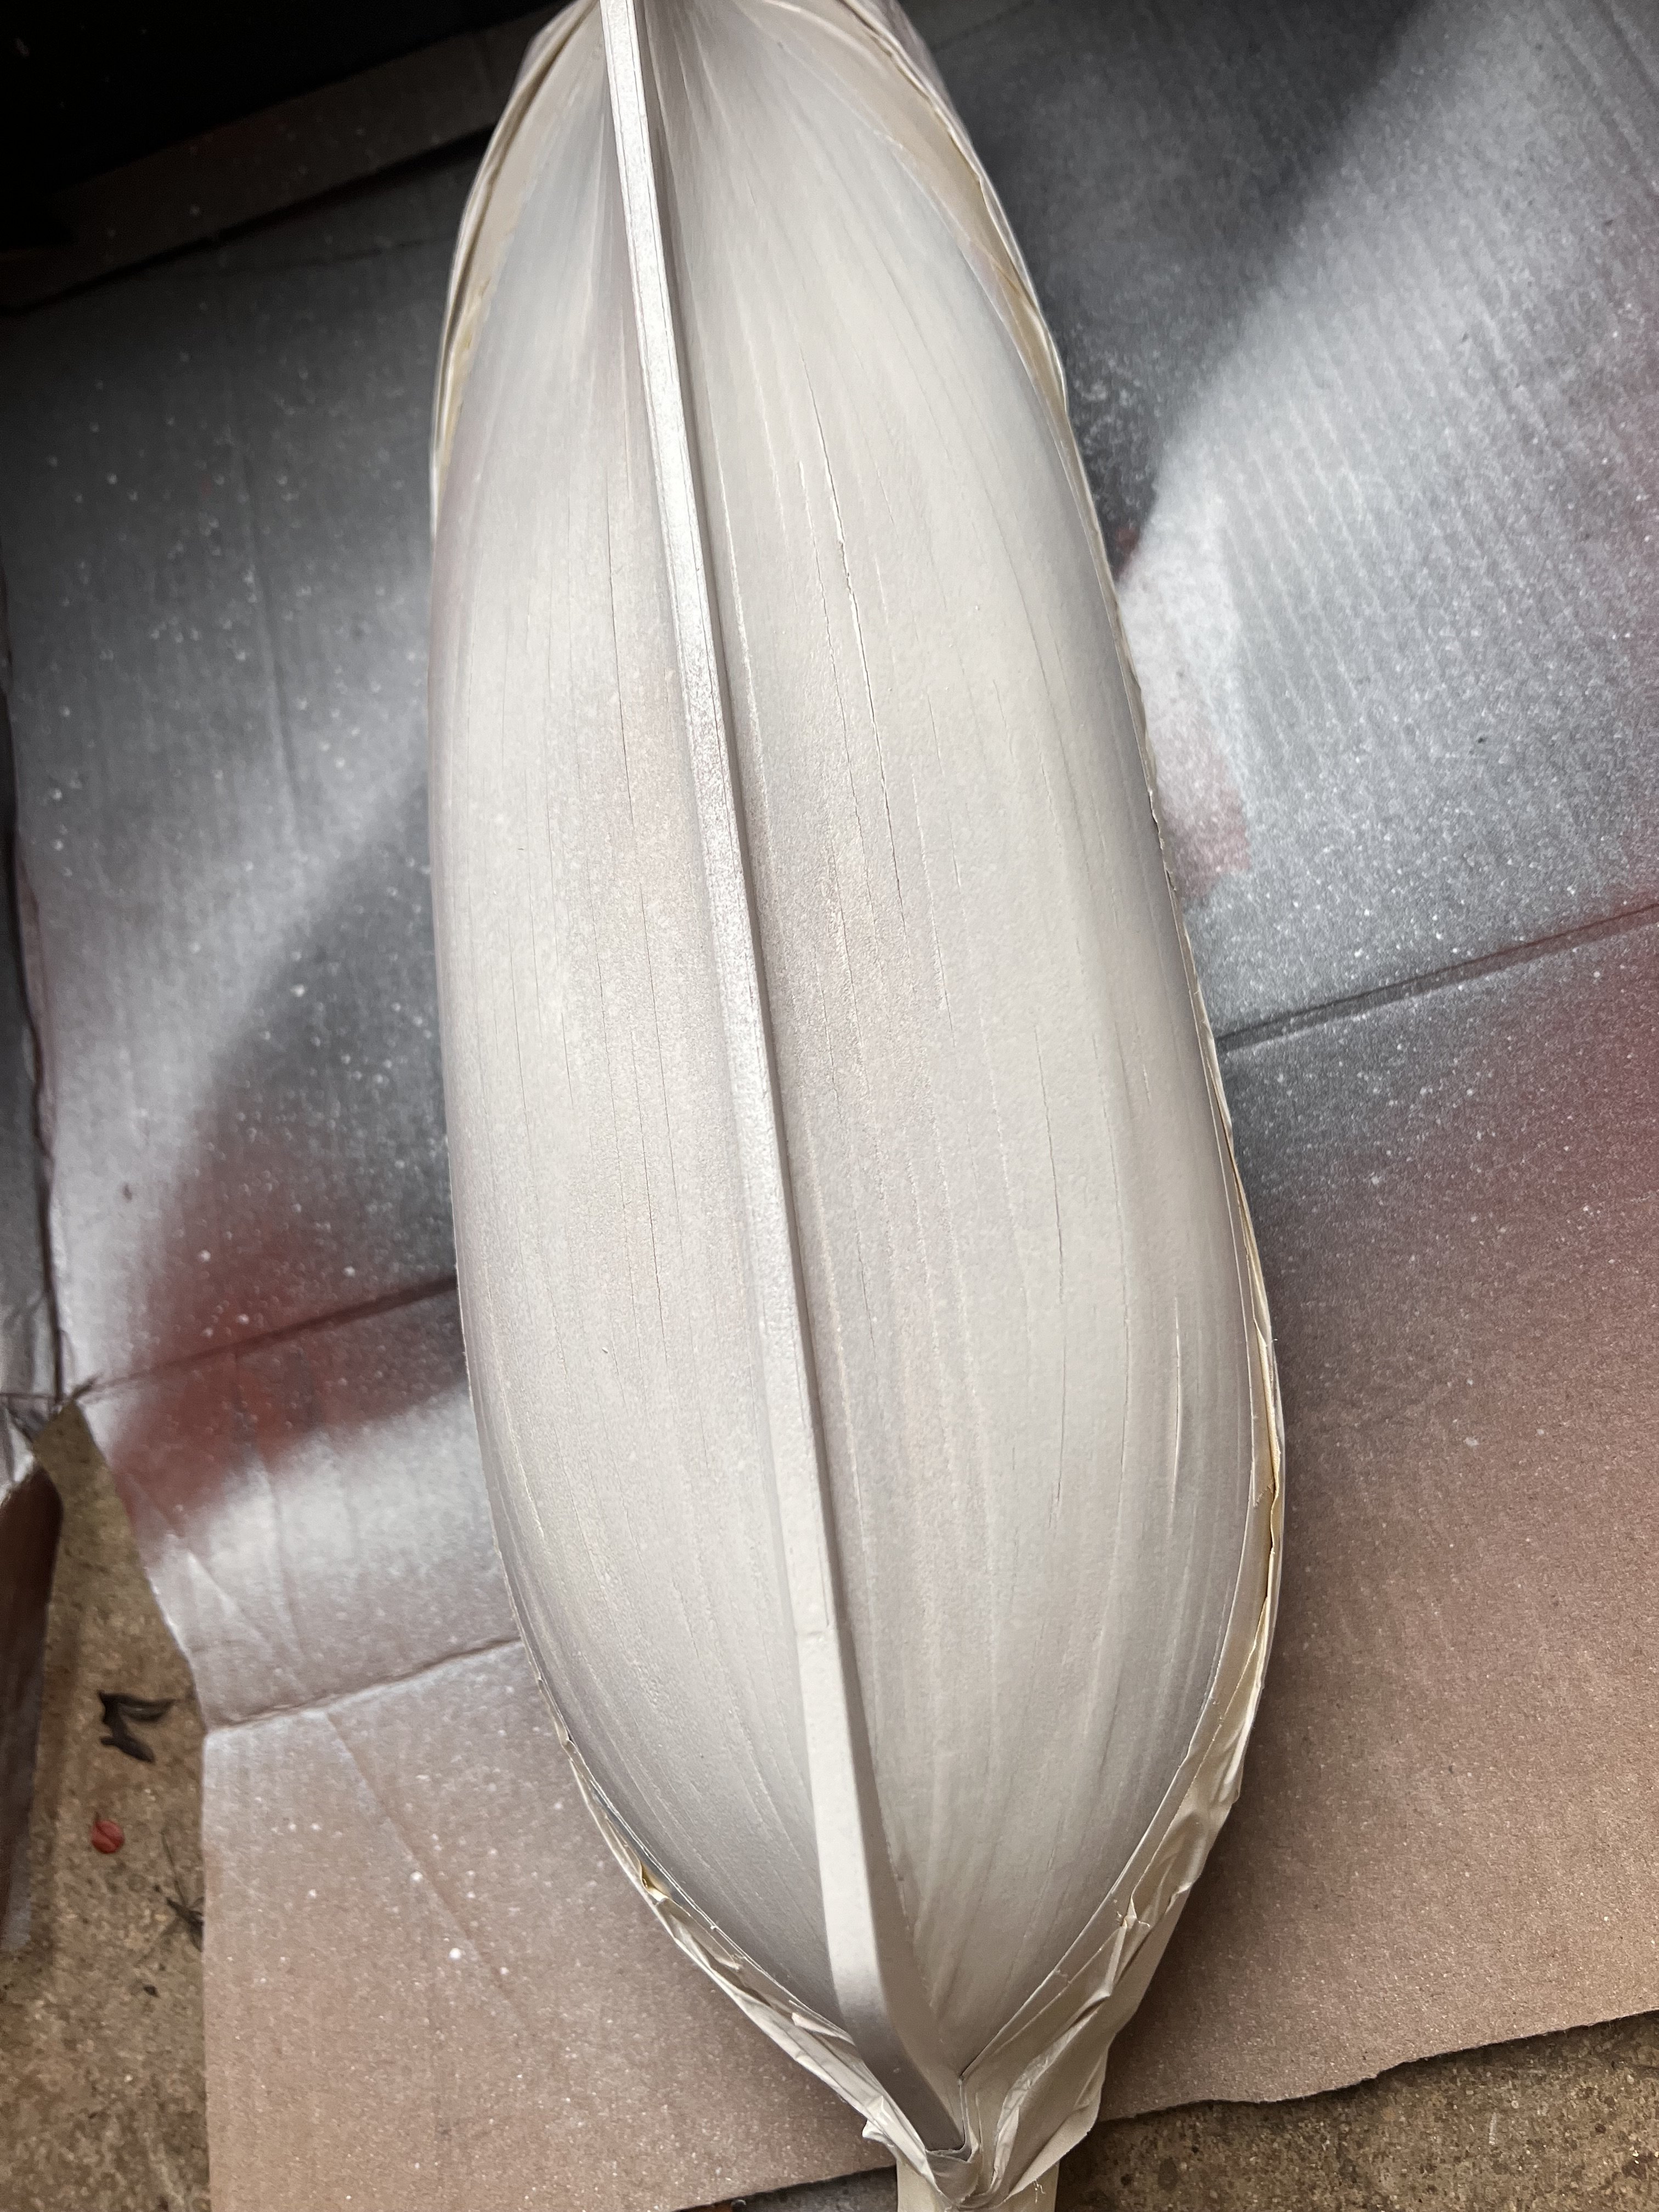
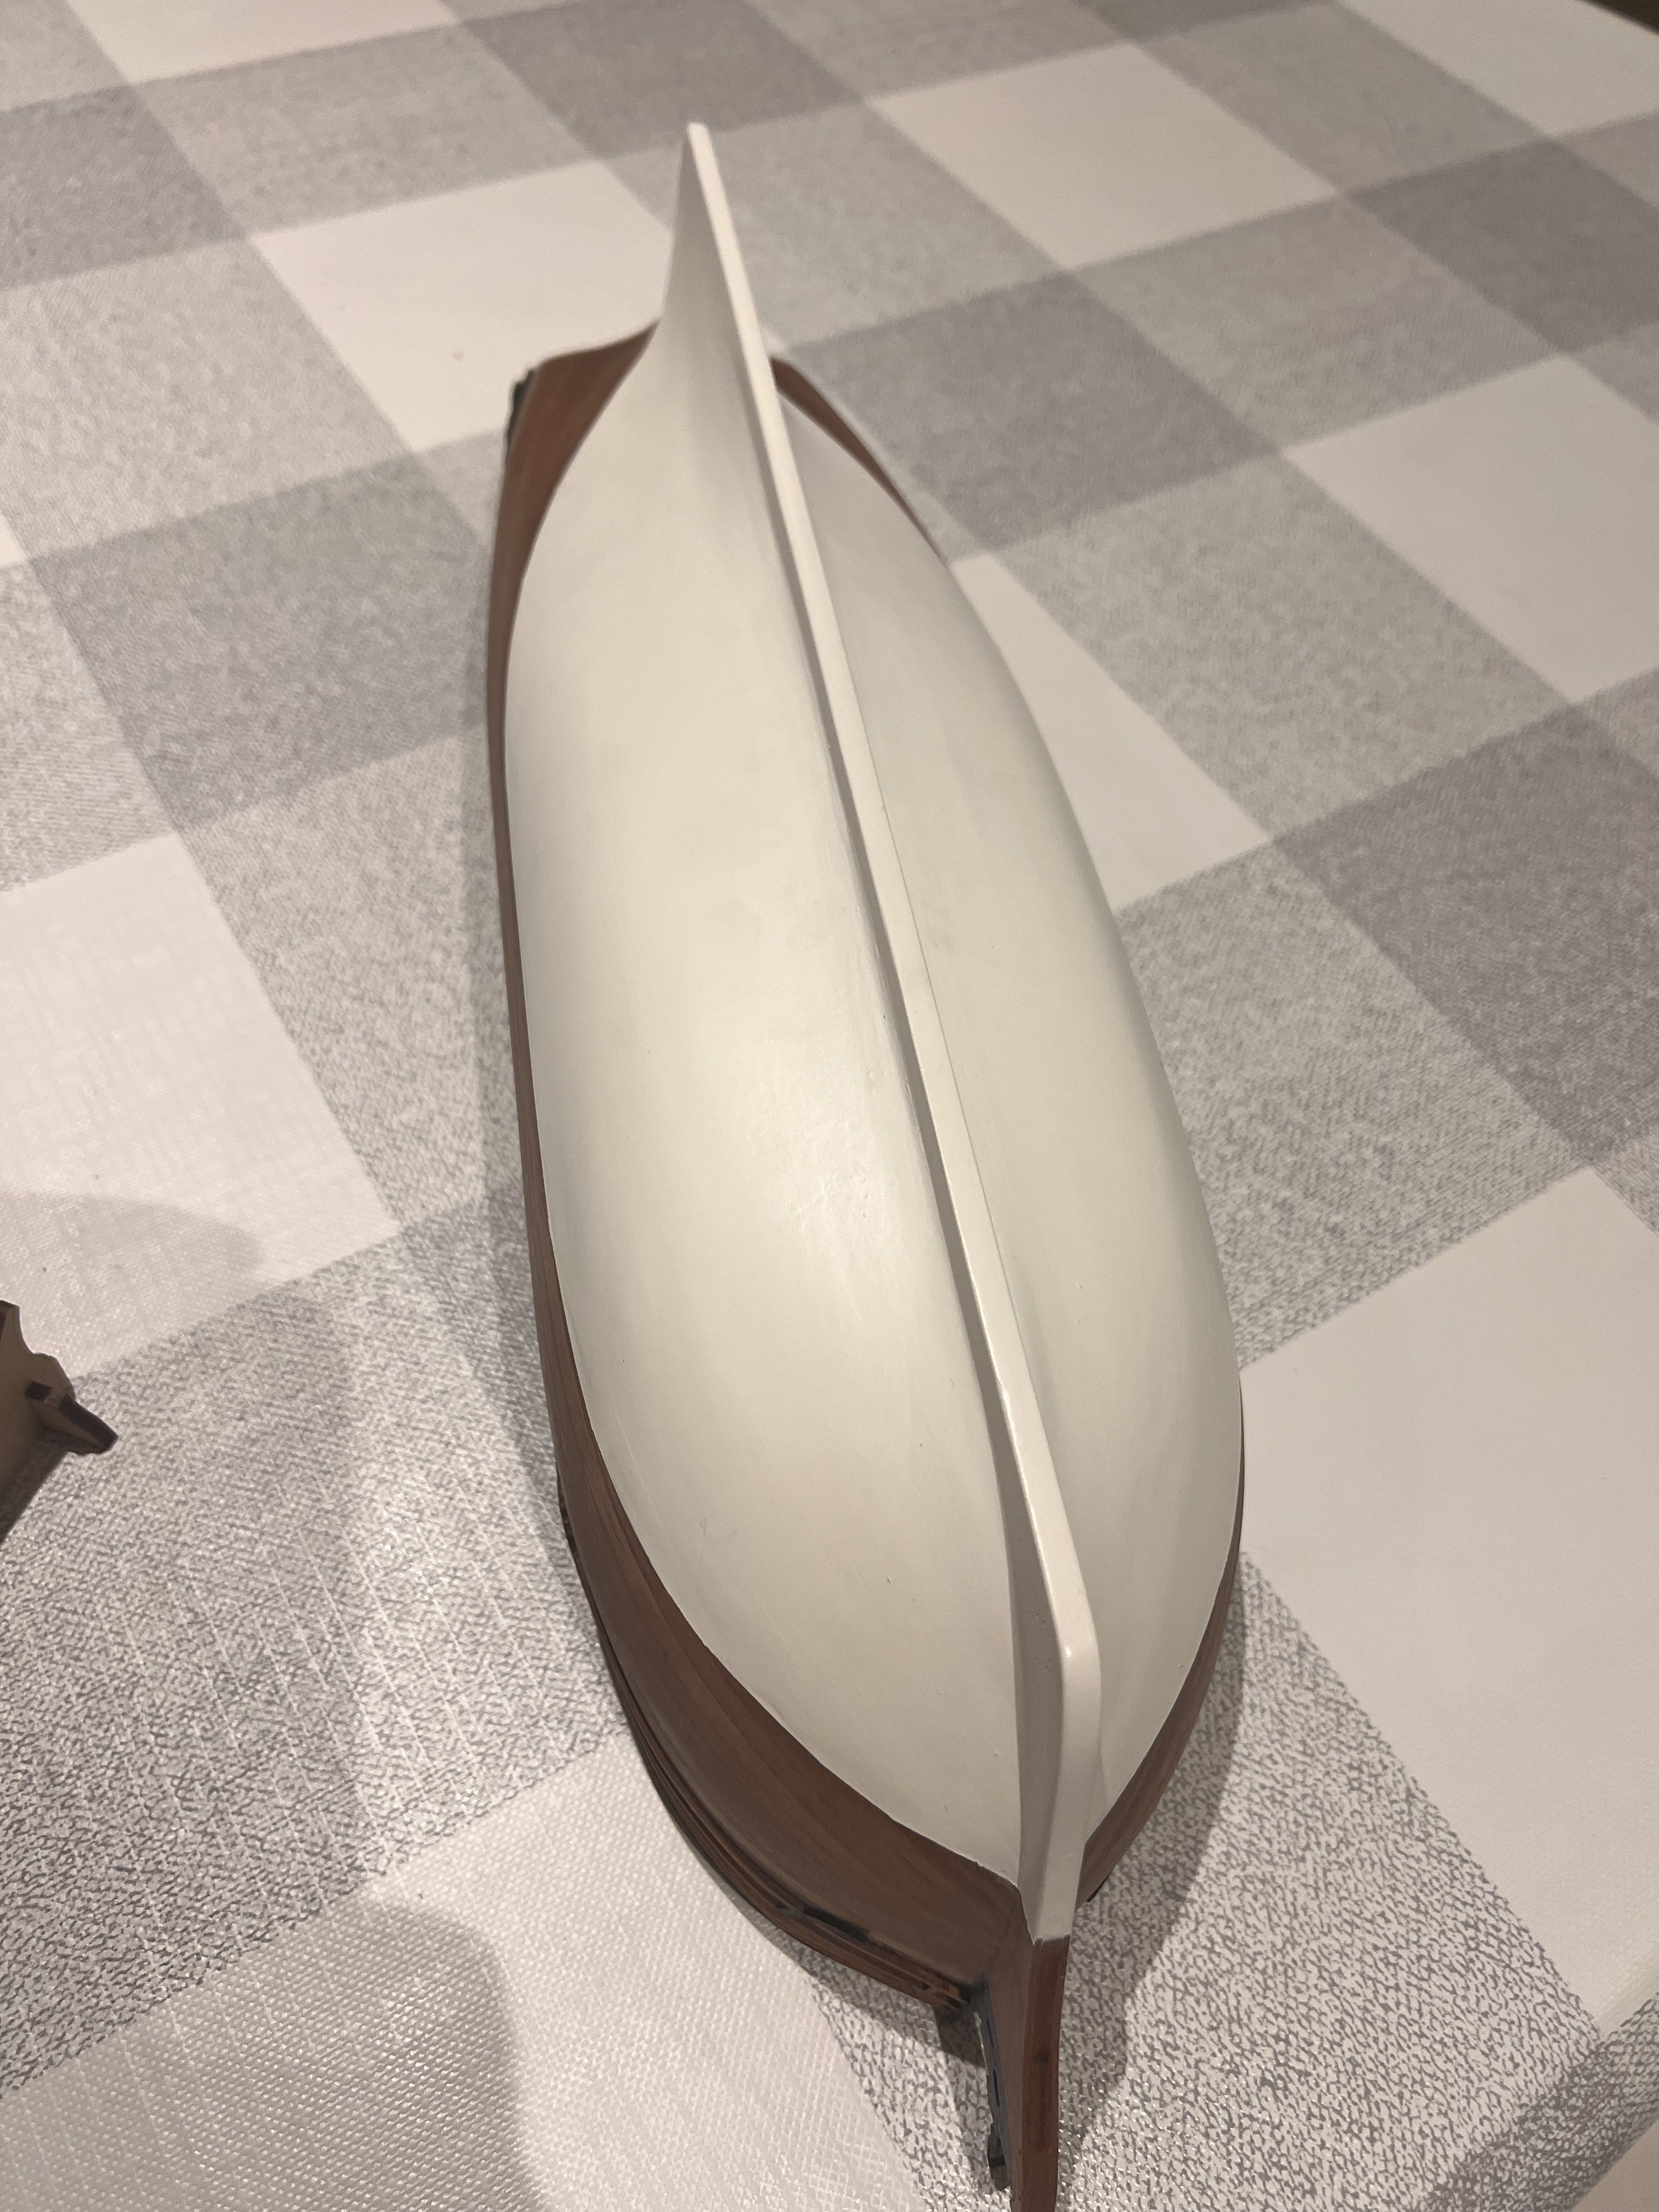
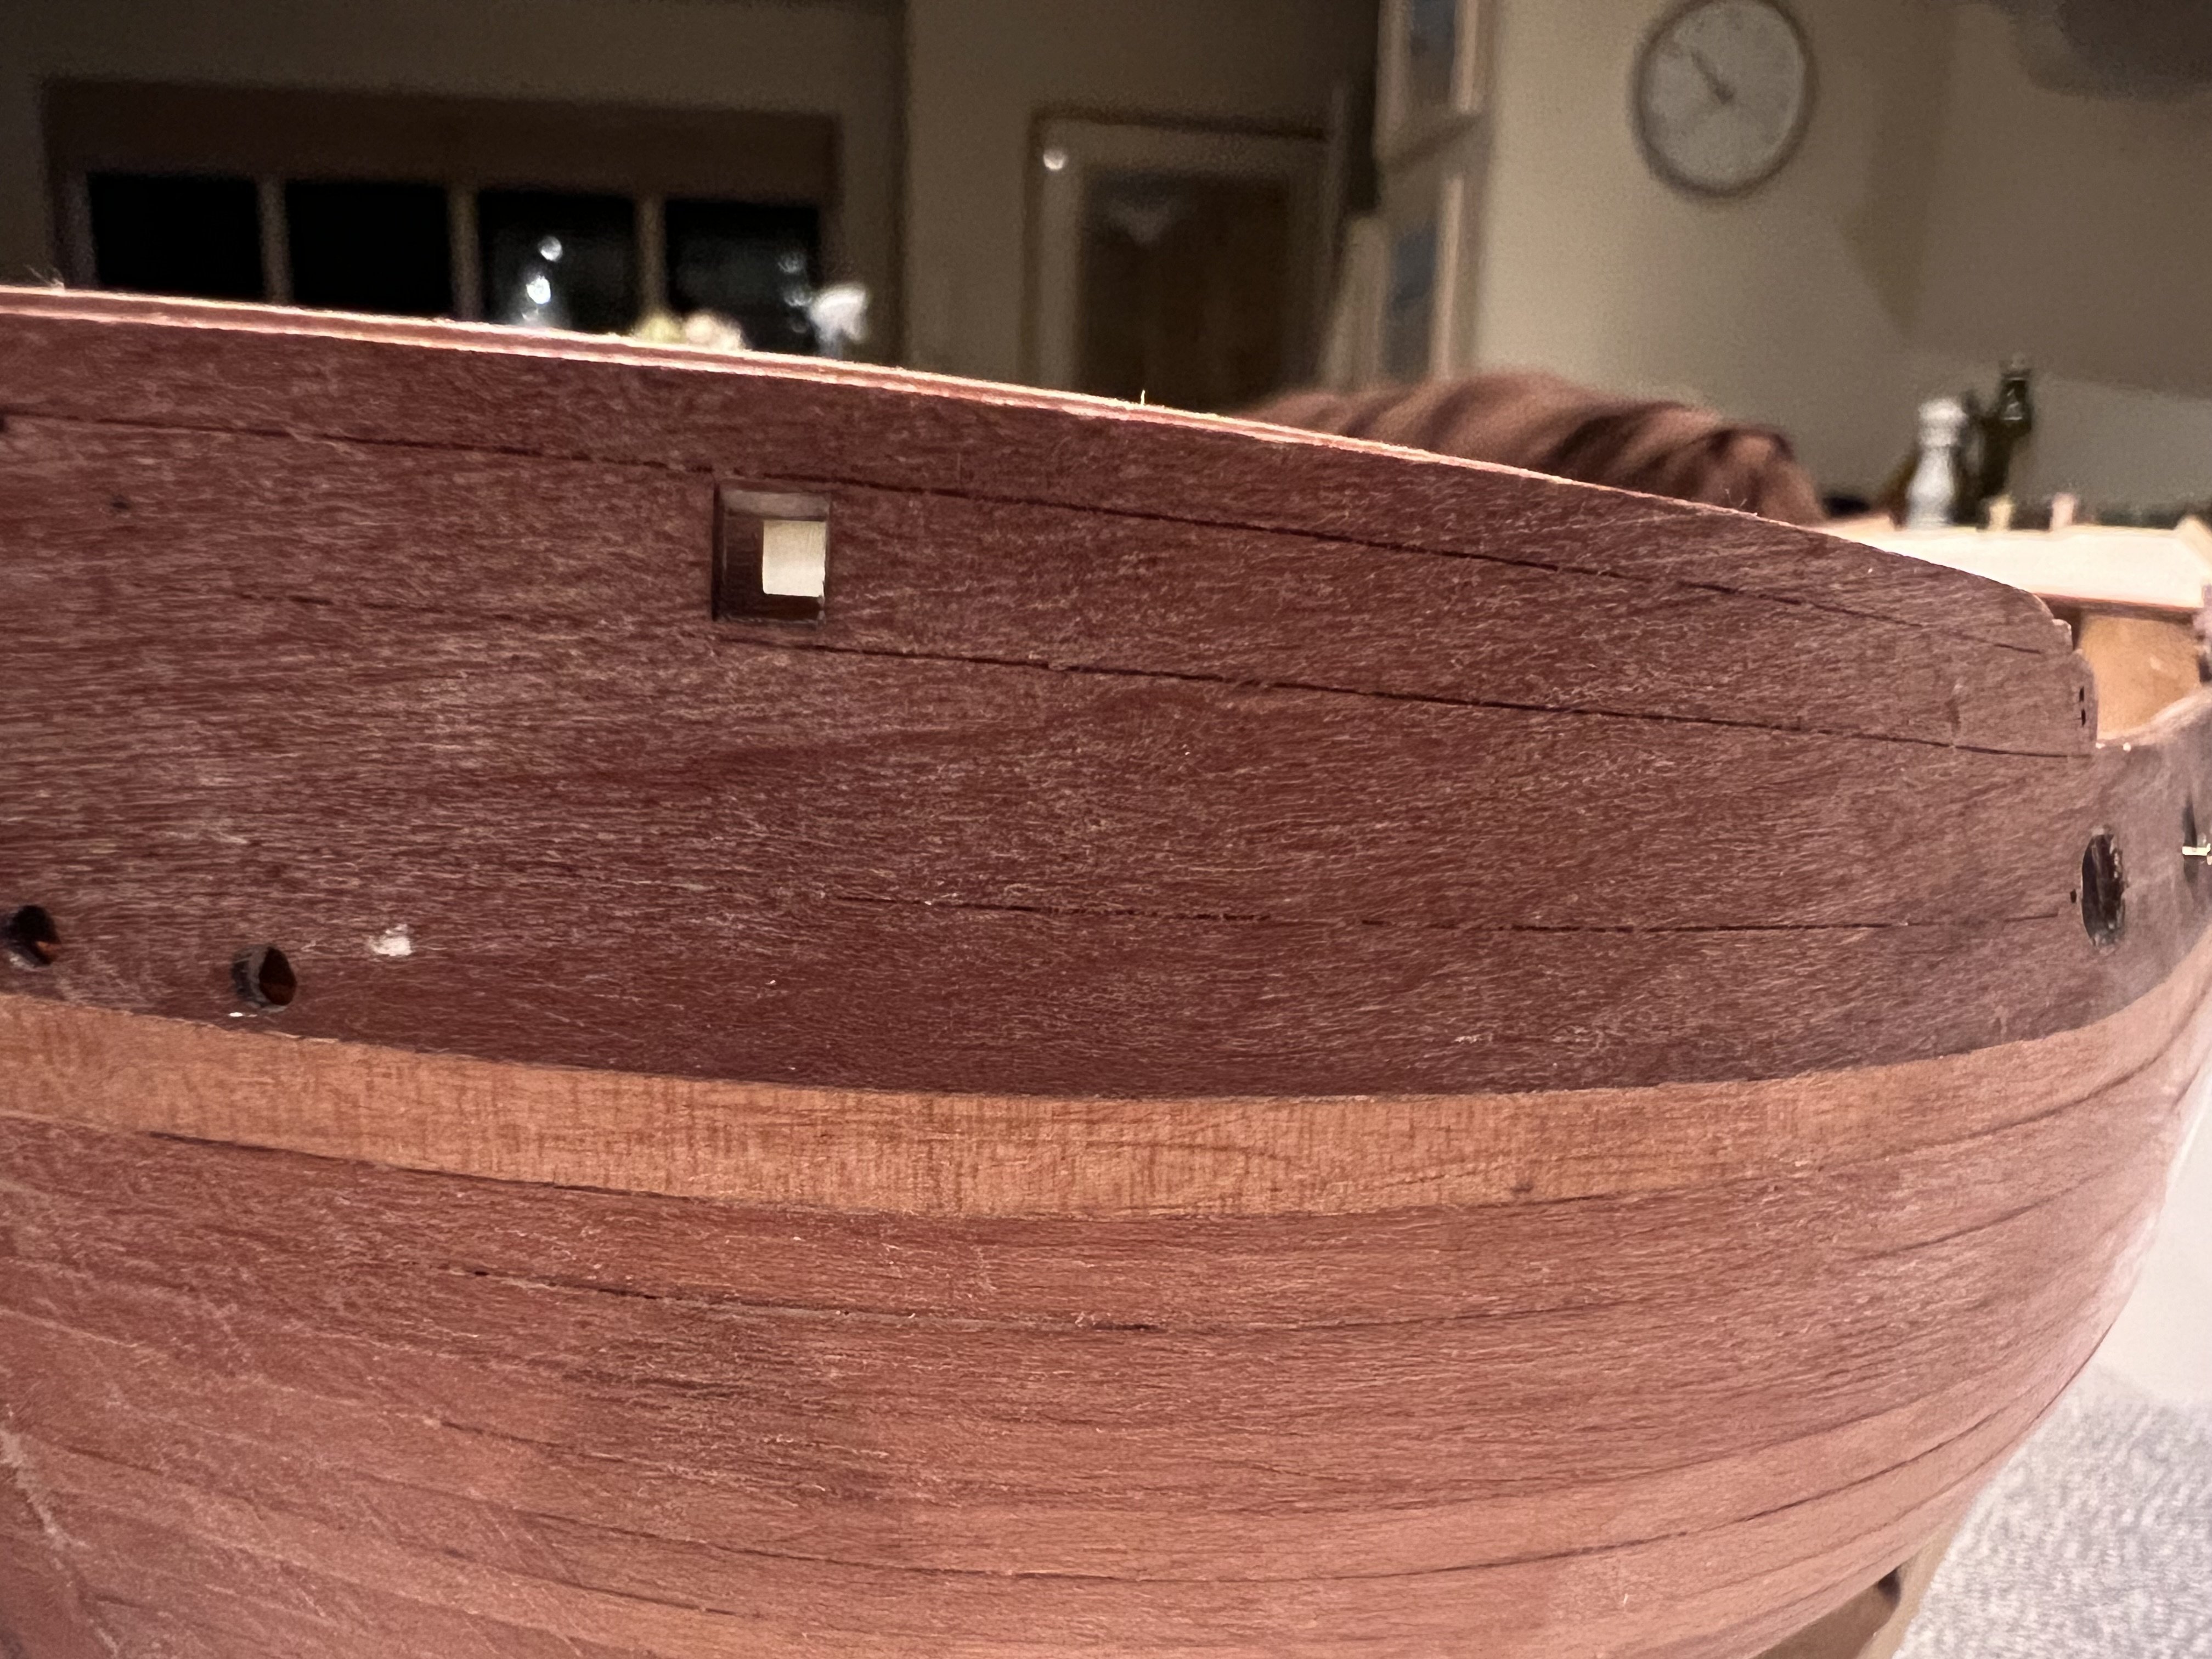
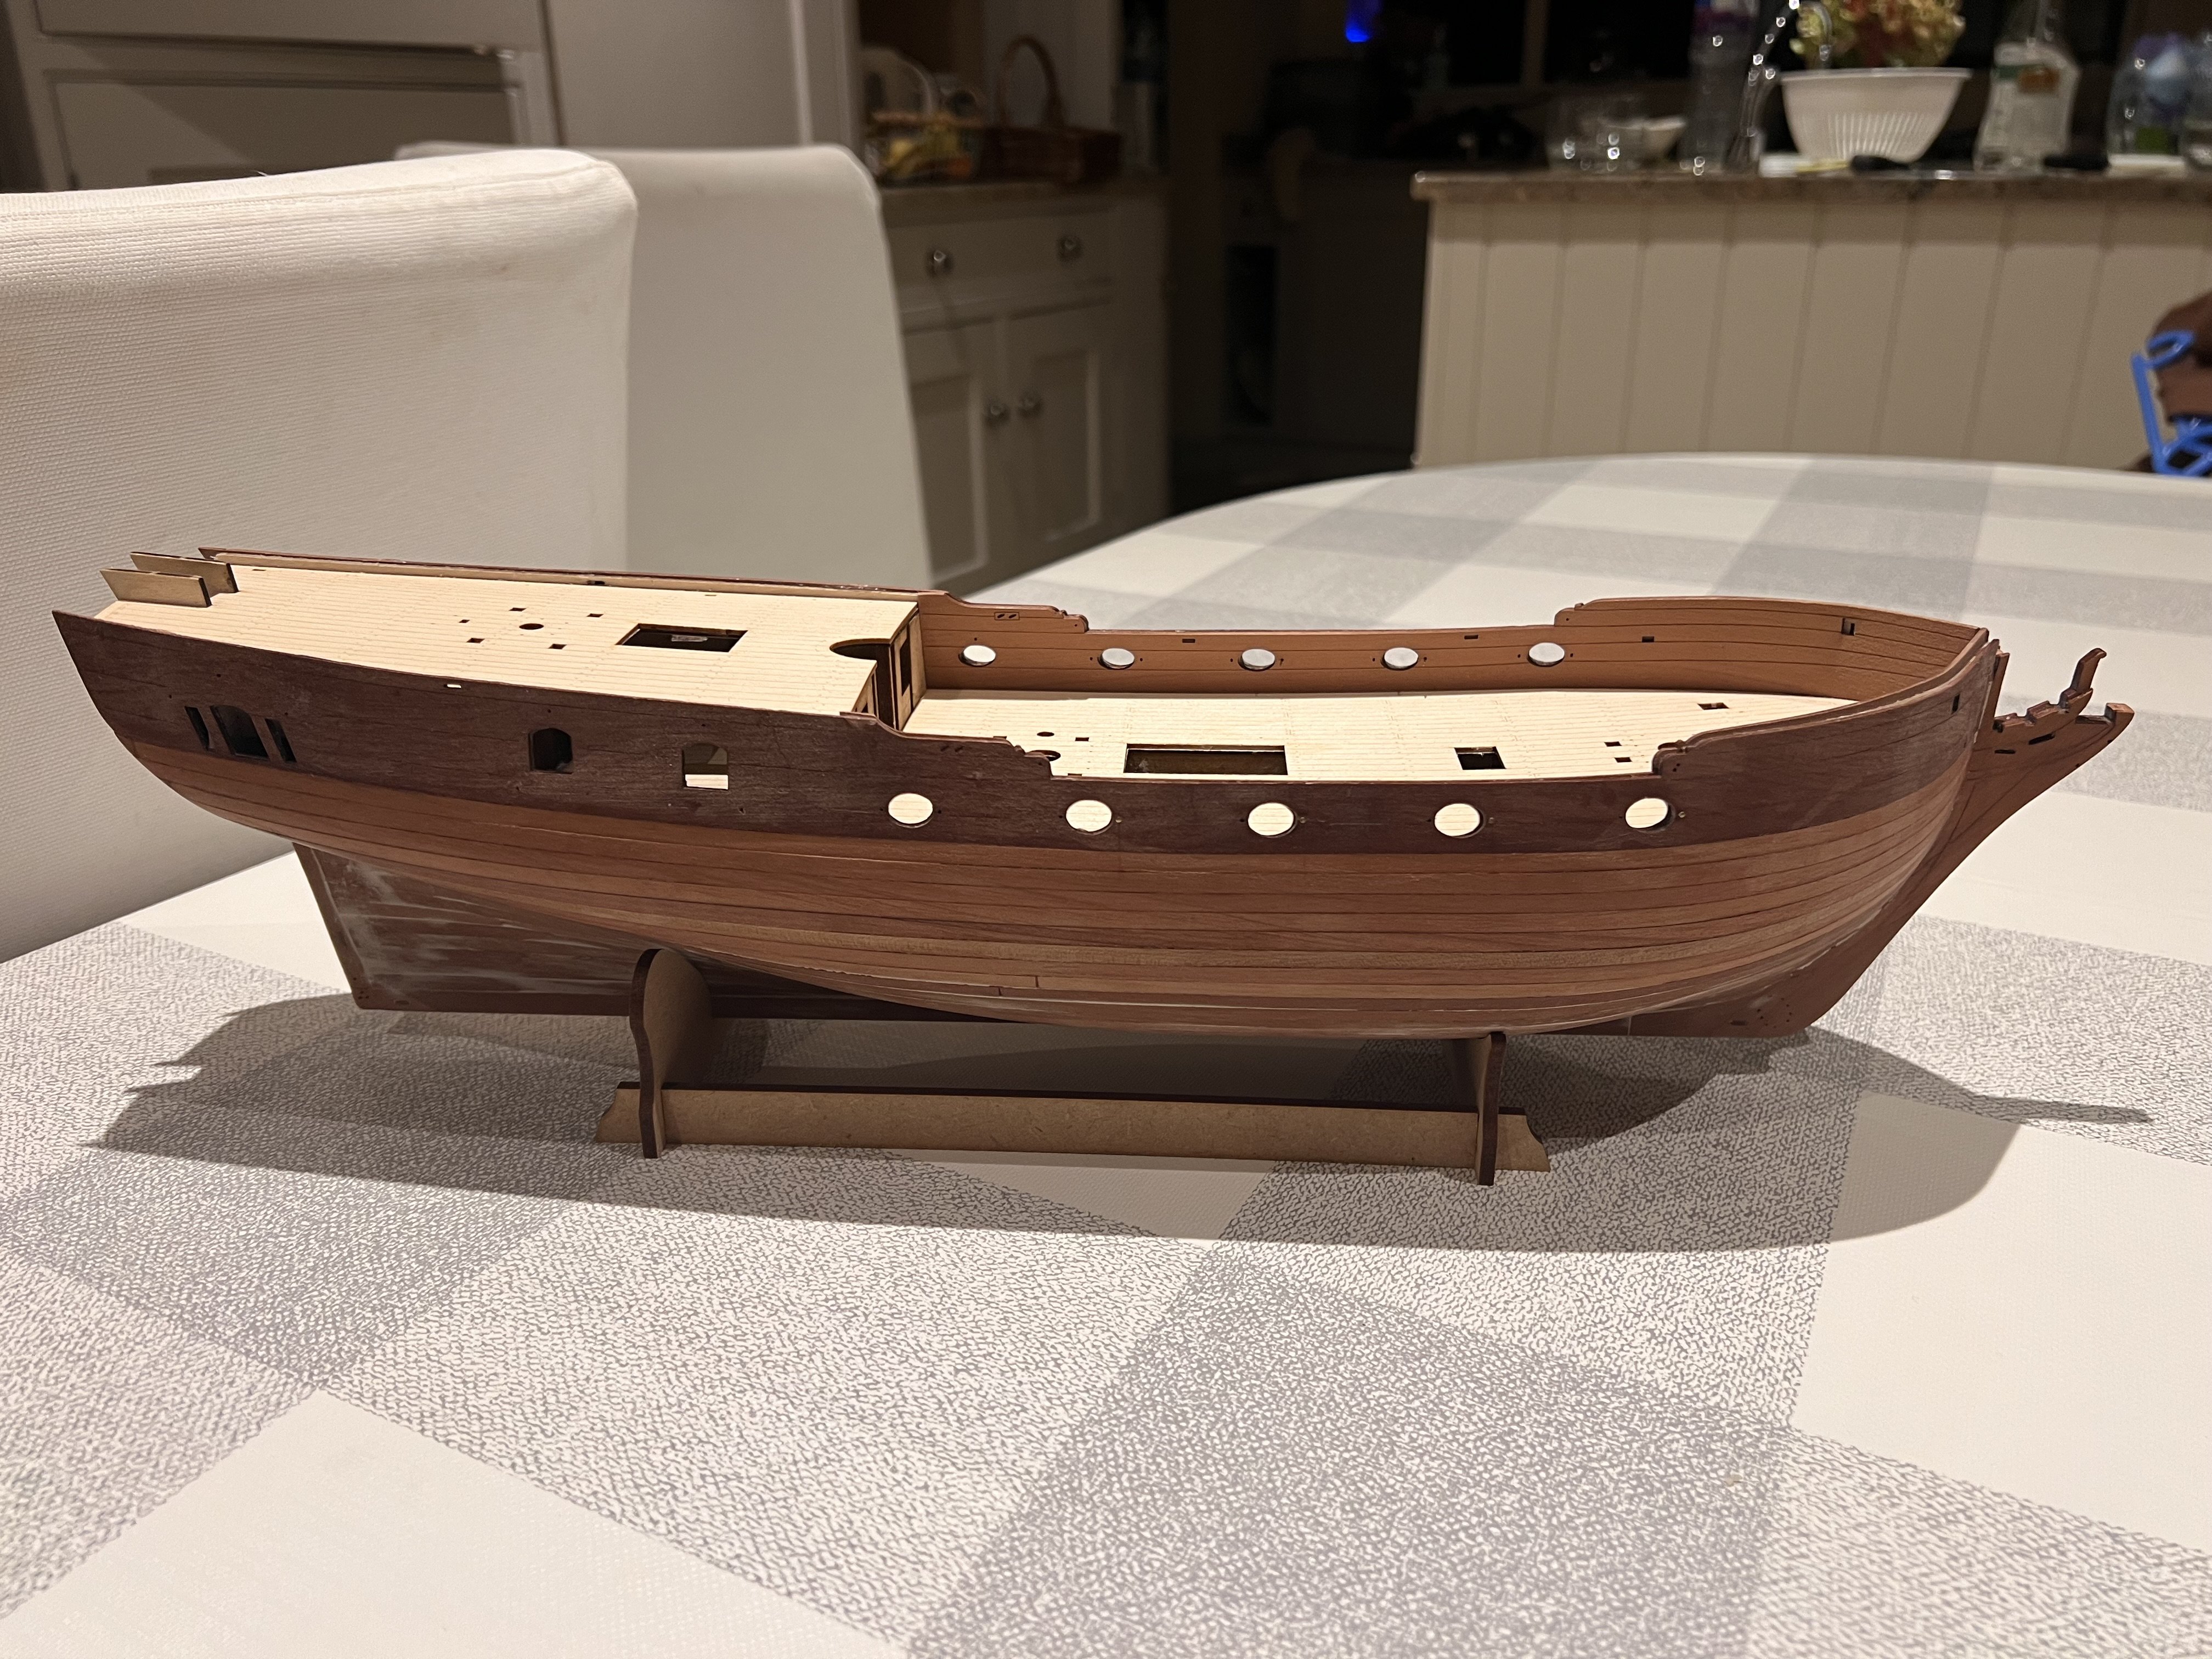
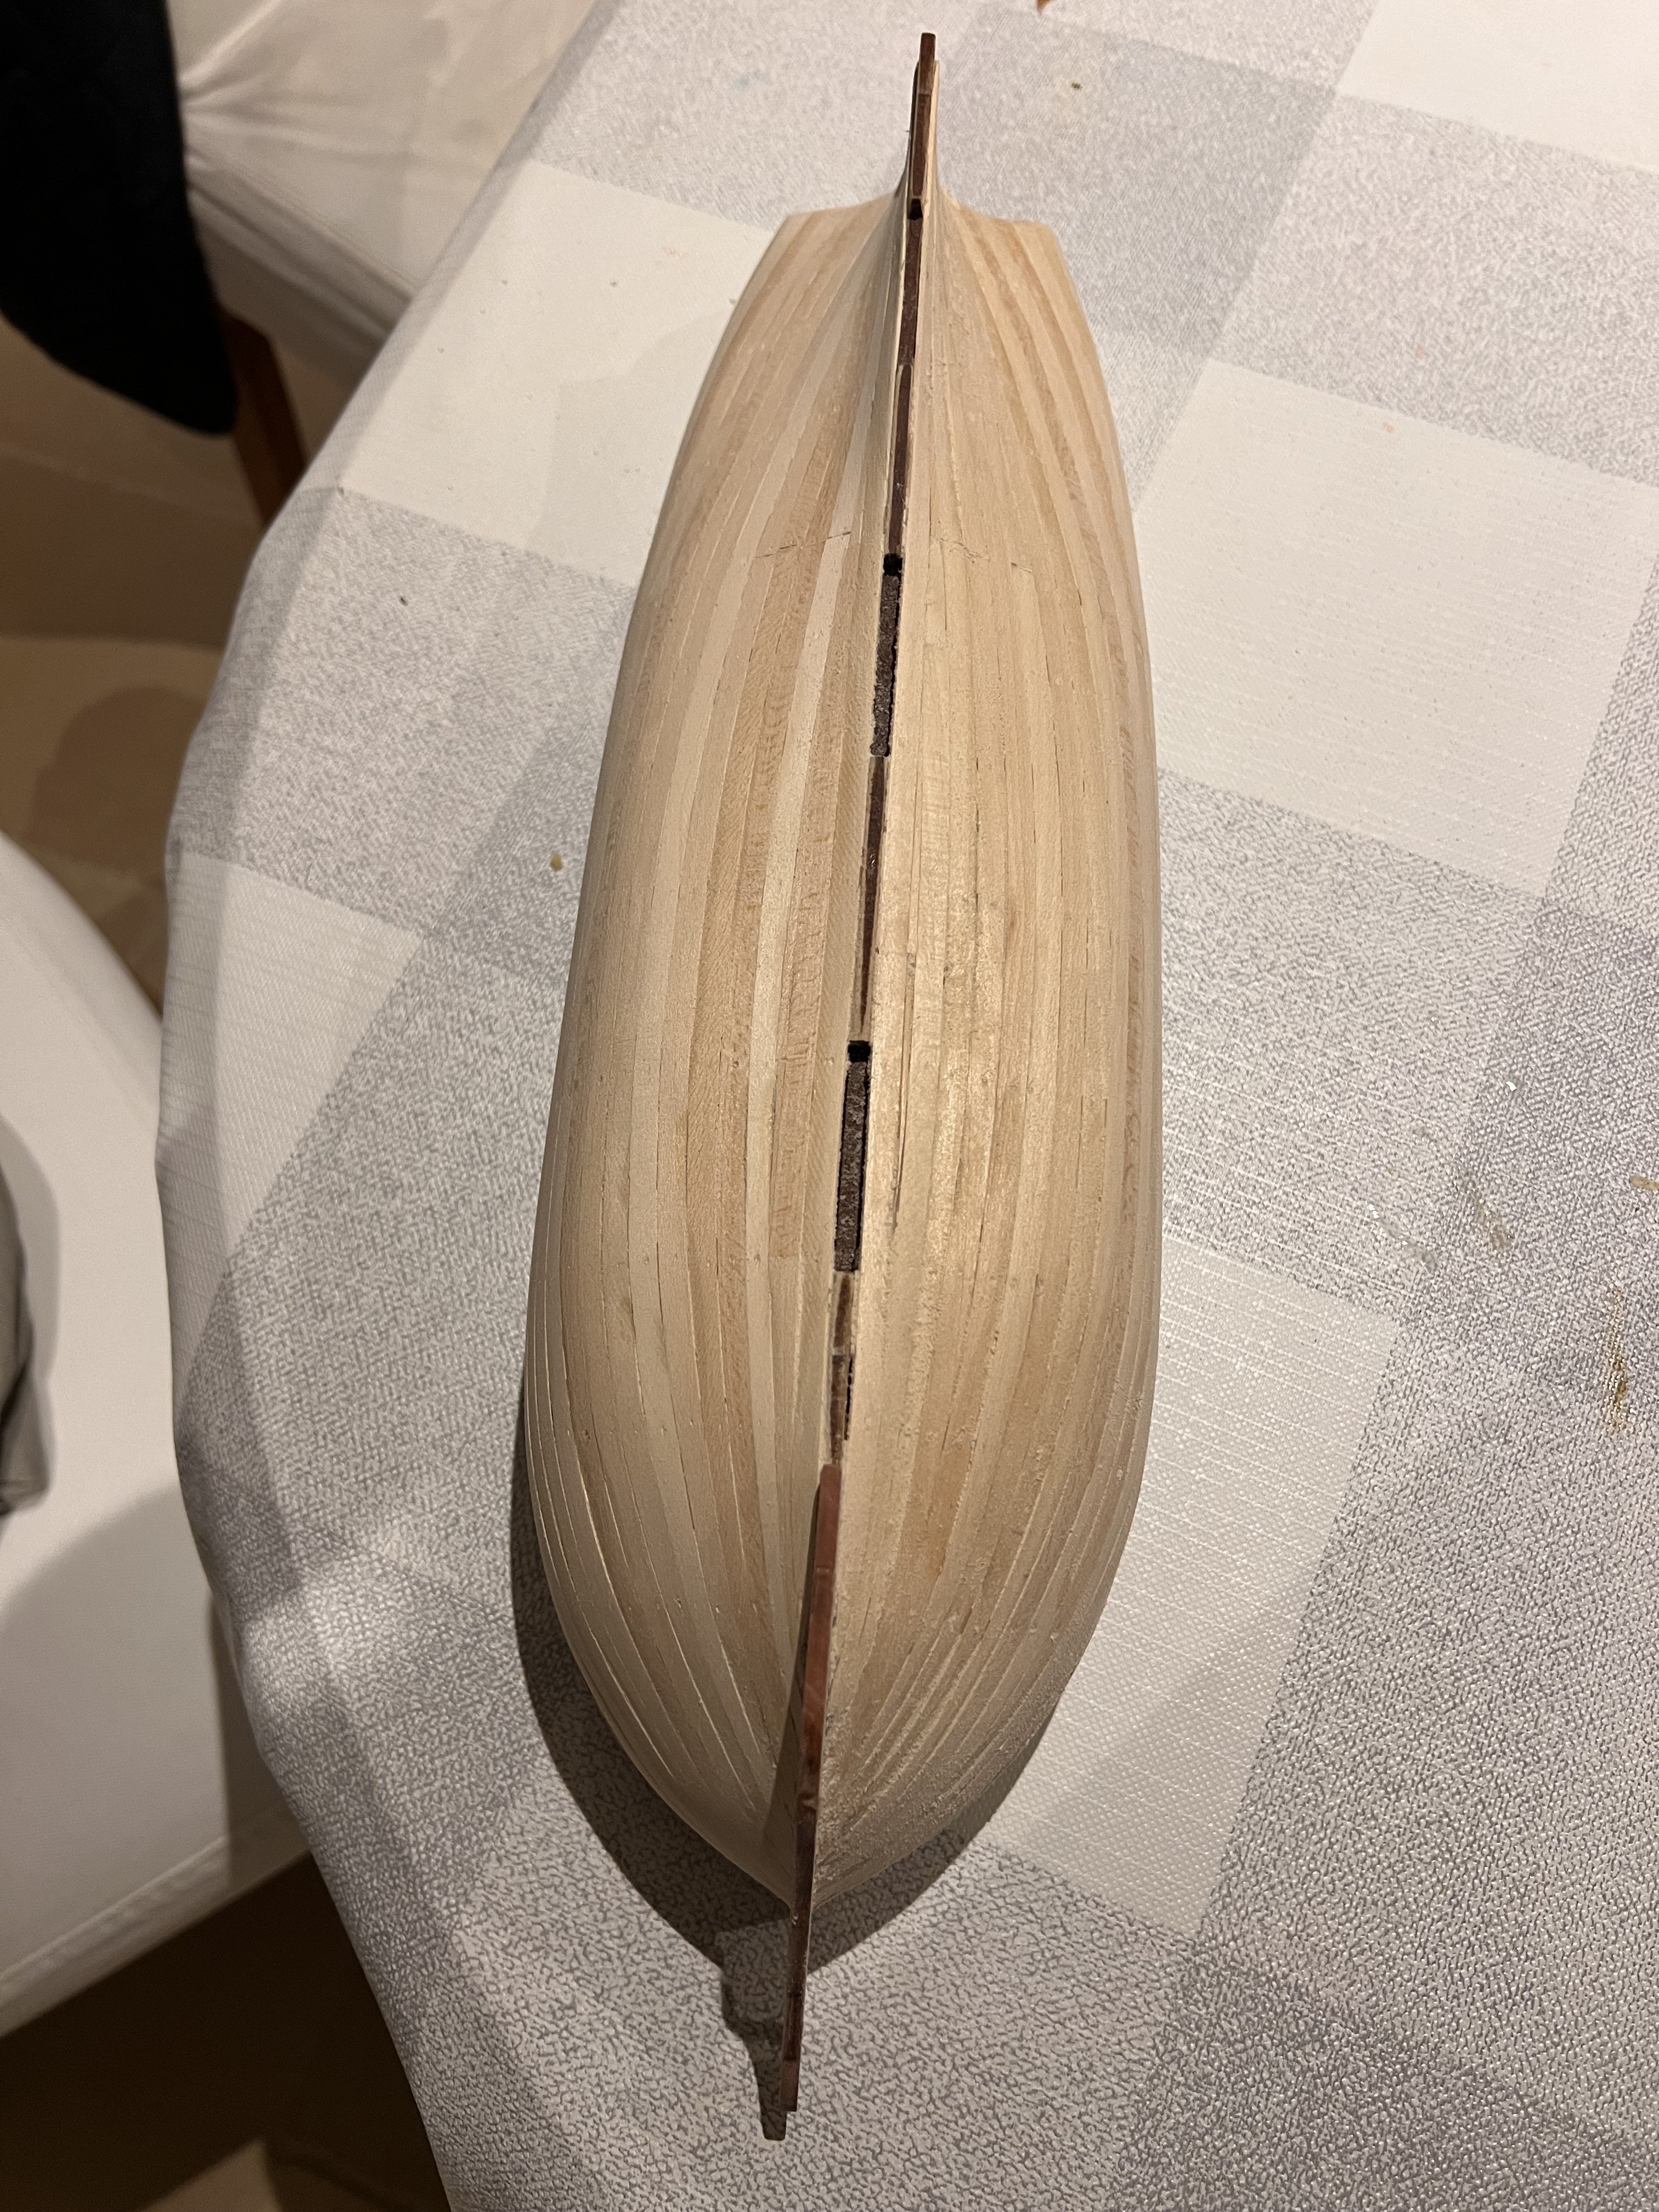
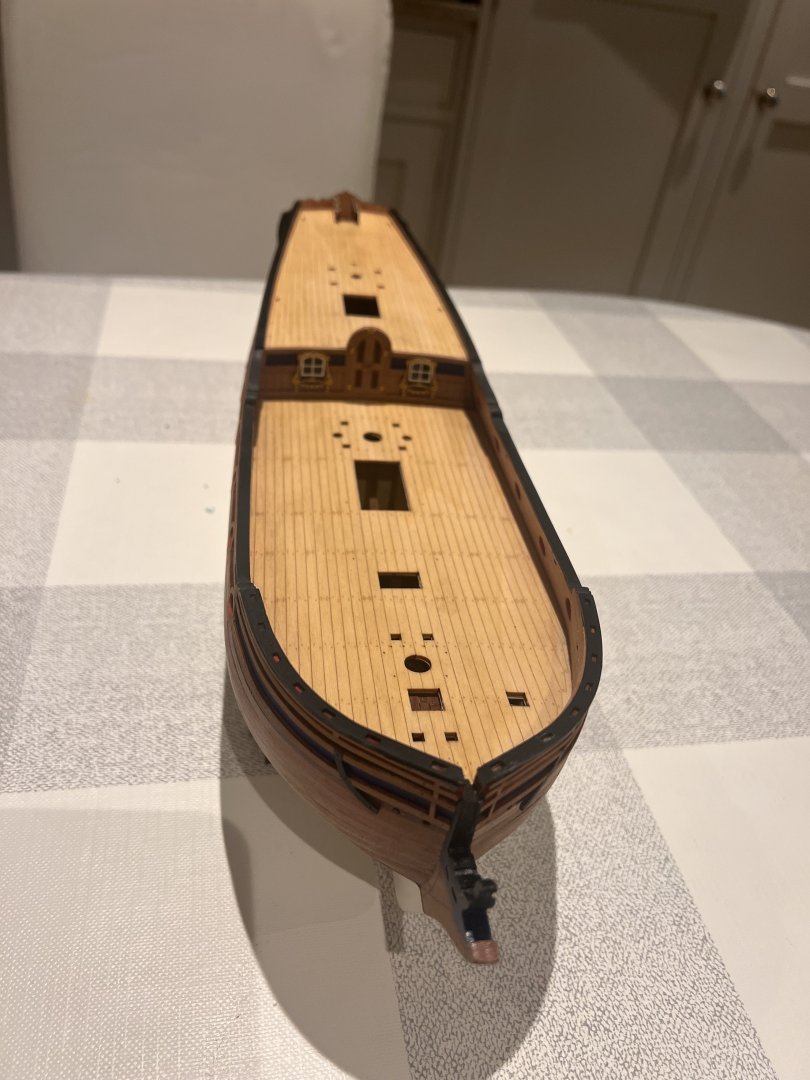
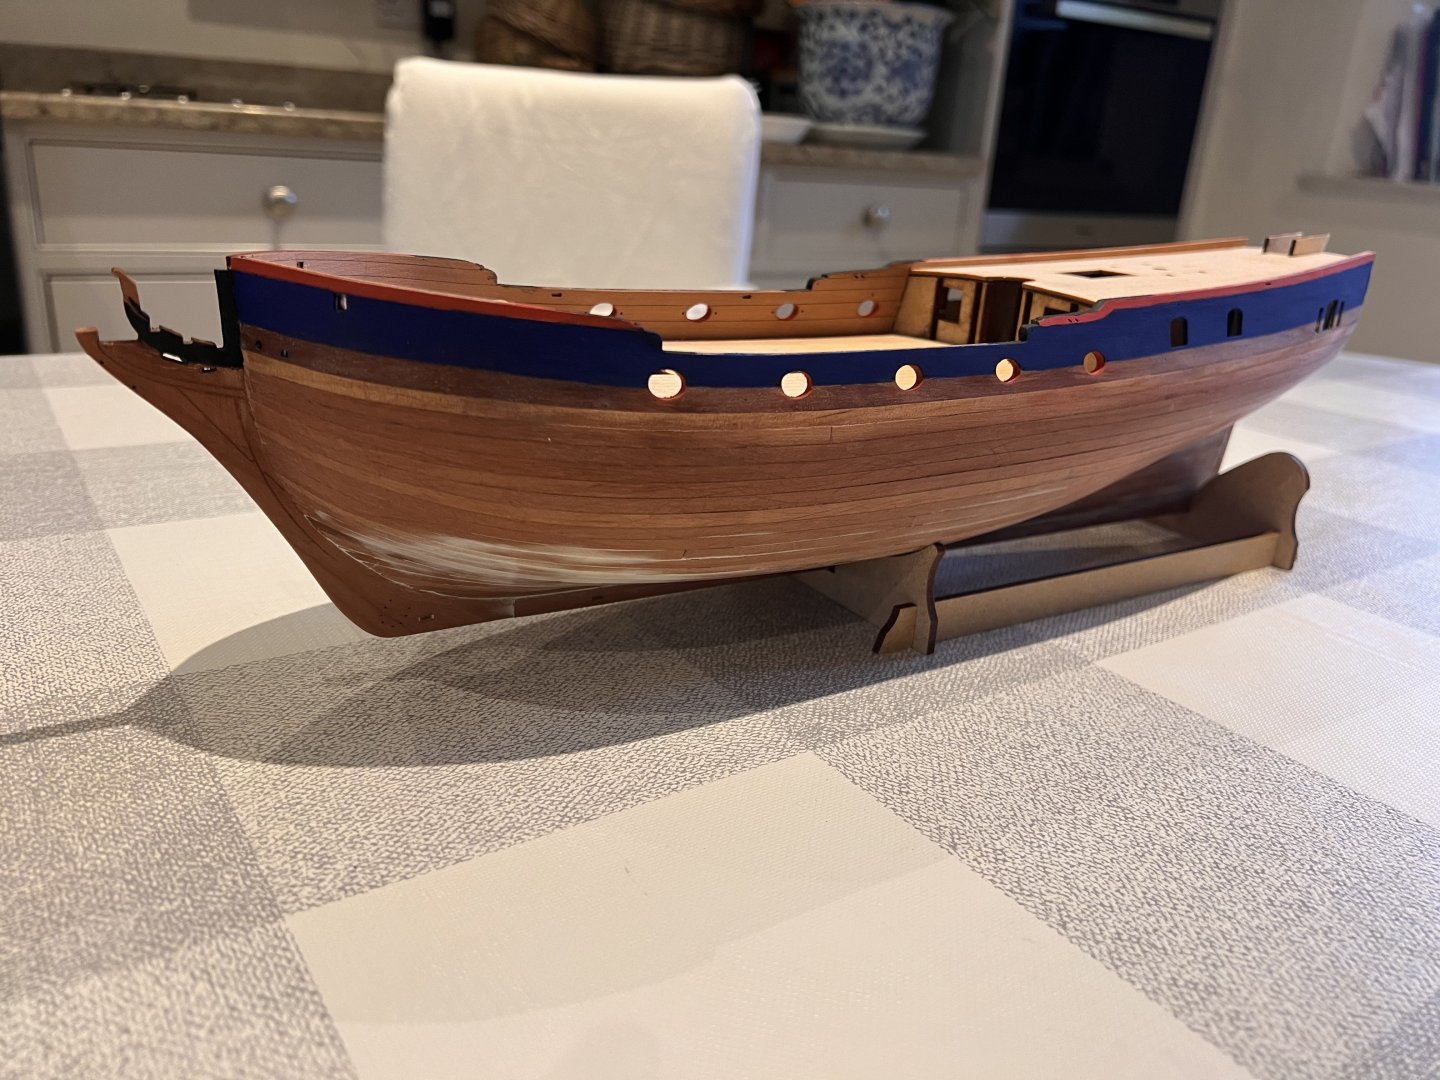
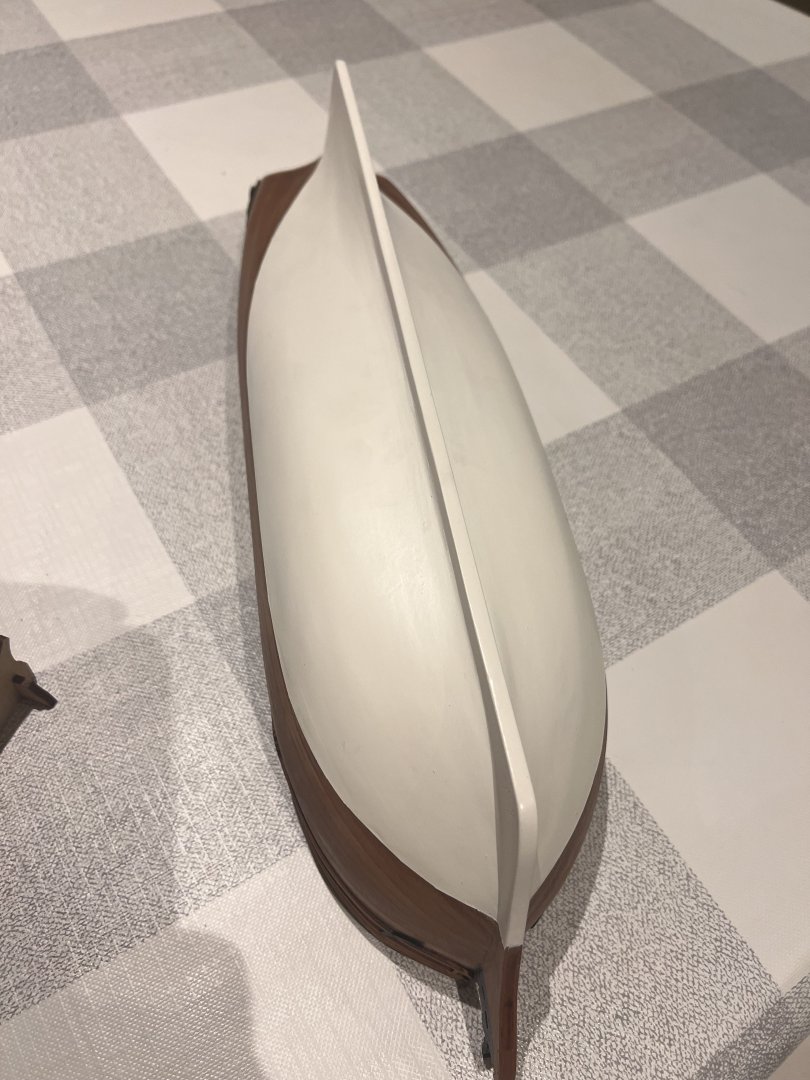
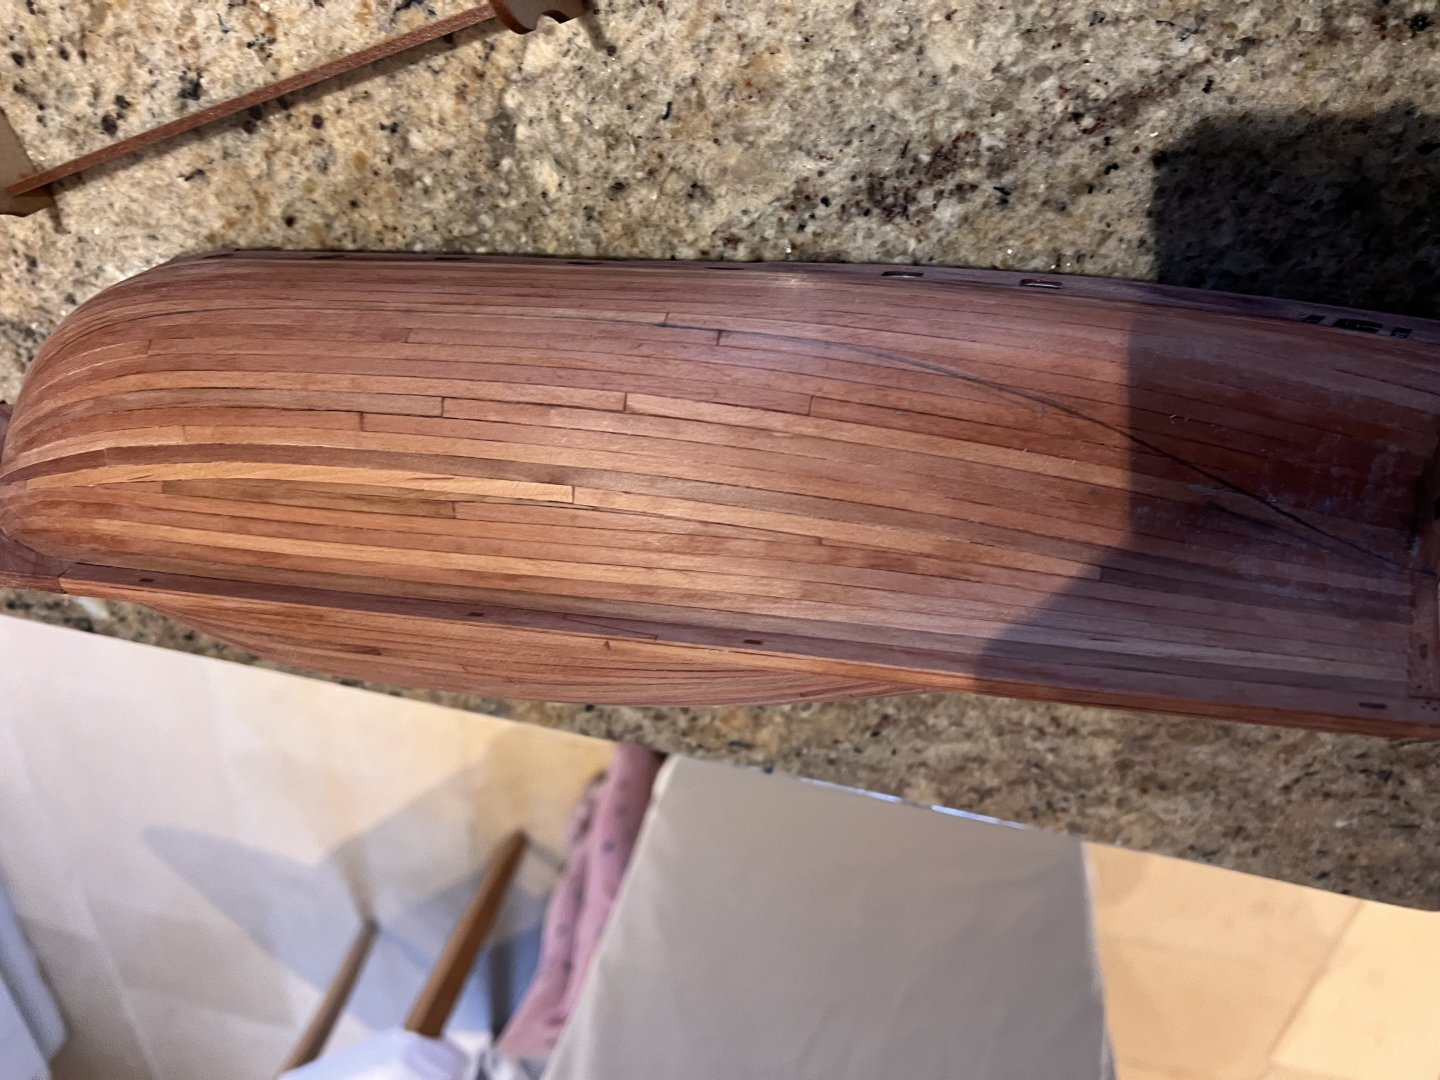
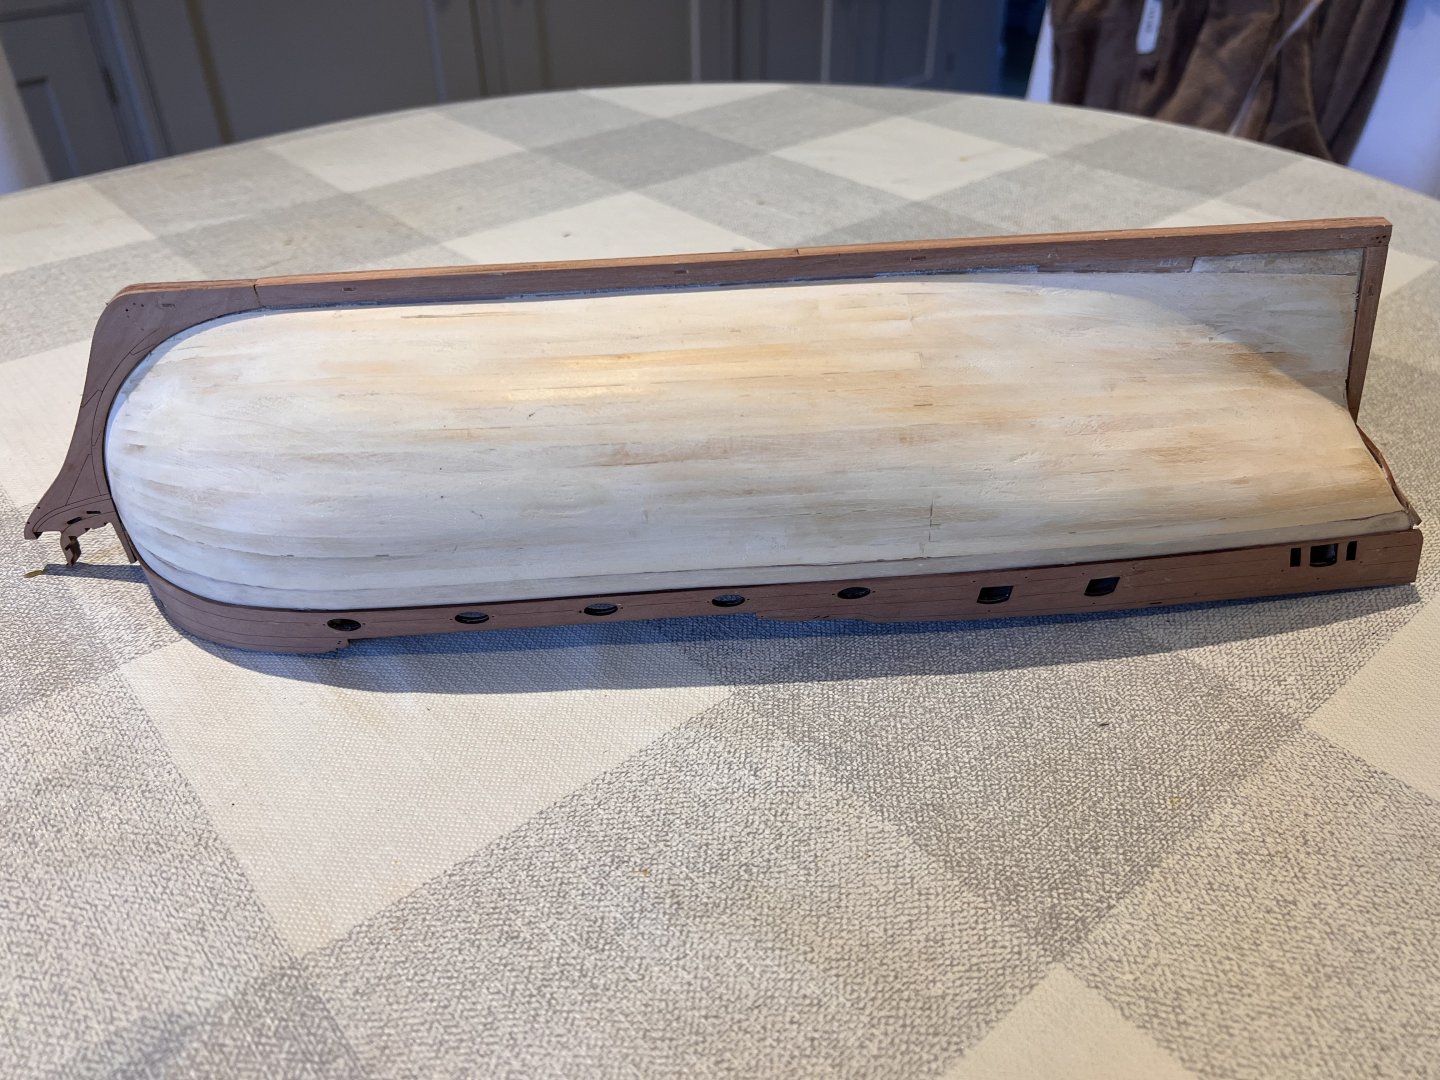
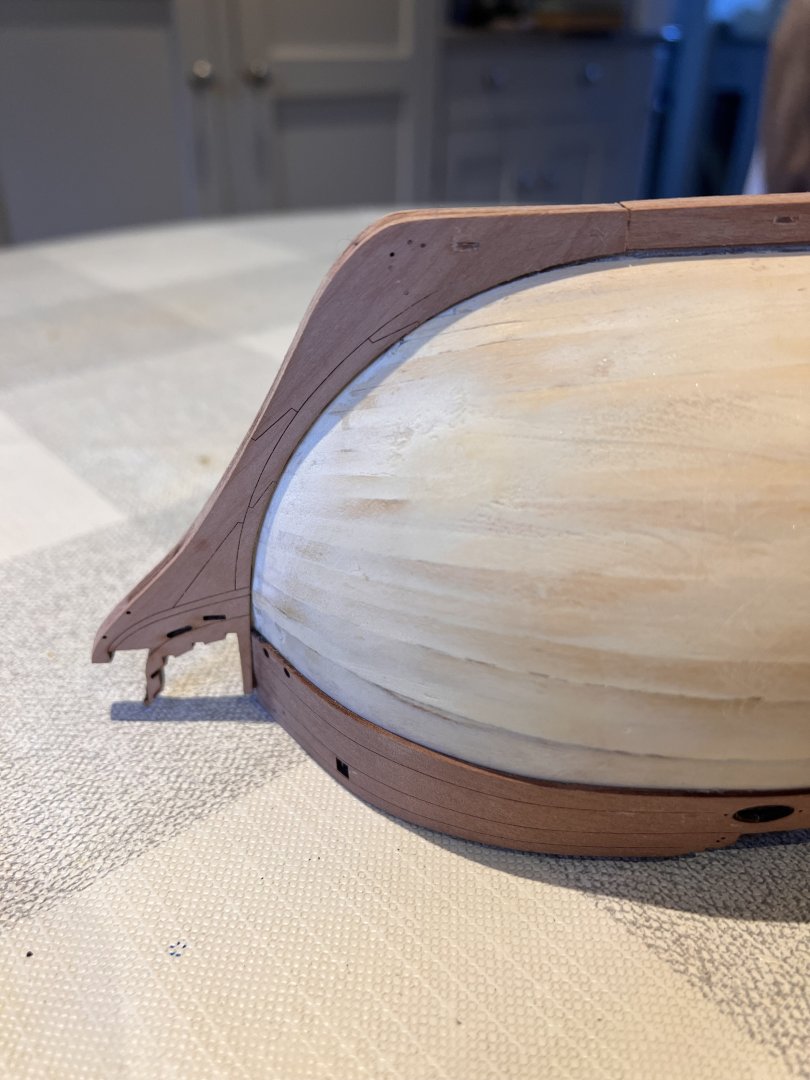
Second planking is complete. DoK’s hull is quite forgiving, but not enough that my planking didn’t get a bit messy at the bottom. I’ve added the waterline in the photo below. Everything below that will be painted white and I don’t mind what it looks like so long as I can fill and sand it smooth. The stern area was the hardest part, in particular how to terminate the planks against the counter. Looks neat in the photo but I’ve sanded it too much on the starboard side. I’ve put Danish oil on the planks as I usually do and also on the bulwarks. It seems to have stained the wood much darker than usual (Adder’s bulwarks behind in the photo are much lighter after Danish oil). Will need to think if I should have Danish oil on the inner bulwarks. The outer bulwarks are mostly painted so the dark colour doesn’t matter.


- 36 replies
-
- 7
-
-
- Duchess of Kingston
- Vanguard Models
- (and 1 more)
-
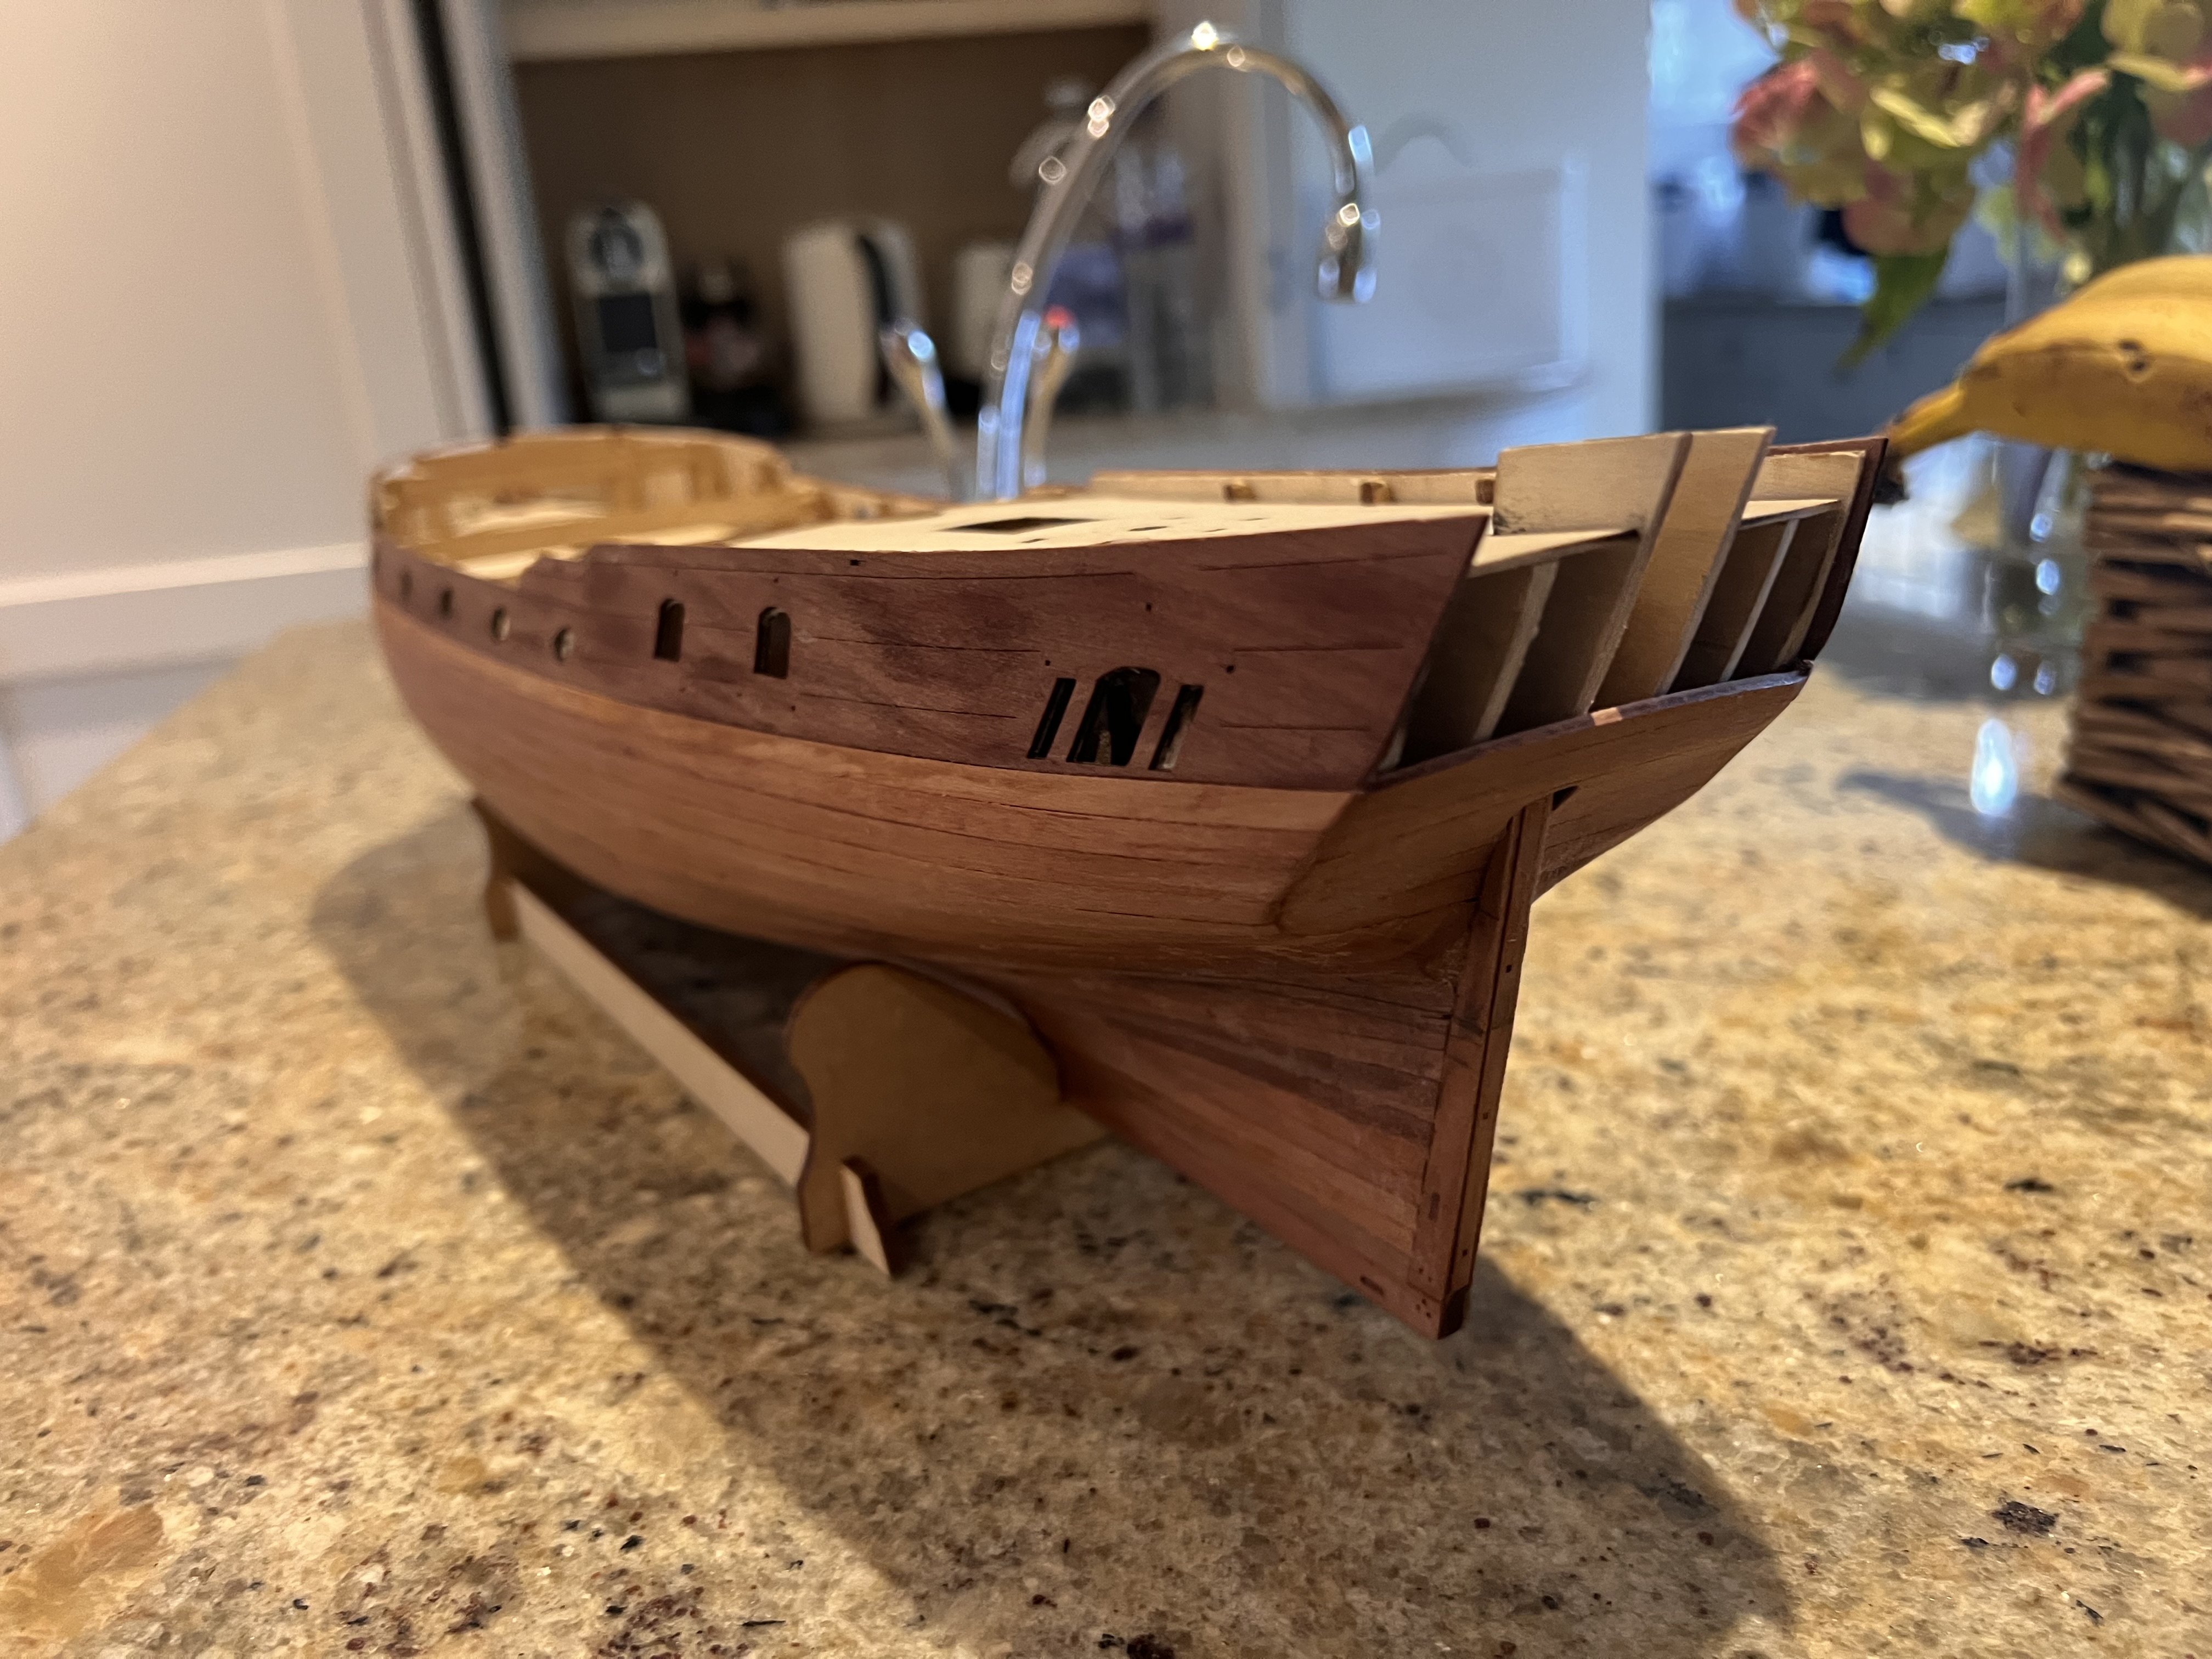
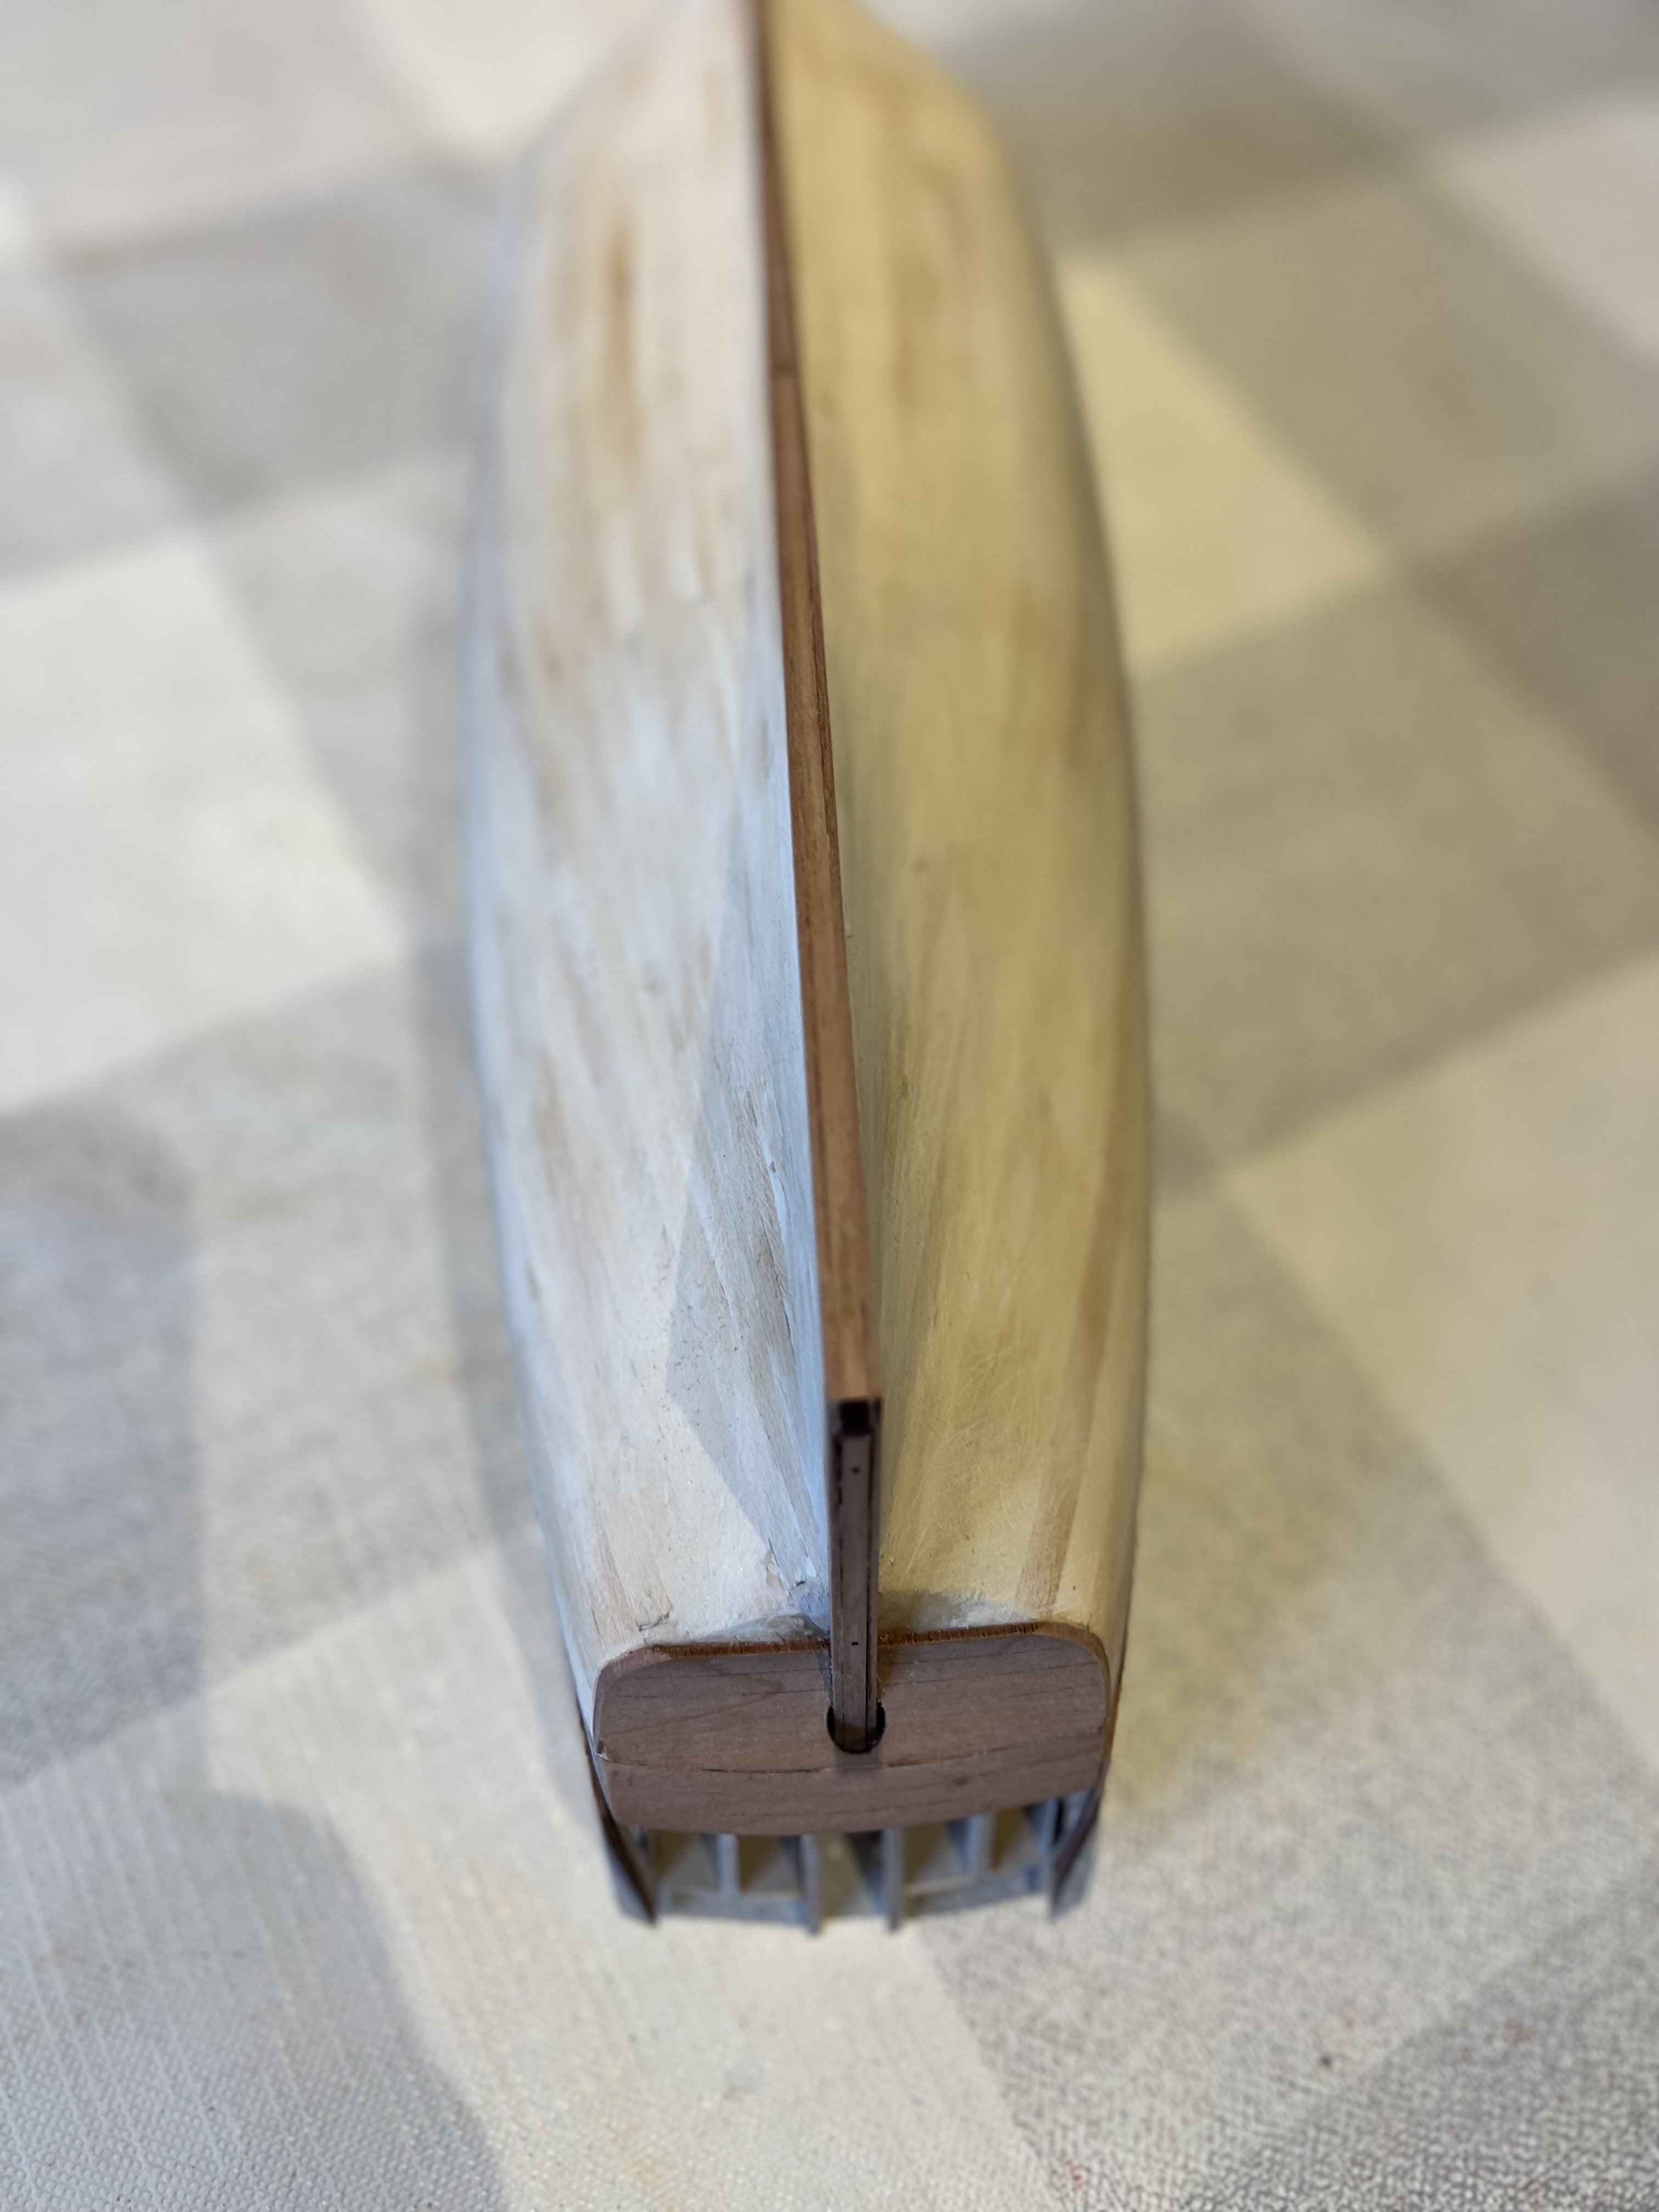
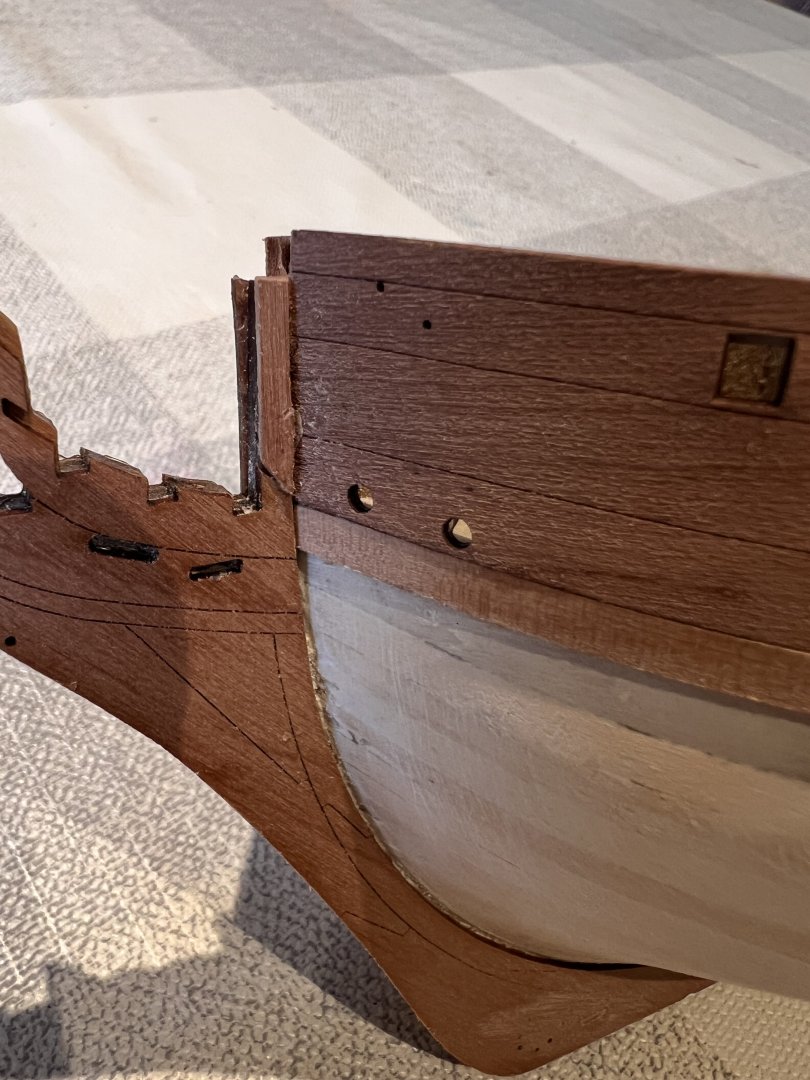
Thanks Andrew! Next the stern post was assembled and the lower counter soaked and bent around a varnish bottle to achieve the correct shape. The counter and stern post were glued in place. The outer side patterns were soaked for 90 mins in hot water and then clamped in place. I also put pins through the holes in both side patterns to ensure that they were properly aligned. After being soaked the alignment wasn’t perfect as the peat wood swells in water. I had to leave them clamped and pinned for almost two days to dry out and shrink back to shape. Once done, they were glued too. Lastly the outer patterns for the keel and stem were glued in place. First breakage for this kit happened here (must be a record for me, usually I’ve broken loads by now). One of the clamps pinged off and took off a small section of the port outer bow pattern off. I’ve grafted a new piece in place and glued it. Still needs to be sanded to blend in. Onto the second planking.

- 36 replies
-
- 15
-
-
- Duchess of Kingston
- Vanguard Models
- (and 1 more)
-
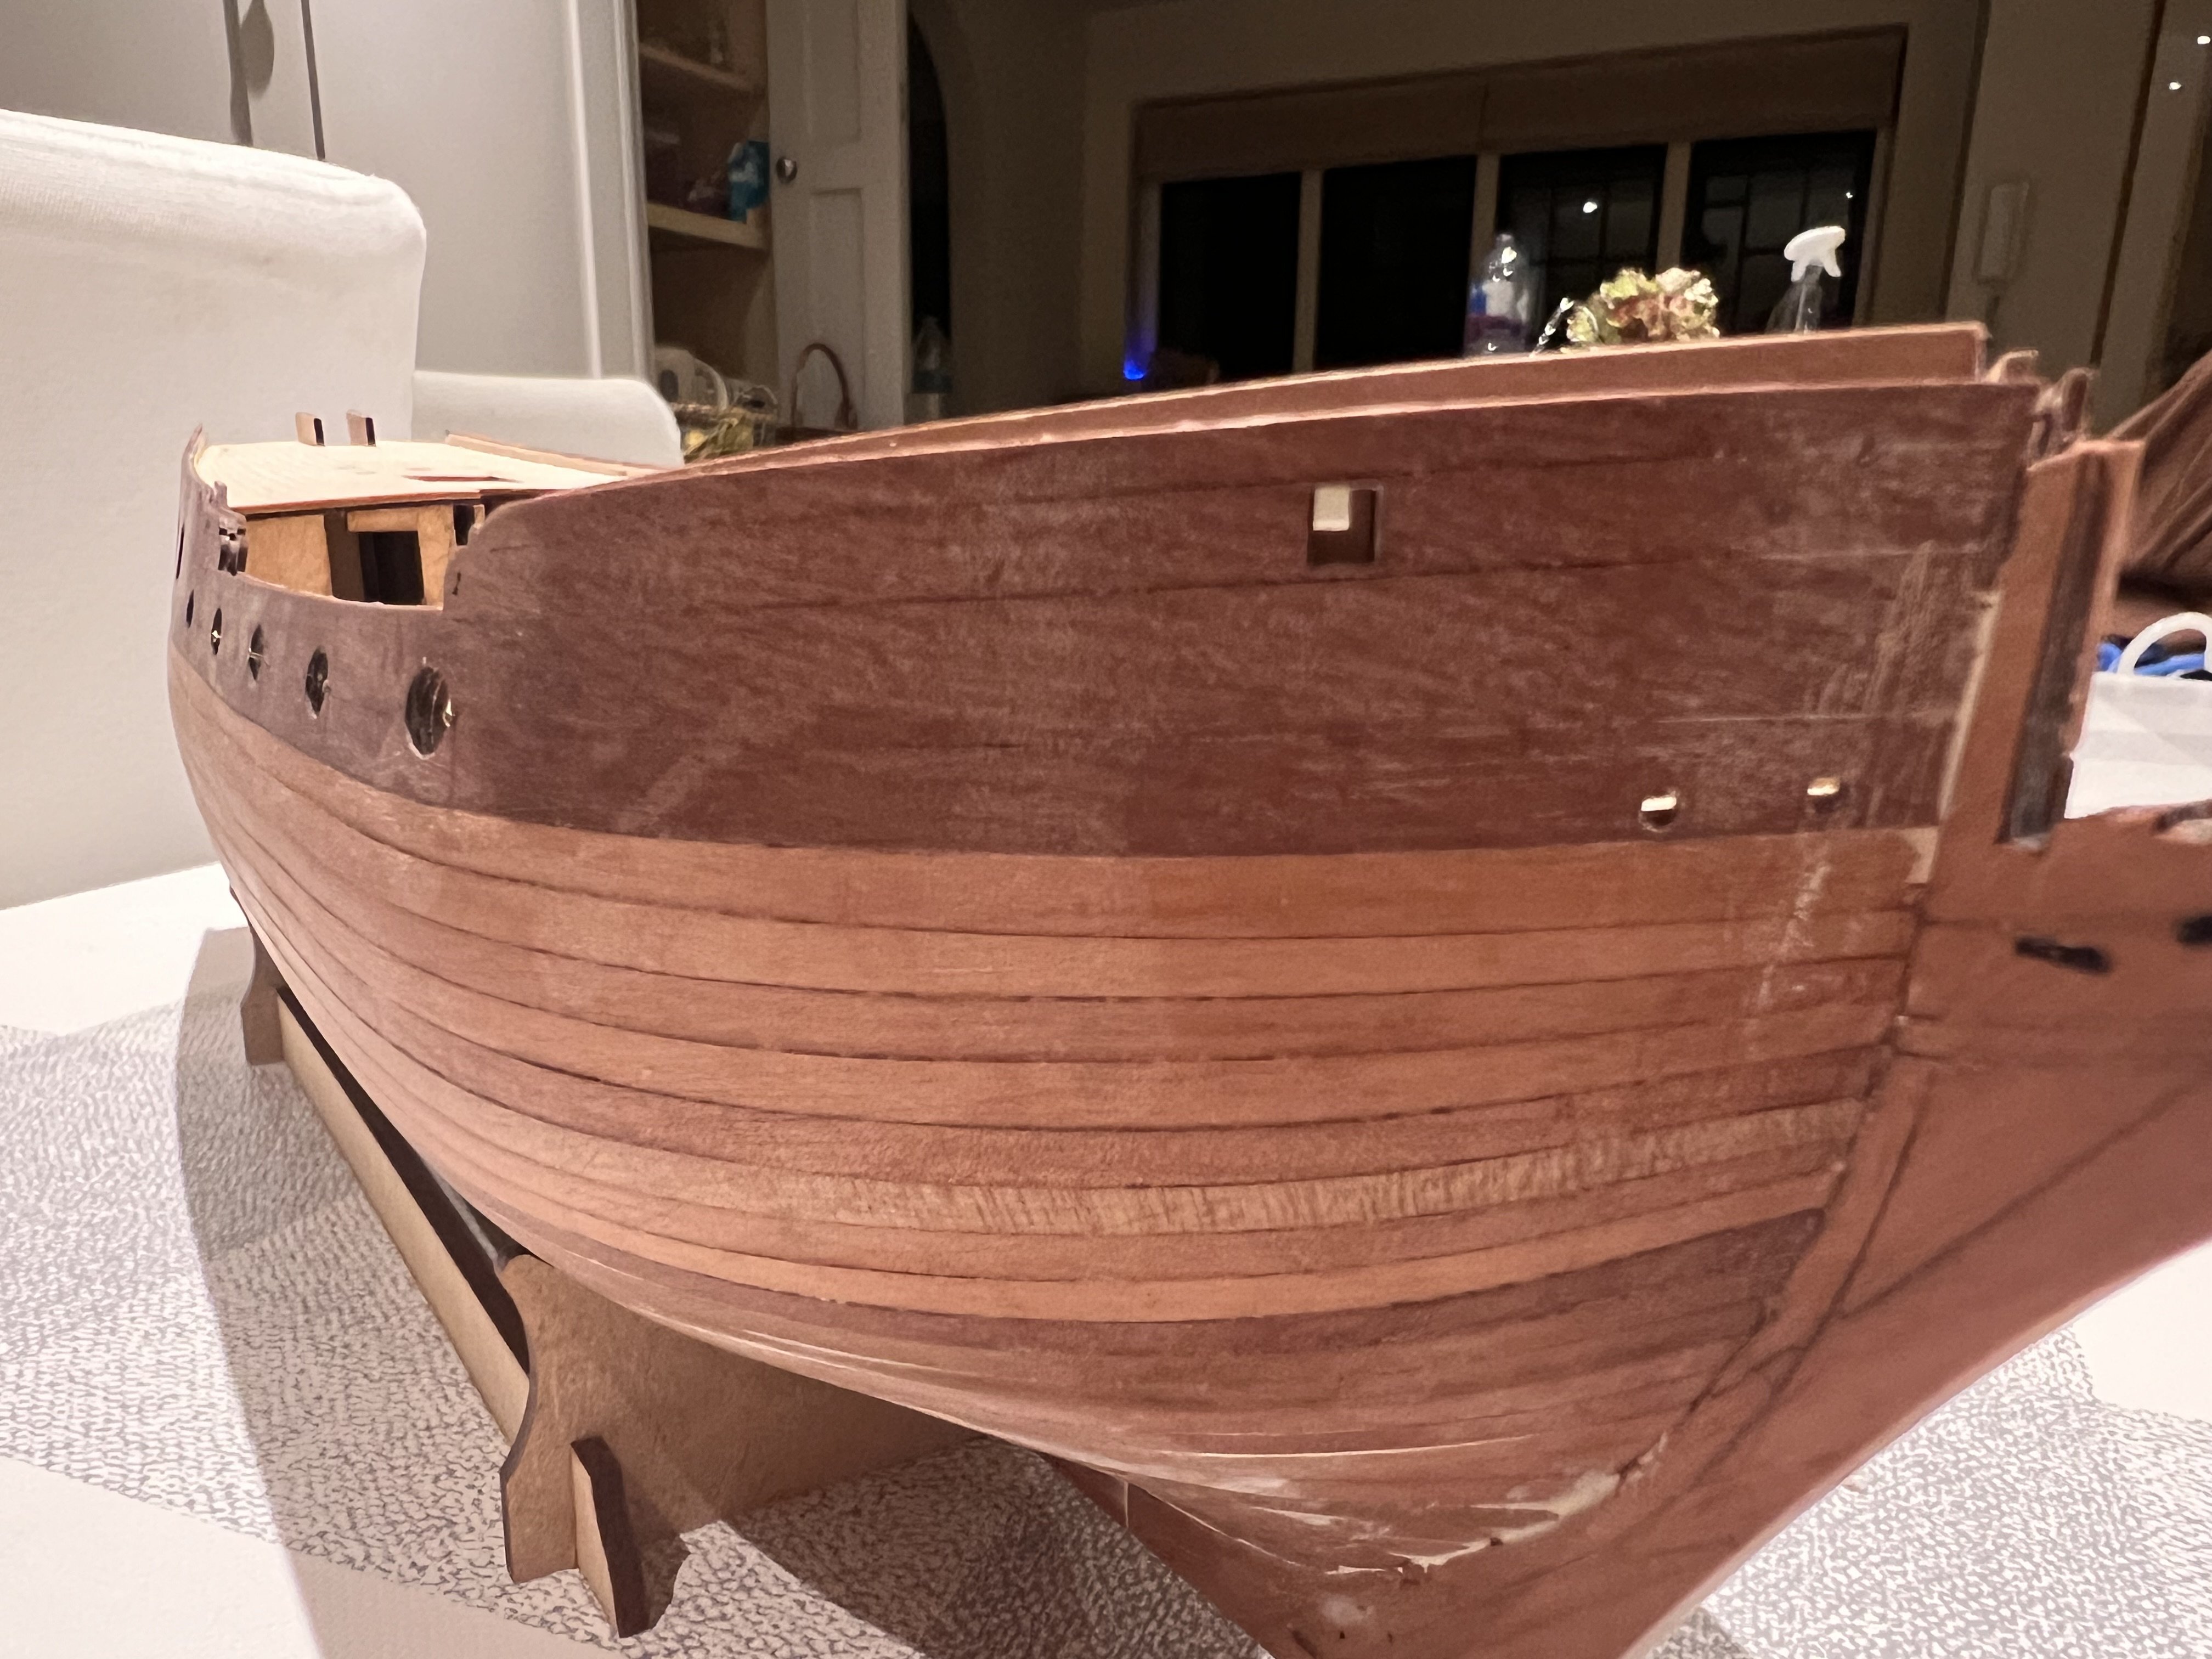
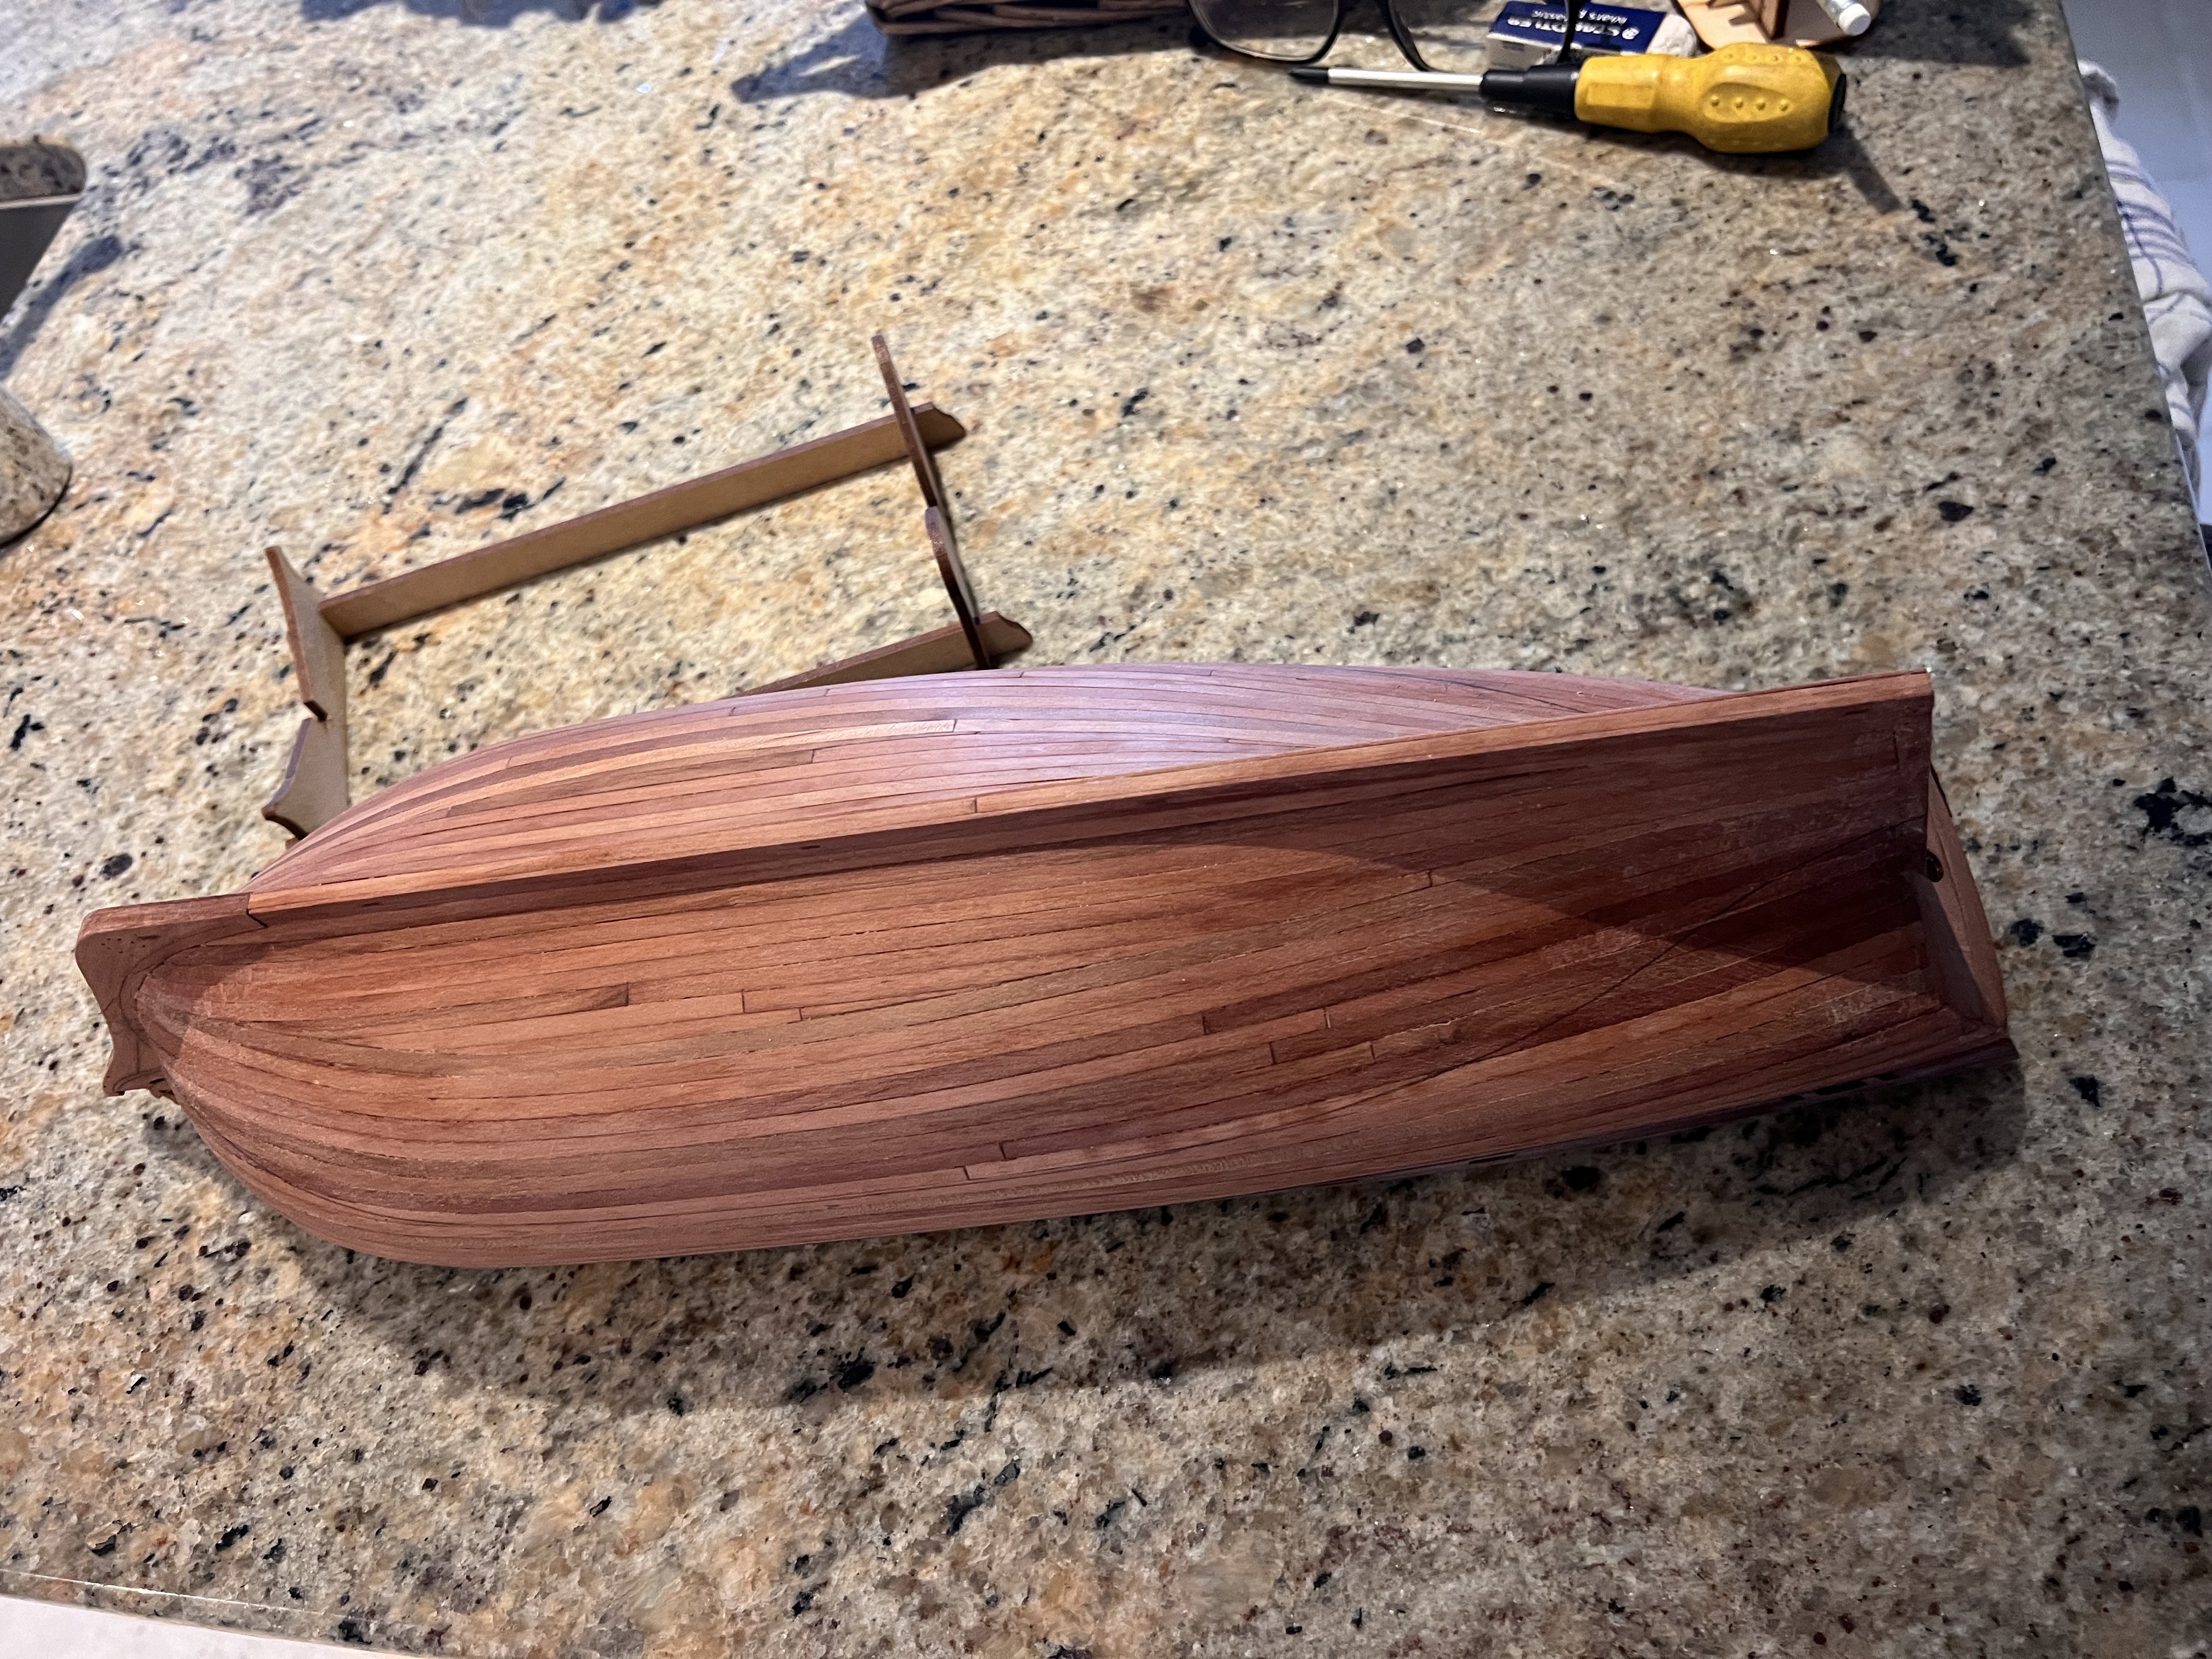
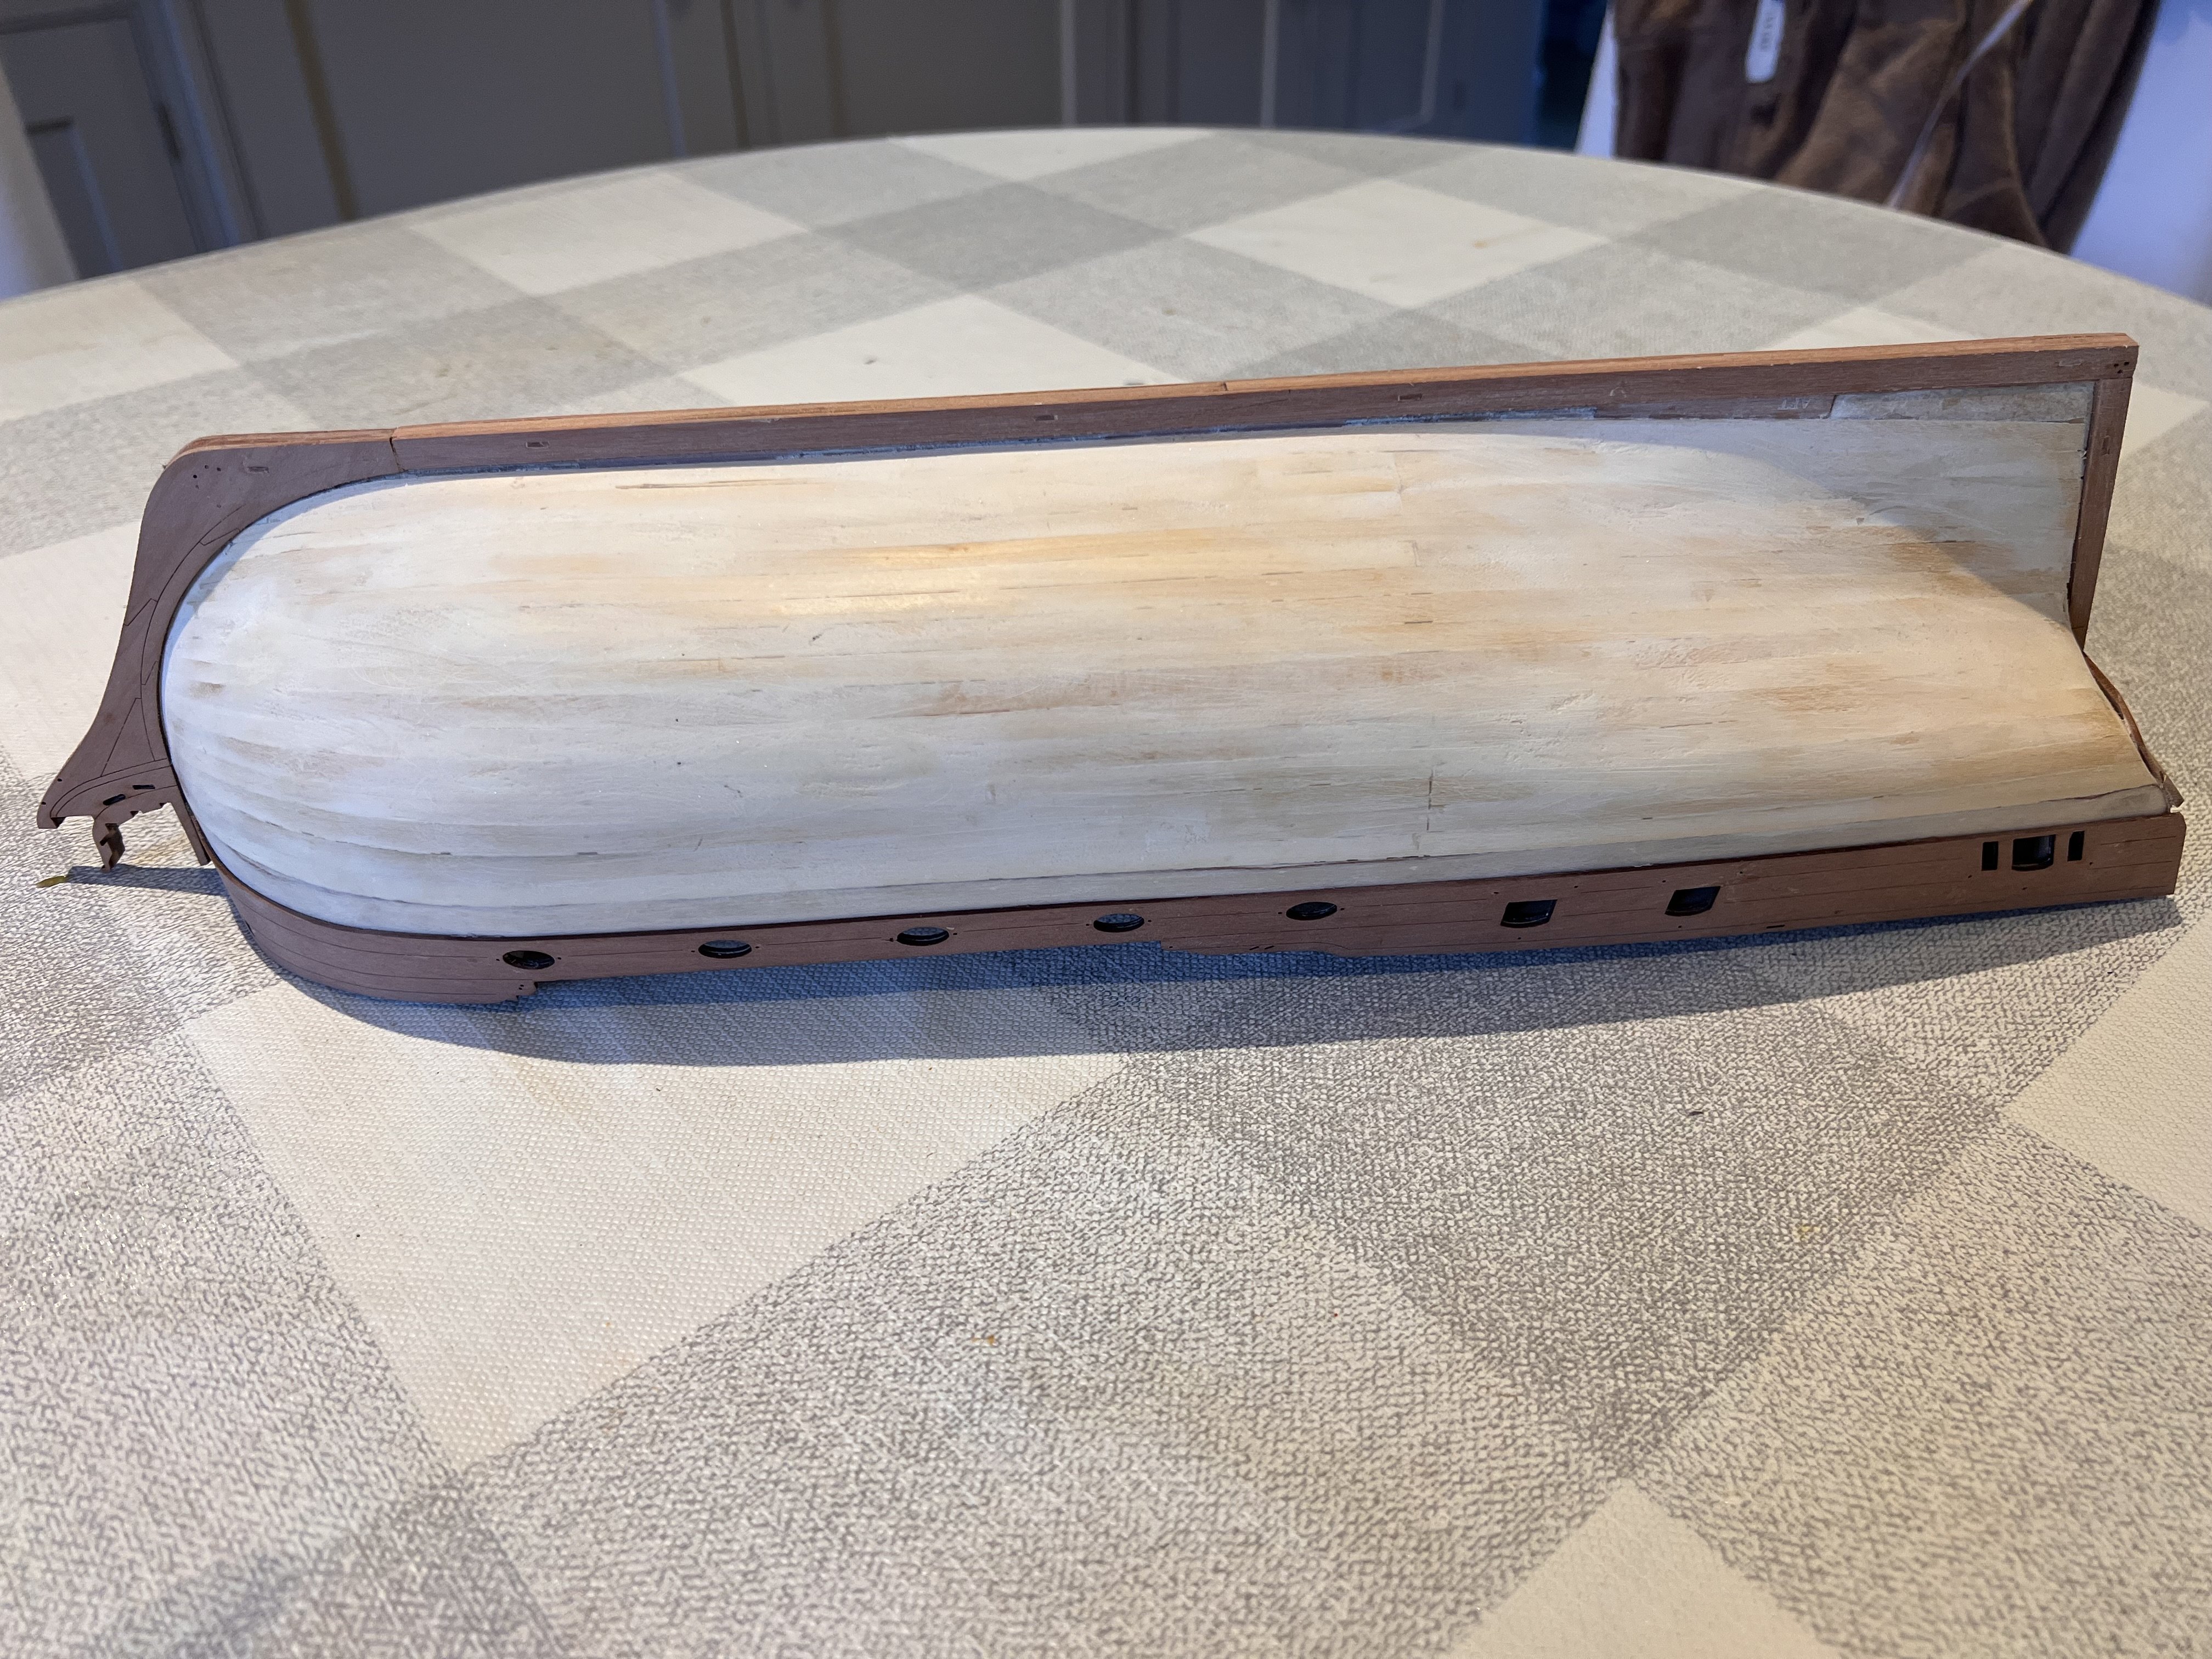
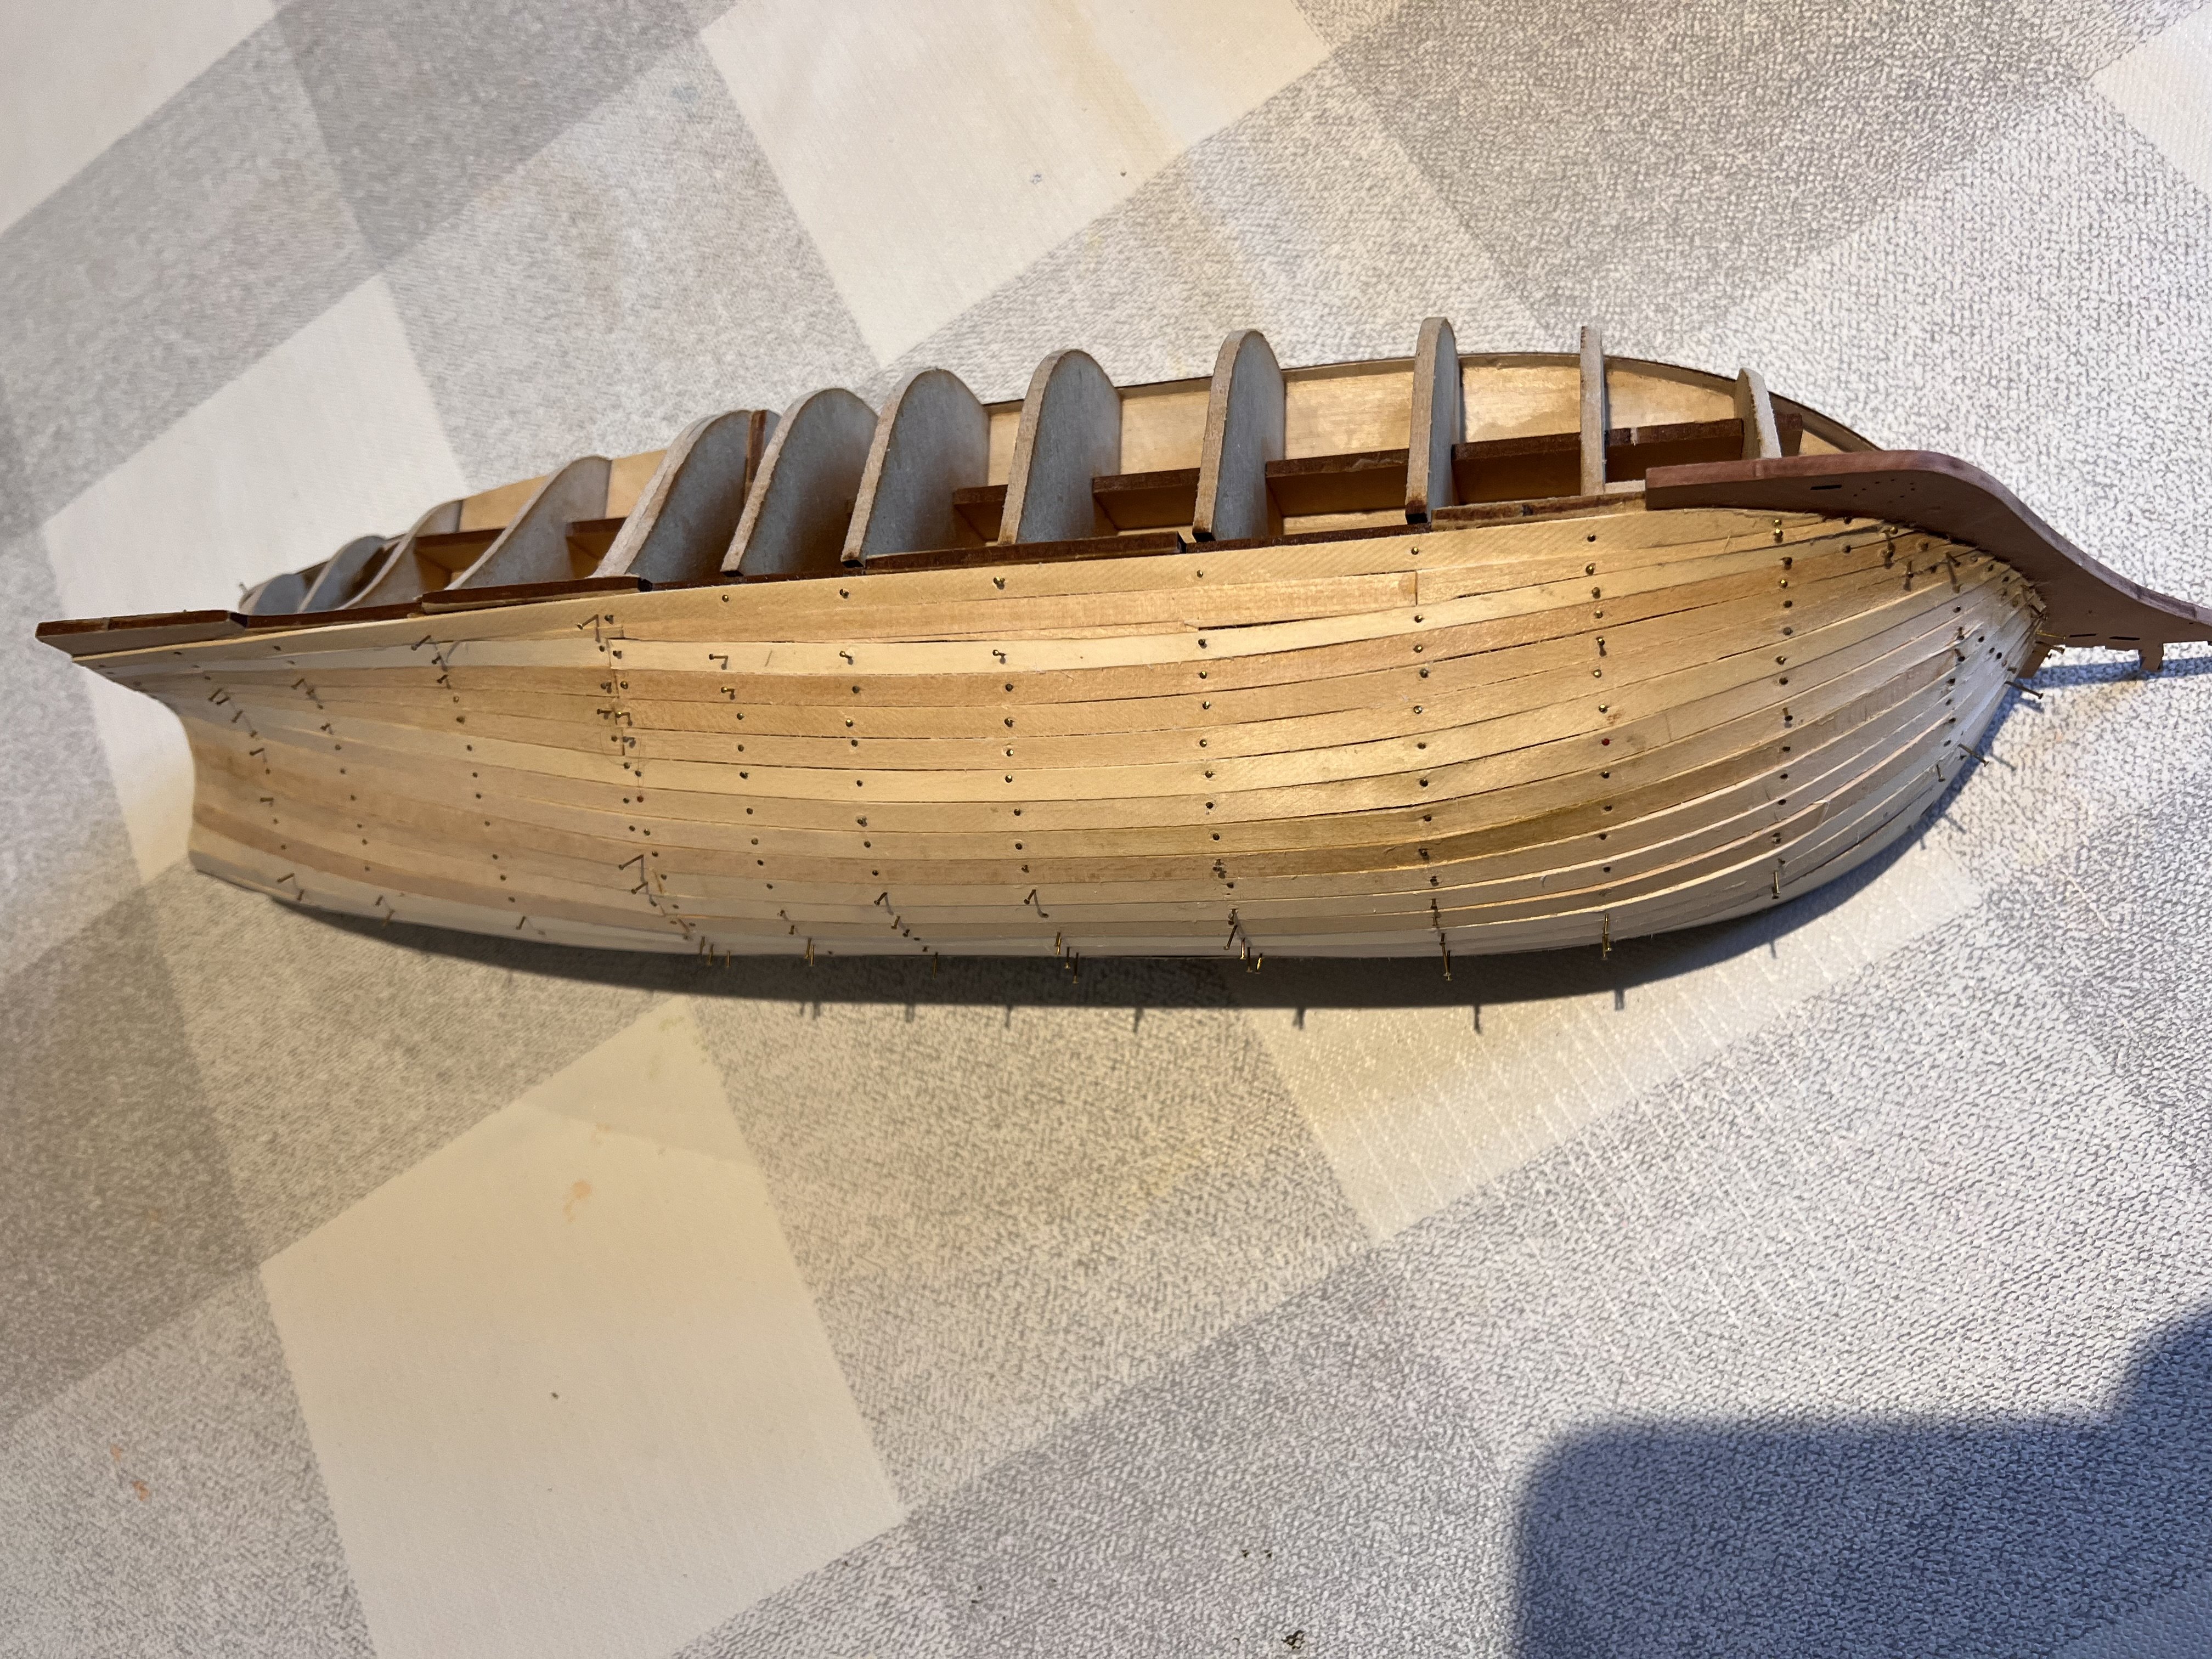
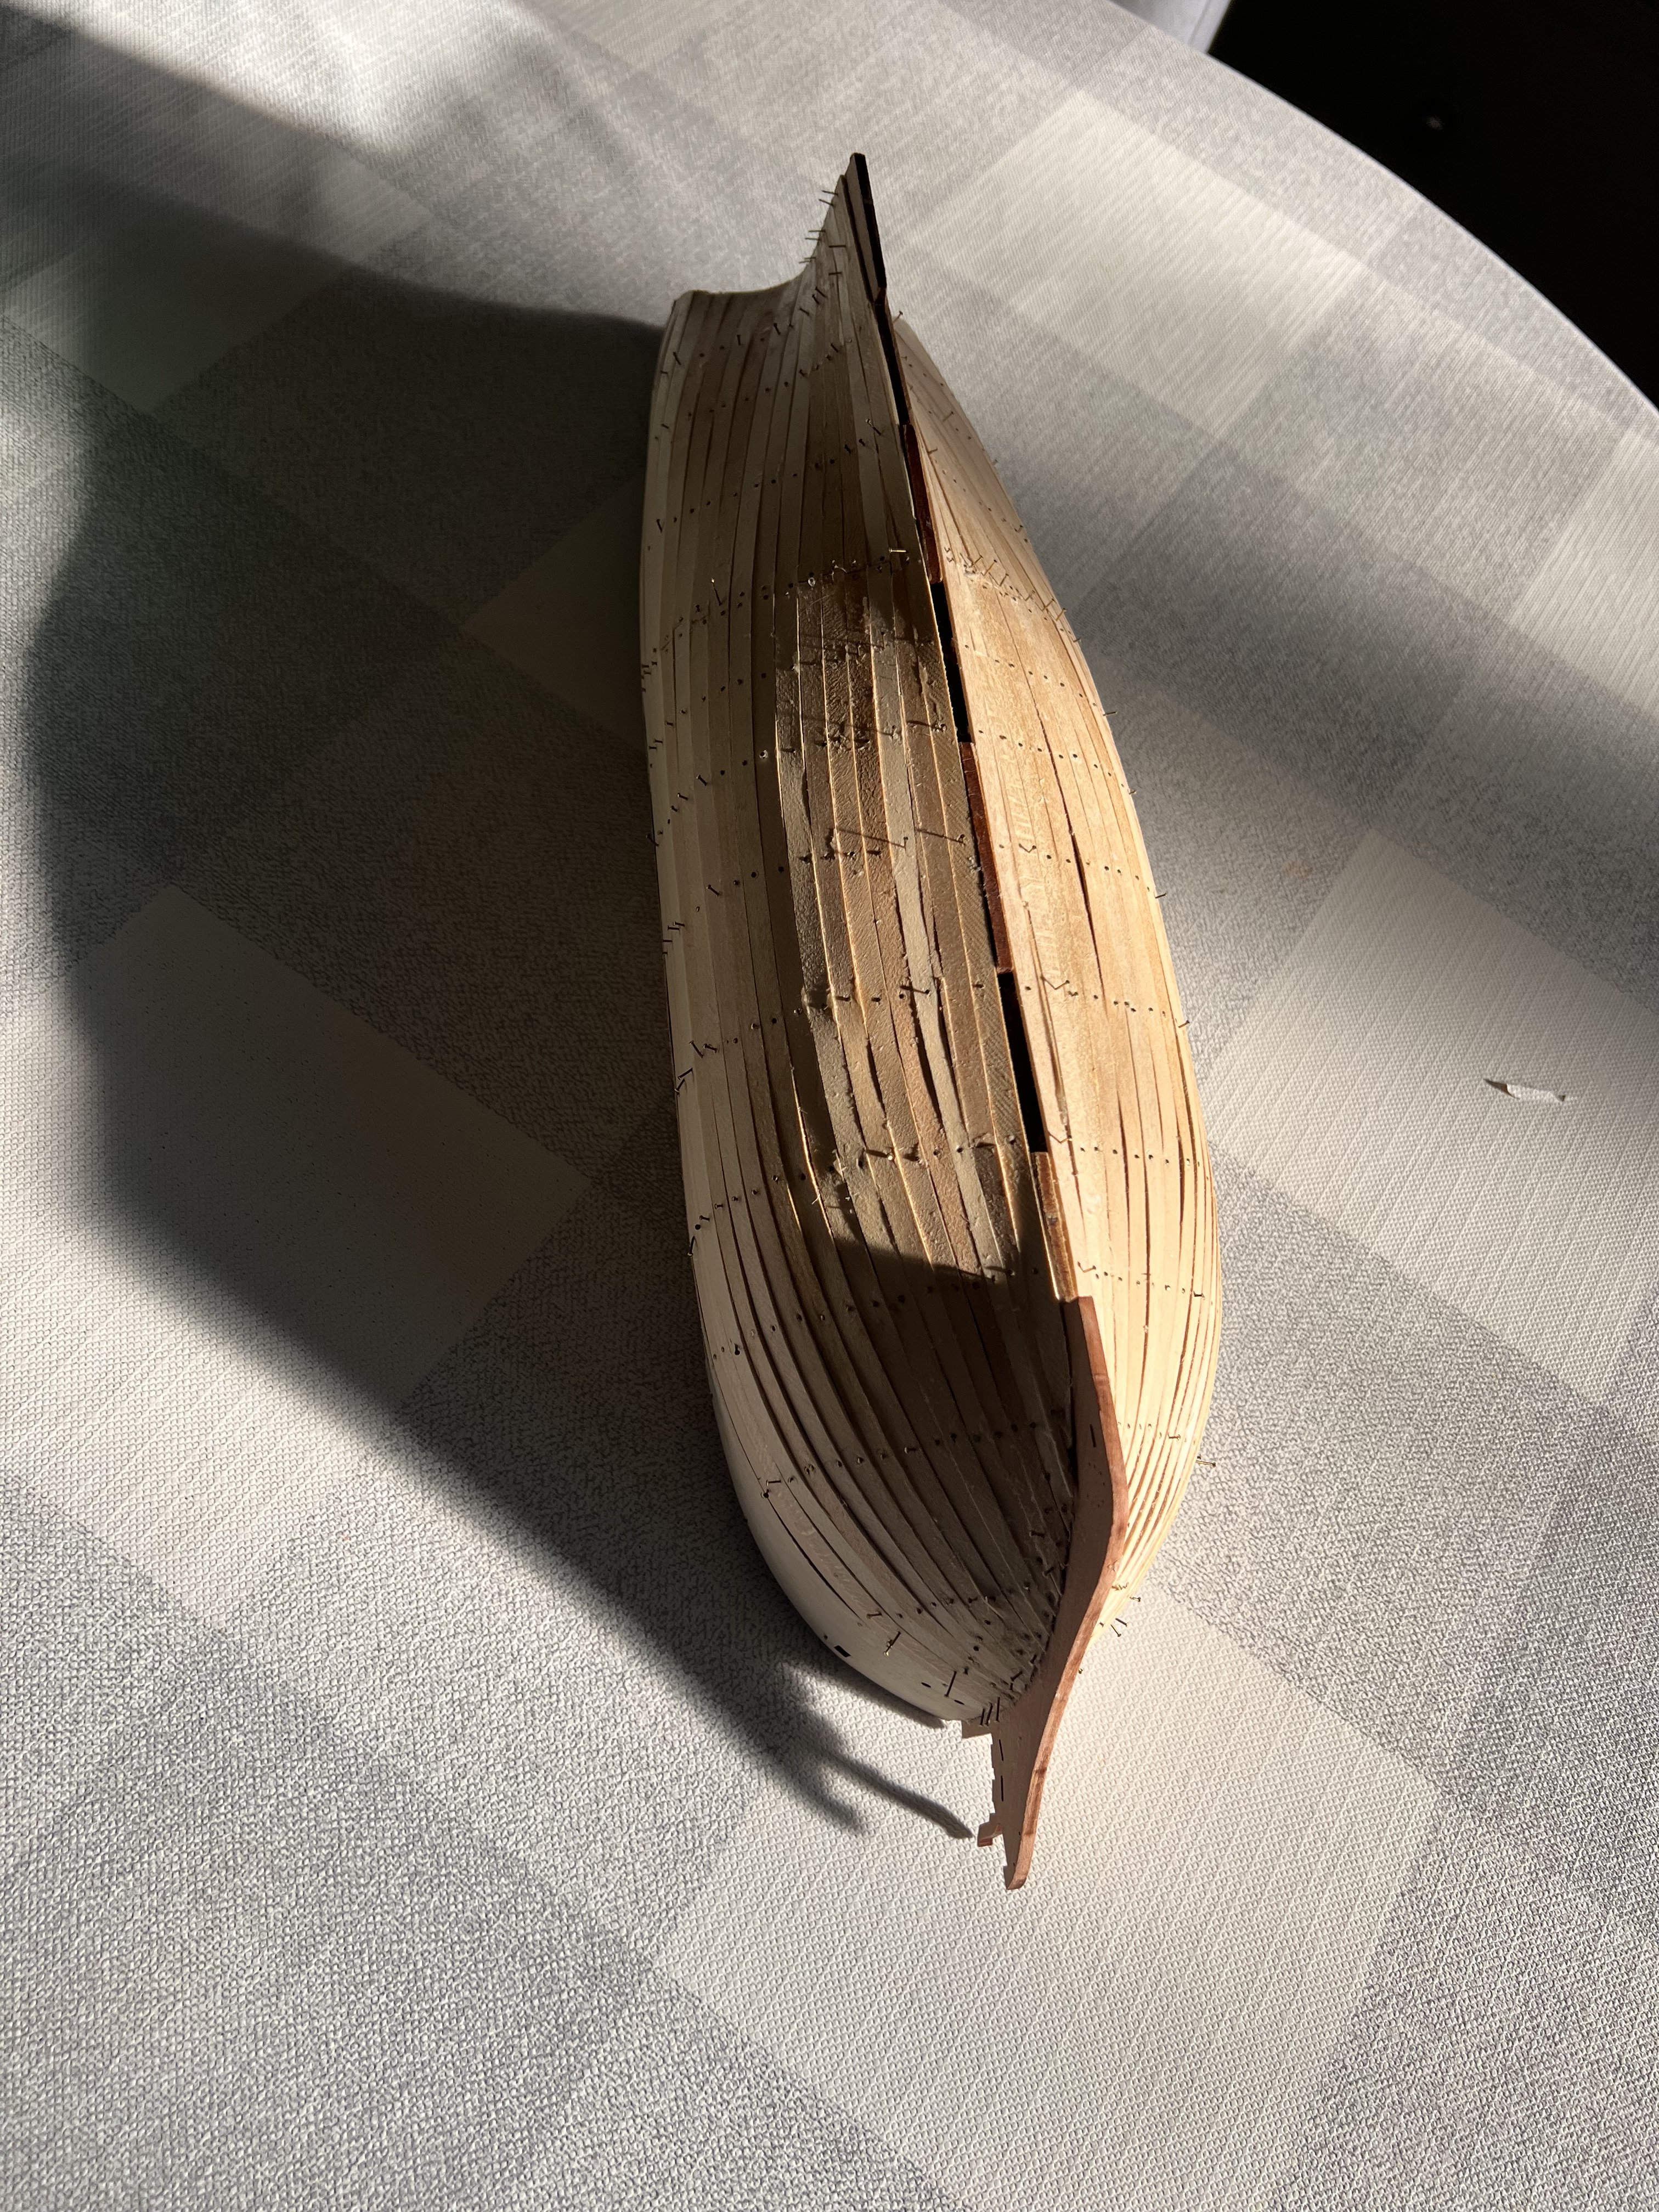
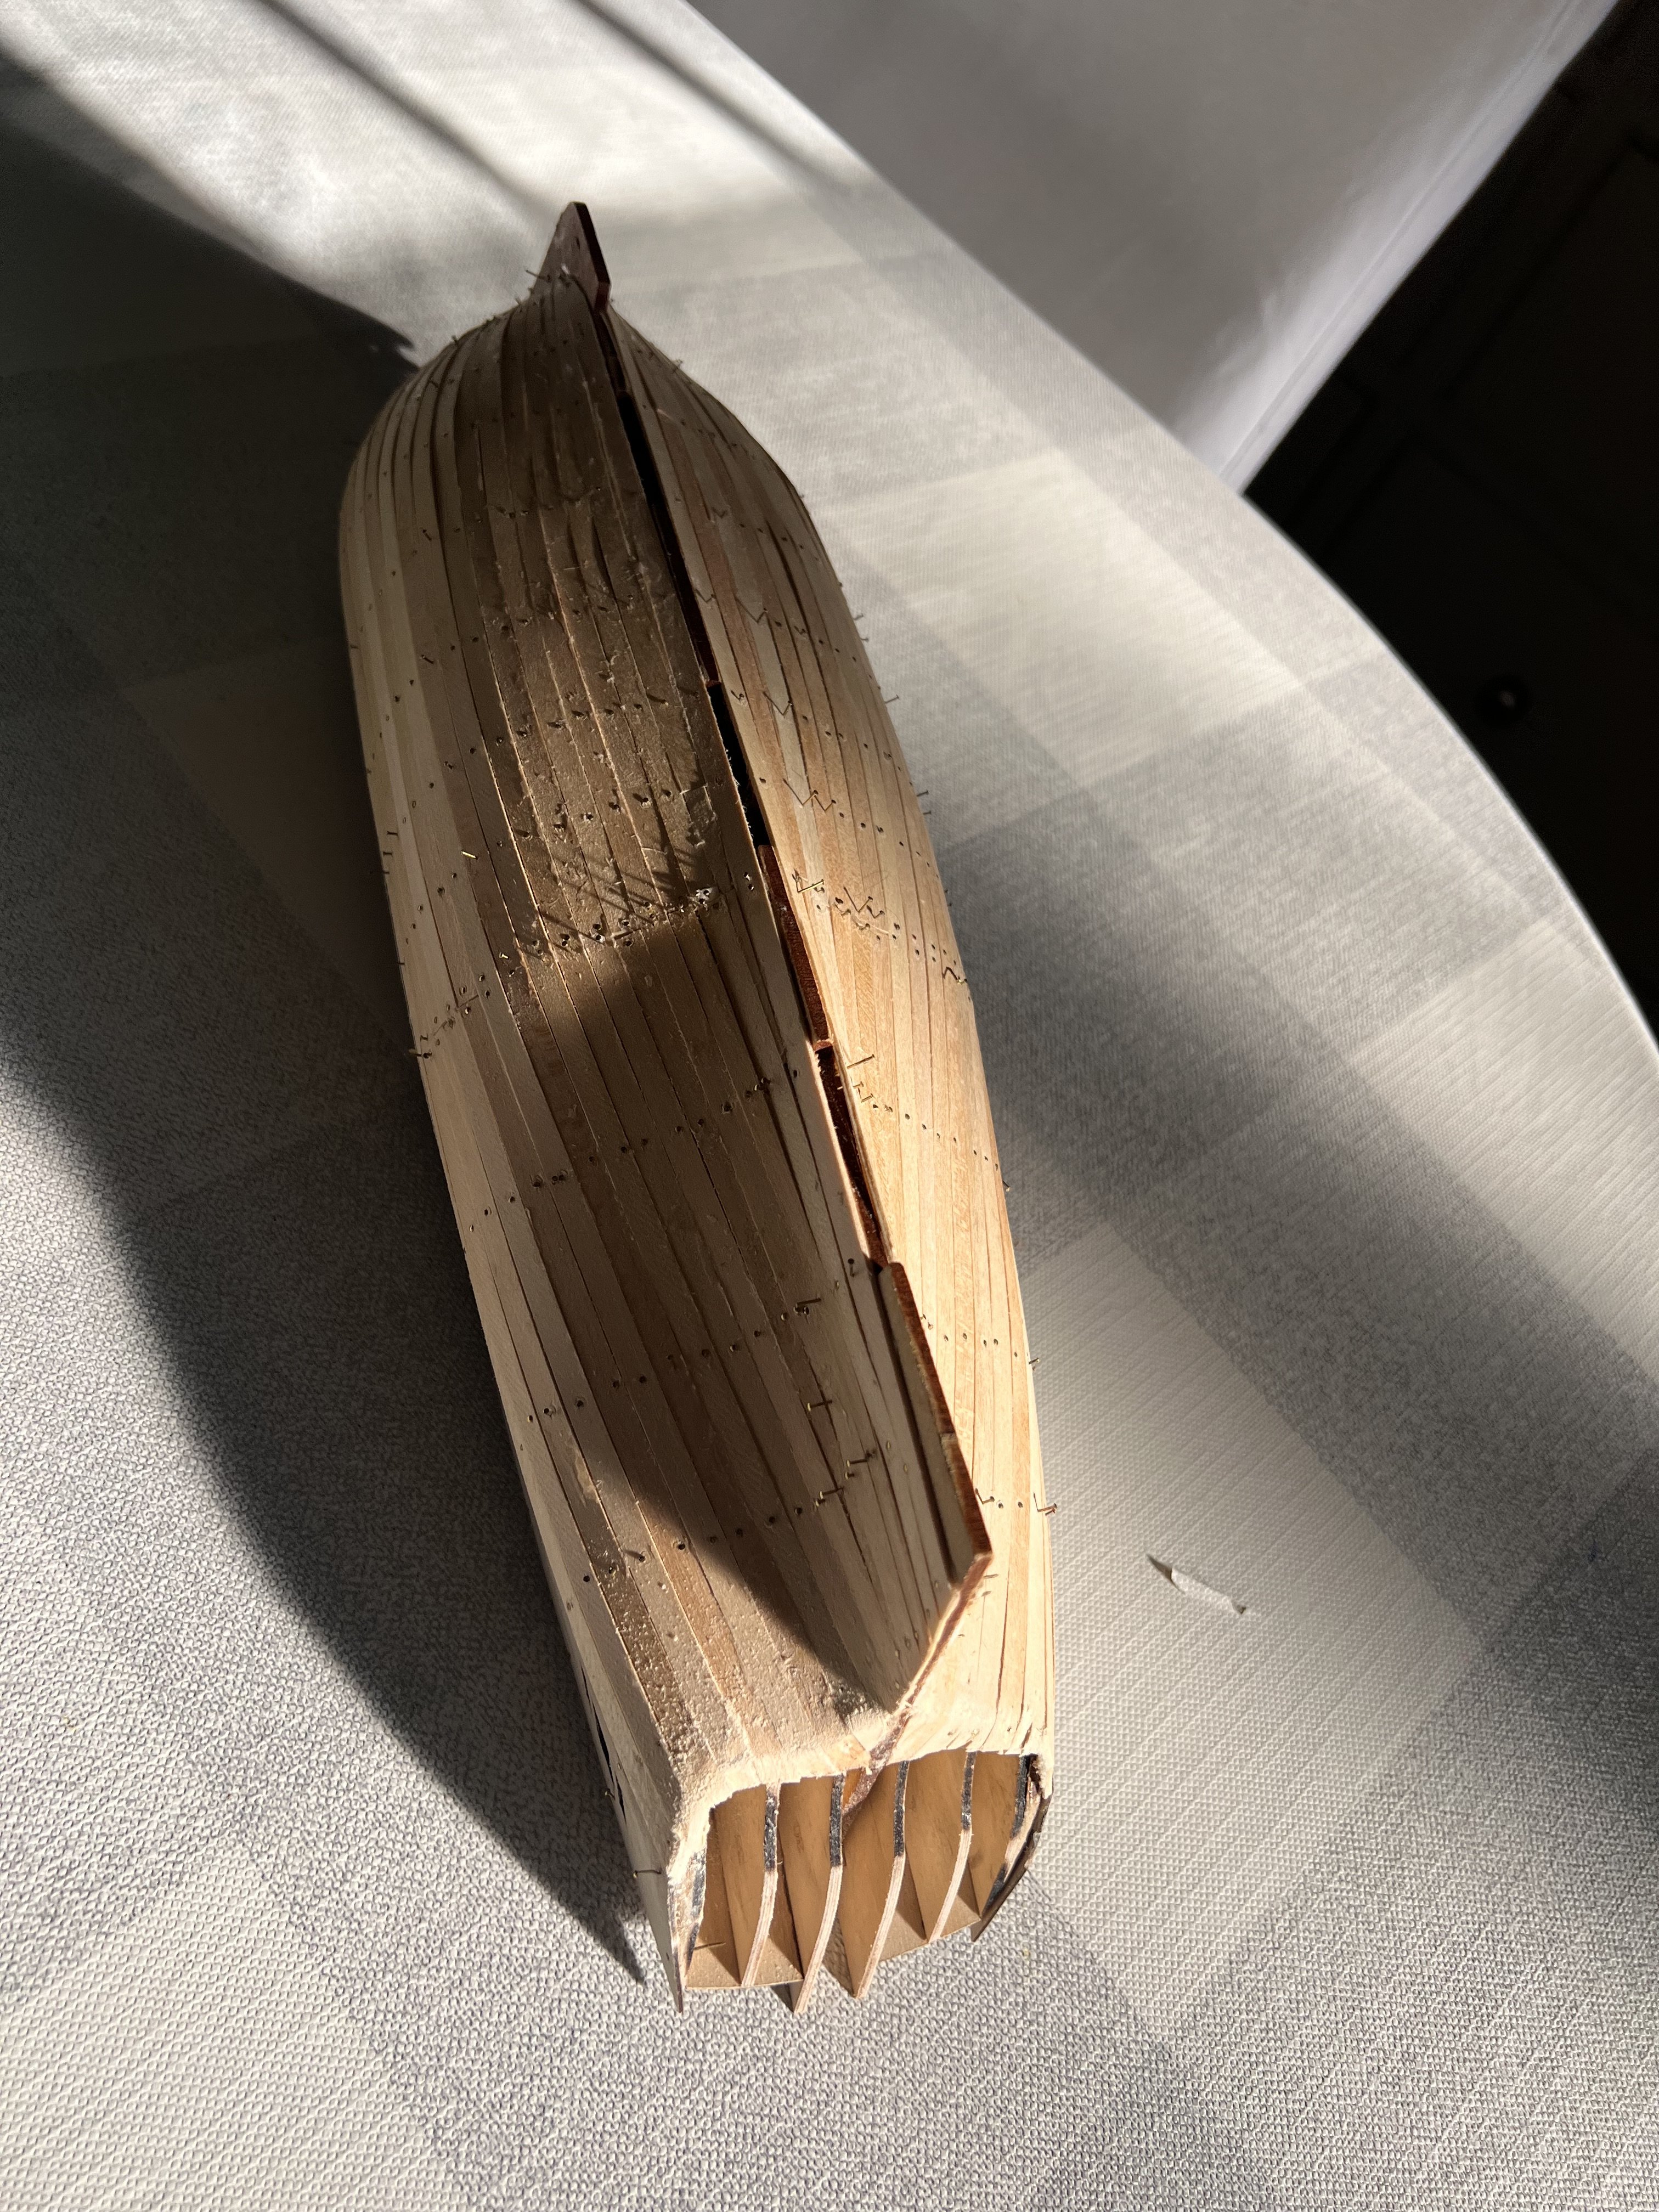
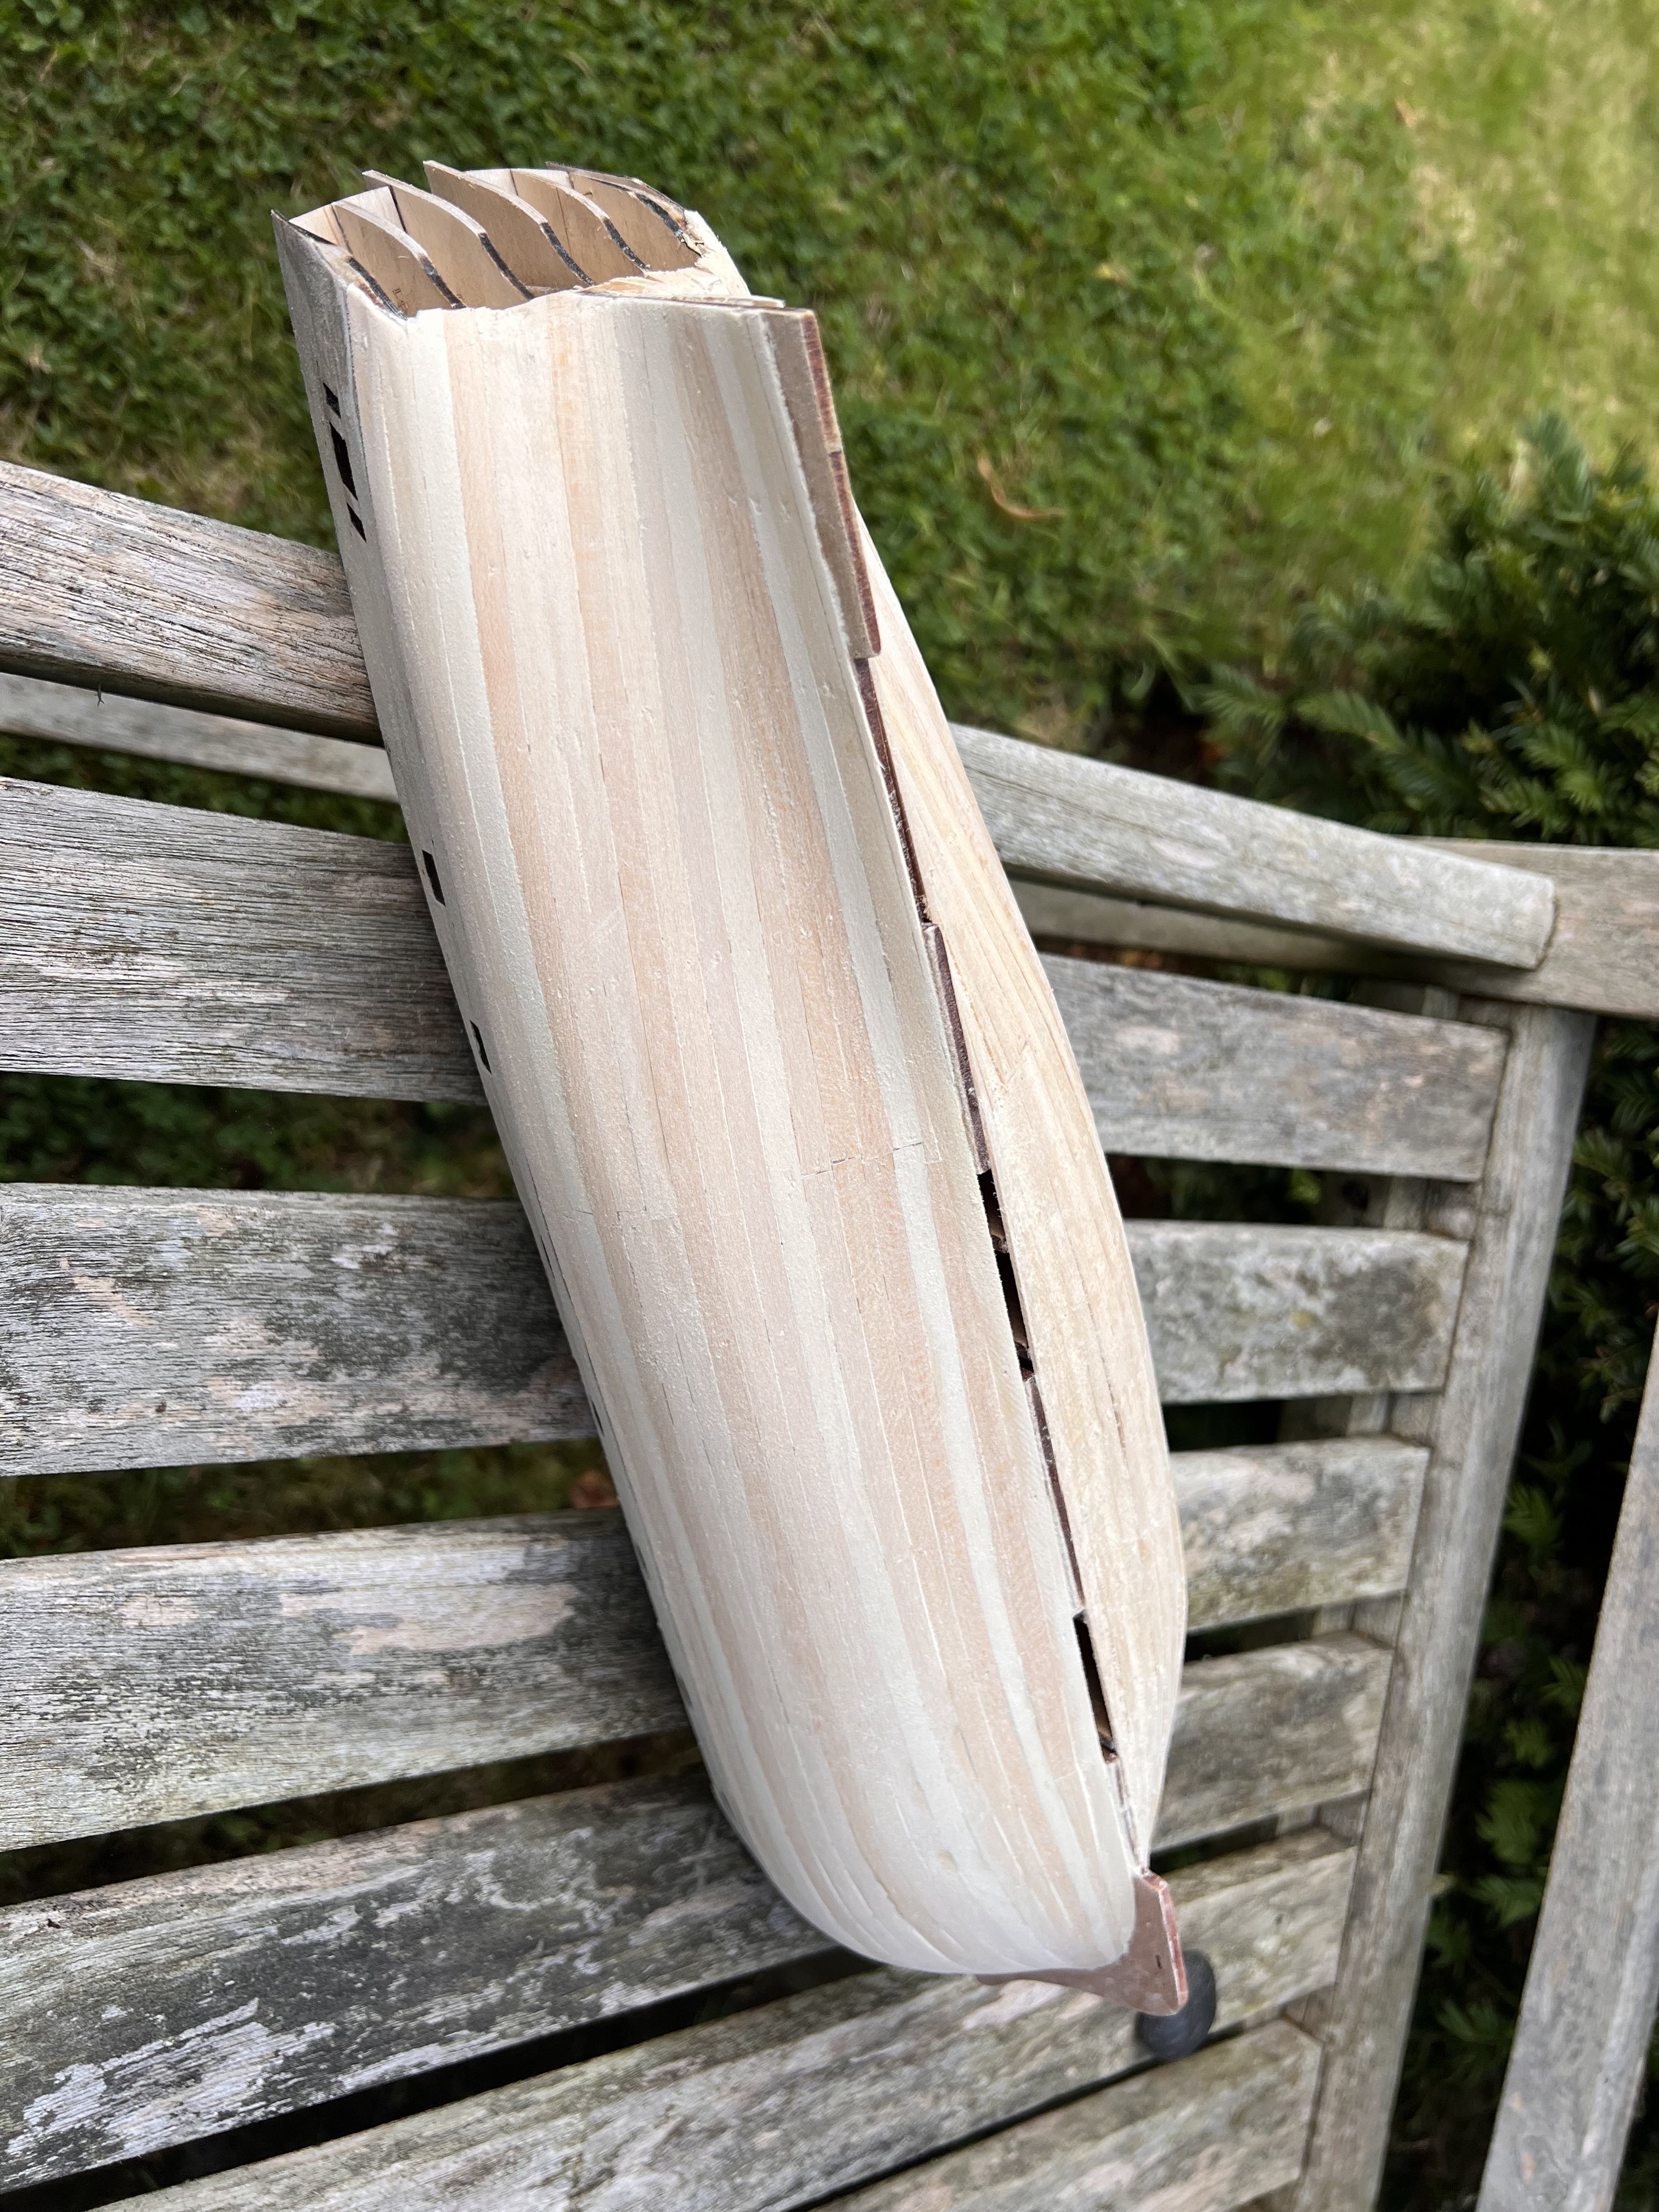
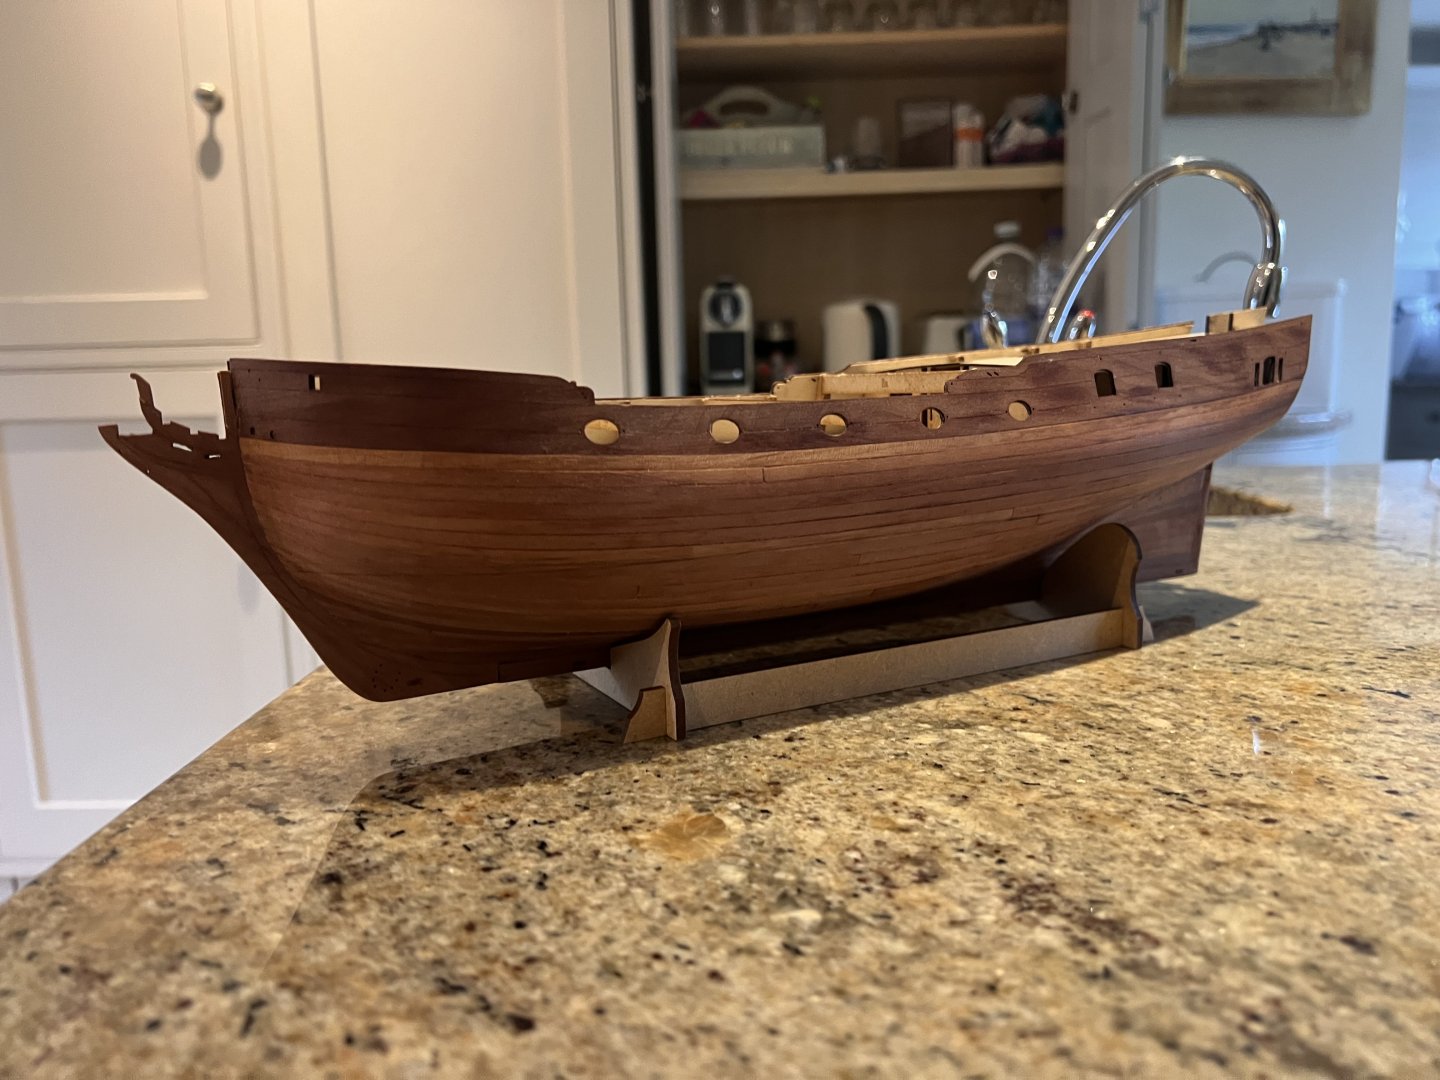
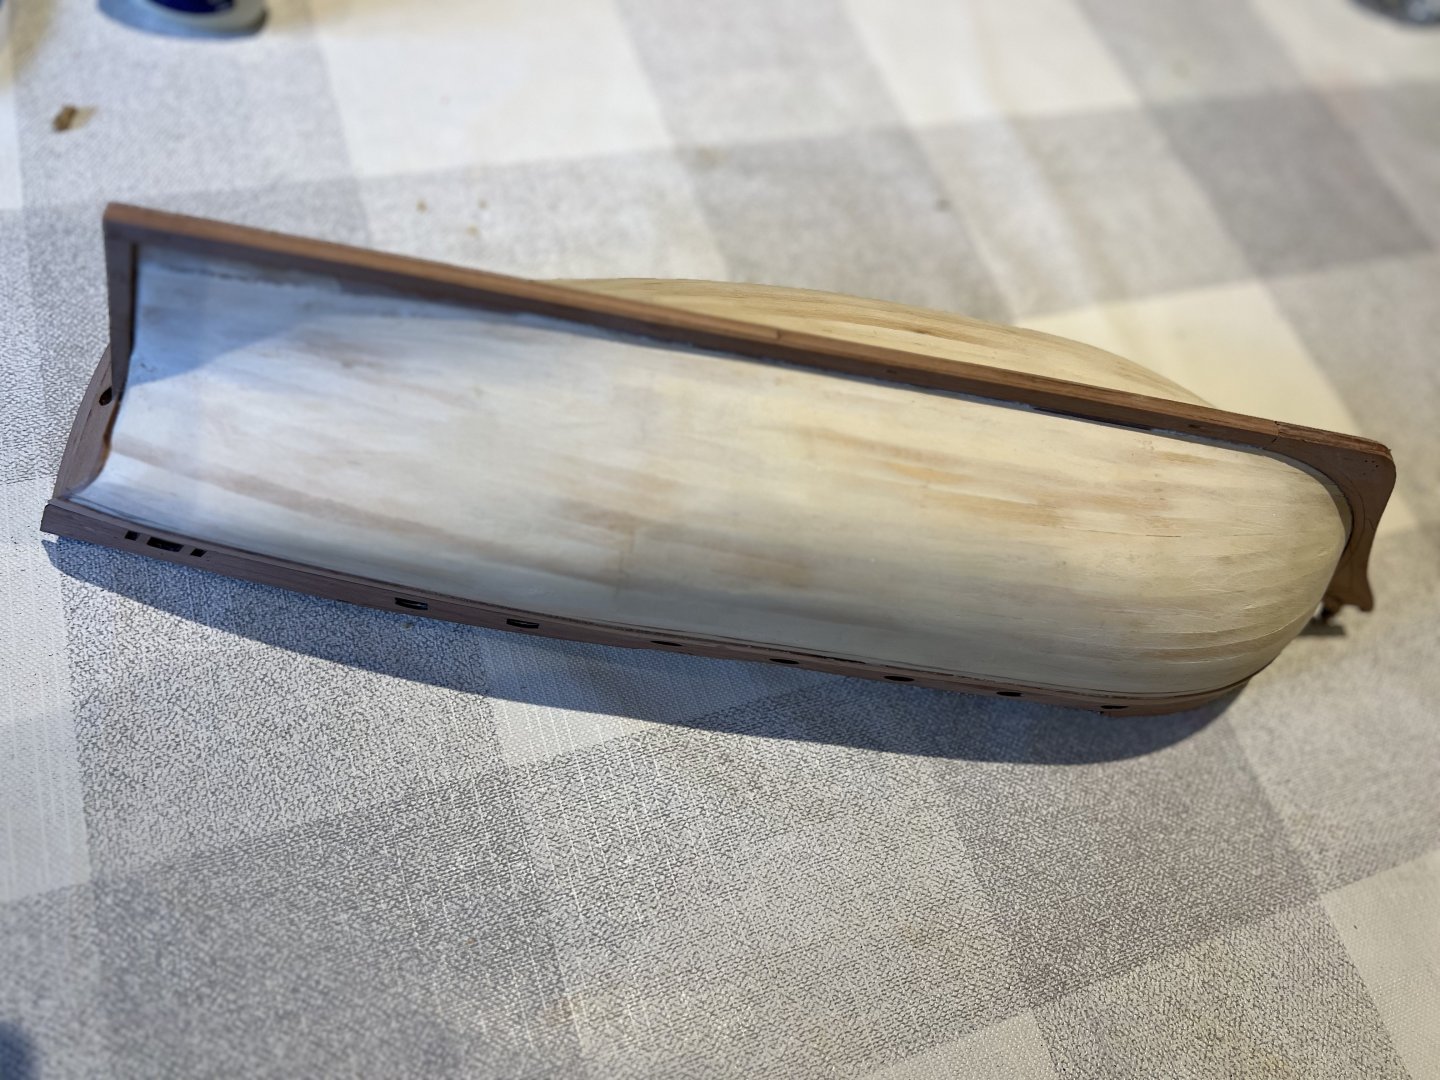
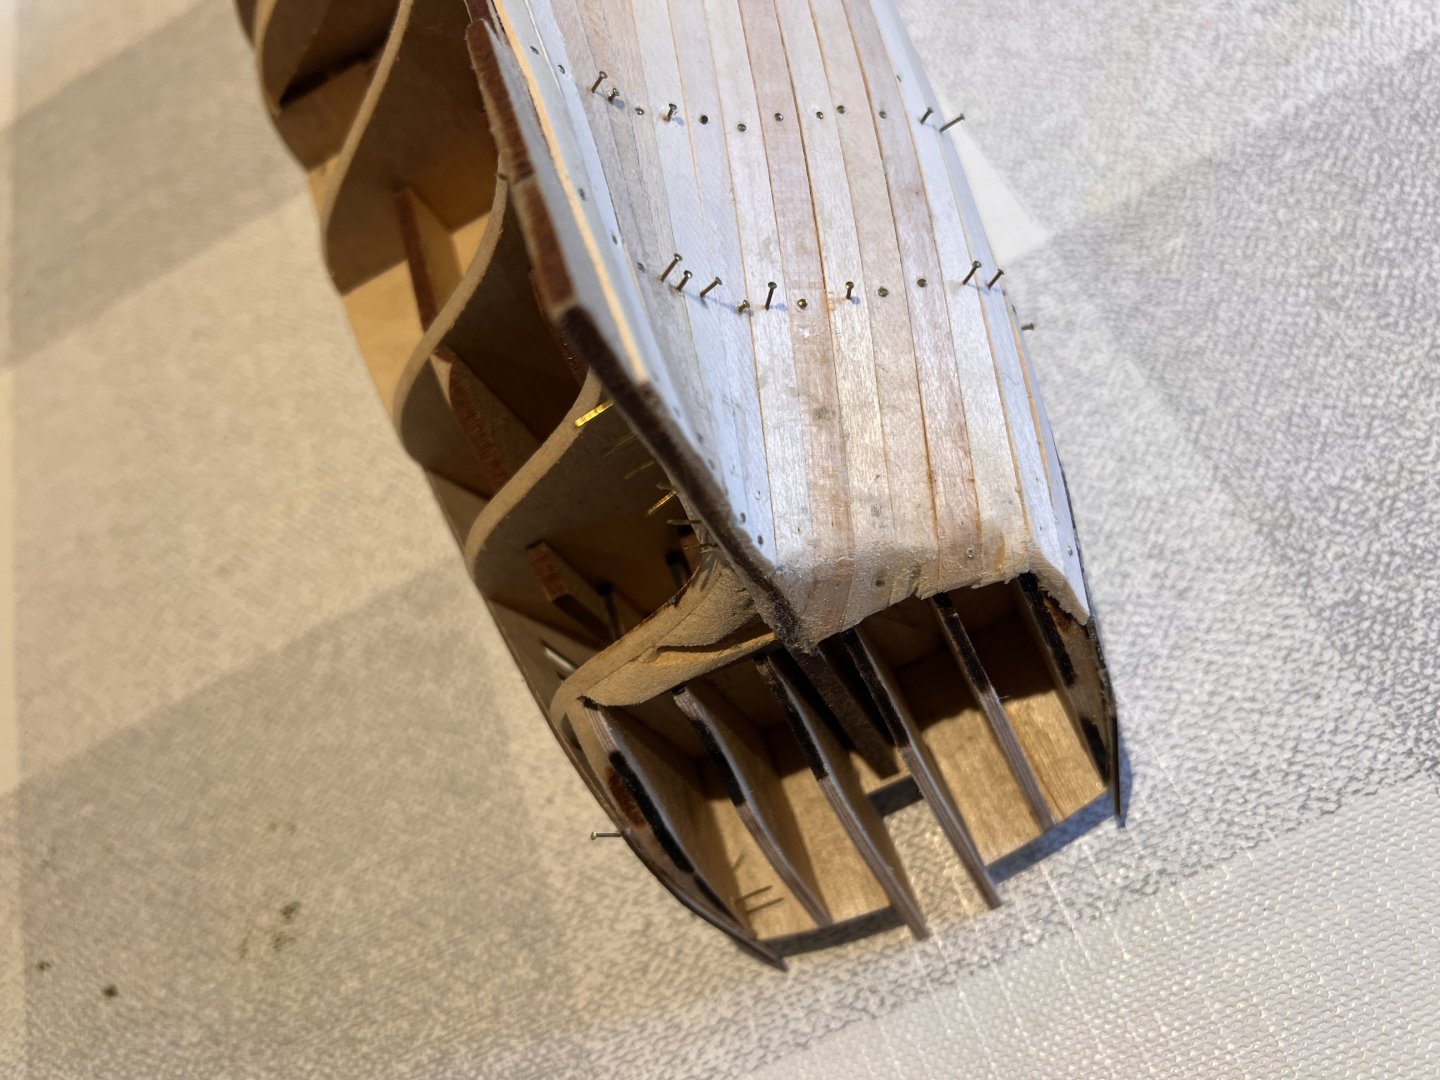
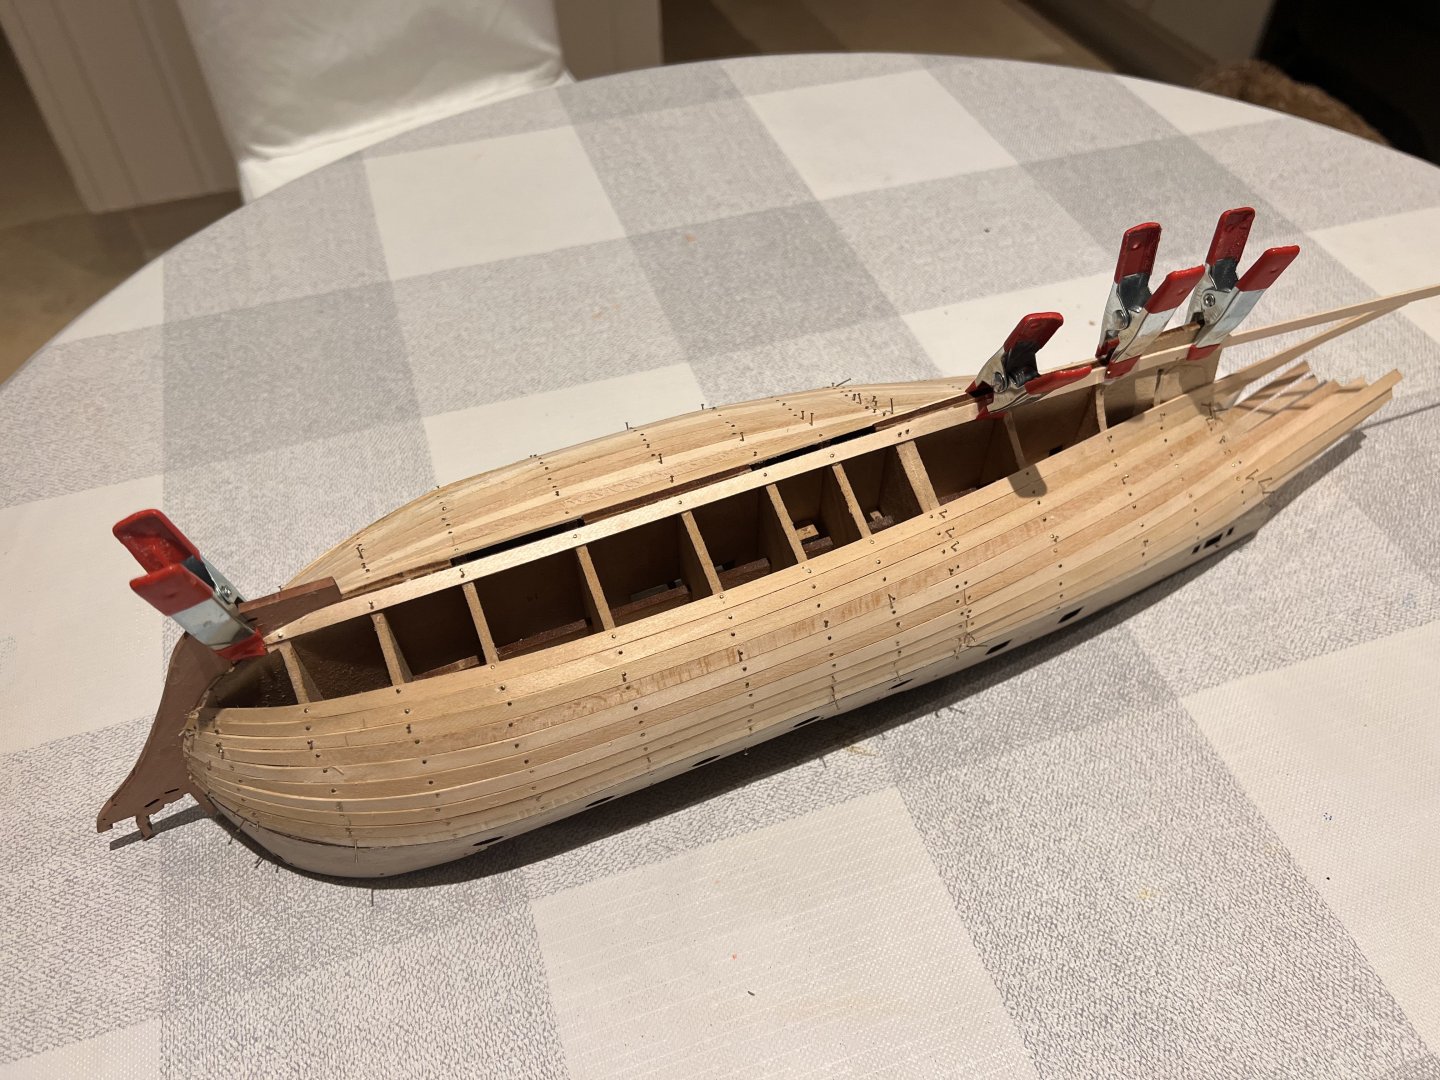
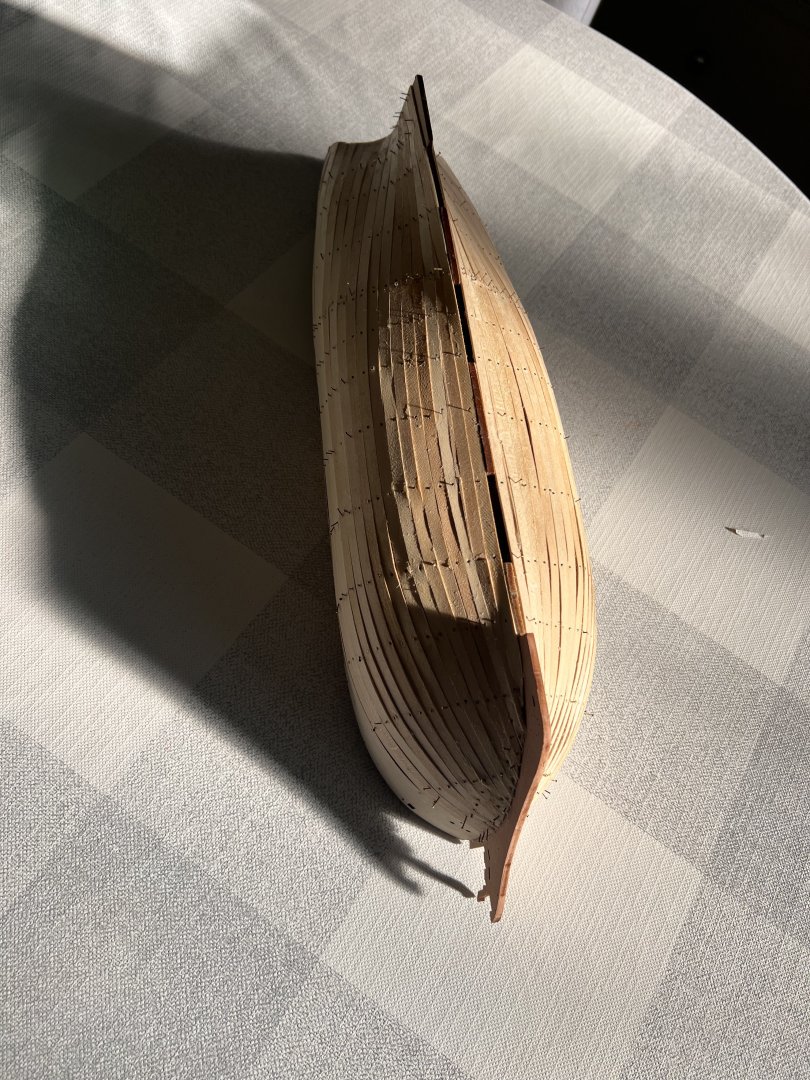
First planking. Complete on the port side. I know best practice is to do each side evenly for most hulls, but Chris’s bracing of the bulkheads makes the structure so robust that I don’t think that any planking could possibly warp the keel. I follow the planking methodology that Chris and James put in their instructions of tapering from the point the plank starts to not run easily along the hull - in this case usually around the second bulkhead. i know that the “Chuck” method of planking, measuring at each bulkhead, is far superior, but I have neither the patience to do it, nor the confidence that I can cut an exact taper into each plank. What I do use that Chuck’s superb tutorials taught me is the plank bending method using a jig and iron. Starboard side underway. I found easiest on this ship to fit the garboard plank but otherwise plank from the top downwards. Hull fully planked before any tidying up. Whilst it’s warm enough and a rare dry day in Gloucestershire, I gave her an initial sanding down in the garden. Despite appearing quite curvy in the pictures, she hasn’t been a particularly difficult hull to plank which bodes well for the second planking. I need to work out how far to trim the planks at the stern back.


- 36 replies
-
- 11
-
-
- Duchess of Kingston
- Vanguard Models
- (and 1 more)
-
Looks great Glenn. Be careful of those eyelets at the end of the jib boom. Being clumsy I snapped three of them off the main ring by accident…
-
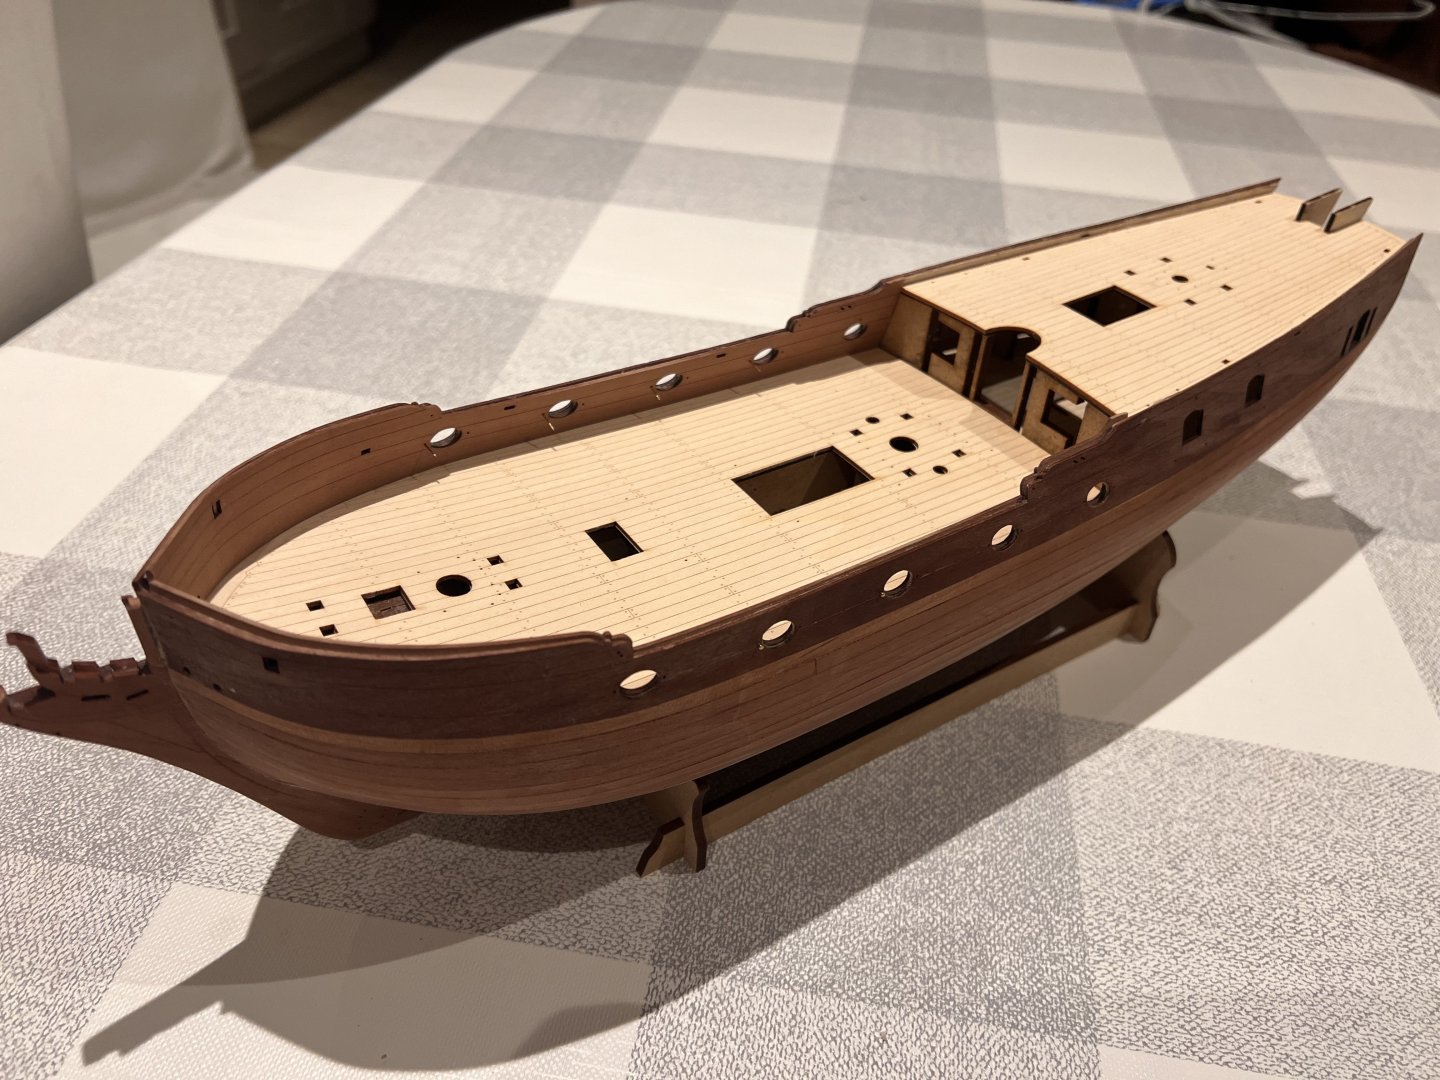
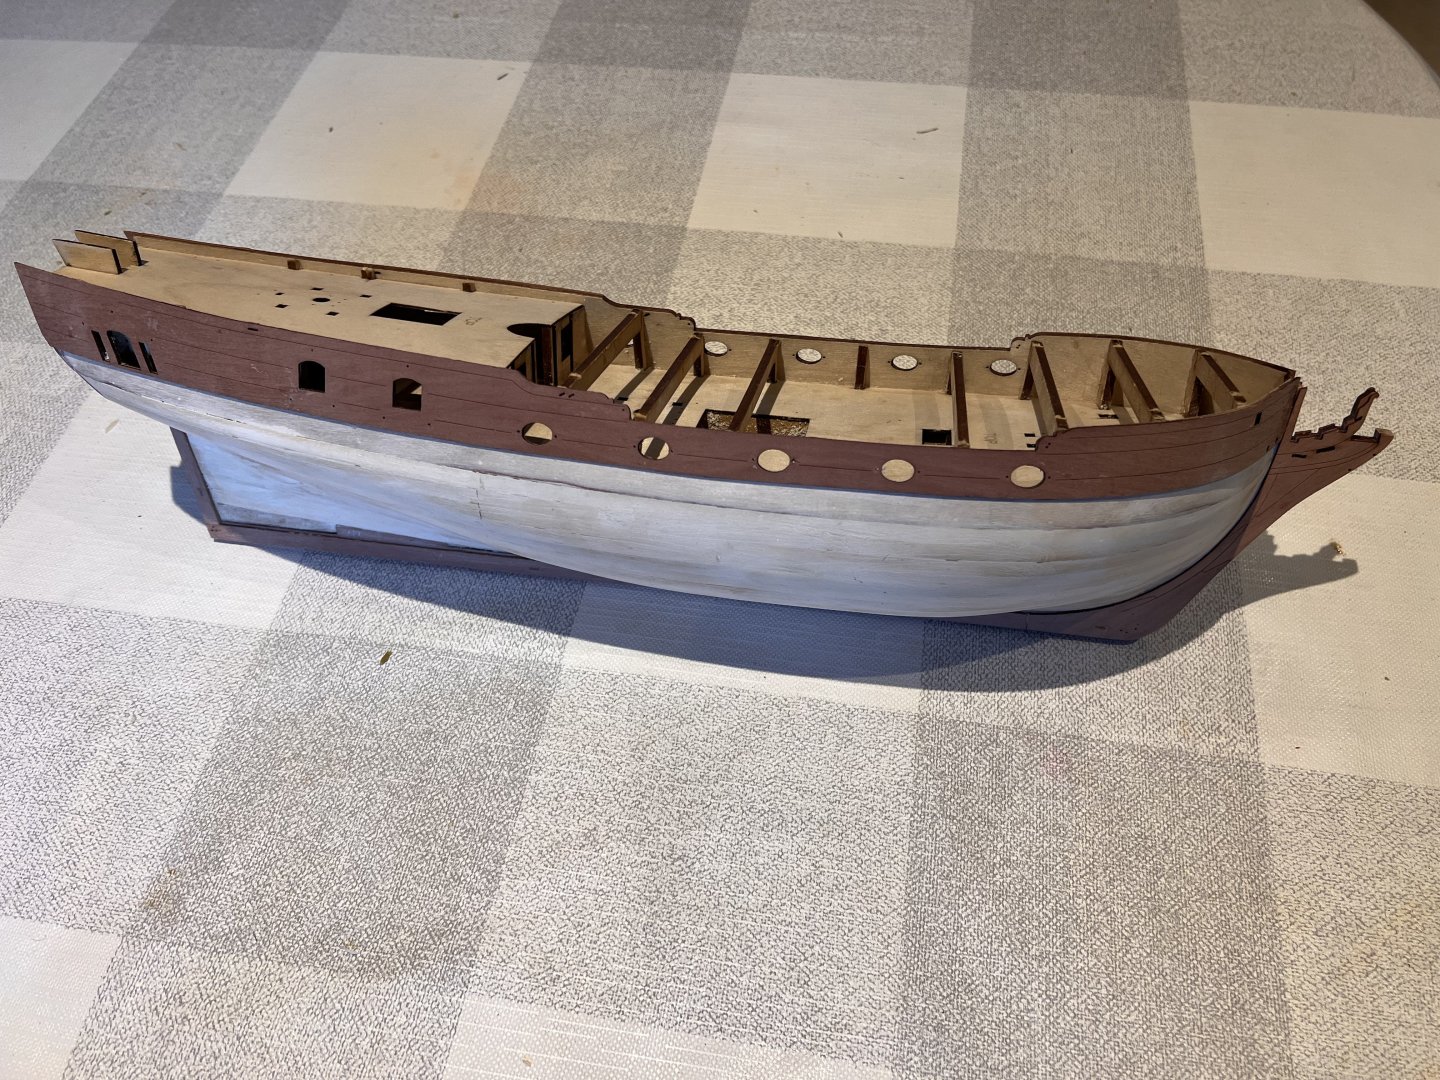
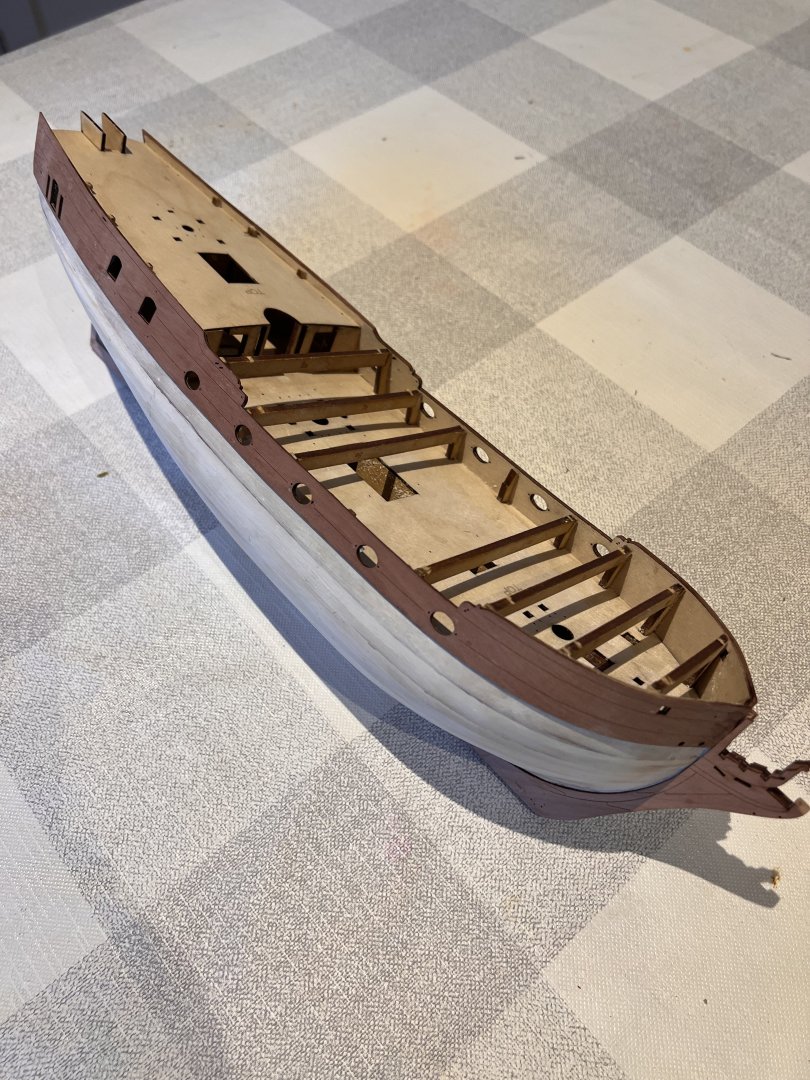
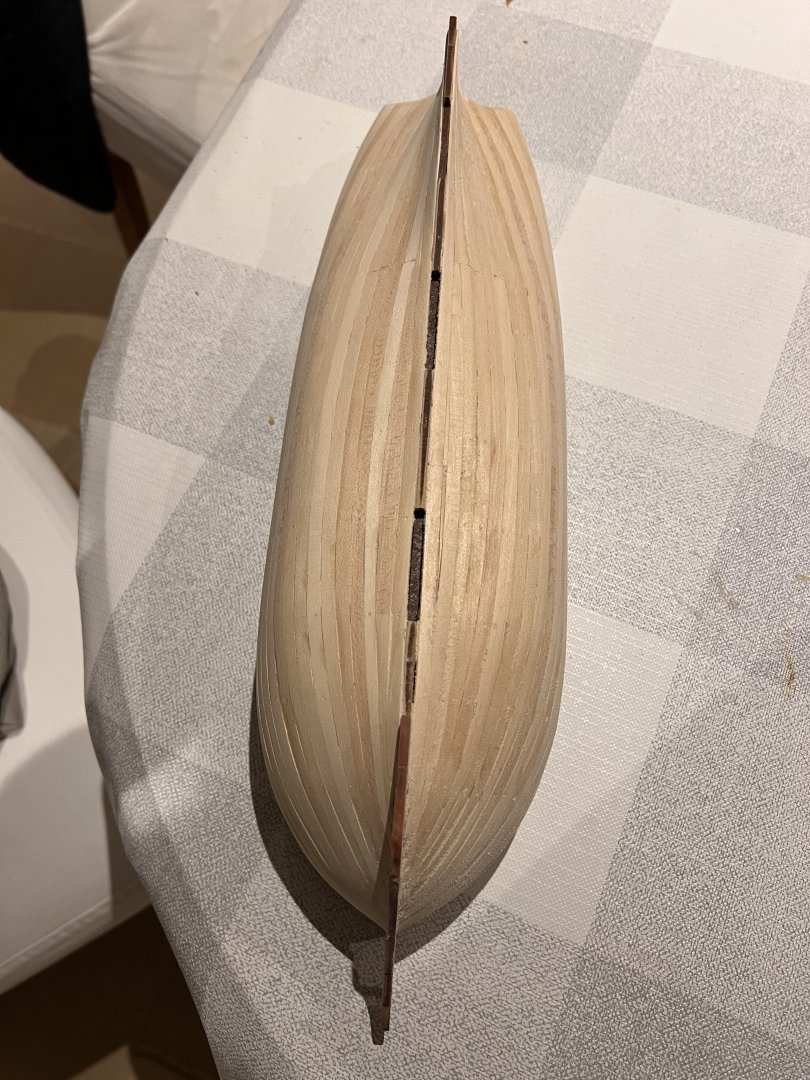
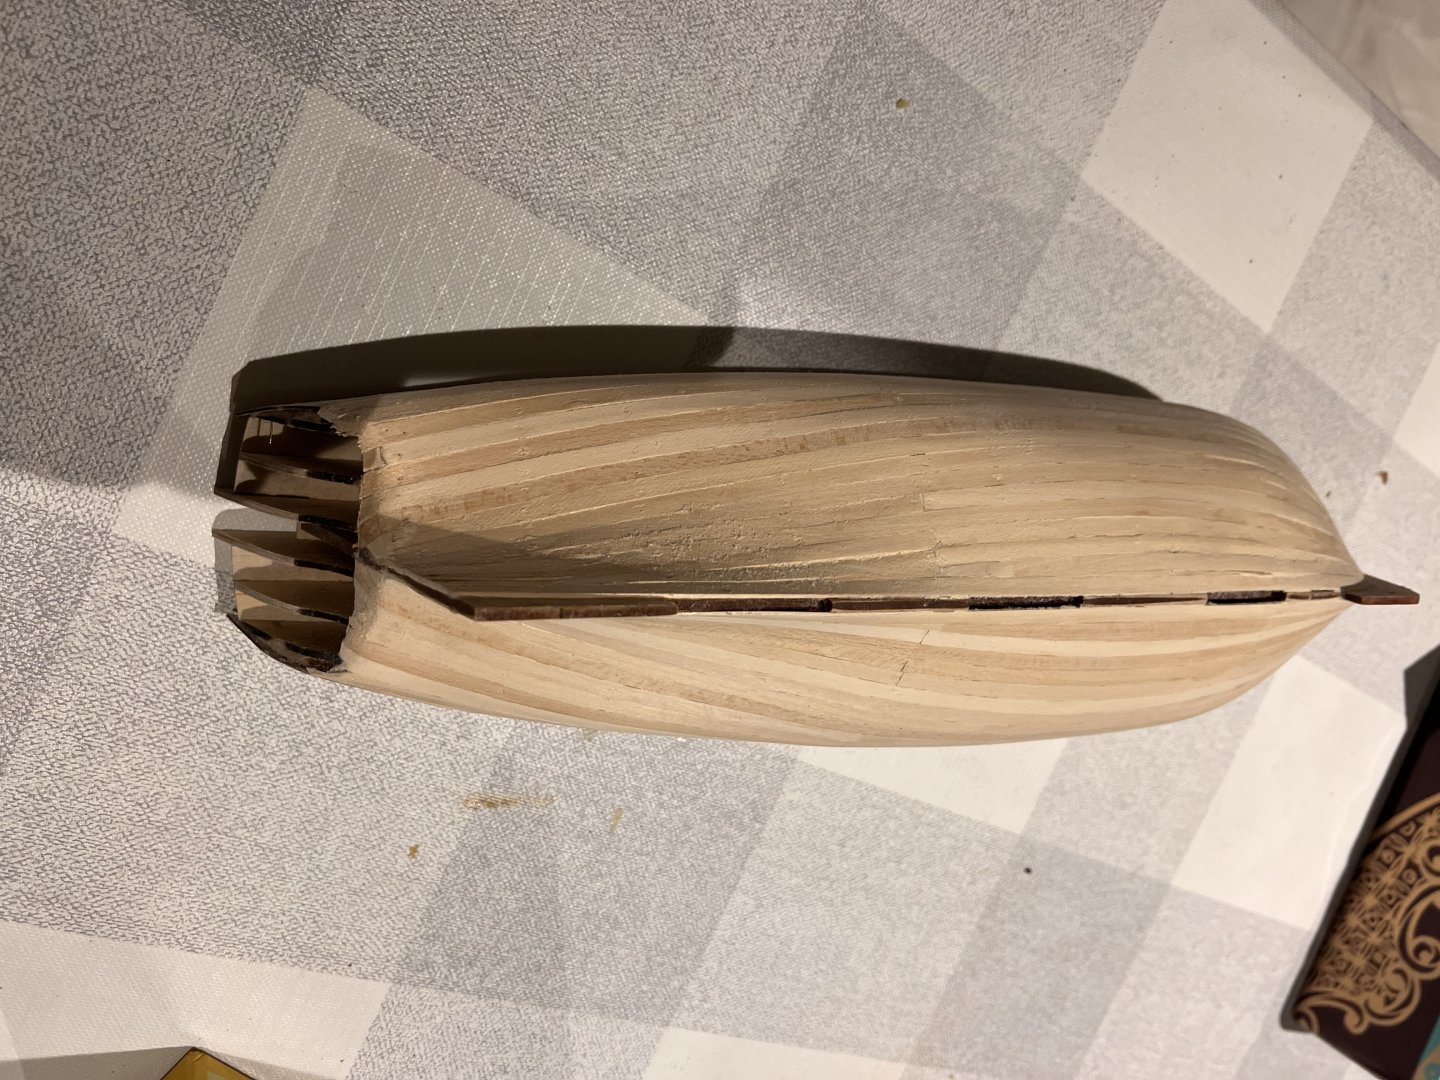
Thanks Ronald. I do like the Vanguard kits, they’re absolutely excellent! Fairings of the hull is now complete. I’ve run strips along the hull to confirm that they lie flat across all bulkheads. The bow pattern was added after fairing. Next the ply bulwarks were soaked for 30 mins in hot water and then bent around a saucepan to achieve the curve at the bow. Left to dry for 24 hours. Then fitted to the hull as per the instructions with holes drilled through the ply for pins to hold in place. Starting to look like a ship now! The outer edge of the bulkhead ears have a very slightly concave shape so I’ve used a plank bender (soldering iron type with a big round head) to try and get the dampened ply to adopt this shape. It’s only very gentle but I think will add to the lovely lines of this ship. Apologies for the orientation of these photos - I can’t change them on my iPhone. Onto first planking next. Need to build a new plank bending former as my last disintegrated… In the meantime I’m scanning the large number of excellent build logs for the best way to glaze her cabin windows. Ideas so far range from black paper behind, Krystal Klear, Fantasy Film, Glue n Glaze to leaving them unglazed. Any advice much appreciated! Many thanks


- 36 replies
-
- 7
-
-
- Duchess of Kingston
- Vanguard Models
- (and 1 more)
-
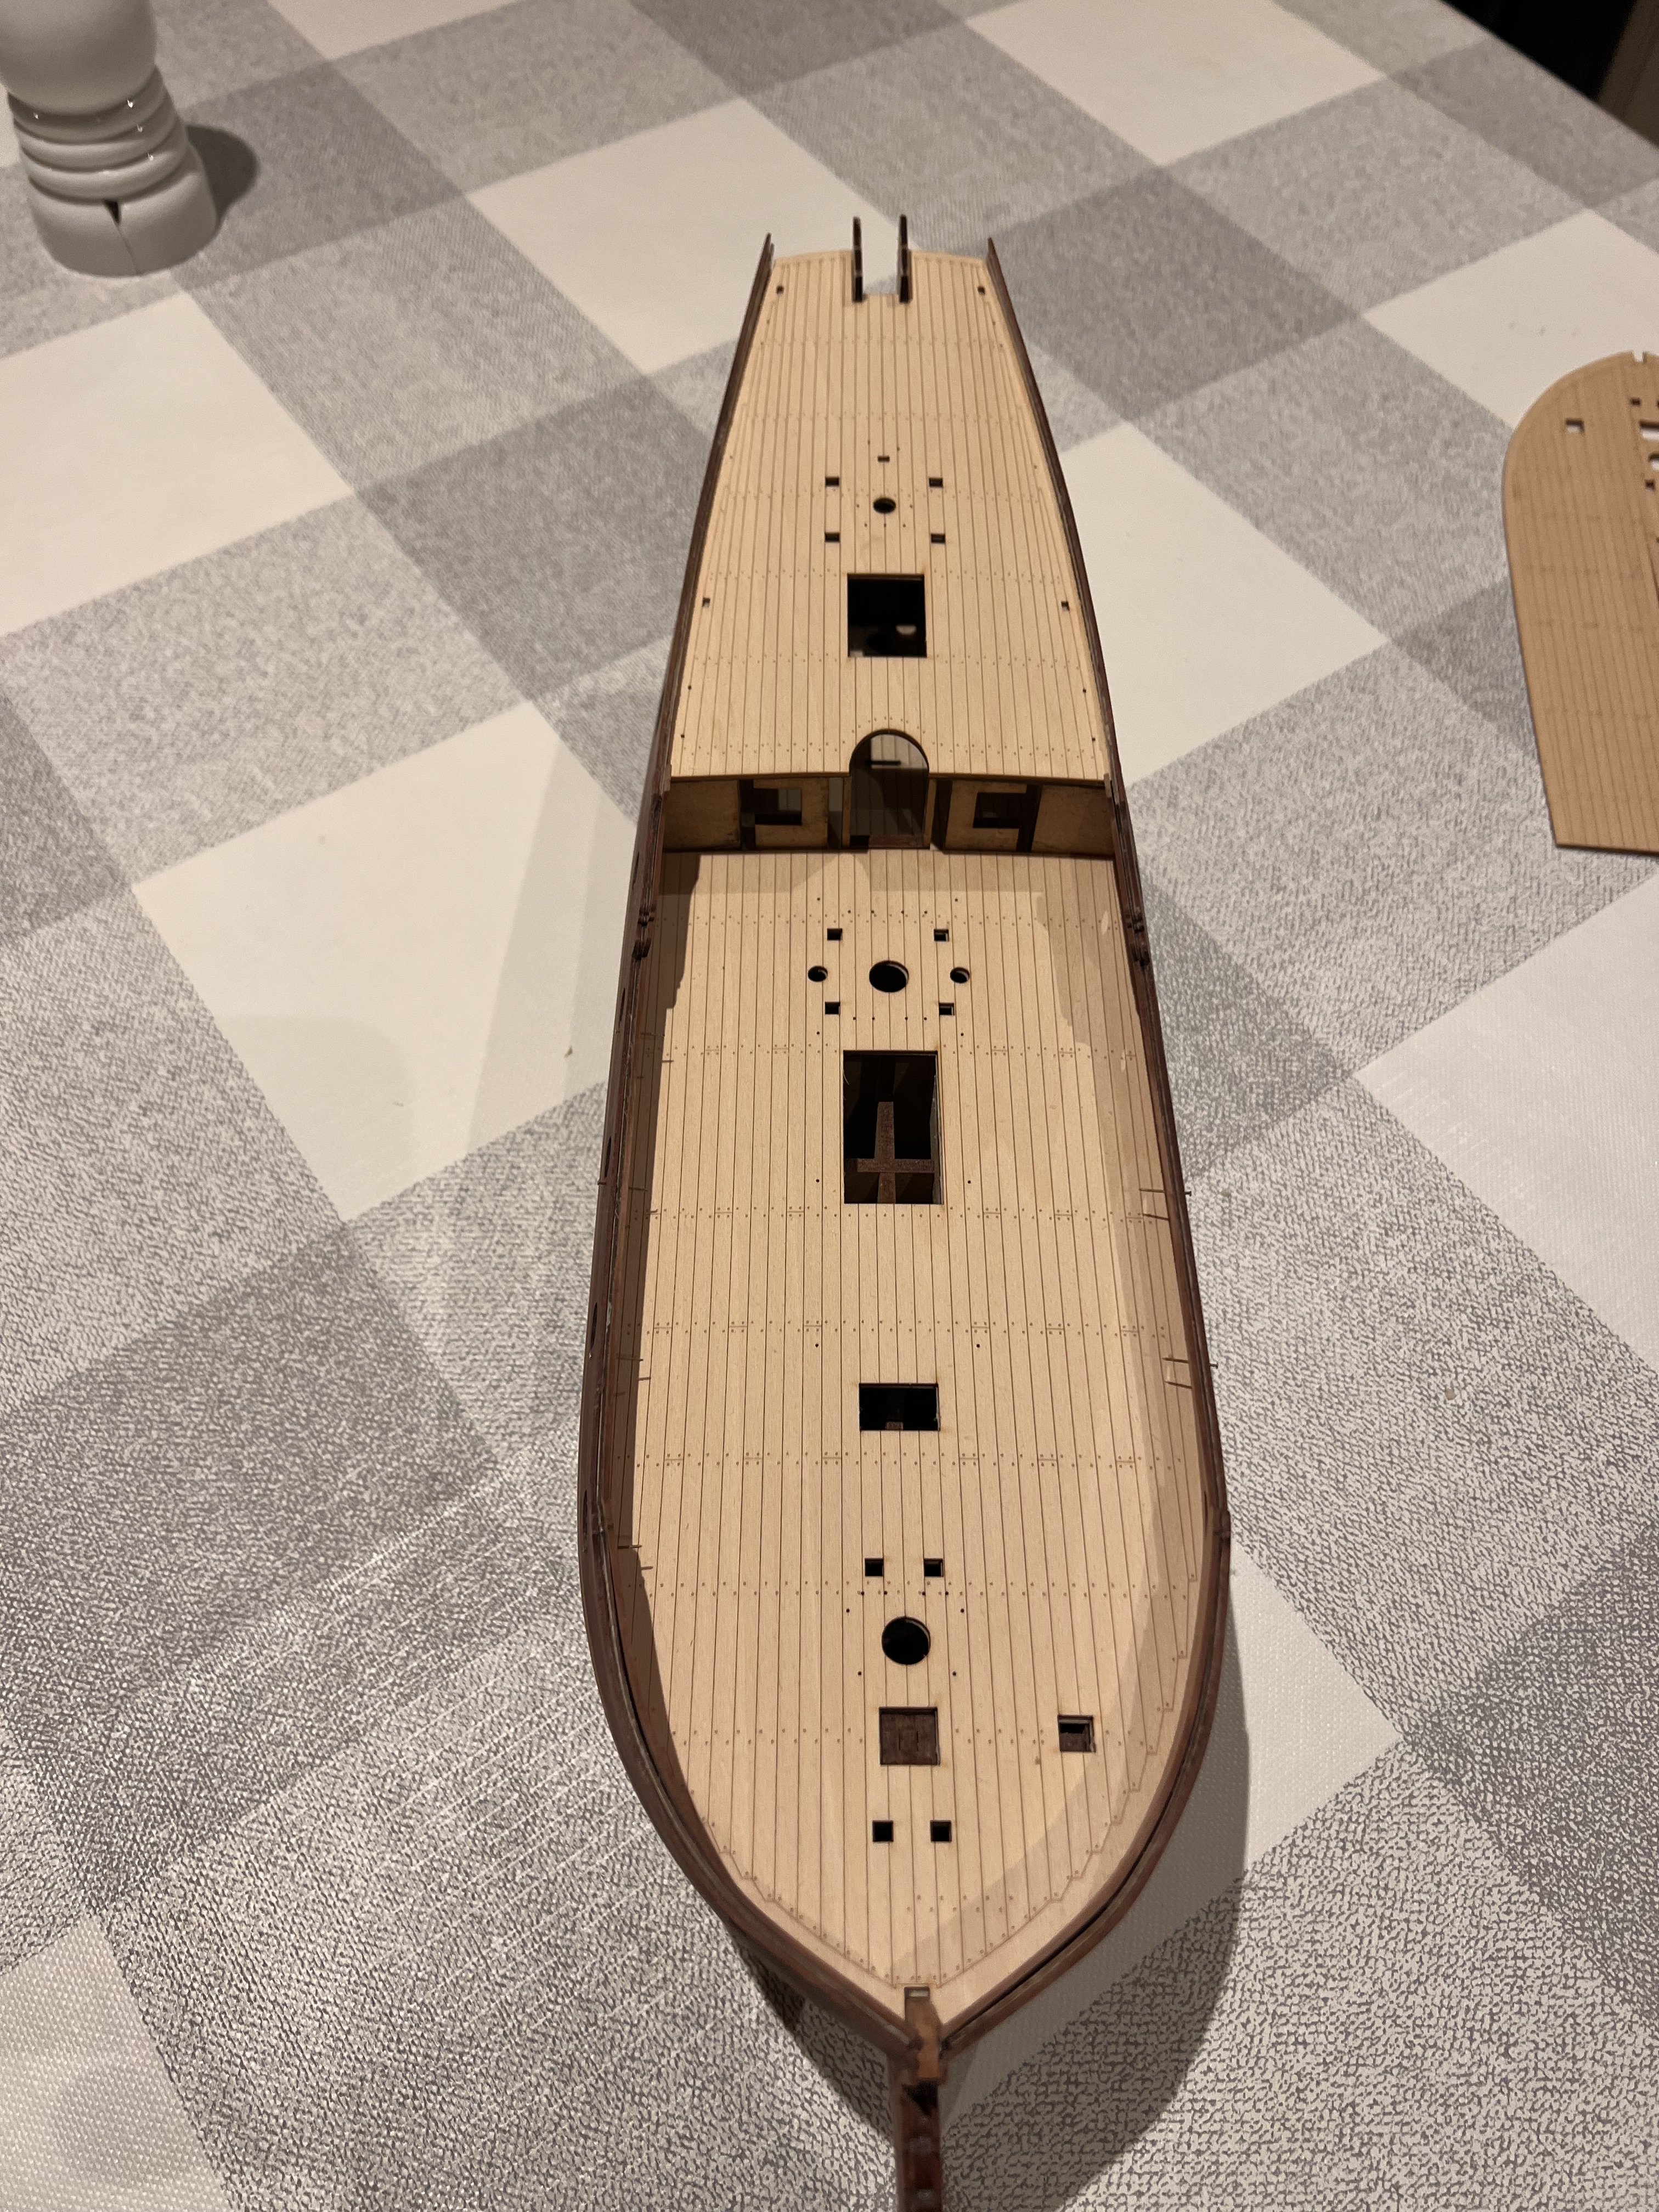
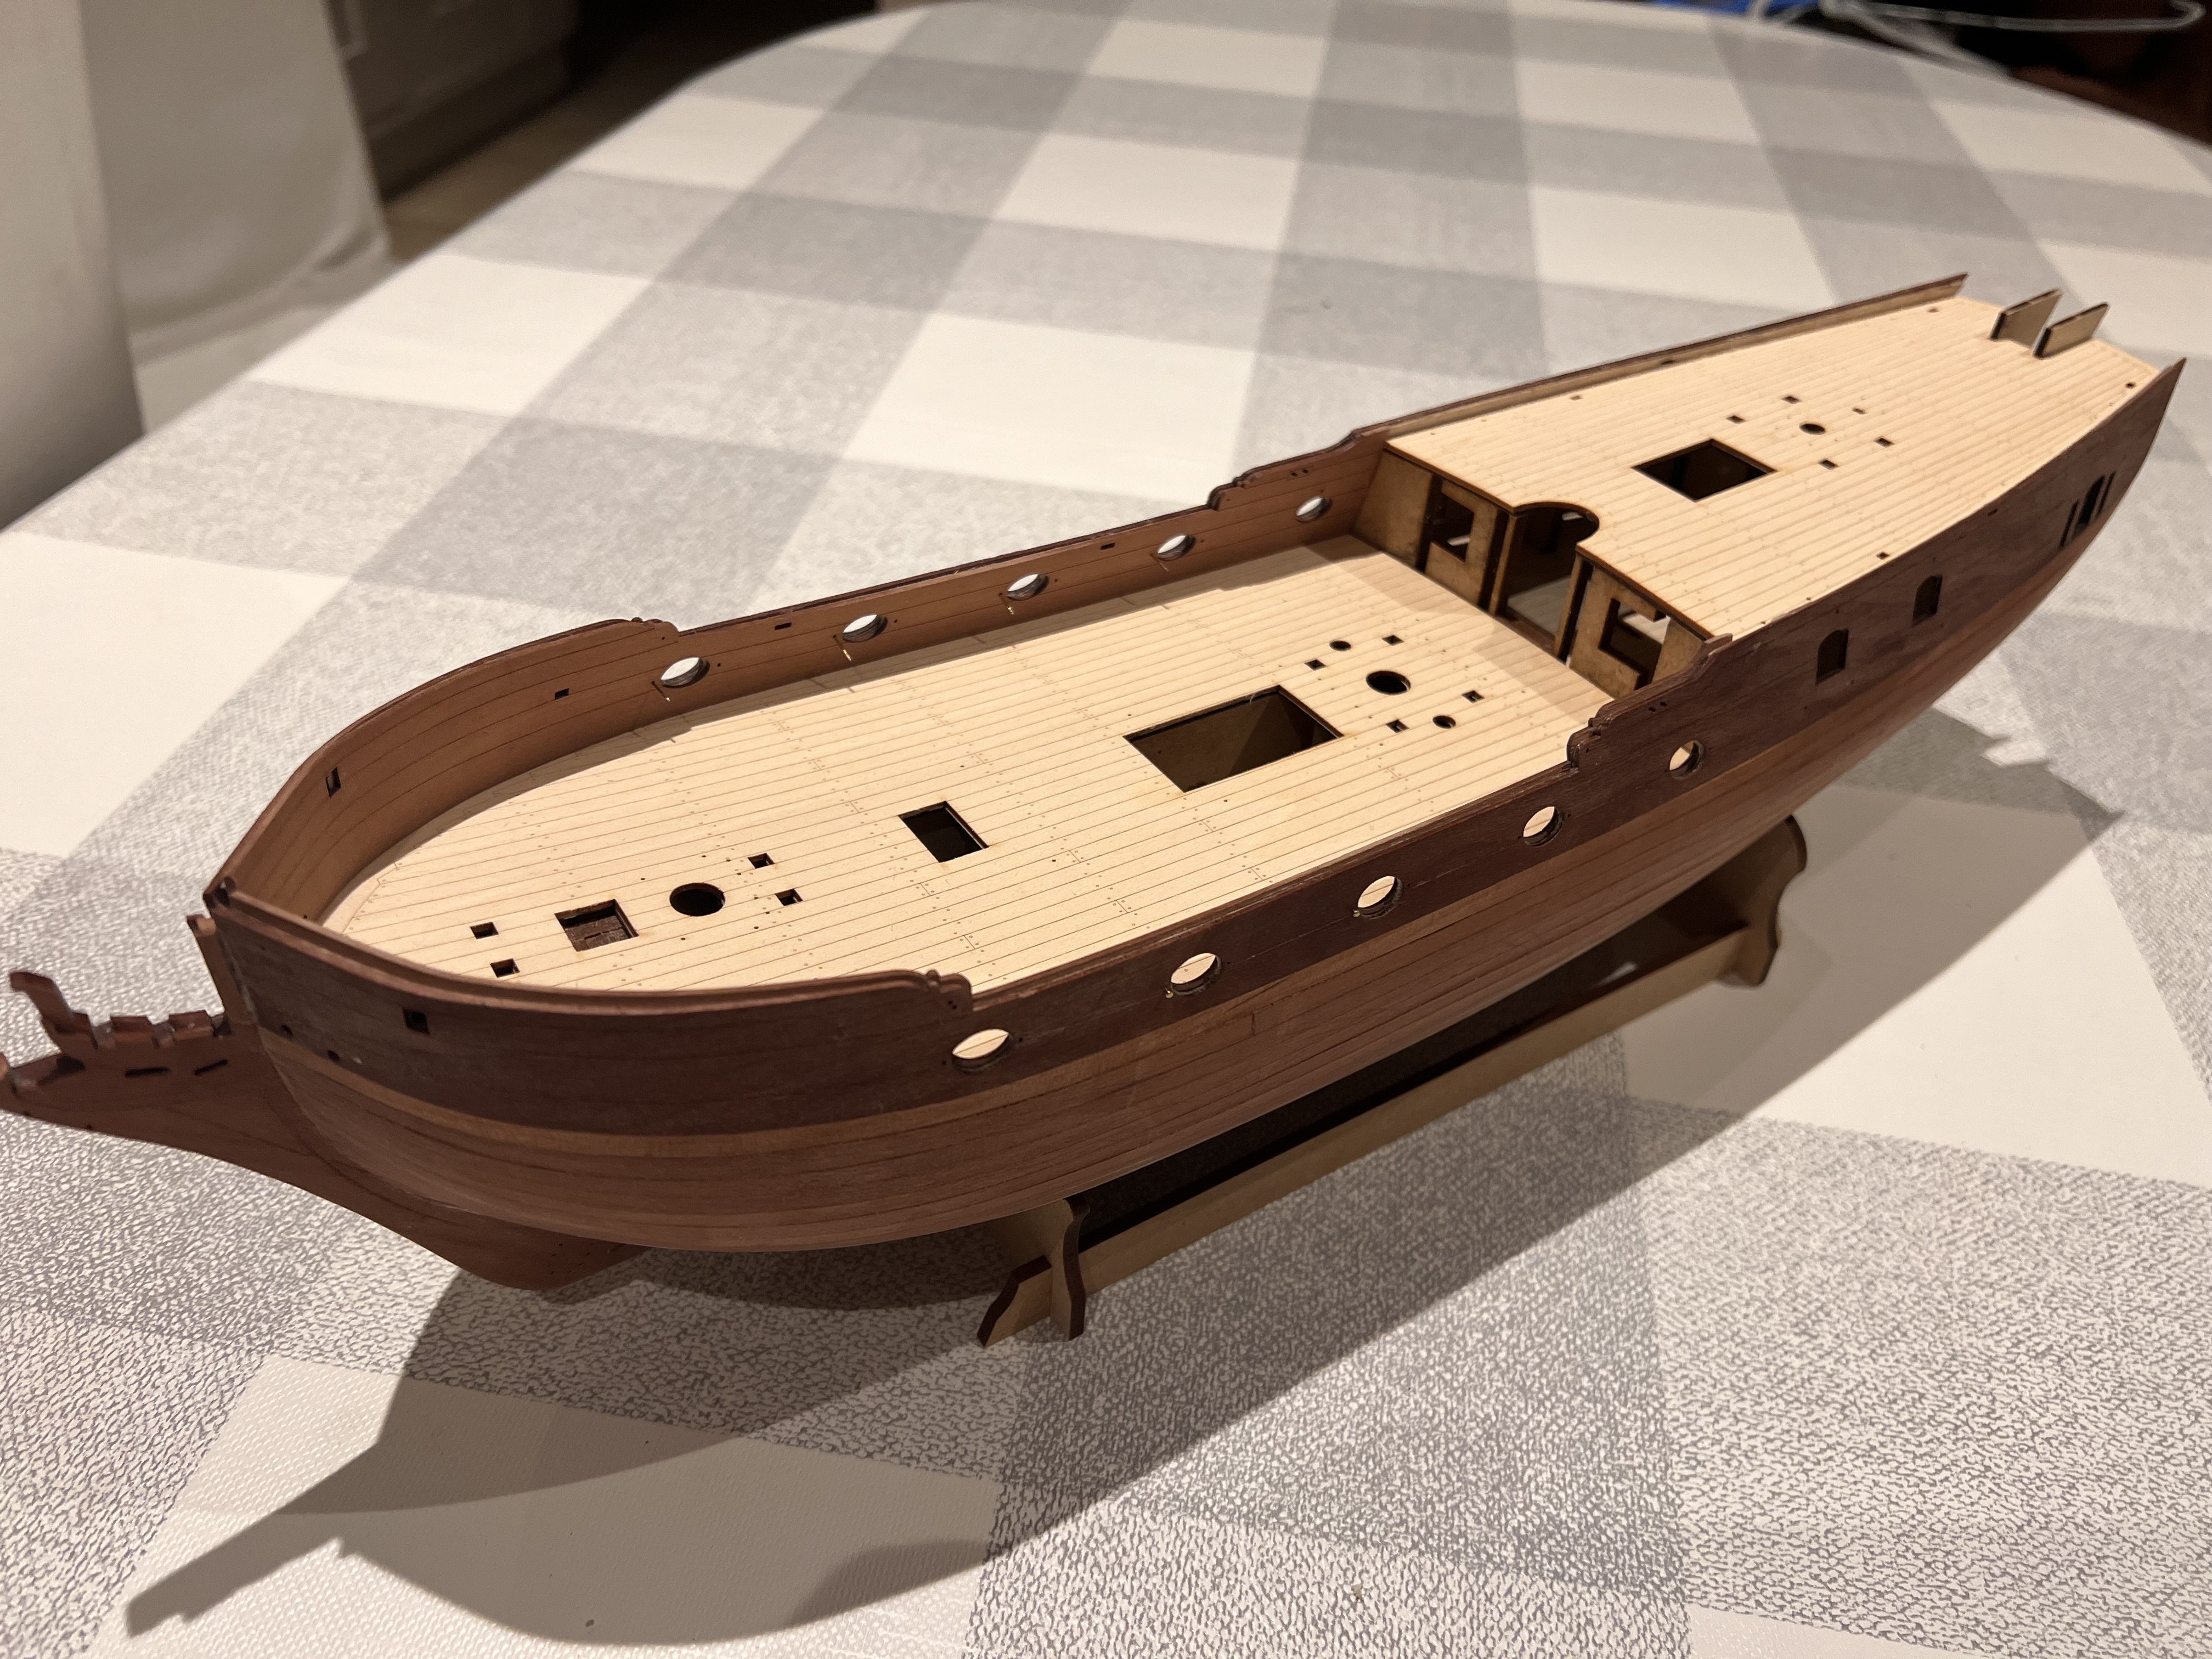
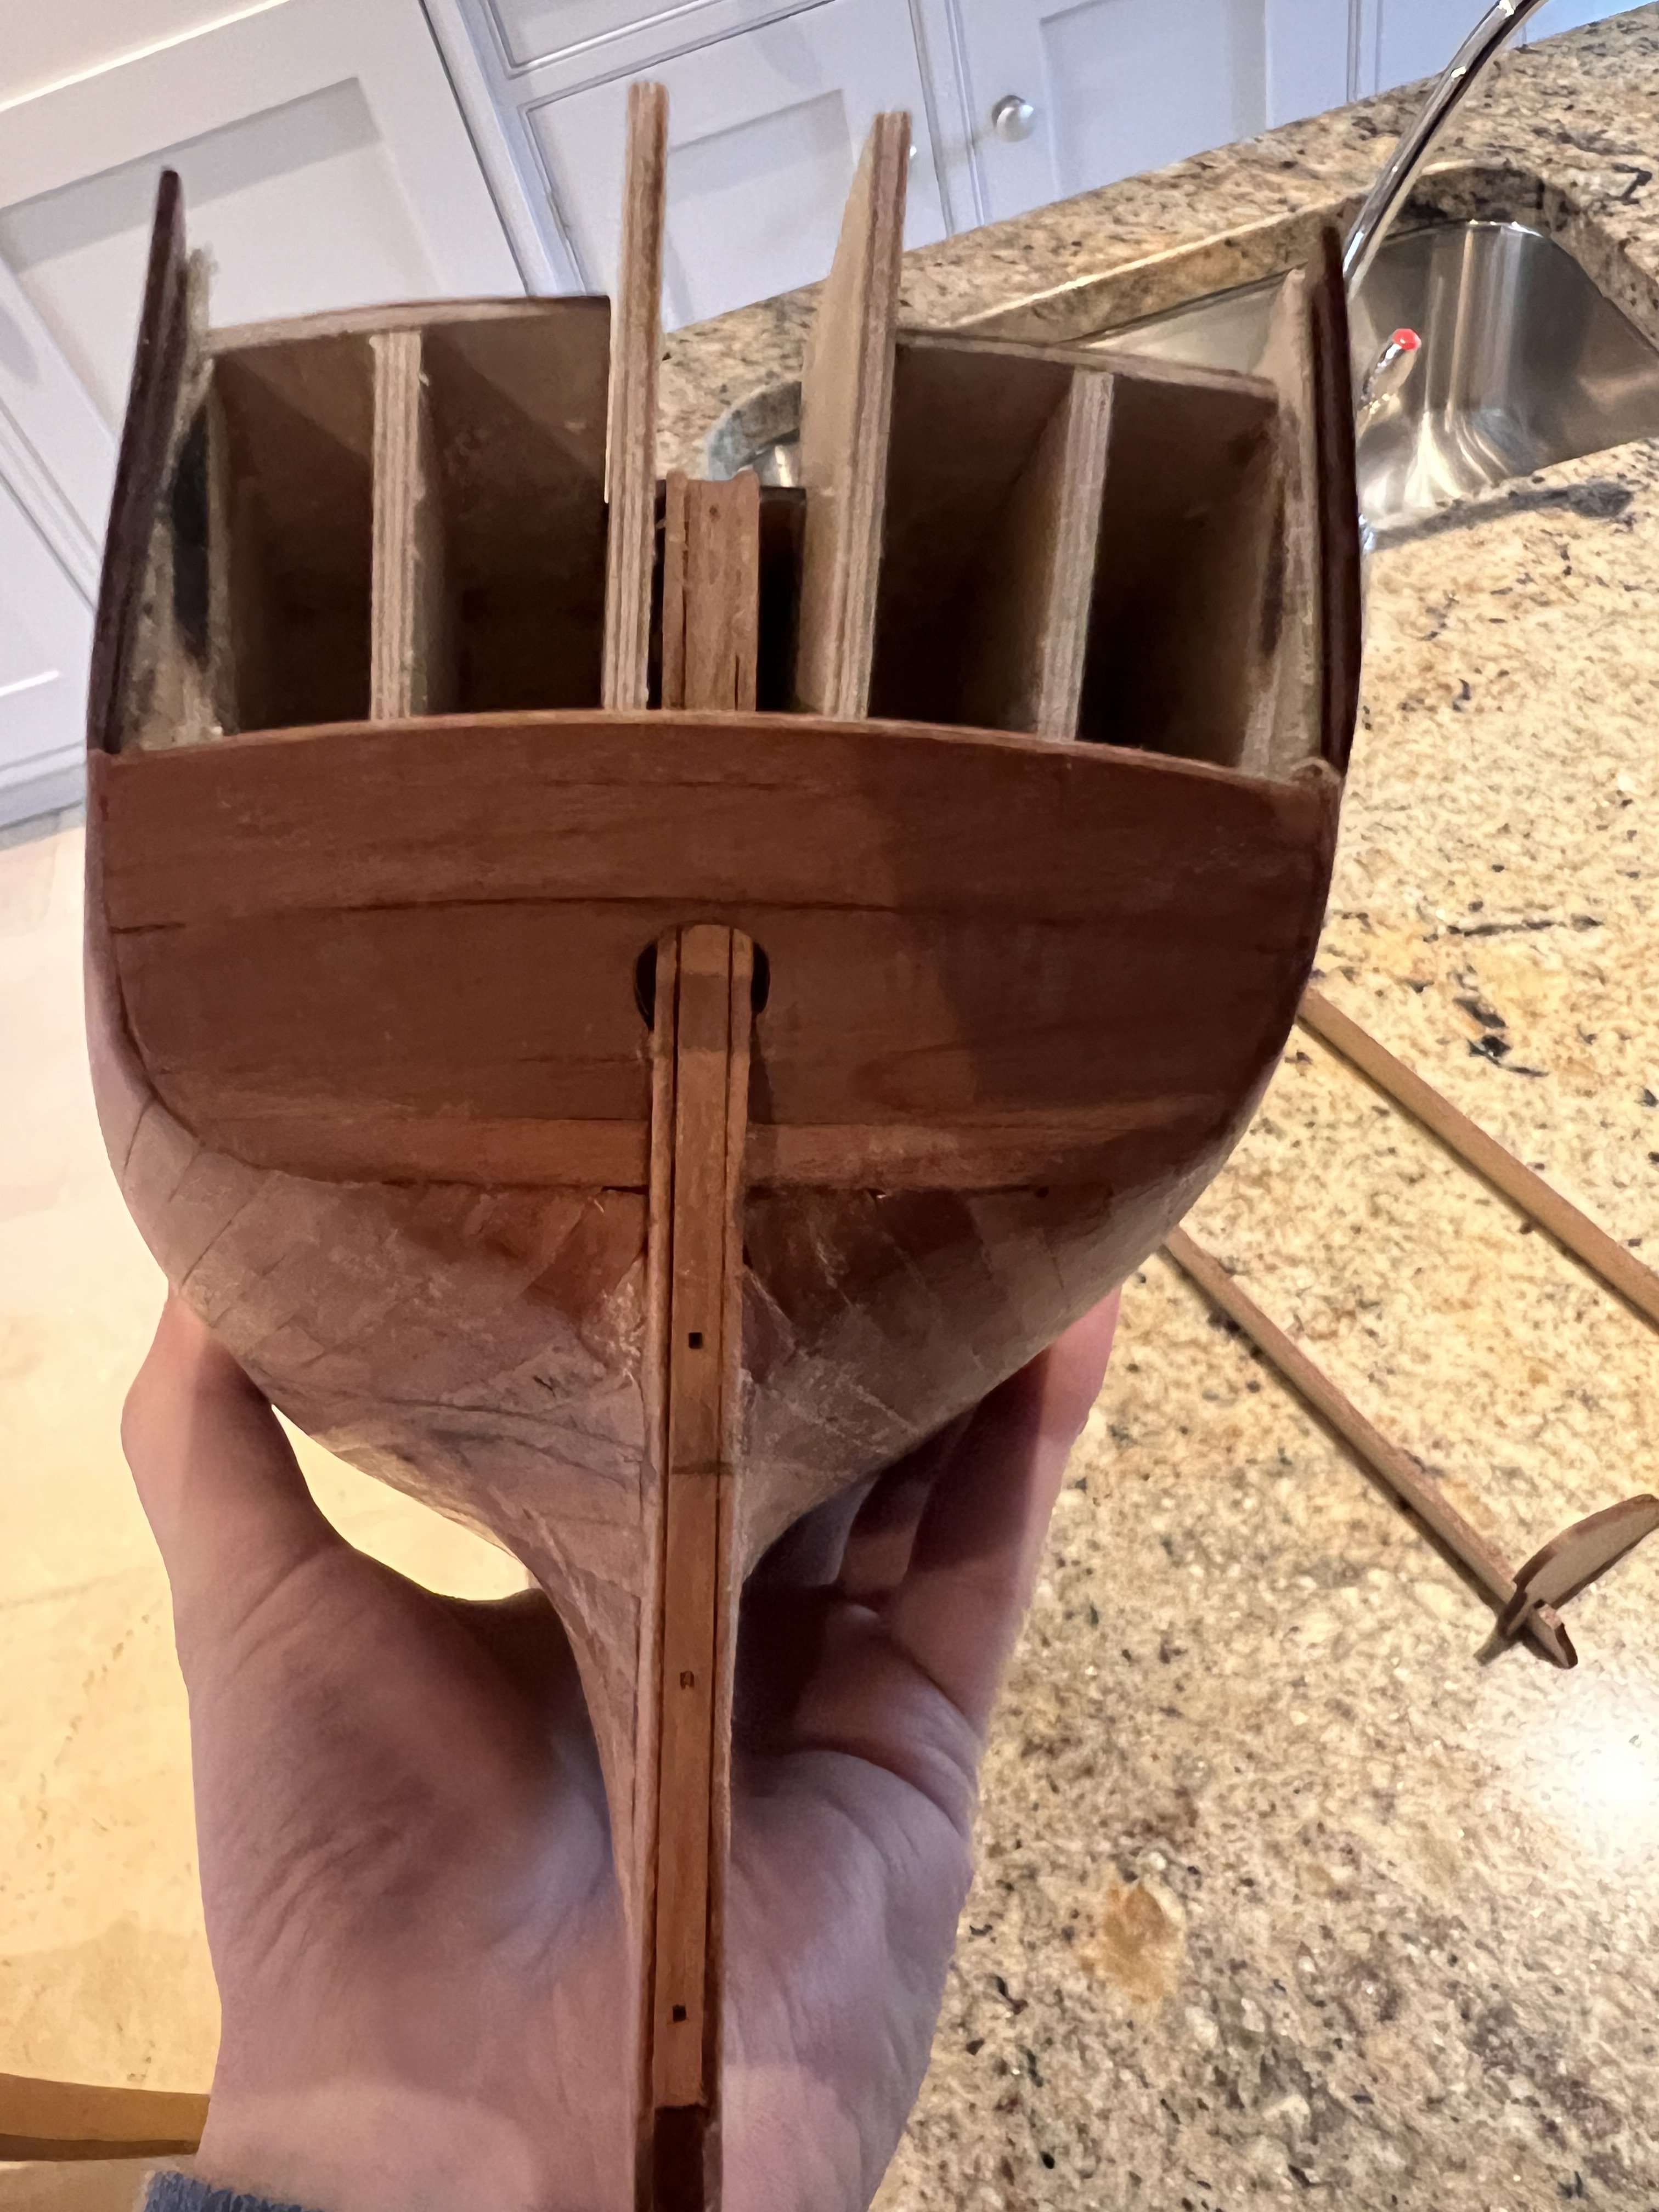
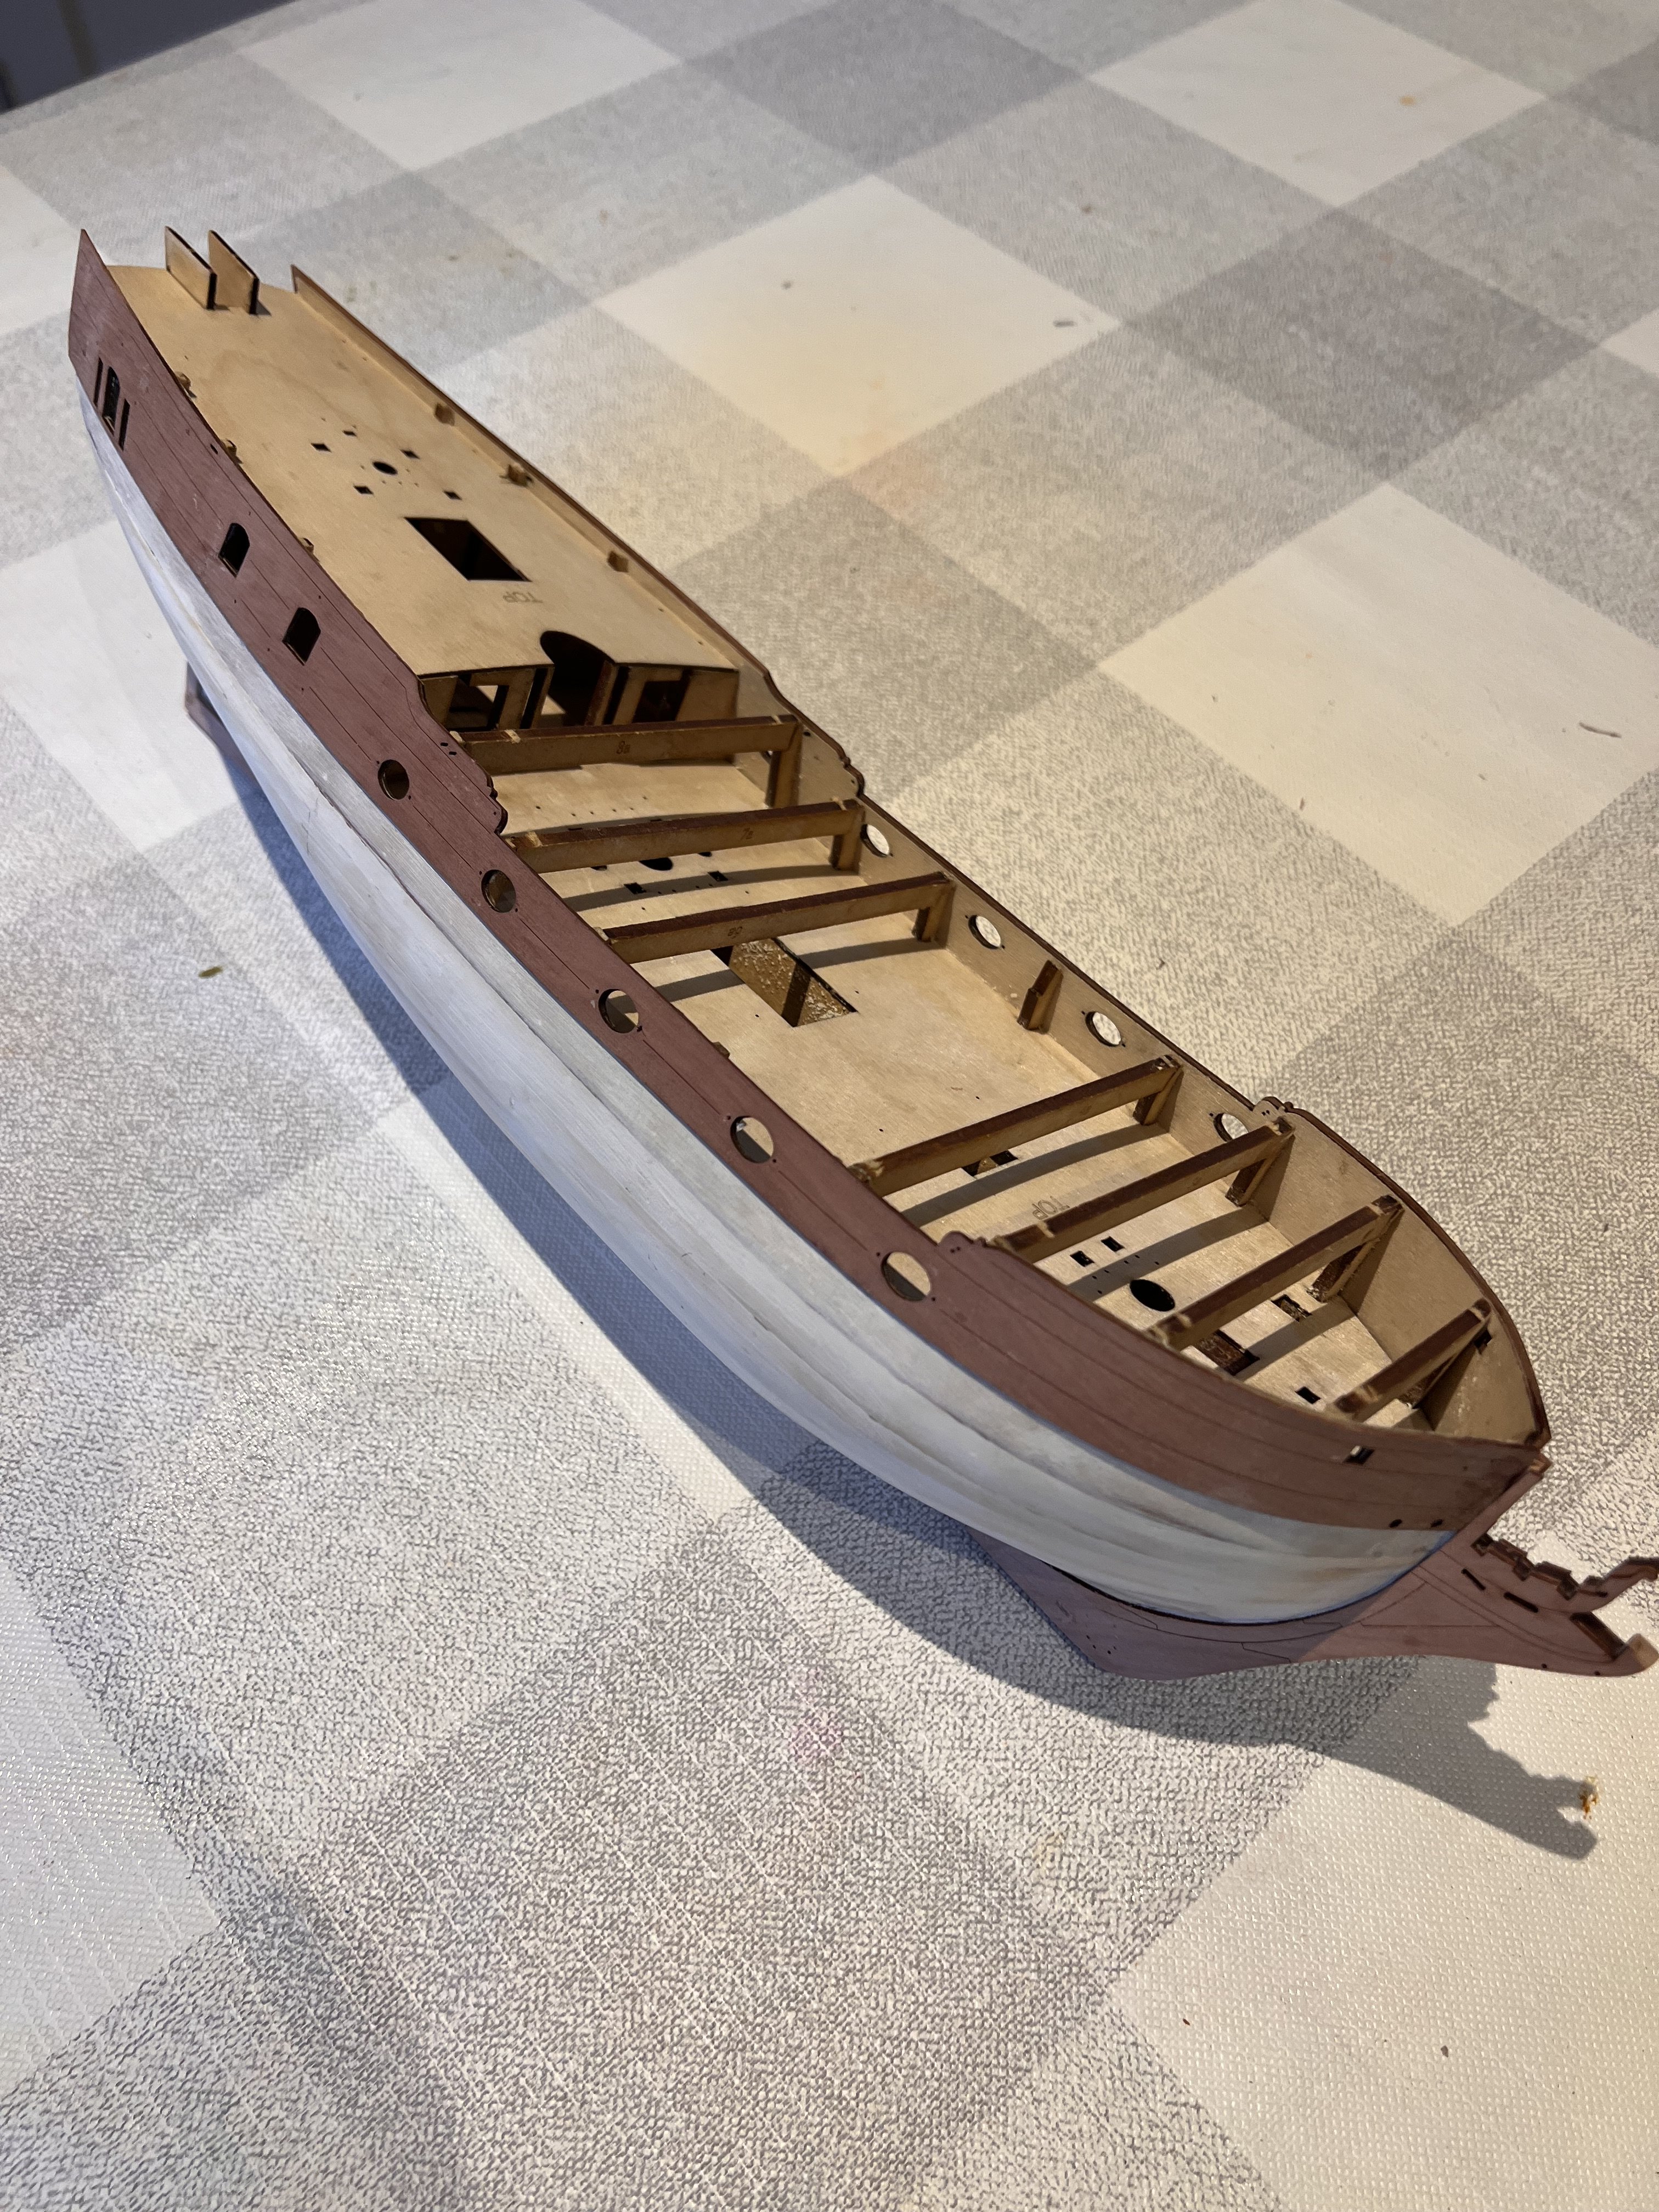
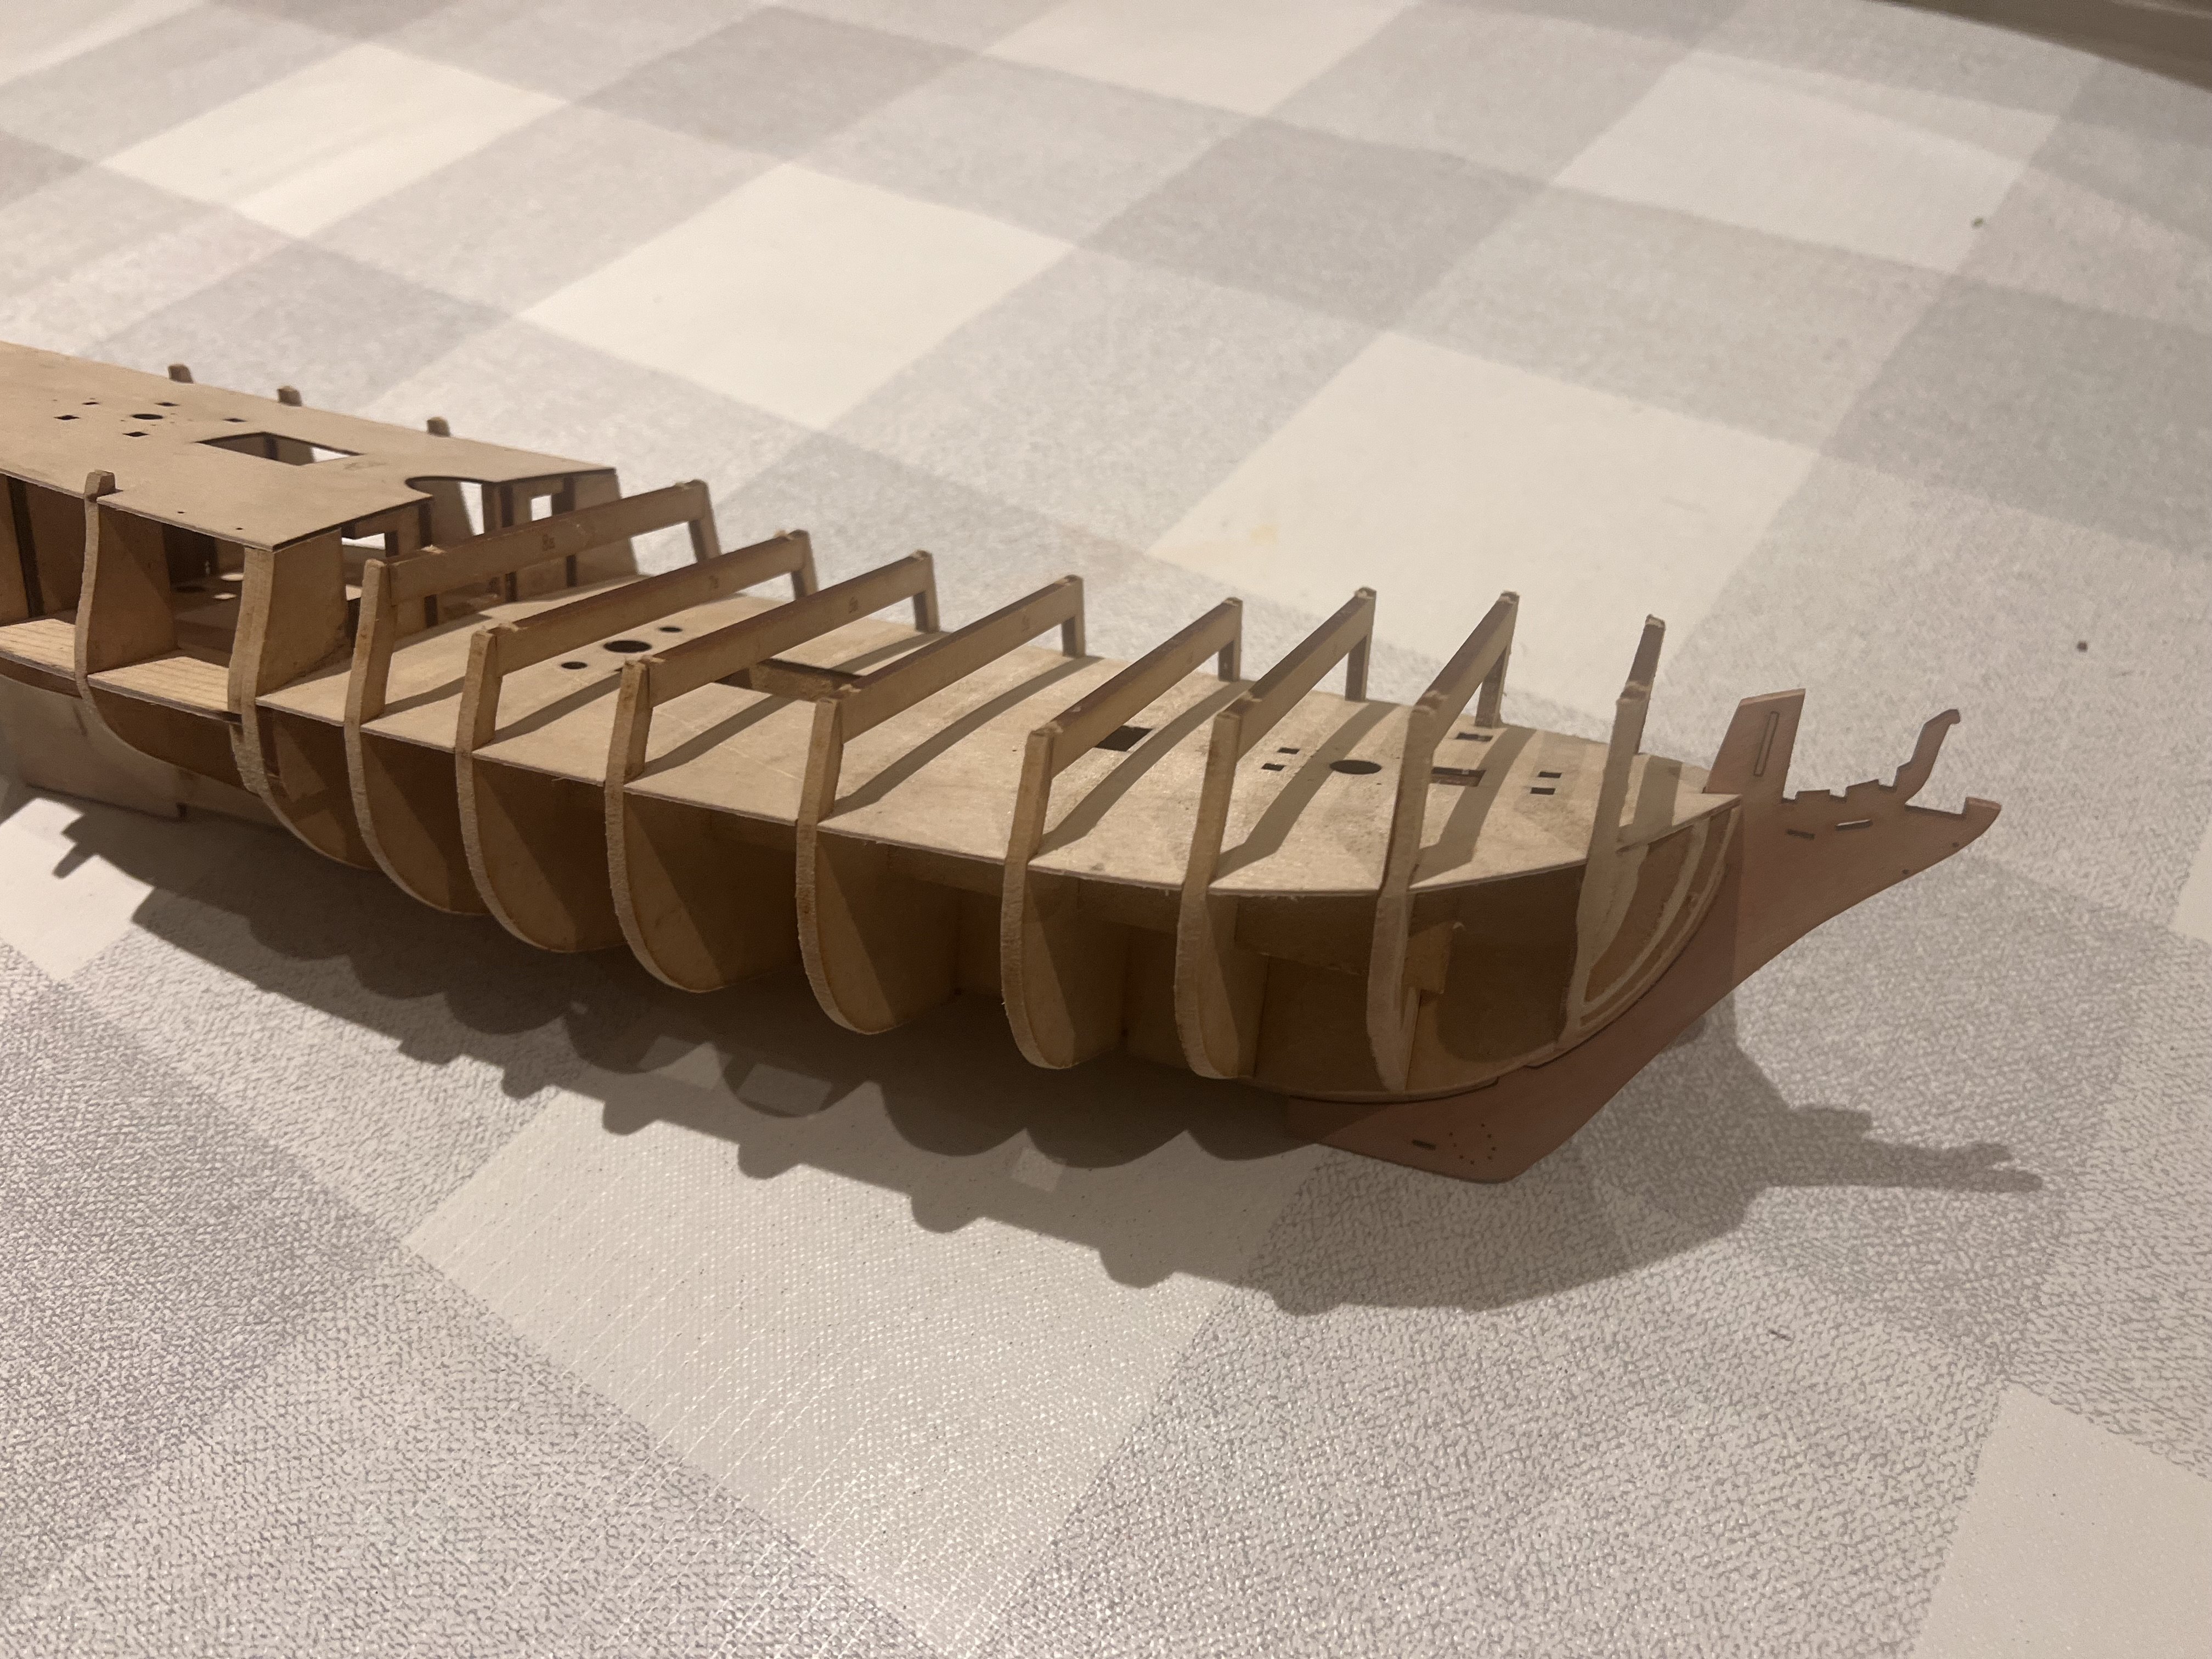
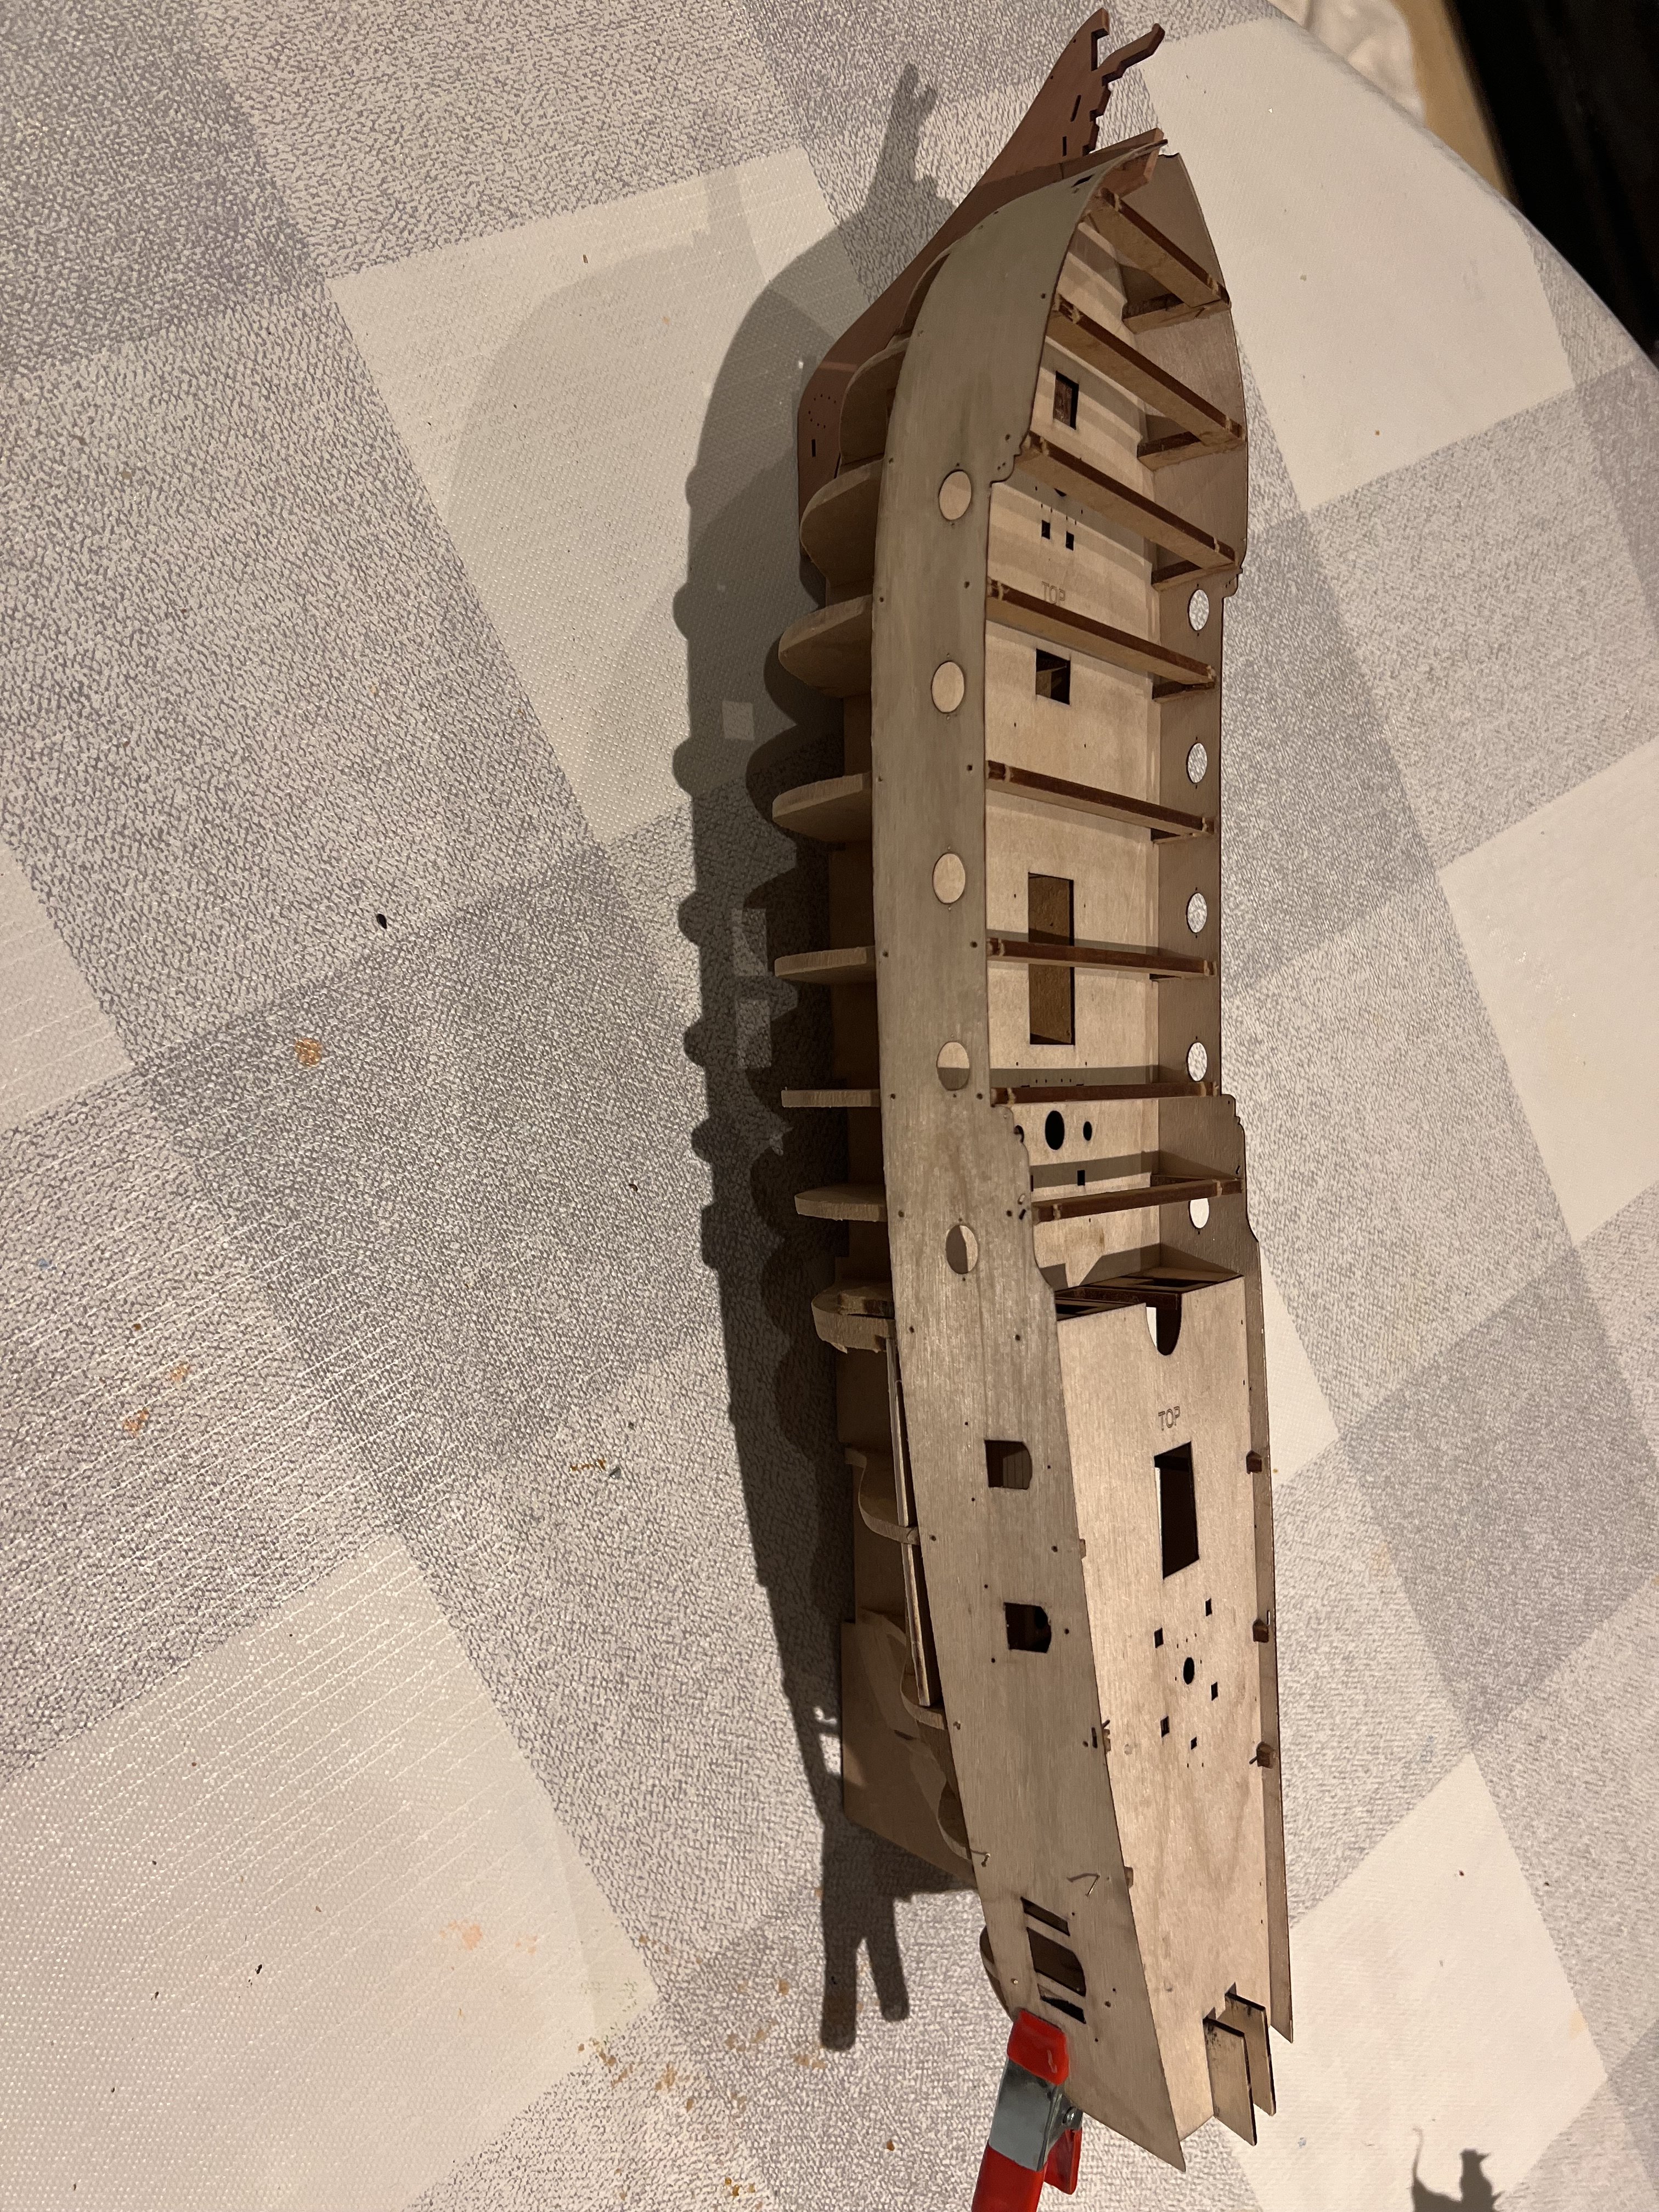
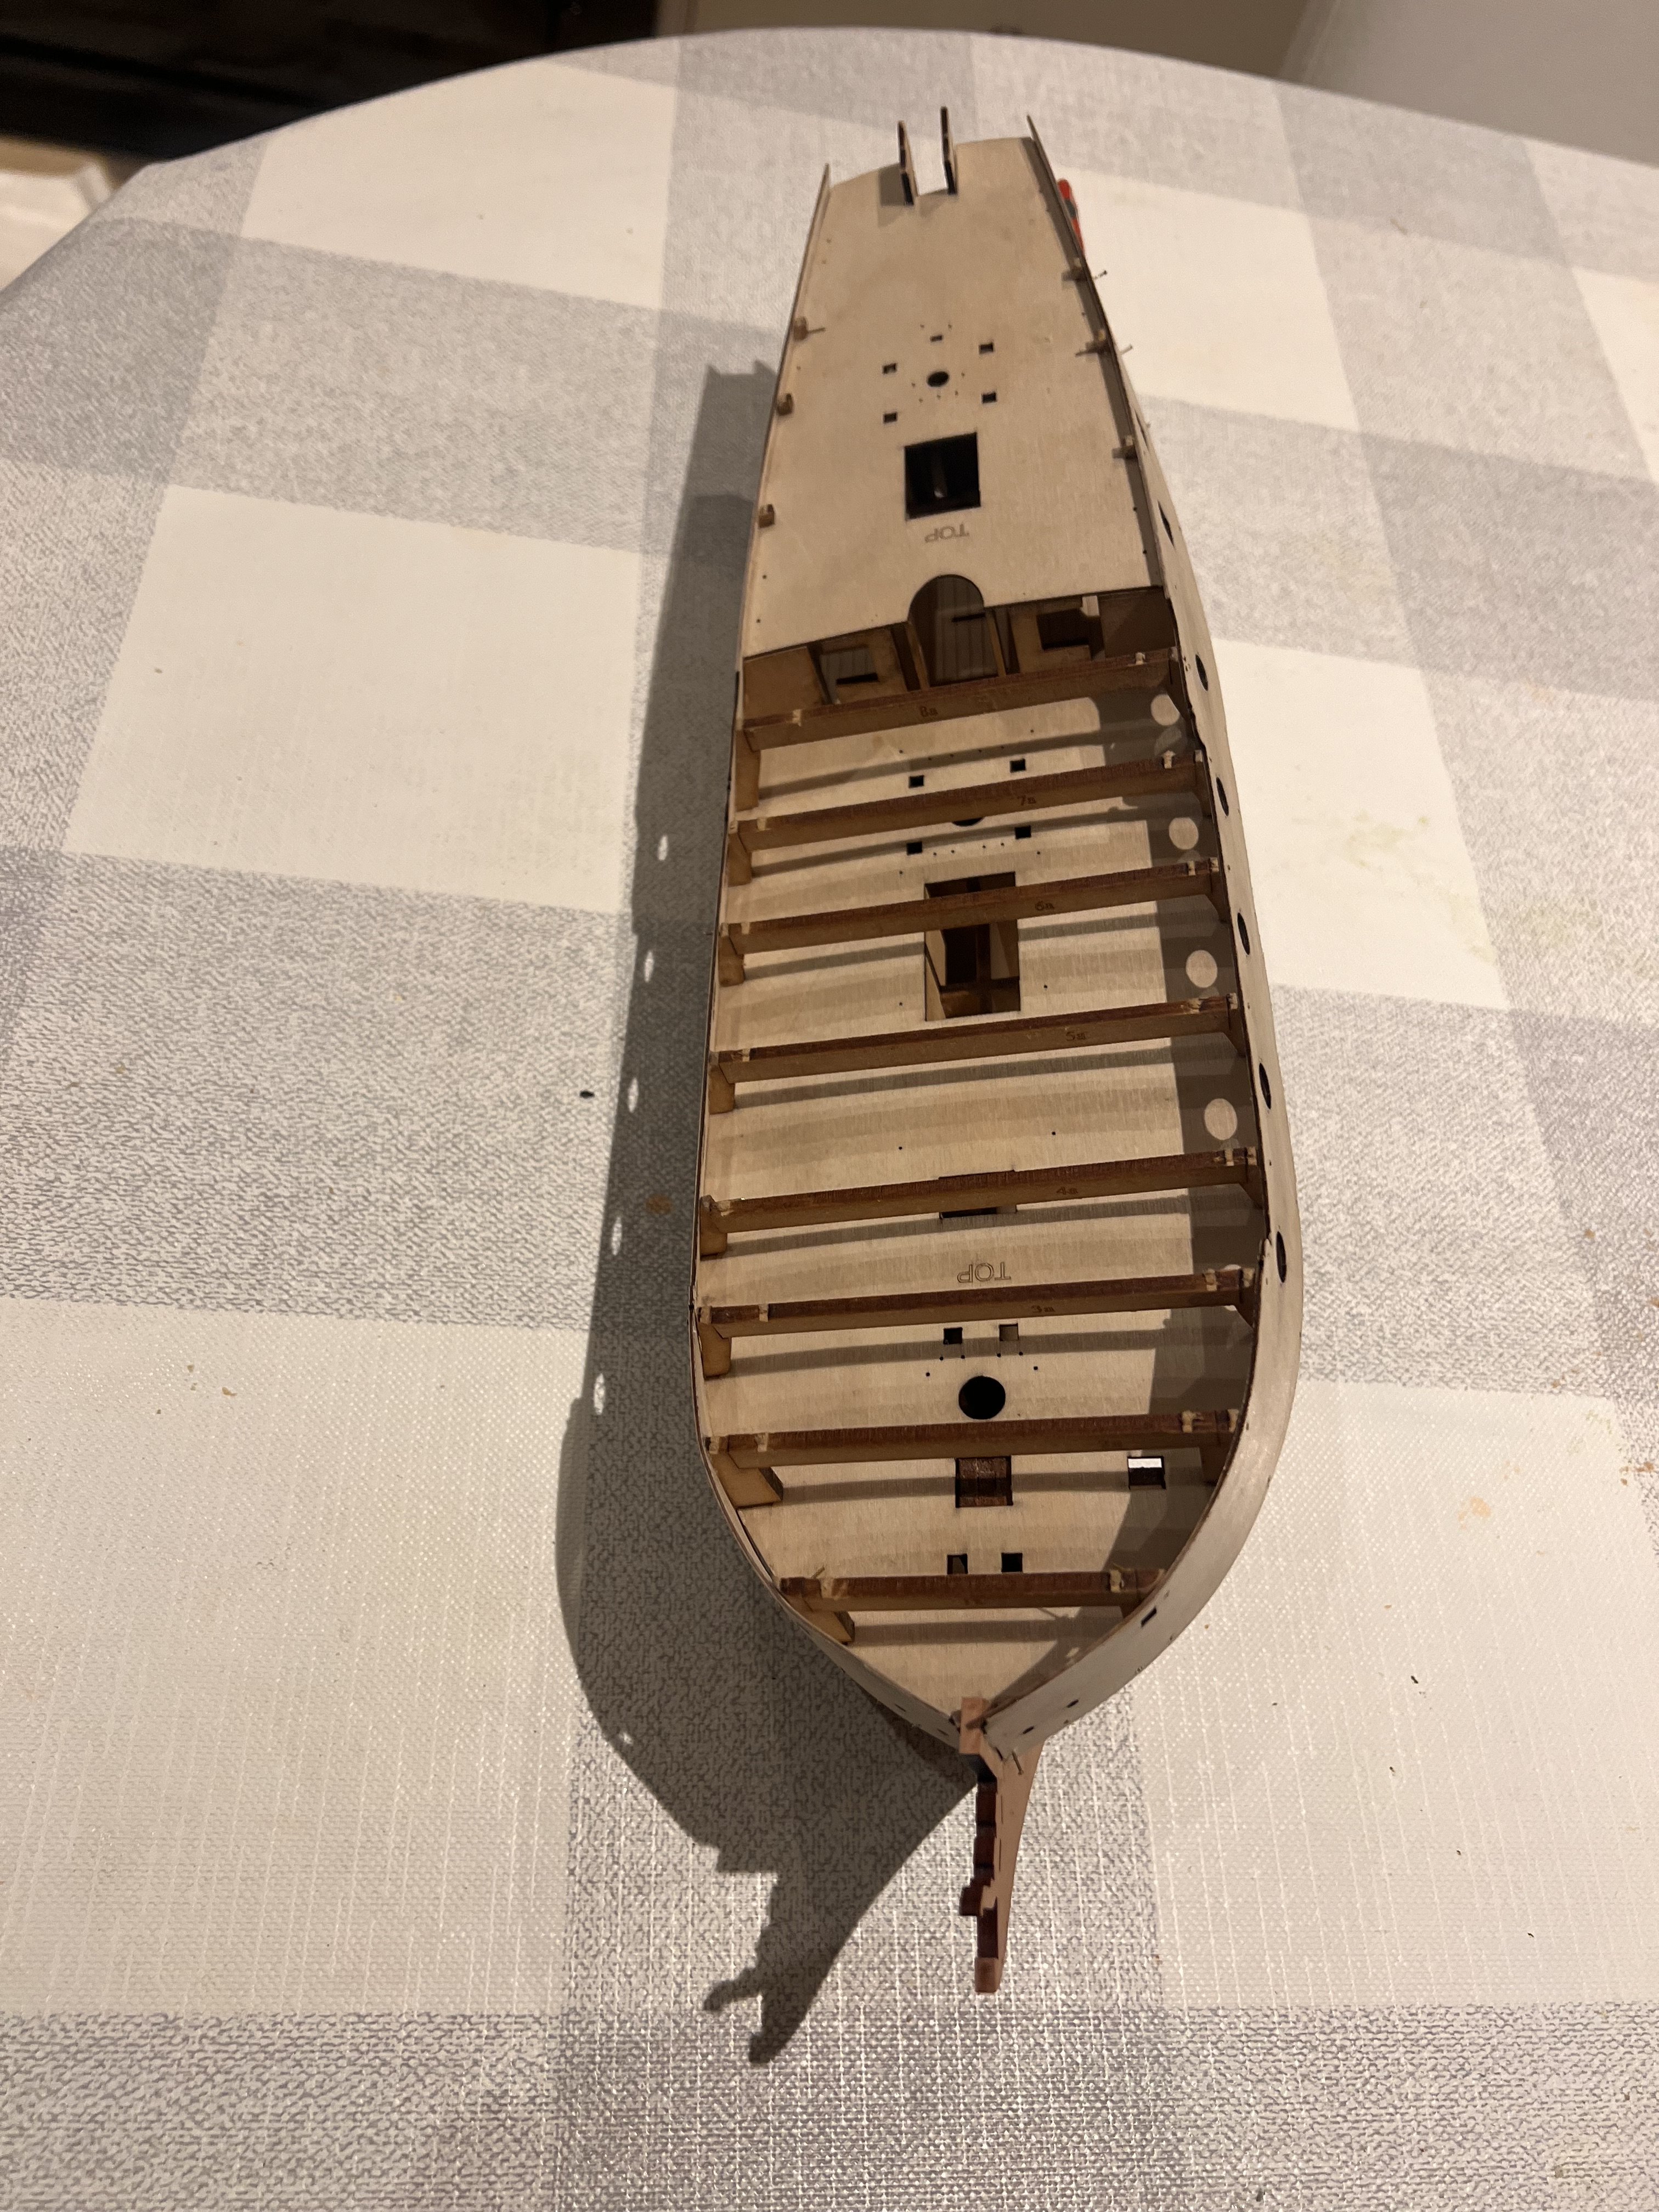
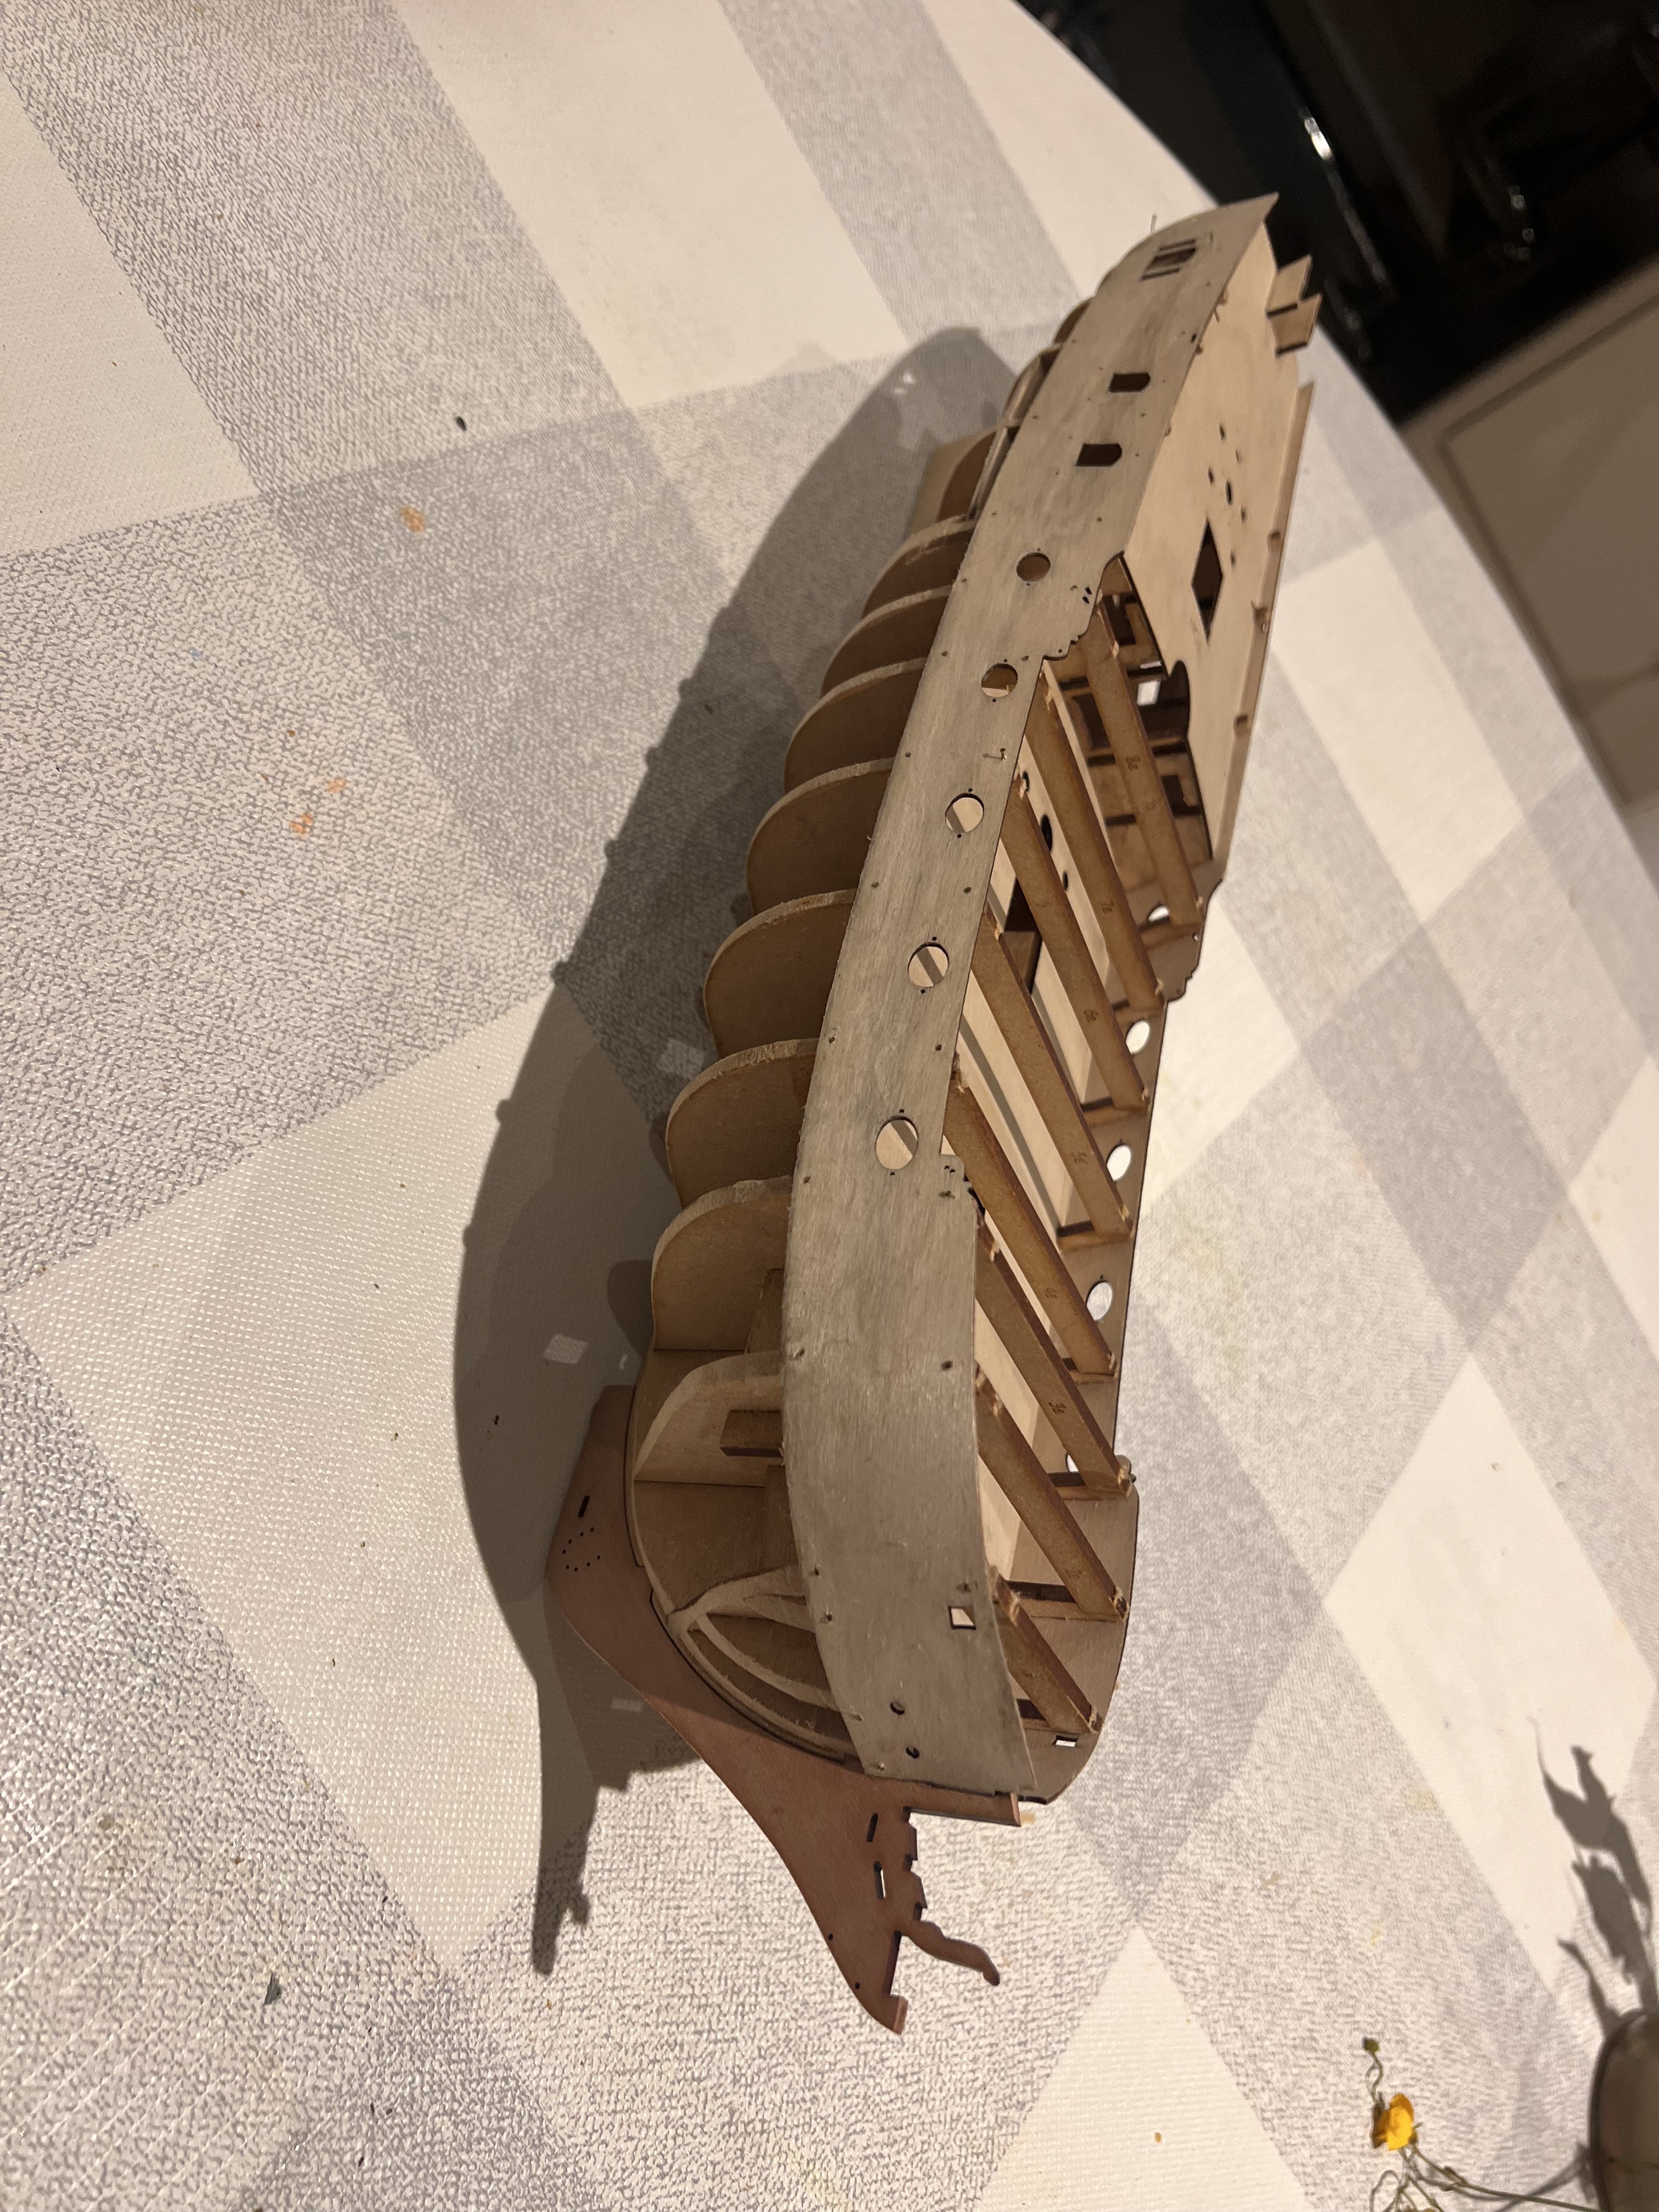
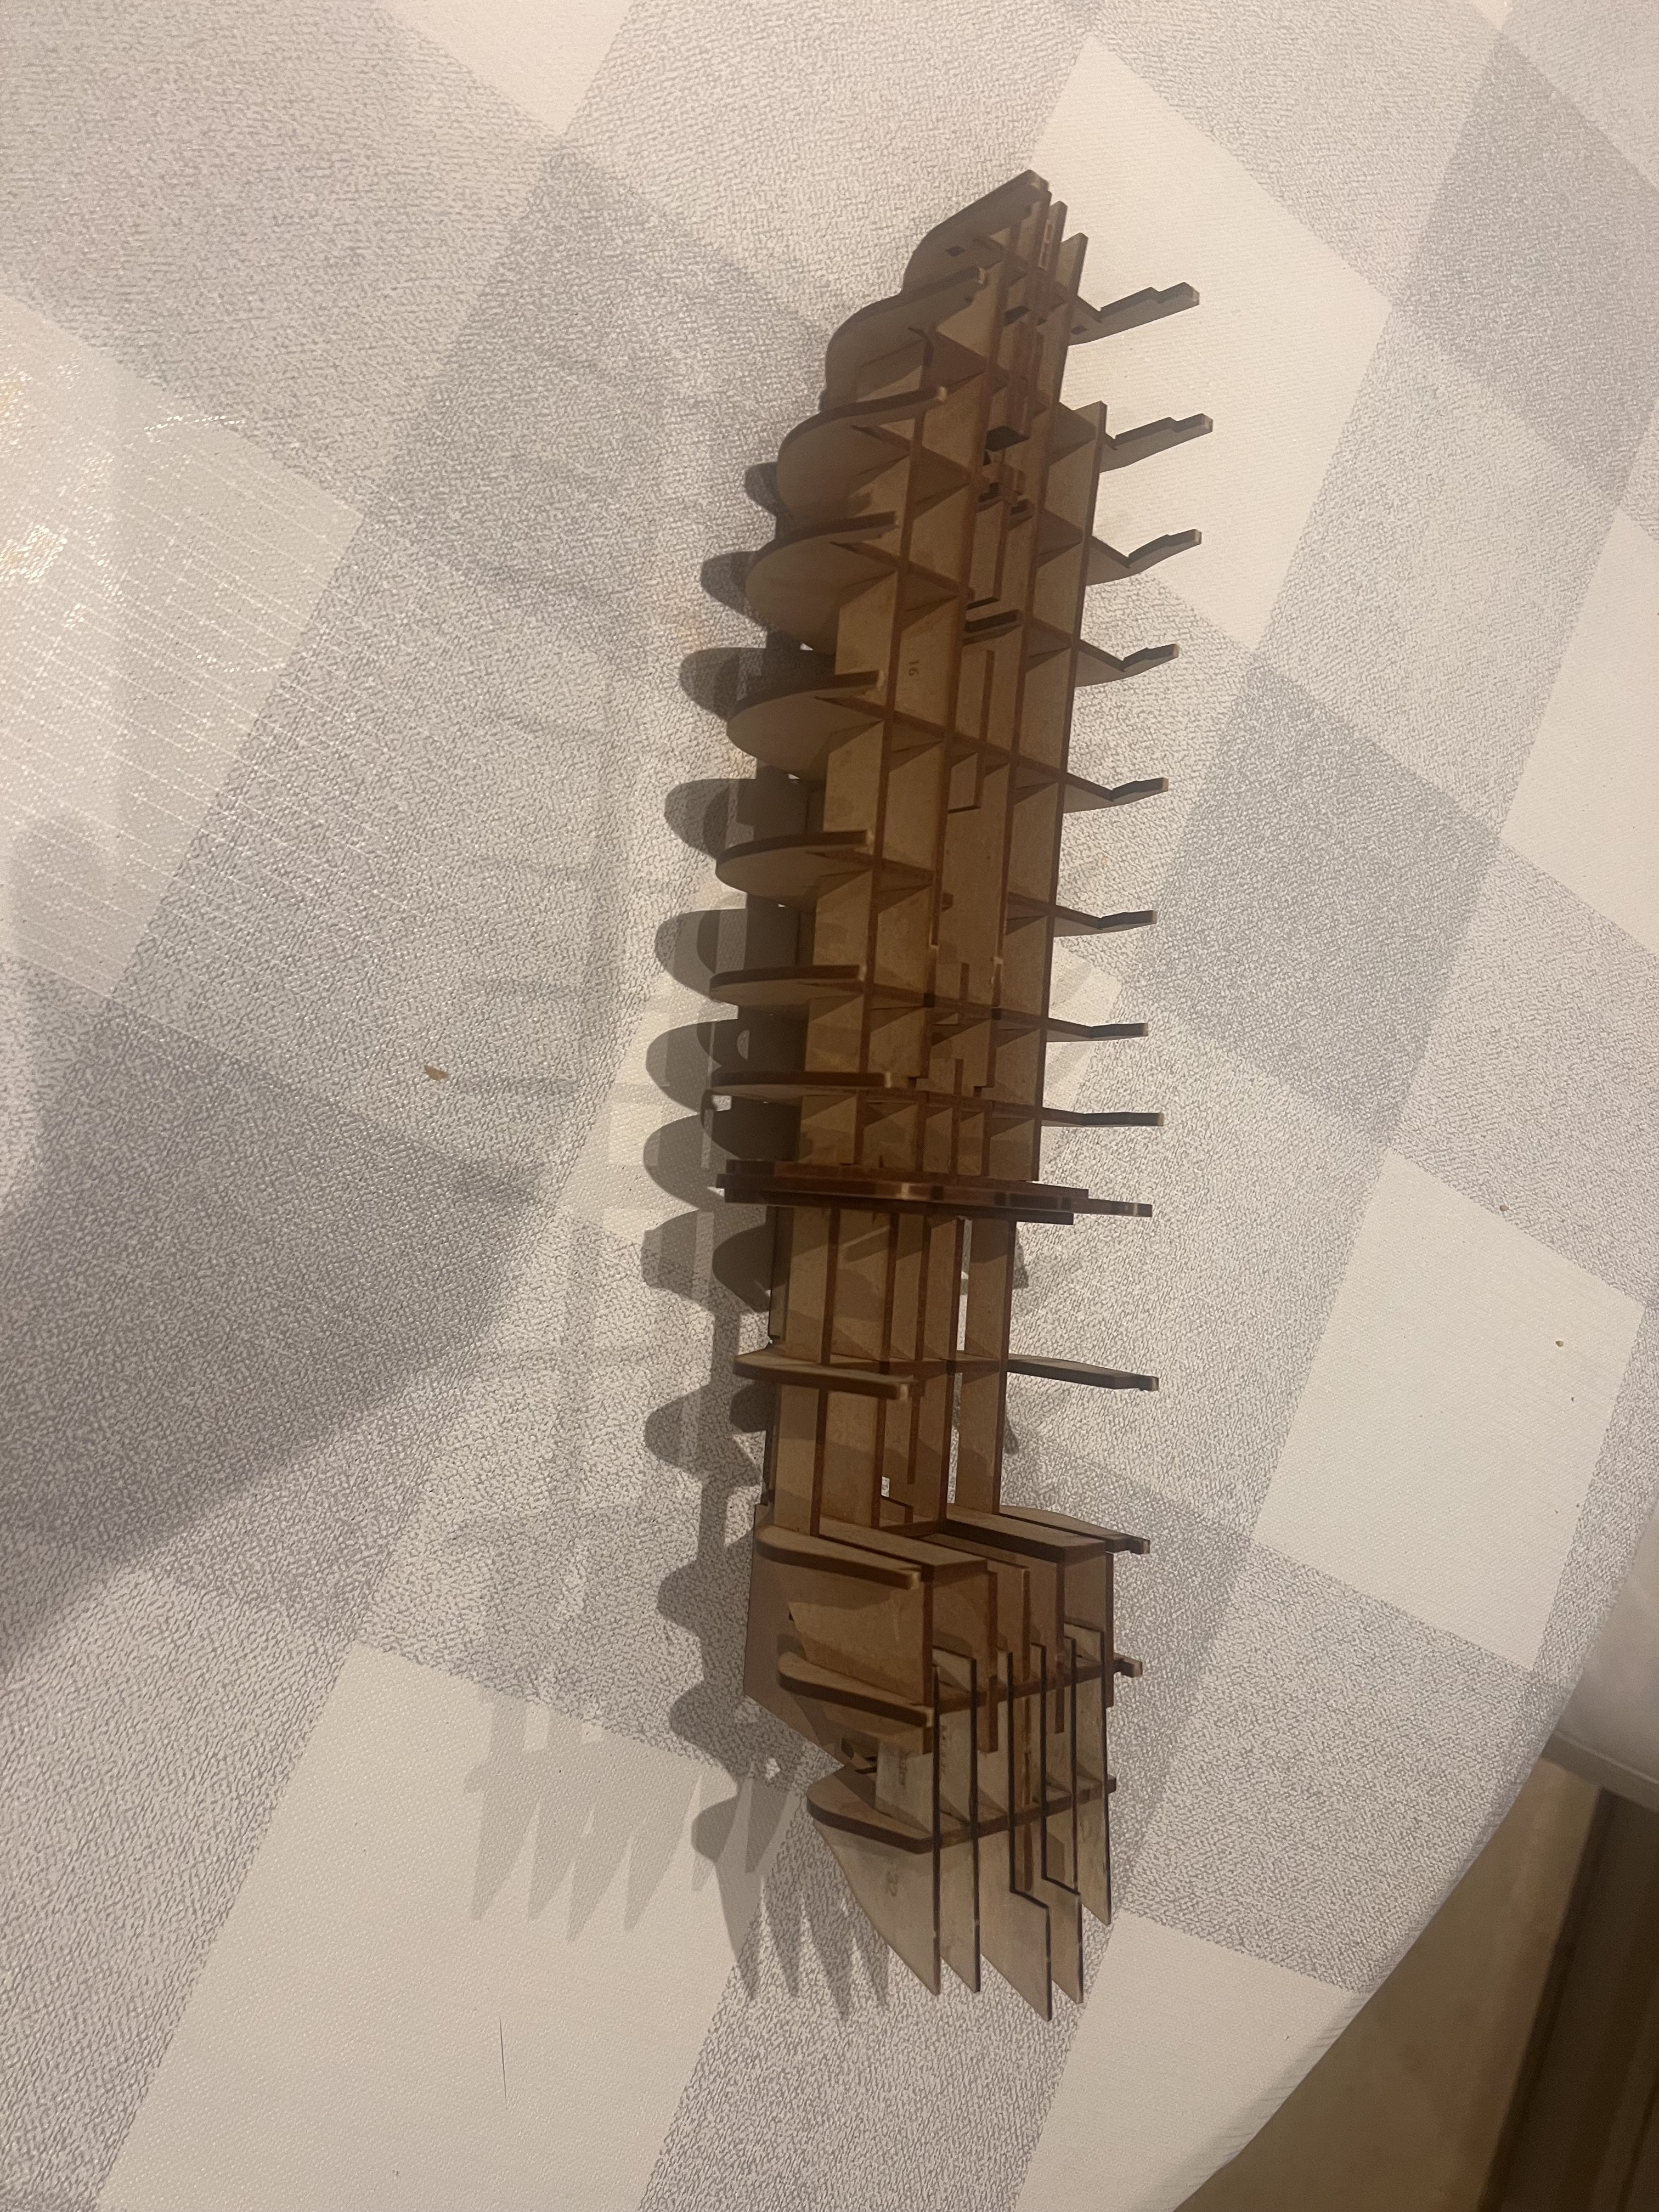
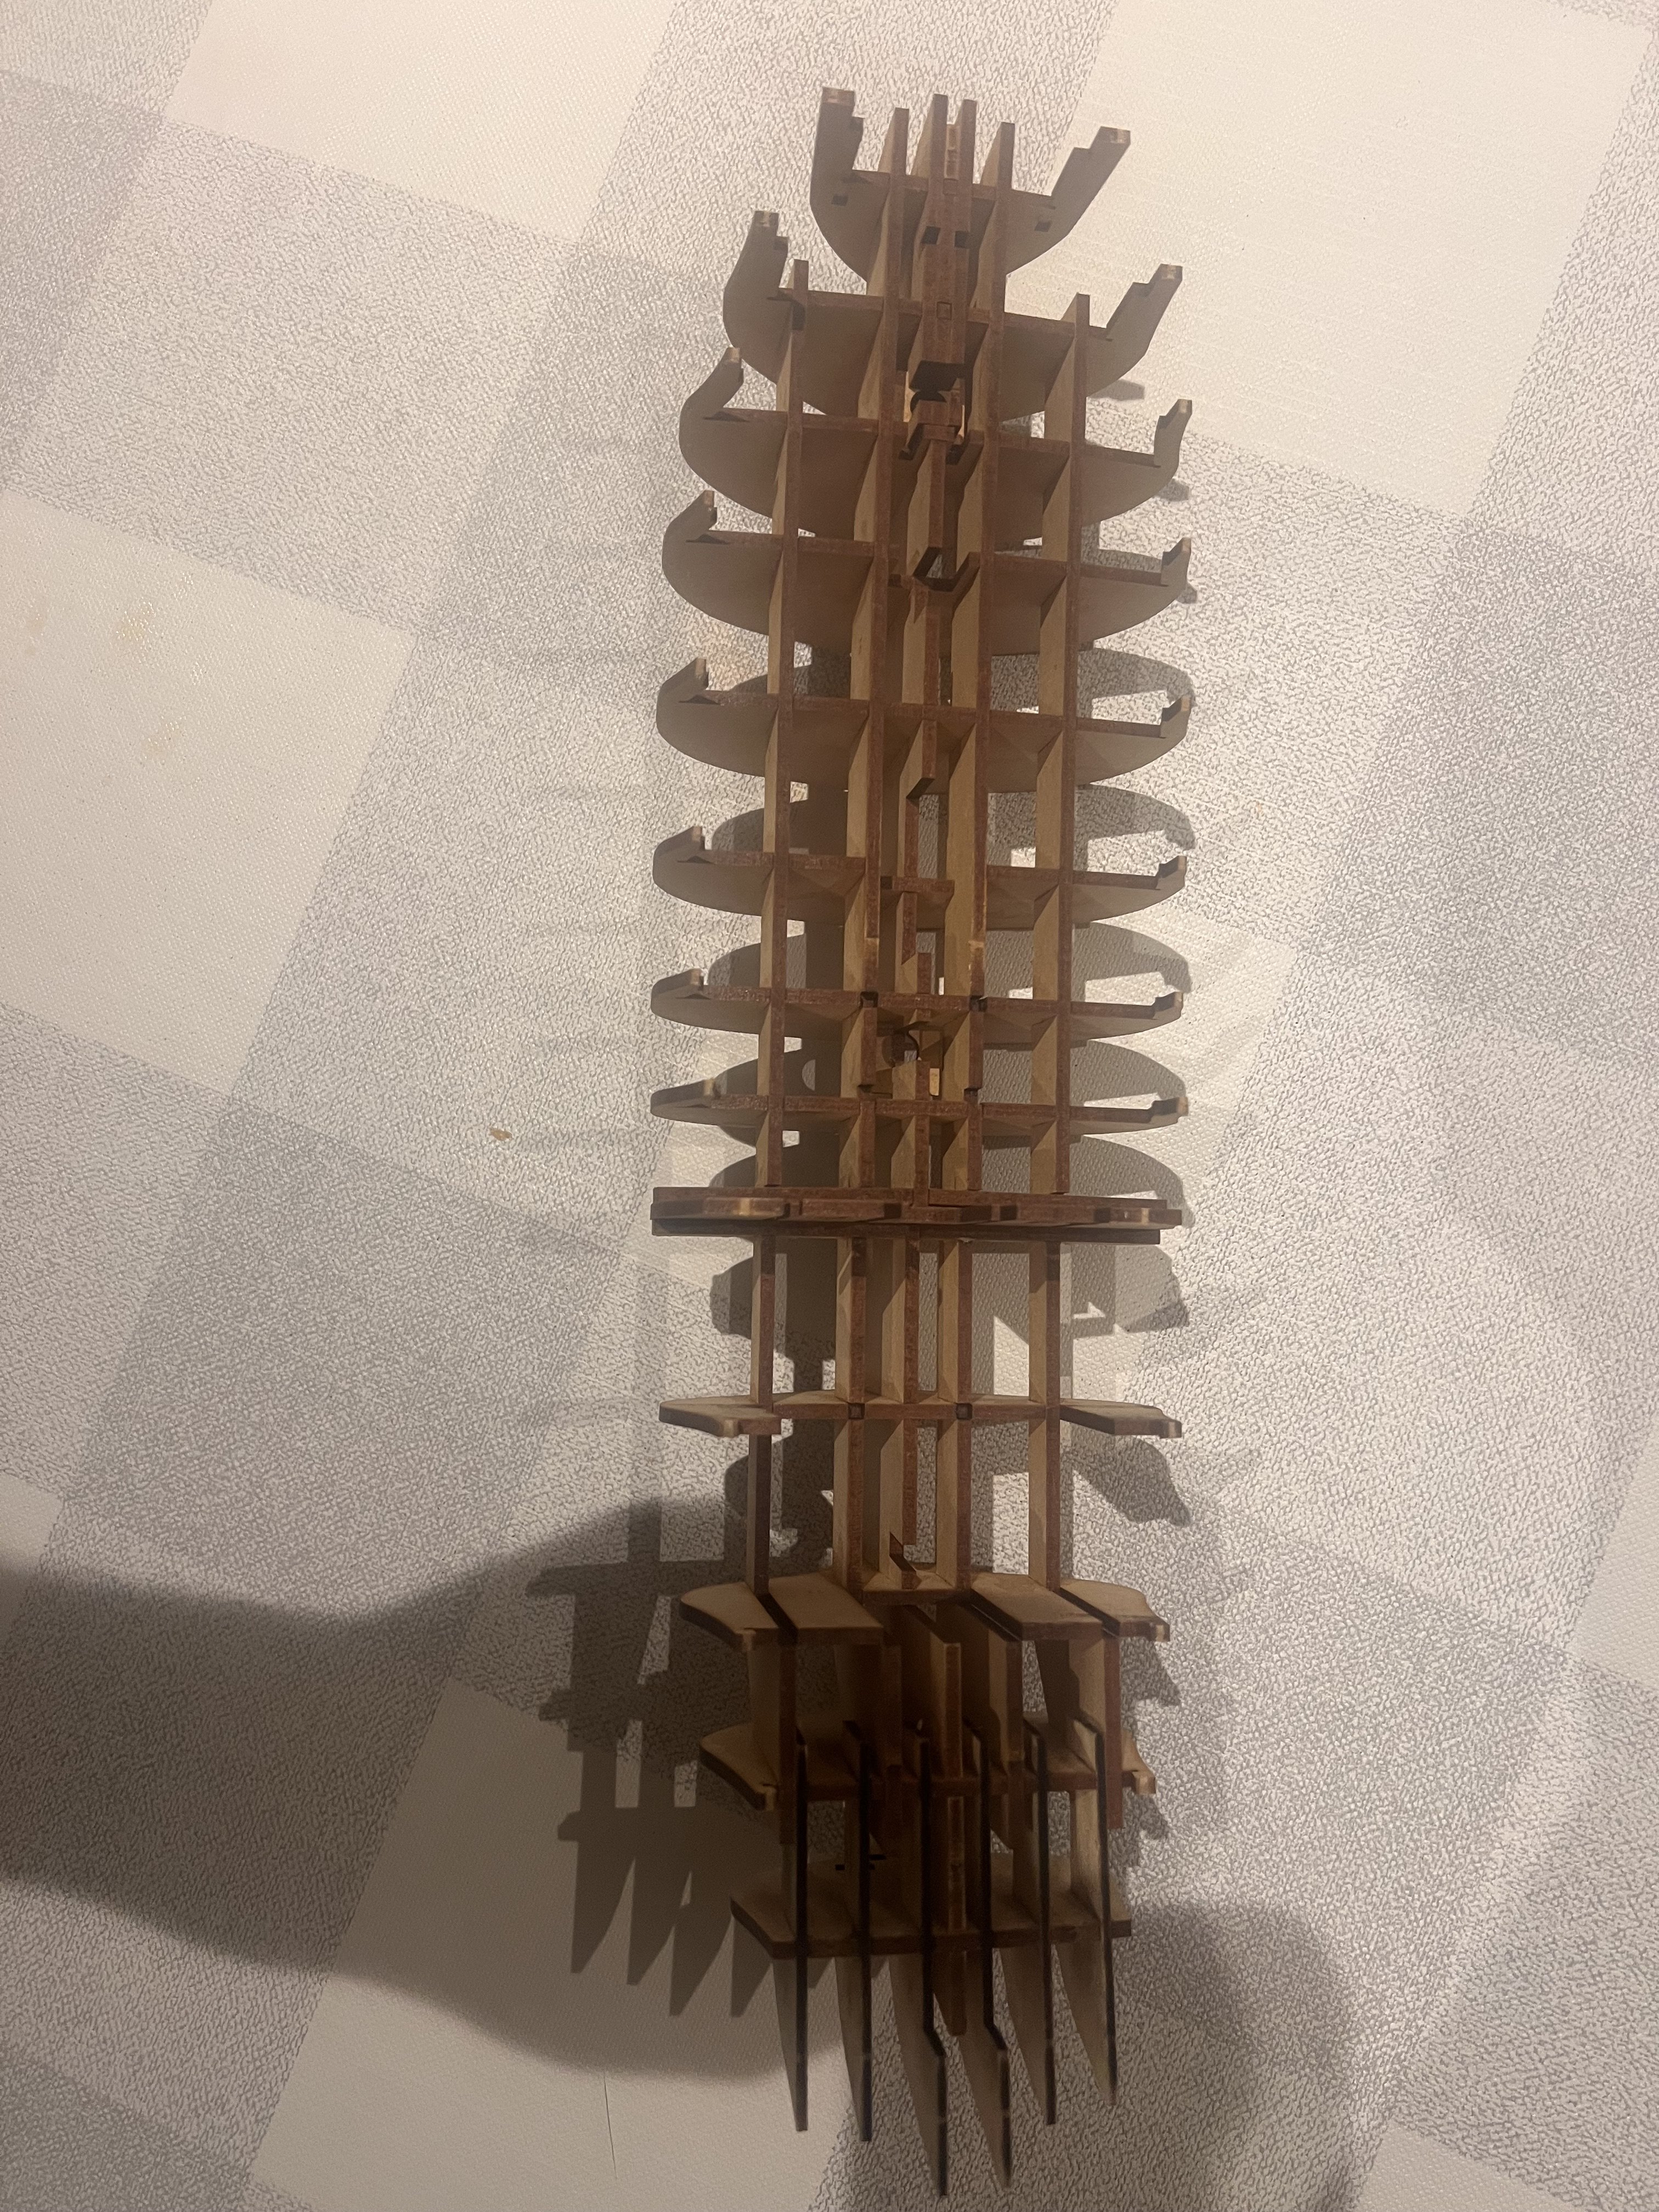
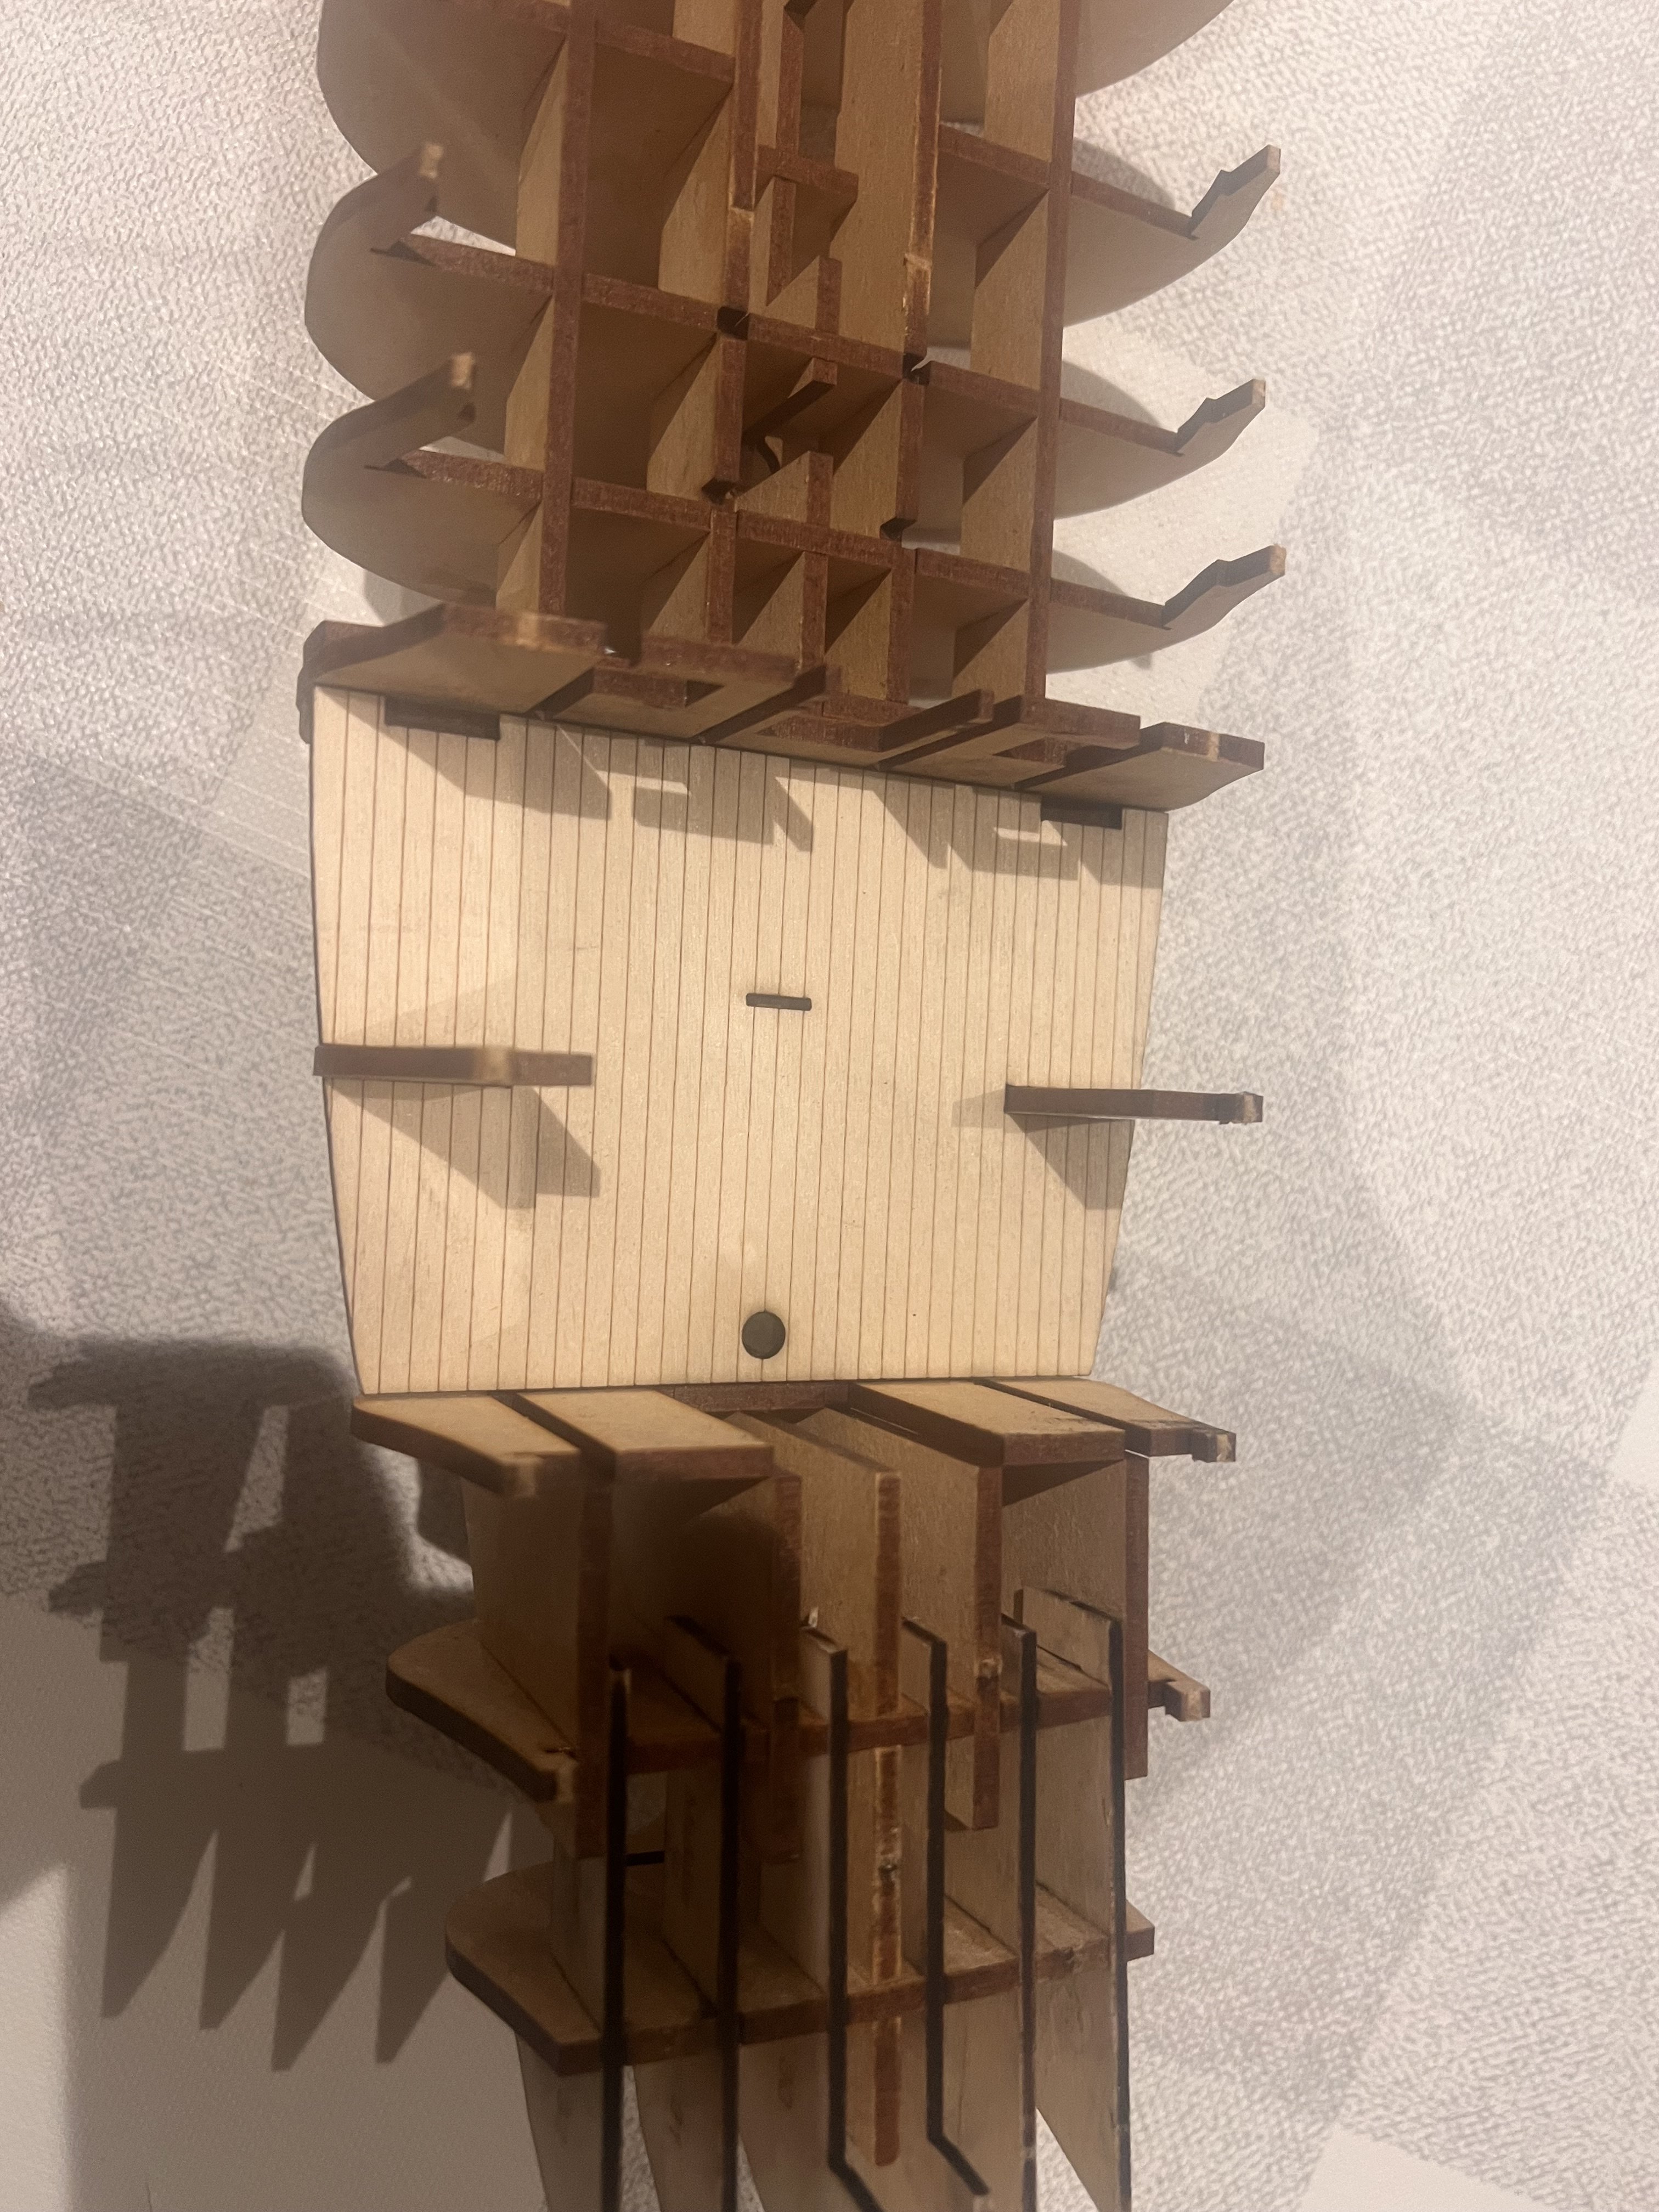
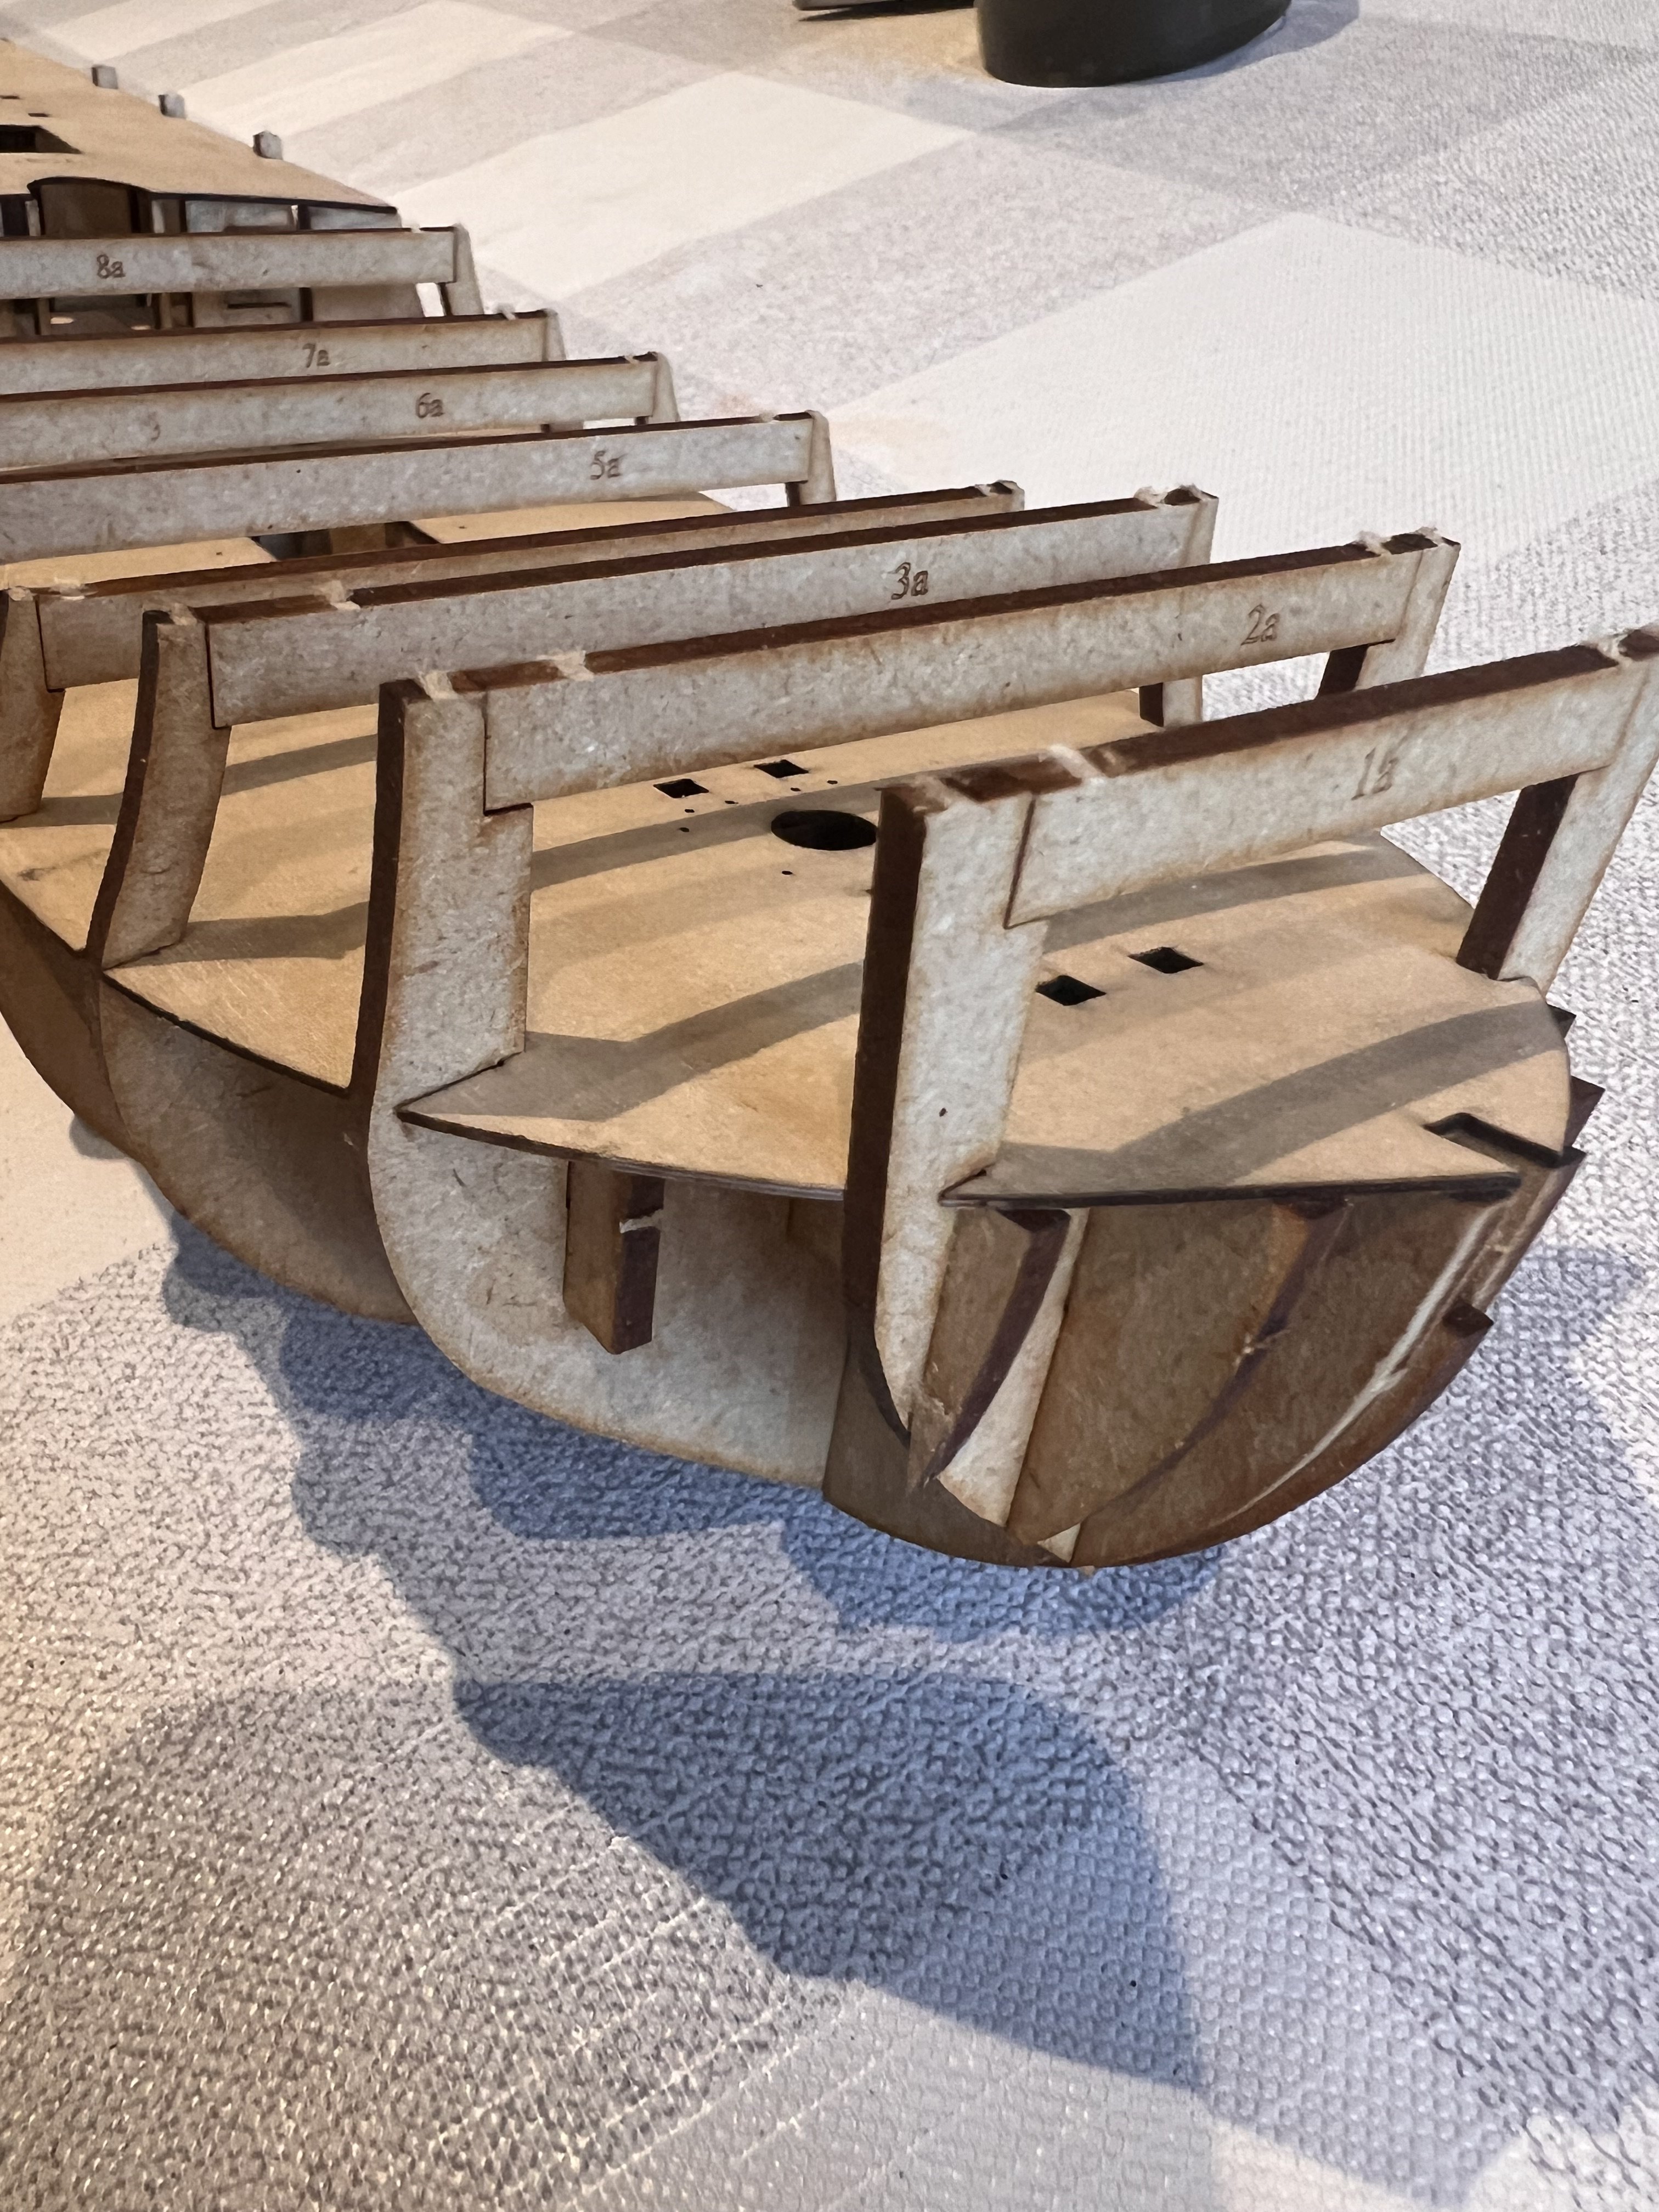
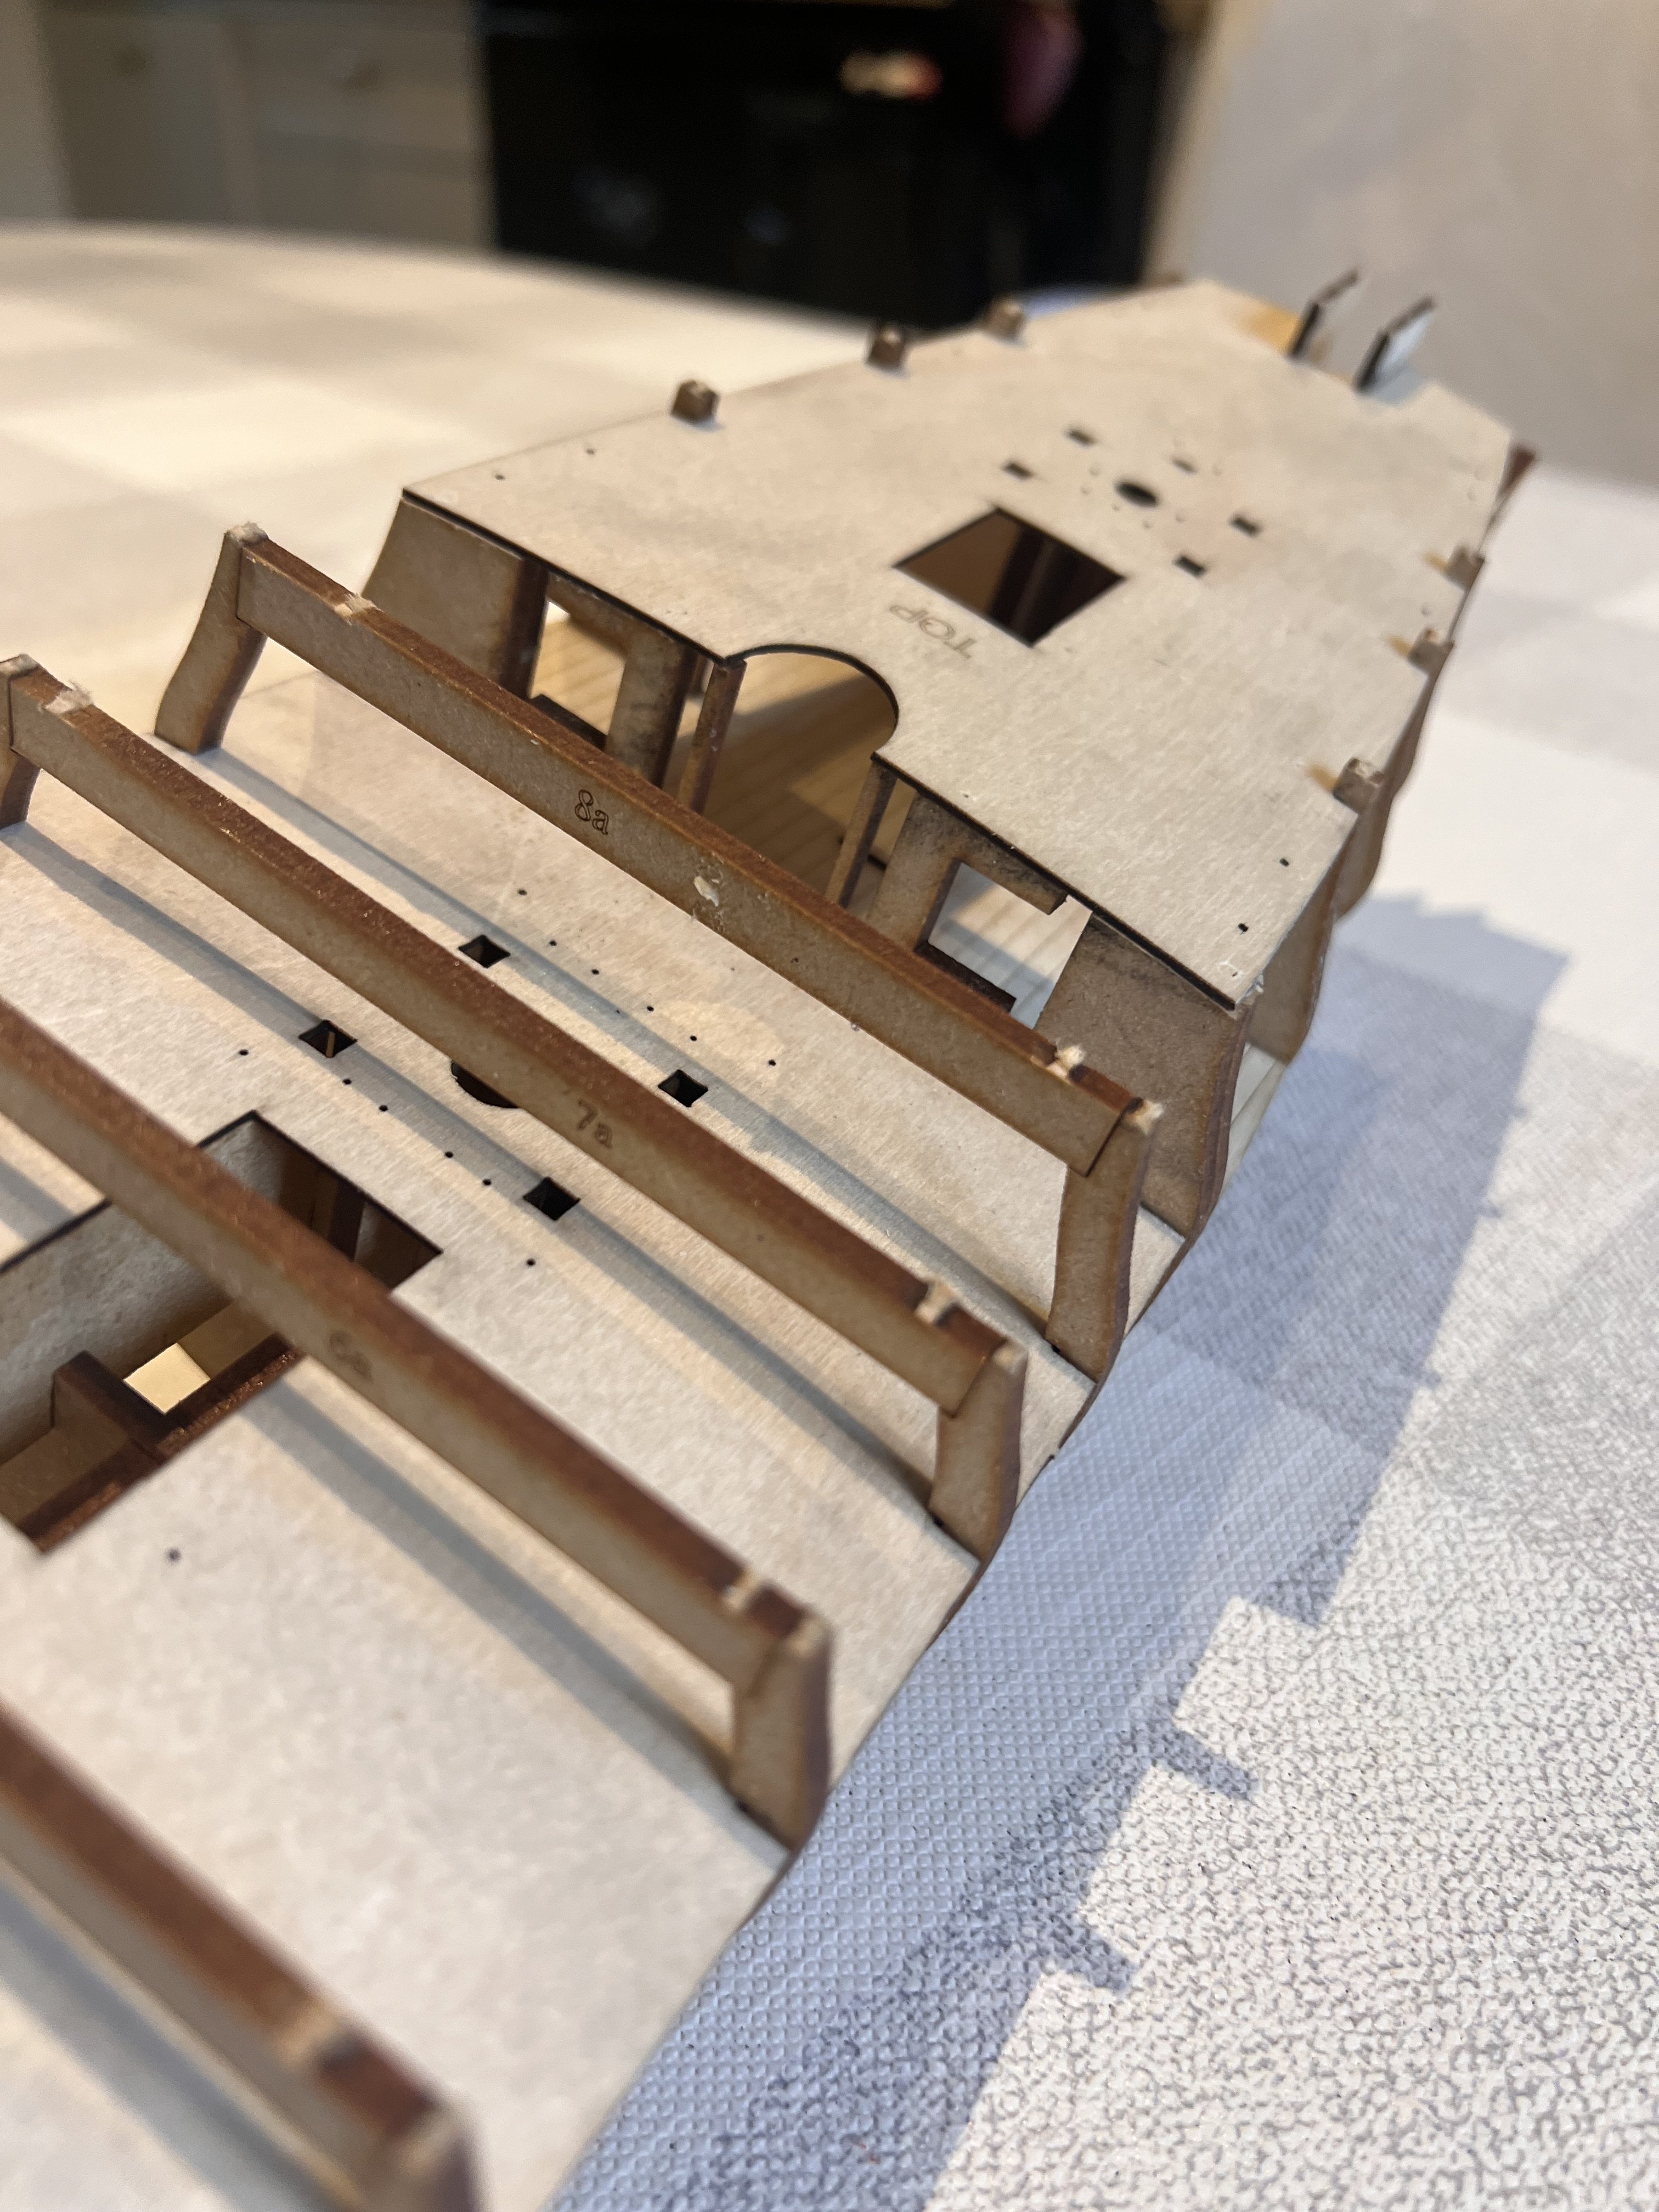
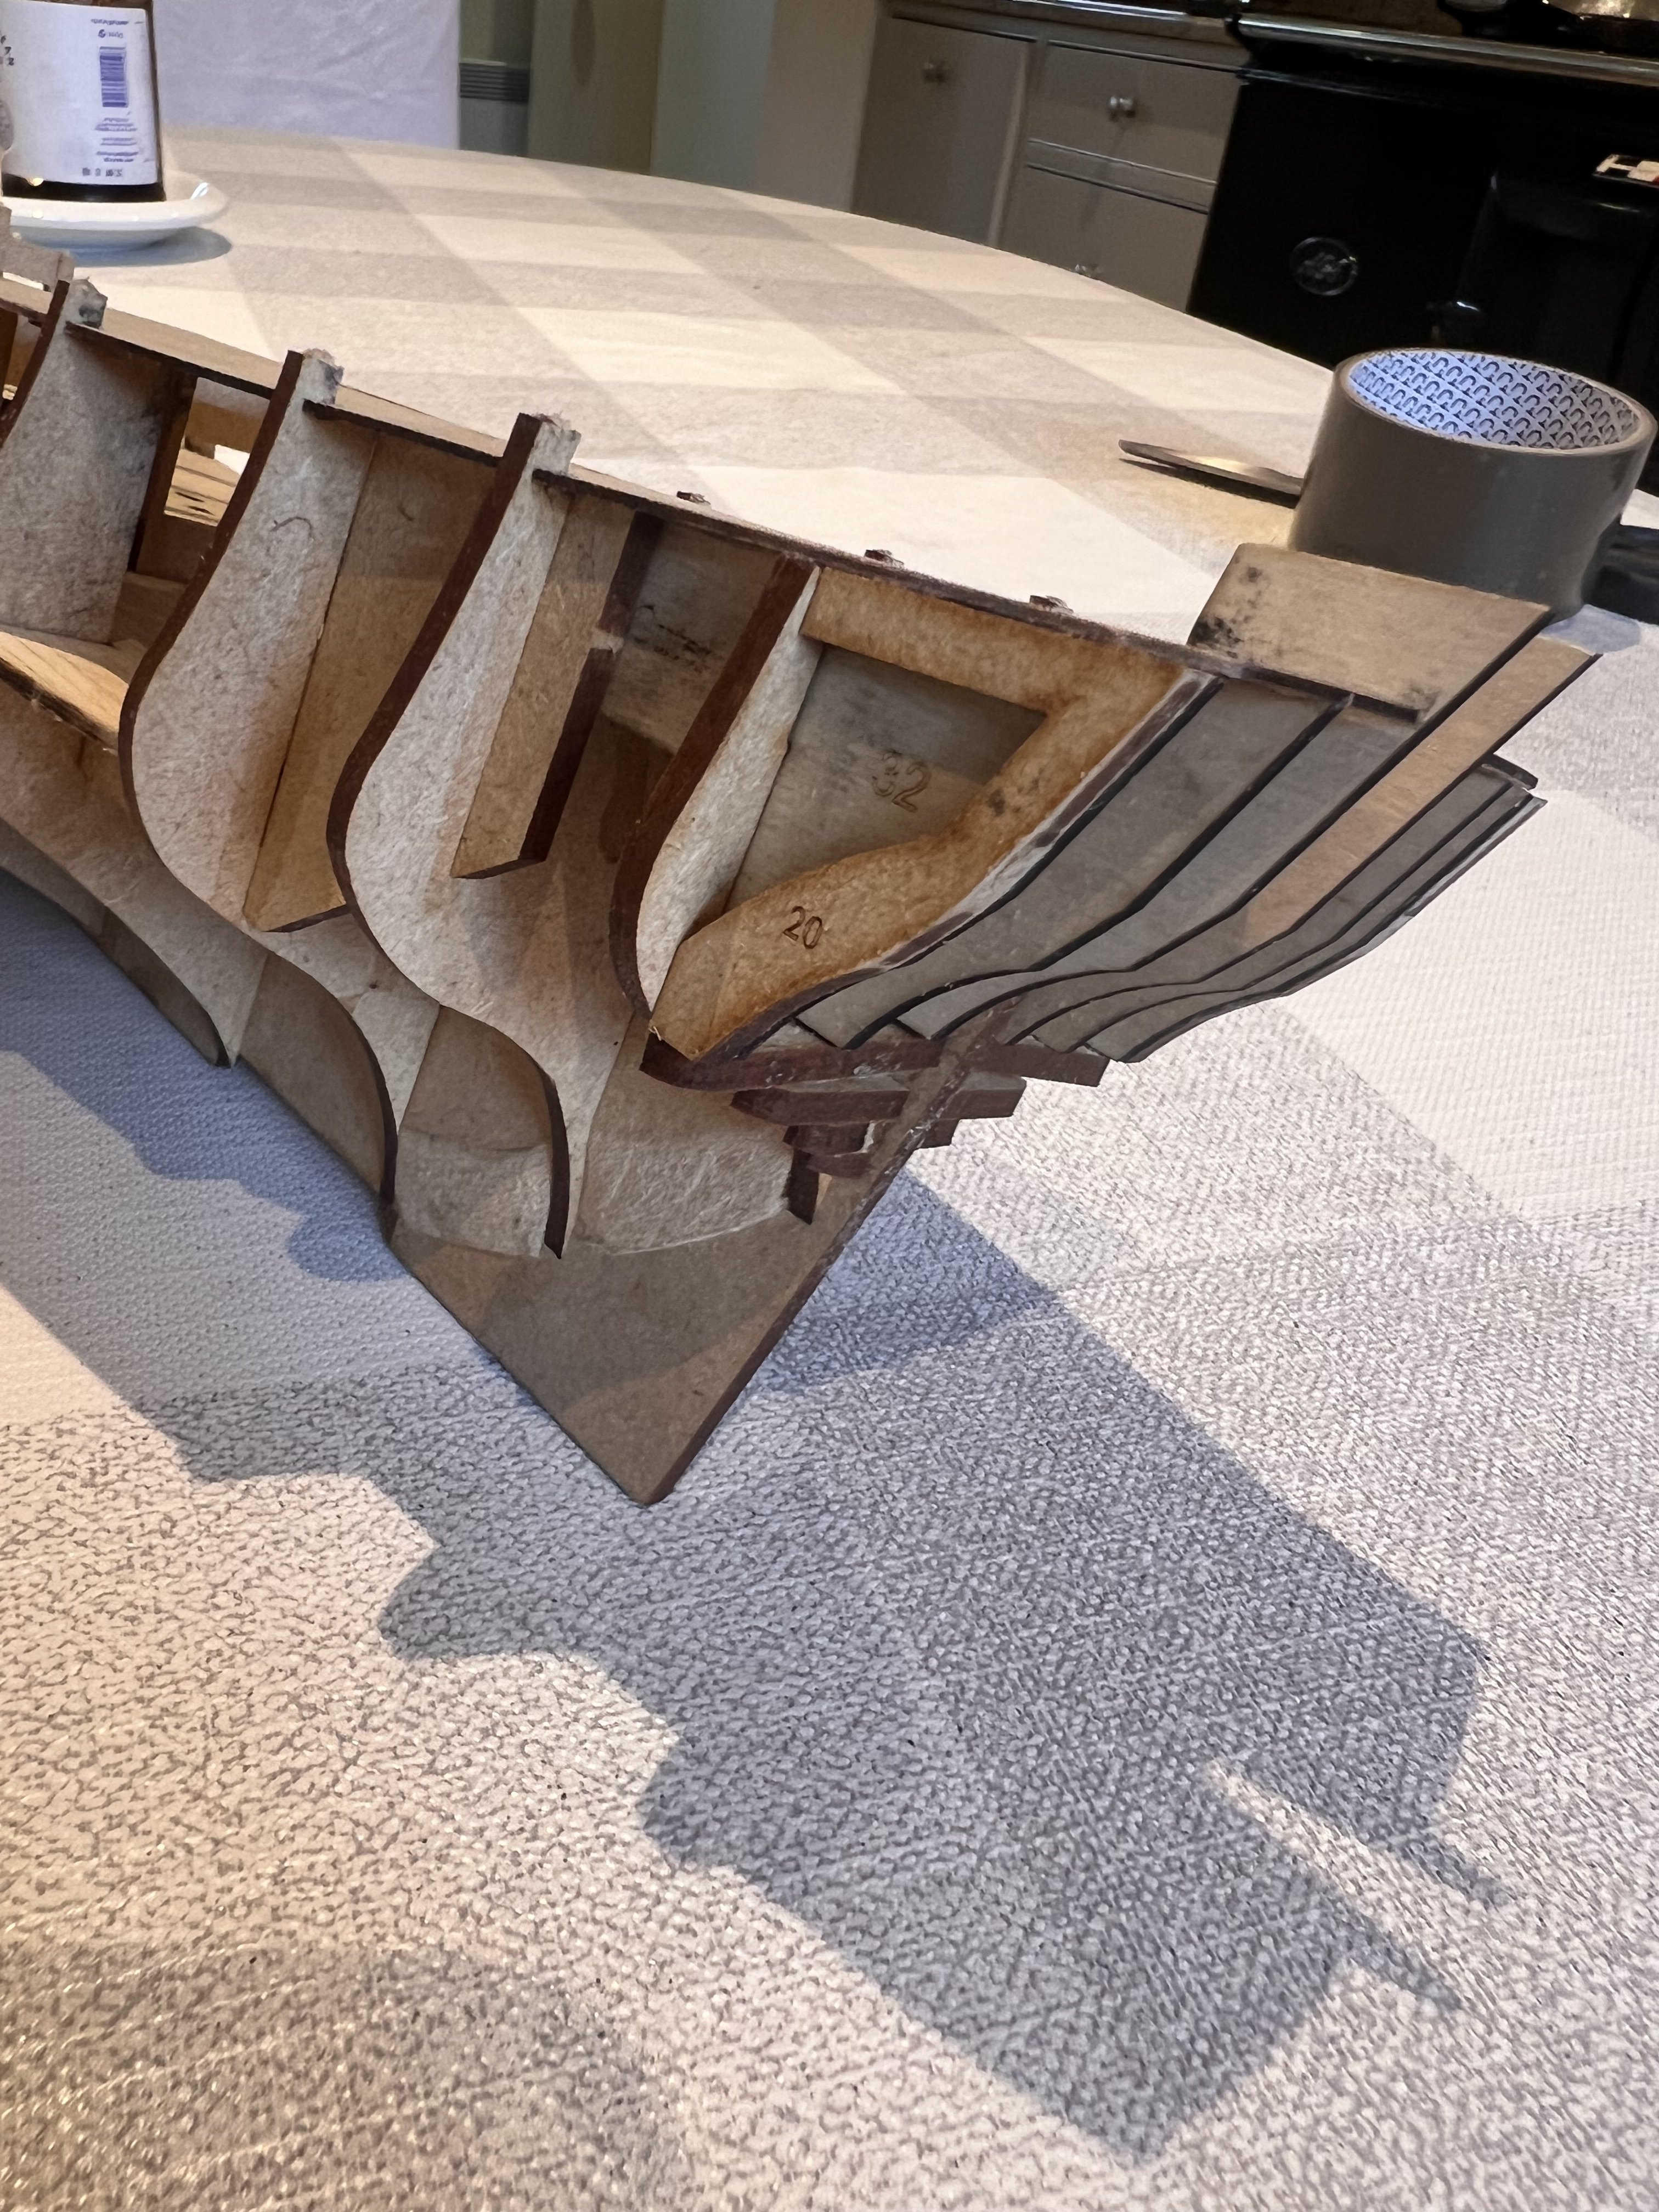
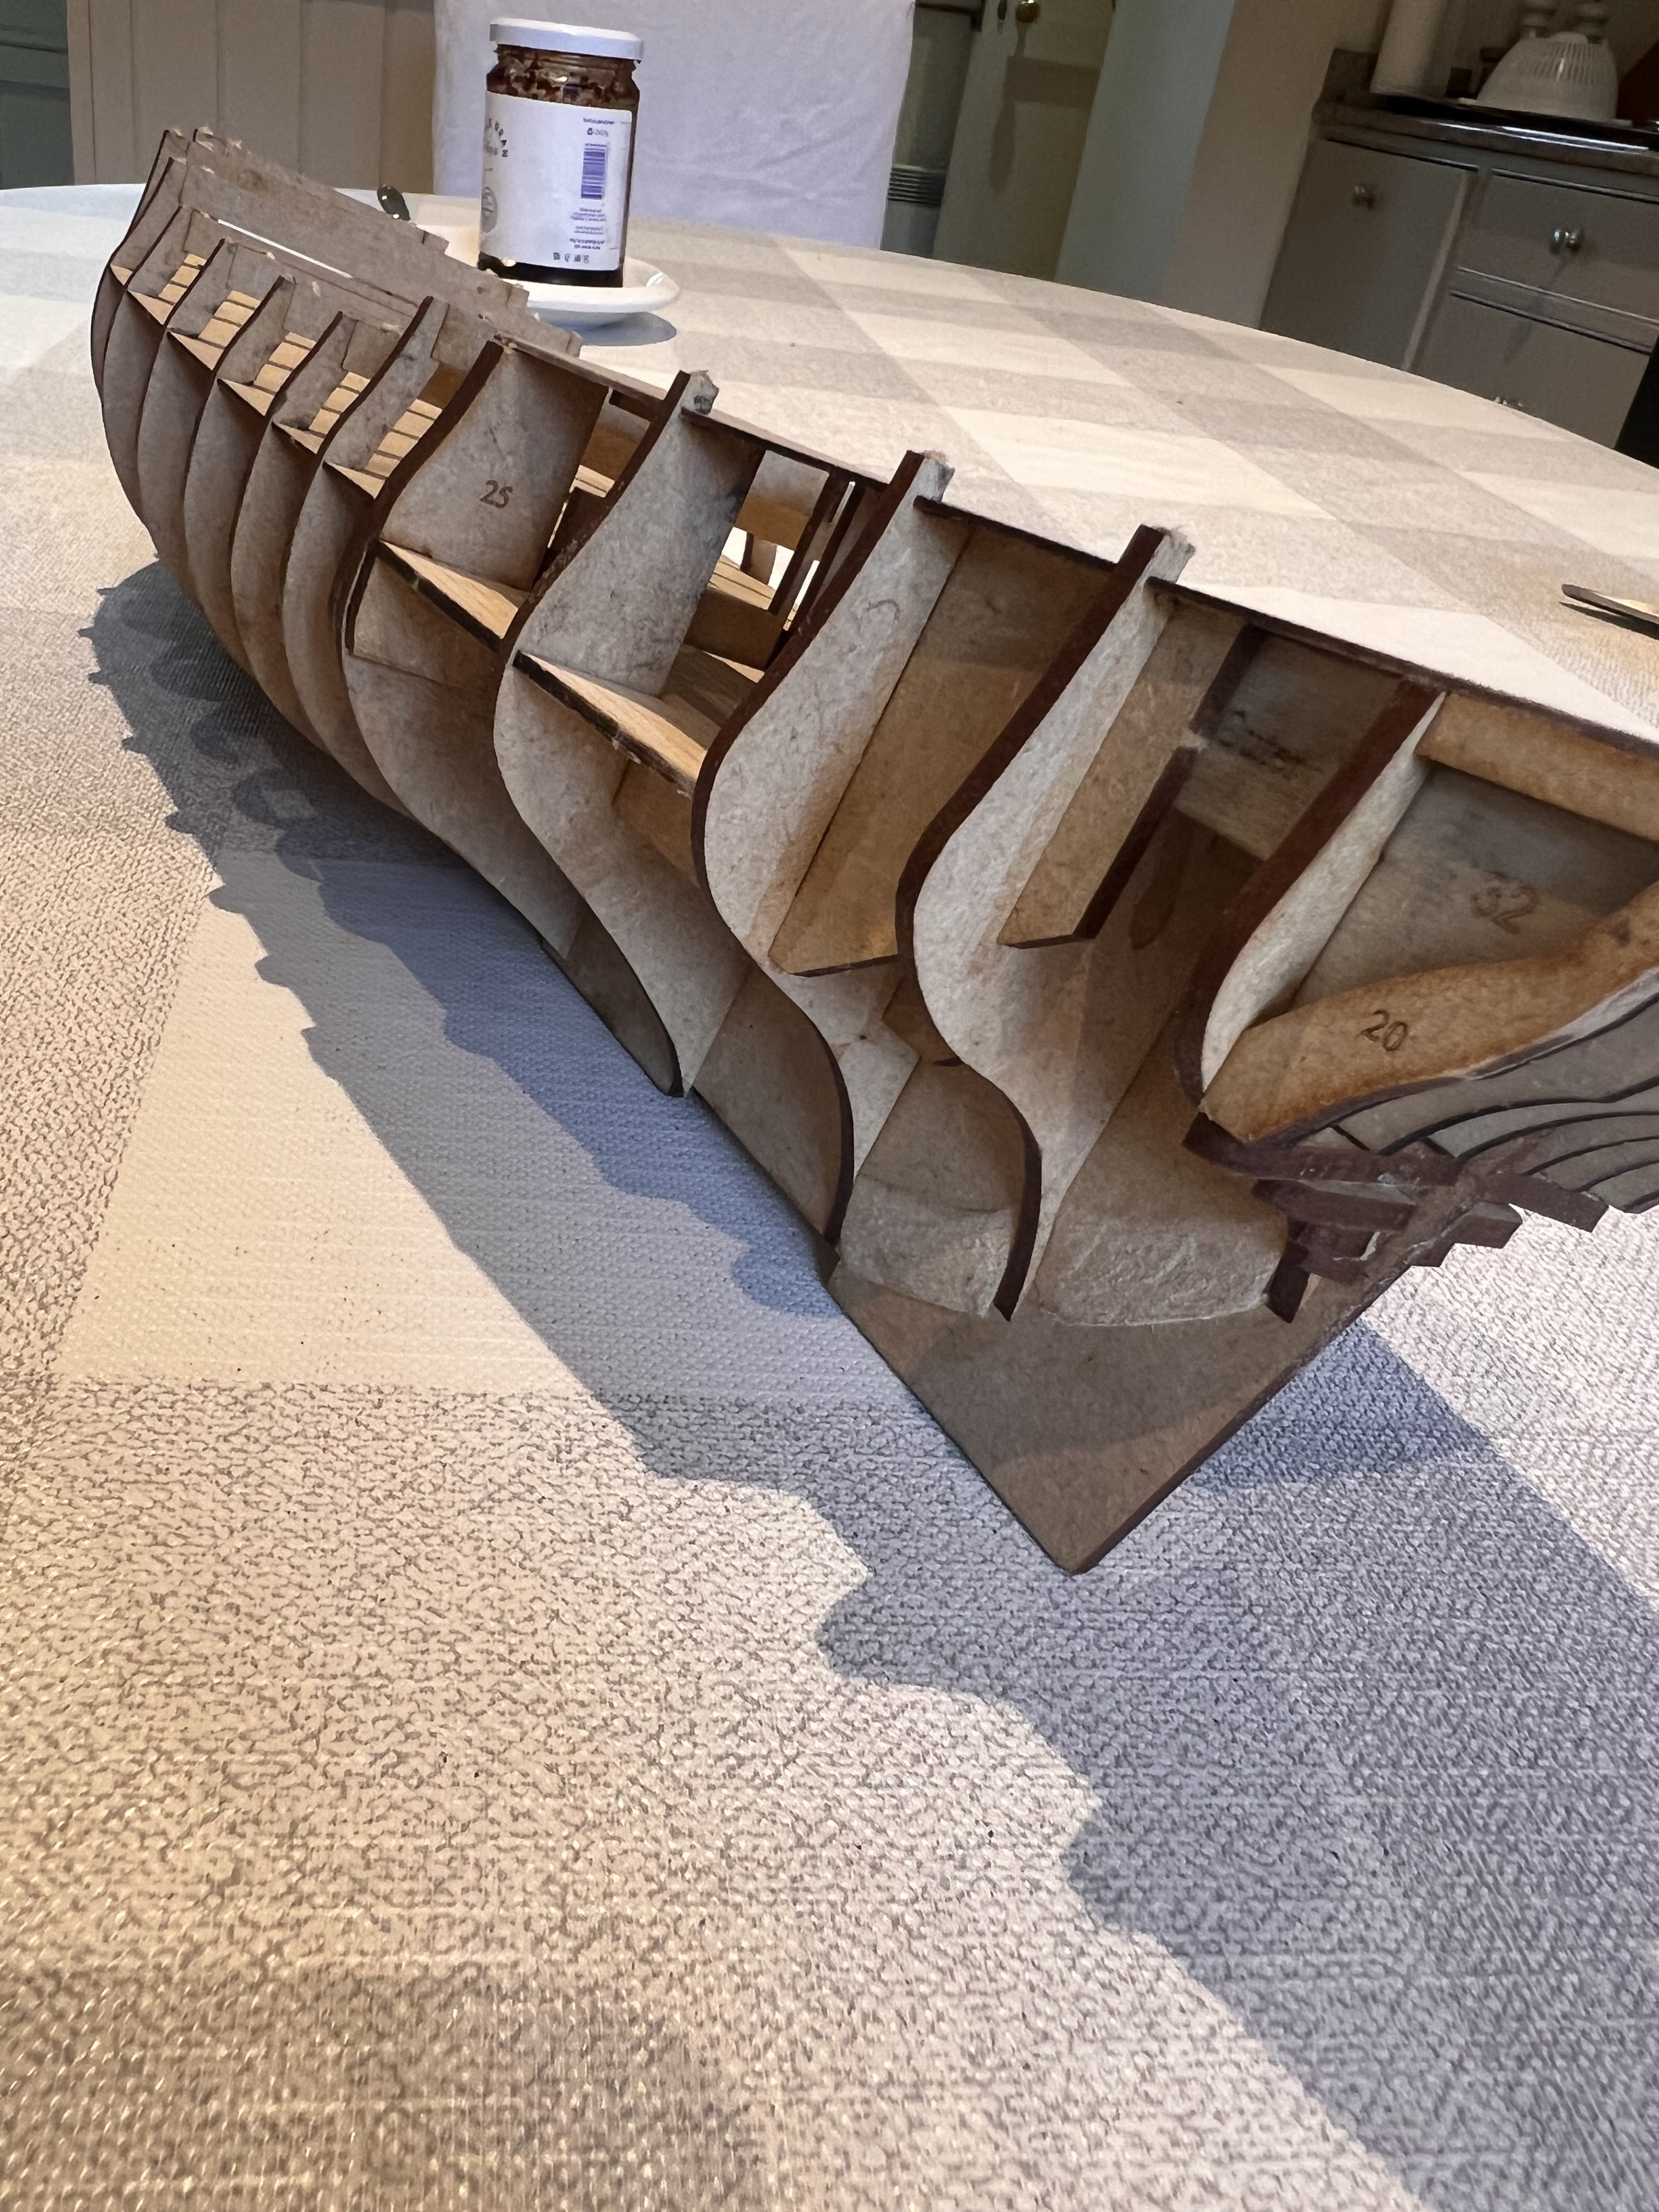
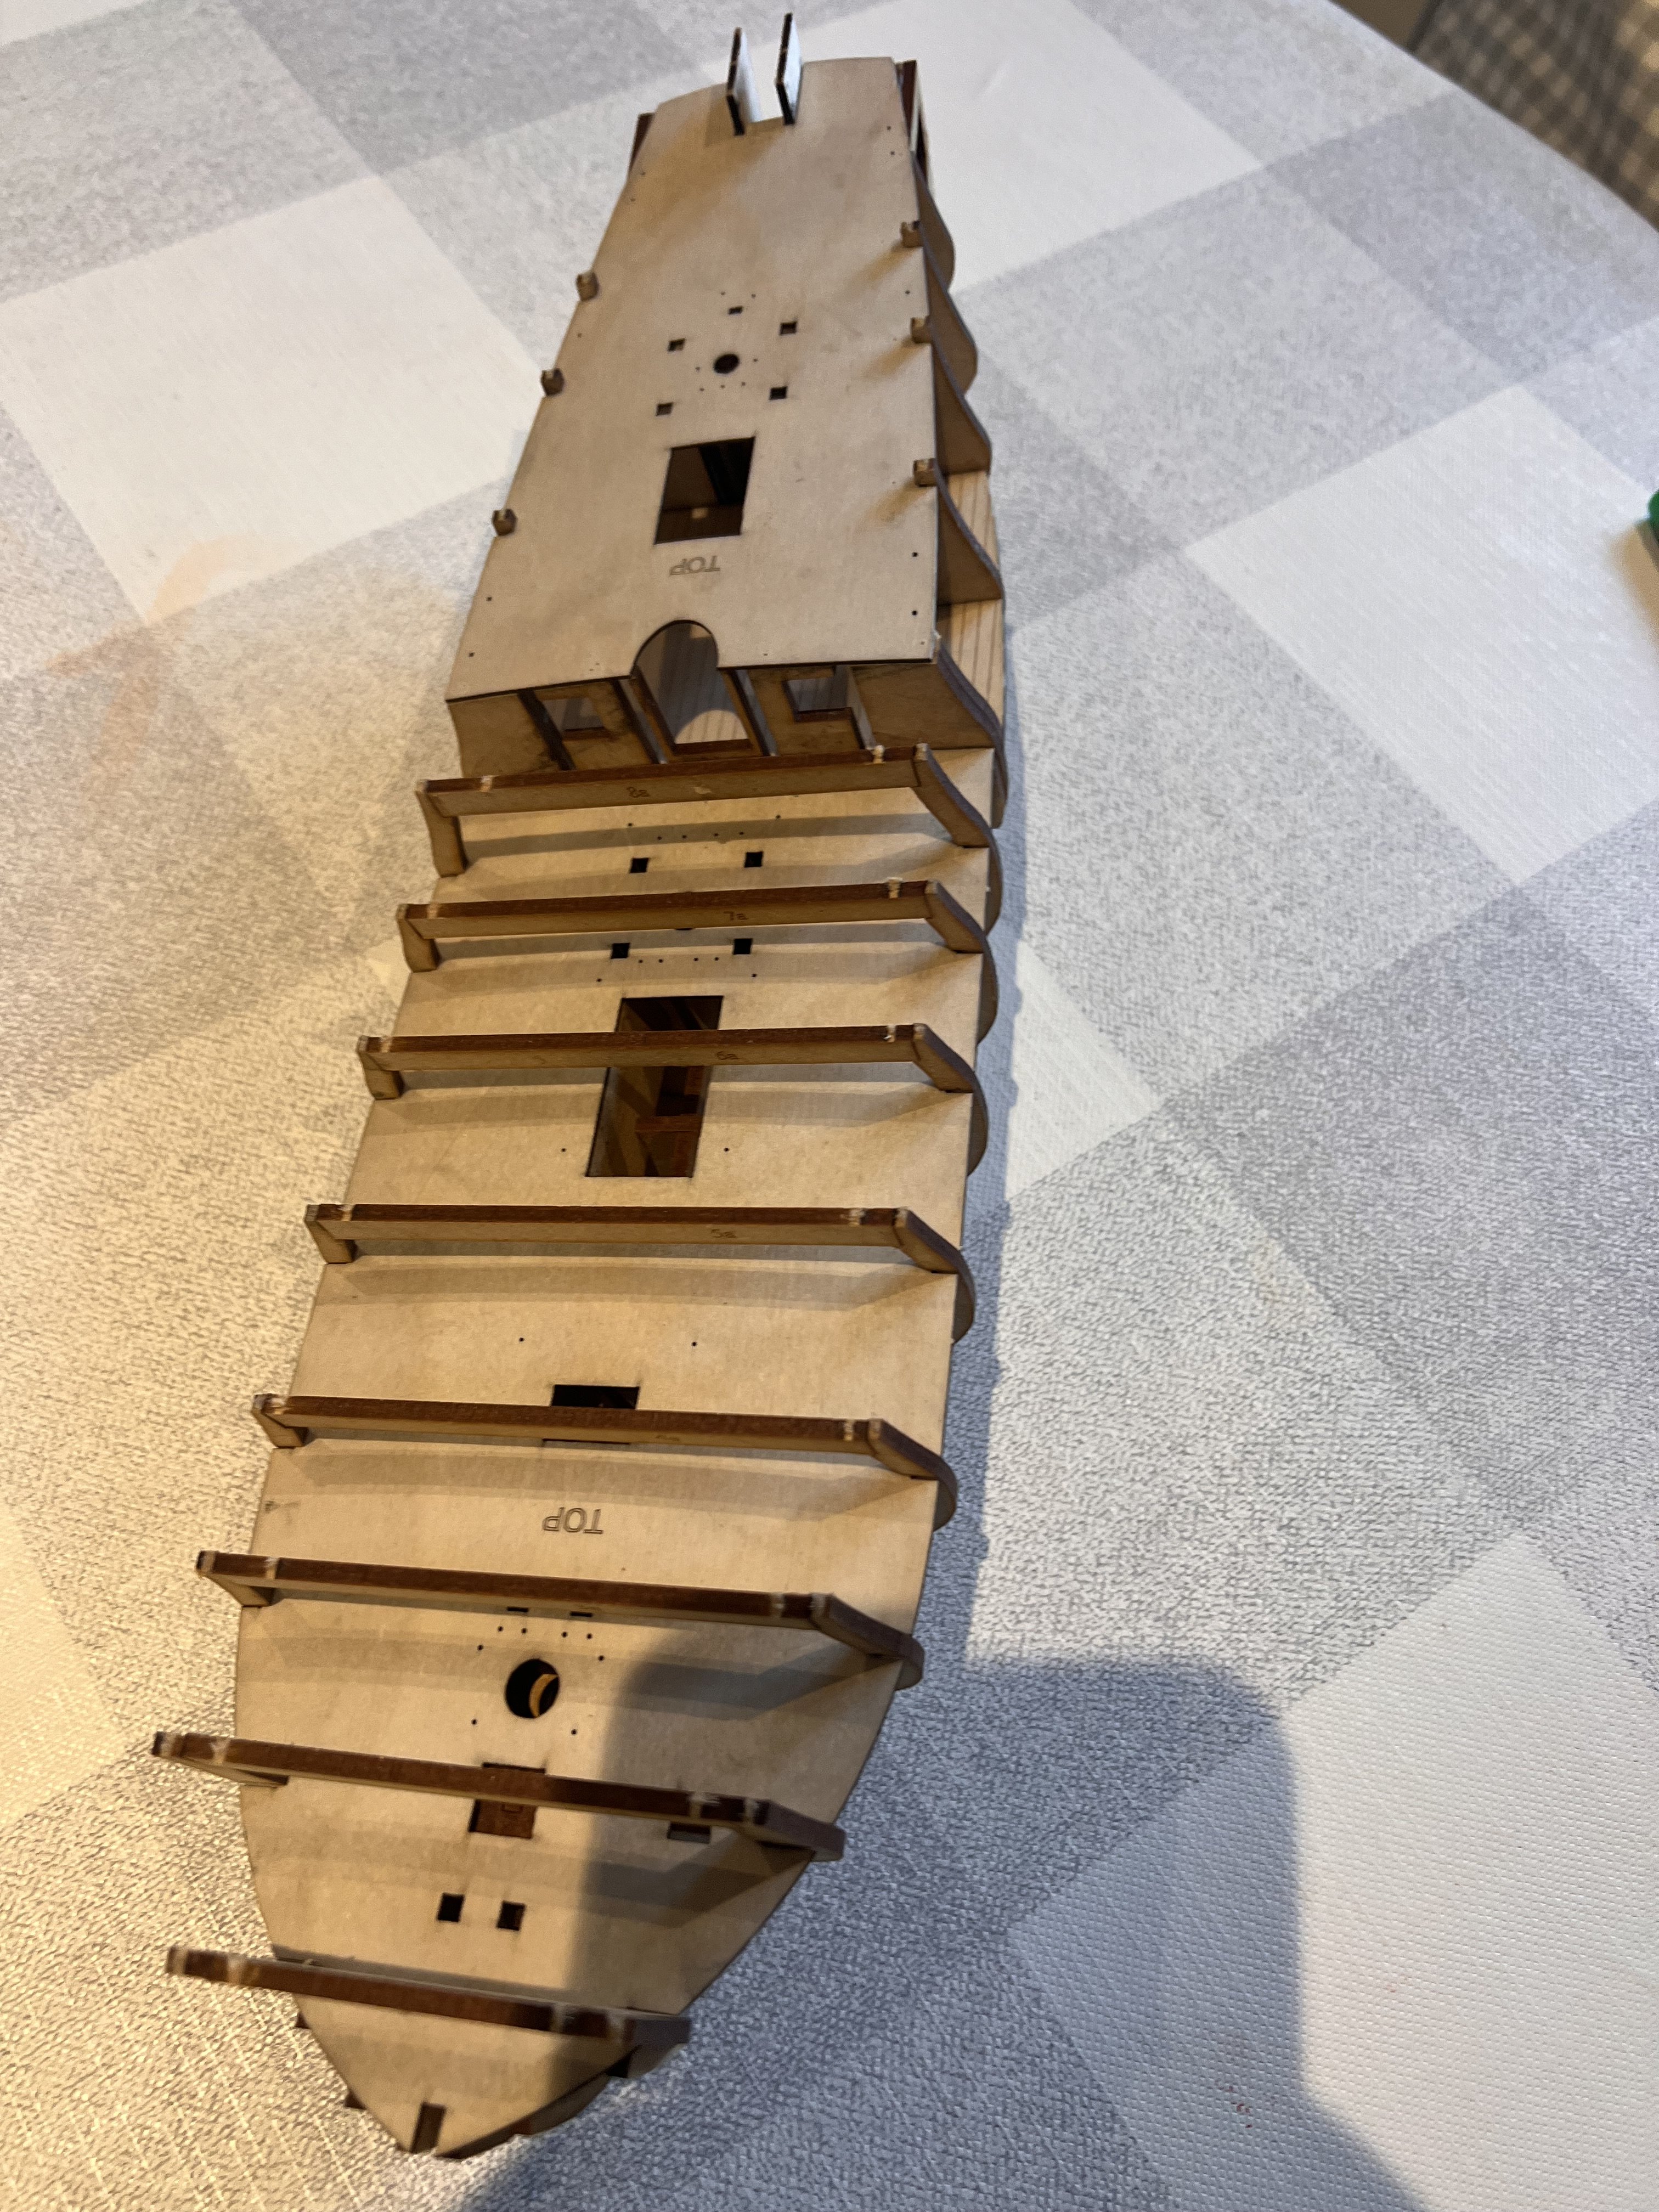
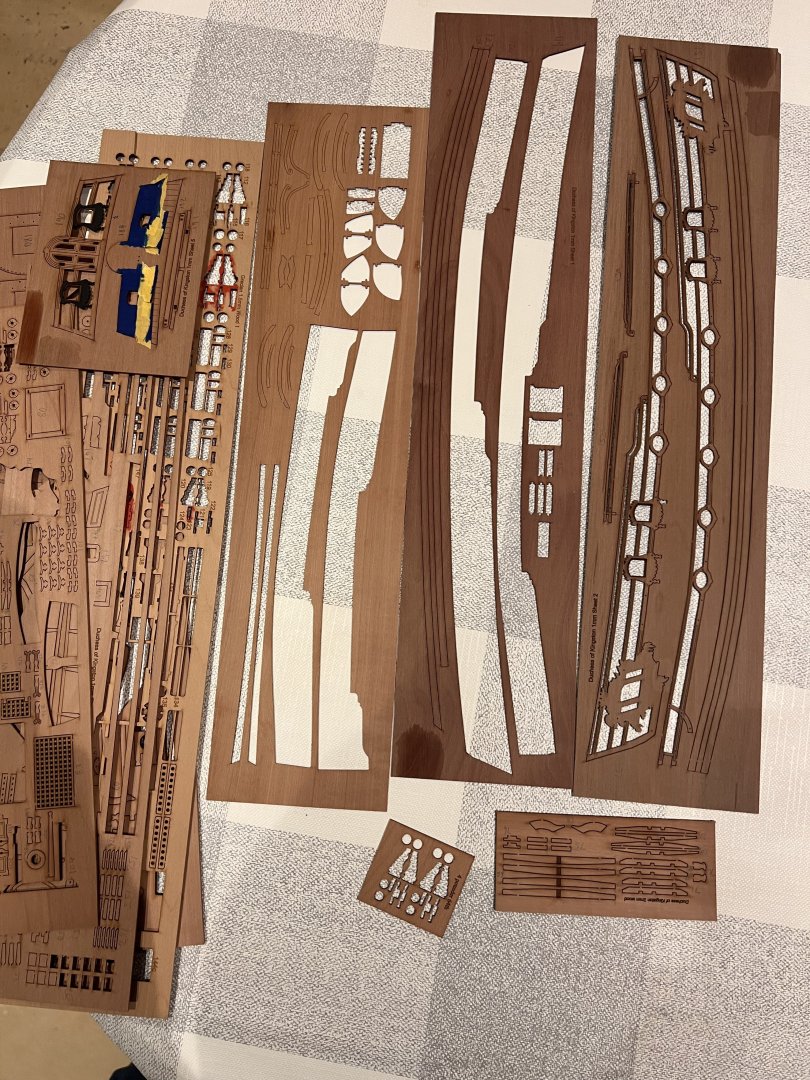
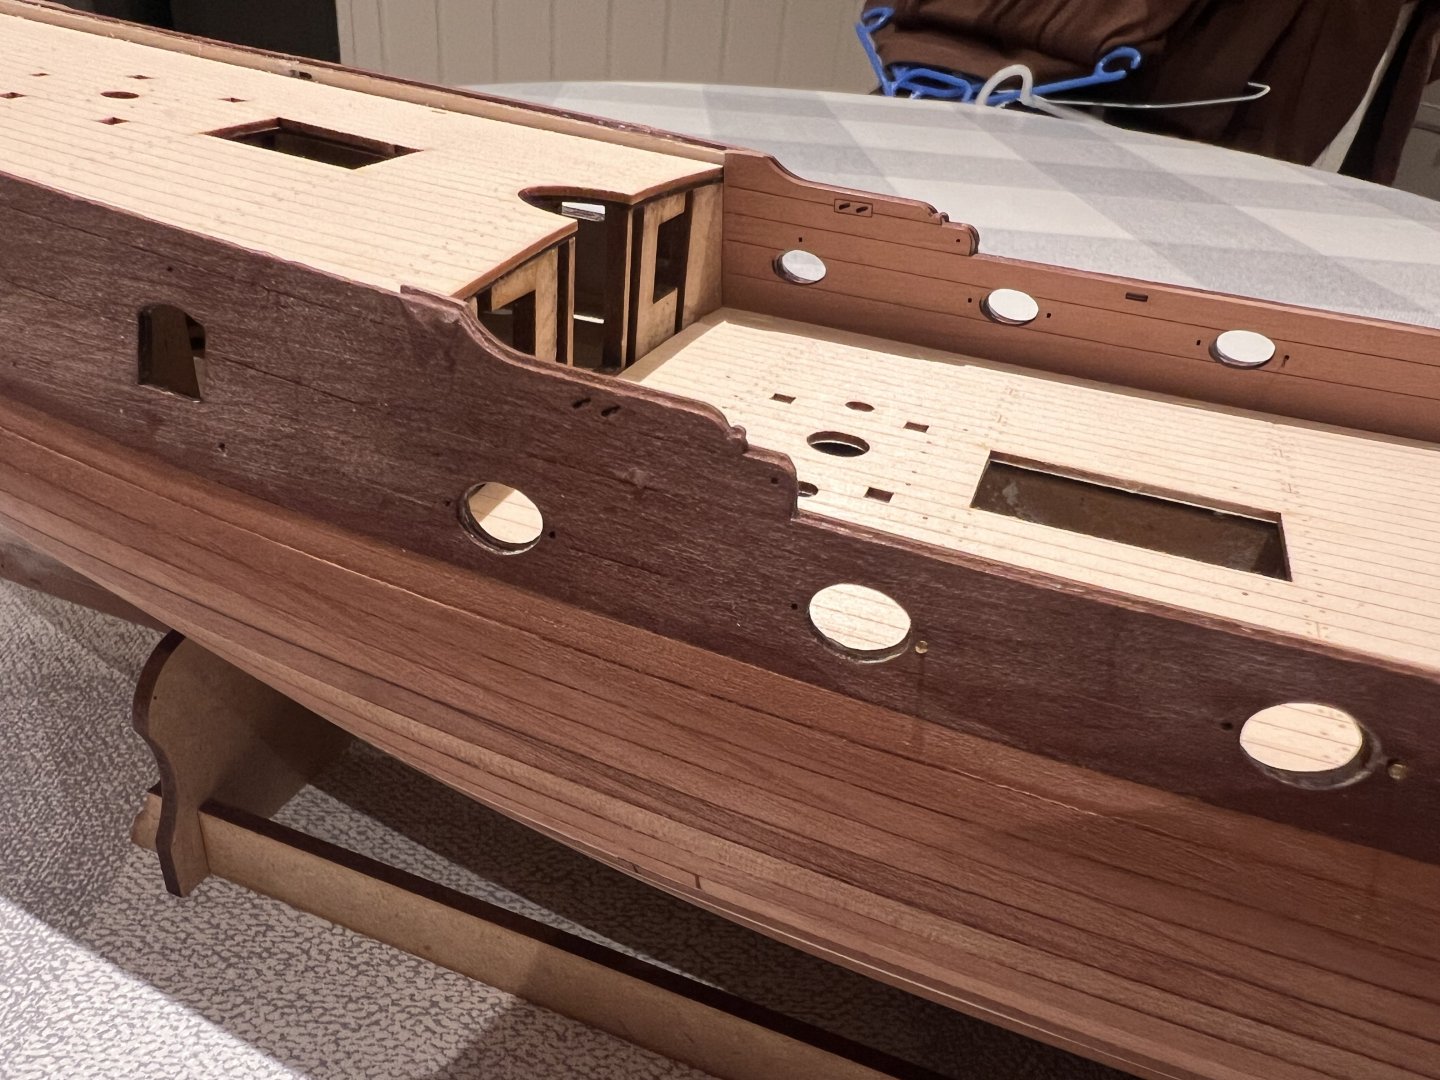
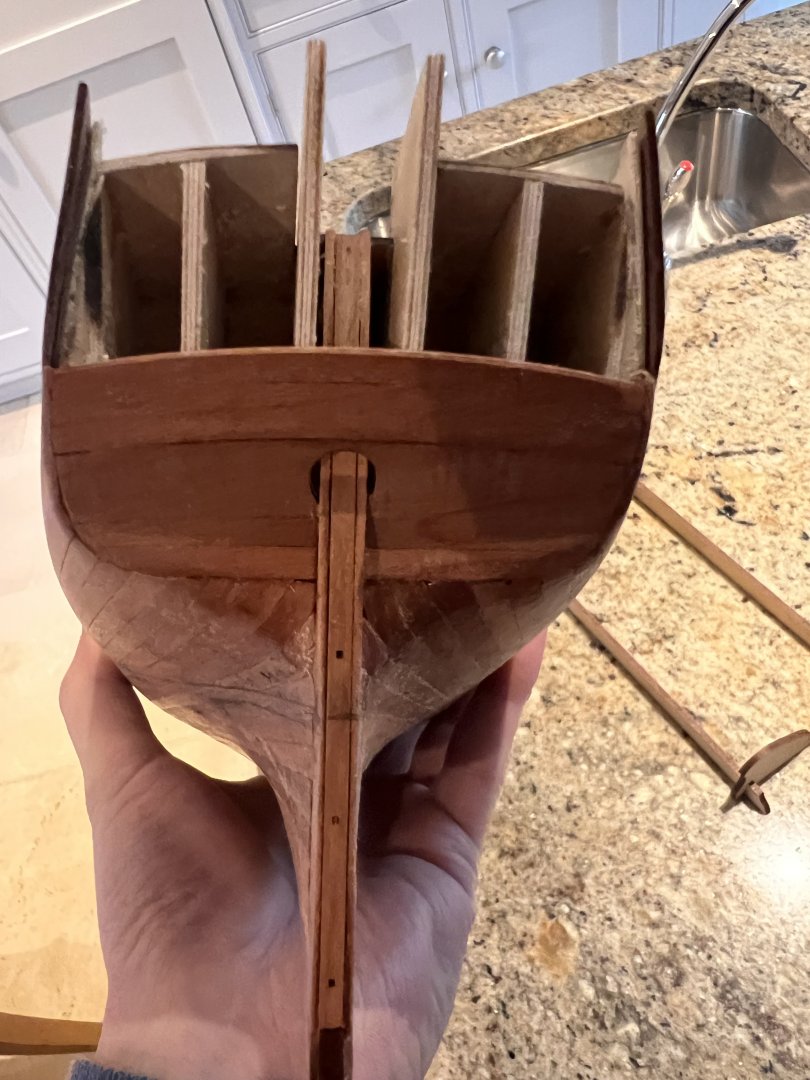
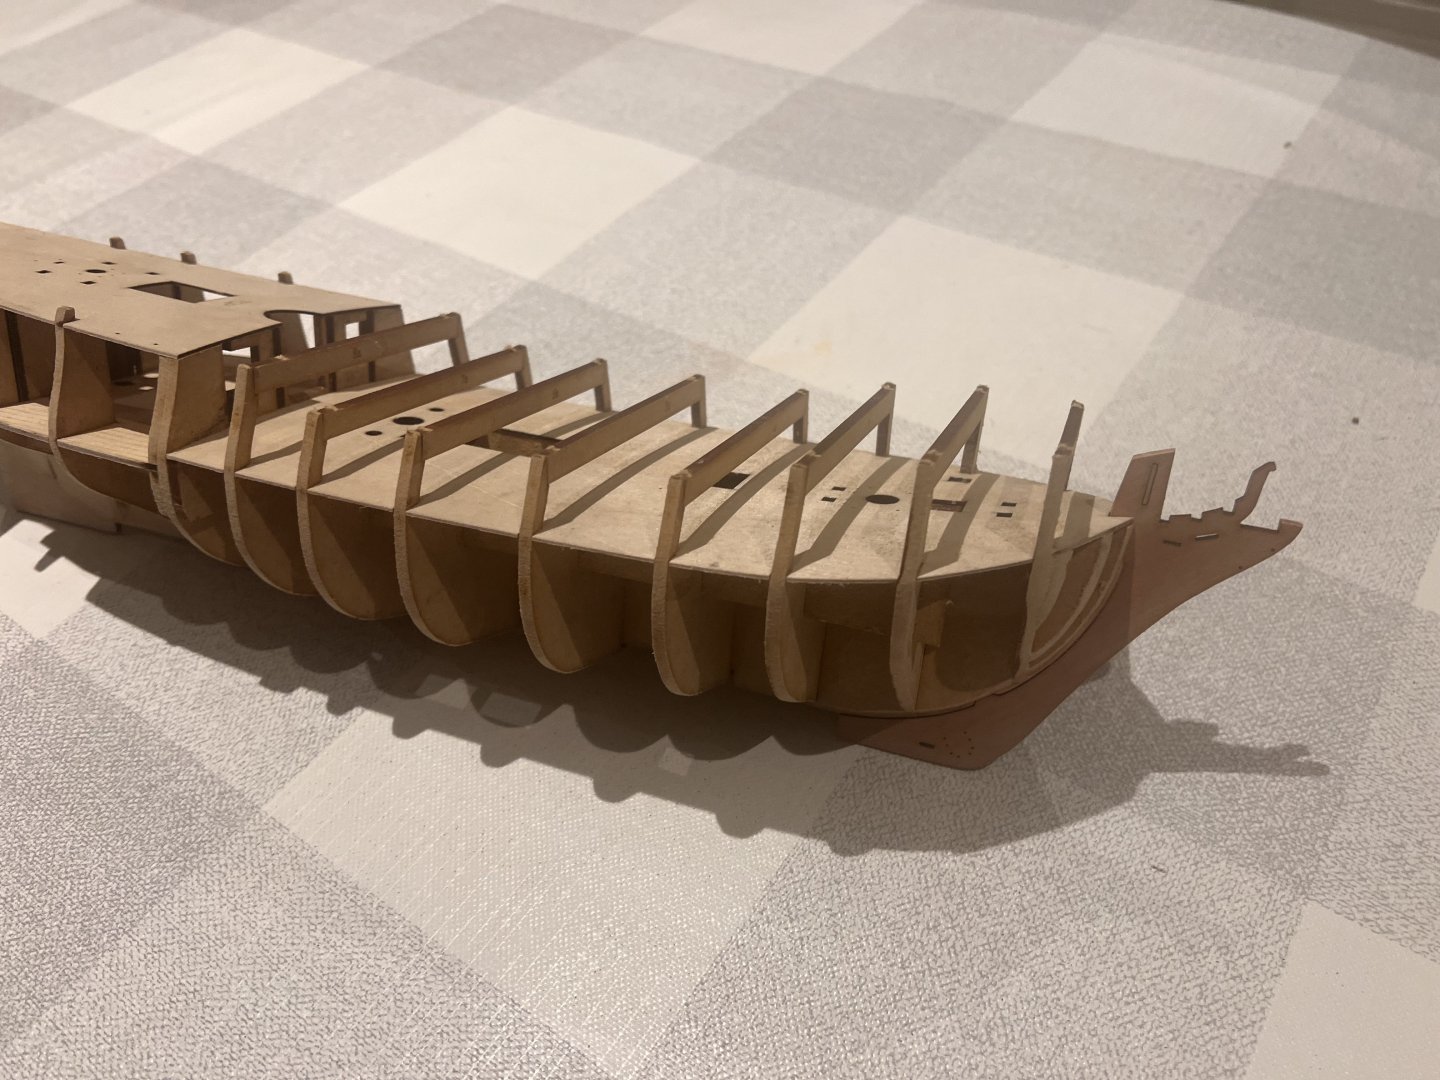
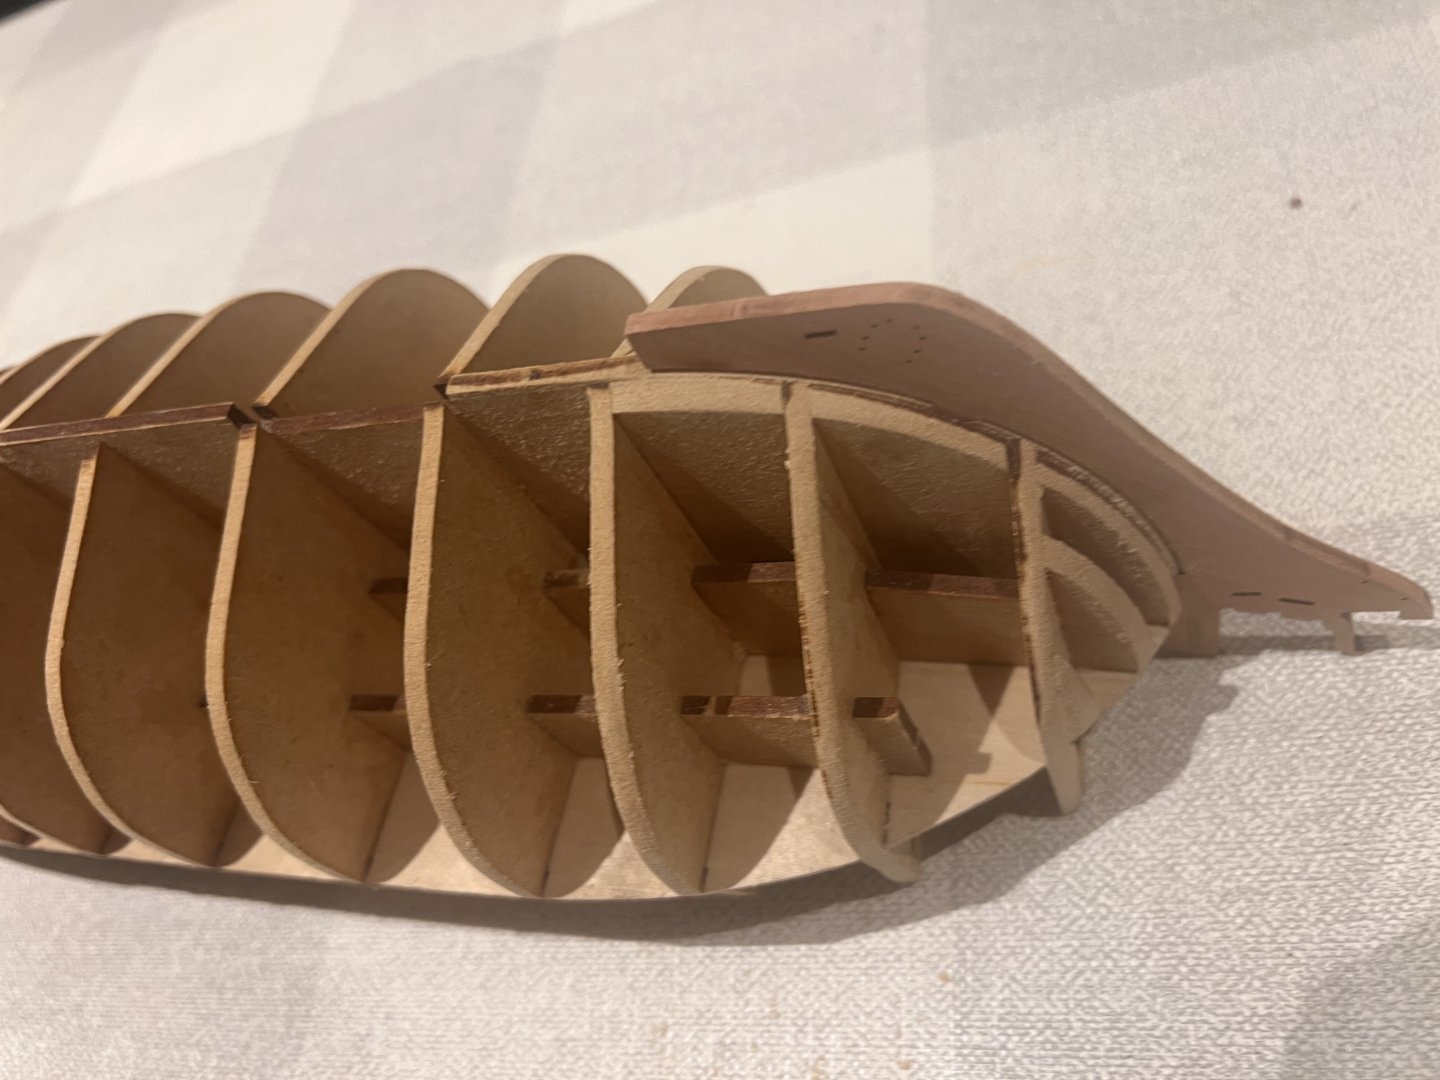
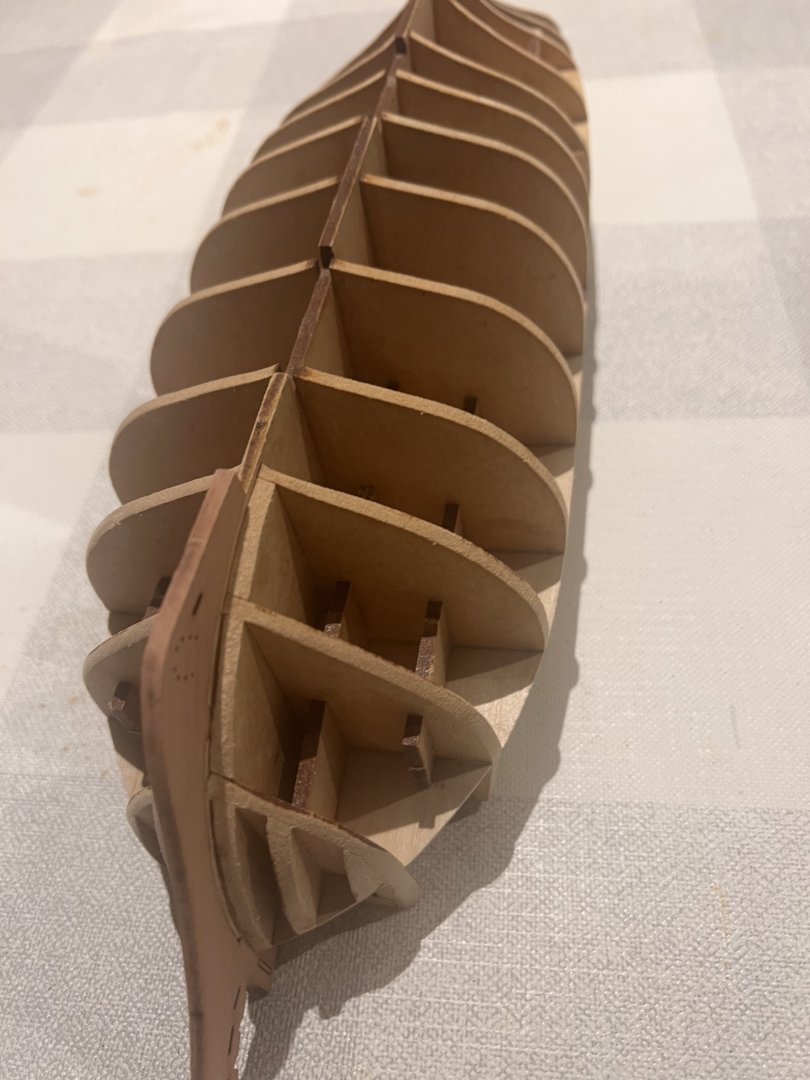
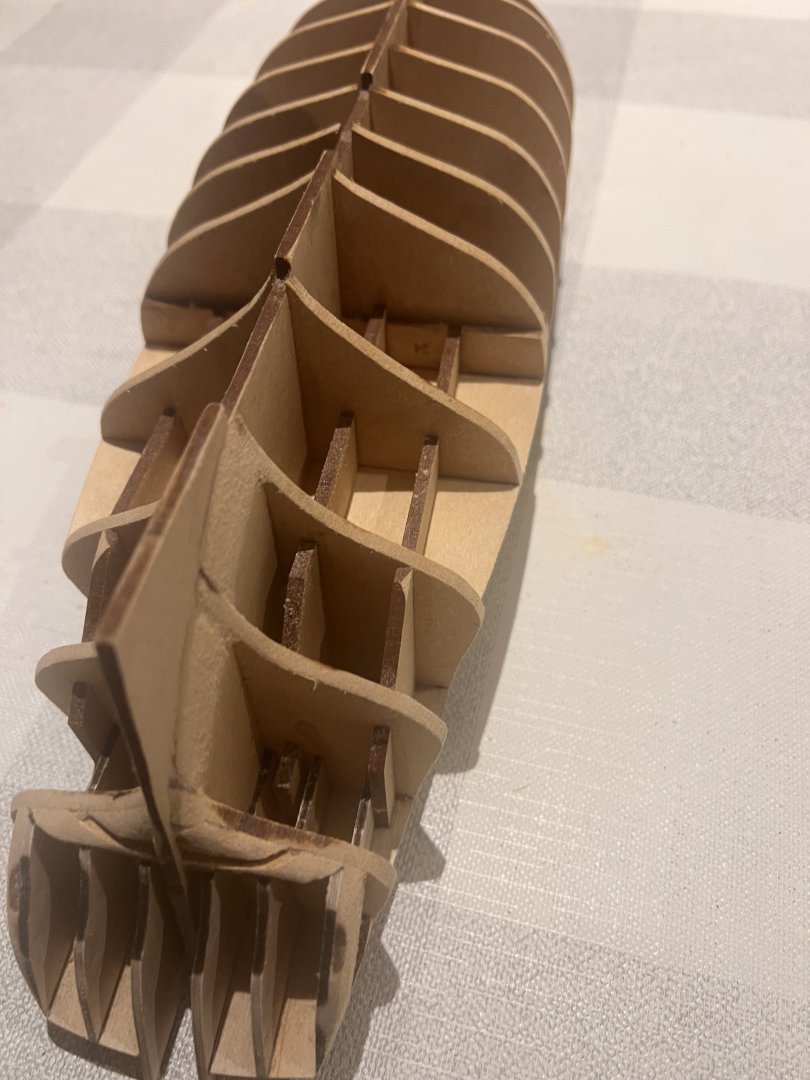
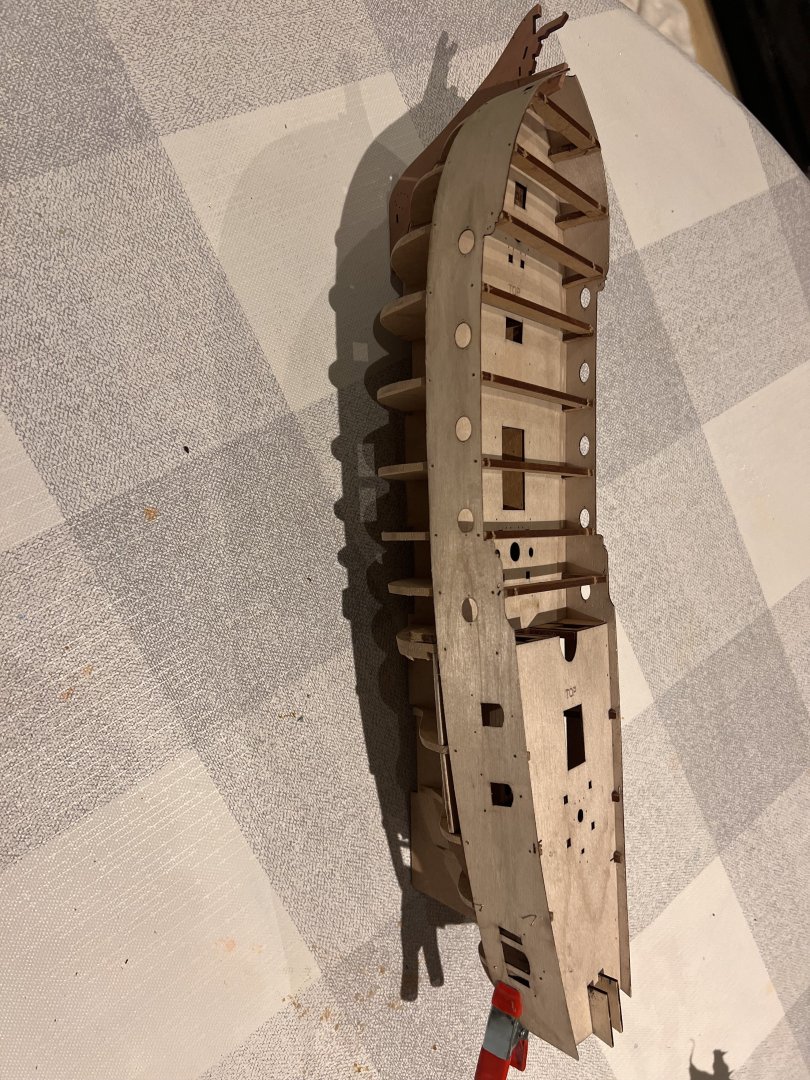
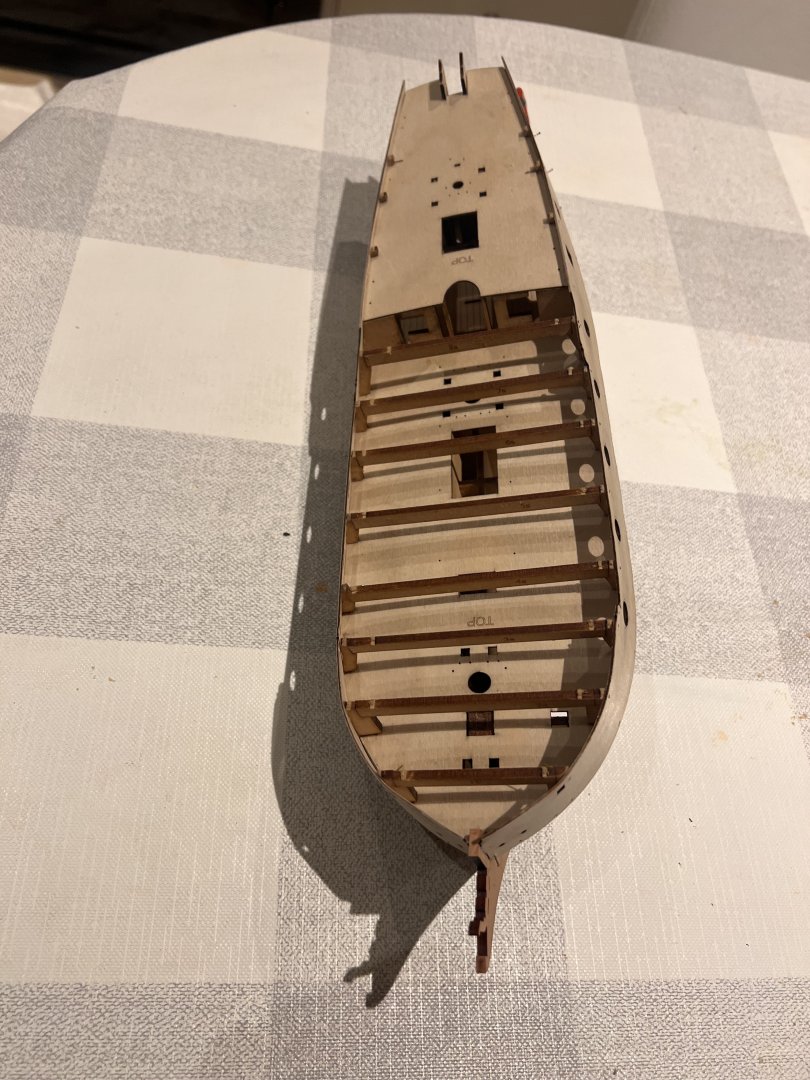
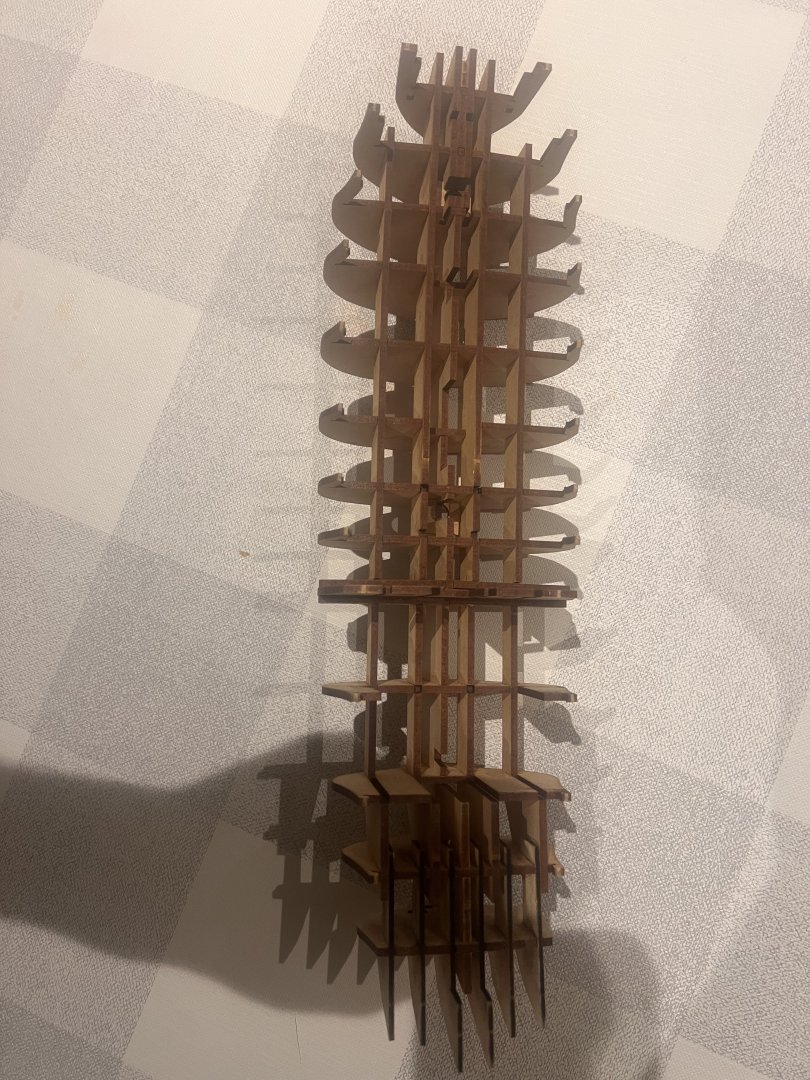
Started DoK last week. She’s another superb kit from Vanguard. The usual incredibly high standard of materials, plans and instructions as I’ve come to expect from Vanguard. This is my 10th boat and 10th kit from Vanguard. DoK is my first ship-rigged vessel and three-master. I haven’t shown the kit opening and contents as lots of others have already done so. There’s lots of excellent build logs for DoK from much more experienced builders so not sure this one will add much. The skeleton structure for the hull is extremely well reinforced with longitudinal pieces and there’s barely any chance of the keel bending or bulkheads not being square. The stern frames on this kit are plywood which makes them much stronger than MDF and less prone to breakage. The stern frames on this kit are plywood which makes them much stronger than MDF and less prone to breakage. The lower aft deck is engraved ply and fits perfectly. The foredeck bends into place, on the notches the deck fits perfectly too. The aft / poop deck fits well too and I held in place with pins whilst the glue dried. The bulkhead ears are weak so Chris has an ingenious way of strengthening them with cross beams that like the ears are sacrificial. The only departure from the instructions so far has been that I haven’t pre-bevelled the bulkheads before fitting them to the keel. On most of Chris’s later models he has added an engraved line to bevel to, but not this one so I decided not to risk overdoing the bevelling and to do all the bevelling on the hulk.

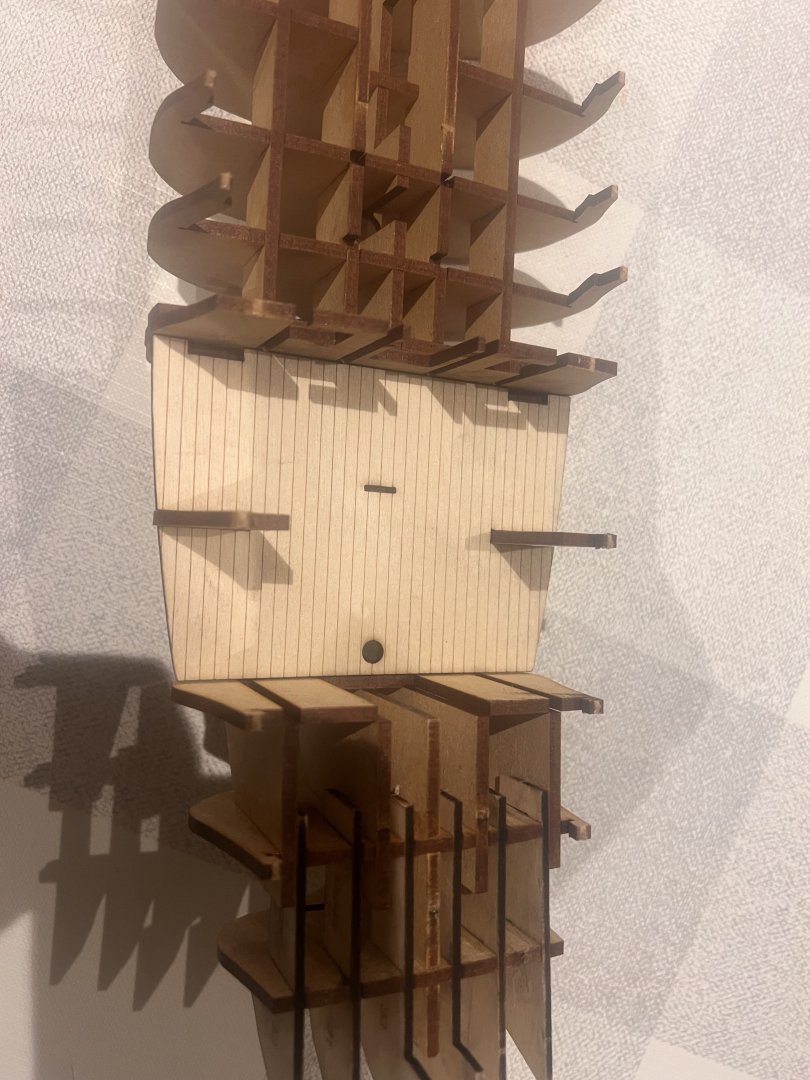
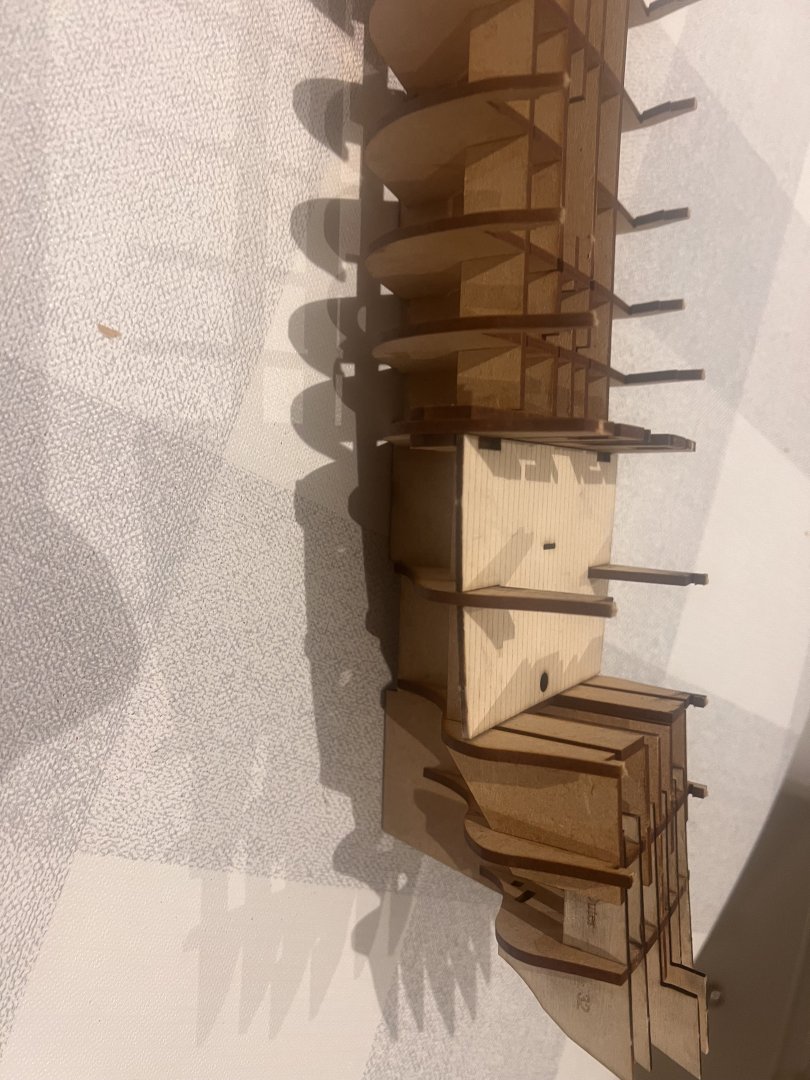
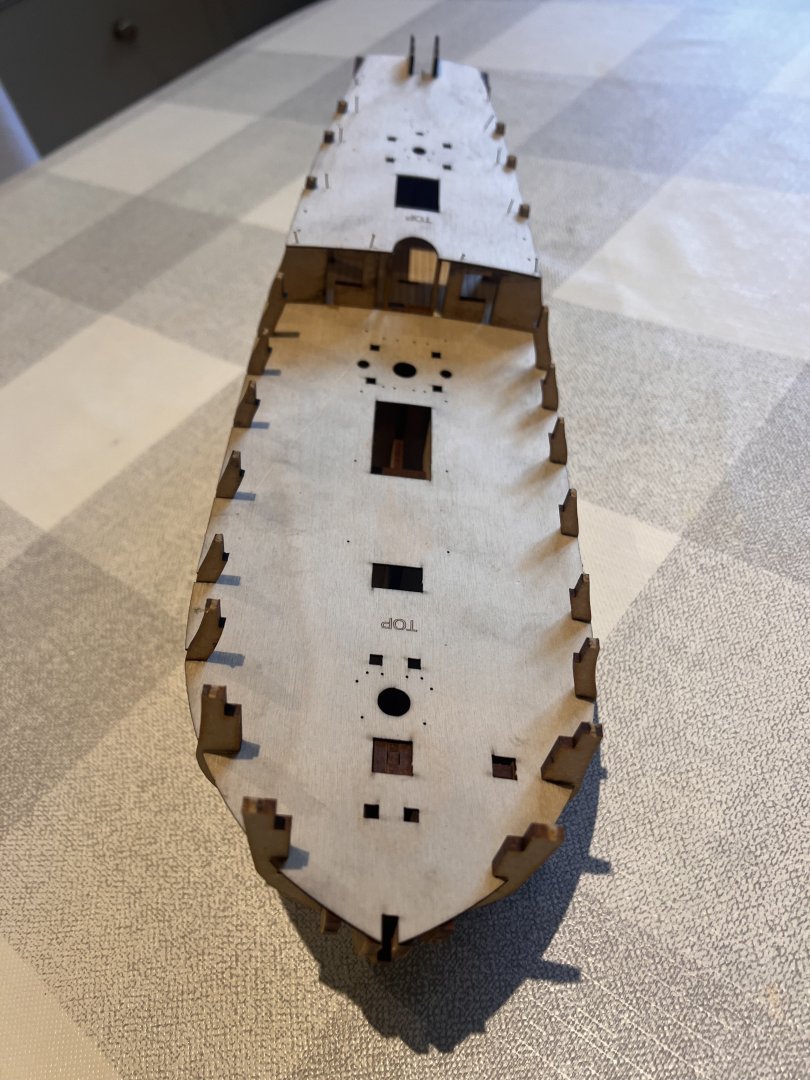
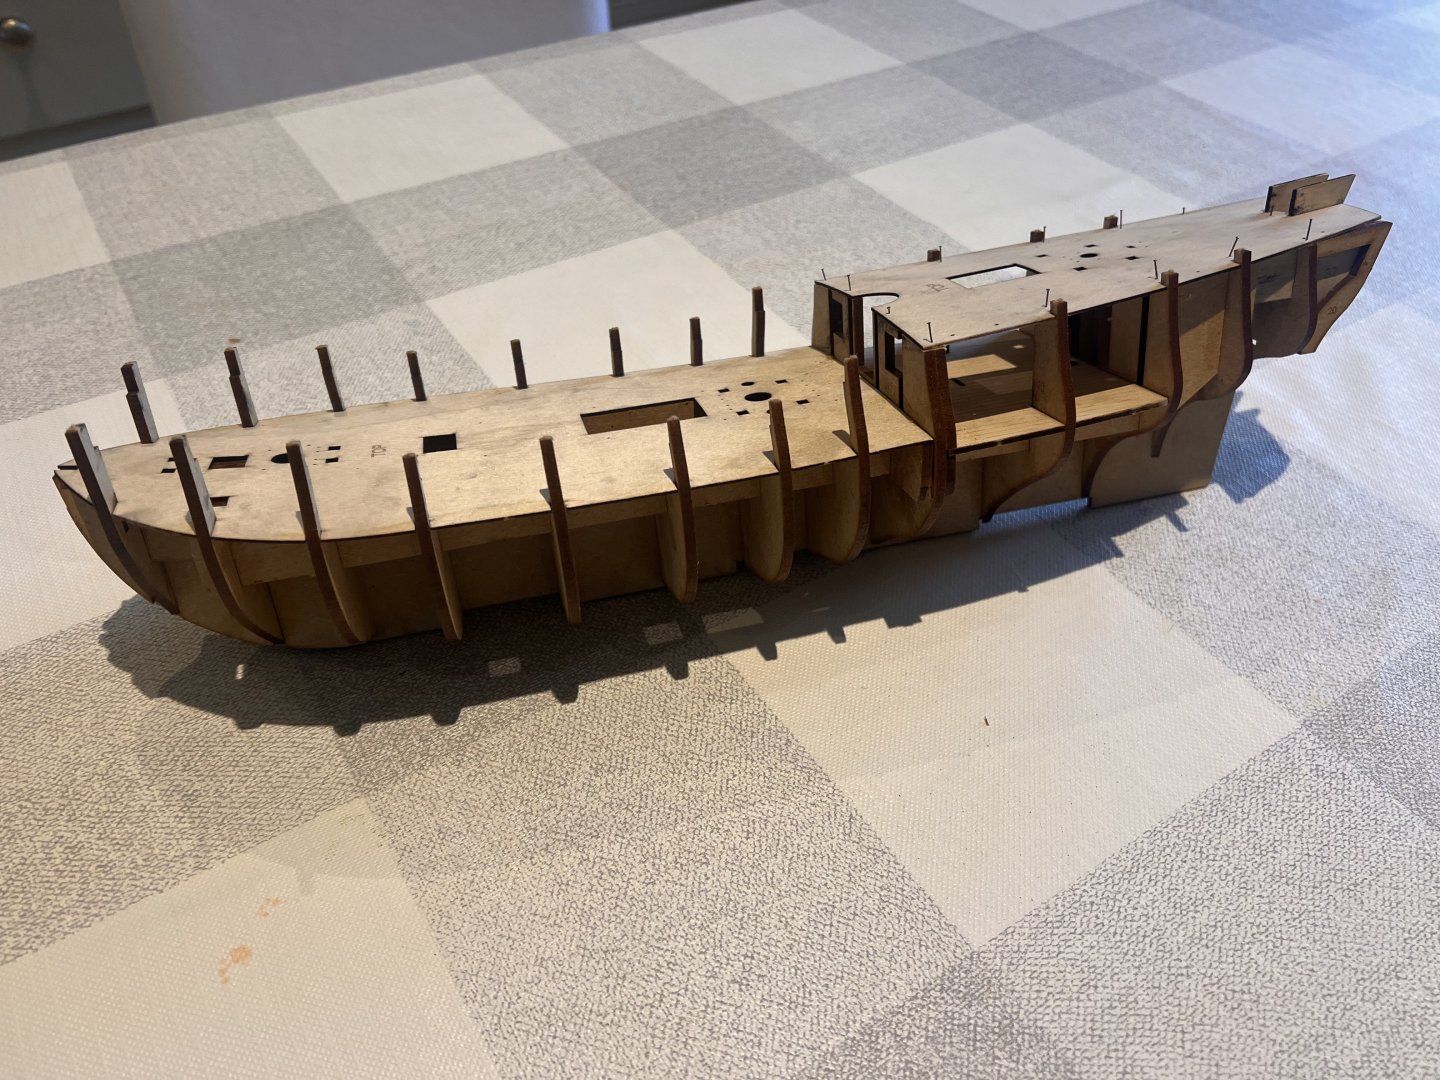


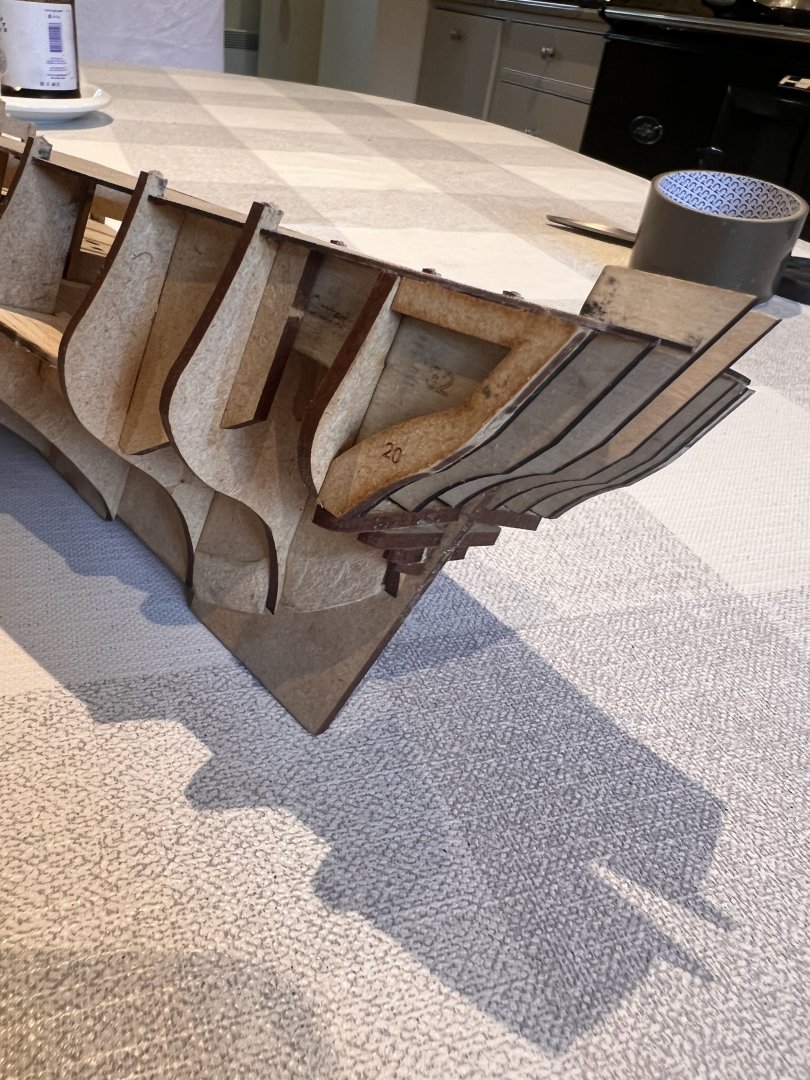
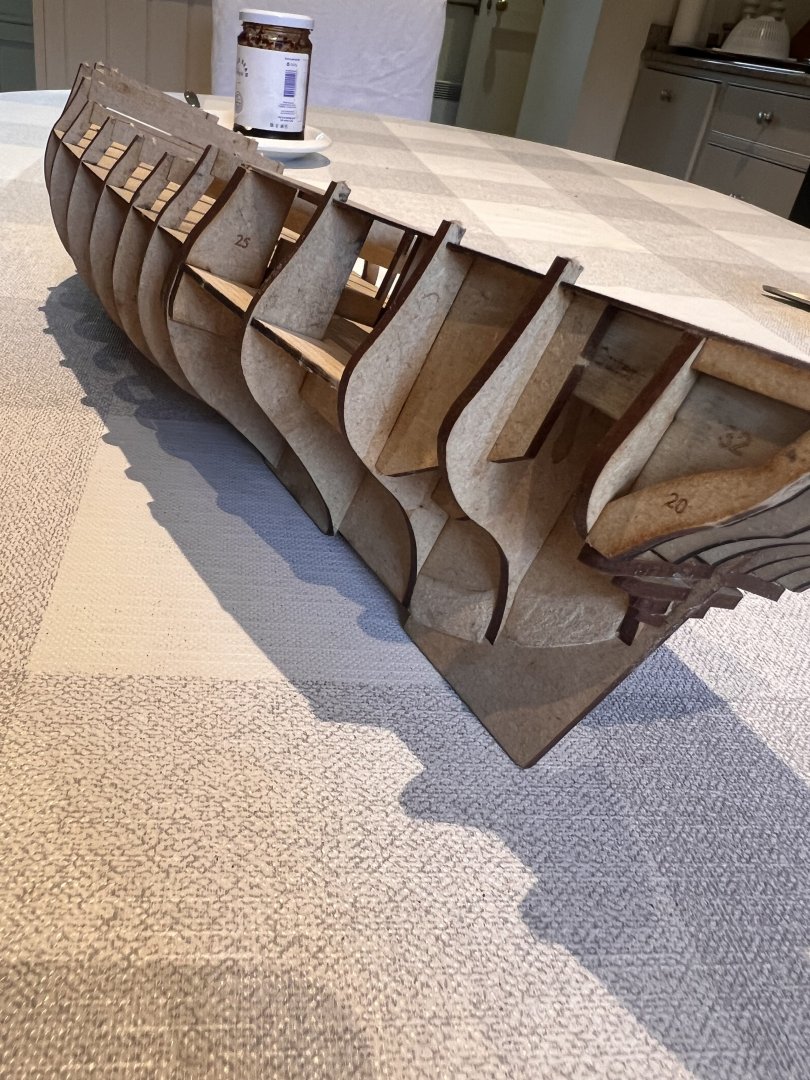

- 36 replies
-
- 14
-
-
- Duchess of Kingston
- Vanguard Models
- (and 1 more)
-
Amazing sails and build Andrew, she’s coming along beautifully. Thuky - is there a flow aid product you recommend? Thanks
-
Thank you Ronald, Eck, Uwe, Chris, David. Much appreciated. I have had a good look at DoK's plans vs. Speedy and as Chris says there is more rigging for DoK, but to do the full rigging for Speedy looks considerably more complex. So DoK next it is. I'm hoping to build Speedy after DoK with all the running rigging in place, but if that is too difficult I will fall back on a similar rig to Adder as Chris suggested, In terms of lines included on DoK it looks similar to those included on Adder with the addition of crows feet which will be a new challenge. The hull / decor looks like a big step up, but that is my favourite part of the build so I'm looking forward to it! As expected DoK is the same absolutely excellent high quality kit that I have got used to from Vanguard. I probably will have a break and start building her in a few weeks time.
- 146 replies
-
- 3
-
-
- Adder
- Vanguard Models
- (and 1 more)
-
Andrew, Ron, Thuky, Thanks for all the comments and praise, much appreciated. Dan
- 146 replies
-
- 2
-
-
- Adder
- Vanguard Models
- (and 1 more)
-
Thanks Chris, when I get to Speedy I’d like to add all the extra rigging if I can. The more familiar I am with the basic rigging, the easier I’ll find it to add more… Duchess sounds like the more sensible next build. Shrouds and ratlines are a touch dull, but they’re not difficult. Thanks Glenn, size will really help too, more confirmation for the Duchess. I’m away a couple of days but when I’m back I’ll look through Duchess’s plans more thoroughly and make a final decision. Strongly suspect that it will be for Duchess.
- 146 replies
-
- 1
-
-
- Adder
- Vanguard Models
- (and 1 more)
-
Thanks Andrew, Bob and Glenn! Andrew - my next build was always going to be Speedy (my stash is strictly kept at 1 kit) but I found Adder’s rigging a challenge and for Speedy adding all the extra rigging going under the tops and belayed below seems a little daunting. I think it’s an extra 3-4 blocks for each side on the main and fore yards… So I’ve bought Duchess of Kingston too, which I understand has less of the running rigging - albeit not without her rigging challenges either (3 masts, crows feet, etc) and there’s a lot more detailed painting to be done. I’m going to have a good look at the rigging plans of both and decide which should be built first. Chris, if you’re reading this I’d be very interested in your view on which is the more natural progression after Adder? I’m not worried by either hull, it’s just the rigging. Many thanks for any advice. Dan
- 146 replies
-
- 3
-
-
- Adder
- Vanguard Models
- (and 1 more)
-
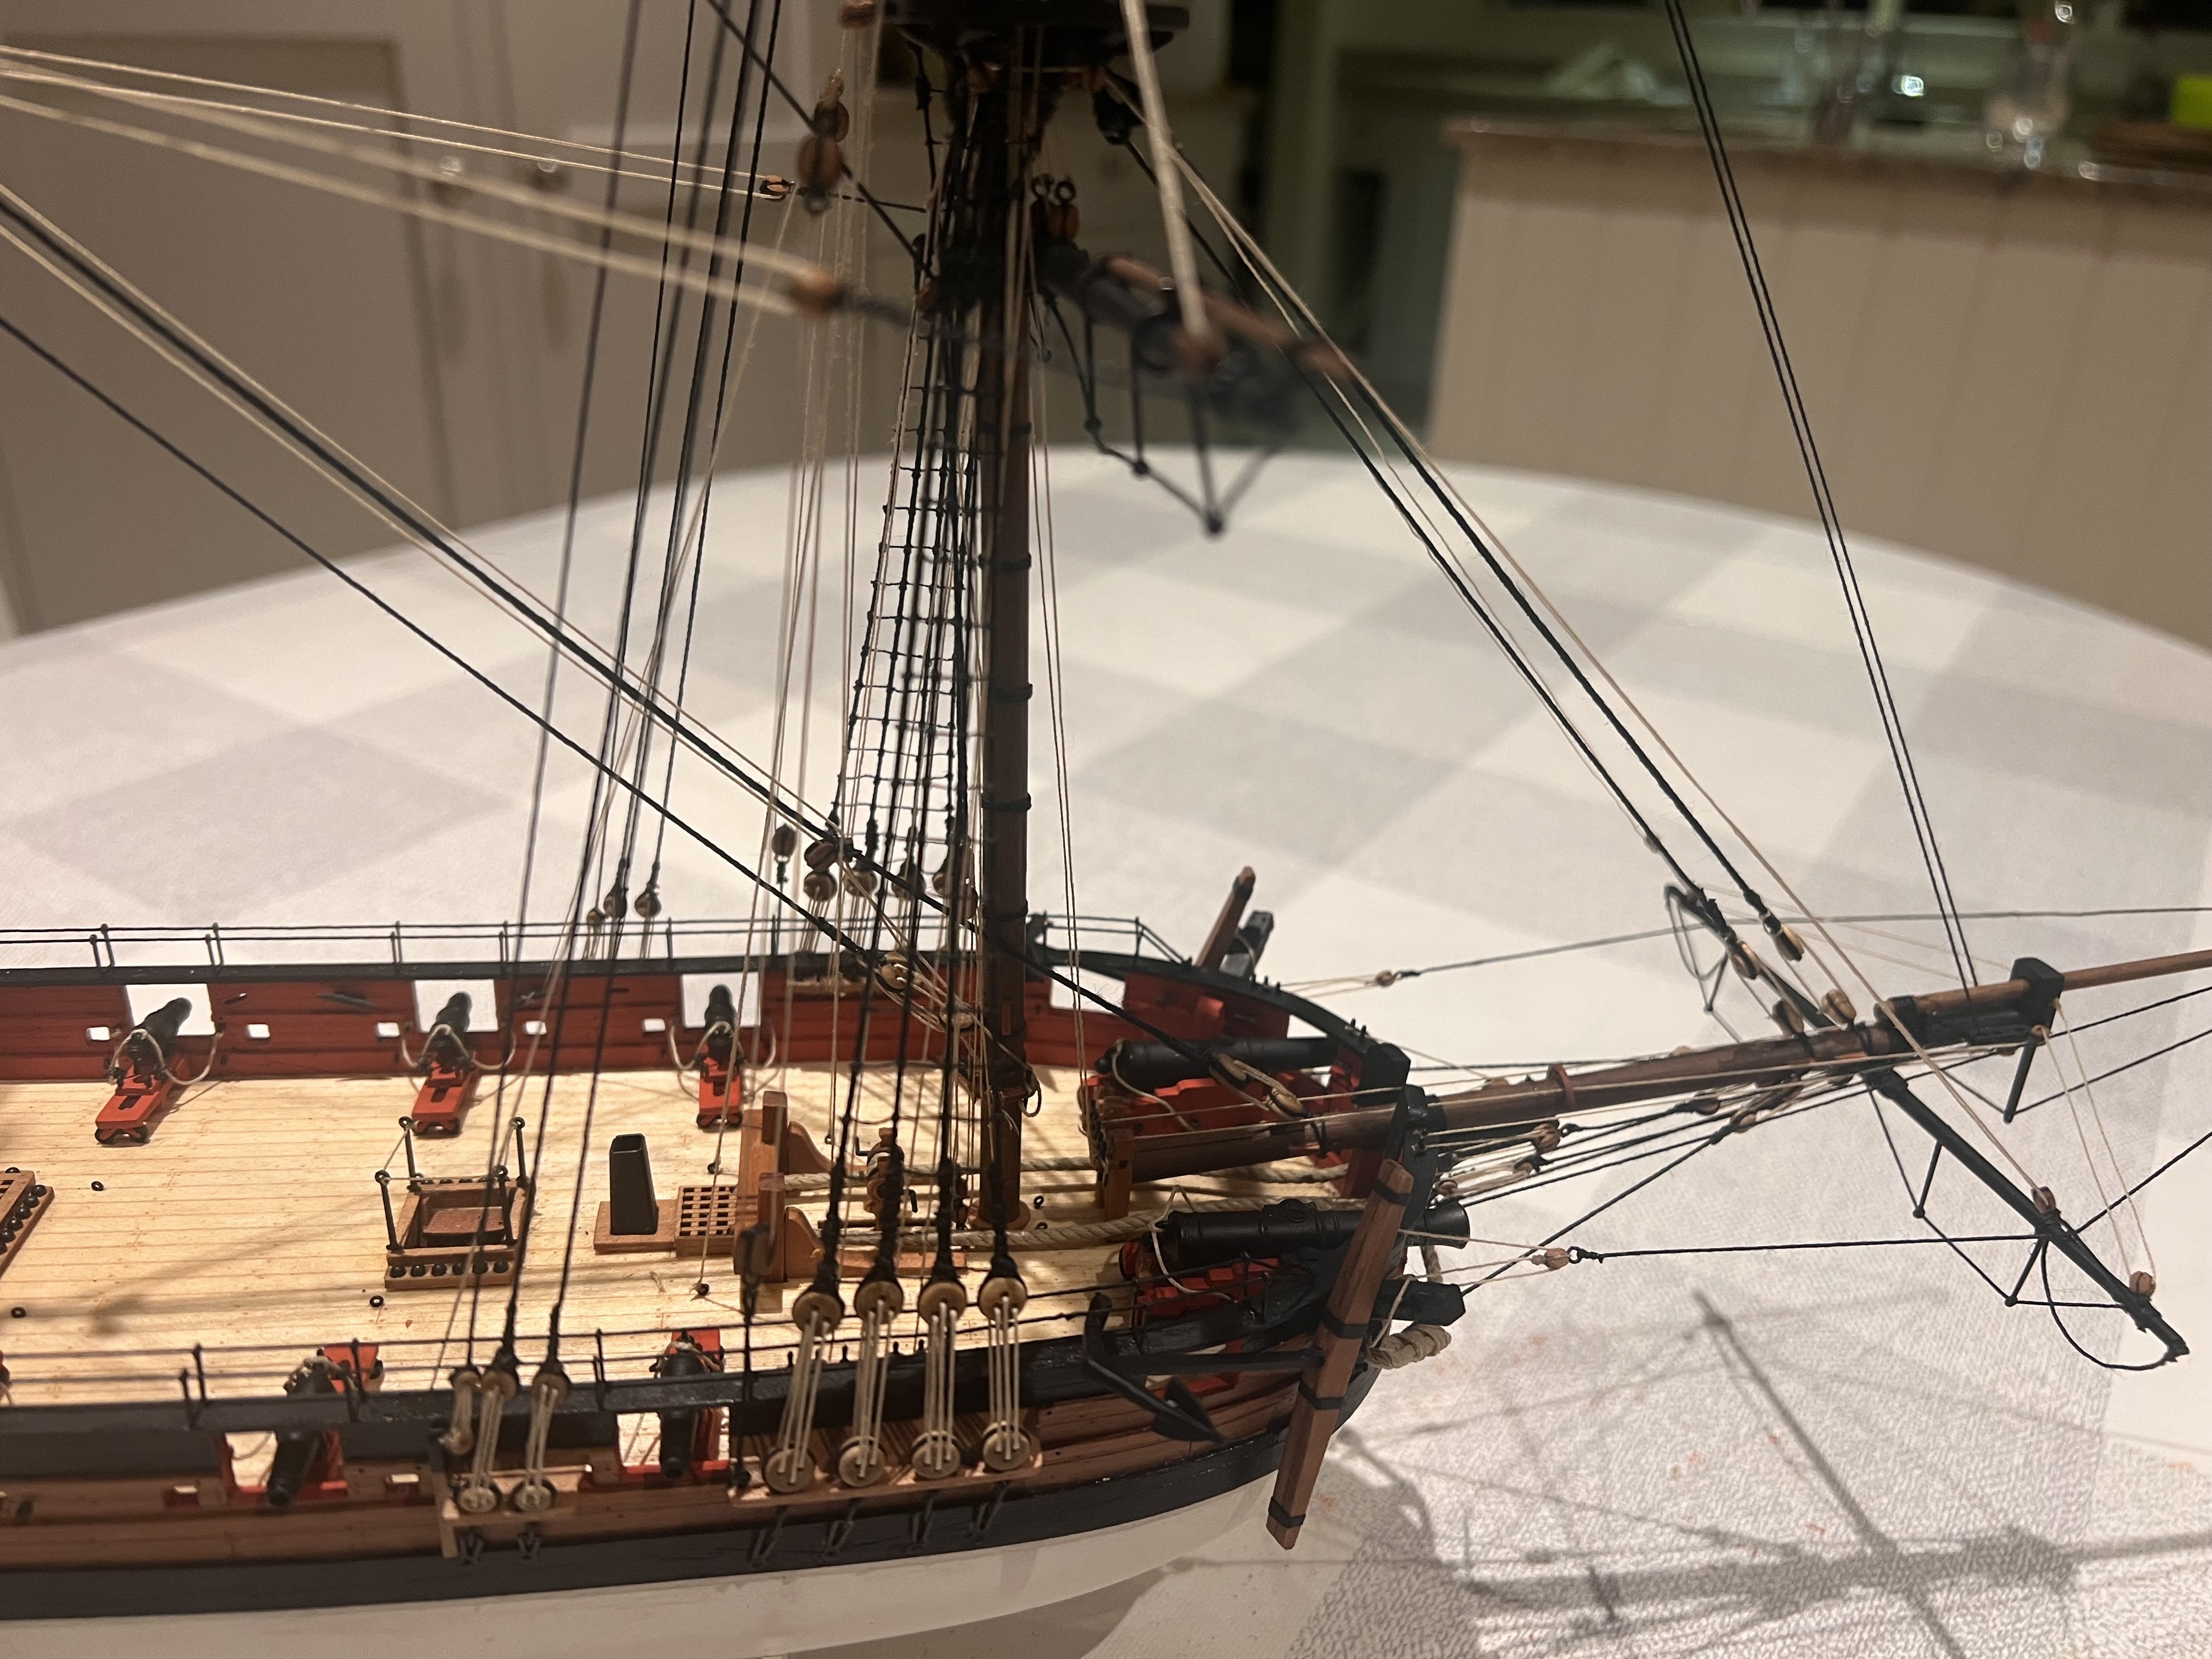
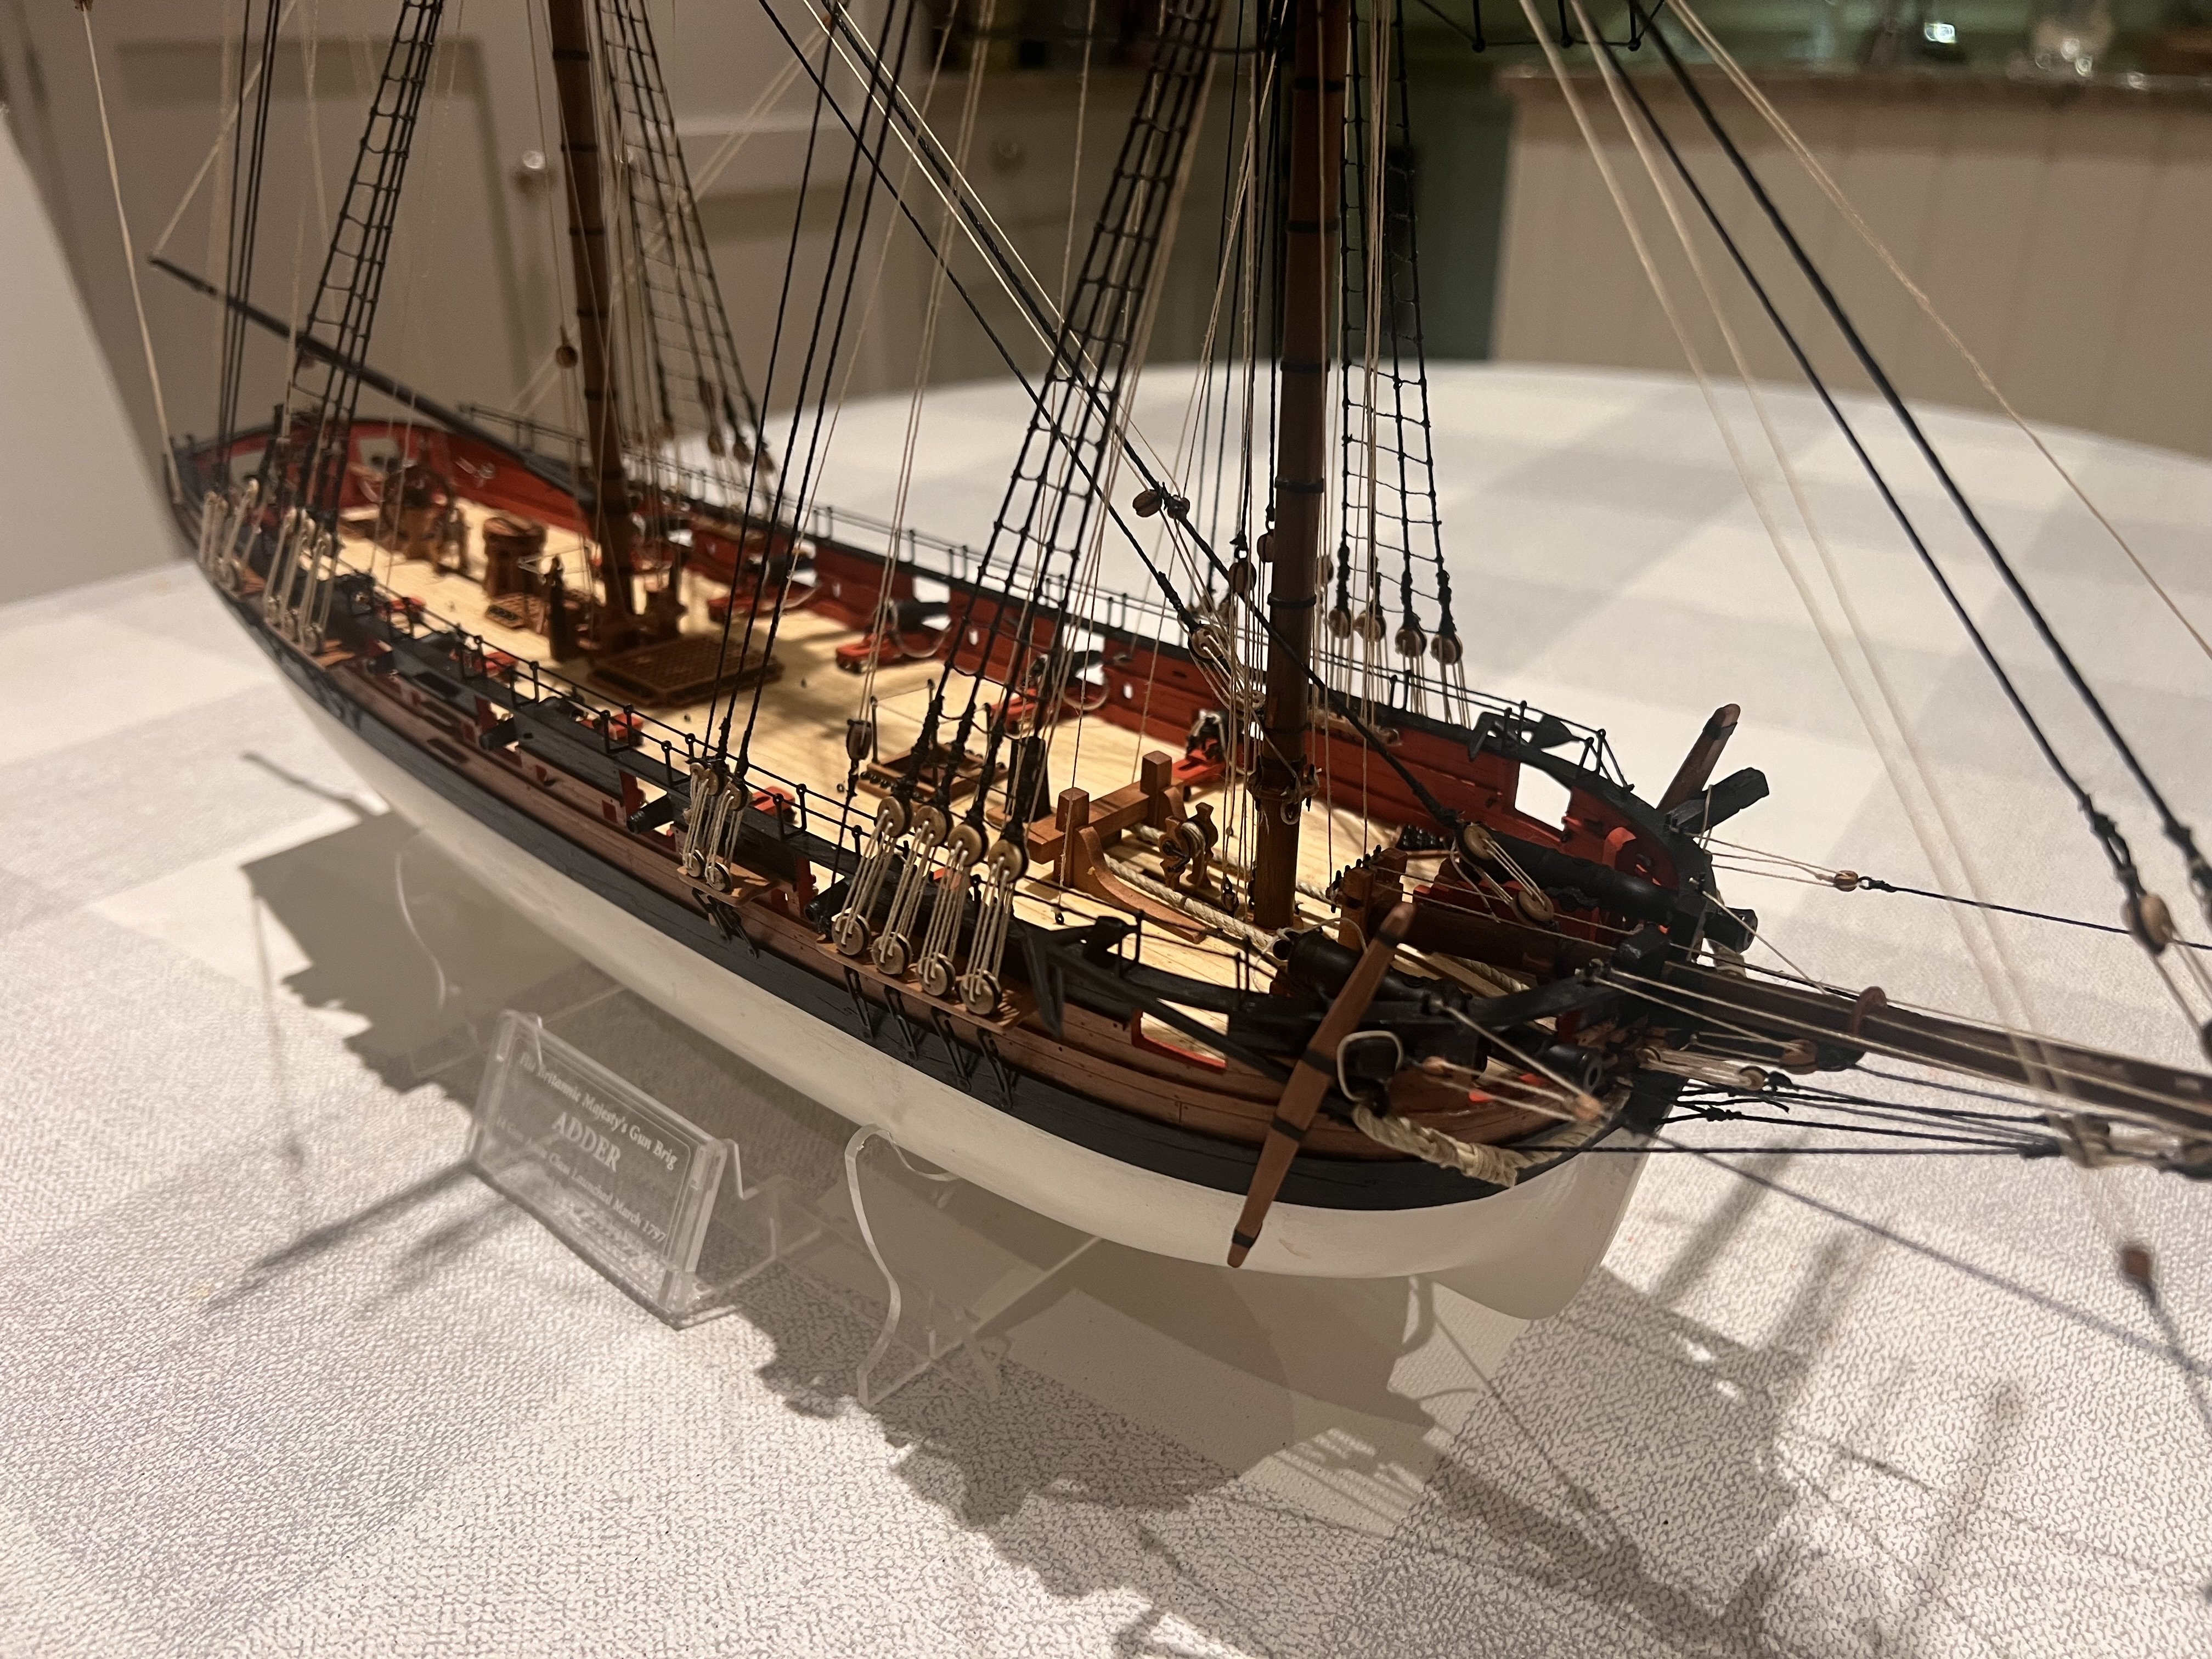
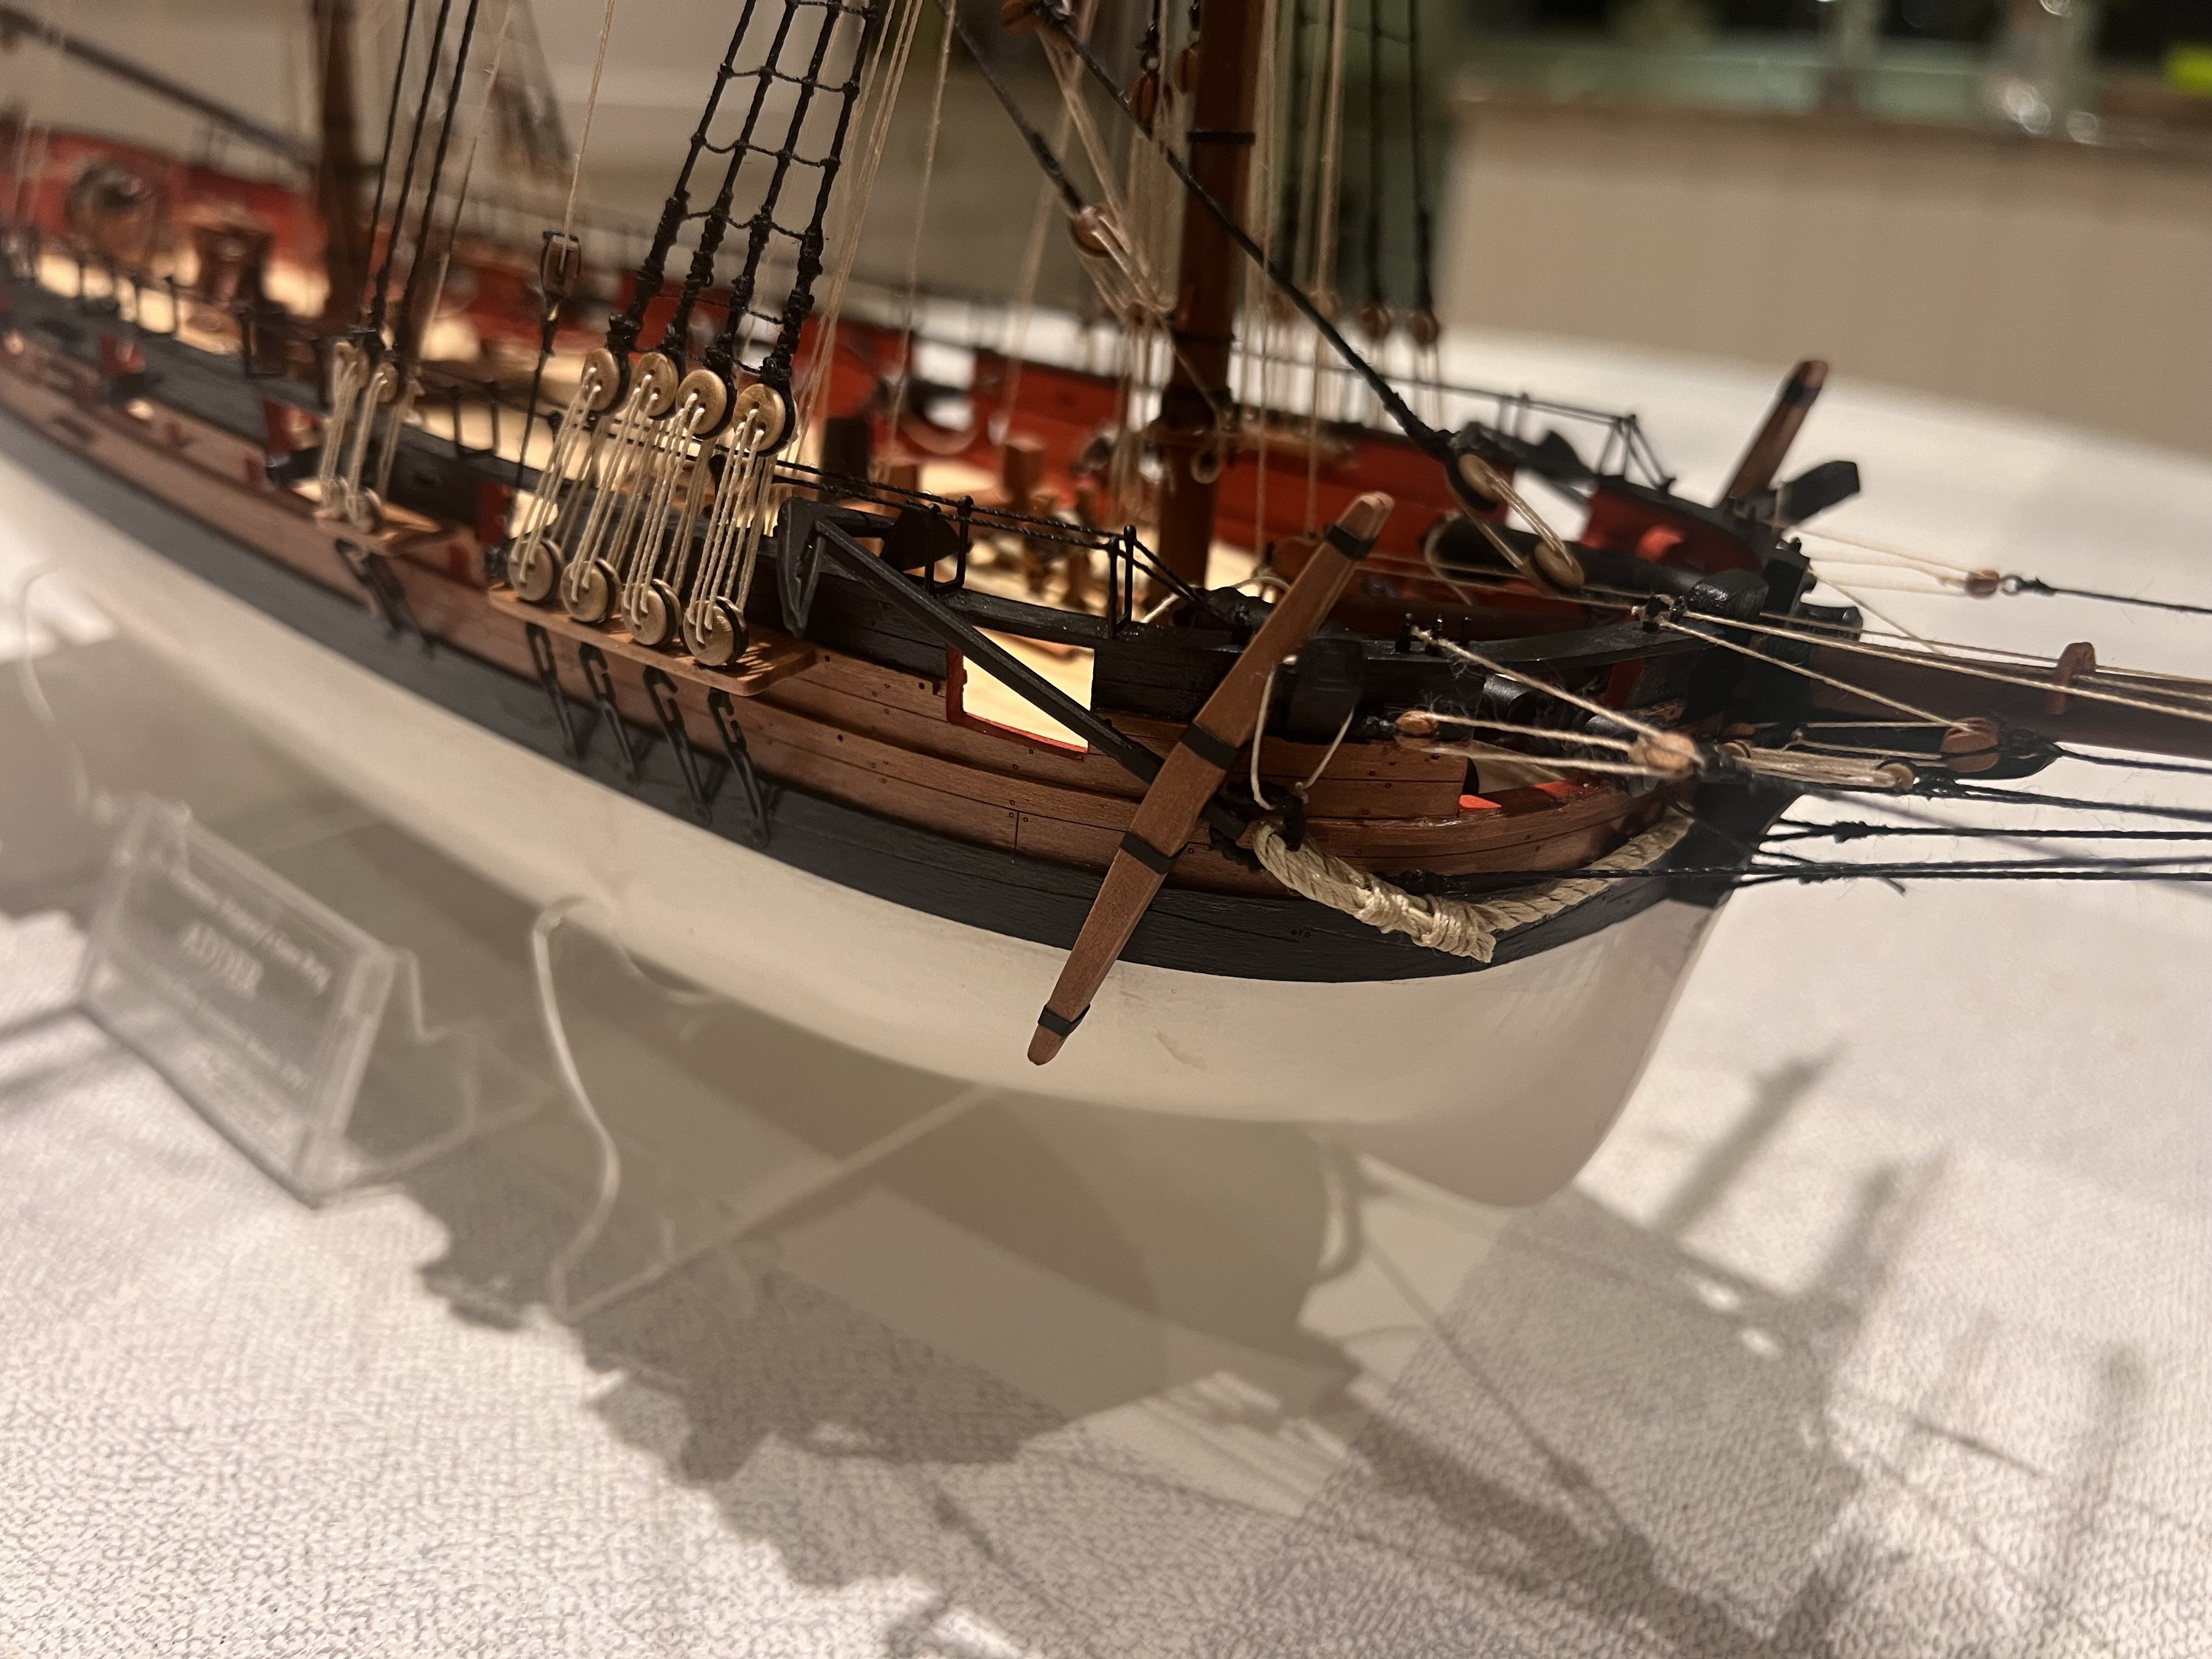
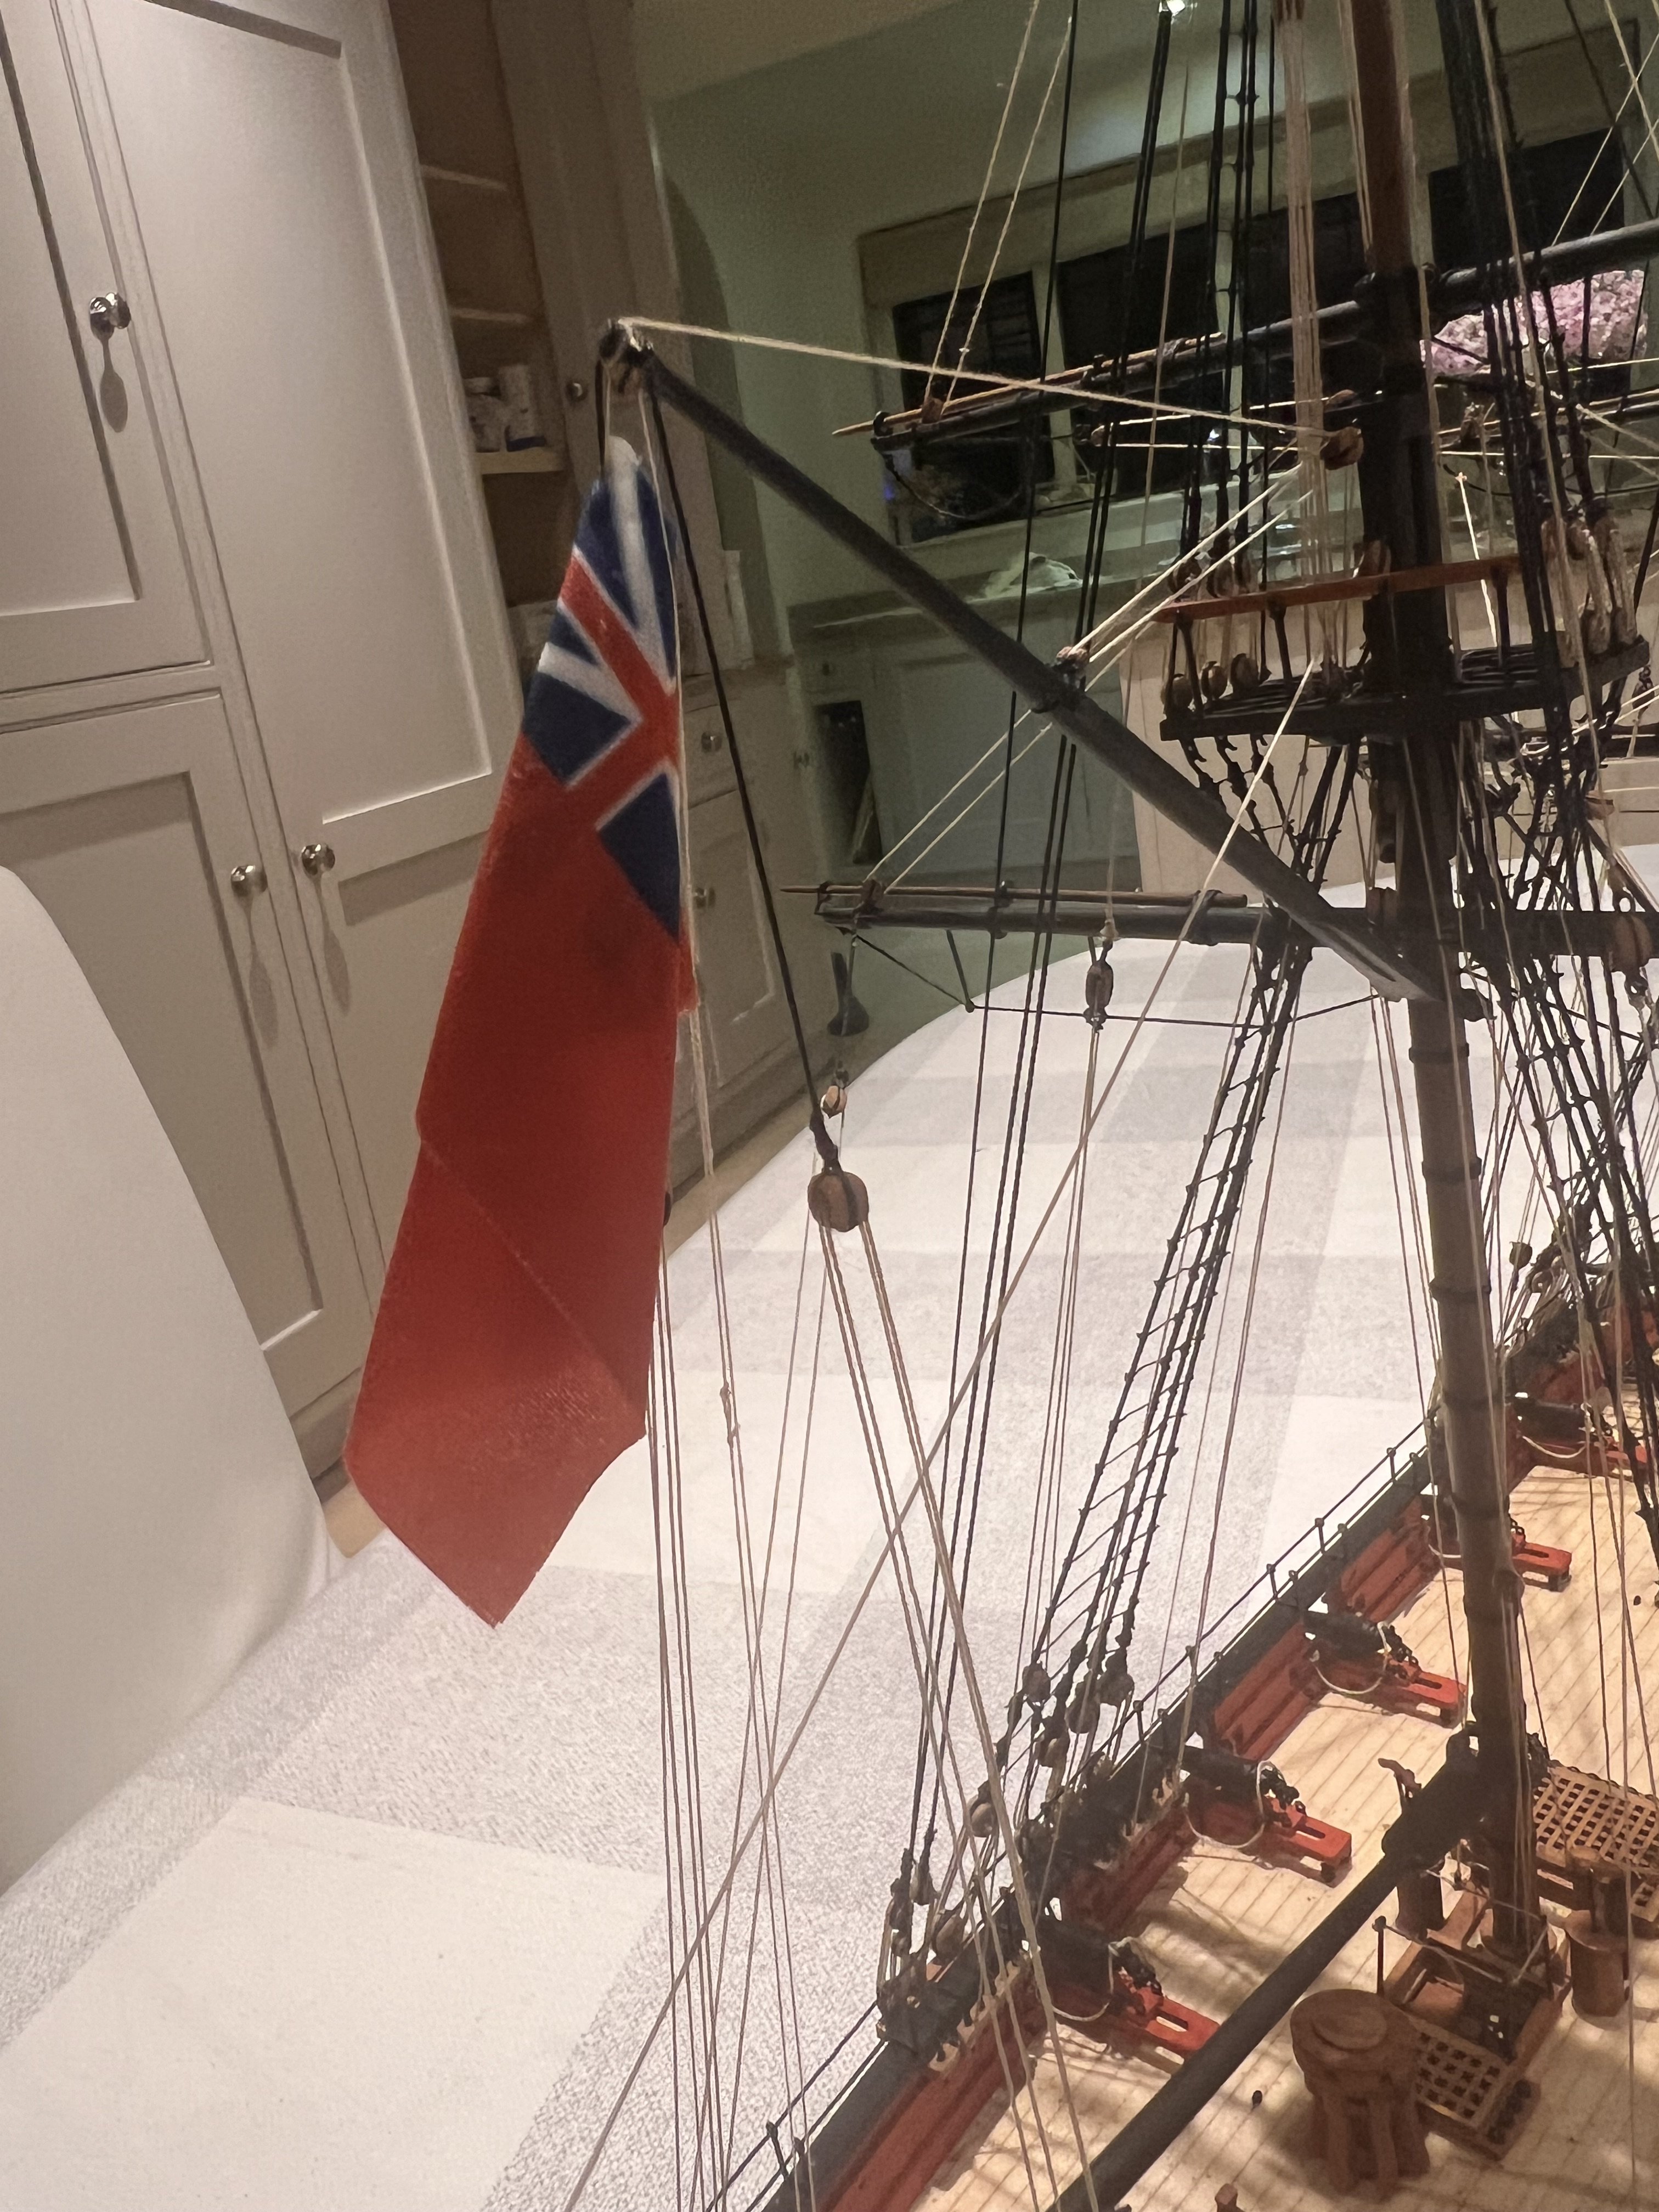
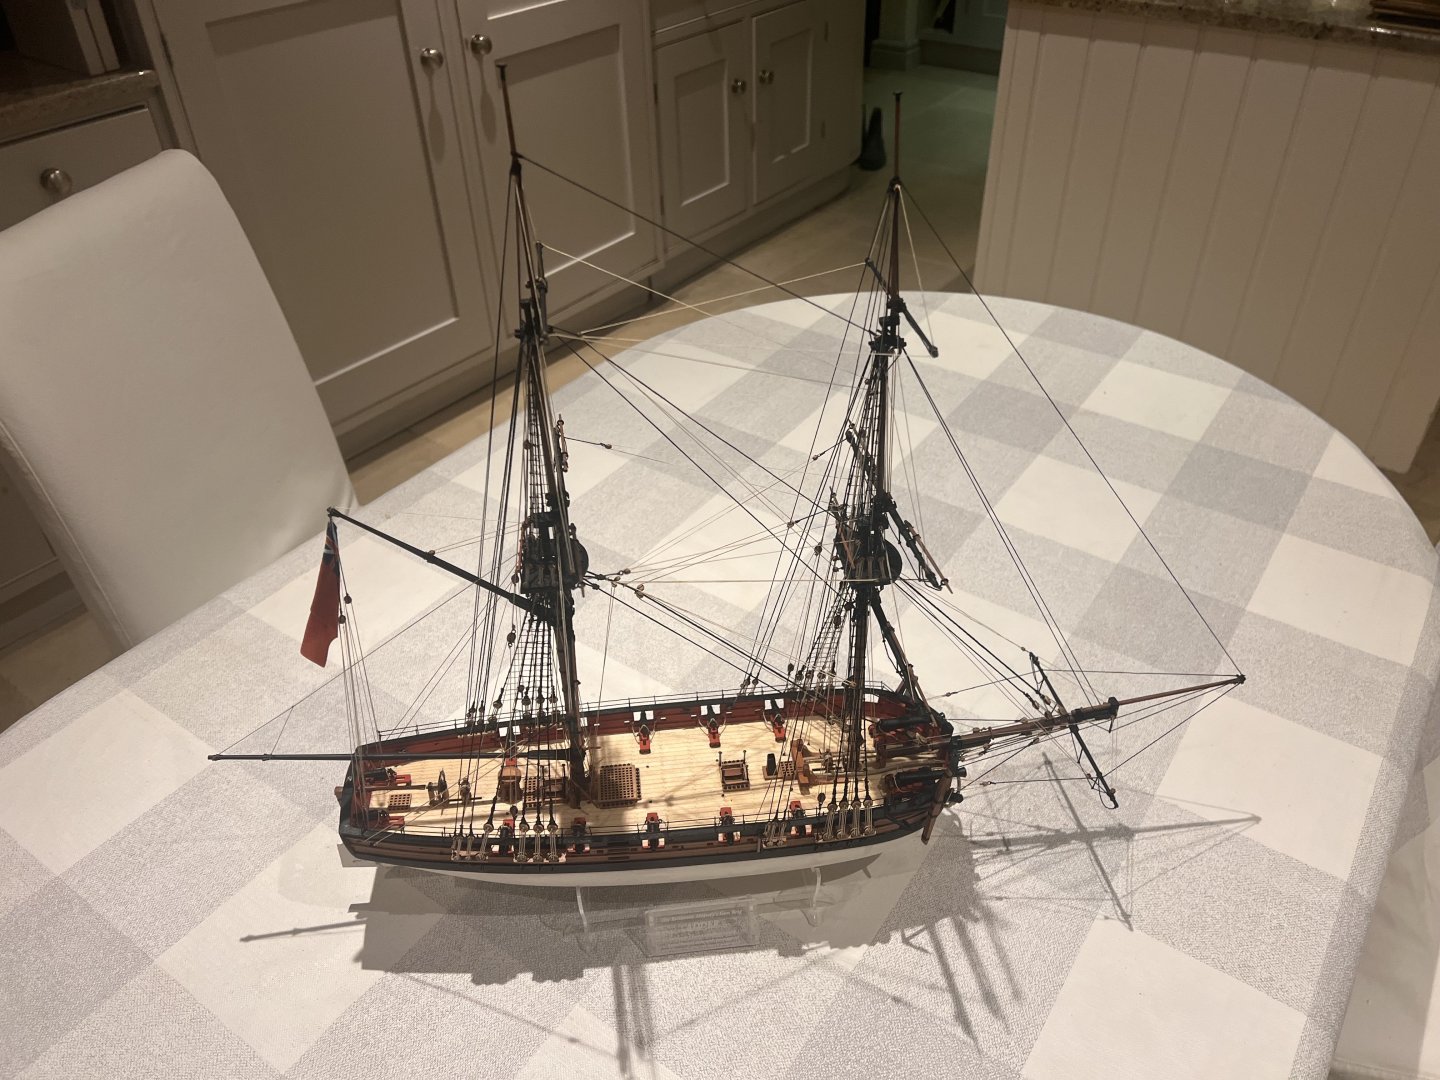
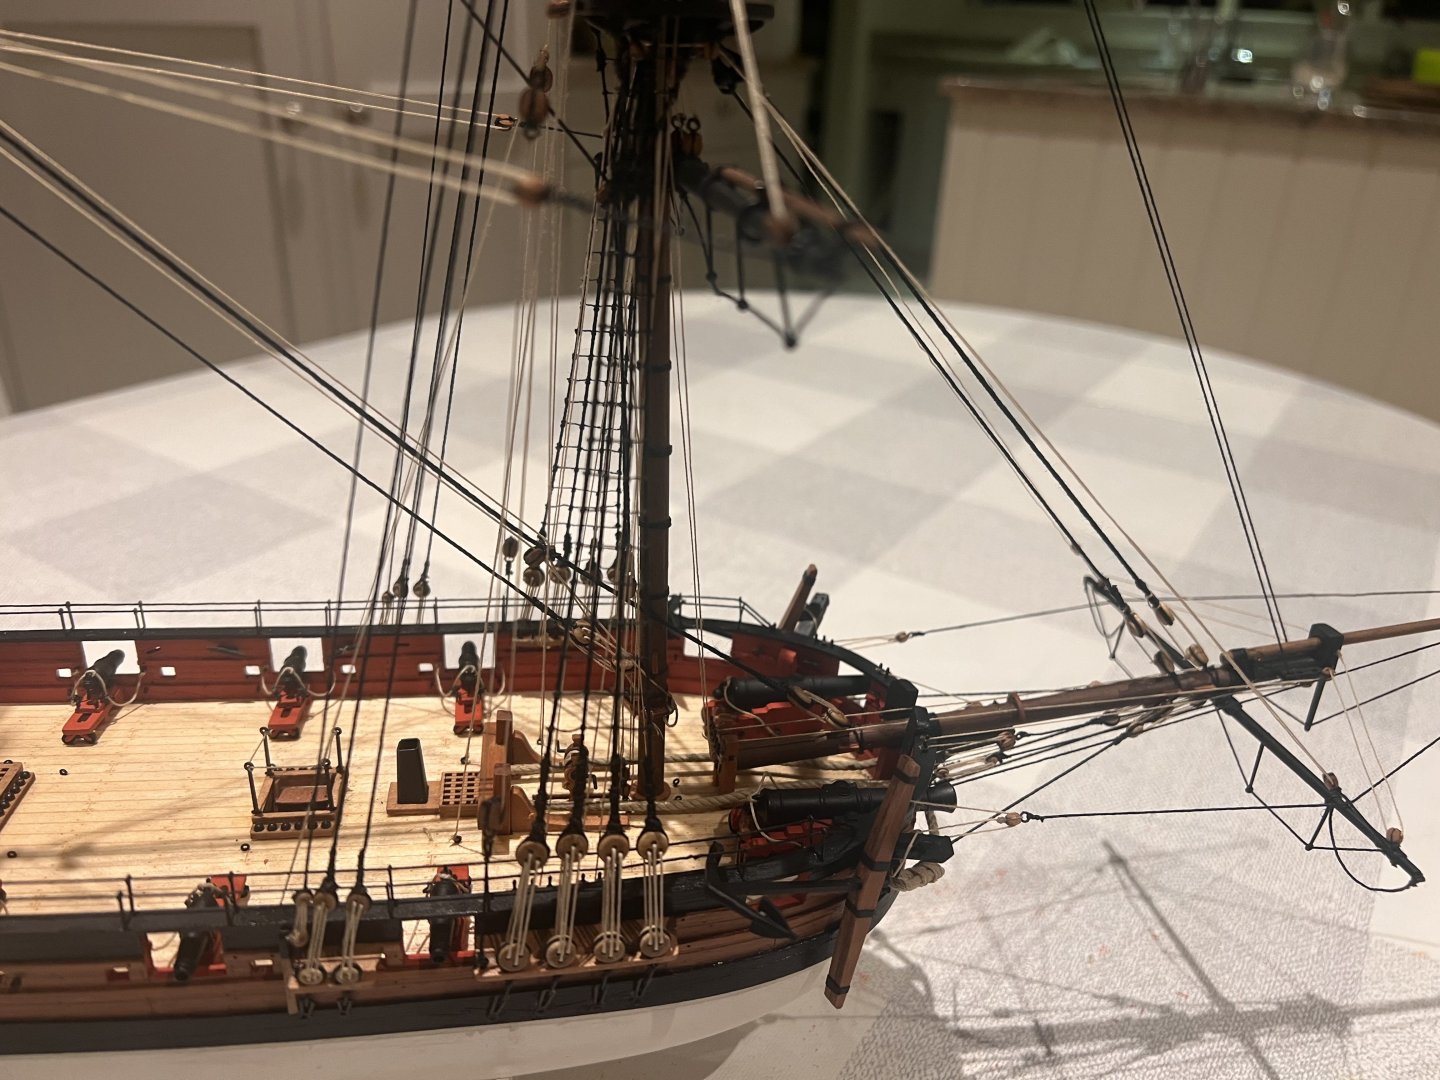
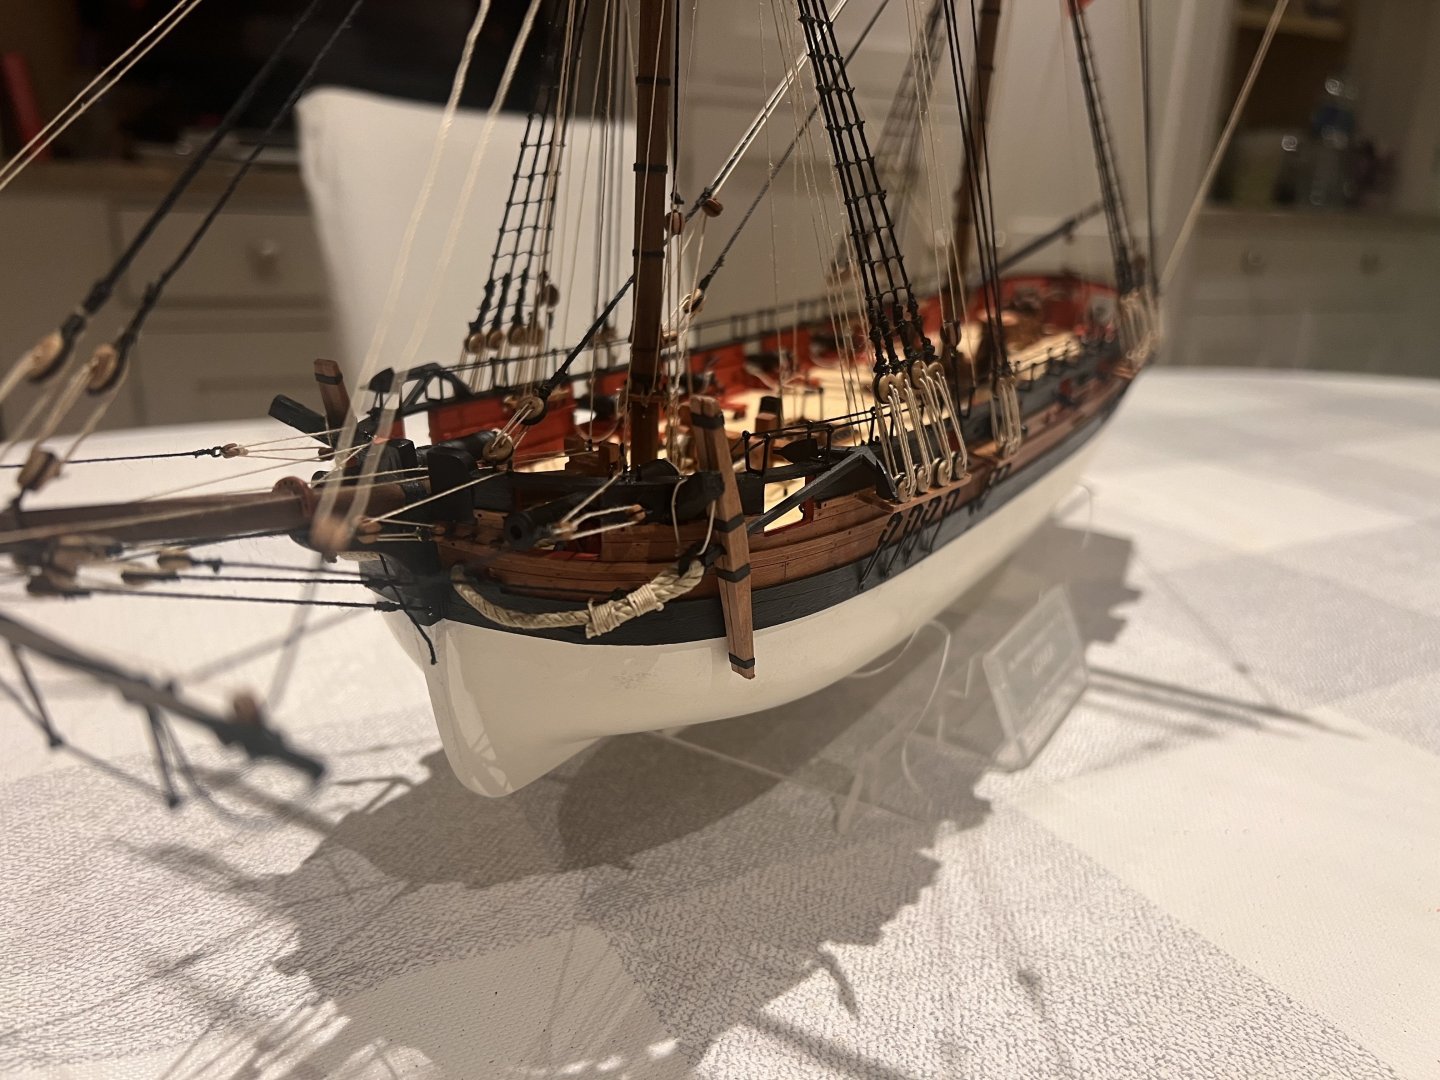
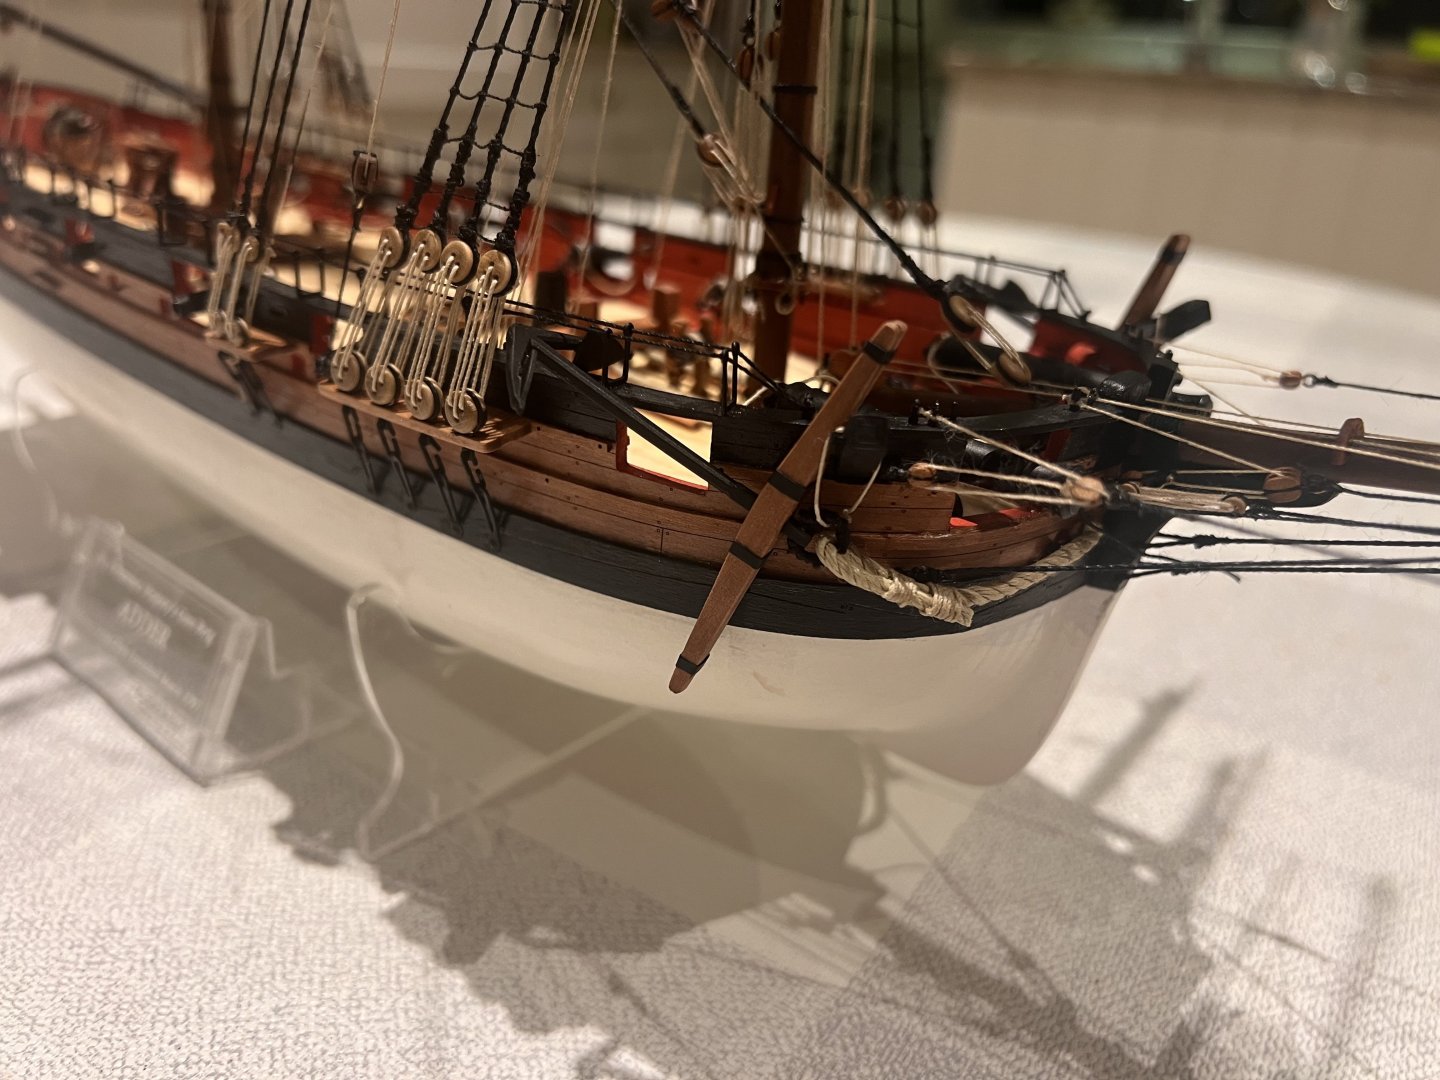
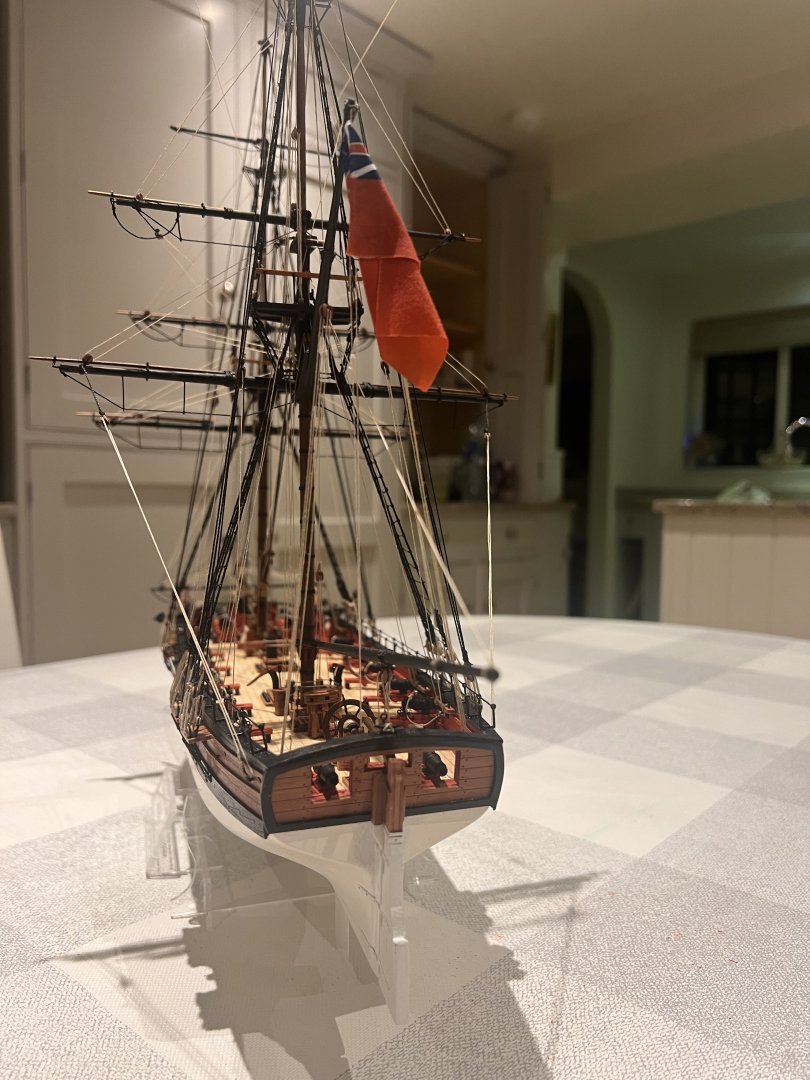
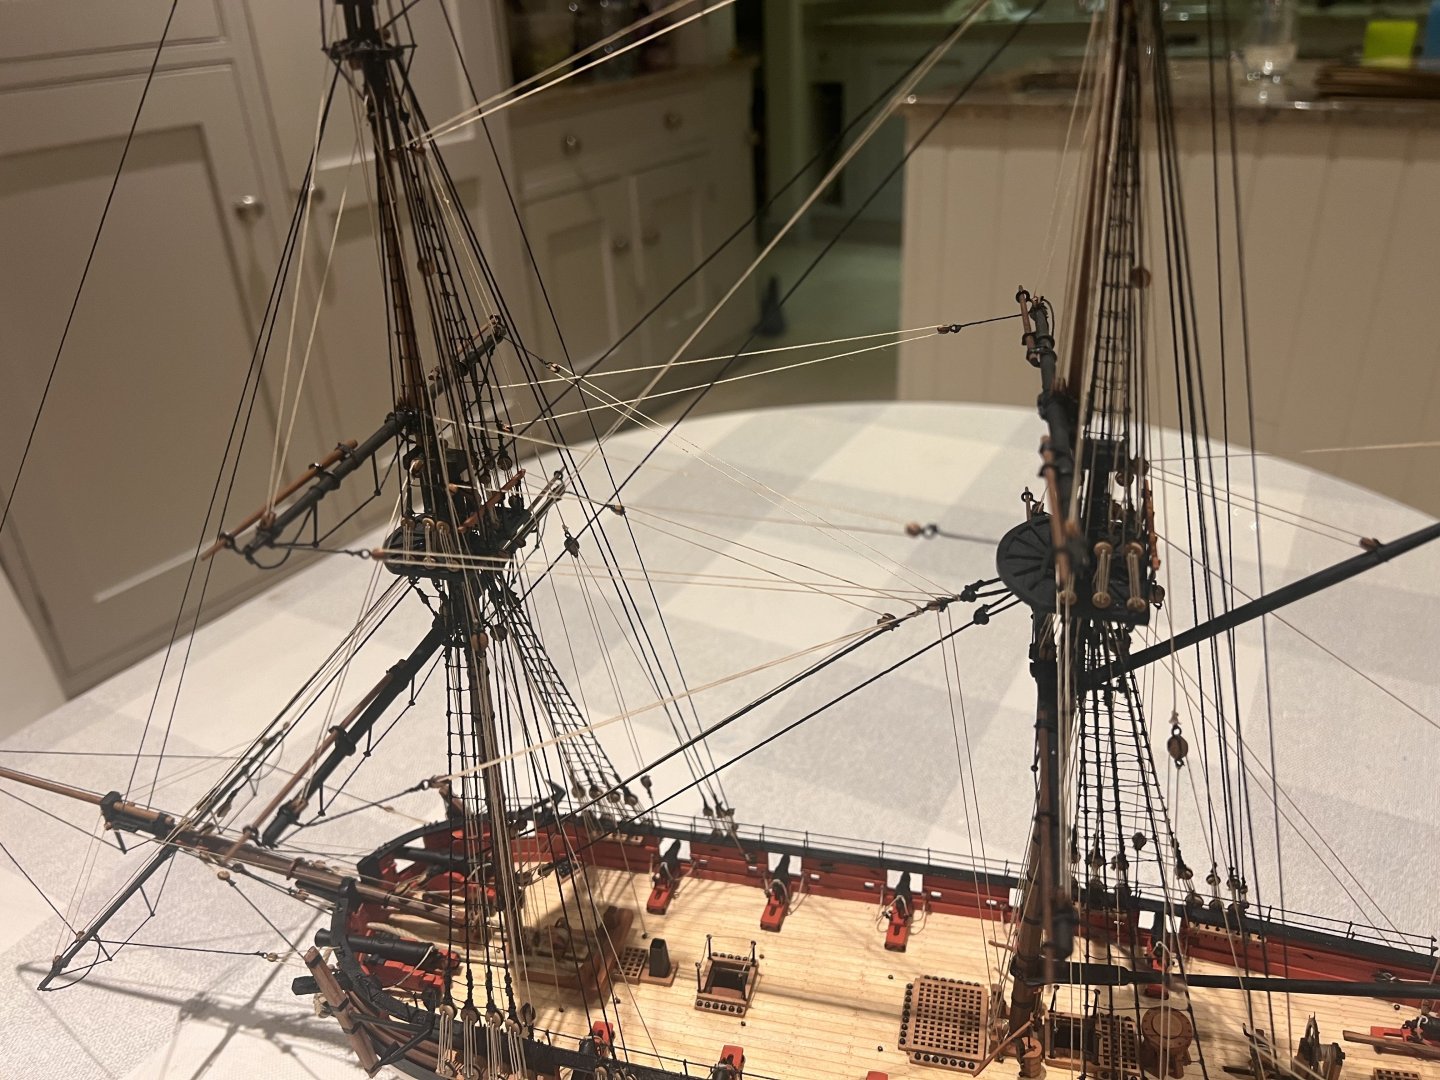
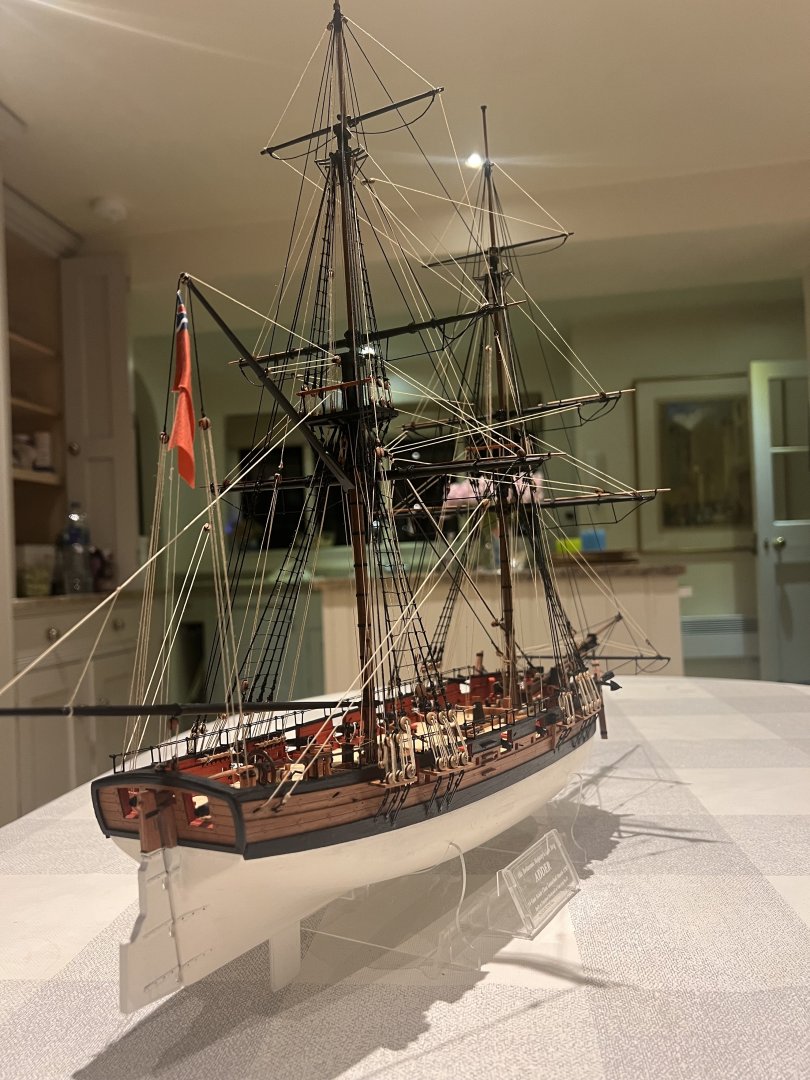
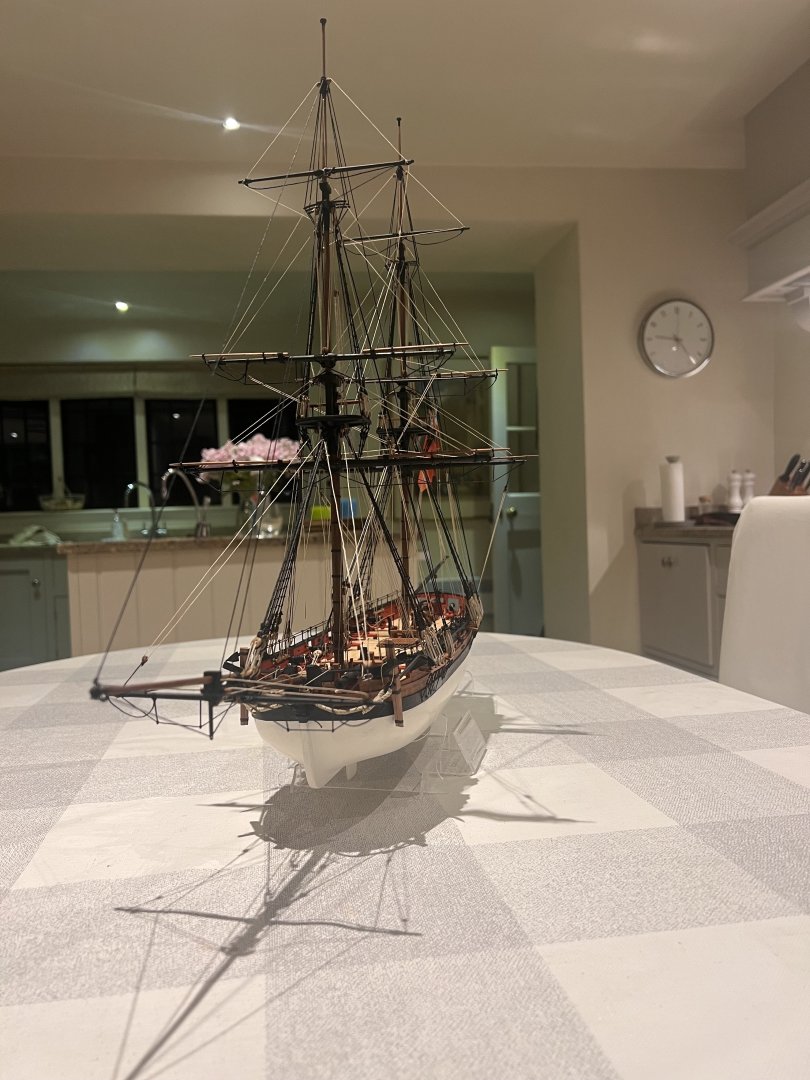
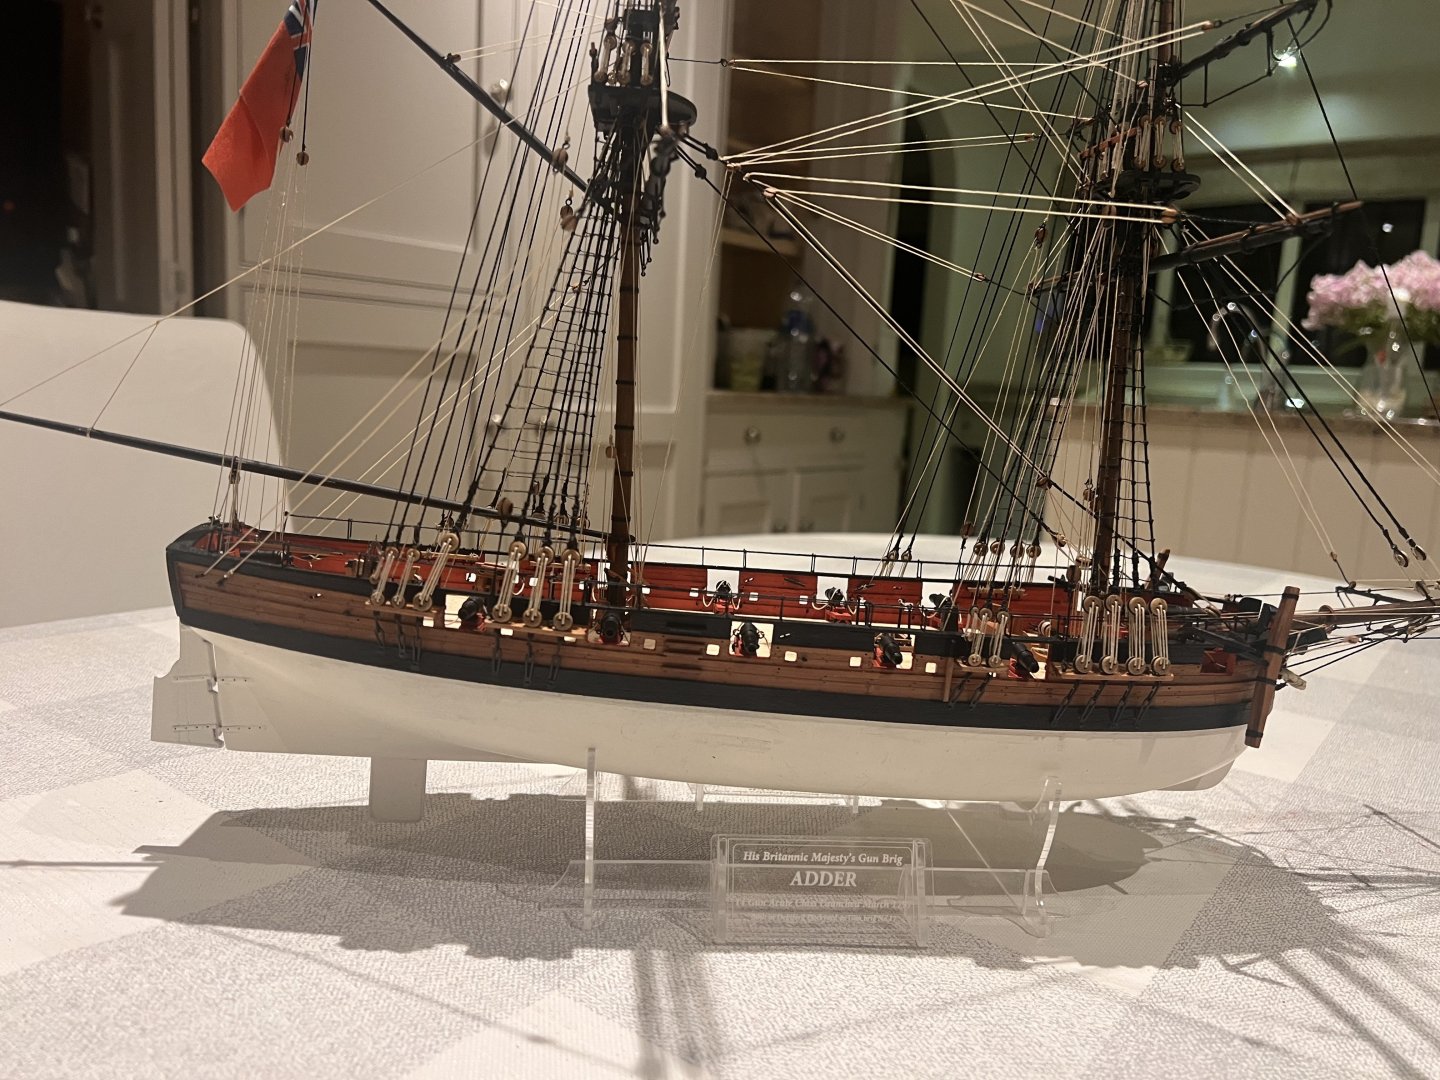
Adder is now finished. Another absolutely superb kit from Vanguard. Even more so than on previous Vanguard kits Chris has really innovated and made this ship as easy as possible to build whilst in no way compromising the finished outcome which I think looks superb (despite my building skills). I can’t Adder recommend enough. Adder was a step up in terms of complexity for me over Grecian and Alert in two areas. Firstly rigging a square rigger, the plans were excellent and very clear but just tying off the lines to belaying pins and feeding them around and through the tops was very fiddly (and that’s on a slightly simplified rig than other kits such as Speedy/Flirt). Nonetheless this was the ideal first square rigger for me to build and will prepare me well for my next build. Secondly the bow planking would have been a challenge if I’d wanted to have an unpainted lower hull, but the cleverness of Chris’s kit is that all the planking is below the waterline so it didn’t really matter what the planking looked like so long as it was smoothable with sandpaper and filler. Other than those areas I found her to be a very straightforward and accessible build. I have barely strayed from the kit and made very few adjustments such as drilling out the carronades and breach rigging the cannons and carronades. I’ve added a red duster. The ensign is a flag from BECC and isn’t very high quality. It’s heavily shown up by the American ensign I bought from Vanguard for Grecian which is made on a much higher quality material, with better printing and a lower propensity to fray at the edges. Unfortunately the ensign sets that Chris sells are too big for a small model such as Adder. Chris any chance you could sell some high quality small ensigns? I used the same process as on Grecian for shaping the ensign with a fabric stiffener and weighting with crocodile clips, this ensign needed a fair bit of CA to hold its shape too. Thanks to Chris for another super kit and for everyone else for the advice, likes and encouragement.


- 146 replies
-
- 20
-
-
-
- Adder
- Vanguard Models
- (and 1 more)
-
Ron and Uwe, thanks so much for the advice. I’ll definitely order a copy of that book. I’ve done plenty of sailing on modern fire and aft rigged yachts, but certainly don’t understand how square rigged sailing ships were handled. Andrew and Eck thanks for the comments.
- 146 replies
-
- 3
-
-
- Adder
- Vanguard Models
- (and 1 more)