HOLIDAY DONATION DRIVE - SUPPORT MSW - DO YOUR PART TO KEEP THIS GREAT FORUM GOING!
×

DB789
-
Posts
427 -
Joined
-
Last visited
Content Type
Profiles
Forums
Gallery
Events
Everything posted by DB789
-
 Congratulations on another stunning model. I’ve learnt so much following your builds!
- 648 replies
-
- 2
-

-

-
- Indefatigable
- Vanguard Models
- (and 1 more)
-
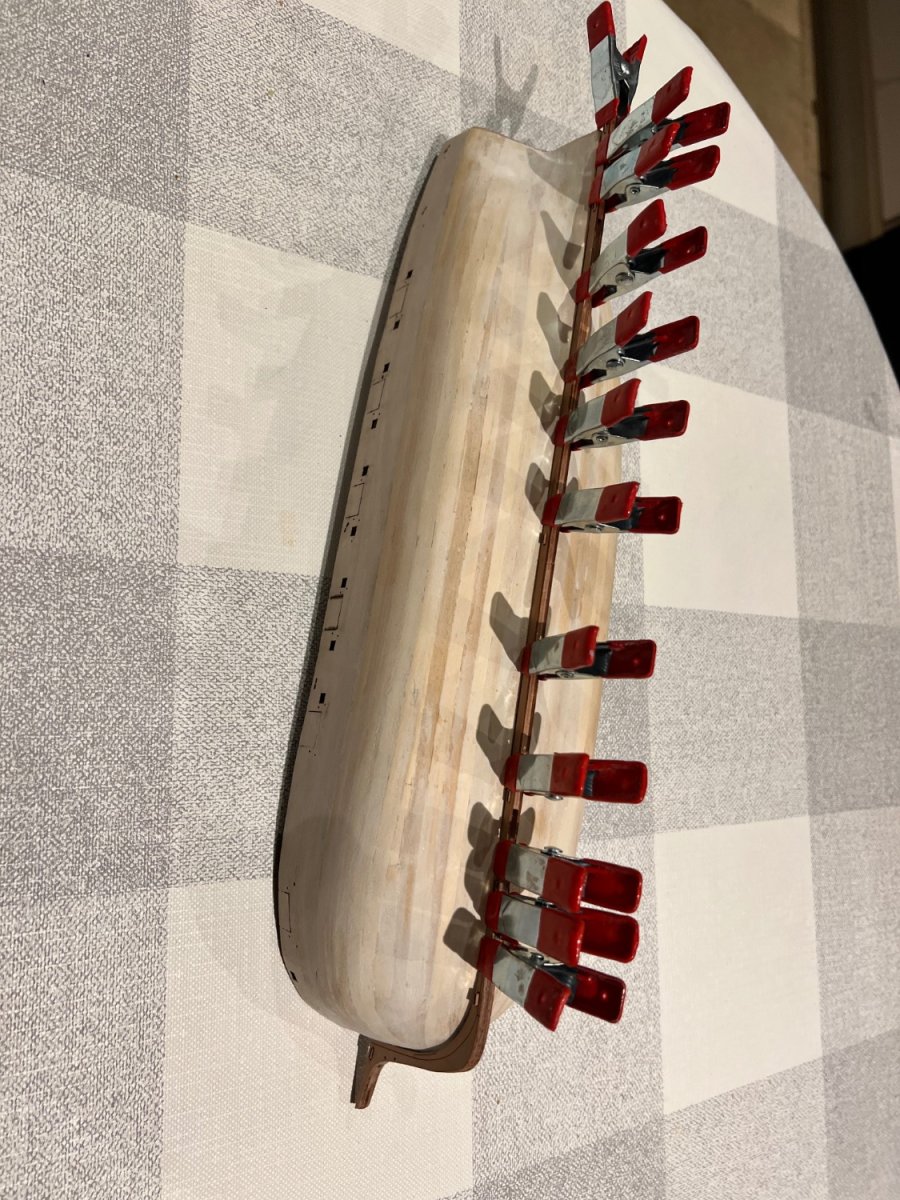
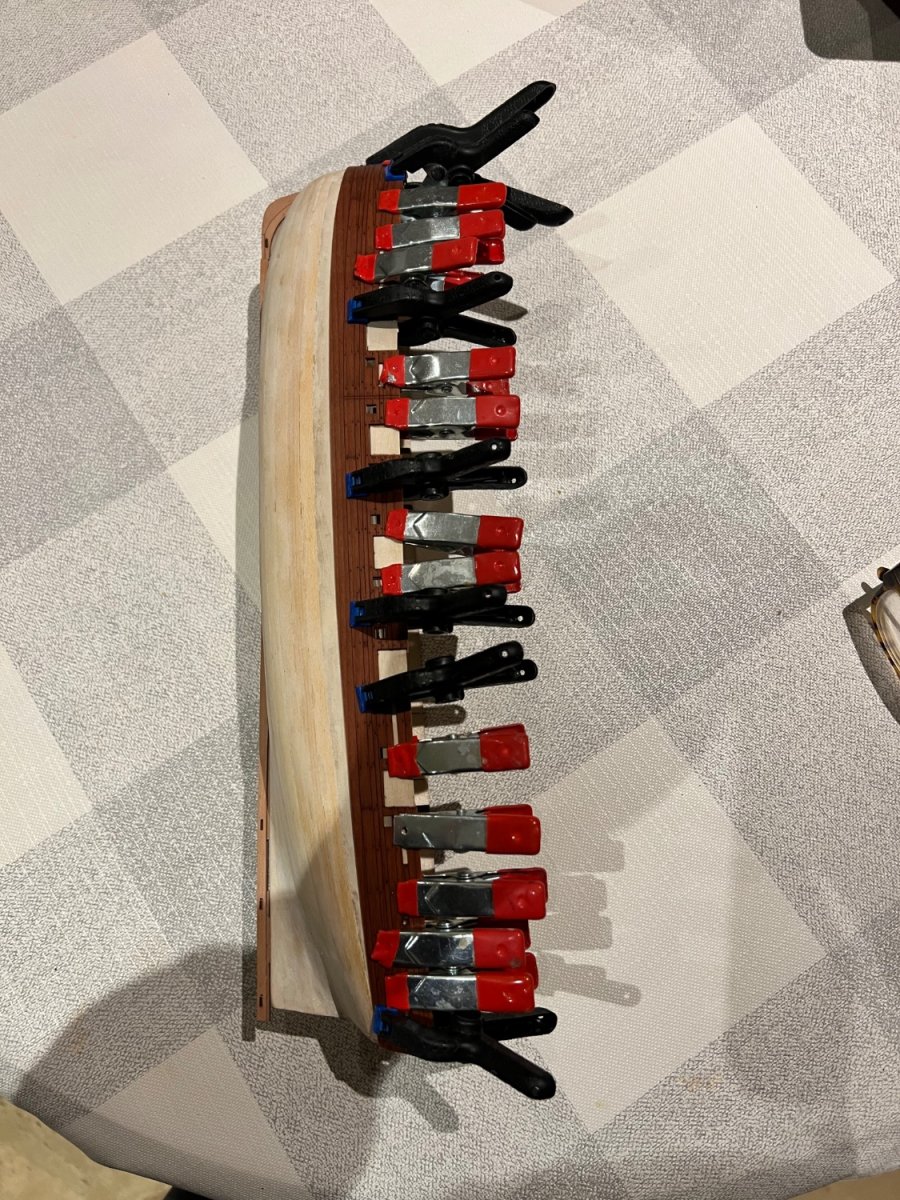
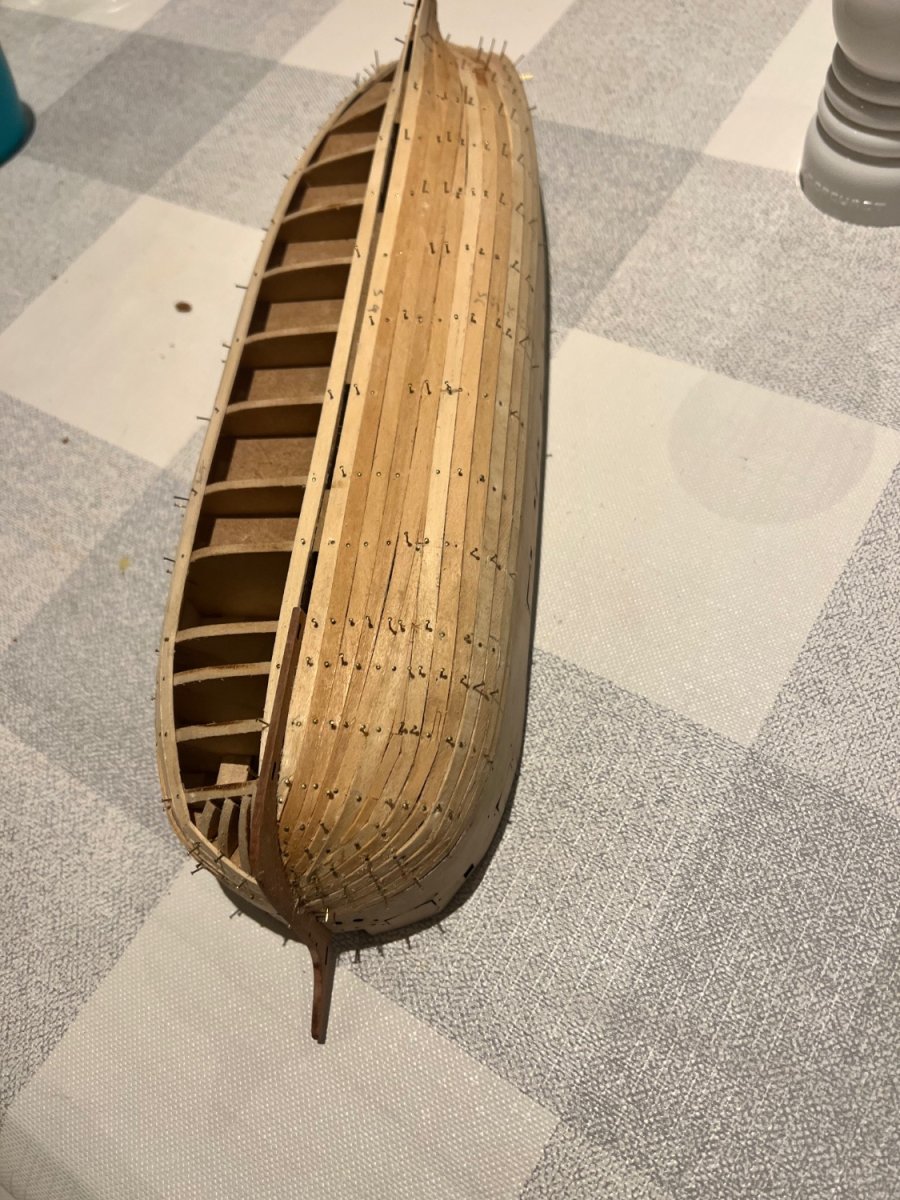
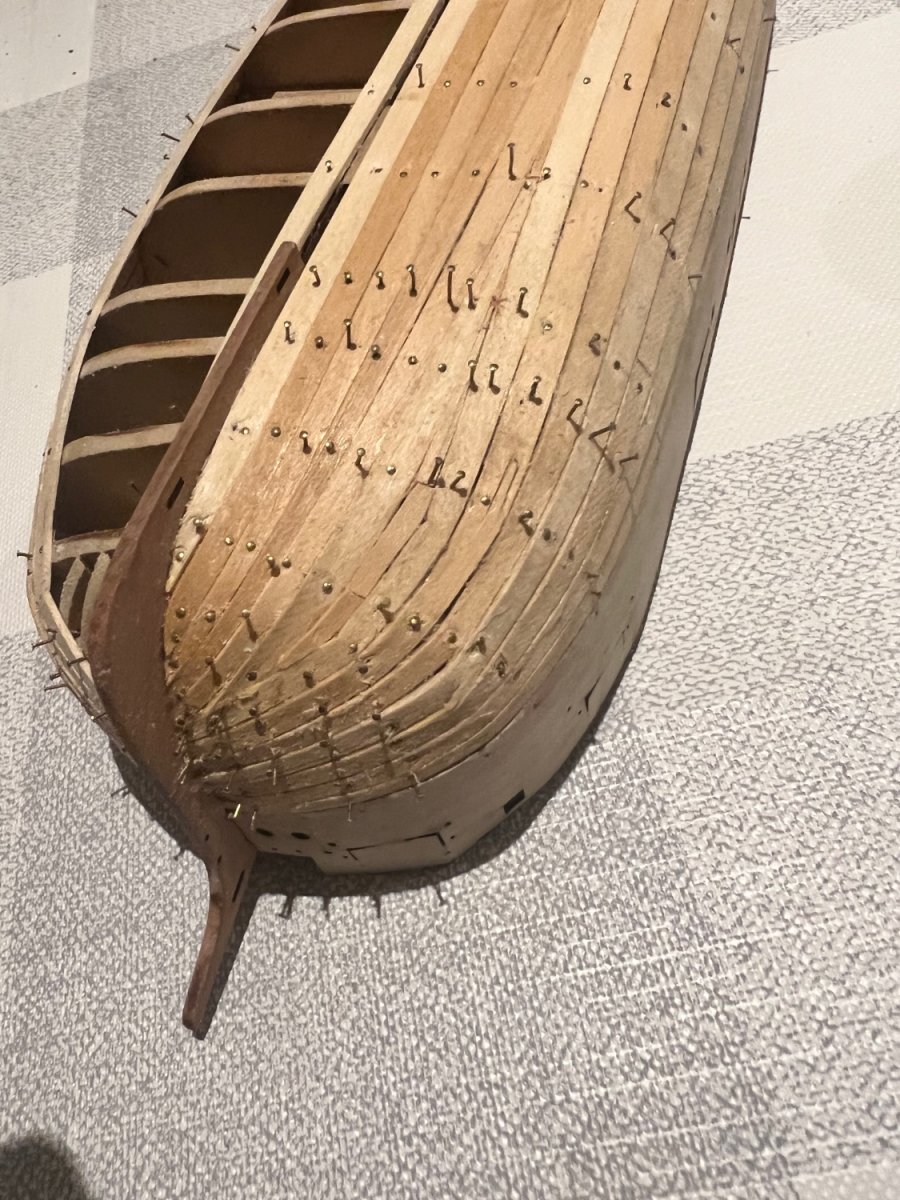
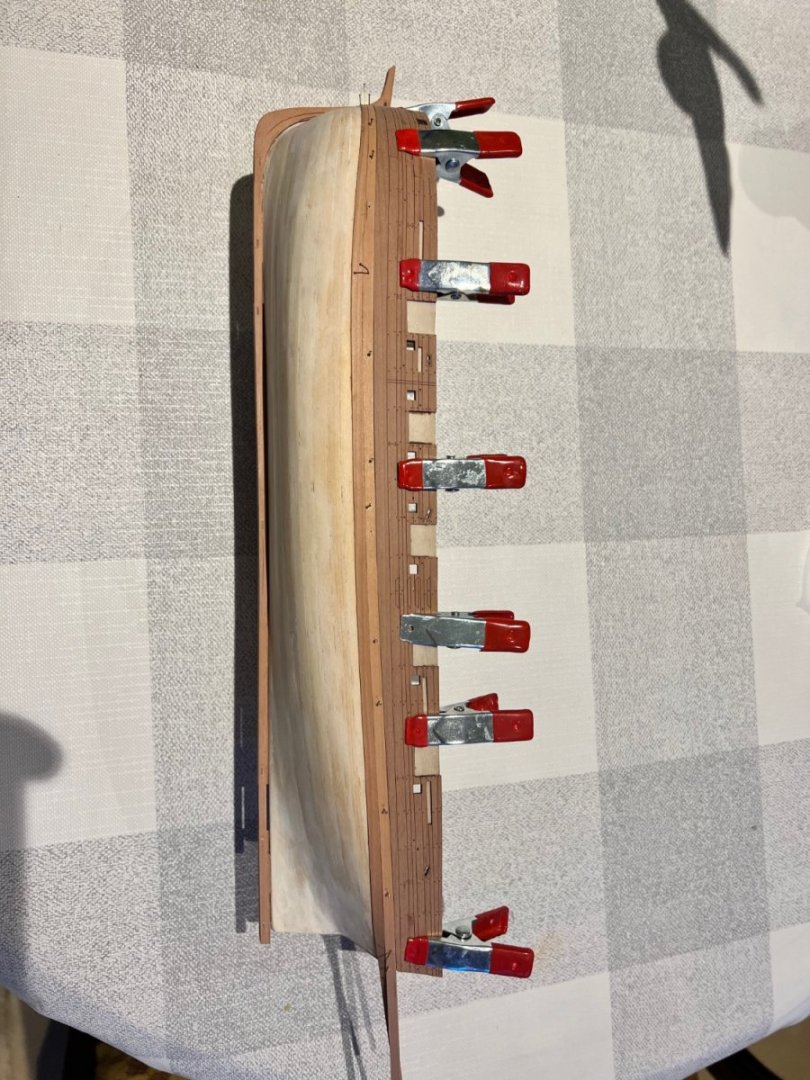
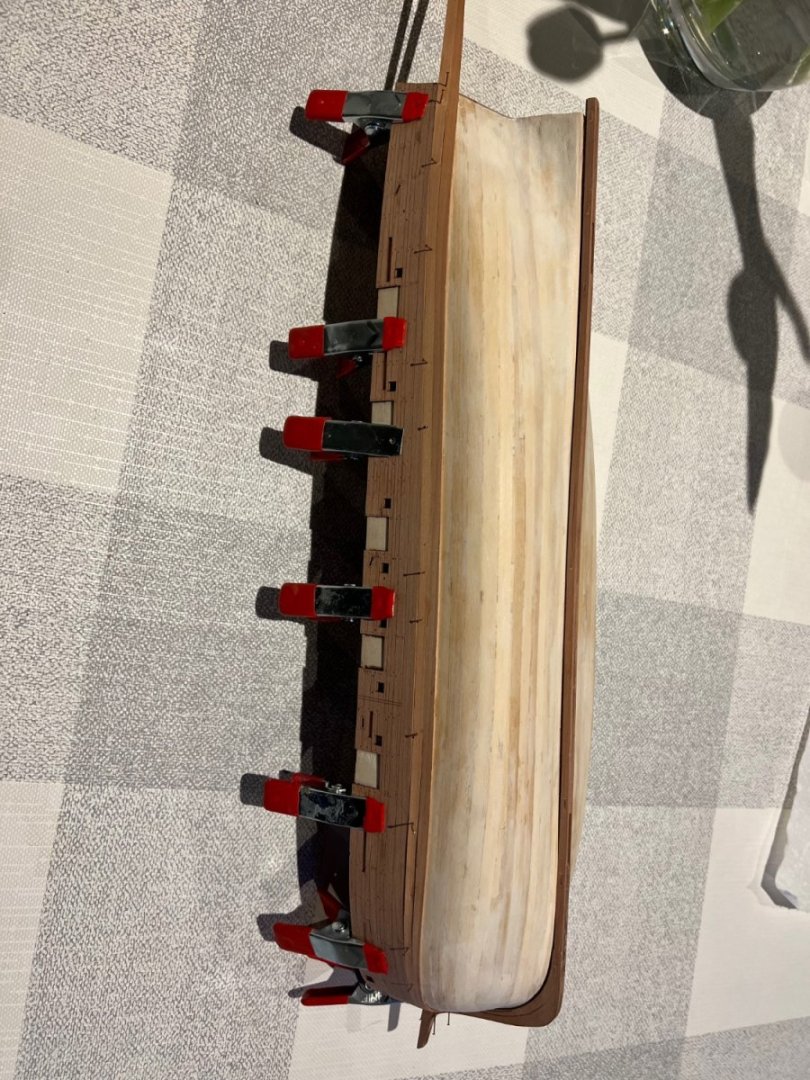
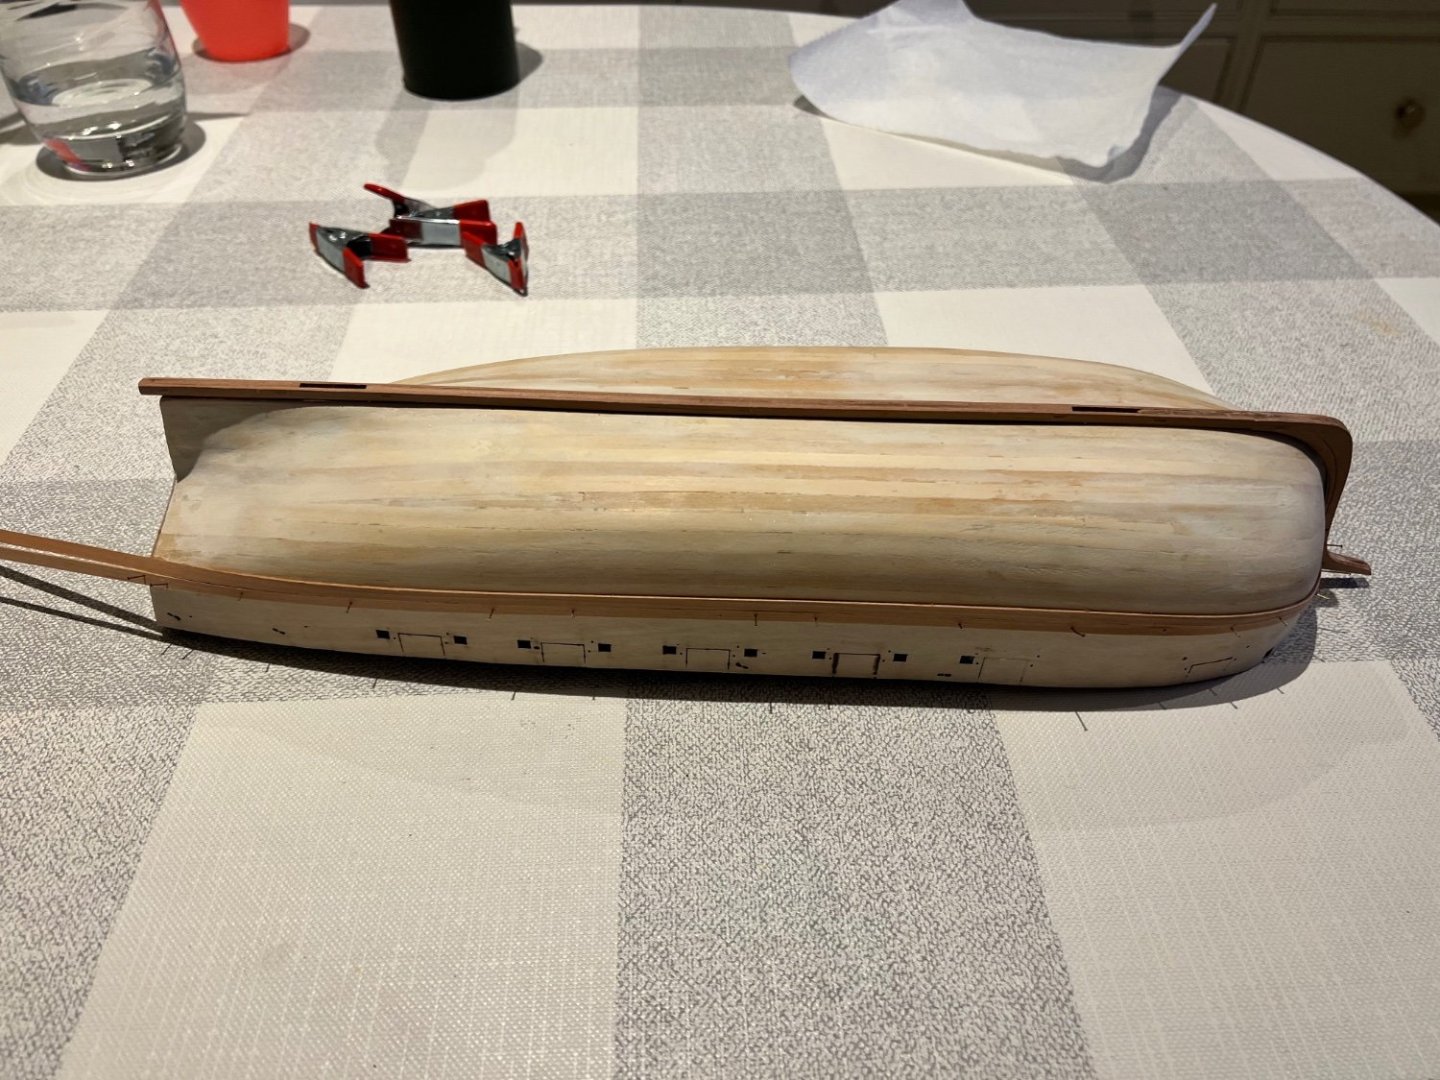
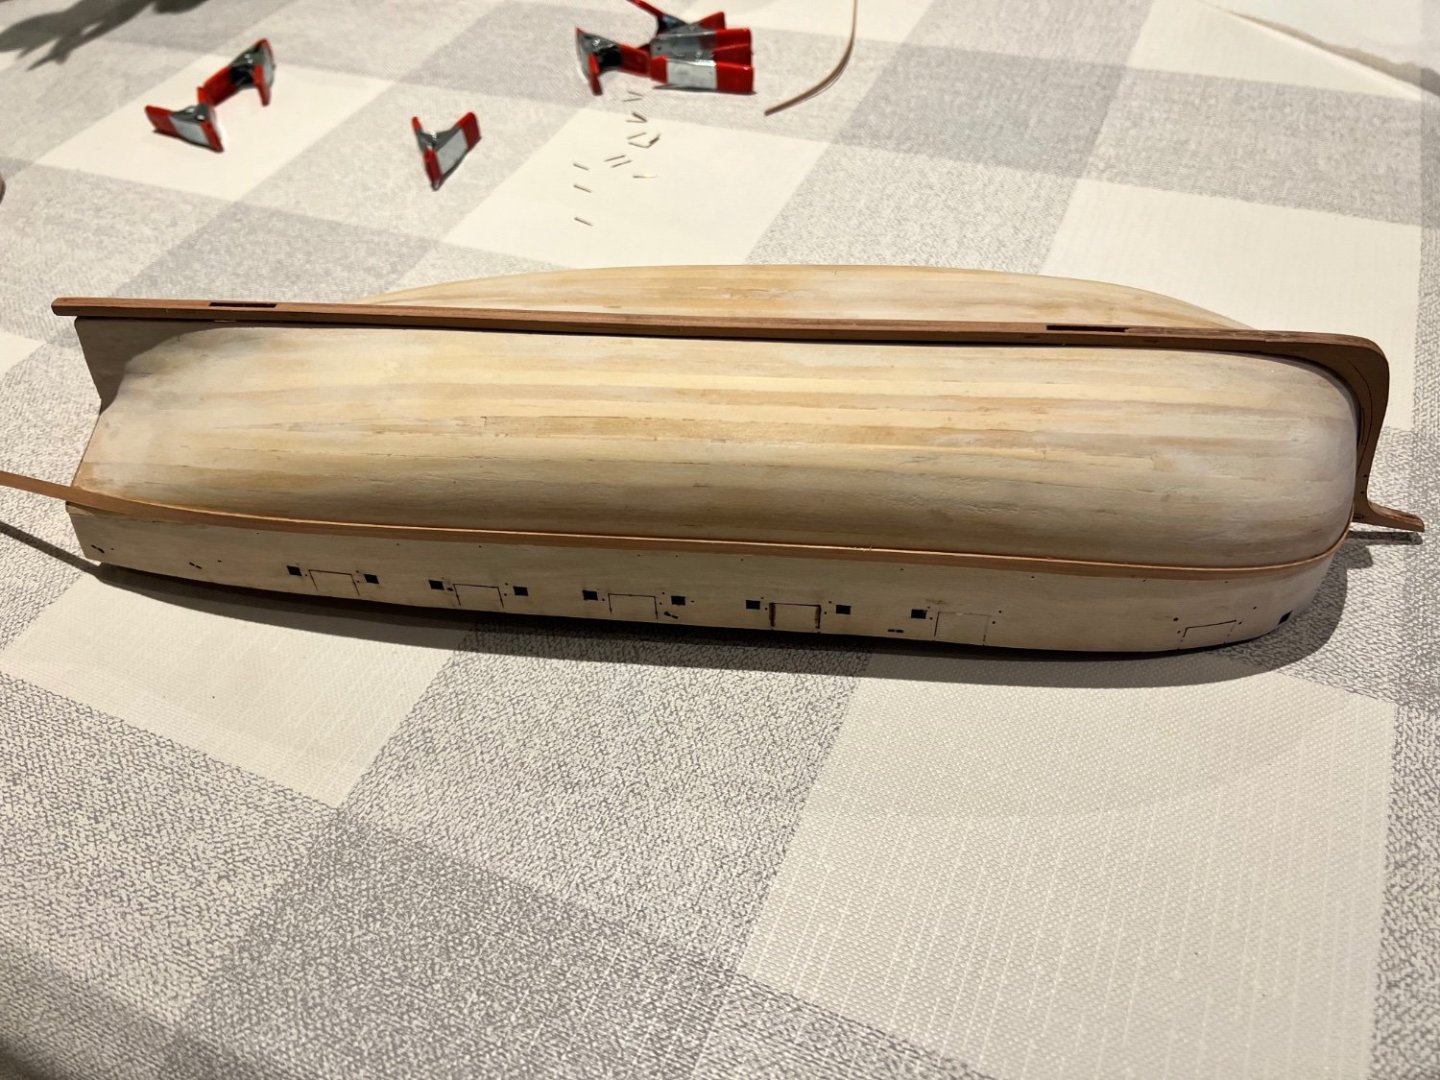
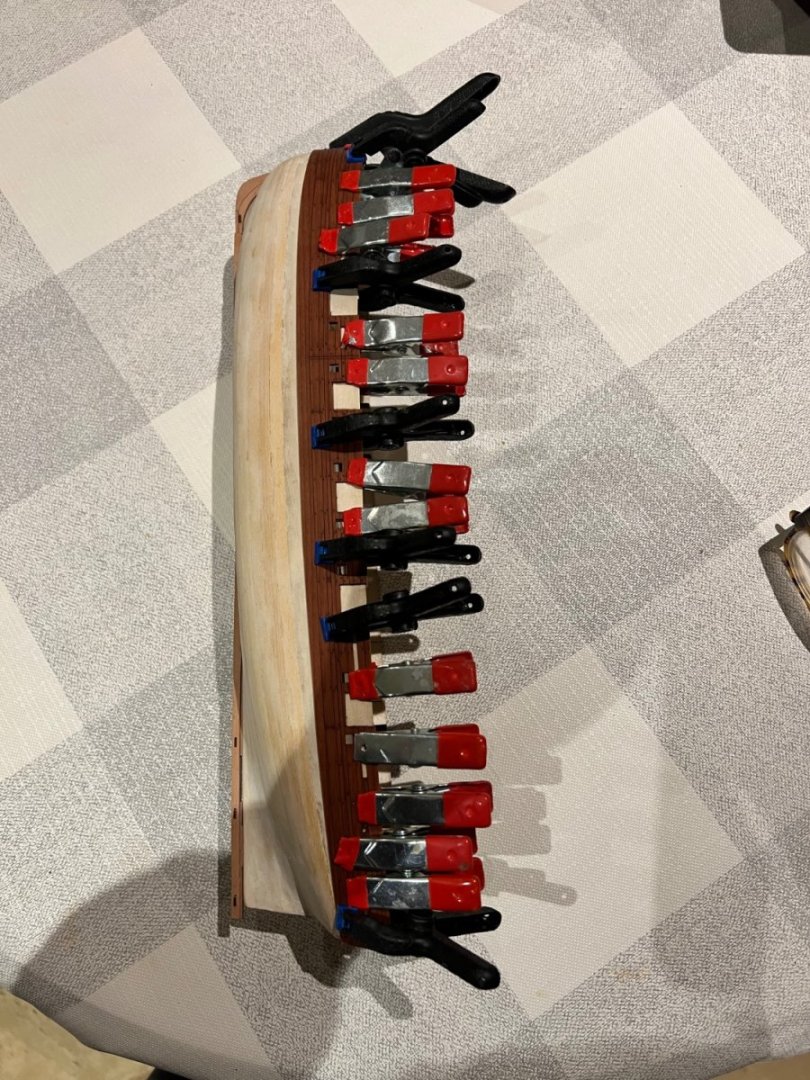
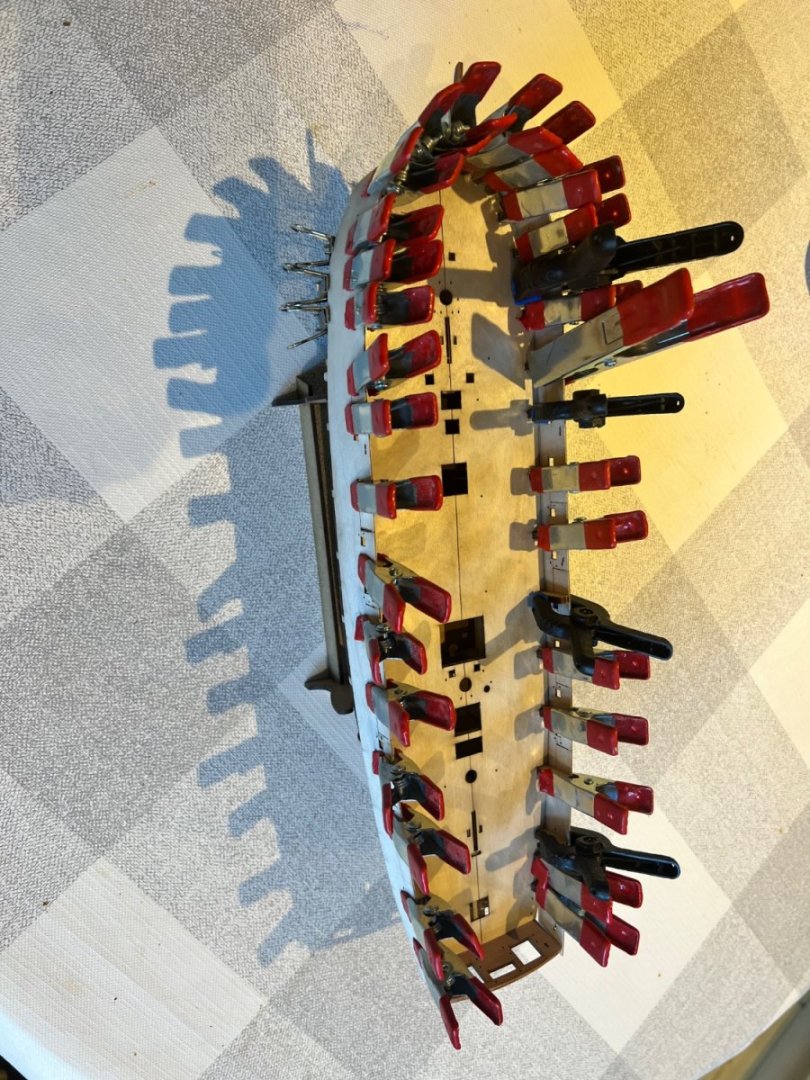
Thanks Glen, she’ll be a minnow compared to your impressive Indy. I’m really enjoying Adder. As per Chris’s excellent guidance the bulwarks, once soaked were clamped and left to dry for two days. I then unclamped them and checked their fit over any holes, oar ports, etc. which was near perfect. The now pre-formed outer bulwarks below: Then the bulwarks were carefully reclamped and the first plank was added without glue and pinned in place snug up against the clamped bulwarks. The bulwarks were then removed so no CA glue sullied them and the second plank added and glued in place. I’ve added back the bulwark for illustrative purposes in the two photos below. (Apologies for photo orientation, I can’t correct this on my iPhone). Then the top plank was unpinned and removed, leaving just the single second plank on the hull. At this stage I debated discarding the top plank as it has pin holes in it, but decided it would be hard to match its taper identically on a replacement plank and the plank will be entirely under the gunwales so the holes don’t matter. This plank was then glued in place too. Then I continued planking down the hull. As can be seen in the photos below I’ve followed Chris’s advice and tapered 75% of the plank away at the bow, except for the top plank which was tapered to 50% so it was less likely to be split by a pin. Looking good so far, only 4 planks on the port side in place, curves look much softer than on the first planking. I won’t have much time for ship building for the next week, unfortunately. Will be back on the case after that.


- 146 replies
-
- 10
-
-
- Adder
- Vanguard Models
- (and 1 more)
-
I found them fiddly on Grecian. Clearly you have to shorten the “tongue” a bit as the bulwark is too thin to accommodate the full length. The holes were wide enough for the tongues except for a few cases where the layers of bulwarks were very slightly out of alignment (due to soaking) and in those cases it was relatively easy to enlarge the hole with a micro drill - albeit the drill bit is circular and the hole required is rectangular. I accepted that it wasn’t a perfect fit, but didn’t have problems with CA from that. I would also love to know how the experts would approach this.
- 125 replies
-
- 1
-
-
- Trial
- Vanguard Models
- (and 1 more)
-
Thanks Chris, I’ll leave it a couple of days to dry. I’m not going to glue it until the second planking is complete, as you suggest in the instructions. Just use it for positioning the first plank for now, but it will need to shrink back for that too.
- 146 replies
-
- 1
-
-
- Adder
- Vanguard Models
- (and 1 more)
-
Thanks Chris, I’ll do that. How did you bend it dry around the bow? Mine felt like it was going to snap so I soaked it.
- 146 replies
-
- 3
-
-
- Adder
- Vanguard Models
- (and 1 more)
-
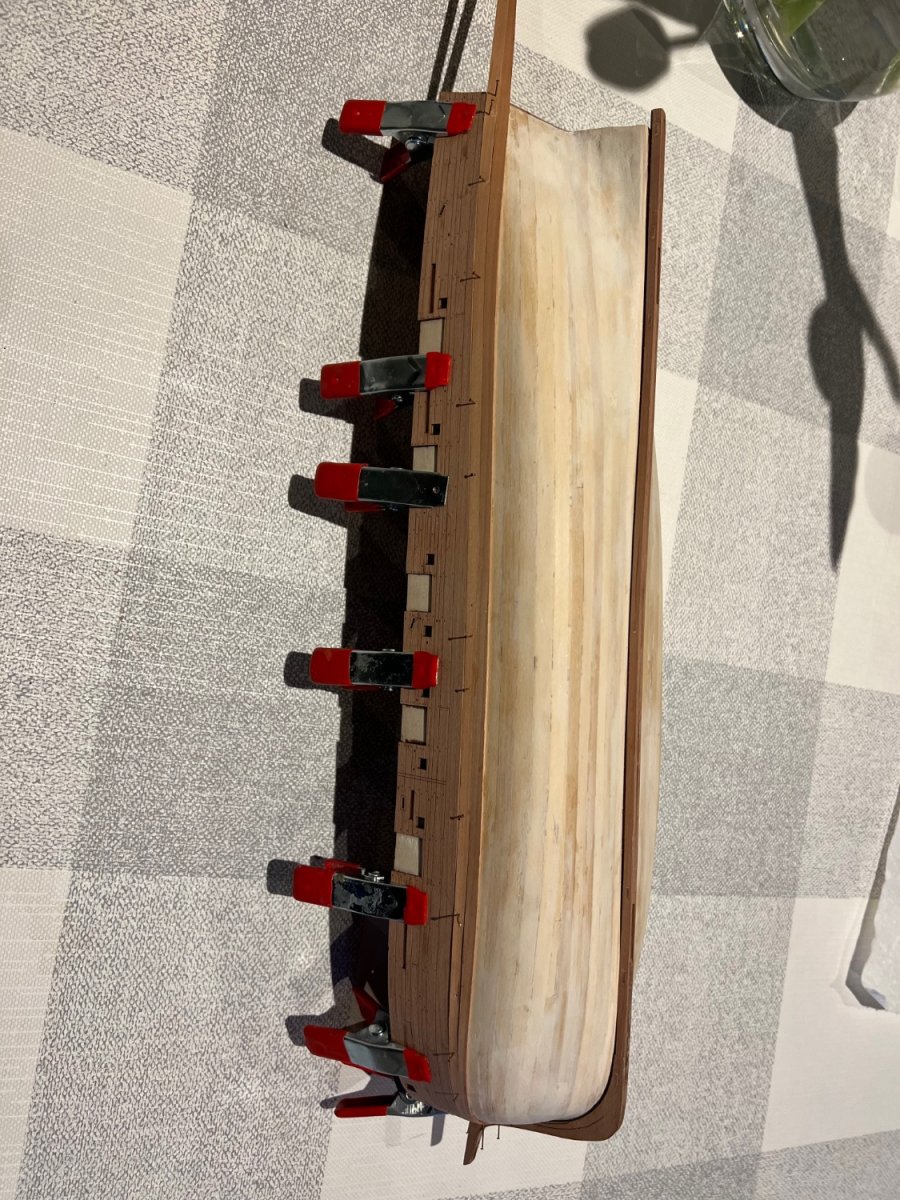
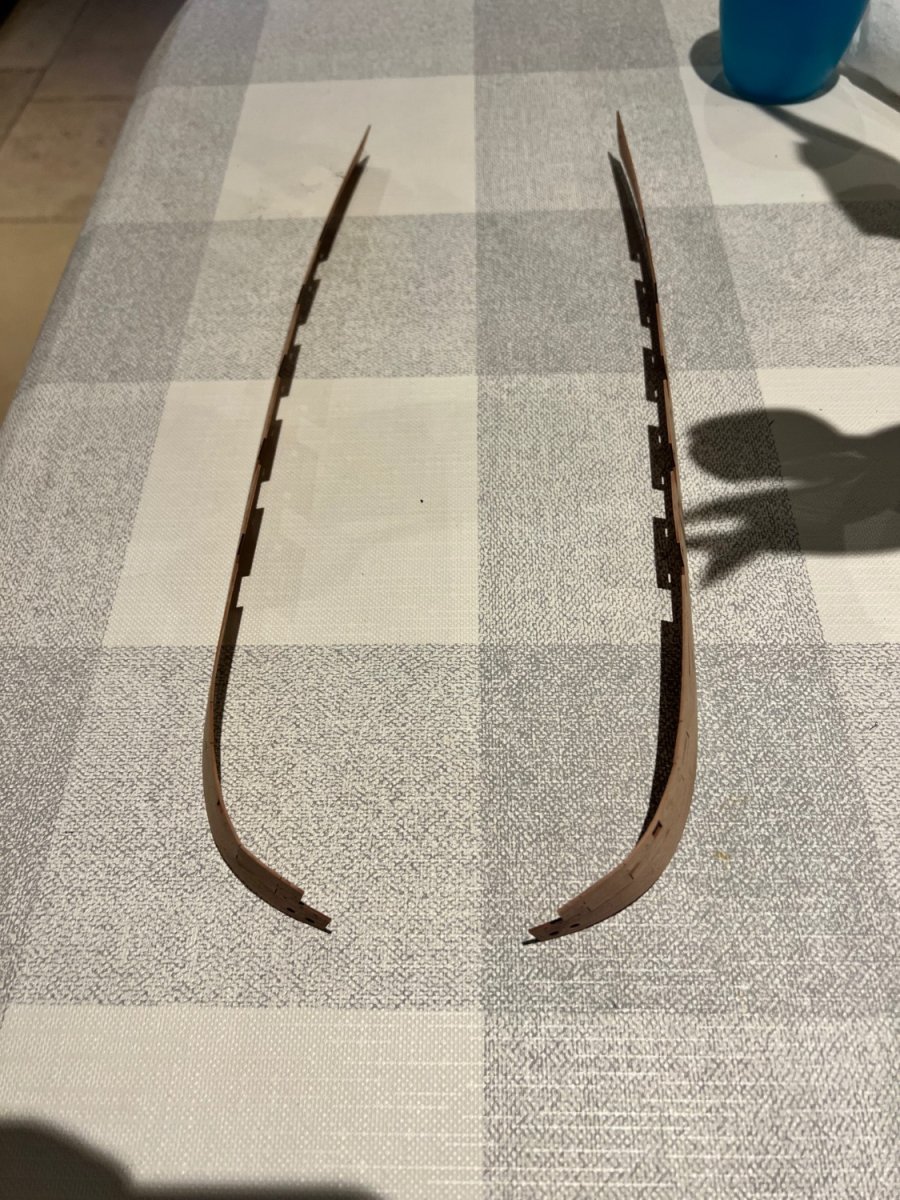
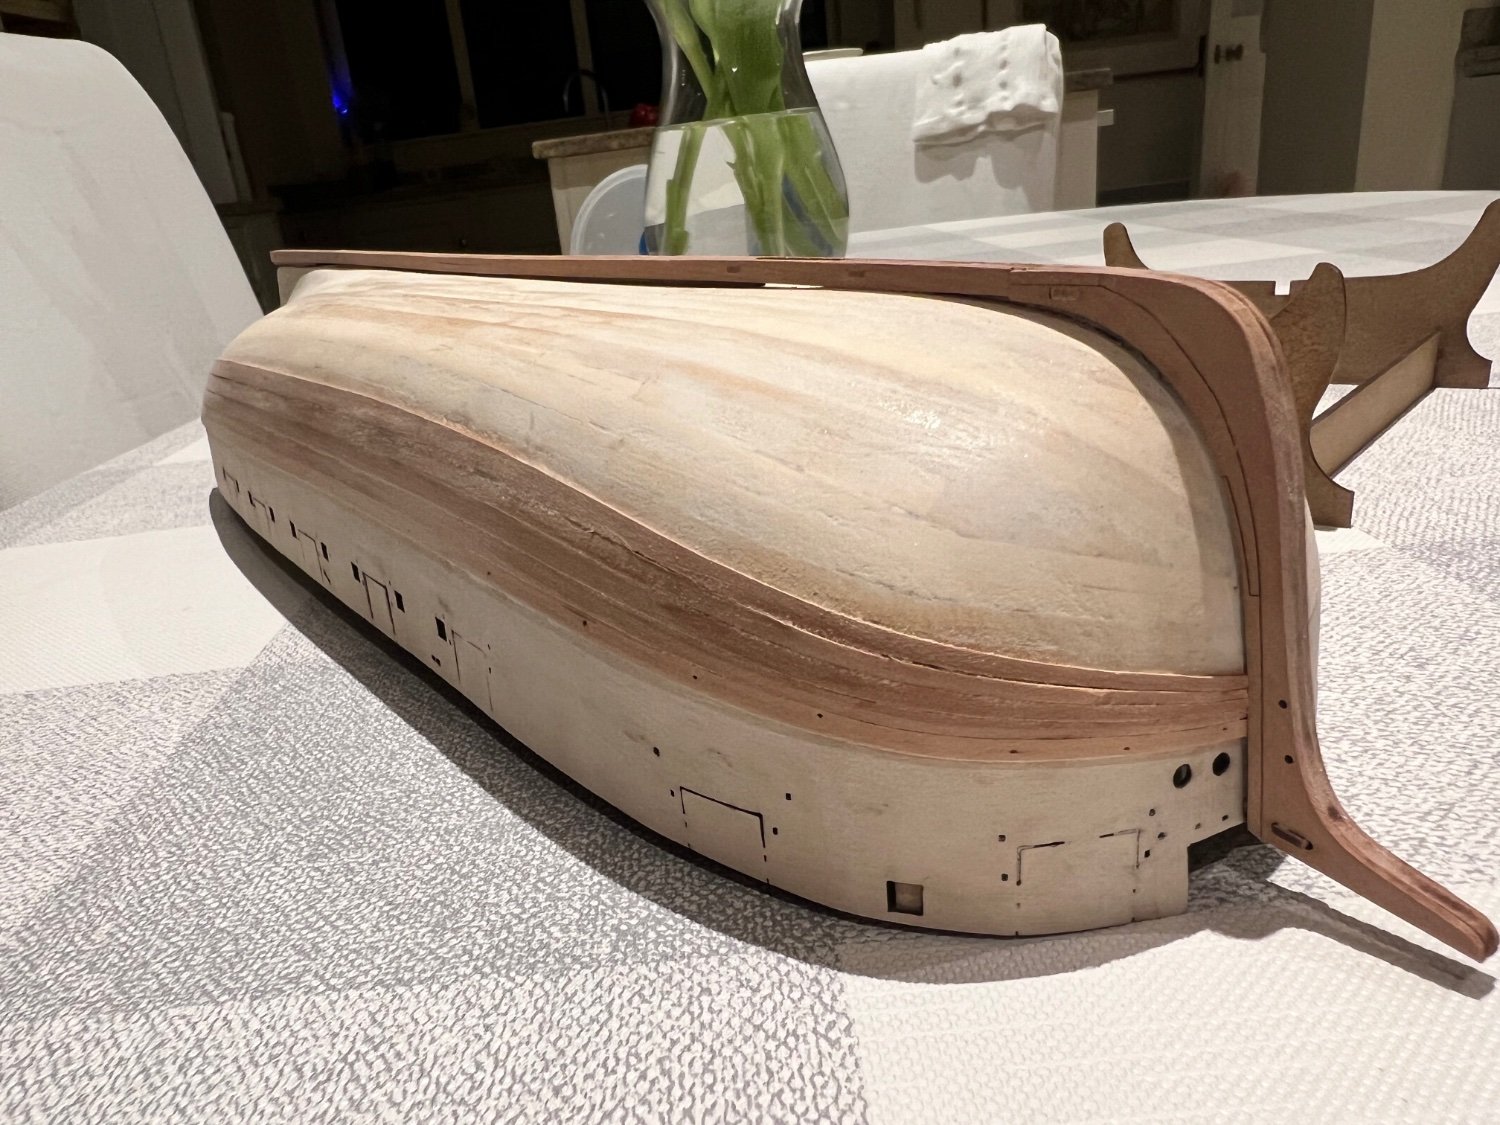
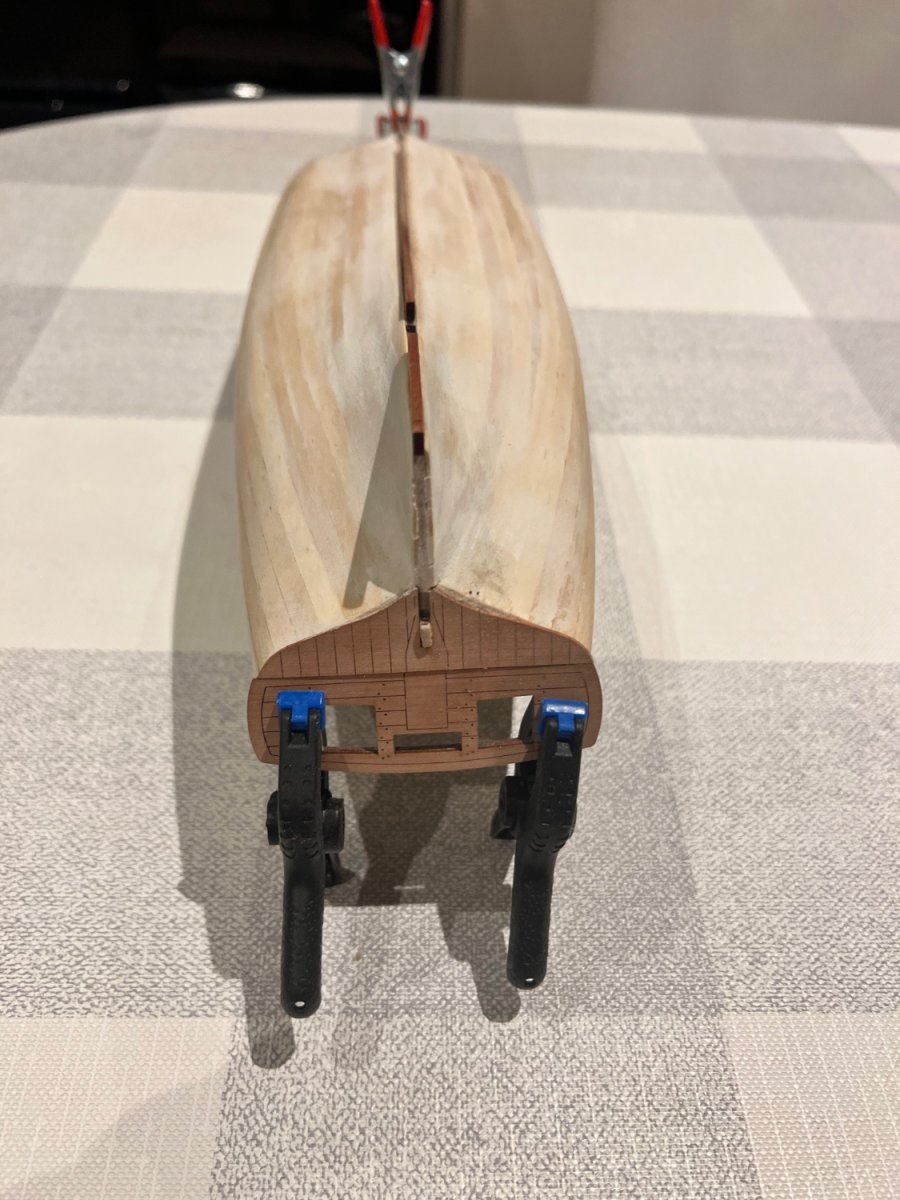
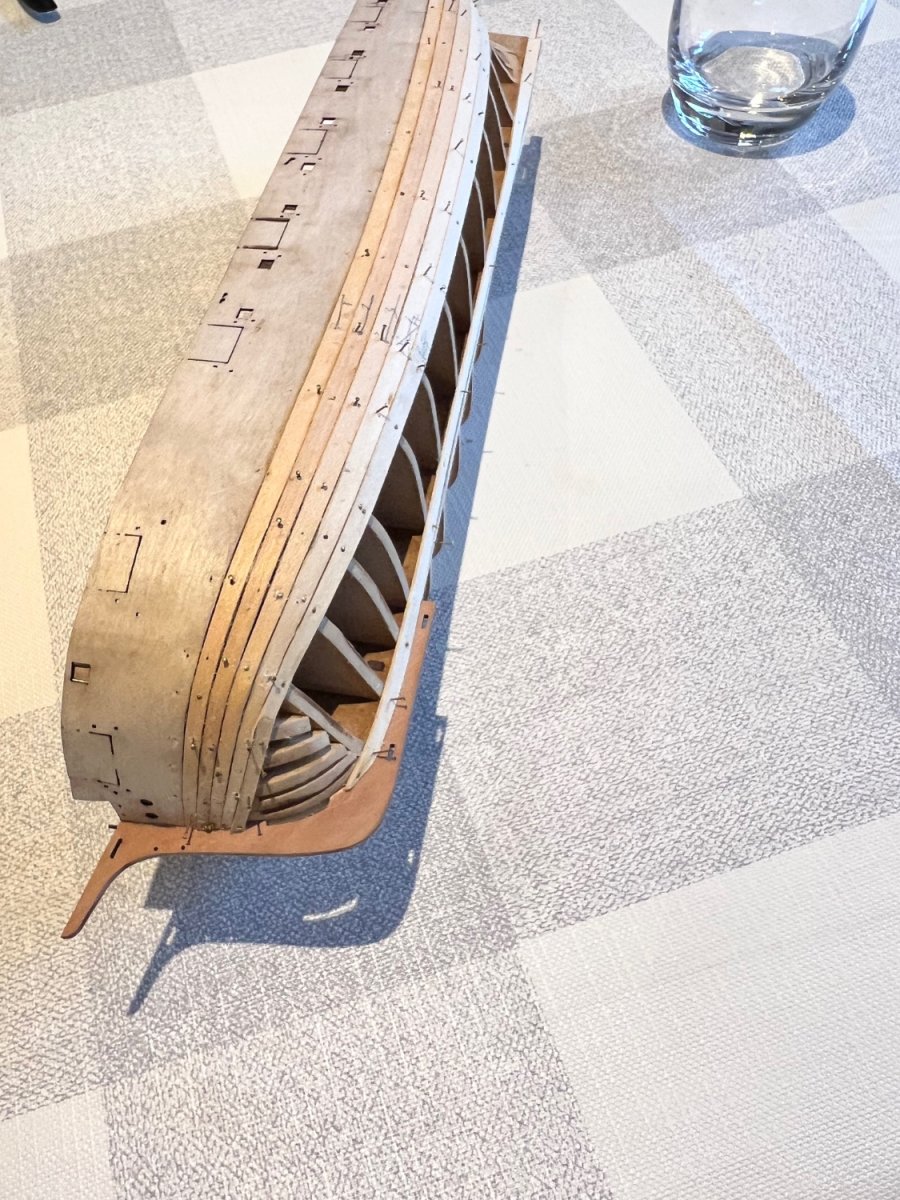
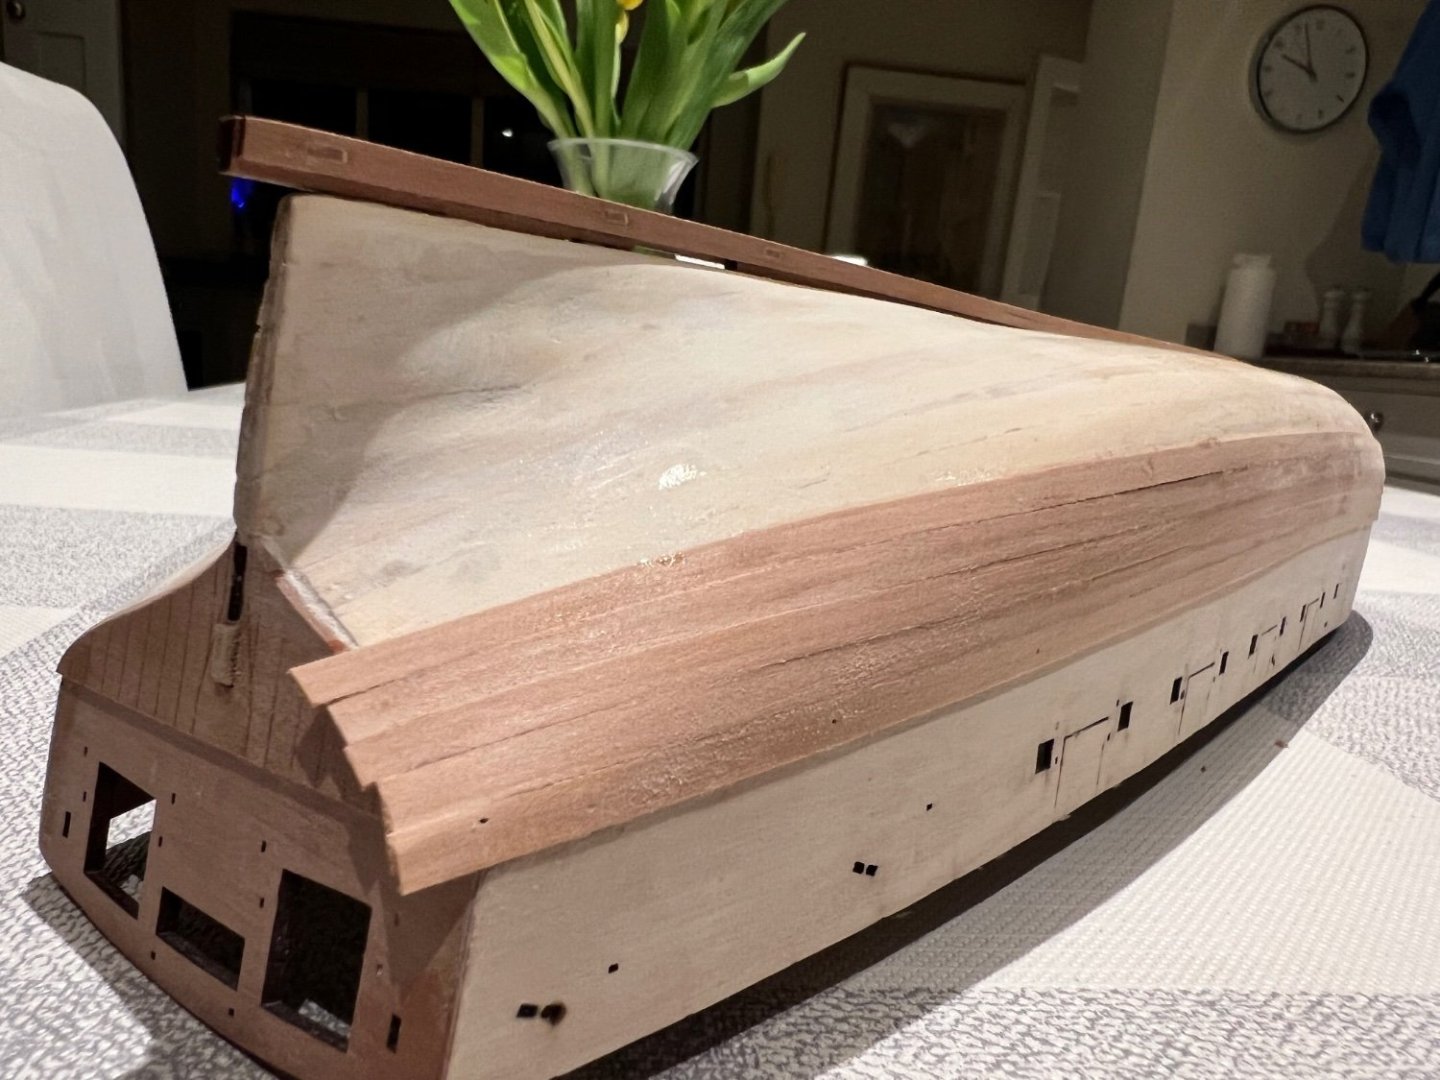
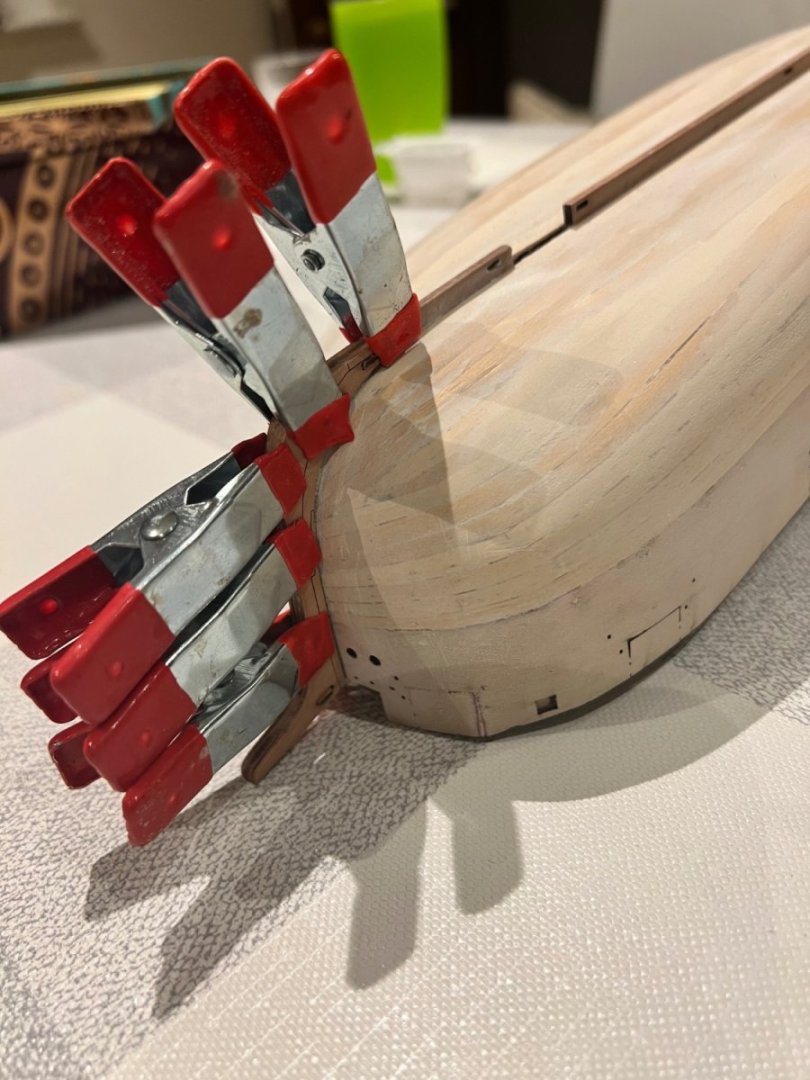
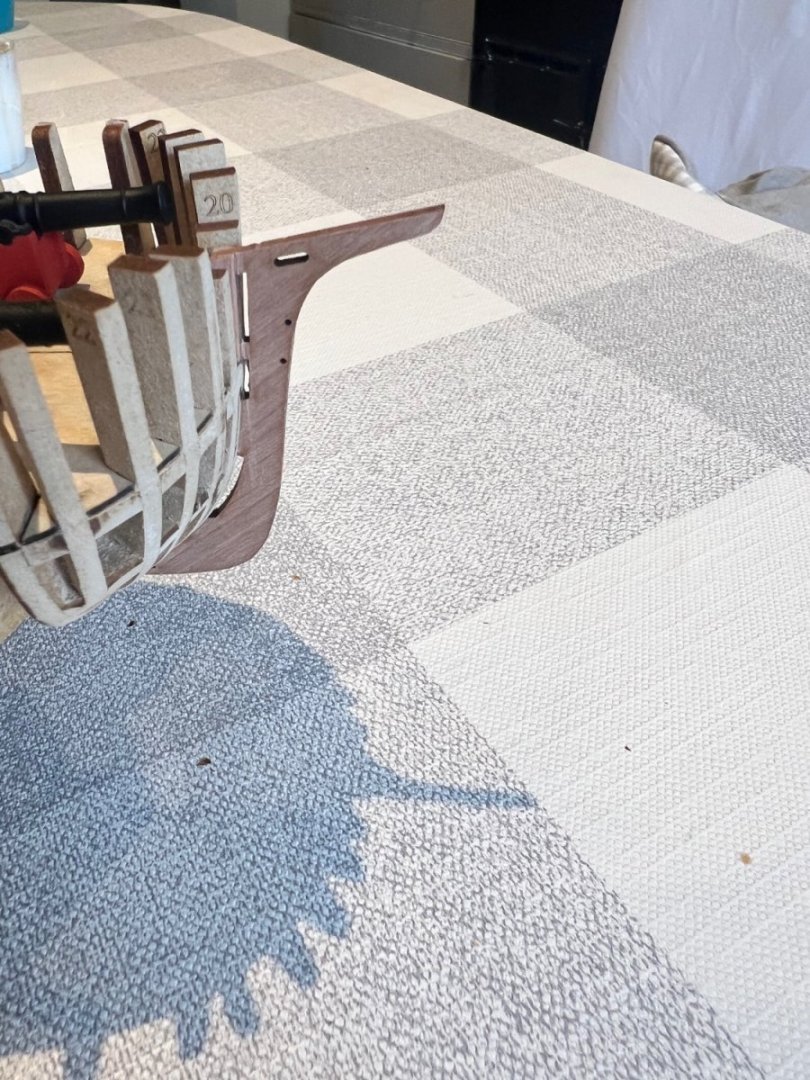
This is the completed first planking, sanded and filled. It’s good and smooth to the touch, although it doesn’t look it in the photos. The lower transom is glued on, the upper part I’ve clamped just to aid positioning the lower transom and will remove. The fascia is added to the stem post, creating a decent rabbet for the second planking. The keel is also added, showing the gaps for the drop keels. Then the fascia for the keel. Lastly in this post, I soaked and then clamped the outer fascia for the port bulwark. I tried dry fitting it, but it would have snapped if I forced it. The instructions don’t say soak the part, but a few pages later, Chris shows these pre-shaped, so I think soaking is the right approach.


- 146 replies
-
- 12
-
-
- Adder
- Vanguard Models
- (and 1 more)
-
Thanks Simon, I’ll try that planking technique. You’re right it should really be Duchess before Speedy as the former, like Adder, has slightly simplified rigging with a few lines omitted. Not sure which order I’ll build them… I have Speedy, but not Duchess.
- 146 replies
-
- 2
-
-
- Adder
- Vanguard Models
- (and 1 more)
-
Thanks Simon, I do the same pushing the pins fully in when I can’t pre-form the planks well enough, such as in this case. I haven’t tried ironing the planks onto the bulkheads but soak and iron them on a jig as per Chuck Passaro’s method. Usually this works very well, although I’ve never managed to achieve the perfect fit from this approach that Walter [and Chuck] have described, maybe one day…. Adder’s bow is very bluff due to her role as a gun brig, I suspect much more so than Trial and certainly more than any other build I’ve attempted. I’m not at all worried about how the end result will look on Adder. I’m not a purist, if the end result looks good, I don’t really mind how I got there! My build trajectory is likely to be similar to yours. Likely Speedy next, then Duchess unless Chris throws a spanner in the works and comes out with something else exciting like Adder. I’d strong recommend Grecian too, she’s easy to build, looks fantastic finished and the built model is quite substantial compared to Adder, Speedy, Alert, Trial, etc. I don’t think the photos online do her justice as she’s hard to photograph with those very long masts and bowsprit.
- 146 replies
-
- 2
-
-
- Adder
- Vanguard Models
- (and 1 more)
-
Walter, Simon, I’m not sure I entirely agree on a warship. Looking carefully at Chris’s photos of the Adder prototype on the VM website and in the manual, there doesn’t look like there is any visible hint of planking under a very smooth white painted lower hull. That’s the look I’m aiming for on Adder, although I doubt I’ll be able to achieve it! I liked a bit of planking showing through on the VM fishing boats, as these were likely much cruder built working boats.
-
Simon, look forward to seeing you build her. I’m enjoying your Trial which is looking great.
- 146 replies
-
- 3
-
-
- Adder
- Vanguard Models
- (and 1 more)
-
Thanks Ogri, will do. Yes, Chris’s advice is super too. I’ve also built the 24 pounders. I agree entirely on Vanguard. I’m posting my log to help any other builders with some of the issues that I, as a relatively inexperienced builder, run into and how these are overcome. Plus to benefit from the wealth of knowledge, advice and experience of other builders on MSW.

- 146 replies
-
- 3
-
-
- Adder
- Vanguard Models
- (and 1 more)
-
Allan, Thanks for the very useful advice. I have indeed watched the Chuck Passaro video numerous times. I don’t use his tick mark method - I’m too impatient and find it hard to accurately apply the correct width of taper to each plank. I think that Chris, Walter and Ogri are correct, the problem for me was not tapering enough, which in turn meant that the run of the planks across the bulkheads was not directionally the same as I checked for whilst fairing by running a test plank across the bulkheads. As I worked down to plank 4 the curve at bulkhead 1 became too sharp for me to pre-form with edge bending. I use the jig, soaking the plank and heating with an iron to edge bend that Chuck shows in his videos, but I wasn’t able to bend a tapered 1mm thick plank to such a sharp angle without snapping it. The lifting you flagged is only really on planks 3-5 from the top and in each case is where the plank has actually snapped. These 1mm thick planks provide a great deal of leeway to sand out a bit of edge lifting. If I’d tapered more then the angle would have been less sharp. You’re right, if I’d used Chuck’s tick mark method for tapering the curve would have been less sharp and preforming would have been easier. The second layer on this build will also be forgiving as it is under the white paint and can also be filled and sanded. But you’re absolutely right, if I ever want an unpainted hull like I need to up my game. Thanks again. Dan
- 146 replies
-
- 5
-
-
- Adder
- Vanguard Models
- (and 1 more)
-
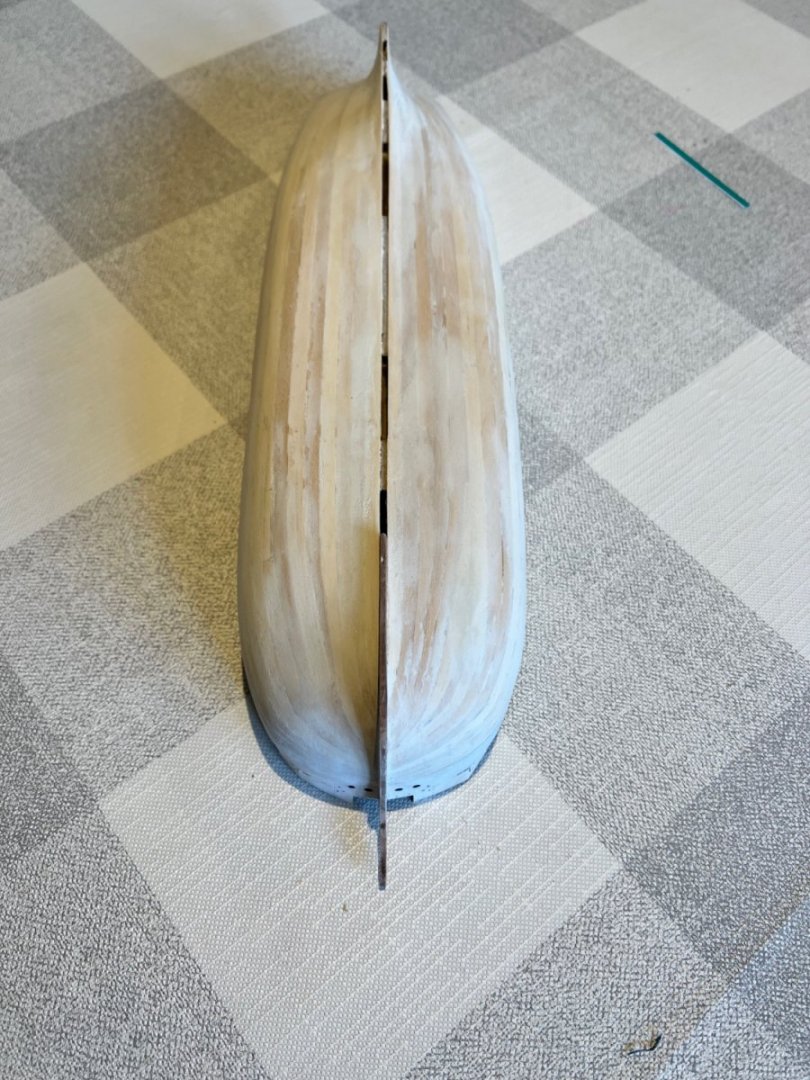
Thanks Chris, I was tapering at ~50% so not enough. You make it look so easy in the instructions! I’d done a few more planks down from the top before I saw your and Ogri’s useful advice and have finished the starboard side working up from the bottom. Not planking of great beauty or to be proud of, but will certainly sand and fill into a suitable base for the second planking. Still need to add a stealer at the stern. I’ll try more working up from the garboard plank on the port side. The joy of this build is that even if I do as bad a job of the second planking, it will all be under the white paint below the waterline so can be sanded and filled to perfection. Thanks again for all the advice. Ogri - wish you were doing an Adder log too.


- 146 replies
-
- 11
-
-
- Adder
- Vanguard Models
- (and 1 more)
-
Thanks Walter, I think you’re right that the root of my problem is probably fairing. I did check the flow with a piece of planking - it seemed fine, but I guess not
- 146 replies
-
- 4
-
-
- Adder
- Vanguard Models
- (and 1 more)
-
Thanks Jim, Andrew and Simon. The bulwarks are glued and fit well. I’ve started planking, following the method in the instructions, tapering heavily at the bow. My planking skills are pretty poor and whilst the first three planks go on fine I’ve struggled with the compound curve on the fourth and fifth planks just forward of bulkhead 1. First three are fine…. On my build the curve just becomes too sharp and the edge bending causes the wood to snap. I’ve tried lots of different approaches such as soaking, soaking and then using an iron and jig (as demonstrated by Chuck), Amati bending tool, etc. but I just can’t get it around the curve without snapping. Planks four and five are much harder for me. Clearly this is a limitation of my skills not the kit - any advice or recommendations would be hugely appreciated. The planks are a thick 1mm and even if not perfect I’m confident I can get a good base, even from broken planks with some filler and sanding. But it would be good to try and improve my skills so I can plank neater for the second planking (also painted so I can use filler and sanding liberally). Thanks Dan


- 146 replies
-
- 9
-
-
- Adder
- Vanguard Models
- (and 1 more)
-
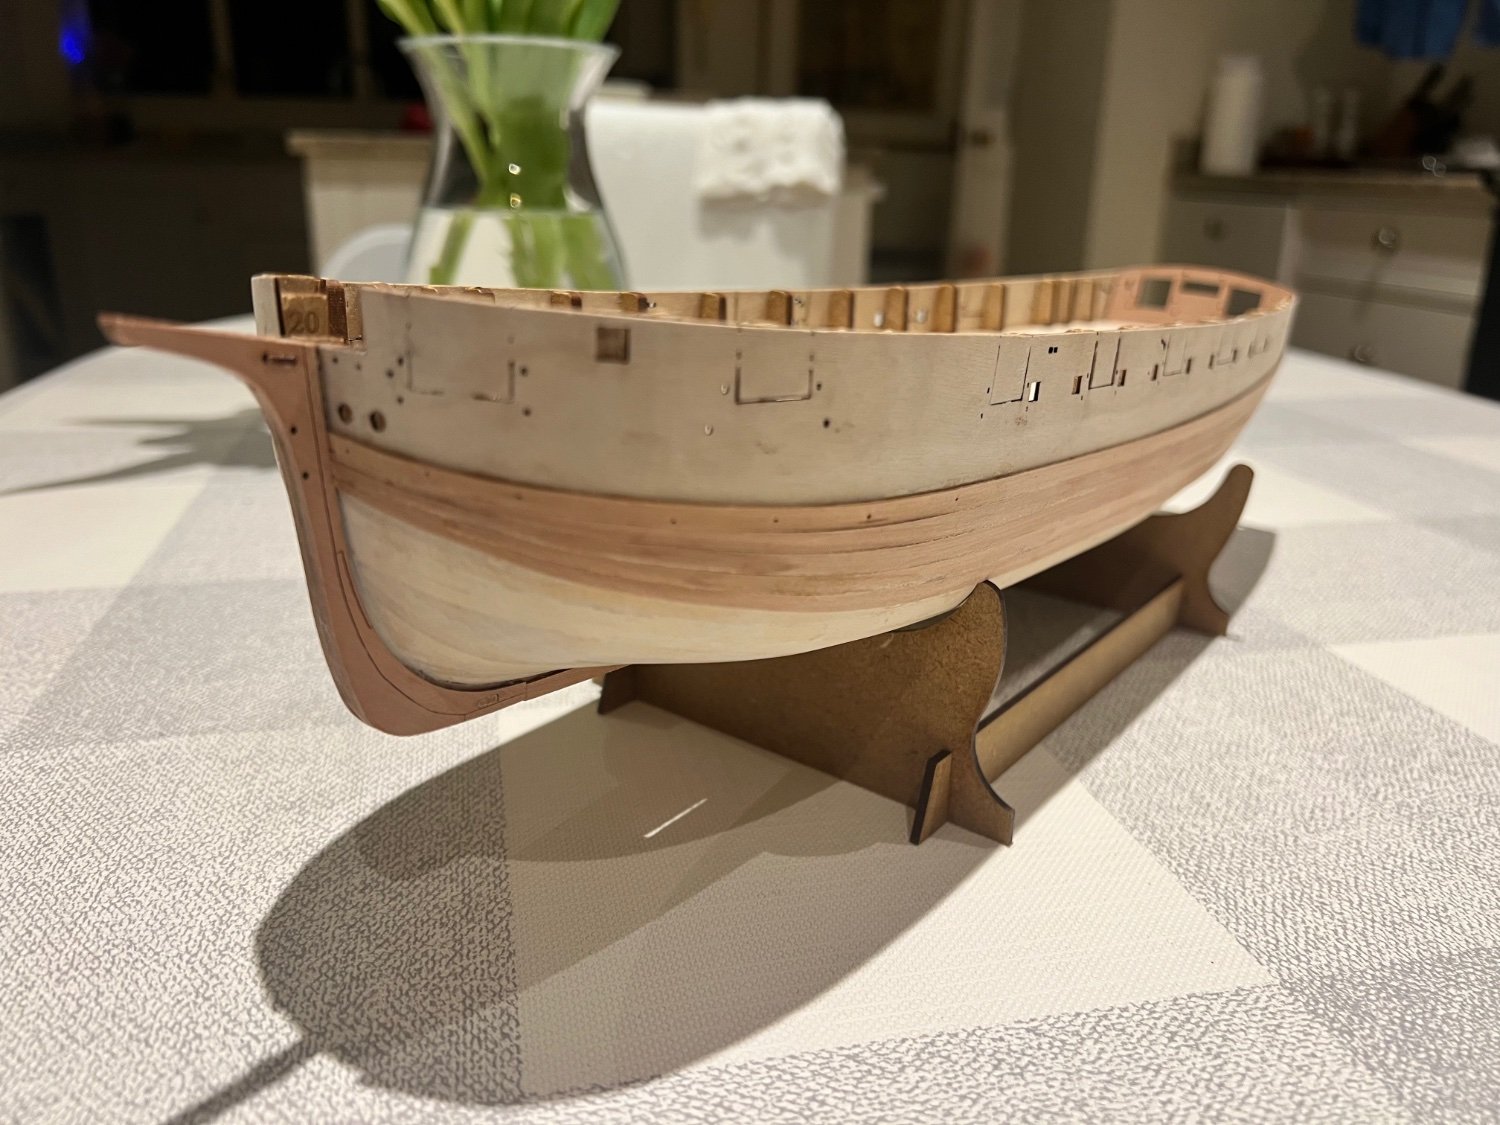
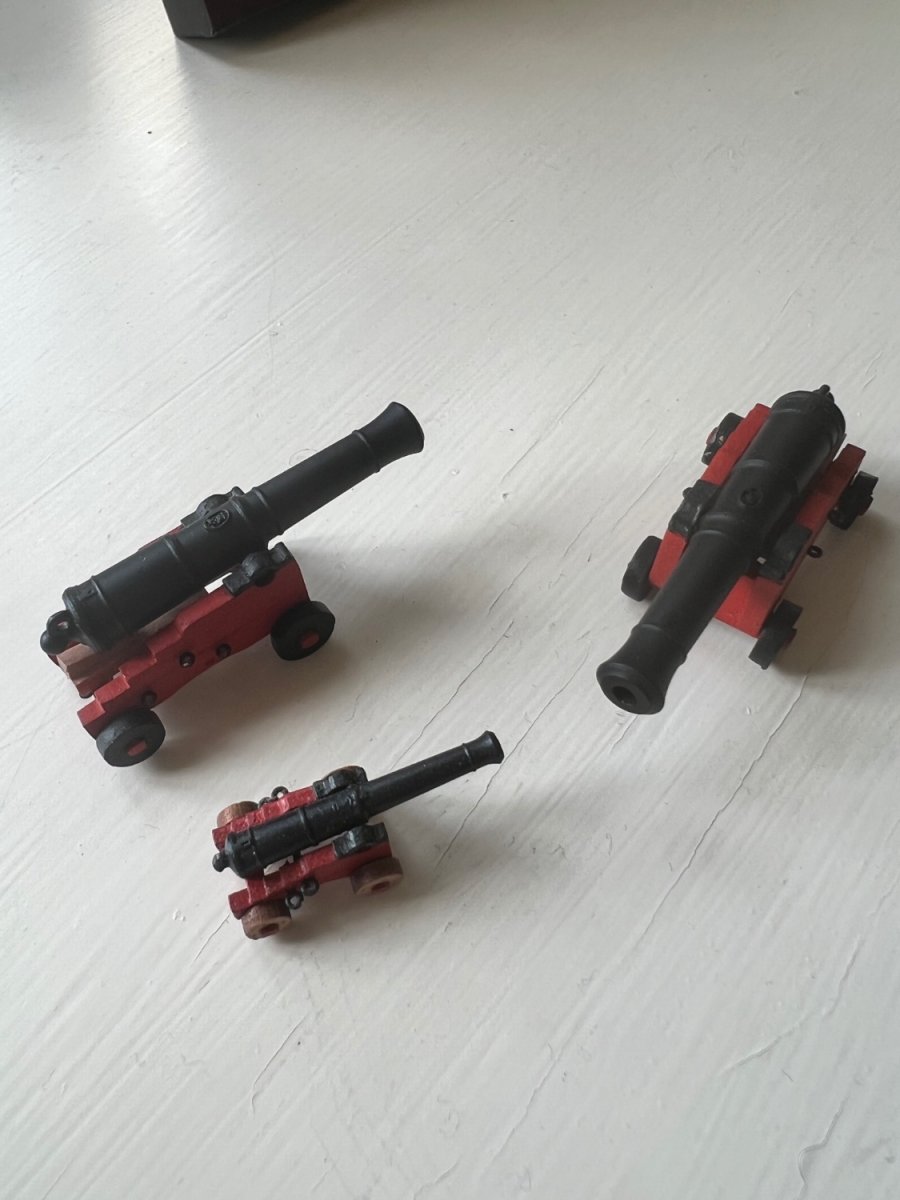
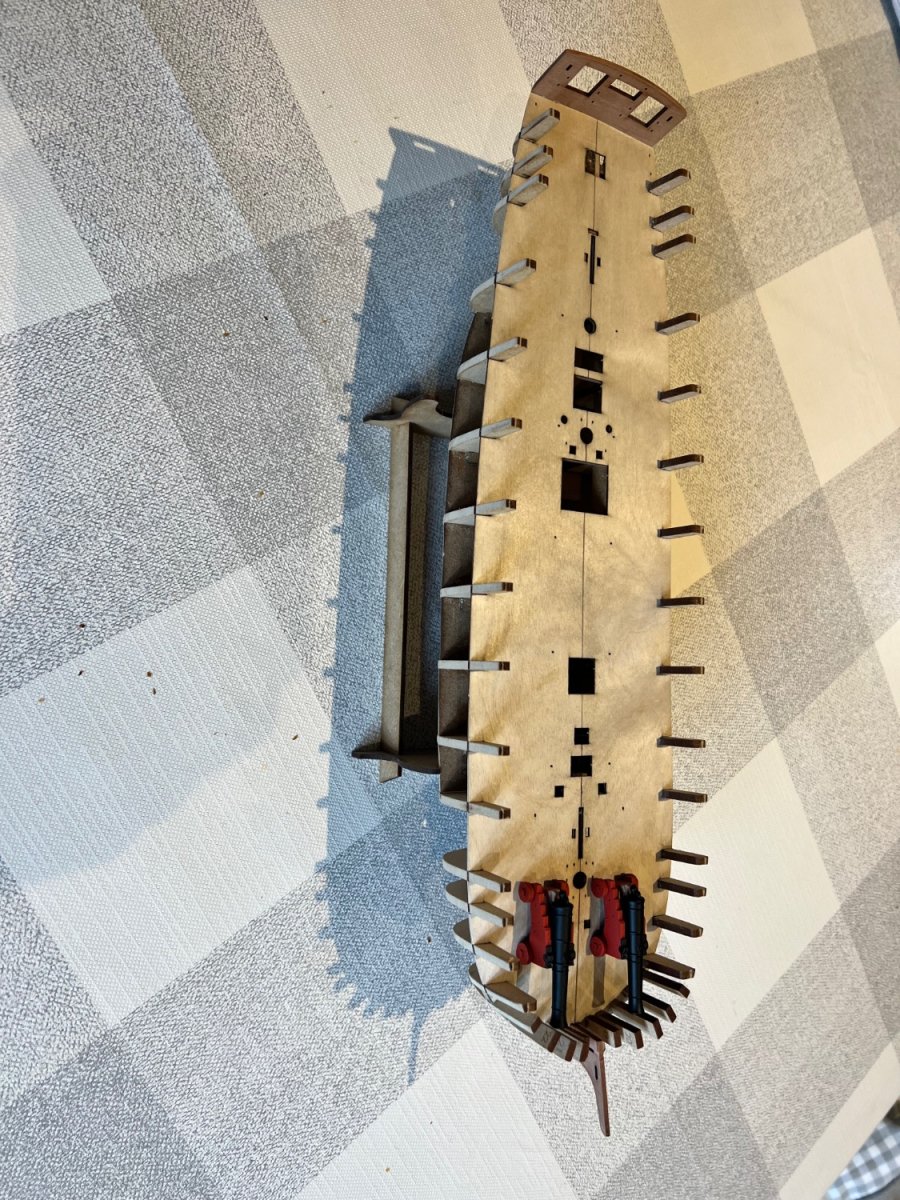
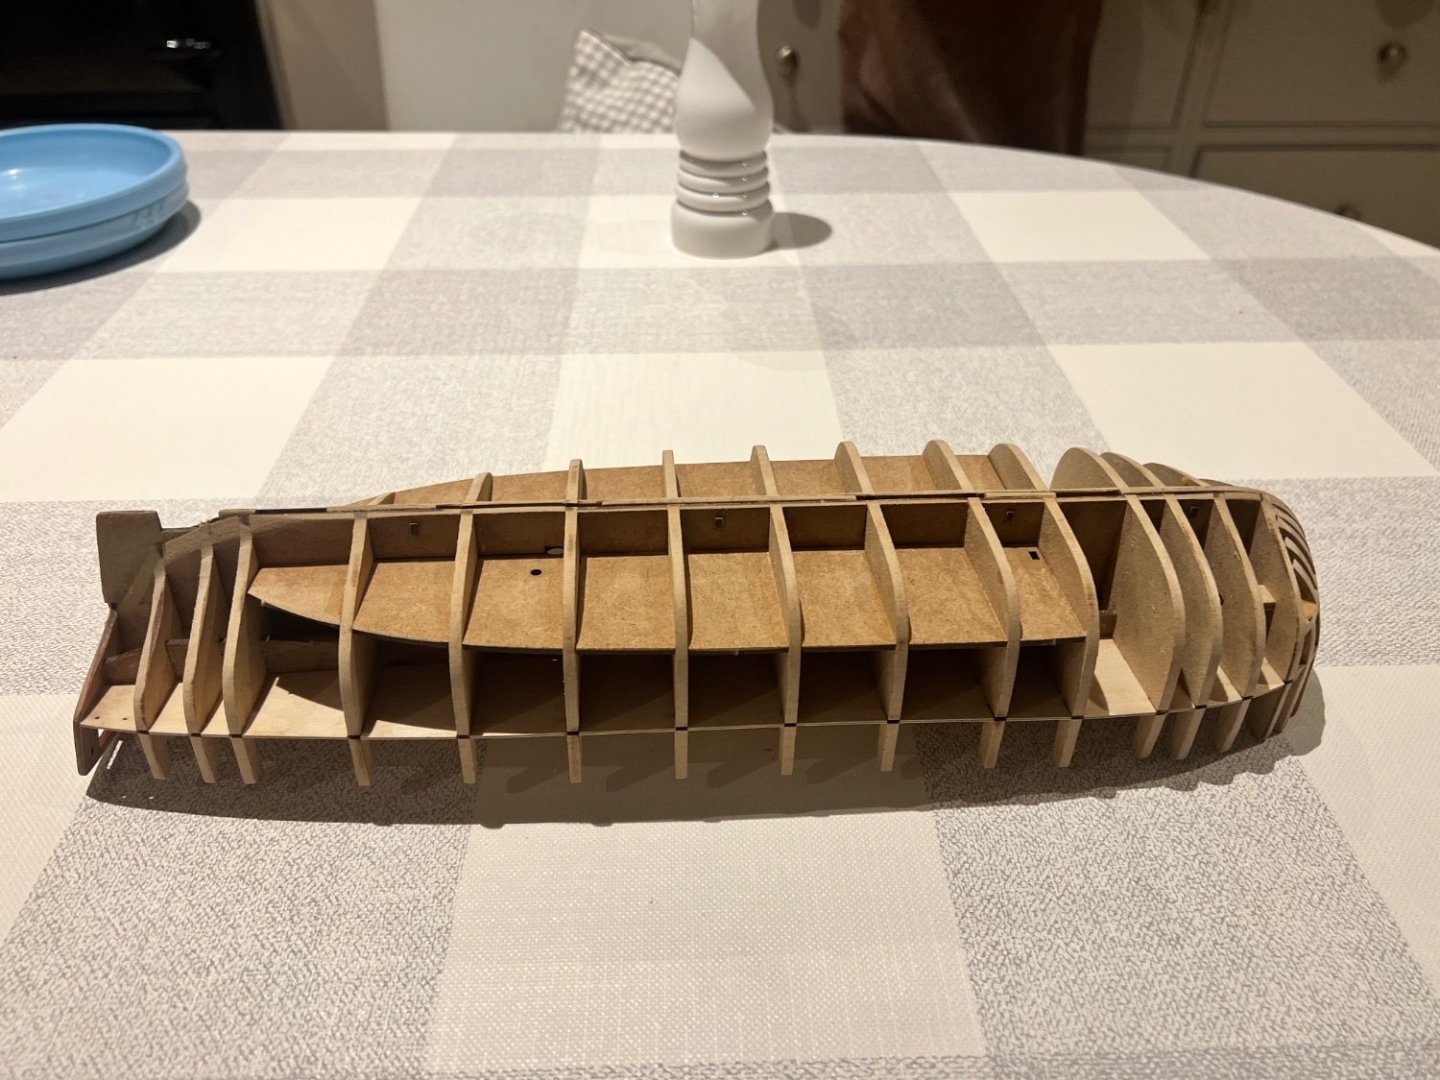
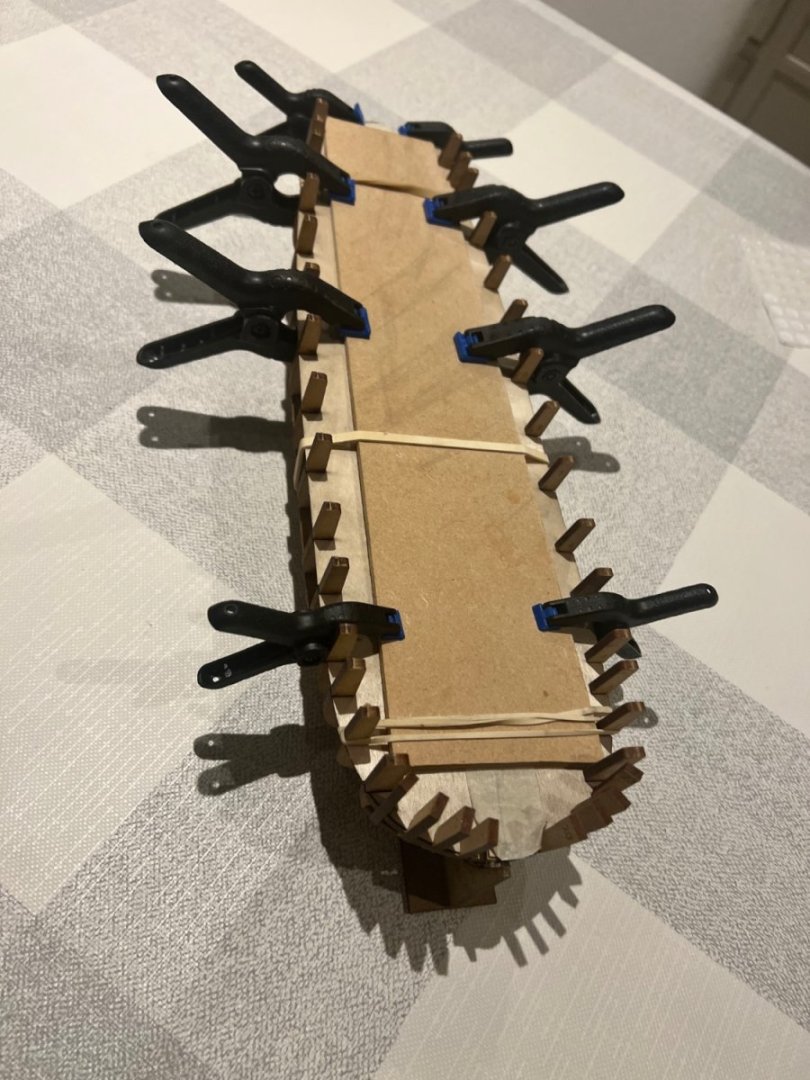
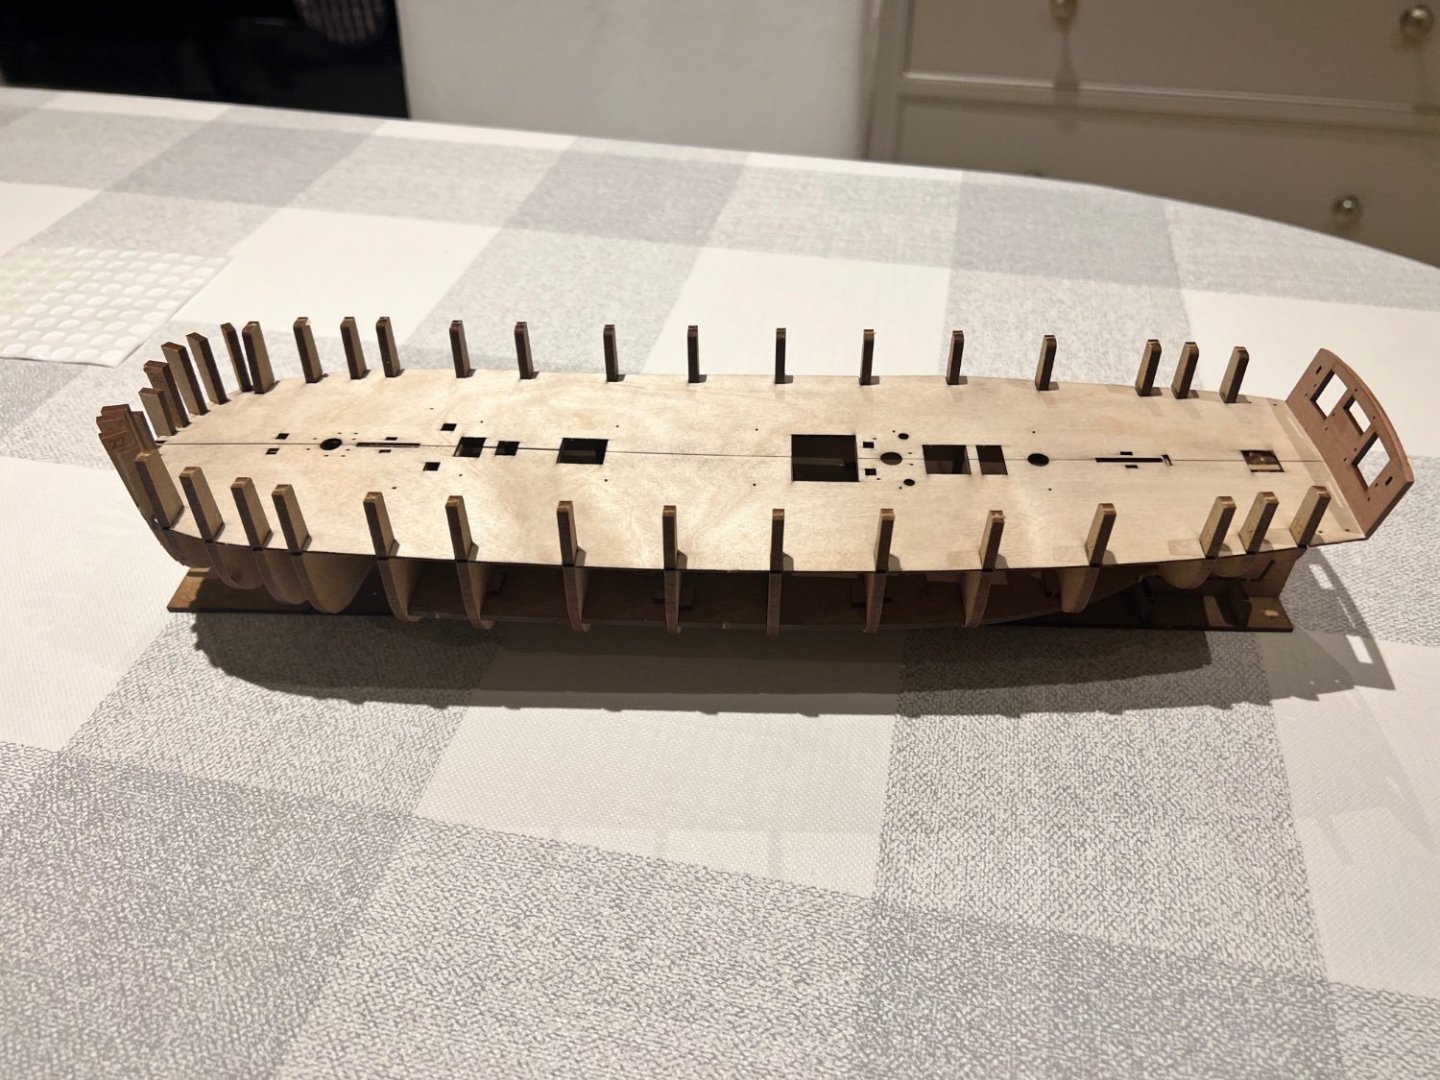
Thanks Allan and Mugje. I agree, Chris’s kits are superb and really interesting choices of subjects. I like the unusual ones! The temporary keel base and jig for the keel now snaps off and there’s a build cradle for the rest of the build. Here she is with those two 24 pounder cannon. The hull was faired, which was a pretty easy job, I followed the photos in the manual. The prow was then assembled, fitted and glued, them left to dry overnight. After that the plywood bulwarks were soaked in hot water for 15 mins then clamped on to take the shape without glue. All as per the instructions with a clamp on every bulkhead. Now drying for 24 hours.


- 146 replies
-
- 14
-
-
- Adder
- Vanguard Models
- (and 1 more)
-
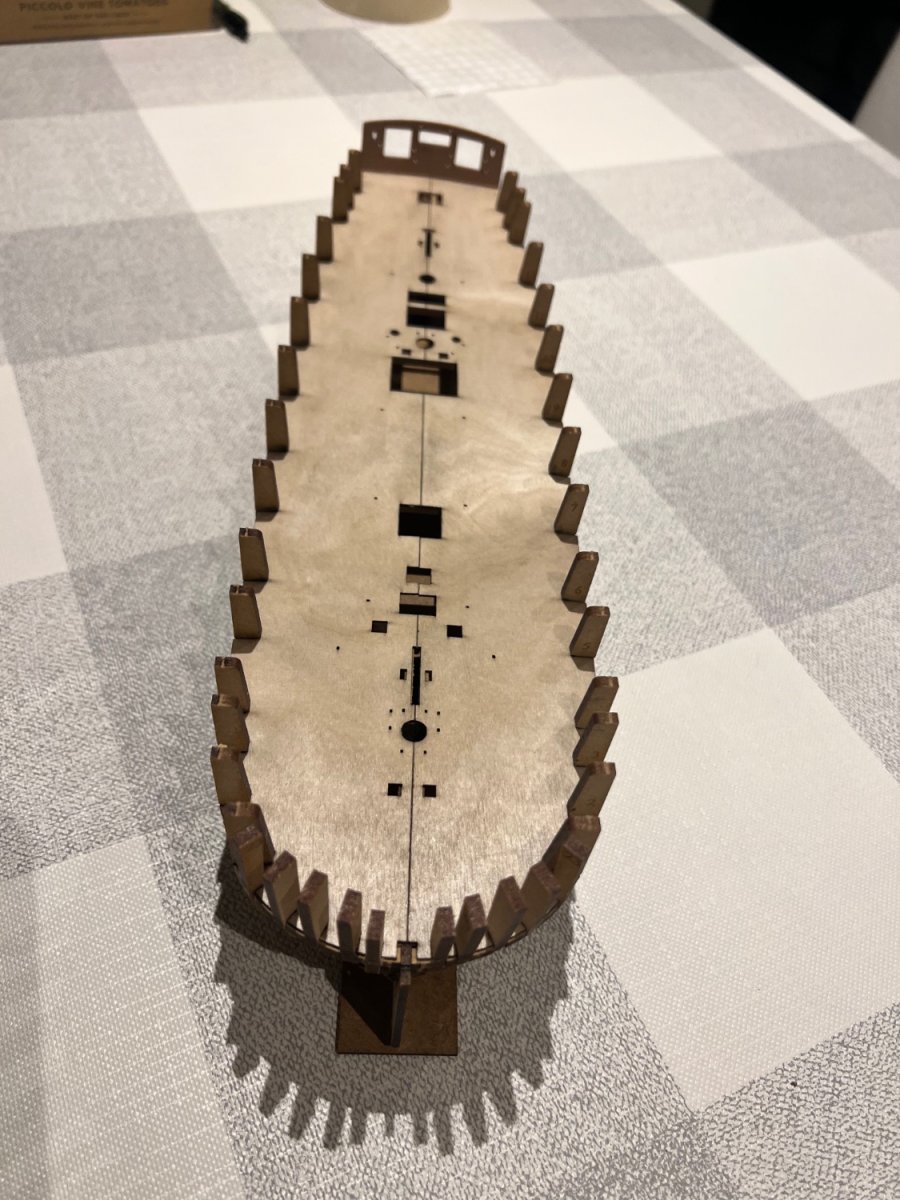
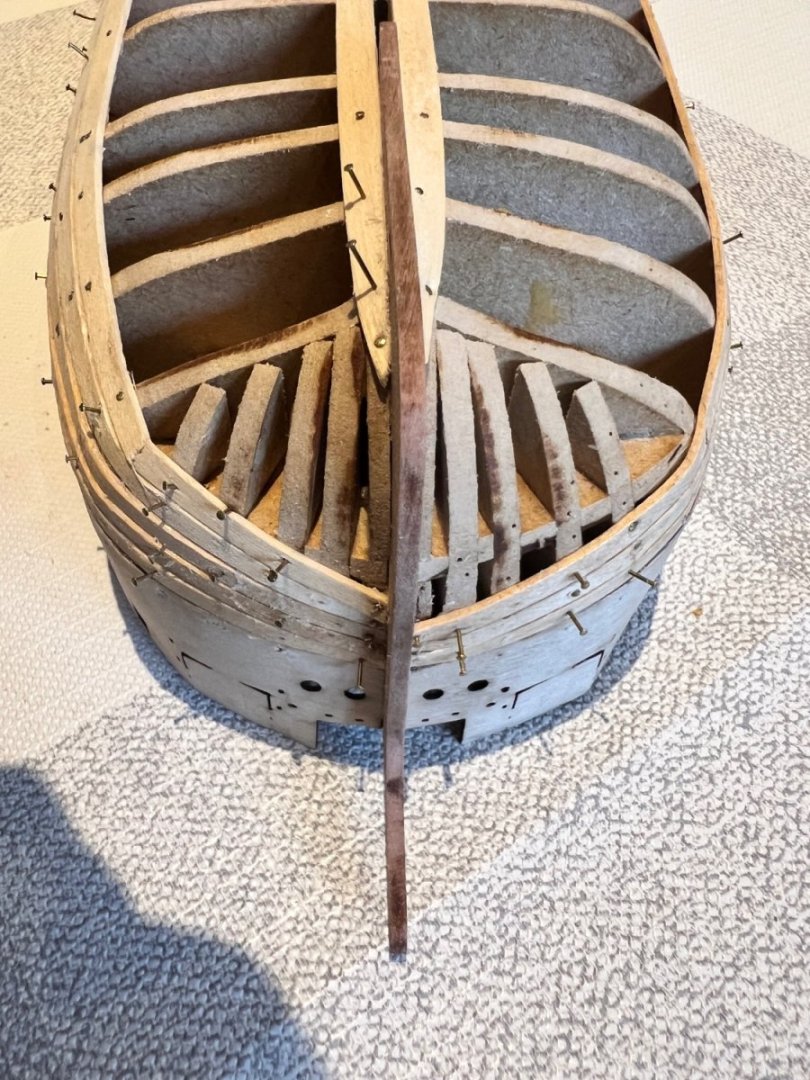
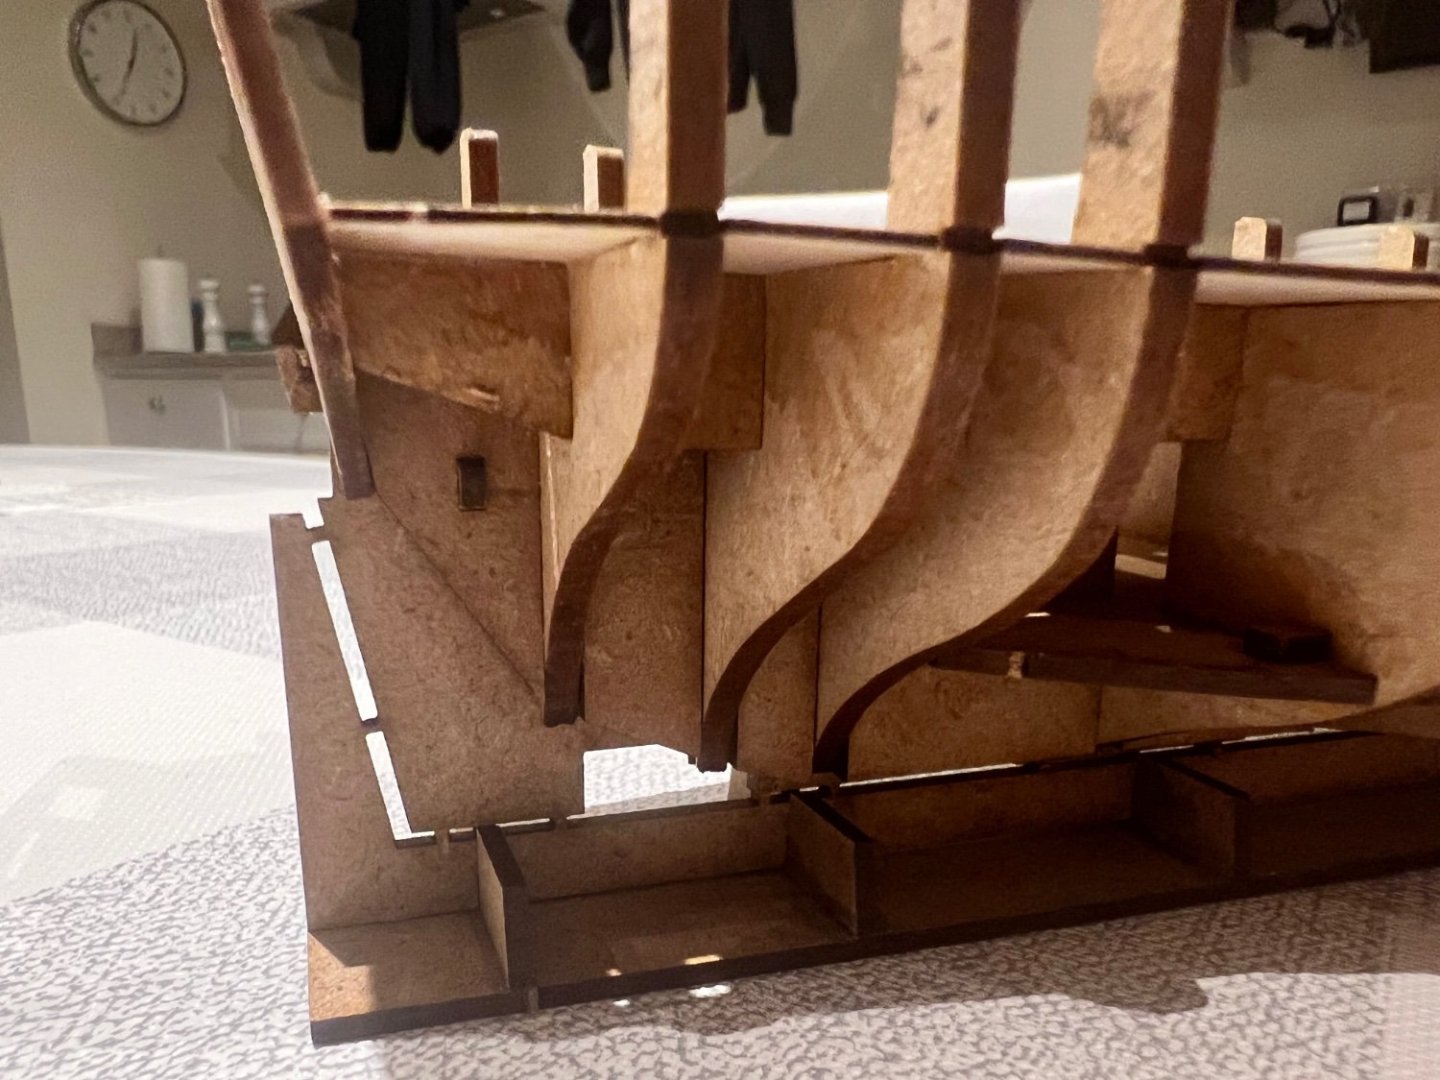
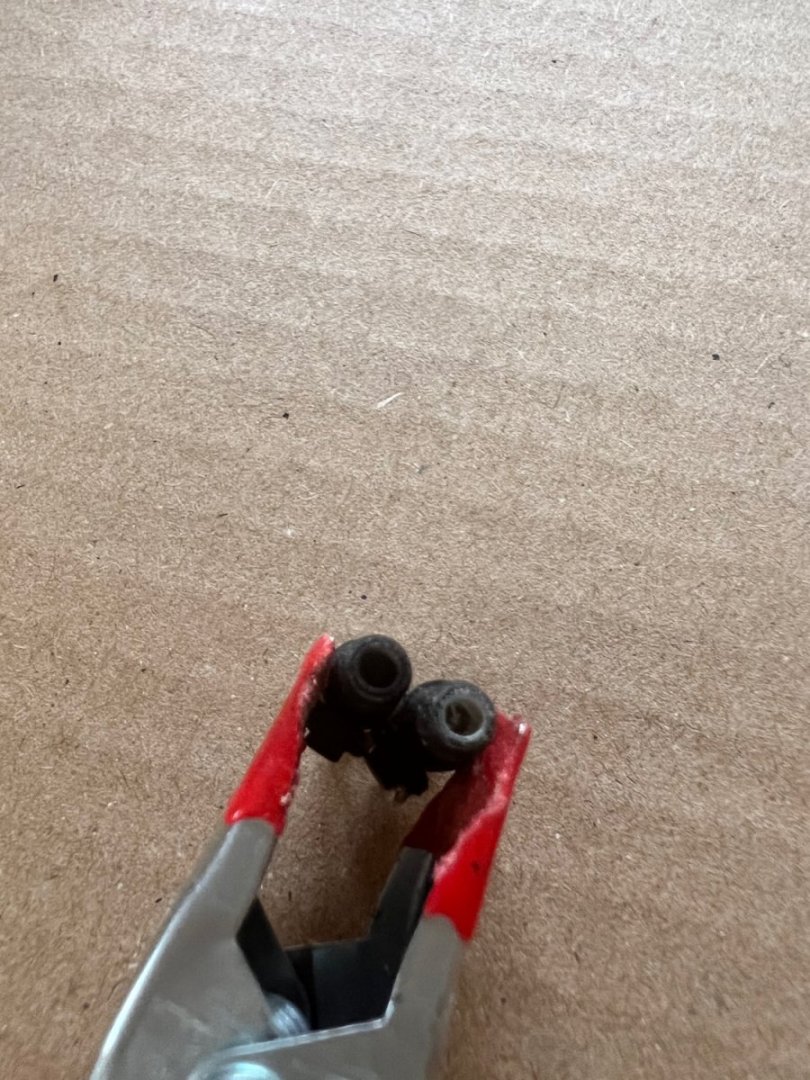
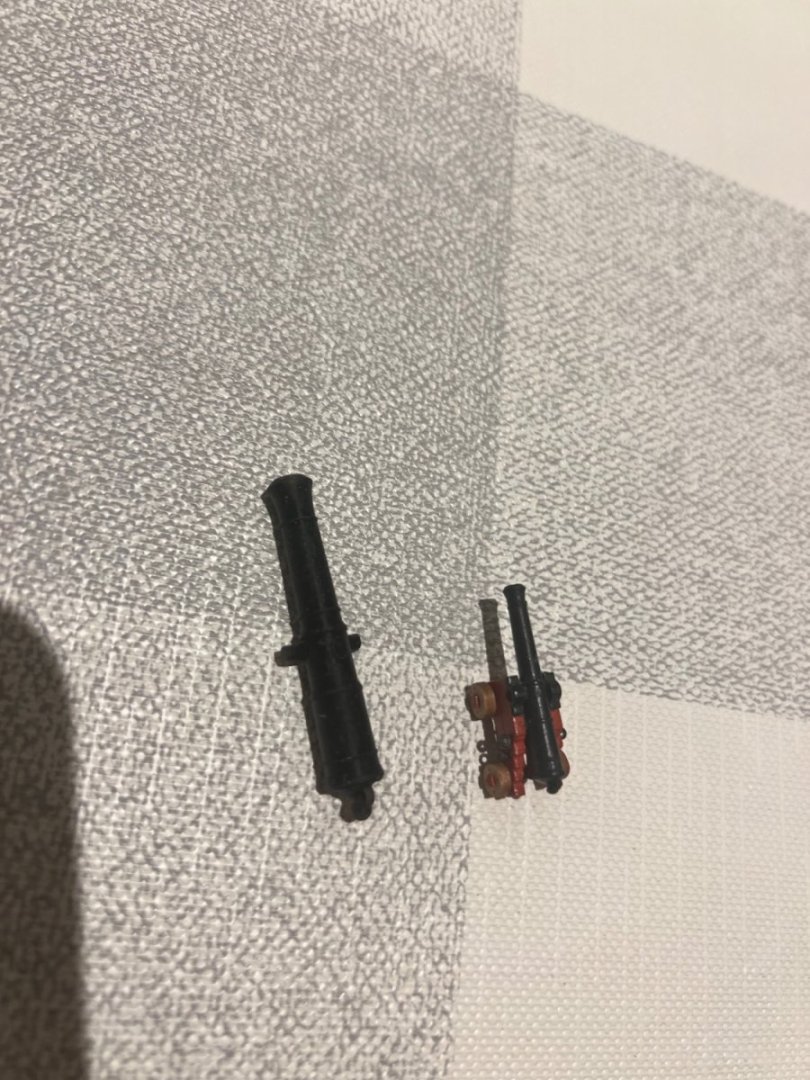
Thanks Andrew, enjoying following your Trial build. So impressed that Chris changed the name for your gun brig base to “Sparkler” - now that’s customer service! Theo - thanks too The last day on Adder has posed some interesting challenges of my own making. I decided to fit the plywood false deck before the aftermost bulkhead part 153 to help ensure that the bulkhead was at the right angle. So far, so good. I’ve fitted 8 of these plywood decks to VM models so I know the drill, but on Adder I snapped it down the centre line. I could not fit the two parts so that they were aligned leading me to think that the structure below must be out of alignment. I contacted Chris suggesting that I’d better start again and buy the MDF sheets and plywood deck again from him. Instead, he told me that once the deck is split it’s hard to get the halves aligned, but there’s a neat trick to achieve this: taping the two halves together before they are fitted and then adding them, letting the glue dry and removing the tape. This I did and it worked very well. I clamped a flat piece of scrap wood on top to ensure the central join stayed flat and painted diluted PVA over all the joints below. I also added most of the MDF pieces that form the bow structure. Then it was time to fit the rear bulkhead 153, but as can be seen below there’s a small overhang of the false deck over the end of the keel and the longitudinal formers parts 31. Checking vs the plans, this results in the bulkhead being at the wrong angle and the false deck needs to be sanded back in line with the keel and parts 31. The gap between the bulkhead and the keel shouldn’t be there in the photo below (unglued). If you’re following the sequence in the instructions, this will need to be sanded back before the deck is fitted as the bulkhead will already be in place. I checked all this with Chris and he told me that he usually makes these type of parts over long to cover all eventualities, better to have too much than too little. Now in the right position and back on track below. Chris thanks so much for your help. Whilst the glue was drying I started work on the cannons and carronades. The 3-D printed resin barrels are very high quality, but on the carronades the cavity for the barrel is shallow and if you look closely you can see the flat bottom ~1mm inside the lip of the barrel. I saw on someone’s build log that they had drilled these a little deeper, so decided to do so too. The barrels are surprisingly strong and easy to drill. In the photos below the right hand barrel has been drilled to ~2.5x as deep. It’s grey because of the resin and the inside of the barrel will need to be painted black again.


- 146 replies
-
- 14
-
-
- Adder
- Vanguard Models
- (and 1 more)
-
Thanks Chris, timing worked for me as I’d just finished Ranger. I only started Adder last night… I’ll be aiming as close as possible to Chris’s prototype and won’t be modifying anything on Adder.
- 146 replies
-
- 4
-
-
- Adder
- Vanguard Models
- (and 1 more)
-
Thanks Kai, good luck with Sherborne. I’d like to build her too at some point.
- 146 replies
-
- 2
-
-
- Adder
- Vanguard Models
- (and 1 more)
-
Thanks Chris, I thought it would be something simple like that. It’s so appreciated having you available on MSW to answer queries such as this.
- 146 replies
-
- 5
-
-
- Adder
- Vanguard Models
- (and 1 more)
-
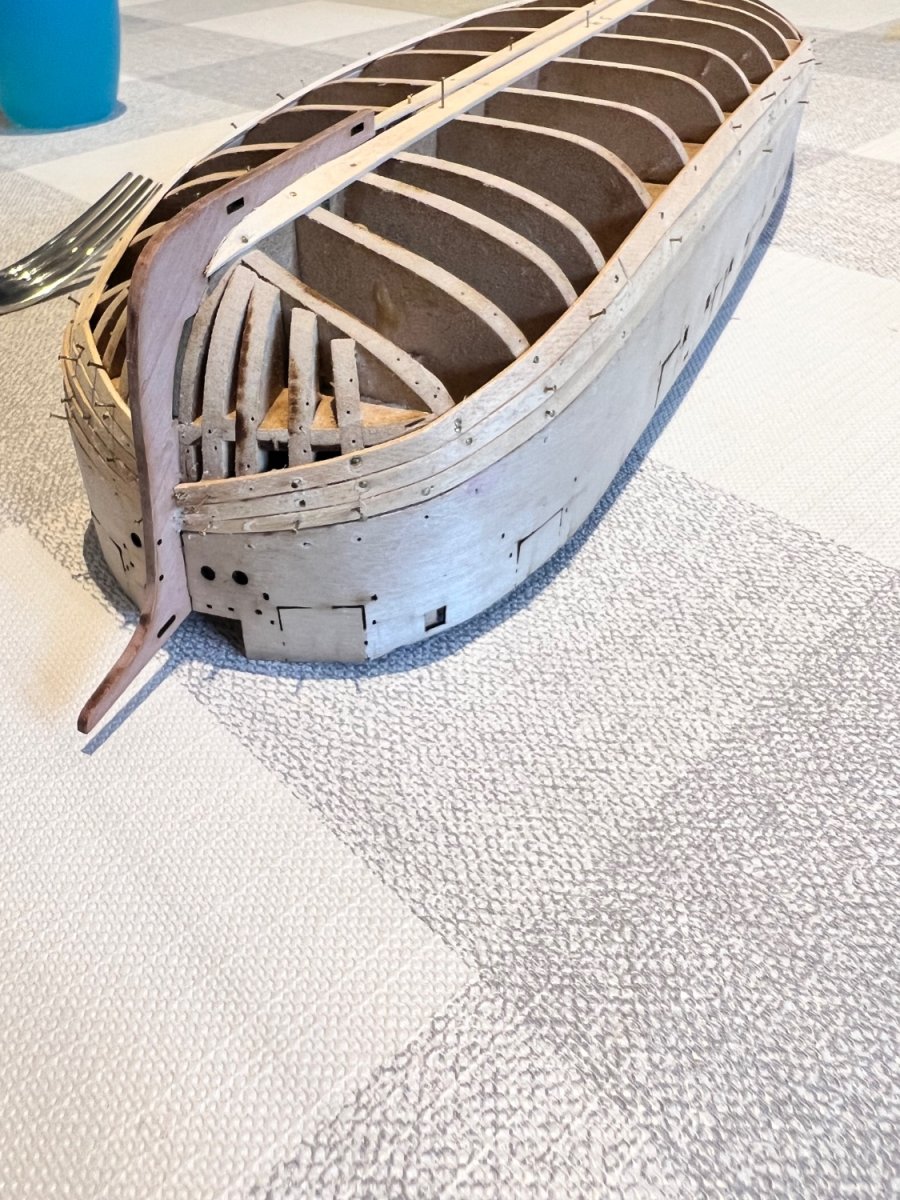
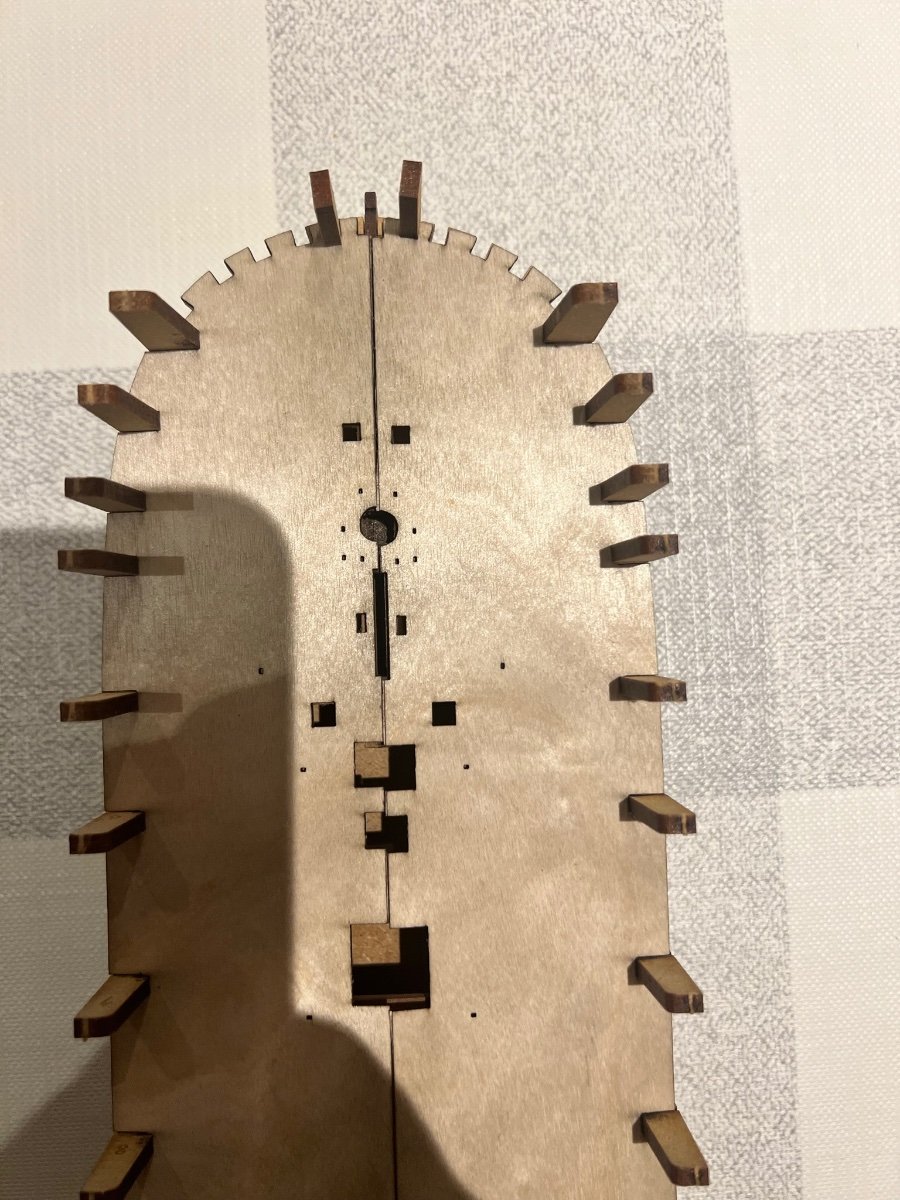
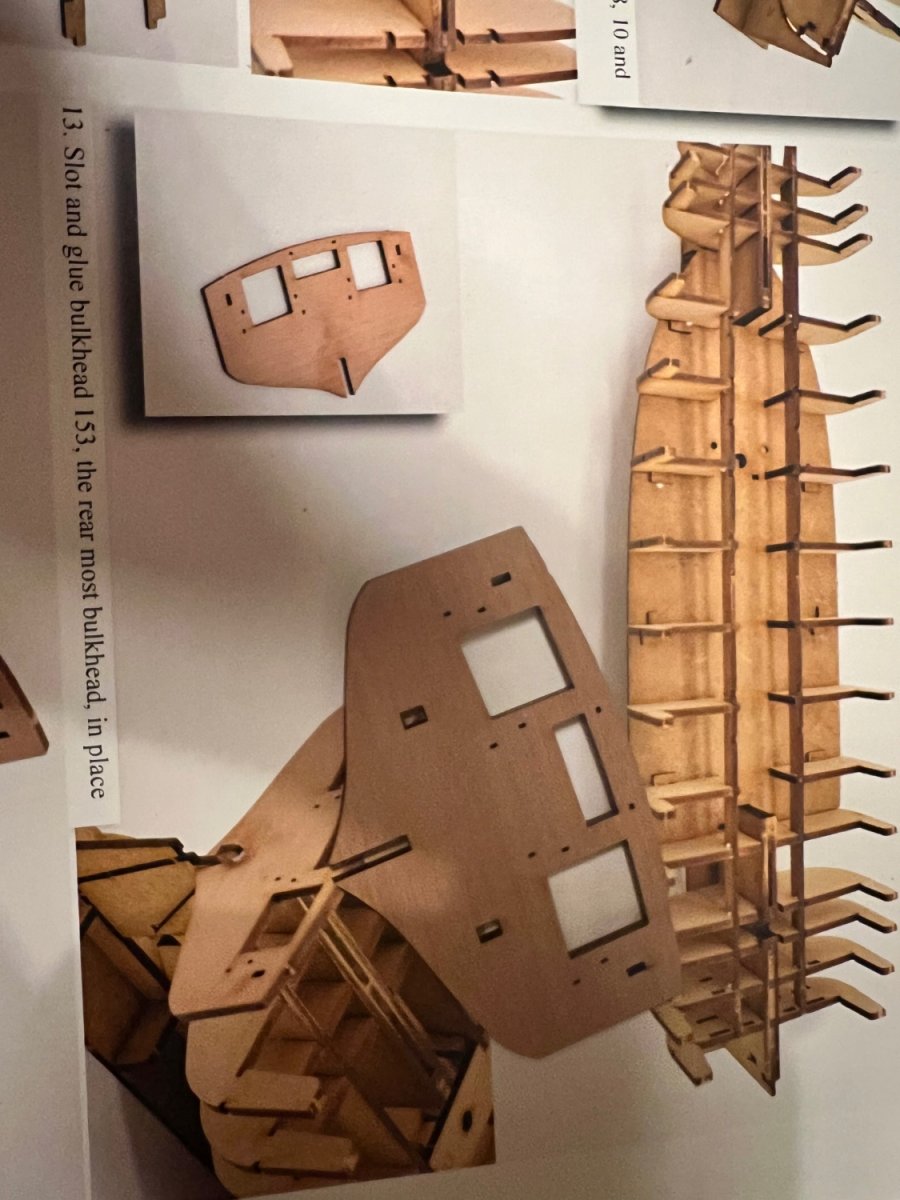
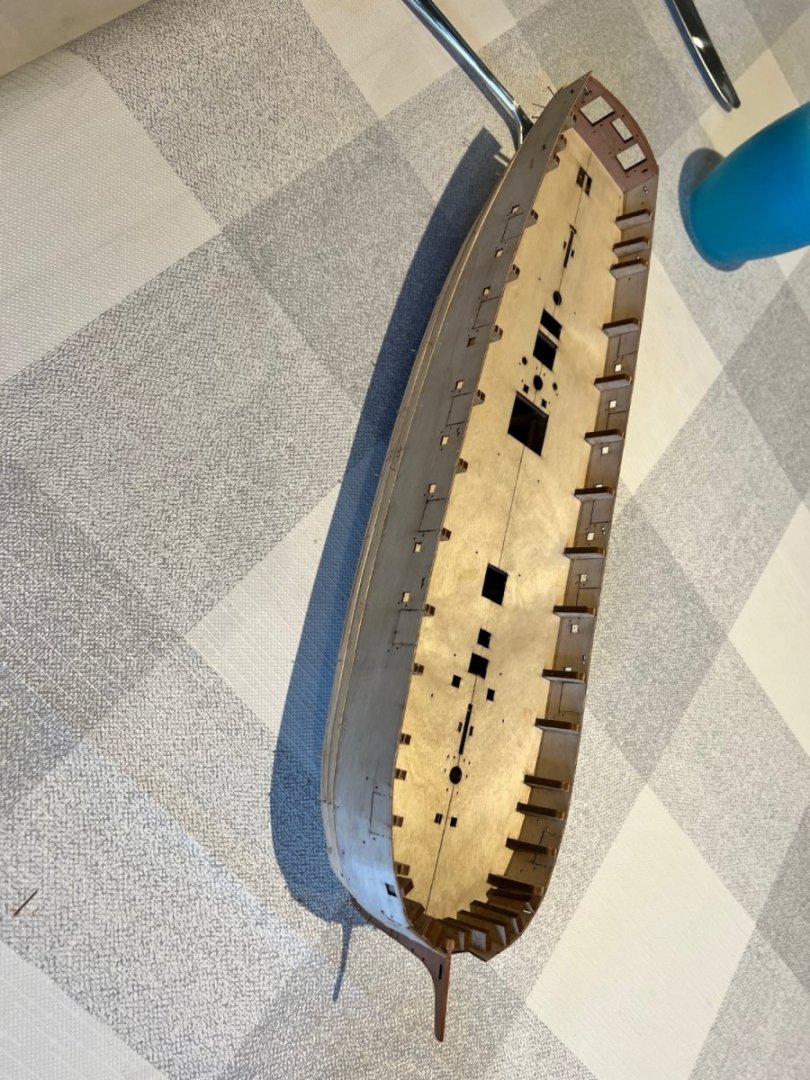
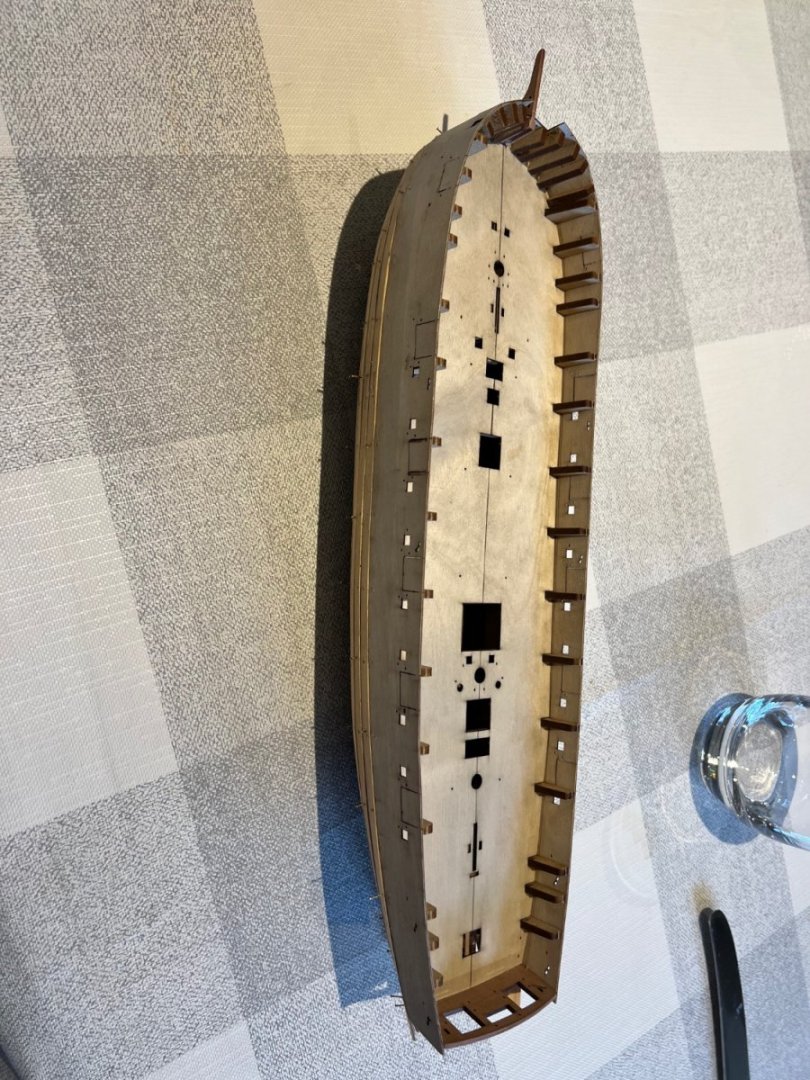
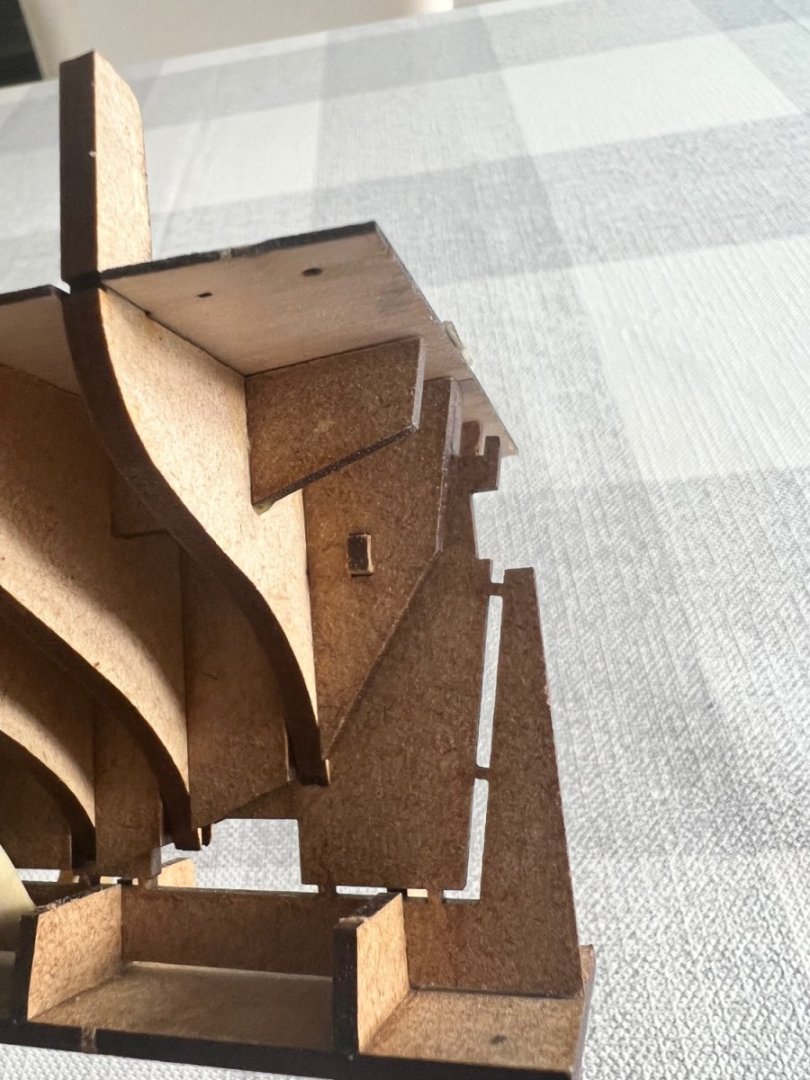
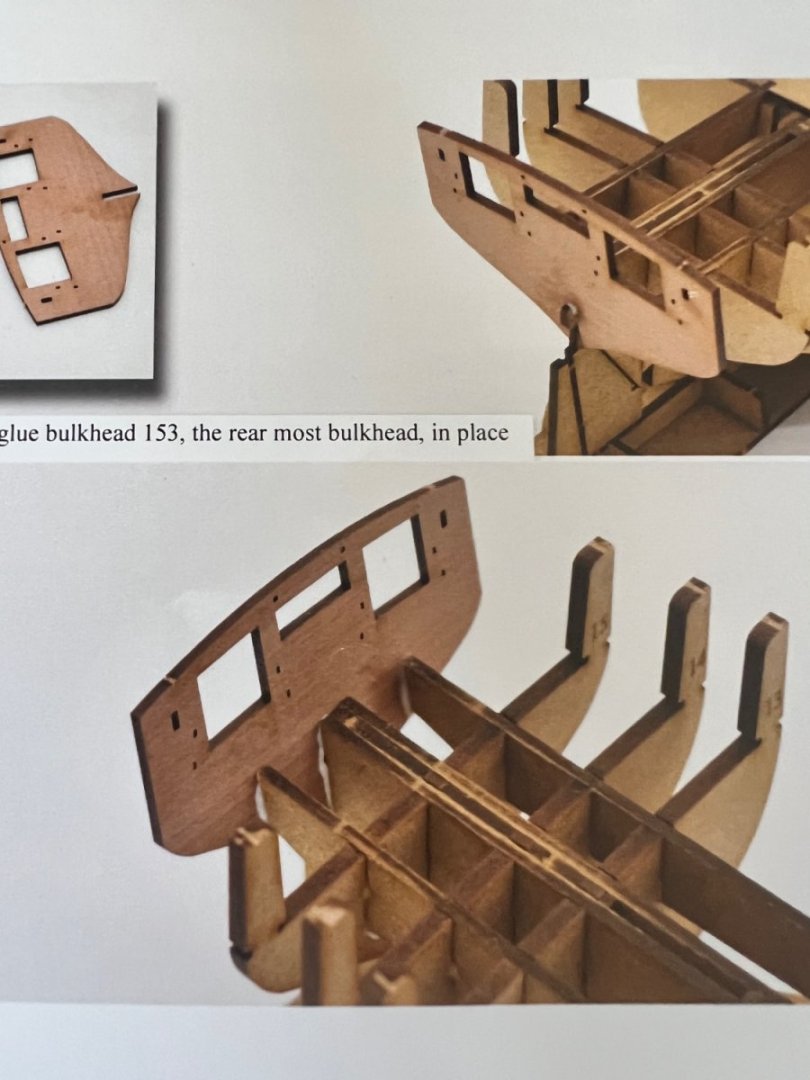
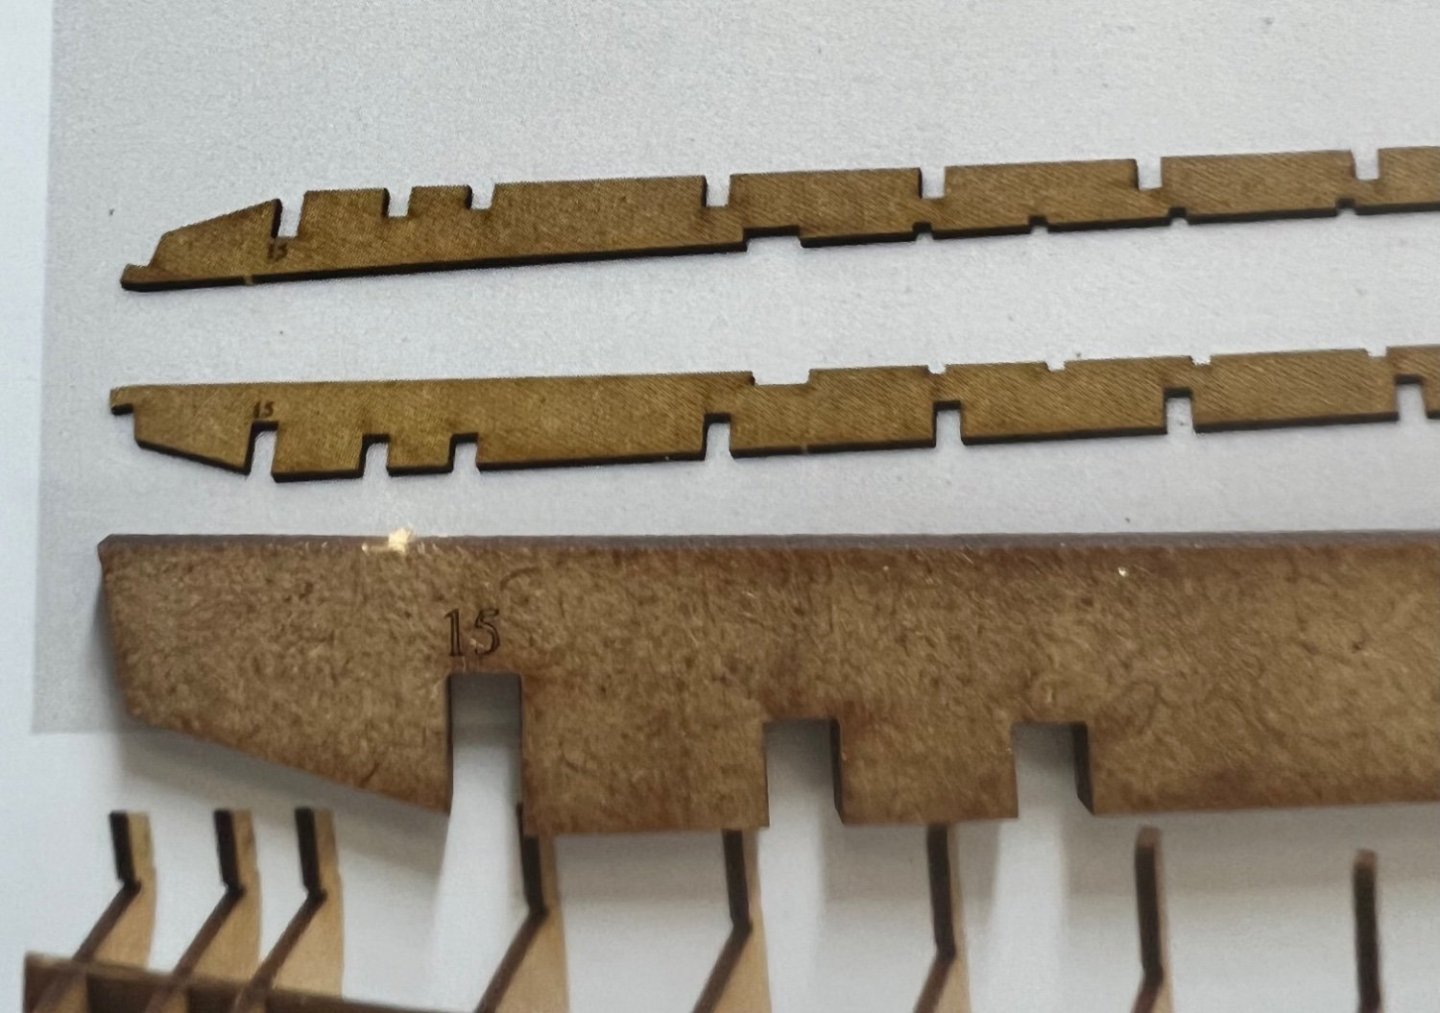
Next to go on is the rearmost bulkhead 153. This is a pearwood piece that is the rearmost bulkhead. There is a small inconsistency here between the instructions and the part. The part has two square holes in it which are not present on the photo of the part in the instructions. The holes go against the end of parts 31 (see photo below) but there is no tab on parts 31 to go through the holes. The instructions show that there should be a tab at the end of parts 31, but my parts 31 don’t have it (photos below). I think that the holes in 153 should be there and parts 31 should have the tab. This is very very minor and I’m just raising for awareness for other builders and it really doesn’t matter for the build. The lower half of part 153 is covered later by etched planking which will hide the holes. I just need to be extra careful getting 153 aligned without the tabs.


- 146 replies
-
- 20
-
-
- Adder
- Vanguard Models
- (and 1 more)
-
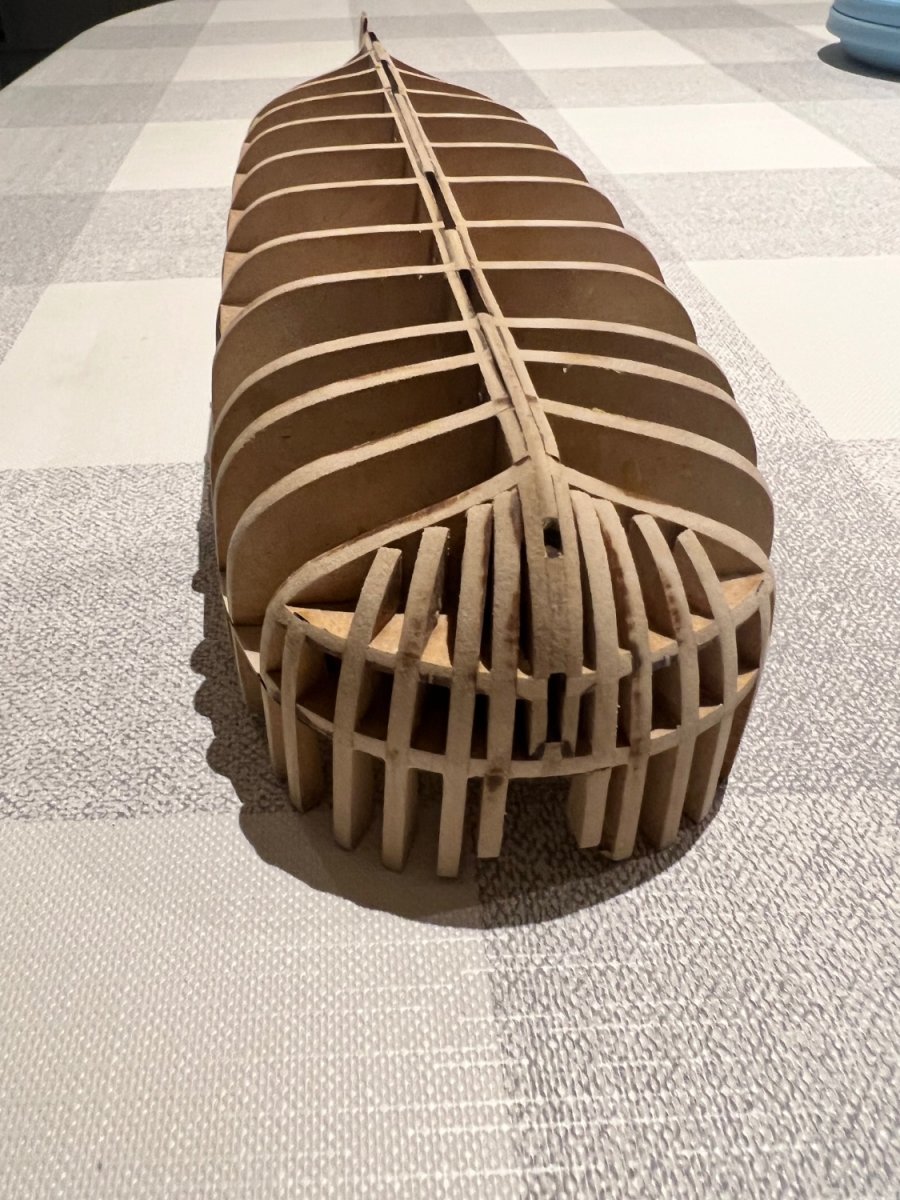
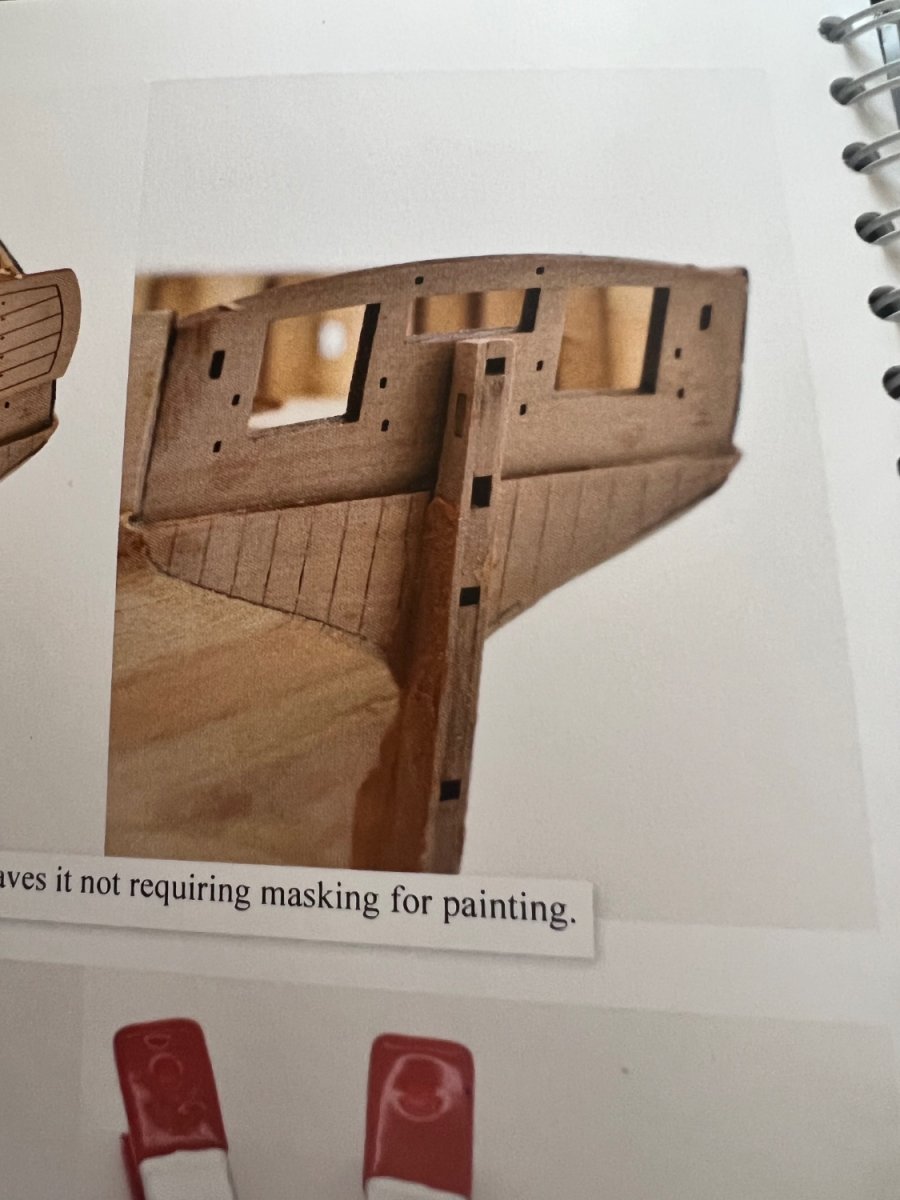
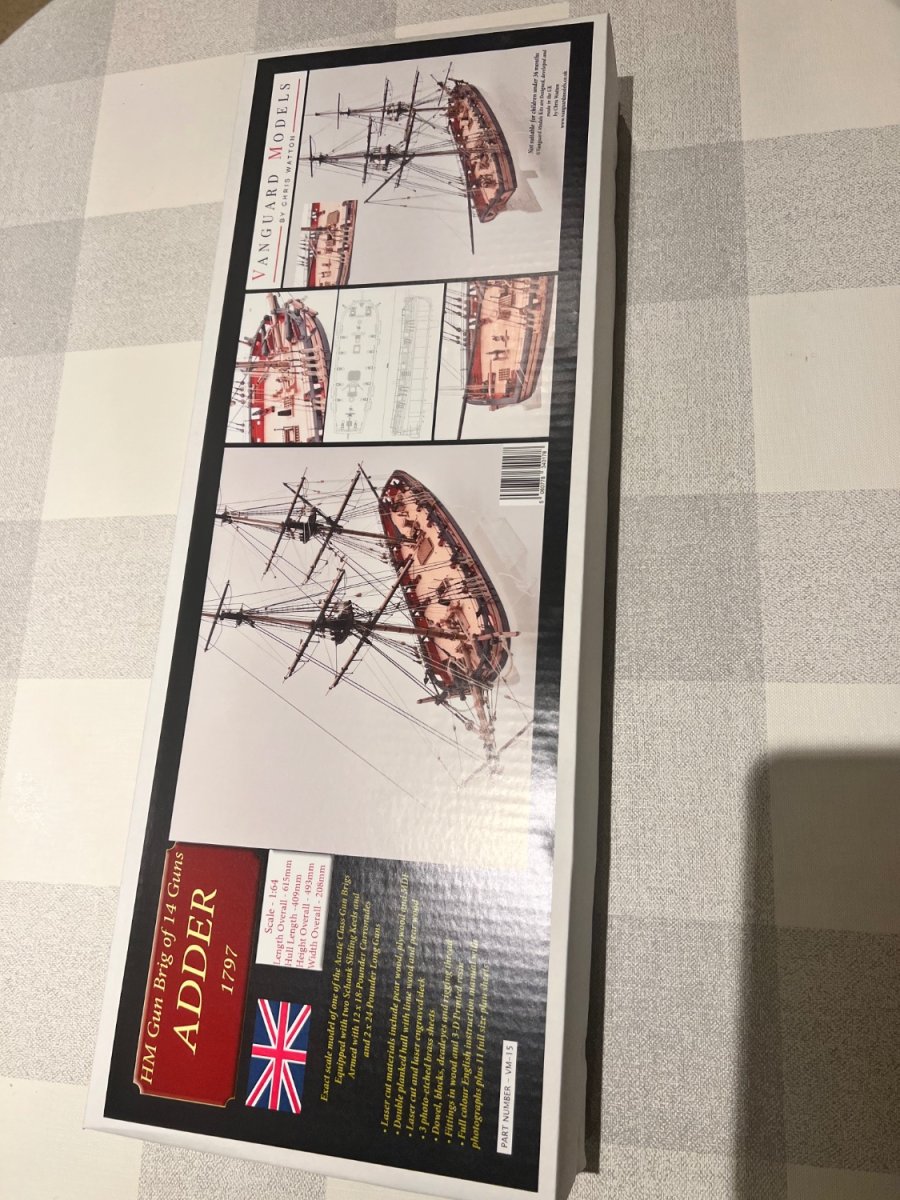
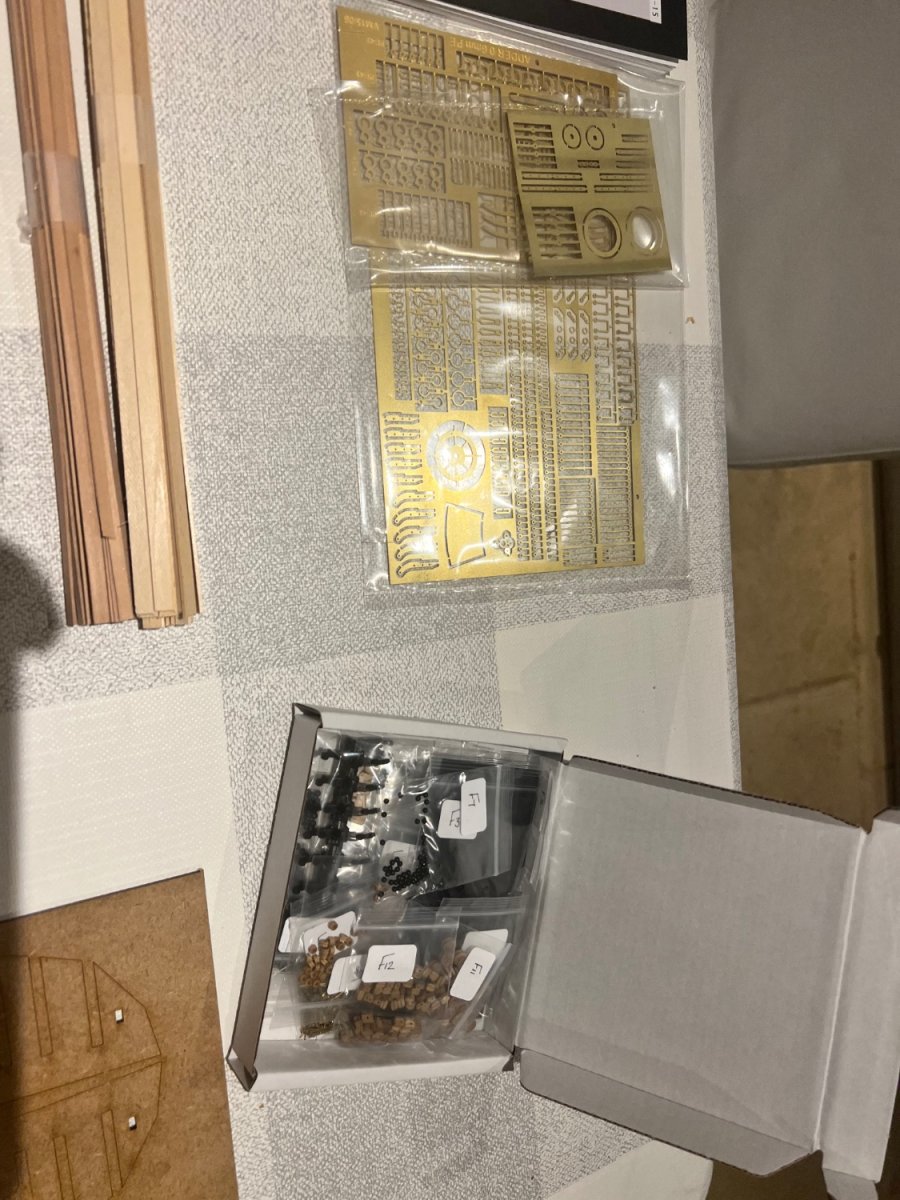
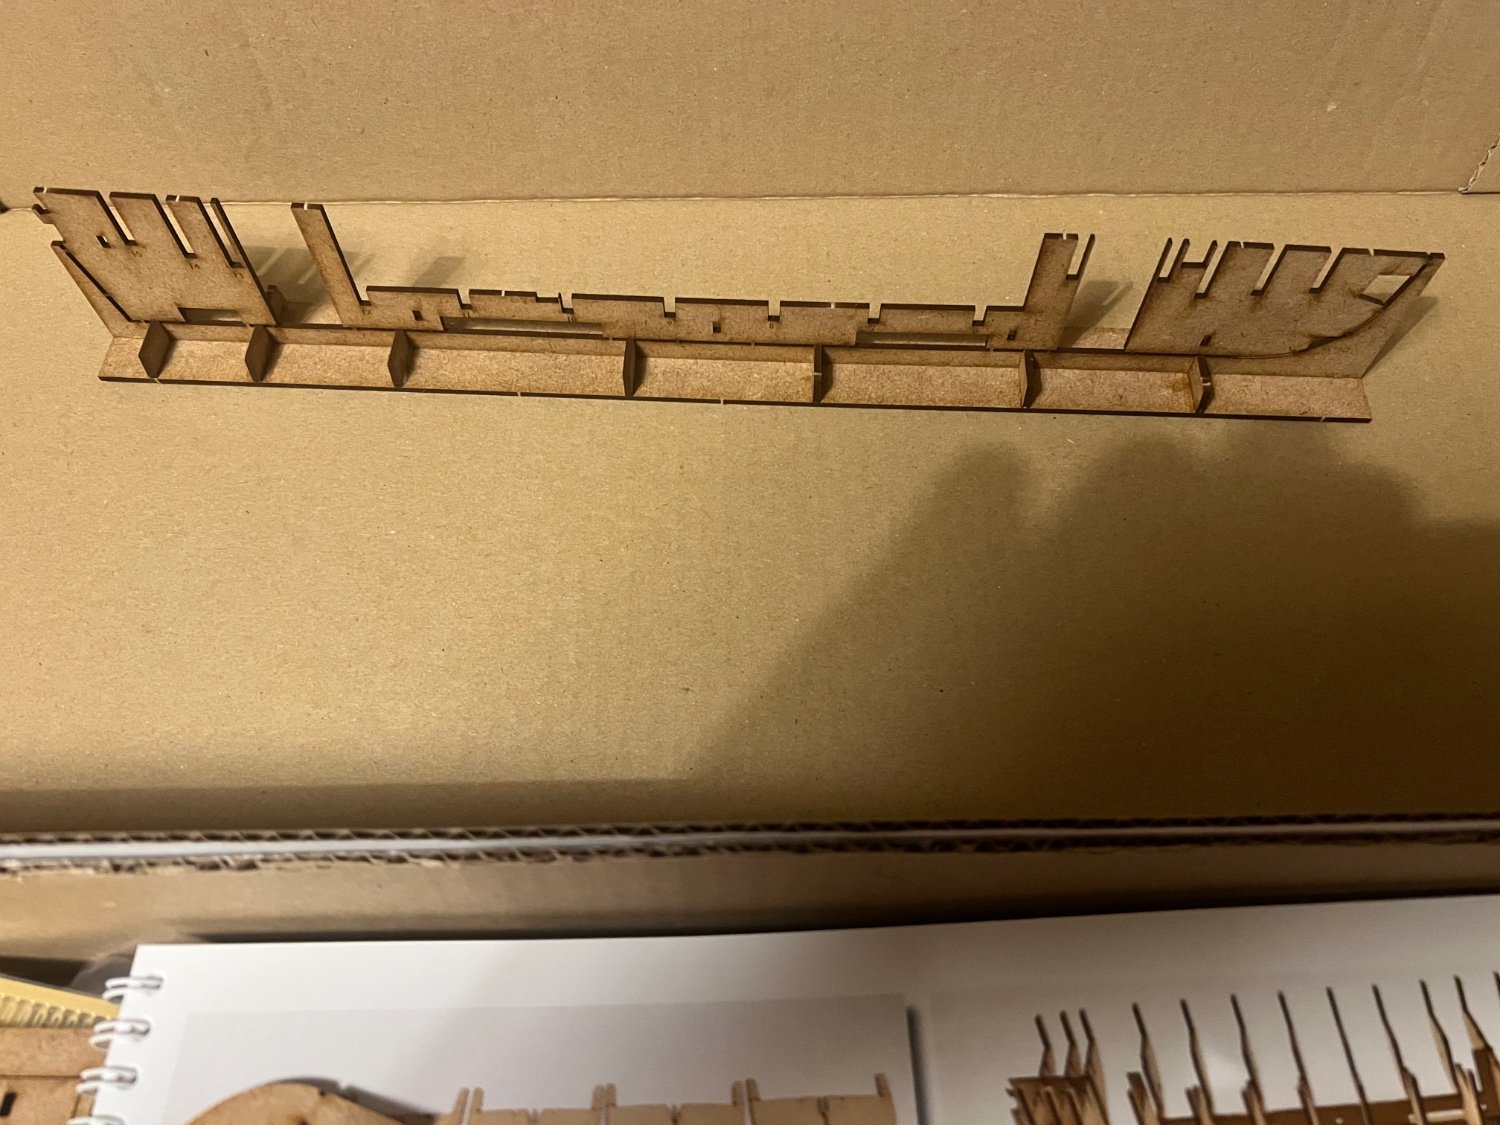
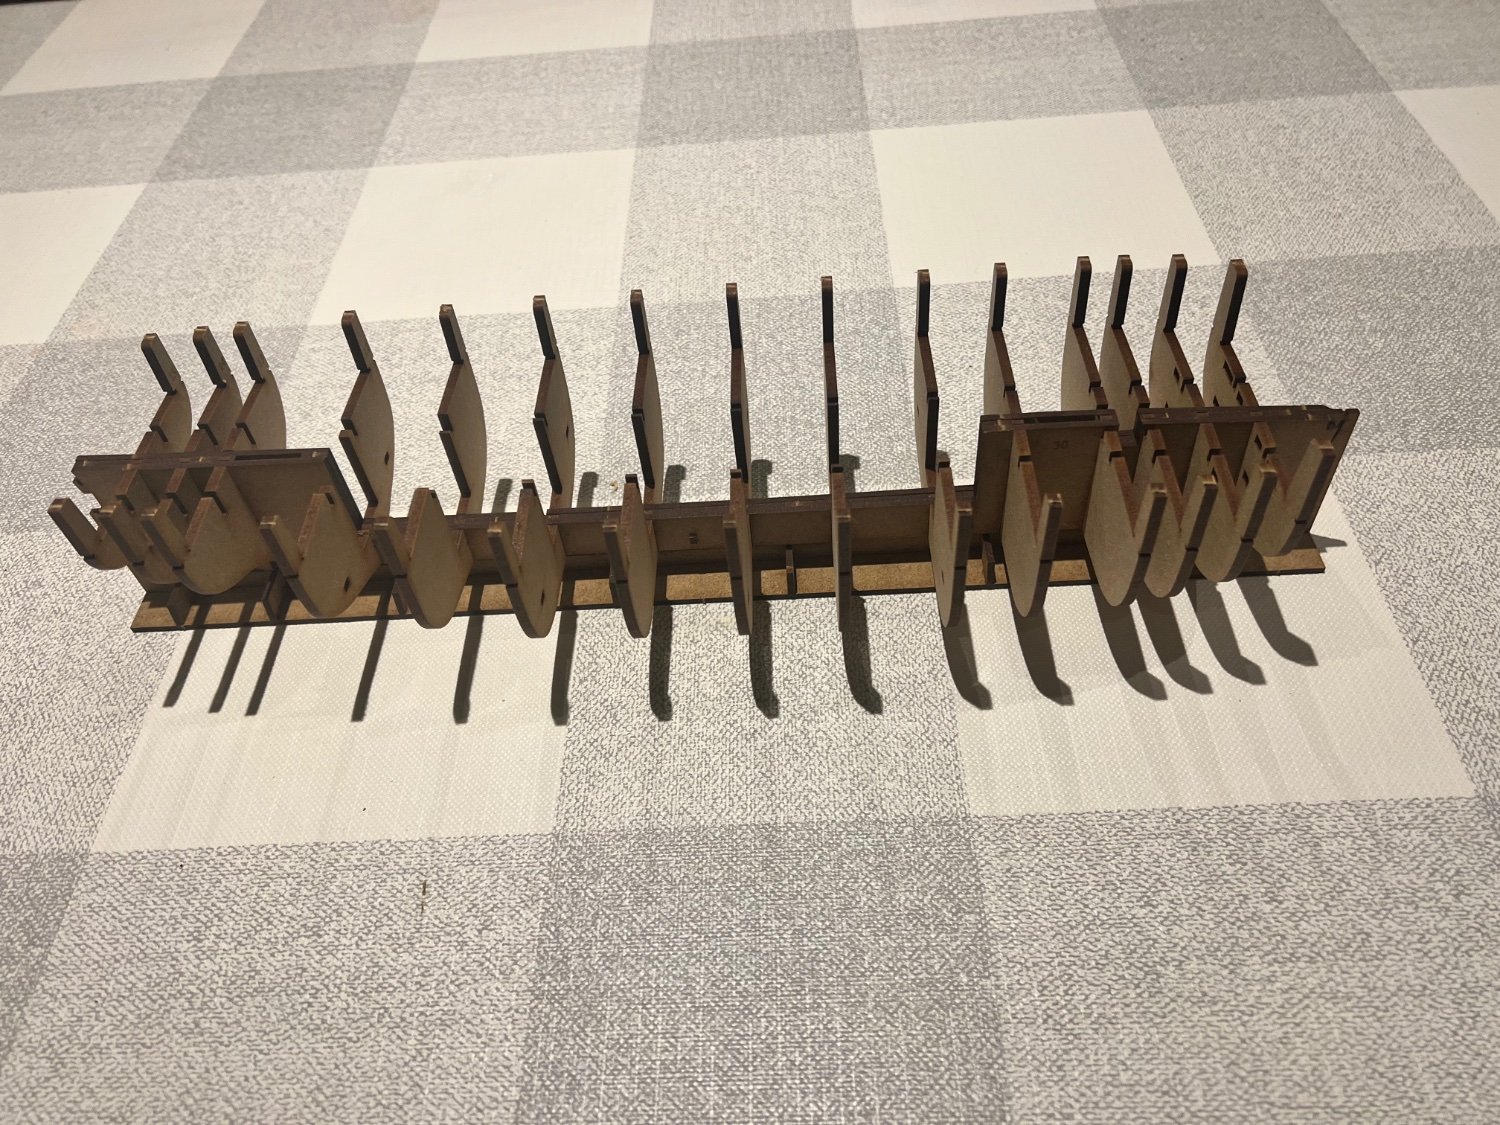
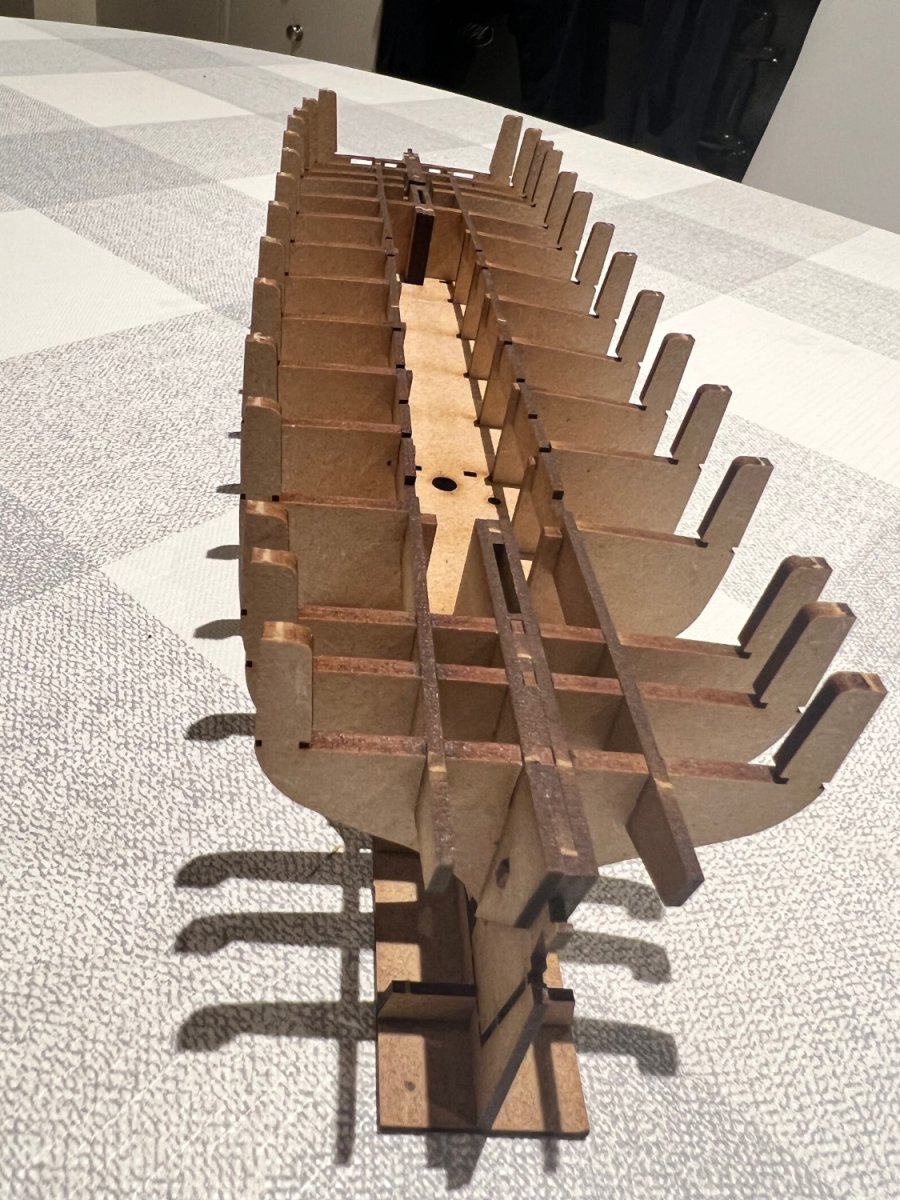
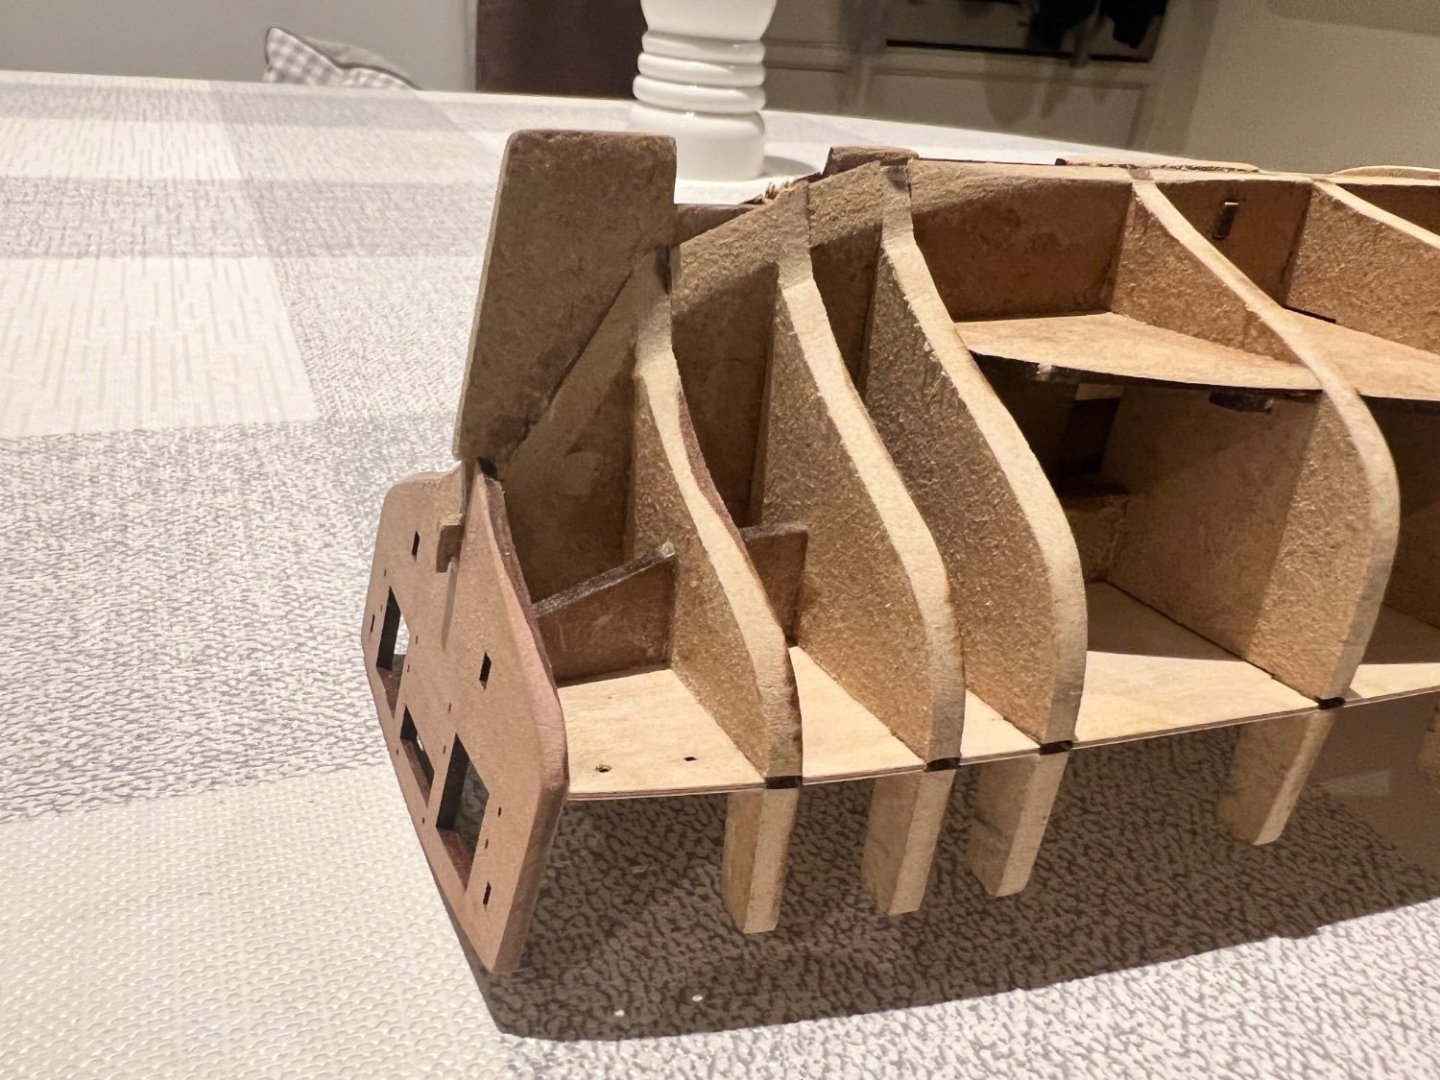
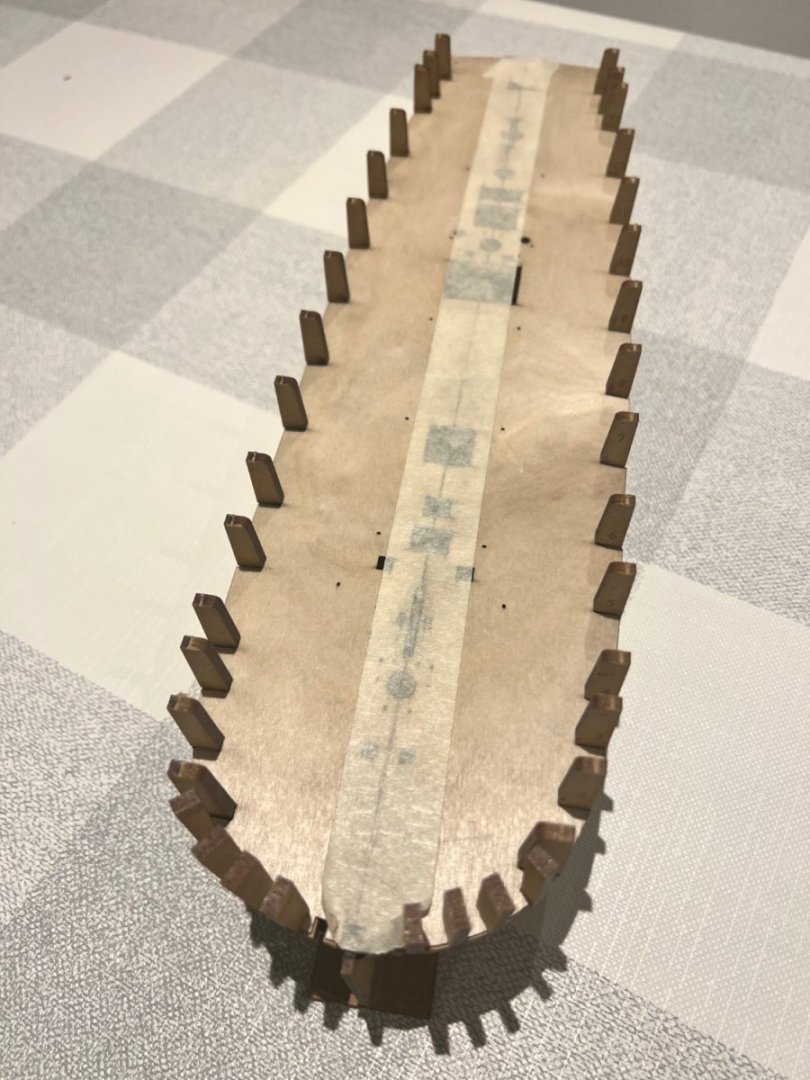
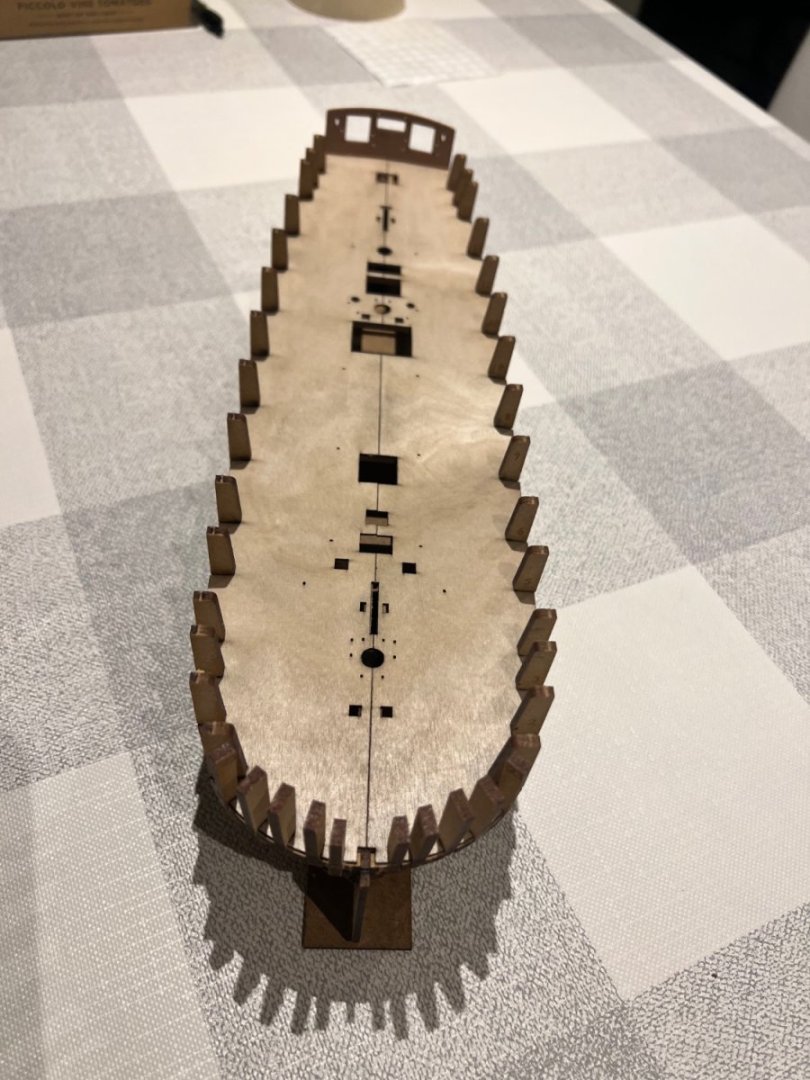
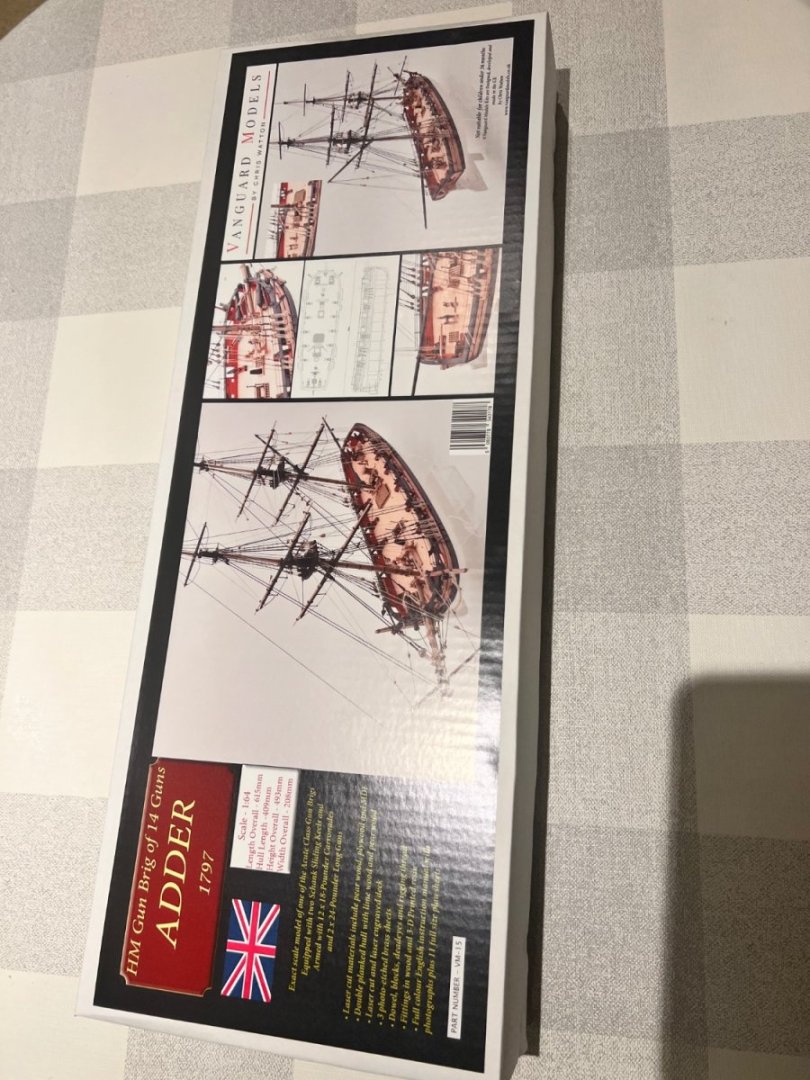
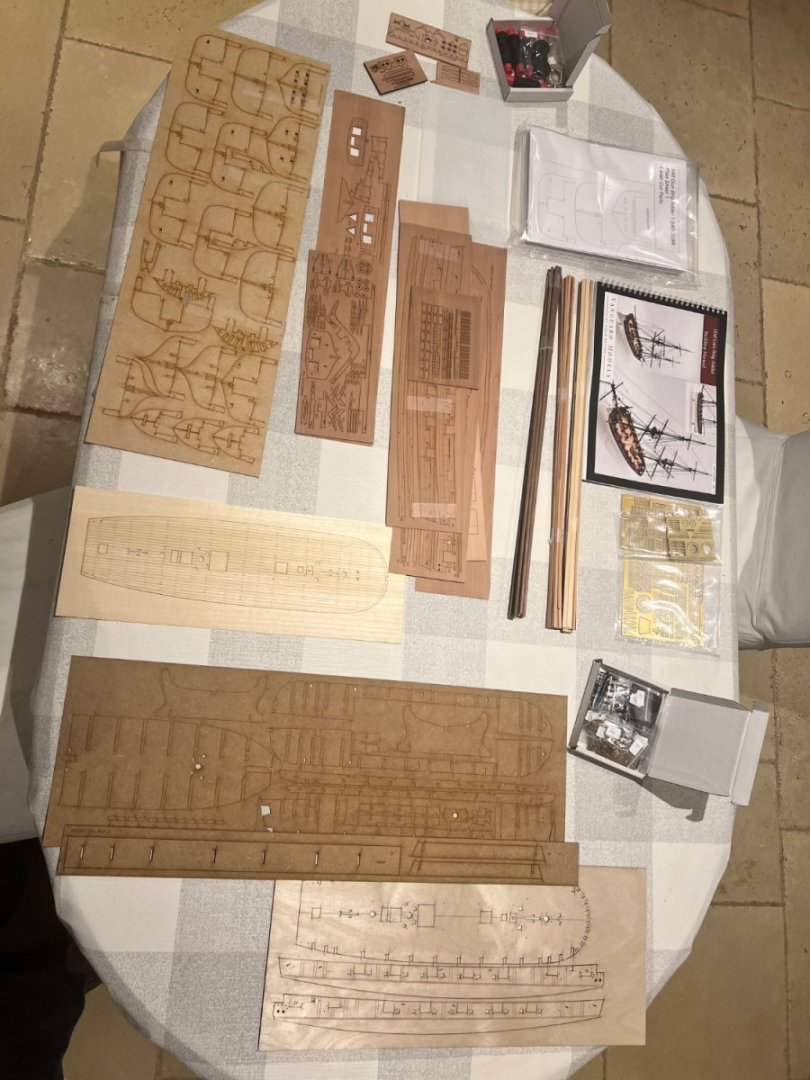
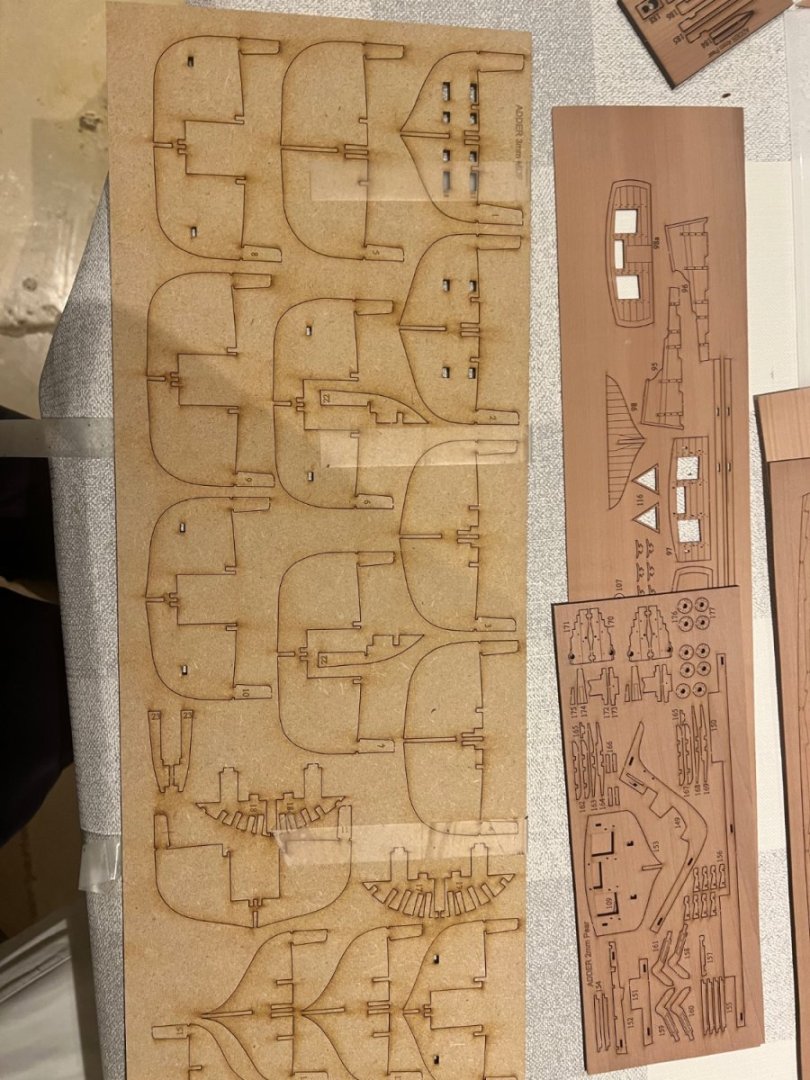
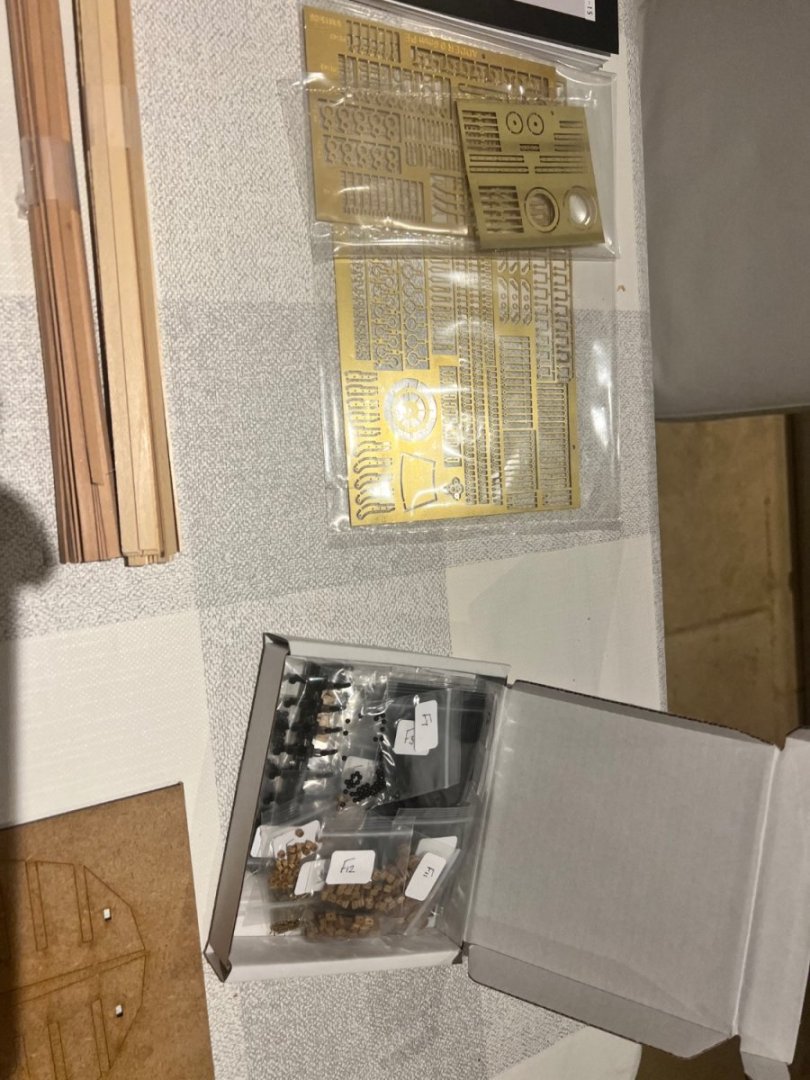
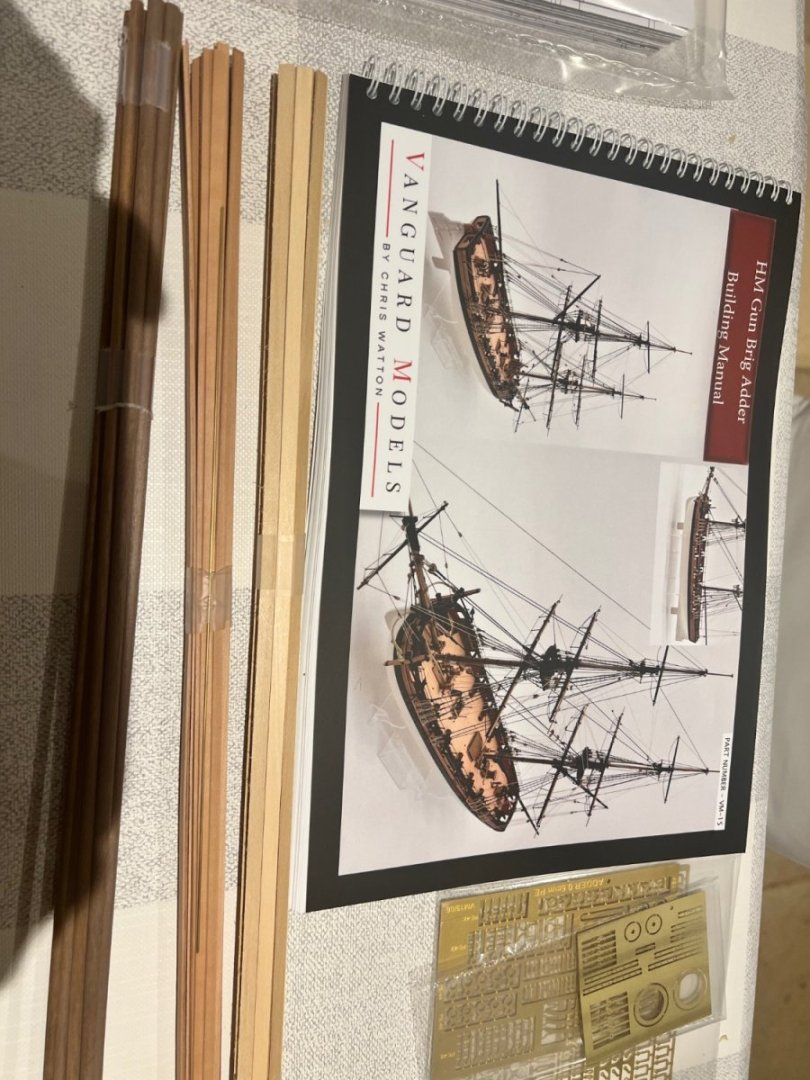
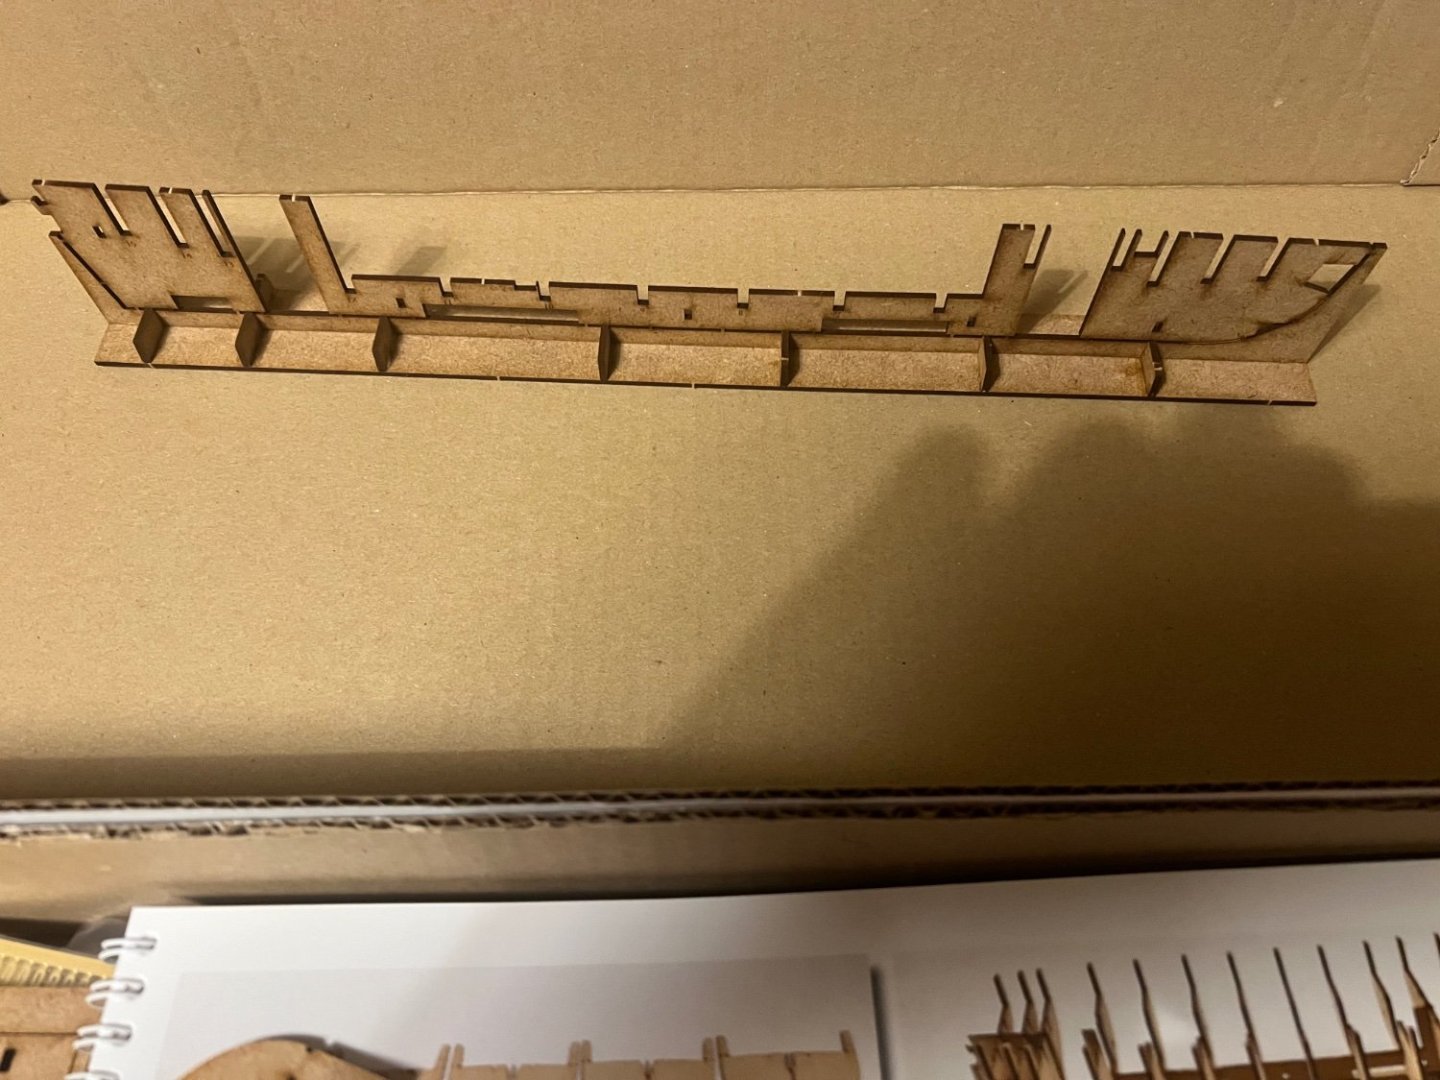
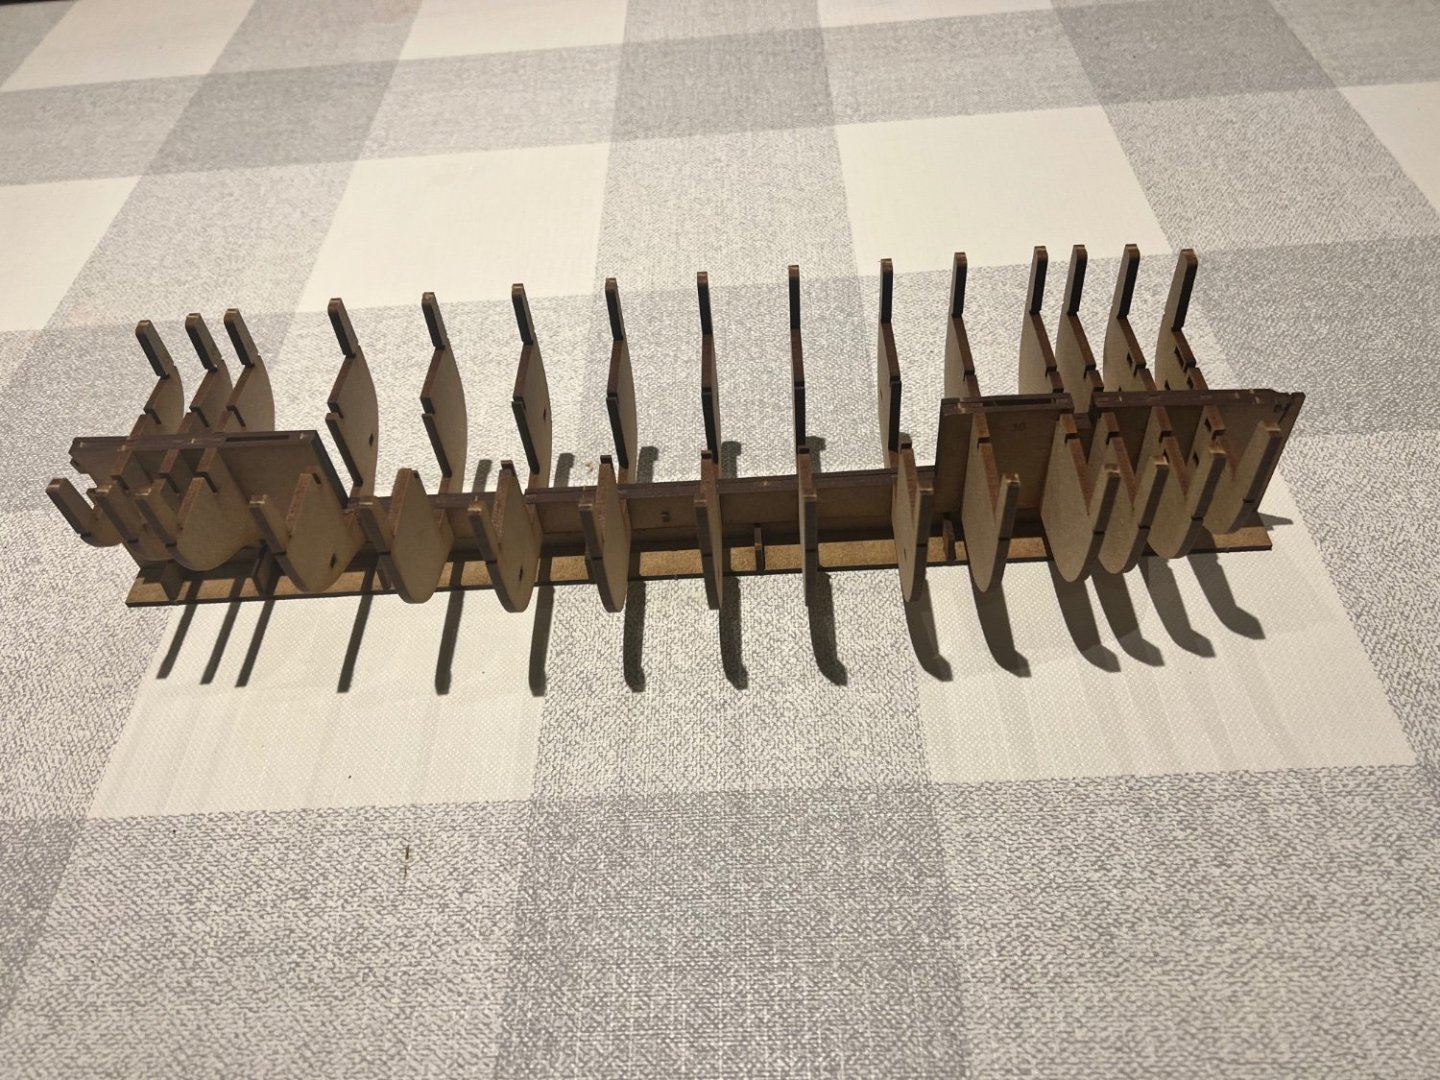
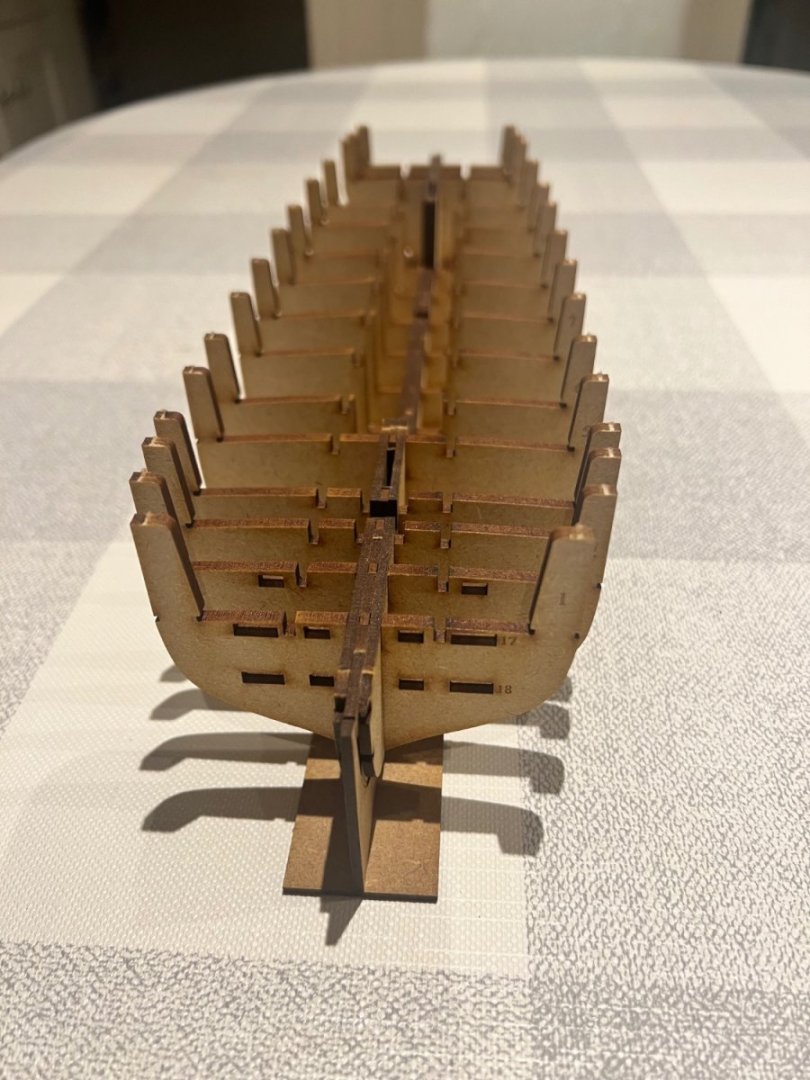
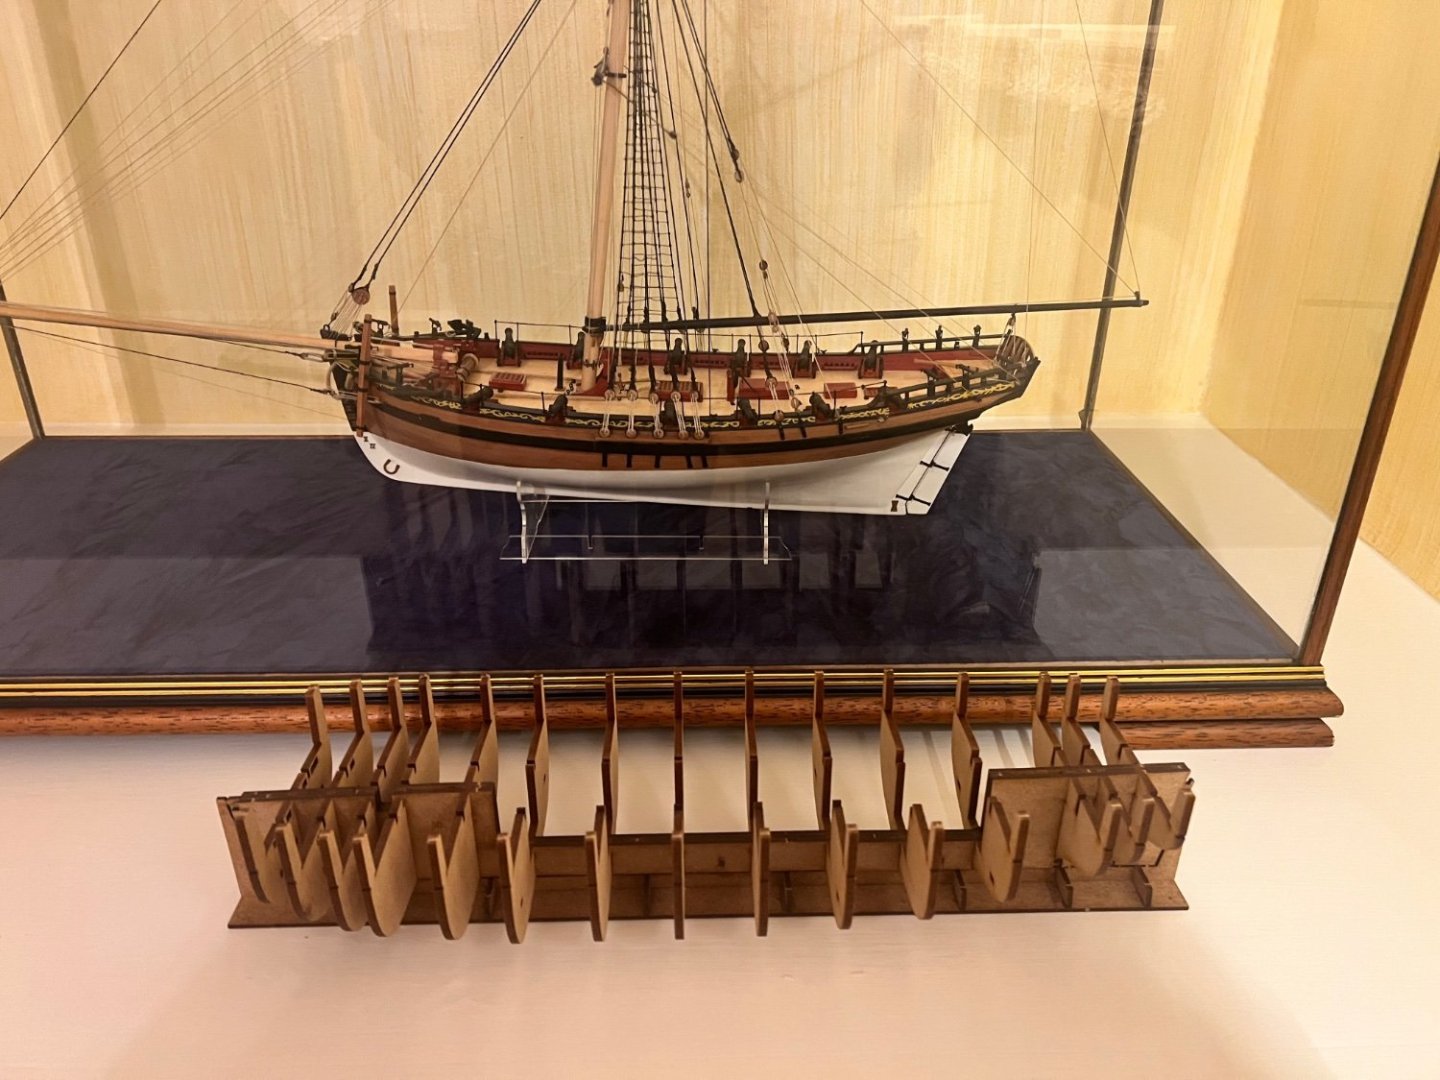
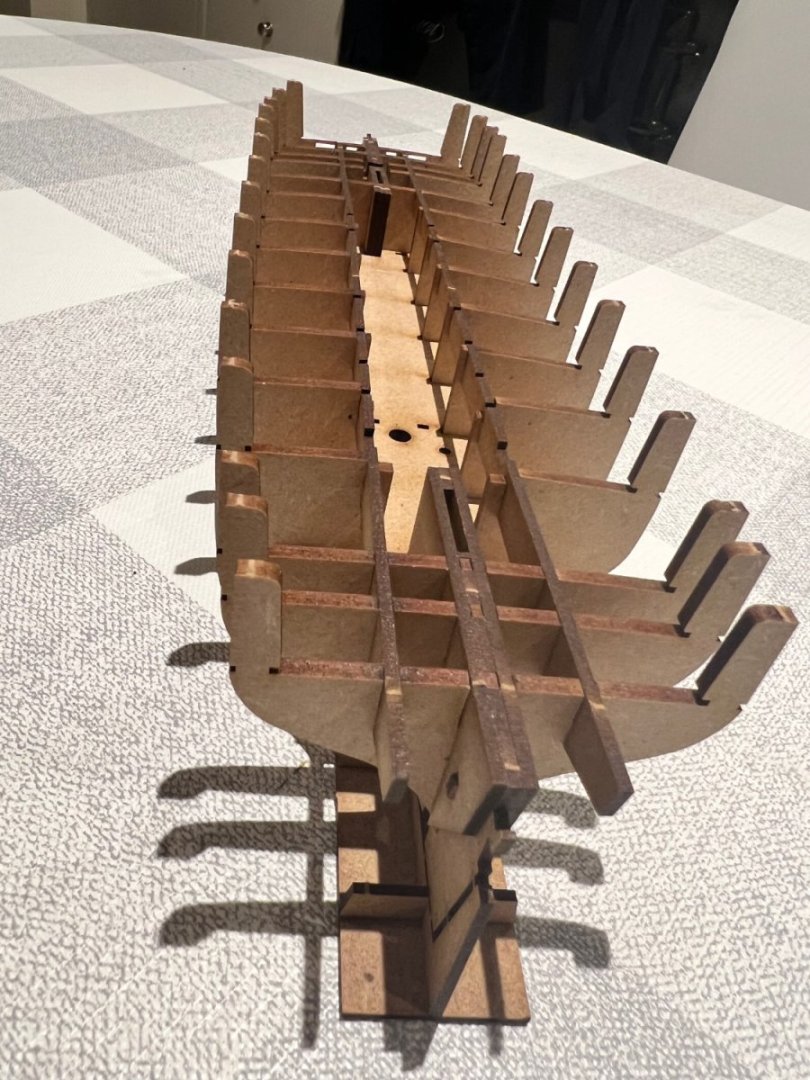
Whilst I’ve been away Adder appeared on my doorstep. Adder will be my ninth build (all from Vanguard) and my first square rigger. My plan had been to build VM’s Speedy next, and I like to only have one kit waiting to be built next so a stash doesn’t build up. But speaking to Chris, he advised me the following: I have a great deal to learn on how to rig a square rigged boat and where all the lines go, so having a slightly reduced rig for my first square rigger makes absolute sense. Chris also advised that the bluff bow on Adder is not a problem for planking as half the hull is covered in pre-cut engraved parts and the actual planking is all white painted and below the waterline. I know I’m not a builder who has the patience to ever produce a planked and fully unpainted hull, so that’s music to my ears. I had also really liked the look of this highly unusual boat when Chris first released pics of his prototype and knew I’d want to build her, so it became a question of whether I should build Adder or Speedy first. Chris’s guidance made it very clear to me that Adder should be the first. Beautifully packaged with the usual exceptionally high quality content that I have come to expect from Vanguard. Some photos of the box contents: Those two 24 pounder cannons, which are Adder’s raison d’etre, are huge. Shown here compared one of the tiny surplus to requirements 4-pounder cannons from Grecian. Chris has continued to innovate here and the first instruction is to build a throw away keel base / build slip which the keel slots into. Furthermore, the keel itself is attached to a jig that will be broken off later. All very clever and helpful. The bulkheads slot in easily. Once the bulkheads are in parts 30 are dropped into place each side of the keel to secure them. As in other VM builds these do a wonderful job of making the structure more robust, but can be stiff to push fully home. As usual I did break each of these at least once fitting them, but they’re fully seated in place and the breaks don’t seem to matter. There’s so much robustness and other supports to ensure alignment in Chris’s hull structure that a few small breaks don’t matter. On Grecian by mistake I left out a whole set of bracing supports across the bulkheads without any detrimental loss of structural integrity for her hull. Photo of Adder with Alert below. Adder is roughly the same length, albeit a very different shaped hull. I knew her dimensions, but as a two-master she looks bigger in the VM photos. She is going to be a very nice easy size to case and display at home. Lower deck was fitted and parts 31 across the top of the bulkheads, another part ensuring the structure is straight.


- 146 replies
-
- 21
-
-
- Adder
- Vanguard Models
- (and 1 more)
-
So glad it was a help! James does make the prototype builds look effortless. Enjoy and do post some photos of yours when she’s complete.