HOLIDAY DONATION DRIVE - SUPPORT MSW - DO YOUR PART TO KEEP THIS GREAT FORUM GOING! (83 donations so far out of 49,000 members - C'mon guys!)
×

DB789
-
Posts
428 -
Joined
-
Last visited
Content Type
Profiles
Forums
Gallery
Events
Everything posted by DB789
-
 So glad it was a help! James does make the prototype builds look effortless. Enjoy and do post some photos of yours when she’s complete.
 -
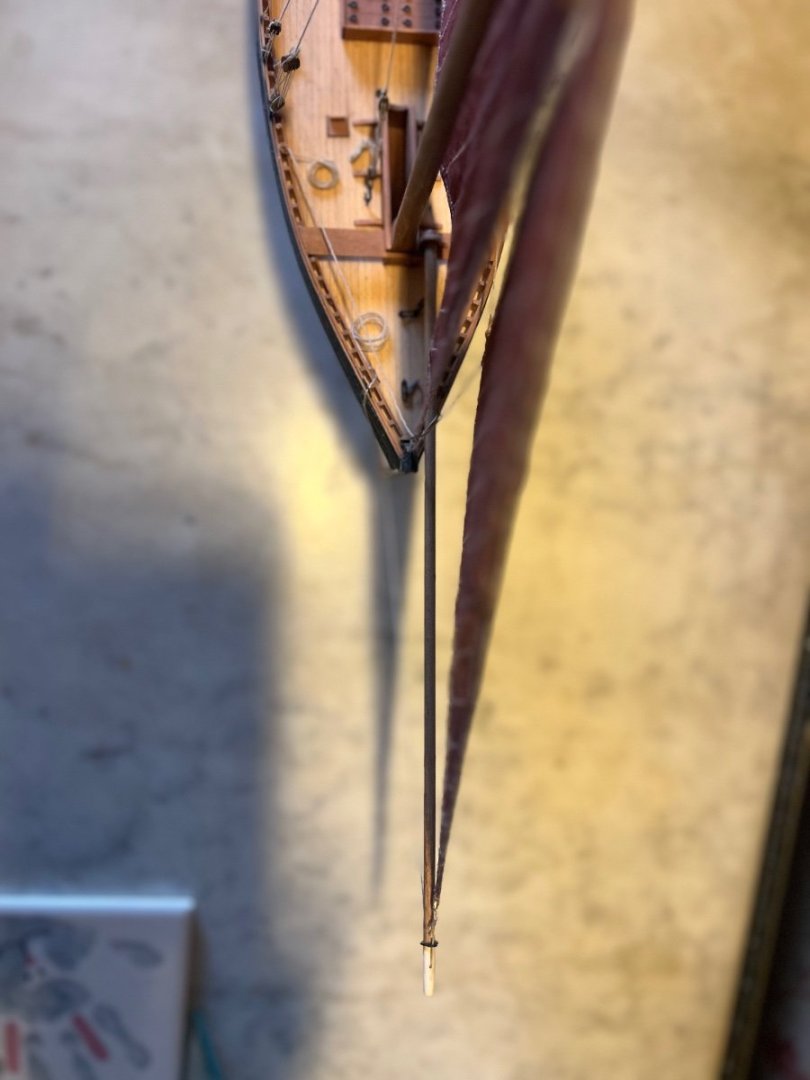
Looks great, it could be the perspective in the photo, but it looks like your bowsprit isn’t straight. I think that it should be parallel to the centreline of the hull and roughly in line with the boom. Photo from my very dusty Zulu below.
-
Thanks Chris and Bob, I’m very glad Chris W included them too. I’ve really enjoyed making them. Although my wife is asking me where all these boats (now 8 in just under 2 years) are going to live and she may have a point…. Having swapped messages with Chris, my next build will now be Adder, not Speedy. Chris assures me that despite the bluff bows the planking isn’t too difficult on Adder with all the planking being under the white paint and below the waterline and only 12 planks per side with the rest pre-cut. I think Adder is such an interesting looking boat, but the main reason for switching now is that Chris has left off some elements of Adder’s running rigging which makes her more straightforward to rig than Speedy which has everything included. So Adder is probably a better intro to square riggers for me than Speedy. My pre-order of Adder is in.
- 25 replies
-
- 2
-

-
- Ranger
- Vanguard Models
- (and 1 more)
-
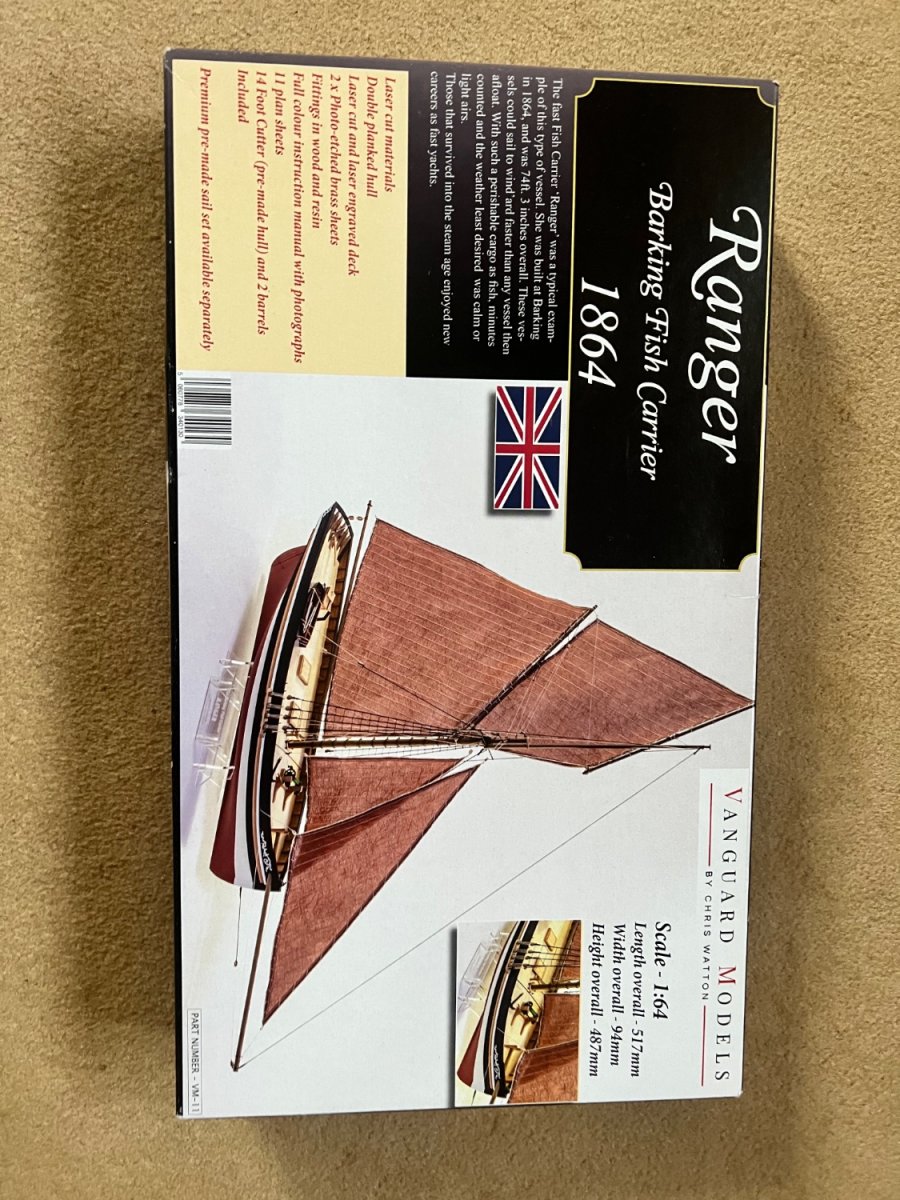
Thanks Jacques, Essentially she’s very similar to Nisha, just bigger. Planking particularly straightforward on Ranger and rigging a little less fiddly by virtue of being more accessible due to her size. Rigging is much the same except for the topsail which has an additional yard on Ranger whereas it joins onto the topmast on Nisha. Overall, Ranger is bigger boned and more robust than little Nisha, although that didn’t stop me breaking lots of the MDF parts and stepping on the resin boat - but that’s more to do with my clumsiness!
- 25 replies
-
- 2
-
-
- Ranger
- Vanguard Models
- (and 1 more)
-
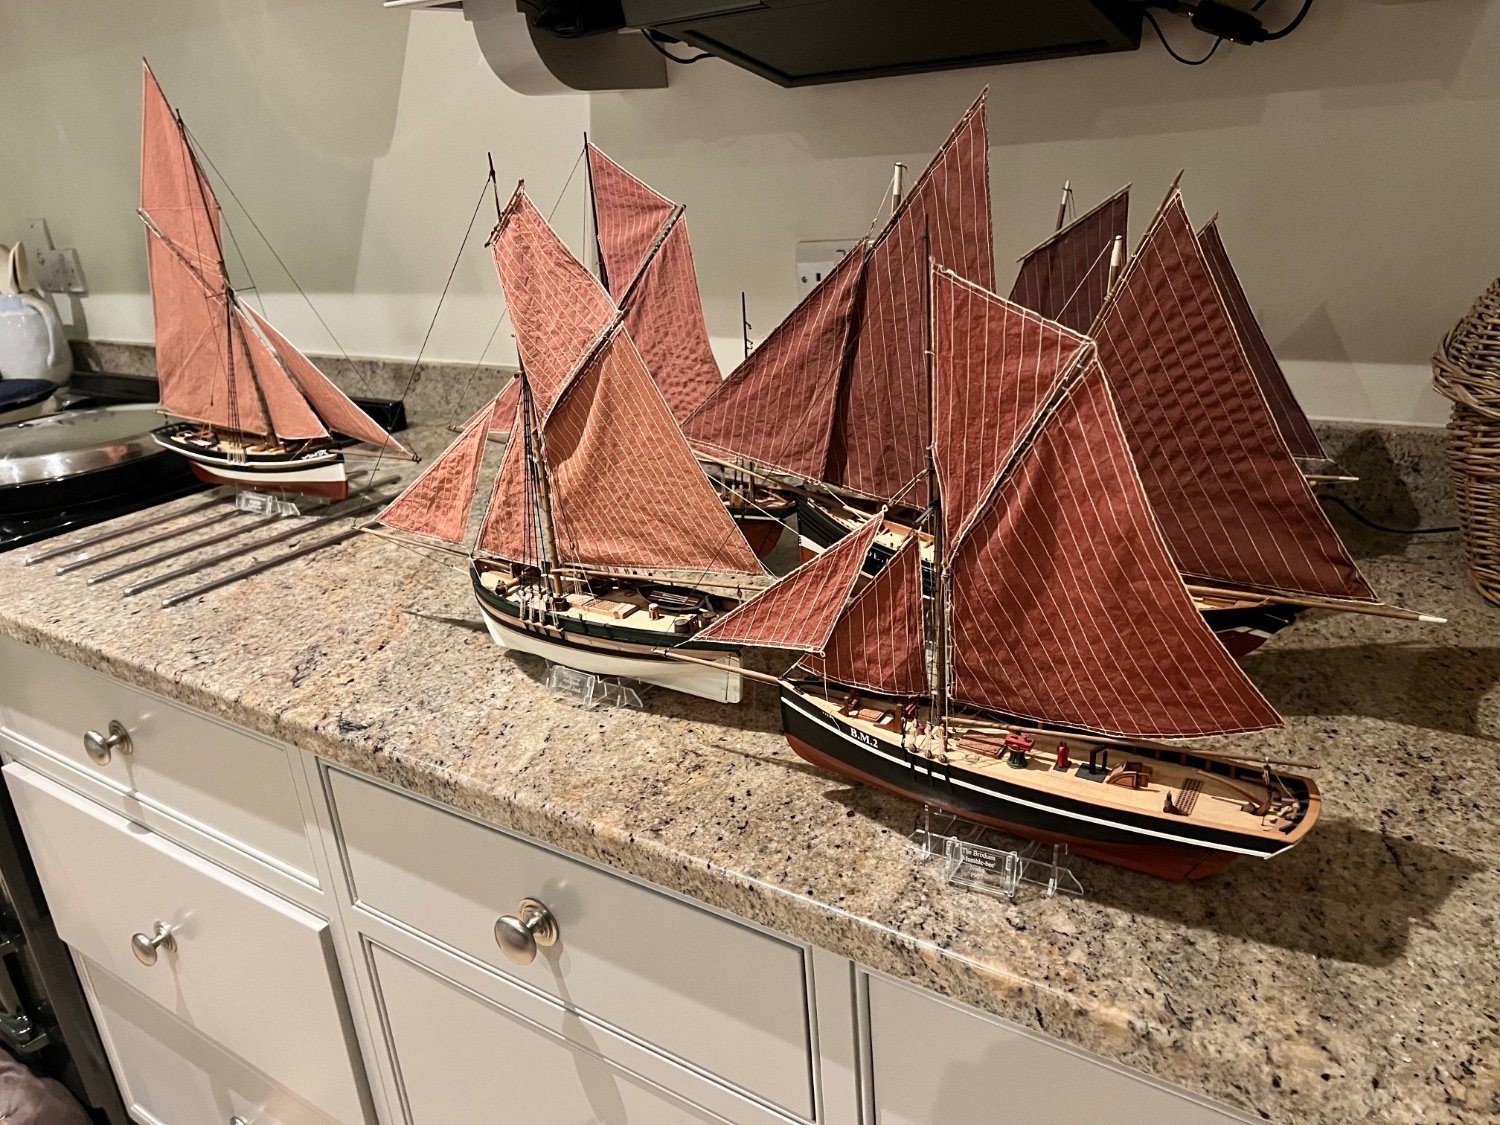
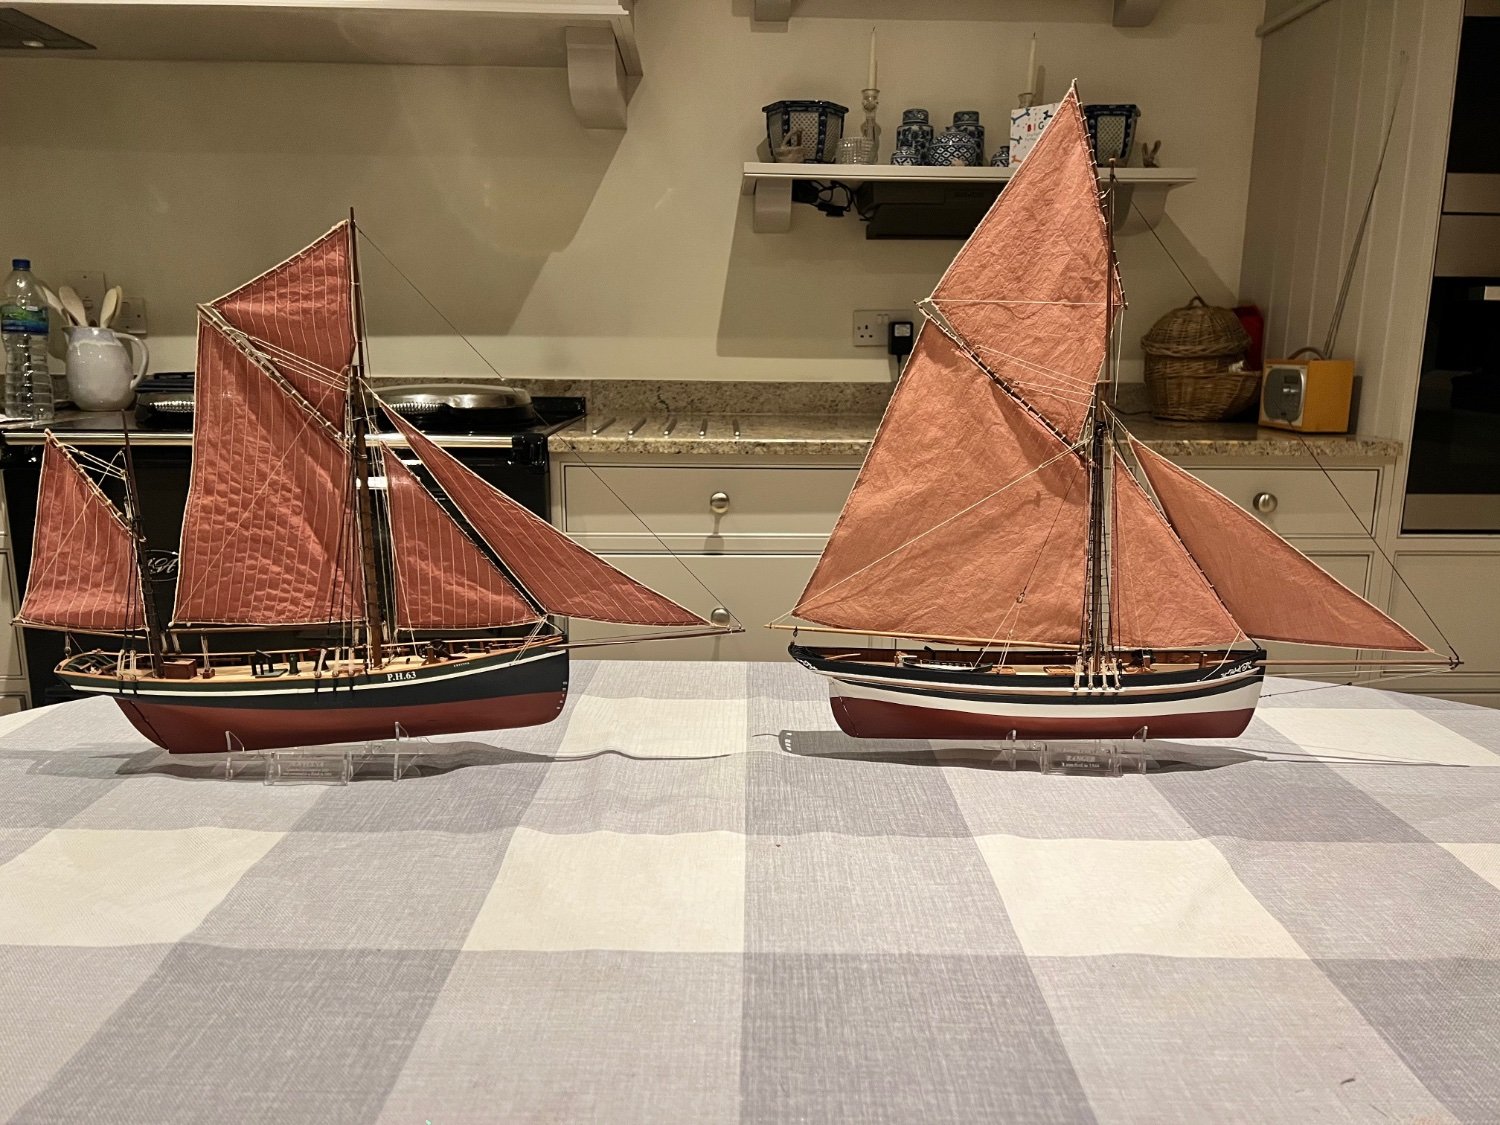
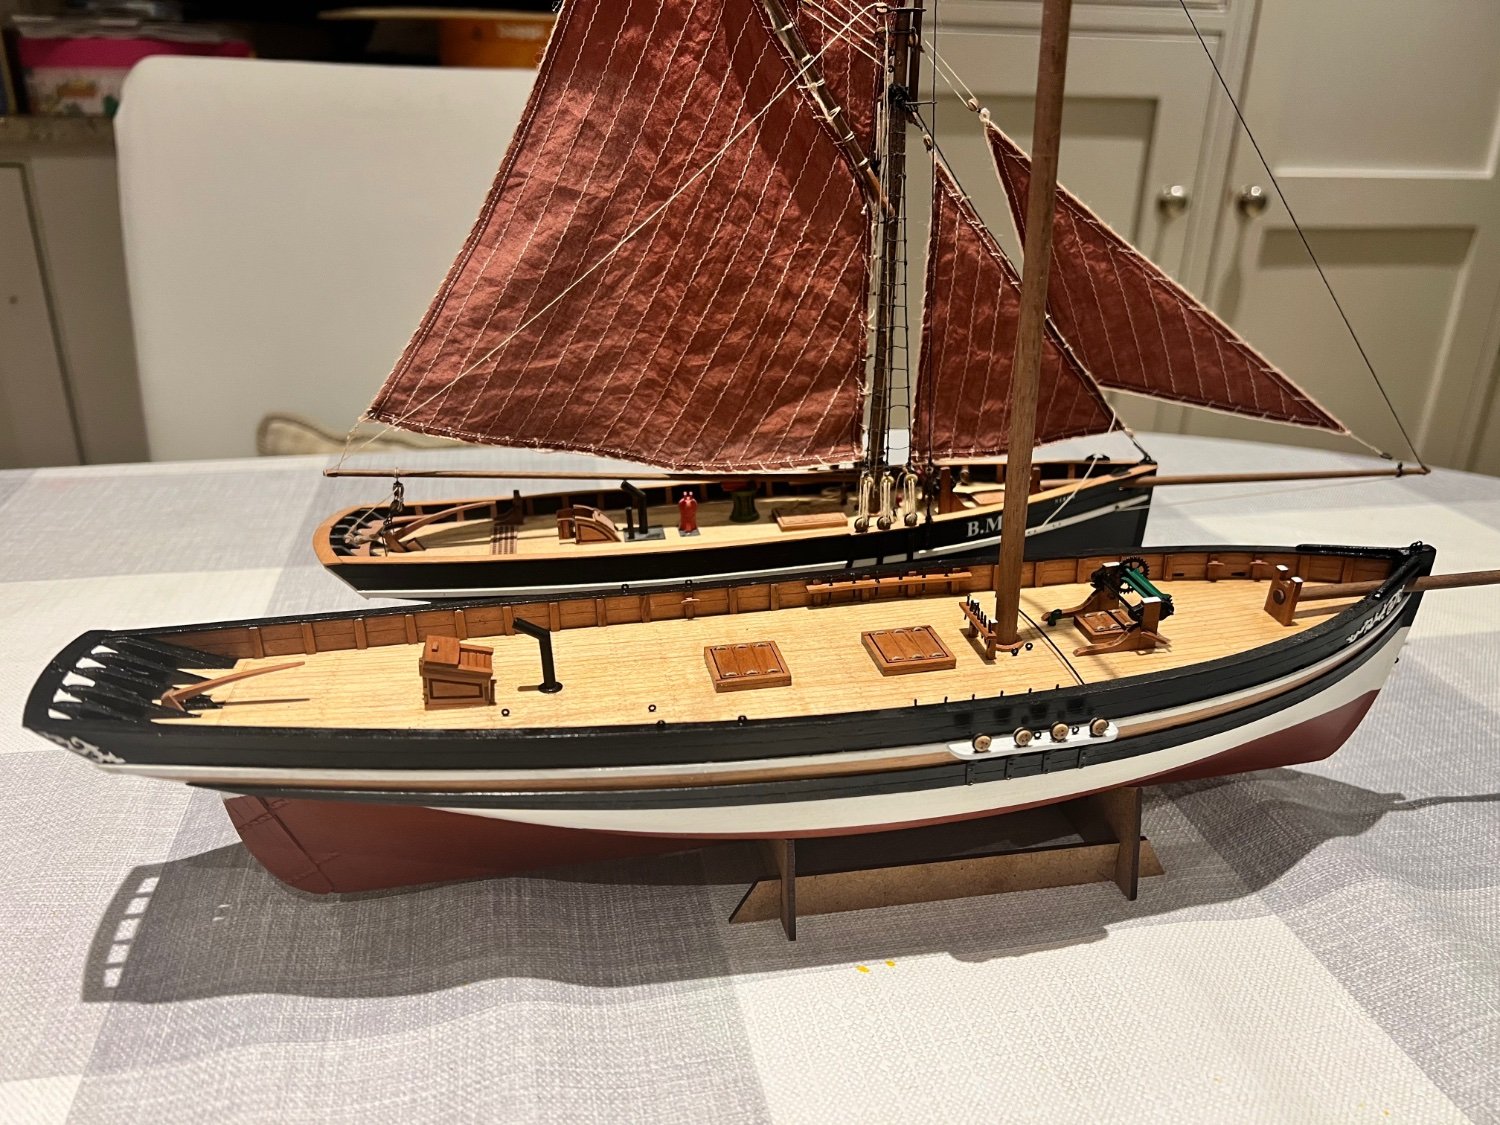
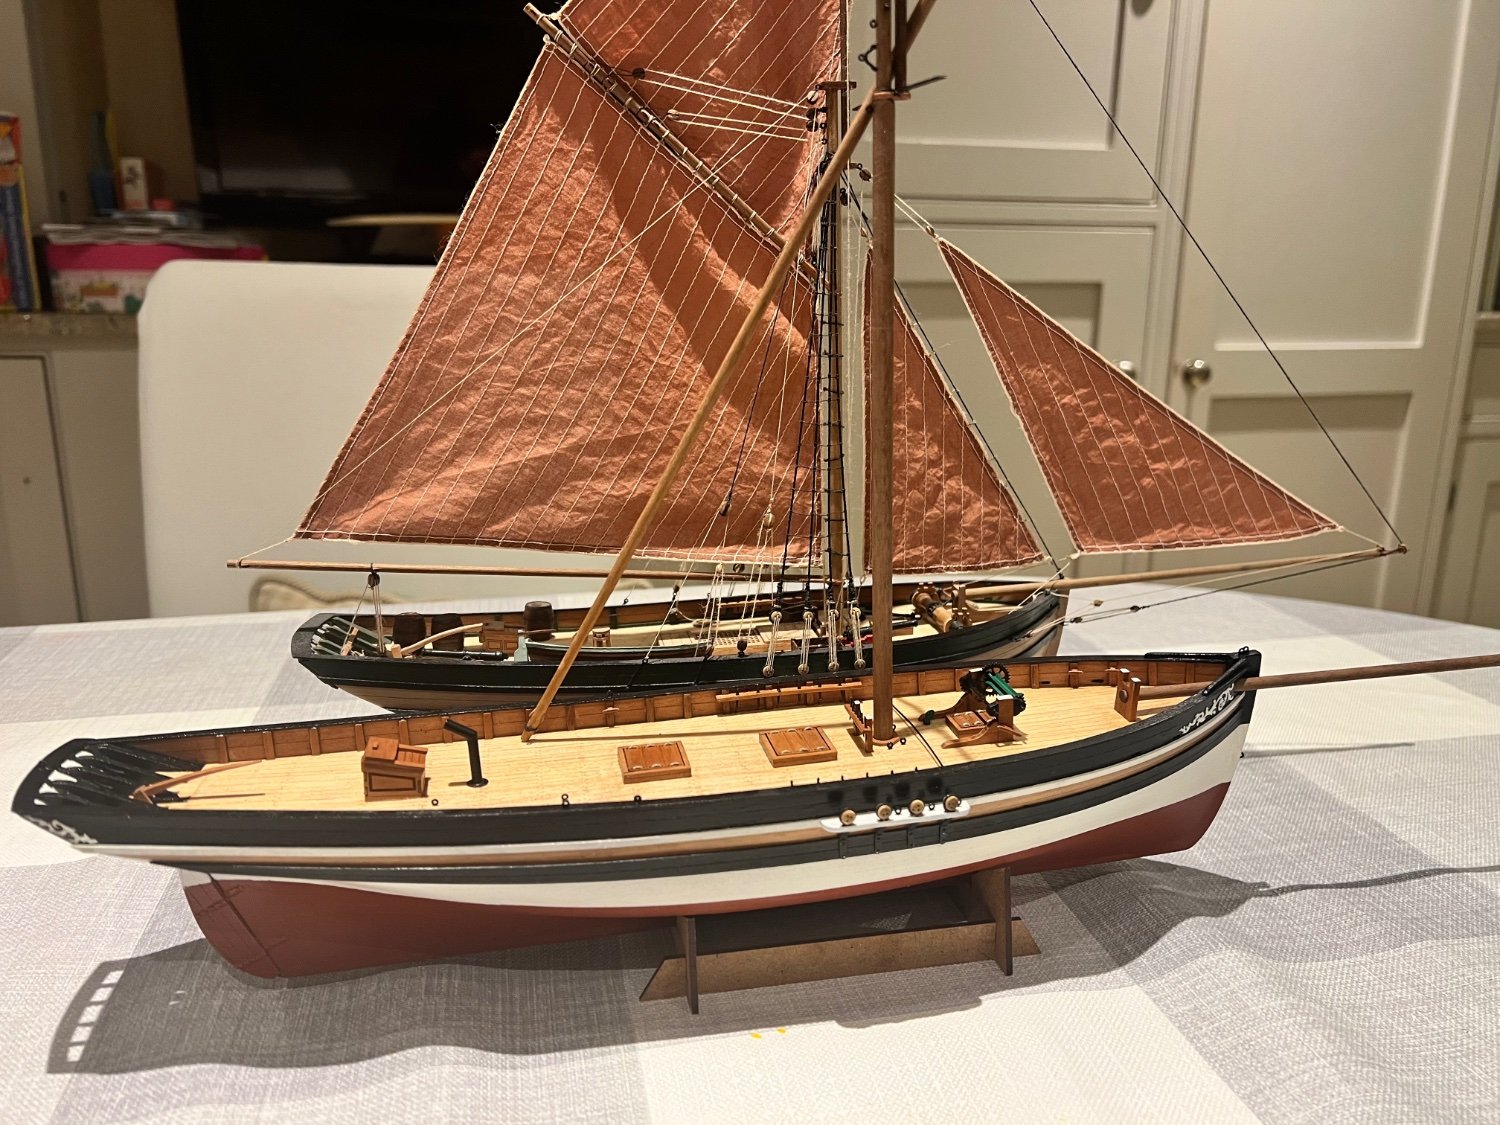
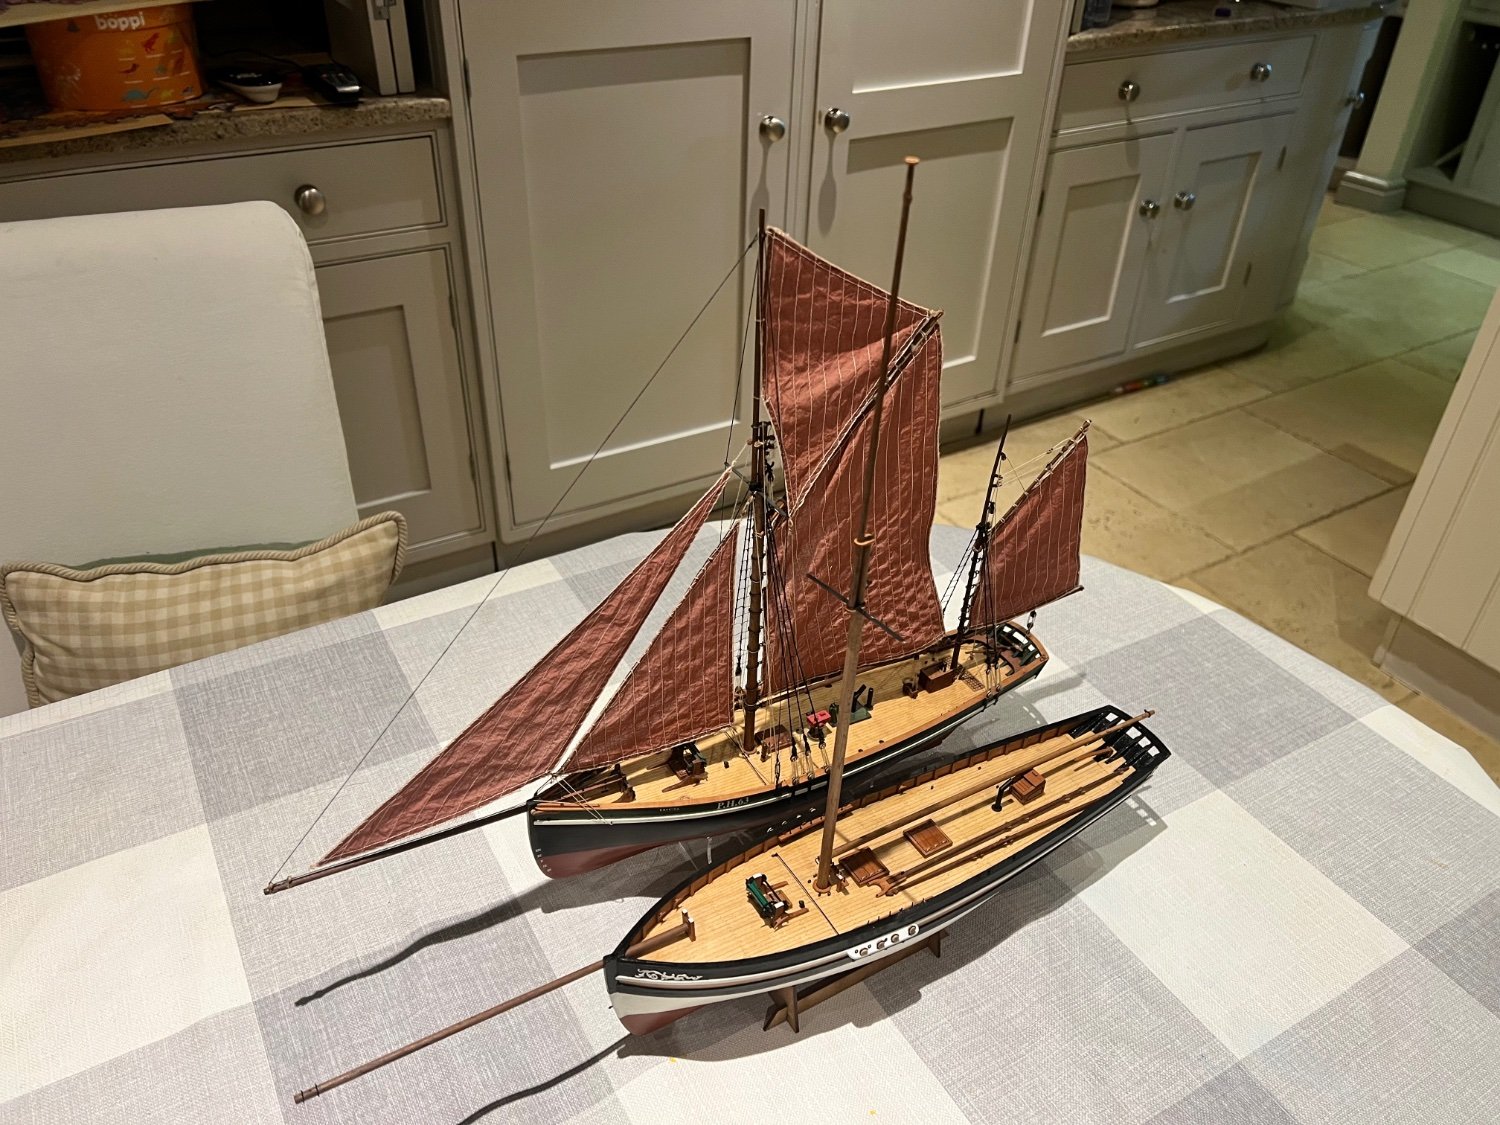
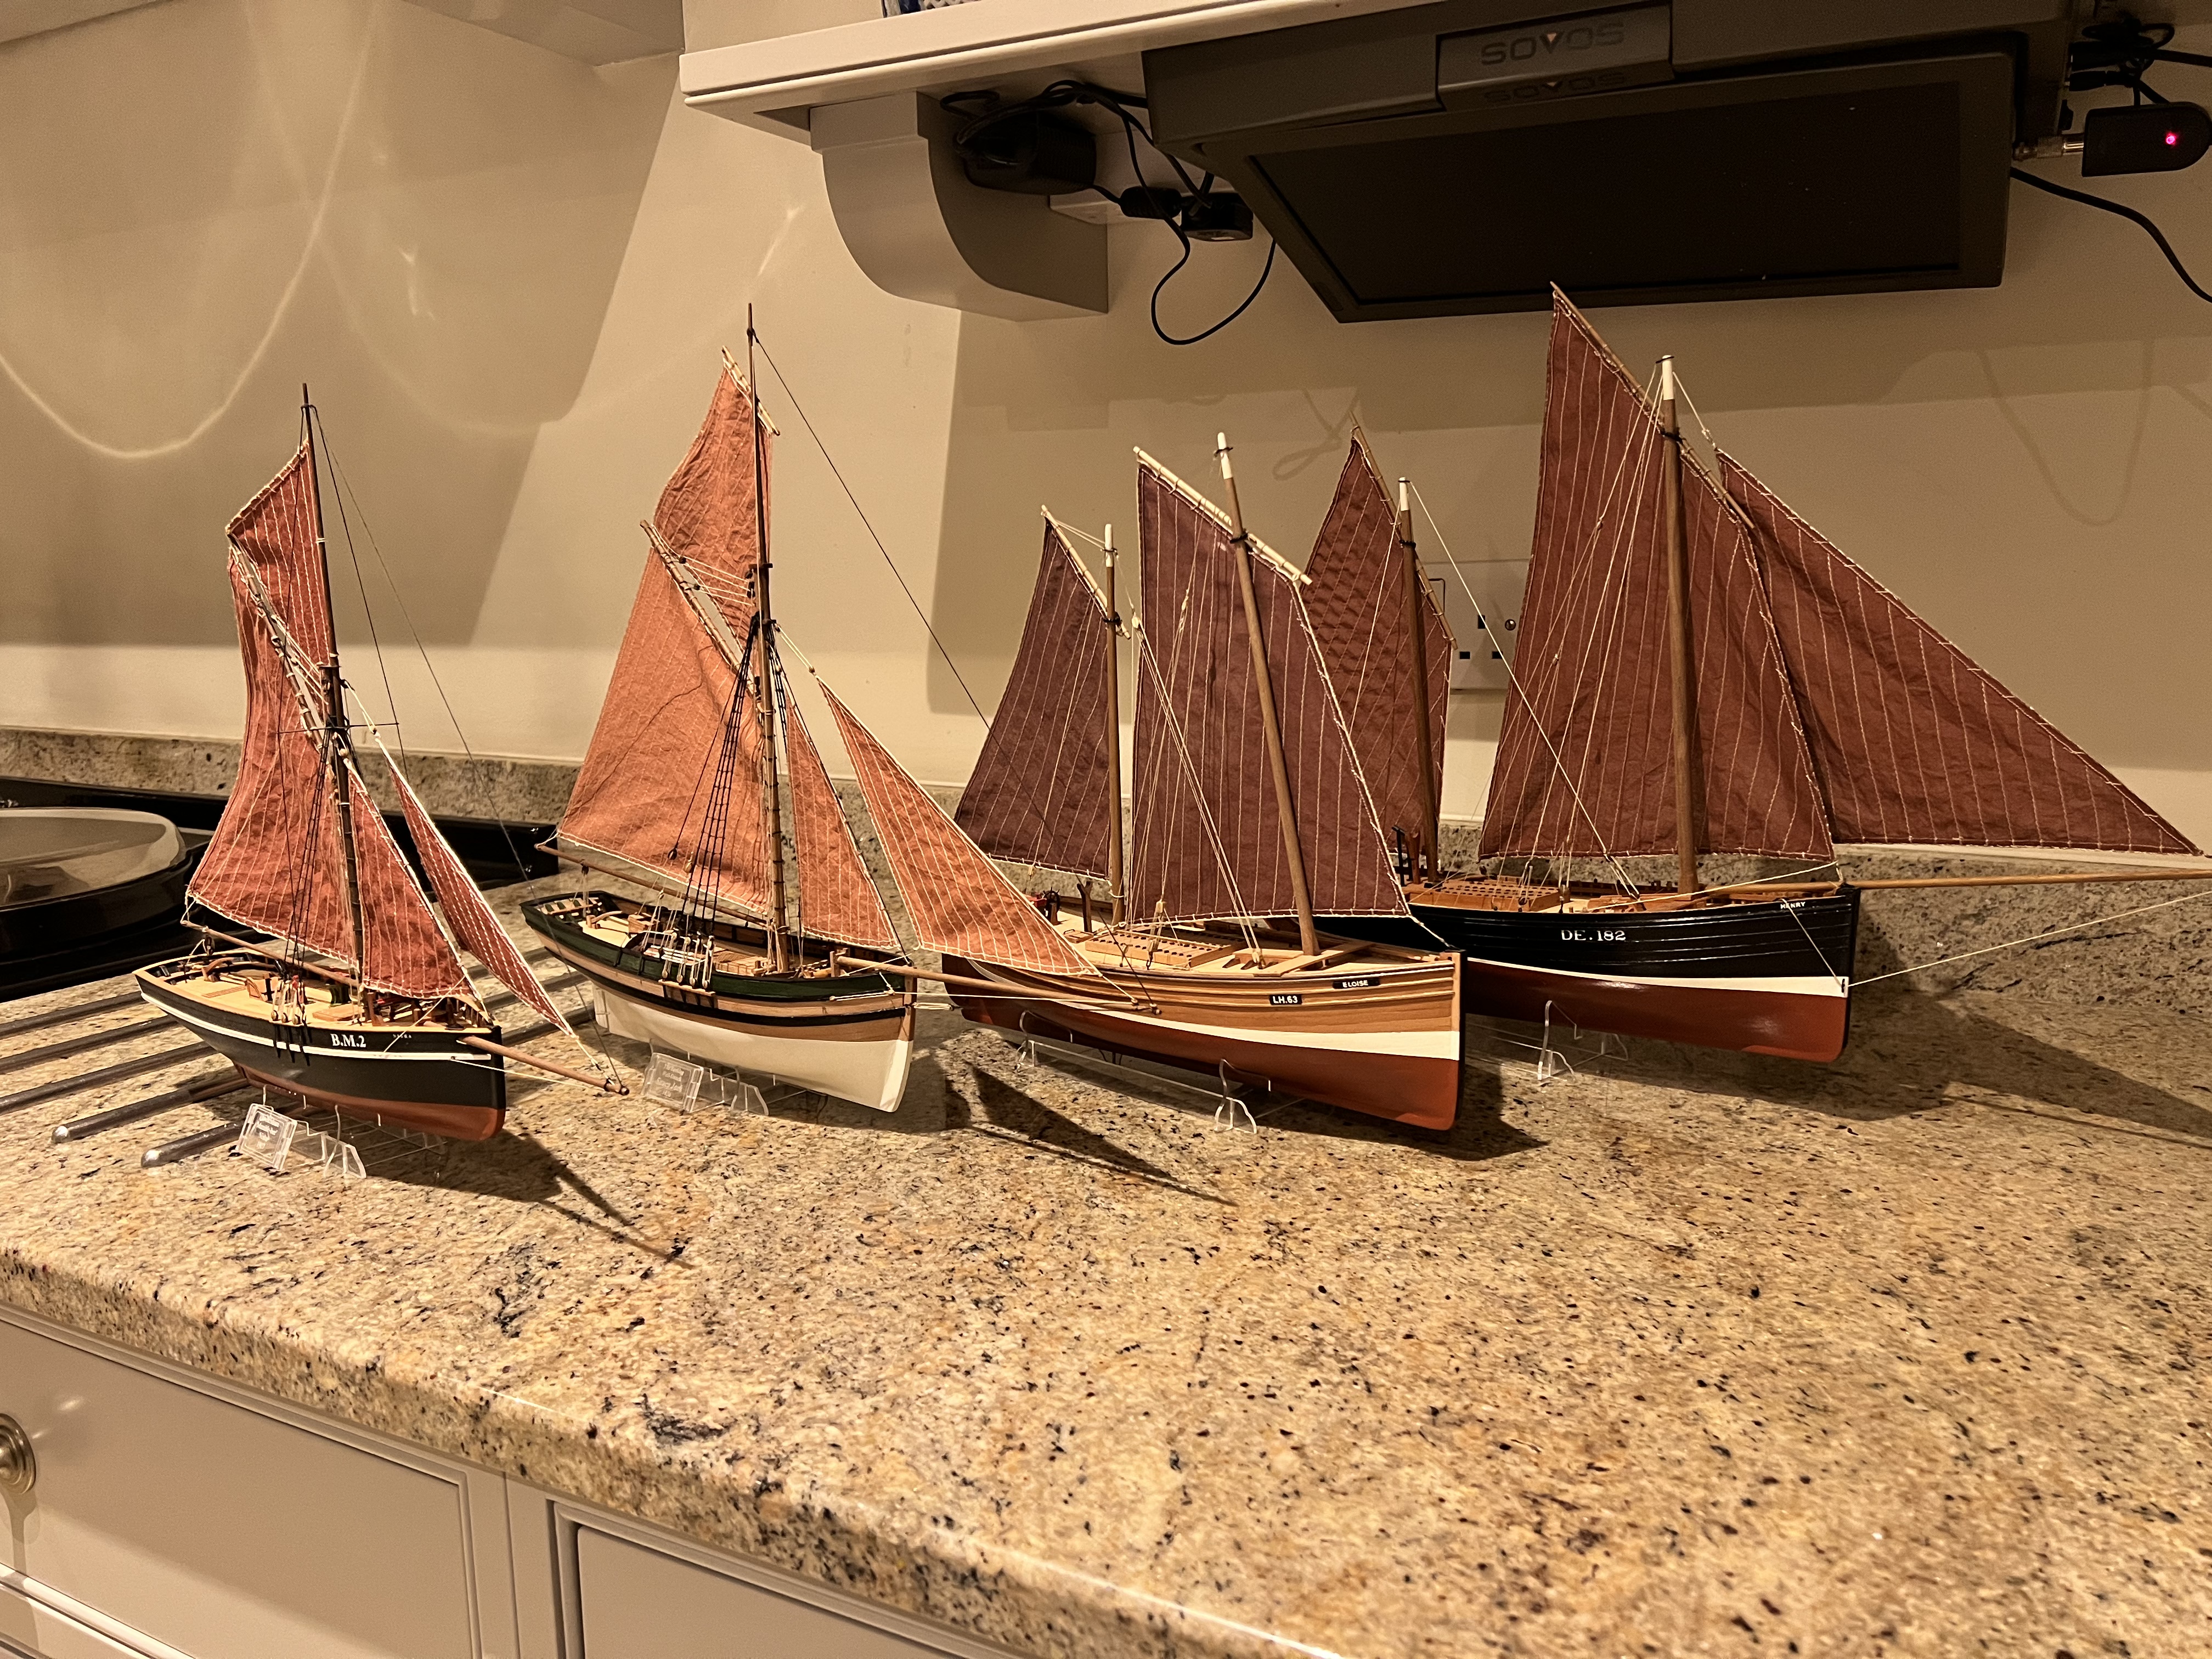
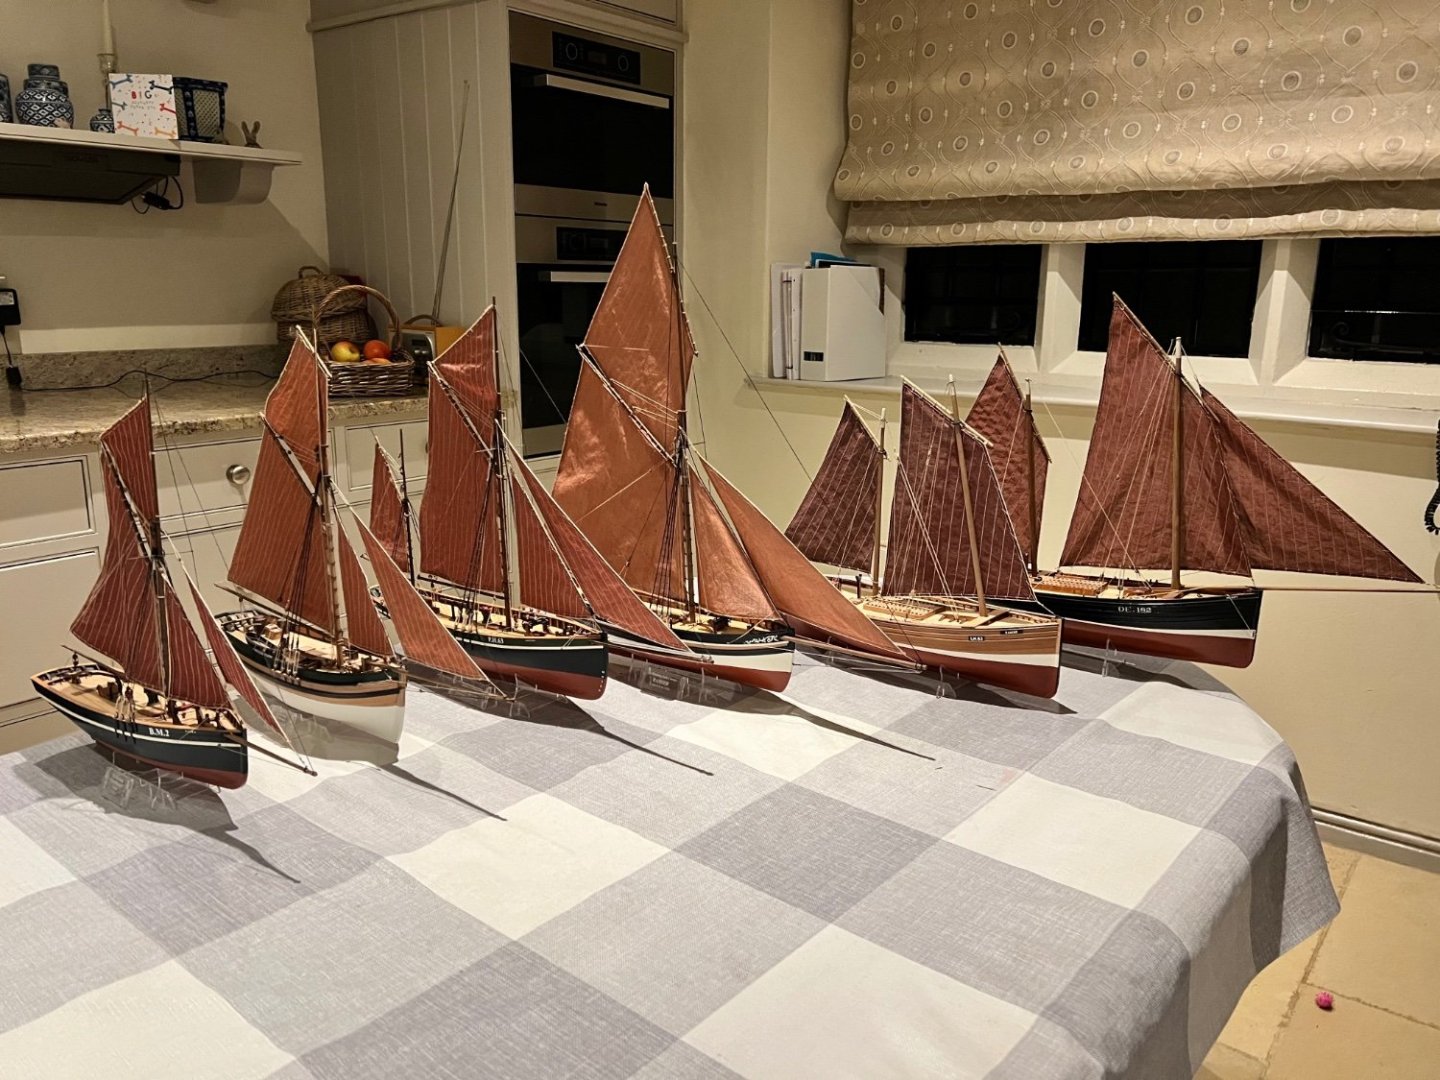
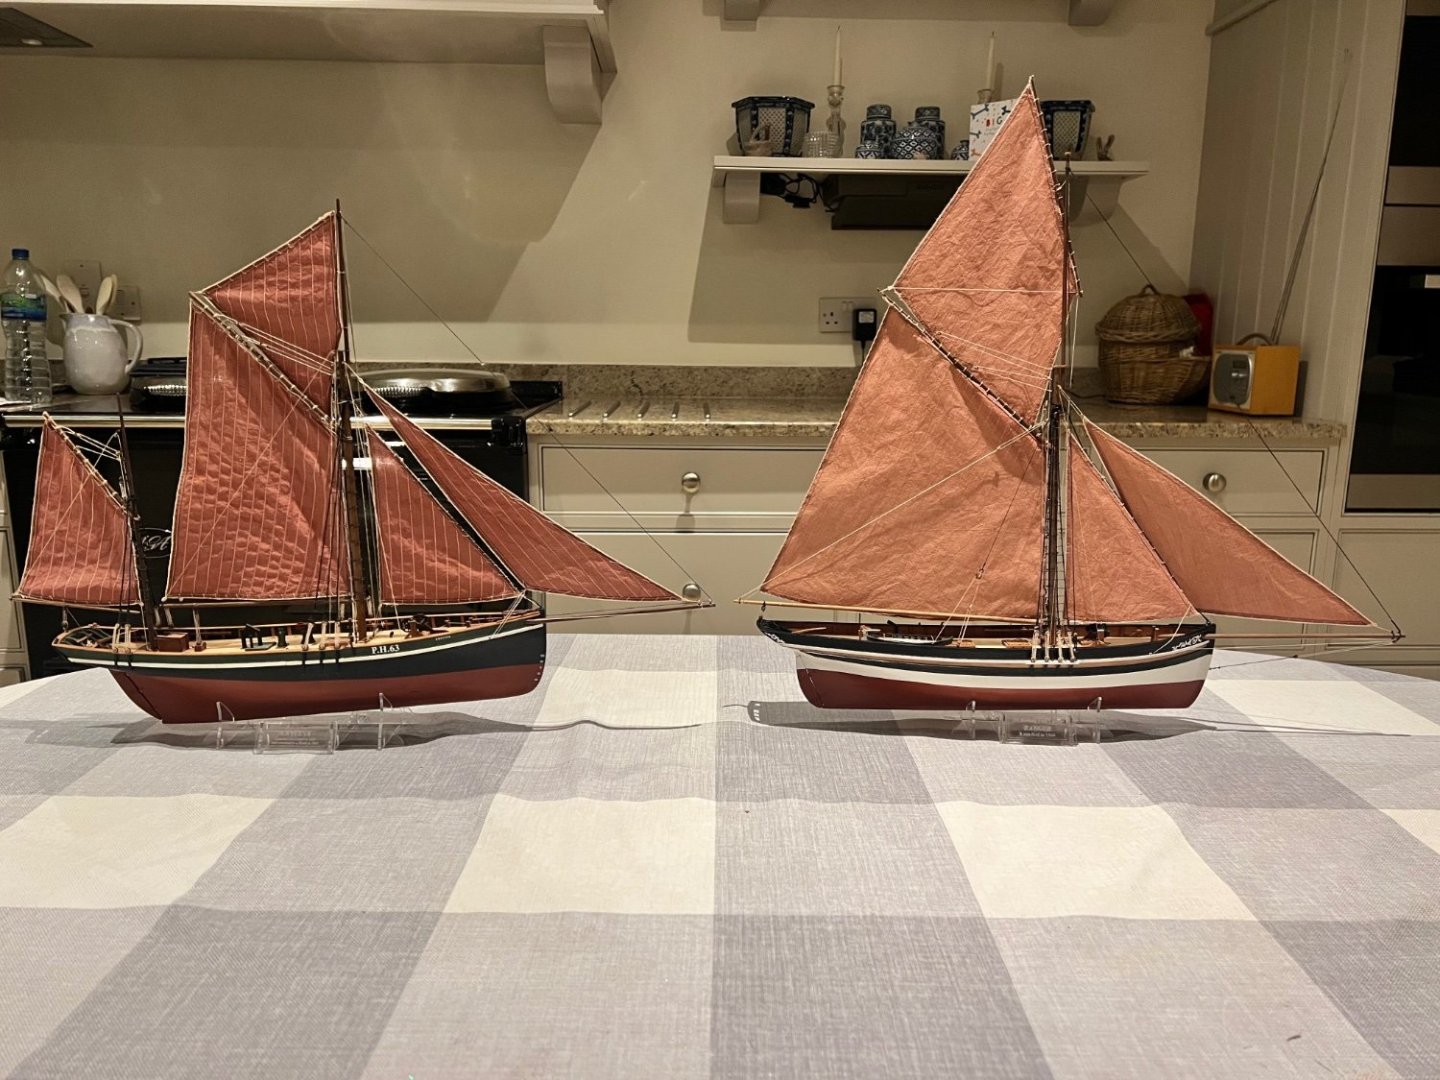
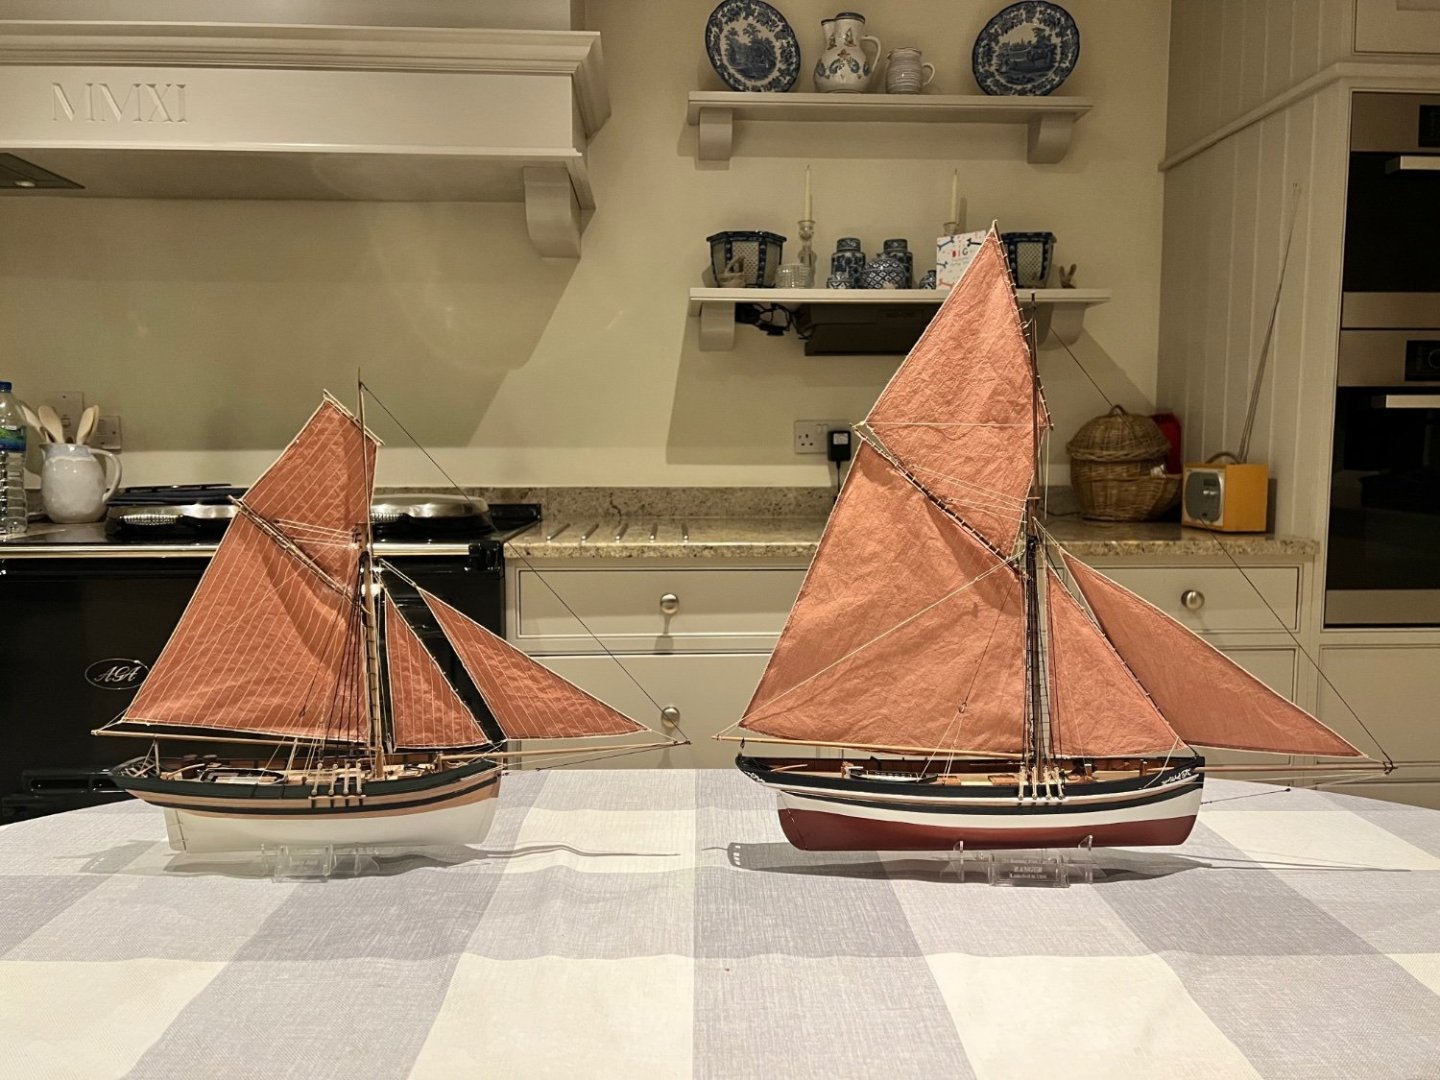
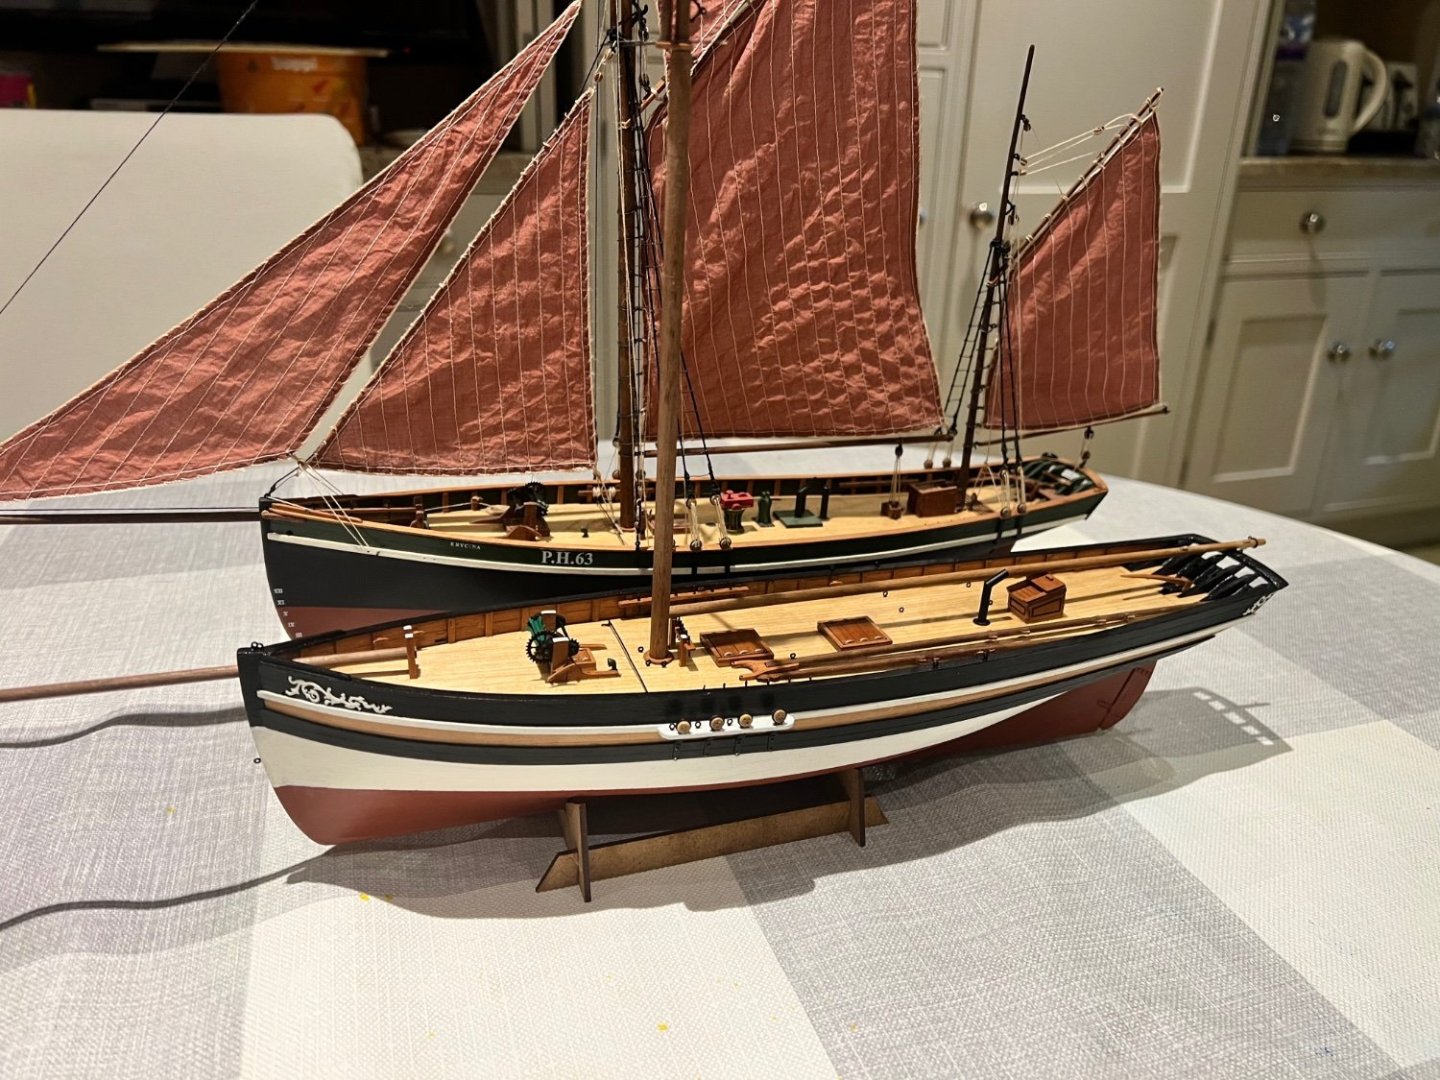
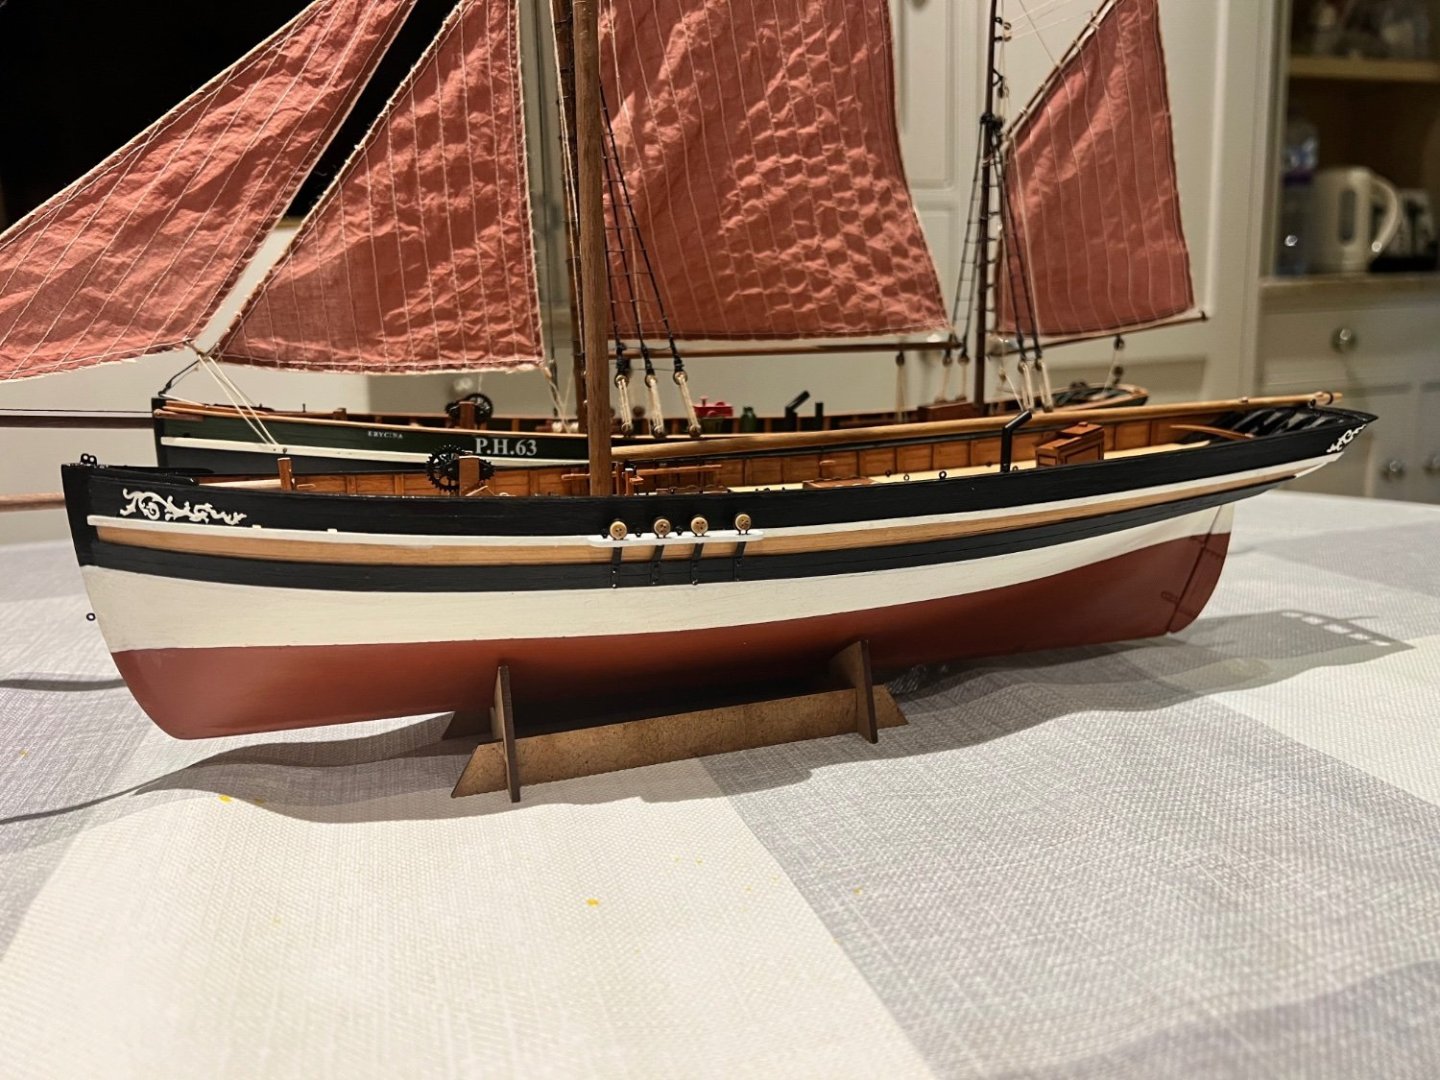
Ranger is welcomed to the fishing fleet. The fleet. Note how much taller Ranger is. Overall length and hull volume are considerably smaller than Zulu. I haven’t included Alert or Grecian as the risk of a breakage getting them out of their cases is too high. With Erycina, similar hull sizes but very different rig. Both have very graceful lines. With Saucy Jack. The shape of the two boats’ bow and stern are very similar, but whereas SJ is short and tubby, Ranger is long and graceful. I’ll be taking a few weeks off boat building. My next build is highly likely to be VM’s Speedy which I have waiting unless I’m tempted in the meantime by something more bite size such as VM’s Sherborne (not promising to build all the VM armed cutters as I have done for the fishers!) I do really want to build VM’s Adder too, she looks great, but I’m a little daunted by planking those bluff bows. I think Speedy before Adder.

- 25 replies
-
- 10
-
-

-
- Ranger
- Vanguard Models
- (and 1 more)
-
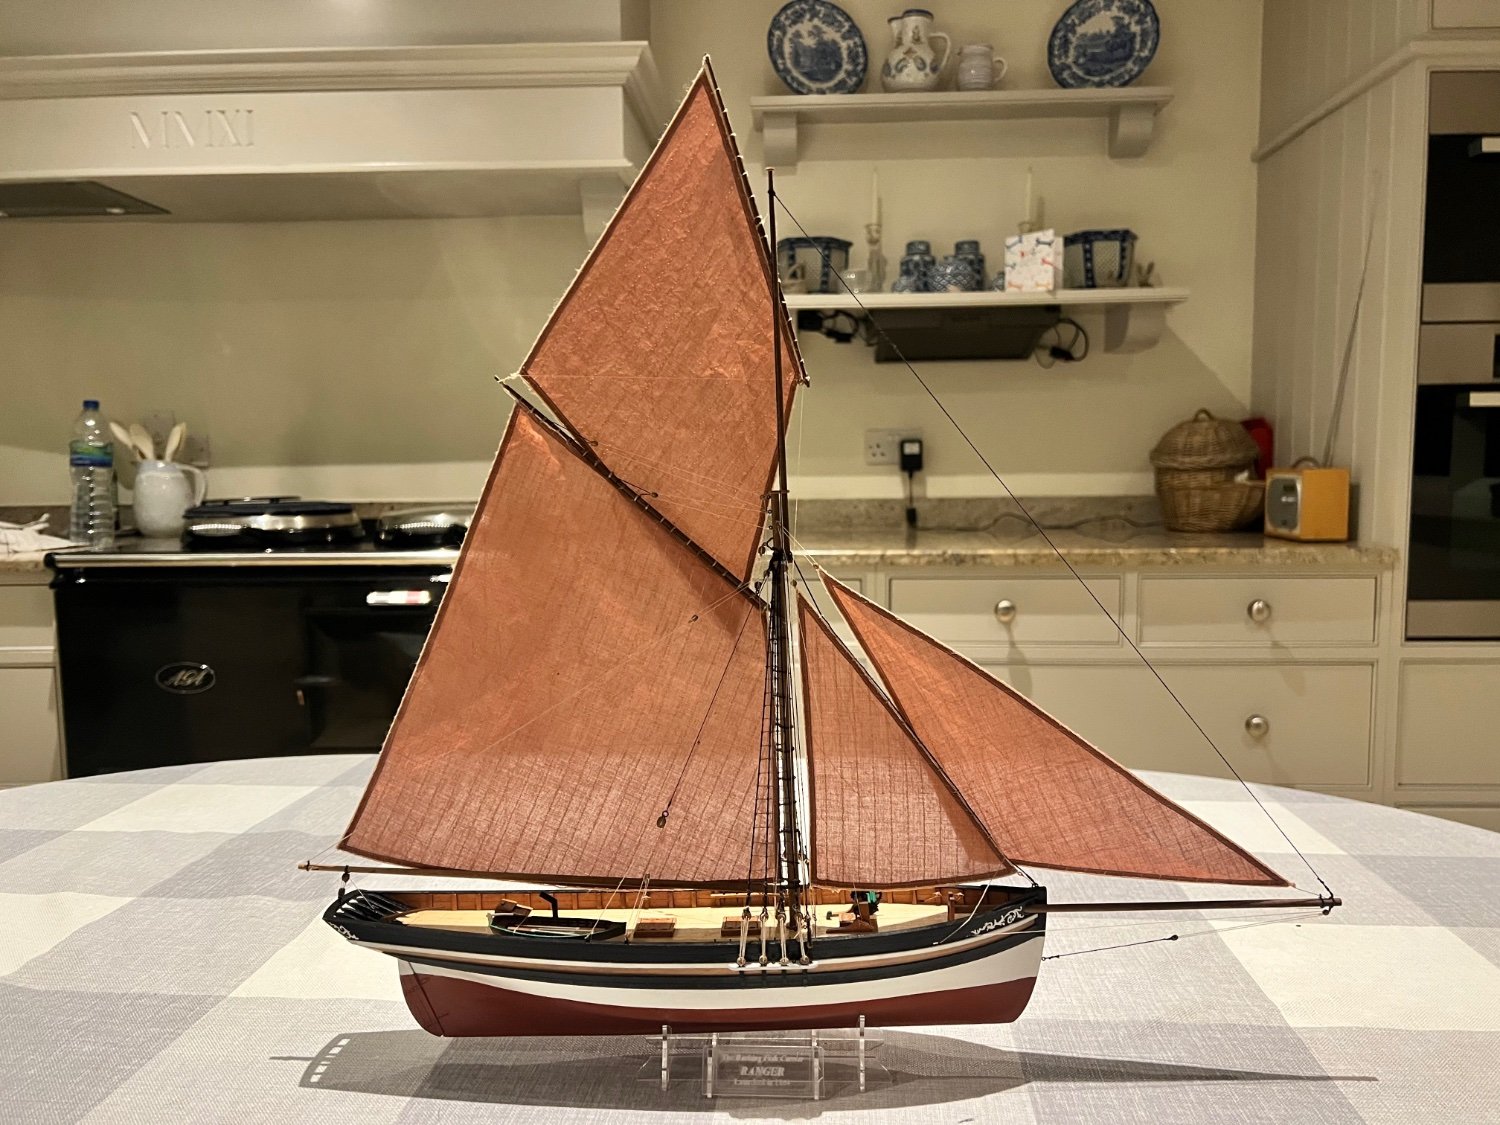
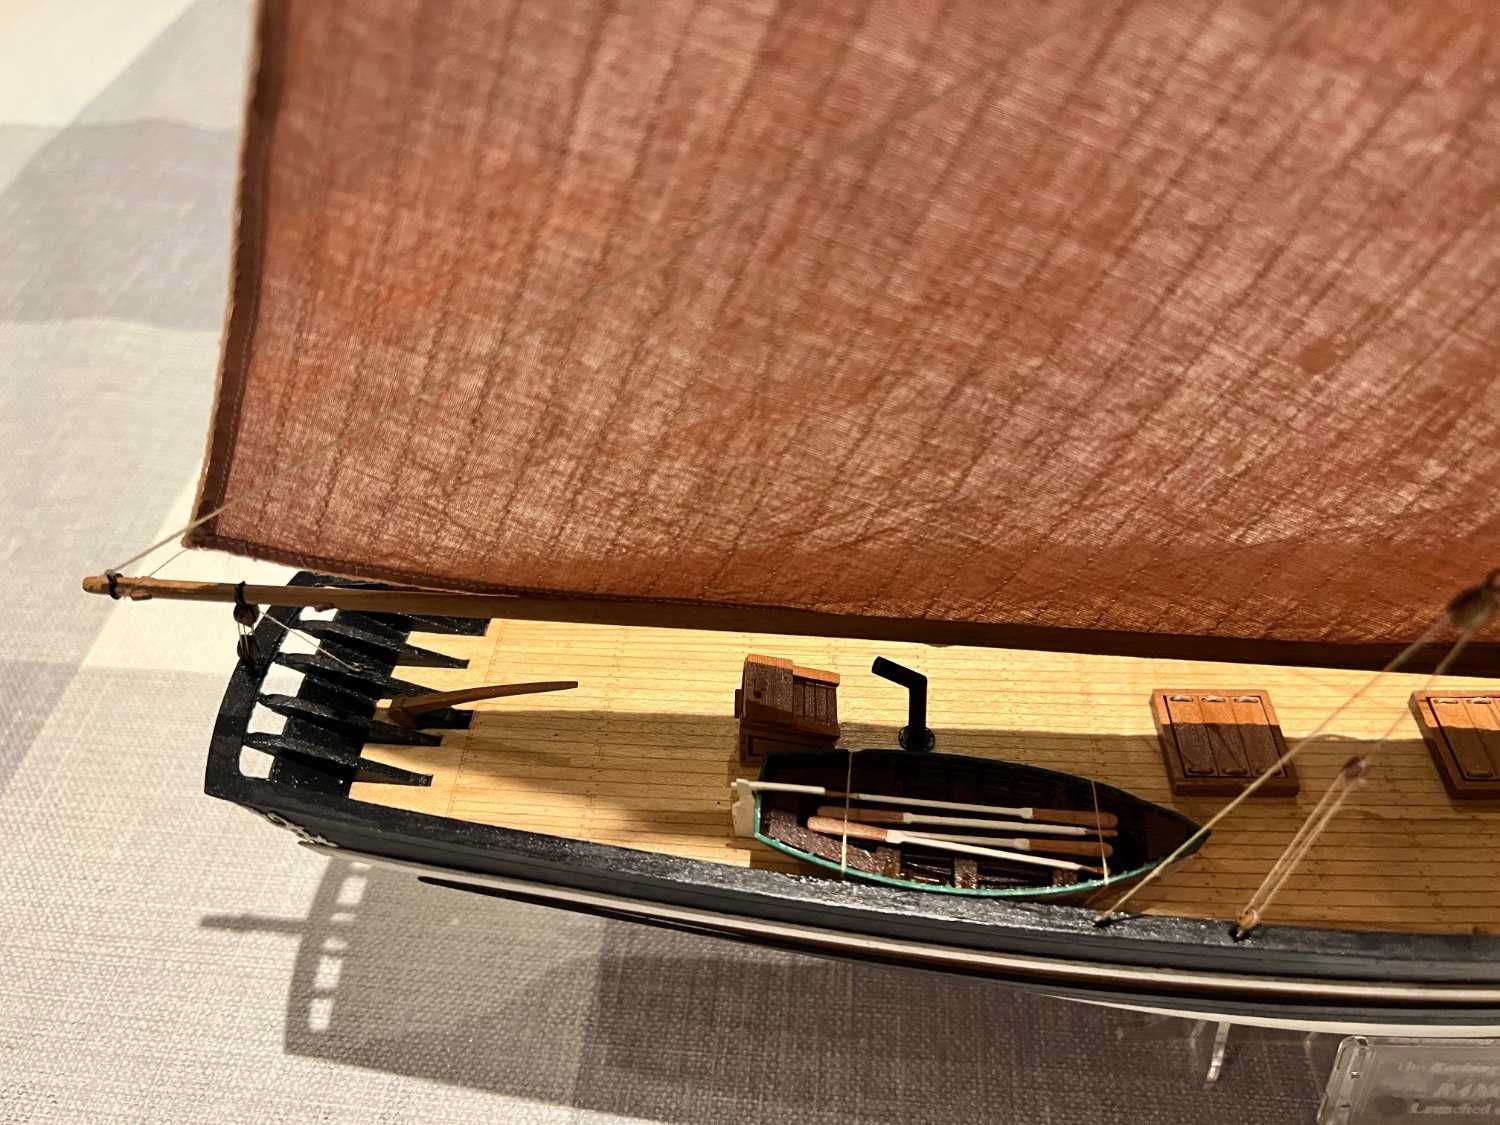
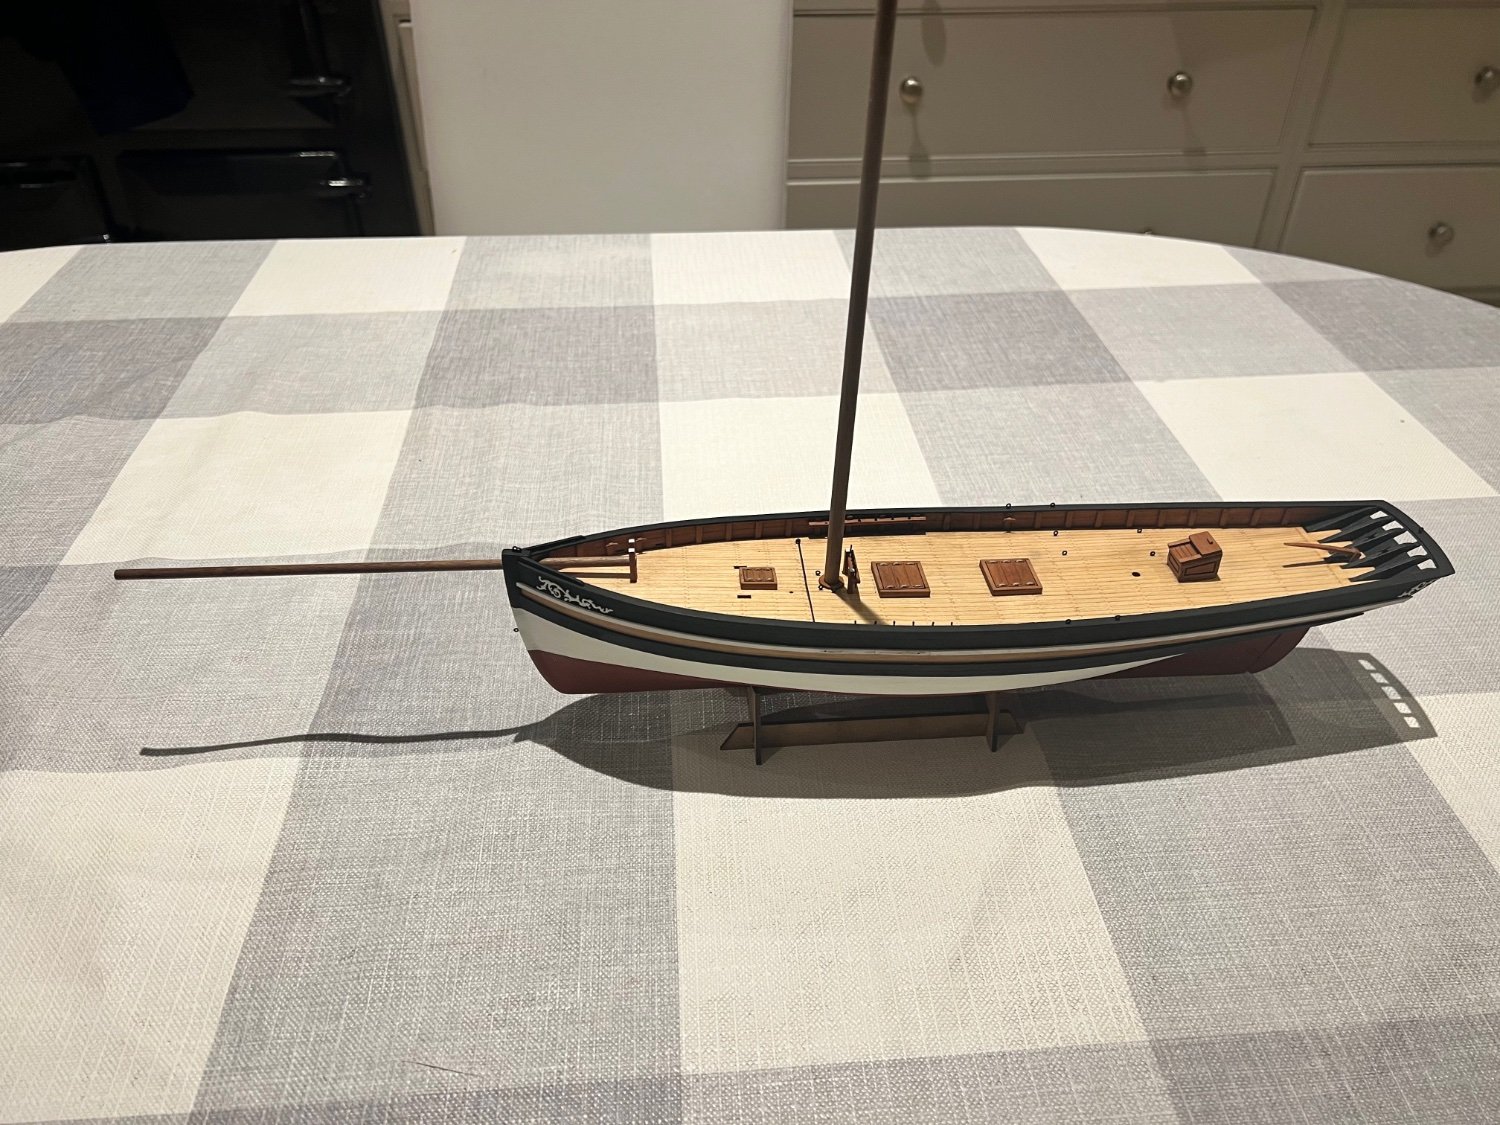
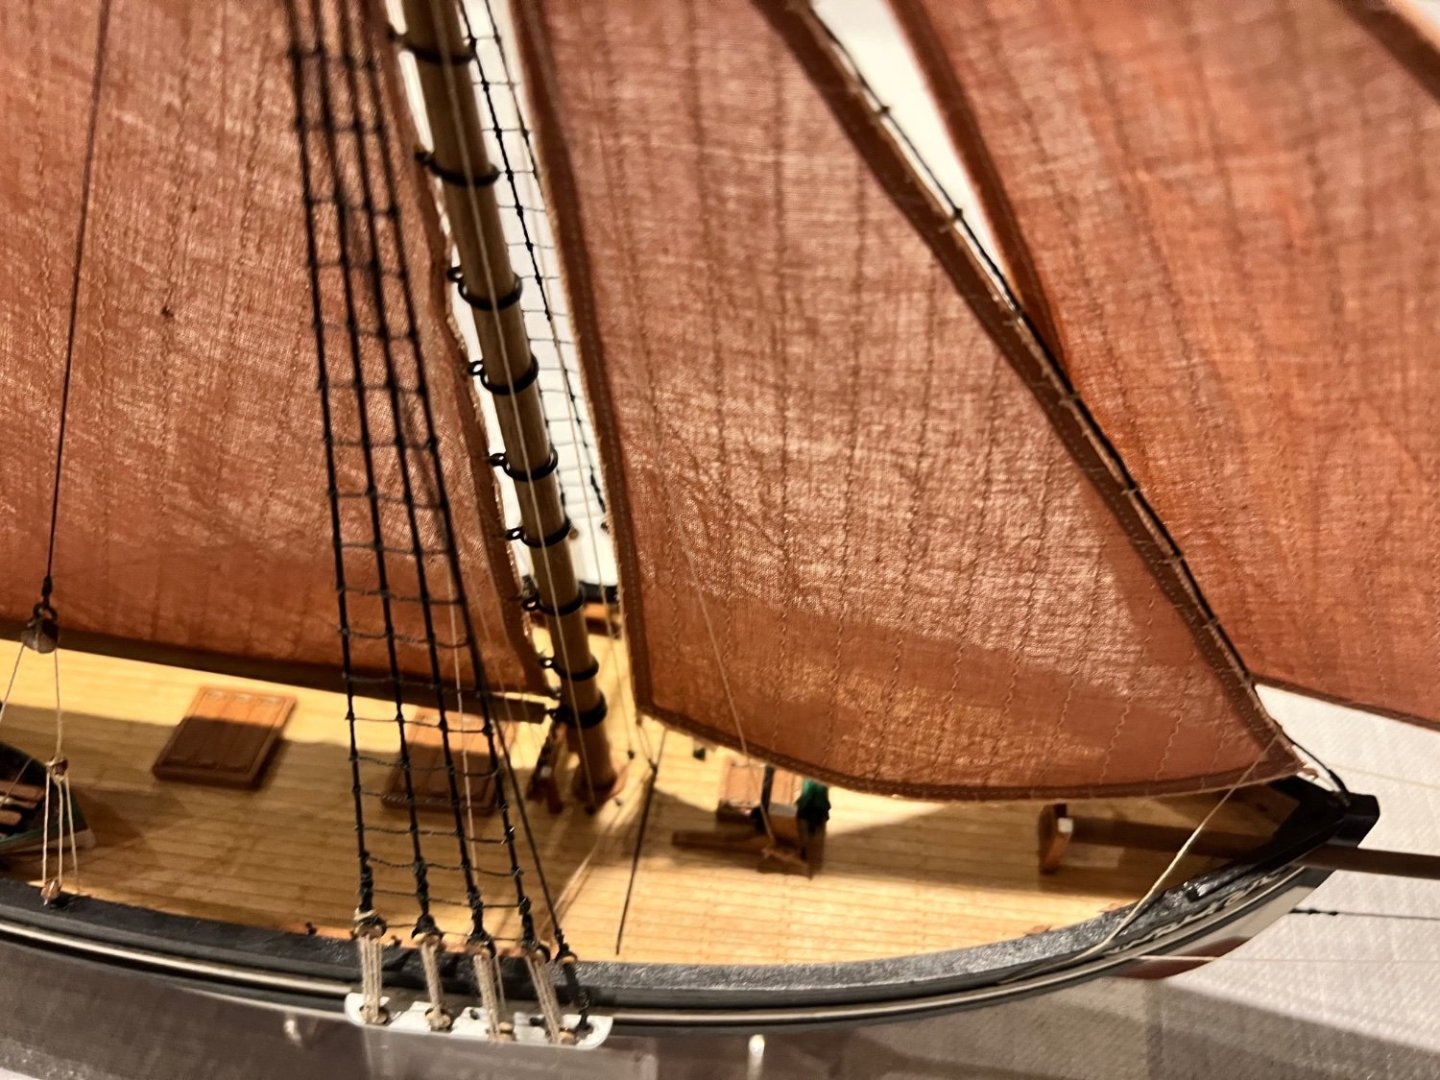
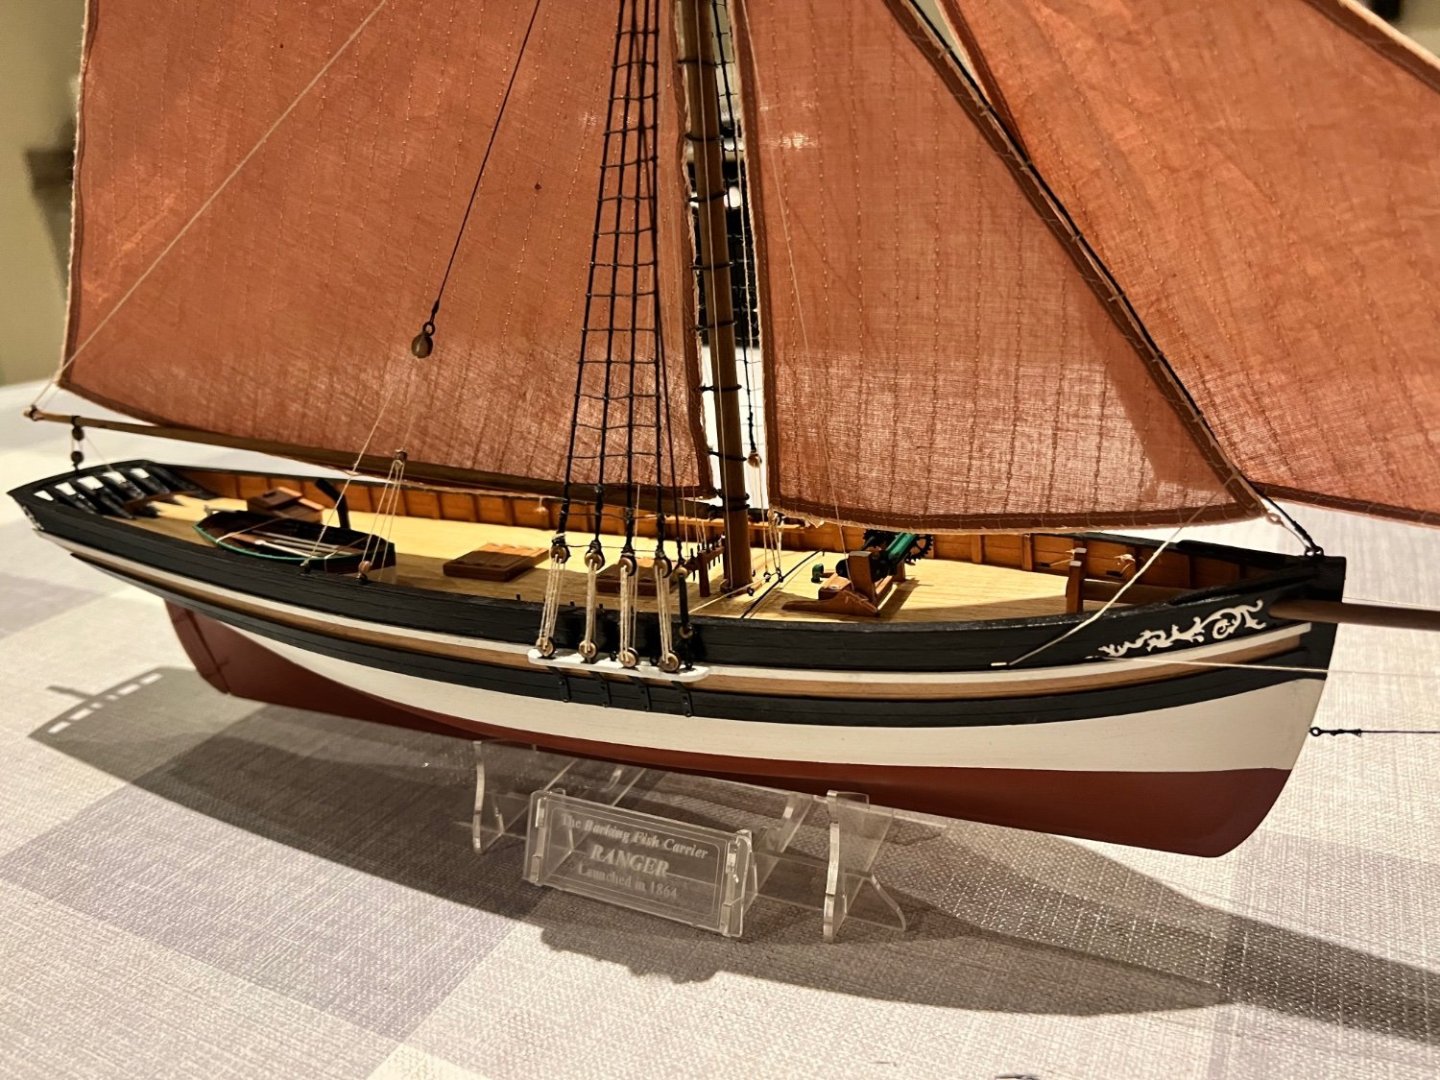
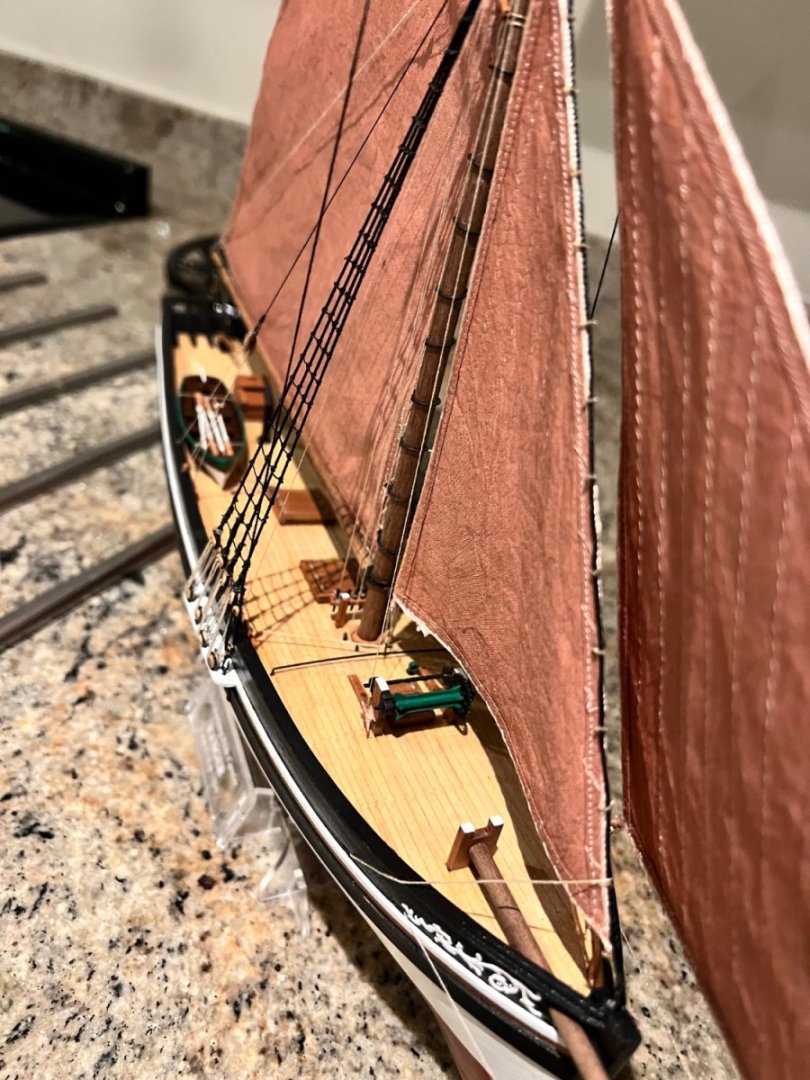
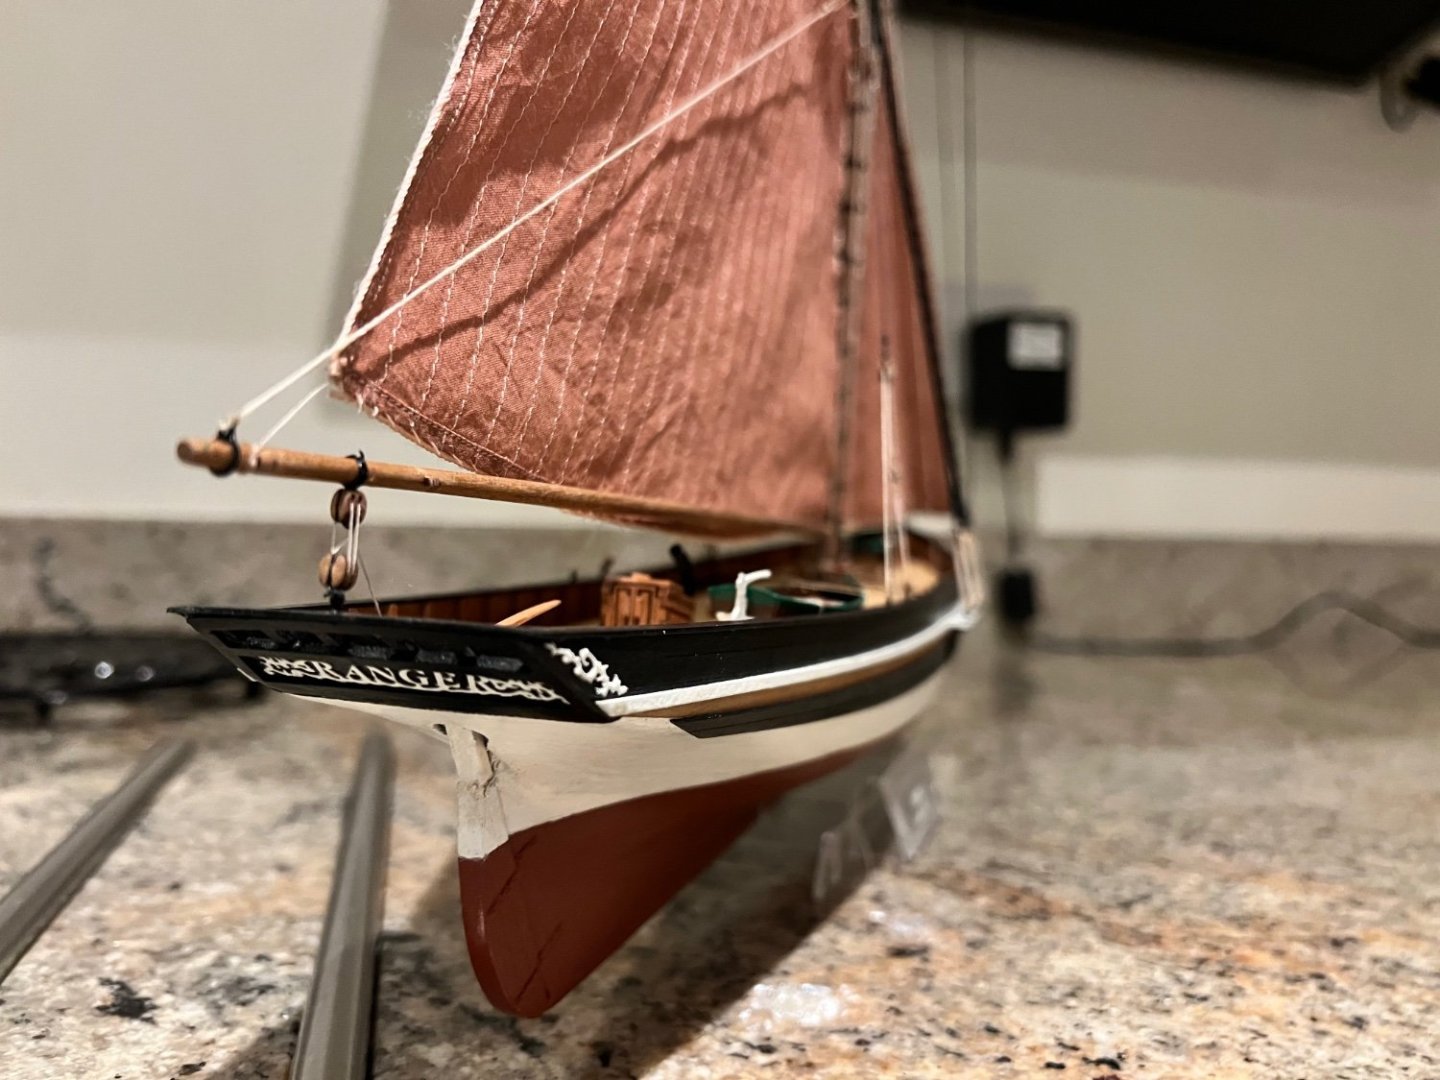
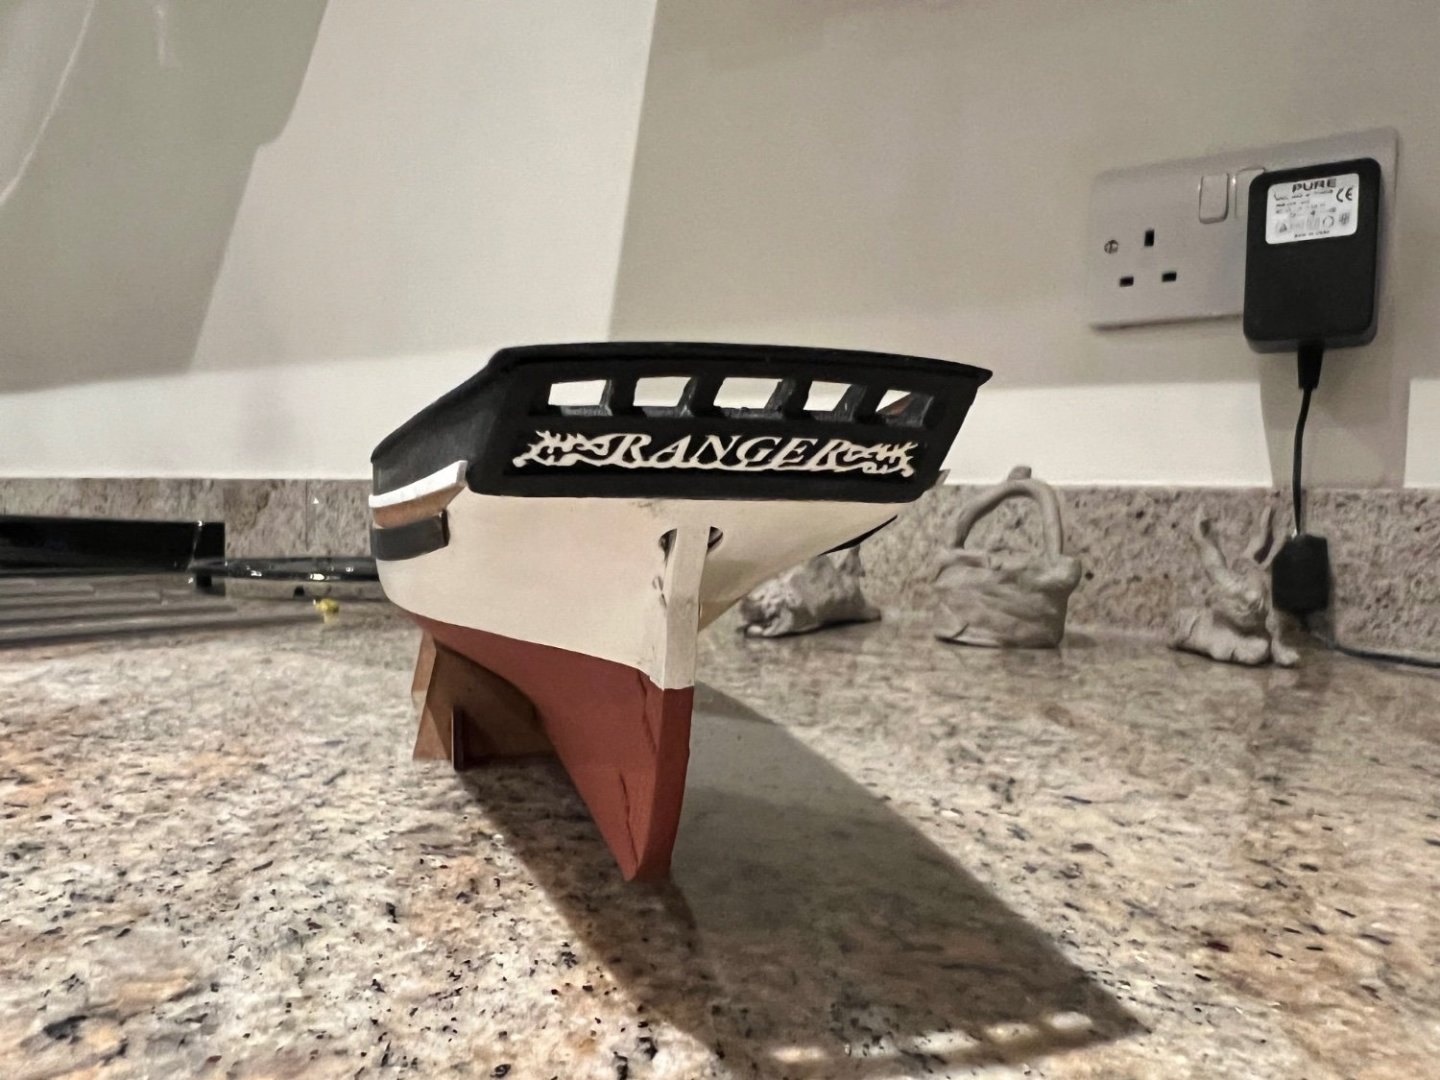
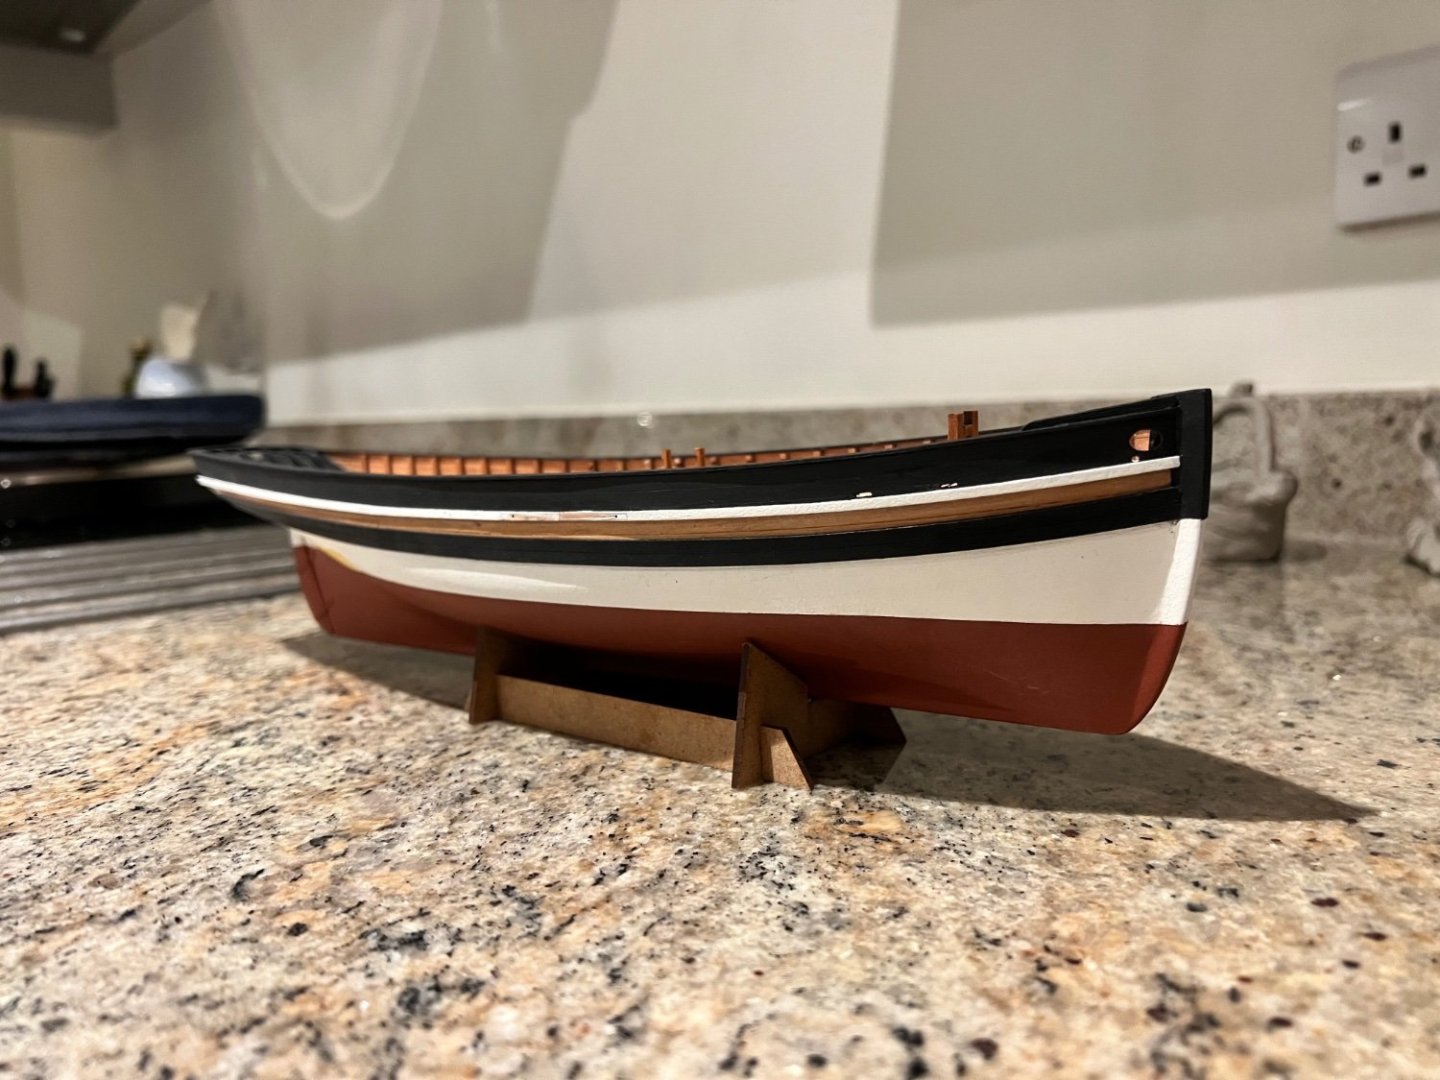
Ranger is essentially finished… I may yet decide to add some barrels that came with the kit if I can drag the paint to give a good enough approximation of wood to include. I also may add rope coils, but it’s one of my least favourite jobs and I still haven’t done so for Alert. Lots of photos below. Thanks to Chris for the superb kit, James for the excellent build log. Thanks also for the advice and likes on MSW - much appreciated. My thoughts on Ranger are that this is yet another extremely high quality, well thought out kit from Vanguard. Highest quality materials, superb instructions, etc. …. Everything I’ve come to expect from a Vanguard kit. She builds into a stunning boat too. My build closely followed that of the prototype, I’ve only erred on minor details such as painting the channels white. Having now built all six Vanguard fishing boats, this is also one of the easiest and most suitable for beginners. I thought the hull and planking the easiest of the 6 fishers. Of the 3 cutters and the ketch Erycina, she is the easiest to rig by virtue of just being bigger and less fiddly. The two luggers are by far the easiest to rig, but if you’re not so keen on the less ship-like lugger rig, then I’d recommend Ranger as an ideal first boat. I’d also add that the luggers, and Zulu in particular, are a little trickier to plank. The resin boat is a nice touch in the kit, which only Saucy Jack and Ranger in the VM range include. I’m slightly in two minds whether to include these boats though as I find the interior of the boat very difficult to look like wood. There’s less going-on on Ranger’s deck as she’s a fish carrier, not a fishing boat so fewer winches and other fishing gear. I guess I do need those barrels, and there’s a resin anchor too (also broken when I trod on the launch). I really like the photo-etch detailing on the stern and gunwales.


- 25 replies
-
- 4
-
-
-
- Ranger
- Vanguard Models
- (and 1 more)
-
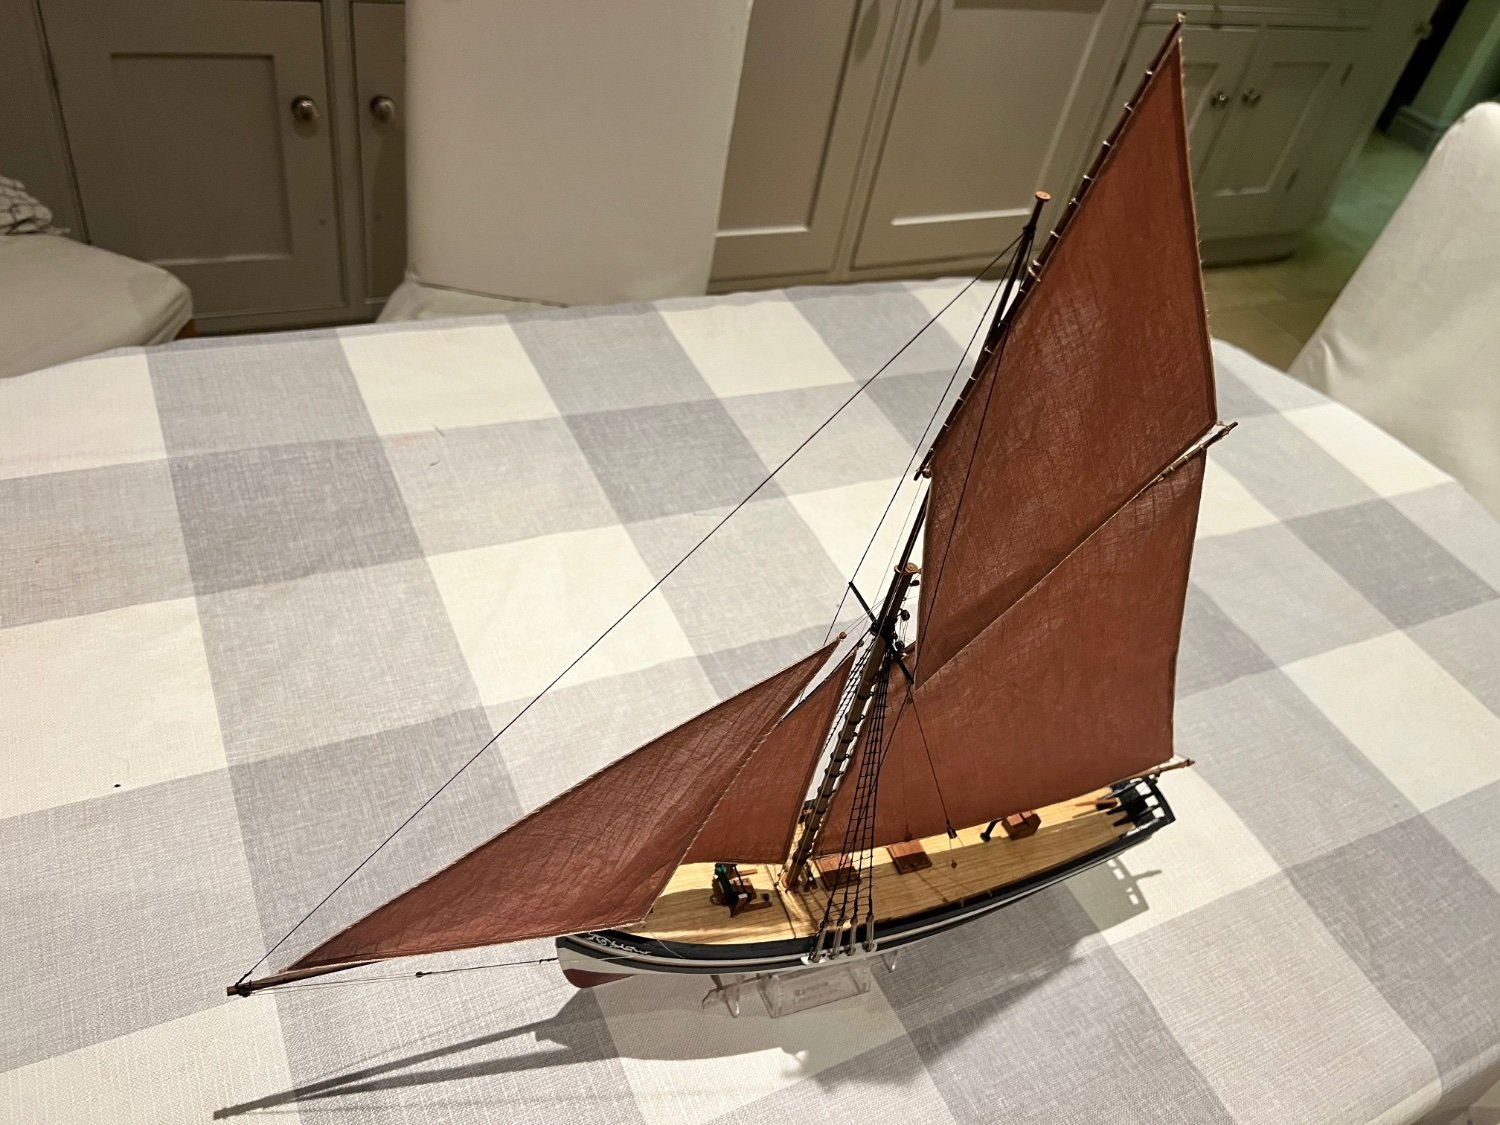
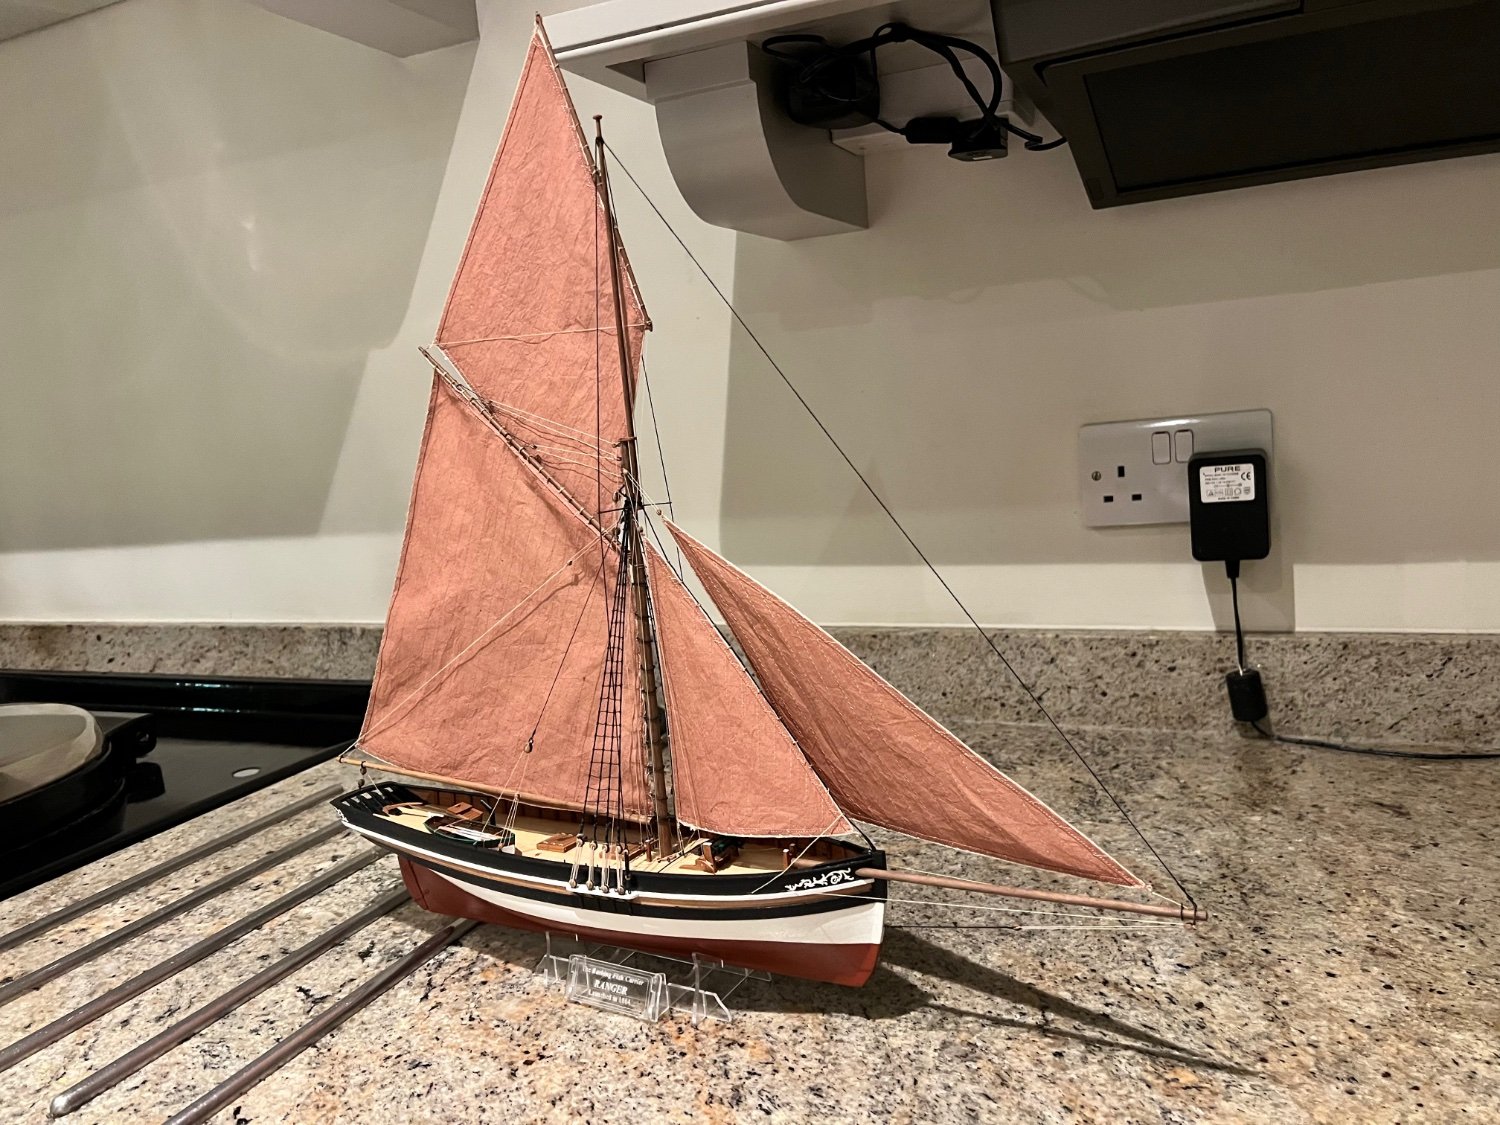
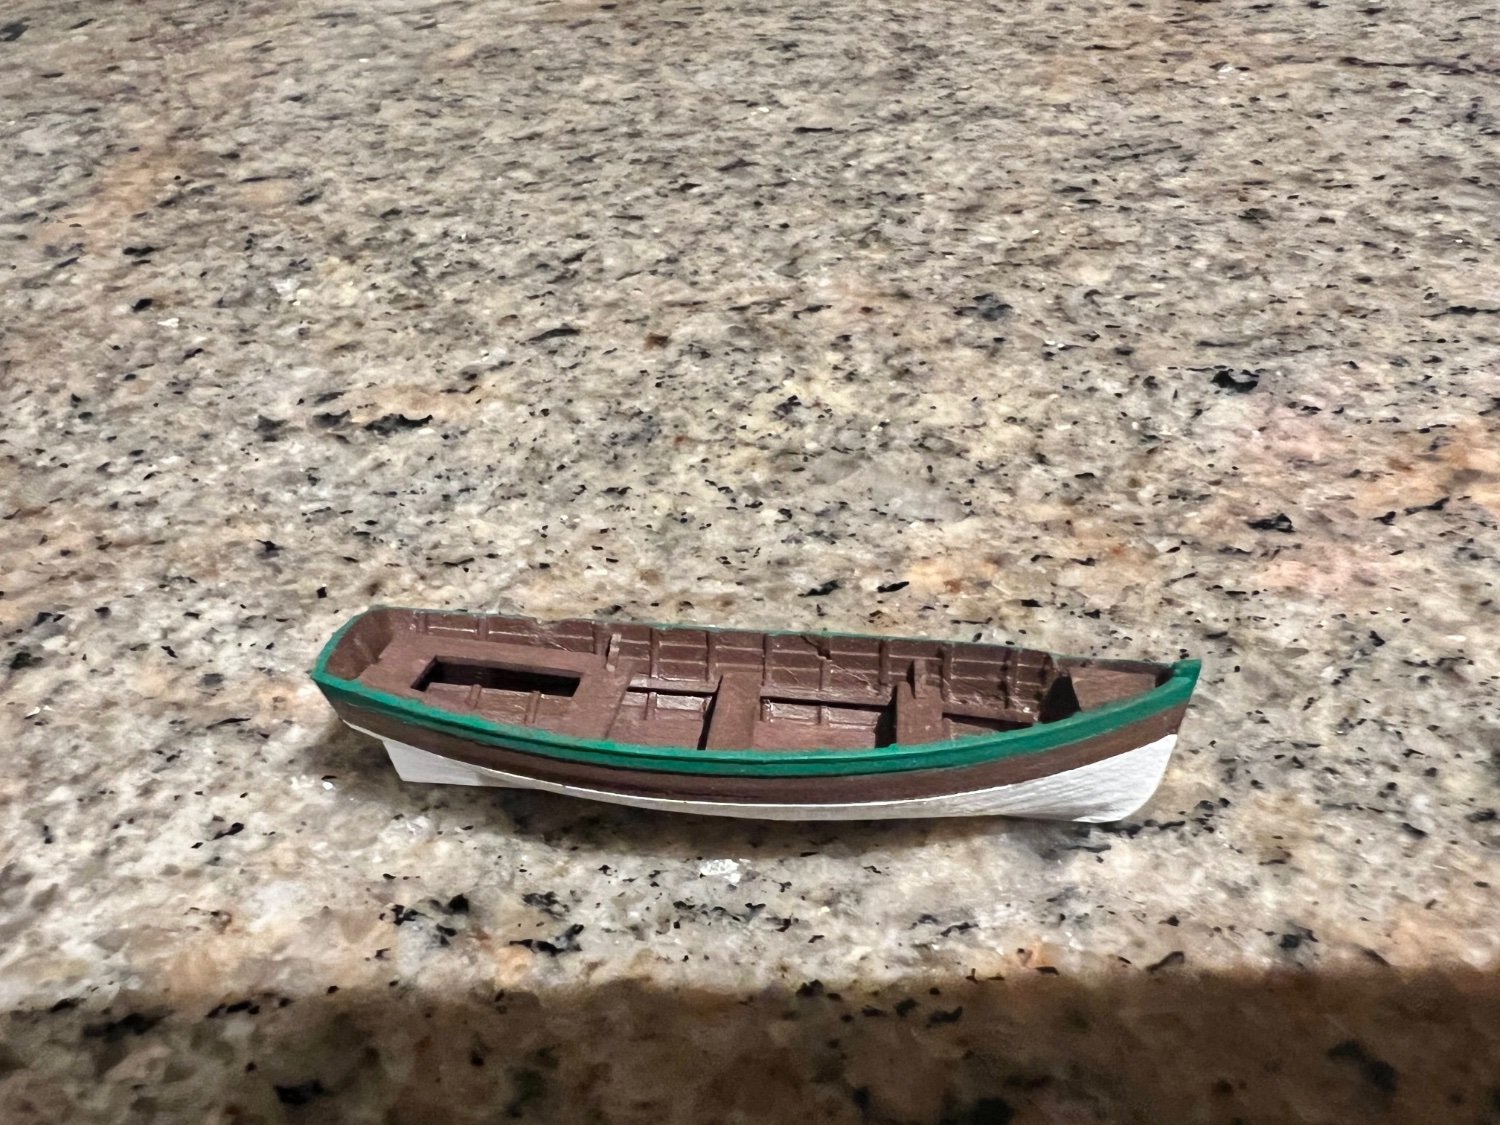
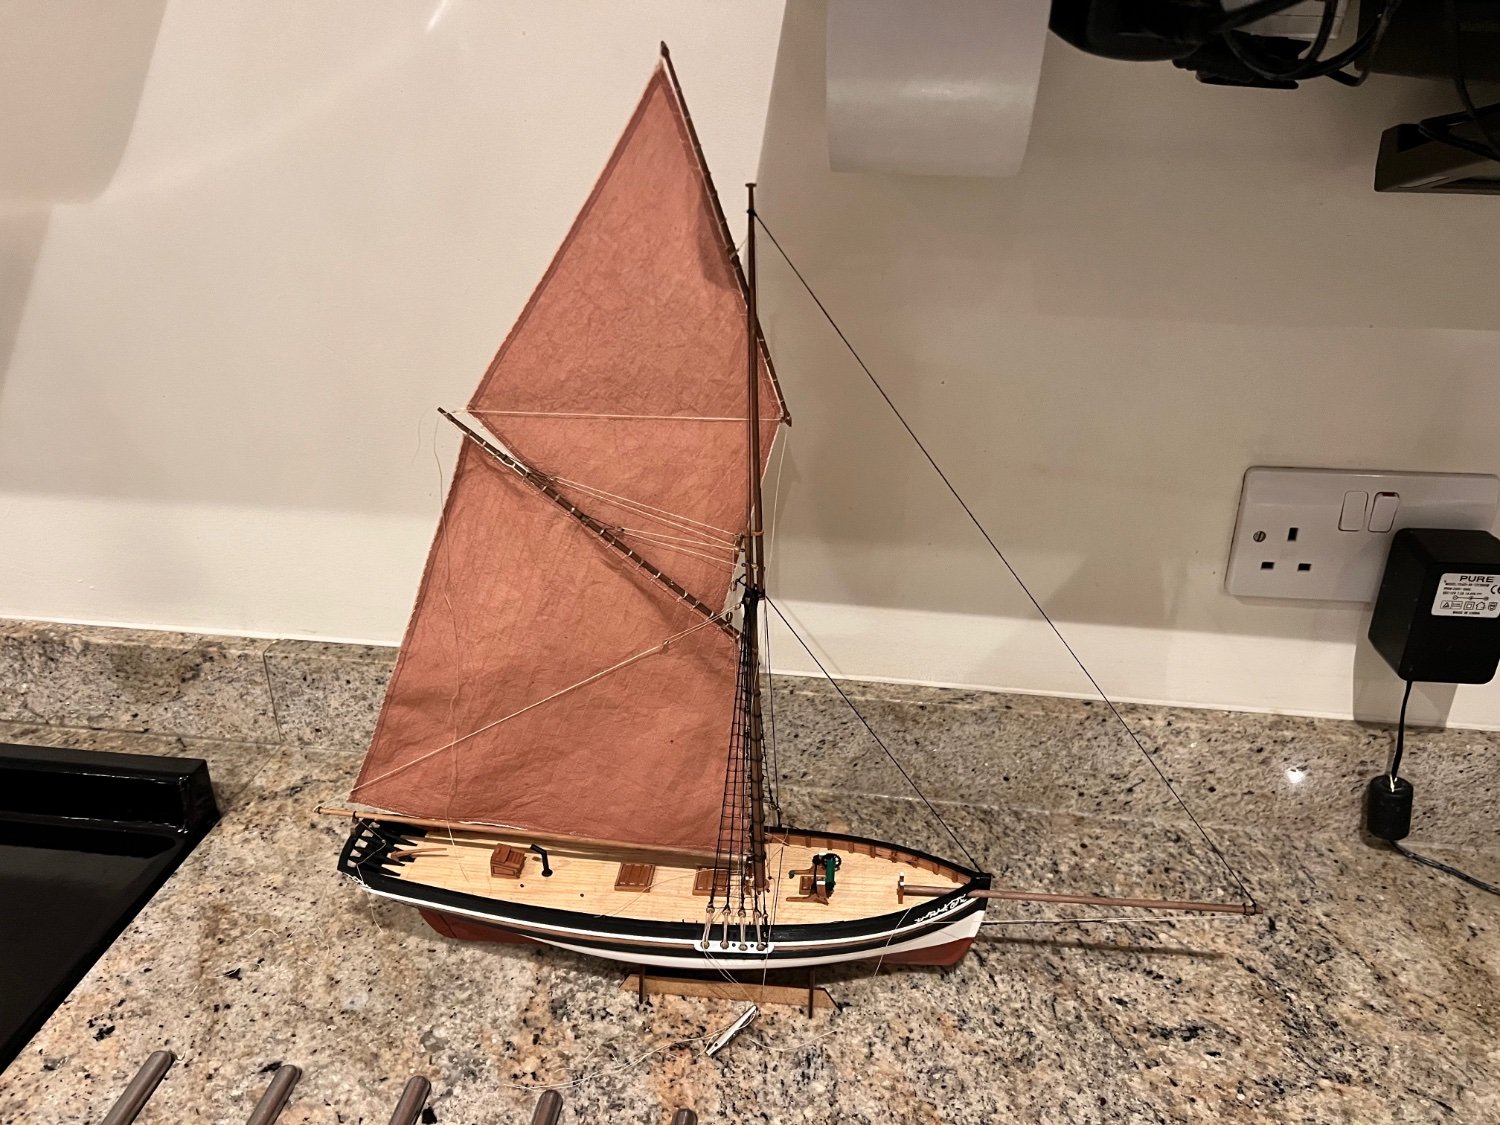
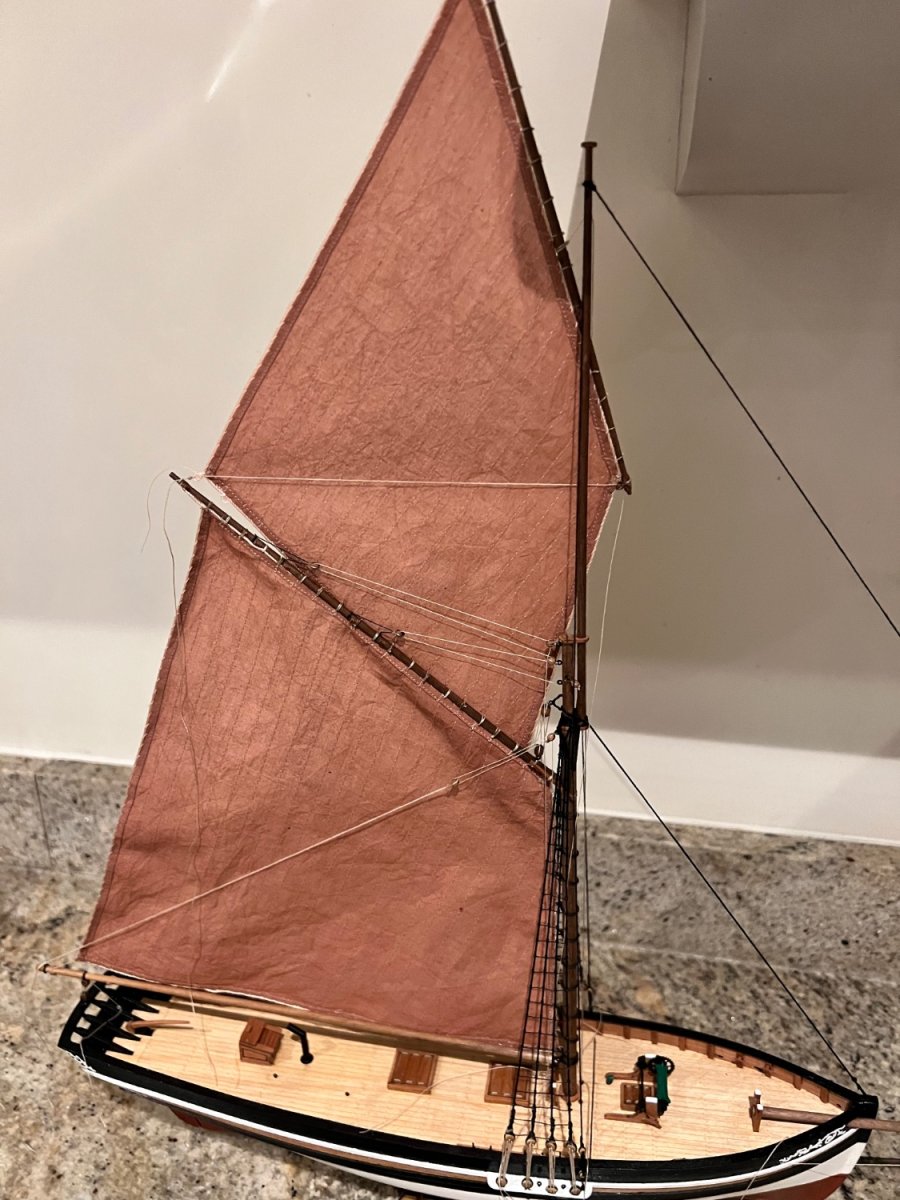
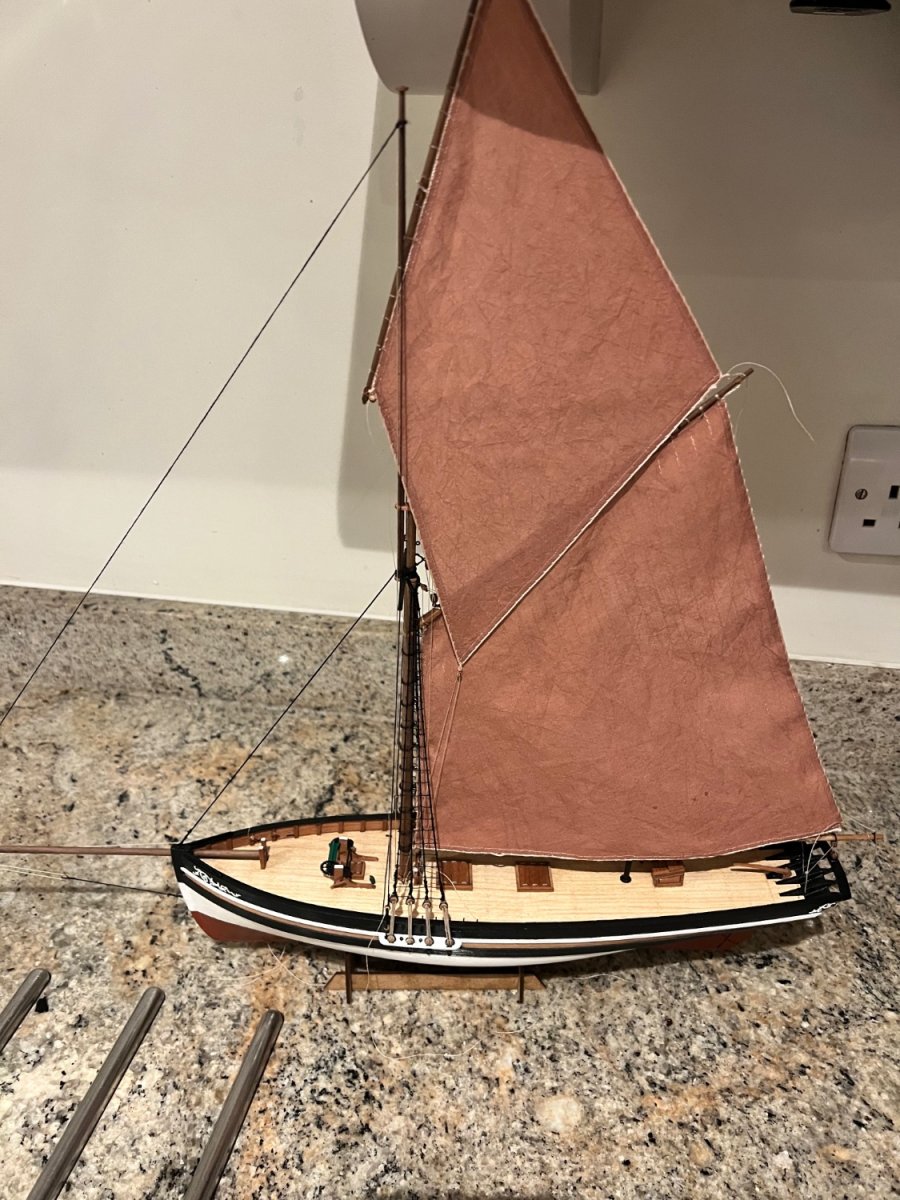
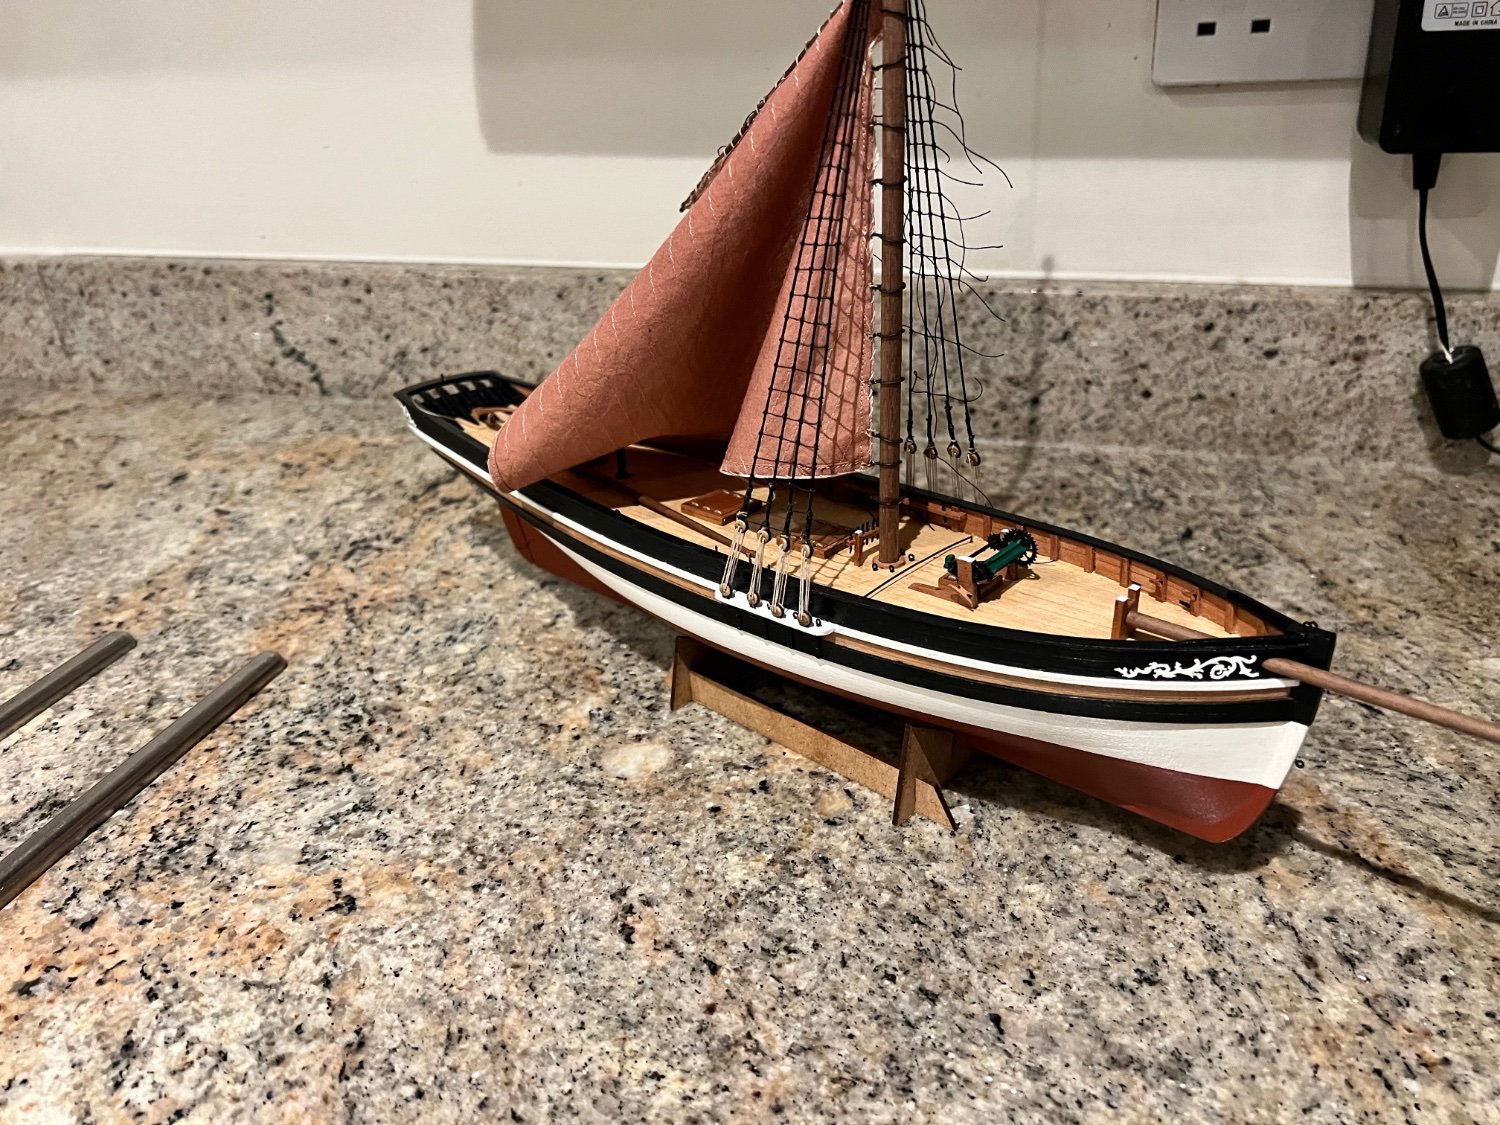
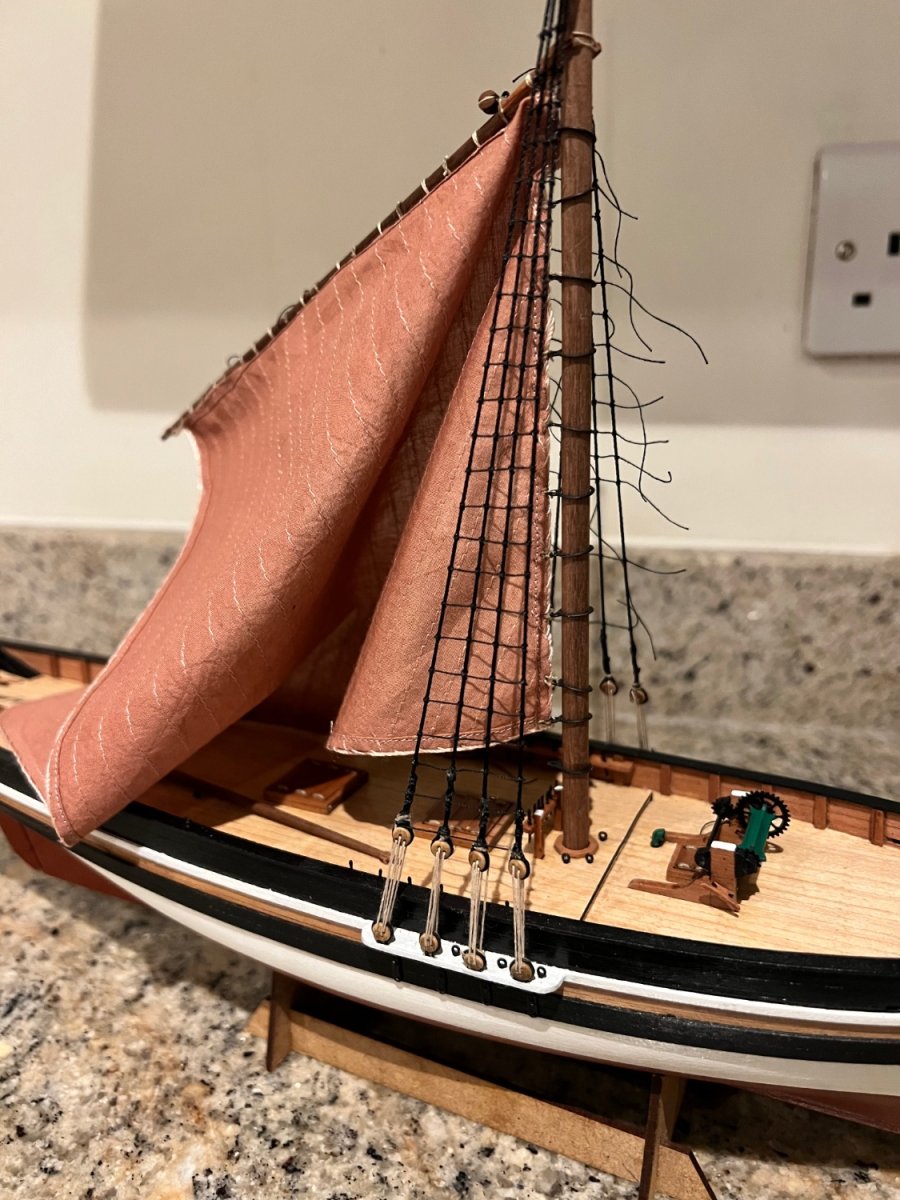
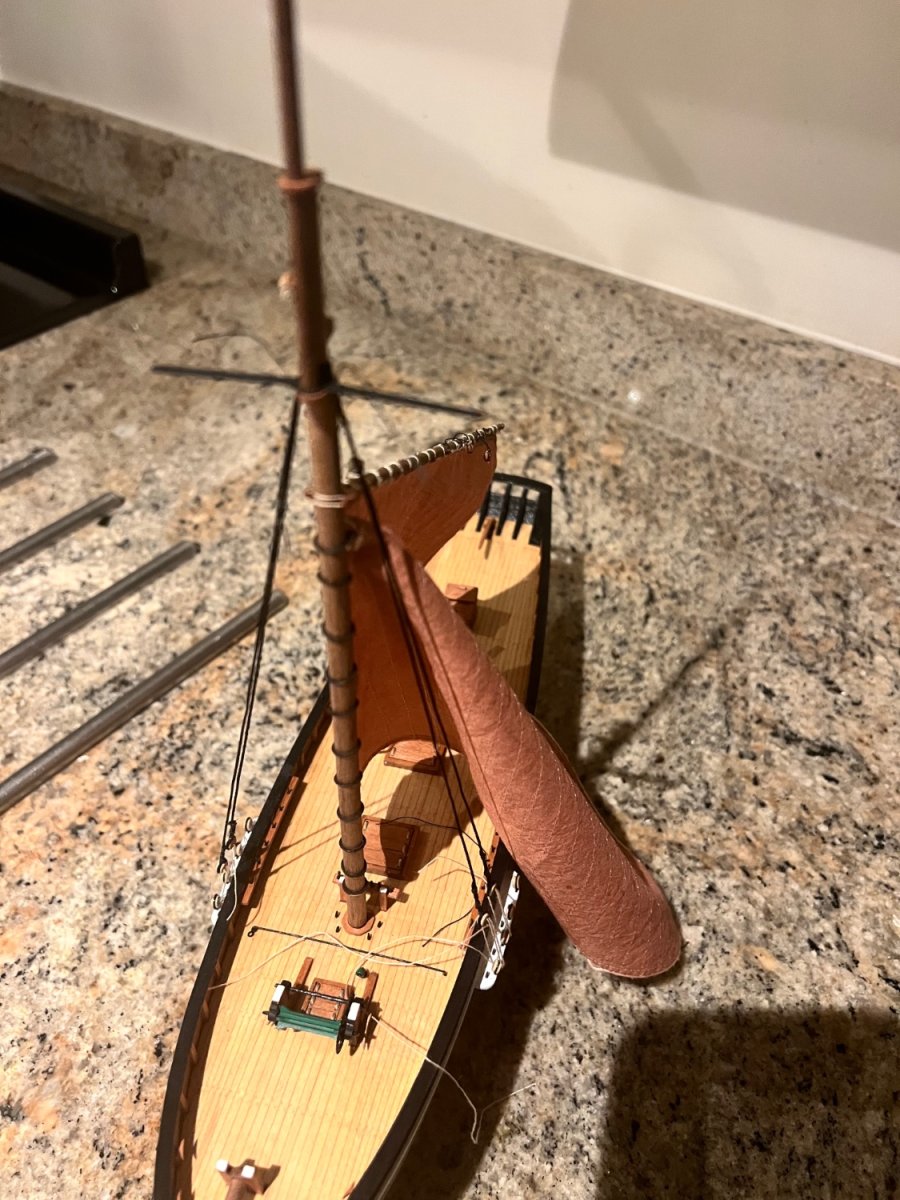
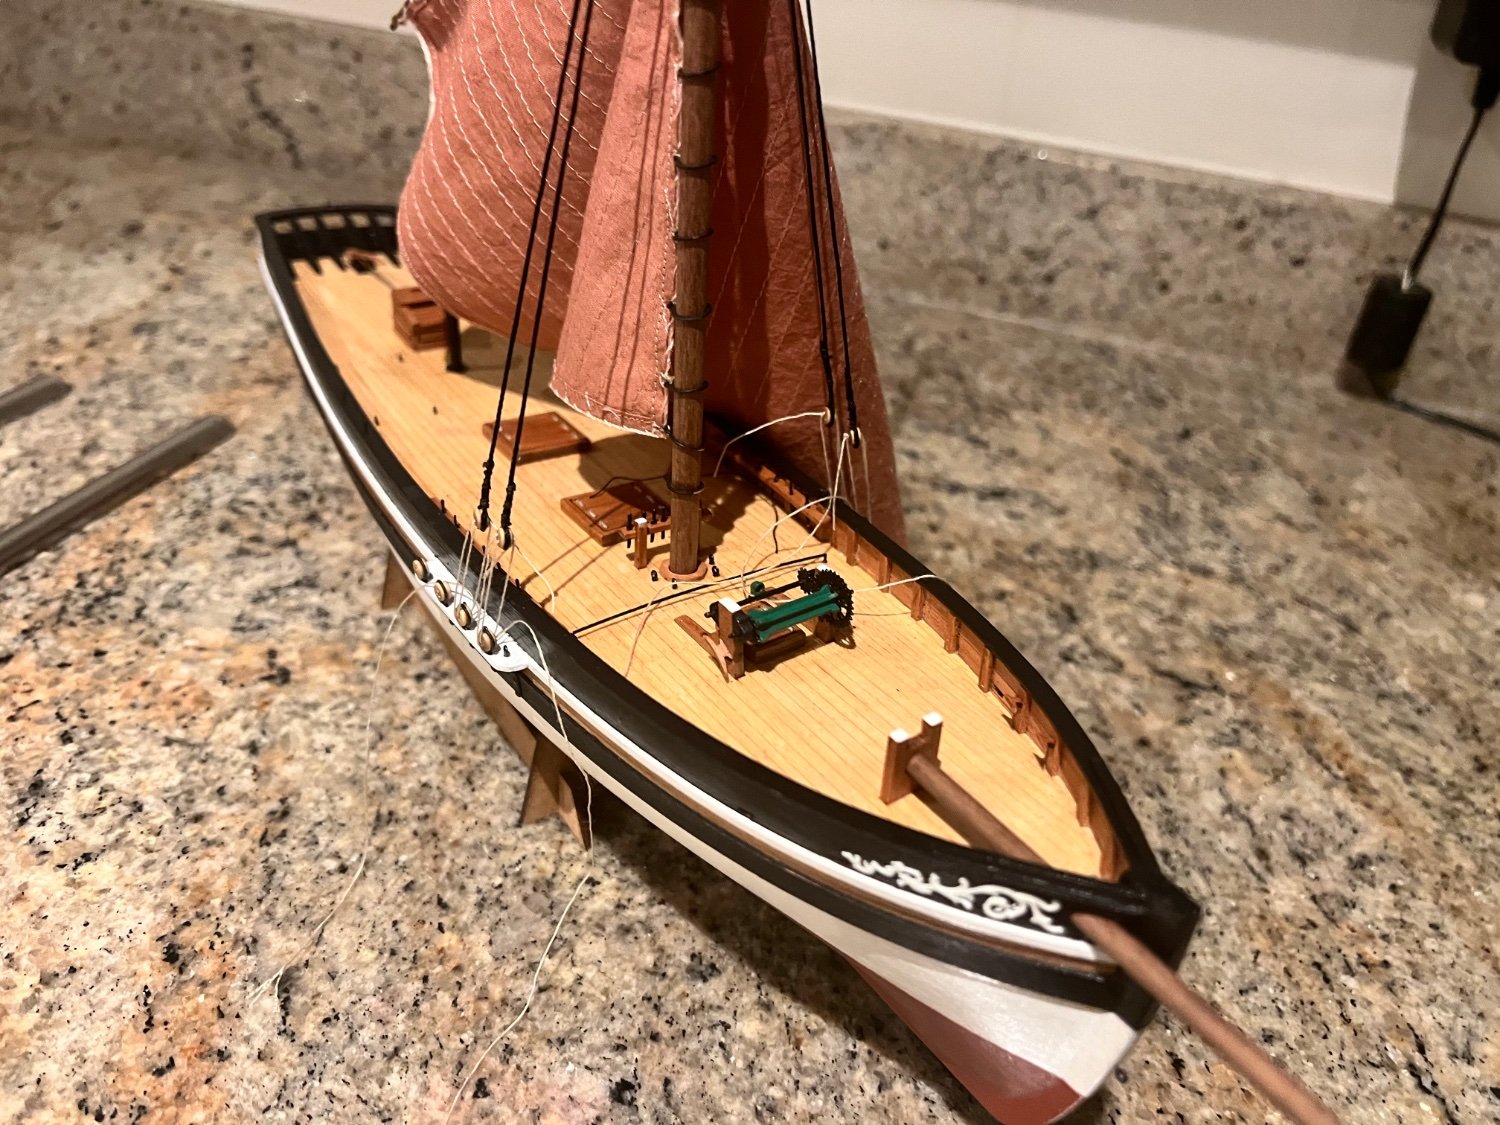
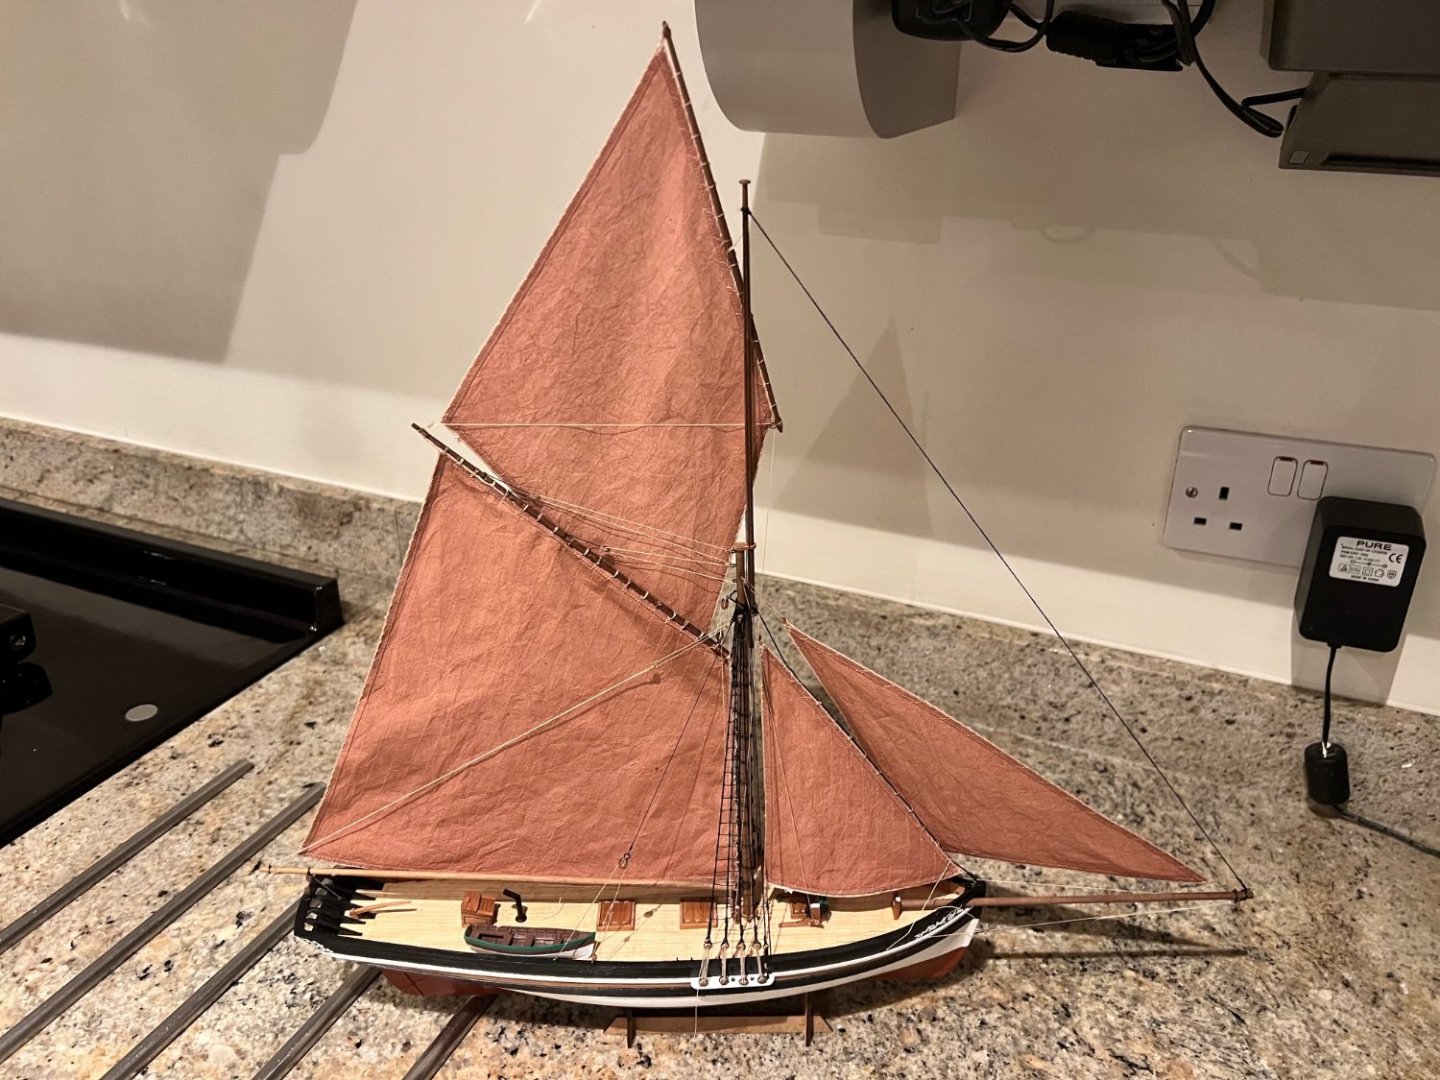
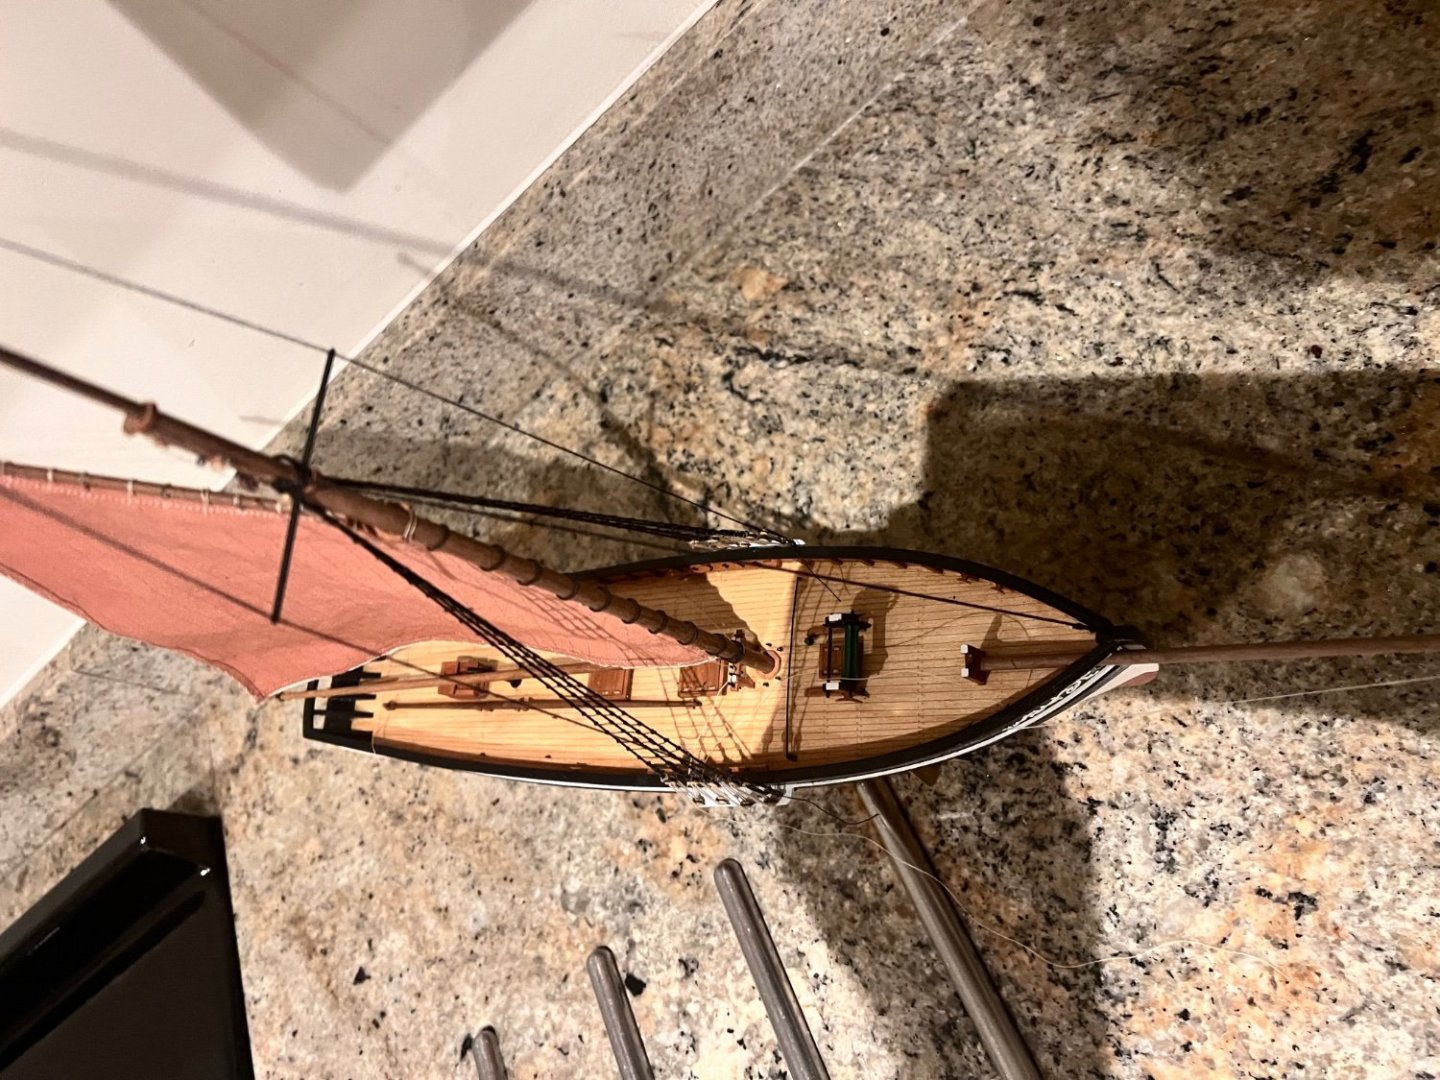
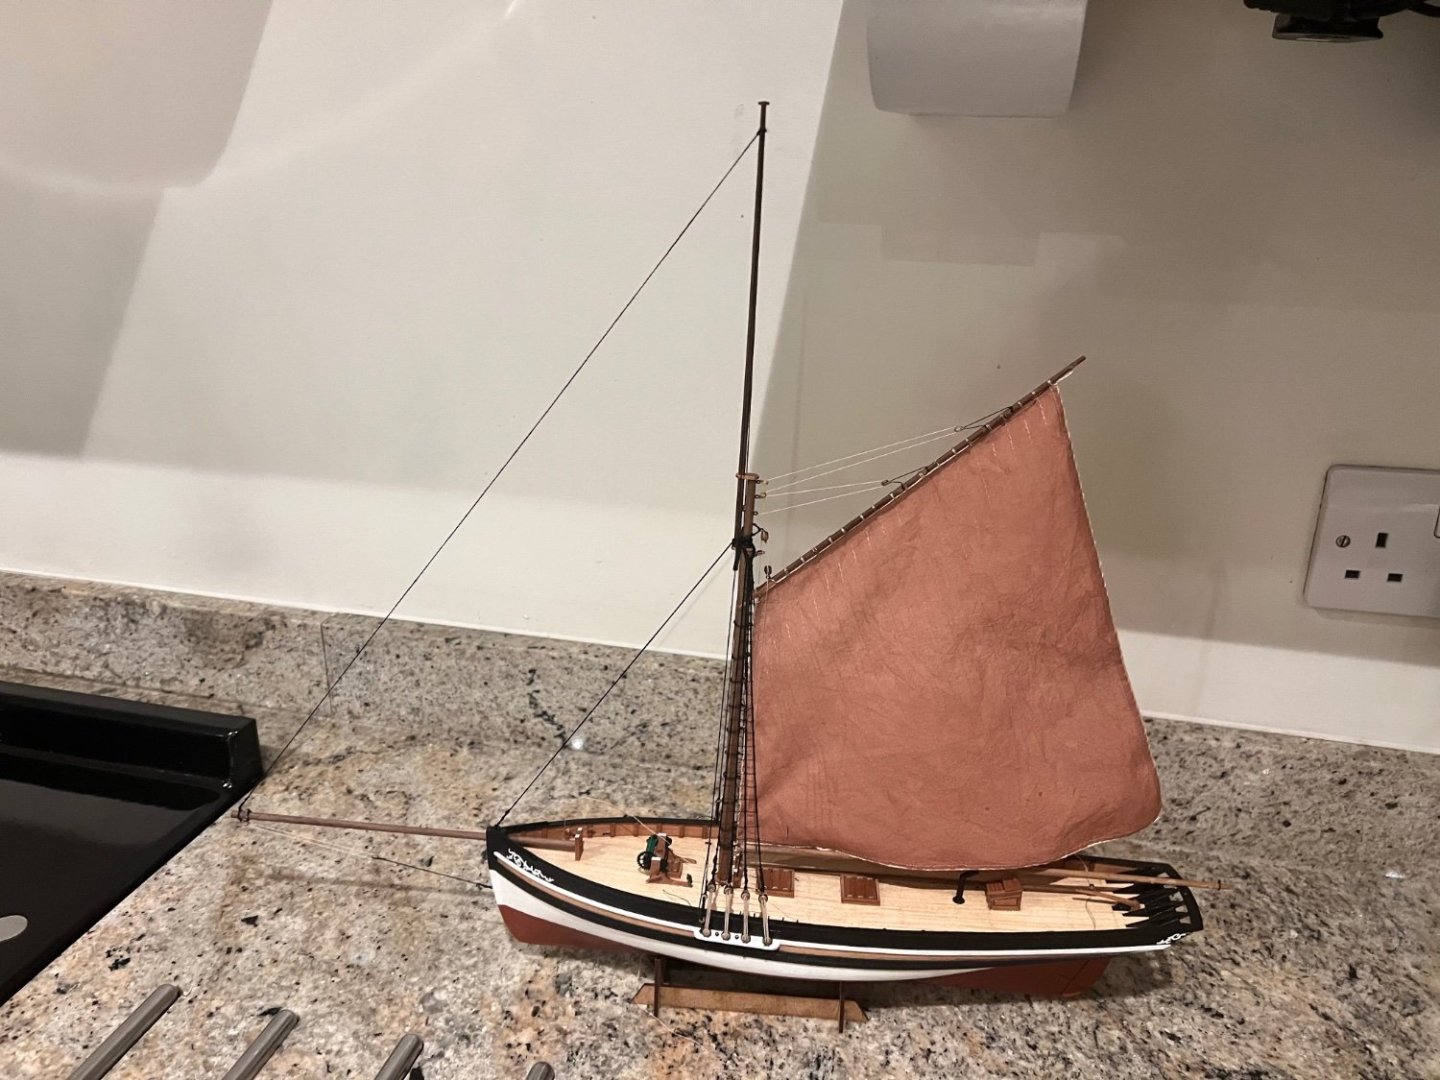
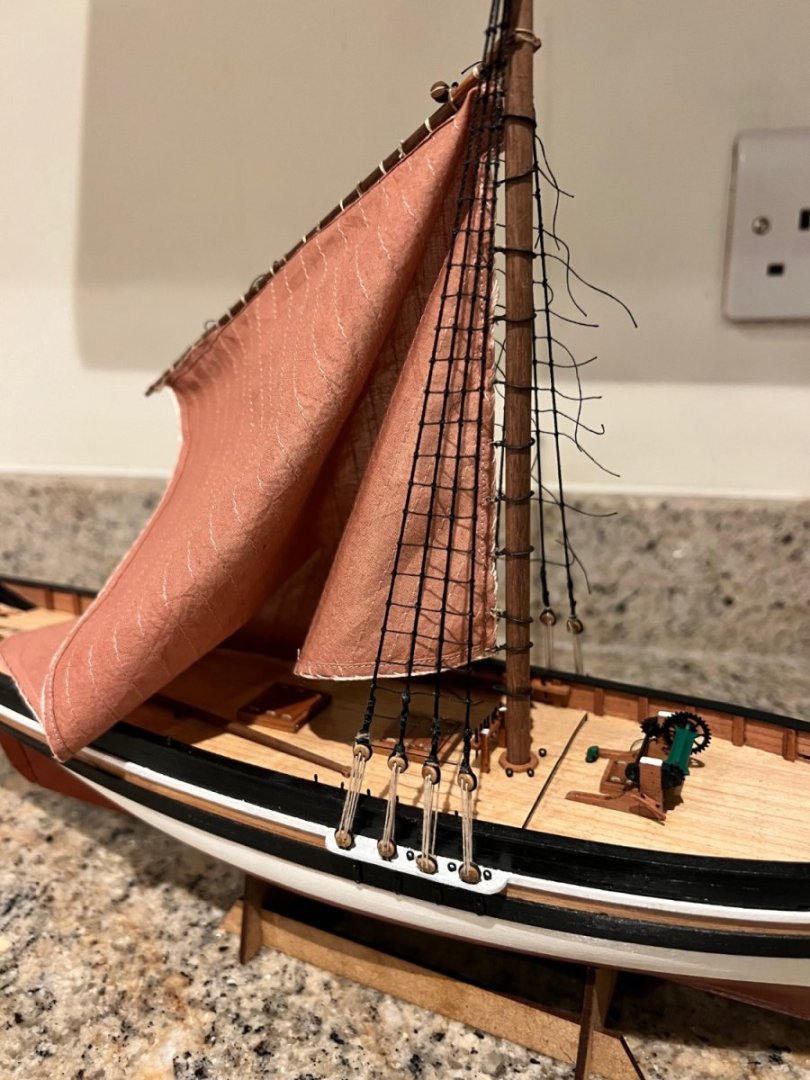
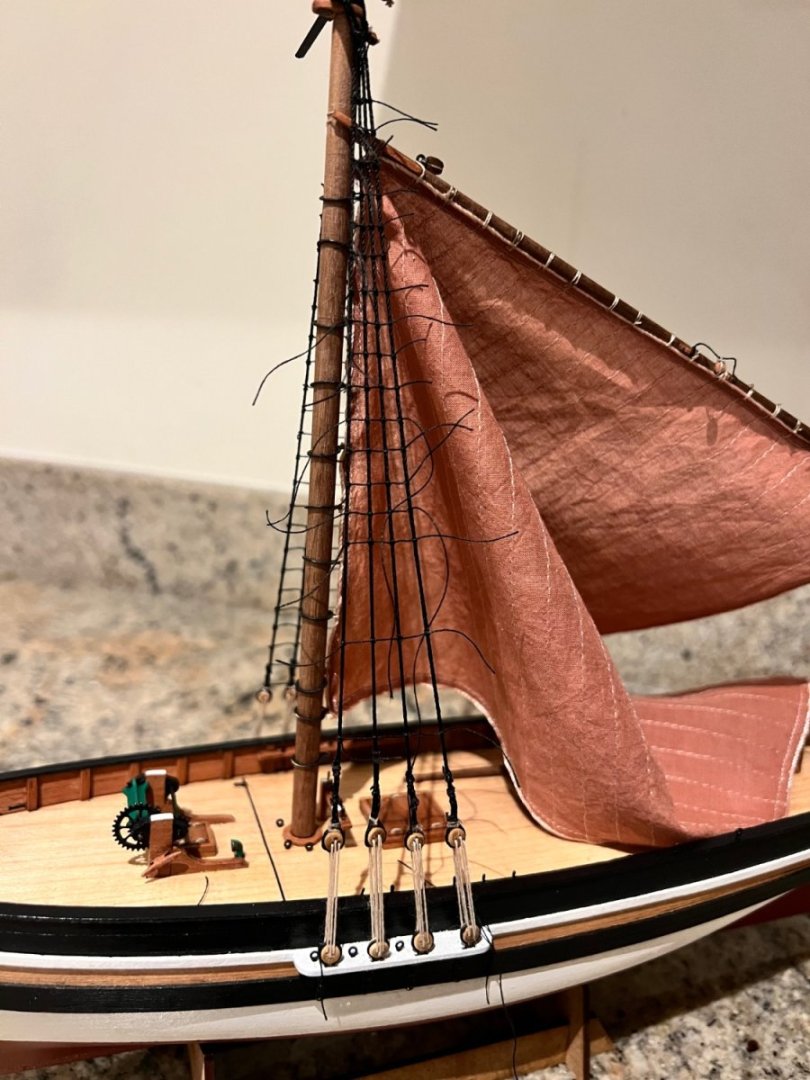
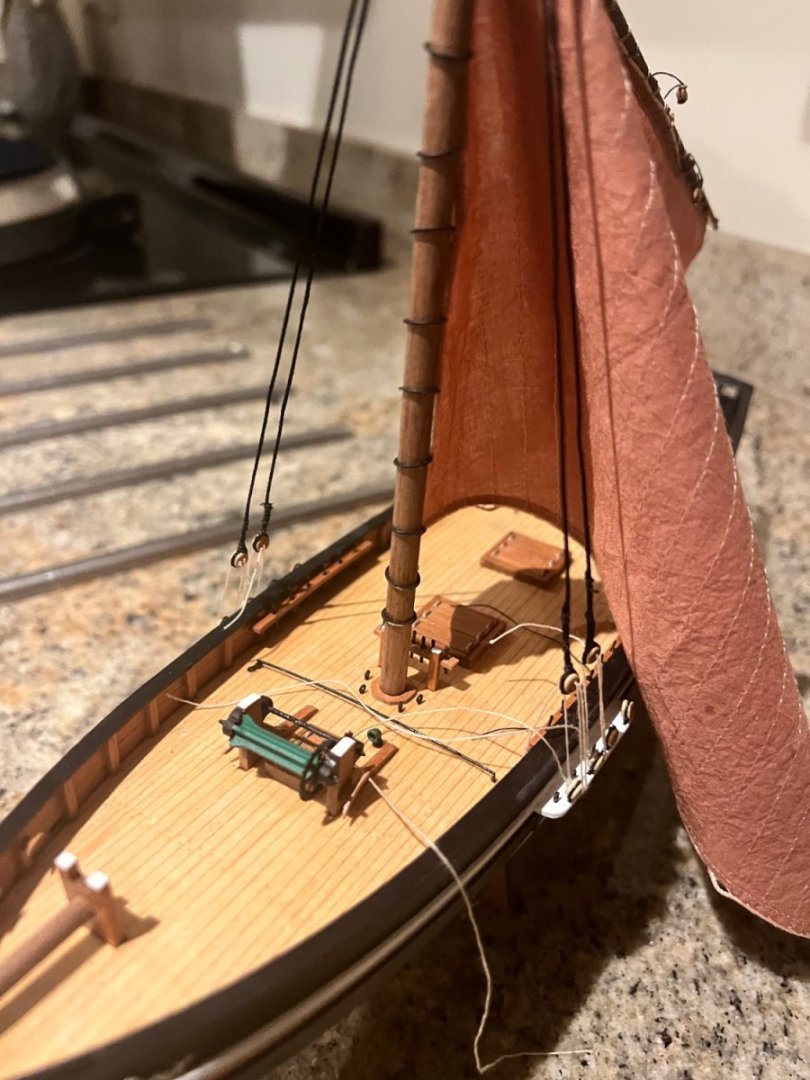
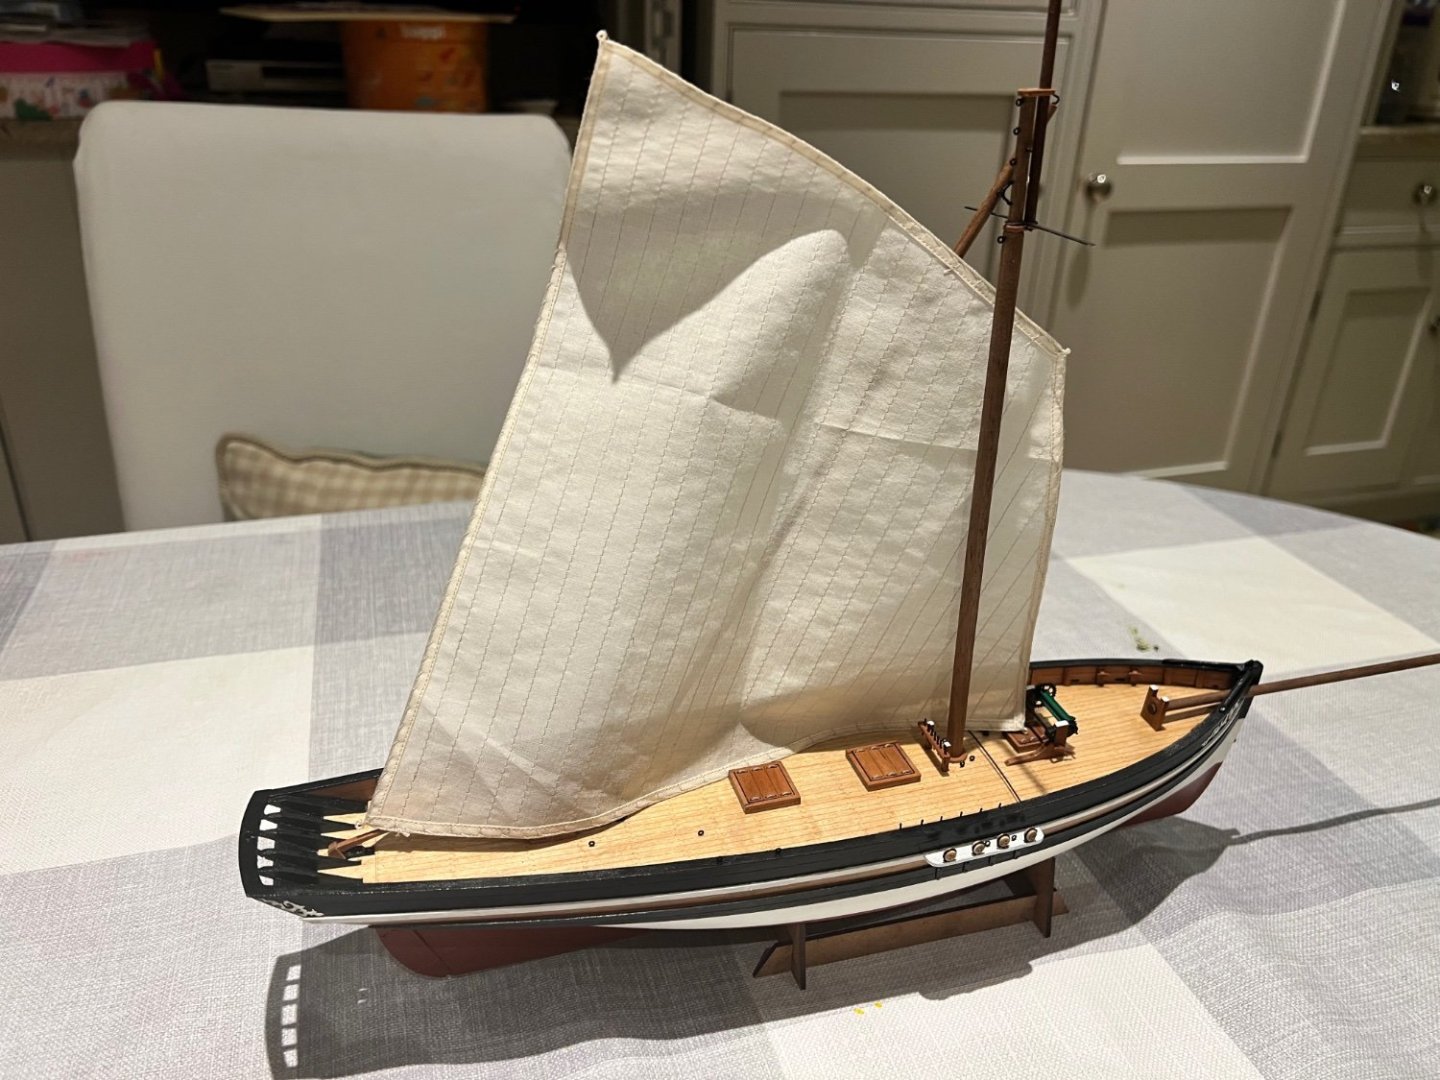
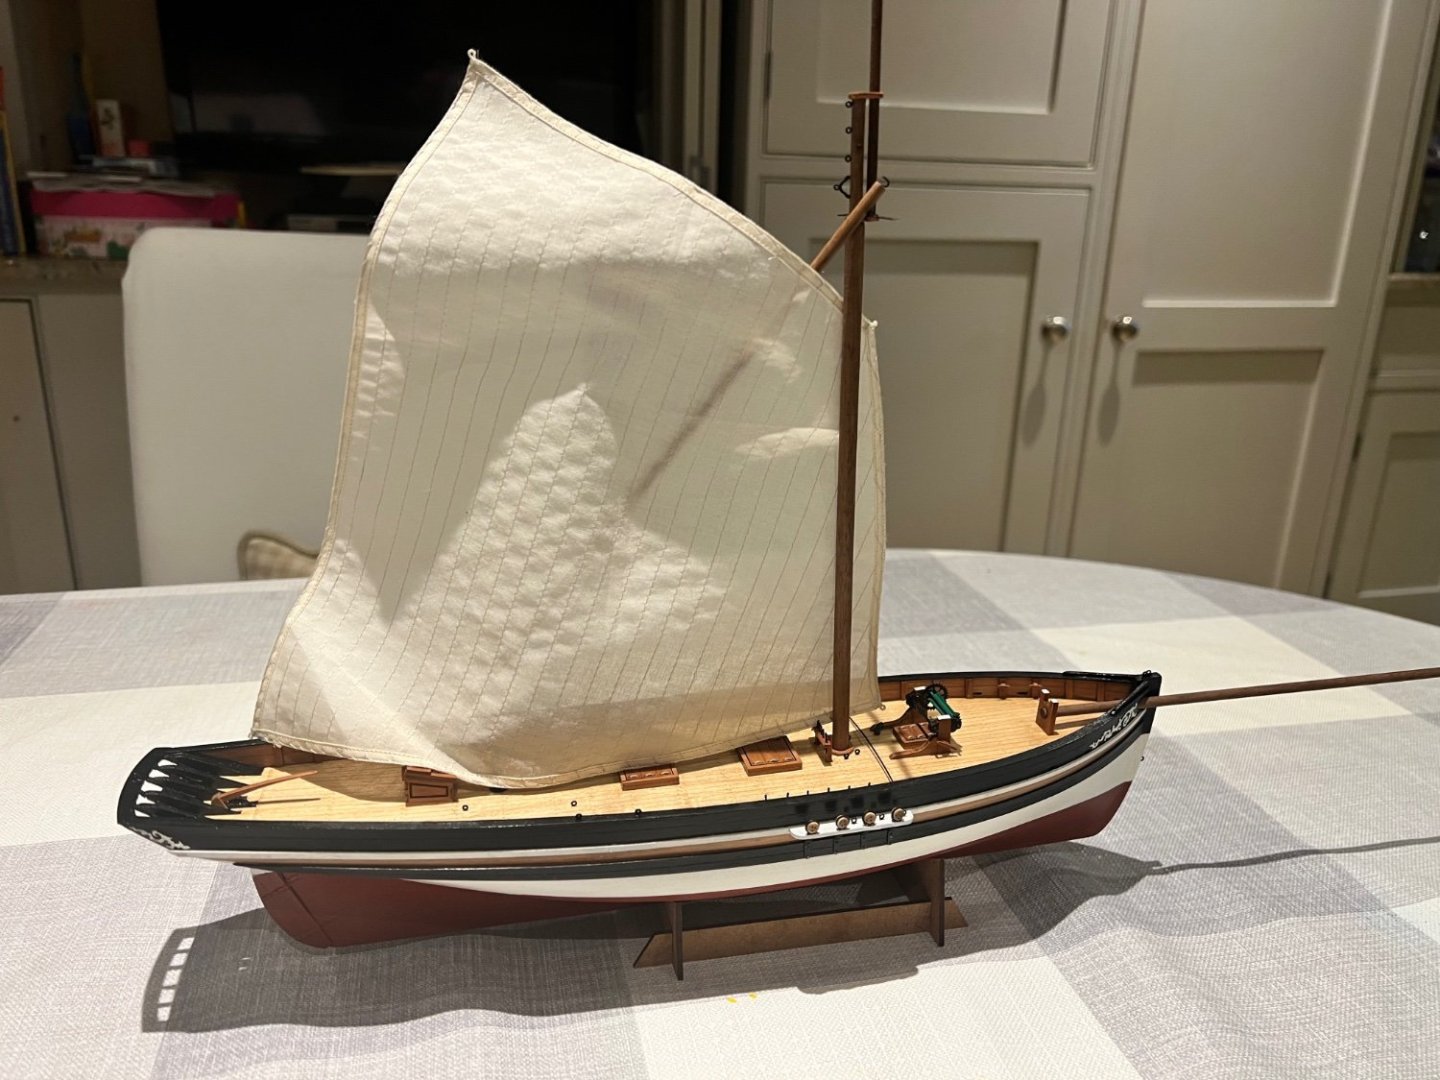
Sails complete. Still a few lines to tie-off. I still need to add the port backstay. She is very pretty this boat with lovely lines and full spread of canvas. Despite being an 1864 vessel and older than the the other Vanguard fishers except for Saucy Jack, she feels more modern and yacht like. I managed to step on the resin tender when I first opened the kit. I have painstakingly glued the little boat back together plus some filler. Not looking terrible, but if you look closely some of the breaks are visible as a dent in the port gunwale aft that I couldn’t repair with filler. I’m planning to try to drag some oil browns on the interior to give a more wood like appearance than the current matt Tamiya Red Brown paint.

- 25 replies
-
- 4
-
-
- Ranger
- Vanguard Models
- (and 1 more)
-
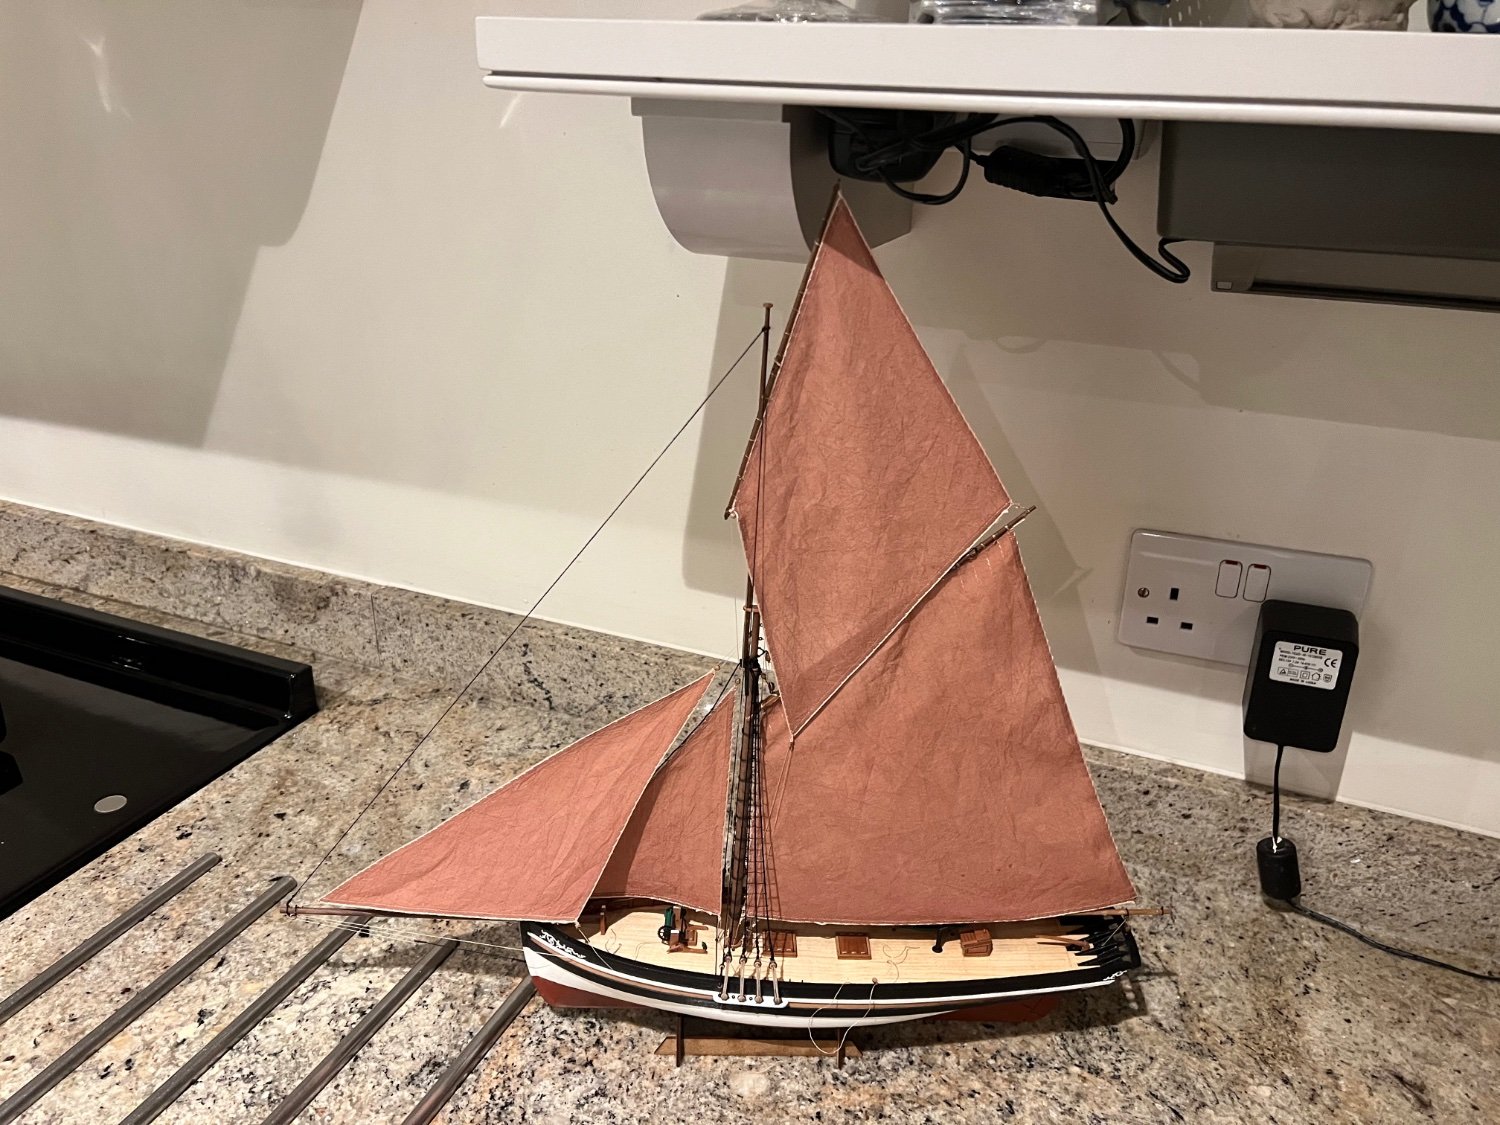
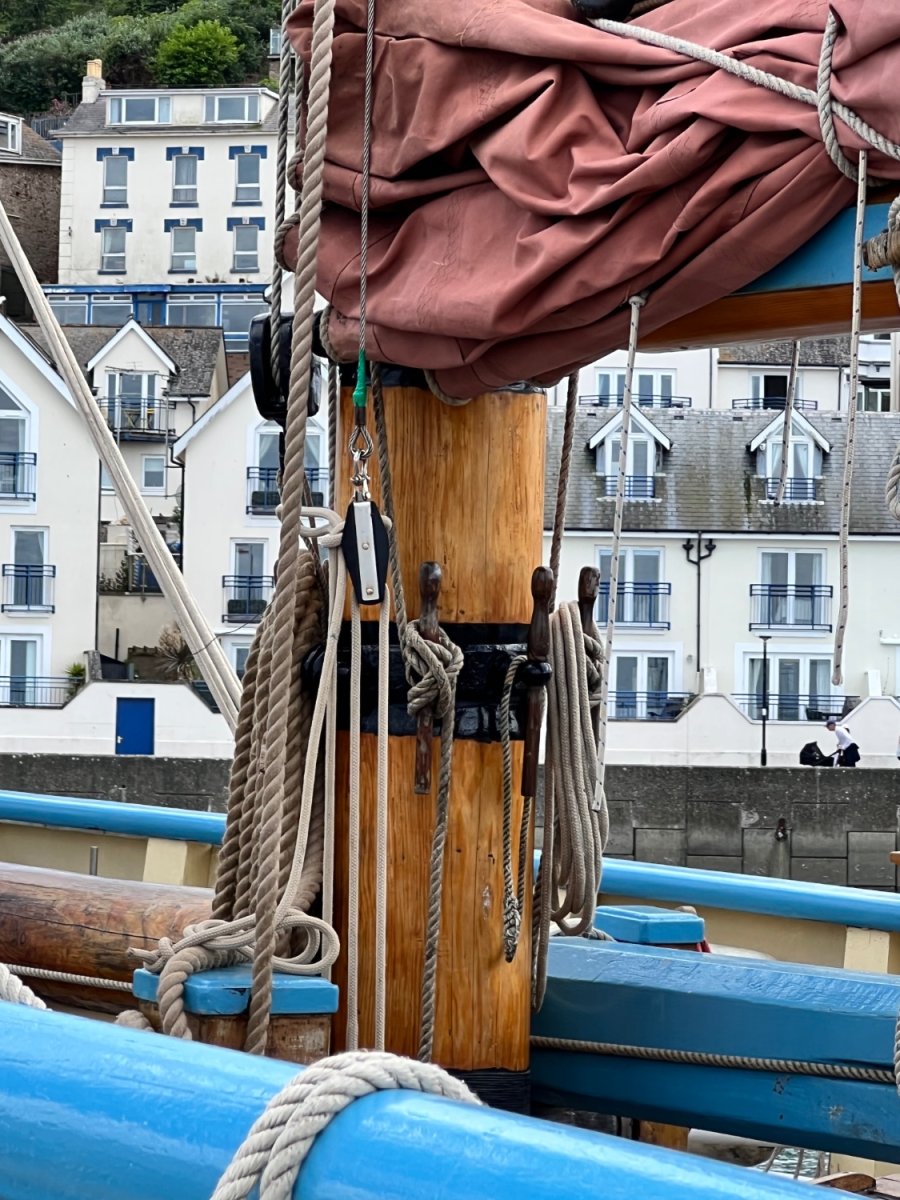
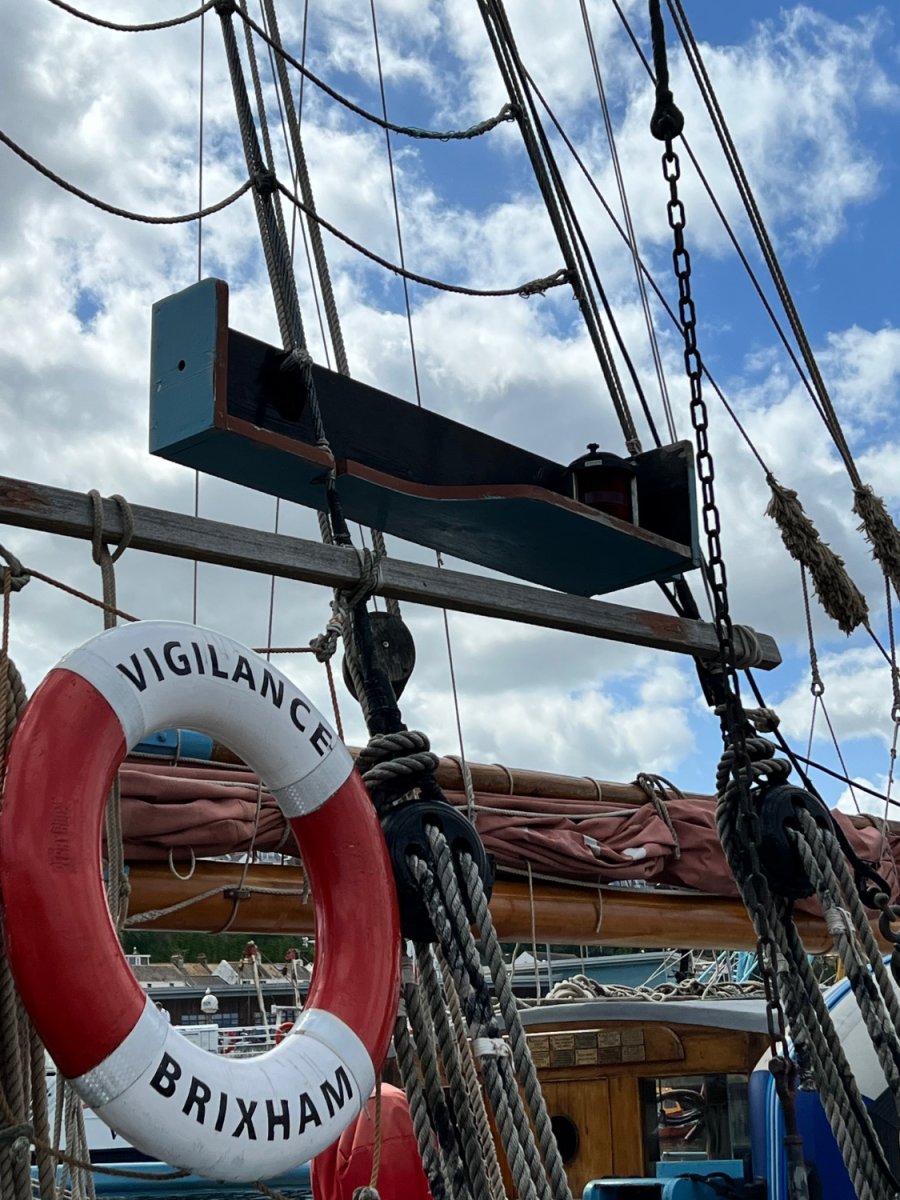
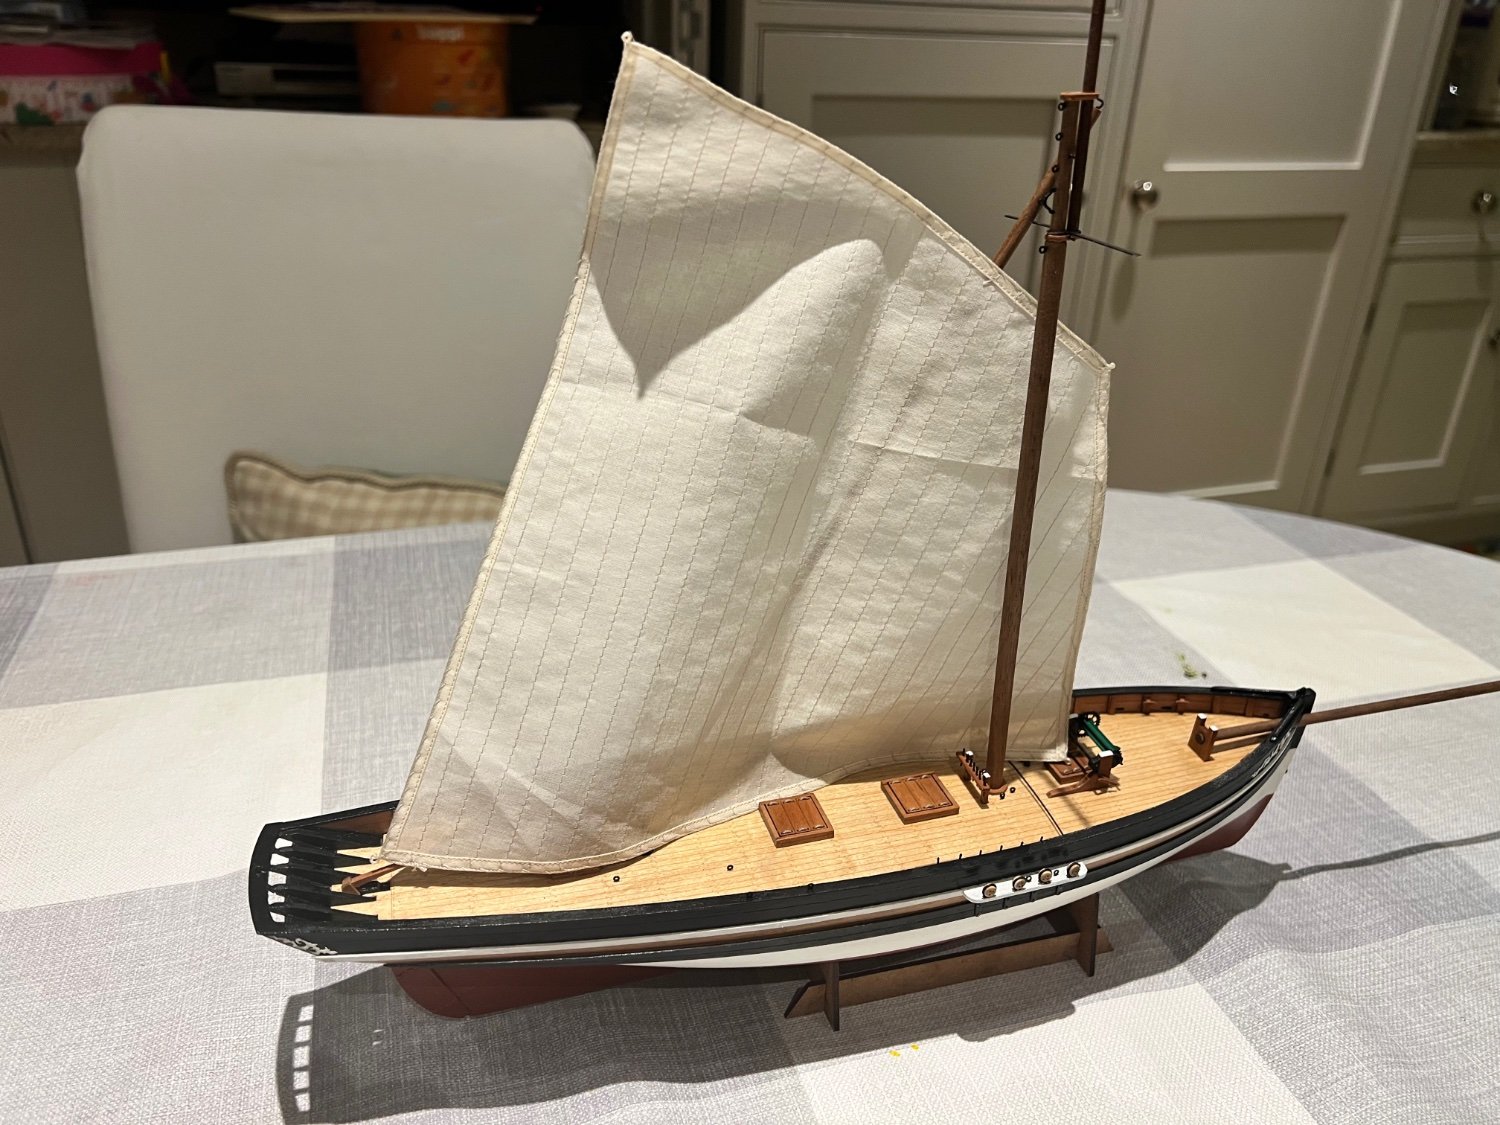
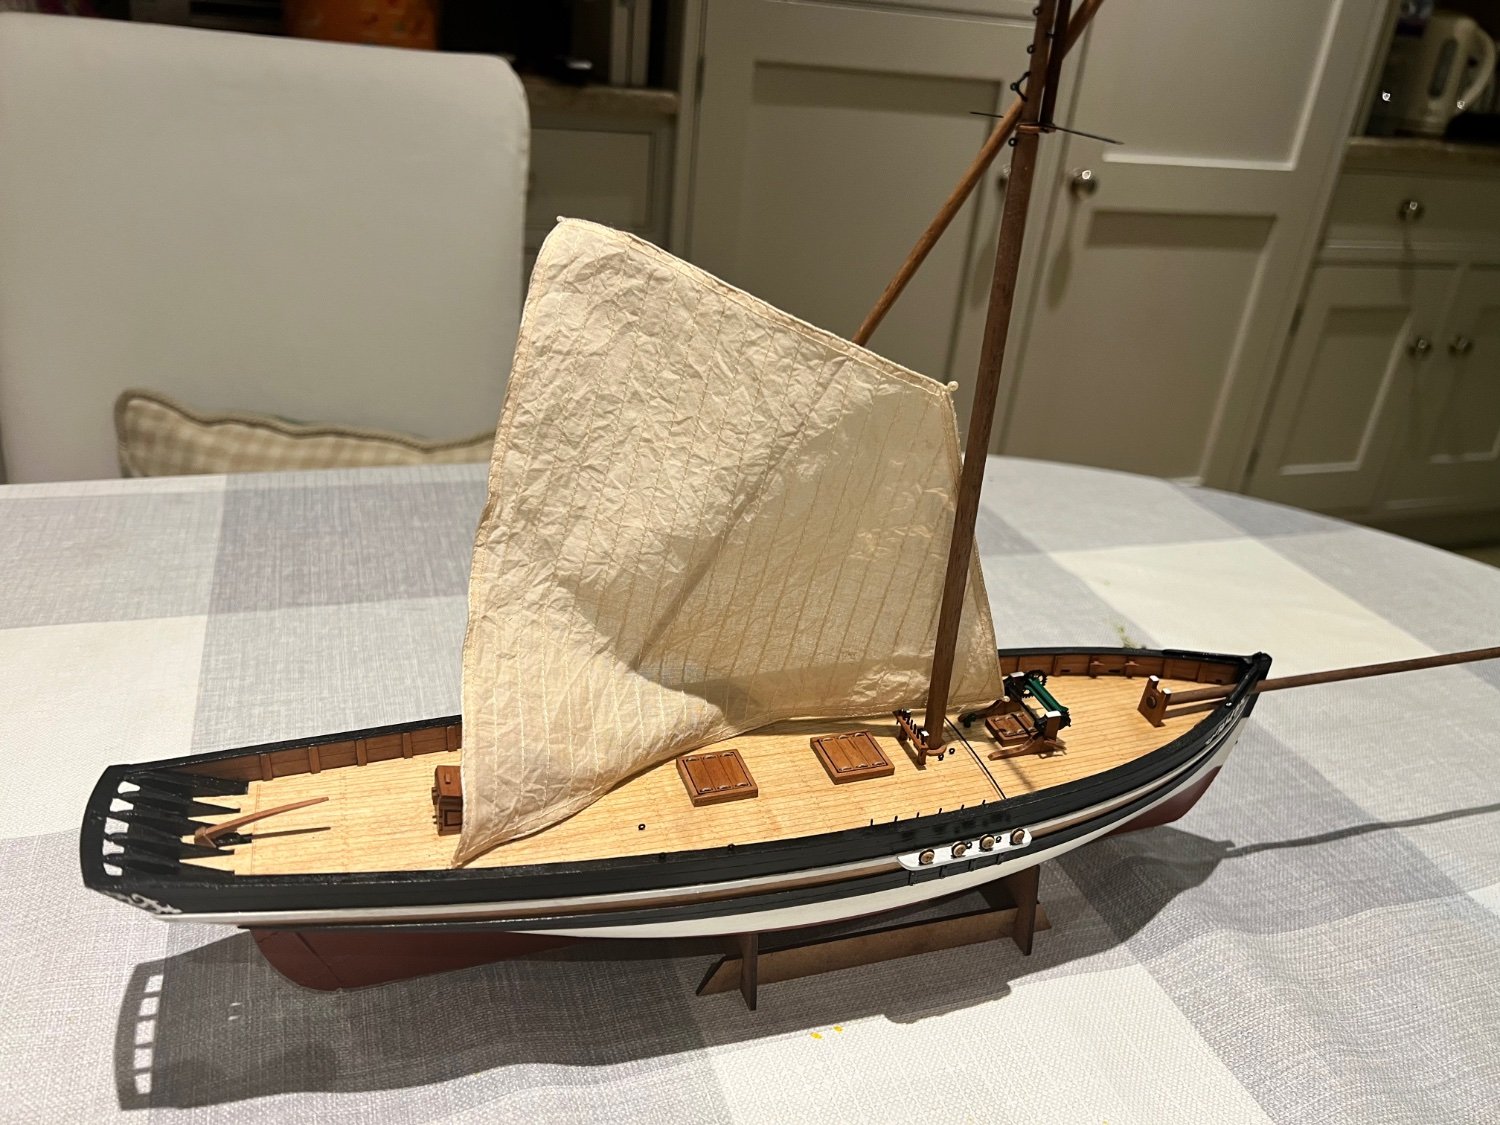
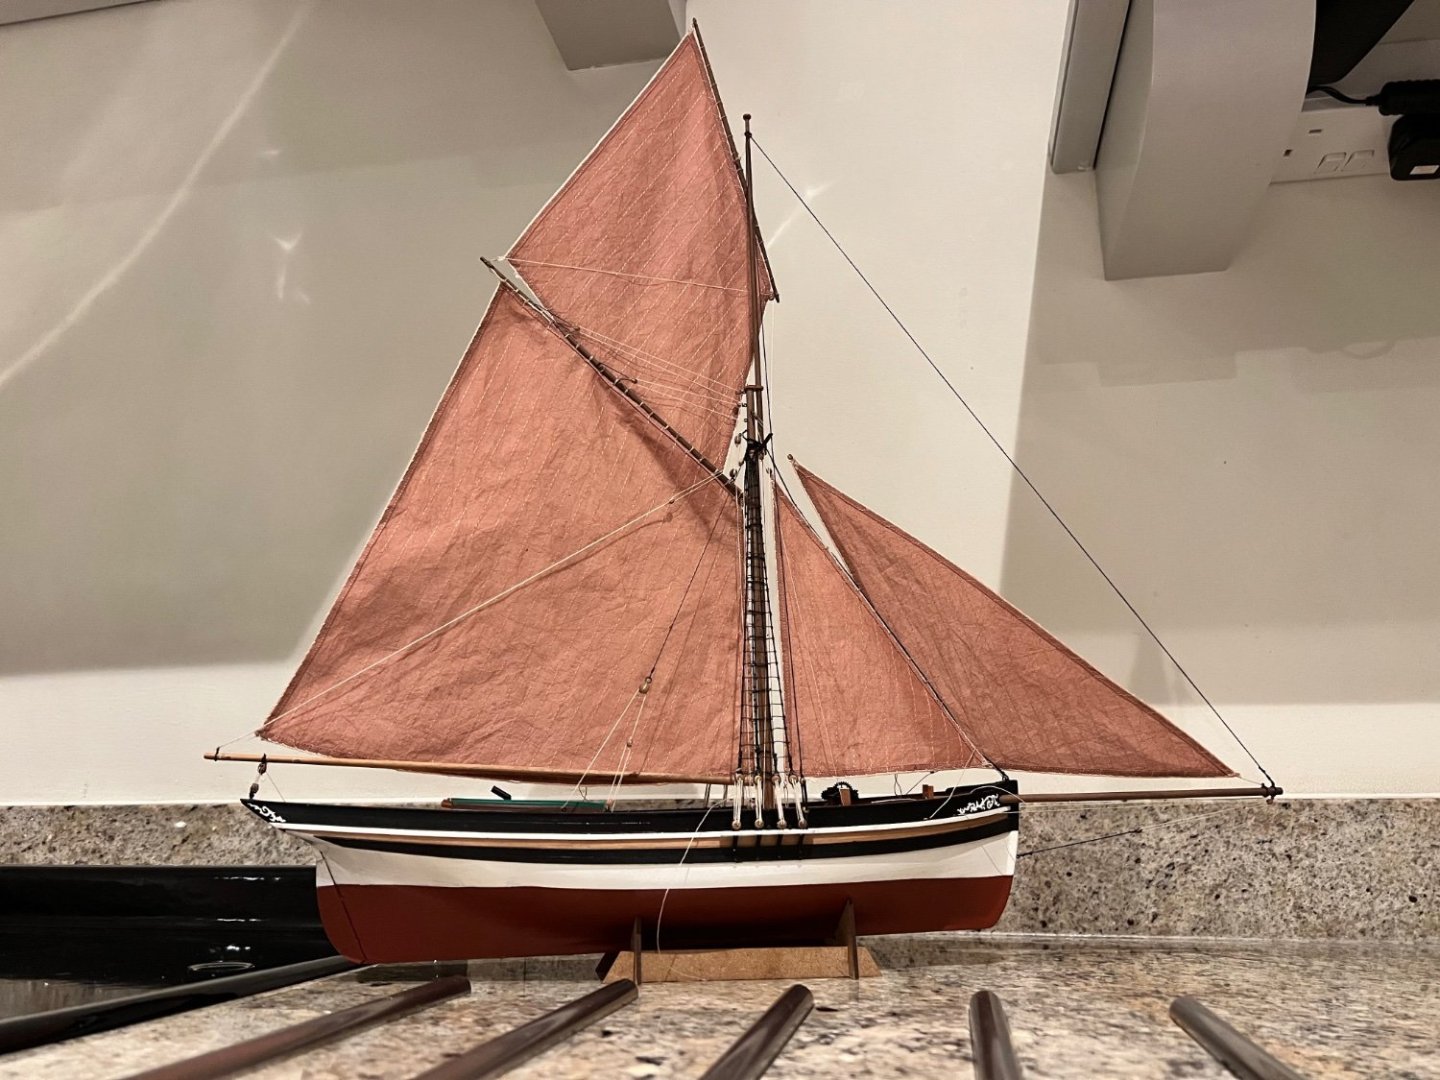
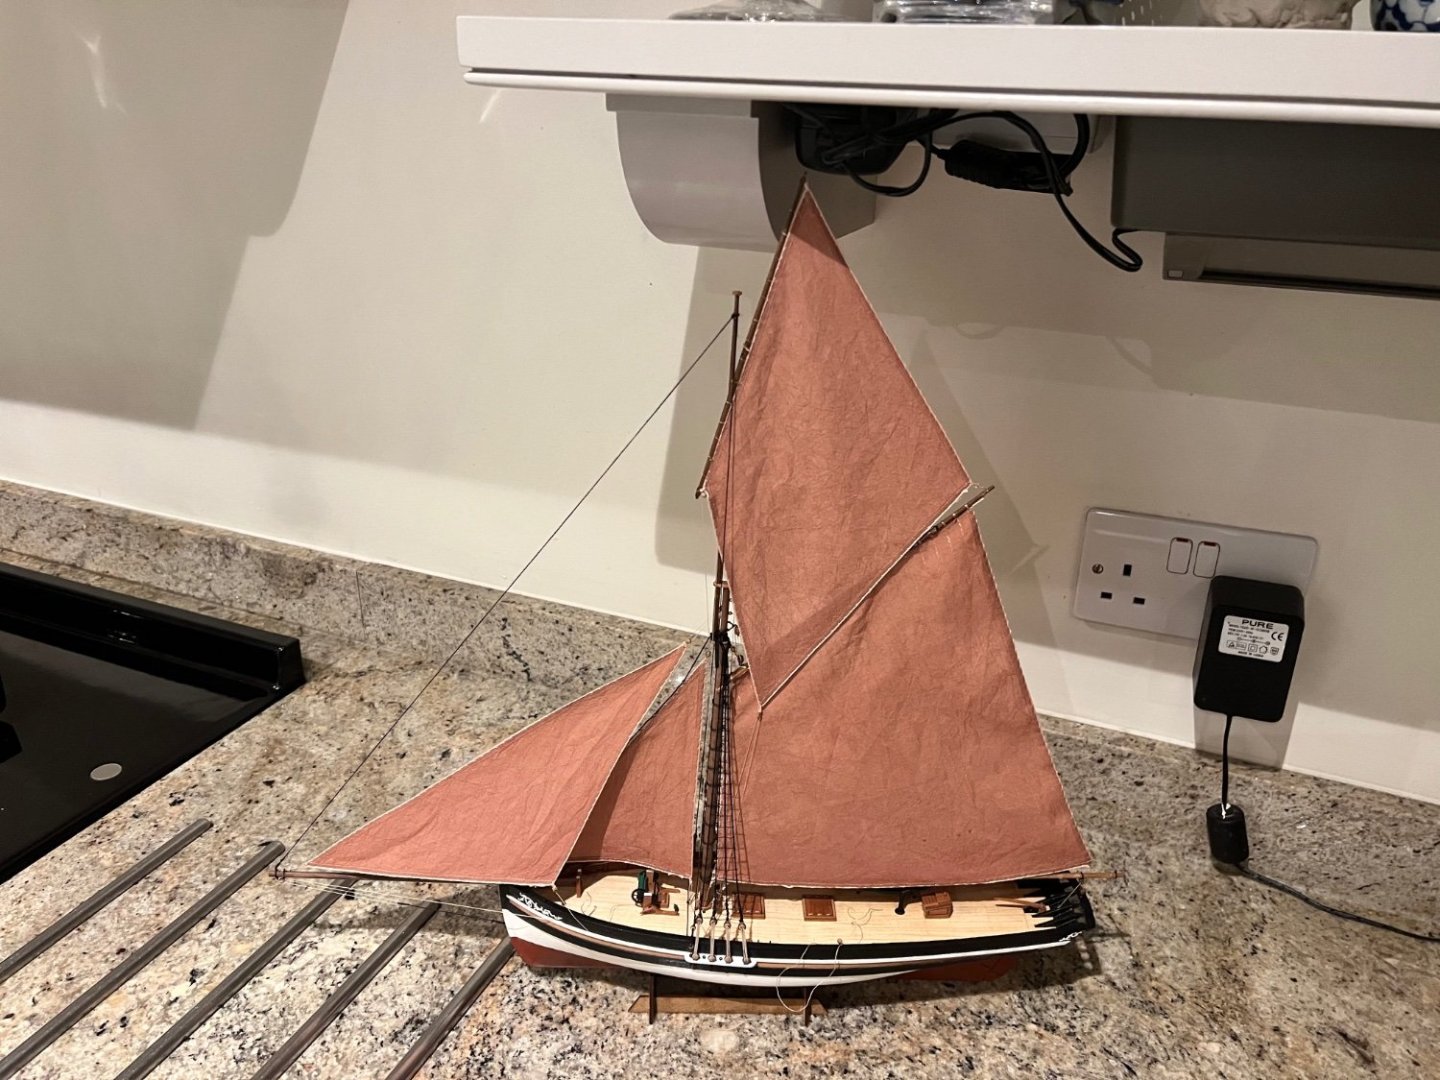
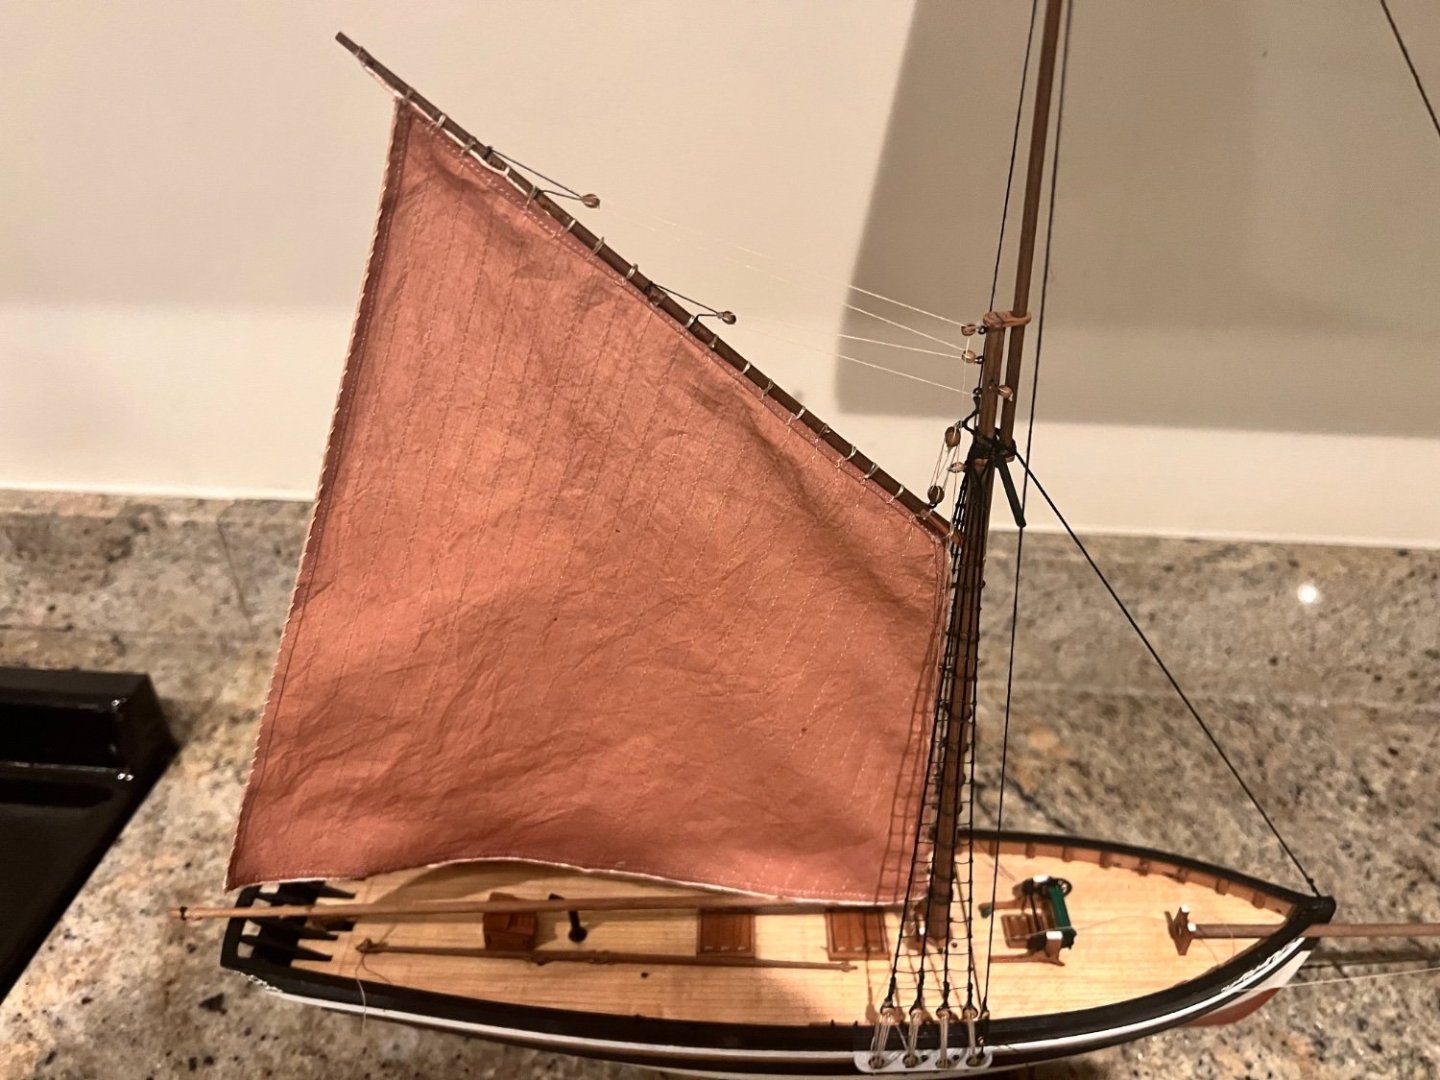
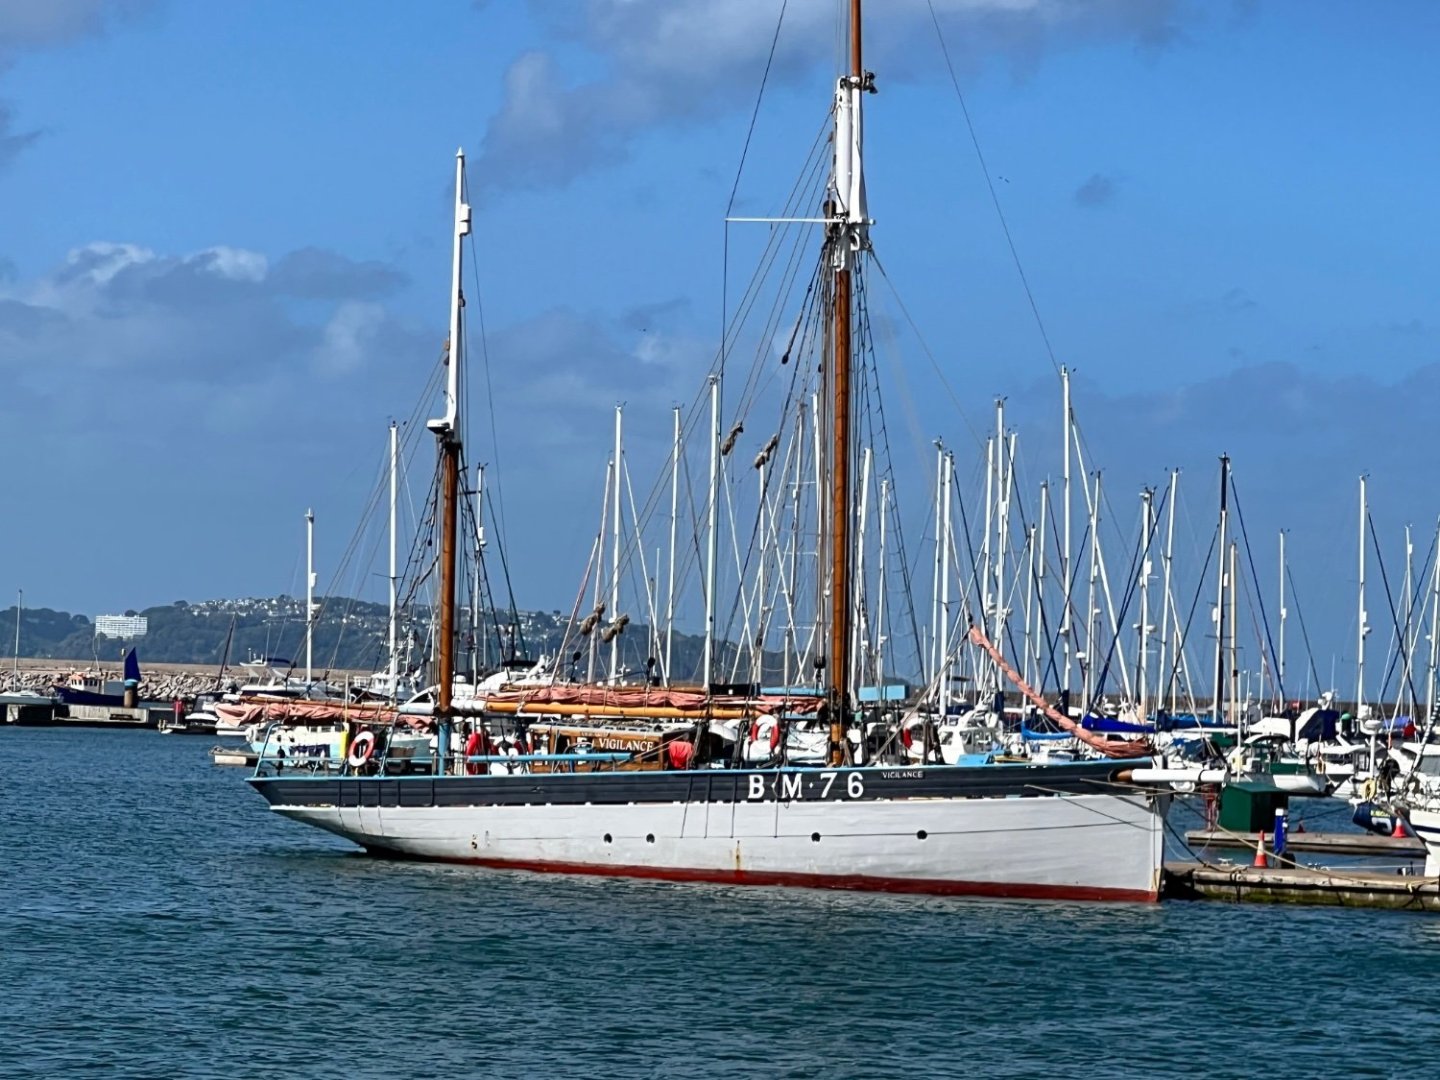
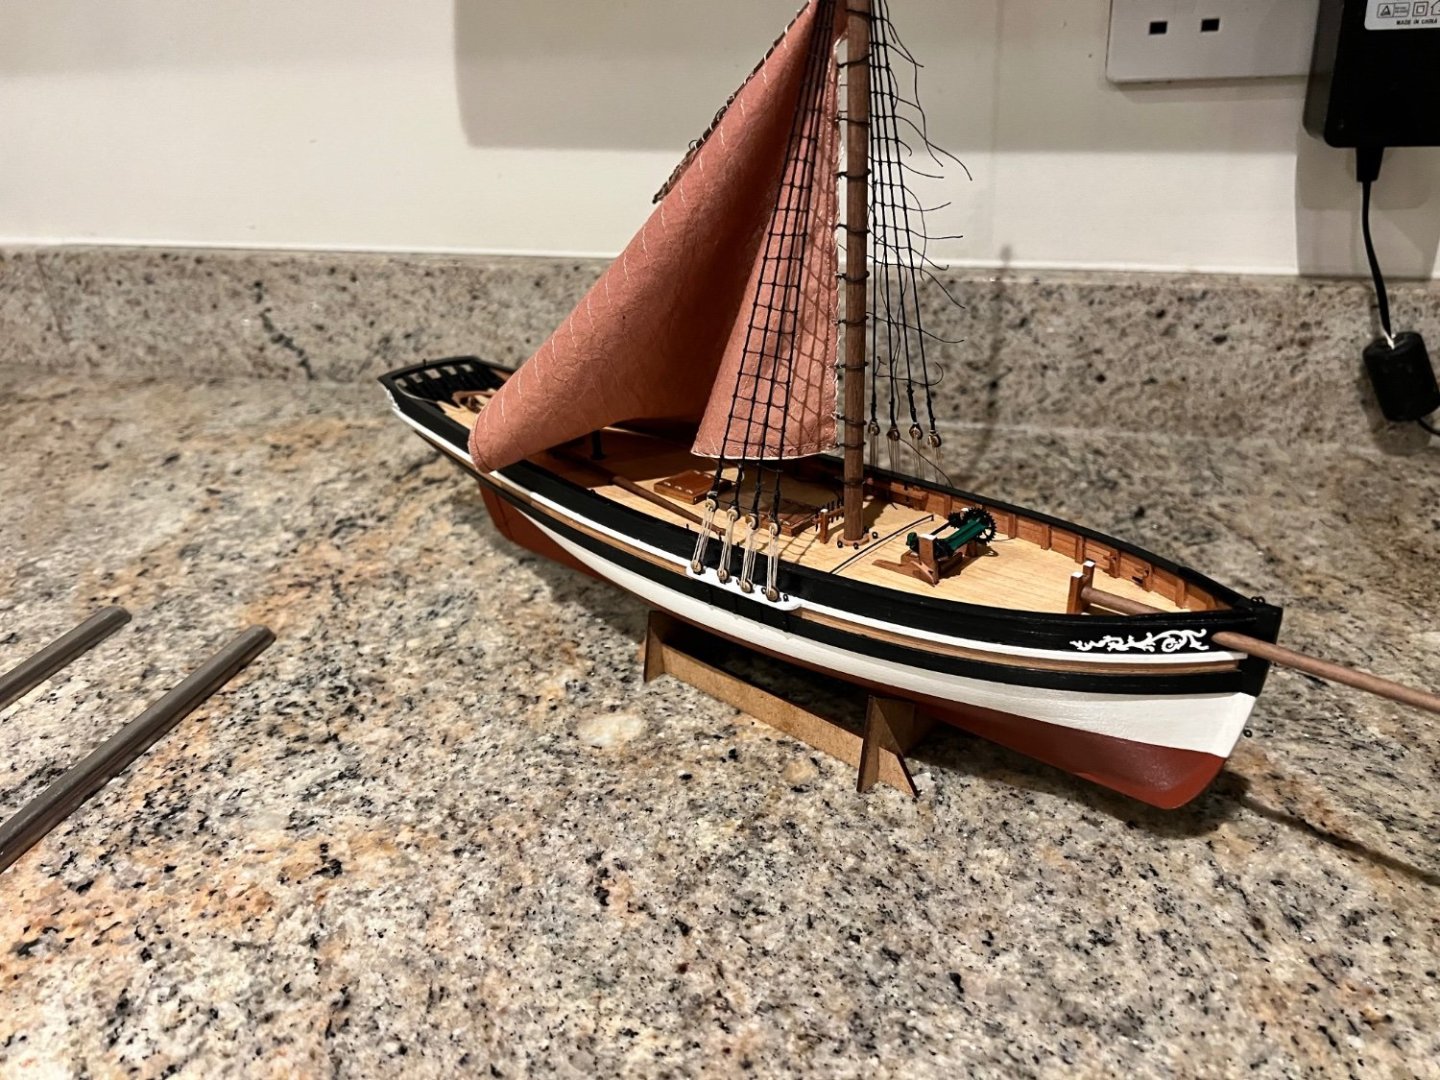
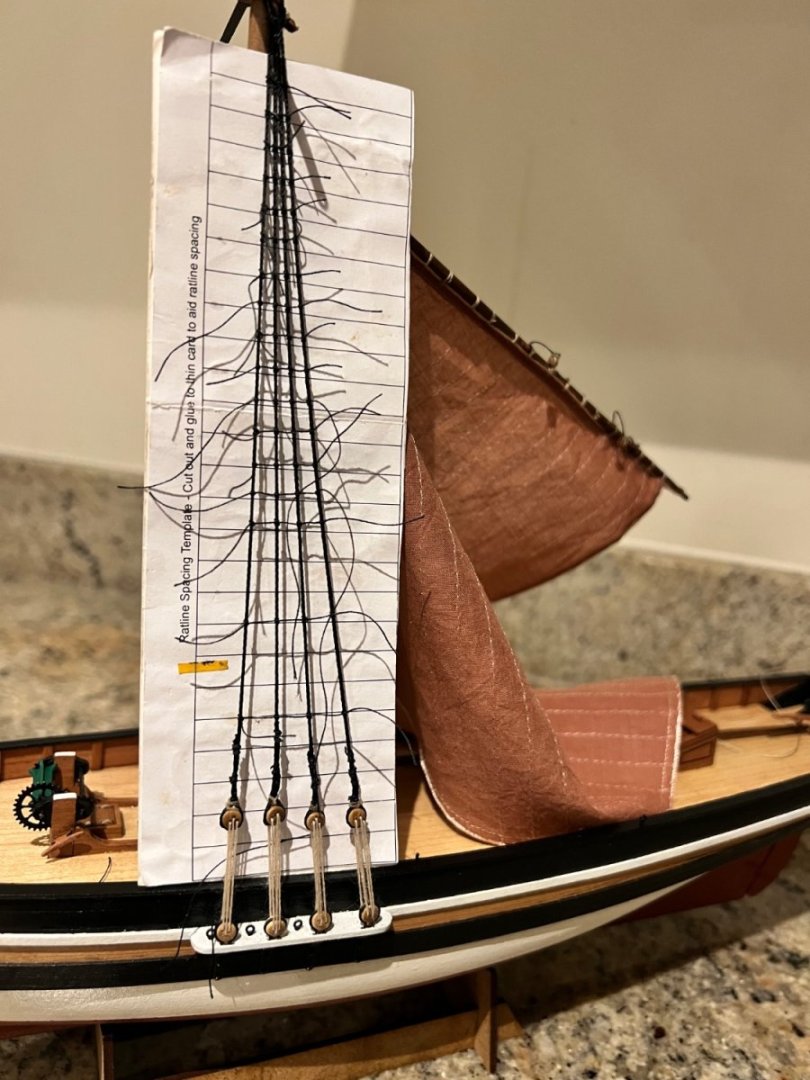
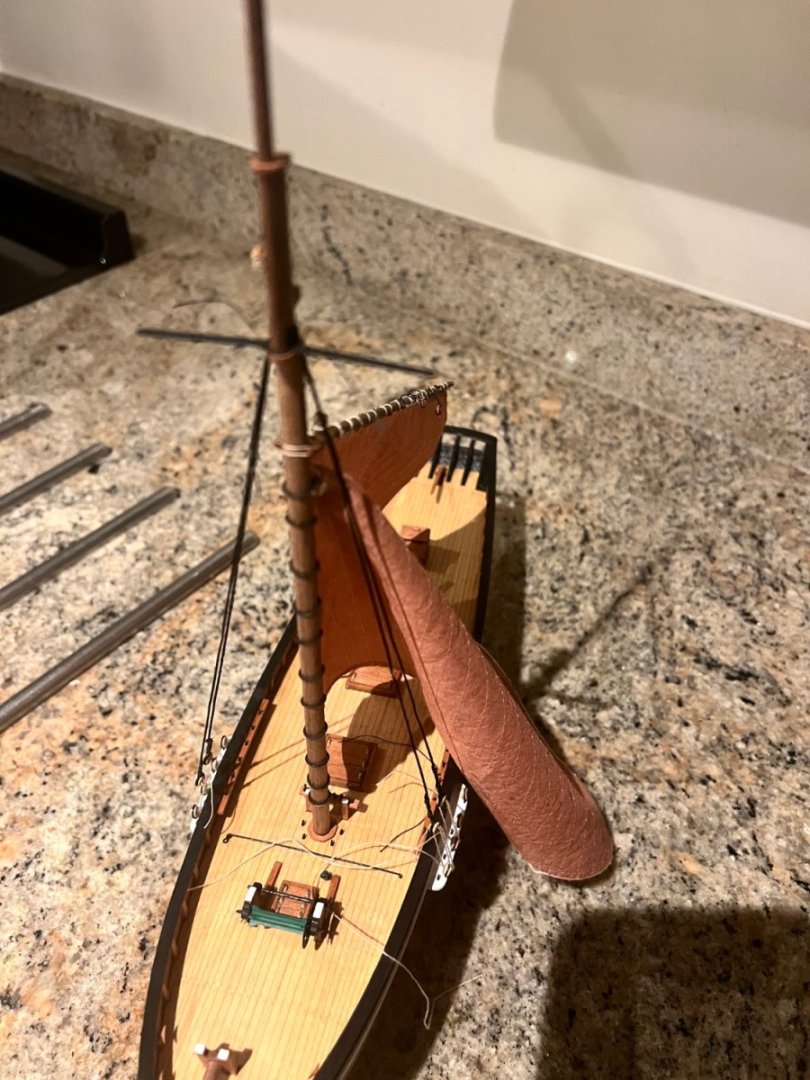
Thanks Rick. Ratlines complete. Stays, except for backstays added. Left backstays off whilst I’m setting the mainsail so they’re not in the way. Topsail added too. All fairly straightforward, just followed the excellent Vanguard plans. The most challenging element is adjusting the lines to achieve as uncreased sails as possible - this boat has big sails compared to the rest of the Vanguard fleet. Most of the lines are not fully tied off or glued as I’m still adjusting for position. My sails are a paler, pinkier colour than most fishing boat builds on here - I’ve avoided the RIT dye Wine colour and tried to mimic the trawler Vigilance’s sails which I saw and photographed in Brixham in 2022.


- 25 replies
-
- 2
-
-
- Ranger
- Vanguard Models
- (and 1 more)
-
Shrouds fitted. Starboard ratlines done, port ratlines in progress.
- 25 replies
-
- 3
-
-
- Ranger
- Vanguard Models
- (and 1 more)
-
Just a quick update. Decided on a colour for the sails, RIT dye tan (mixed quite strong) and after that the sails dipped for a minute or two in weak RIT dye scarlet mixture, the latter to give the sails a less bland brown colour. Fitting out below. First two shrouds on each side being added. The instructions say add the main topsail to the first first, I’ve decided not to as it will be in the way for the shrouds and ratlines and I’ll risk breaking the topsail yard.

- 25 replies
-
- 1
-
-
- Ranger
- Vanguard Models
- (and 1 more)
-
I can attest to your success there! It worked for me.
-
Simon, She looks super, I really enjoyed building this one too. Such a great kit. you’ll enjoy Nisha too, similar size and rig and I thought a little bit easier to plank. I’ve done a log on all six Vanguard fishing boat builds (Ranger still under construction + Alert and Grecian as my skills have slowly improved) as a relative newbie to boat building it’s been wonderful to have such a wealth of experience and advice available plus some encouragement - so i’d recommend a log if you can face the work! Also we get to enjoy reading it. Dan
-
Beautiful model and case. I’ve really enjoyed following your build!
- 122 replies
-
- 2
-
-
- Artesania Latina
- Pen Duick
- (and 1 more)
-
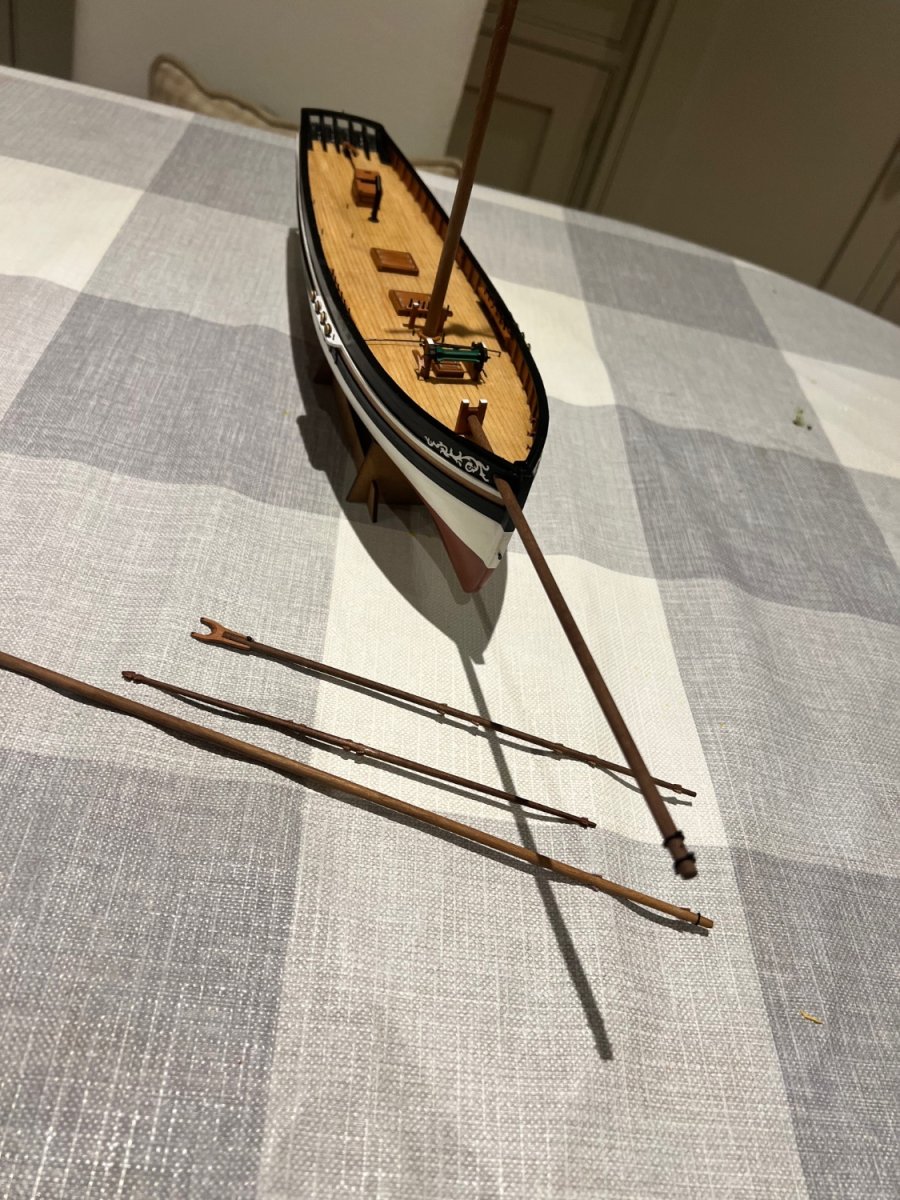
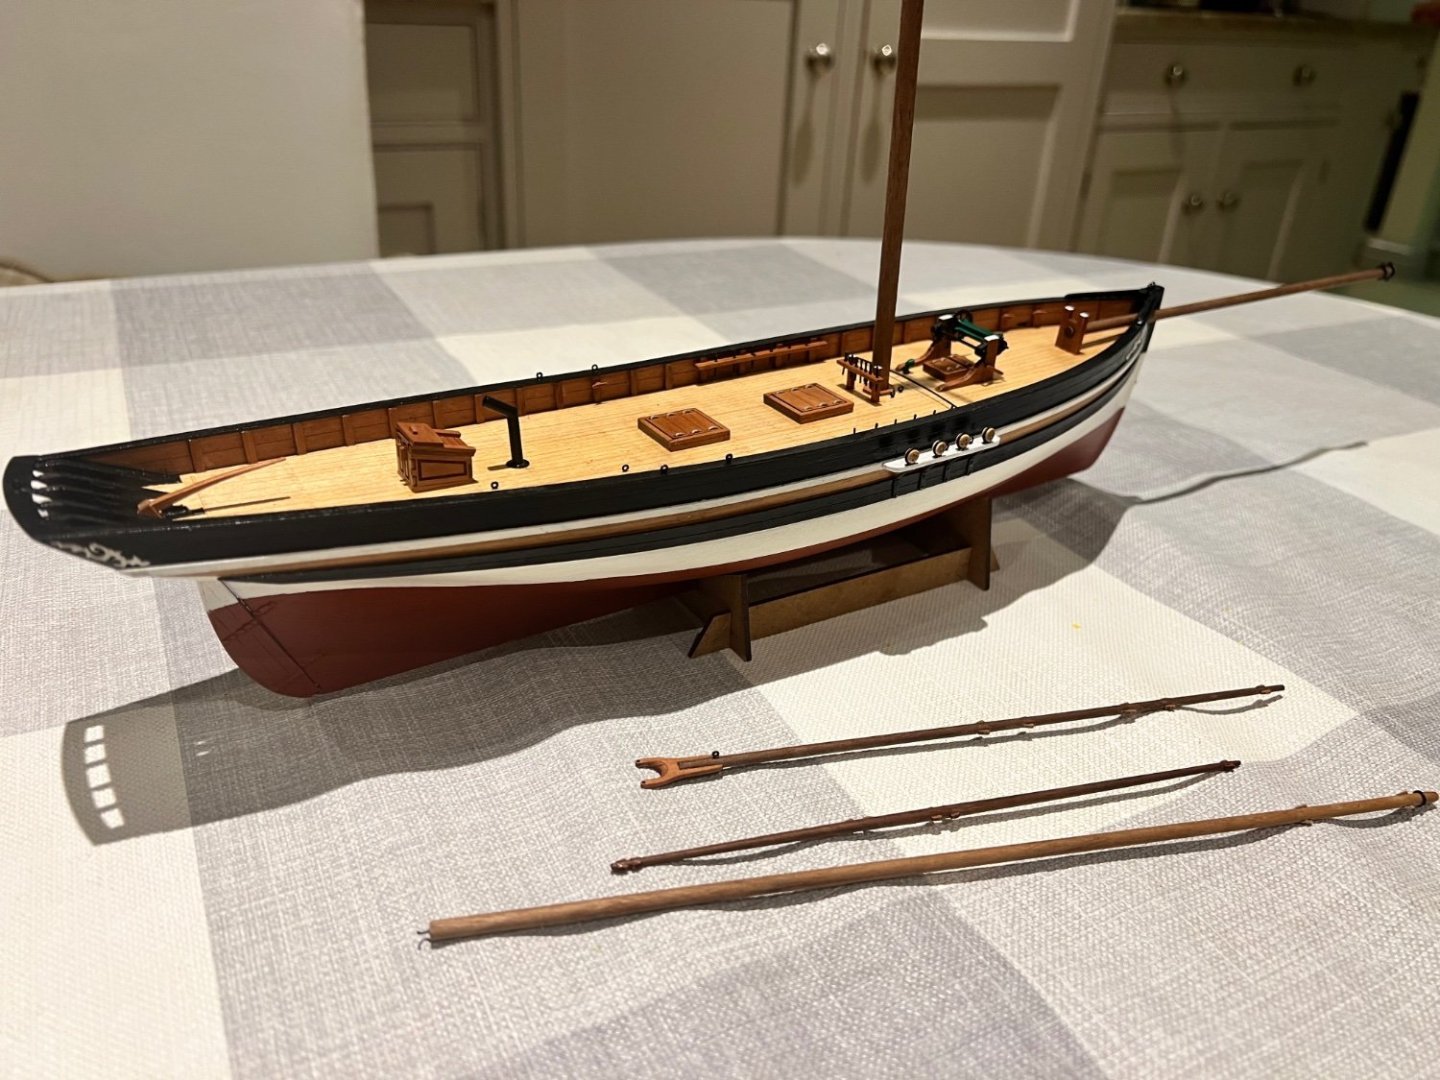
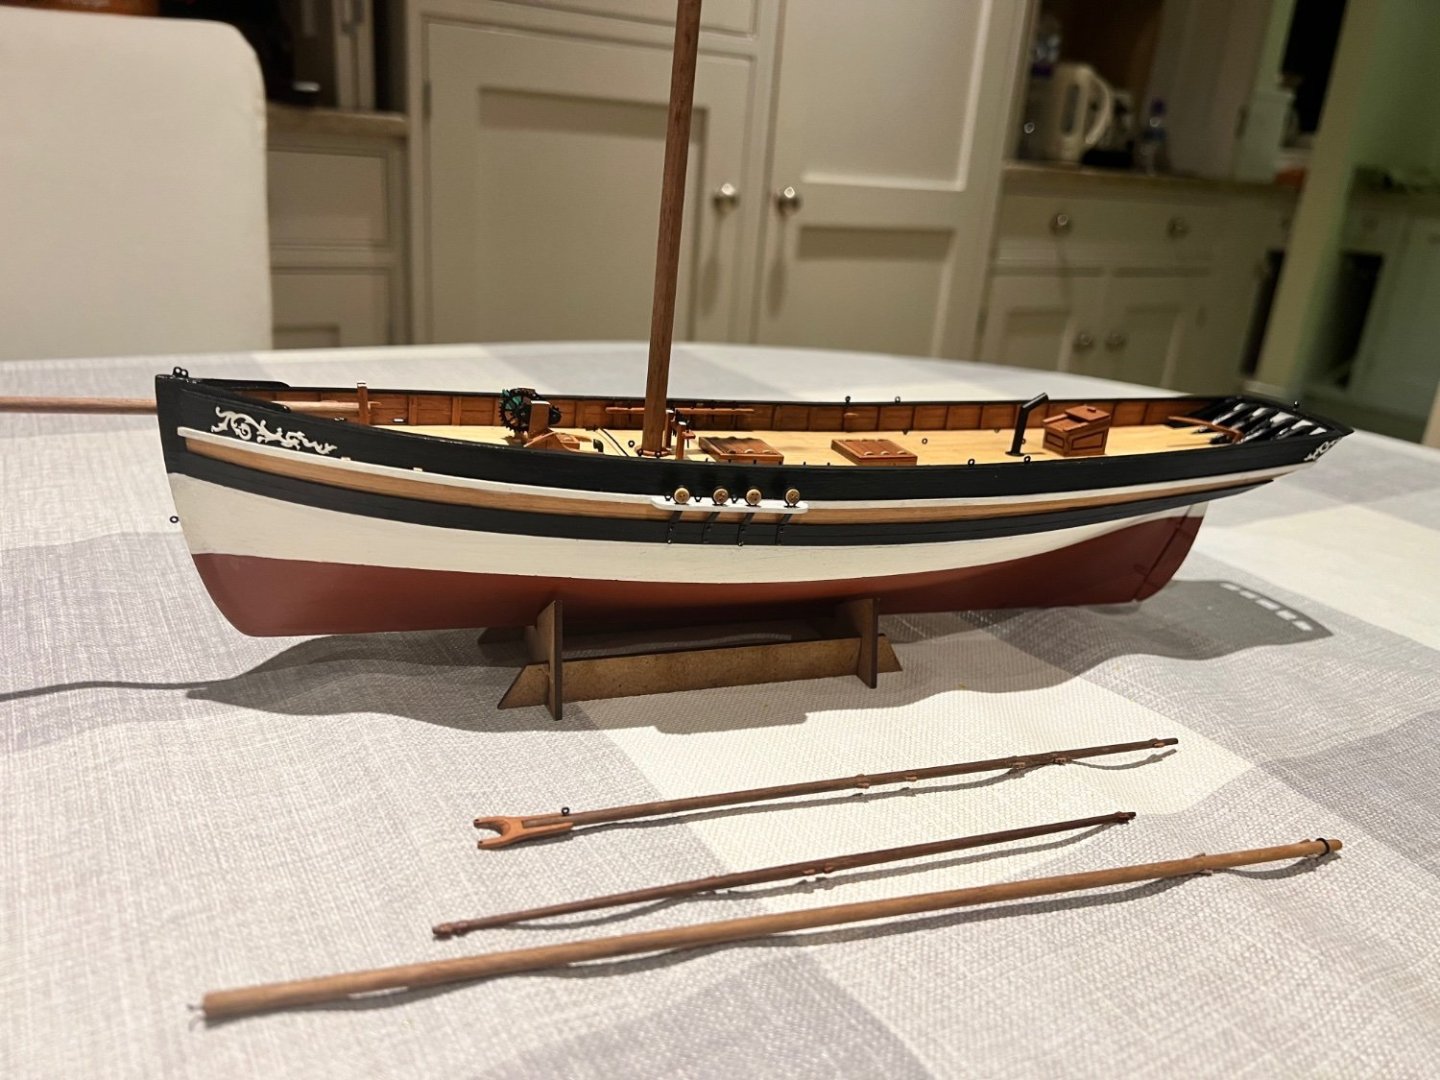
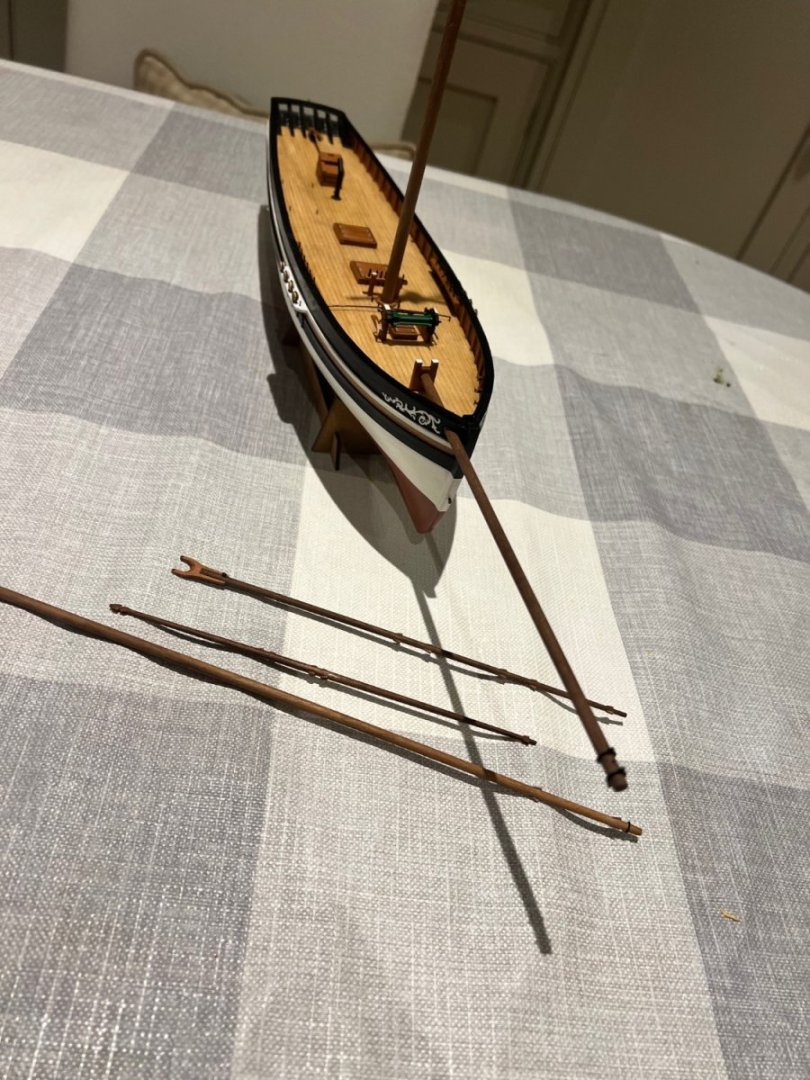
Ranger’s hull and spars are now complete. I can’t do anymore until I make a decision on what colour to have the sails. I had originally intended the undyed white straight from the packet. Is that just too white? It’s a starker white than the photos convey. I had some spare Saucy Jack sails so I dyed one of these with tea. Not sure I like the faintly orange tinge that the tea gives them? Or do I stick with the red / pink sails of the rest of the fishing fleet despite having promised my wife I wouldn’t? Alongside Nisha to give an indication of how dark red sails would look. Or the paler sails Saucy Jack has. I reached this colour by accident and may well not be able to reproduce it. I’m thinking this last might look the best and also be a bit different from Nisha and Erycina. For the sake of completeness here’s some photos of Erycina with Ranger. She’s an almost identically sized boat although with a different rig. Incidentally, Erycina started off life with a cutter rig before being cut down to a ketch and the mizzen mast added. Any thoughts welcome! I’m stuck on Ranger until I can make a decision on sails. Thanks


- 25 replies
-
- 4
-
-
-
- Ranger
- Vanguard Models
- (and 1 more)
-
Thanks Rick, this is an easy boat to make and look good thanks to Chris’s excellent design. I’d like to think I’m getting better at building them, but in reality this is by far the easiest of the four non-lugger rigged fishing boats from Vanguard.
-
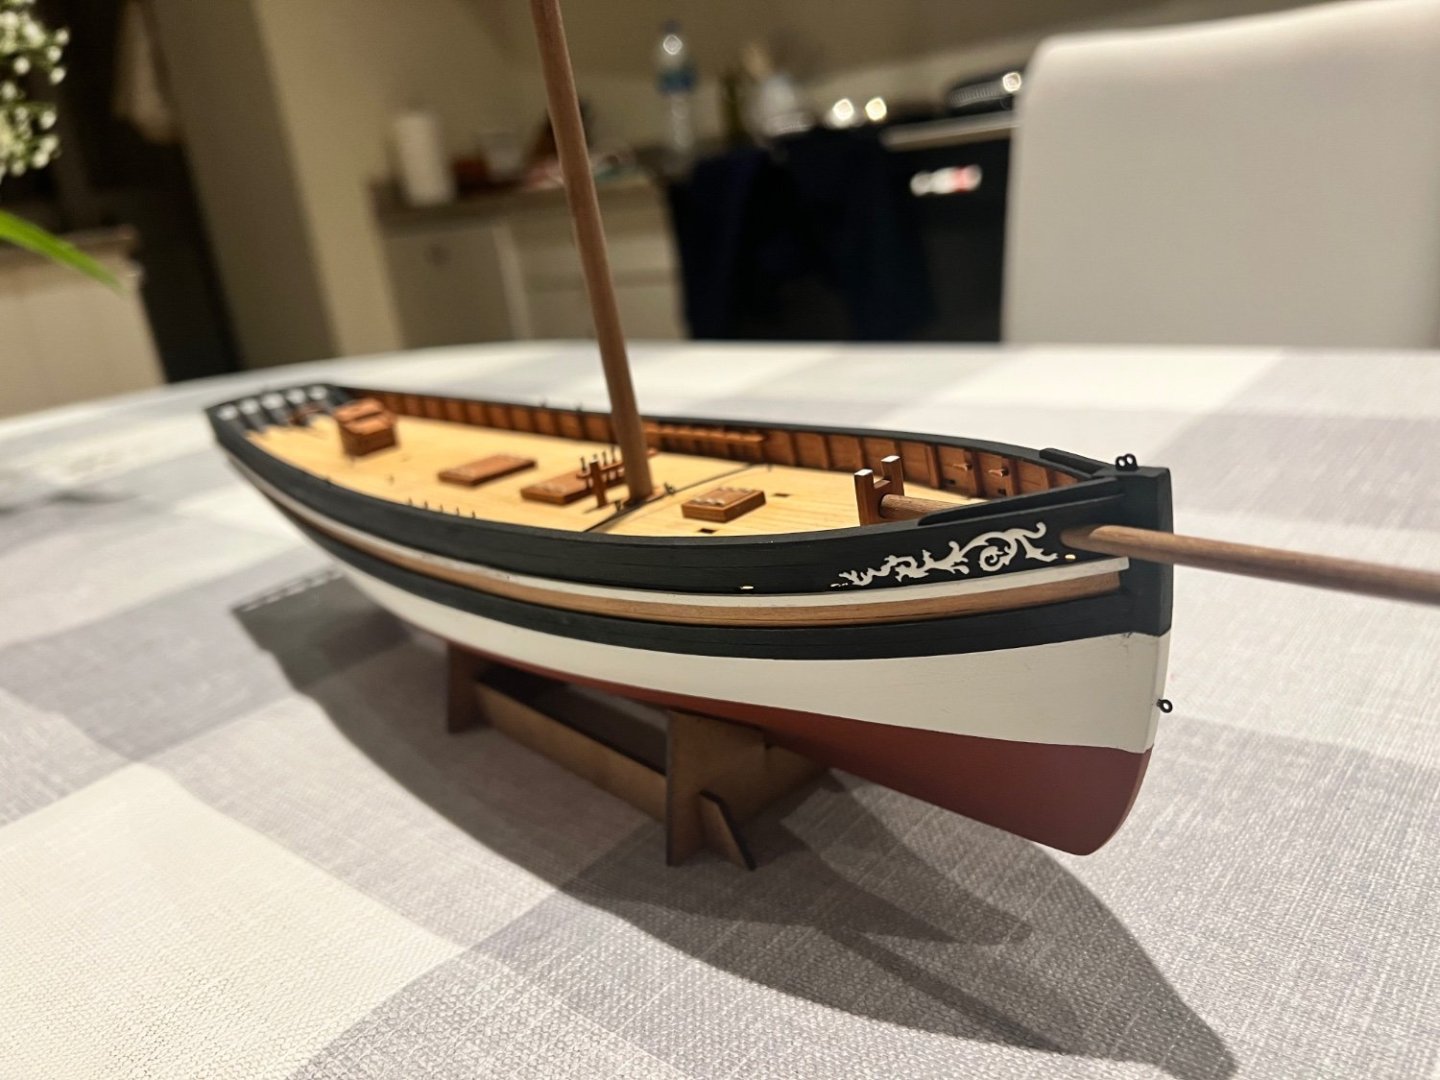
Thanks for all the likes. PE on the hull fitted and looks great. Bowsprit and much of the deck furniture now in place. Still the channels to add an a few other bits and pieces. Tidied up the paint a bit too.

- 25 replies
-
- 4
-
-
- Ranger
- Vanguard Models
- (and 1 more)
-
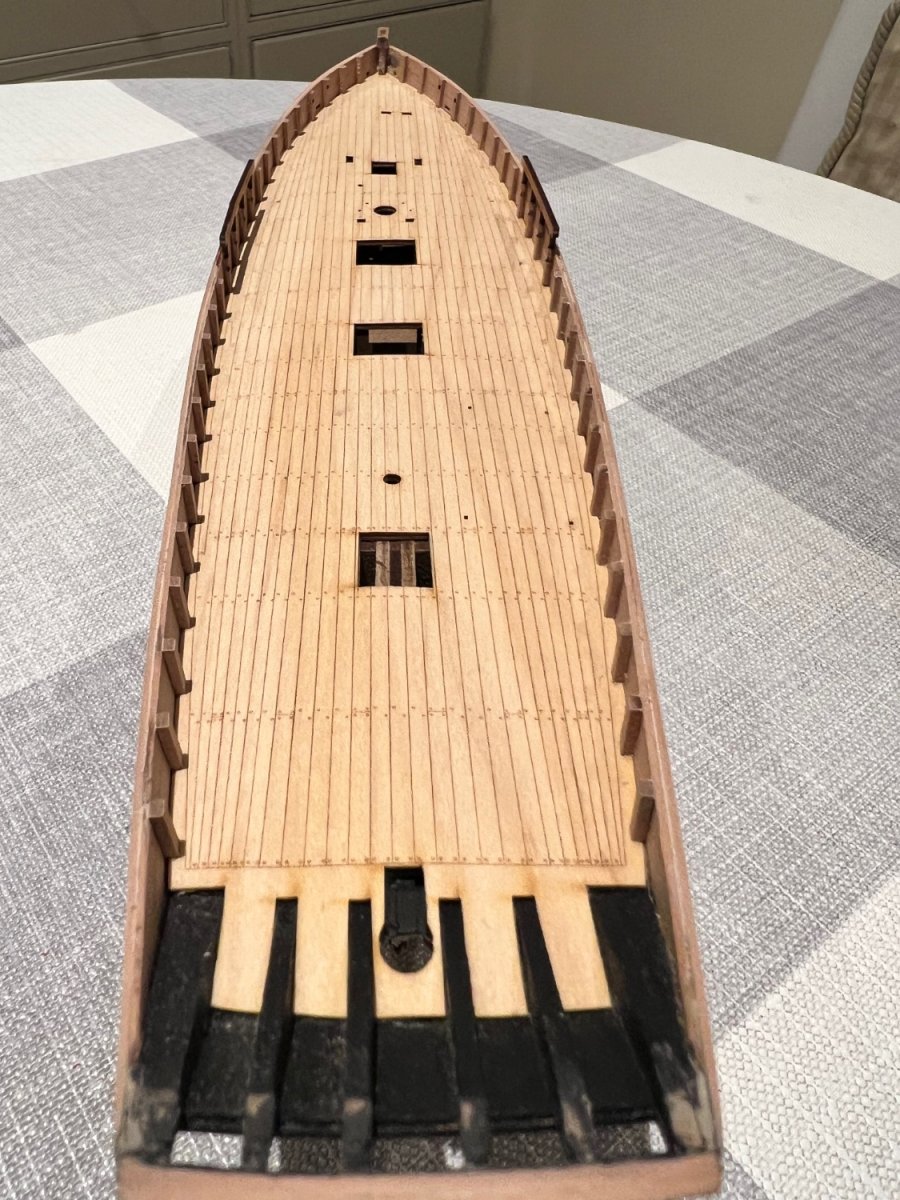
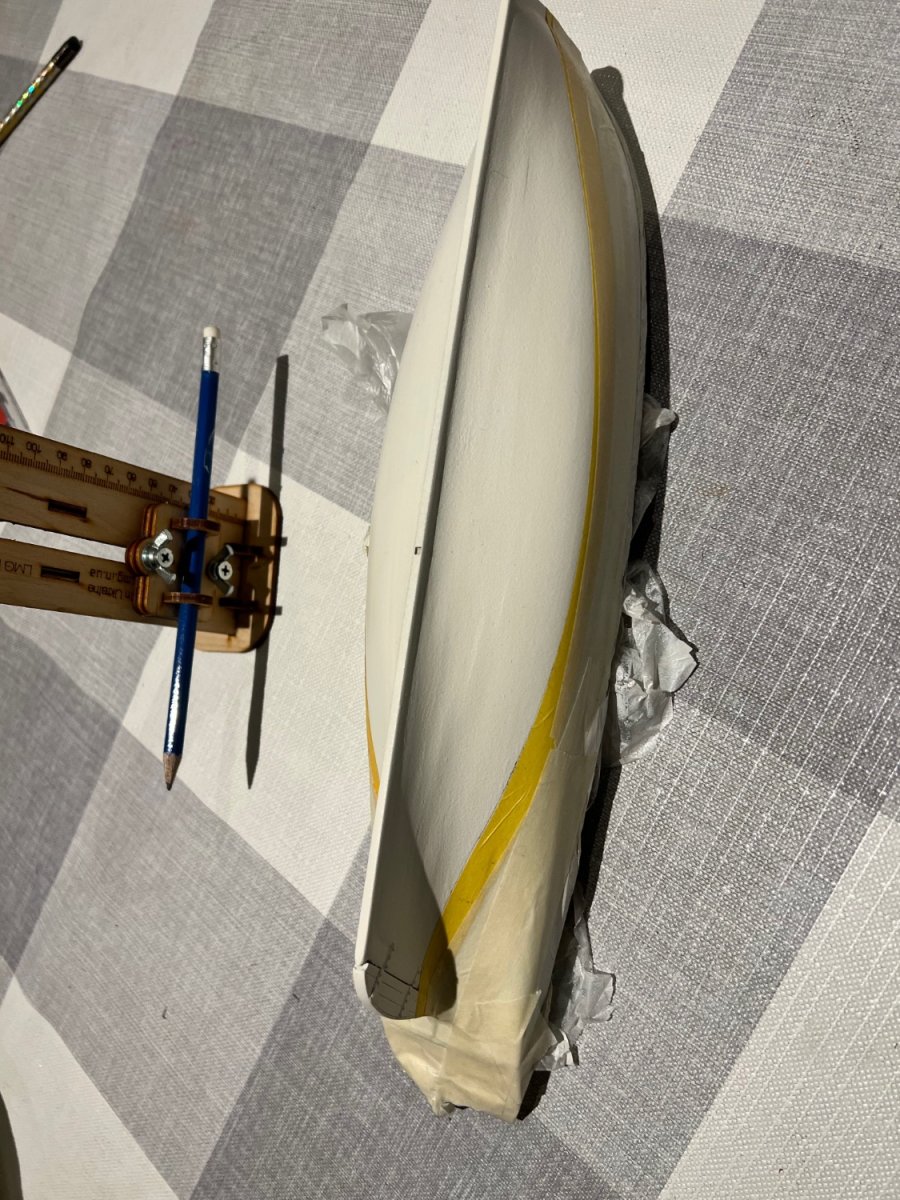
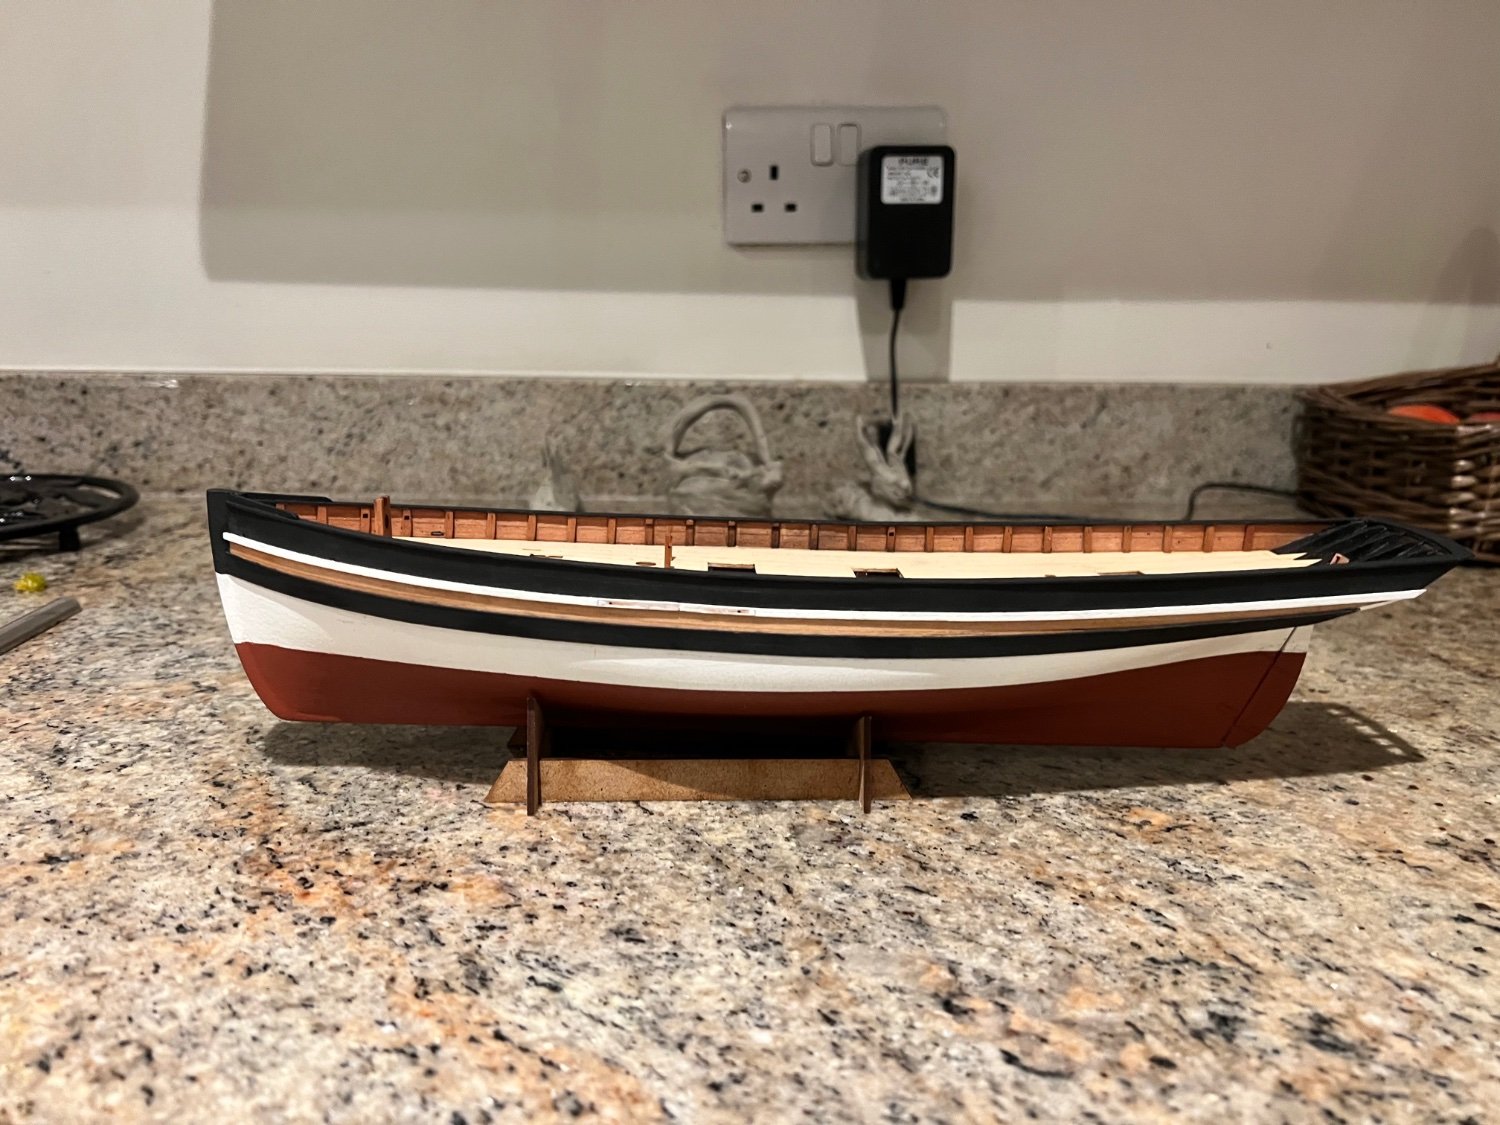
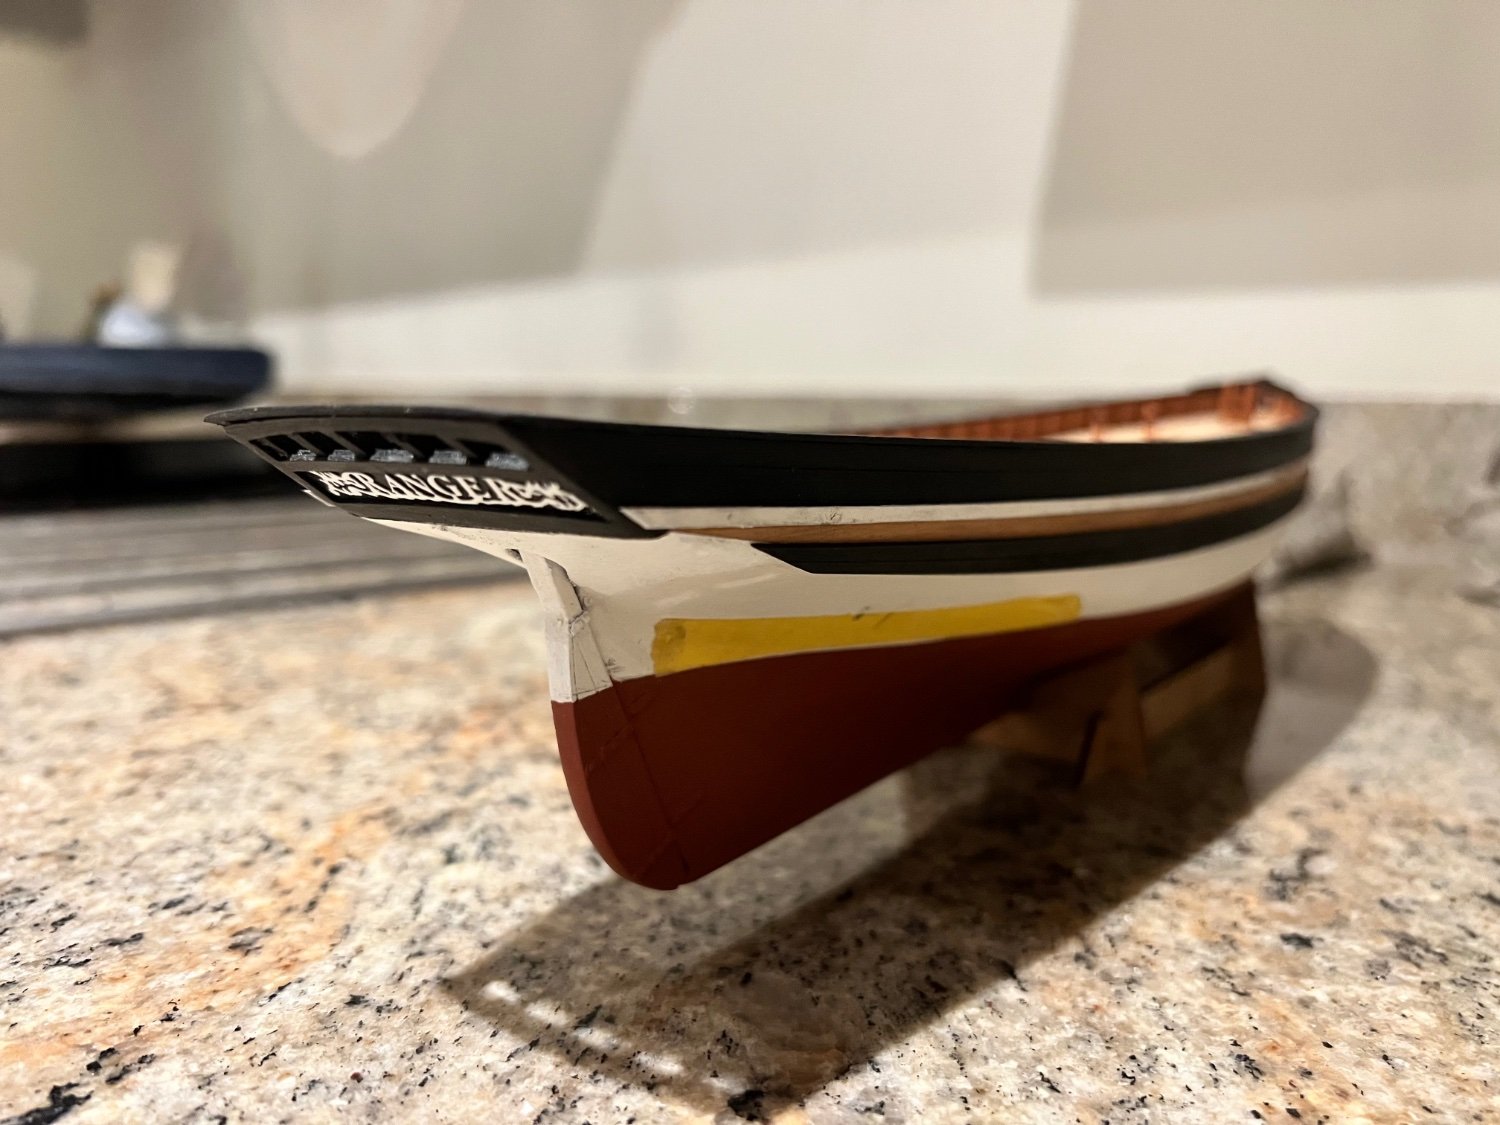
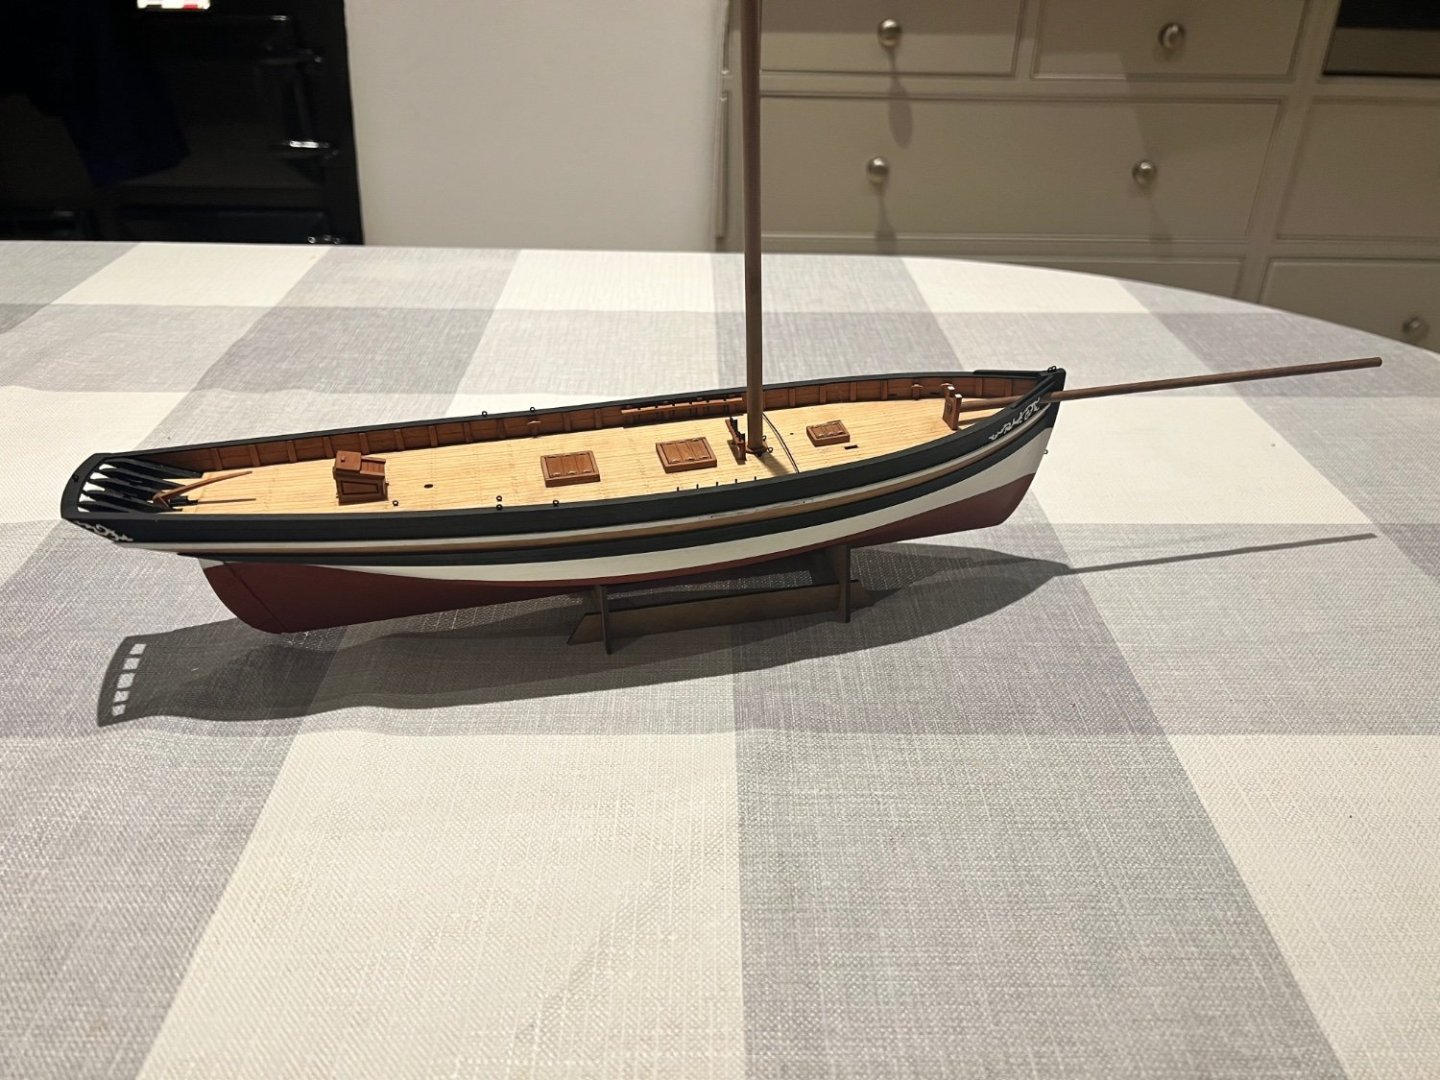
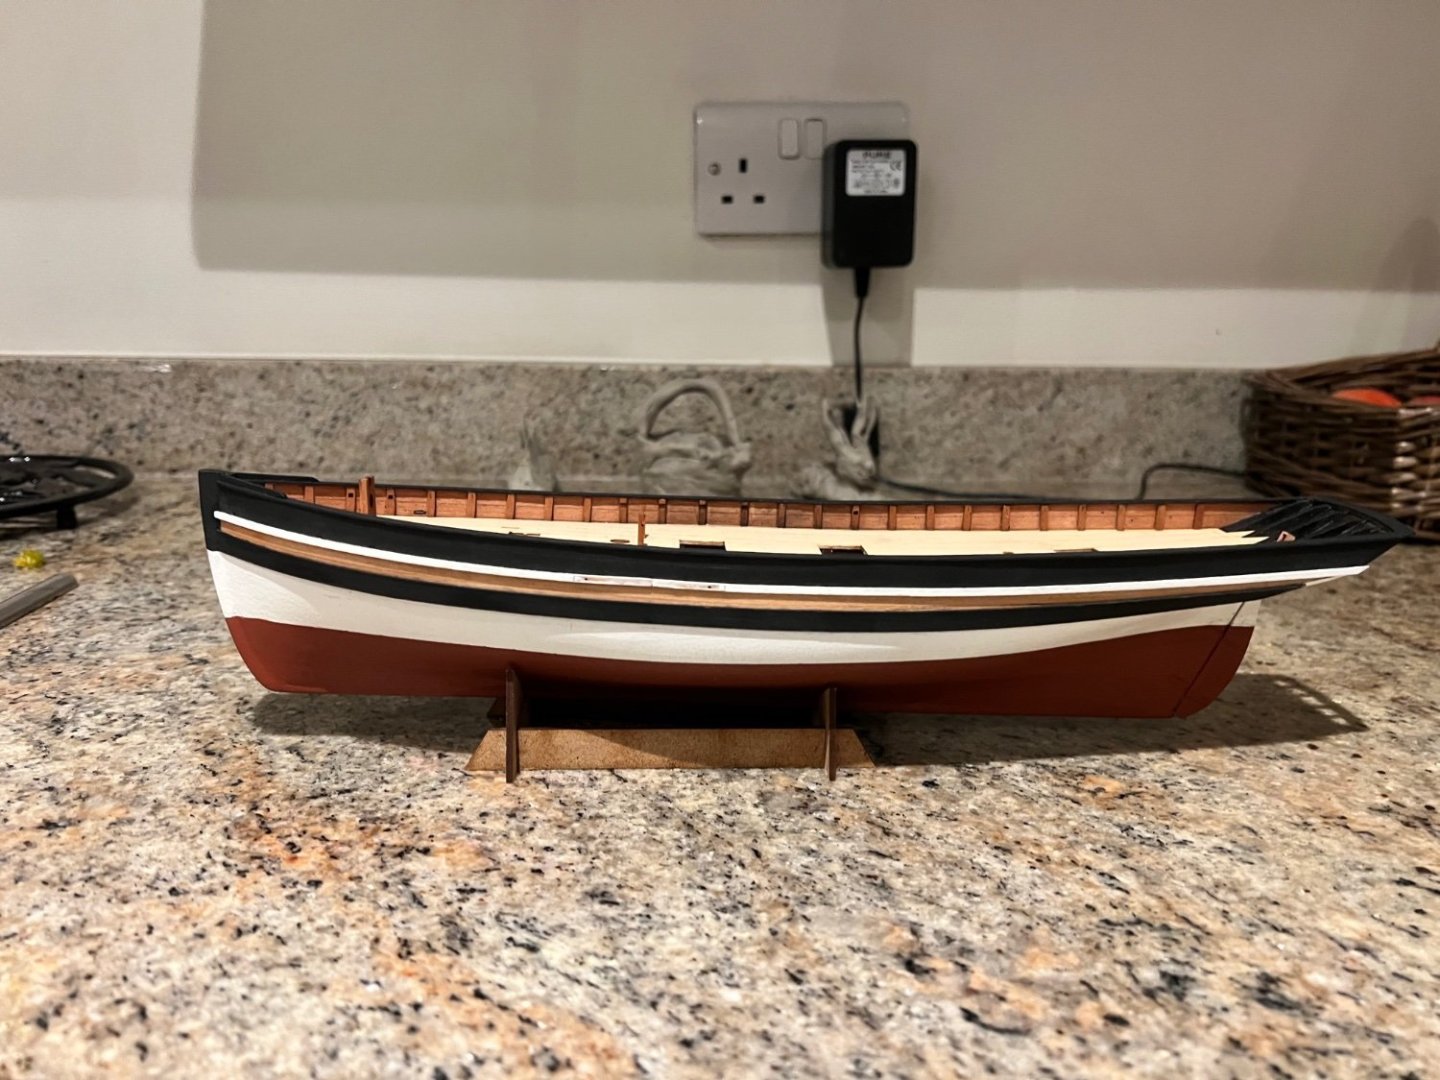
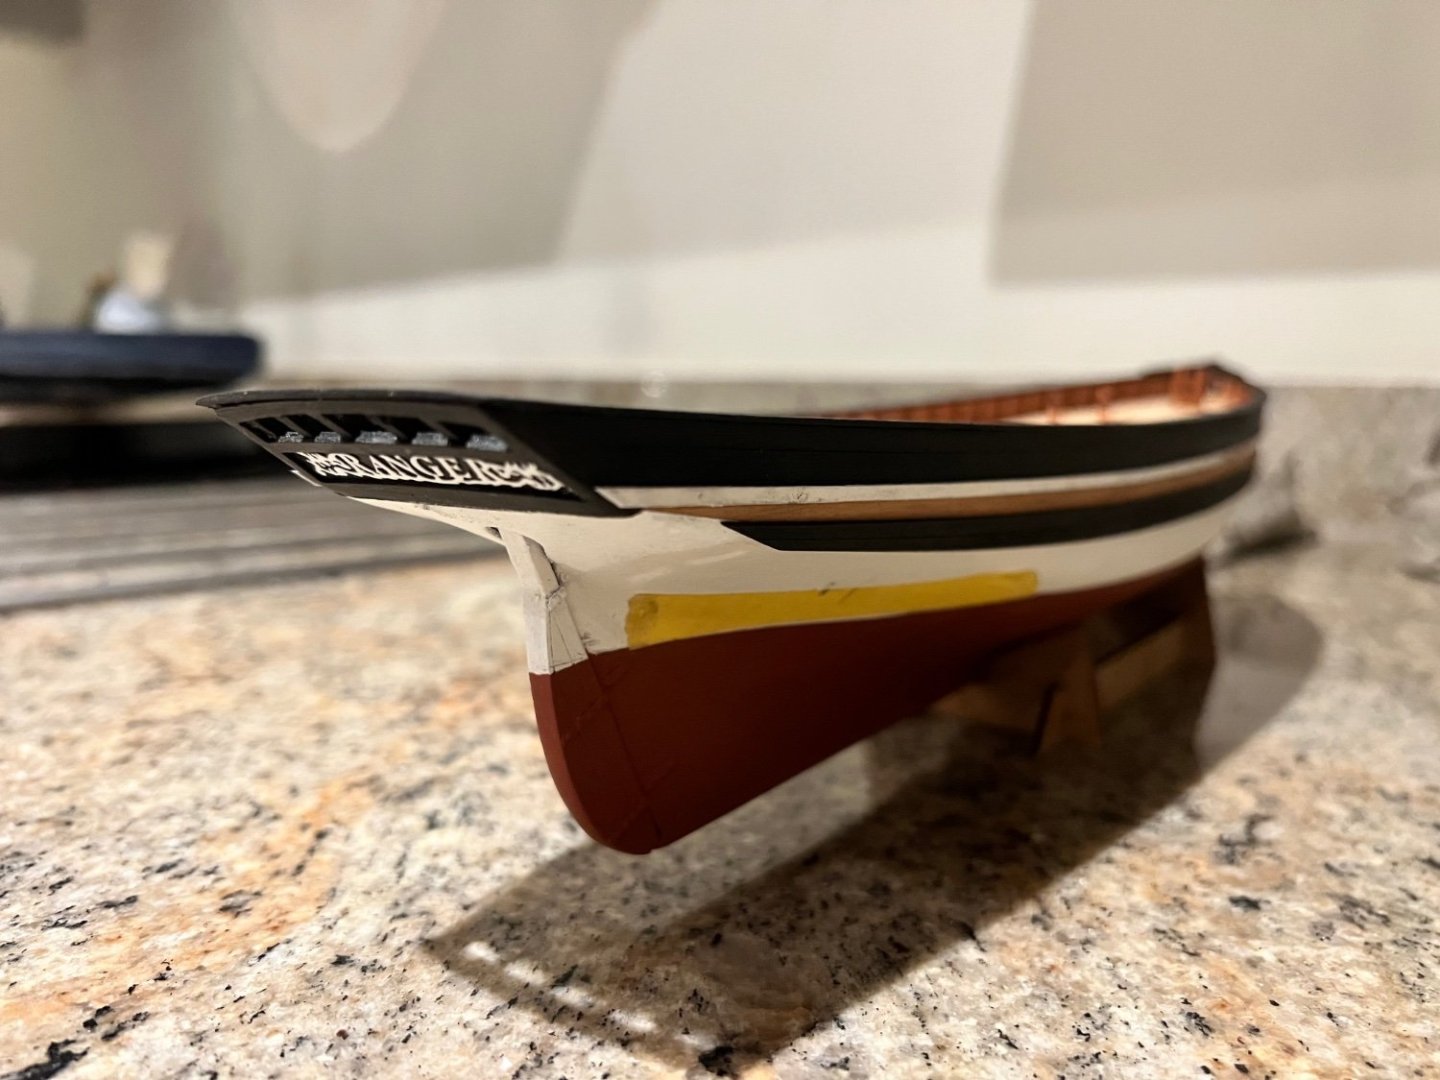
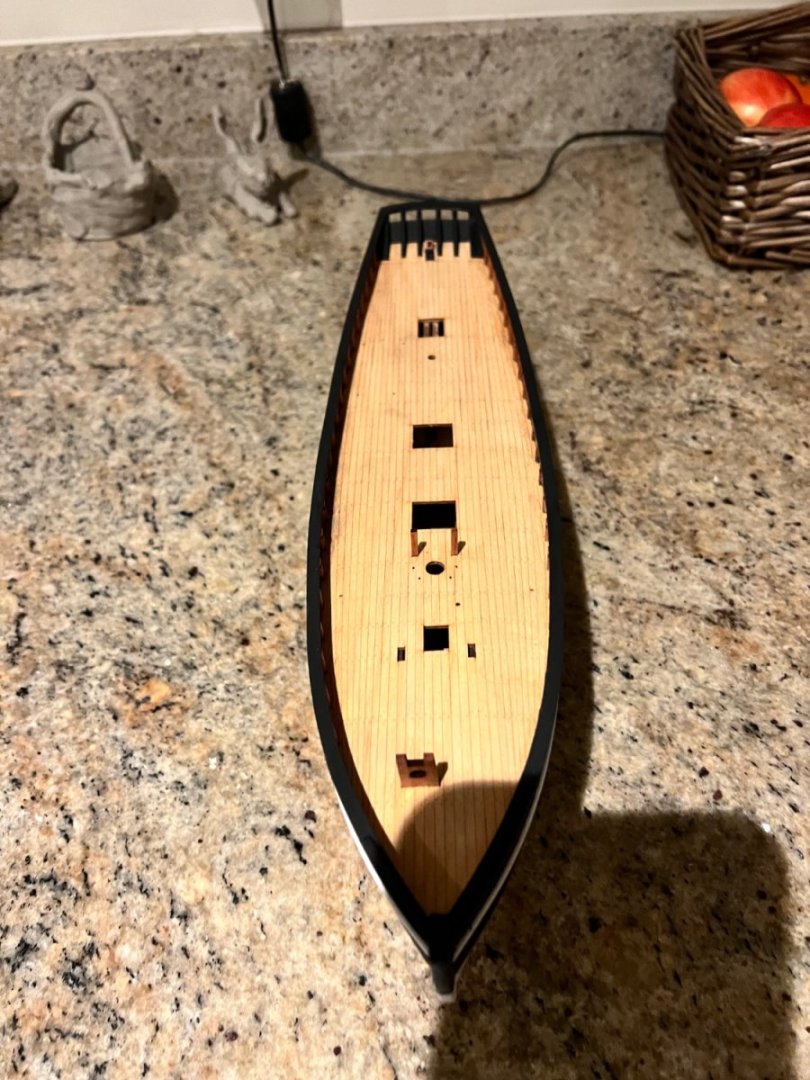
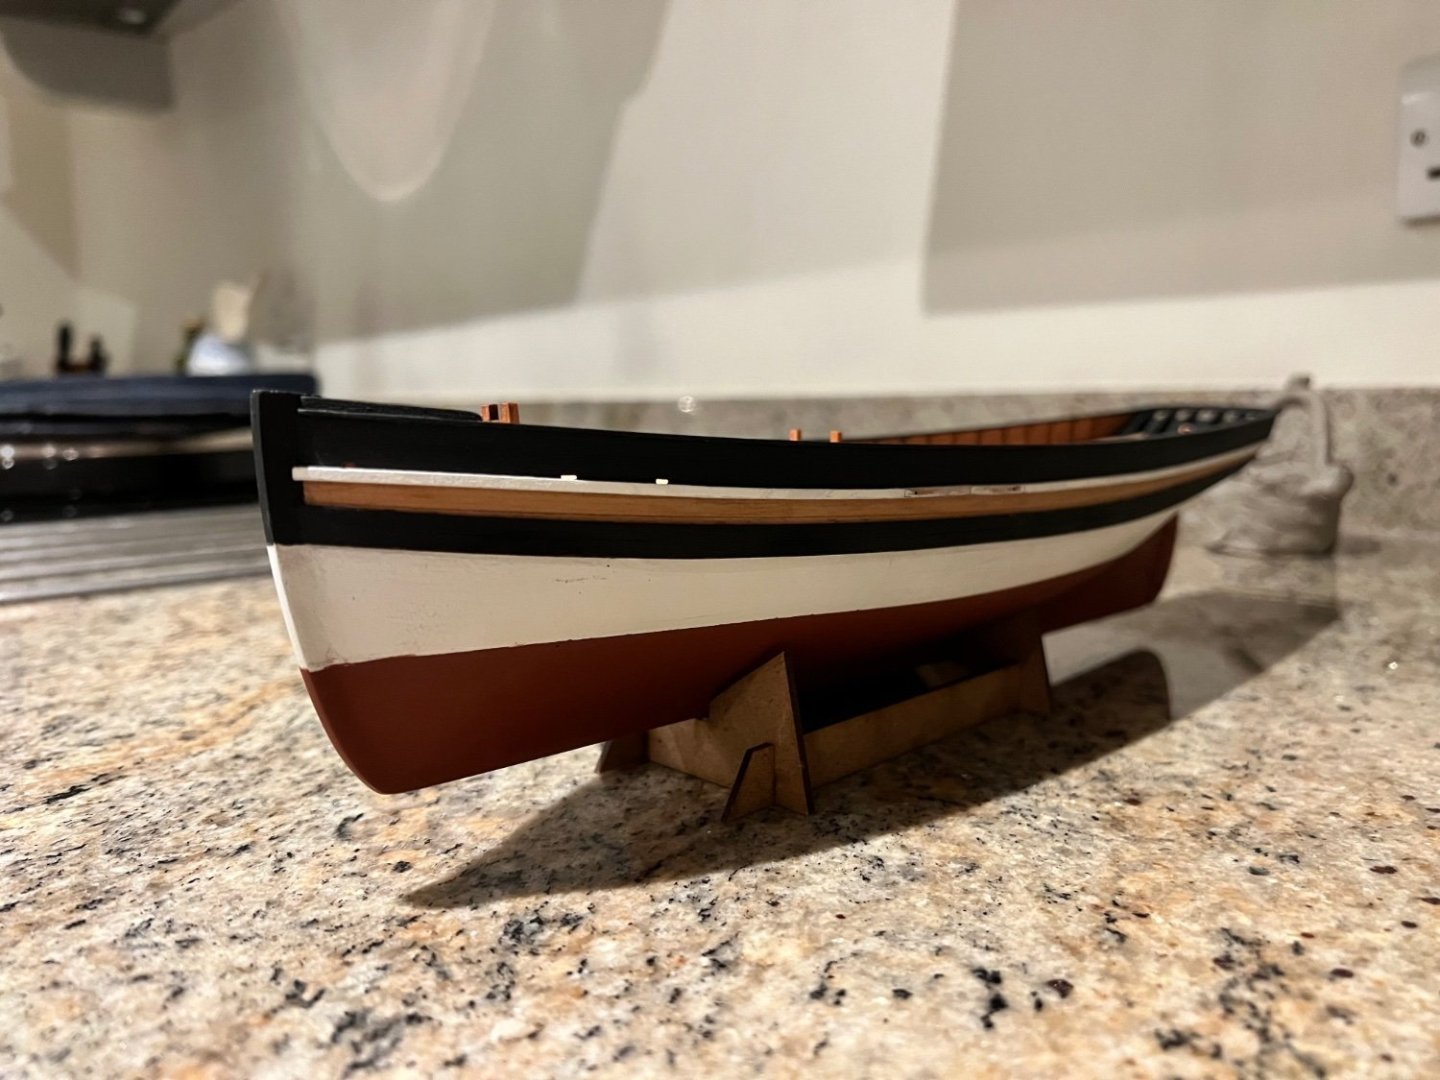
Etched maple deck fitted. Needed a little sanding as usual to ensure a perfect fit. Timberheads representing the tops of the frames were added too. Then painting the hull started. First I painted the upper bulwarks black by hand using the AK black that came as part of the Grecian paint set. Then followed the instruction on where to draw a line and masked the upper bulwarks and a strip below the bulwarks which will be unpainted wood. I used a thin Tamiya tape to form a line then the Tamiya tape with plastic bag attached to protect the top of the boat. The rest of the hull was sprayed white with a rattlecan. Then using the waterline marker a further line was added on the white and masked which is the red oxide paint below the waterline. Once the paint was removed she looked like this. Note there is a random piece of painted PE on her deck and blu-tac still around the hole for the rudder. Then the wales were painted black and added as was the white painted rail on the side of the hull. The really nice thing about these is that they cover up two of the three lines of paint on the hull where there’s a possibility of bleeding under the masking tape, giving instead really sharp clean lines. The only painted line is that between the white and red oxide. What a great design Chris! Worth noting that in terms of paint scheme there is a difference between the plans which specify a 3mm wide white bootstrap above the red oxide, and the prototype / instructions where the whole area above the red oxide and below the wales was painted white. I decided the latter looked more interesting so that’s what I went with. The photo etch name at her stern was added and looks great - so much better than a decal! There a little bit on the waterline I’d like to respray to improve the run of the line on the starboard side (where the masking tape is) not sure if I dare and if it’s worth risking getting red oxide paint elsewhere. Also the black painted rails along each side and at the stern.


- 25 replies
-
- 7
-
-
- Ranger
- Vanguard Models
- (and 1 more)
-
I think she looks excellent. If I didn’t already have a new version of Speedy waiting to be built, I’d choose Adder for my next build after Ranger. I hope she sells well for you Chris, I find the more unusual boats really interesting and appealing.
-
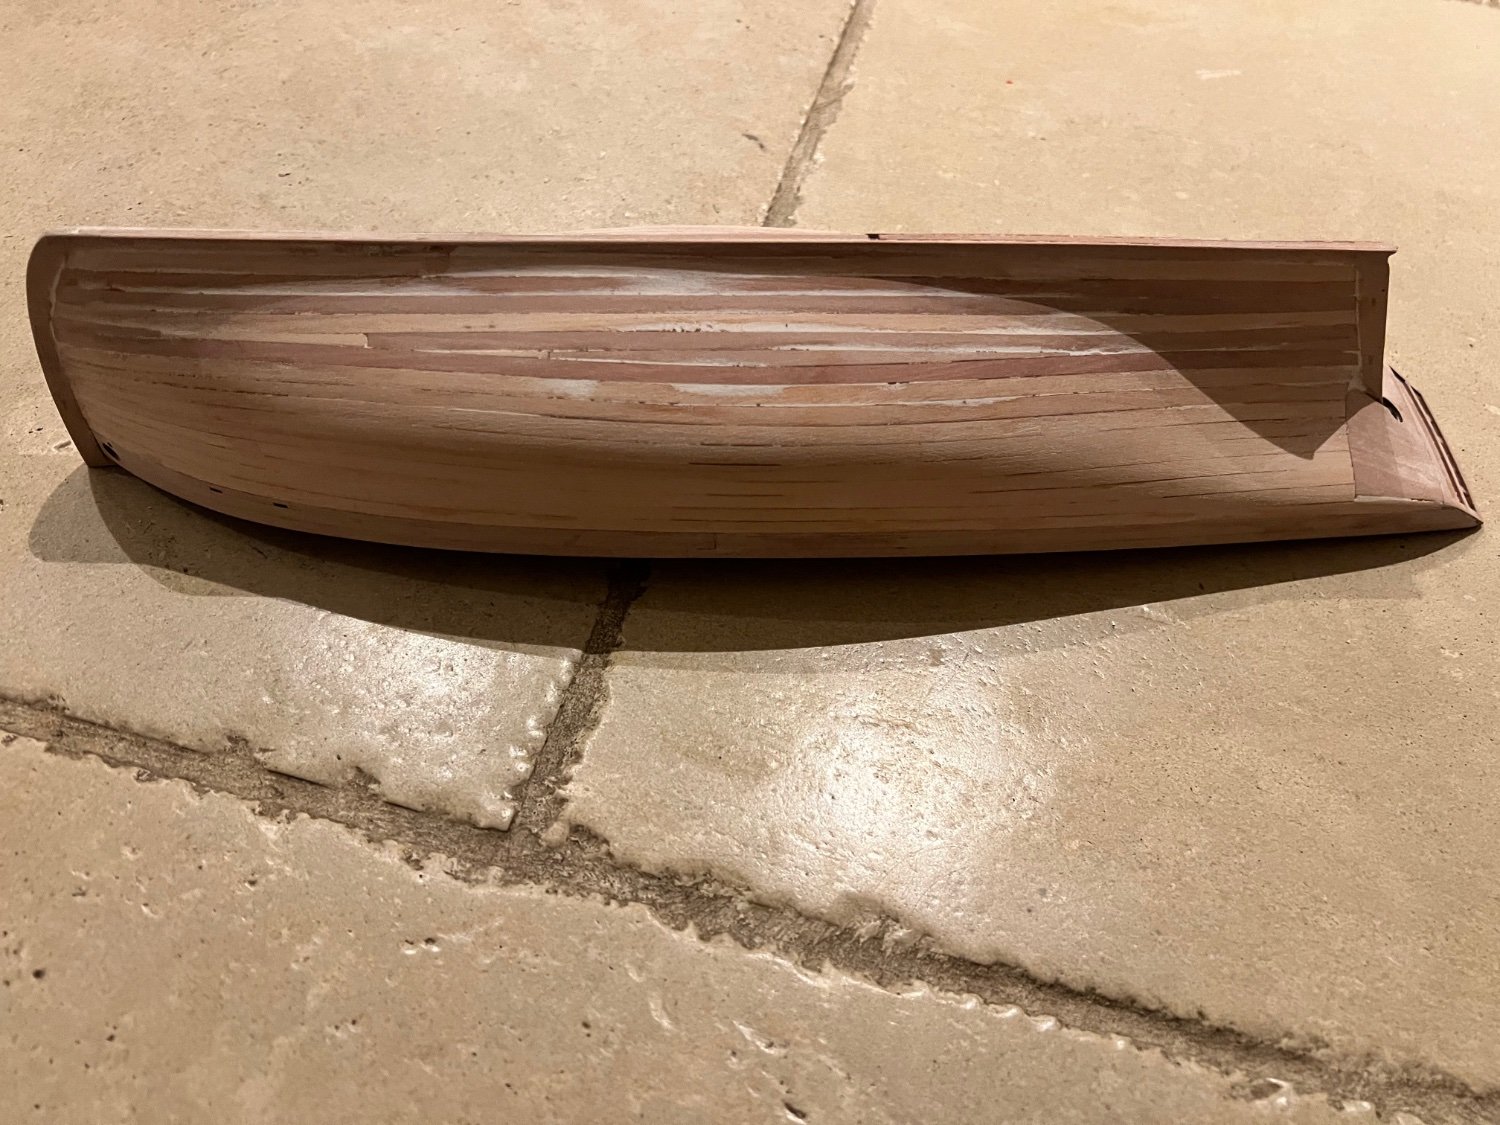
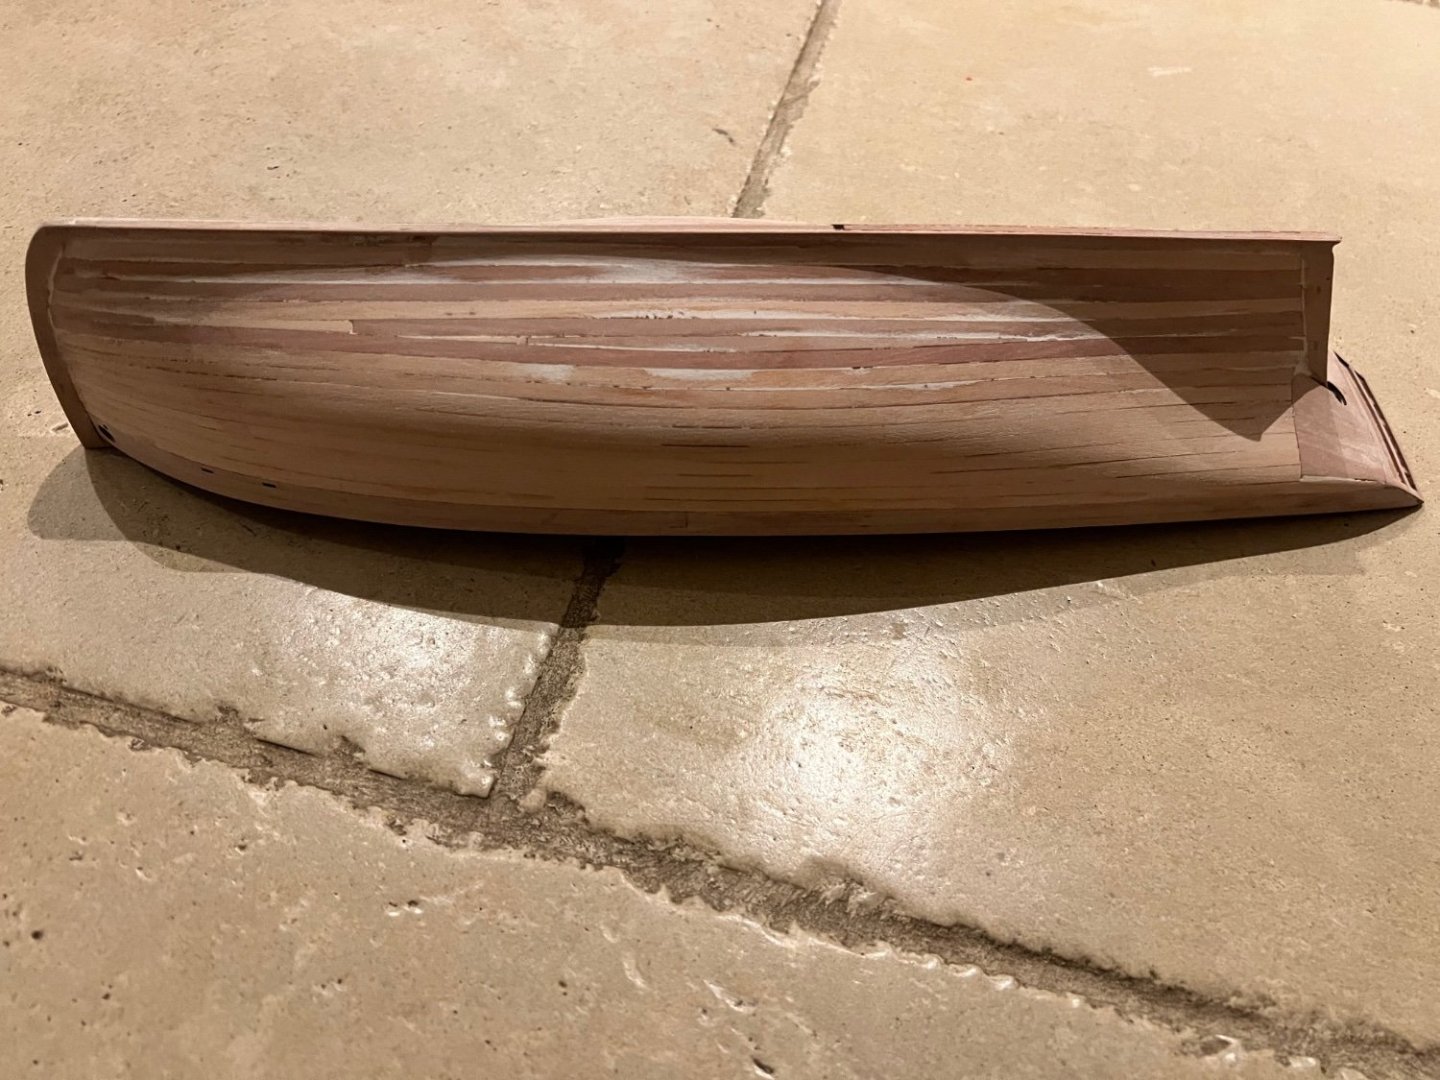
Despite Ranger’s forgiving hull shape, second planking didn’t go as smoothly as I’d expected. The problem was my lack of patience and not the kit. Plenty of filler used on the lower hull. Generally I don’t mind what the planking looks like under paint, especially below the waterline, the exposed wood areas are those that matter and they’ve turned out well I think. Top of the stern counter broke off (as usual for me on these fishers) but fixed back on easily. Then removed the bulkhead ears. I also decided to paint the inner stern area black as the stern timbers are MDF and I prefer not to leave any MDF areas exposed and unpainted. Once the paint was dry I fitted the engraved Maple deck. This needed a gentle sanding at the edges to get a perfect fit. That’s clamped down and drying now. Other than the black inner stern area, I’m planning at the moment to stick to the kit’s suggested colour scheme. Although, I may consider white / tea stained sails instead of red brown on request from the Admiral who who says she already has five fishing boats with “steak” coloured sails floating around the house. Looking at the plans I think Ranger may have the biggest sail area of them all.


- 25 replies
-
- 6
-
-
- Ranger
- Vanguard Models
- (and 1 more)
-
They’re fantastic kits and the end result looks so good even when built by someone with limited model making skills such as me. That’ll be why I’m currently building my sixth Vanguard fishing boat and eighth Vanguard boat.
-
Looking good. I think that the numbers were wrong on these parts in my Zulu kit too, but clear enough what parts went where from the photos in the manual. Funny that this was the Vanguard fishing boat that i was the least interested in building, but now she is complete she is one of my favourites…
-
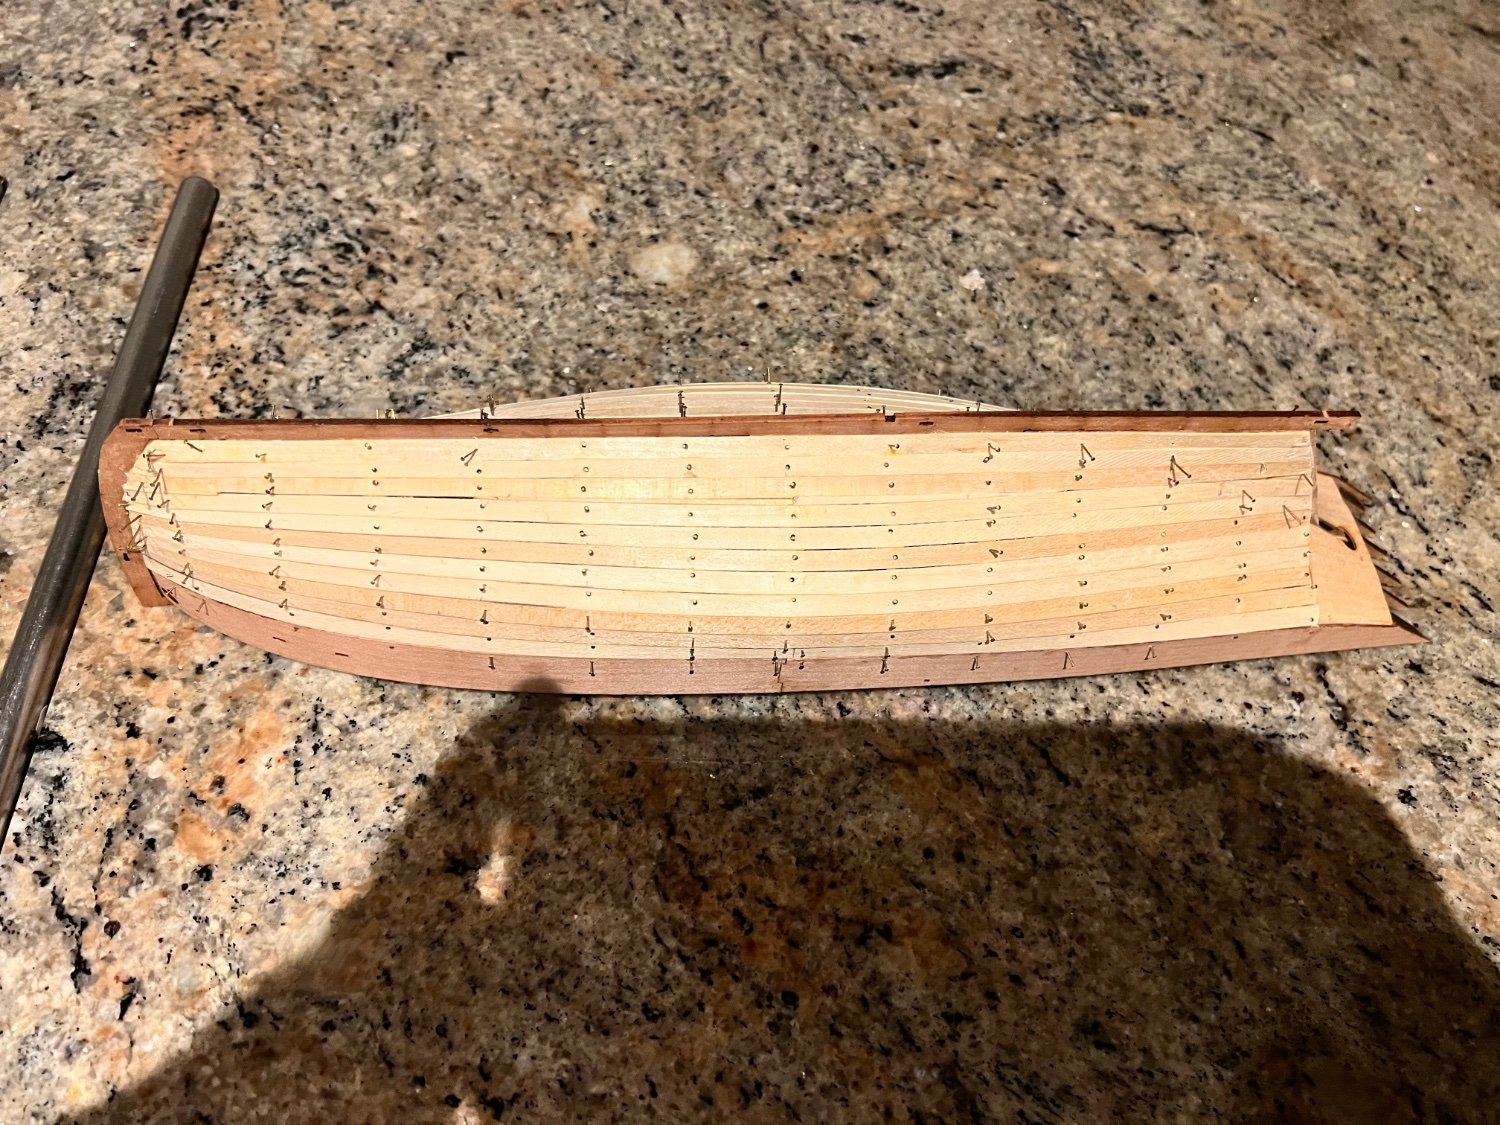
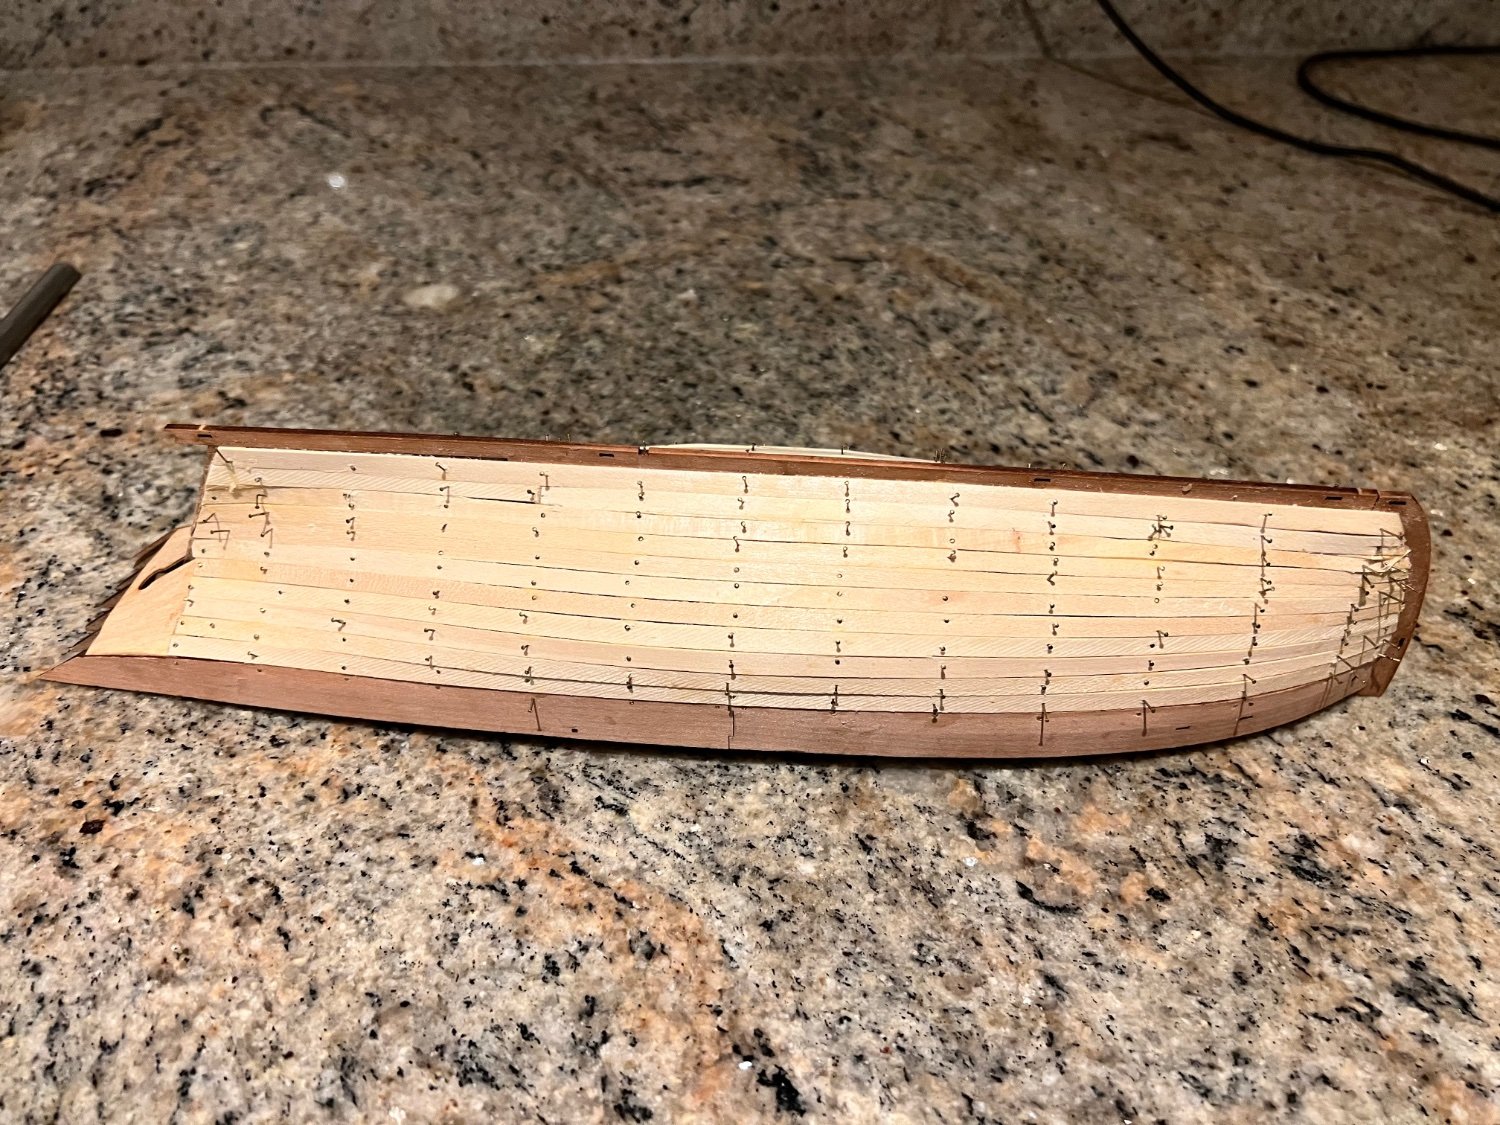
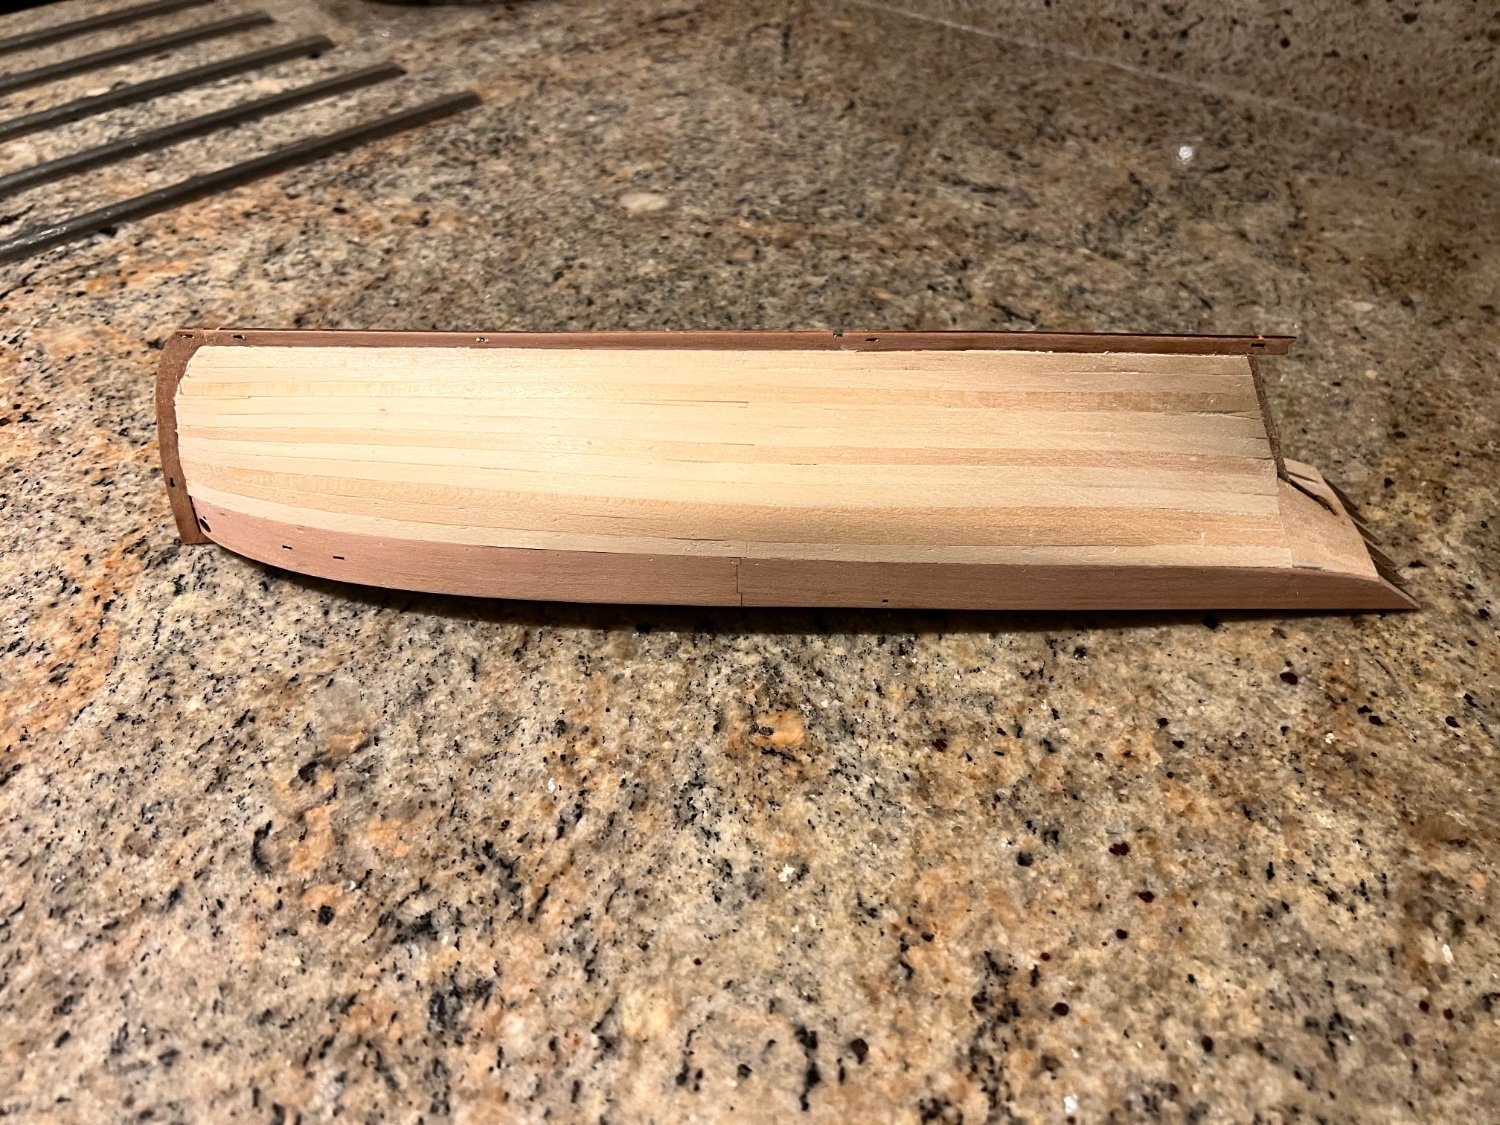
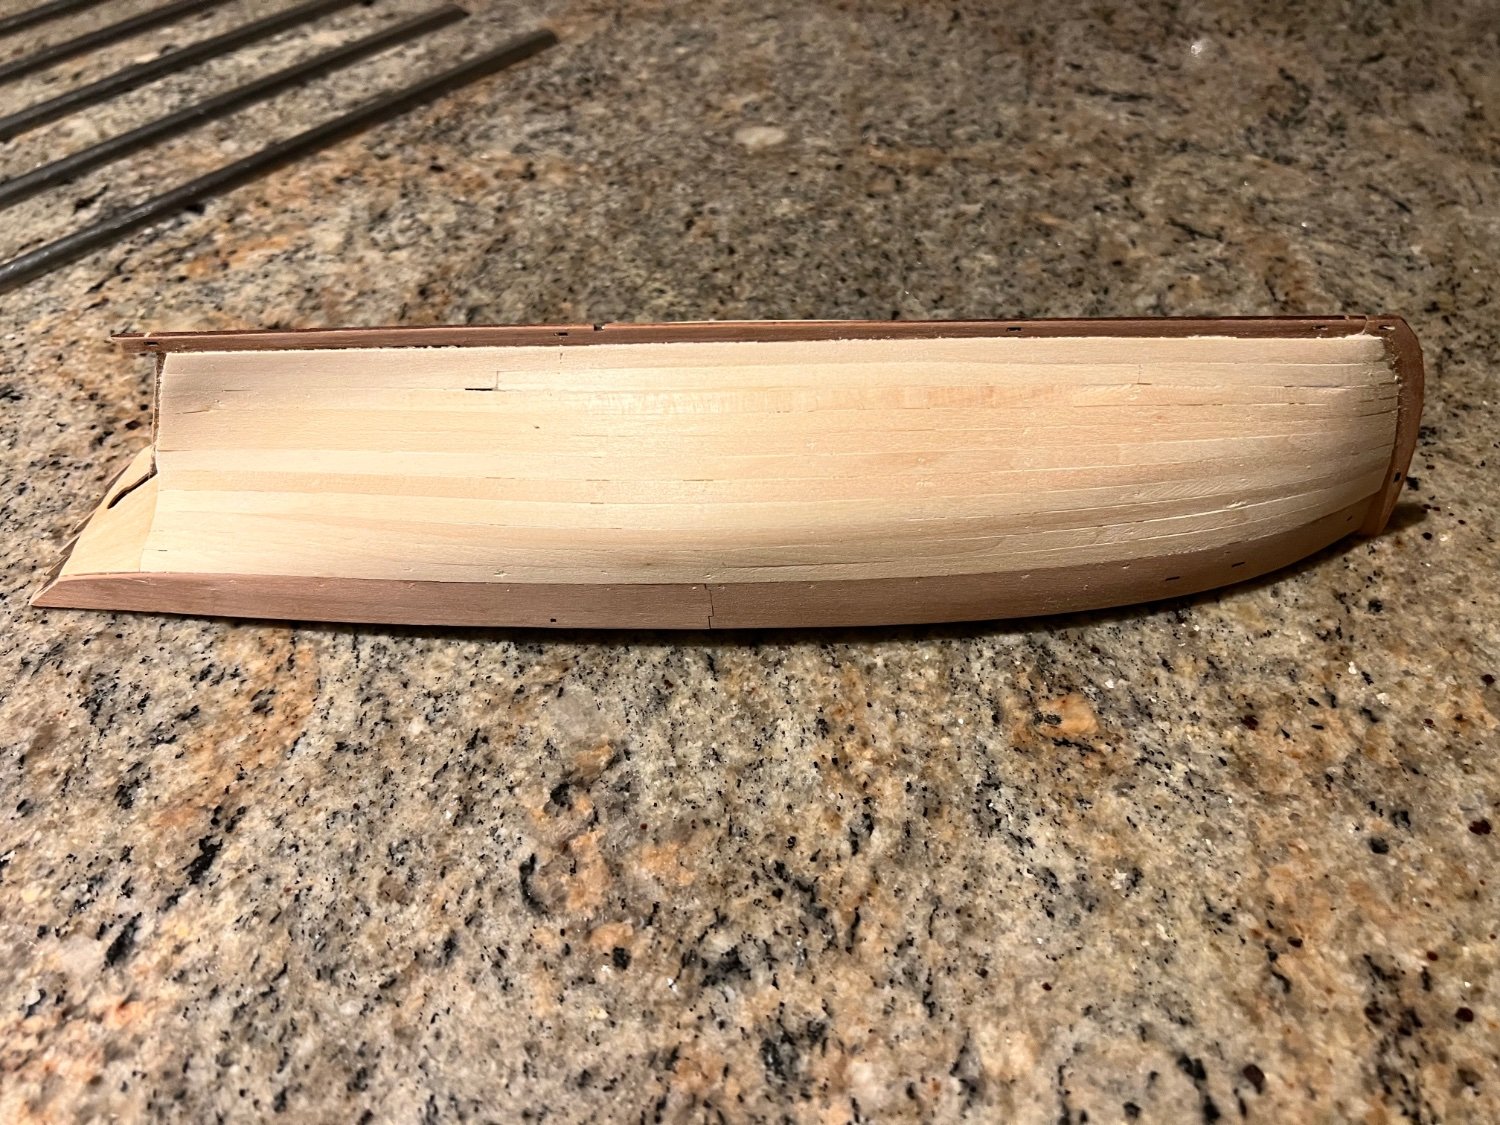
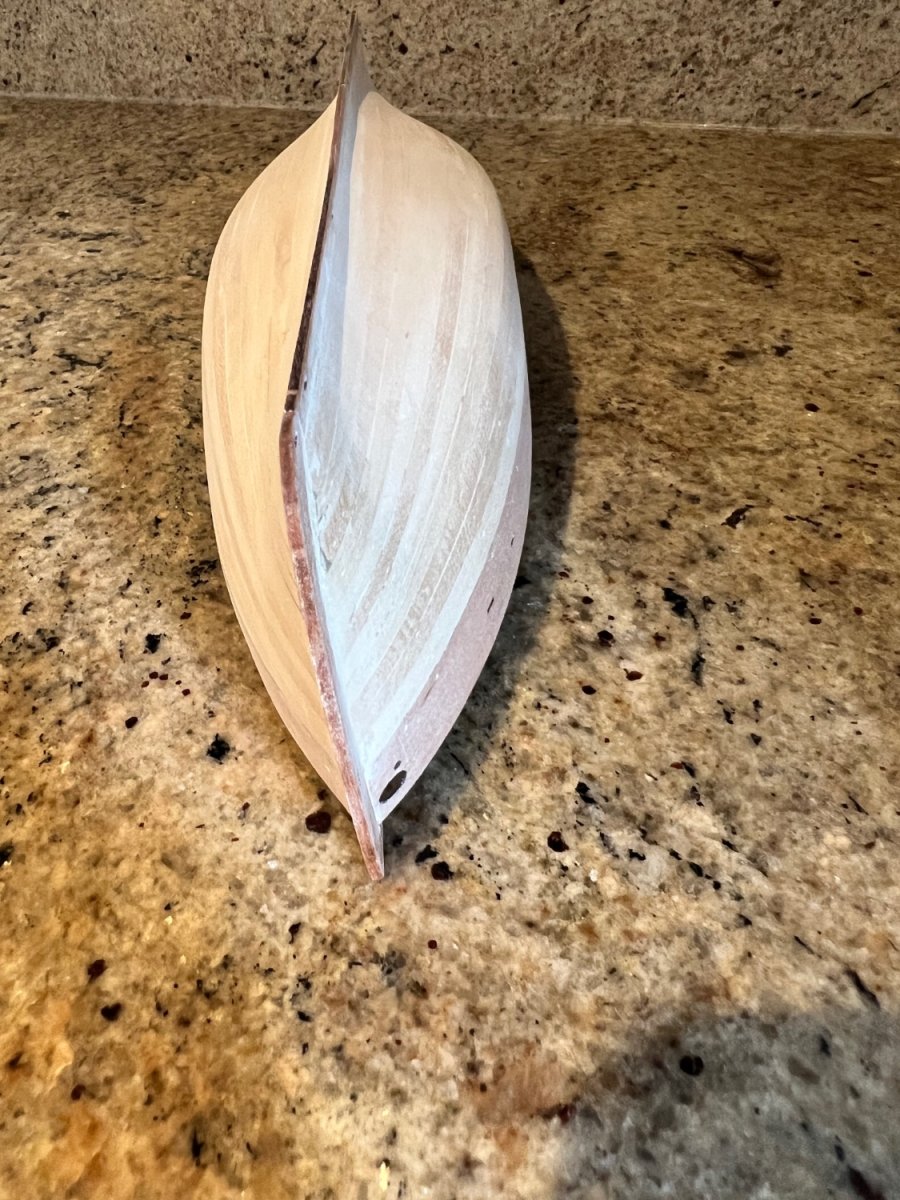
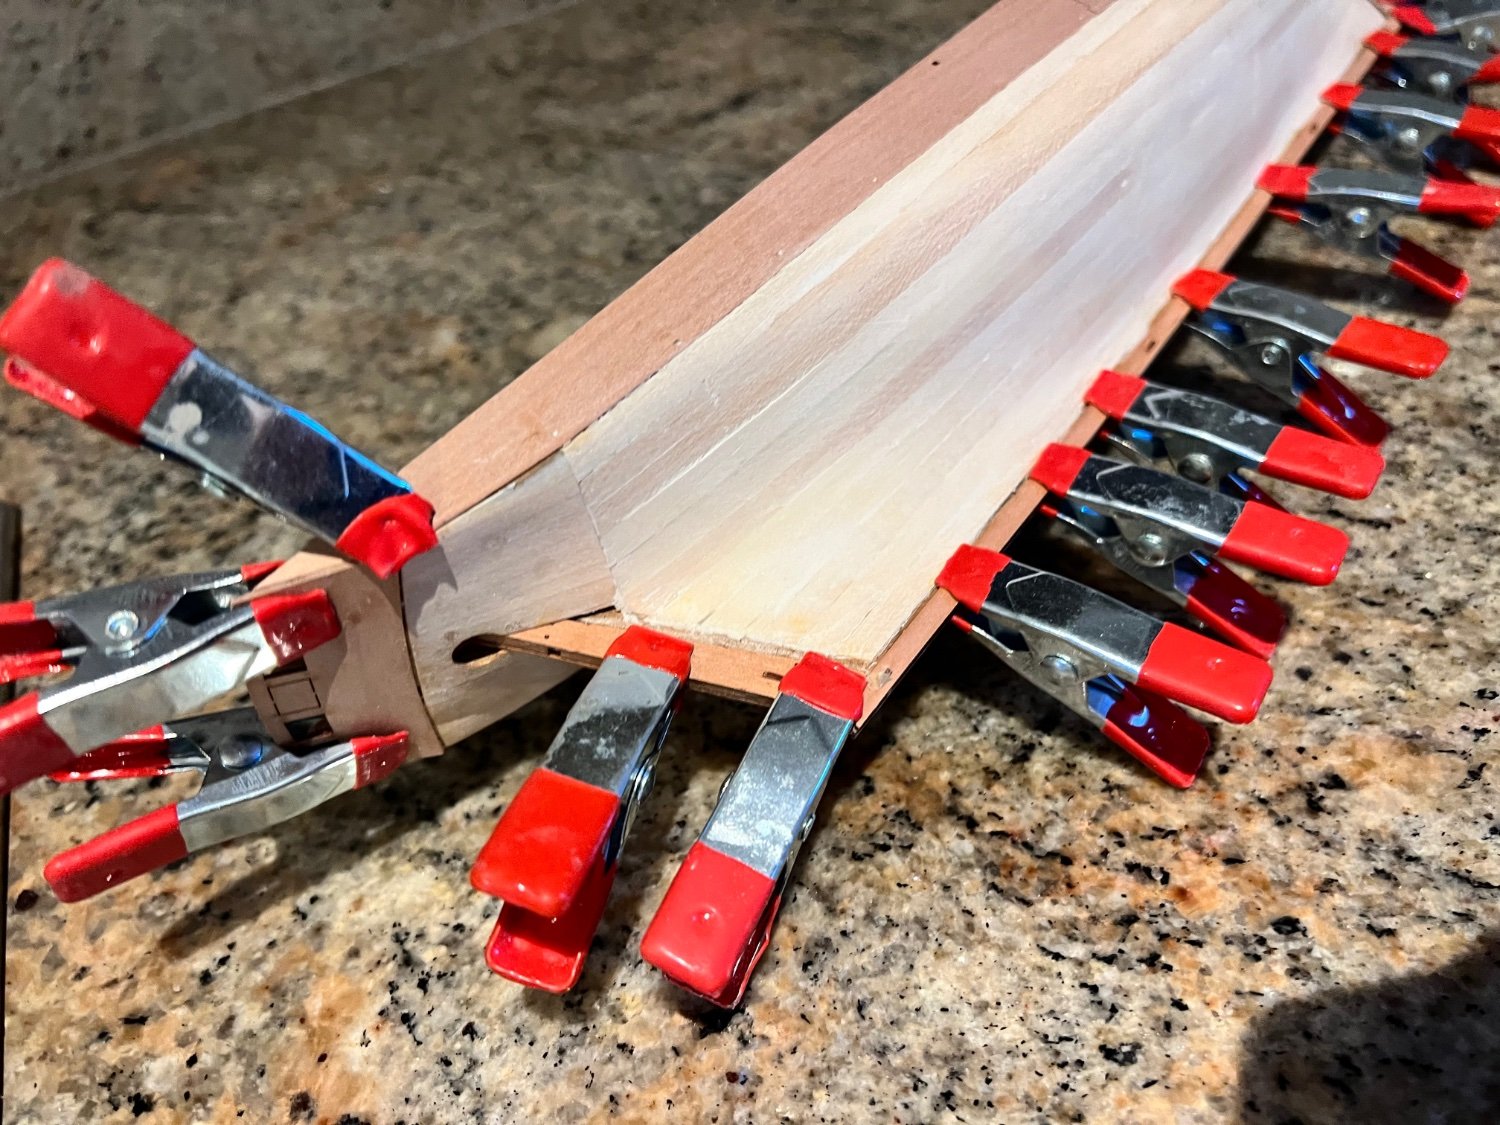
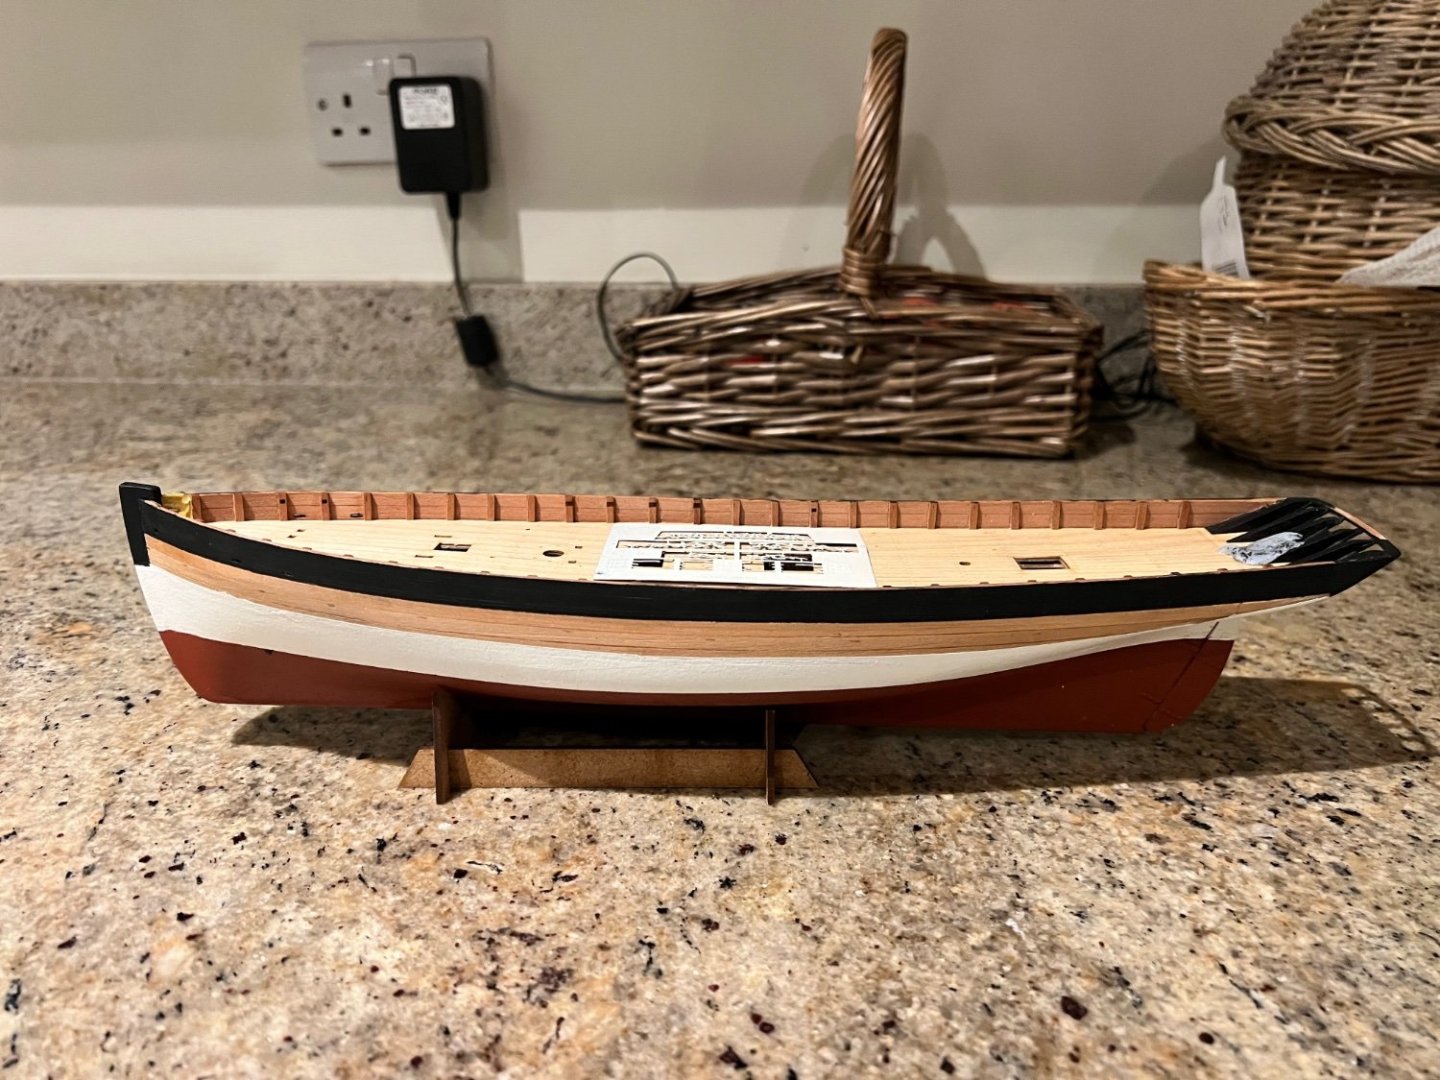
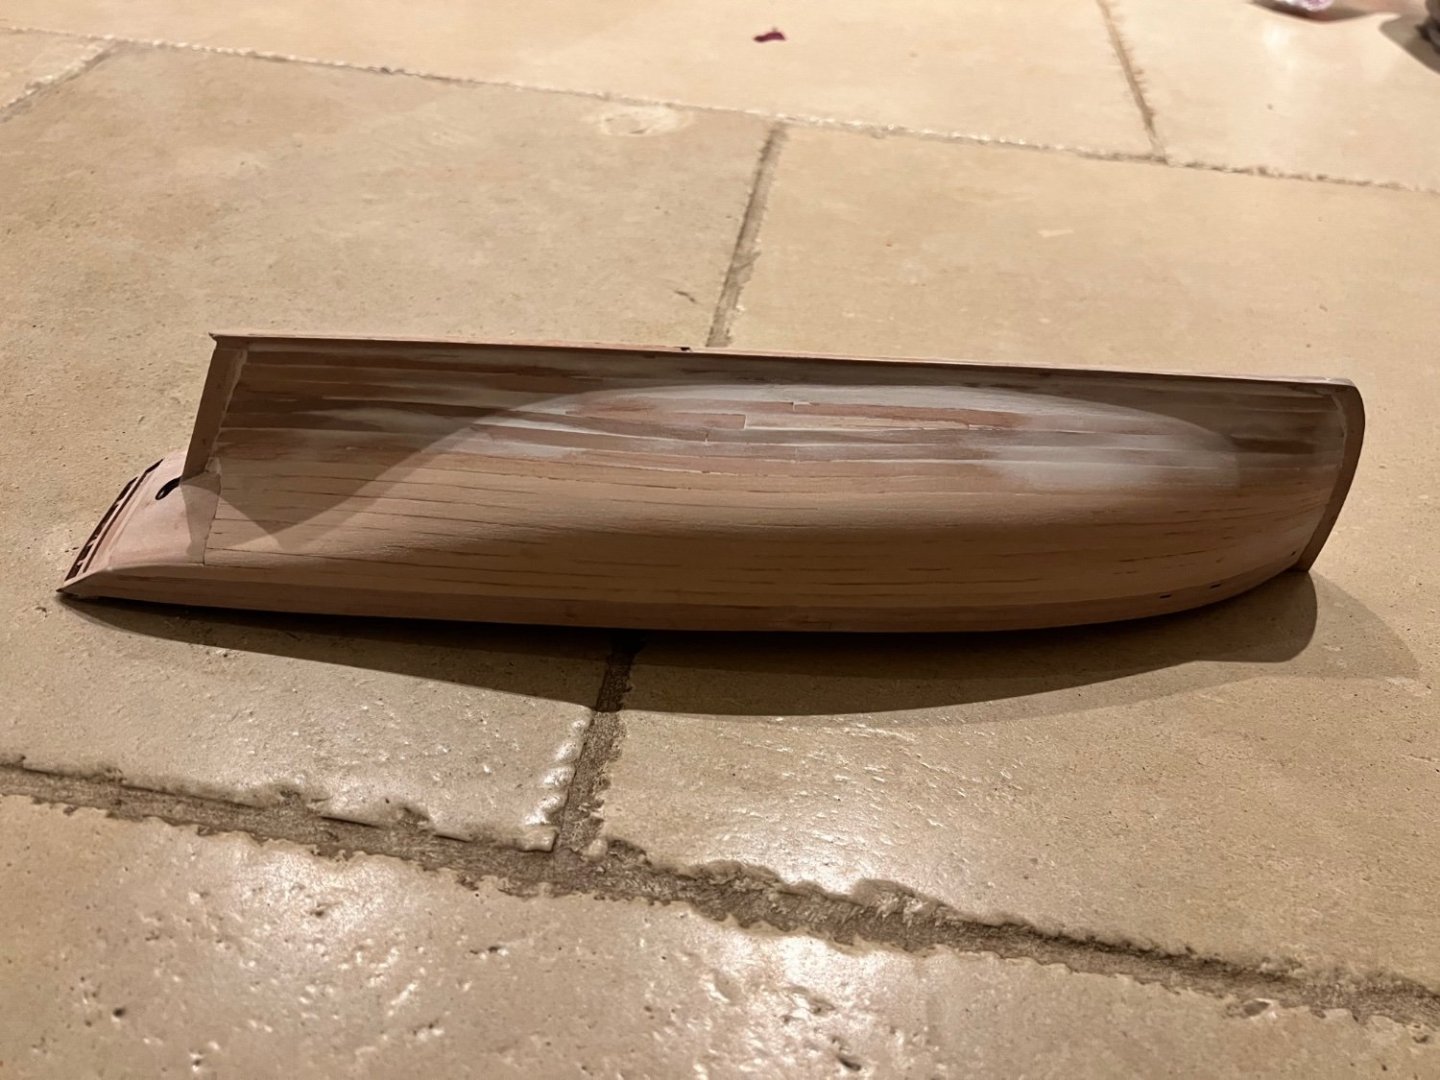
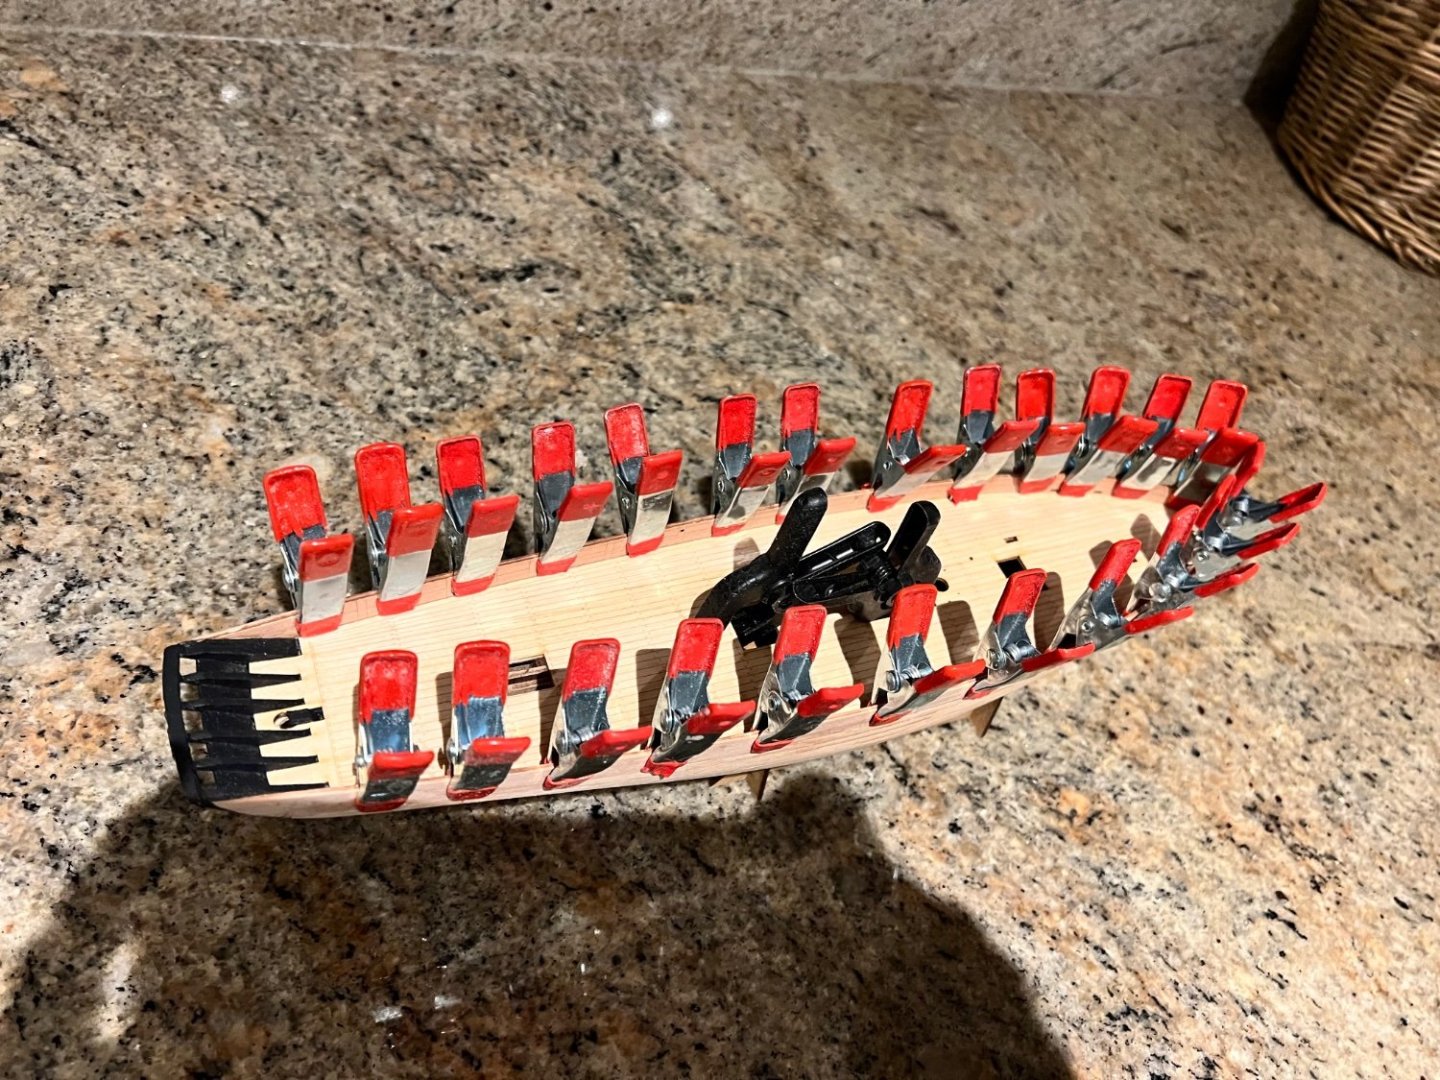
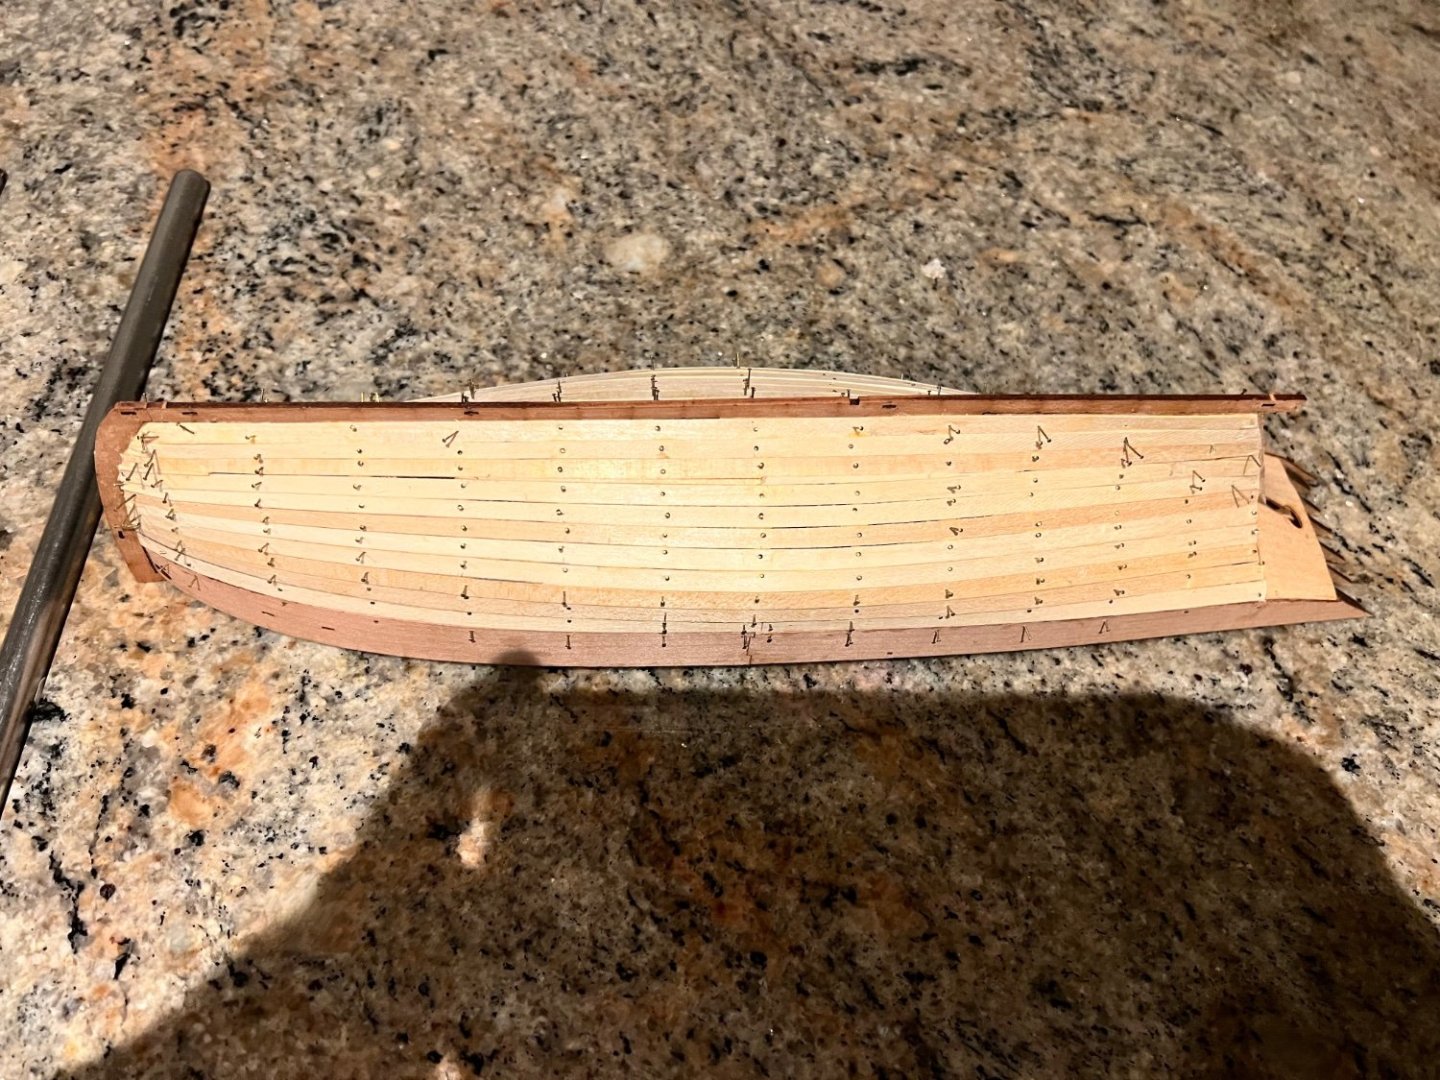
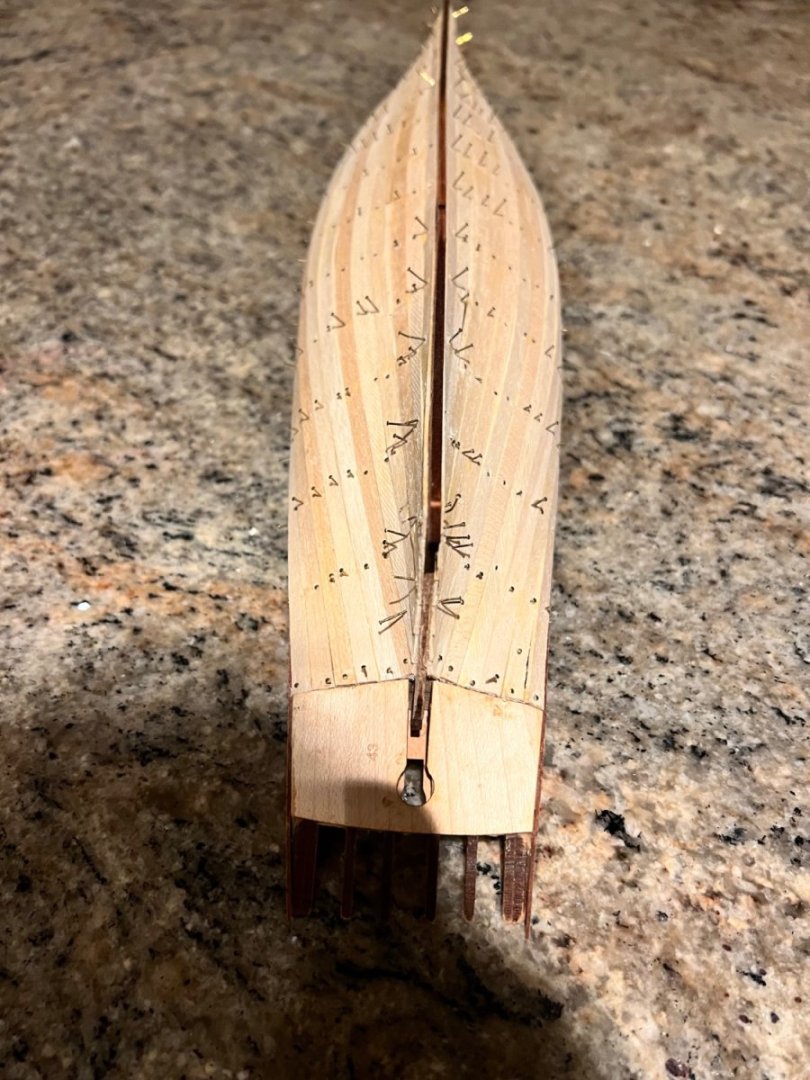
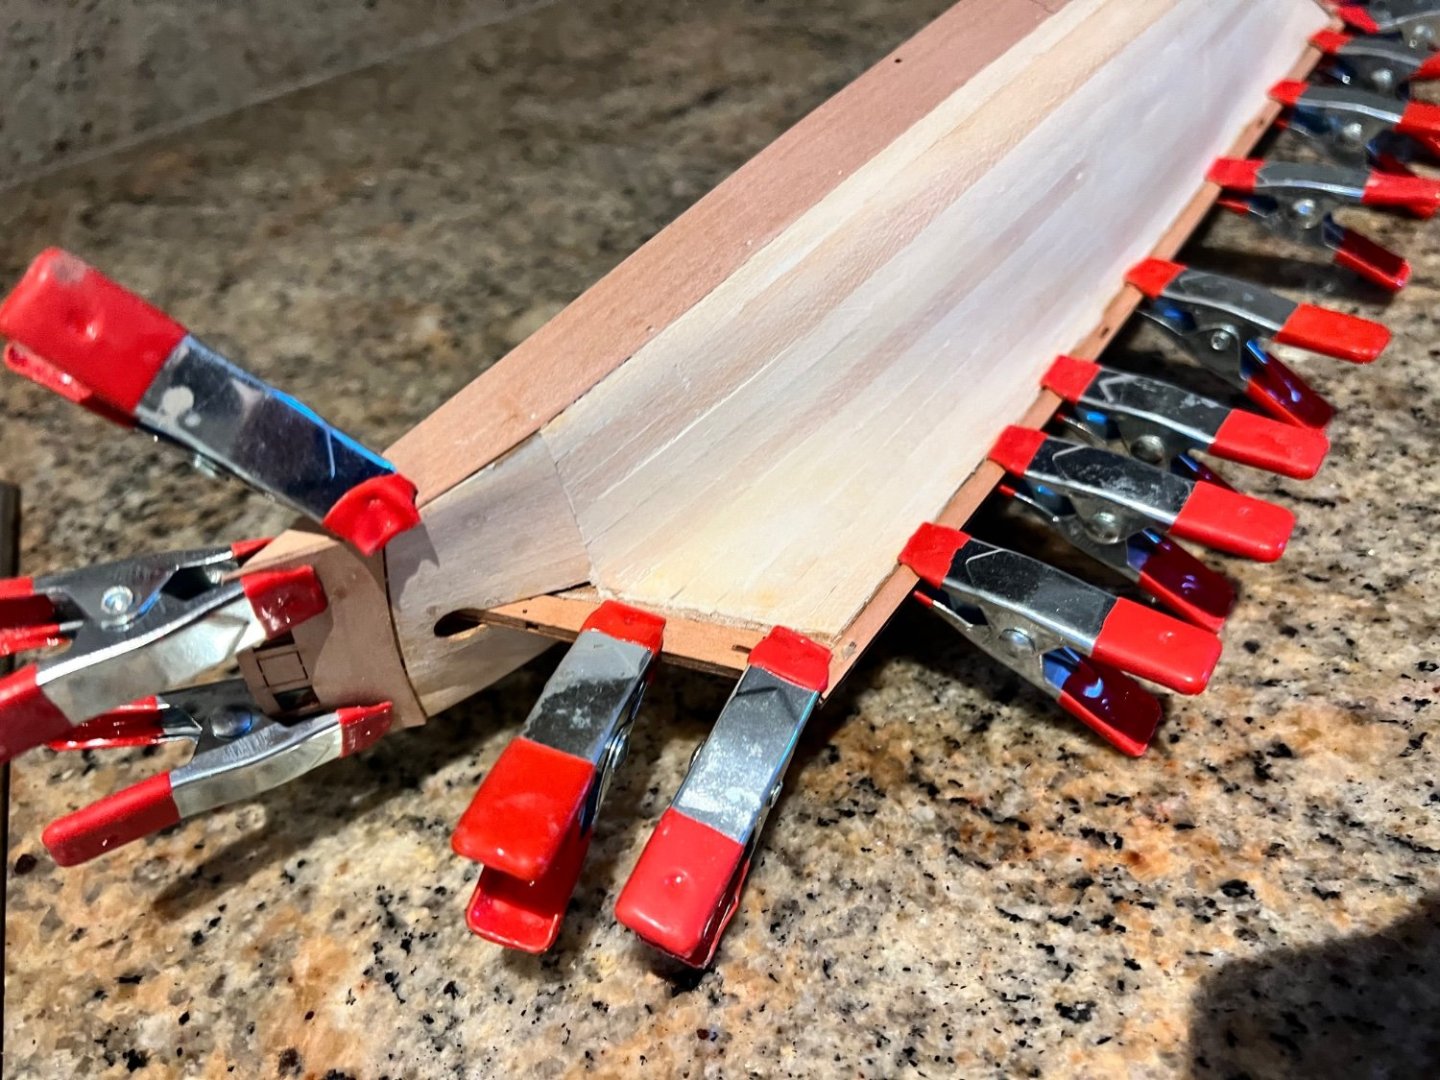
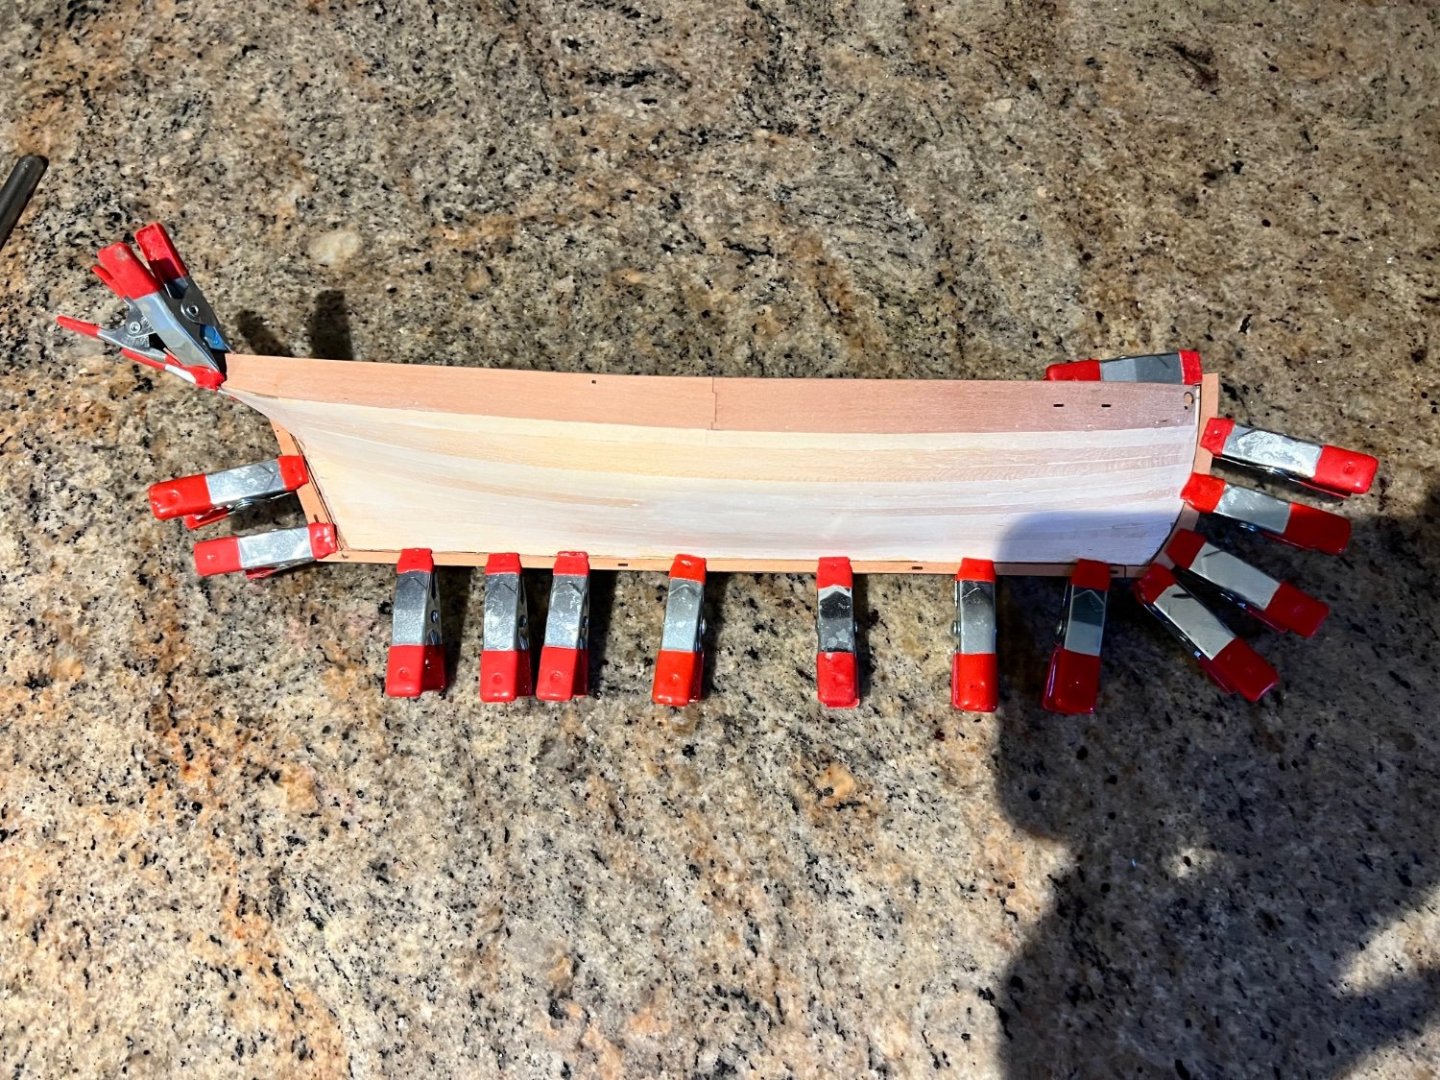
First planking complete. This continued to be easy and straightforward. I could plank her with no edge bending or soaking of planks. Probably would have resulted in a tidier finish if I had edge bent a few of the tougher planks and will do so for the second planking. Then nails removed and sanded. No filler yet. Then the rabbets and inner stern board fitted and clamped to dry. I found that I needed to unglue and sand the tops of the outer stern frames so these were the same shape as the stern board.


- 25 replies
-
- 4
-
-
- Ranger
- Vanguard Models
- (and 1 more)
-
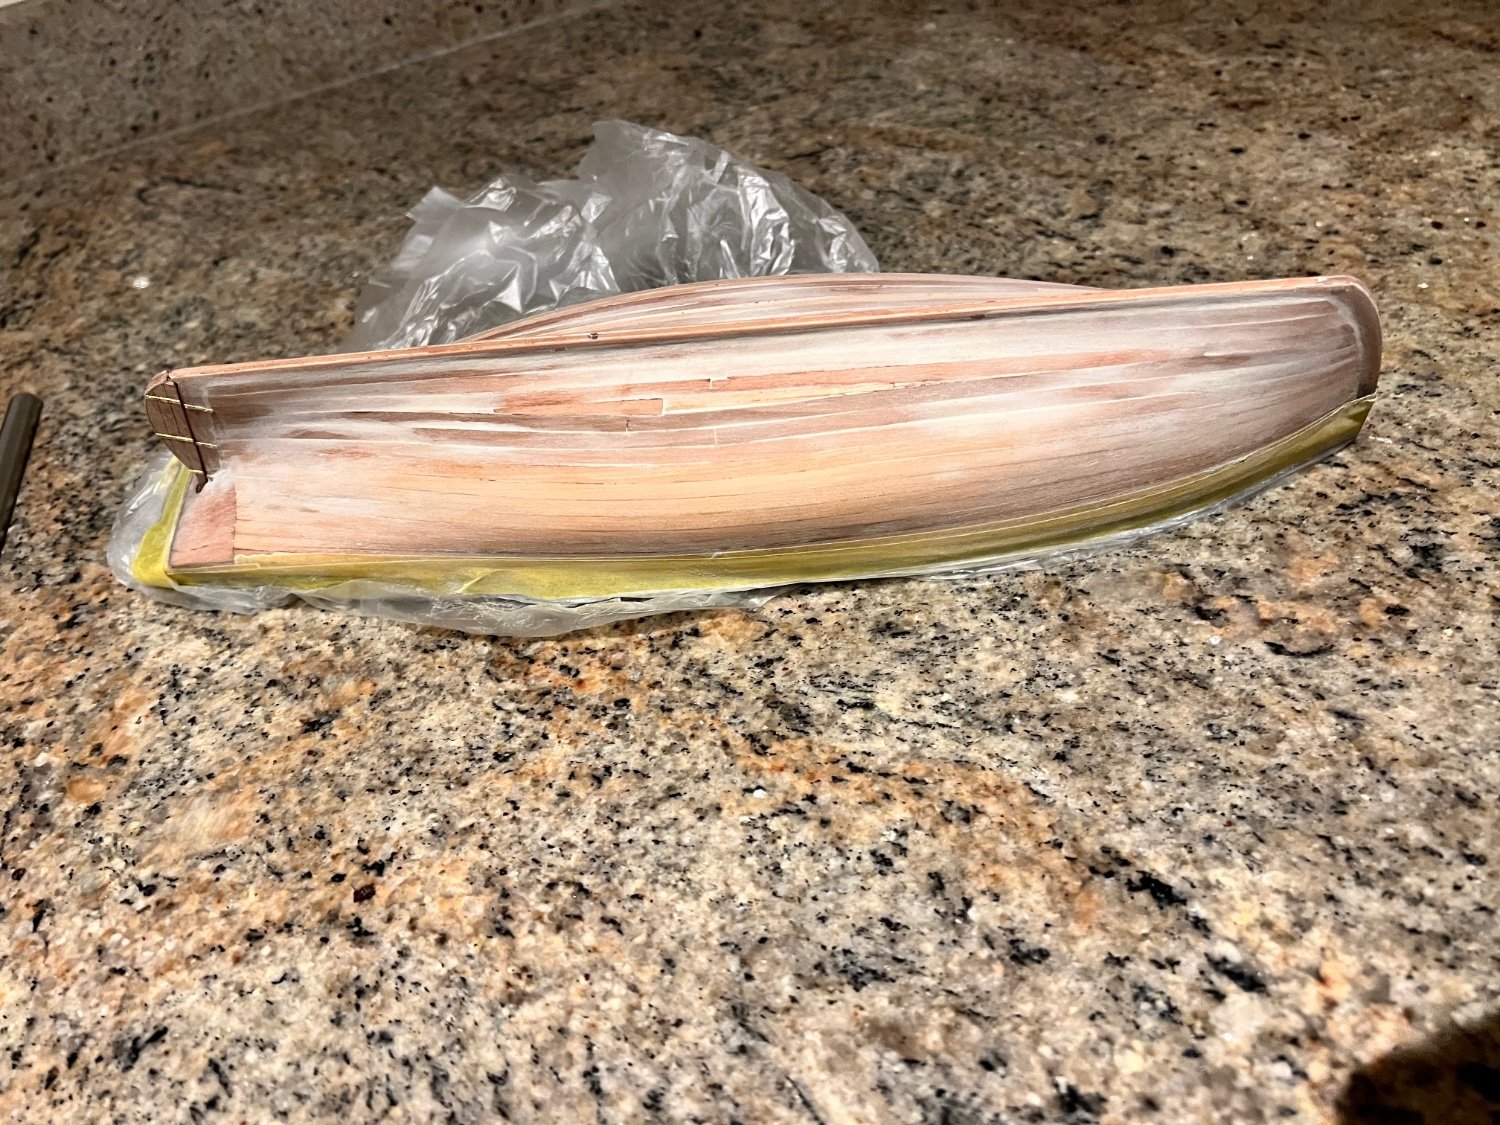
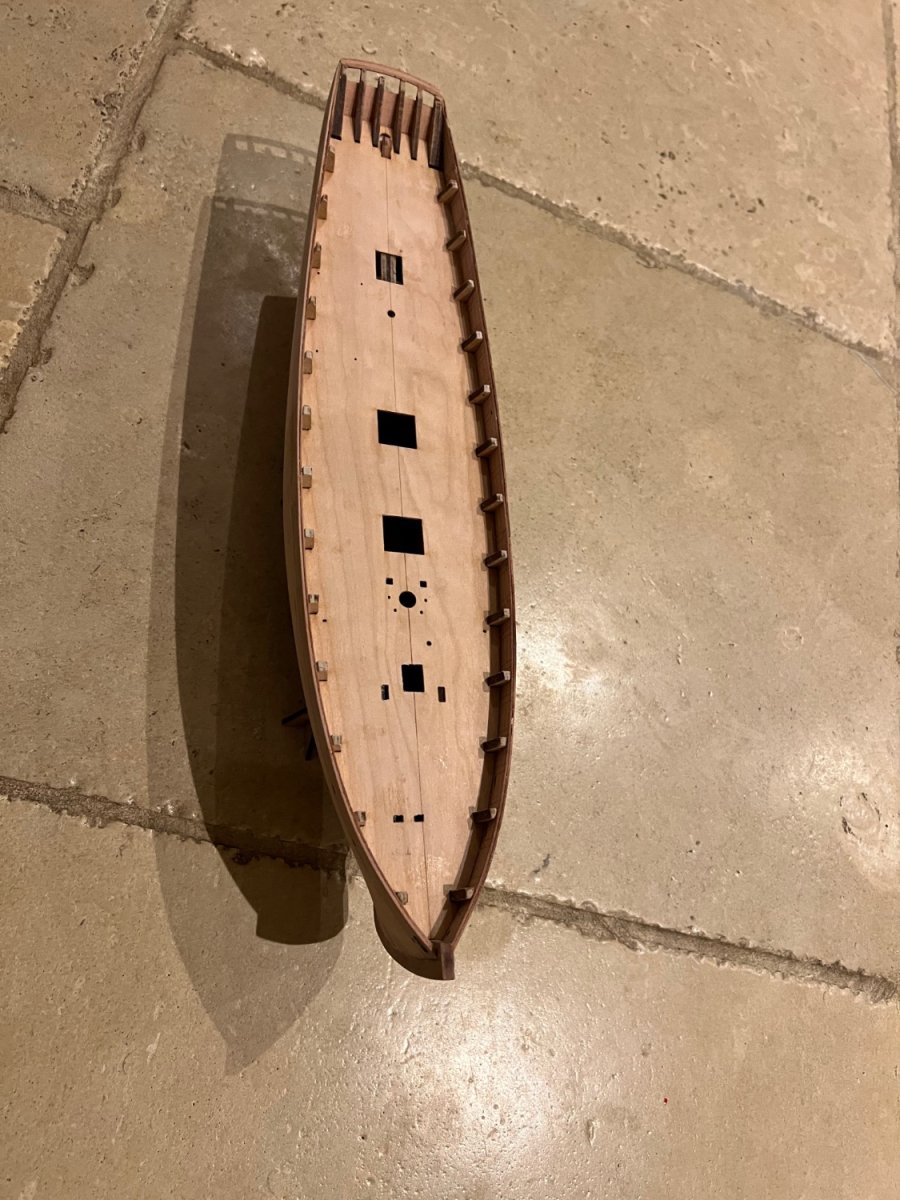
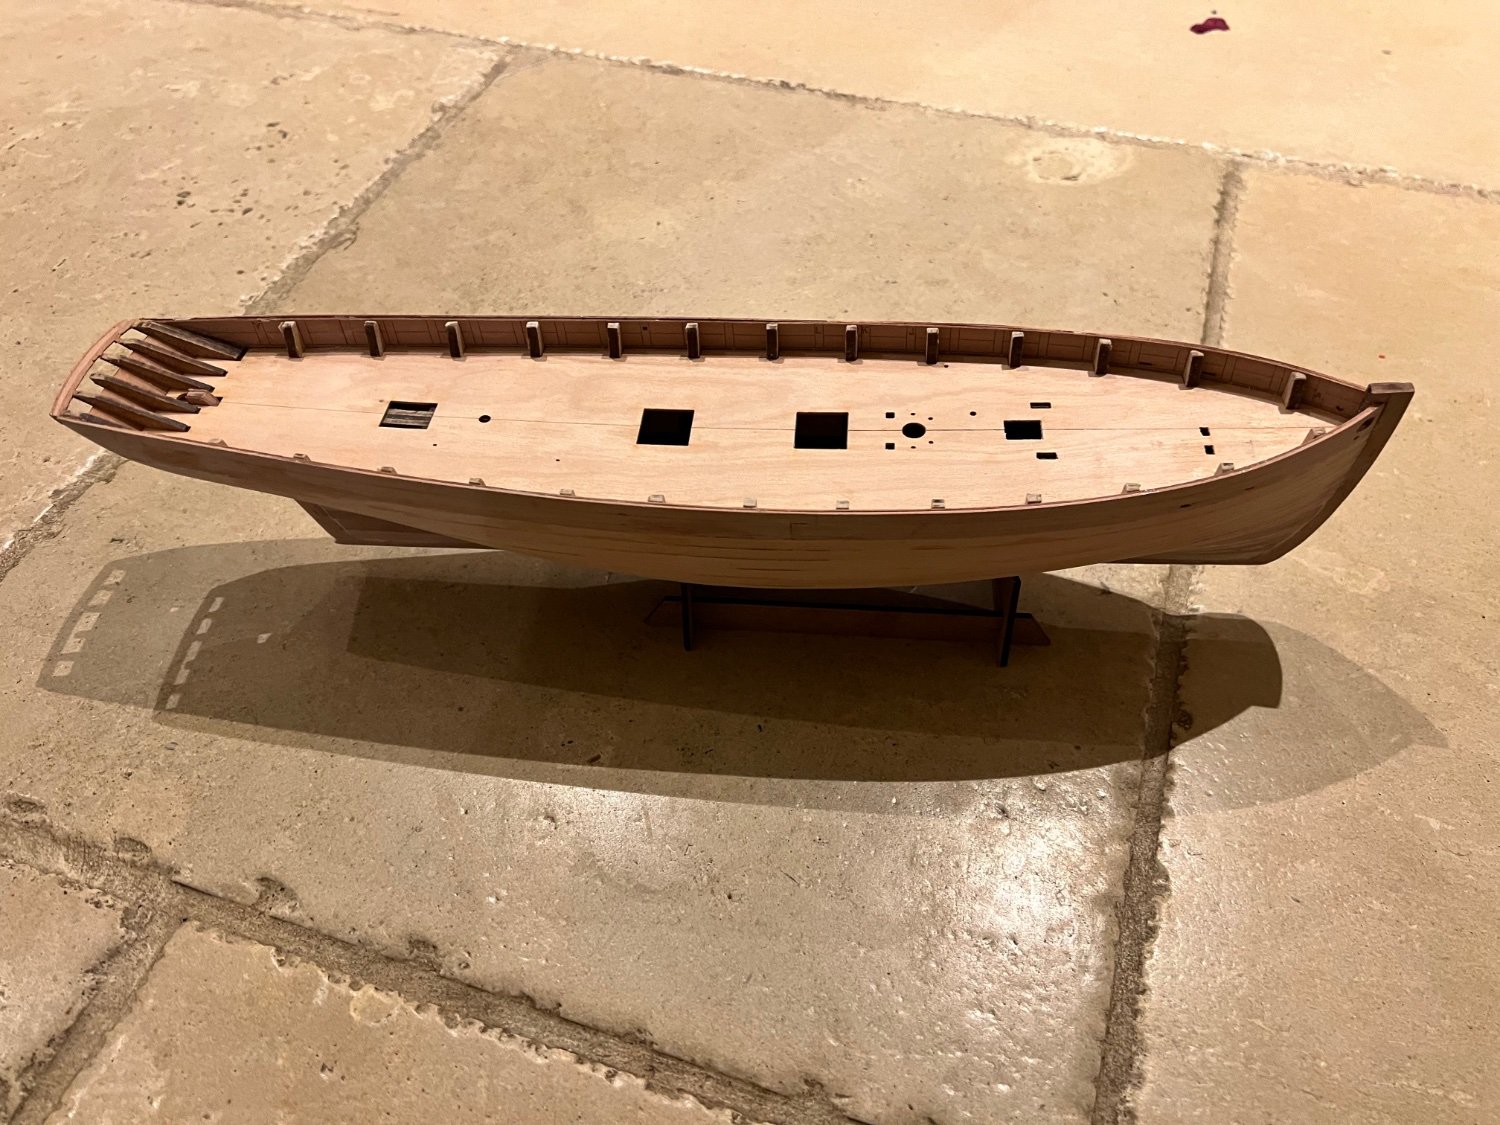
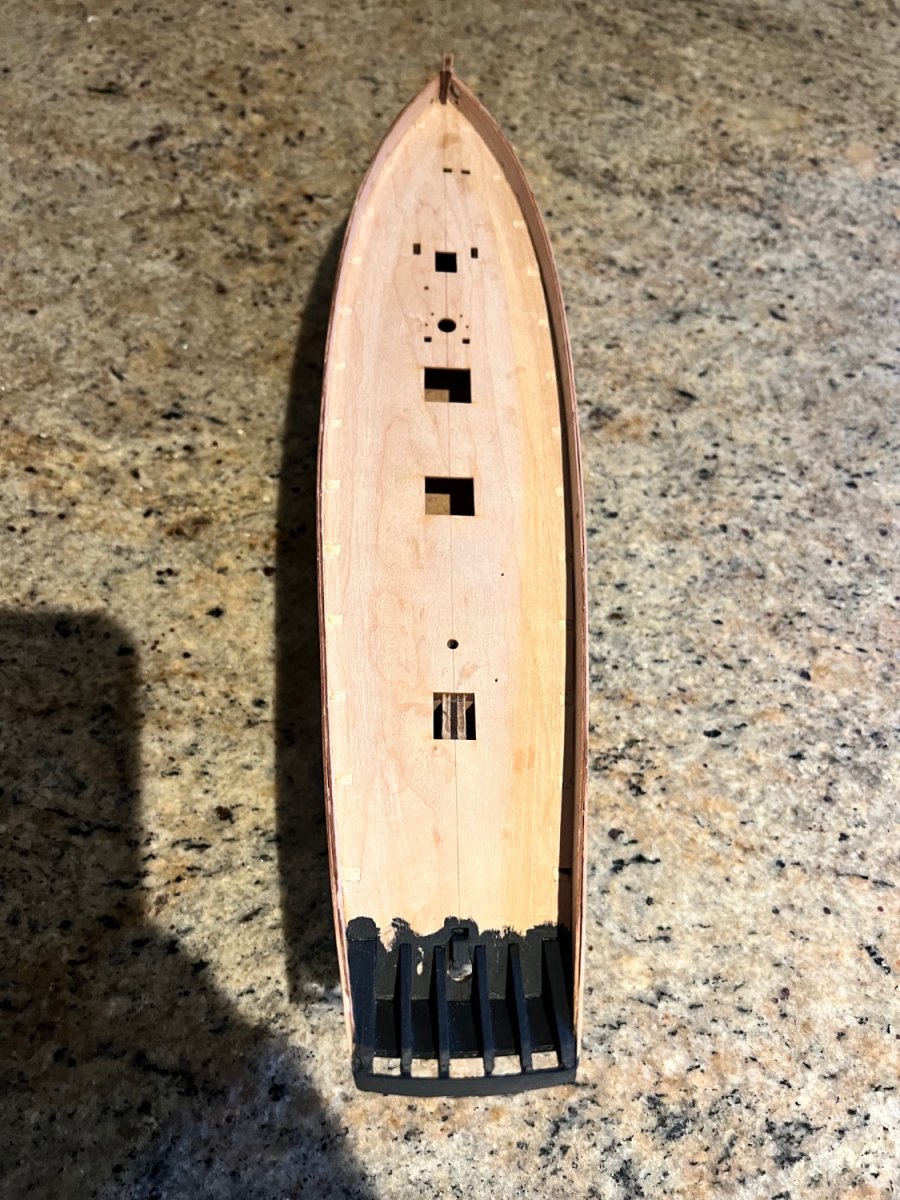
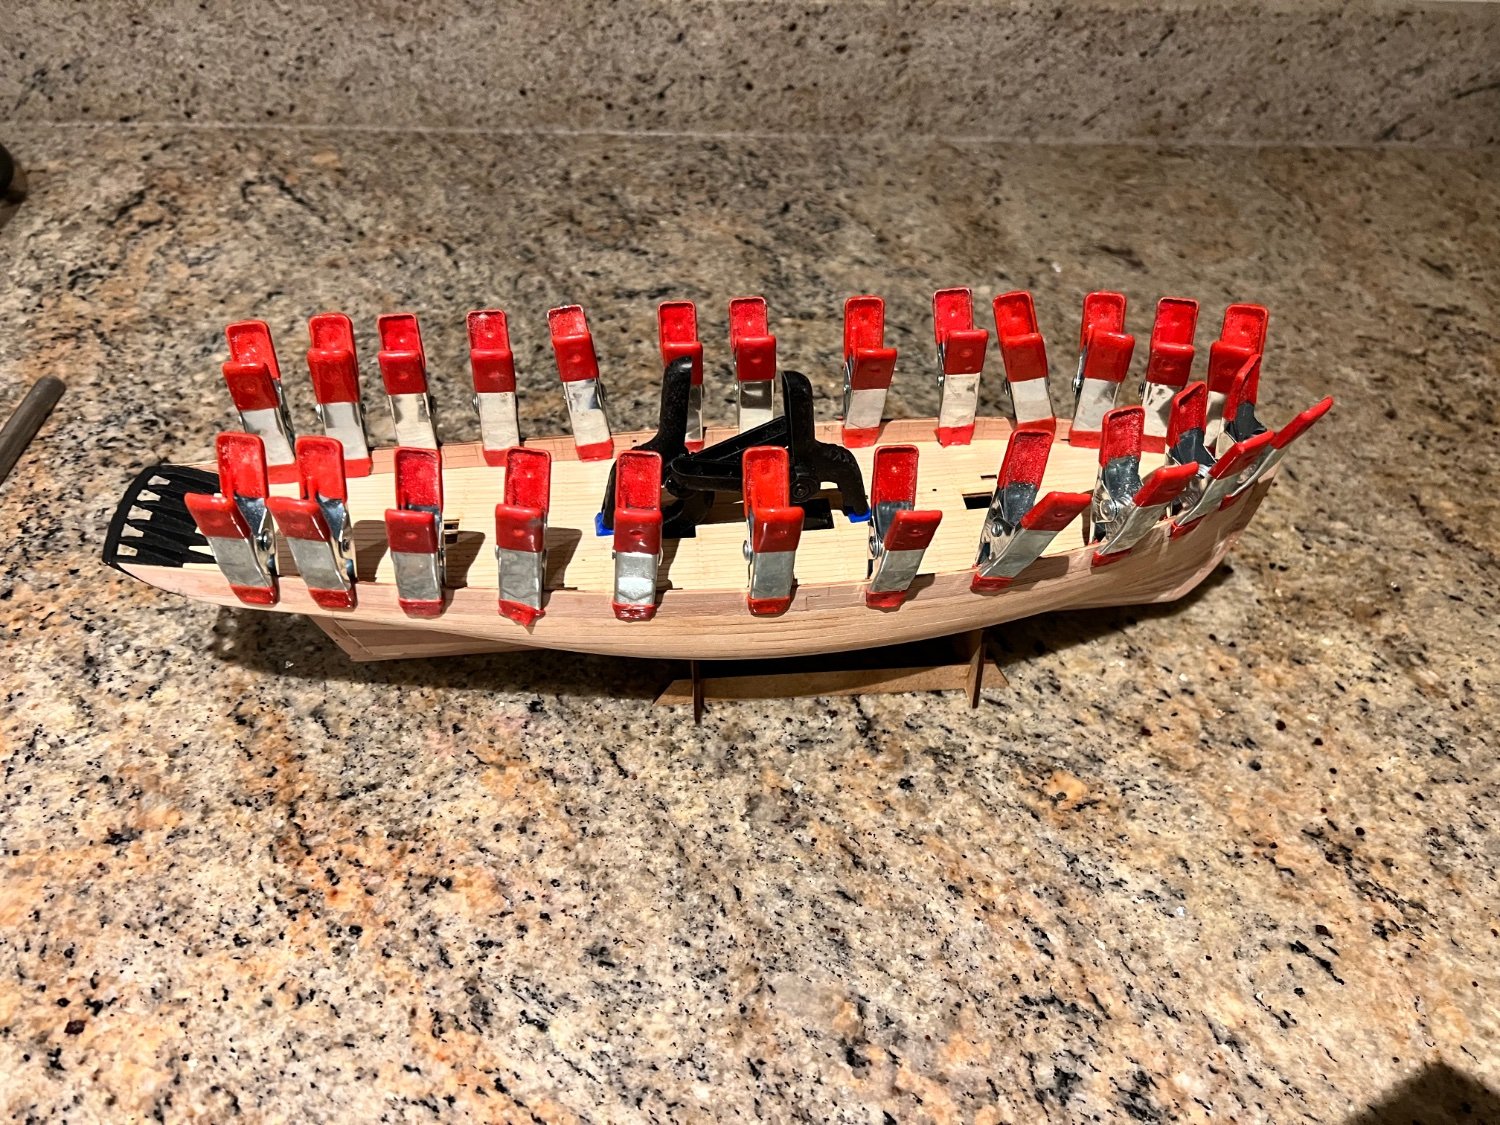
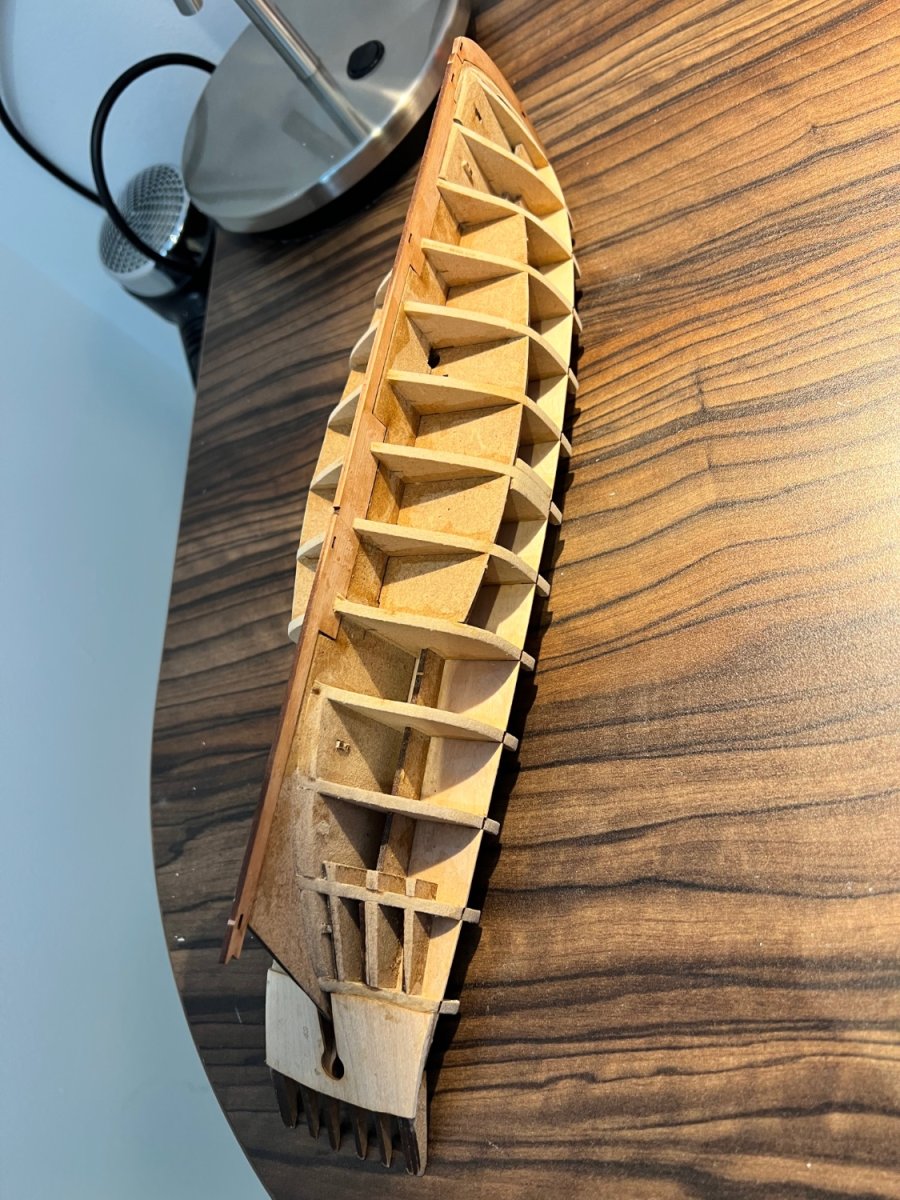
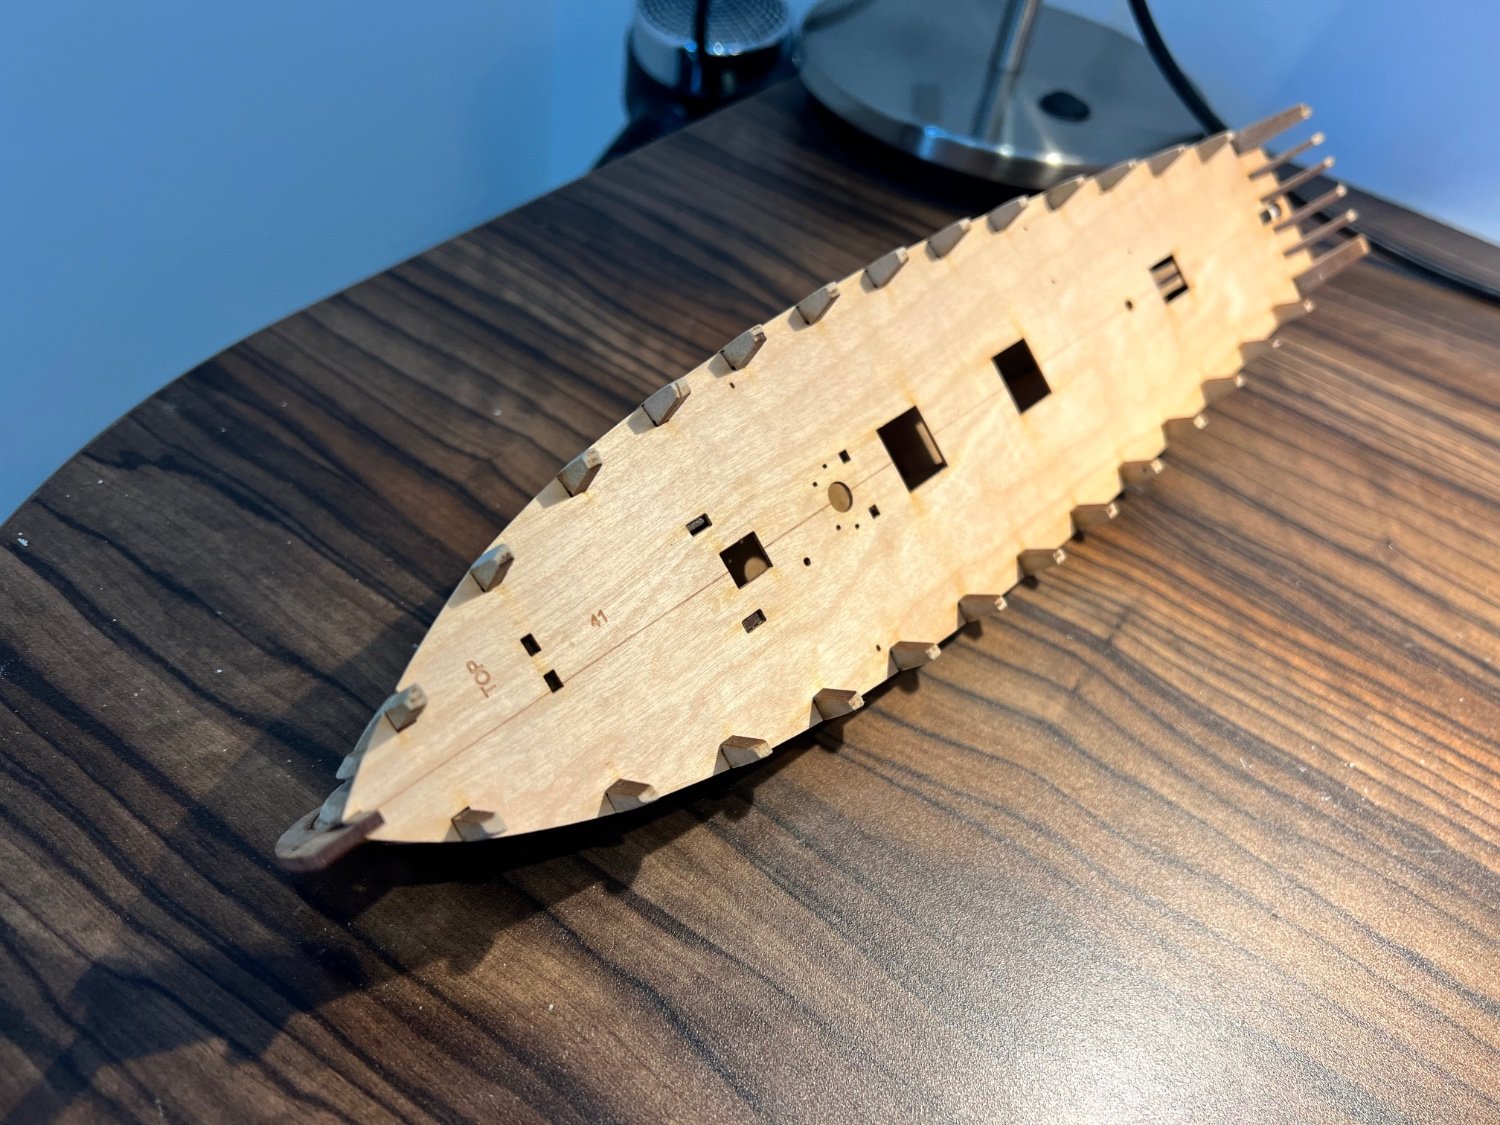
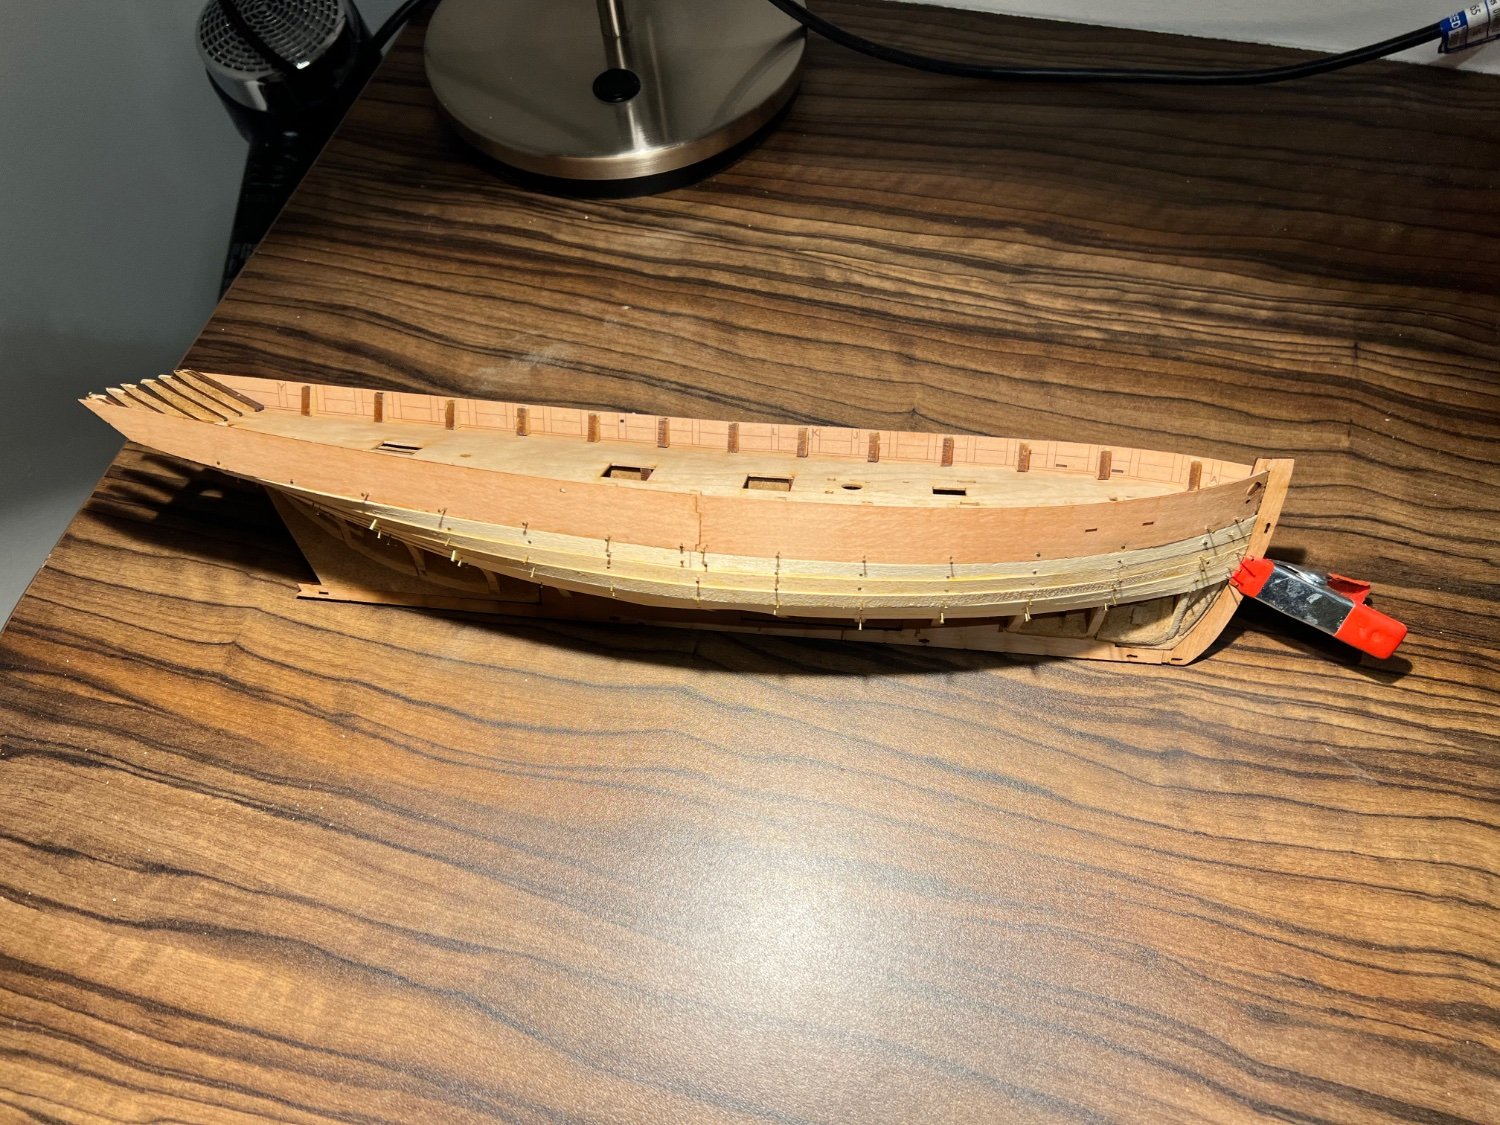
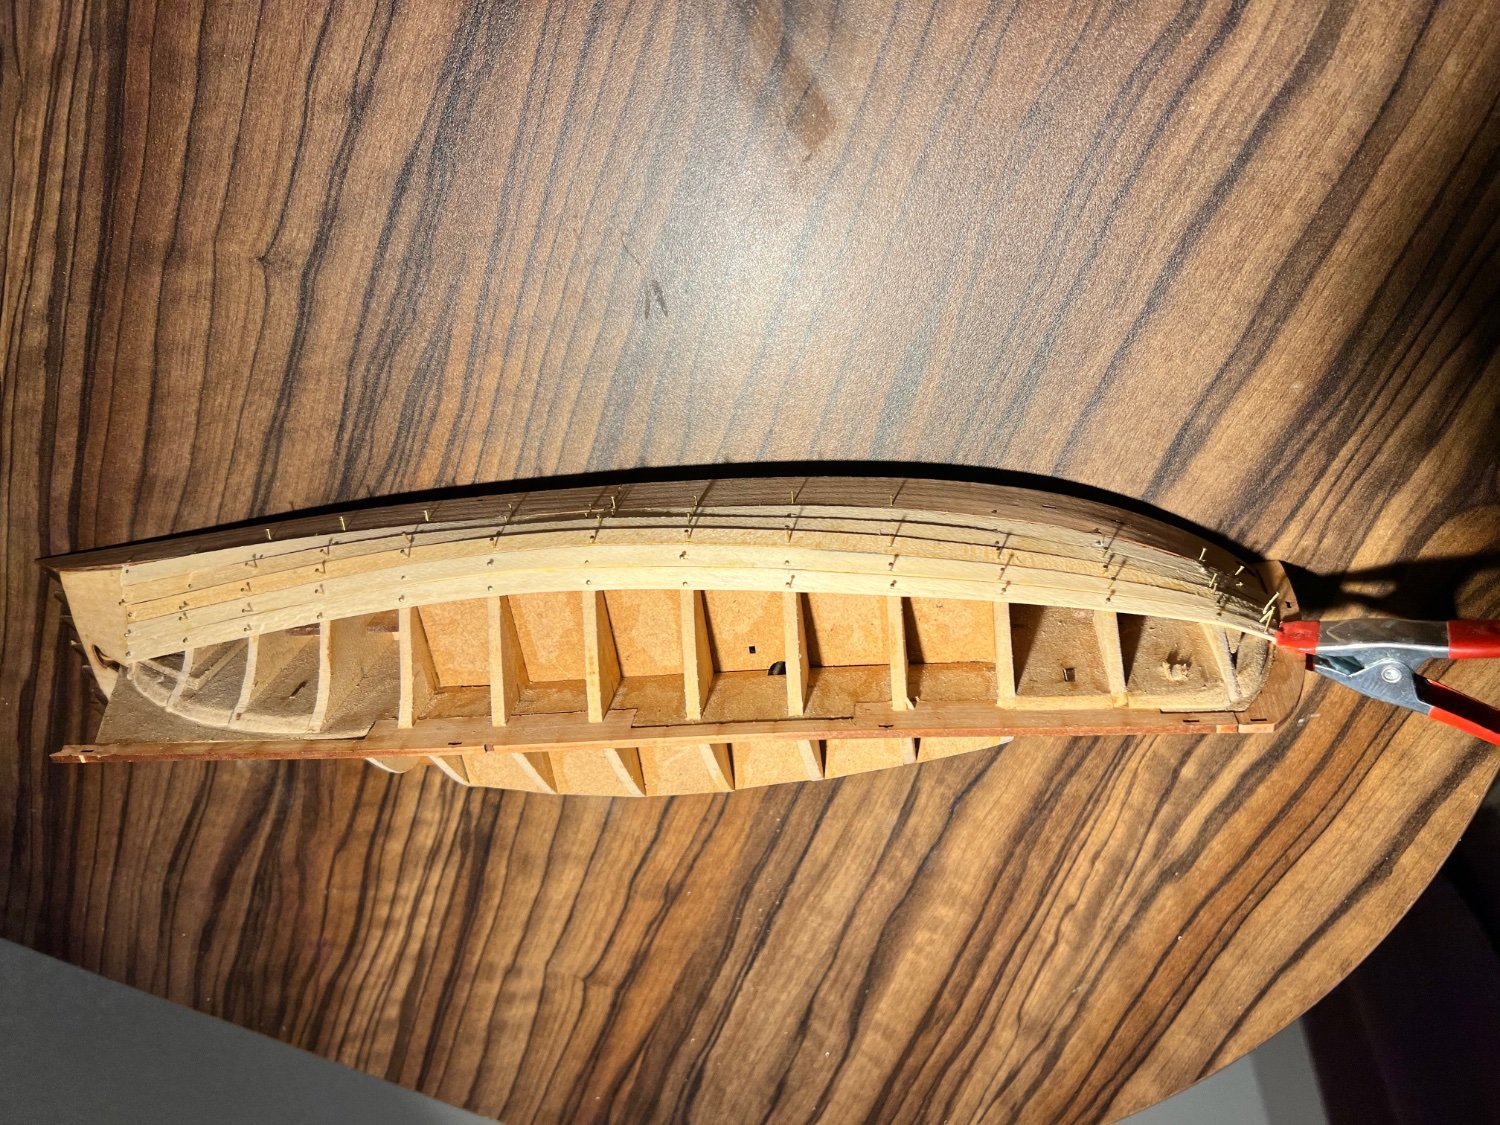
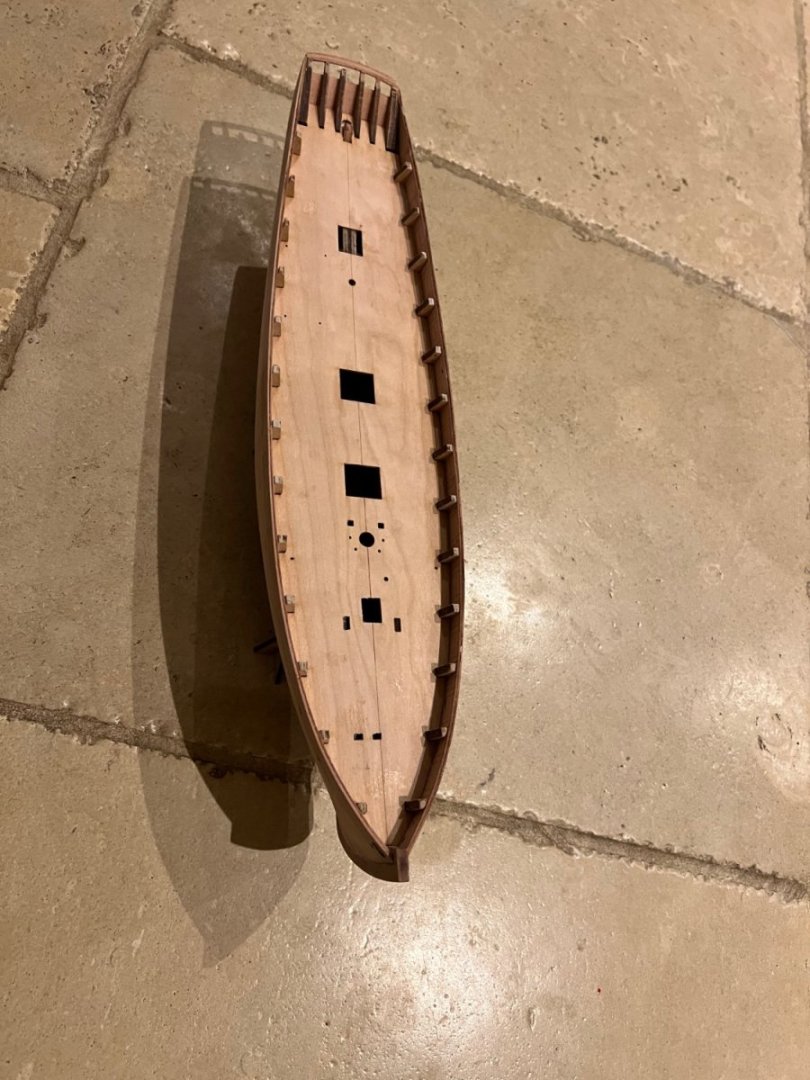
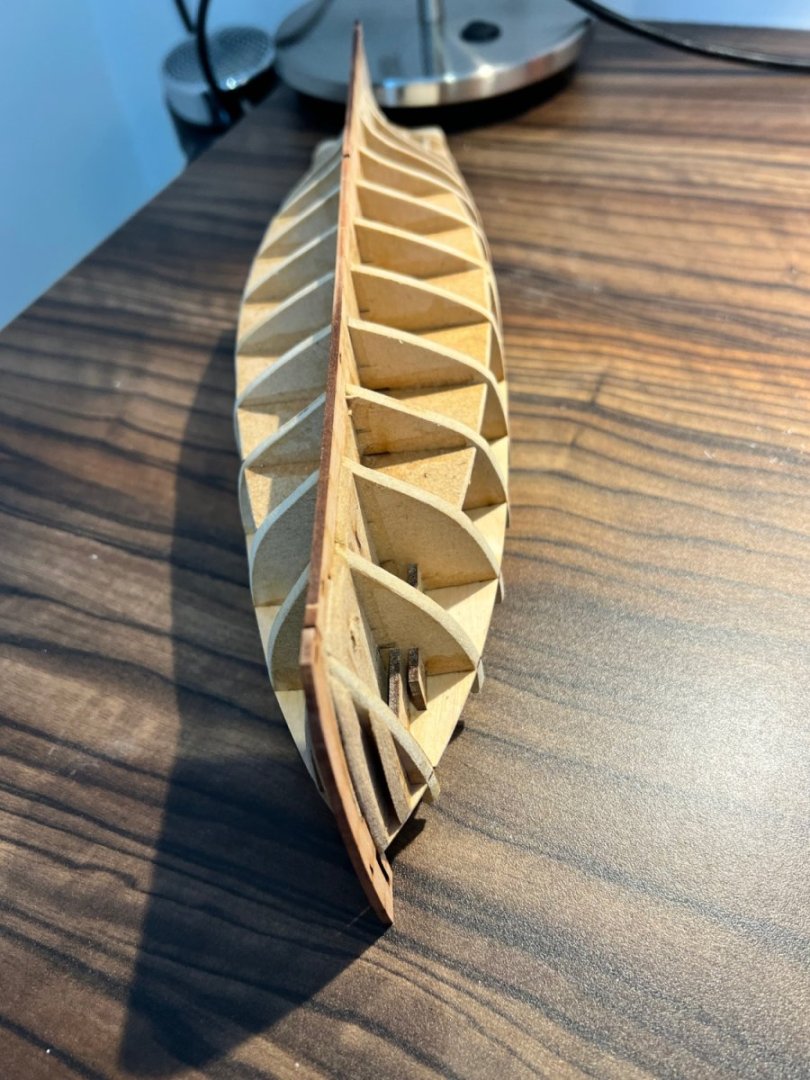
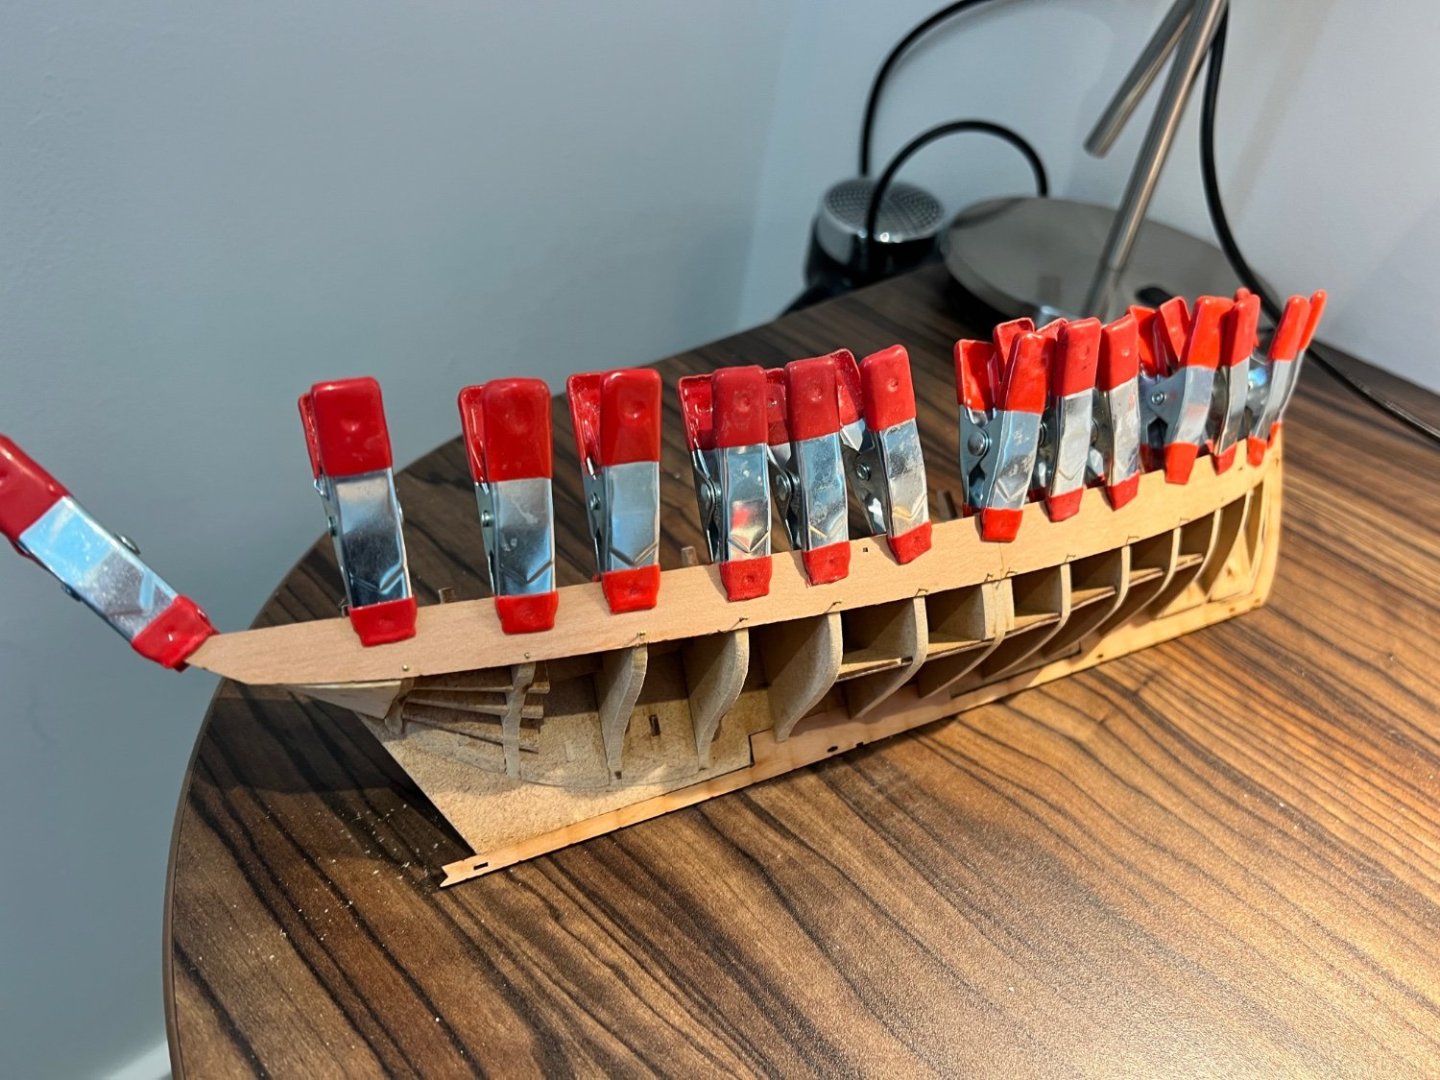
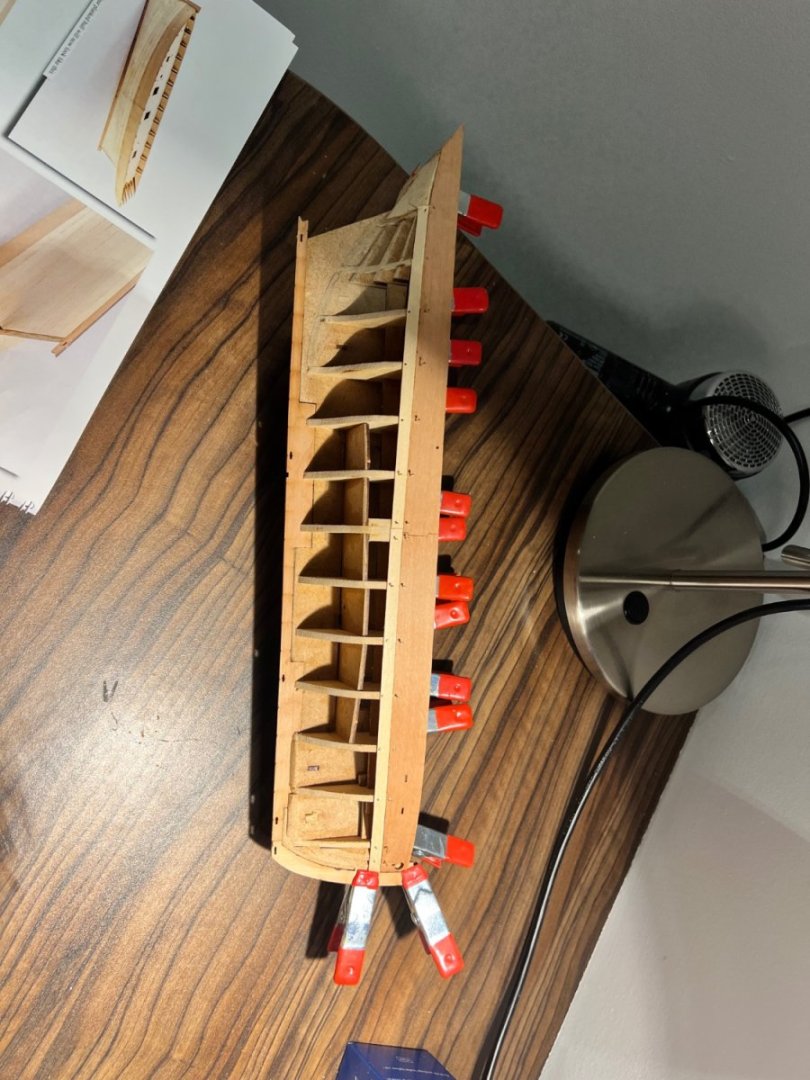
I started Ranger a month or so ago whilst stuck staying in a hotel for a fortnight’s business trip in one of the UK’s less attractive locations. Made a start, but not a lot of progress and then back on the shelf once home whilst finishing Grecian. This will be my sixth fishing boat from Vanguard and the last of the Vanguard fishing boat range. They are a lovely range of kits. Ranger at first glance seems very similar to the others in terms of being exceptionally high quality, very well designed, superb instructions and an excellent prototype build log on MSW. Ranger is similar in length (both hull and overall) and also width to Erycina, but has a much higher single mast to carry a great deal of sail area as her purpose was not to do the actual fishing but return the catch from the fishing fleet back to port as quickly as possible. Her lines, whilst longer, are not dissimilar to those of Saucy Jack. The MDF skeleton of bulkheads, keel and deck is wonderfully over engineered as usual to give a very robust framework with no risk of warping. Hull was faired, but the curves on this one are very gentle and do not require a lot of sanding. The only thing to note is that the slots in this construction do need a gentle sand to get them to fit properly. I have been spoilt on other Vanguard builds being able to do this initial construction without any sanding, I suspect it’s the norm for most manufacturers. I did, stupidly, try and force a couple of the bulkheads on snapping both a bulkhead and the keel itself - an easily avoidable mistake. They’re all glued back together fine now. Lower stern counter went on well without soaking. Just clamped and glued with PVA. Deck clicks in as usual into the helpful slot at the bottom of each bulkhead ear. Then the bulwarks fitted, as per the instructions with a small nail at the bottom, clamped and glued with PVA, although no glue above deck level as the eats will be removed. Again, no need for soaking due to the gentle shape. Once both sides done, time to start the planking. There’s tapering at the bow but not stern. Only a few planks in, but so far this has been the easiest boat to plank. I think Chris or Jim promised this in the instructions or build log! That’s all I did whilst away. Will restart construction shortly.


- 25 replies
-
- 10
-
-
- Ranger
- Vanguard Models
- (and 1 more)
-
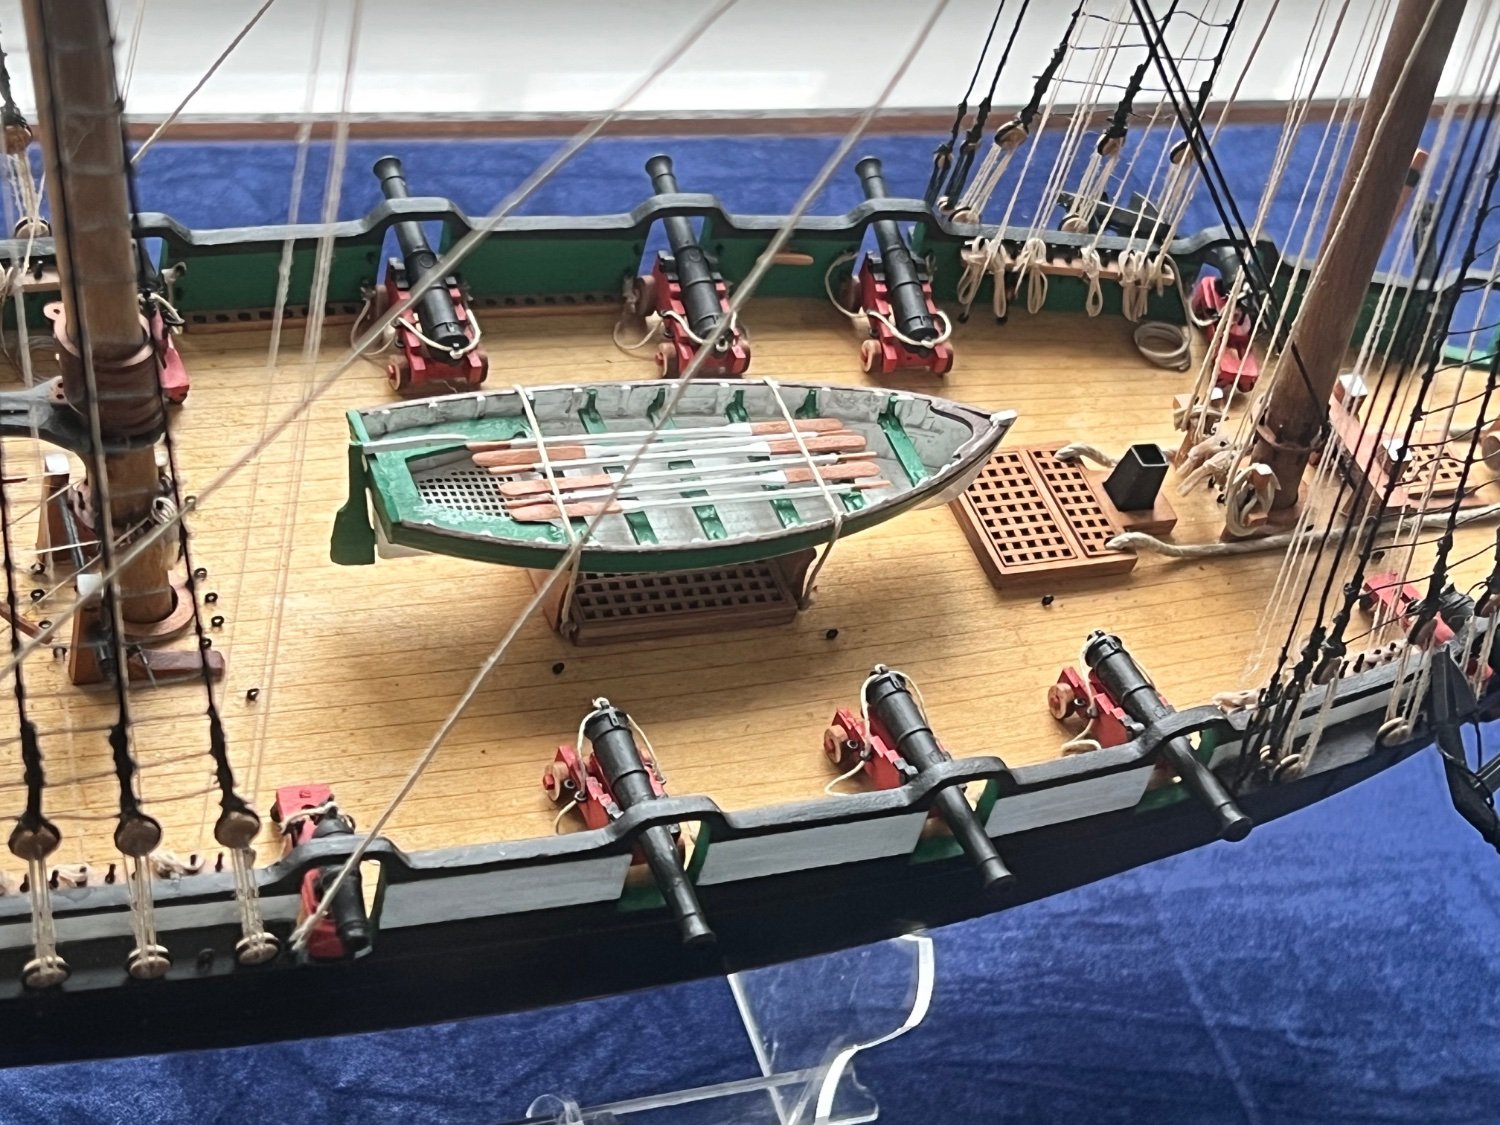
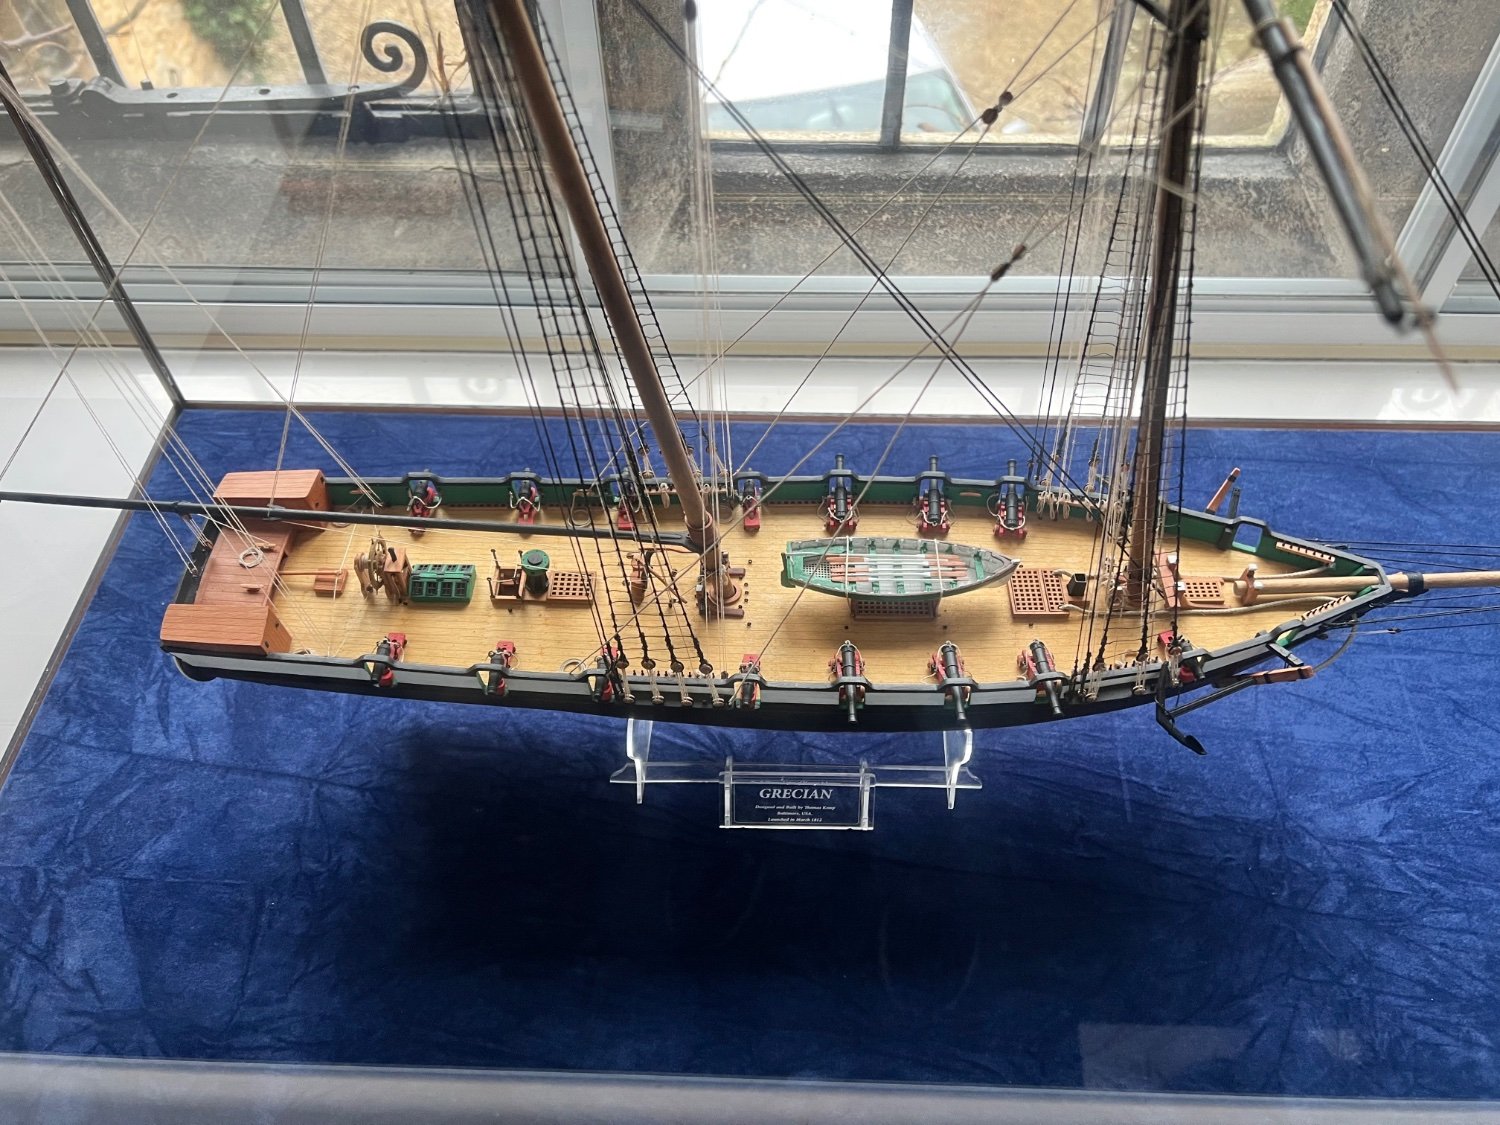
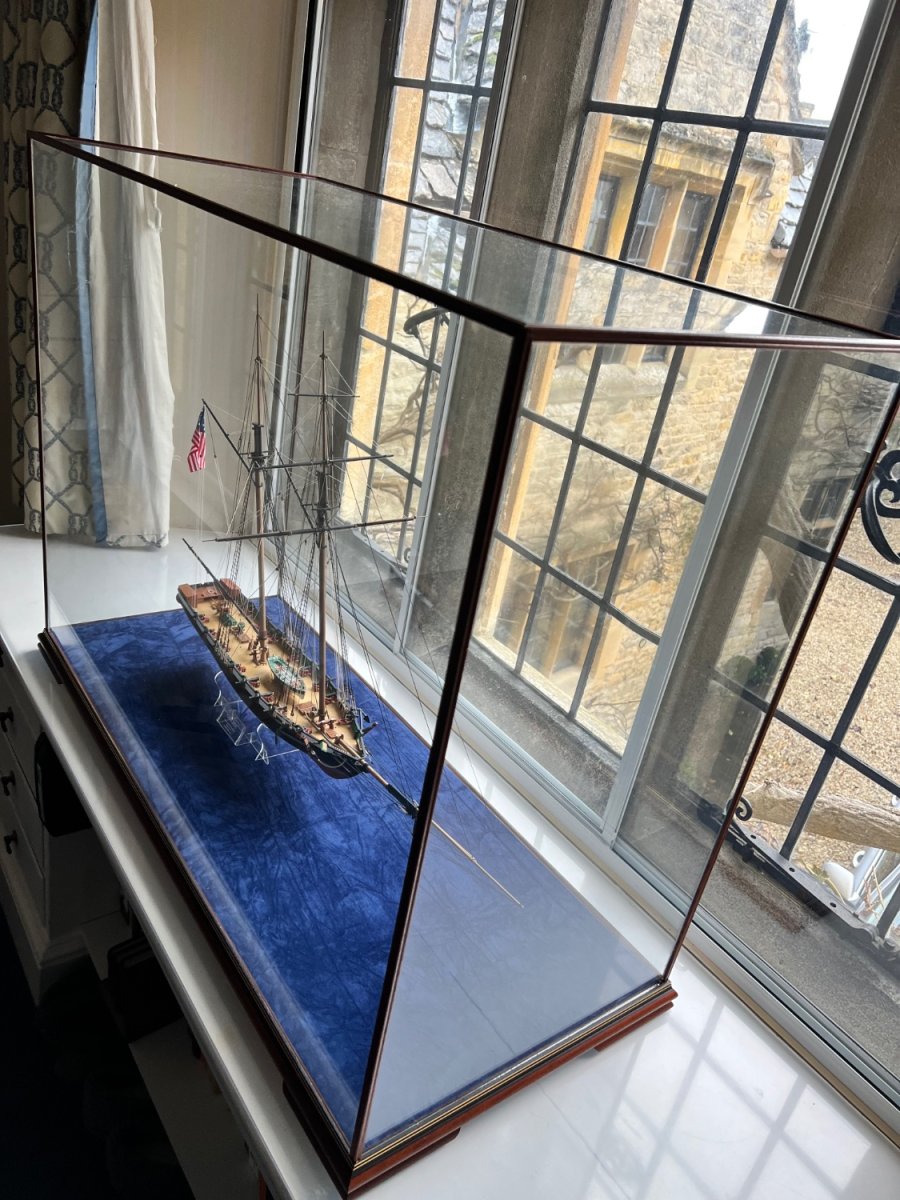
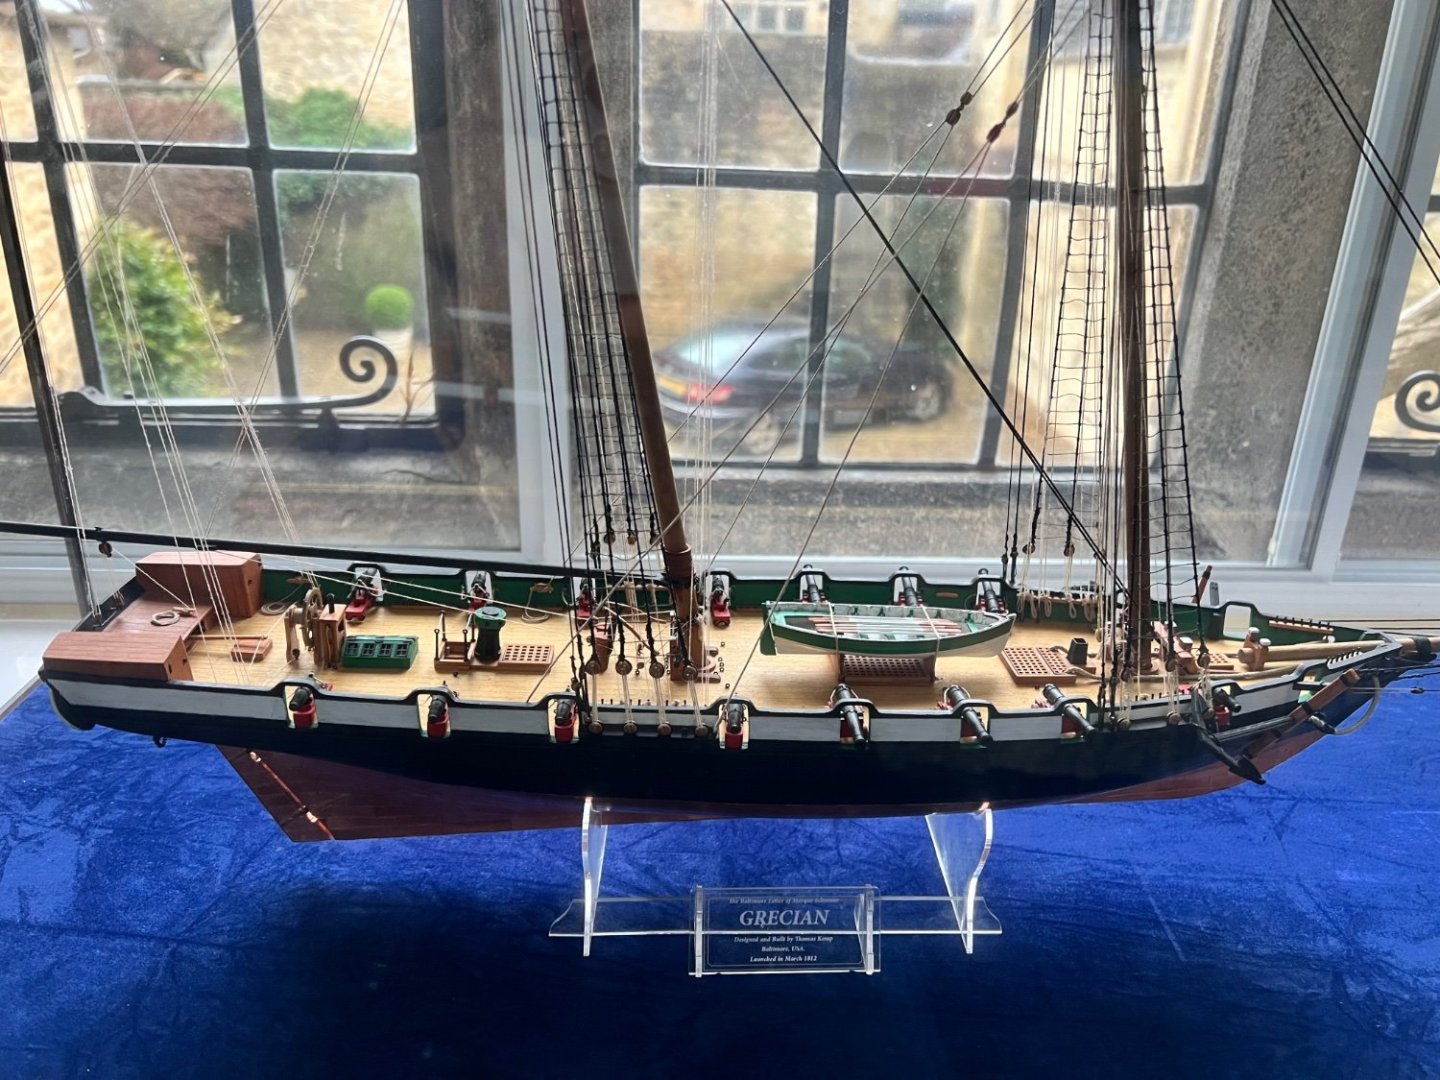
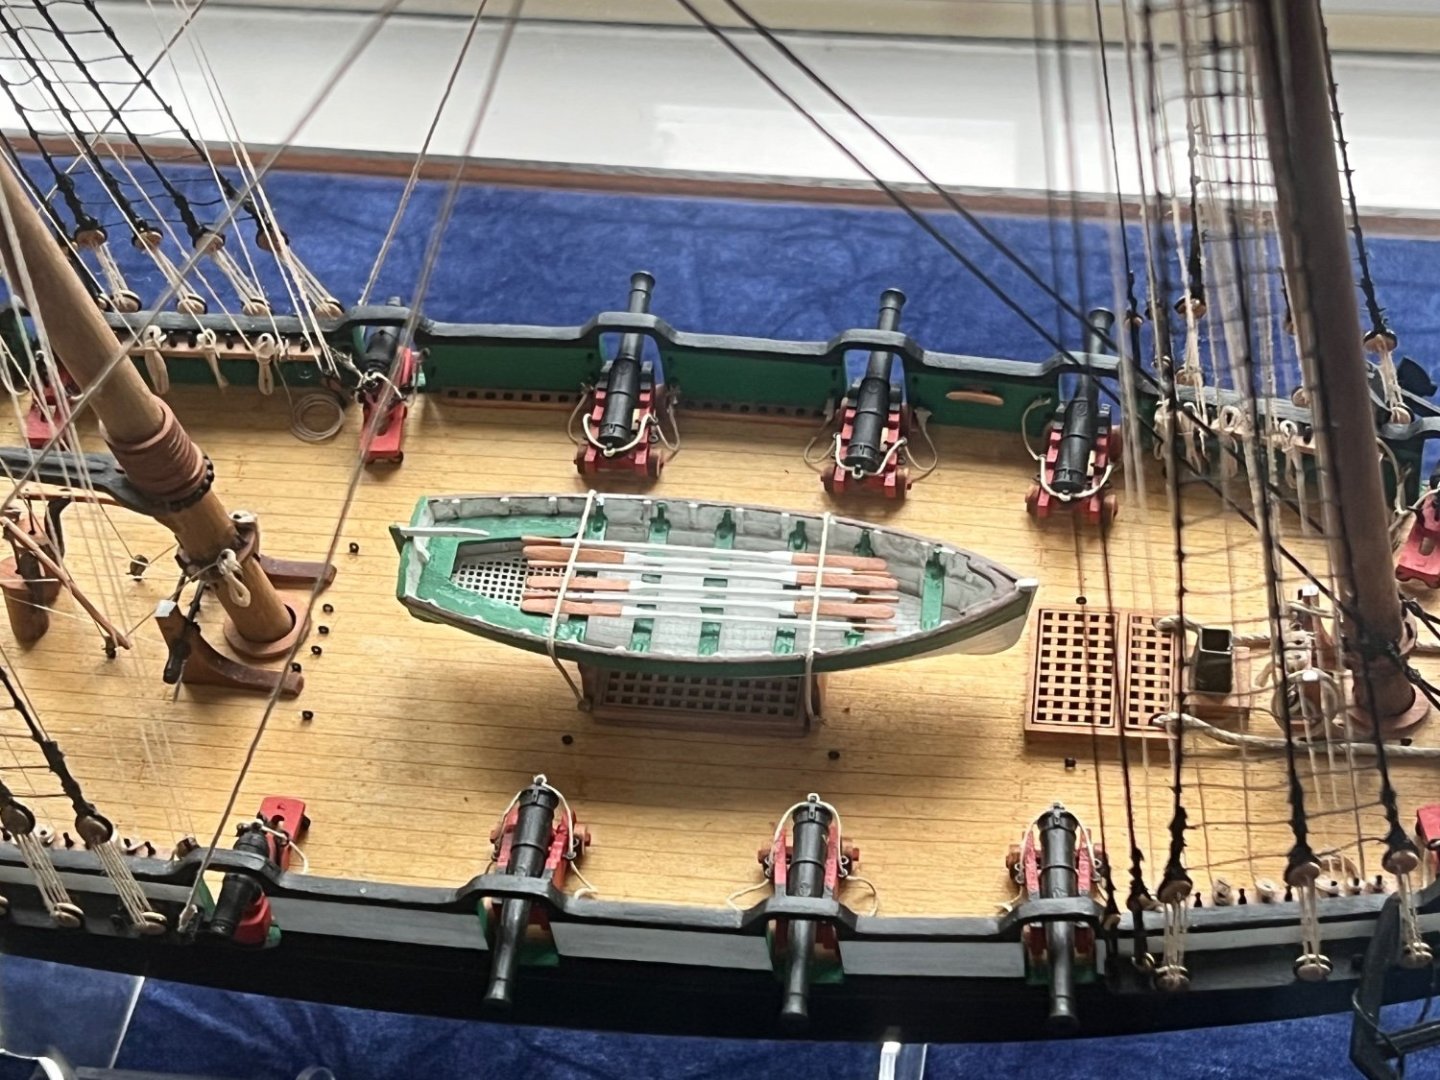
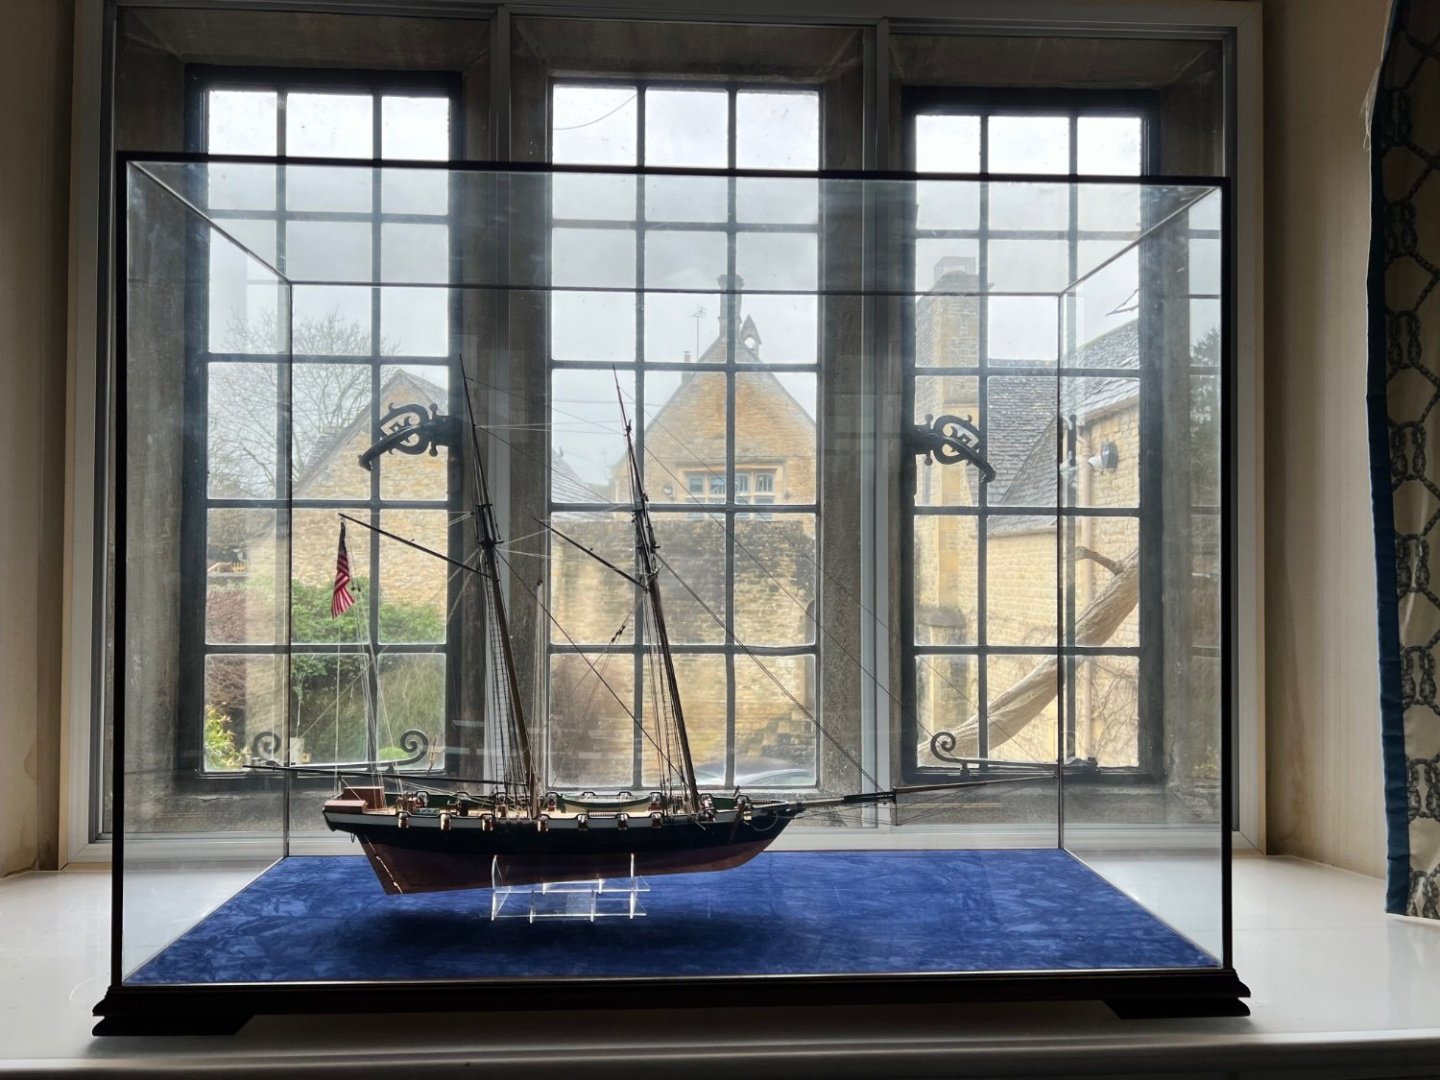
Grecian is finished and in her display case. Rope coils fitted. A few final pics. The case is from DSC Showcases who if you’re in the UK I highly recommend. I have one of their cases for Alert. Despite being handmade from wood and glass they’re much cheaper than the acrylic alternatives. DSC usually make the cases bespoke, but in this case they had this one already made and offered it at a big discount so I bought it. It’s the perfect length, but with hindsight a bit too wide and a bit too tall. Grecian looks a little lost in it, partly due to that huge bowsprit. I suspect that when I eventually build Sphinx I’ll eventually put her in it, her overall dimensions are similar but she’d fill the case better. I’ll probably need some anti-UV film on the case or window to protect against fading. Thanks again for all the advice, encouragement and support on this log, it’s been invaluable! Thanks to Vanguard for yet another wonderful, extremely high quality kit.


- 105 replies
-
- 25
-
-
-
- Grecian
- baltimore clipper
- (and 4 more)
-
Thanks so much Glenn. The end of the yard has a metal collar on so I wasn’t able to drill enough around to remove the old PE but I could get the new piece into the yard alongside it. It’s not absolutely at the centre of the yard, but once painted it will be almost invisible.
- 105 replies
-
- 2
-
-
- Grecian
- baltimore clipper
- (and 4 more)