HOLIDAY DONATION DRIVE - SUPPORT MSW - DO YOUR PART TO KEEP THIS GREAT FORUM GOING!
×

DB789
-
Posts
427 -
Joined
-
Last visited
Content Type
Profiles
Forums
Gallery
Events
Everything posted by DB789
-
 Thanks Glenn, very much enjoying your much more detailed Adder log too. She’s looking super.
- 146 replies
-
- 4
-

-

-
- Adder
- Vanguard Models
- (and 1 more)
-
Thanks Ron, that’s very helpful, it’s roughly what I did so I’m glad I’m on the right track, although the lines did start to tangle up towards the end! That’s a really helpful explanation, thank you. Do you know why we typically depict the topmast and topgallant yards in the lower position on the masts if they were usually raised? Was that their position in port? I really appreciate the advice, thank you.
- 146 replies
-
- 3
-
-
-
- Adder
- Vanguard Models
- (and 1 more)
-
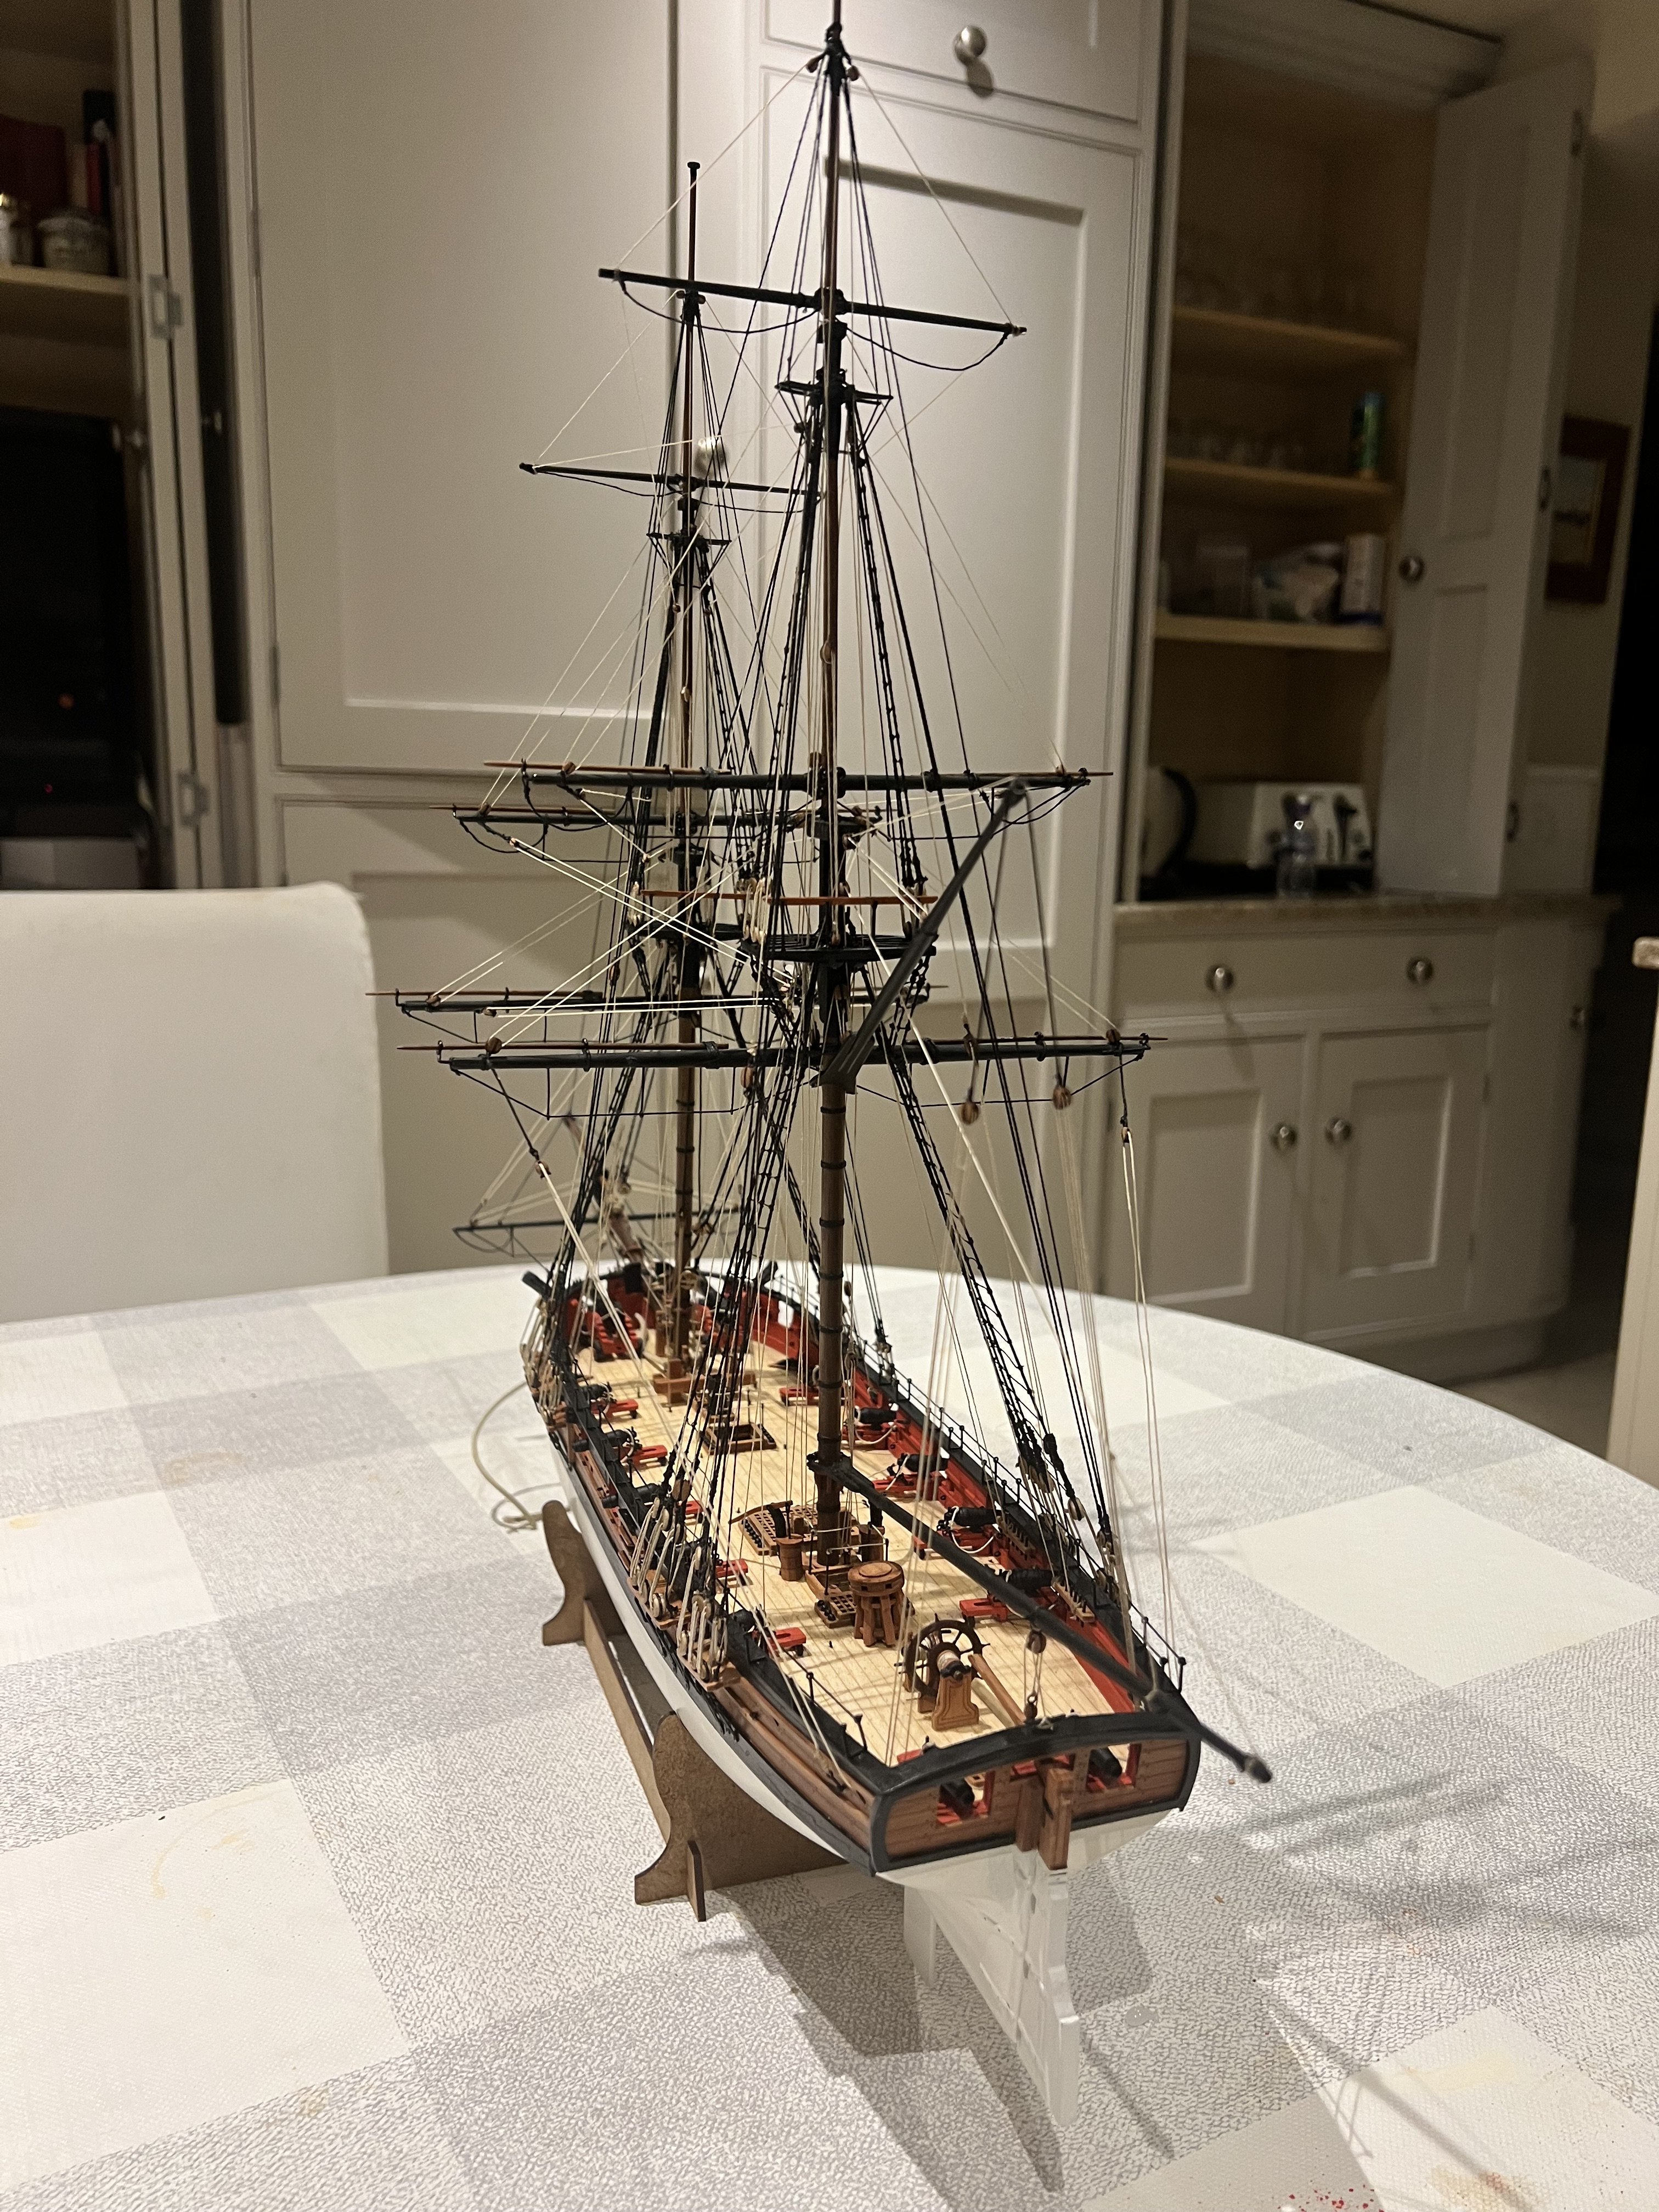
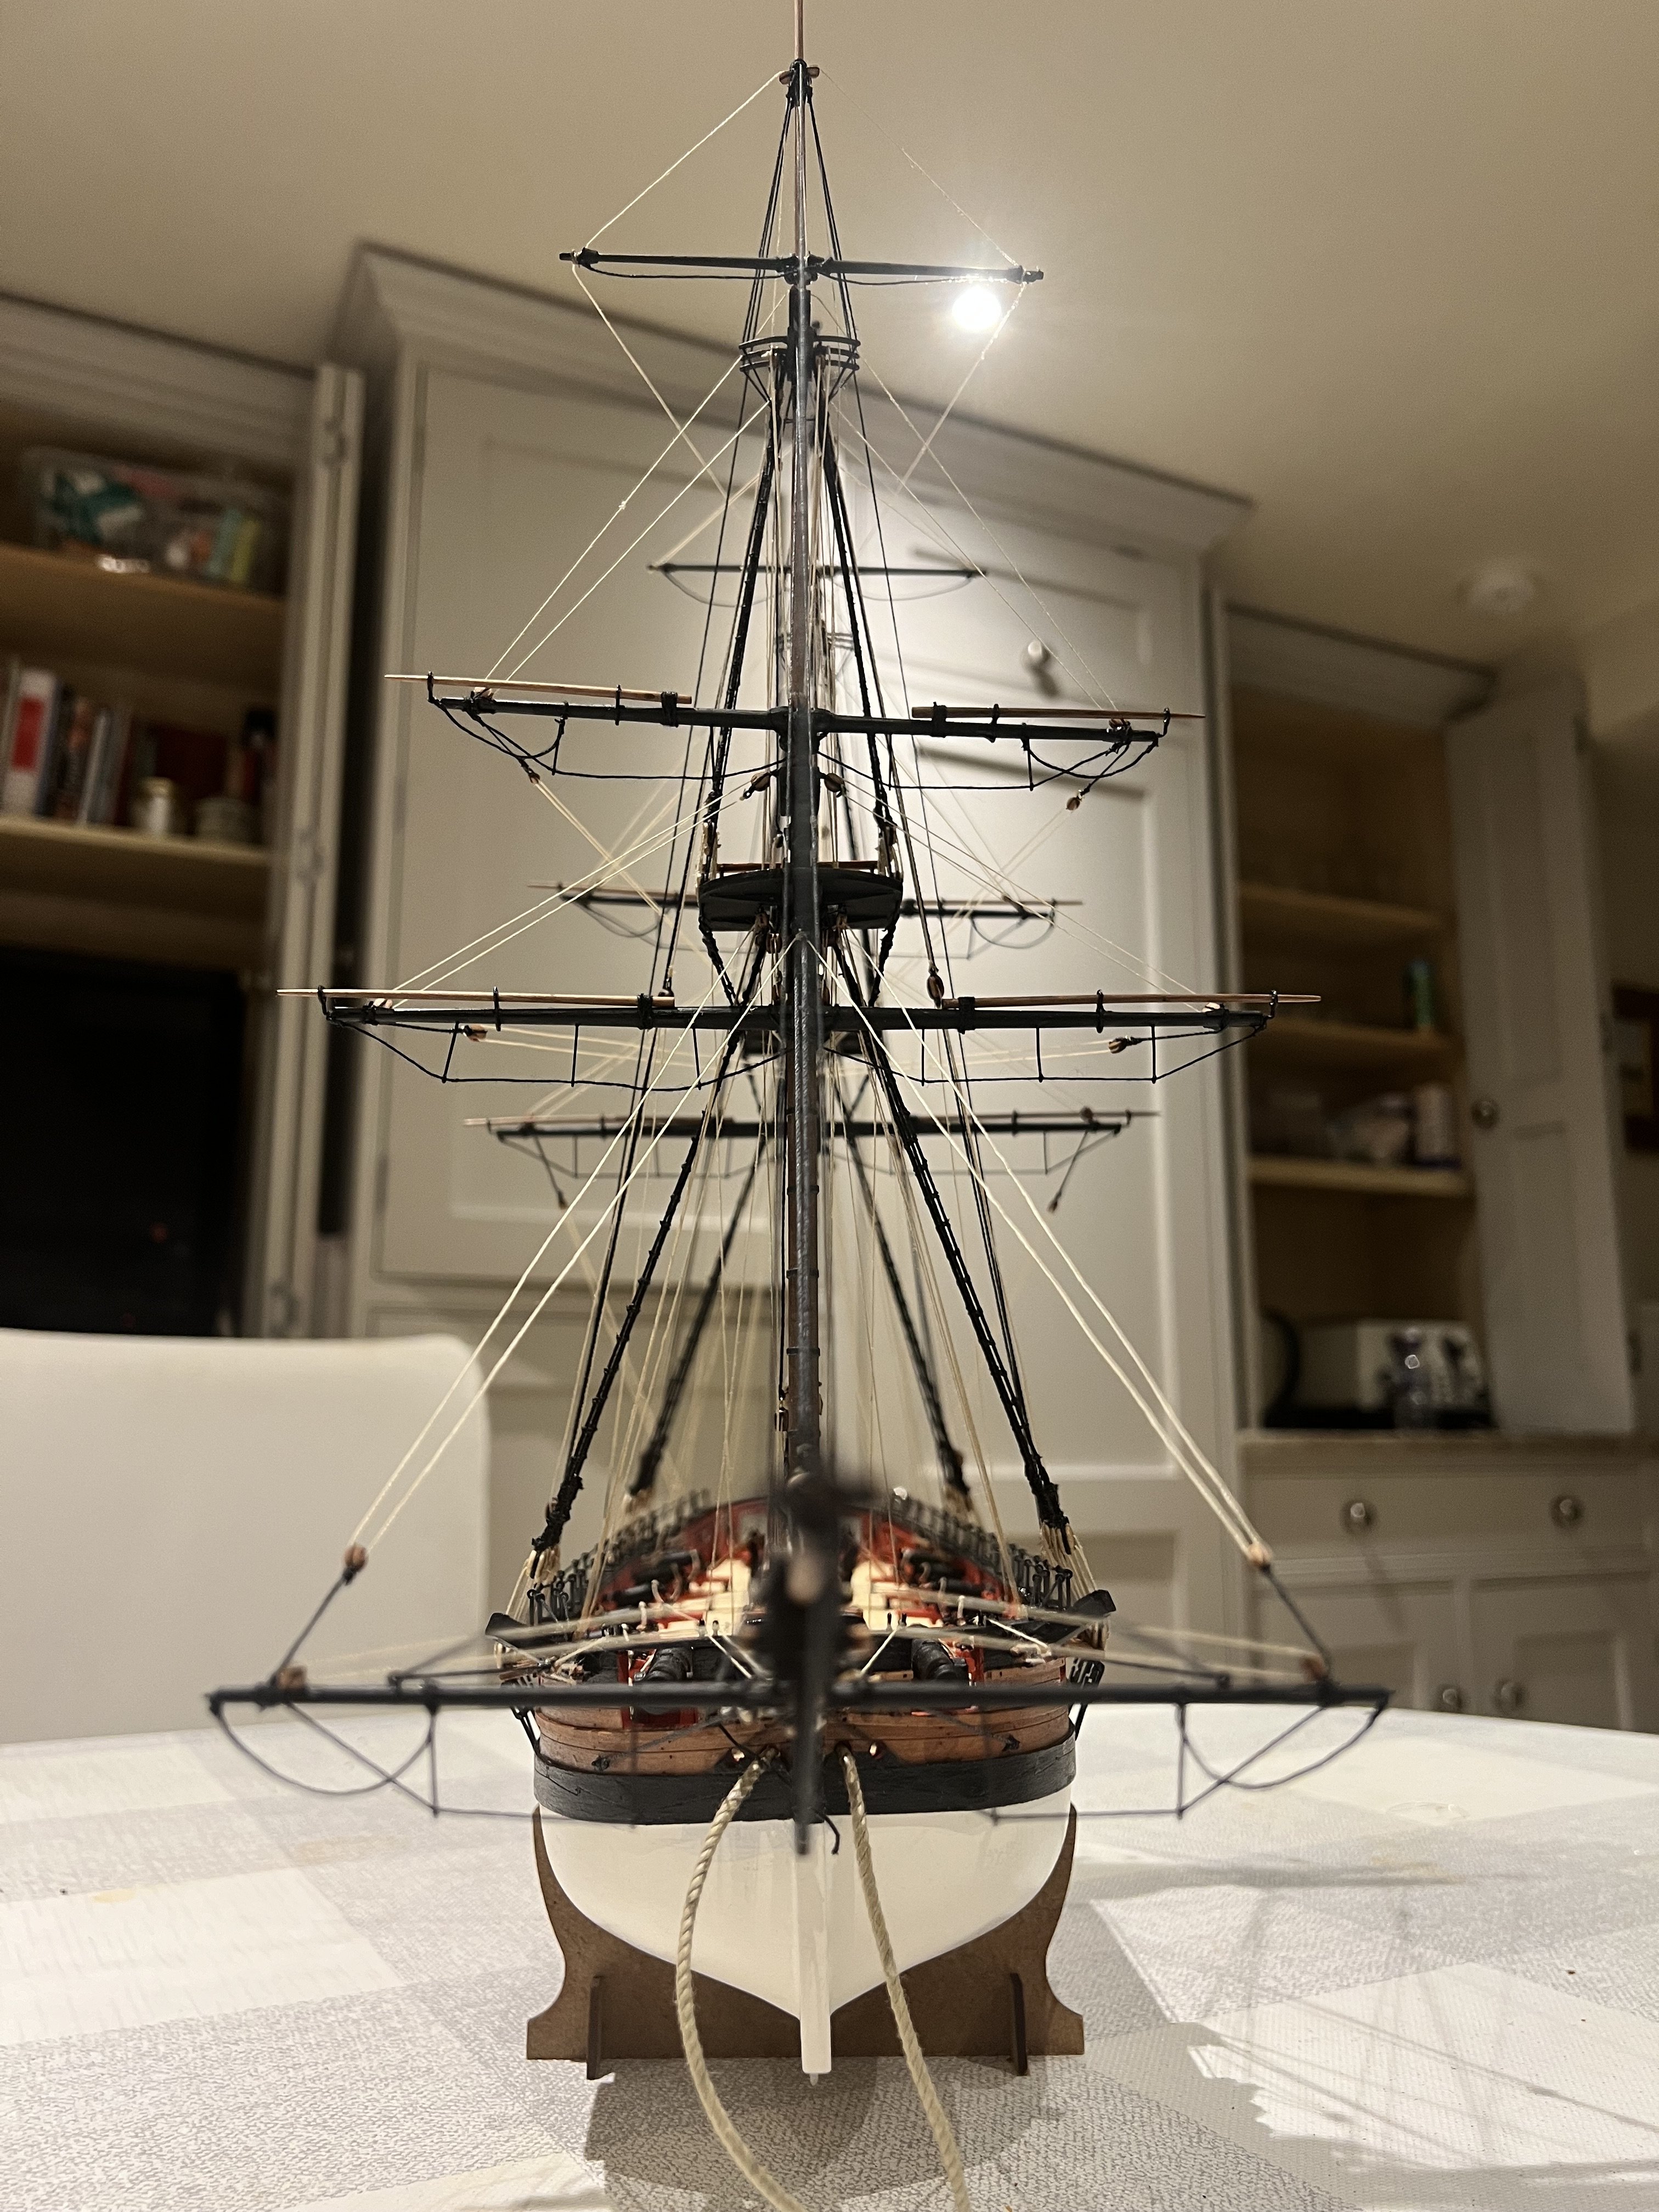
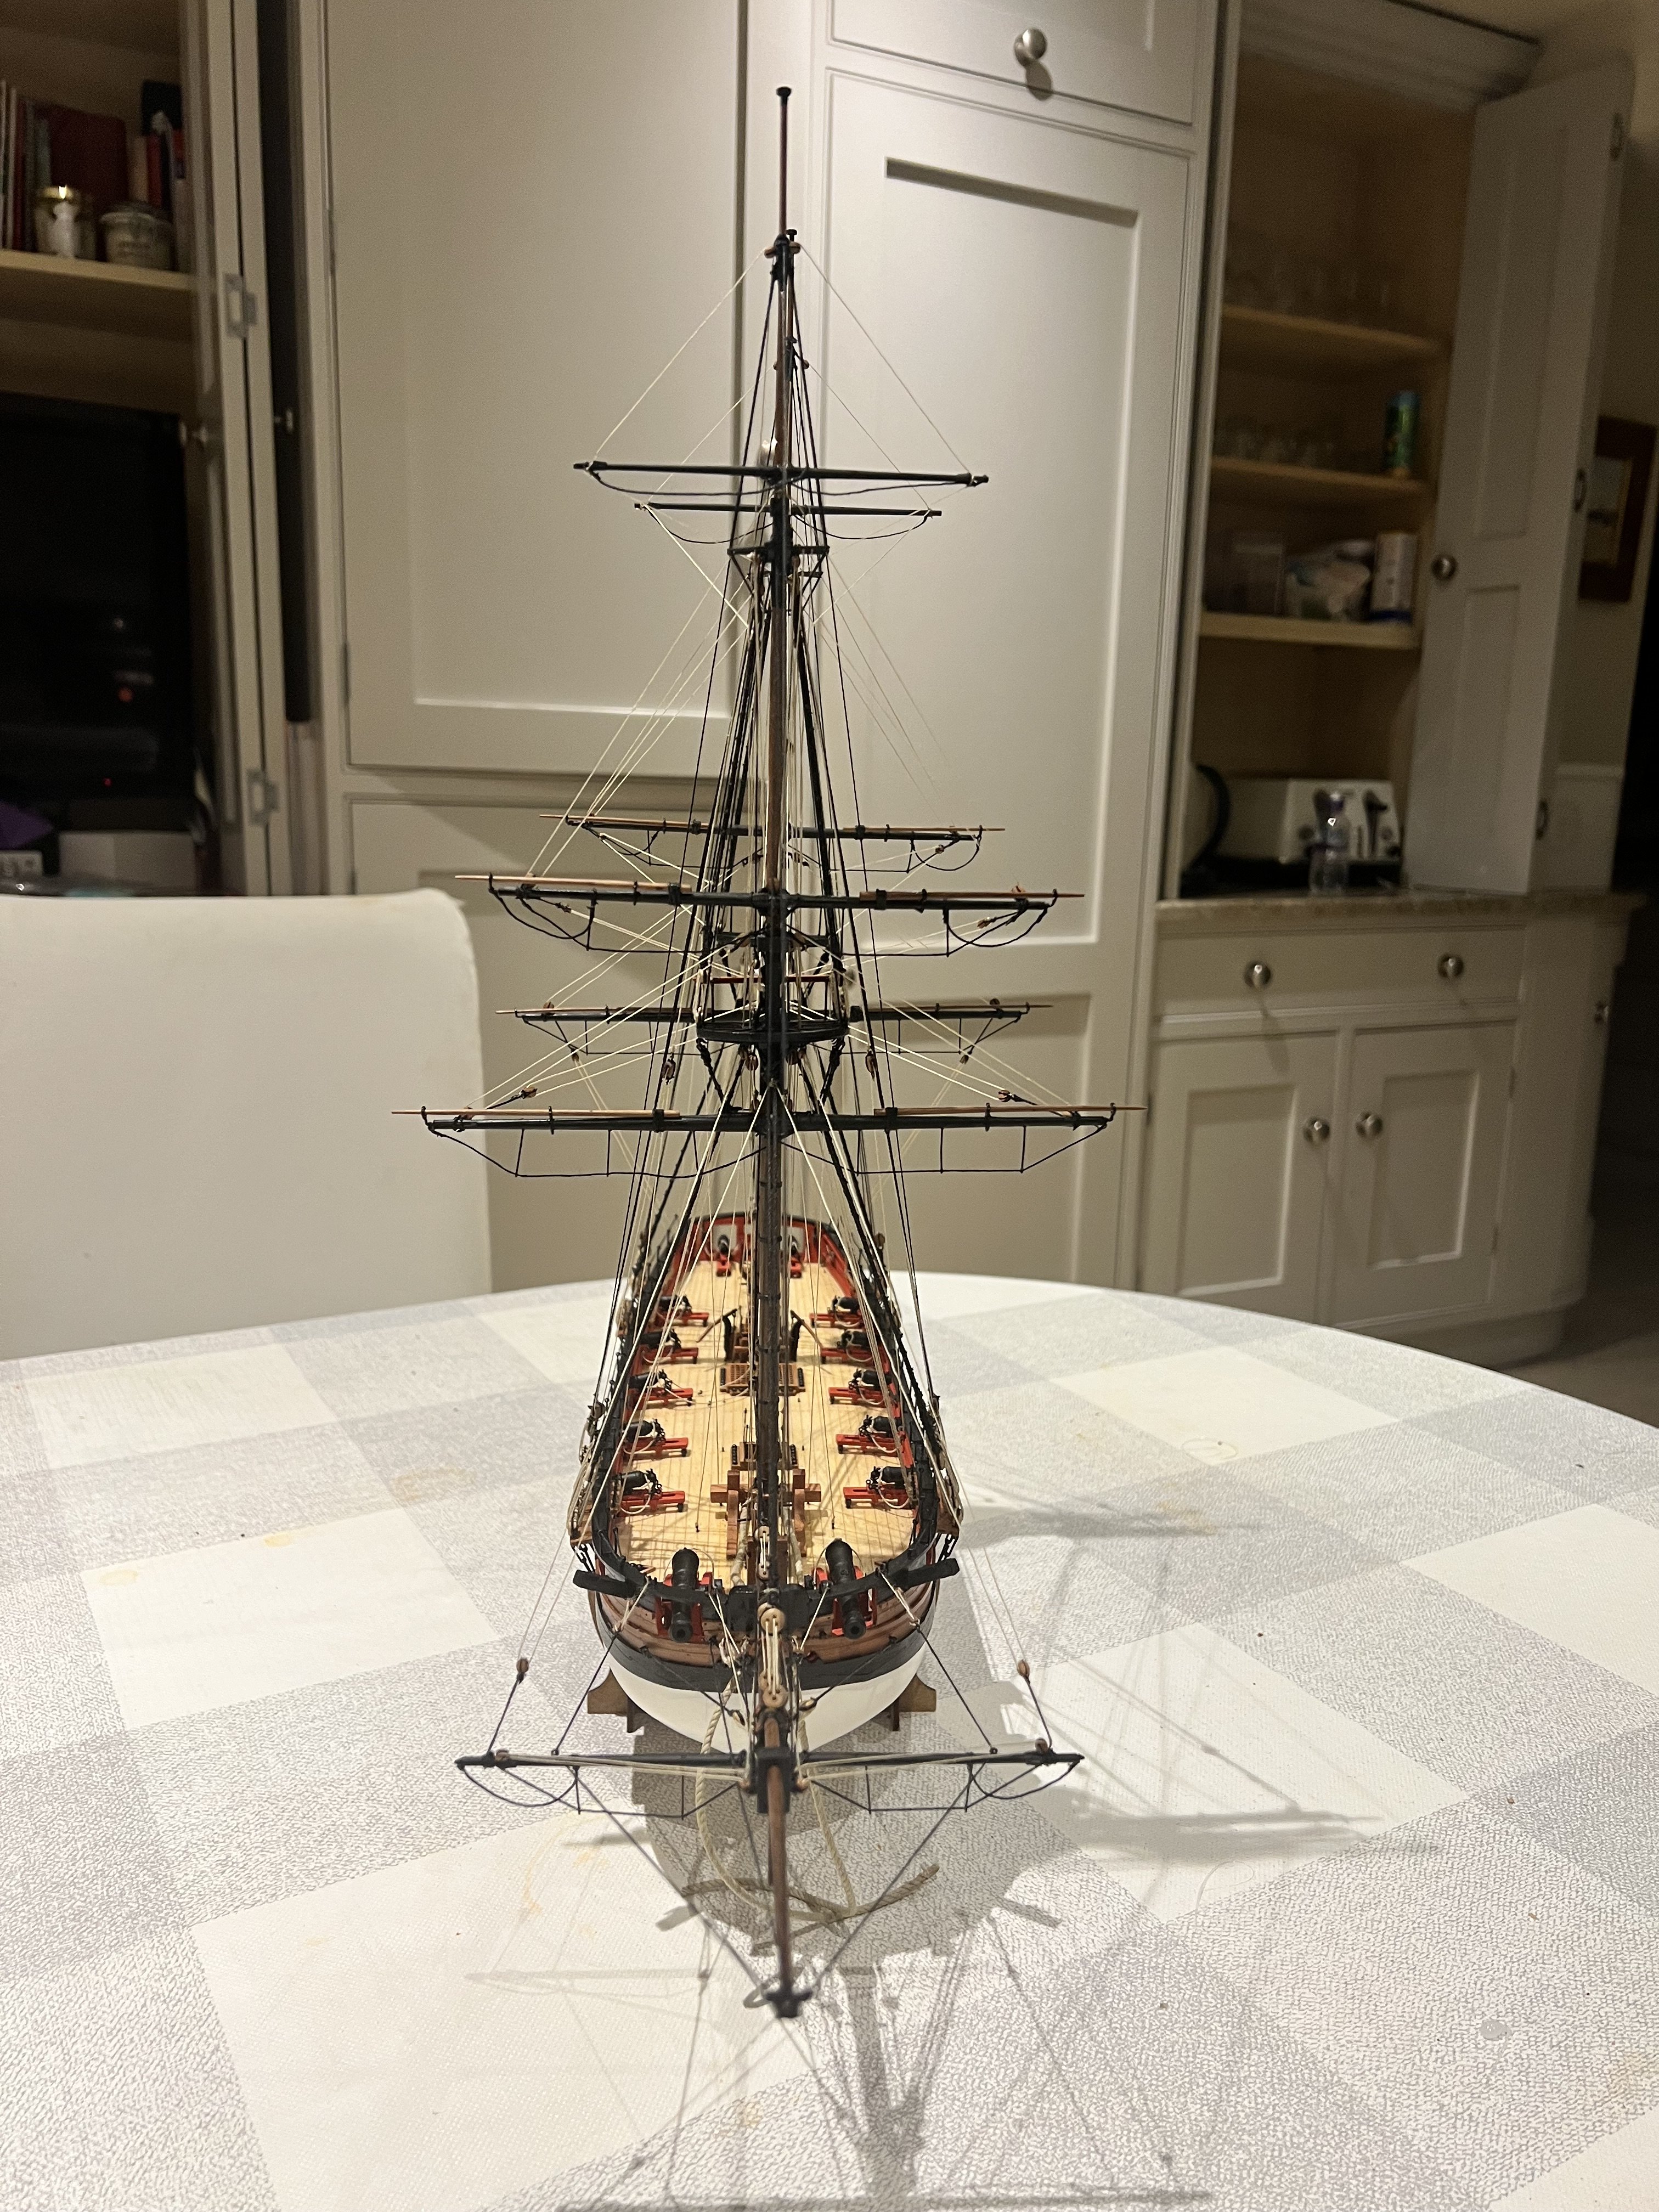
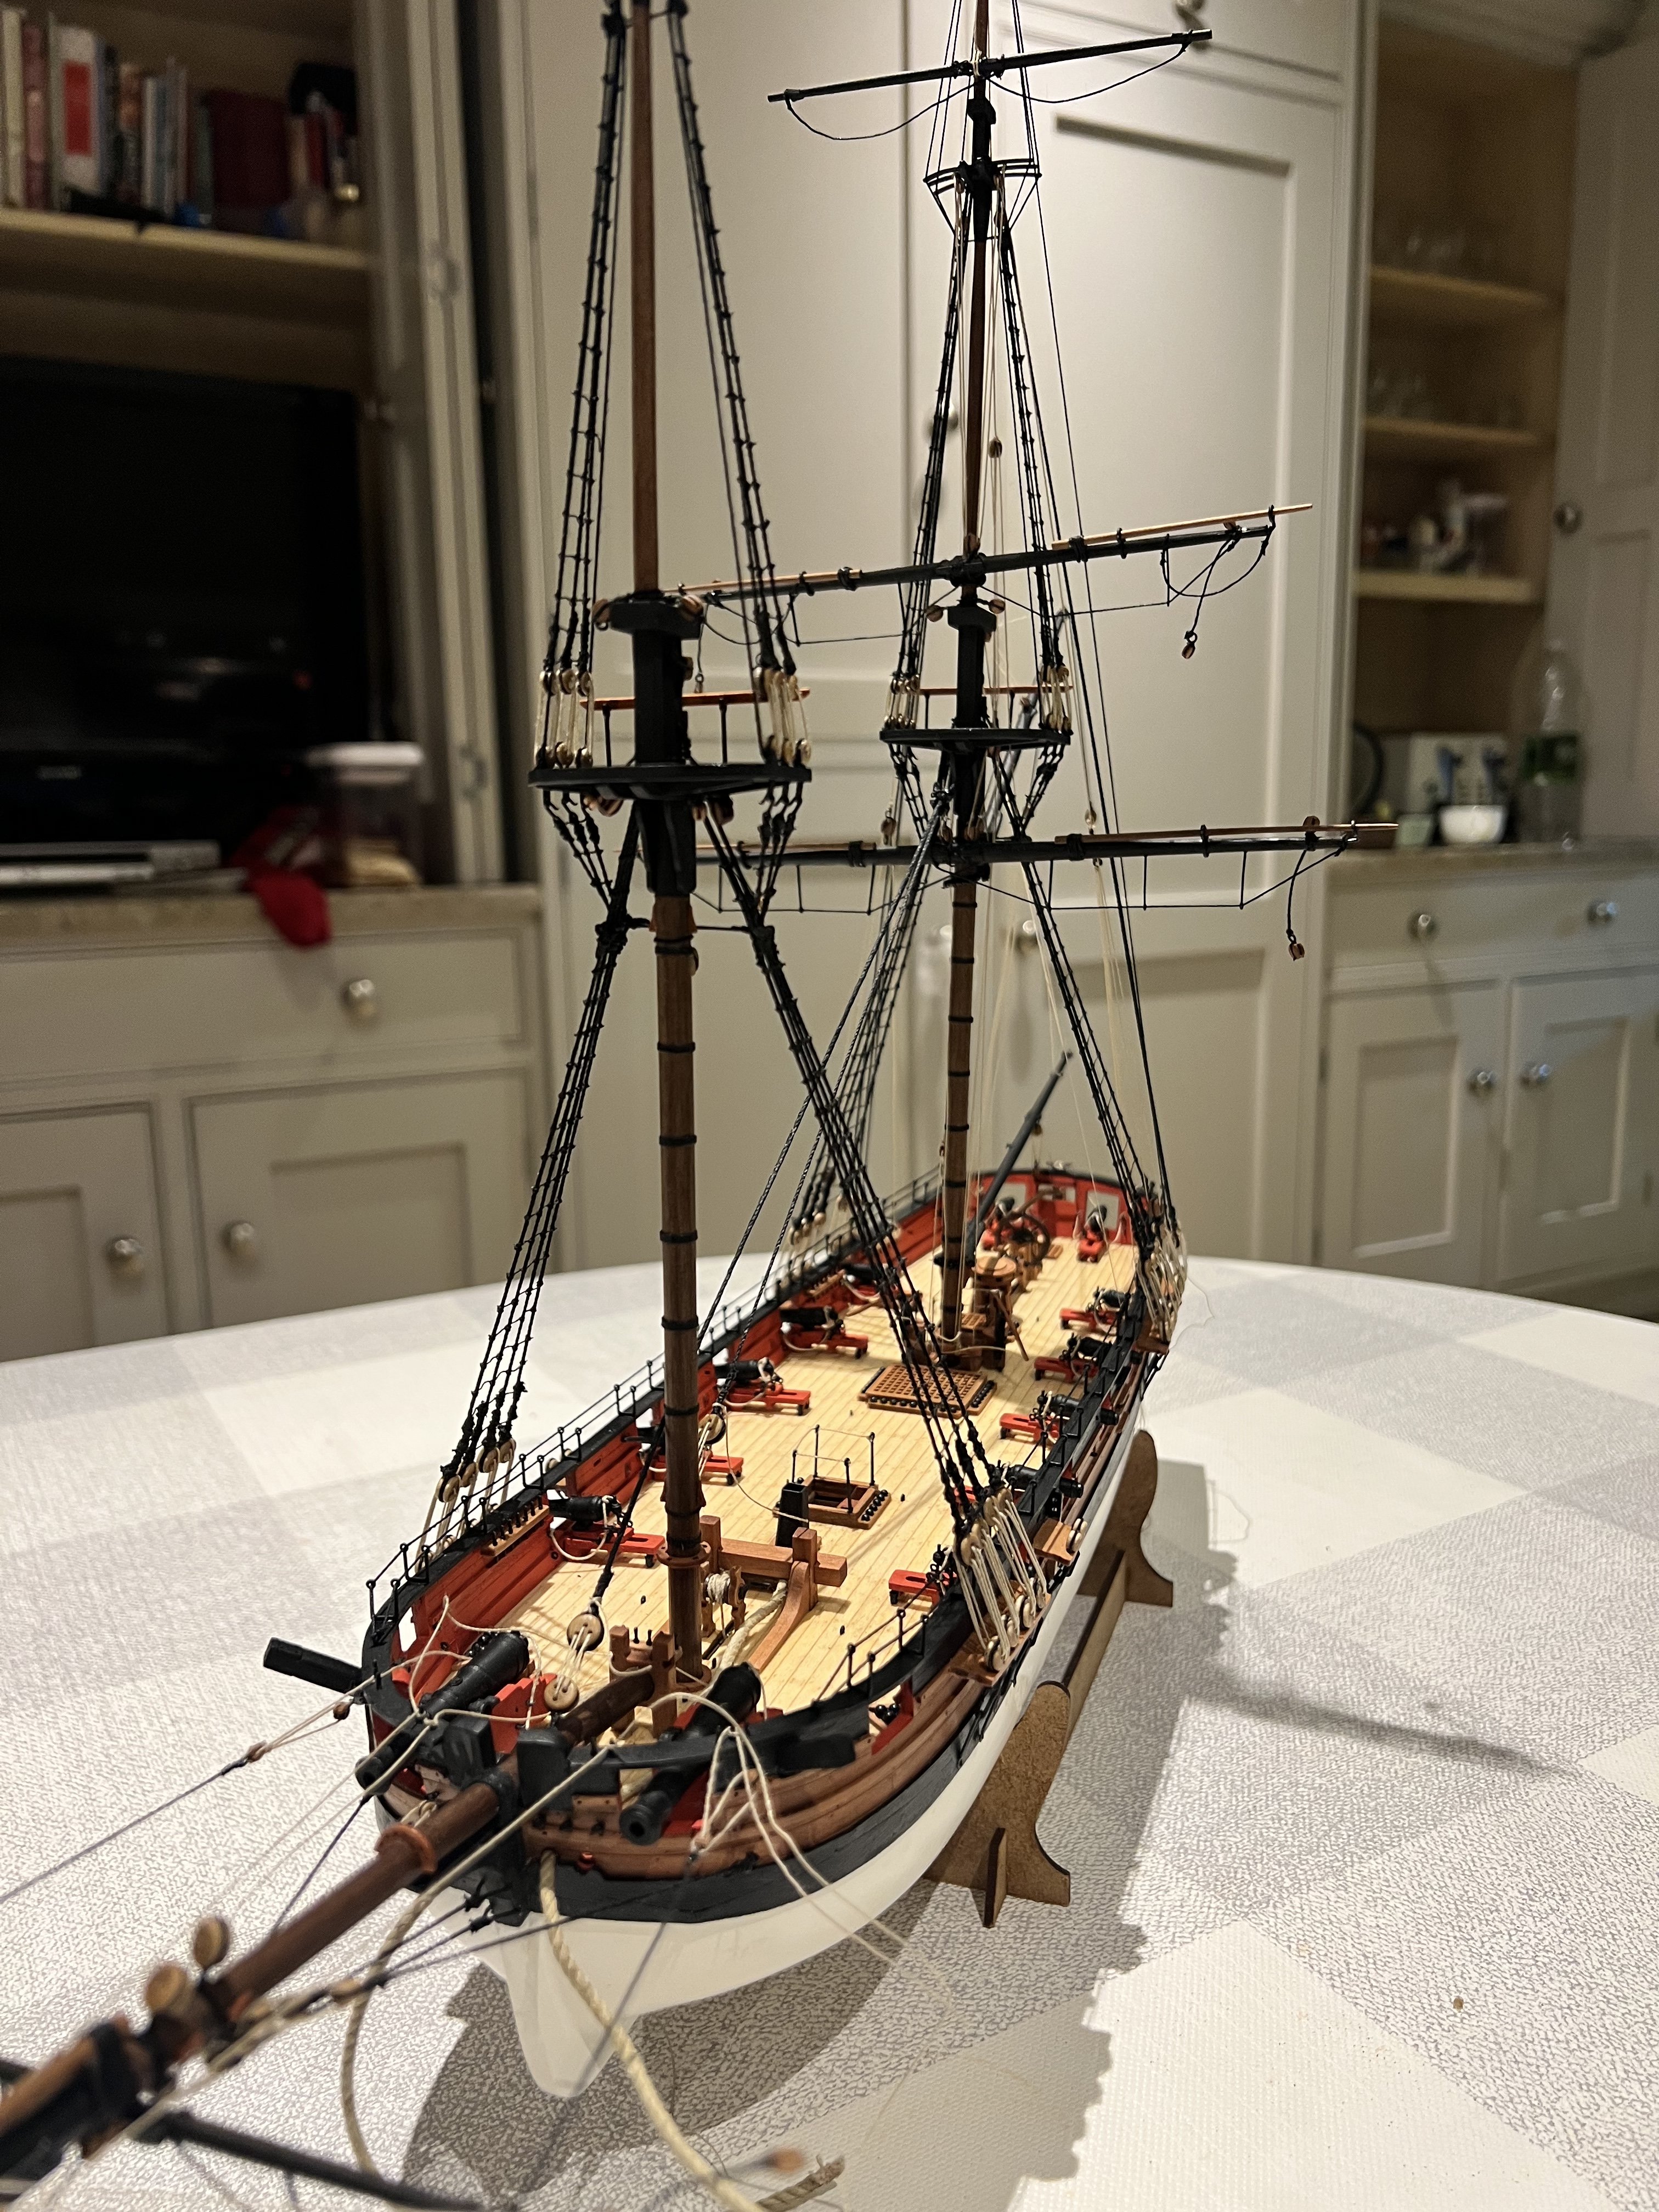
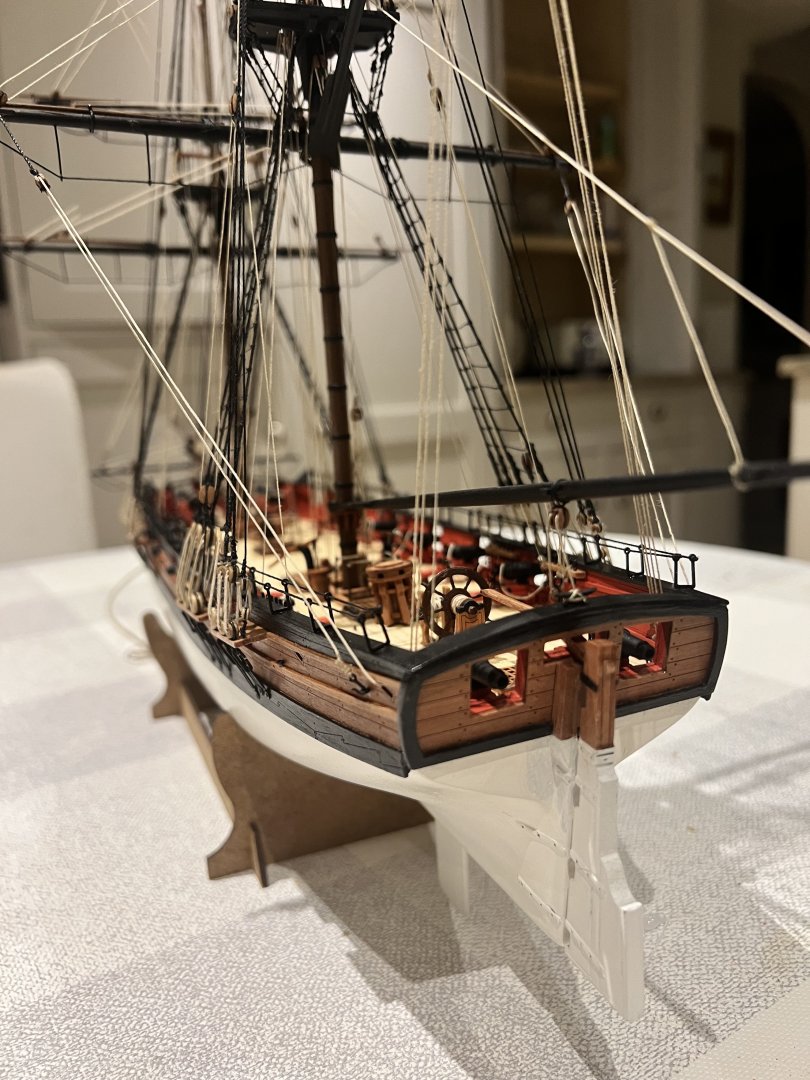
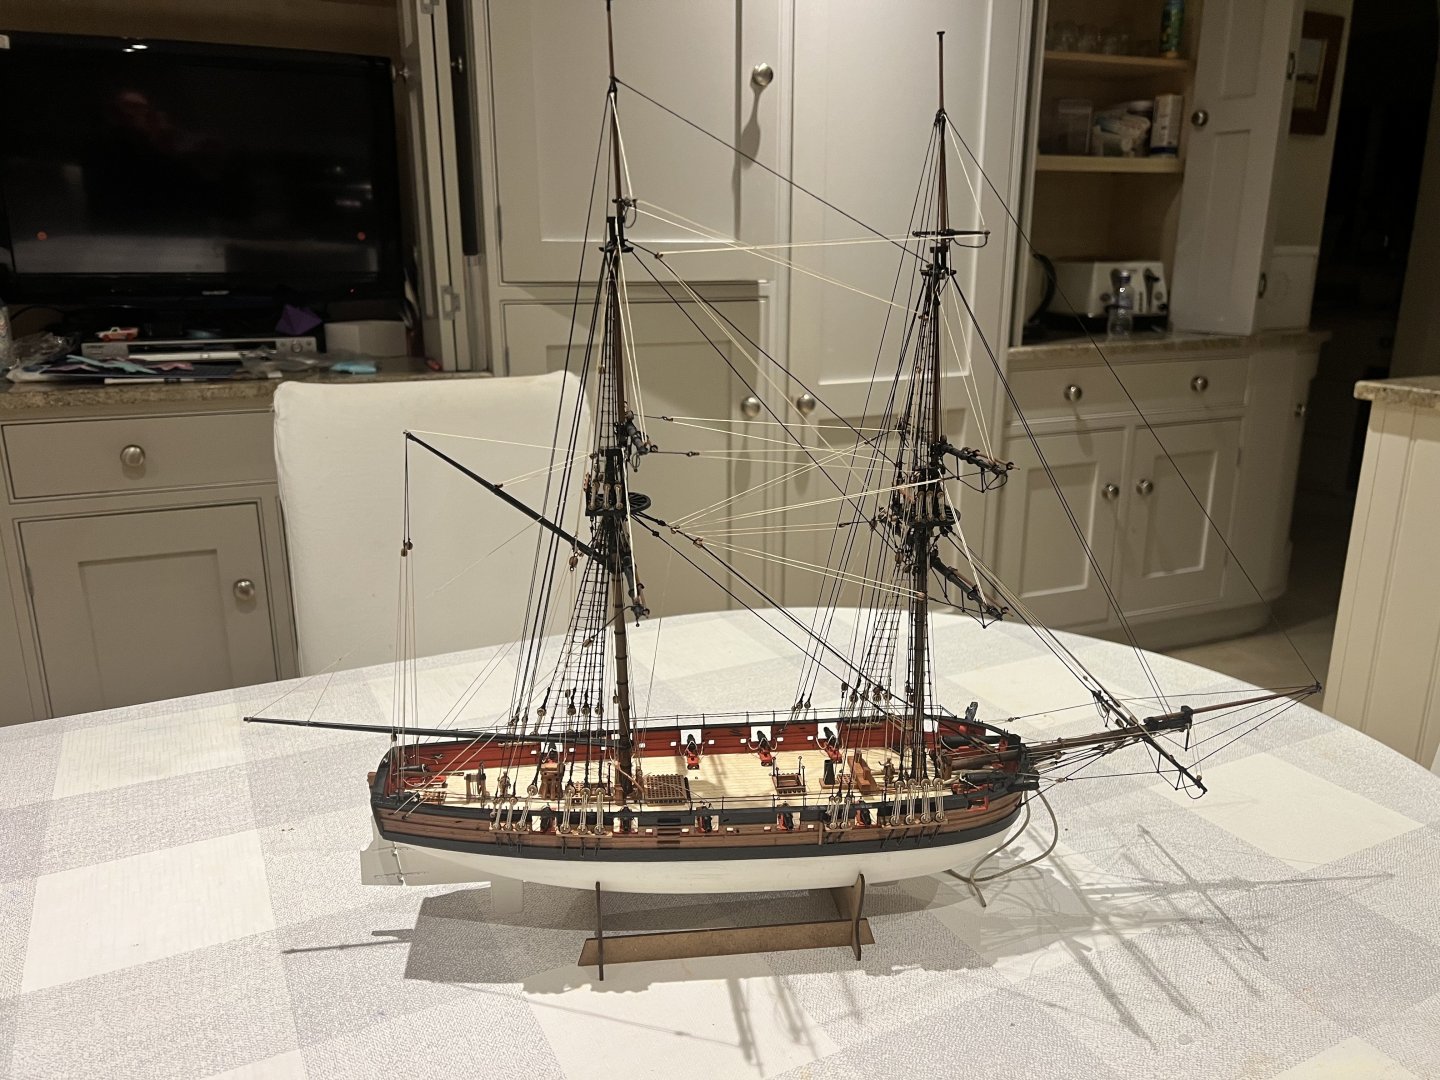
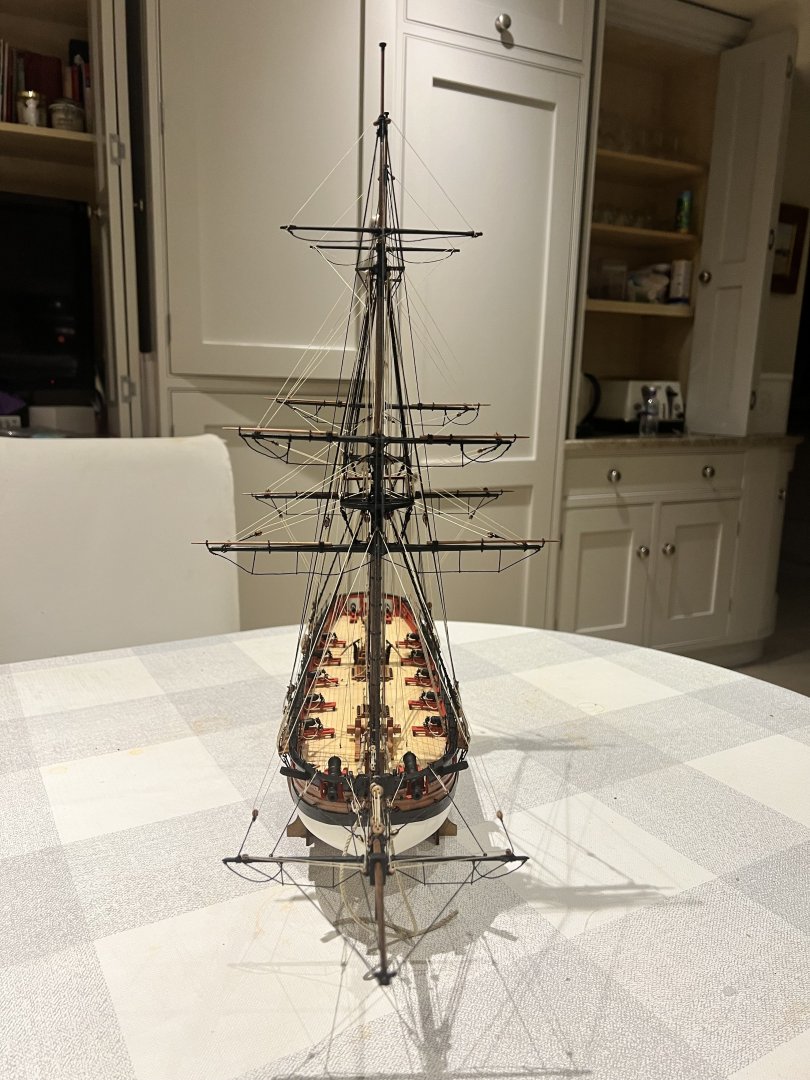
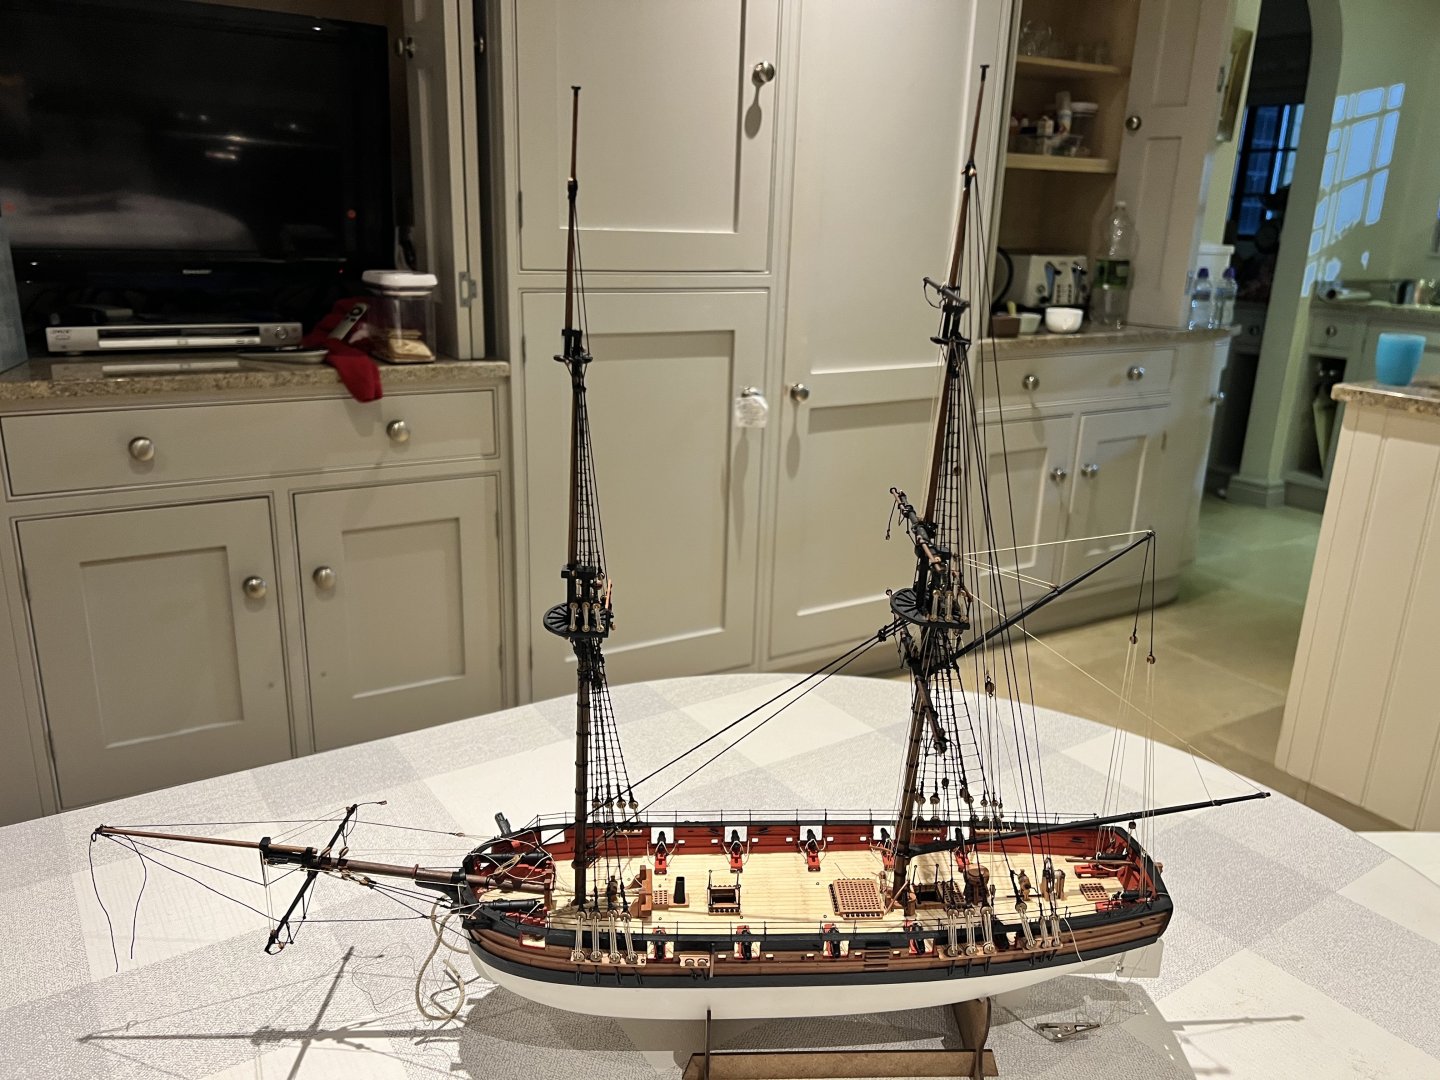
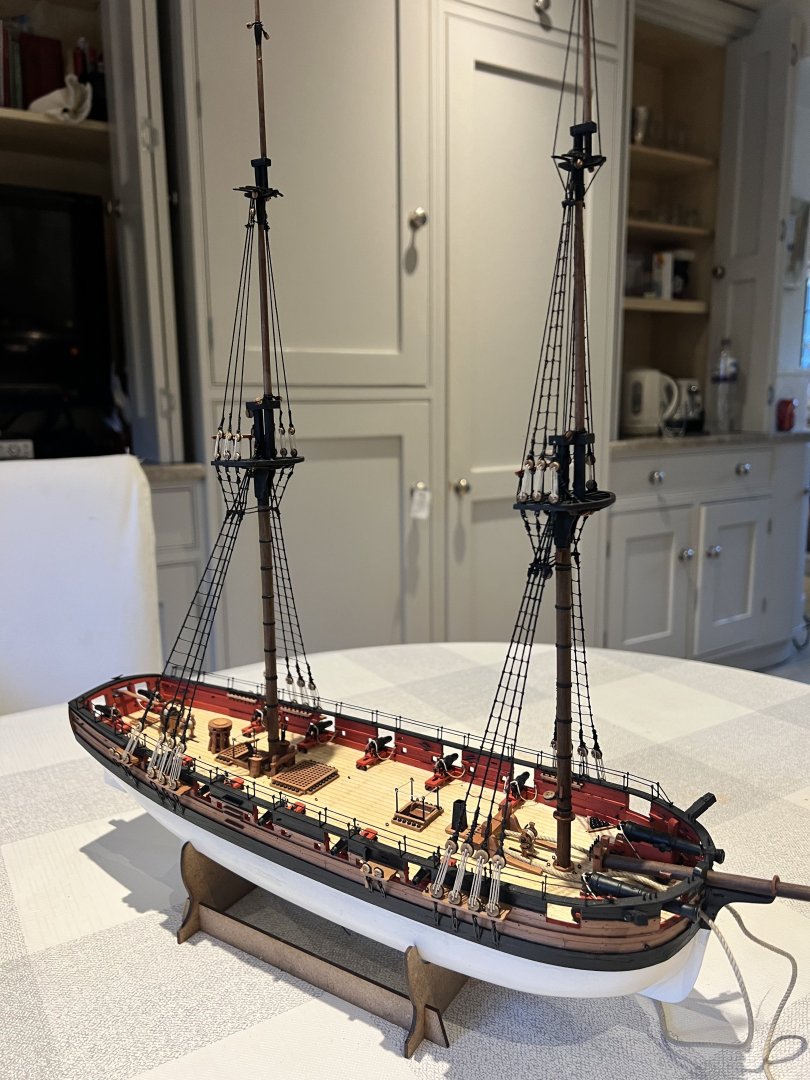
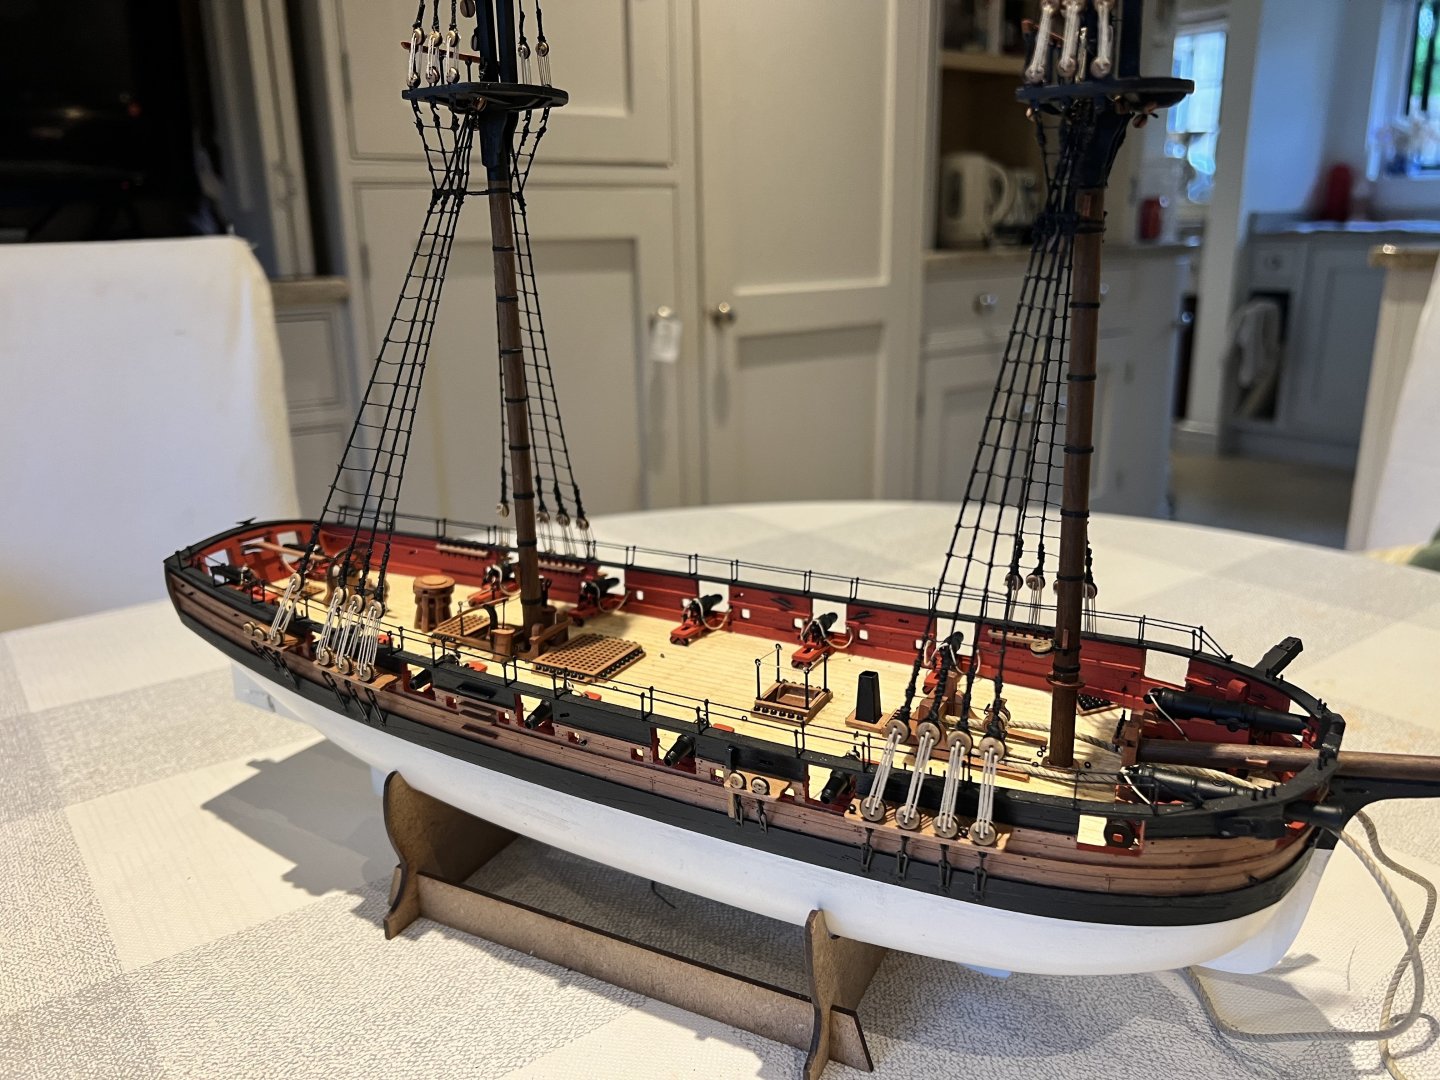
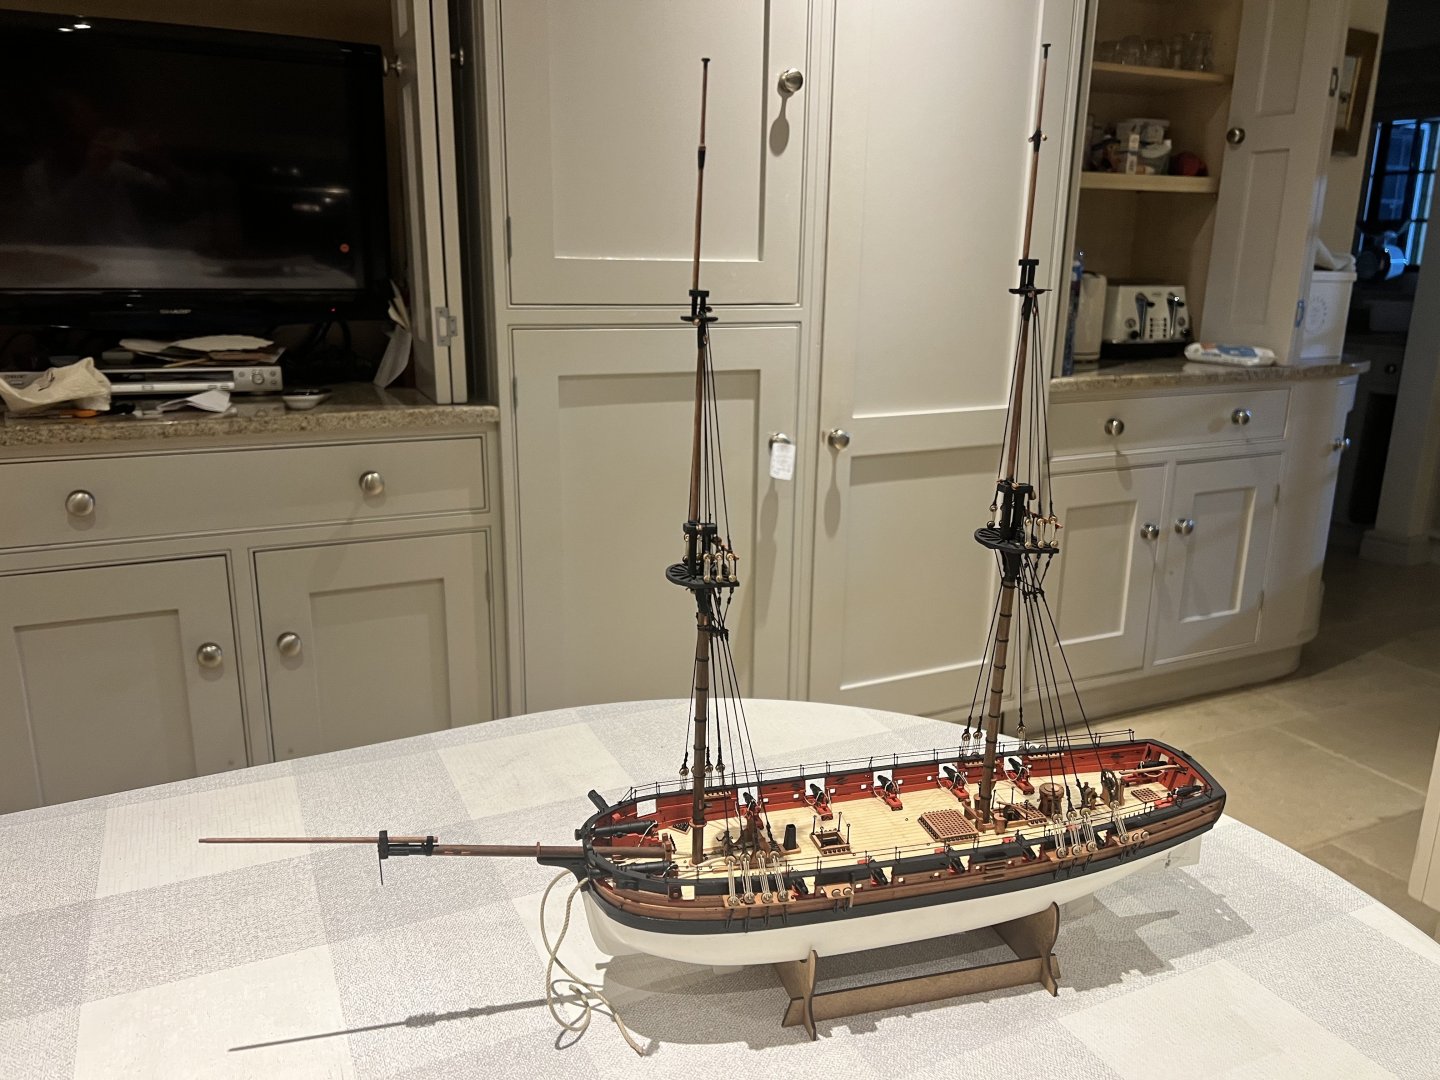
Thanks for all the comments and encouragement. Adder’s rigging is now complete. Rigging Adder has been a steep learning curve for me. I liked Adder as a subject but the kit has been an ideal stepping stone for me as my first square rigger. I’m very glad I followed Chris’s advice to build Adder before Speedy as the latter has more running rigging too which for me would have been too much. Chris’s plans are excellent but I haven’t found it easy. A few of the lines aren’t belayed to the correct points as I couldn’t get them around the belaying pins, but otherwise I think pretty true to the plans. One thing I find very hard is keeping as many as possible of the lines not tied off so I can adjust the rigging and don’t end up with slack lines where the tension has changed from other rigging ropes. I’d be interested to know how others deal with this? I use CA glue too much on the rigging I think which is almost impossible to undo, but I’d struggle to do the rigging without it. All that’s outstanding now are the anchors, refitting a carronade that has come loose, putting some matt varnish on the shiny parrel beads and mouses, and the stand. There maybe a few very small touch-ups too. I may add a red ensign too. I understand that these gun brigs were primarily used as a form of coastal assault vessel. It looks to me as though most of the bowsprit rigging and the spritsail yard would need to be dismantled before the forward 24-pounders could fire. One other generic question about square riggers (and showing my ignorance) but all the kits show the vessels with the main yard raised to the top of the lower mast ie in the position where it would be if a sail raised. Whilst the top and topgallant yards are both at the lowest position on their masts. Was this just the way square riggers had their masts in harbour in real life?


- 146 replies
-
- 10
-
-
- Adder
- Vanguard Models
- (and 1 more)
-
Well done. She looks super. I told you that you’d overtake me. I’m not far behind, last few rigging lines to add and then just the anchors!
- 66 replies
-
- 3
-
-
- Adder
- Vanguard Models
- (and 1 more)
-
I was one of those enquiring about a Master Shipwright Flirt, but now have a new Speedy waiting to be built. Much as I love your models Chris, and I’m on my ninth VM kit, even for me building both Speedy and Flirt might be a step too far…
-
Hope you’re OK! Your Adder is looking super, wish I could plank as neatly as you.
-
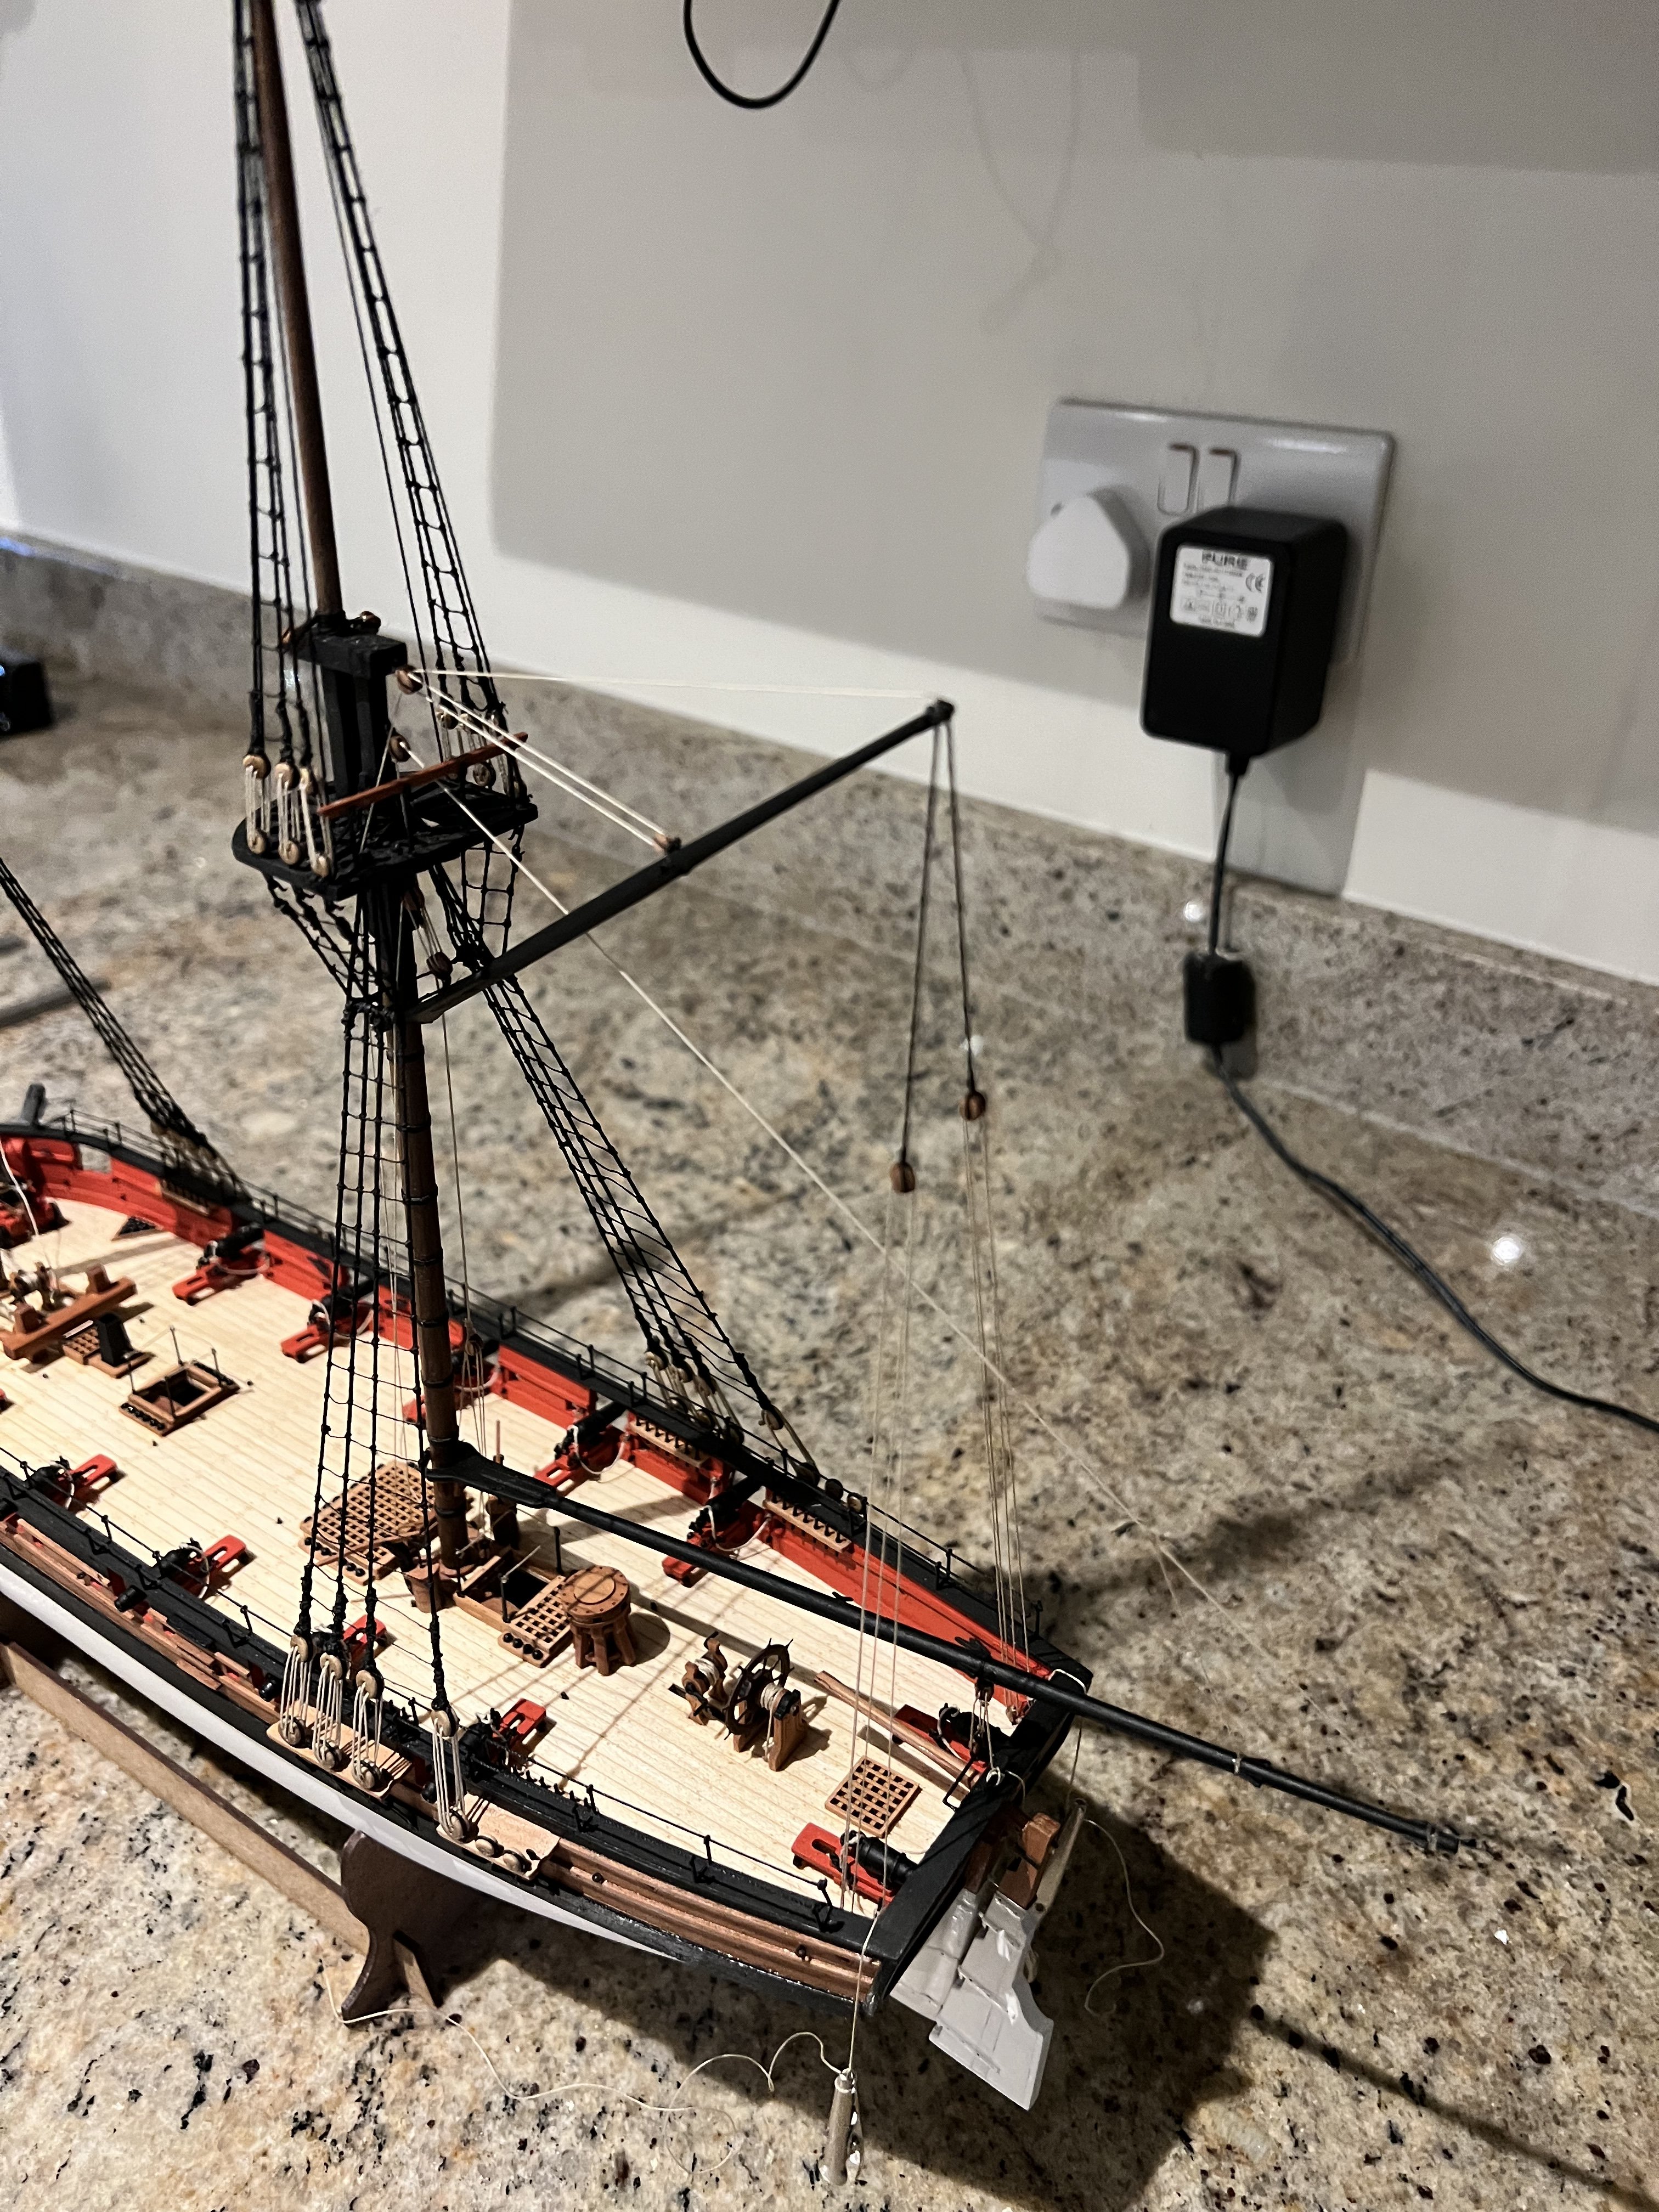
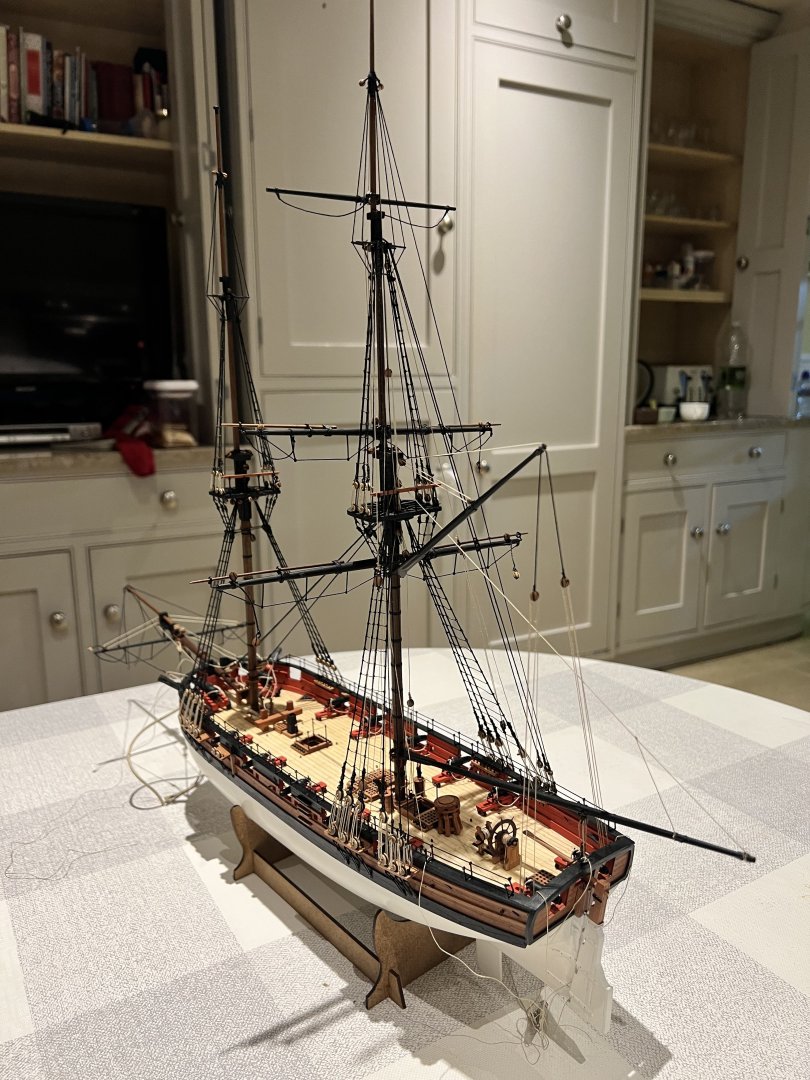
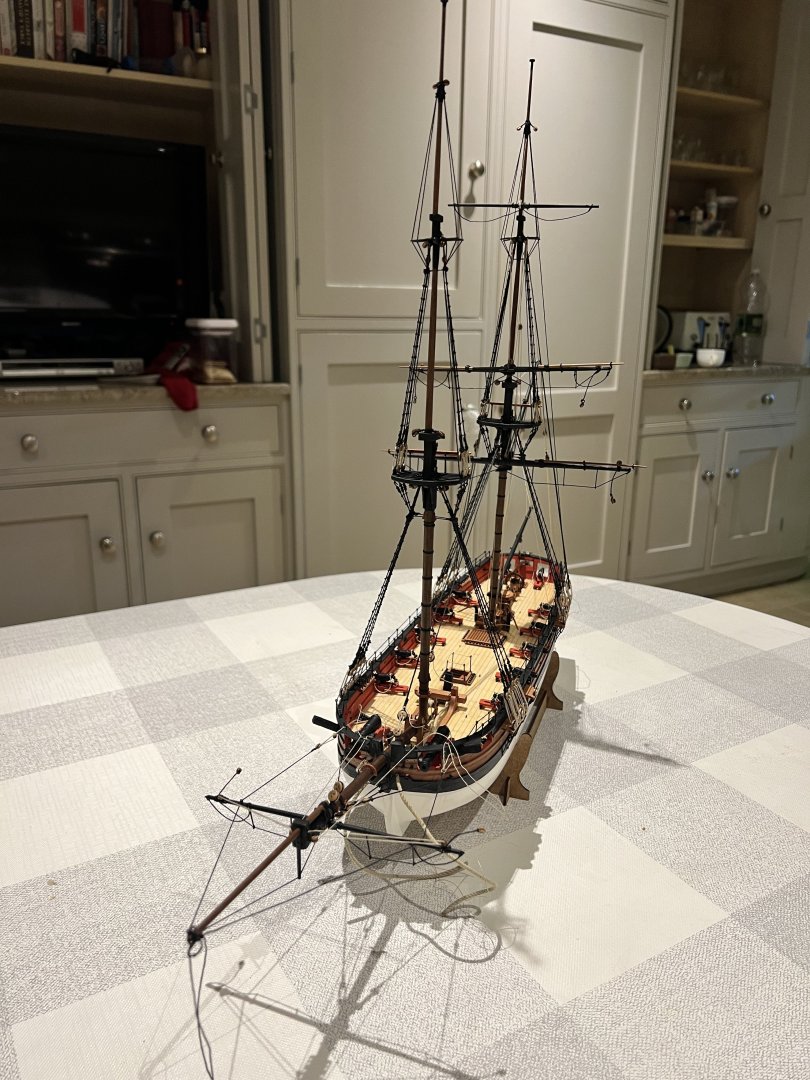
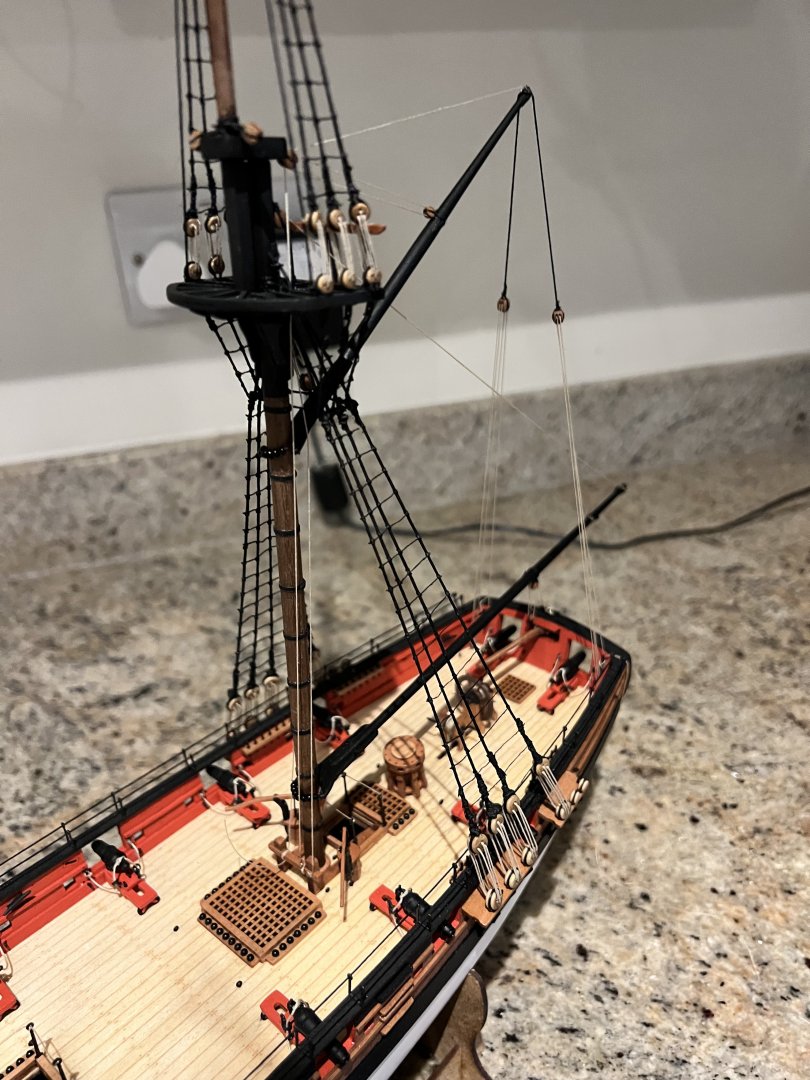
Adder’s rigging is progressing. Most of the main mast rigging is in place except for lifts, braces and any stays to the foremast that would get in the way of adding the yards to the foremast. The access problem to add eyebolts to the maintop was resolved by removing the wooden railing at the rear of the maintop. I’ll need to do the same for the foretop. I haven’t gone into any detail on the log of how I’ve gone about rigging, I’m sure it would just be a guide of how not to do it and the use of too much CA glue. The yards aren’t aligned properly yet and will be when lifts and braces are added. As far as possible I’ve tied lines off or crocodile clipped them rather than glued so I can tension them later if need be. I won’t be able to work on Adder much, if at all for the next 3 weeks, but after that will be back on the case.


- 146 replies
-
- 11
-
-
- Adder
- Vanguard Models
- (and 1 more)
-
Congratulations on an amazing model. I wish I had your skill (and patience)! I’ve really enjoyed following on and learnt lots from your build. Thank you.
- 562 replies
-
- 2
-
-
-
- vanguard models
- alert
- (and 2 more)
-
Glenn, Eck, Thank you both. Really appreciated. I’ll try and get the eyebolt in there with block attached! Best wishes Dan
- 146 replies
-
- 3
-
-
- Adder
- Vanguard Models
- (and 1 more)
-
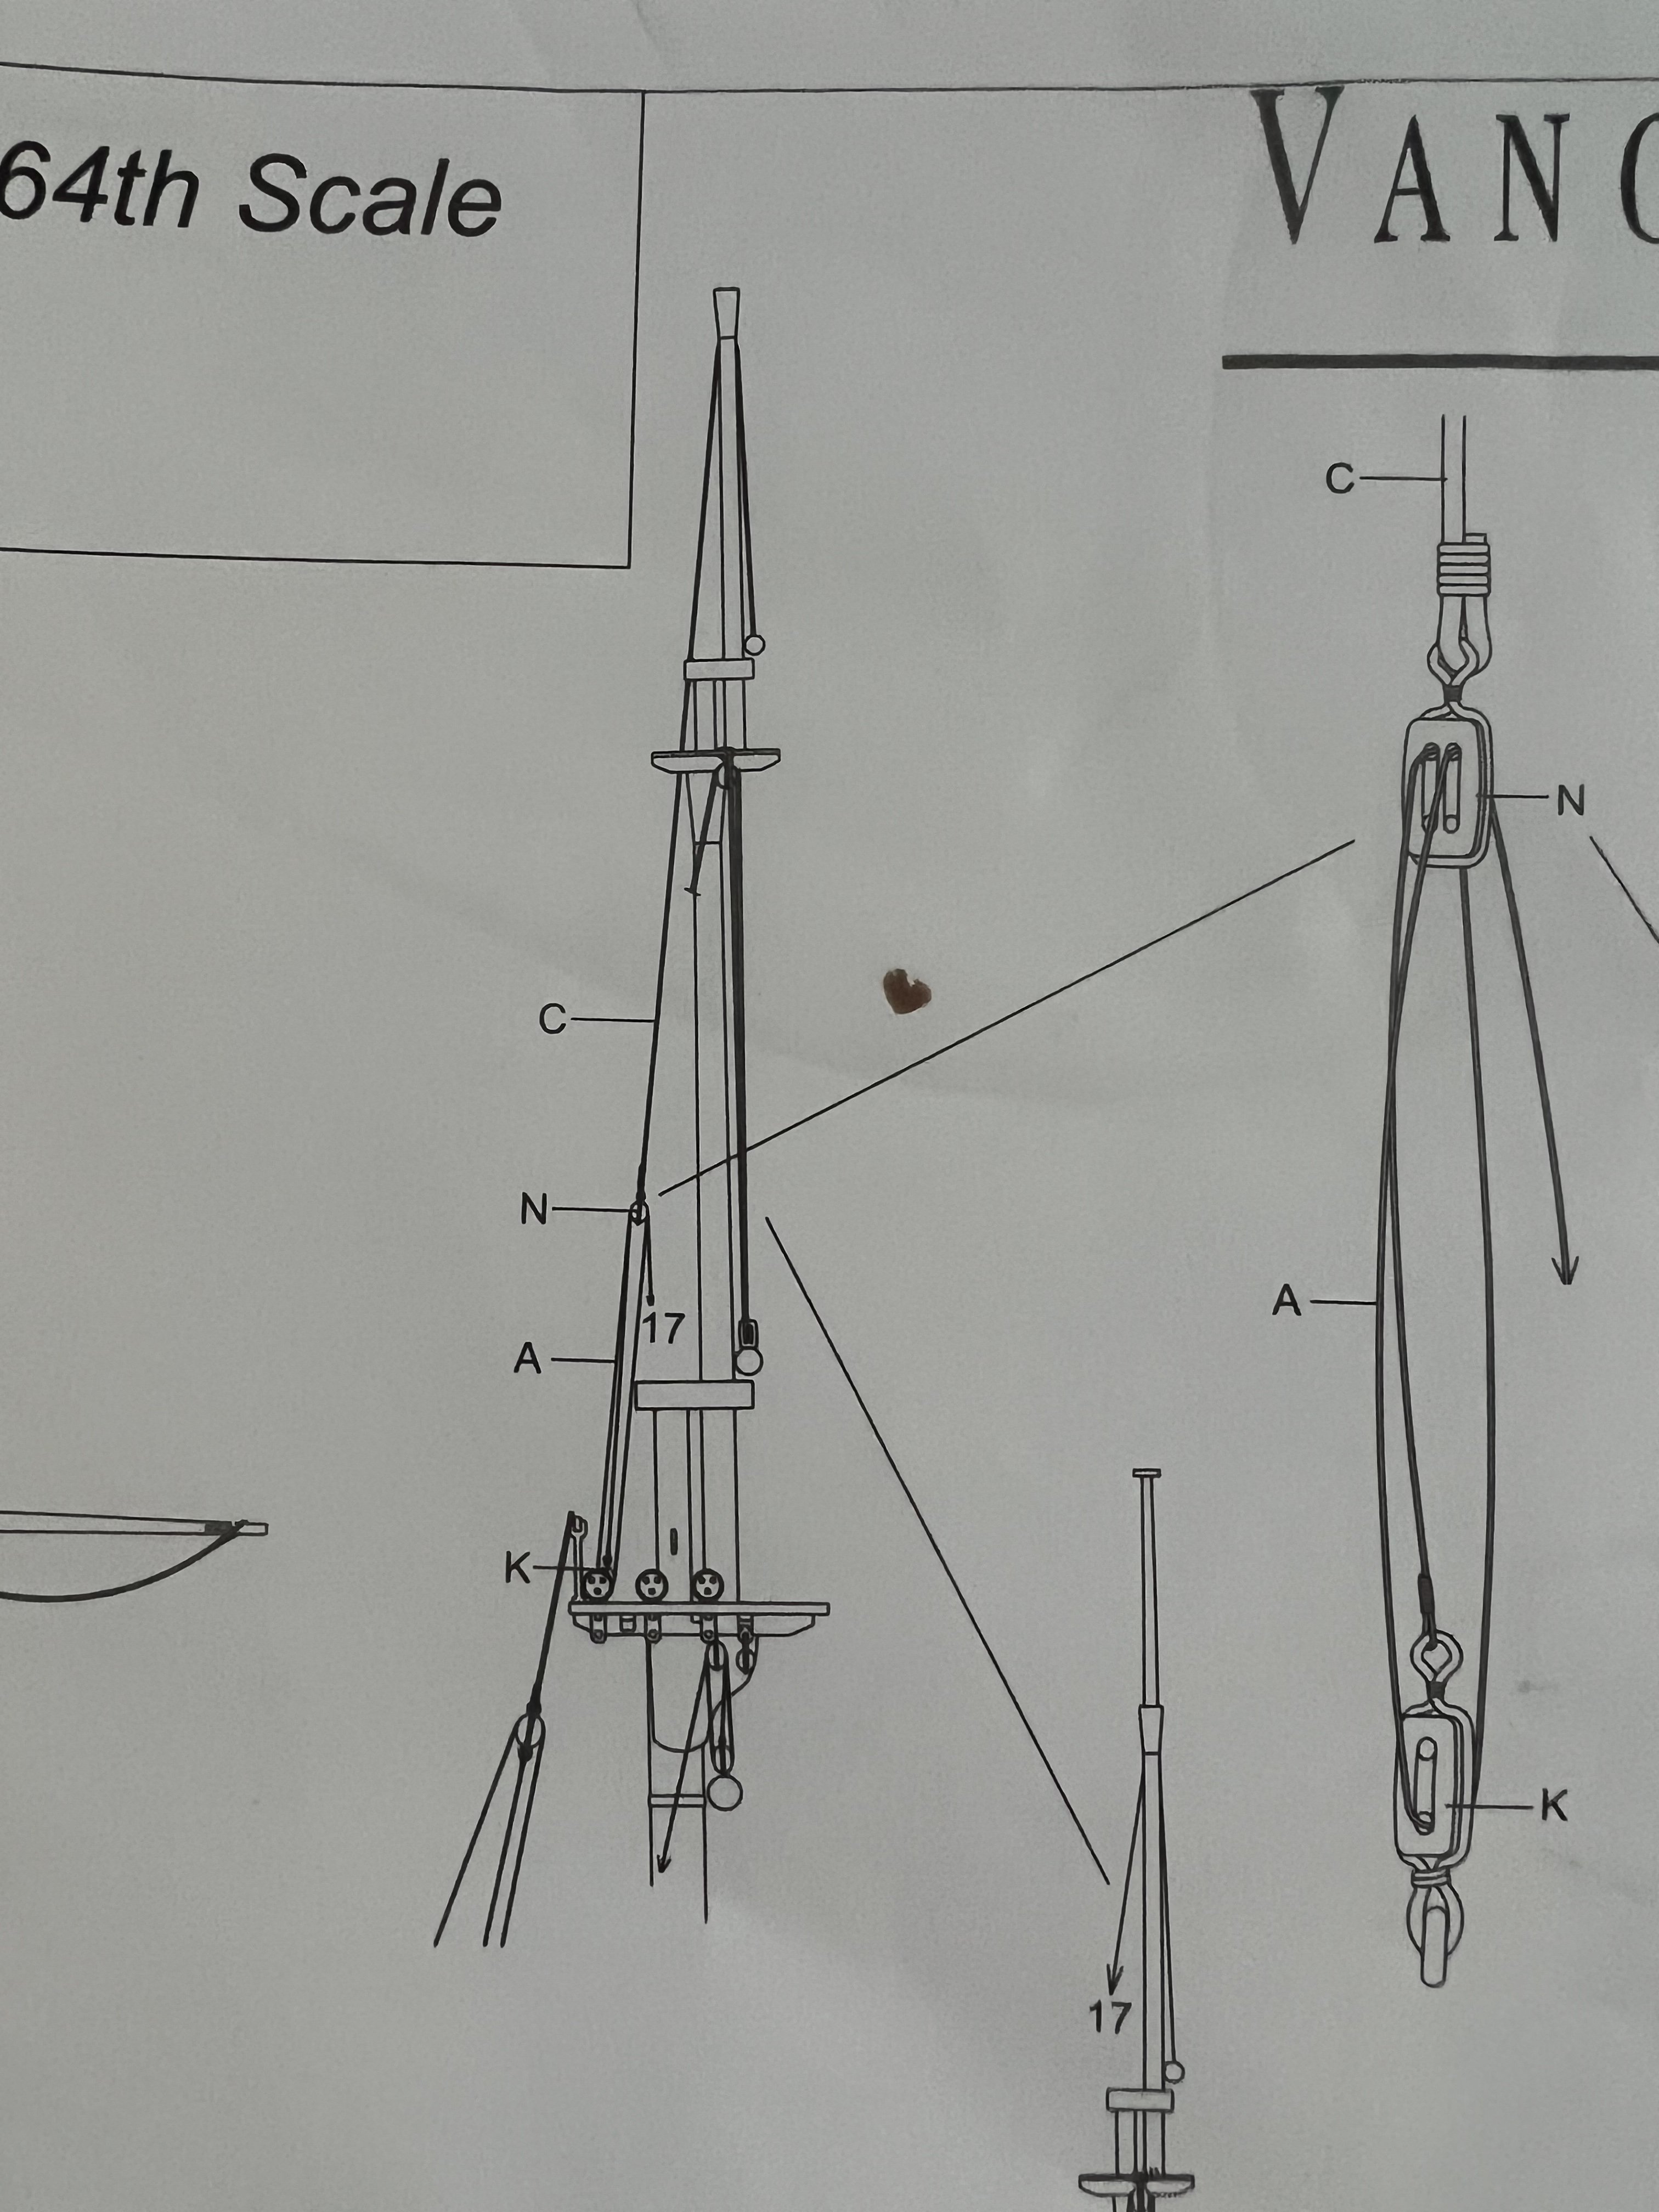
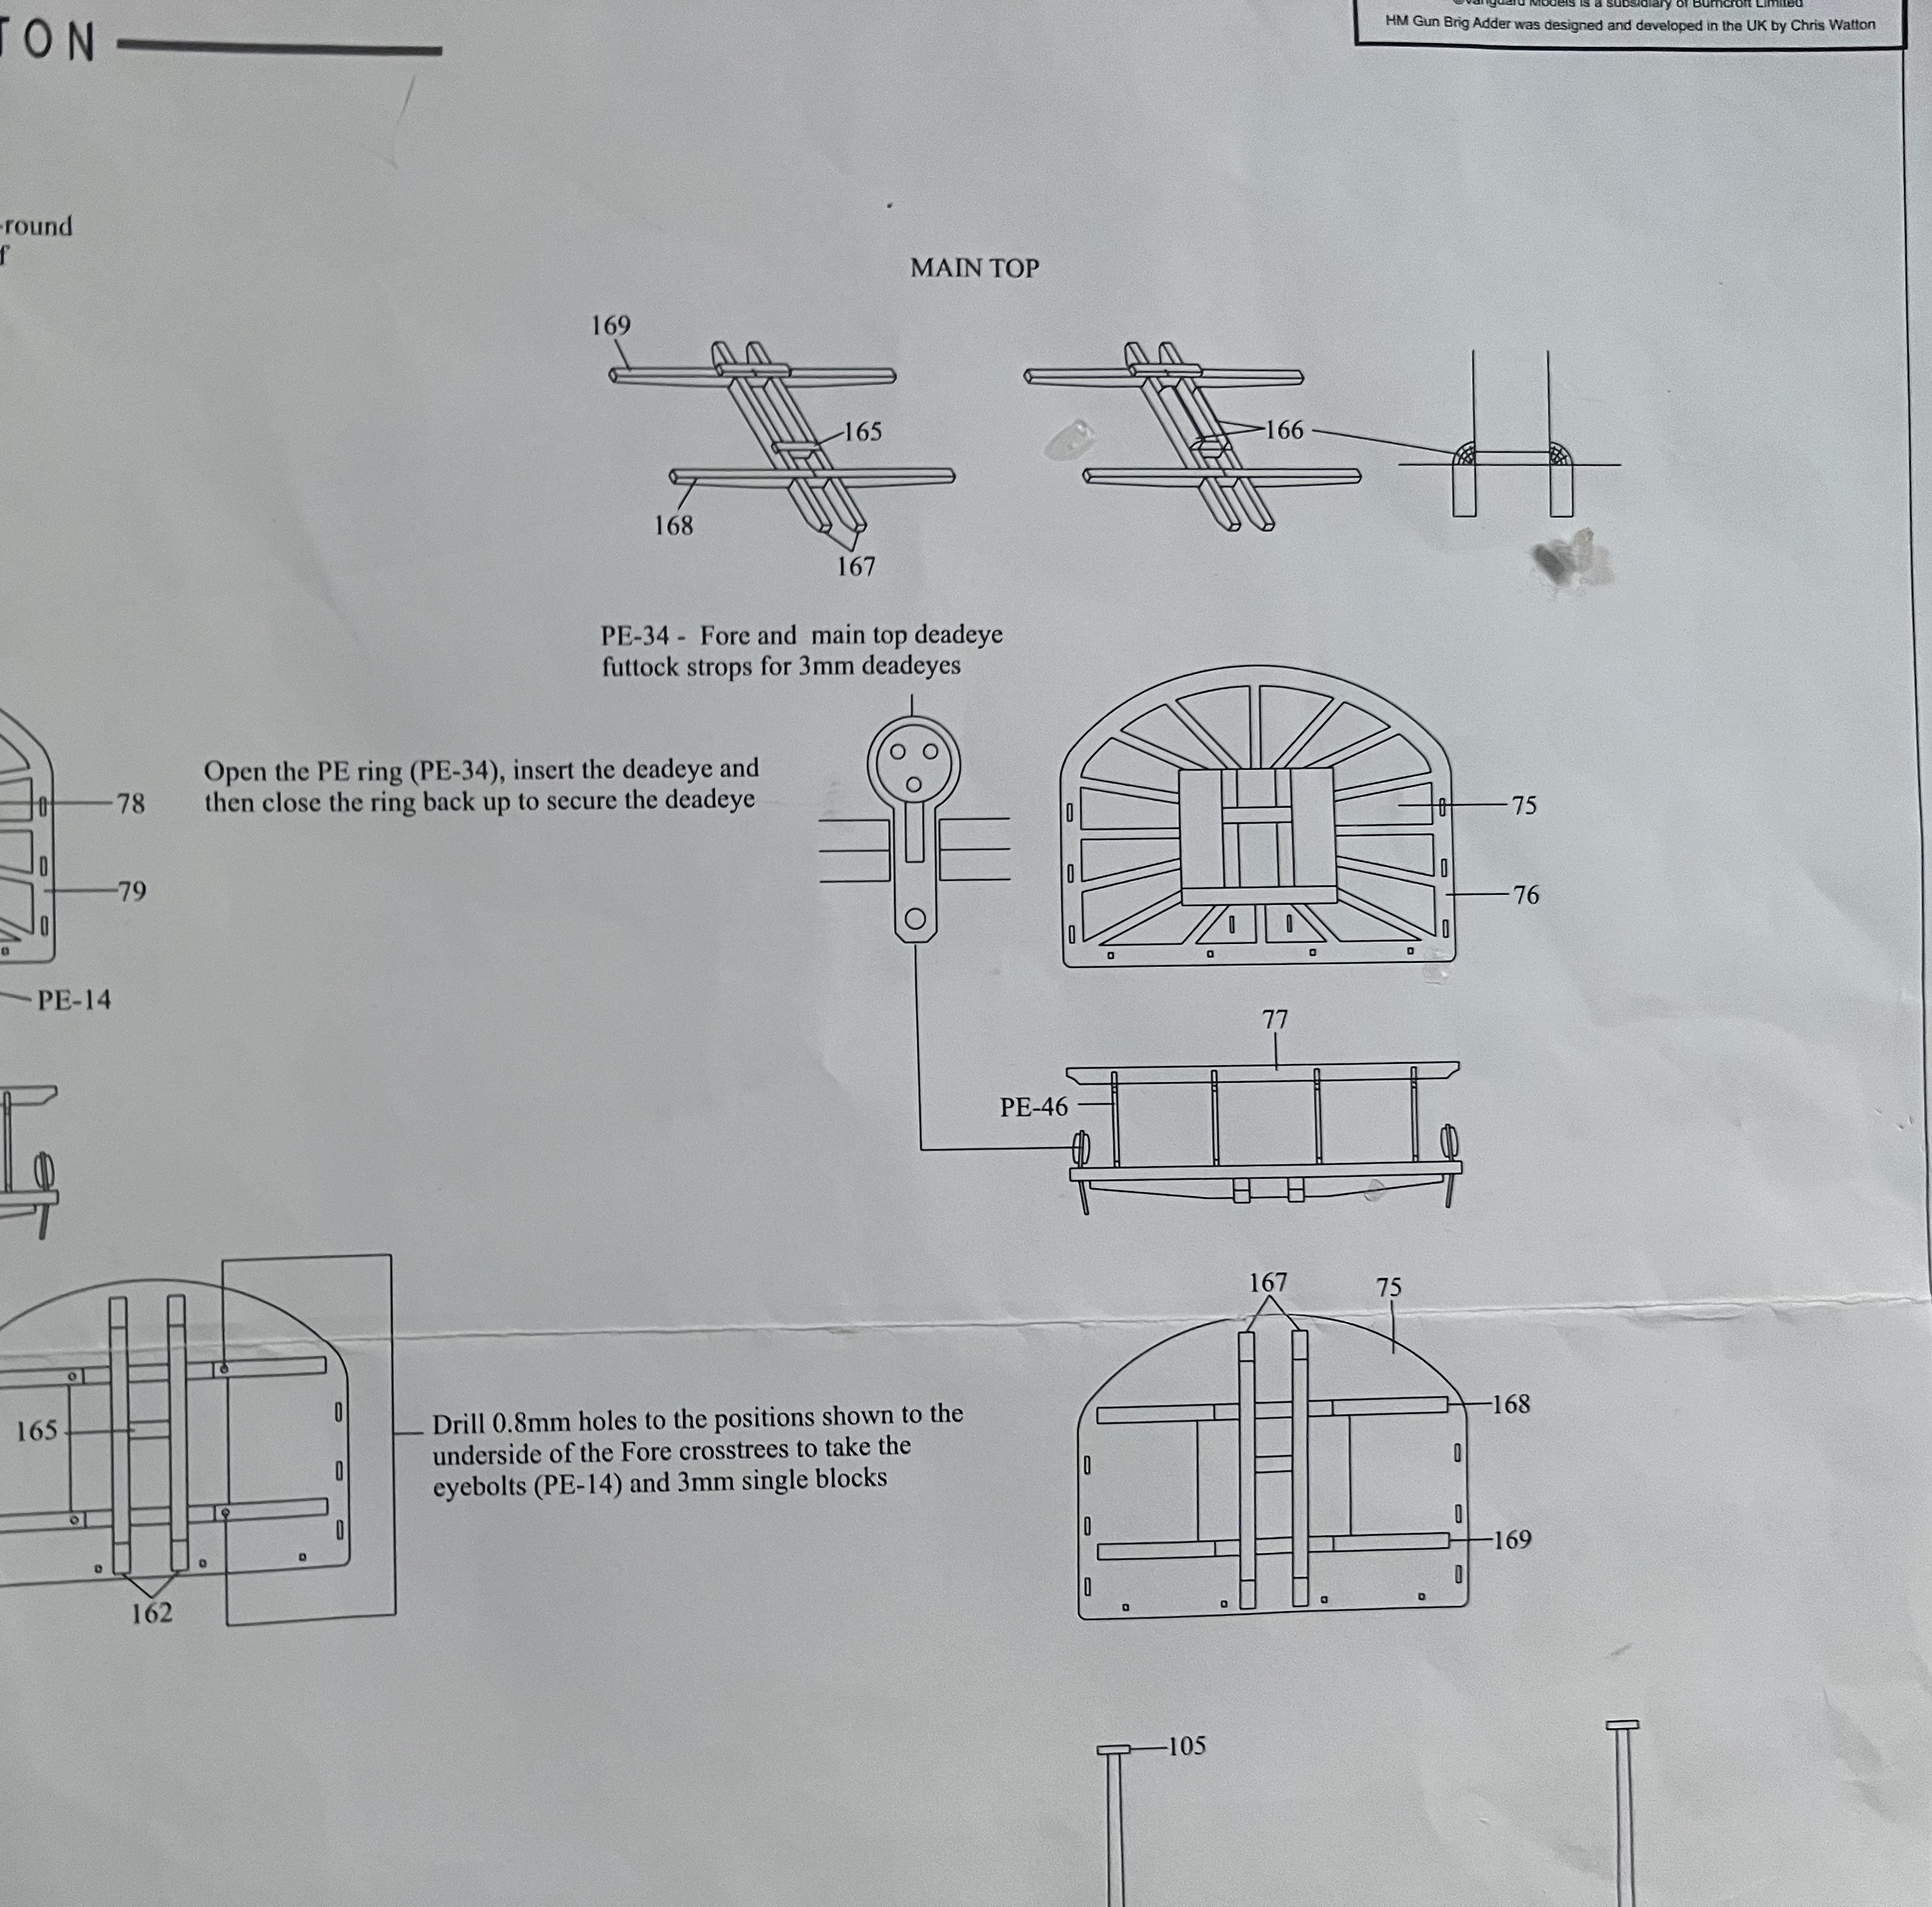
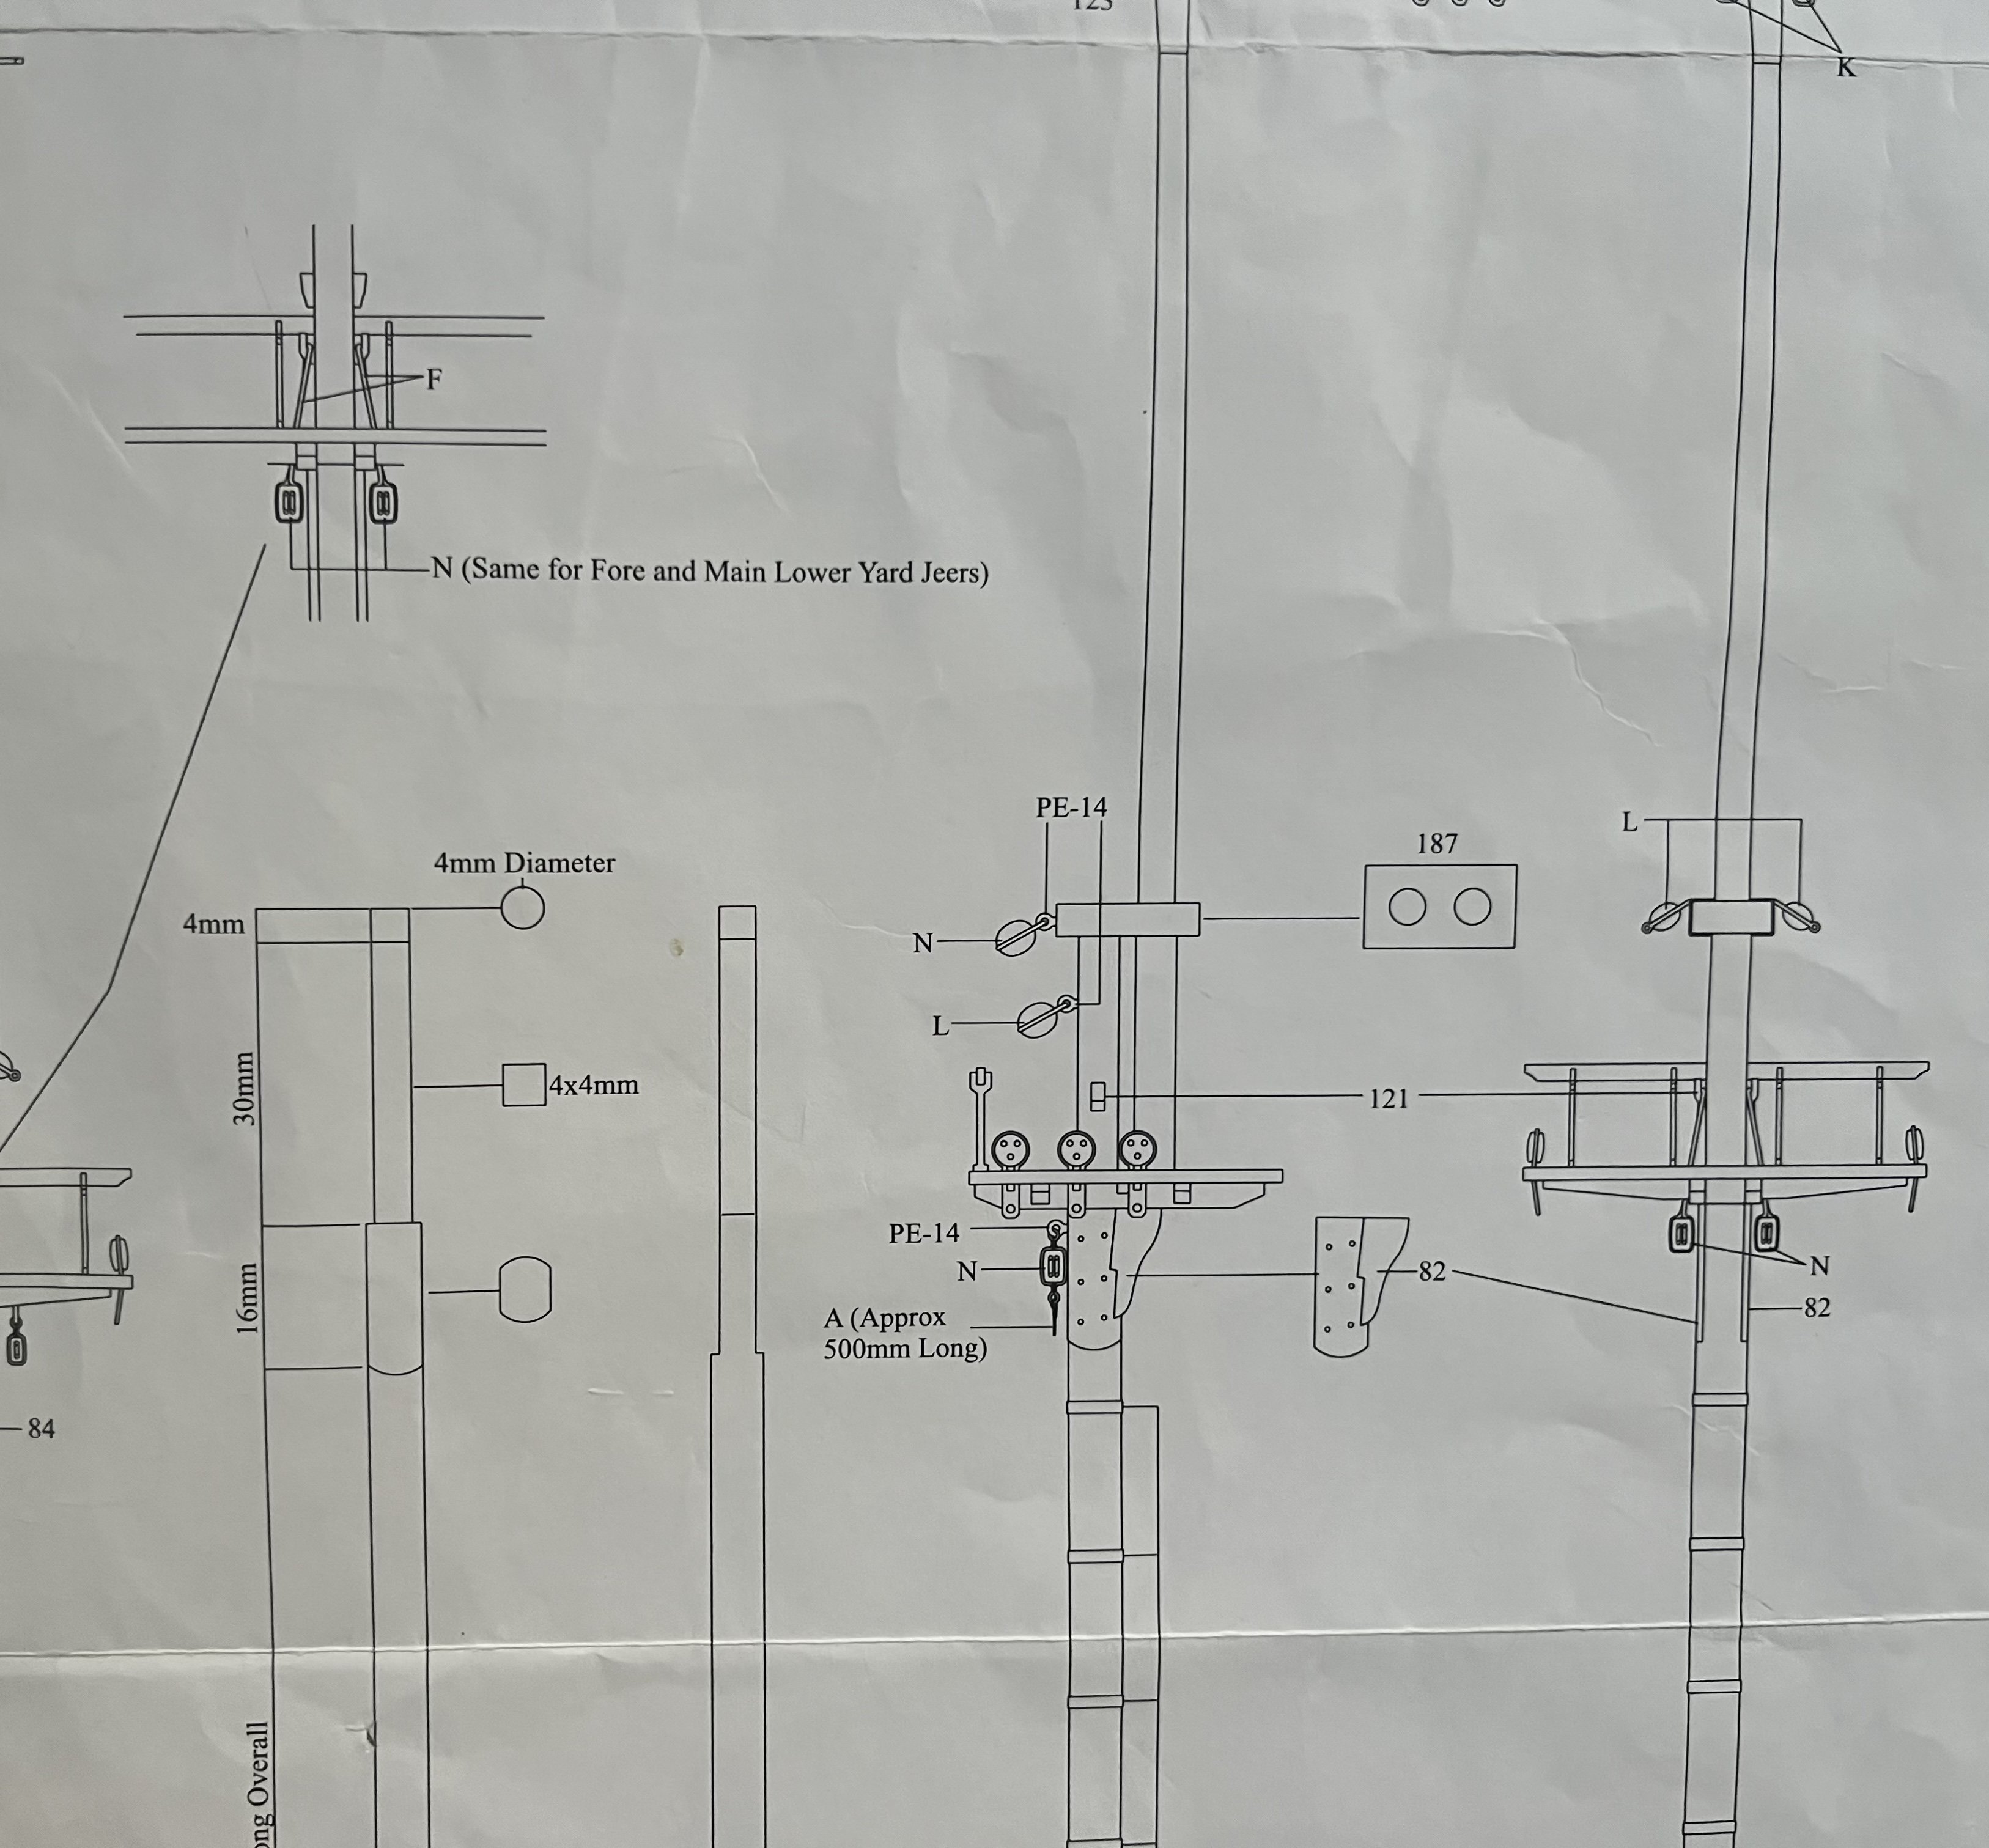
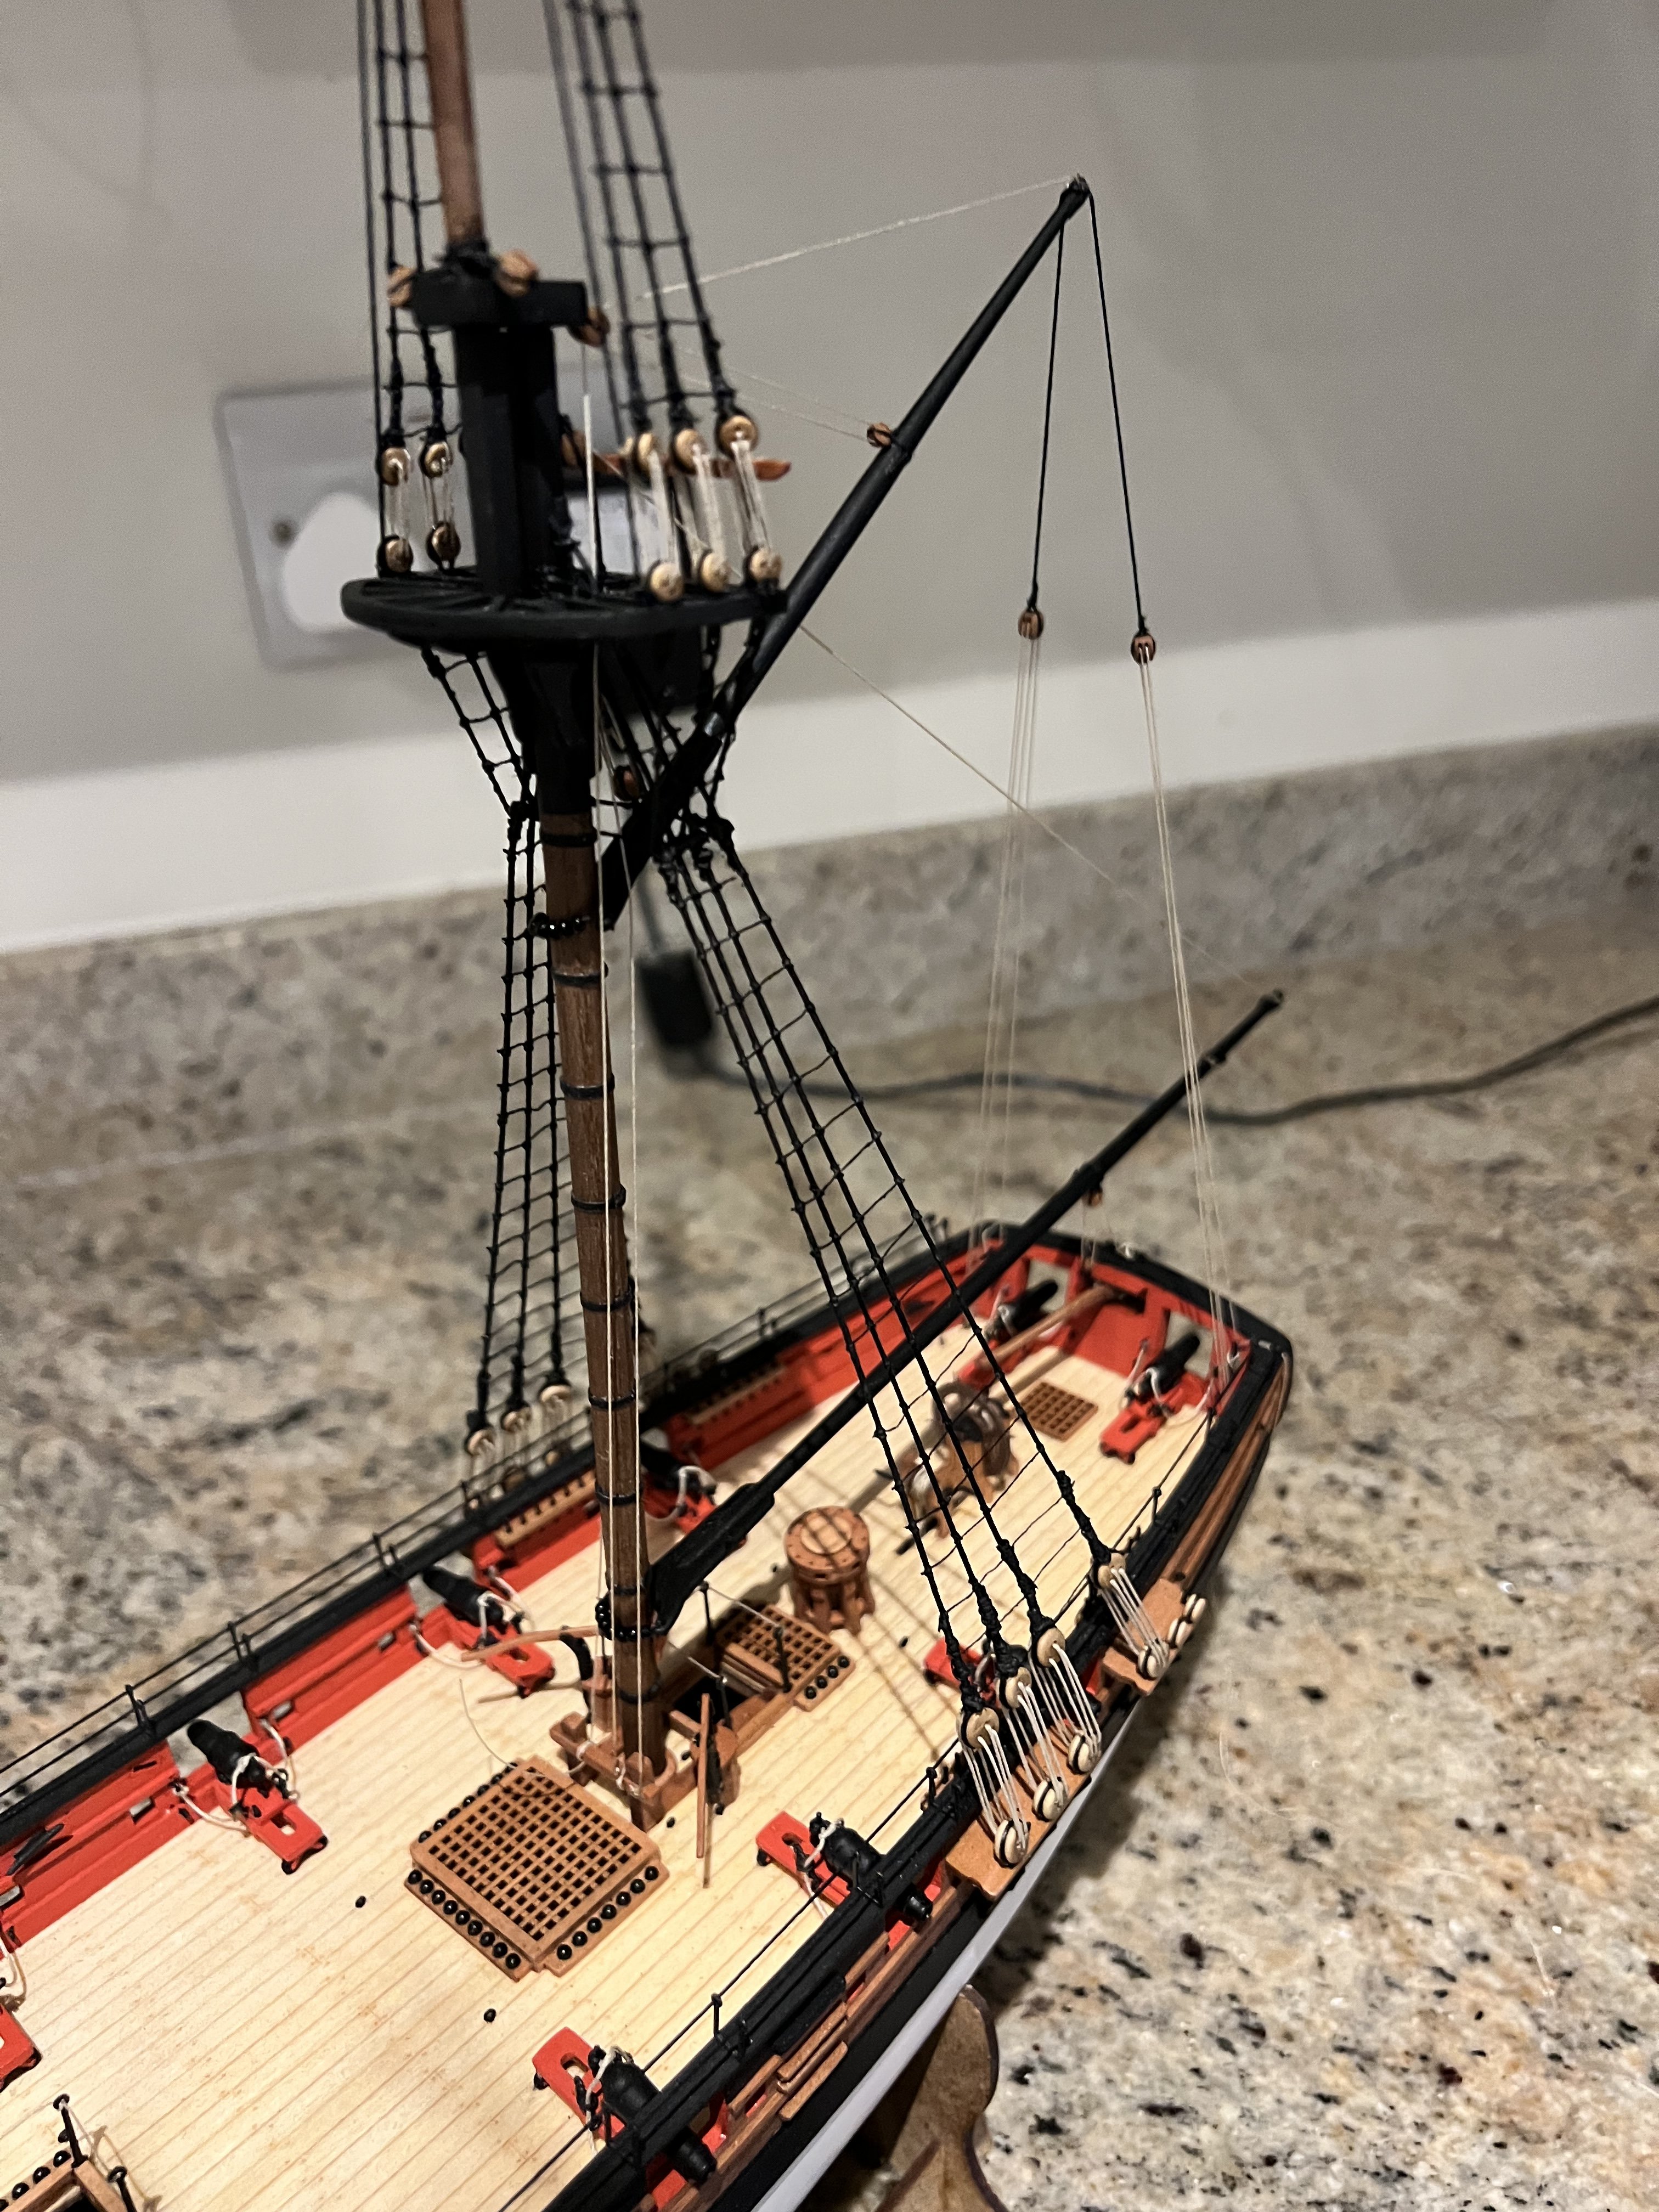
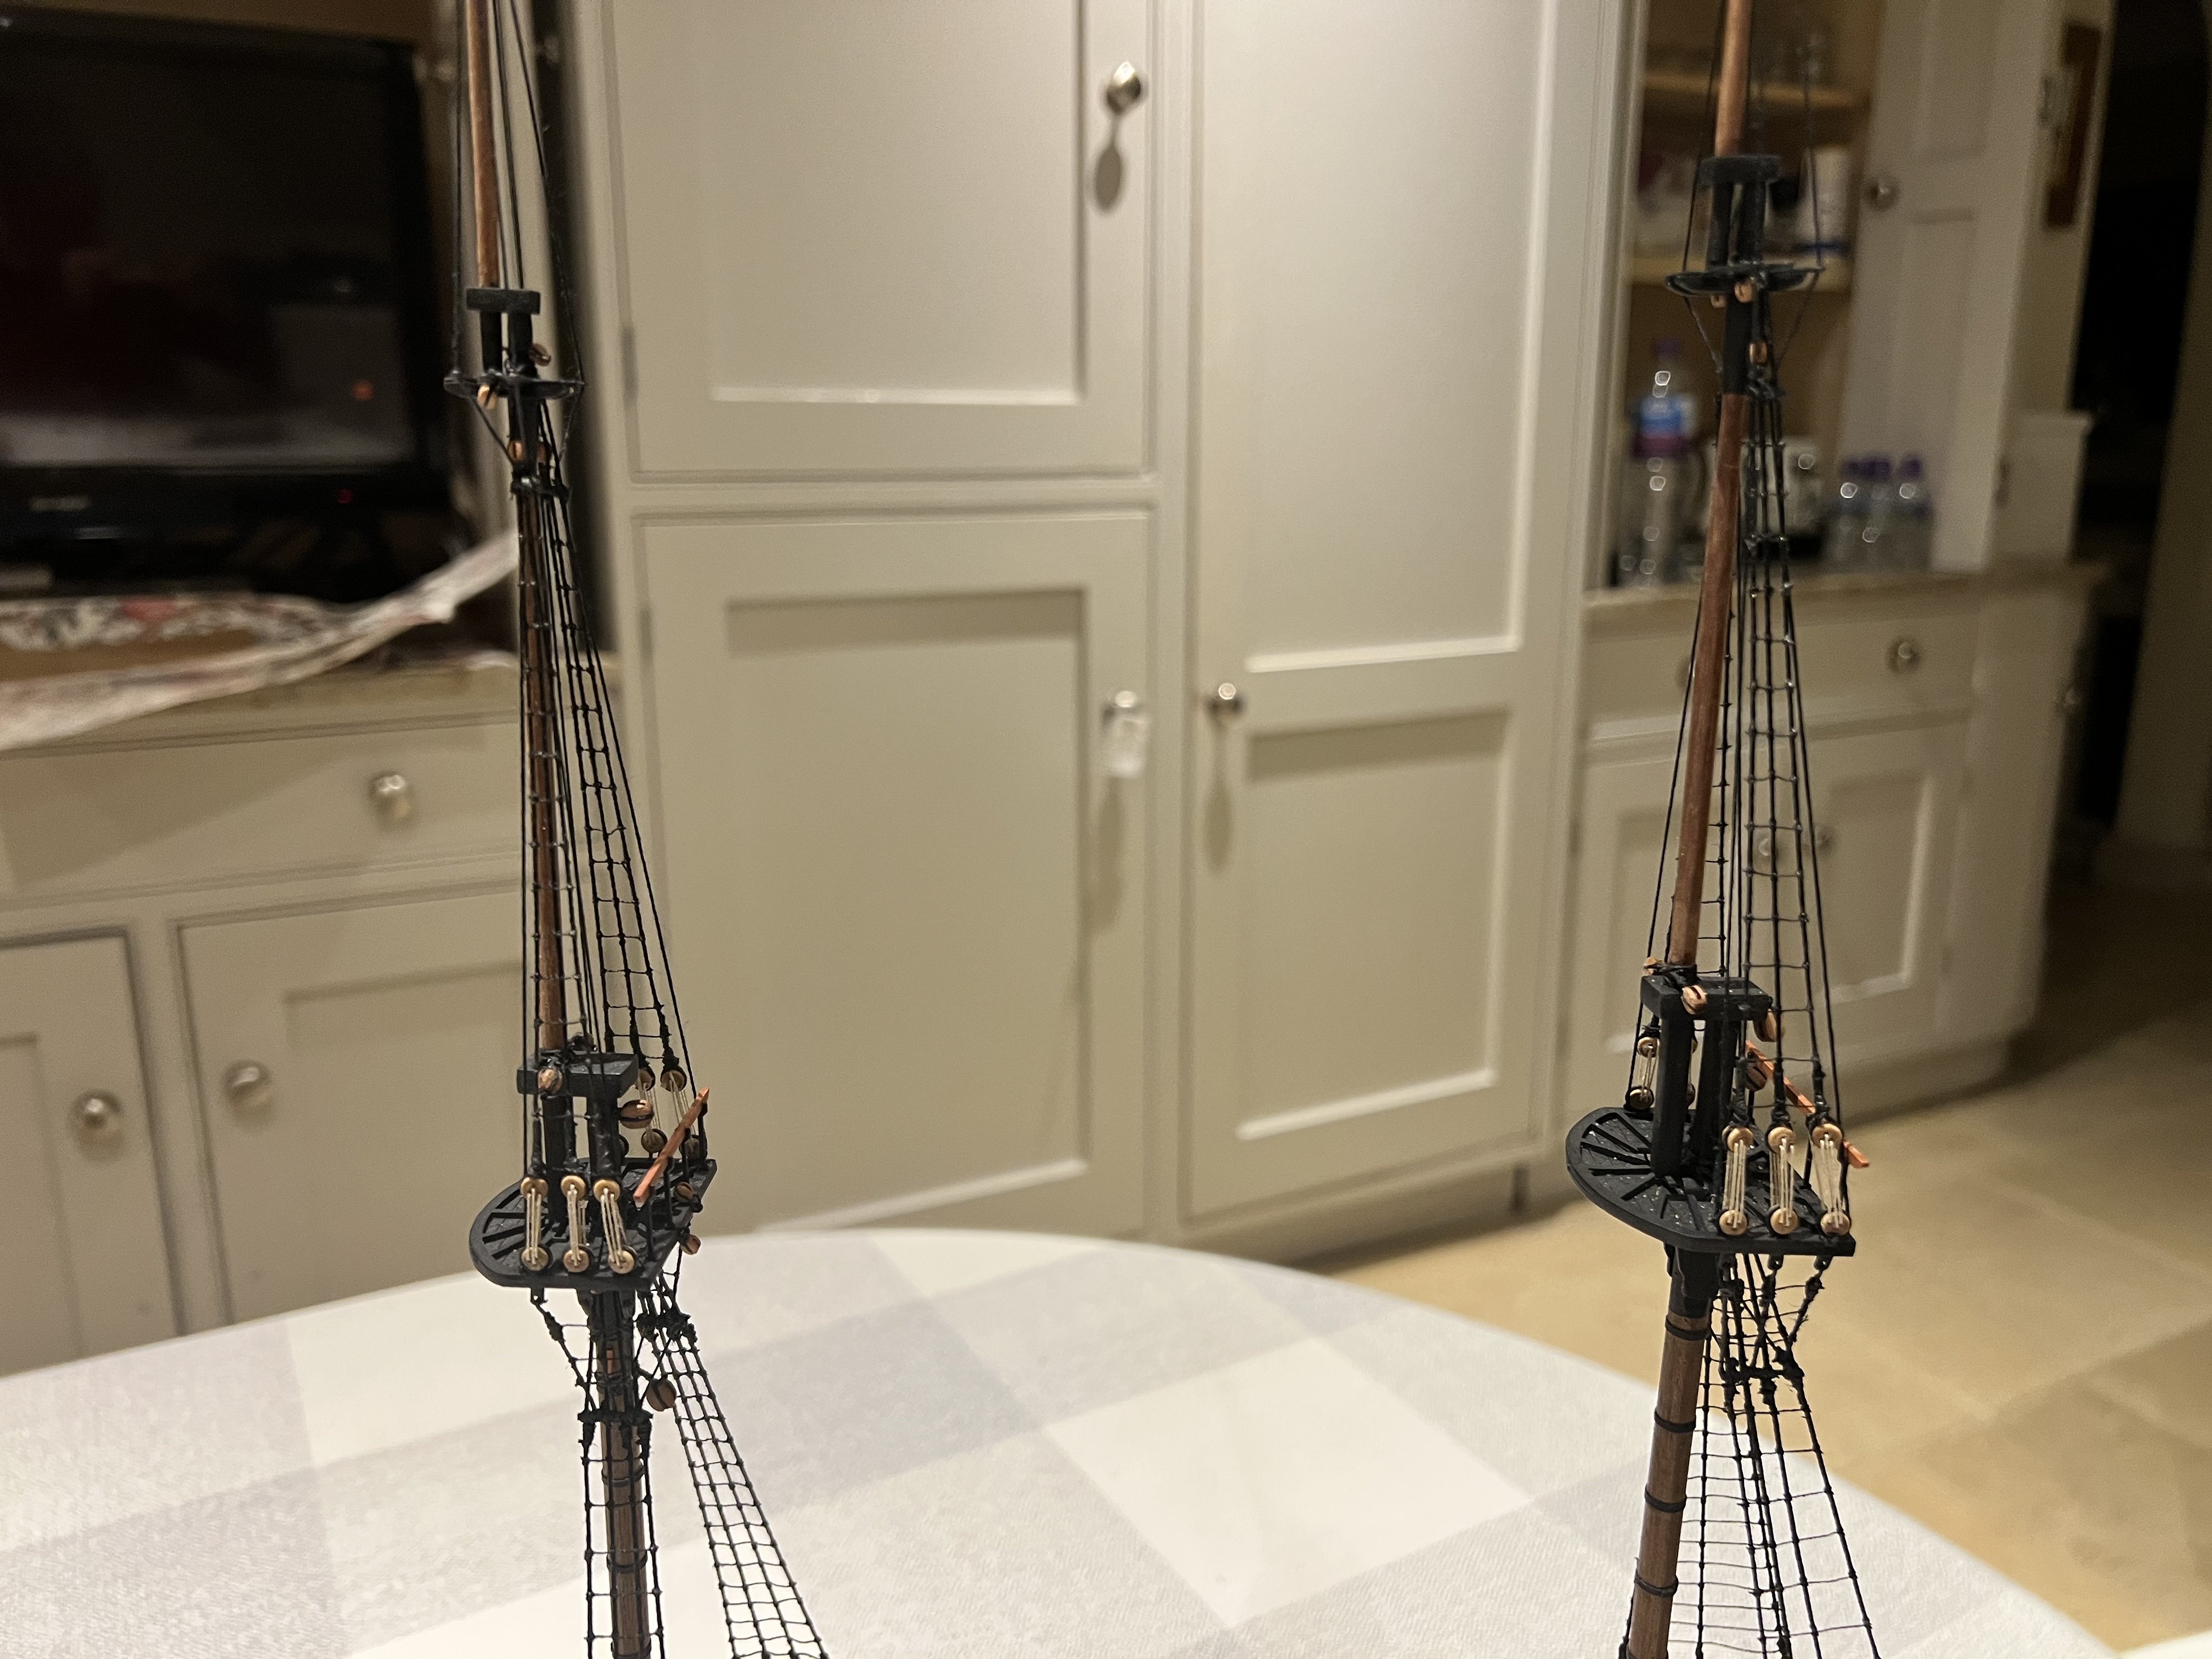
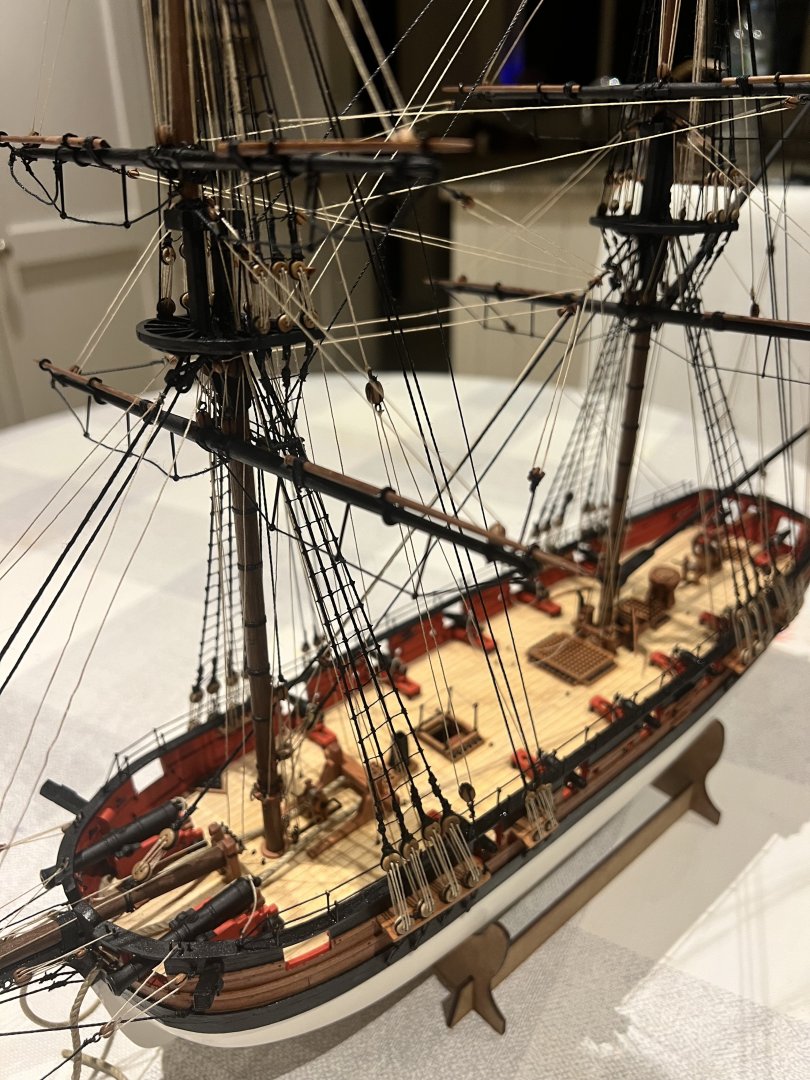
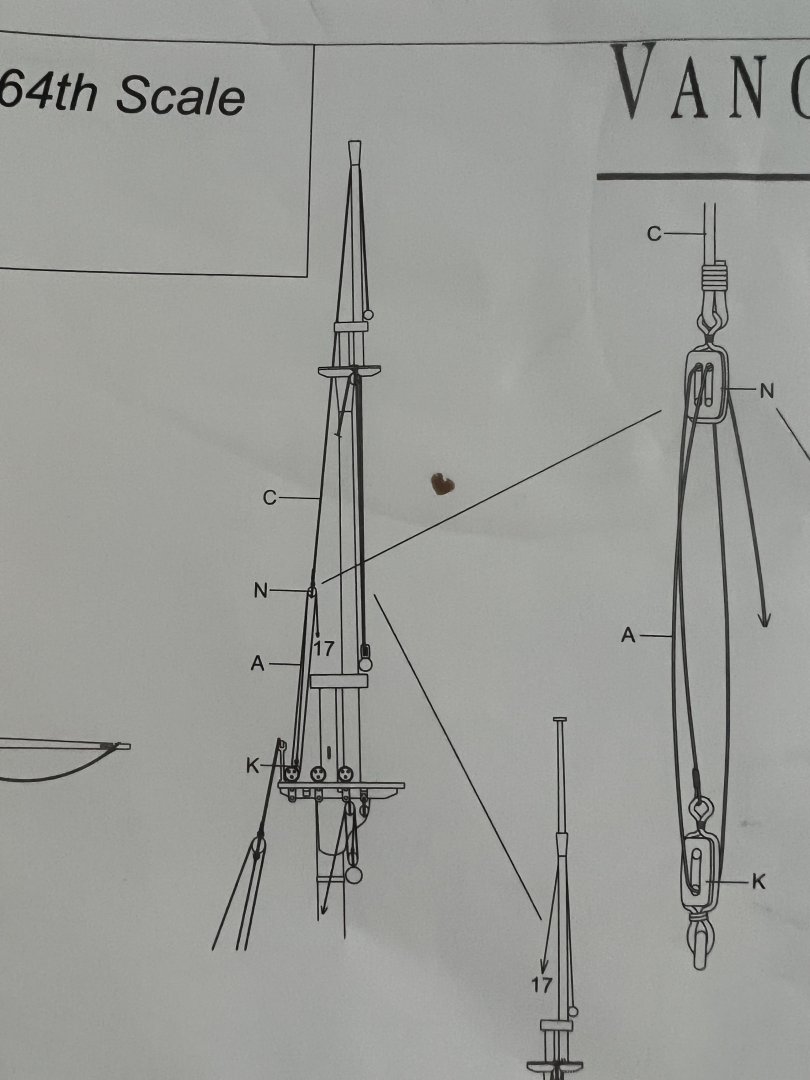
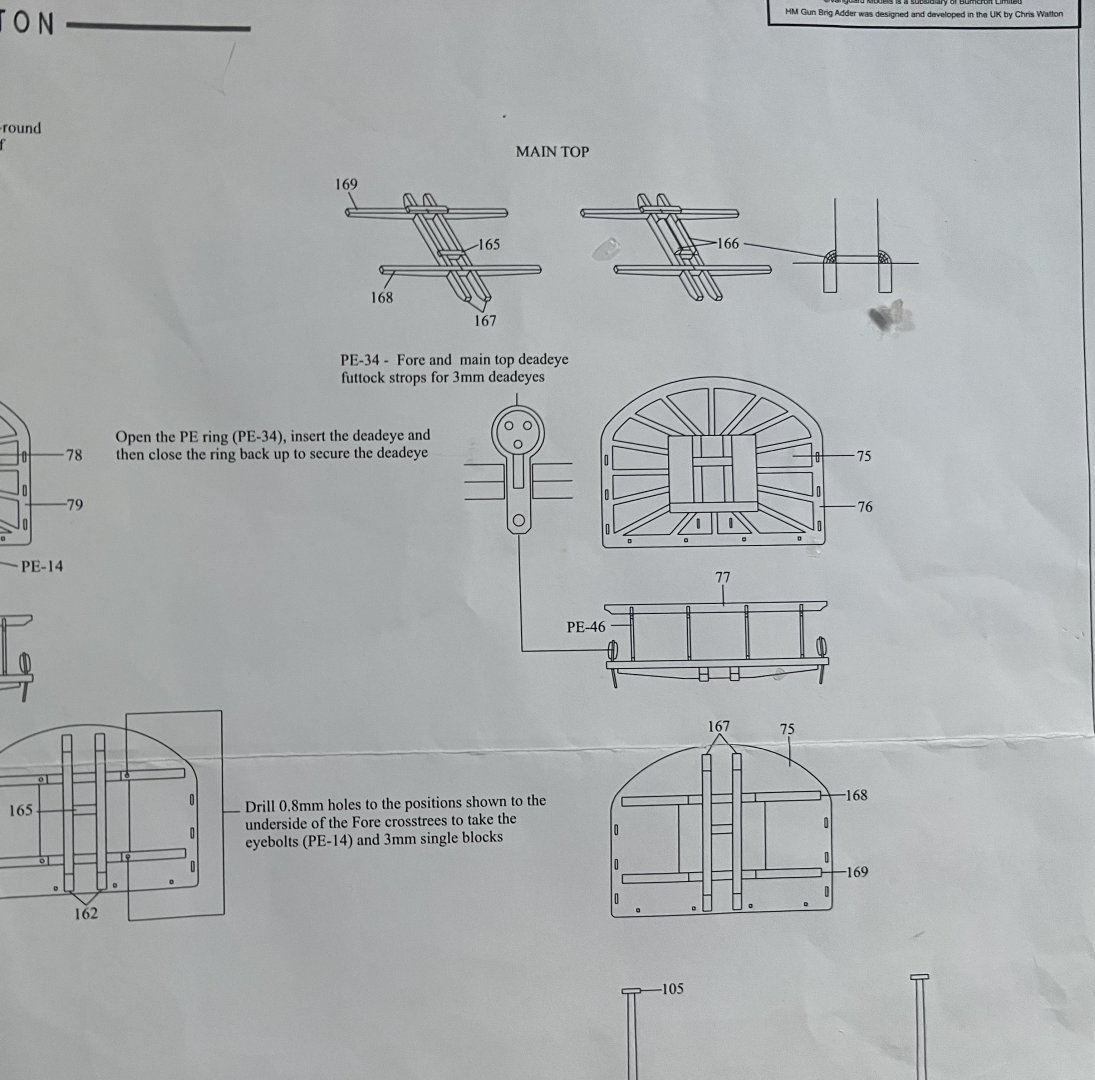
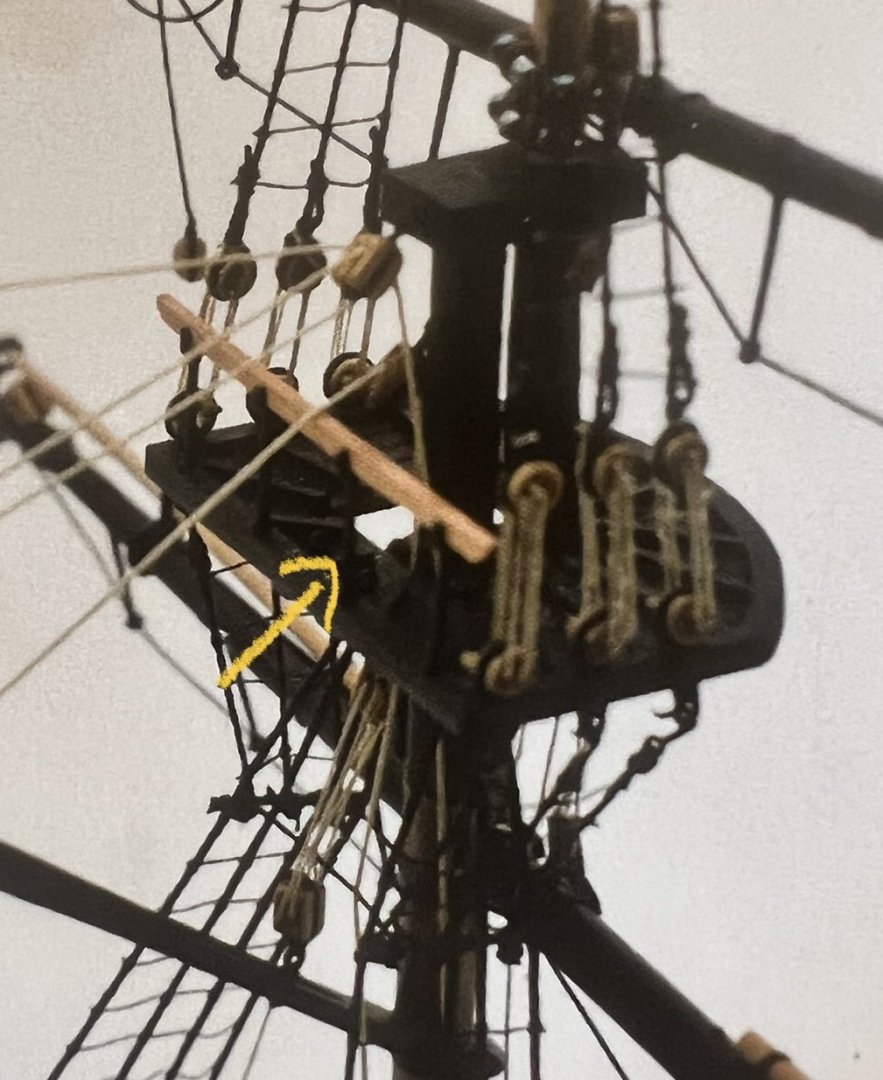
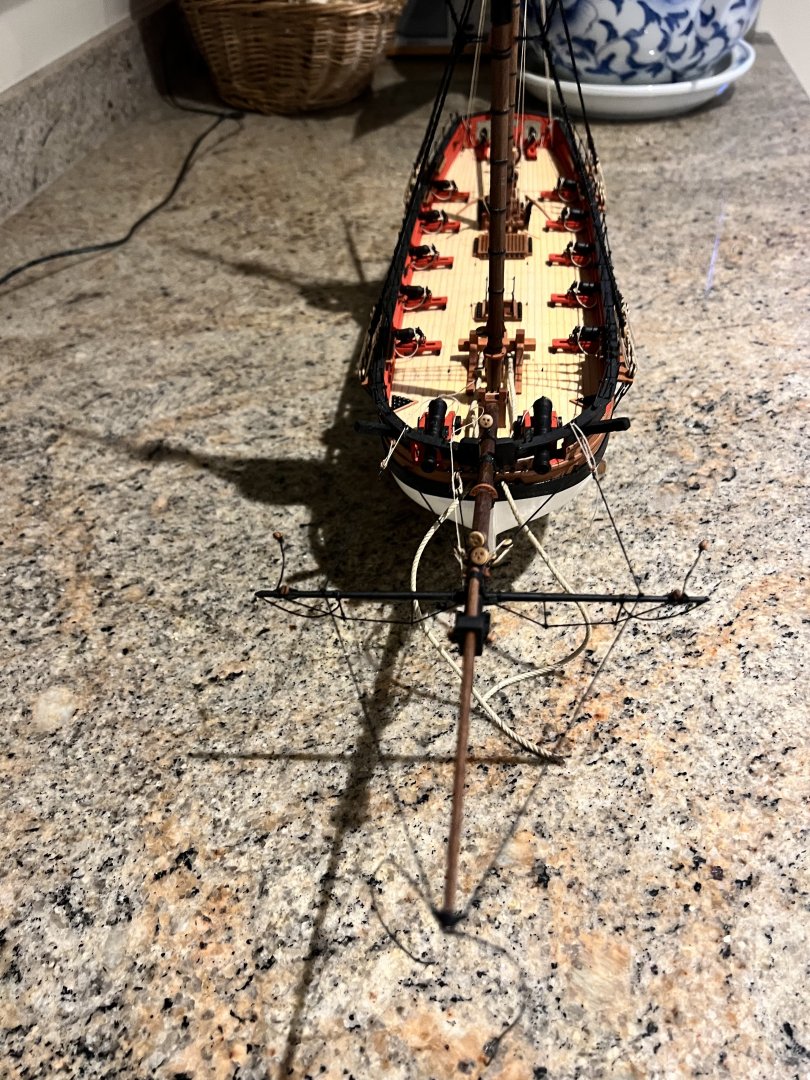
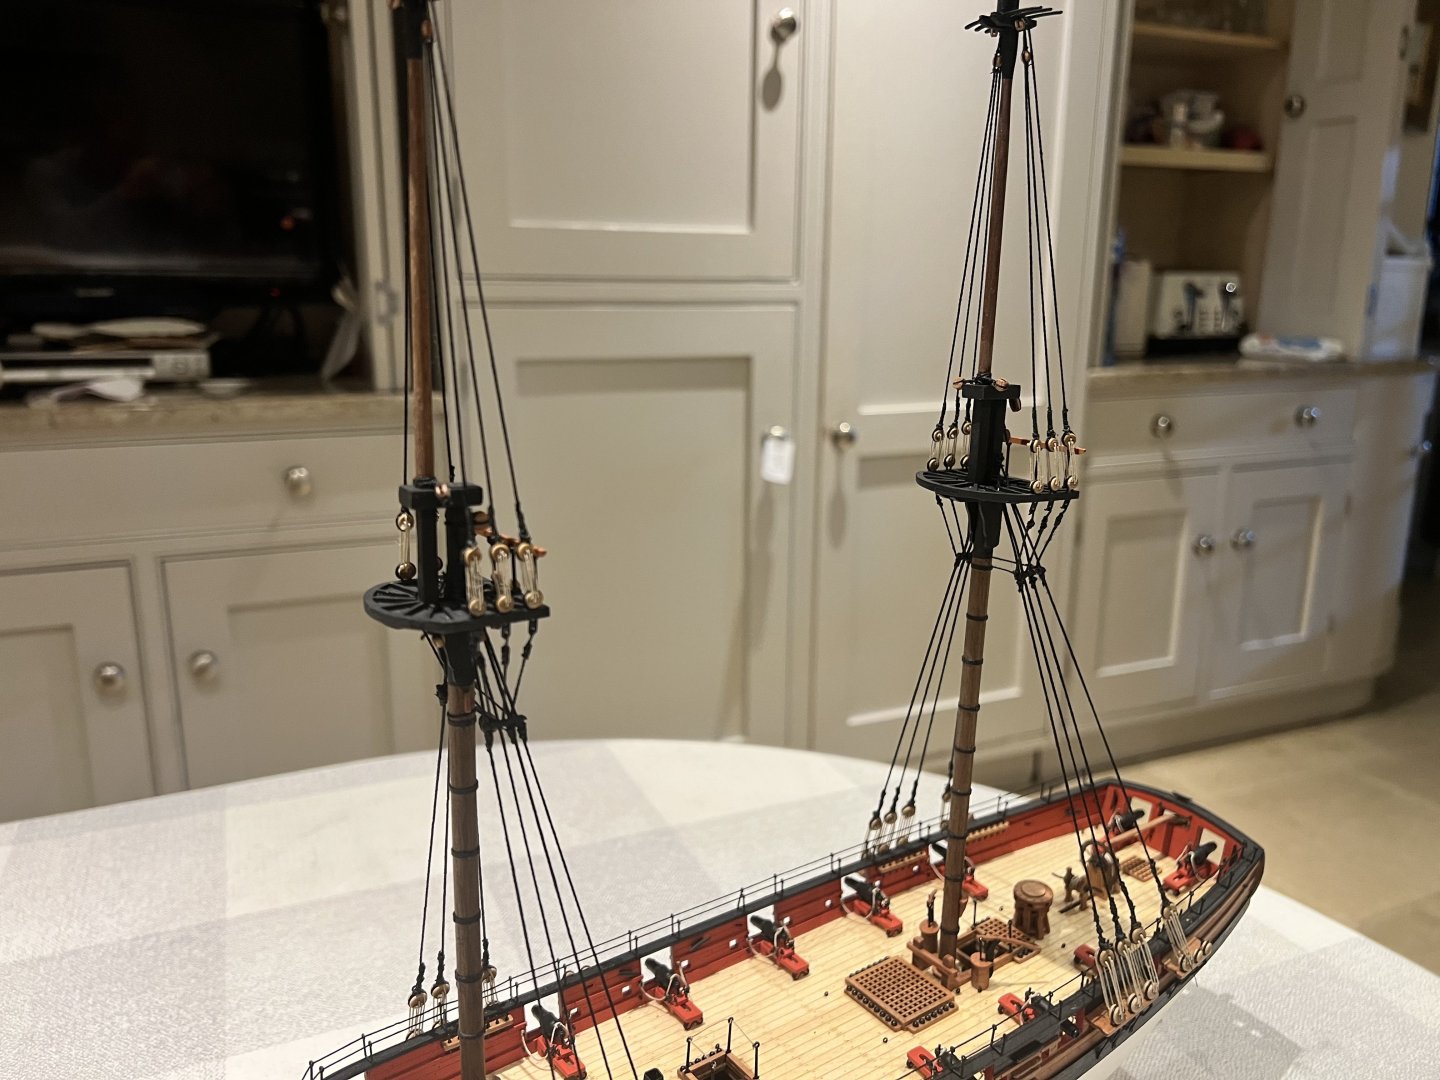
I’d love some advice. I’m fitting the yards to the main mast. I can’t work out from the plans how the line that goes through a hole in the topgallant mast and holds up the topgallant yard works - not sure if this is called a tye or a jeer? I’ve checked the Petersson book I have but it’s not clear either. The plans appear to show this line “C” tied to a block “N” which in turn has lines running to a block attached to the maintop “K” (single 3mm block) on the plans. And then back up to the “N” and then belayed to the aft port belaying pins rack at “17”. The letters actually refer to the size of blocks and thickness of line, but I’m using them to illustrate my question. How does the block “K” attach to the maintop? When the maintop was built there was no indication of needing a block or eye pin at the aft of the maintop (RHS below) although there are two small line running fore and aft that could be eyebolts with hindsight. Chris, I hope it’s ok to post a few small segments of plans on here? The manual suggest doesn’t mention any eyebolts here either, but there’s a photo in the manual which shows two eyebolts in that place where my messy yellow arrow points. I’m guessing that’s what I should be attaching a block to, but I don’t have the access to drill a hole and add an eyebolt and block anymore there as there’s so much rigging around it. Could I get away with adding a block to one of the stanchions at the rear of the maintop instead? I think I’ve worked out what should happen for this line, but not sure how I’ll actually be able to fix it! Any advice greatly appreciated. Many thanks Dan

- 146 replies
-
- 6
-
-
- Adder
- Vanguard Models
- (and 1 more)
-
Thanks Ron. Will do.
-
Thanks Glenn, much appreciated.
-
Thanks Chris, I’ll do that. Much appreciate the advice. Dan
- 146 replies
-
- 1
-
-
- Adder
- Vanguard Models
- (and 1 more)
-
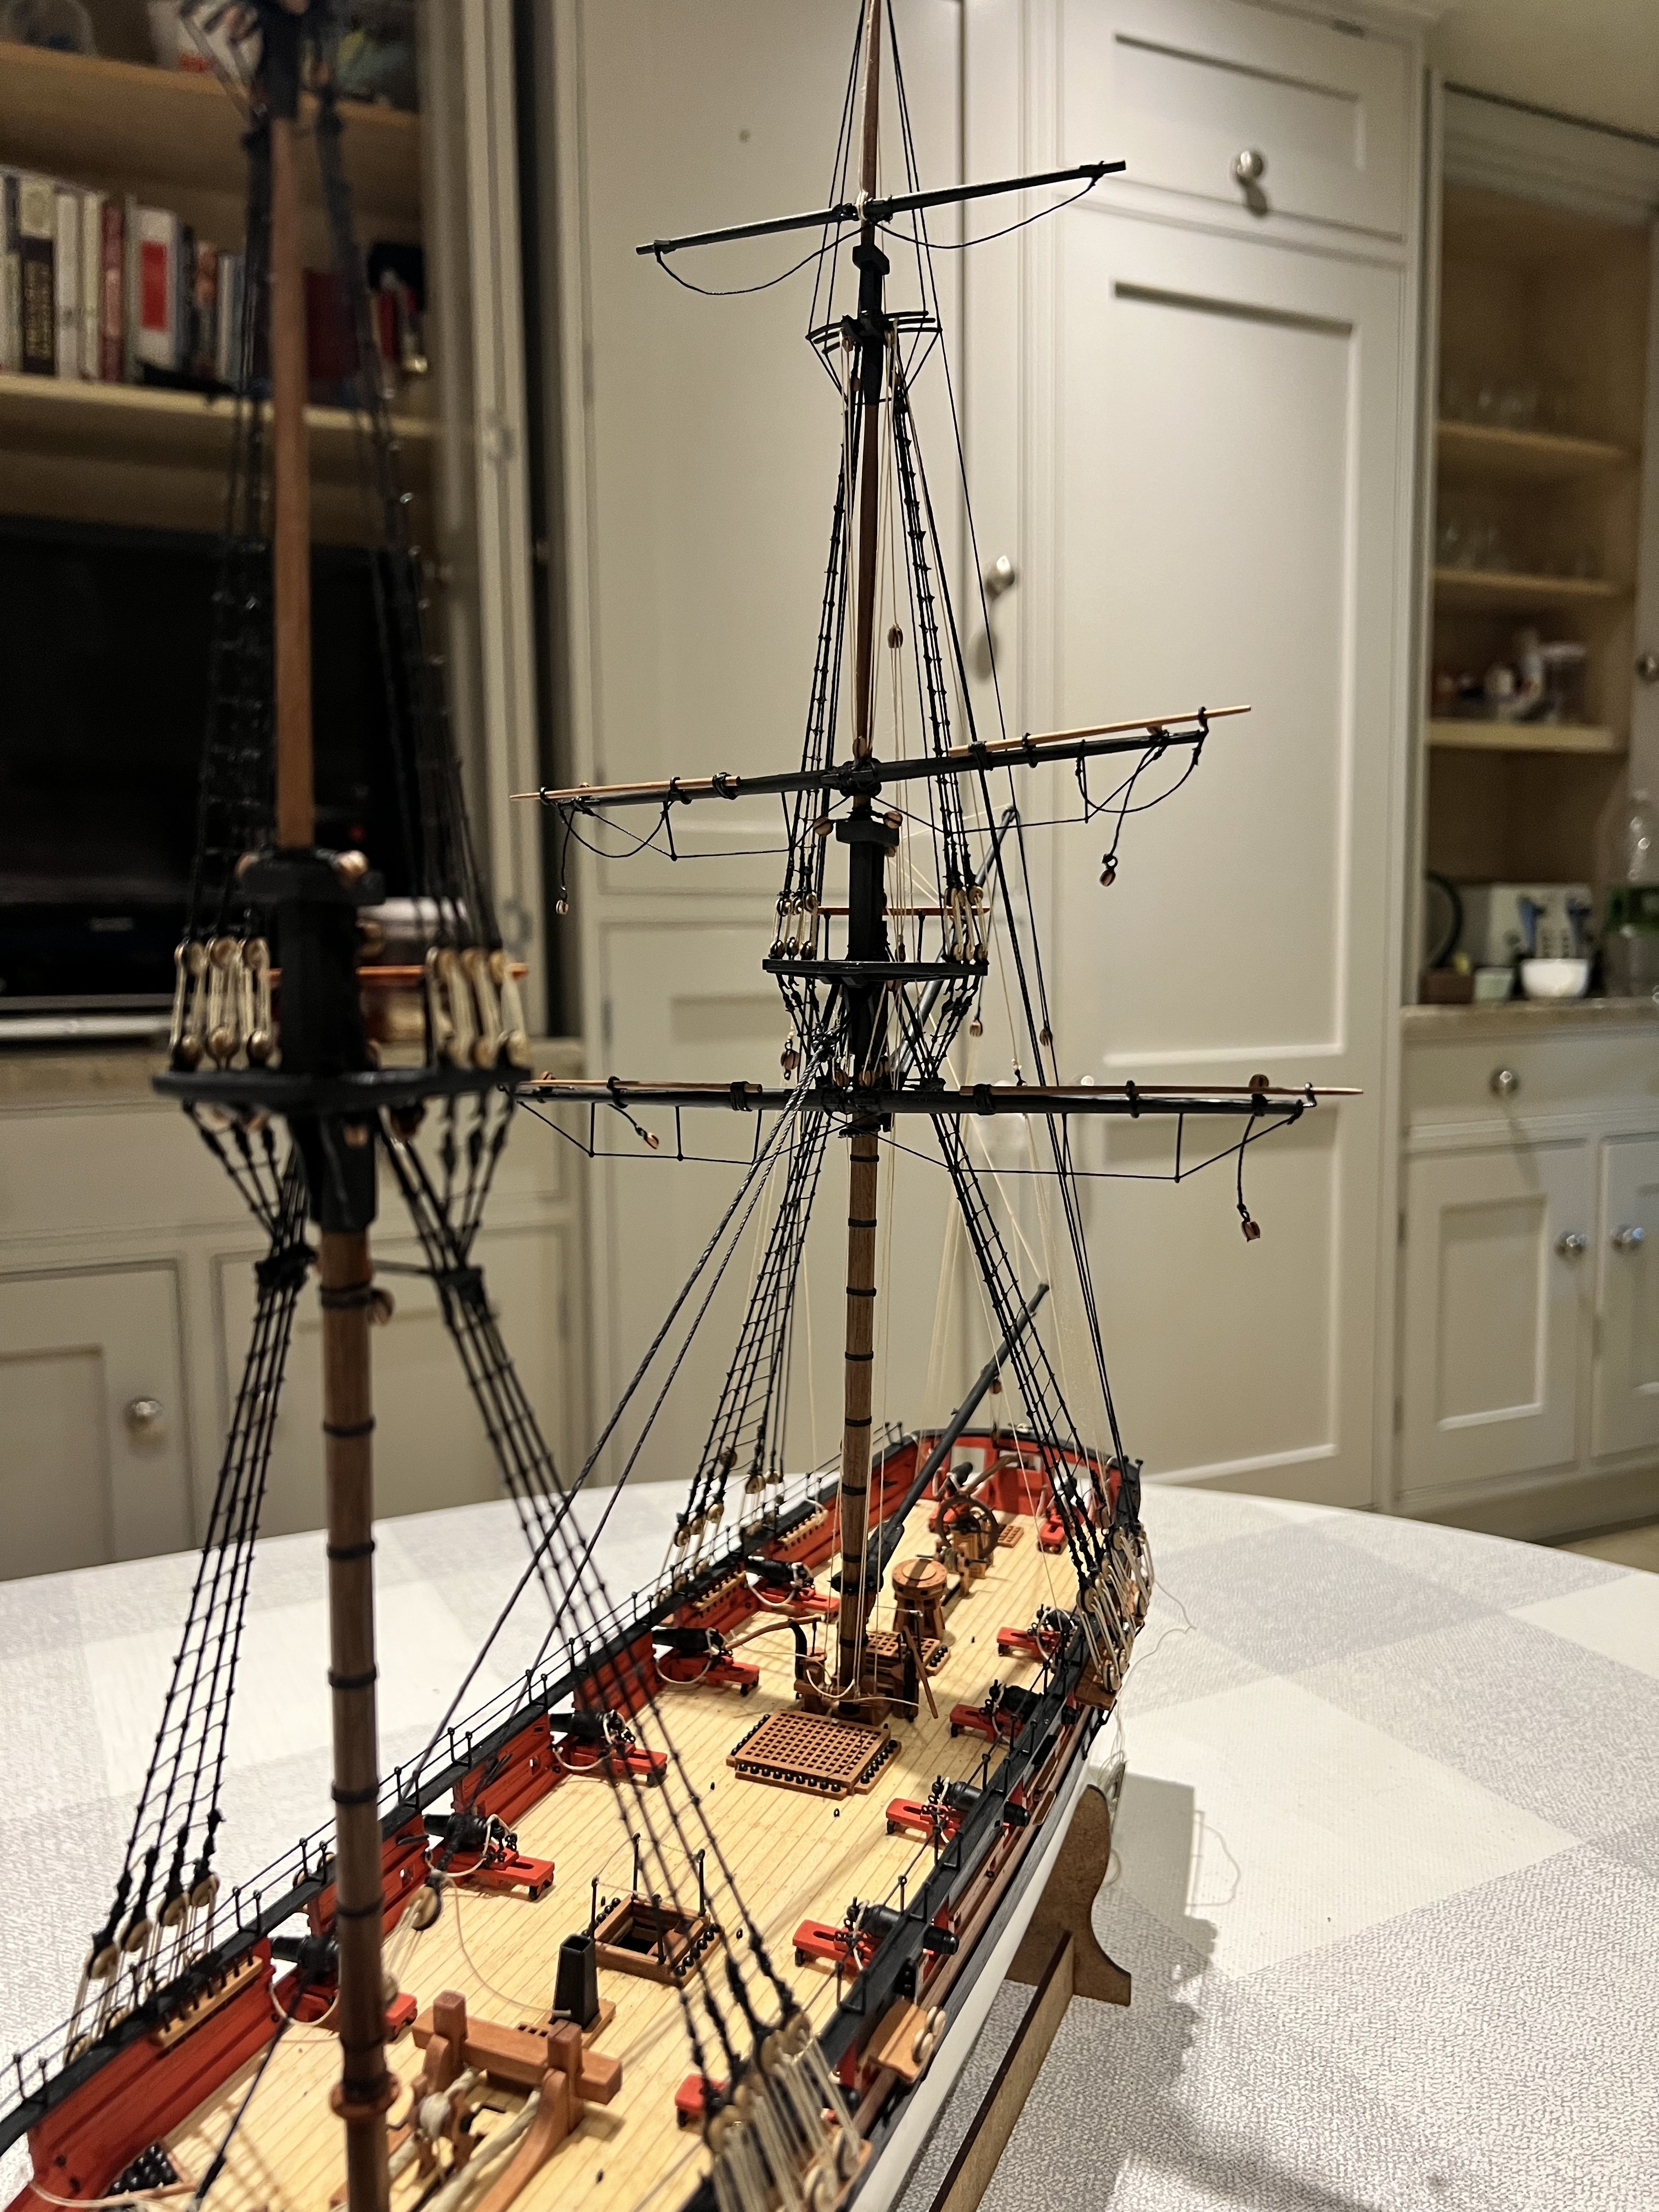
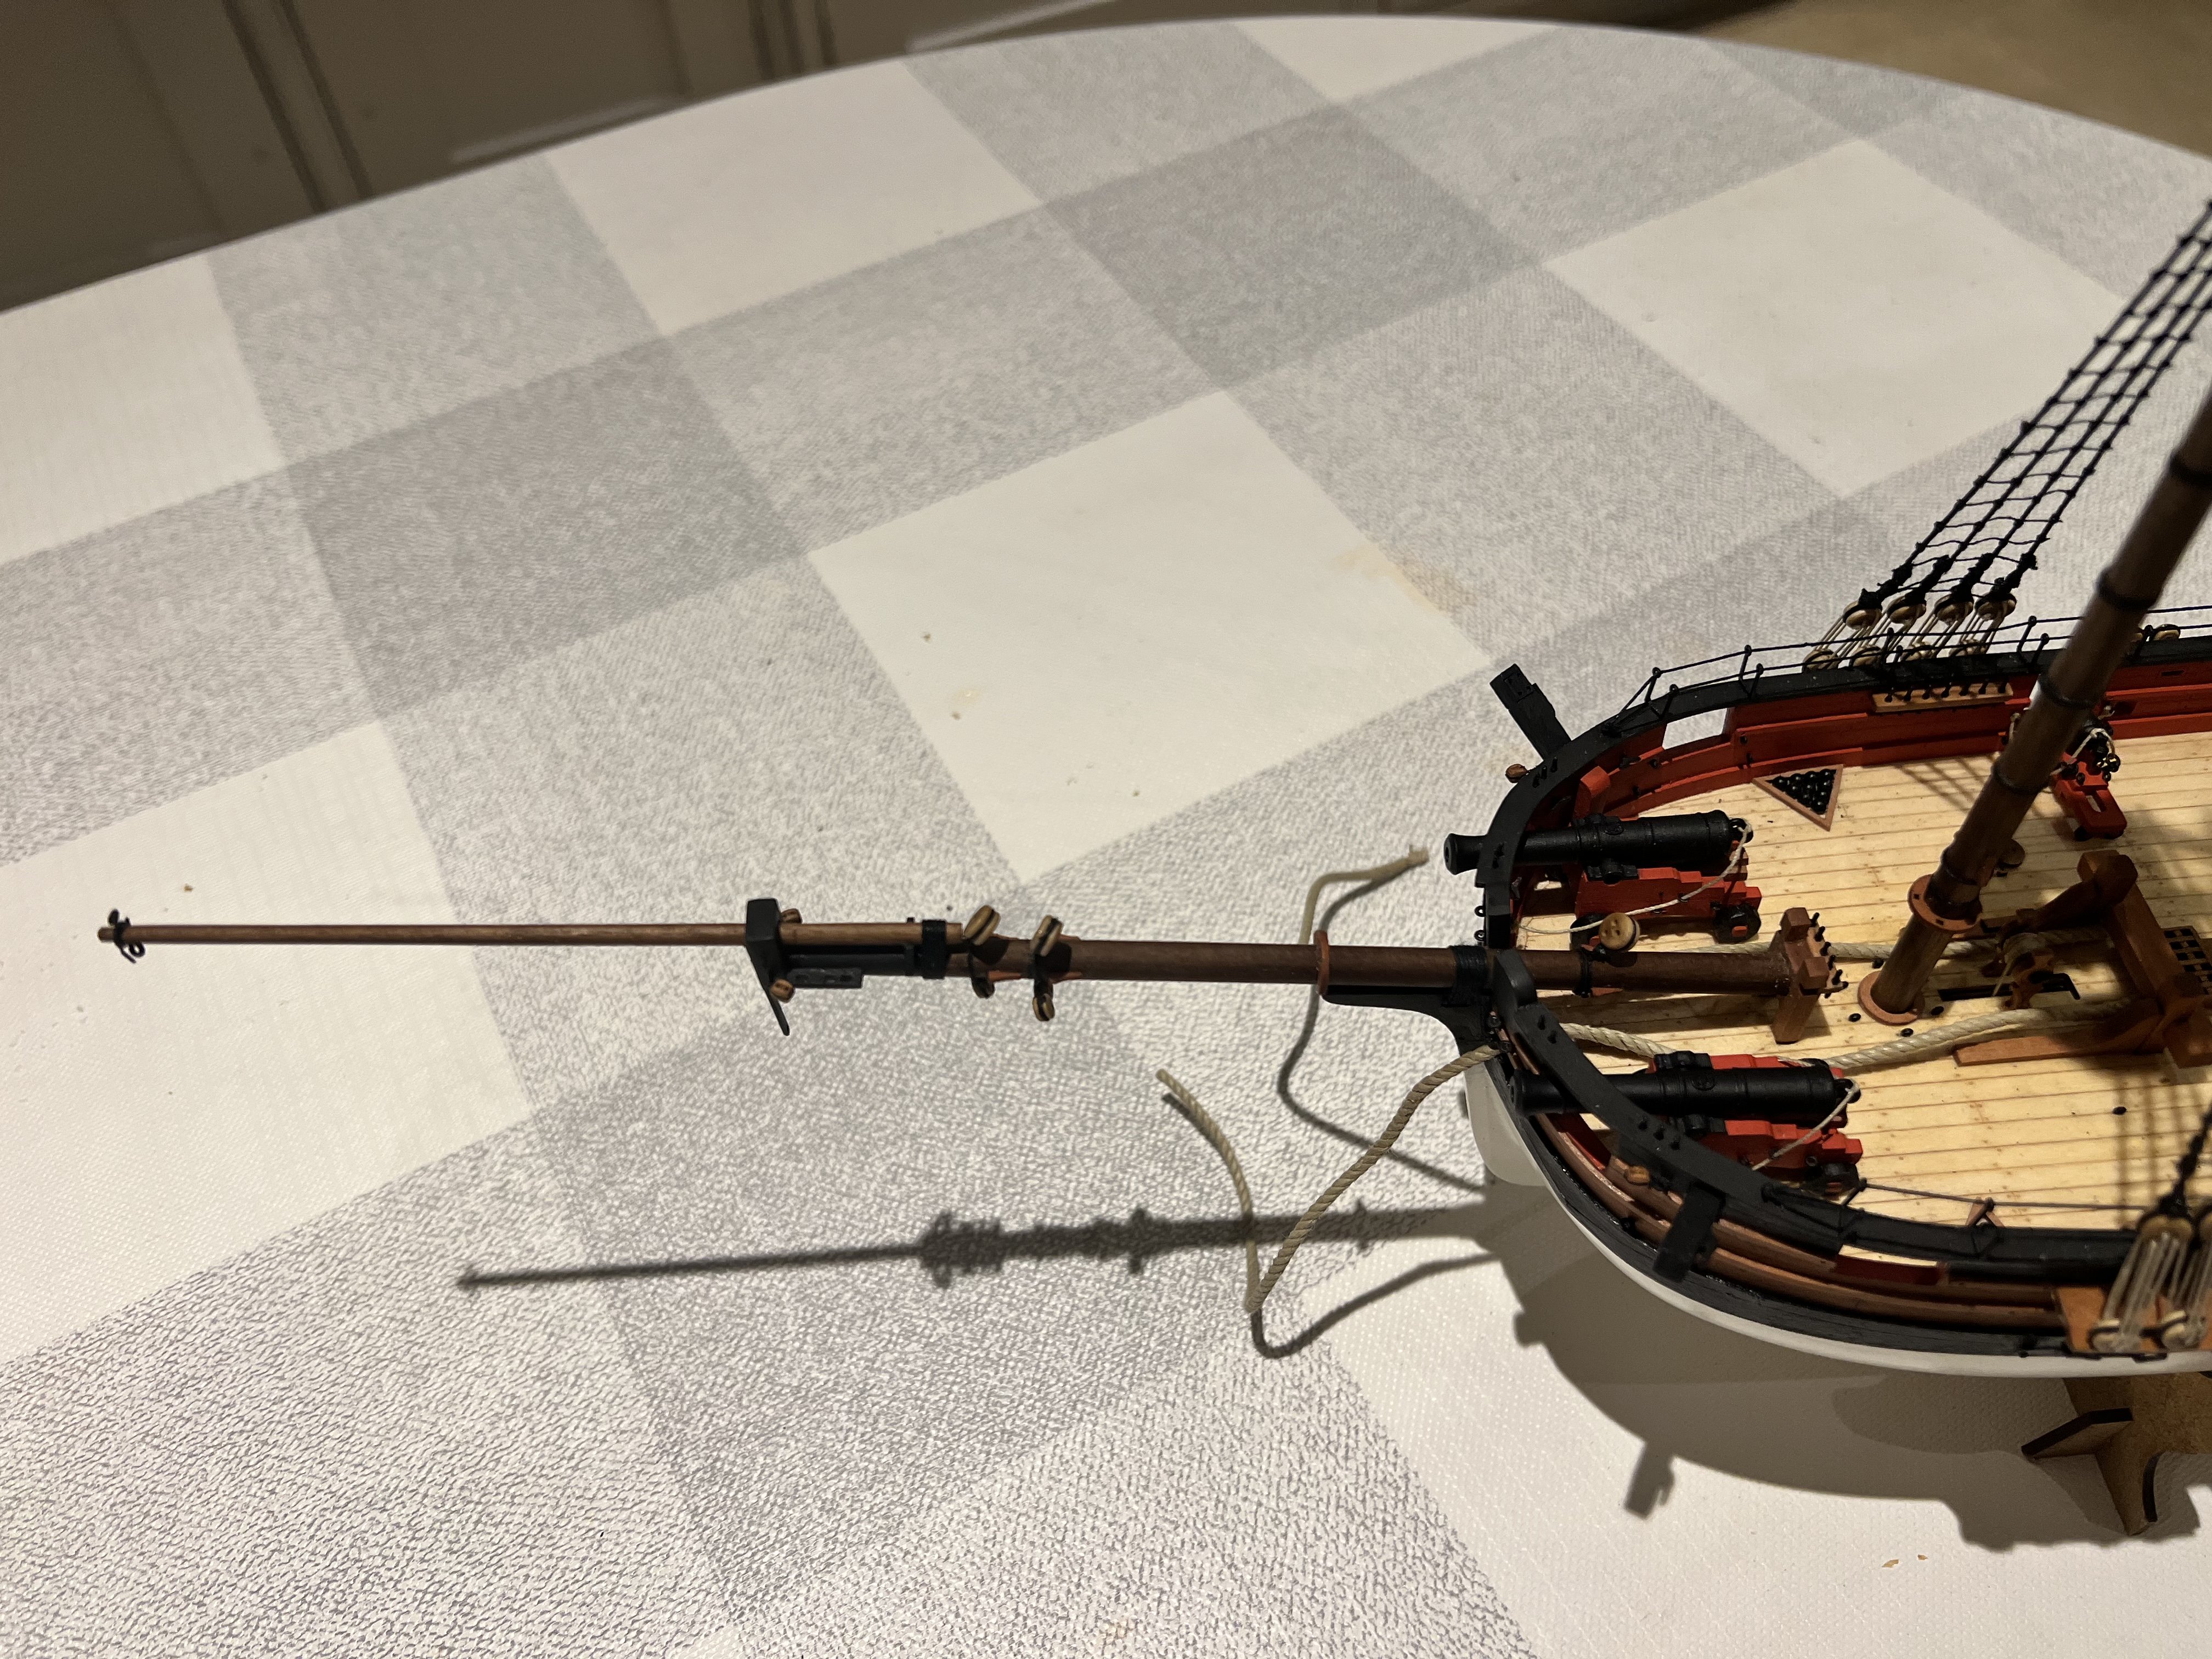
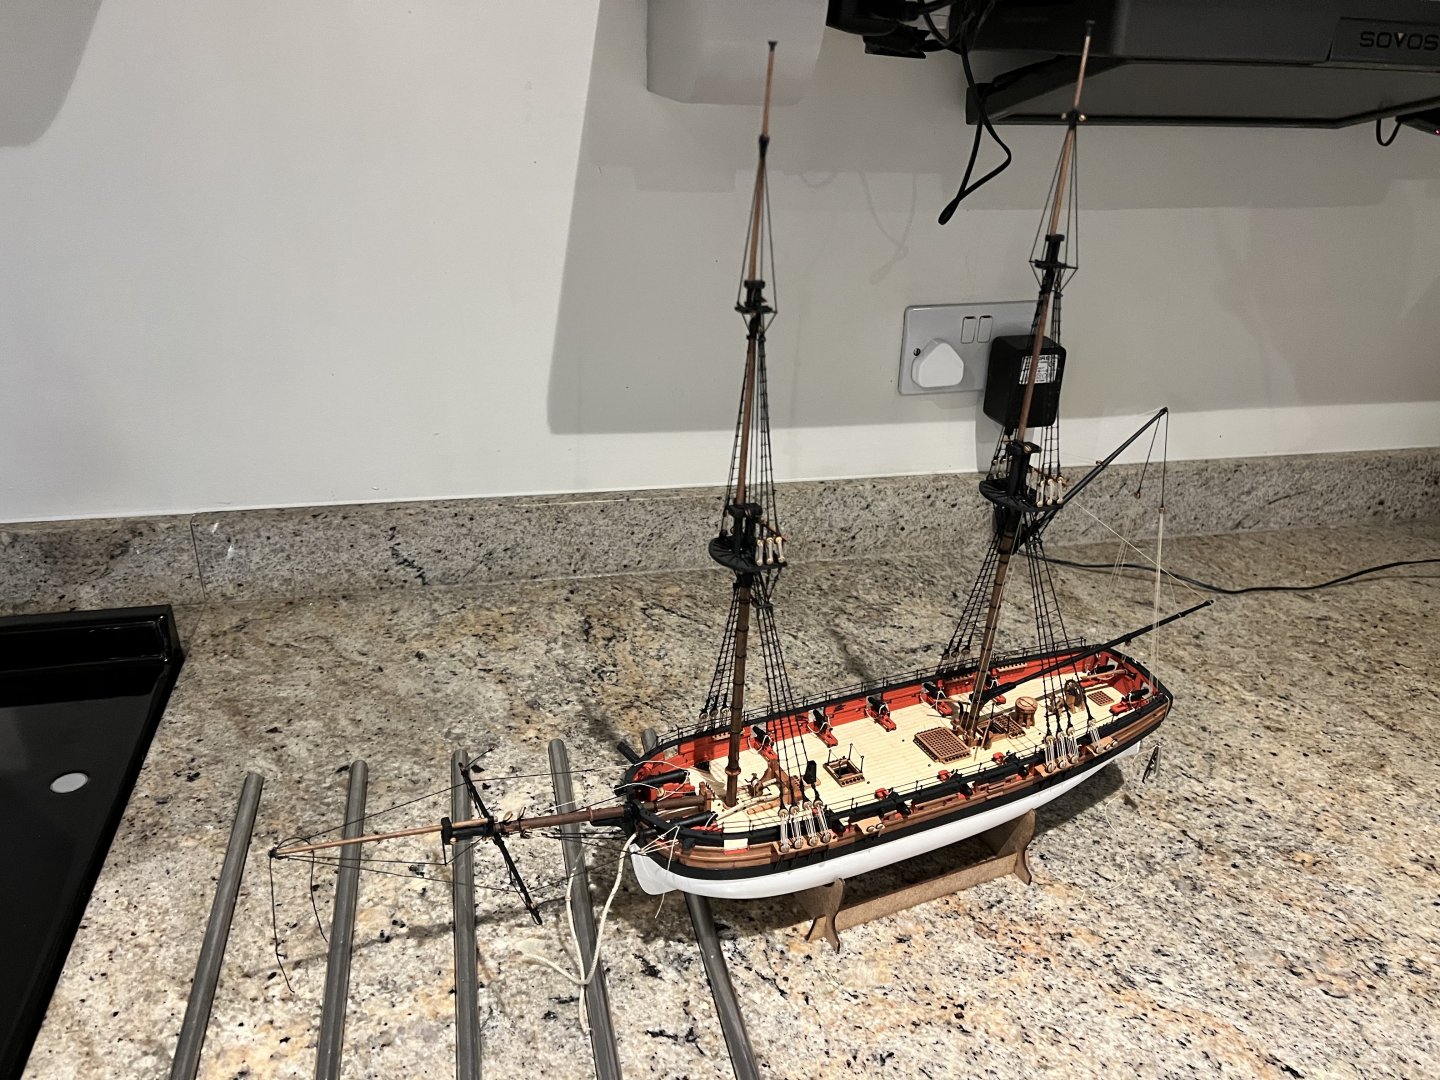
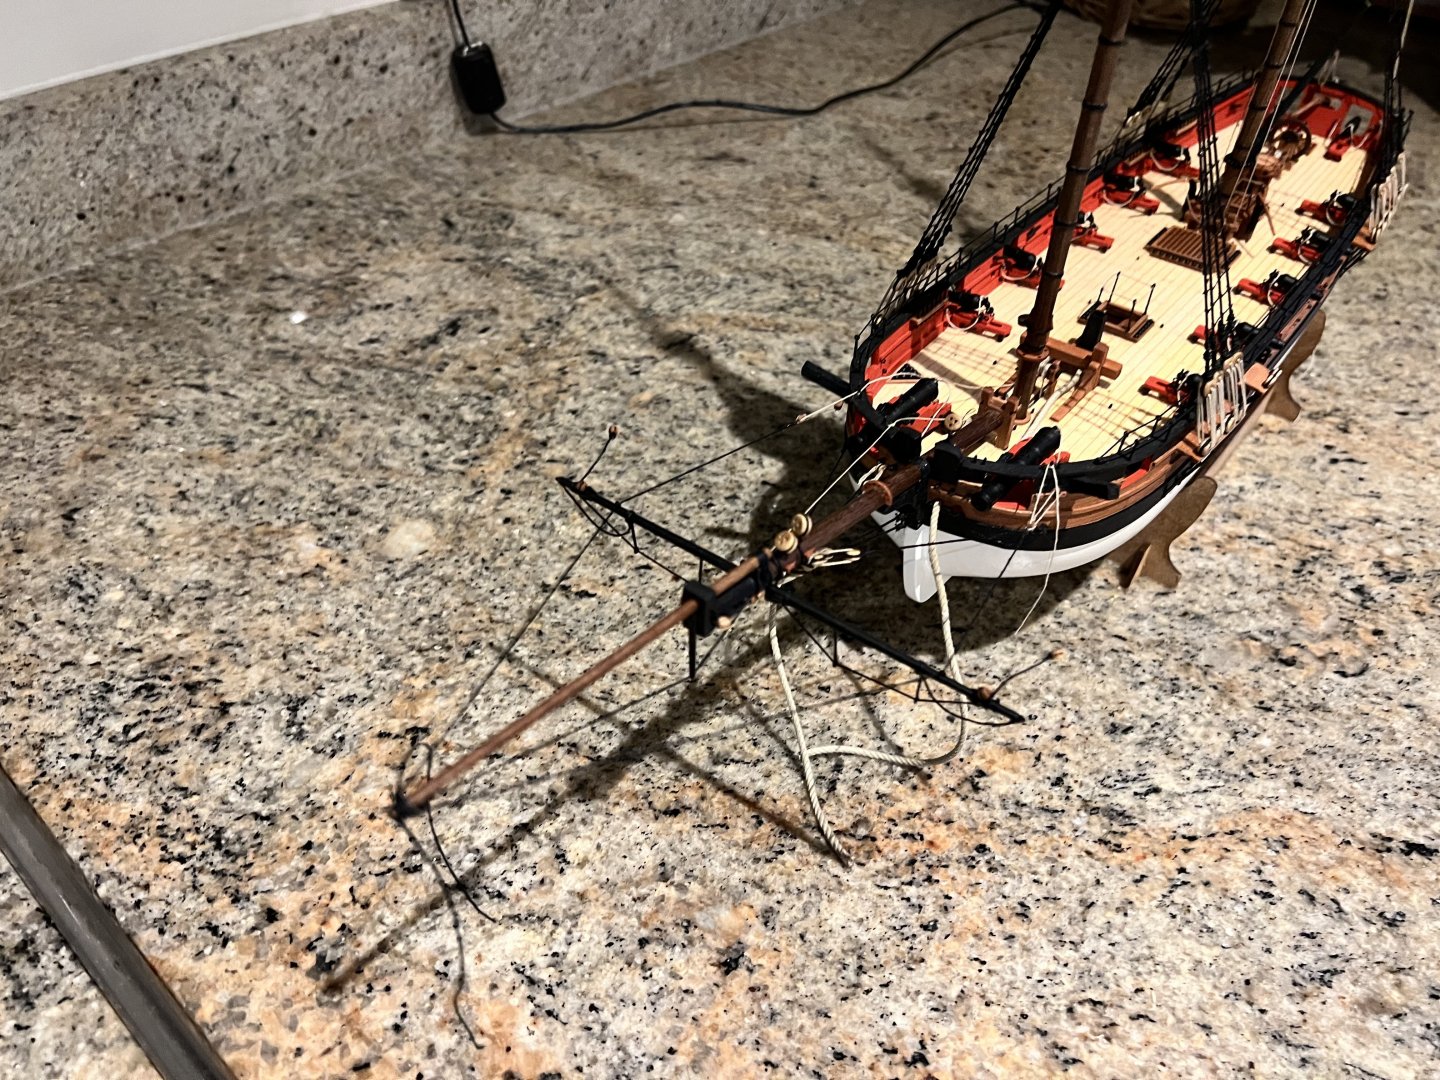
Thanks Uwe. I’ve added the bowsprit rigging, fairly straightforward except there’s a PE ring with four smaller rigs attached to the rim that is at the end of the bowsprit. Being clumsy I managed to break off three of these rings. I’ve CA glued on three replacement rings but they’re not strong so each line goes through the rings and then is tied through the bowsprit rather than the ring. I’ve left some lines tied and unglued so I can add tension later if they go slack when other rigging is added. Also added the main boom and gaff. Much the same as on the fore and aft rigged vessels I’ve built. Onto the yards next I think. Is there a better sequence - start at the top and work down? I’m thinking of doing the main mast yards first and then moving to the fore mast. I’ve still to add most of the stays - I reckon it’s easier to add the yards before the stays? Any advice very welcome. Thanks!

- 146 replies
-
- 10
-
-
- Adder
- Vanguard Models
- (and 1 more)
-
Hi Glenn, I glad my log is of some use! I’m really enjoying building this one although I’ve slowed down as I’m rigging and making yards and spars, which for me is slow going. Adder should be an easy build for you after Indy, Eck’s racing through his build. Yours looks great, I look forward to following along. Best wishes Dan
-
An absolutely stunning model - congrats! I’ve really enjoyed following your build of her.
- 587 replies
-
- 2
-
-
-
- Indefatigable
- Vanguard Models
- (and 1 more)
-
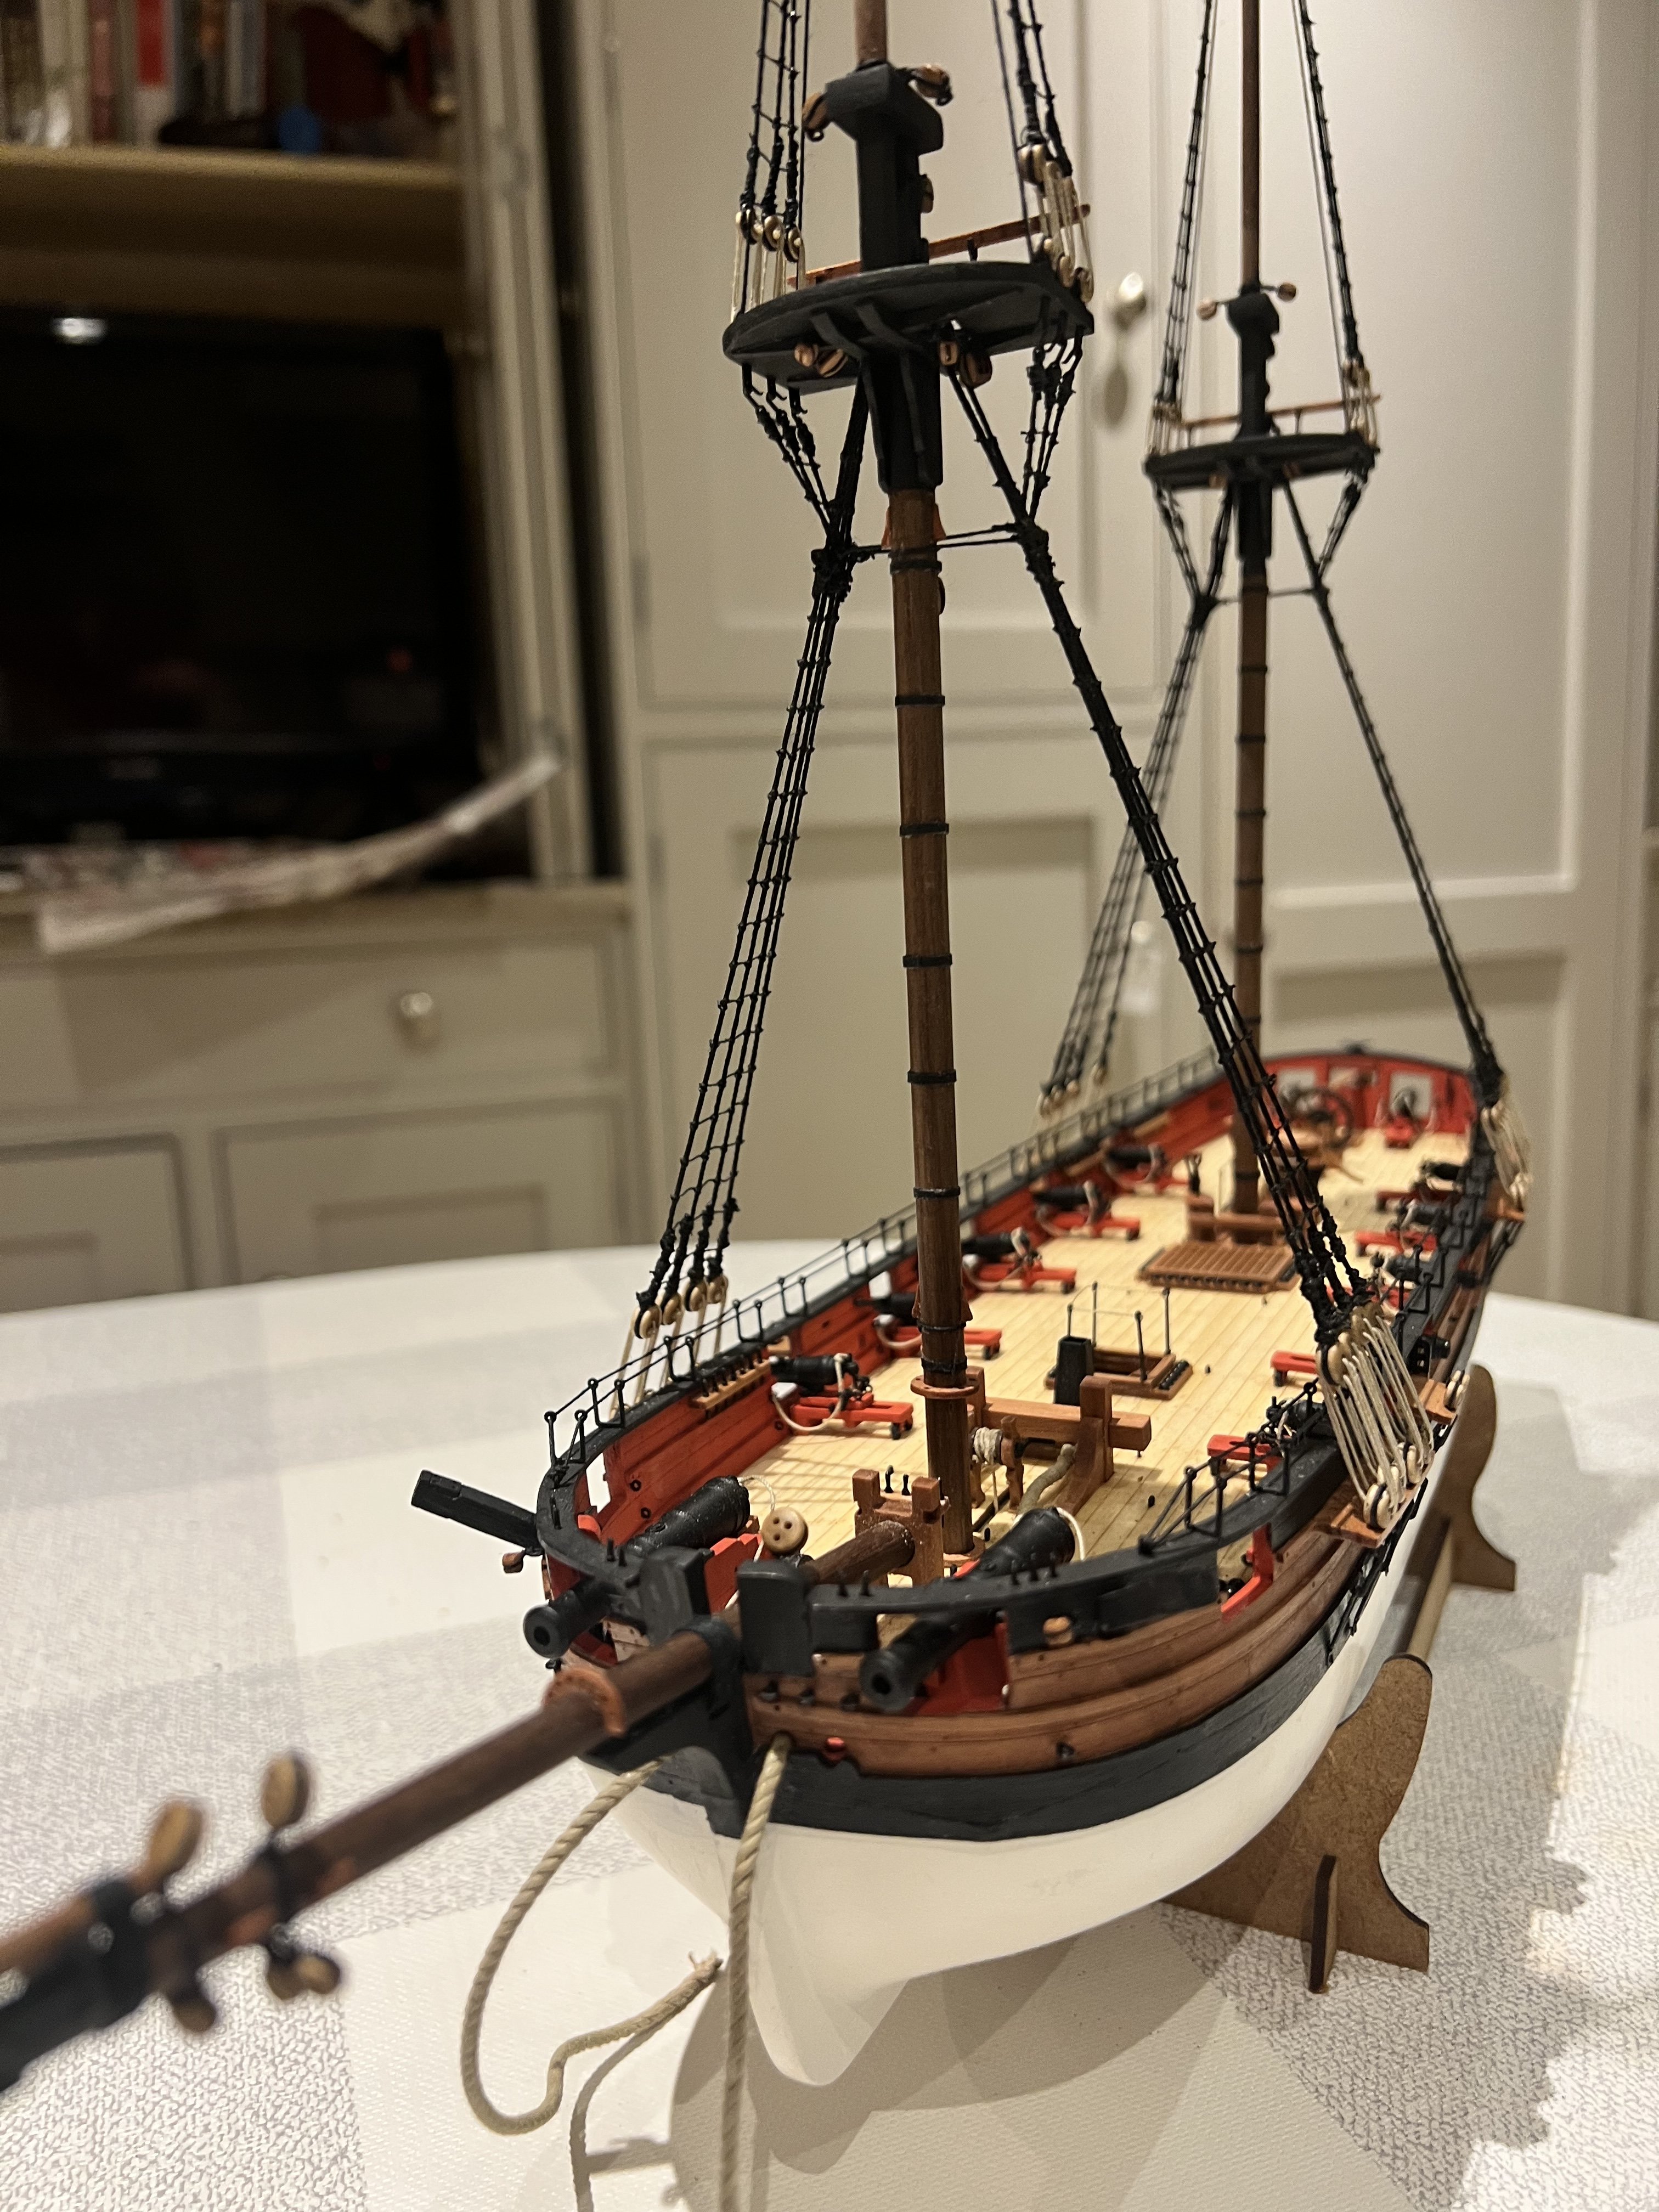
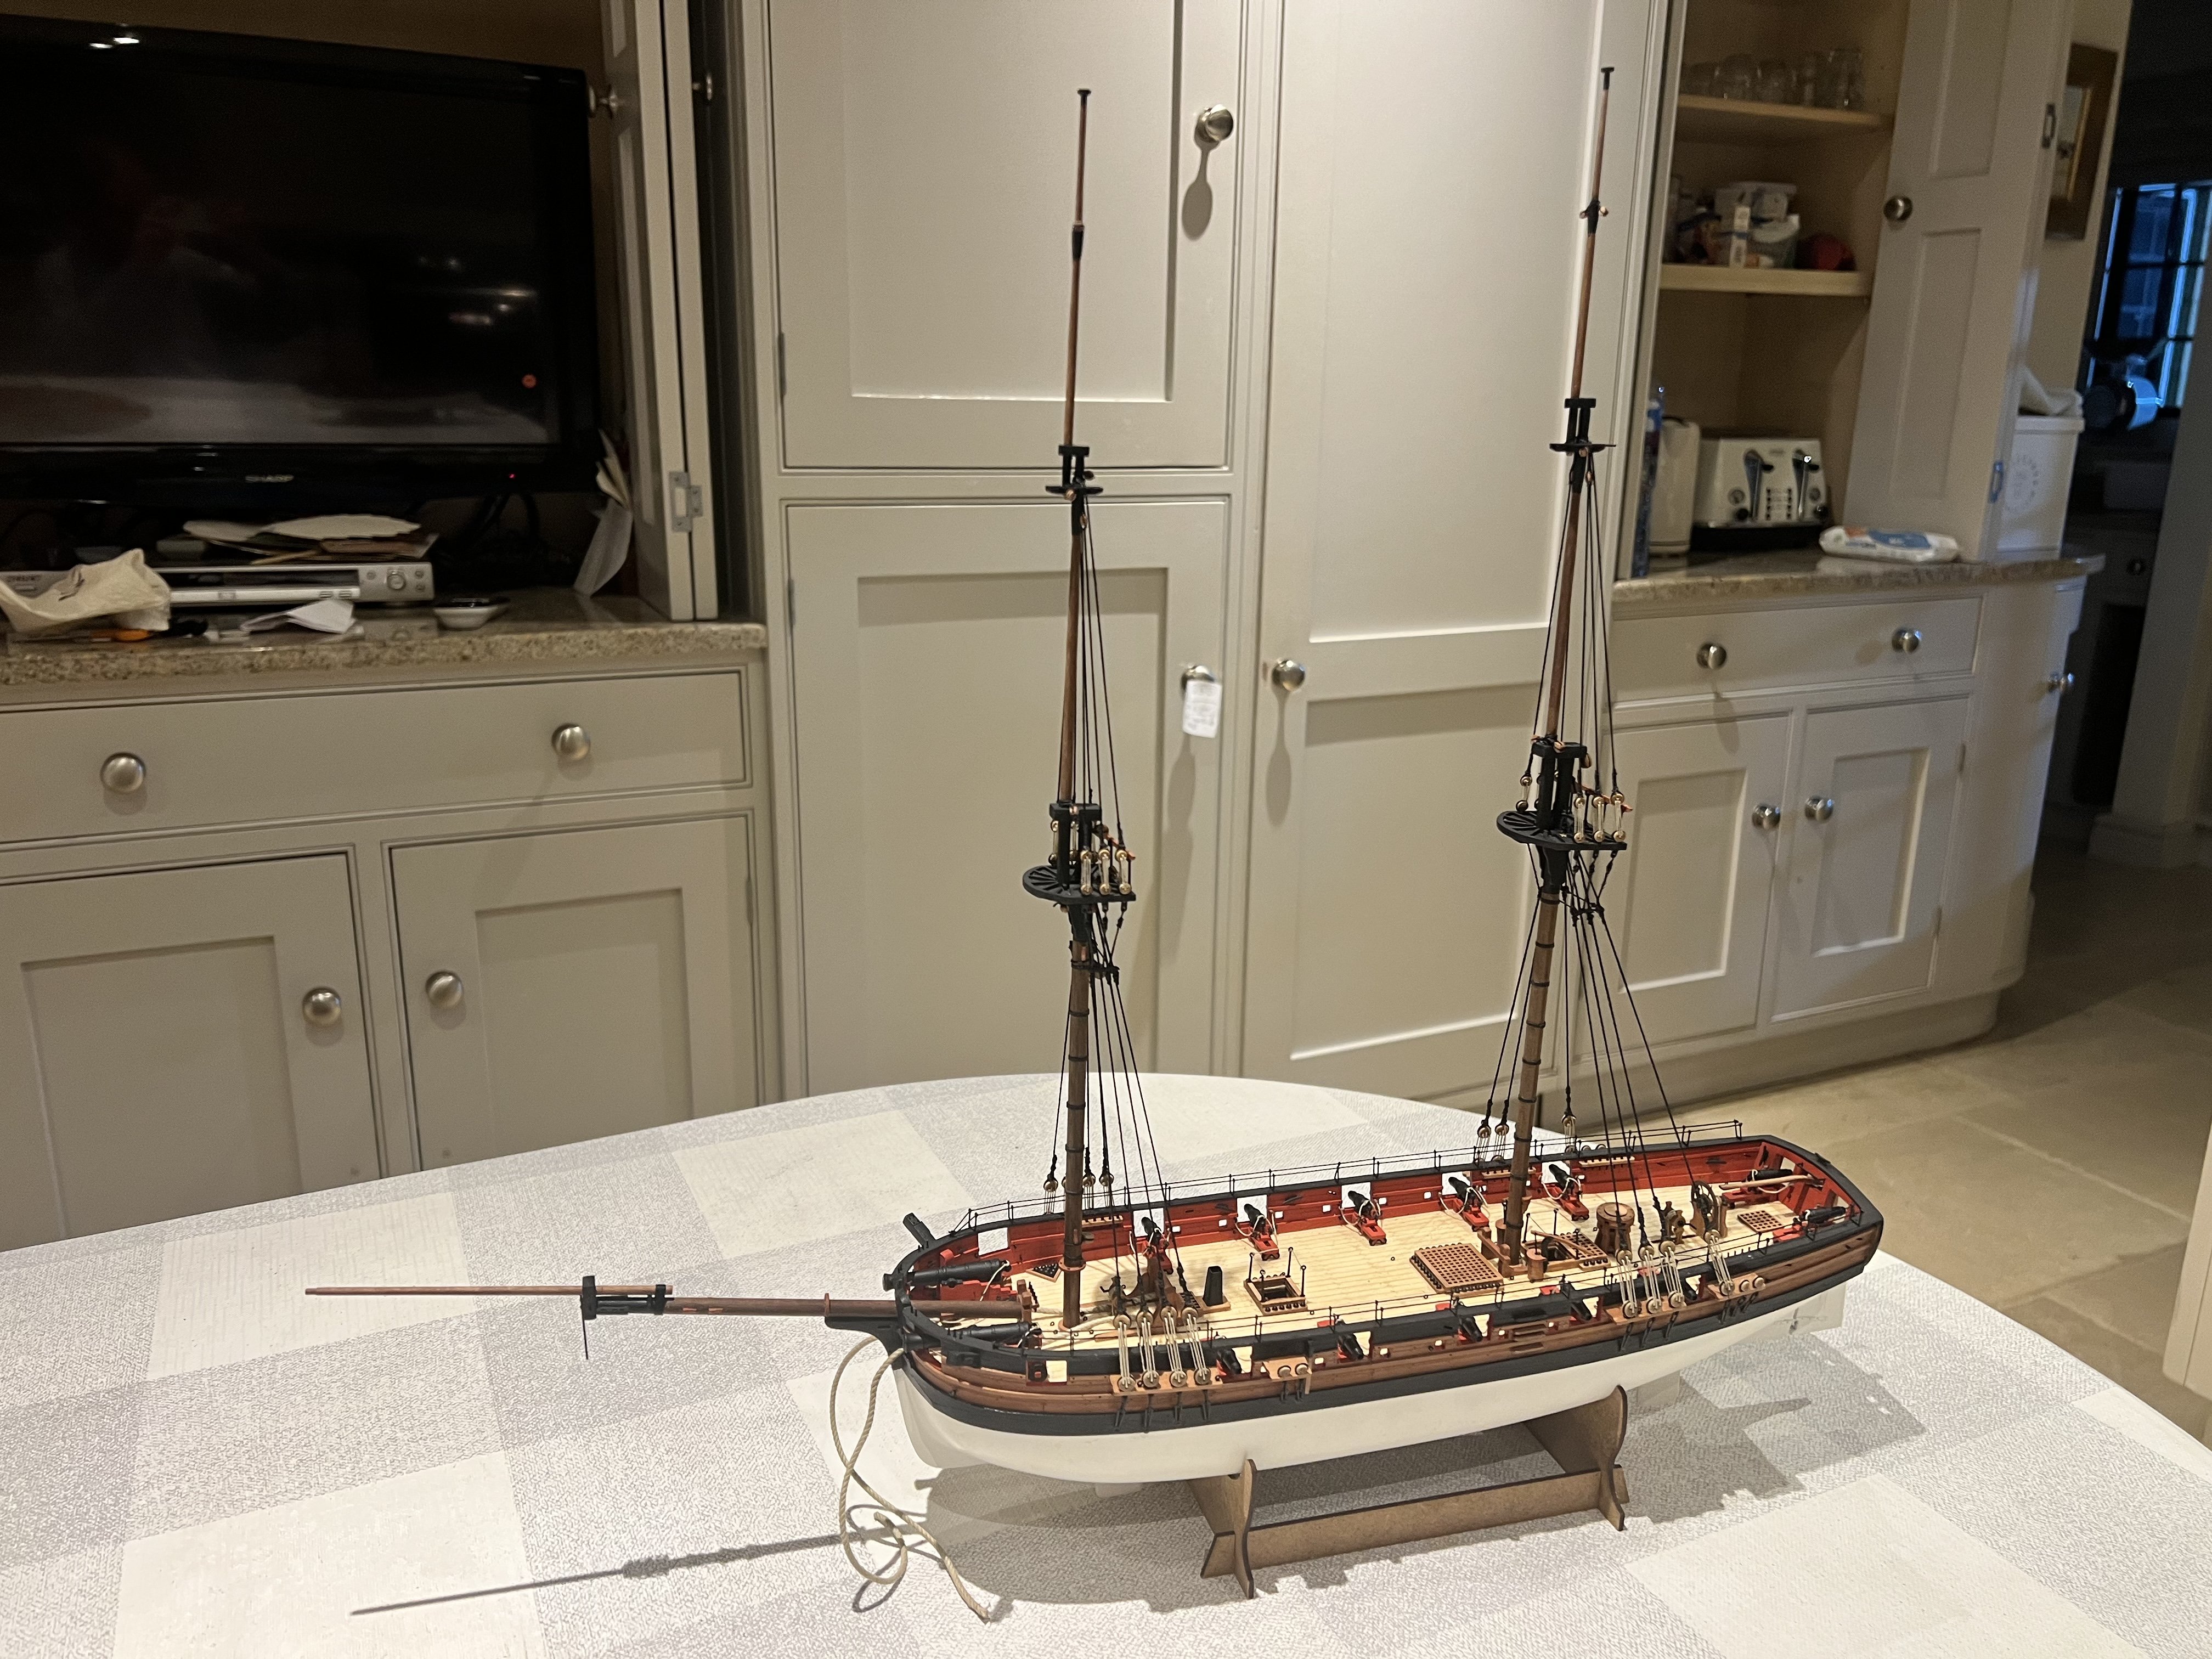
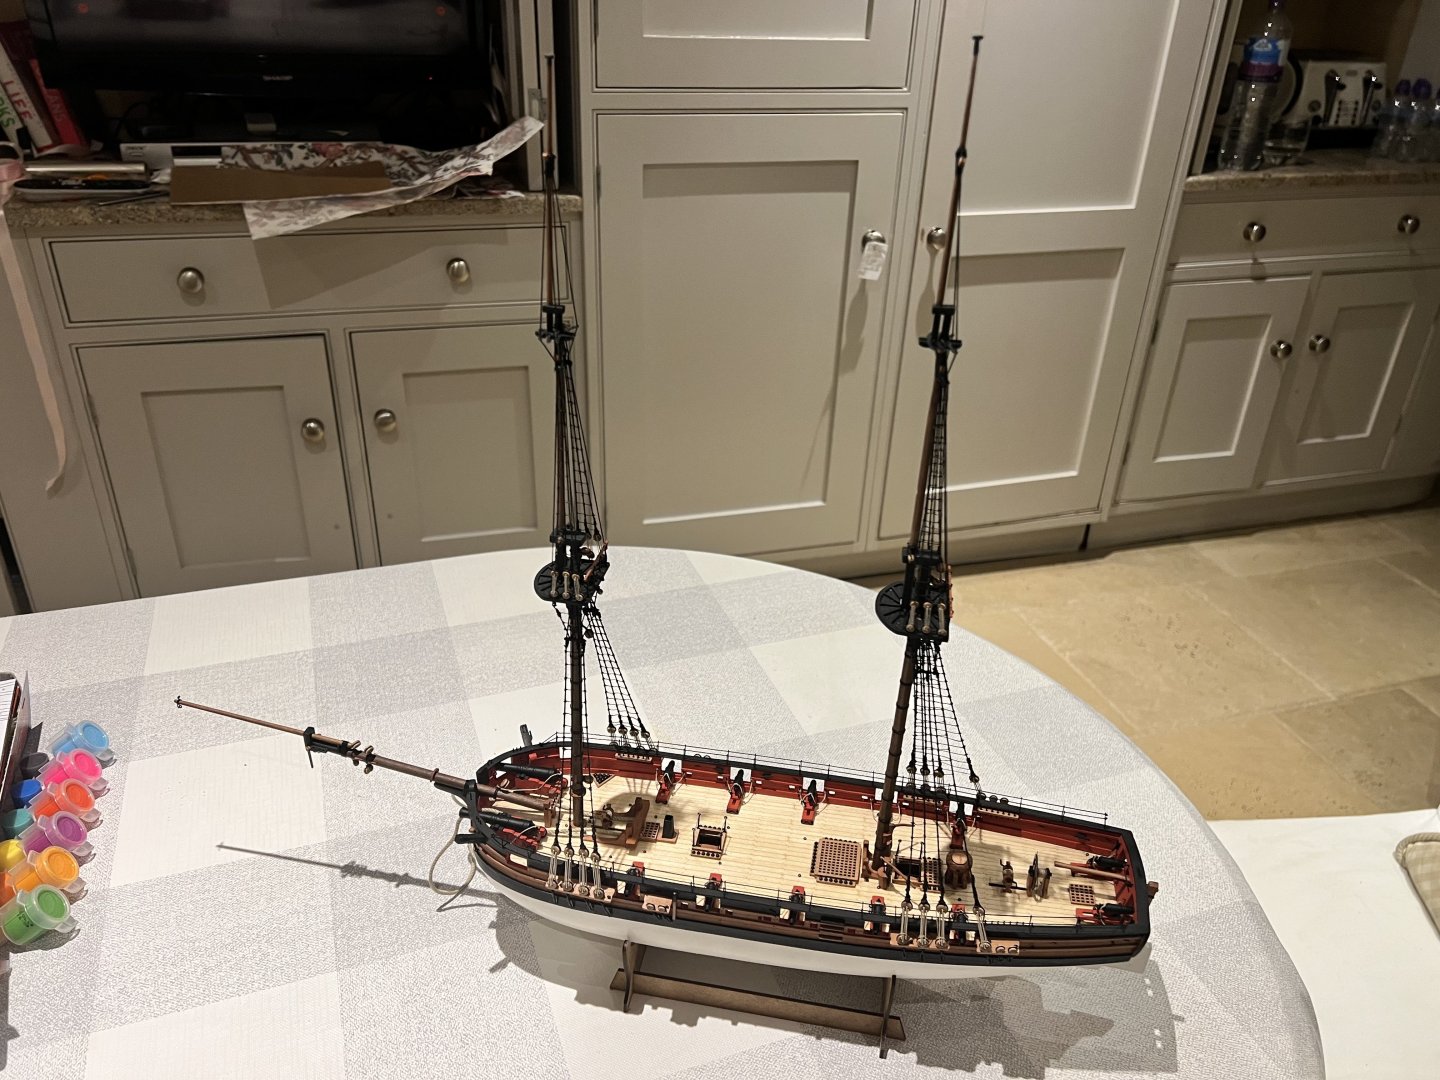
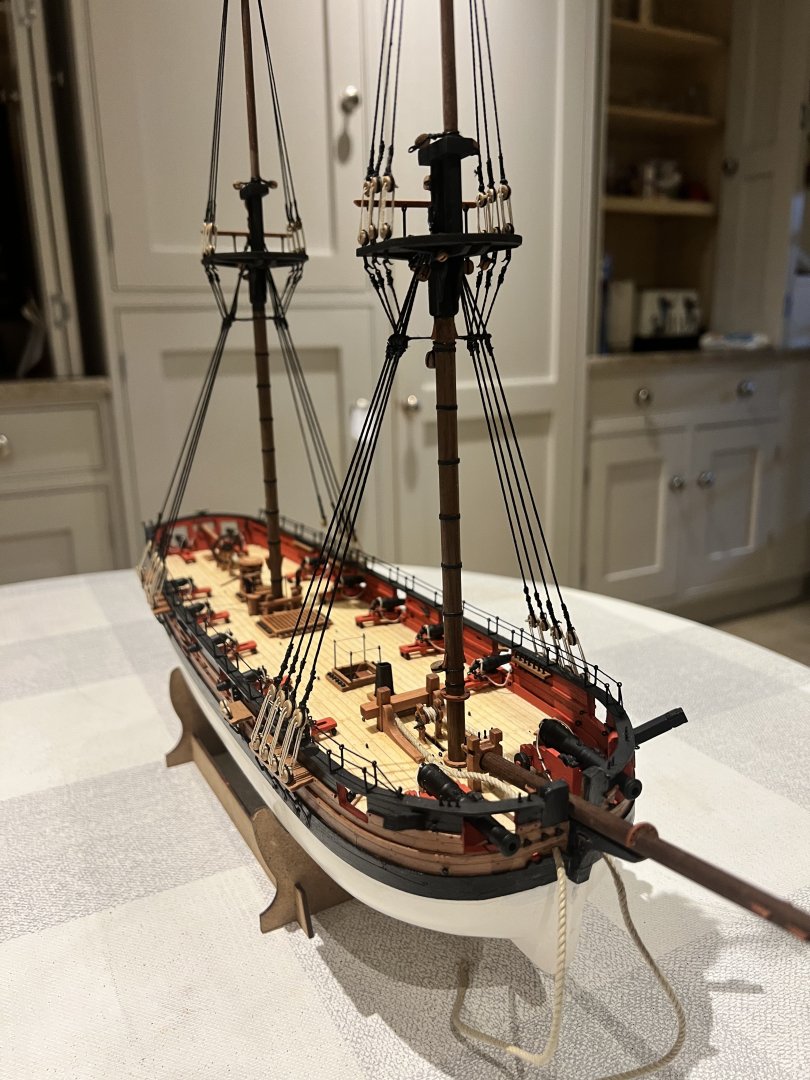
Shrouds and ratlines complete. I’ve attached the bowsprit too. Rigging the bowsprit next, then making and adding the spritsail yard.


- 146 replies
-
- 11
-
-
- Adder
- Vanguard Models
- (and 1 more)
-
Looking great. Think you’re going to overtake me at this rate!
- 66 replies
-
- 2
-
-
-
- Adder
- Vanguard Models
- (and 1 more)
-
Congrats - she looks super. Dan
-
Making some good progress on the ratlines, just the main topmast ratlines still to do. I have added the fore topgallant shrouds too. As always, plenty of room for improvement! Once the shrouds/ratlines are complete, I’ll fit and rig the bowsprit and spritsail yard. I’ll follow the build order in the instructions after this which suggests adding the yards, boom and gaff (all yet to be made). I’m a little worried they will be in the way when I add the stays, but I guess it’s the case vice versa too?

- 146 replies
-
- 13
-
-
- Adder
- Vanguard Models
- (and 1 more)
-
Hi Eck, your Adder is looking super, hope you’re enjoying building her as much as I am. I think that the last two posts were probably meant for your build log? Best wishes Dan
- 146 replies
-
- 1
-
-
- Adder
- Vanguard Models
- (and 1 more)
-
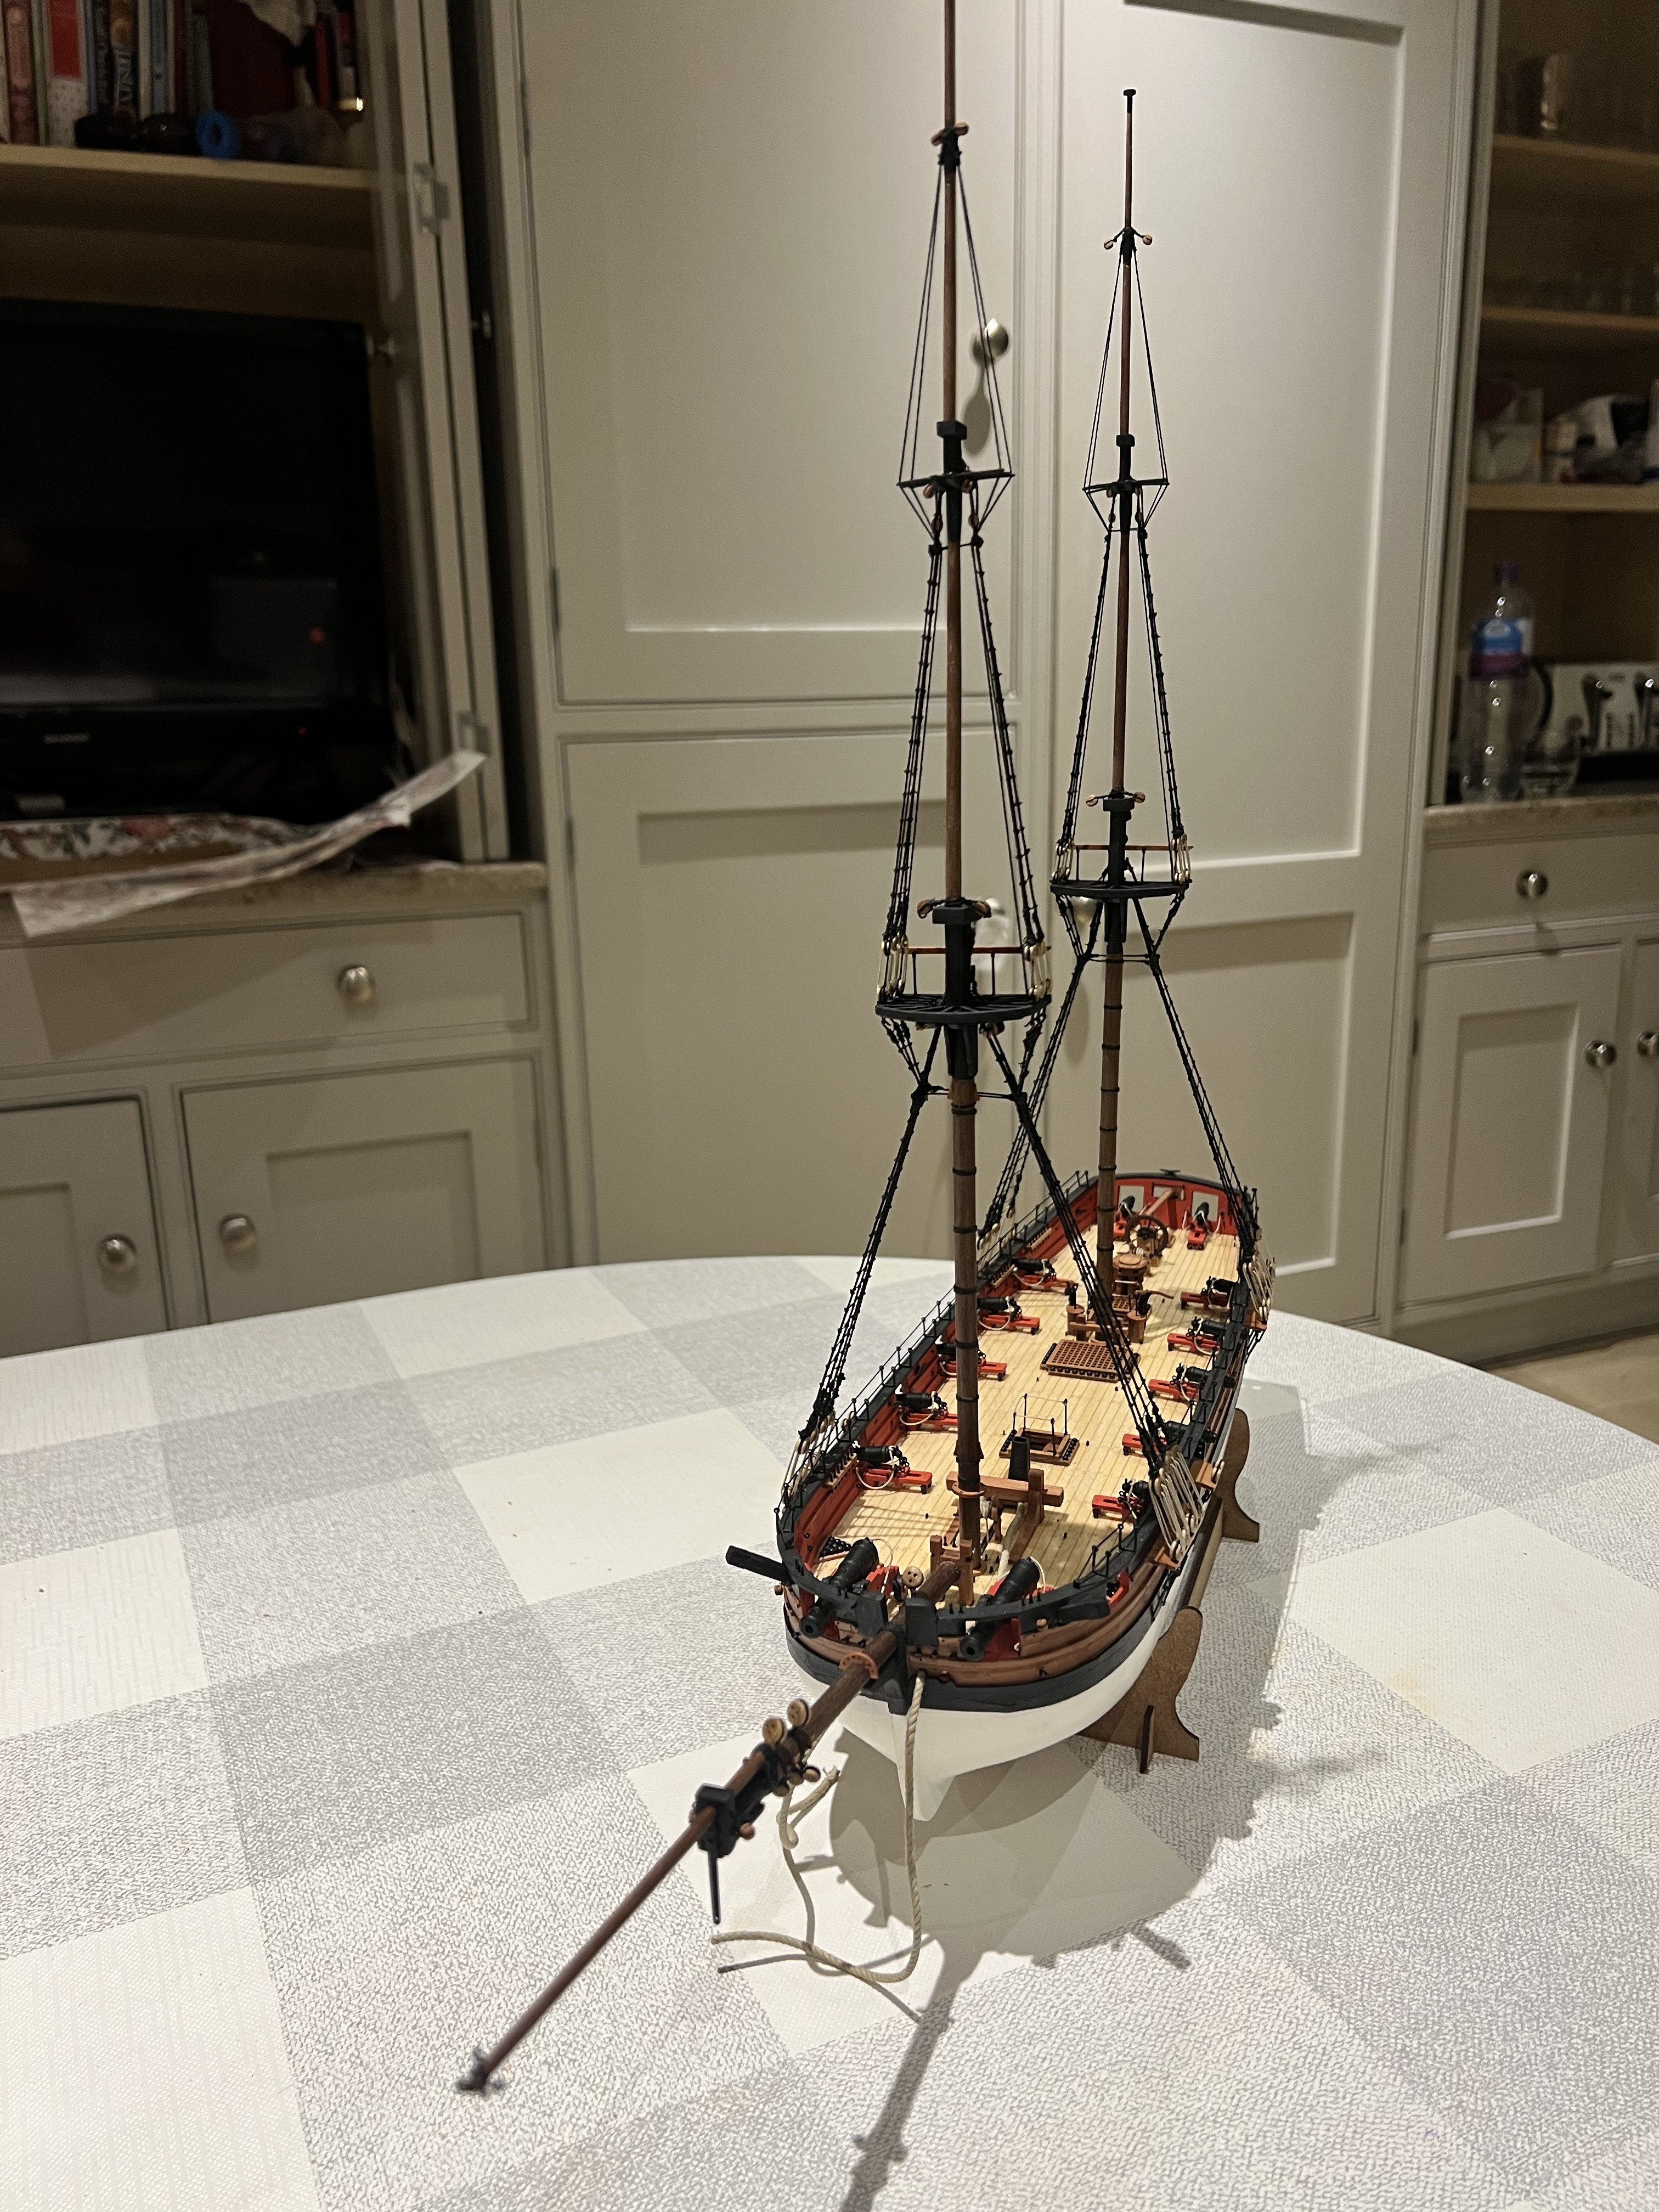
Futtock shrouds and topmast shrouds added. Still need to add futtock staves and catharpins to the topmast shrouds. Then onto ratlines followed by topgallant shrouds. There’s definitely work I need to do to get my knots and seizings tidier! Nice to see her start to take some “3D” shape above decks now. My next post may not be for a week or two as the ratlines will take a while and I may break up the monotony after doing one mast and fit out the bowsprit and make the spritsail yard. I haven’t made any of the spars or yards yet.
- 146 replies
-
- 11
-
-
- Adder
- Vanguard Models
- (and 1 more)