
DB789
-
Posts
429 -
Joined
-
Last visited
Content Type
Profiles
Forums
Gallery
Events
Everything posted by DB789
-
 Thanks so much Glenn. The end of the yard has a metal collar on so I wasn’t able to drill enough around to remove the old PE but I could get the new piece into the yard alongside it. It’s not absolutely at the centre of the yard, but once painted it will be almost invisible.
- 106 replies
-
- 2
-

-
- Grecian
- baltimore clipper
- (and 4 more)
-
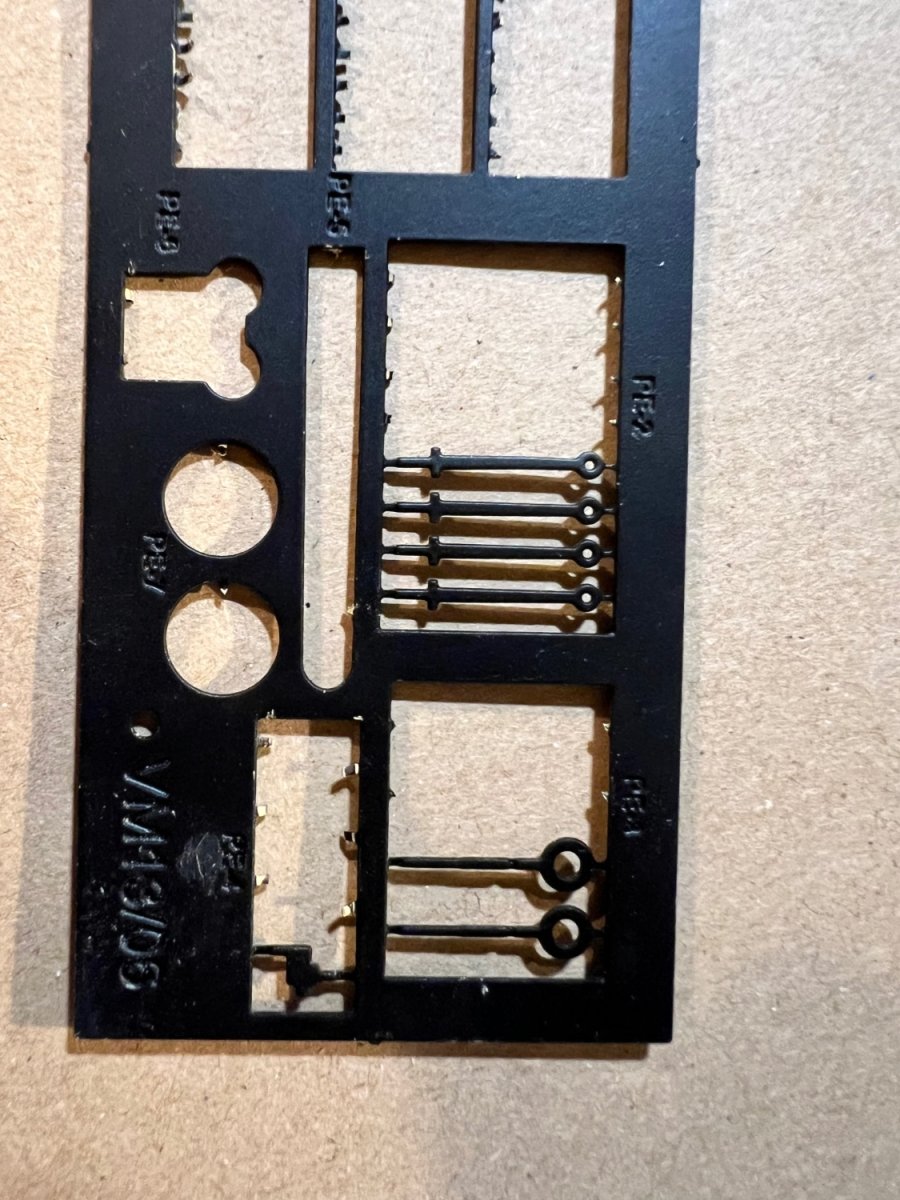
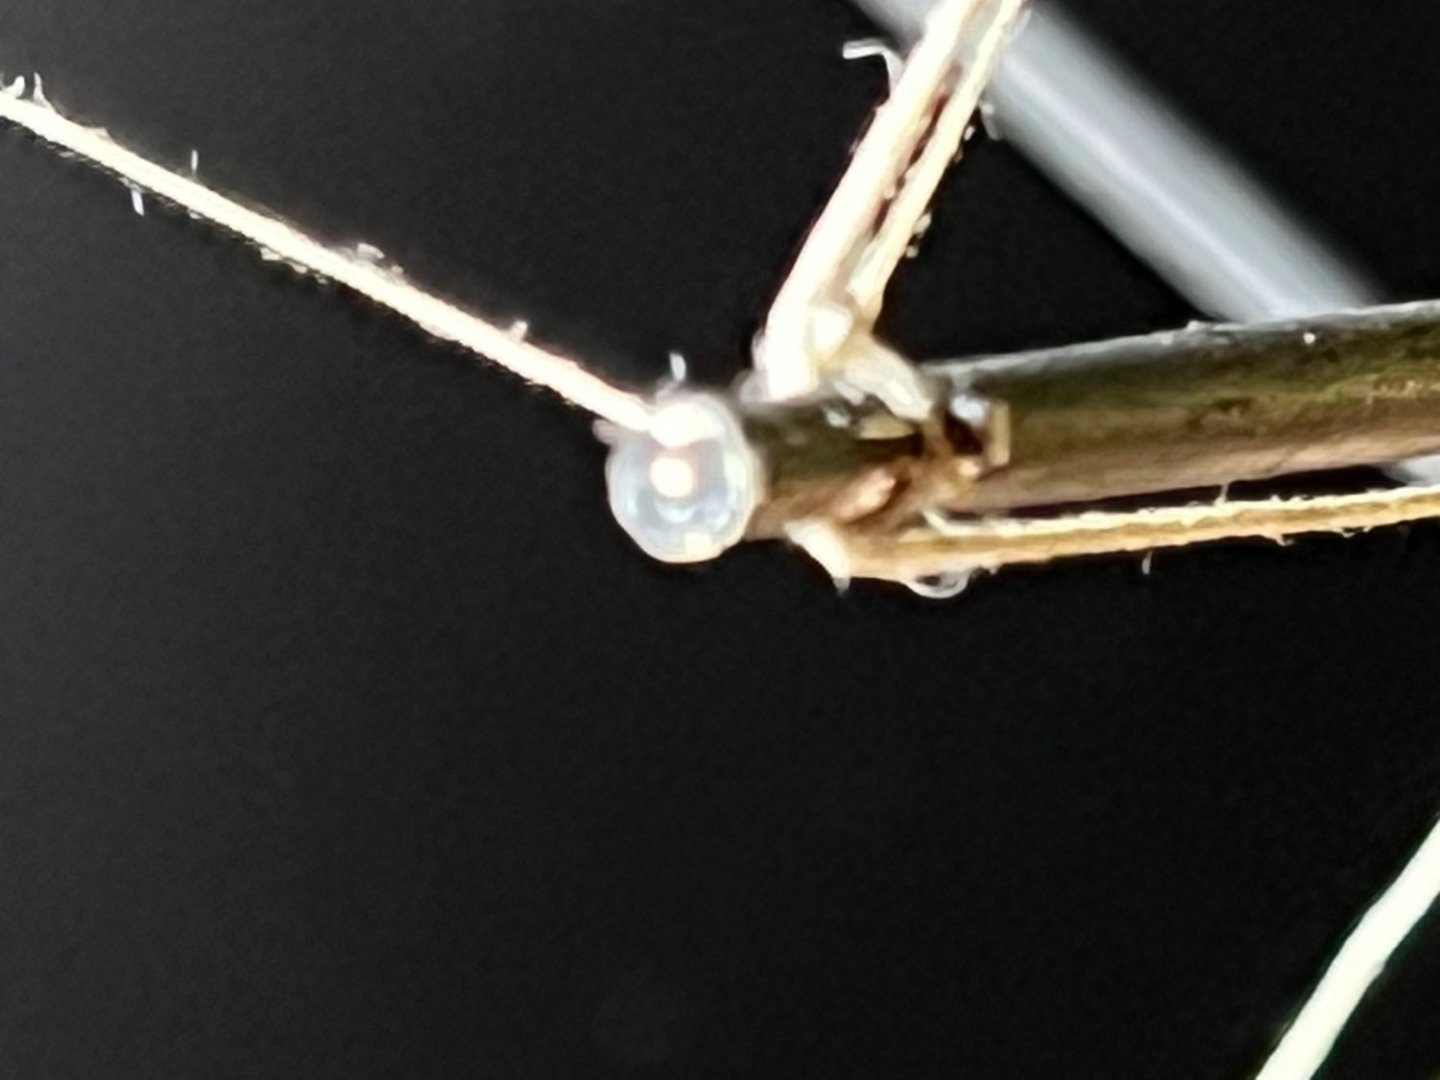
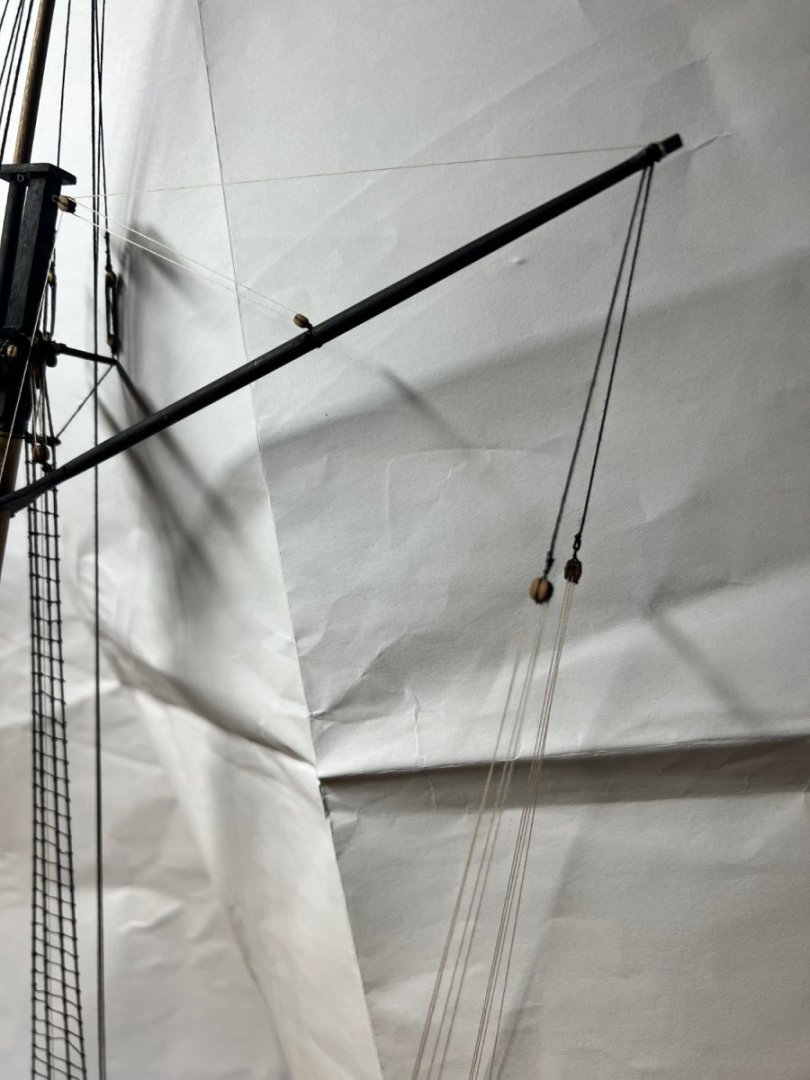
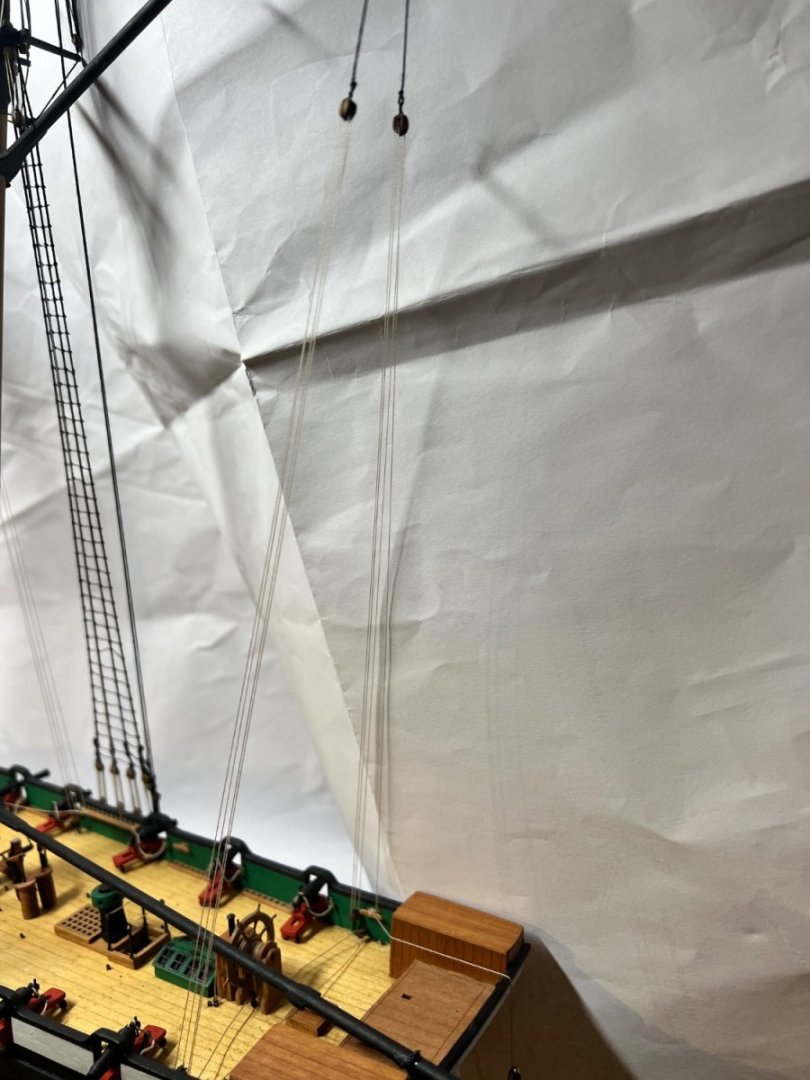
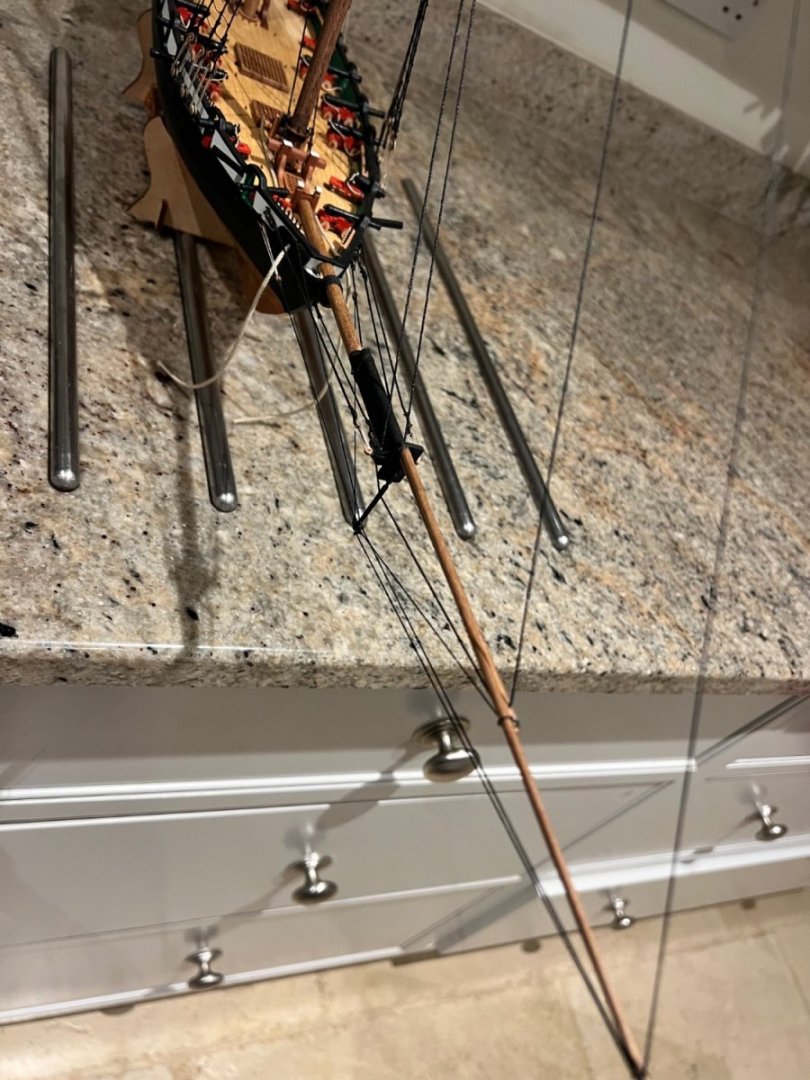
Whilst working on the rope coils, Grecian took some light battle damage from the children. The starboard stunsail boom was knocked off. It has survived but the PE metal mounting for it that comes out of the fore course yard has snapped off. Really bad iPhone photo below, I don’t know how to get the phone to focus right in. The brass dot in the middle is the stump that remains of the original PE-4. Vanguard are amazing in that they supply extra parts with each kit - so I have a replacement. To fit the original piece I drilled a hole in the end of the yard and glued the PE in place with CA. Can anyone advise me on the best way of gently removing the old stub of PE which is superglued in pretty tight? I’ve tried using a little acetone around it but without success. I can’t remove the yard as there’s so much rigging attached to it. Any advice would be hugely welcome! Many thanks Dan

- 106 replies
-
- 5
-
-
- Grecian
- baltimore clipper
- (and 4 more)
-
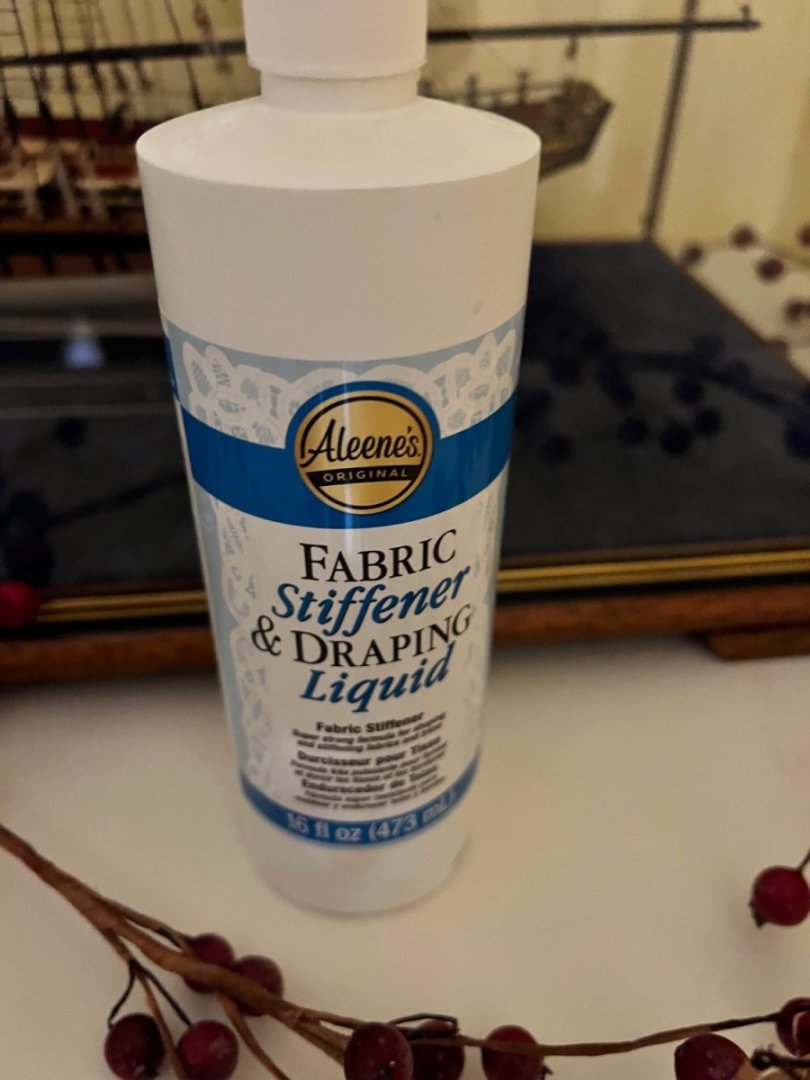
Thank you all for your very kind comments. Craig - I followed Jim’s very useful guidance in the Grecian prototype log regarding the flag. I used the starch product below. It comes out as a thick opaque white goo which you soak the flag in for a few mins before wiping off with a damp cloth and then I hang the flag on its line between two arms of the quad hands and squash to shape using crocodile clips. I didn’t quite wipe enough off and there’s a mild residue on the surface. Also the crocodile clips can leave dimples that will need working out. But the overall effect looks good I think. It’s the flag that Vanguard sell as an extra for the kit and is both very high quality and period correct for the number of stars.
- 106 replies
-
- 2
-
-

-
- Grecian
- baltimore clipper
- (and 4 more)
-
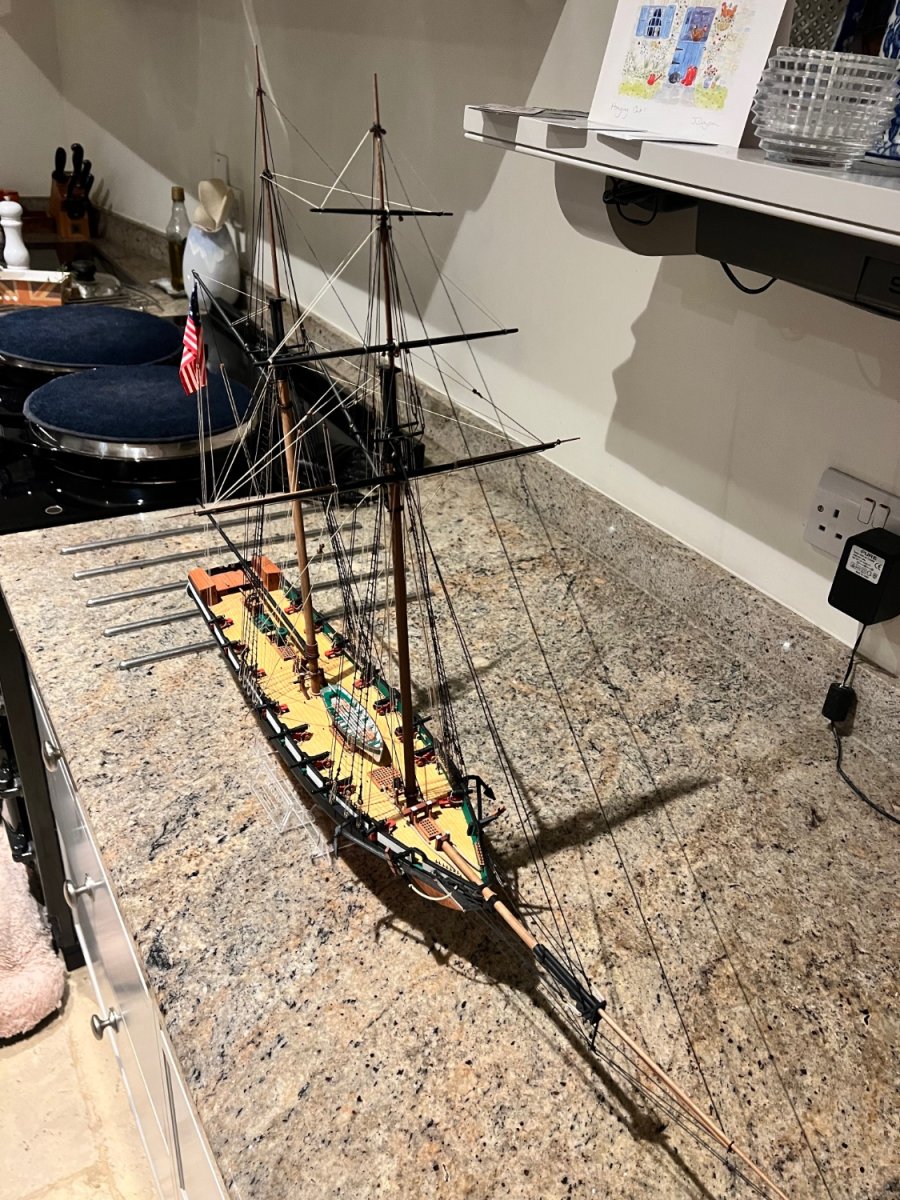
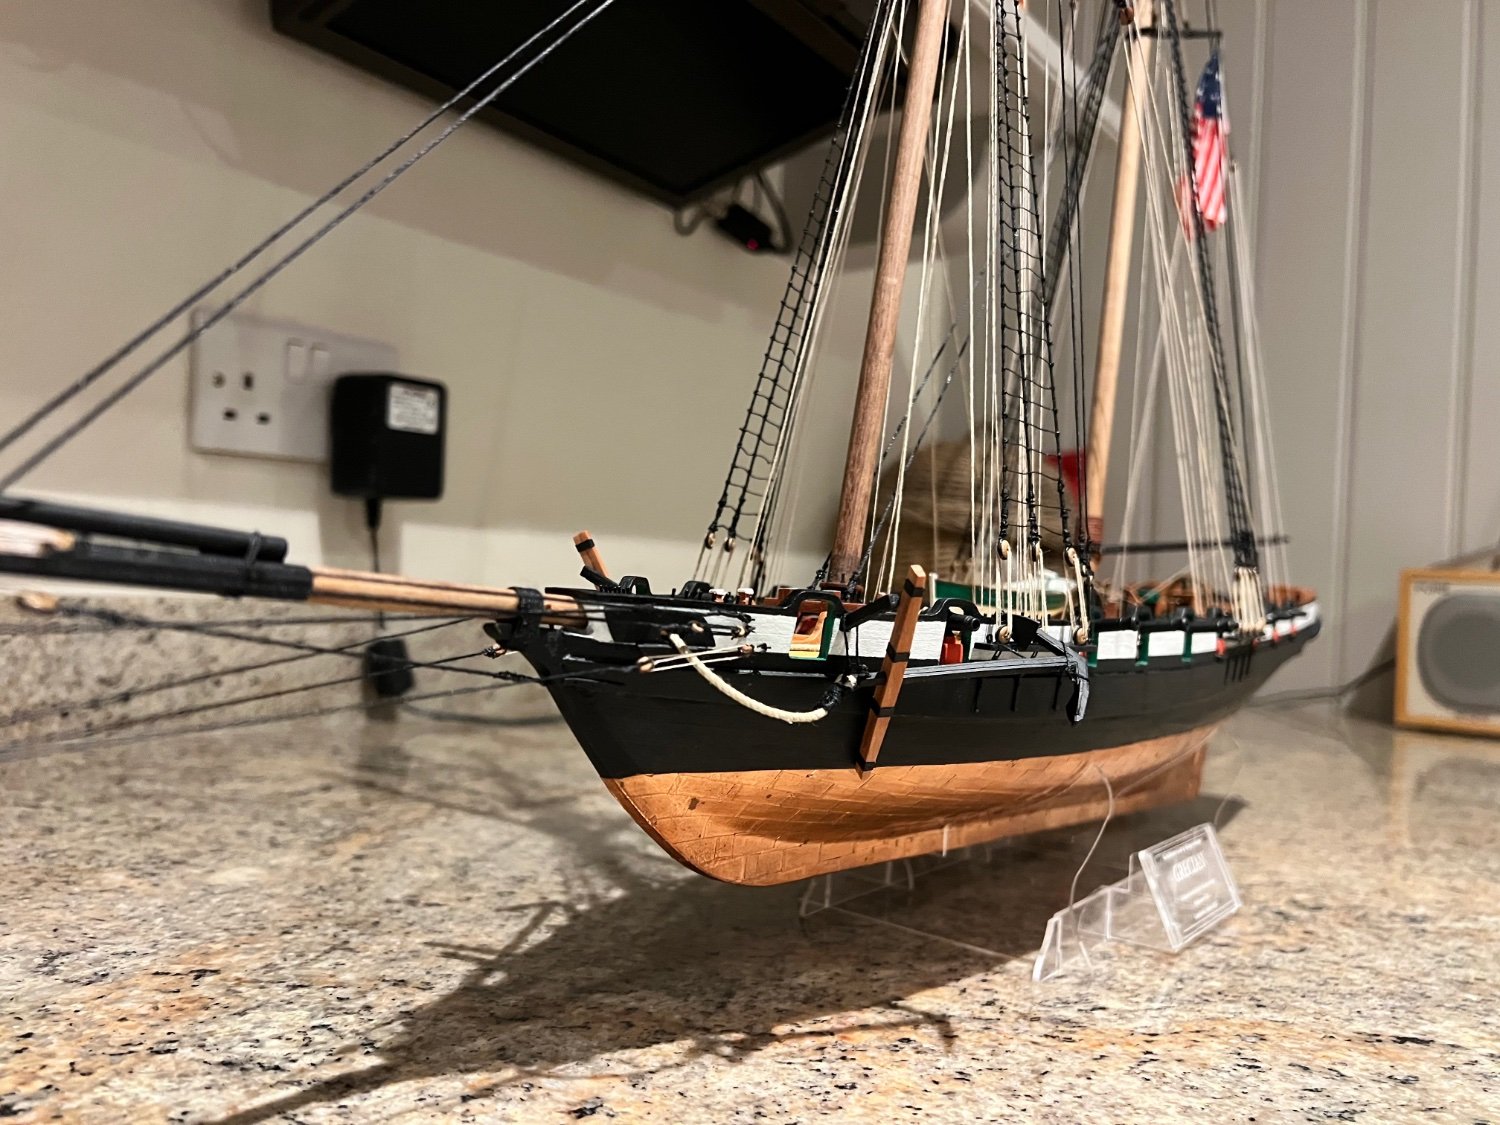
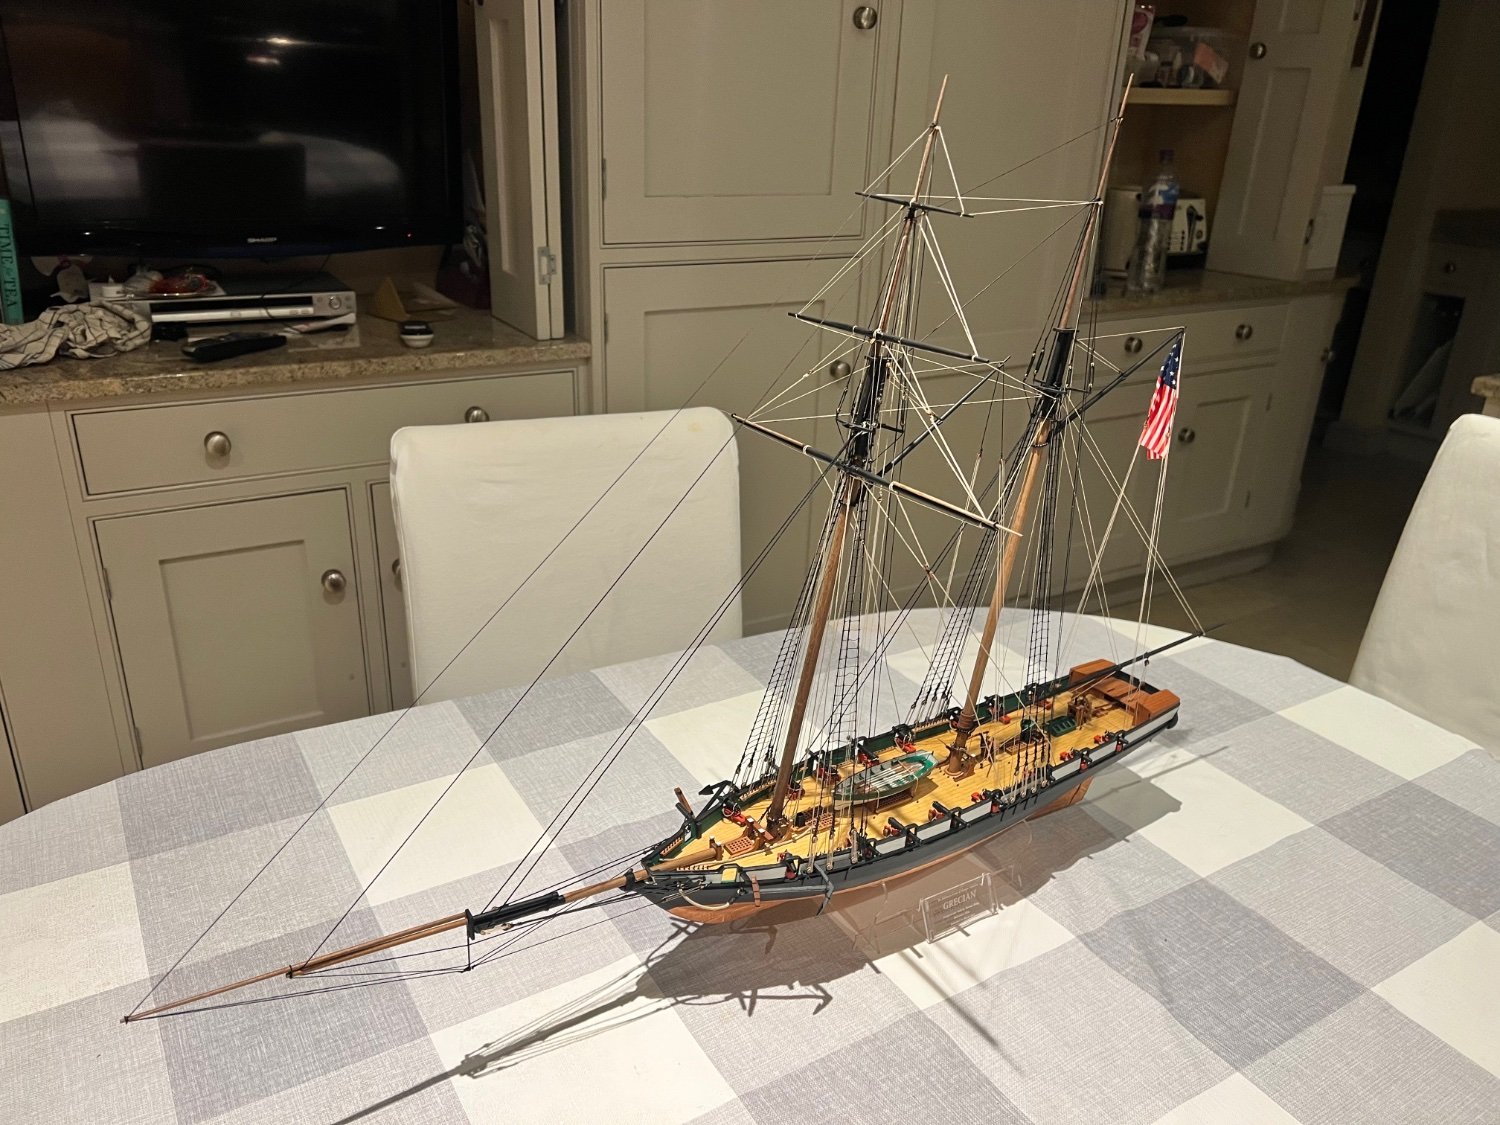
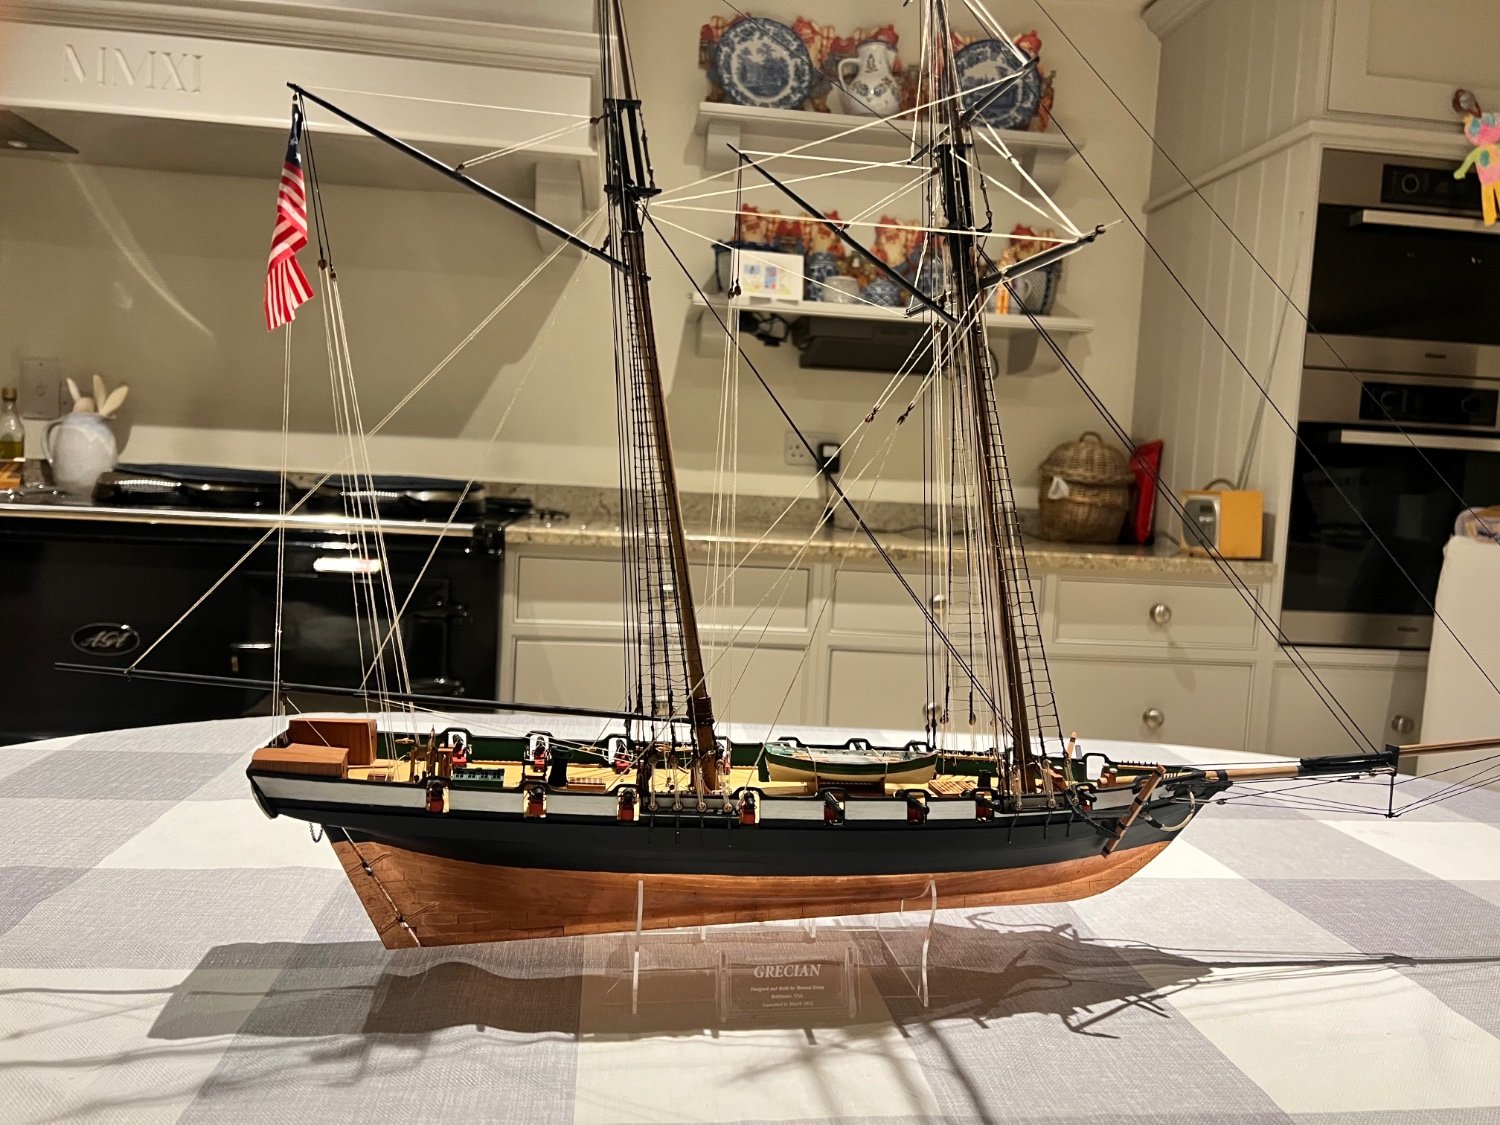
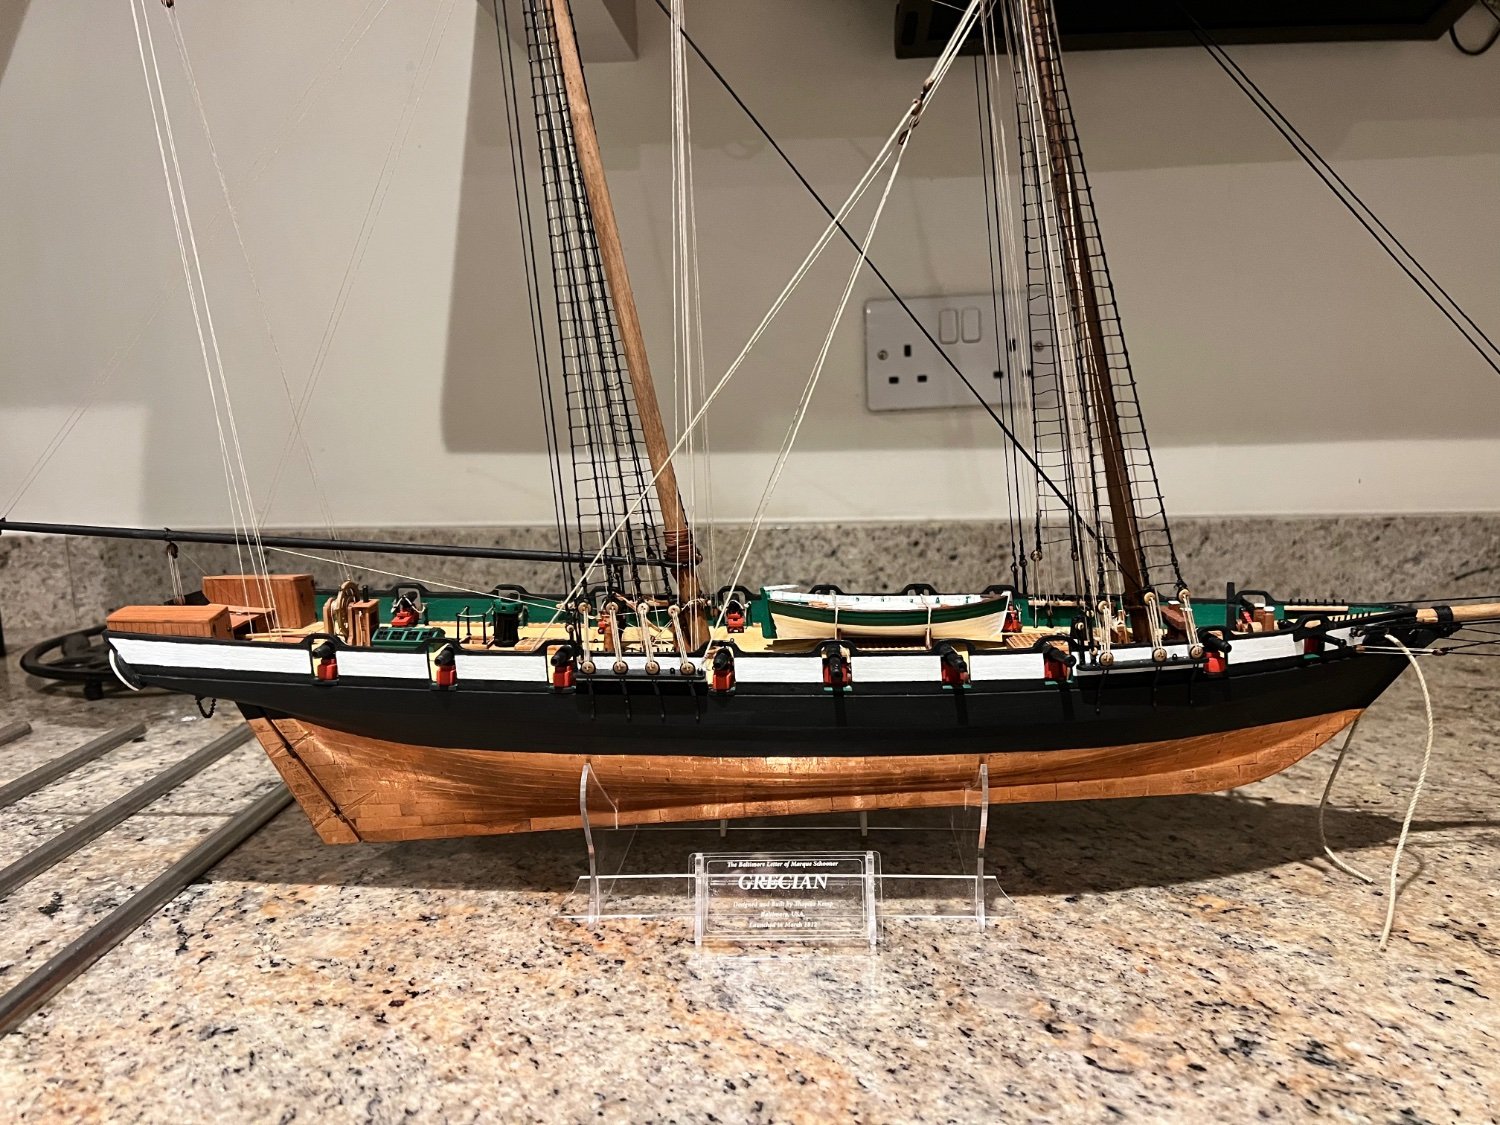
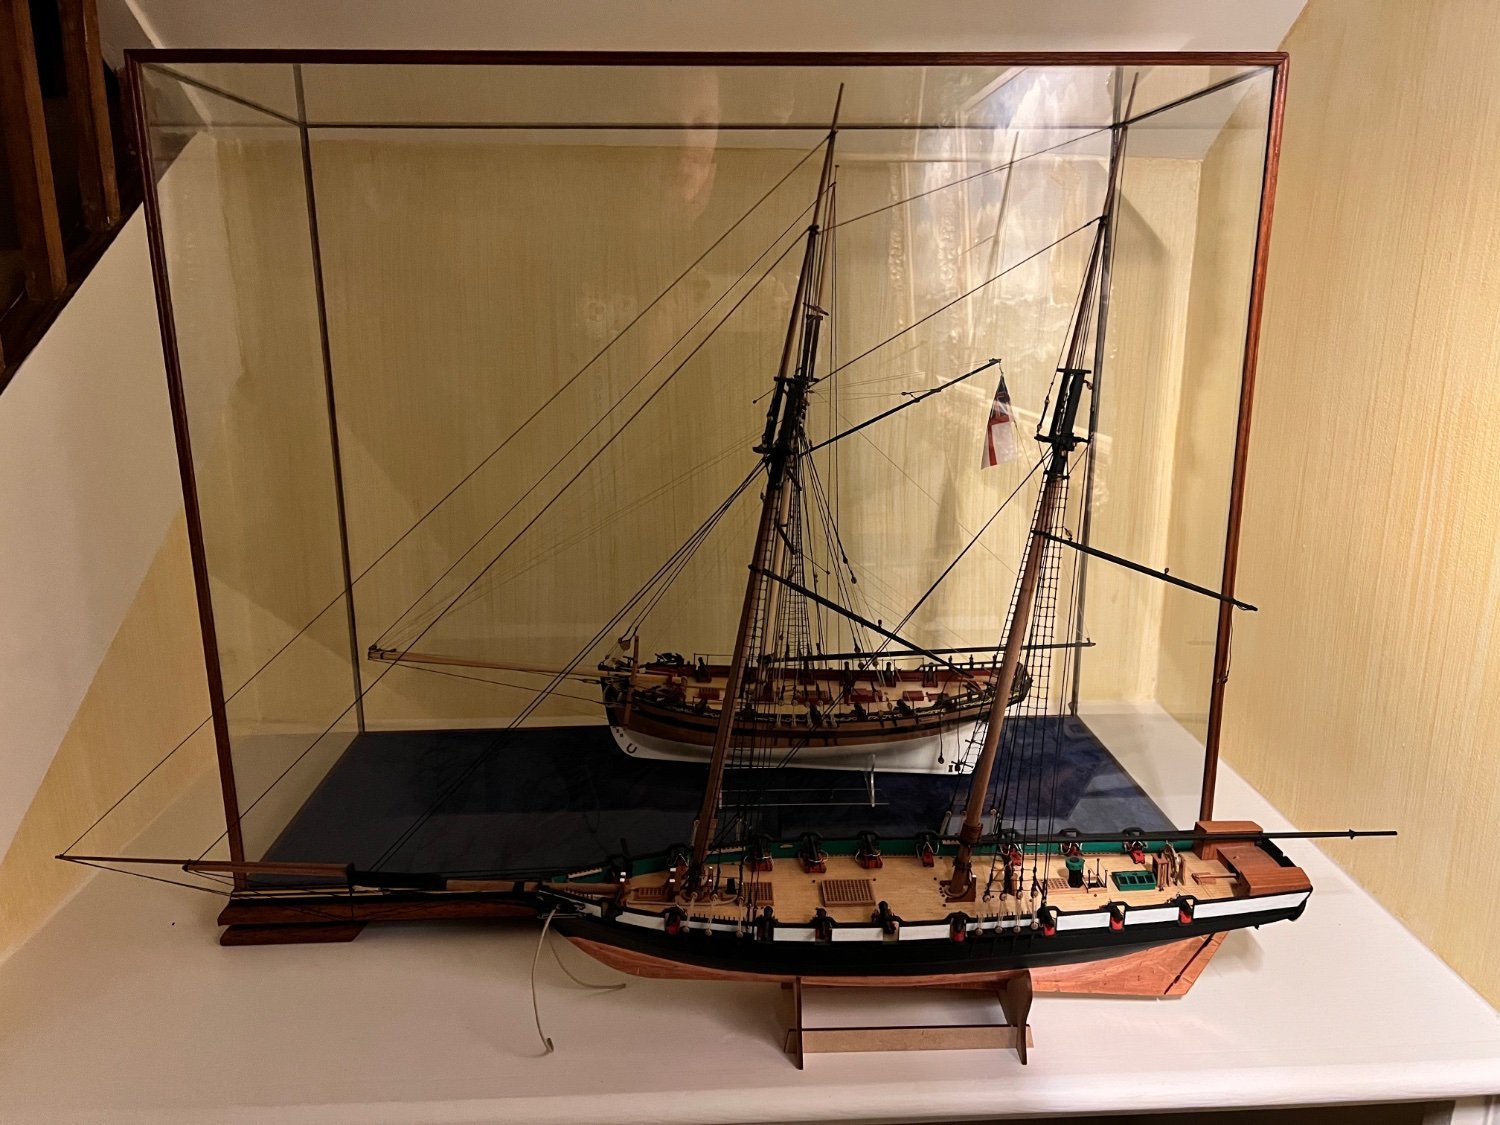
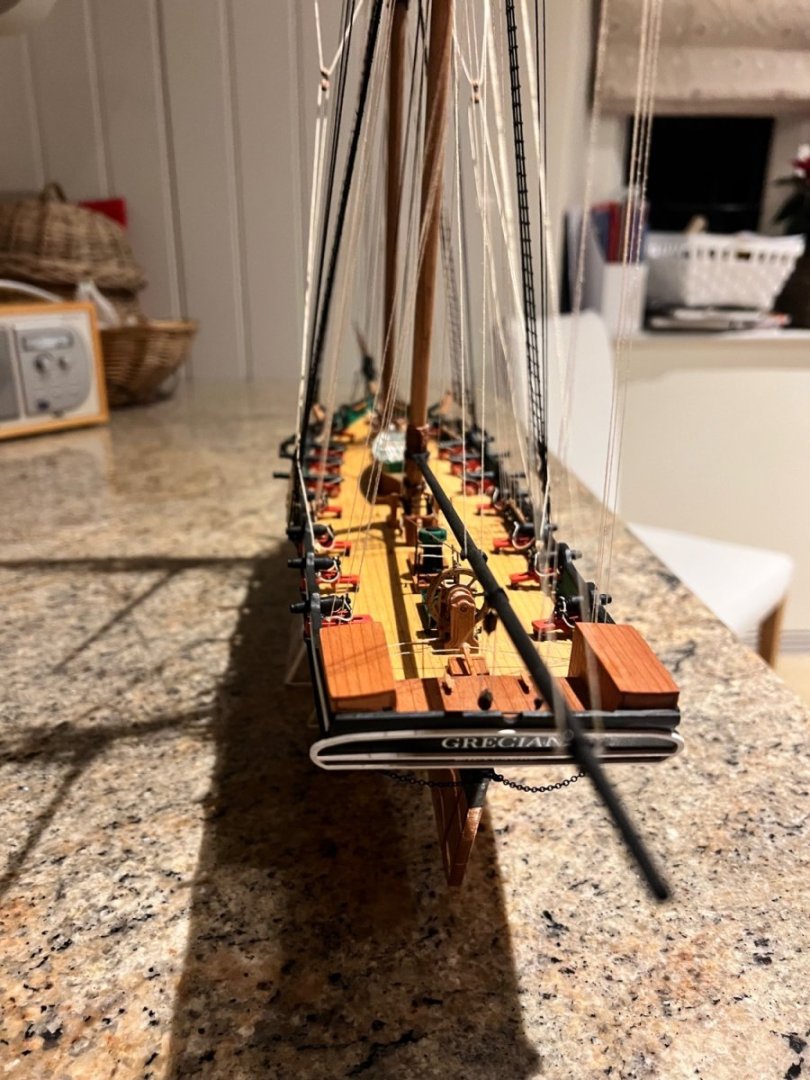
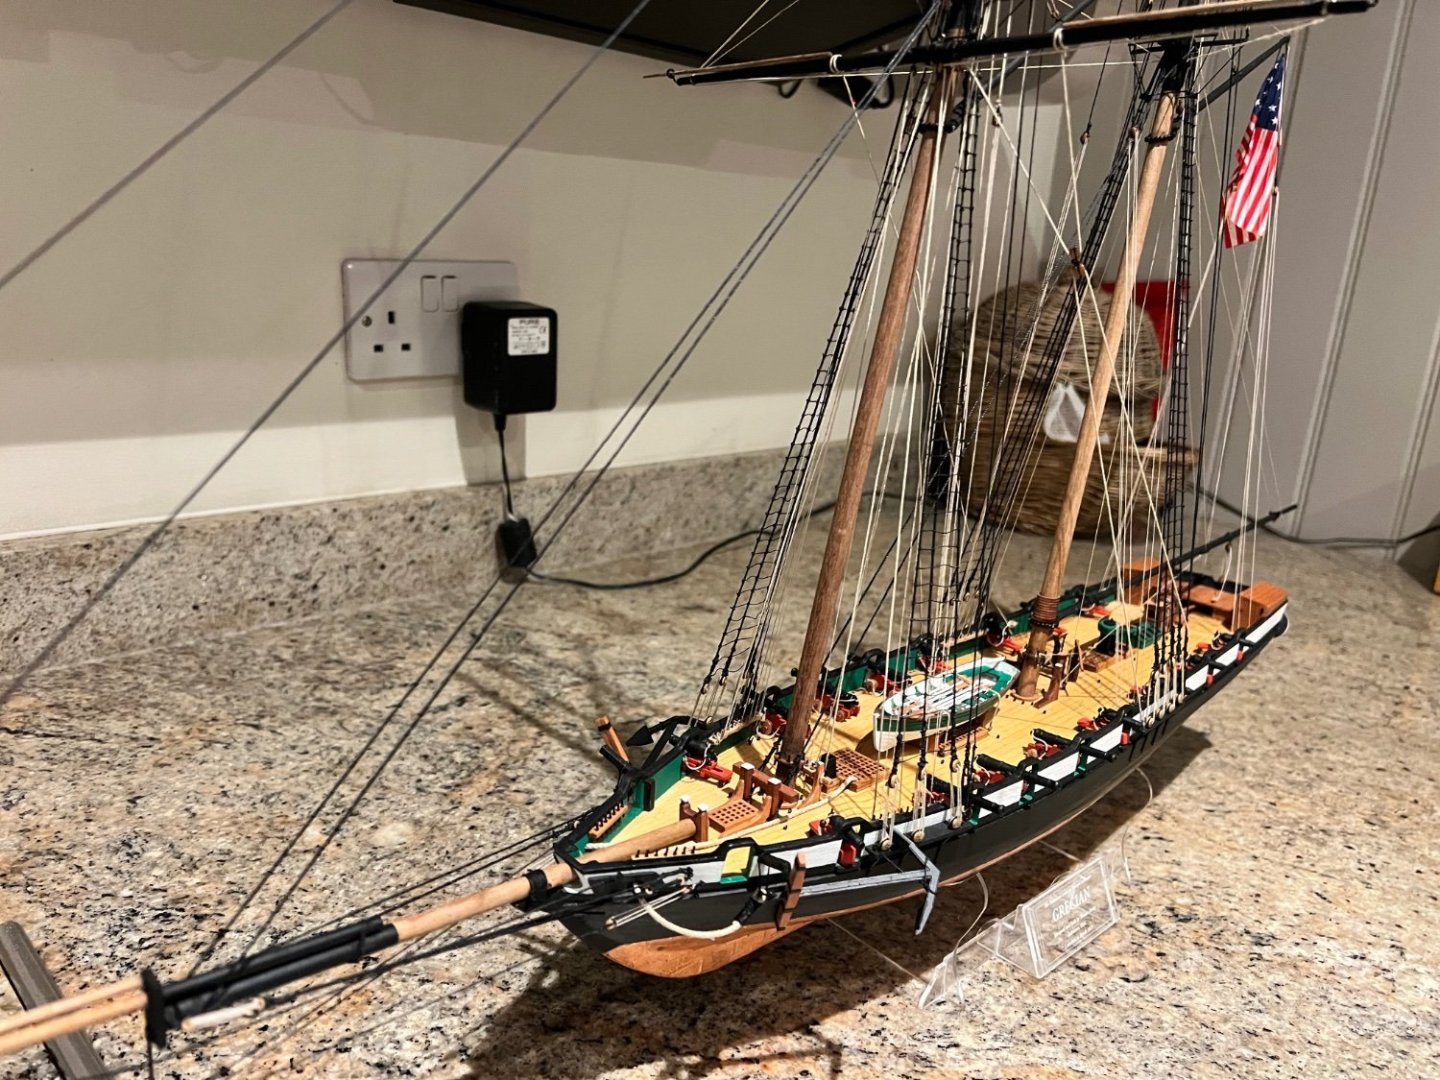
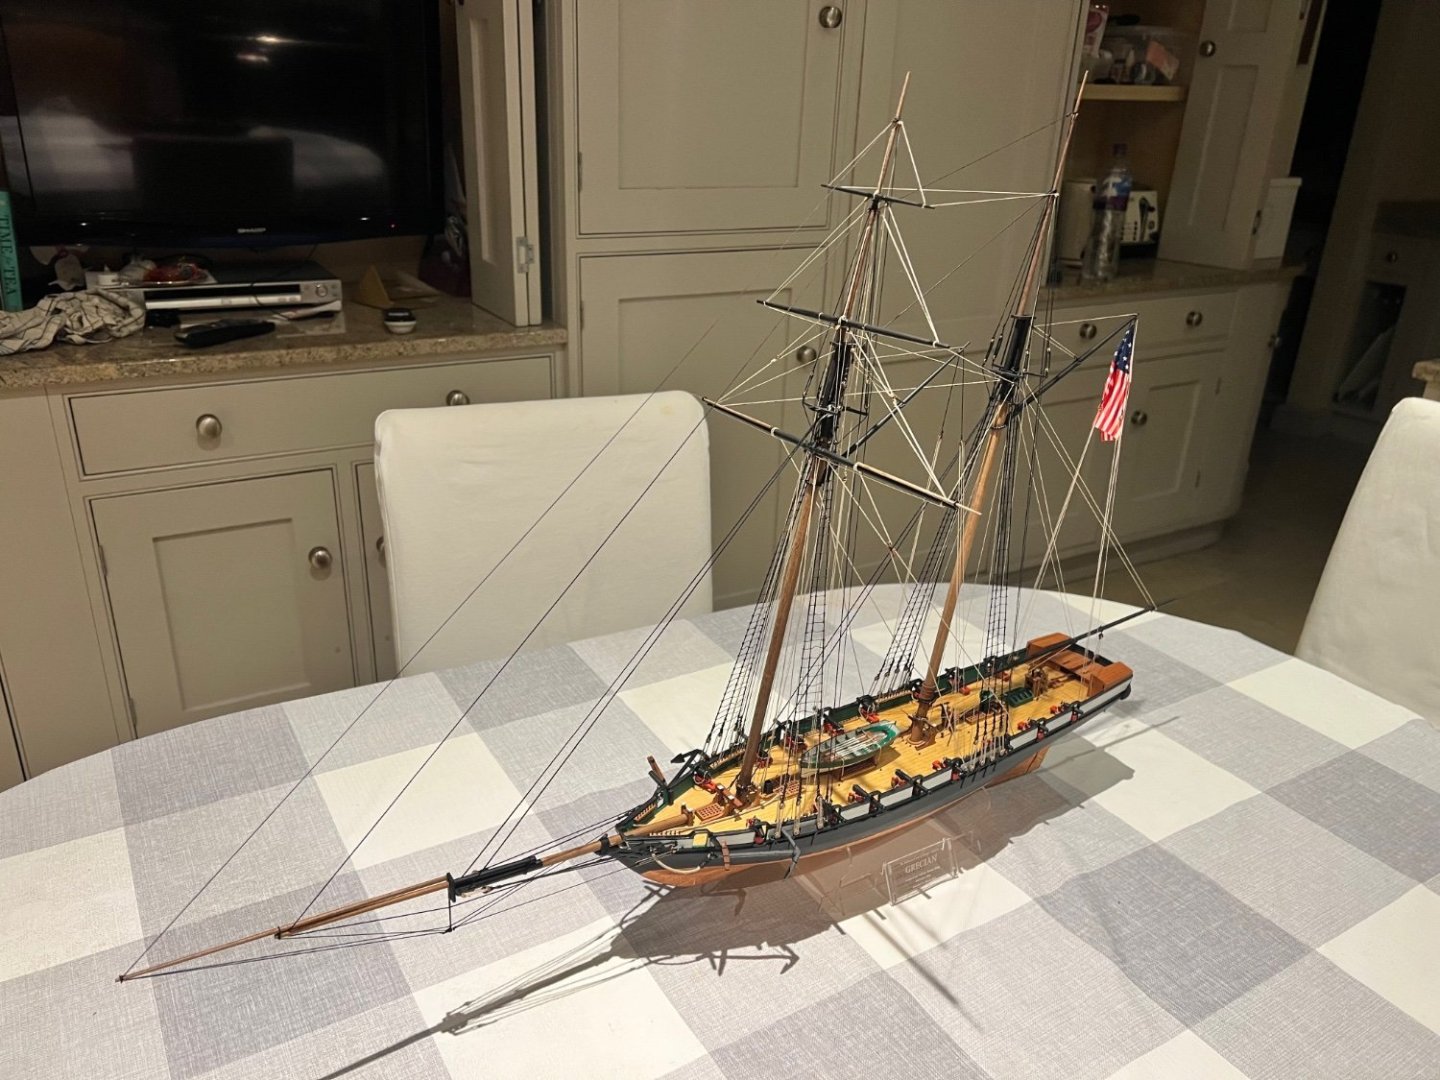
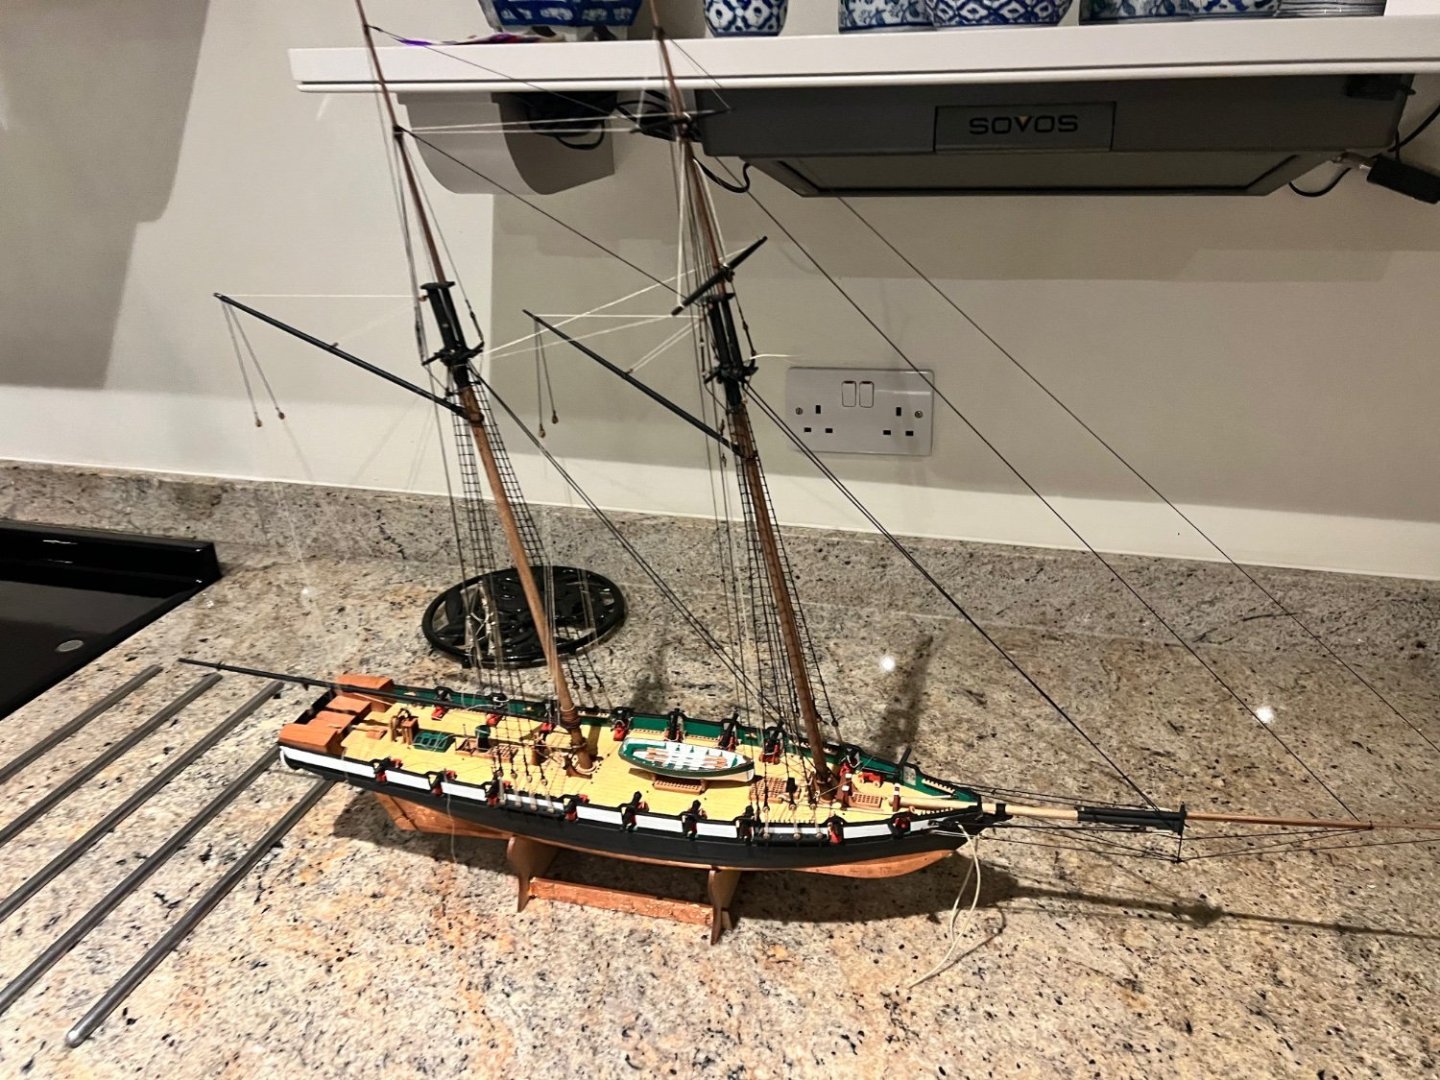
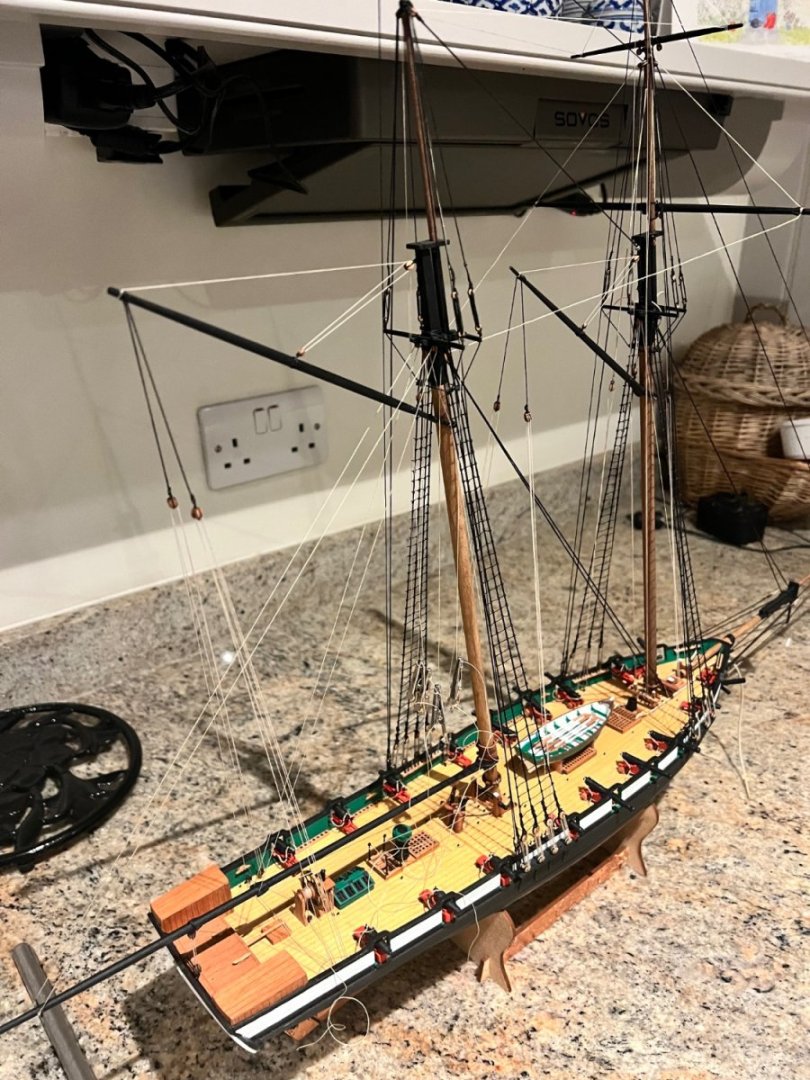
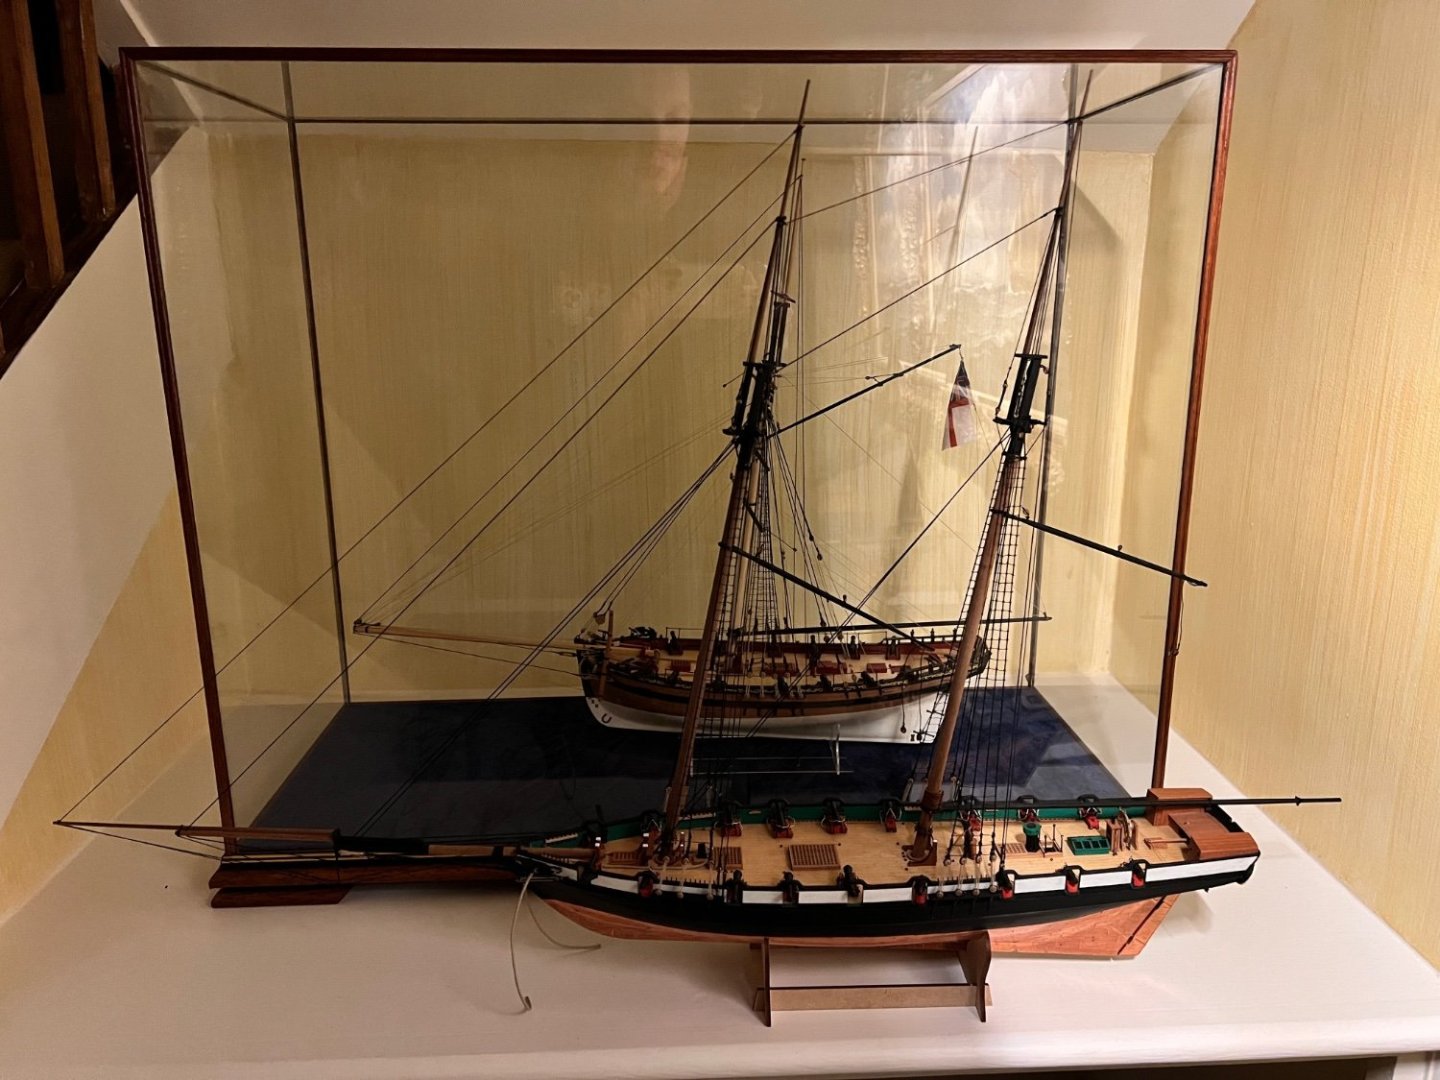
Grecian is complete, except for the rope coils. I’ve decided in the end to leave the front two gunports empty as the prototype does. You can just squeeze in two of the smallest cannon there but it’s a squash with the anchor cable too. I’ll do those and Alert’s rope coils over the next couple of weeks and then mark both boats complete. I haven’t varnished the copper tape either. I thought I’d leave that and see if it tarnishes a bit before doing so. Some photos. Yet another excellent kit from Chris and Jim. Thank you. She’s a lovely looking Baltimore clipper and I’m very pleased with how she has turned out. I’m ordering a very large case for her to accommodate that huge bowsprit. Ranger next for me, then likely the new version of Speedy. Thanks for all the encouragement, advice and likes. Much needed!


- 106 replies
-
- 13
-
-

-
- Grecian
- baltimore clipper
- (and 4 more)
-
I was wondering how I was going to fit more lines to that mast and belaying points… somewhat relieved it wasn’t the simplified version! Thanks Chris.
- 106 replies
-
- 1
-
-
- Grecian
- baltimore clipper
- (and 4 more)
-
Chris, The world is short of copper and the situation is likely to be tough for the foreseeable future. There is huge growing demand for copper globally from the drive to net zero and electrification. Electric vehicles (which use 3-4x the copper of an internal combustion engine vehicle), decentralised renewable generation which needs to be connected to electricity grids (both of which are copper intensive), etc. Whilst copper supply is under pressure with few sizeable new ore bodies being found or new mines being developed; existing mines are experiencing significant ore degradation and do not have infinite mine lives. Most commodity experts I meet forecast the copper market being in material deficit from 2026 and with the deficit getting worse each year to 2030. Sure Tesla are doing some clever stuff with 48V and reducing the need for copper in EVs, but it’s unlikely to be sufficient or soon enough. Short of a major macroeconomic event such as a major recession or collapse in Chinese demand, I don’t see what derails the scenario outlined above. The current inability of your supplier to source copper may be due to post-covid supply chain and inflation related dislocations, so near term supply of copper sheets to your supplier may return, but longer term, high quality copper sheets are likely to become unavailable again or very expensive.
-
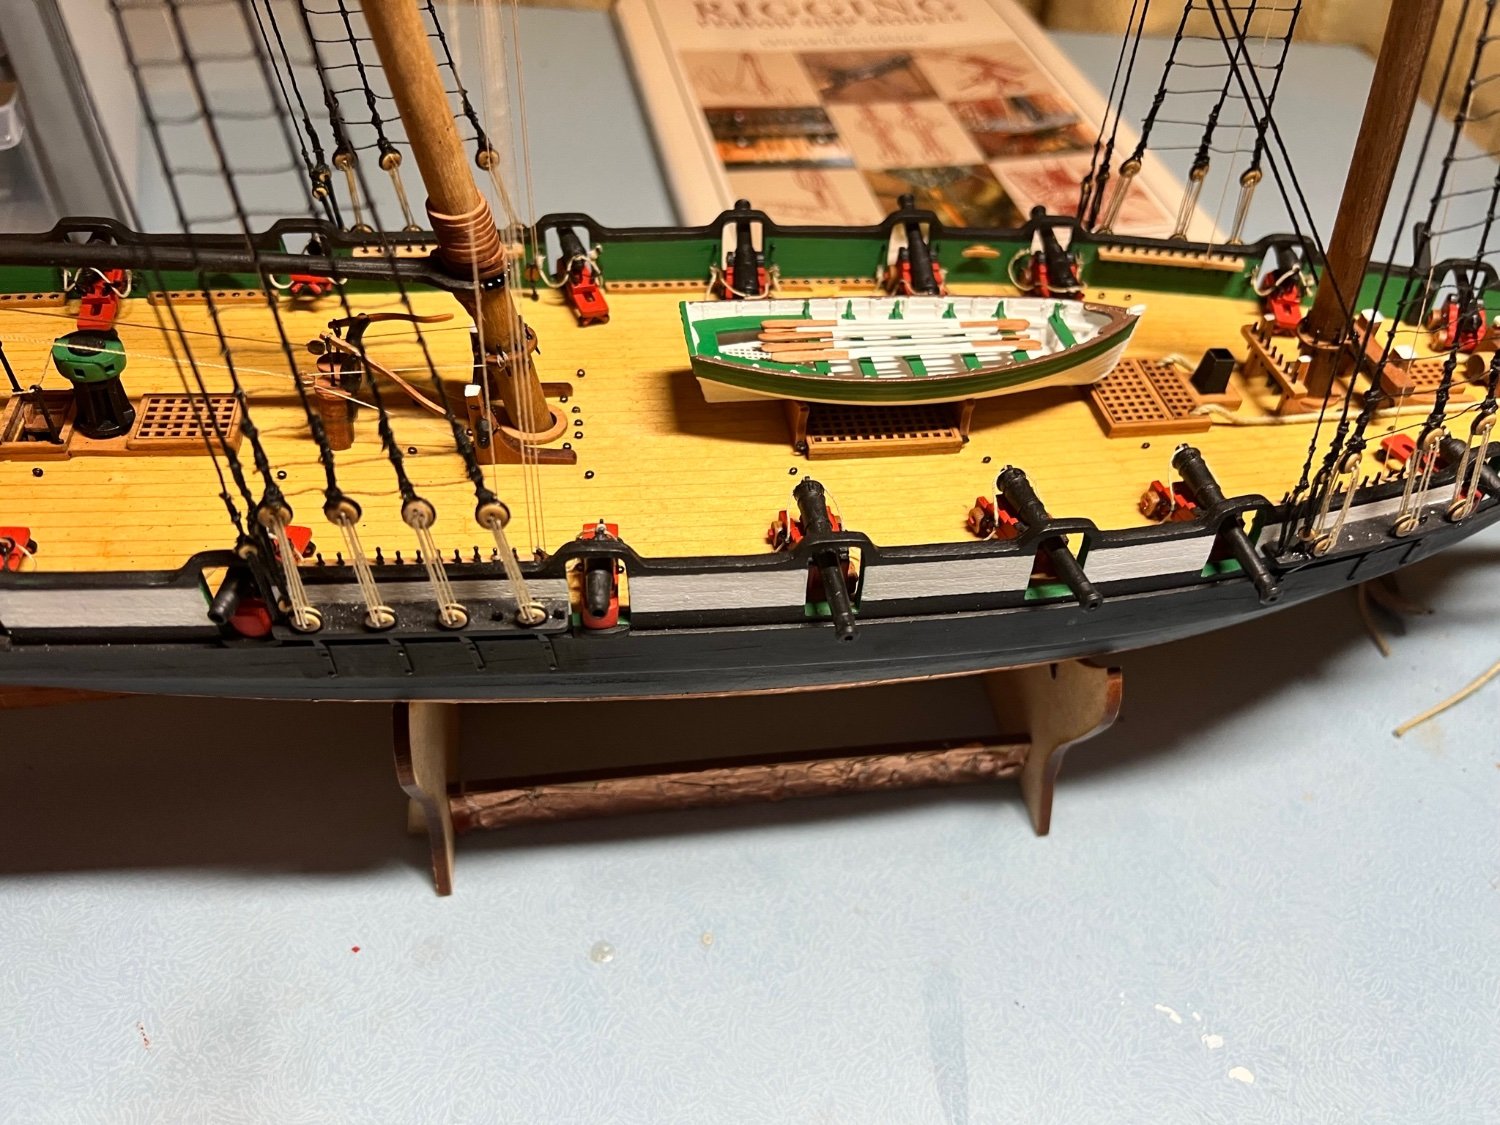
Grecian rigging now complete and the boat fitted. Tightening the rigging whilst keeping the yards square was less tricky than I expected. I’ve kept as true as I could to Chris’s plans and Jim’s prototype, both of which are excellent. Only notable differences, other than a much less skilled builder, are: - no tack toggles in rigging and a few lines tied off to the wrong belaying pins - different paint scheme for the boat - I couldn’t get a good faux wood finish on it. - green vs black skylight - I preferred green. - slightly different cannon layout Only remaining jobs on this build are: 1. Anchors 2. Flag halliard and flag aft 3. Rope coils 4. I need to find a way to repair the broken winch handle (lost the part and tried CA to attach another piece of brass, but without success so far - I’ll add a photo later) 5. General touch up of paint plus waiting for a delivery of Vallejo ultra matt varnish to remove some spots of shiny CA. Thanks again for all the advice and encouragement.


- 106 replies
-
- 17
-
-
- Grecian
- baltimore clipper
- (and 4 more)
-
Thanks Chris, I thought that might be the case. I’m very glad that you have as Grecian is pitched at just the right level for me. Pushing me, but not defeating me! I was planning Speedy next, not DoK (2 masts vs 3, both on a small hull) but based on your comment above, would DoK be a more sensible natural next progression for me. I’m planning to build both at some point? Many thanks Dan
- 106 replies
-
- 4
-
-
- Grecian
- baltimore clipper
- (and 4 more)
-
Thanks, I might try that. I try and tie it off with a figure of eight knot or two around both ends of the belaying pin - which I find very fiddly sometimes. Then glue it and cut it short. Then later make the coil to hang over the top to pretty it up. That guide from Glenn Barlow looks very useful and I’ll use it when I make the coils. I haven’t done these yet for Alert either, not my favourite job… maybe I’ll be doing some coil making for both over Xmas. Thanks Chris, I’ll try that for my next build, the lines are already attached on this one. Glenn- Thanks for the encouragement! Schooner - I’ll try that on lines that I’m confident don’t need adjusting. All the running rigging lines are now in place, but Grecian’s rigging is quite a tangle at the moment. Too many unglued lines, but necessarily so as I want to make sure that each line has the right tension and that the yards are all aligned and parallel (which they are not at the moment). Some lines are not tied off at all and not taught, that will be fixed, hopefully. Getting this right is somewhat of a challenge for me. Is there a good practice way of approaching this, such as doing one yard at a time and then tying and glueing that yards, maybe starting with the top gallant and moving down? I’m hoping when I pull all the right ropes she’ll come good! I see that myxyzptlyk2003 has chosen to simplify the rigging on his Grecian from the plans, maybe I should have done the same, although if I can’t manage Grecian’s relatively simple rigging I’m not yet ready for Speedy which will be my next big build. Thanks again for all the advice and encouragement.


- 106 replies
-
- 6
-
-
- Grecian
- baltimore clipper
- (and 4 more)
-
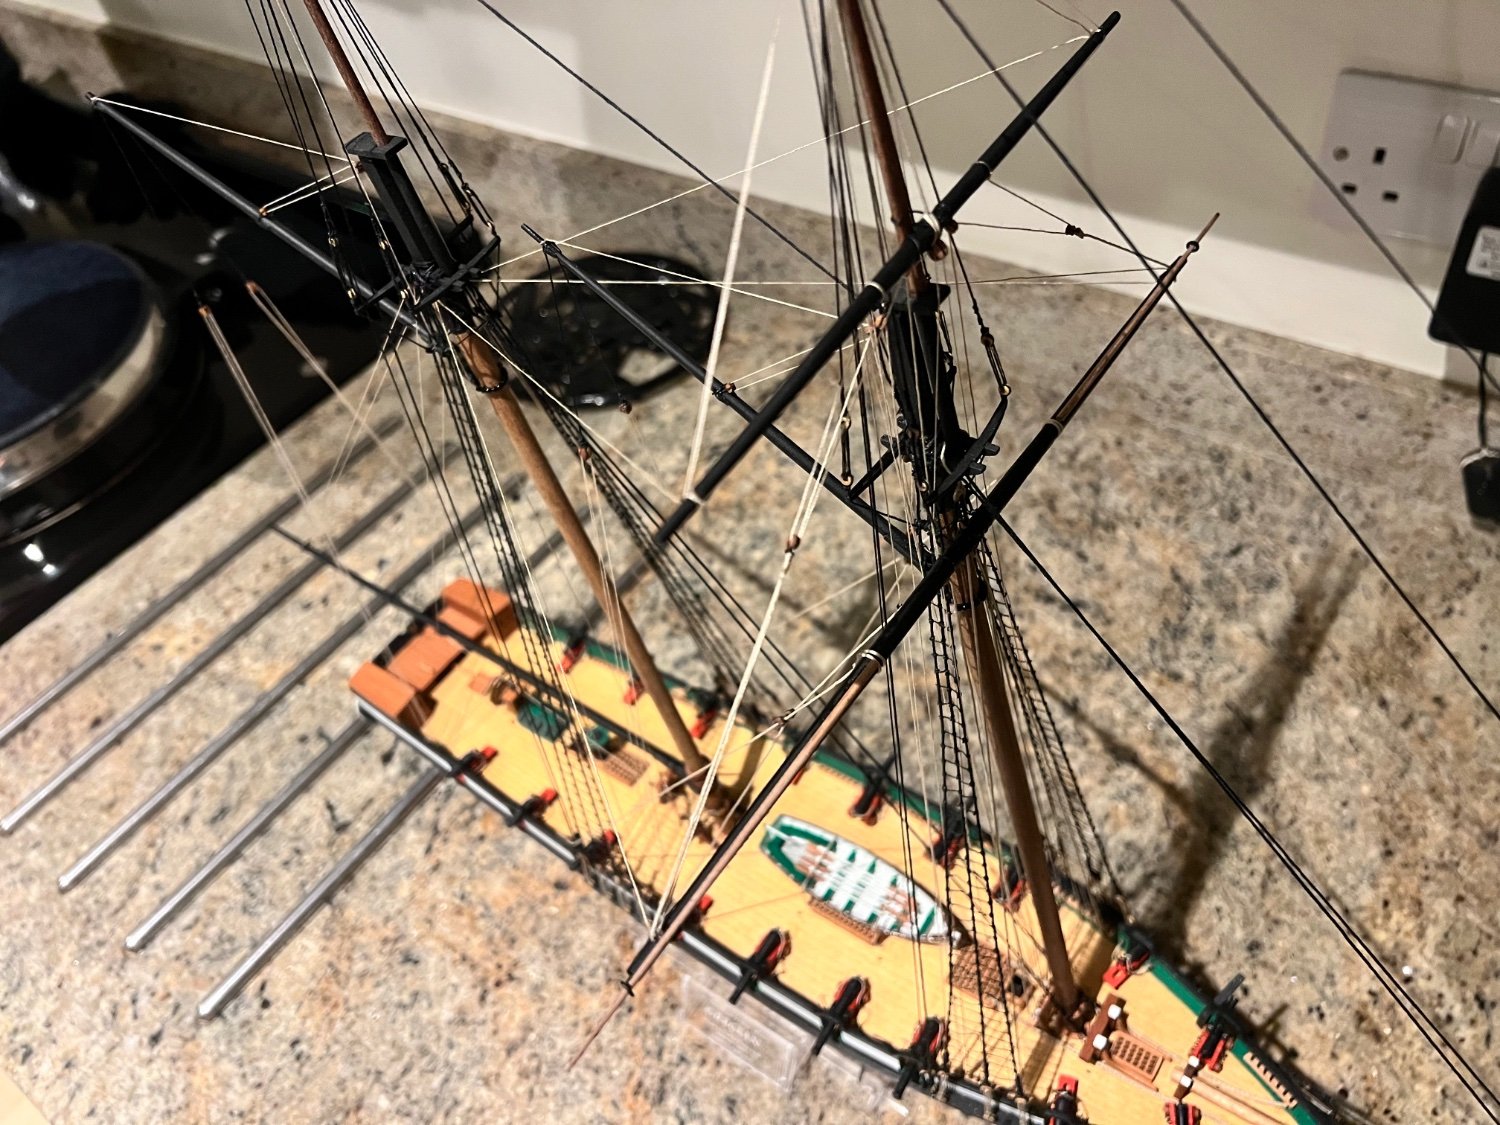
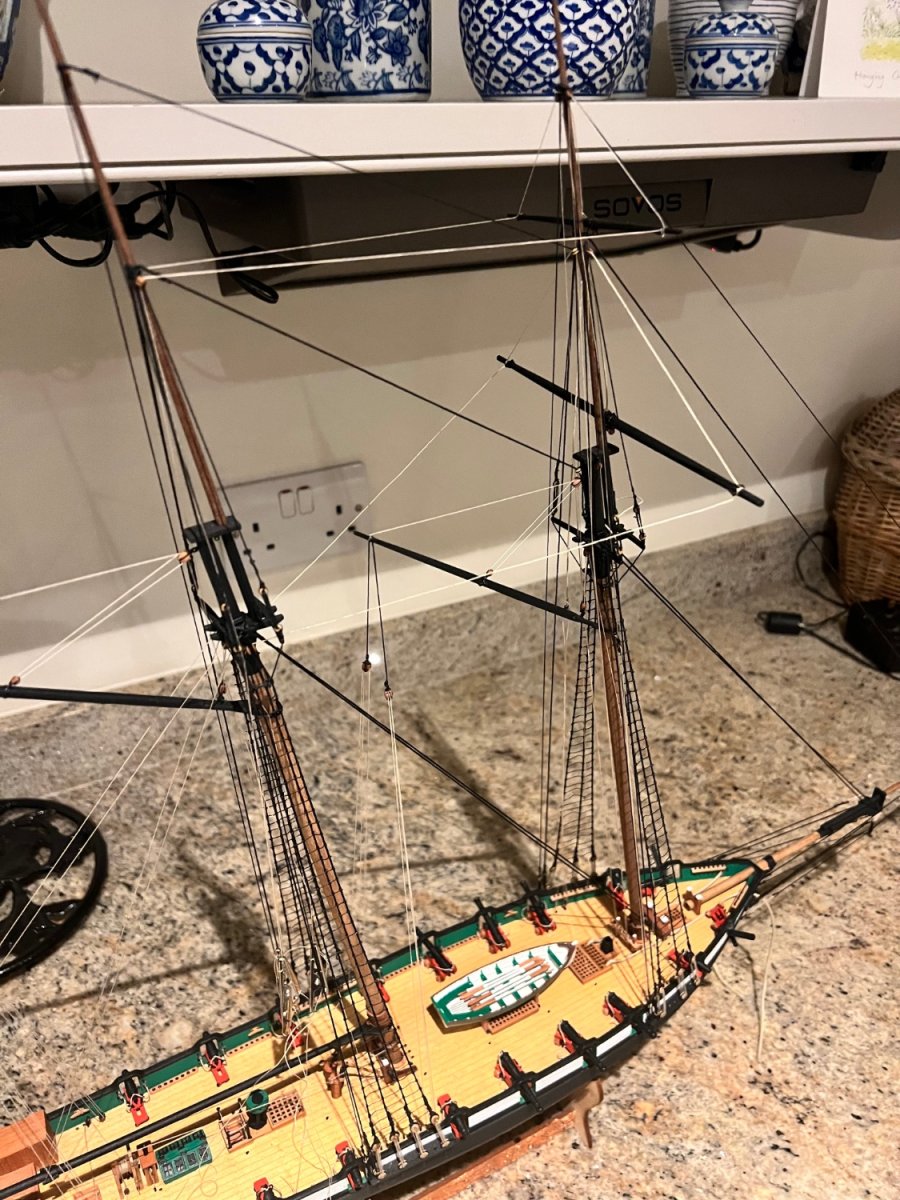
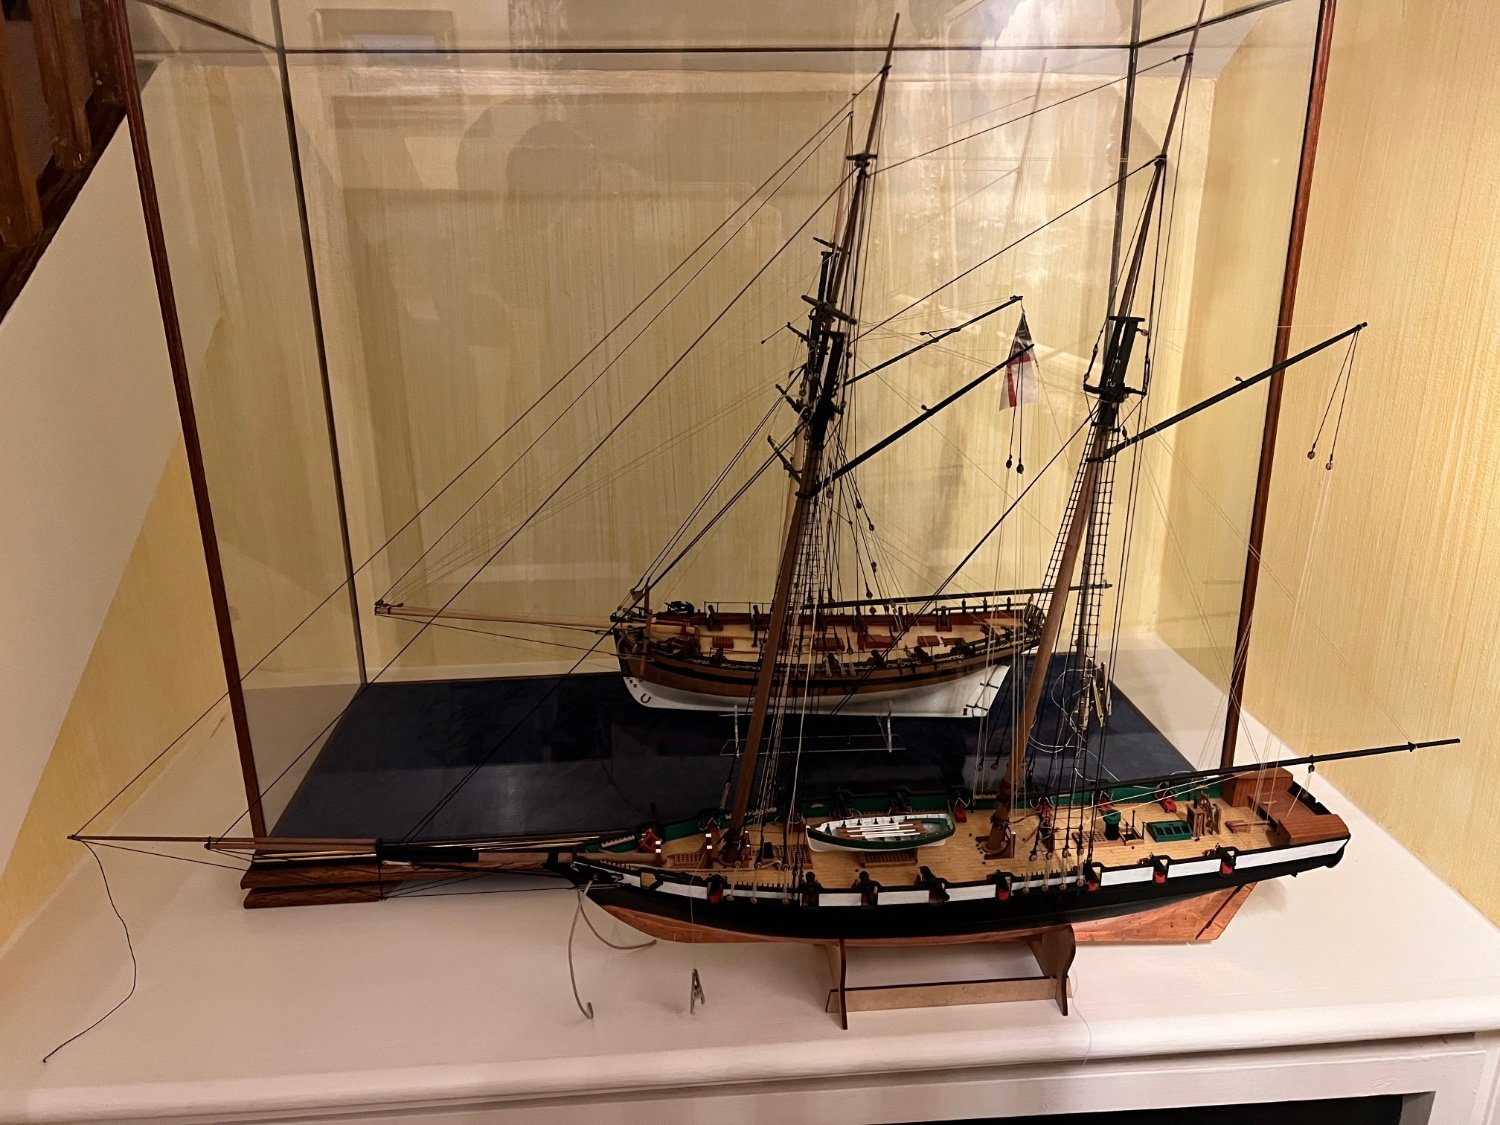
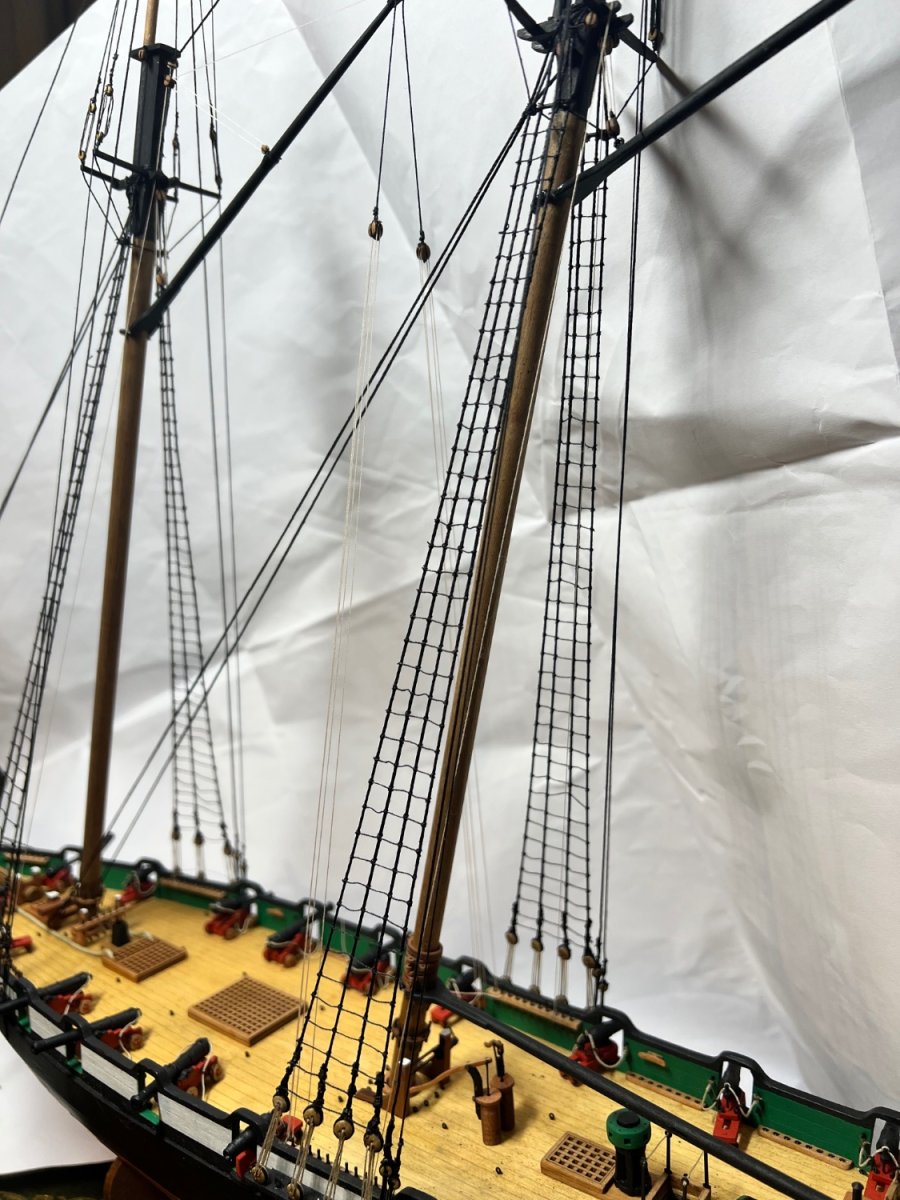
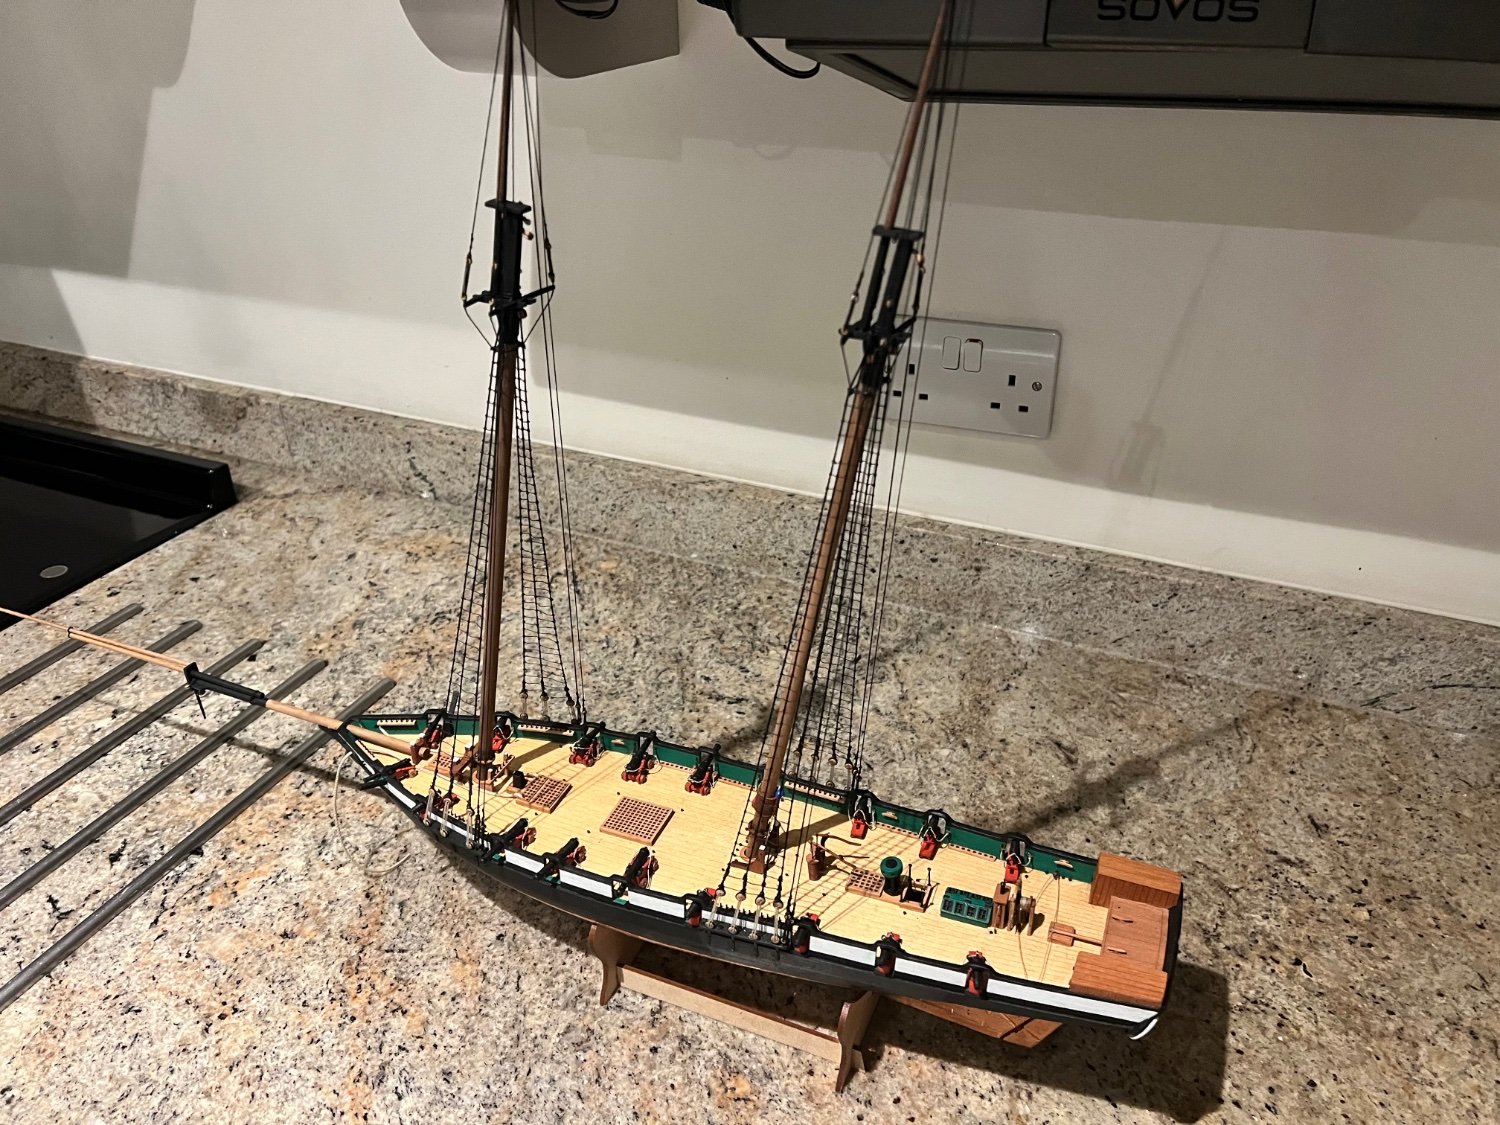
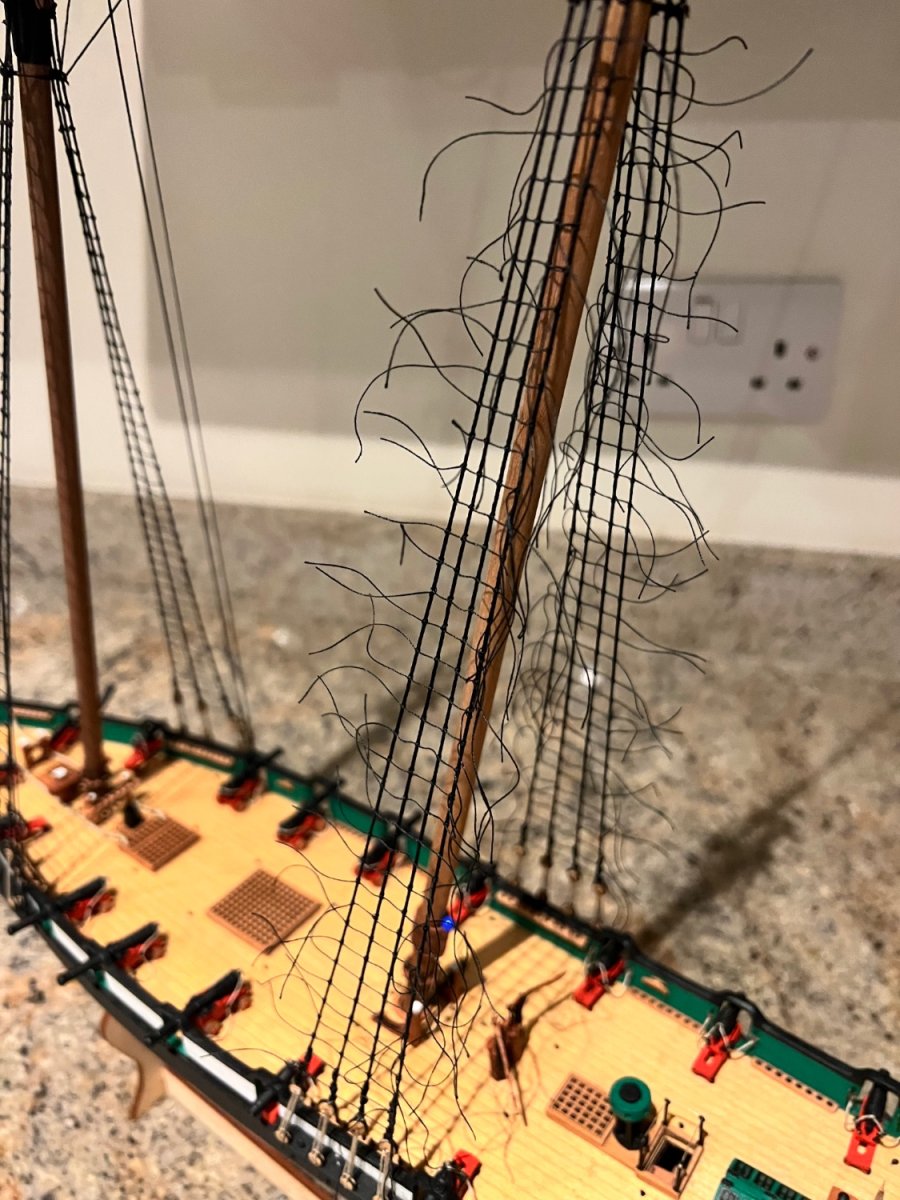
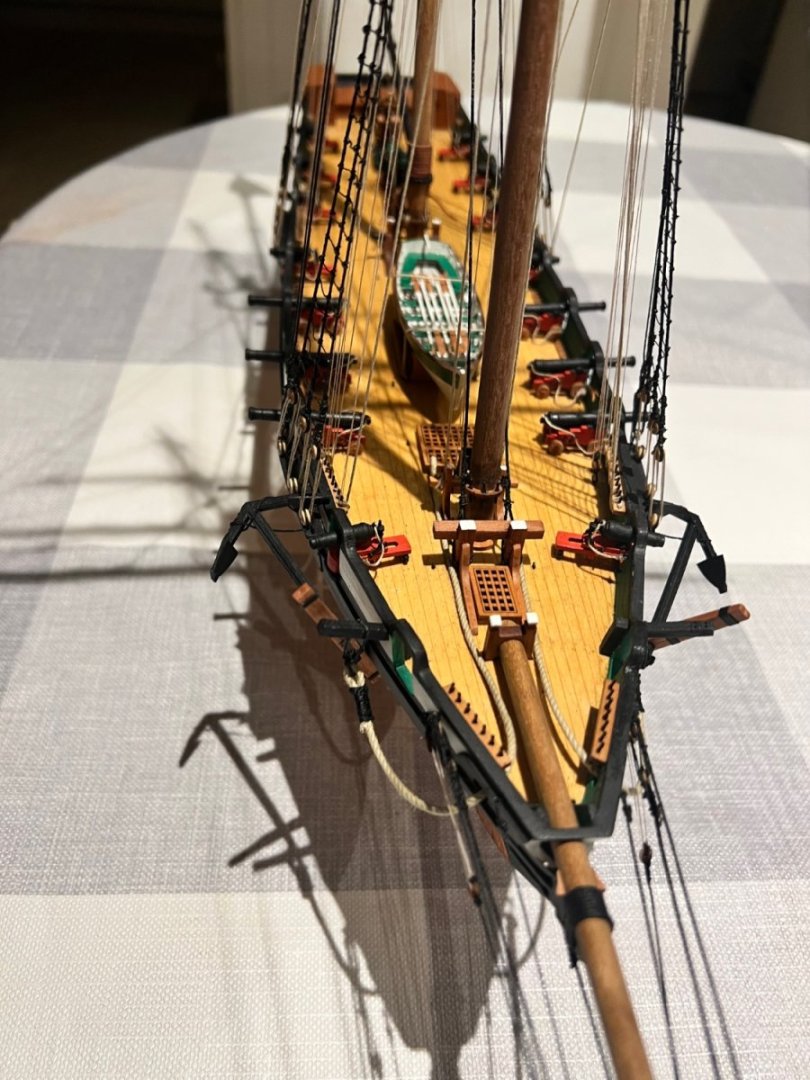
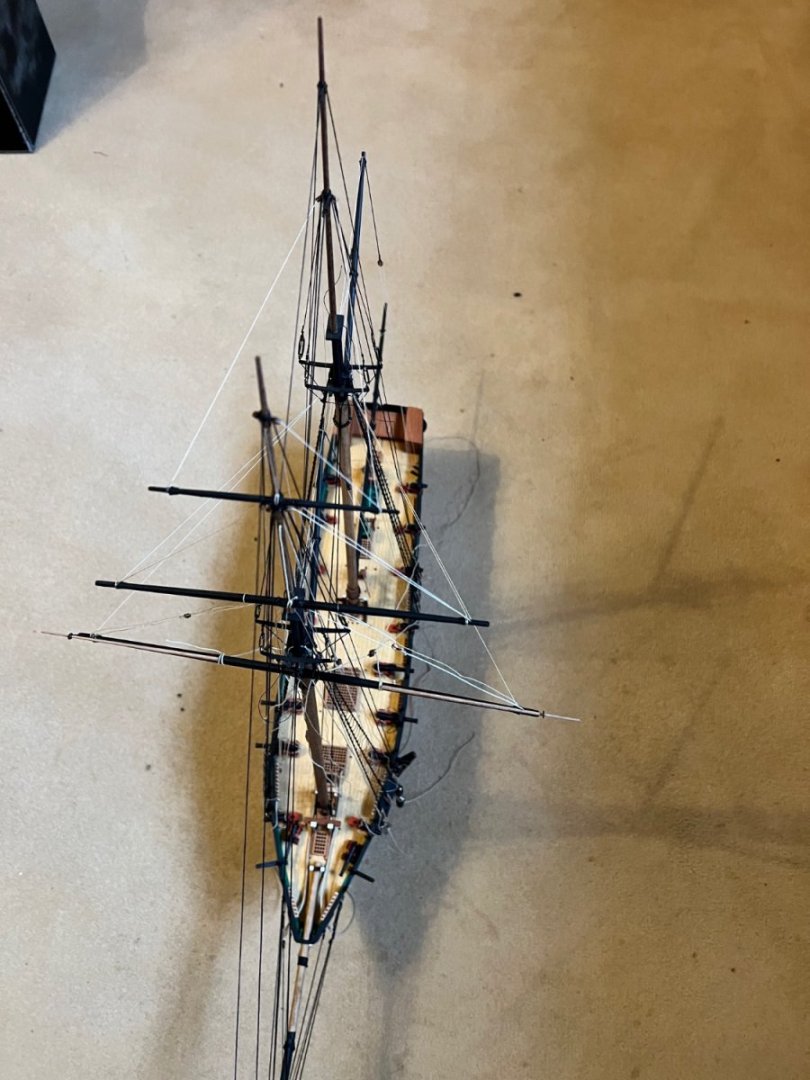
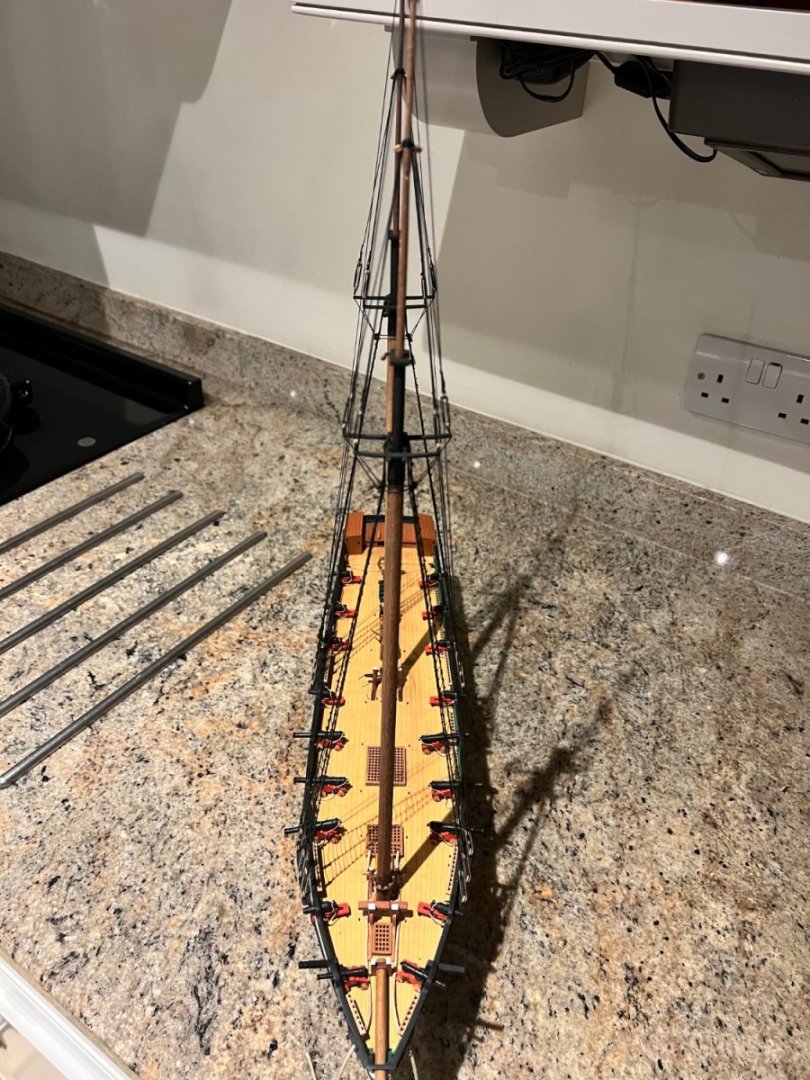
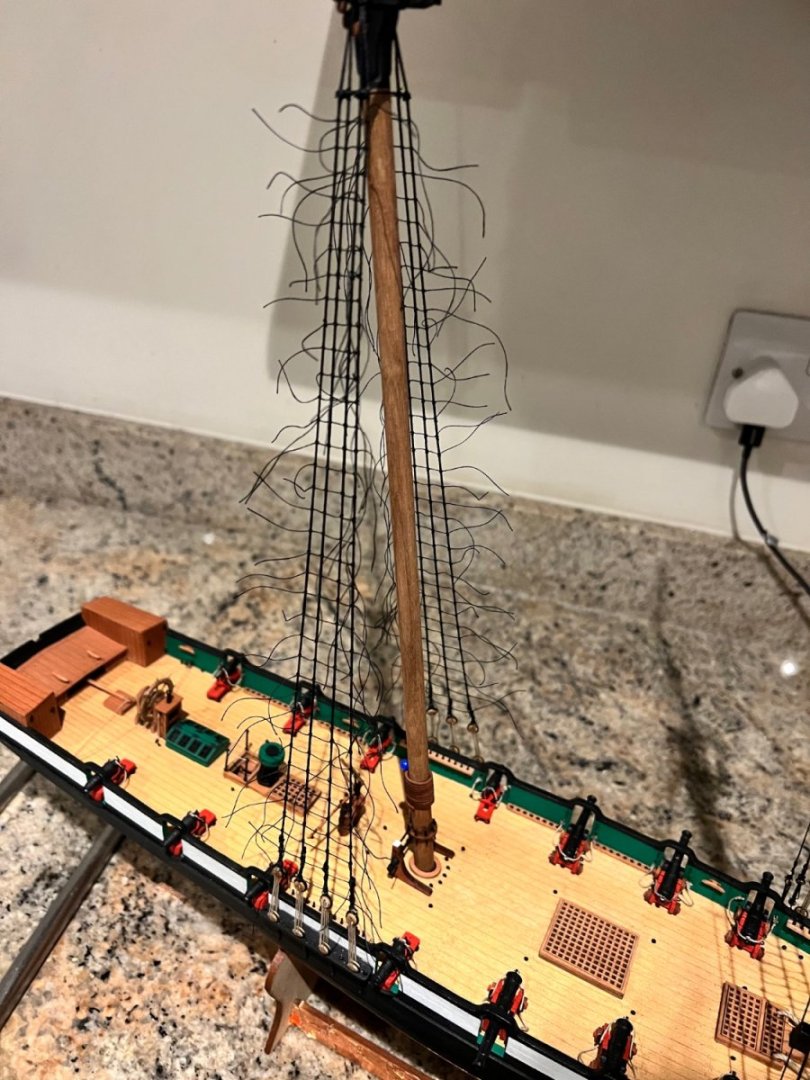
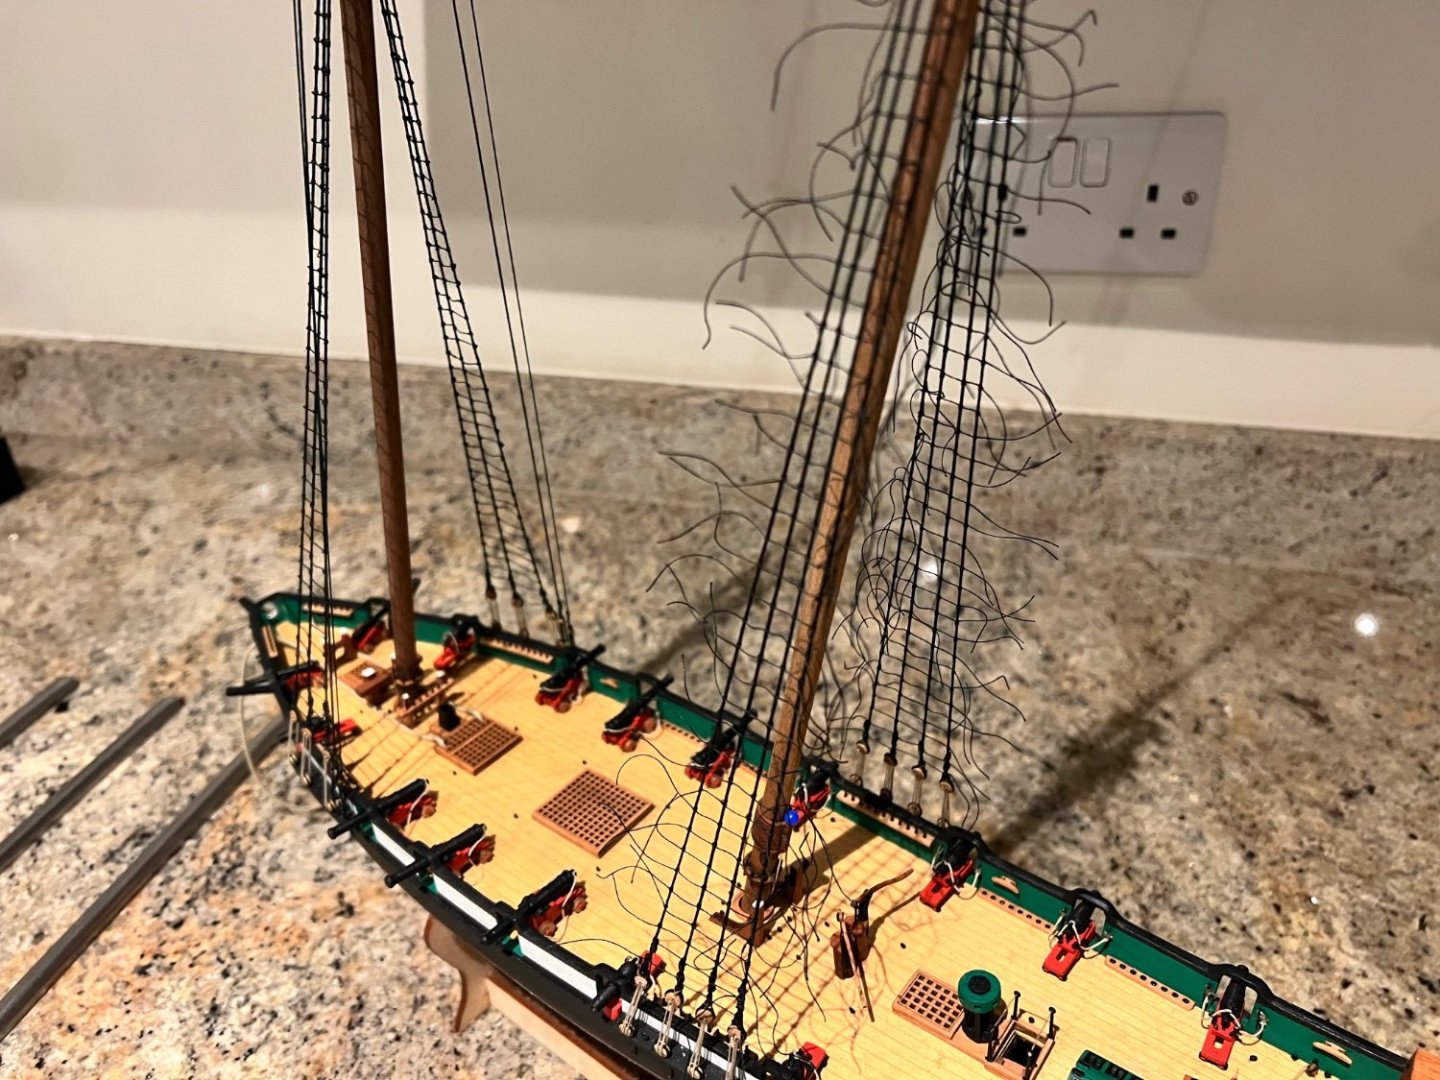
Rigging progresses. Earlier in the log, I mentioned that Grecian is not much trickier than Erycina. That’s true of making the hull, mast and spars. The rigging, however, is more complex. I’m quite used to fore and aft rigging now, but finding the yards on the foremast trickier. As a beginner to this, each of the yards seems to have seven lines attached to it to keep it in position. To start with I didn’t dare tie off and glue any of them for fear I need to change the tension on them later. So for the topgallant and topsail yards I had 10 lines dangling down weighted by crocodile clips getting tangled up…. So I took the plunge and tied off and glued some. Hope I won’t regret it. Fore course yard is yet to be fitted, although the sling for the yard can be seen loosely tied on for now and floating around. I’ve just noticed that in these photos that the forward two cannons are not in place. They’re not glued yet as they may be in the way, the downside of this is that I keep having to rescue them from my little son’s Lego fortress. I’m finding the rigging a little confusing despite Vanguard’s excellent plans. The Vanguard plans superbly layout exactly where each line runs from and too and how it should be attached, they couldn’t be clearer. What I’m finding harder is where each line should run relative to all the other lines without touching them - it would be almost impossible to show this on a plan without it becoming incredibly confusing and furthermore the neutral lines are hard to see against a white background in the photos on Jim’s incredibly helpful build log. The Petersson rigging book doesn’t help in this regard either as it breaks out each line individually too. I’m sure with experience it will become clearer where they should run, for me it’s a learning curve. I think they’re roughly right so far. The other thing I find hard is looping the line around the belaying pins and tying it off, is there a good technique for this? Grecian visiting Alert. Thanks again for all the likes encouragement and advice.


- 106 replies
-
- 15
-
-
- Grecian
- baltimore clipper
- (and 4 more)
-
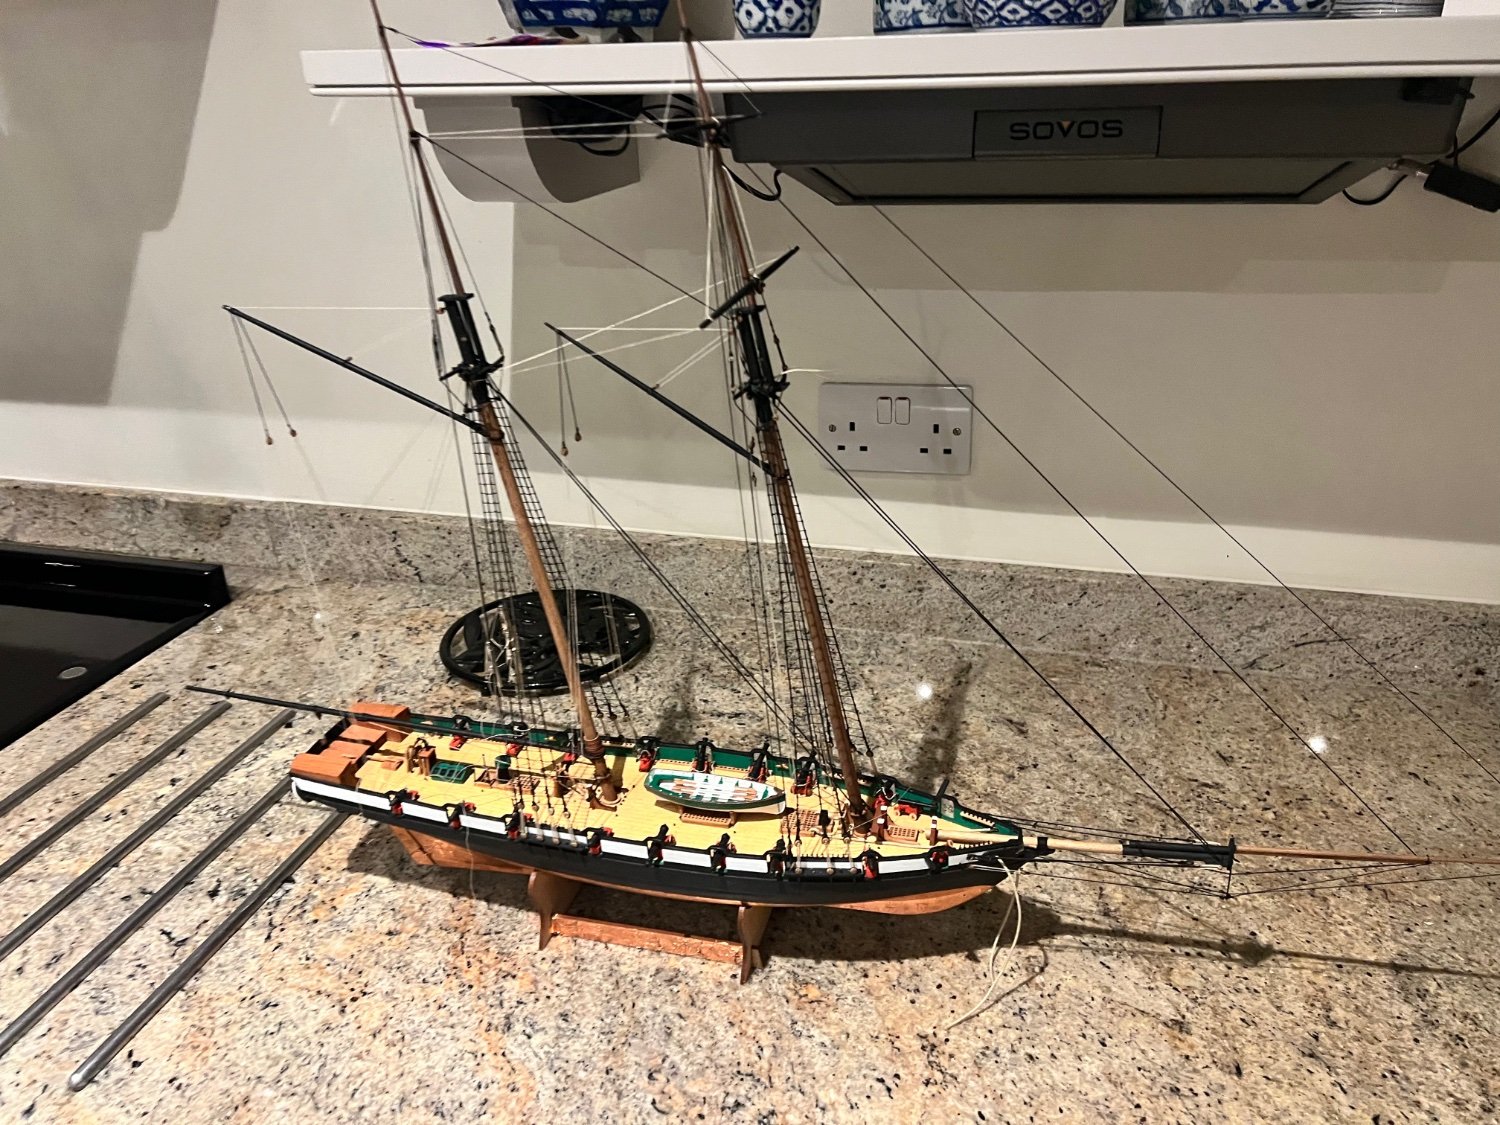
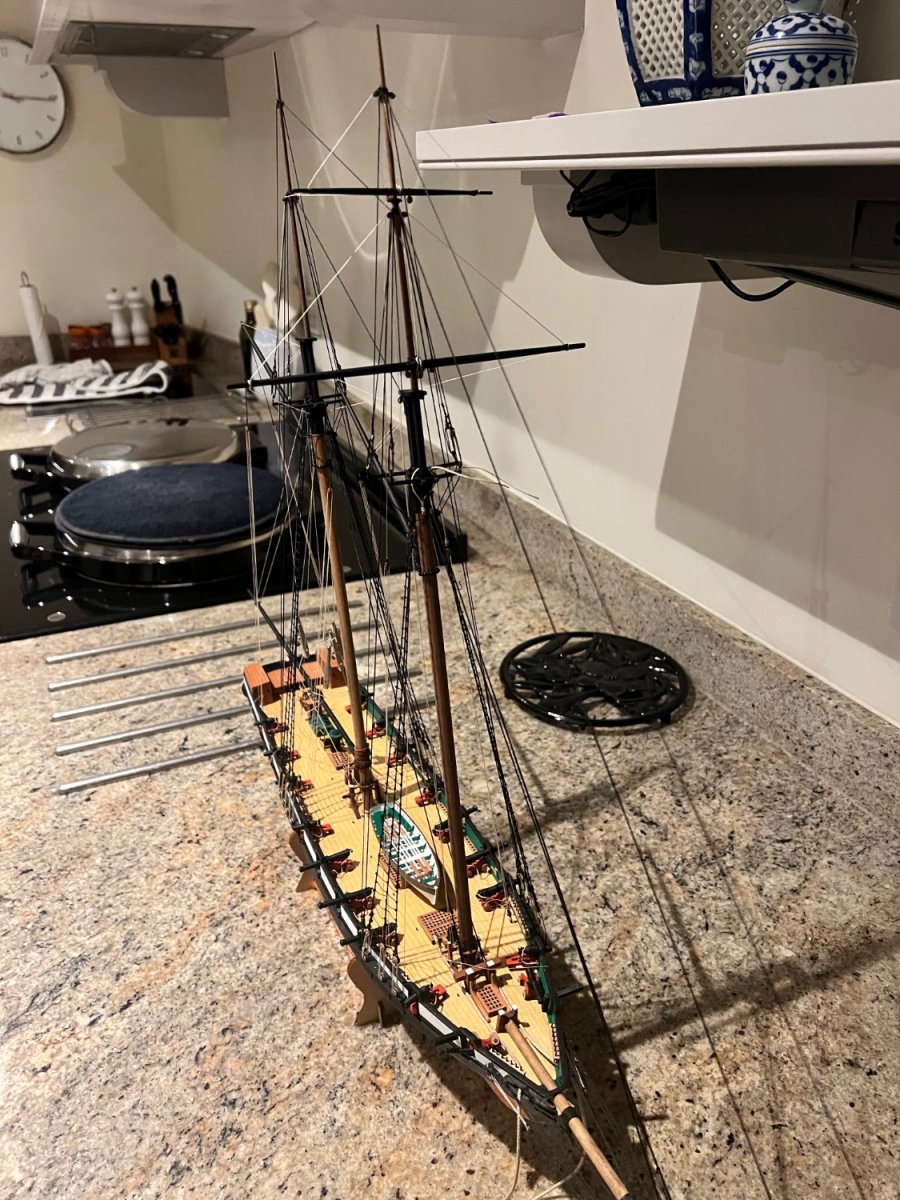
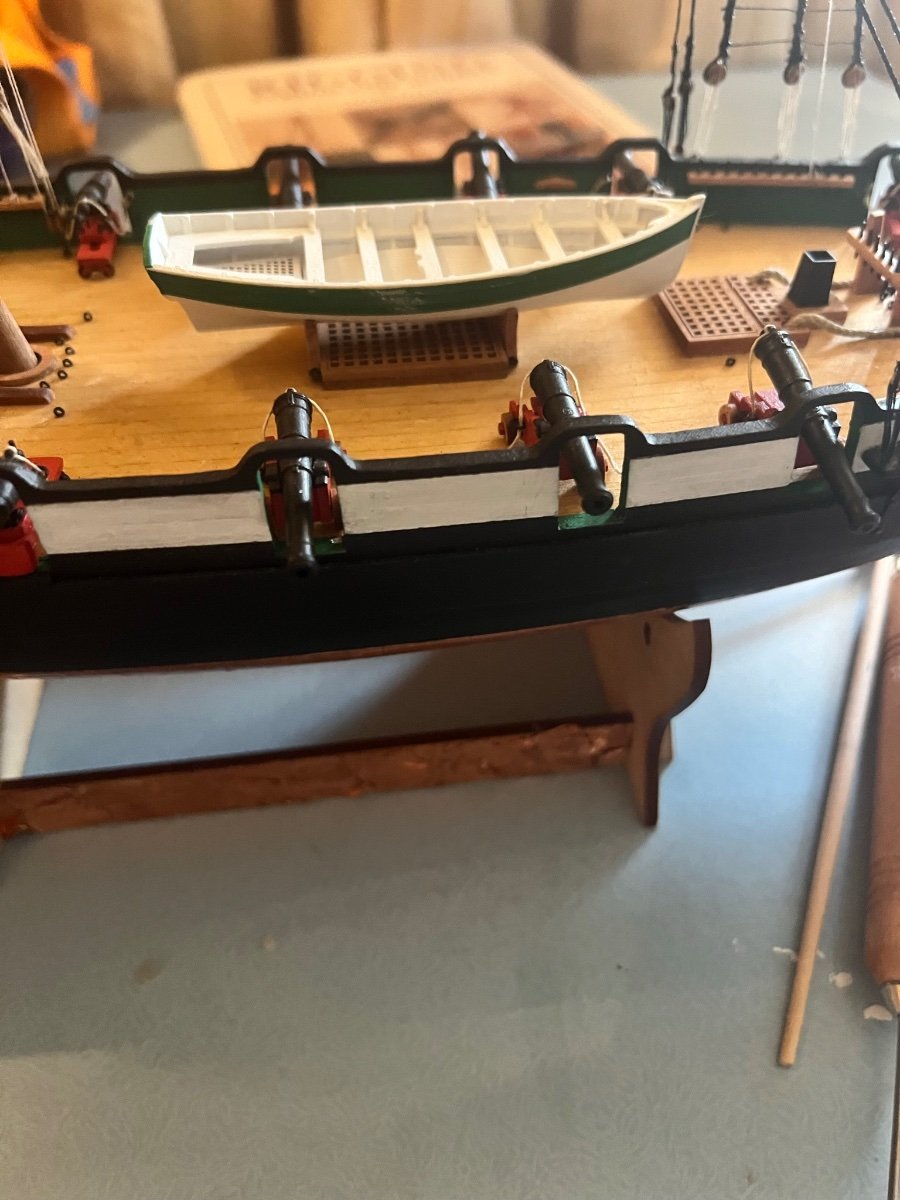
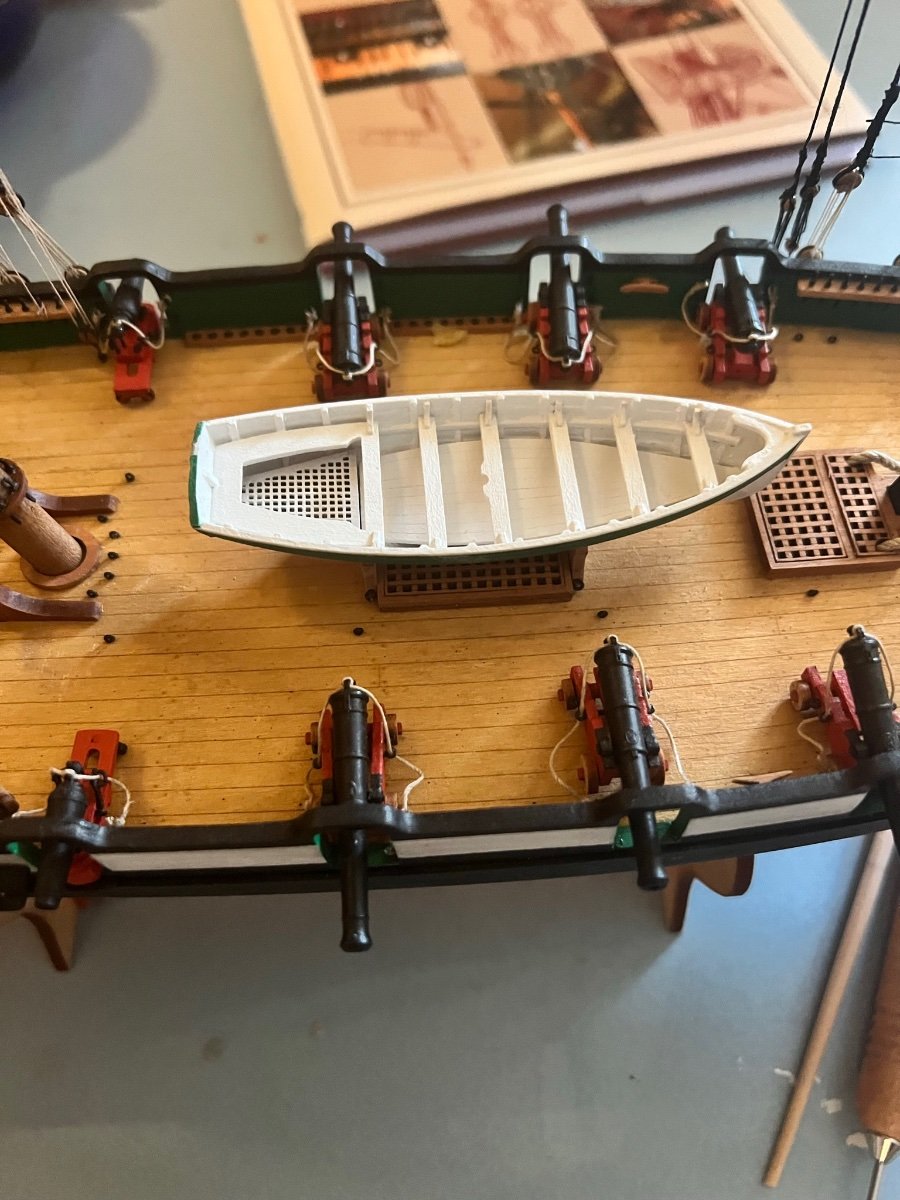
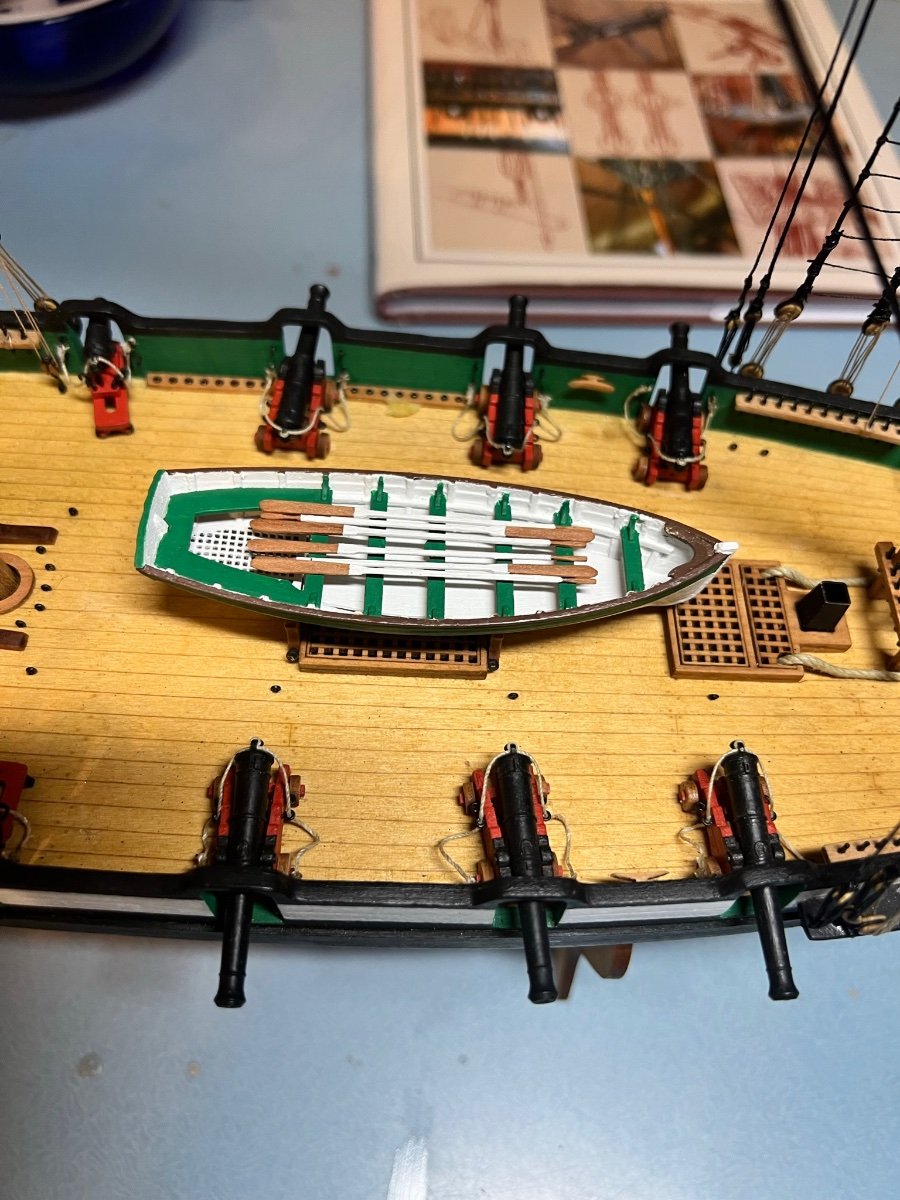
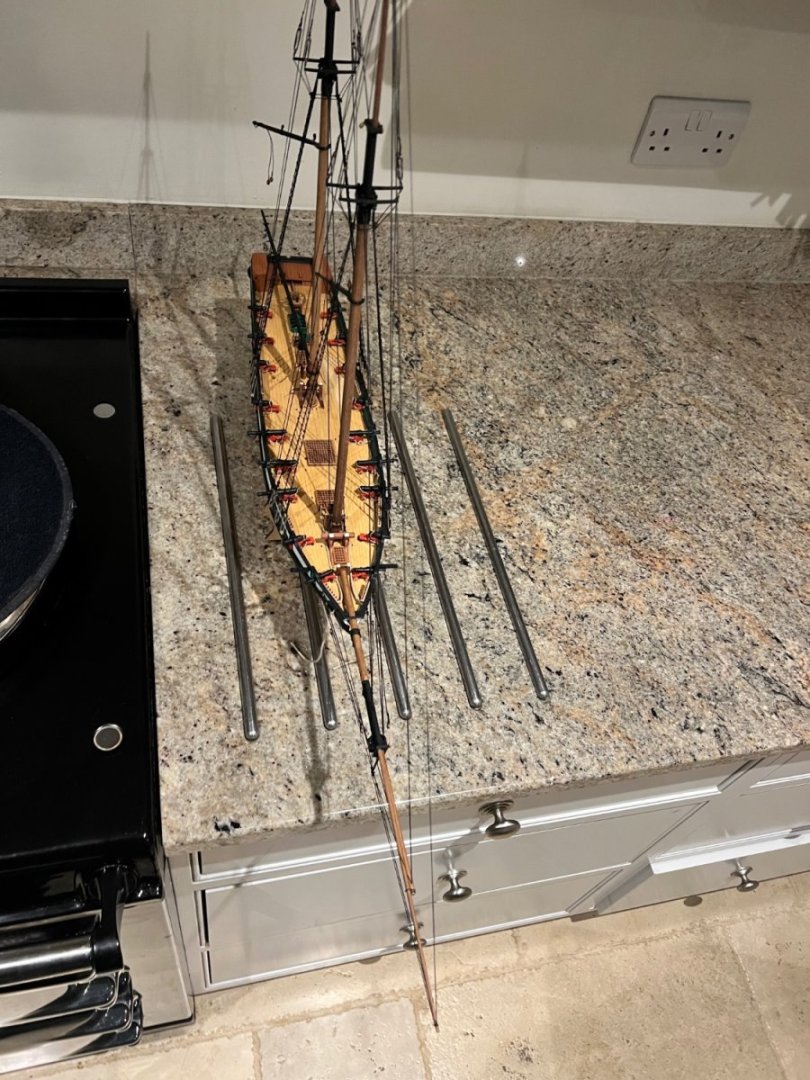
The fore and aft rigging on Grecian is complete (I’ll take some photos later), now only the yards on the foremast to add. These are made and painted but not fitted or rigged yet. So I’ve revisited the boat, which I’ve been putting off. Despite some early successes on the fishers using dragged oil to simulate wood on resin winch parts, I haven’t managed a decent looking dragged finish for the interior of the cutter. Initially I followed the instructions advice and went for white using the same AK white as the rest of the kit, but it looks quite stark and unfinished when fitted to Grecian. Note, not all the cannon are glued in place and need aligning. I decided instead to paint some of the interior green and the gunwales brown. Looks better, I think. Still a little touching up of paint to be done here and the boat needs to be tied down. I broke the tiller handle and had to fashion a new one, so I’ll likely add the rudder and tiller when the boat is in situ and finished. Once the foremast yards are added and rigged then I think it’s just the anchors left to do. Plus any tidy up and varnishing. Thanks again for all the help, advice and likes!


- 106 replies
-
- 11
-
-
- Grecian
- baltimore clipper
- (and 4 more)
-
Thank you both again. I used a sharp knife which initially left the deck appearing a bit scratched, but then retreated the area with Danish oil. Looks great thank you. I didn’t dare using isopropanol as the deck isn’t varnished. Chris your guidance on the natural vs black 0.1mm makes complete sense. I think given my propensity for spilling Indian ink and wrecking the model at a late stage of build I’ll probably stick with the lower risk option of black 0.1mm line from Guterman which I used on Grecian. That’s excellent advice on the ultra Matt varnish for shiny CA spots rather than repainting which can get messy. I’ll source some and use it in future. I haven’t varnished anything on Grecian, do I need to? I’ve used Danish oil on the bare wood parts which gives me the colour I’d like. I could experiment again with mixing some wipe-on poly using Glenn-UK’s recipe or I could go without. On Alert I just used the matt Vallejo varnish undiluted and it looks OK, that’s an option too.
- 106 replies
-
- 4
-
-
- Grecian
- baltimore clipper
- (and 4 more)
-
Another piece of advice if I may? I’ve painted some of the rigging - either where it says dye the neutral 0.1mm lines (although I’ve mainly used black 0.1mm thread for this, there’s a few places that I didn’t) or where I’ve used a little CA and it’s shiny. In doing so I splattered some small black drops on the deck (using the AK-47 acrylic paint set from Vanguard for Grecian). I didn’t notice at the time and they’ve had two weeks to dry Now there’s quite a lot of rigging up it’s not easy to sand these off and they’re quite stubborn. Is there an easier way to remove them with a solvent (I’ve tried water). The deck is not varnished but does have Danish oil on it. Many thanks Dan

- 106 replies
-
- 2
-
-
- Grecian
- baltimore clipper
- (and 4 more)
-
Thanks. That’s what I’ve been trying, it has got rid of the twists in the lines but didn’t get rid of the 90 degrees out of alignment. I’ve tried Chris and Glenn’s diluted PVA on one vang so far and it seems to have worked a treat. Your Alert is looking stunning, I wish I had your patience and attention to detail!
- 106 replies
-
- 5
-
-
- Grecian
- baltimore clipper
- (and 4 more)
-
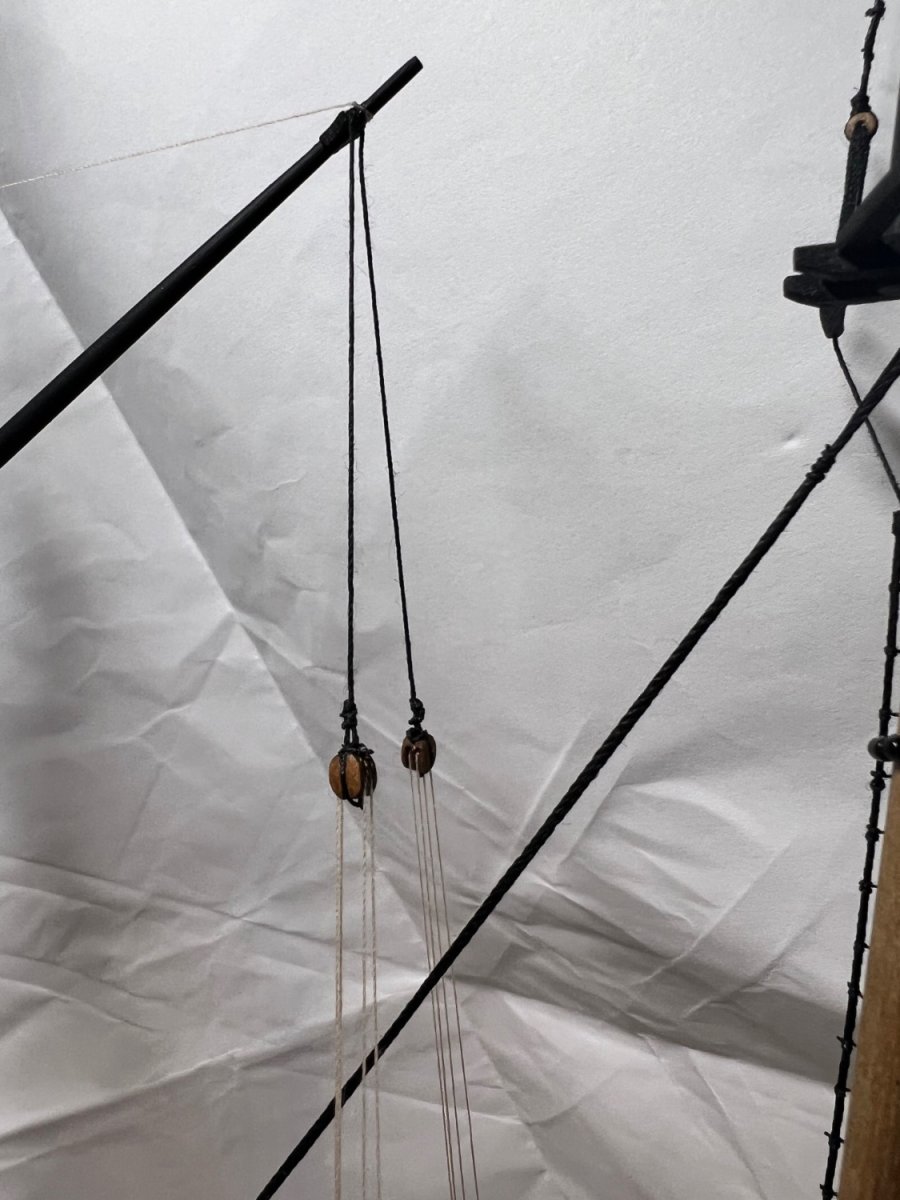
I’ve been away a fortnight so very little progress. I’d love some advice. The block on the starboard vang for both the fore and main masts wants to turn 90 degrees and so is out of alignment. I’ve had great difficulty getting the four lines up to the block not to twist as soon as I let go, so this has been the best I can do with the lines untwisted. Can anyone recommend a way to get the block to turn 90 degrees and stay there? I’ve tried unthreading the line multiple time and re threading having twisted the block but to no avail. Main mast: Fore Mast: Thanks for any help!


- 106 replies
-
- 7
-
-
- Grecian
- baltimore clipper
- (and 4 more)
-
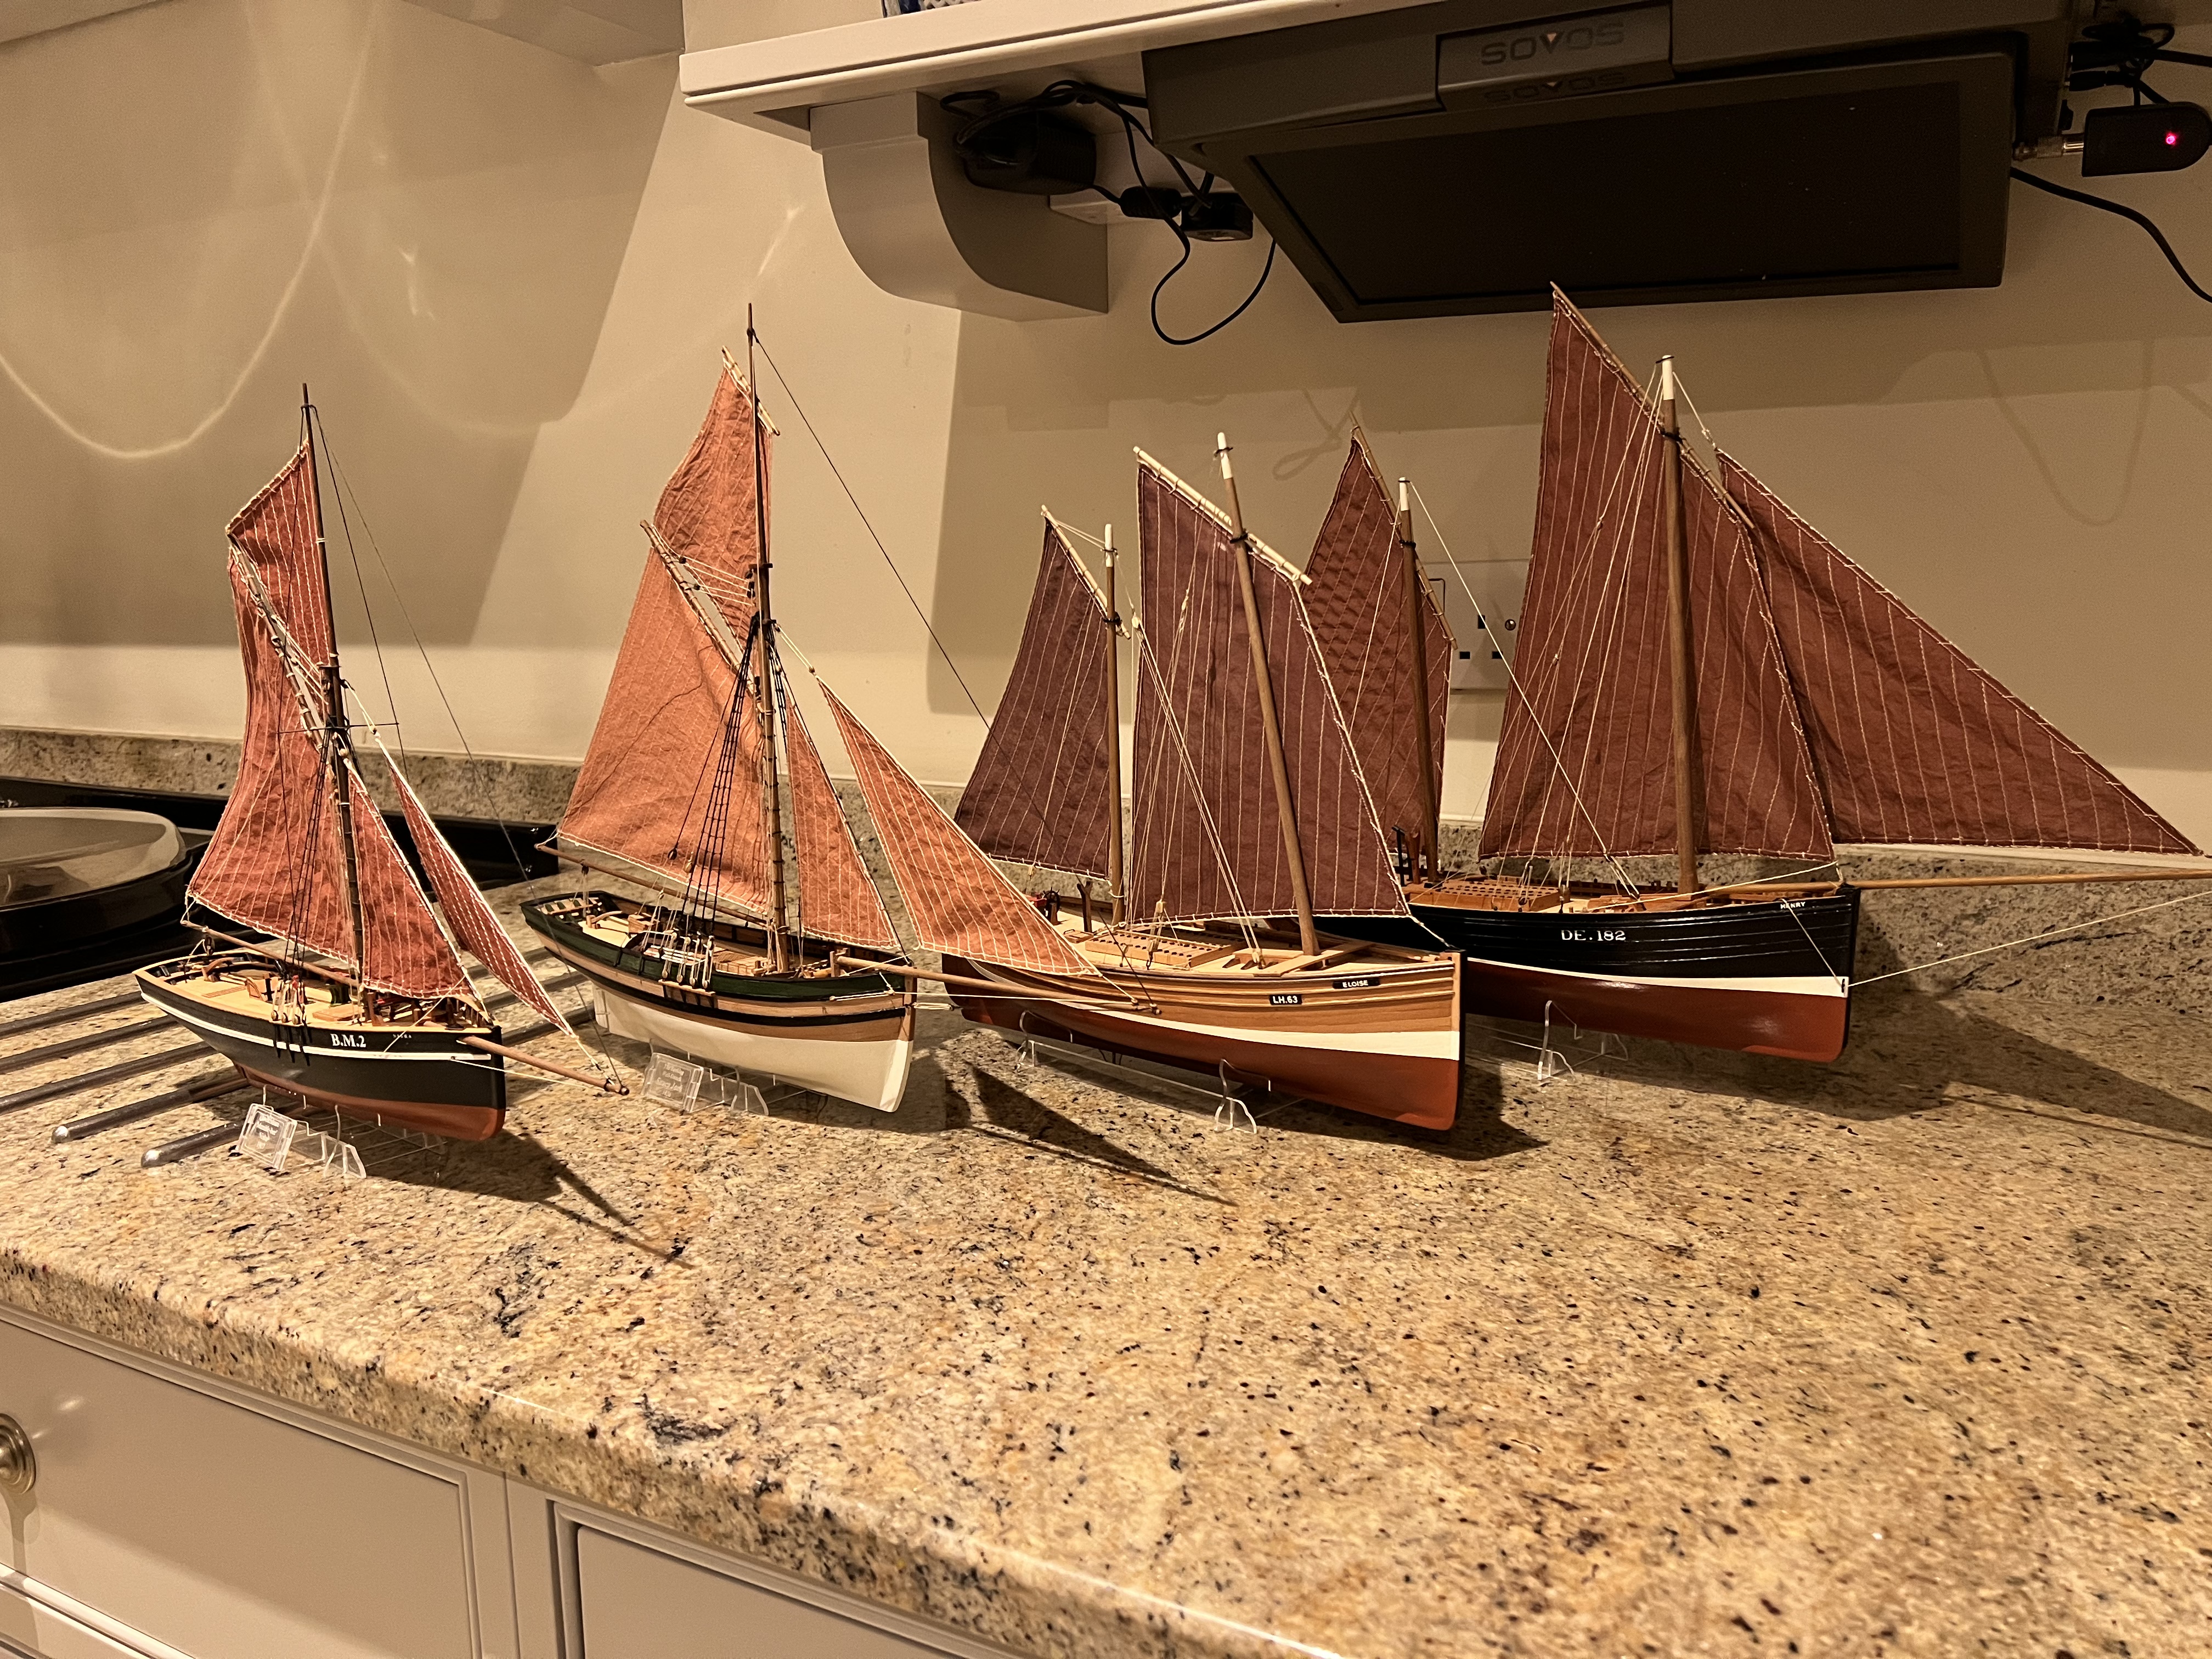
Chris, as a relative newcomer to the hobby (a year and a half and almost seven boats built, all Vanguard and mostly fishers), I’m certain I’d not have got into boat building without your superb range of kits and indeed Jim’s excellent instructions and build logs. I will always be very grateful and I can’t see why I’d ever buy a kit from another manufacturer and risk almost certain disappointment. It’s fantastic to hear how well your business is going. I think your kits are absolutely excellent and clearly differentiated from competitors. Personally, I’d happily pay significantly more for them, I appreciate that not everyone can afford to and there’s always a tricky balance between price and volume of sales. I probably won’t be popular on MSW for saying it, but possibly increasing prices, reducing volumes sold and growing your margin could give you a similar level of profits and free up some of your time from manufacturing so you can design new kits. Dan
-
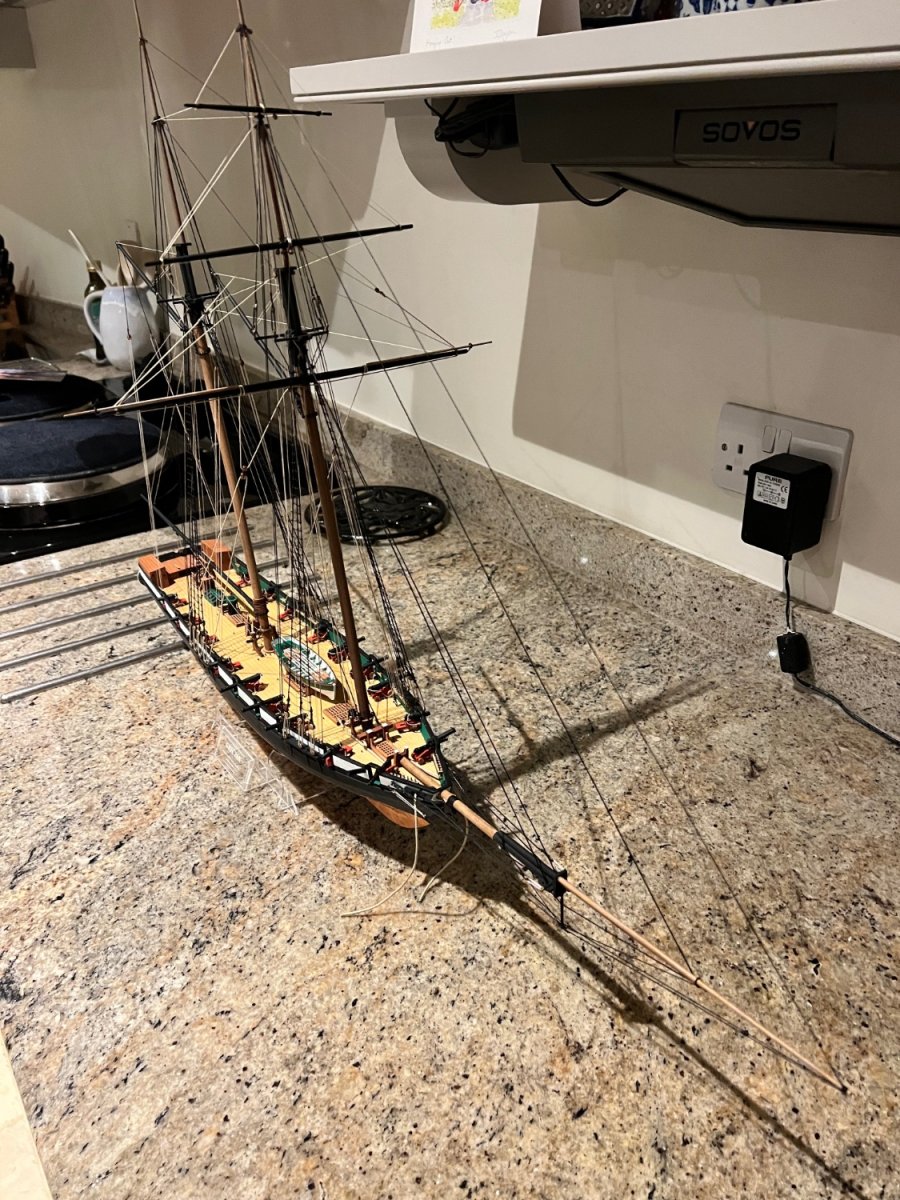
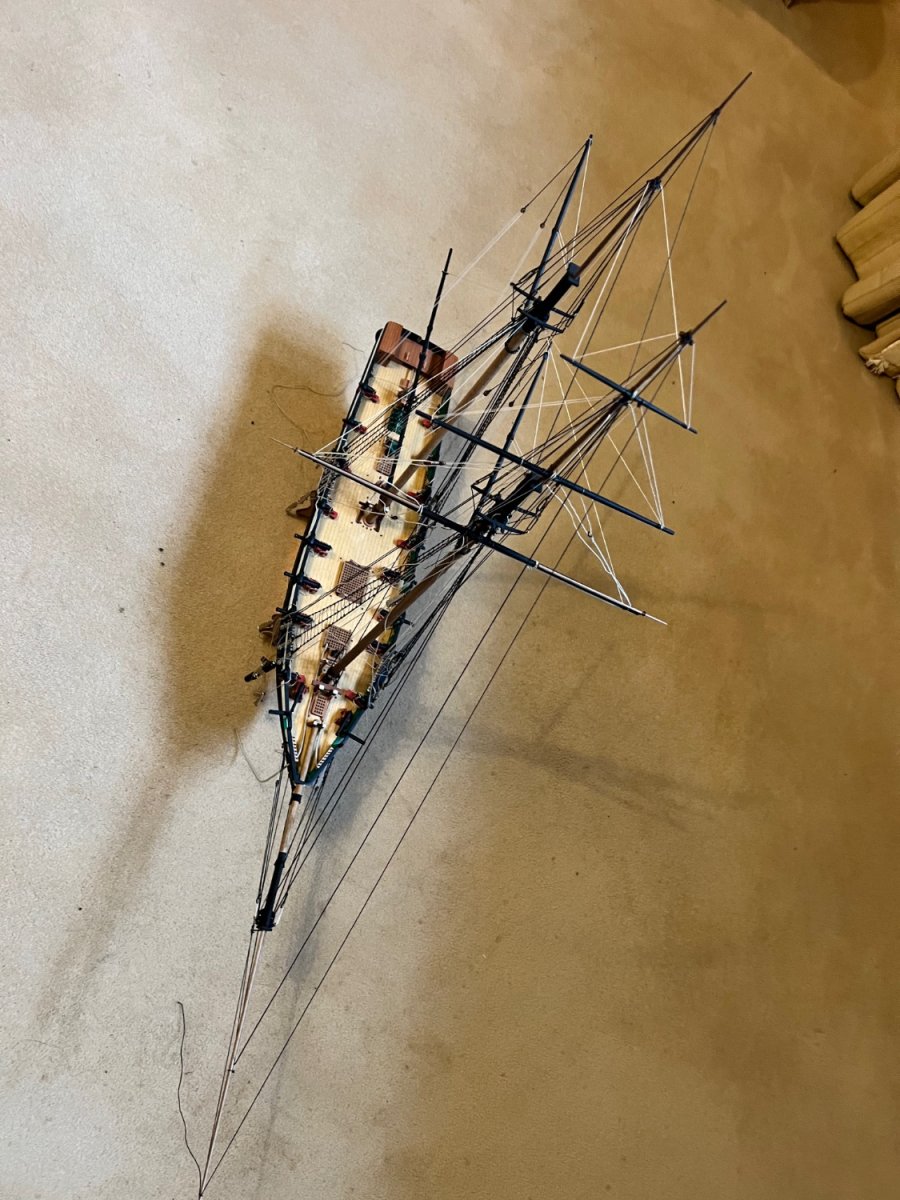
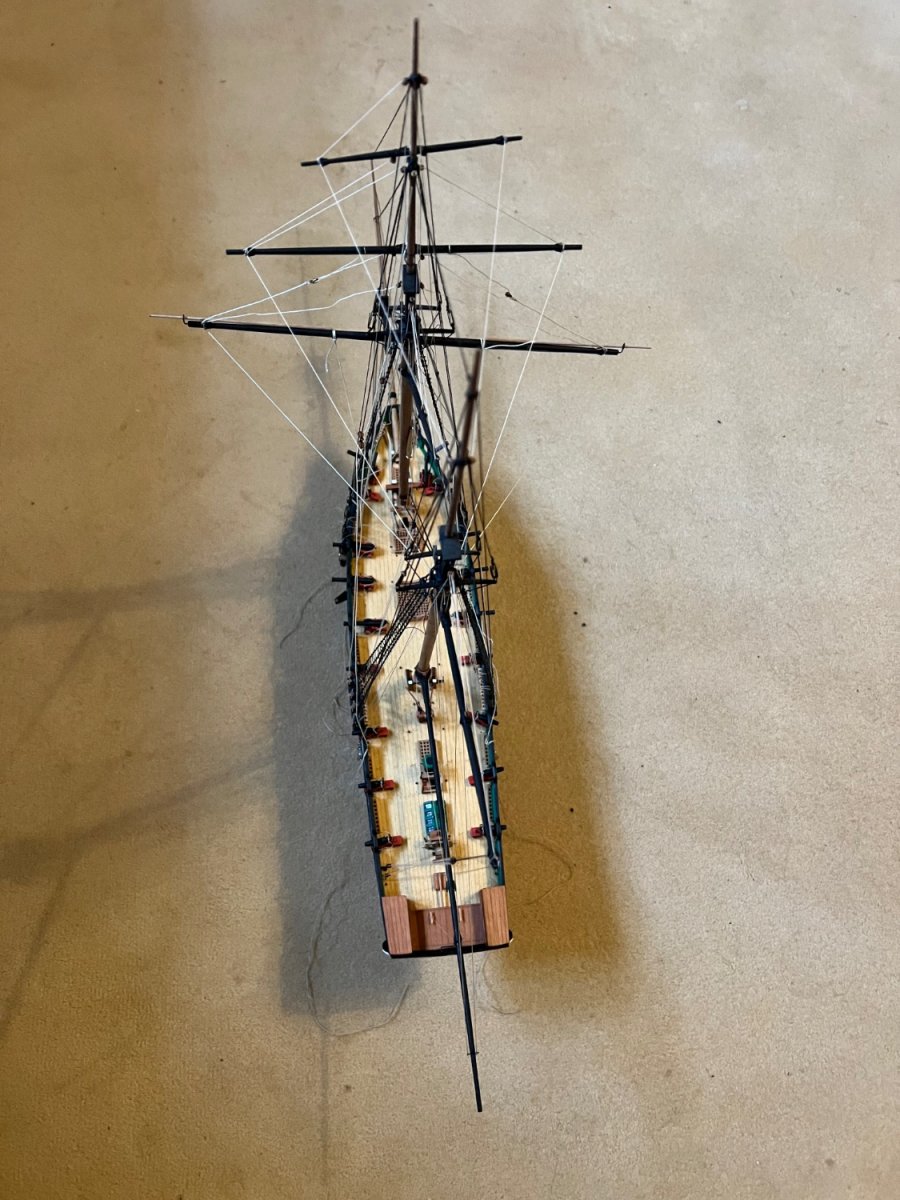
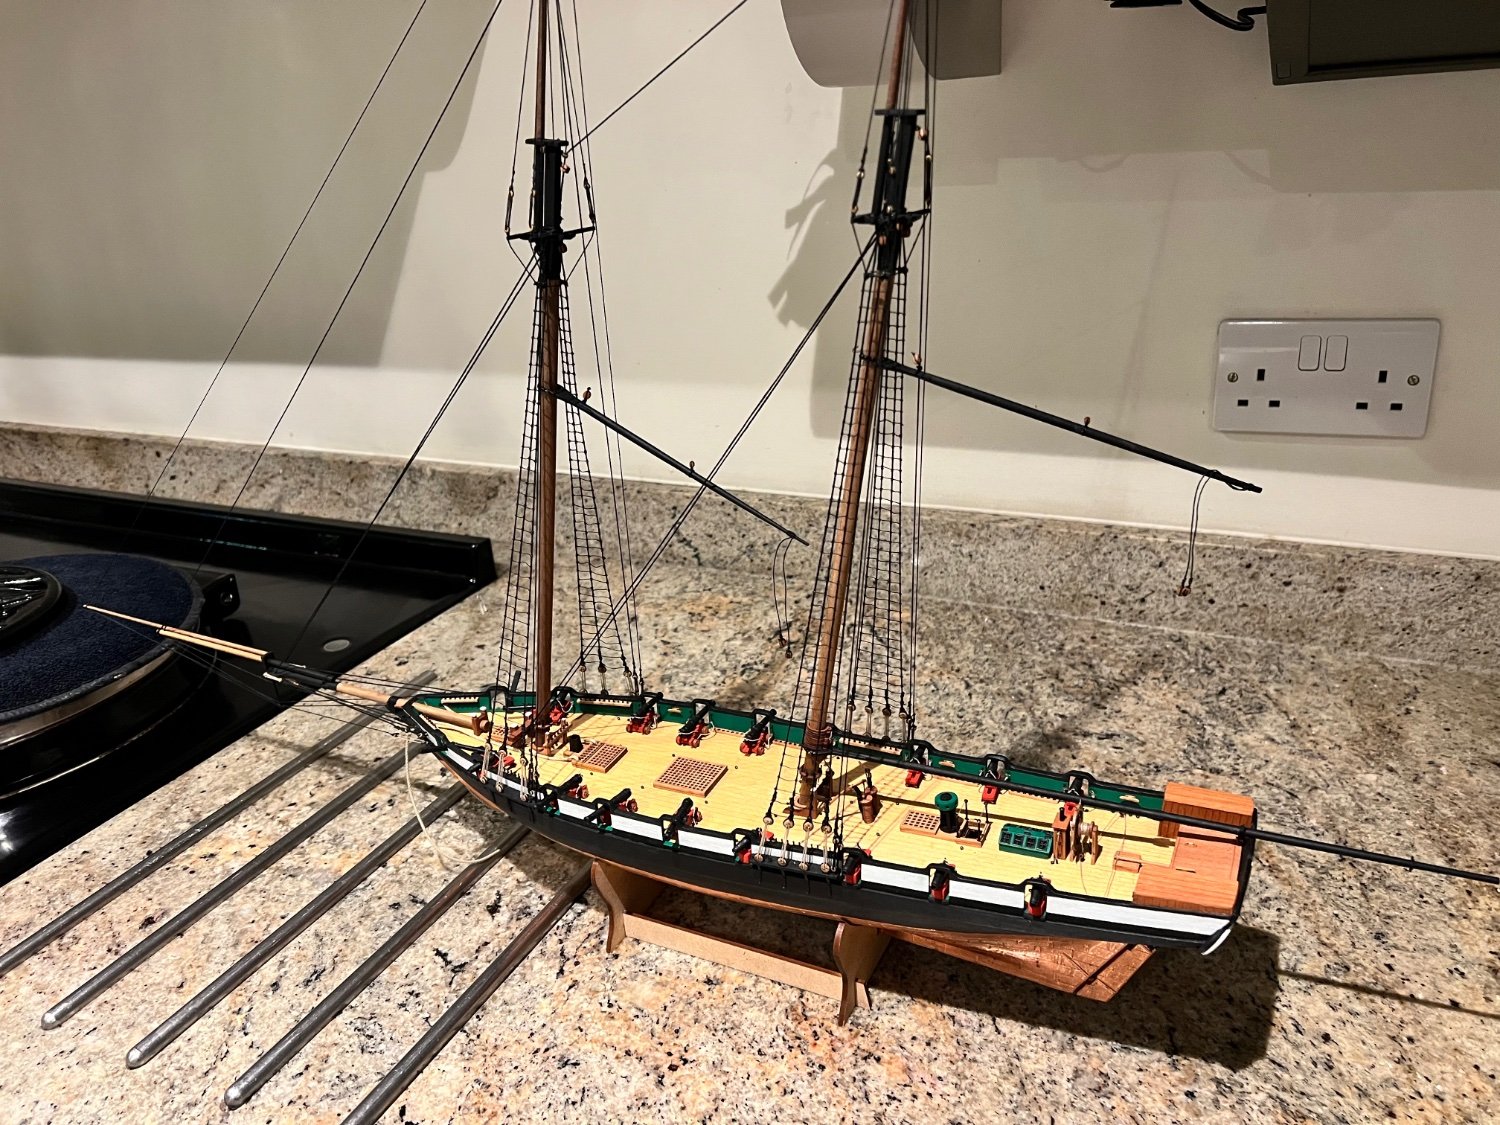
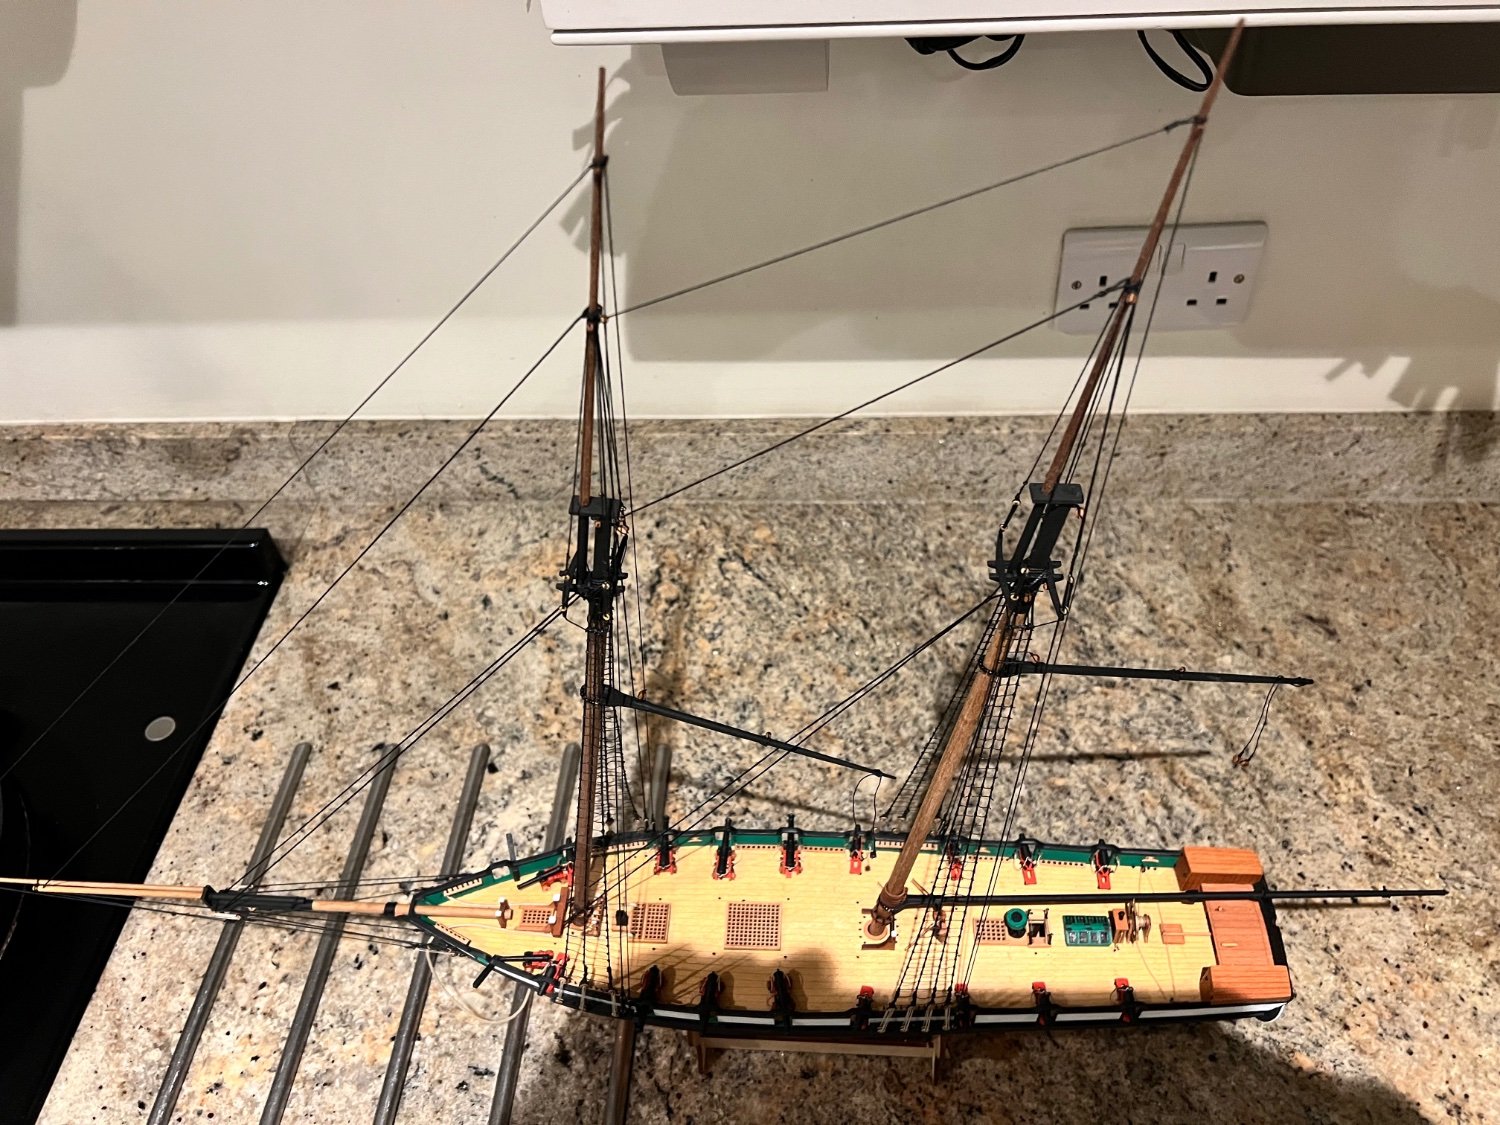
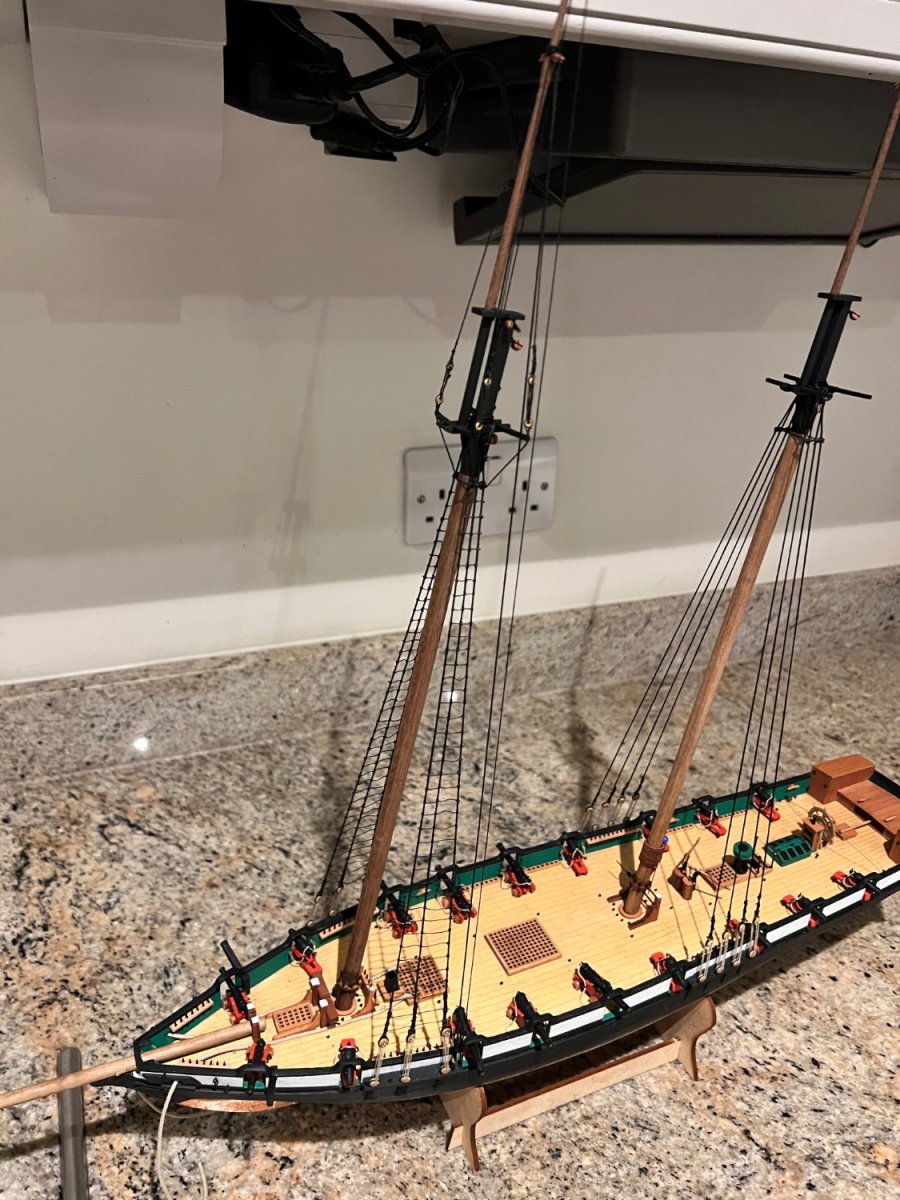
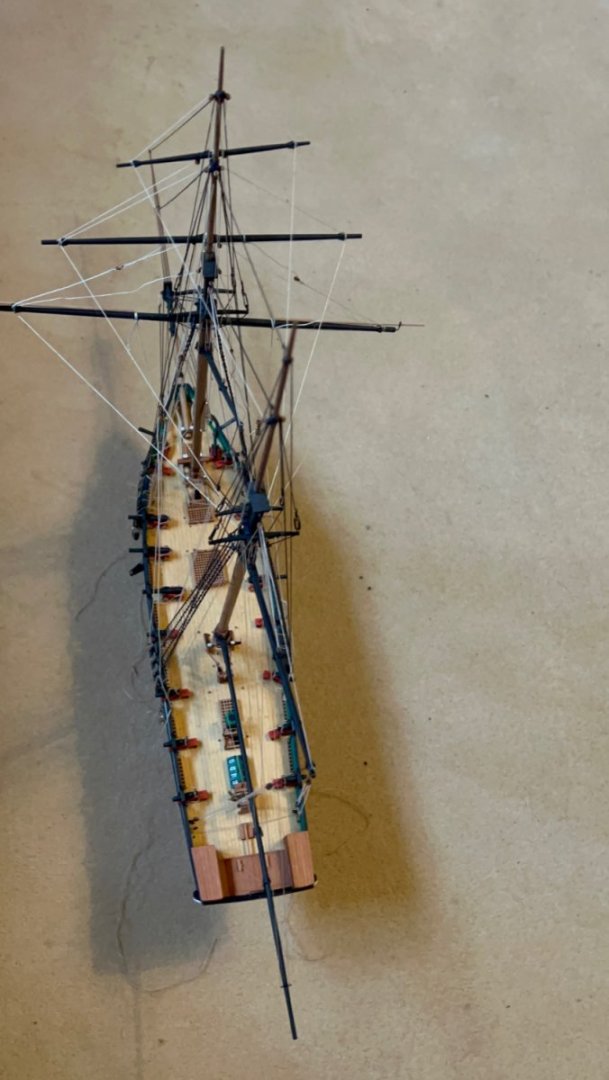
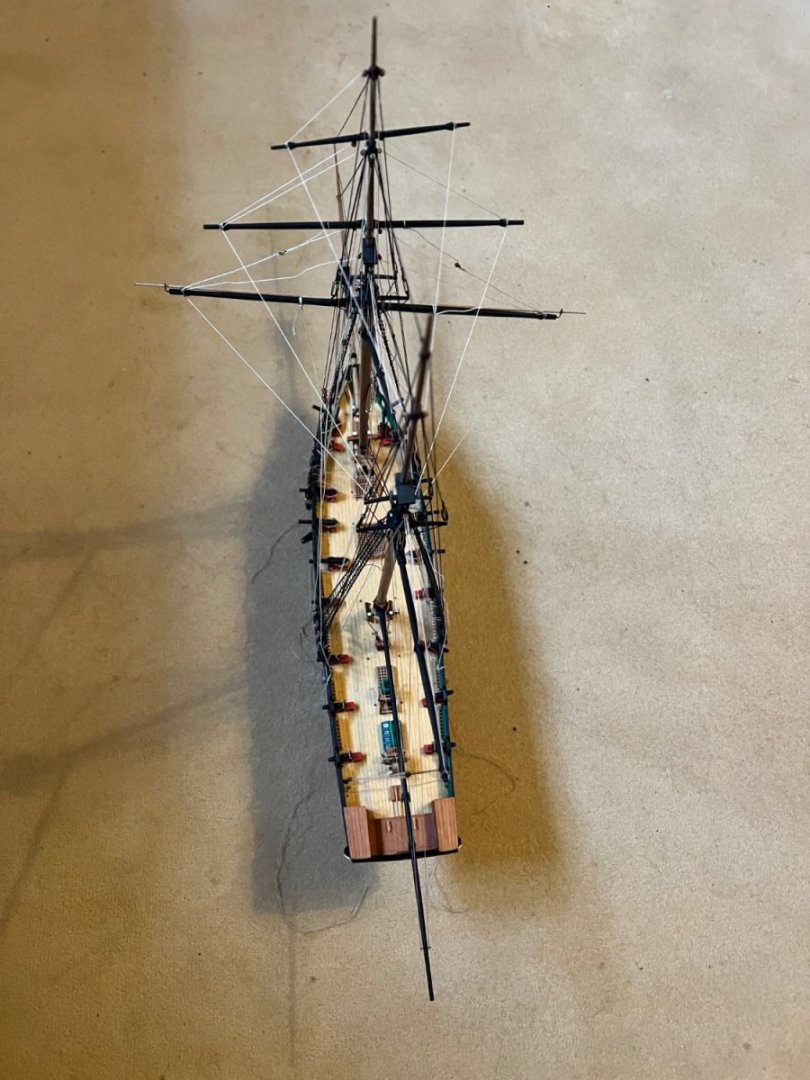
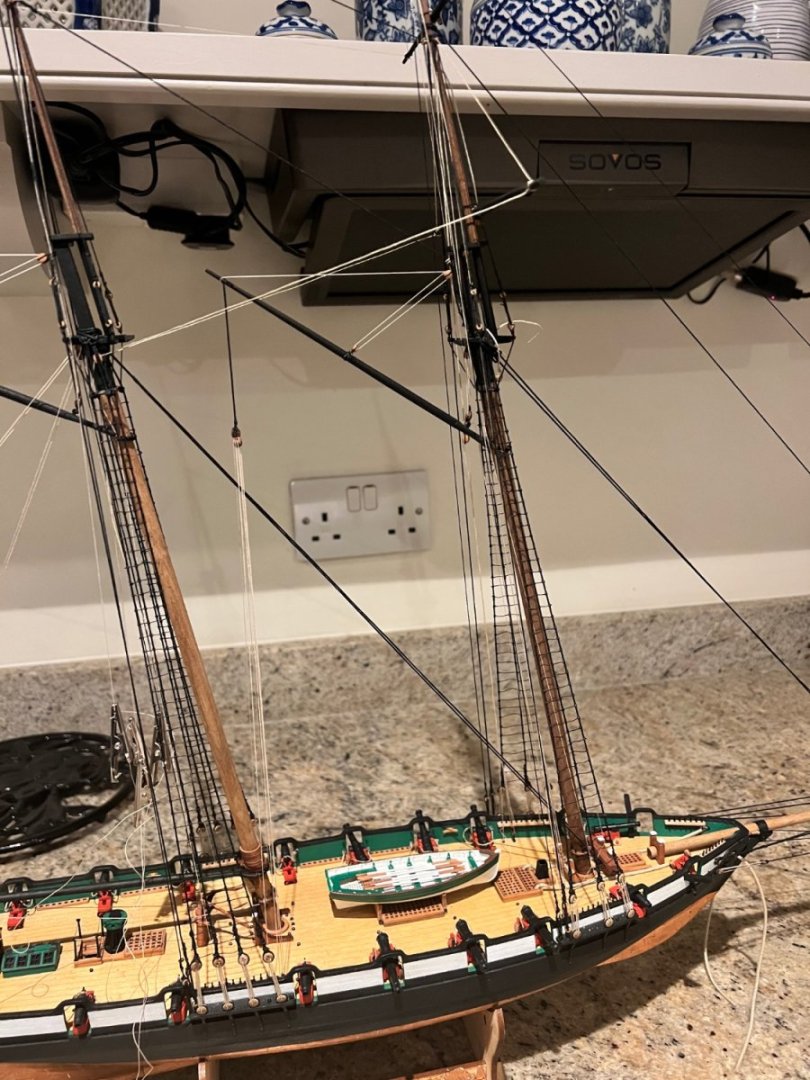
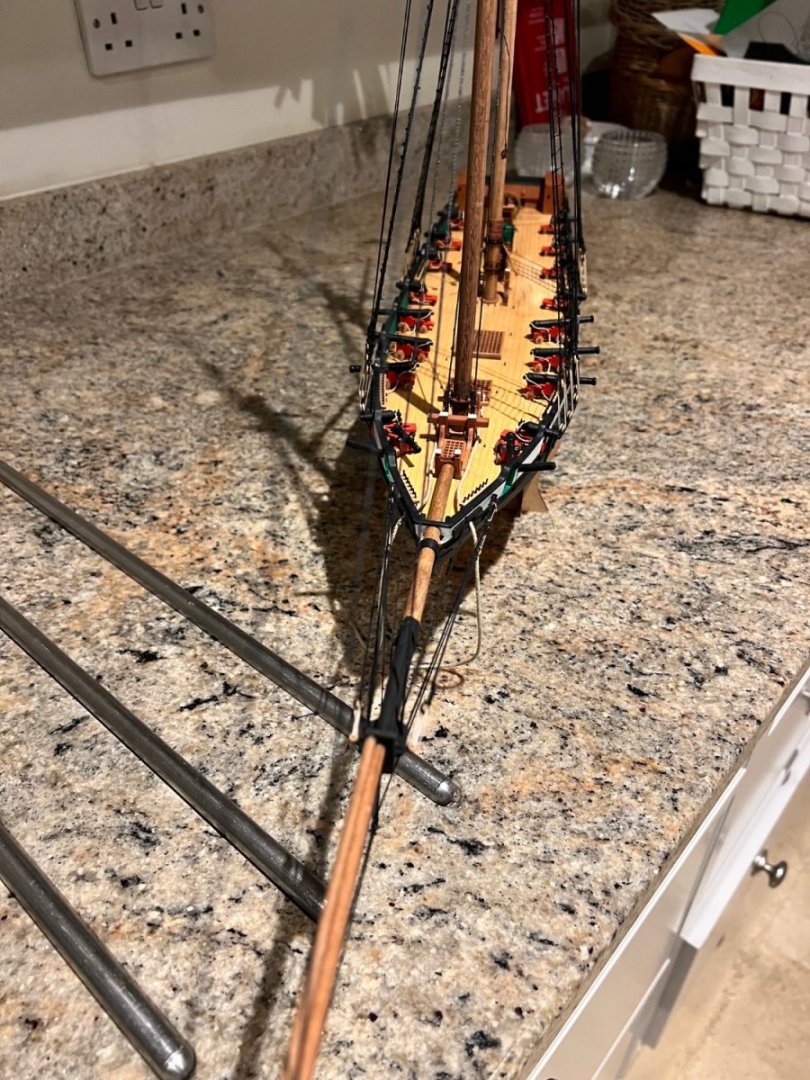
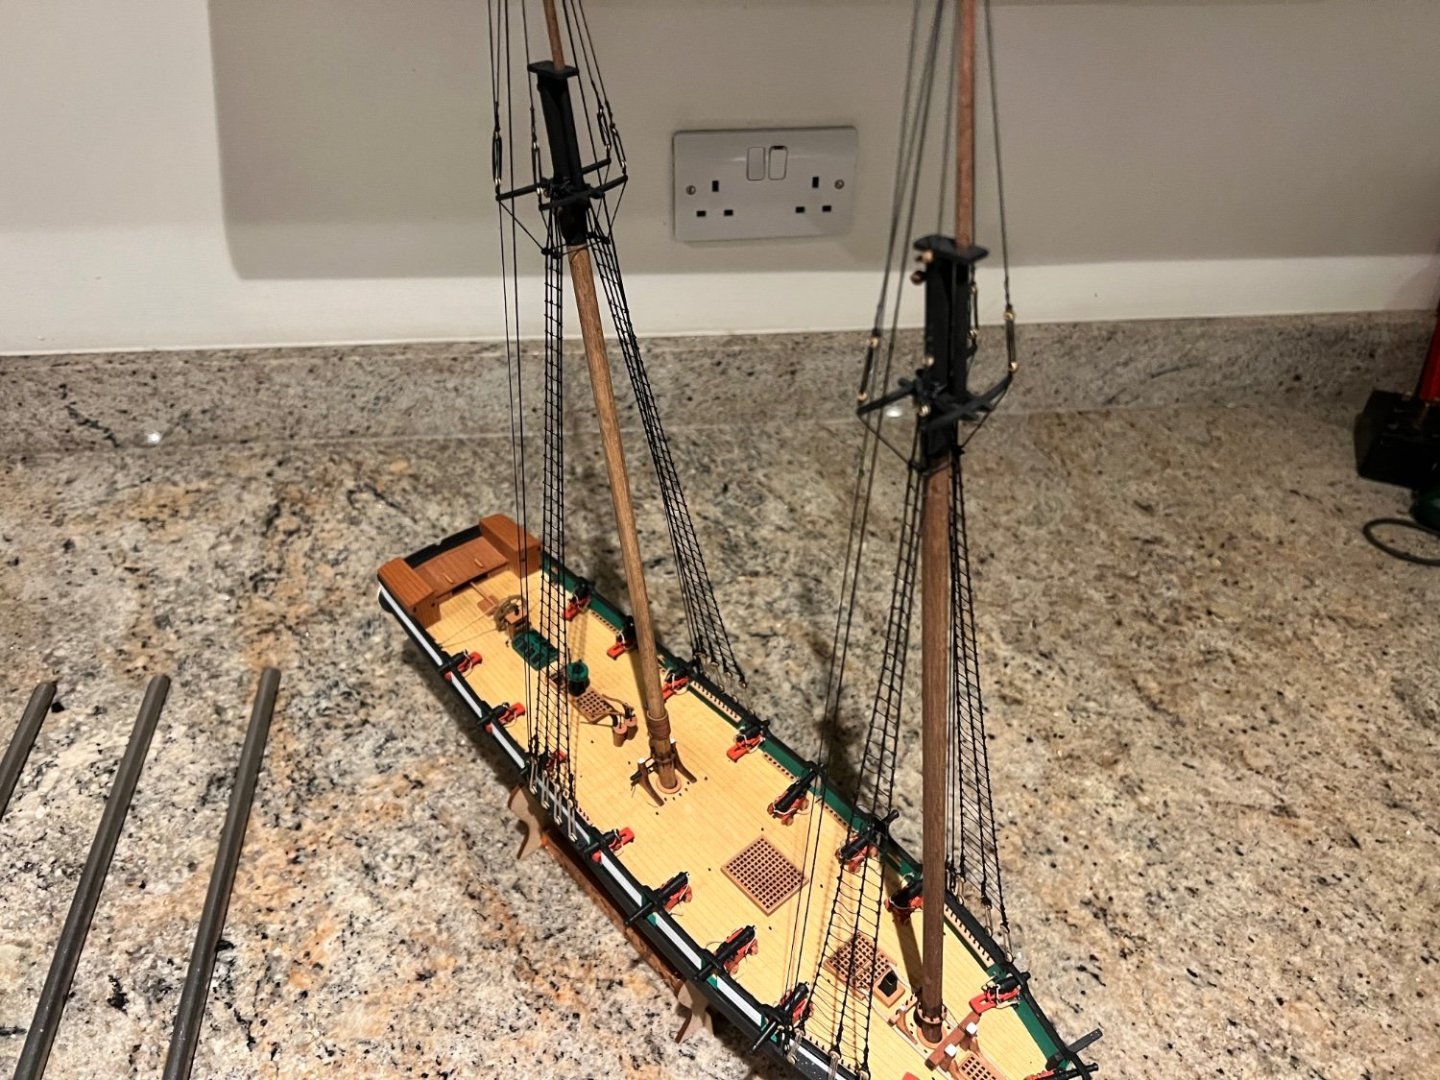
Standing rigging I think now complete. No big issues, but it’s certainly been more complex than the Vanguard fishers, albeit only harder than Alert in that there’s more of her having two masts not one. The gaffs and boom are just held on by parrel beads and are not in their final positions. She’s not an easy model to photograph well in her entirety without a photo bay with white background given the height of the masts and lengths of bowsprit and boom. So apologies for the not great photos below. There’s a lot of lines going to the bowsprit, but the Vanguard plans are incredibly clear and split these out superbly across a couple of plan sheets. Aided by Jim H’s excellent build log photos of Grecian. Phil thanks for the advice on gammoning, that worked a treat. With Alert. Running rigging and foremast spars still to be added. Anchors I’ll fit last. No decision on the ship’s boat yet, I need to do more work on it before deciding. Thanks for all the likes and encouragement. She’s a great kit and I thoroughly recommend her to other builders - surprised I’m the only Grecian build log on MSW other than Jim’s prototype.


- 106 replies
-
- 11
-
-
- Grecian
- baltimore clipper
- (and 4 more)
-
Thanks Phil, I’ll try that.
-
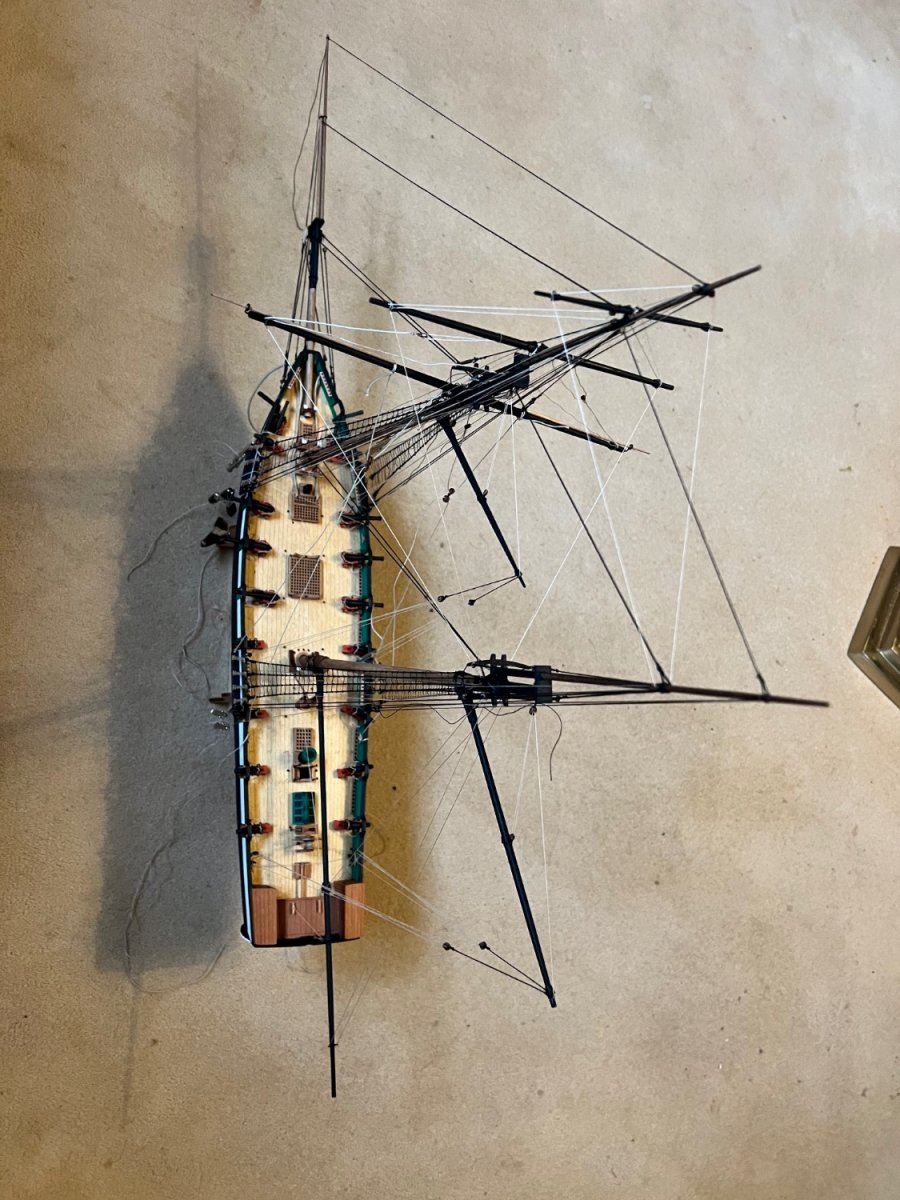
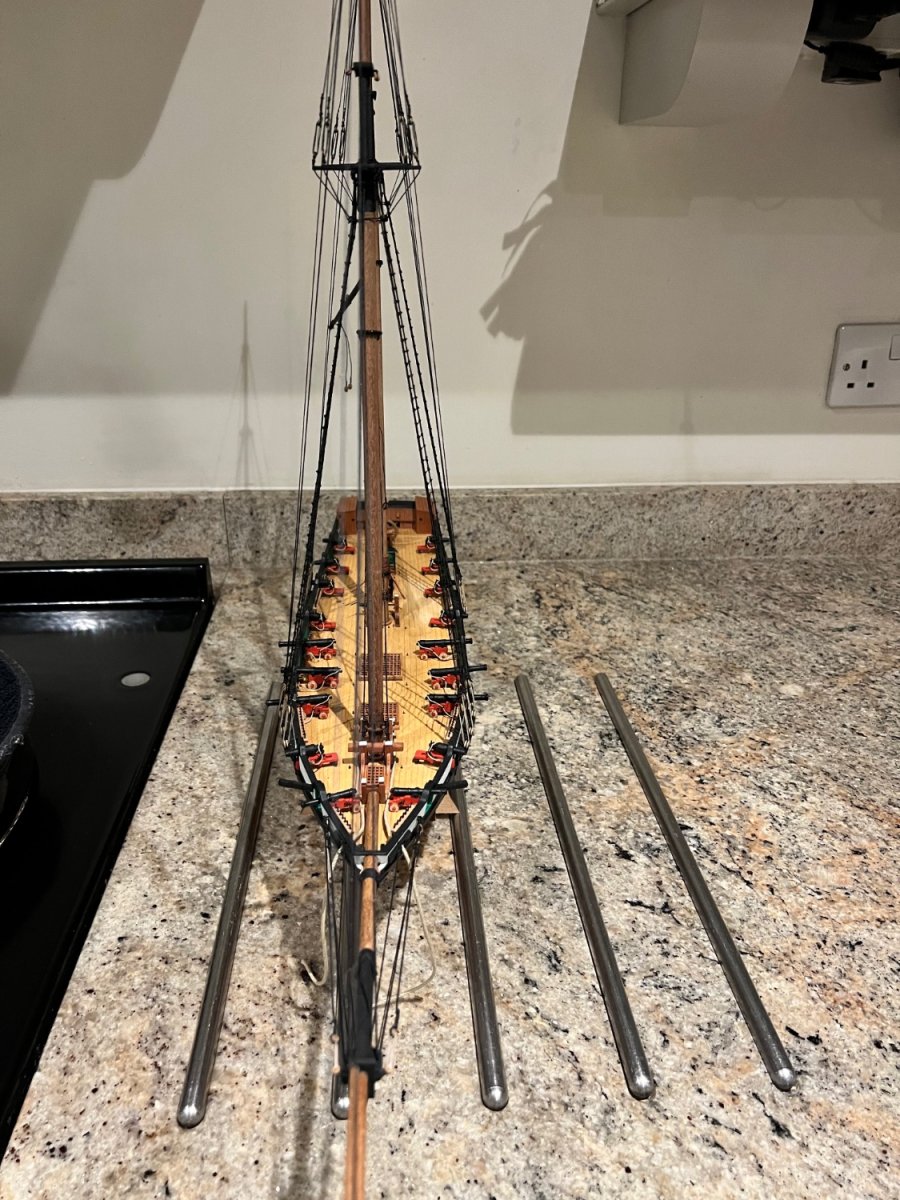
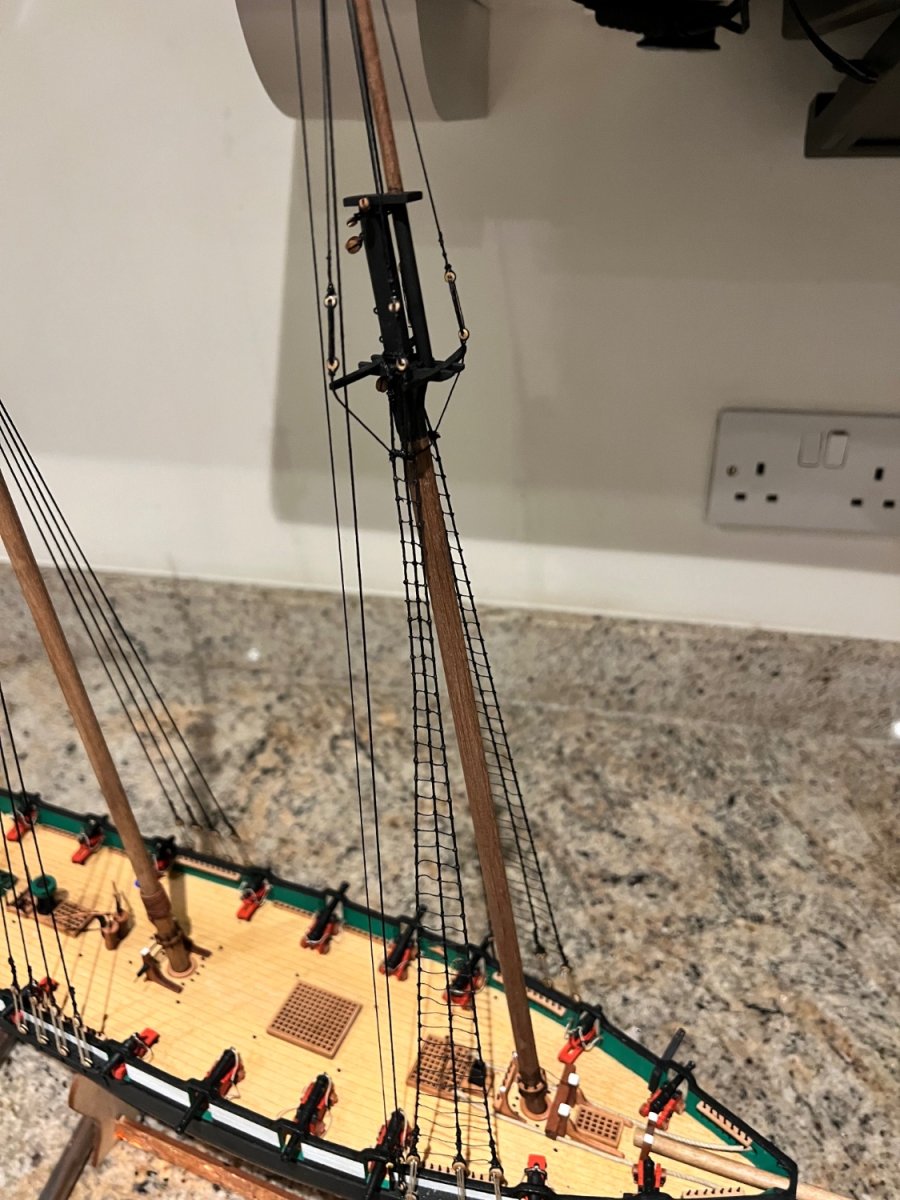
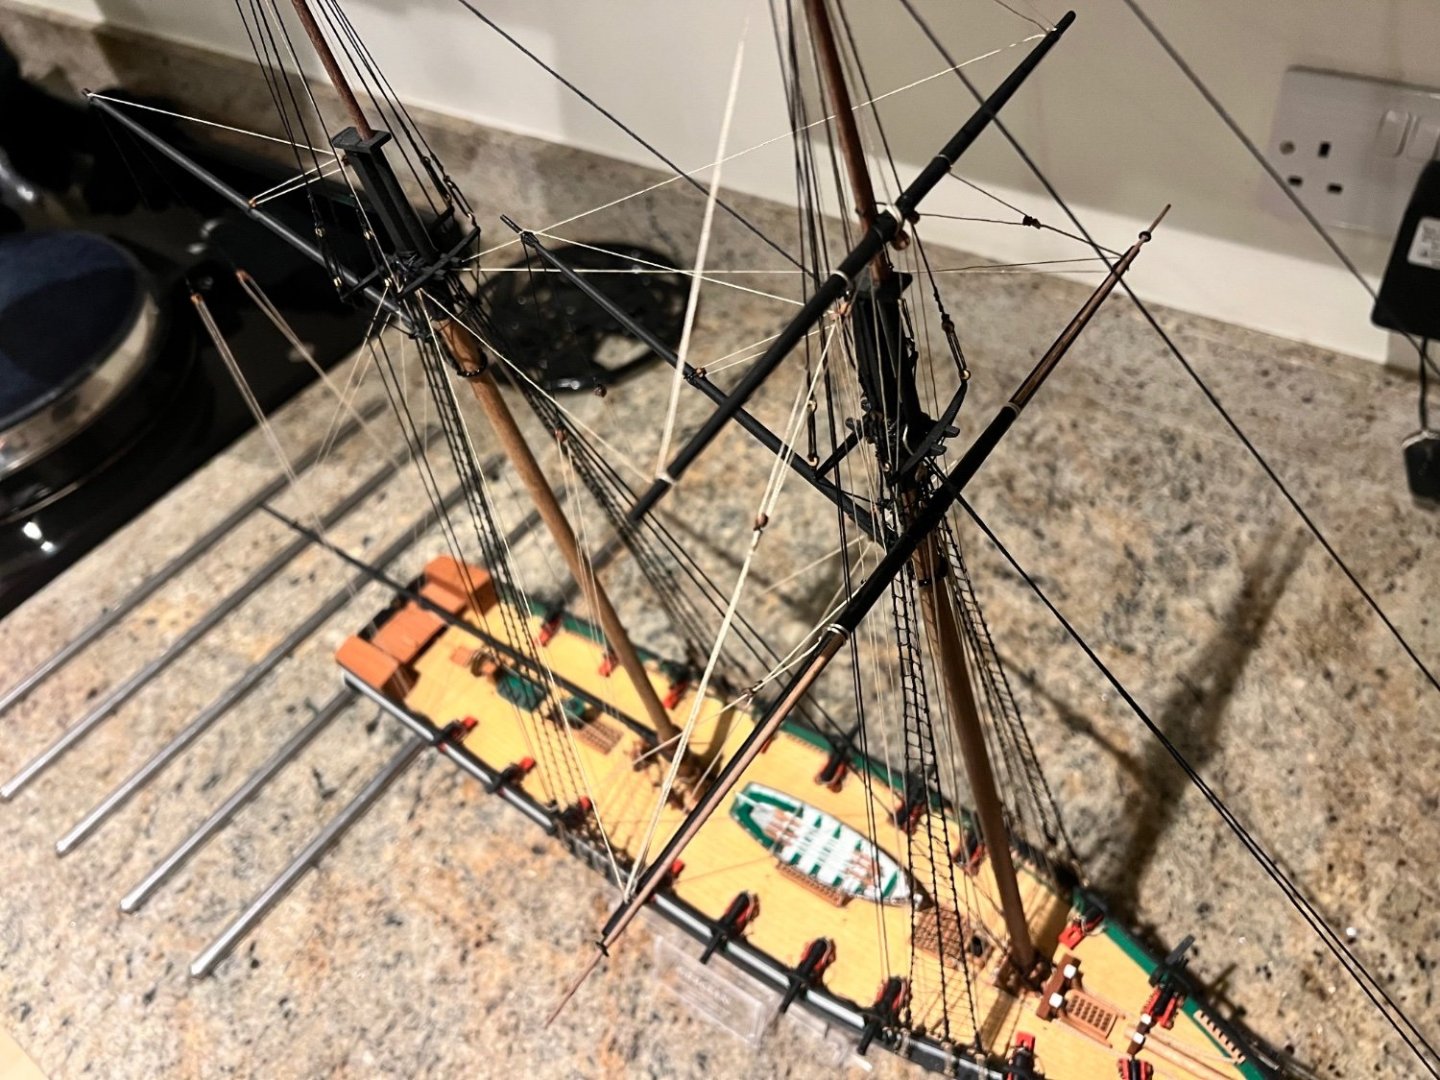
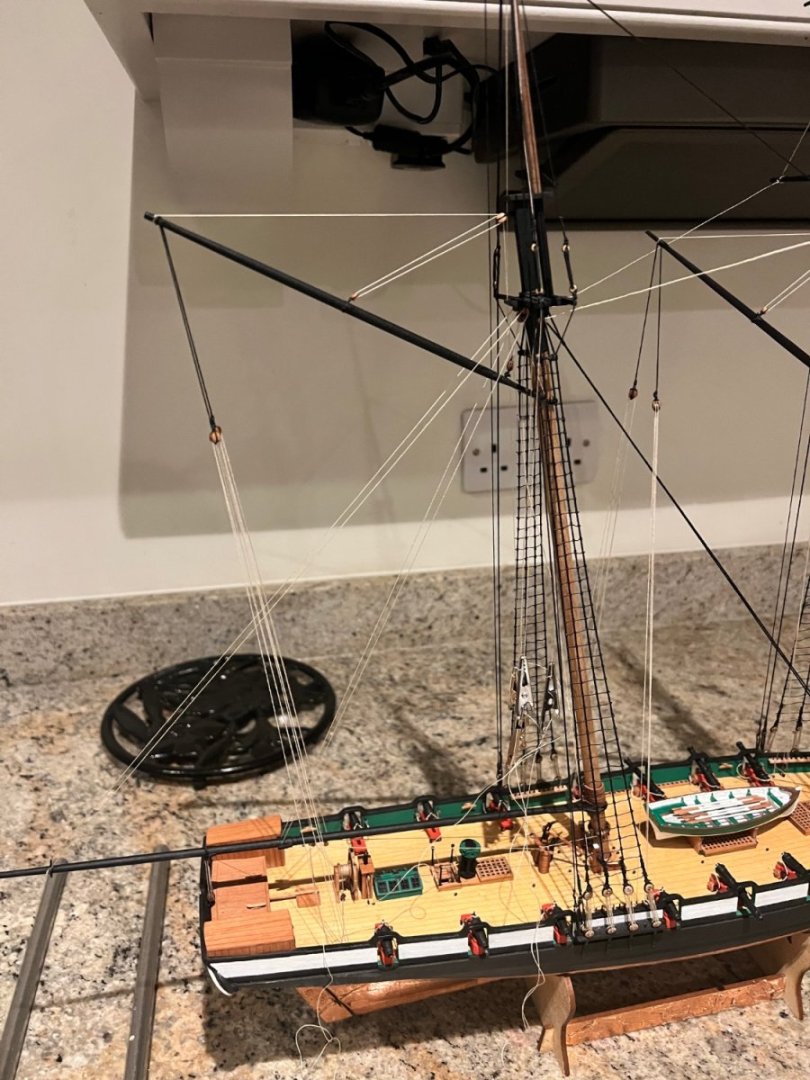
Tying the ratlines, one of the more tedious jobs. There’s almost 200 ratlines to be tied across both masts. There’s only ratlines on the lower shrouds on Grecian, but these masts are tall… clove hitches galore, almost 700 knots. Main mast upper shrouds, futtock shrouds and backstays fitted. I do like the 3D shape of her rigging starting to come together at this stage. I’ll likely make and fit the gaffs and boom before the standing rigging on the bowsprit. Once the bowsprit is glued she’ll become a big, fragile model to move around and the likelihood of a breakage increases. When it does come to fitting the bowsprit there’s some gammoning to be done, can anyone suggest how to tie the end of this off neatly? Many thanks


- 106 replies
-
- 8
-
-
- Grecian
- baltimore clipper
- (and 4 more)
-
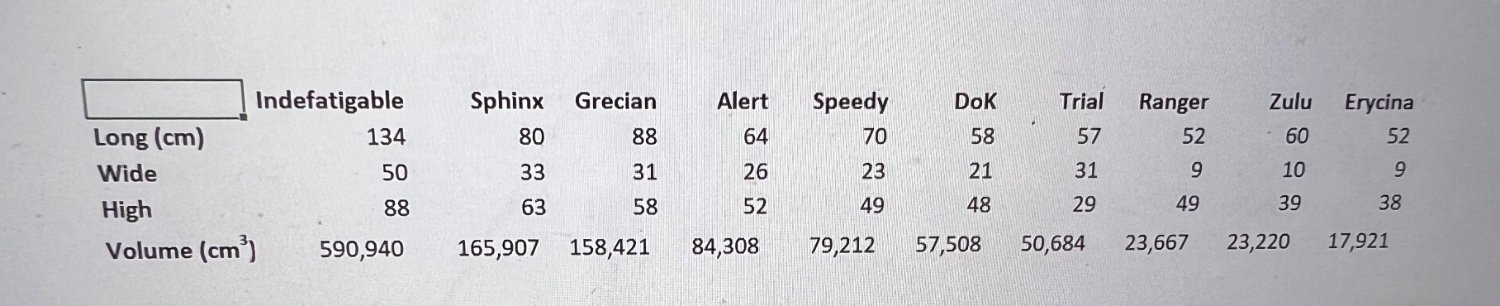
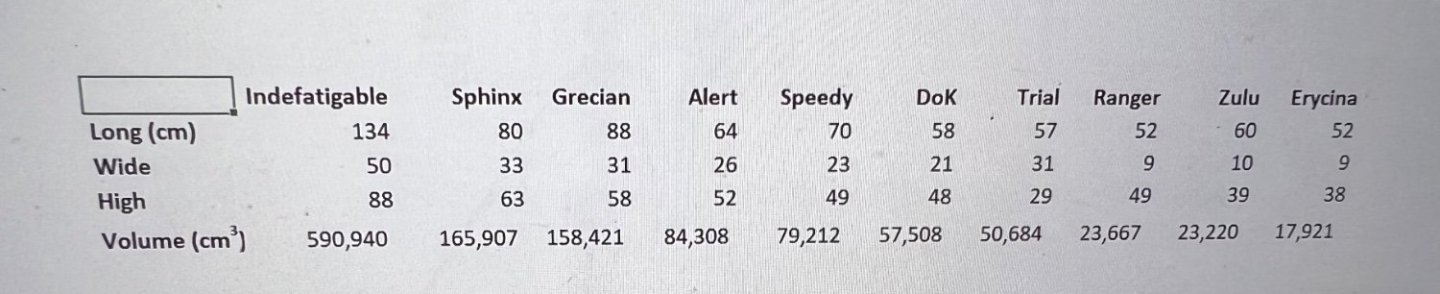
Grecian is a really fun kit, very straightforward to build, but she’s going to take up a lot of room. I’ve put together a table based on the dimensions of the kits on Vanguard’s website. The measurements are at the widest / longest / highest part so would be the absolute minimum dimensions for the kit to fit within a rectangular case with no additional space around it. Grecian is longer than Sphinx and the overall volume of a case only marginally less than Sphinx which is a much more complex build and the one I’m aiming for eventually. Grecian’s volume is roughly double that needed for Alert or Speedy, the latter being surprisingly small. I think that the height measurement for Trial is wrong on the website, in the photos she looks taller than the larger fishing boats but Chris’s height measurement says 285mm. I suspect her correct height should be 385mm which makes her volume 68k cm cubed so just between Speedy and Duchess of K. Ranger is my next build. After that I’ll tackle my first square rigger. That will almost certainly be the new version of Speedy. I did debate Speedy vs DoK, but DoK is much smaller than Speedy and has the rigging of three not two masts to fit in. I think too soon for me to tackle such a lot of rigging on such a small ship.
- 106 replies
-
- 6
-
-
- Grecian
- baltimore clipper
- (and 4 more)
-
Thanks Bob, it’s huge. Going to require a large case…
-
Not had enough time shipbuilding recently, so just a few photos. To break up the monotony of ratlines I added the upper shrouds, futtock shrouds and backstays to the foremast before starting ratlines on the main mast.


- 106 replies
-
- 10
-
-
- Grecian
- baltimore clipper
- (and 4 more)
-
Thanks Chris, much appreciated. I’ve run a line across between the port and starboard catharpins on each mast both behind and in front of the mast. That’s what I think your plans show although differs from photos in the instructions - although the lines might not have been fitted yet in the photos.
- 106 replies
-
- 2
-
-
- Grecian
- baltimore clipper
- (and 4 more)