HOLIDAY DONATION DRIVE - SUPPORT MSW - DO YOUR PART TO KEEP THIS GREAT FORUM GOING! (Only 20 donations so far - C'mon guys!)
×


moreplovac
-
Posts
794 -
Joined
-
Last visited
Content Type
Profiles
Forums
Gallery
Events
Everything posted by moreplovac
-
 Almost there, almost there.. The challenge will be what next.. Thank you, appreciated. Cheers
- 360 replies
-
- 1
-

-
- sultana
- model shipways
- (and 1 more)
-
Mini (micro) drill bits in bulk, not sets.
moreplovac replied to moreplovac's topic in Modeling tools and Workshop Equipment
Thanks Jaager, i will check it out. Appreciated. -
Mini (micro) drill bits in bulk, not sets.
moreplovac replied to moreplovac's topic in Modeling tools and Workshop Equipment
Hello vaddoc, thanks. I have a handful of broken bits waiting for some other usage than drilling 🙂 Appreciated. -
Mini (micro) drill bits in bulk, not sets.
moreplovac replied to moreplovac's topic in Modeling tools and Workshop Equipment
I put myself on their email list so i can get their flyers.. Appreciated. Cheers -
Mini (micro) drill bits in bulk, not sets.
moreplovac replied to moreplovac's topic in Modeling tools and Workshop Equipment
Thanks, will check them out. Cheers -
Mini (micro) drill bits in bulk, not sets.
moreplovac replied to moreplovac's topic in Modeling tools and Workshop Equipment
Hi John, Appreciated your assistance; i am located in Vancouver BC so will definitely take advantage of this site.. Yes, Amazon is good place to buy but as you said there are different quality products they are selling. Thanks again. -
Mini (micro) drill bits in bulk, not sets.
moreplovac replied to moreplovac's topic in Modeling tools and Workshop Equipment
Great, thank you all. Good stuff. Appreciated. -
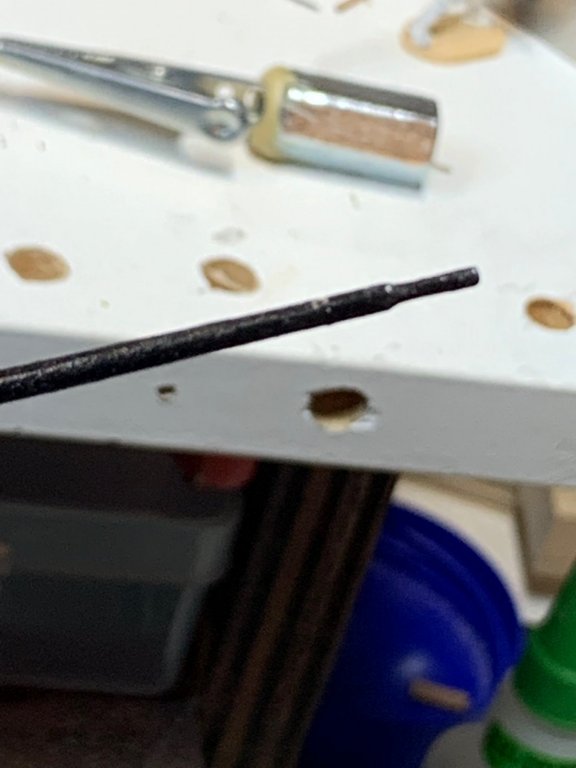
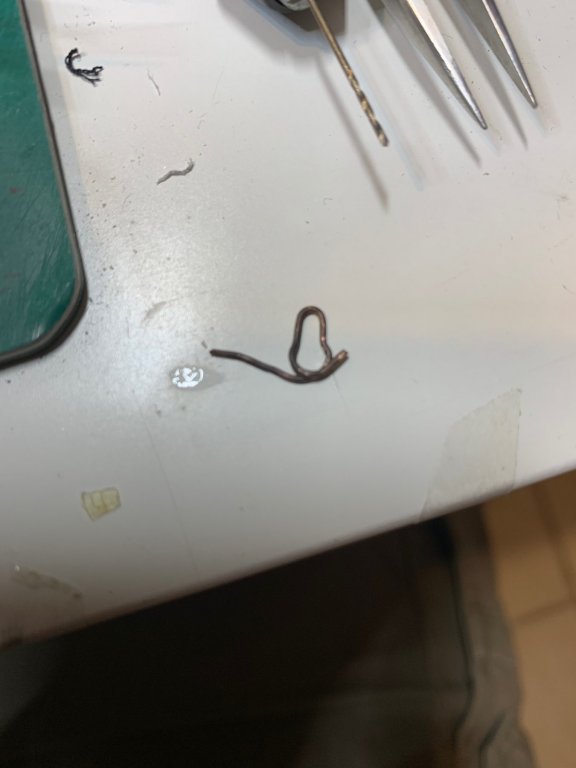
Hello, can anyone suggest a good place where i can get a mini drill bits in bulk, not sets? For example where can i get a 15 pieces of 0.3mm, 10 pieces of 0.4mm and 20 pieces of 0.5mm bits? I dont want to buy a sets, just individual sizes. I have researched a bit online but not quite useful results showed up (or maybe i dont use correct terms).. Appreciate assistance..
-
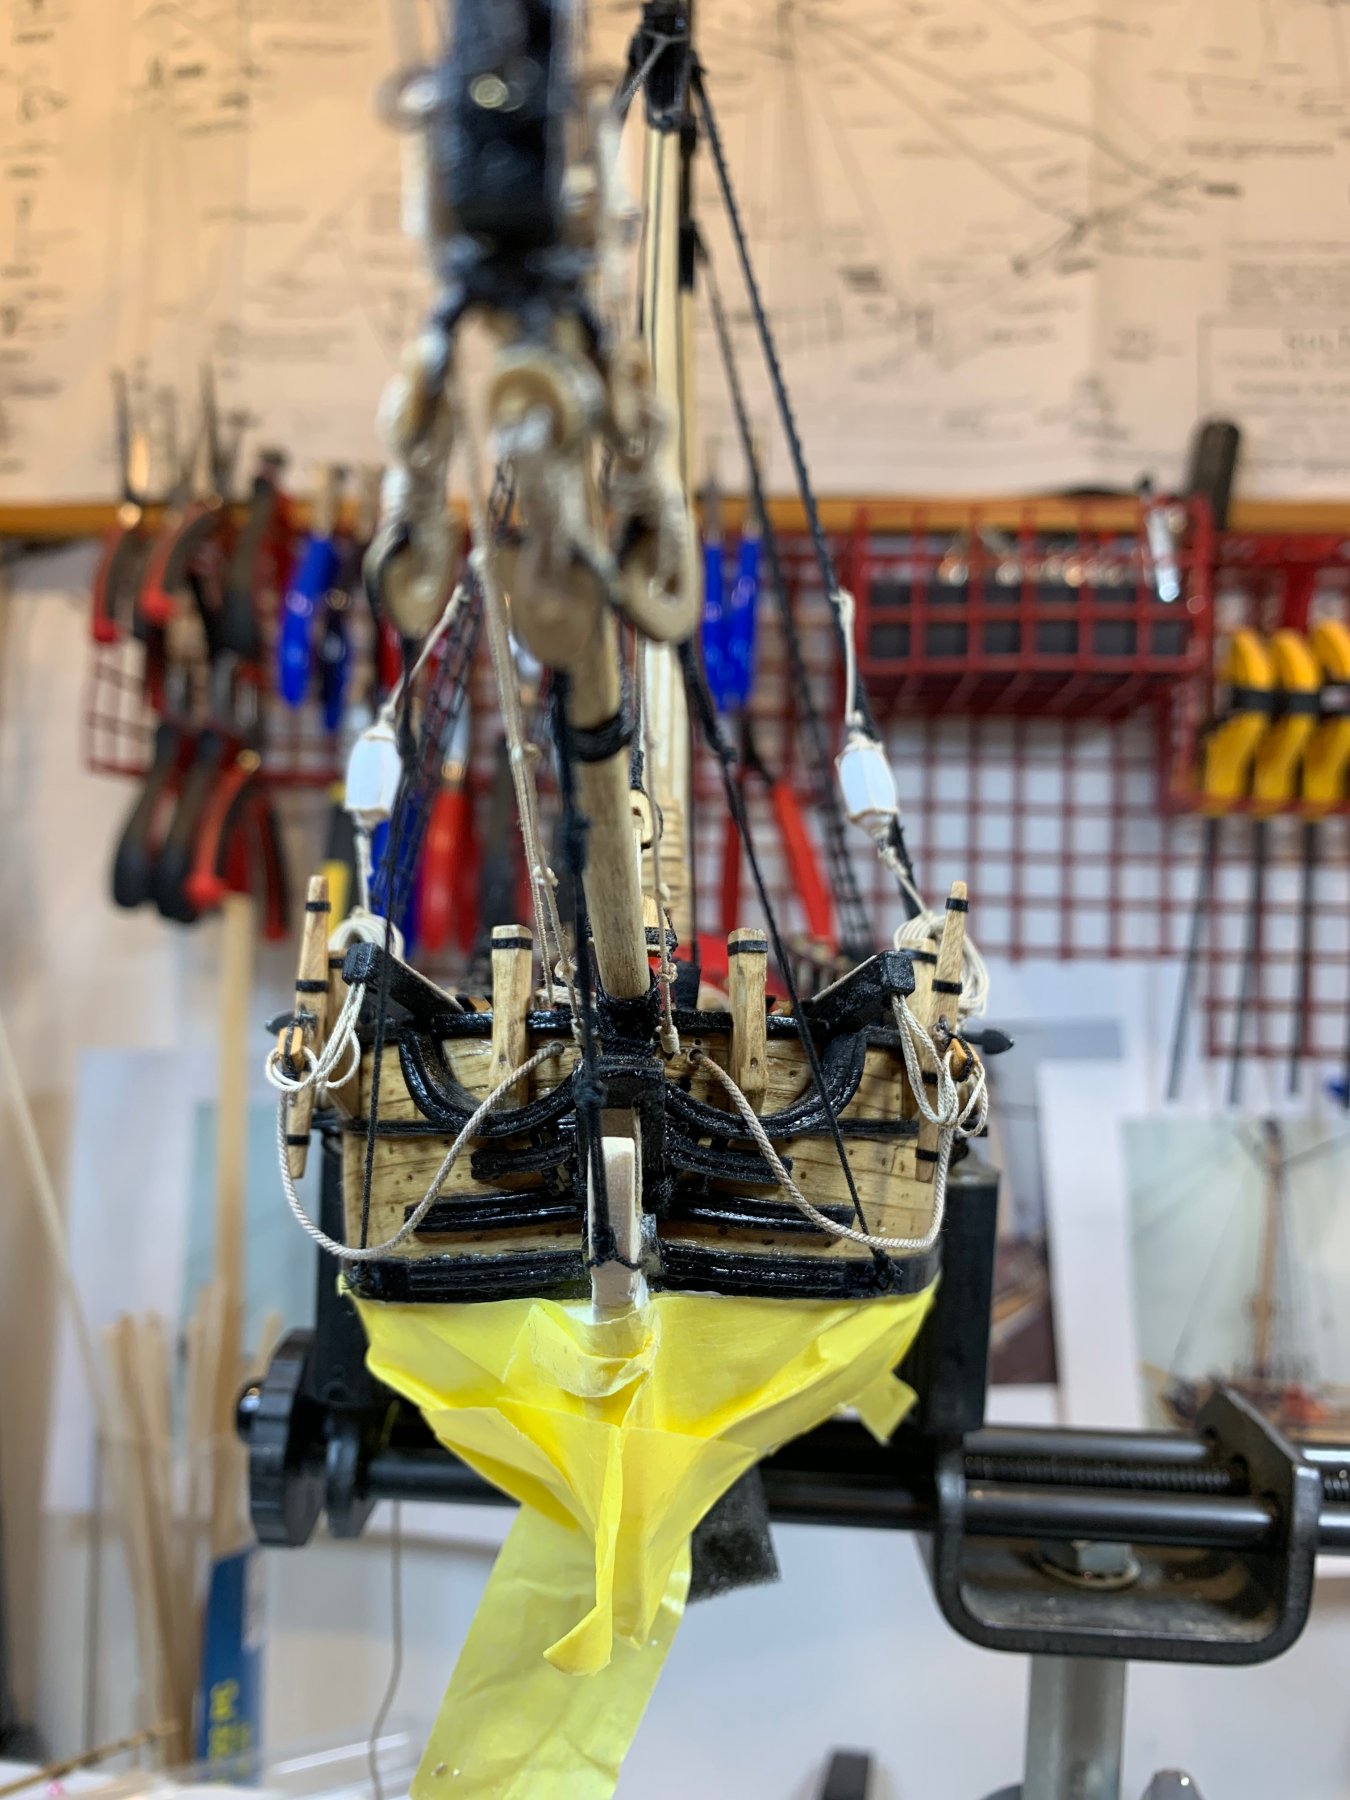
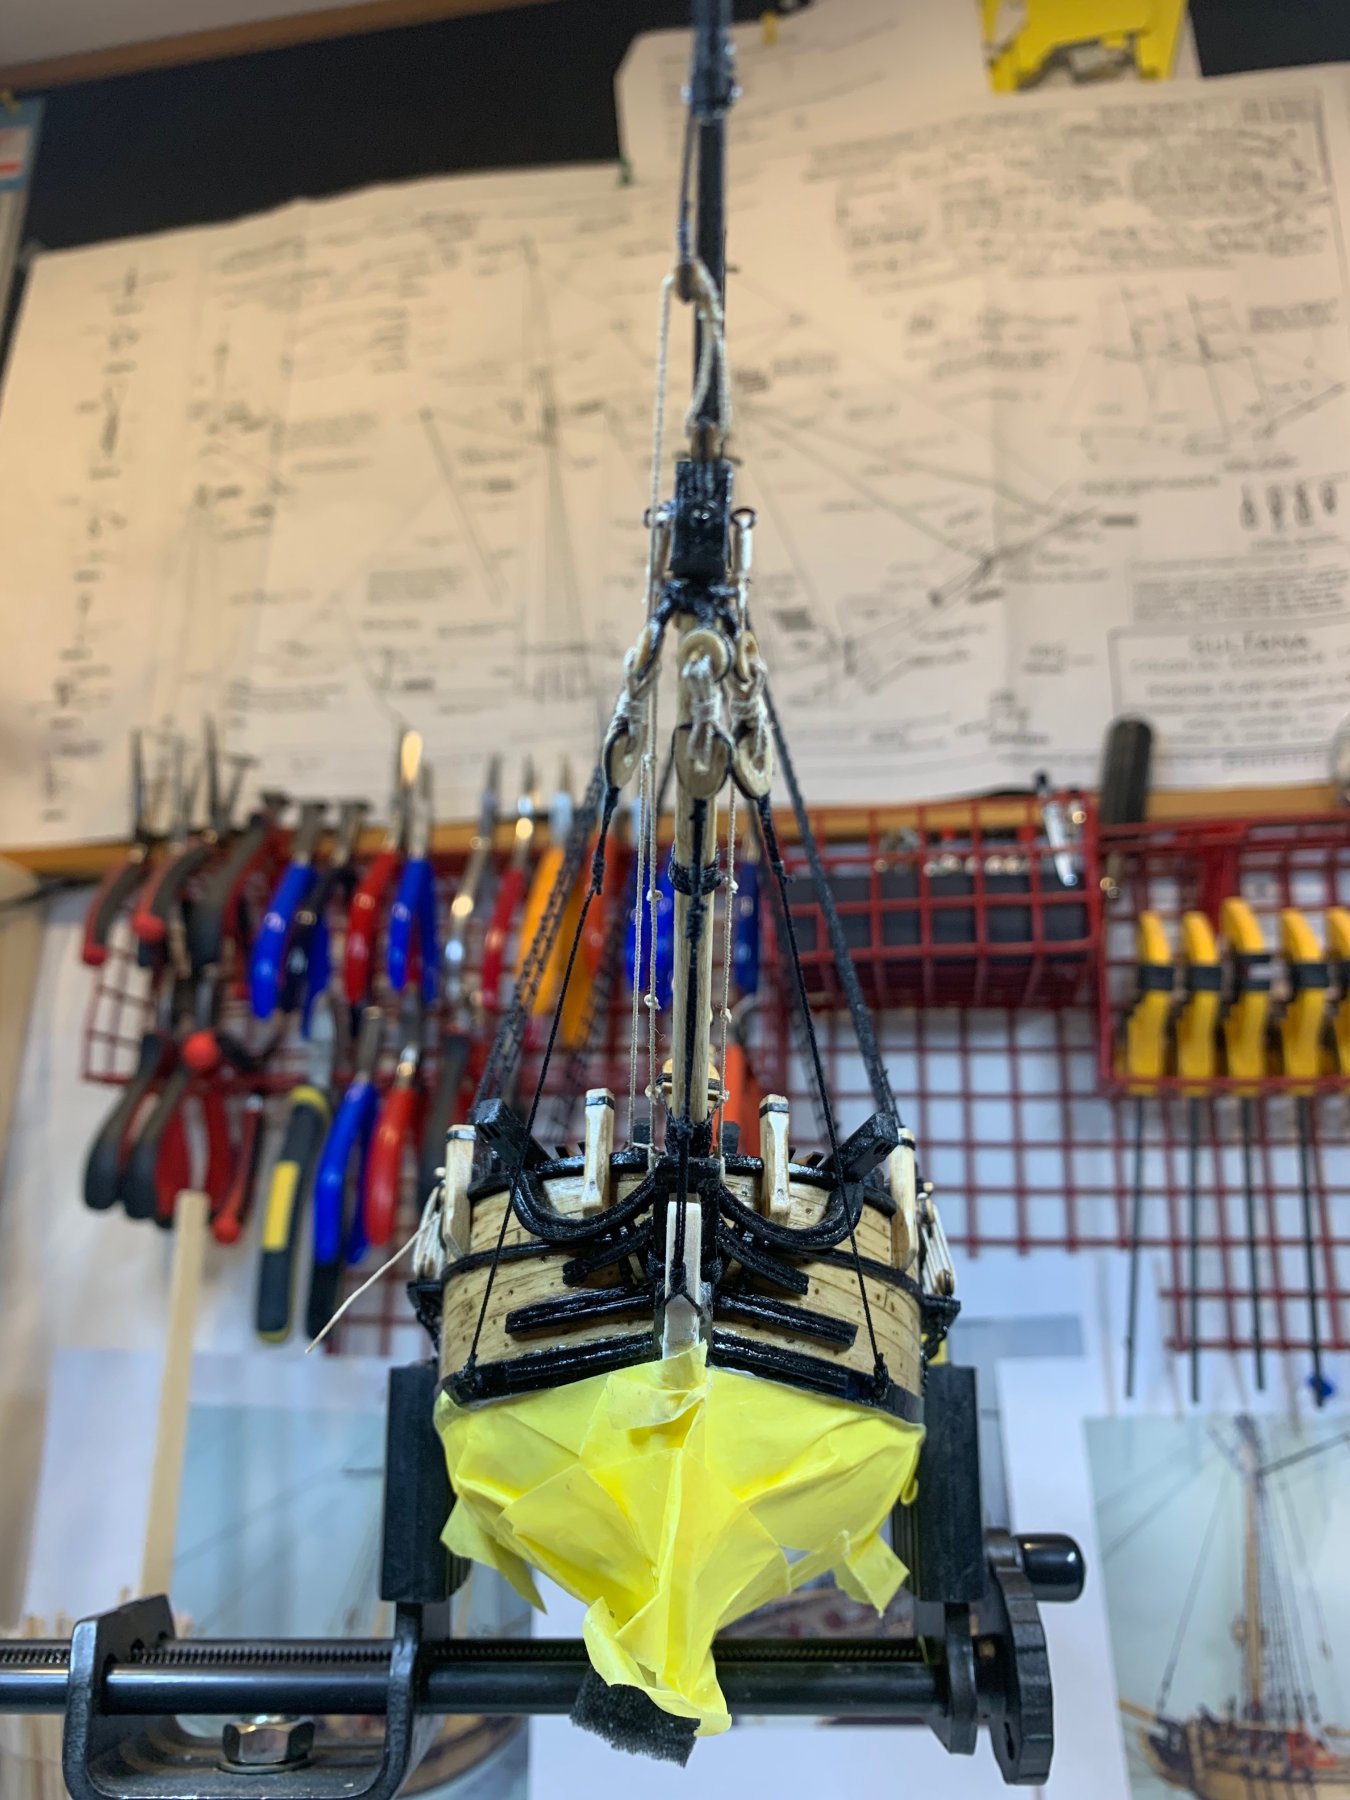
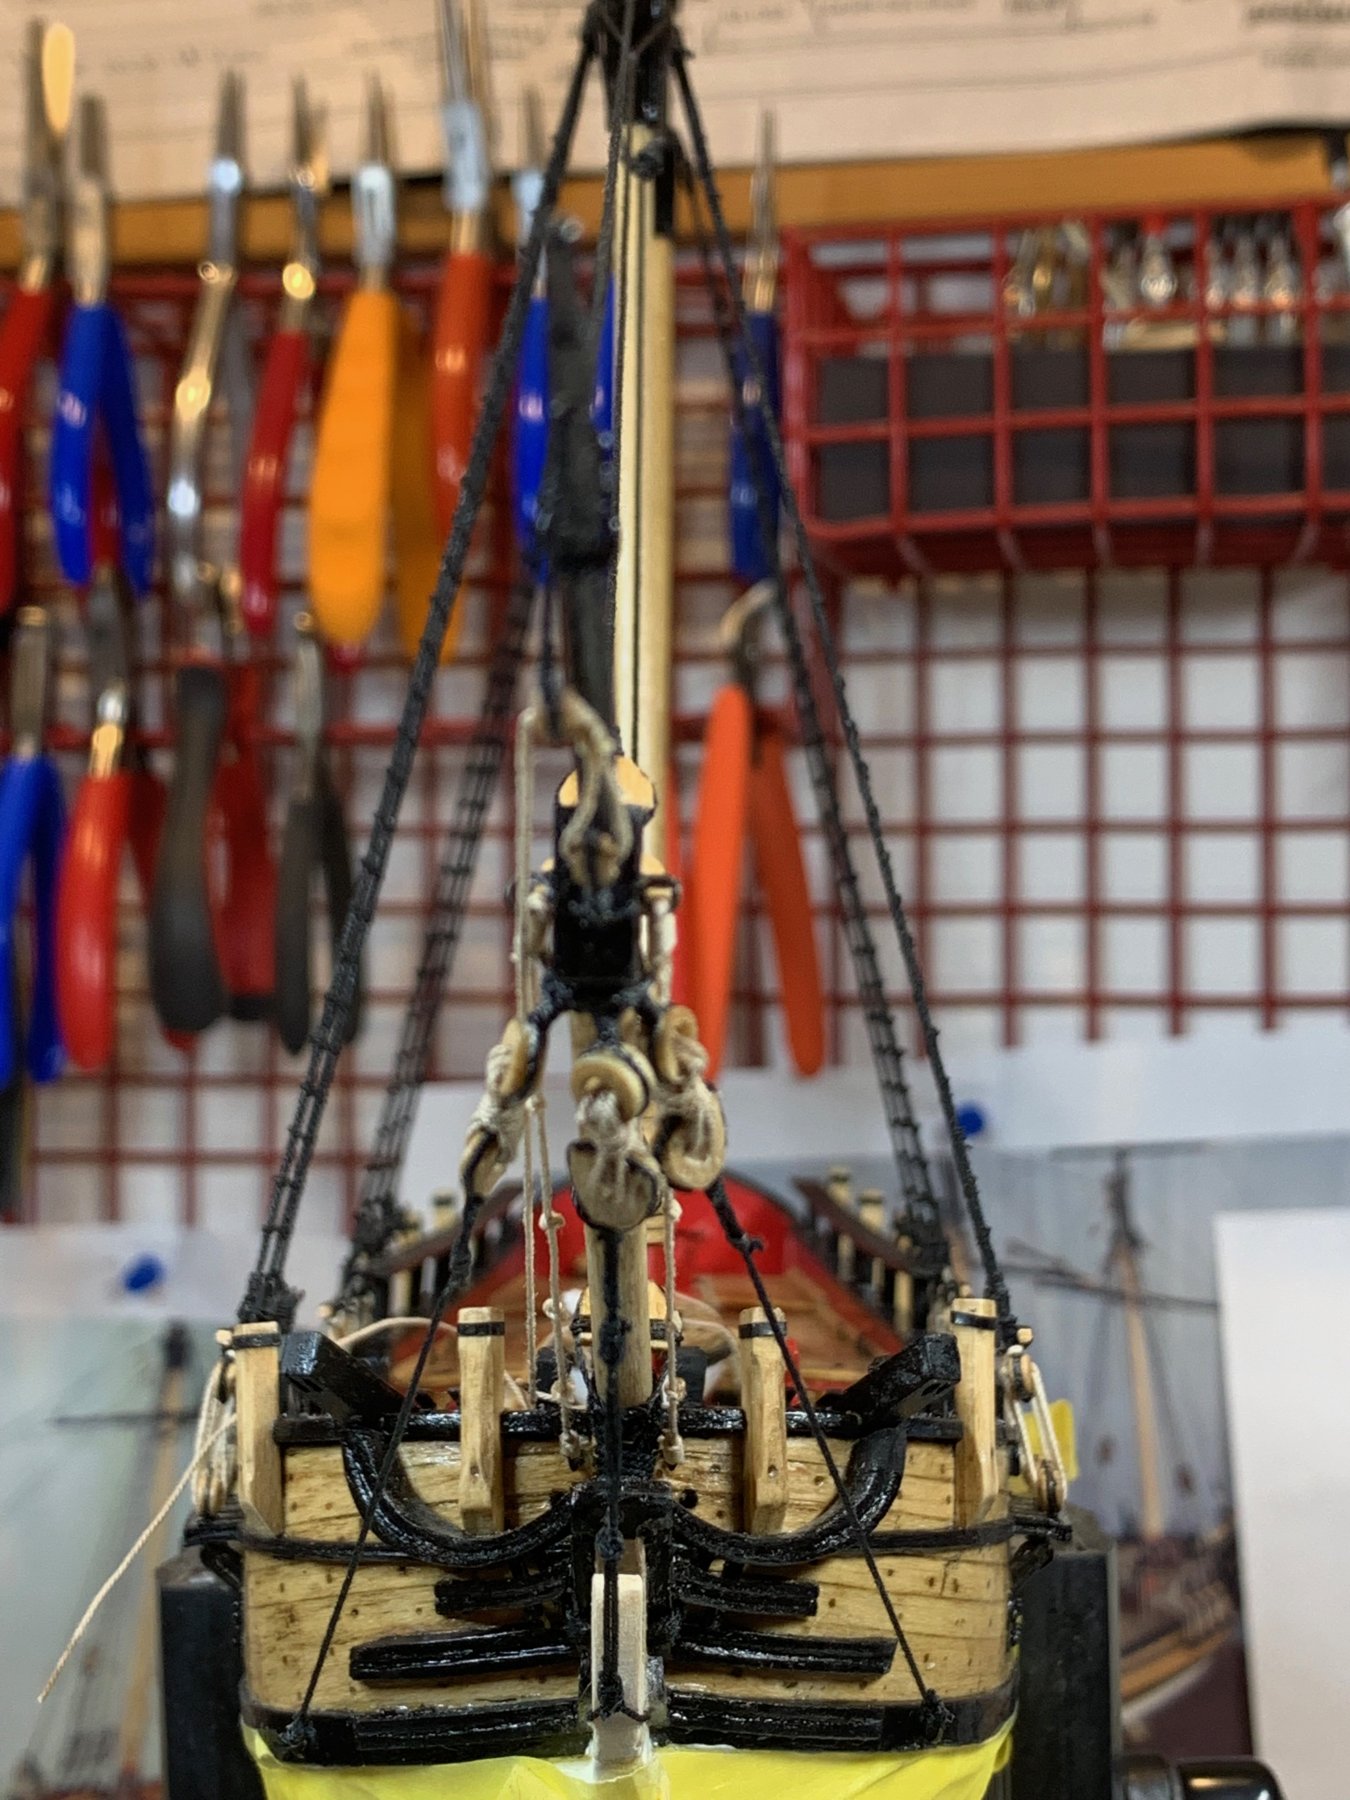
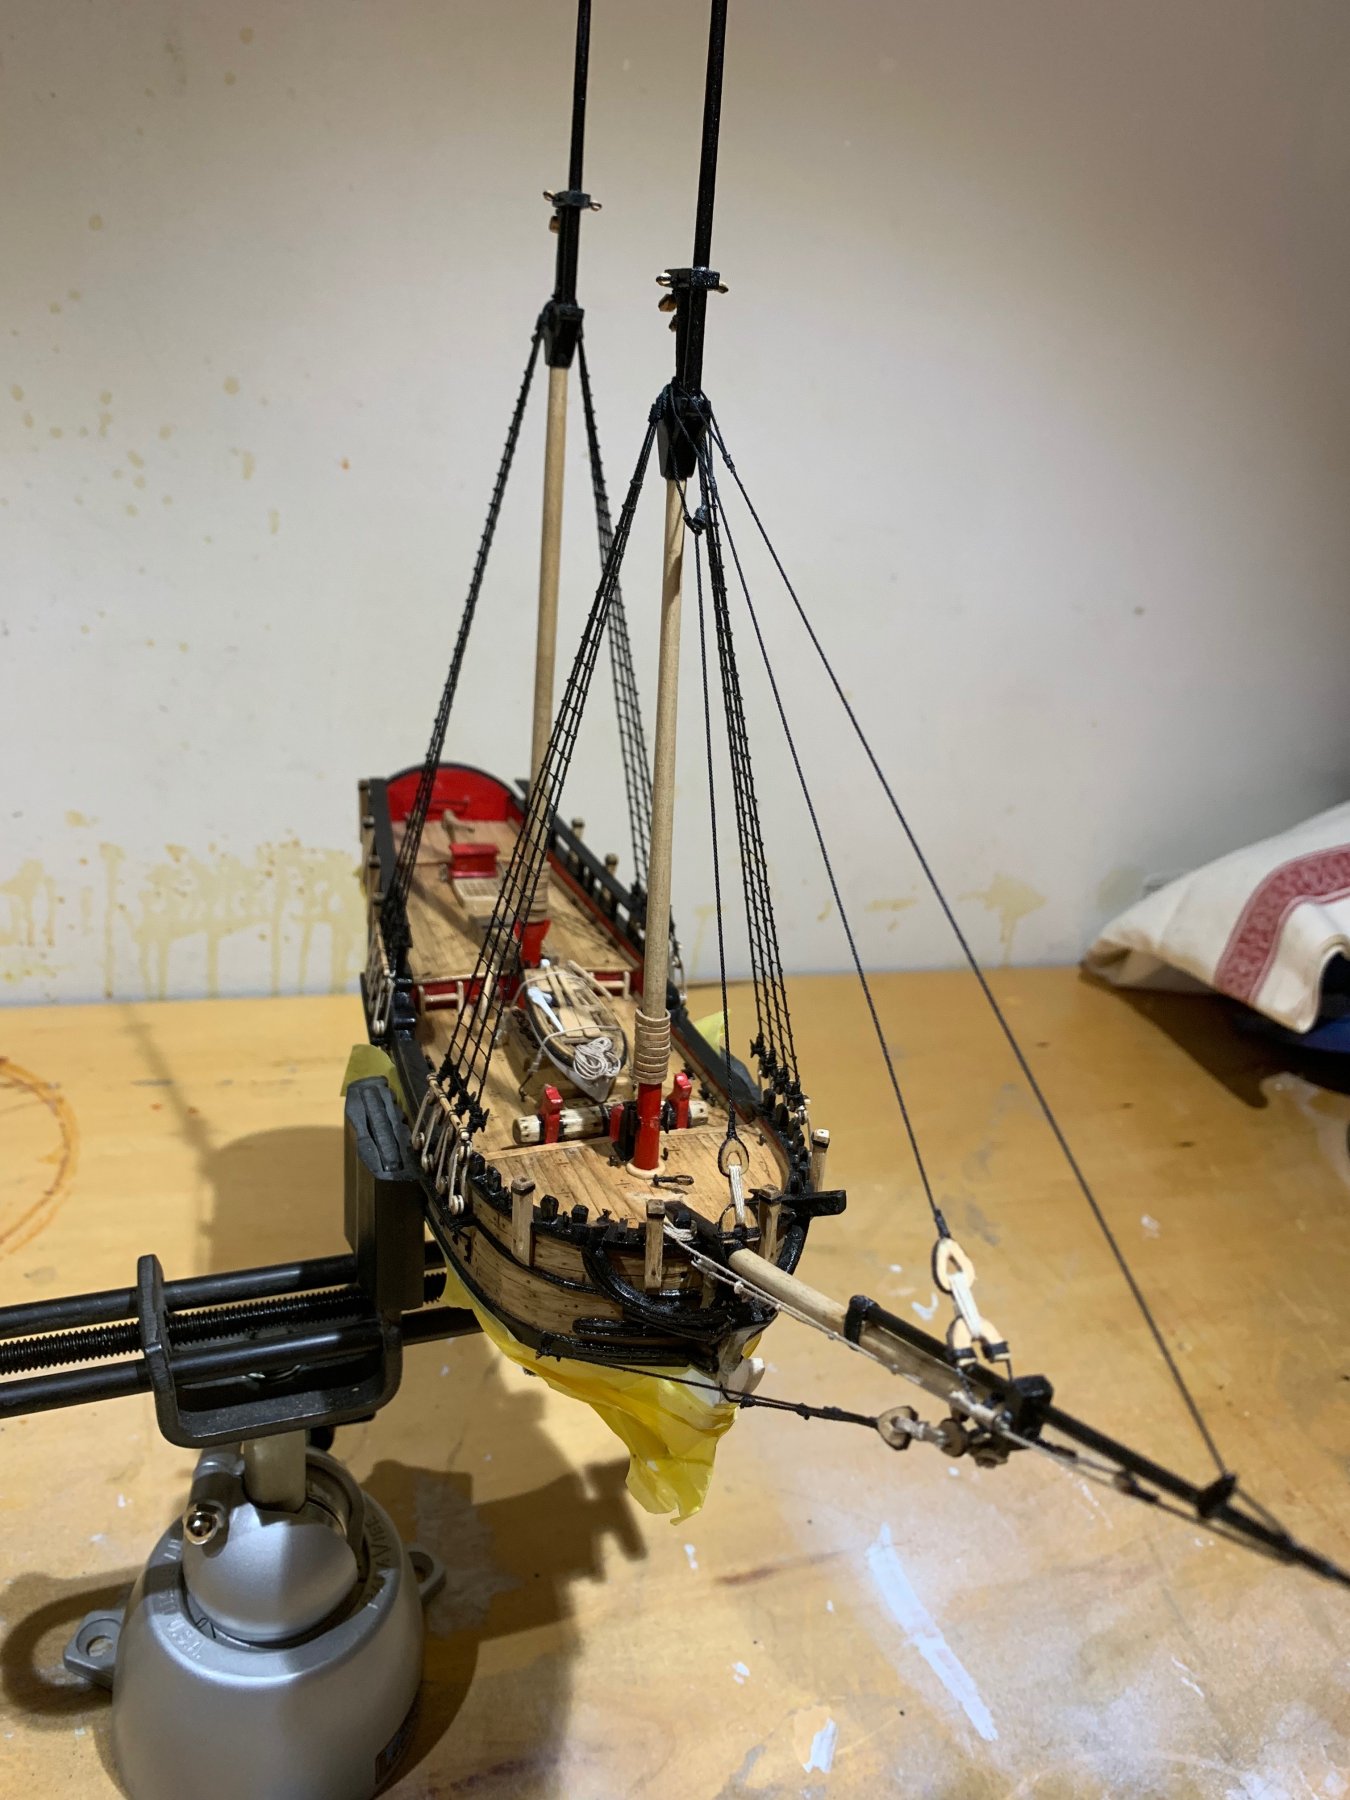
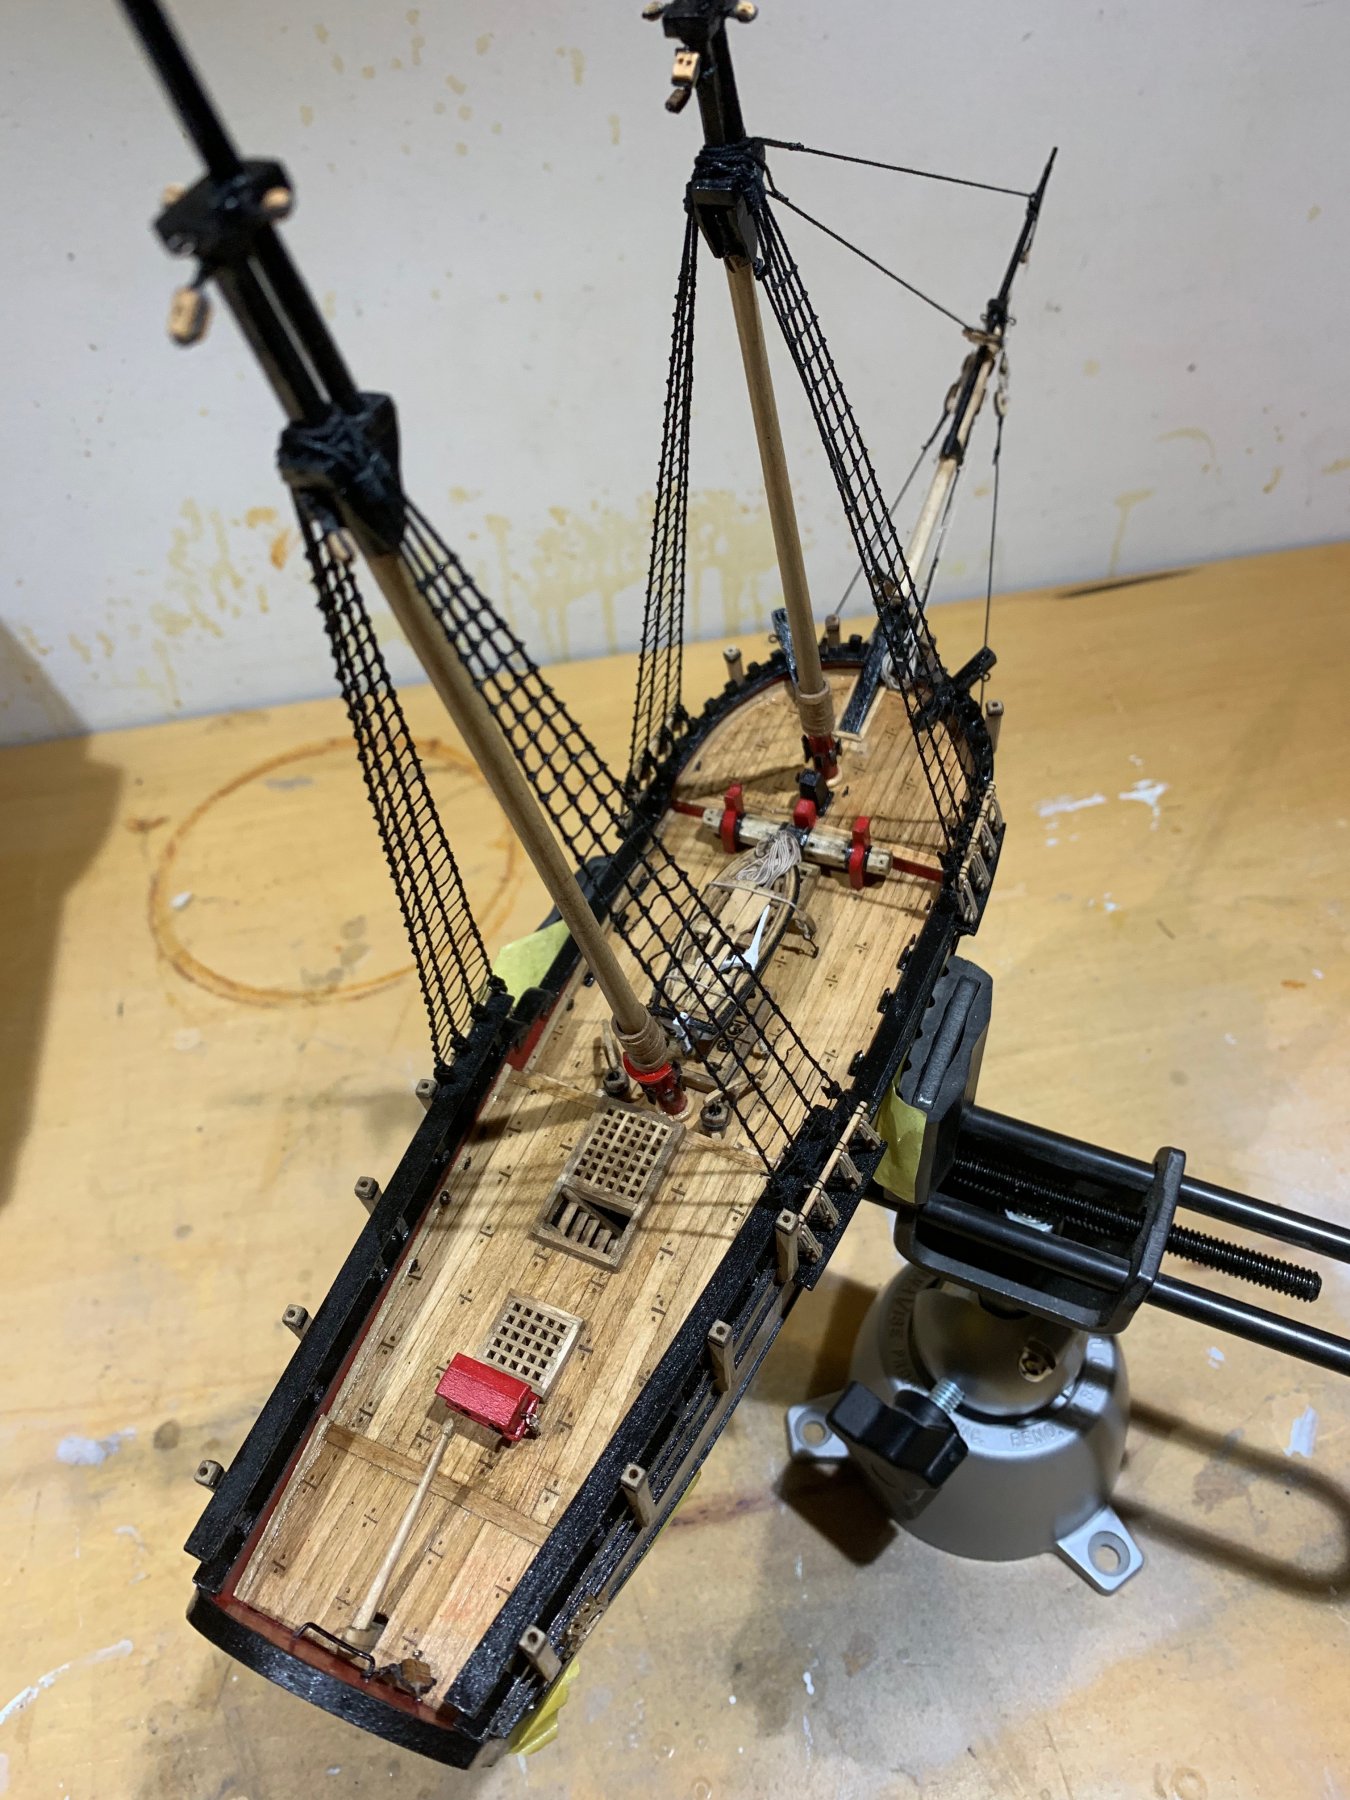
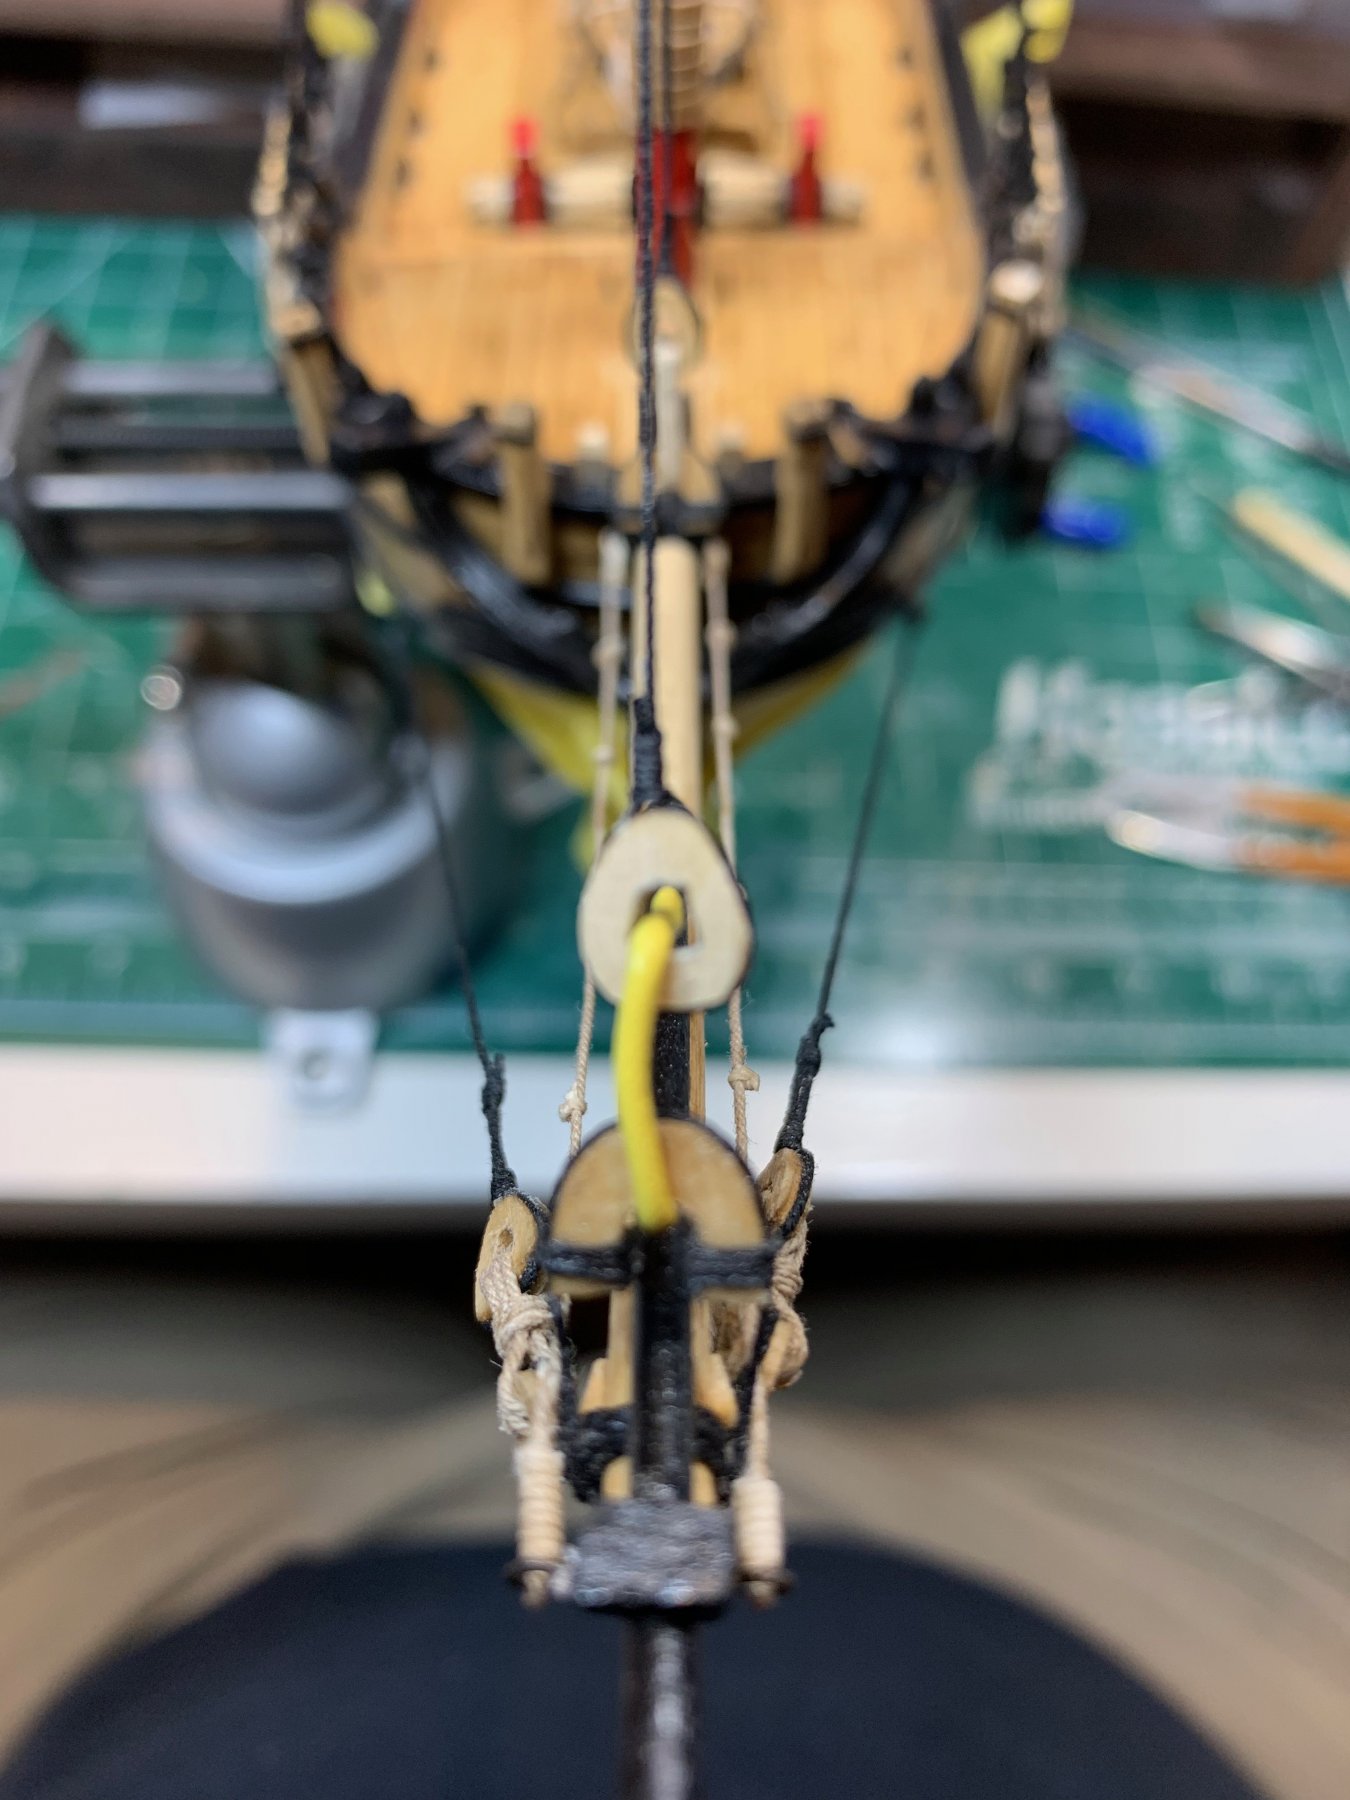
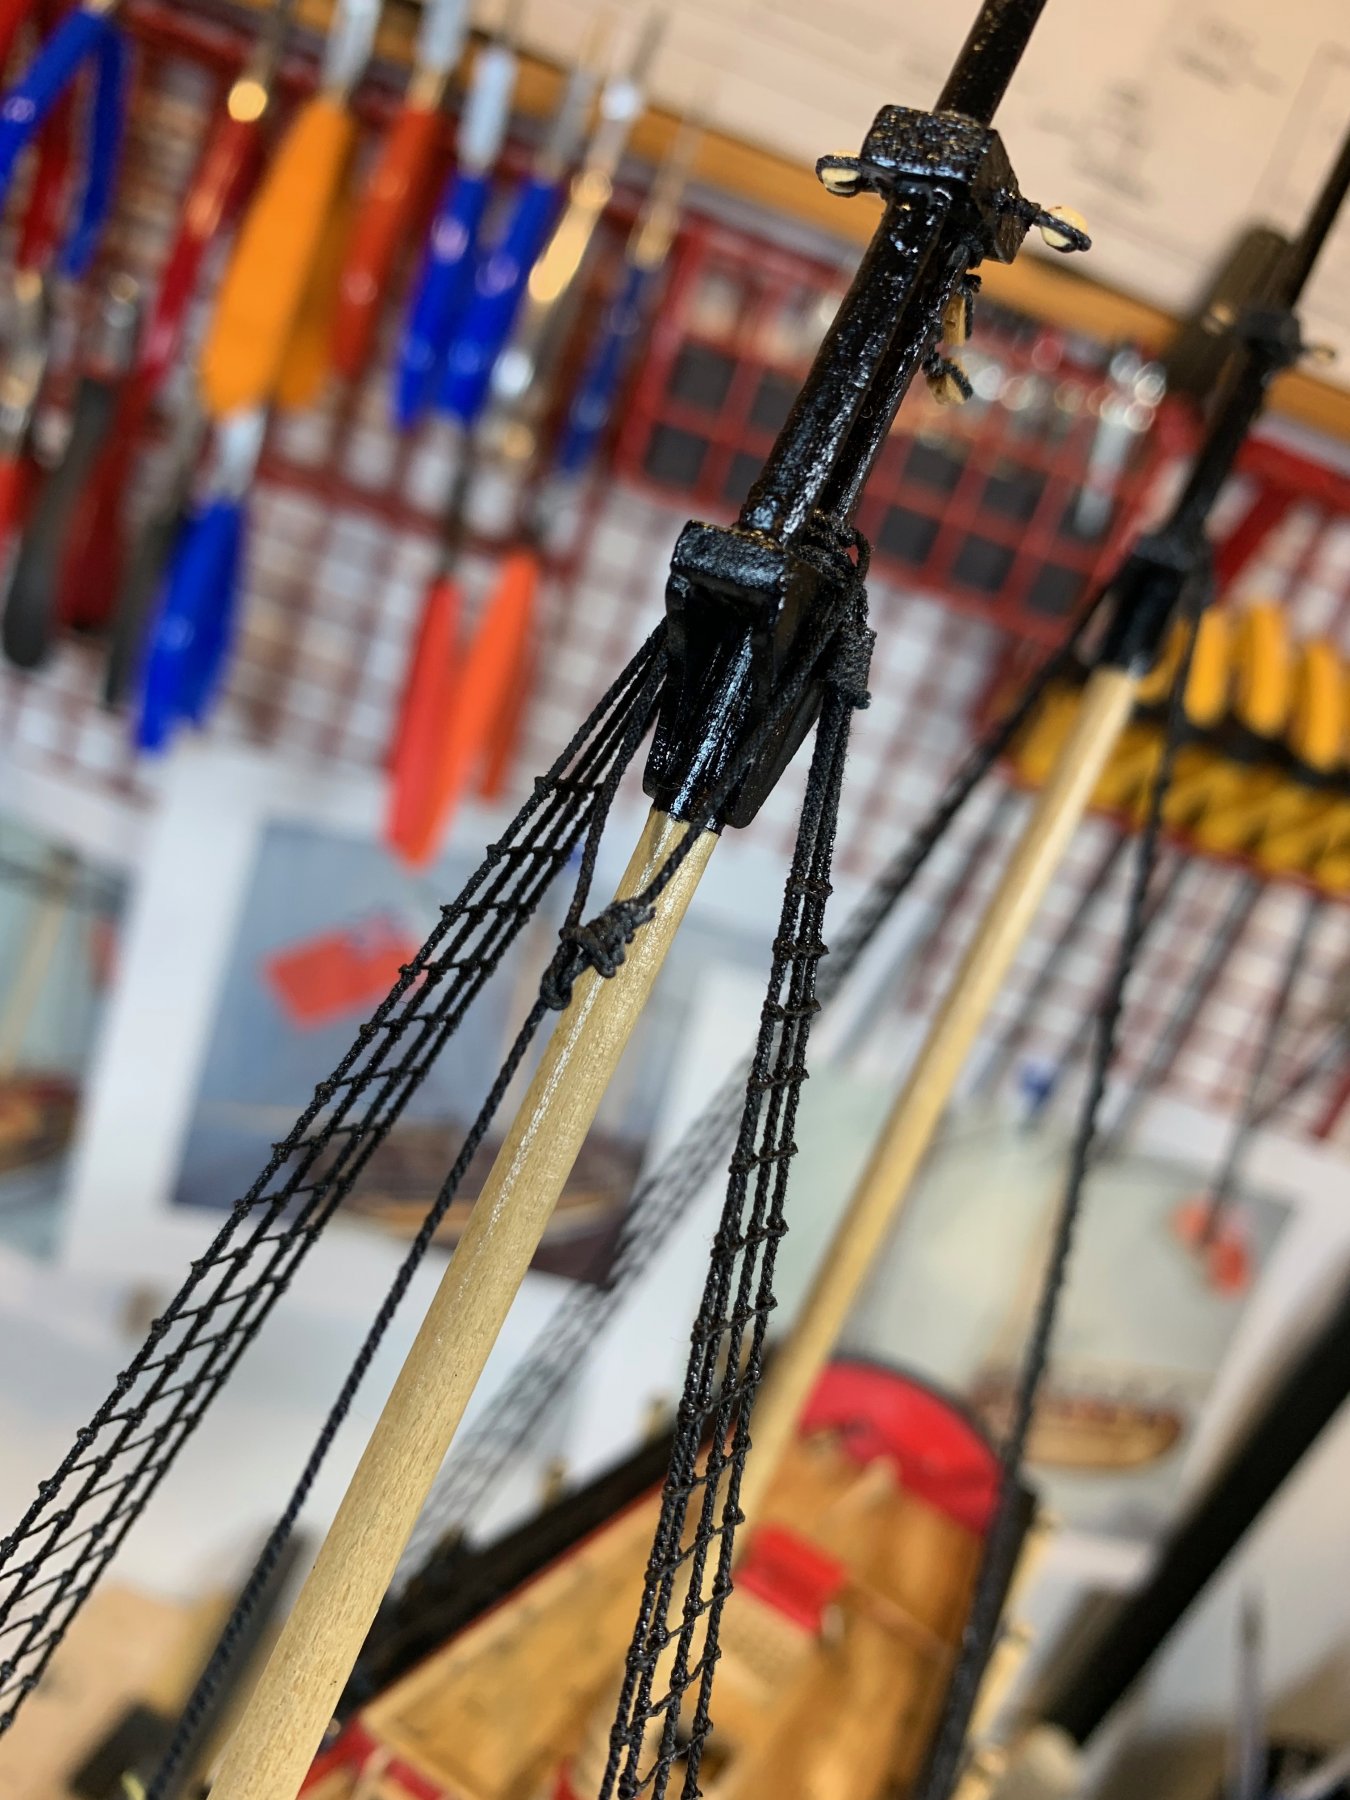
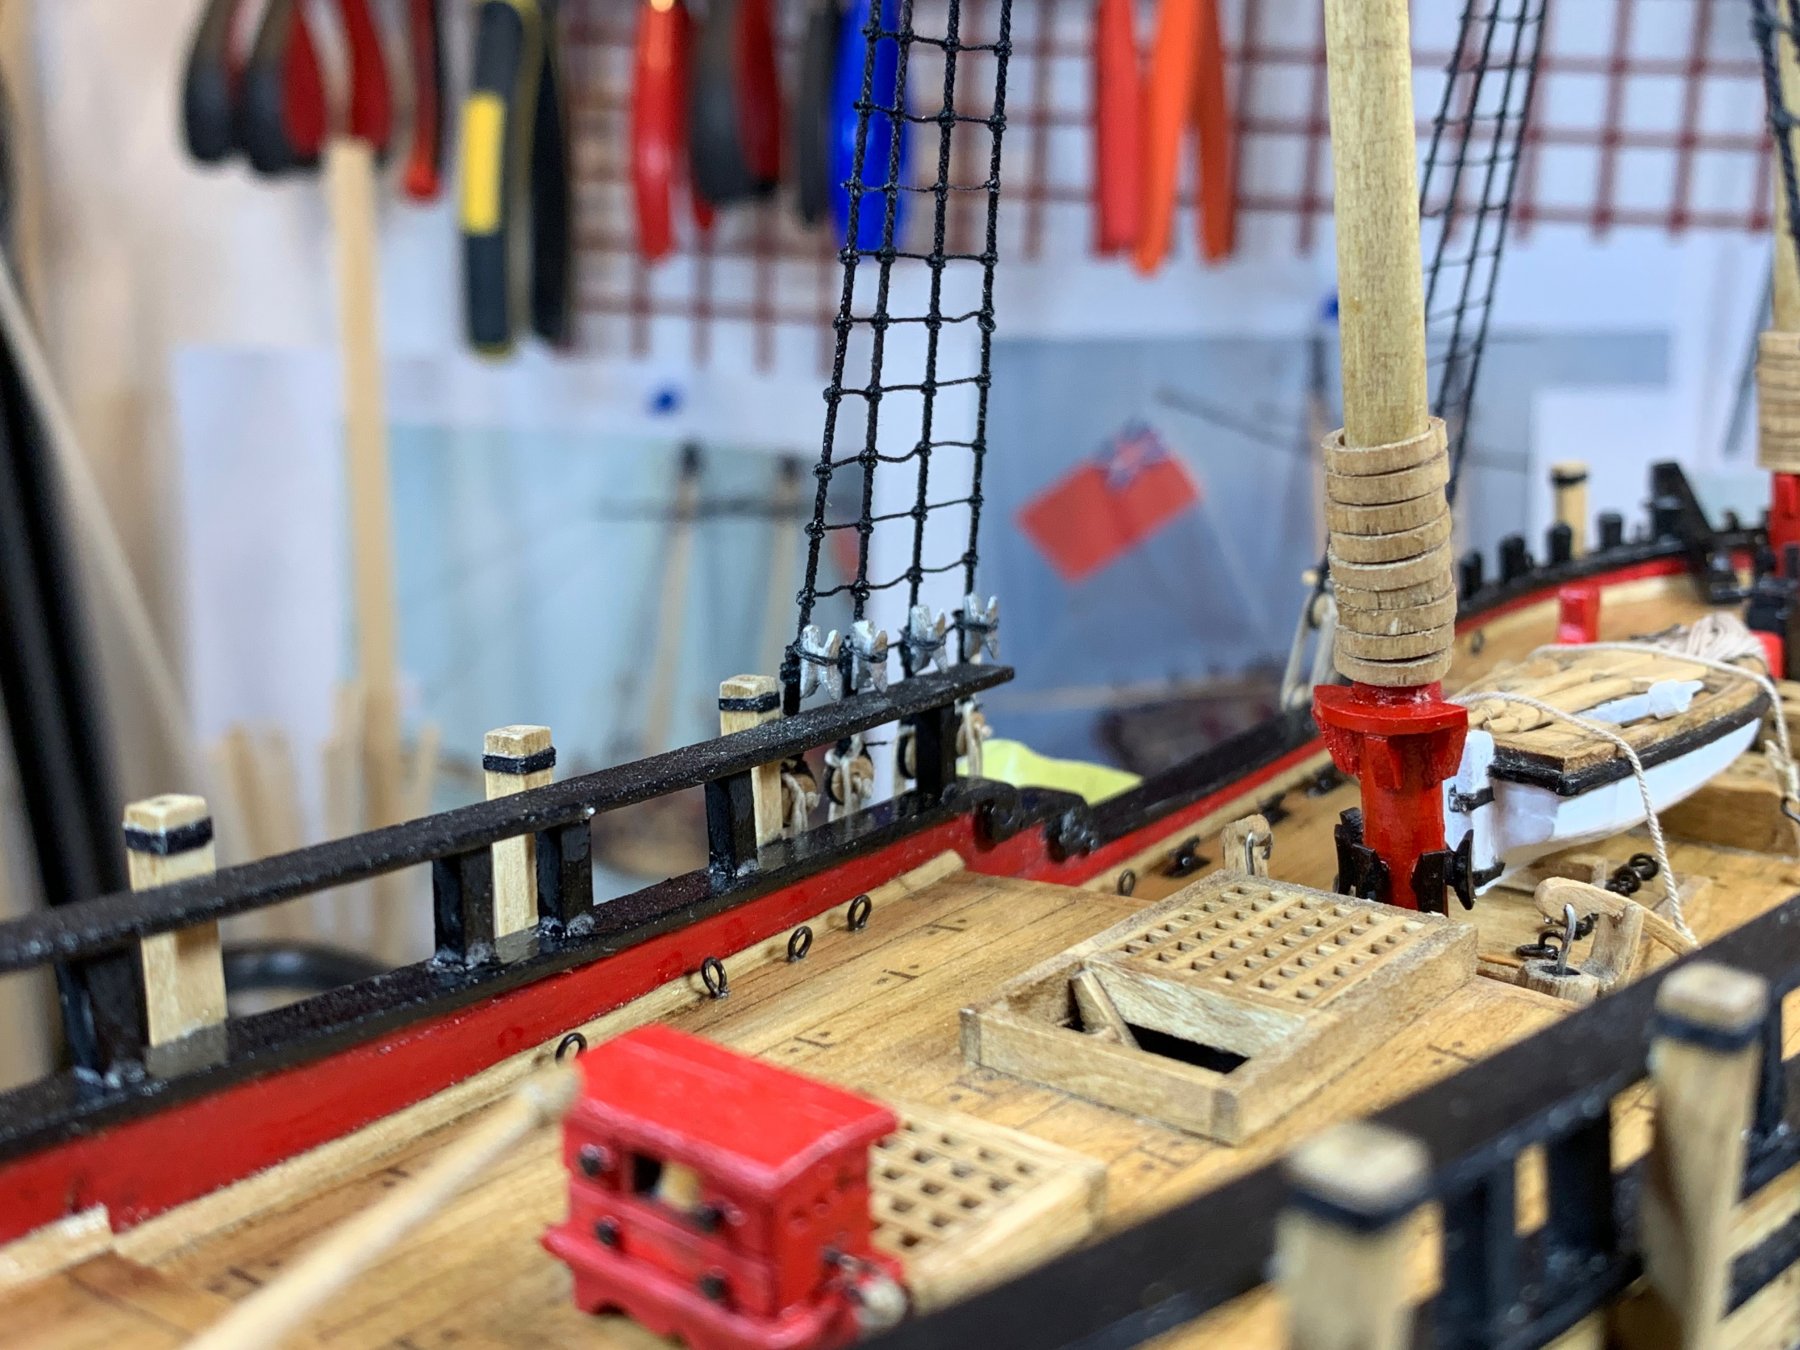
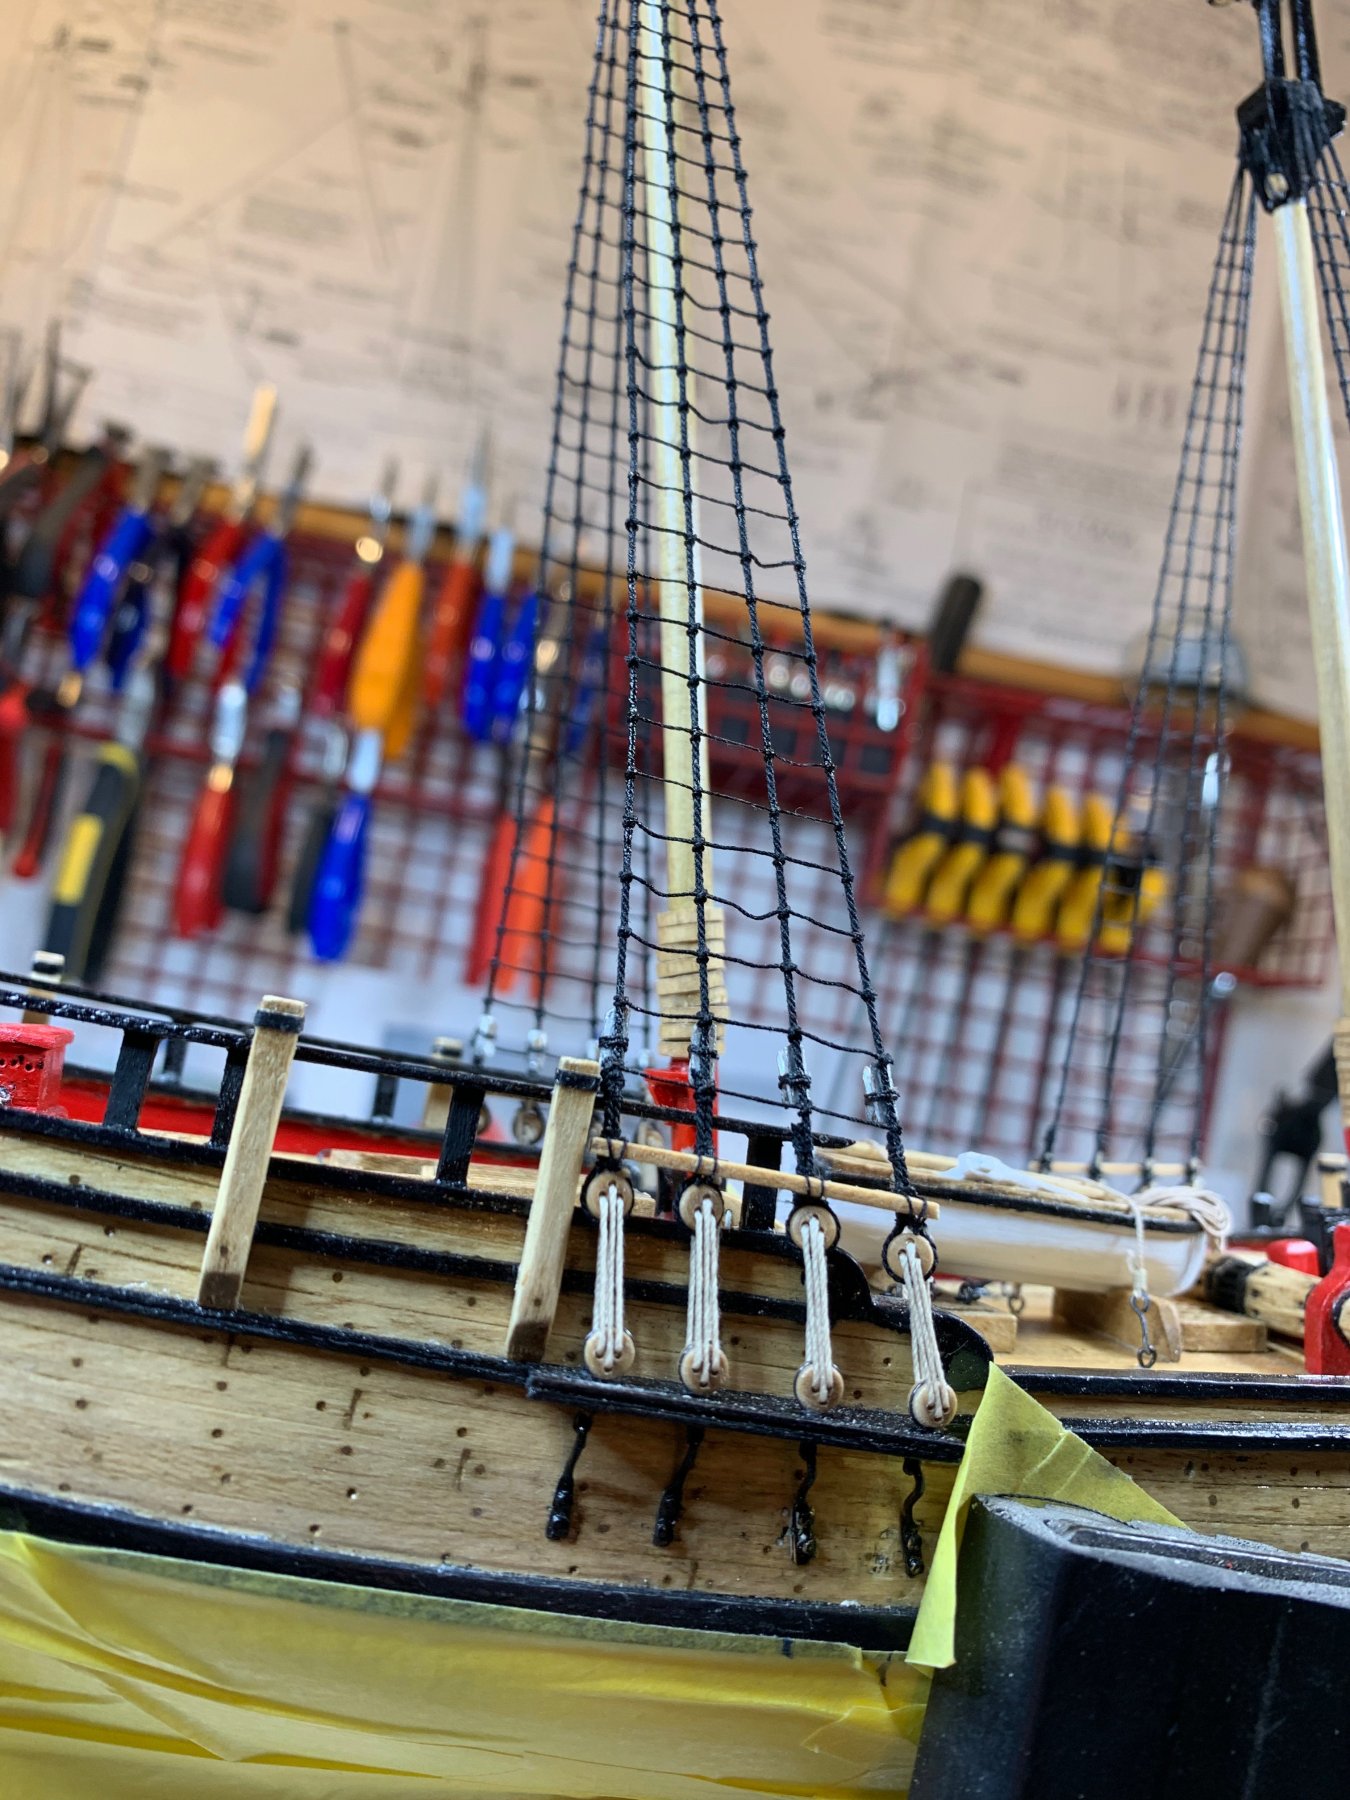
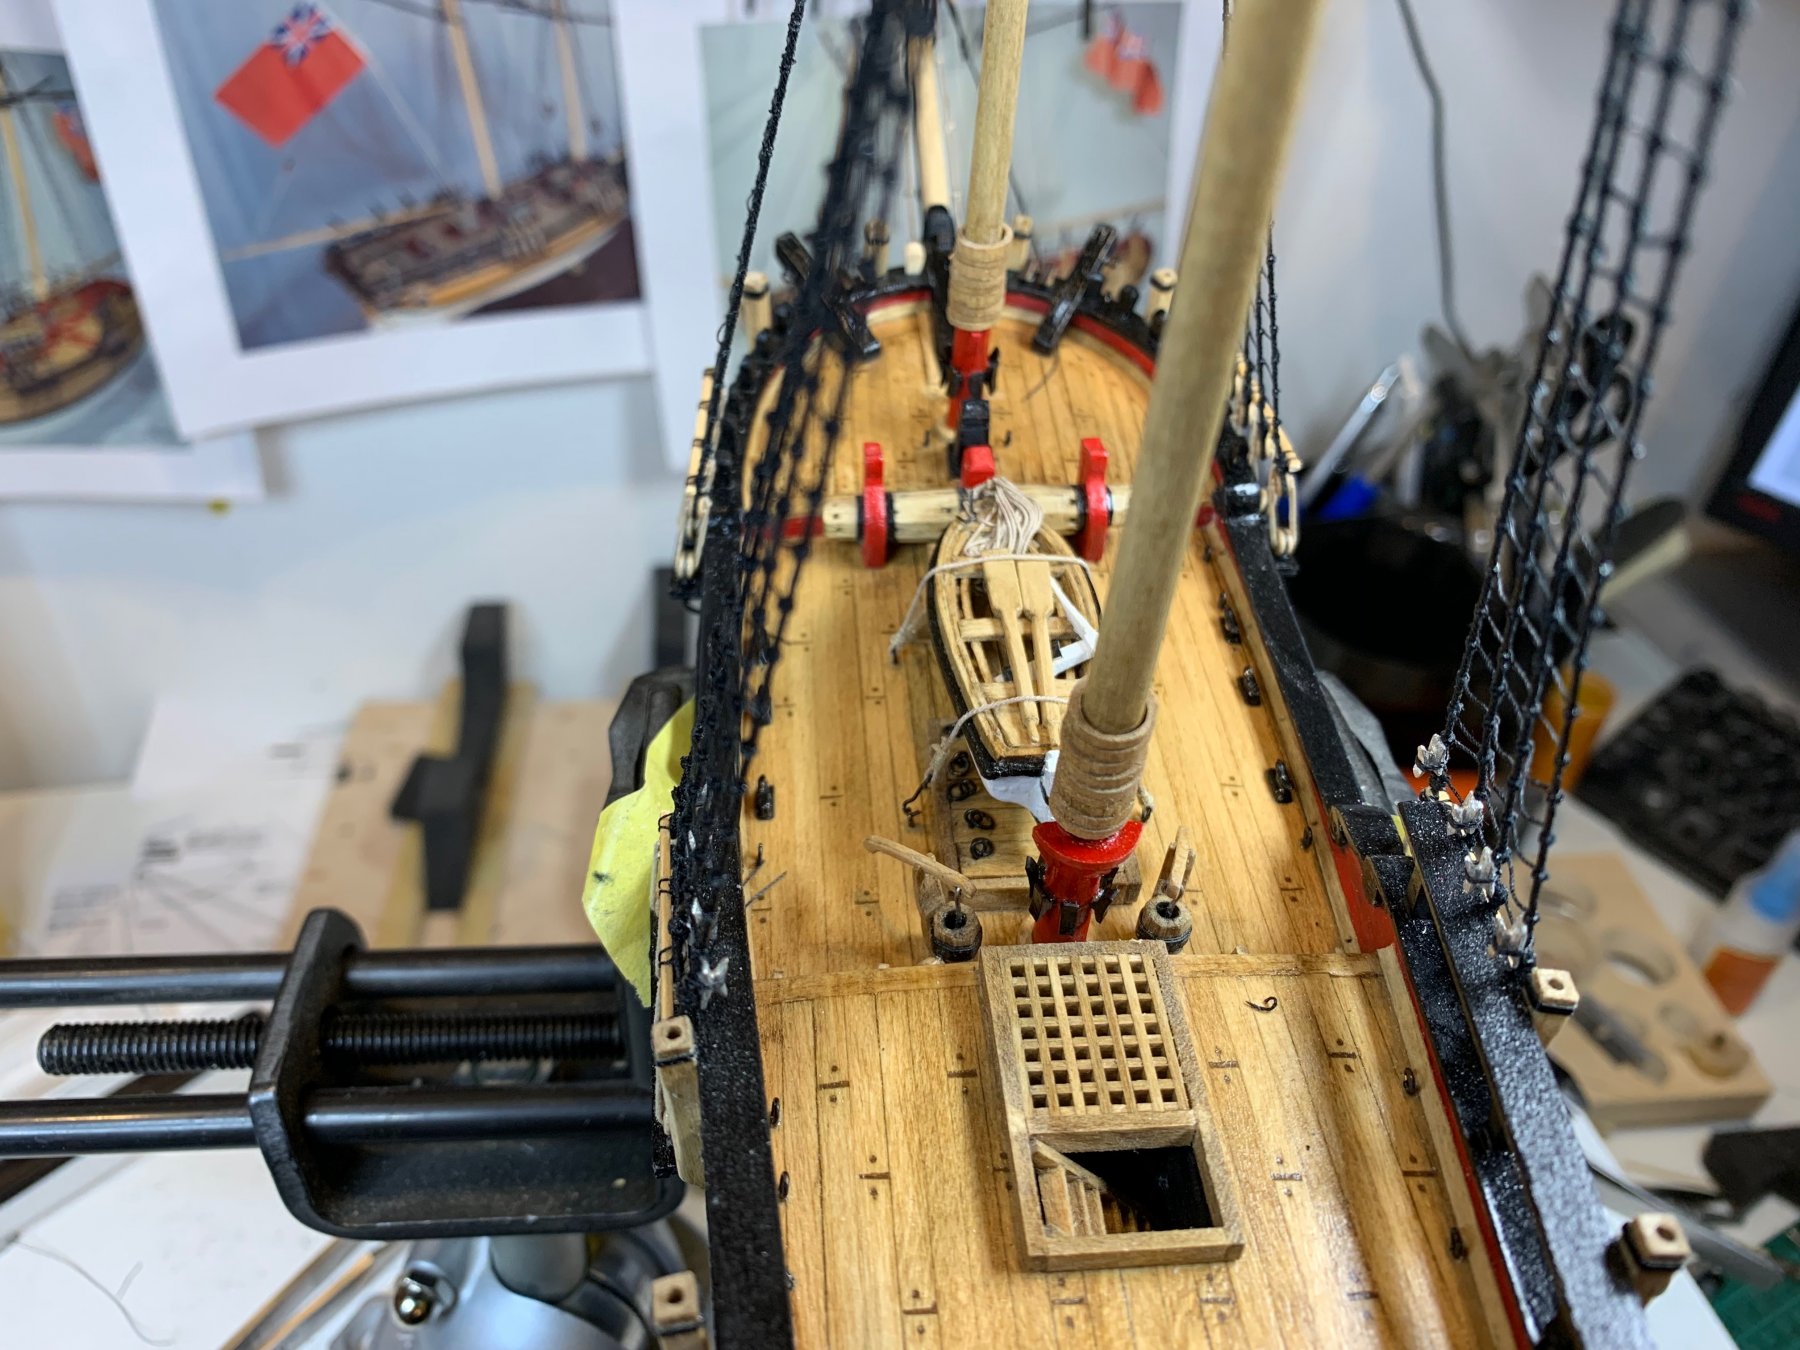
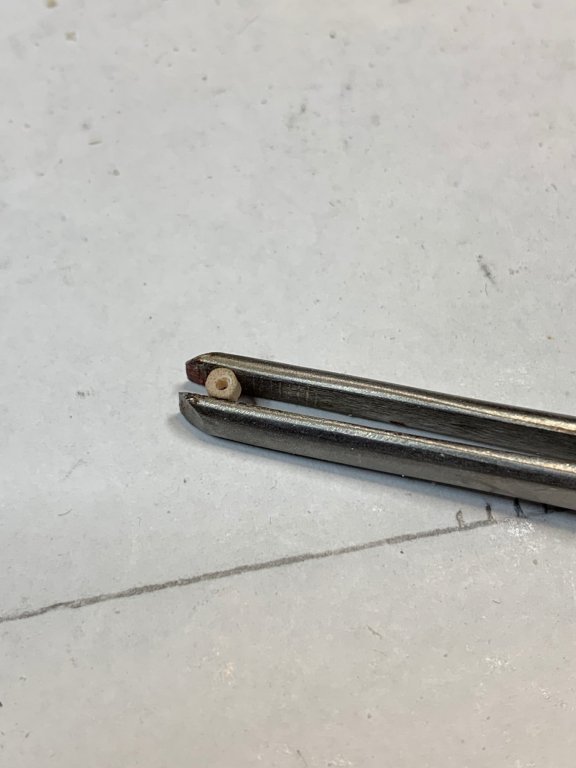
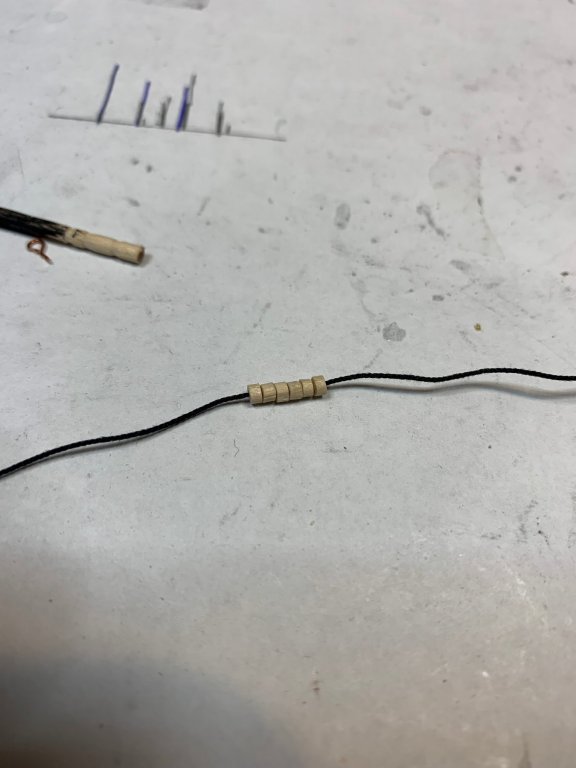
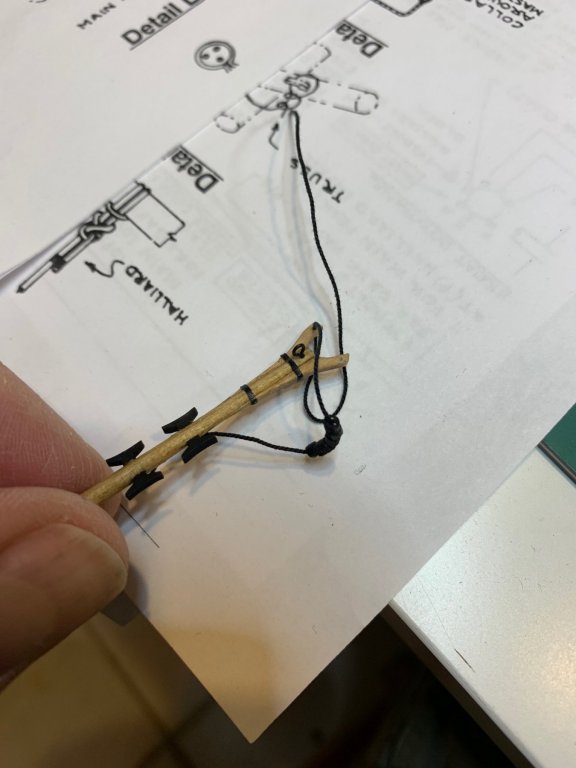
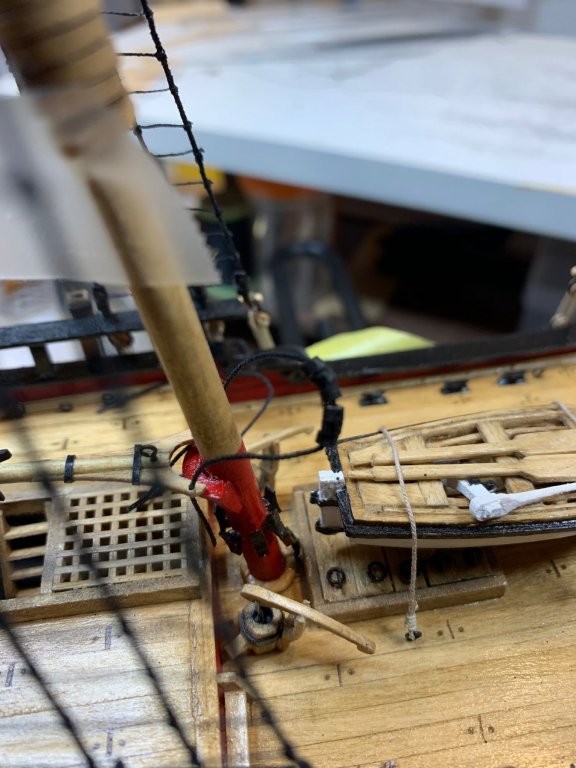
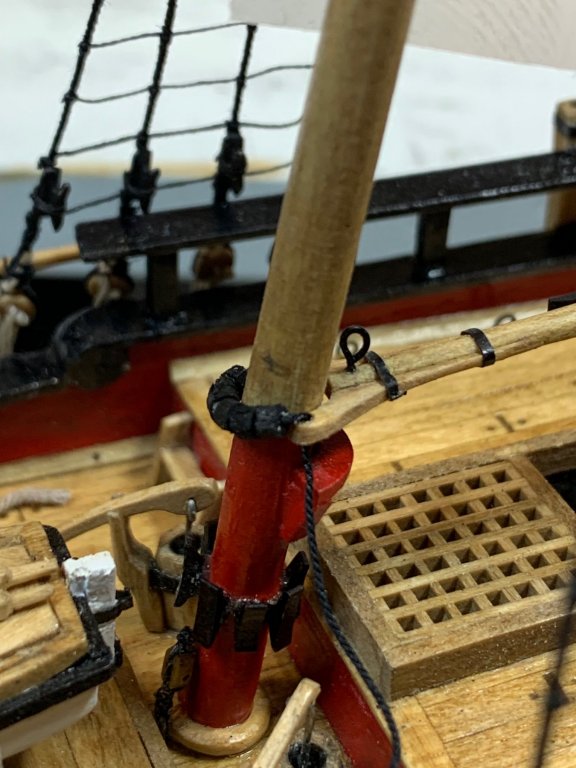
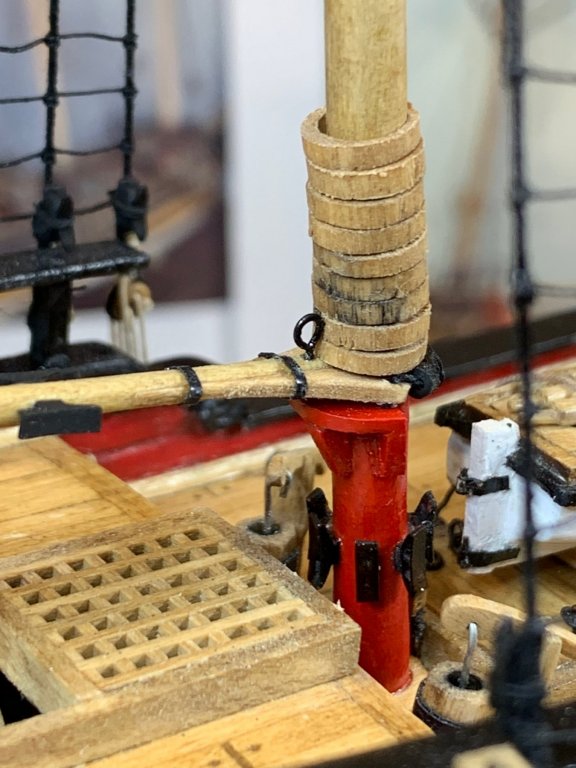
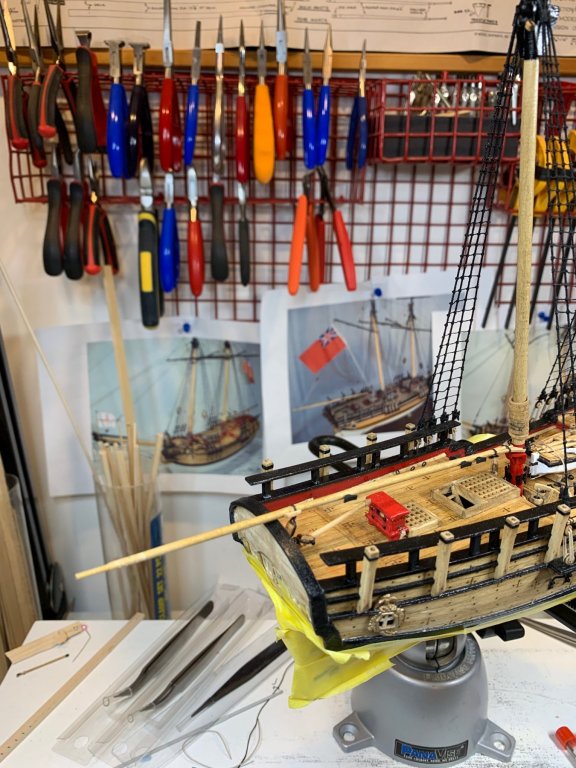
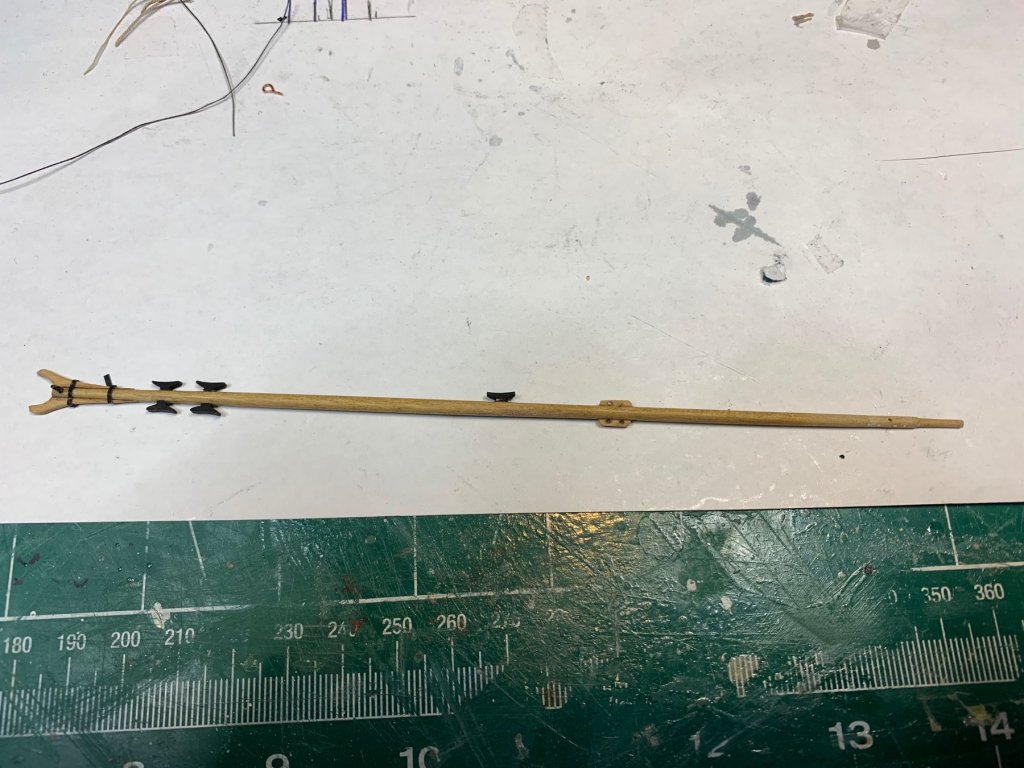
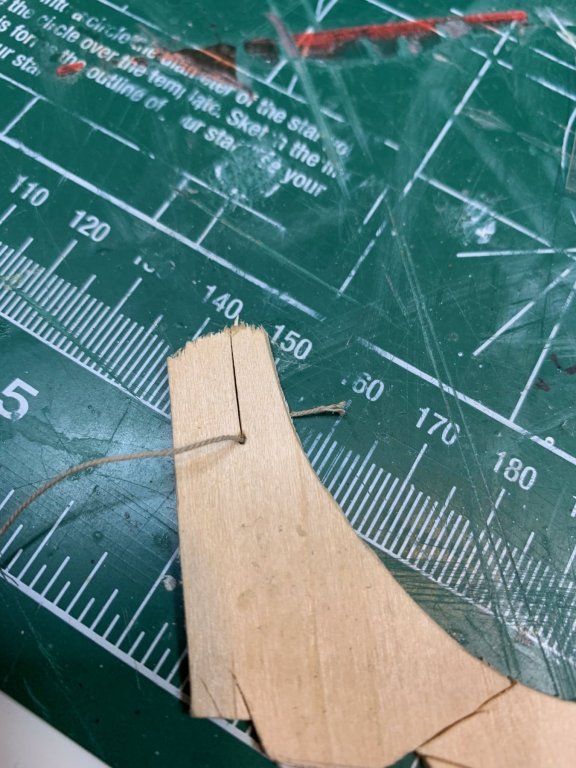
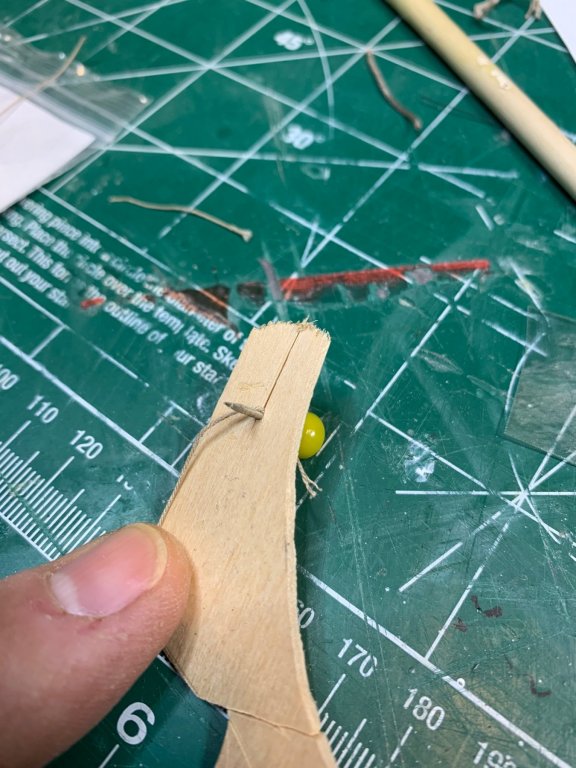
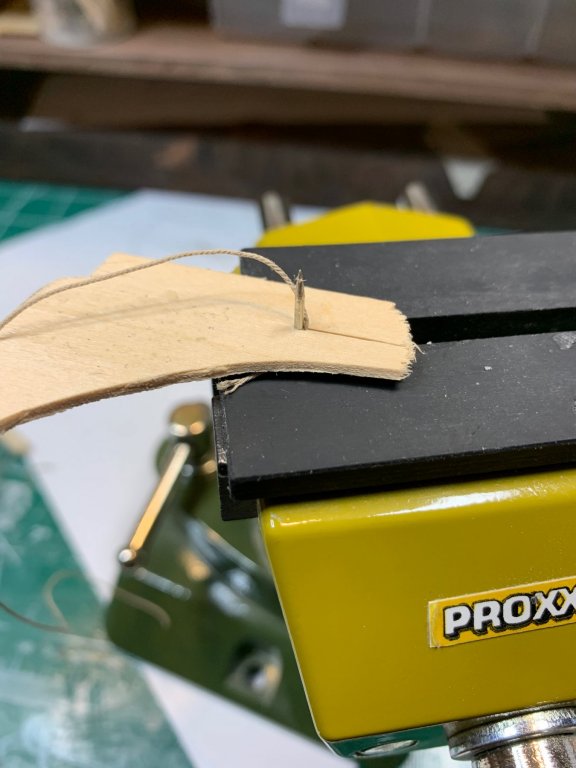
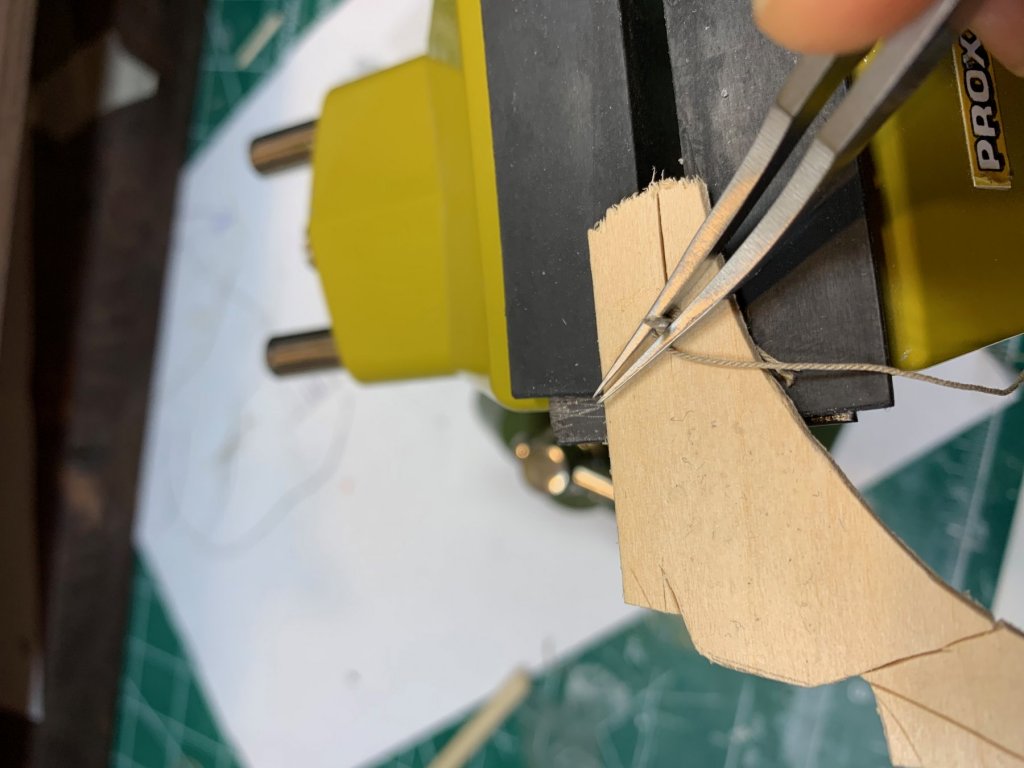
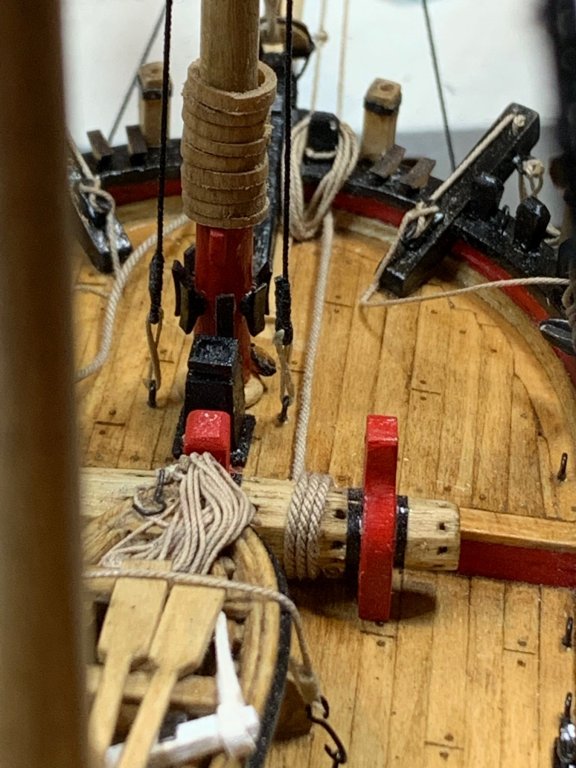
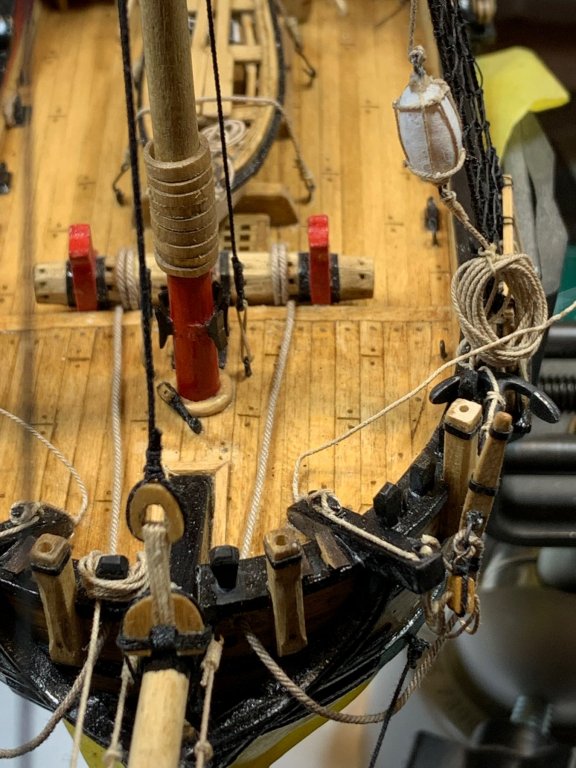
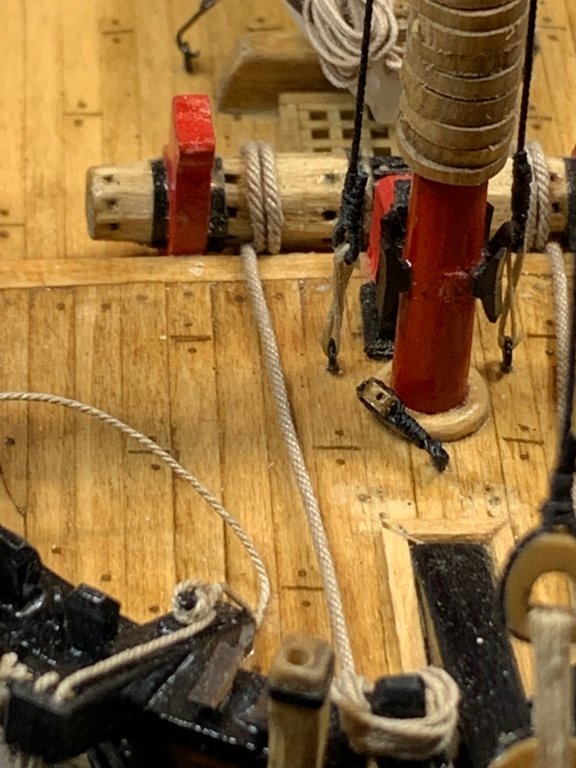
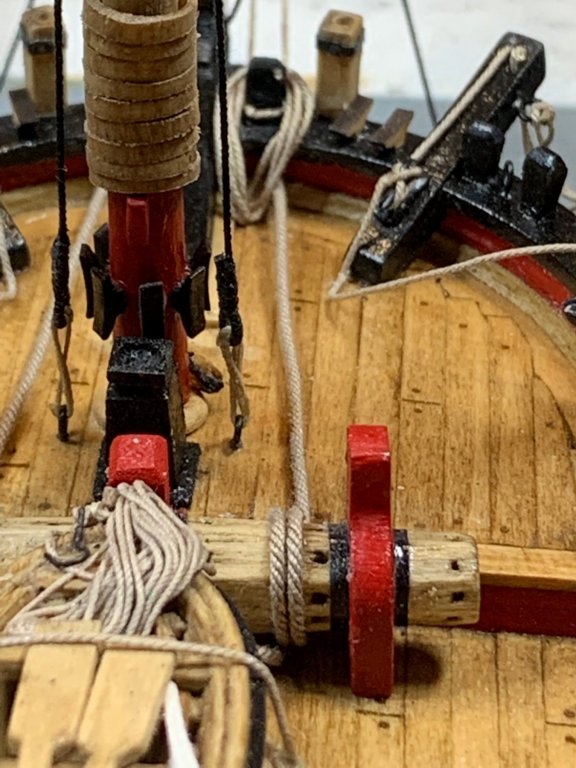
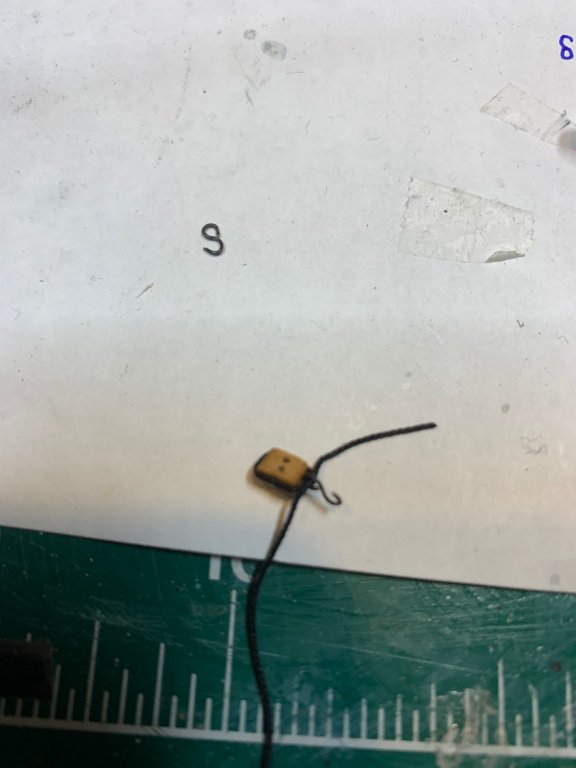
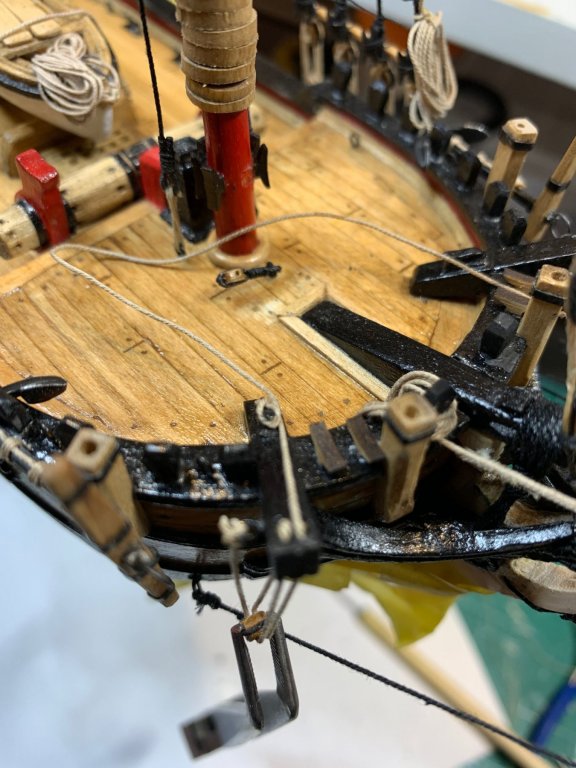
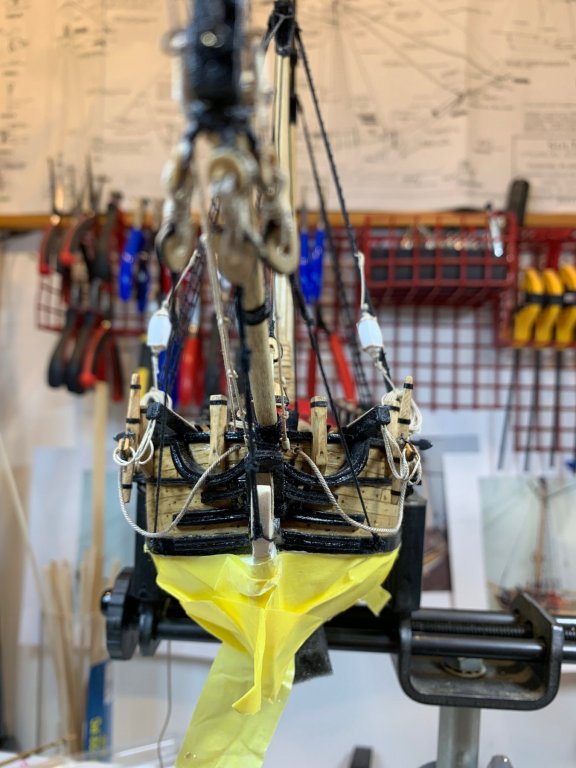
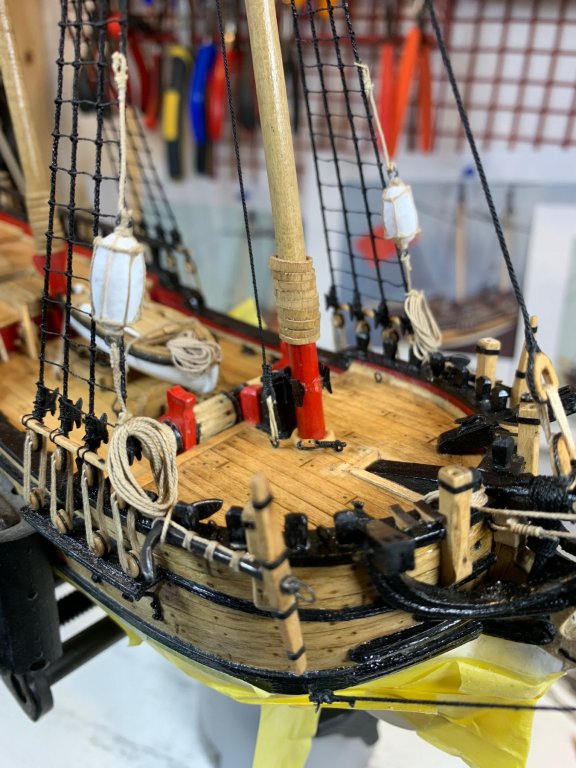
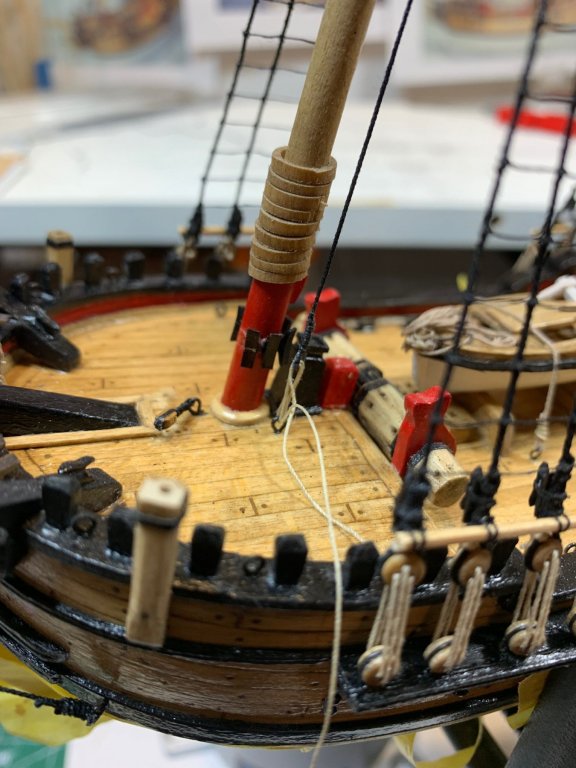
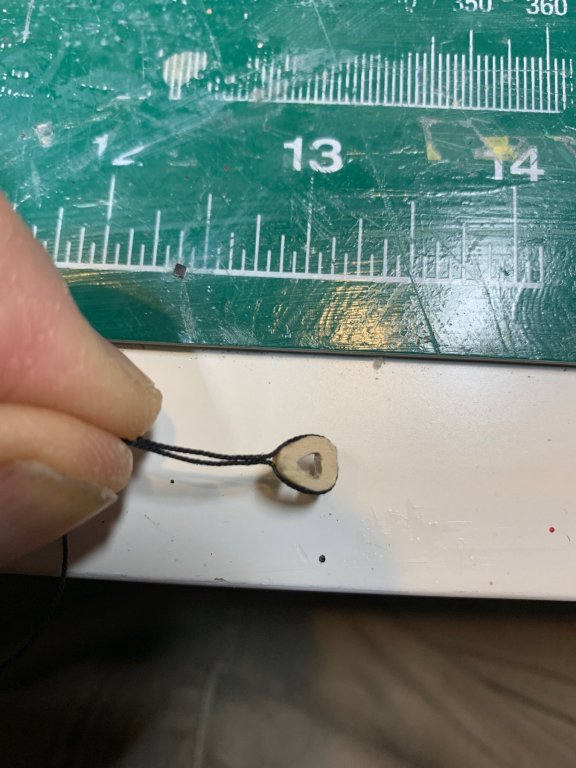
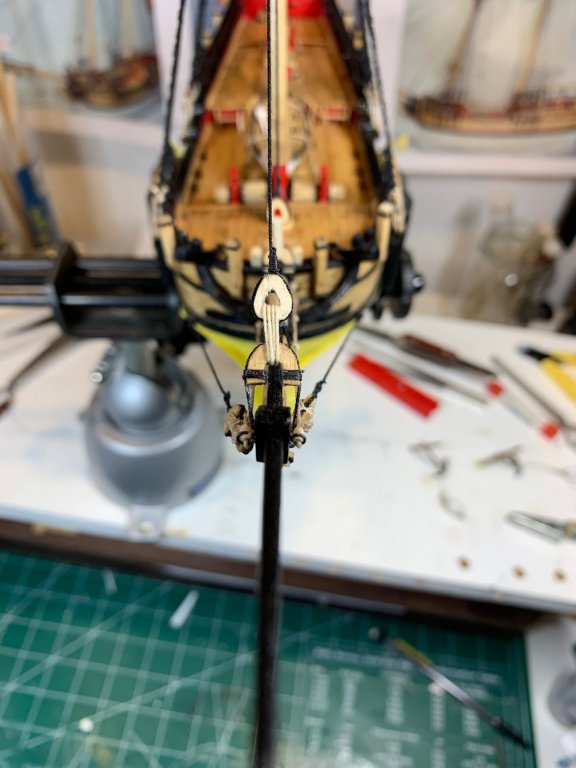
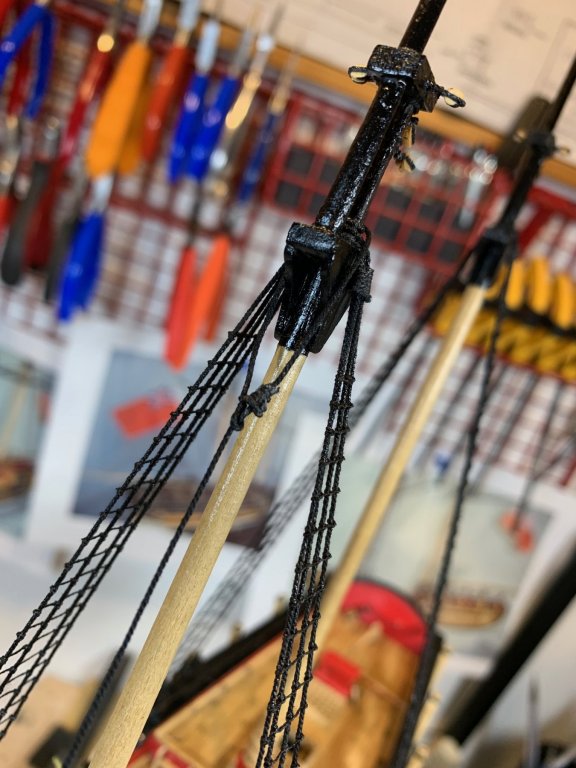
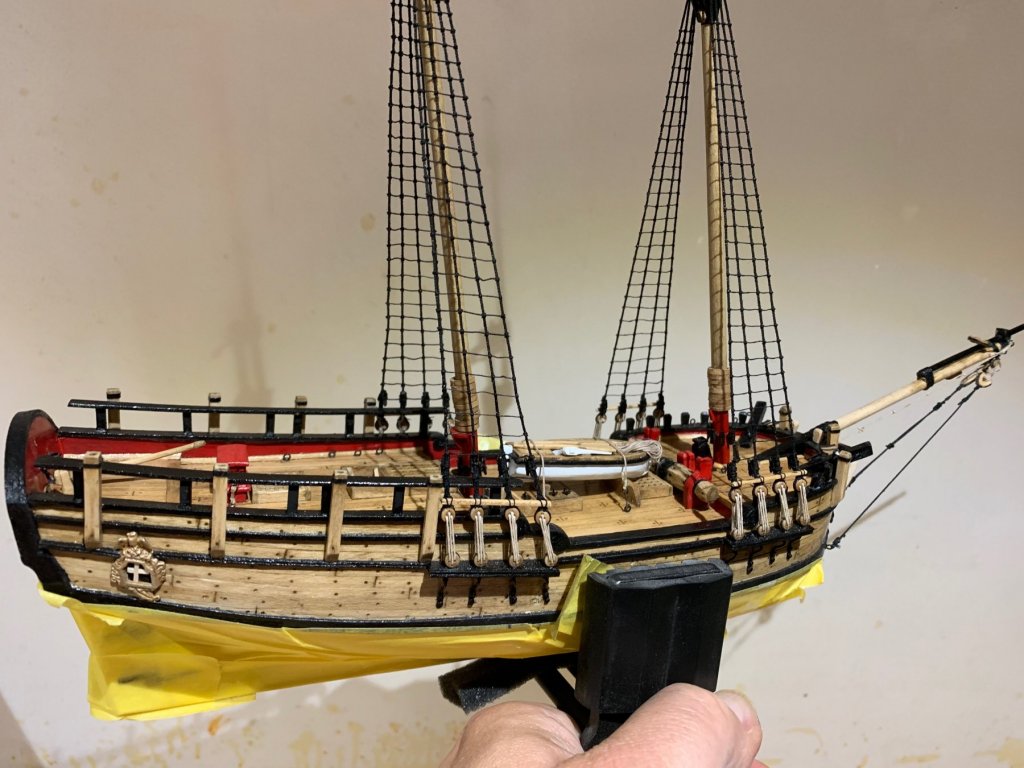
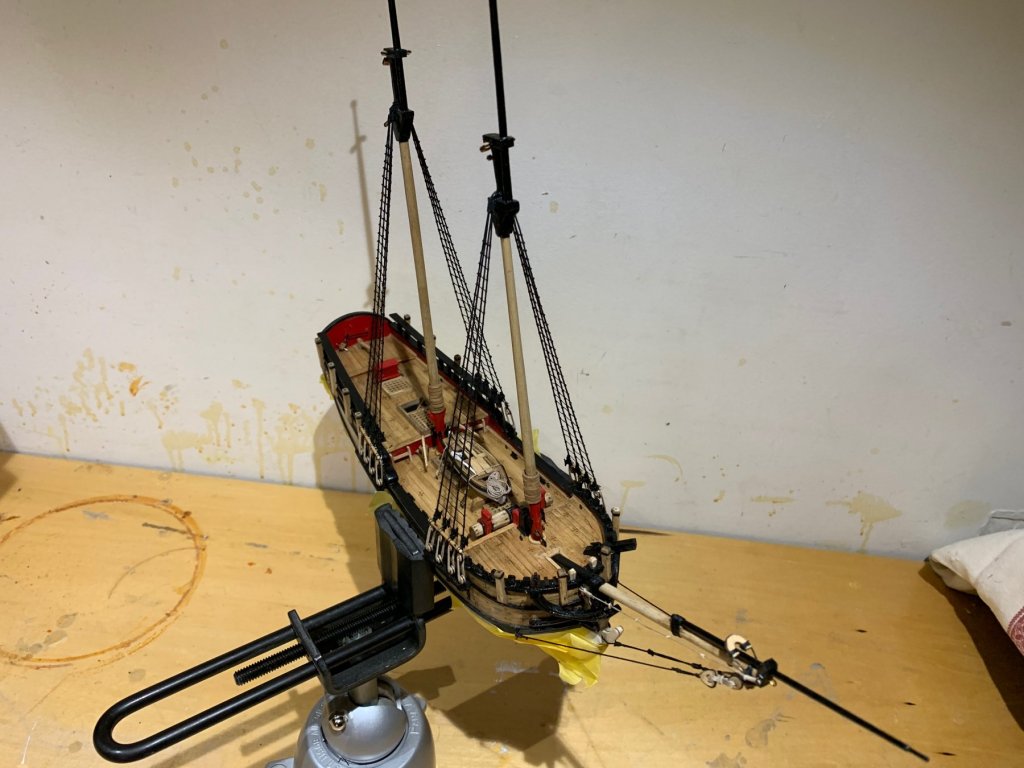
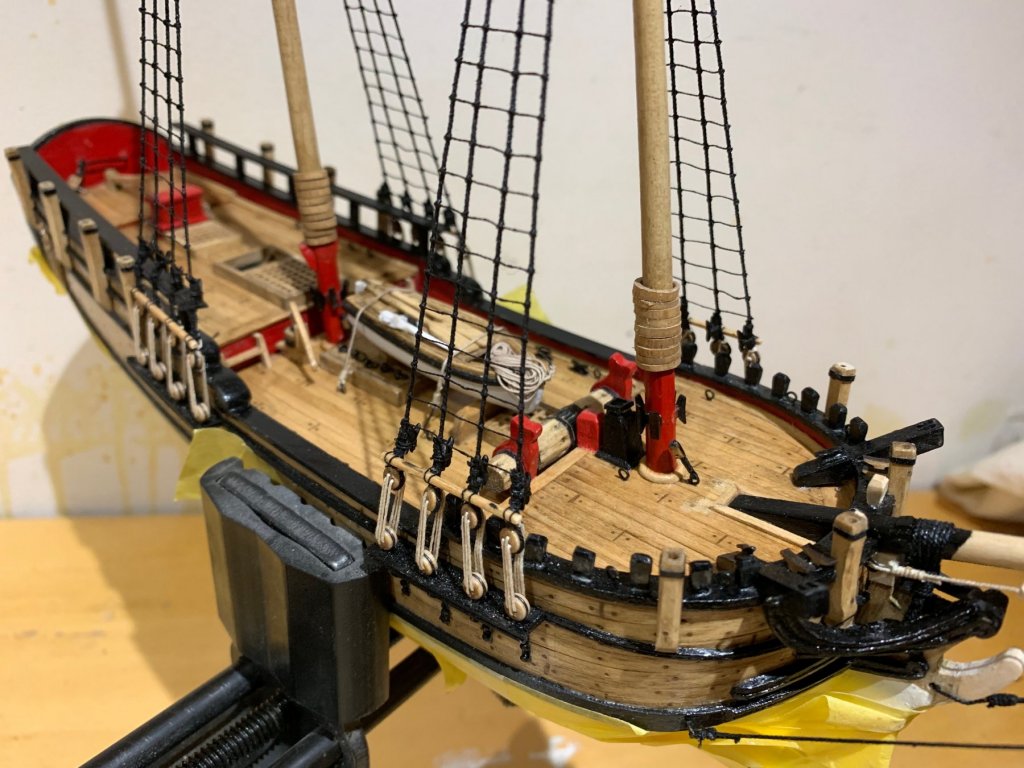
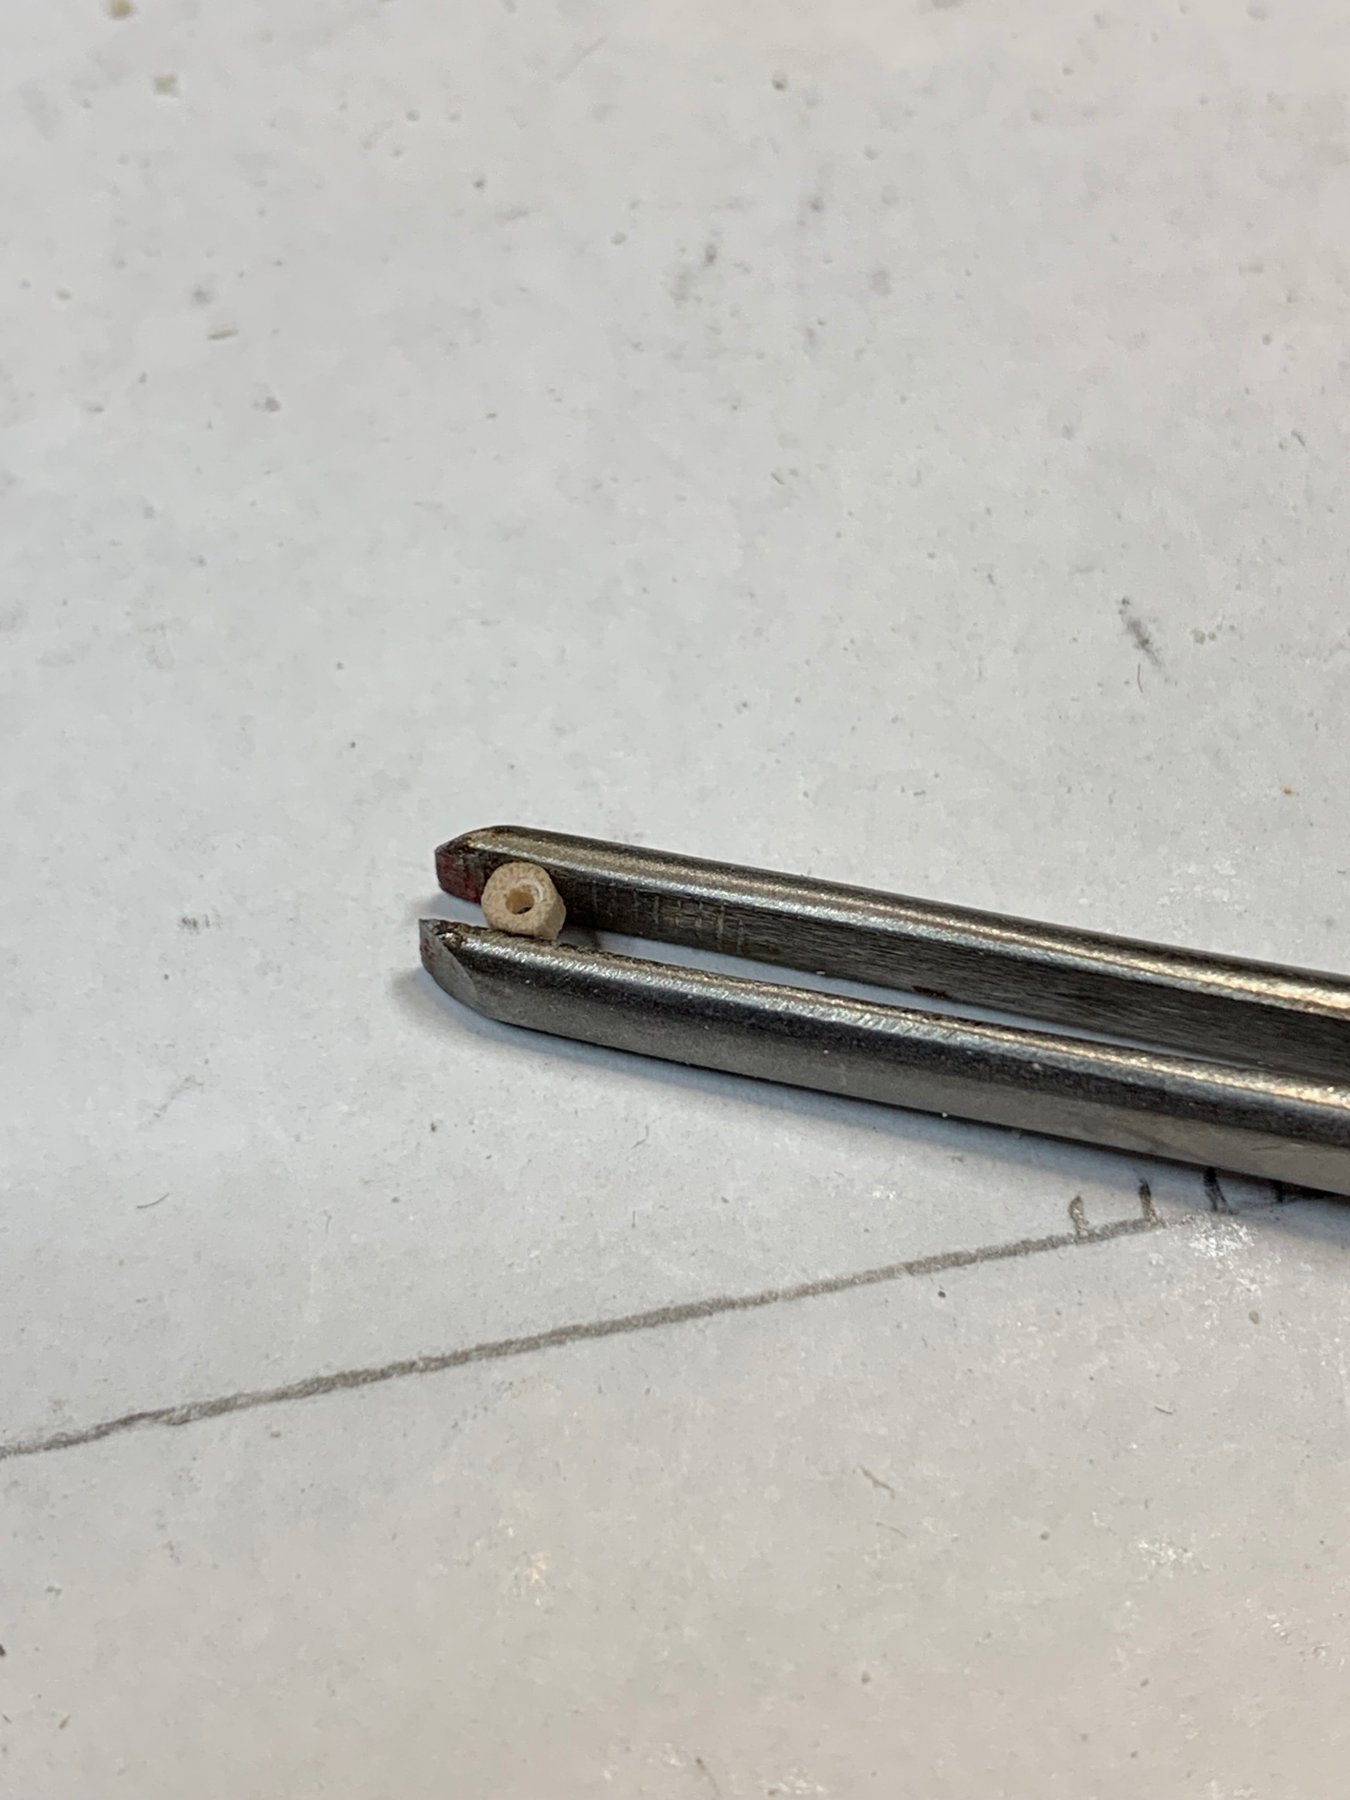
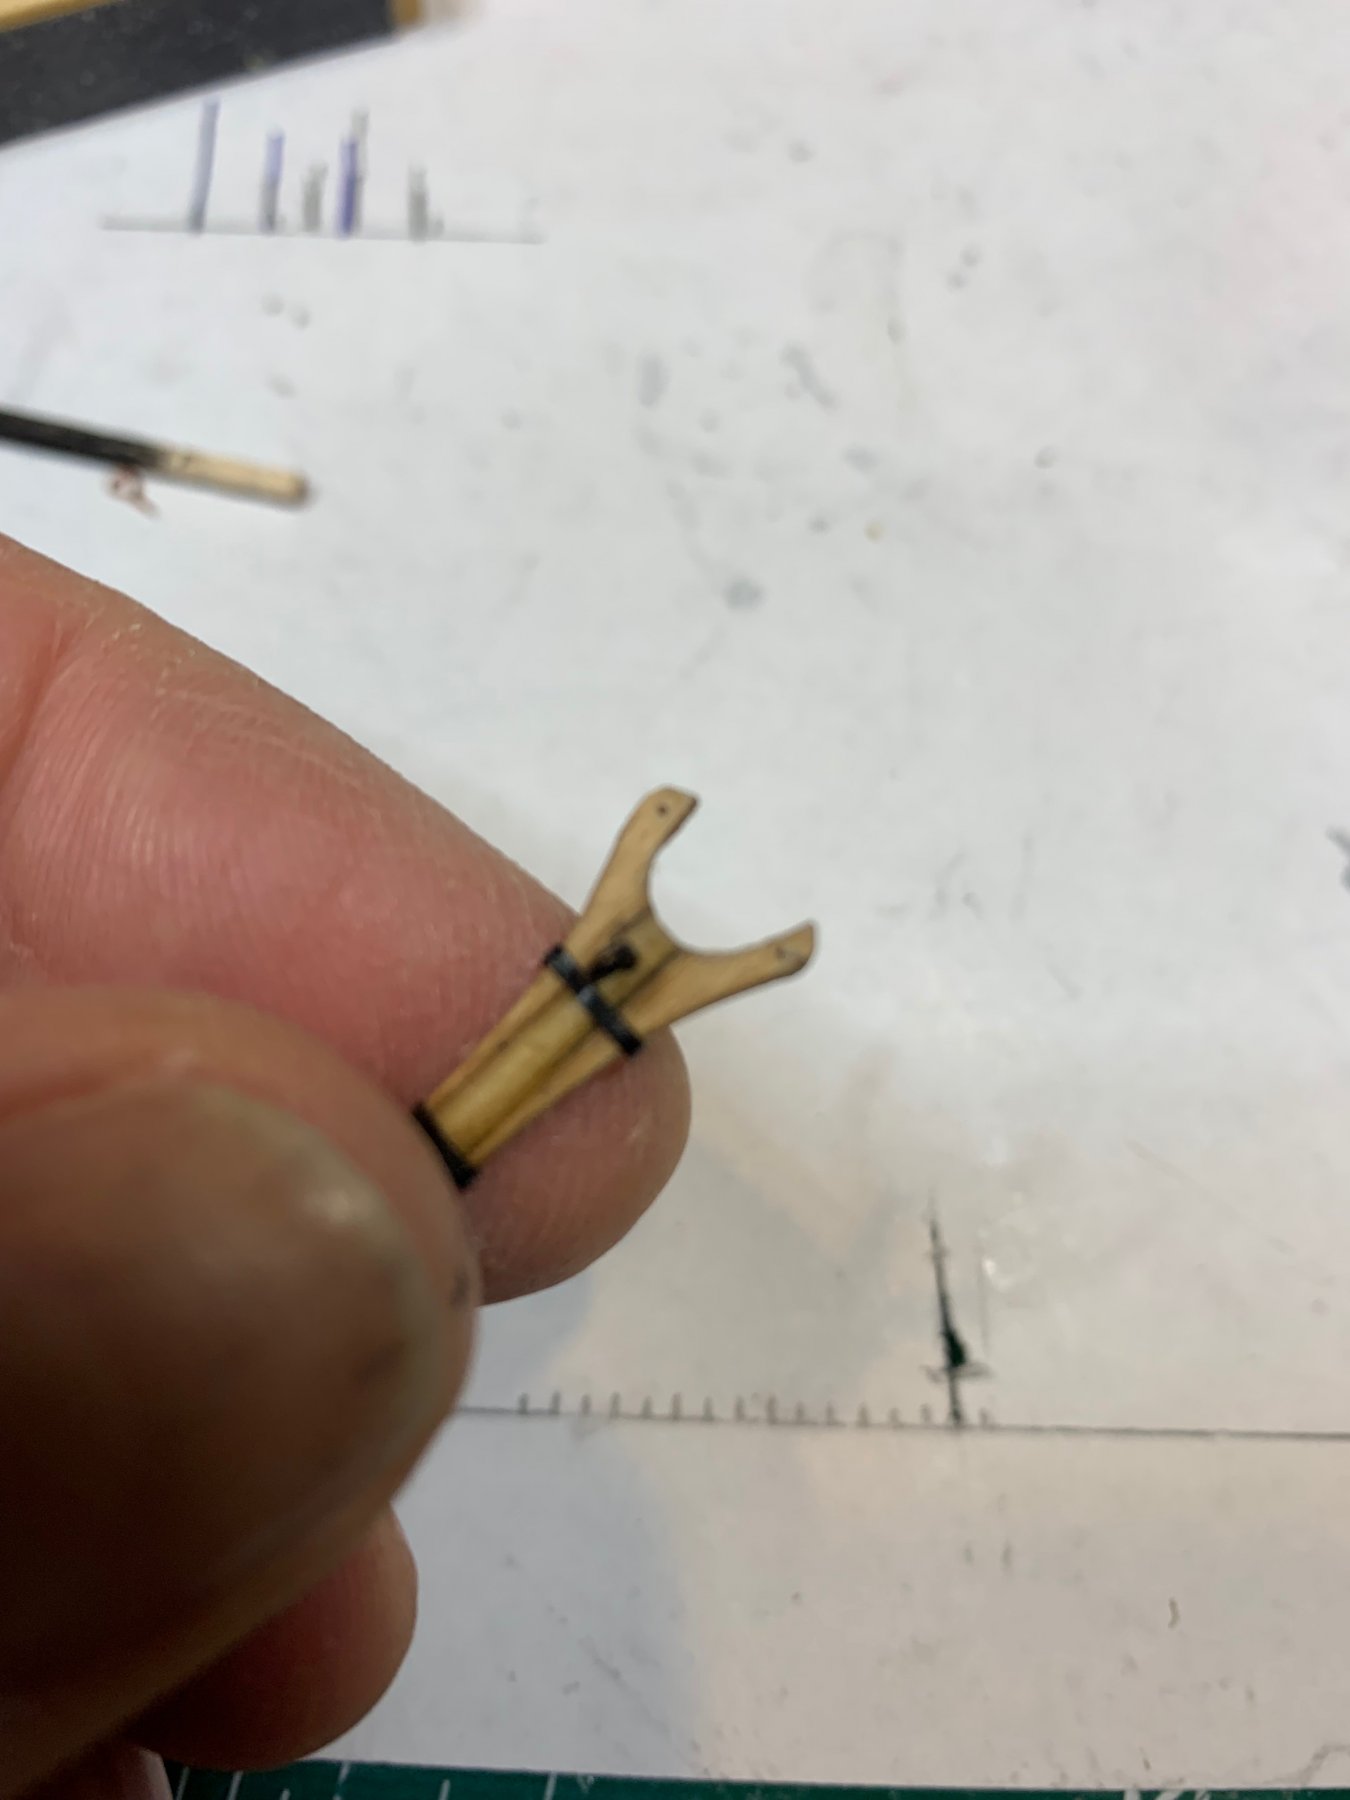
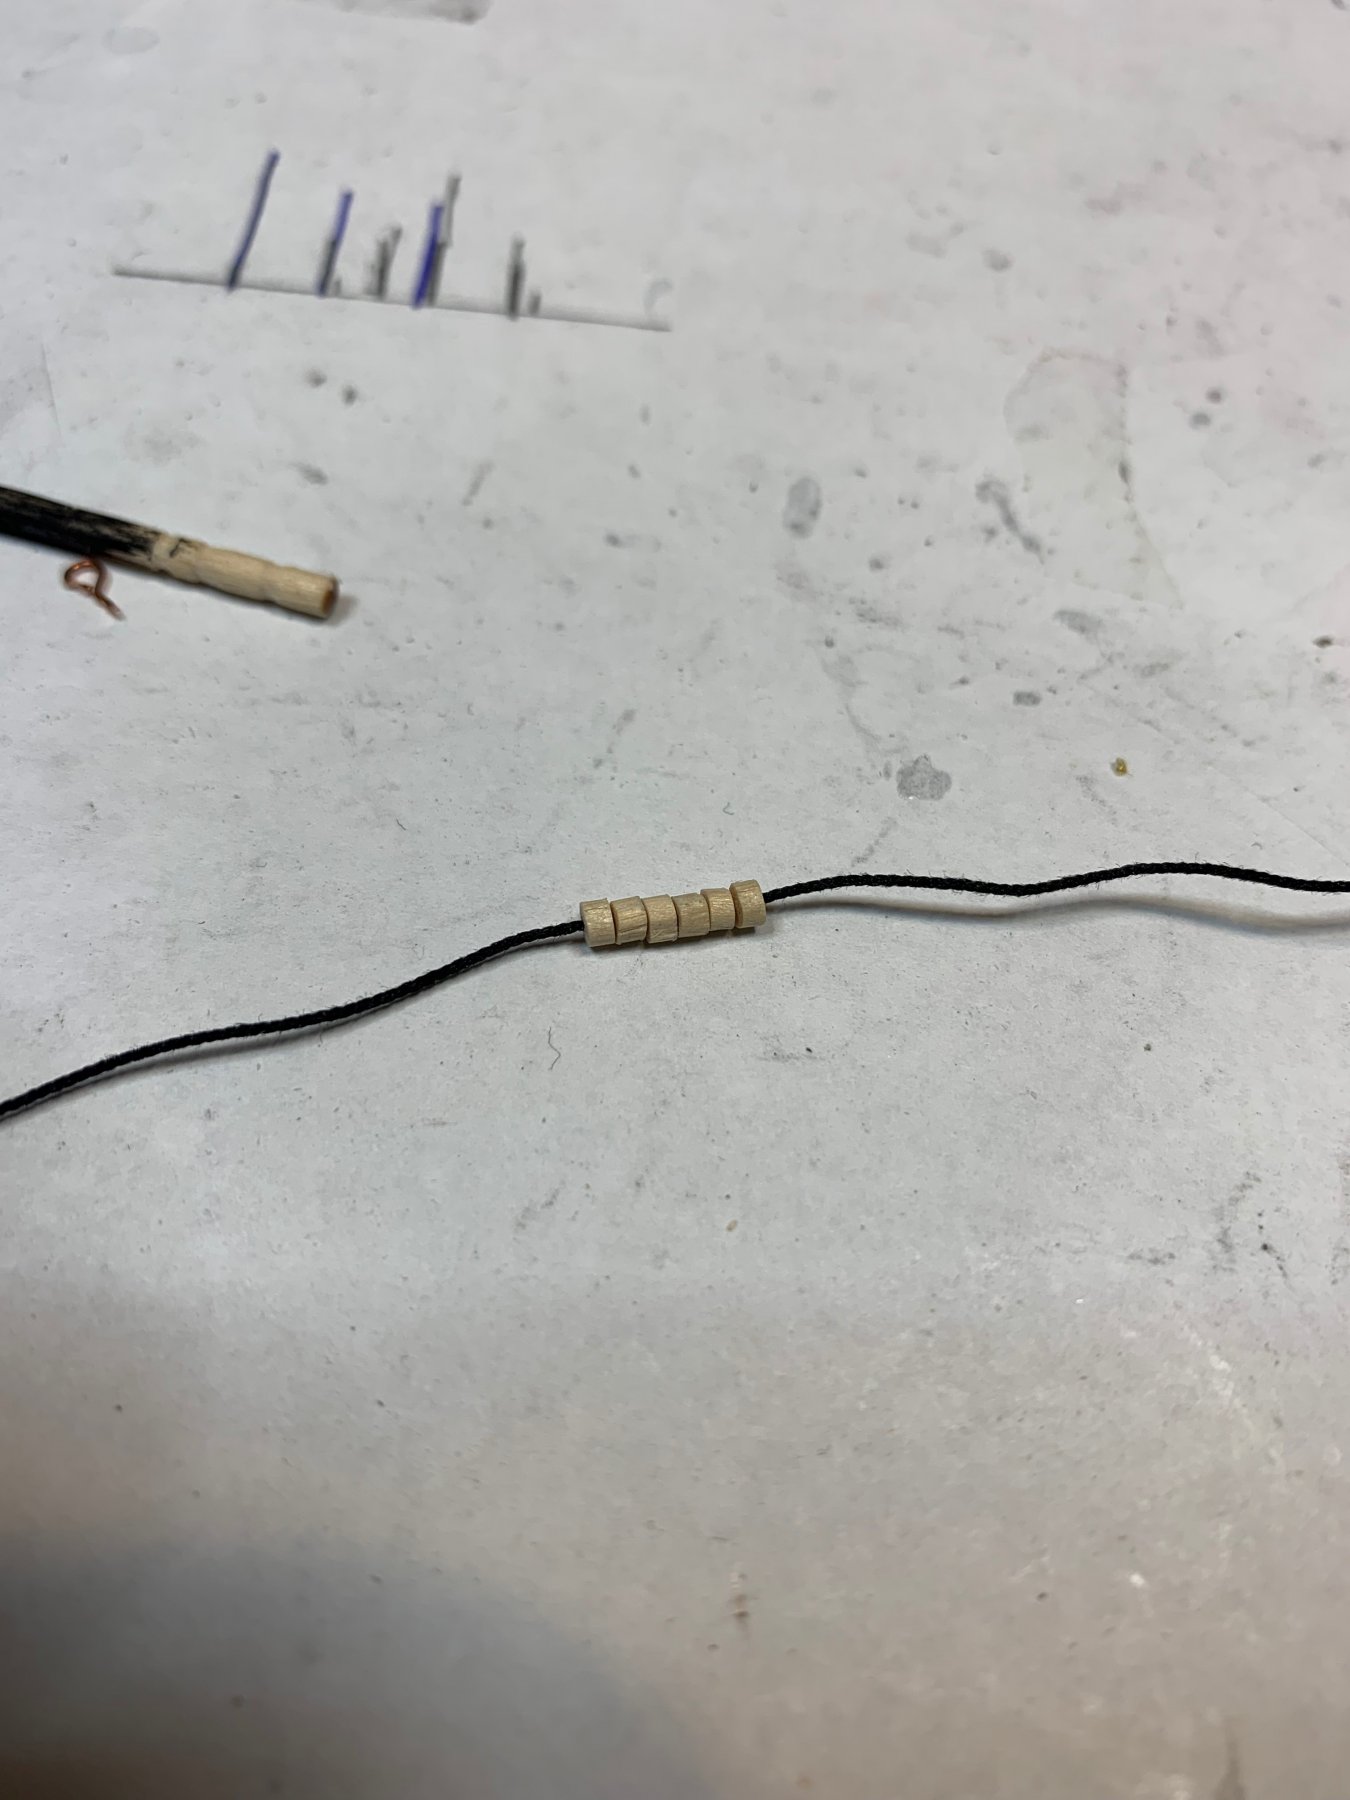
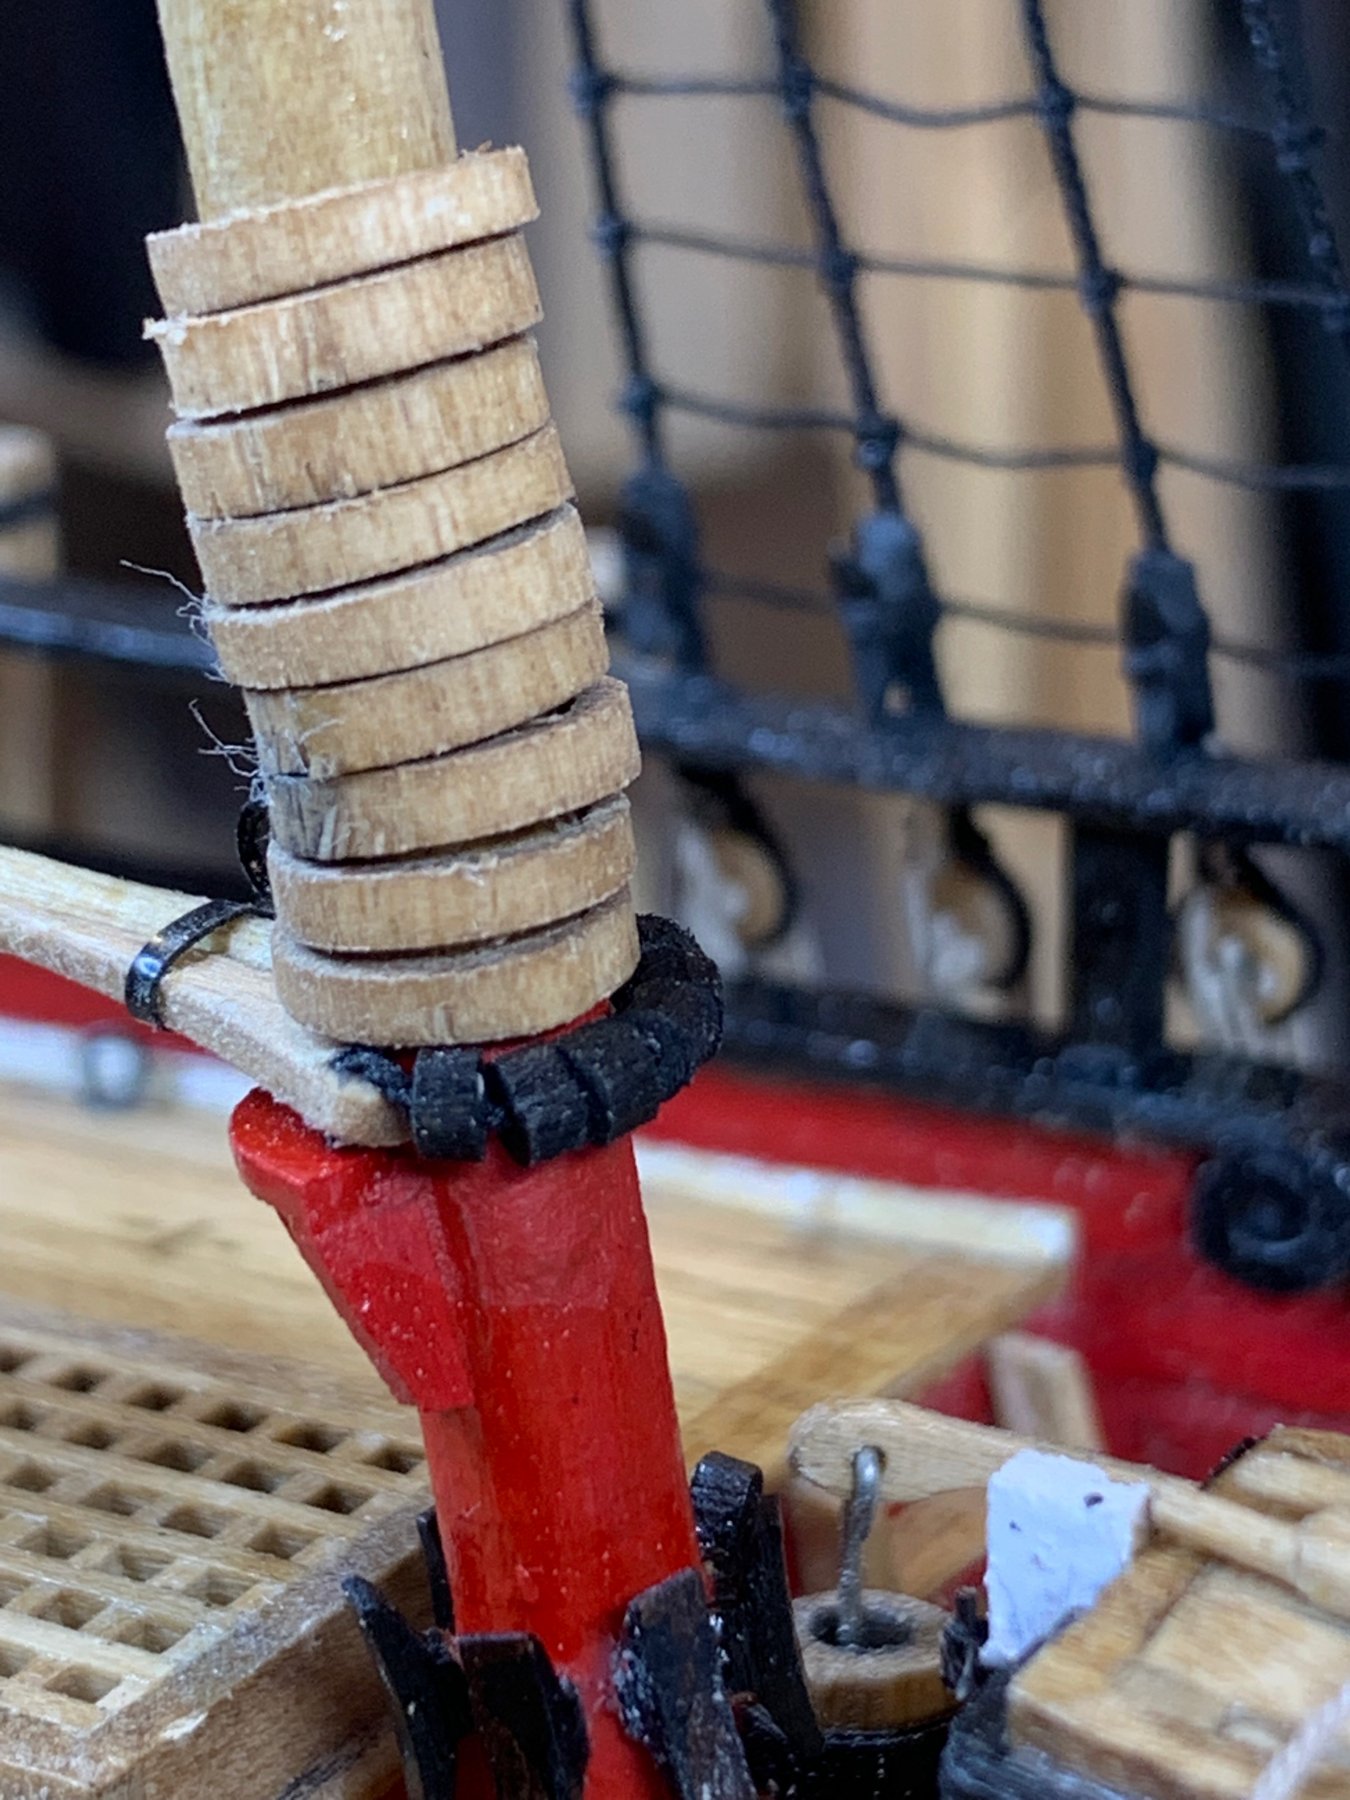
After same time adapting to the new work place, a bit of free time allowed me to work on the ship. In the same fashion as marked in the Practicum, i had to replace all dowels provided in the kit. Most of them were warped and pretty much useless. The boom was completed sometime ago. The dowel was shaped by measuring the diameter on few reference points from the plan. The final tapering was done by hand... Then the jaws for the boom were traced from plan and glued to the boom and final jaws shaping was done afterwards. The holes thru the jaws was drilled after the boom was completed, very carefully as wood can split. So start with tiny drill bit, don't use Proxxon, do it by hand, and progressively make the hole wider with different drill bit size. A bit time consuming but what the heck, it is a hobby.. The holes are used to hold parral beads, used to provide smooth move for the boom with less friction on the main mast... The boom ready for assembly.. I was searching online for breads that are appropriate in size and shape to be used on the boom. Was able to locate some available in the amount of 1000 per bag, which i think it will be too much for this project so i decided to make my own. Could not find a use for 993 remaining... They will not be fully rounded, rather in the shape of a tire and i think close enough for this application. First, one tootpick was picked from the pile that had the best shape. Then using a custom made size template (two nails and a piece of scrap wood) i cut about 10 of them, in the length of 1.5mm. The sanding took place to remove any strings and to bring the beads in appropriate shape.. Using a Proxxon (as a mater of fact any other drilling tool will do the work) i drilled hole thru the appr. center of each bead. During this process some of beads just flew somewhere off my work bench - that is why more were cut....No way i will be able to find them.. Then the string was run thru them and whole assembly was painted in flat black. The boom ready to be mounted... The boom was left in natural color, not painted, just stained in Golden Oak like the rest of the wood.. Before mounting i fixed all mast hoops up on the mast since they are sitting on the top of the boom jaws... Then the other end of the rope with beads was run thru the holes of the jaws and secured with touch of glue on the top of the jaws and rope was bent and forced to the jaws. This way the rope beads does not stick up from the jaws.... The excess rope was cut and secured with a glue on the bottom of the jaws as well. Not sure what others will do but i decided not to make a knot on the beads rope since it will bring the boom up and boom will not rest properly on the mast. The hoops were released and rested on the top of the boom.. So if you come very close you might noticed that beads are not rounded but looking from a normal distance i dont think this will be an issue. From the opposite side... Then i seized a 4mm double block around the boom in preparation for a boom sheet assembly.. Since i forgot to install this block ahead of time, i had to lift a boom in order to get more room for tools and hands... Just watch for these small gotchas.. And completed... Waiting for other tasks... Happy modeling..


- 360 replies
-
- 2
-
-
- sultana
- model shipways
- (and 1 more)
-
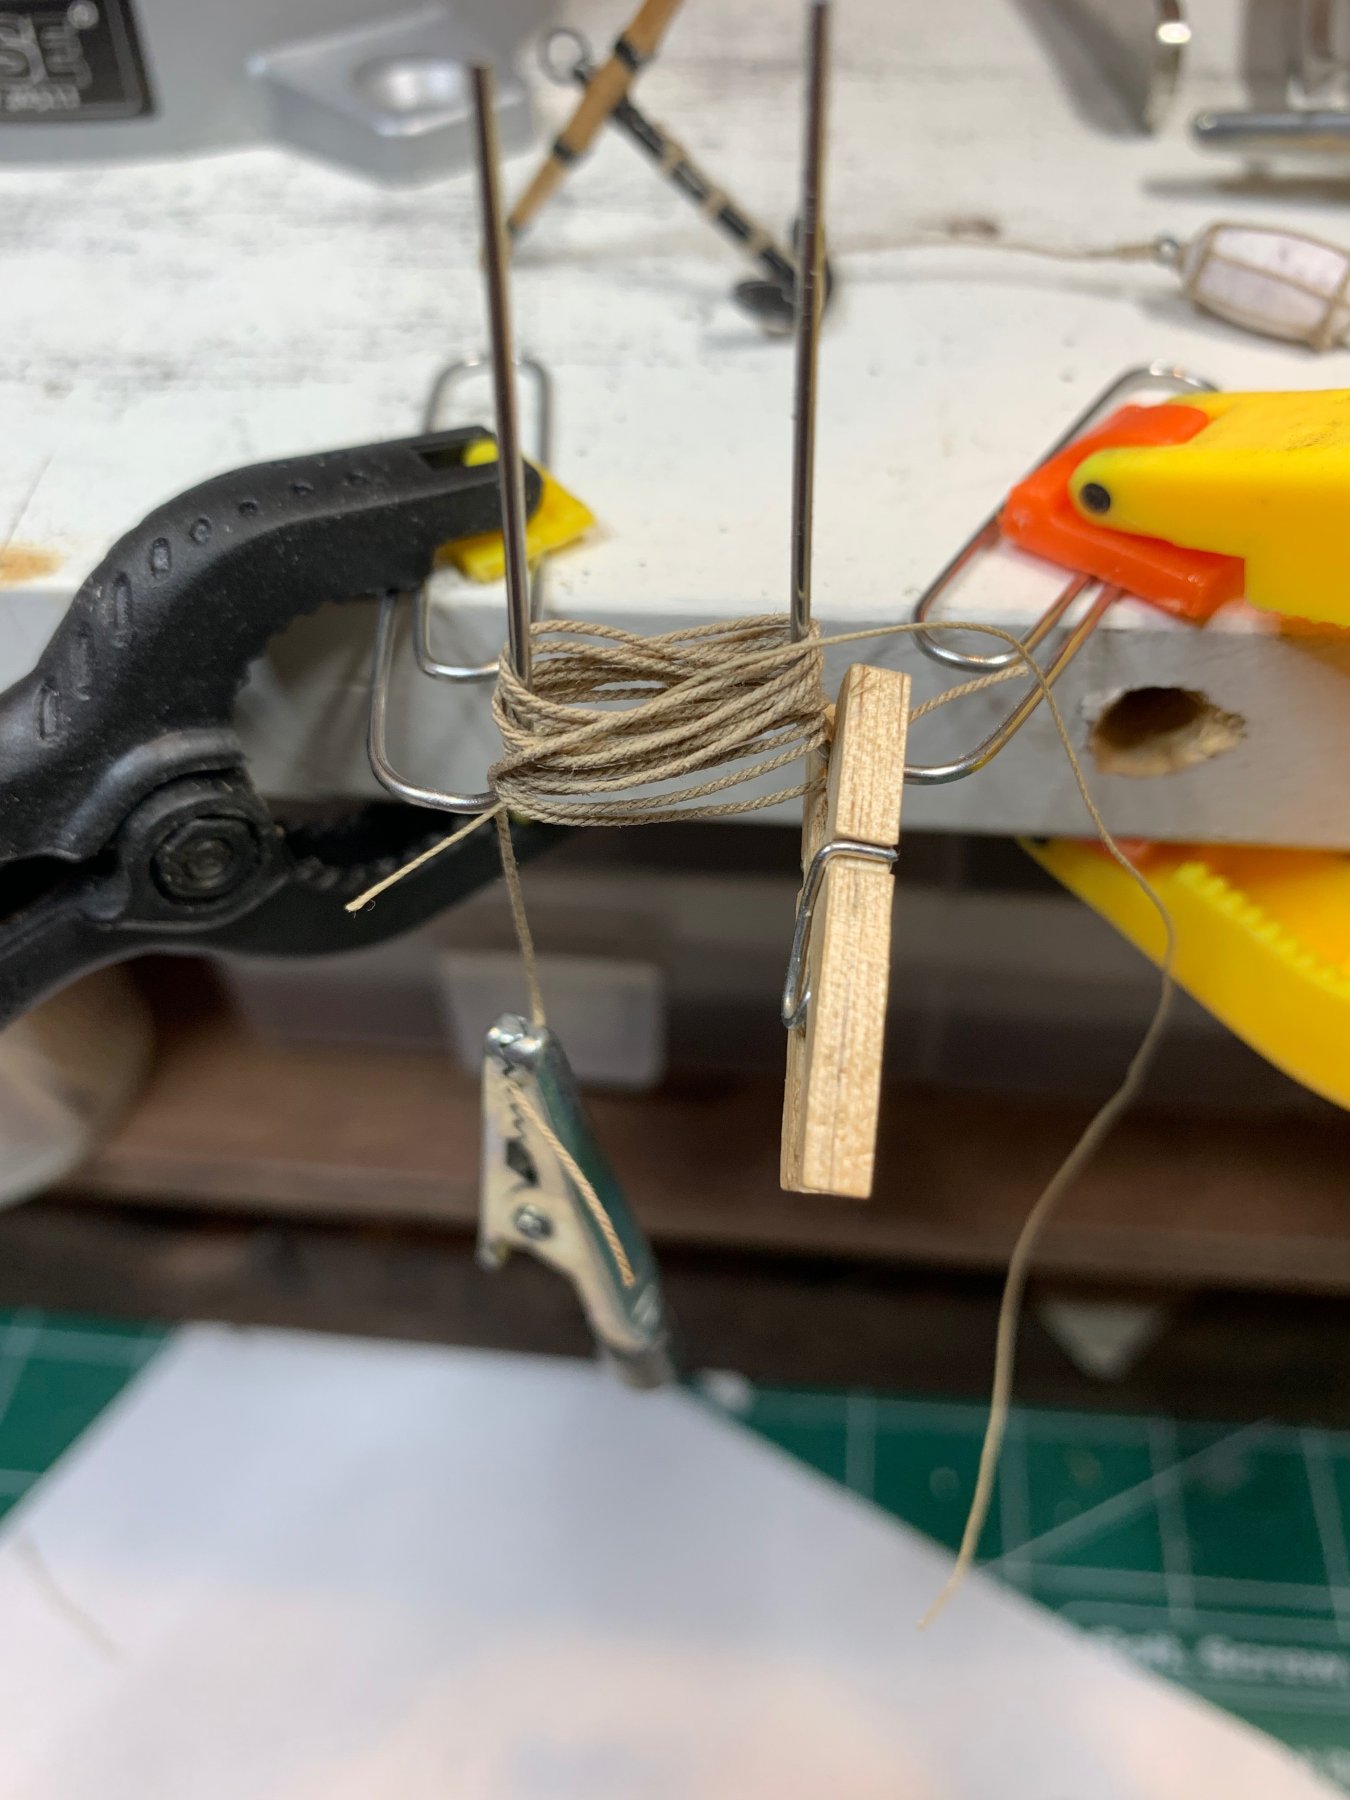
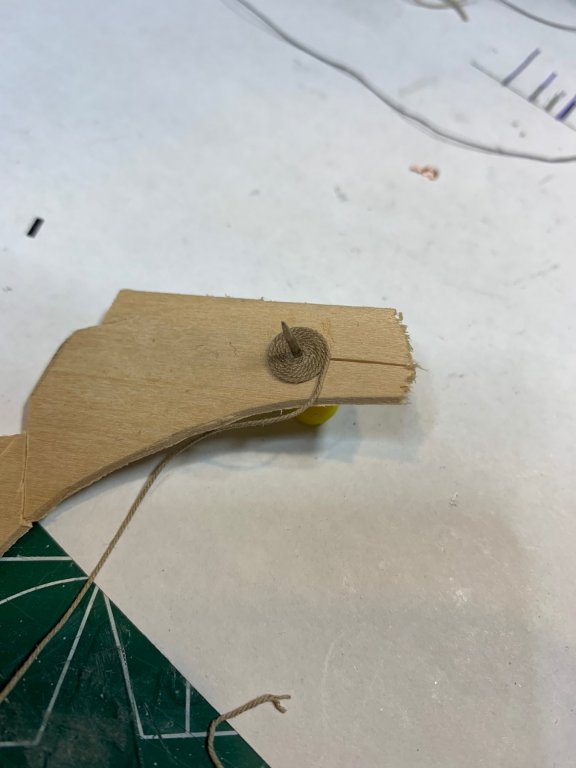
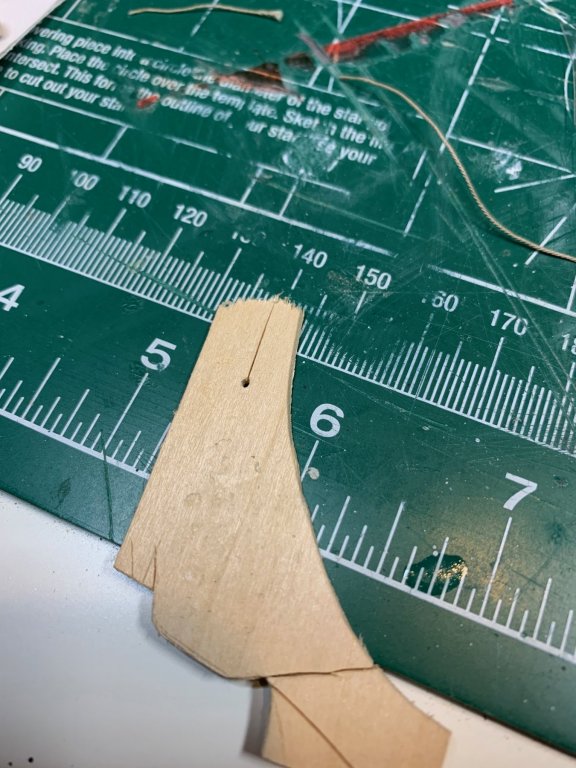
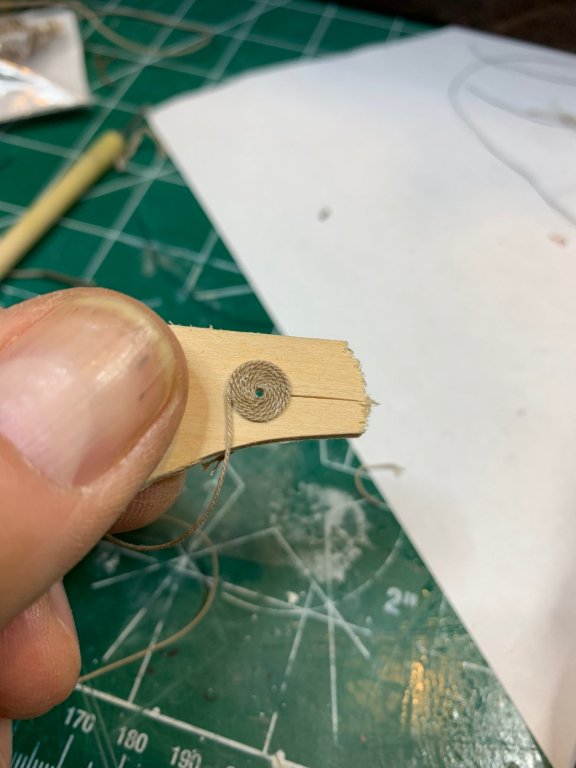
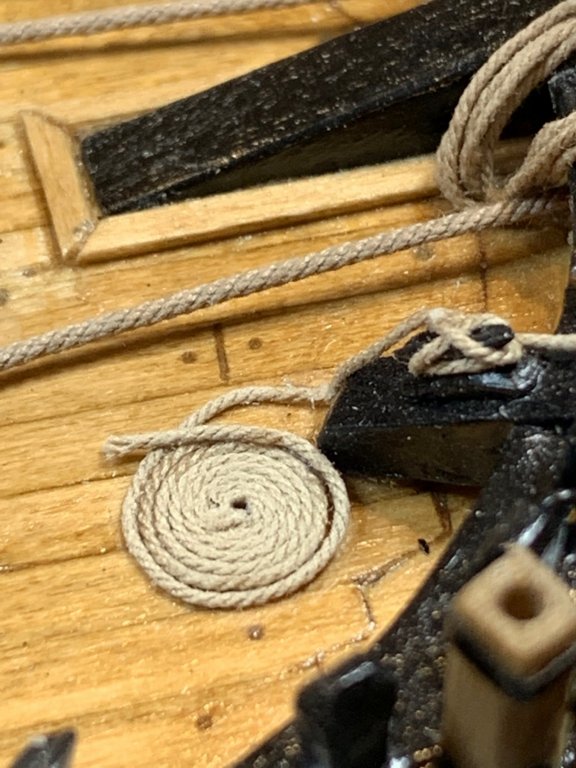
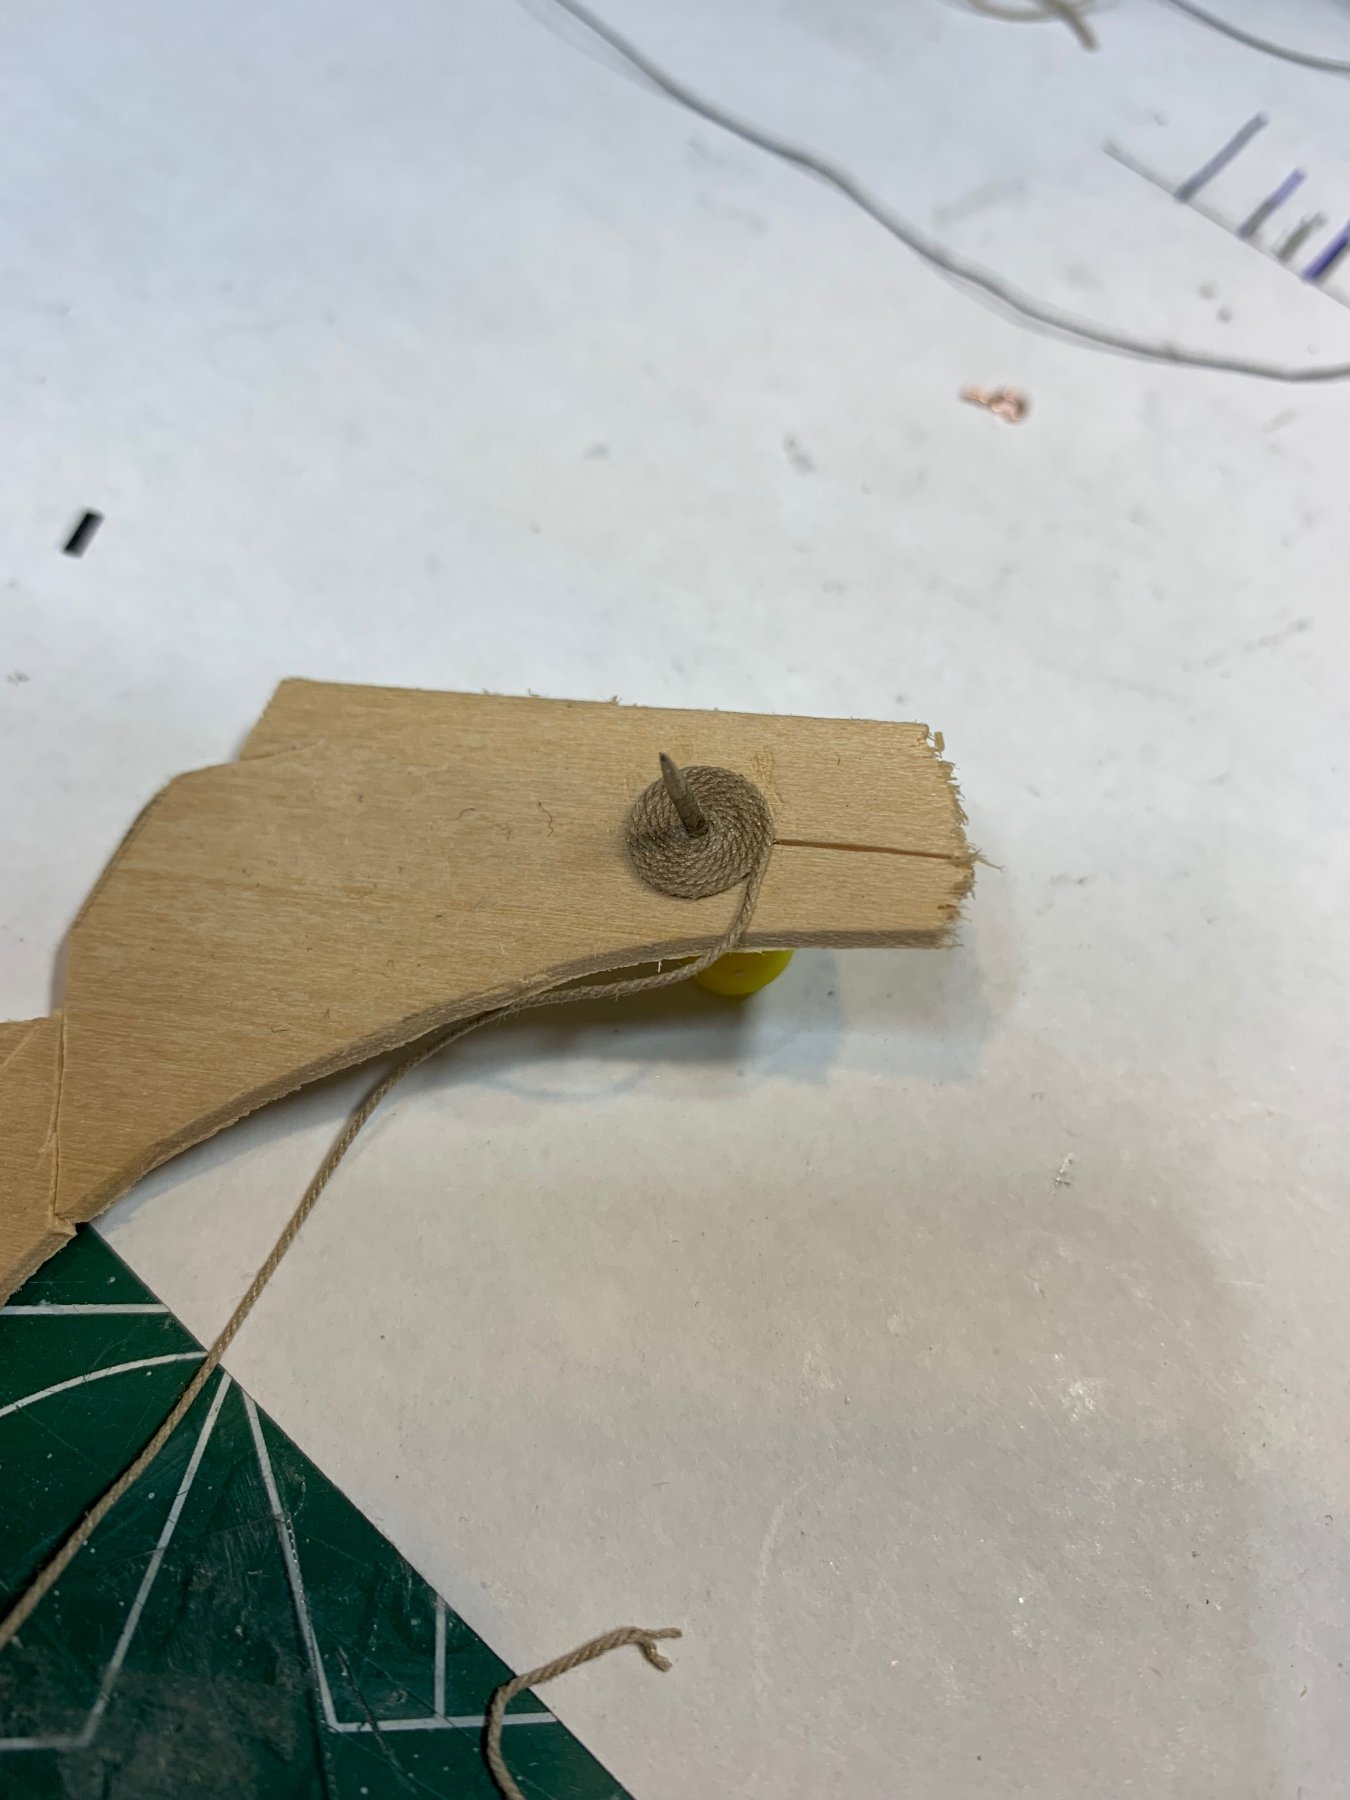
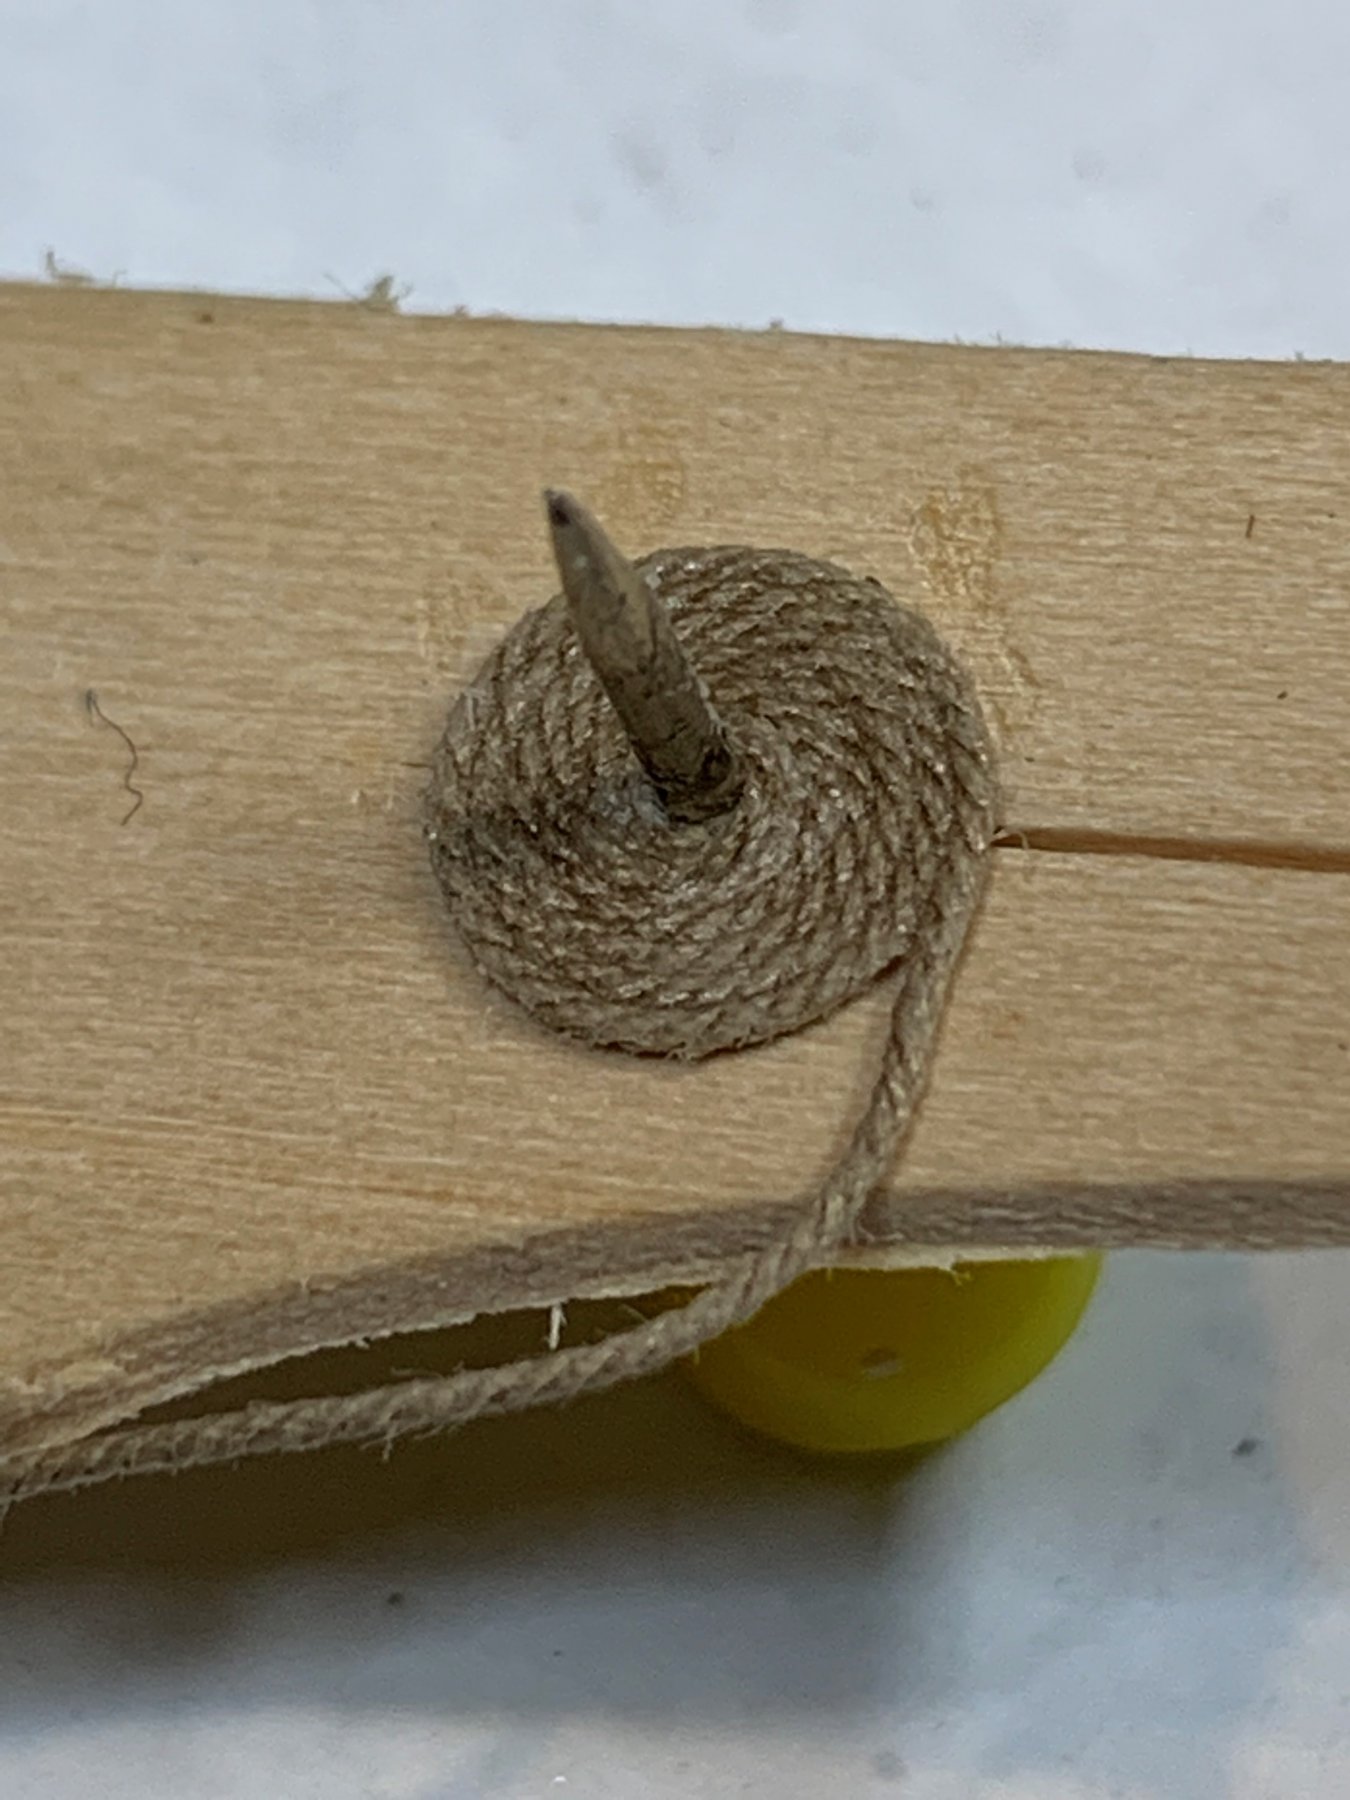
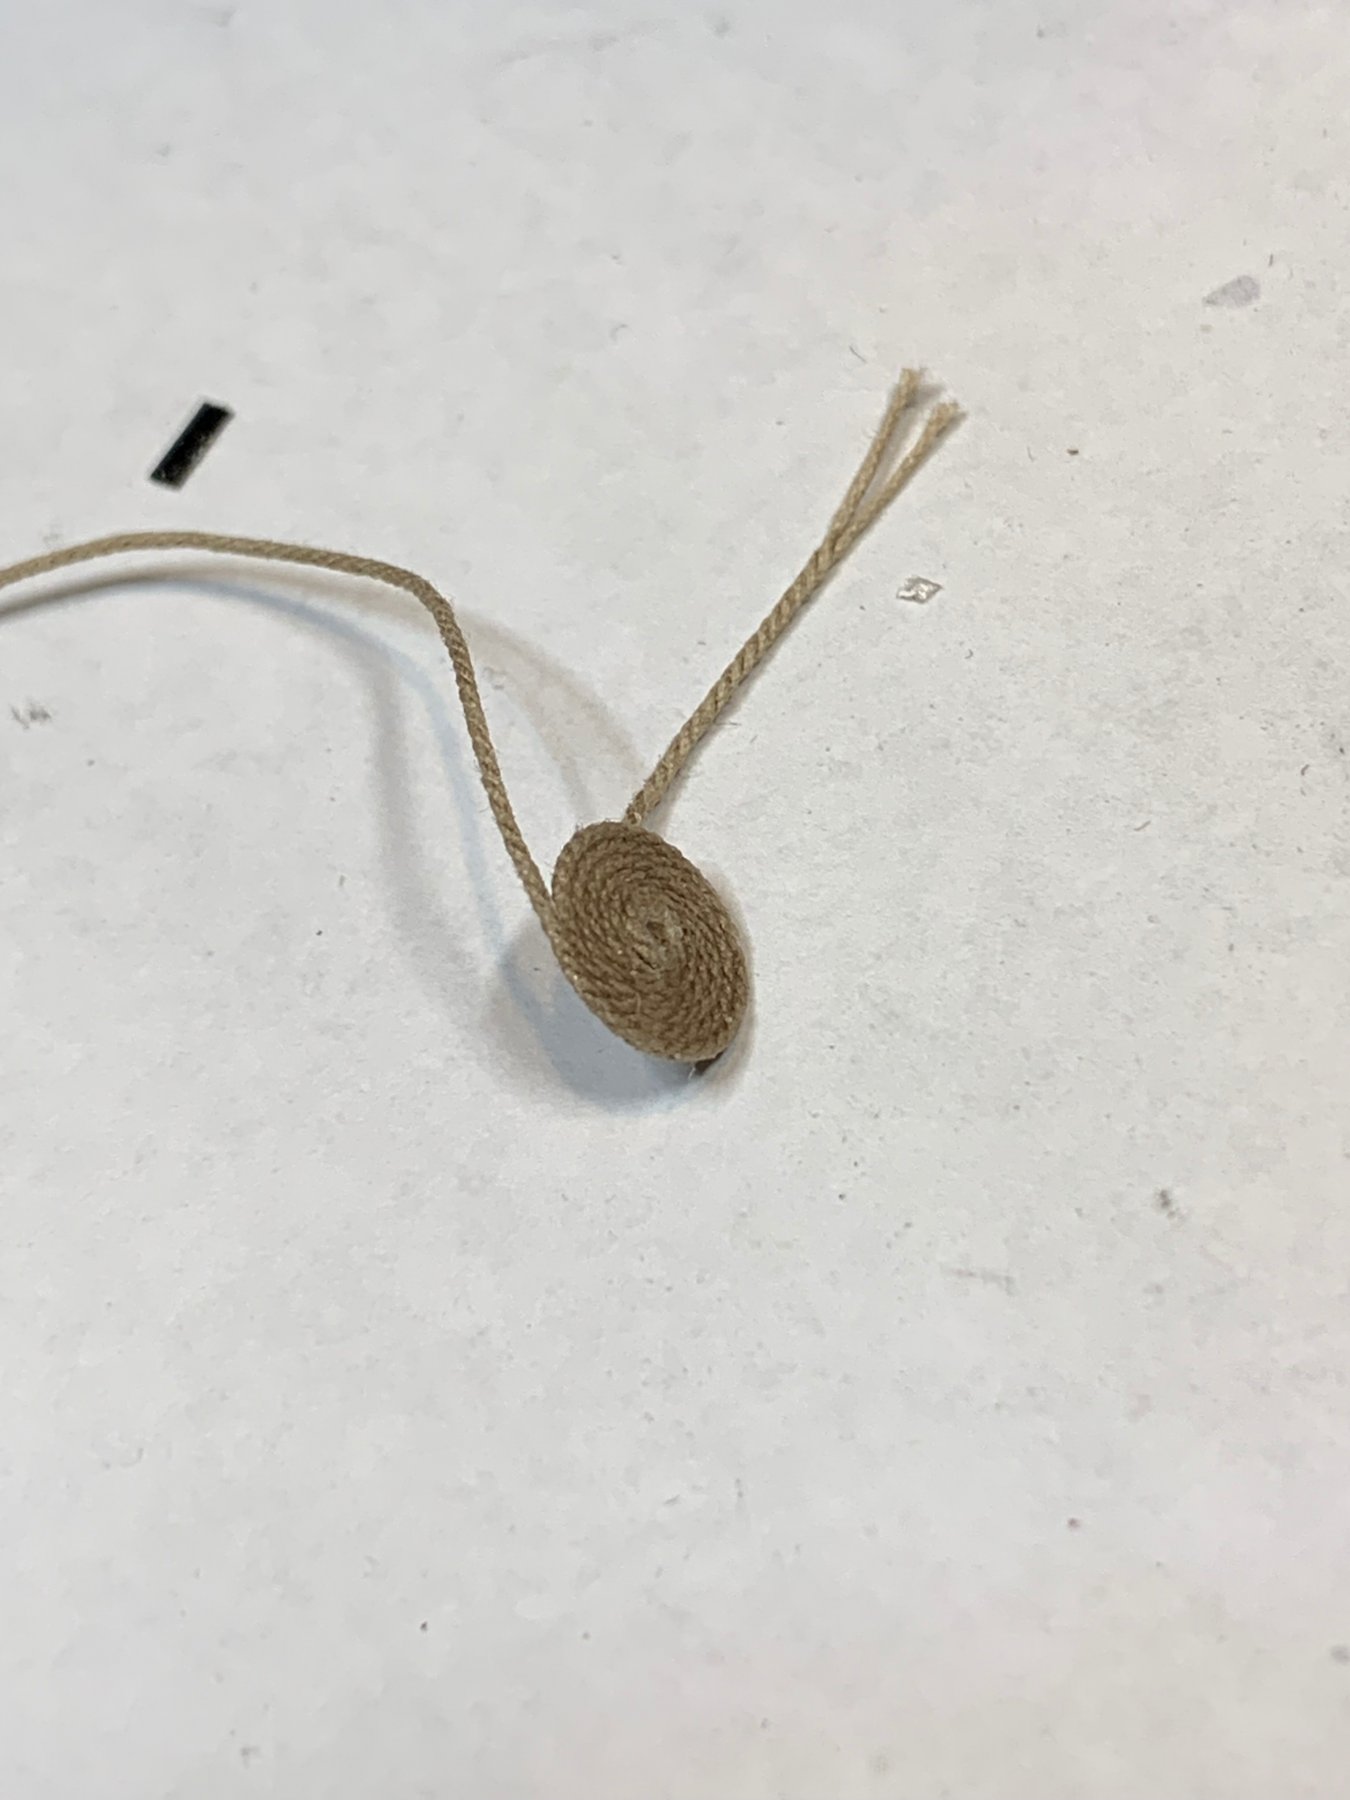
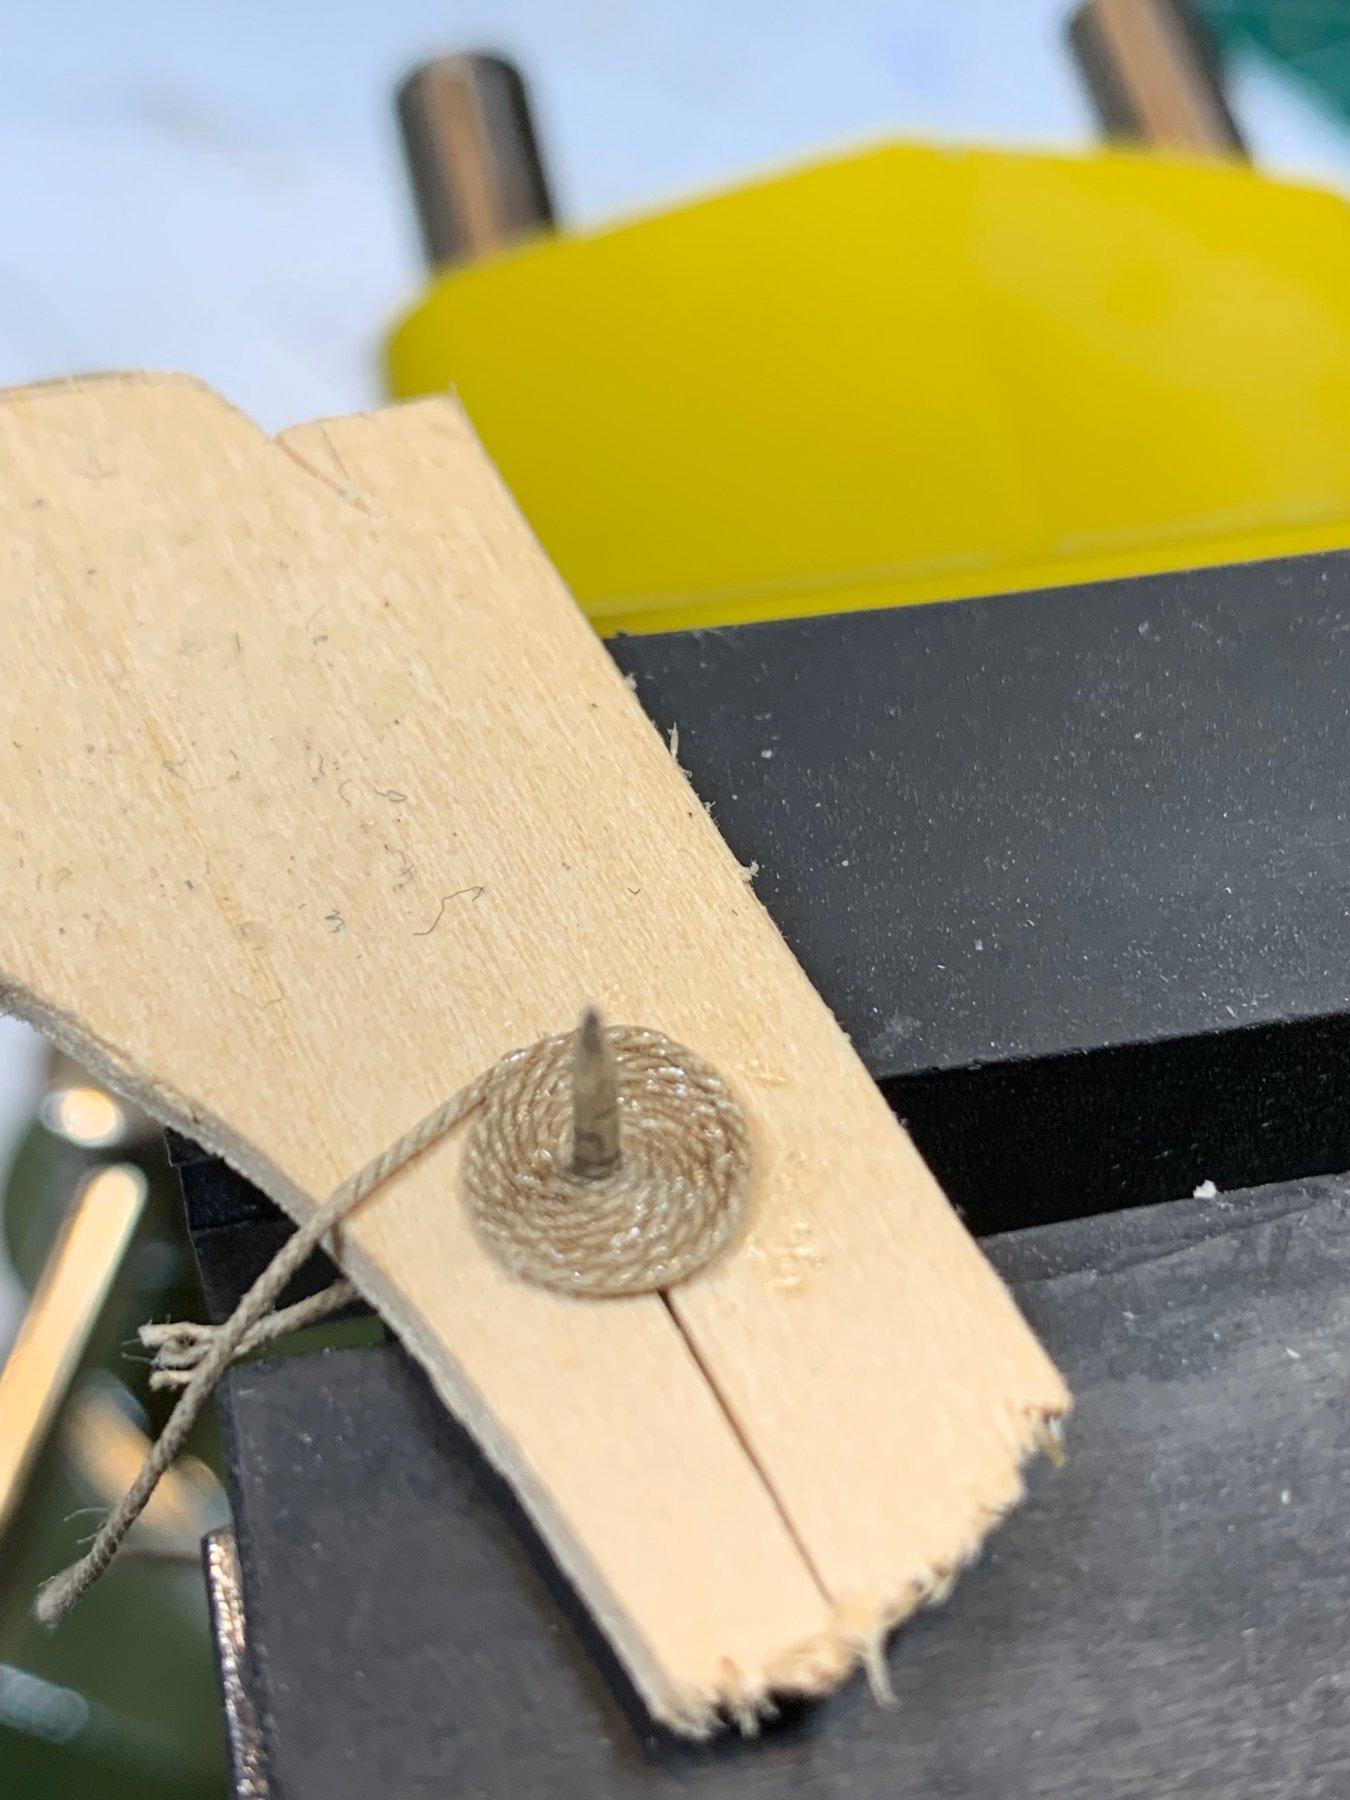
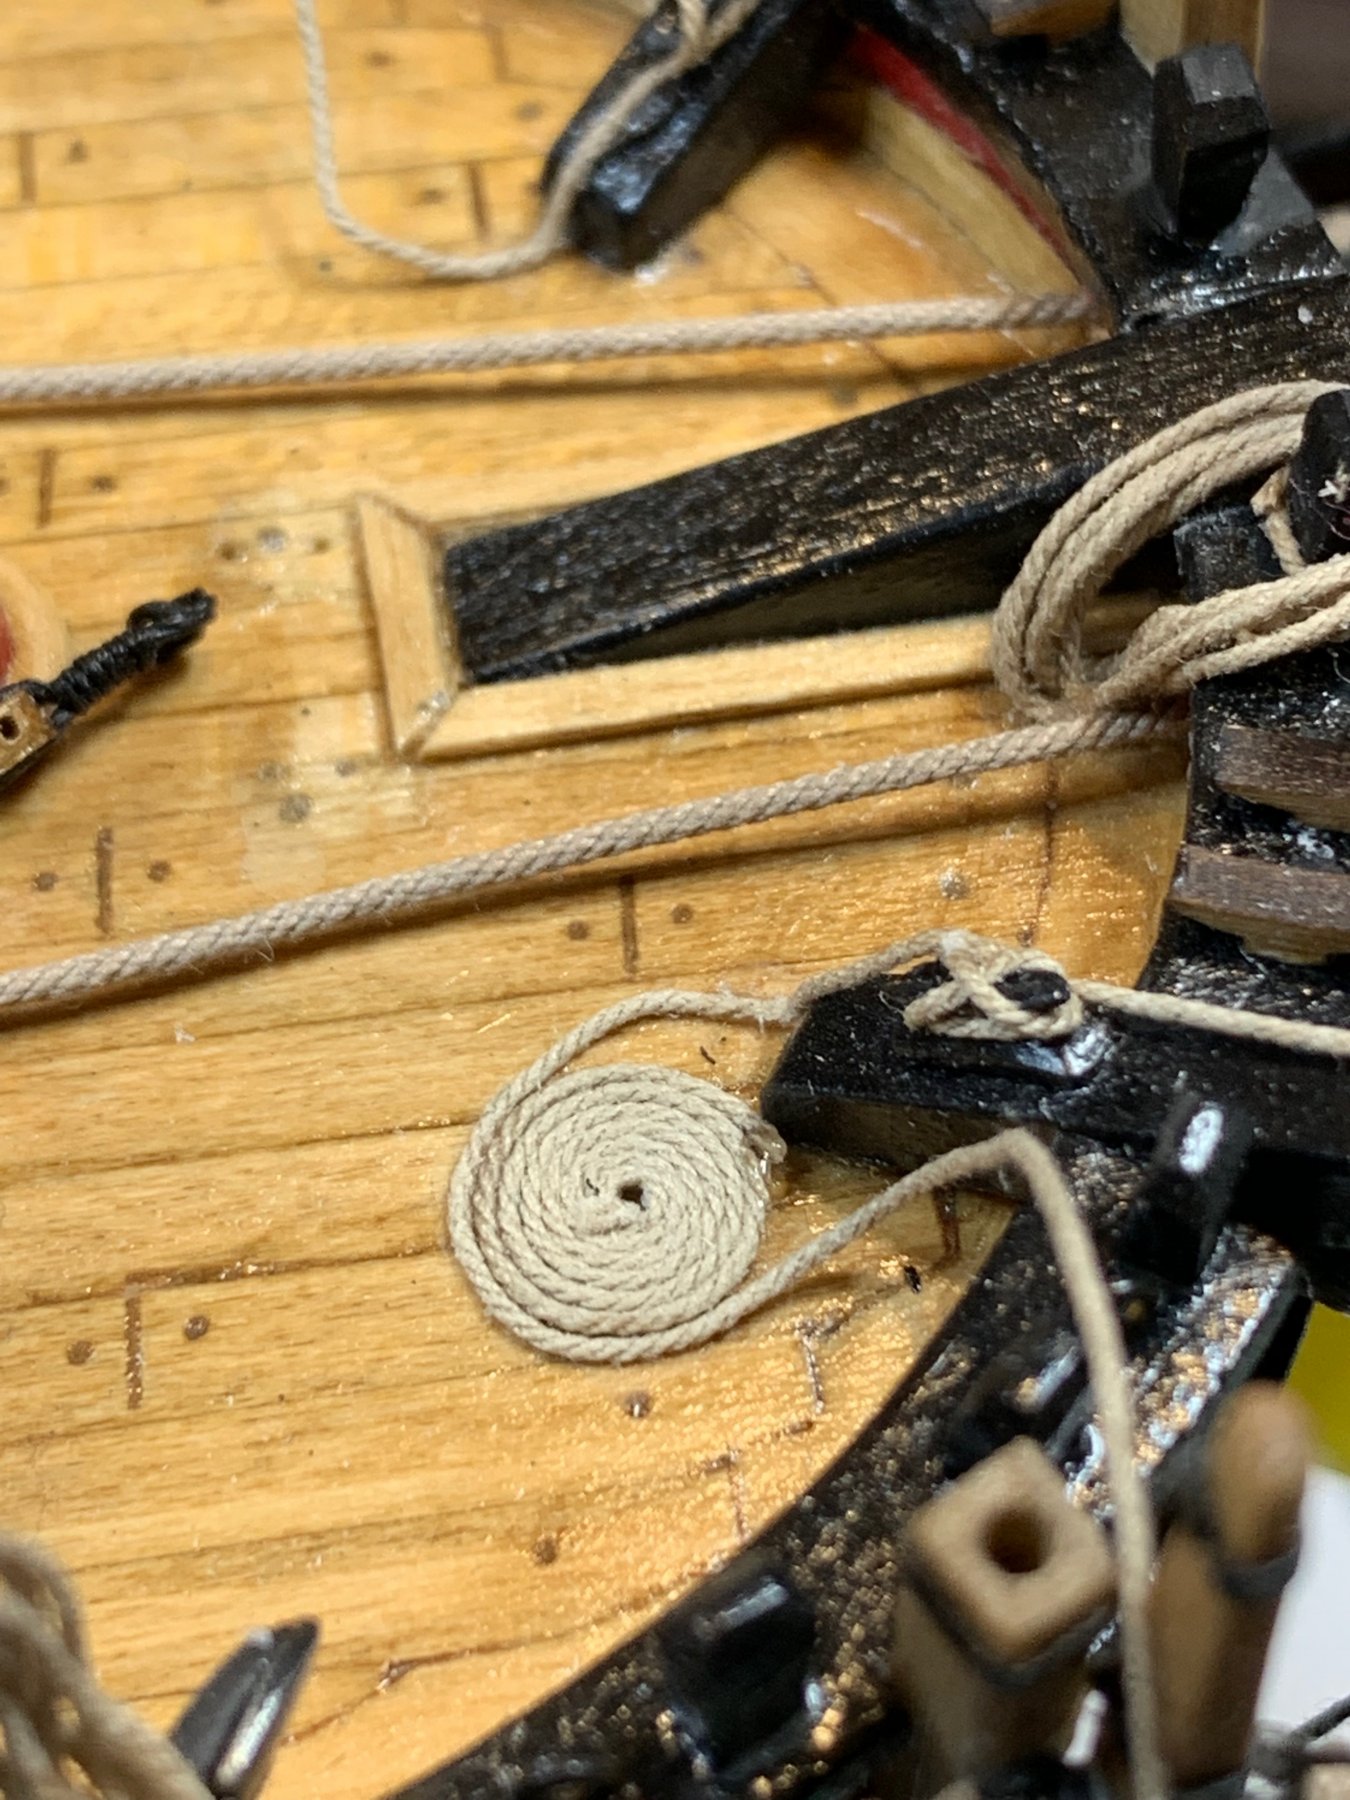
Then i spent some quality time making other rope coils; here is end result of the coil mounted on the ship.. So, how did i got here? There were few other forum topics explaining the technique to make a coil rope. Since i will need only two, small ones, i decided to make my own technique. It is simple and does the job quickly. I will definitely use some other ways once i need to make more larger coils and in a bigger number... First, a pin was pushed thru the piece of spare wood. The wood was cut to allow the rope to pass thru. Then the pin was secured in a wise and the coiling process begun.. I used tweezers to hold the coil and to prevent it from unwrapping. After few circle runs, glue was applied to the coil to freeze it.. and the pin was removed. Then the coil was glued to the ship, first making sure i will be able to hide the end piece of rope so the transition with other rope end is smooth and not visible to a naked eye.. Small amount of glue was applied on the outer edge of the coil to have the rope glued, in the attempt to make it a part of the same coil.. The end result is very interesting... Happy modeling..


- 360 replies
-
- 3
-
-
- sultana
- model shipways
- (and 1 more)
-
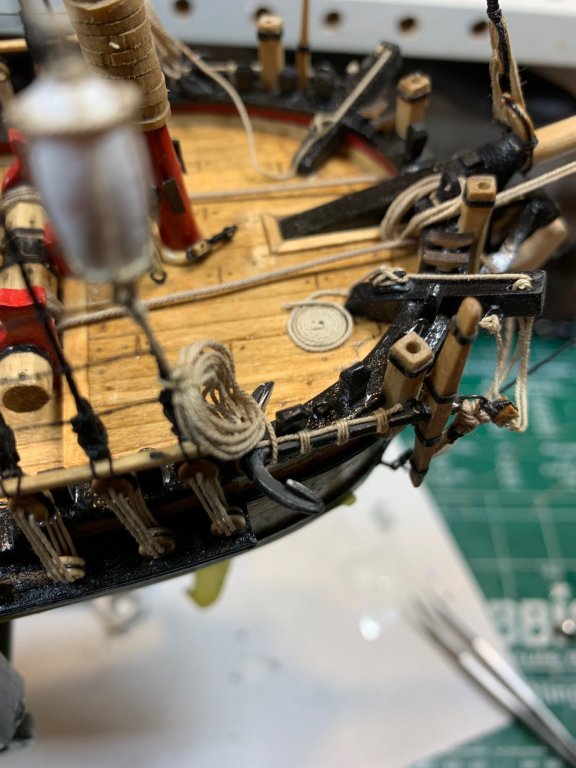
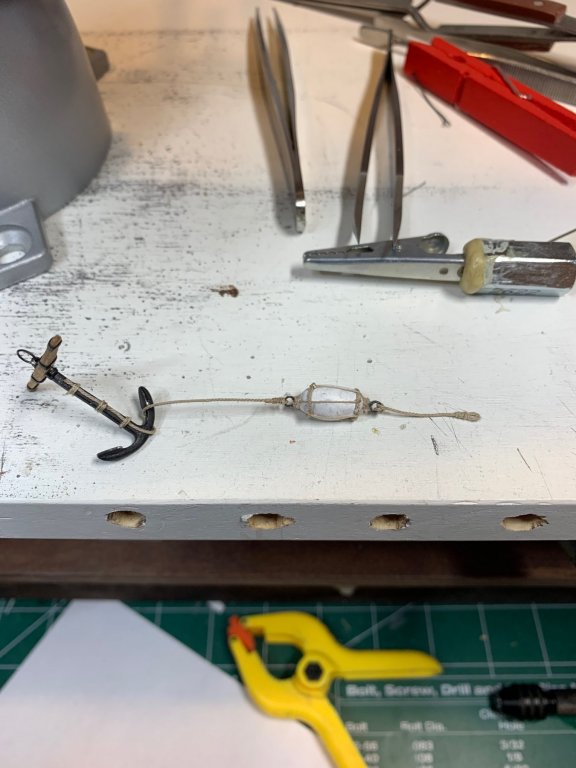
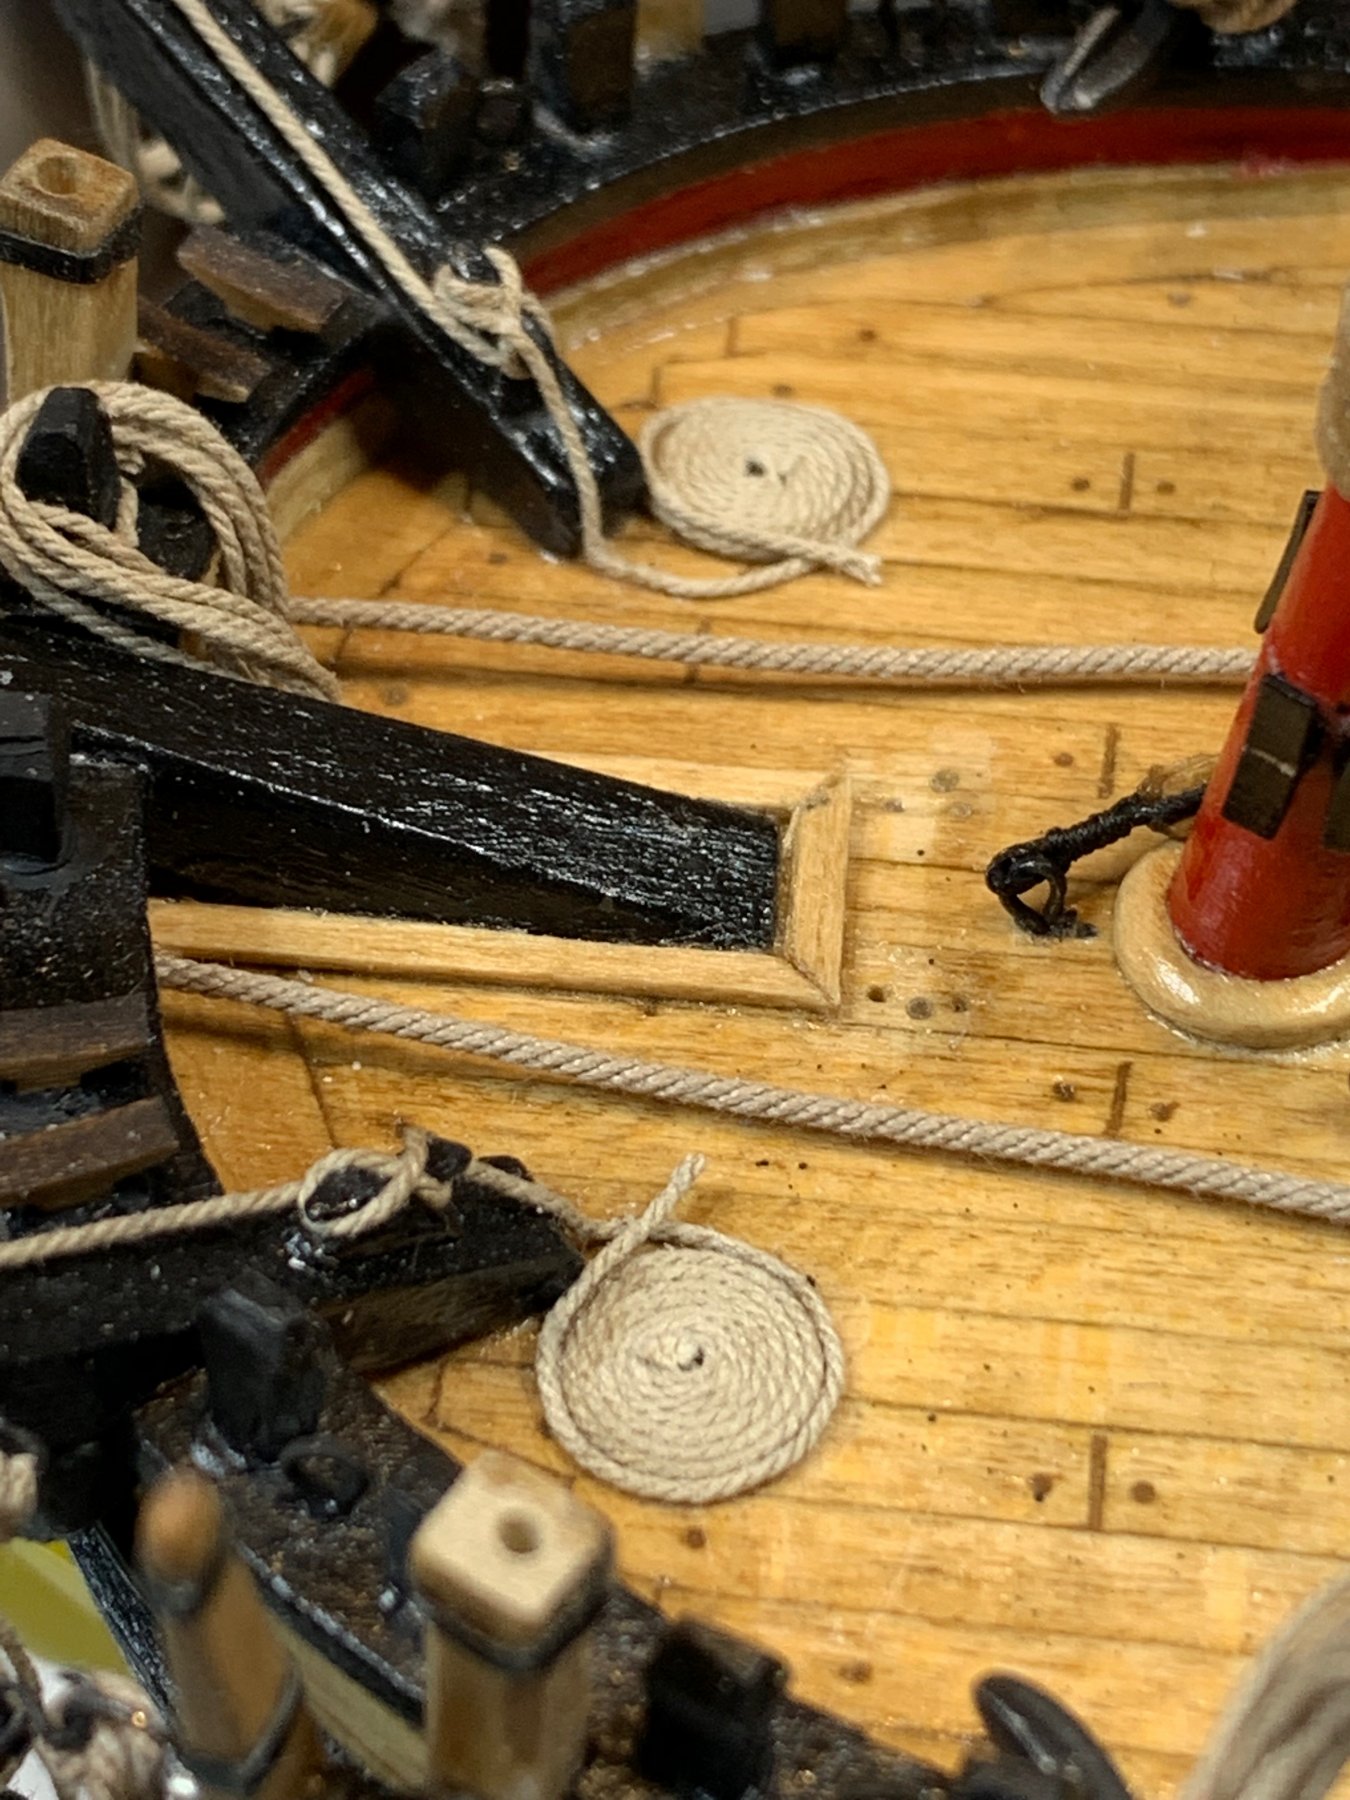
So to finish up mounting the anchor, the anchor rope has to be added. First i laid the rope without thinking about other rope end that has to go thru gratings... Then i remove the rope and tied it up again, in different direction.. At the same time i corrected the rope coil to rest on the anchor rope. Before the anchor rope was going thru the rope coil.. Not sure how 🙂 Now it looks more appropriate.
- 360 replies
-
- 1
-
-
- sultana
- model shipways
- (and 1 more)
-
Thanks Patrick, i actually using pictures from your blog to get more info about building process... Sometimes is good to be a follower :-)..
- 360 replies
-
- 1
-
-
- sultana
- model shipways
- (and 1 more)
-
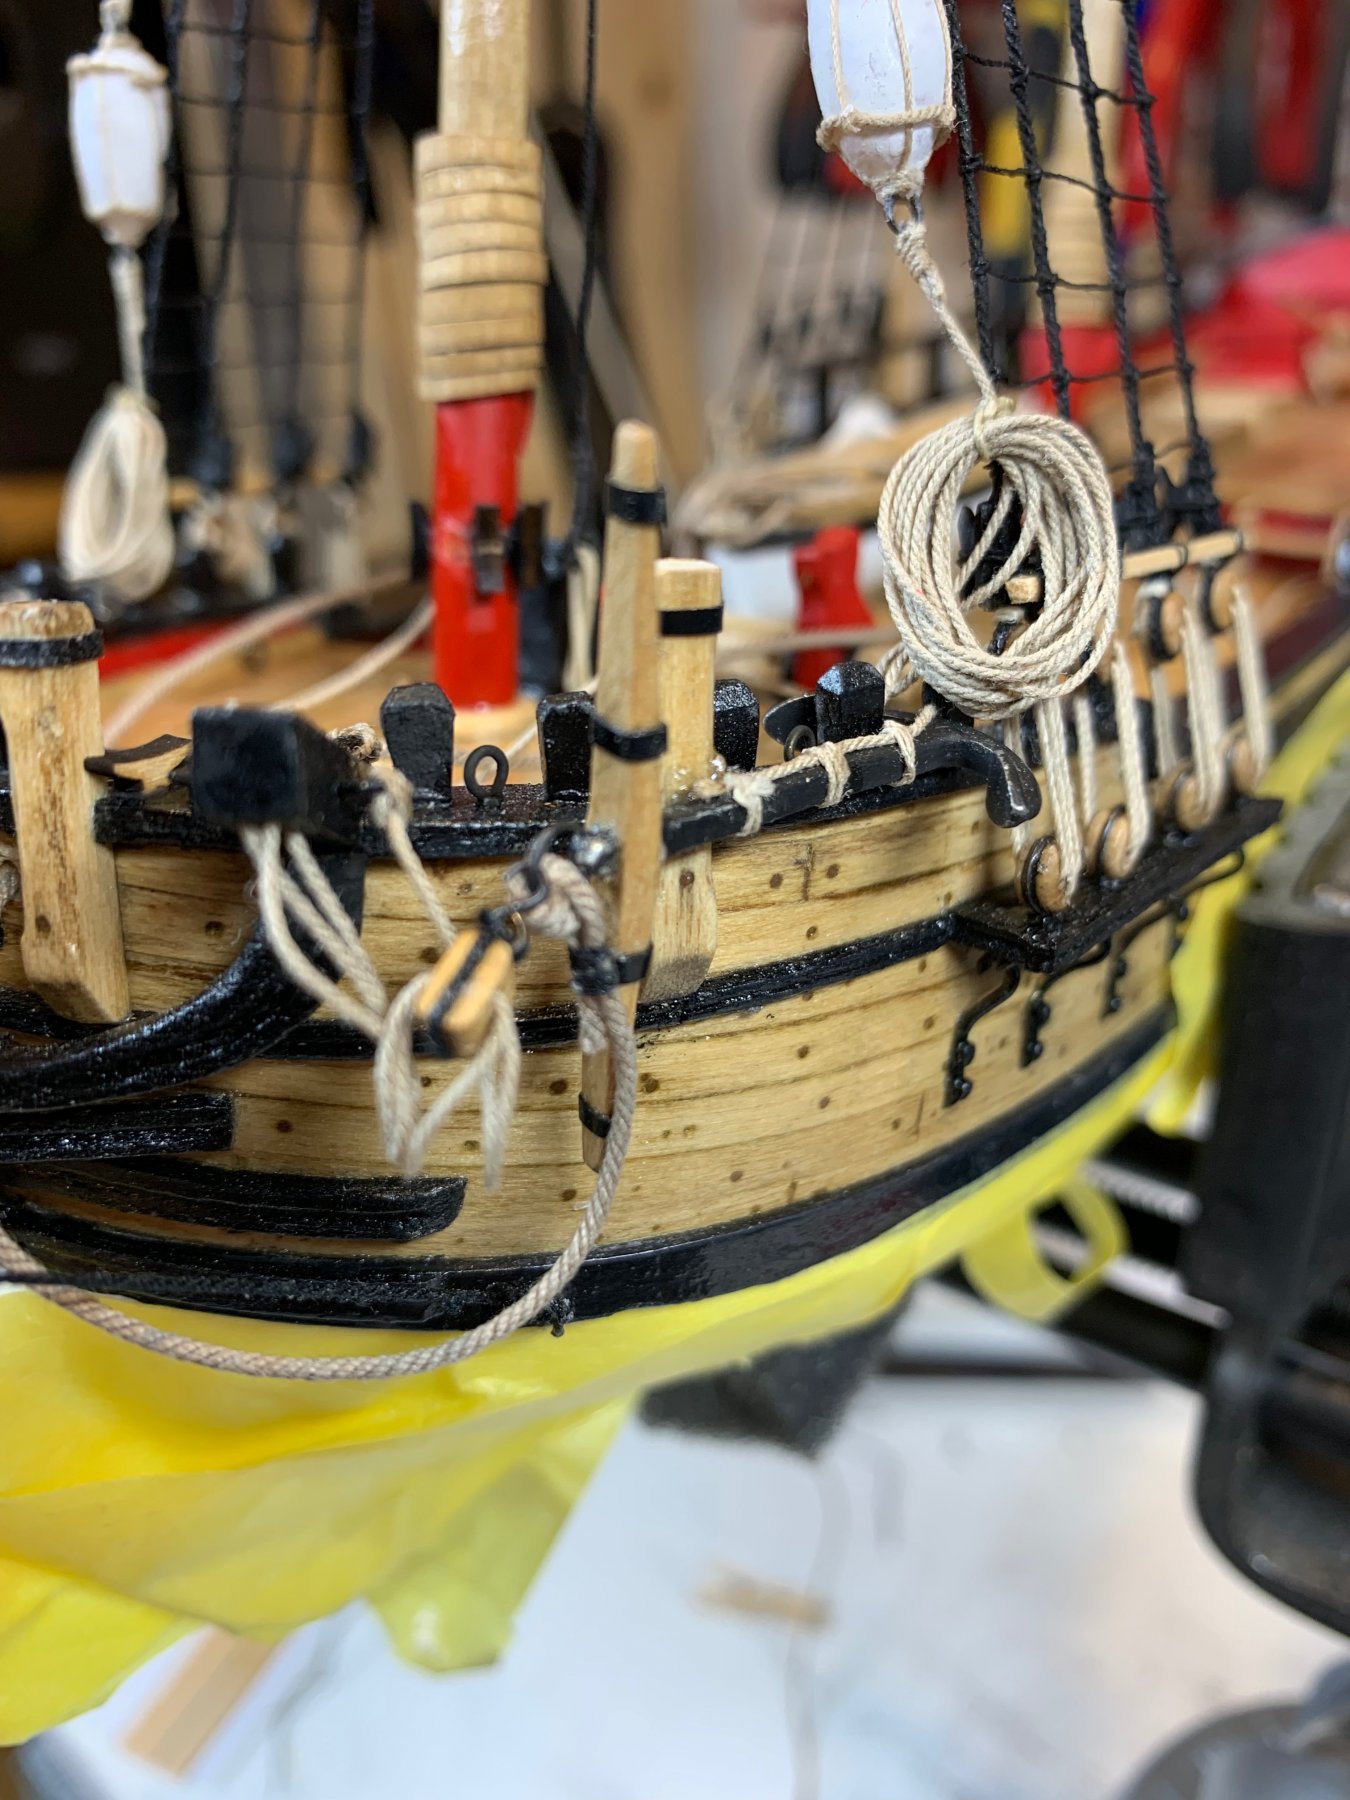
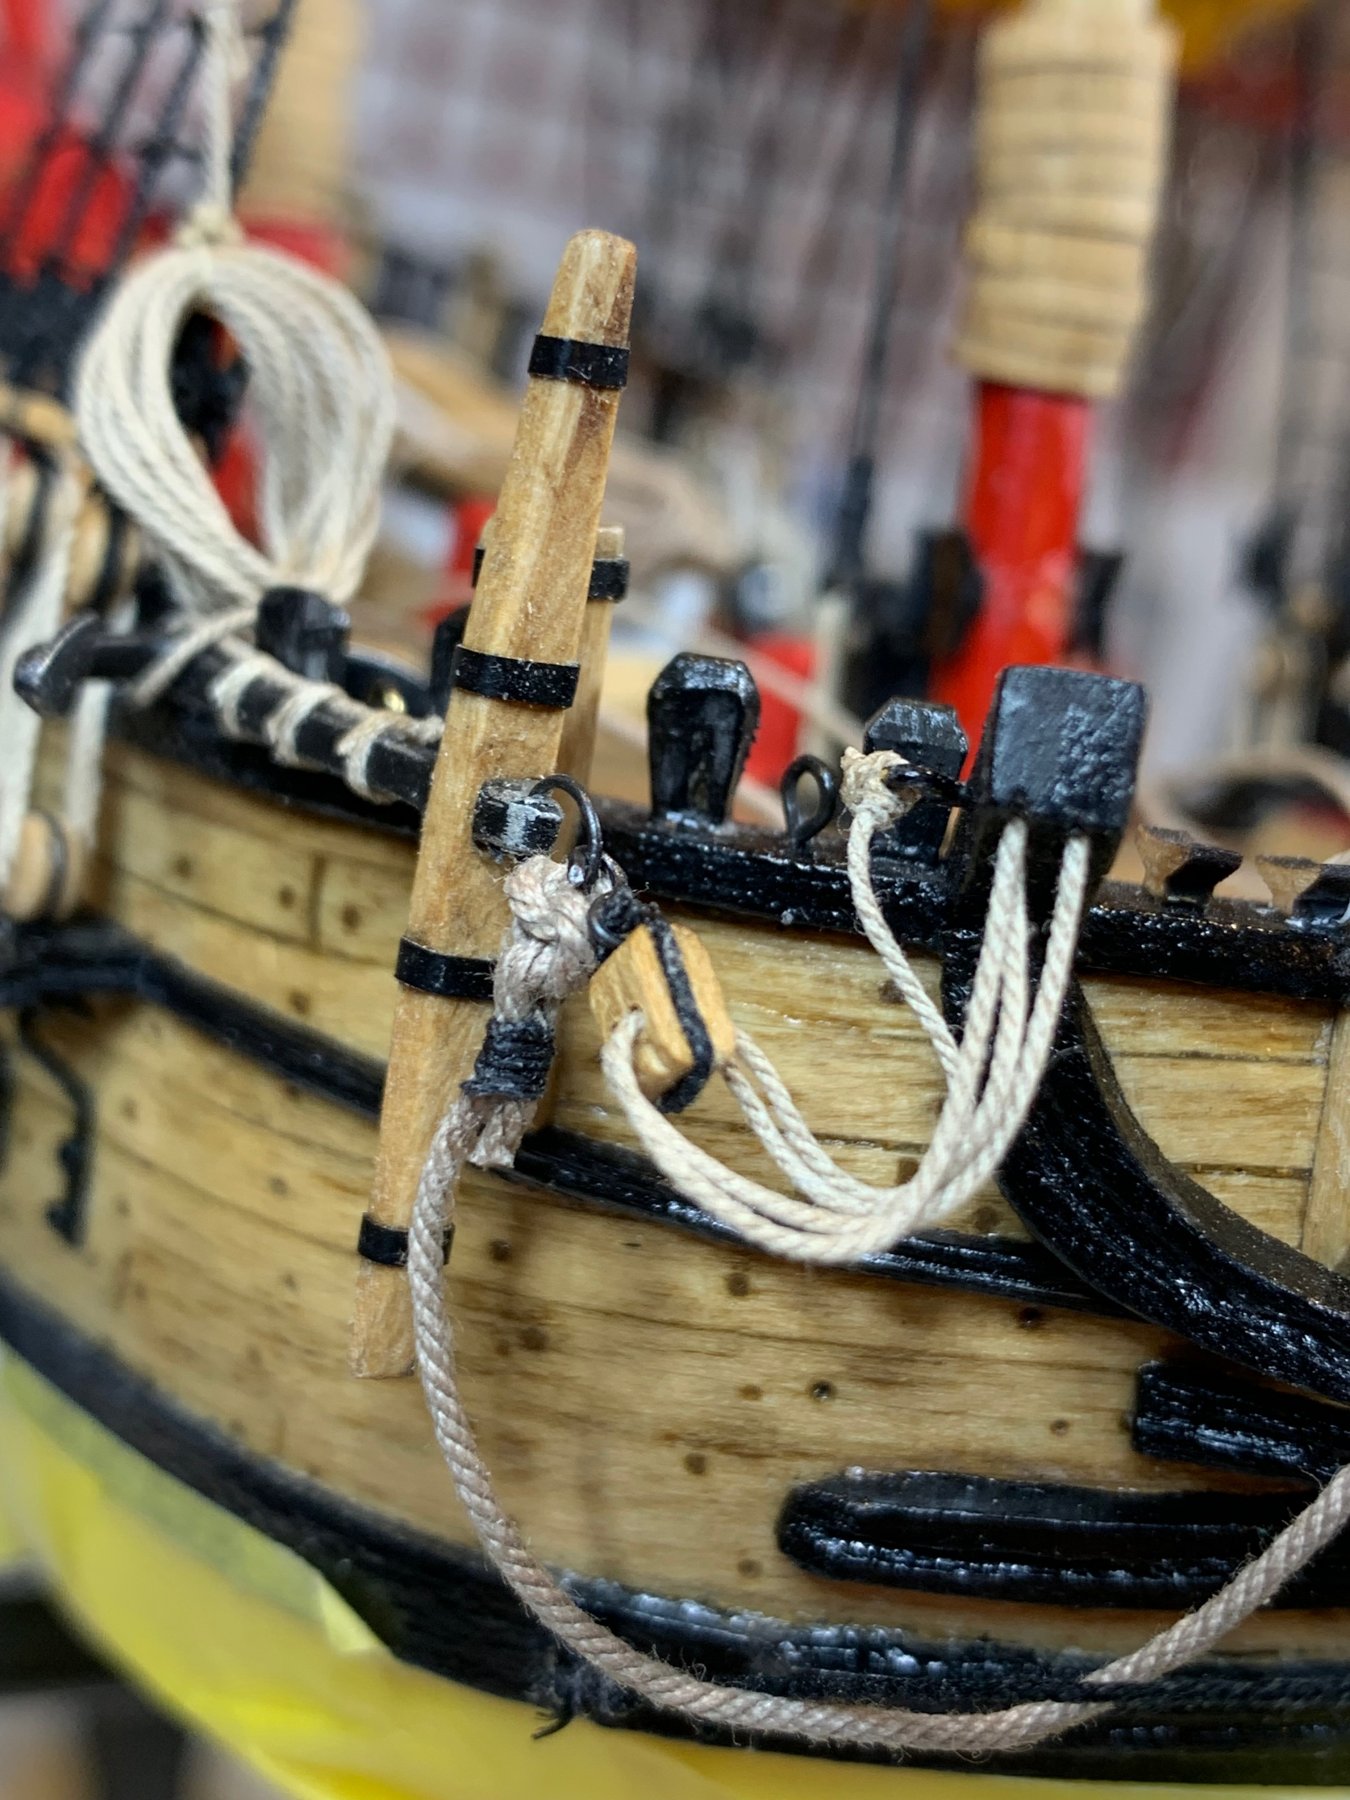
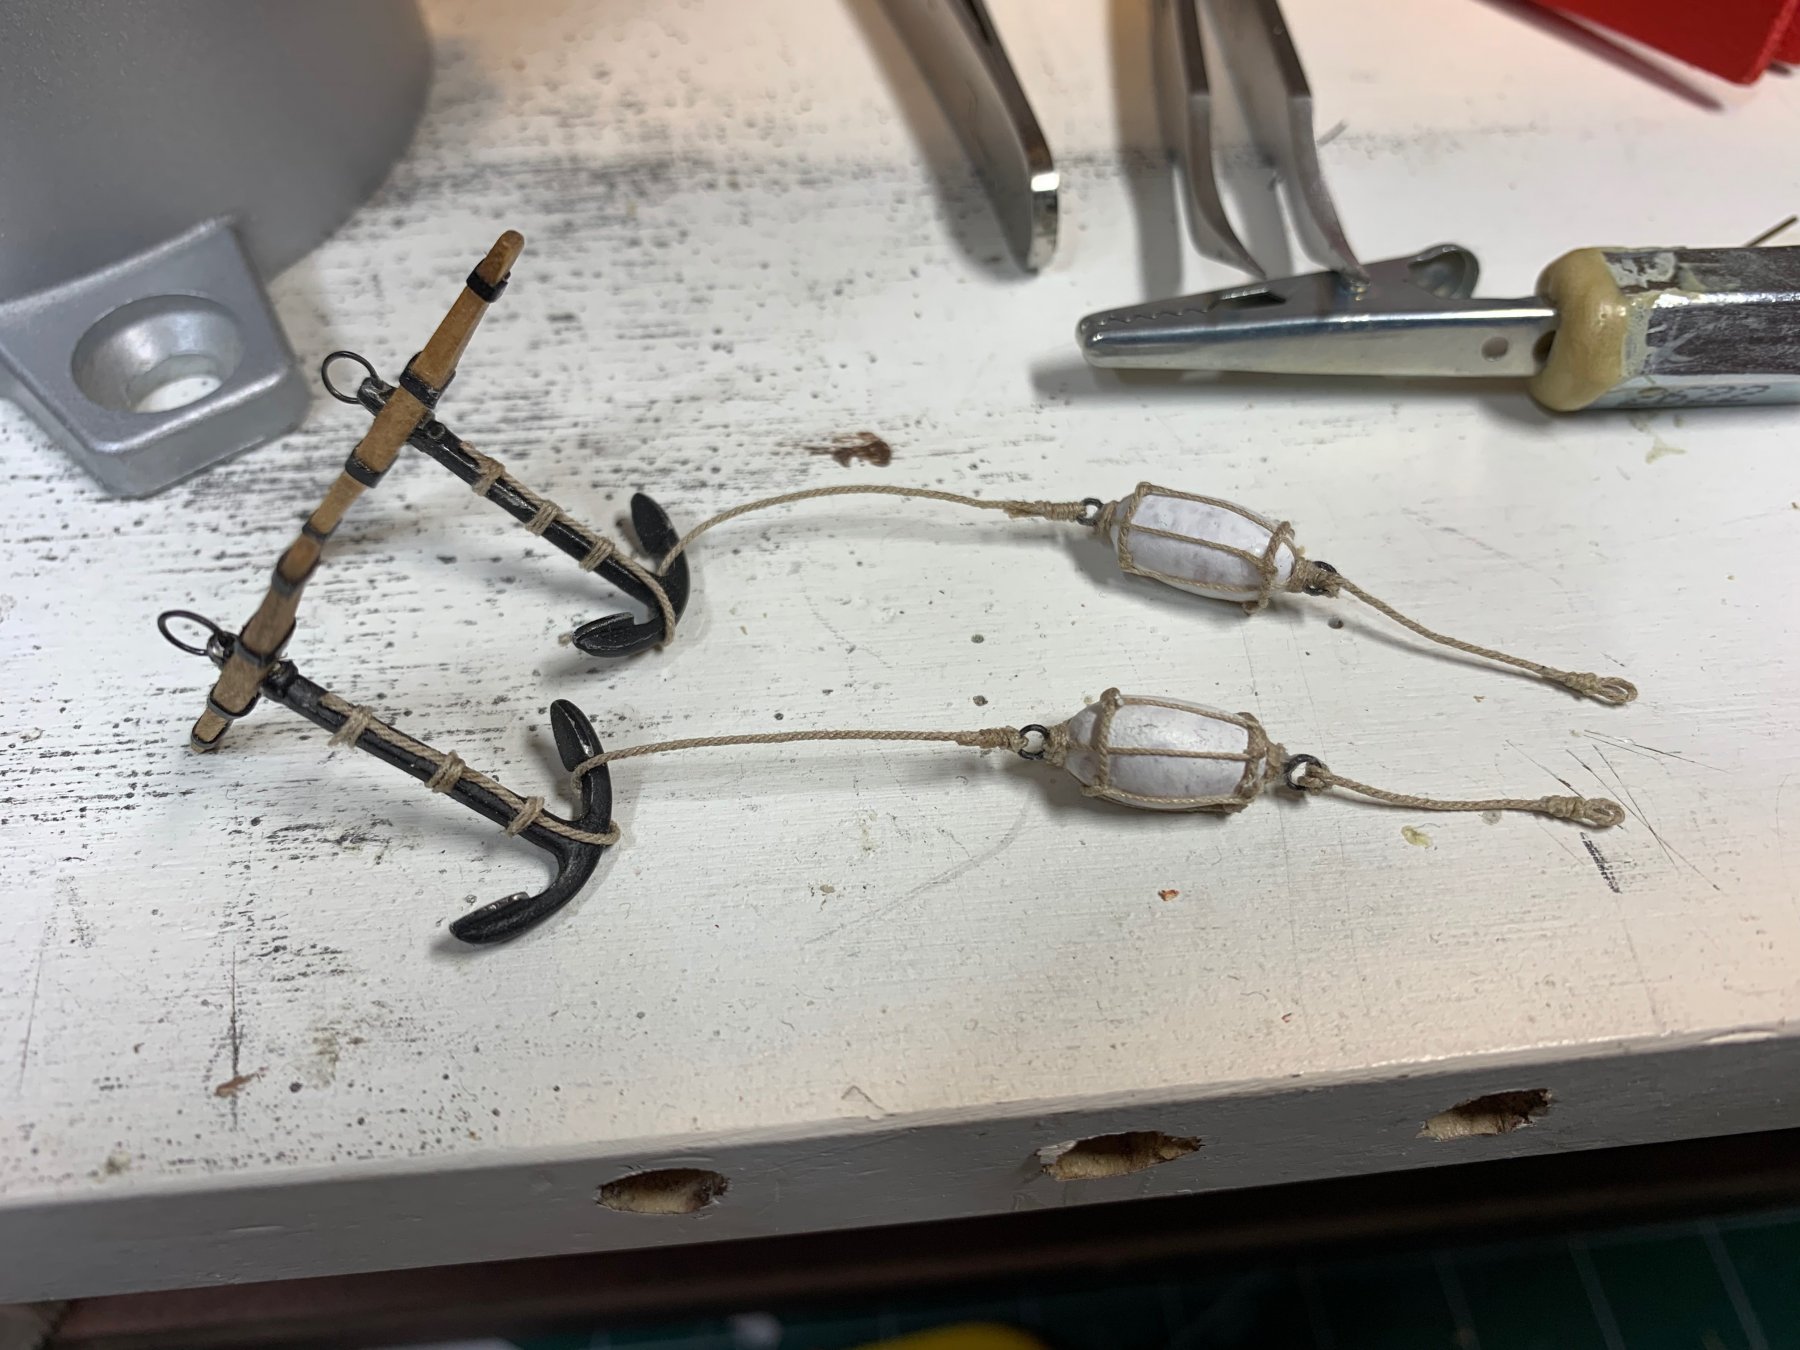
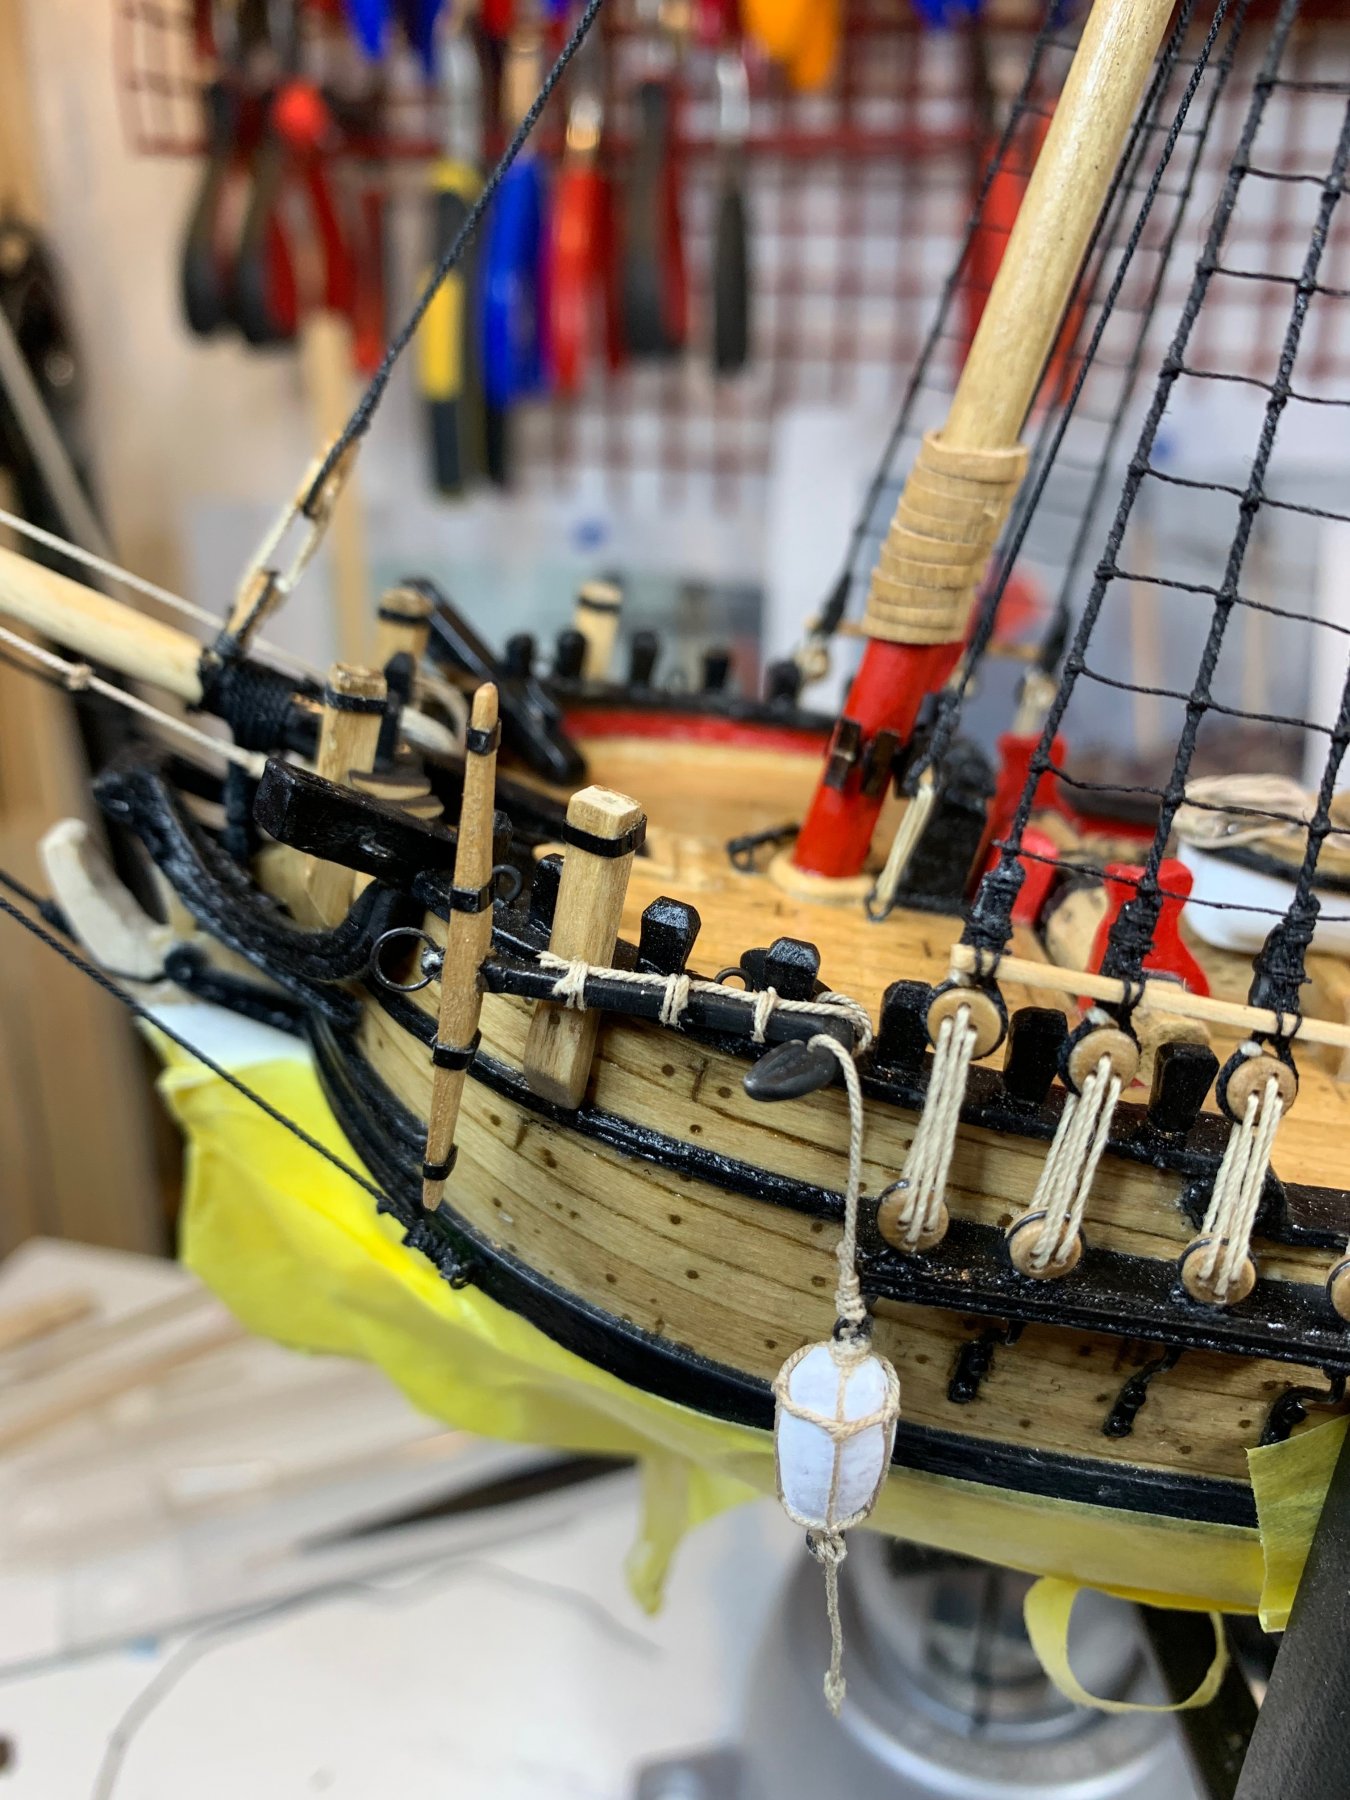
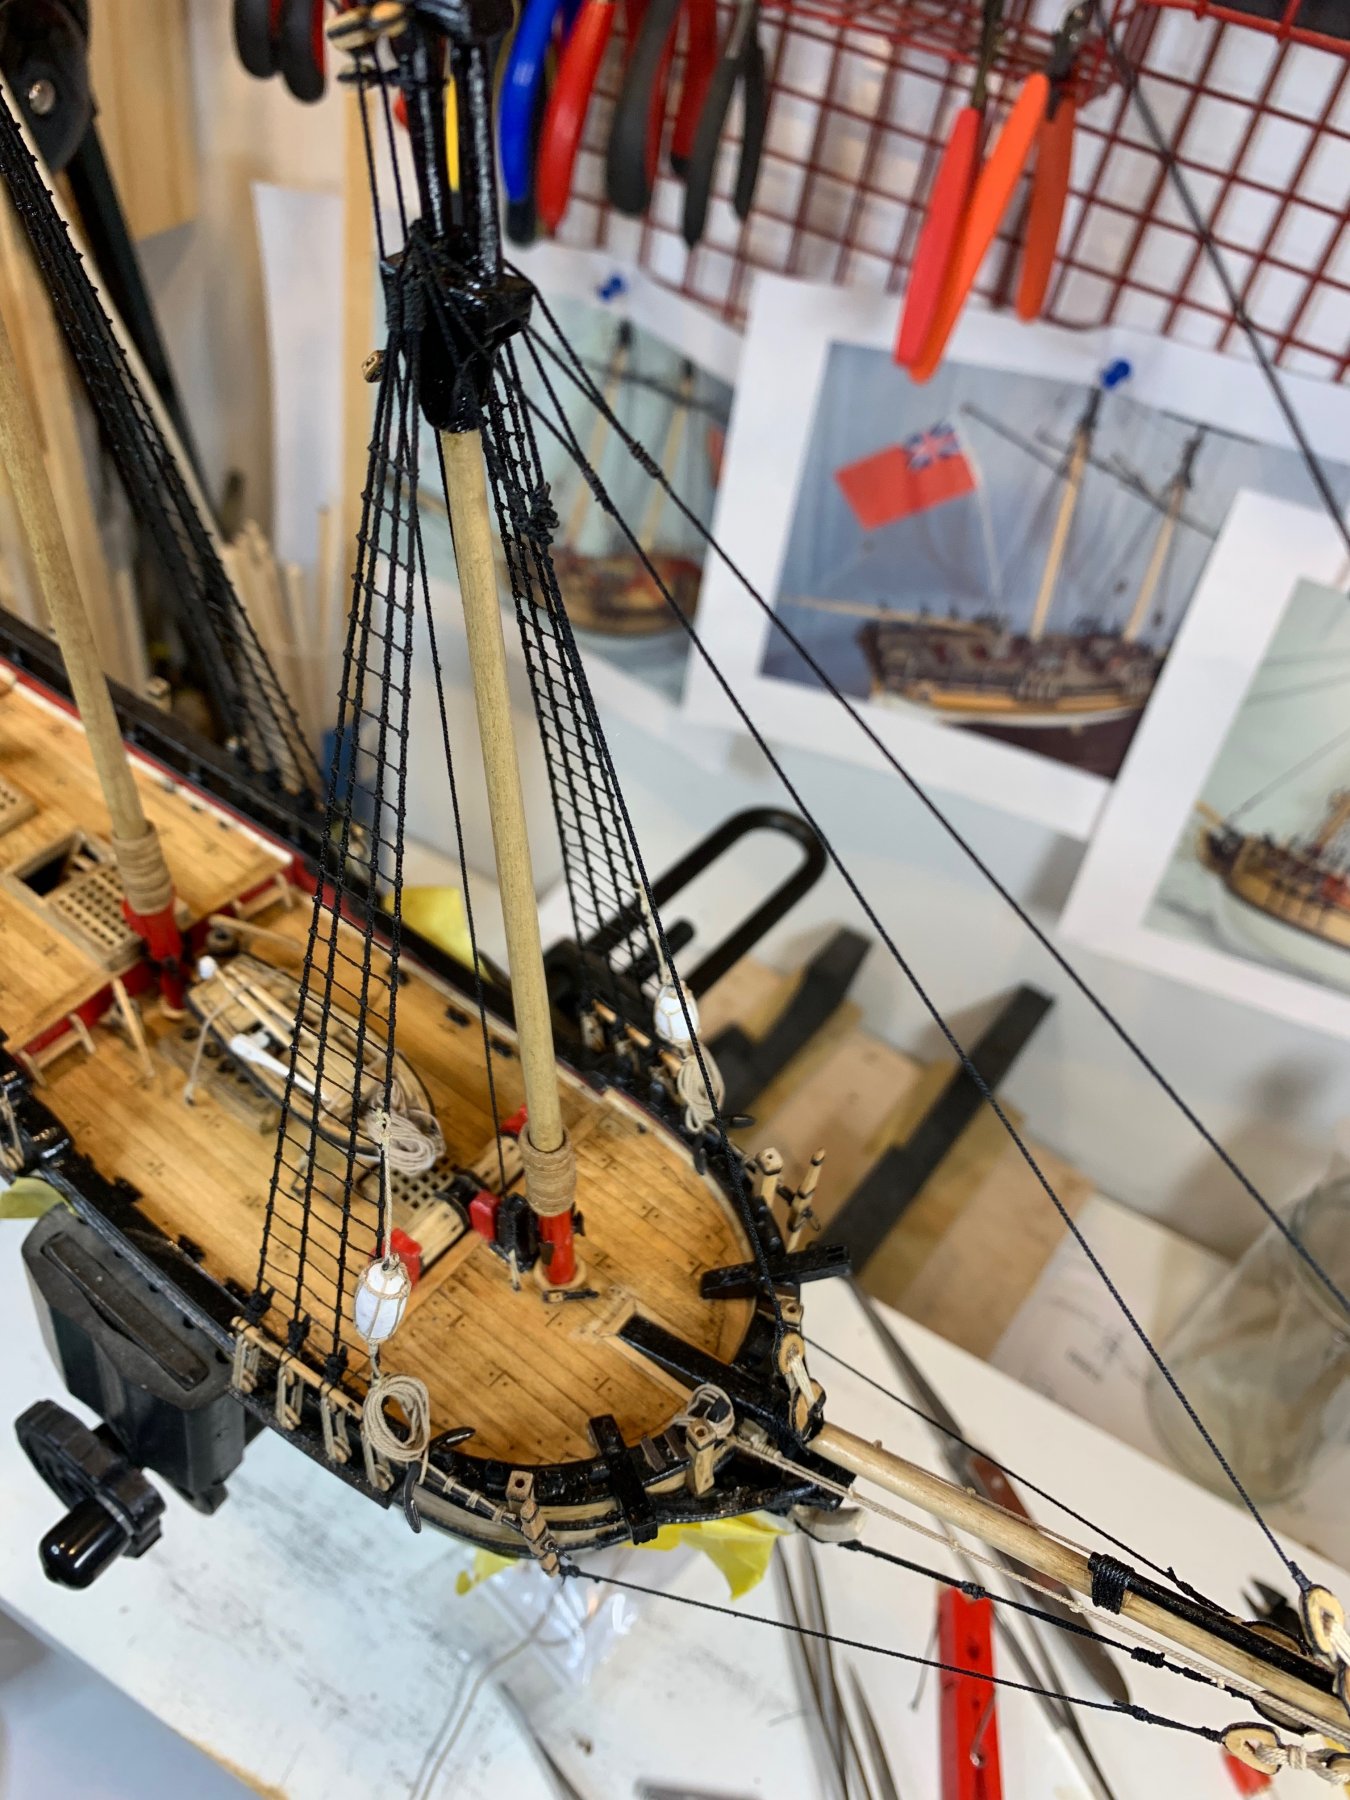
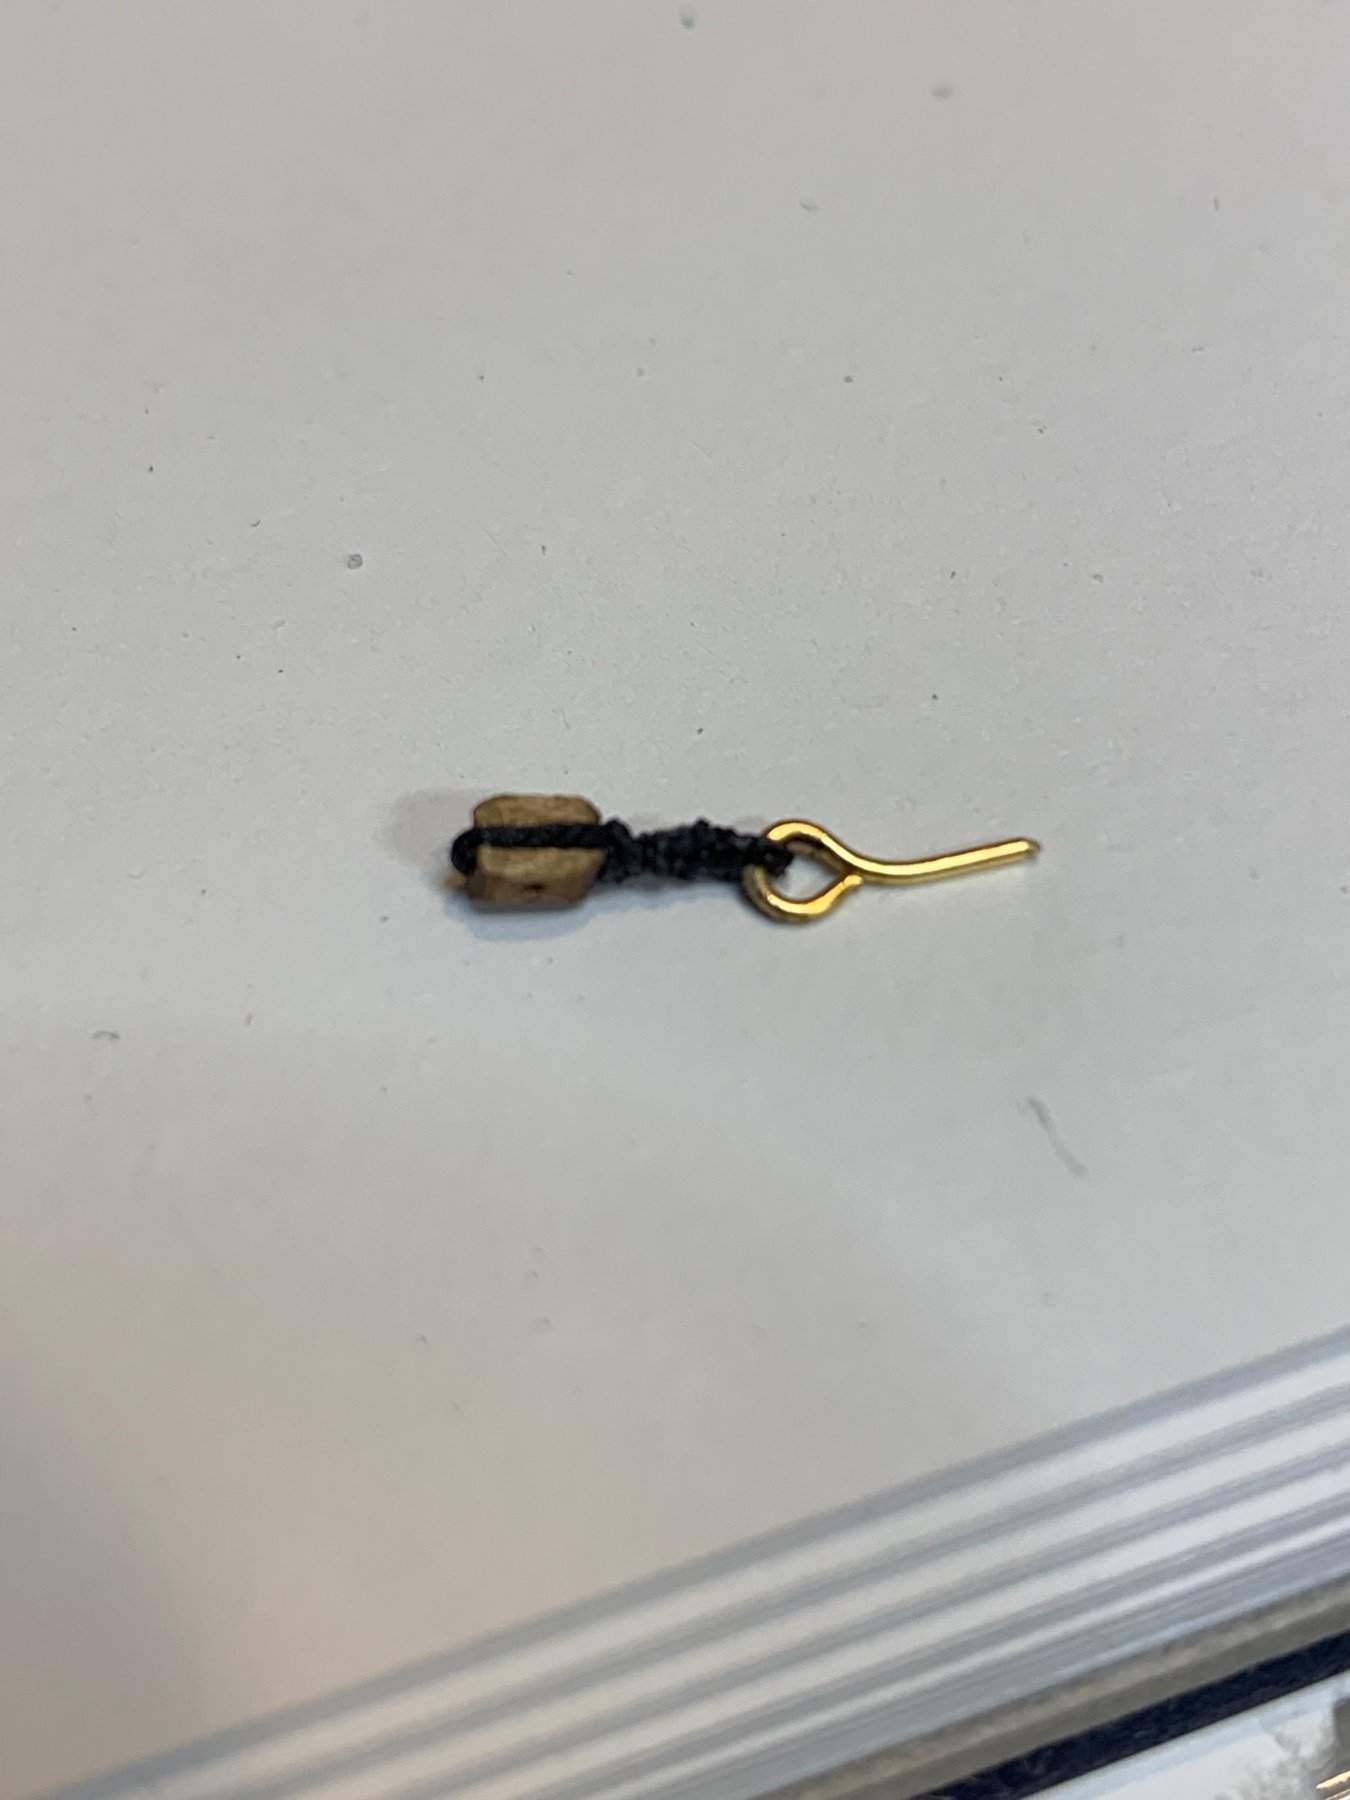
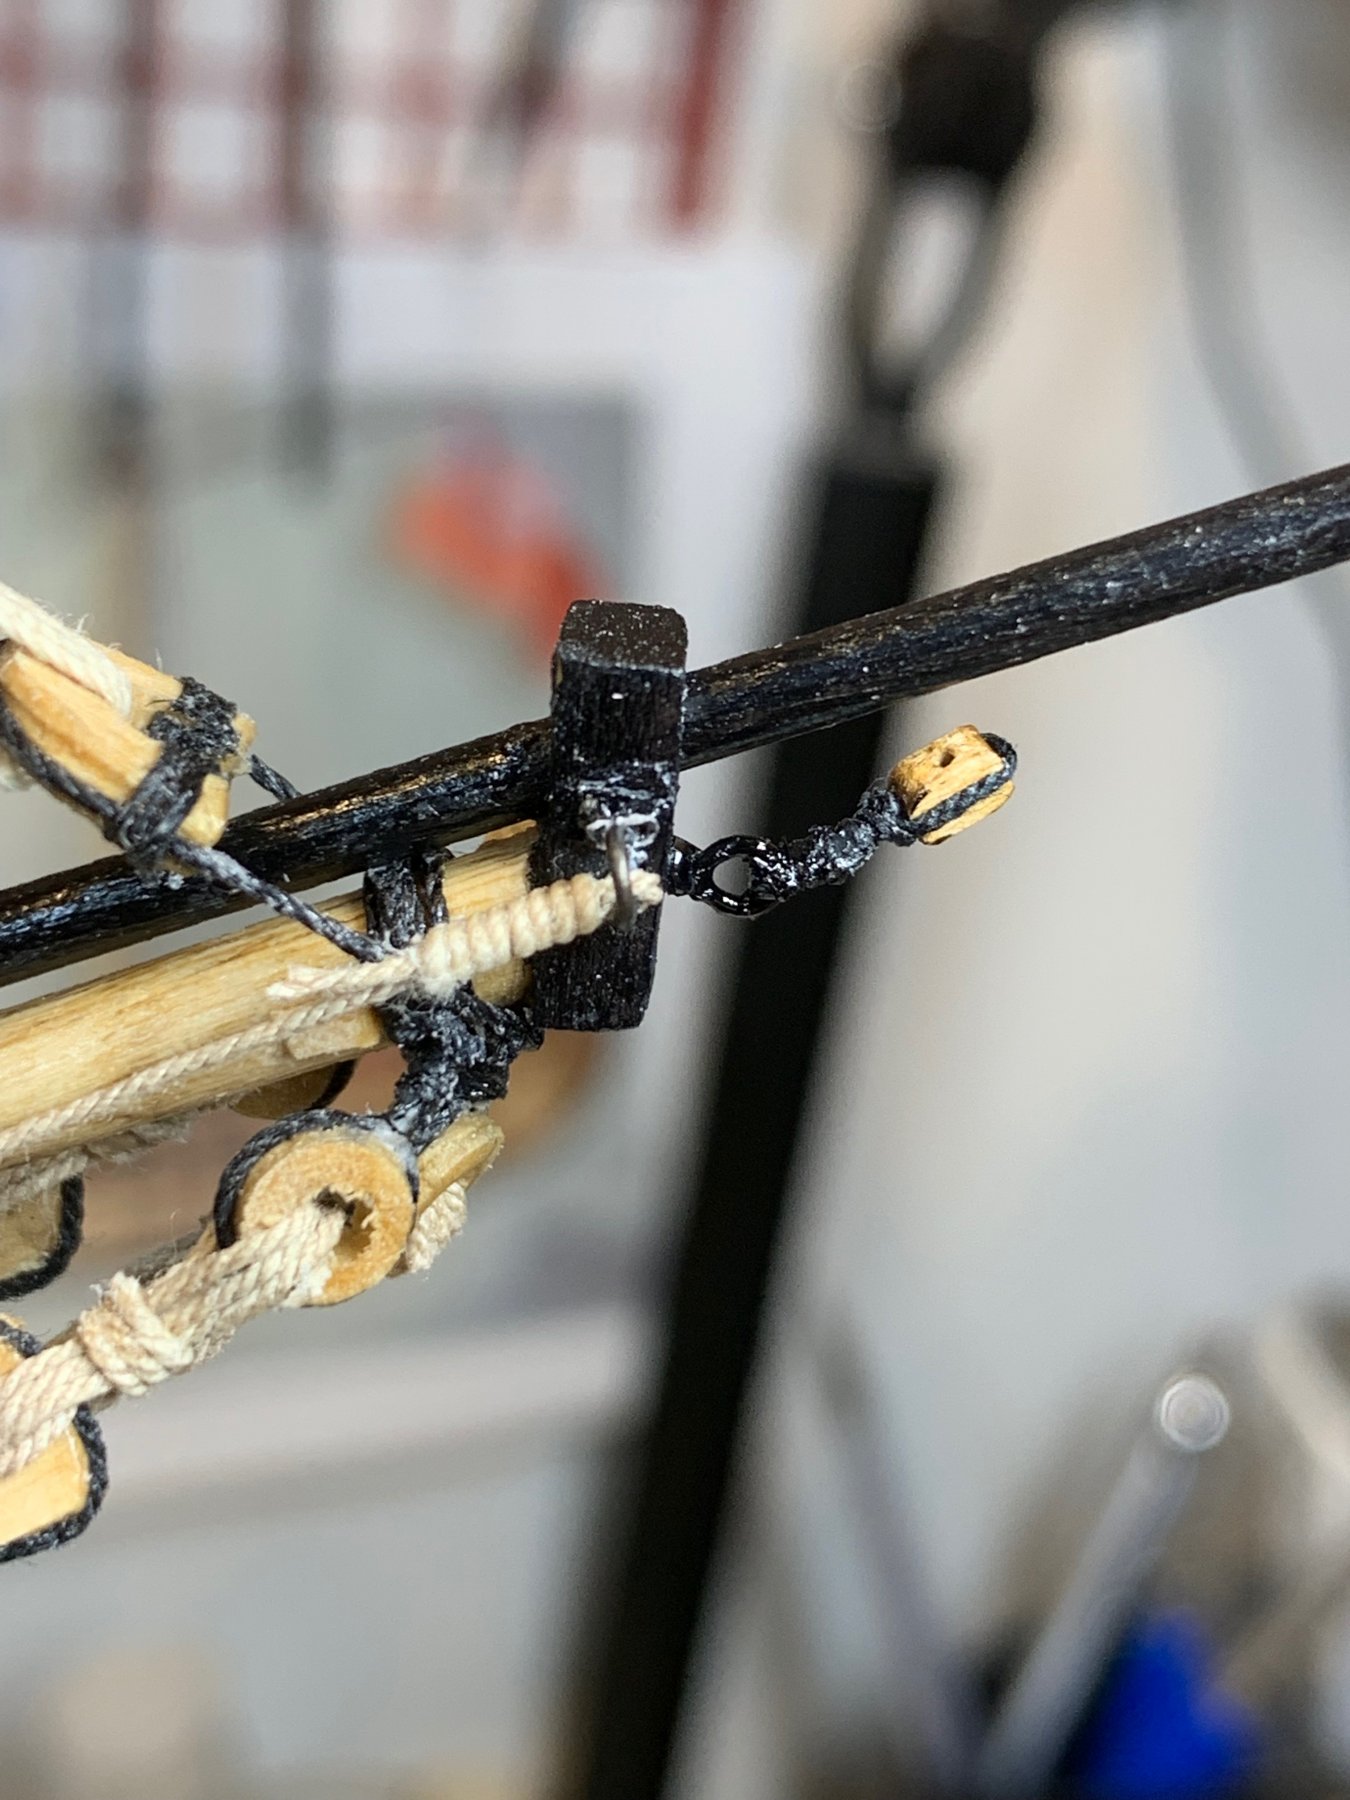
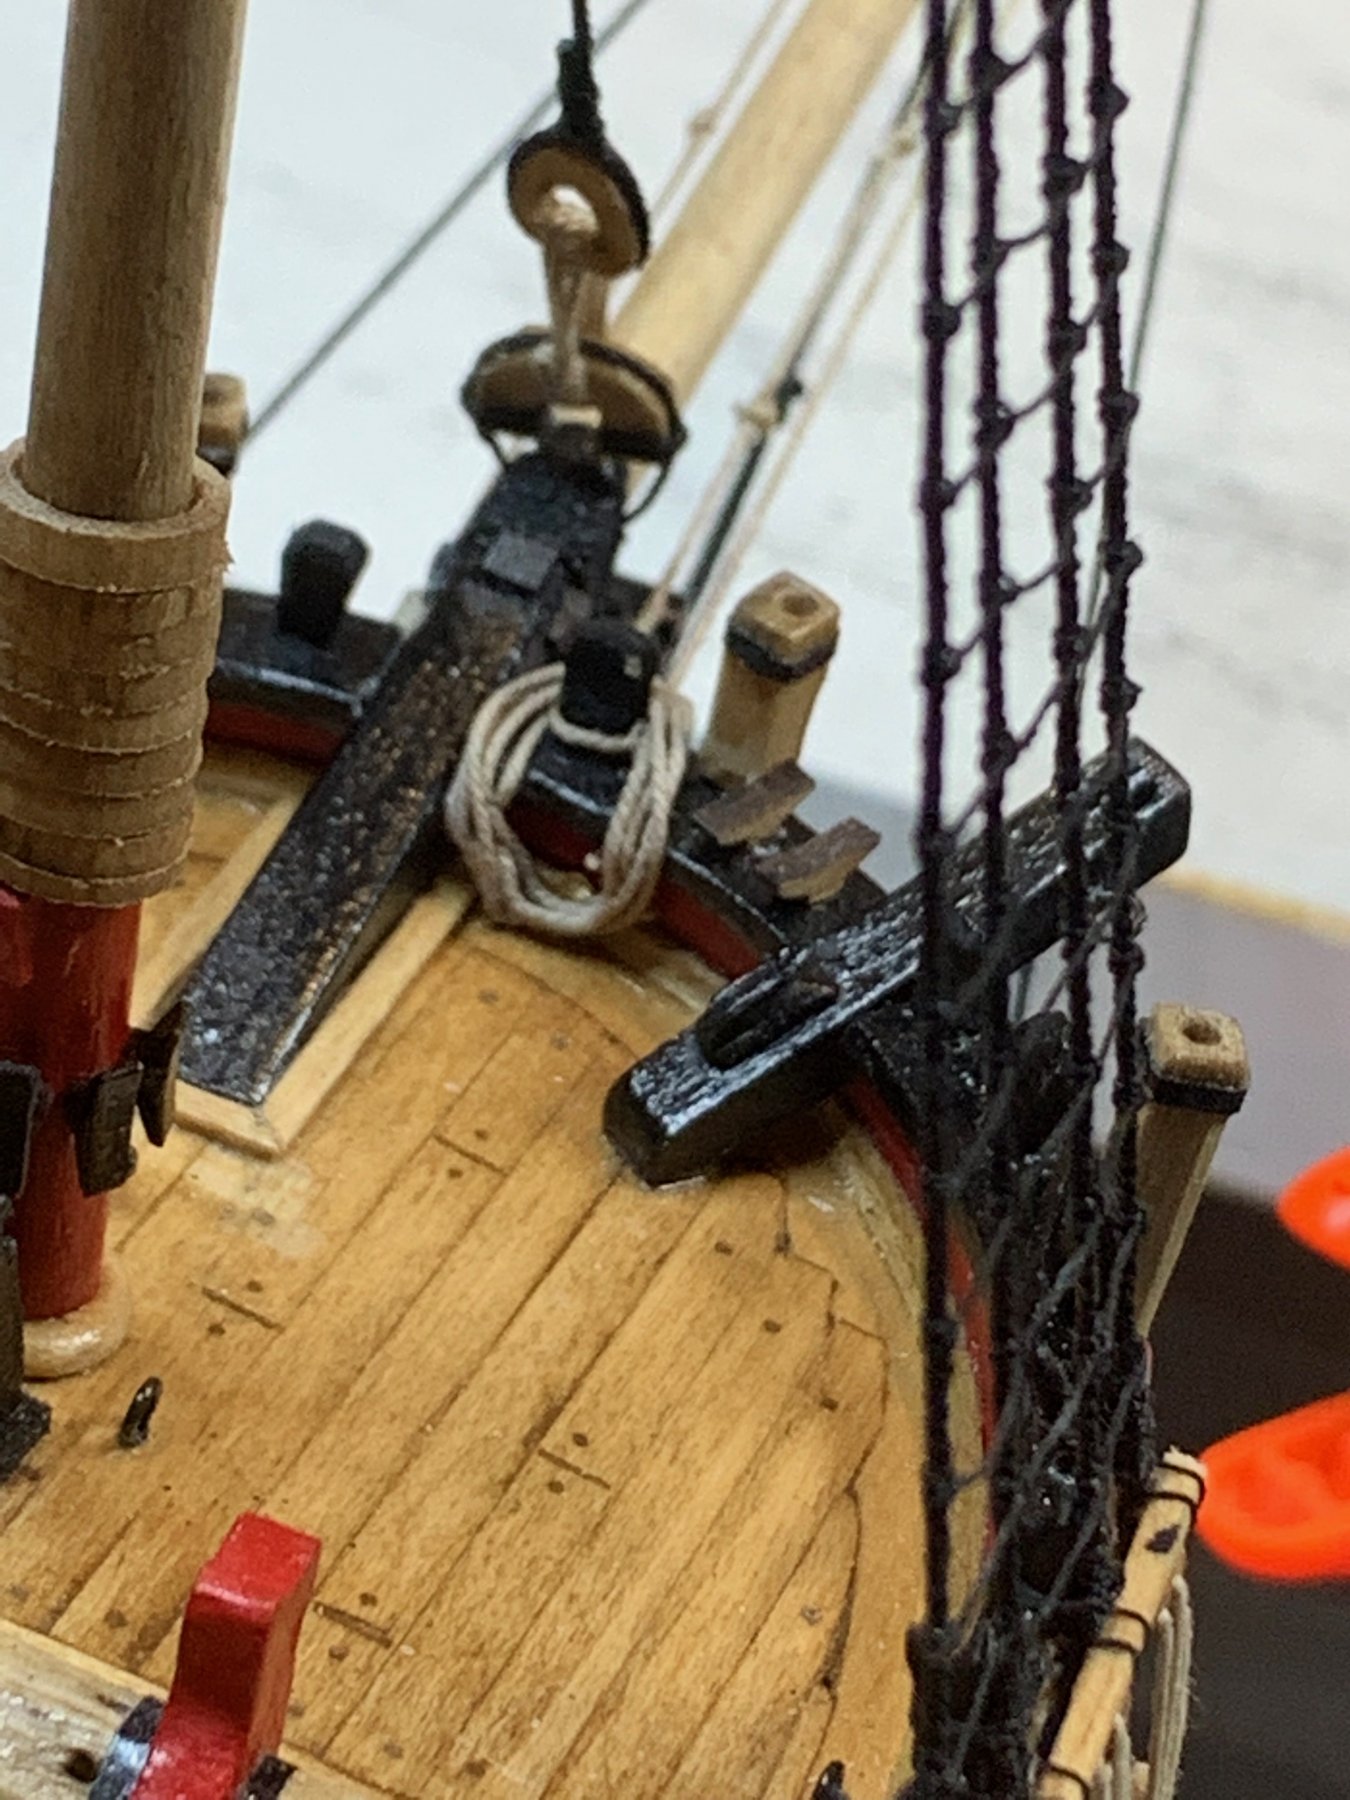
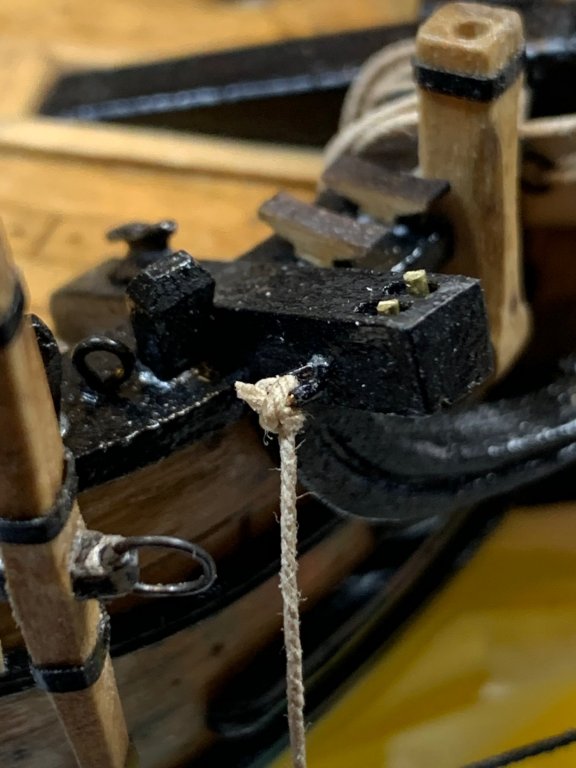
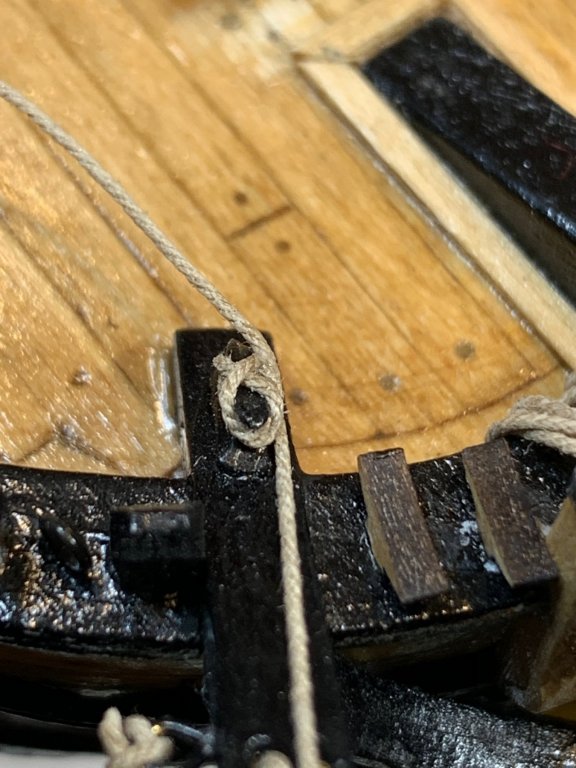
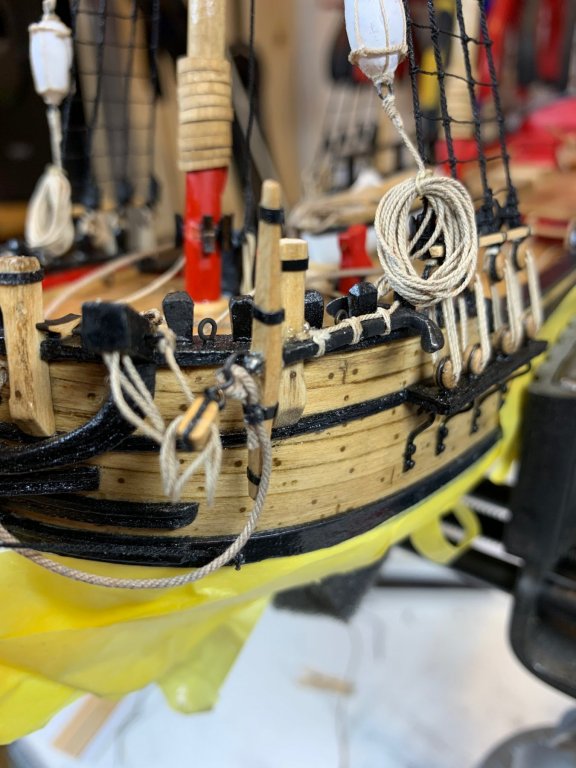
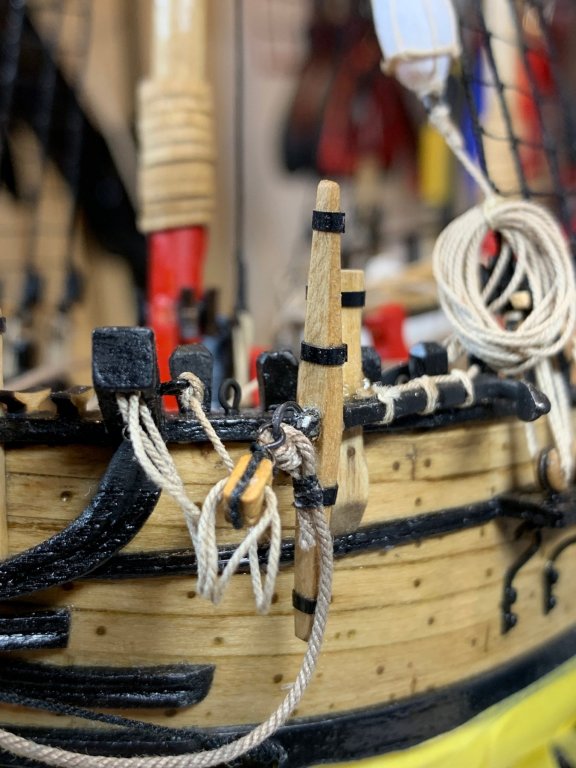
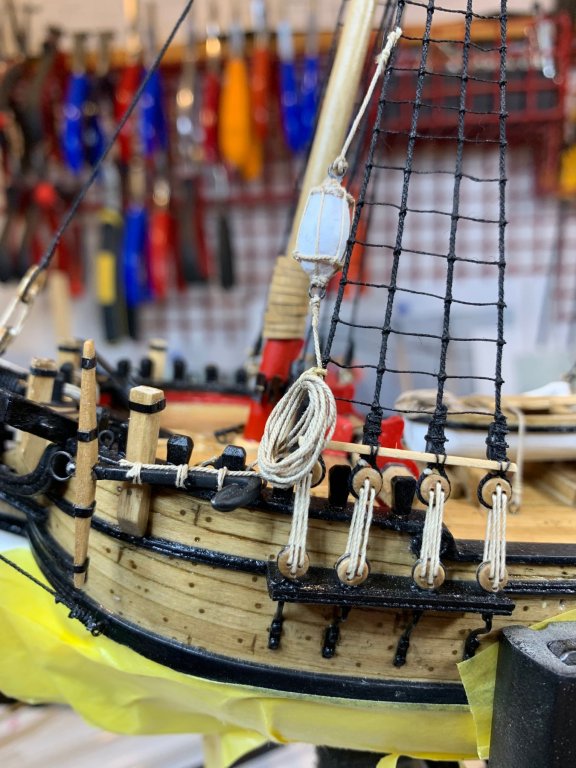
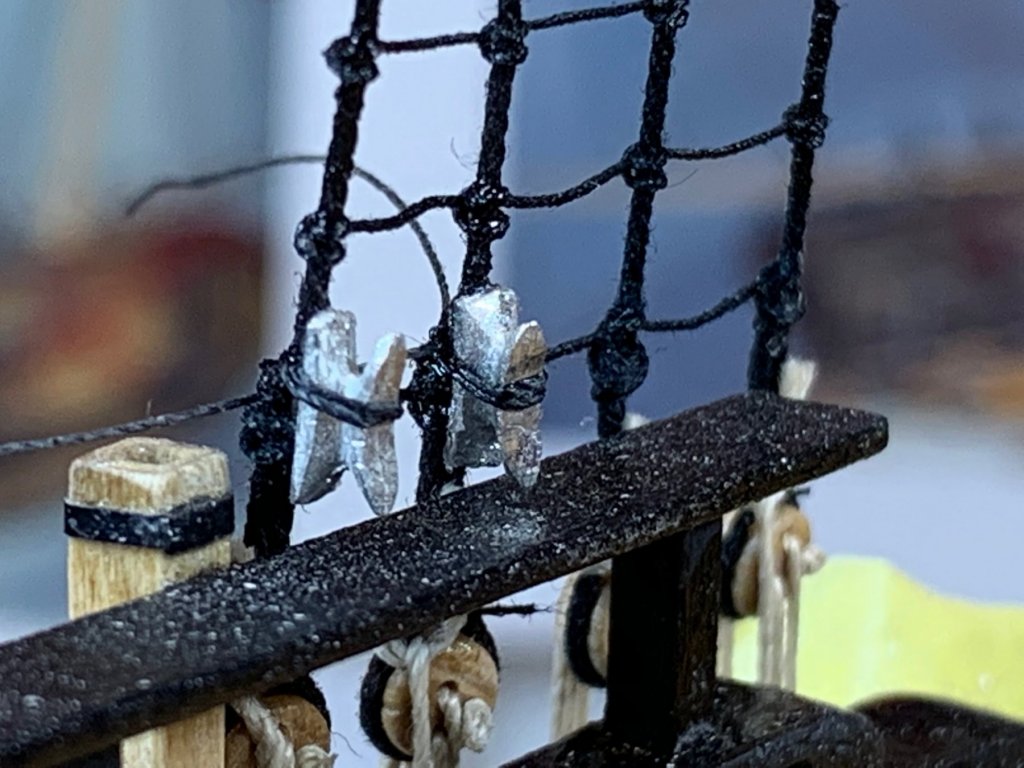
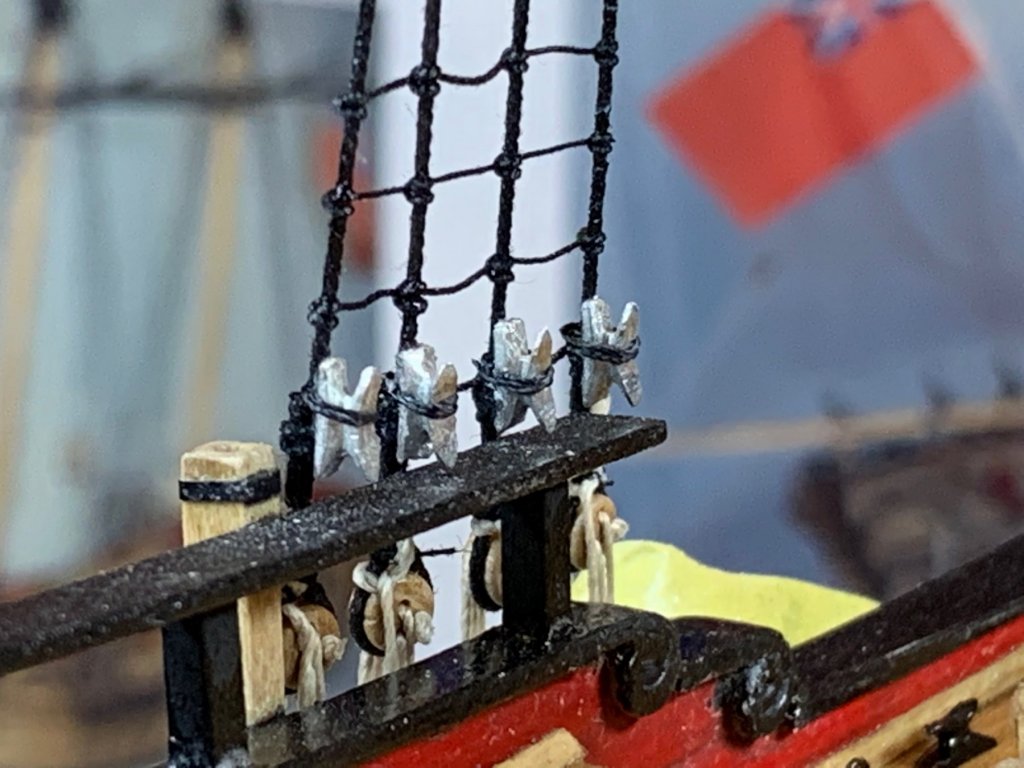
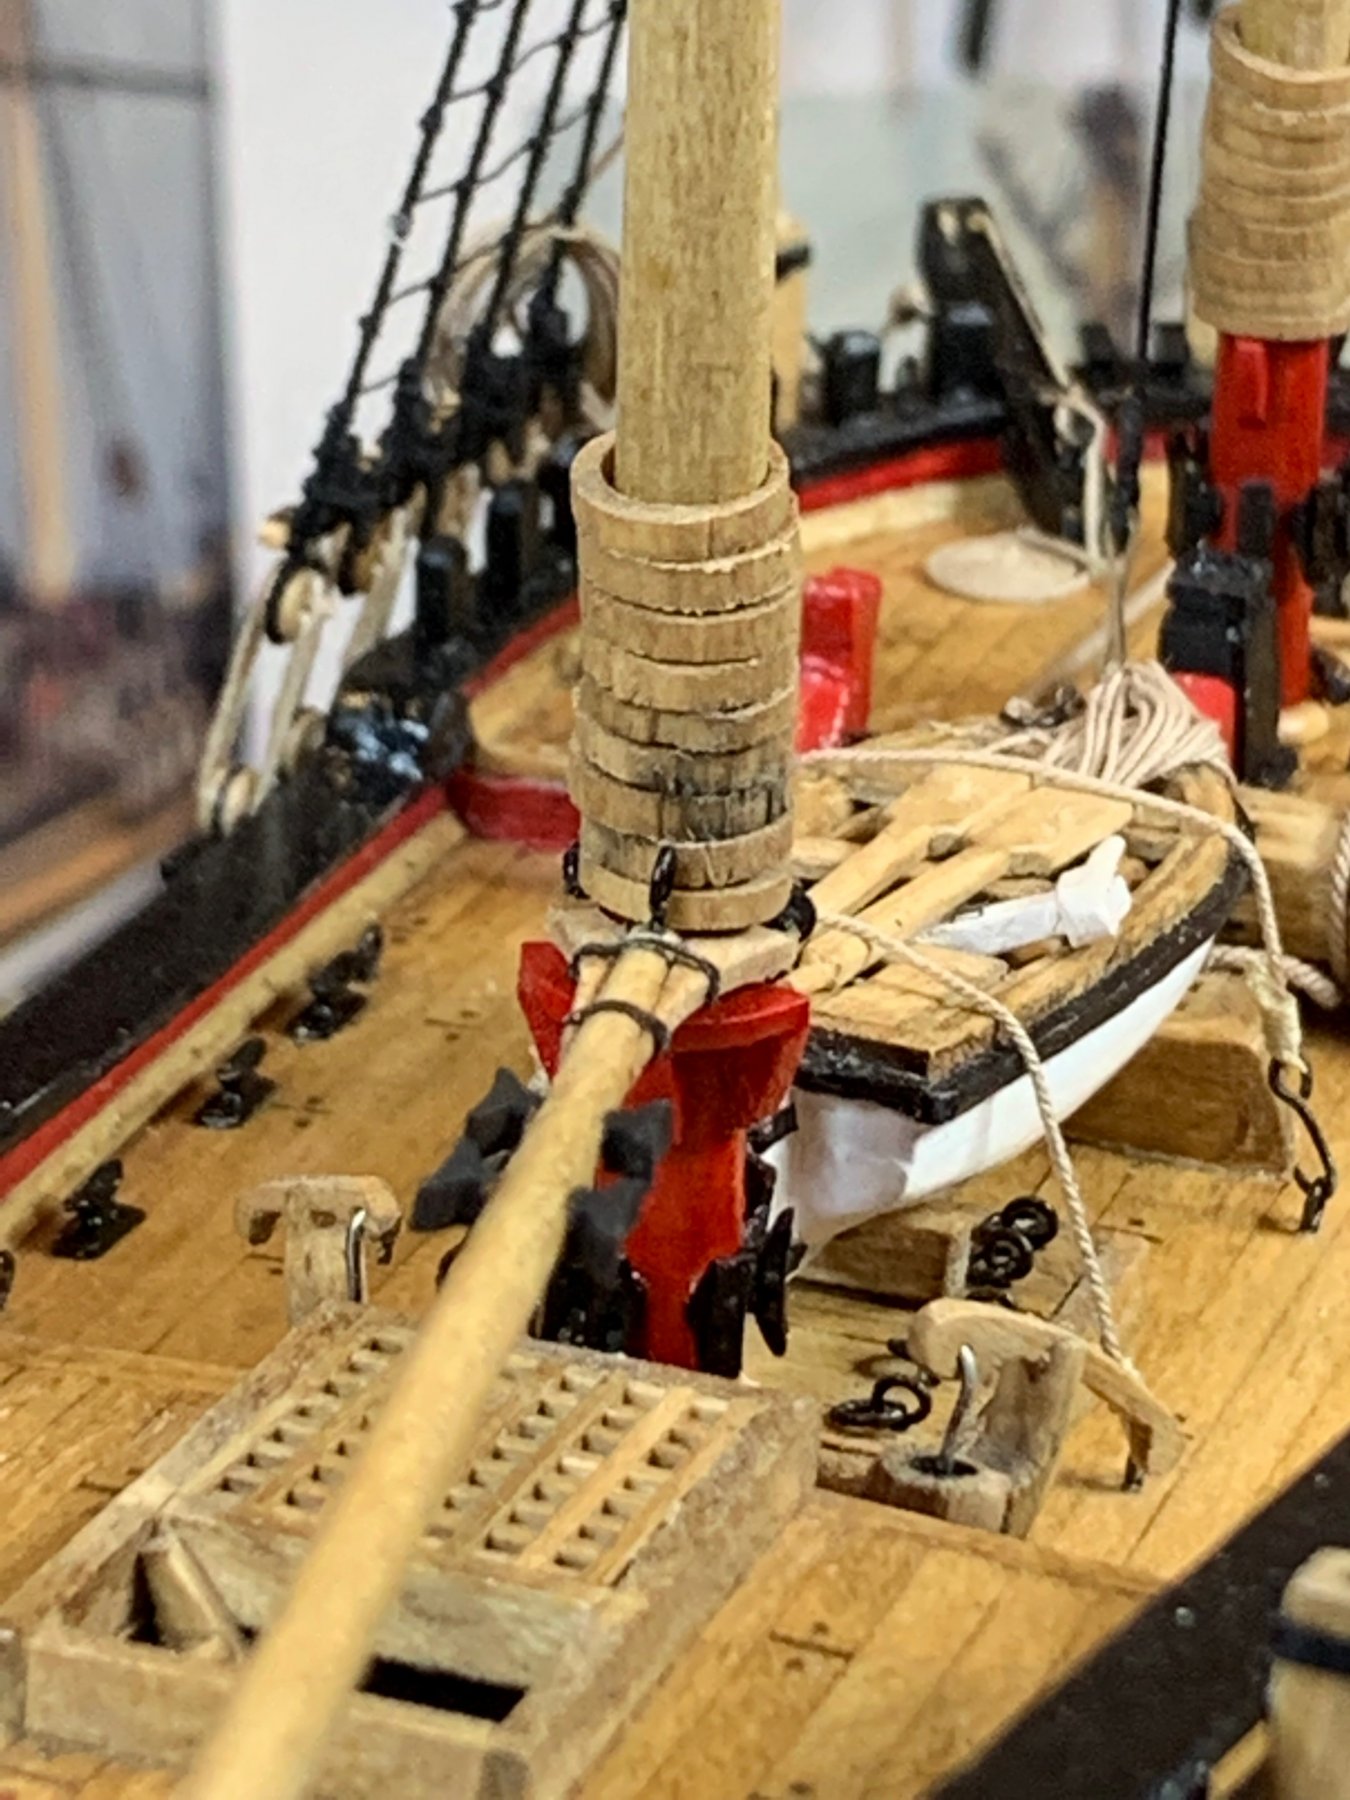
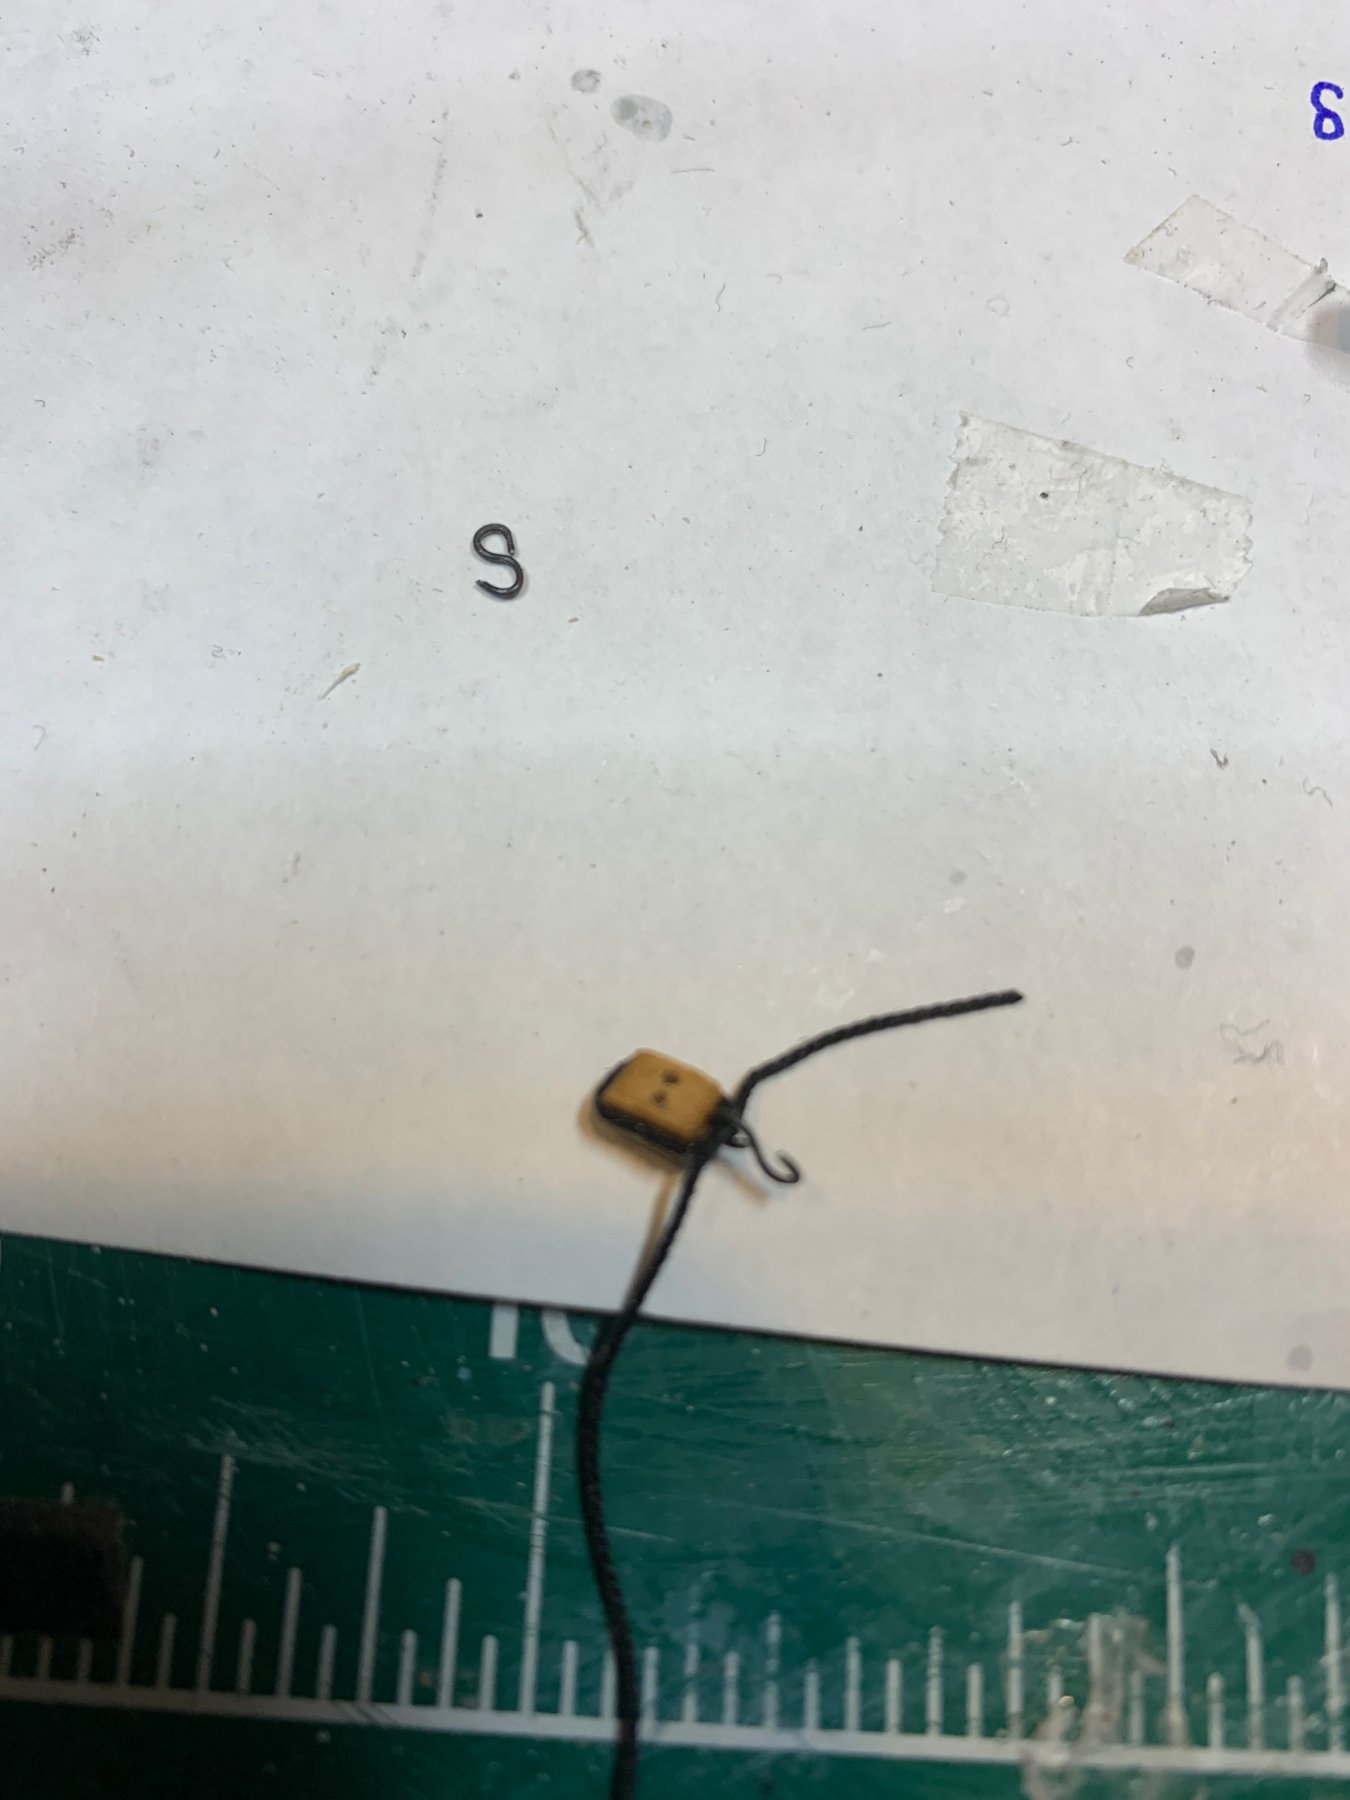
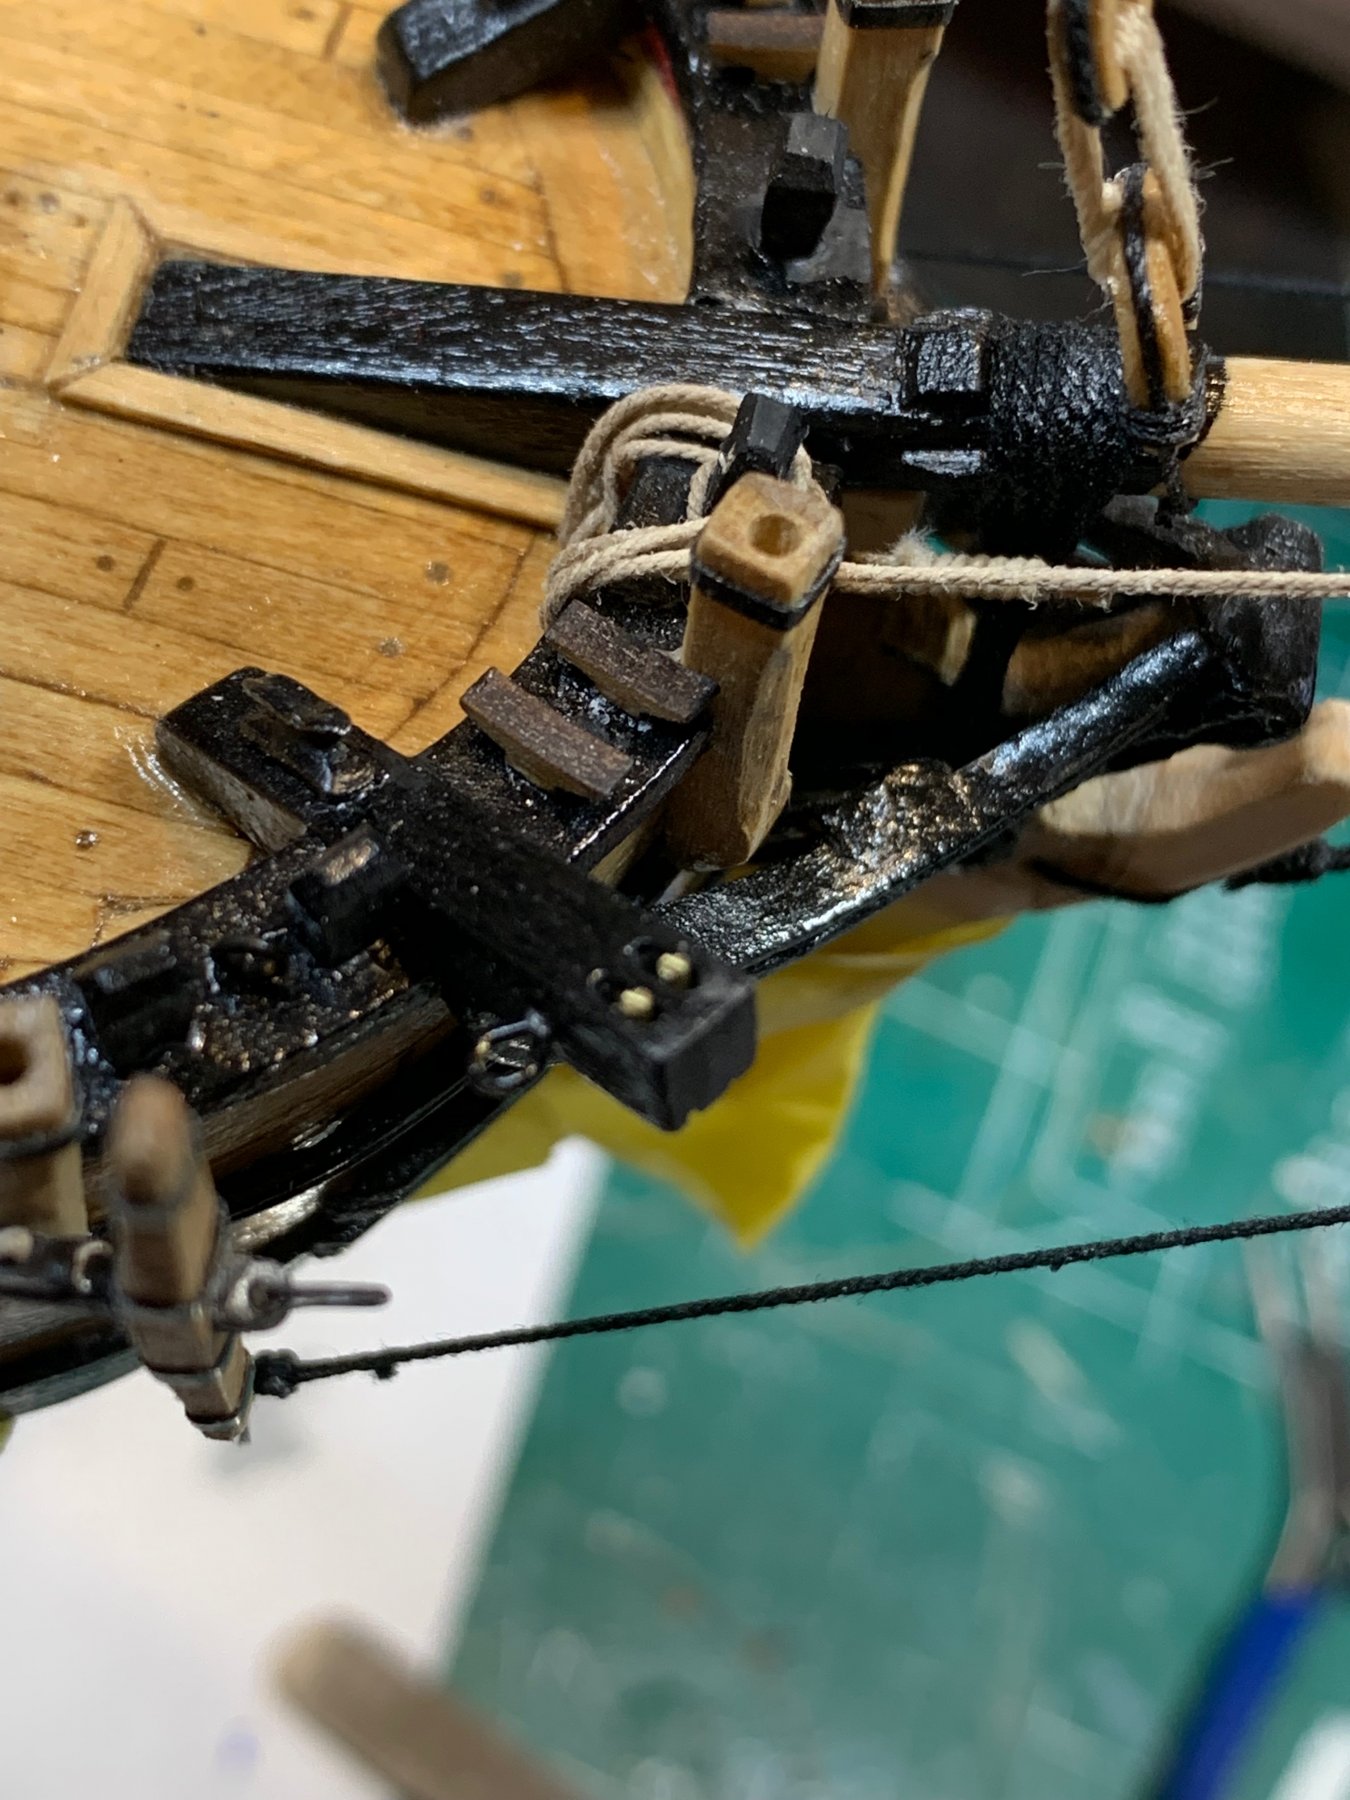
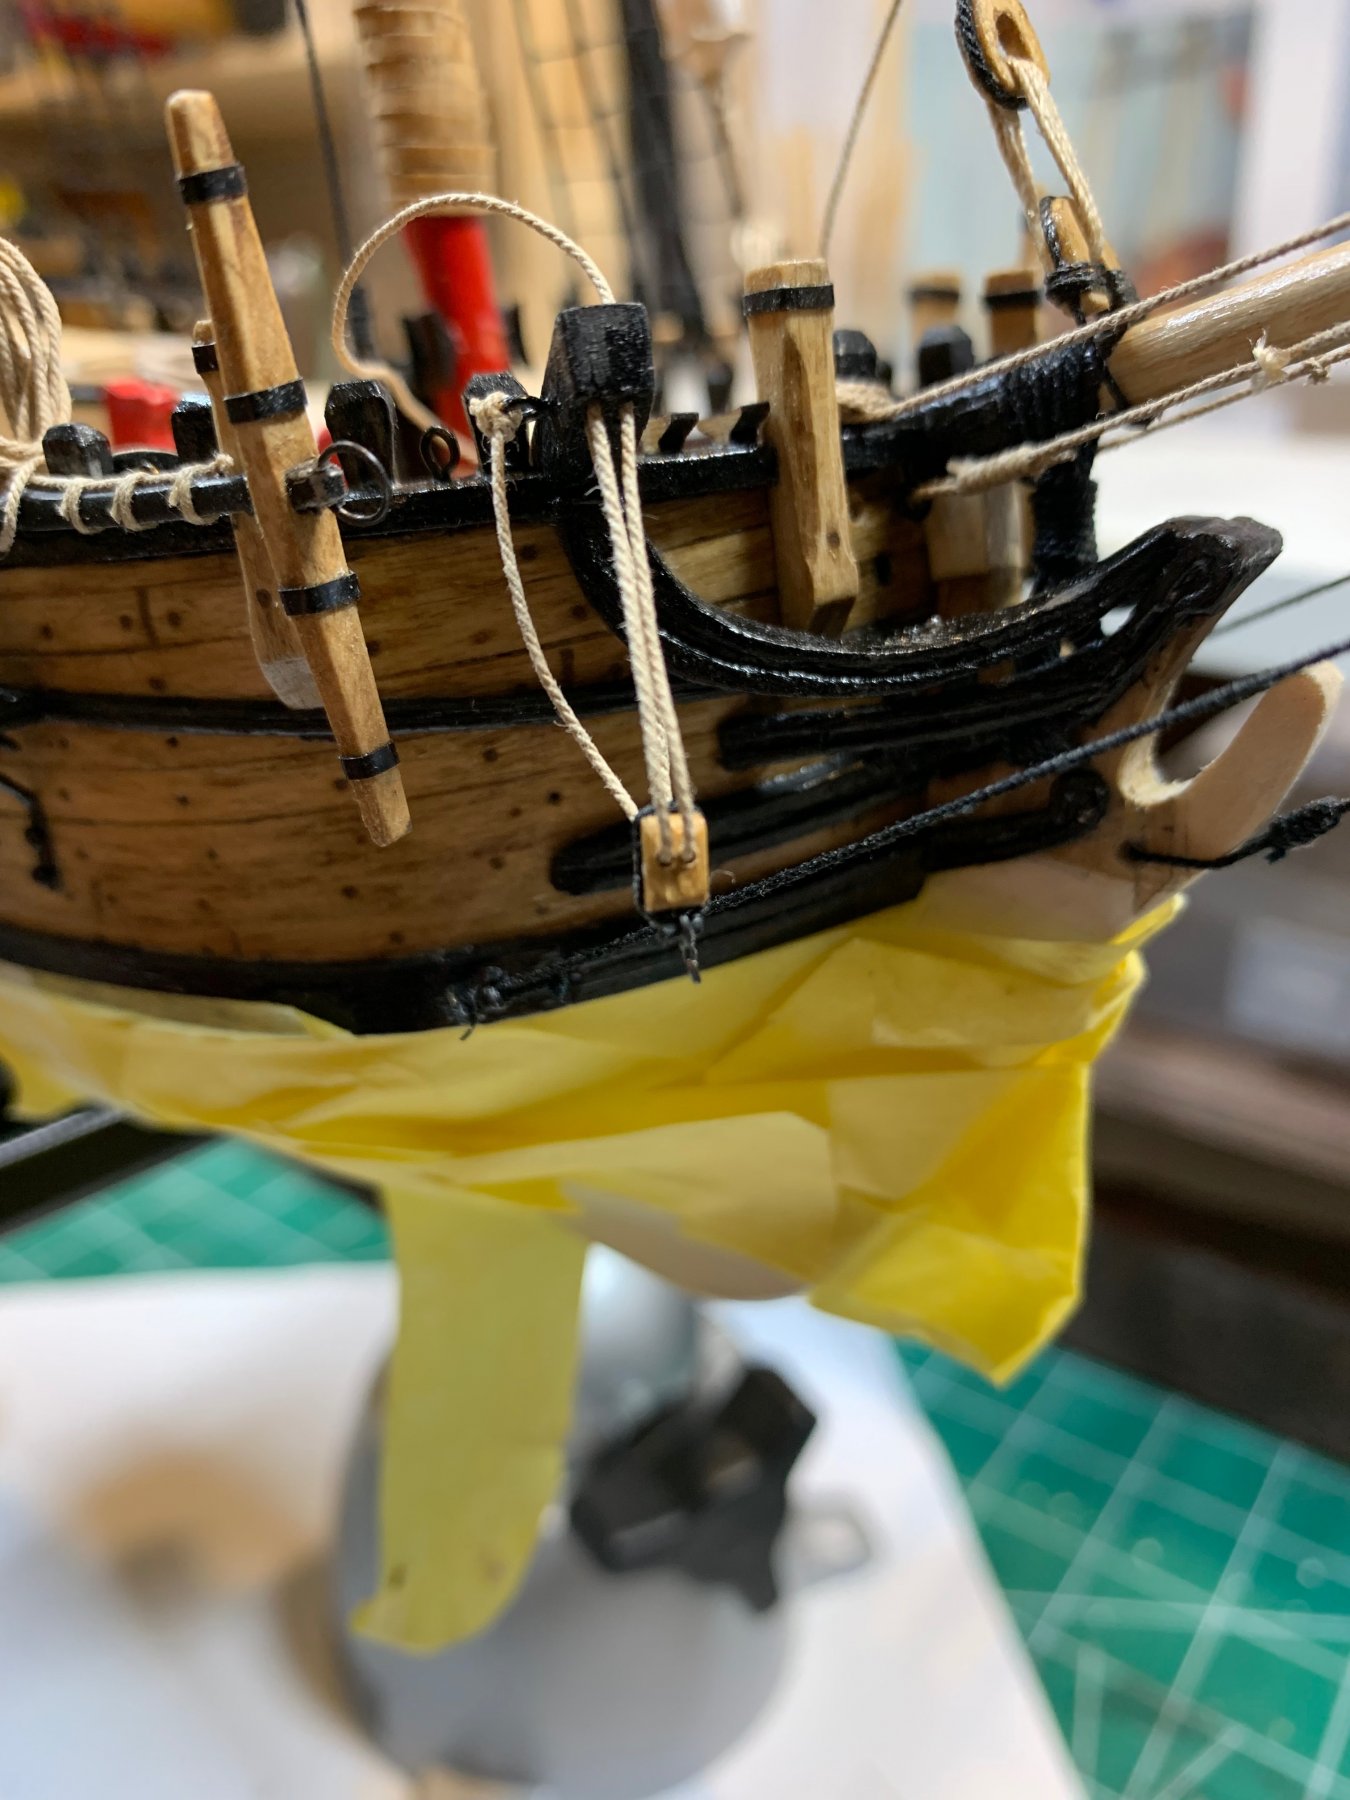
Work on anchors continue with making a blocks with hooks... The blocks were provided in the kit, now the hooks have to be made... The hooks were tied to the block with a rope that was glued to the block; the size is too small for any other type of knots (well at least for my fingers). So here is a hook and completed block. I decided to simulate a wheel that is positioned inside the cathead and holds the rope, with a piece of wire. This wire was inserted in the openings of the cathead... The mounting of wooden block started by knotting the rope... To make the rope as straight as possible, i used a tweezers as a load... The the rope was tied to the cathead.... The other block was installed as well.. Both assemblies.... I am not sure if positioning the anchors this way is historically (and naval practice) correctly but i decided to leave it as-is to bring up a bit more details of wooden hooks assembly. It was meant to take a "wow" from people that are looking to the model (and are not following this post 🙂)... The anchors were tied with a rope following some techniques from other ship modeling books. Happy modeling..


.thumb.JPG.d357a732975c8ff31da124950aec1086.JPG)

- 360 replies
-
- 3
-
-
- sultana
- model shipways
- (and 1 more)
-
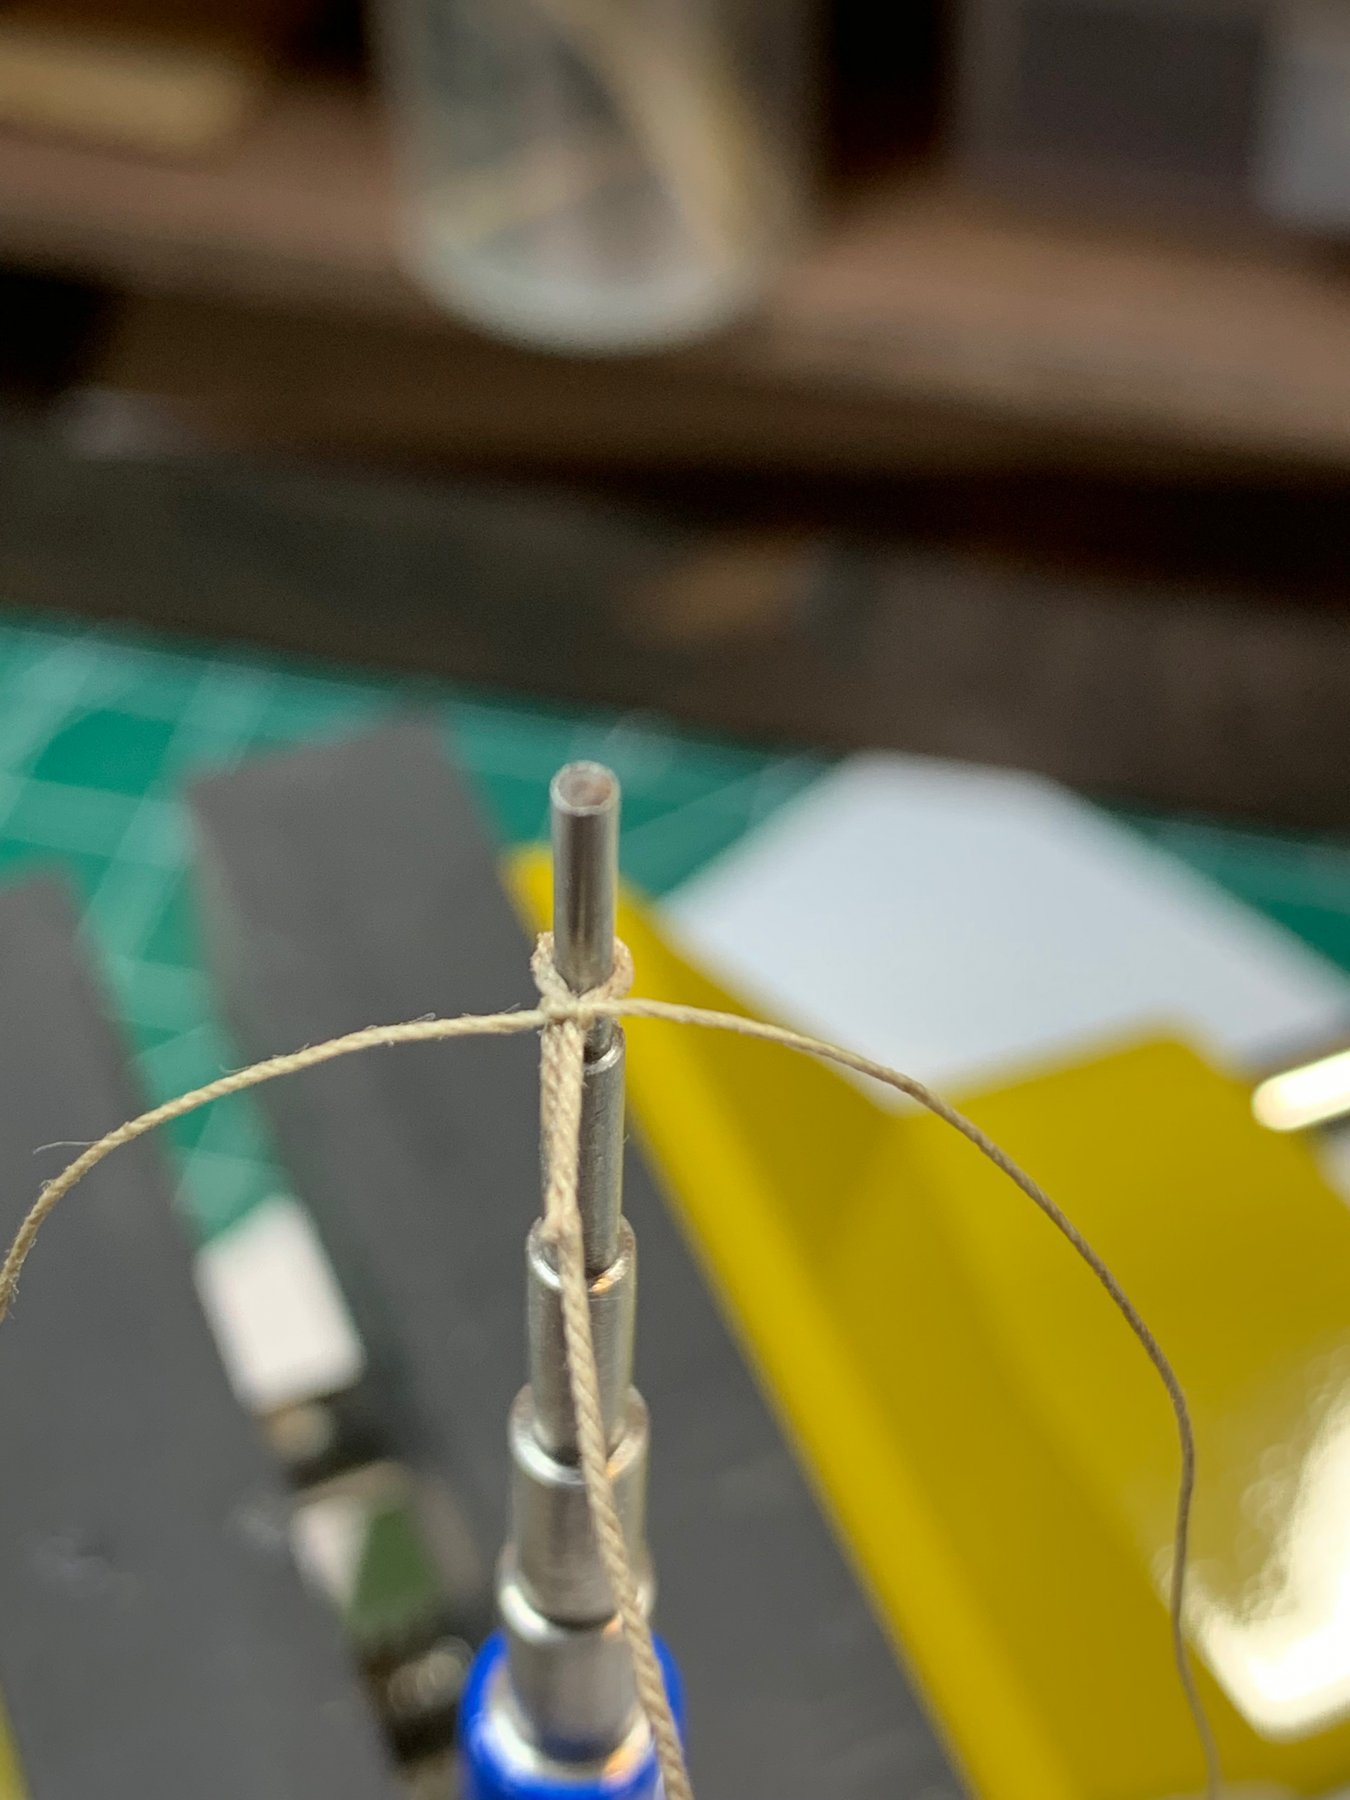
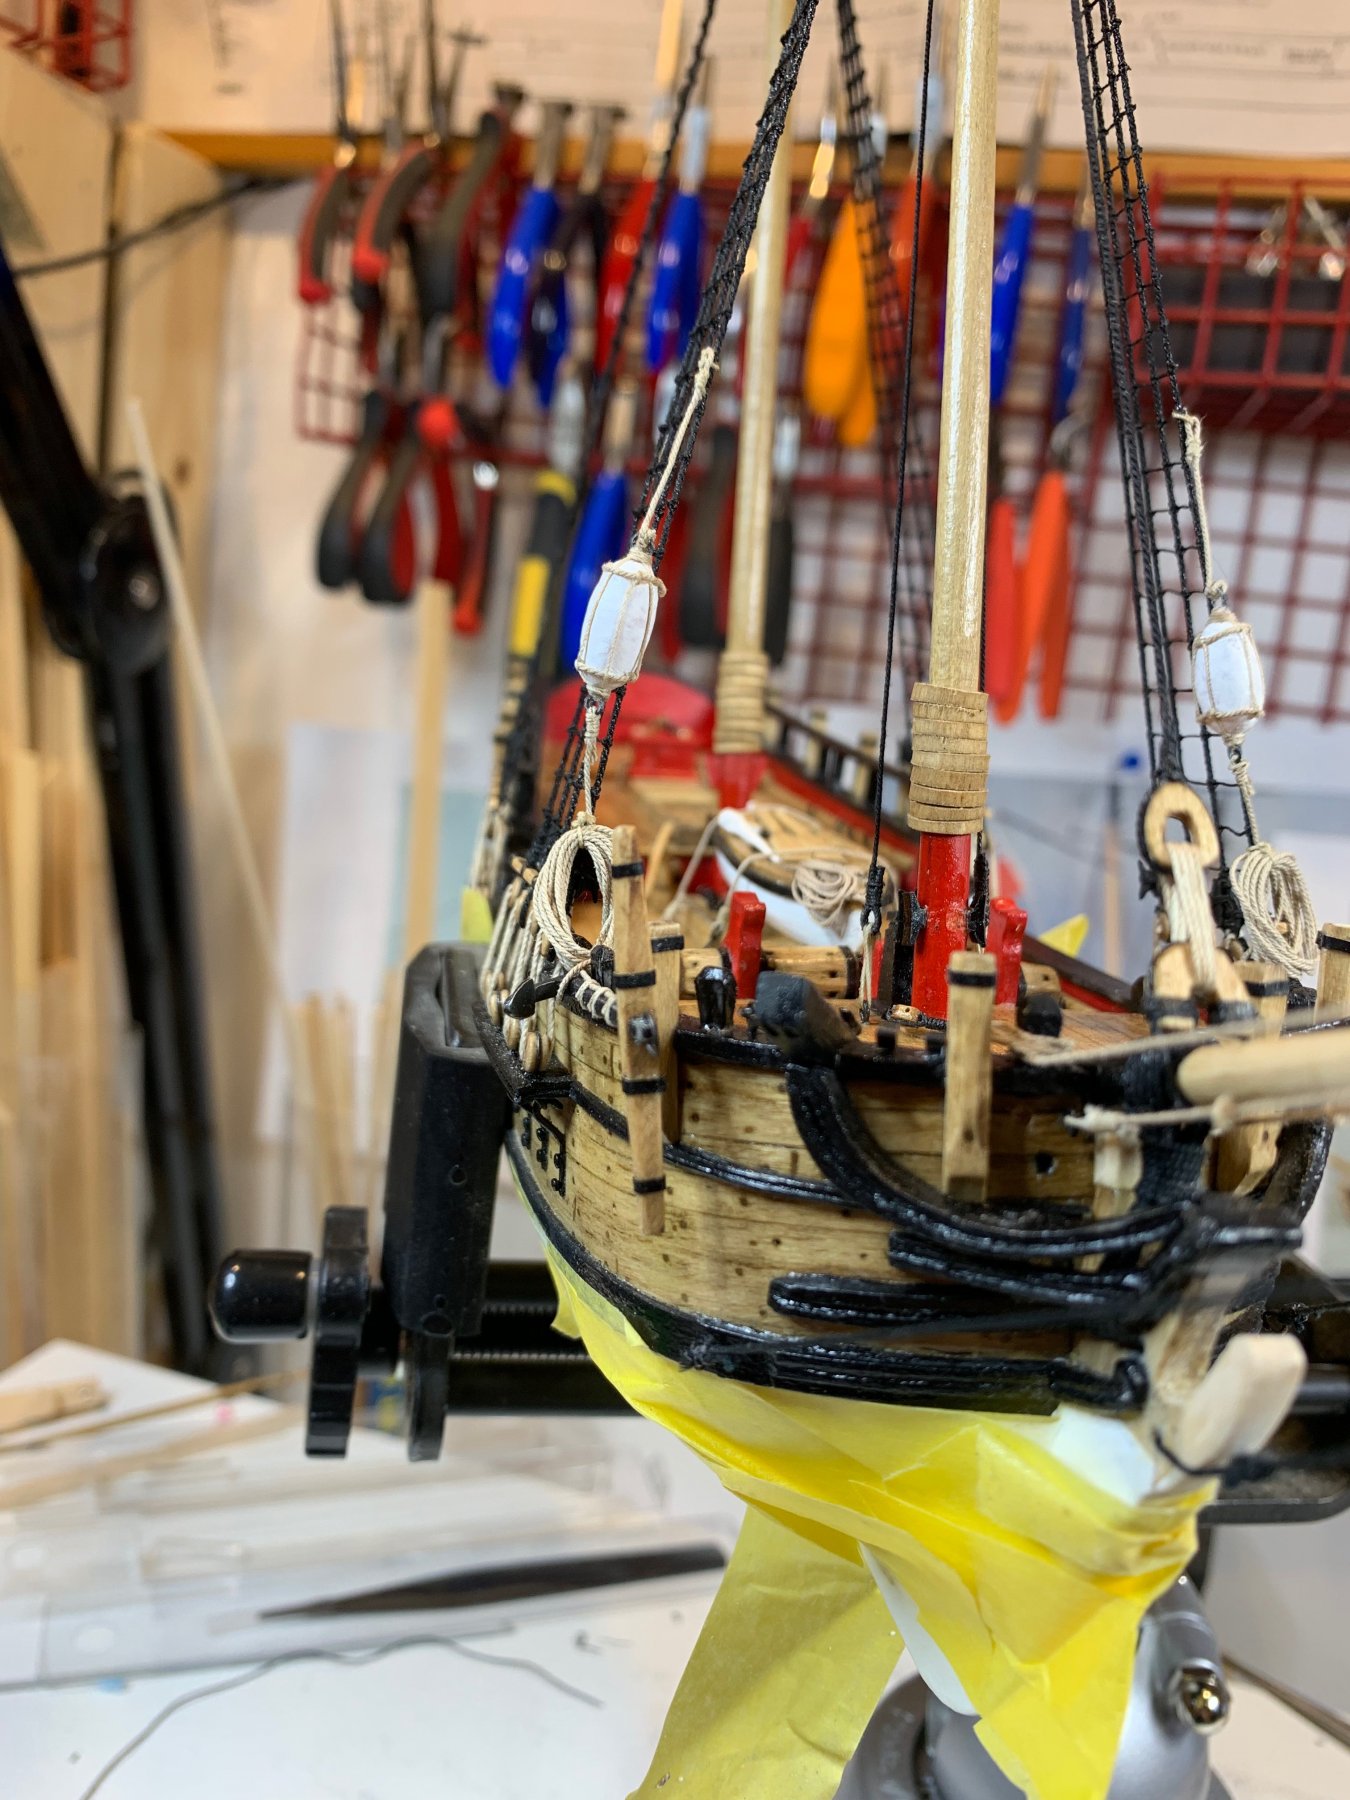
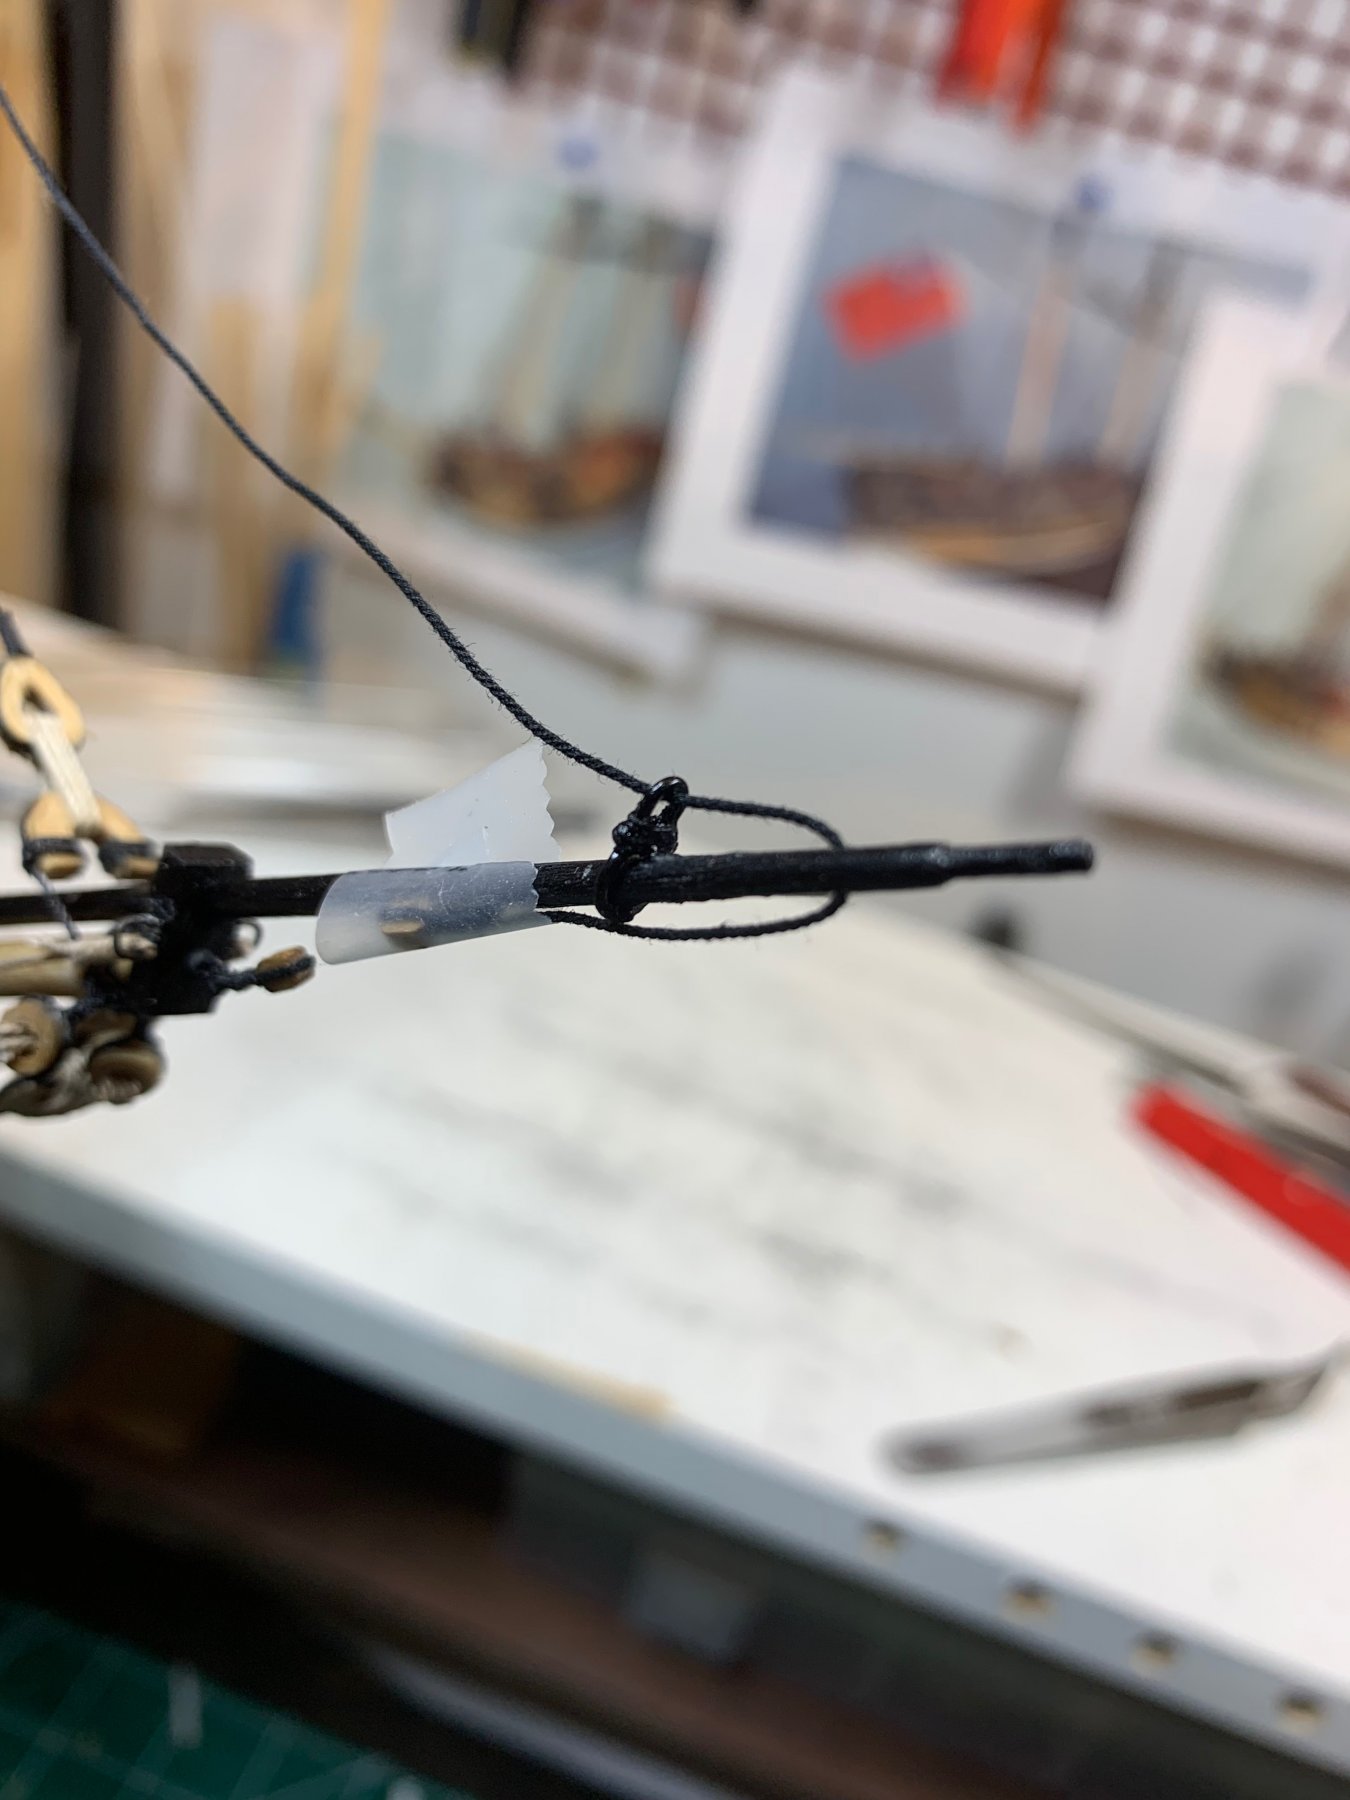
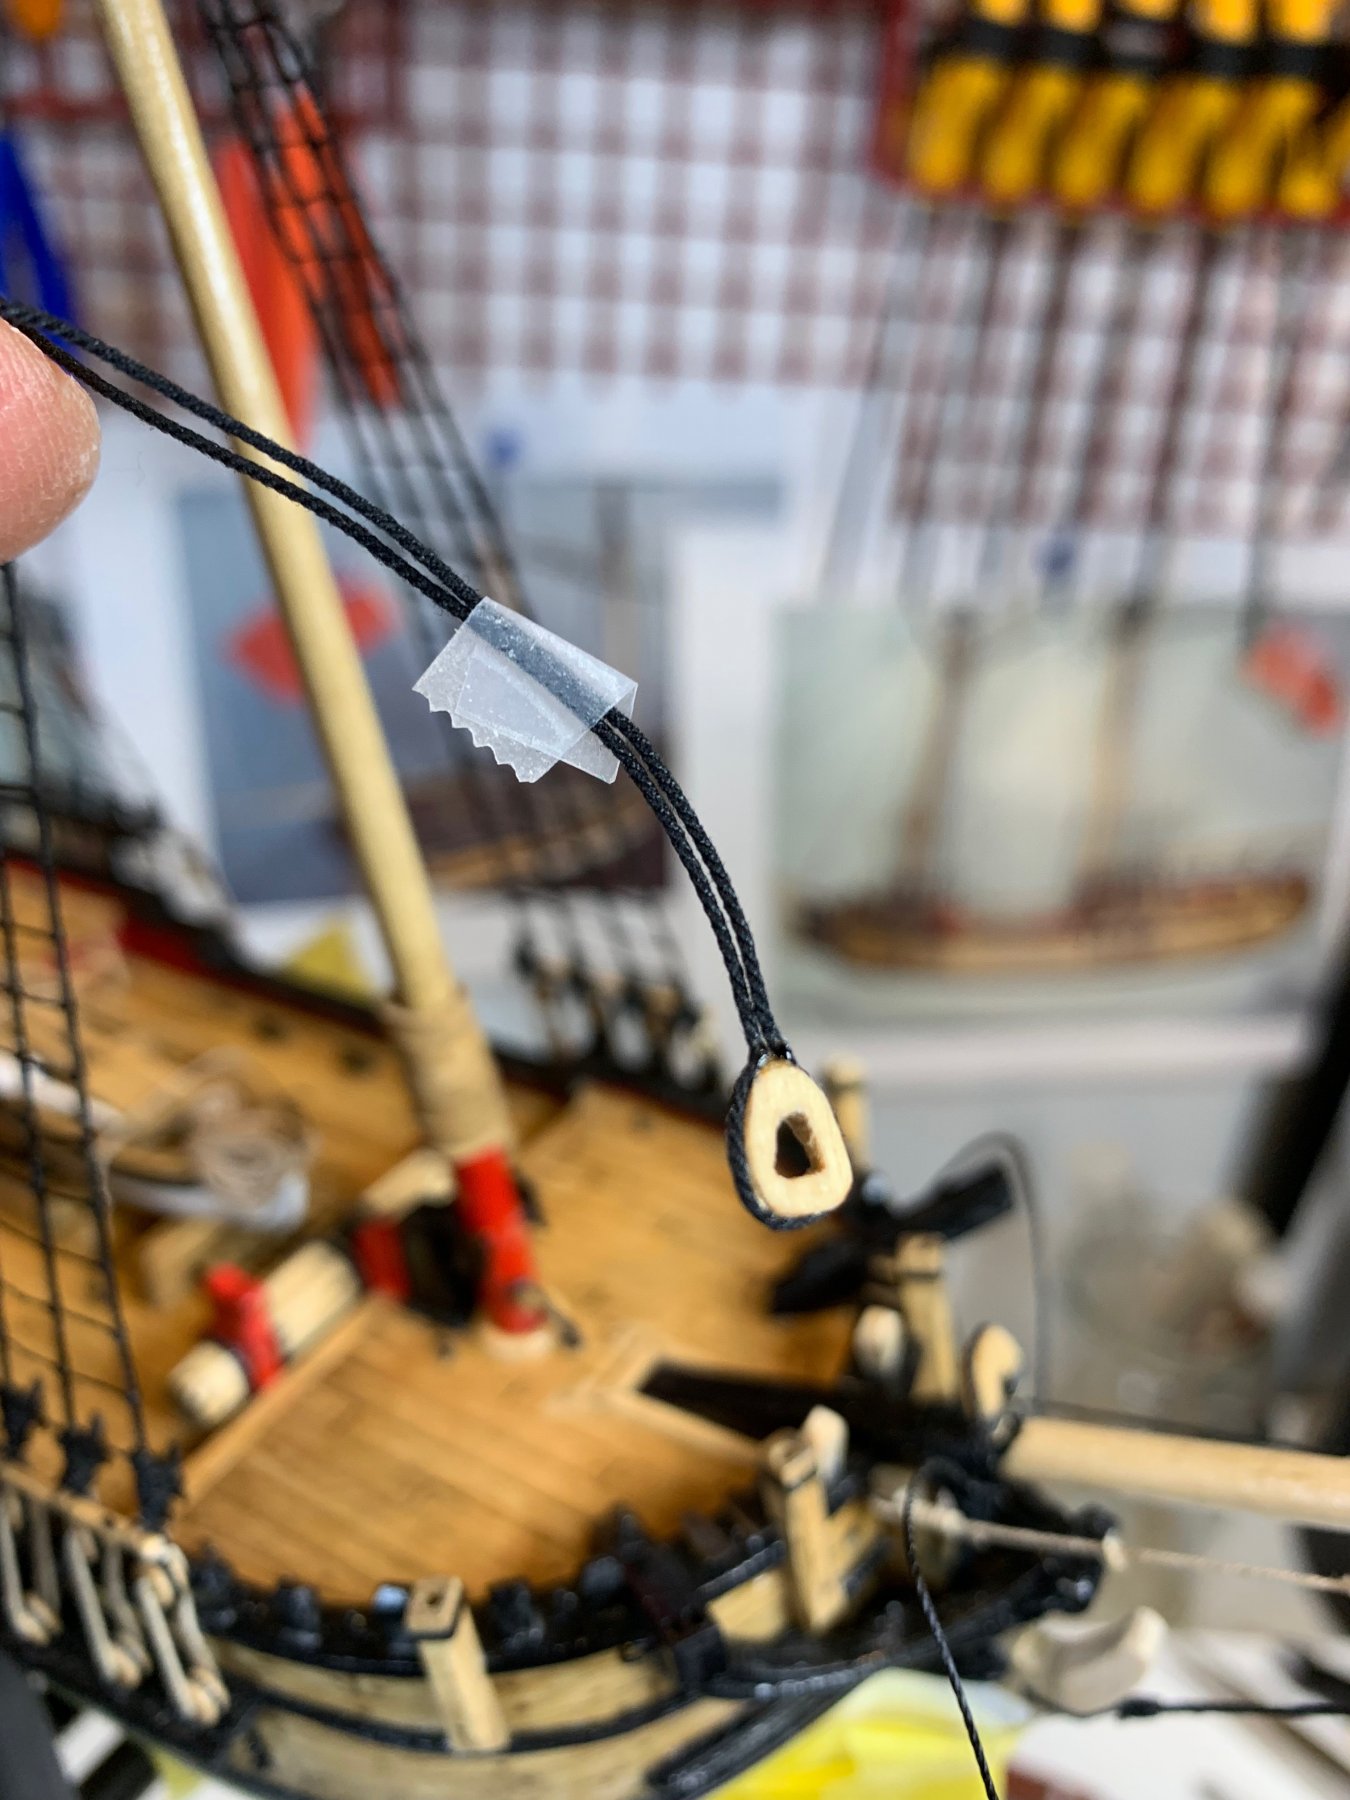
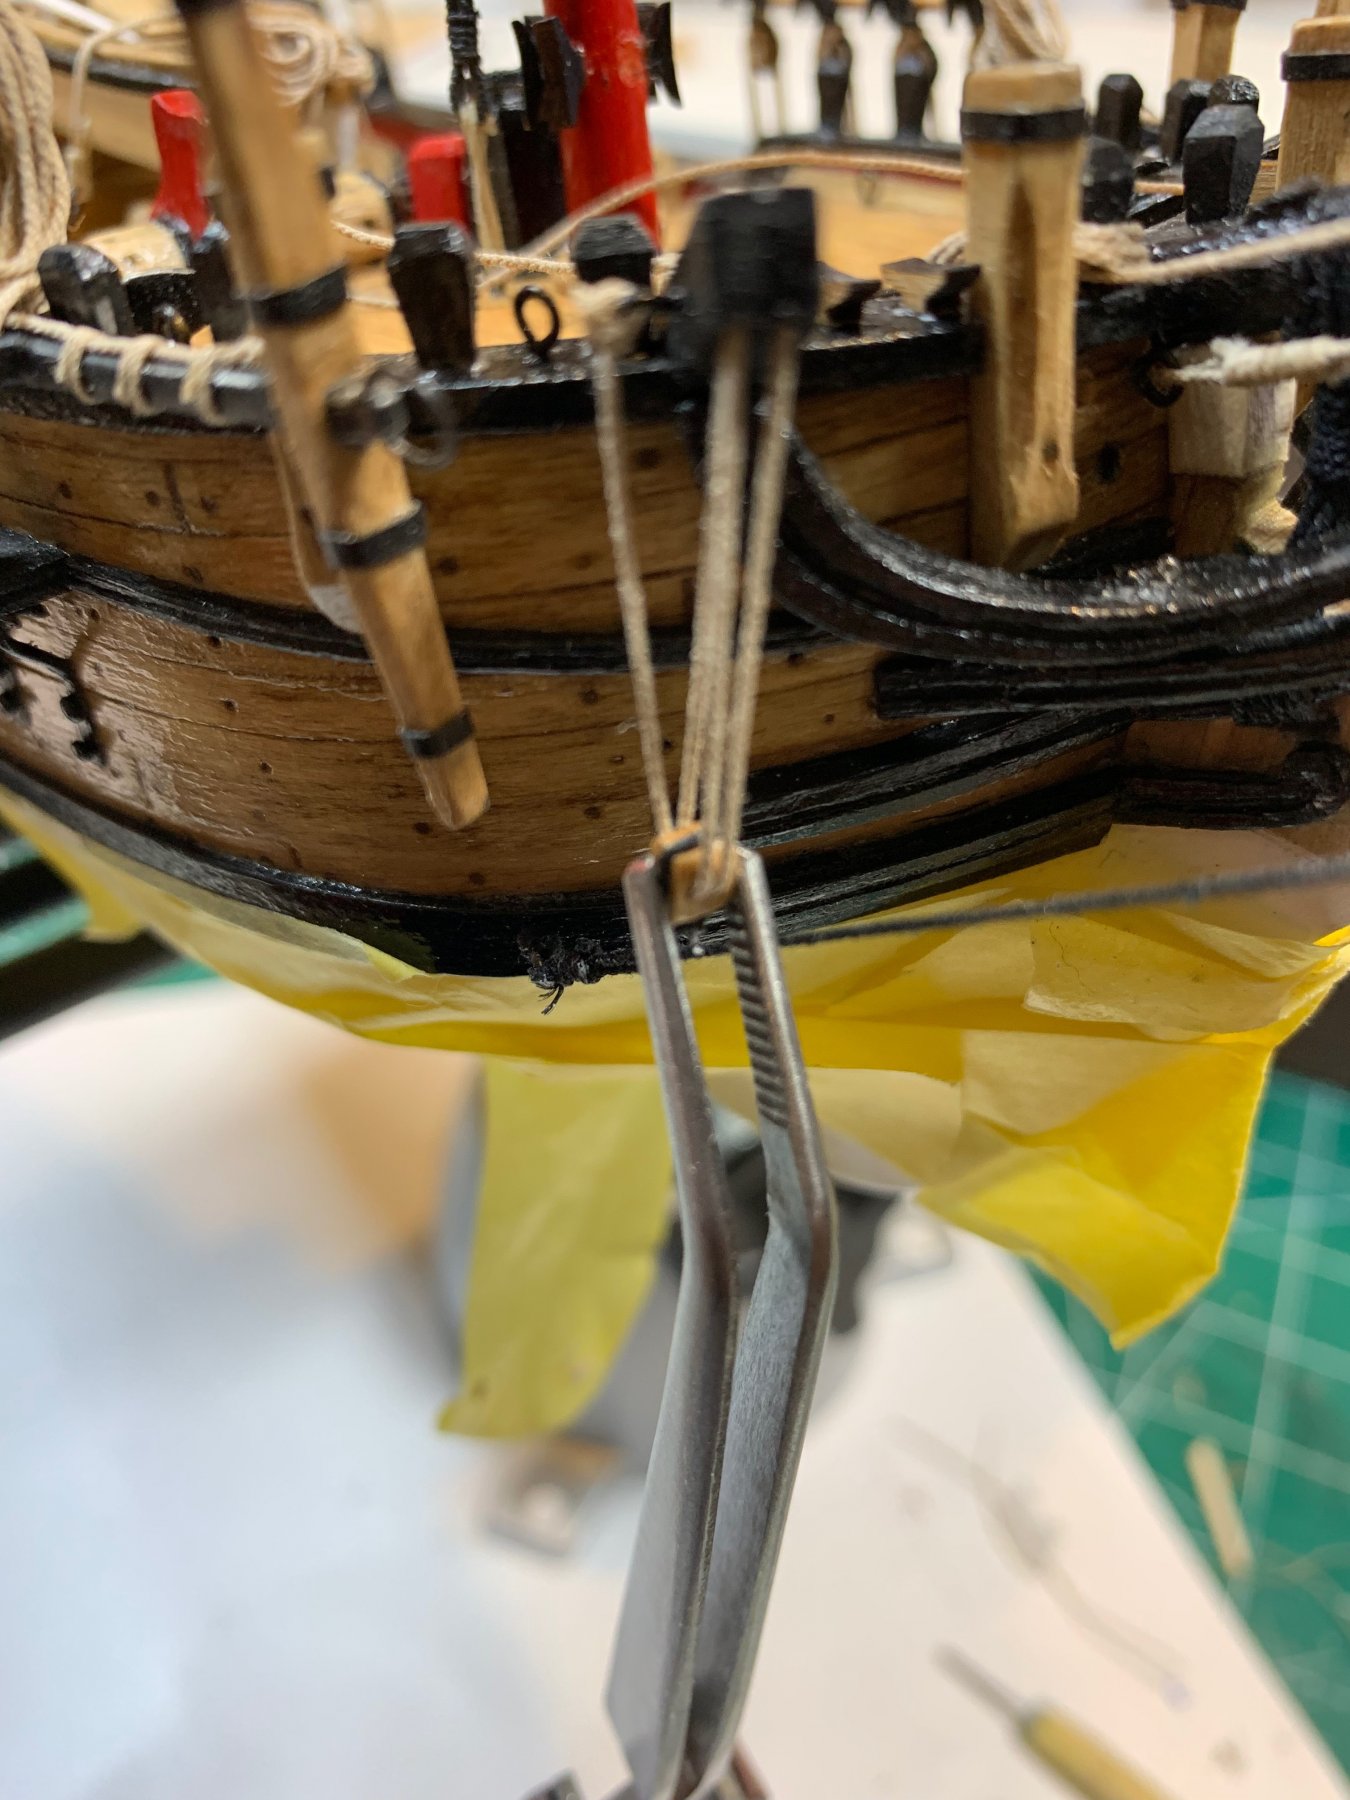
After few days vacation and due to the new job engagement i am back to shipyard.. Today i have attacked the anchors. The rope eye was made and attached to the buoy' other end, into the eye bolt. The eye was made using fairly simple and self-explanatory process shown on next picture.. Both buoys completed and ready for mounting. First the anchor was mounted and glued to the ship... Then the buoy was attached to the ratline and the rope coils for both buoys were made... The rope coil was attached to the ratlines. And both anchors installed and waiting for a anchor cable to be installed... Not sure if i had to do this part (anchor cable) before mounting it to ship... We will see... Happy modeling...


- 360 replies
-
- 5
-
-
- sultana
- model shipways
- (and 1 more)
-
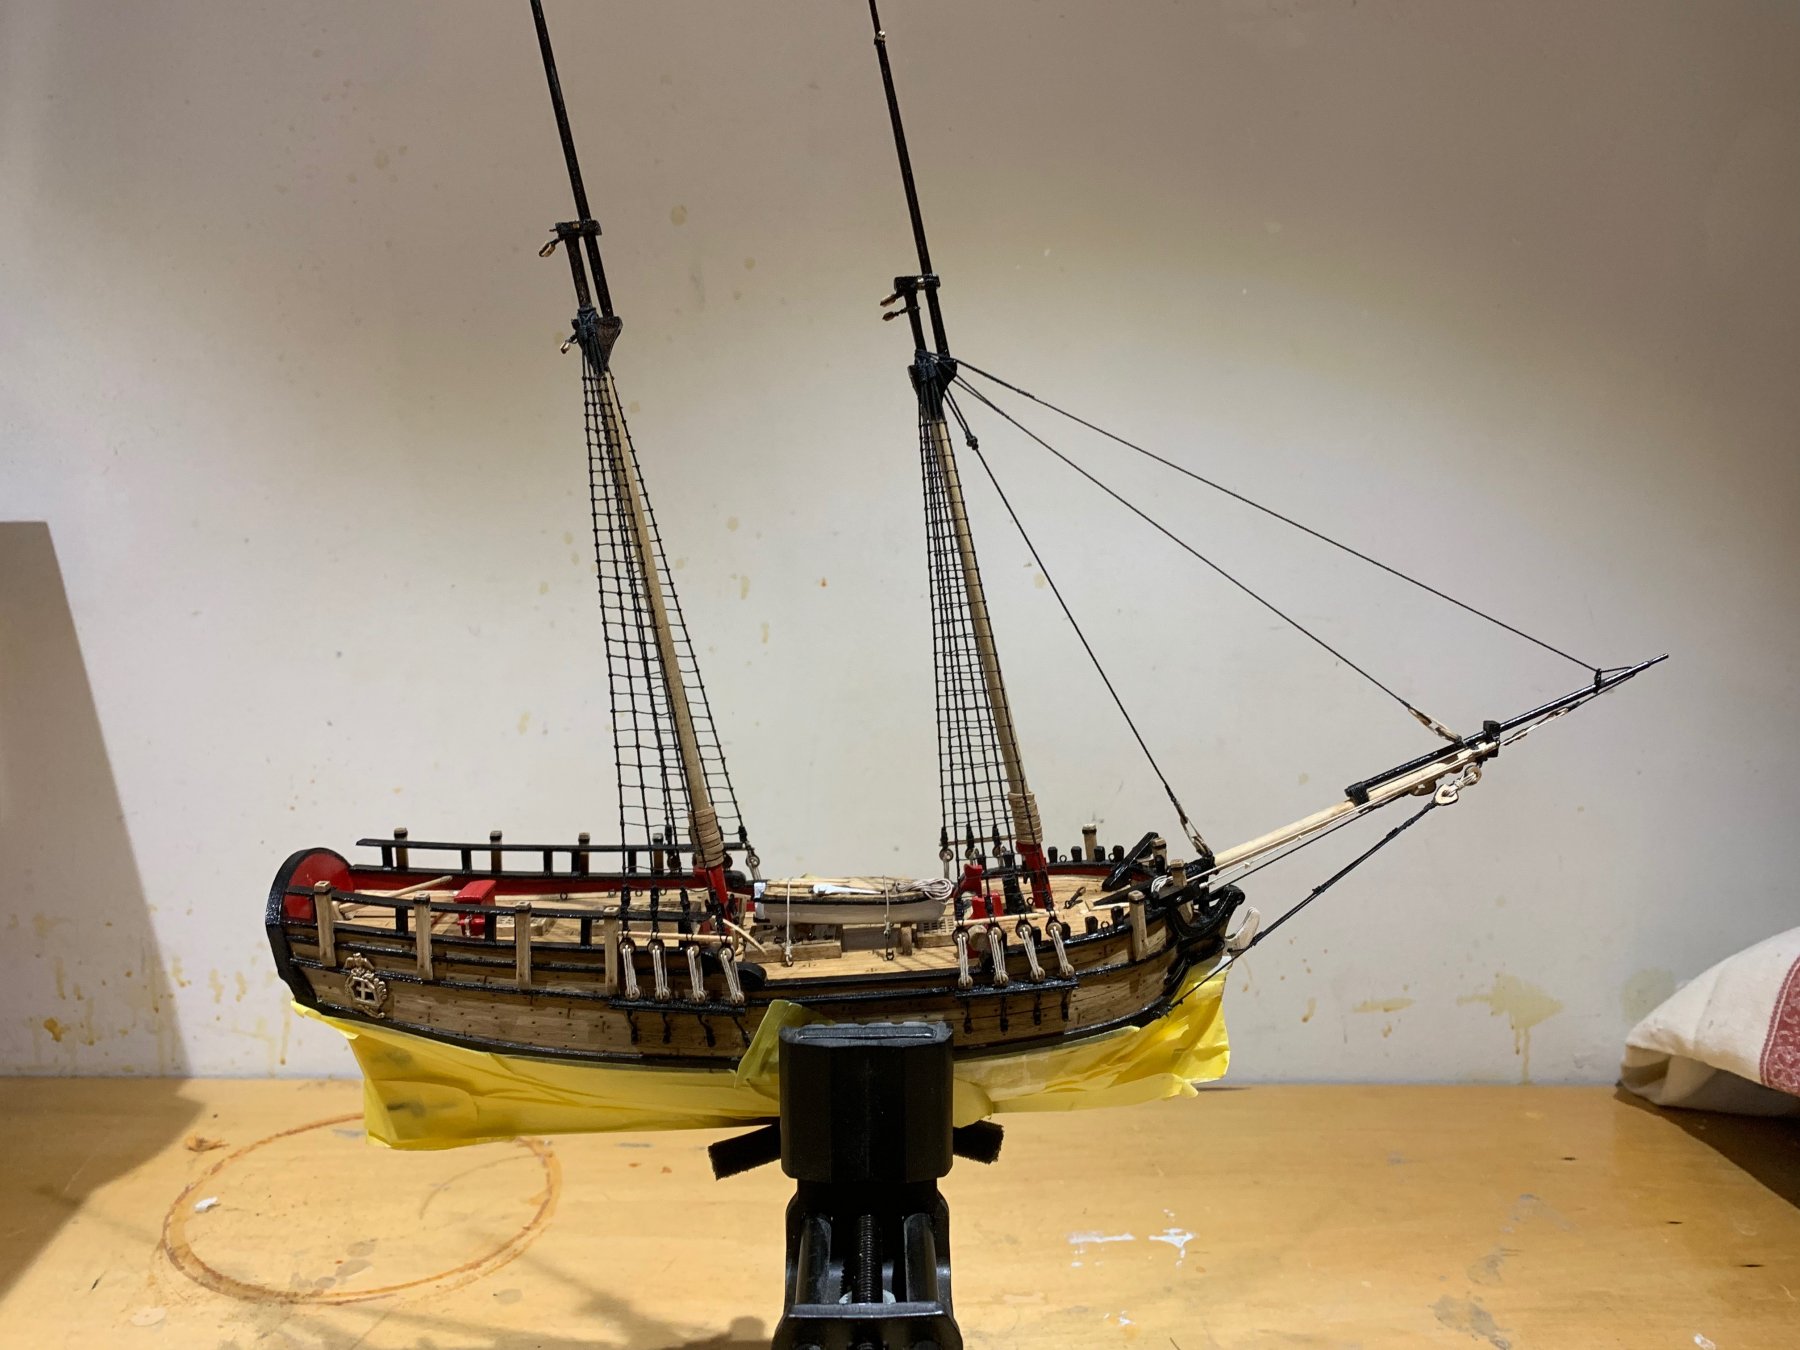
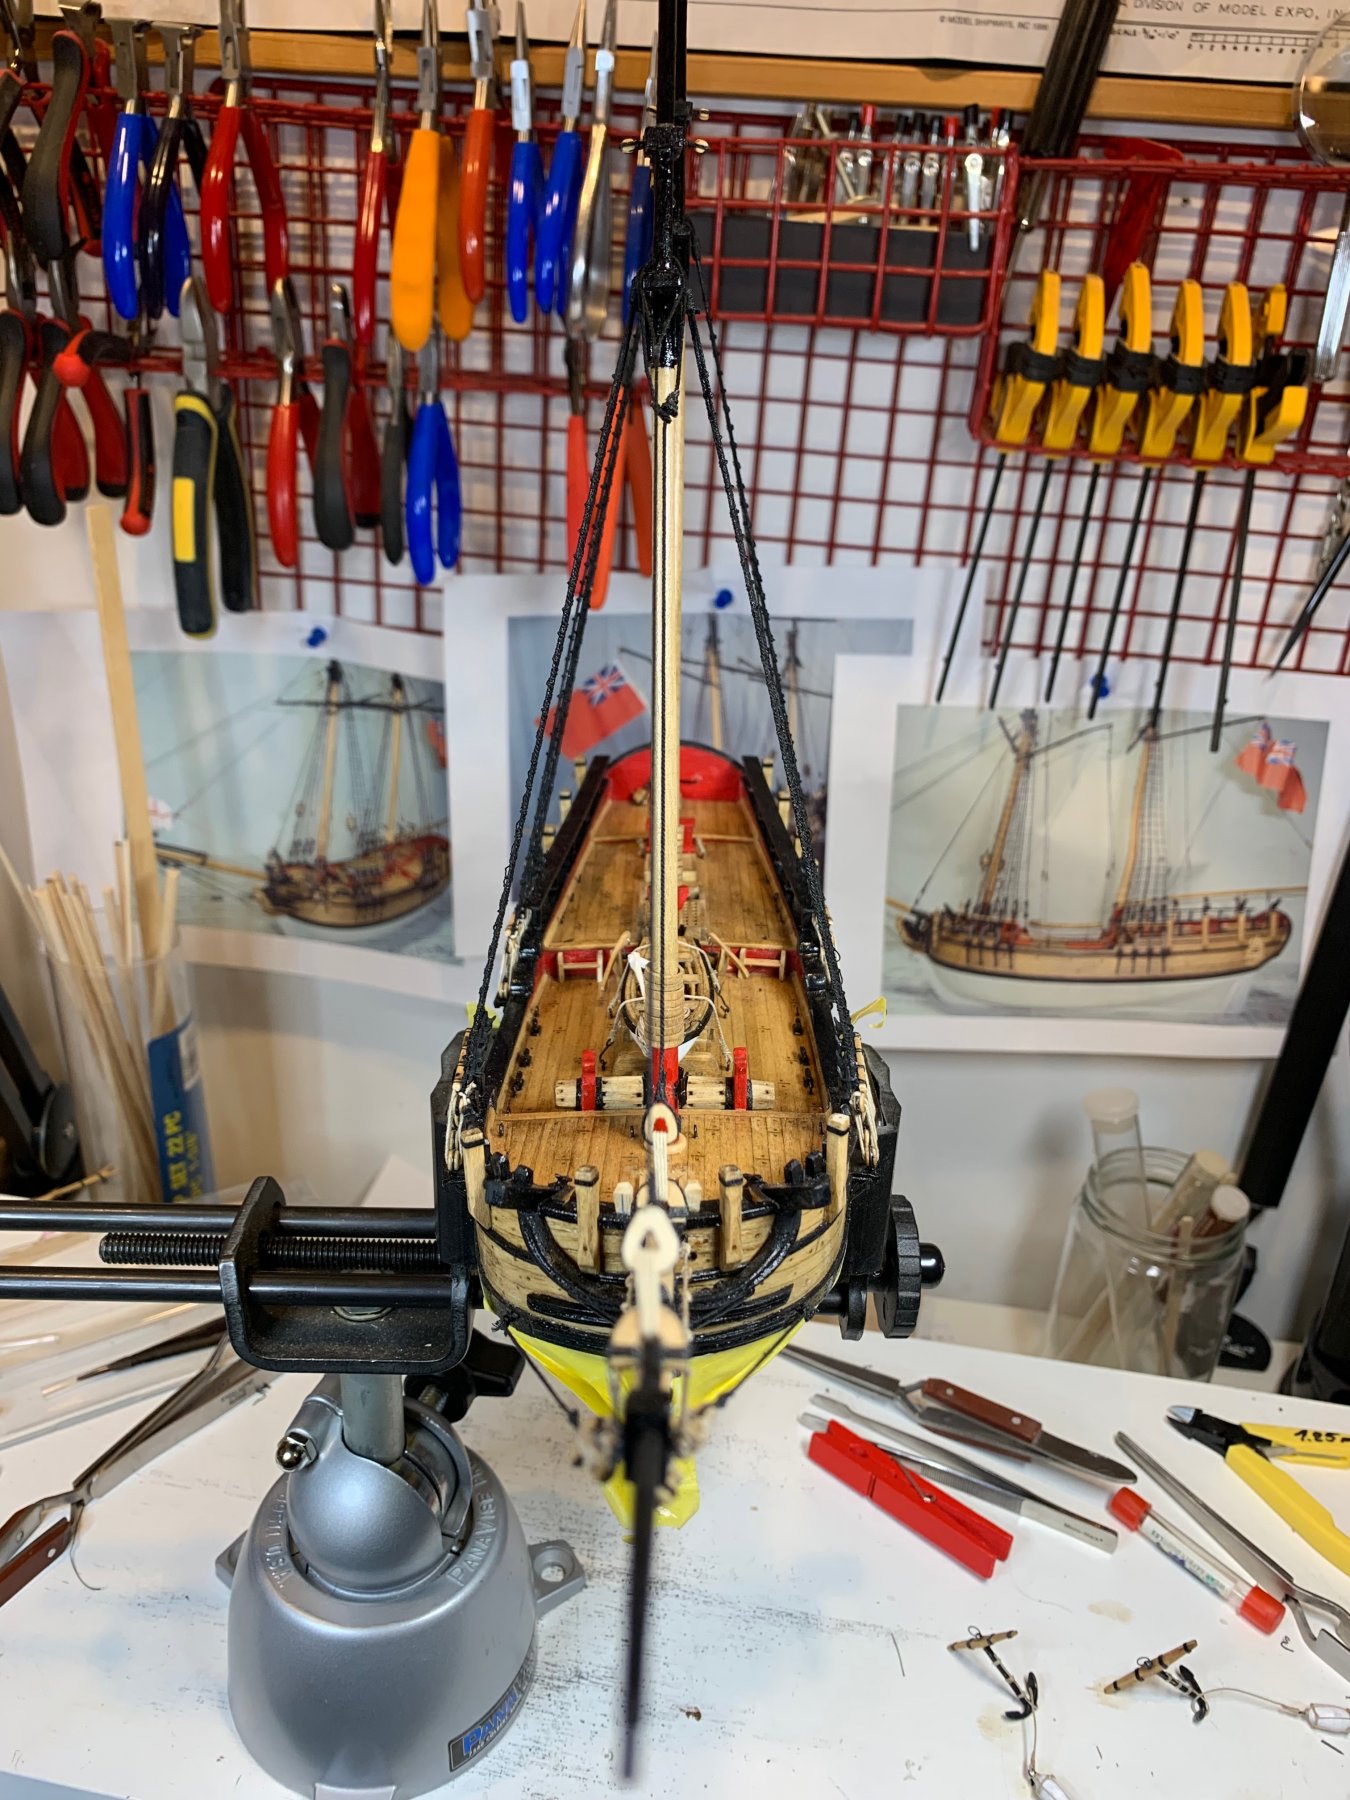
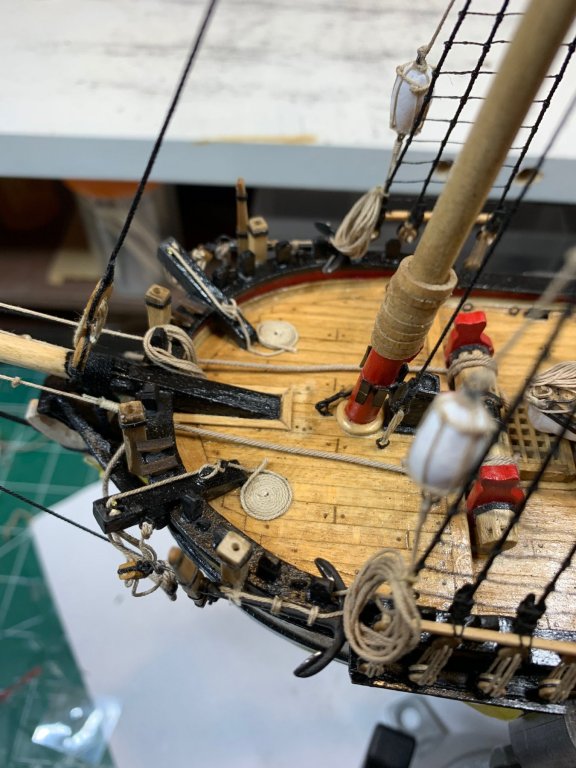
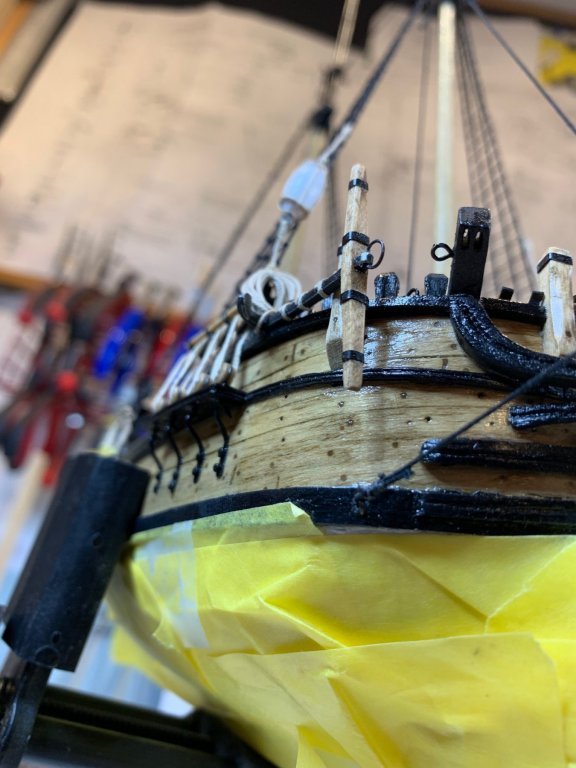
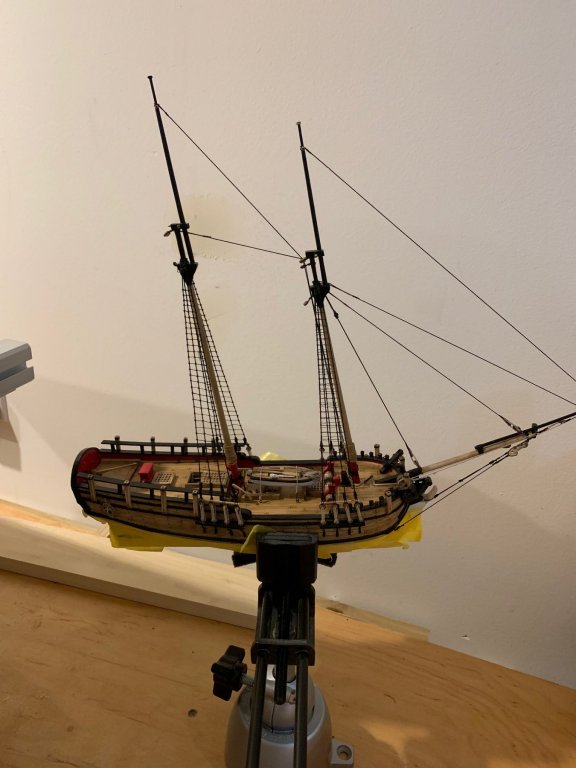
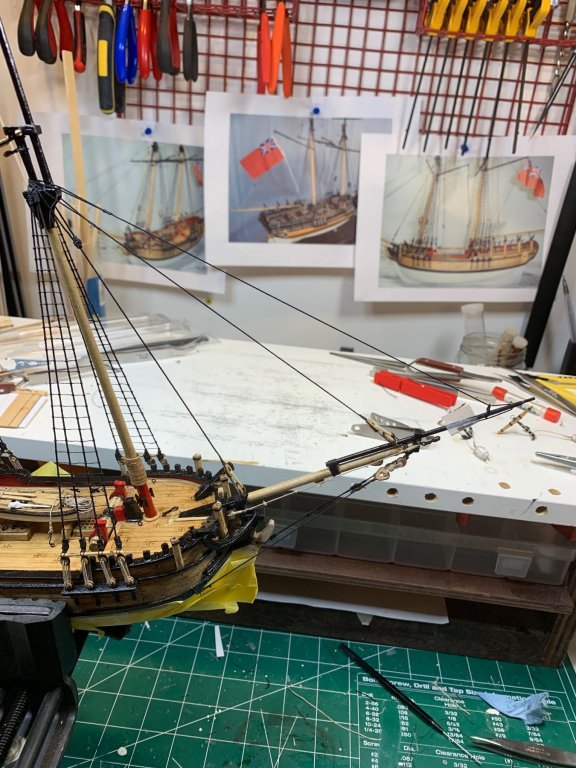
A bit more of rigging has been completed... Fore topmast stay.... main topmast stay and main stay... Following Chuck' practicum the bullseye were simulated. The rigging line going thru a block... tightening the line with a help of a small home-made weight... Lanyards for the stays on each side of a mast... And the final product... Happy modeling..


- 360 replies
-
- 1
-
-
- sultana
- model shipways
- (and 1 more)
-
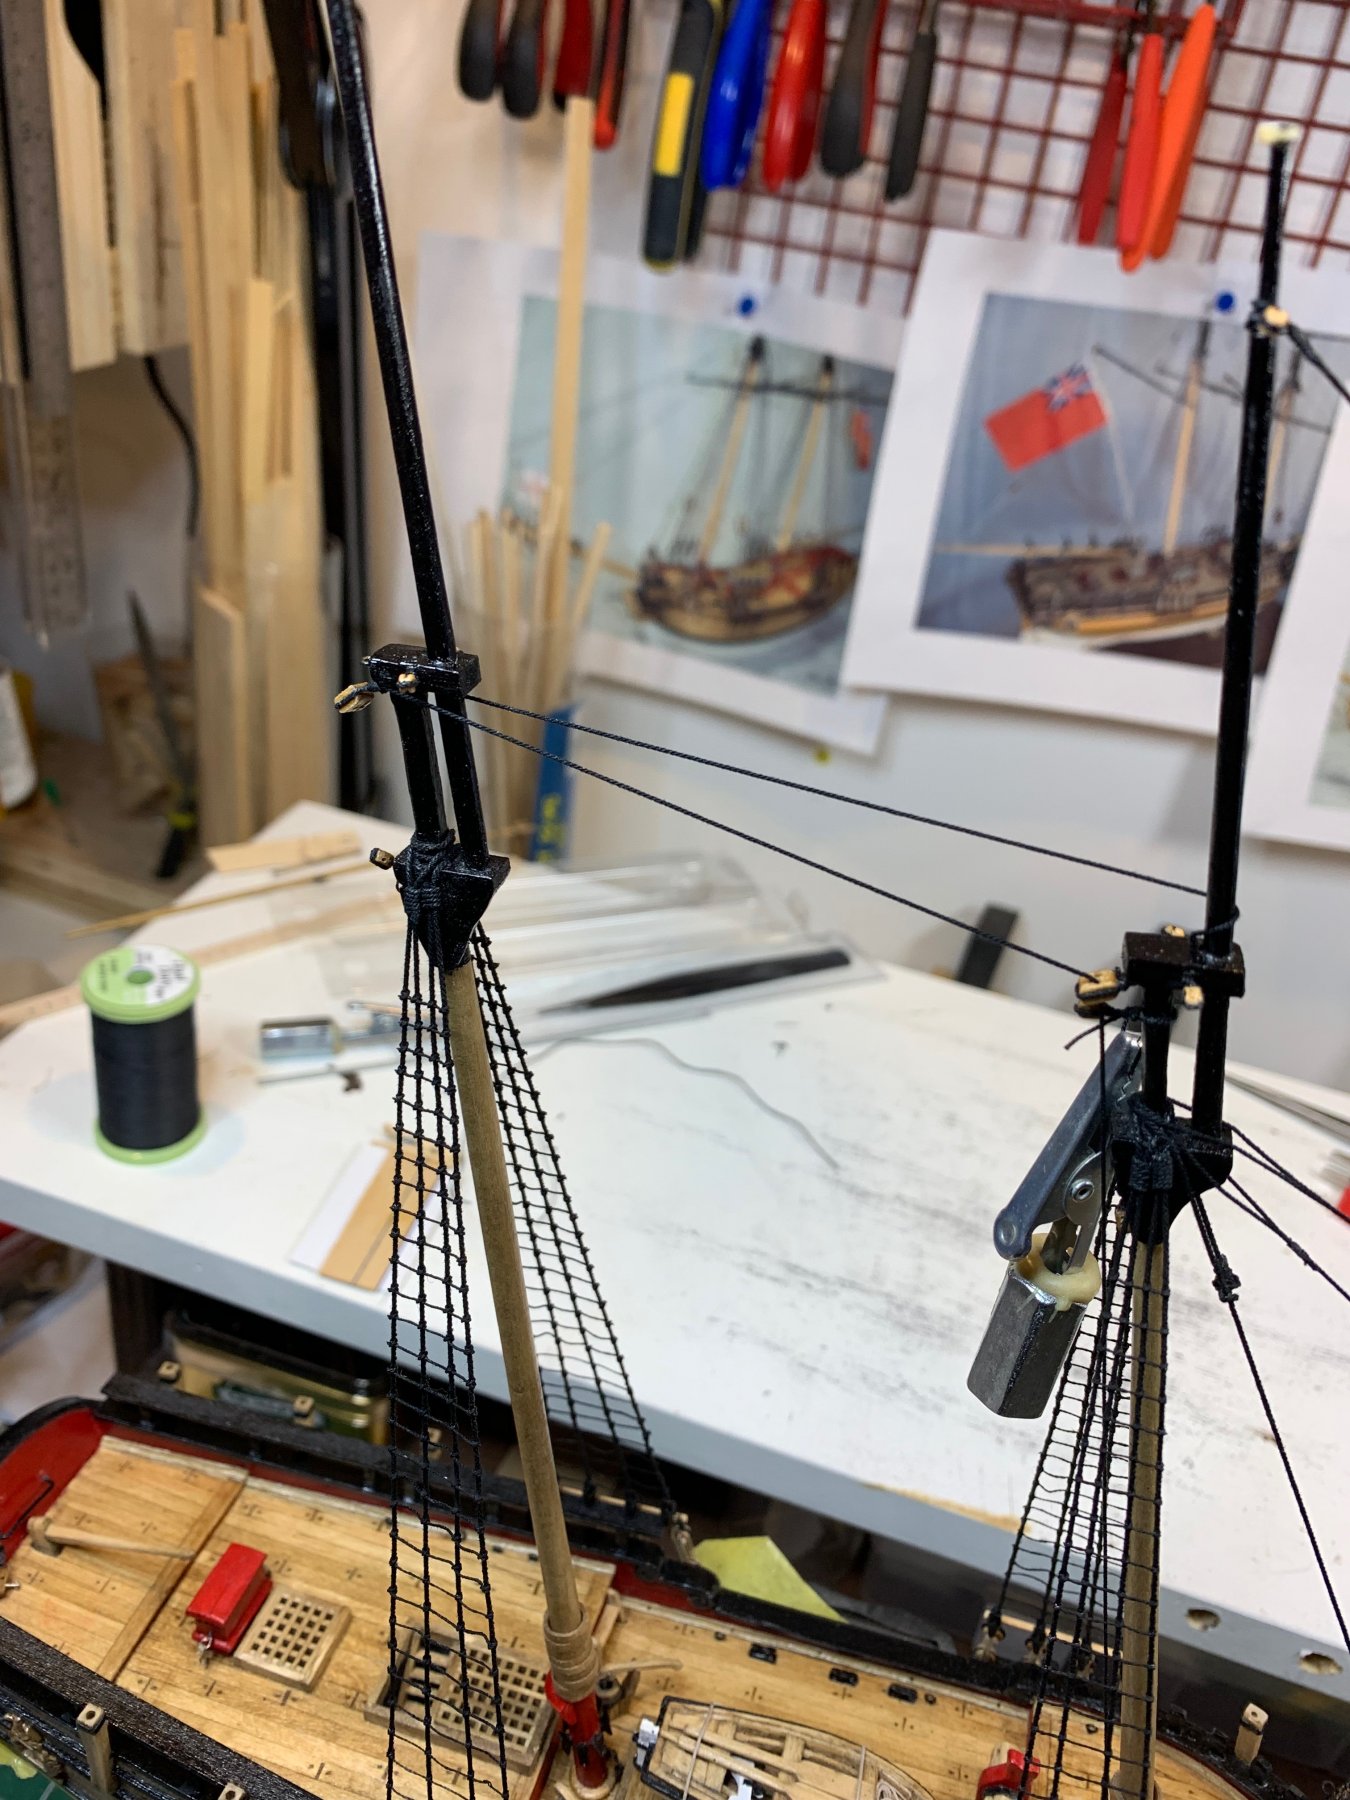
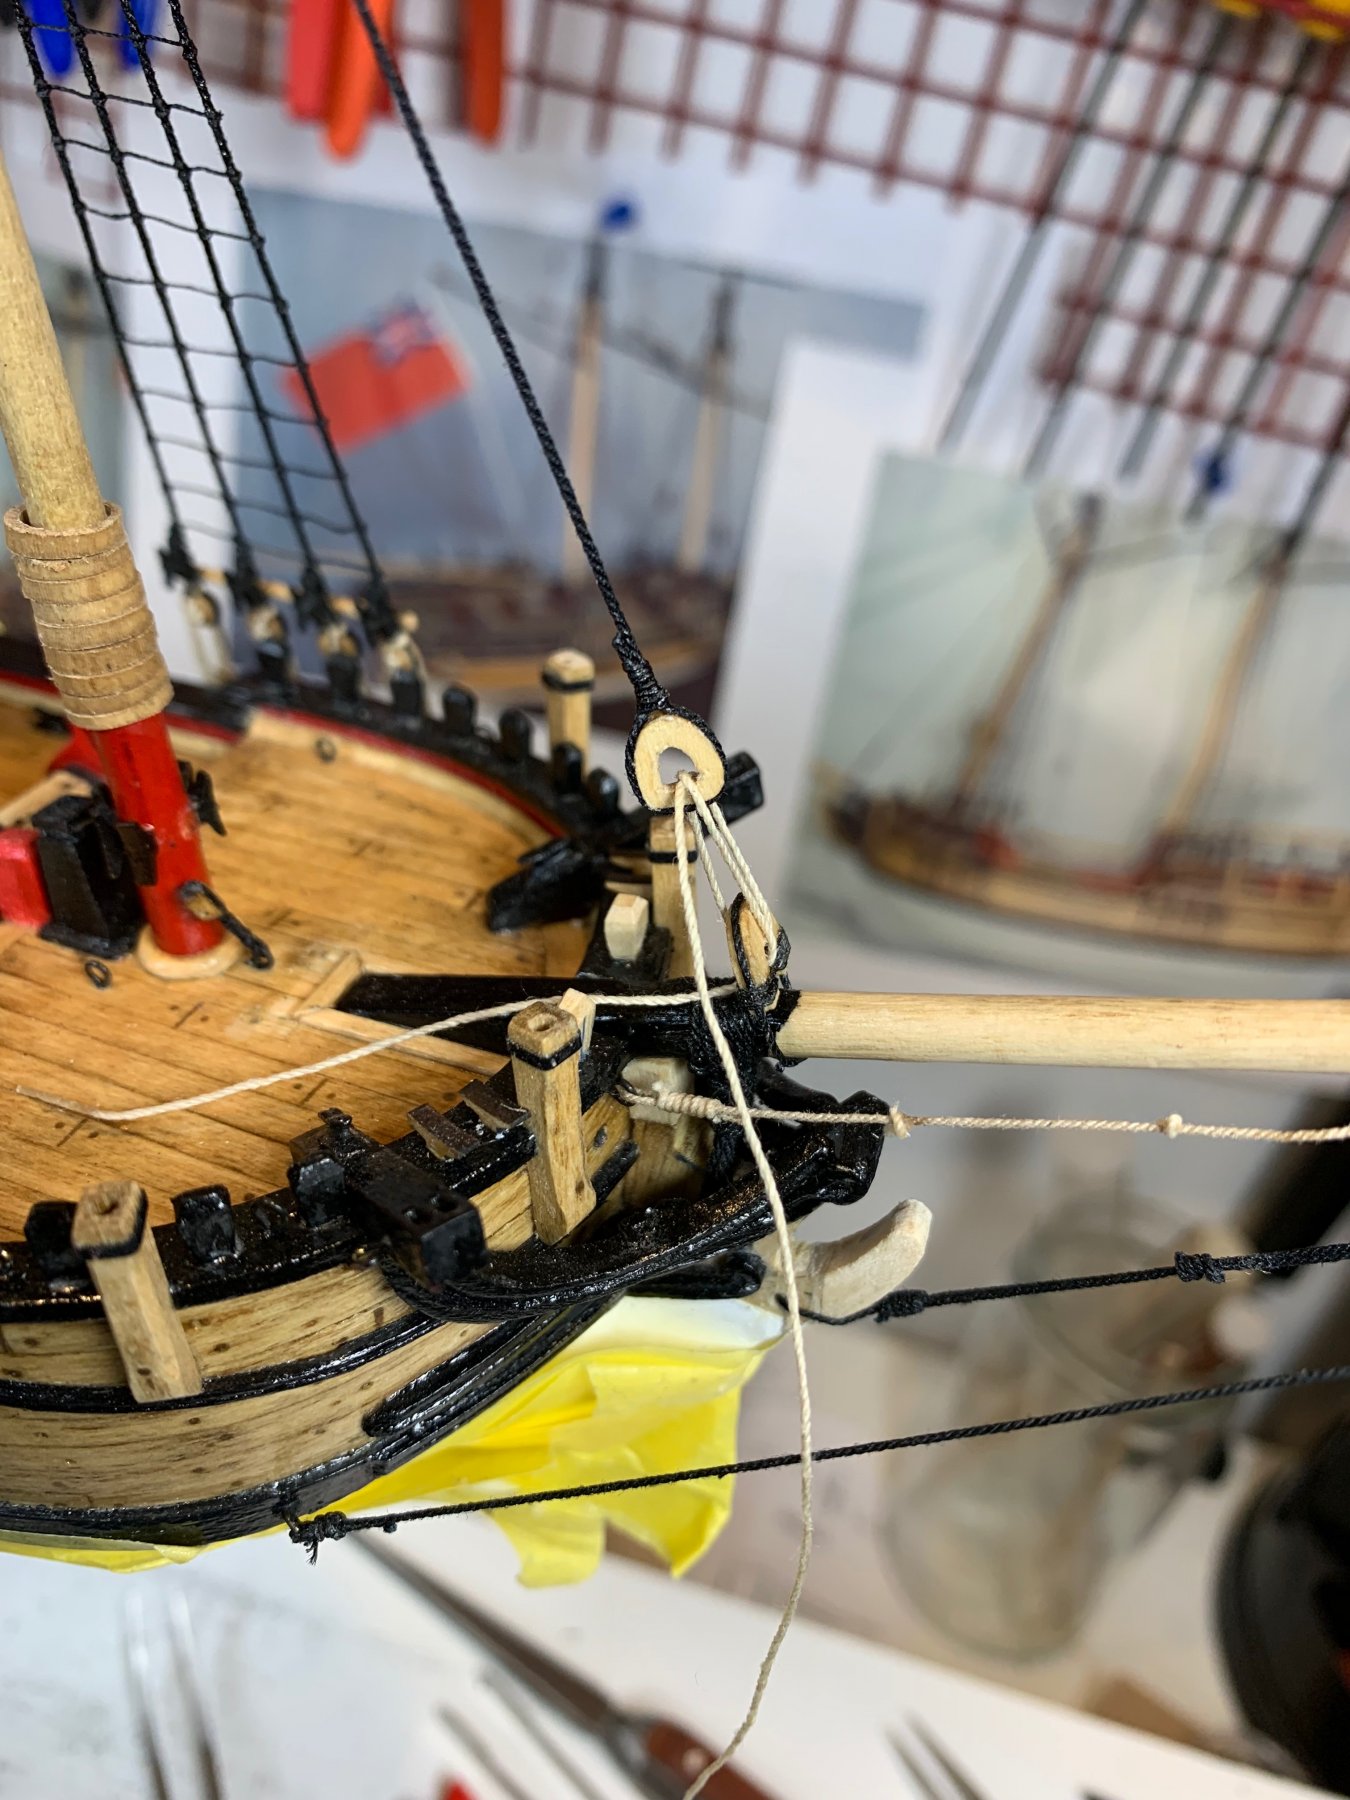
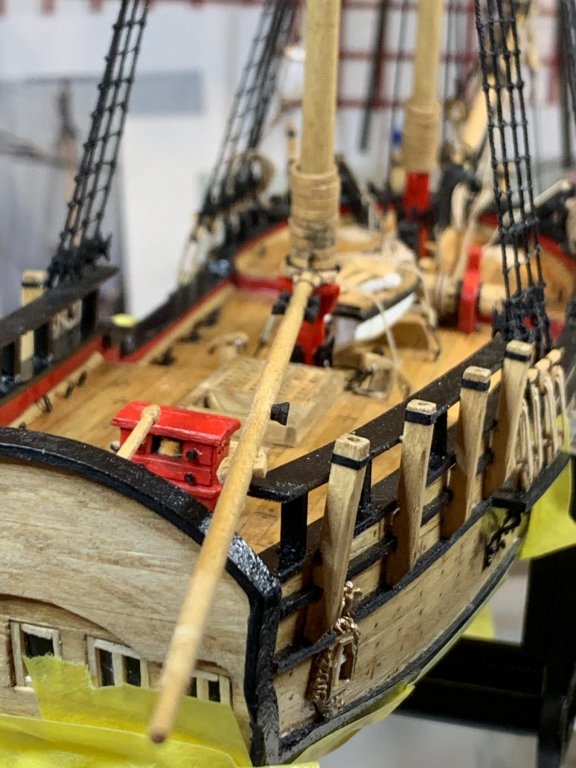
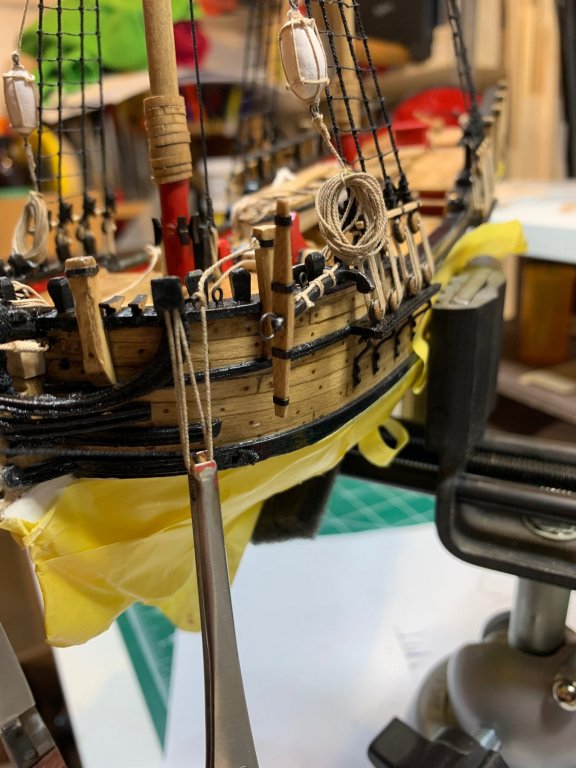
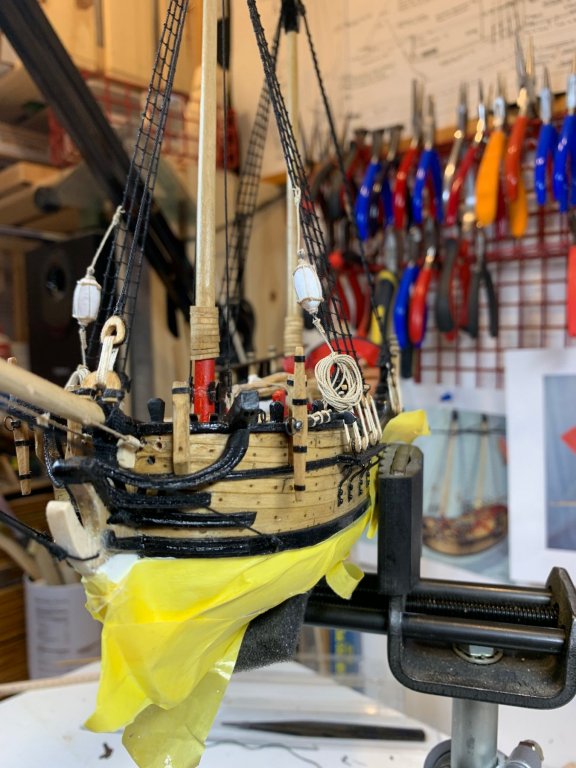
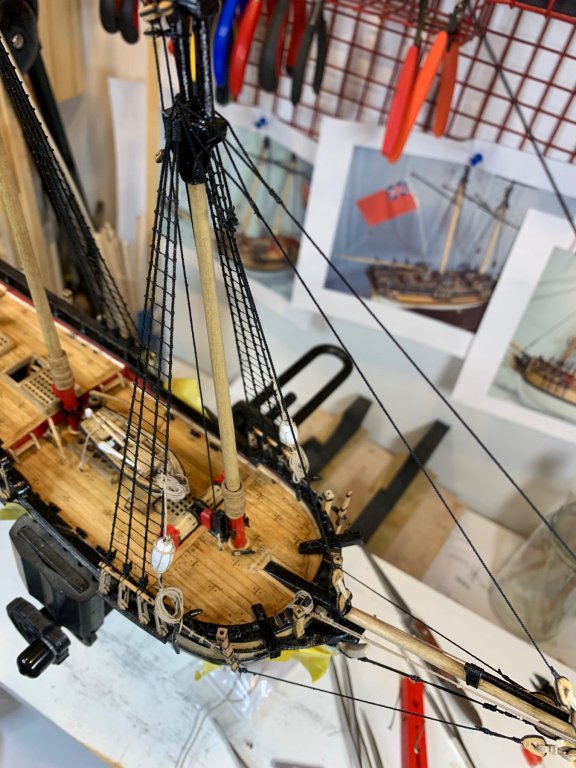
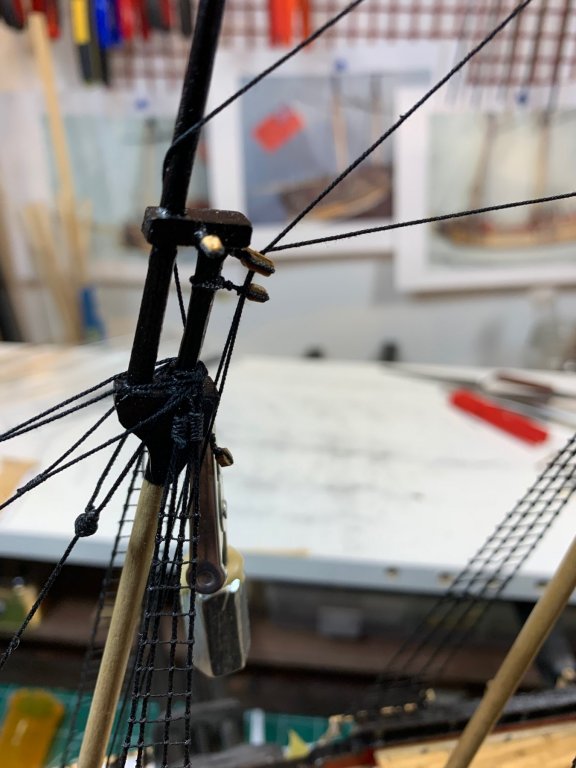
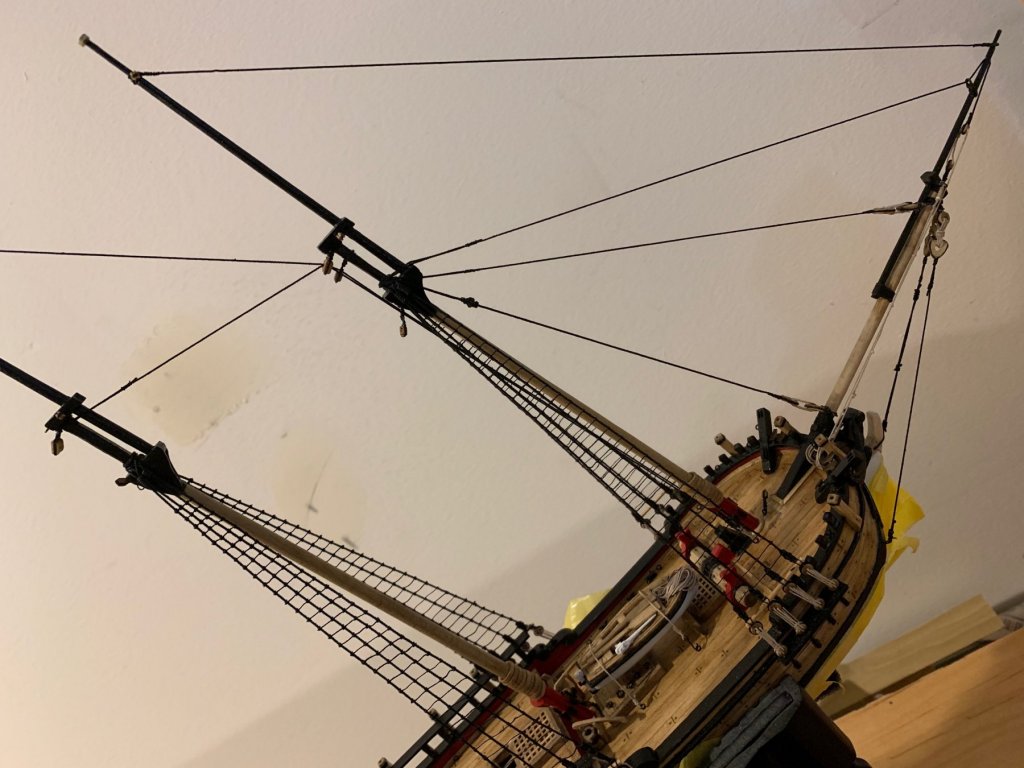
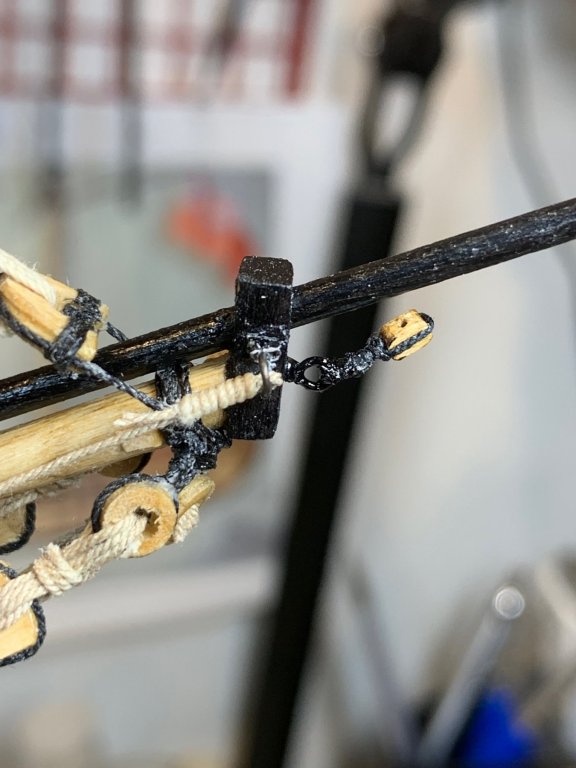
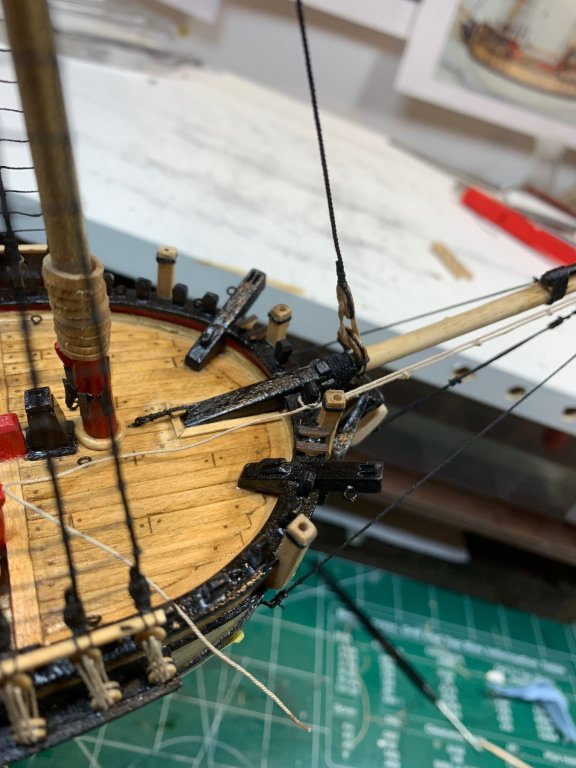
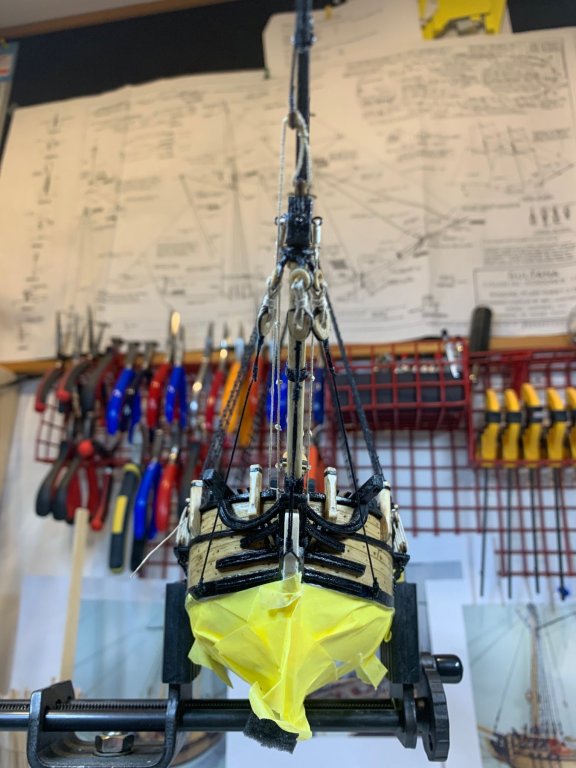
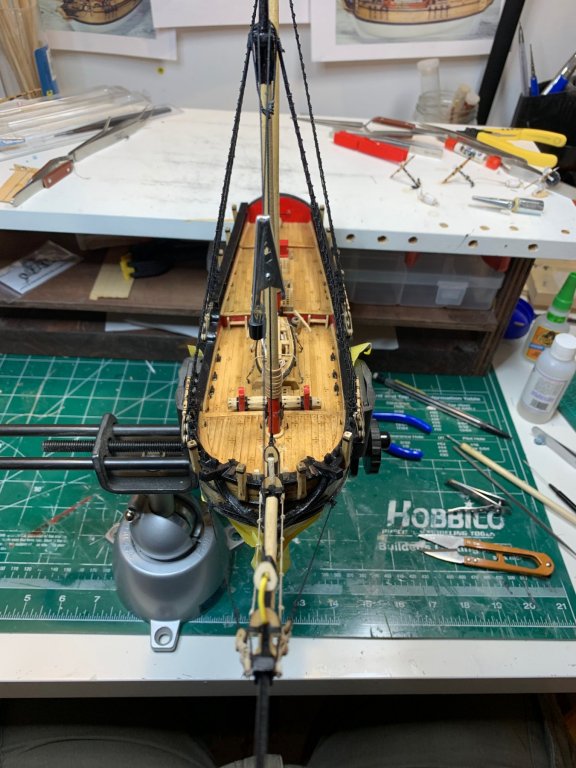
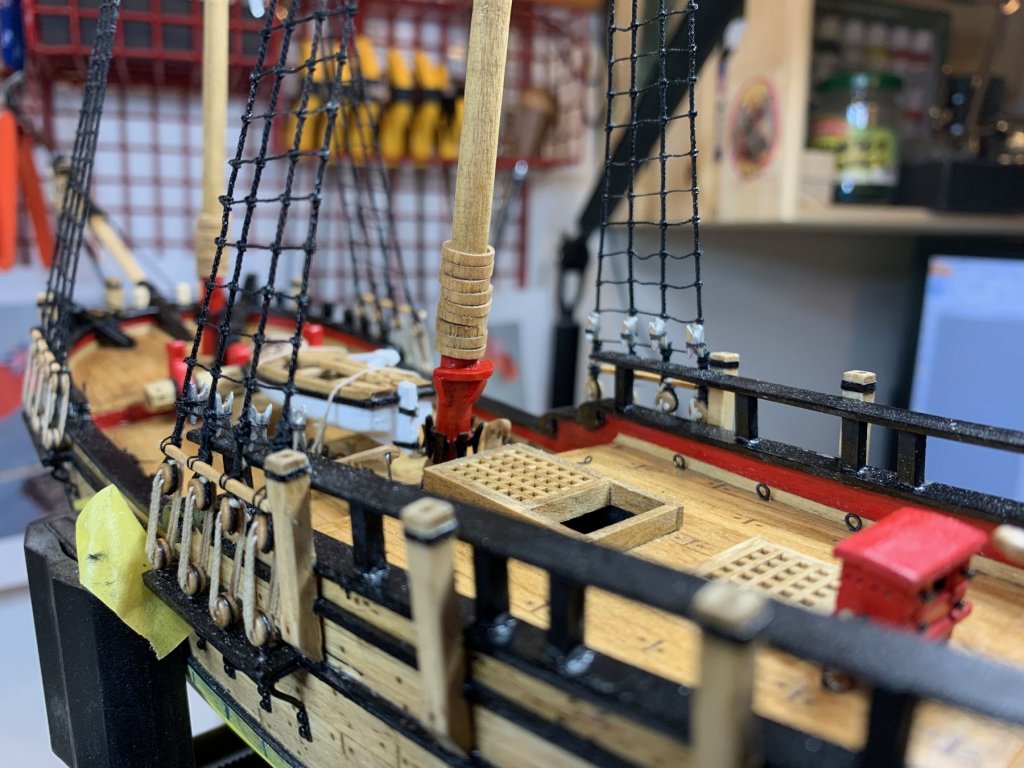
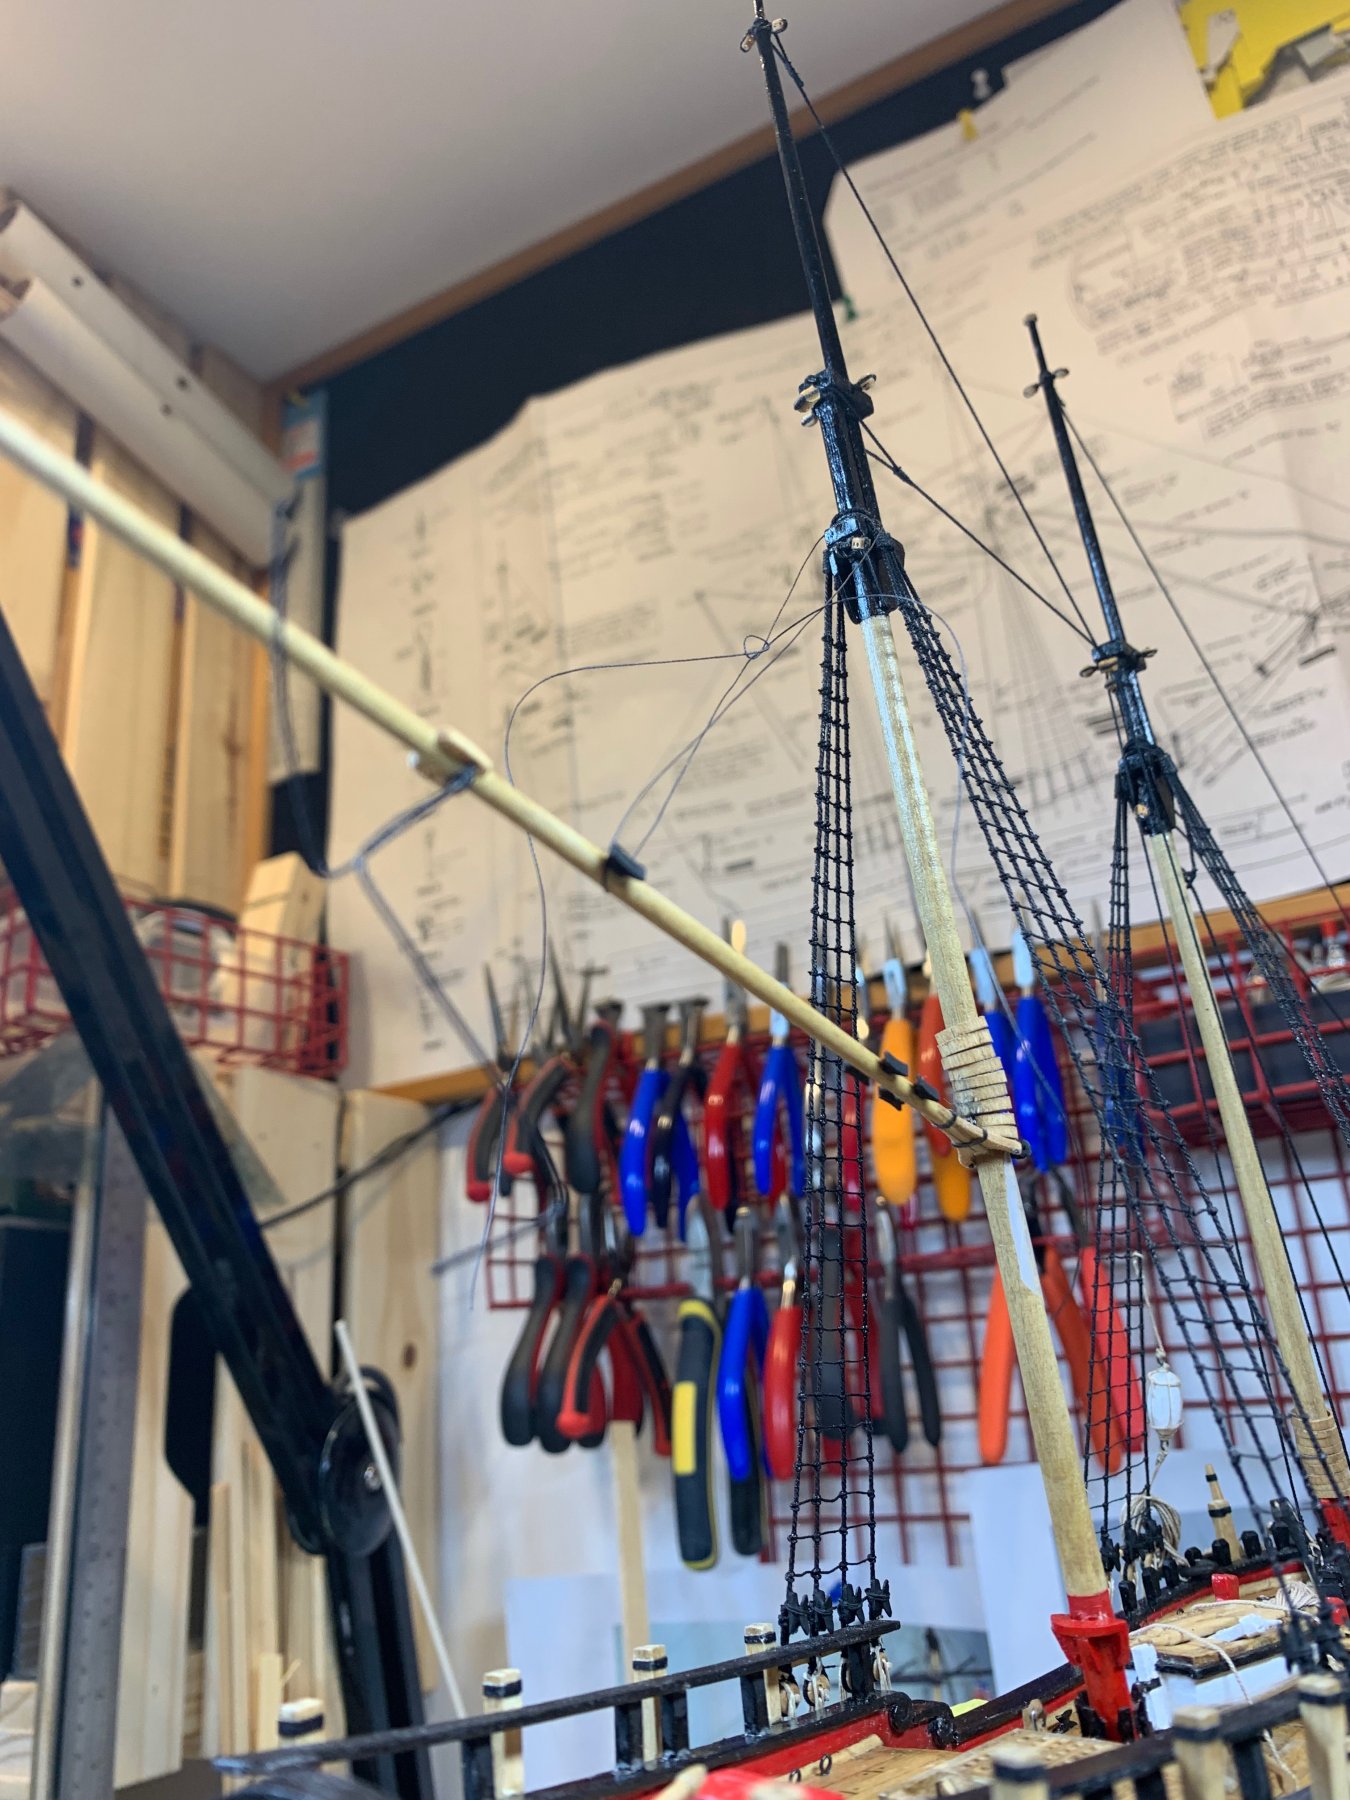
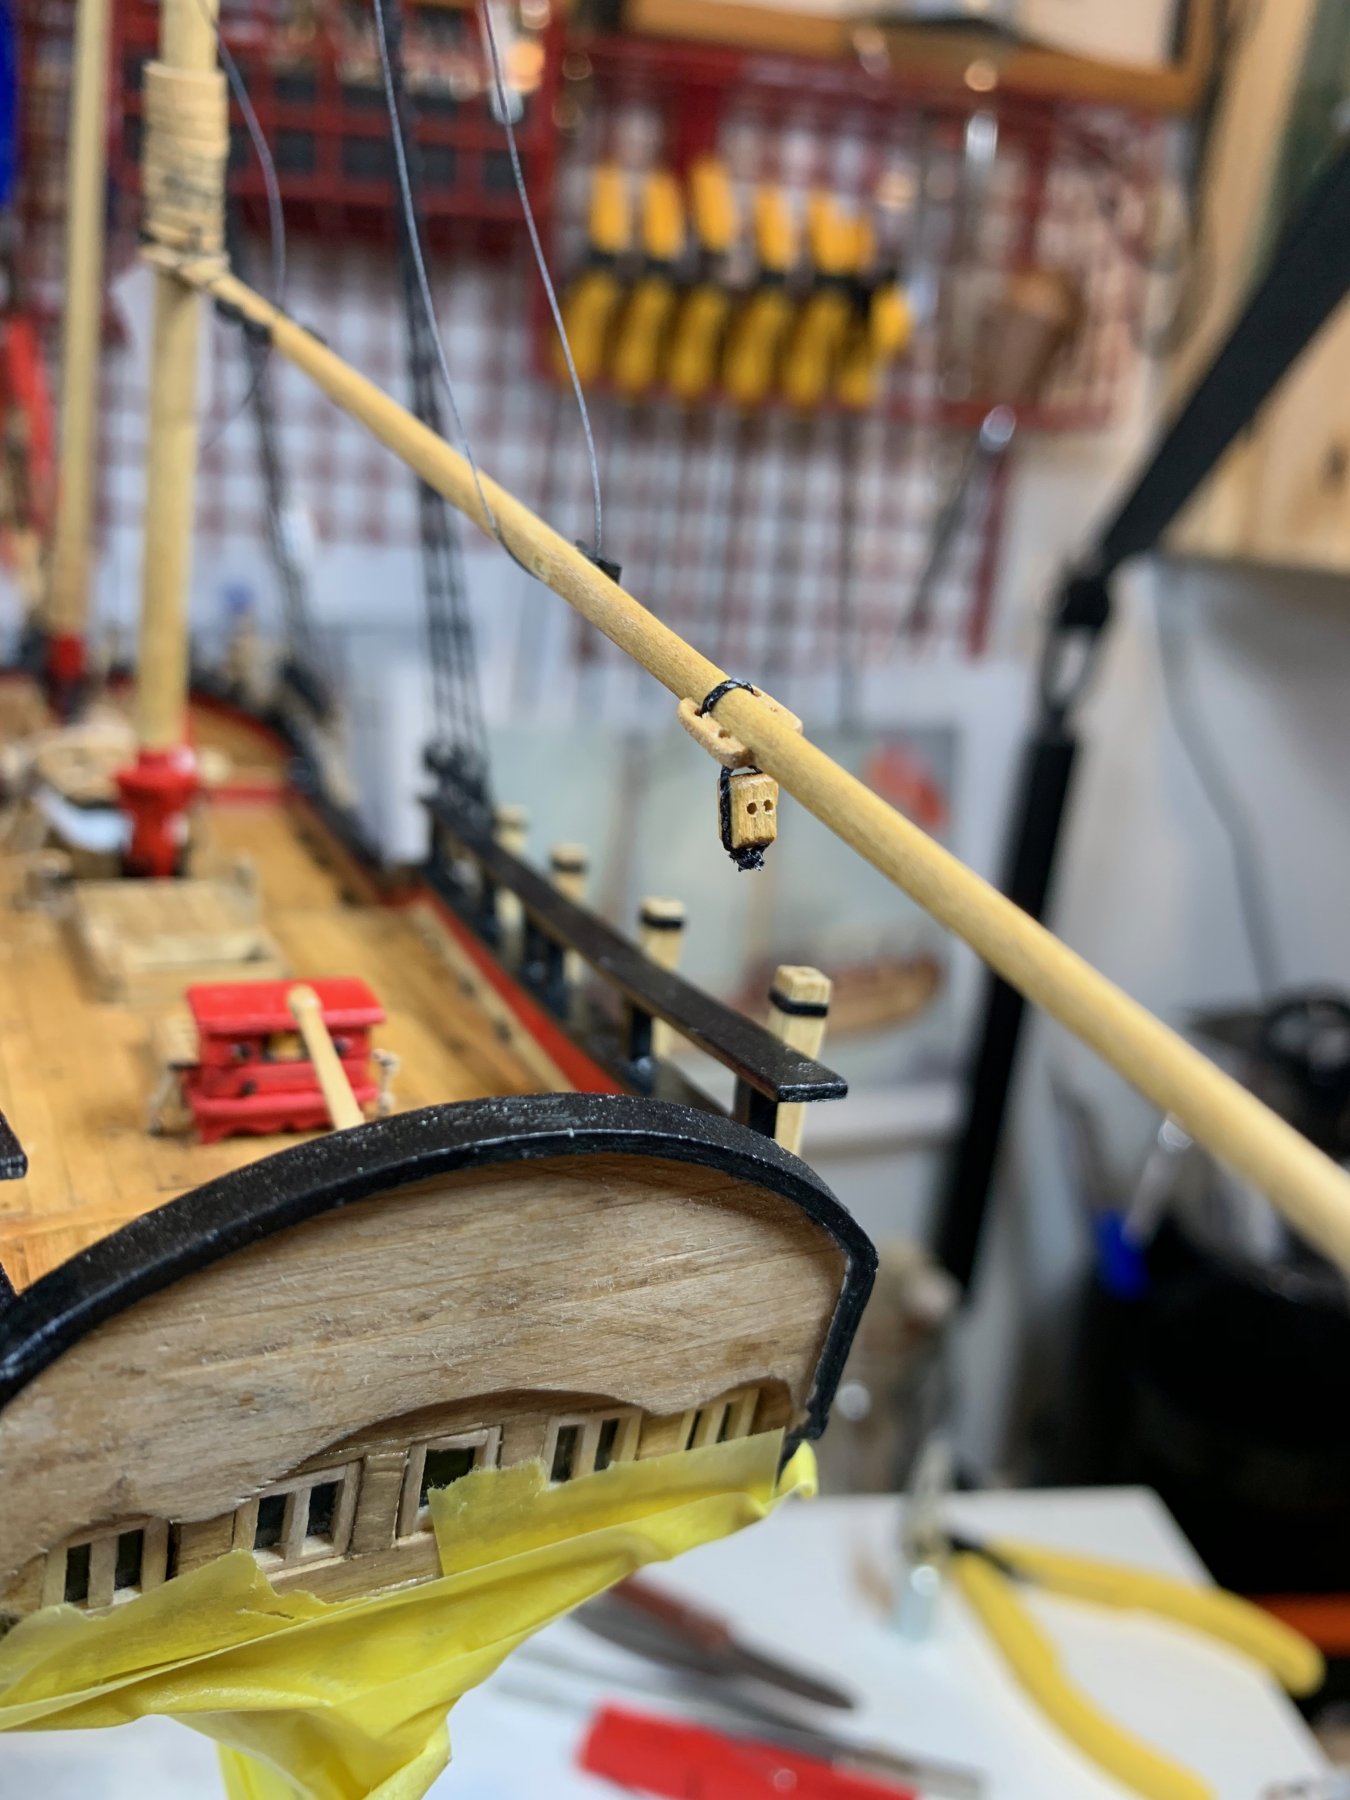
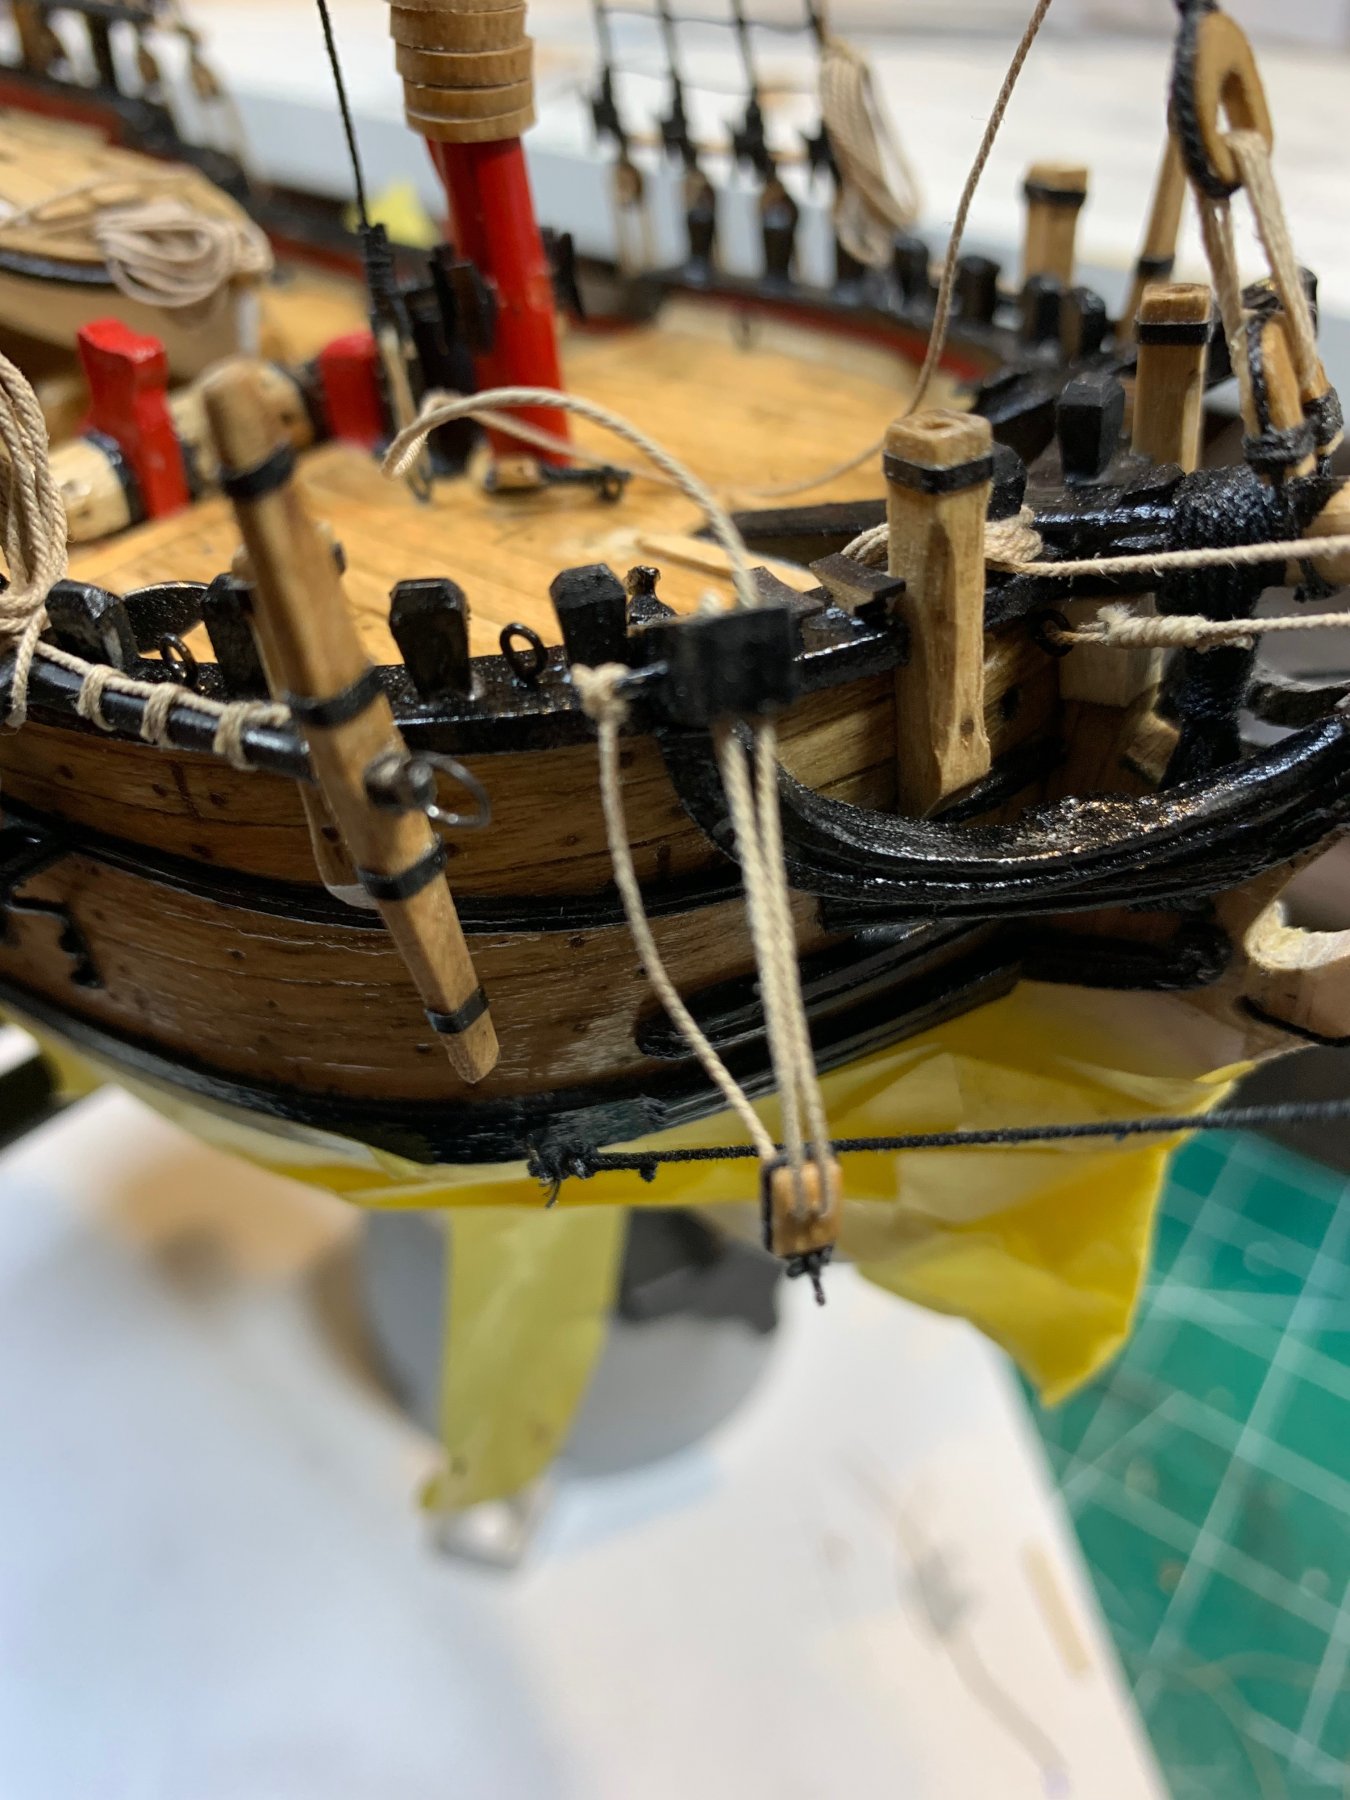
Outer jibstay rigging was next.. first i have attached a single block to the hook... painted the hook in flat black paint.. .. and mounted on the ship. Traveller was mounted next, fixed with a drop of a glue to proper position. Must say that traveller' position on kit plan and on Practicum do not match so i decided to drop it somewhere in between, where it made sense in my opinion. The outer jibstay line was pushed thru the jibstay and fixed with a scotch tape.. Prep for seizing... And seizing completed.. Now the other side.. Interesting view of all kind of roping ... And the whole ship so far... Happy modeling.


- 360 replies
-
- 1
-
-
- sultana
- model shipways
- (and 1 more)
-
I will try to correct it but will not remove all of rigging line. Wish i found this topic a bi earlier:
- 360 replies
-
- 1
-
-
- sultana
- model shipways
- (and 1 more)
-
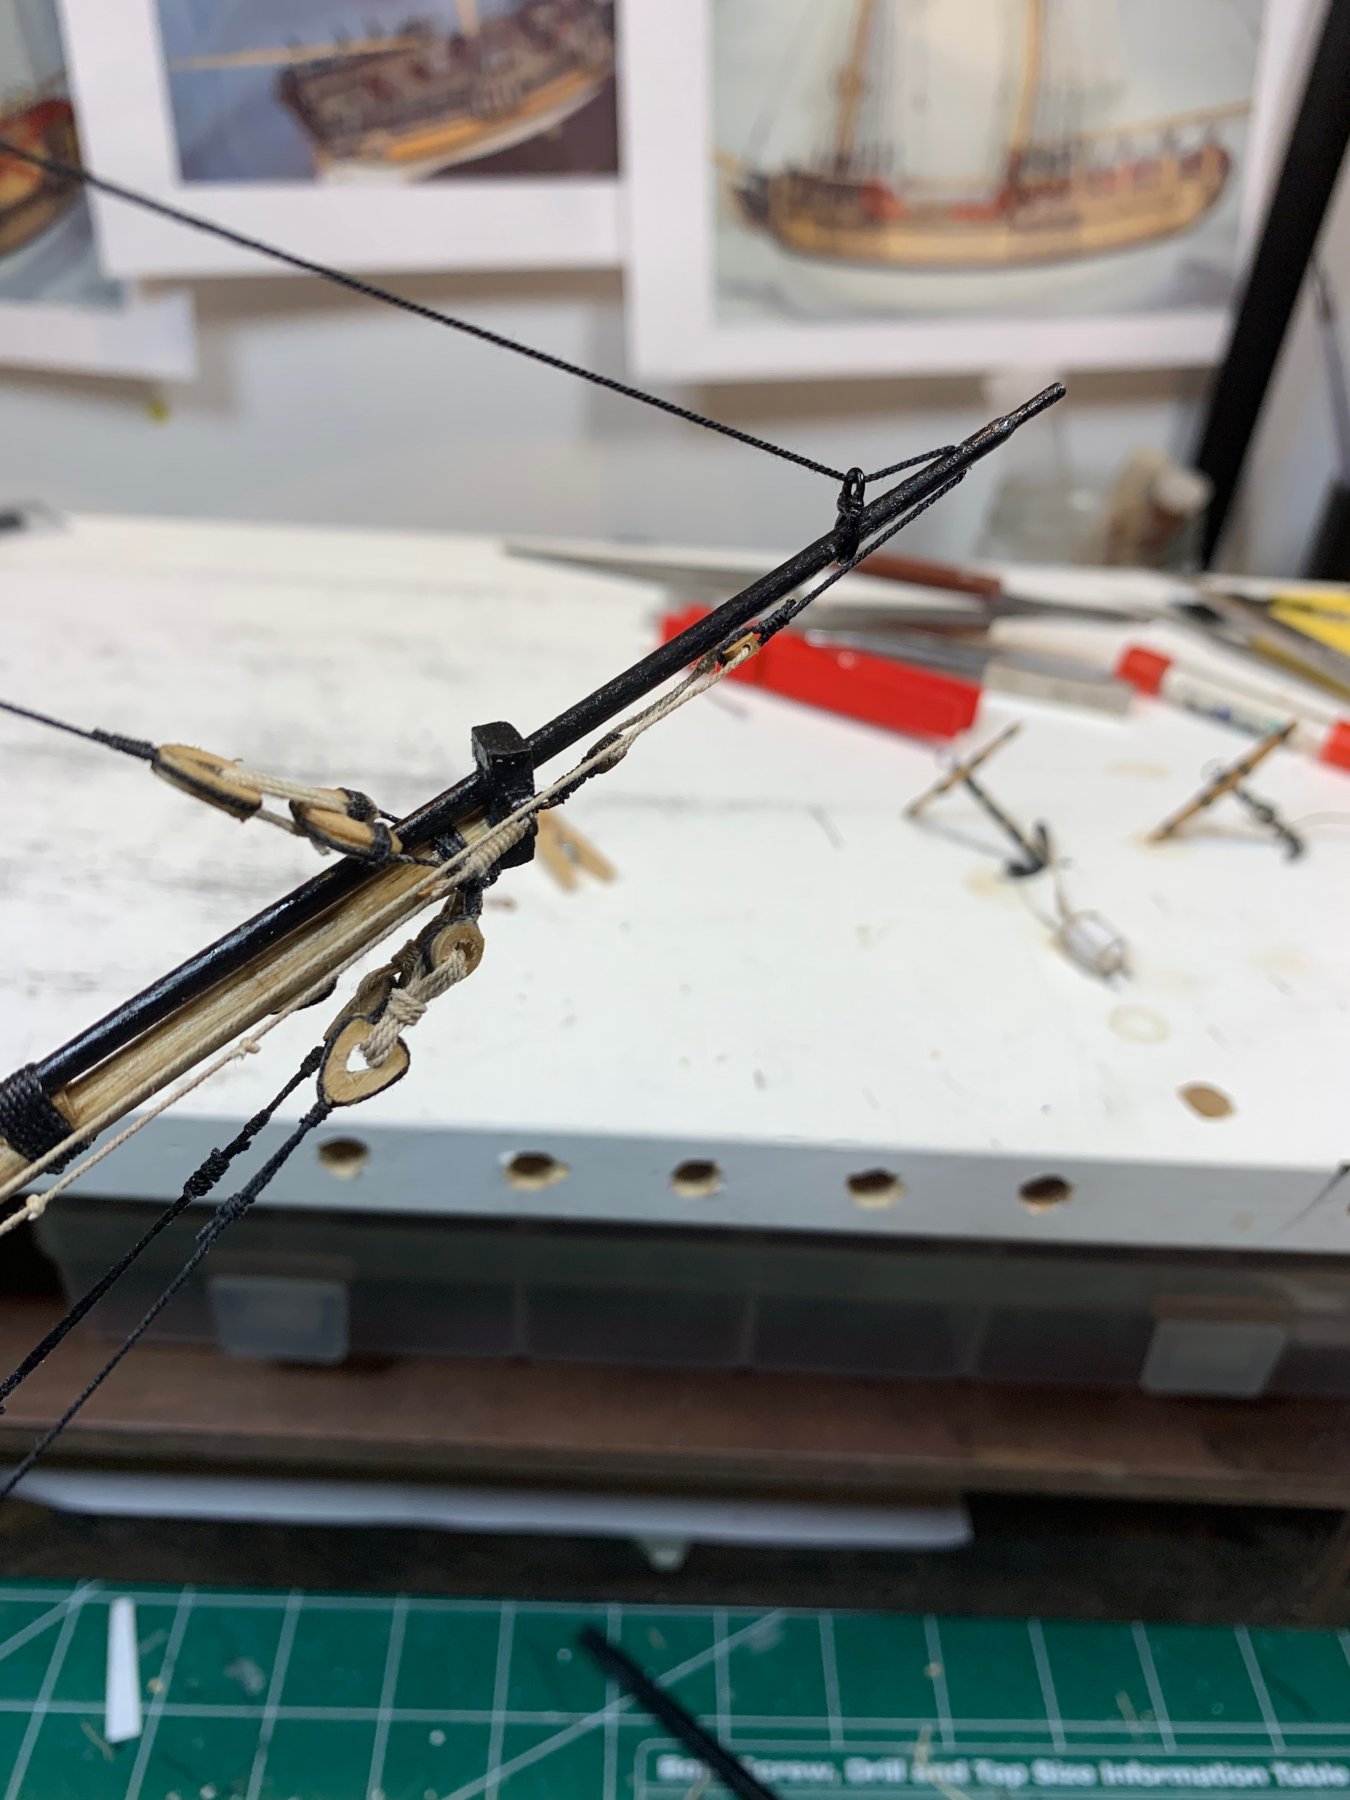
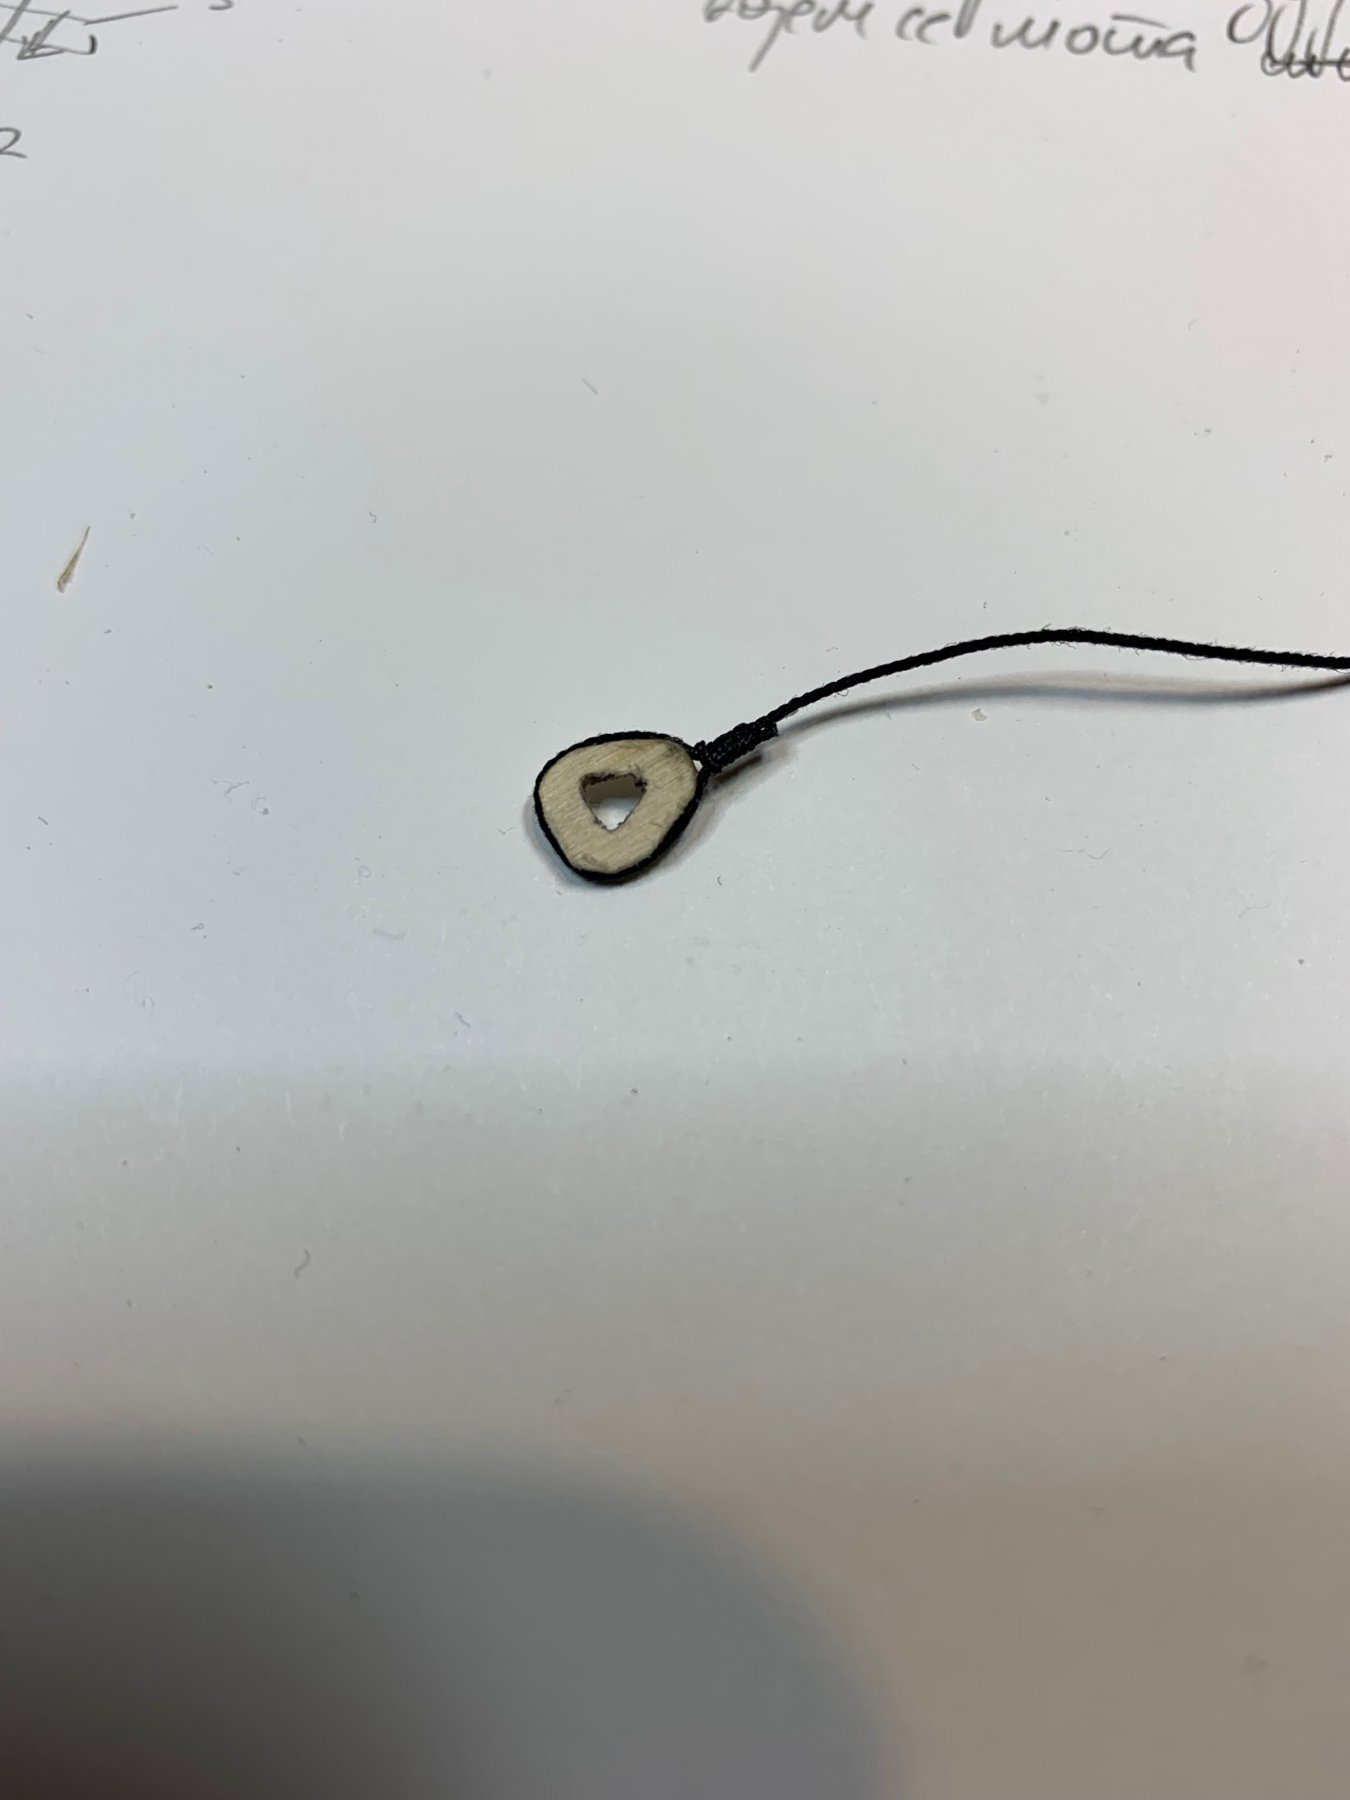
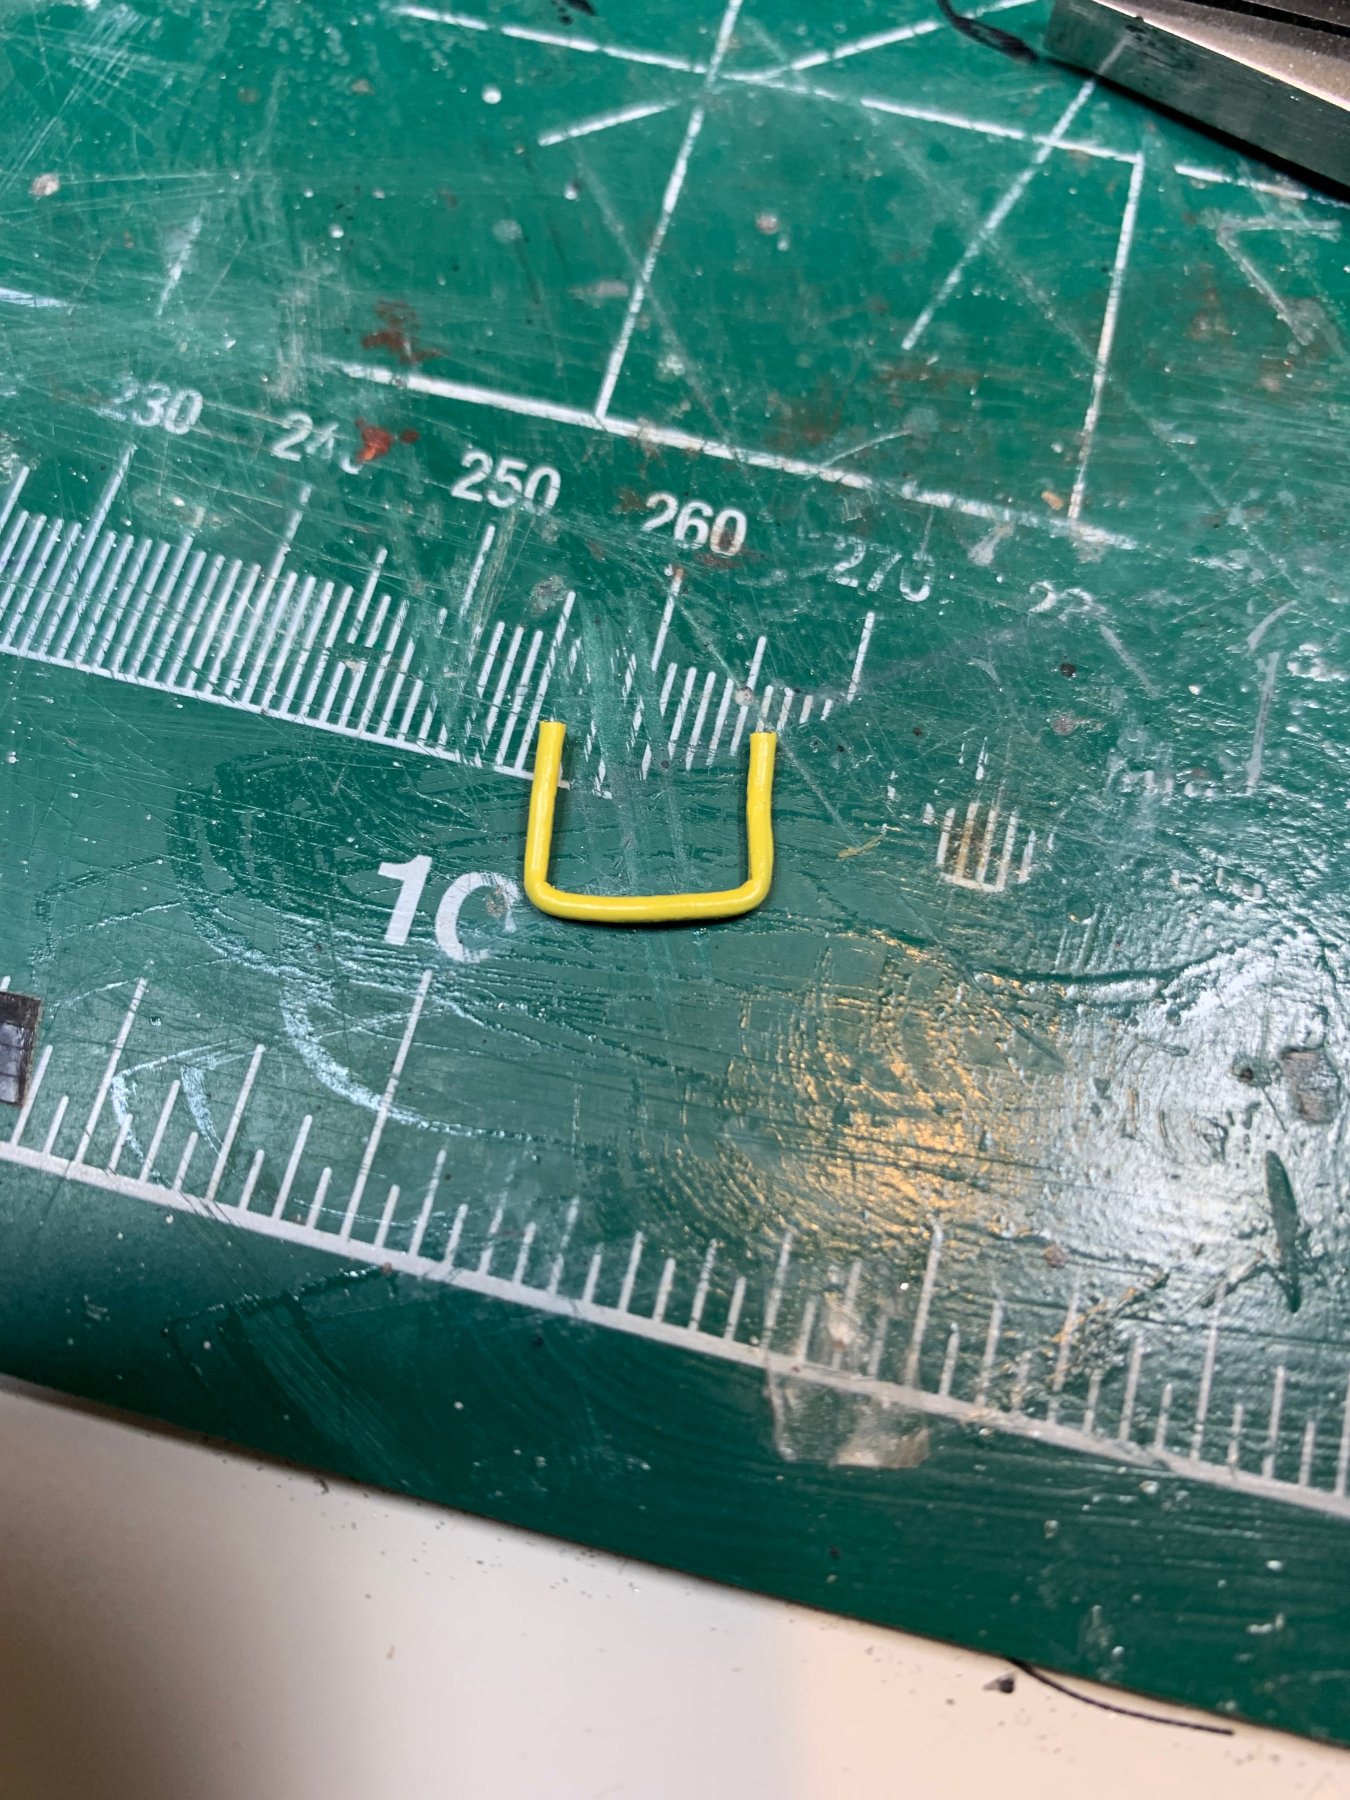
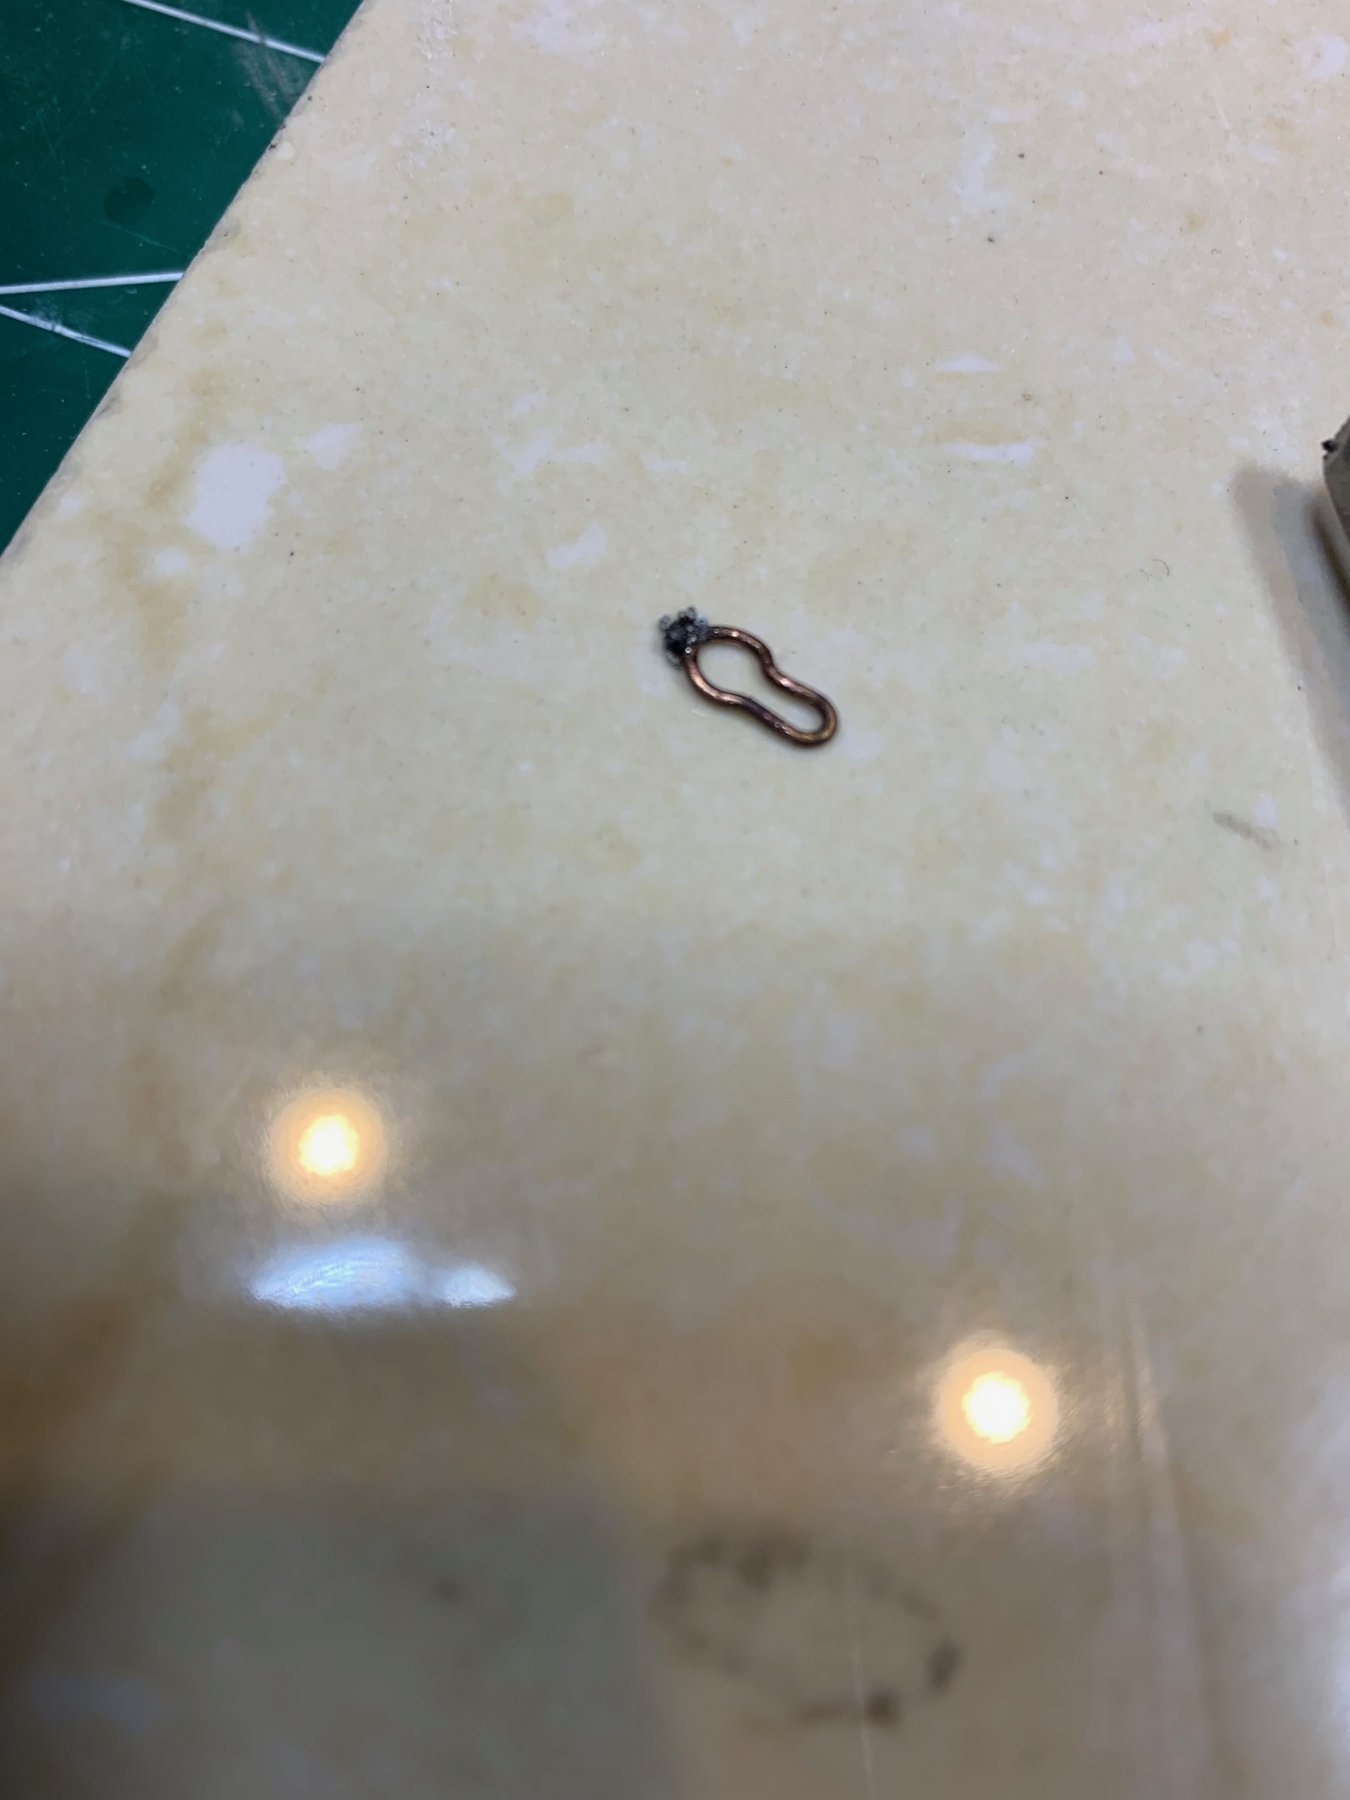
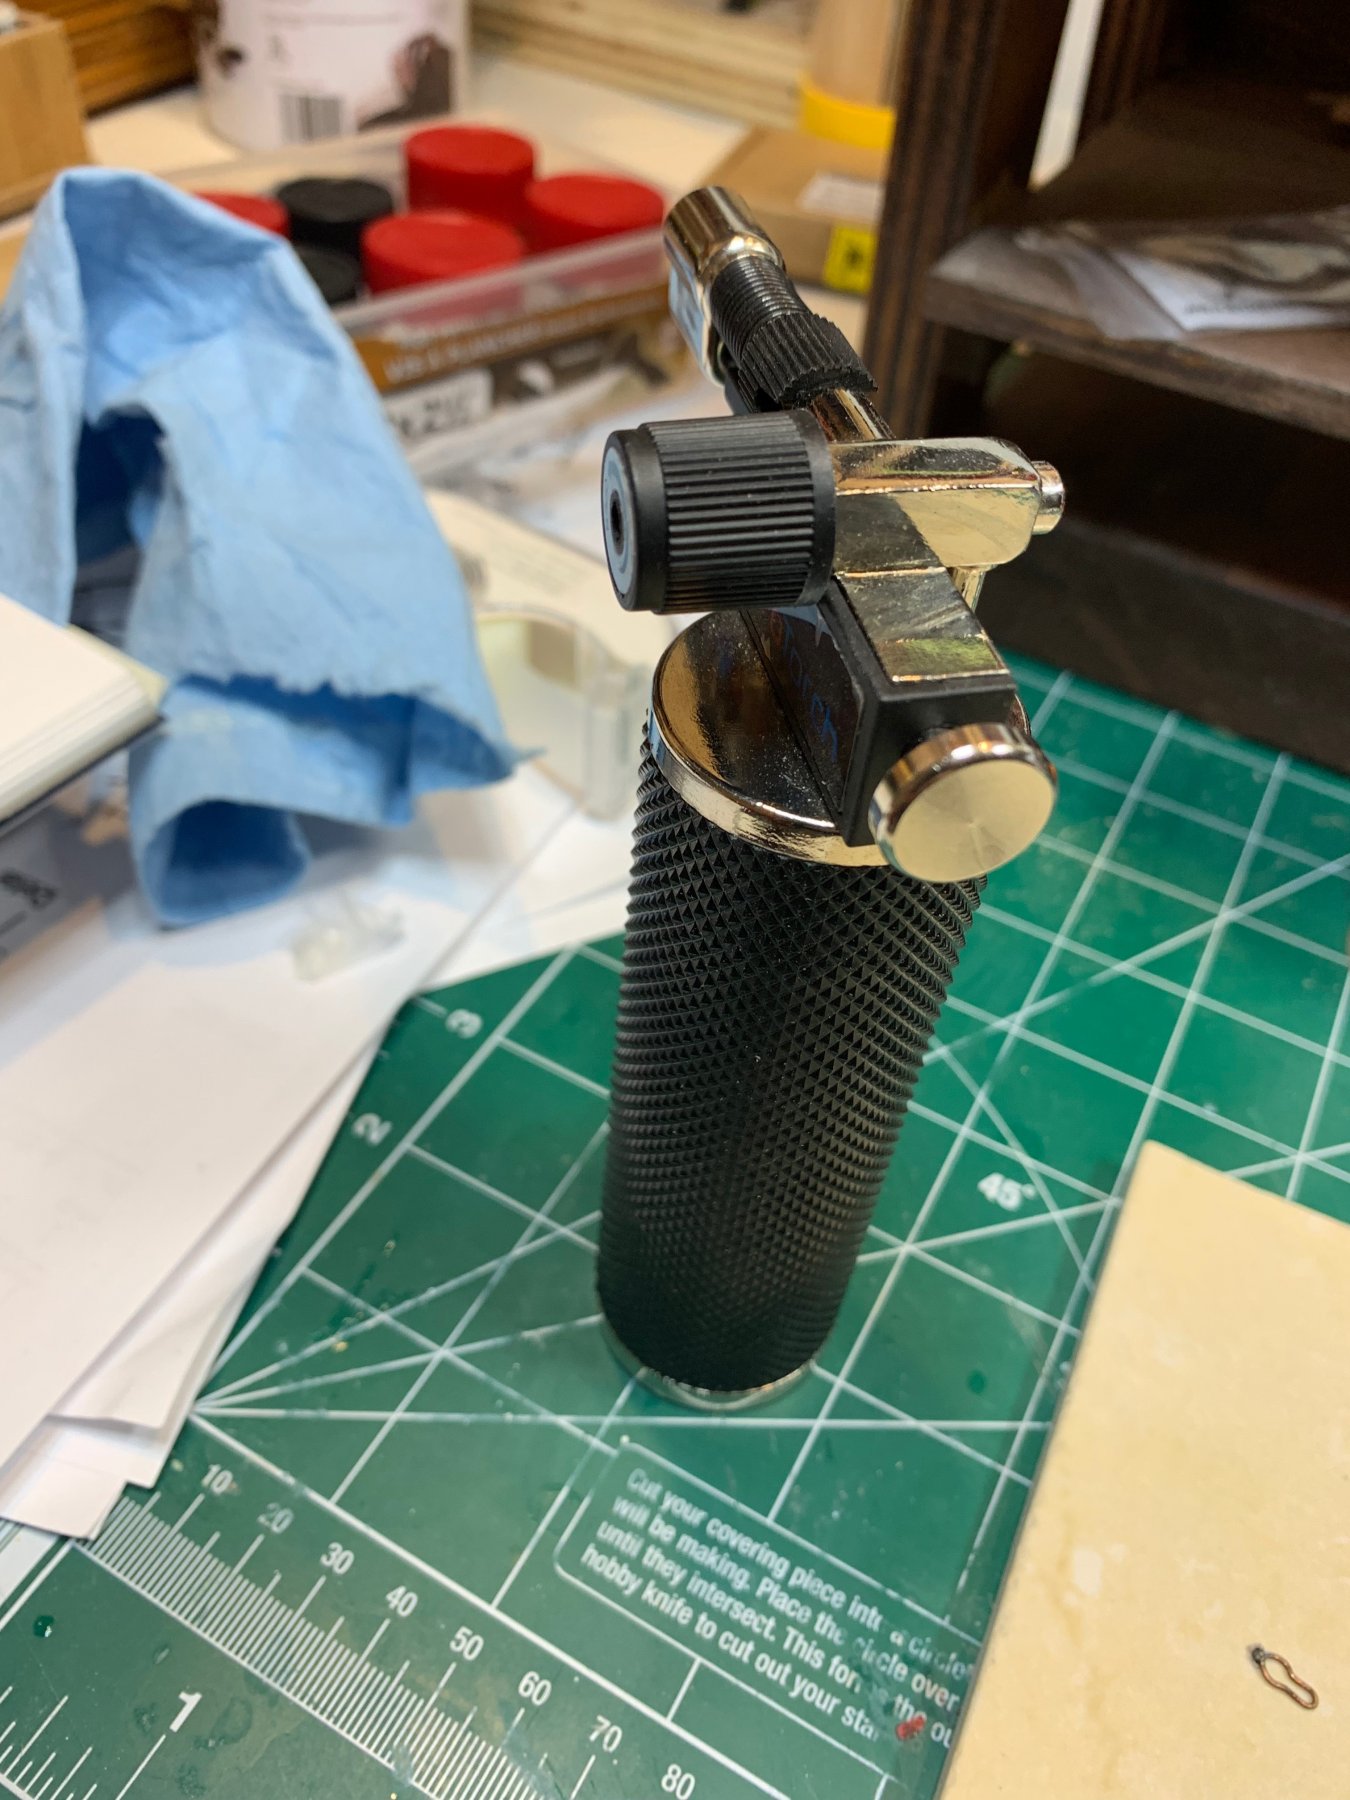
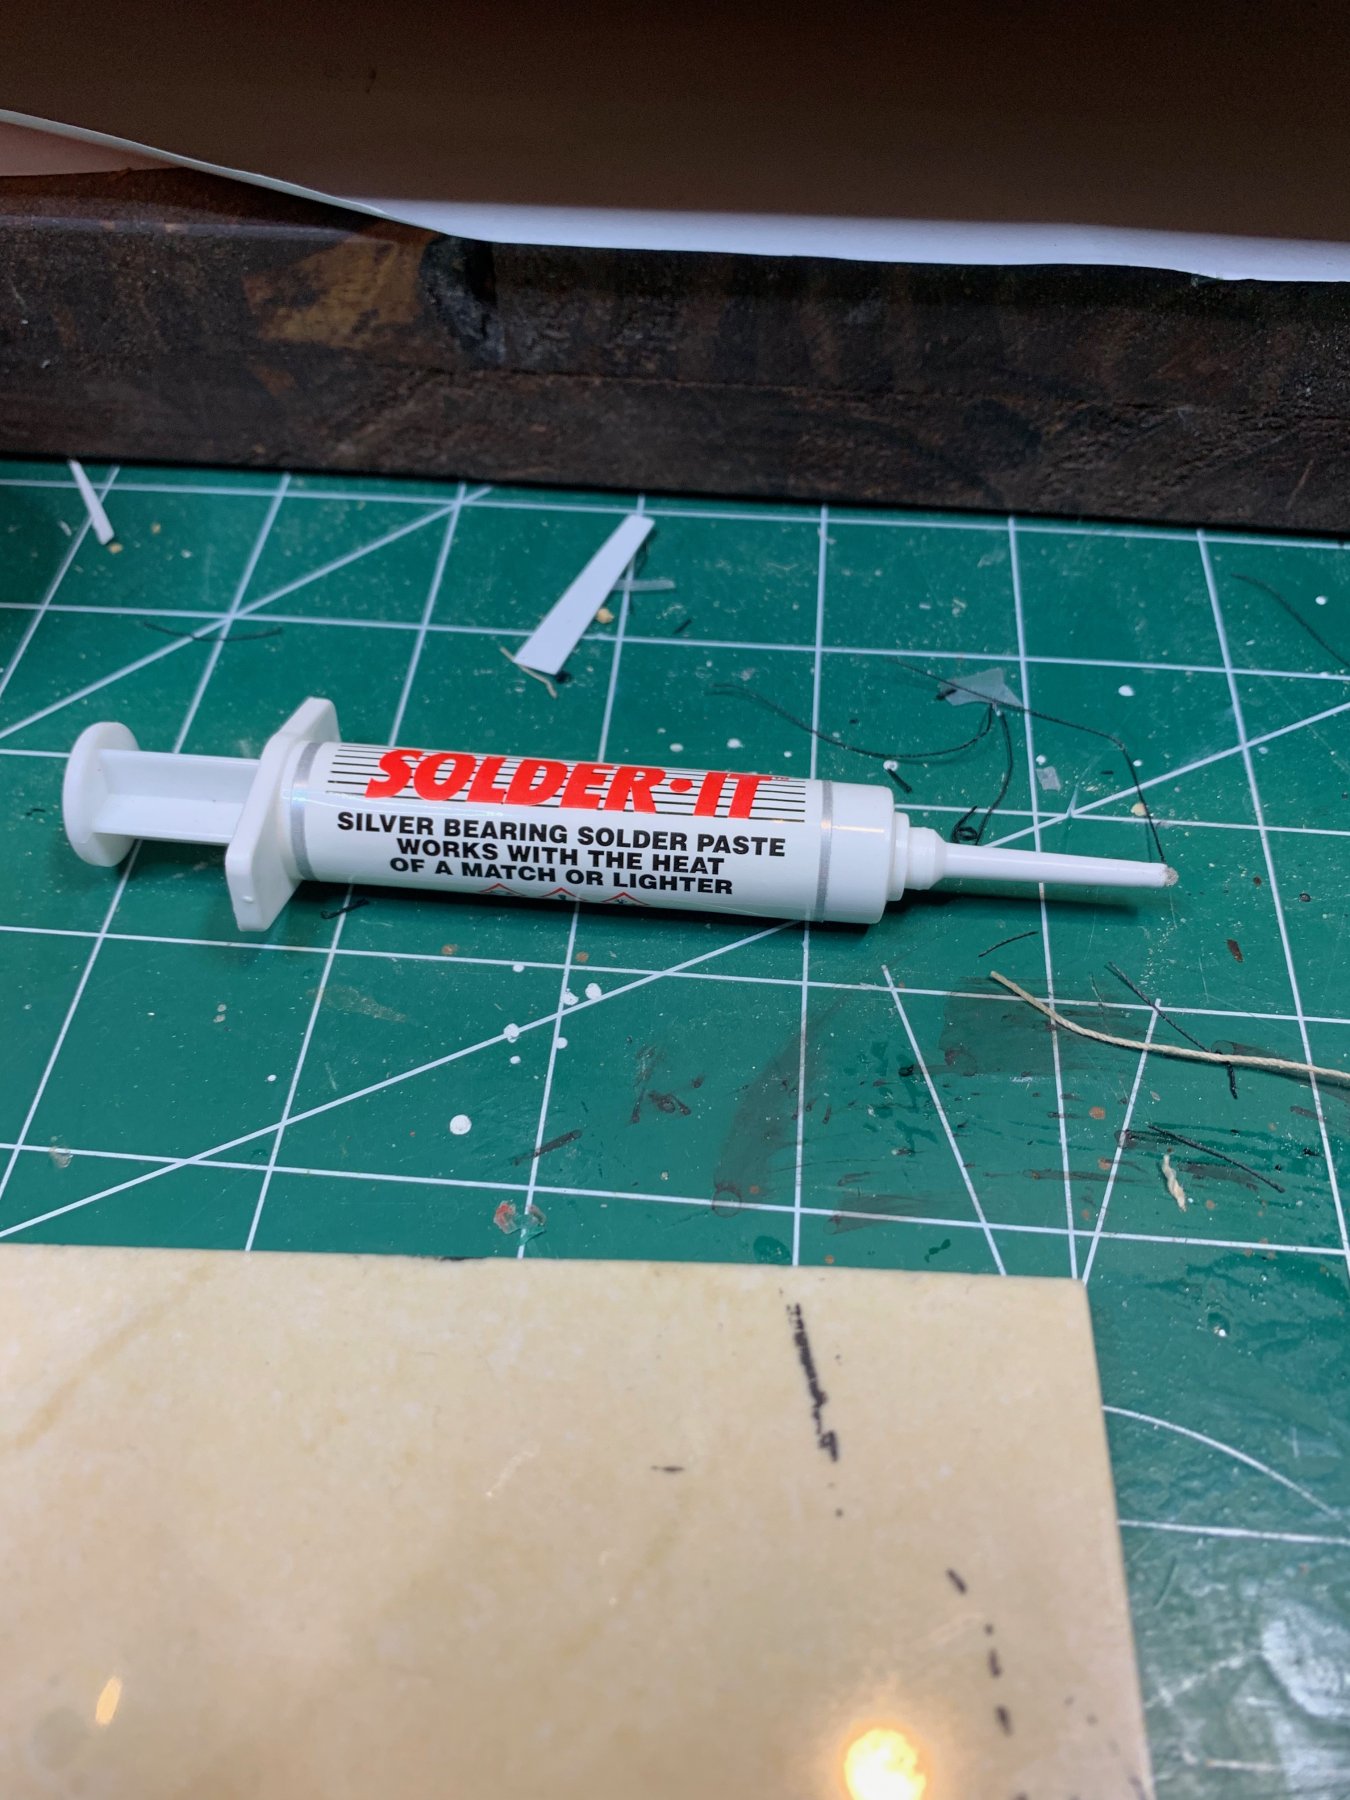
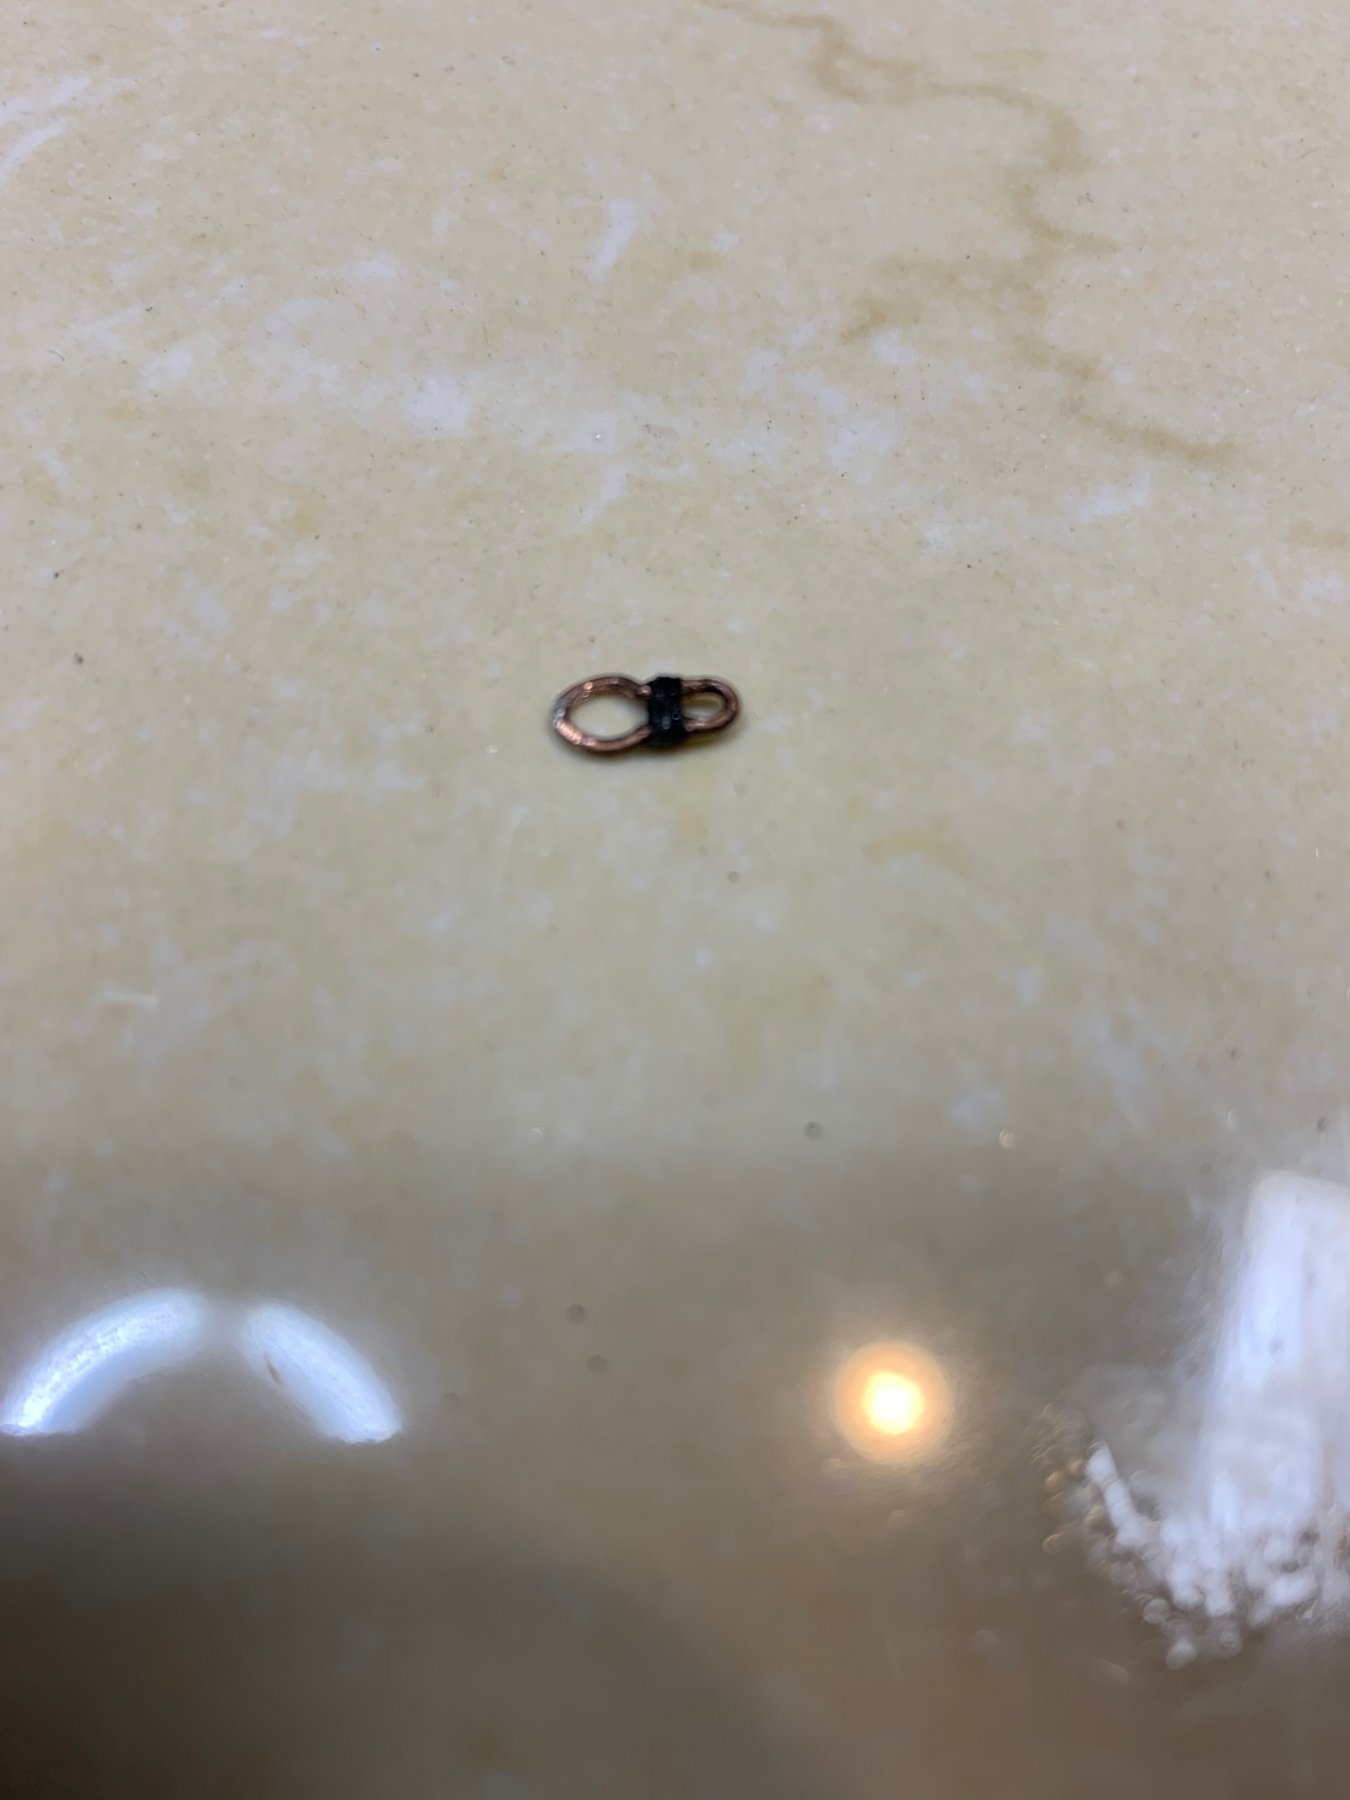
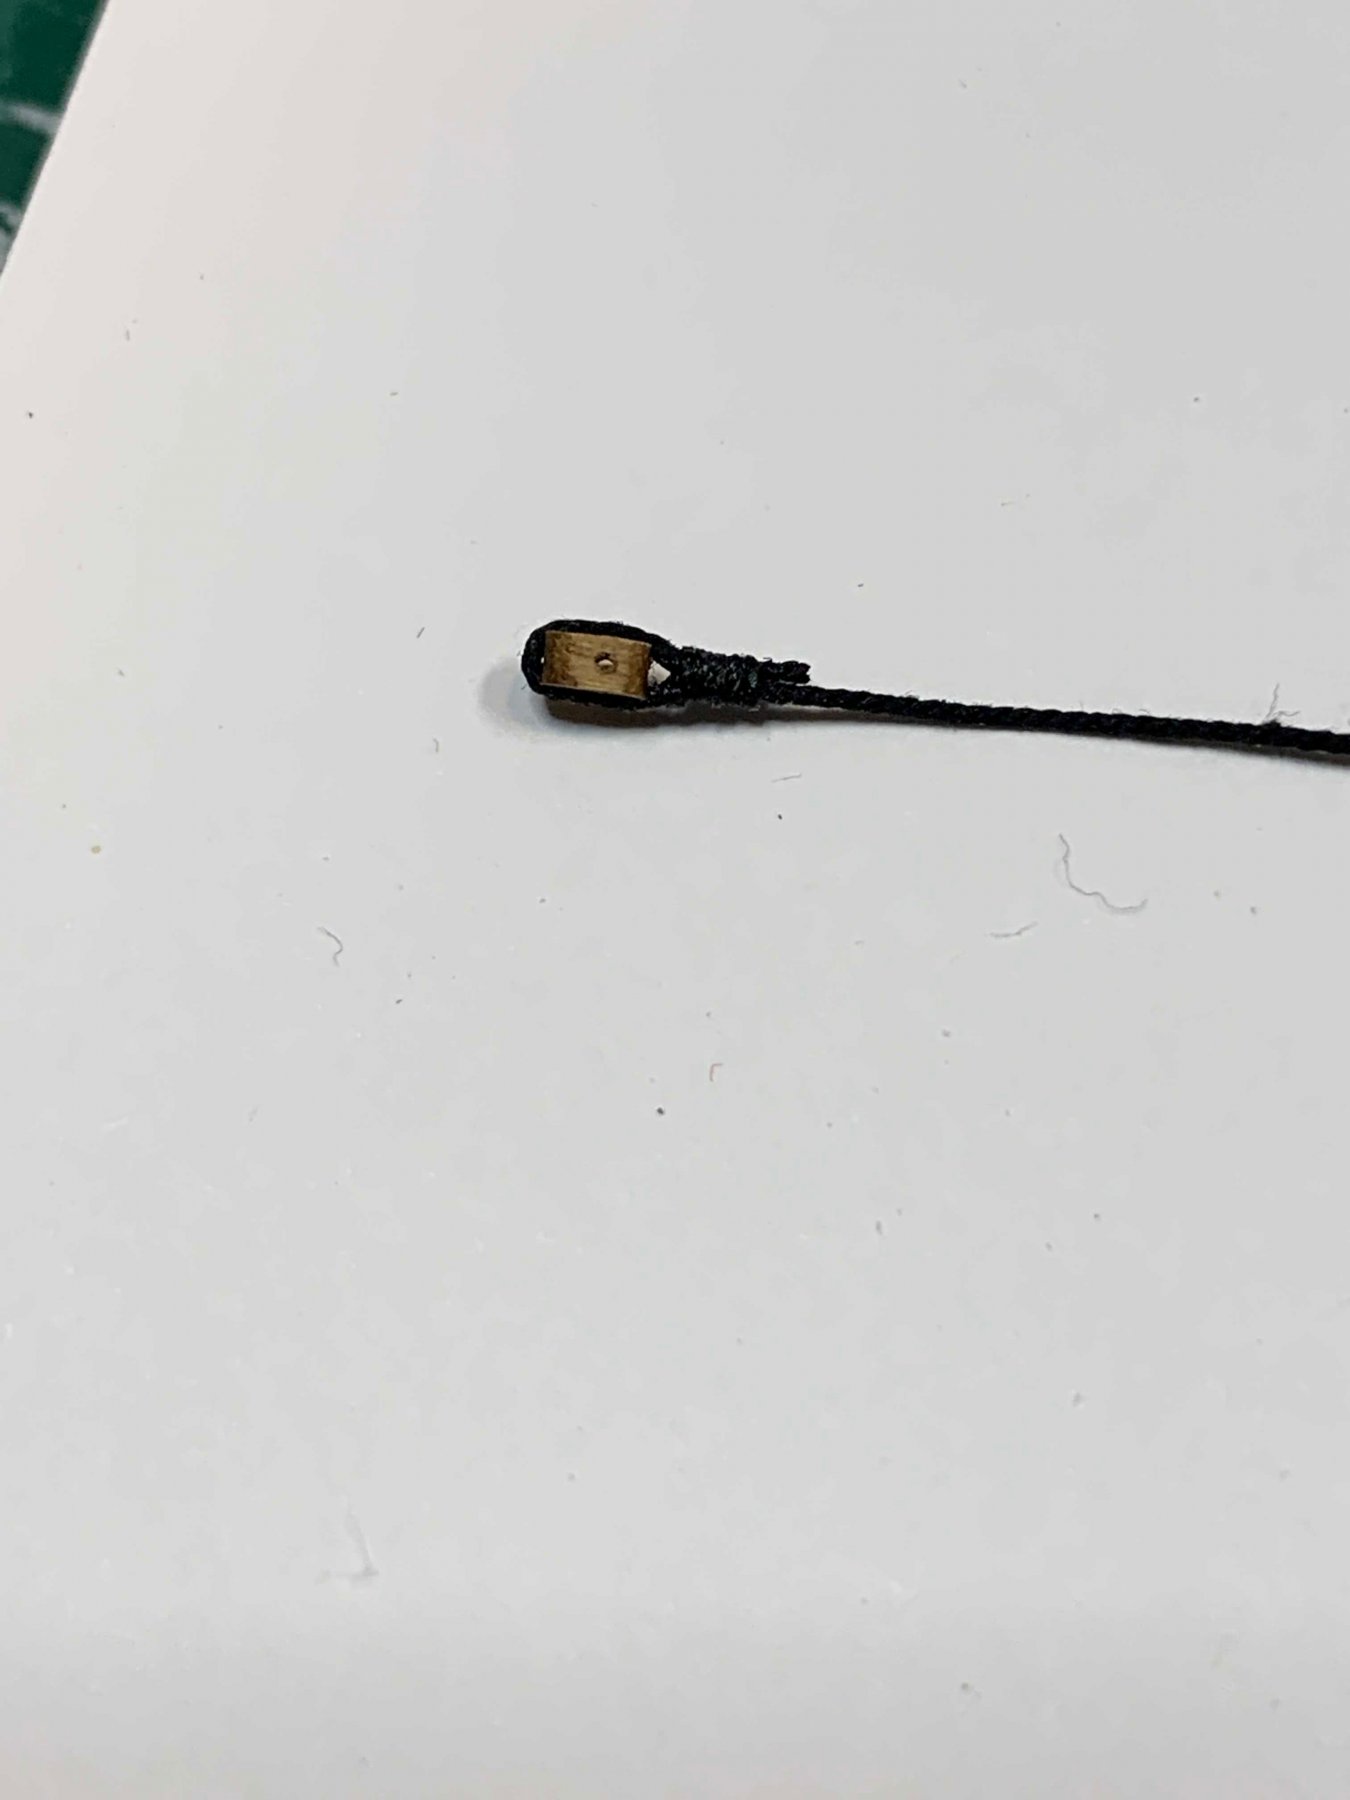
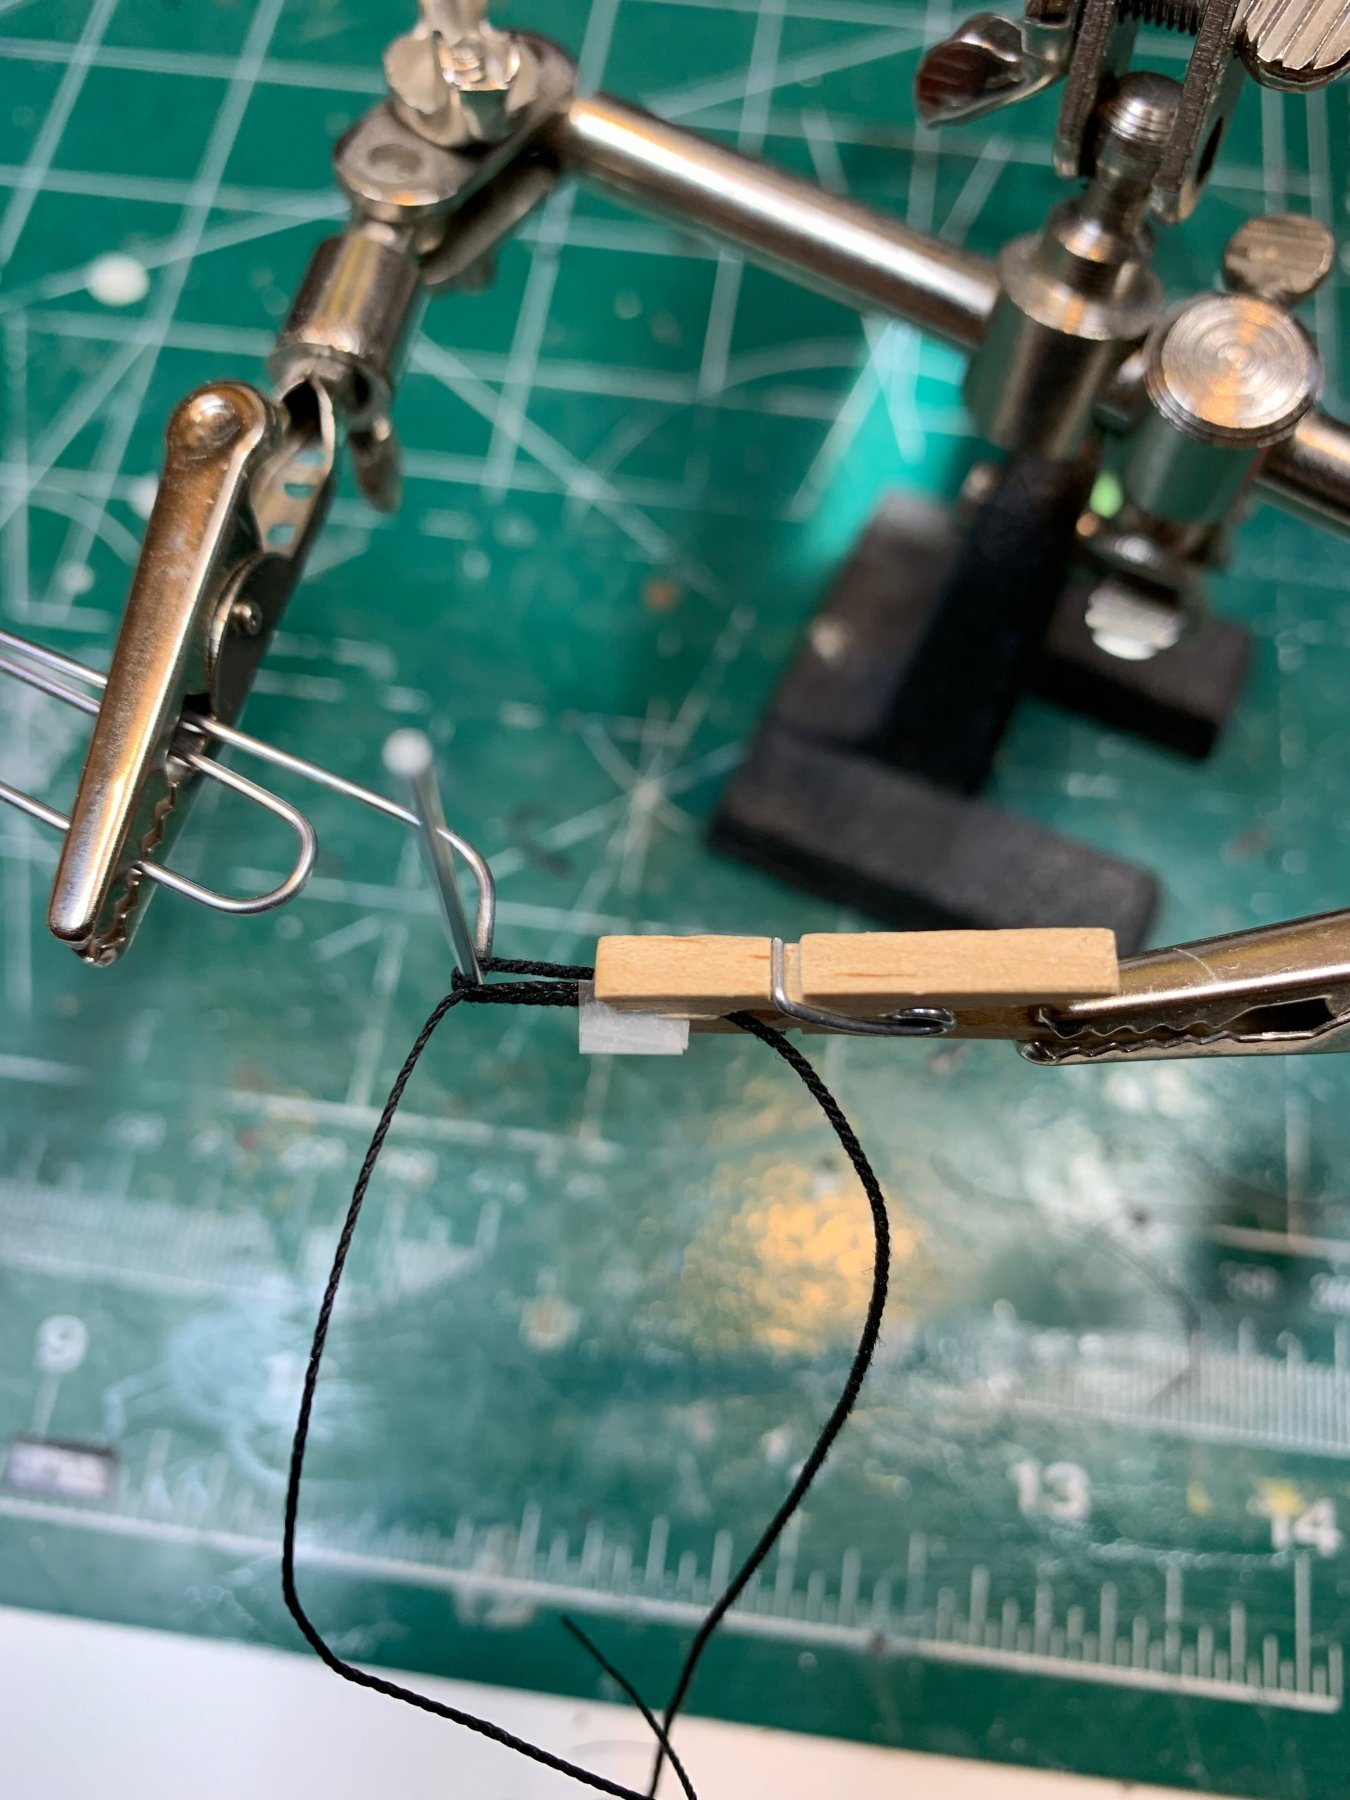
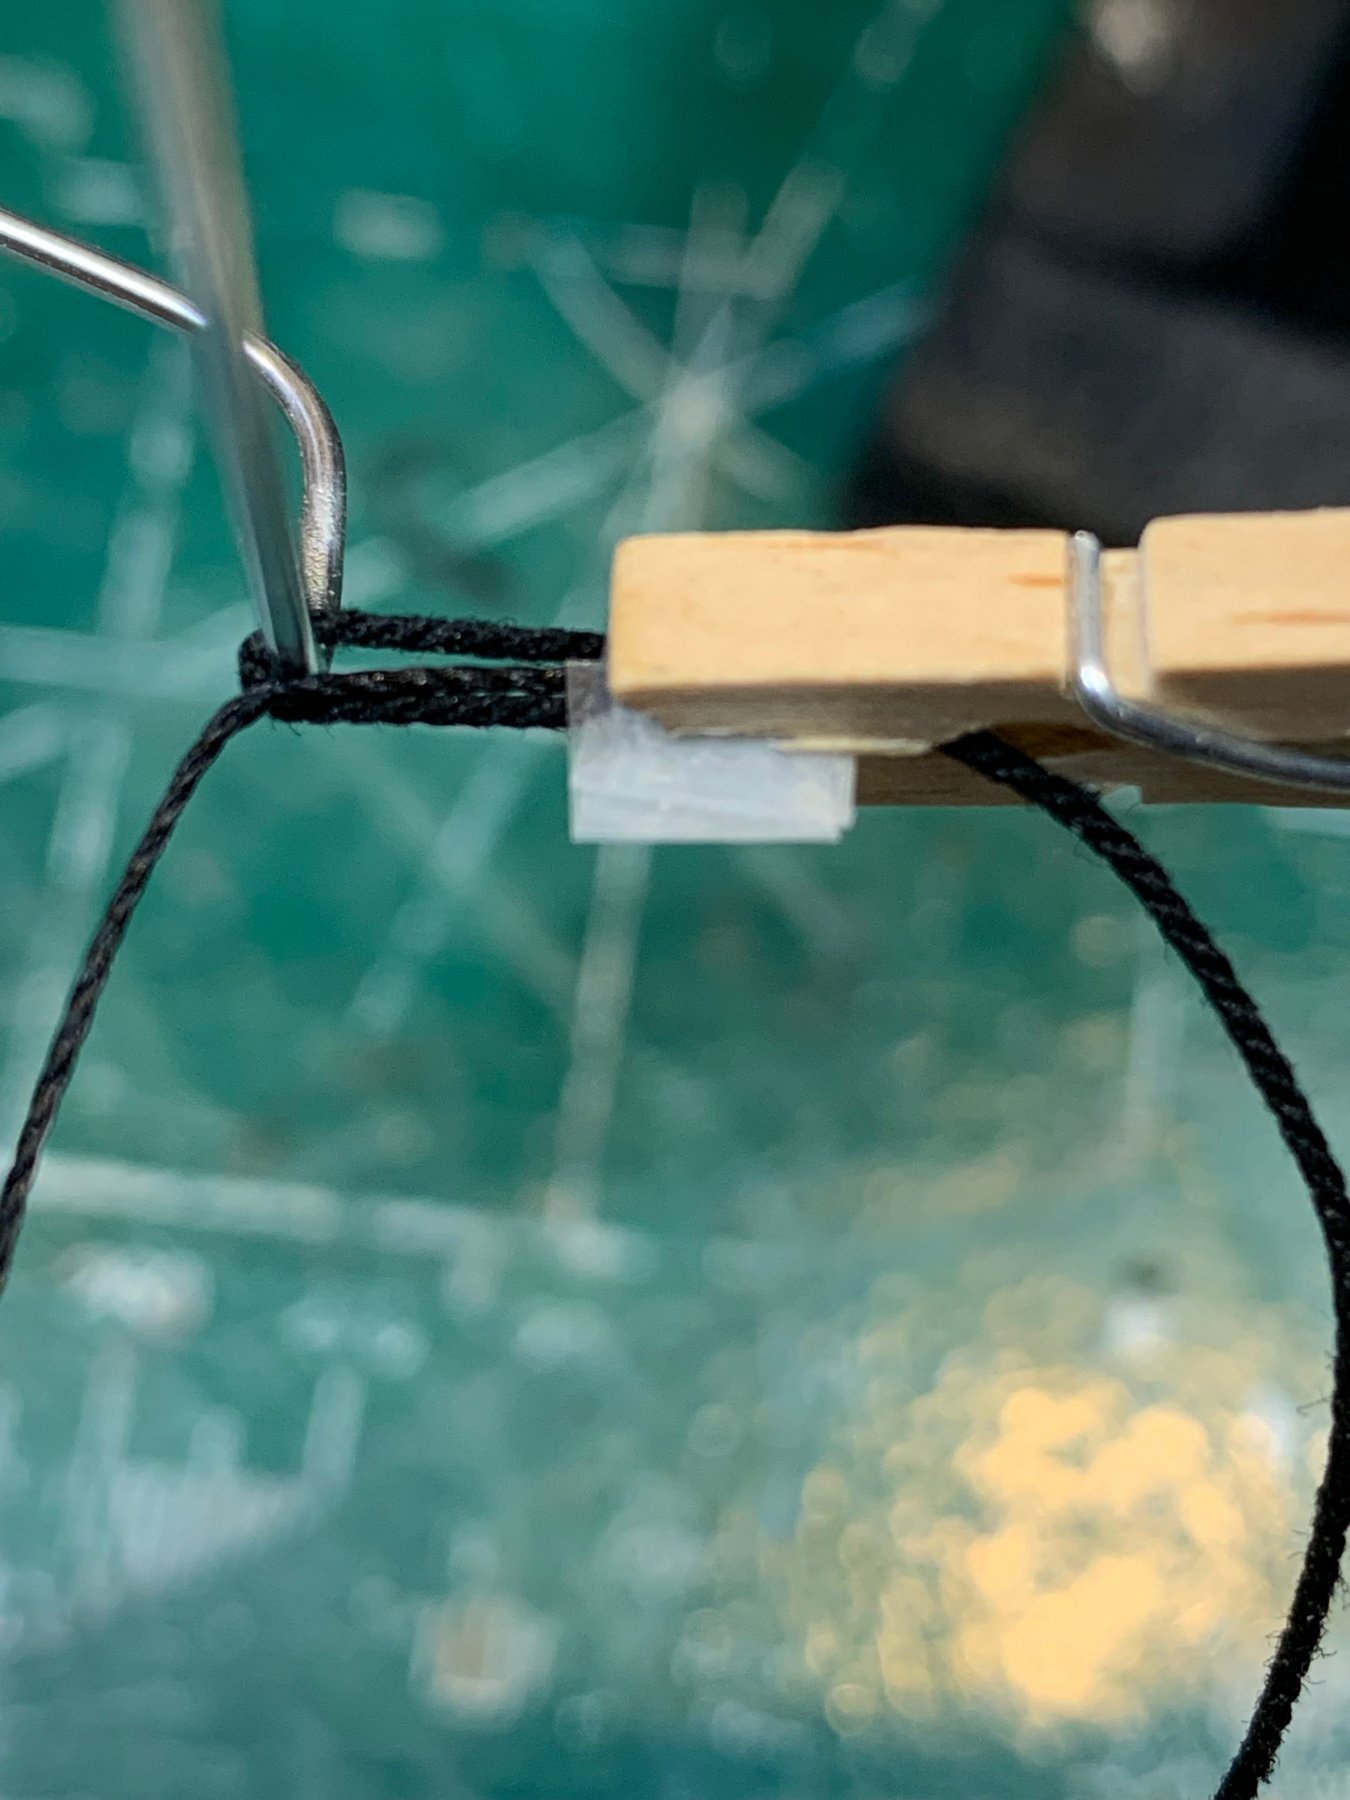
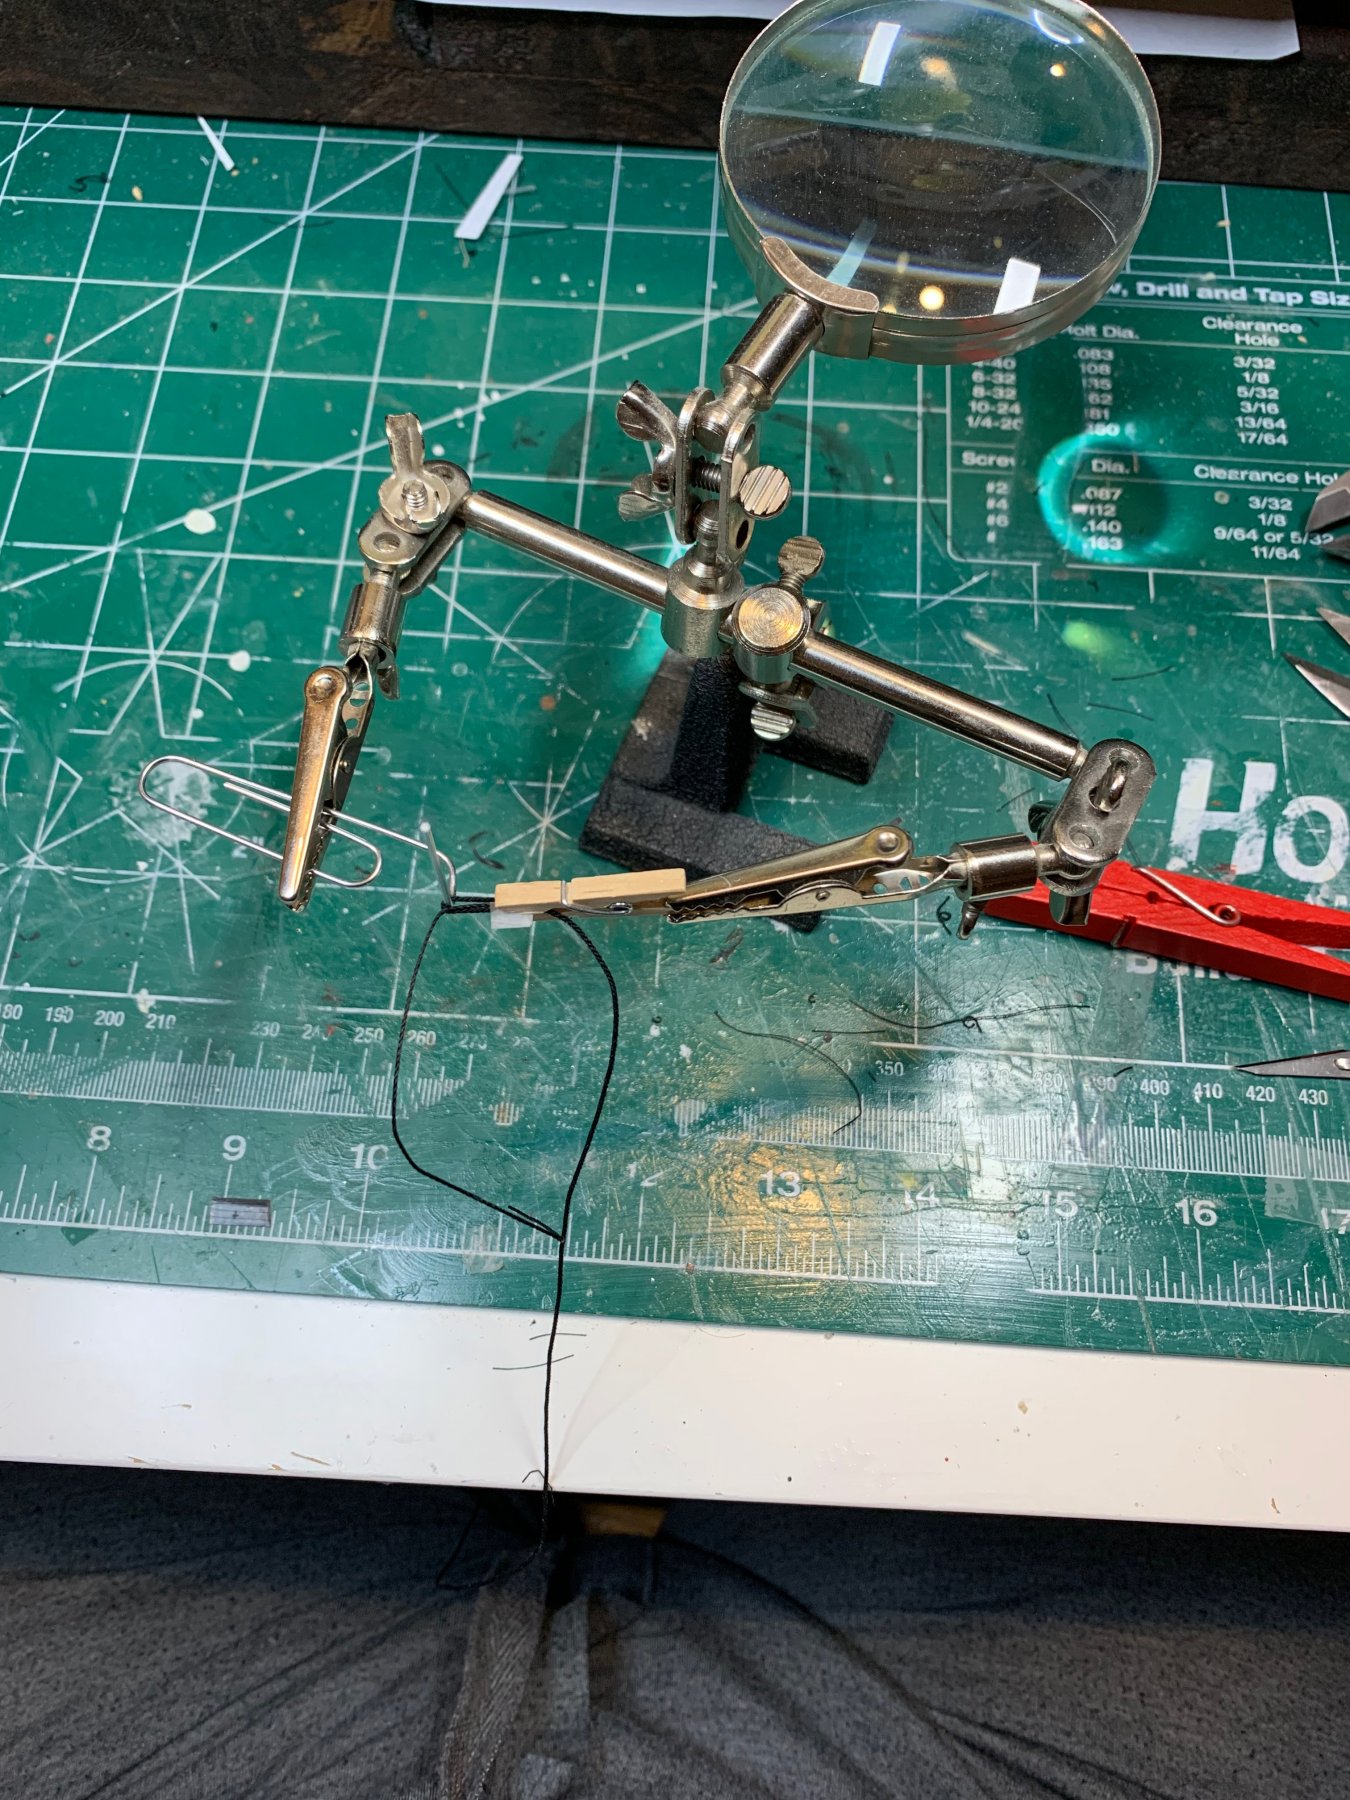
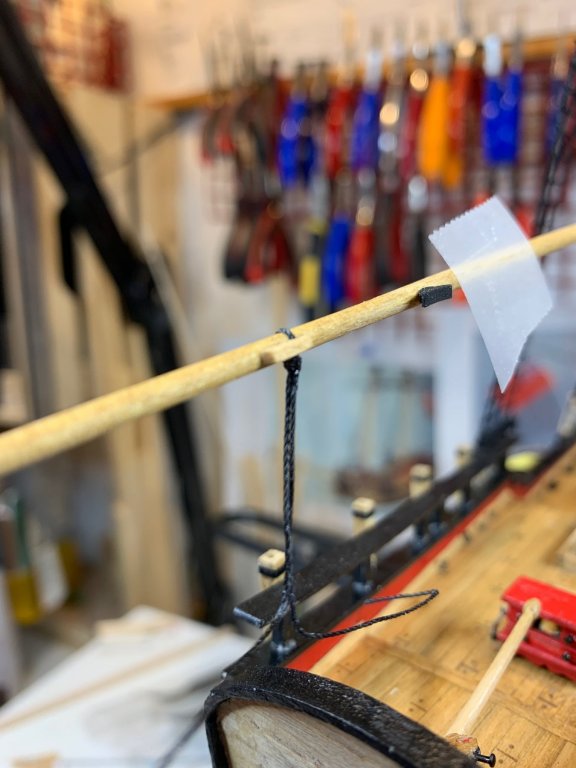
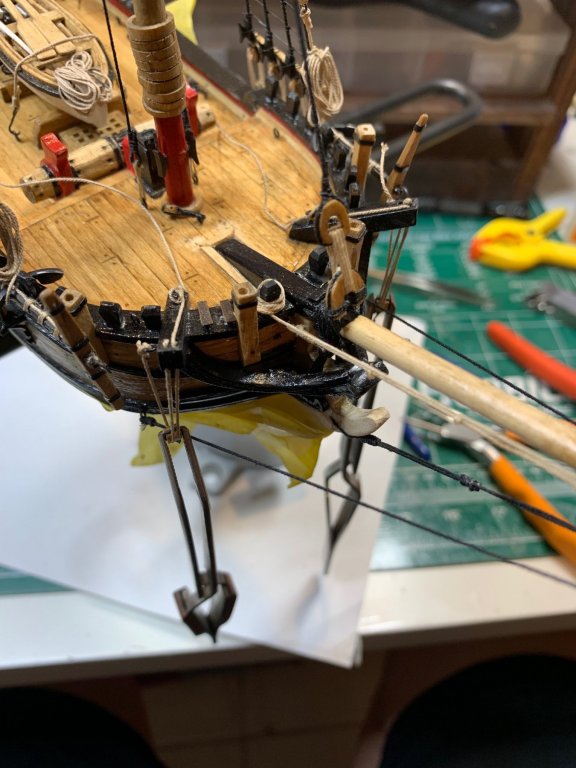
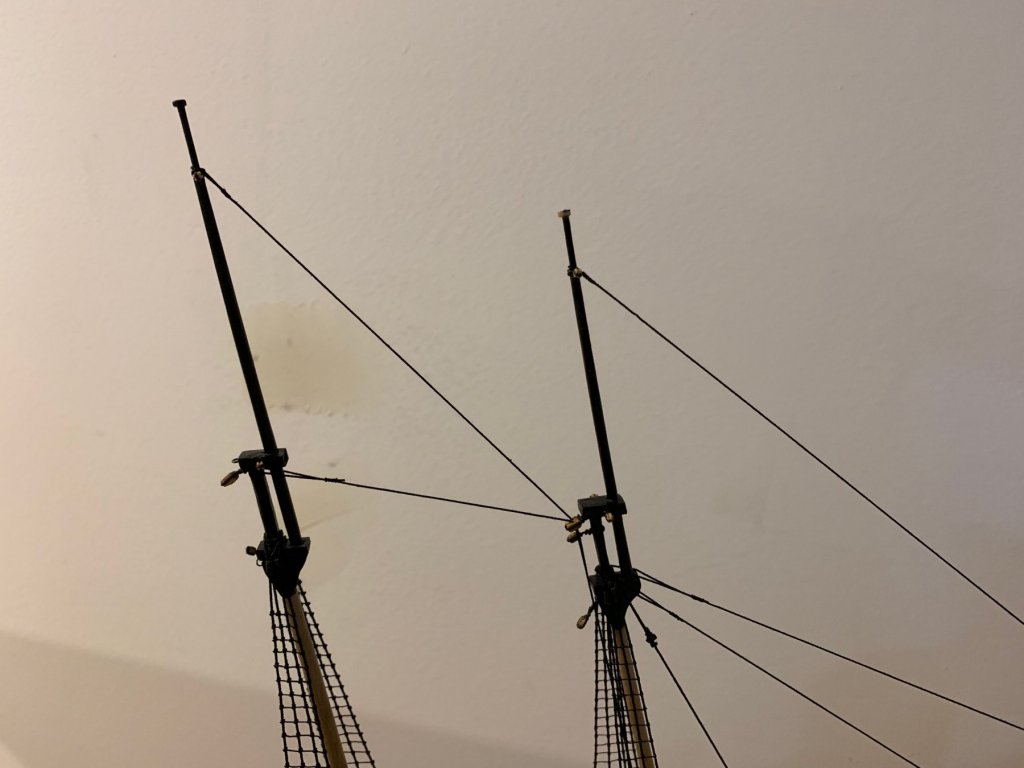
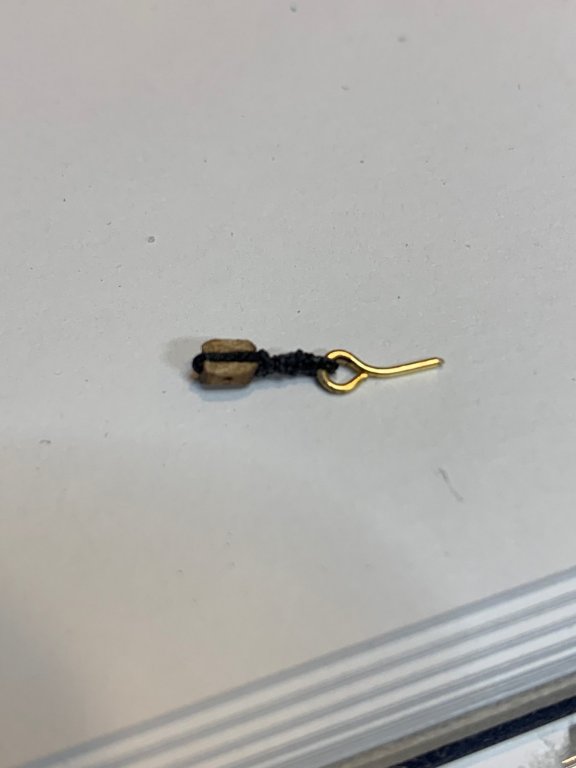
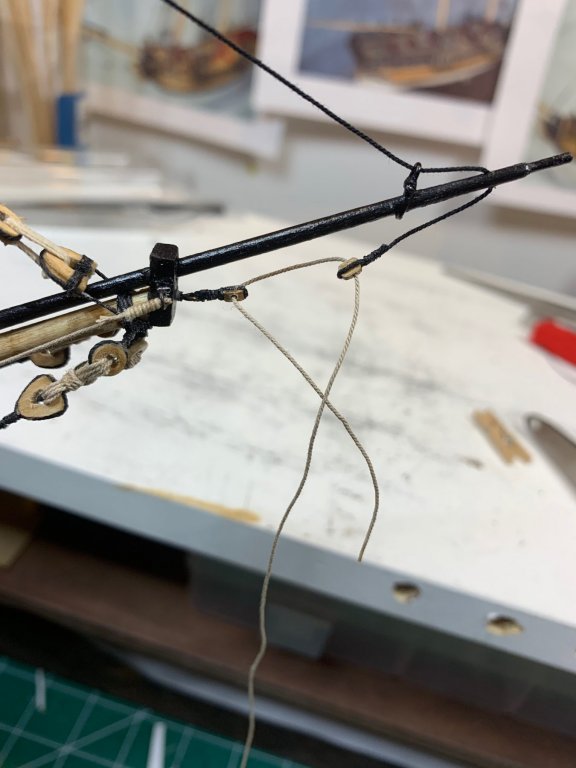
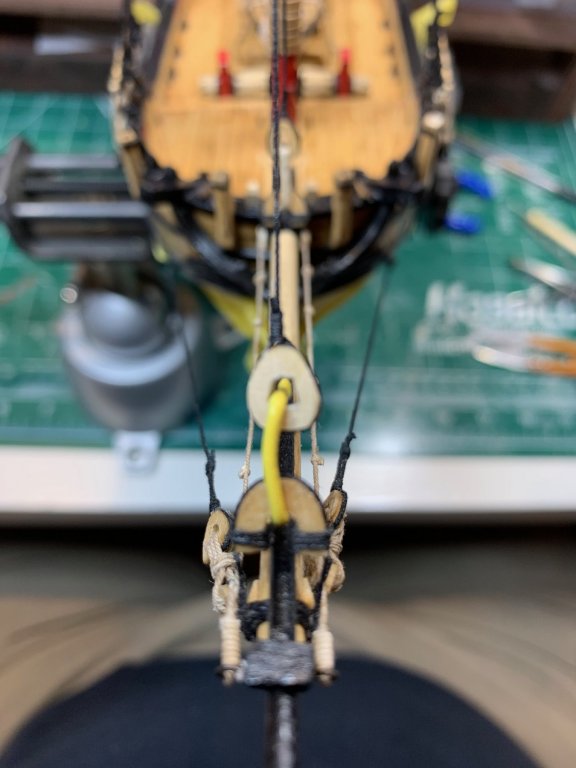
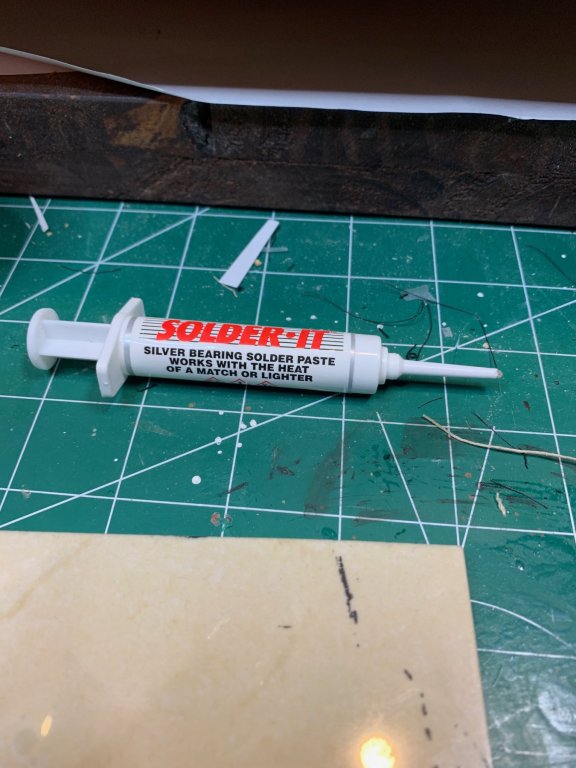
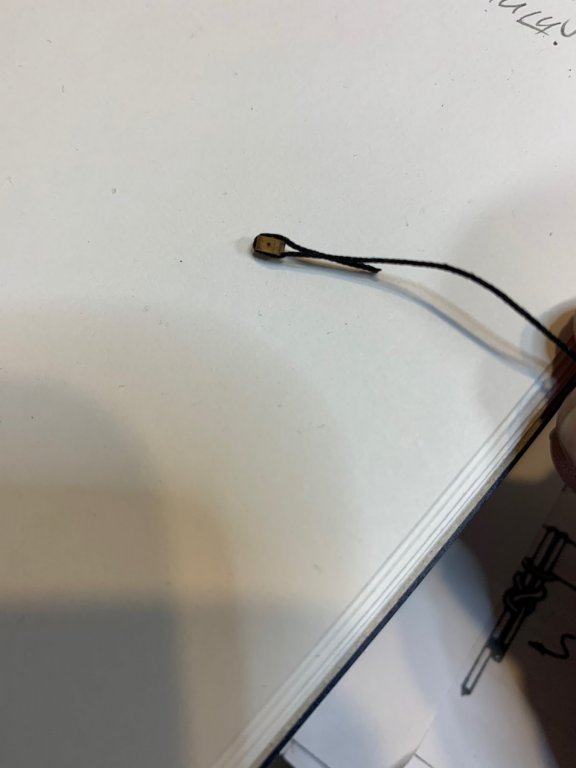
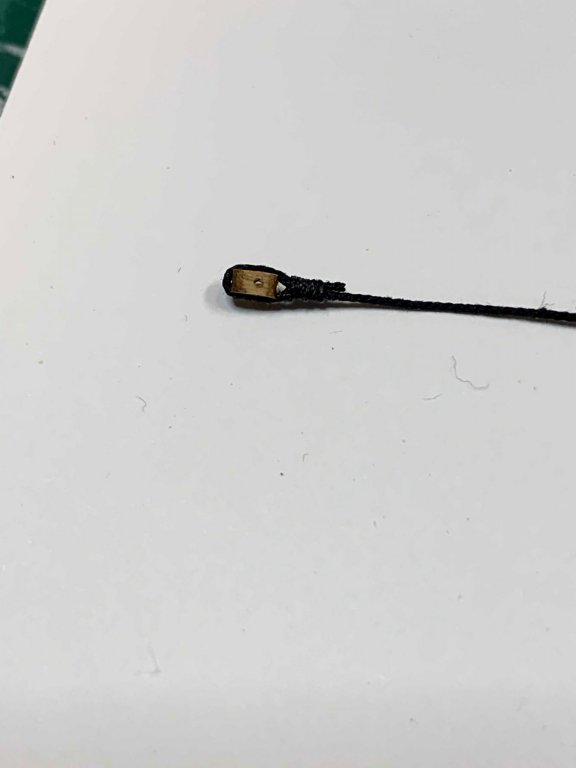
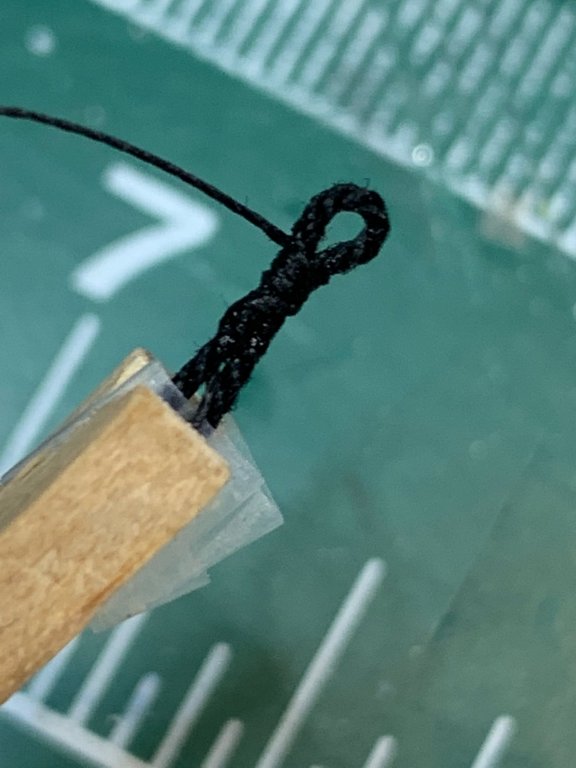
Inner jibstay is next, a new heart was made and seized on the black 0.45mm rigging line that will be used for outer jibstay. Then, to make a lineyard in the same length as fore stay, i made a small template out of a wire... This will keep the distance until i finish up seizing a top part of the line.. and completed... Then i drilled a hole in the jib for a outer jibstay rigging... The outer jibstay 0.45mm will be was seized around the trestle tree. The opposite end will run thru a traveller, which i made out of a 0.3mm black wire.. The loop was soldered and soldering part filled... Then the whole traveller was dipped into flat black paint and left to dry. Soldering is done with a torch and solder-it paste.. Not the expert in soldering but this combo works perfectly well.. Finally a small piece of sewing thread was tied around the top of the traveller to finish it up. Single block was seized on one end of outer jibstay .. ..which ended up today' activity. Happy modeling.


- 360 replies
-
- 1
-
-
- sultana
- model shipways
- (and 1 more)
-
Thanks, Yes, it is very nice little model, a bit too little for my hands 🙂 but overall very nice project. Just do lot of custom made parts and it will be enjoyable journey..
- 360 replies
-
- 2
-
-
- sultana
- model shipways
- (and 1 more)
-
Yes you are right, i should have done a bit more research 😞 I will try to correct it, i might have a bit more extra room on the line... Cheers
- 360 replies
-
- 1
-
-
- sultana
- model shipways
- (and 1 more)
-
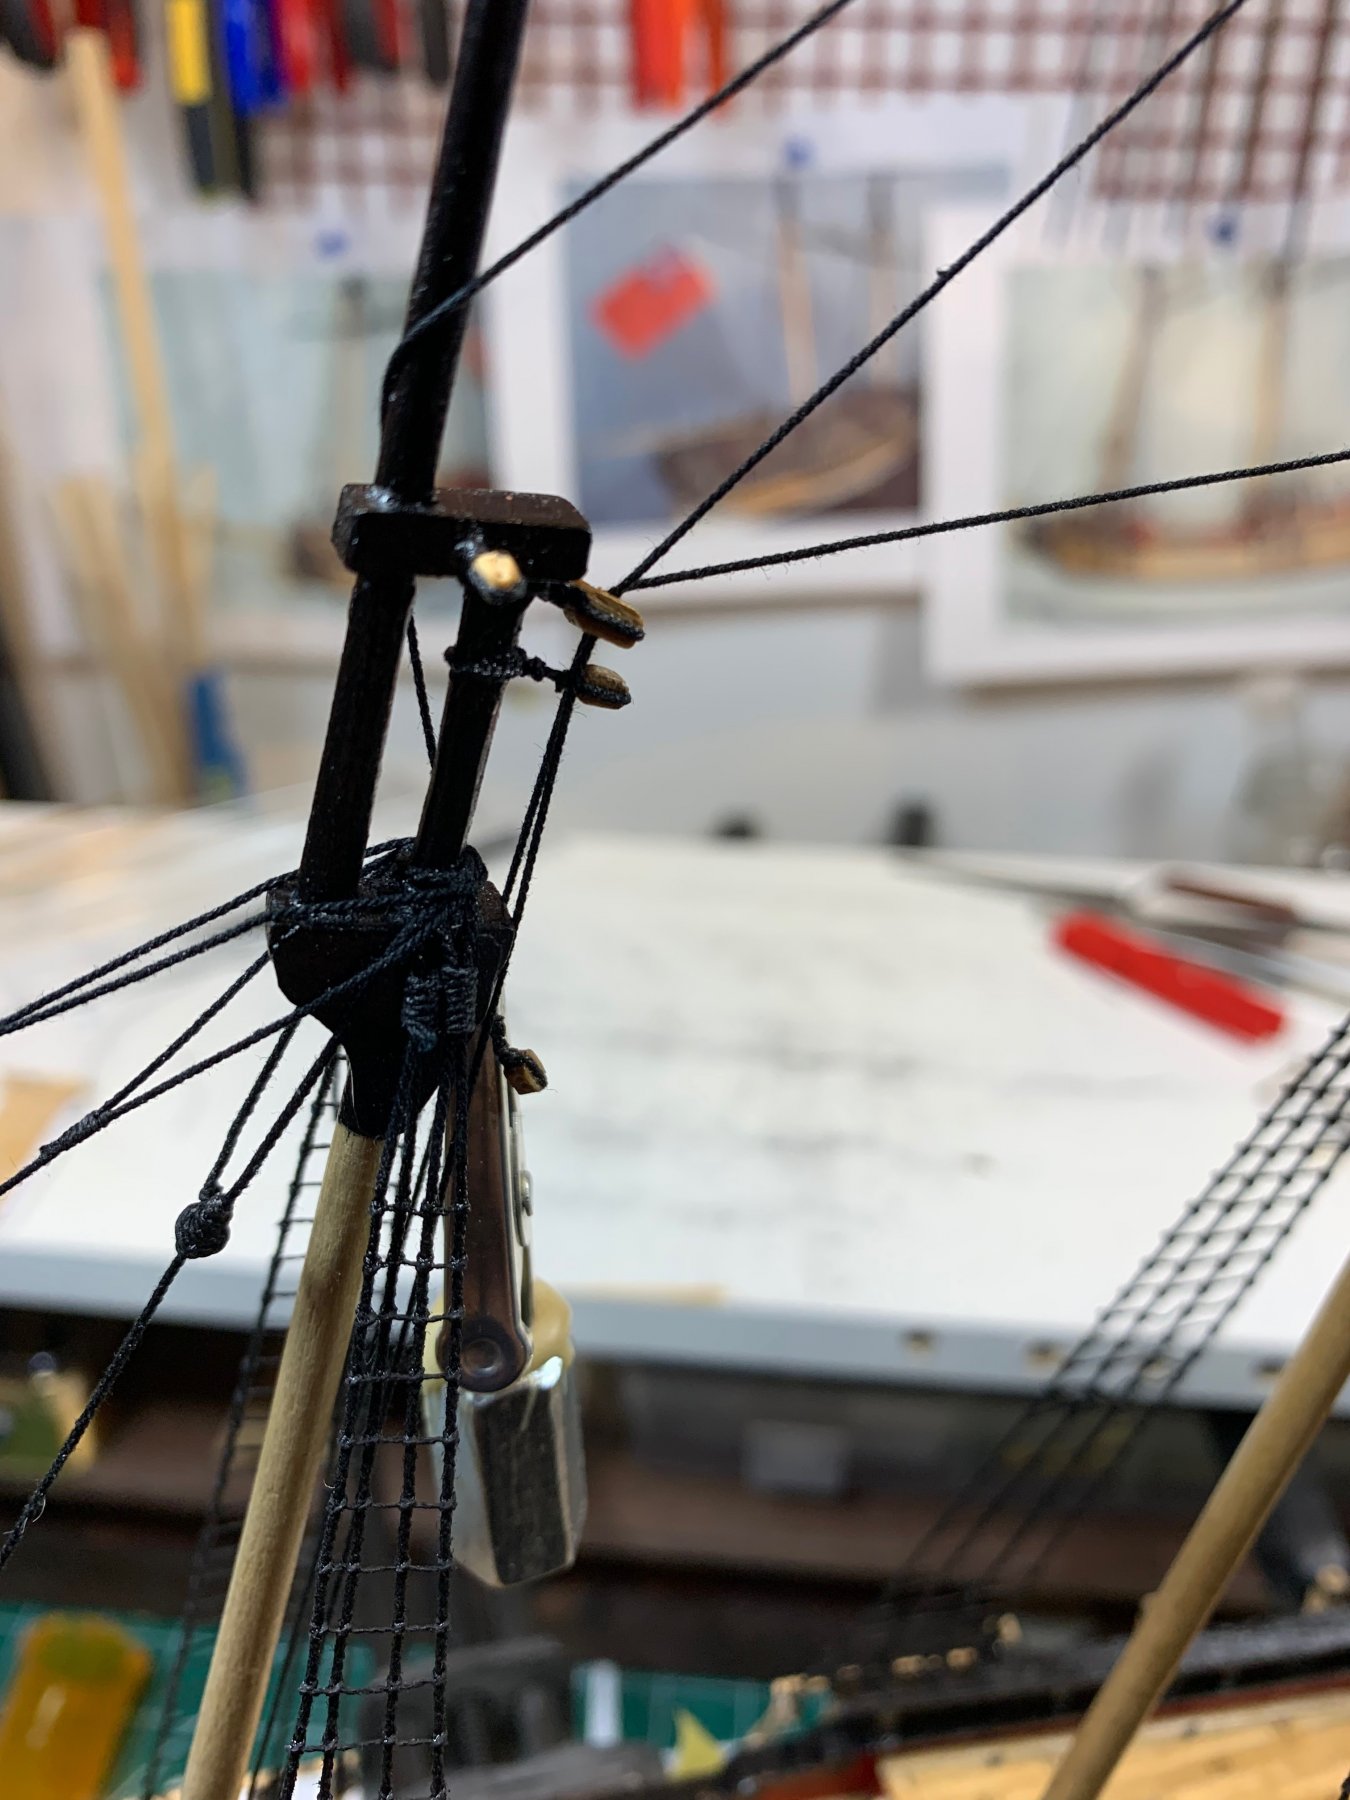
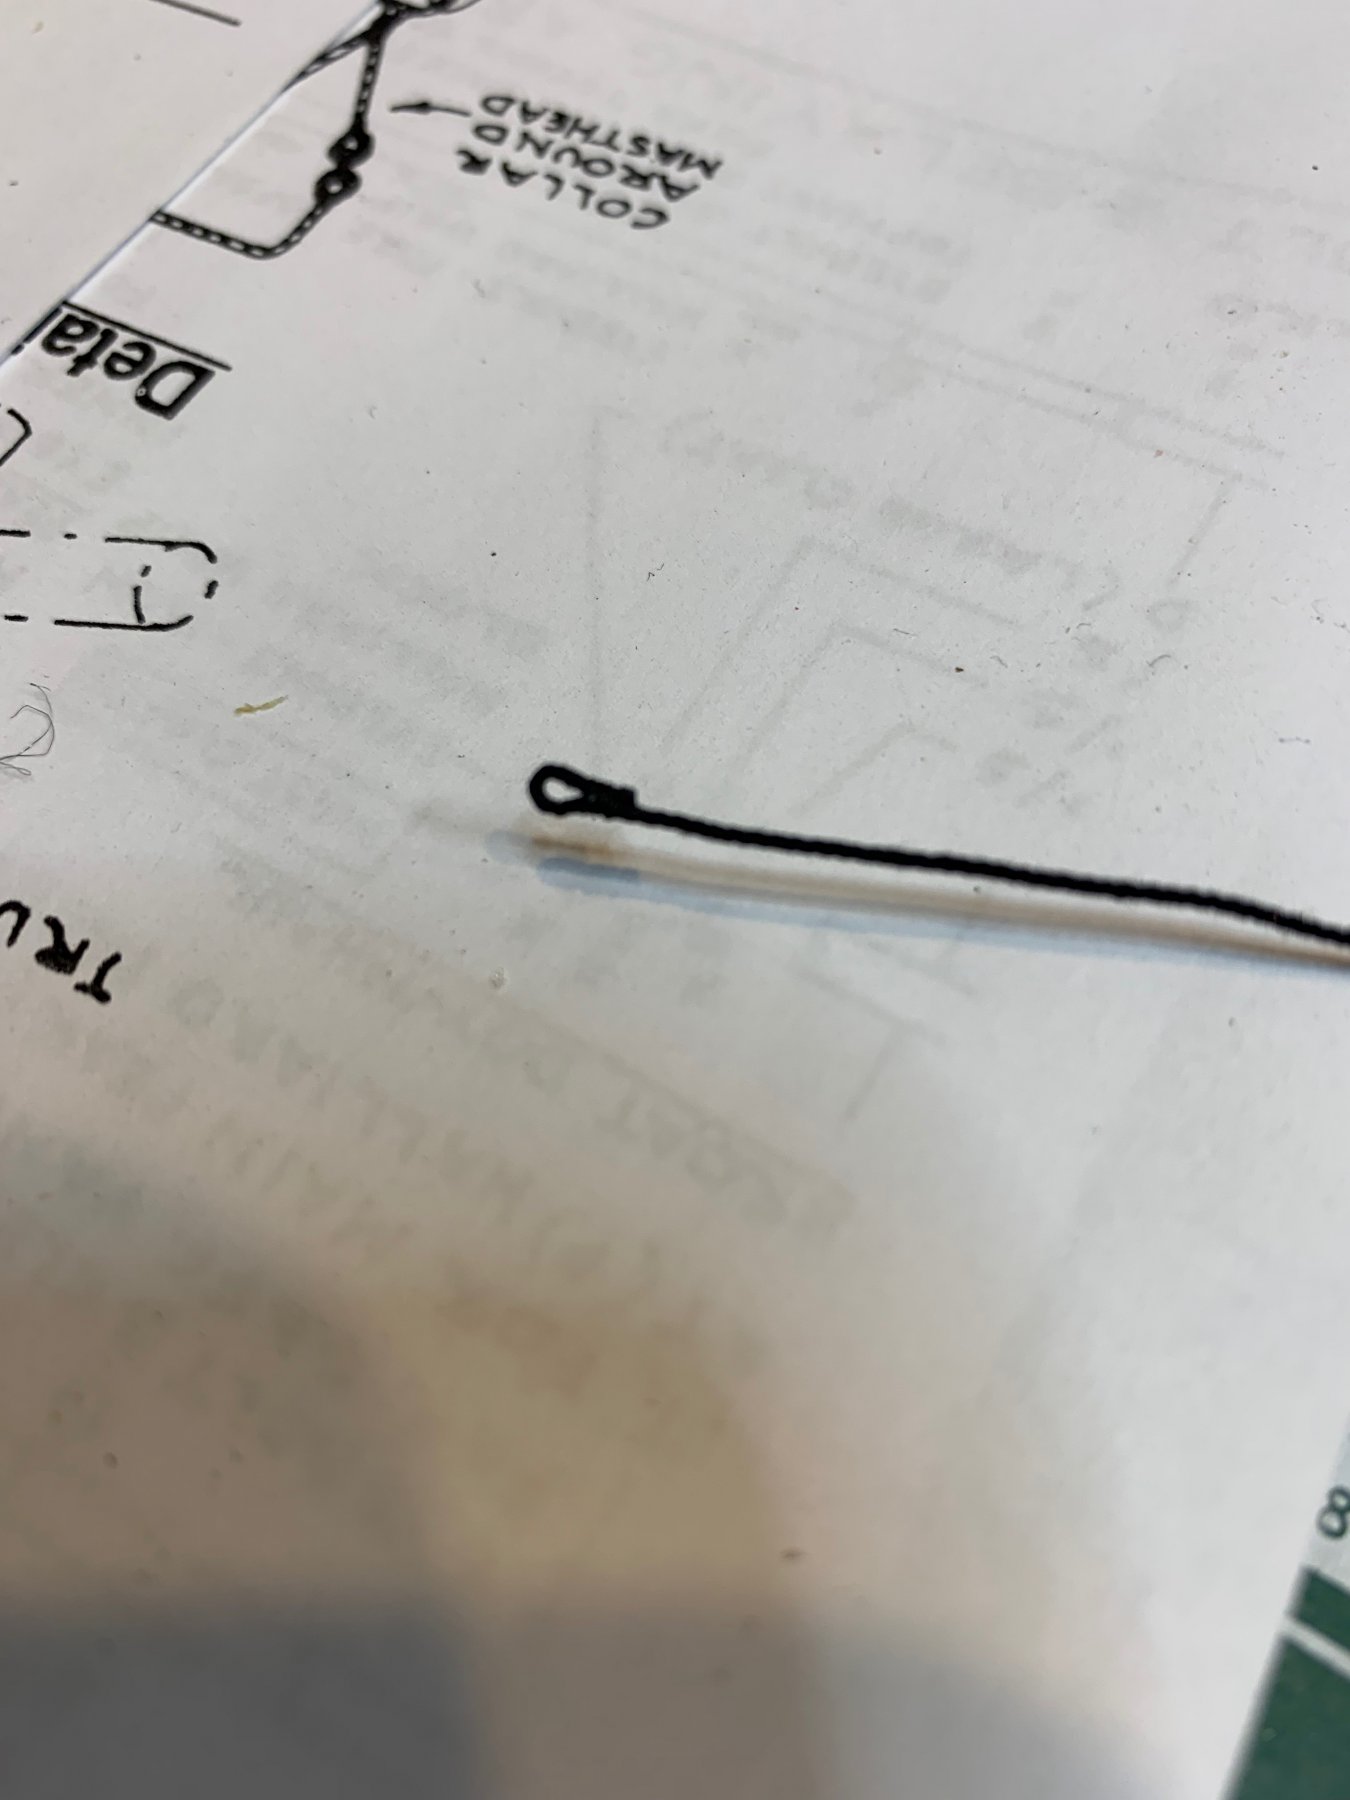
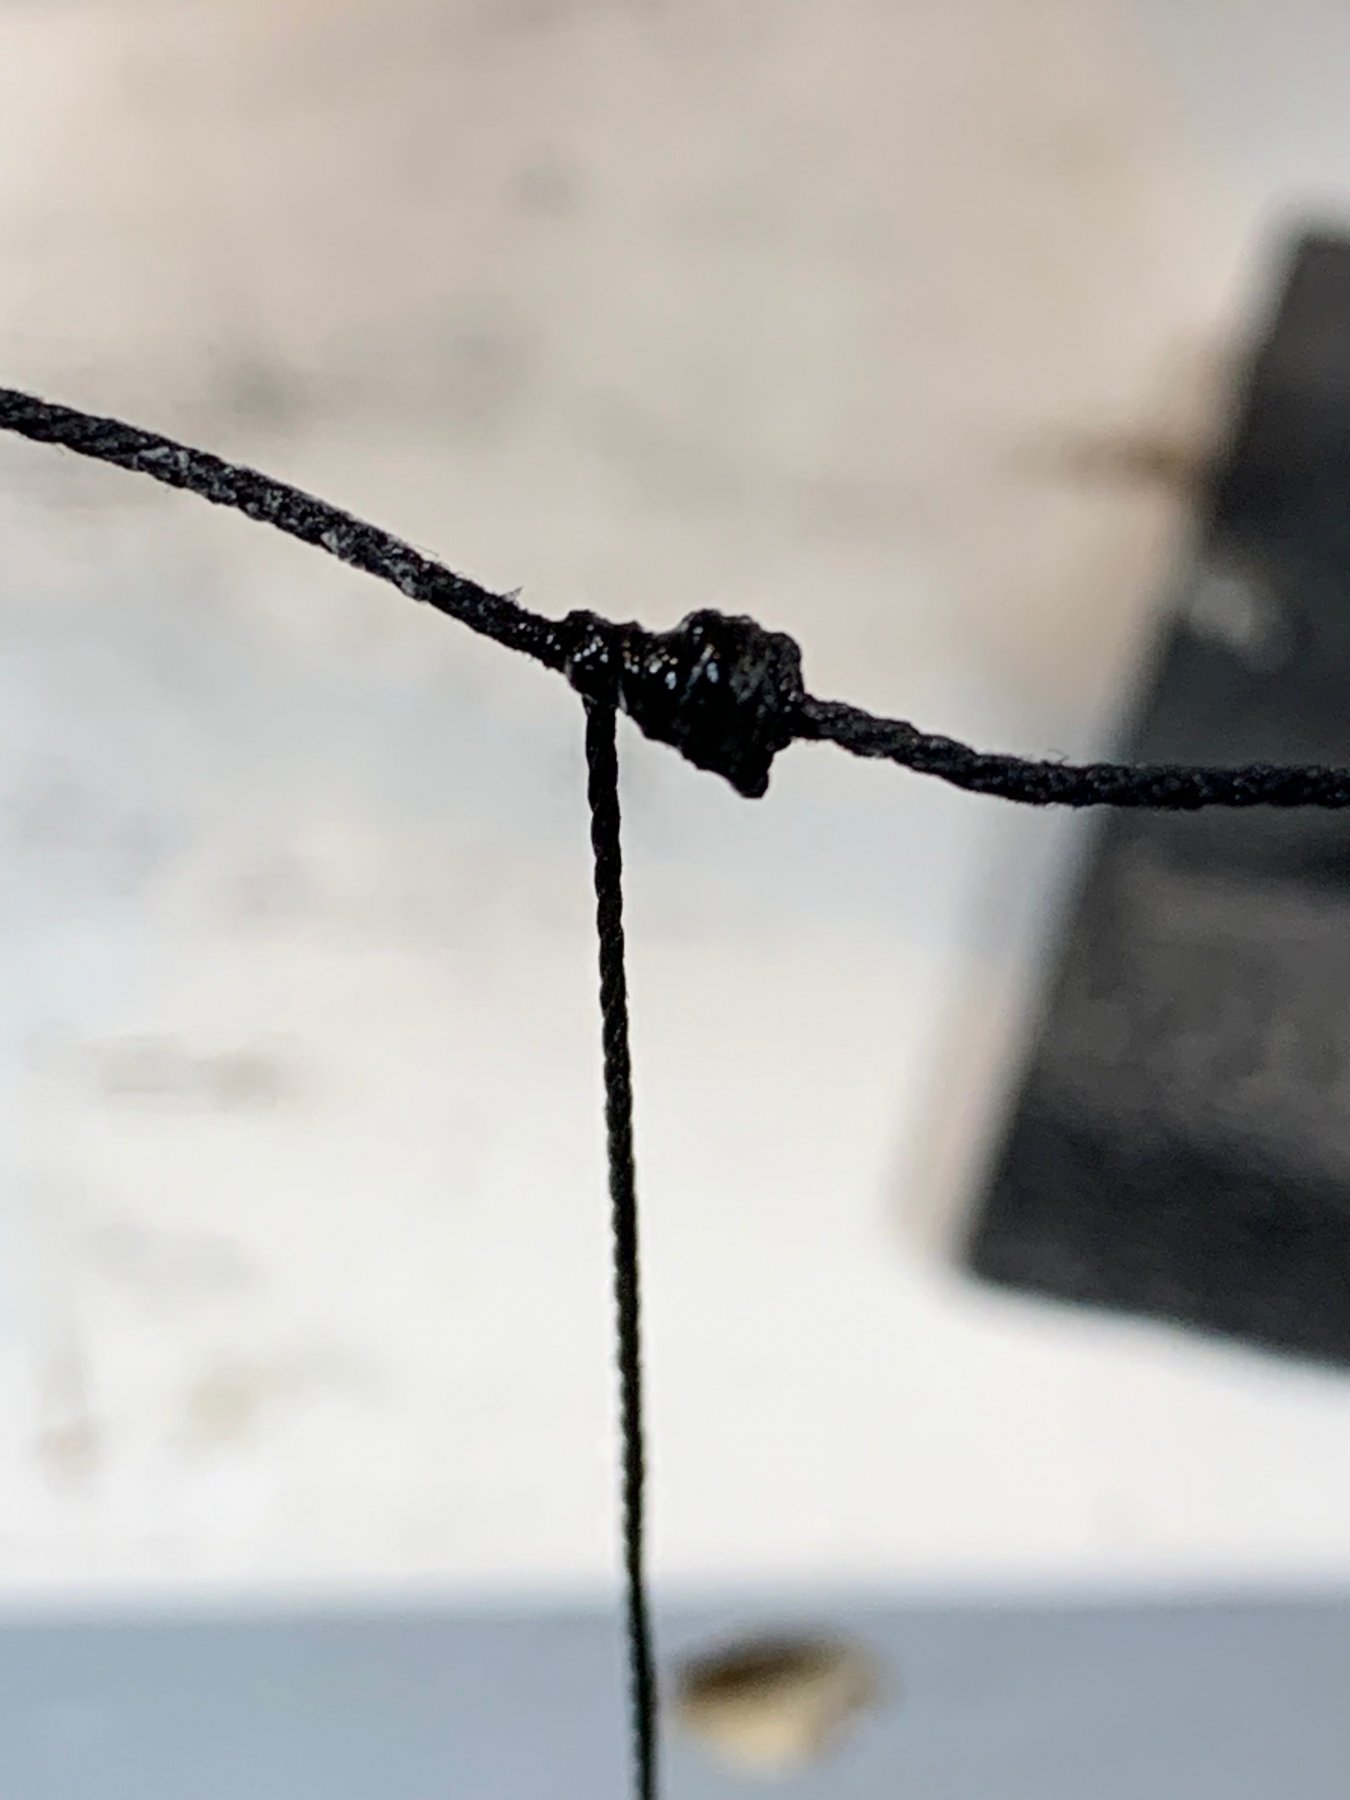
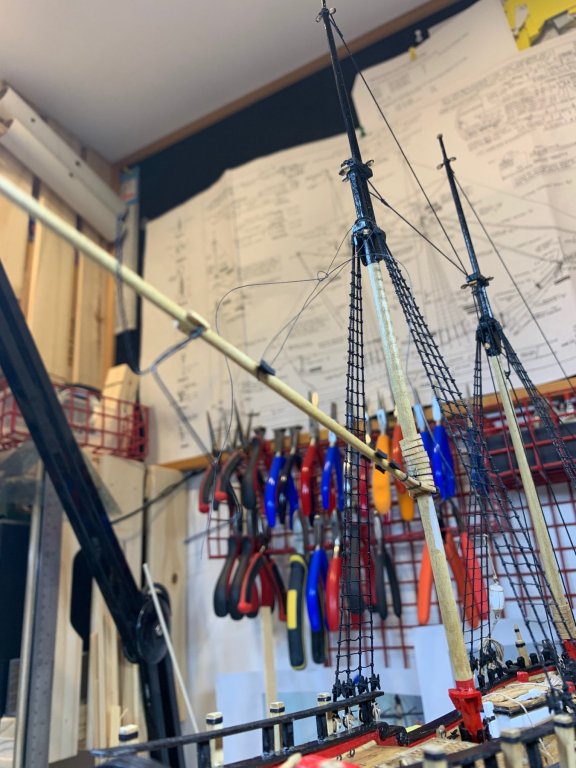
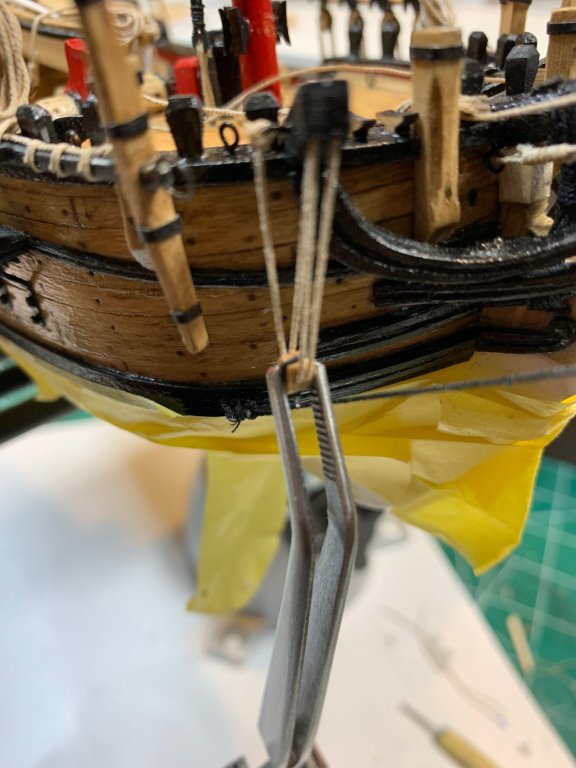
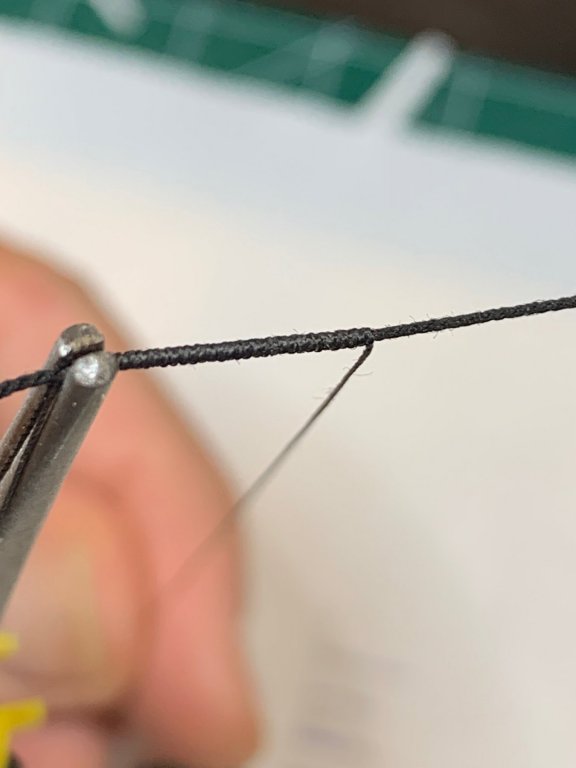
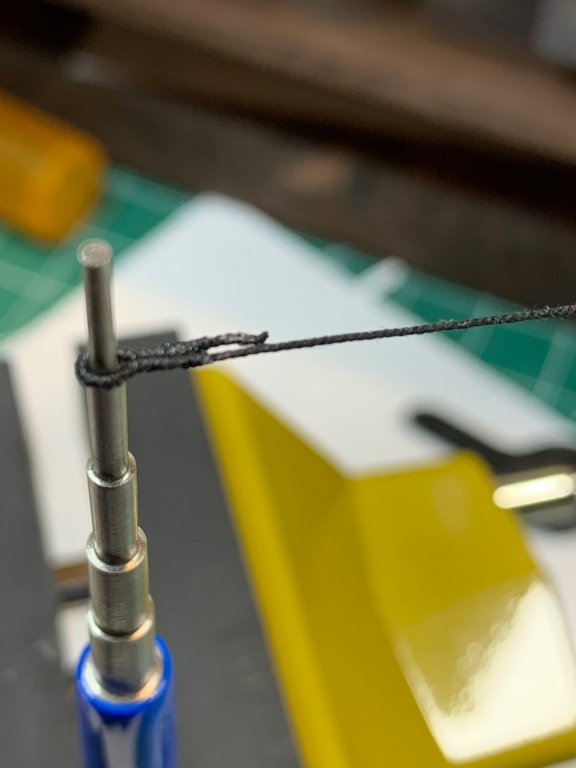
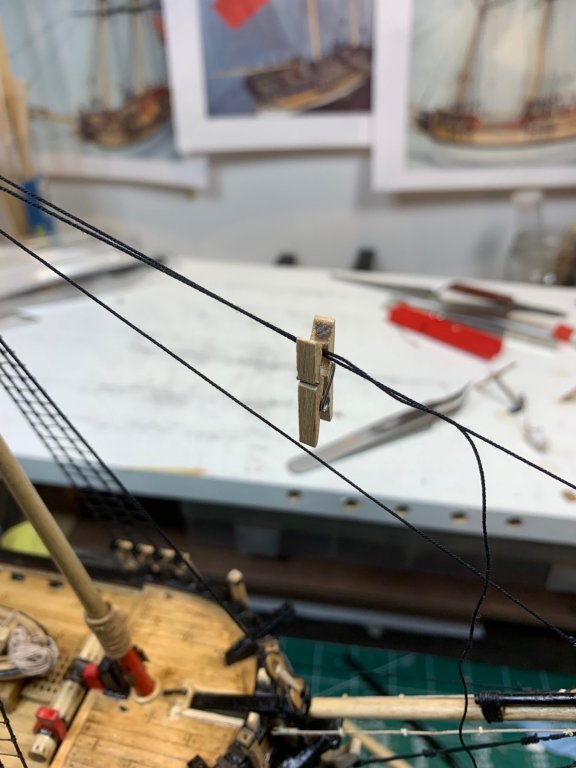
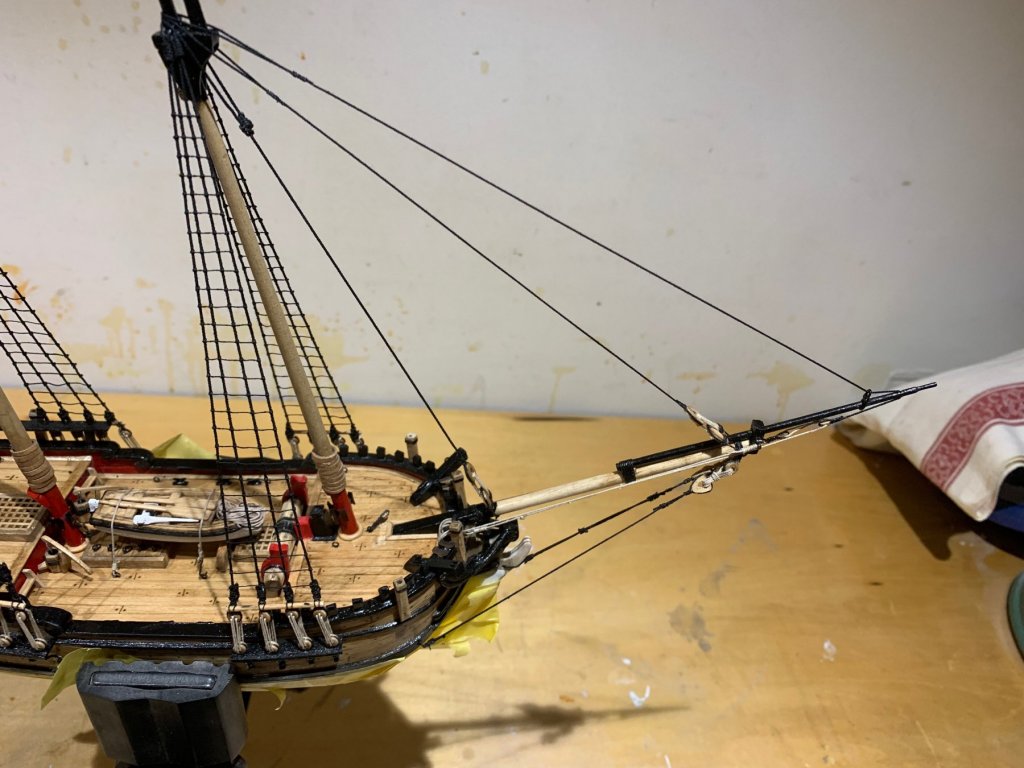
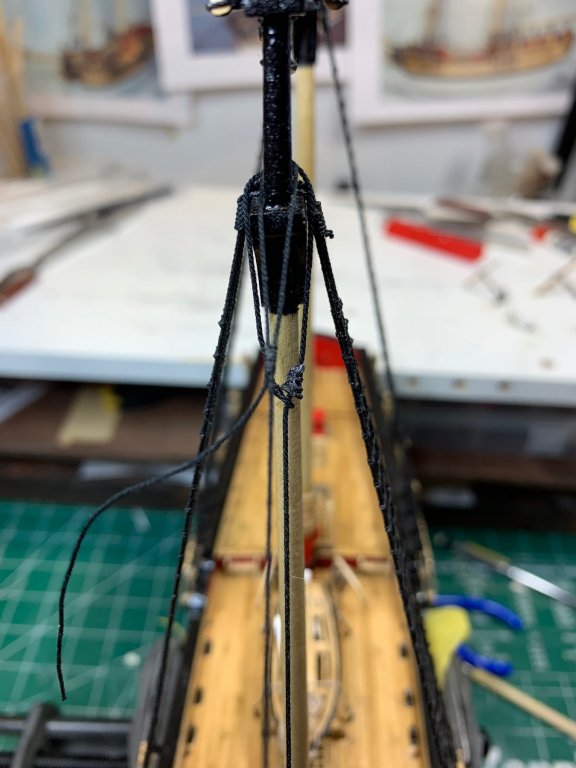
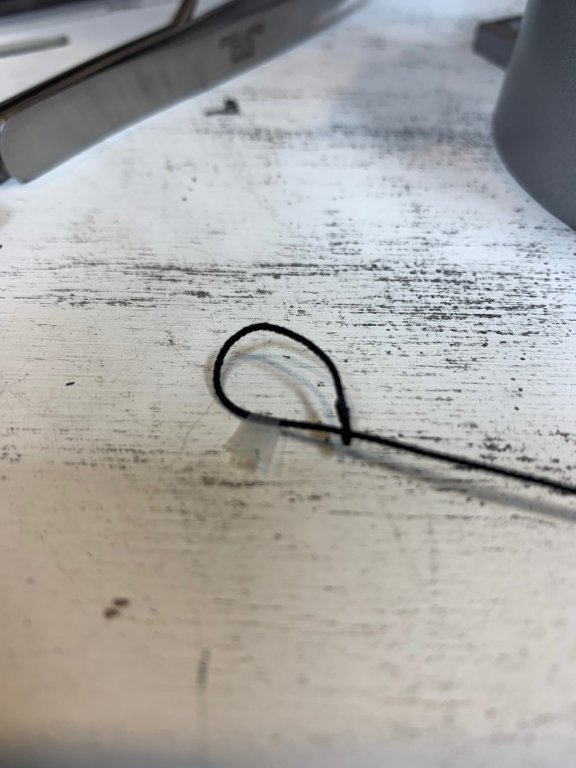
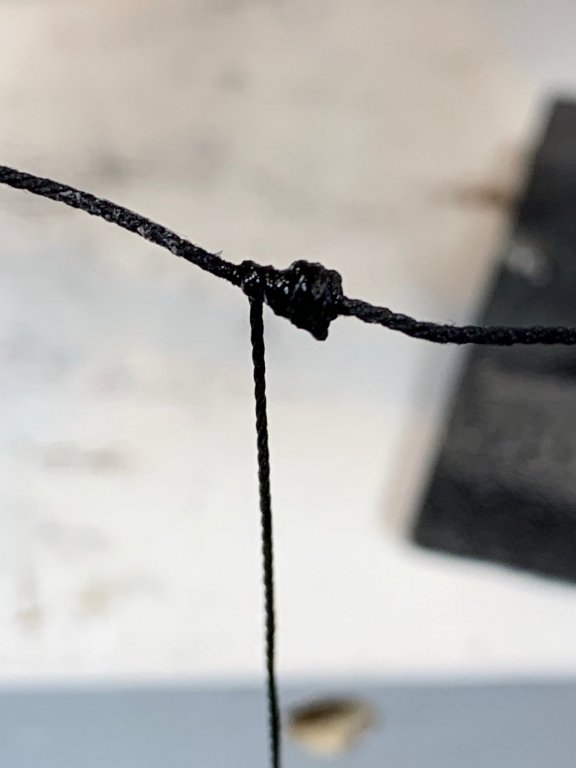
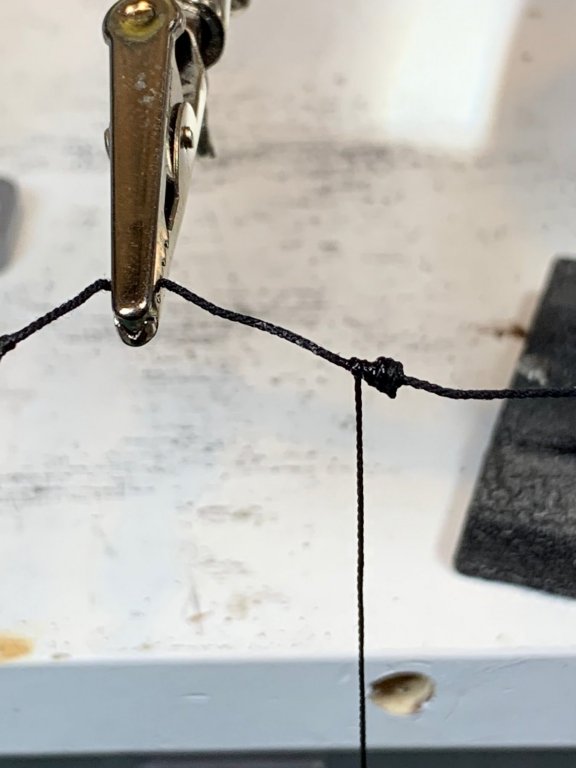
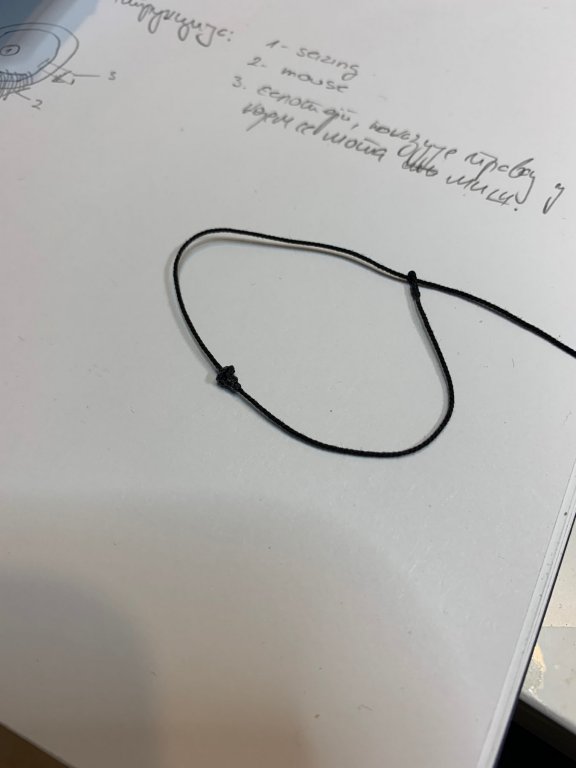
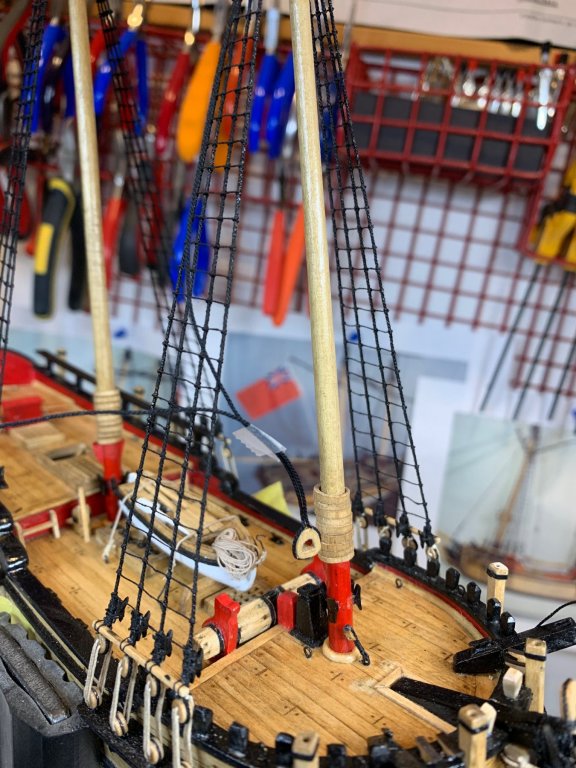
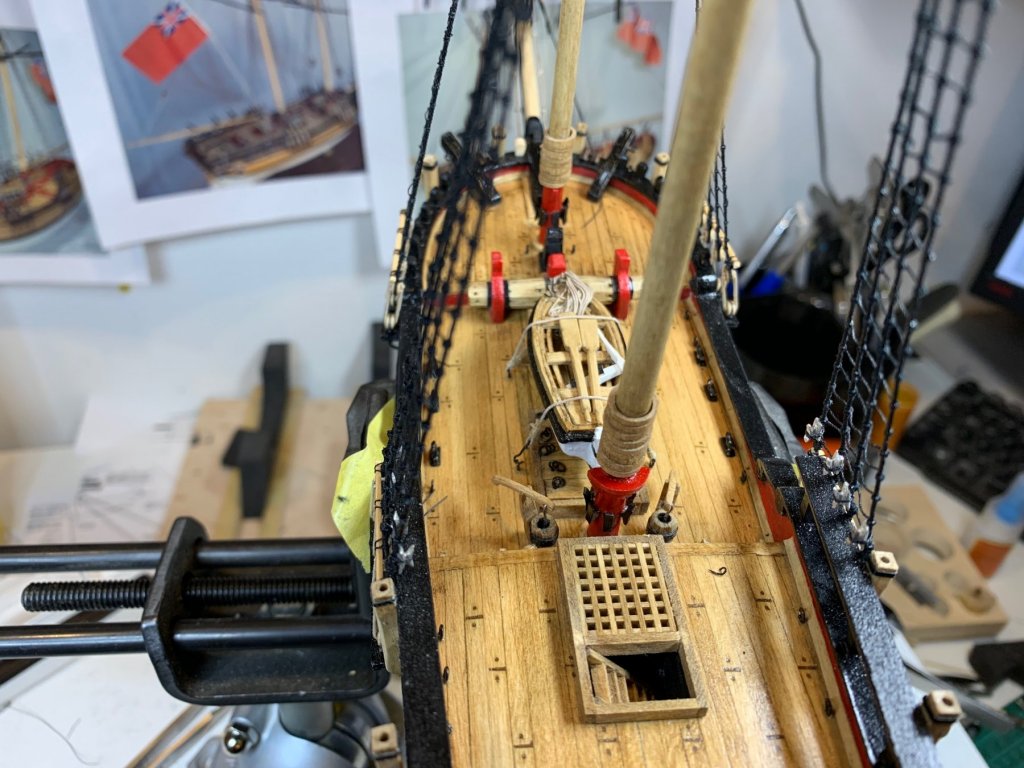
The work on standing rigging has begun. Following practicum i will start by rigging the forestay, inner jibstay, outer jibstay and fore topmast stay. The forestay will be rigged using a mouse. Apparently this is how schooners in those days were rigged, according to Practicum some other books referenced in it. I was able to dig up some left over black rigging line in correct size i will be using it for this work. The rigging line is in 0.7mm (.028), and apparently this is the heaviest rigging line used on Sultana, with exception of the anchor cables. This rigging will be only one where a mouse is used. The construction started by seizing a loop. It is a bit of a challenge to have it done nicely since this is very tiny loop.. The loop is done, and the mouse position was marked with a piece of a tape... With a help of super glue i was made a pear shaped mouse by coiling sewing thread around the stay... And completed assembly.. - I made a mistake, the same one as mentioned in practicum so need to find a way to correct the mouse, this is not correct way of positioning the mouse.. The wider part should be further from the loop, not closer. Testing on the ship.. Need to be tied up a bit more... So, now to the rigging of the forestay. One more heart was made and seized on the end of the rigging line. The correct length was marked with a scotch tape and seizing done with sewing rope... And testing with some lineyards... It is already too late, finishing it up tomorrow.. Happy modeling.


- 360 replies
-
- 3
-
-
- sultana
- model shipways
- (and 1 more)
-
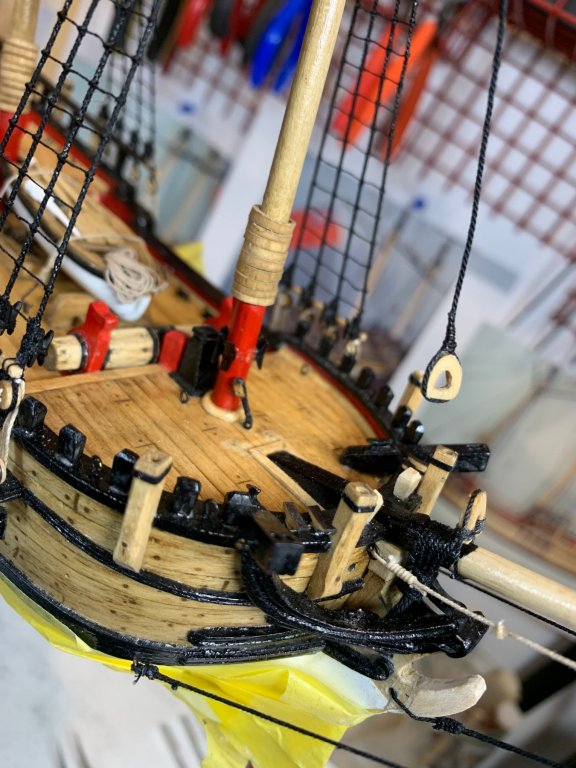
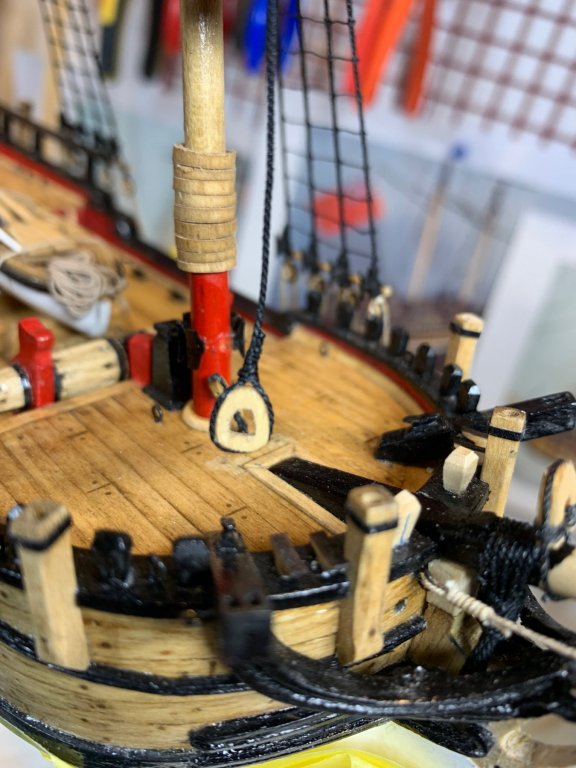
Cleats were installed and painted flat black. Mental note to myself: don't follow practicum to the letter and paint cleats before mounting them... Much easier.... Next, rigging the stays.. I dont have enough black rigging lines so i will try to color some dark brown (or tan) lines instead of buying new set of lines. Happy modeling.
- 360 replies
-
- 2
-
-
- sultana
- model shipways
- (and 1 more)
-
Thanks Lou, appreciated. Mental note to myself to make sure ratlines are tightly knotted and frozen with a touch of glue so they will not open with time..
- 360 replies
-
- 1
-
-
- sultana
- model shipways
- (and 1 more)
-
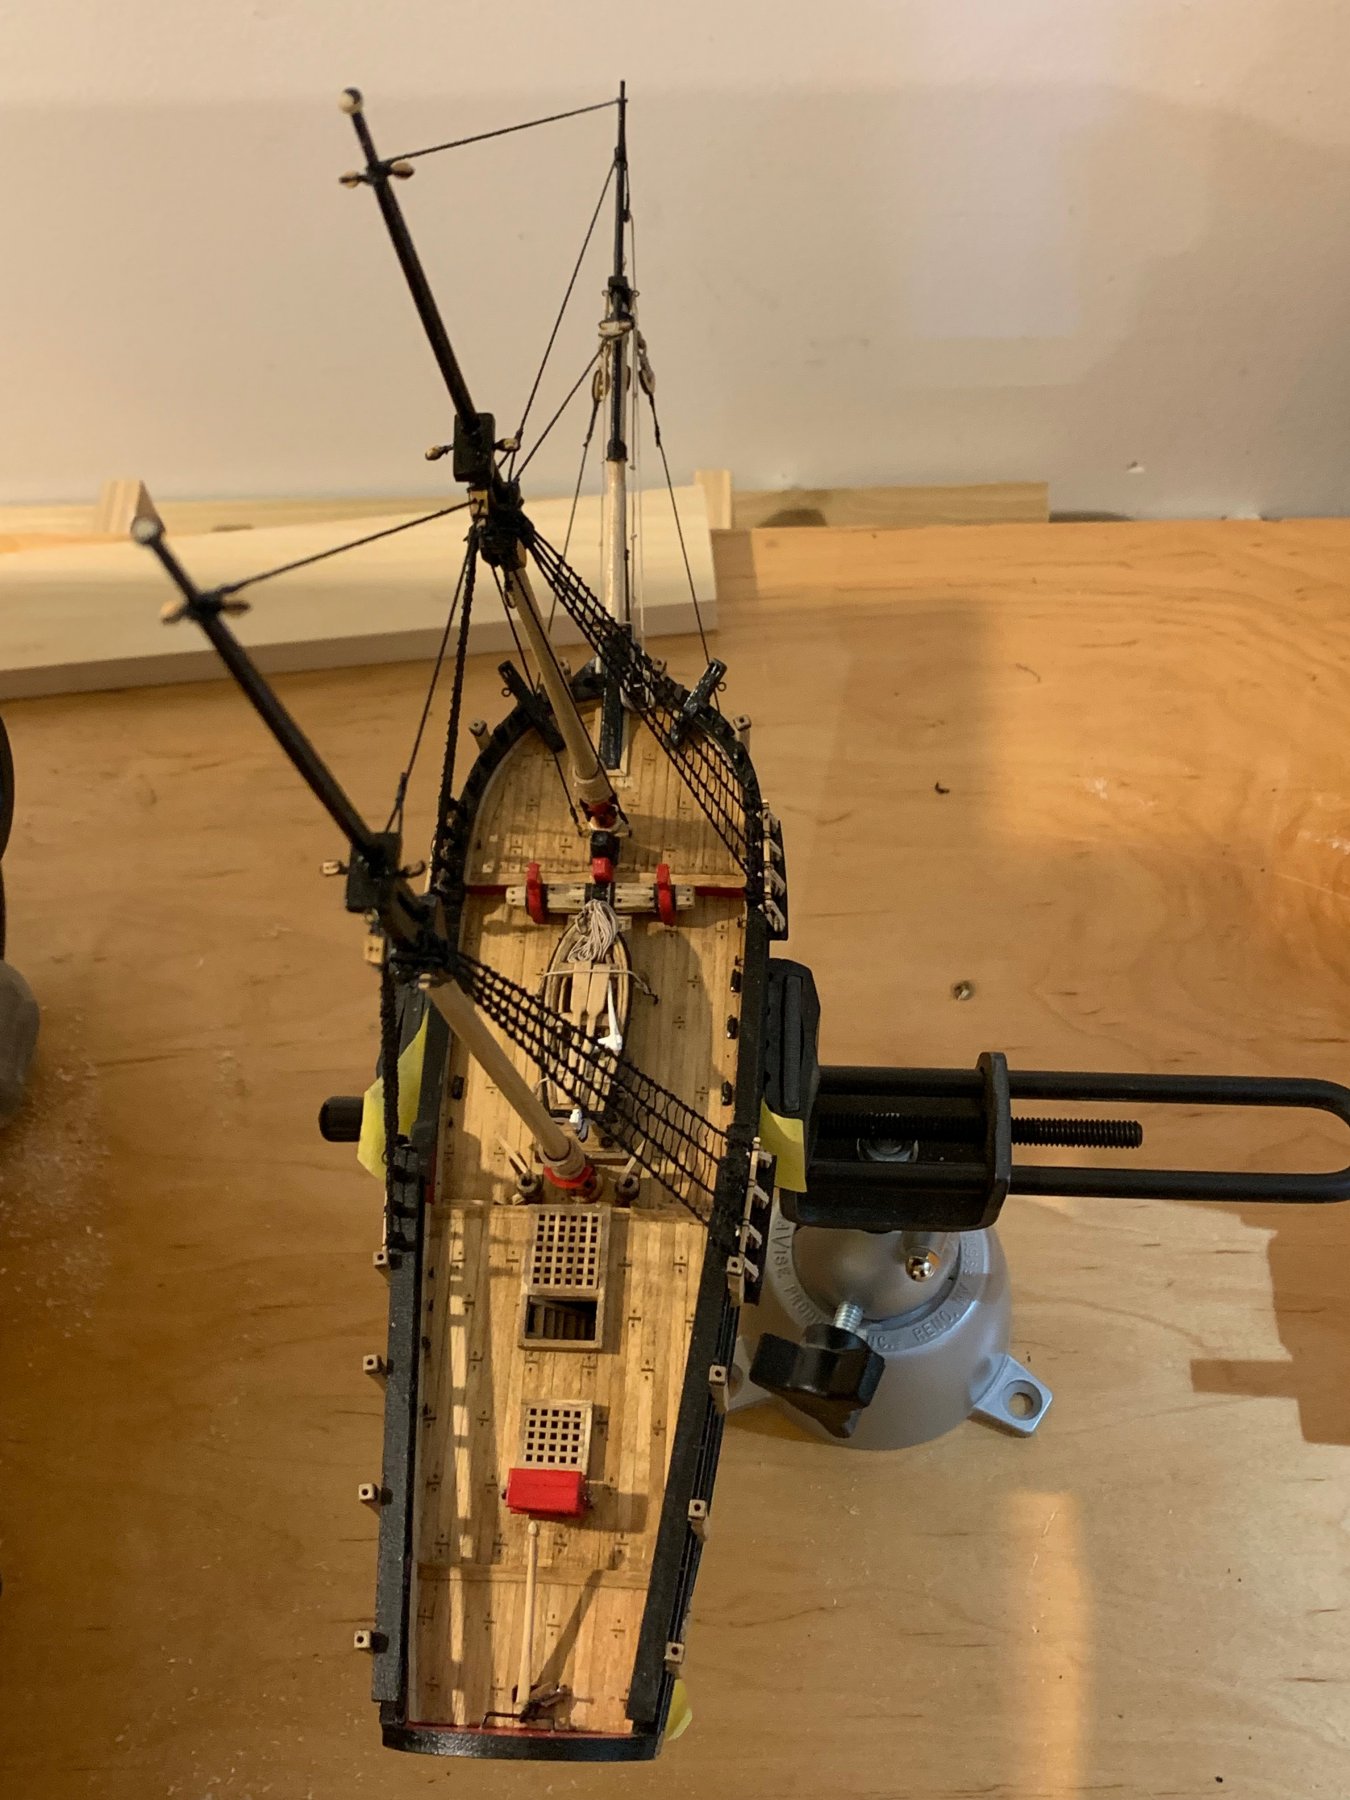
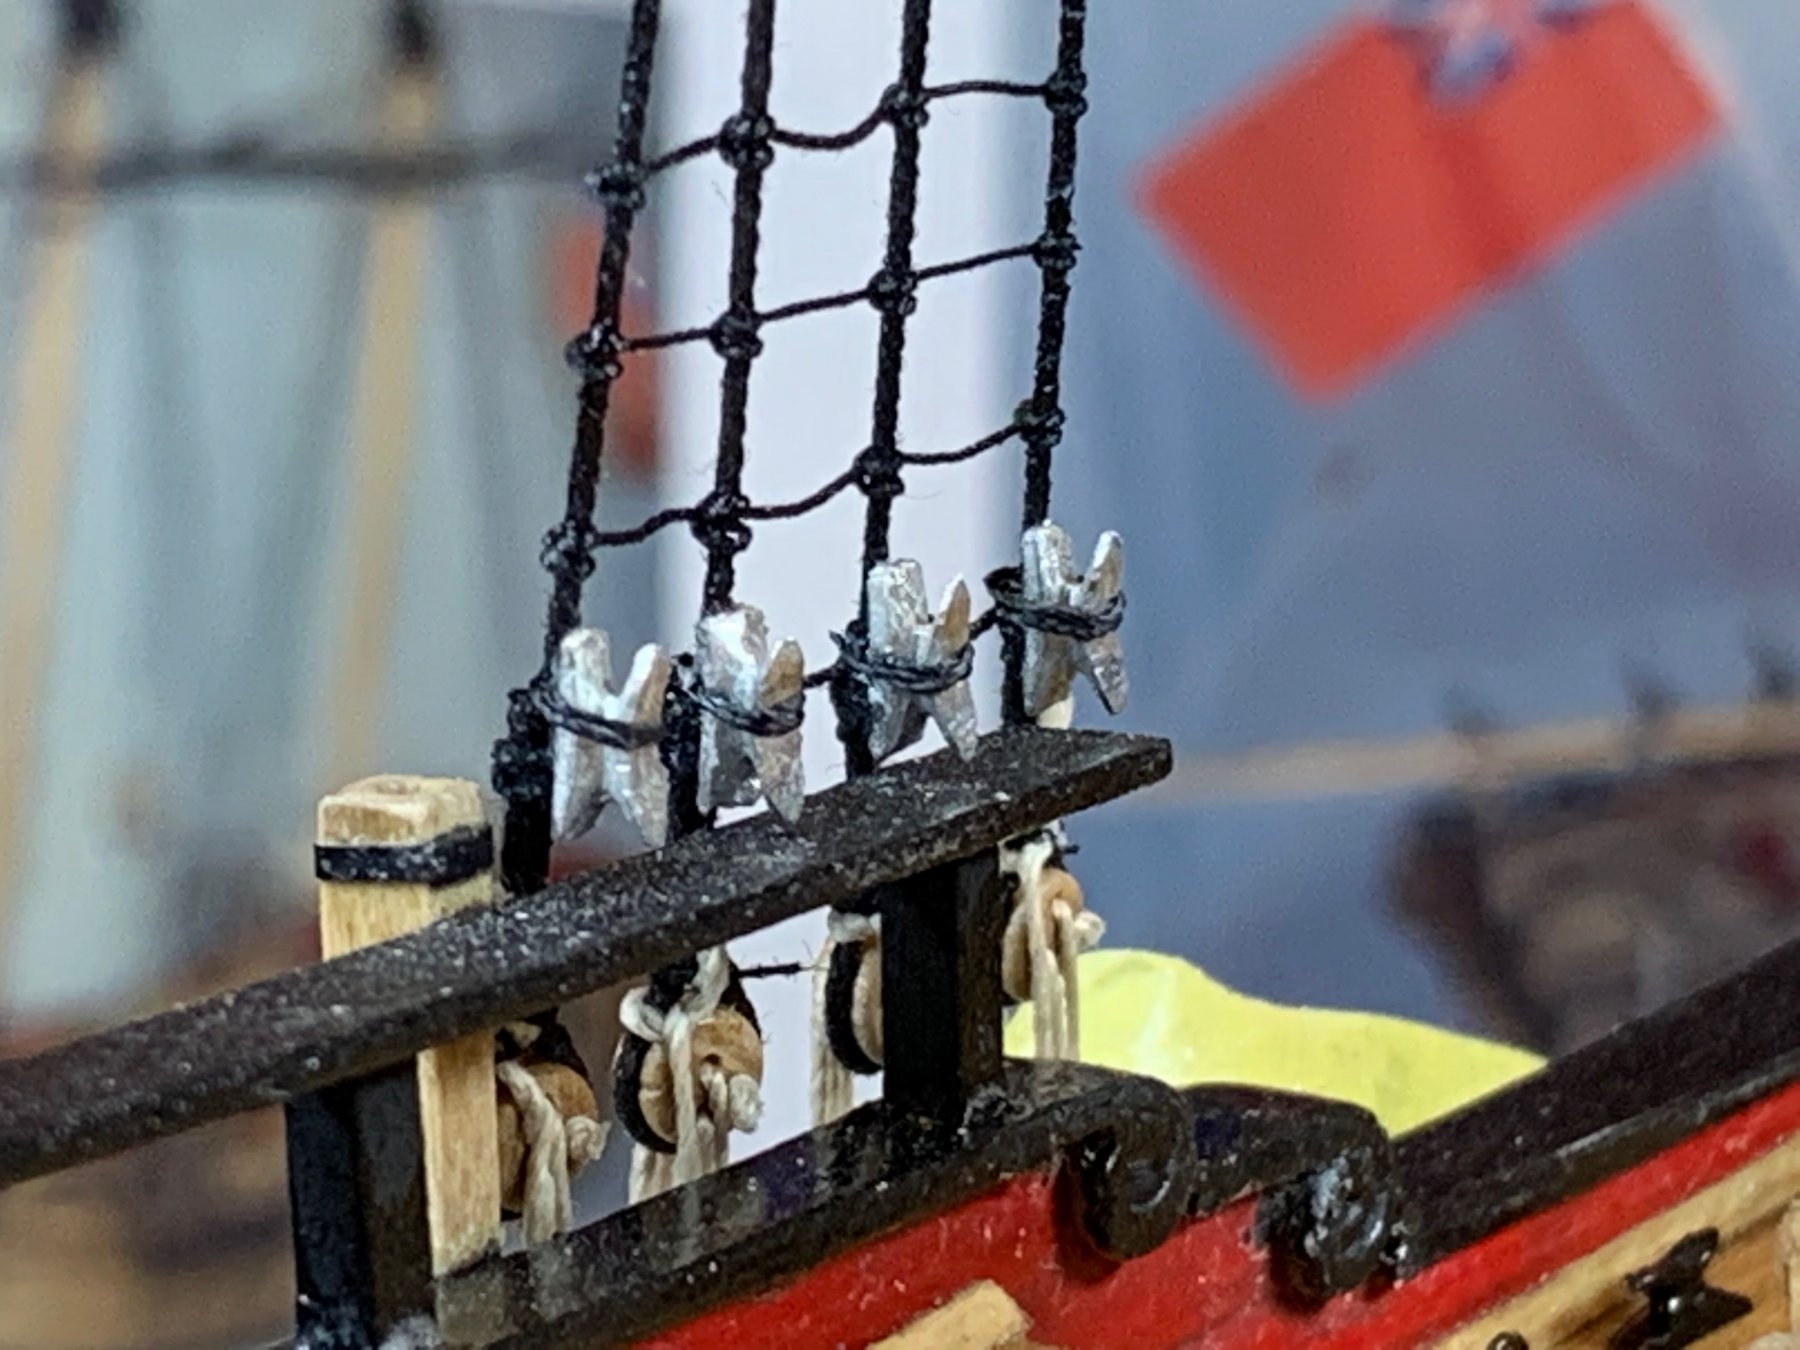
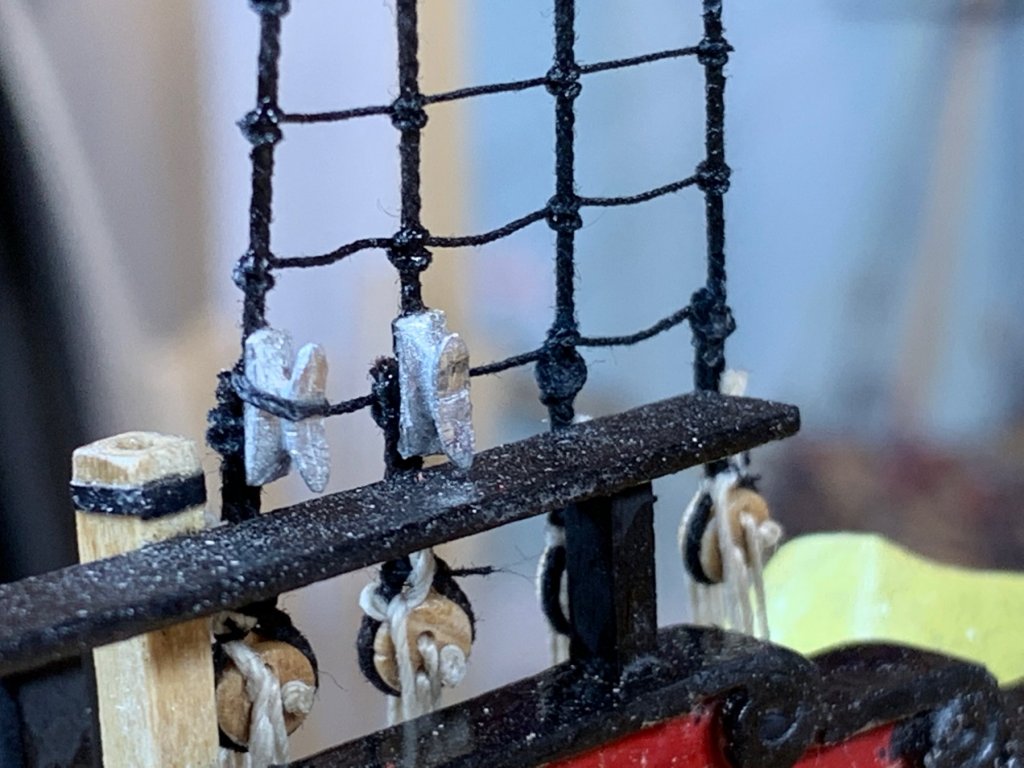
The cleats were modified in order to fit the scale of the ship. Out of the box they were looking a bit oversized... Each cleat was cleaned and filled to fit properly on the line. They were mounted on the inside of each shroud as per kit plan. They were glued first and then, when glue was dried, lashed with a black rigging line, in size .008. The lashing was tied around the center of each cleat. Just simple two knots were enough to fix the cleats to the shroud.. The coat of flat black will be applied to each cleat once all are mounted and lashed. During this process i noticed few ratlines that were become loose.. Not enough glue was applied to knots. so i decided to replace them. Four removed ratlines... and four replaced ratlines. Happy modeling.


- 360 replies
-
- 2
-
-
- sultana
- model shipways
- (and 1 more)


.JPG.e16379c82ede2e6062d1f1567b7aa87f.JPG)