

BarrettM82
-
Posts
36 -
Joined
-
Last visited
Content Type
Profiles
Forums
Gallery
Events
Posts posted by BarrettM82
-
-
Interesting @mikegr where did you get the stl's? Did you add any supports to the barrels or leave without ?. I struggled with the supports
- Old Collingwood, Canute and mtaylor
-
 3
3
-
-
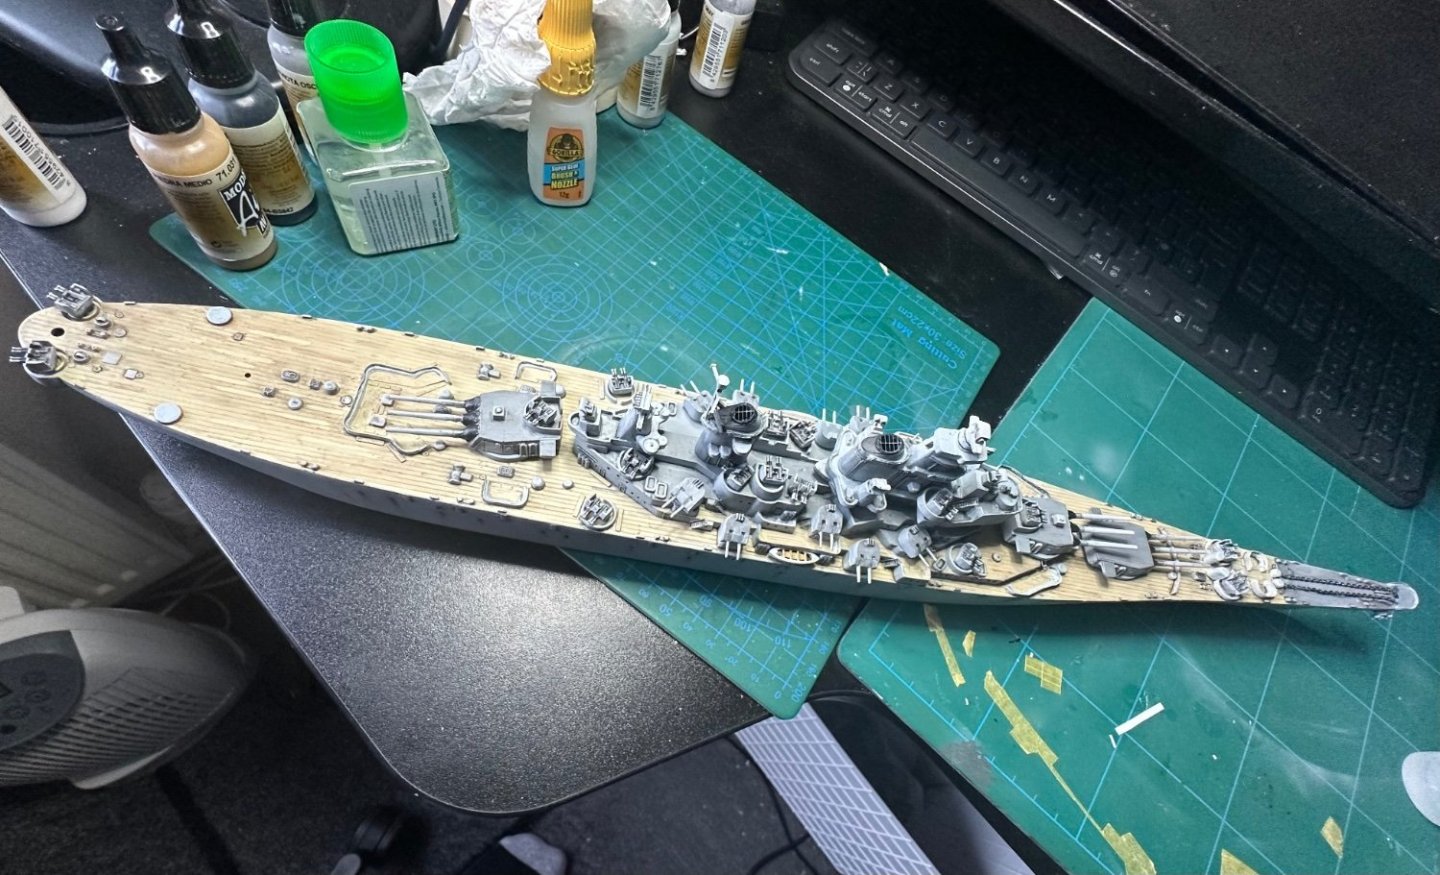
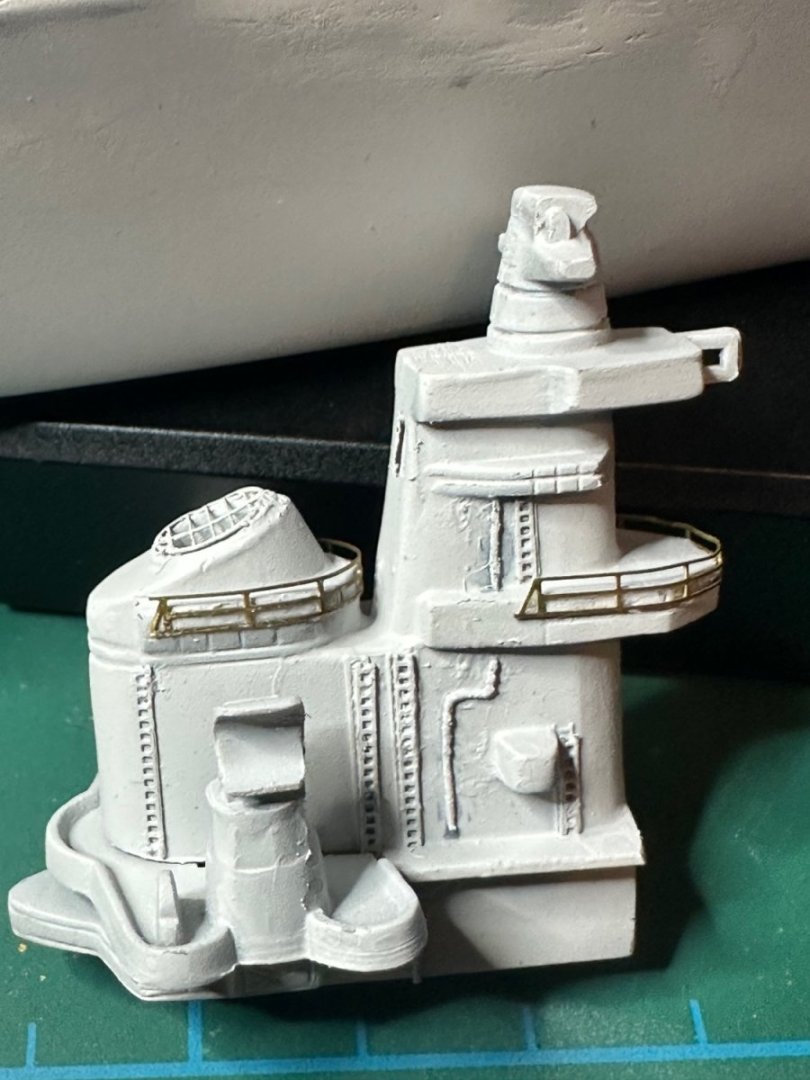
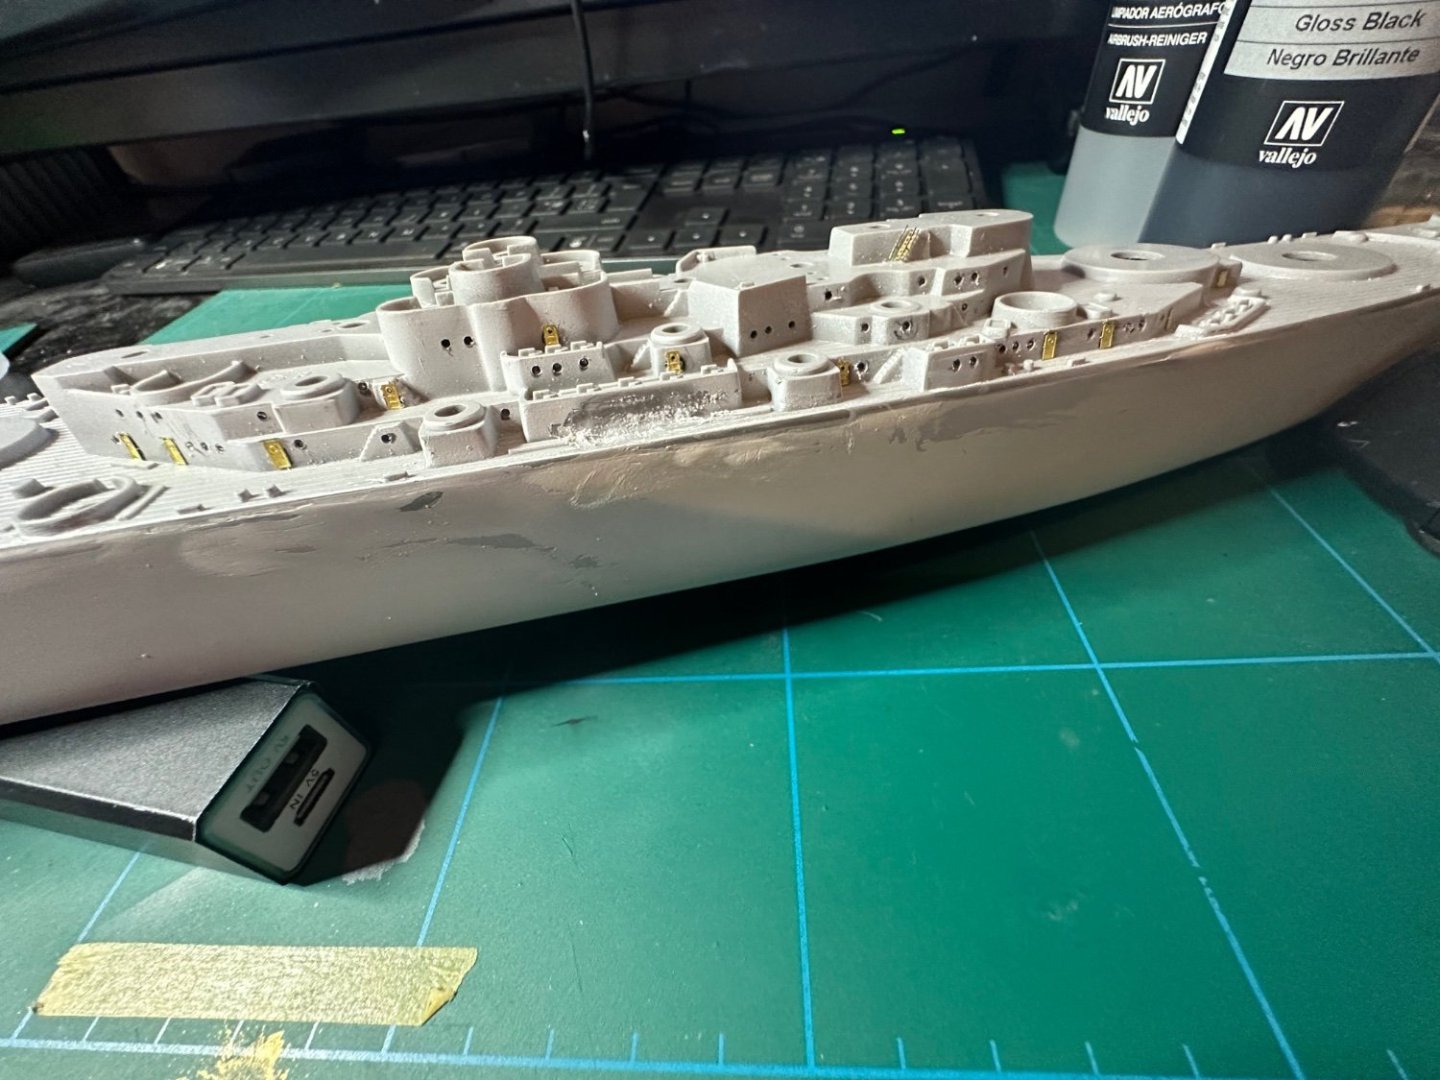
Superstructure parts added, weathering using Vallejo washes and 1mm Tamiya masking tape used for decking effects.
- robert952, Canute, Bill Morrison and 2 others
-
5
-
Portholes drilled now to start deck paintwork.
- robert952, mtaylor, Bill Morrison and 1 other
-
4
-
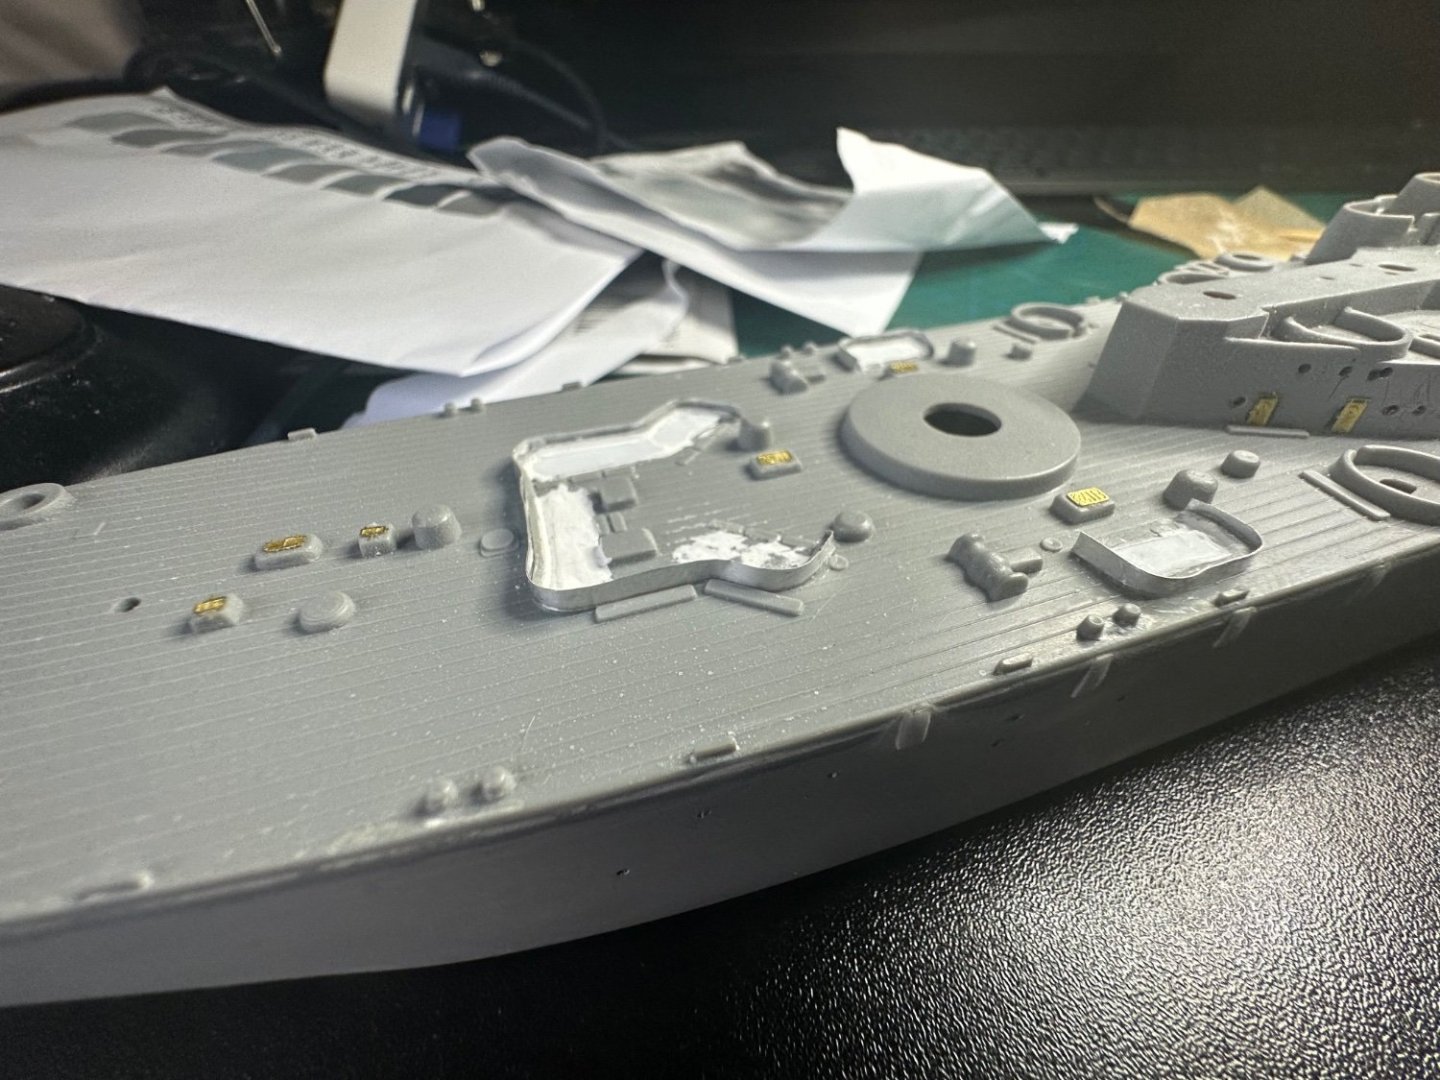
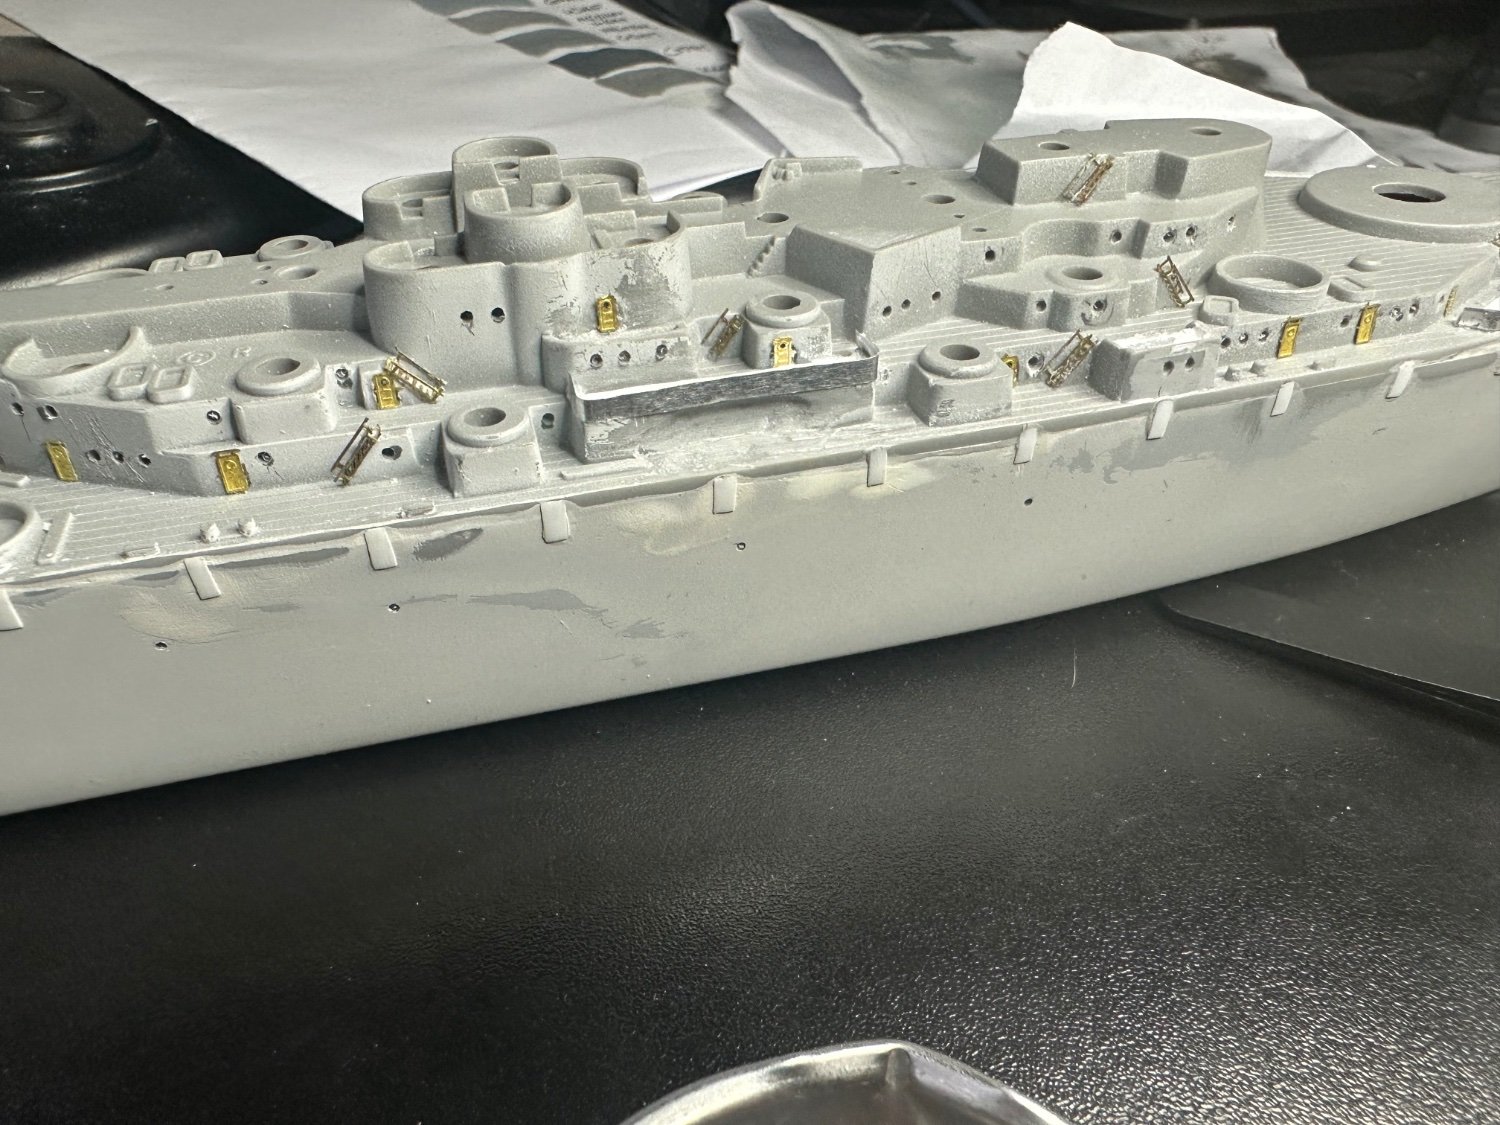
Using Syrene to add plating and anchor base along with aluminium sheeting to raise the terribly moulded splinter shields. Also added PE ladders, steps and doors. Kept the Aztec stairs as a base for PE.


- robert952, Canute, Bill Morrison and 1 other
-
4
-
-
Thanks ddp,
Some great tips there. Unfort the 1/500 guns are out of stock but let's see might come back. Can't do myself as would need resin high end printer
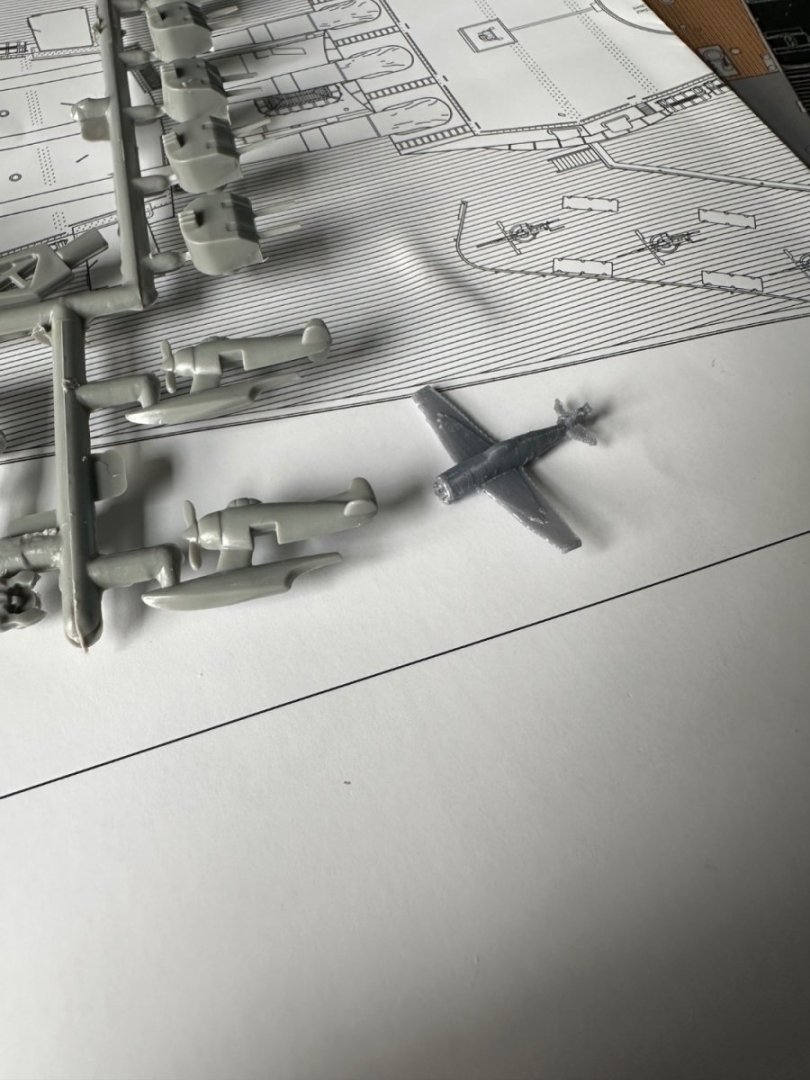
however my basic pla injection printer did a good job of making a realistic hellcat versus the one with the kit!
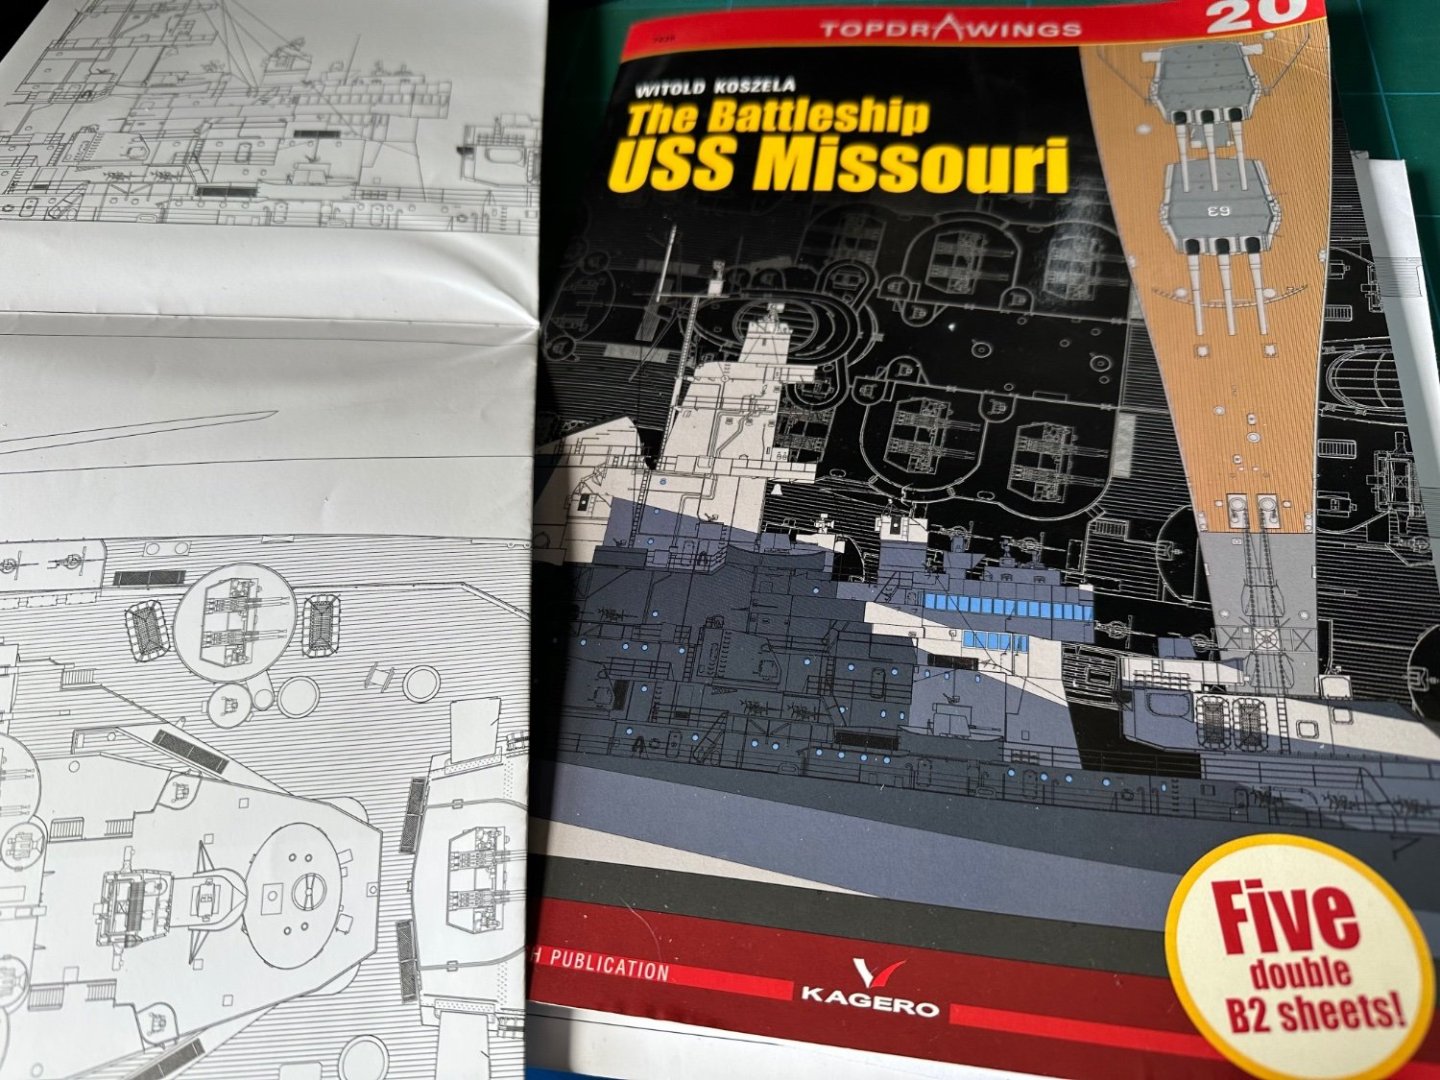
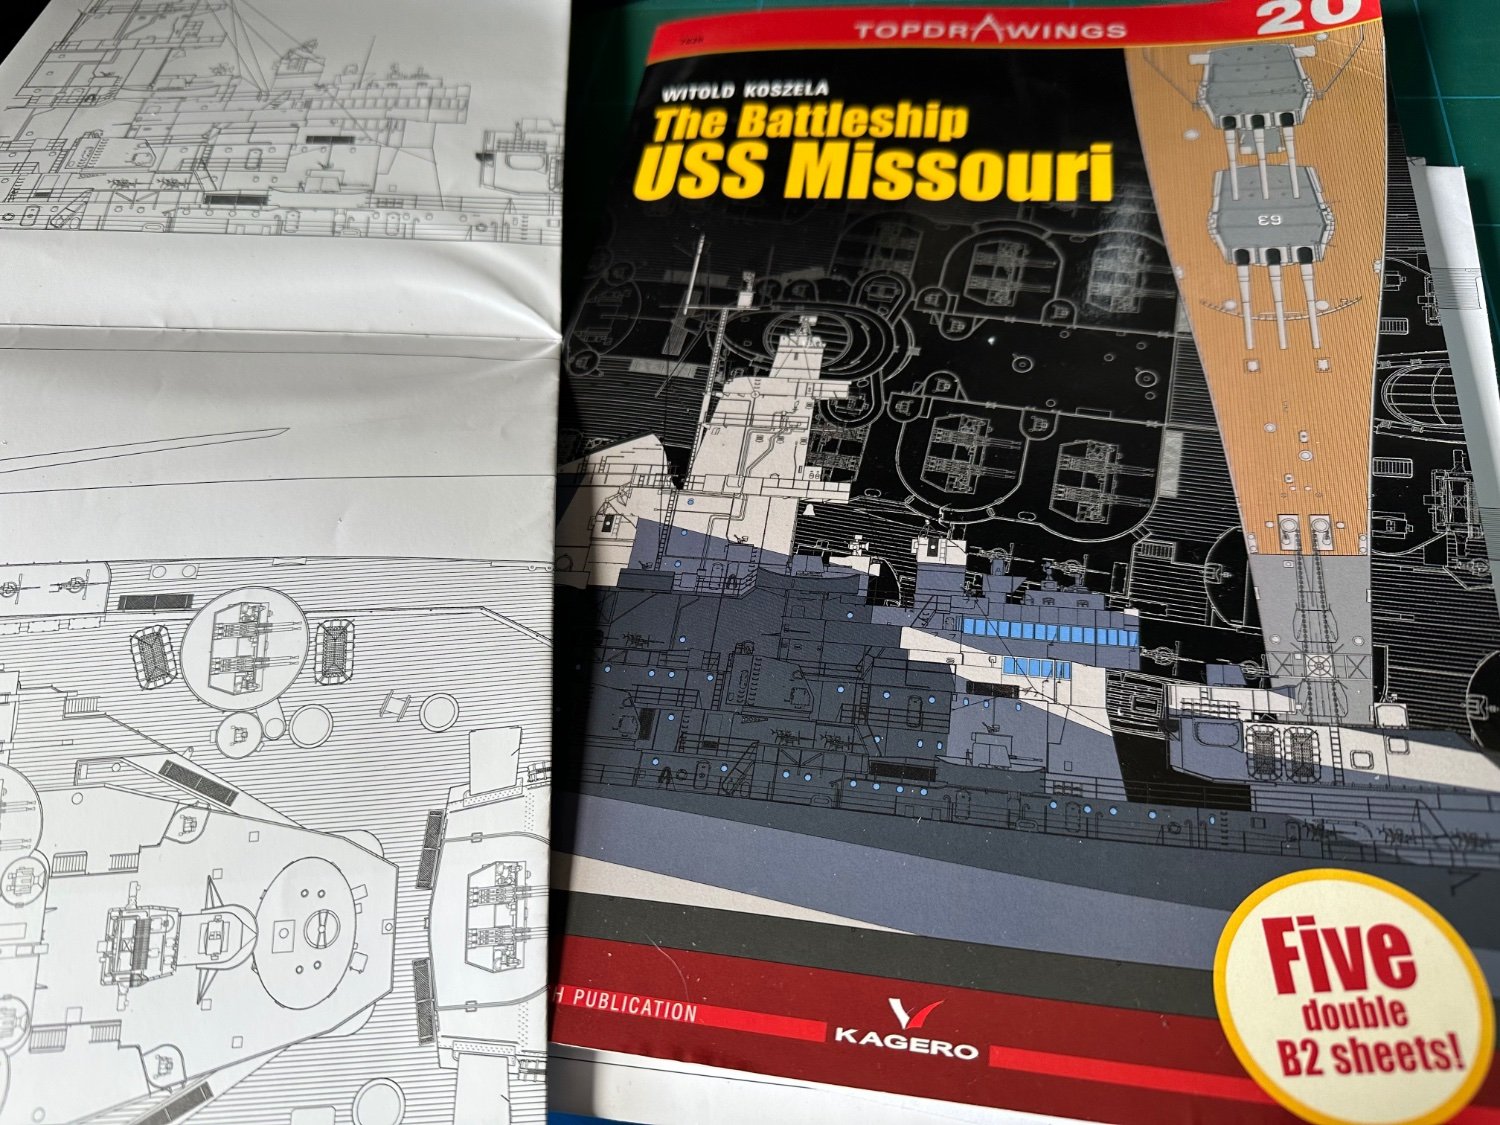
I'm using top drawings book as guide to layout / detail etc. A great resource !
- Bill Morrison, Canute and mtaylor
-
3
-
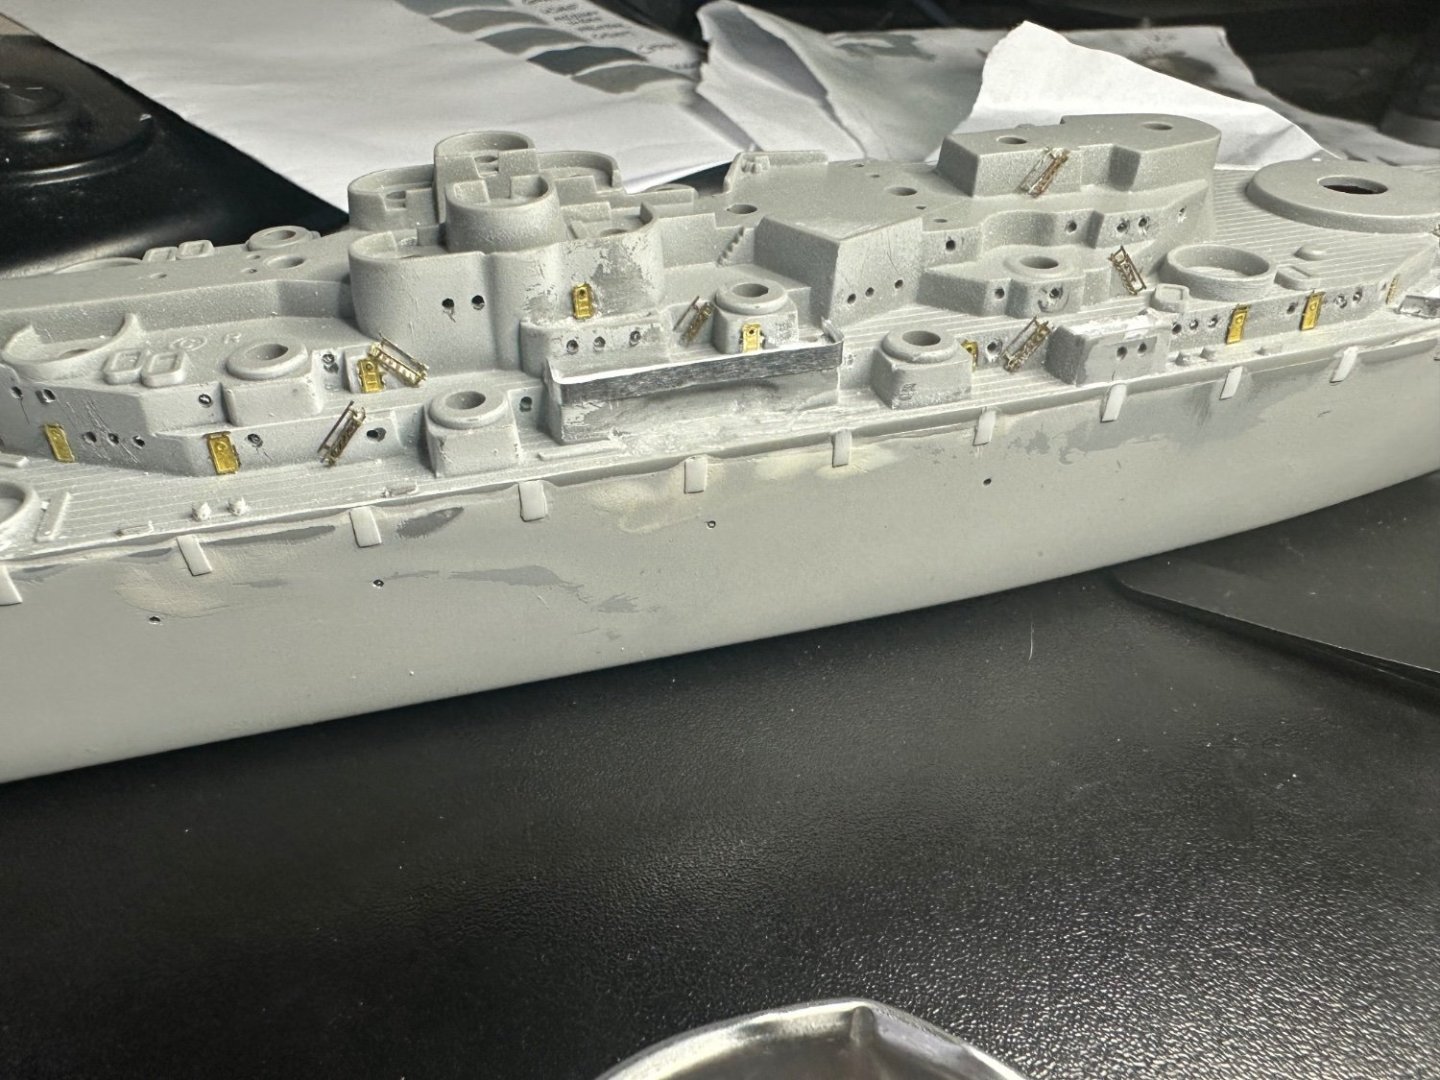
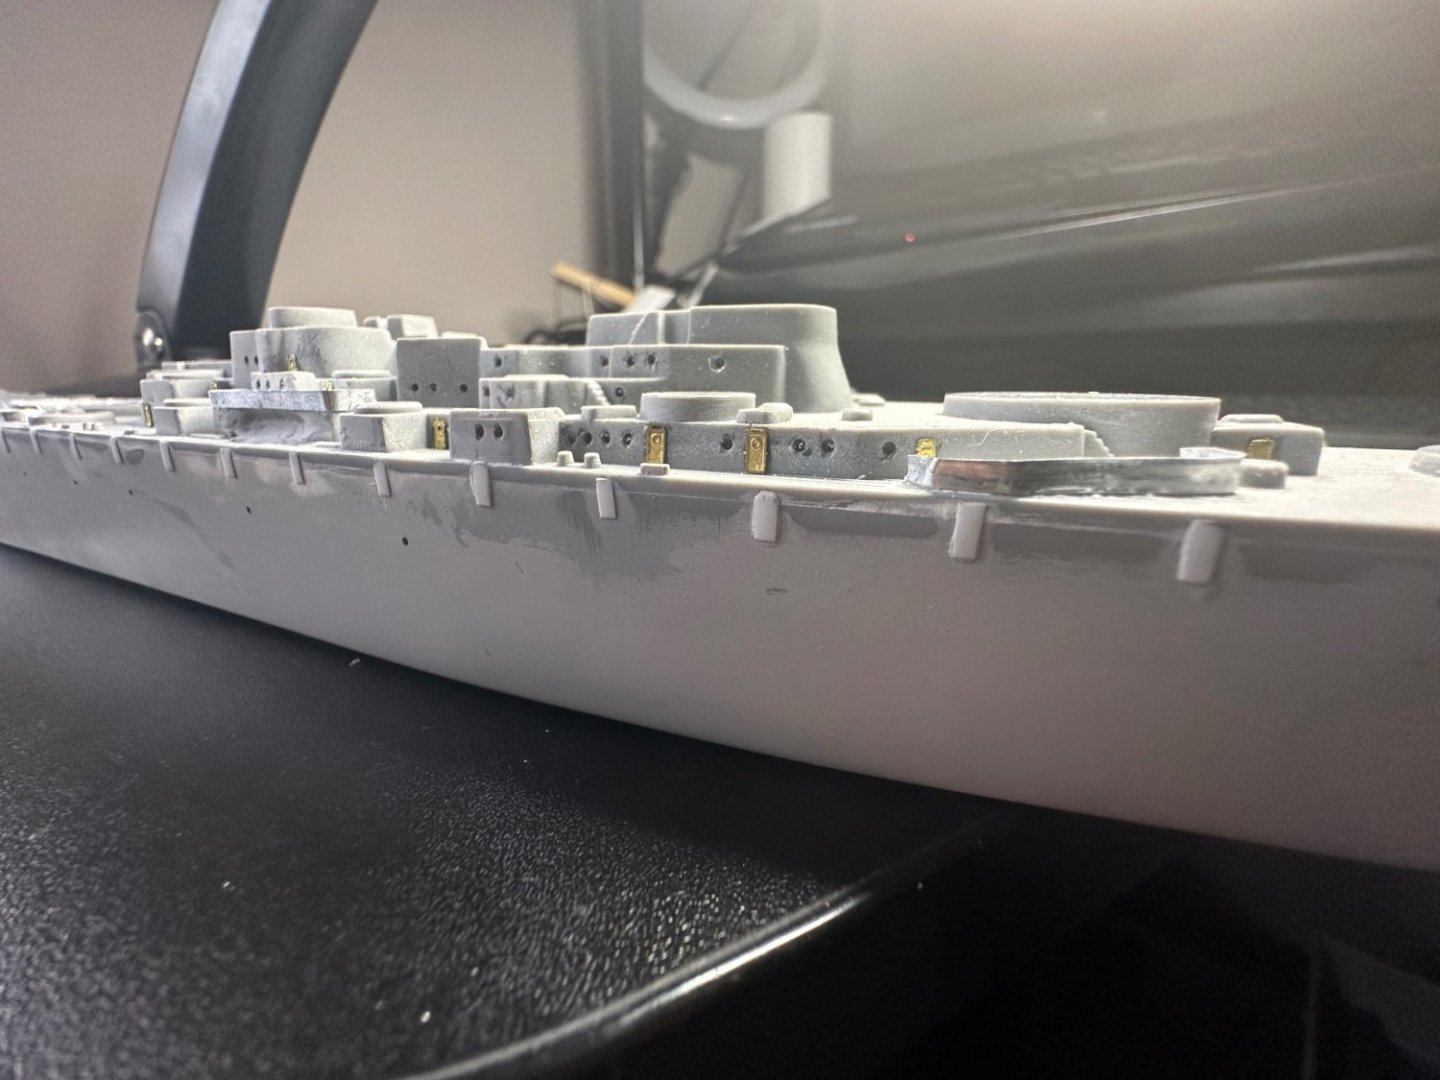
Finally back on this after break on other projects.
- Started the PE additions
- Bored out the portholes
- Added more detail to superstructure like piping, ladders and railings
- Added blast bags to guns with rivet detail.
- Added conical base to rear Bofors mounts with Milliput.
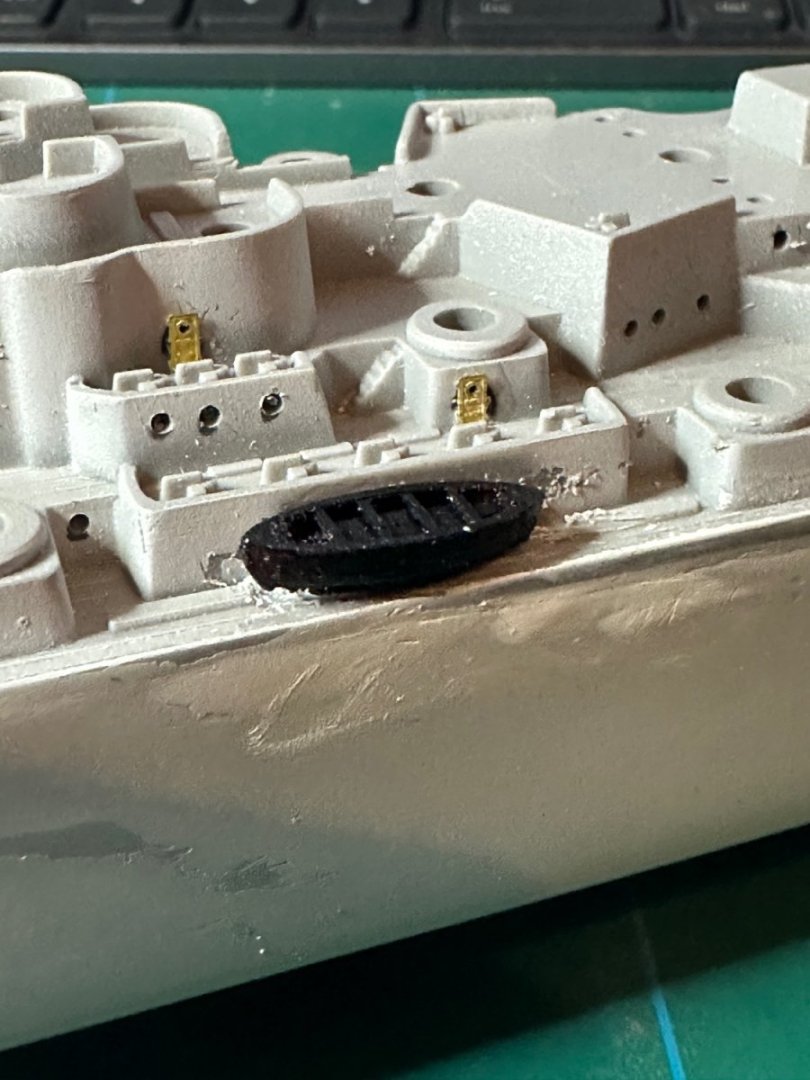
- Removed ridiculous upside down life boat with scratch designed 3d print
All a bit rough and needs fine sanding but getting there.
Next:
- Remove deck machine guns and replace with PE versions. Add hull features like plating and outlet ports, panel detail and raised rivet detail.
- Add gas cylinders and life rings to lower deck.
- Add PE SK2 radar dome to mast.
Still struggling on Bofors replacements, thinking of going resin scratch build from silicone molds. Need to see on that one.
- Bill Morrison, yvesvidal, mtaylor and 3 others
-
6
-
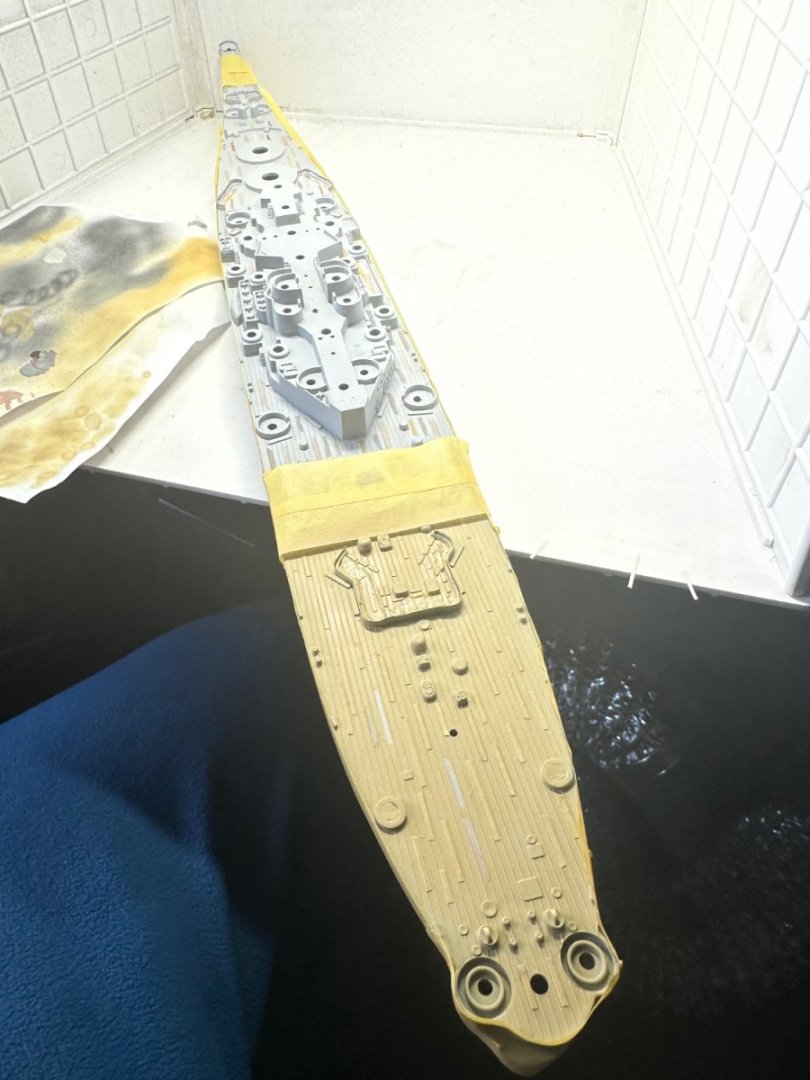
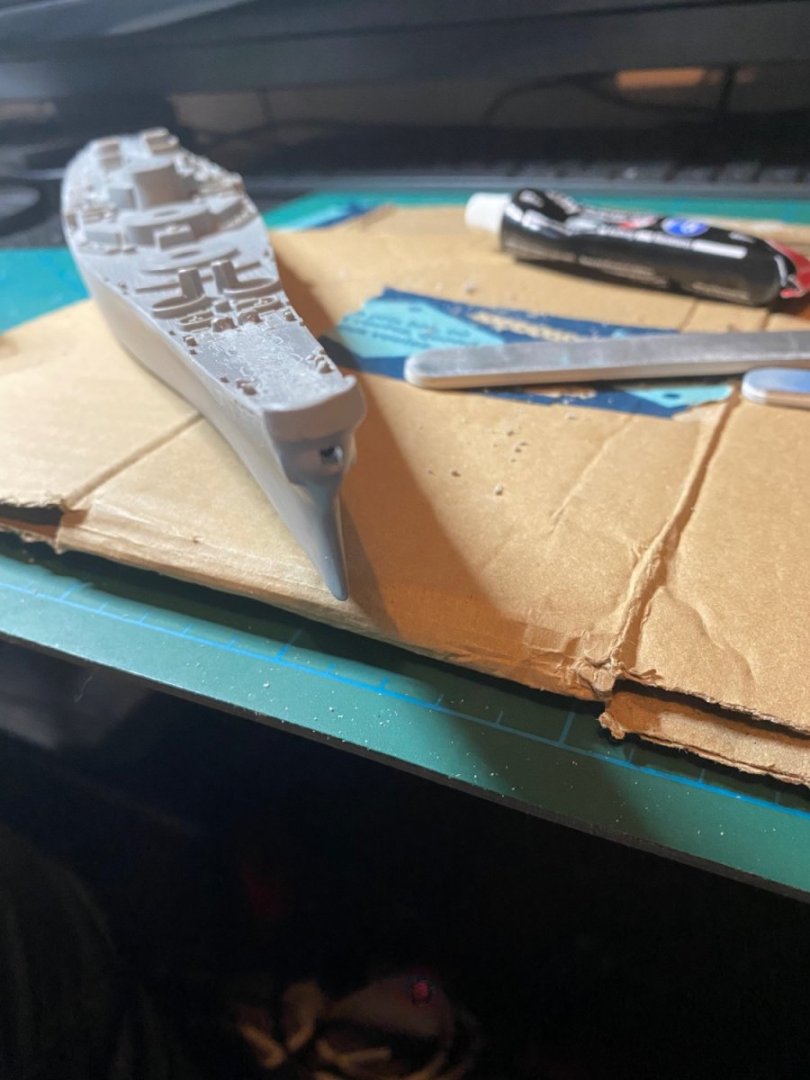
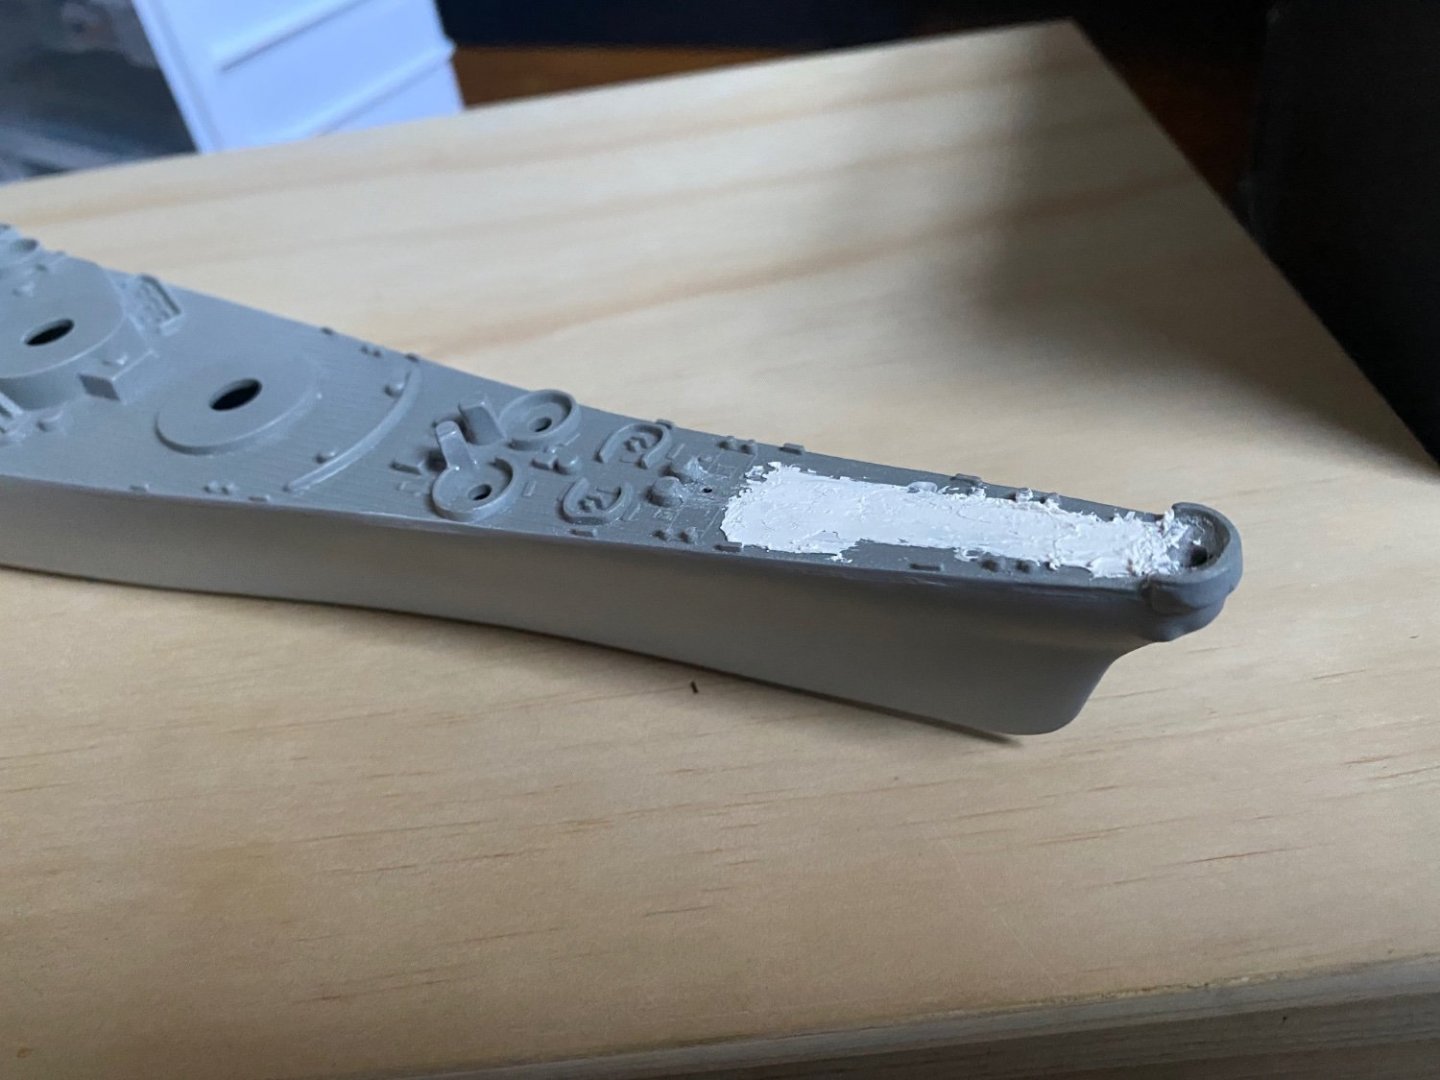
Filling gaps.. lots of filling! Have filed out the rubbish chain mouldings and added filler putty to produce new smooth surface. I’ll add real chain later. Drilled cavity for mooring chains.
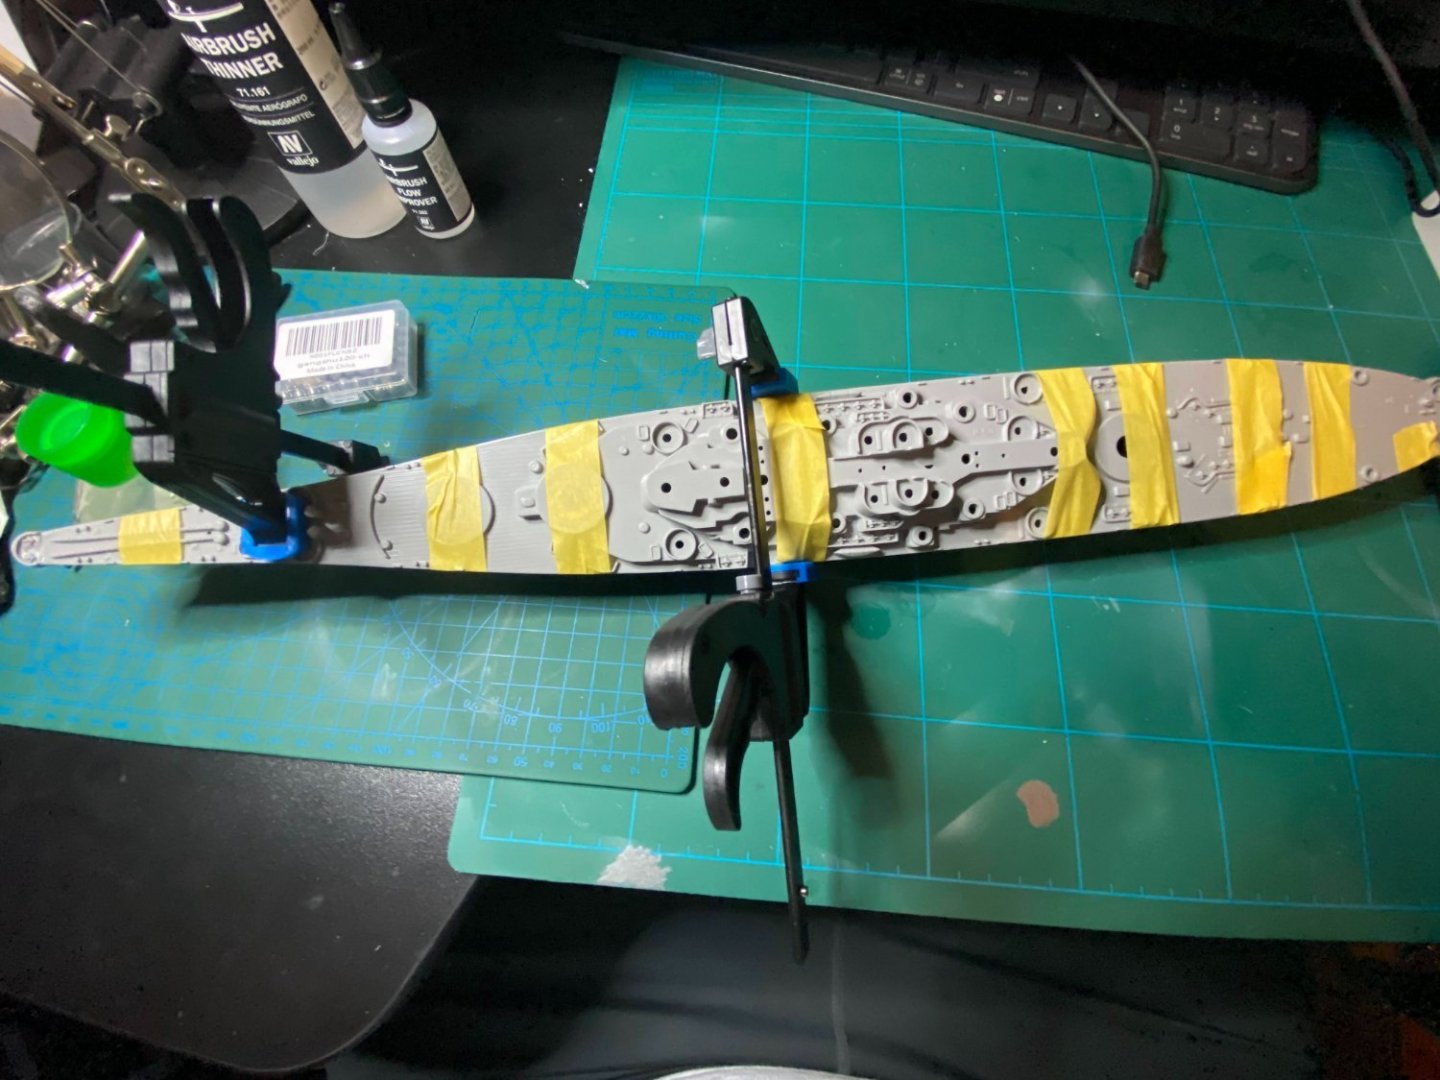
Finally added thick layer of primer to hull , so I can score panel lines to hull.
Toying with doing some preshading of panels like in my plane projects. Not sure, maybe even use fine black marker then overspray to give some hint of panels. It’s my first ship so a bit clueless. Anyone any advice?

-
Gluing and clamping done, time for some sprue glue to seal up the gaps etc.
- mtaylor, robert952, Old Collingwood and 4 others
-
7
-
One question for you pros out there.. anyone have any experience with radar in particular sk2 builds from PE.. instructions not the best. Can't find any youtube tutorials either.
- Old Collingwood, Canute and mtaylor
-
3
-
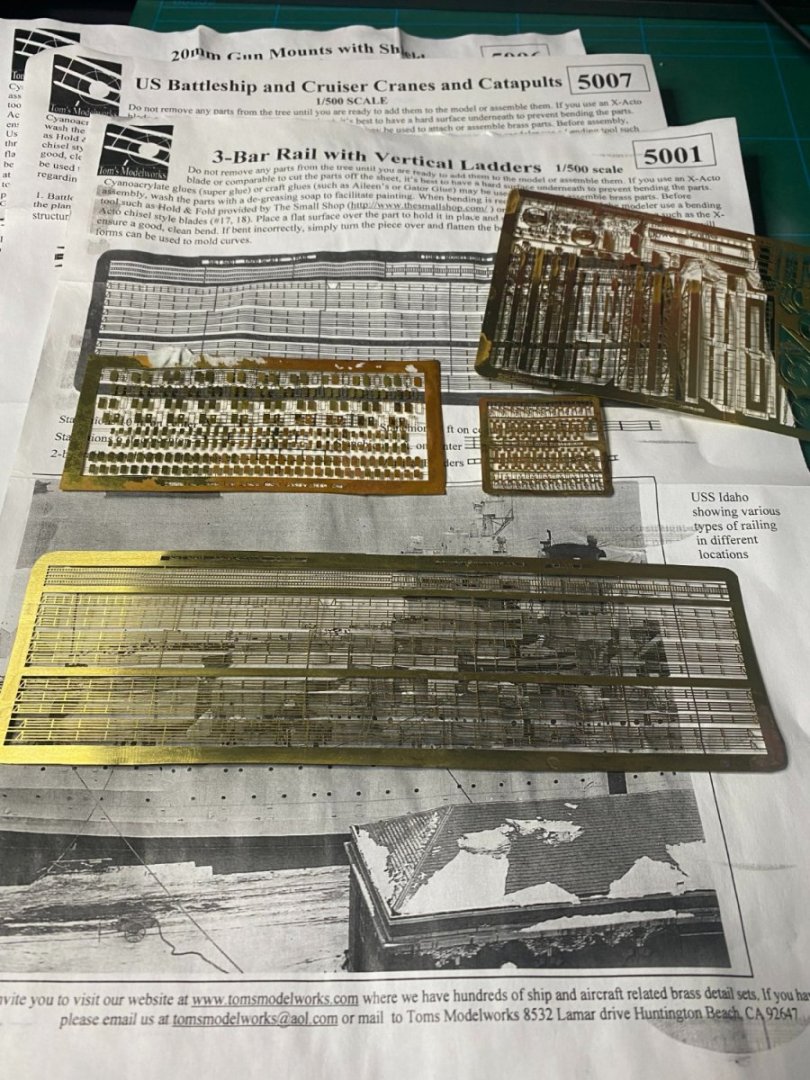
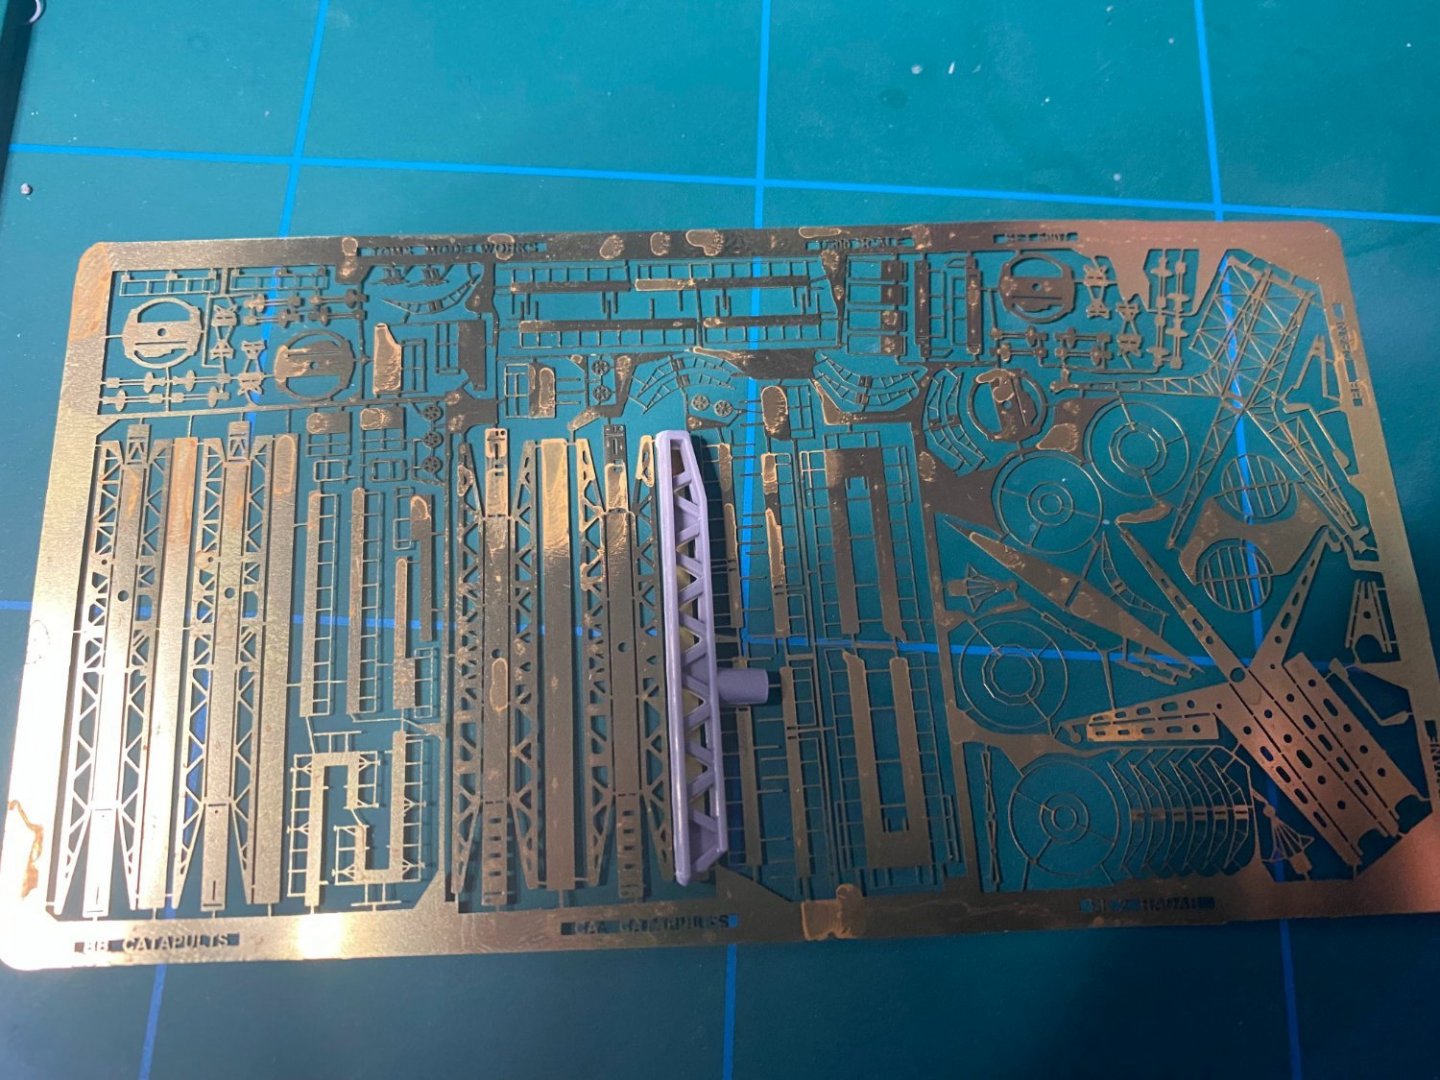
Right Photo etch arrived from Toms models, a bit water damaged & rust etc.. a shame looks like it was dunked in water in transit, not the Tom's models guys fault. Anyway... all should be repairable.
The good news is my naïve , crack pot idea actually might work! as the scale looks fine on the railings, doors, and even main catapults for the planes - see catapult example below.
- mtaylor, Canute, king derelict and 5 others
-
8
-
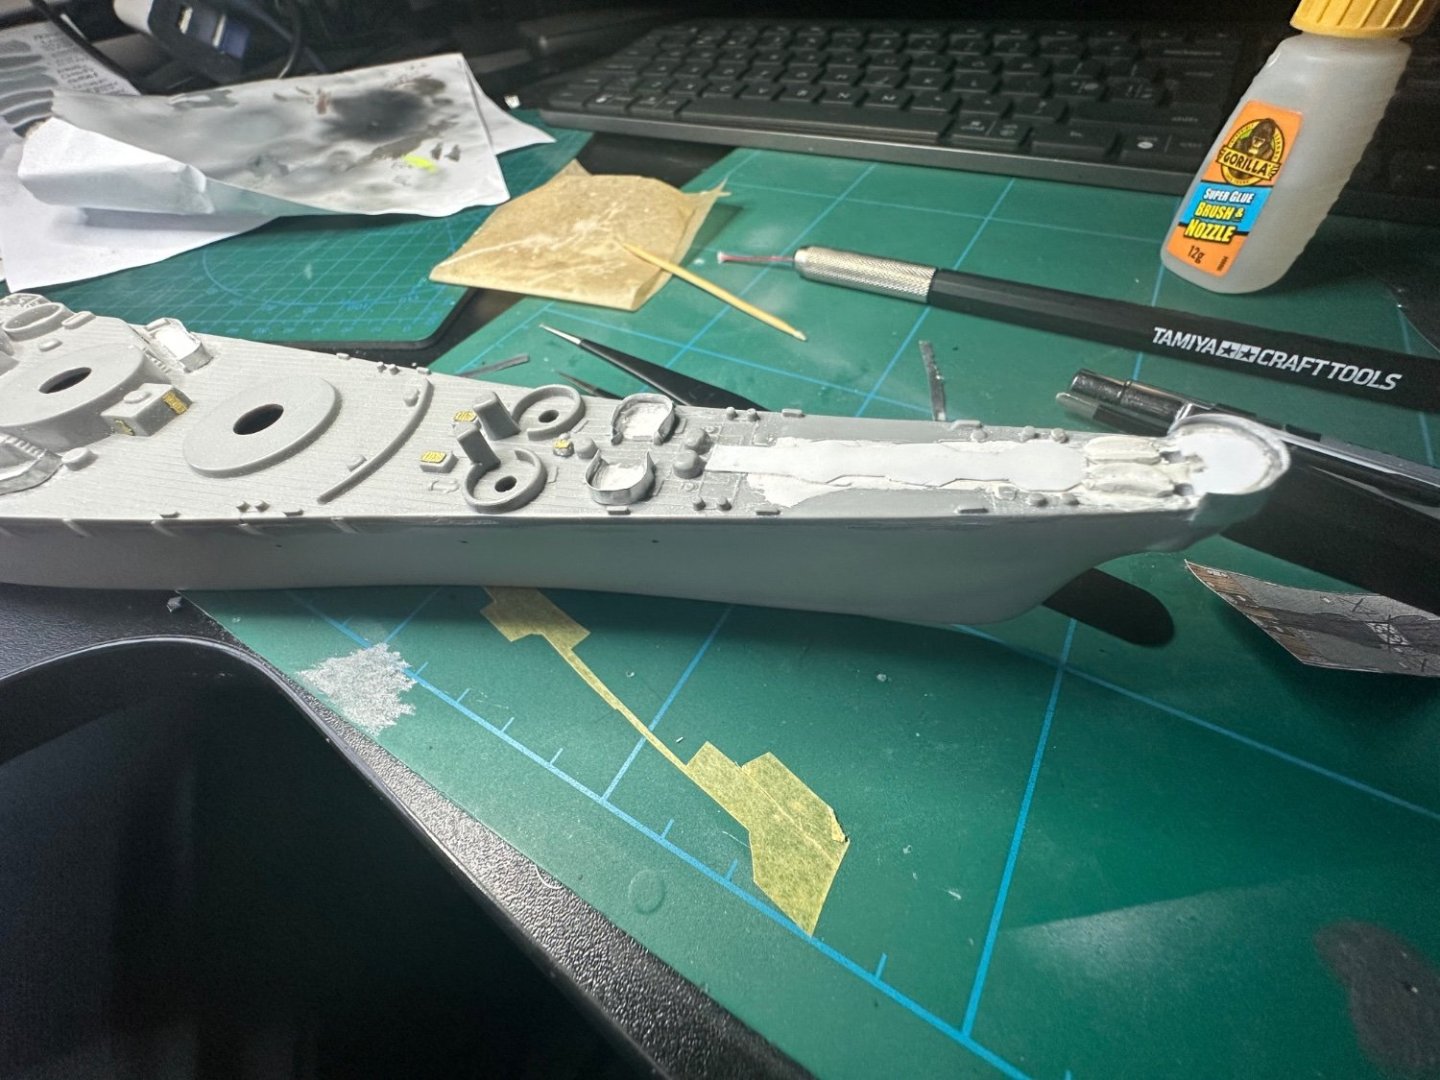
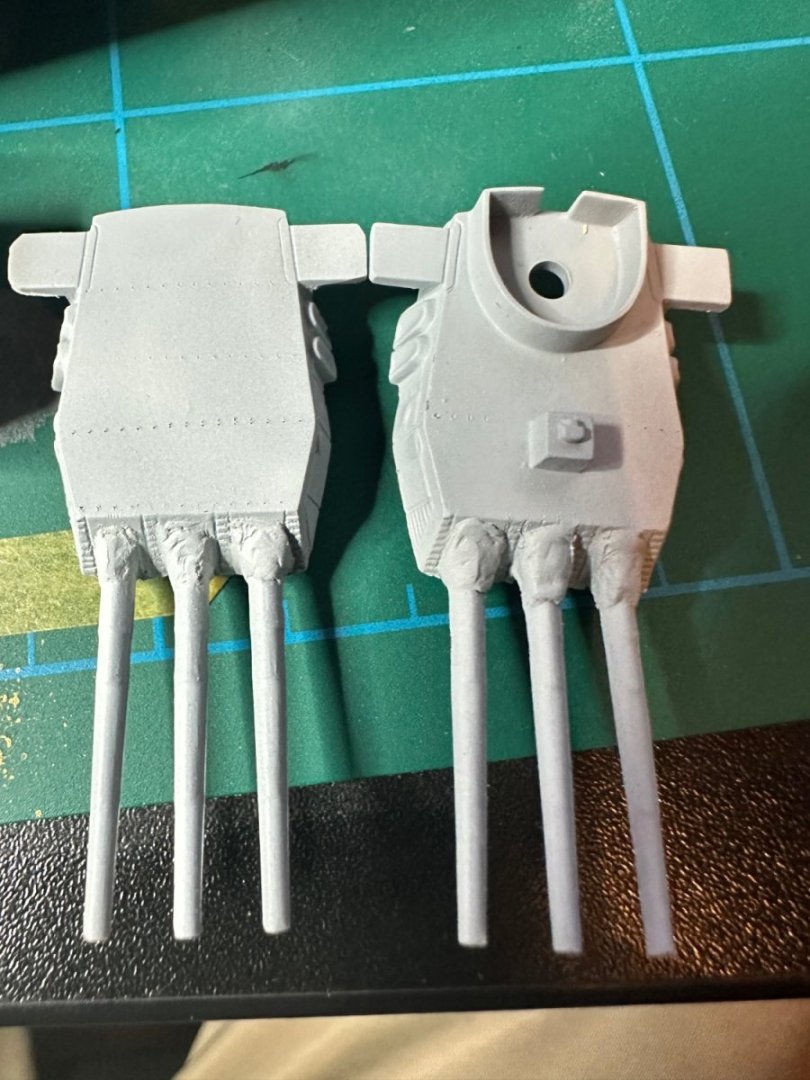
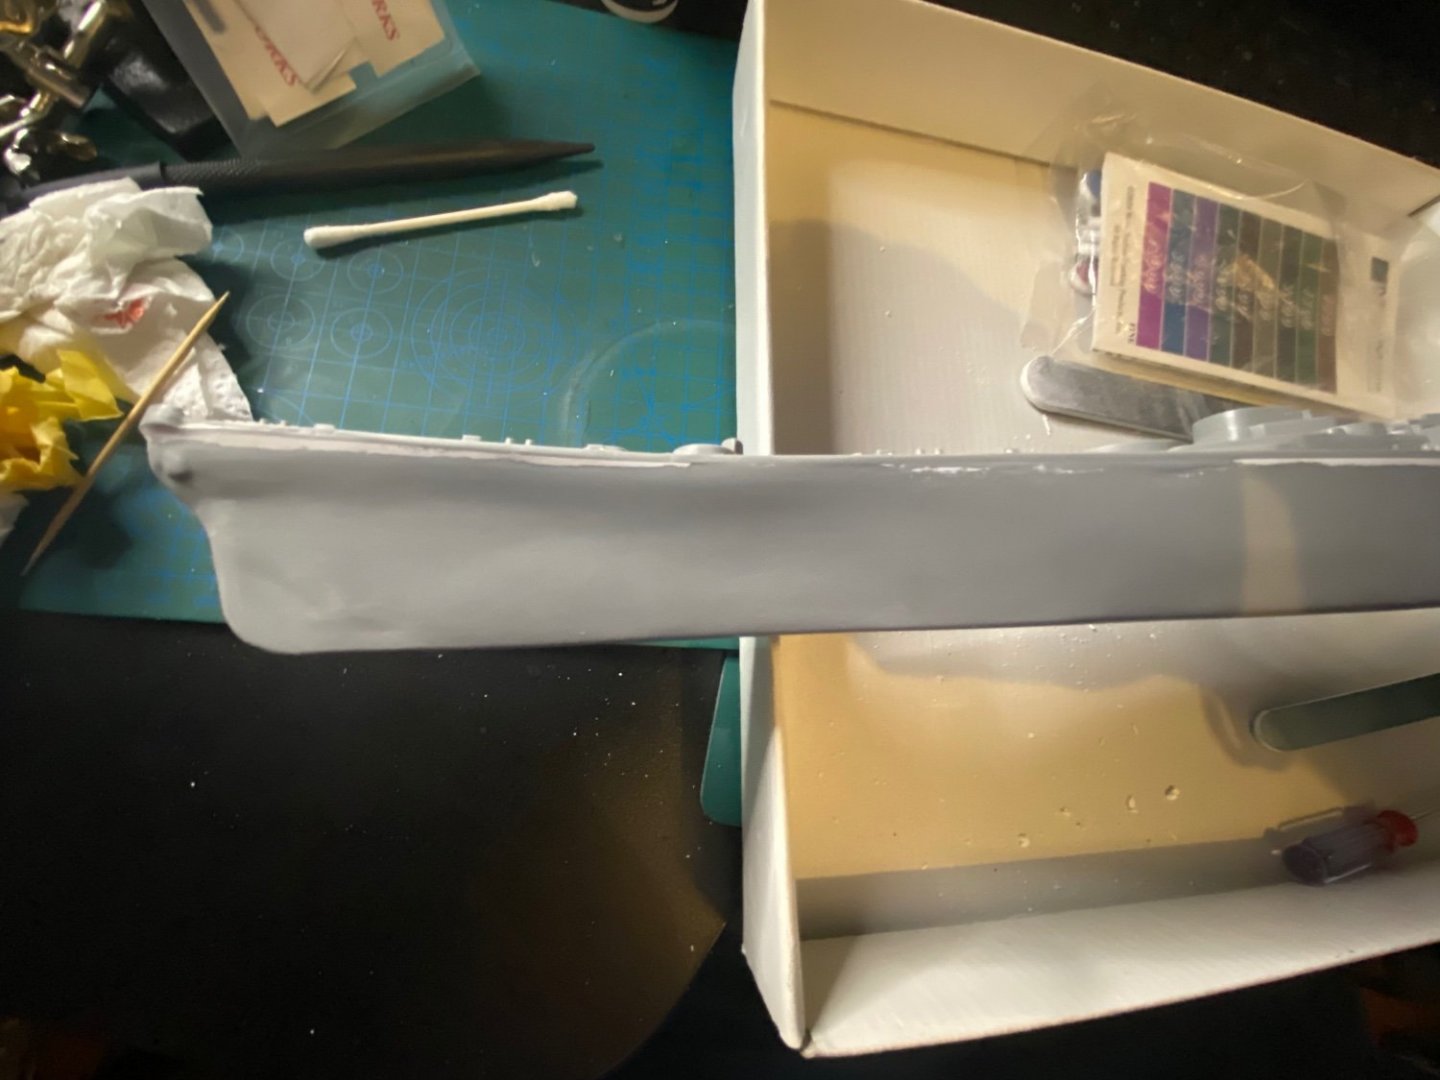
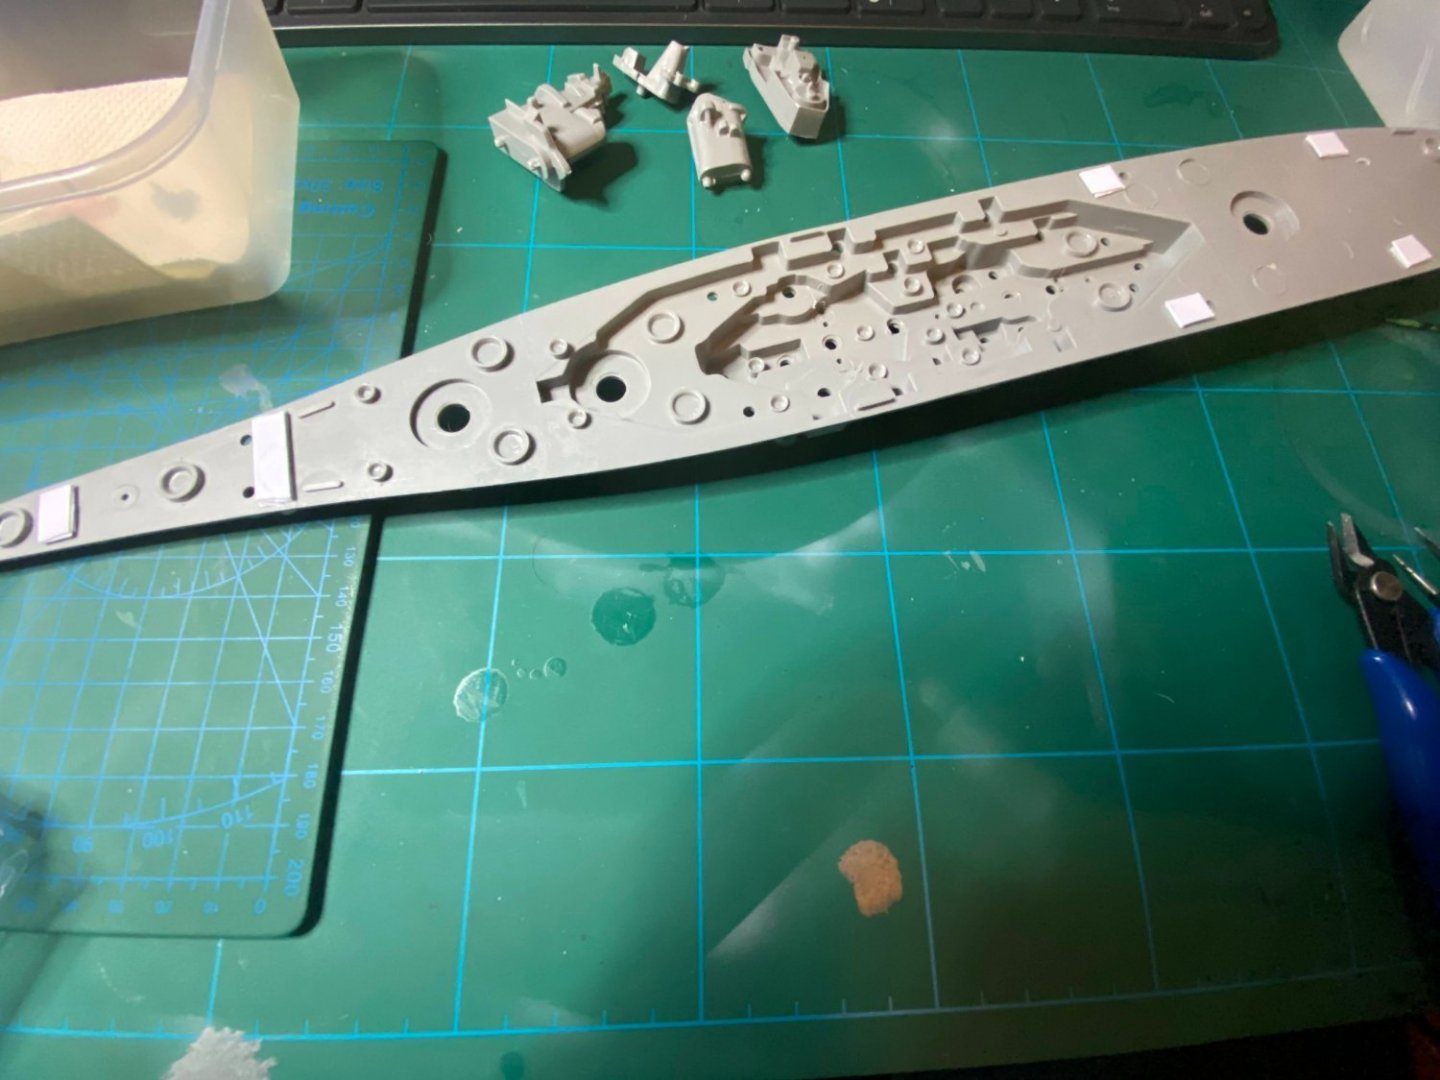
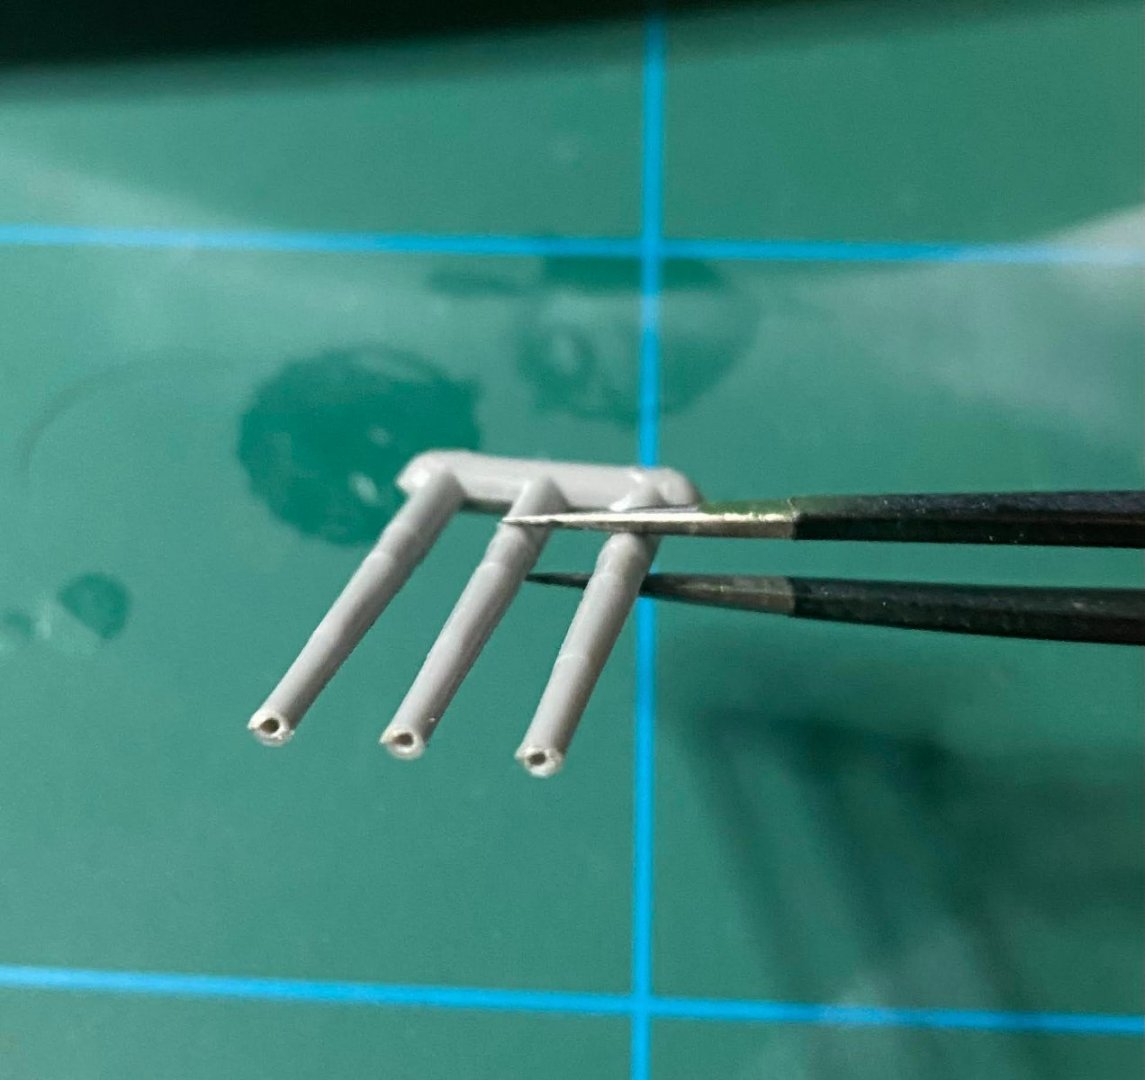
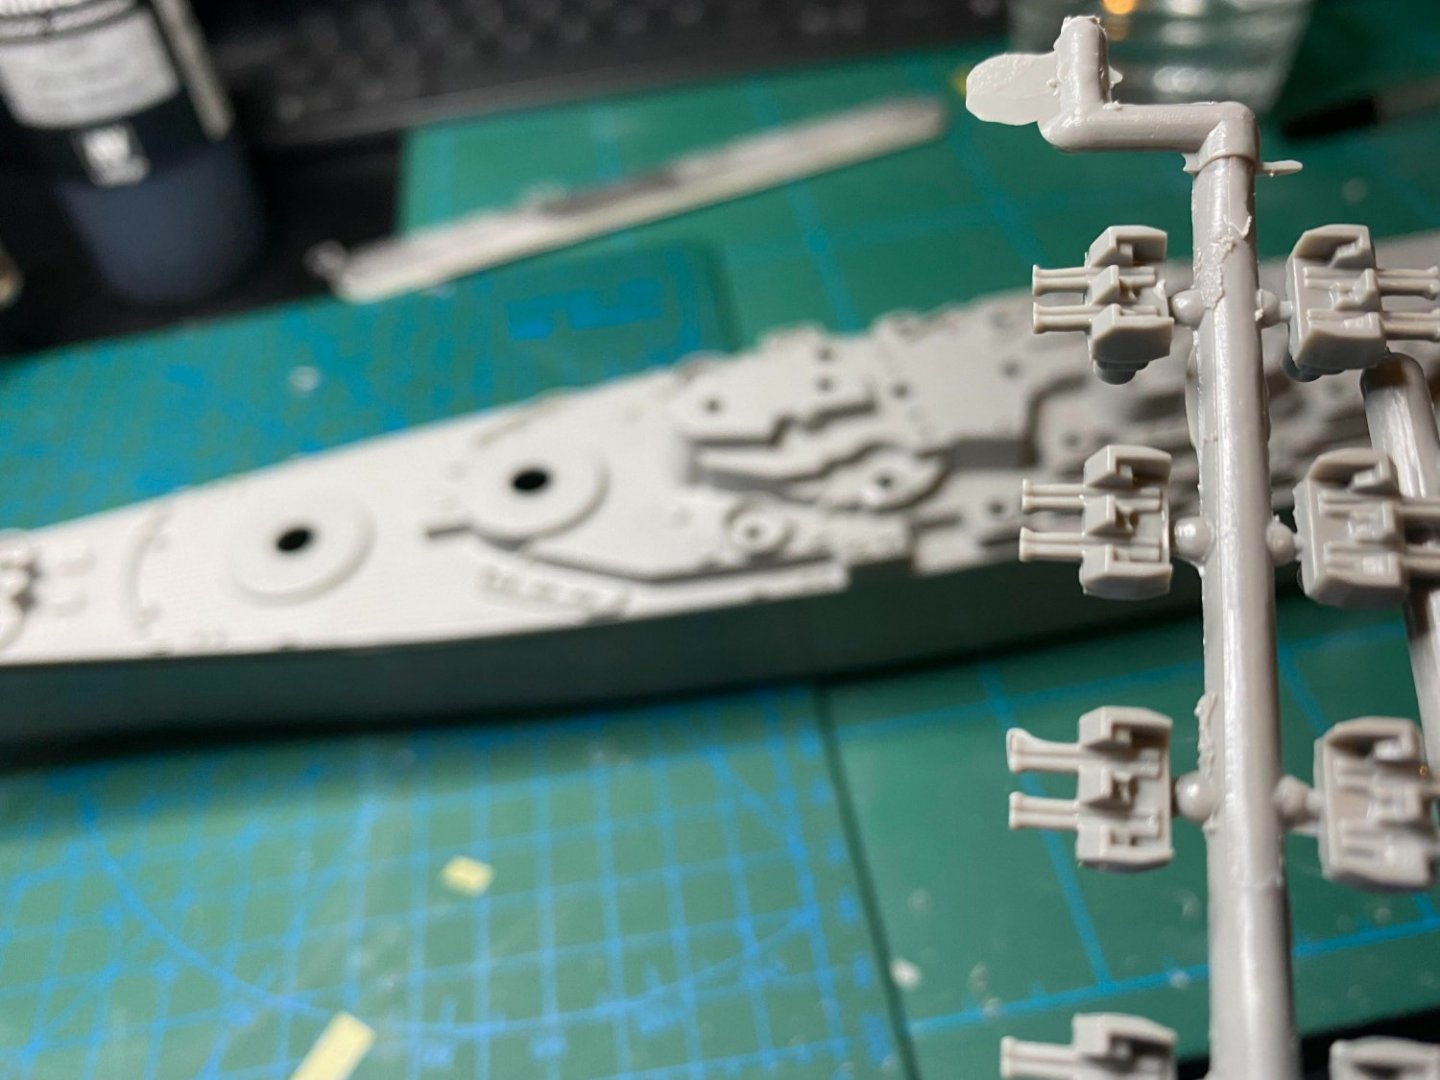
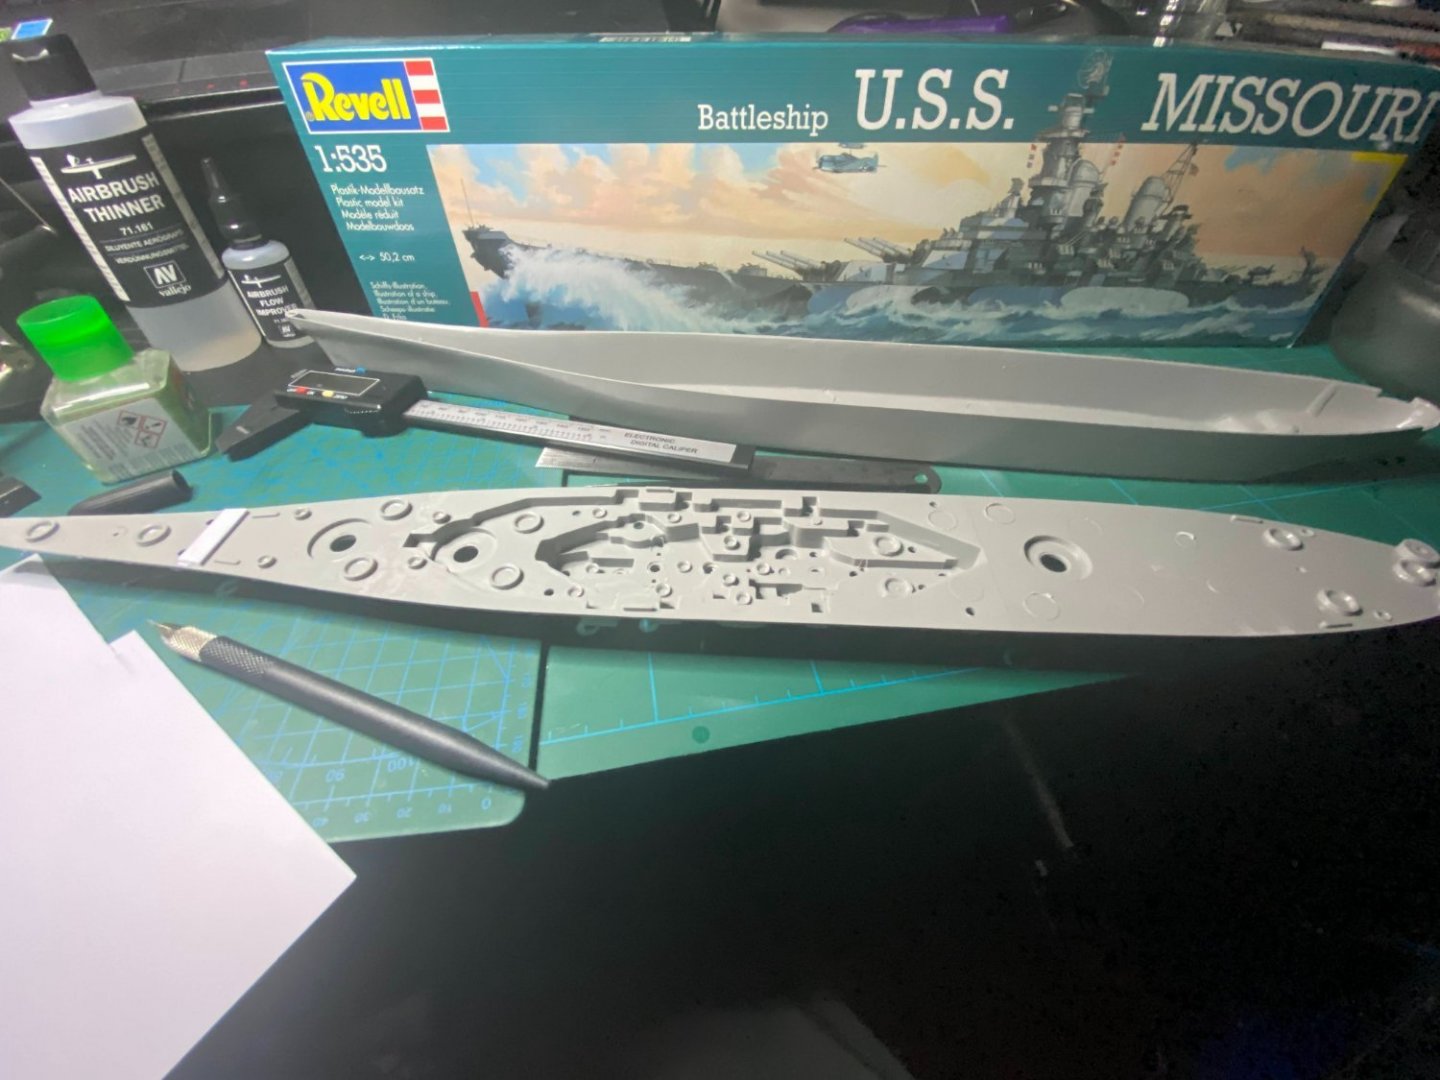
This poor kit really is showing its age, have ordered light clamps to be safe for the gluing part of the deck to hull, I'm worried it might pop with the poor fit. Yes.. could just use tape but better be safe. In the meantime, have done a batch of mods to help with fit and prepared a new batch of sprue goo for the inevitable gaping holes. Also bored out the main gun barrels and glued up the very basic super structure parts.
-
1 hour ago, lmagna said:
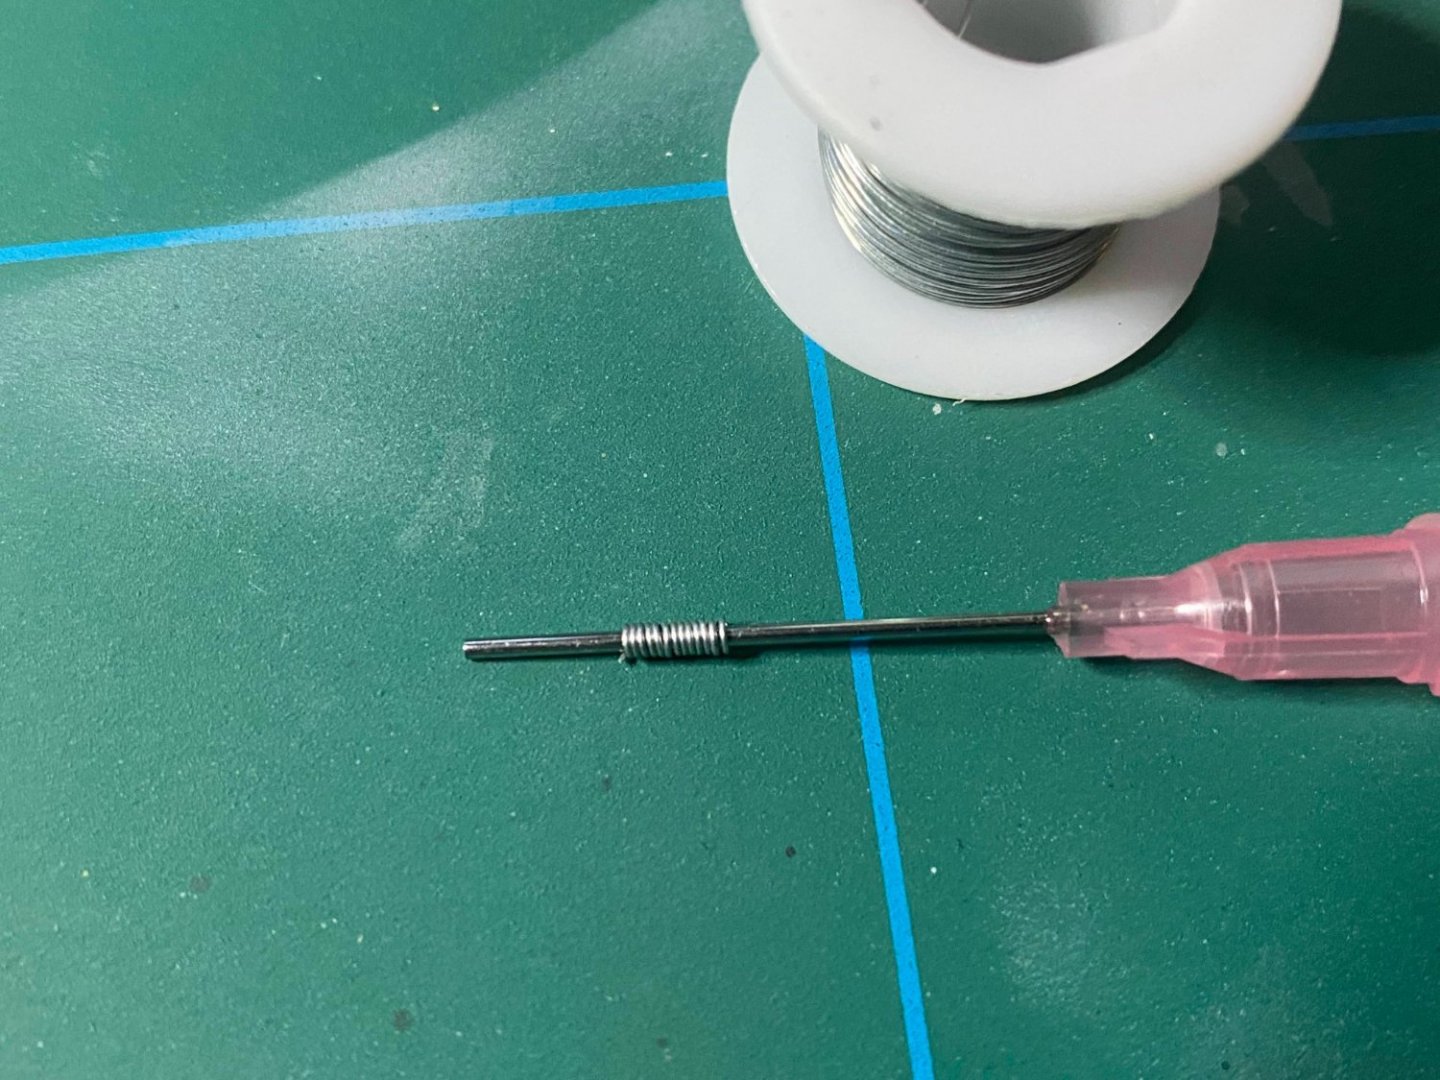
You should be able to find some very thin copper wire that can be wound around the 40mm barrels to make the springs. That should be more delicate looking and easier than Milliput.
Great minds imangna! was thinking the same, did a rough prototype here on my car detailing blunt needle. Not bad, will need to scale down a notch but good to have this option. At this scale more than enough detail though. Anyway, I'm going to move on and have this route in the back of my head.

-
42 minutes ago, mikegr said:
for barrel improvement i use brass. I think 0.4-0.6mm would be ok in your case. Also sterile needles are good as they come in even smaller diameter. I cut them with a rotary tool with a disk cutter. Then sand a bit the edges.
Super helpful mikegr, thank you. Needles are good shout too as I have a batch for car paintwork repair. With brass, can you flare it at all with heat? or will it crack? The bofors also seem to have recoil springs, so could just use a bit of milliput to replicate them.

- mikegr, Bill Morrison, AKRYPTO and 3 others
-
6
-
1 hour ago, mikegr said:
An average Trumpeter kit in 1/700 would give more detailed AA guns not to mention high end brands
True Mikegr but if I go that route I might just be tempted to drop the revell build completely! and 1/700 just a bit small for the space I'm looking to fill.
9 hours ago, king derelict said:The Bofors are nasty but could you replace the barrels with brass rod or use brass barrels from a bigger 1/700 scale calibre?
Good Luck
Alan
Never used brass rod, would a normal metal saw be enough to cut it, also would need super small sub 1mm diameter right? Finally, can you flare brass without cracking it at those dimensions ? The Bofors have flared ends on their barrels. I'm looking around for 1/700 custom barrels but no joy so far.
I still have a mad thought of trying to use a resin option , has anyone used resin castings from a silicone scratch build mould to custom build ship parts?
-
7 hours ago, Grayhawk said:
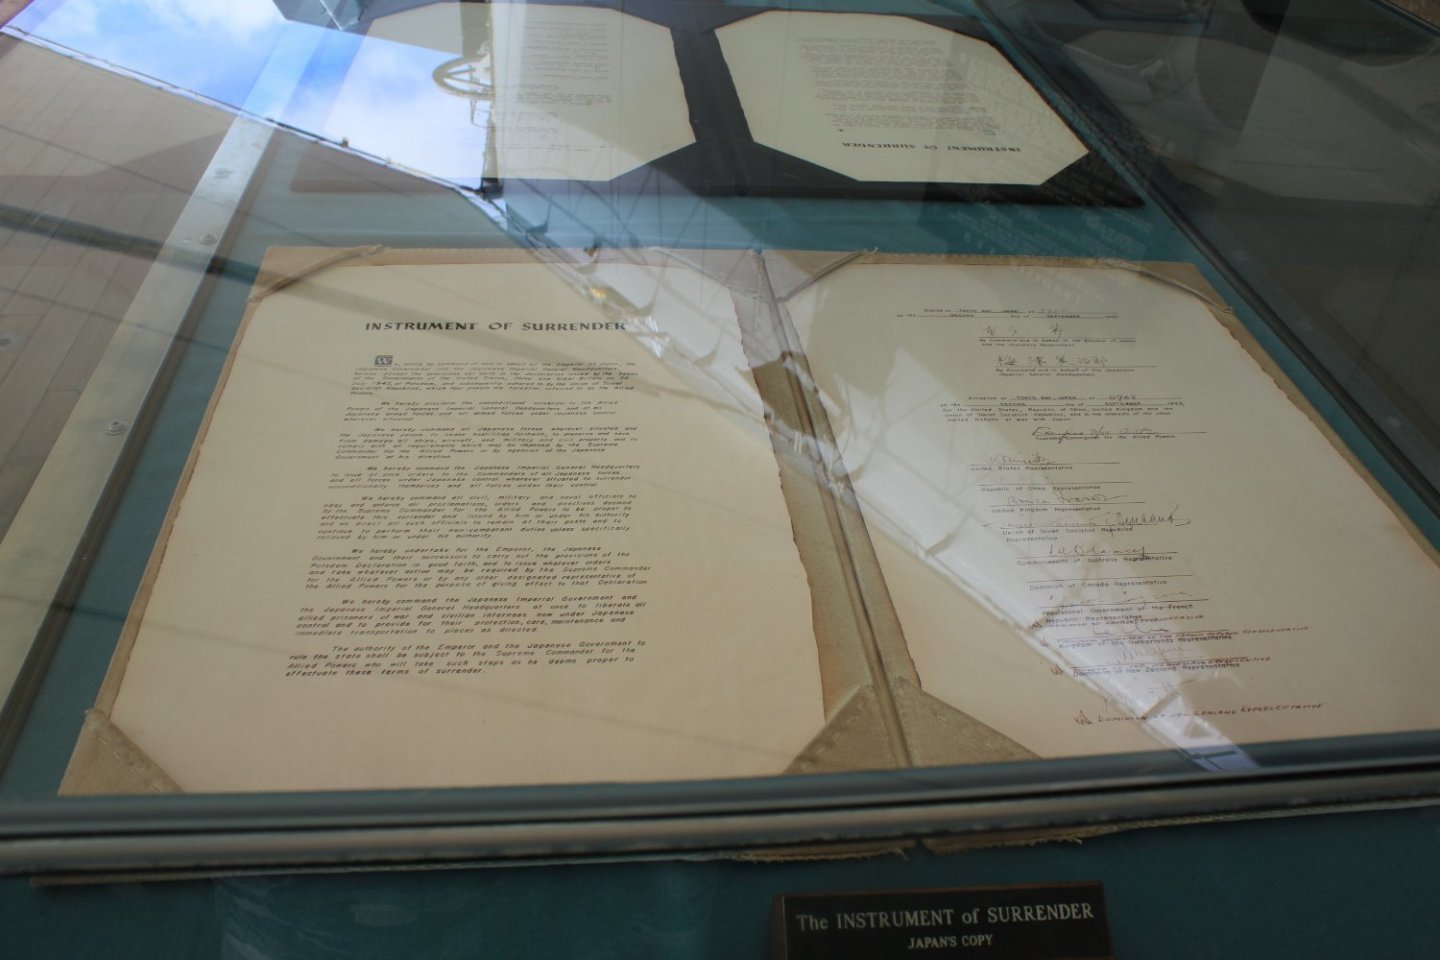
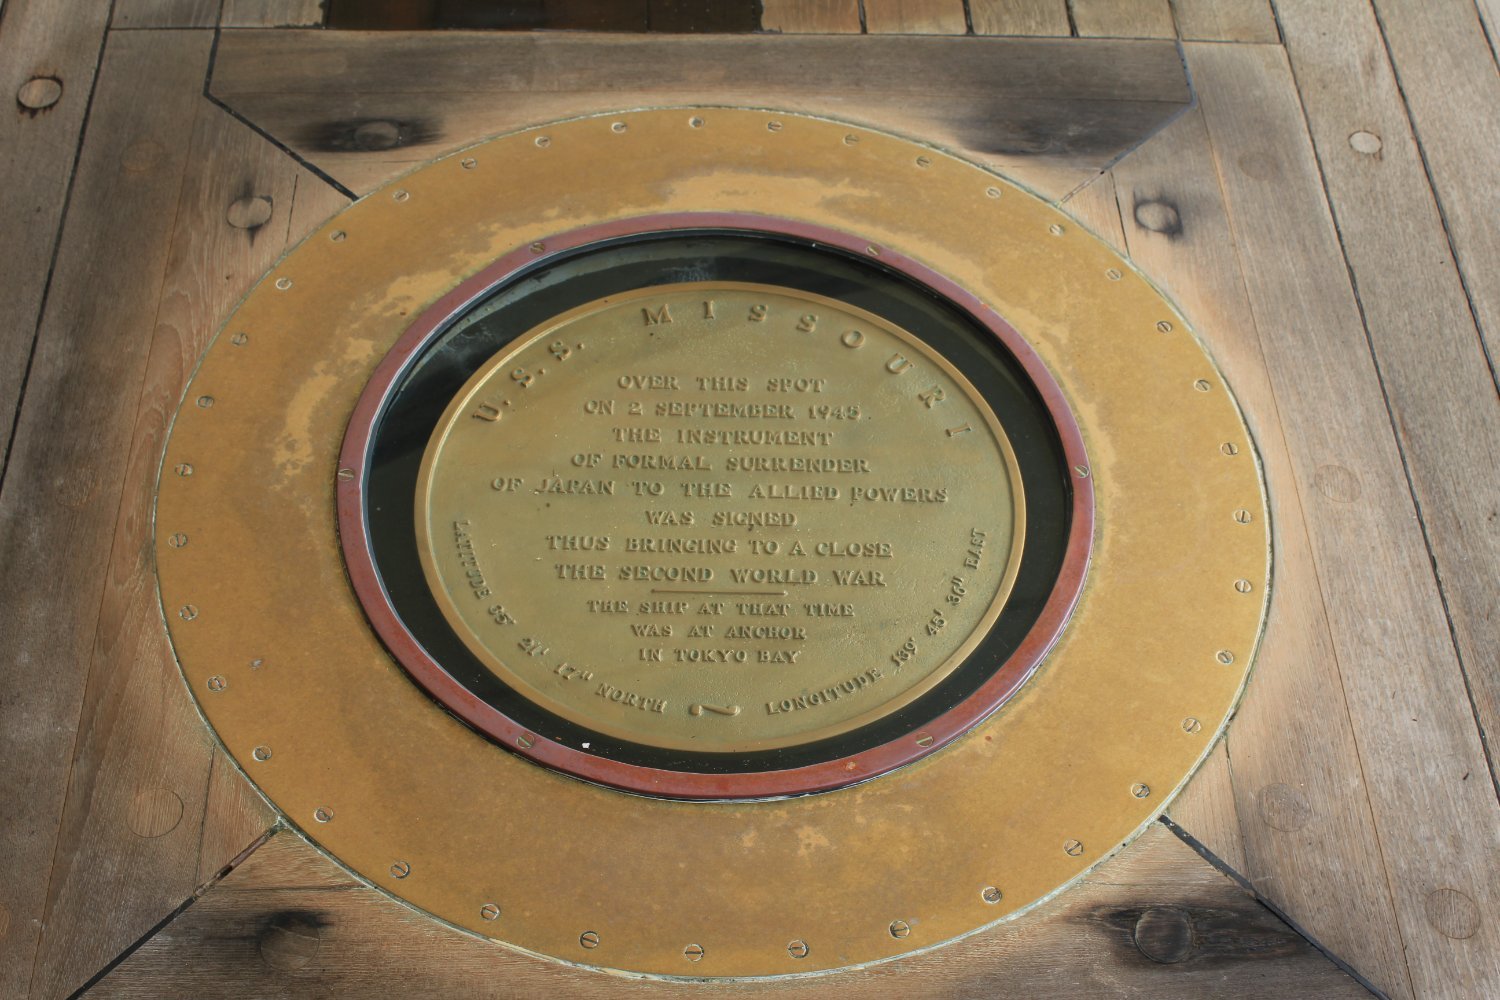
Wouldn't pounding your hand repeatedly with a mallet be easier. It feel so good when you stop!!! That's quite the project. I built one when I was about 10 and it looks like a New Jersey when it'd done. Does it still come with the medallion relating to the signing of the surrender of Japan? Always wondered if it was still in the kit. Cheers!!!
Sure does Grayhawk, part of the nostalgia of getting this kit to remind me of the real visit. Here's the brass plate replica included in the kit, with my photos from the real thing in Hawaii.


- mtaylor, Bill Morrison and Canute
-
3
-
Thanks Chris,
Many thanks for you comments and fair point on the 1/500 to 1/535. The main elements from Toms will be the 50 cals and railing but you've got me thinking.... mm... was hoping I'd get away with slightly larger main SK2 radar and crane pieces. I haven't got them yet, still waiting on the post but may be option to scale them back?
- lmagna, mtaylor, Old Collingwood and 1 other
-
4
-
-
Here's the double Bofors... wow , where do you go from here?
- Canute, Old Collingwood, ccoyle and 4 others
-
7
-
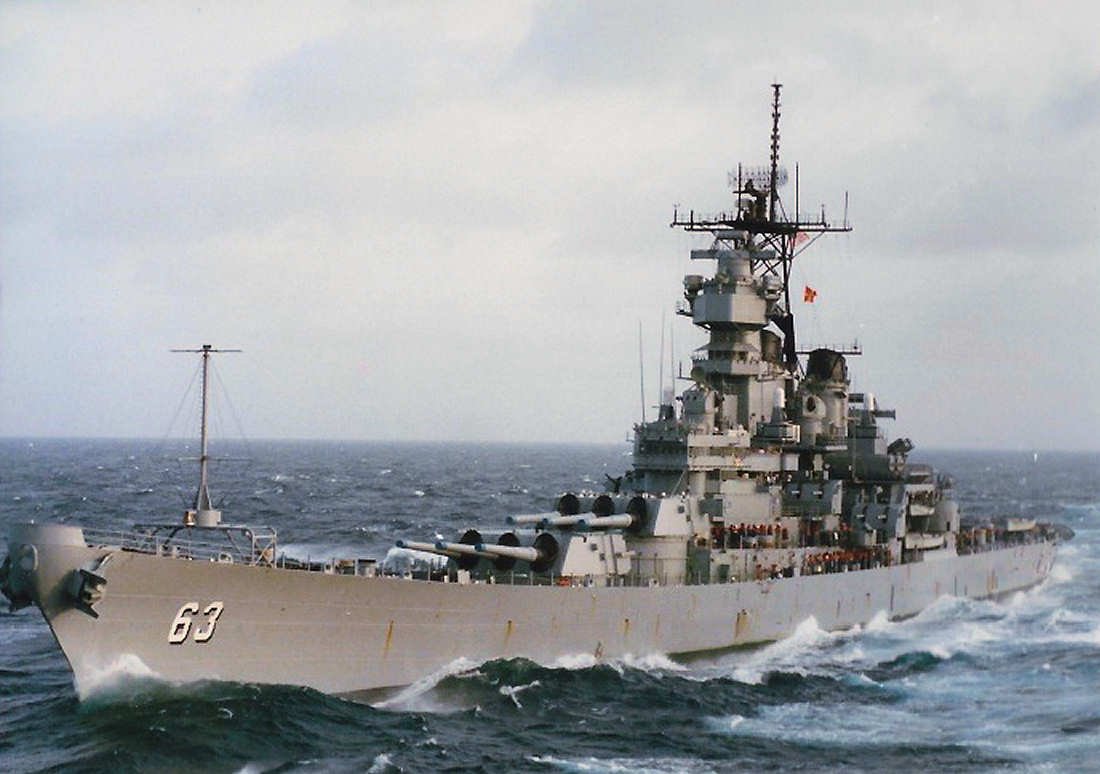
Starting my first ever ship build on the much maligned Revell 1/535 kit. Ever since visiting the Missouri 10 years ago, I wanted to have a physical memory of the visit. The lack of detail on the kit is well commented on, so I'm looking at using my visit memories and photos to bring this early plastic model up a little bit in terms of finish.
Why the Revell kit? when it gets hammered on the forums? Well, the main reason if honest, is that it will fit with a current F1 LED lit display cabinet and I will be attempting to set it in an ocean diorama. So the 1/535 suits this purpose and I don't care that the underwater part of the hull is shaped like a bath tub. The Tamiya and Trumpeter kits of much higher detail but bigger scale would be too big to fit in the case... and finally, I feel like a challenge! which I may regret over time!
To achieve this I'm trying the following:
- Getting PE at 1/500 from Toms model works
- Redoing all the "crucifix" 50 cals to PE
- Adding detail in the hull to reflect raised panel lines and rivets
- Real chain on anchors, not the gator teeth casting that's there at the mo, with rebored anchor
- Adding PE to superstructure and creating detail regarding portholes / deck items
- New radar and catapult PE items
- Added railing
- Reboring Smoke Stacks to have grill structures
- Reboring mooring chain cavity at the bow end
Before starting properly, I'm wondering if anyone with ship building experience has any thoughts on whether this is a fool's errand or achievable? I've done a good bit of car and plane modelling but never ships.
Also, the real parts that has me stumped are the double bofors guns. The moulds are off the chart bad , looking like legs sticking out of a box.
Considering scratch building and then doing a cast resin to replicate.. don't want to blow the budget on 3d printing and there's nothing commercially available in that scale. So any pointers there would be appreciated.
Anyway wish me luck and nice to join the community here.
- mtaylor, king derelict, RGL and 5 others
-
8


USS Missouri by BarrettM82 - Revell - 1:535 - PLASTIC - first build
in - Kit build logs for subjects built from 1901 - Present Day
Posted · Edited by BarrettM82
Finally getting to final stages. Added model to sea diorama, using tin foil and gel medium as base, cotton wool for wave crests. Also used Vallejo still water which gave nice effect. Finished with Tamiya X22.
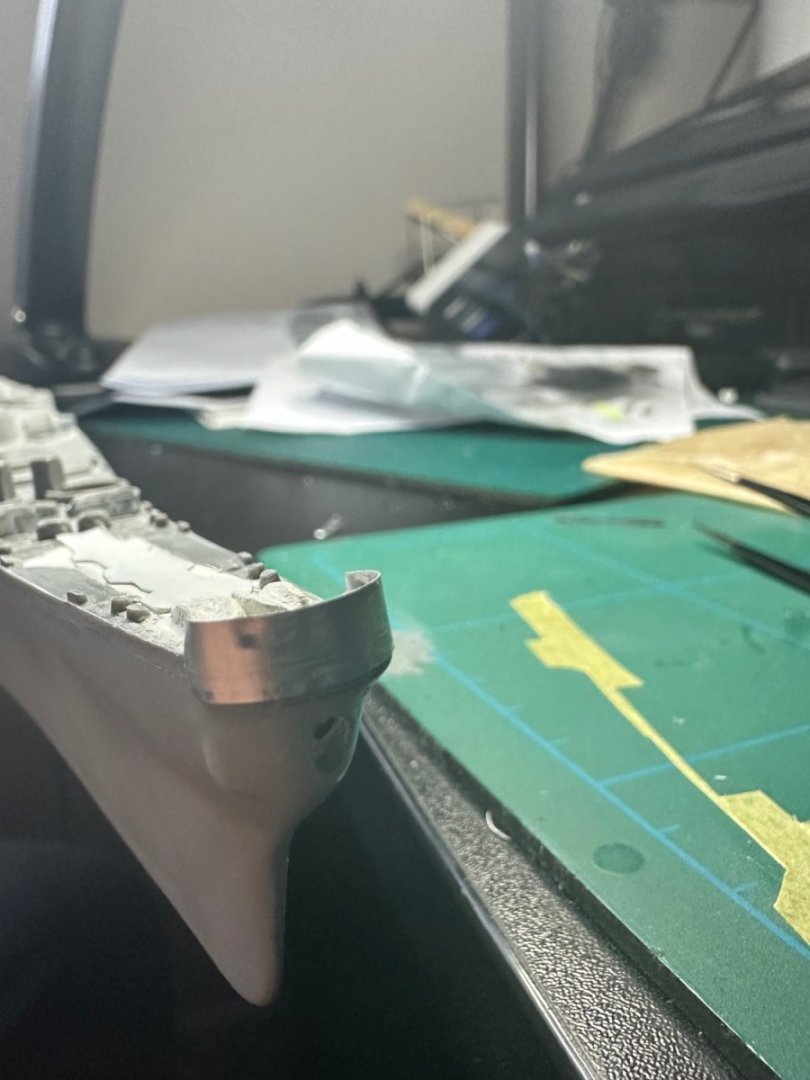
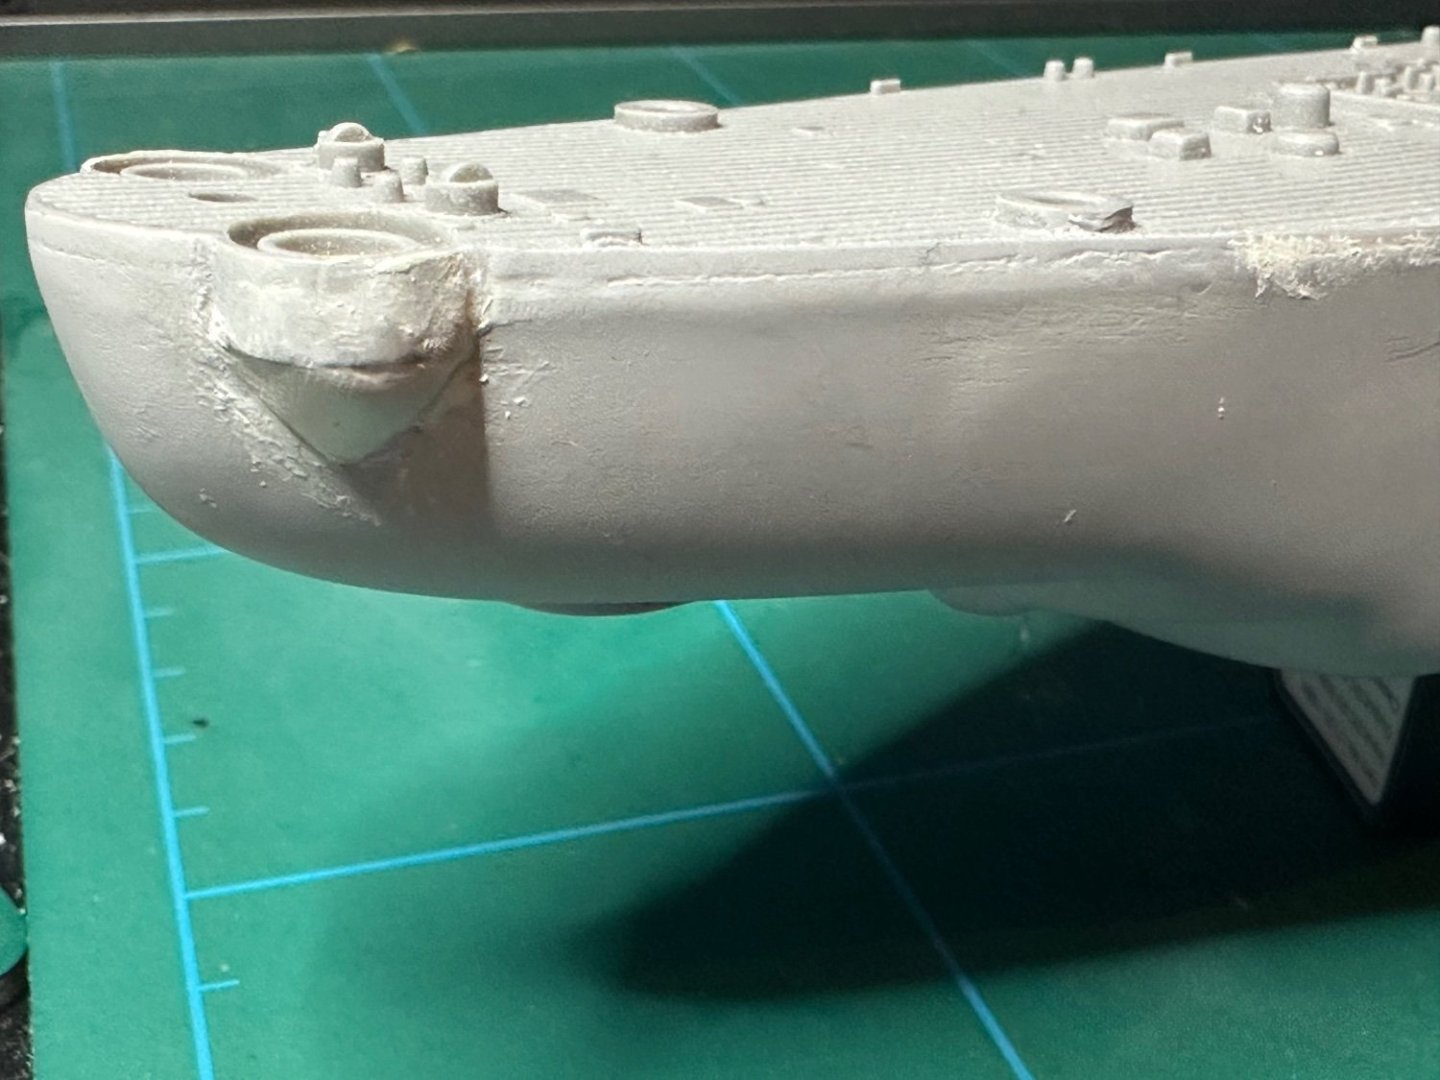
Close up of bow end with scratch build from aluminum sheet and flag pole from medical needle, PE railings added definitely improve the detail and look. AA guns on bow now on scratch build styrene platform... much better than the crucifix moulds on originals
Detail for PE on funnel grilles and 3d printed life raft, lots of scratch building over very poor detailed original. Added 3d print gas cylinders along with PE stairs , radar dish and drilled portholes with hatch doors
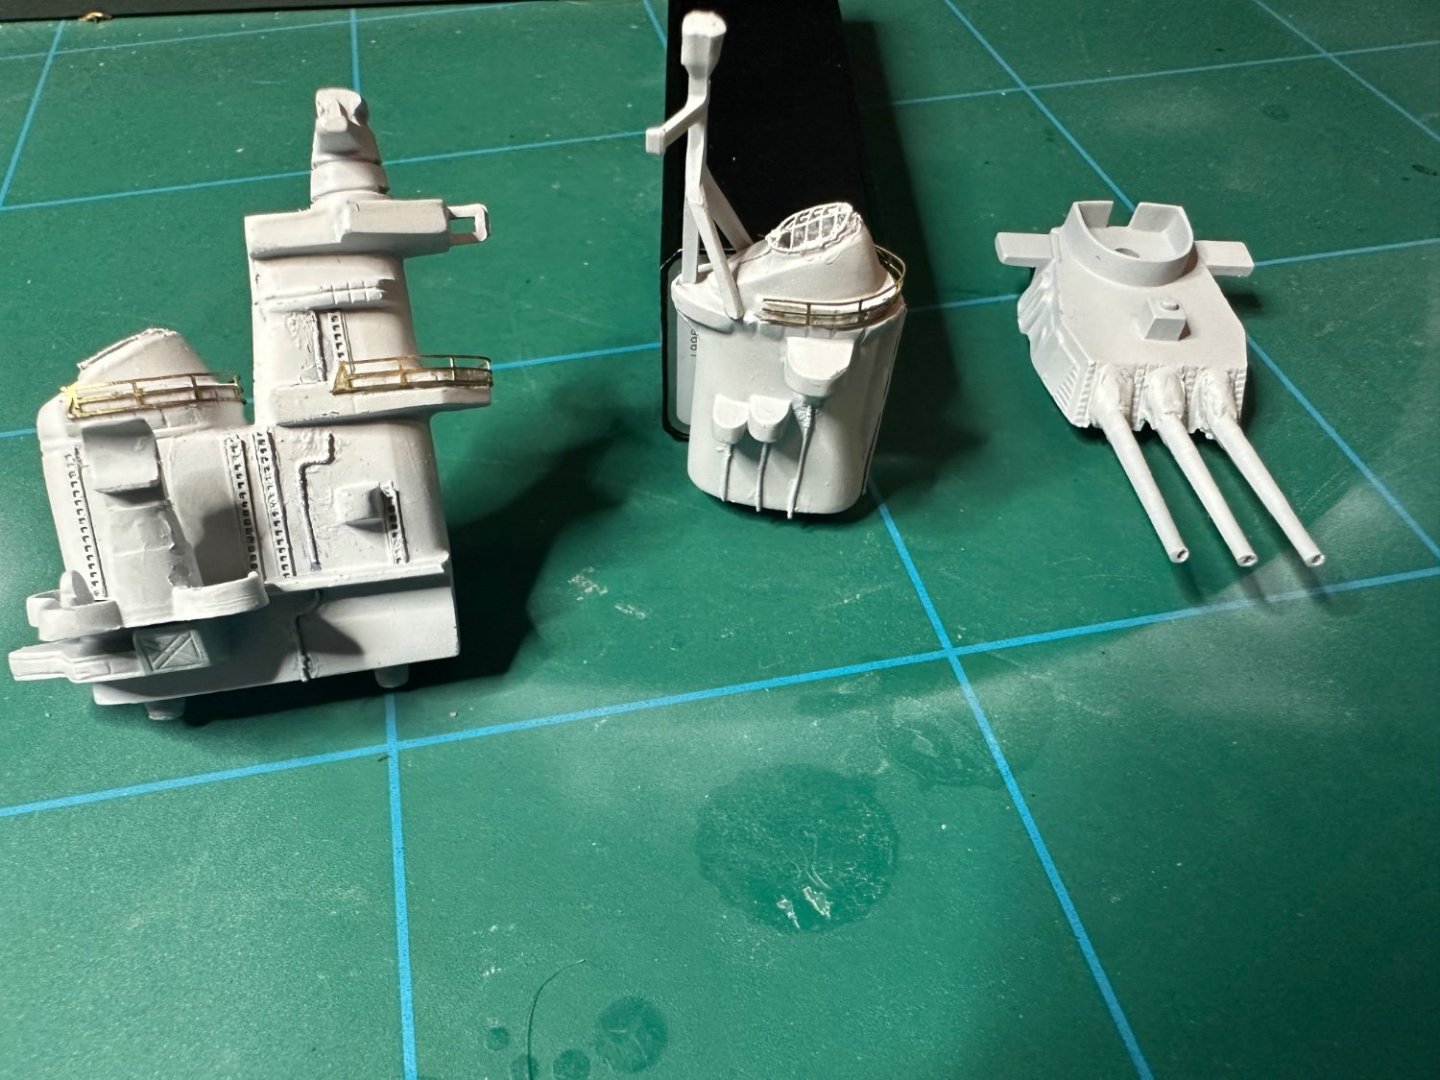
PE crane, catapult and 3d printed planes, again to improve chunky poor detail originals
Milliput scratch building for bofors base at the stern
More angles including detail of milliput blast bags for main guns and bored out barrels
Made my own custom decals to add more windows on lower levels as original only came with one decal for windows