Ferrus Manus
-
Posts
1,407 -
Joined
-
Last visited
Content Type
Profiles
Forums
Gallery
Events
Everything posted by Ferrus Manus
-
 @amateur having seen the footage and news reports for both disasters numerous times, I think the main contrast is that the Columbia landing was going to be just another shuttle landing, until it wasn't. All there really was was a disintegrating "meteor" in the sky, and the shuttle was never heard from again. Challenger, on the other hand, was being watched by the entire United States. She was being cheered for, saluted, egged on to her flight into orbit. As one commenter said, schools paused their sessions for the day to watch the launch. The entire nation stopped what it was doing to watch Challenger soar into space, and so it seems fitting that Challenger would have made a larger cultural impact.
 -
Honestly, I feel a bit old as well. I was born in 2004, right at the beginning of the tail end of the Space Shuttle program- the shuttle returned to flight when I was a year old. After the cancellation of STS, I personally mailed a letter to President Obama asking why his government had shut it down (I was 6 or 7 at the time). He actually got back to me a couple of months later, and in the typical fashion of a politician, danced in circles around the question without giving a response. To date, I still miss the shuttle program.
-
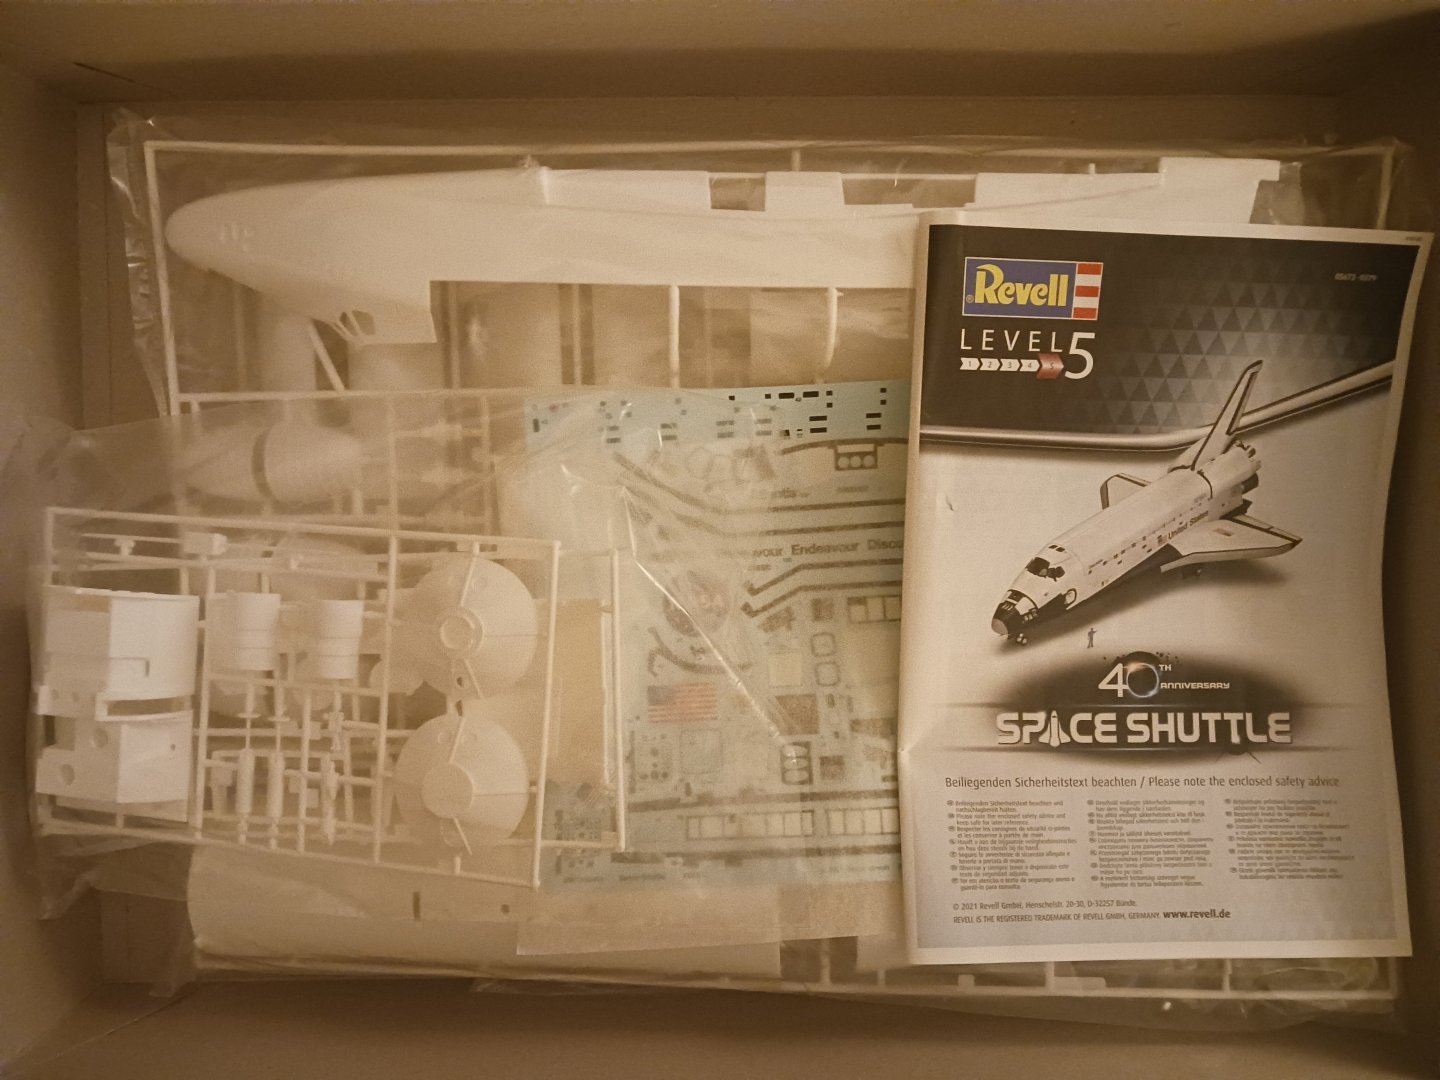
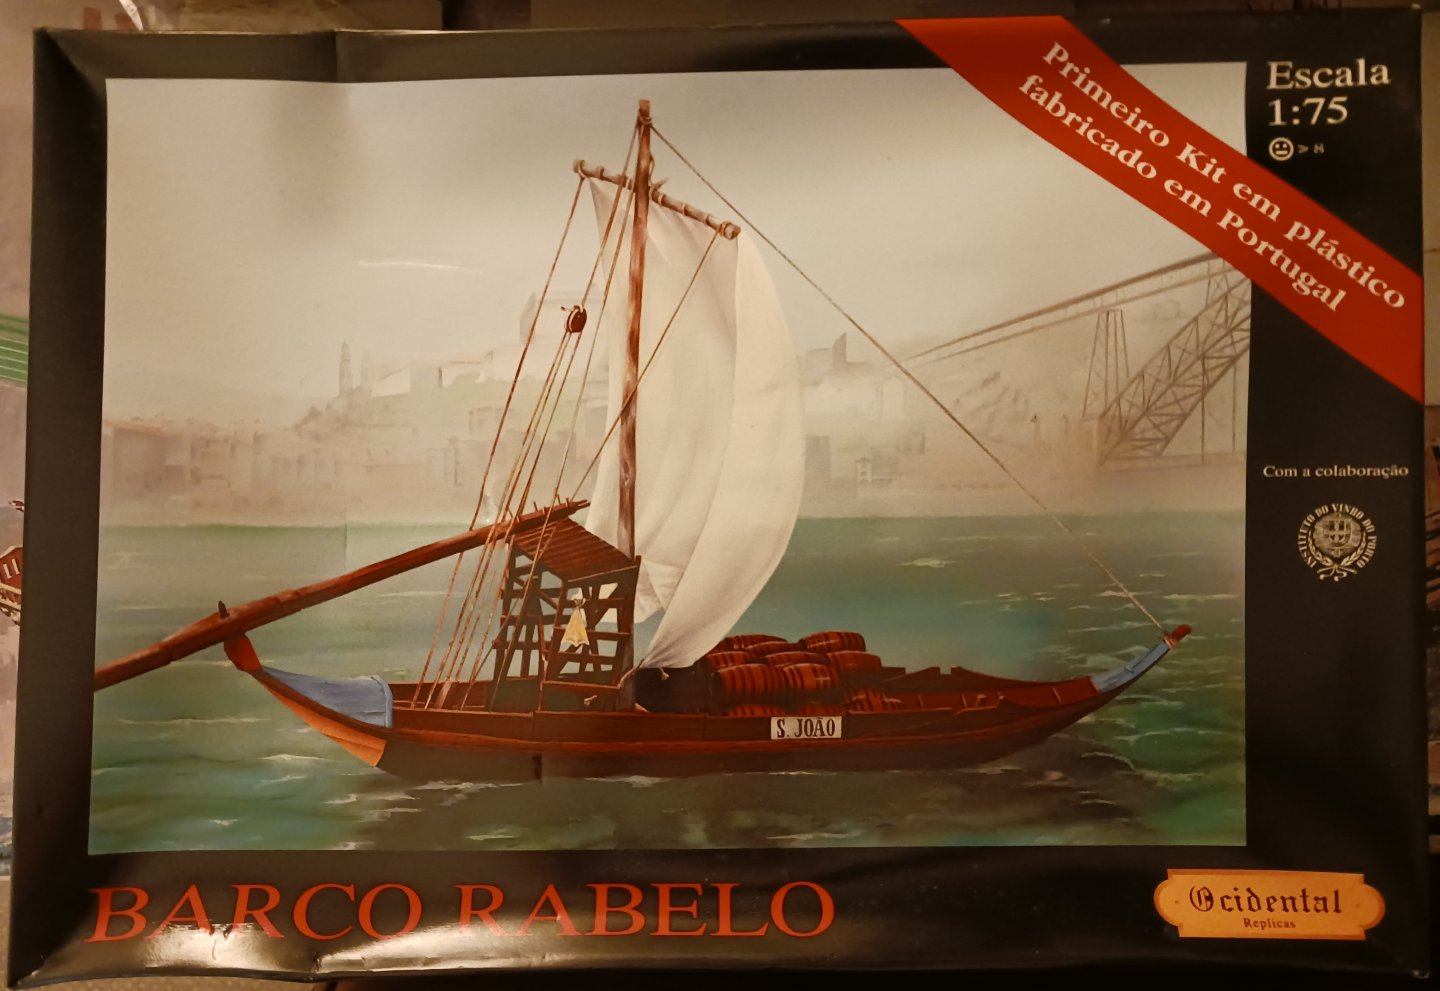
Hello all, I bought Revell's 1/72 scale space shuttle orbiter back in July if this year, and it has been sitting in my closet unbuilt ever since. It's time to finally open it up and start it! I planned initially on building the orbiter as the Columbia, as she would have appeared later in her life. However, as I was doing later research on the kit, I found out that A. all of the space shuttle orbiters had different thermal protection patterns, and B. the only orbiters you could model accurately are Columbia as she would have originally appeared prior to STS-9, and Challenger. So, I chose Challenger. Here's a look at the box: From what I've gathered, the kit shows its age, but with a little effort and skill, can be transformed into an extremely good-looking (although maybe not picture-perfect) representation of the orbiter. So, I am making a few decisions about the model. 1. Just the orbiter will be built. I will not be purchasing the Monogram stack in order to represent the boosters and external fuel tank. That being said, Challenger especially deserves to be modeled as the full stack. 2. Most of the tile work will be a painting exercise. I specialize in ships, not spacecraft, so I will likely build out of the box as much as possible for the sake of not risking the kit. 3. Challenger is the only orbiter whose orbiter-specific markings are not included in the decal sheet. This was a massive oversight by Revell, and I will be purchasing a set of decals for her. Once more, as I have stated in the title, I will be depicting Challenger, quite possibly the second-most legendary spacecraft of all time, only being surpassed by the Saturn V, as she appeared immediately prior to her 73-second flight into the unknown. Wish me luck.

-
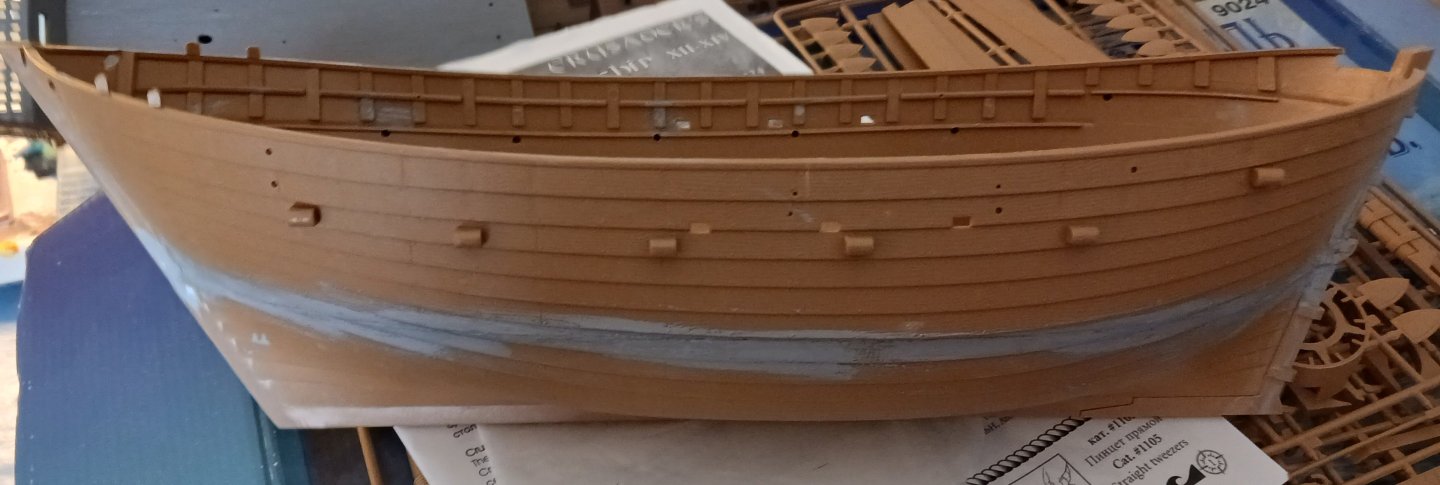
I've painted quite a bit of the boat now, including the decks, some parts at the bow and stern, and the boat's very long name: Later, the decks will become crowded with the crew's tools and equipment, so enjoy them now while they're bare. More to come soon.


- 17 replies
-
- 5
-

-

-
- barco rabelo
- 1/75
- (and 2 more)
-
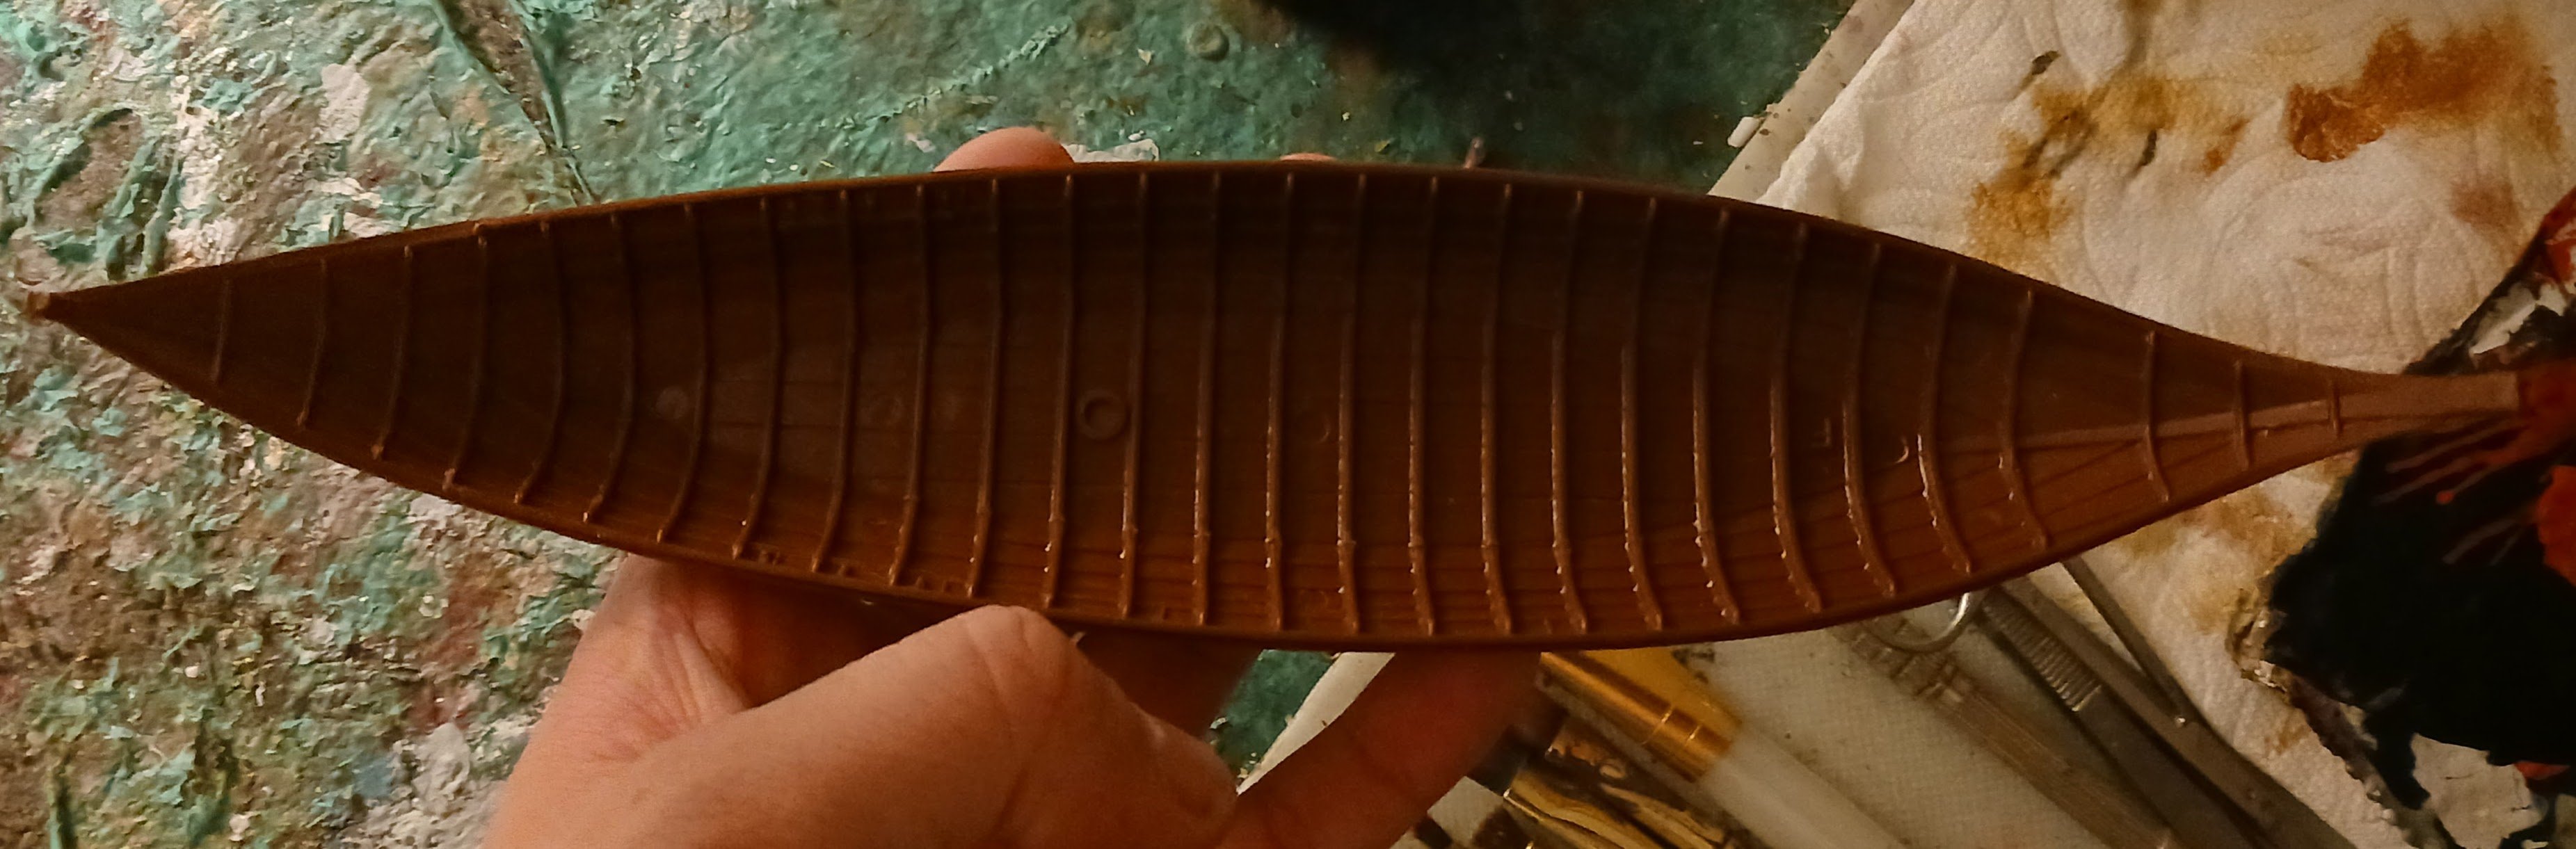
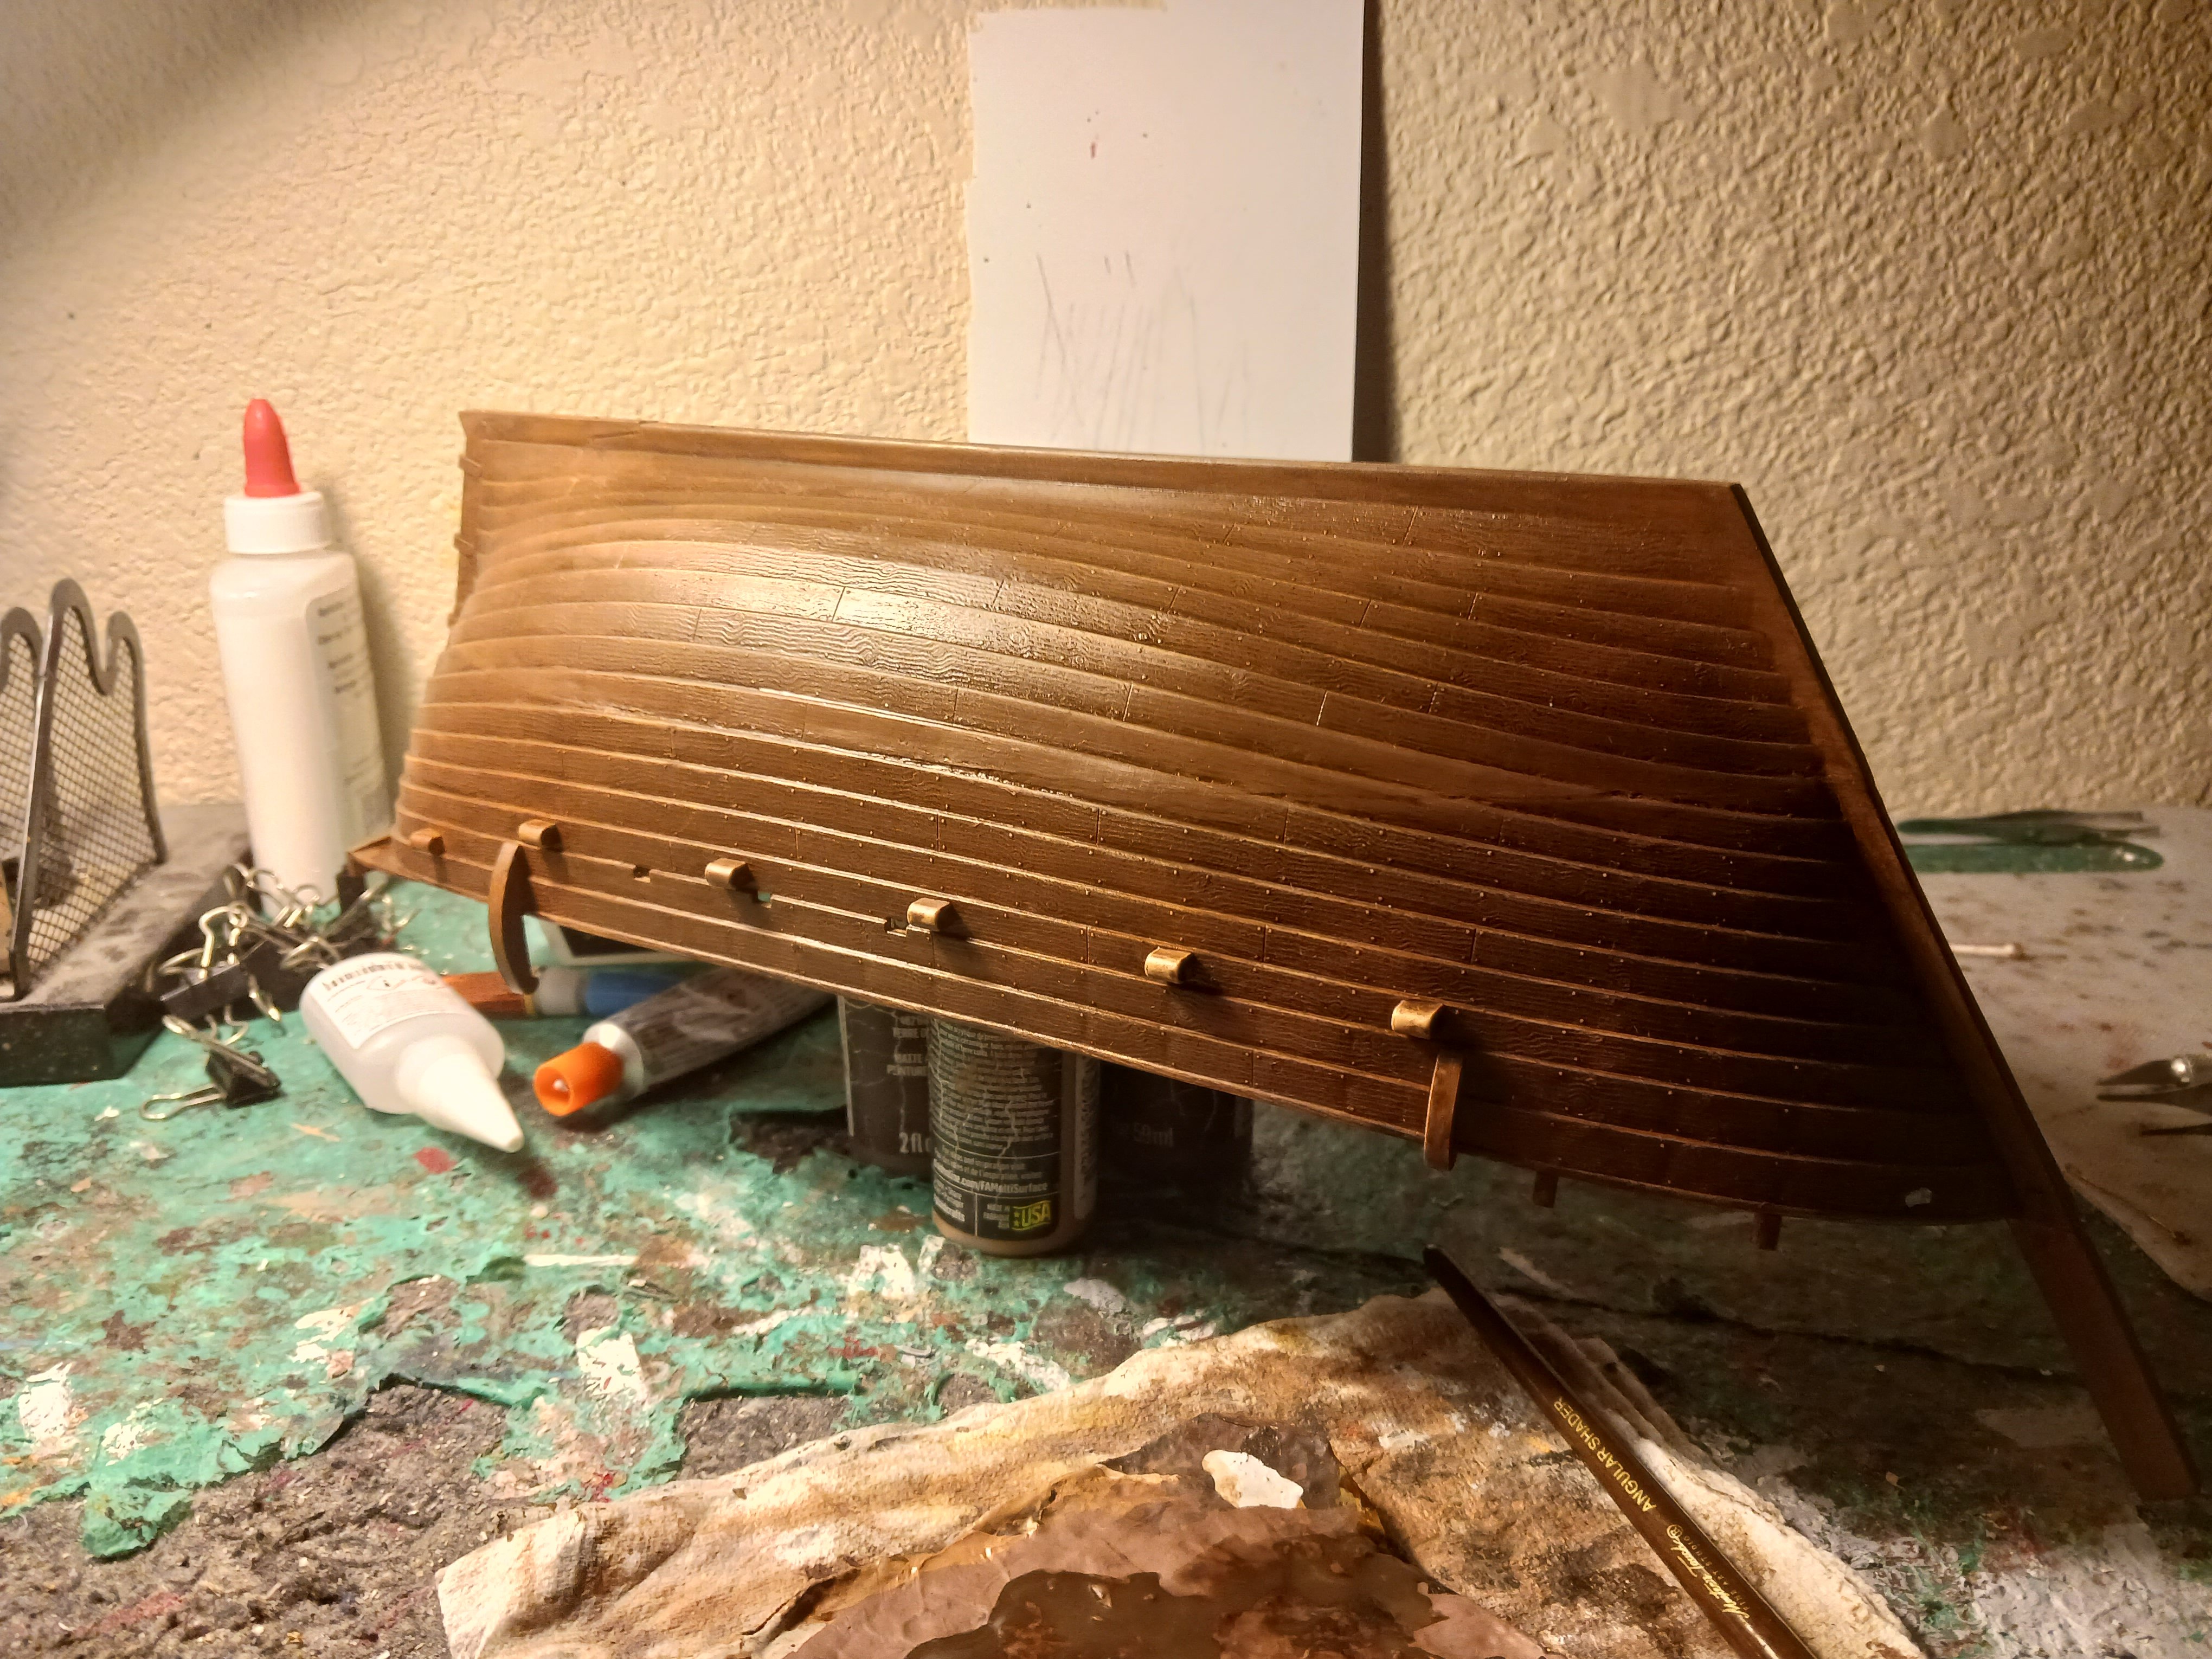
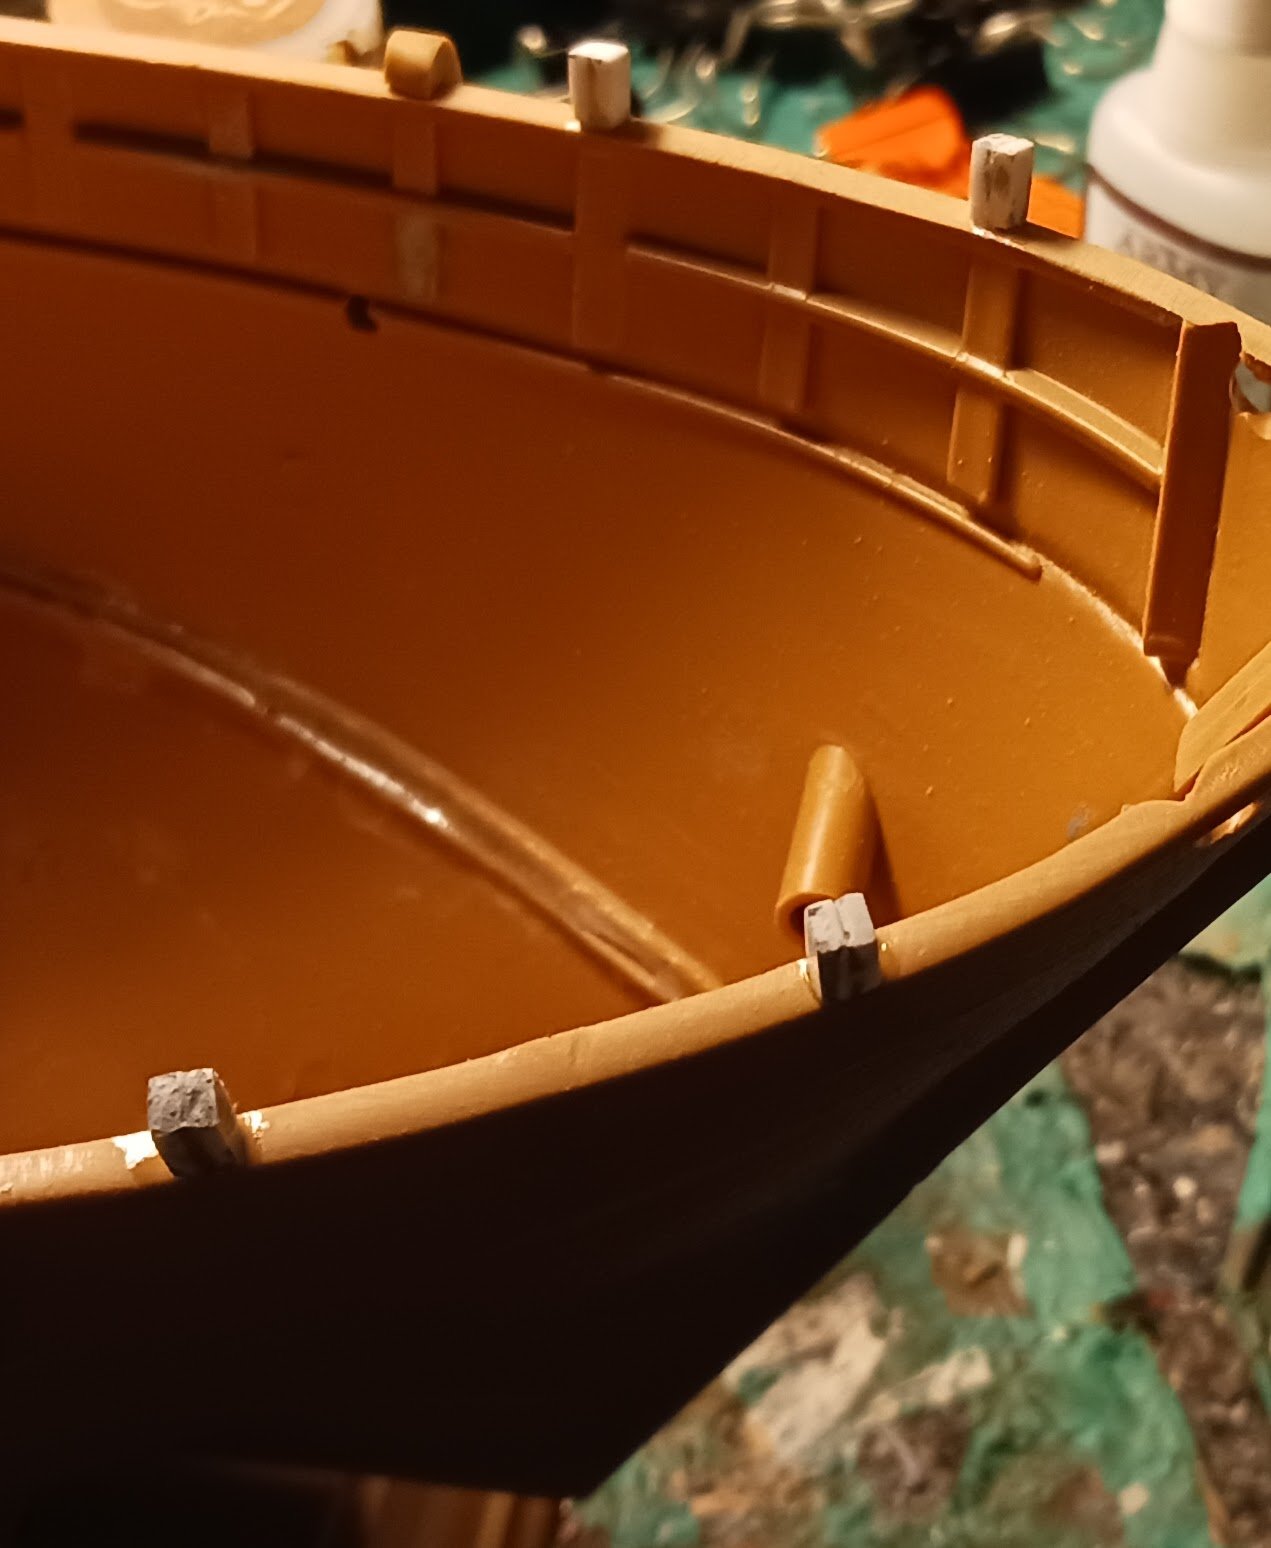
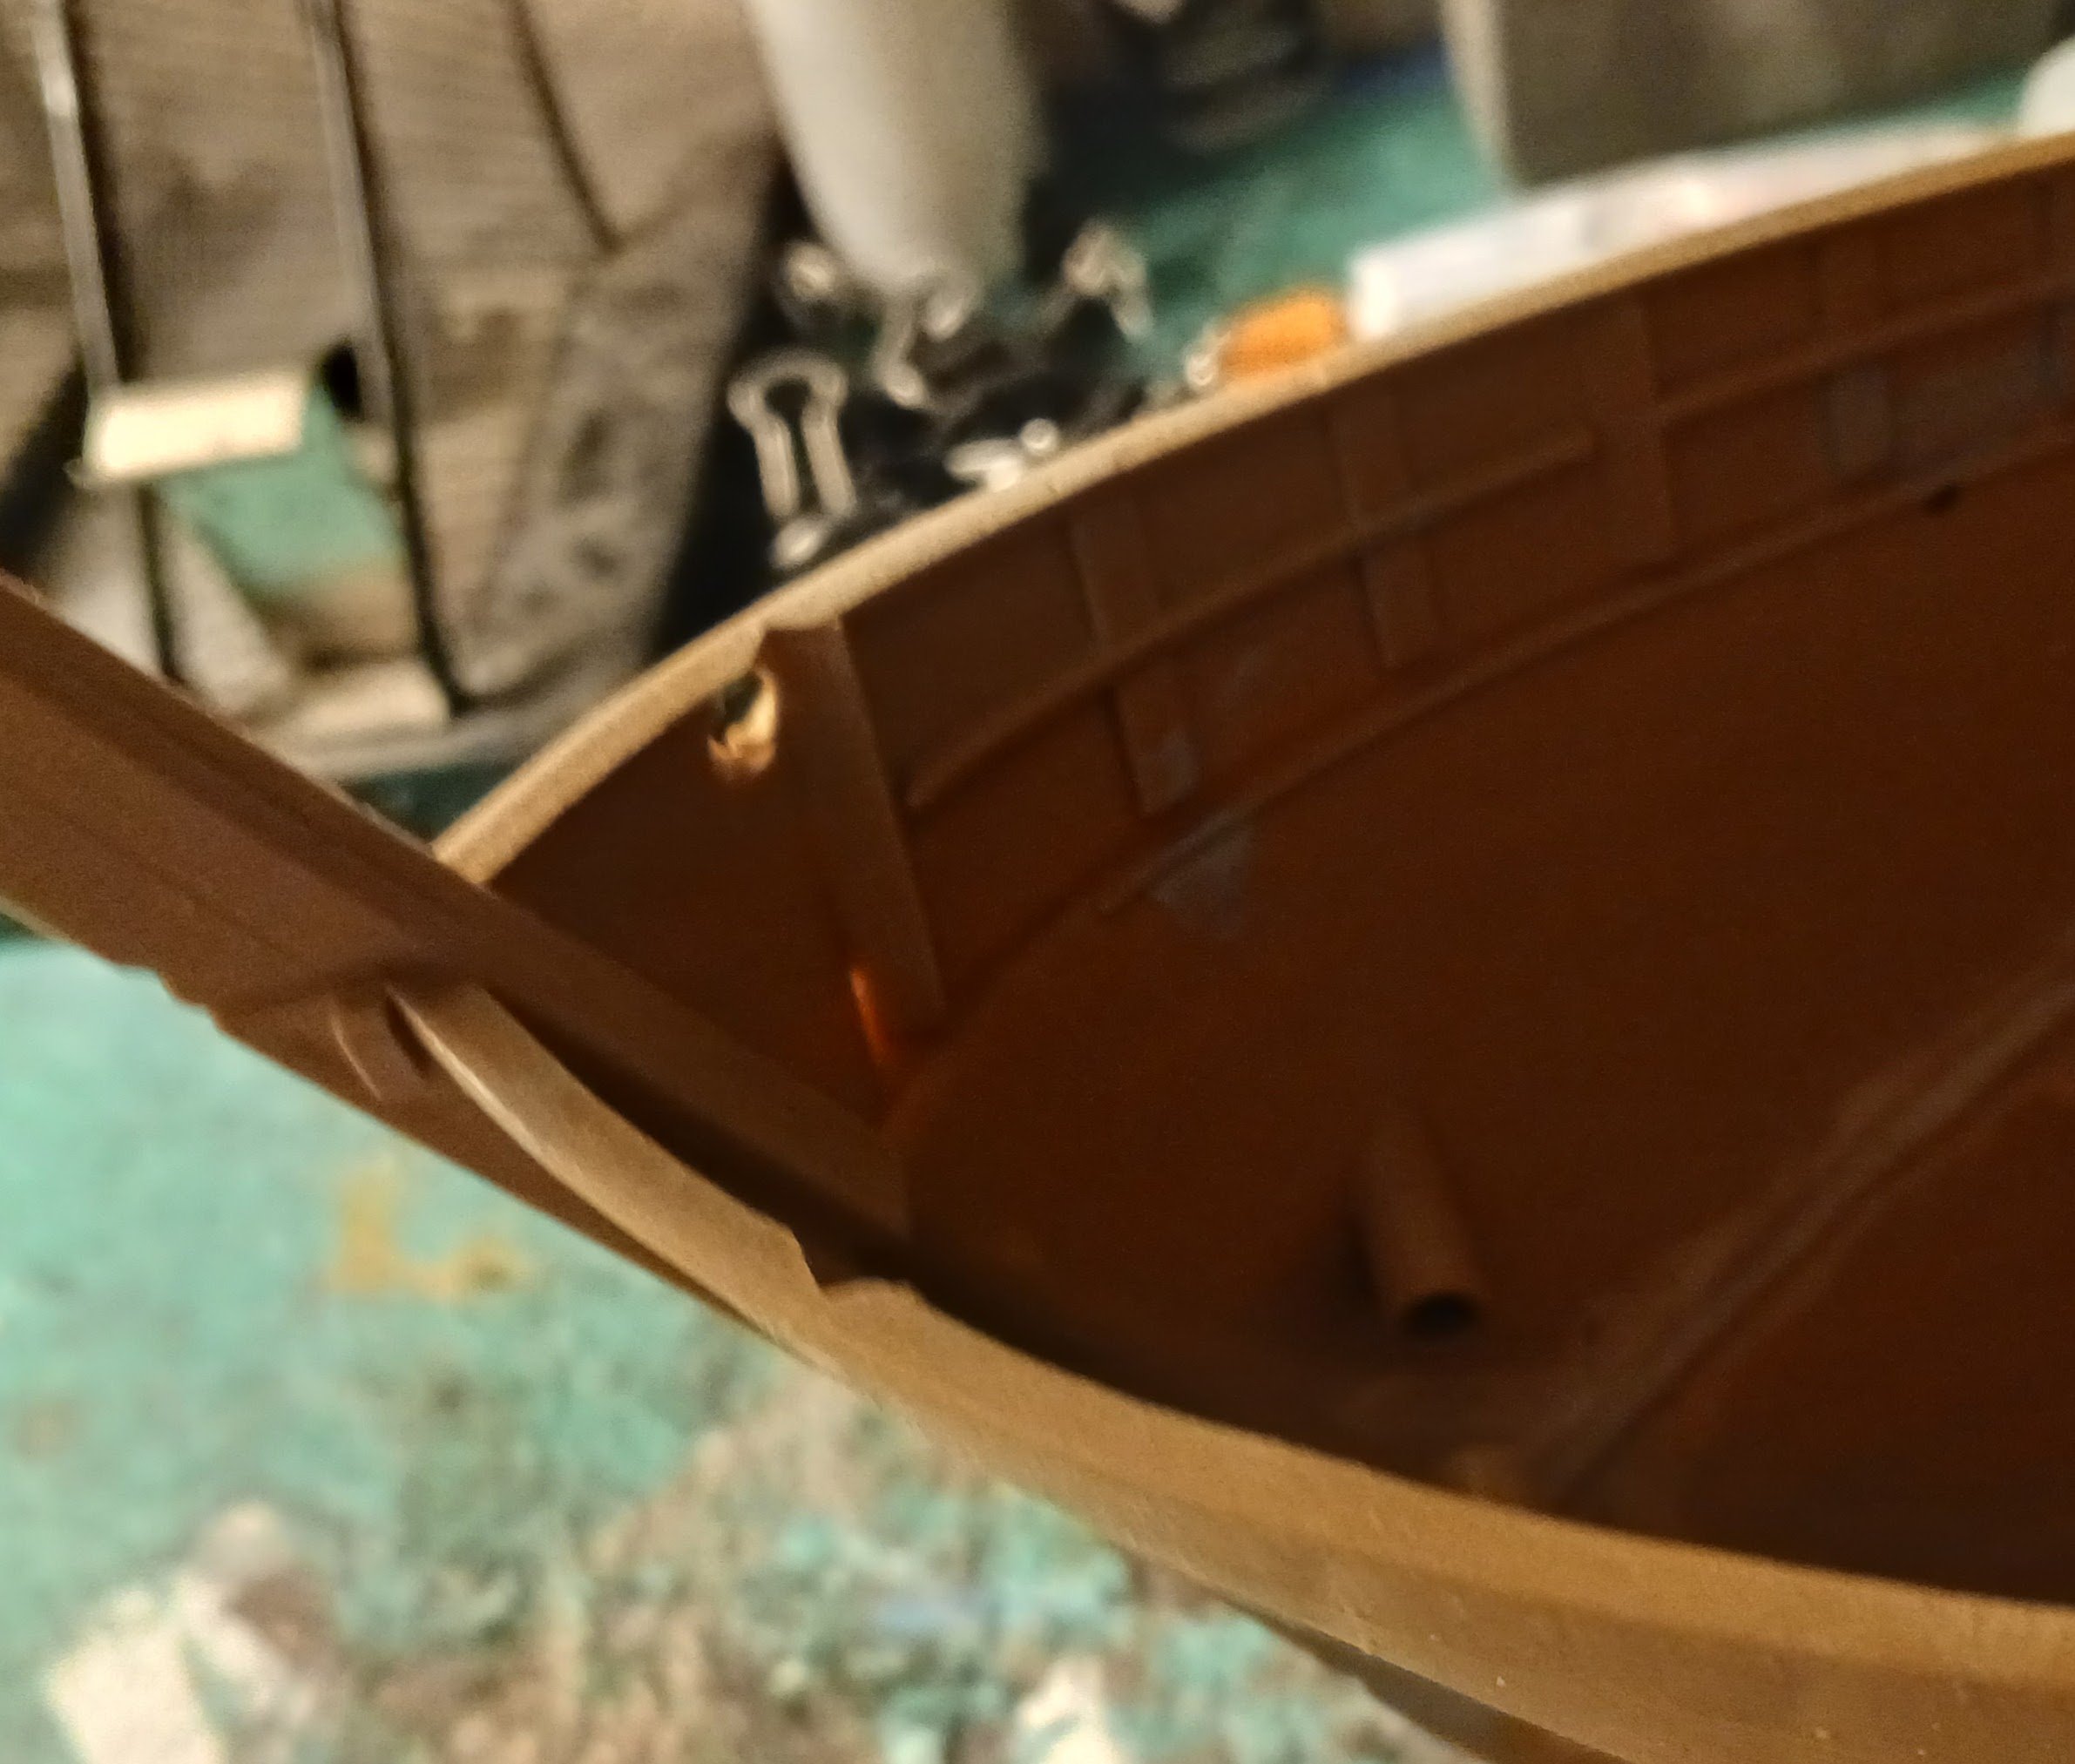
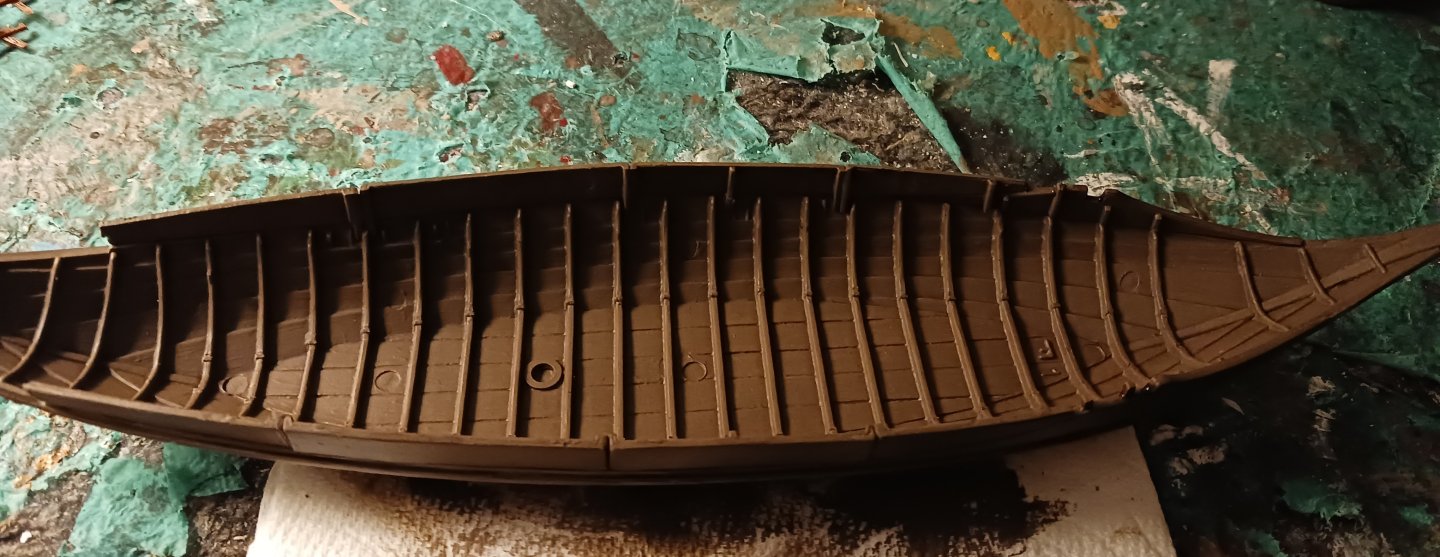
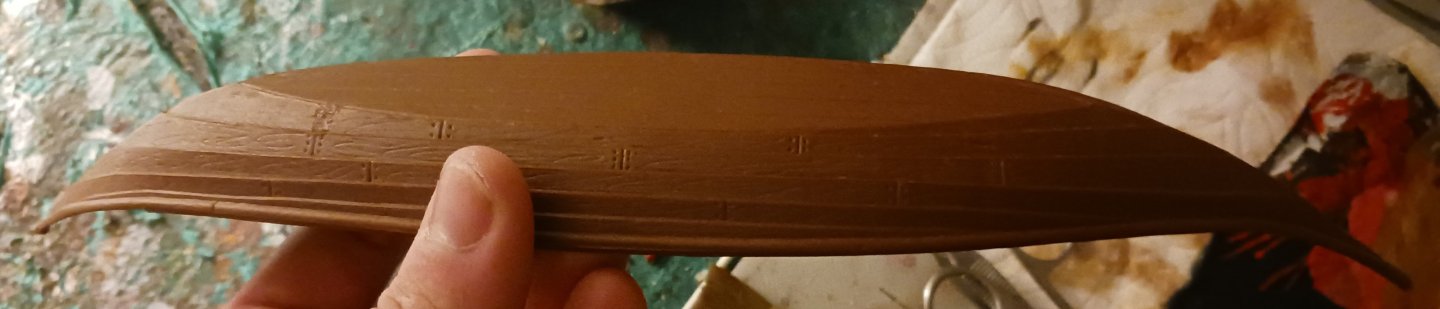
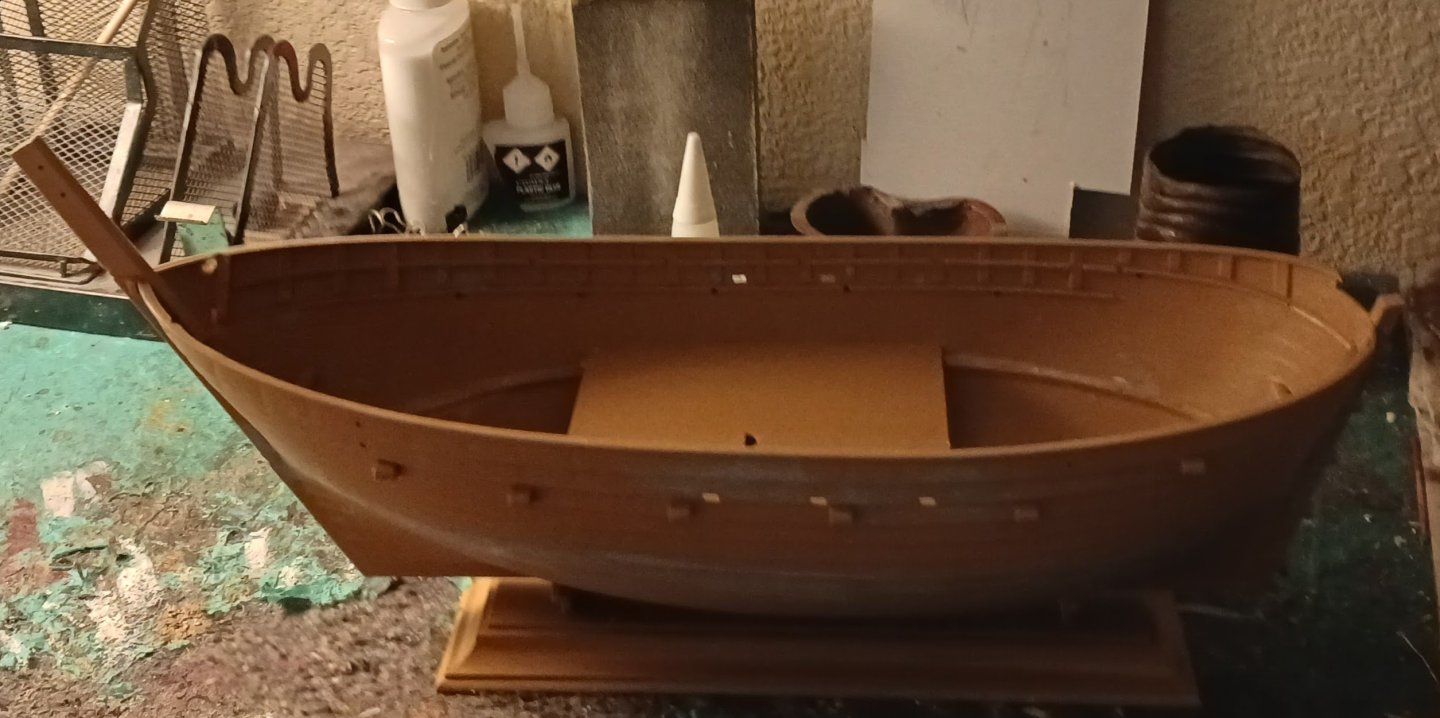
I began work on the Rabelo by installing the forward oarlocks and putting the removable boards into position. Then, I painted the entire hull. The hull was painted with a mixture of brown and grey, then a brown wash was applied, and afterwards, I dry-brushed the interior of the hull. Here are the results: The manufacturer was kind enough to put the ejector pin marks in places that wouldn't be seen on the completed model.

- 17 replies
-
- 4
-
-
- barco rabelo
- 1/75
- (and 2 more)
-
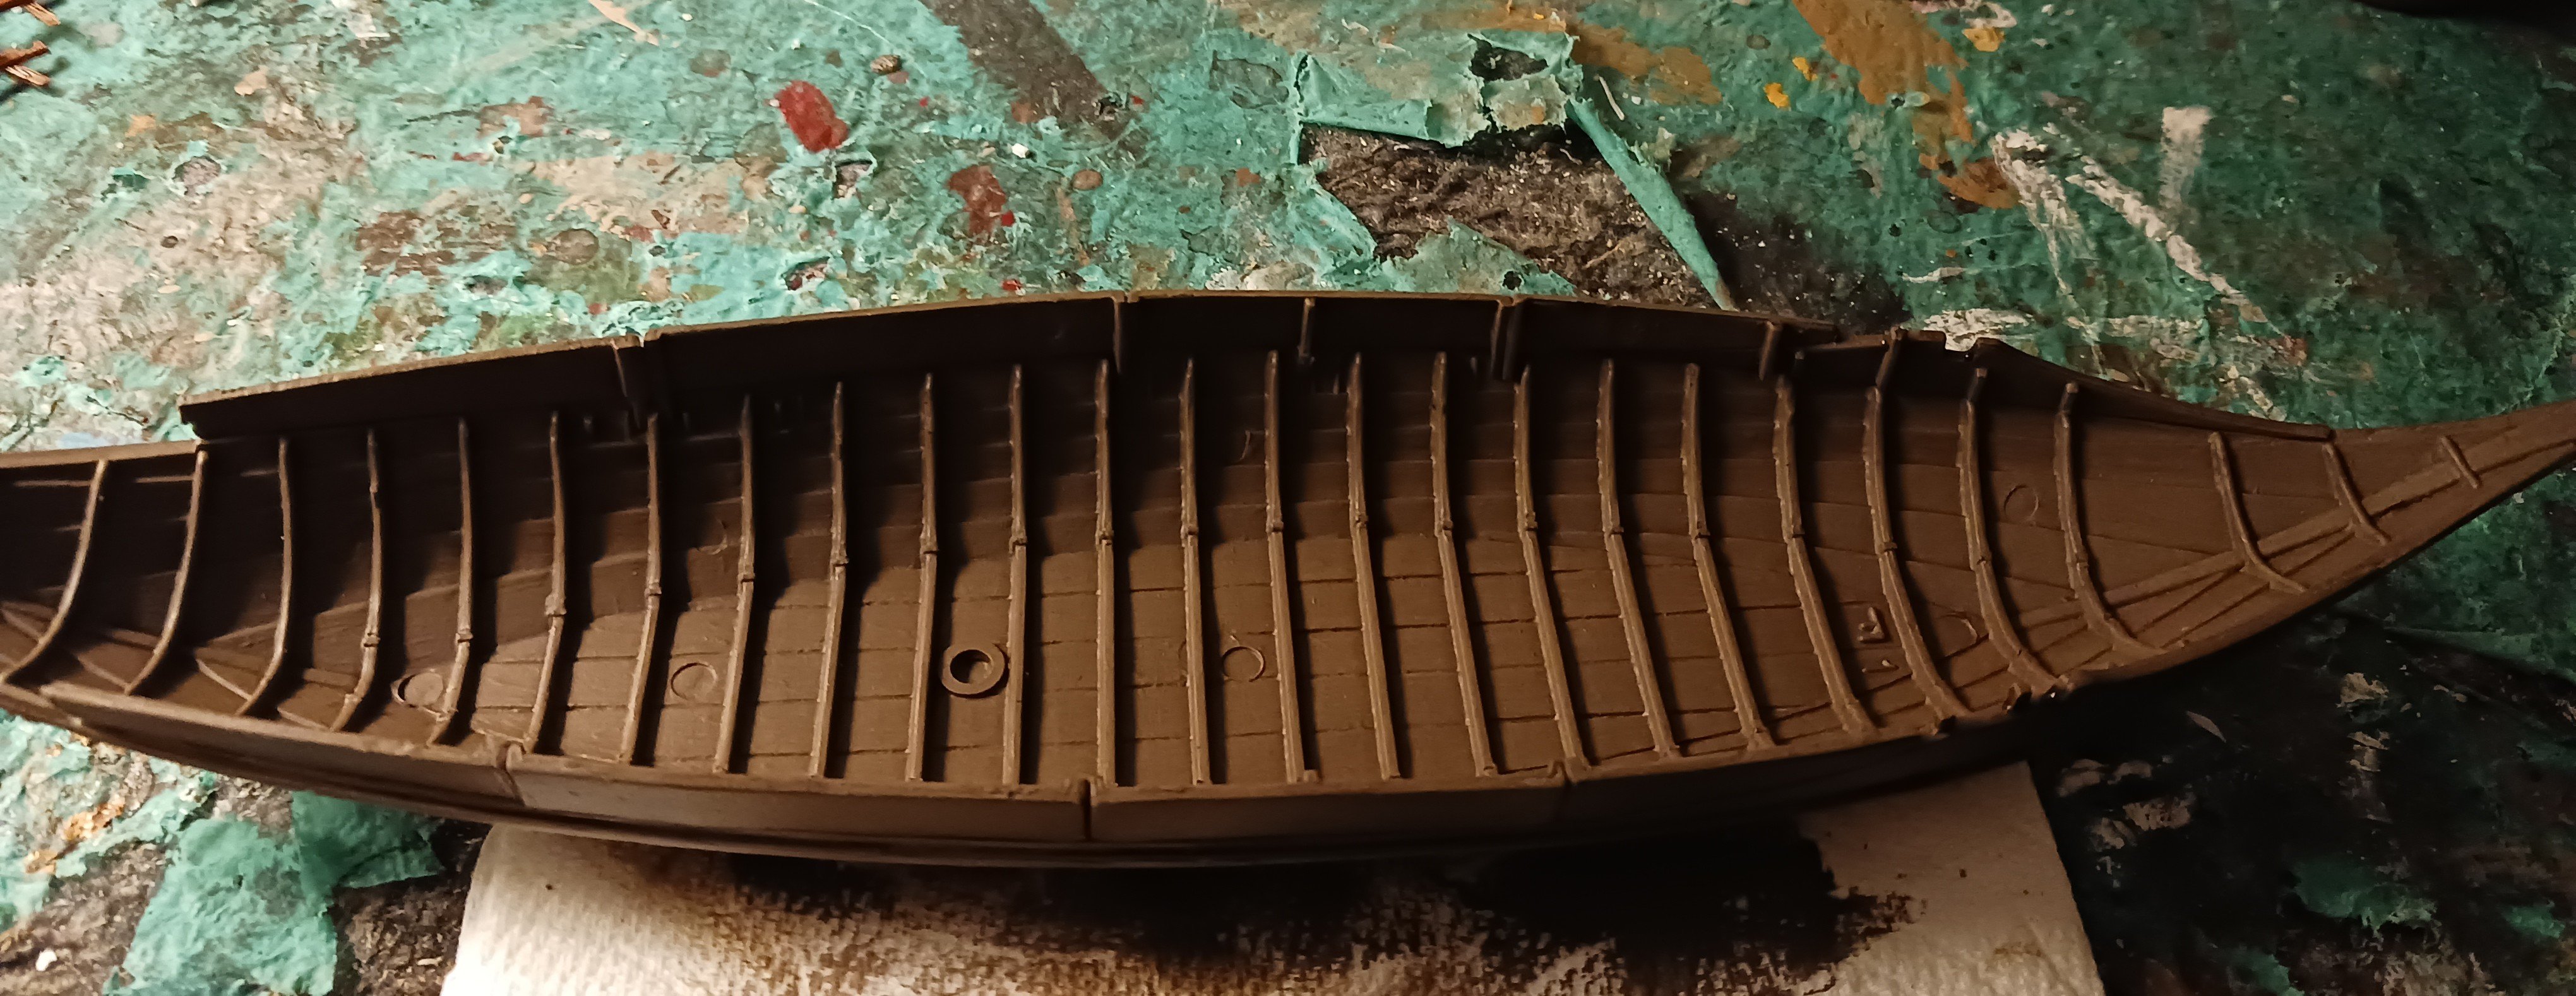
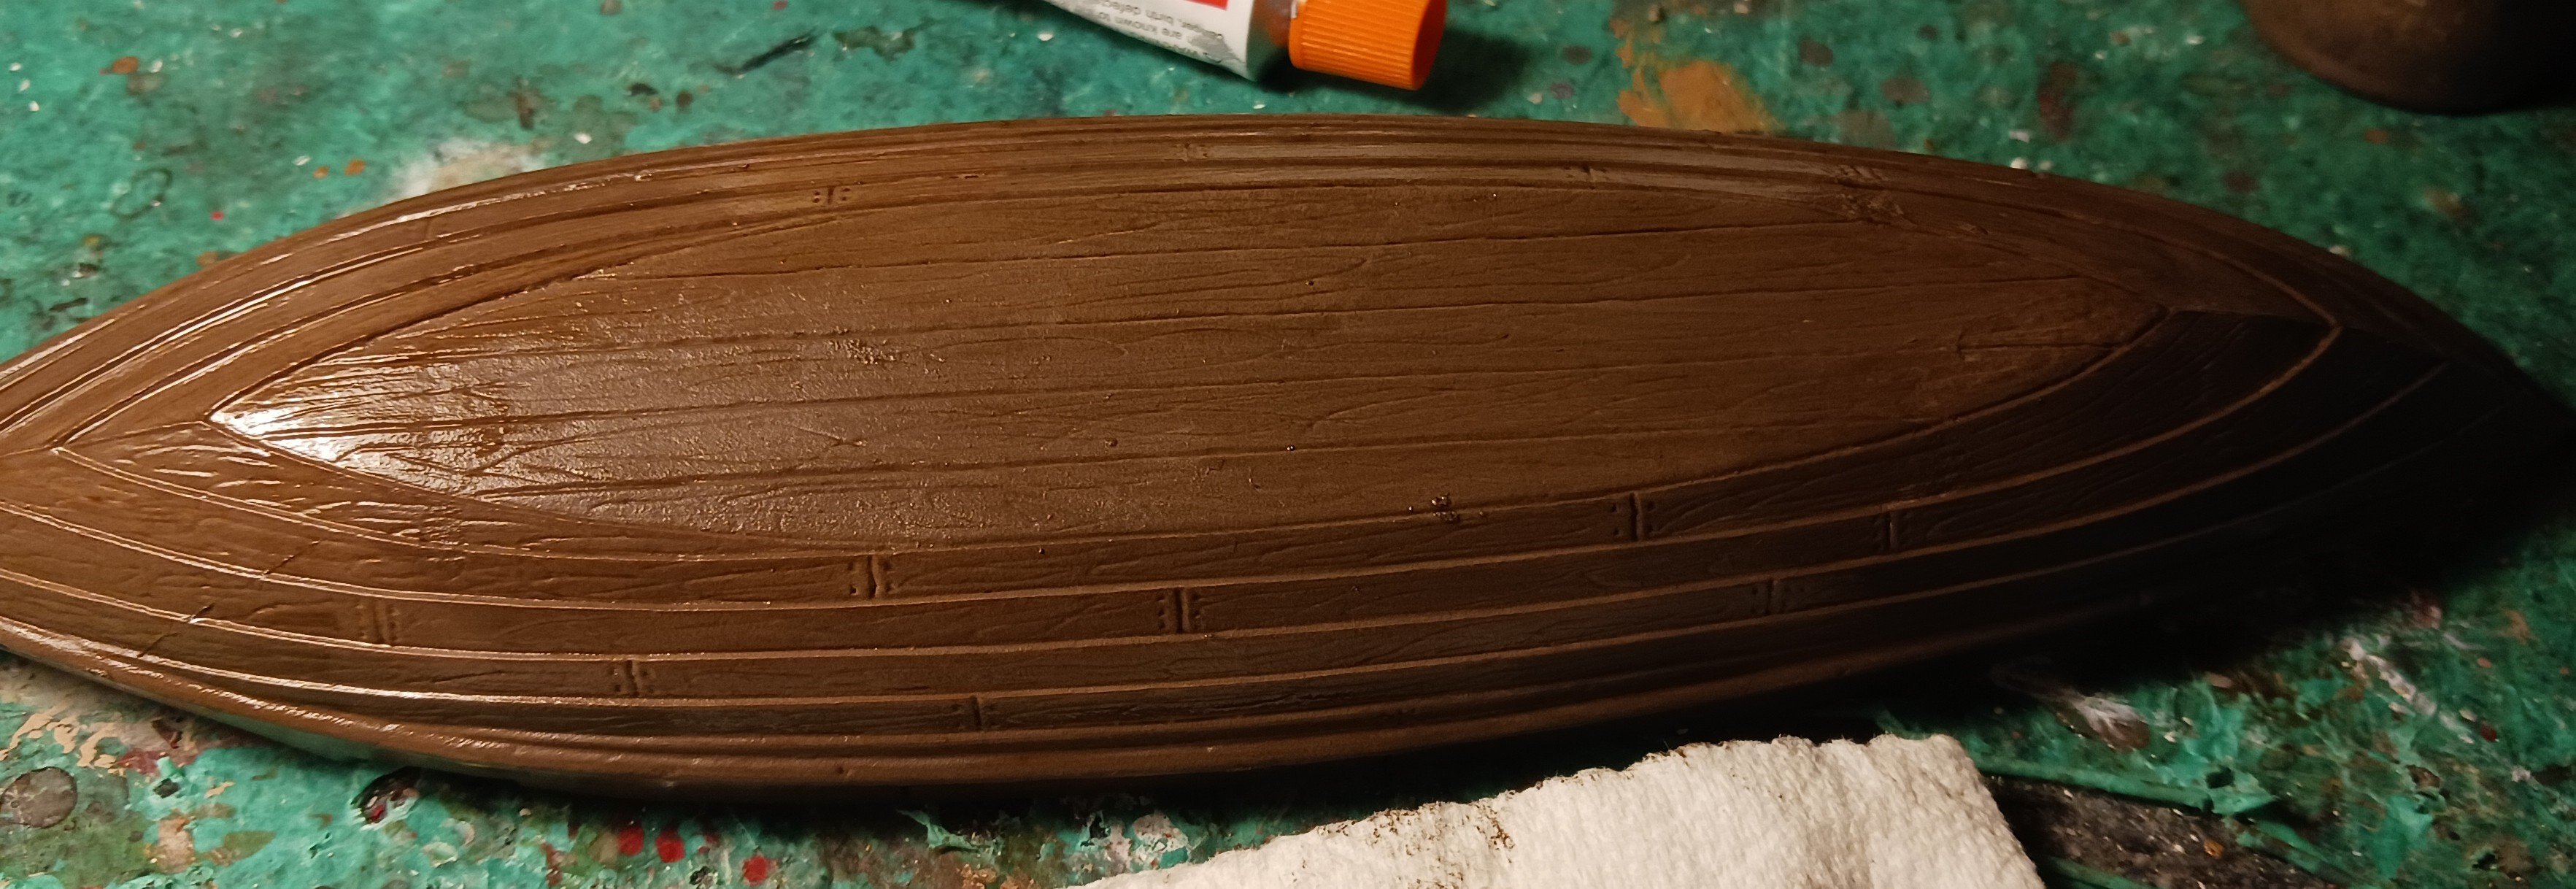
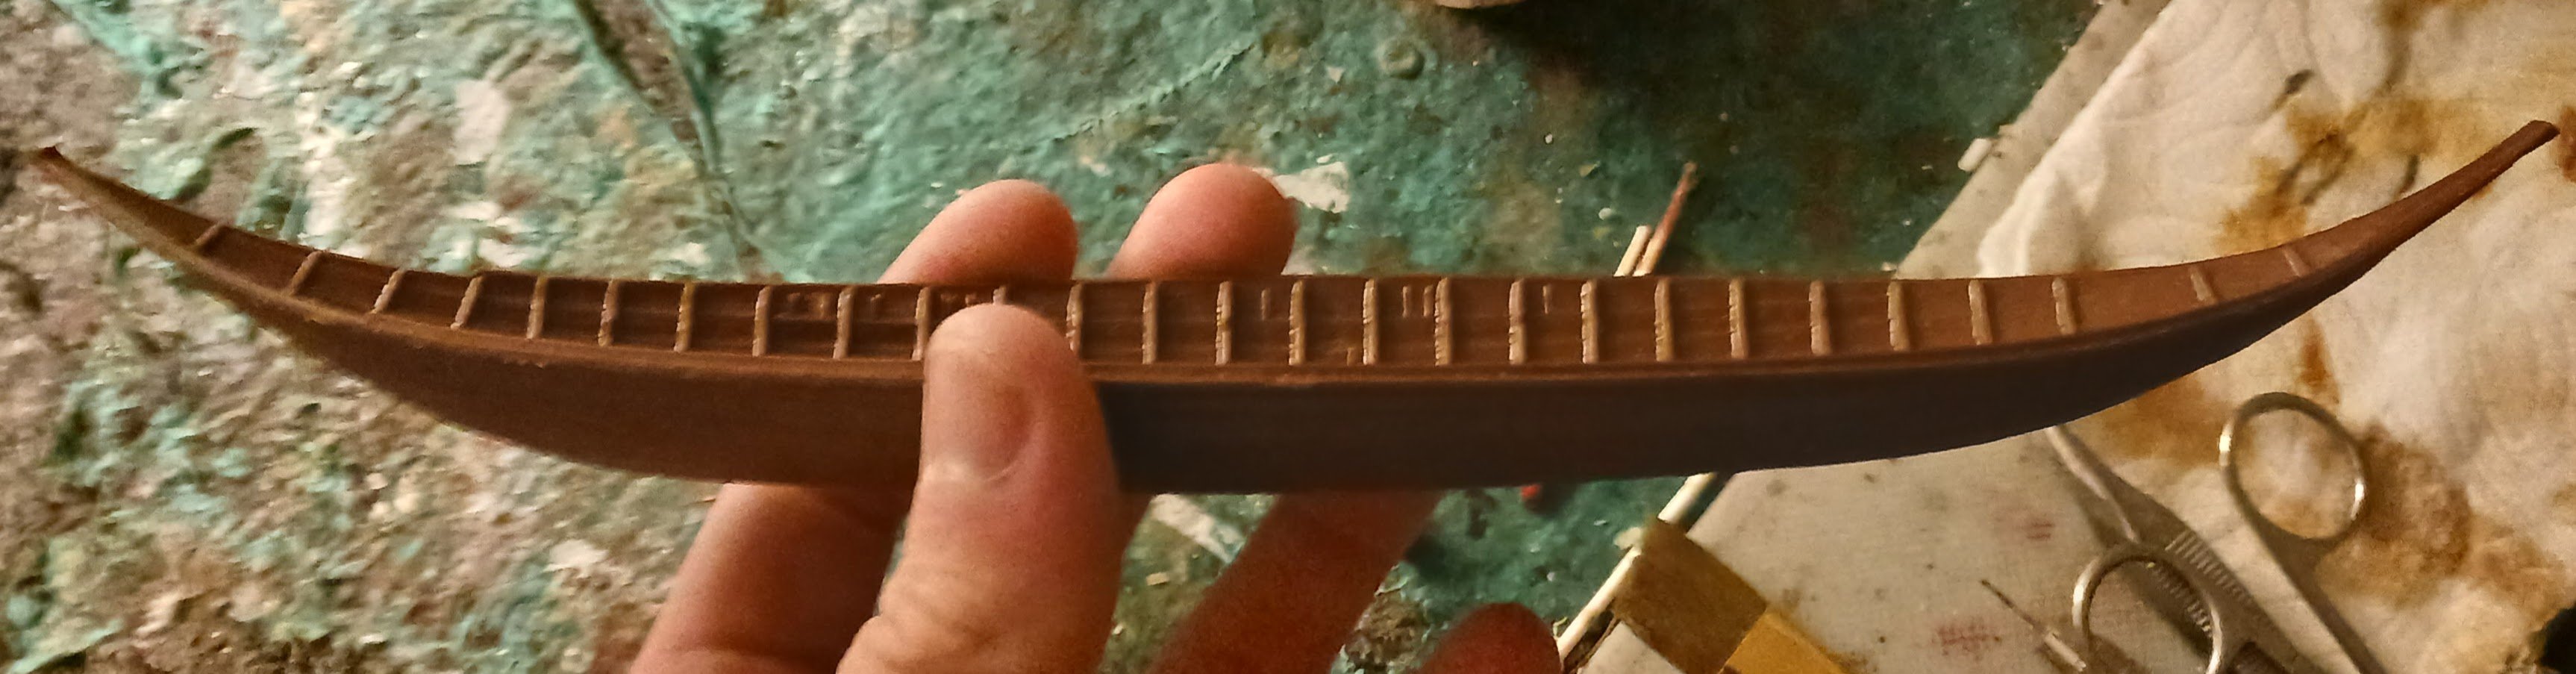
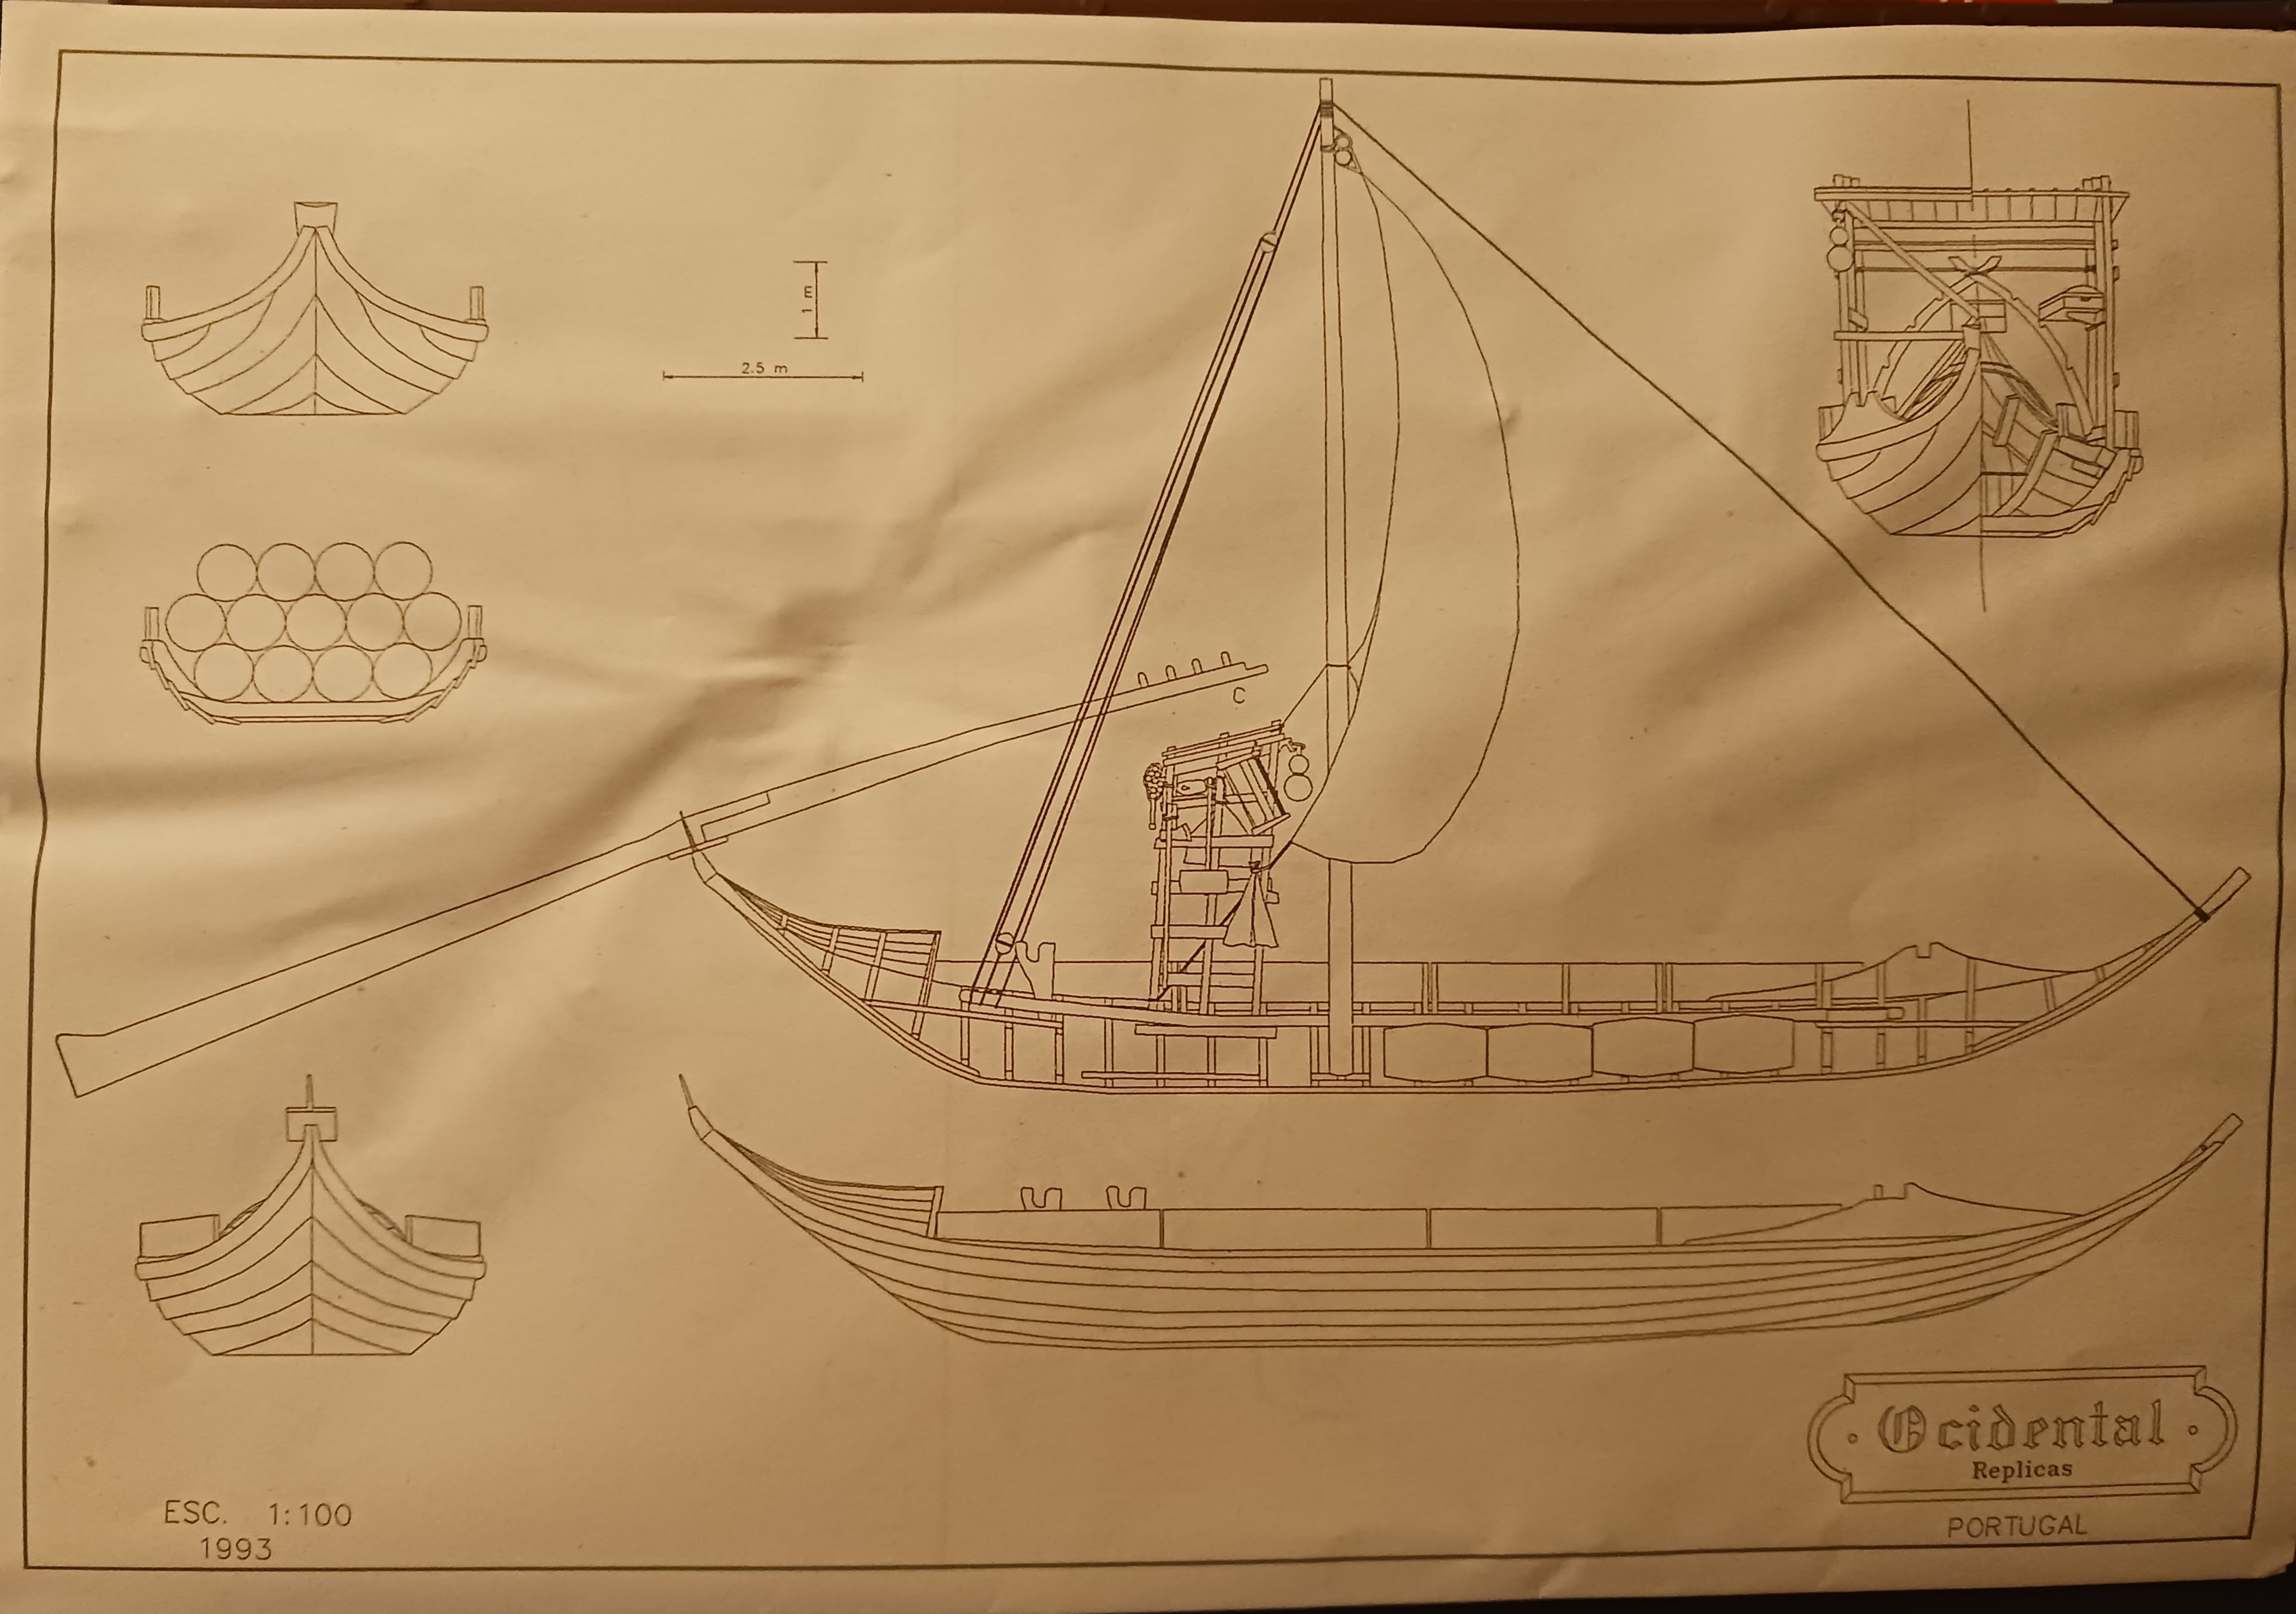
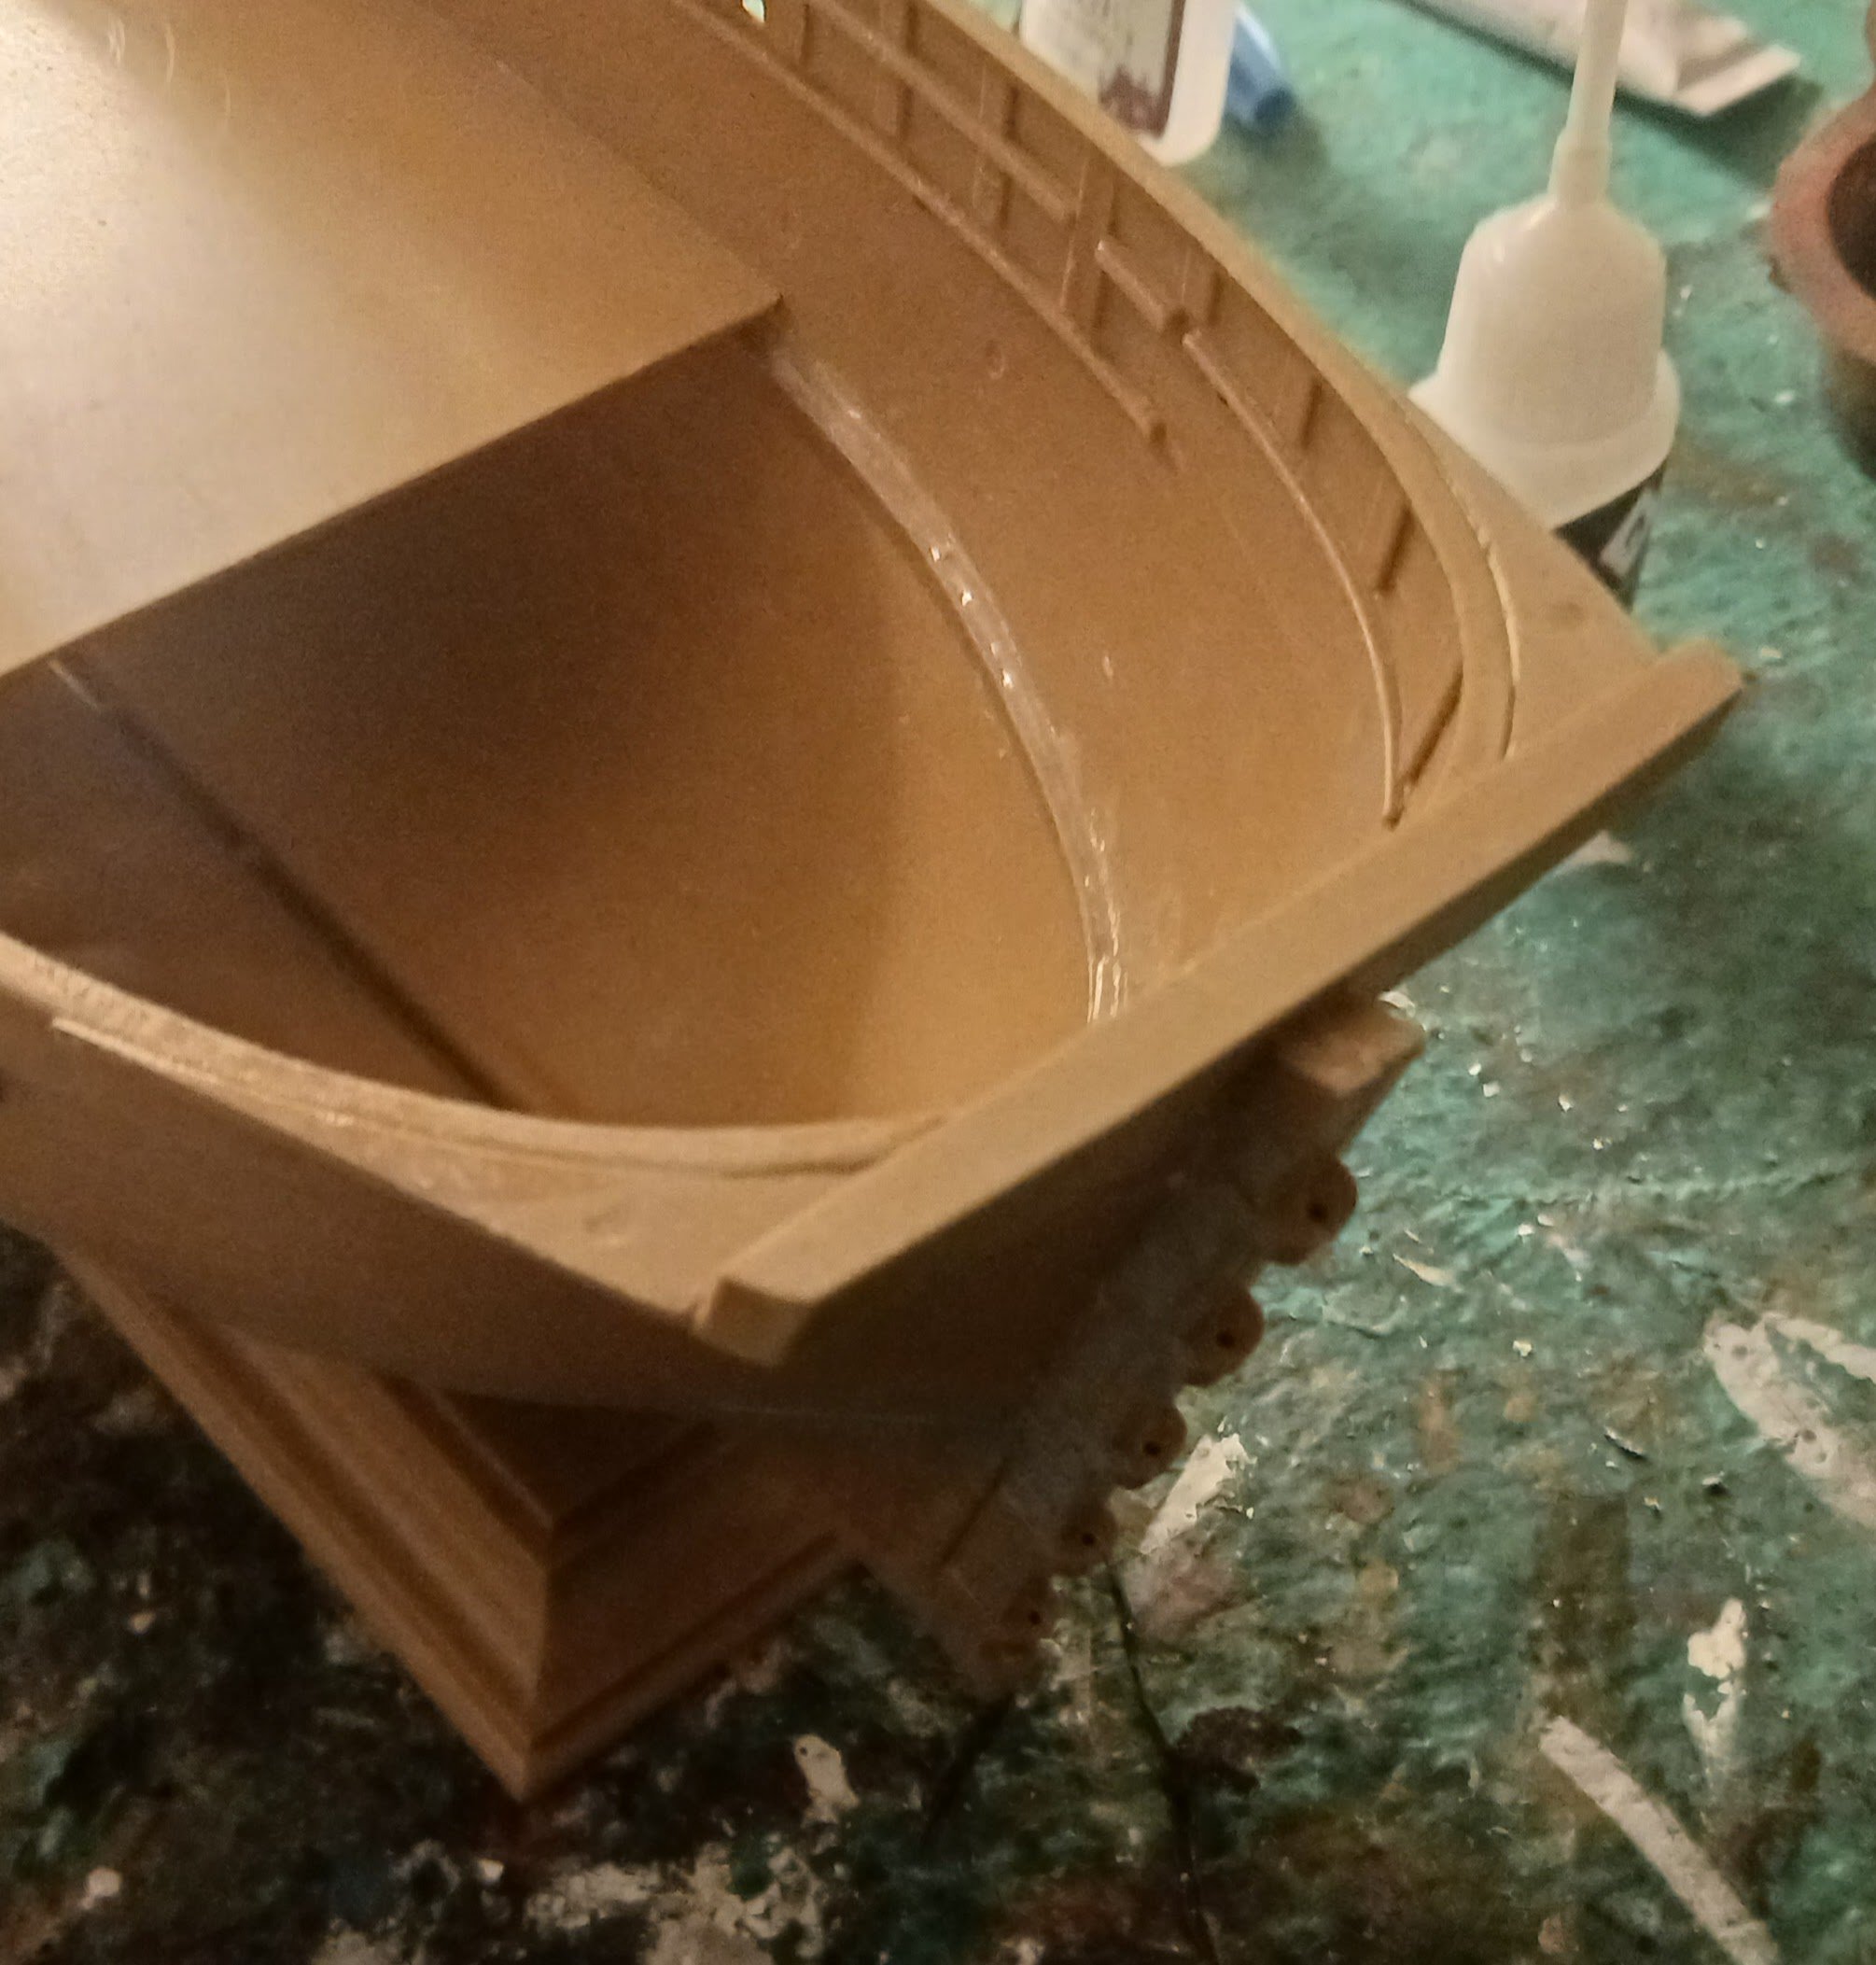
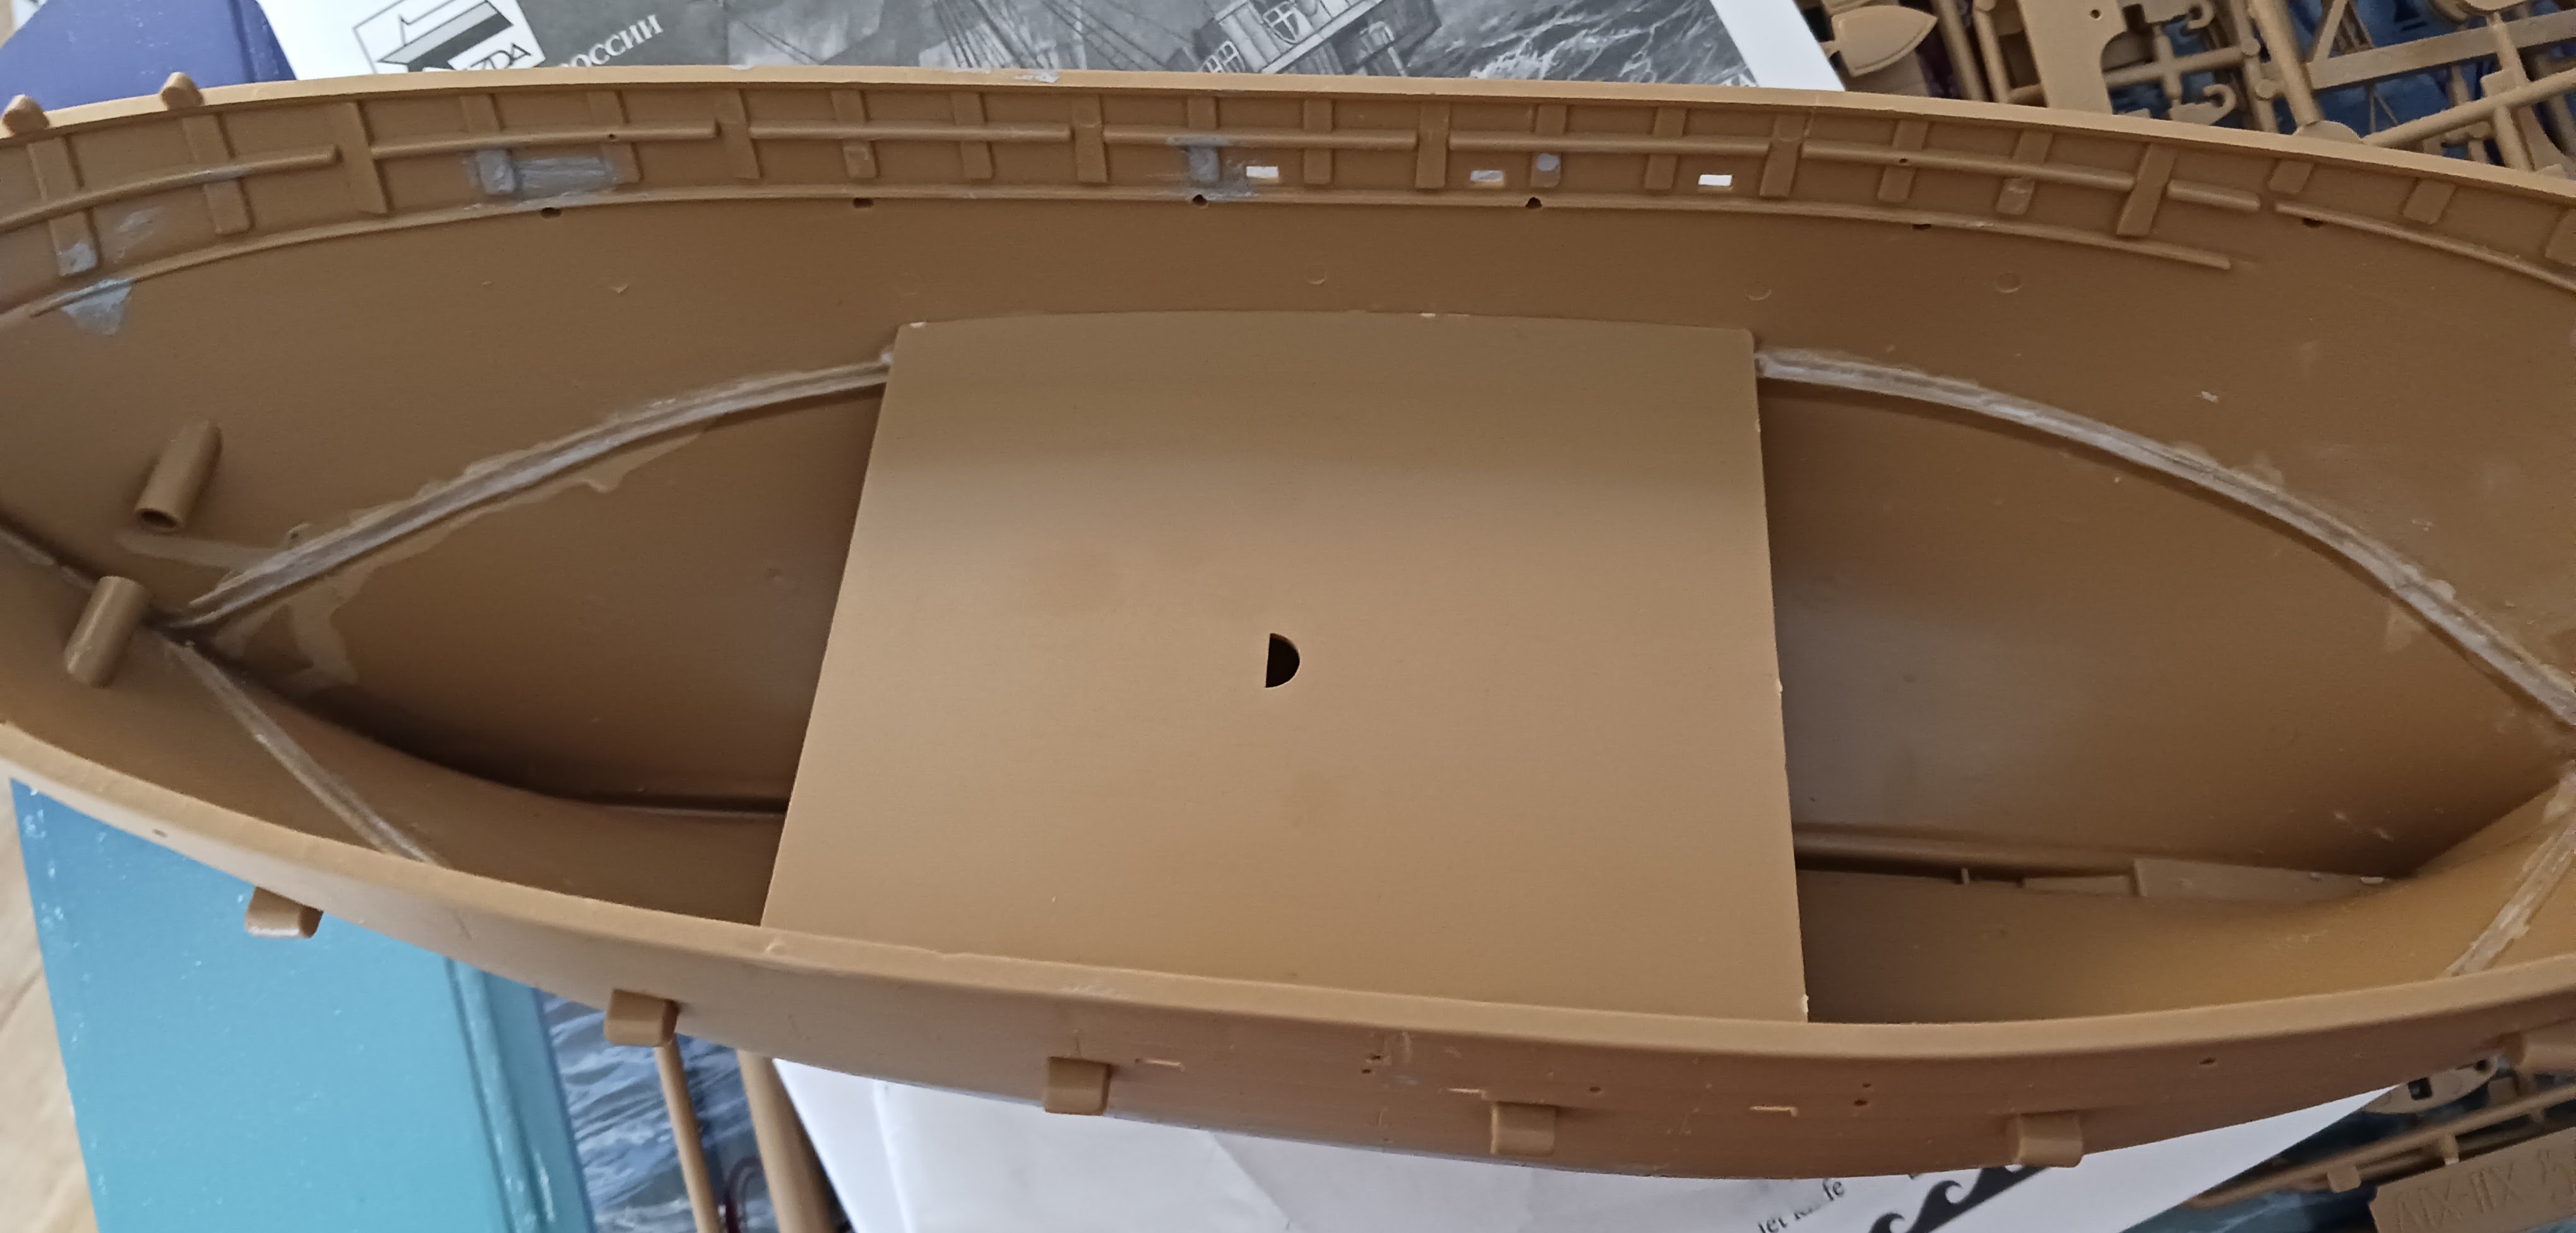
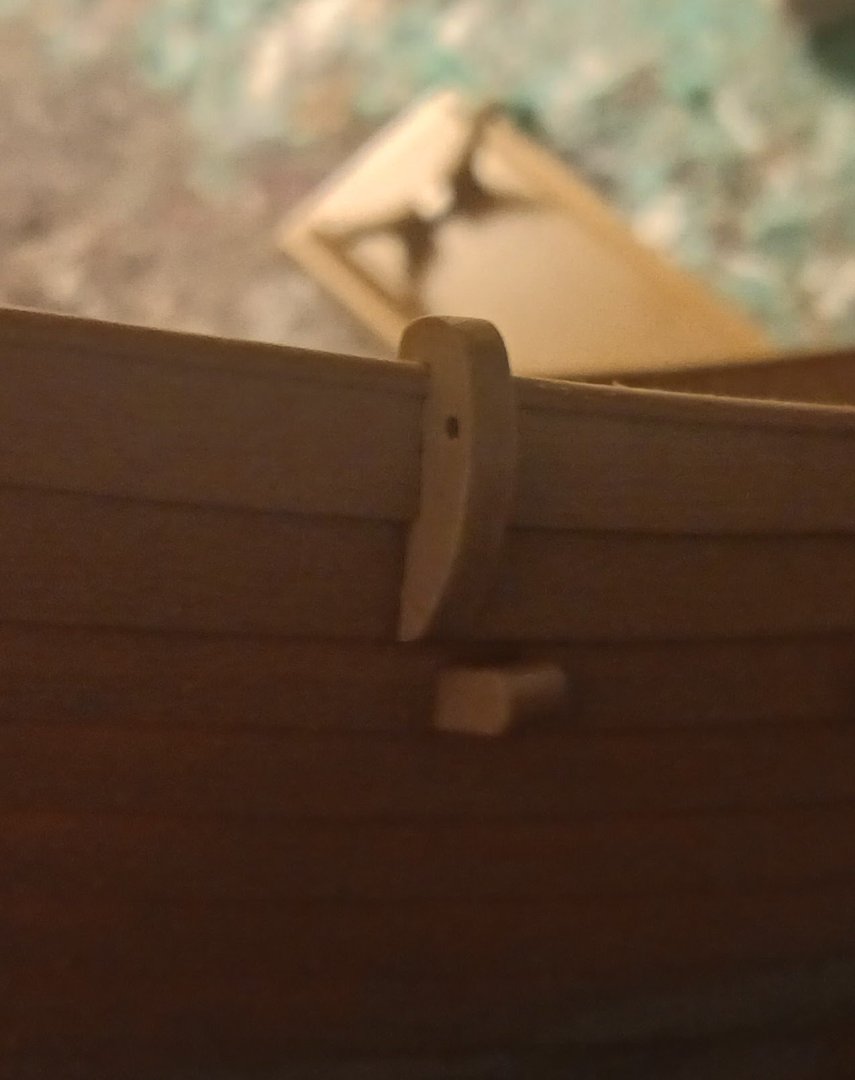
We need not dredge up the shipwrecks of the Douro- these boats existed in living memory, and some, I assume, still exist in their current form. However, some documentation would be nice. For that reason, I will be ordering a book about the design and function of the Rabelos. In other news, I will be starting the model officially probably tonight. I have the hull off the sprue. It's a very detailed, very beautiful thing, with correct dimensions and wood grain molding on both the interior and the exterior, and markings for the correct alignments of parts. This already sets the model above many others I have built. Here is the diagram on the back of the instruction sheet, which will be very helpful with determining where everything goes: The first order of business will be to clean up the parts and attach the four oarlocks at the fore and aft, and then the eight removable planks that serve to increase the freeboard of the ship. In addition, the fulcrum for the steering oar, the espadella, will be added. Afterwards, the hull will be painted.


- 17 replies
-
- 3
-
-
- barco rabelo
- 1/75
- (and 2 more)
-
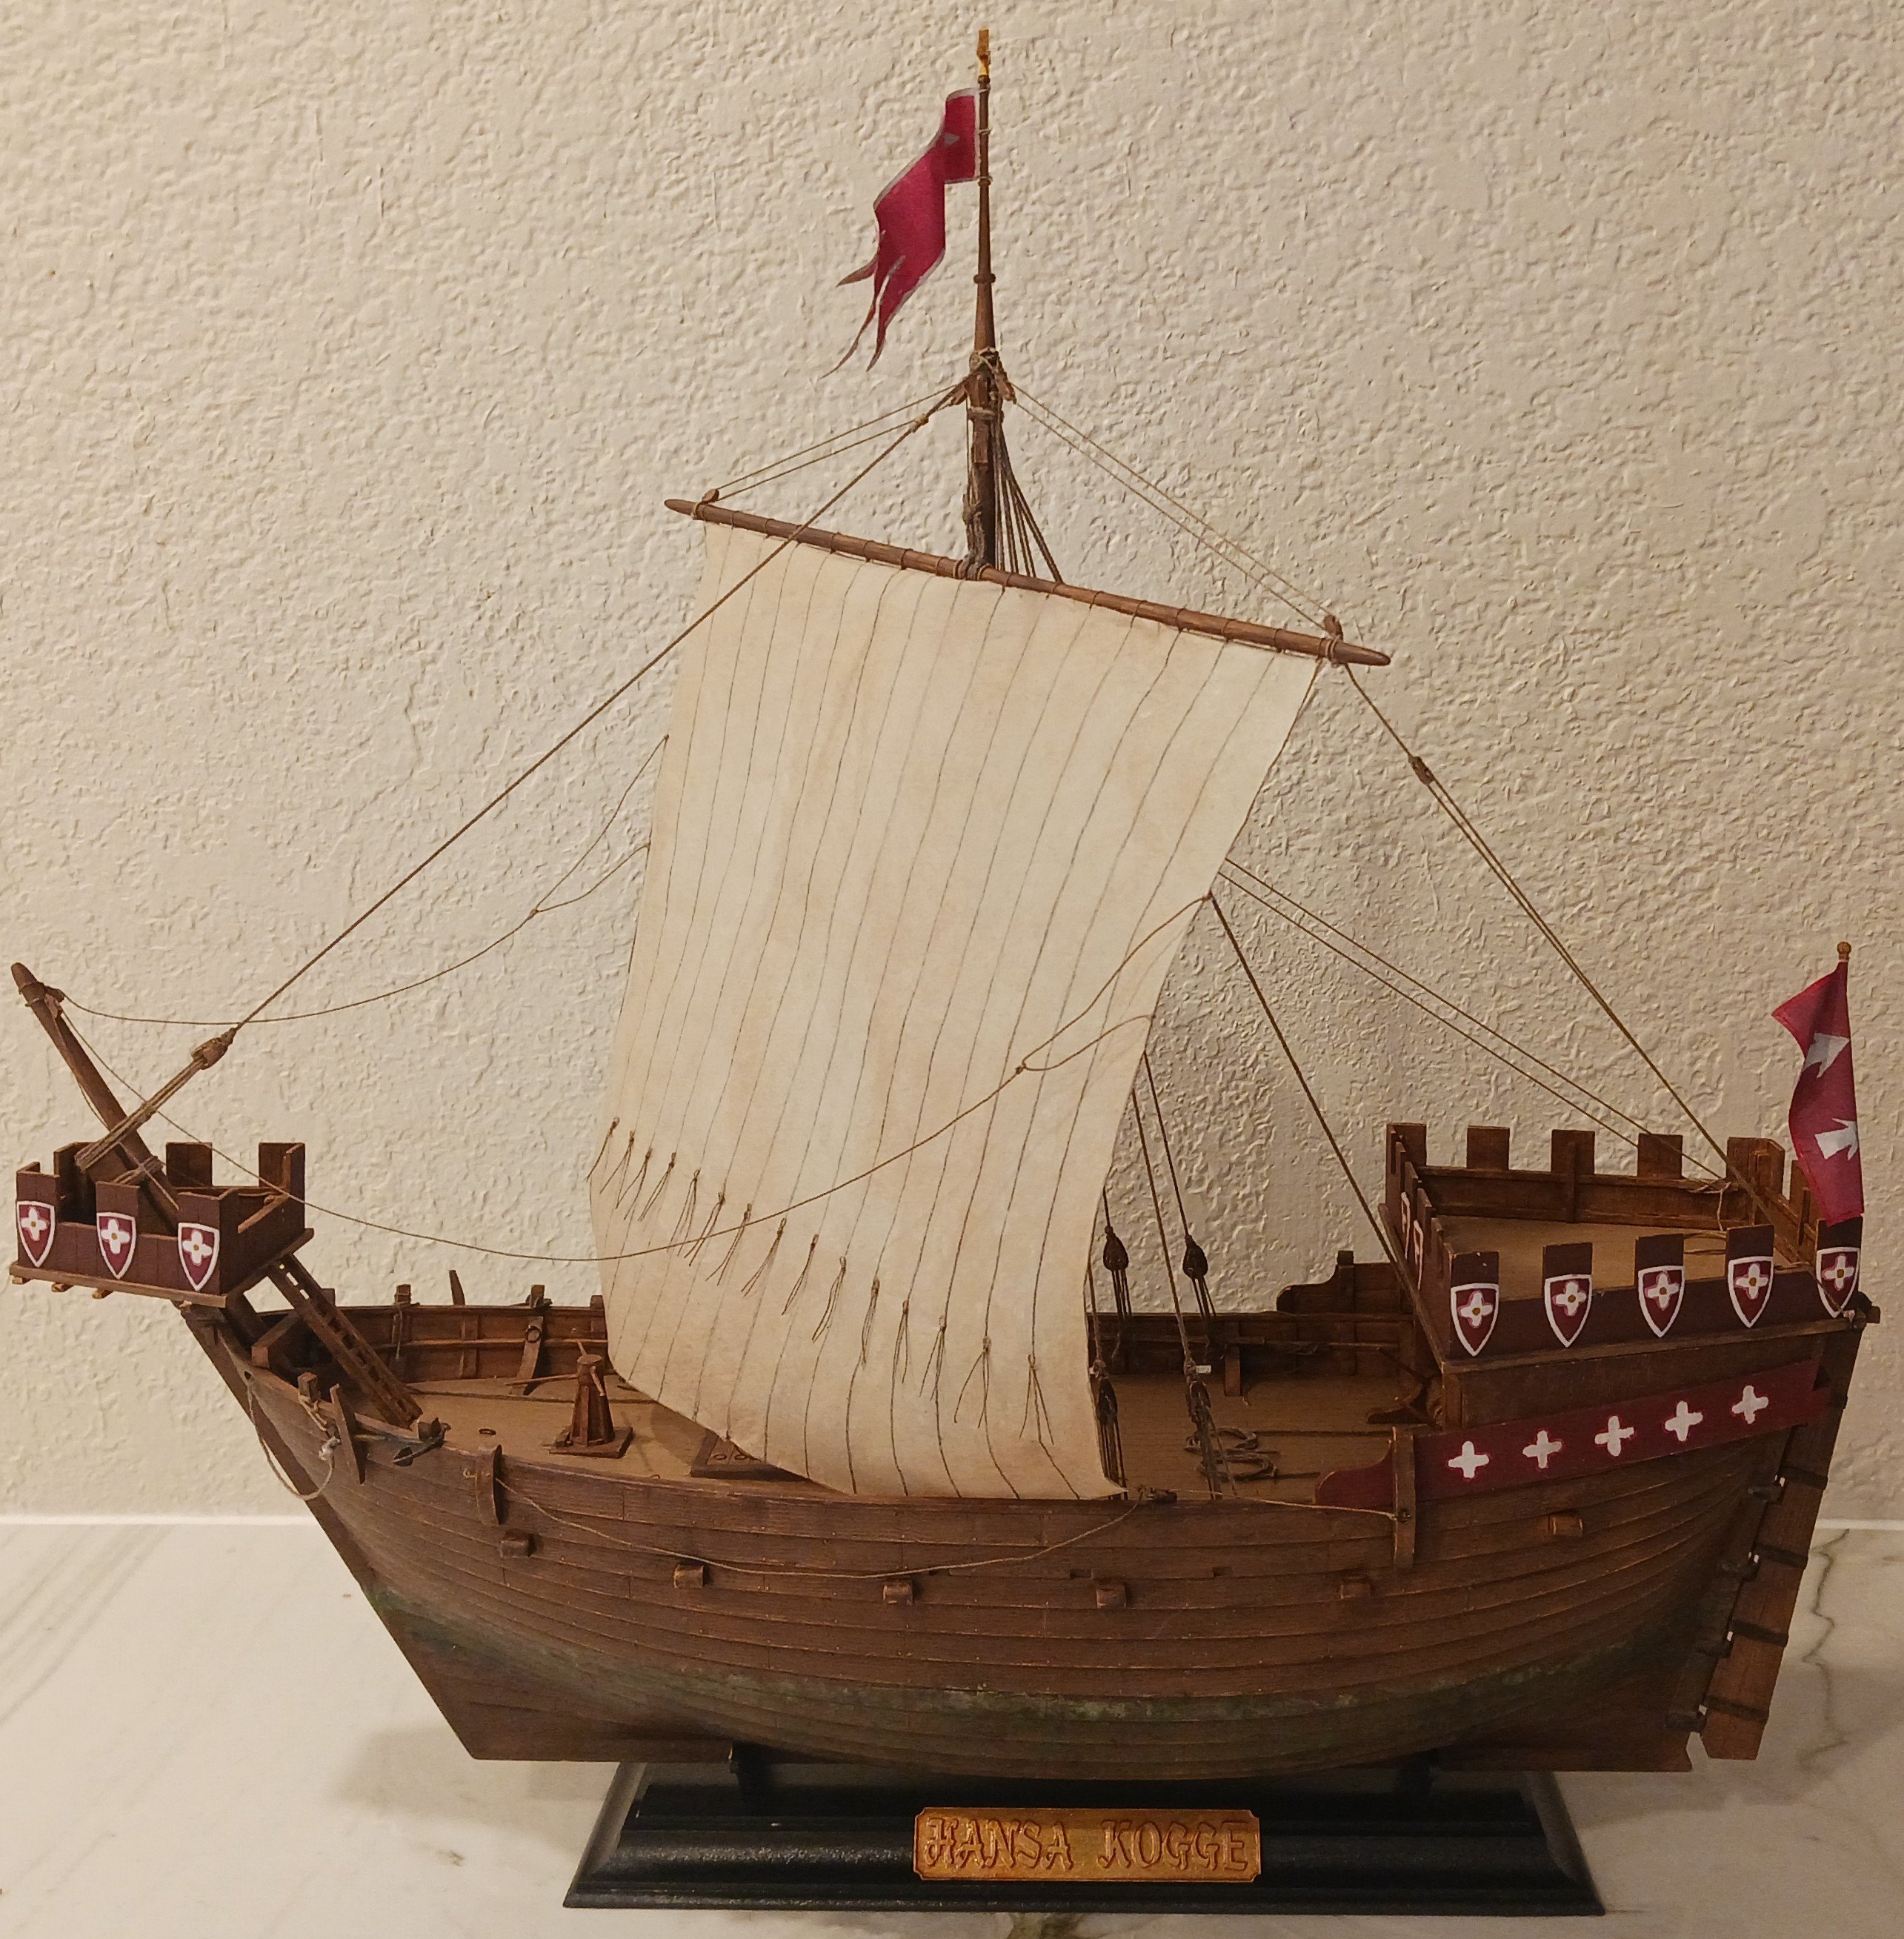
Hello all, If you remember my recent build log, I made a Medieval Hanseatic cog for an ex-professor of mine from community college. As a bit of background, he grew up in Portugal and recently traveled back to Portugal during the summer while classes were out. Anyway, as a sort-of belated birthday gift, he decided to get me this: This is a model of a type of riverboat that operated on the Douro River, in Portugal, called the Rabelo. The Rabelo boats mainly transported Port wine from the upriver wineries to the cities of Porto and Vila Nova de Gaia, where they were (and still are) exported to the world. Anyway, I have tried to find this model online for at least a year, with no luck. So, Professor Afonso and I decided to exchange ships. I plan to build this model as one of the original Rabelo boats from the early 20th century, and I plan to make it as perfect of a replica as possible, using some new techniques and materials. Overall, the kit is extremely well-executed and detailed, so there are no problems there. I plan on using several documentaries as well as some photographs as well as a book for reference.
- 17 replies
-
- 6
-
-
- barco rabelo
- 1/75
- (and 2 more)
-
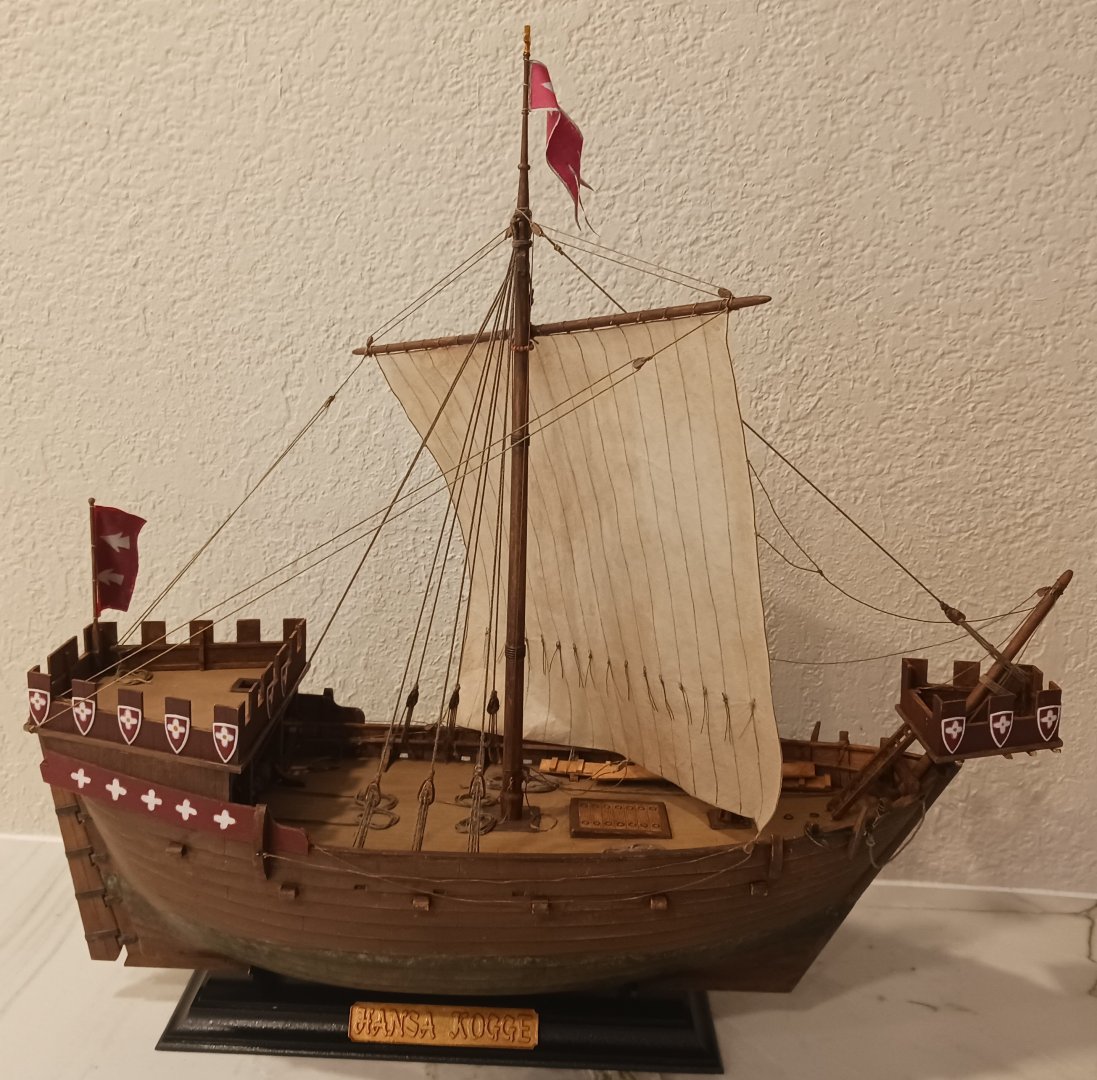
Aaaand... FINISHED!! If you've been watching my logs for a while you've probably heard of a character named Mr. Afonso. (Look at my Santa Sofia build log, second page where we deal with the flags). Anyway, more about him. Mr. Afonso is actually Professor Afonso. I met him early last year due to having him as a professor for a general education class, and we clicked over a shared interest in maritime archaeology and history. In fact, he shared information with me regarding universities that are engaged in maritime archaeology research. Anyway, this model was made for him as a gift. At the time of writing, I will deliver this ship to him in a few hours. Here are the finished photos: Thank you all for viewing this build log. I will likely have more pictures to post later.


-
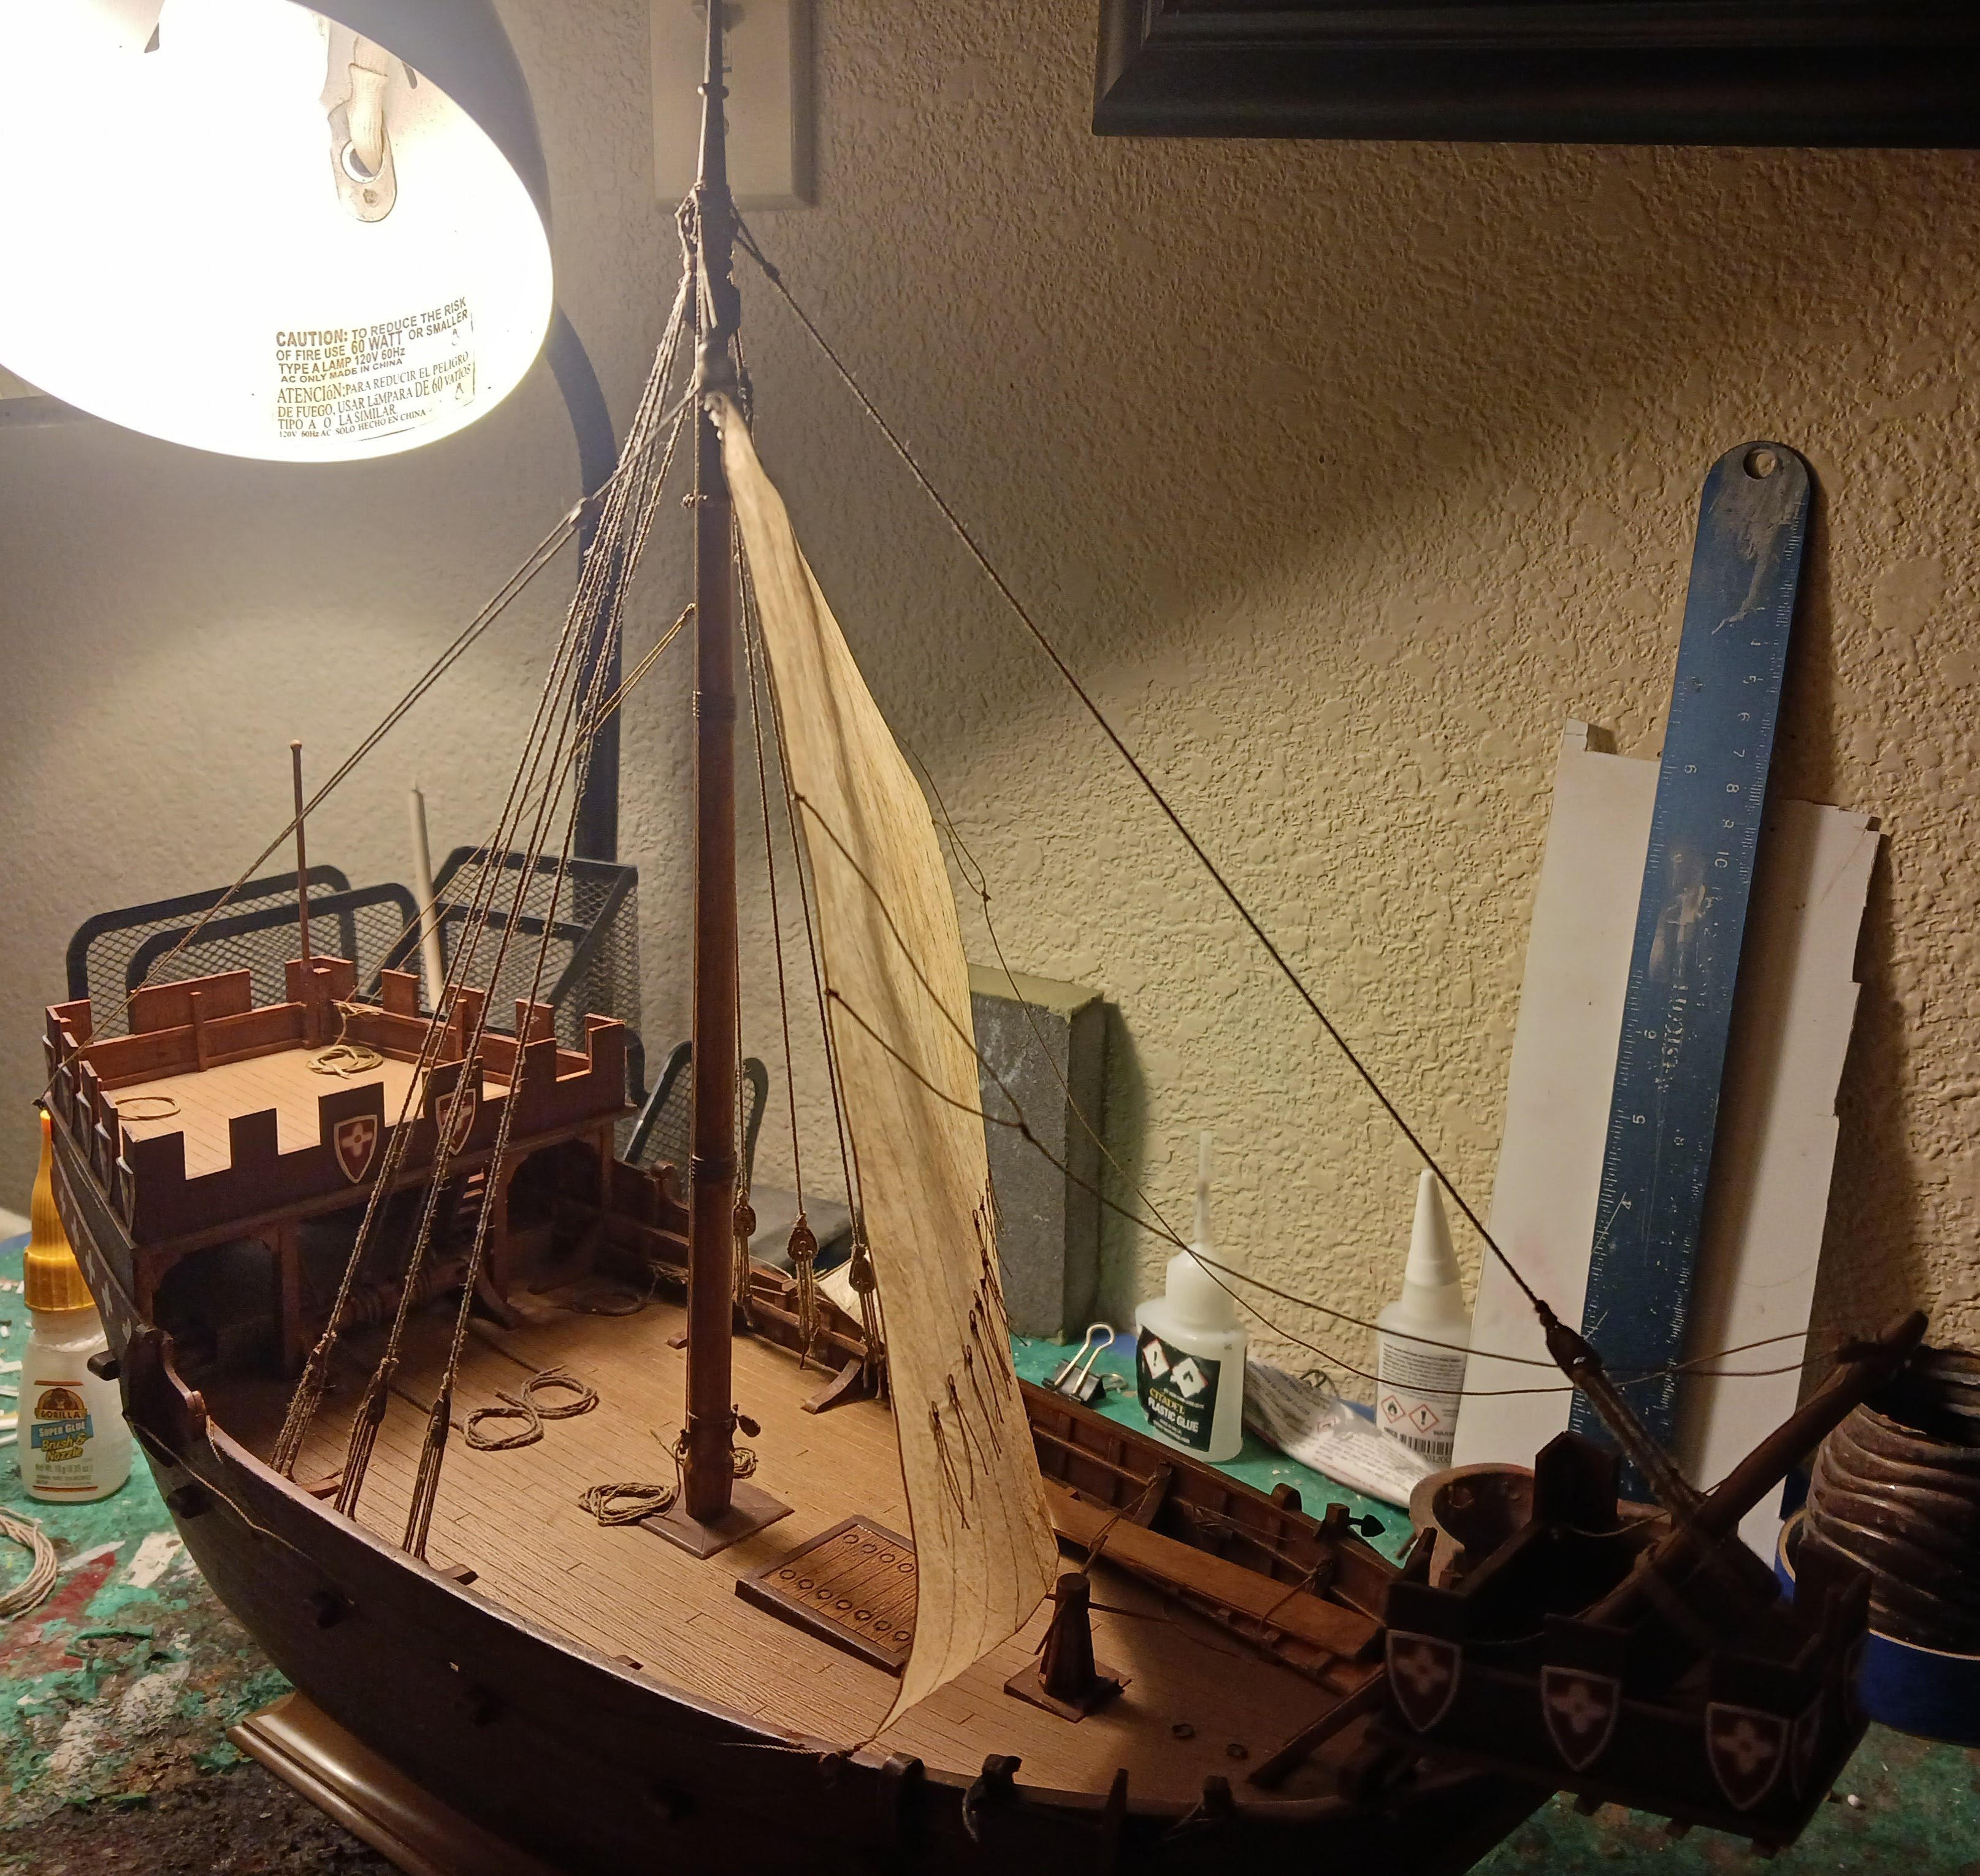
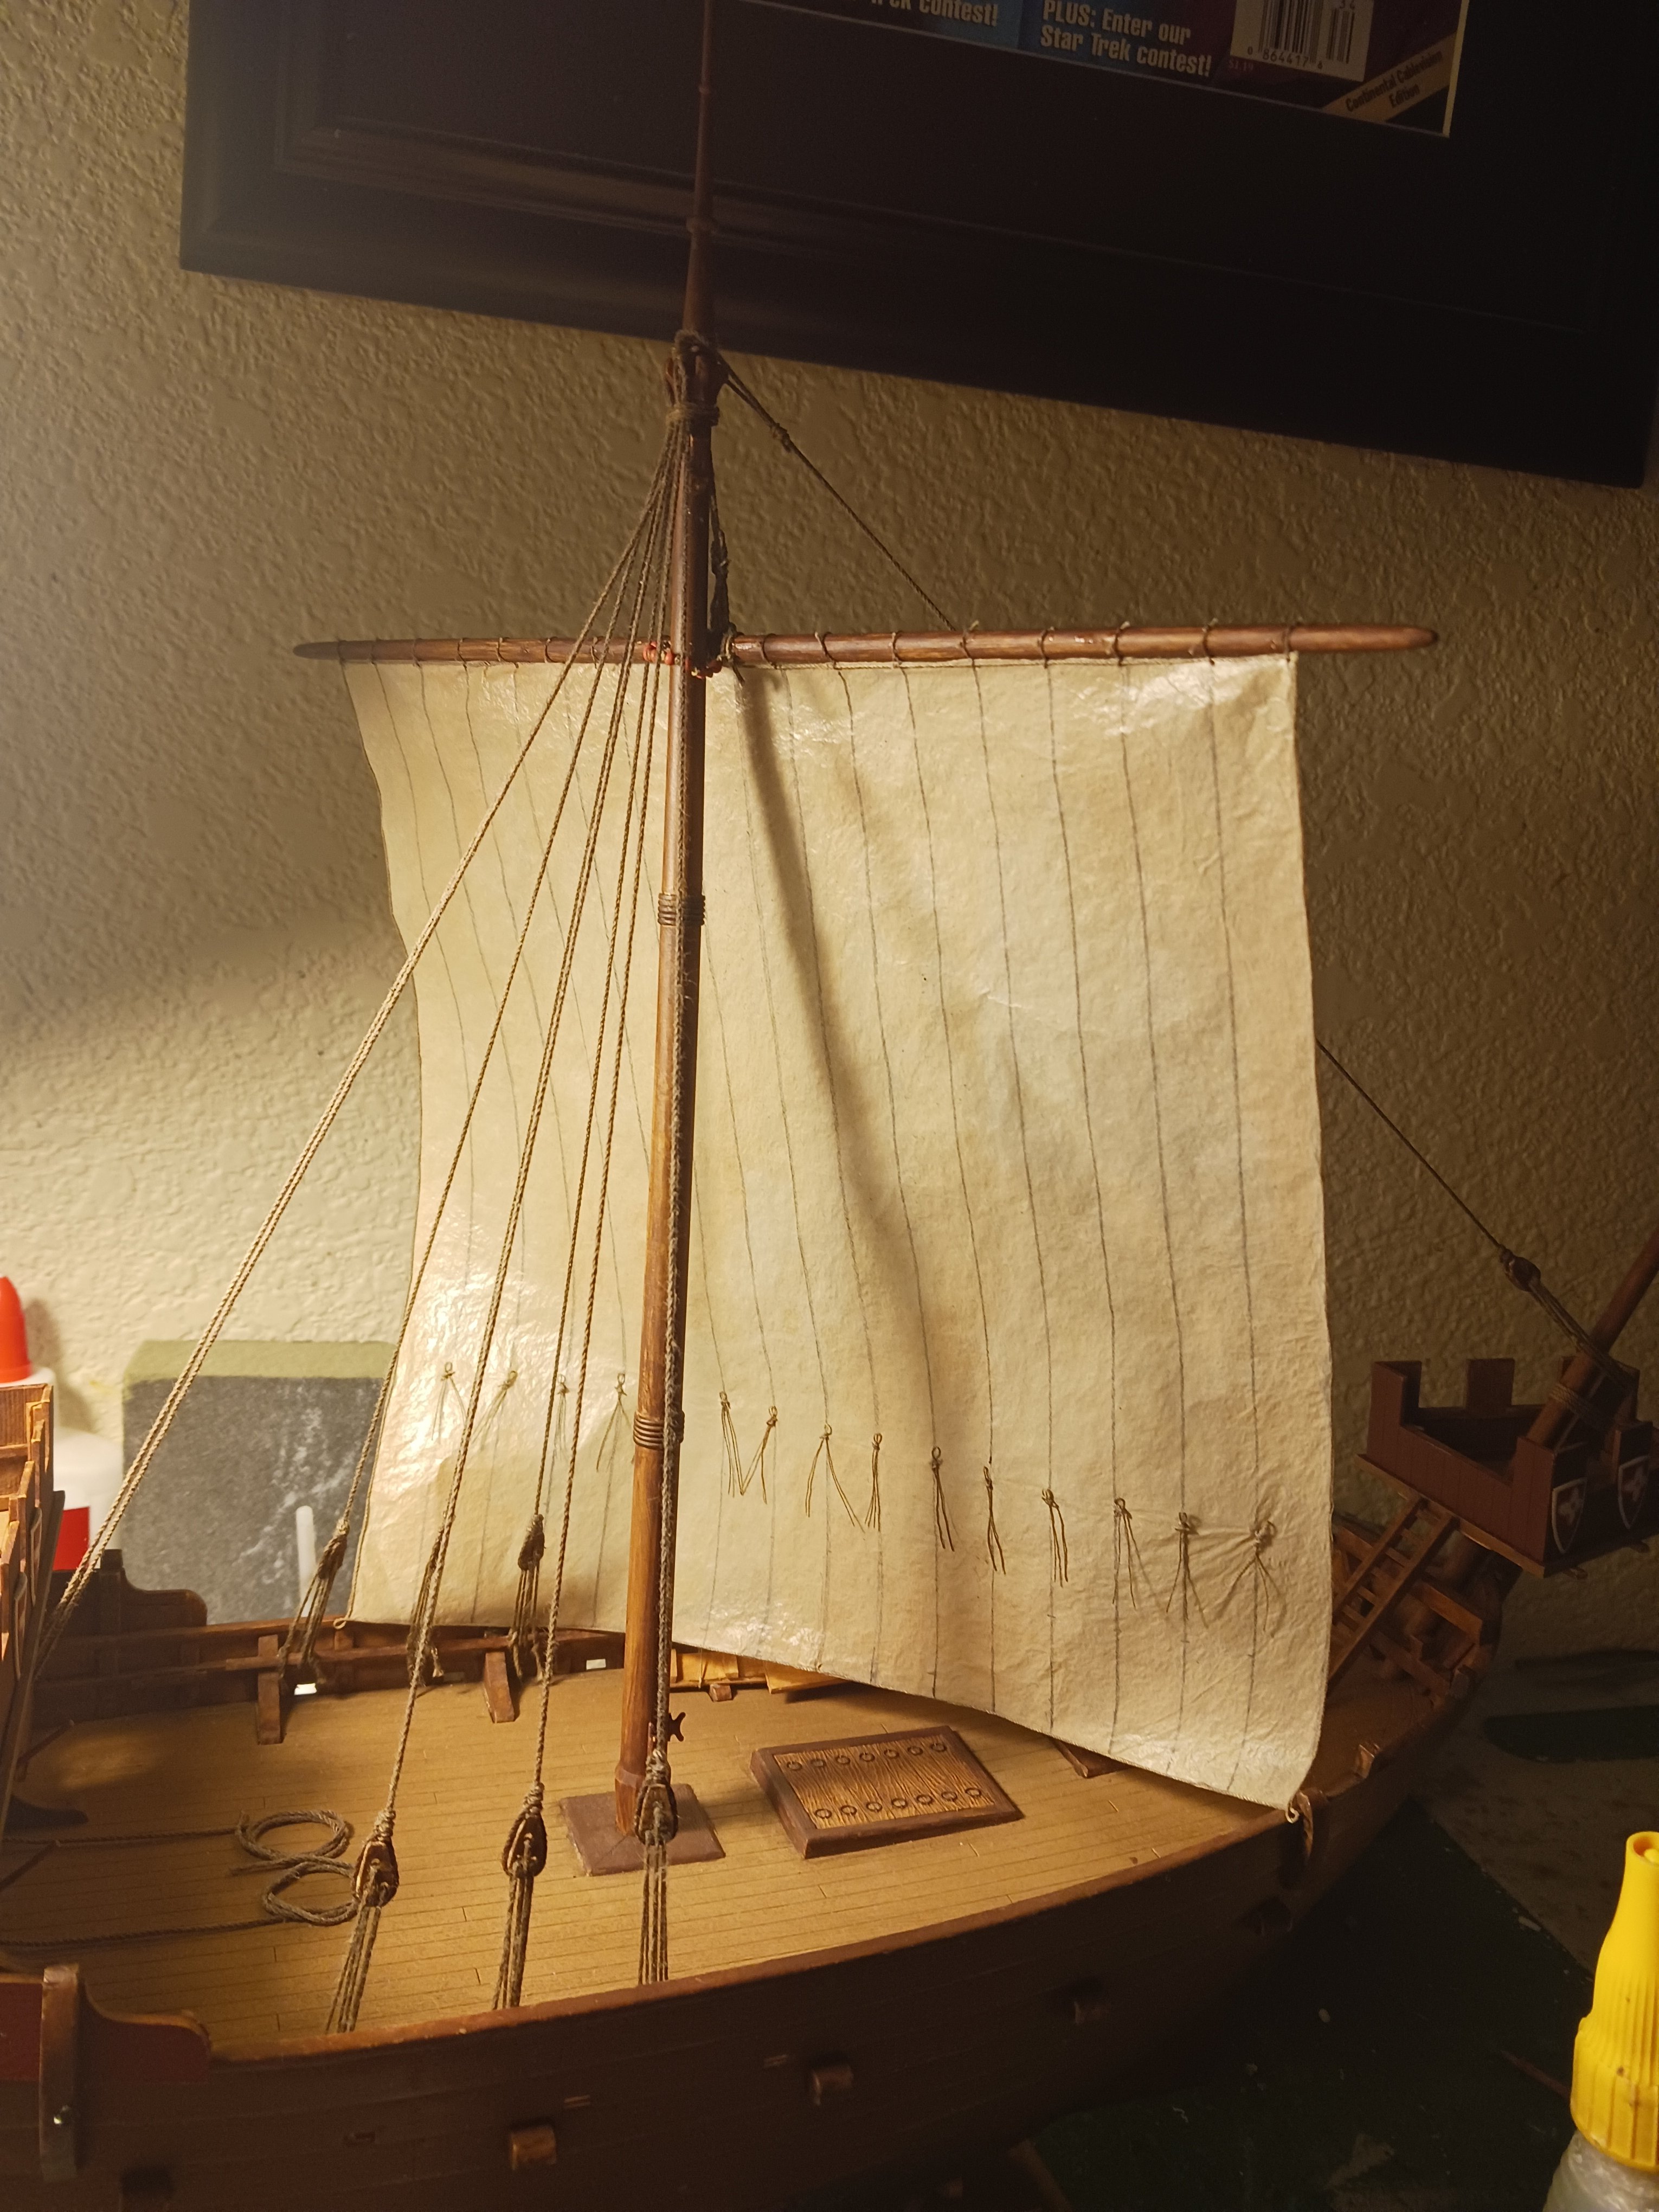
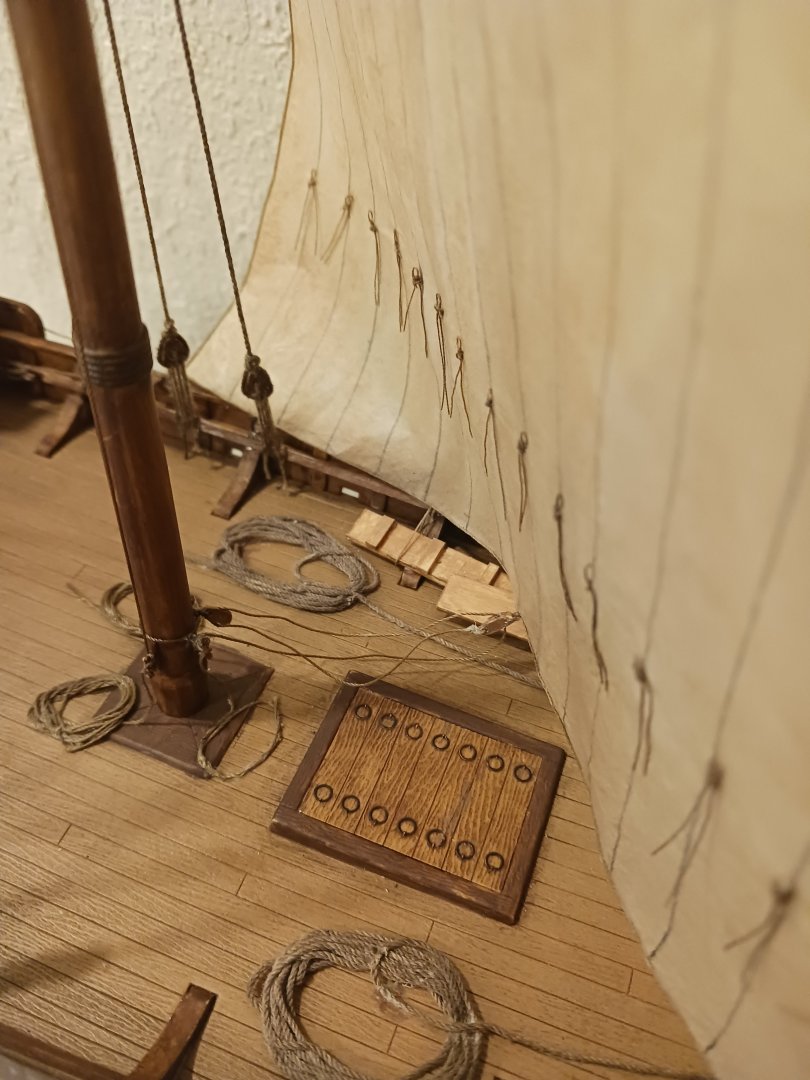
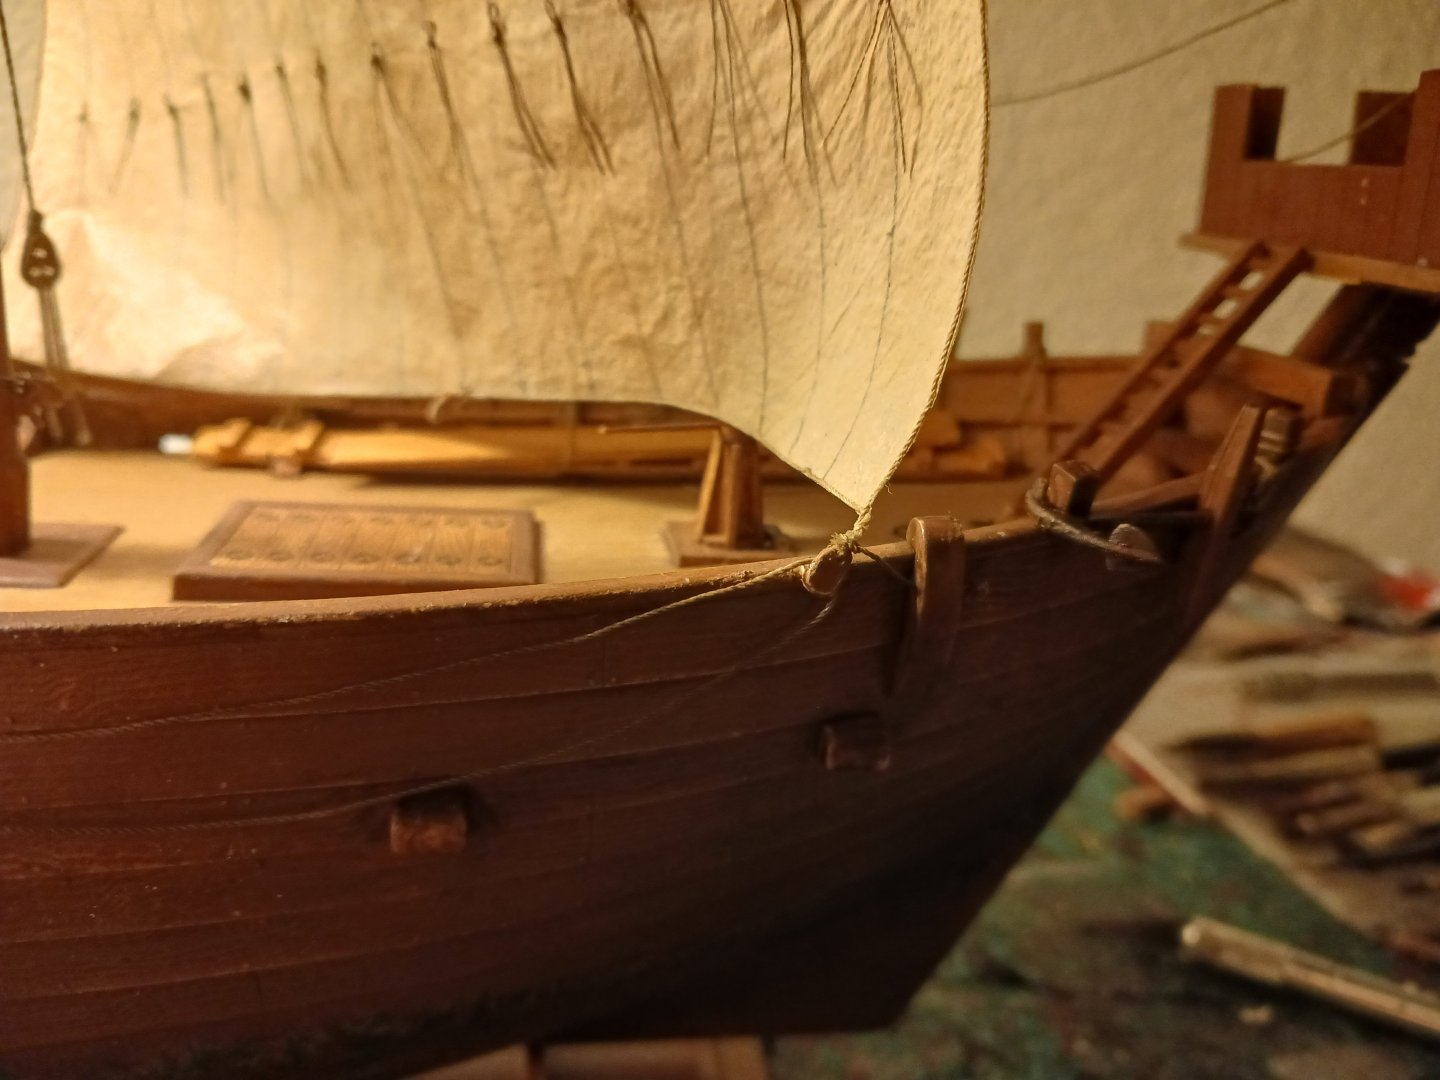
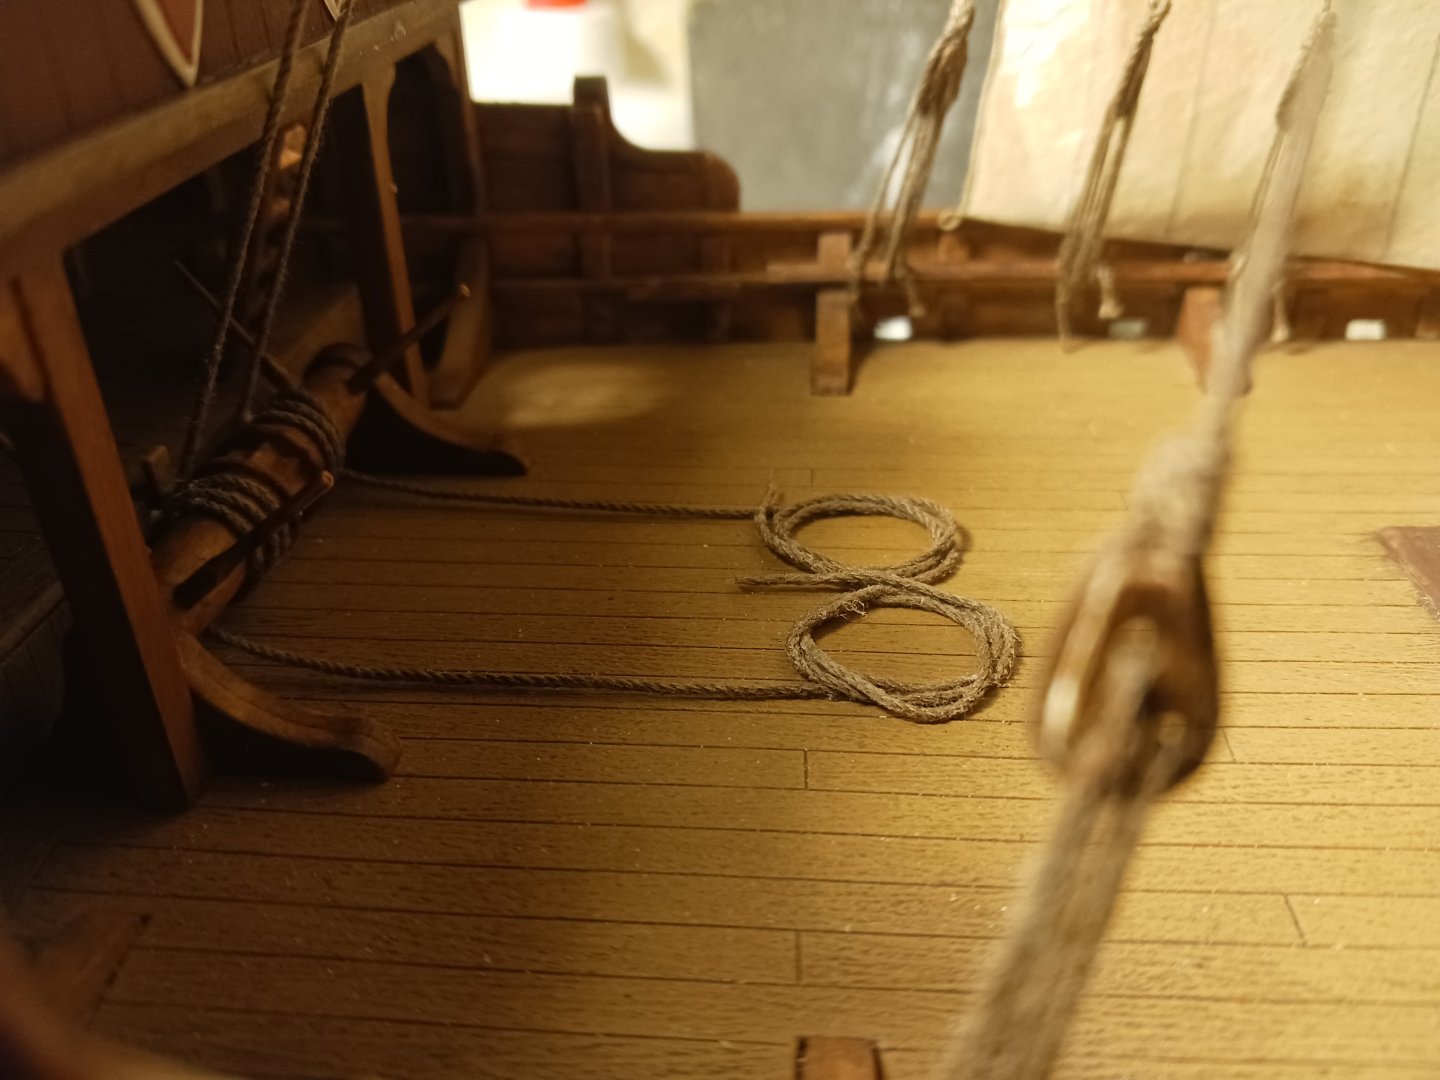
I've finished most of the standing rigging since the last post, pictured below. The one thing I have yet to do (actually two things) are the center sheet and the anchor cables. The anchors are both glued and tied into place at the bow, but they have yet to receive anchor cables. The cables are about twice the length of the ship and will be displayed on deck. That brings us to the center sheet. The kit provided me with a cleat to attach to the front of the mast, and then provided no further instruction regarding its use. However, we can assume that a center sheet is implied, and I think every depiction of the Stralsund Cog shows part of the sail wrapped around the mast. Medieval artists frequently misrepresented the center sheet as a strip of sailcloth around the mast, so we can assume the Stralsund Cog had a center sheet. Either way, I will be including one.


-
Furthermore, the interpretation of multiple reefing rows fails to consider the fact that multiple of the images I saw with these reef points showed ships with only one row of reef points on the sail.
-
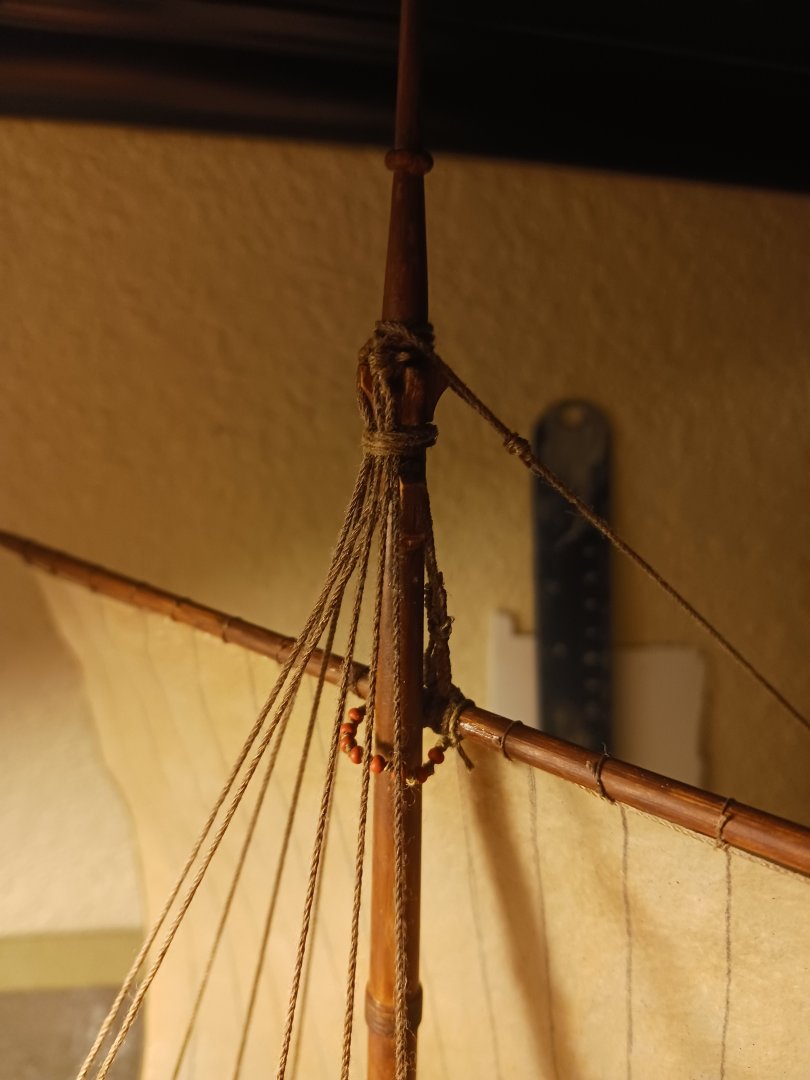
Hello Steven, it's nice to see you on this build log. I would argue that the interpretation provided in the article you reference only works if two or more rows of reef points exist- mine has one. I choose to go with my own interpretation of the workings of the reef points solely because I refuse to take the sail down and add another row- one was time consuming enough. Anyway, I have the sail and yard mounted to the mast and the parrell made up, with knots in between the trucks. I have also scratch-built all the blocks for the ship.

-
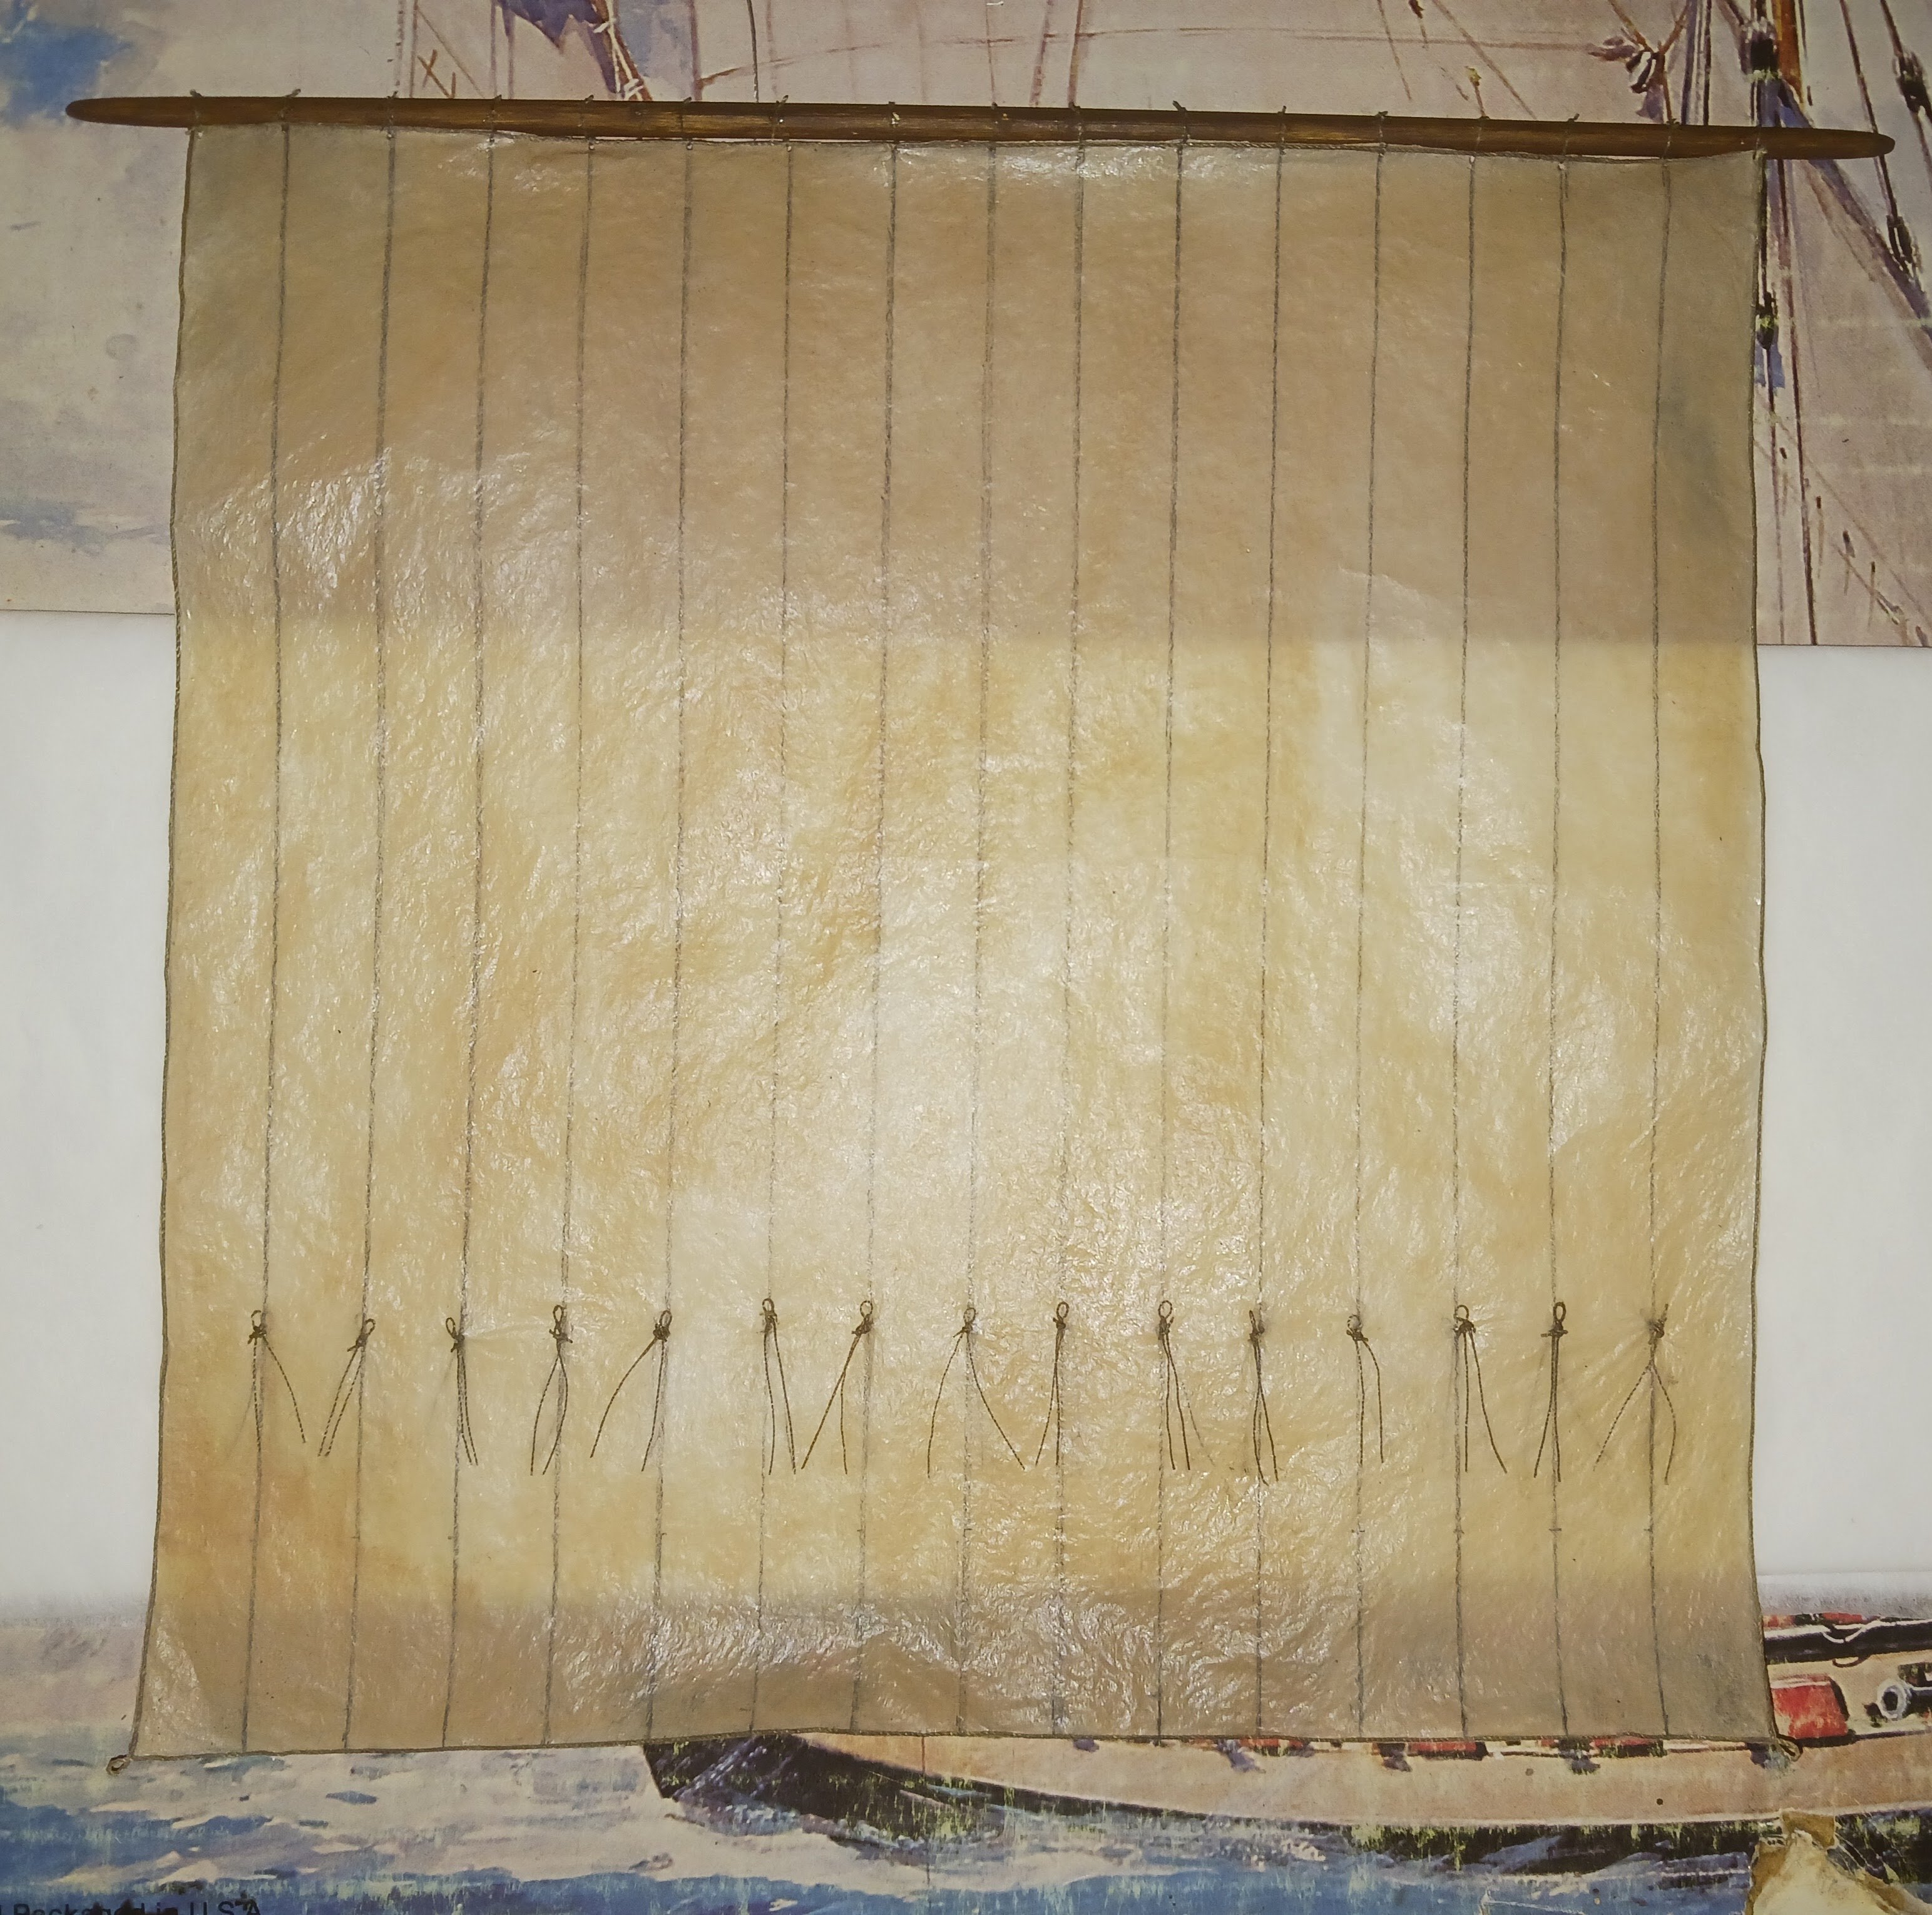
The robands and reef points have been made. I tried to envision my idea in the last post as authentically as possible, which I think I succeeded in doing. I also painted and installed the ladders, which are not pictured. The next steps entail attaching the two lift lines to the yard and rigging them to the windlass. Then, we can properly start the running rigging.

-
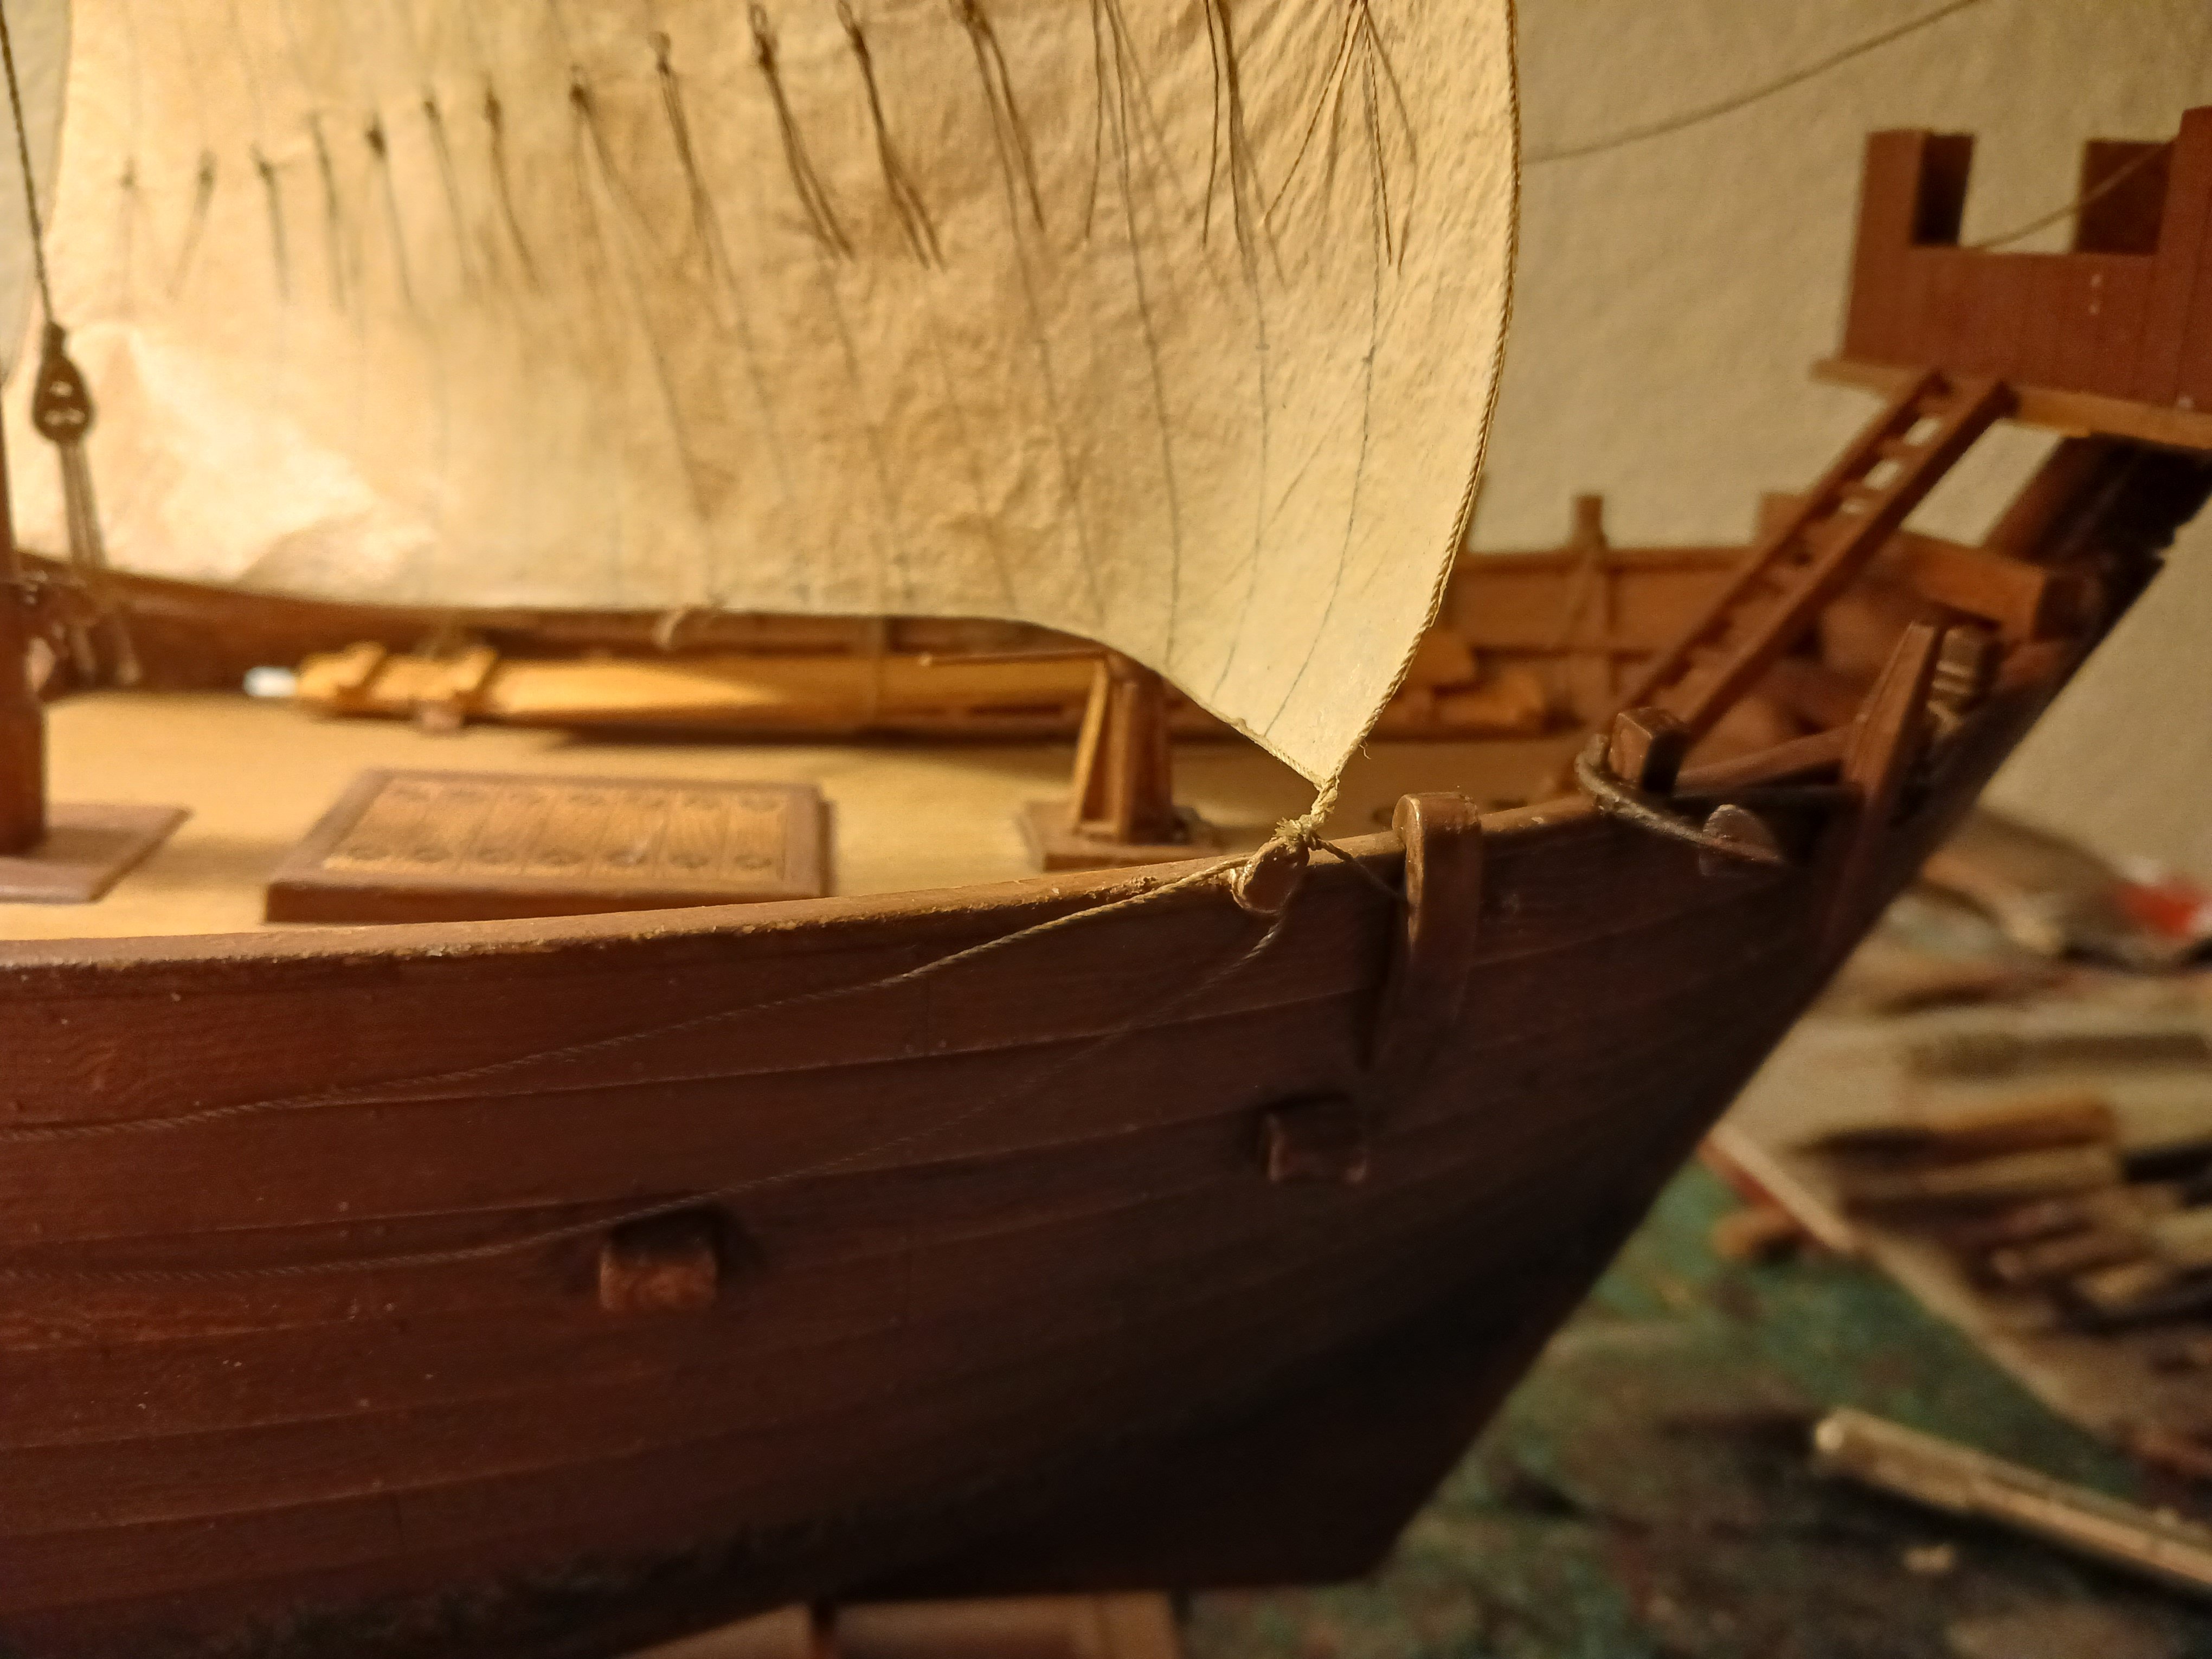
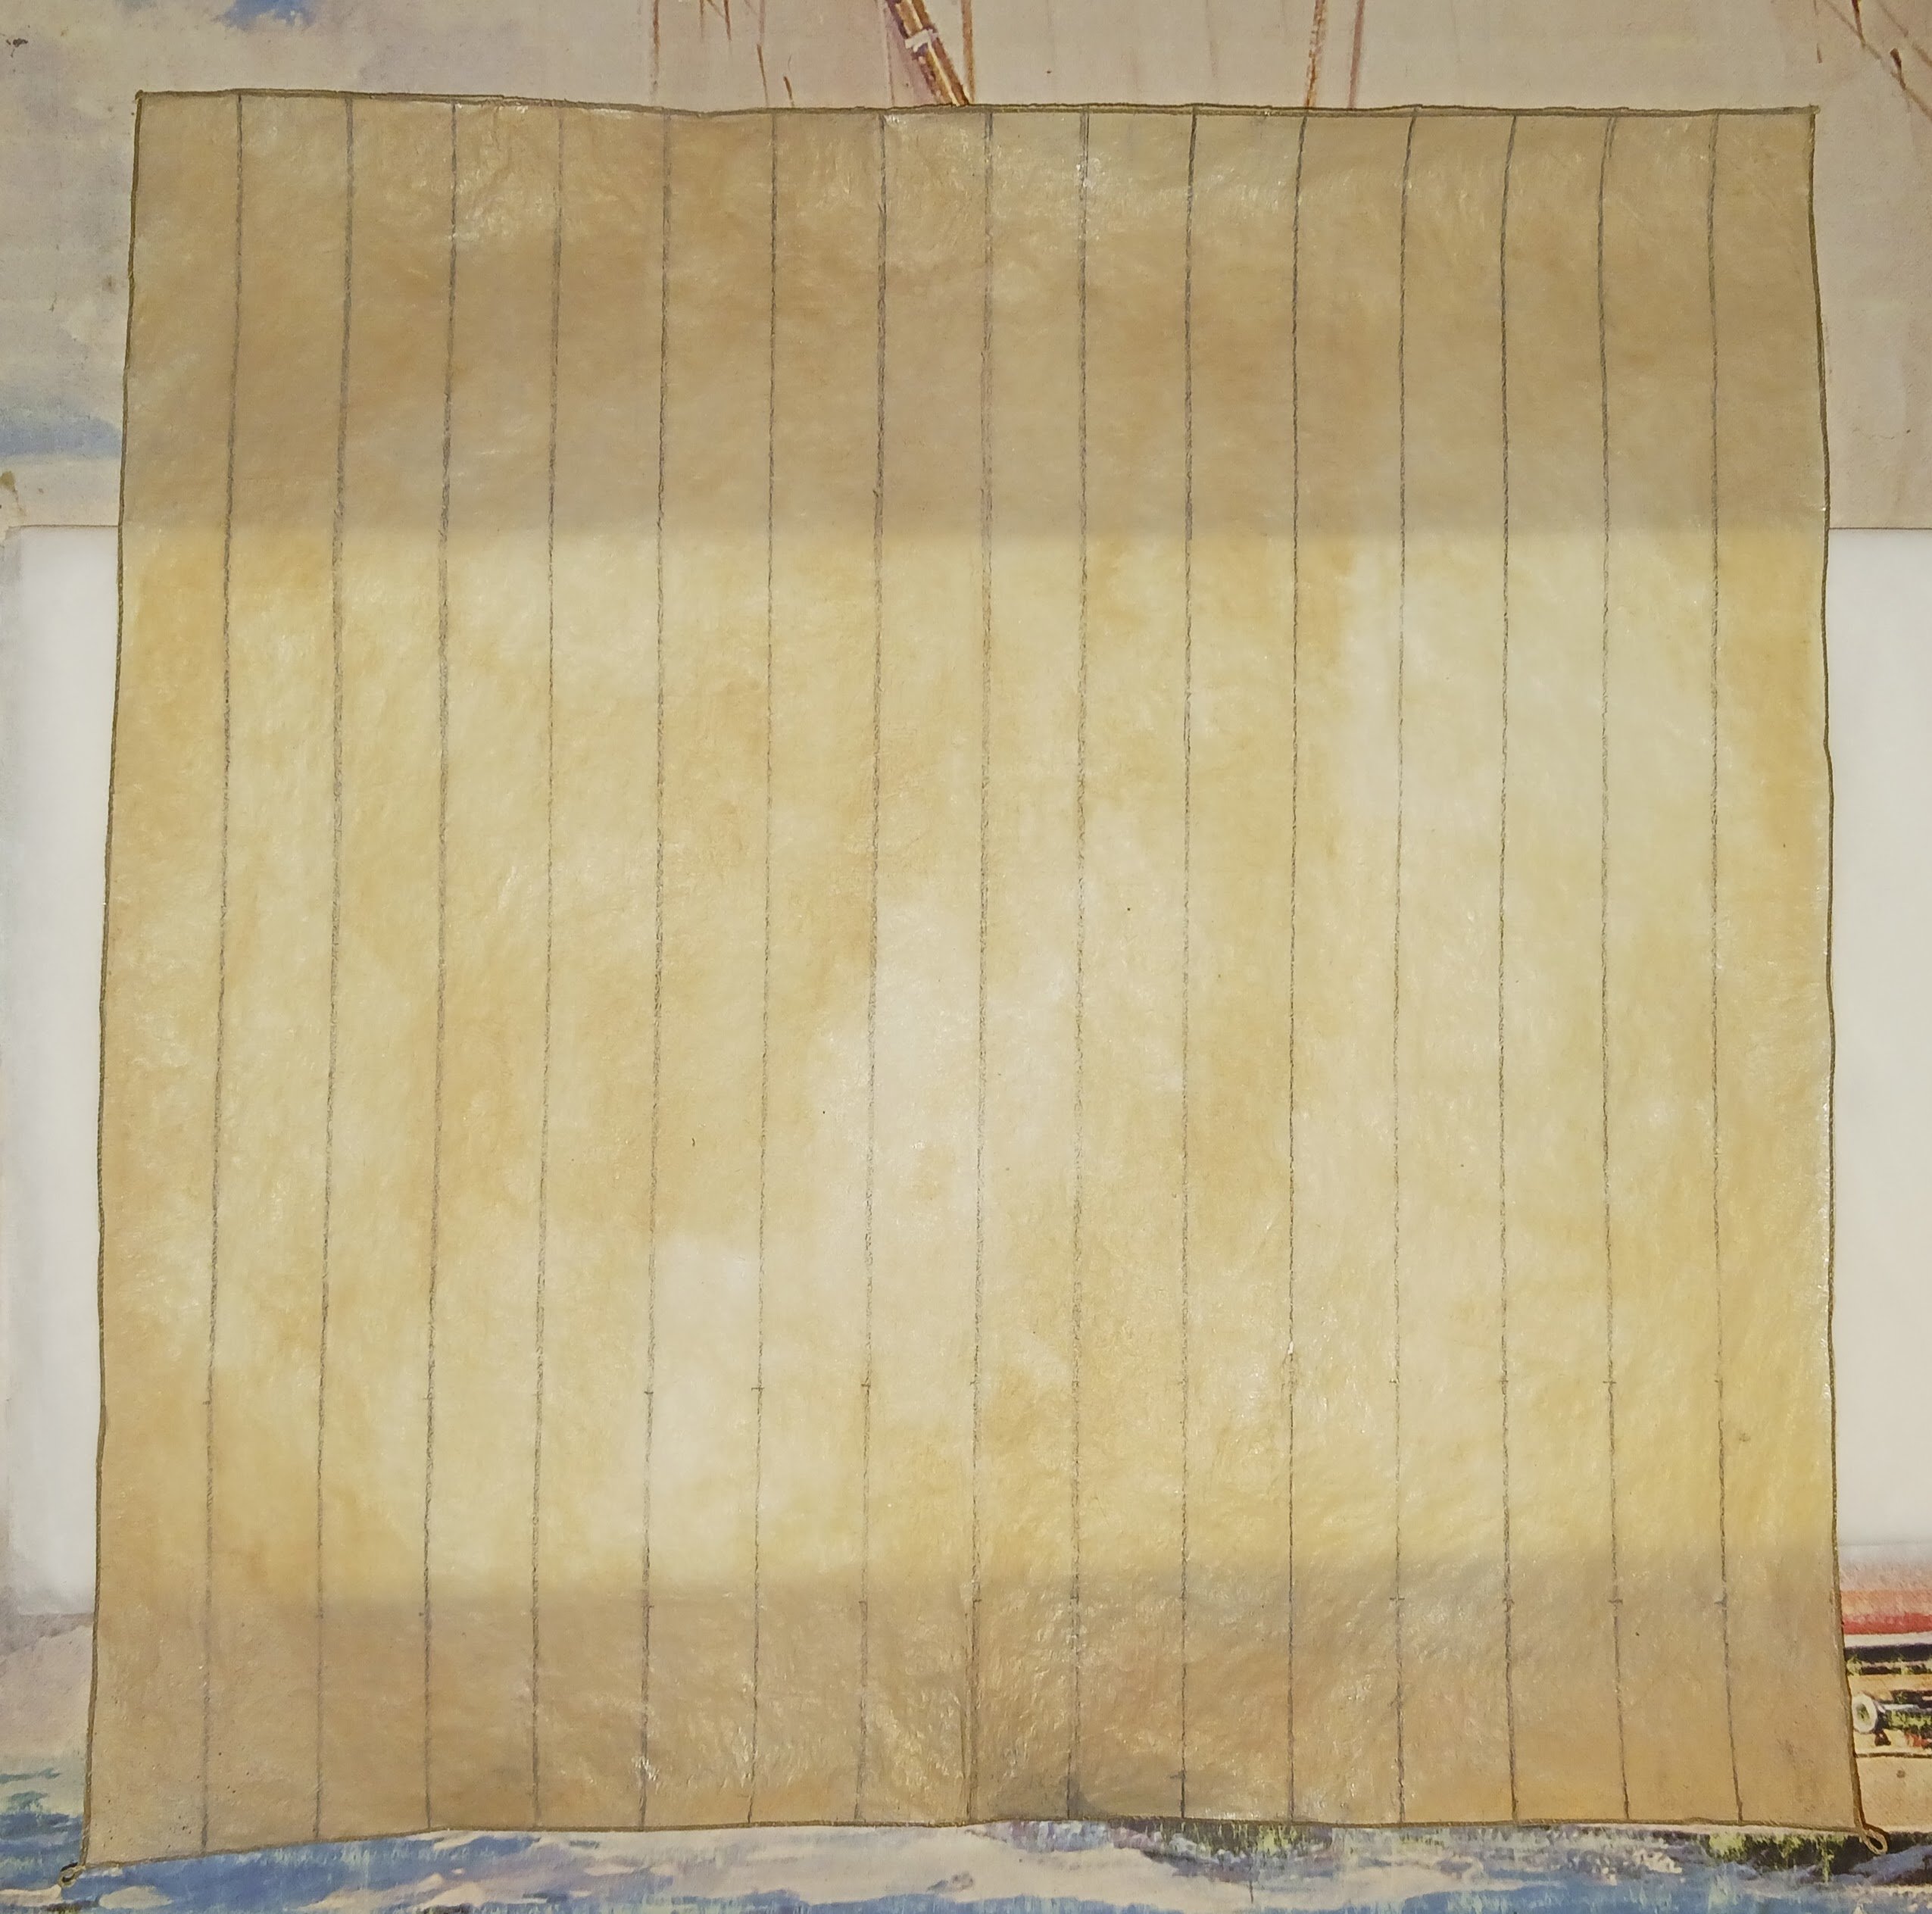
The sail is very simple so far, only some lightly painted silkspan with a bolt rope attached and some cringles at the bottom for the sheet and tack lines. However, I would like to add two rows (possibly just one) of reef points to the sail. Reefing on Medieval ships worked significantly differently from the way it works today. On modern square-rigged ships, crew climb aloft to reef from the top down by pulling the sail towards the yard. Before the bonnet superseded the reef point in the mid-15th Century, reefing was done from the bottom of the sail up, from the deck. When analyzing Medieval images of square sails, I came across an interesting phenomenon- reef points seemed to be made with two general designs. You have the regular reef point with just one line going through the sail, and then you have this: All of these images are from Steven @Louie da fly's Pinterest collection, and seem to show a rope loop with loose ends tied to the sail. These are shown on both the fore and aft of the sail. Perhaps, if this is true, the loose ends of the rope loop could be passed under the bottom of the collected sail and tie to the rope loop on the opposite sail, and vice versa?
-
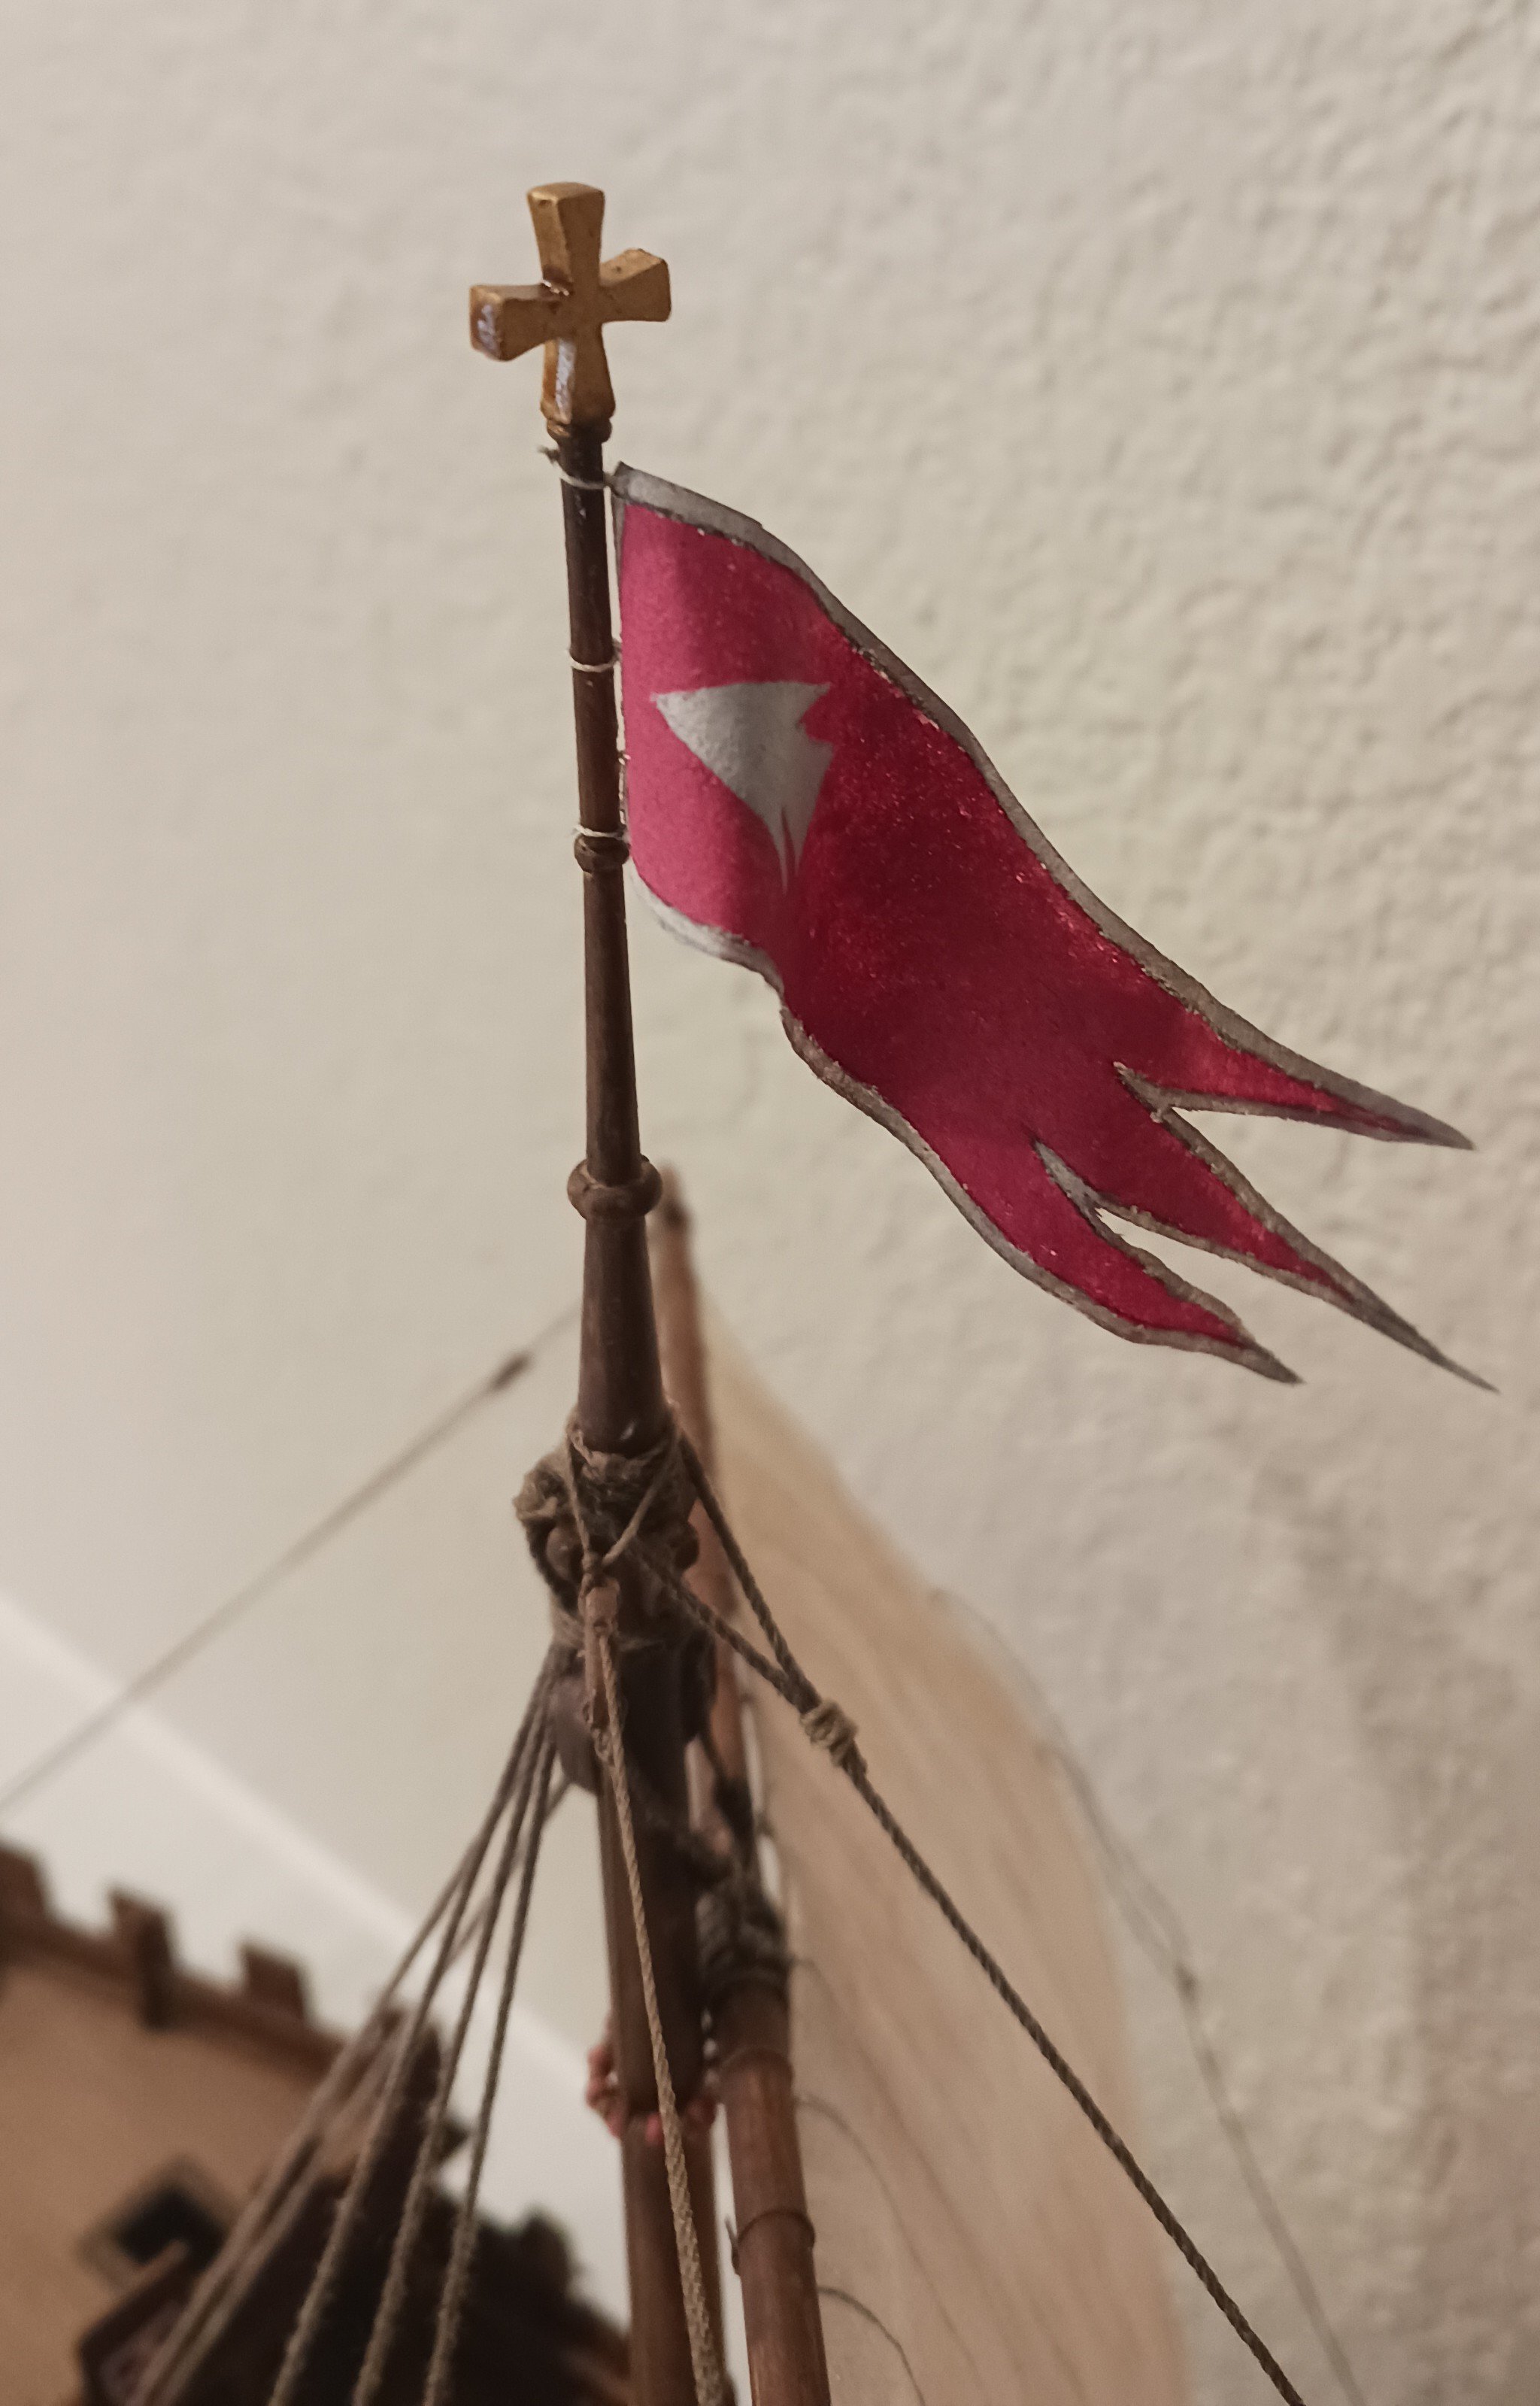
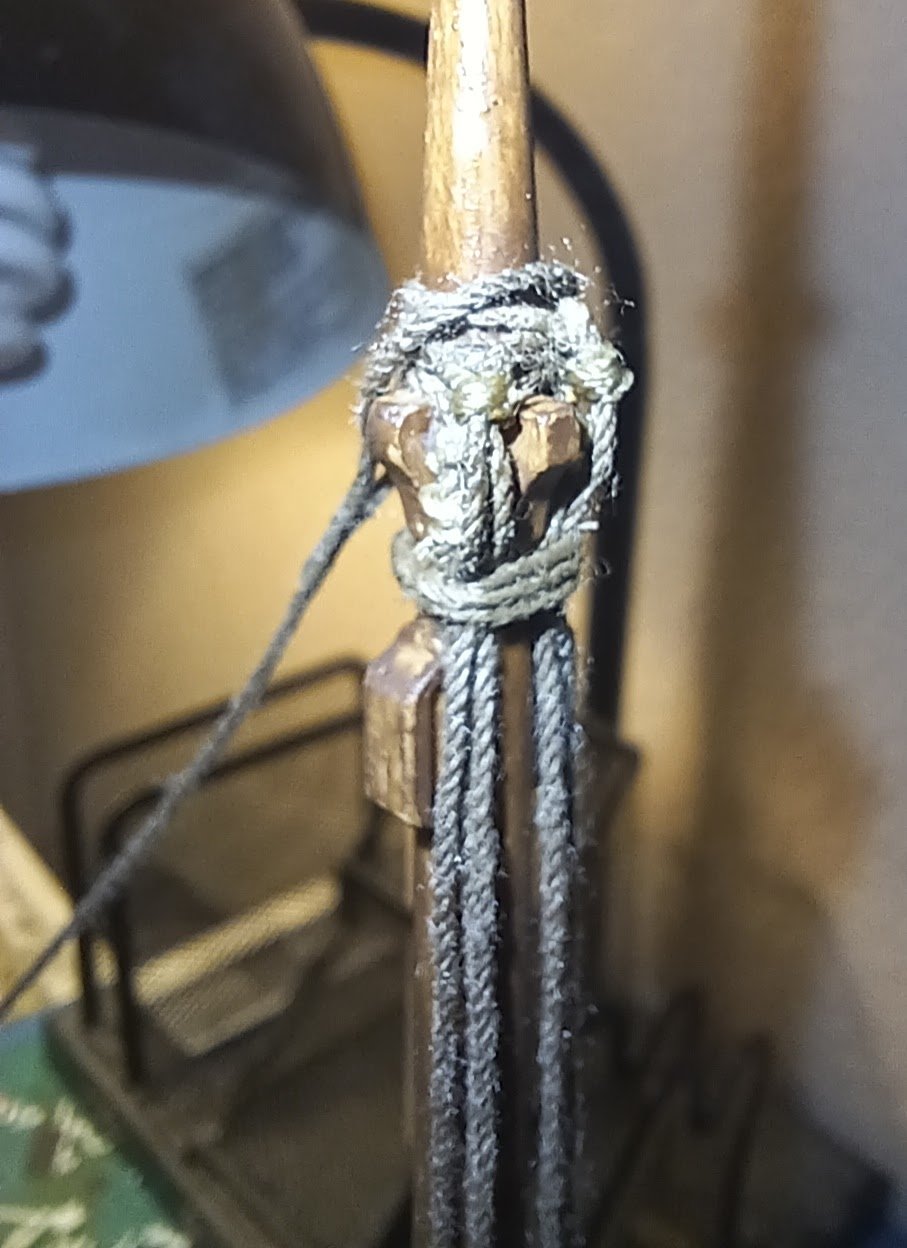
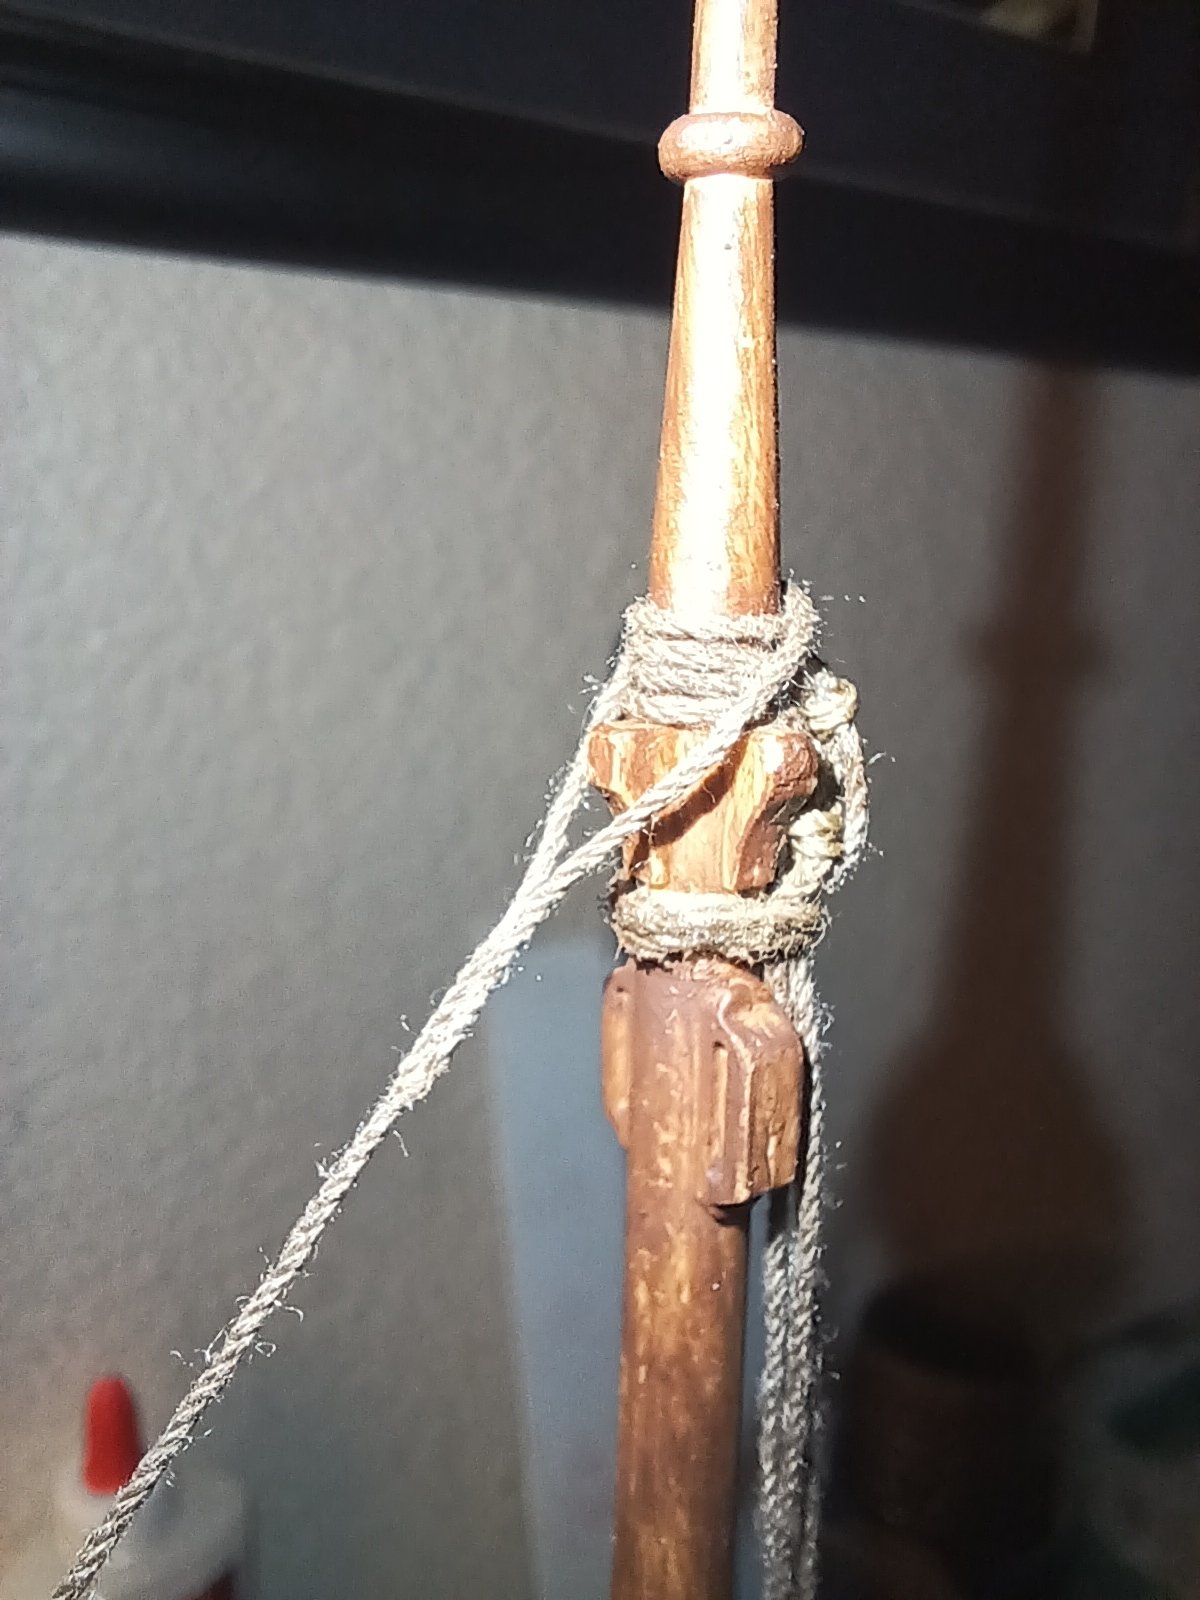
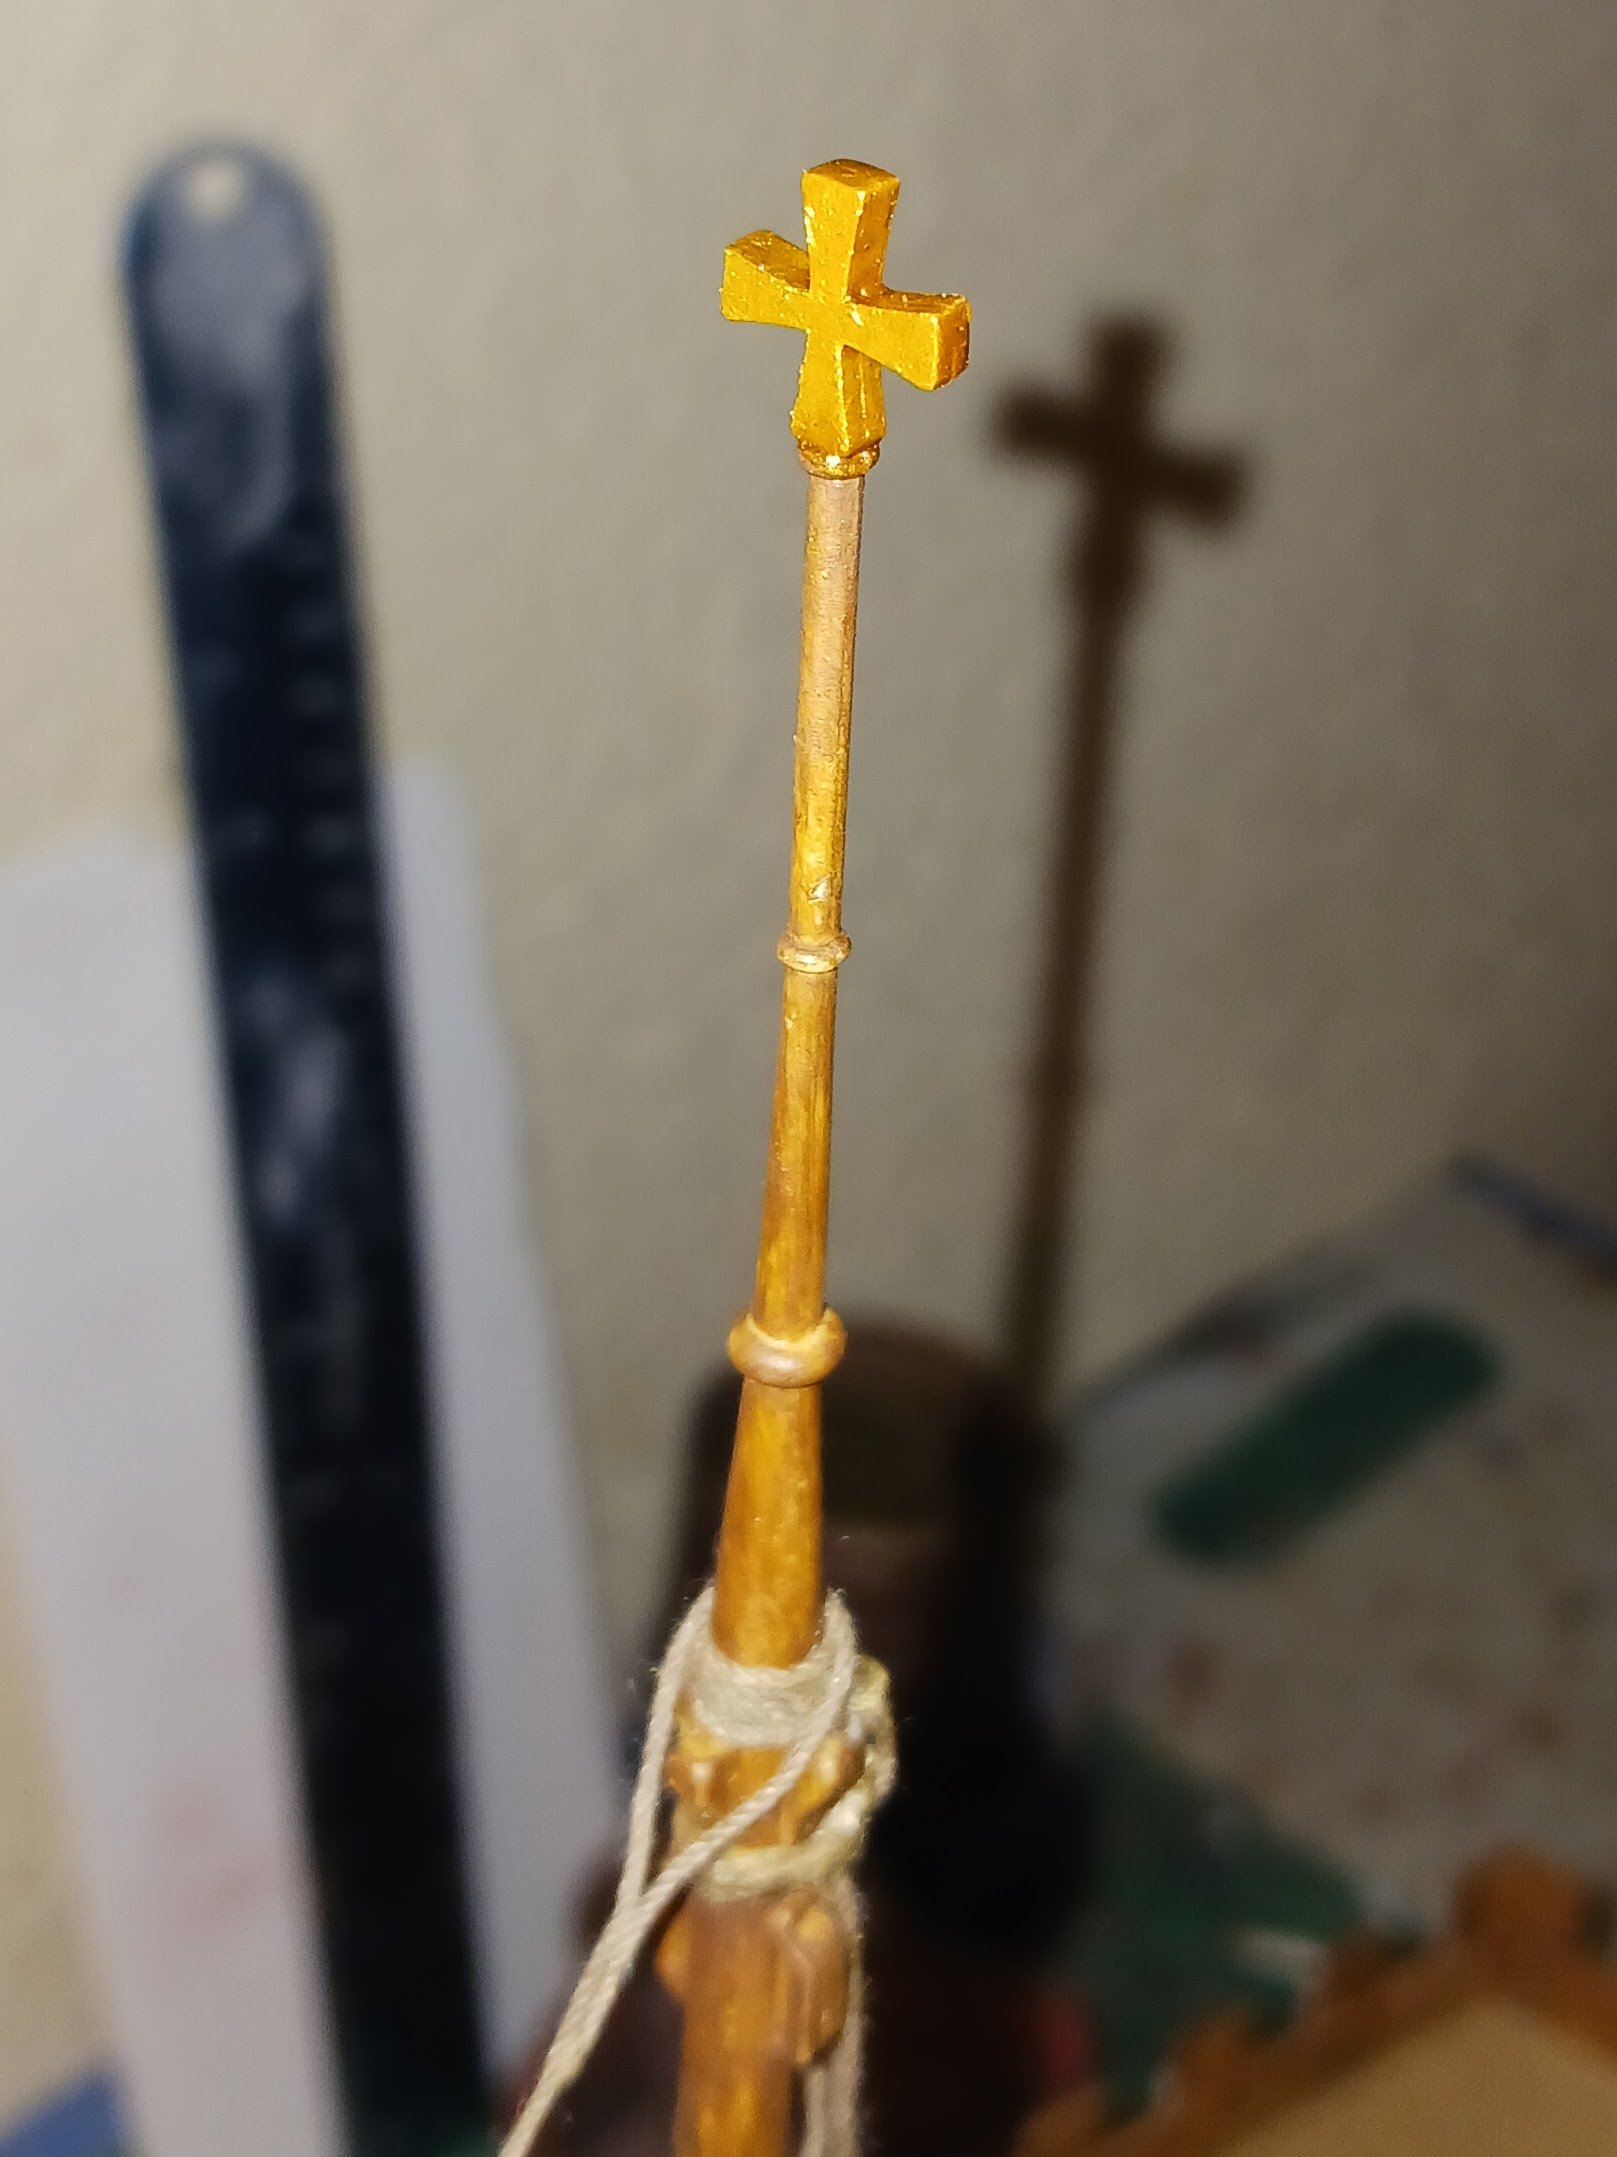
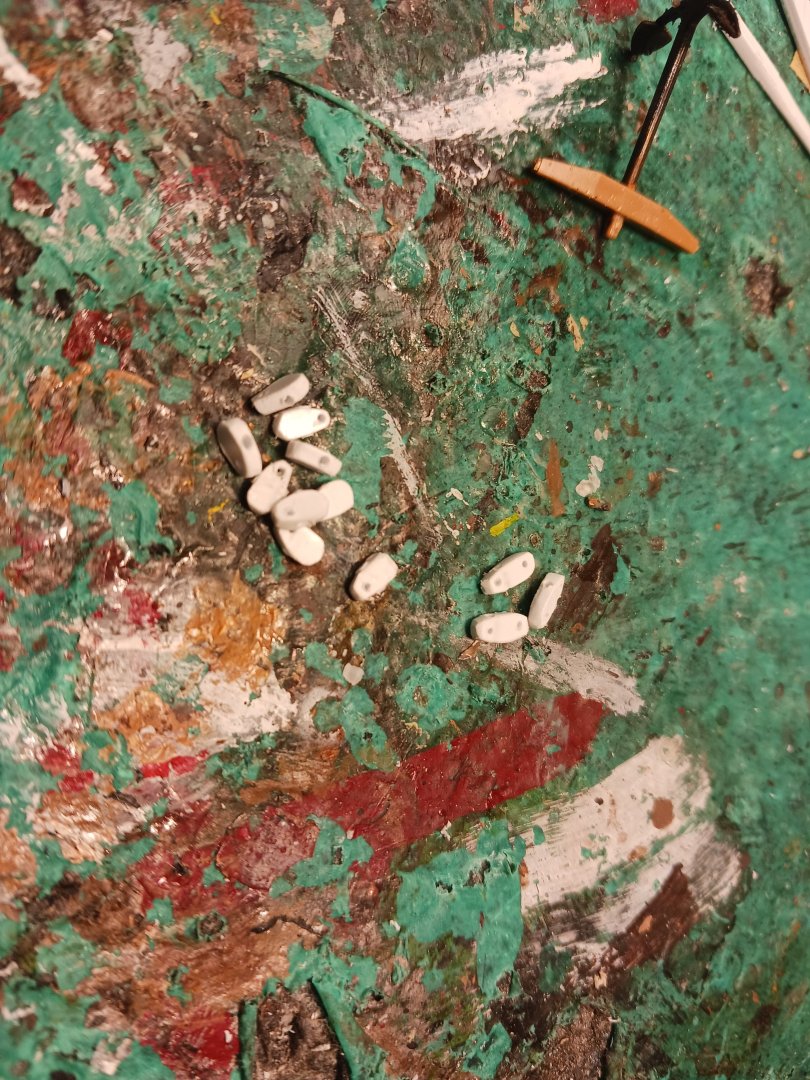
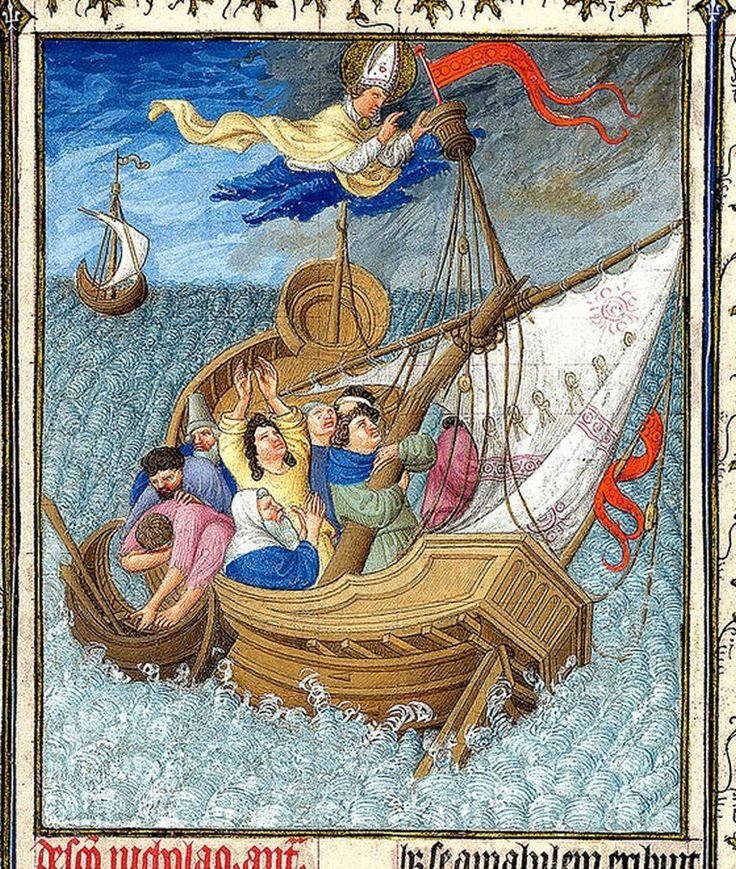
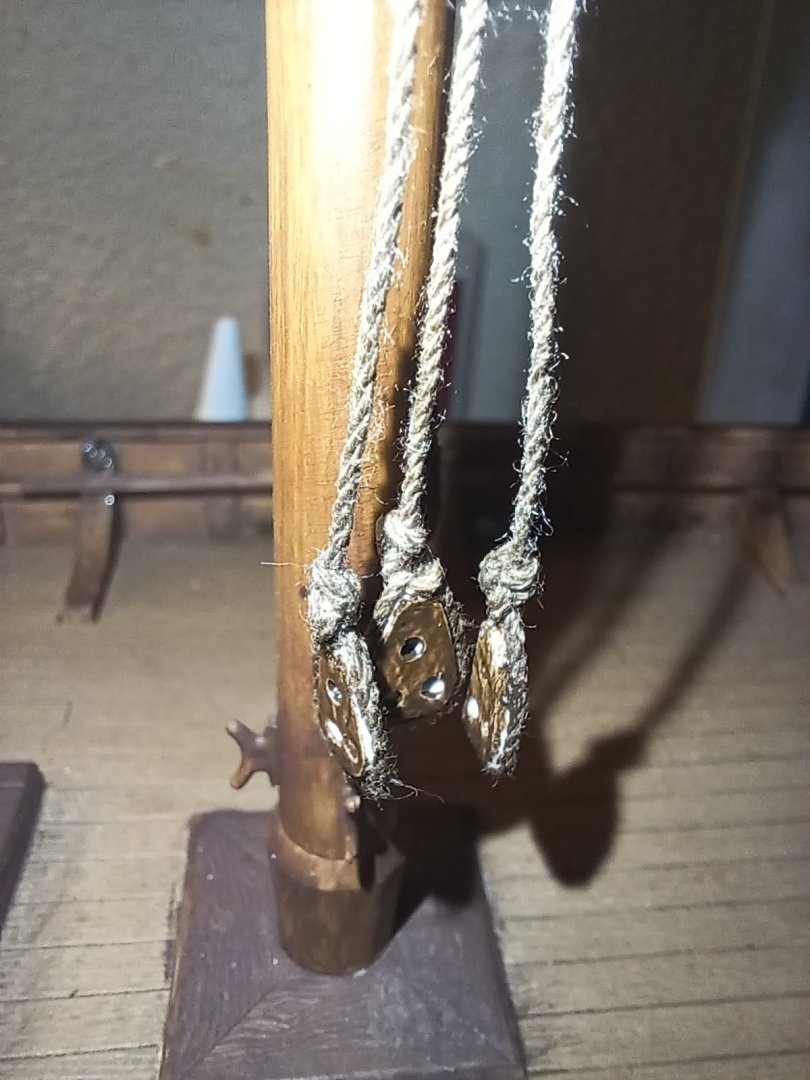
Hello all, sorry for the extended absence. Since the last post, I have completed the painting and installation of the mast as well as the standing rigging. The Stralsund Seal shows three shrouds on each side of the mast, plus a forestay that anchors around the top of the stempost. I chose to tie the shrouds around the mast with seizings as well as sieze a bit of rope around the mast below the mast top as a preventer. This would be seen on later Mediterranean ships. The forestay seizes have yet to be made. Finishing up the masttop is a golden cross: I made a total of six deadeyes that were intended to be based on the Bremen Cog excavations, as they were the closest piece of evidence in terms of time period to the Stralsund Cog, even though the two are separated by over a hundred years. These deadeyes will be tired directly to the stringers instead of to lower deadeyes, as would be the case on later ships. I devised a very primitive system for the deadeyes that involves both ends of the lanyard being tied to the stringer, while retaining most of the functionality of a deadeye. While this system is probably in no way accurate to what the Stralsund Cog would likely have had, it is at least plausible as a prototypical deadeye arrangement. The forestay terminates in a heart whose lanyard is wrapped directly around the top of the stempost using a similar system. All blocks are attached to their shroud/stay with three half hitches.


-
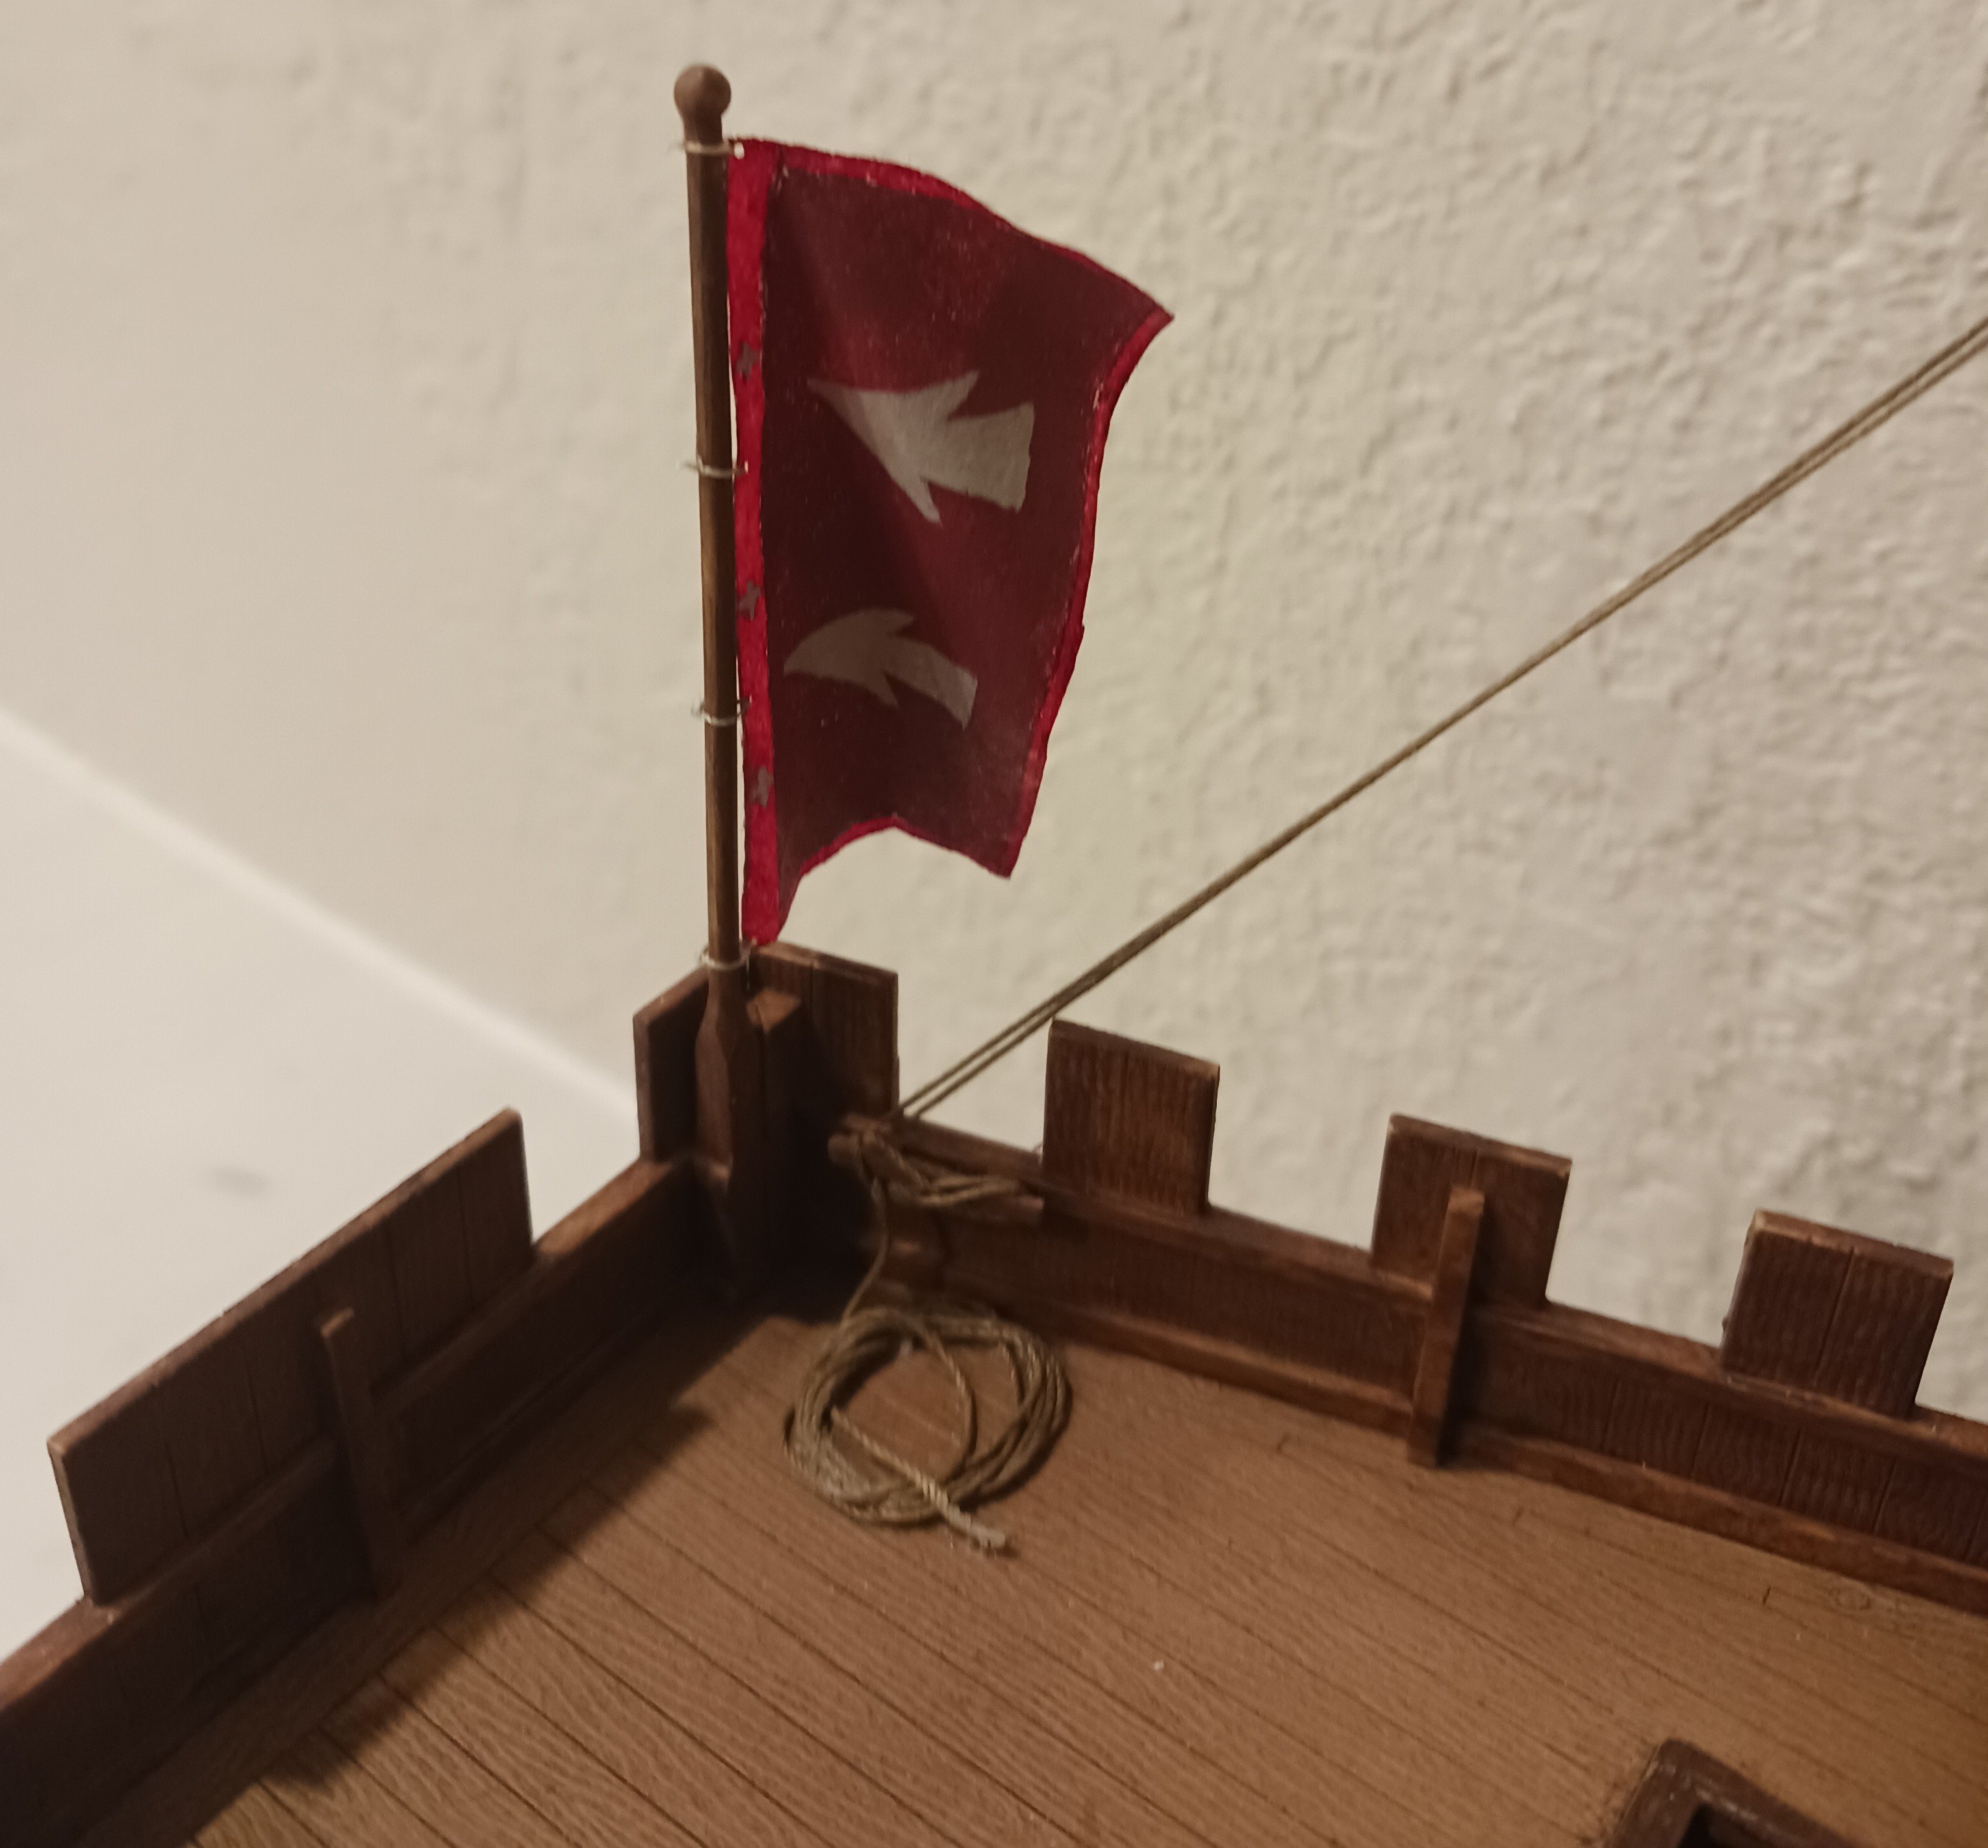
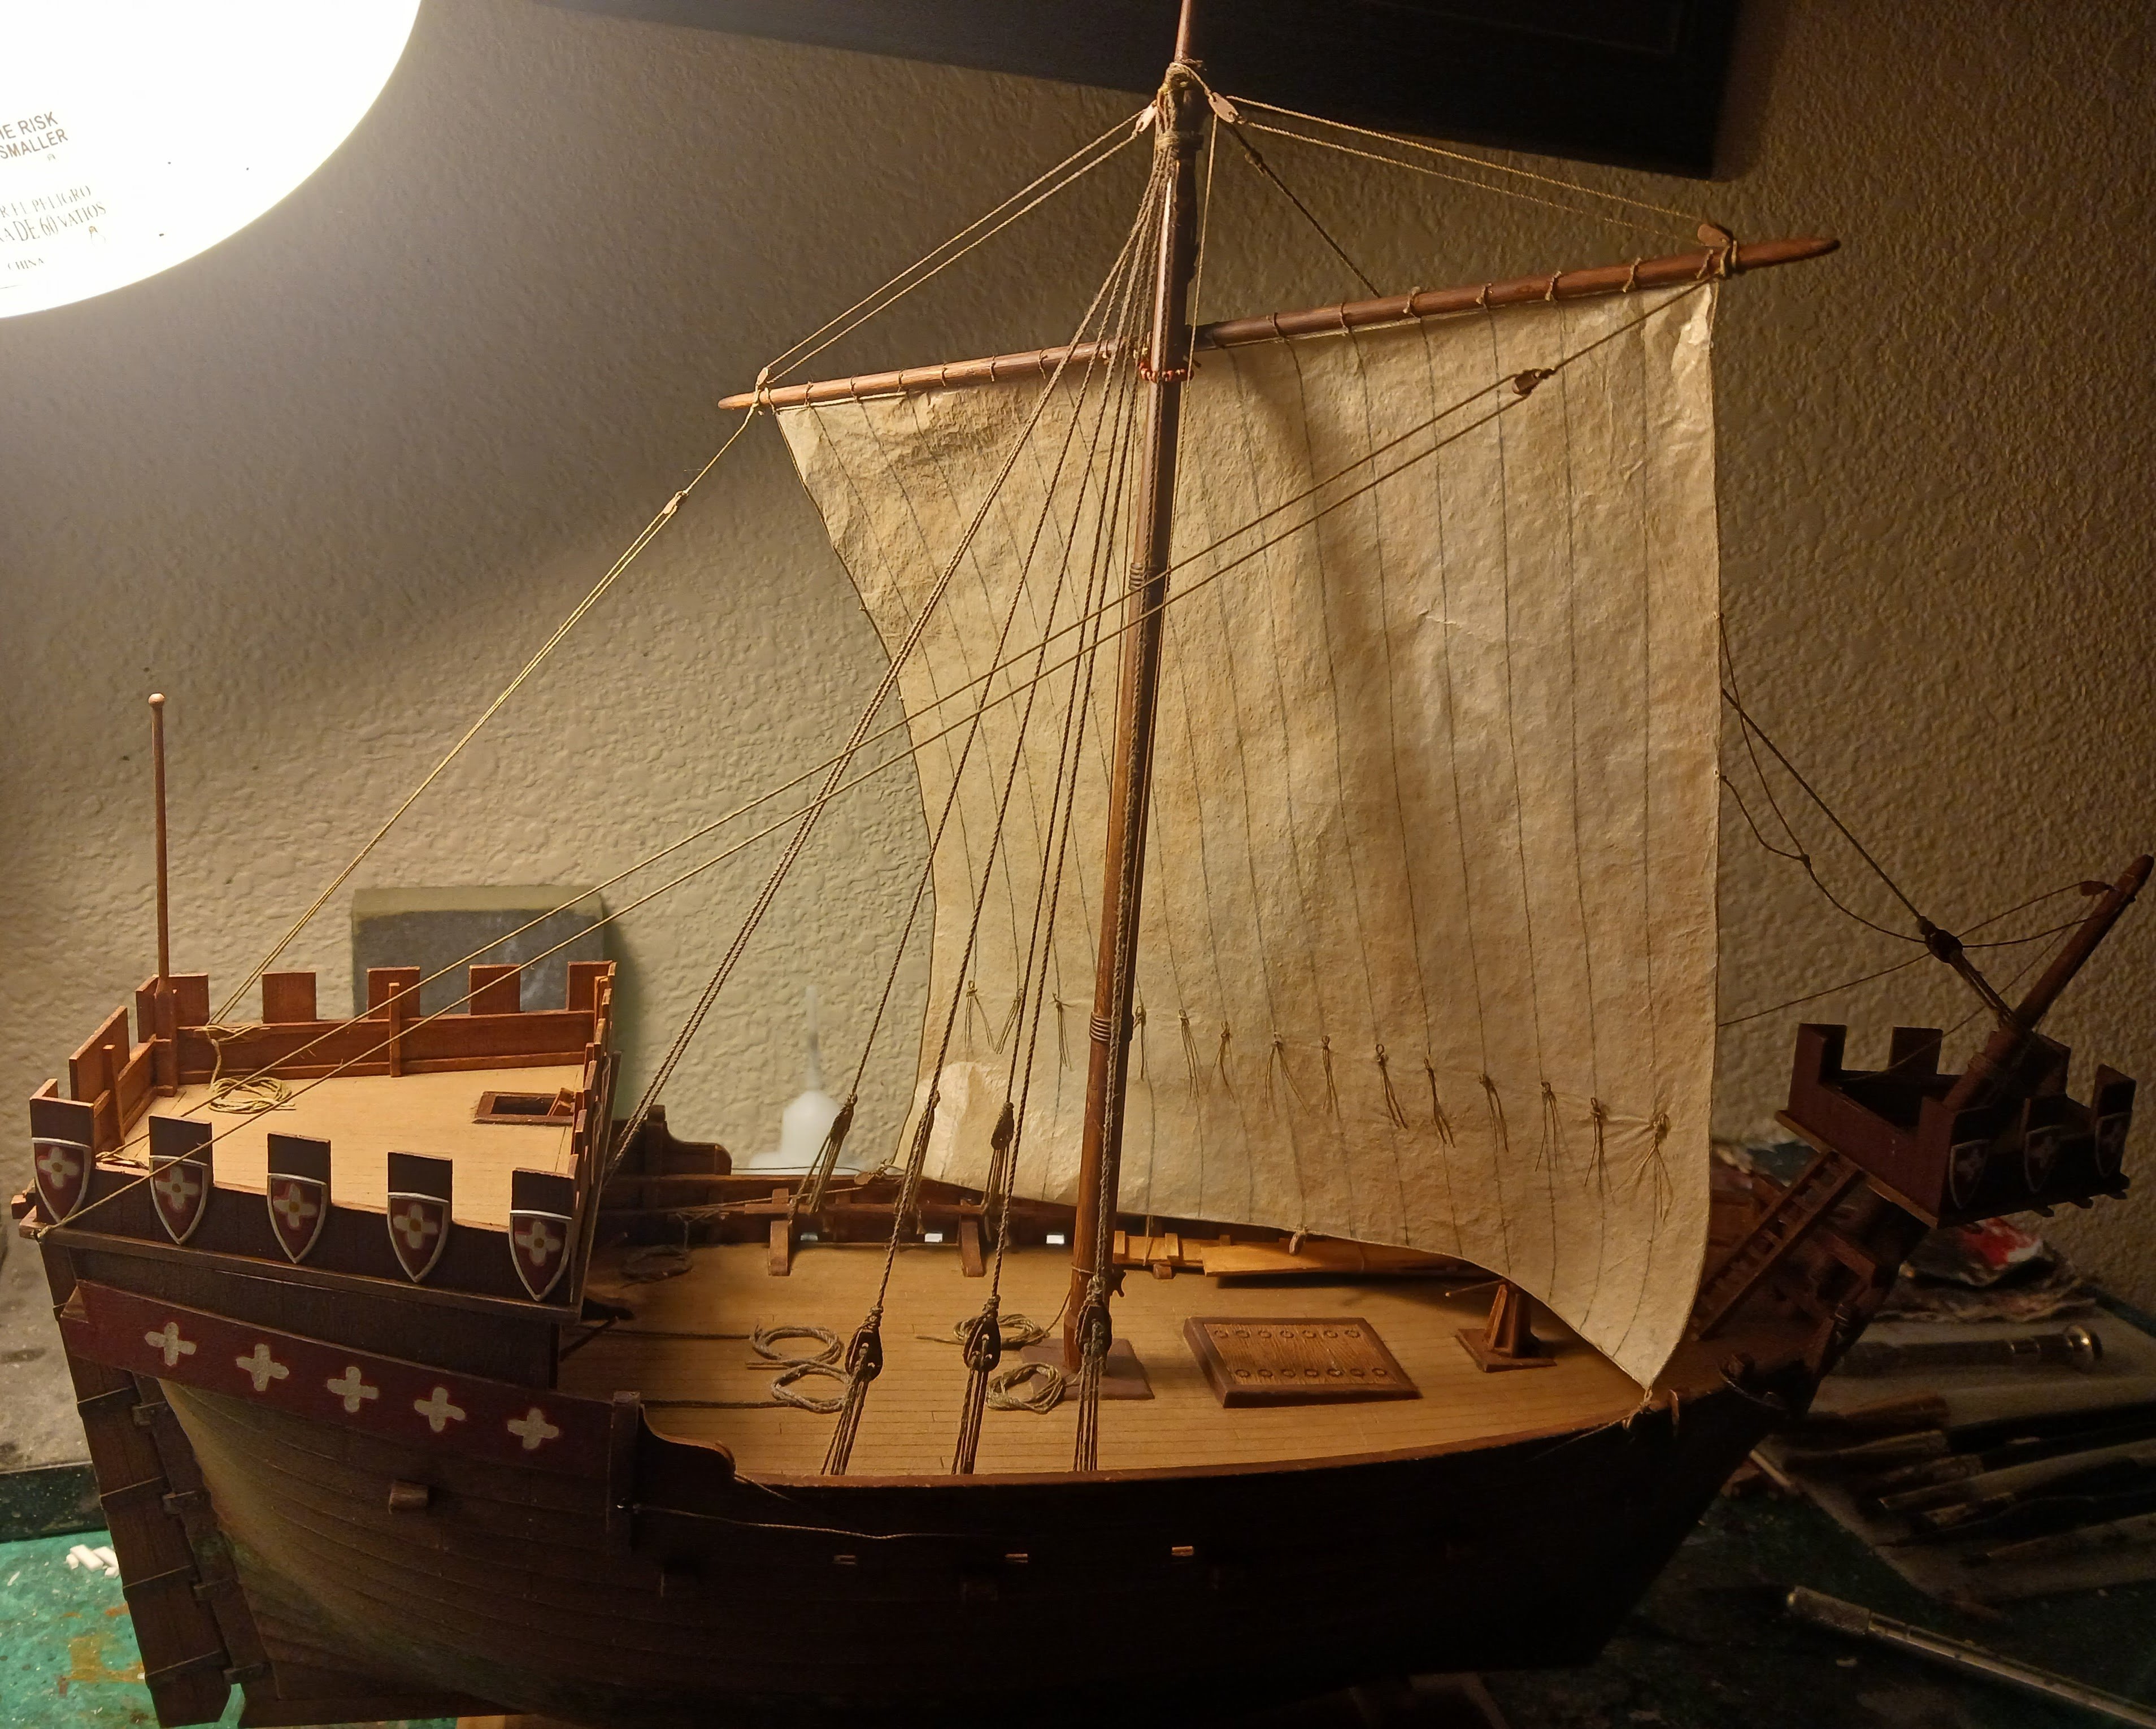
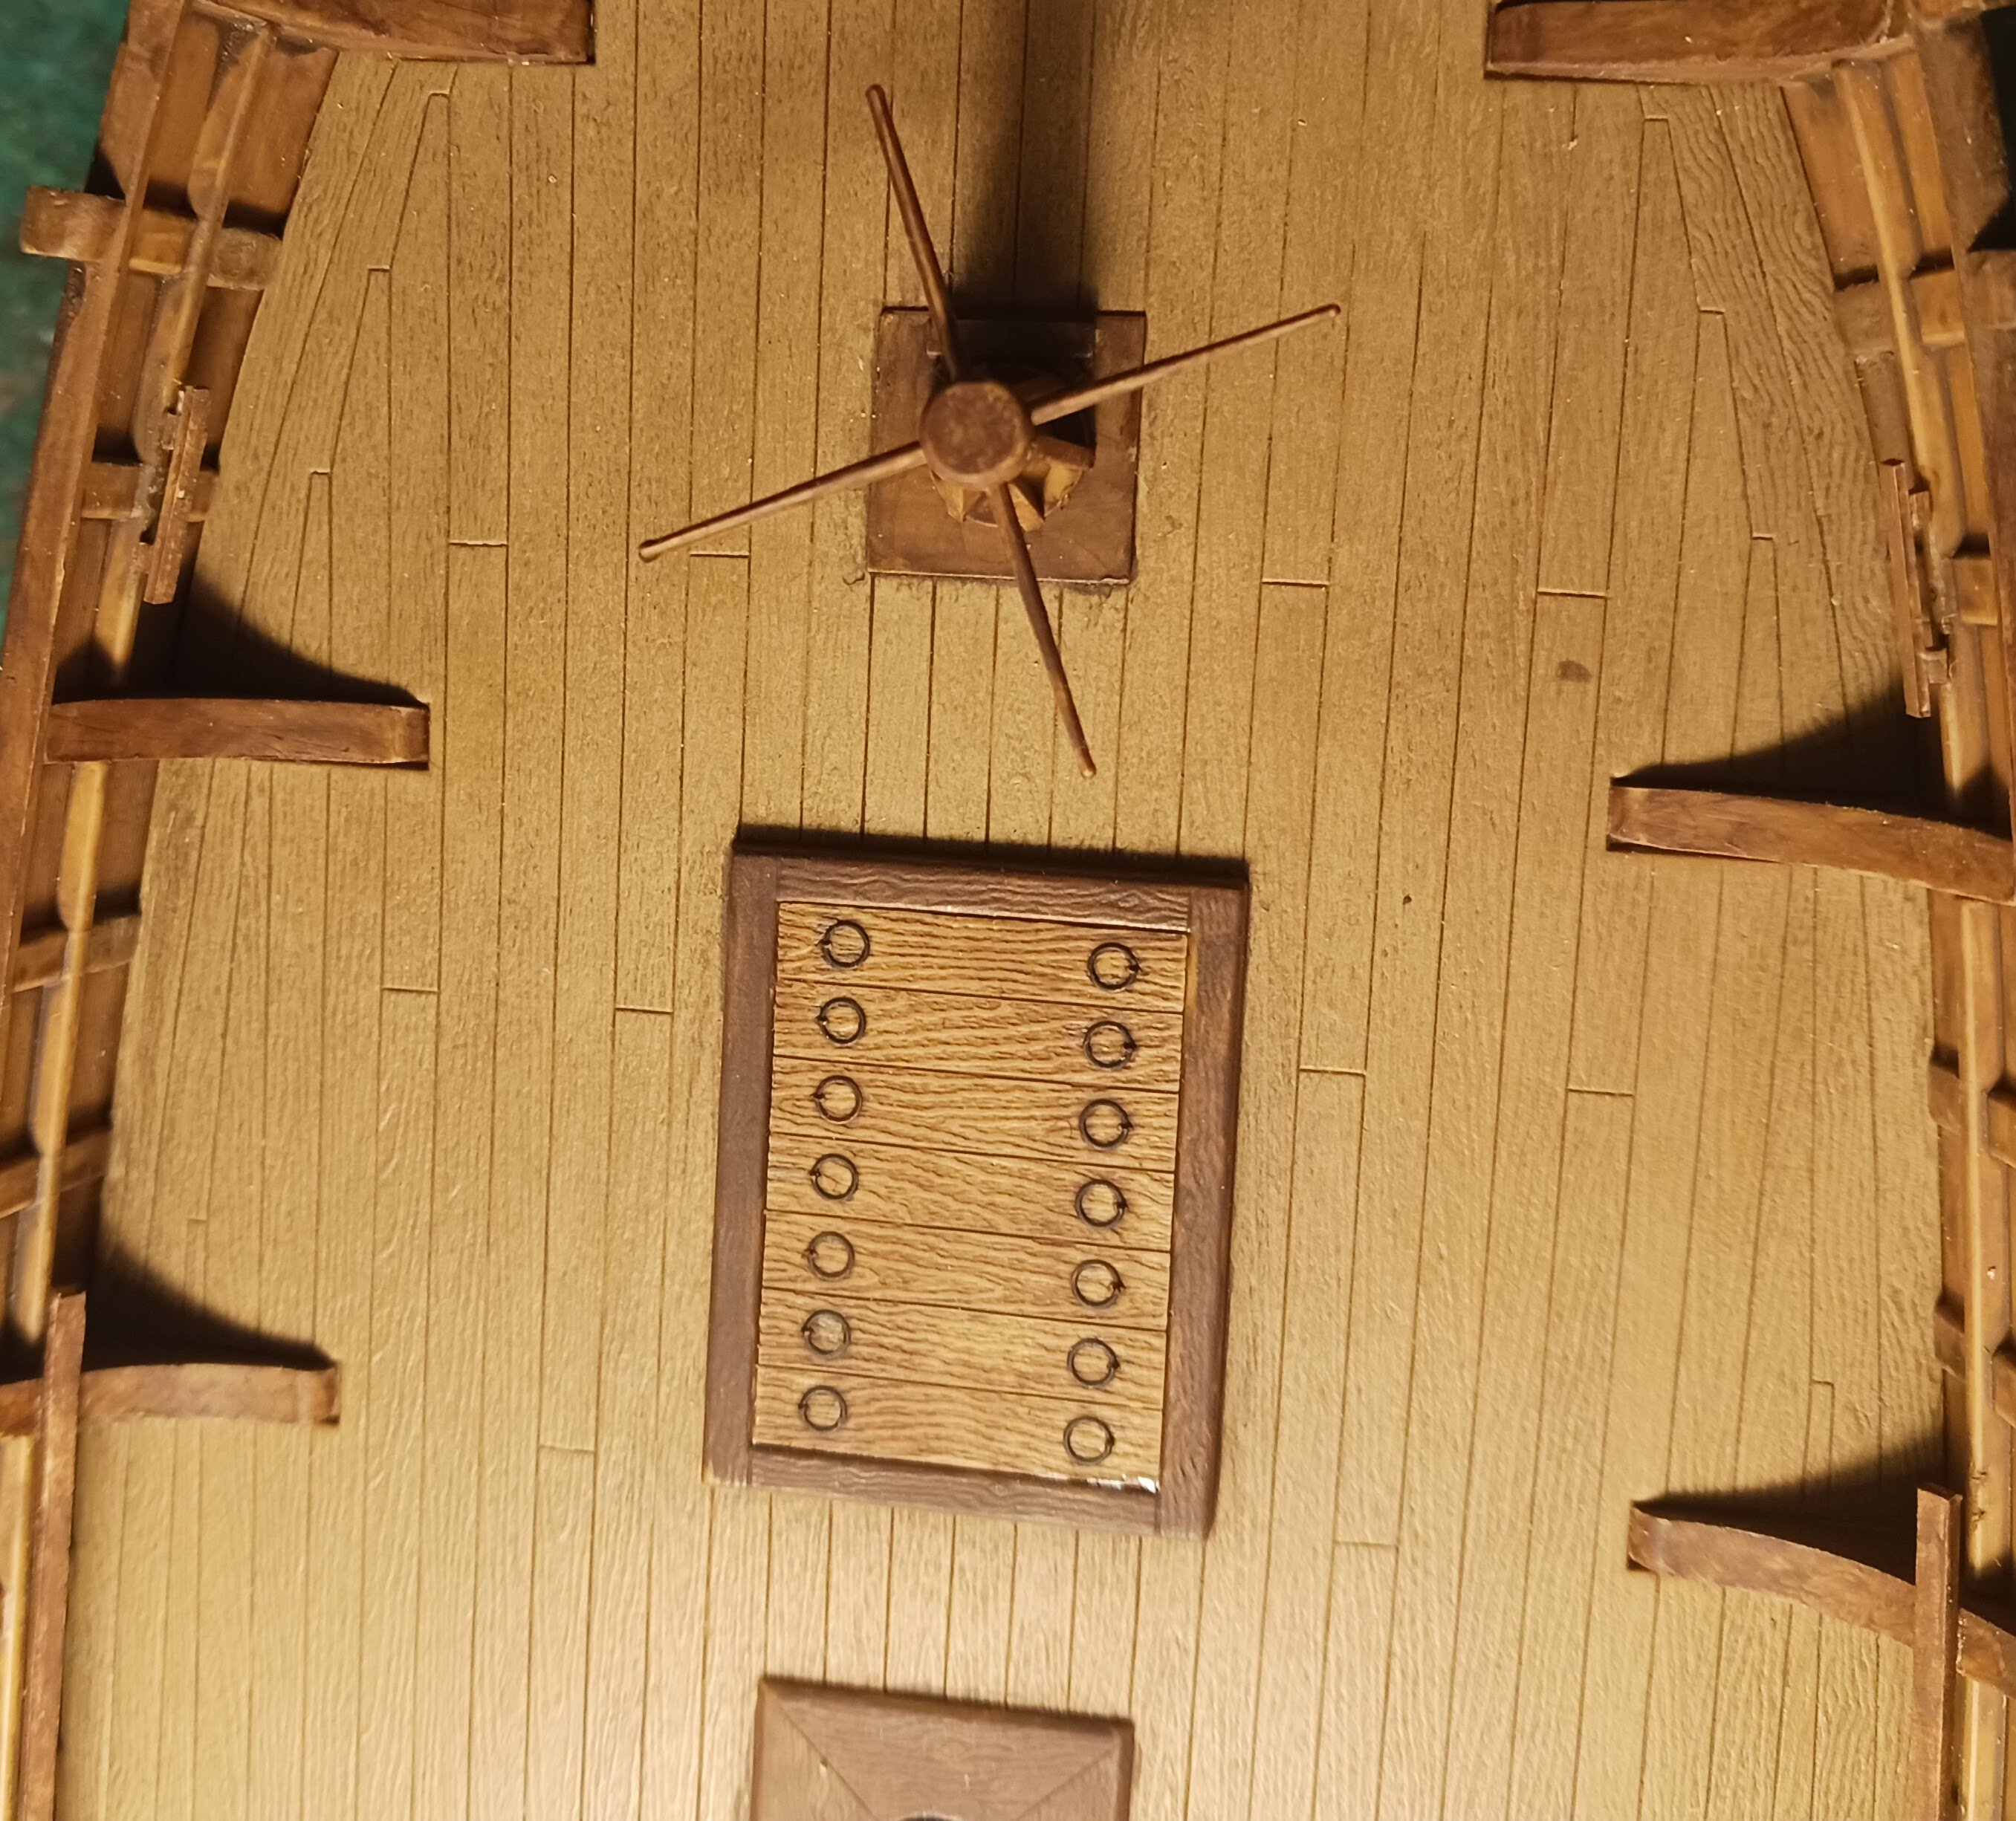
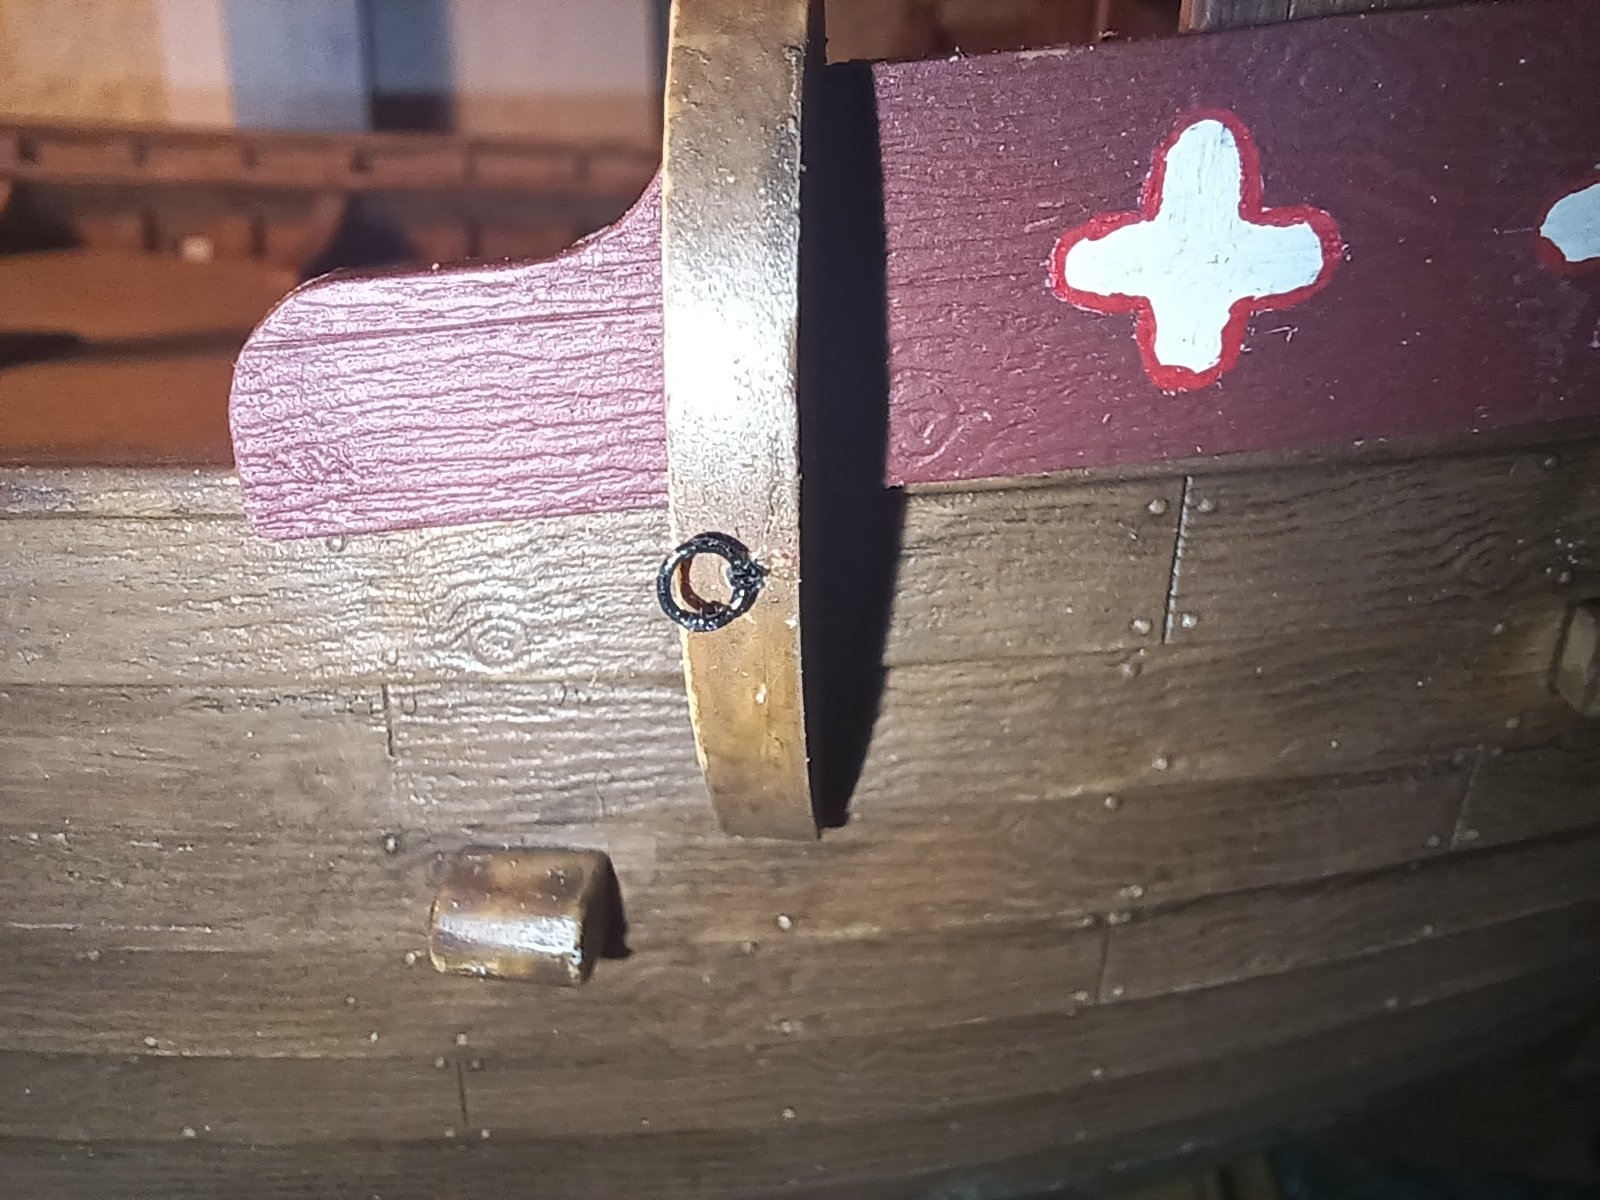
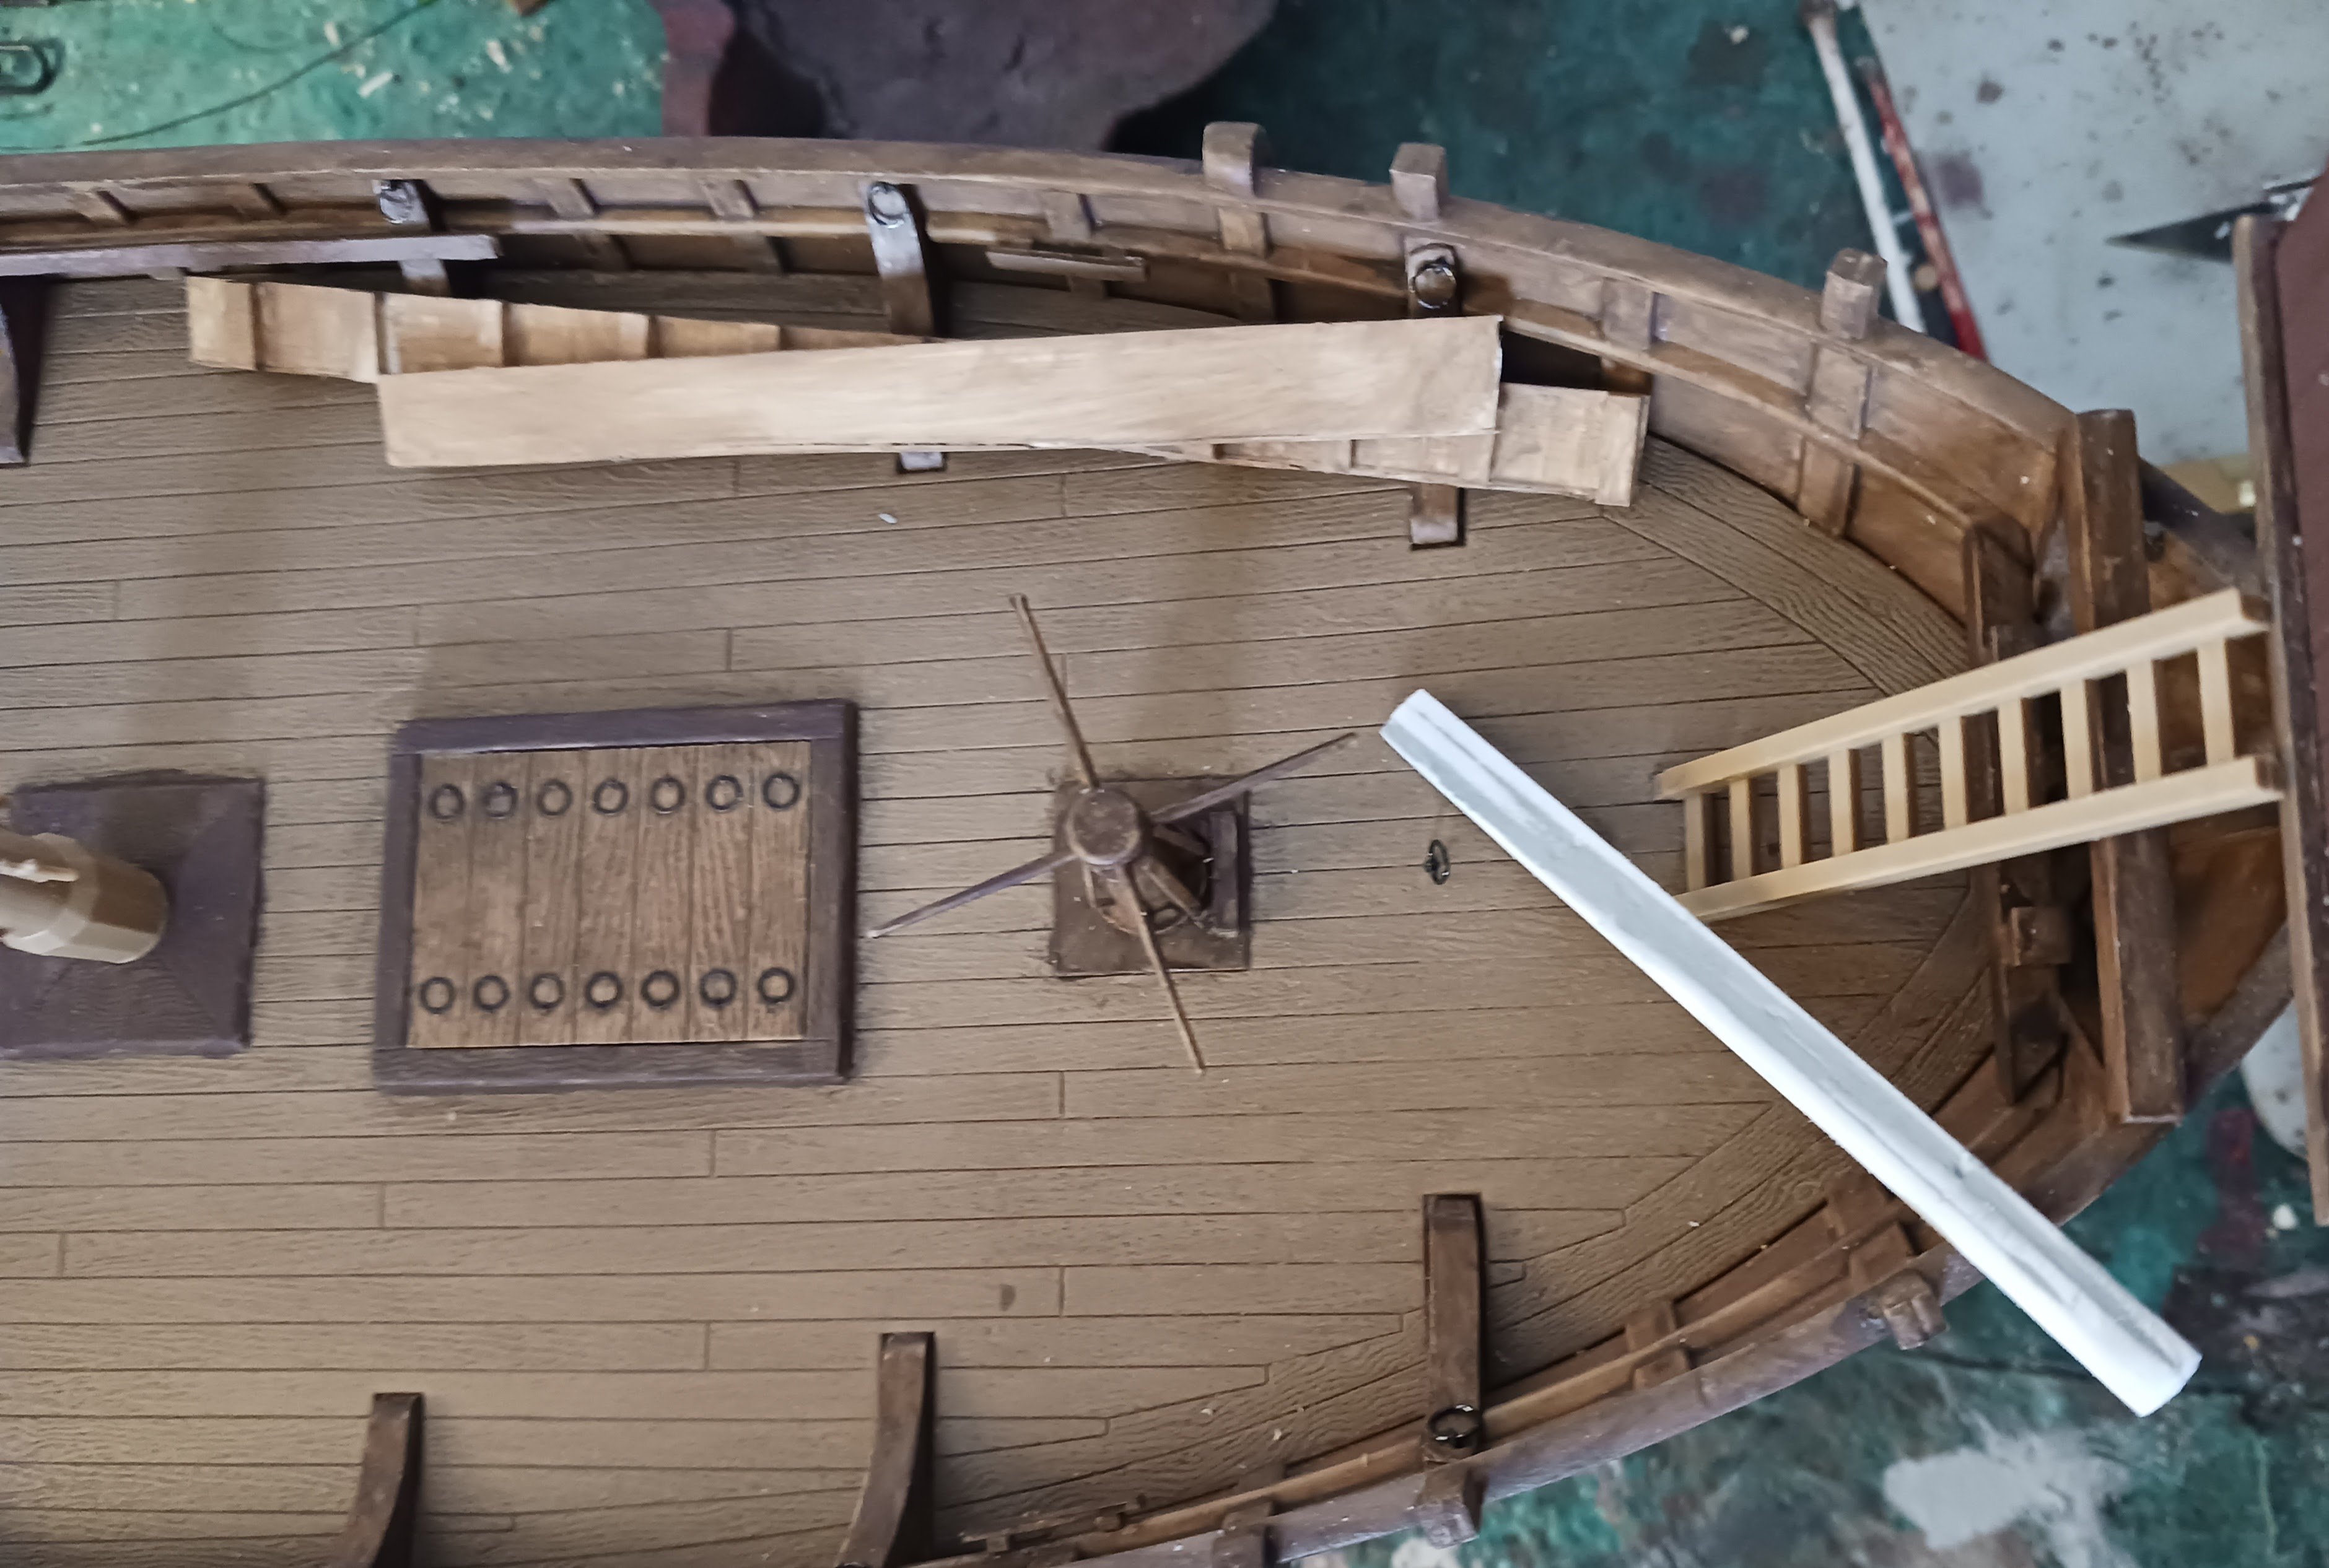
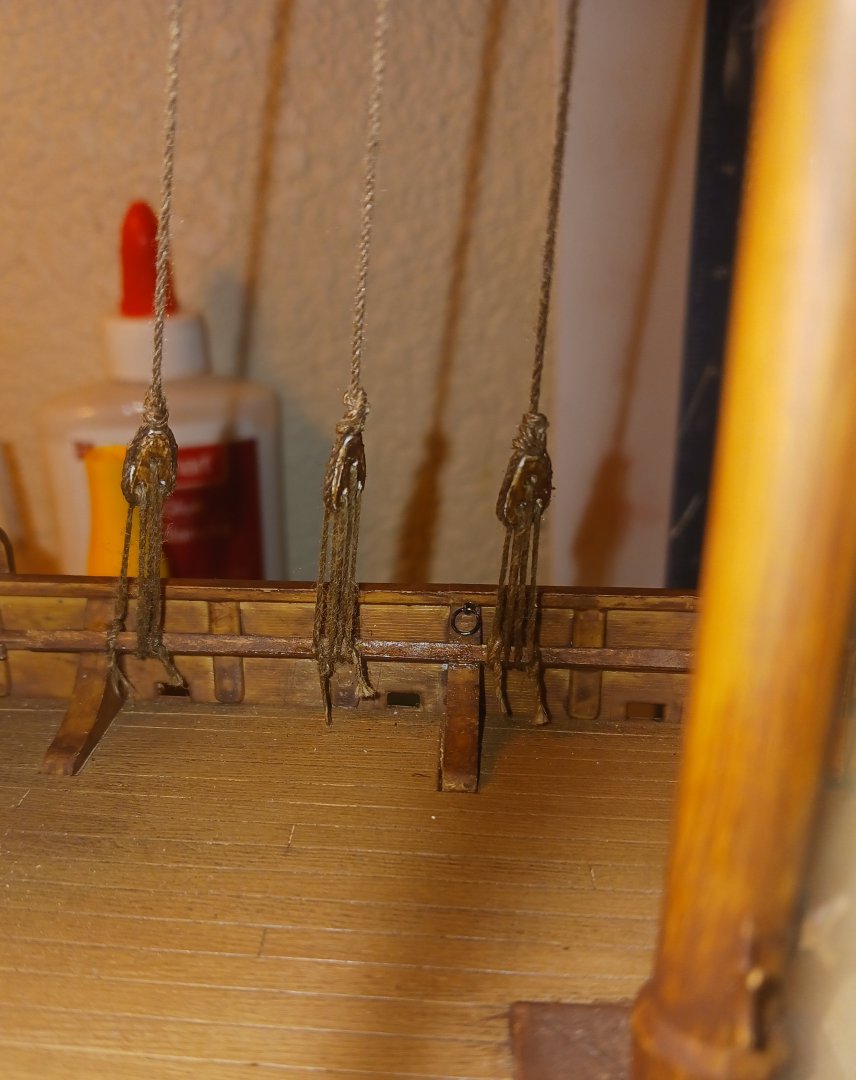
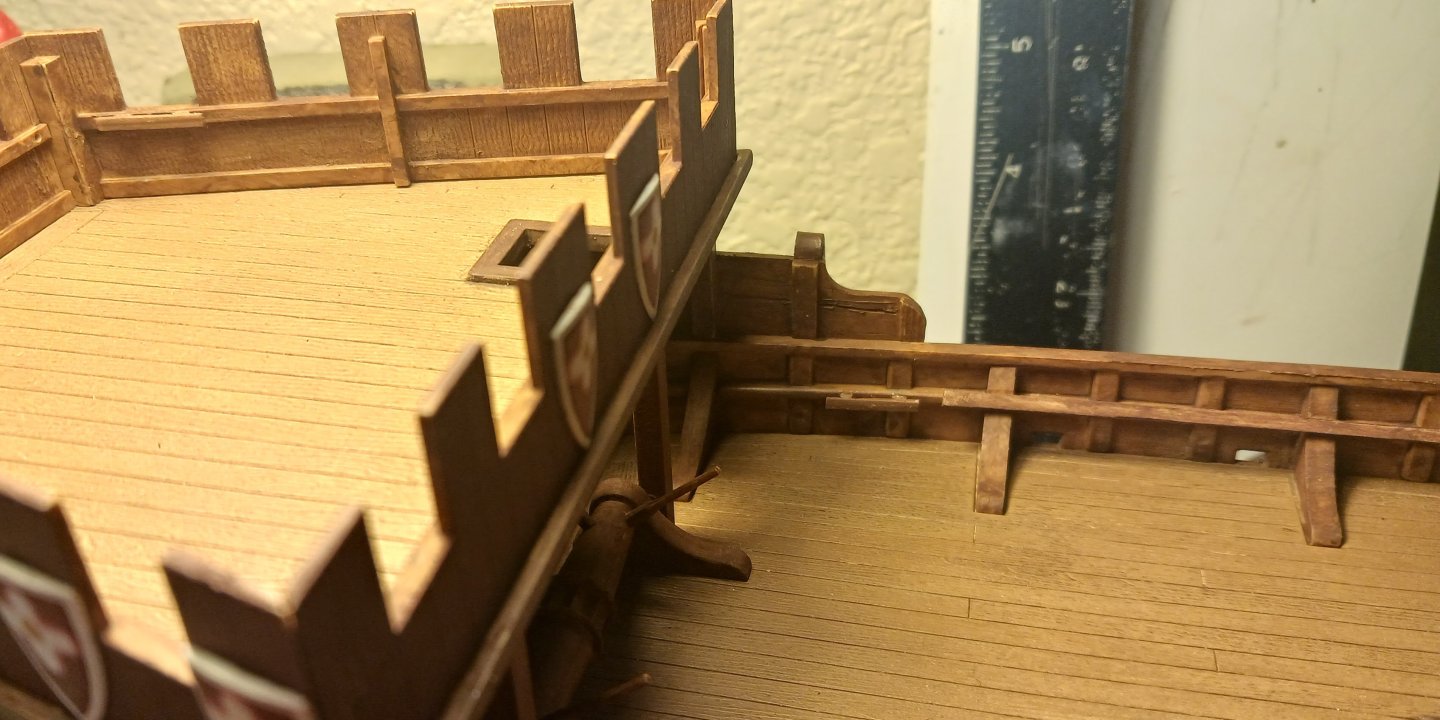
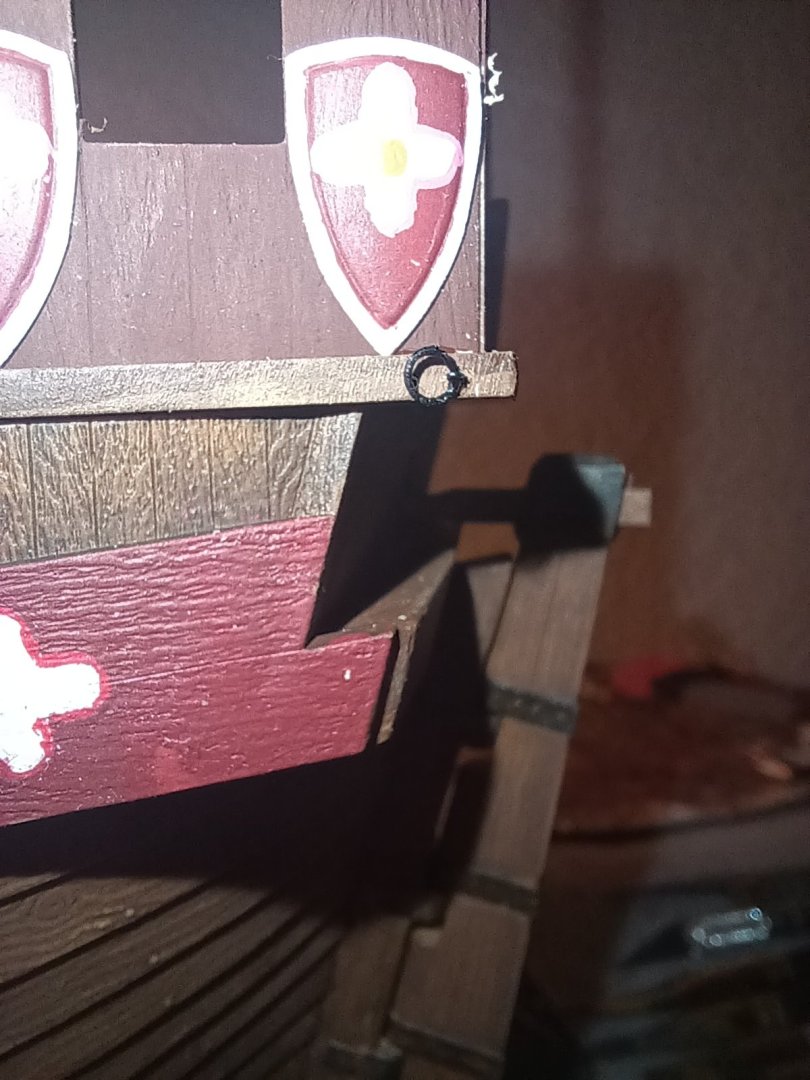
I've recently done significant amounts of work on the cog. Firstly, I've gotten all of the belaying points and stringers painted and put in place. I replaced most of the cleats provided in the kit with scratch-built kevels. I've also painted the stern flagpole and bowsprit. What I've also done is made ringbolts- lots of them- and put them in place on the ship. This is, above all, a cargo ship. I wanted to put ringbolts- (four on each side) on the deck knees, mostly as tie-downs for deck cargo. I don't know if this is corroborated on the Bremen Cog or any other cog for which the upper works are still present. It would make sense, however. The tie-downs, in this case, are for two gangplanks- the longer of which is for men and animals to walk upon, and the shorter is for rolling barrels up into the ship. You might be asking about the unpainted timber hanging off the stern- that is a prototypical form of fish-davit/cathead. It is essential to my solution for the anchors. Anchors on cogs would likely have been too big to weigh up into the ship by hand, necessitating devices to do so. After an anchor is raised out of the water via the anchor cable and capstan, men would haul the proto-fish davit into place (with two sheaves) and haul on the line with a four-to-one mechanical advantage, with a hooked block on the other end to weigh the anchor the rest of the way to the gunwale by its ring. The idea is to get the anchor ring as close to the foremost timberhead as possible. Rinse and repeat for the anchor flukes. The line would terminate either on a cleat on the davit or on the capstan. Imagine a fish davit doing the job of a cathead. This is obviously all just conjecture, and I would like a few opinions on it, but it seems like a reasonable solution. I intend to depict one anchor as fully stowed, with the other being hauled by the davit.


-
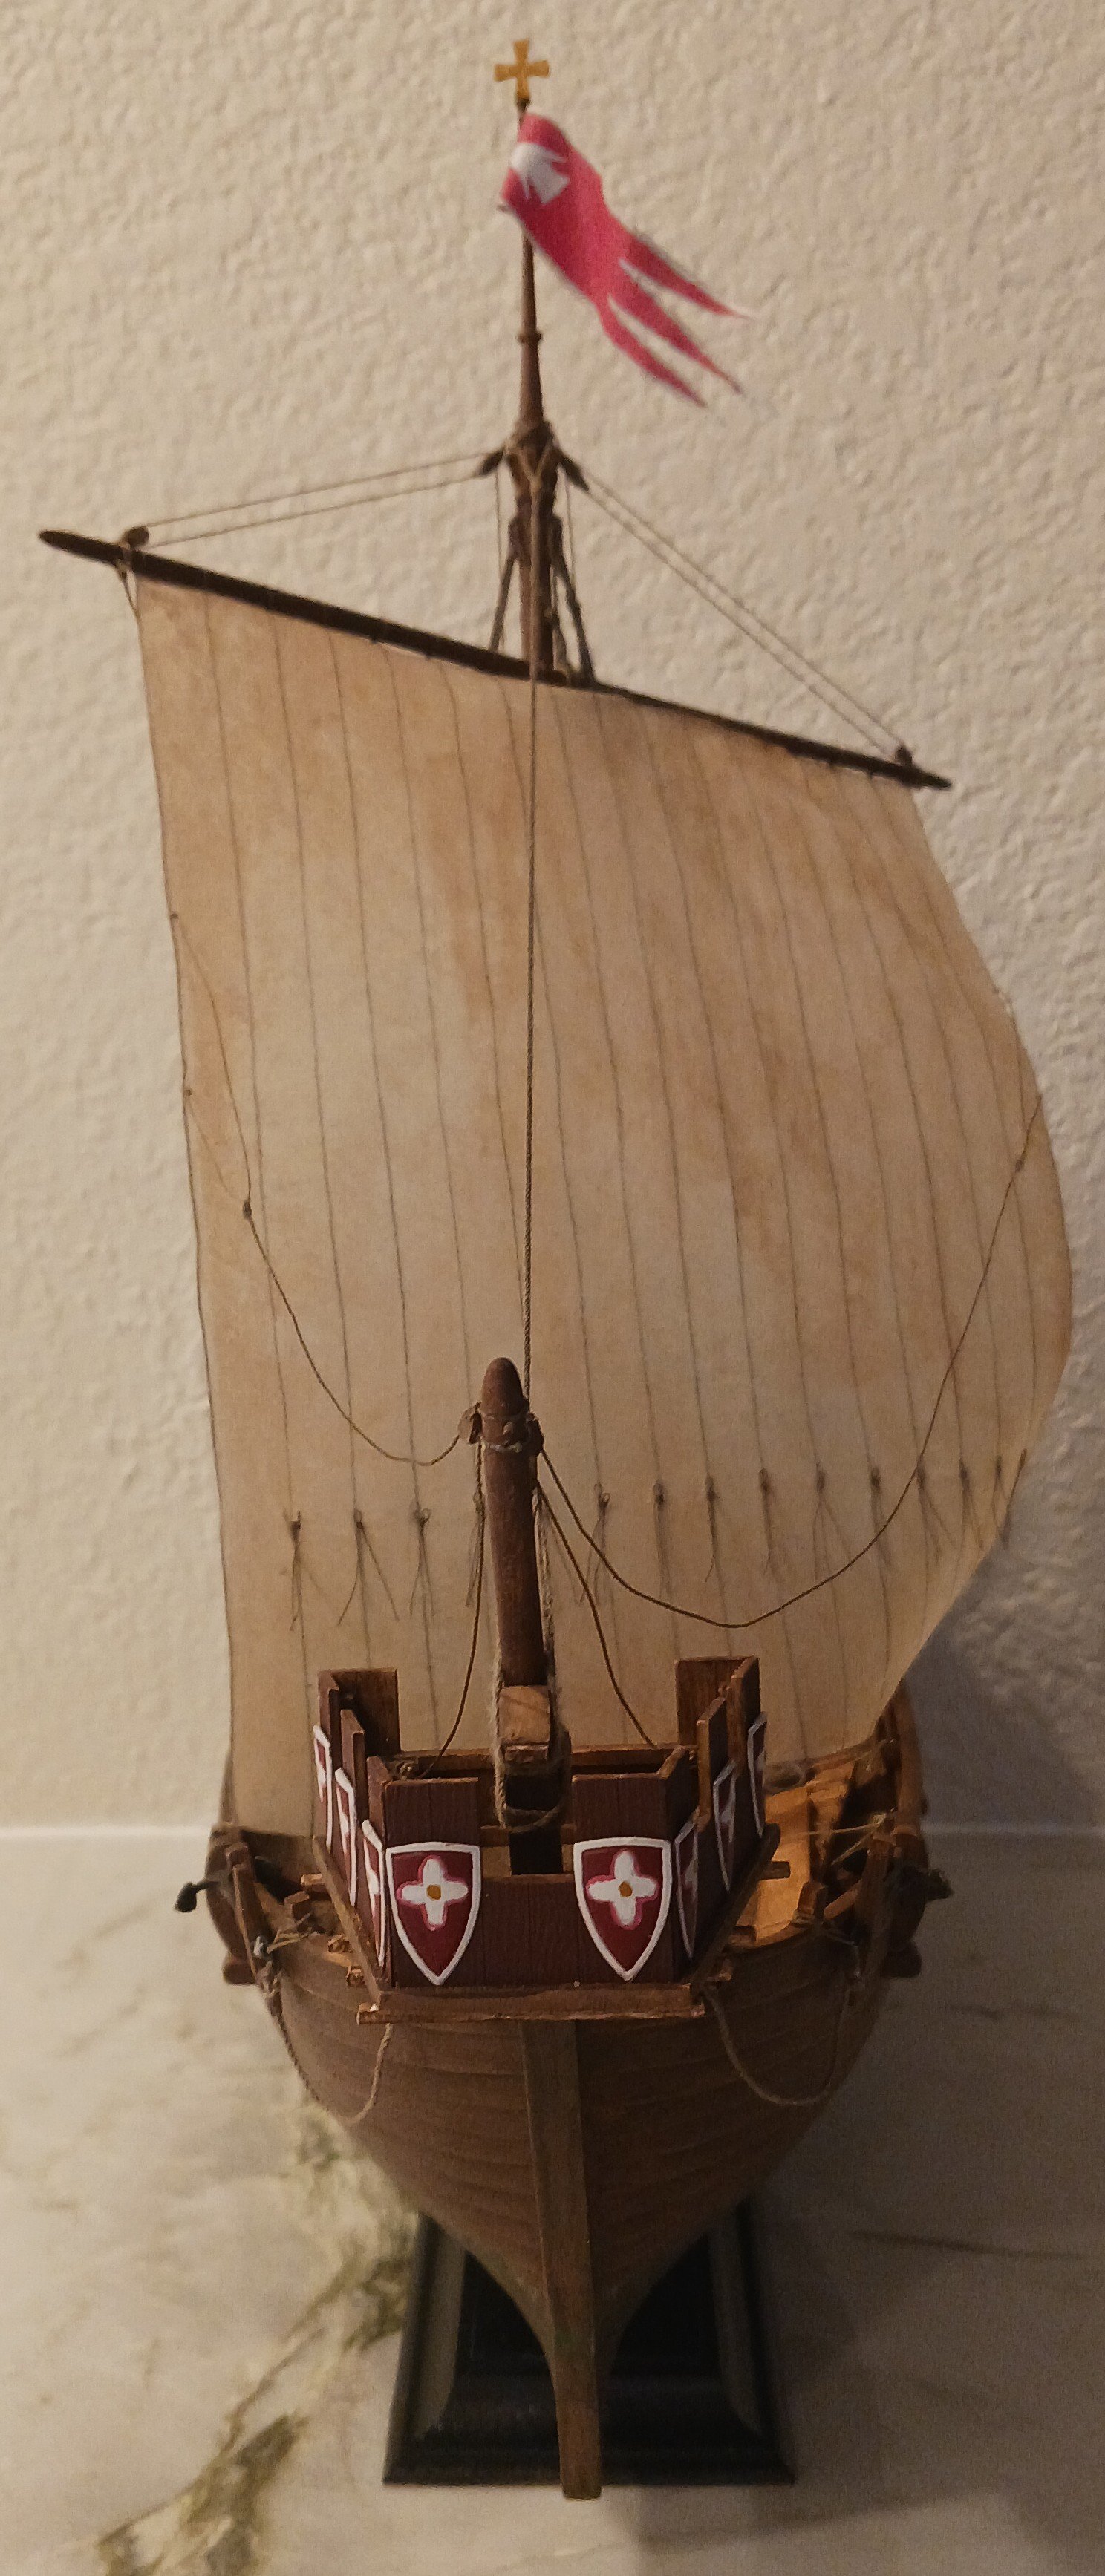
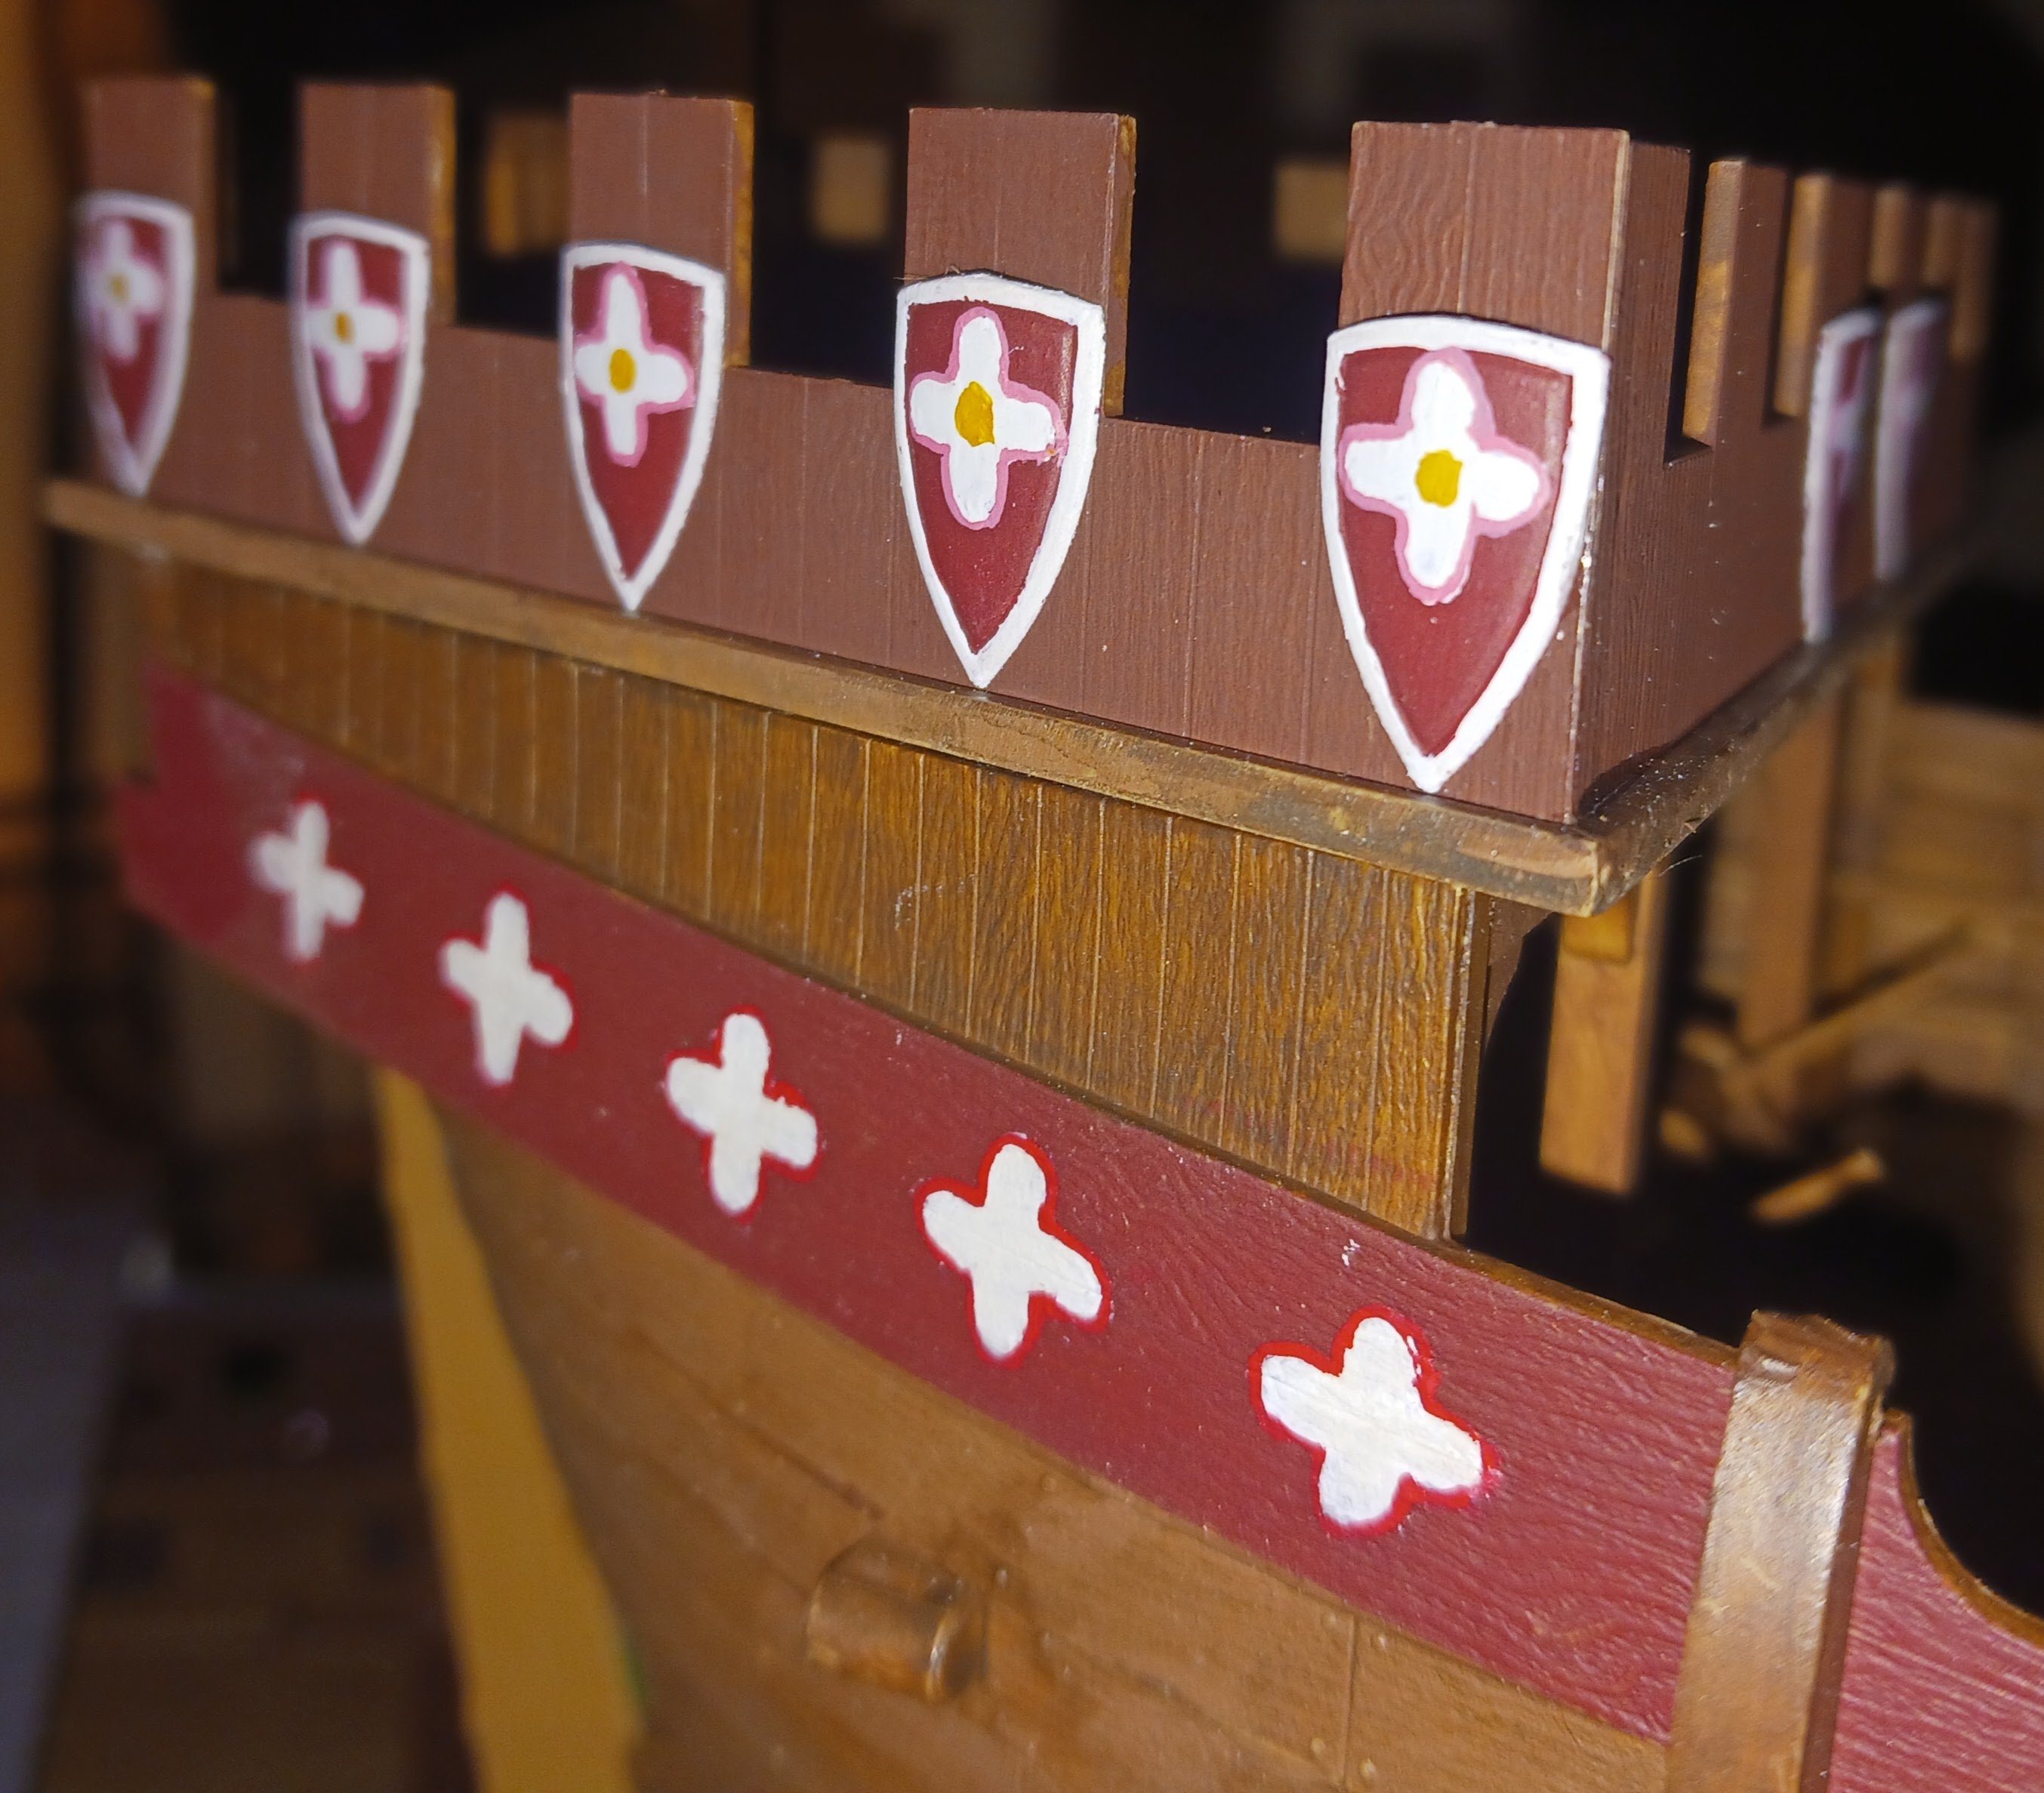
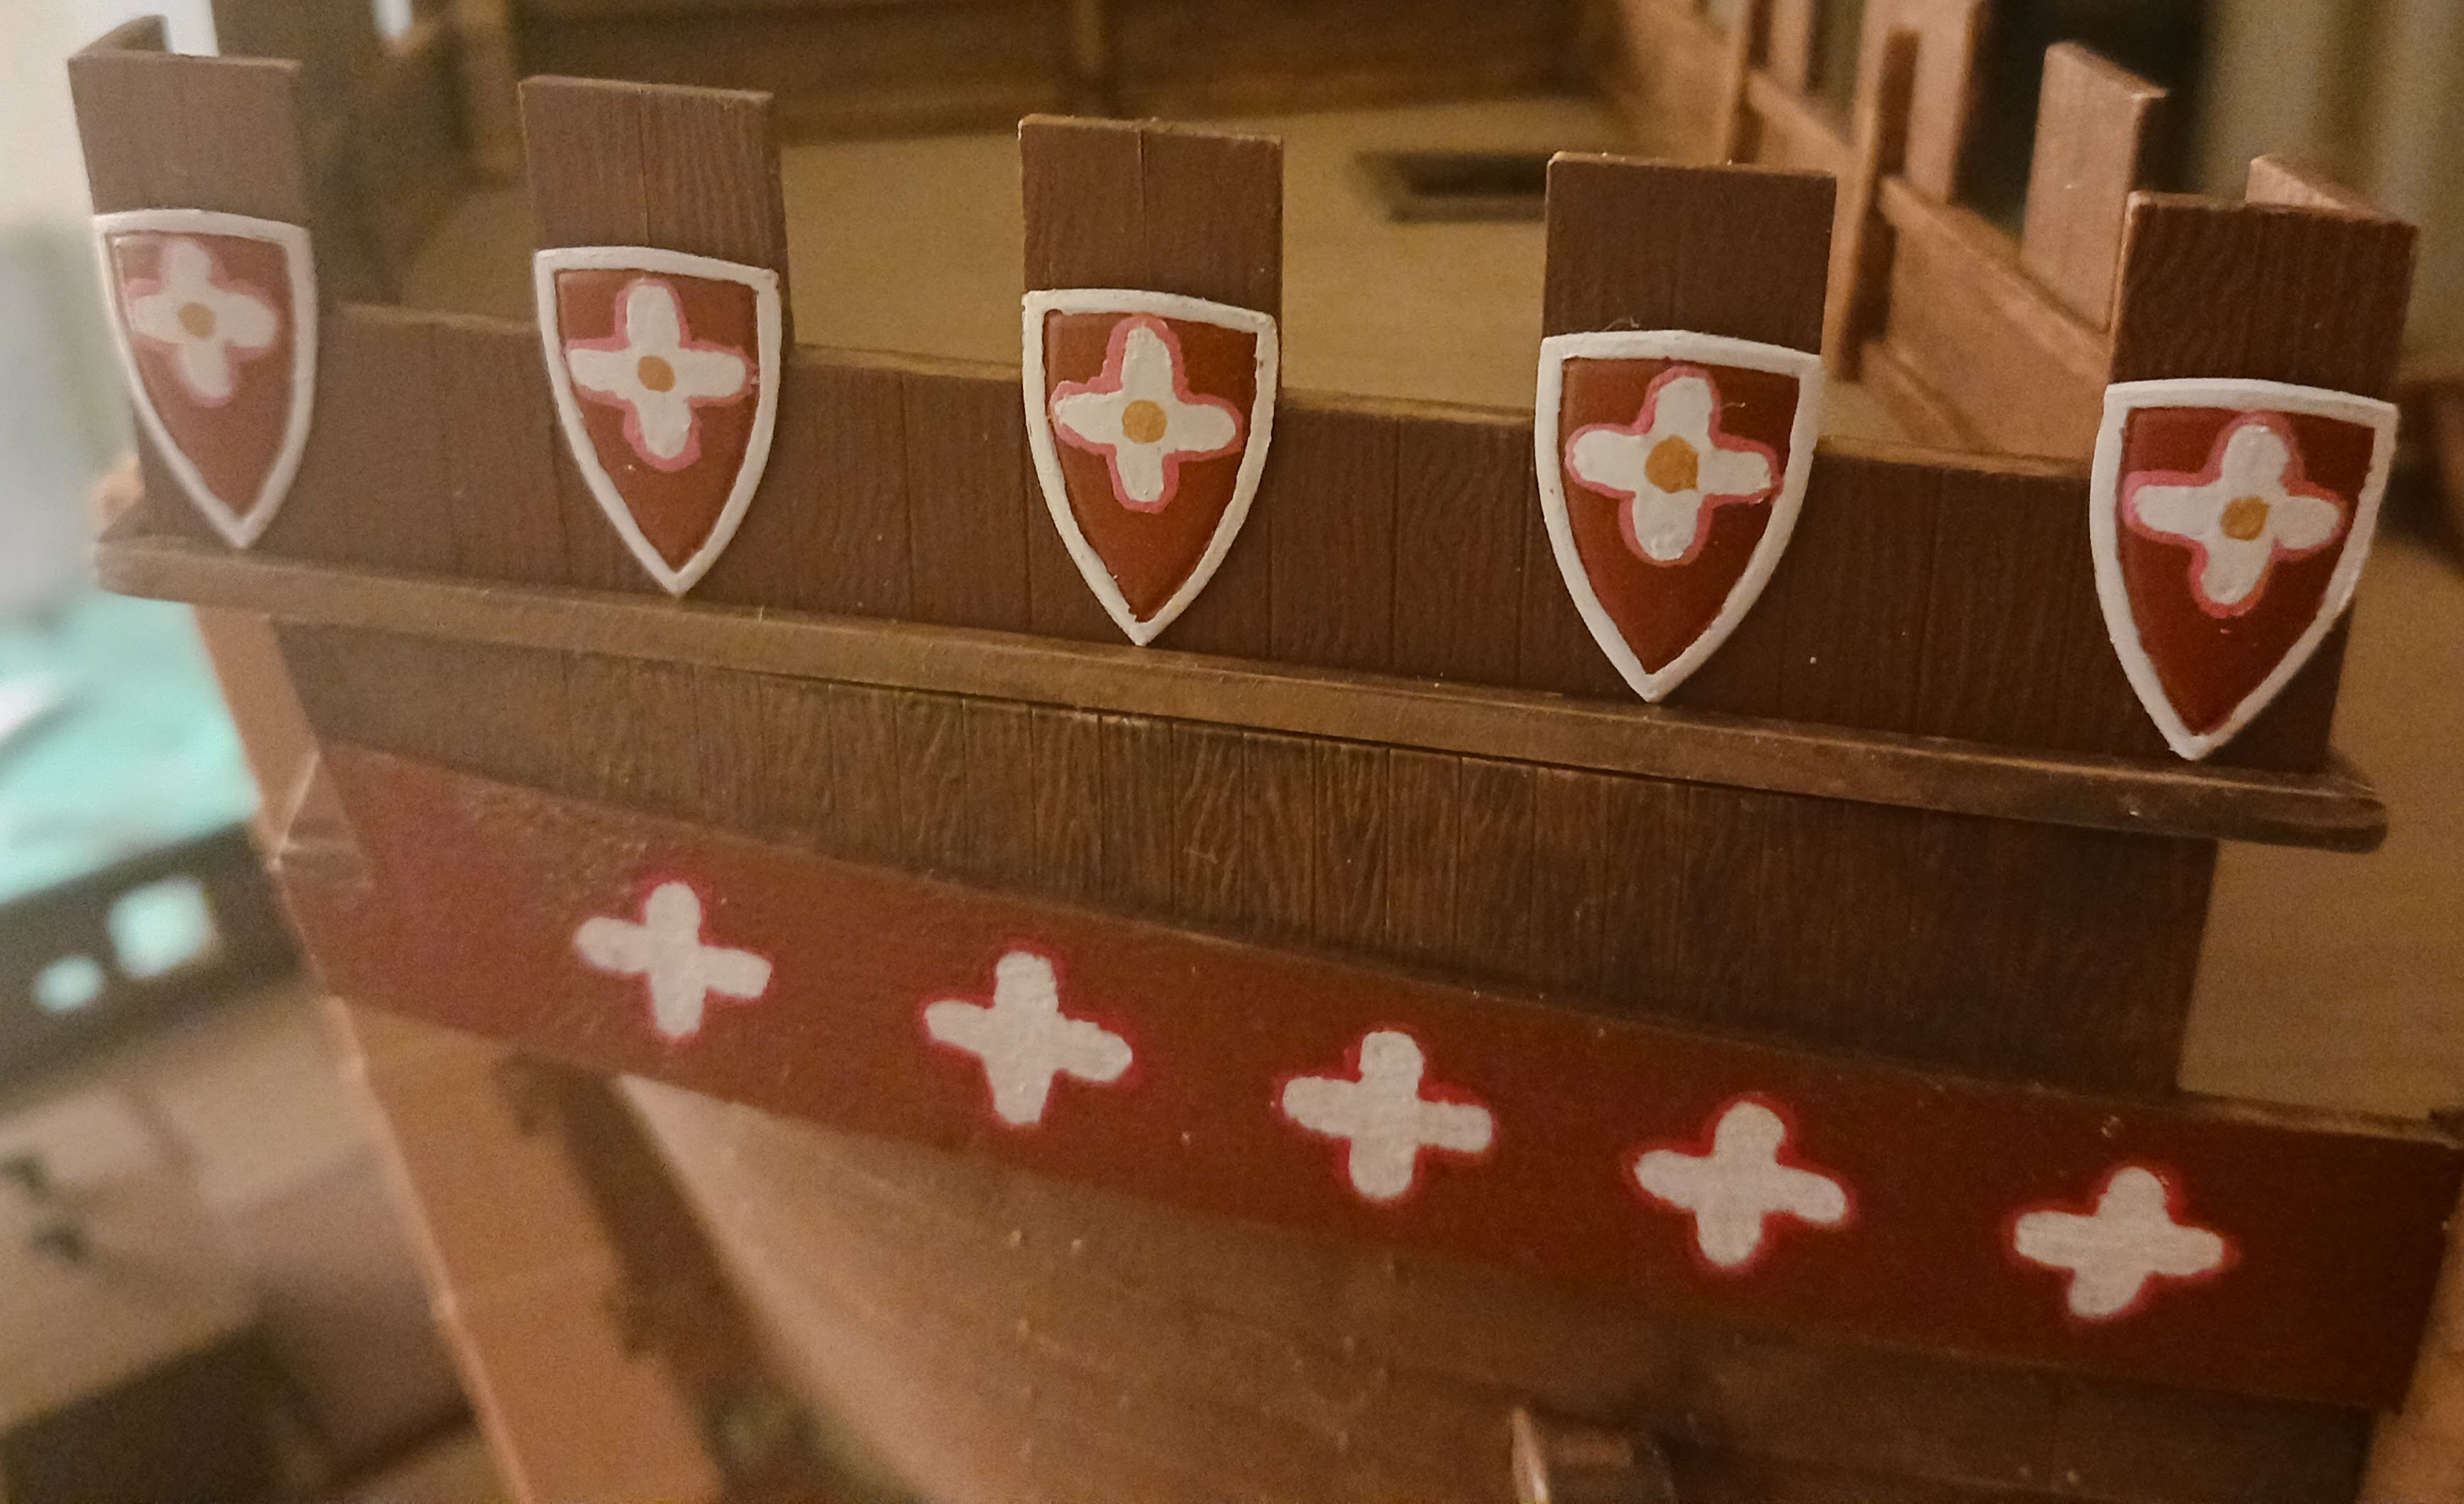
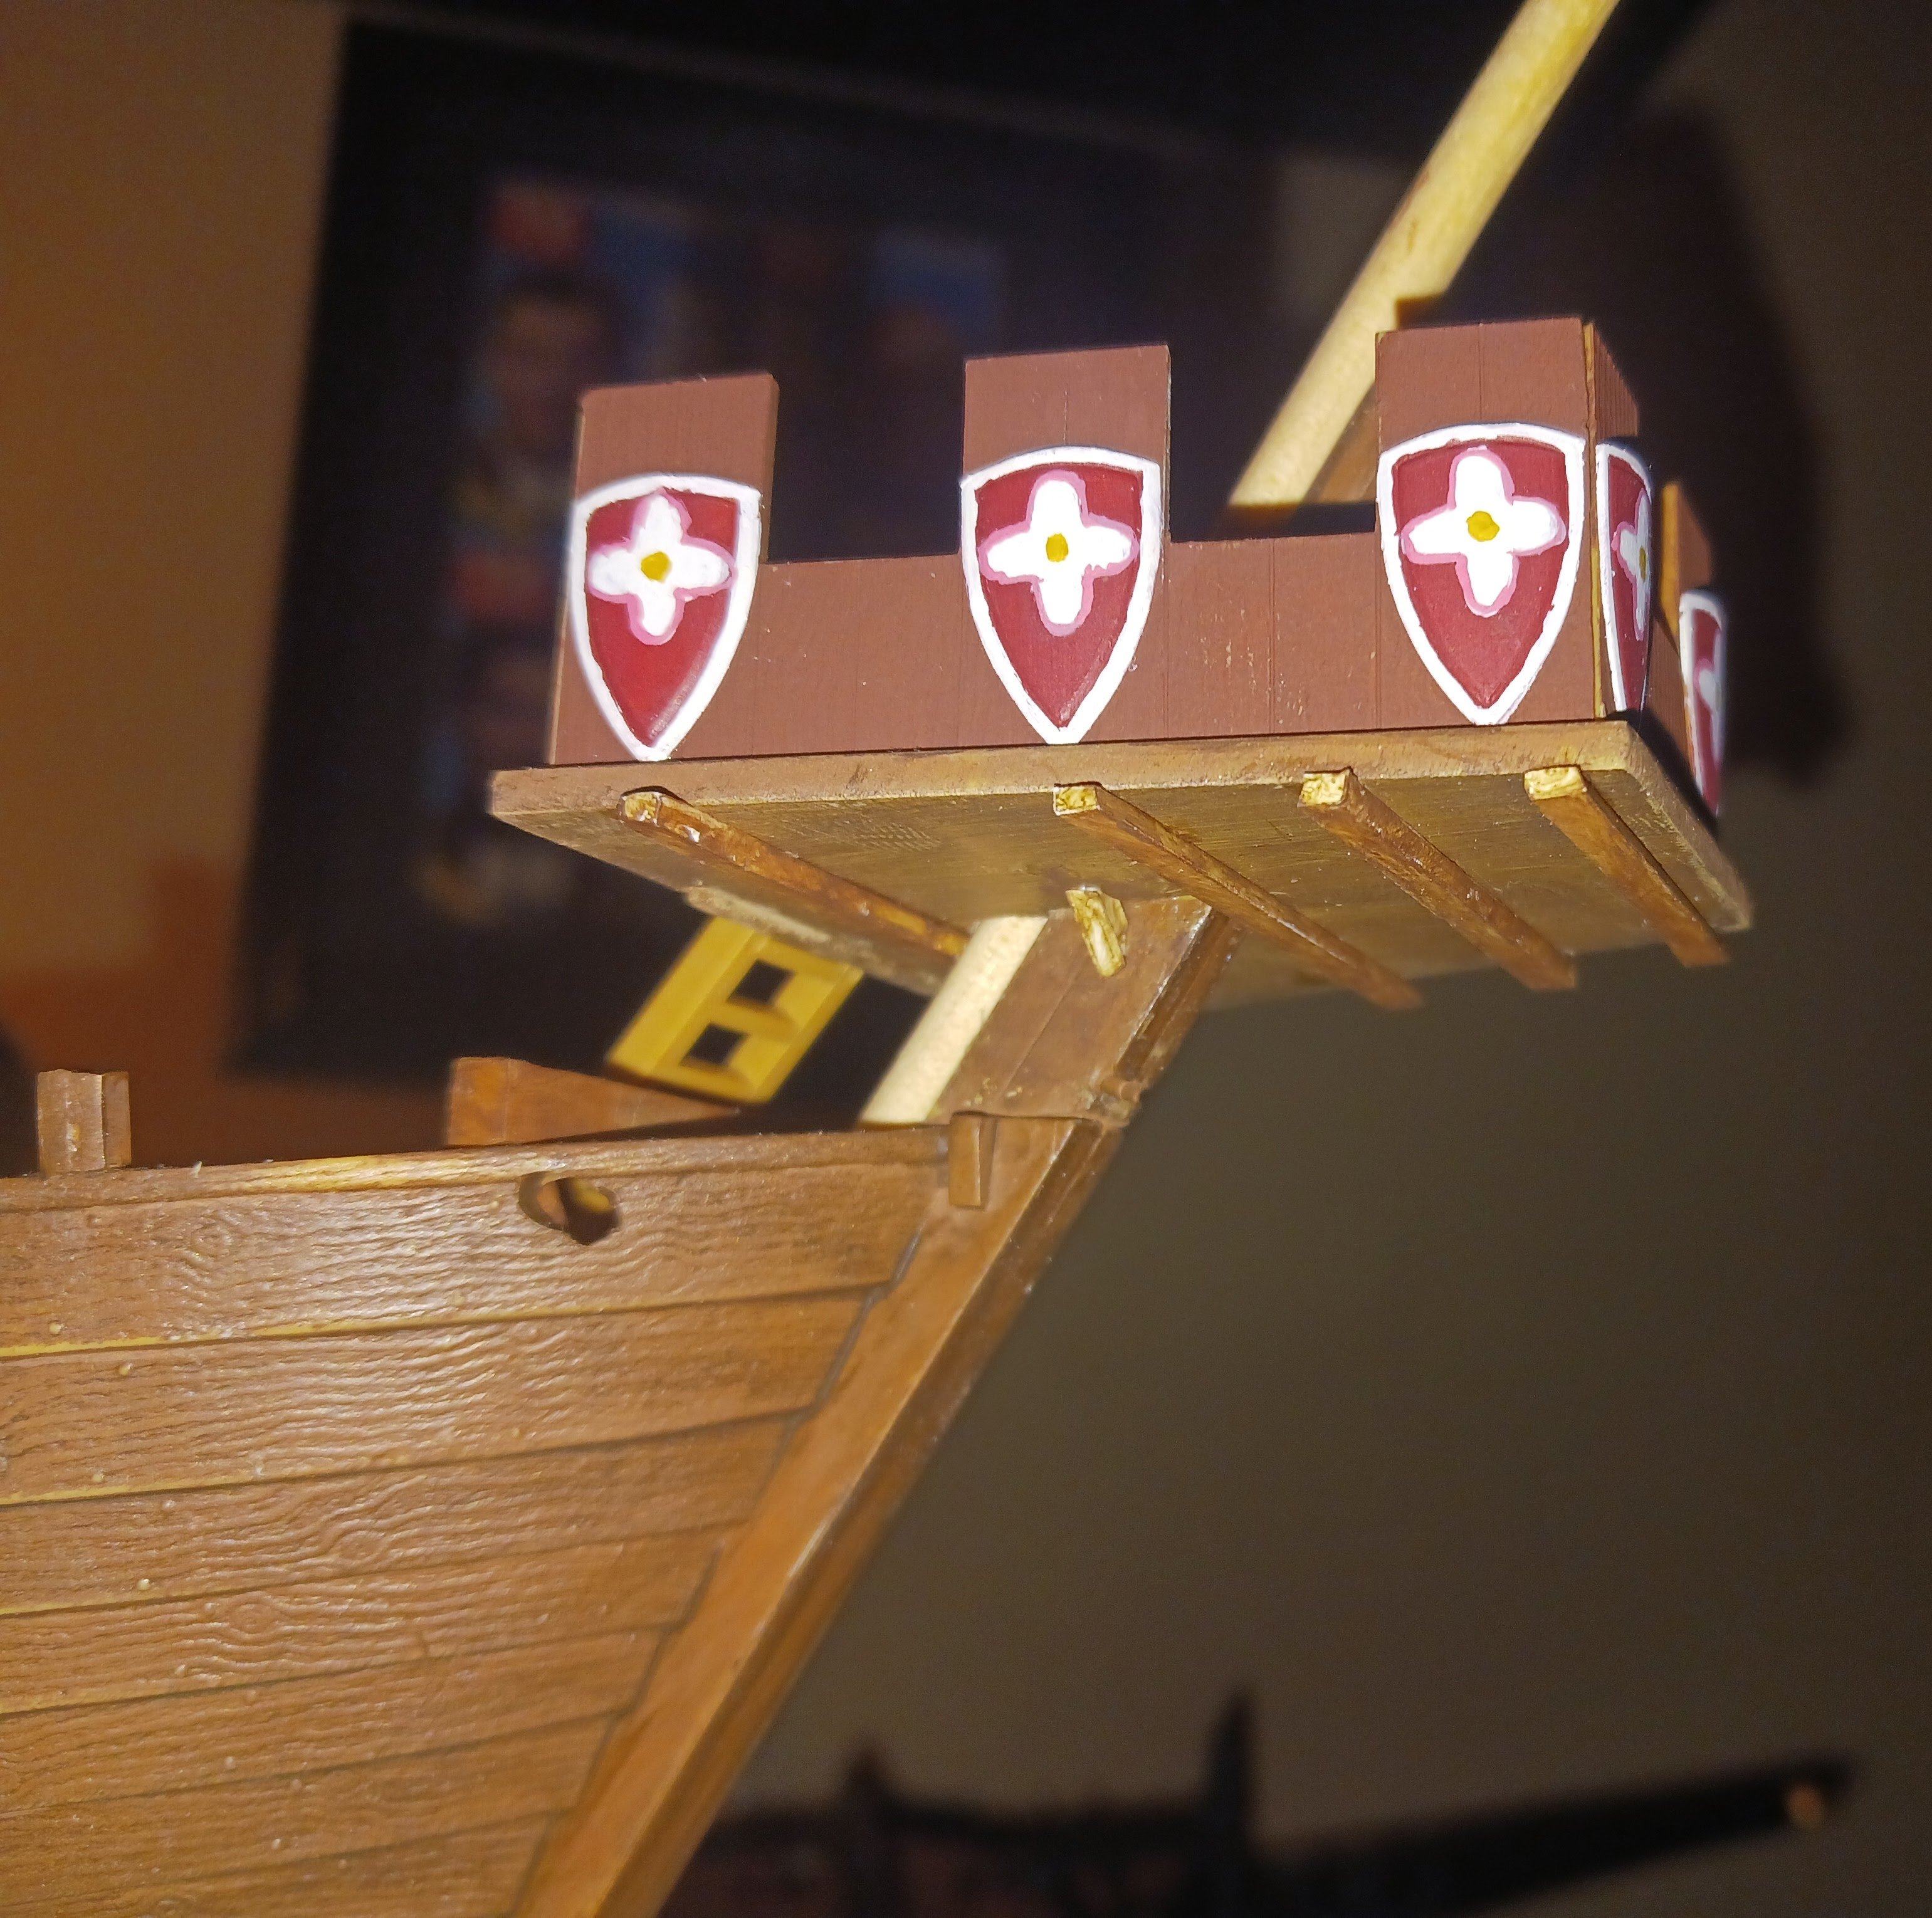
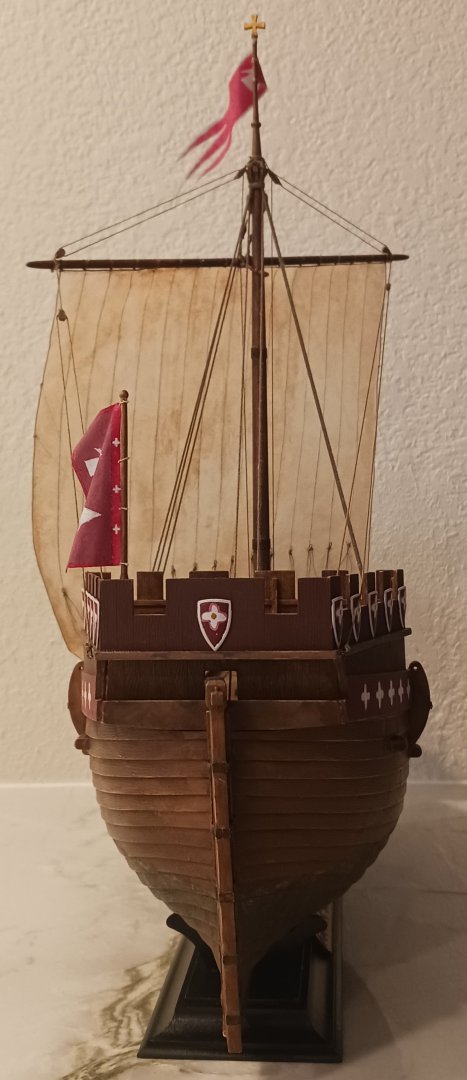
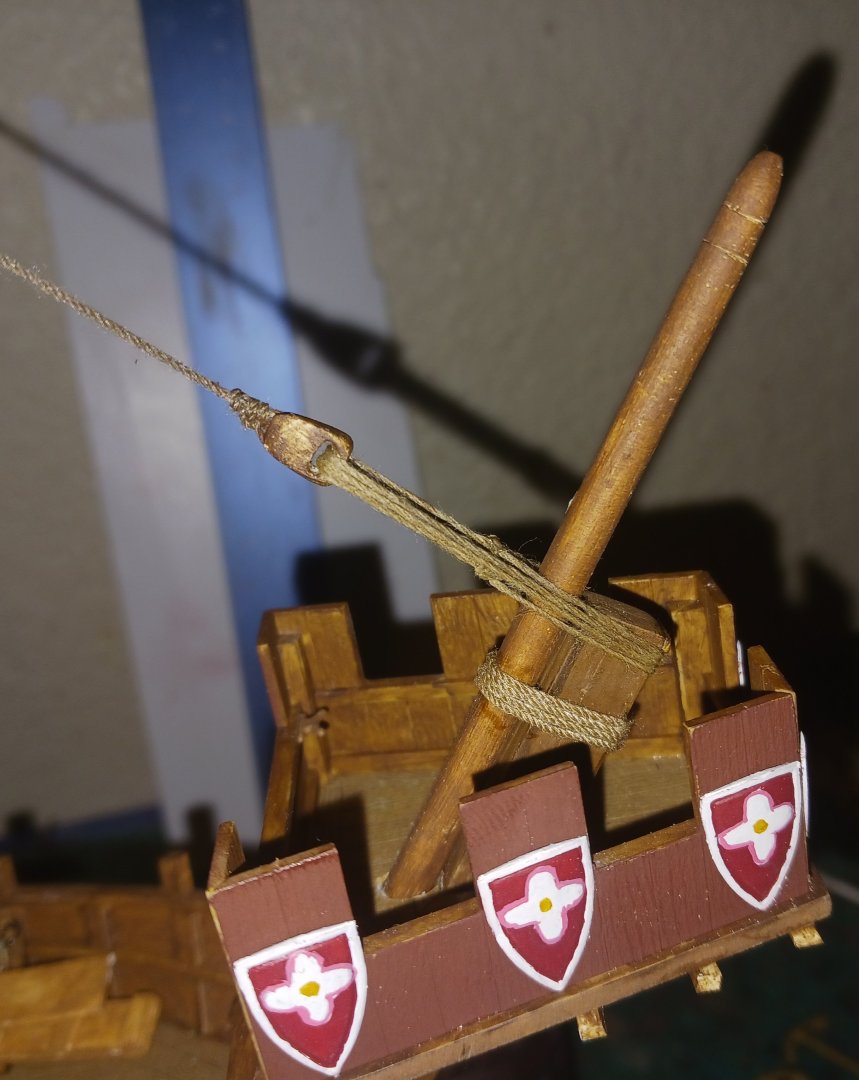
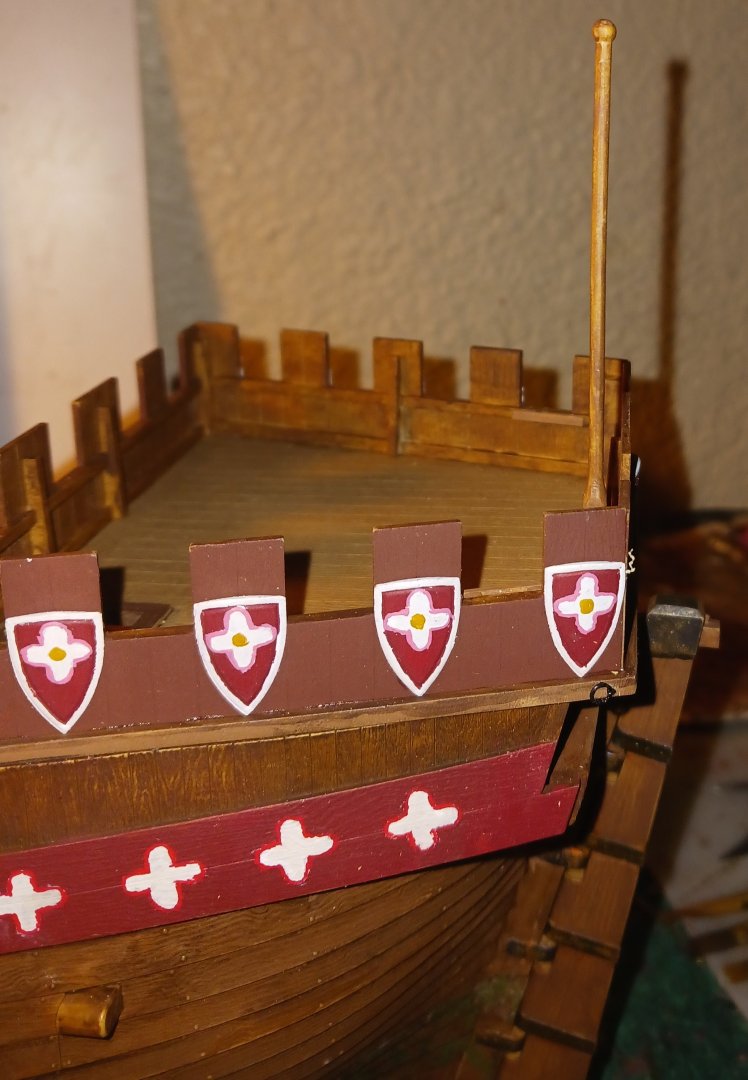
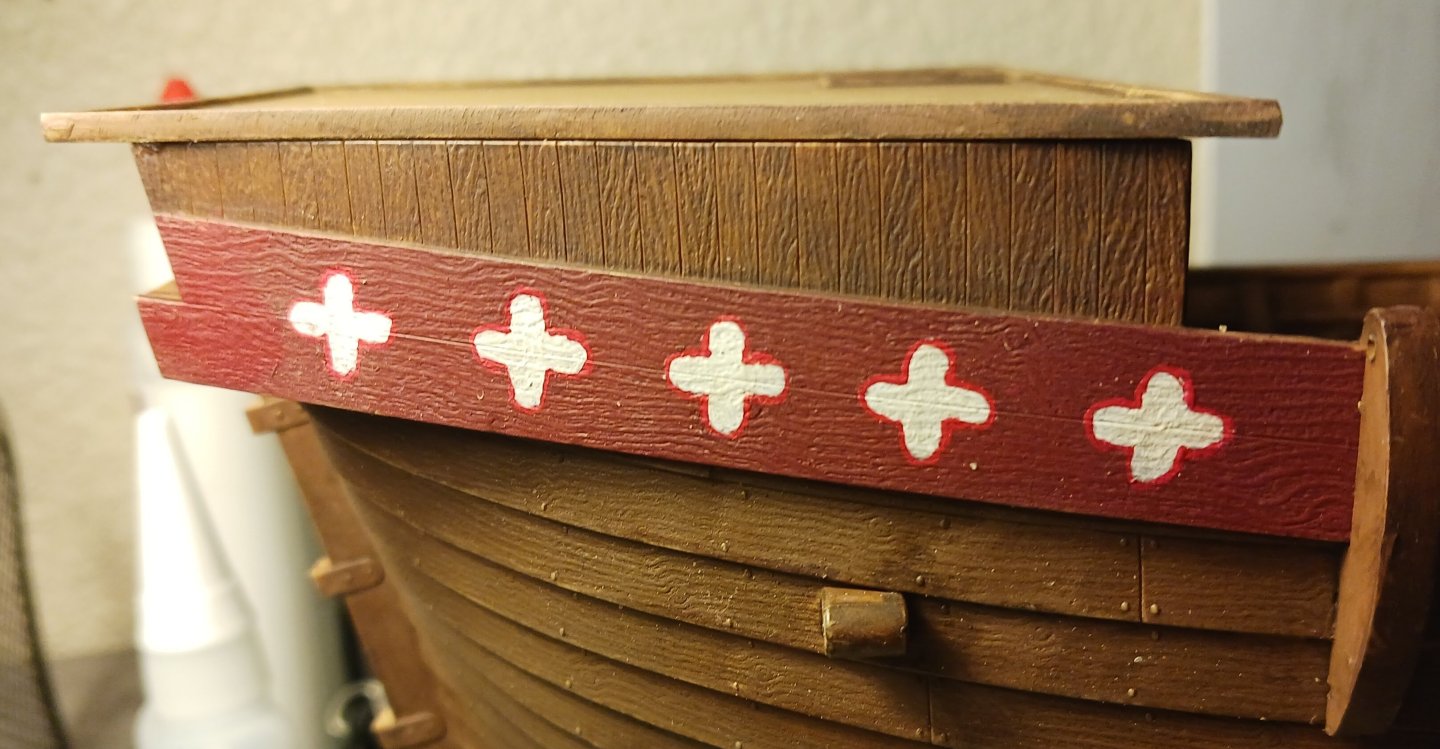
I've recently finished both the fore and stern castles. On the sterncastle, I puttied over most of the holes as I intended to rearrange the patterns of the shields. The "Crusader Cog" sprue that Zvezda gave me contained many shields molded together in rows. I cut them apart and cleaned them up to use in accordance with the patterning on the real Stralsund Cog. Obviously I used quite a bit of artistic license with the painting of the flowers. Then, I started on the forecastle. The Seal of Stralsund shows the forecastle as being mounted significantly higher on the stempost than the actual model, whose forecastle rests on the bulwark. This was relatively easy to fix, as the forecastle ladder was long enough to accommodate the change in height. In addition, I drilled a hole in the forecastle deck to accept the bowsprit, which I turned from a kitchen skewer. I also added some framing and bracing to the underside of the castle. The next steps will be fleshing out the deck details and painting the spars (which I have already started on).


-
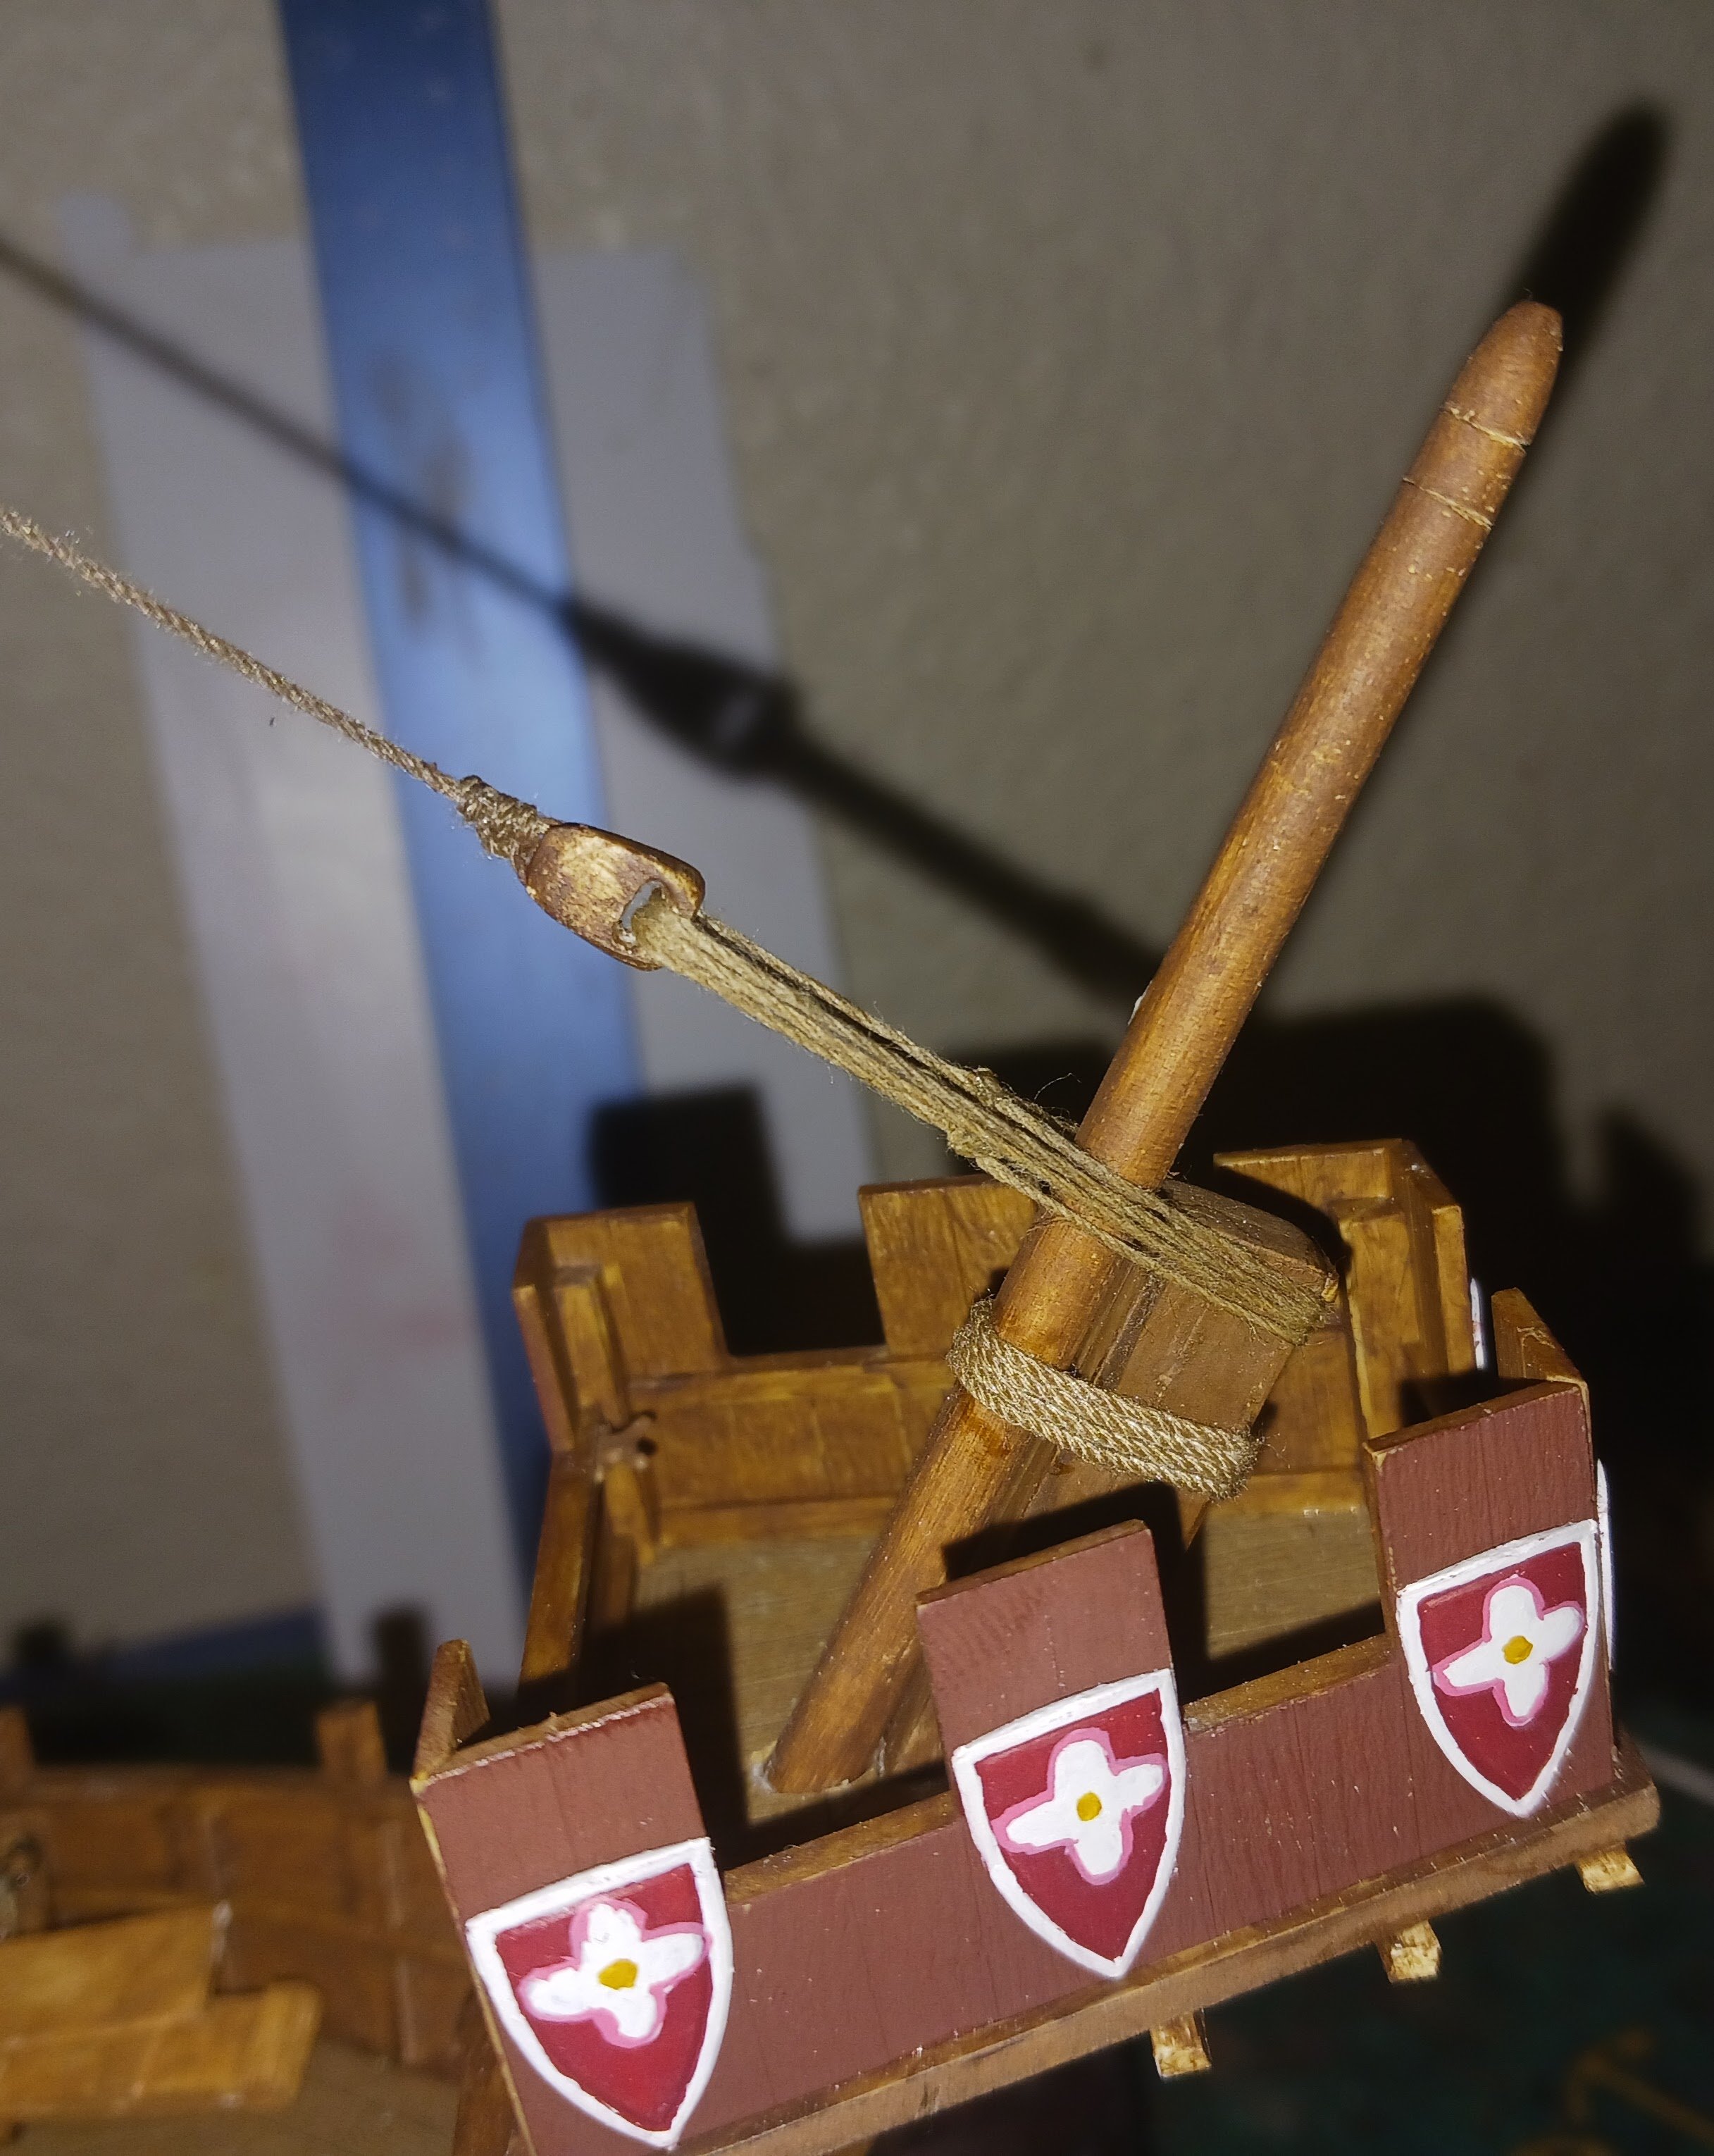
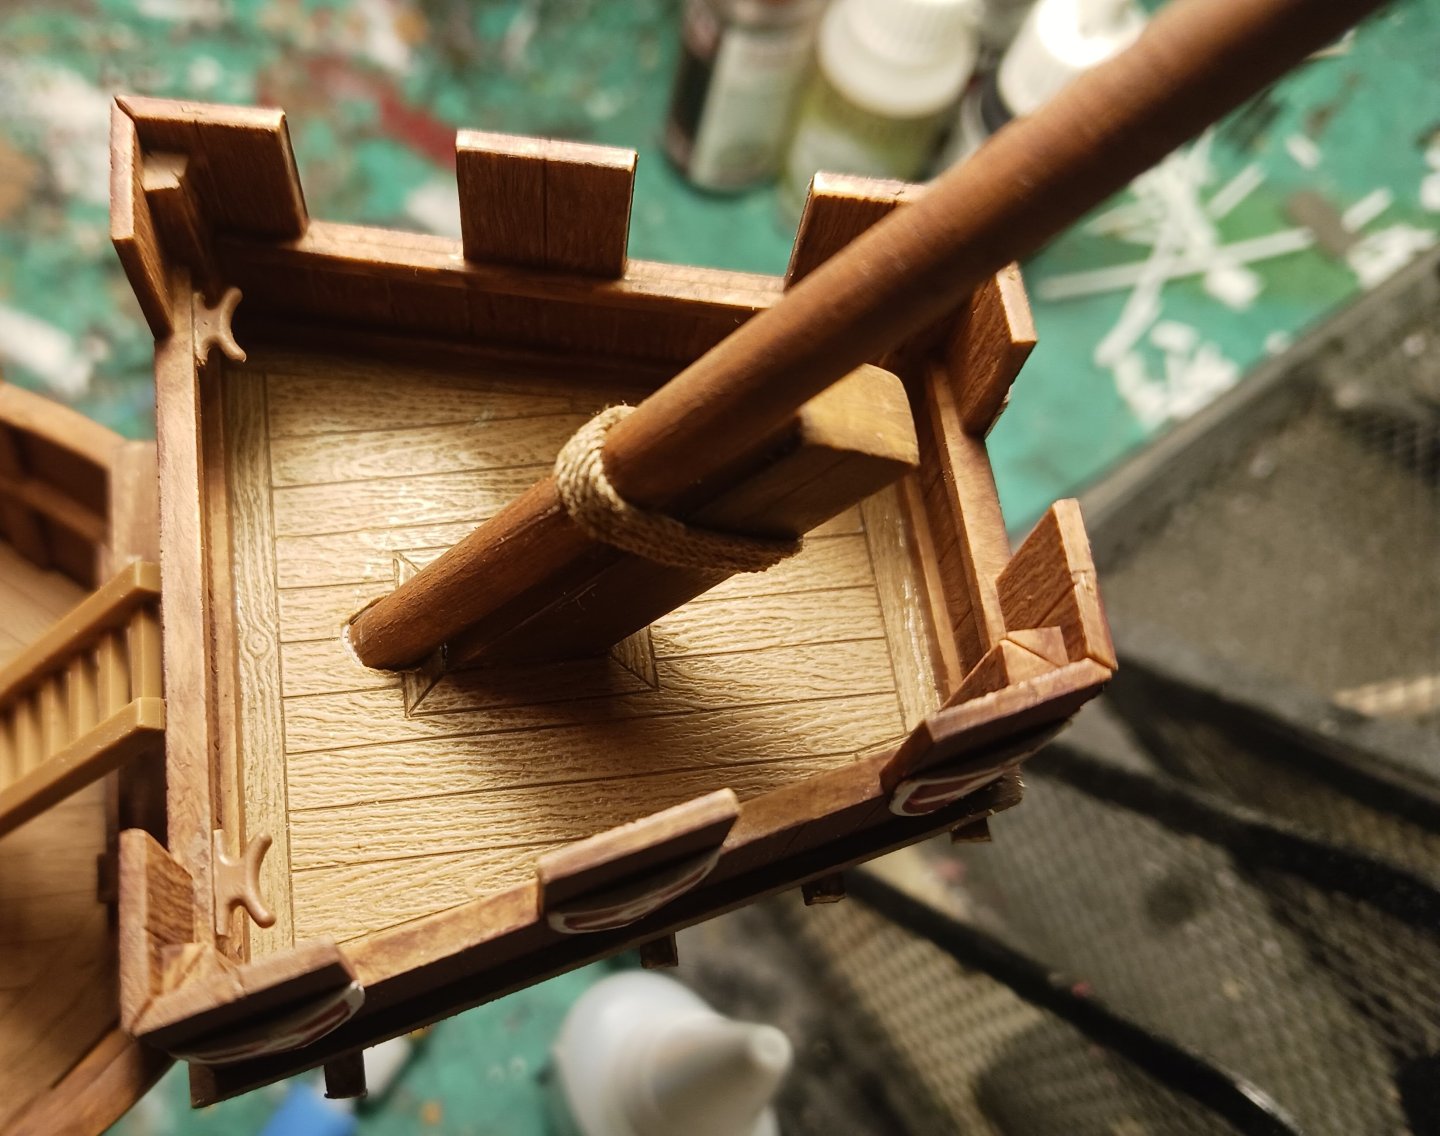
Hello all, apologies for the lack of posts as of this week. I have made some significant progress on the ship, starting with the winding gear. The winding gear consists of a capstan for the anchors and a windlass for the yard. More will be said regarding how both pieces of equipment are used later. I also made the mast and stepped it temporarily. It will be removed, cleaned up and painted, and re-stepped later once the hull is finished. The sterncastle was where I had to reference the Stralsund Seal a bit. For one, there are four merlons and three crenels on the castle's side parapets on the seal. On my model's side walls, there are five merlons and four crenels. While this isn't catastrophic enough to necessitate me fixing it, it does require me to make a few decisions regarding the decoration of the forecastle. For one, it does not affect the dimensions of the lower sterncastle walls, which are also differently shaped than what's shown on the Stralsund Seal. The seal depicts five flowers with five petals apiece on the lower sterncastle walls. I chose to depict them with four petals per flower for ease of painting. All of which are painted freehand, a first for me. I wanted it to look imperfect, almost akin to Medieval painting techniques. The flowers all have bright red outlines. The seal shows the flowers as having round centers (as a real flower), so I may paint the centers with a yellow ochre. A similar system will be used for the side parapets of the sterncastle. On the five merlons will be mounted five shields, with flowers. The shields will be bright red with white outlines, and the flowers will be white with pink outlines for contrast and yellow ochre centers. On the forecastle will be a similar system of decorations. I will be doing a significant amount of scratchbuilding for the forecastle, so stay tuned.


-
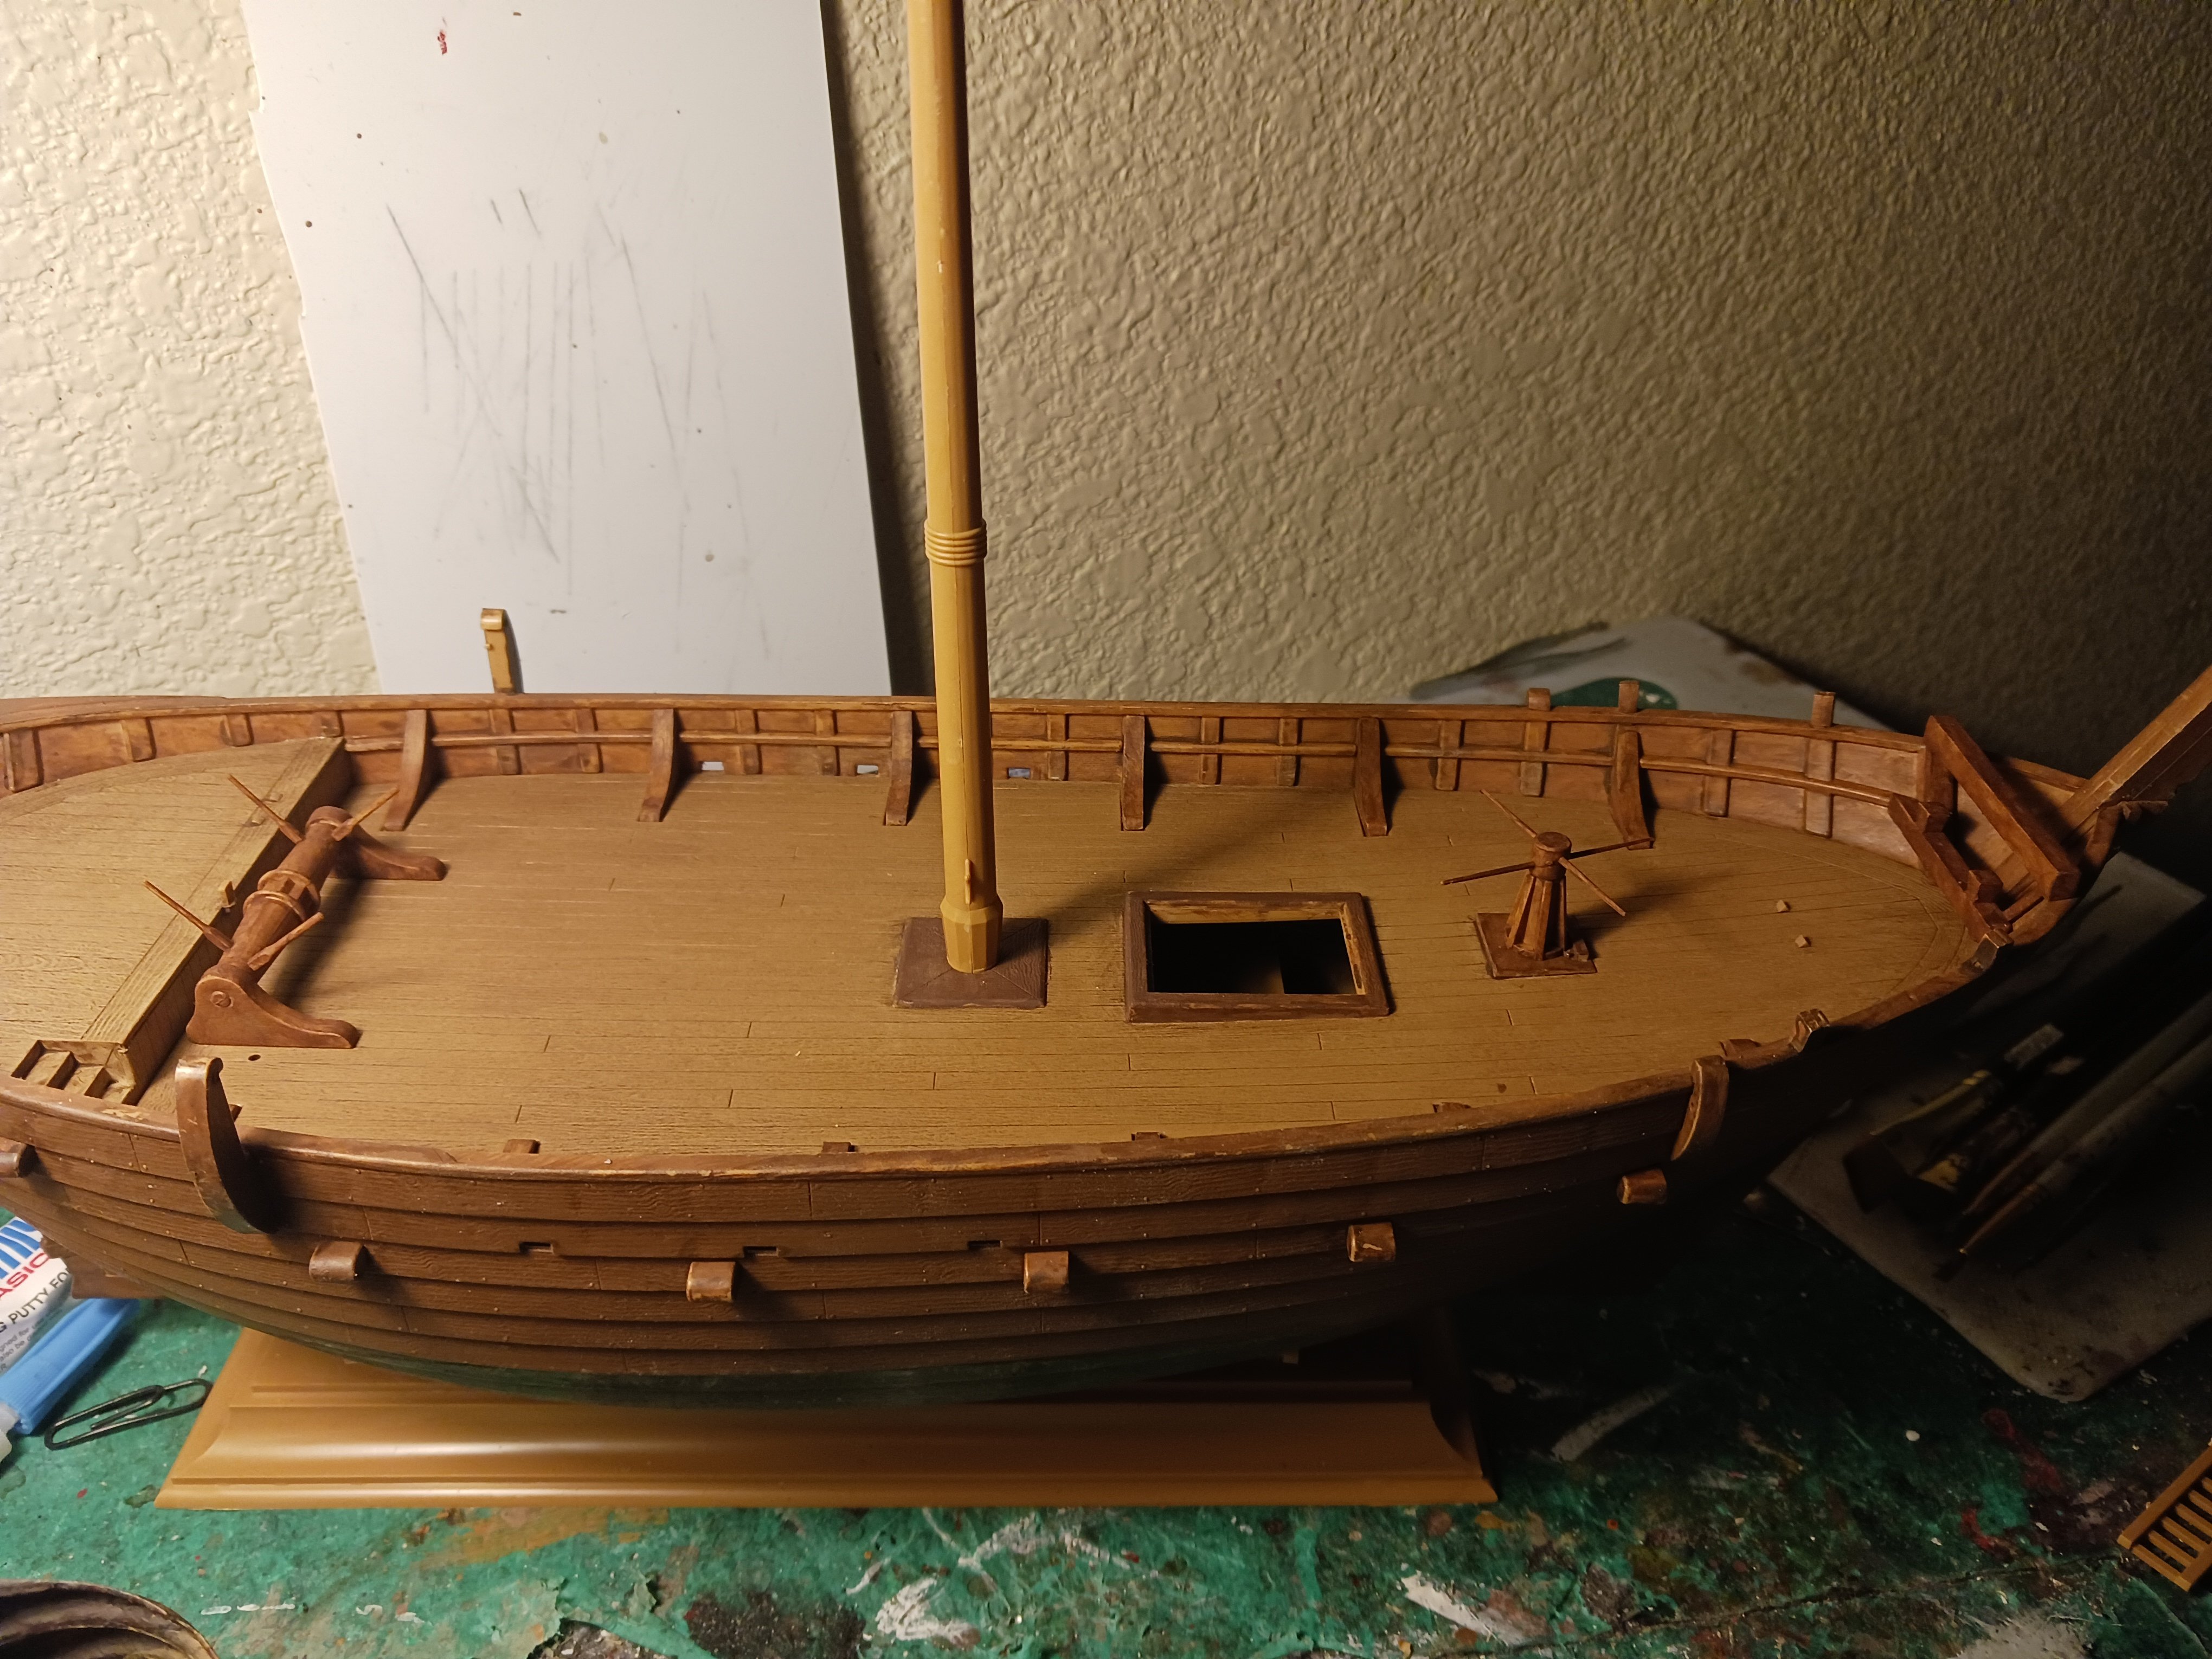
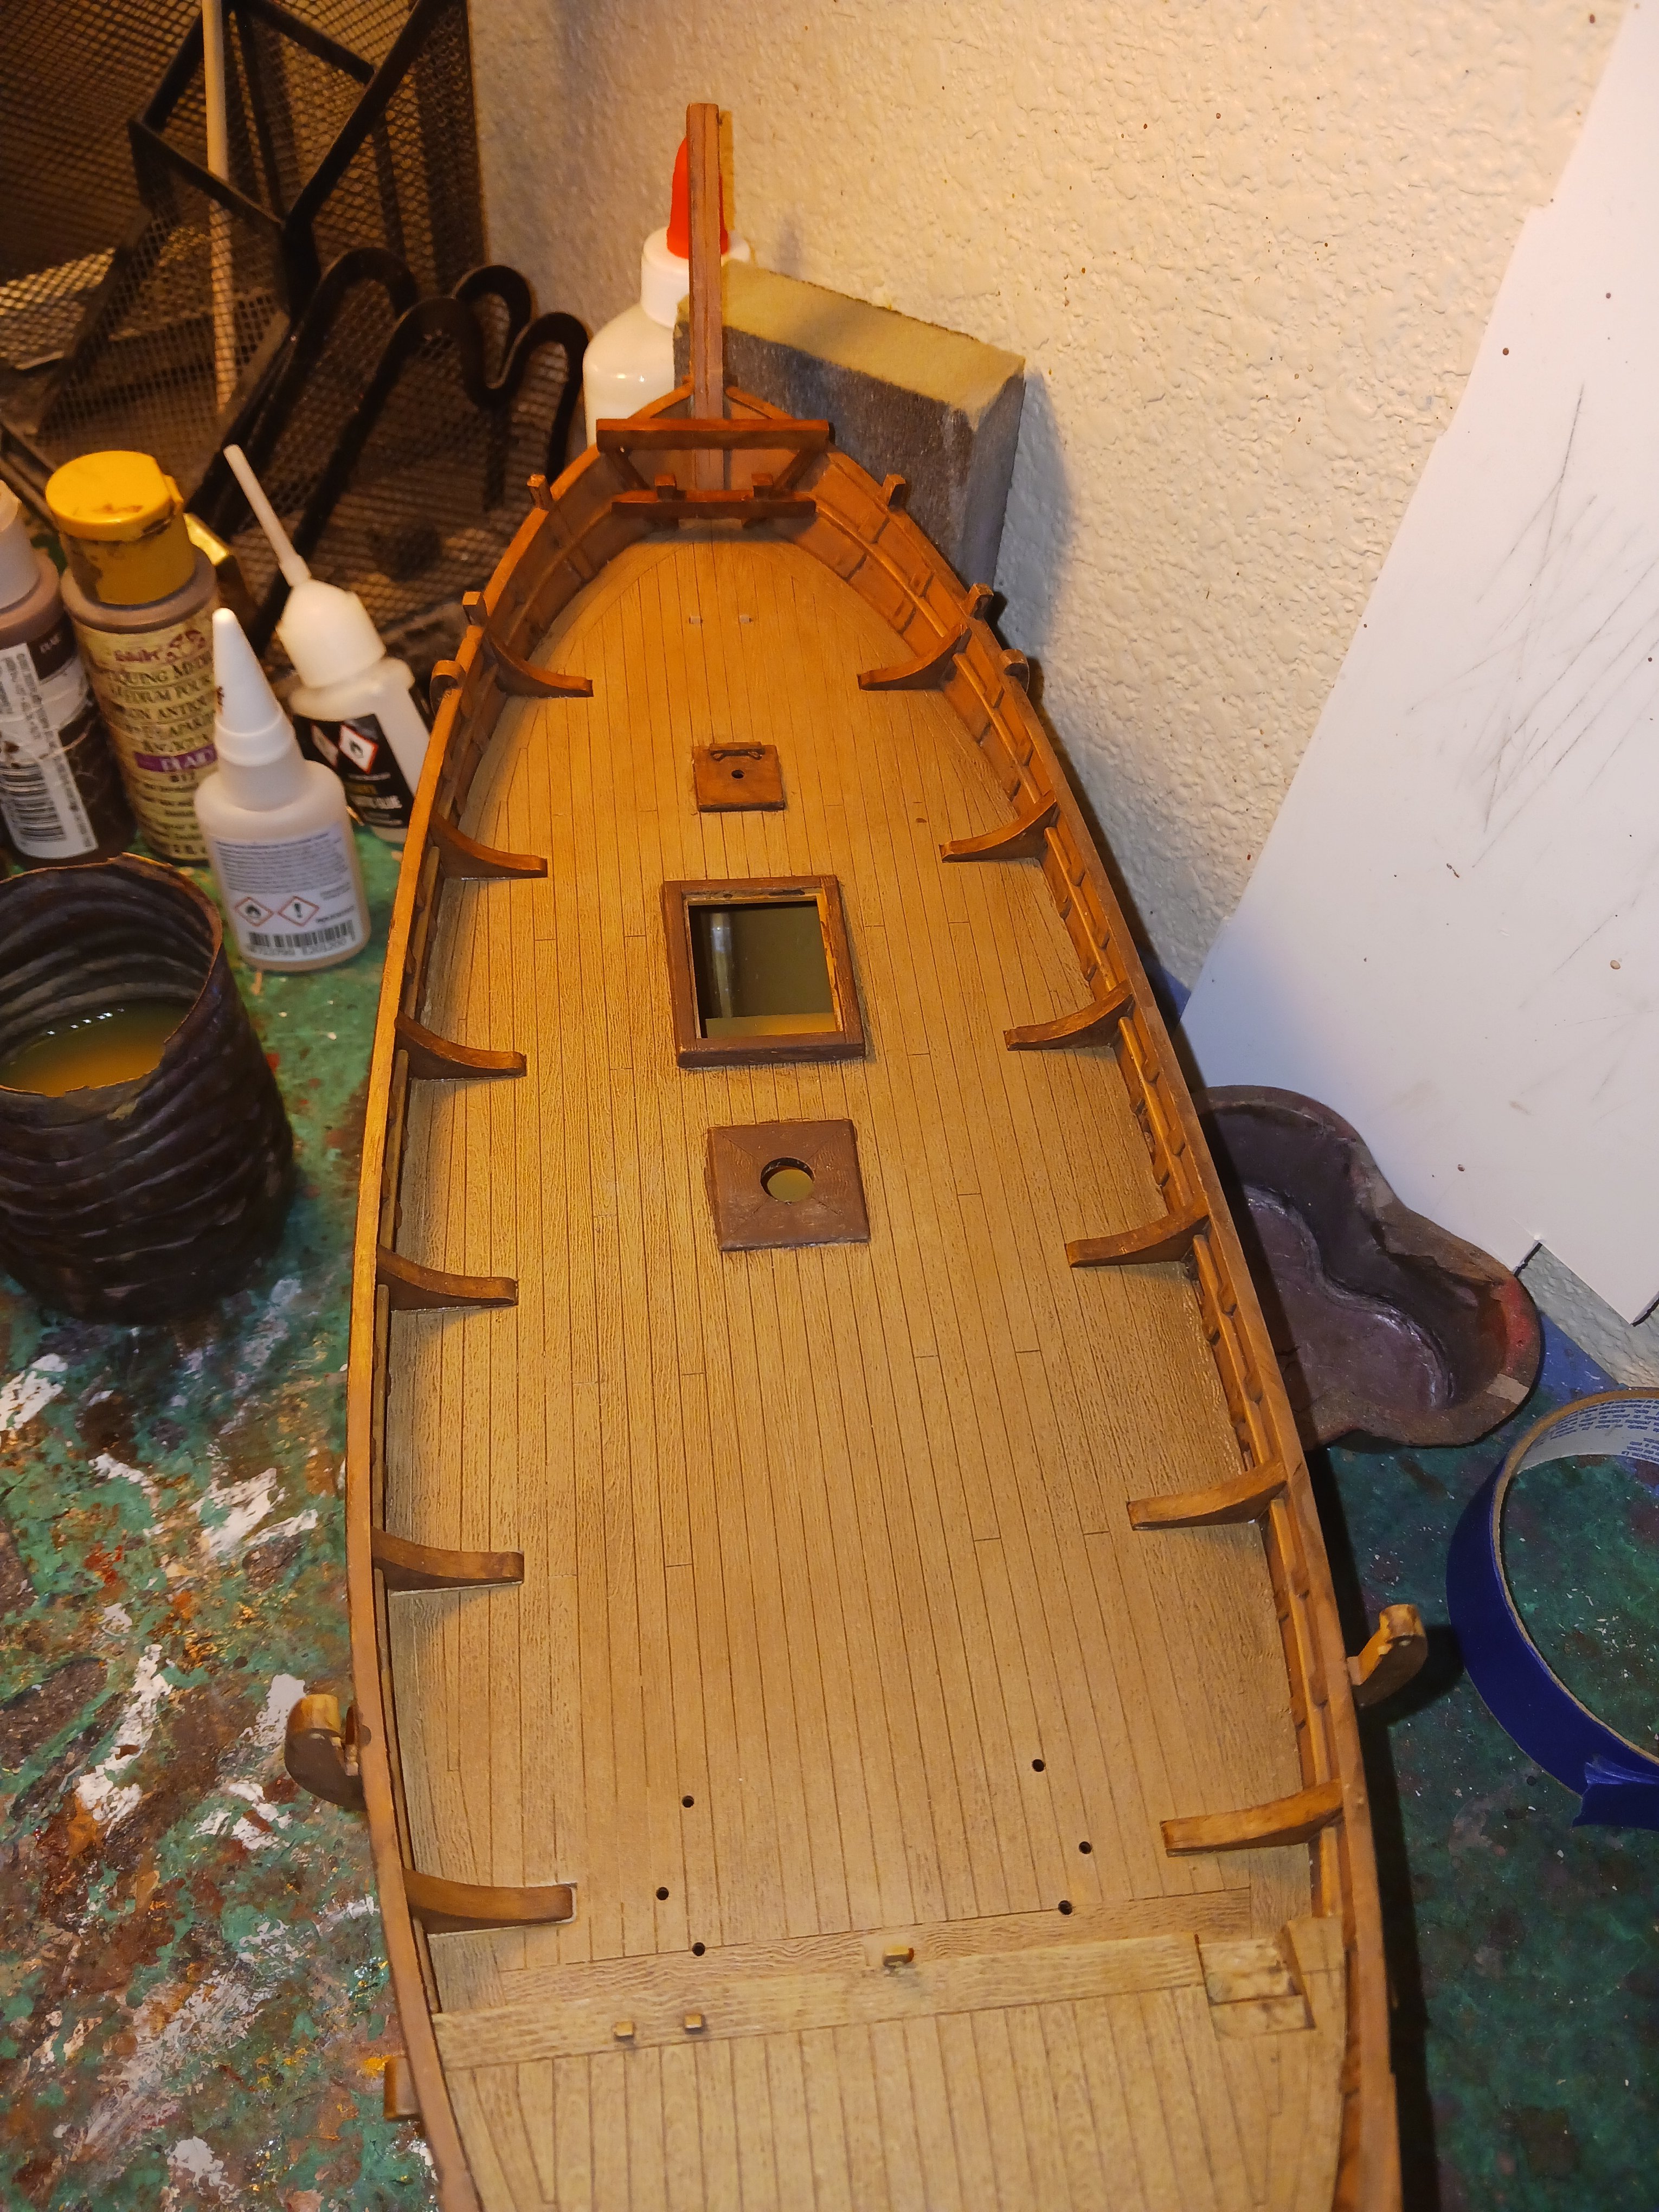
Here's the deck, as well as the fore bitts and the deck knees. I made everything seem as much like unpainted wood as possible.

-
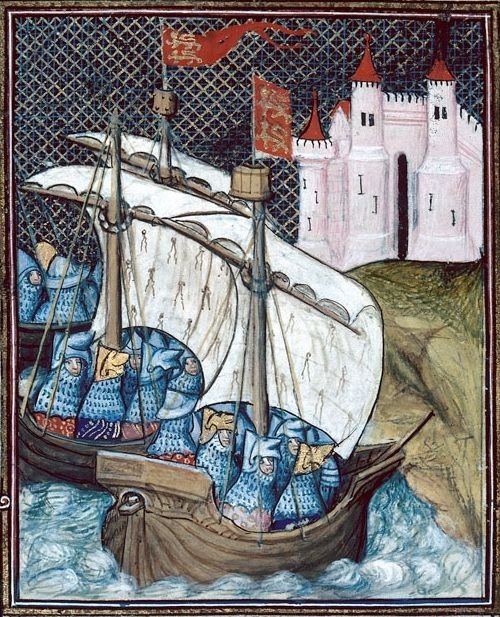
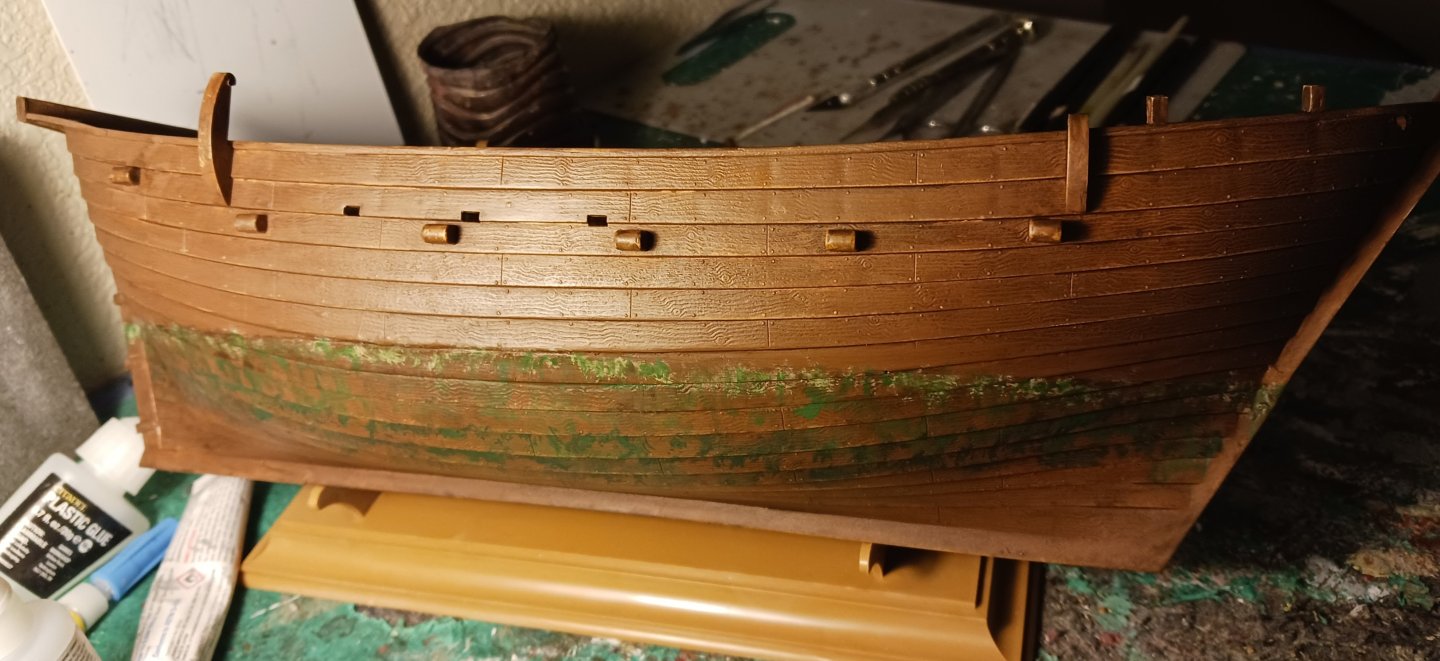
Unfortunately, I'm not in charge of the ship's upkeep- just its construction. I went a little heavy on the algae so it would be visible when on display, but for now the ship is careened in order to show the effect. The algae is partially based on a 13th century image showing Crusader cogs crossing the Bosphorus Strait.
-
This morning, I did the rest of the staining/wash for the hull of the cog. It went about as well as could be hoped for. Later today, I will see if it needs a dry-brushing, repaint some of the places where paint was stripped, and start some of the weathering. Since these photos were taken, I've cleaned up some of the paint on the exposed through-timbers.

-
I got a good start on the painting today. I added two coats of a mixture of two brown paints, and a wash went on top of the entire thing. Tomorrow, once I can be completely sure the paint has cured entirely, I will put on a sludge wash of heavily diluted antiquing medium over top of the entire hull, and wipe off the excess with a paper towel. This should ensure the beautiful clinker planking stands out, which is the goal. After that, I can do some decent weathering below the waterline. I want to show how disgusting it gets in between those clinker planks, and just put on some general silt and slime. To my knowledge, they didn't actually tar or otherwise use any anti-fouling measures (at least, I've seen no pictorial evidence thereof), so I can presumably go wild.
-
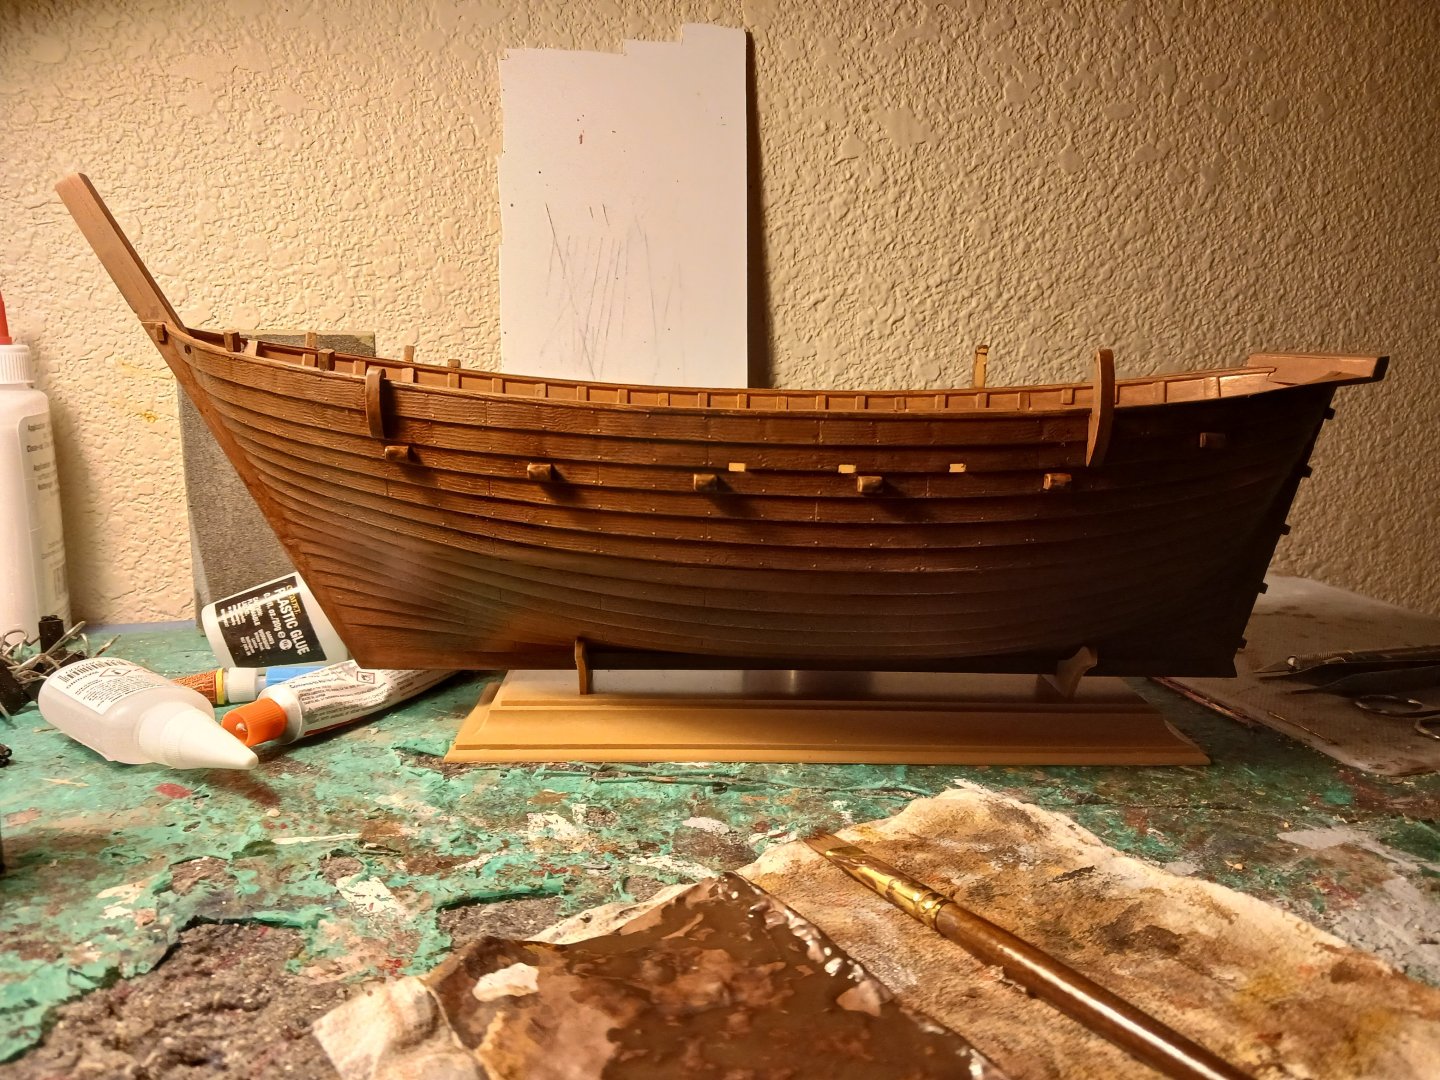
I have done a few things with the ship's hull in preparation for painting, since the last post. I have installed both the chess trees and the sheet blocks, some of the afterworks, and the four timberheads for the anchors. Any imperfections should be covered by the paint. I intend to cover any non-tan elements of the ship with a base coat that looks similar to the plastic, just for the sake of uniformity.


-
Here's where we are so far. I've built the rest of the stempost and sealed many of the holes in the ship. I opted also to putty over the holes in the interior stringer for the cleats on which the sheets and tacks belay. I wanted instead to belay those lines (as well as the braces) on scratchbuilt kevels. I also sanded off the molded timberheads. In addition, I did something pretty radical- I built up the stand to set the ship on as a kind of build board, which we will paint when the model is finished. The point of this was to make construction easier and keep the hull off of the table, something that tends to ruin hulls. This brings me to the question of how to make the anchor stowing architecture. On a ship with a simple stop cleat (like the Santa Sofia) you can find a way to stow the anchor on deck. This doesn't work on this ship, as the anchor ropes run through hawse holes in the bow. This brought me to two potential solutions. The stowing architecture could either be in the form of timberheads that stick up from the frames, or knightheads that are fastened inside the gunwale and would, on a real ship, go straight down to the keel. Both solutions produce essentially the same effect.

-
The Bremen Ship has a mounting for the capstan on the sterncastle deck. No one knows how it was used. My ship has a capstan at the fore to weigh the anchors and a windlass at the aft to raise the yard.
-
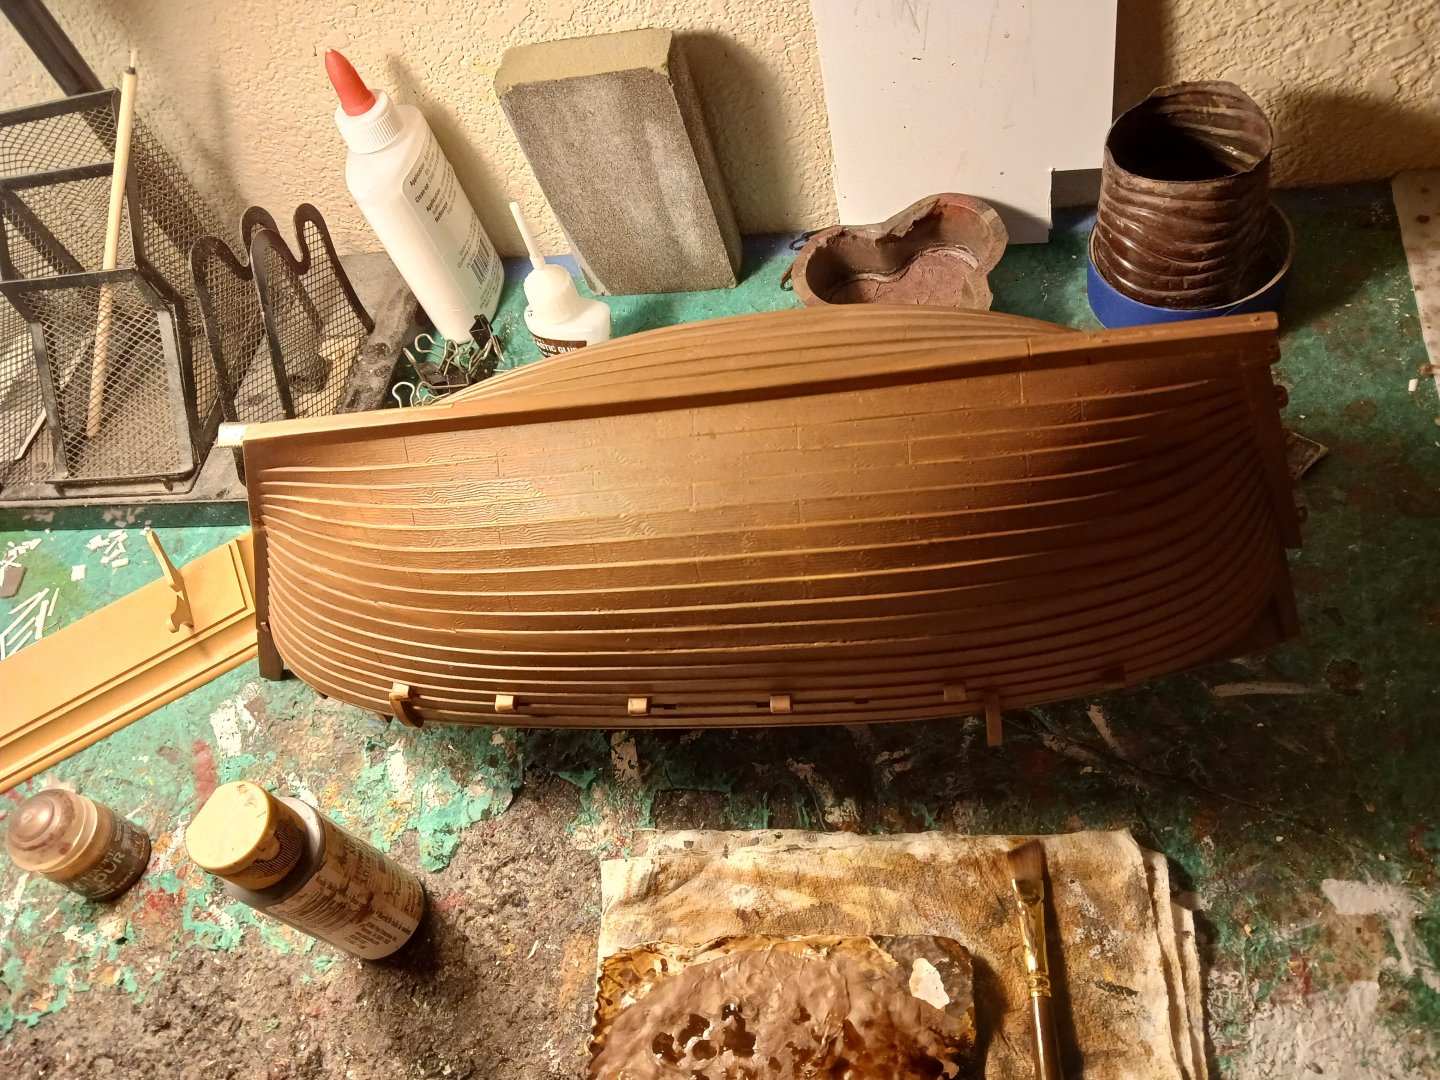
Here's what we have to work with as far as the hull is concerned. I can already think of a few things we need to do to the hull before we can even start in earnest. Firstly, I intend to fill the holes for the futtock riders, as they aren't present on the Stralsund Ship. We will keep the smaller riders at the fore and aft (although not on the Stralsund Ship) as they will be used as sheaves for the sheet and tack lines. One really egregious thing Revell did is have the modeler attach the shrouds to the futtock riders, although that system isn't present on the ship from the Elbing Seal (1350) which the ship is based on. We're going to add a short stringer across two of the deck knees in order to anchor the shrouds. The second thing that needs to be done is to remove those crappy excuses for timberheads at the bow and replace them with scratchbuilt card alternatives.