Ferrus Manus
-
Posts
1,407 -
Joined
-
Last visited
Content Type
Profiles
Forums
Gallery
Events
Everything posted by Ferrus Manus
-
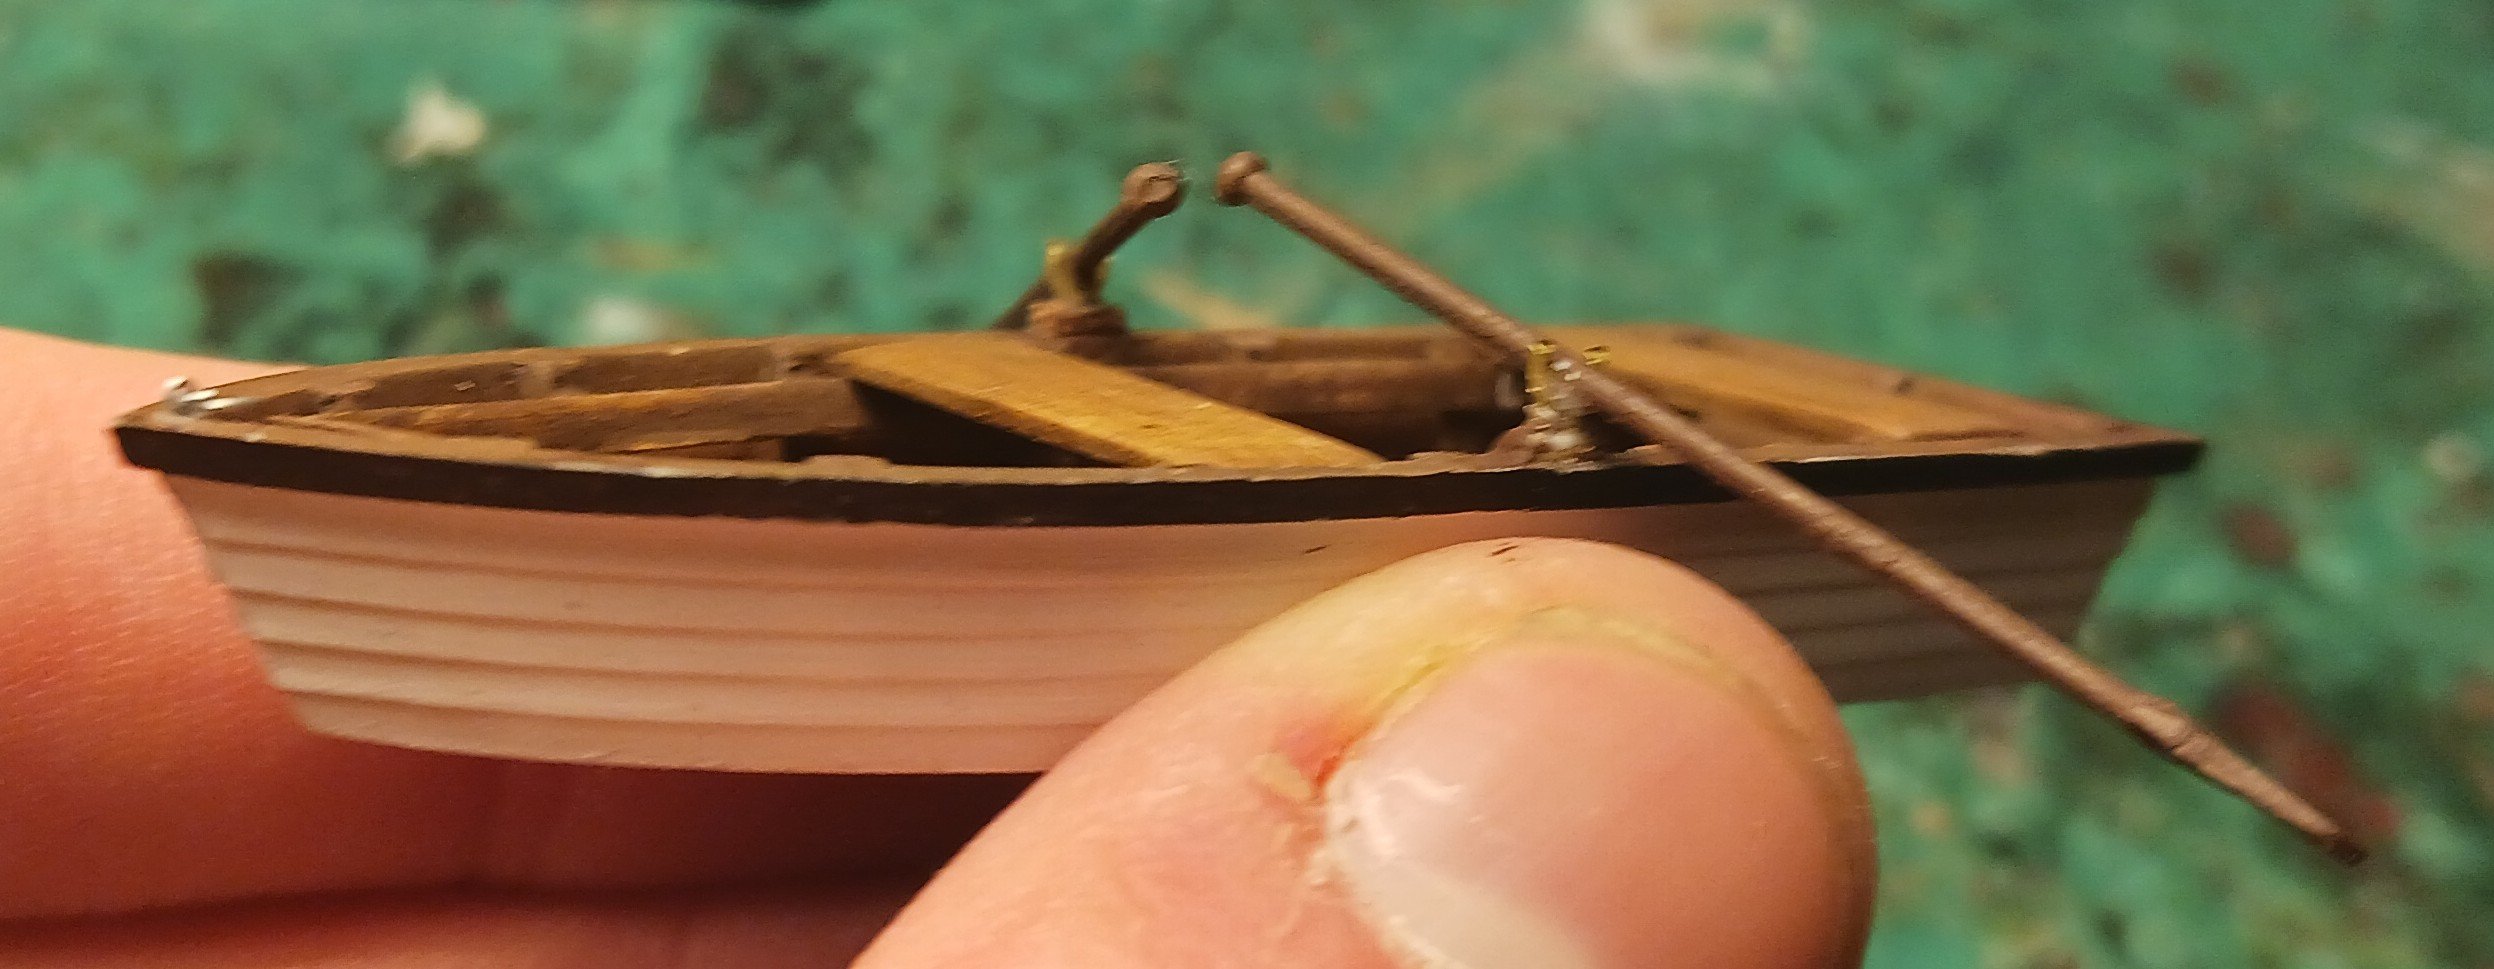
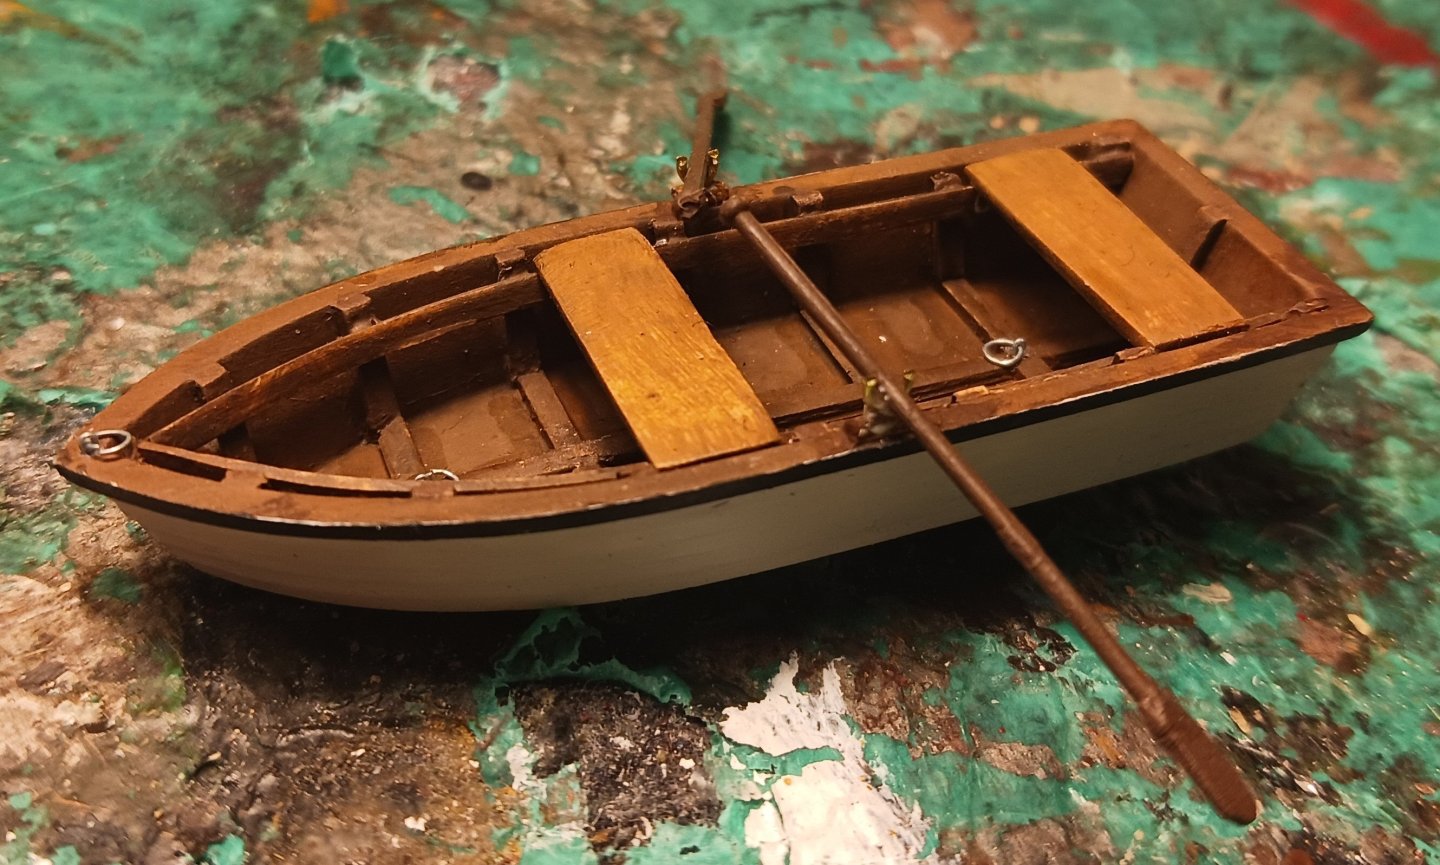
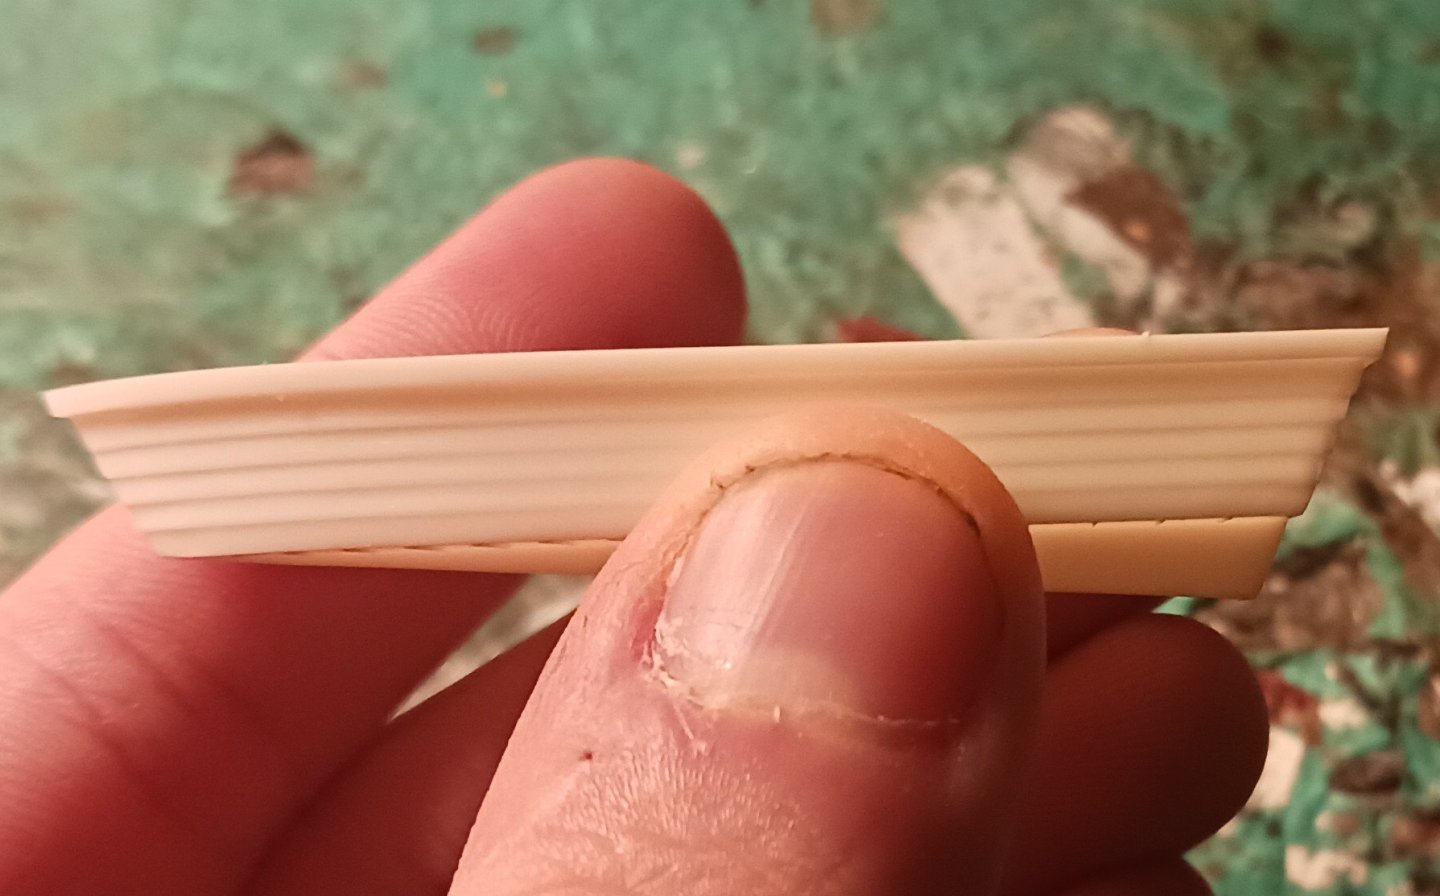
 #616 is now most of the way to being complete, minus the reconsideration of the oar positions and the stand. You see, when I built this little skiff, I encountered a problem I am all too familiar with when building at such a small size- the lesser the size of the contact area, the much less effective most adhesives become. When gluing a plastic (painted) oar to a metal oarlock, one of the only things that works is CA. Having broken off the oars from the oarlocks and the oarlocks from the hull several times, the CA began piling up into an unsightly mess that can be seen in the first few pictures. So, I took the oars off of the oarlocks, sanded and repainted the affected areas, and replaced the oarlocks. Here is the result of my efforts from yesterday and today:
- 56 replies
-
- 4
-

-
- Lindberg
- sternwheeler
- (and 1 more)
-
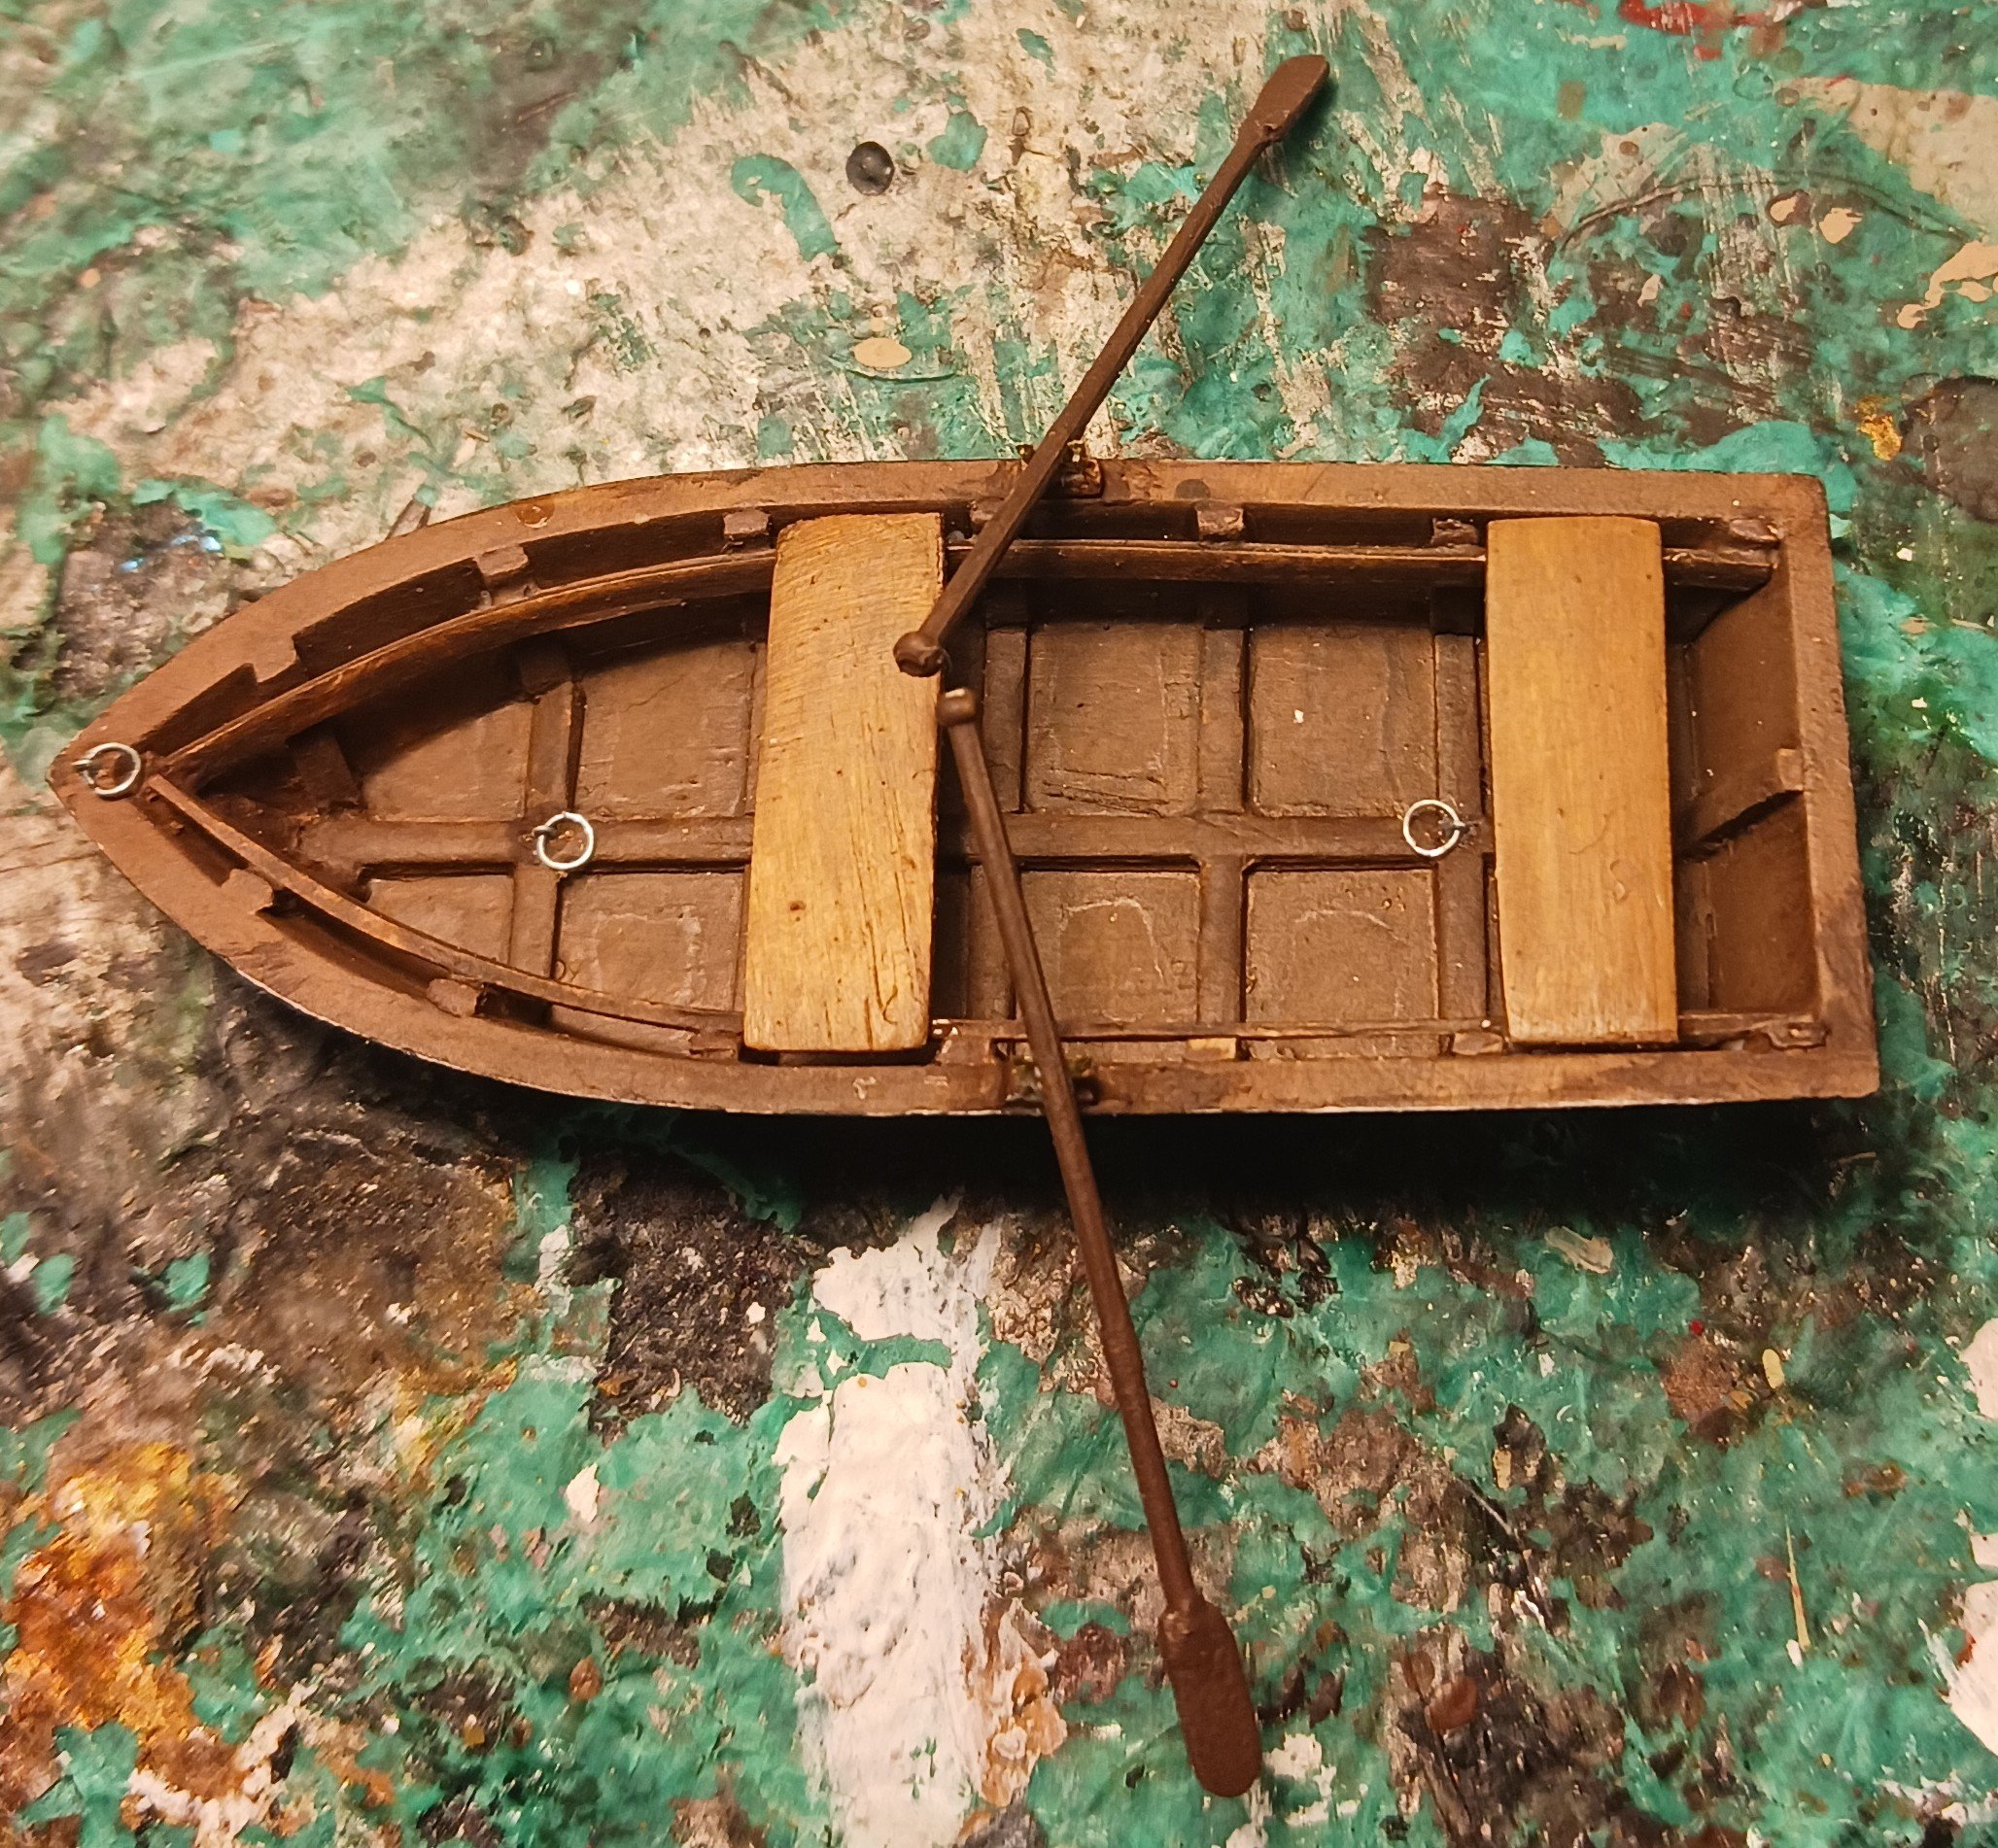
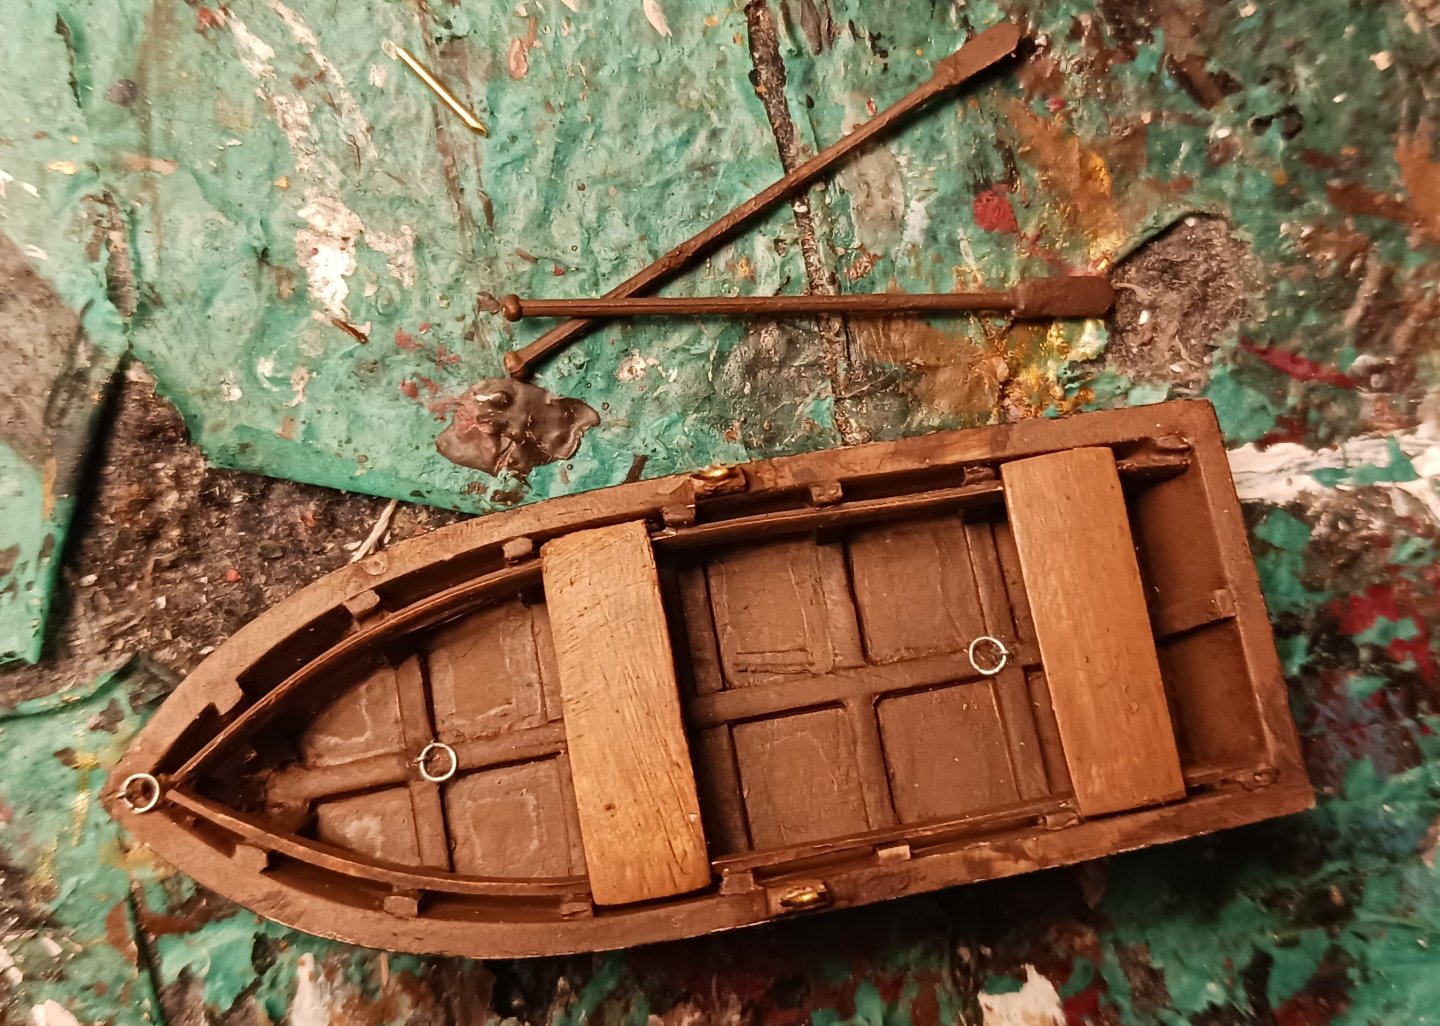
I'm not quite done with 616, Eric. I plan to give the hull some disgust and abuse, give the bottom of the hull some gloss paint, and a little something special as well.
- 56 replies
-
- 3
-
-
- Lindberg
- sternwheeler
- (and 1 more)
-
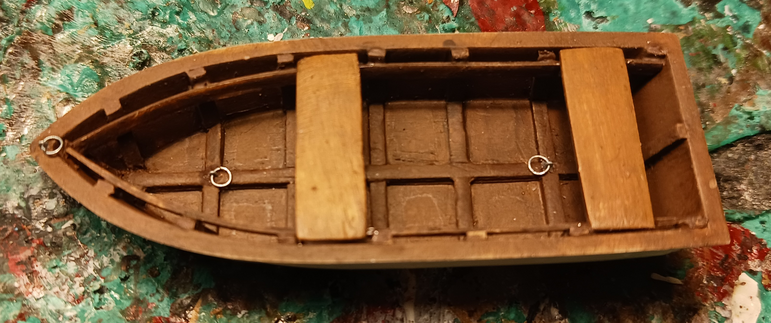
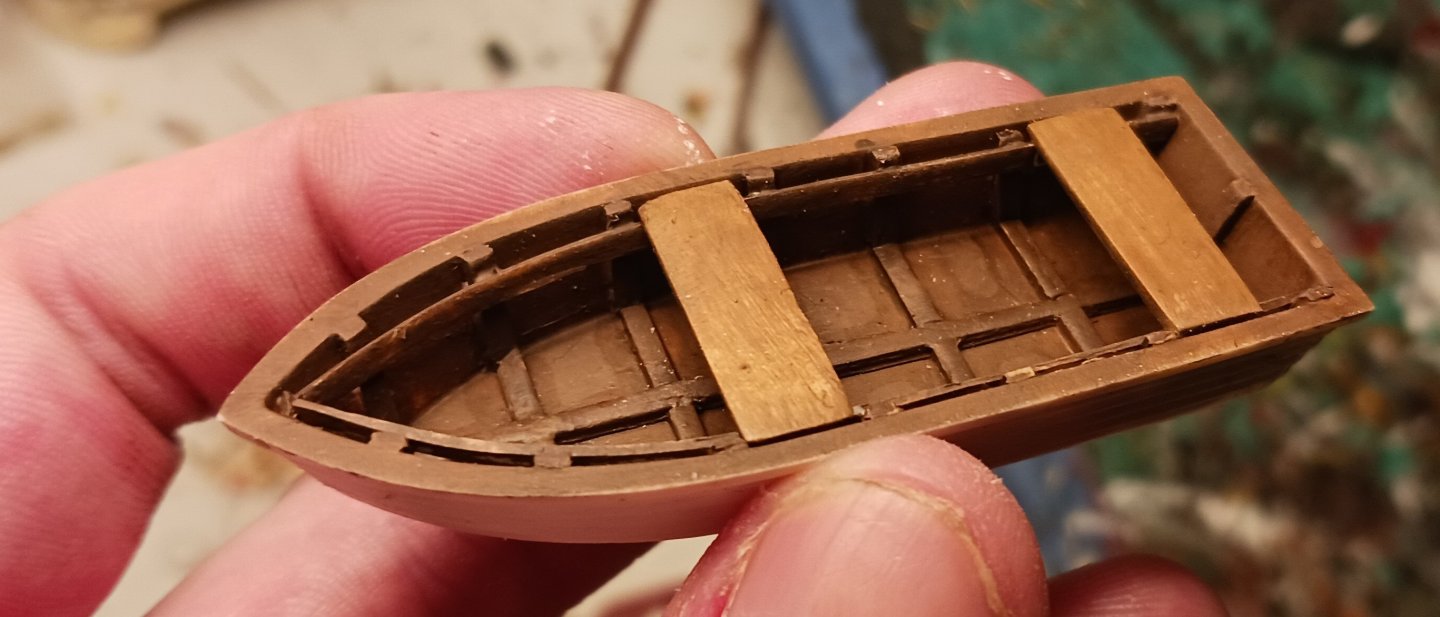
The ship's boat is now finished, having gotten oarlocks, oars, and an exterior paint job:


- 56 replies
-
- 4
-

-
-
- Lindberg
- sternwheeler
- (and 1 more)
-
I made an executive decision regarding the thwarts, and painted the interior.
- 56 replies
-
- 6
-
-
- Lindberg
- sternwheeler
- (and 1 more)
-
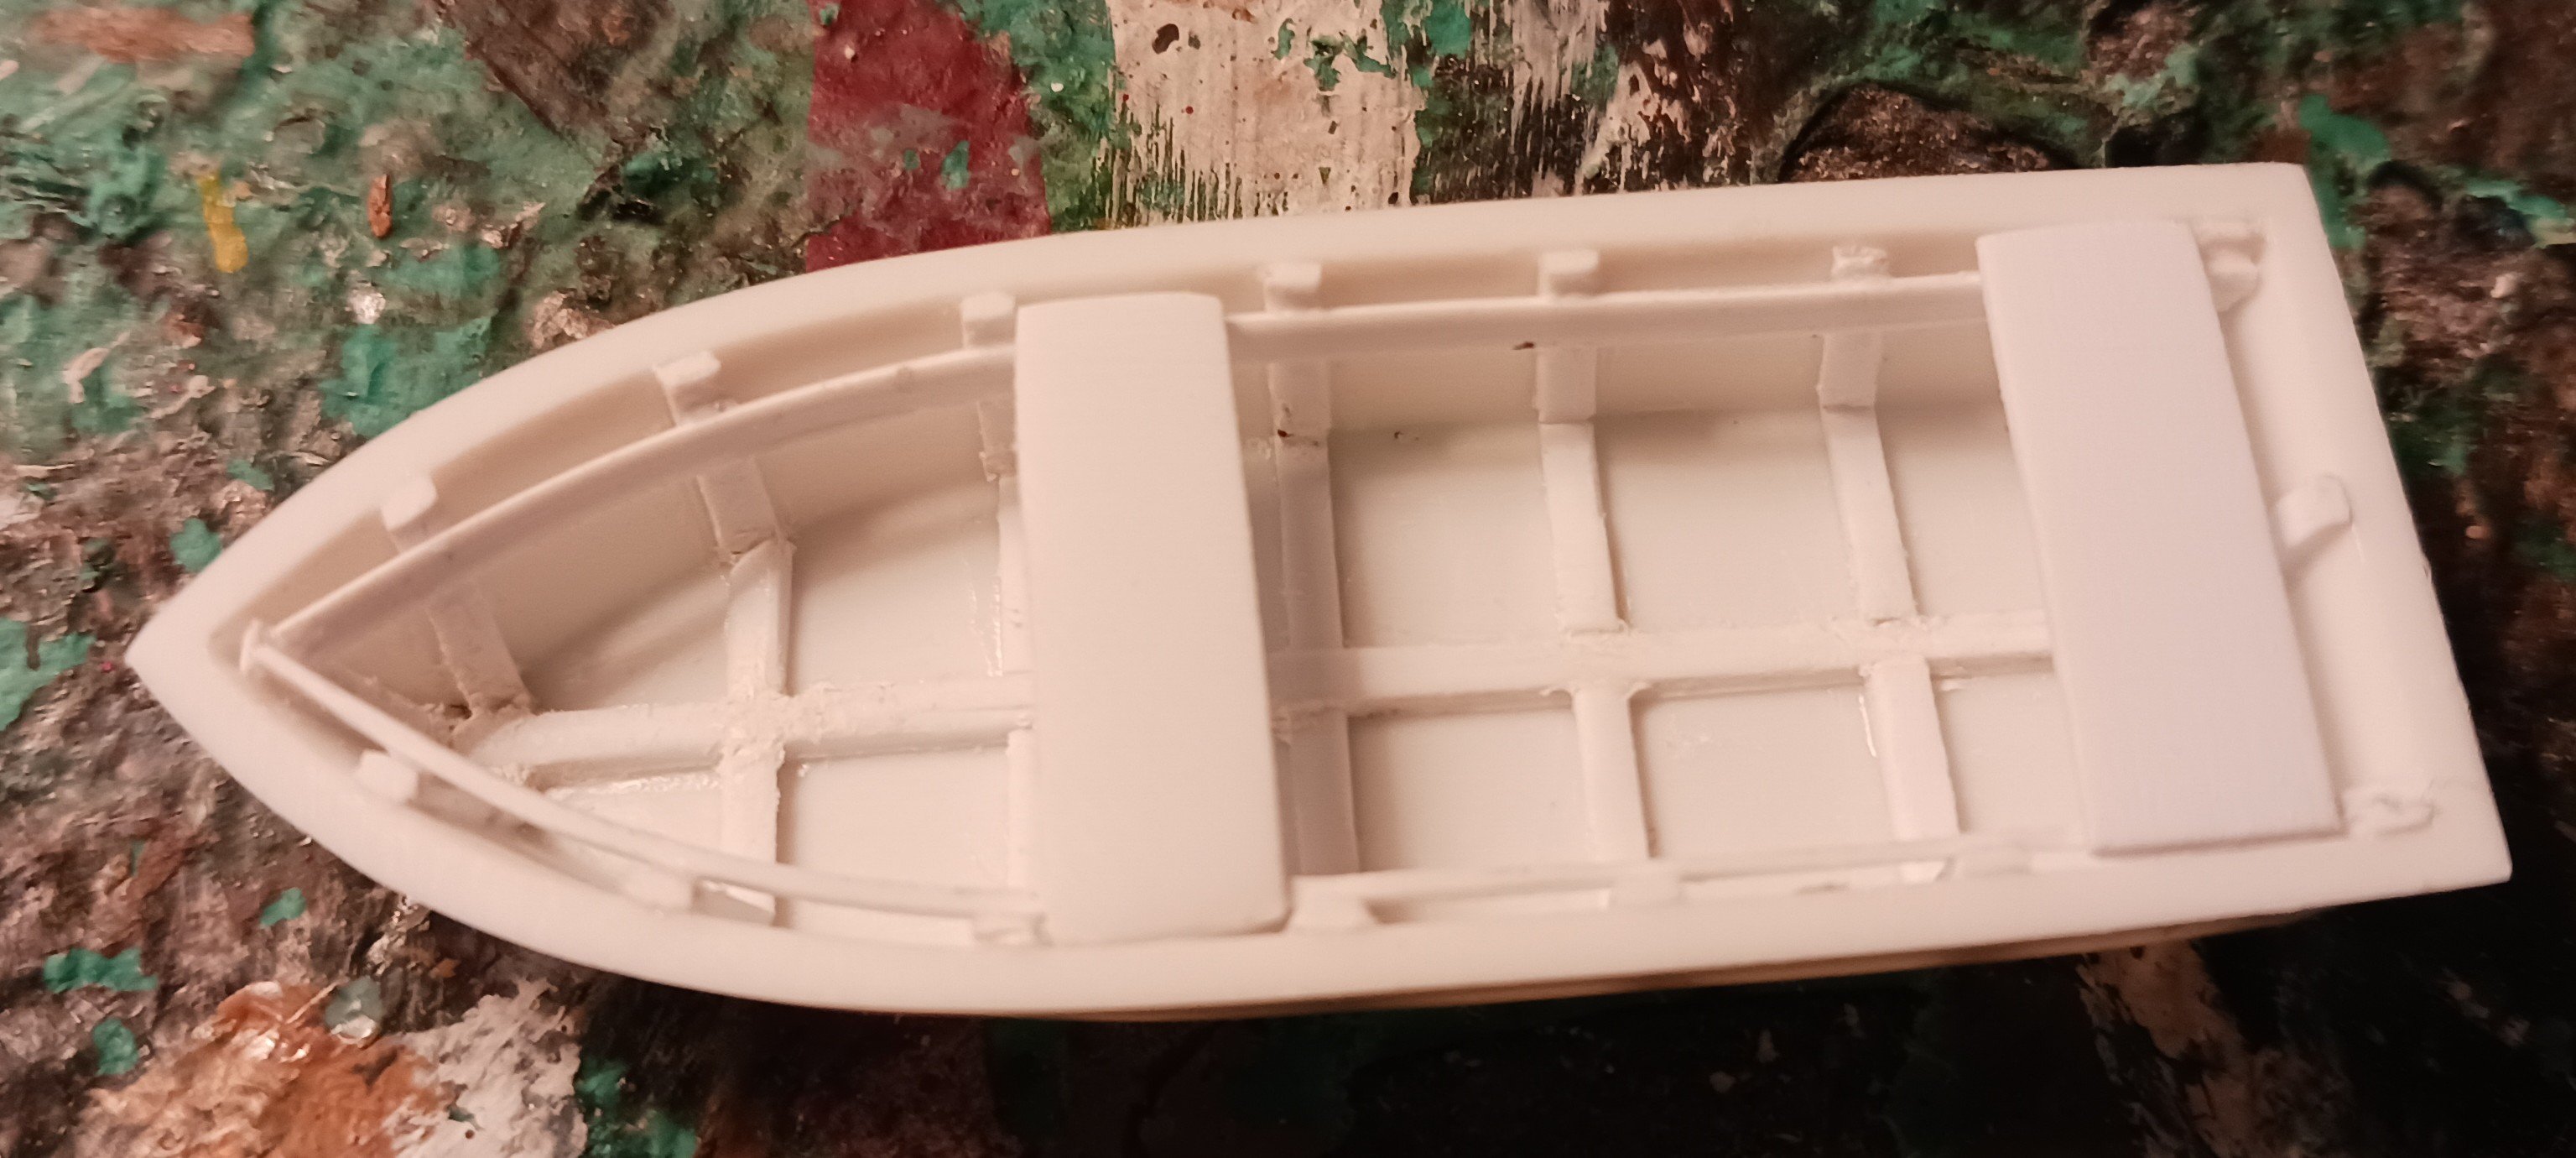
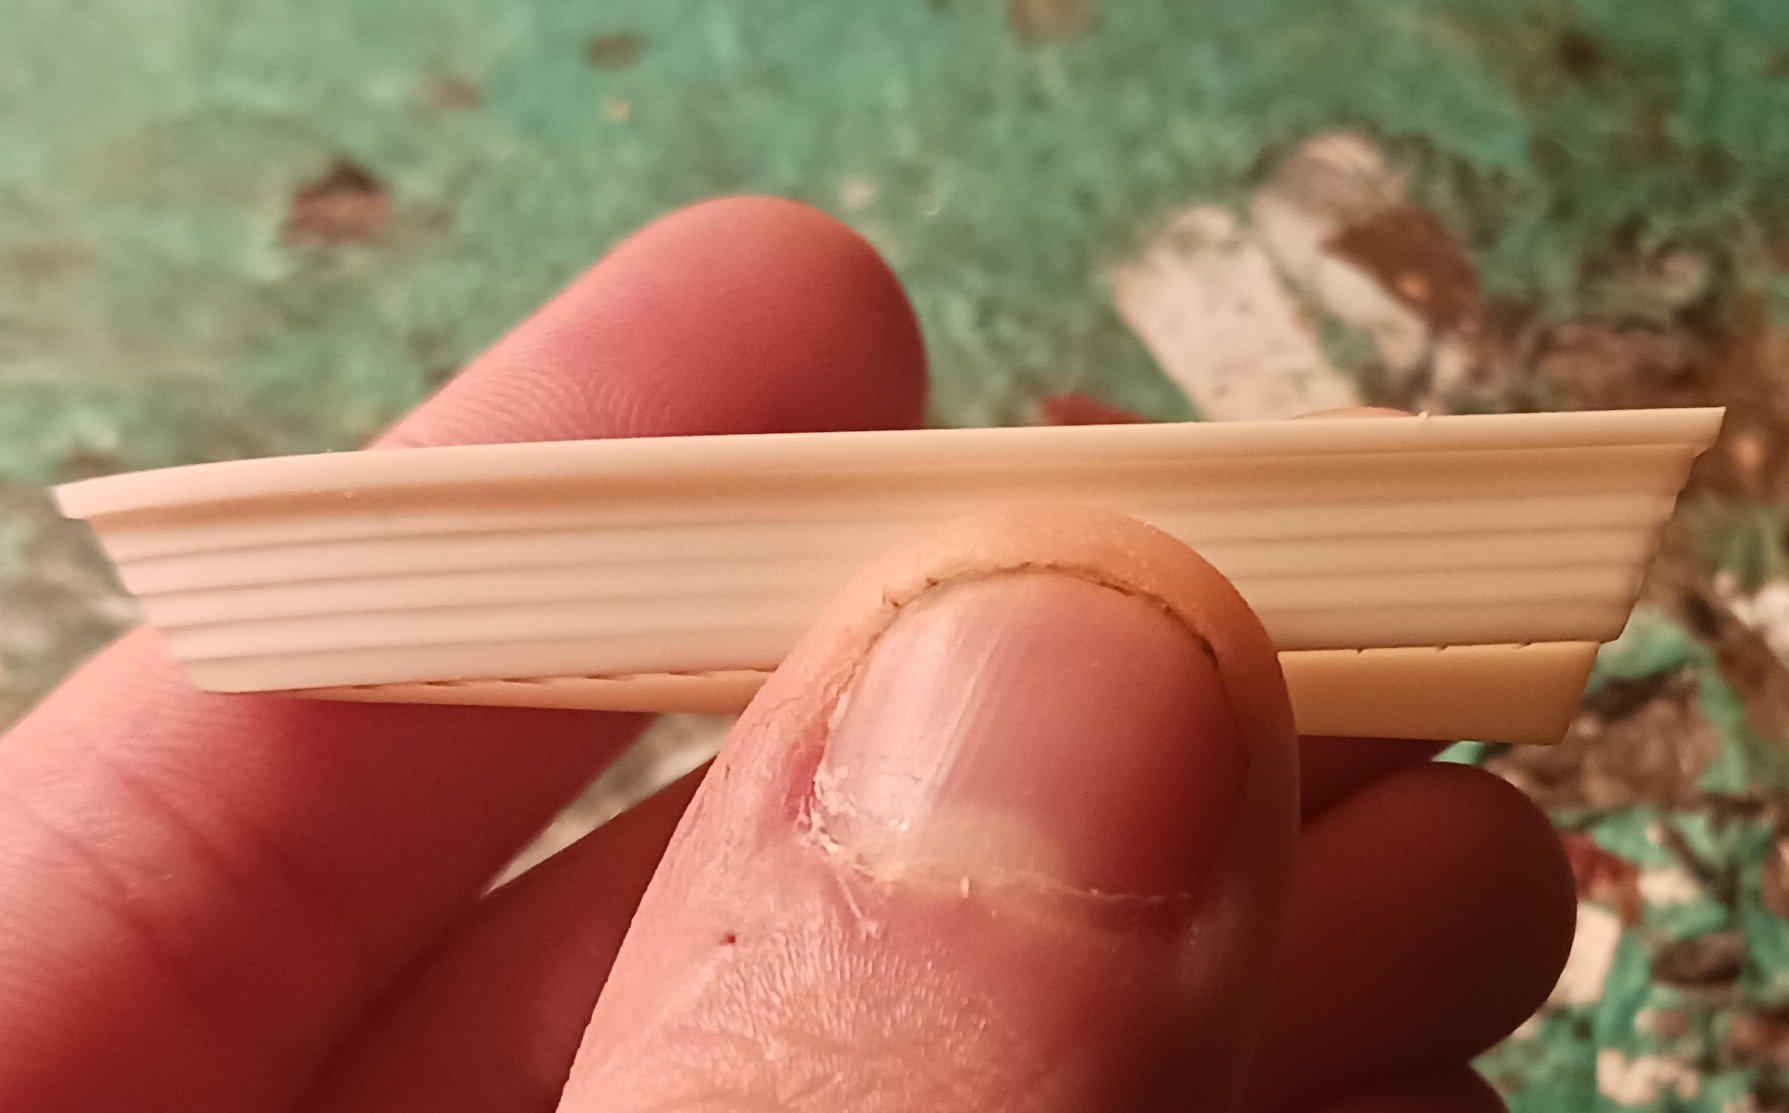
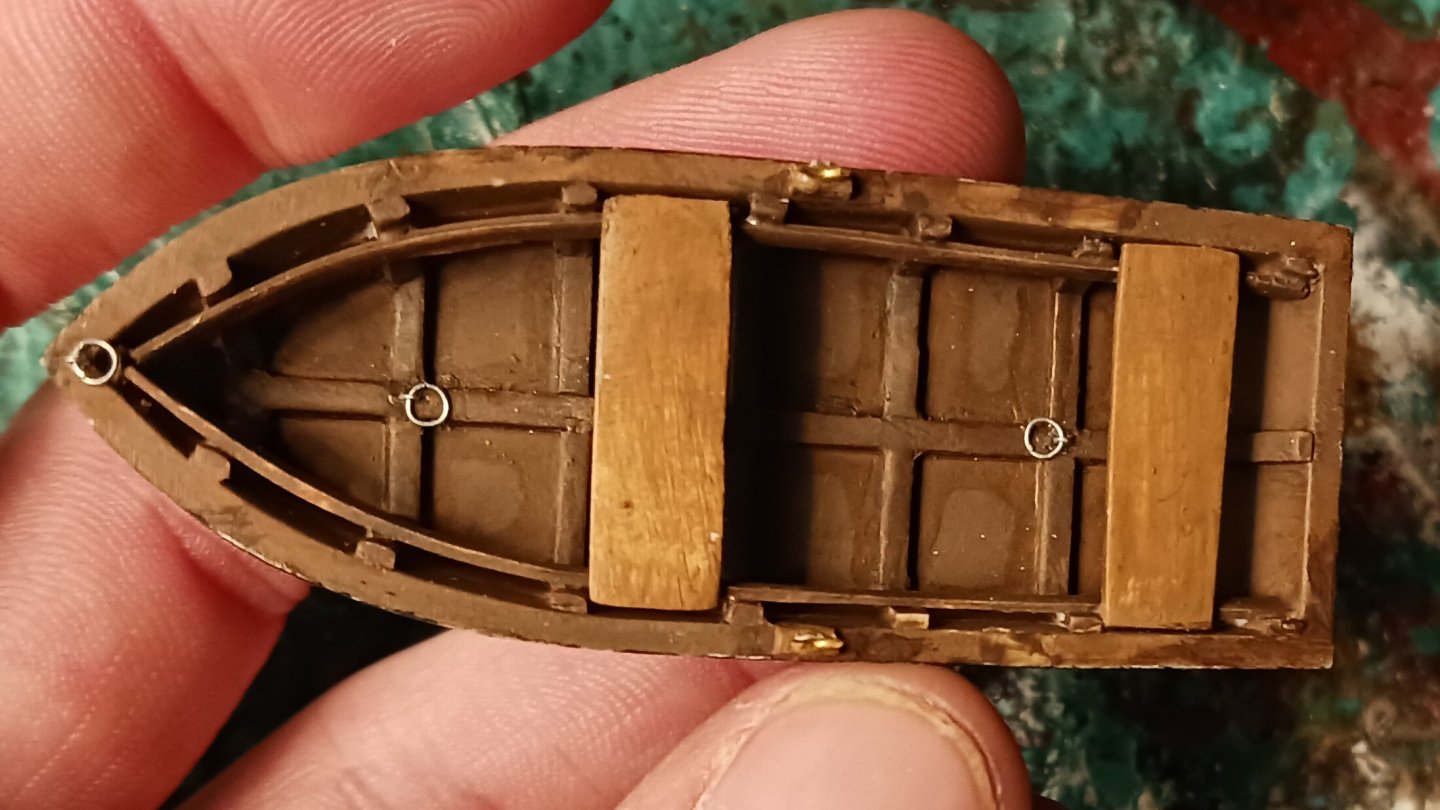
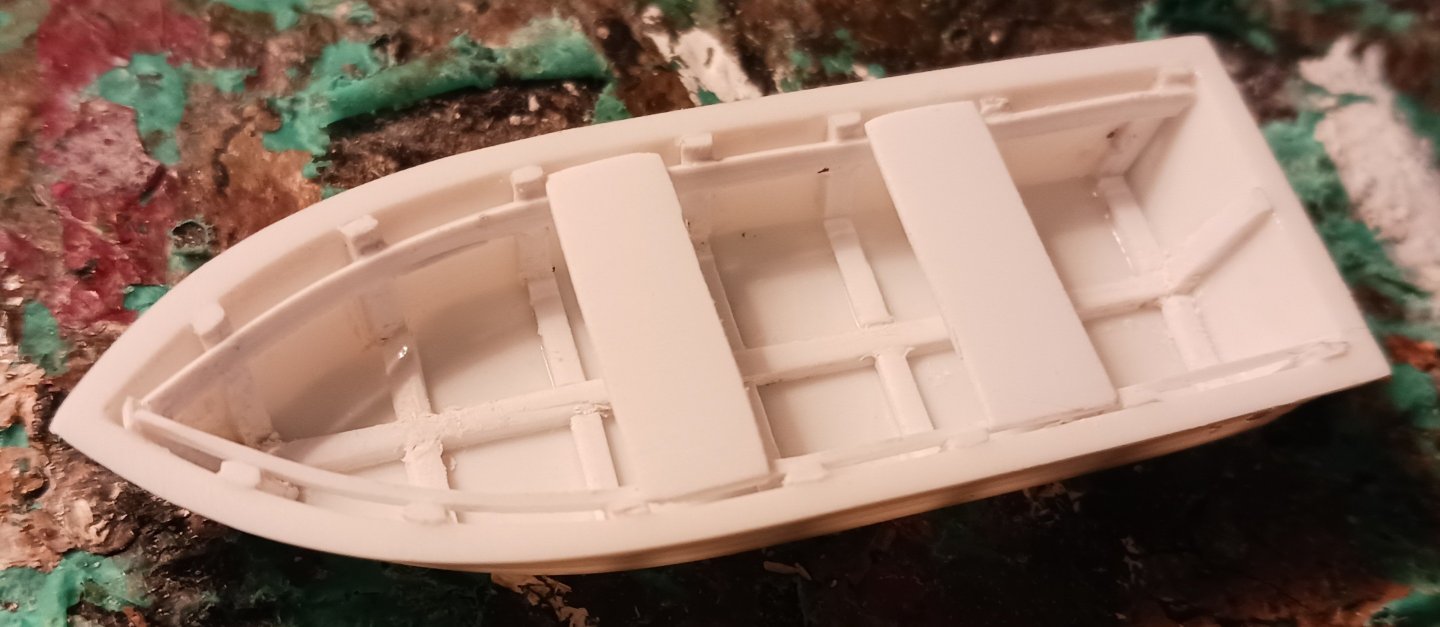
I have now made and added the inwales to the boat, and shaved down the frames to the correct height. Afterwards, I made the two thwarts for the boat. The forward thwart is the thwart from which rowing will be done, and its position has been decided on. However, the aft thwart can occupy one of two positions, as shown. Any input would be appreciated. Input regarding the thwarts would be appreciated. I know the boat looks terrible up close and personal, but it's naught but 2 and a half inches long and all inadequacies will disappear when painted. From what I understand, plastic is a much less forgiving medium than wood.

- 56 replies
-
- 5
-
-
- Lindberg
- sternwheeler
- (and 1 more)
-
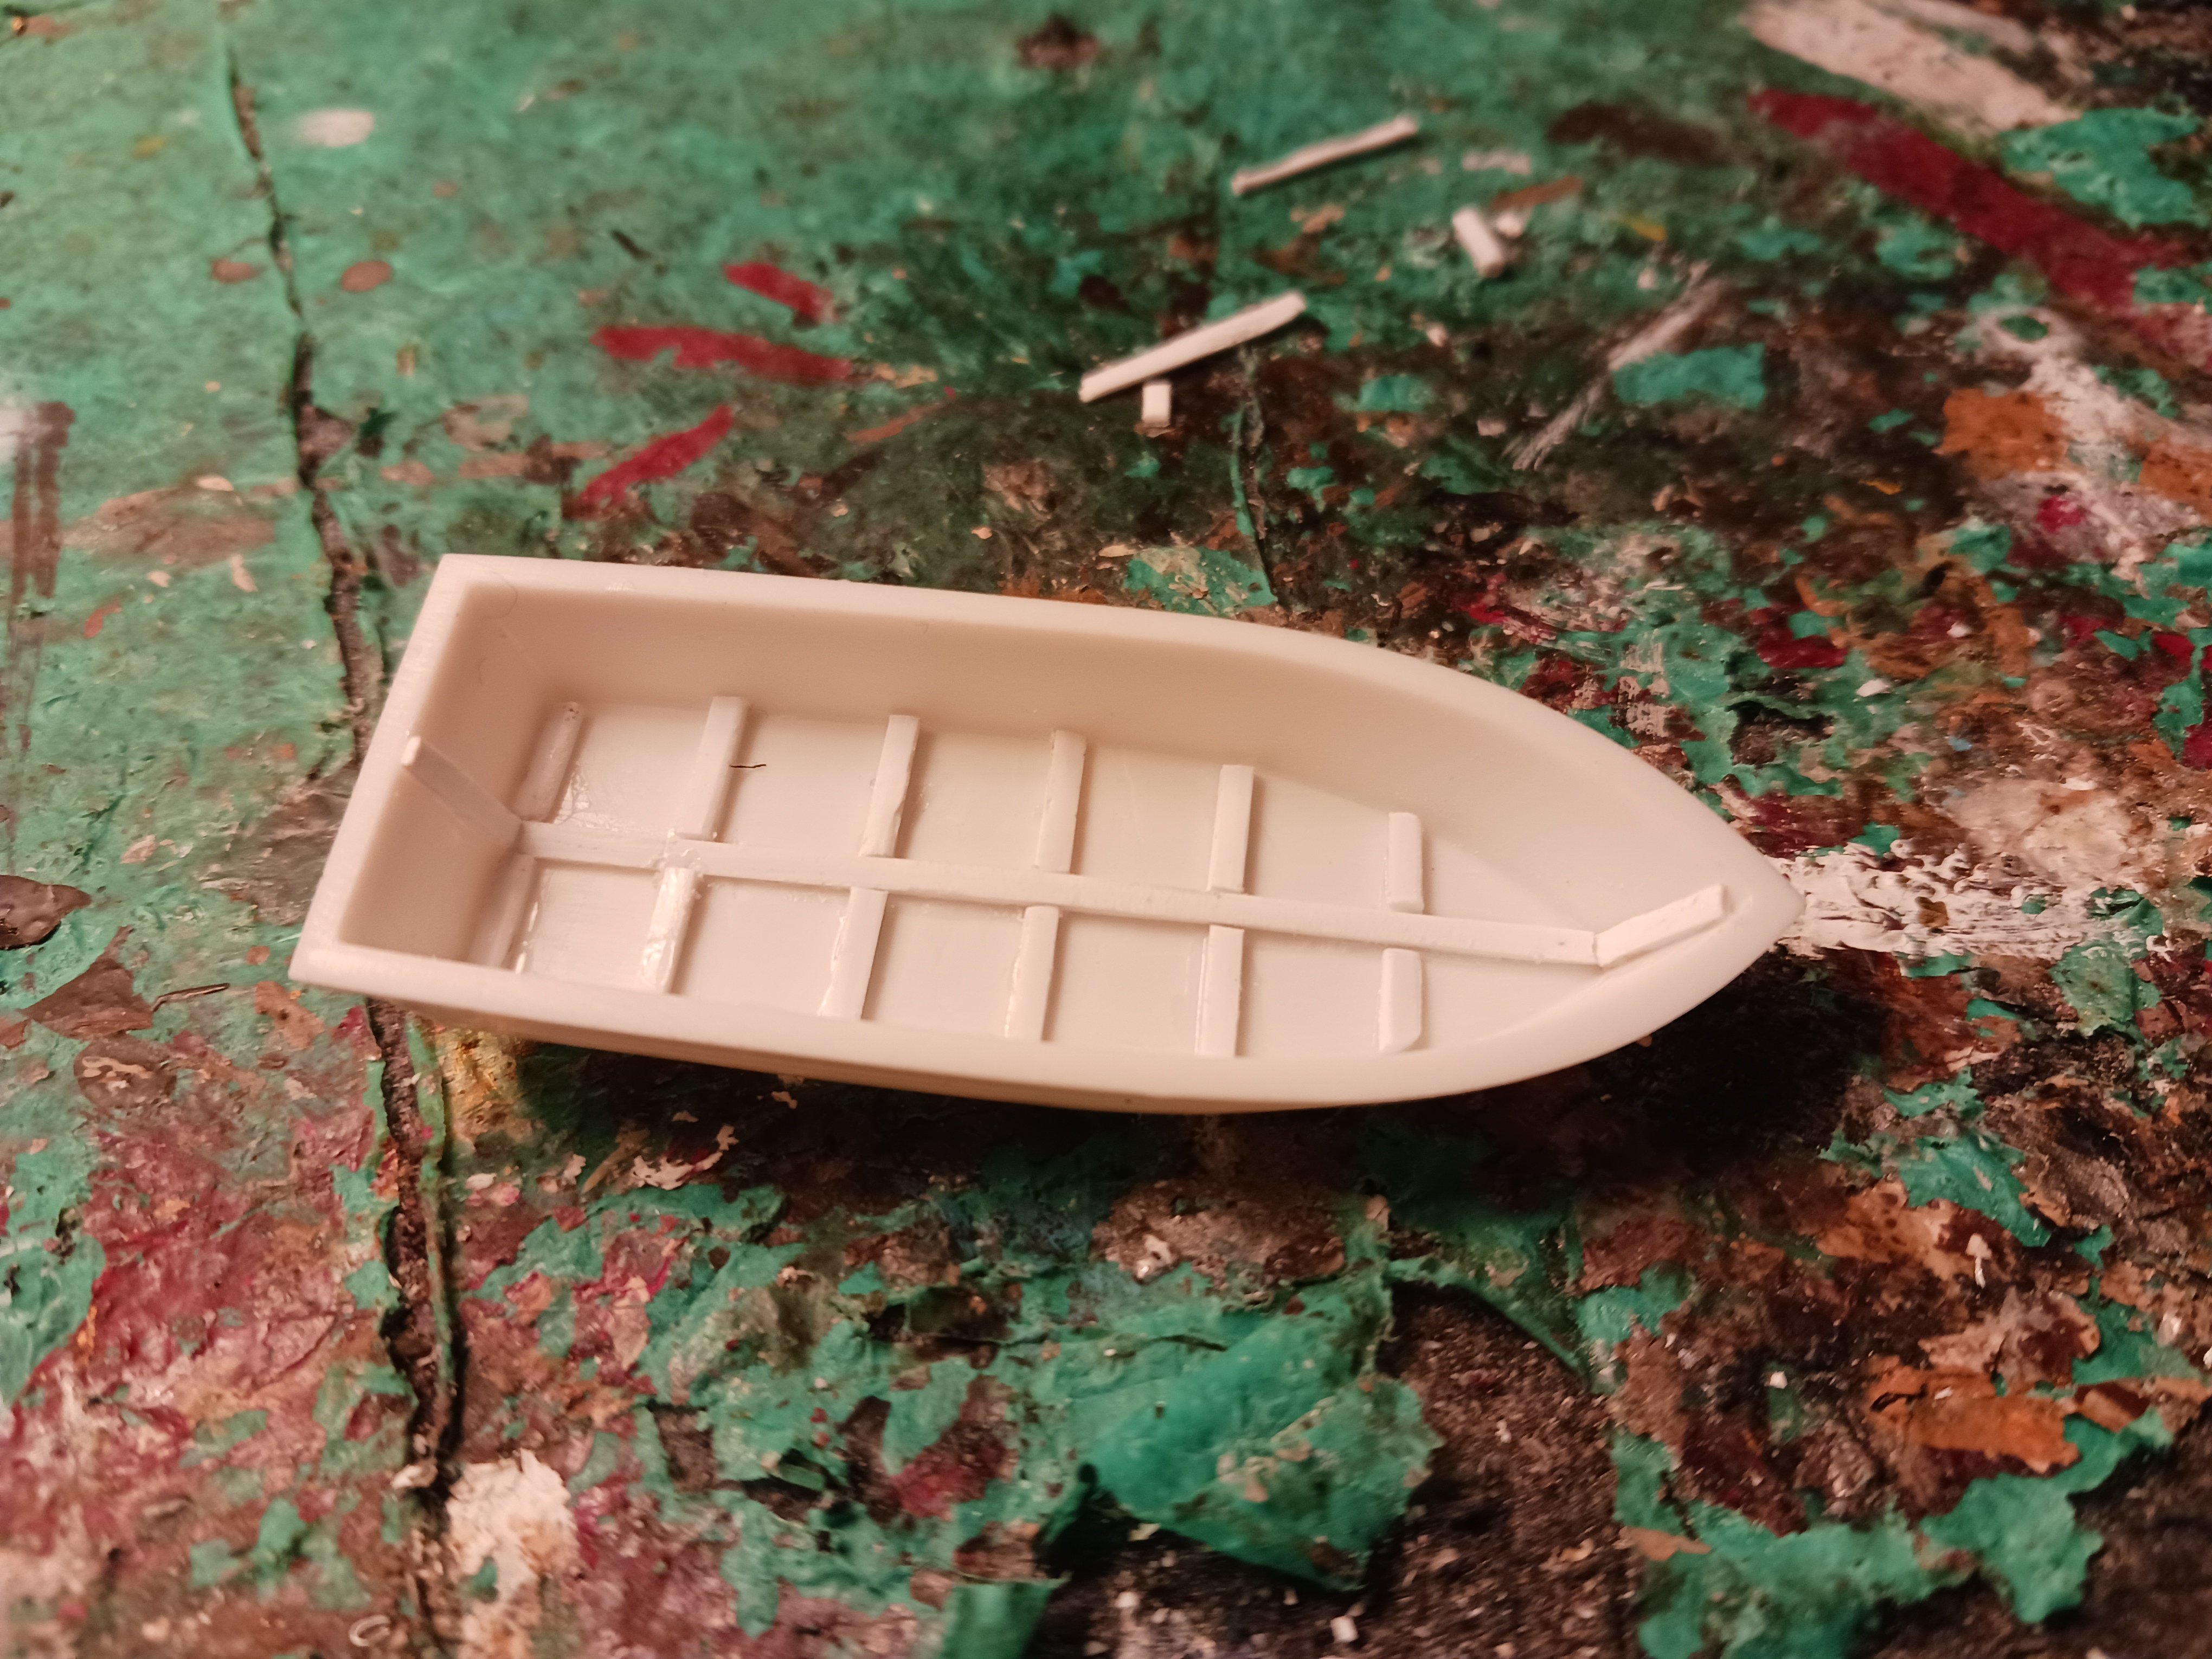
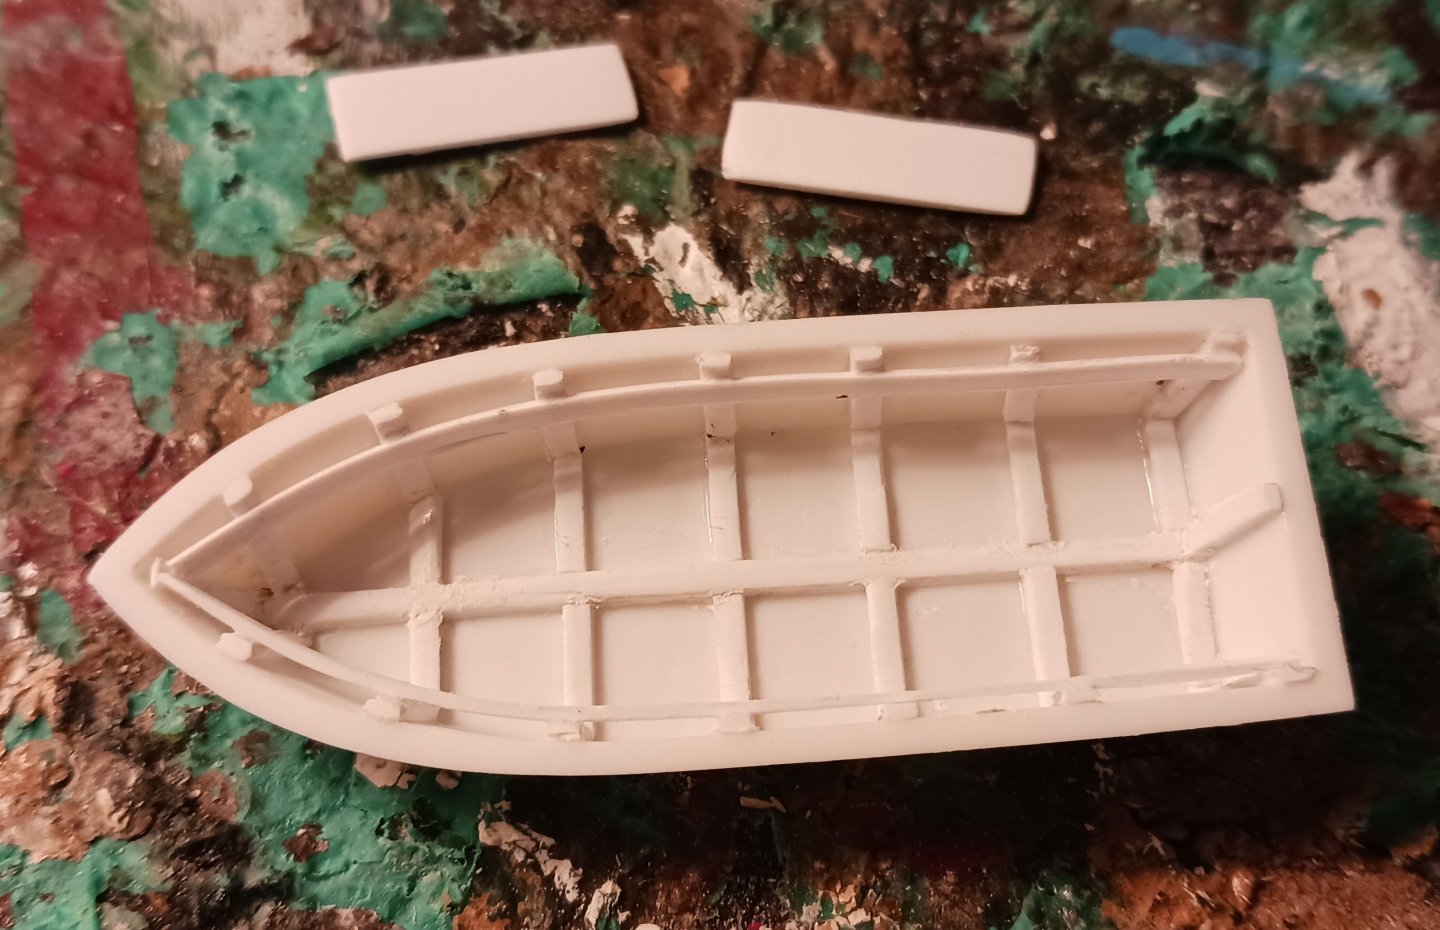
The vertical portions of the frames have been installed (I don't know the names) which must now be sanded down to the level of the gunwale. The inwales will be added afterwards, and then the boat will be painted. The thwarts will rest upon the inwales. I will fill and sand any ugly portions of the frames before any of this happens.
- 56 replies
-
- 4
-
-
- Lindberg
- sternwheeler
- (and 1 more)
-
So, you made up the tradition and I am not to carve that into my boat? Gee, thanks. I thought you were full of facts, not fiction. 🤣
- 56 replies
-
- 4
-
-

-
- Lindberg
- sternwheeler
- (and 1 more)
-
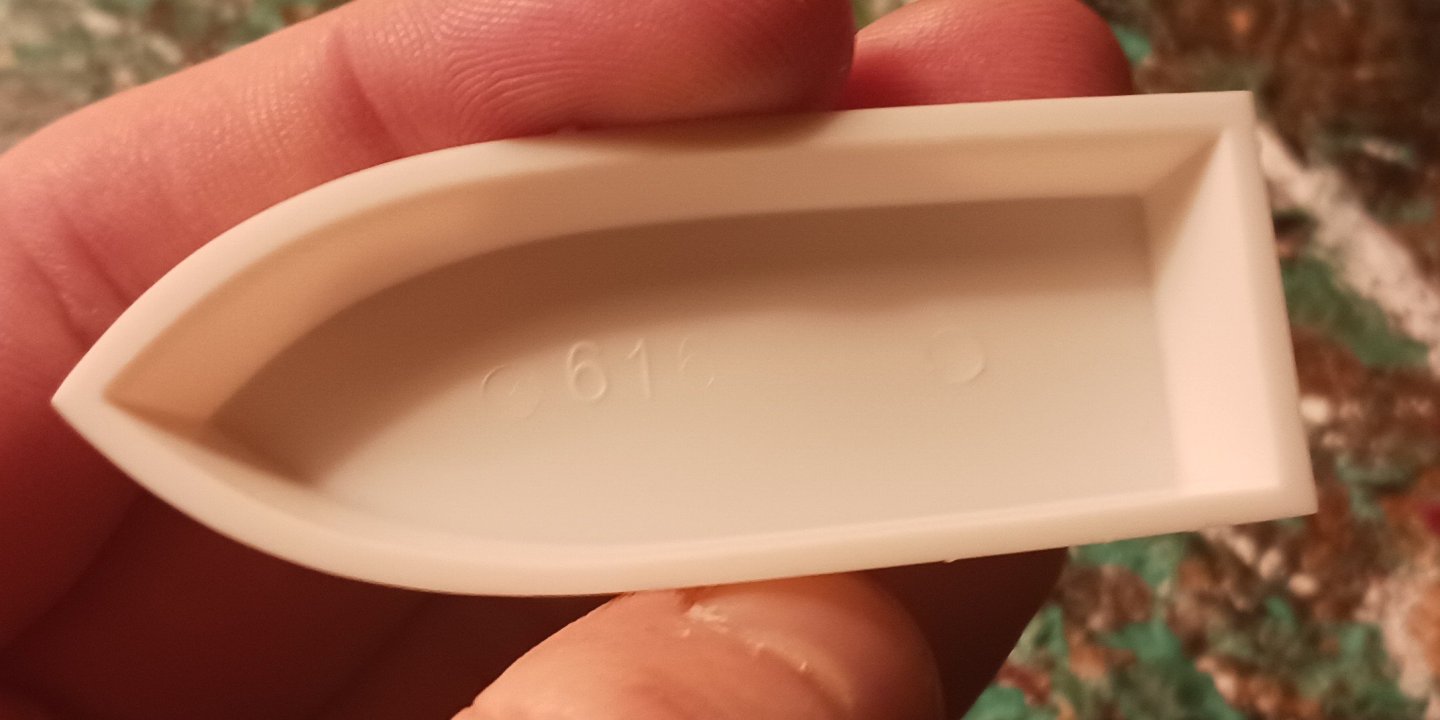
Eric, you are giving Lindberg far too much credit. That is the number 61, the part number of the boat. I will make the carving on the underside of the boat when it is finished.

- 56 replies
-
- 4
-
-
- Lindberg
- sternwheeler
- (and 1 more)
-
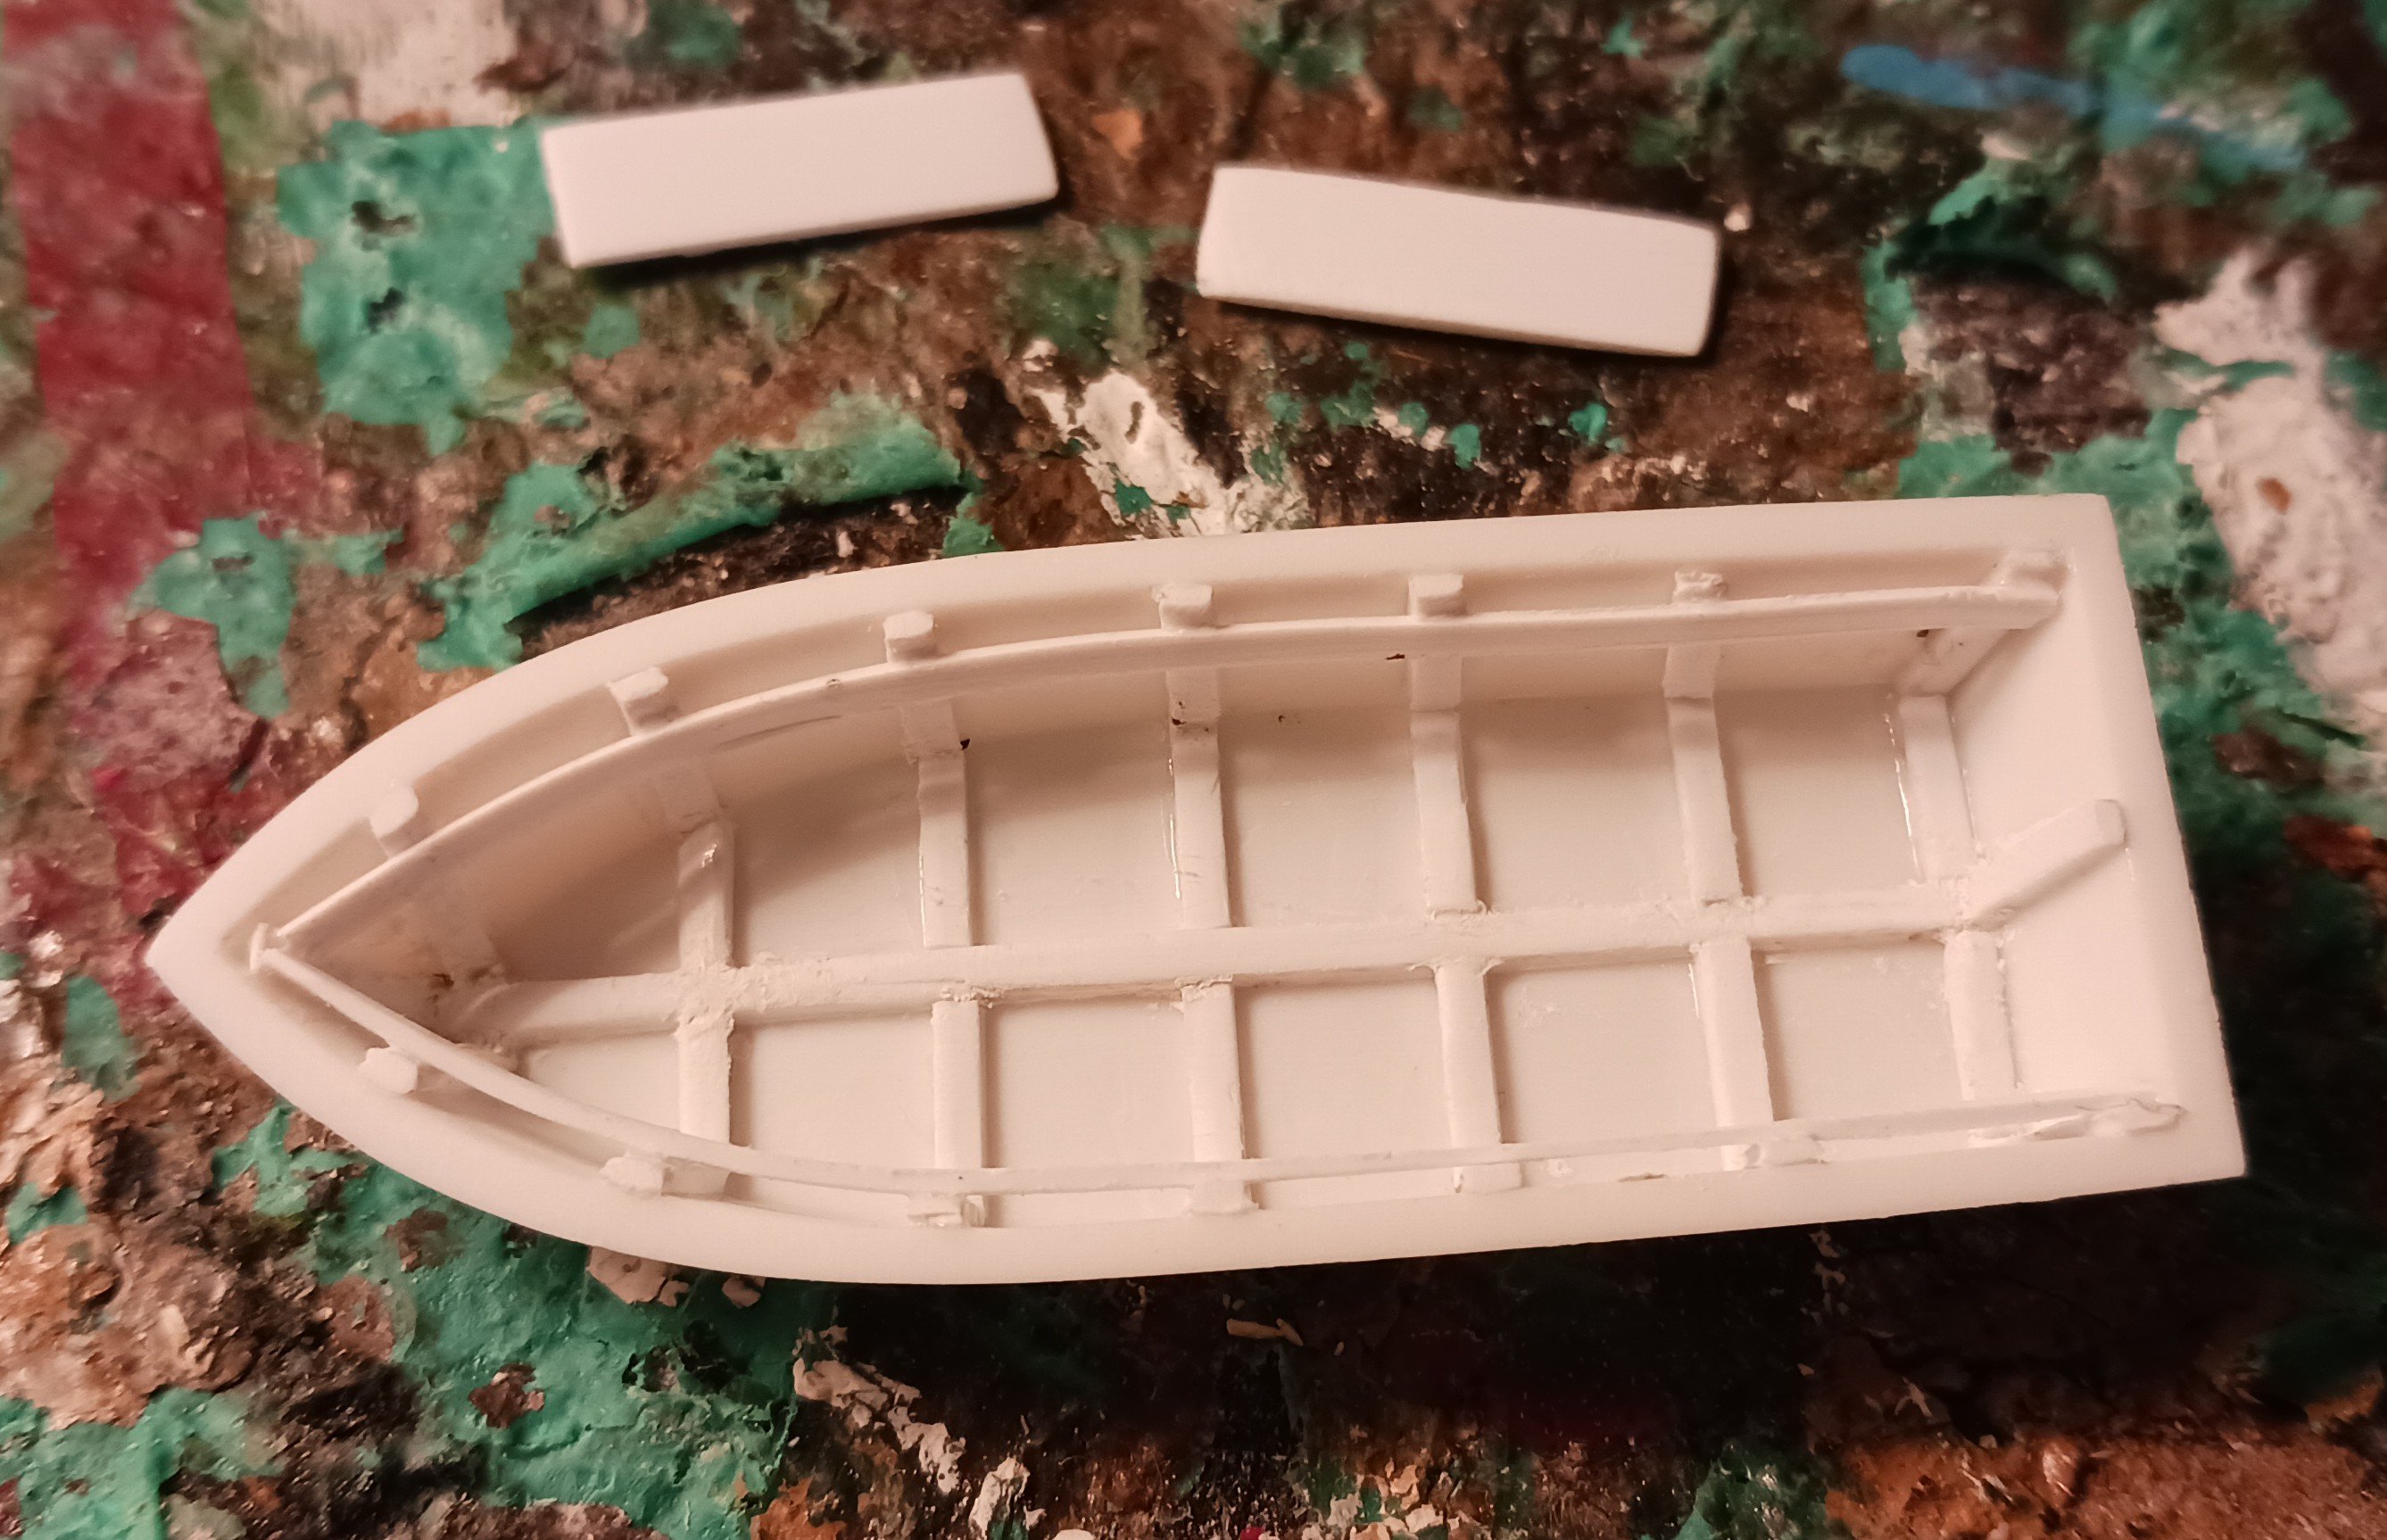
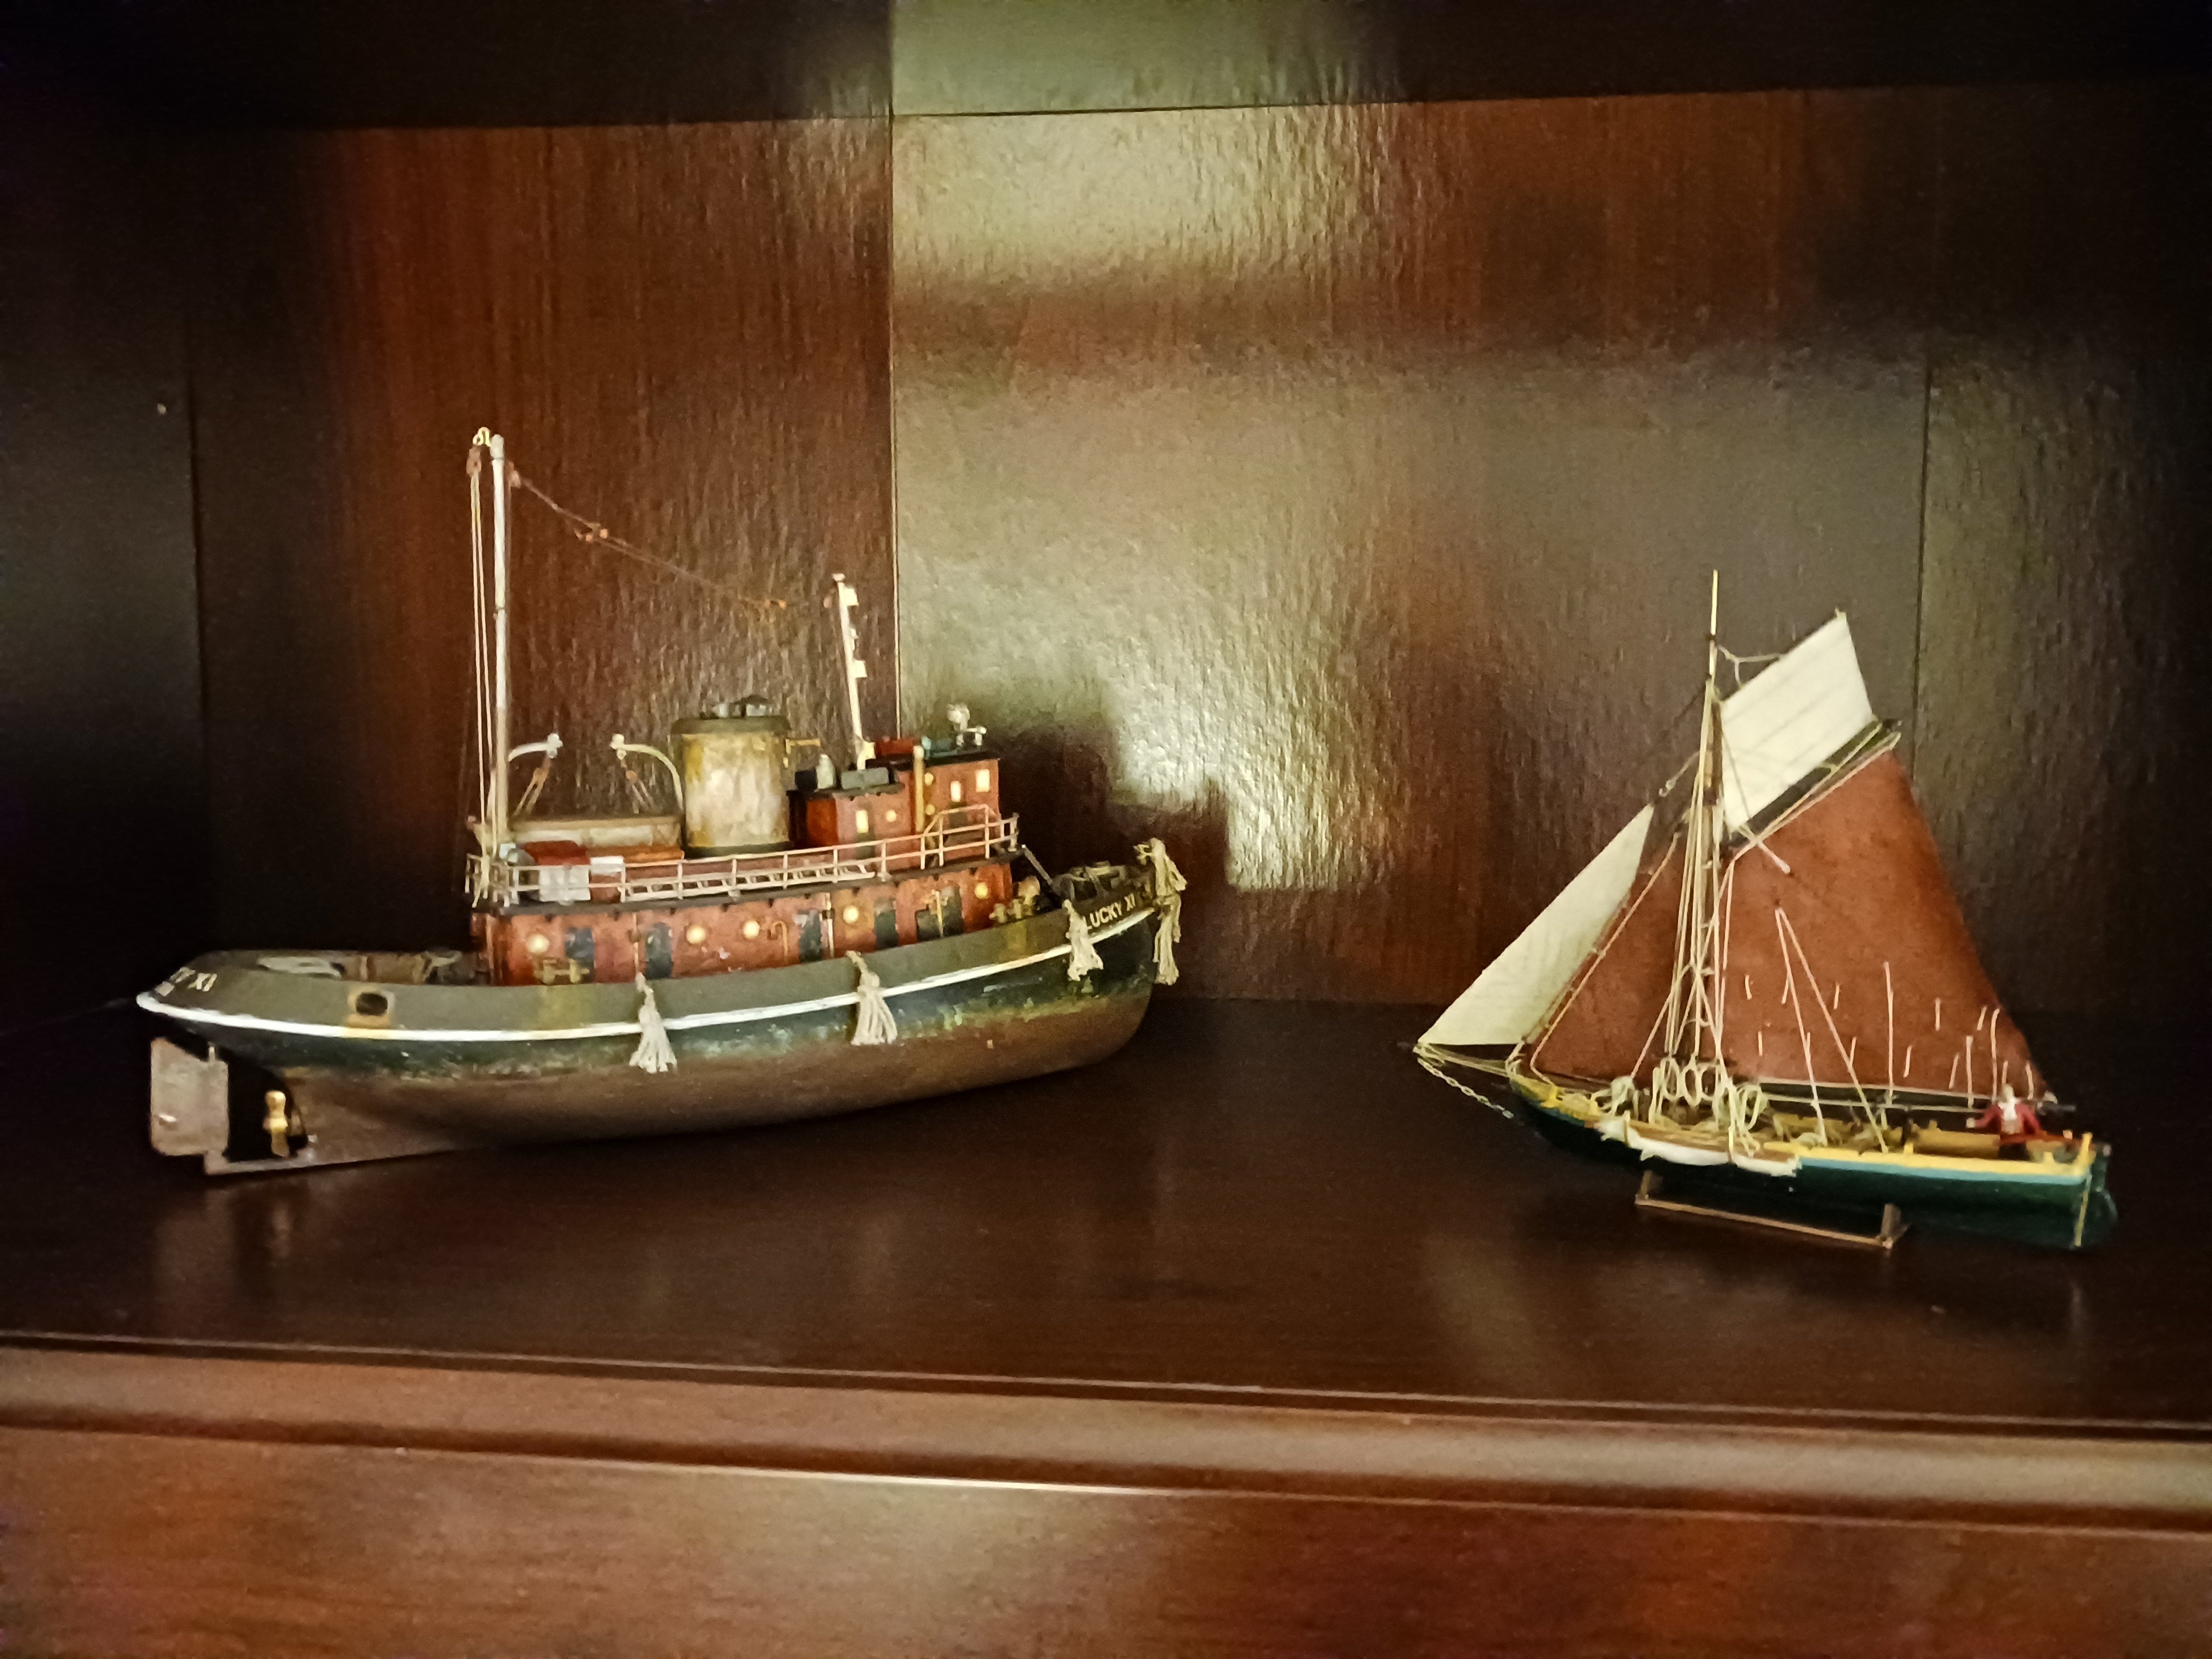
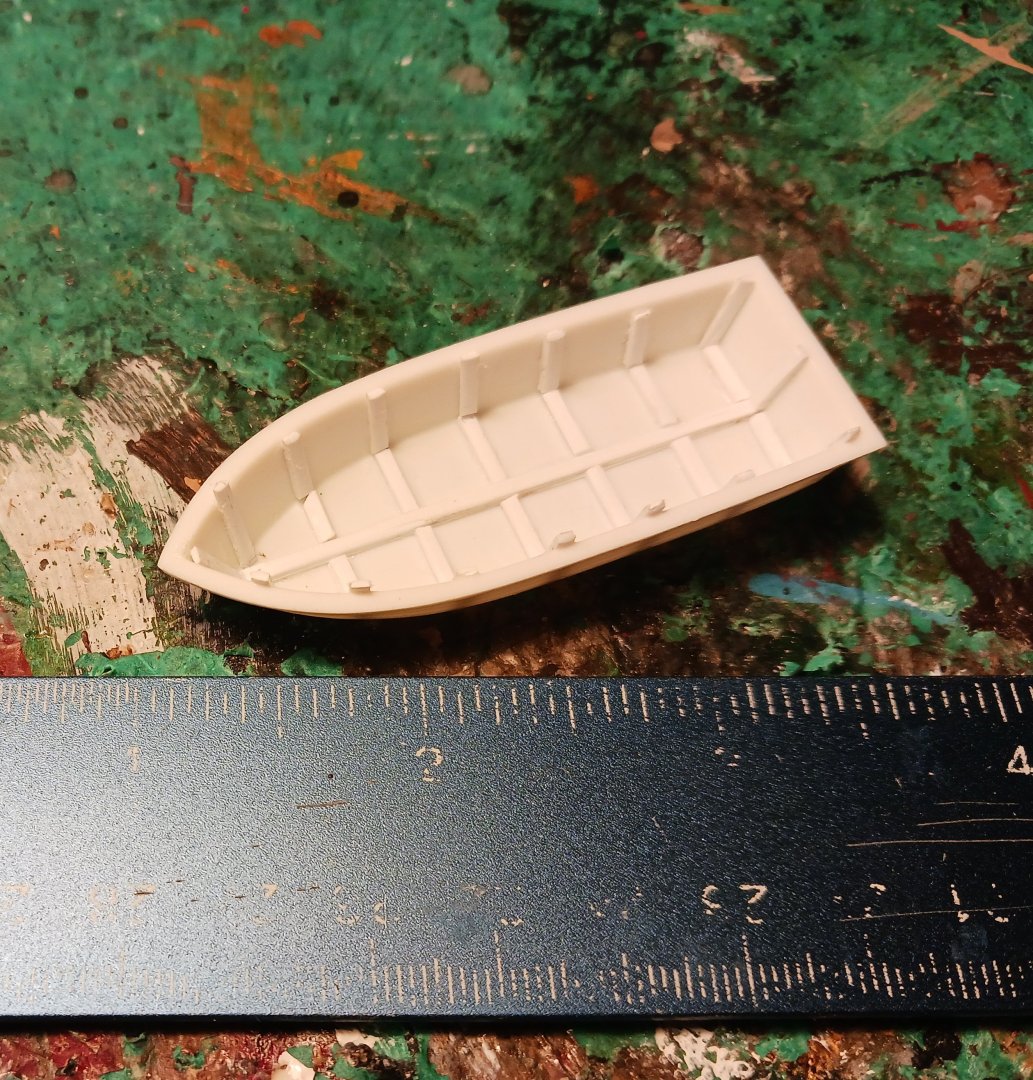
Eric, all of your information has been extremely helpful and insightful, and I greatly appreciate your comments. None of them come off as anything other than informative and objective, and quite frankly, I would like to know more. Now, I think the completion of the ship's power train warrants a slight pivot to take a good look at the ship's skiff. here's the sorry excuse for a boat that they gave me, even though it looks fine on the outside. It is obvious that Lindberg never thought that some modelers would like to display their ship's boat somewhere other than upside down on the upper deck. Now, if you know me or have seen some of my logs, I usually want to display ship's boats separate from the actual model as a miniature piece. Let's see if we can build ourselves an interior for this boat.
- 56 replies
-
- 6
-
-
- Lindberg
- sternwheeler
- (and 1 more)
-
@Keith Black @Cathead @Kenchington It seems as though the two inaccuracies in the boiler system actually cancel each other out. If the fireboxes were to be at the front, they would be at the front to increase airflow towards the extremely long chimneys (good to keep coal ashes away from a wooden boat) but the chimneys are abnormally short for this kind of boat. Now, this kit doesn't pretend to be an accurate depiction of any one boat, or even type of boat. Honestly, if I wanted a true-to-life representation, I would have just scratch-built my own steamboat as modifying the many inaccurate parts of this kit probably would have taken more effort. This kit, in its most basic form, is meant to be built as essentially a toy. I am choosing not to build it as such, obviously. At its core, despite its inaccuracies and failings, it is one of the least offensive offerings in either plastic or wood. Most of the other steamboat kits out there in either medium look very inaccurate, and honestly, quite ugly. Hence the large proportion of scratch built steamers on this forum.
- 56 replies
-
- 5
-
-
- Lindberg
- sternwheeler
- (and 1 more)
-
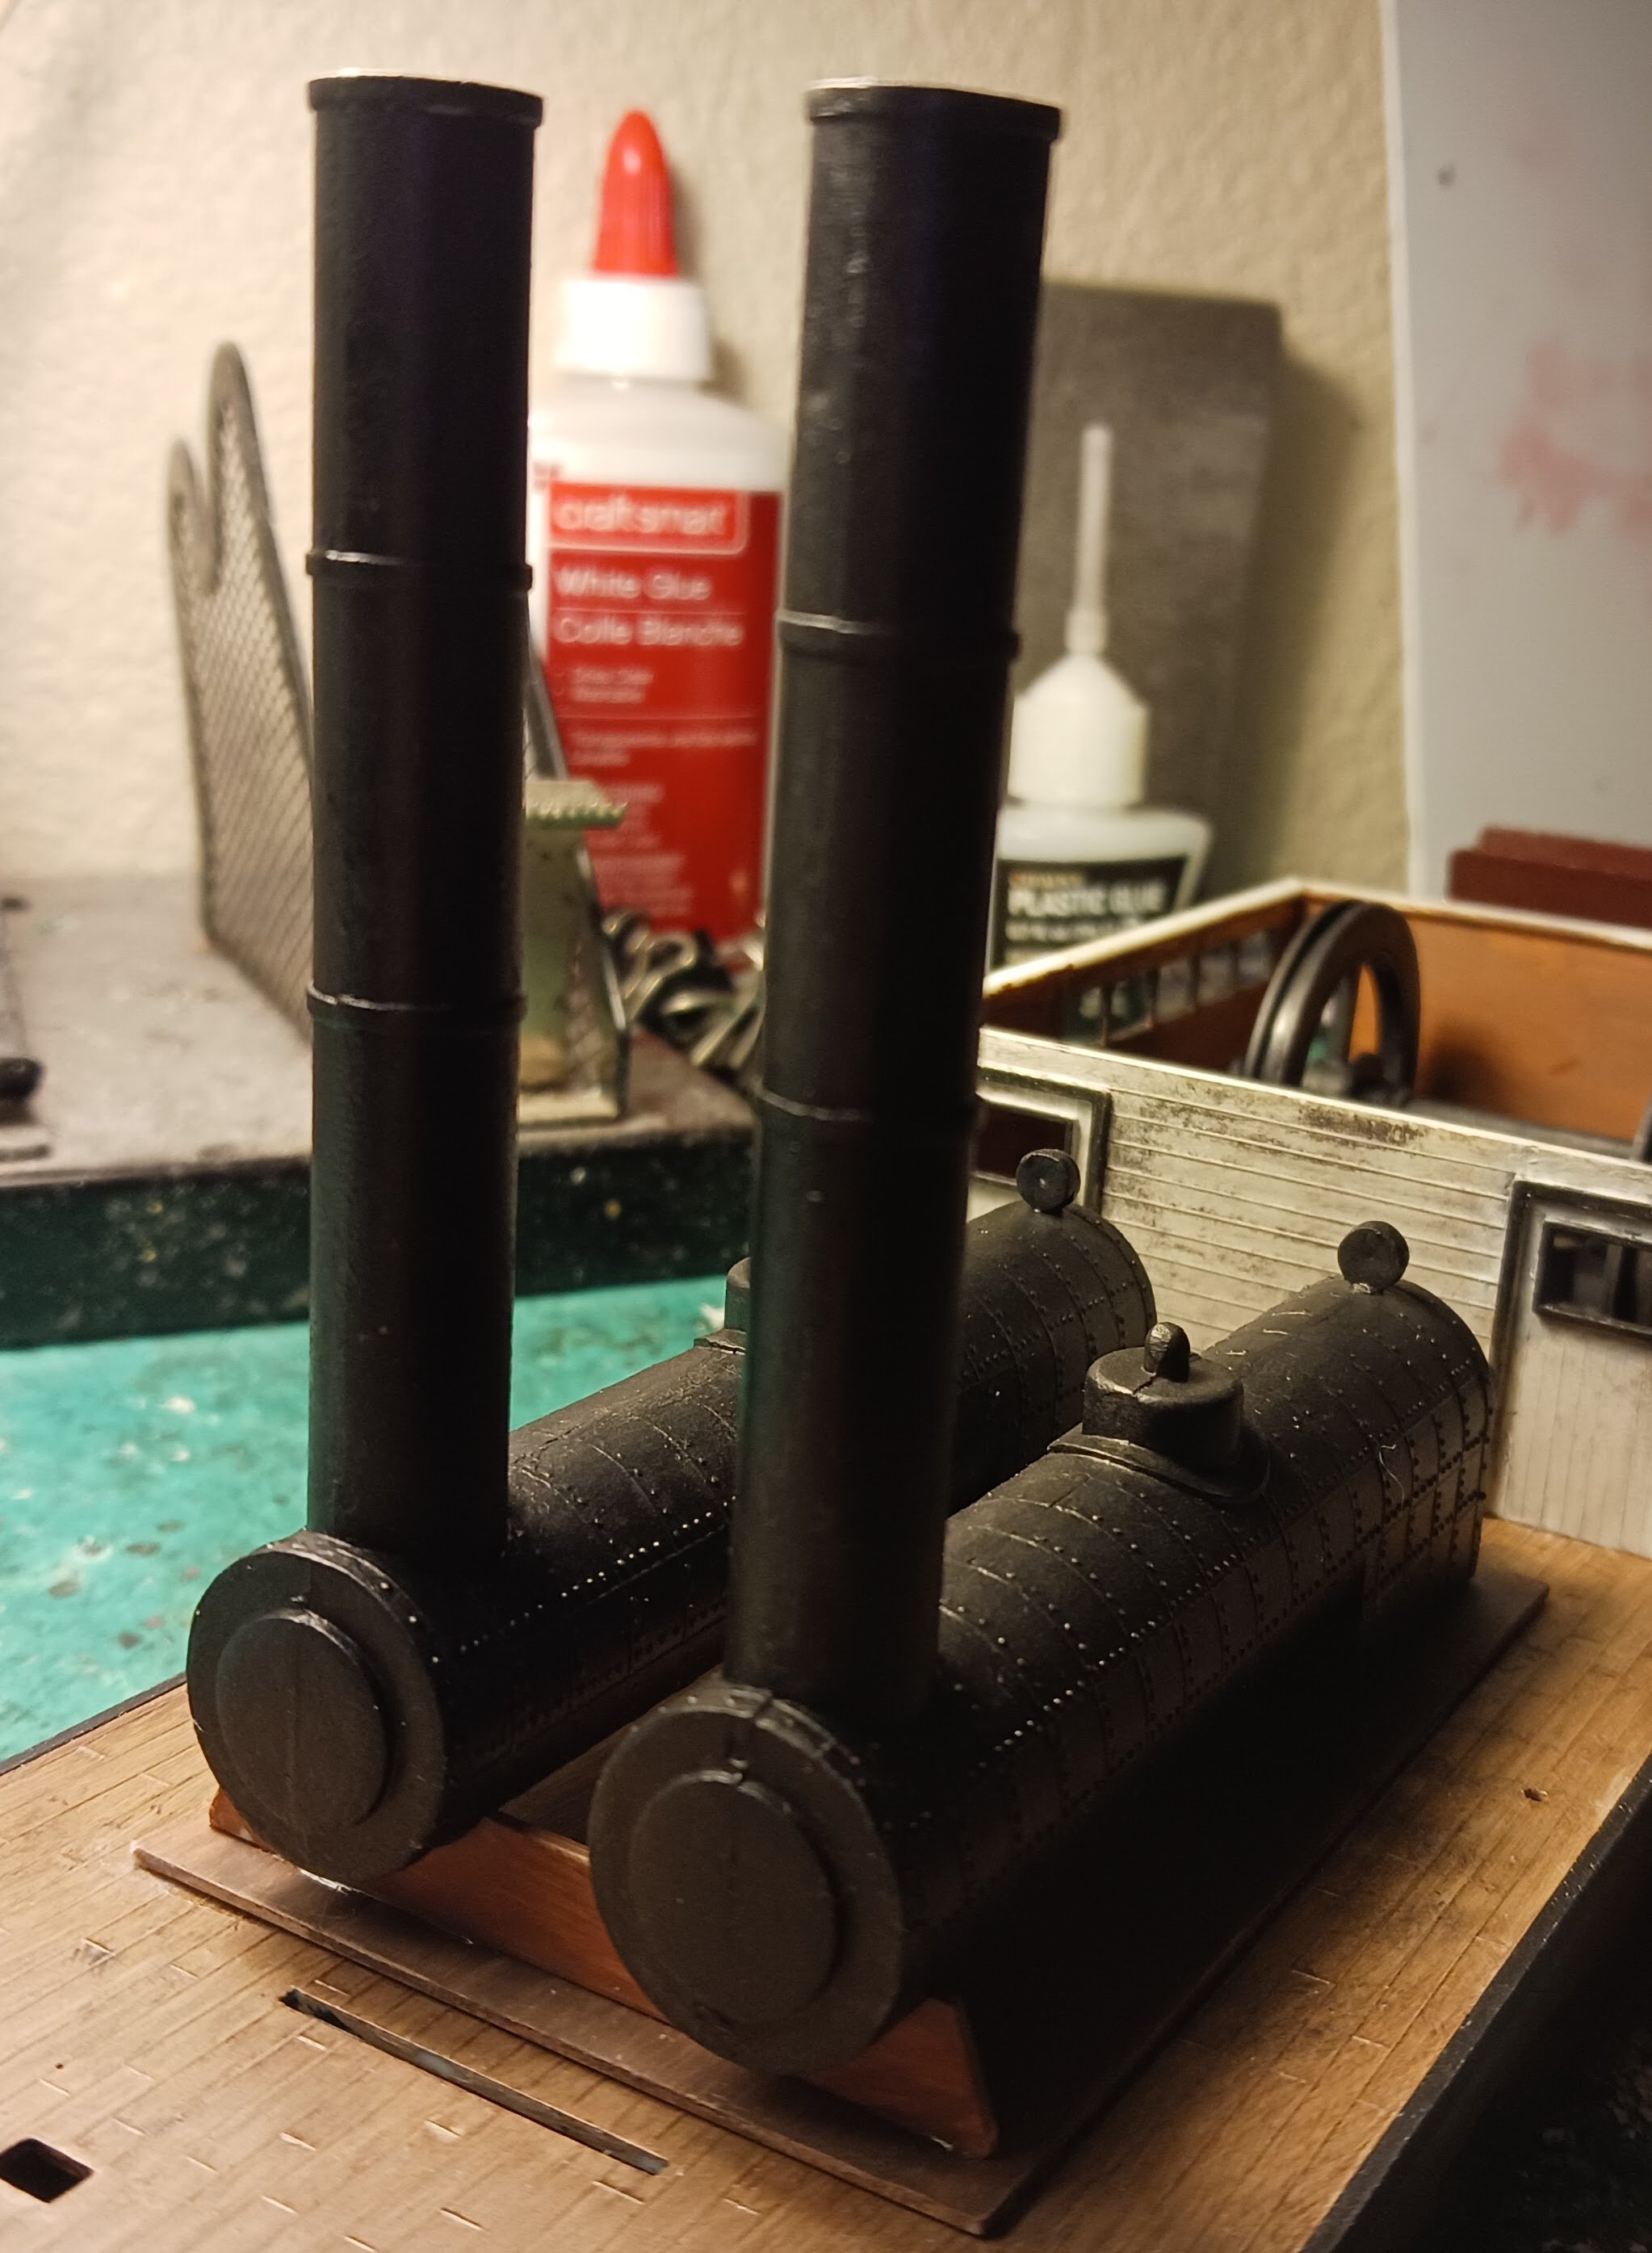
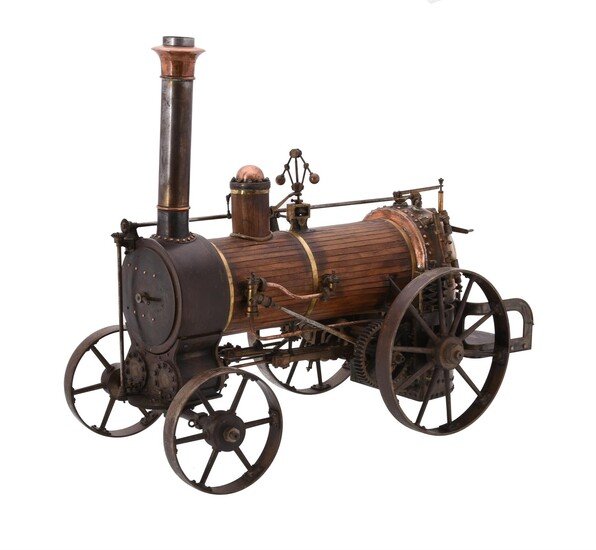
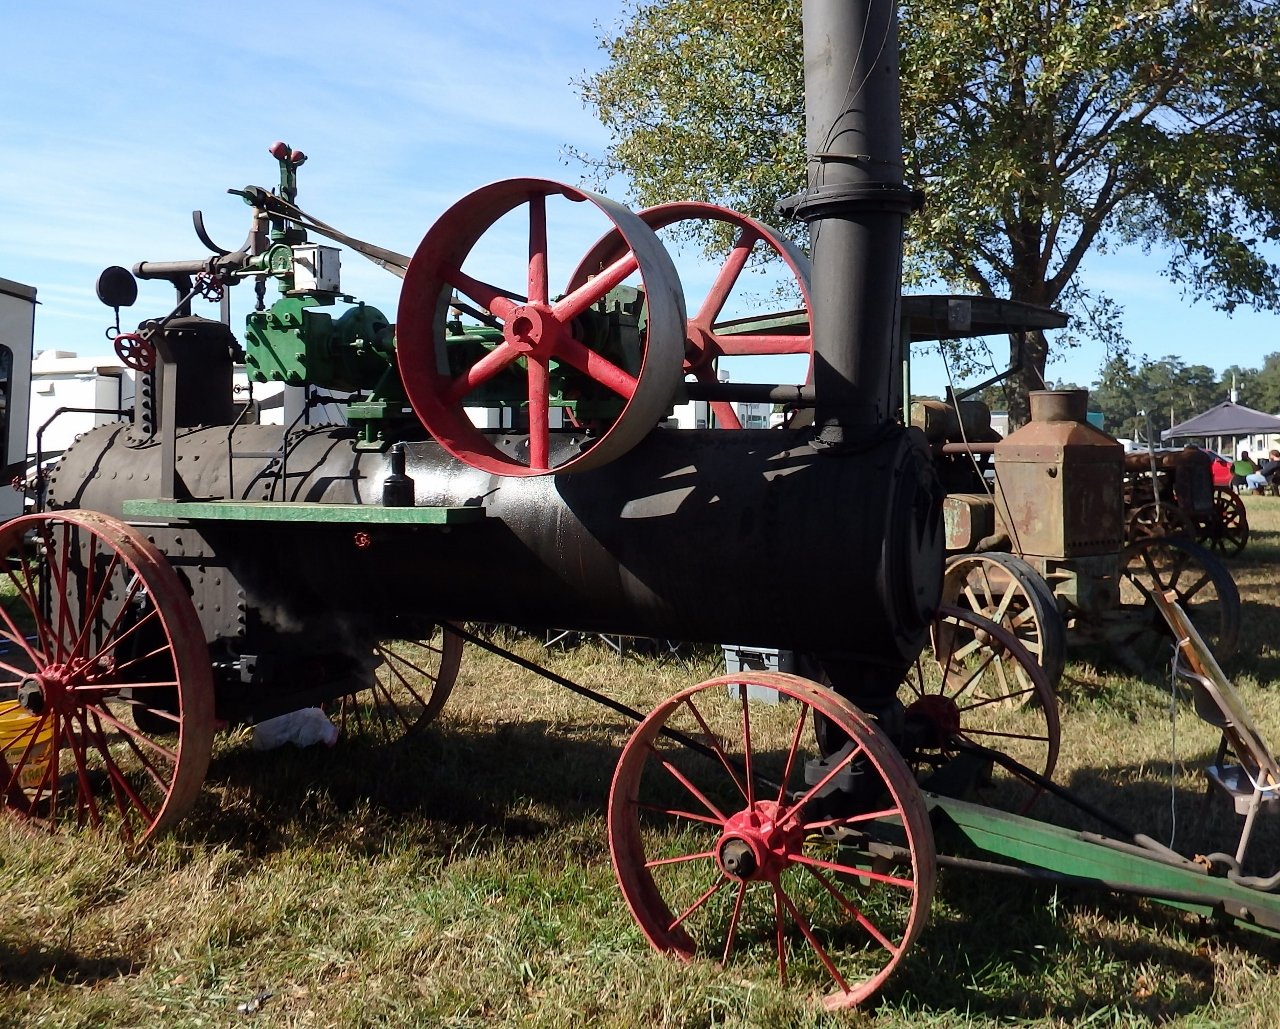
Eric, I think the steam boilers in question might be based on land boilers used in steam tractors and locomotives. For one, there is this article that explains that the conflagration of coal gases run in a tube through the water in the boiler, heating it: There are also some images of steam tractors that show the firebox at the back and chimney at the front, which seems to have been the standard configuration at the time: Our boilers on the ship seem to be at least partially based on this steam tractor from 1920. Perhaps the designers of the kit misapplied the concepts of land boilers to their marine boiler design. This begs the question: if the coal box and chimney are both at the front of the boiler, how would the water be evenly heated?

- 56 replies
-
- 4
-
-
- Lindberg
- sternwheeler
- (and 1 more)
-
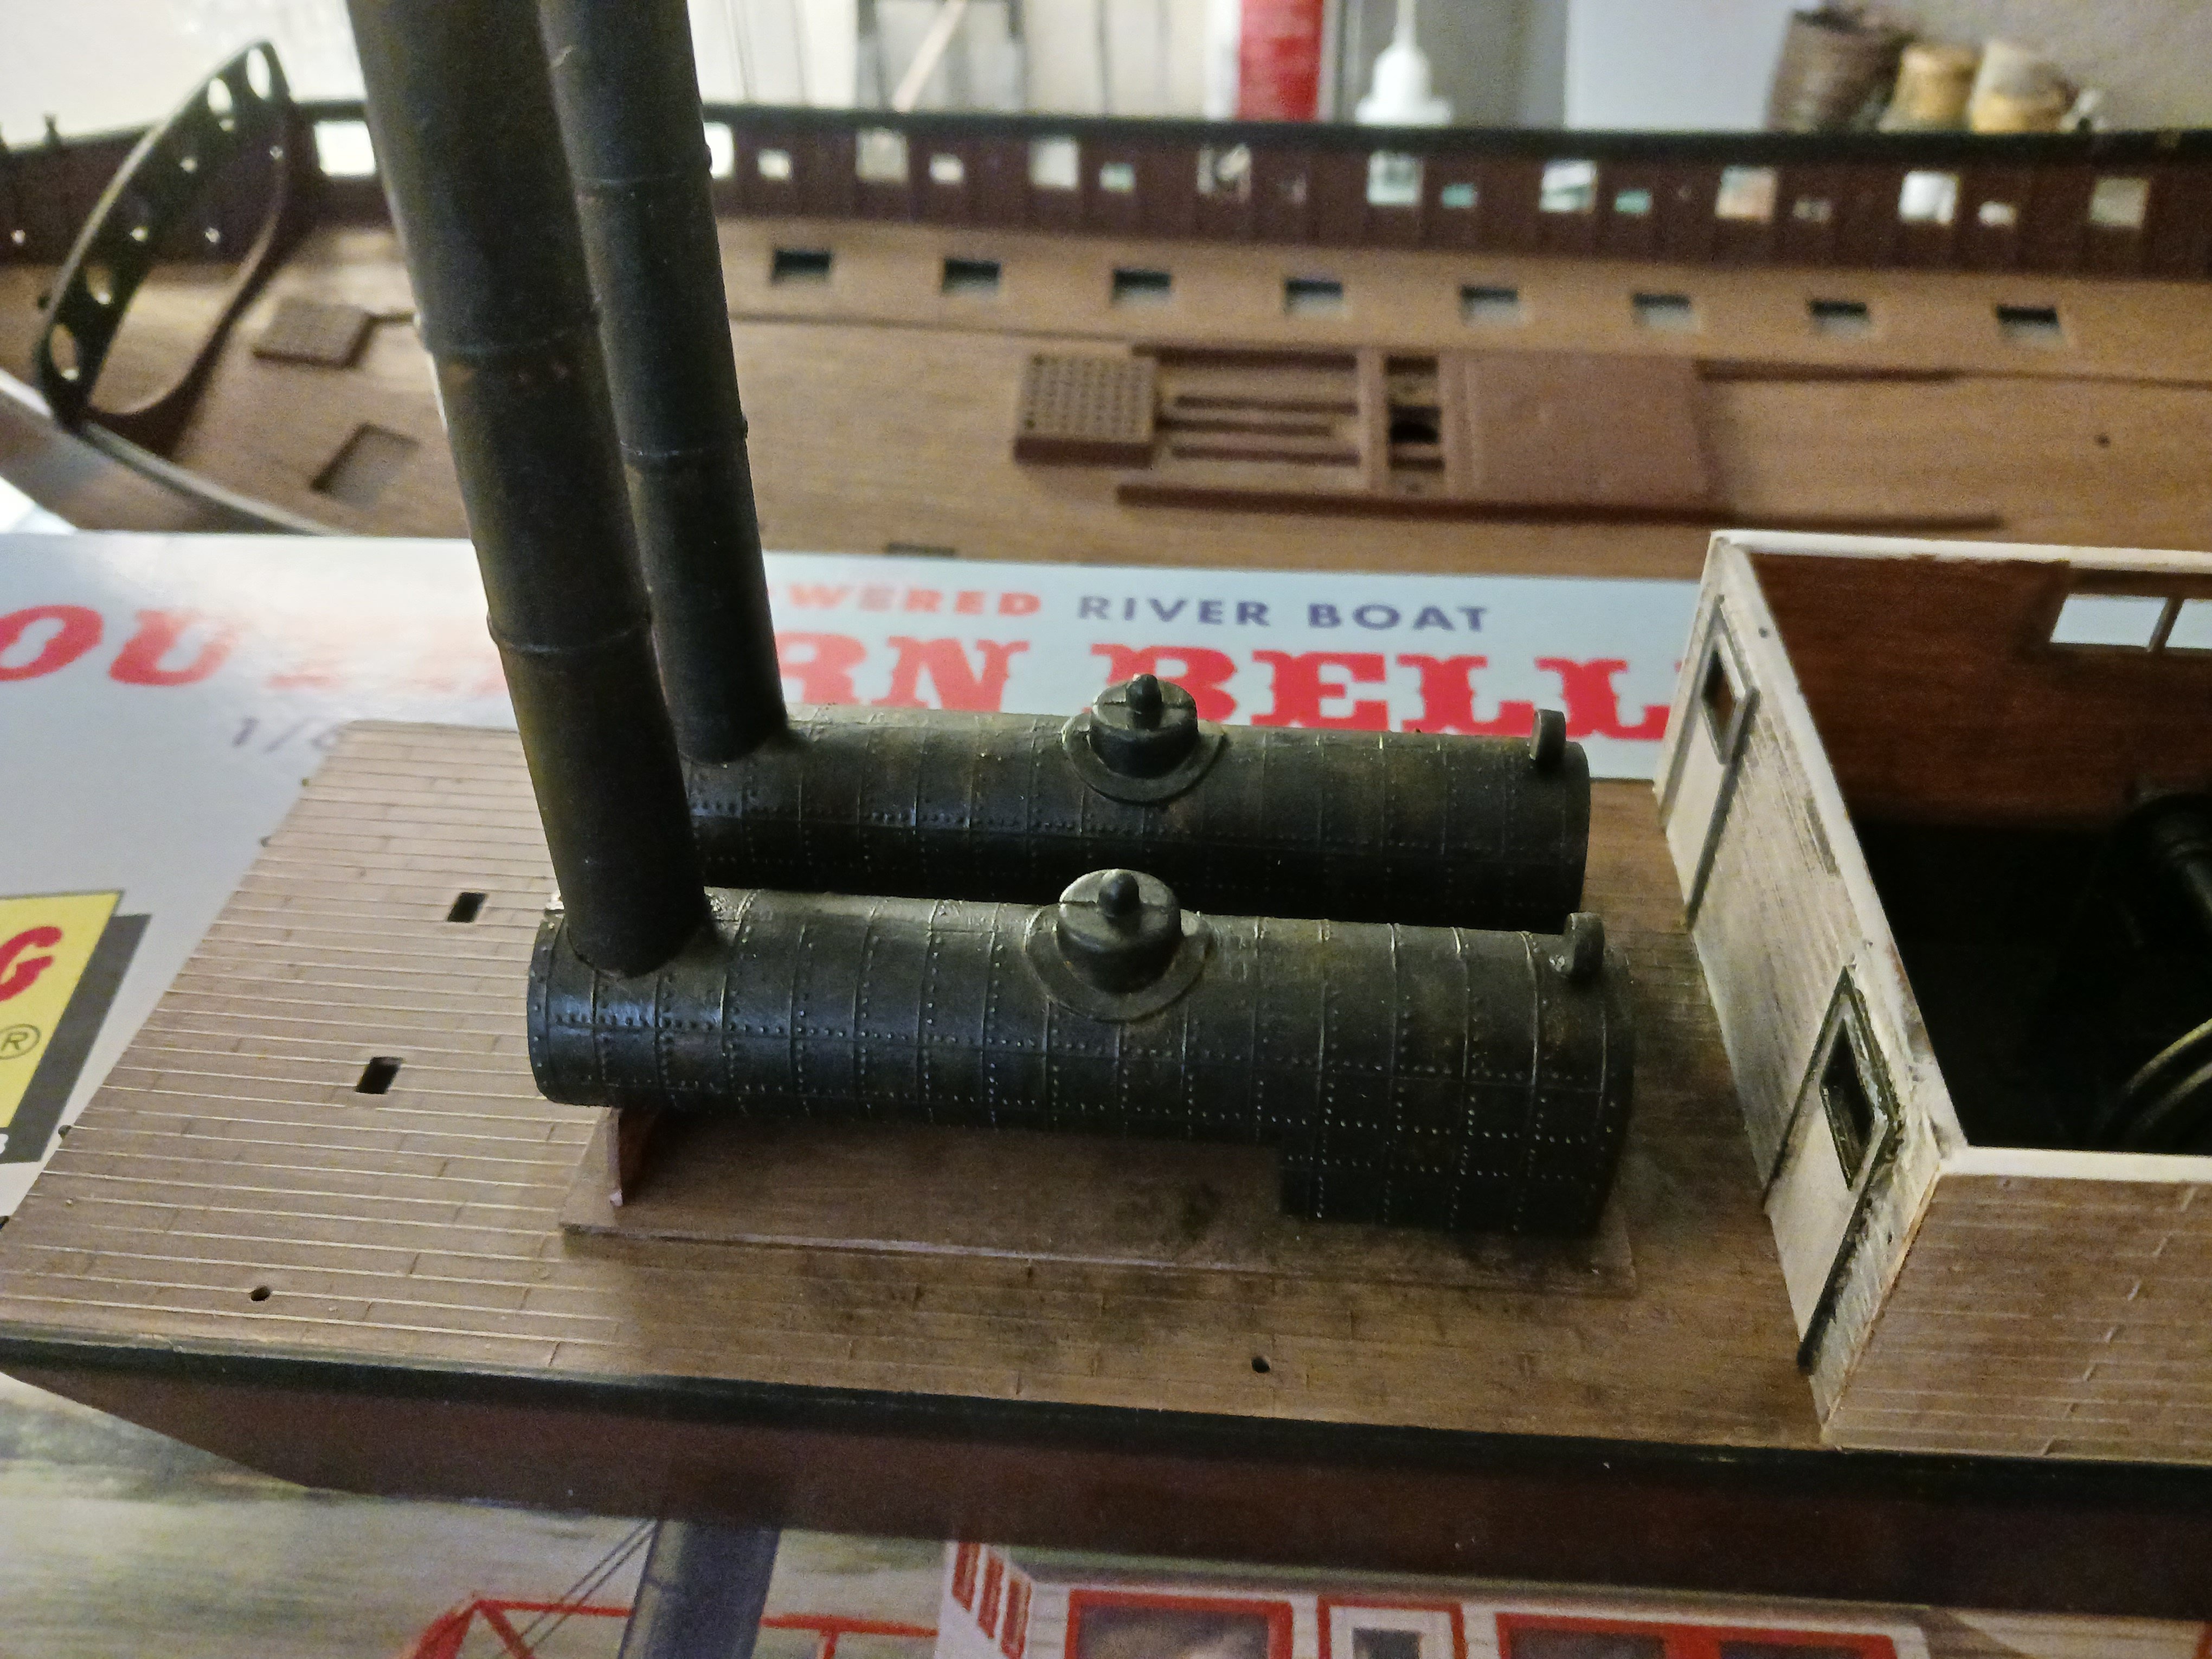
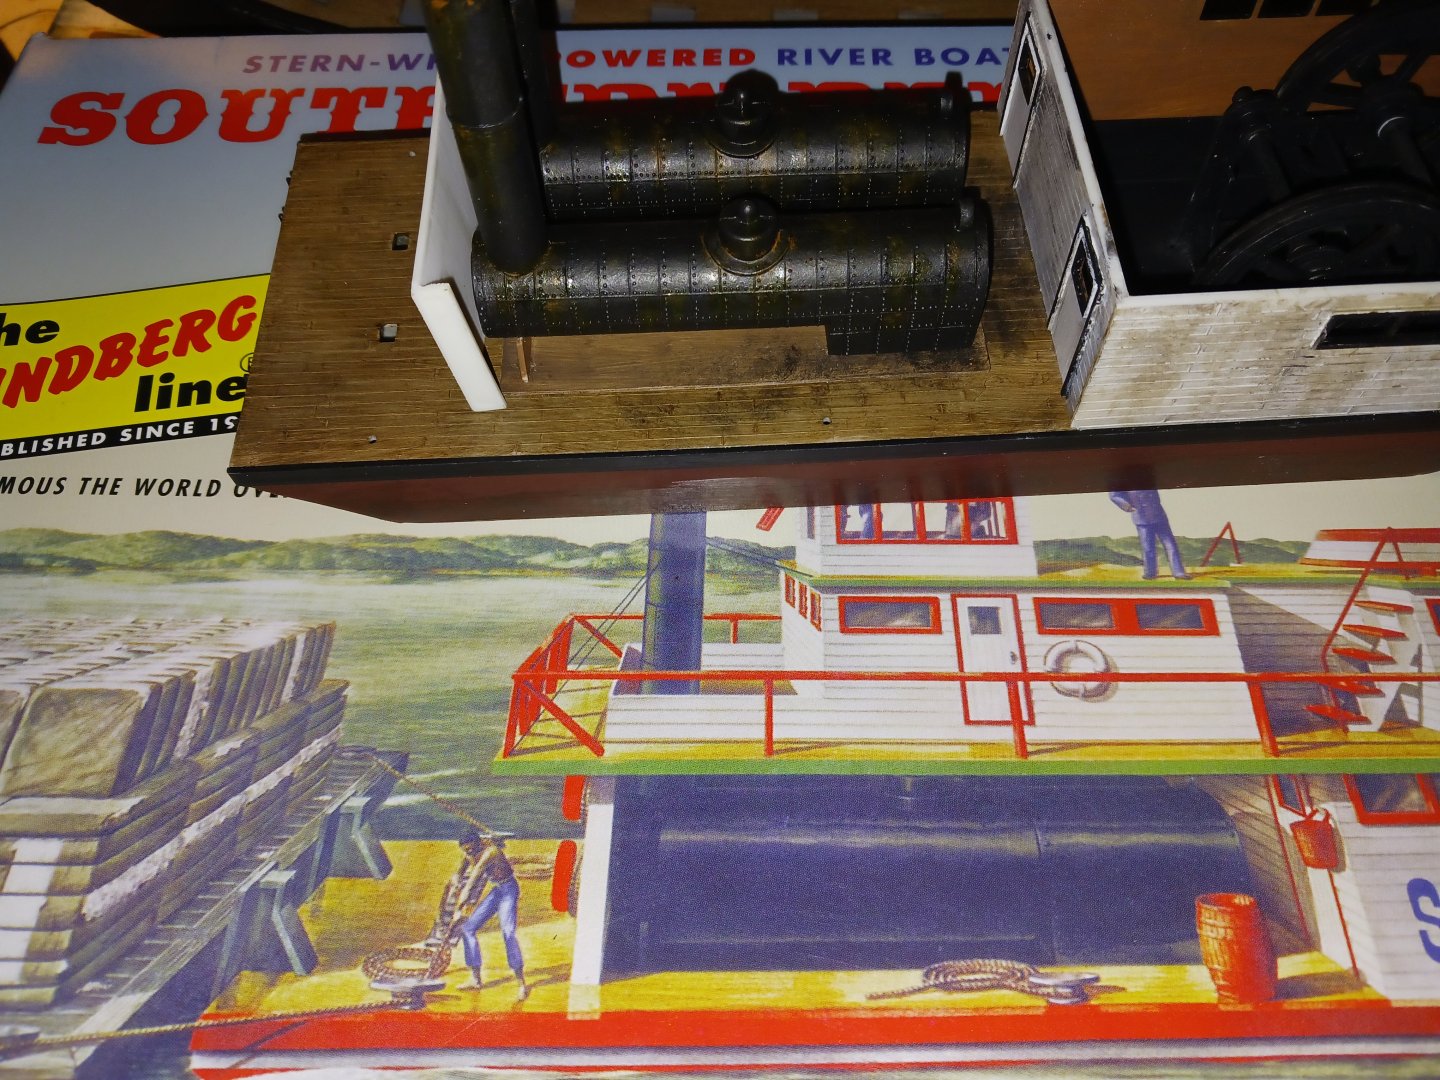
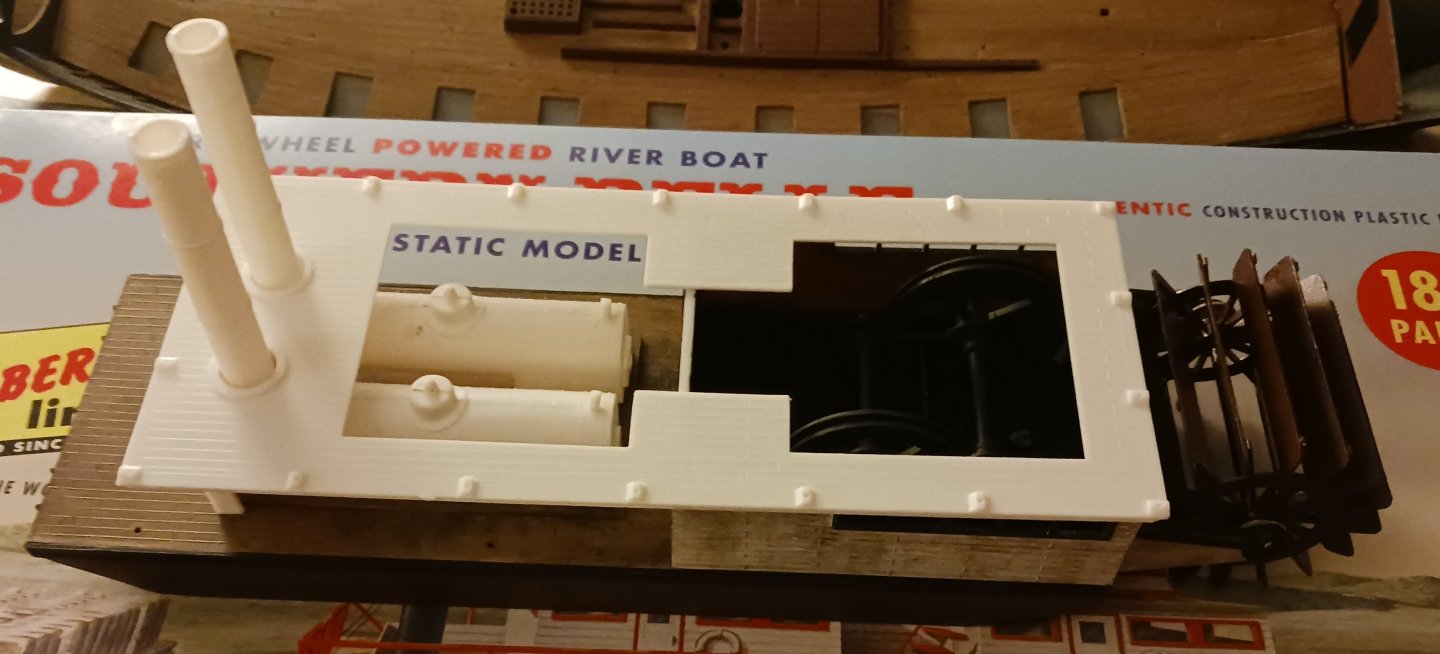
Eric, as I primarily deal with sailing ships, I am well aware of the confounding terminology involved. With that said, I understand that this kit is not based on a real ship, but is instead designed to look like a relatively convincing replica as viewed by a non-expert. This kit puts the fireboxes at the back of the boilers- there are even doors molded onto them. Furthermore, the location of the fore bulkhead makes it impossible for a man to even access the fore of the boiler to shovel coal. While this is inaccurate, I am not willing to scratch-build new boilers on a boat that should only take a few weeks to build. In other news, I have gotten the boilers and chimneys painted.


- 56 replies
-
- 7
-
-
- Lindberg
- sternwheeler
- (and 1 more)
-
I've now made up and painted the platform upon which the boilers sit, built the boiler assemblies, and I have them dry-fitted in place as well as the fore bulkhead and the second deck. Next step is painting and installing the steam boilers.
- 56 replies
-
- 6
-
-
- Lindberg
- sternwheeler
- (and 1 more)
-
Kieth, I greatly appreciate being taught the terminology for a type of ship I know very little about. Anyway, yesterday I got the arms and other machinery hooked up to the sternwheel, and the siding for that section of the ship into place. As is relatively standard for my work boats, I made the weathering severe and nasty, indicating a long life for the ship. Next is the coal boilers and associated machinery. I have also decided on a name for this boat- Carol Ann. Maybe when Lula's rudders jam, Carol Ann can push the supply barge for the pile driver. (Seriously, Kieth, your Lula is a masterpiece that I couldn't hope to compete with as I build this kit. You should be proud of her.)
- 56 replies
-
- 7
-
-
- Lindberg
- sternwheeler
- (and 1 more)
-
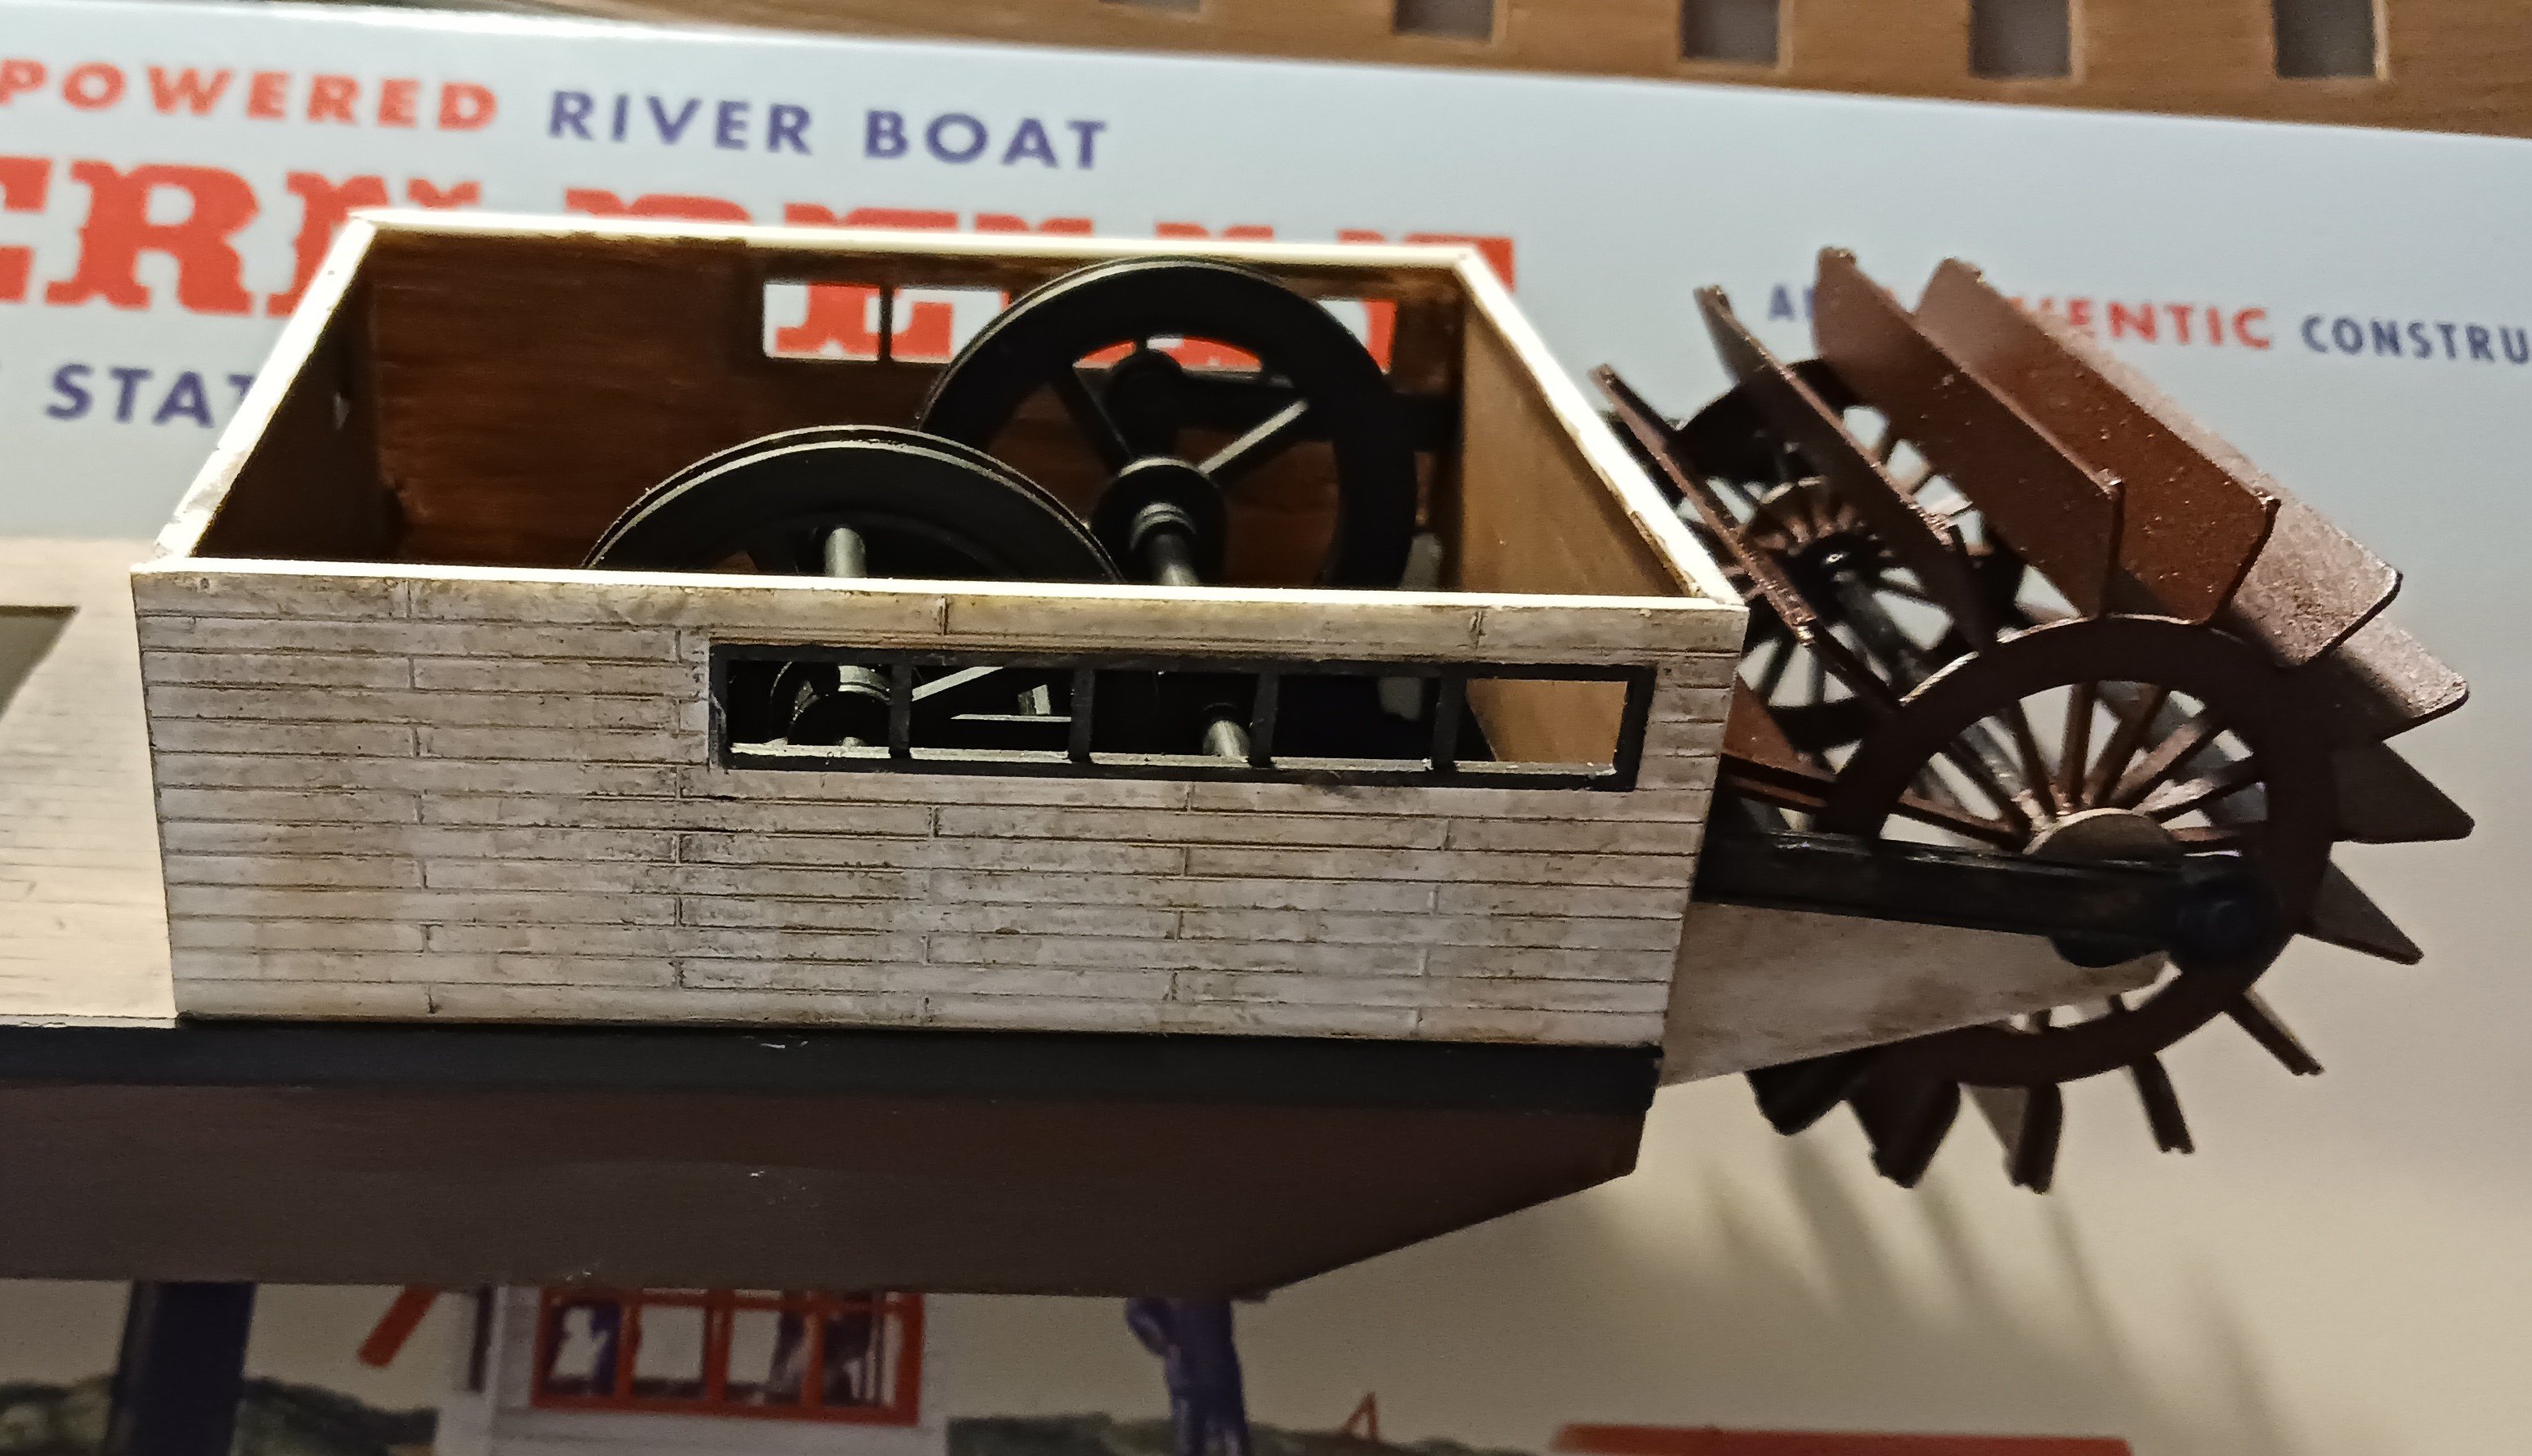
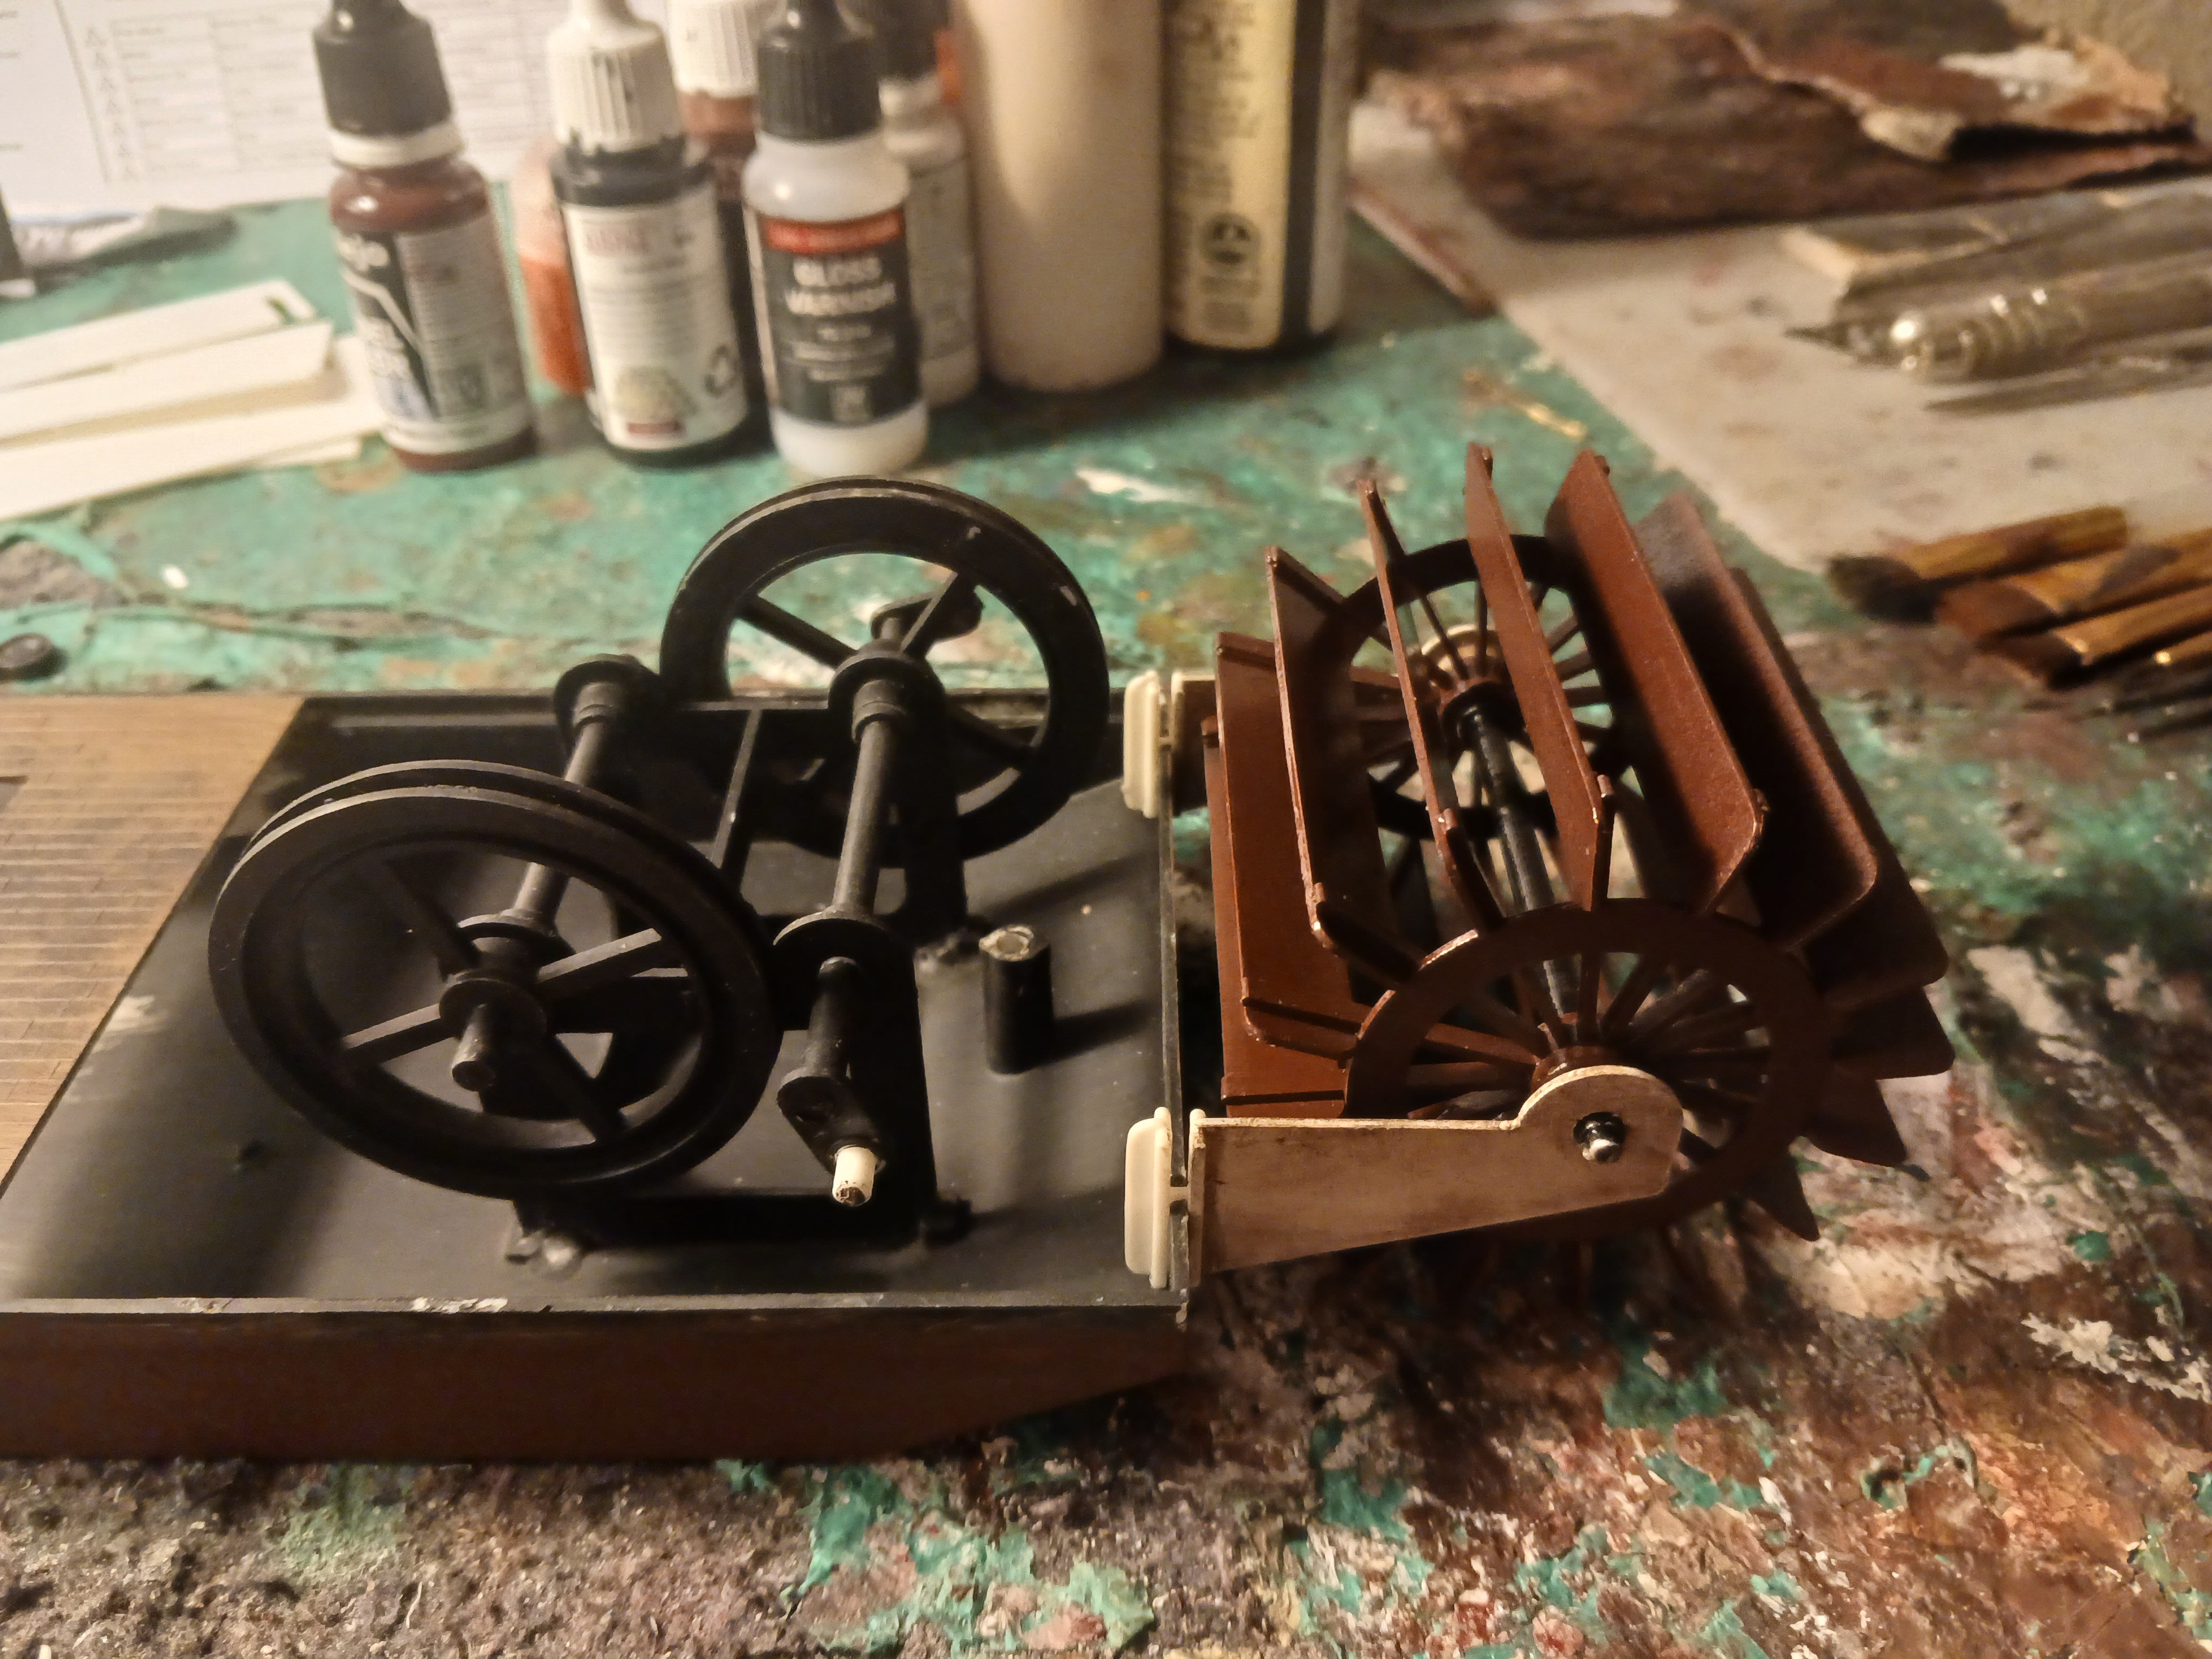
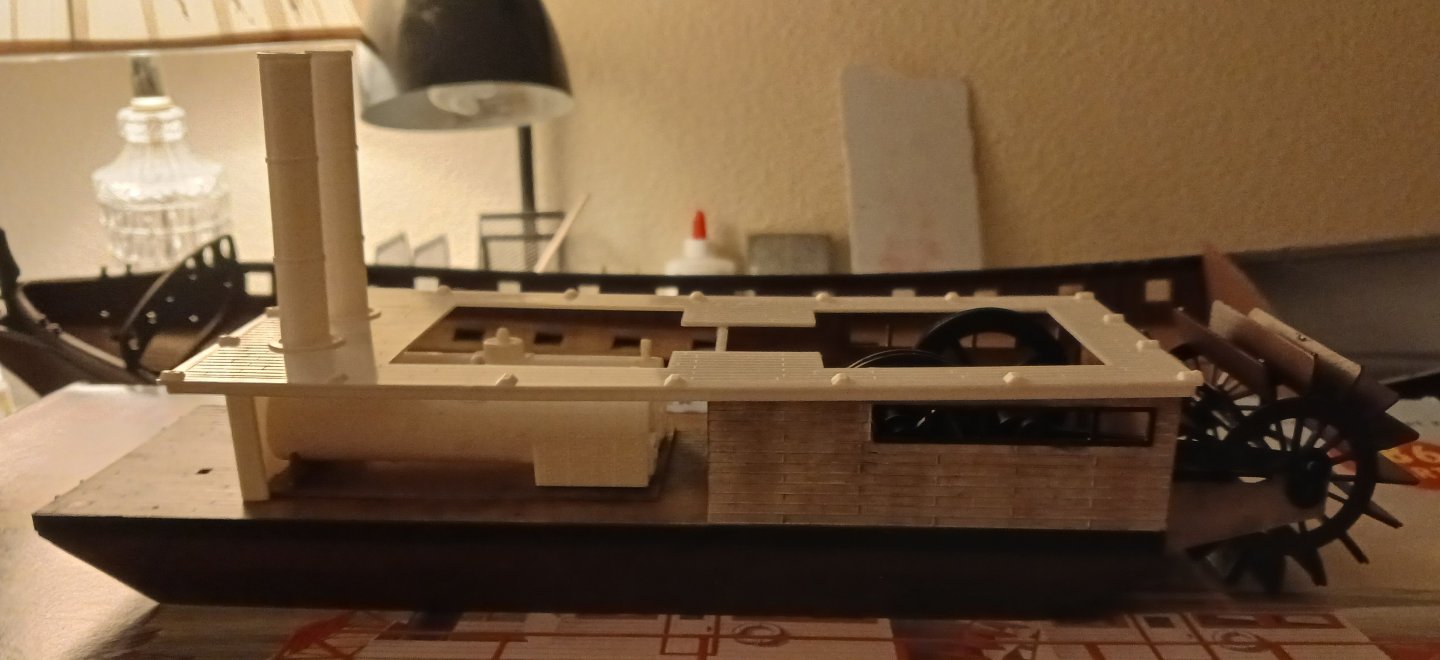
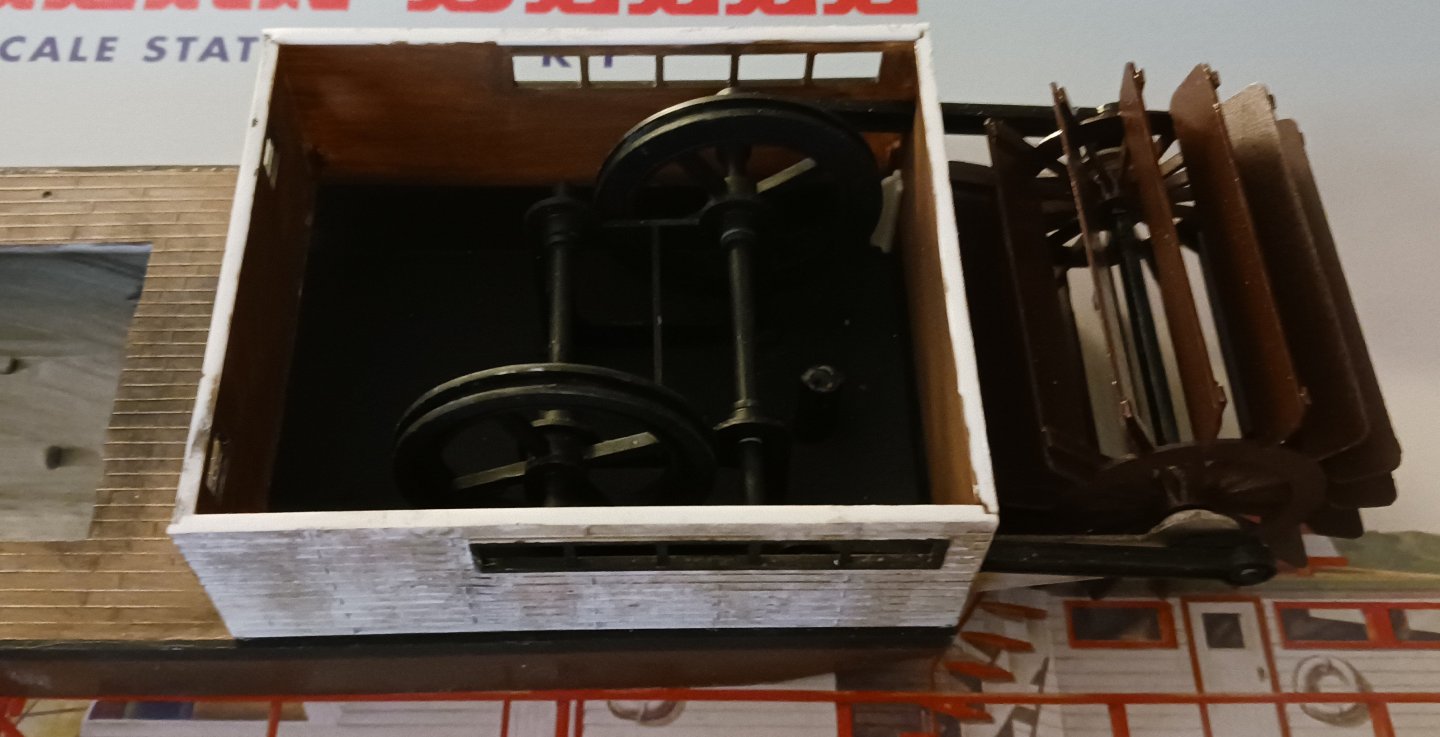
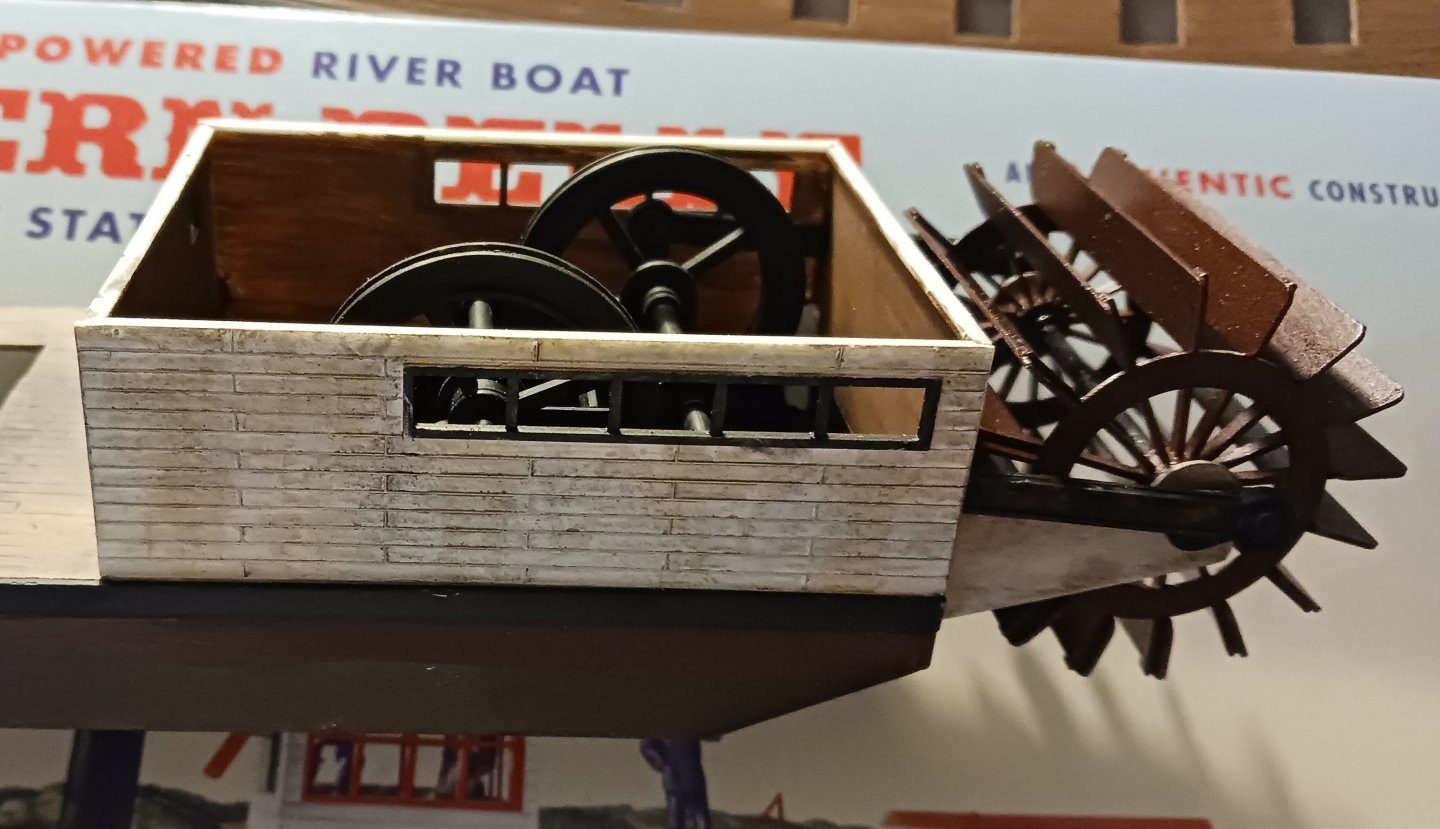
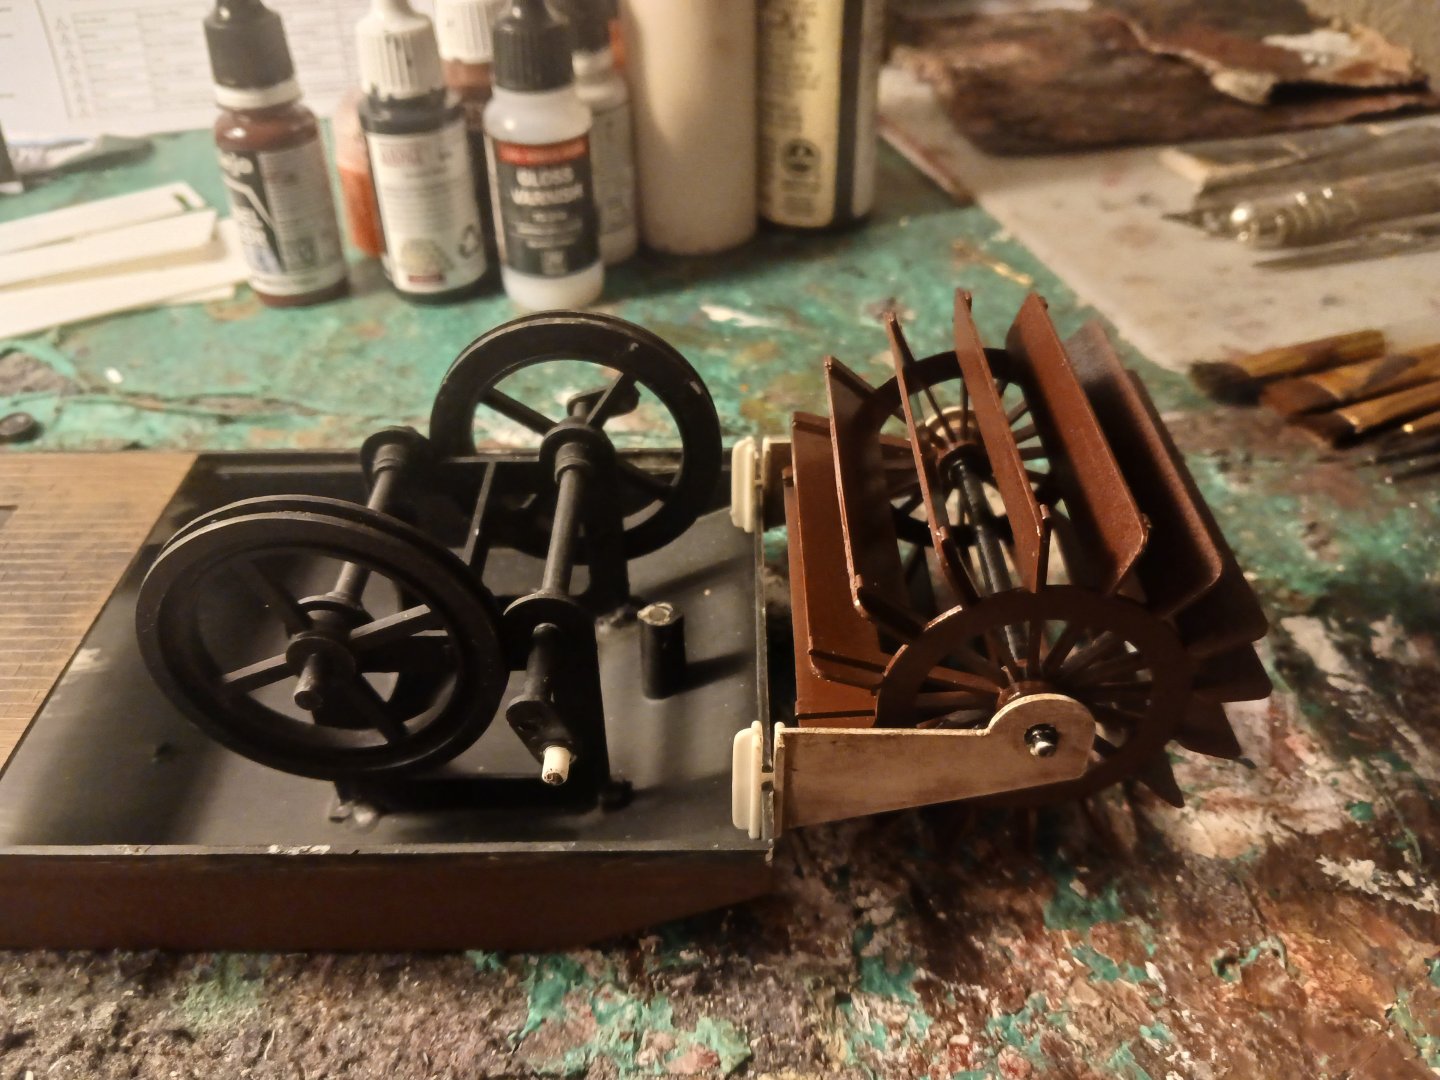
The process of finishing up the sternwheel involved entirely disassembling the wheel assembly and associated machinery, realigning and repainting the wheel and machinery, and gluing the paddles to the wheels. The process of assembling the paddle wheel: The paddles were attached five at a time. After they were all in place, I repainted any areas that were scuffed up by the assembly process, and sprayed the wheel in a clear sealant. This is to protect the wheel from further scuffing and to simulate the wheel being wet from the water it revolves around in. Here is the wheel as it sits tonight: Tomorrow evening, I will assemble the rest of the stern machinery.
- 56 replies
-
- 8
-
-
- Lindberg
- sternwheeler
- (and 1 more)
-
Wow, an America!? This is a kit that, in my experience, has been nearly impossible to find for sale. I want to build this kit sometime in the future, but it isn't on my radar at the moment. I am definitely going to follow this, and I'm sure it will be built with the utmost precision and care. Definitely an interesting subject. Are you going to build the yacht as designed, or as rebuilt by Donald McKay?
- 7 replies
-
- 1
-
-
- America
- Schooner Yacht
- (and 2 more)
-
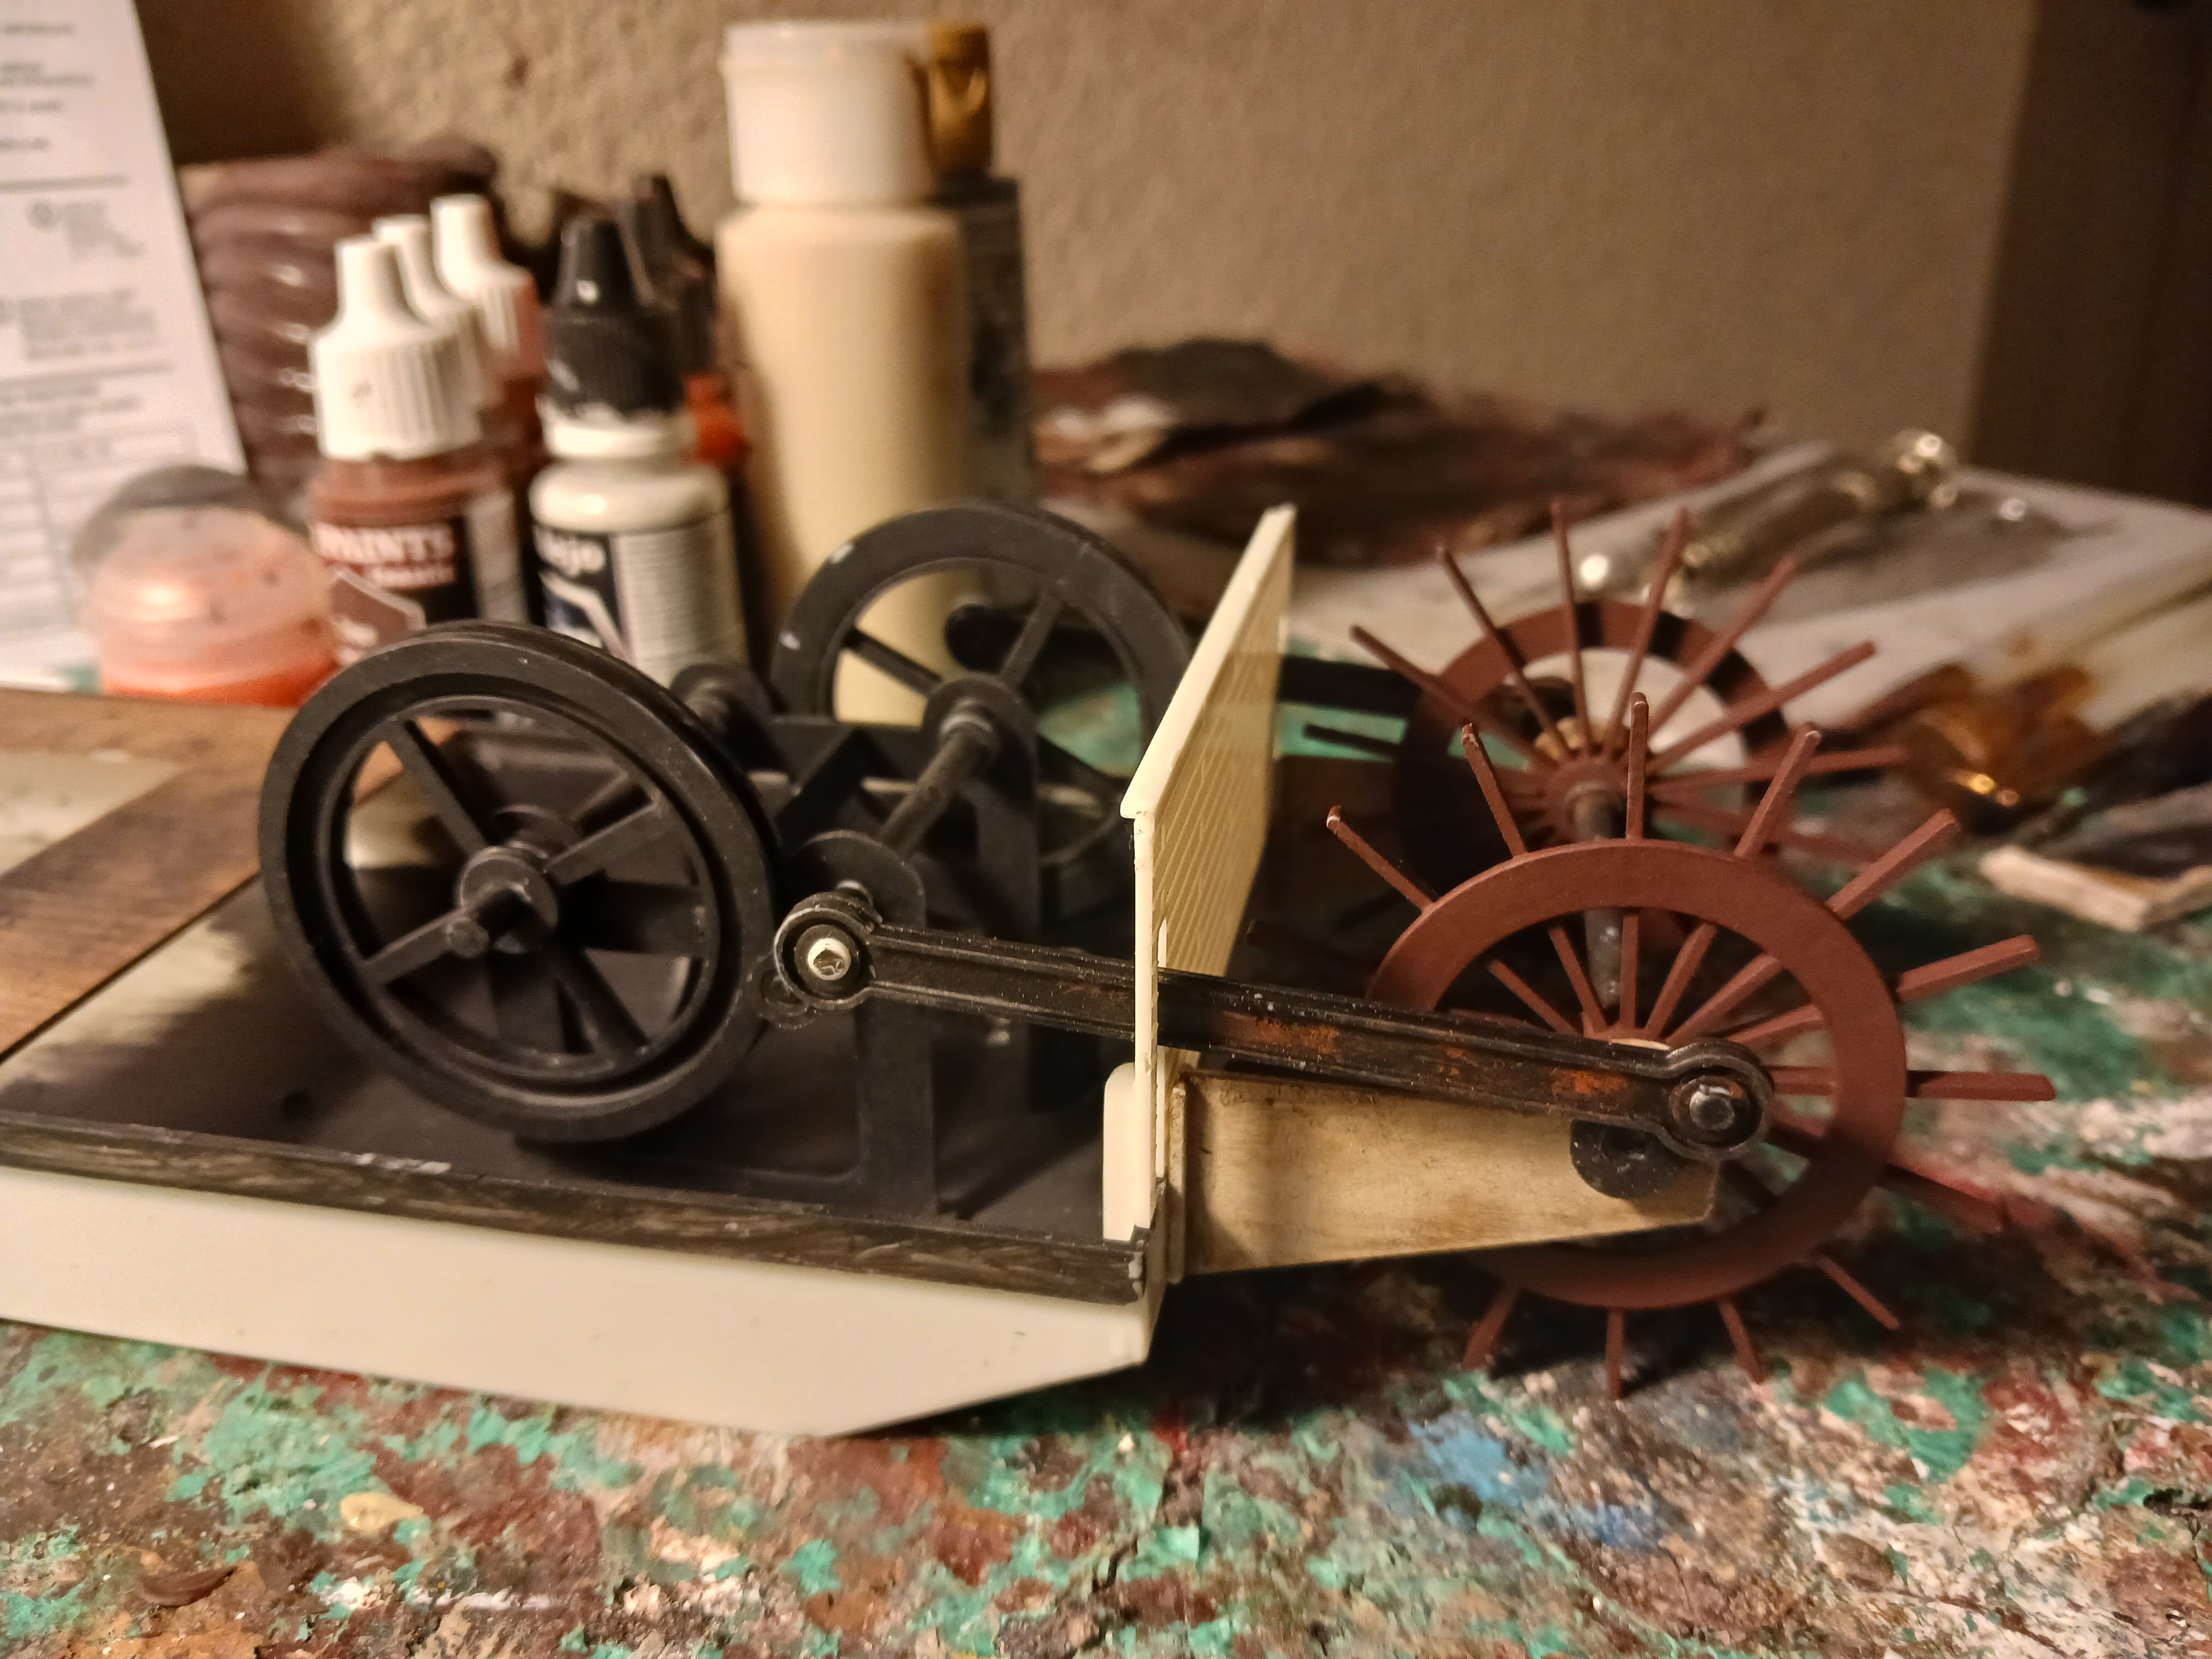
Now I know why most of the machinery and moving parts on a ship powered by steam would have been unpainted iron- when I painted the parts, I had to give them a protective coating or the paint would rub off, and, much to my annoyance, the arms would have a habit of freezing up when I attempted to cycle the stern wheel. That has, hopefully, been remedied by close alignment of the arms and the parts that connect them to the paddle wheel. The aft assembly is not permanently affixed to the hull as of right now. The individual paddles themselves and the hull will be painted the same shade of red as the wheels. I didn't spend much effort dirtying up the machinery inside the hull itself, as that will only be visible through the windows. I might not even paint the interior walls, we'll see. So far, with just a few exceptions that arise from necessary procedures (unless, of course, Lindberg wants to supply me with genuine cast-iron parts), this is shaping up to be a fun little project.

- 56 replies
-
- 4
-
-
- Lindberg
- sternwheeler
- (and 1 more)
-
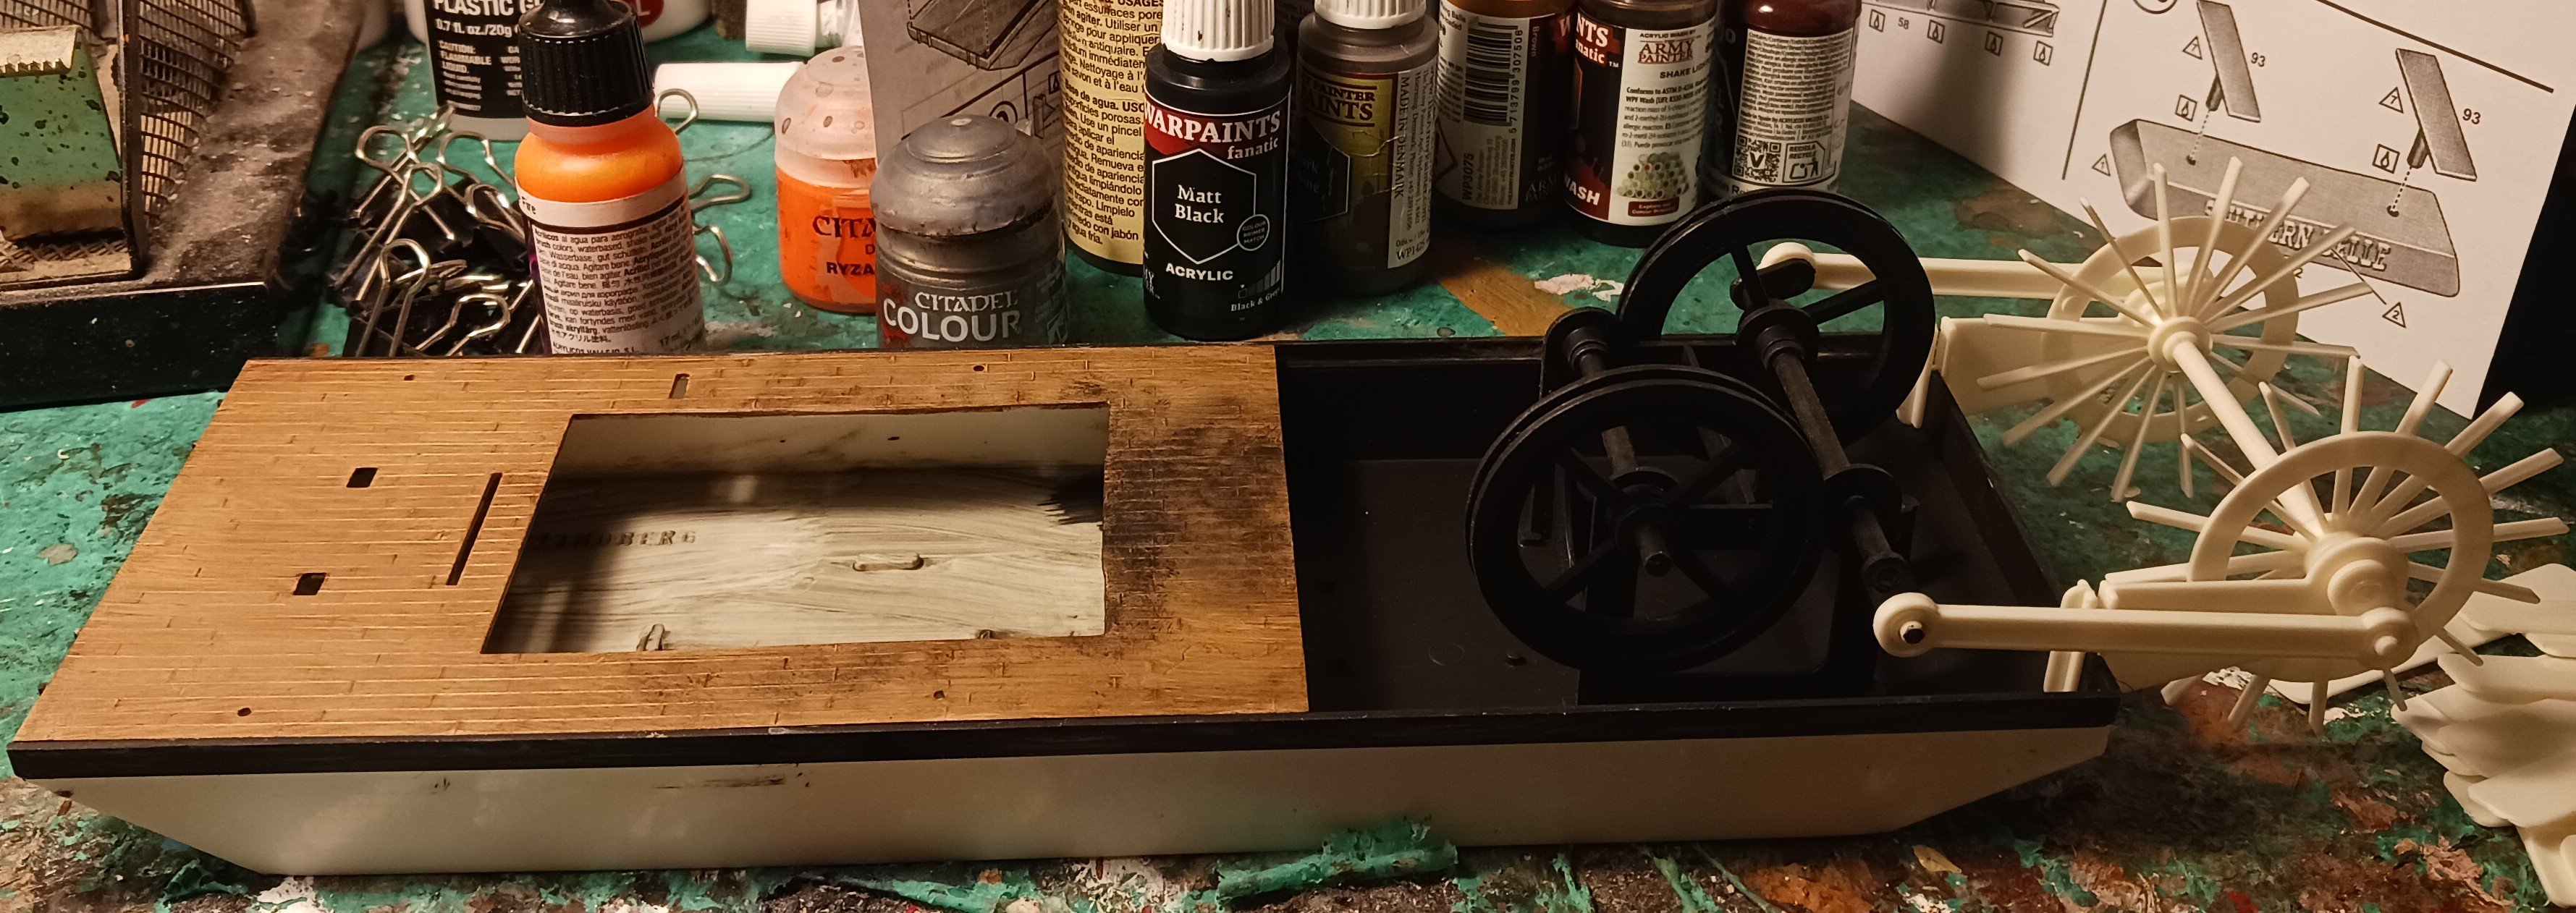
Yesterday and today, I worked on the engine room machinery mostly, and also painted the deck. I'm not particularly a fan of the pristine "as launched" appearance of modern restorations/reconstructions (this goes for models as well) of work boats. They wouldn't have looked like that for most of their working lives, and in the case of a coal steamer, would have looked disgusting after the first voyage. Hence the unhealthy, lung-destroying layer of coal dust on the deck immediately aft of where the boilers will be. So far, I have assembled the engine room machinery and dry-fitted the paddle wheel and its associated ironworks.

- 56 replies
-
- 5
-
-
- Lindberg
- sternwheeler
- (and 1 more)
-
A build log is being made for this build because I would like to get some information/do some research on Late 19th century American sternwheel paddle boats. This is Lindberg's "Southern Belle" kit, although it isn't based on any particular ship. I will still be working on the Chebec while I am building this kit, and this kit will not take long- maybe 3 weeks max. I have a few things dry-fitted so far, namely the fore deck and engine room gear. One of the things that factored into my decision to build this model is the fact that the last (and first) powered work boat I made was Revell's tug boat, which turned out pretty great. The tug, accompanied by a late-19th century fishing smack: Another element that factored into my decision to build this kit was @Keith Black's Lula, a sternwheeler intended to supply a floating piece of machinery. The only issue here is that I have never, and I mean never, seen a river boat, even a barge-pushing river boat, whose bow and Stern were completely squared off. Any information would be helpful.


- 56 replies
-
- 6
-
-
- Lindberg
- sternwheeler
- (and 1 more)
-
Sadly giving up on Erycina build
Ferrus Manus replied to bigcreekdad's topic in Wood ship model kits
As someone who also has poor eyesight, I am fortunate to be able to do the 1/100 and 1/96 ship kits. That being said, you could try Midwest's Sea Bright Dory, a beautiful looking rowboat in 1/16 scale with little to no rigging. It should be easy on the eyes, and I'm sure you could make it look magnificent.
-
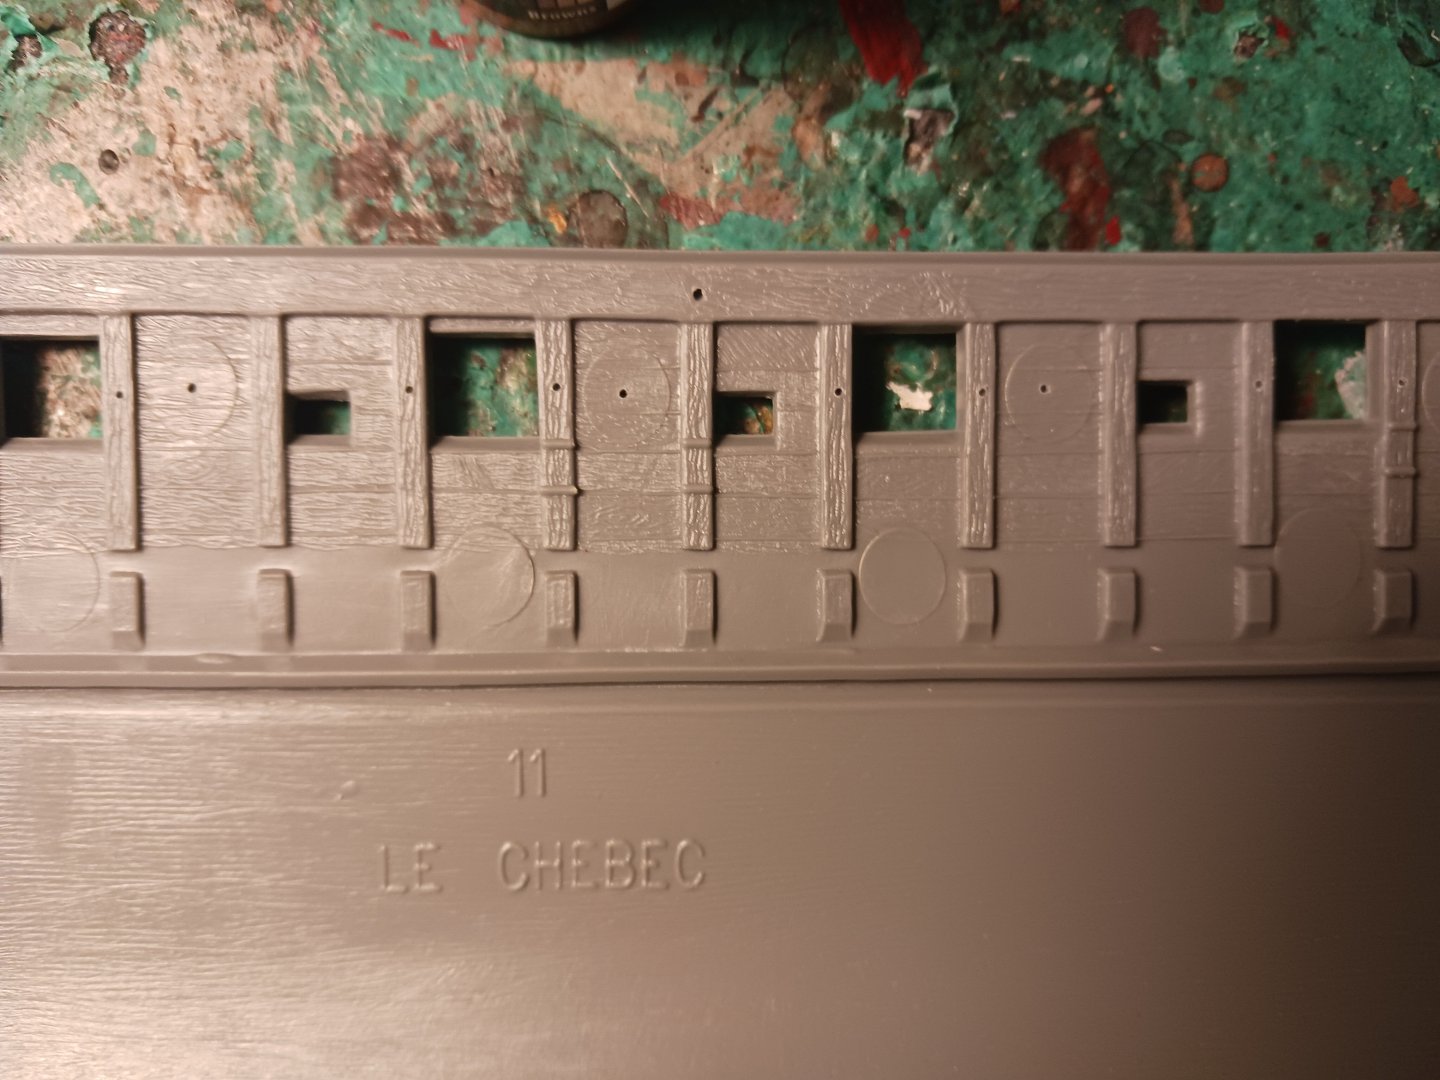
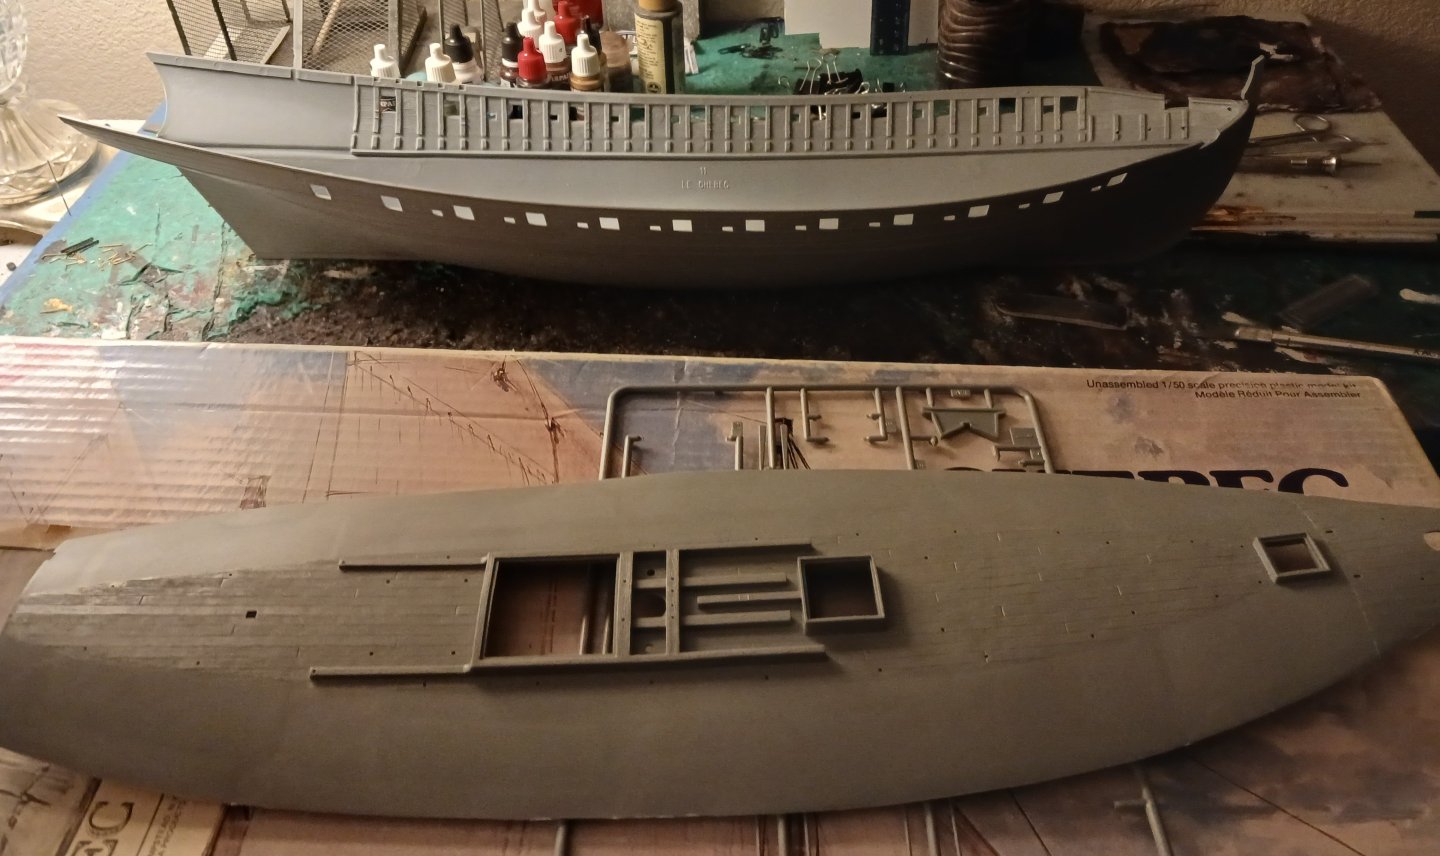
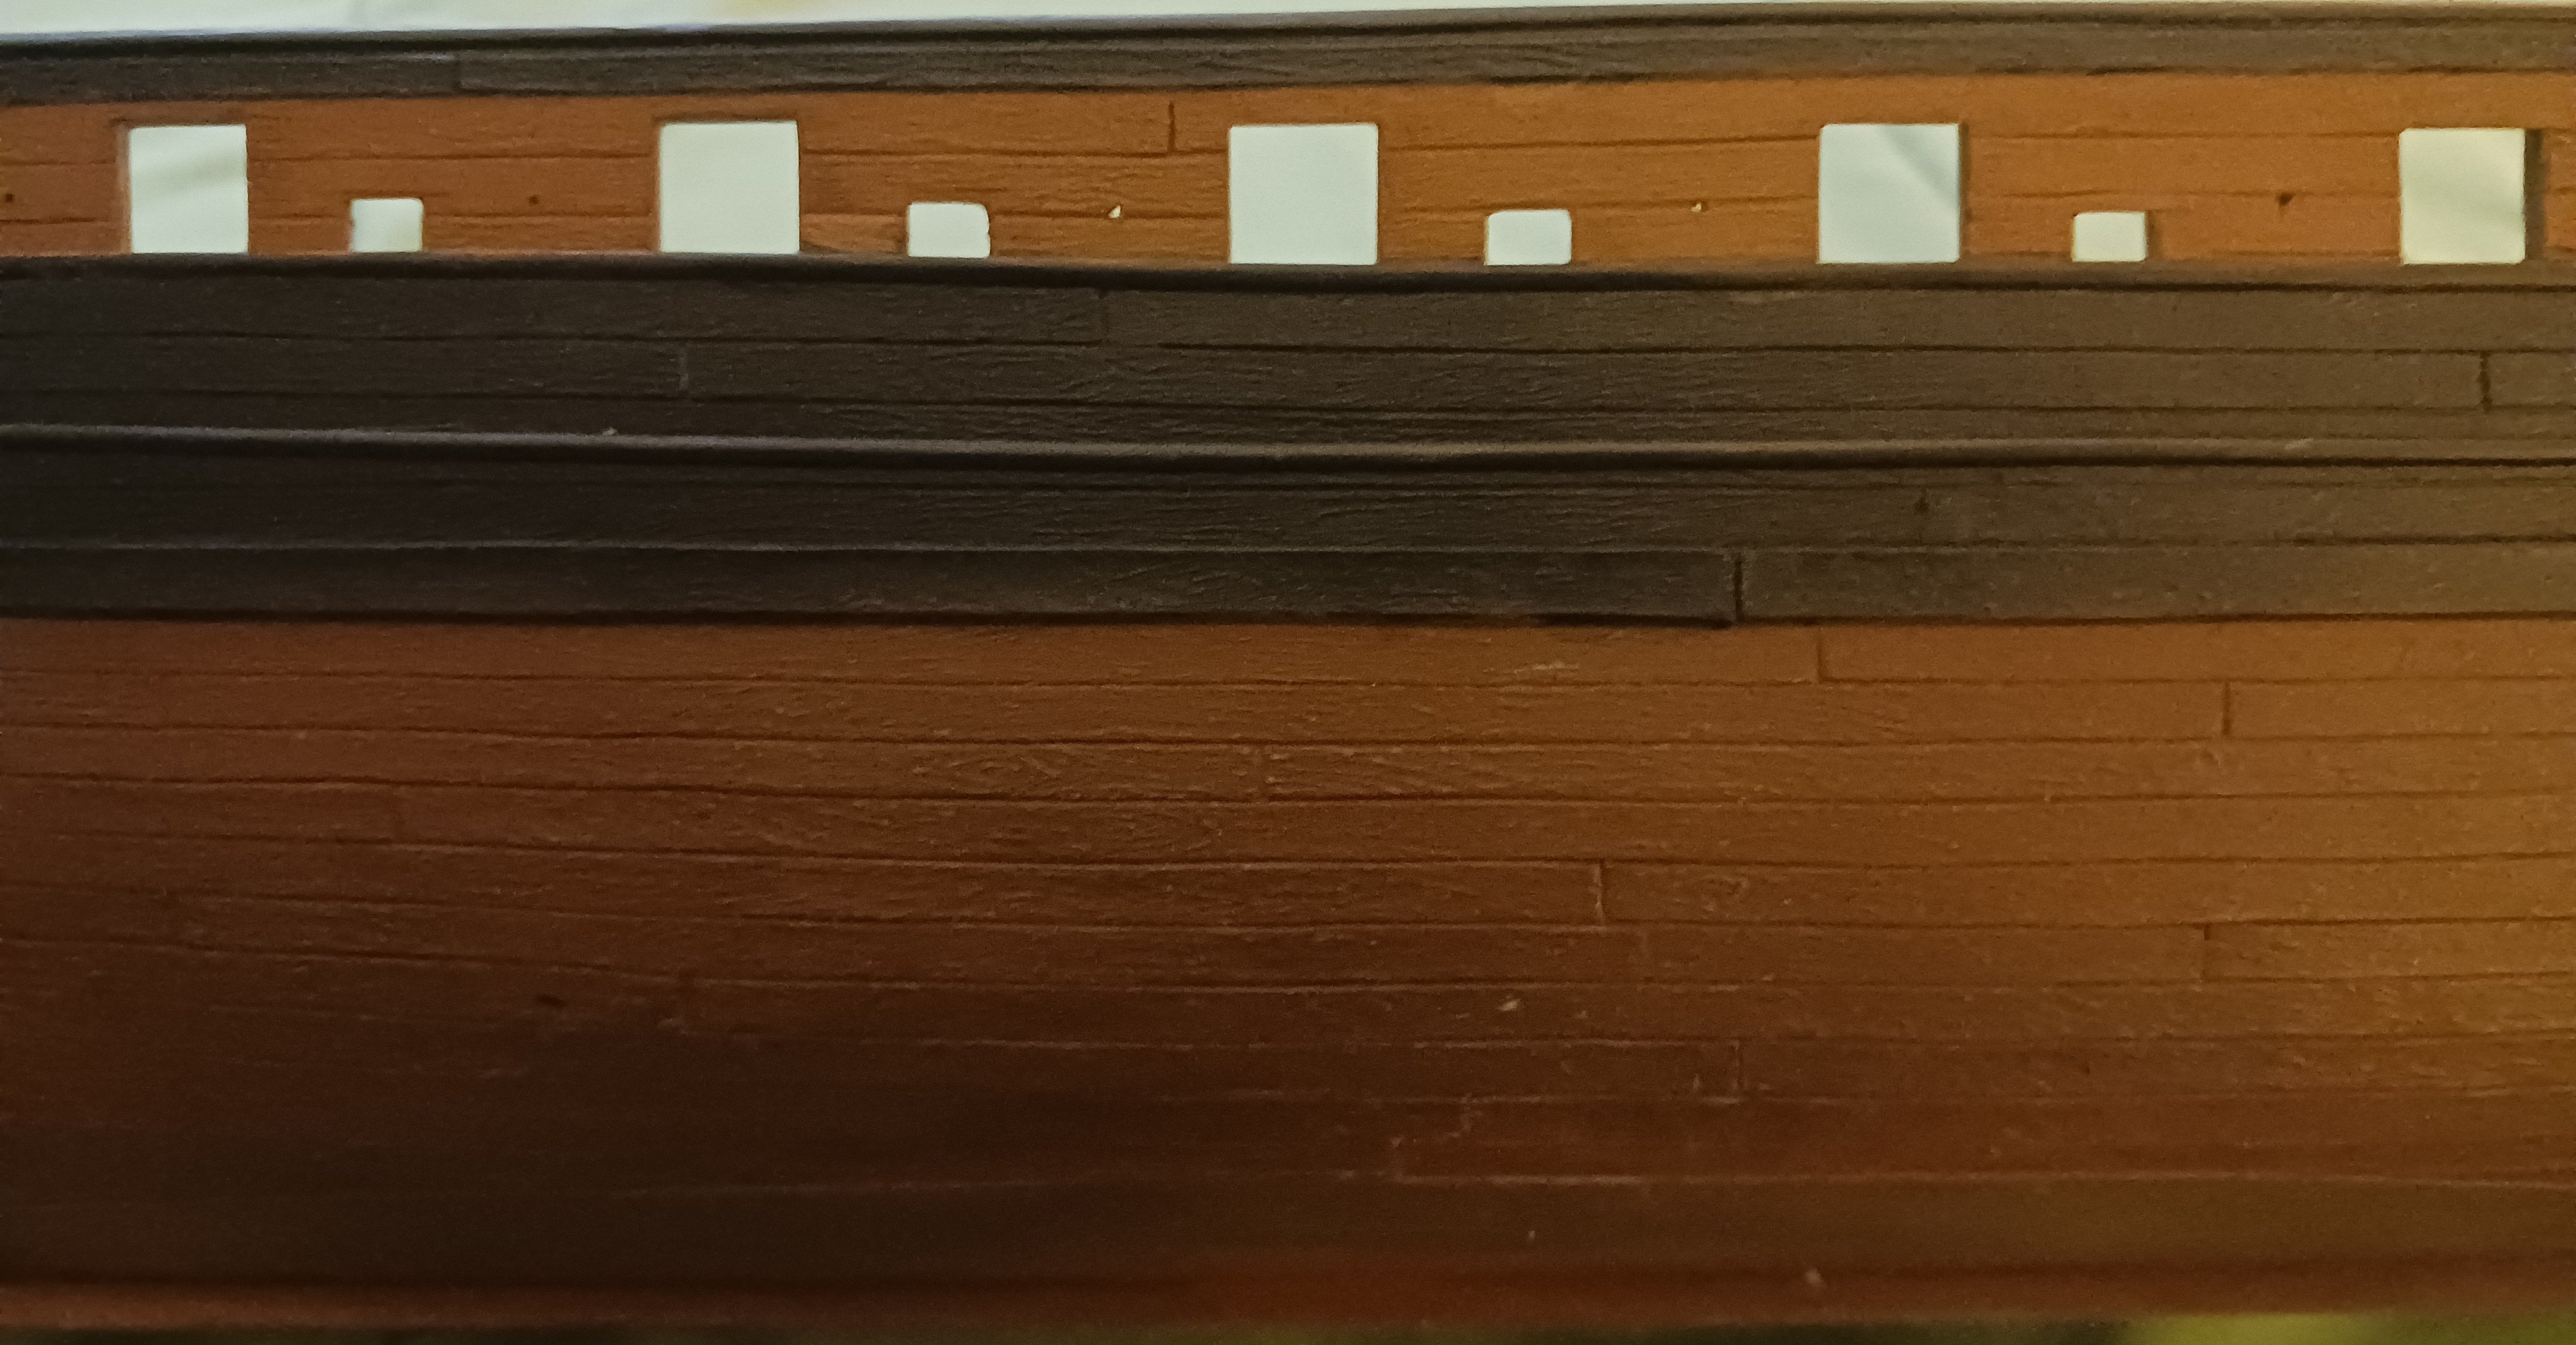
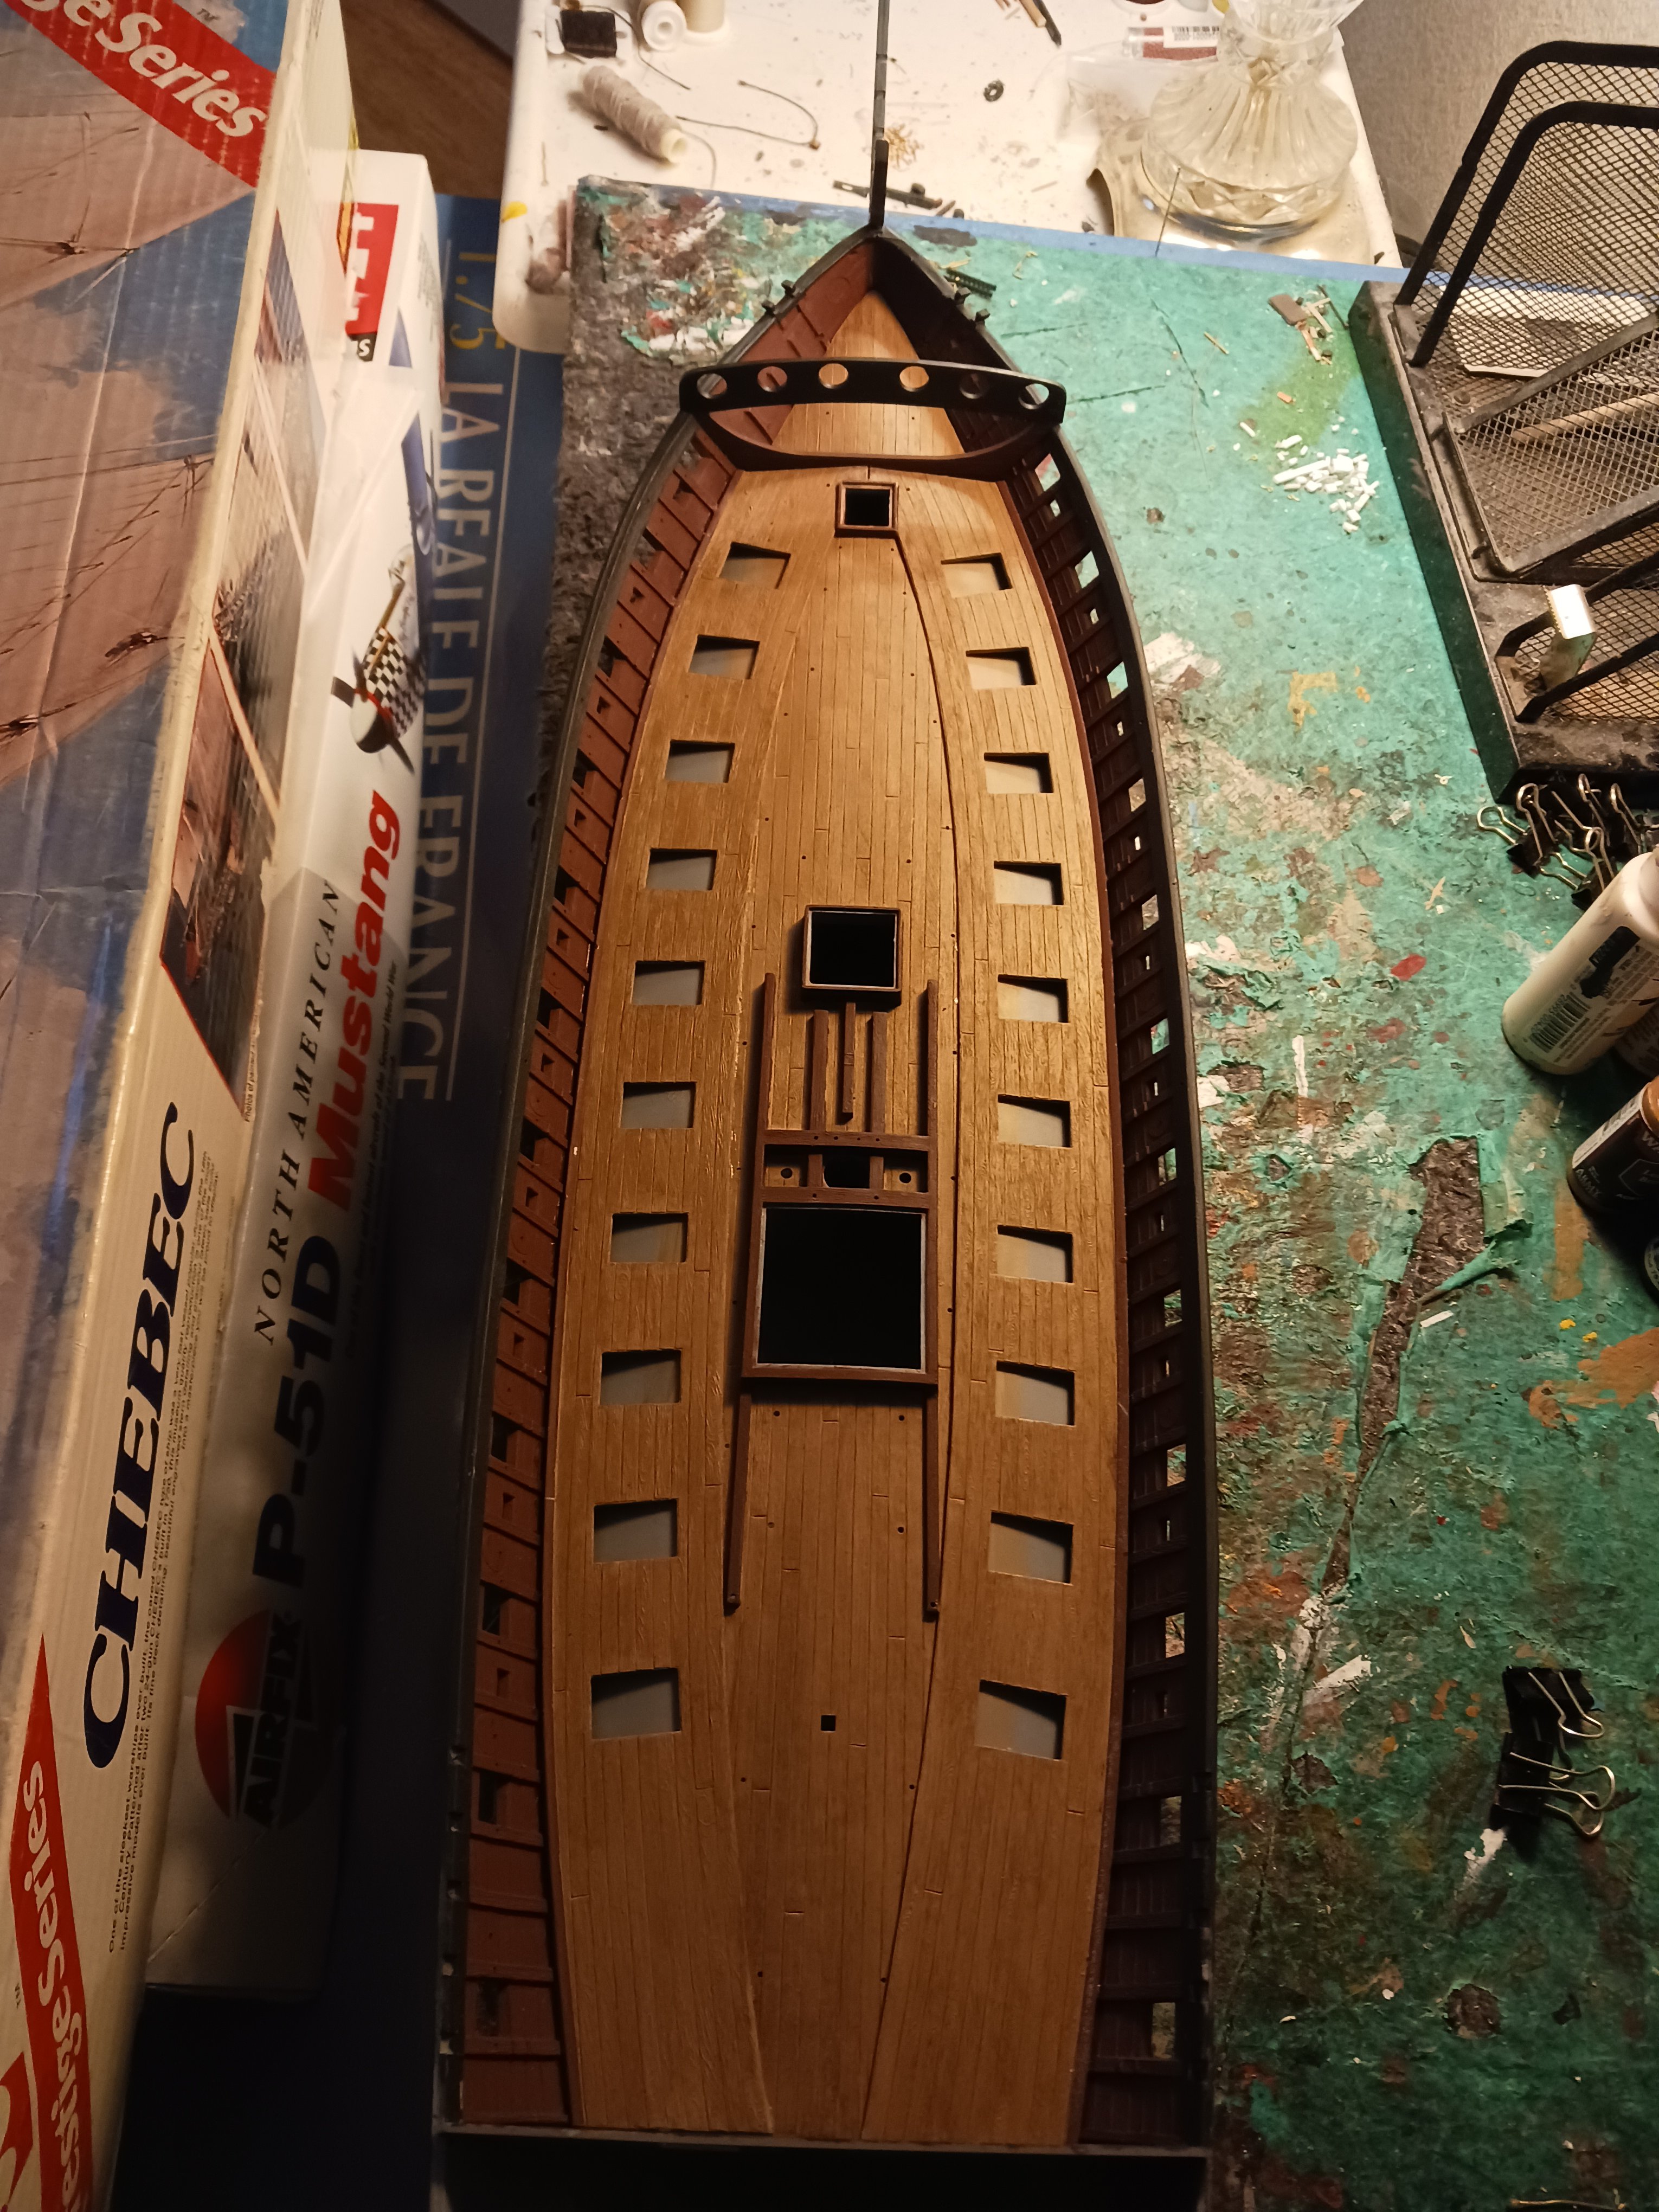
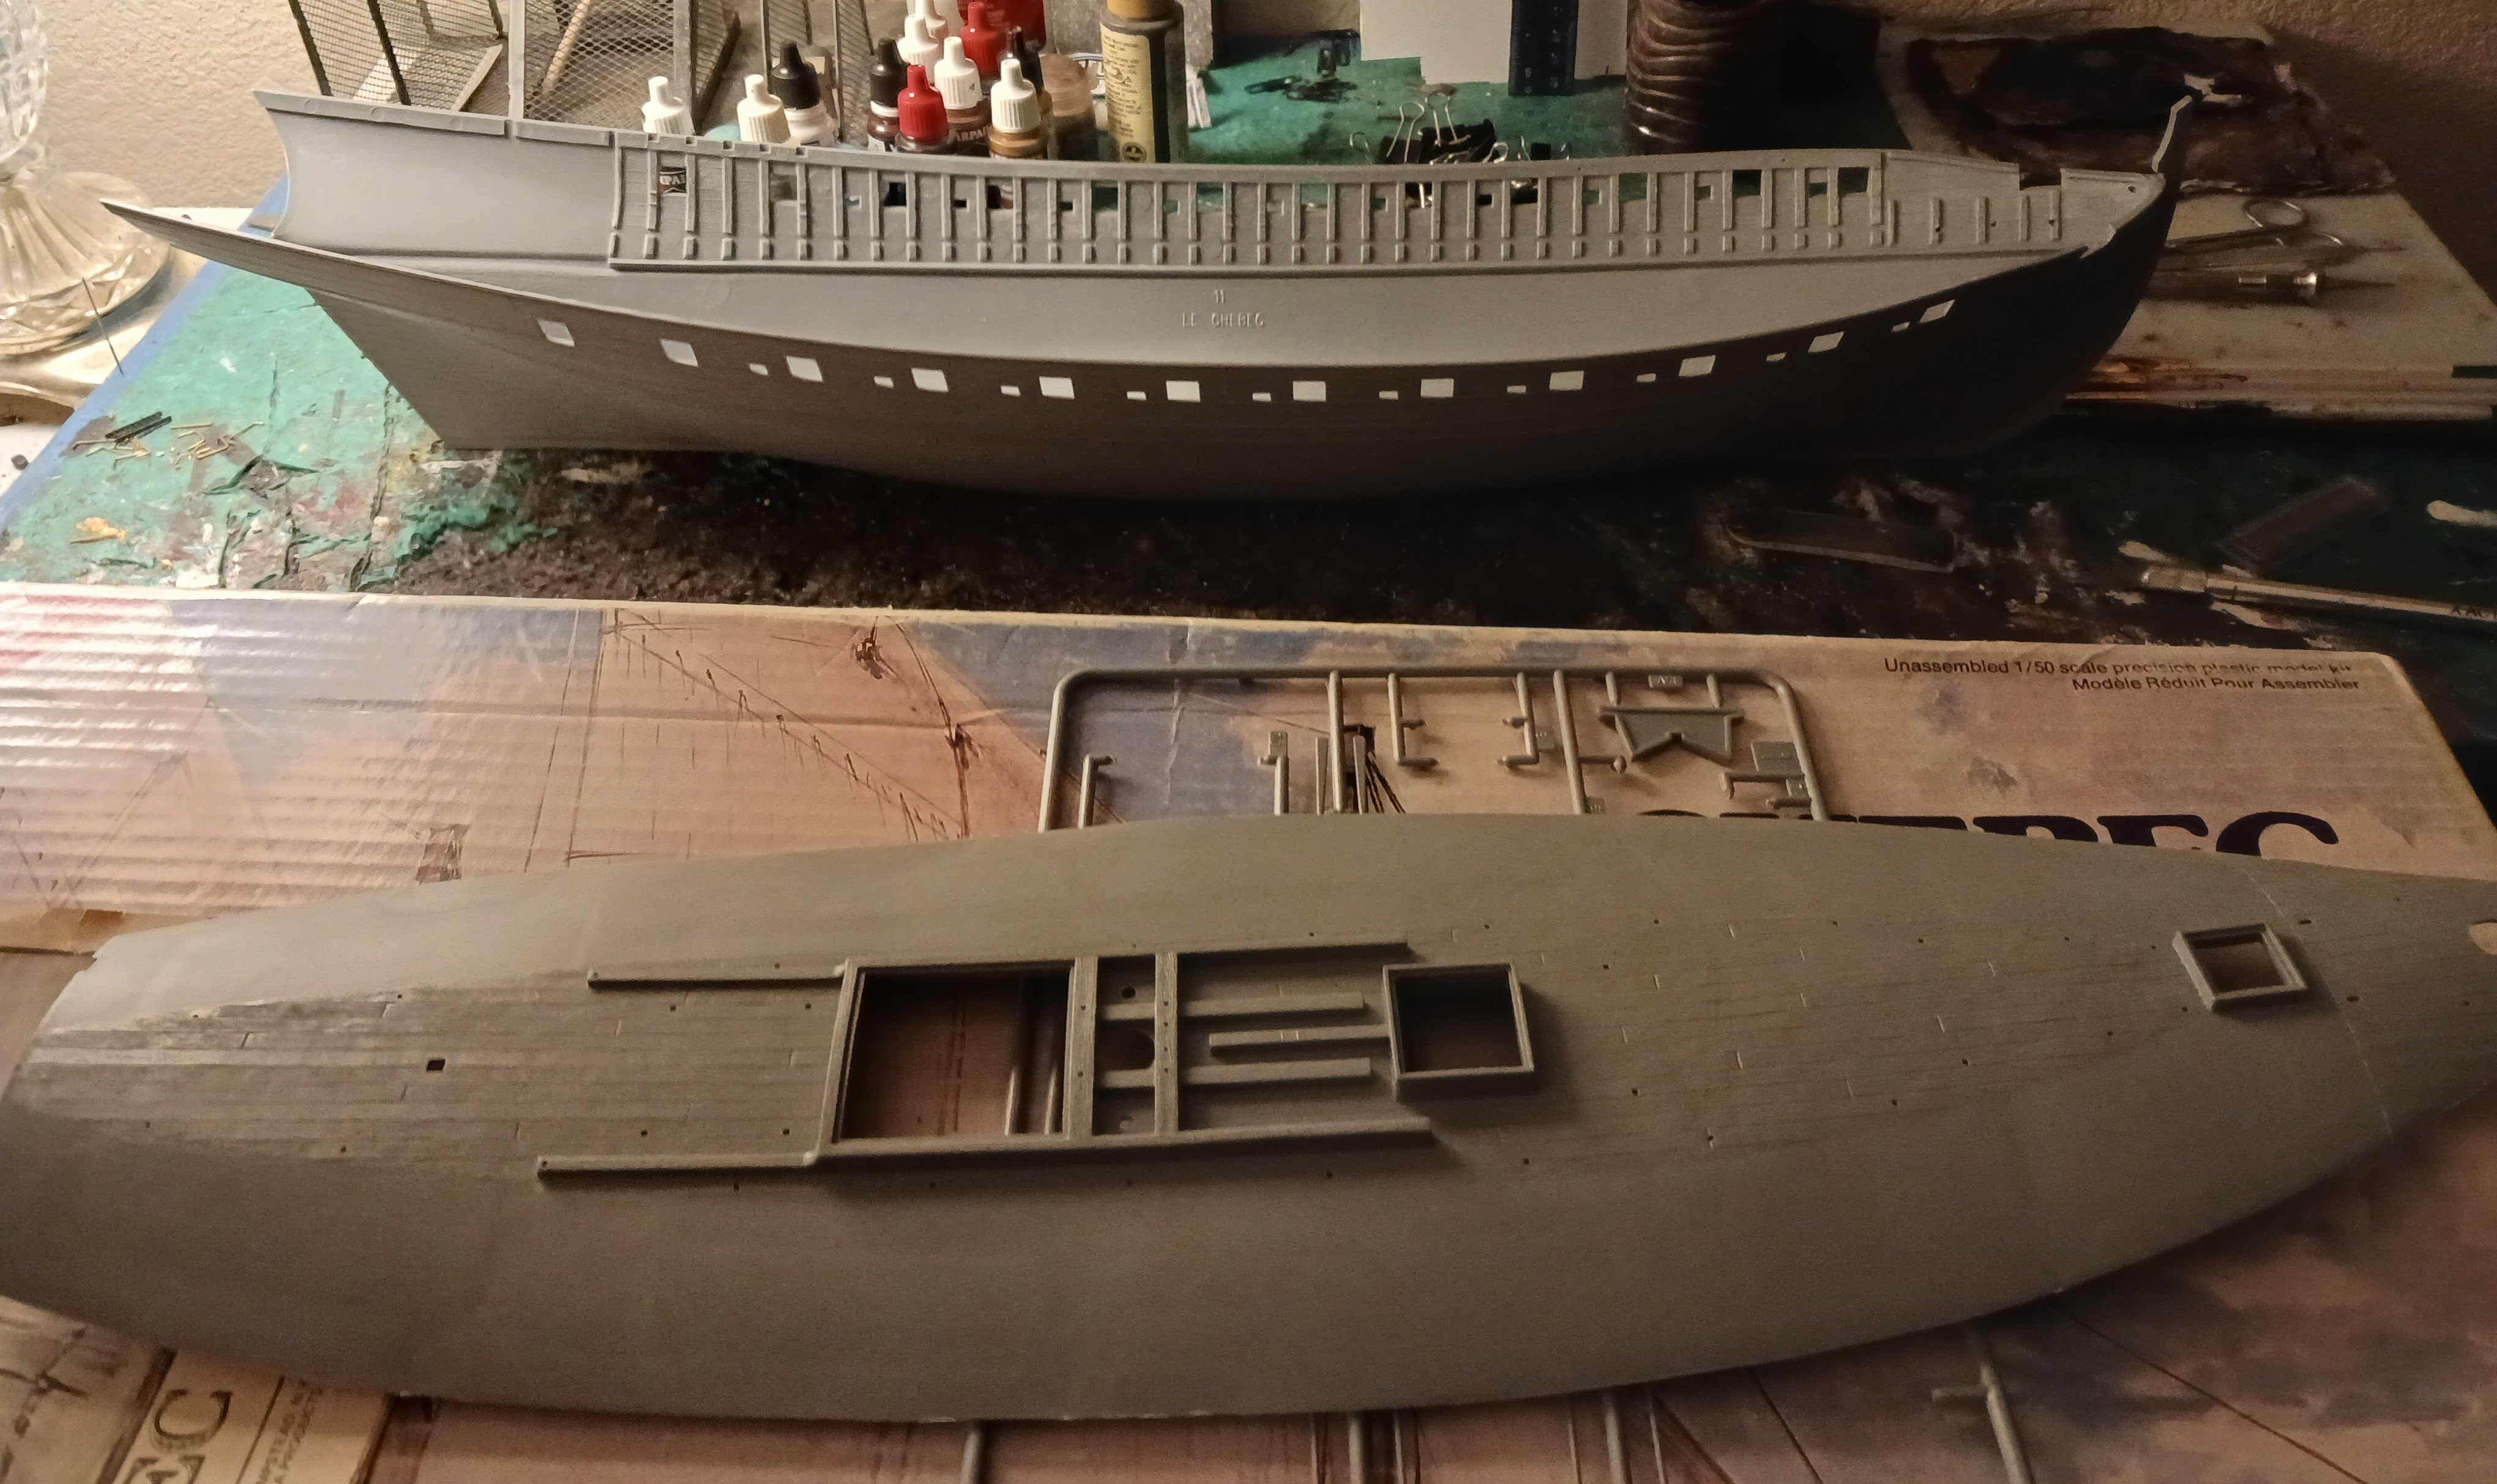
I apologize for severely neglecting this build log. Since the last post, I have painted the hull, installed the beakhead, transom and anchor timbers, and painted and installed the deck. For the most part, I have attempted to base all of the ship's colors off of the museum model. The deck pieces took about 4 days to paint and wrestle into place. The two gangways on the sides of the deck are not identically shaped, I checked. Thanks, Heller! This might have serious implications when we go to mount the inhaul eyebolts for the ship's guns. The next jobs are, in order, to paint and install the hatch and 22 gratings, paint and install the inwales, and paint, rig and install the gunport lids.


-
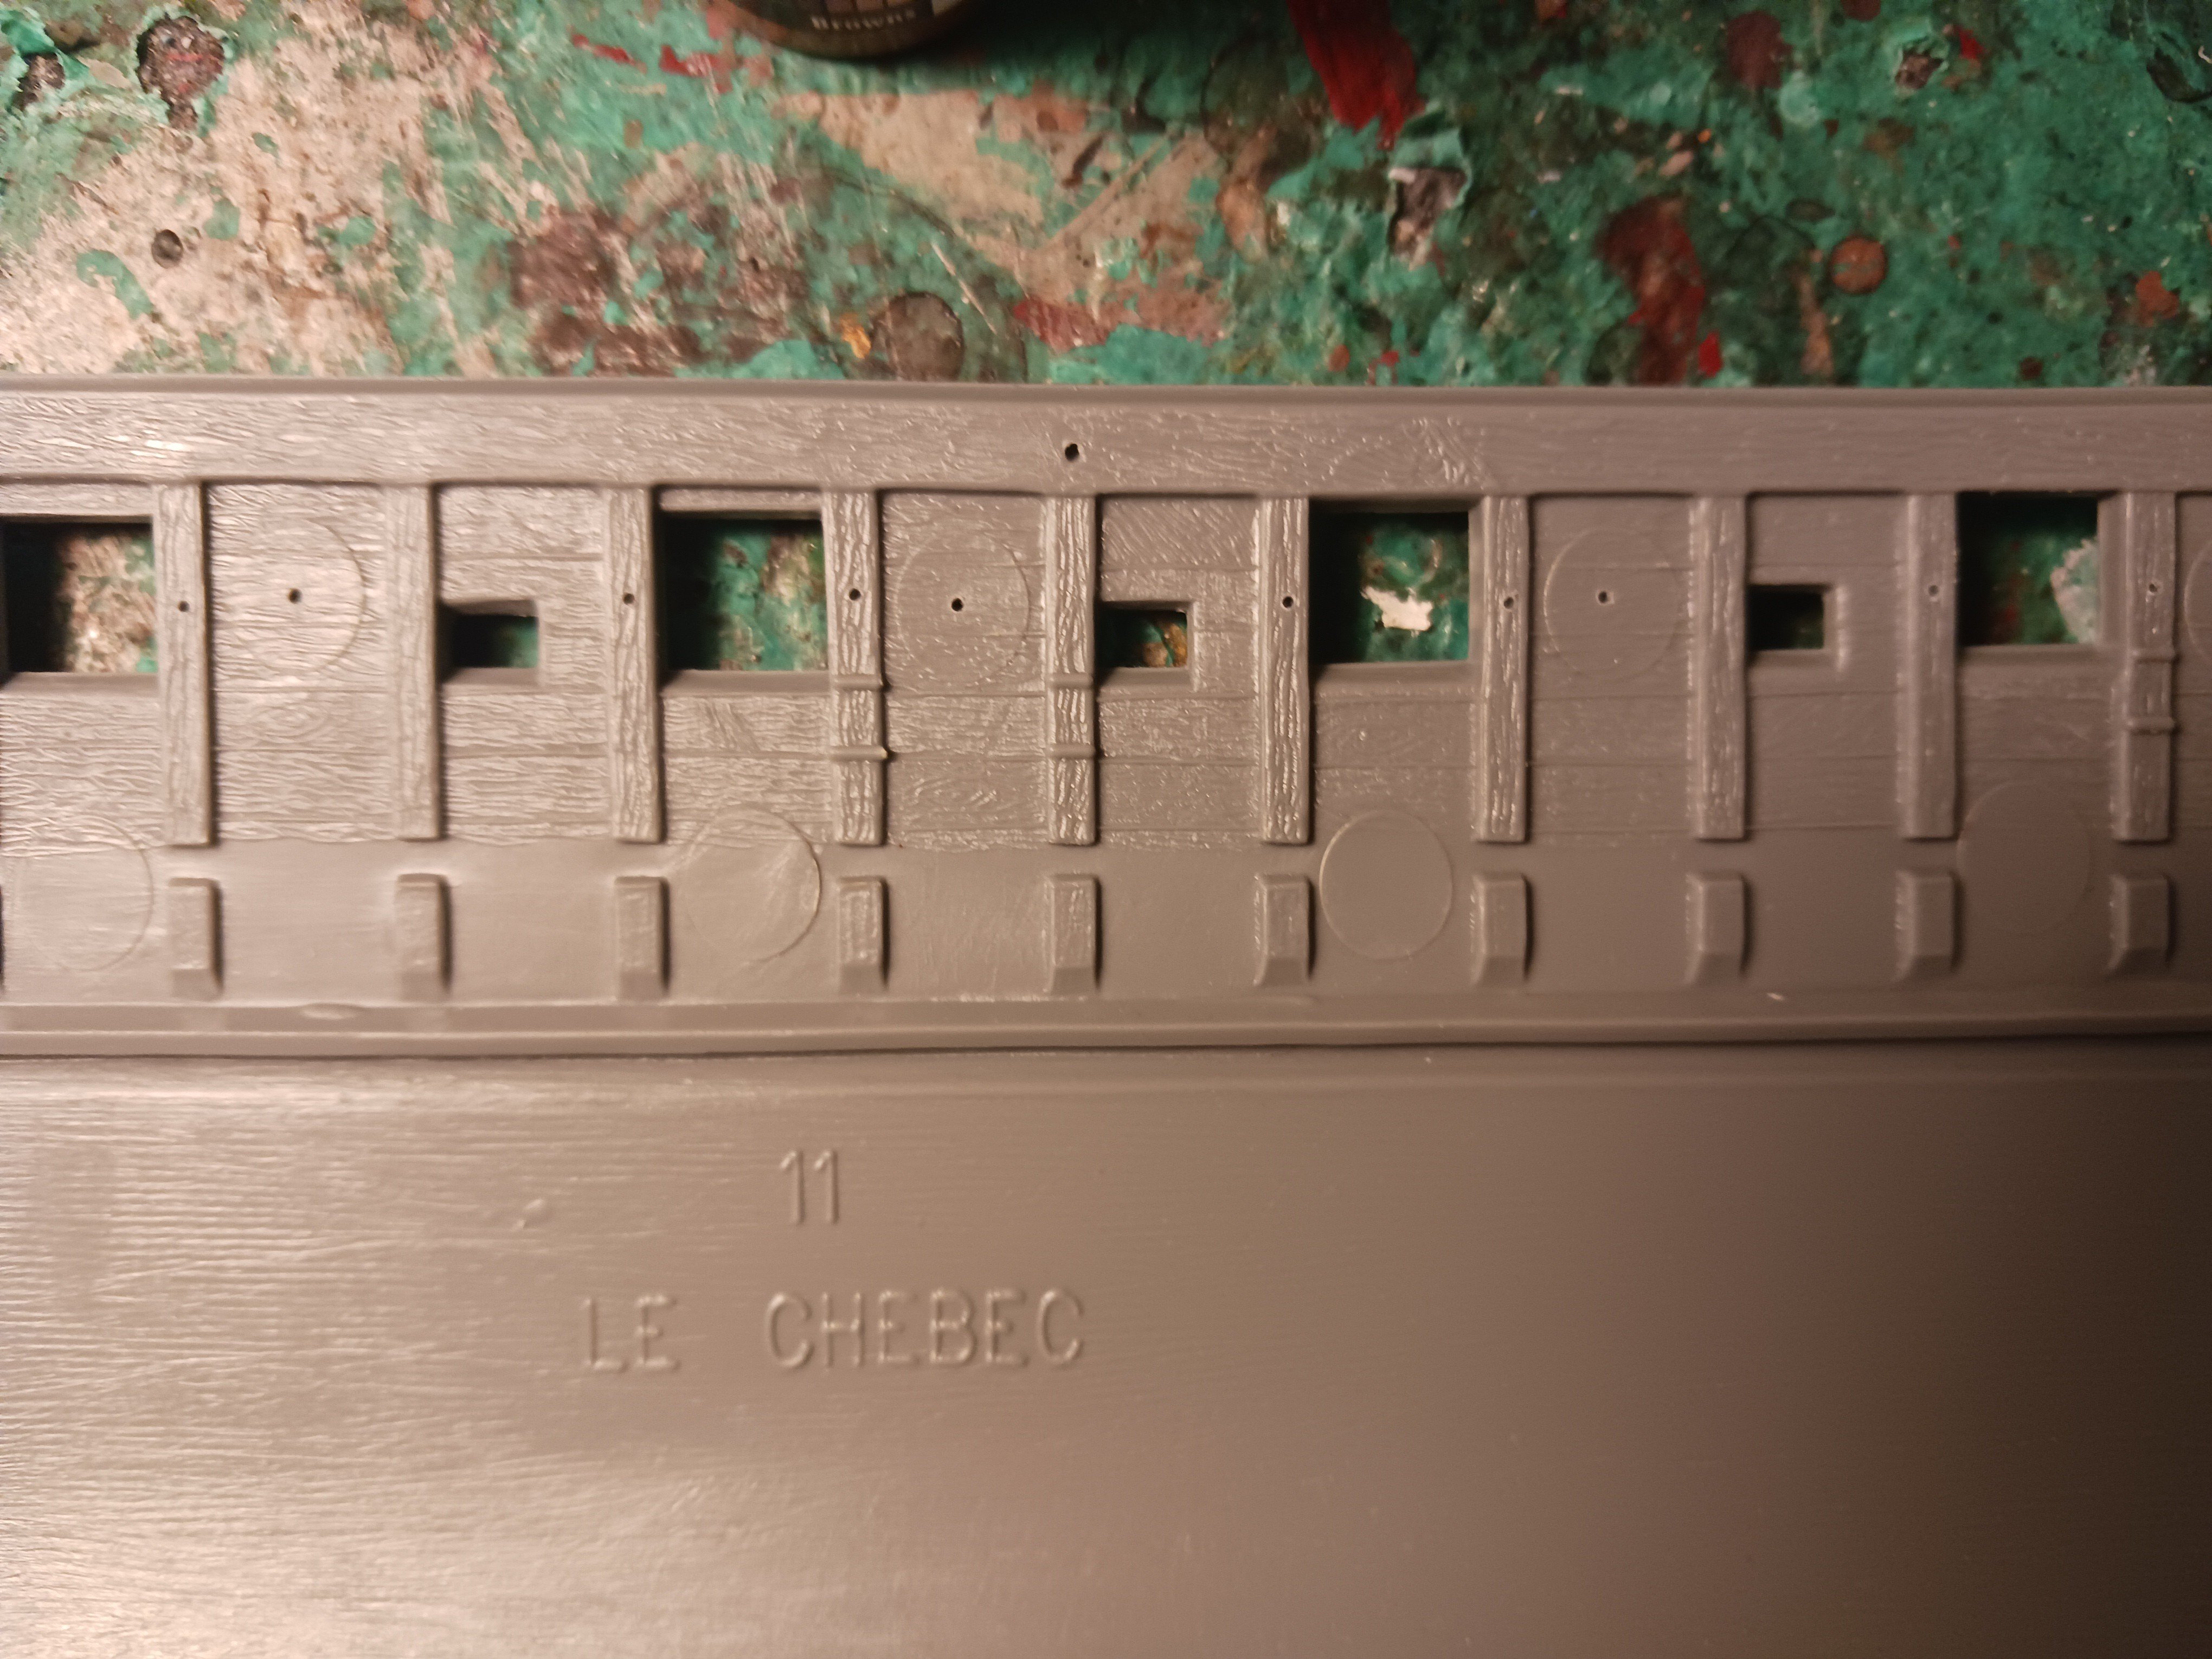
About the injector marks on the hull: I tried to scrape them with a knife, but I couldn't get the knife straight enough (because of the stanchions) as to not damage the plastic. I am afraid to attempt sanding them as it would surely destroy the wood grain, and I wouldn't be able to re-scribe it properly. I figure they will probably just disappear into the detail. At least, I hope they will. This is the only thing about this kit that really grinds my gears.
-
Today's jobs were drilling holes for the gun rigging eyebolts and gunport lid outhauls, and gluing the hull halves together. Tomorrow will be painting.