Ferrus Manus
-
Posts
1,407 -
Joined
-
Last visited
Content Type
Profiles
Forums
Gallery
Events
Everything posted by Ferrus Manus
-
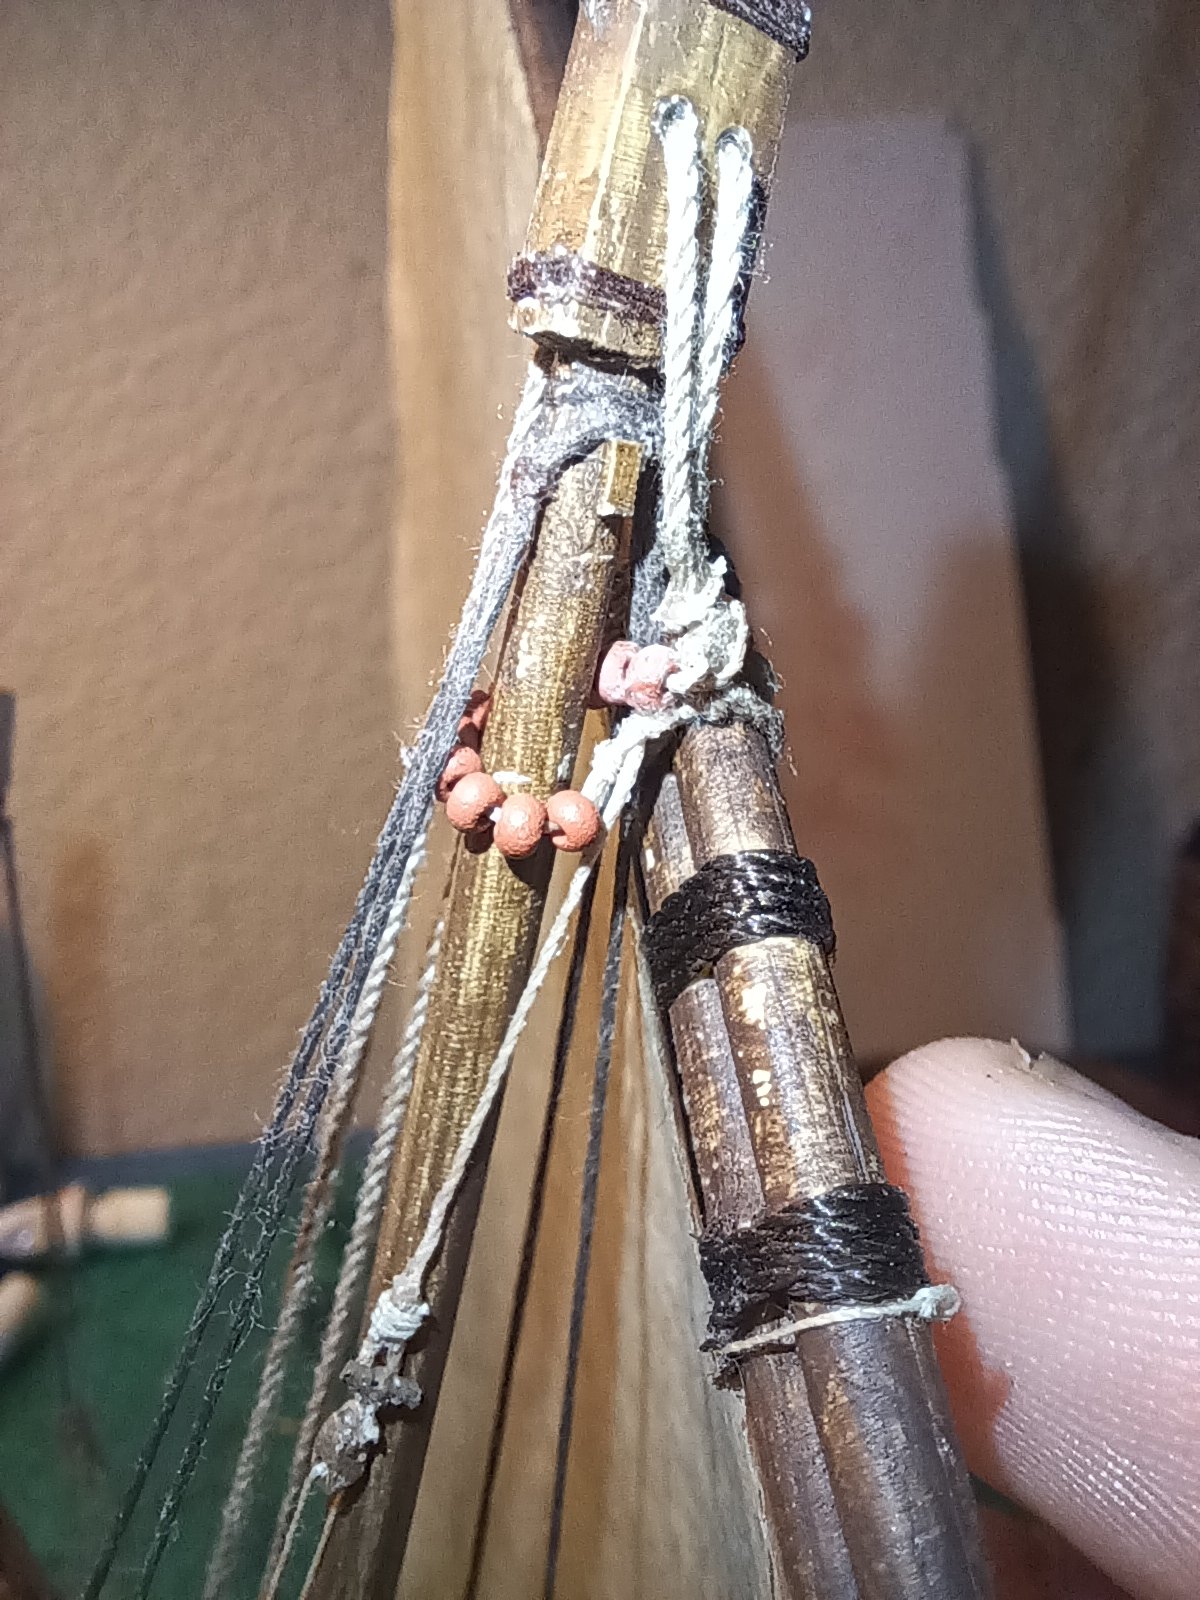
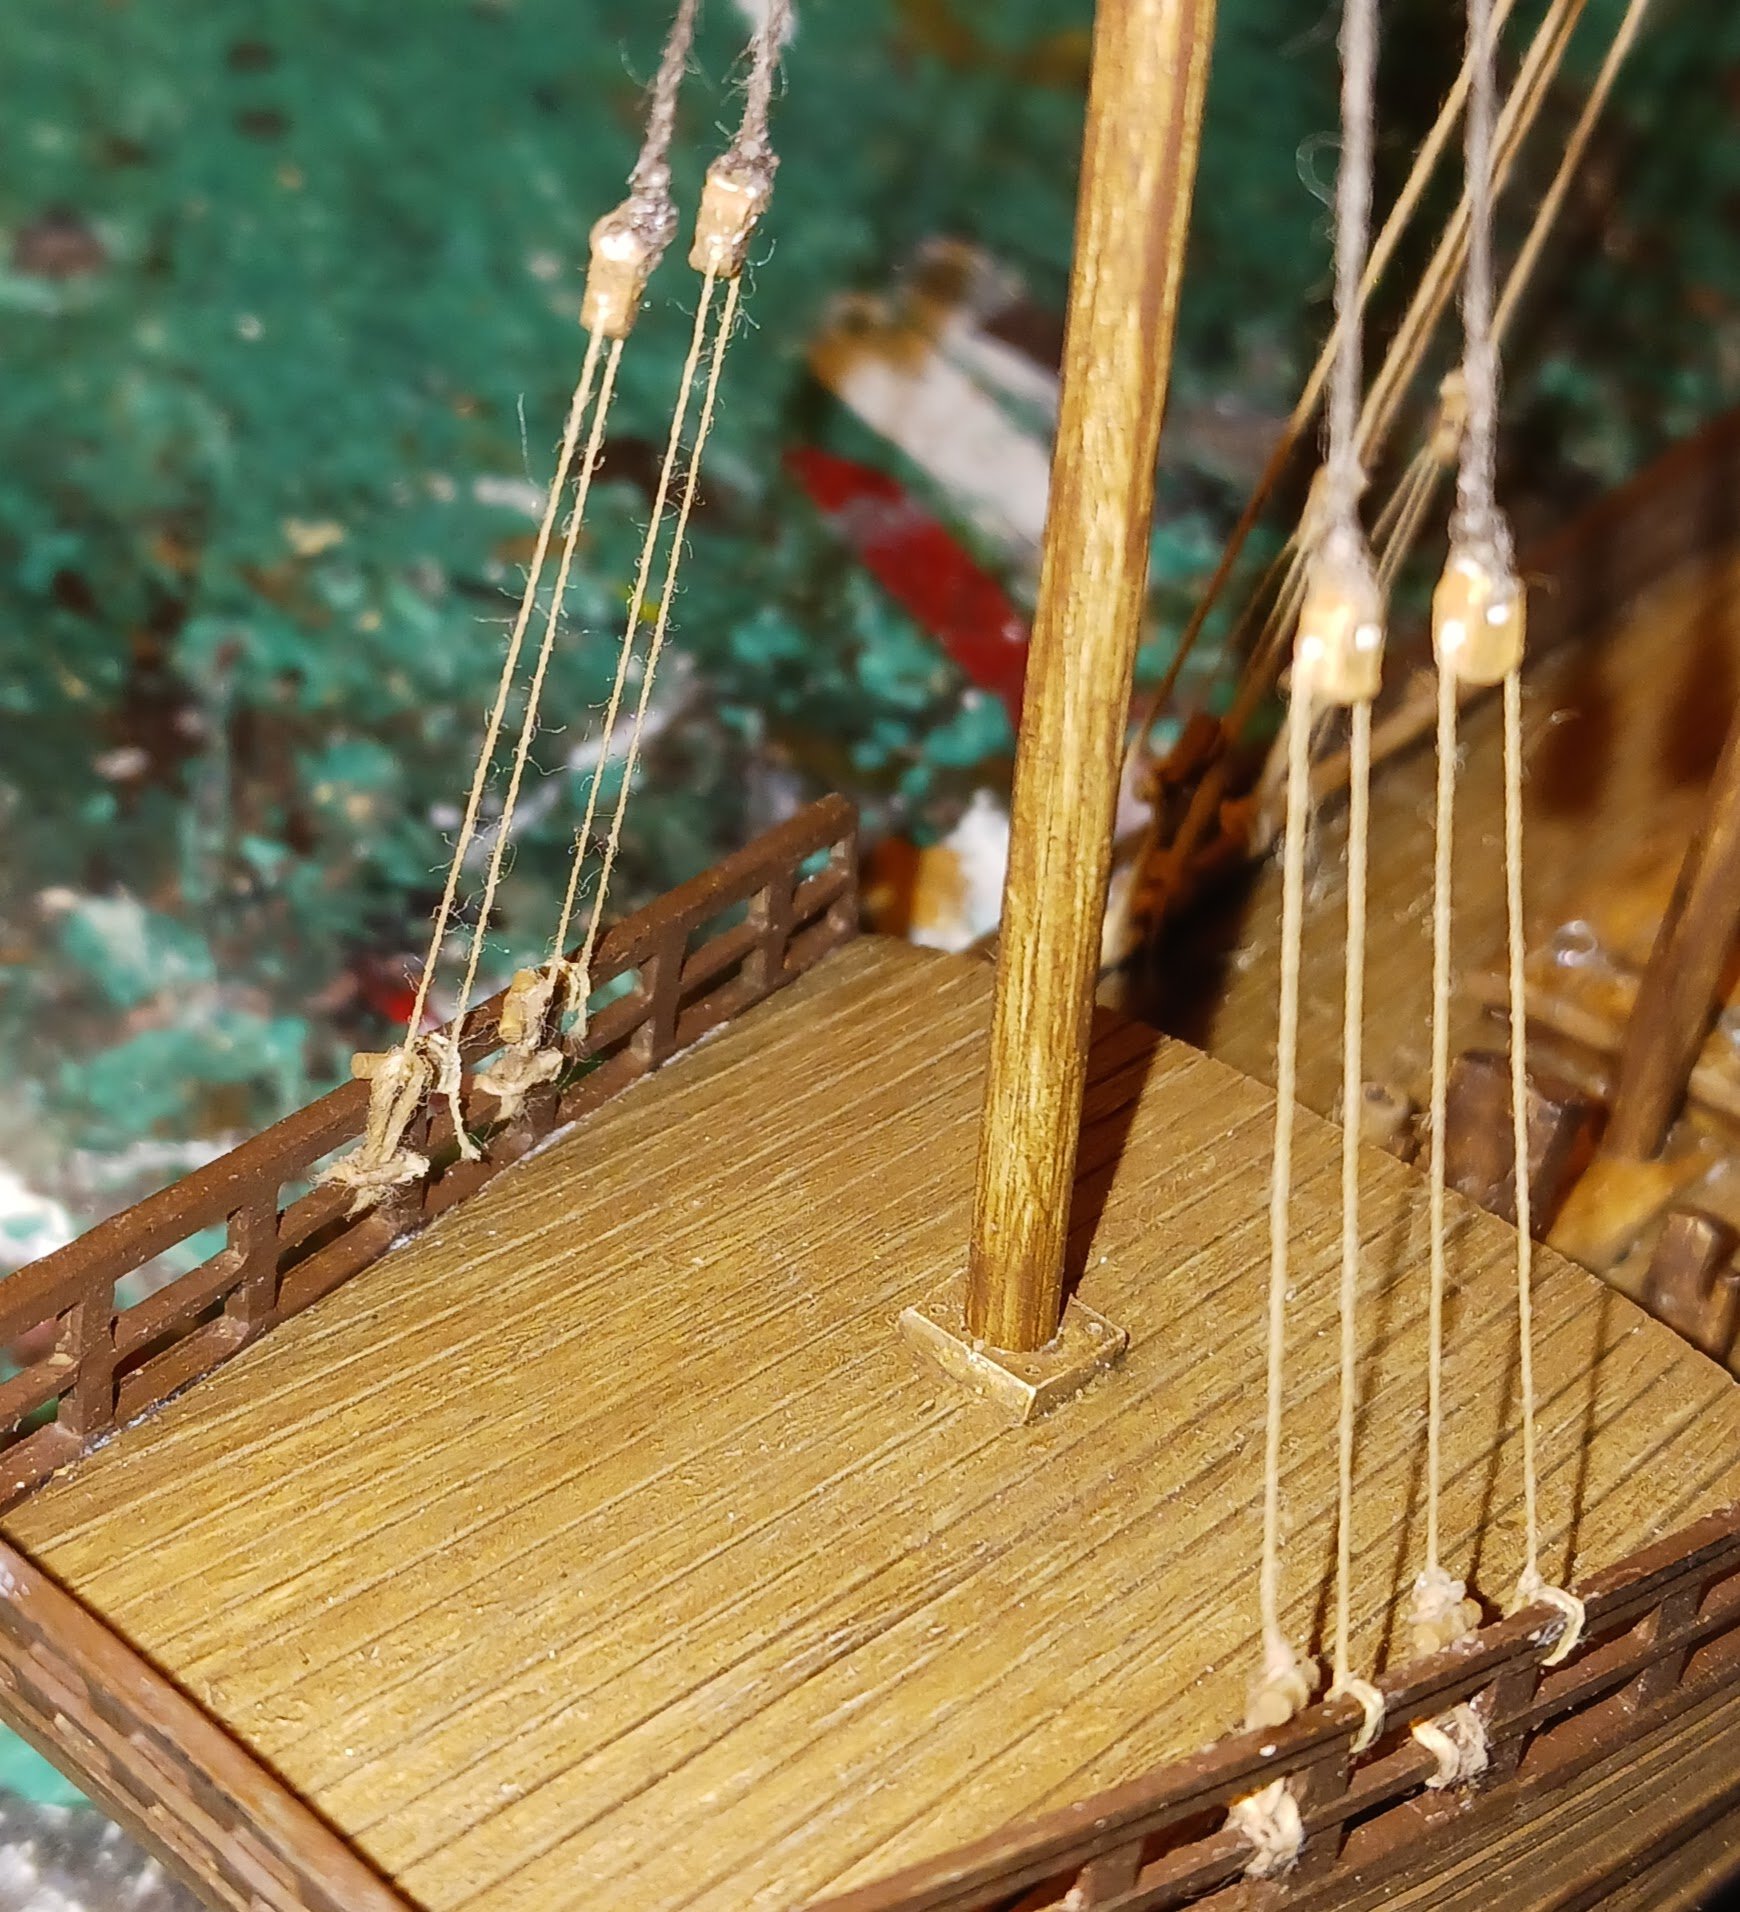
 The mizzen yard halyard and parrel tackles: While it's only visible with flash photography and not visible in real life, one of my only gripes about CA glue is that it dries with an ugly white residue left behind around the application site that needs to be painted over.

-
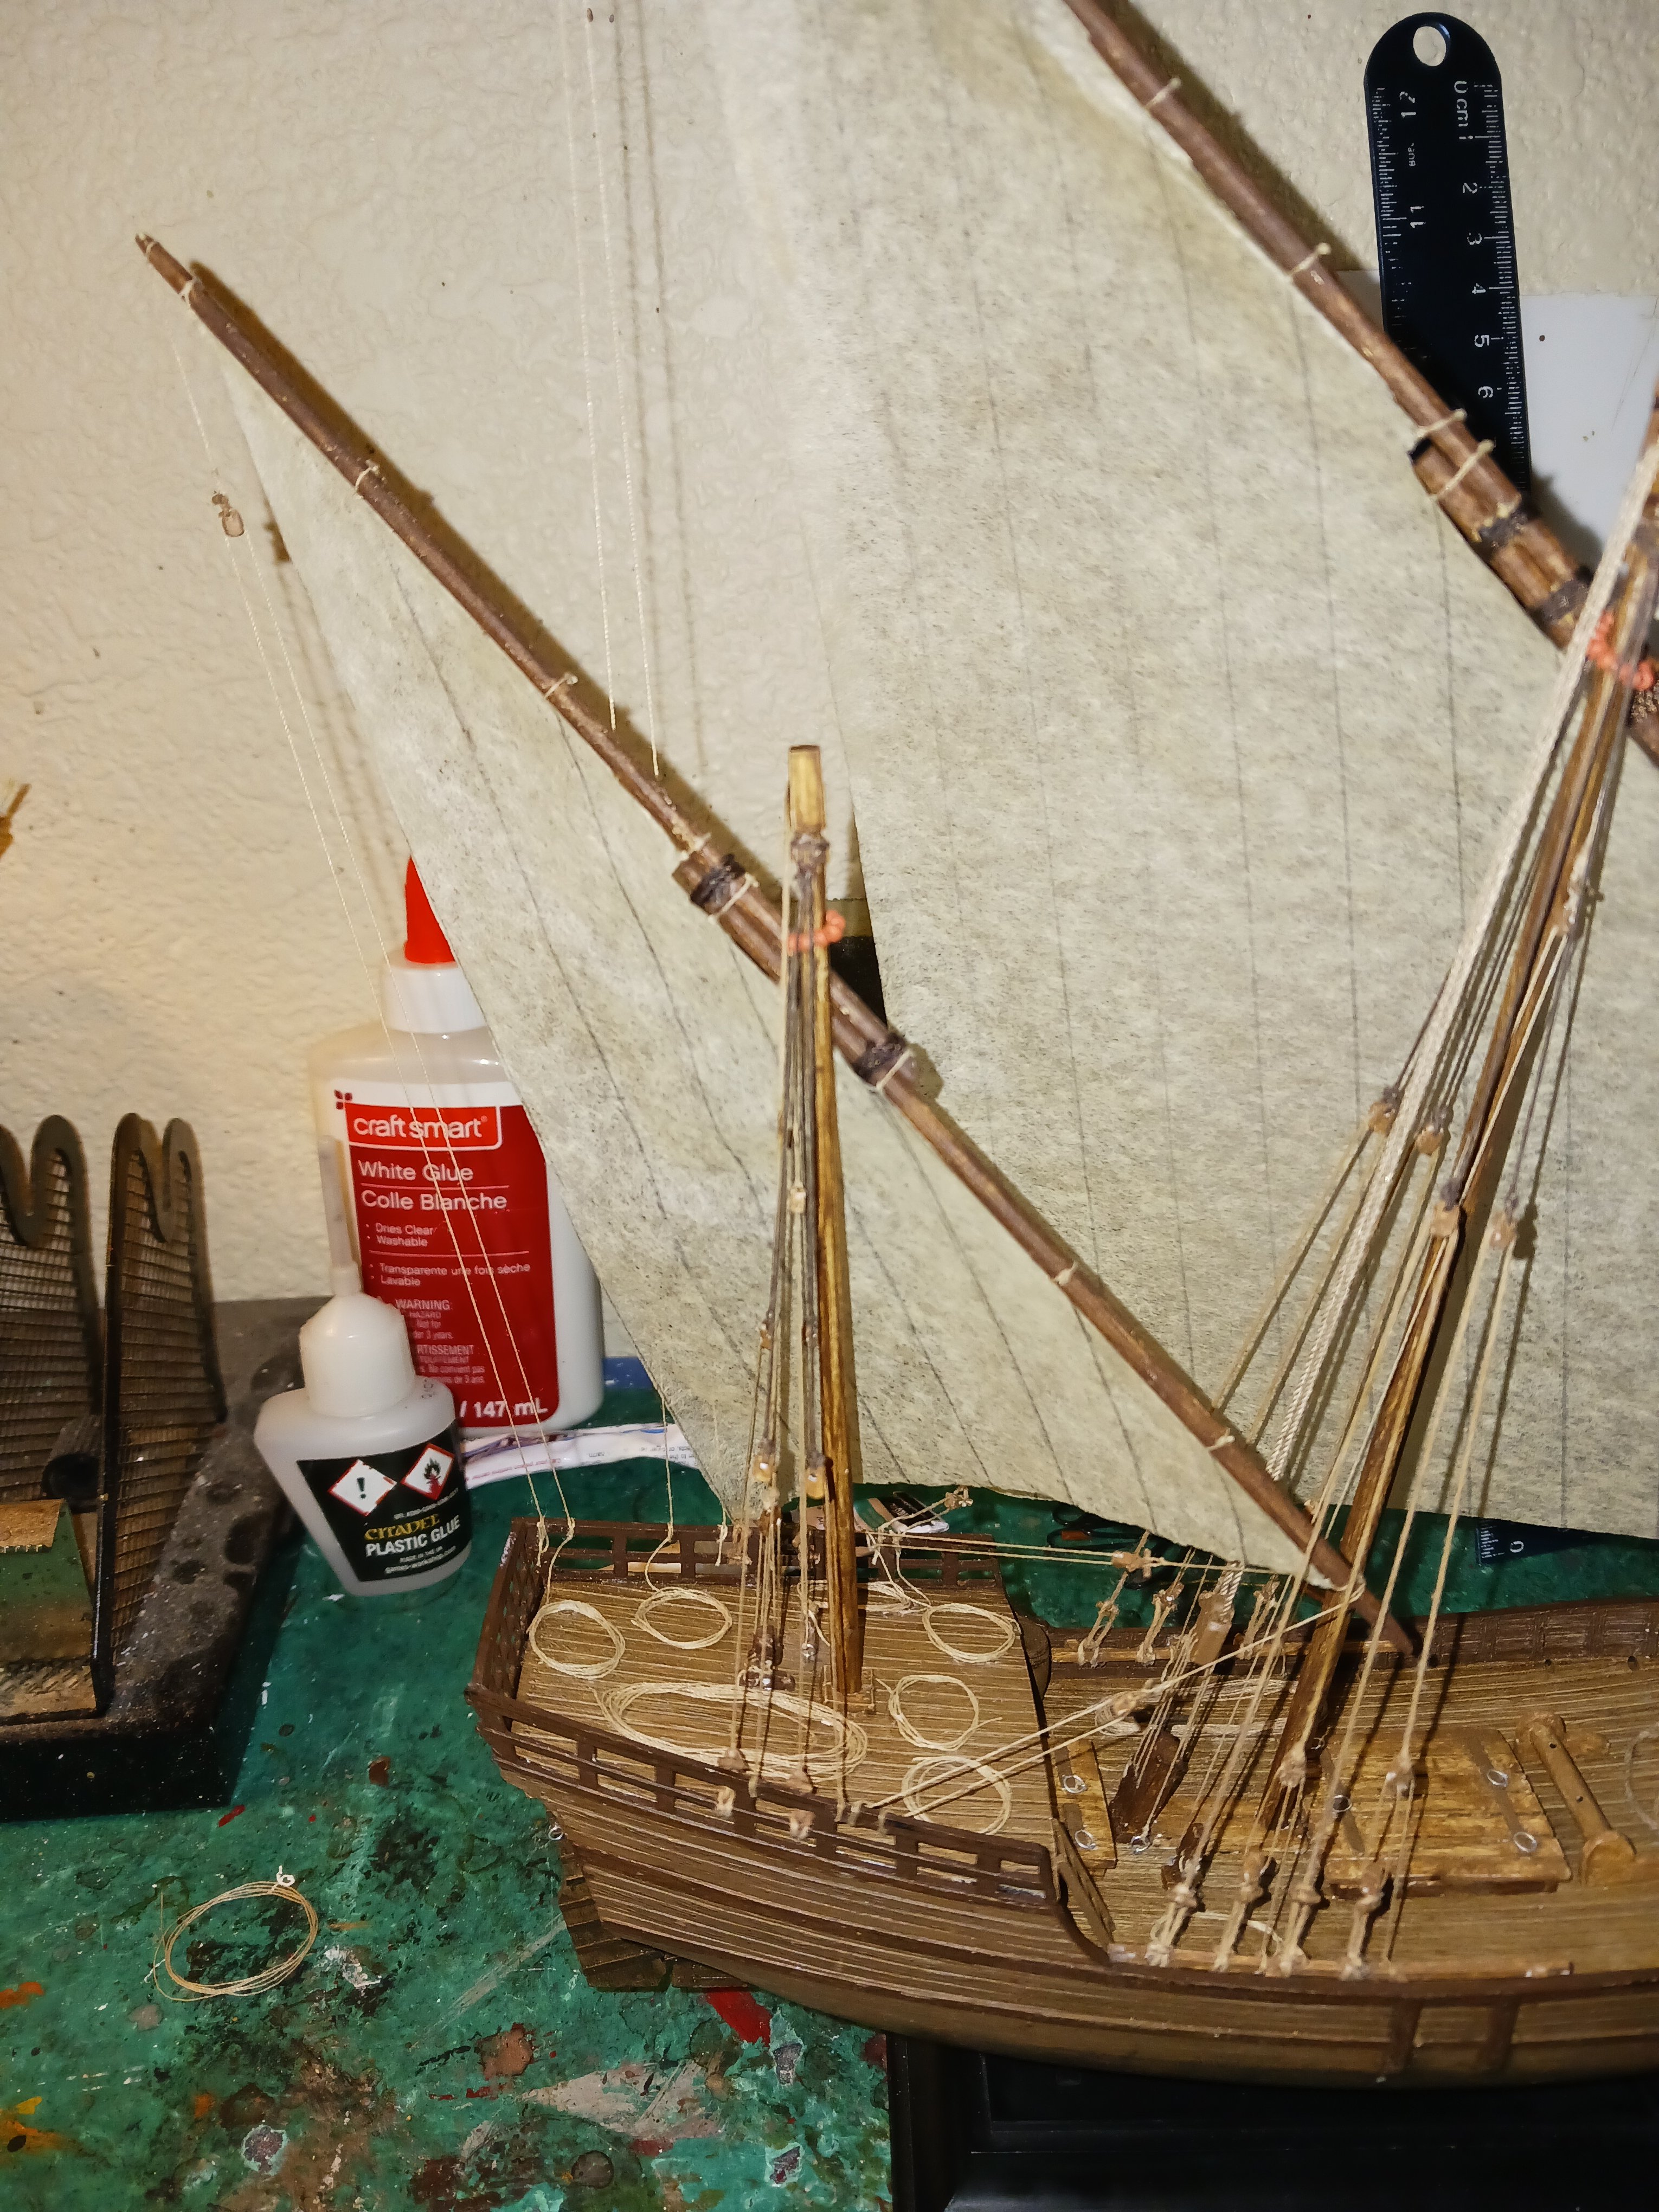
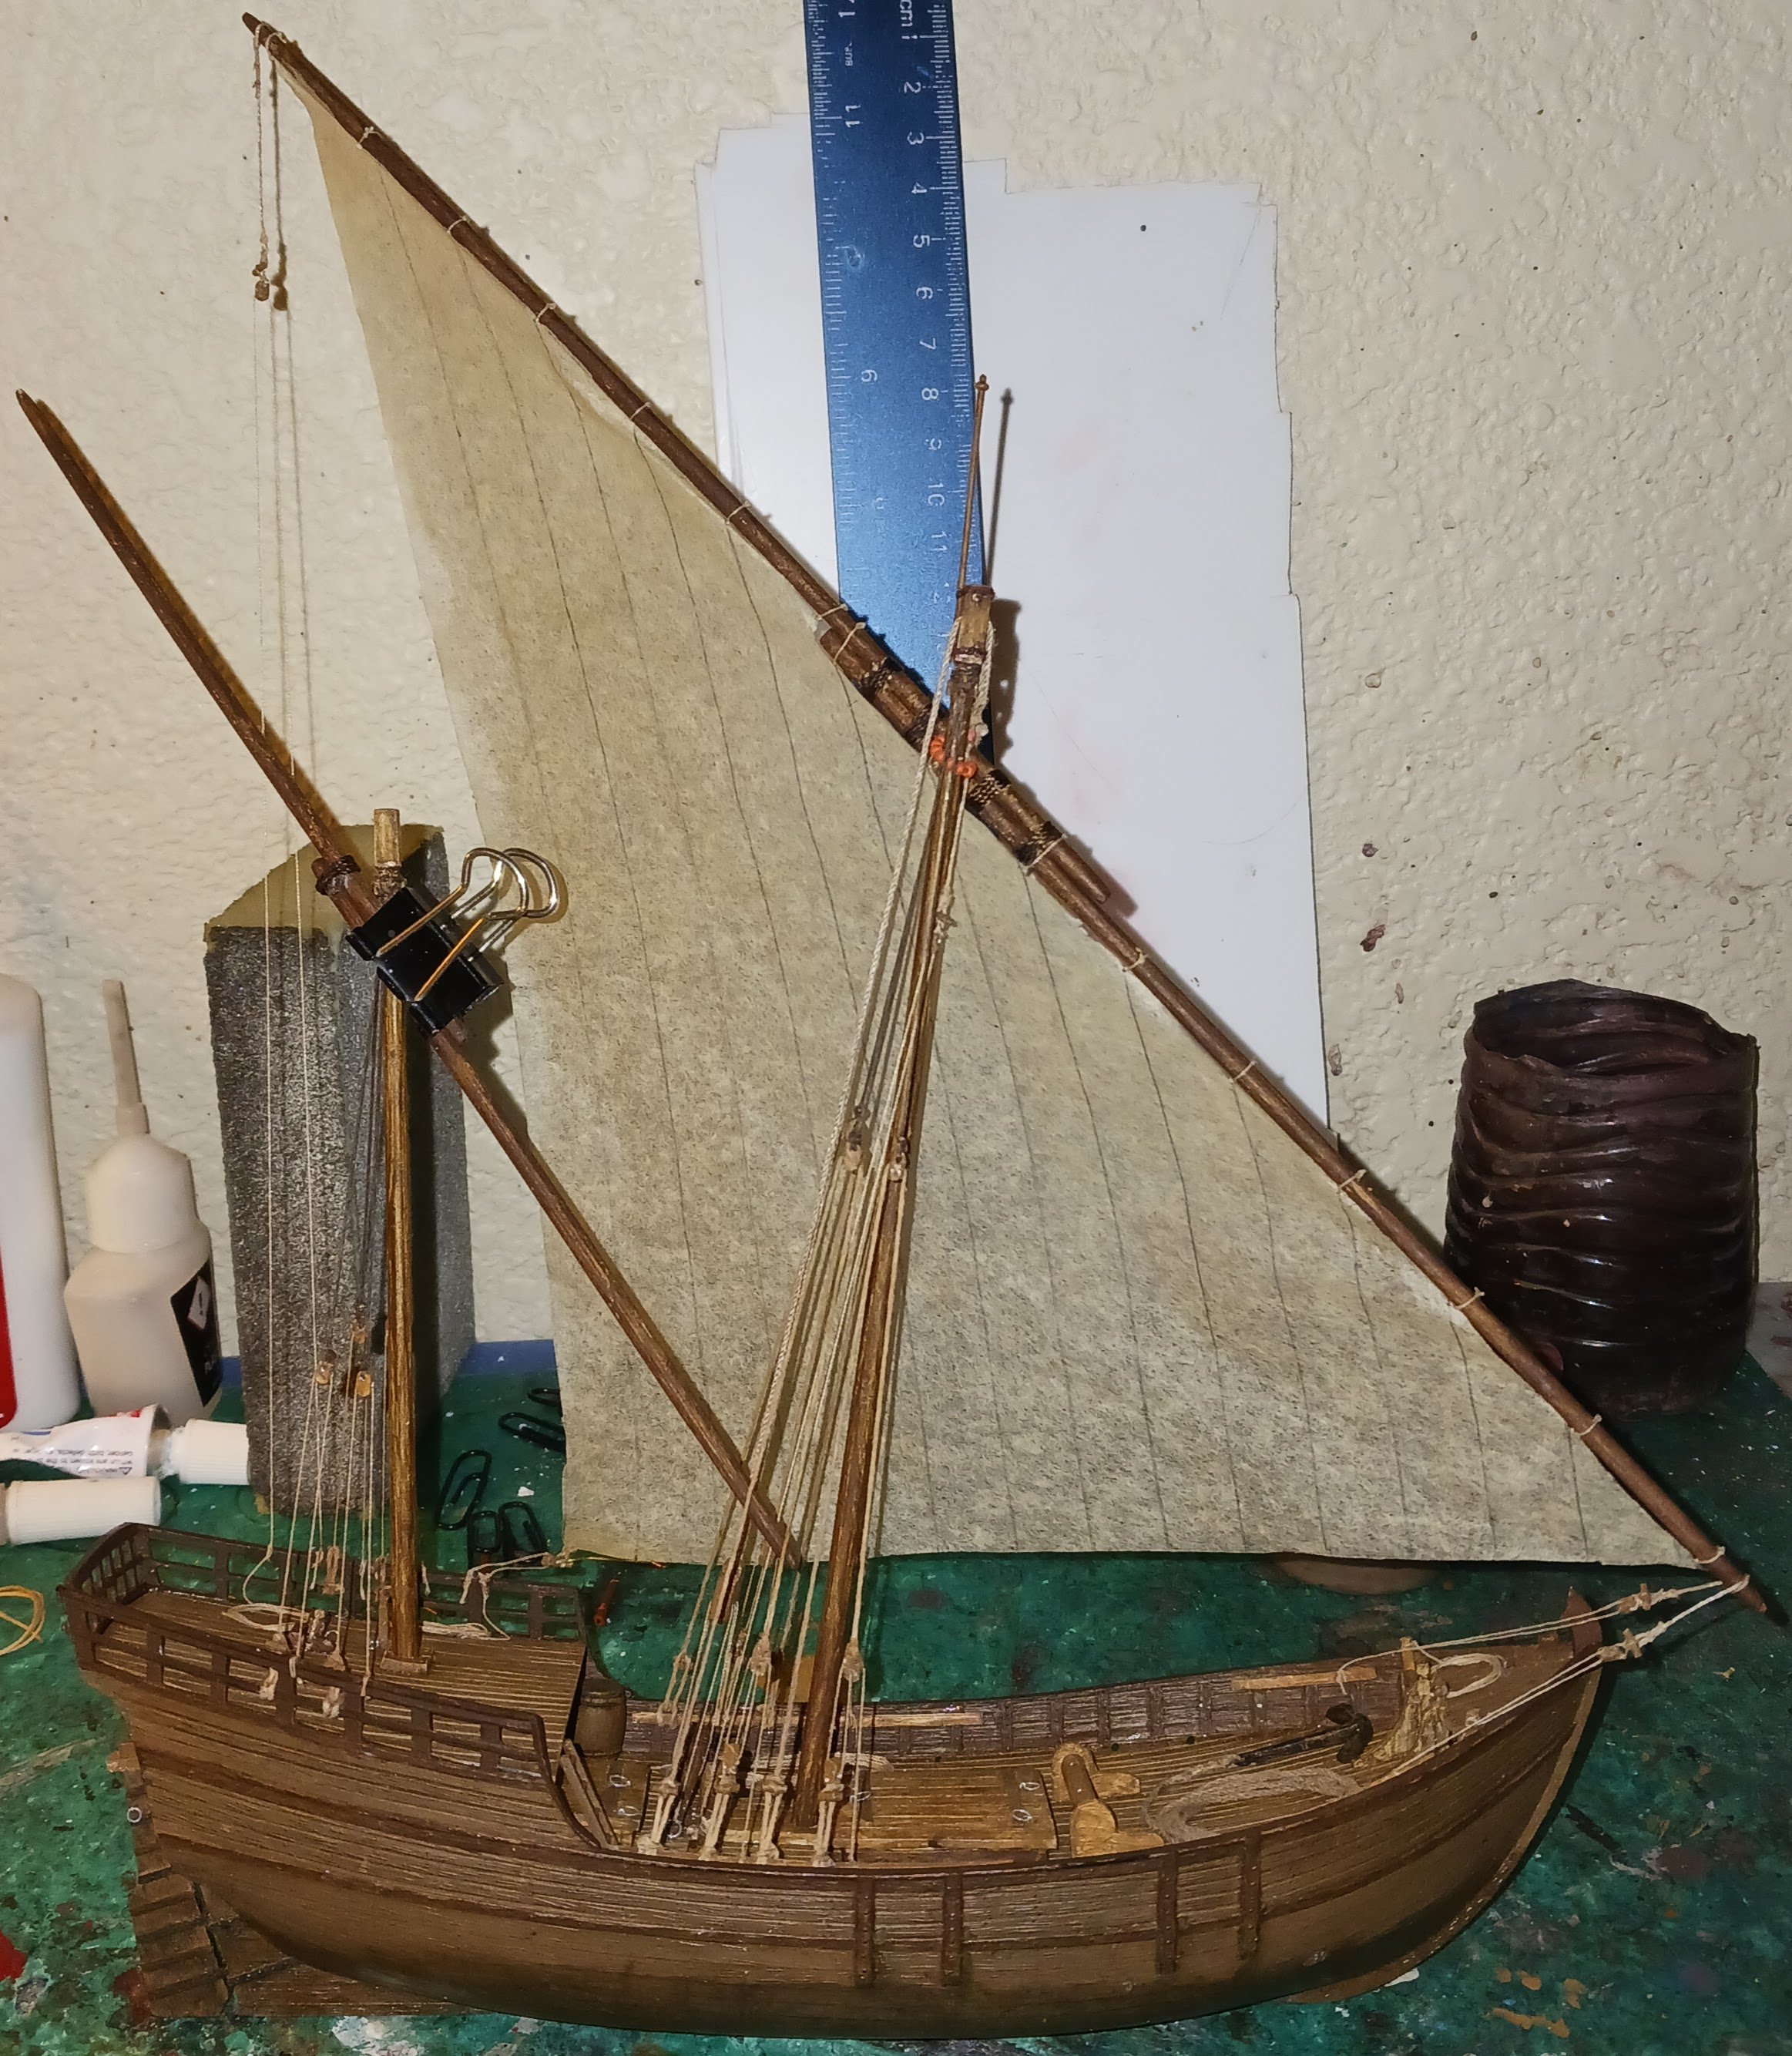
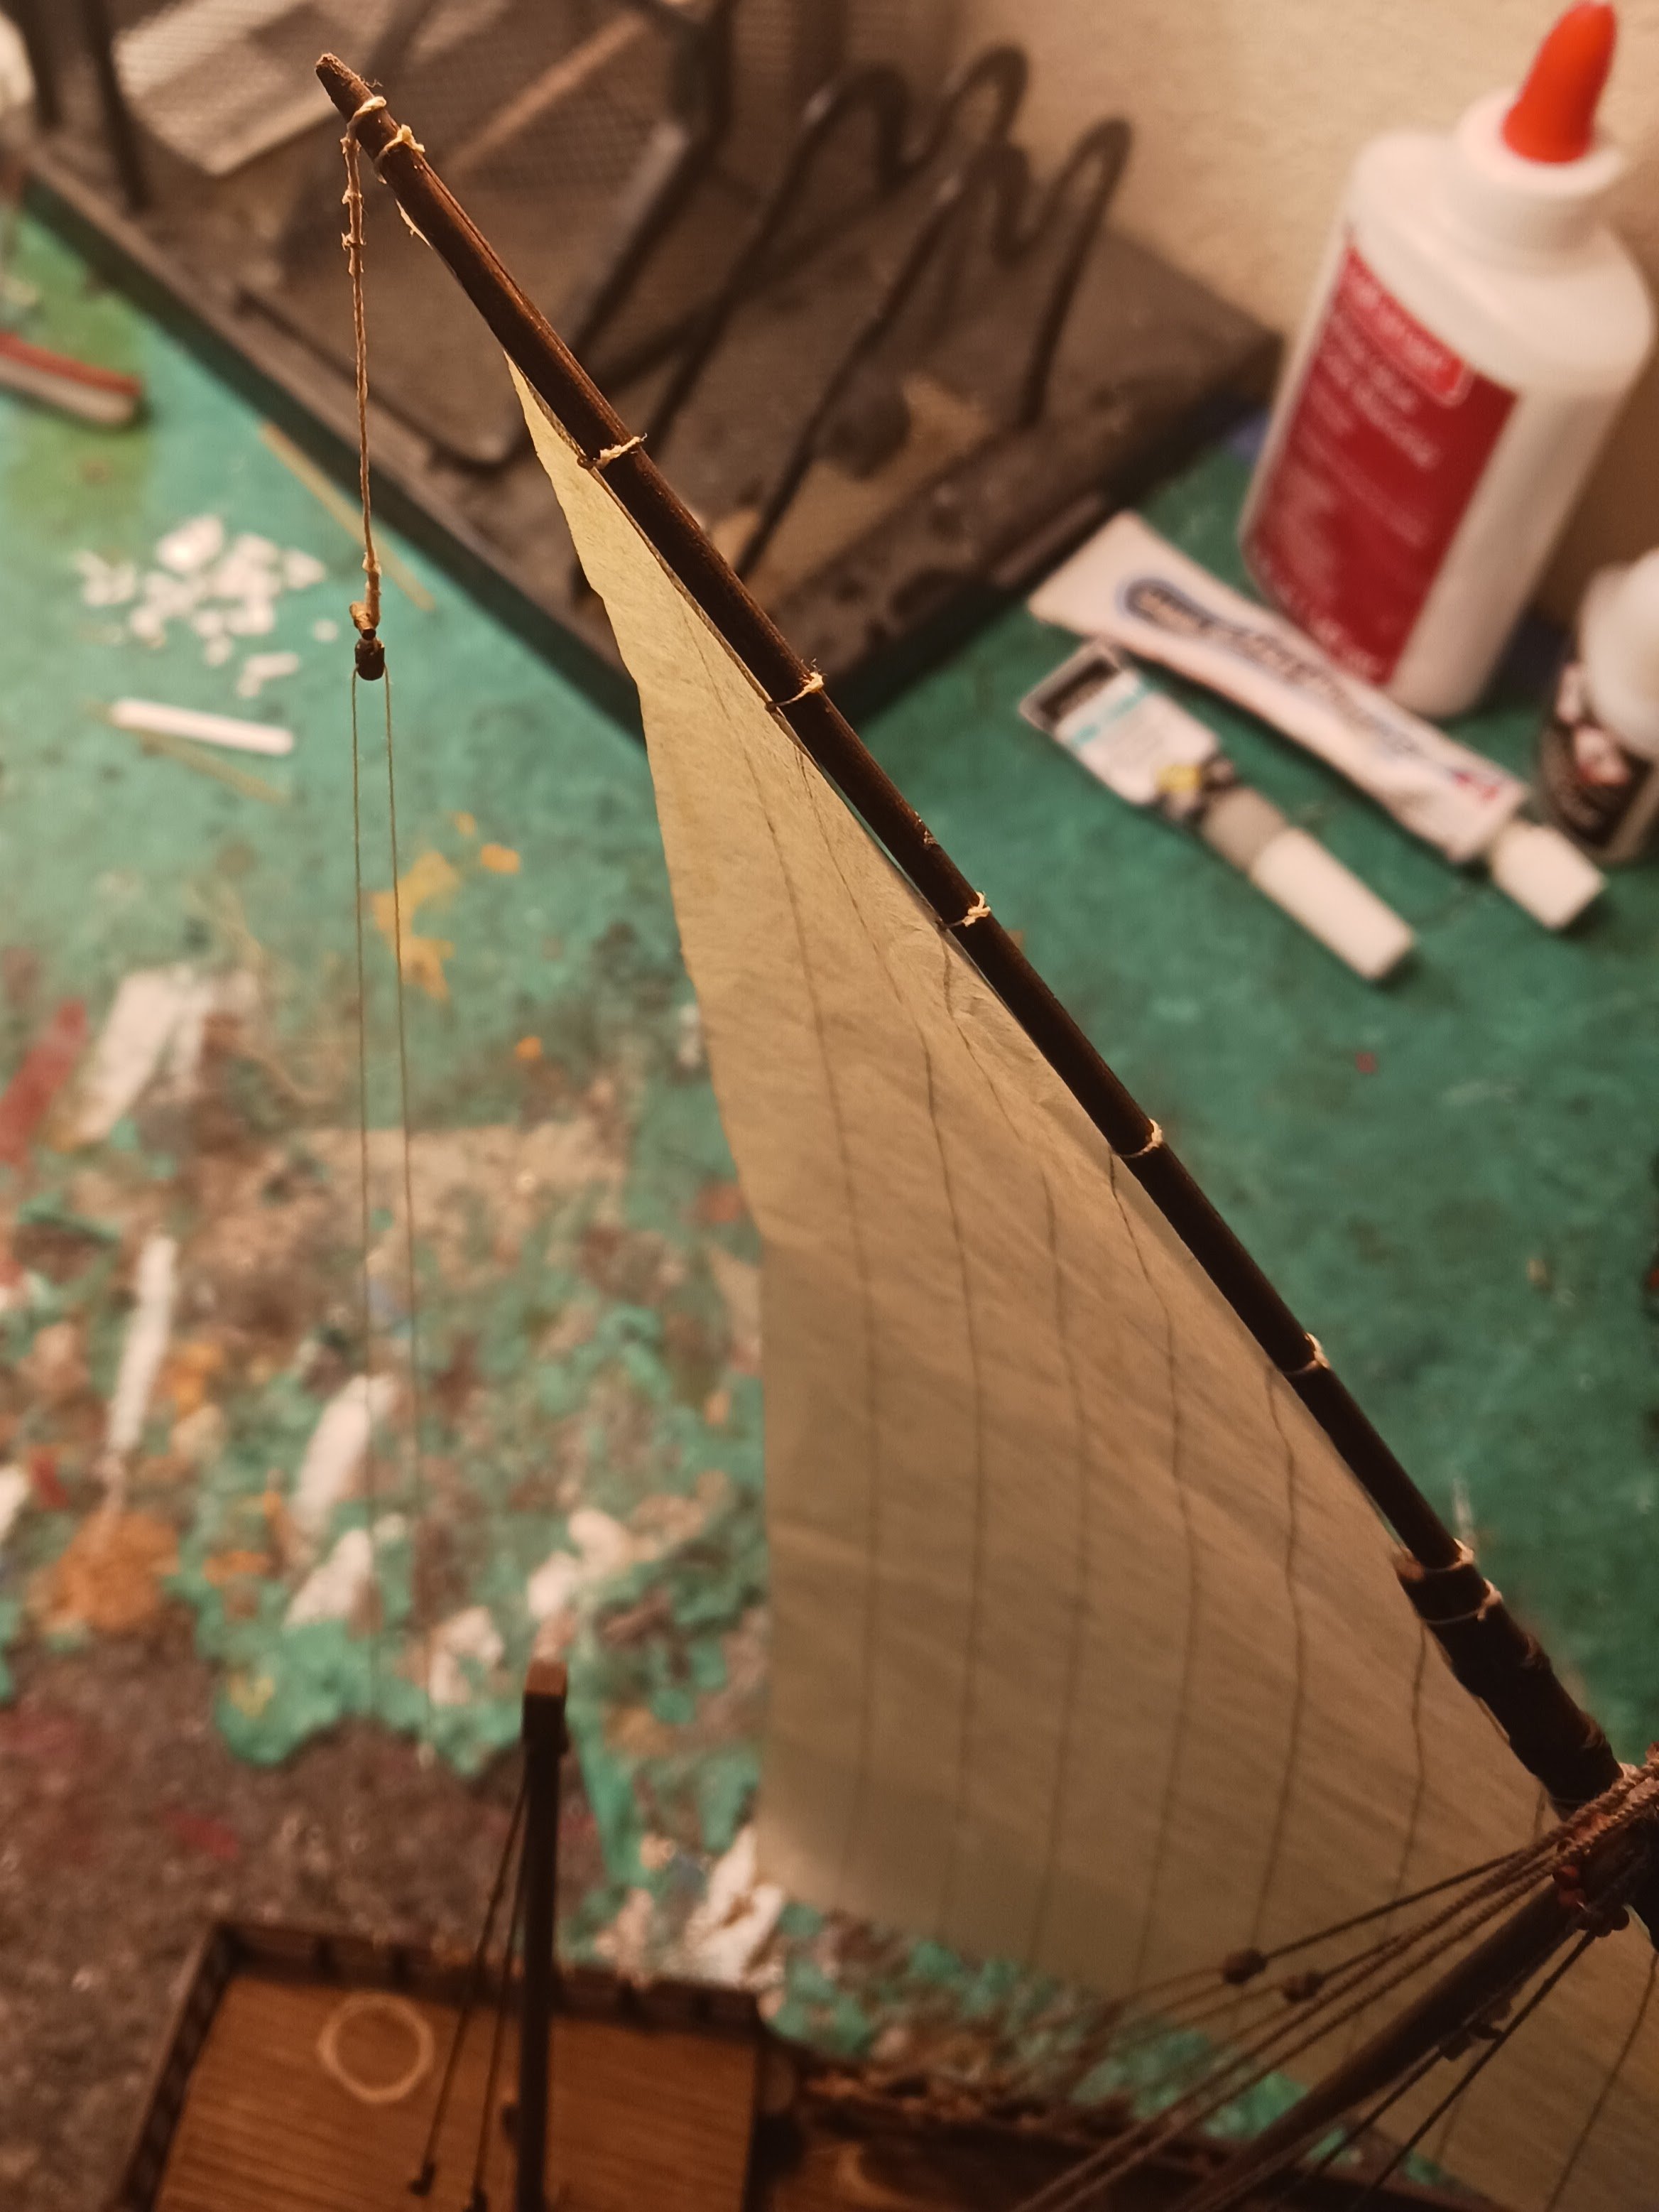
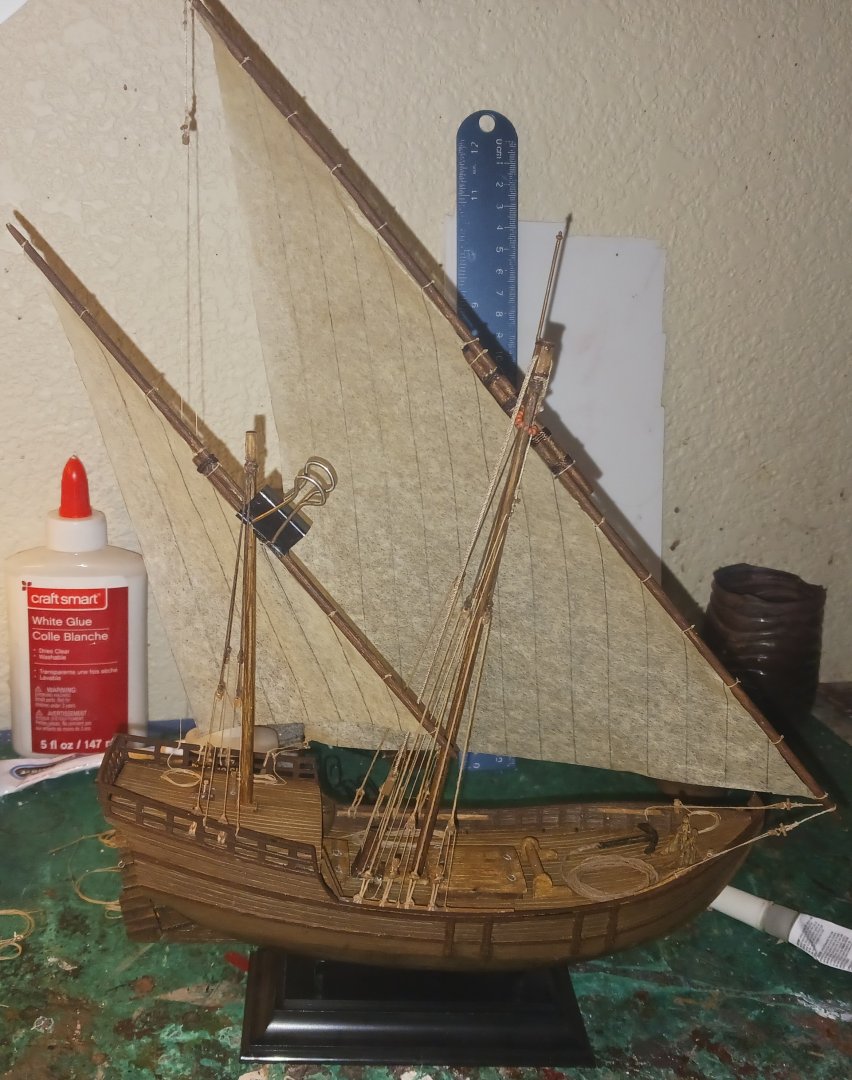
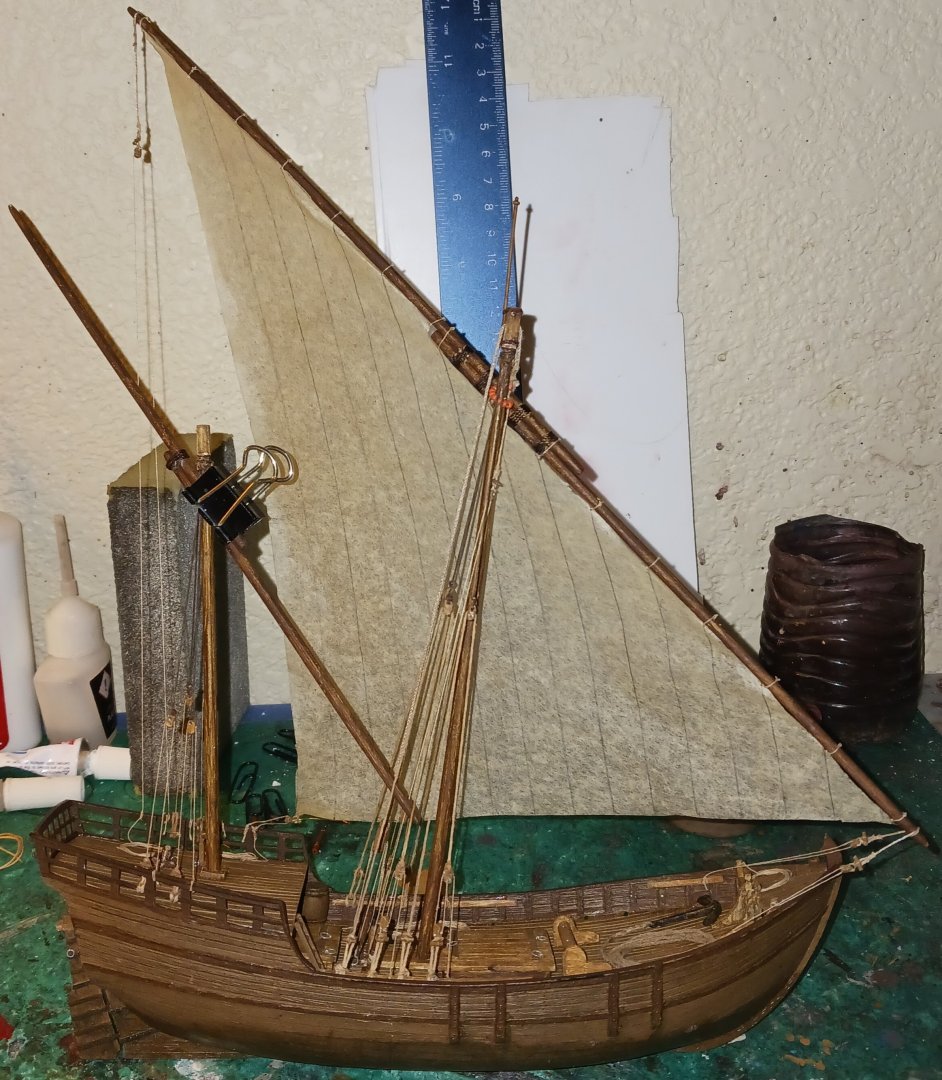
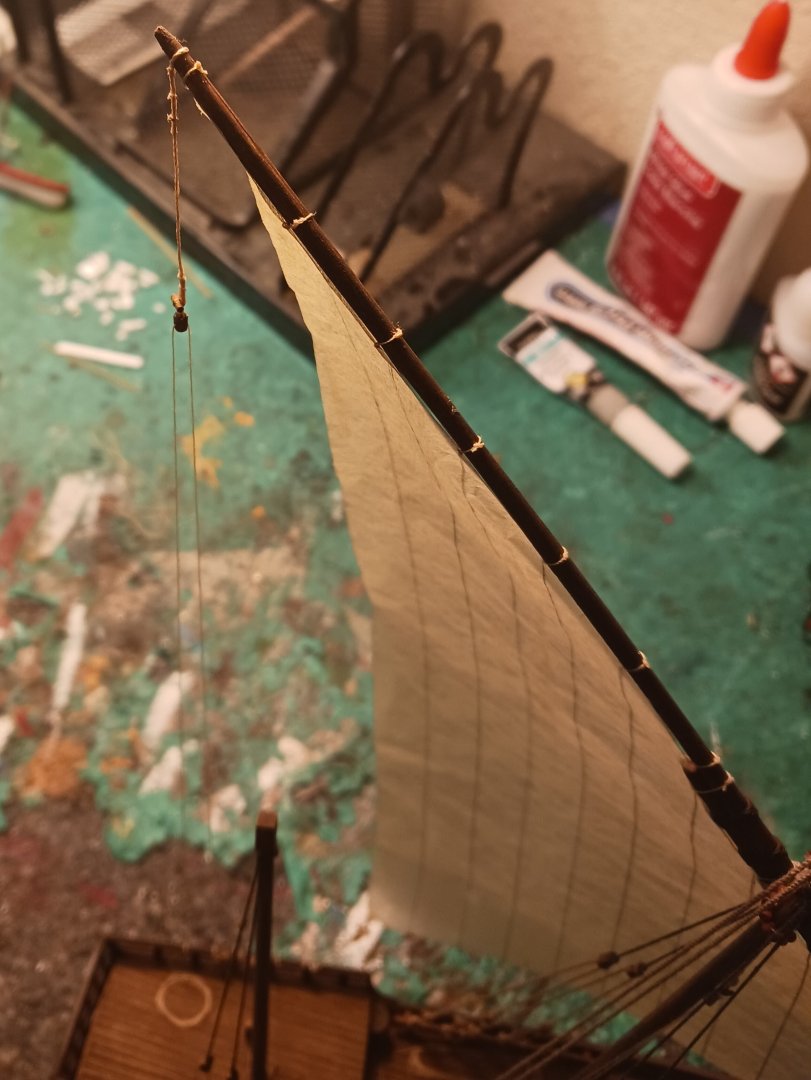
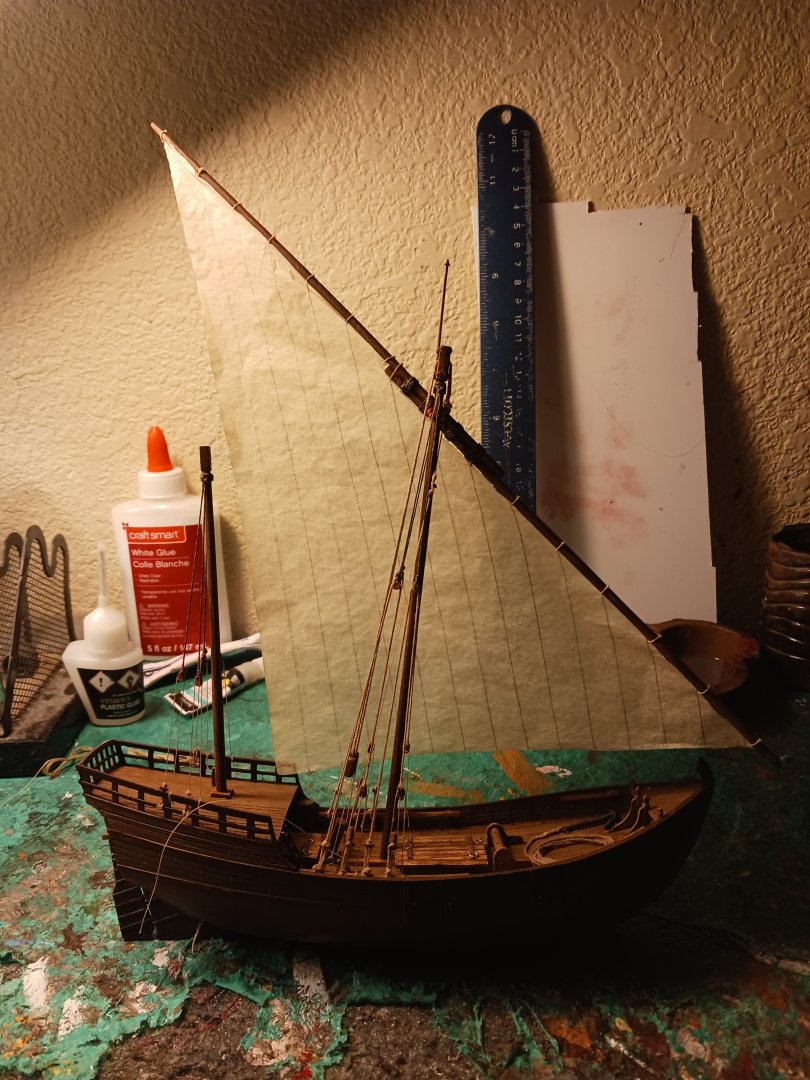
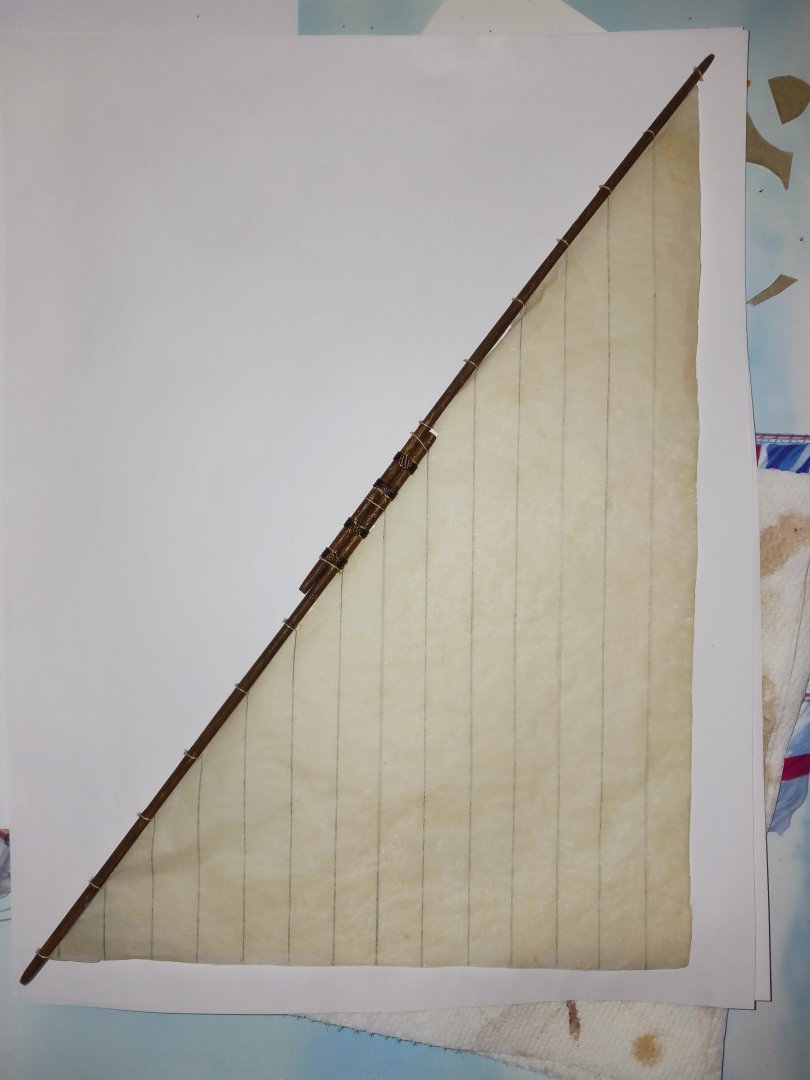
Small update, I have bent the mizzen sail to the yard and made the stand, which will eventually be painted and decaled. My solution for the mizzen yard and sail:
-
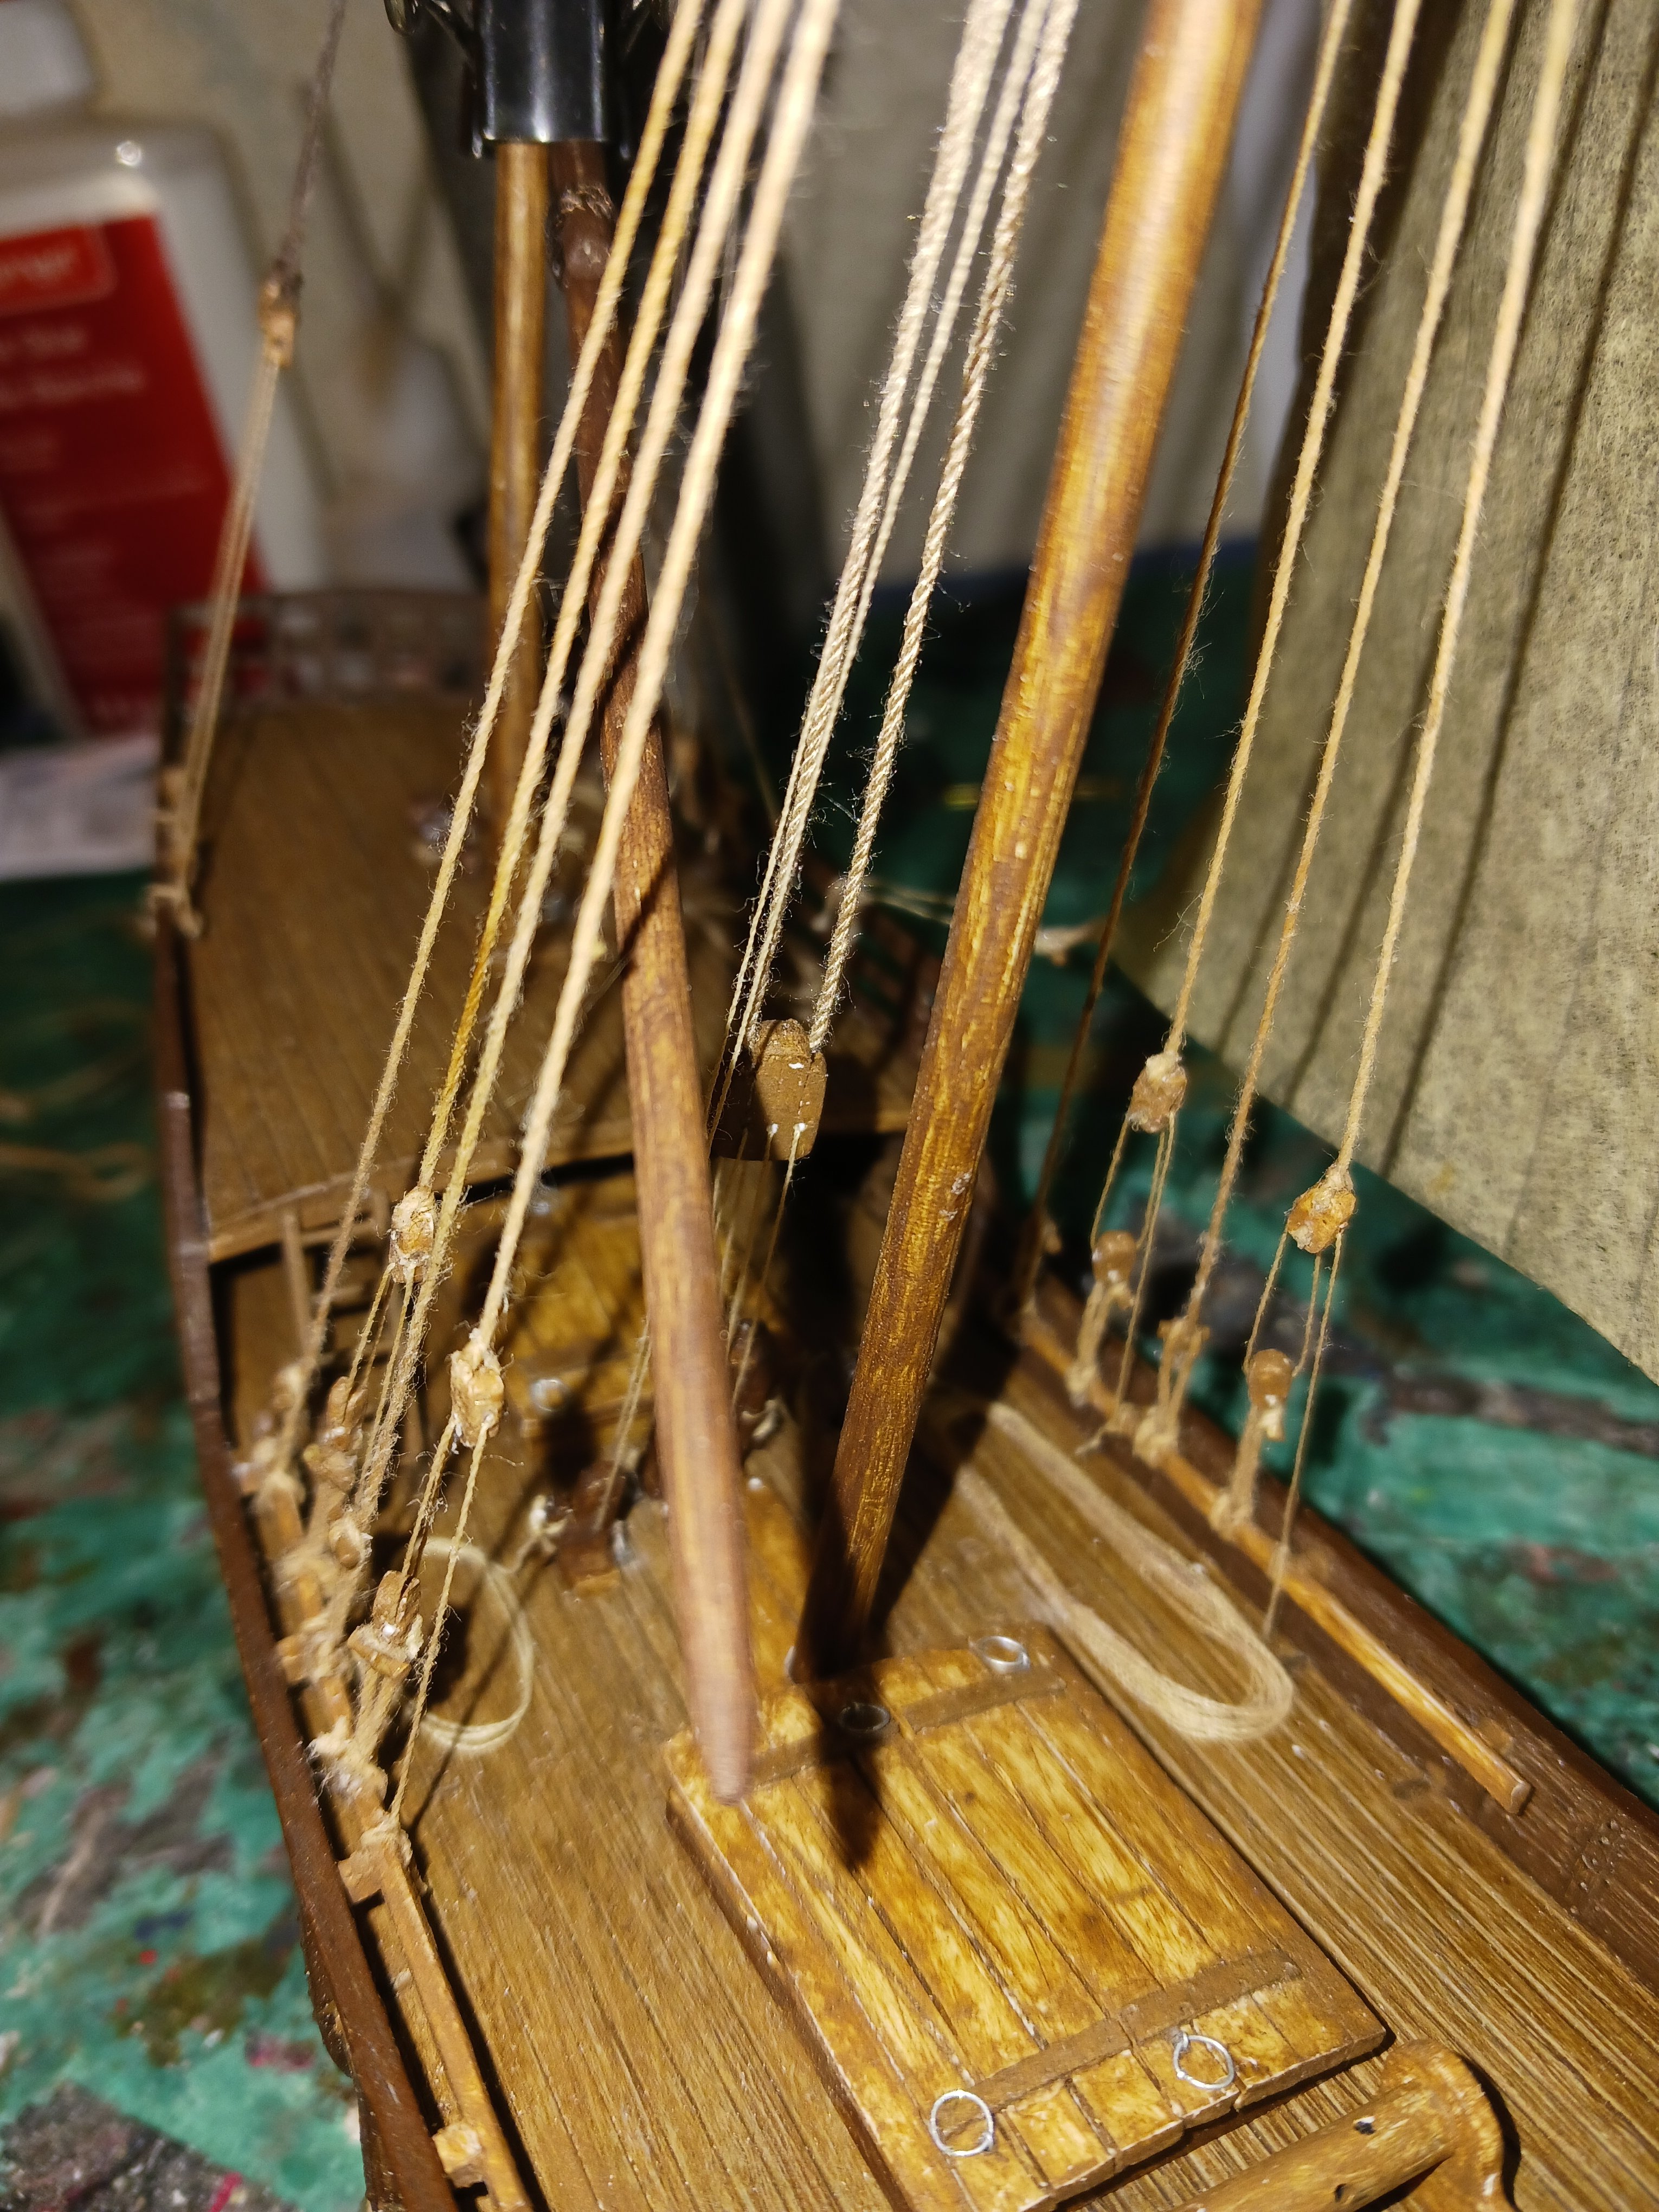
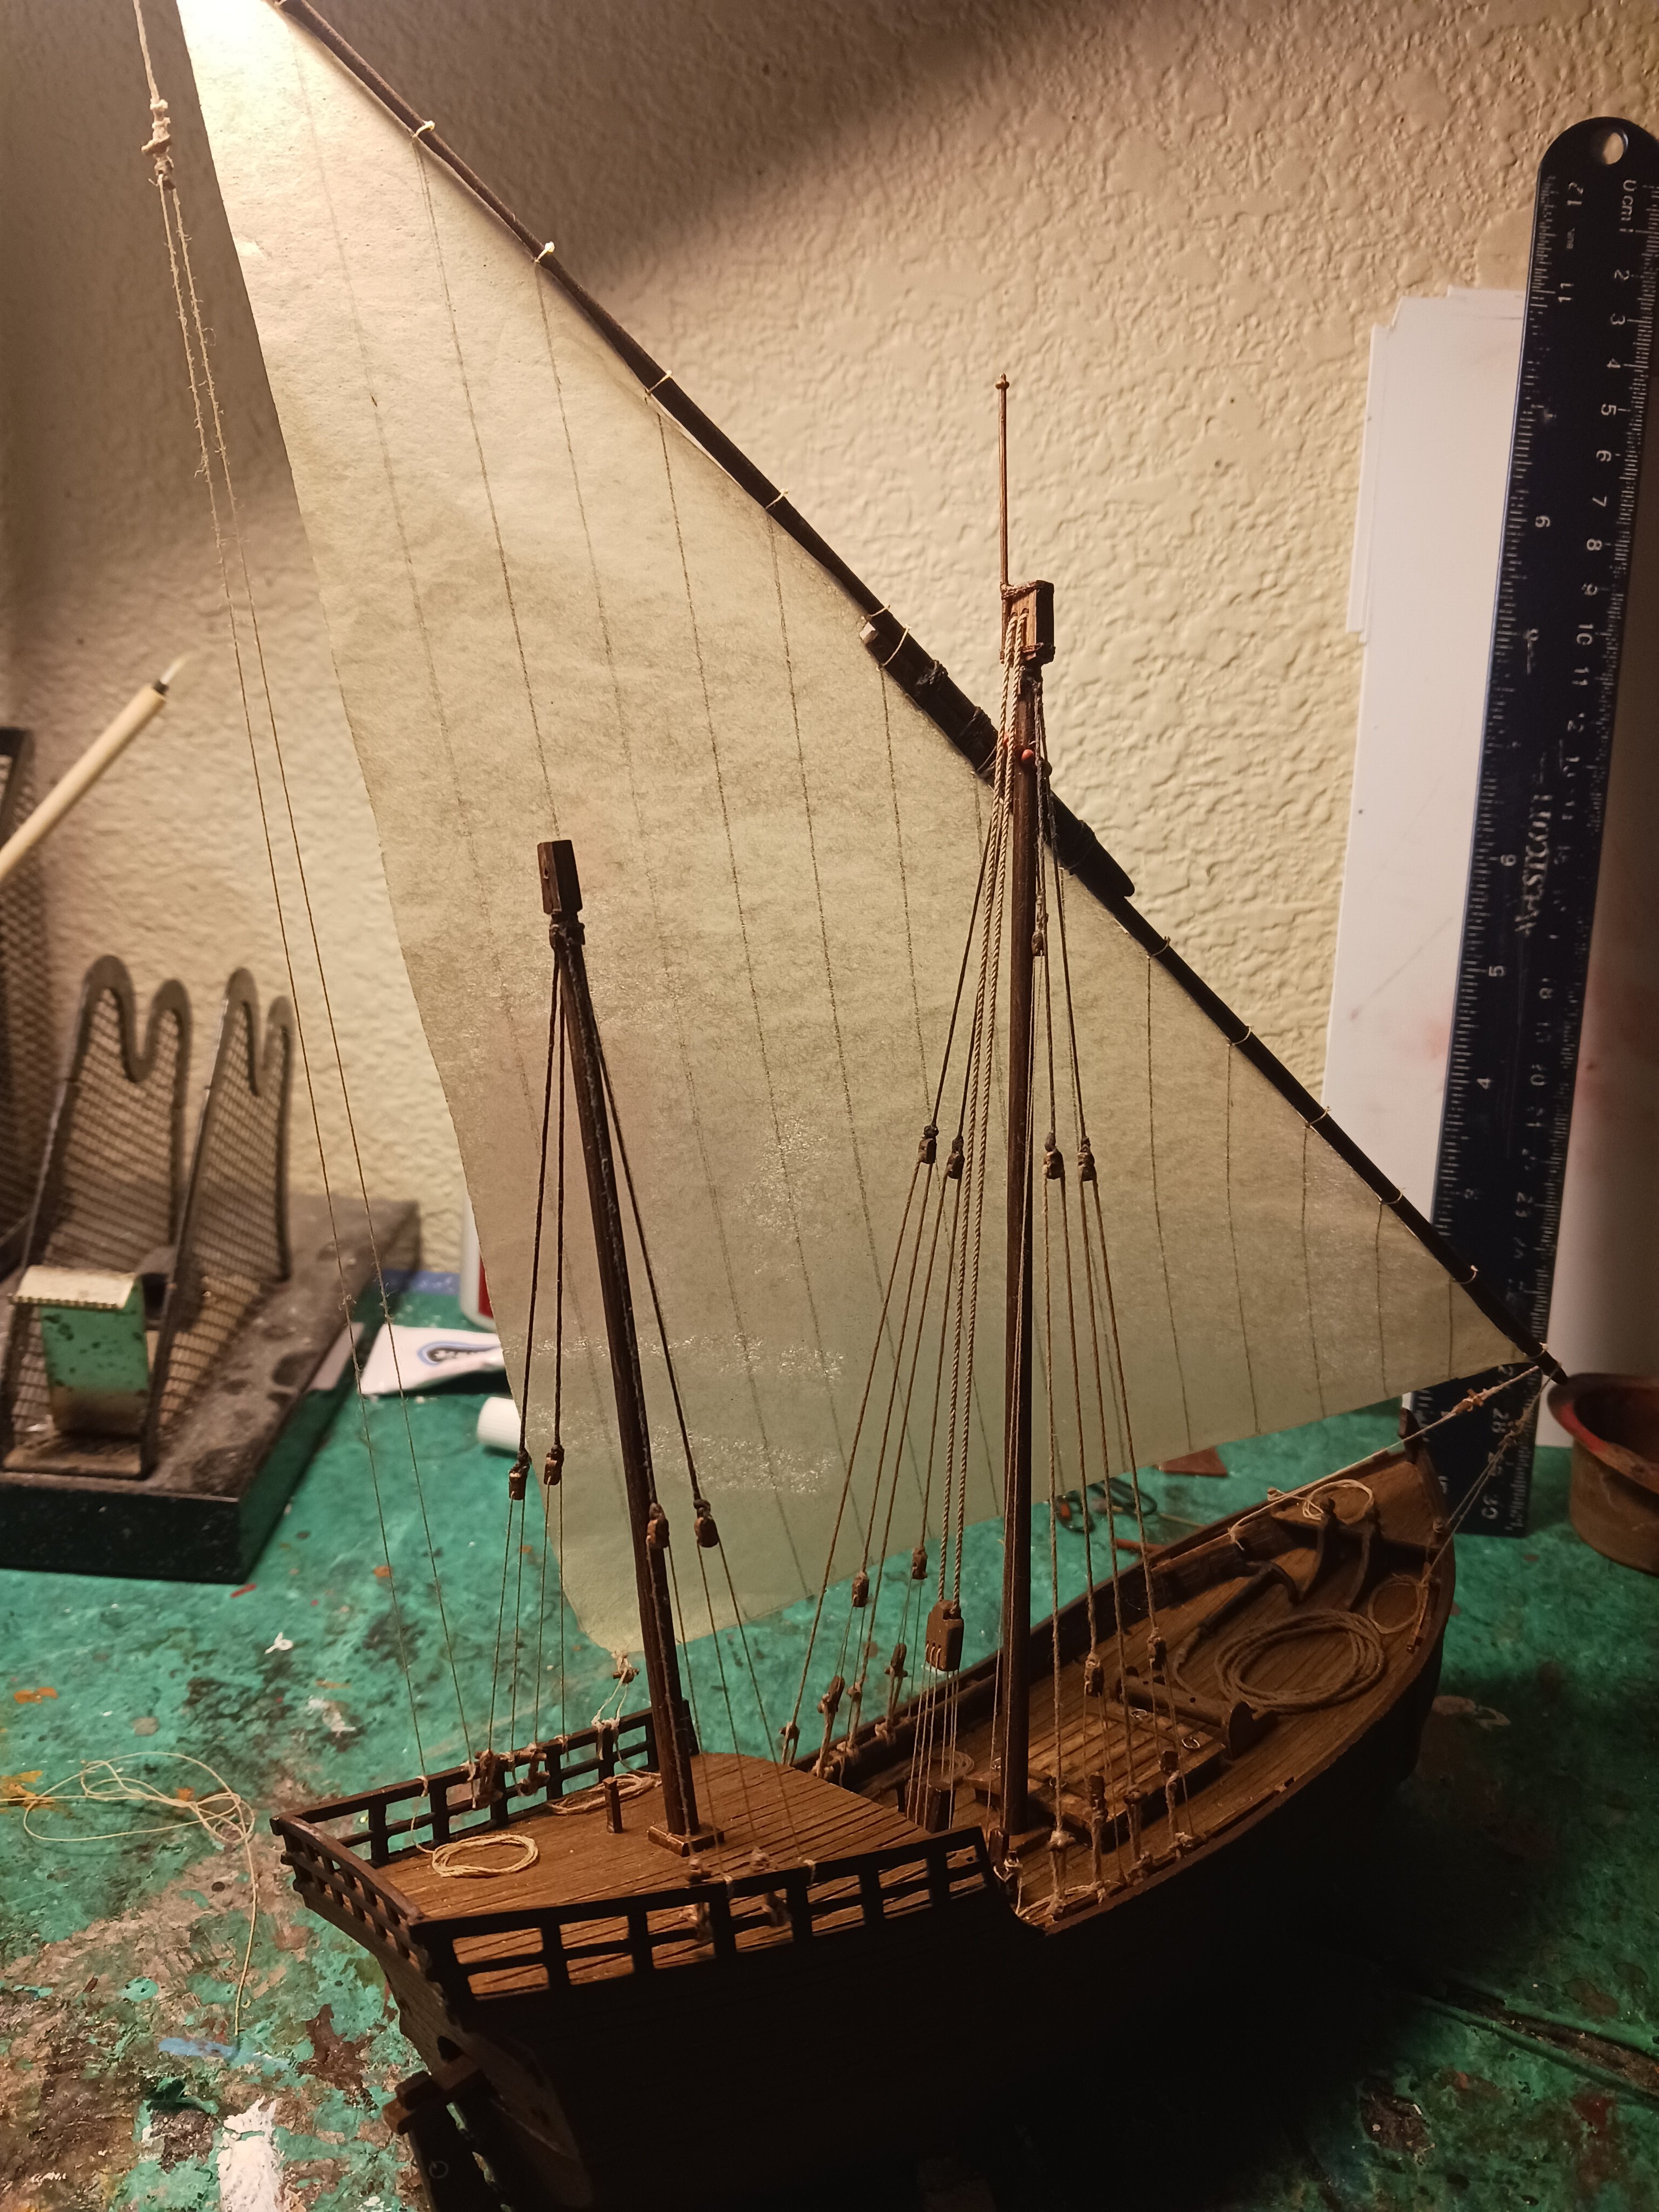
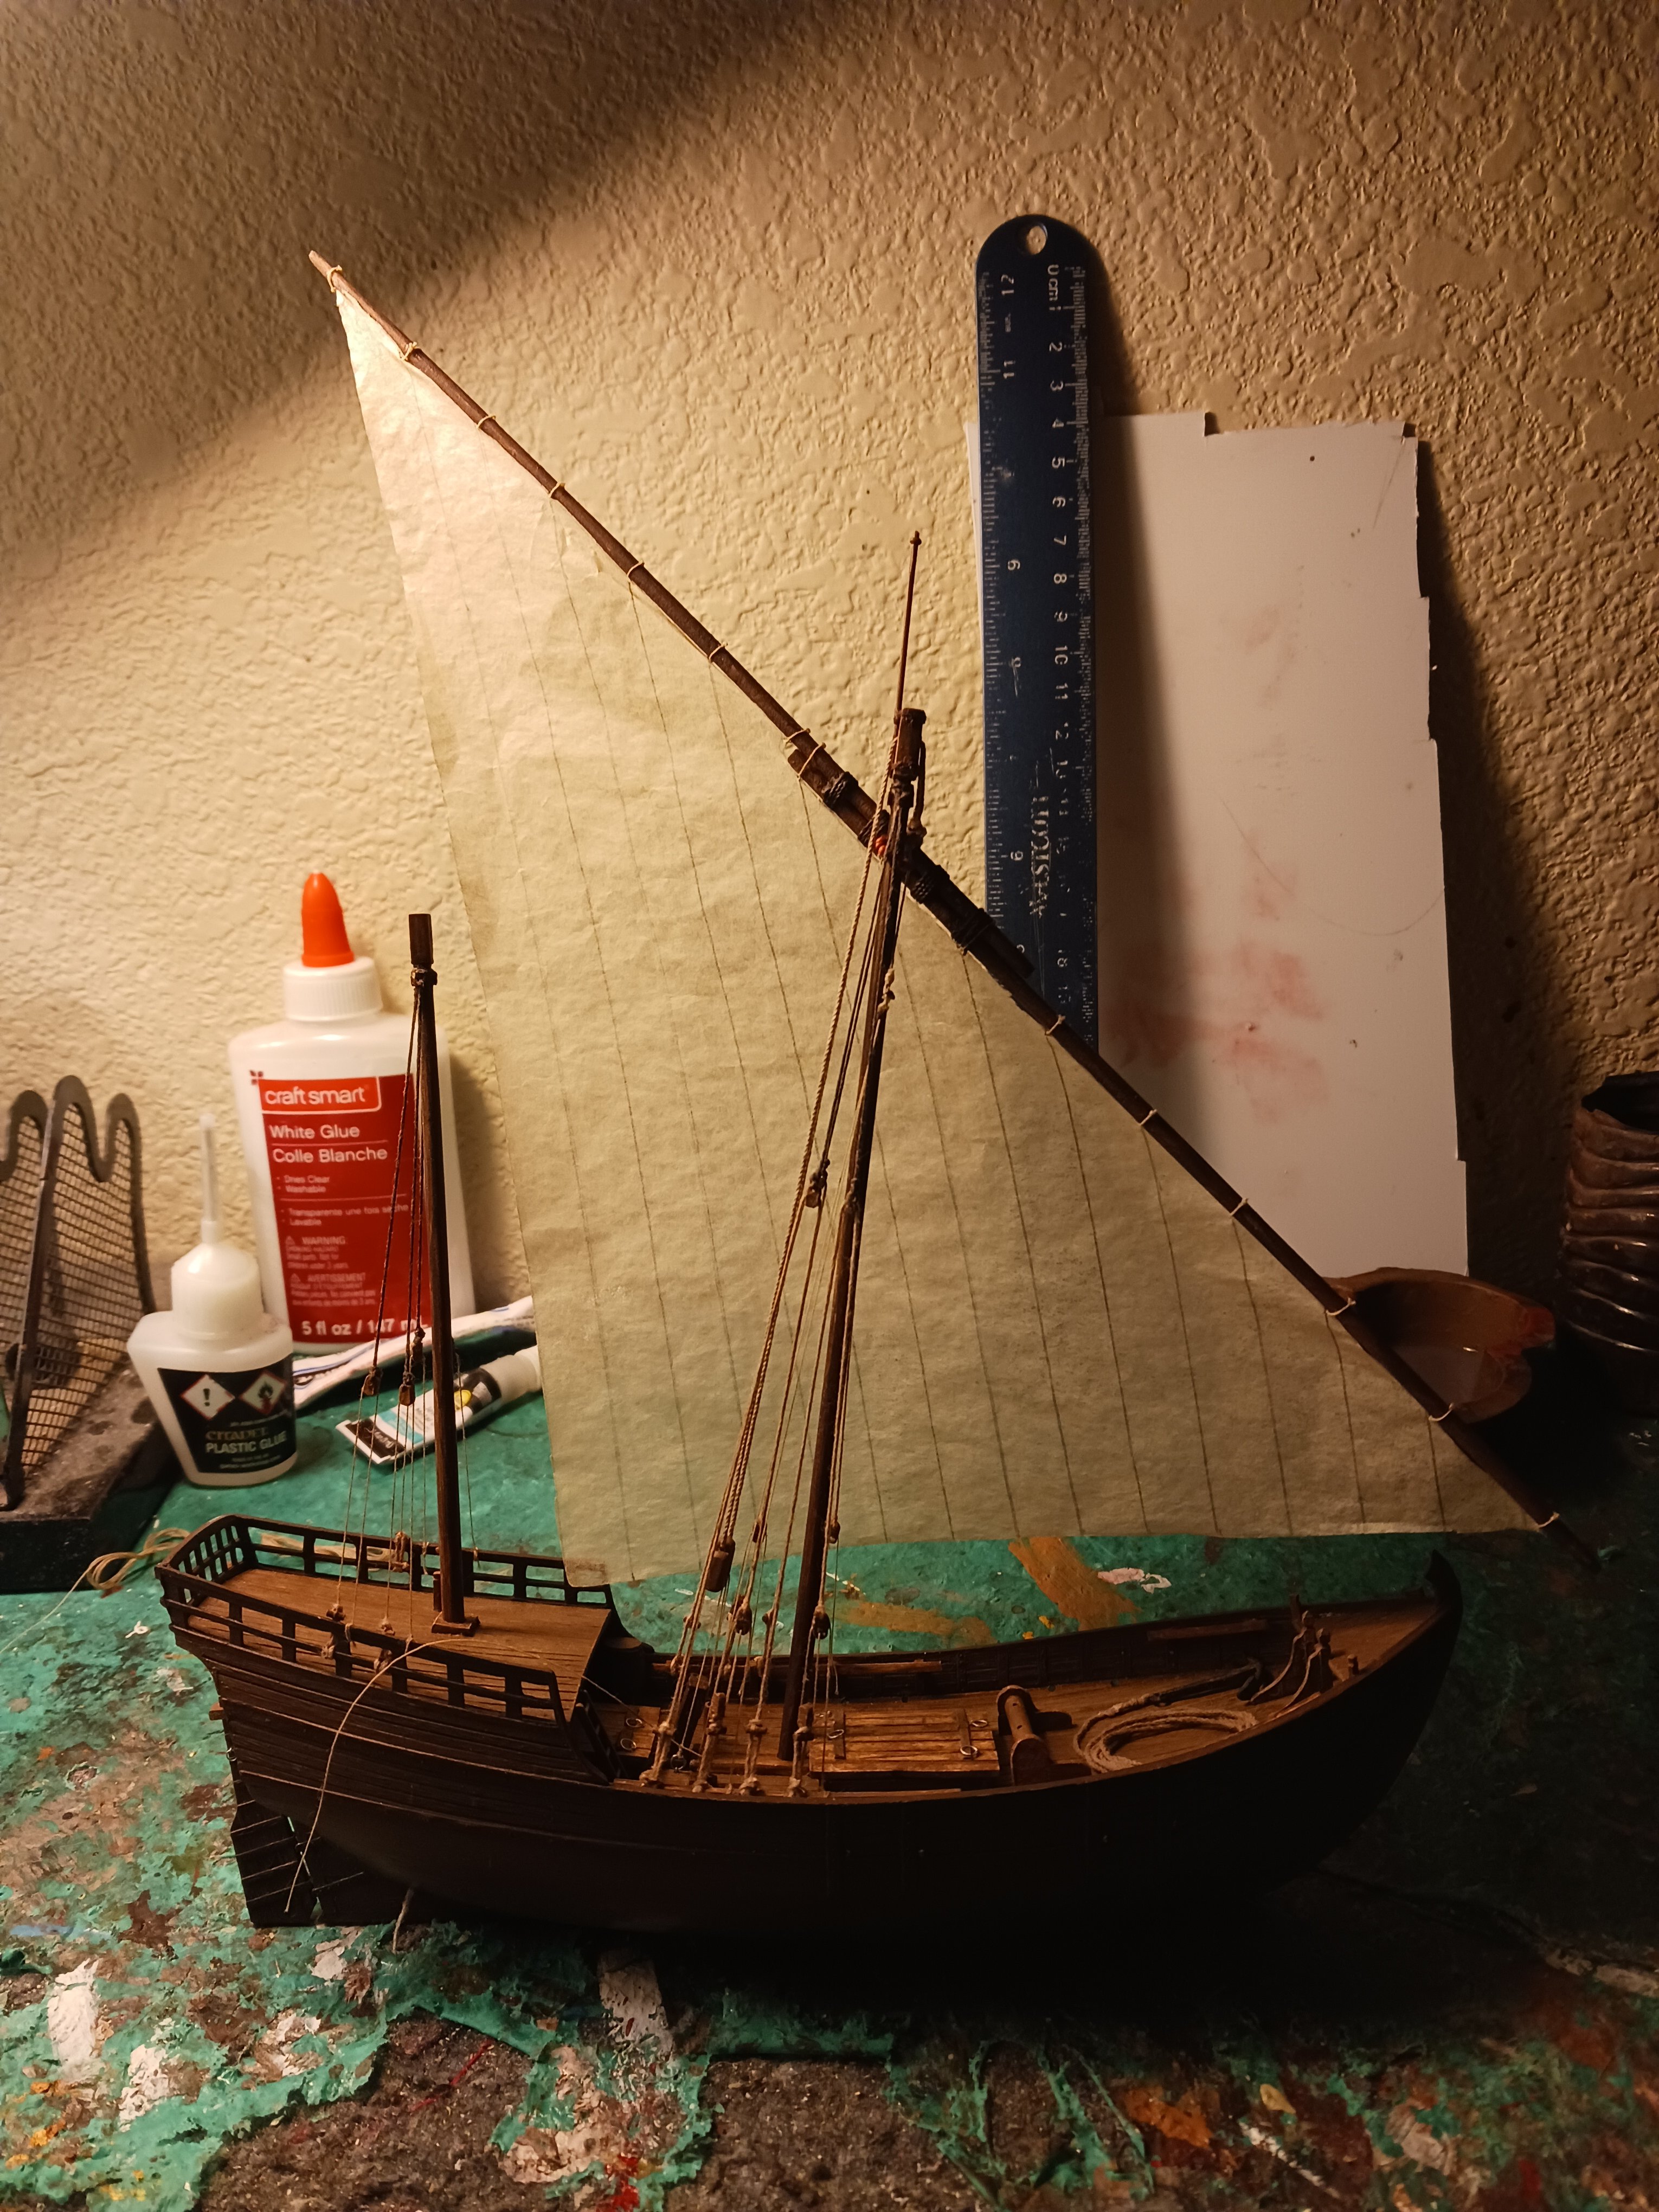
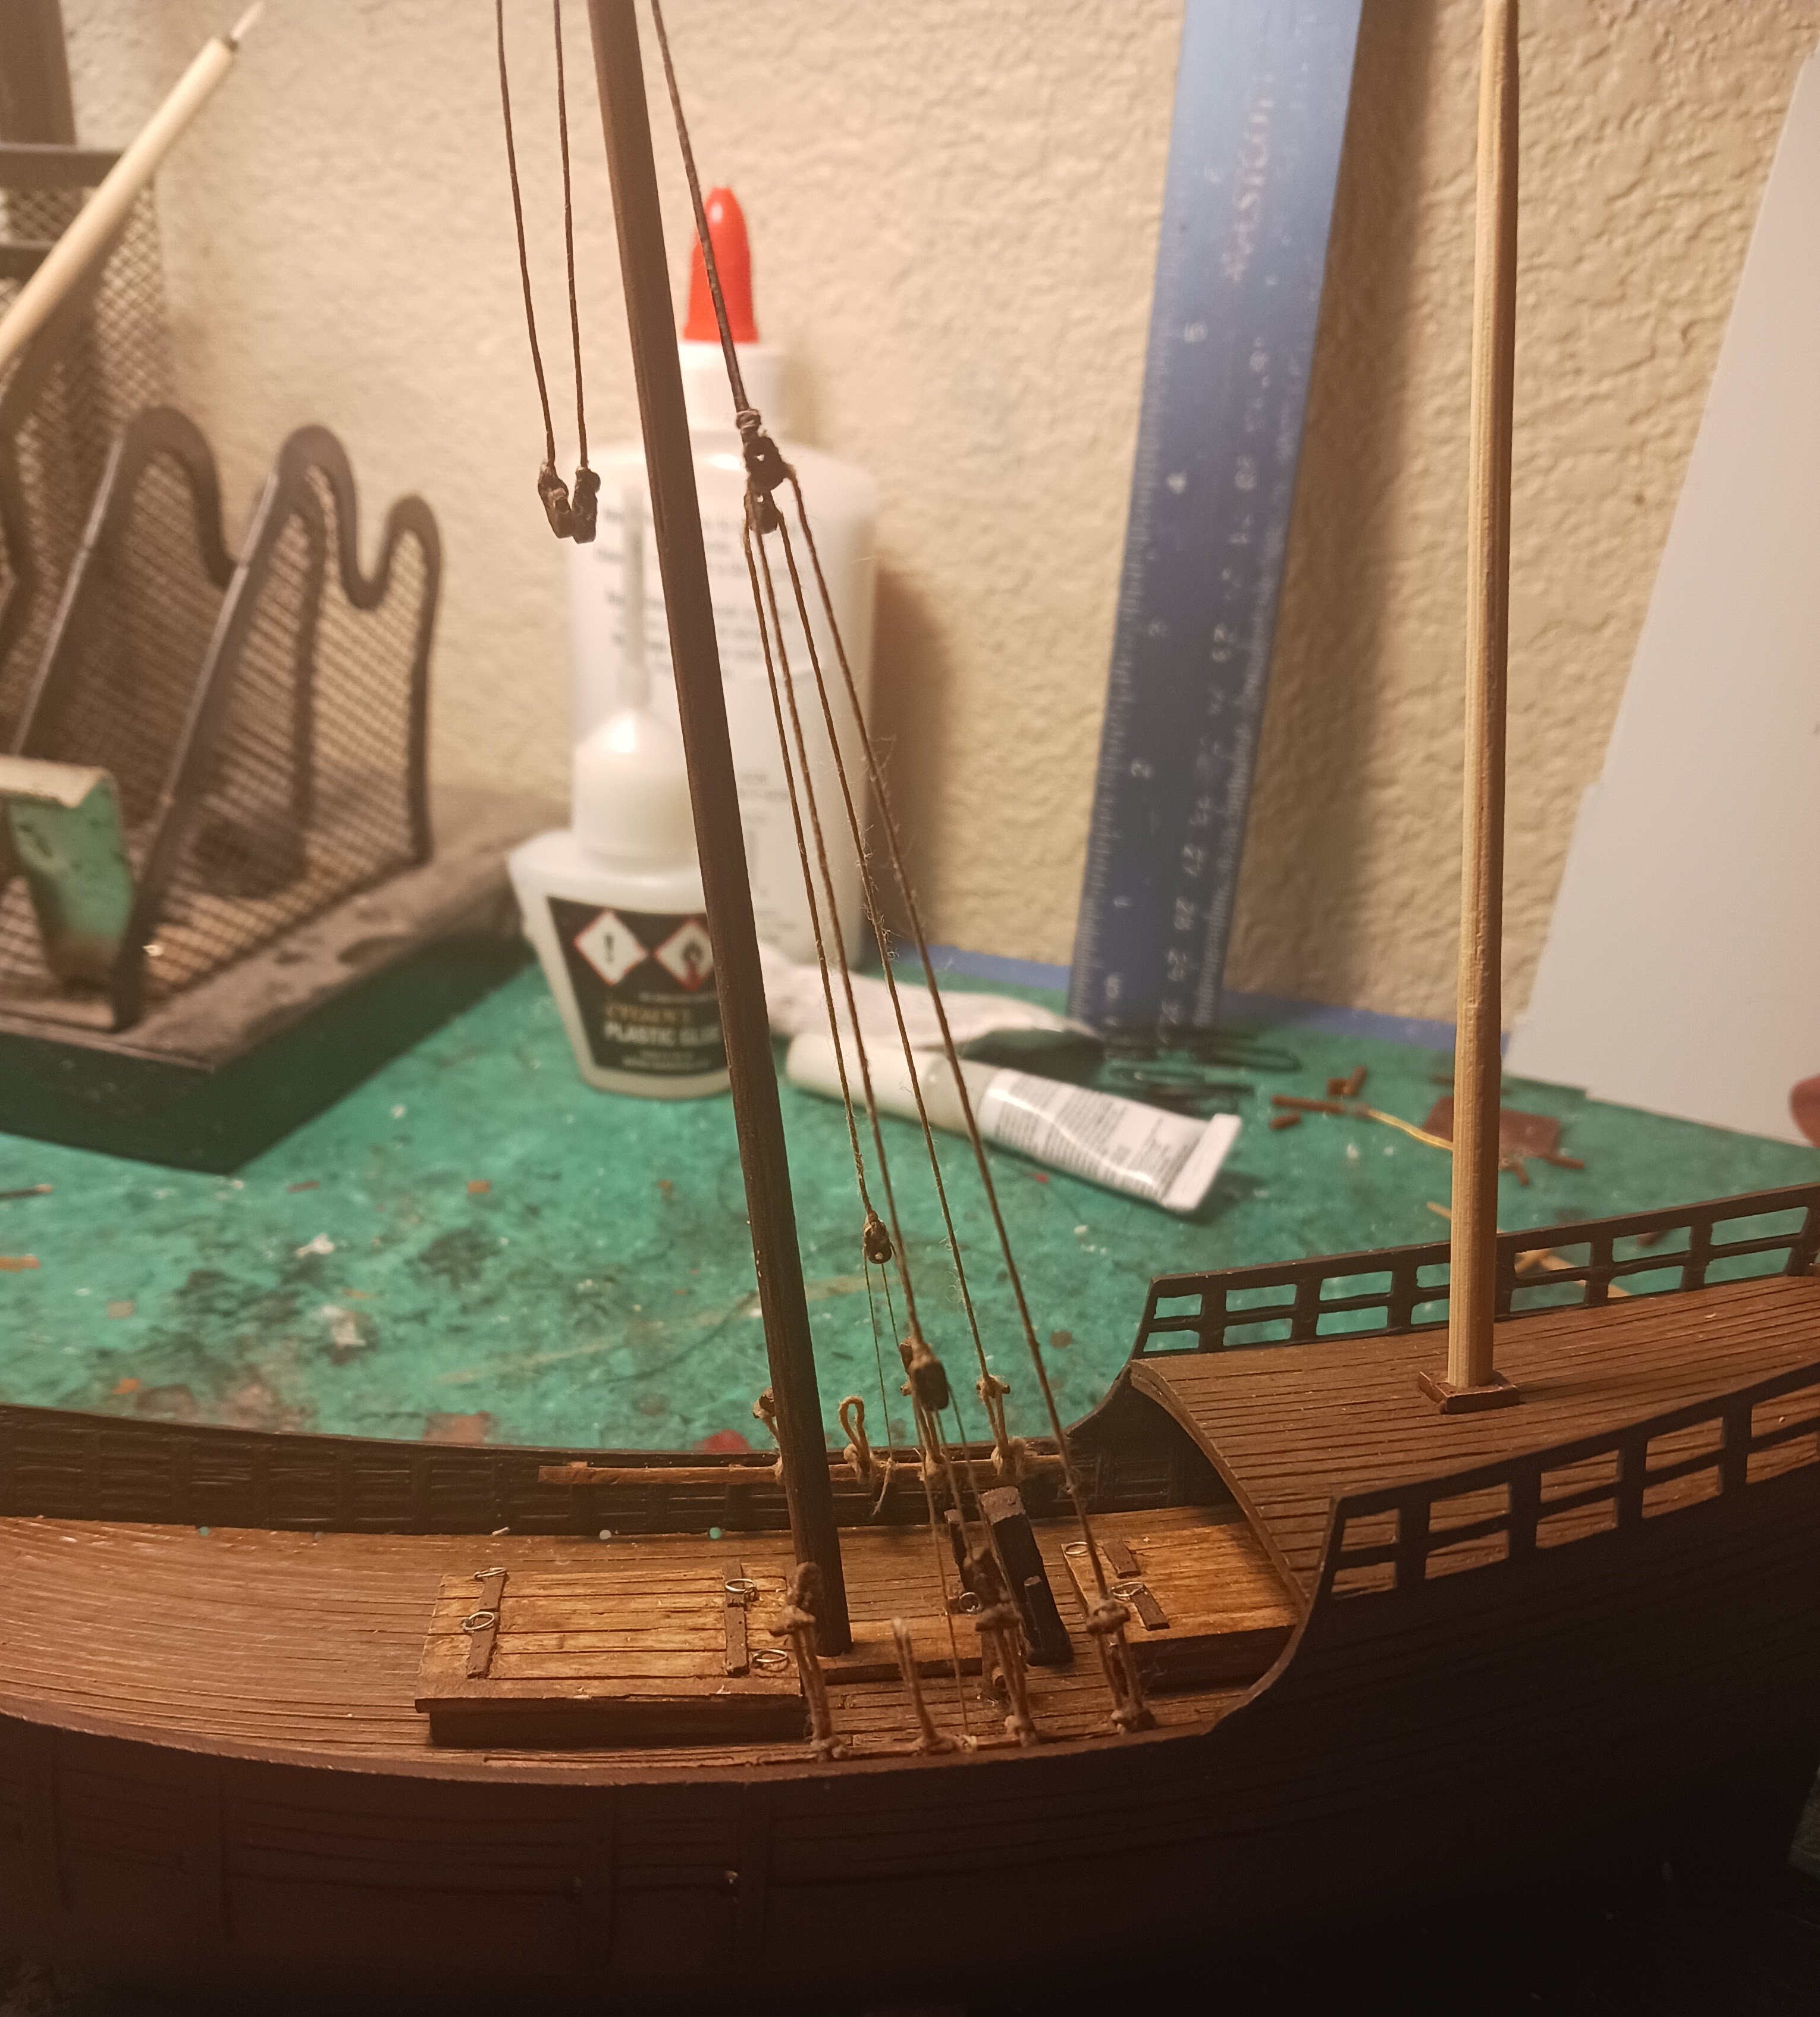
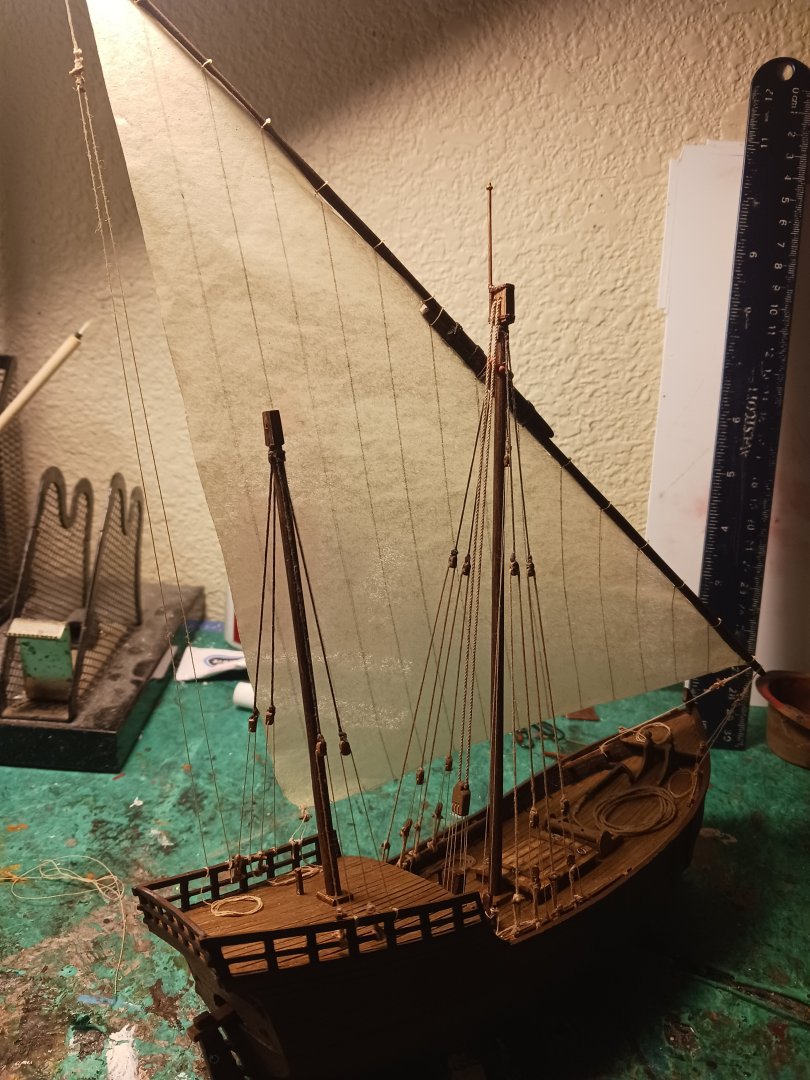
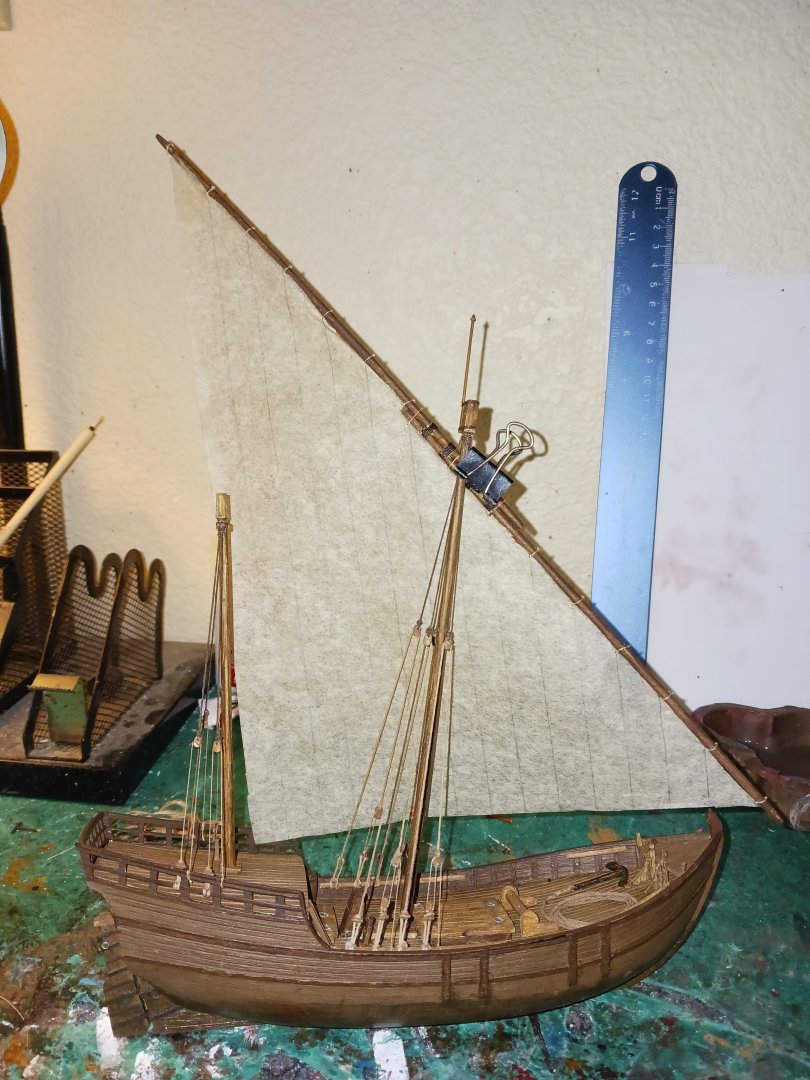
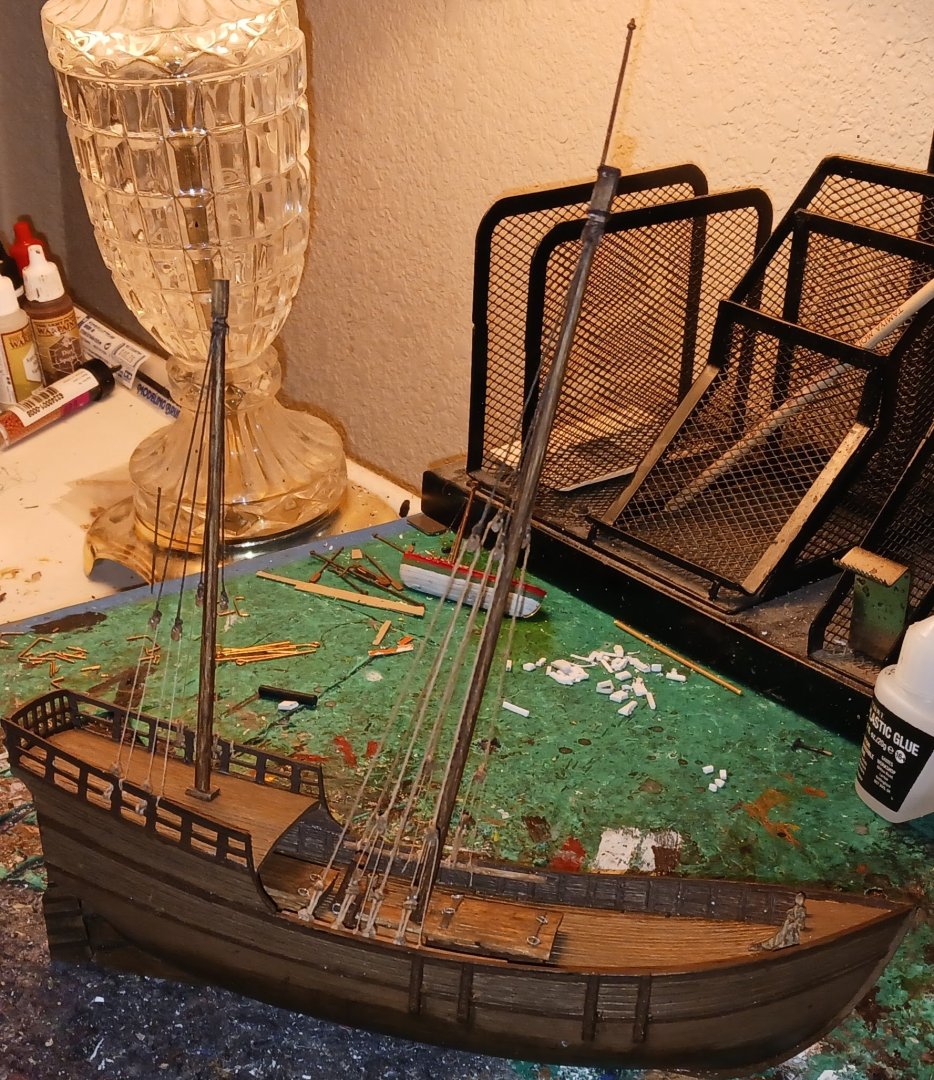
It's time now that I run headlong into the only real problem with this kit- the mainmast placement. As I started to work on the placement of the mizzen yard, I realized just how little space there was to work with at the back of the ship. I actually intended on displaying both the main and mizzen yards in their fully upright position, but now I have some doubts. I quickly realized that the mizzen yard would be at a steeper angle than the main yard, which looks a bit tacky to me, especially in light of paintings of caravels. So, I am thus preparing to depict the mizzen yard at half-mast, in the process of being raised. Thankfully, the lee shrouds on the mizzen loosened up naturally on their own. As per Steven's advice, I wanted to depict the mizzen yard outside the shrouds, just like the main. You should now understand the problem here. The placement of the mainmast complicates this severely, as seen in the photos. The main halyard and parrel tackles both foul the mizzen port side brace, and vice versa. The main vang fouls the mizzen sail and potentially the mizzen sheet, depending on how I depict the sail- both of which are problems that would not exist if the main could be moved to about the middle of where the forward hatch is now. I realized this at the beginning of the build, and I just wasn't willing to scratch-build a new main deck. Belaying the braces on the relatively empty forward section of each main rail would severely limit the crew's ability to wrestle the mizzen yard to a different tack. My plan is to either suck up my pride and display the mizzen fully aloft, or keep all the mizzen lines, save for the halyard and parrel, slack.

-
I am now one with the ship. Somehow, in the process of hand-sanding the second spar for the mizzen yard, I nicked the tip of my thumb. In other news, the mizzen yard is ready to be assembled.
-
More progress on the mainsail: I recently rigged the braces, single vang, and sheet. I've recently adopted a more realistic modus operandi for displaying coiled line. I don't really want to risk ruining the work I put into making the sail material wrinkle-free by brushing it with diluted super glue and blowing it with a fan, as the amount of billow in the sail currently is realistic for a light wind. The issue is that this type of silkspan, while scale-accurate, is very light and not stiff in any way. This lends it to poor billowing in the absence of real wind.

-
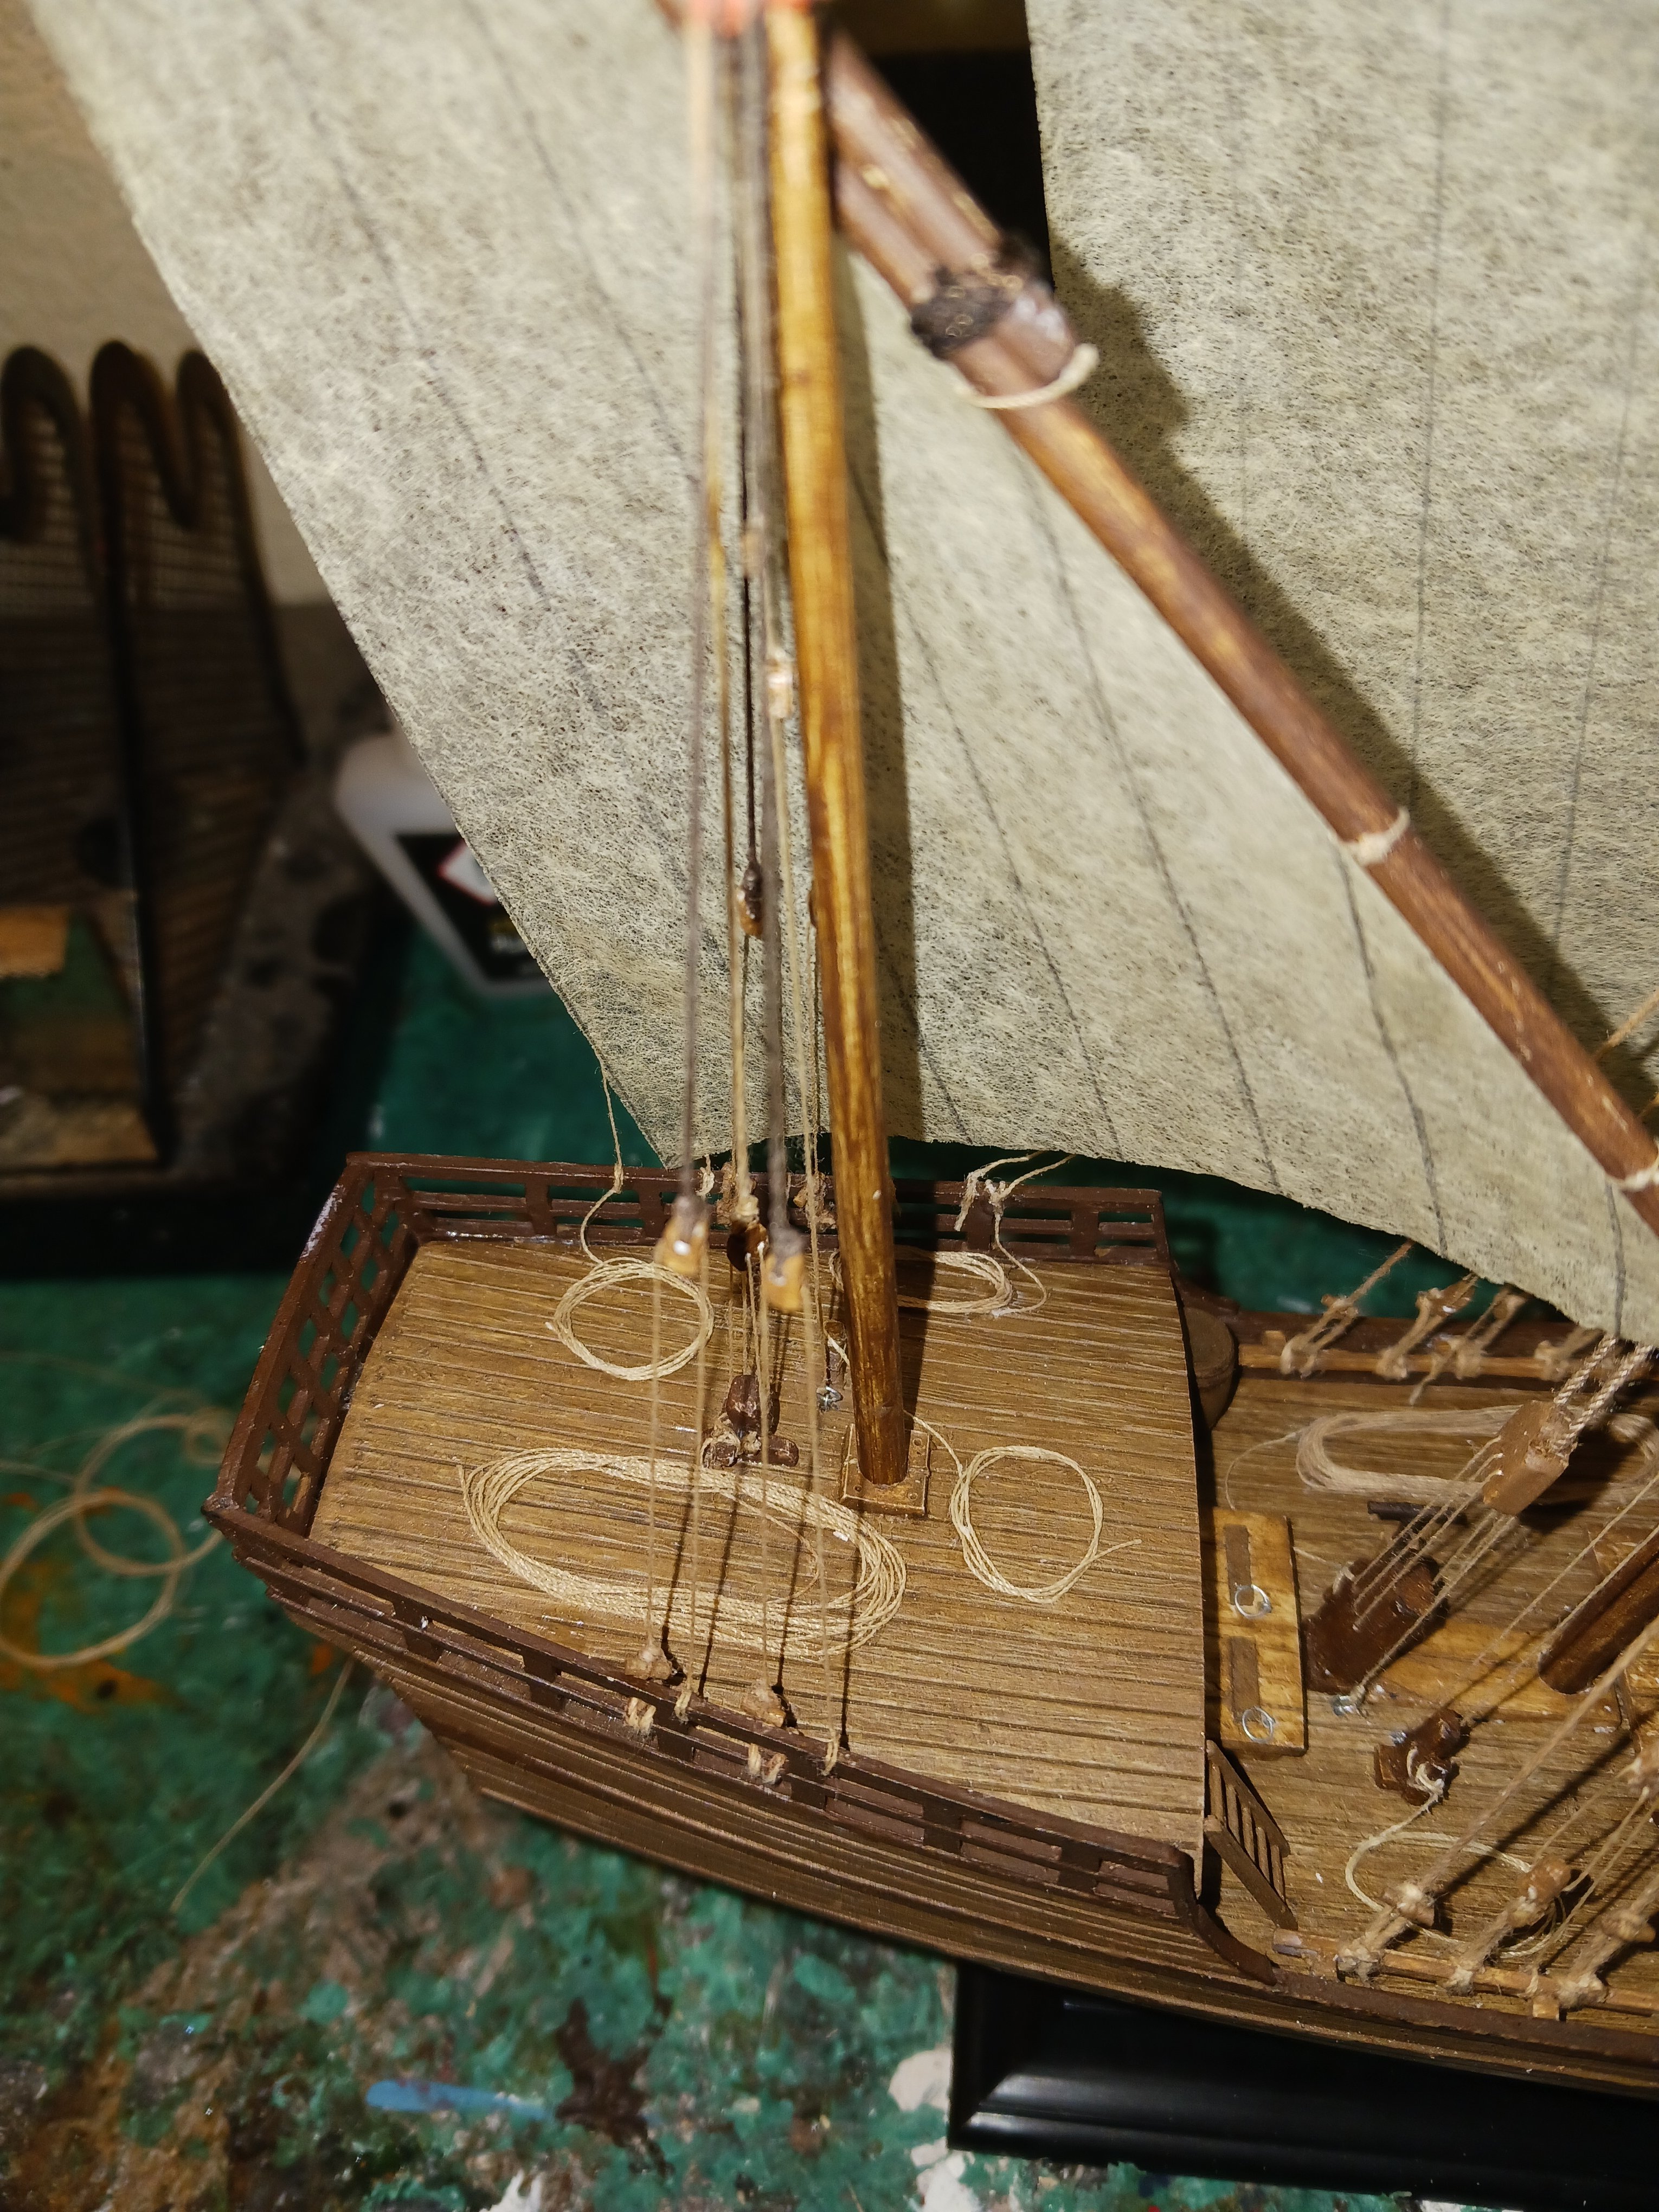
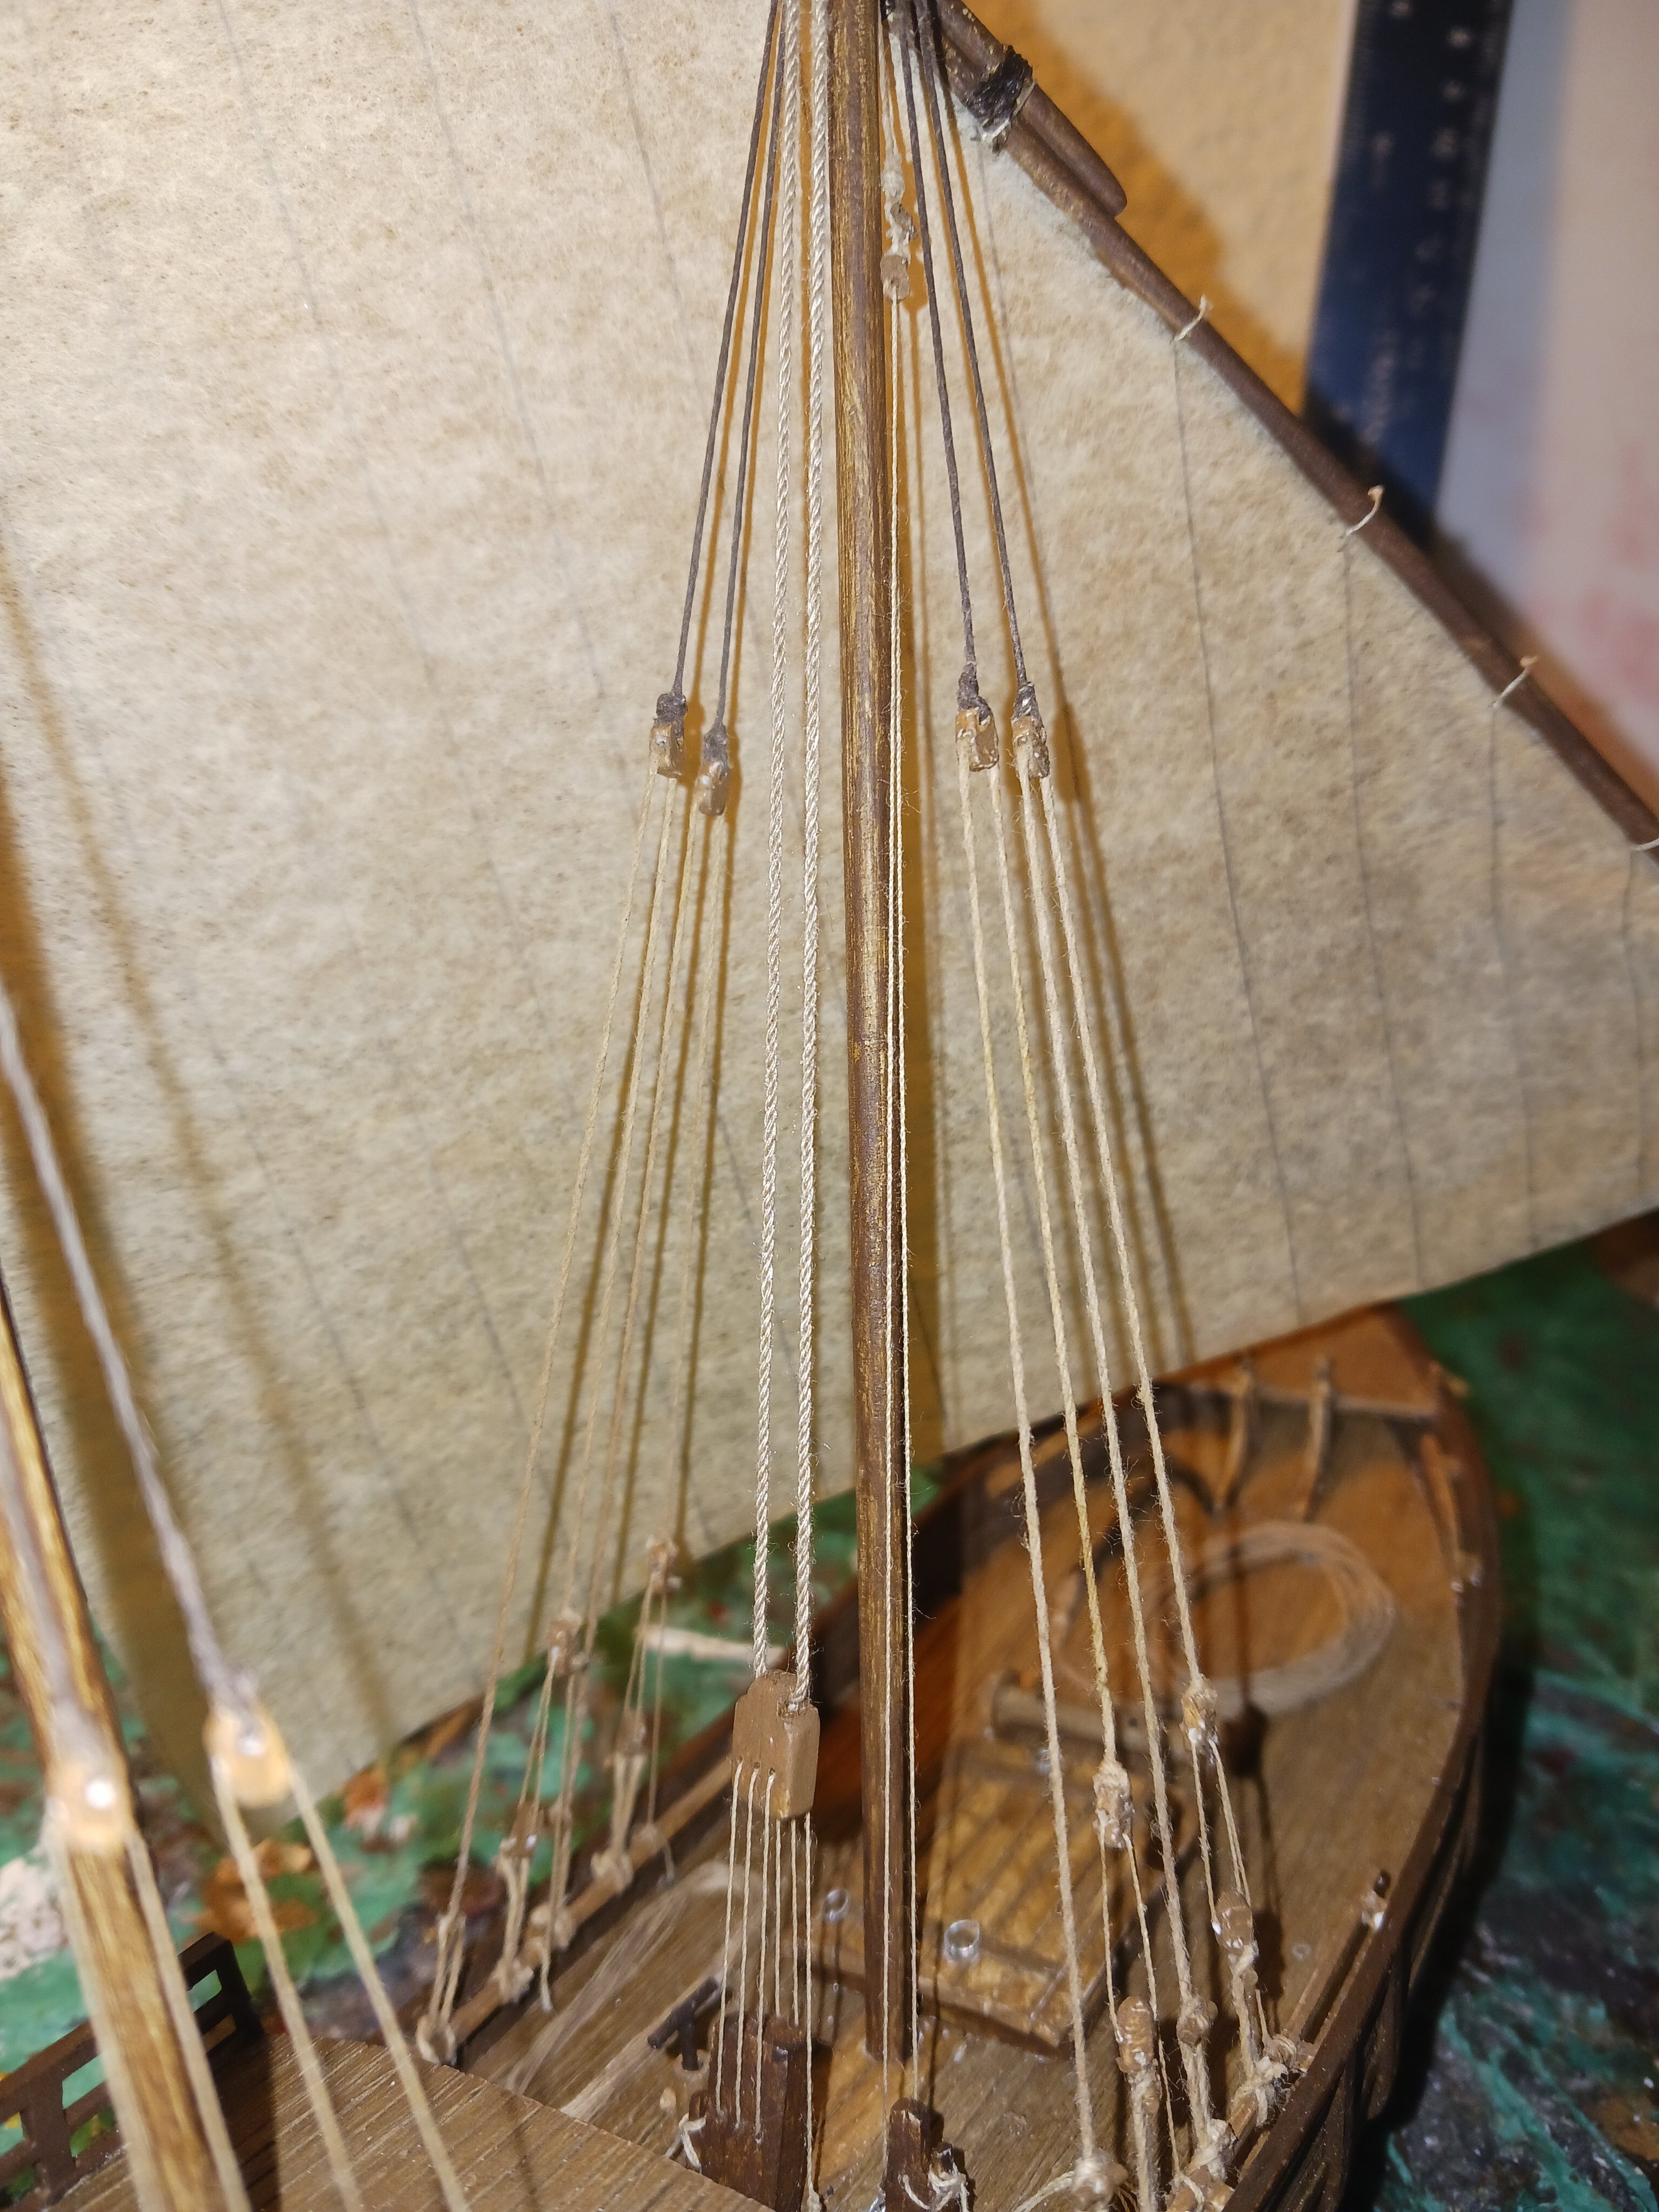
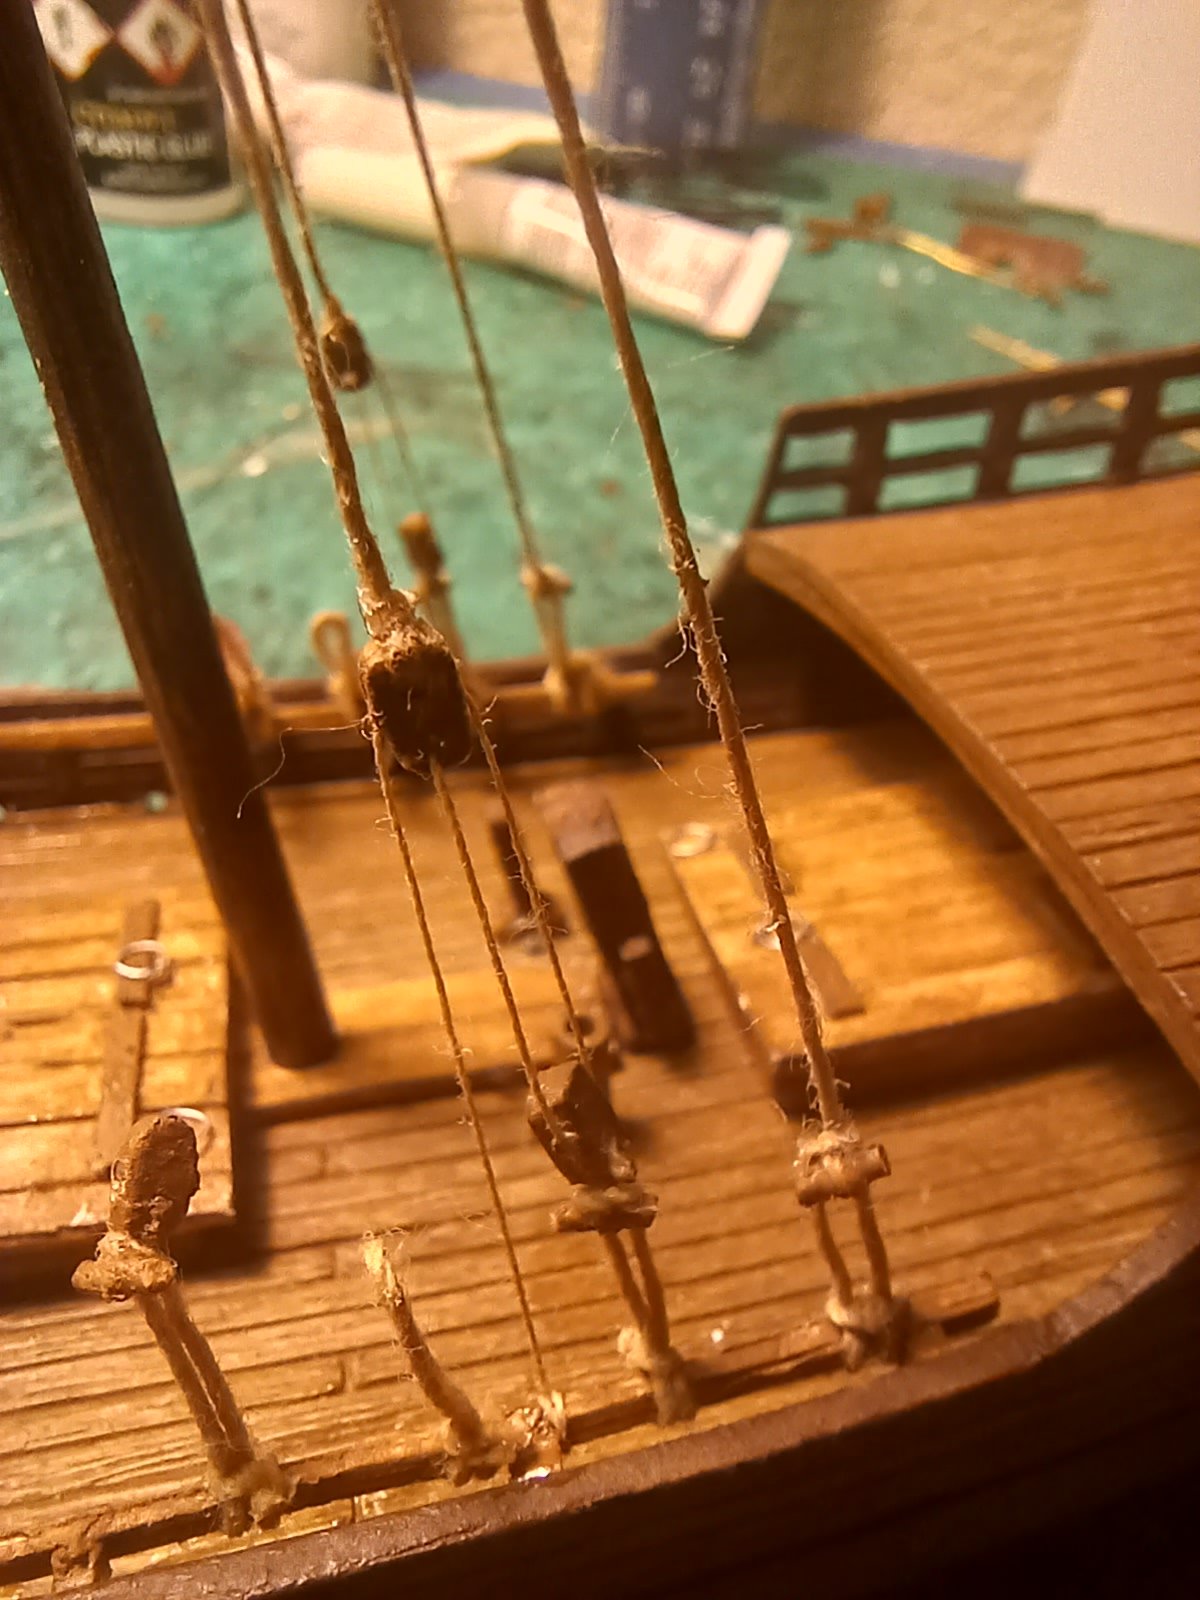
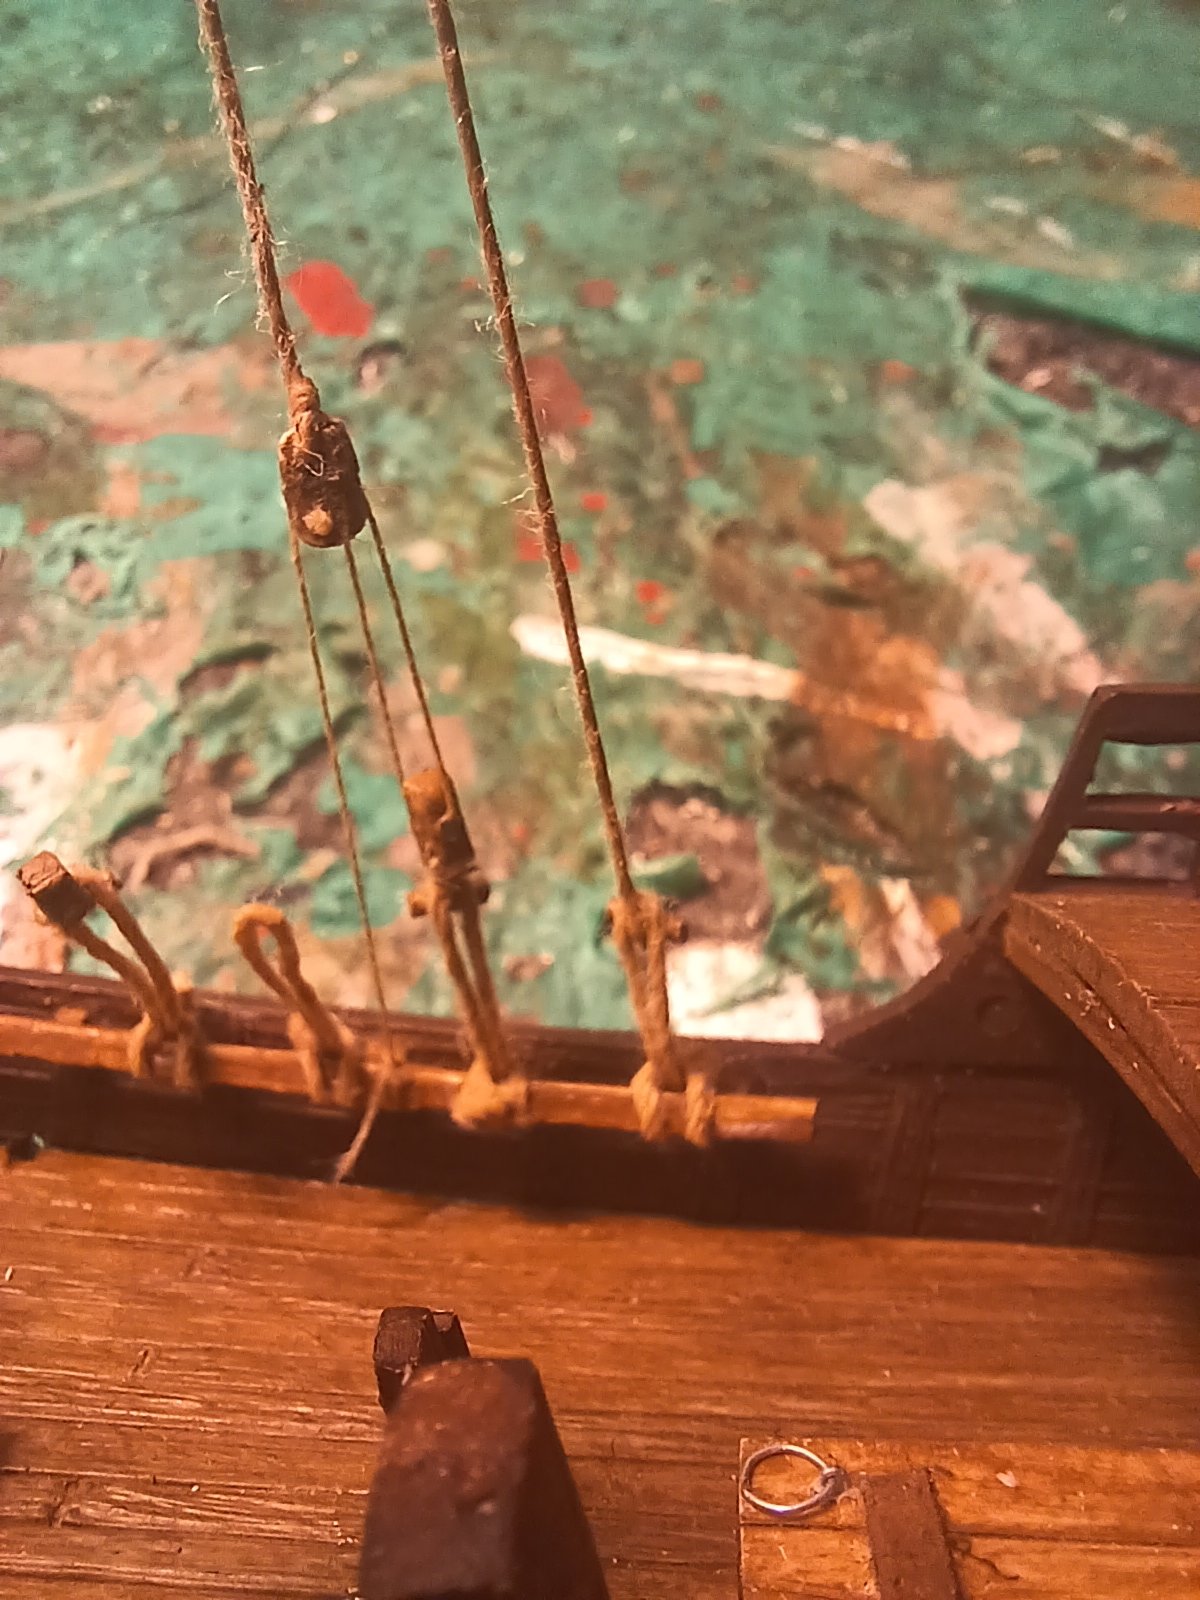
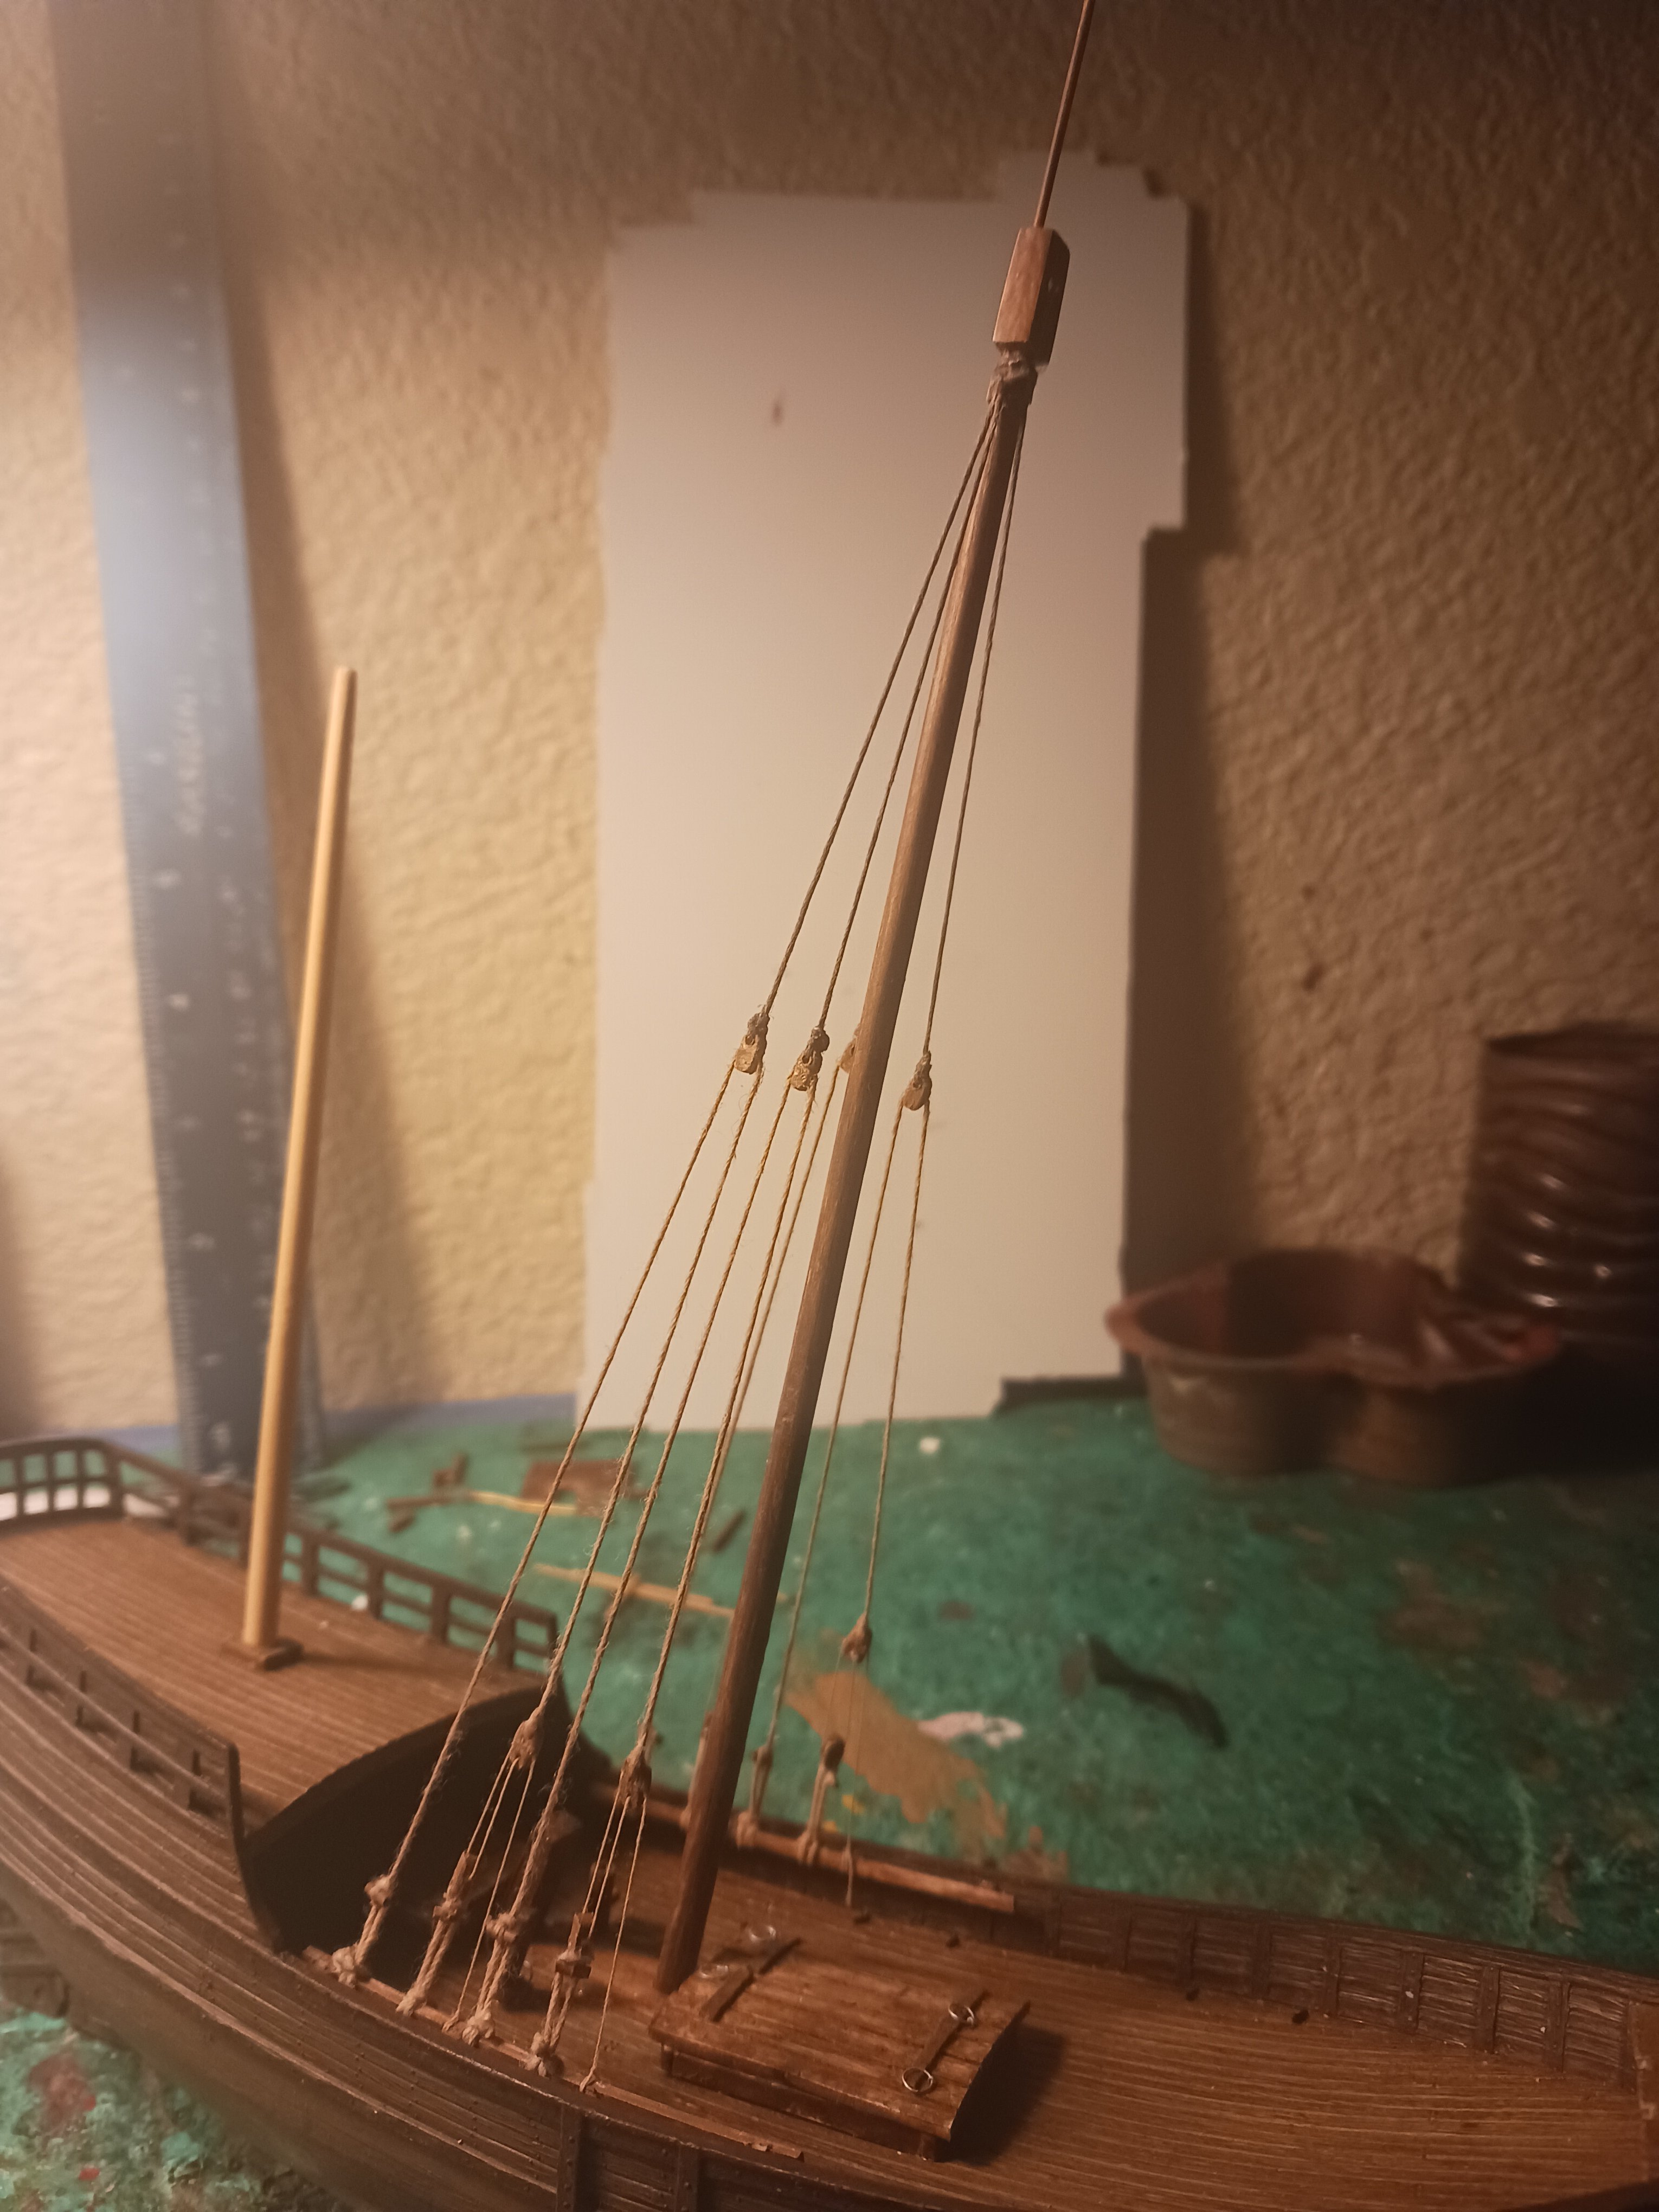
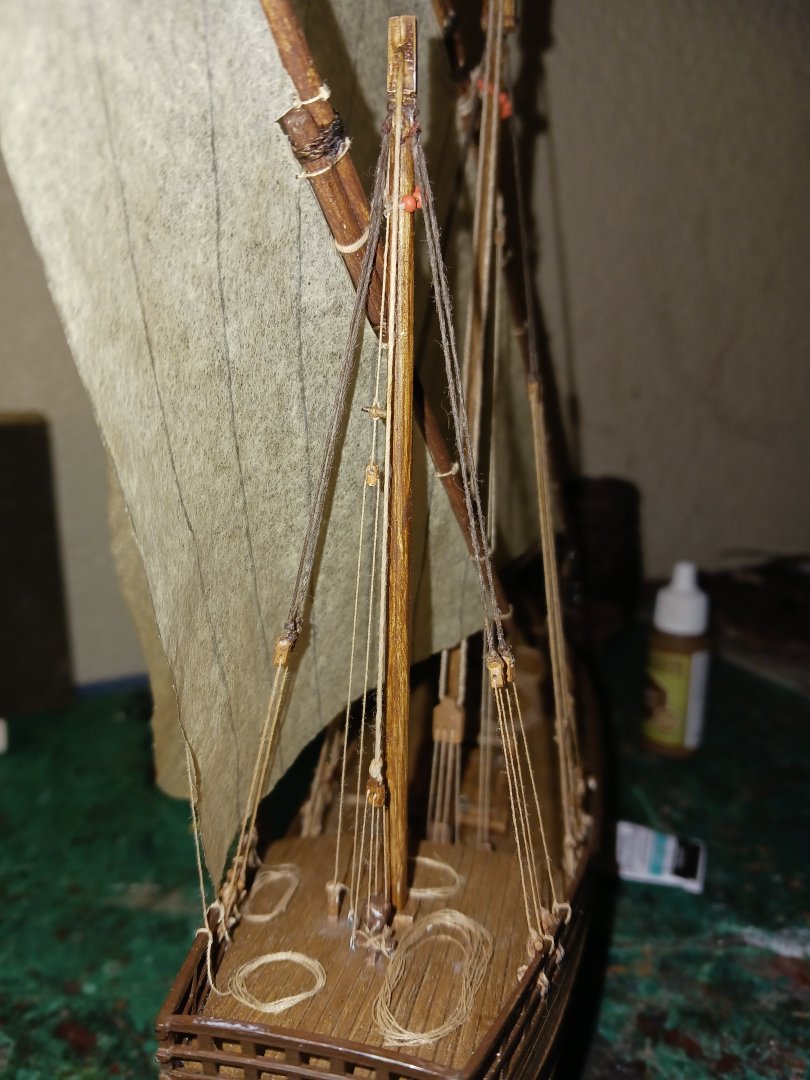
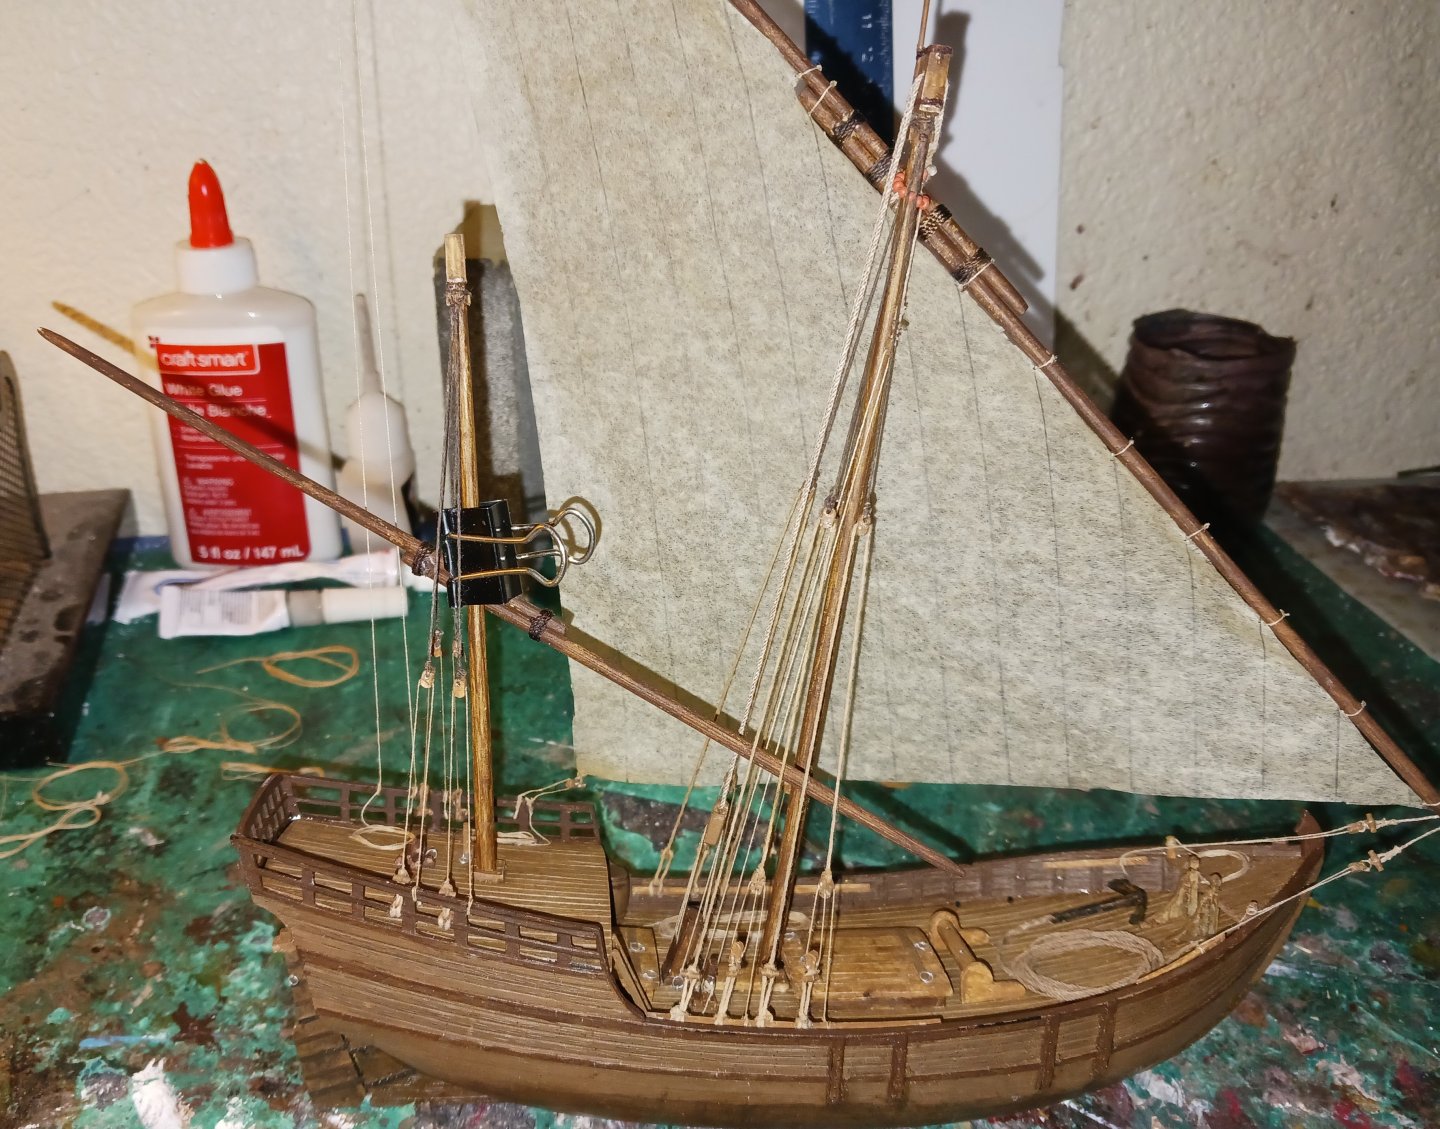
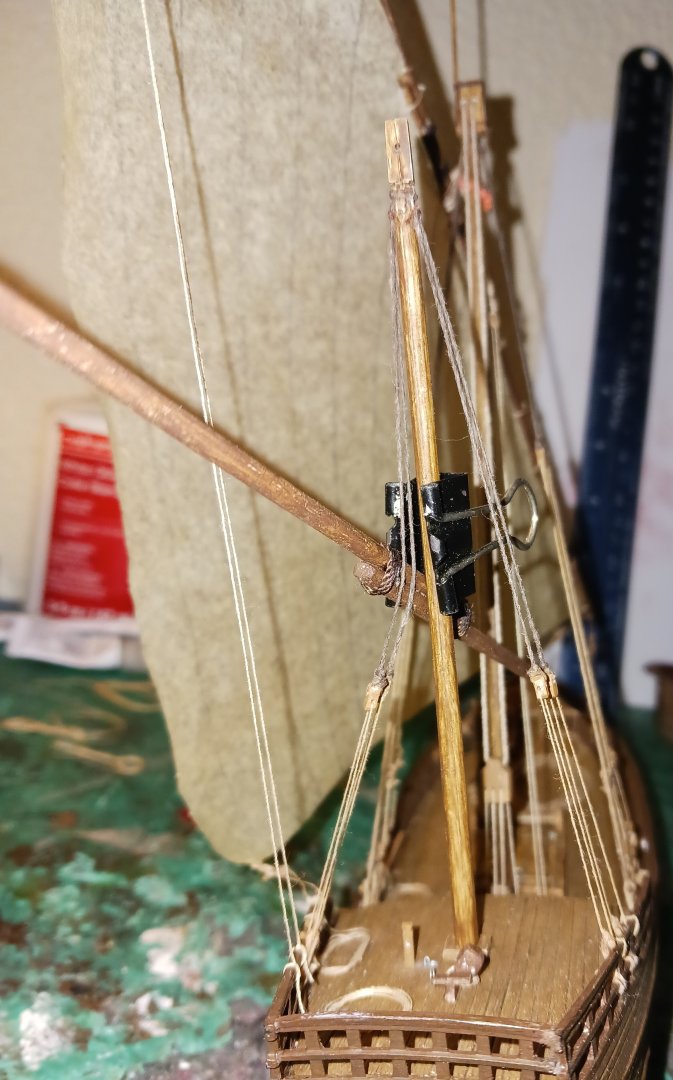
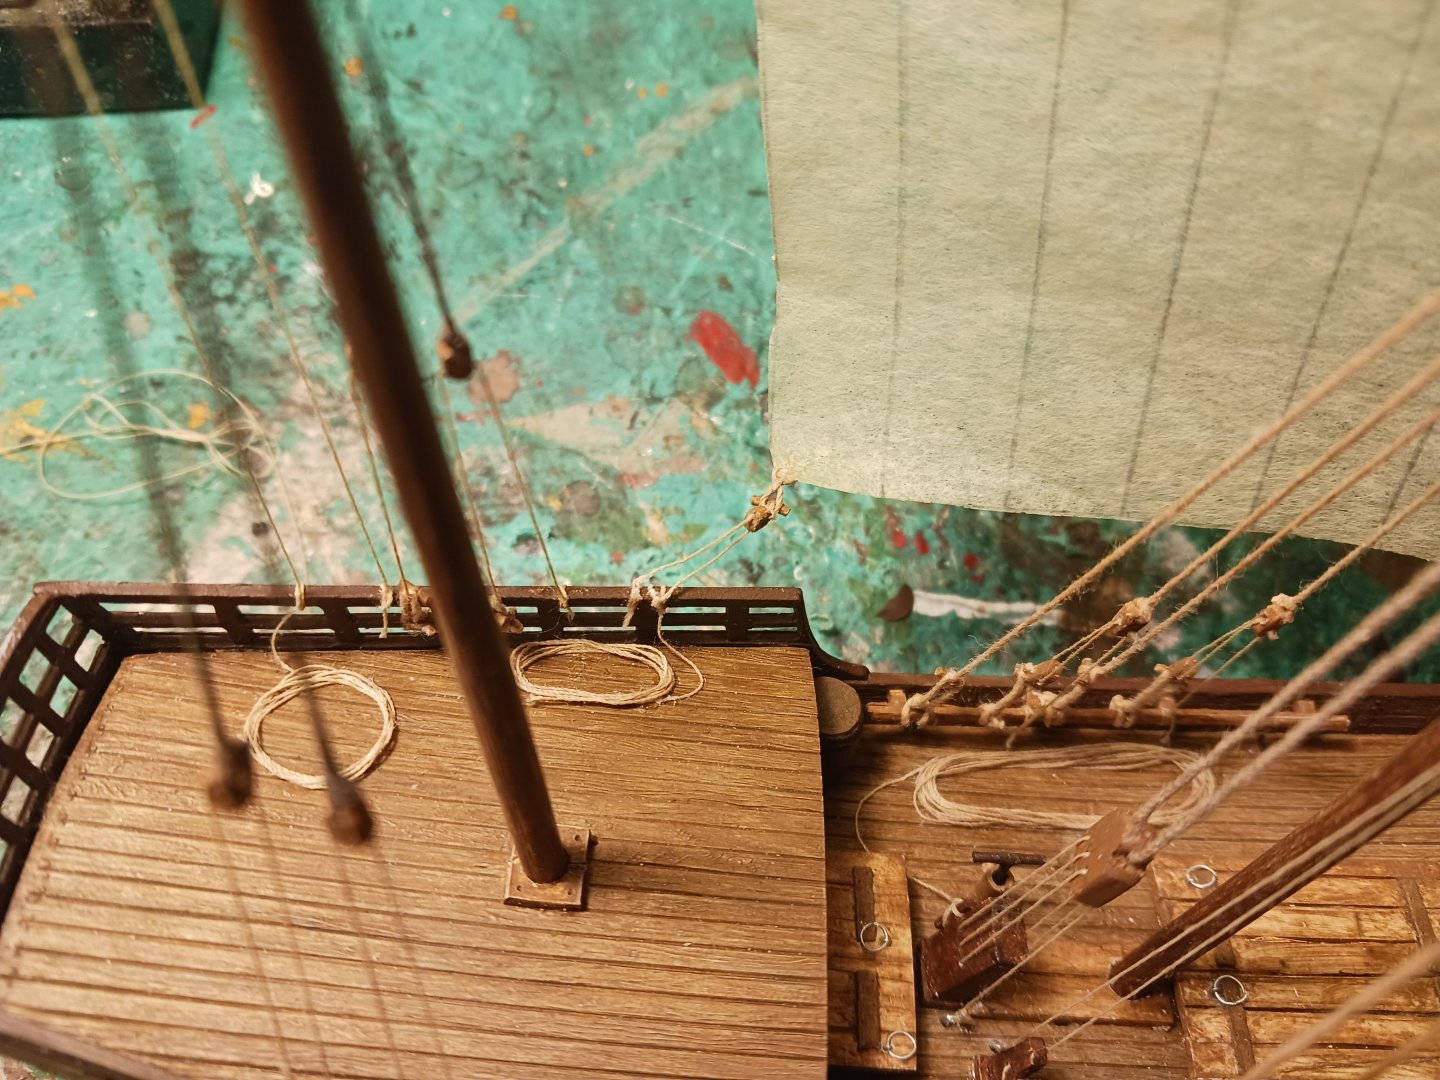
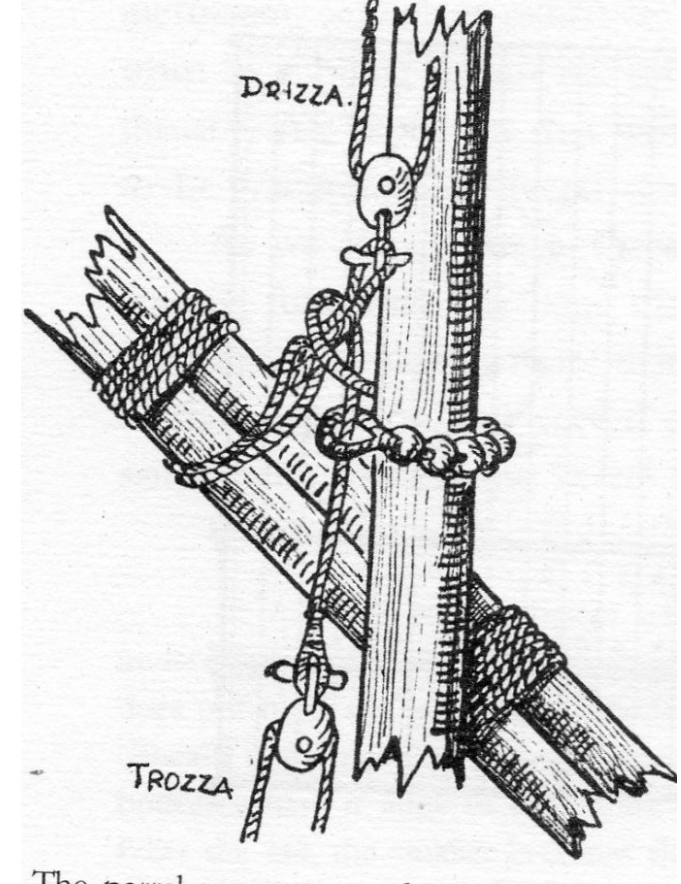
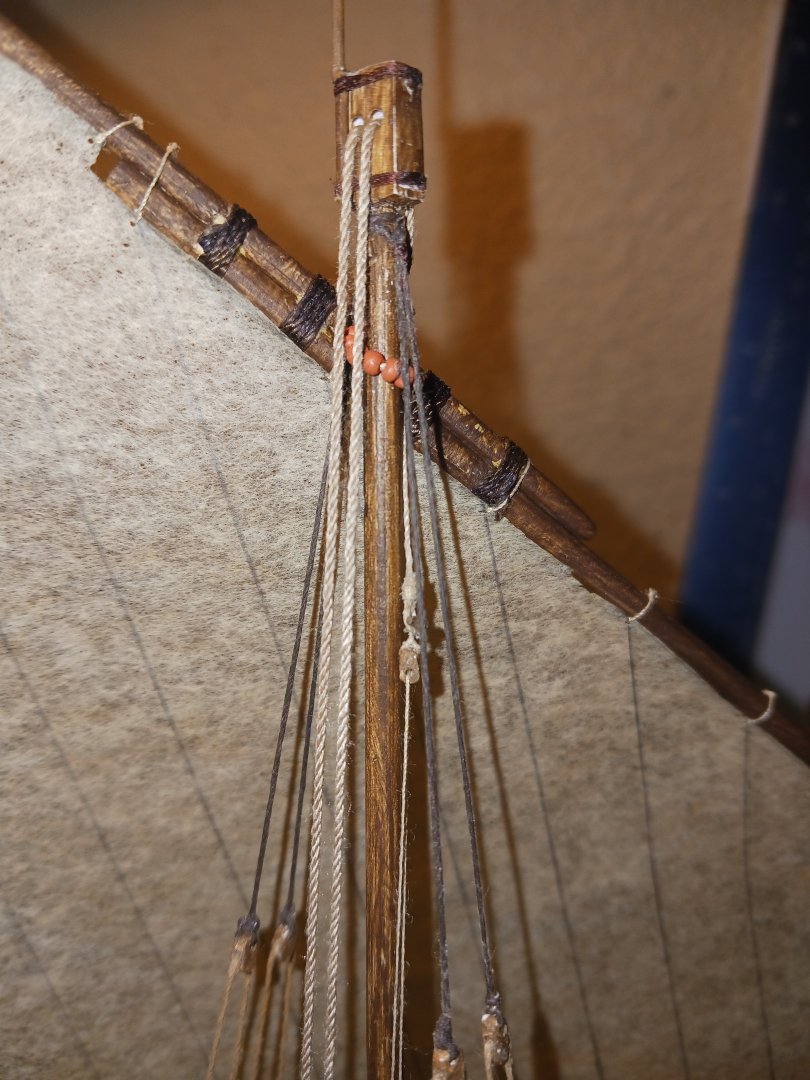
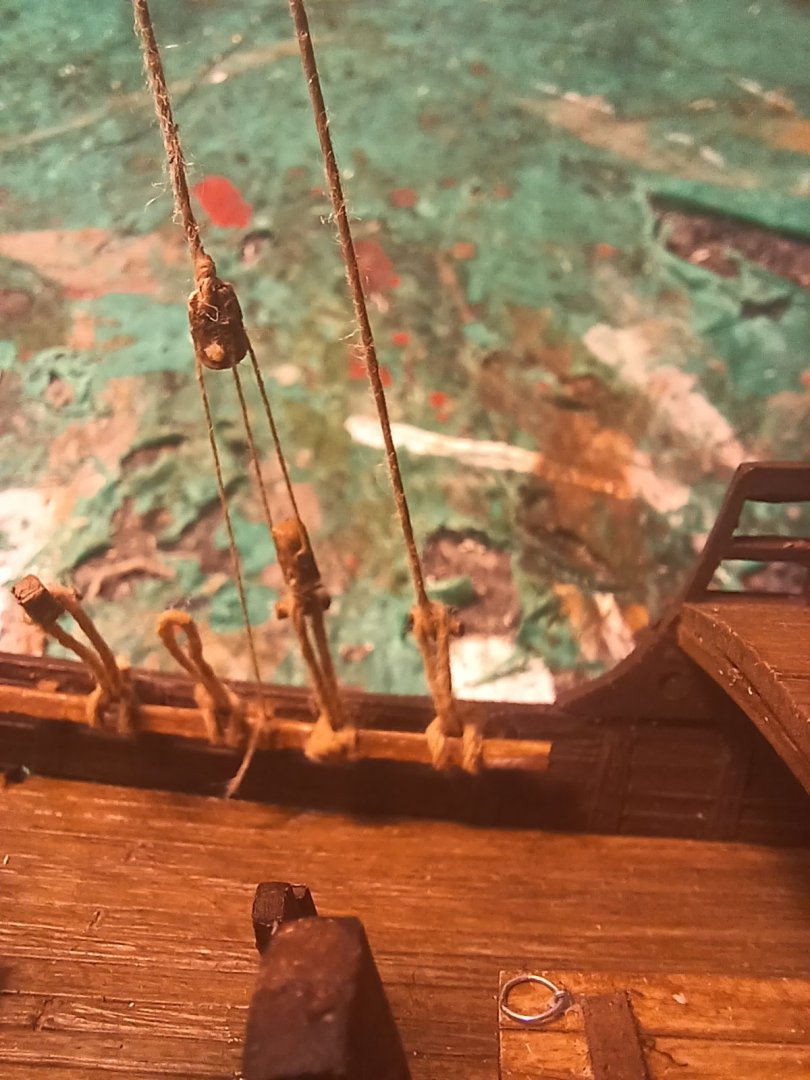
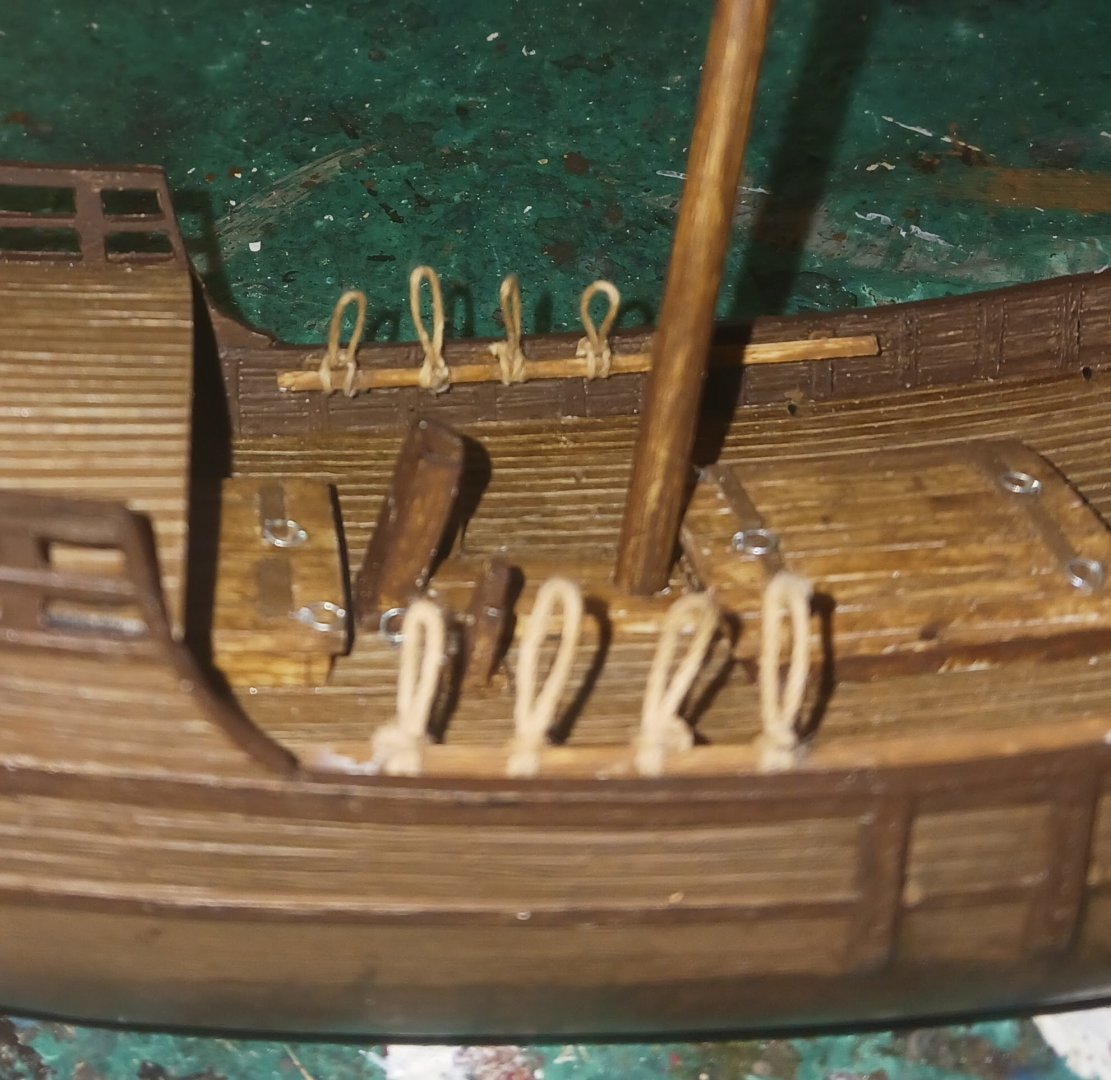
I got the halyard and parrel lines rigged today. I based the parrel off of this image, which I'm assuming is from some Italian research paper: Yes Steven, I've been stealing your sources. Here's the parrel: And on deck, the halyard and parrel lanyards, blocks and knights: The sail provides excellent shade for the crew, protecting the men aboard from the blazing Mediterranean sun. The ship so far:


-
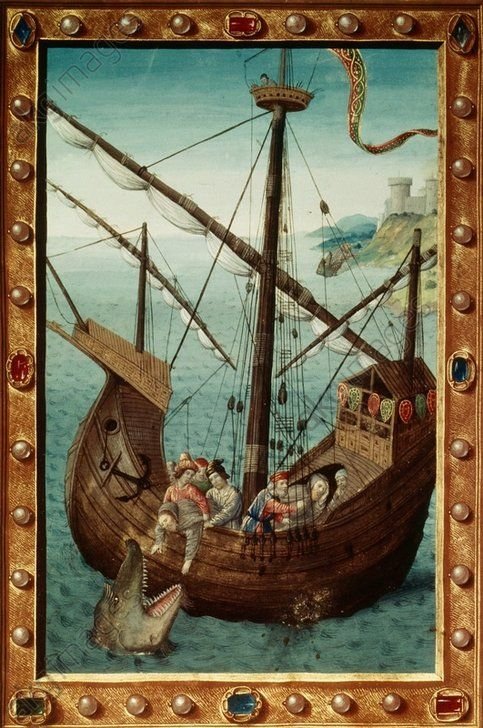
Regarding gaskets: I have never seen permanent gaskets affixed to any yard on any Medieval ship in any of the artworks I have seen. However, from evidence, I could probably give you a good idea of how sails were taken in on a Medieval lateener. Realistically, lateeners and square-riggers were probably pretty similar when it came to taking in sail. I know of a couple of good pictures of men tying up sail, here is one of them: Taking in sail on deck: Another good shot of a furled sail: My guess is that a sail was lowered to the deck and men would take short lengths of rope, climb on top of the yard, gather the sail by hand, and tie it up with the ropes. This would probably have been gradually replaced by permanently affixed gaskets.

-
The bent sail and yard, and how they will be displayed on-ship: I did something a little differently than usual. Usually, what I do is take a small piece of line, thread it through the hole in the sail, and tie it together at the top of the yard. This time, I put a knot between the sail and yard, and another one on top of the yard. The idea of this was to prevent the top of the sail from bunching up at the yard, and it worked about as well as I expected. I dunked all of the ropes needed for this sail in a brown paint/water mixture, and you can see some of them behind the stern castle.
-
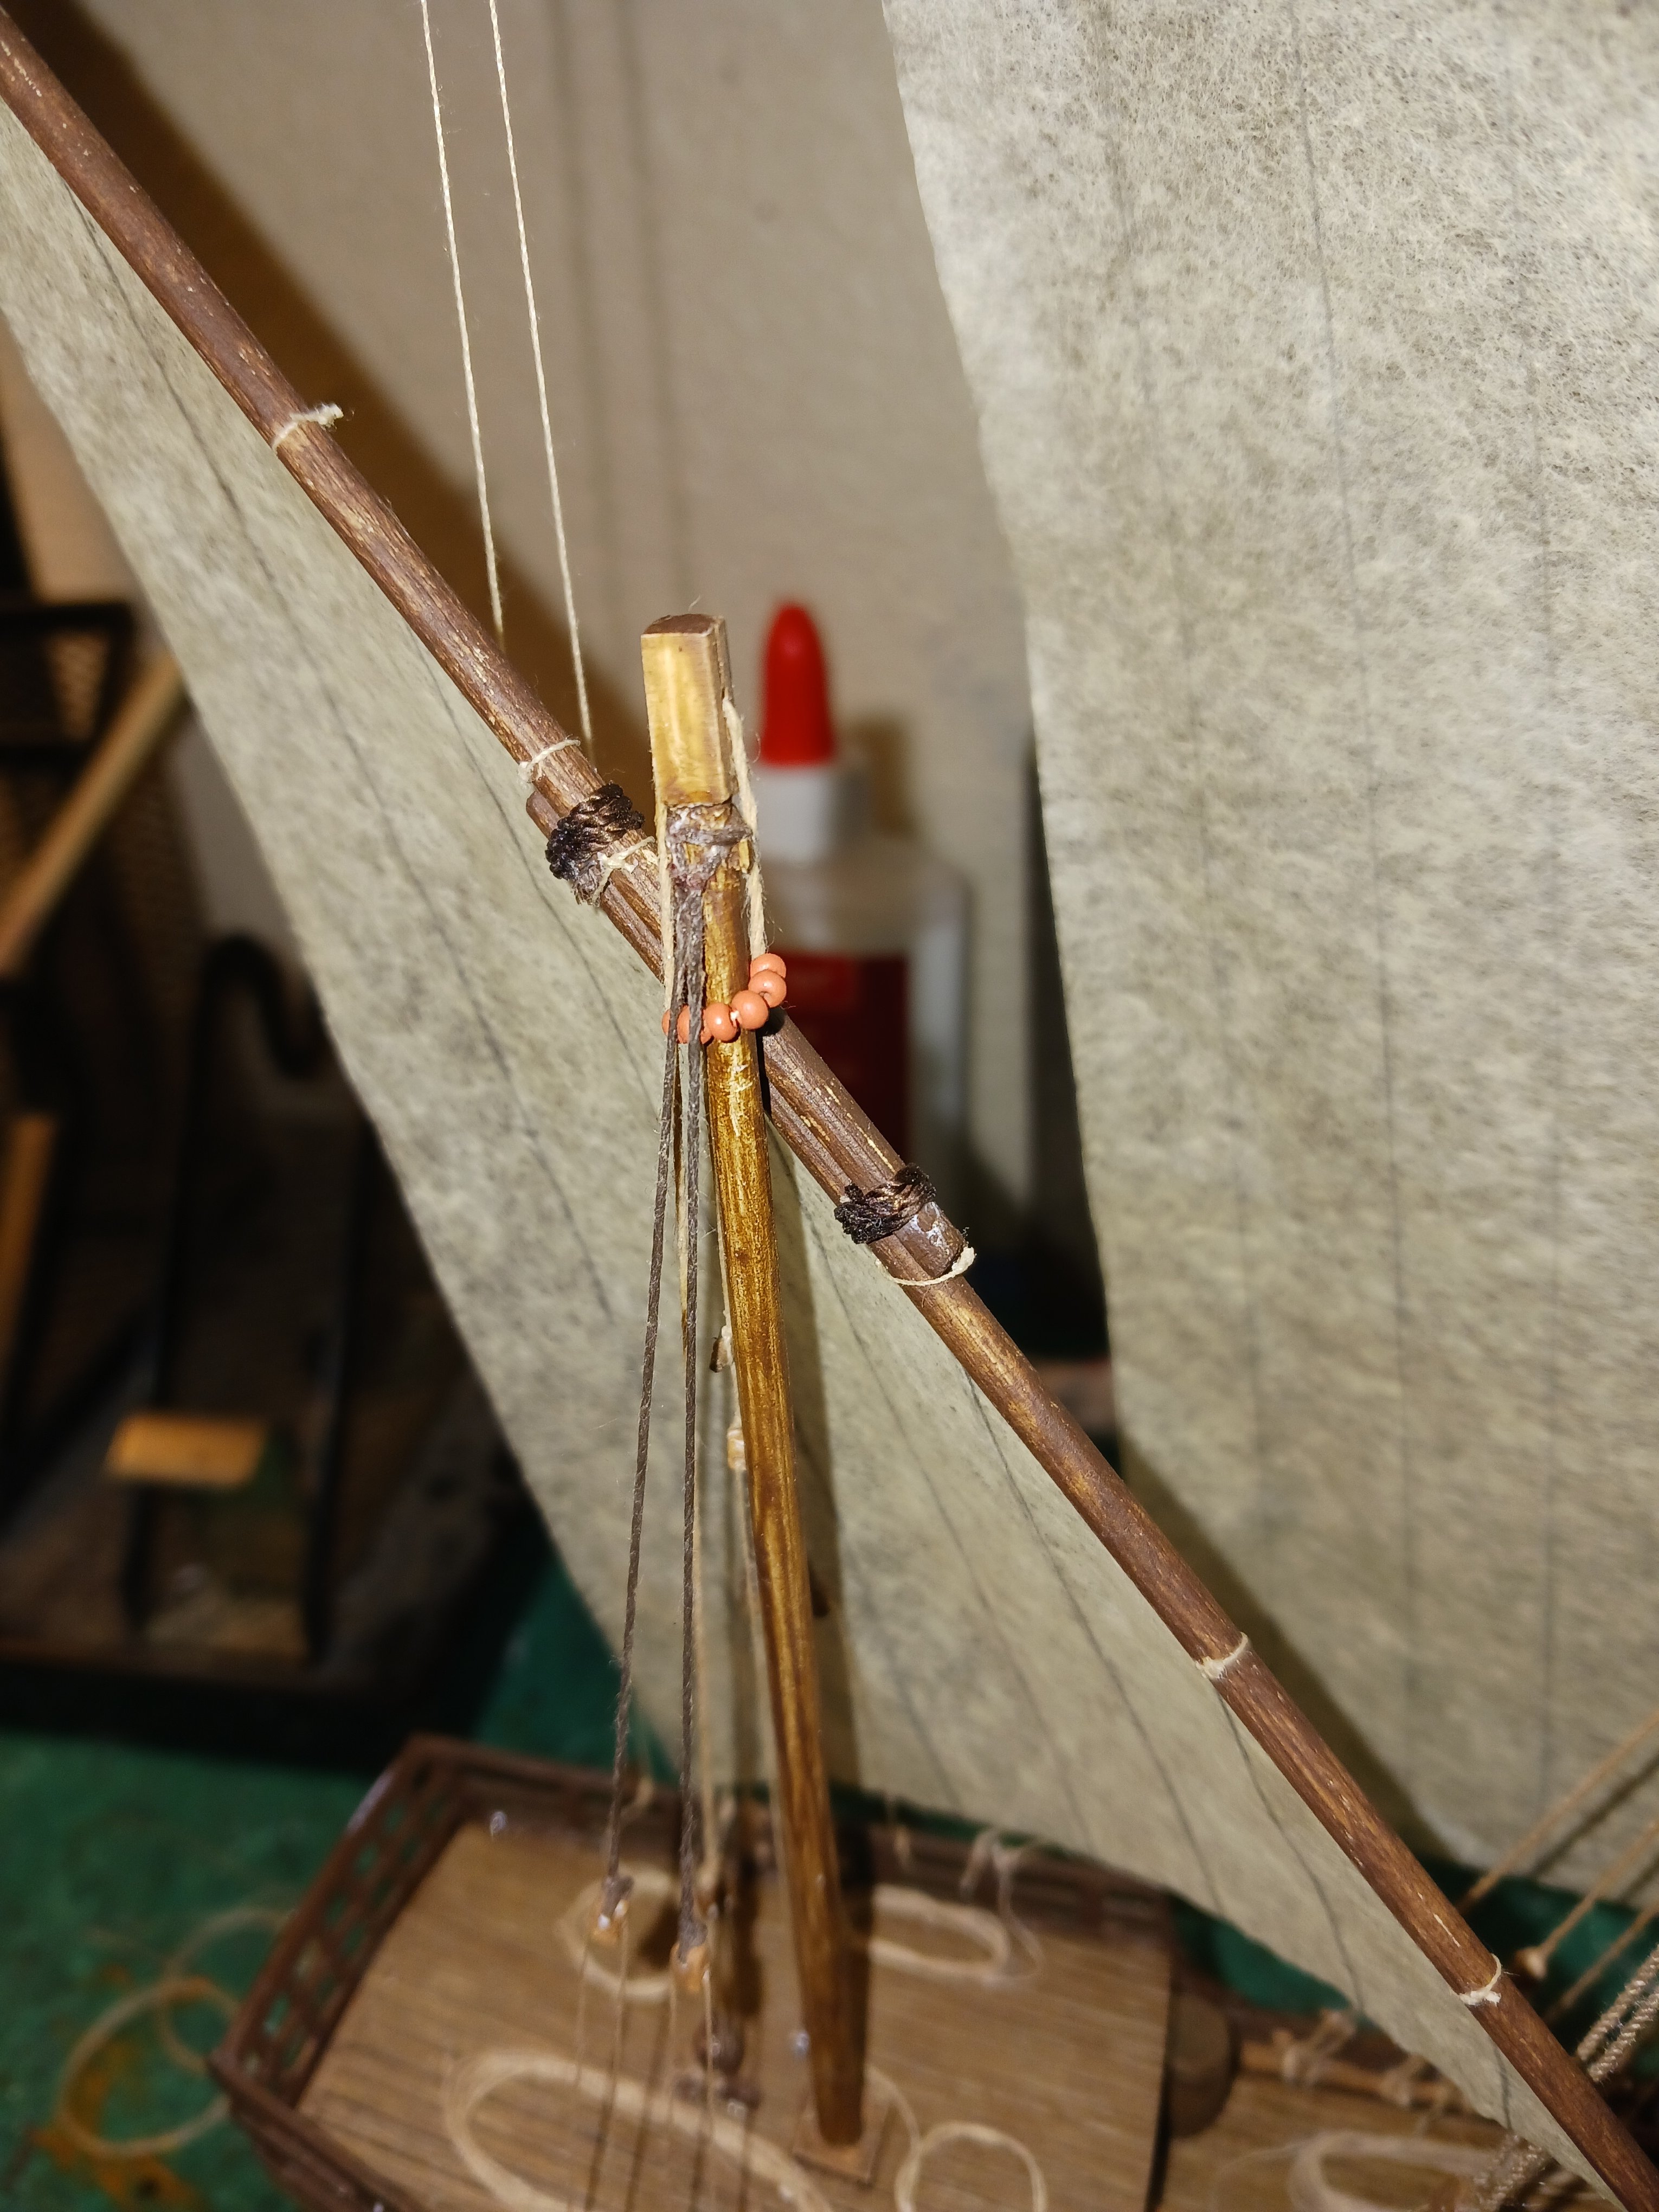
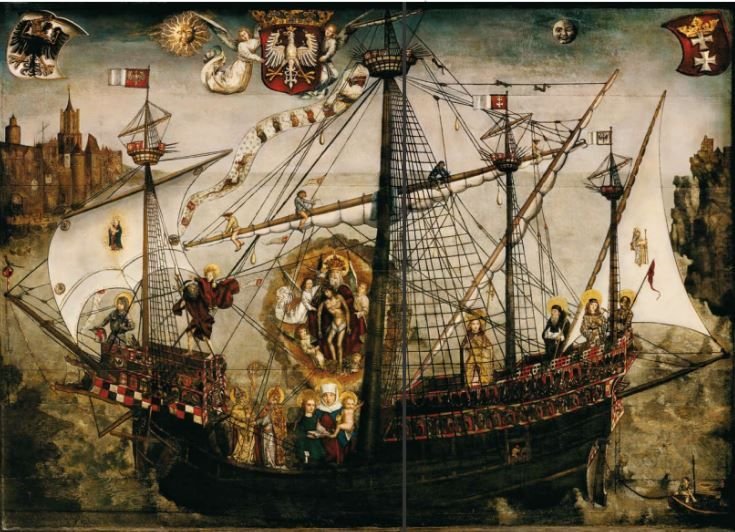
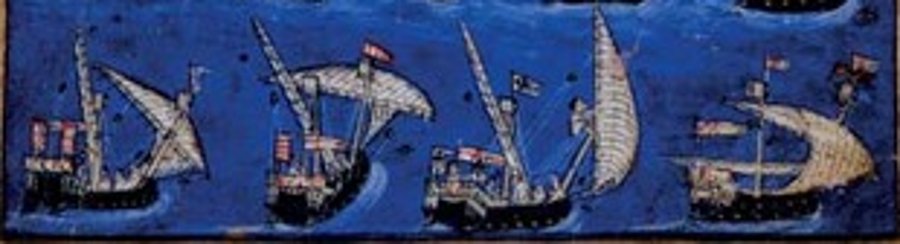
The rigging elements for the main yard and sail: I have chosen to display my ship with only one vang on the main yard, and this is why: Now, I have some ideas regarding how the rigging is supposed to work. Remember, Santa Sofia is more a Medieval lateener than anything else, and caravel running rigging sources are nearly non-existent. When they exist, they are almost always over a hundred years after my caravel would have sailed. So, let's go back a hundred years. This is a detail from the "Siege of Acre" painting in the Cocharelli Codex, from the 1330's. Historians actually have no real idea whether this is Acre or Genoa, but based on context, it is probably Acre. Anyway, the artist is kind enough to teach us how to sail a Medieval lateener at the bottom of the page, showing one ship in the process of changing tack. Either way, only one vang is shown on each yard. This vang swings around the yard behind the sail on each tack. This, logically, performs the same function as two vangs would, with half the hassle. The braces at the front of the yard would actually control it, while the vangs (or vang) would simply brace the end of the yard against the wind. As I have said before, we need to discard more modern notions of how sailing works when dealing with Medieval ships, as parts change purpose.
-
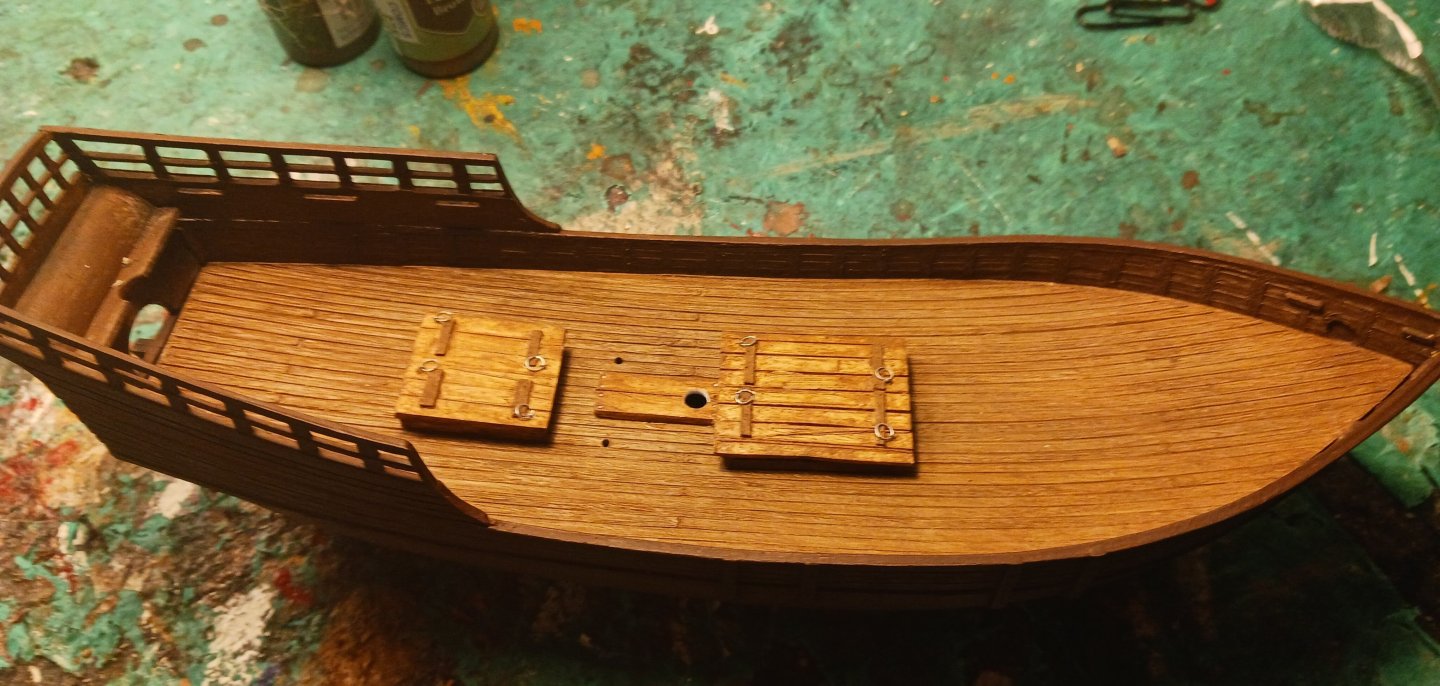
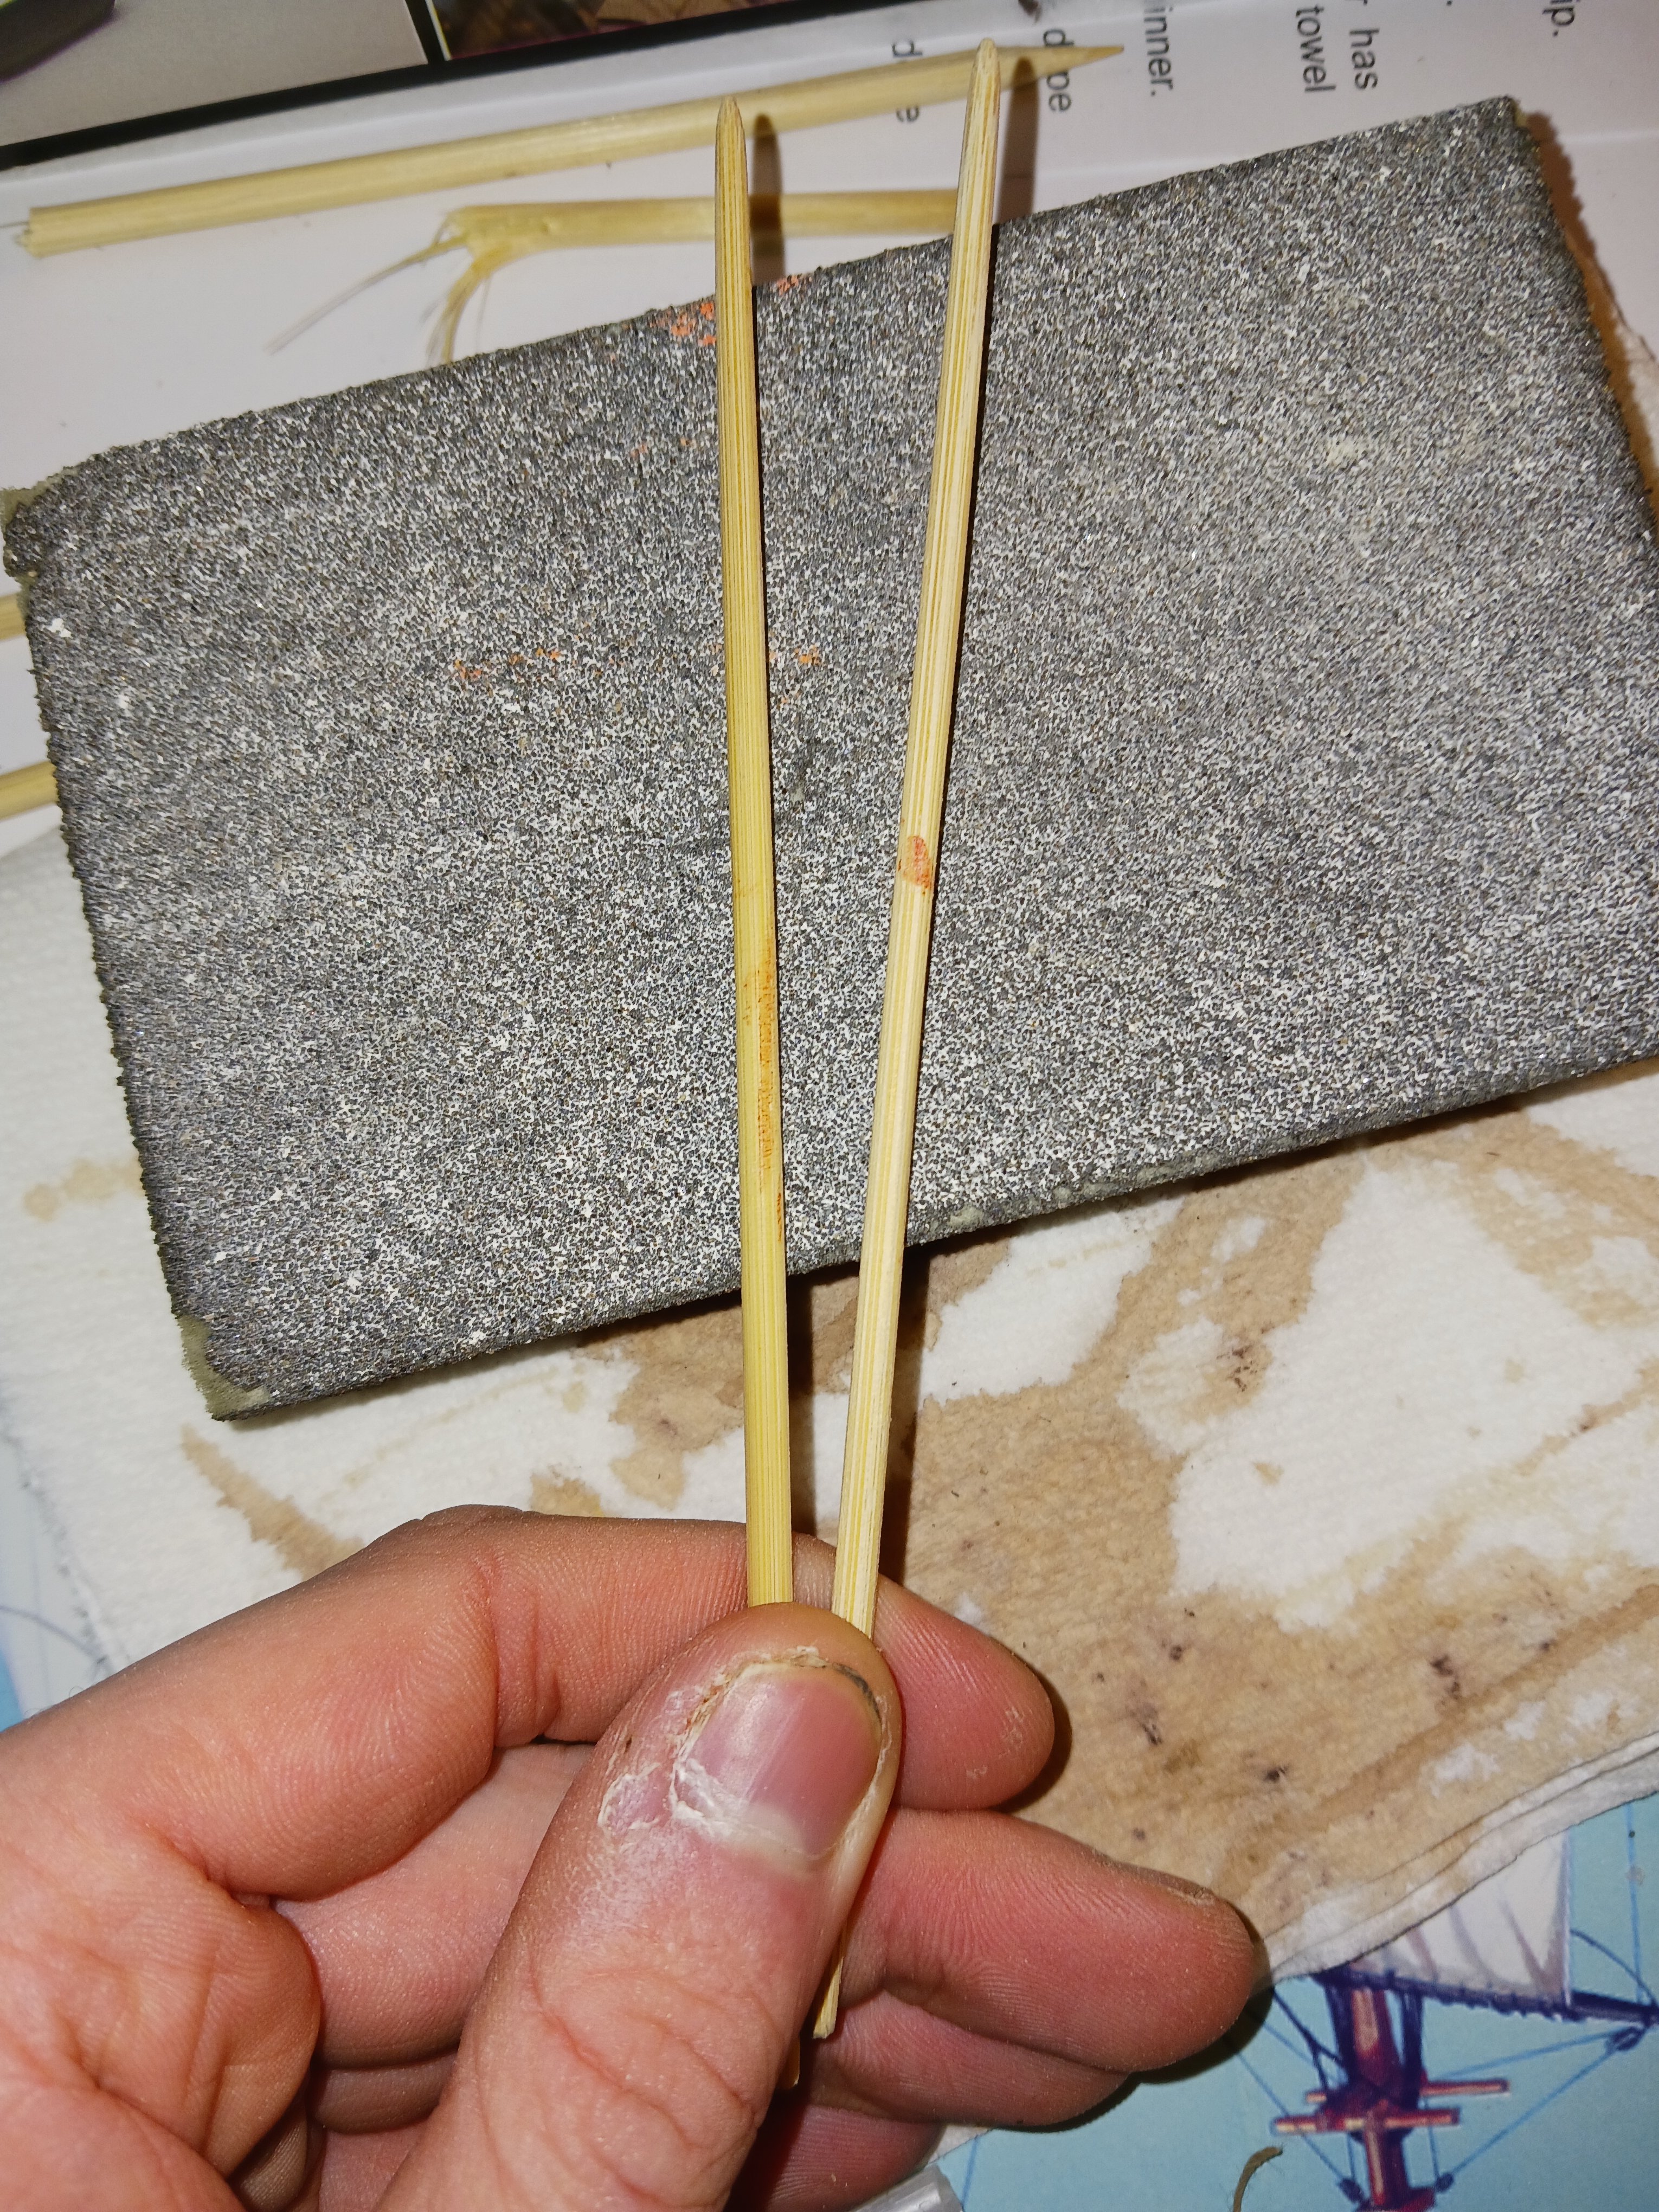
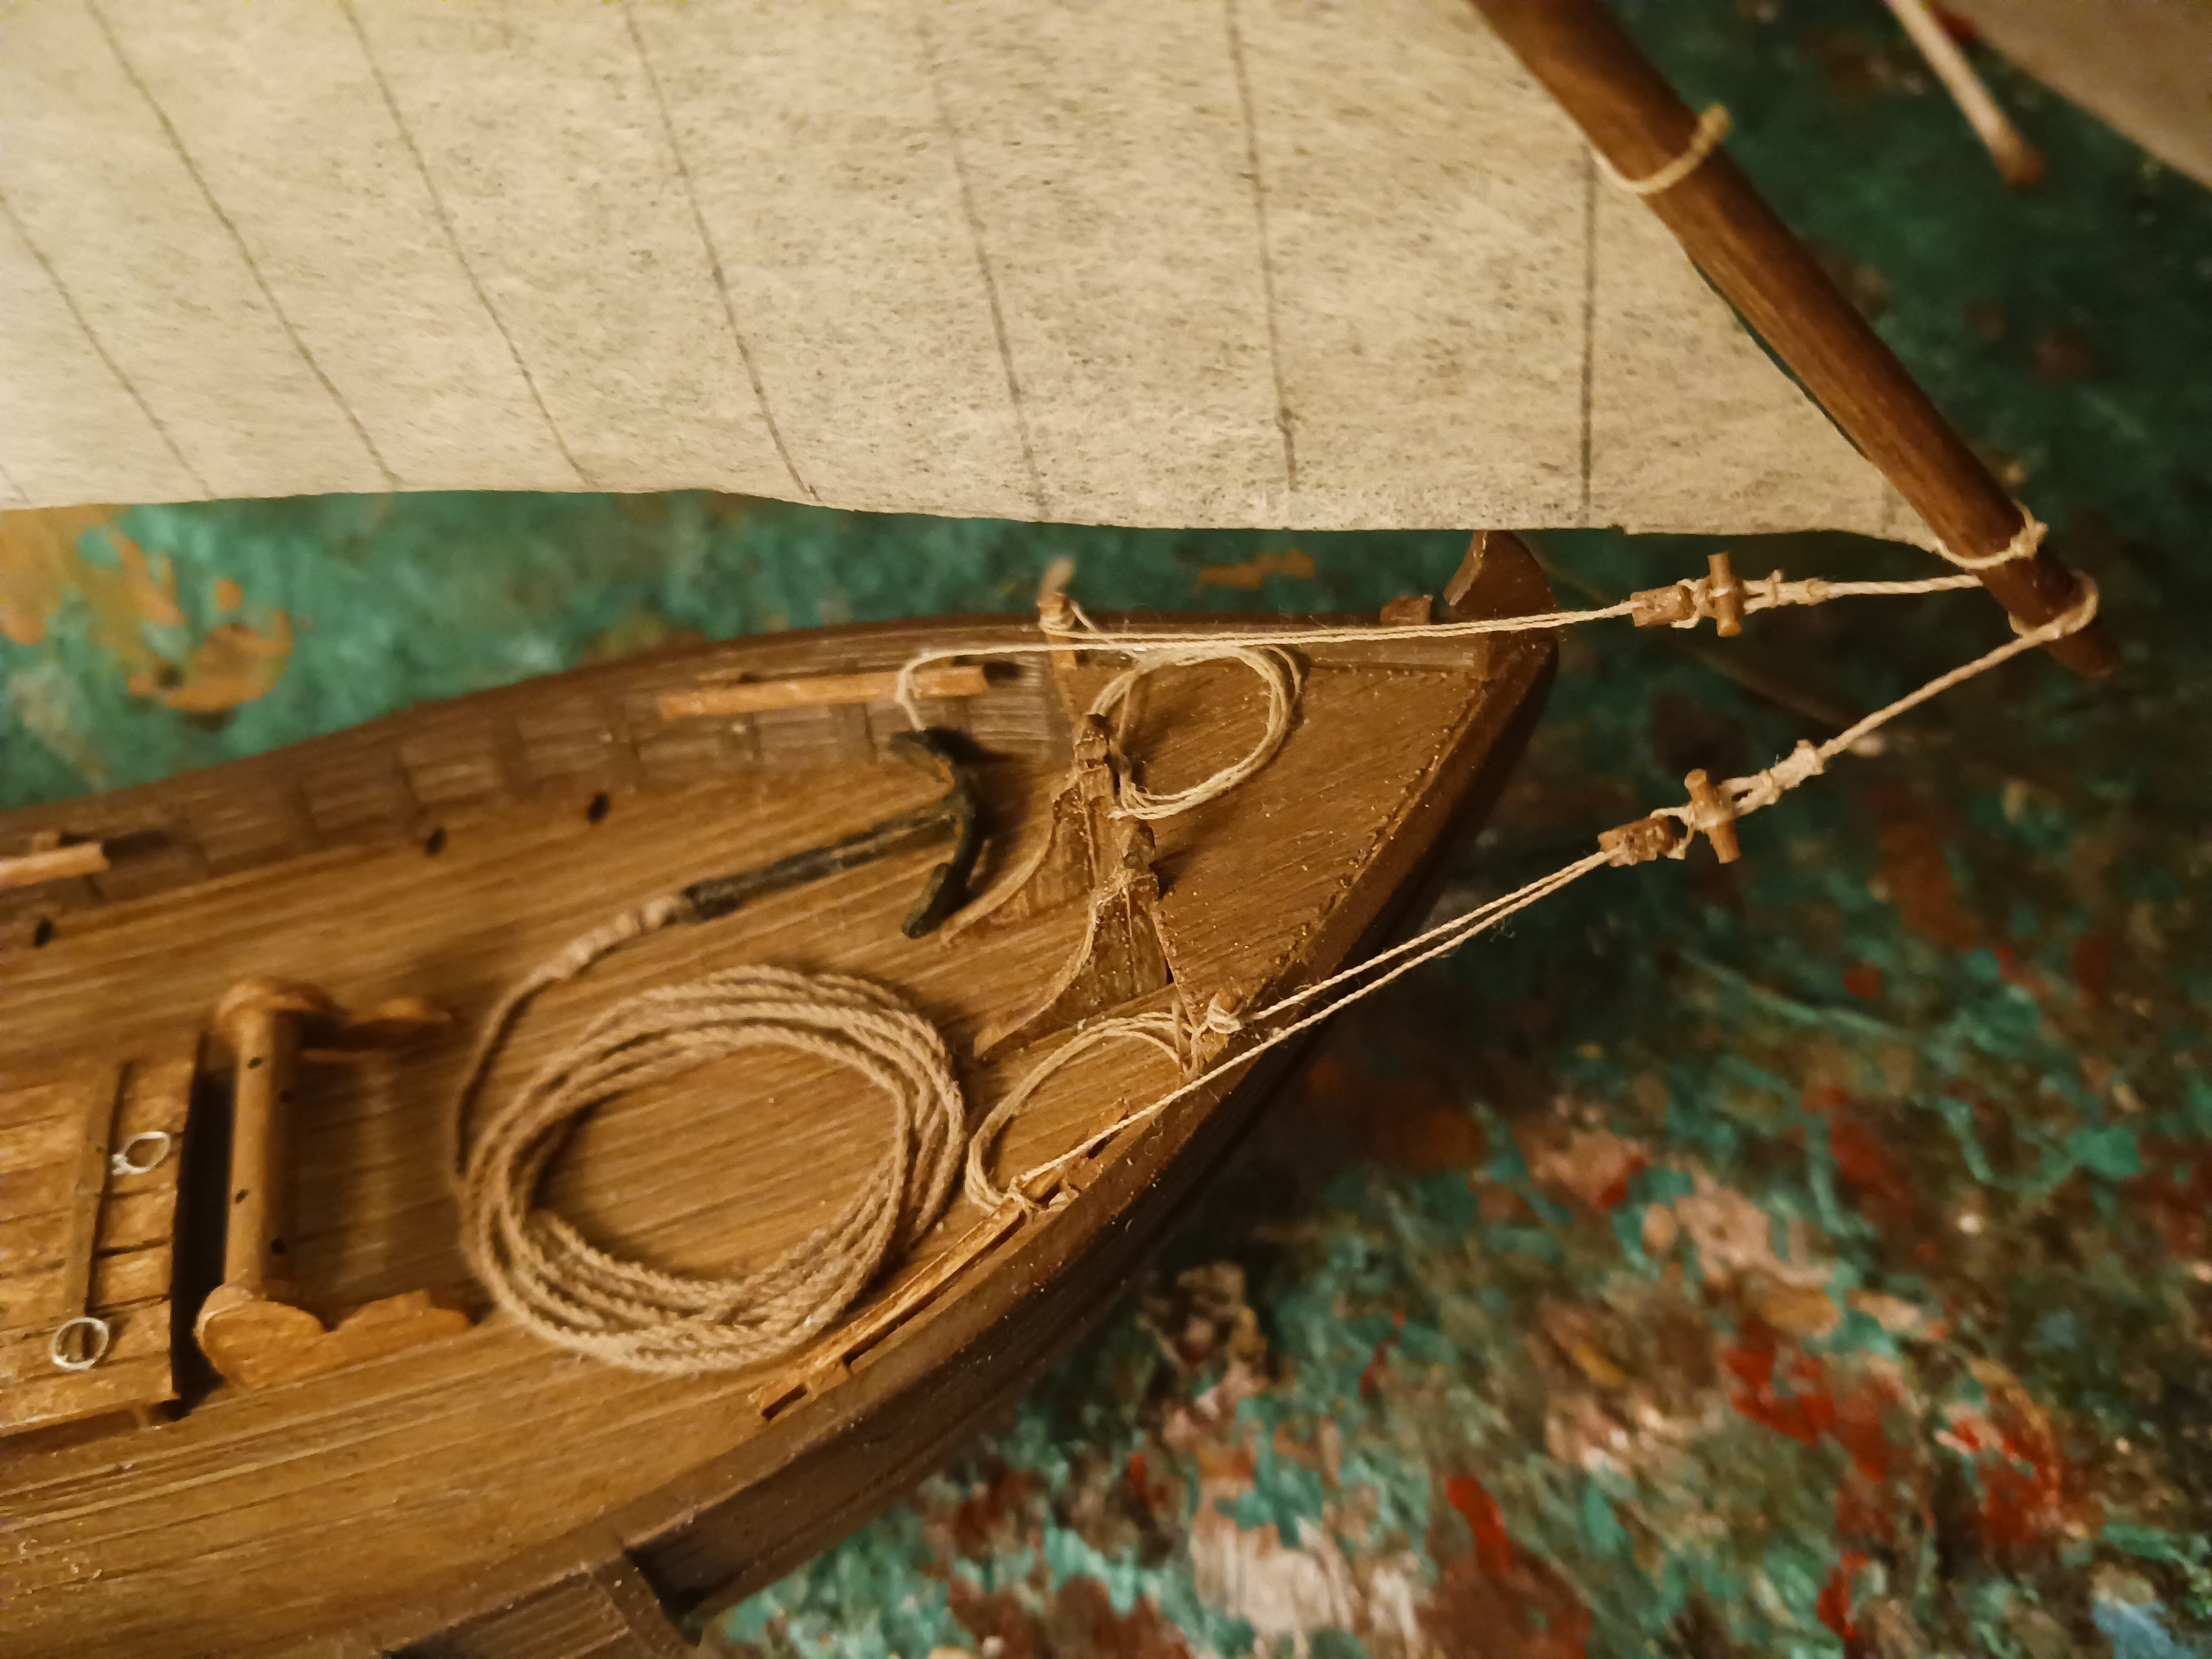
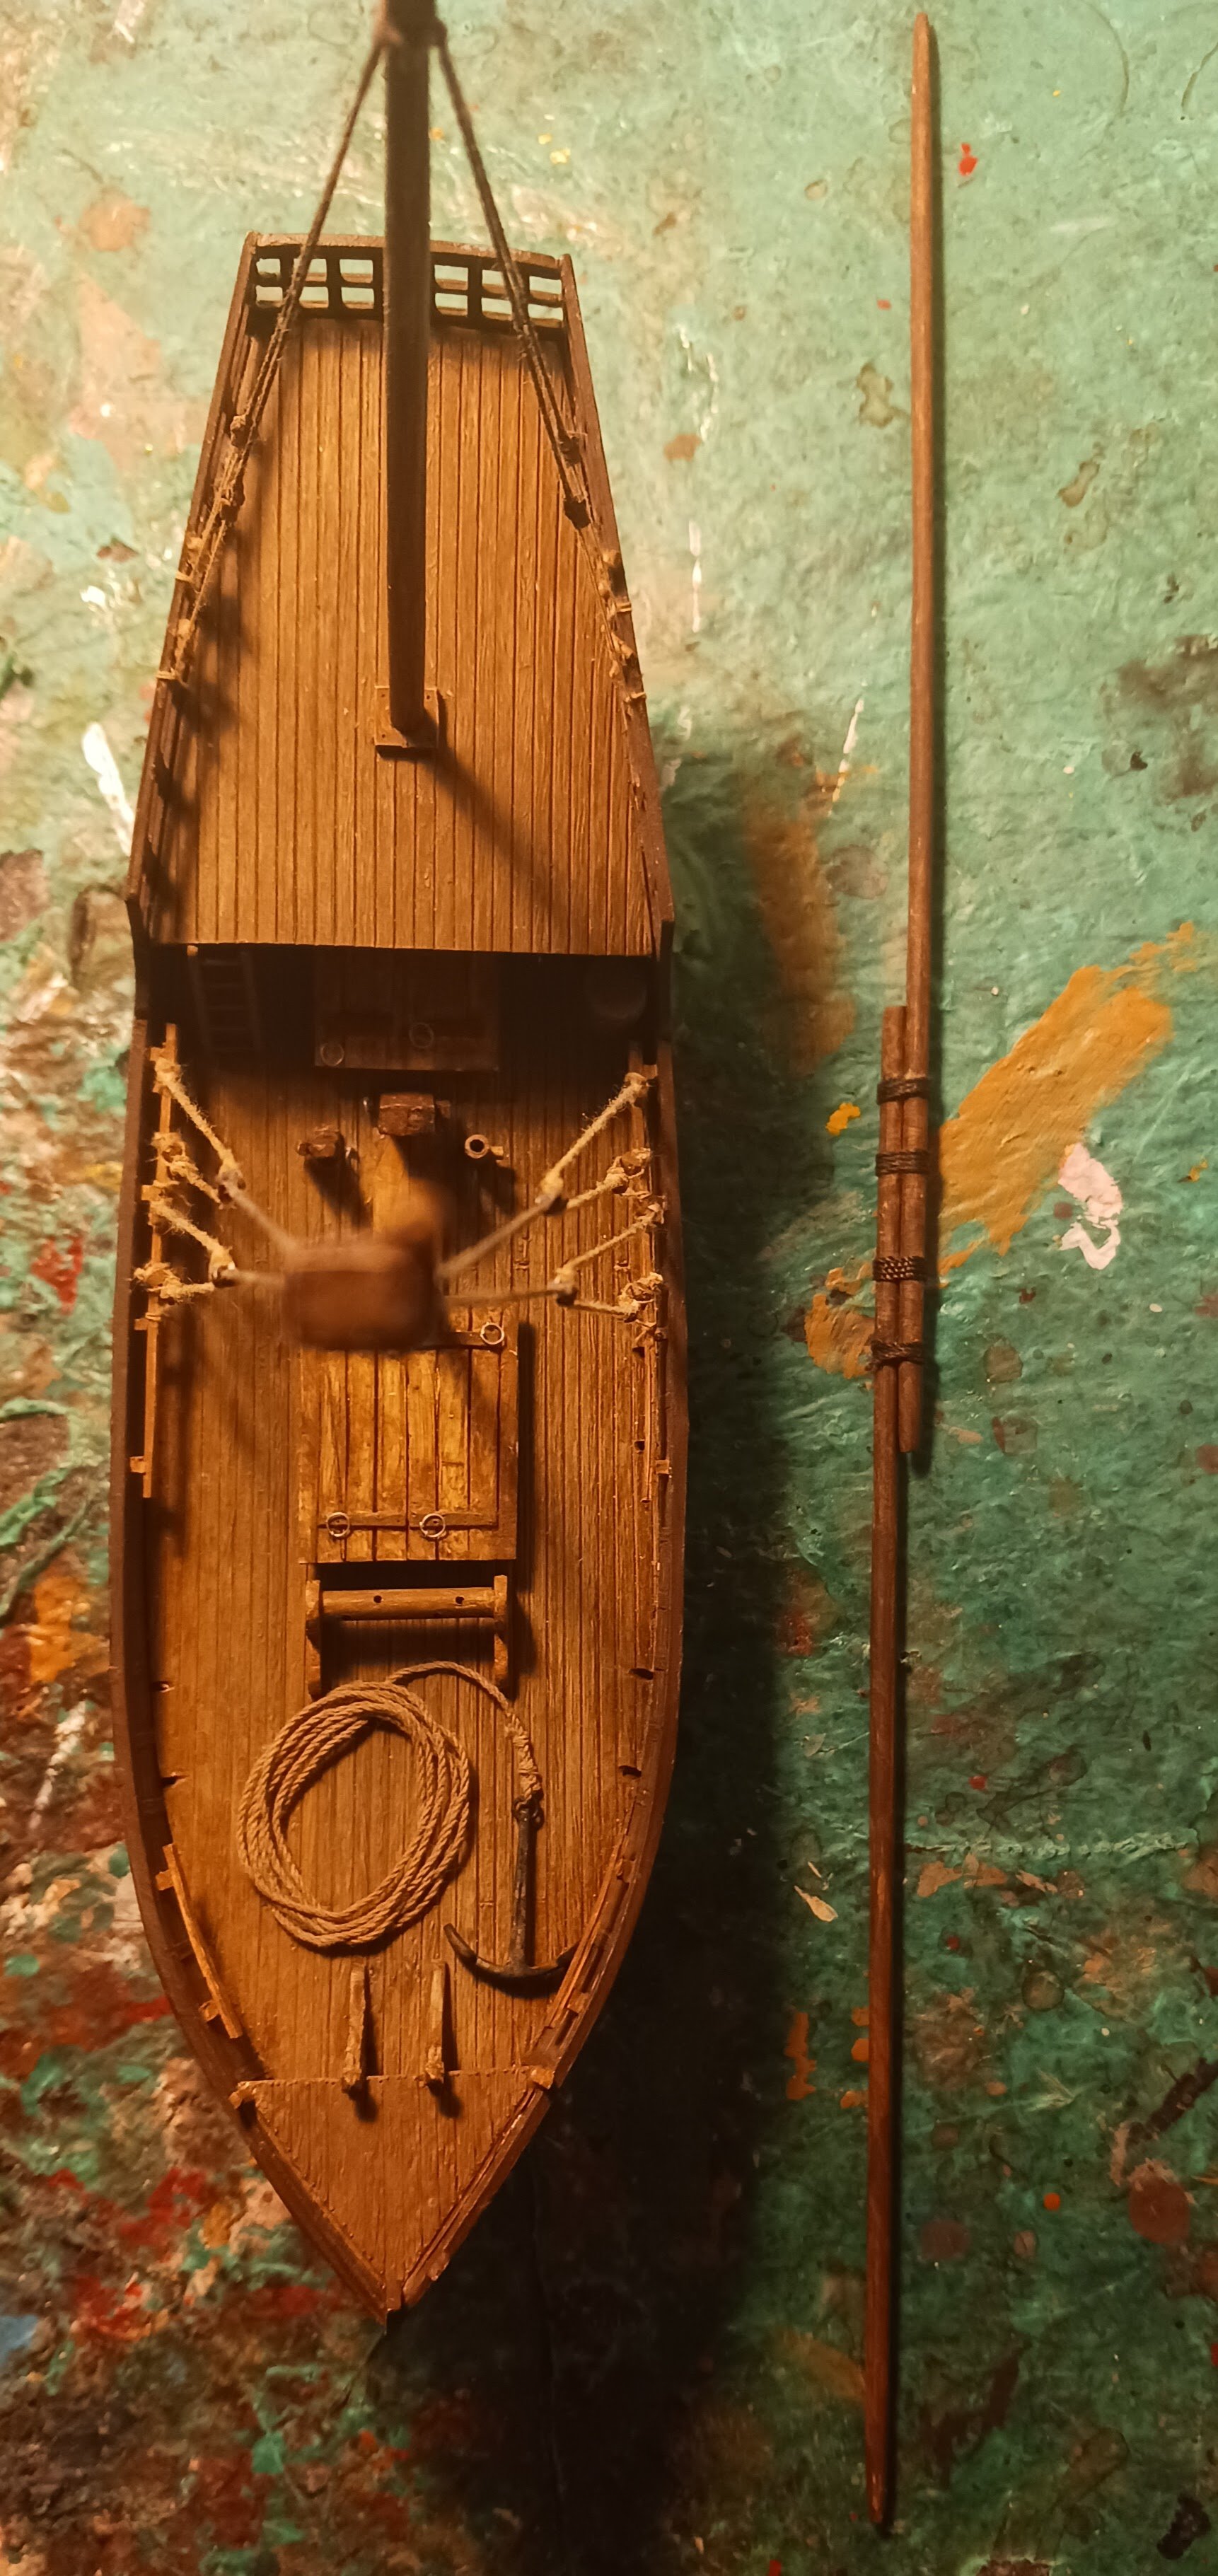
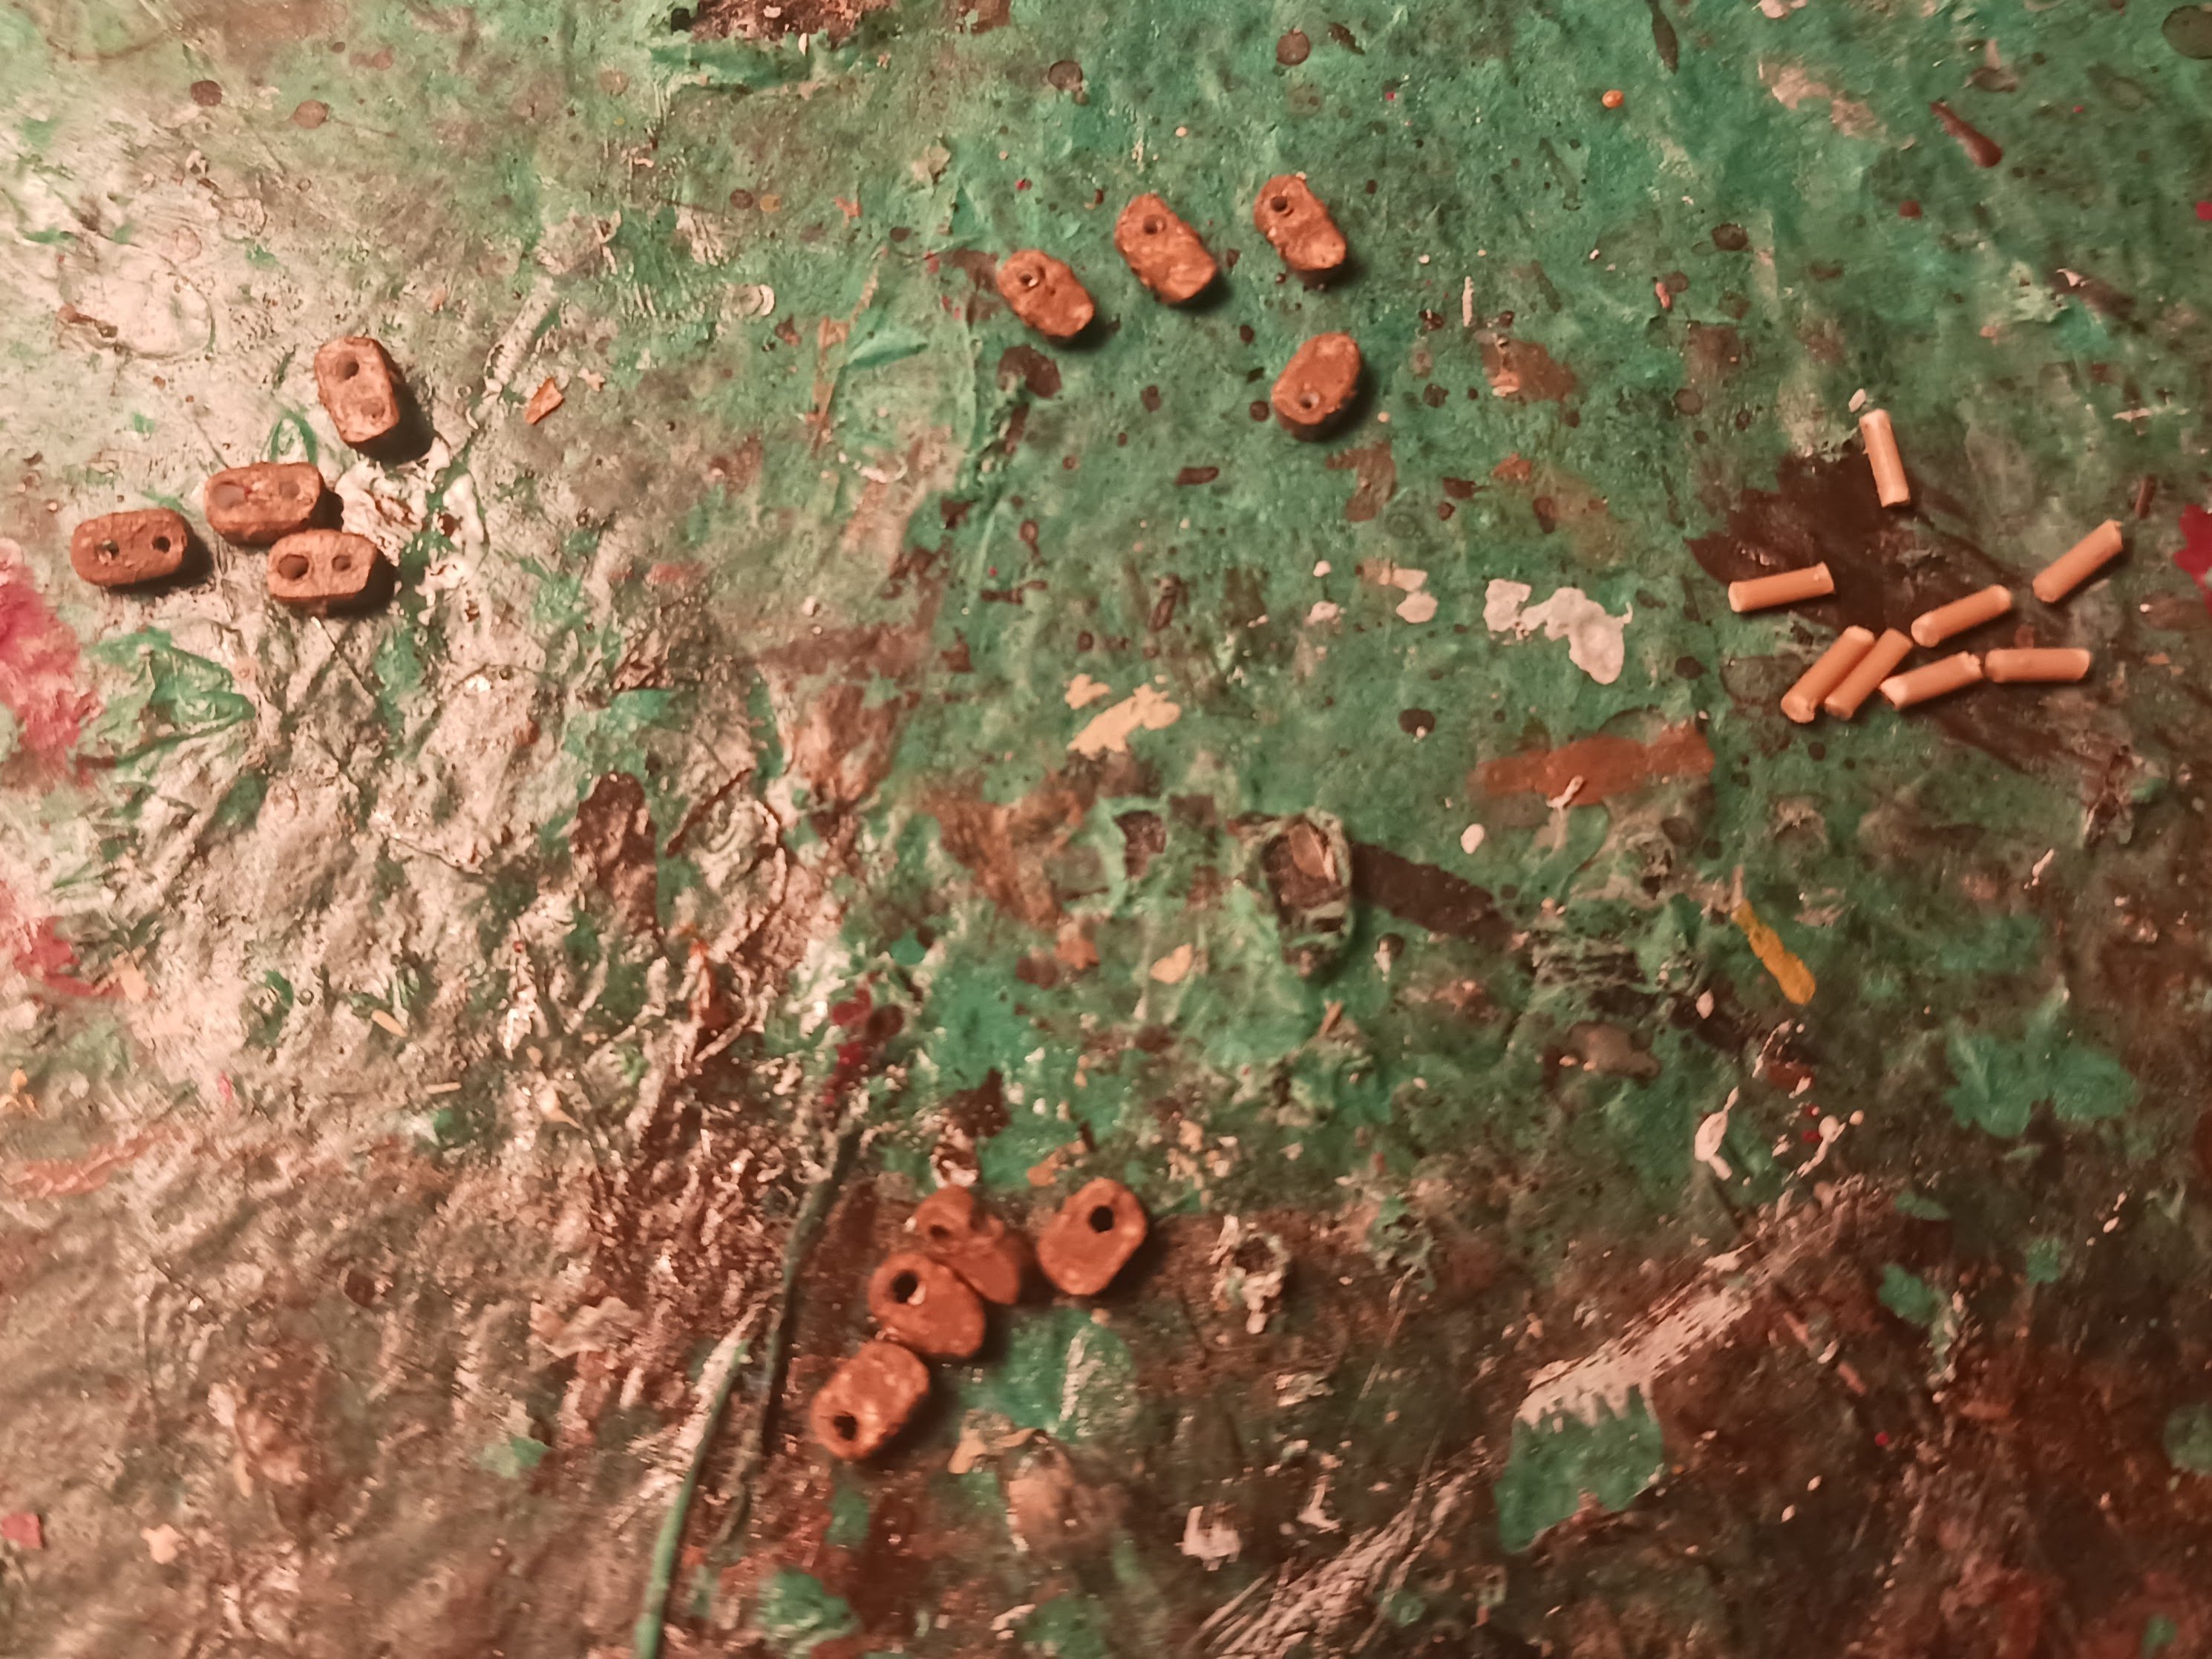
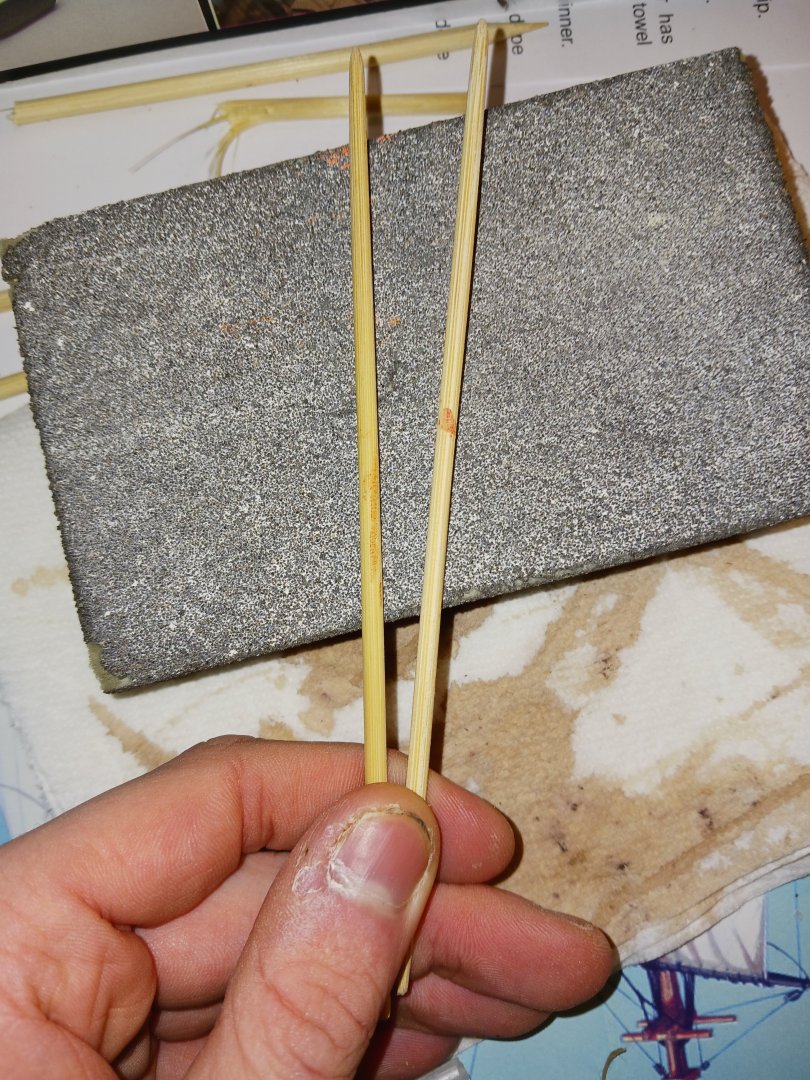
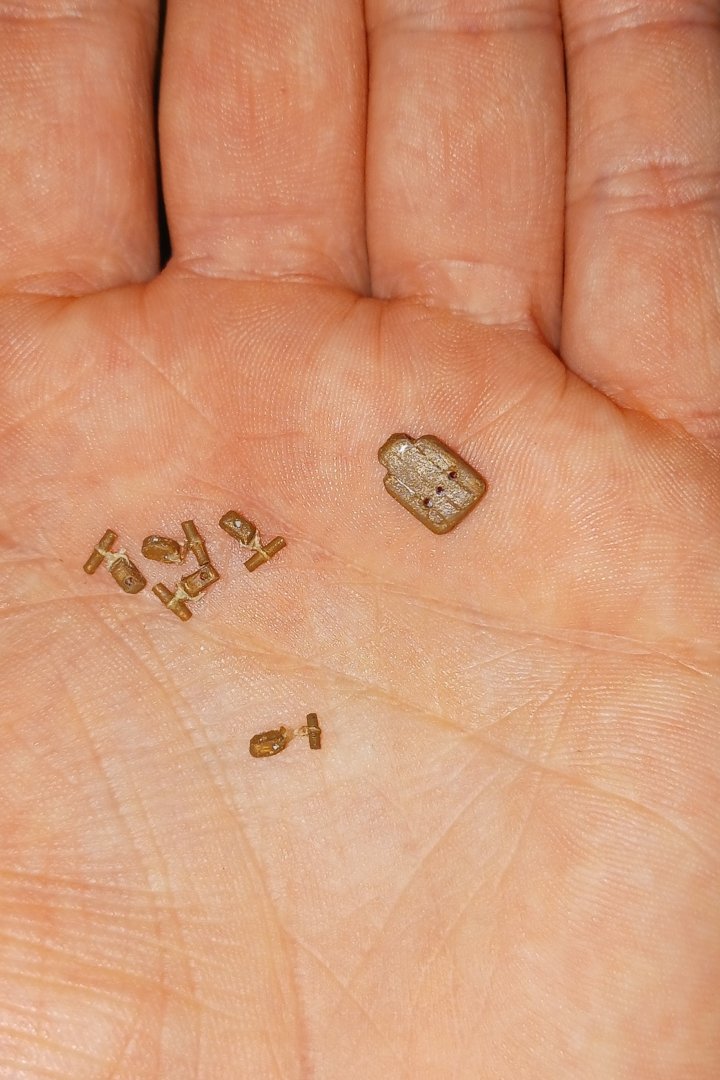
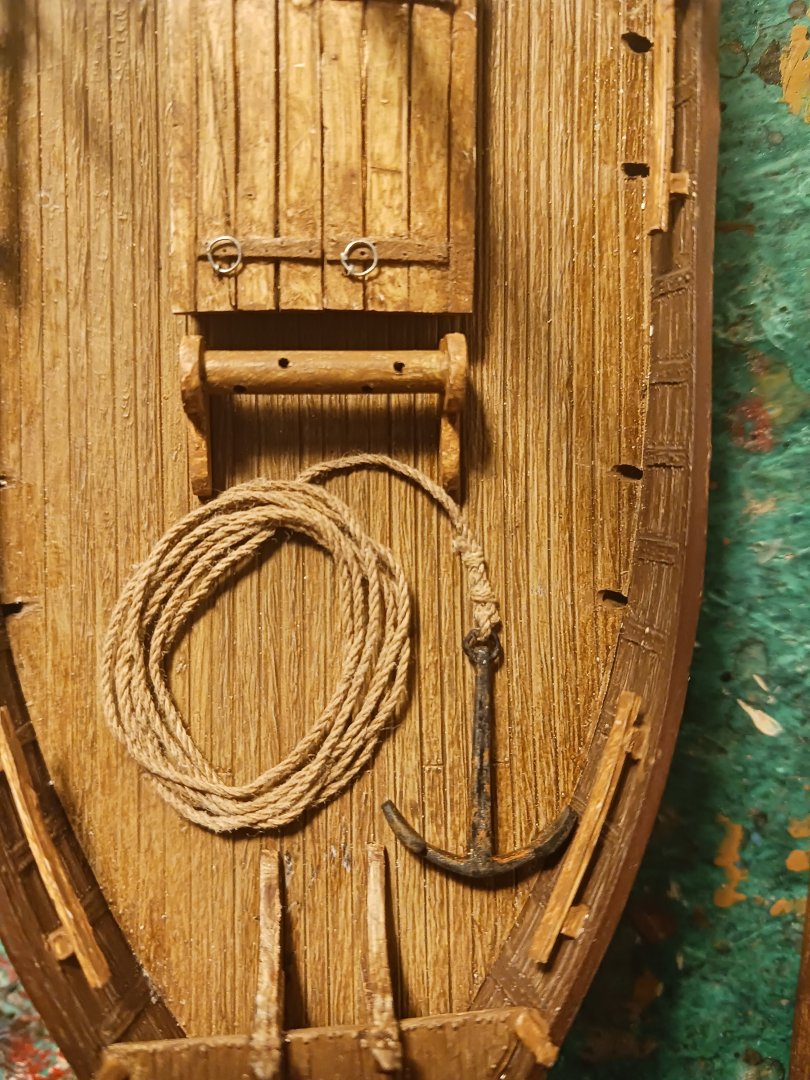
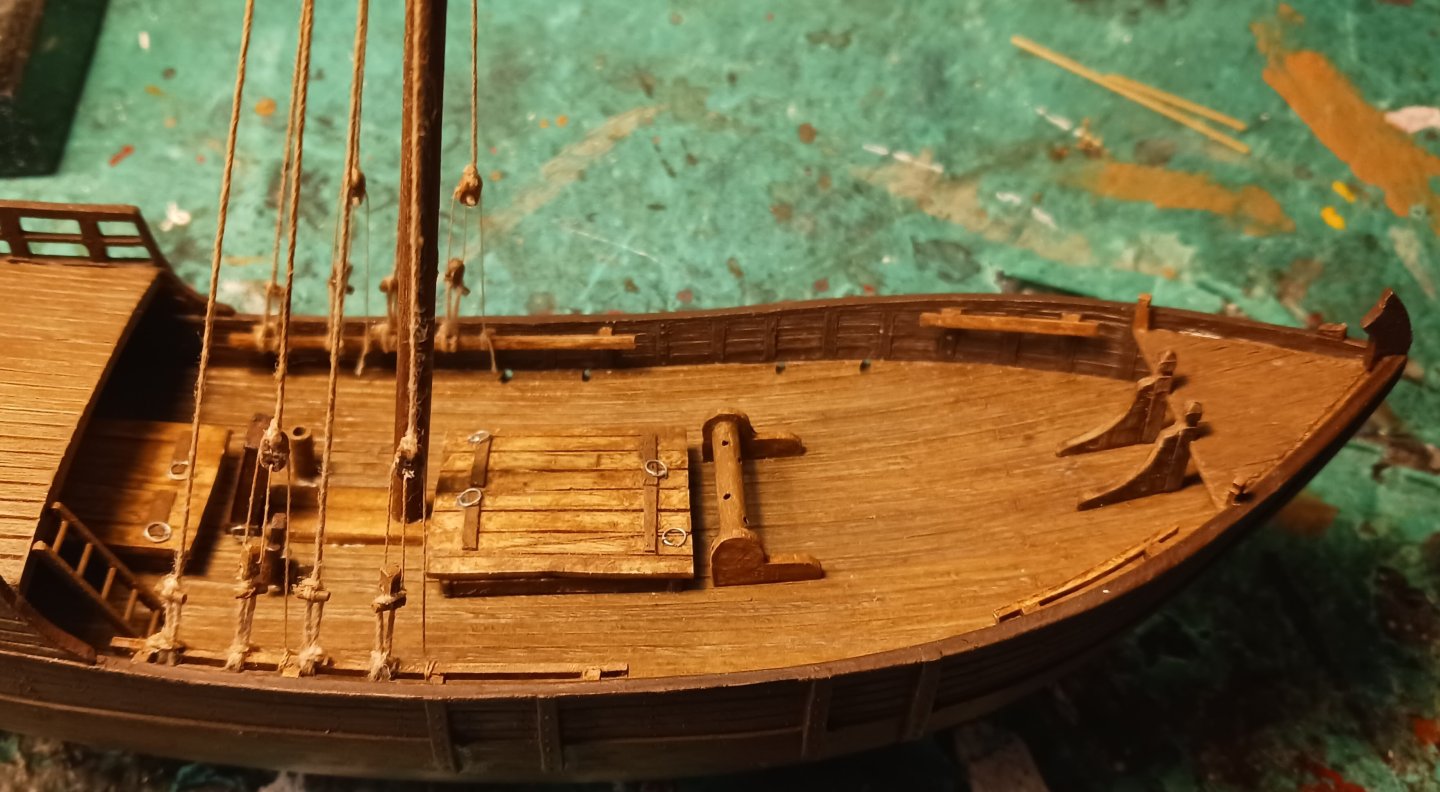
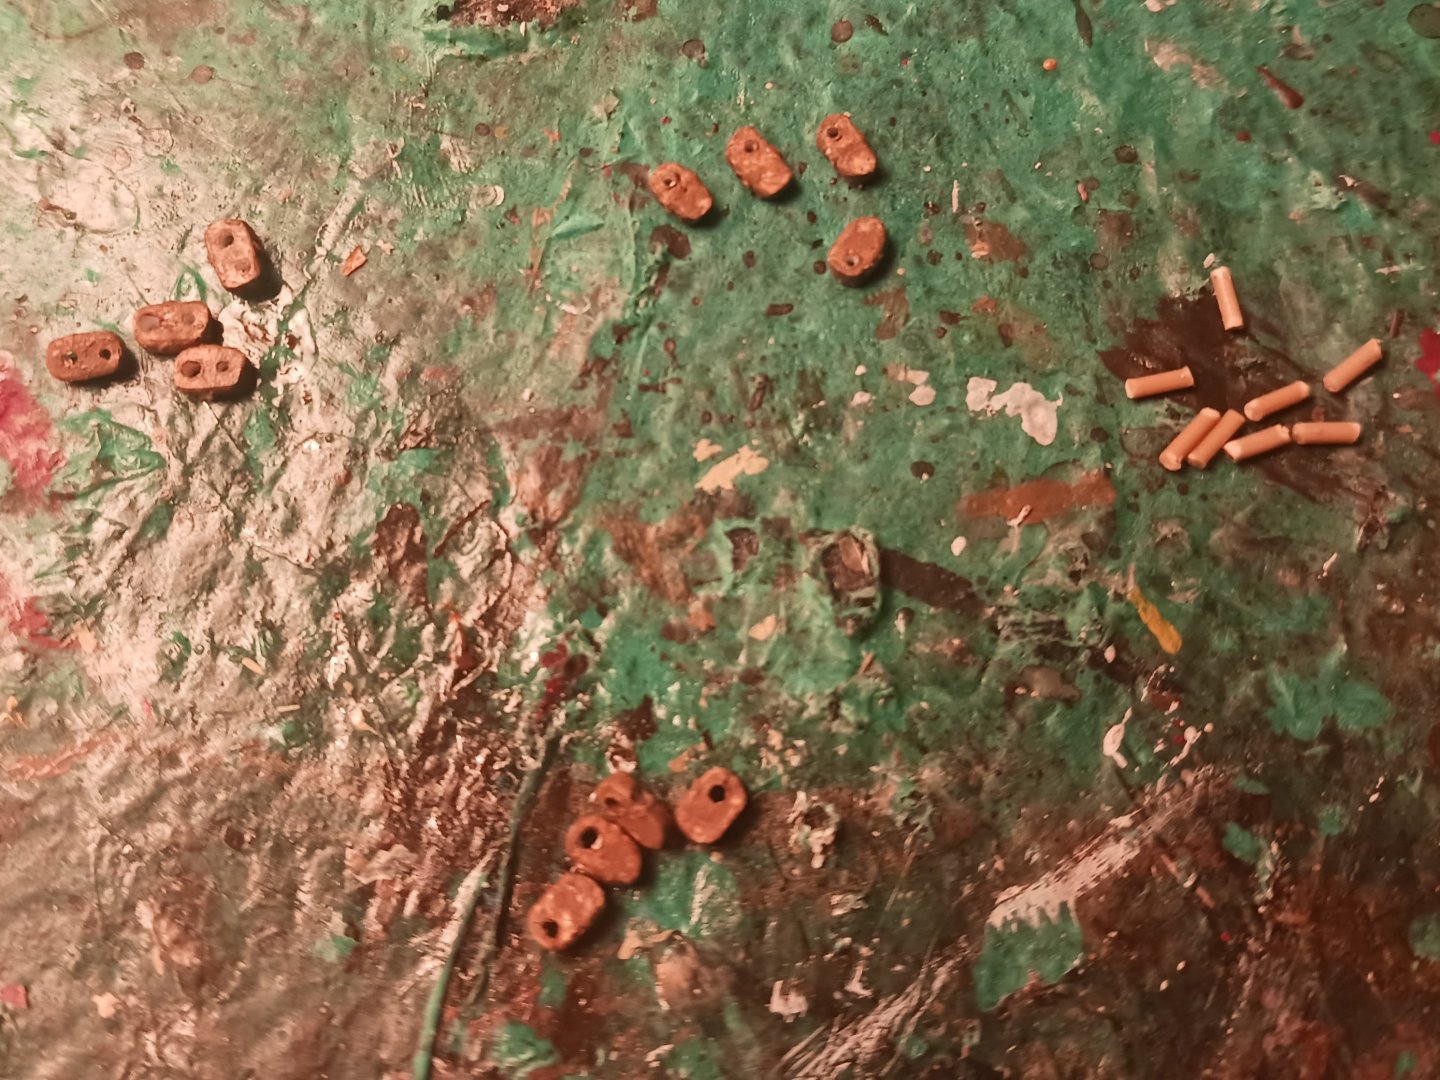
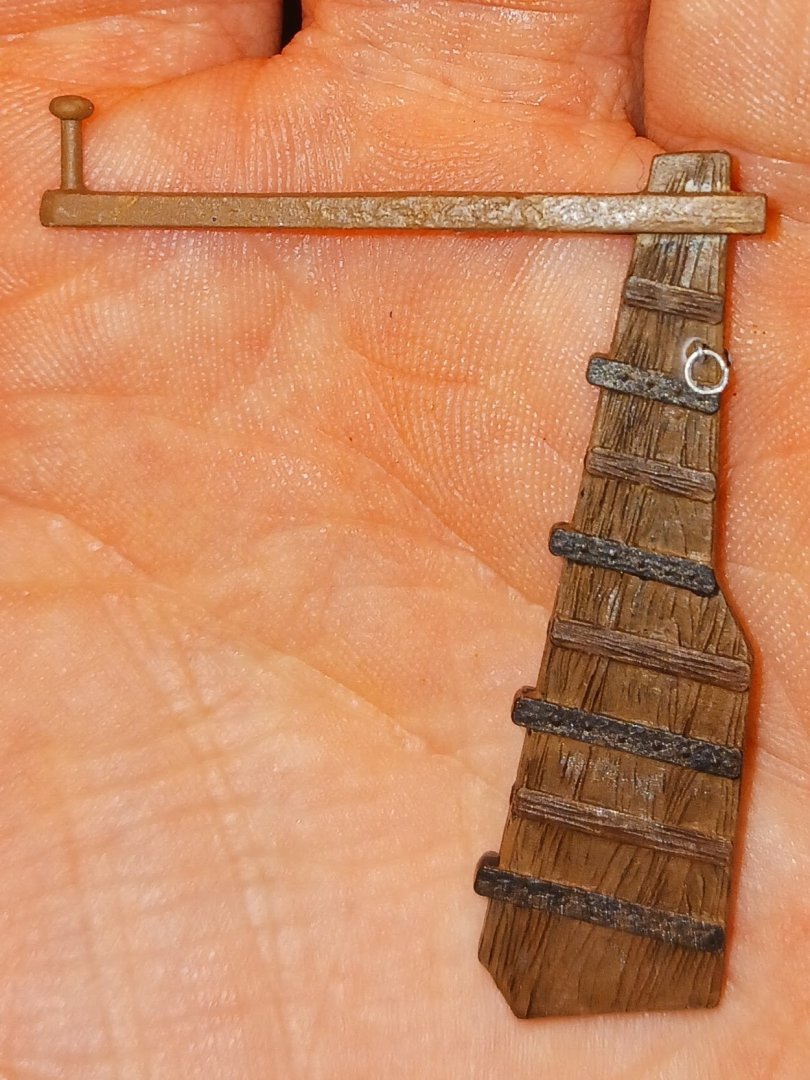
Now, I have a solution for the anchor issue. The issue is, last time I made this kit, I endowed the ship with an anchor system more befitting of a much larger vessel. So, for this version, I planned on keeping it simple- a single, stockless anchor that rests on the deck with a coil of rope and no rope locker. When in use, the anchor cable would be tied to the huge timberheads at the bow and would run between the stop cleat and the stempost. The windlass would be used to weigh anchor. I also used the kit-supplied barrel, presumably as a means of storing caught fish, and made my own main yard by turning two kitchen skewers. It is ever so slightly longer than the kit-supplied yard, and much thicker, in keeping with near-contemporaneous sources on Medieval lateeners. You don't want a flimsy yard, especially considering the huge forces the mainmast, yard and sail would have been subjected to when underway. The logical next step is to make and bend the sail to the yard, make blocks and toggles, and set the main.

-
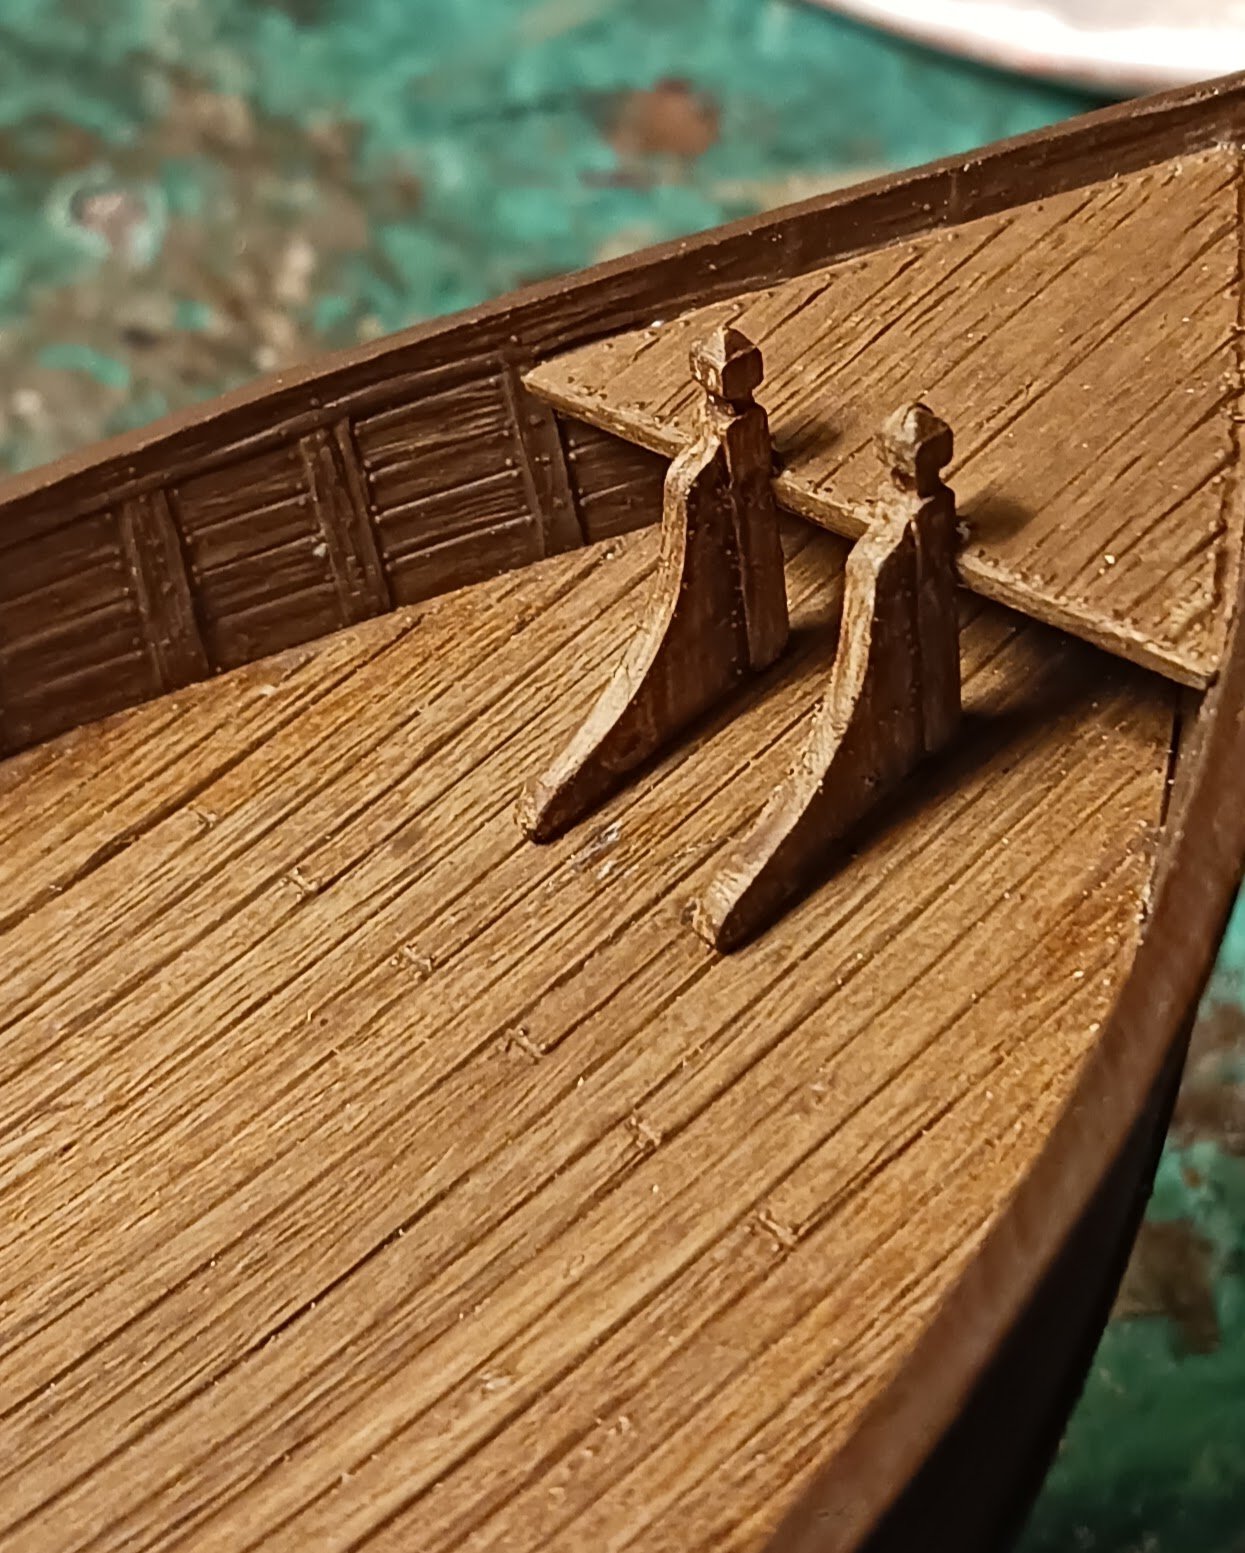
The last few days' worth of progress includes the ship's stempost, a stop cleat, two timberheads, the fore belaying rails, the windlass, and the ship's only ladder. I am also working on a solution for the ship's anchor setup.
-
Does anyone know what this rigging is called?
Ferrus Manus replied to RobMann79's topic in Masting, rigging and sails
In my experience rigging galleons, I have rigged crowsfeet an extensive number of times. However, I have never seen or used crowsfeet in this way. The way I understand them to be used is to distribute tension. It could be that this is a special application of crowsfeet, or that their function had completely changed by the 18th century. I could be wrong in my initial assessment in this case, and if I am, please disregard my initial reply. -
Does anyone know what this rigging is called?
Ferrus Manus replied to RobMann79's topic in Masting, rigging and sails
Those are called crowsfeet, and they are intended to balance out the tension on various lines. In this case, the crowsfeet are used to equally distribute the tension from the stay across the fighting top. -
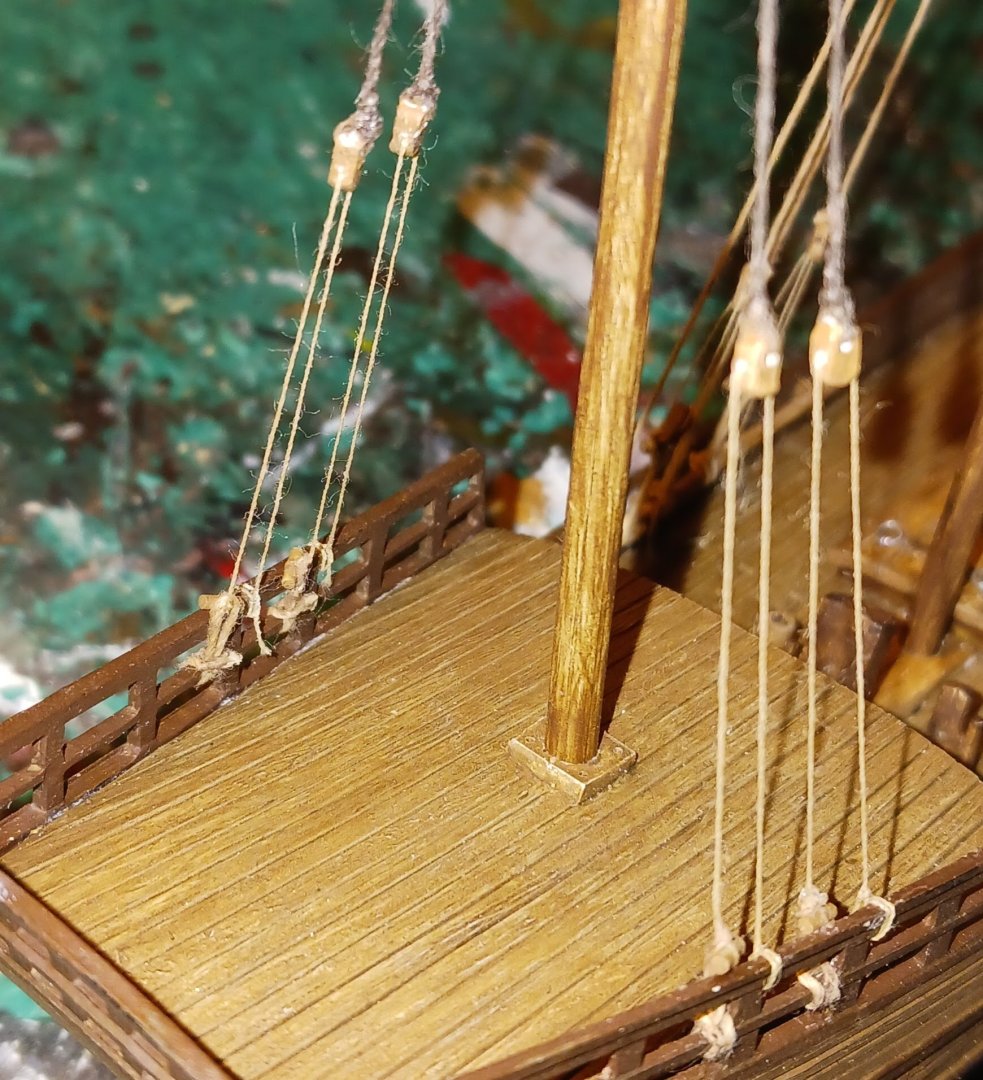
The three additions to the model in the new year are the mizzenmast, the mizzen shrouds, and the two fore timber heads. These timber heads will be important when we discuss the anchor arrangement later. The only other part of the bow that needs to be made is the stempost, which will come next. Apart from that, the only other pieces of deck furniture that have yet to go on the ship are the windlass, ladders, and mizzen halyard/parrel block arrangement.

-
That's pretty much exactly what I did. The lip balm I use to wax line is derived from beeswax.
-
Having nothing else to do for New Year's, I did the shrouds. Despite my best efforts, the lines remain hairy. It gets less visible the further away you get from the rope. I attempted to design the blocks and tackles to be as close to the Mataro model as reasonably achievable, and I think I did a pretty good job. In fact, I'd say that disregarding the quality of the line itself, this is one of my better shroud setups.


-
I made up the parts for the mainmast rigging, having made the decision (in the absence of Steven's input) to make whip-and-tackle shrouds. These are the closest I can get at this scale to "true" Medieval blocks. I also made and put in the rope loops for the toggles. Each shroud will have two toggles, one at the base of the whip and the other at the lower block for the tackle. The placement of toggles is intended to ensure the shrouds can be disconnected from the hull easily and from deck level. Much to my dissatisfaction, the only thread I have in the correct diameter for the rope loops is the crappy "thread" (if you can even call it that) supplied in a 60's Revell kit. Despite me having stained and heavily waxed it, it remains ridiculously hairy. You can't see it in the picture.
-
Now that it's nearly time to get started on the standing rigging, do we think whip-and-tackle shrouds would be reasonable for a mid-15th century Iberian lateener?
-
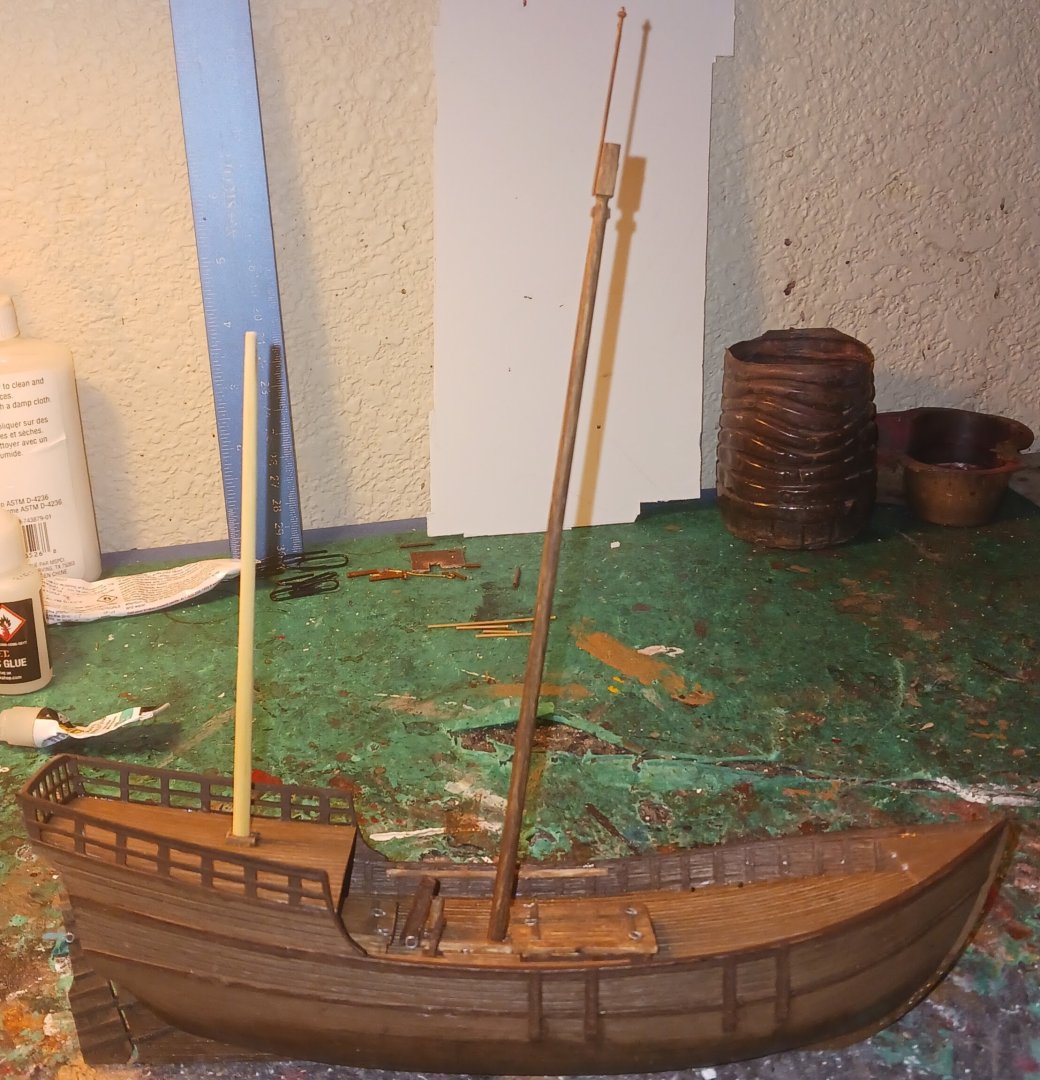
I have done a significant amount of work on the caravel in the last few days. For one, I have made up the main calcet and flagpole, and both masts. Both masts are currently resting in their intended final positions on the model. I also glued the rudder in, and got both castle decks painted and glued into place. The only modifications were supporting timbers under both decks, and partners for the mizzen mast. Looking back, both of those injector pin holes are in such horrible places, and probably wouldn't have been too hard to fill. Let's just chalk it up to shipworm.

-
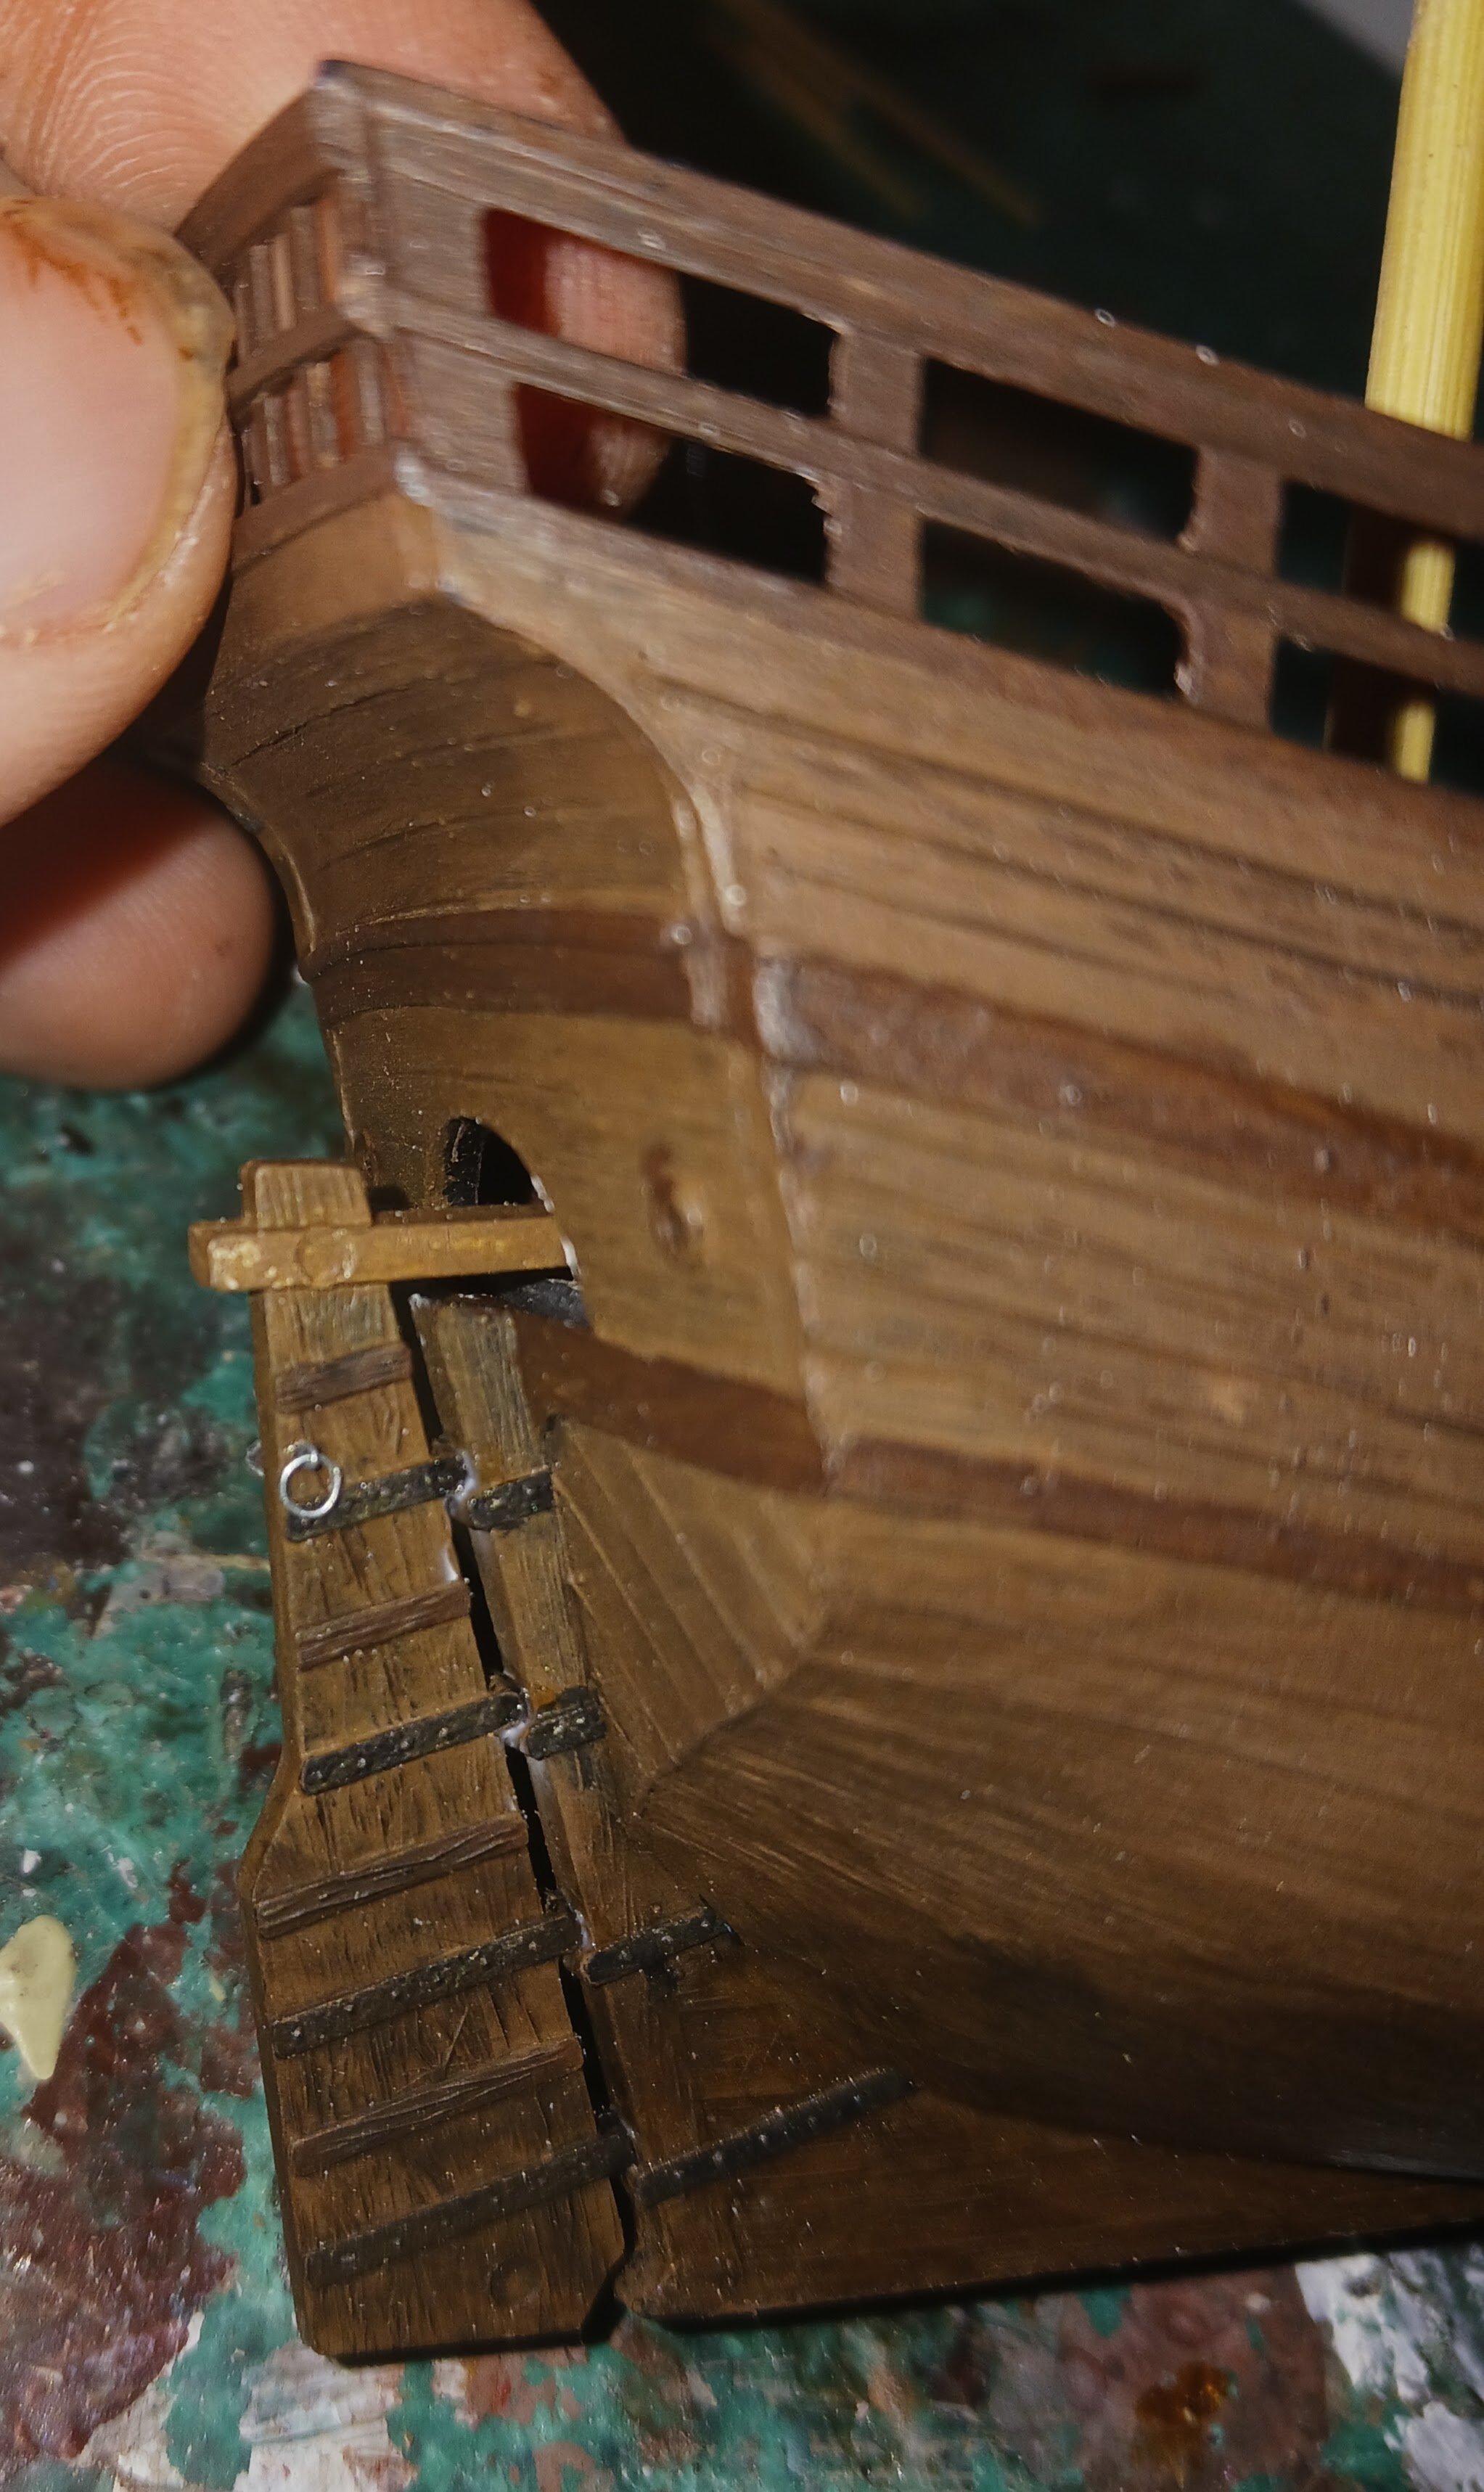
Here's the rudder that I modified to fix some of the issues I experienced last time. First off, I solved the problem of potential preventer ropes by attaching two ringbolts to the rudder, one on each side. Secondly, the tiller was unrealistically fat and long. So, I shaved the tiller down a good 8 inches at scale, slimmed it down the same way, and attached a handle that a crew member could actually get his hand around.
-
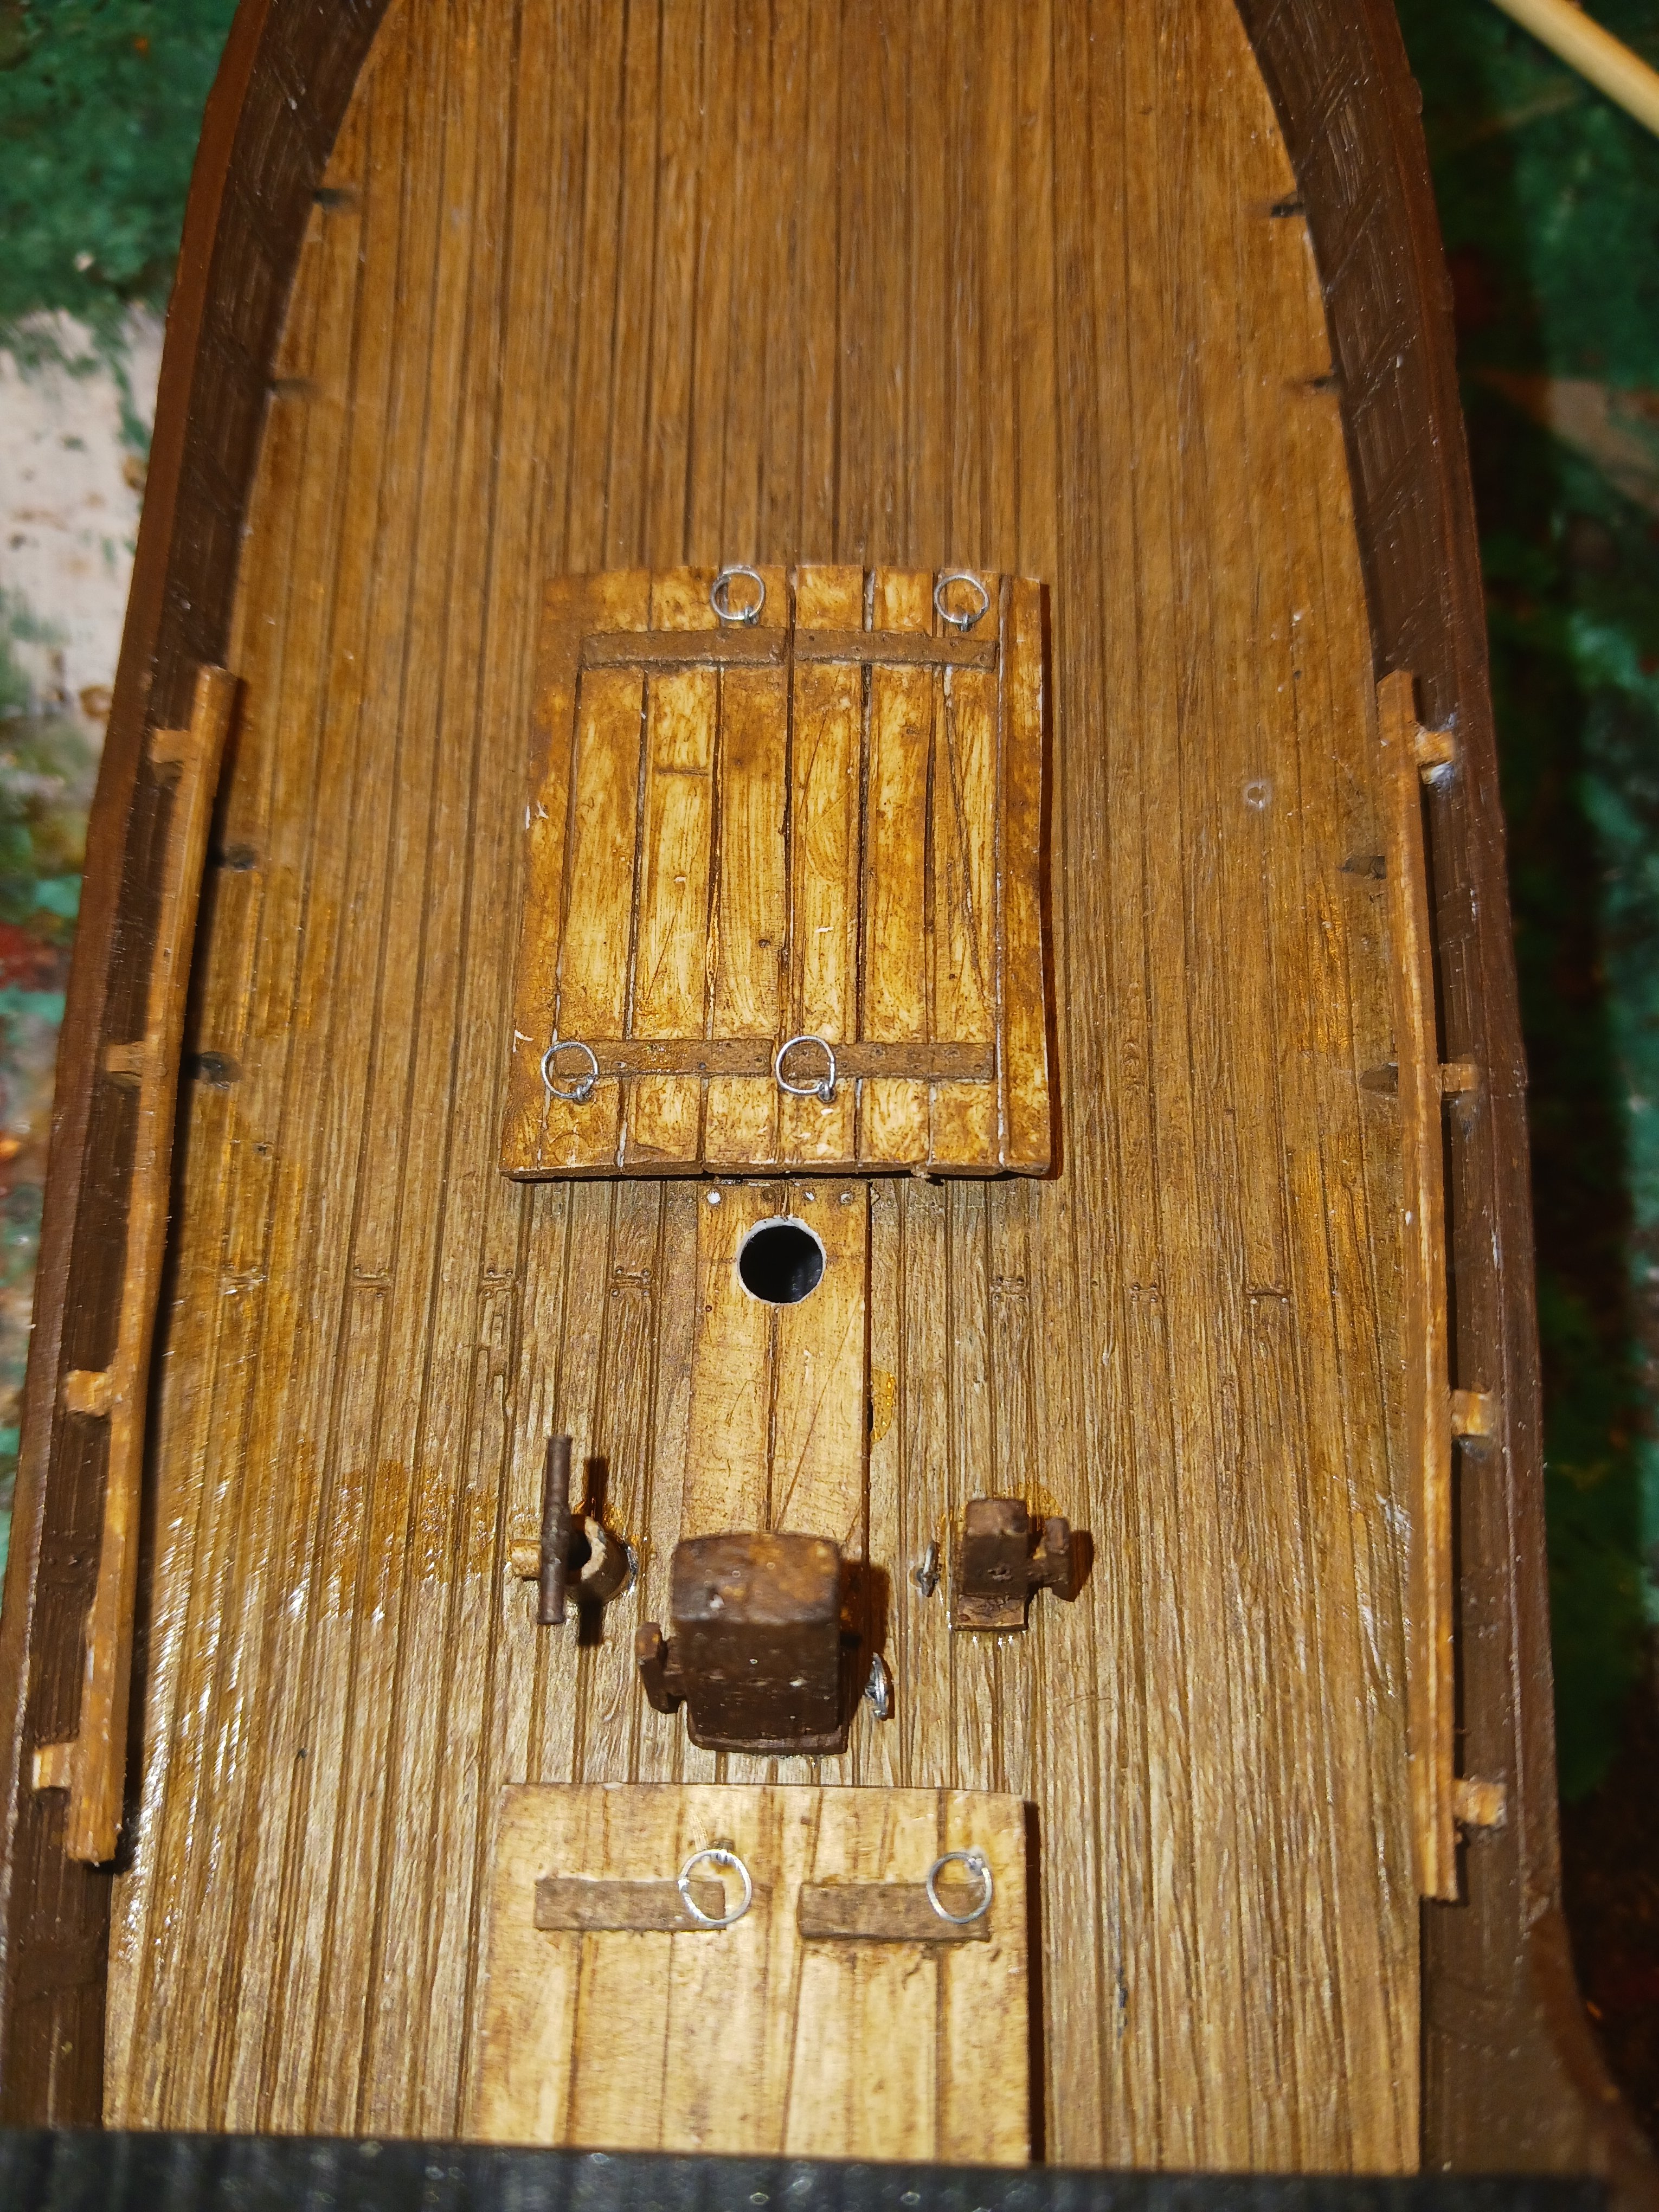
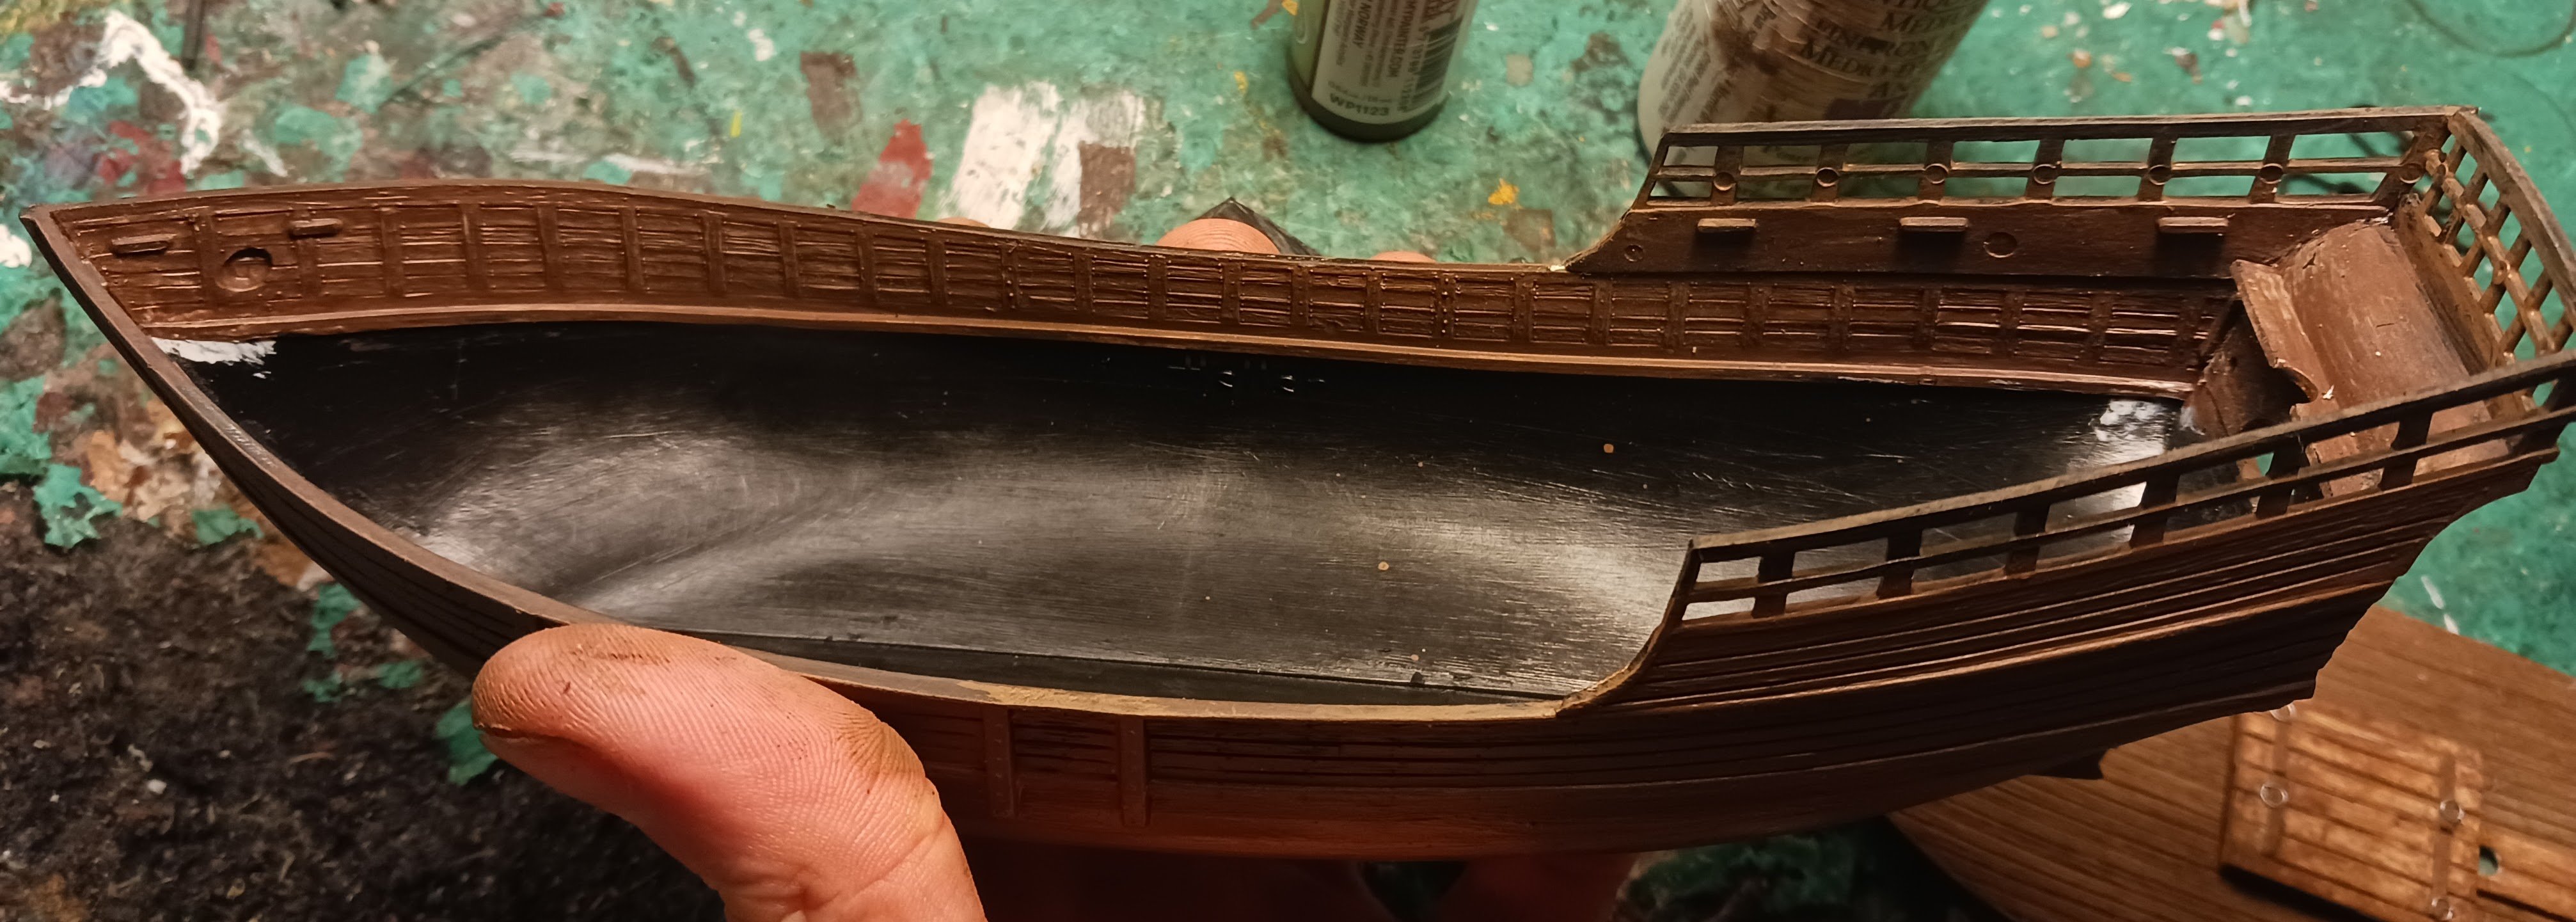
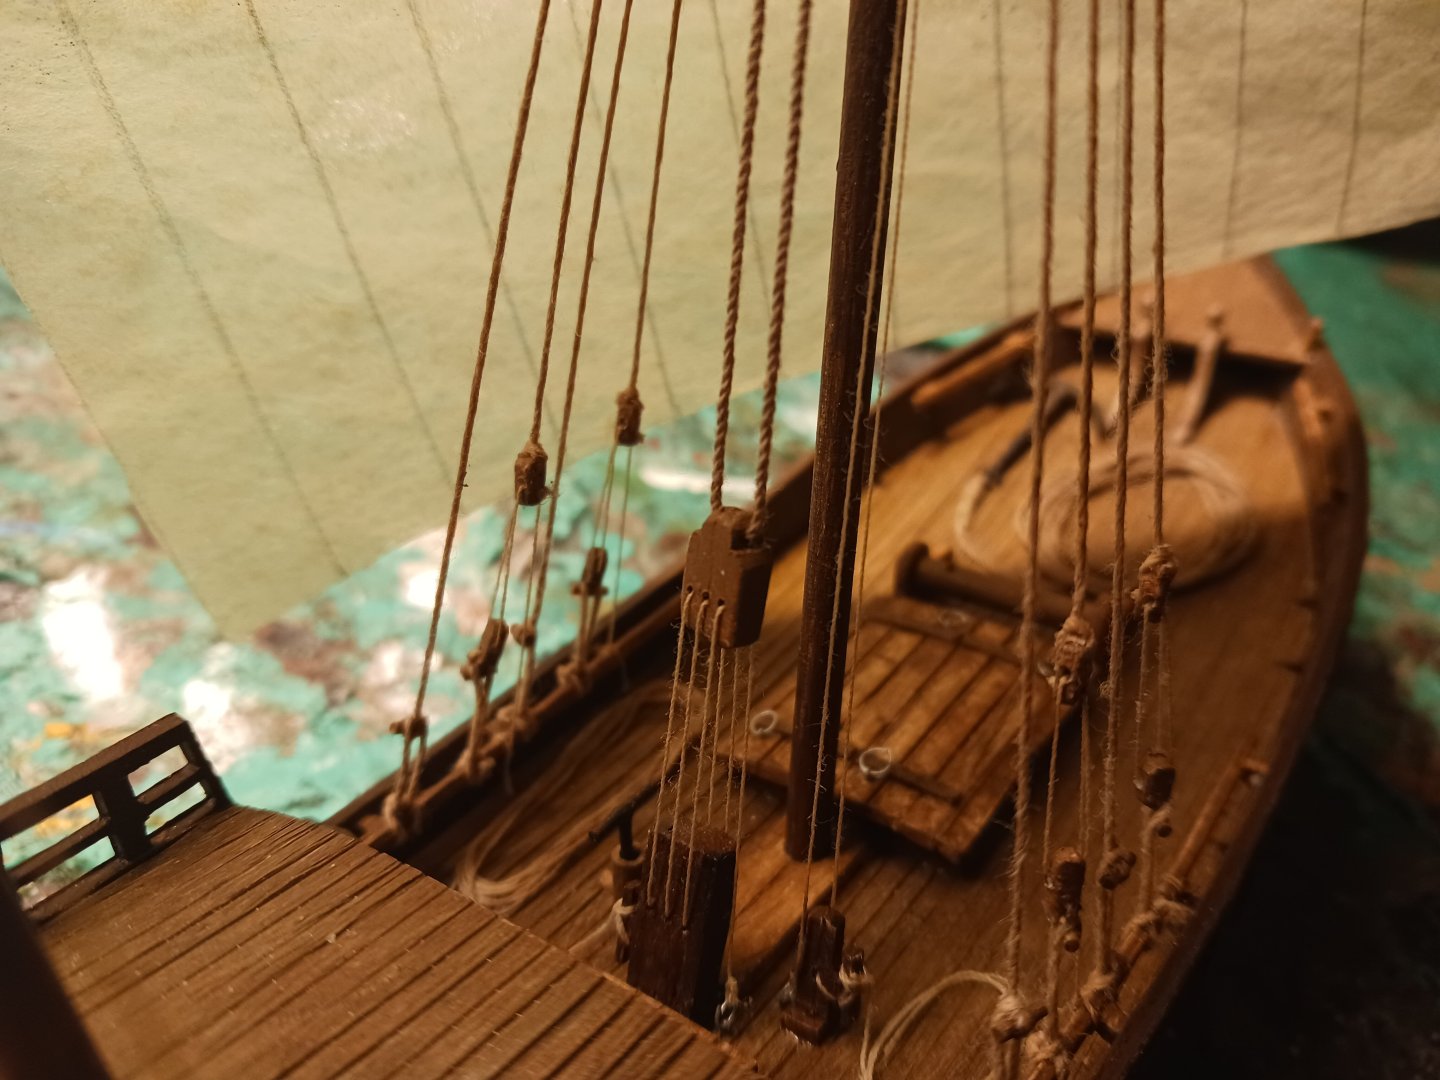
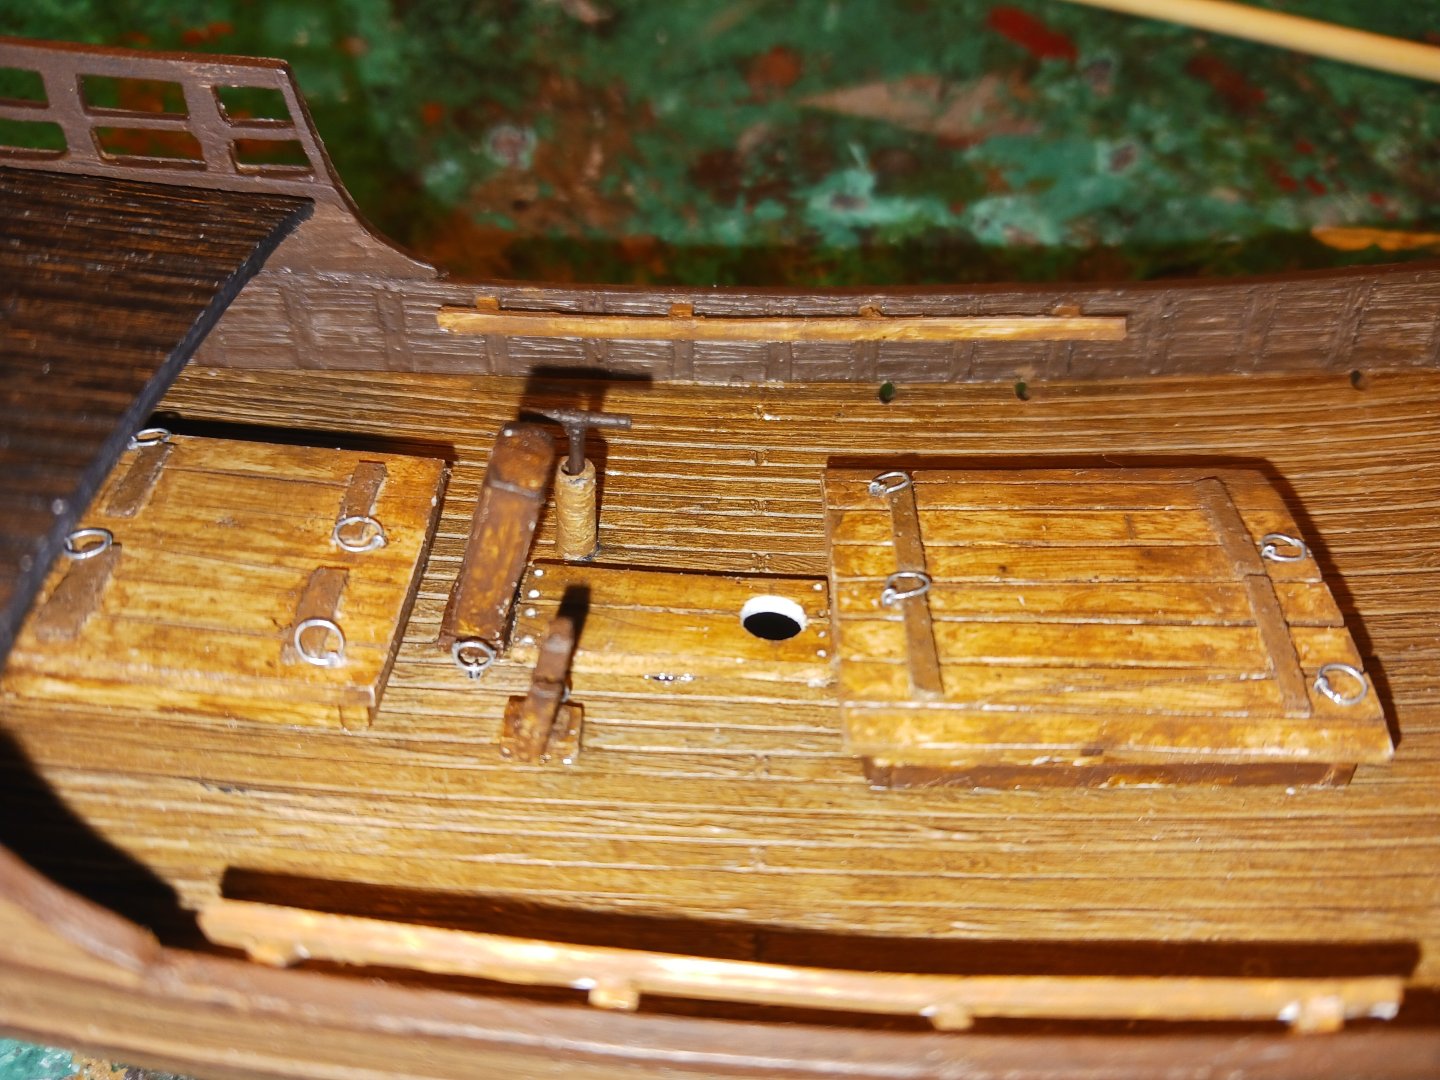
I made and fitted the mainmast halyard knight, the parrel knight, and the ship's pump. I also made the bottom of the hull look a little more disgusting and painted gloss on the hull and deck where water would be. I think I might leave the pump handle off until the rigging is done as I might accidentally break it off.


-
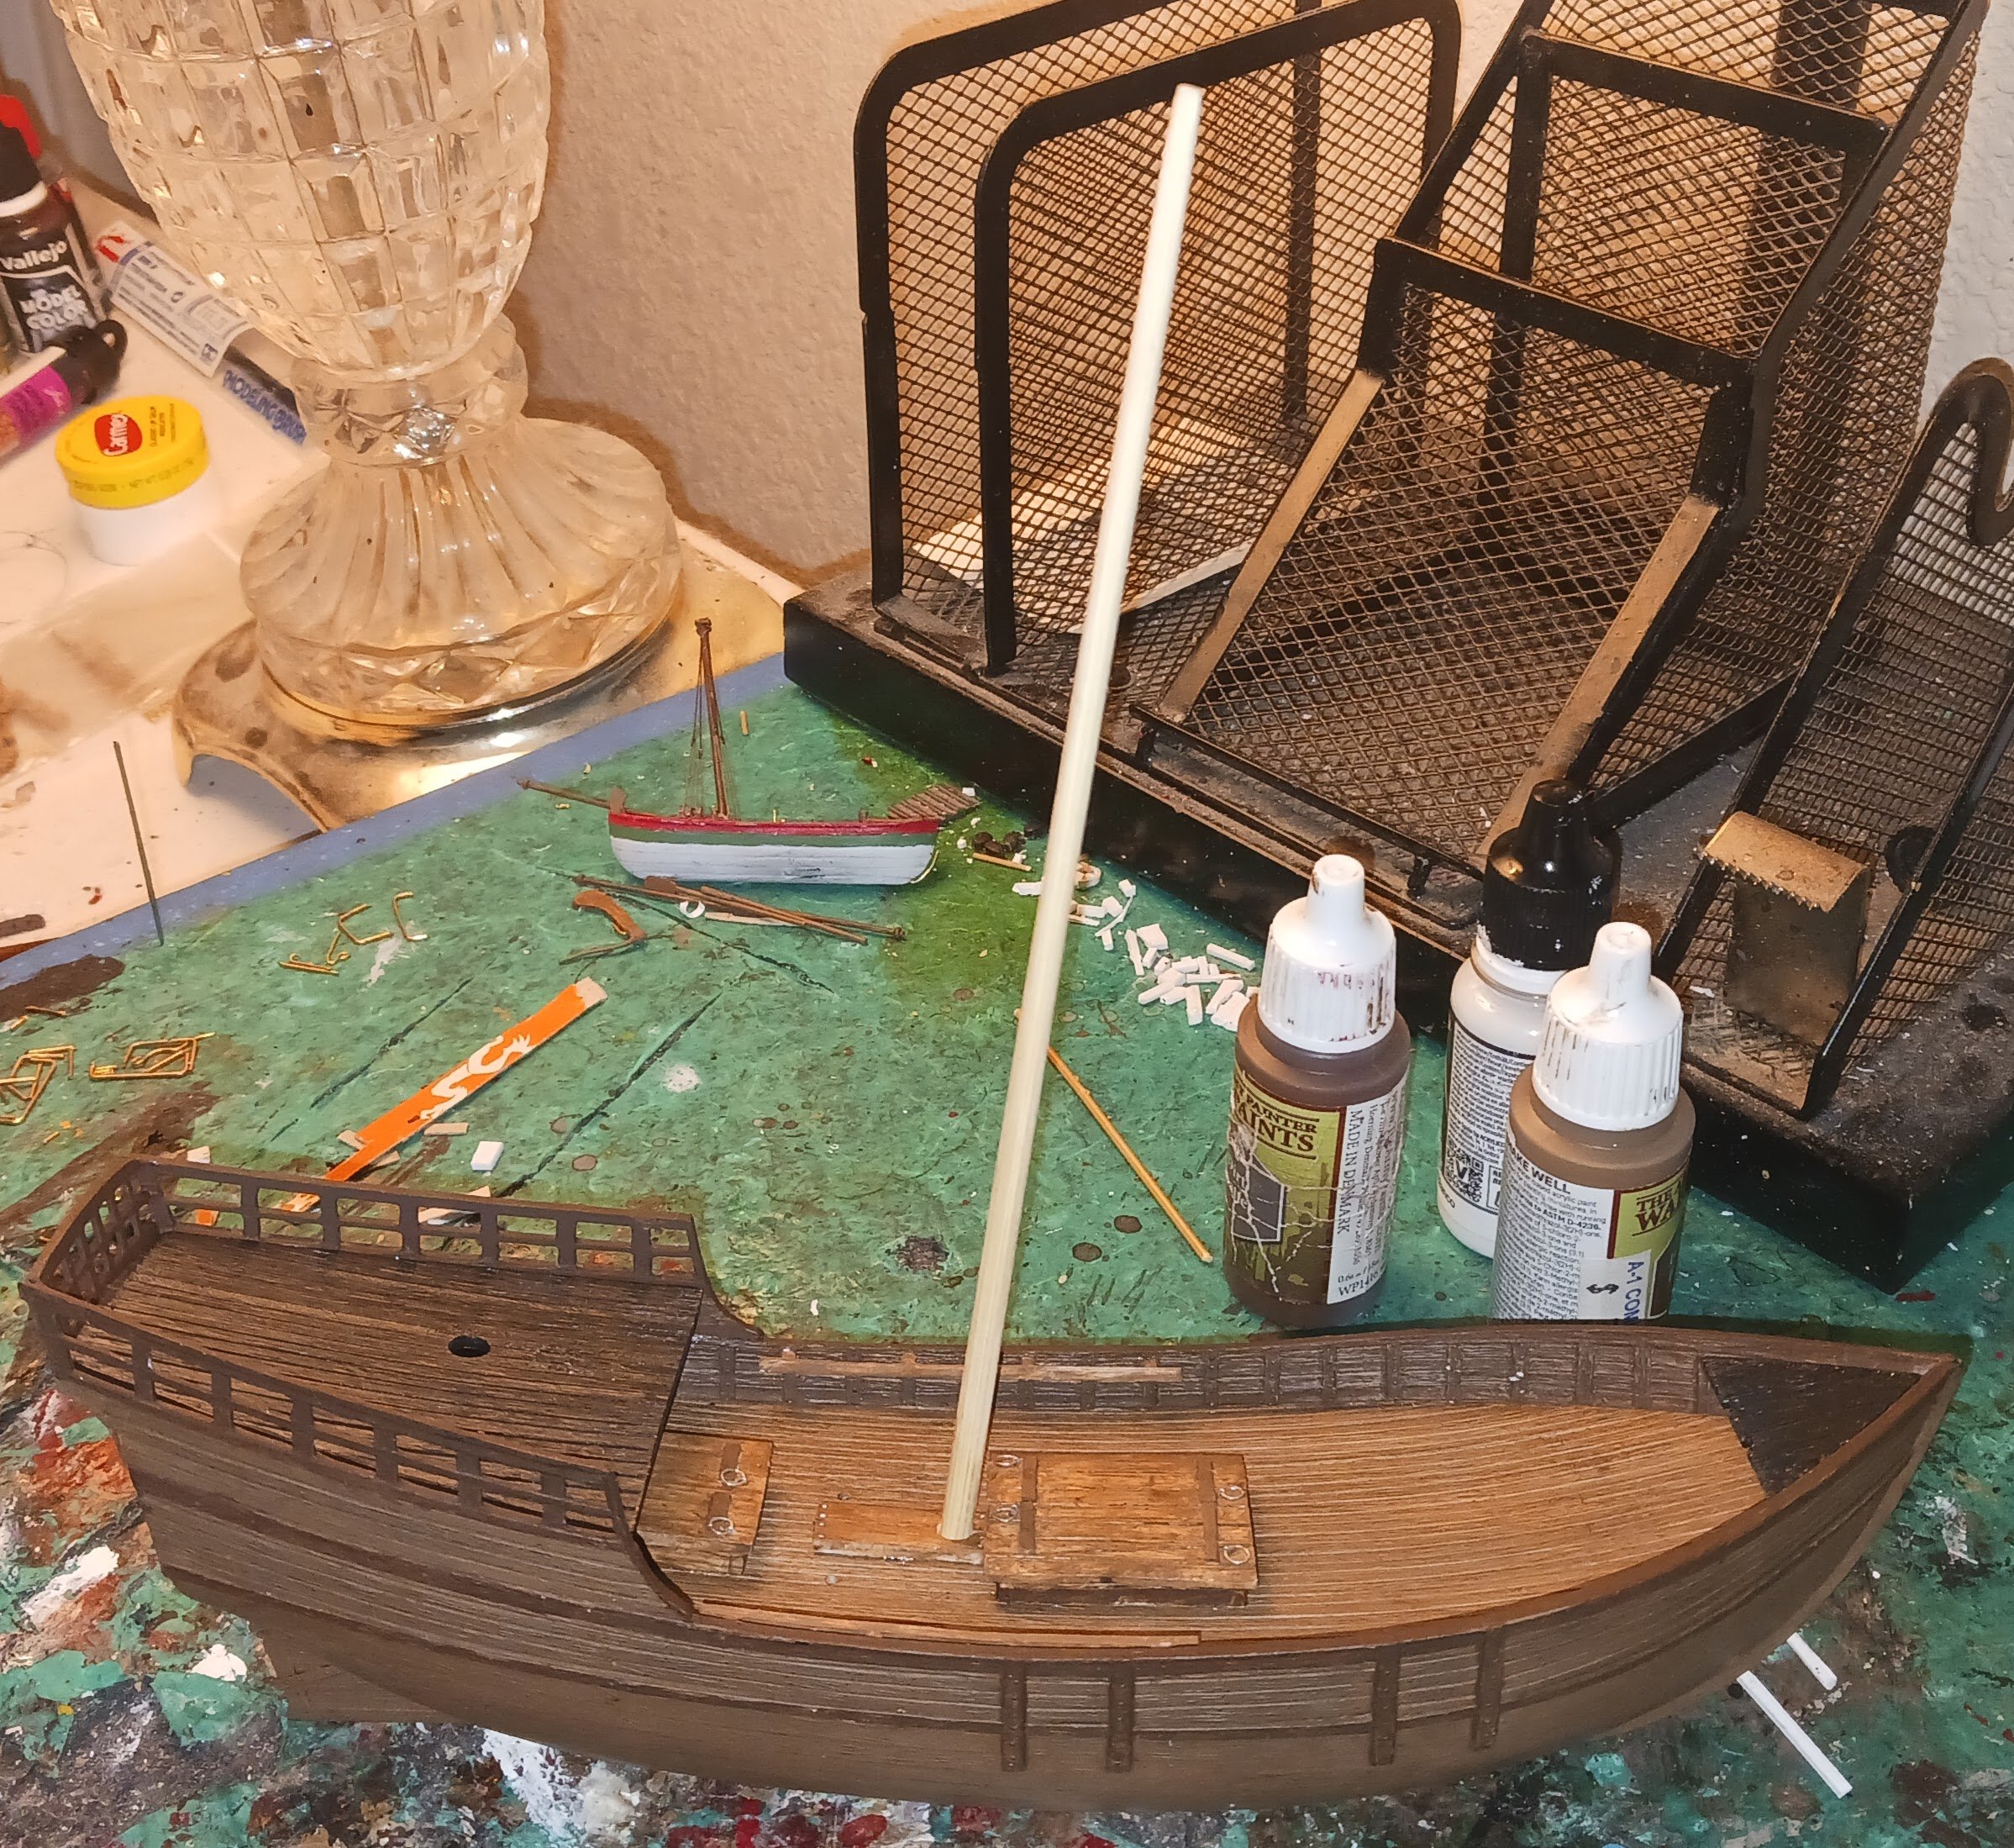
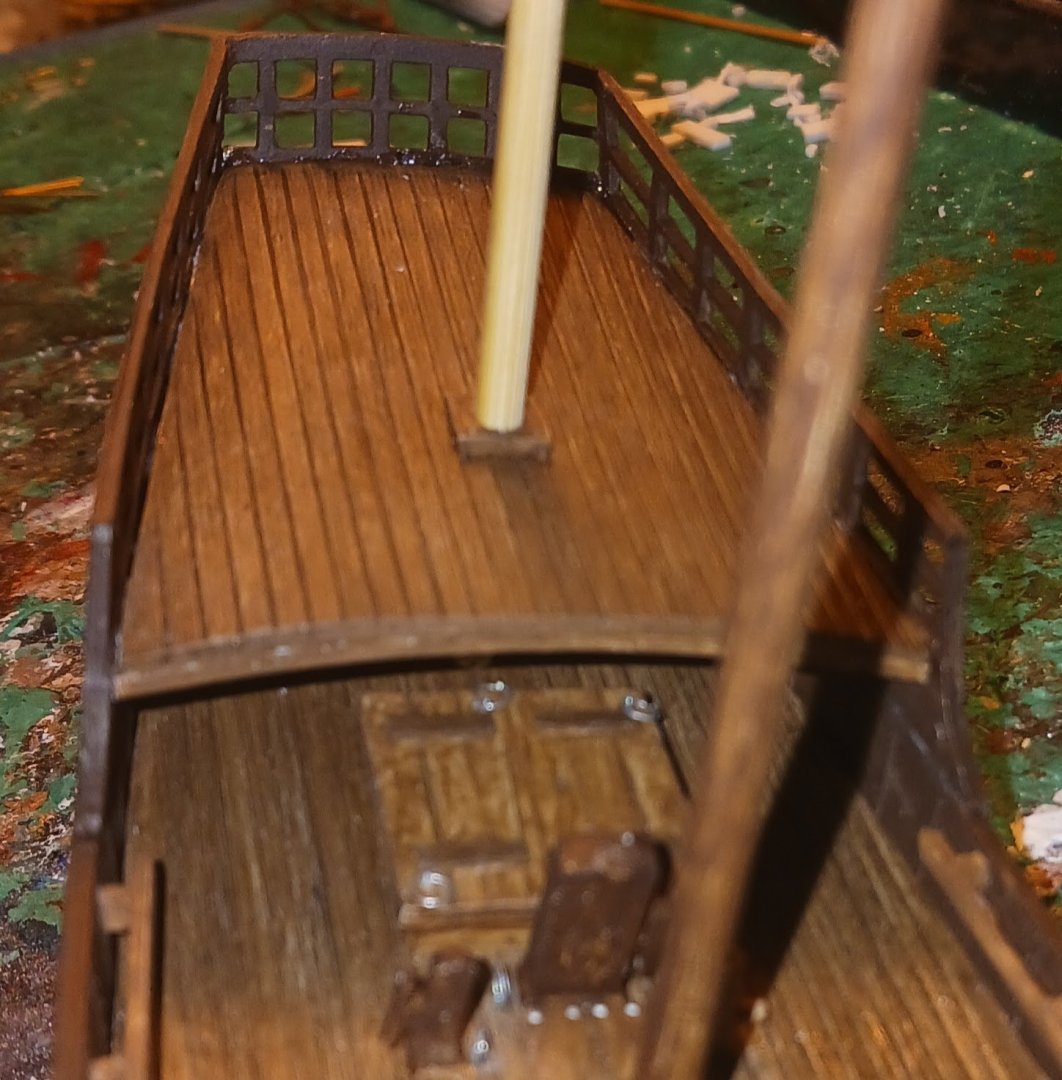
I fixed and repainted the stern railings, then I temporarily put in everything I could for this picture- the mast, quarterdeck, and forecastle deck. Previously, I installed the two main belaying rails for the ship, on both sides of the amidships section. I will install another, smaller pair immediately behind the forecastle. I want to discuss the arrangement of the deck furniture before moving on to potential shroud arrangements. Firstly, I used the two futtock riders that were supposed to go at the break of the quarterdeck to create a set of guiding rails for the mainmast. That way, I could adjust the rake of the mast while ensuring proper alignment. I did not intend to use the pieces as intended, so I reused them. Secondly, I want to talk about the two holes in the deck. There are two holes on either side of the mast partners that were originally intended to accommodate a pin rail. This obviously wouldn't have existed on a mid-15th century caravel, or any lateener for that matter. Anyway, I need a way to cover them up, and I came up with several options. Firstly, I could install two bilge pumps over them. My only issue with this is that the ship would likely only need one. Secondly, I could offset the halyard knight to cover one of the holes, and make a smaller knight for the parrel tackle to cover the other hole. The offset of the halyard knight would make no sense in the absence of a mizzen stay, so I compromised between the two. Over the port side hole will go the ship's single bilge pump, and over the other will go the parrel knight. The halyard knight will go between the aft hatch and the mast partners, on the center line. While the rigging of the ship is a long way off, I would like to at least discuss the shroud arrangements, as they will affect the deck arrangement. The only issue is that contemporary depictions of shroud lines on caravels do not show the tackles. Most of what we know about caravel shrouds come from lateeners before and since, and contemporary square-rigged ships. Last time, I simply went with the standard lateener shroud tackle approach. There would be no issue with doing it that way this time, but I might want something more interesting. Should I go with the standard approach, there would be no need for deck ringbolts to accept a whip. Should I decide on two pairs of whip-and-tackle shrouds, there would need to be four ringbolts on the deck. I'm sure Steven has some answers as to whether that seems reasonable in light of archaeological and pictorial evidence. I'm sure caravel rigging was not standardized at that point.

-
At some point before the introduction of the quarterdeck I will have to go back and fill/sand the injector pin marks in the stern railings.
-
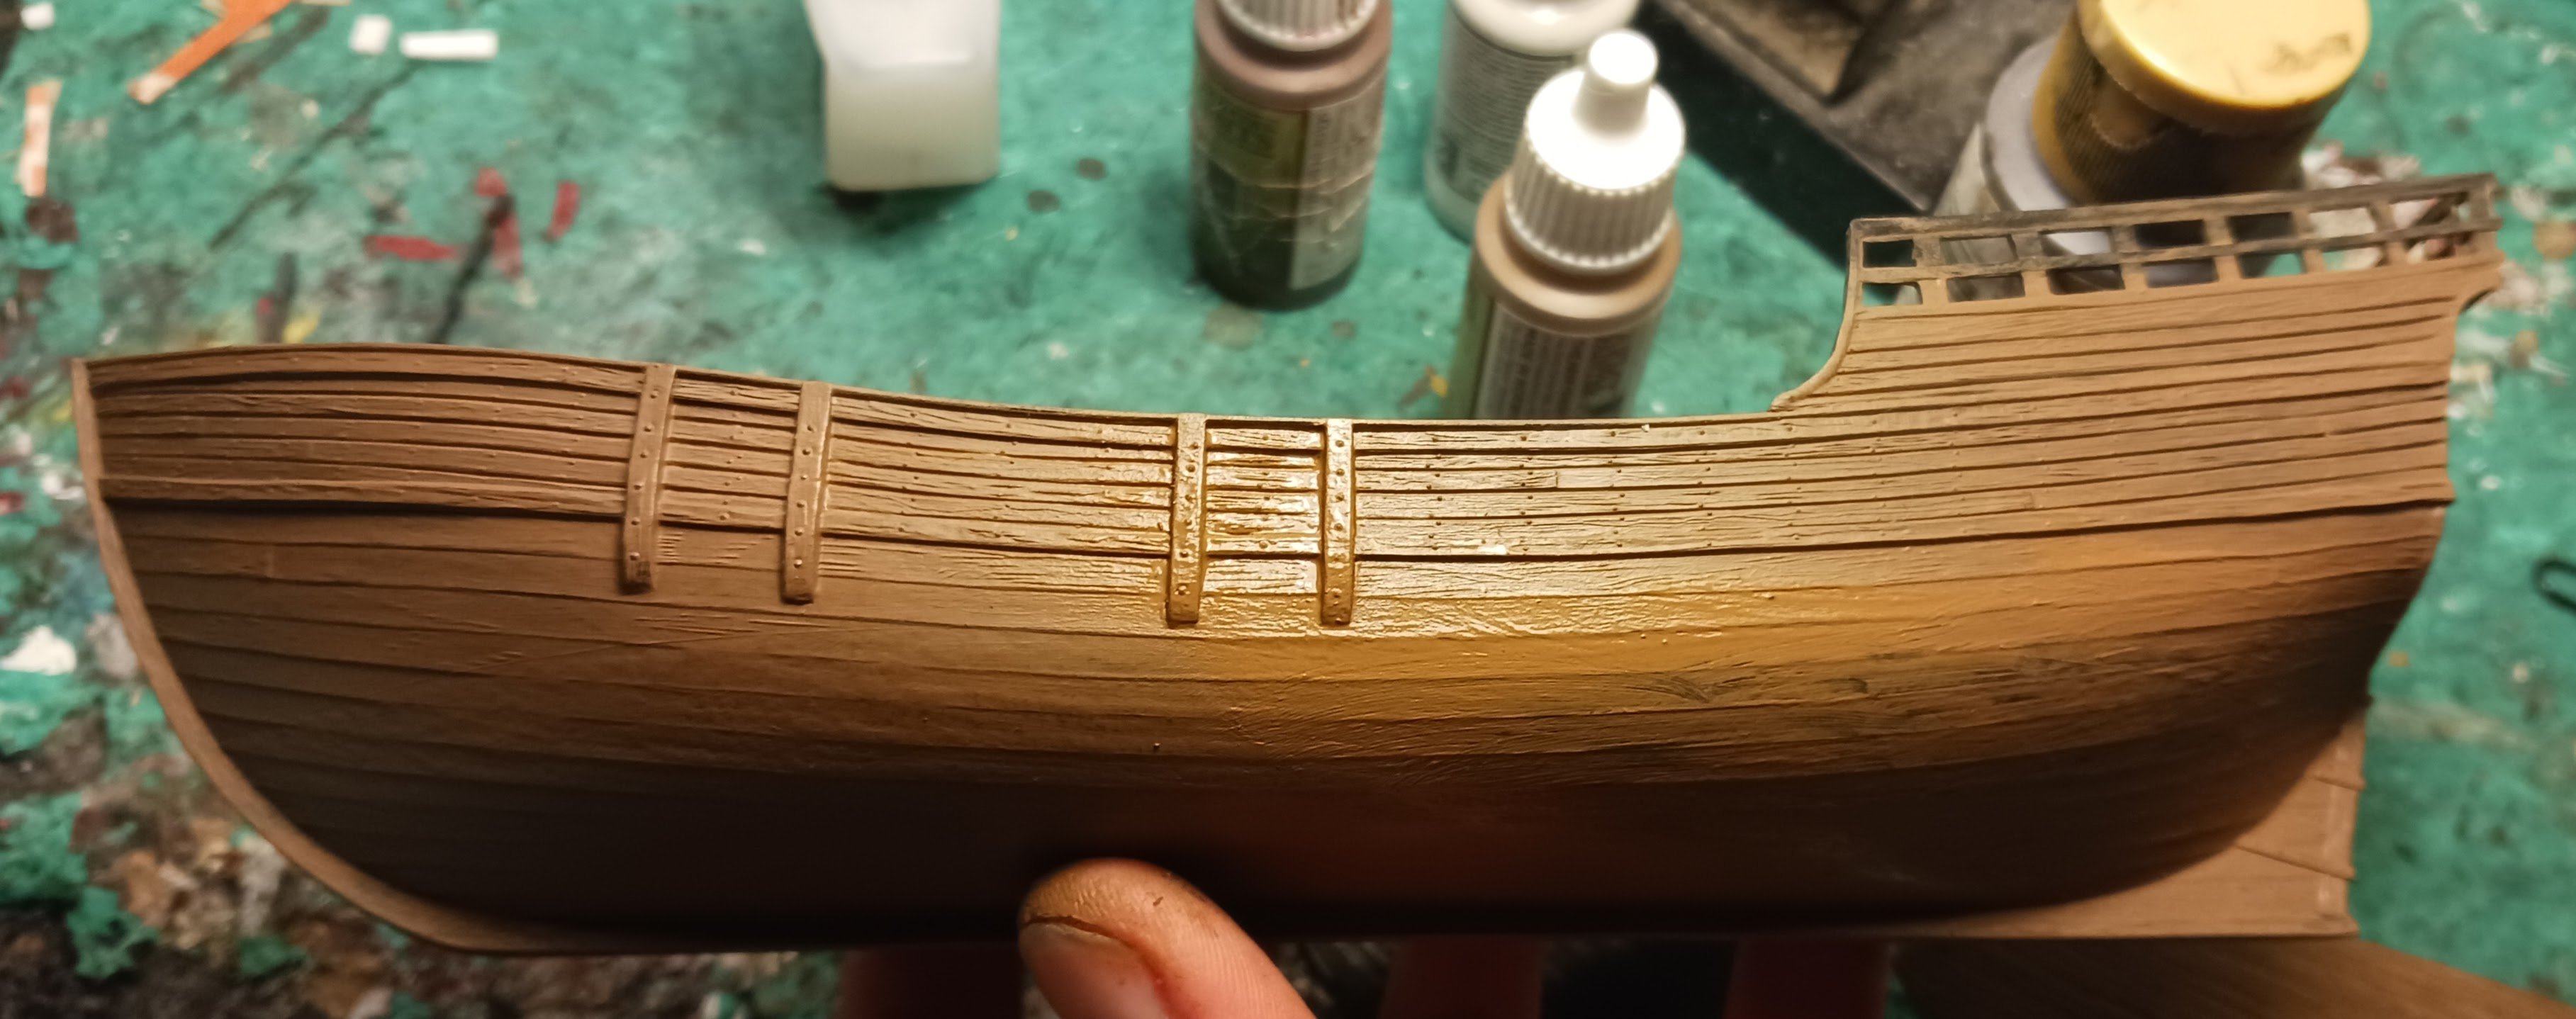
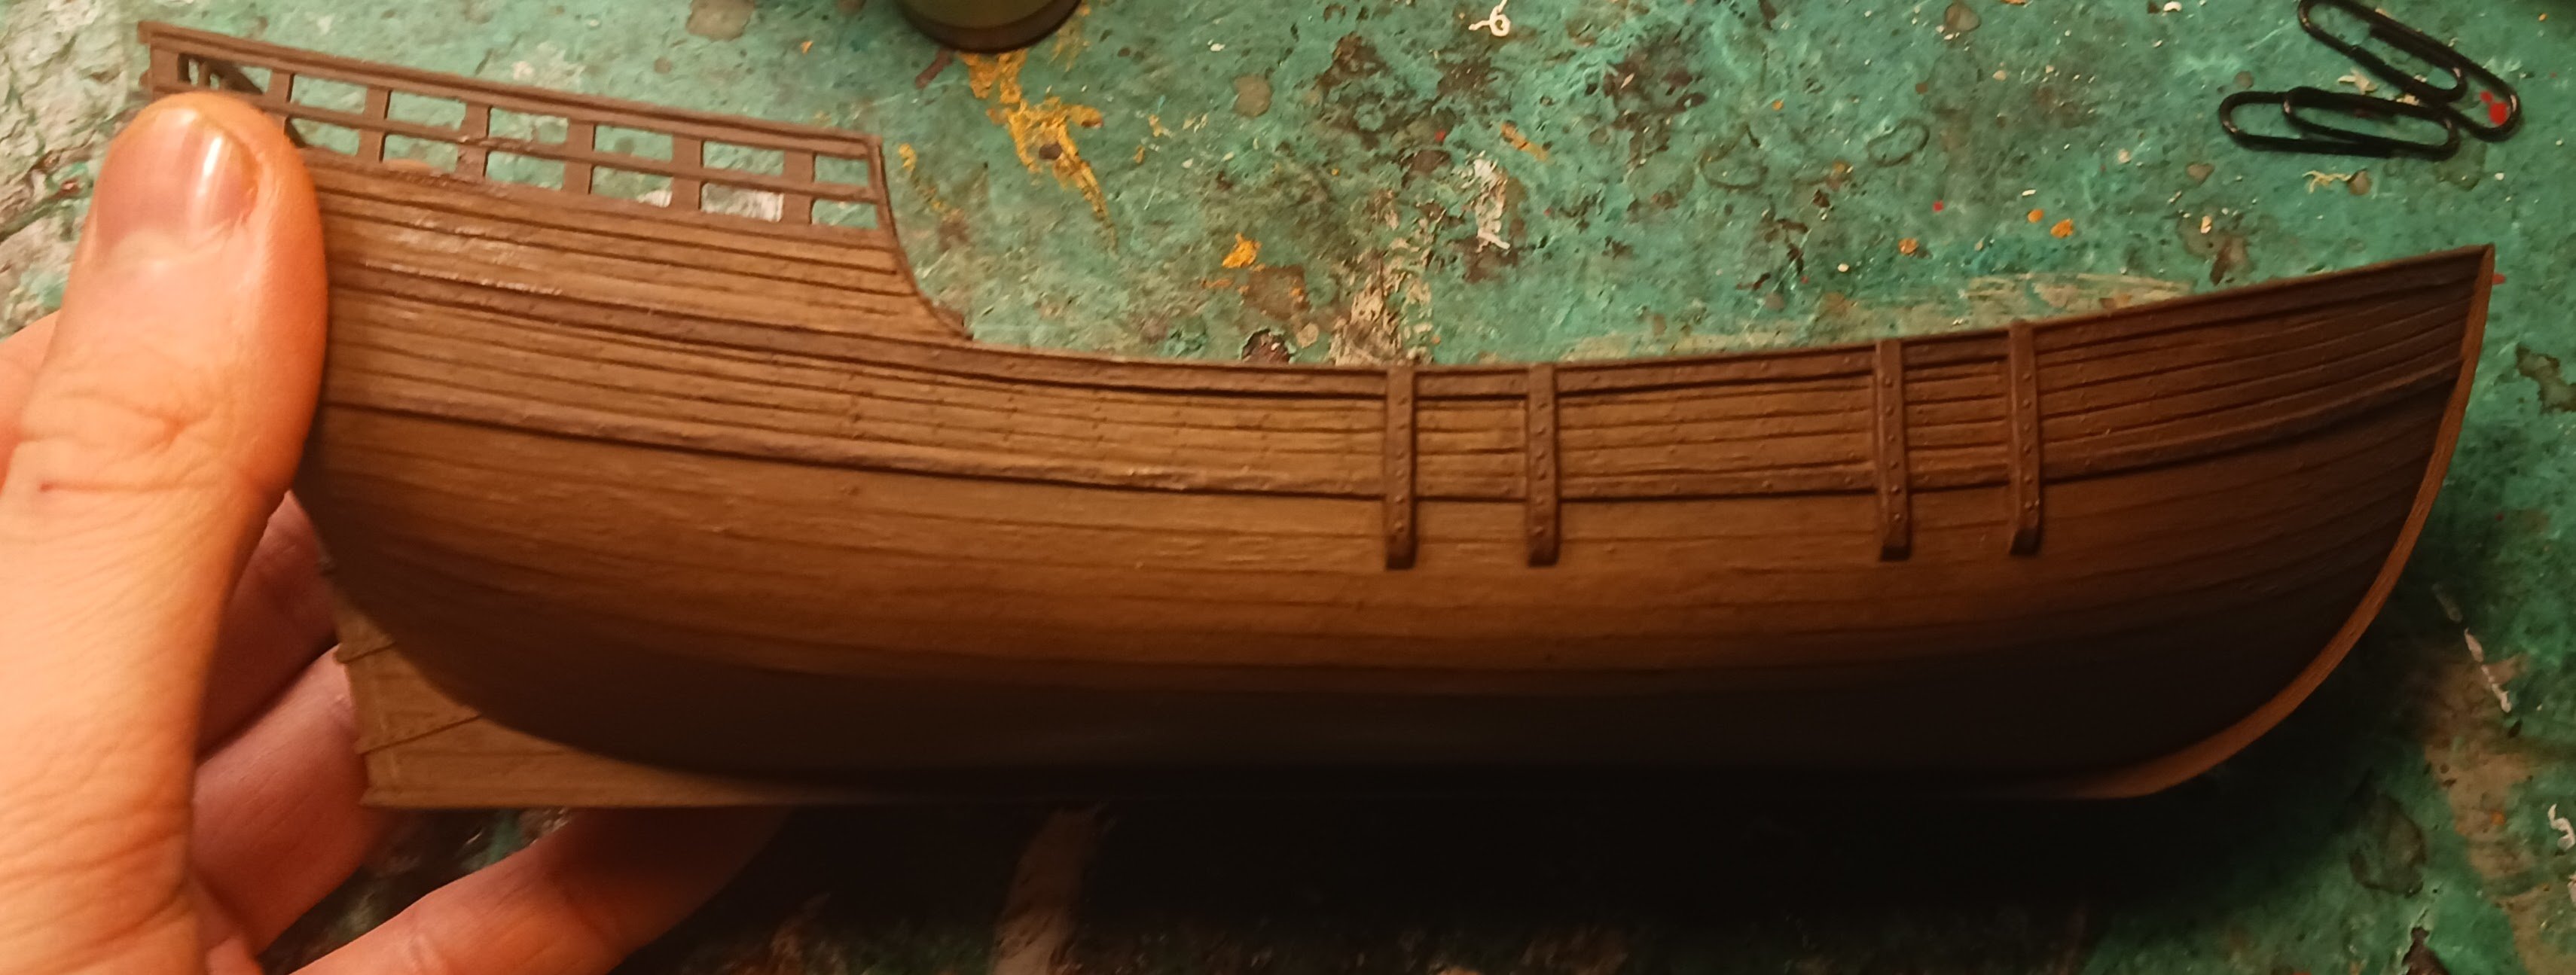
The painting of the ship continues... I kind of wanted to make it look like the Mataro Carrack, minus about 400 years' worth of aging.