-
Posts
51 -
Joined
-
Last visited
Content Type
Profiles
Forums
Gallery
Events
Everything posted by Erdict
-
What a great looking ship Glen. That’s something to show for generations. Definitely taking some tips from your log.
- 476 replies
-
- sphinx
- vanguard models
-
(and 1 more)
Tagged with:
-
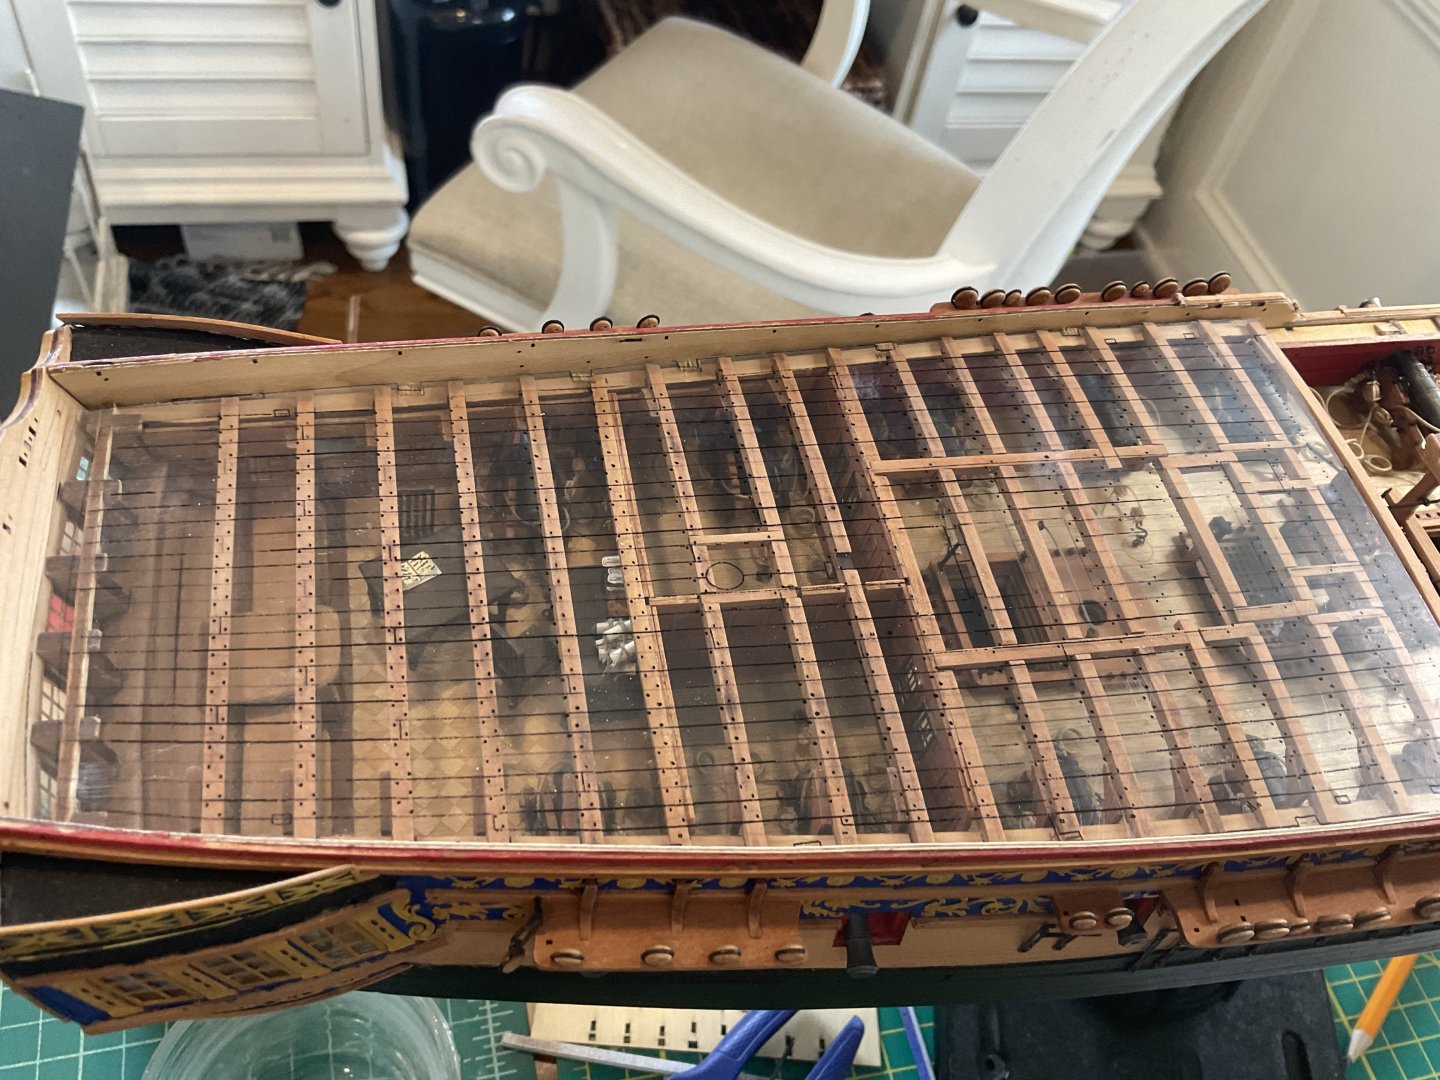
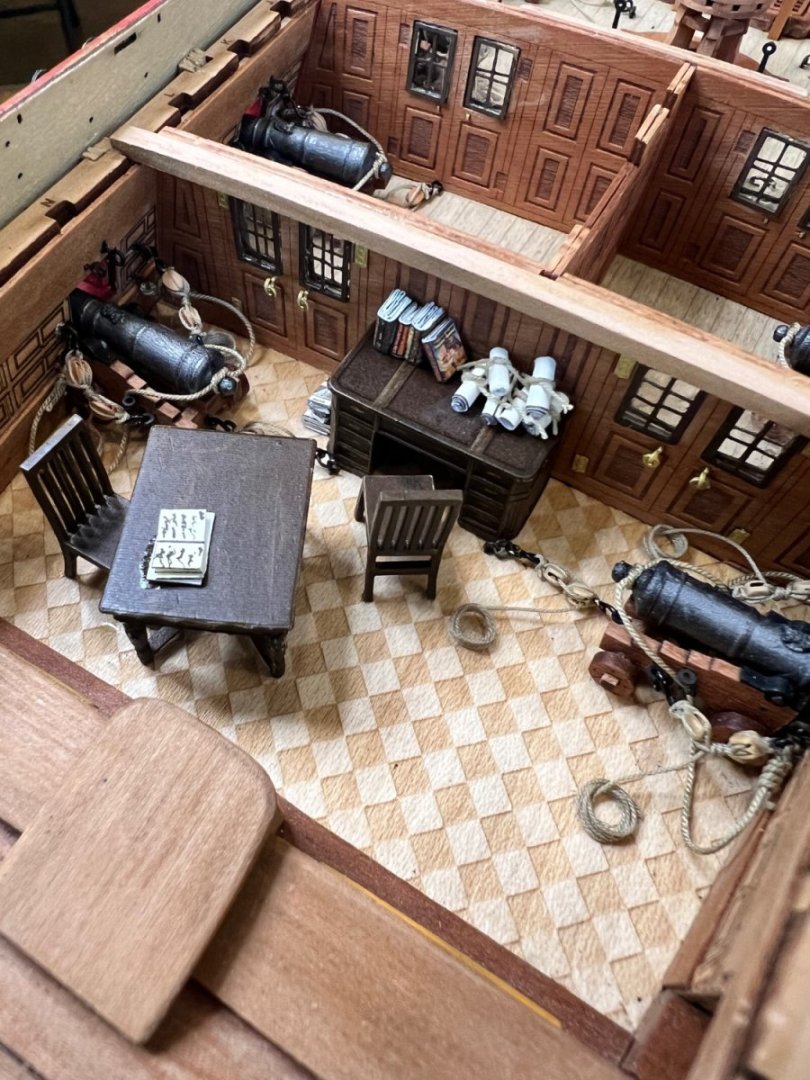
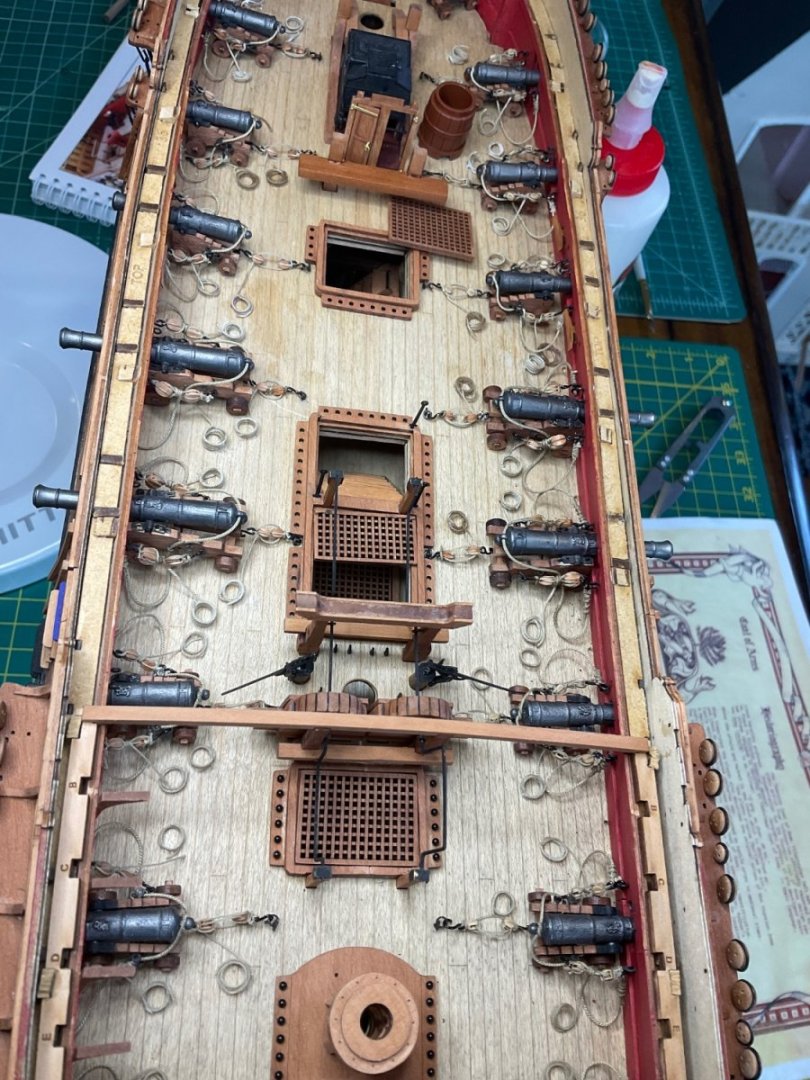
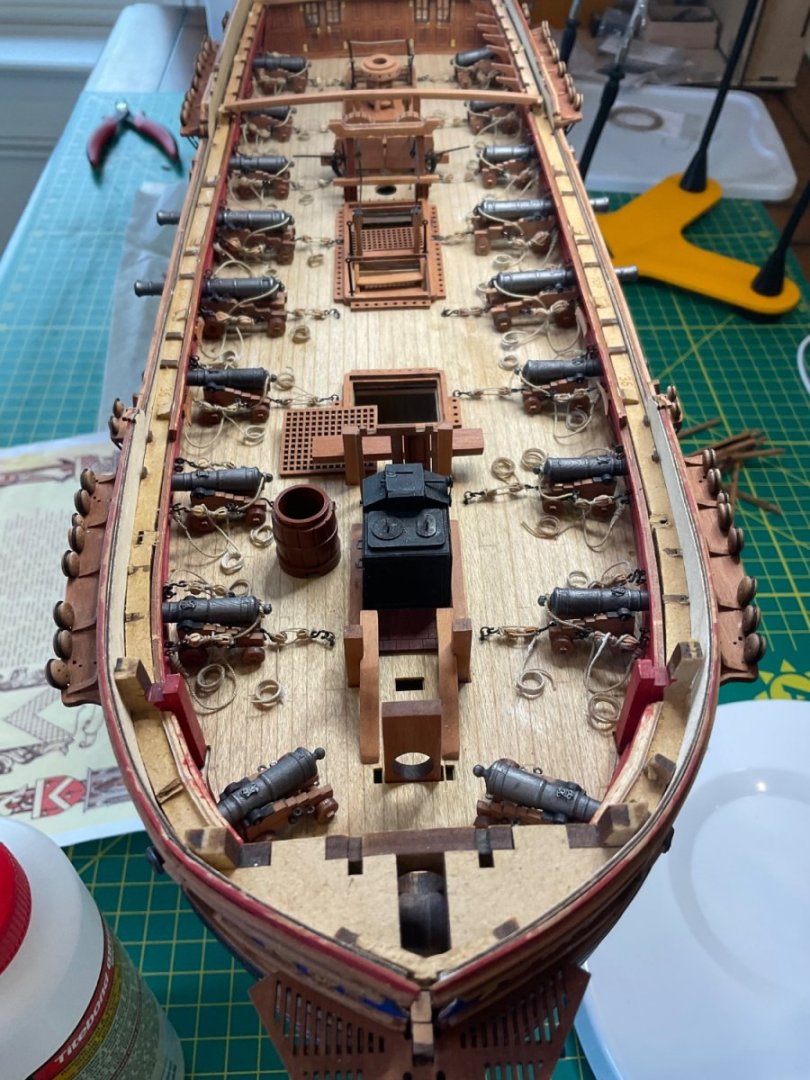
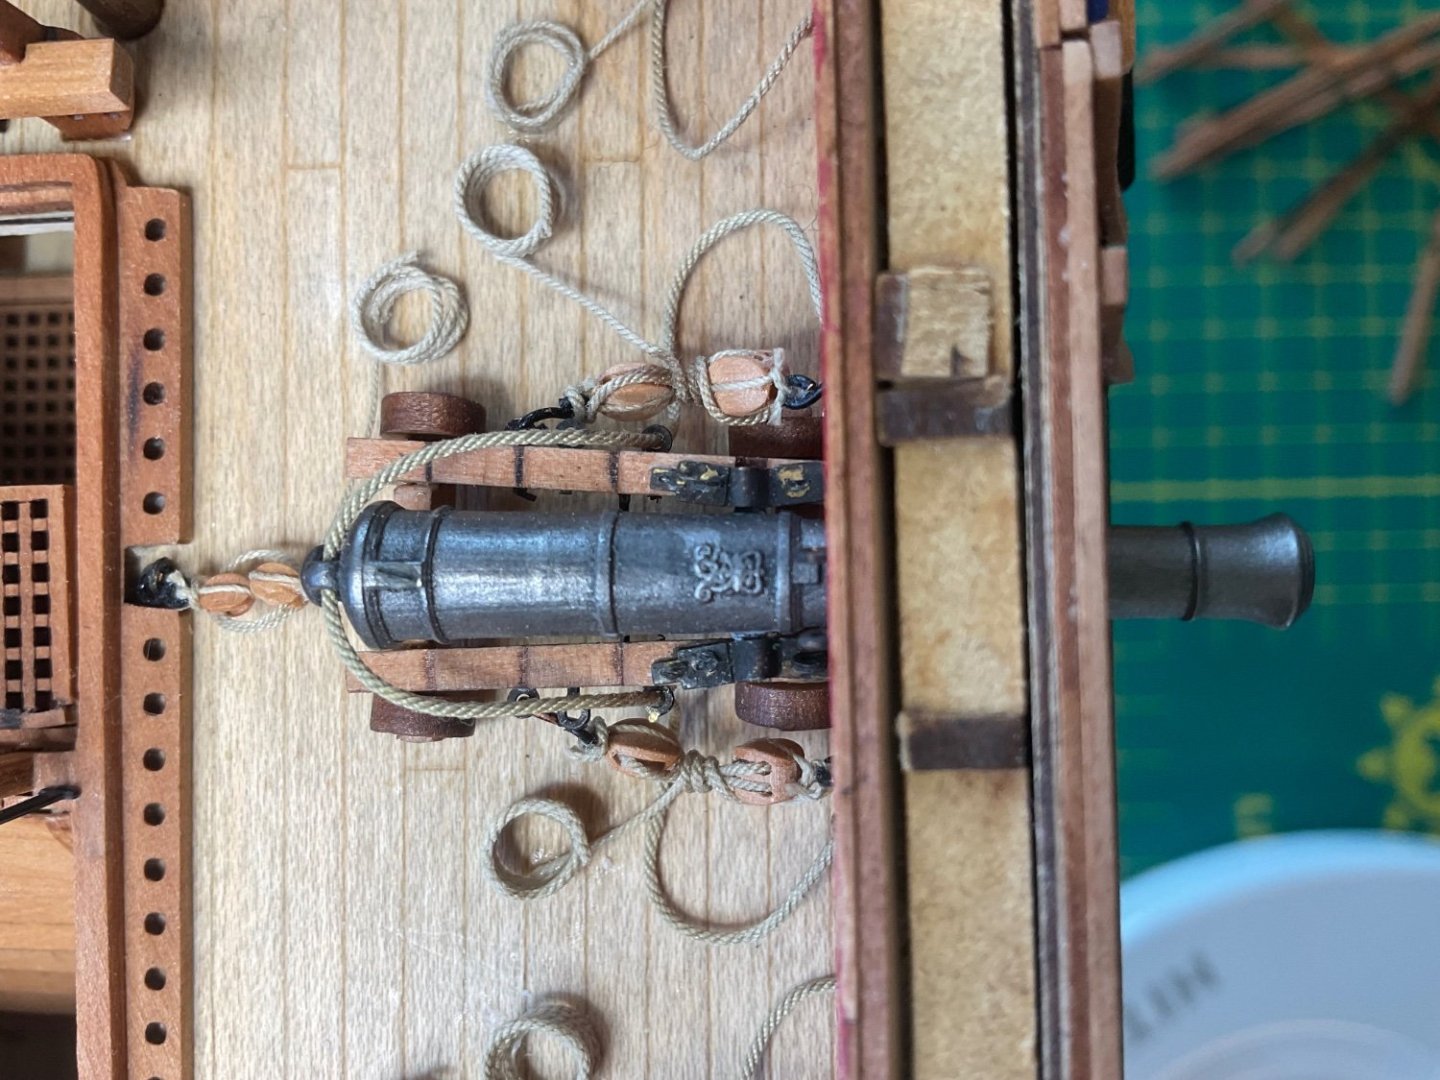
Post Fourteen: Cannons It has been a long time since my last post, for two reasons: 1) I took six months off, which is normal for me (mostly family things), 2) I finally finished the cannons, and they were much more difficult than I imagined. I decided to add the optional rigging. This was by far the most challenging step I think I have faced. It took about 30 minutes for each rig set, 1.5 hours for each cannon. I enjoyed finding carriage gun rigging parts, but man were they small and challenging to work with. Here are some pictures of the cannon set up. This is a close up of one completed cannon. I used Vallejo silver dust pigment to color them. I also added the king’s crest to the top of each cannon. Picture before rigging. And here they are all rigged up. I added two larger cannons to the midship and placed two extra at the fore. Those last two I’m not bothering to rig because, I don’t think they’ll be seen with the upper deck. As a little extra, I completed the captain’s quarters. The books were so small you can’t distinguish them, but the front book on his desk is Treasure Island, and the top book beside the floor is Moby Dick =]. I’ve got a special plan for how I would like to set up the upper deck to better showcase these quarters.
-
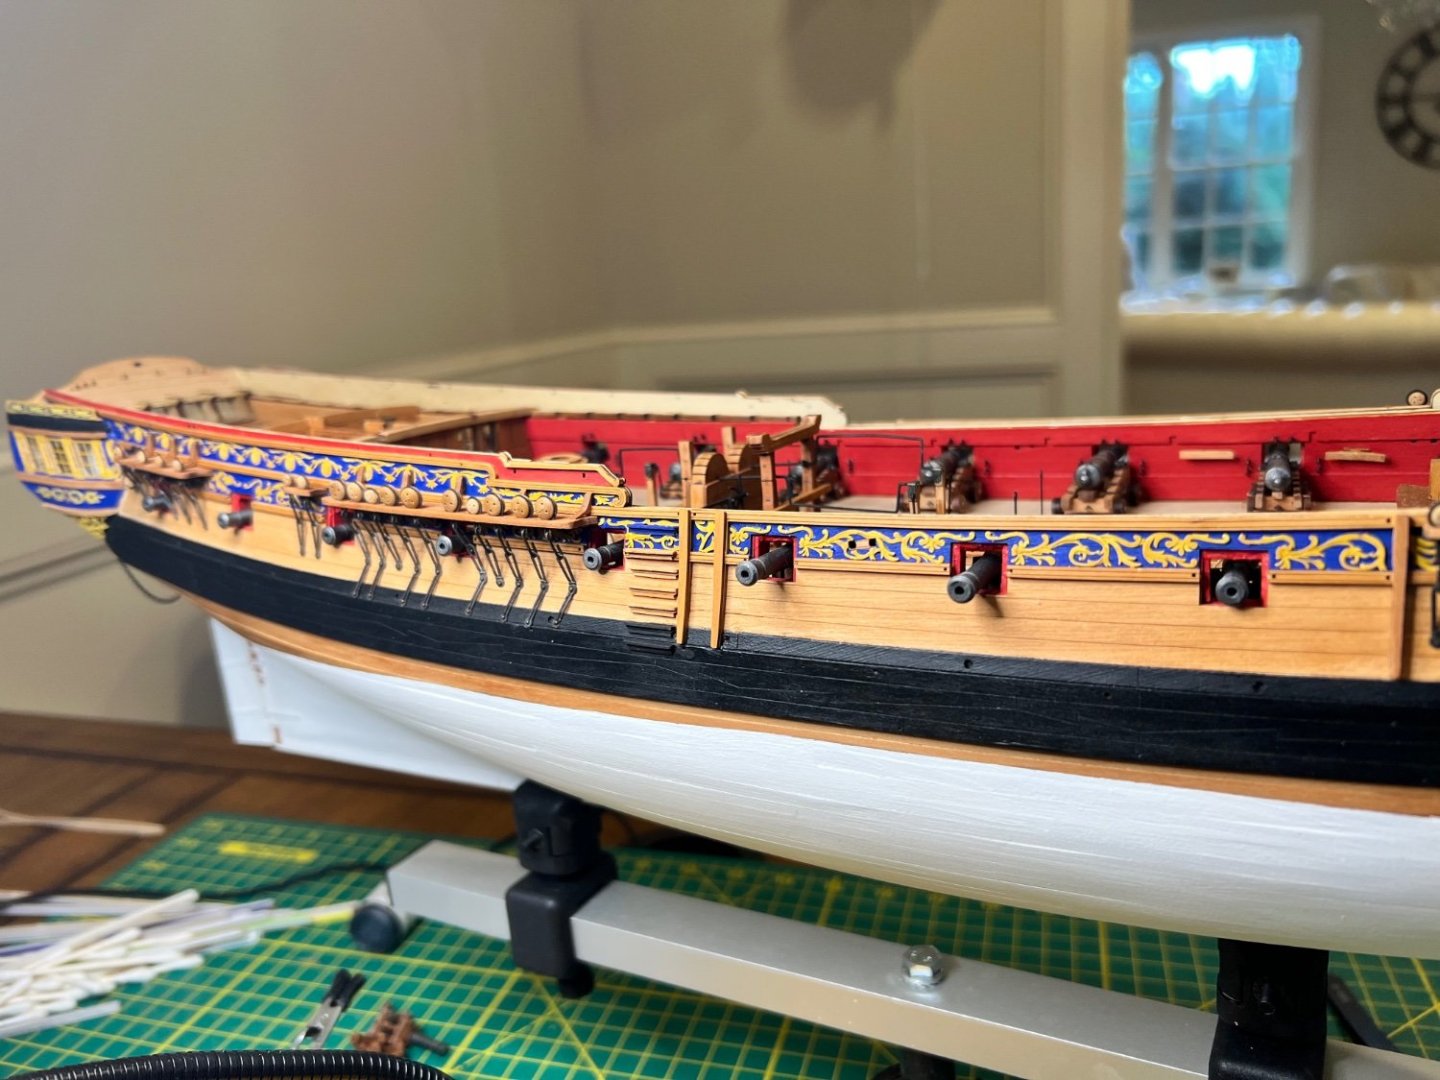
Post Thirteen: Completing Outside of the ship I have now finished the detail work of the outer ship. My impressions of the ship so far are that while the model fits together much more nicely than any previous model I've made, the level of detail increases the complexity level. In many ways this model is less difficult than my previous model the HMS Dianna because the amount of carving and "good enoughing" I had to do to make that model go together was a challenge. These parts are by far better quality, and they fit together so much better. Still, the shear amount of details added to this model offsets the easier fitting, making this model equally as challenging but in very different ways. Personally, I really enjoy the detail work. I picked up figure painting between models, and I find this skill directly applicable to Vanguard models. I am not keeping the exact colors of the kit. Instead I have borrowed from other builders on this site creating it in the fashion that suits my taste. I am willing to deviate from historical accuracy to a degree if I like the aesthetic alteration. For the yellows I followed Blue Ensign with the Ochres. I didn't like the ivory white as much for the high detail coat, so I left it out for the most part. Here I have hung the anchor. I used the Syren fittings, as I prefer the swivel. Adding these side details was a new challenge for me. I like using this PE material. It's perfect for painting, as it is layered. My biggest problems here was preventing the CE glue from turning the blue paint white and stationing them on accurately. It was tedious to lay them out, and I had a lot of touch up work after it was done. Wow! This close up makes my "great" painting job look rather sloppy. One thing I'm a little unsure of is the "leafy" piece next to the windows. Is that supposed to go there? I see some modelers add it, while others place it in different spots or not at all. I think I made it look nice enough in the end. Here the channels have been added. I found them rather normal to install. Here is the completed rear. It took a lot of time to get the Sphinx decal the colors I wanted. In the end, I bought high quality paper, a new printer (we needed it), and printed the photo twice overtop itself. This created a much richer color that resembles the blue paint. I am very happy with this outcome. =] The roman numerals proved tricky for me. I had to touch them up after CE gluing them on, as I couldn't help pulling off chunks of copper paint while gluing. These pieces are so small! Detailing the nose of the ship, I really like what Blue Ensign did (if you can't tell, I'm a big fan of his work!) I painted in blue all the middle lines to add an extra elegance to the design. Below is side shot of the nose: Finally, the completed outside! The deadeyes were a real treat! Their design was great to work with. I blackened all the PE parts in this kit with Brass Black. That was new for me as well. (I also started the inside, but I'll save those pictures for the next post.) One final note: I have used mostly Natural color wood finish stain on the parts. I love the aesthetics of this finish brings. Thanks Hollowneck for the advice.
-
Post Twelve: Many Updates In keeping with my poor ability to keep up with this journal, I have taken relatively few pictures and have not posted in a timely manner. Still, I have many updates worth sharing. Many of these have been inspired by Blue Ensign. I I felt my pear planking veneer showed too many errors, so I decided to paint the lower end white per the instructions. Here, I opened the quarterdecks following B.E's design. The deck on the starboard side is for storage, so I painted a few buckets and glued them in. It was the only storage items I had that fit that small space. Of course, the port side has the seat of ease for the captain. Next I completed the captain's quarters. First, I painstakingly crated the bench. Then I detailed the quarters with stain and decals that I copied from the books or B.E.'s build log. Next I turned to detailing the sides of the ship. Here are current photos of the build. I use Natural colored stain for the unpainted wood areas. My daughter's princess tent sets in the background =]
-
Post Eleven: Planking *sigh* Yes, this is a long process. I think it took me about 1.5-2 weeks. I lost steam on this step. I forced myself to get 4 per night after I made it about half way. I started matching each side to ensure they were even with each other. I found these thinner planks (about 1/2 the thickness of what I'm used to) were so much easier to work with. Bending was easy. I soak and iron with a laundry iron, but I found a plank bender worked fine on the fore side. I only needed to soak and iron on the aft. I applied a liberal amount of natural wood filler to seal the cracks when the helmet was completed. Sanding was a breeze. I just keep my hand-held Dyson by my side. I cut the planks short of the aft to have an easier time of bending the planks. The aft side requires a sharp curve. The fore side required some careful measurements to ensure they matched on each side and kept pace with the main body of the planking. By the halfway mark, I set one plank on each side. This made it easier to close the helmet in. Here you can see I made pencil marks before I made my fore-side cuts to make sure I aligned correctly. Completed Helmet Added wood filler and sanded: There are still several bumps, but they are soft and gradual. I may go back and sand more. I'm not worried about the little gaps showing in the first and third picture below because they lay down flat quite easily. When I place the veneer, I will have no problem with those. Generally, I am happy with the helmet so far. I do believe the veneer will smooth things out quite nicely when the time comes.
-
Post Ten: Gun Deck and Hull Side Pattern I absolutely formed the hull side pattern backwards. These are the mistakes I make. Glaring errors that are completely avoidable. I wanted to get them curved before the kid's bedtime to work on the ship later on. Well, you know how the saying goes: Haste makes waste. Luckily, they measure perfectly backwards and forwards. I just don't get the laser etchings to guide me. I agree with B.E. and was actually rooting for him to use the black and white checkered pattern. I will be using this myself.
-
Post Eight Turns out I am not good at keeping up with my journal. I have a lot of updates, but I am going to have to switch to more generic logs or I will never complete this journal. Forgive me. I write for a living, and I seldom find the strength to add a log at the end of my week. Here are updates for the bulwarks. You can see I created a pattern that follows after B.E. for the for deck.
-
Post Seven: Gun Deck, Gun Port Frames, & Bow Planking Patterns Before I glued down the gun deck underlay, I followed others in tasting the fit of the various pieces that attach through the gun deck. Here are three views that show the attachments. They all fit fairly nicely, as I continue to find using this kit. Satisfied, I glued down the gun deck. Here are a couple views of the gun port frames. They fit in fairly nicely. Though, I feel I pushed them in a little too far. I ended up having to sand down these frames more to get them flush as a result. Apparently my children made it into these photos. I think we were preparing for nap time =] I ended up sanding these quite a bit more in order to get them flush. It wasn't terrible, but I'm grateful I keep a hand vac ready for all the saw dust that gets about. Finally, I beveled the bow planking patterns. This MDF material sands very nicely. I had no trouble at all getting these to a satisfactory shape. The first picture below shows some squaring issues I had with the bulkheads. I'm not too worried about it, but there may be a little discrepancy with one or two bulkheads. With this completed, I am now ready to lay the inner bulwark frame.
-

Diana by Kyak - OcCre - 1/85
Erdict replied to Kyak's topic in - Kit build logs for subjects built from 1751 - 1800
Hey Kyak, this is wonderful progress on a great model. I finished this one last July. I admire the job you've done so far. I'll be following your log. -
Your build continues to amaze me. Thanks for keeping such detailed logs! I follow them religiously. Your's too Hollowneck.
- 858 replies
-
- Sphinx
- Vanguard Models
-
(and 1 more)
Tagged with:
-
Post Six: Stern Counter Frame (Mod) Here I literally cut corners. I would encourage folks to look at all the hard work and effort Blue Ensign put into measuring and designing the proper cuts for the stern counter frames. It was thorough and painstaking to anticipate many steps ahead to make sure he didn't cause problems for future steps. I am enjoying a much easier walk down a tail he already blazed. Here are lines for the cuts. I used my new jigsaw (I love it!) to remove the corners. And I installed them! I can't help but laugh because this post is so short. It just does't reflect the amount of research B.E. put into making this mod successful. Thanks!
-
Post Five: Color Scheme I finally got to a point where I needed to decide on a color scheme. I think I would like to follow more in line with Hollowneck. He prefers more stains than painting, which he outlines in detail on the first page of his Sphinx build log. I have a slight preference for stains, and I think it will make this a little more my own. I bought the Natural, Weathered Oak, and Golden Oak. Here I stained the grates in Natural. I like the look of it, as it appears to brighten the color just a touch. I stained the lower deck in weathered oak. It's interesting, it reveals the underlying grain of the board, which is an unexpected consequence of using a single sheet over individual planking. Since it's the lower deck, it will be shaded, so I'm not too worried. I'll need multiple coats for higher decks. Still, I like the look of the weathered color. For the gun deck support beams, I followed B.E.'s lead and carved them into spindles. I stained them natural, which I find pleasing. I hope they're still visible later on in the build. I will also add a picture of the longitudinal deck beams. I used a rotary sander with 600+ grit sand paper. This section was wide and easy to access, so I felt comfortable using it.
-
Post Three: Assembly of the Orlop & Lower Deck First I glued the ket orlop landing onto bulkhead #5 I then inserted each half of bulkhead #4 into position. A couple things here. 1) Blue Ensign used a clamp to pull bulkhead #4 towards #5. I tried this, and it didn't work for me. I ended up taking it off and resetting it. 2) I found the block that B.E. glued on helped a lot to square up bulkhead #4. Also, that line I wished I had cut a little lower in my previous post come up too high. I had to do a little sanding there just by the block I added. Here are some pictures of the kit orlop platform. I haven't received my orlop stairs yet. I actually just got a delay notice today from UPS, so I'm taking my time with the steps leading up to the gun deck installation. I bought a pile of 3D printed cargo a while back, so I painted this. I think it will go nicely down there next to the stairs. Also, you can see my idea for the grate. B.E. set his to the side. My crew didn't bother to take it all the way off the opening so they could just slide it back on. I don't think any officers come down this far to look. I was so engrossed in my work that I forgot to take any picture of me building the non-kit orlop platform. Oops! It was made of a scrap of pear with some planking from my previous model. I made it as wide as long (which was the distance between bulkhead #9 & #10). I think it could have been a few mm wider. Here is a bottom view with both. This is actually the picture of me gluing on the lower deck following the instruction manual. I used some diluted glue and a paint brush the same way as this at the end of my previous model for the sails. I have to say, I am very fond of this method. I find myself using it a lot. It is similar to painting miniatures, so it may just be familiarity. Next post I will fix the break I made in bulkhead #13, stain the grates, and assemble the gun port frames. Then onto carving the gun deck support beams.
-
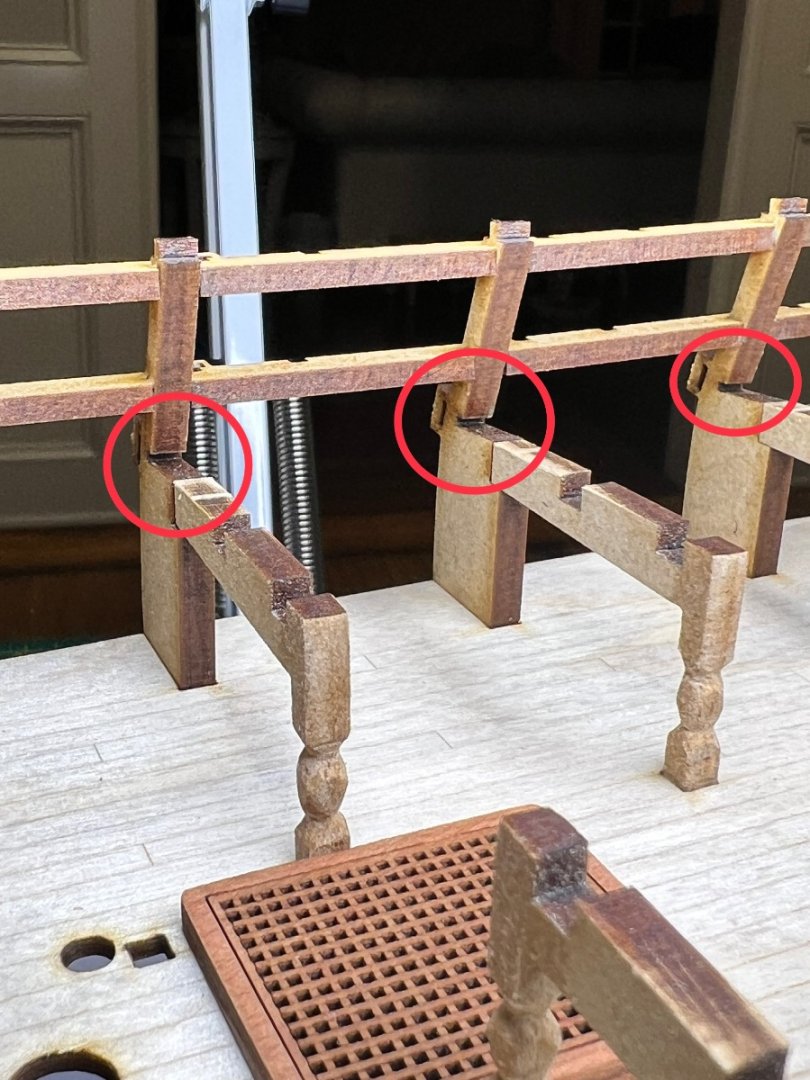
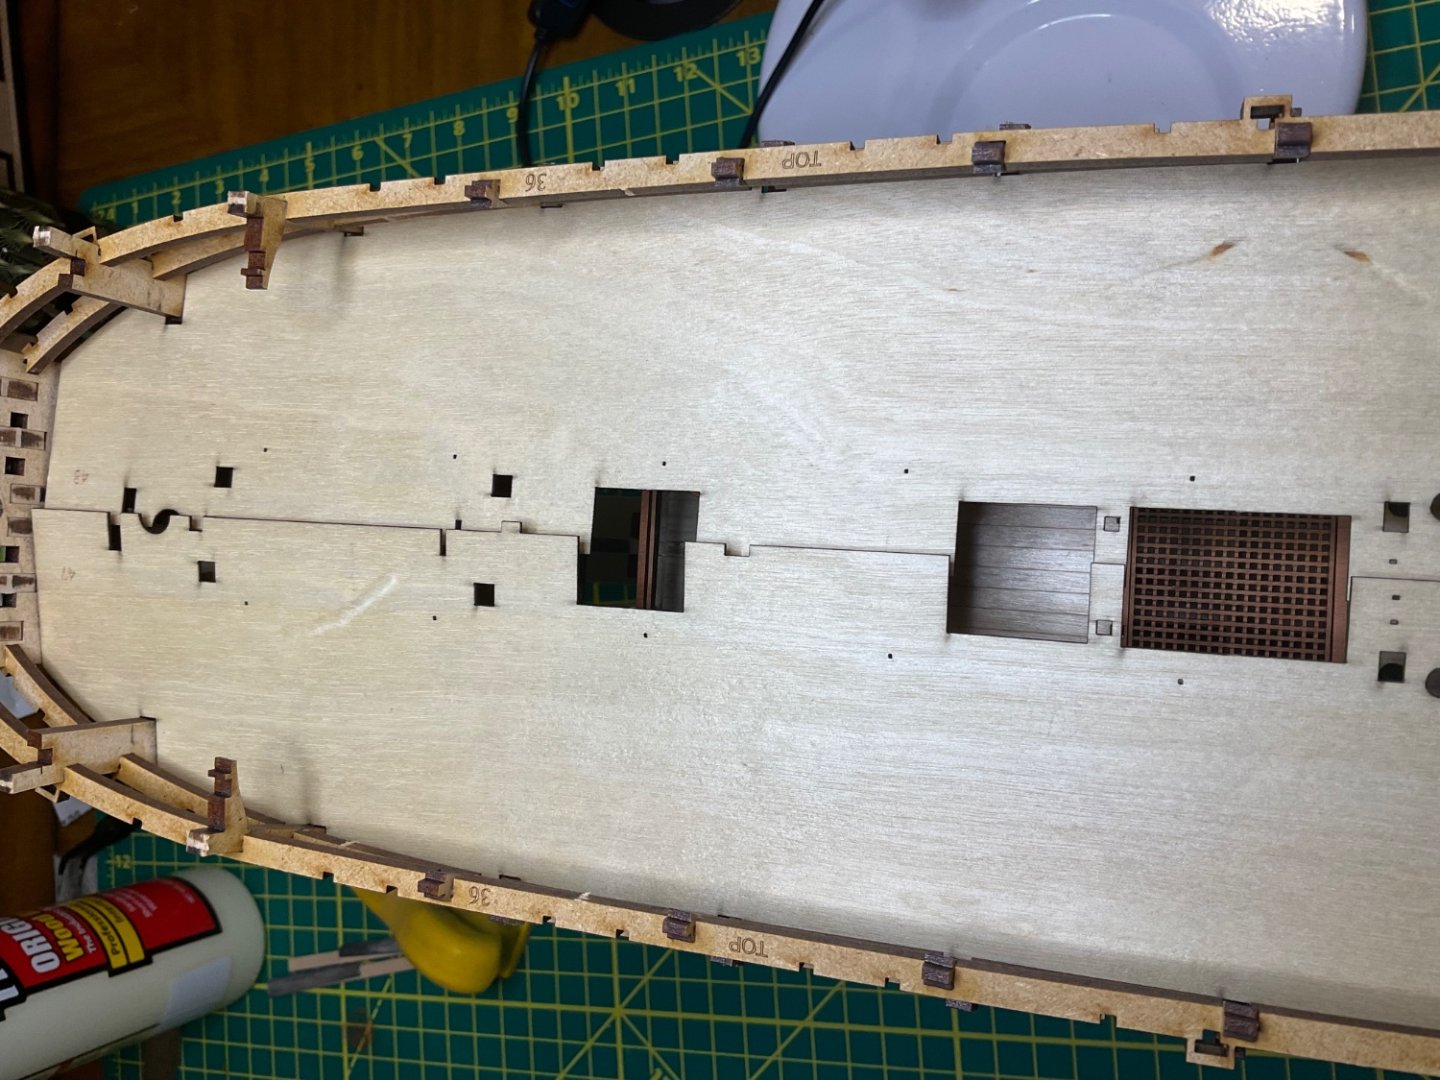
Gundeck Ply Fix (please note) I can’t believe I missed this. There are little slots tucked underneath each bulkhead ear where the gundeck ply fits snugly with a little help. I didn’t have to alter anything. Although, one could widen the wedge if one wanted to, I don’t think it’s necessary. Little embarrassed, but all’s well in the end. 😊 Just in case someone else gets stuck on this, here it is: And it fits perfectly.
-
What a nicely done model! I’m really glad to have yours to follow as I begin my build. This is going to be a really important reference for me. Well done!
- 476 replies
-
- sphinx
- vanguard models
-
(and 1 more)
Tagged with:
-
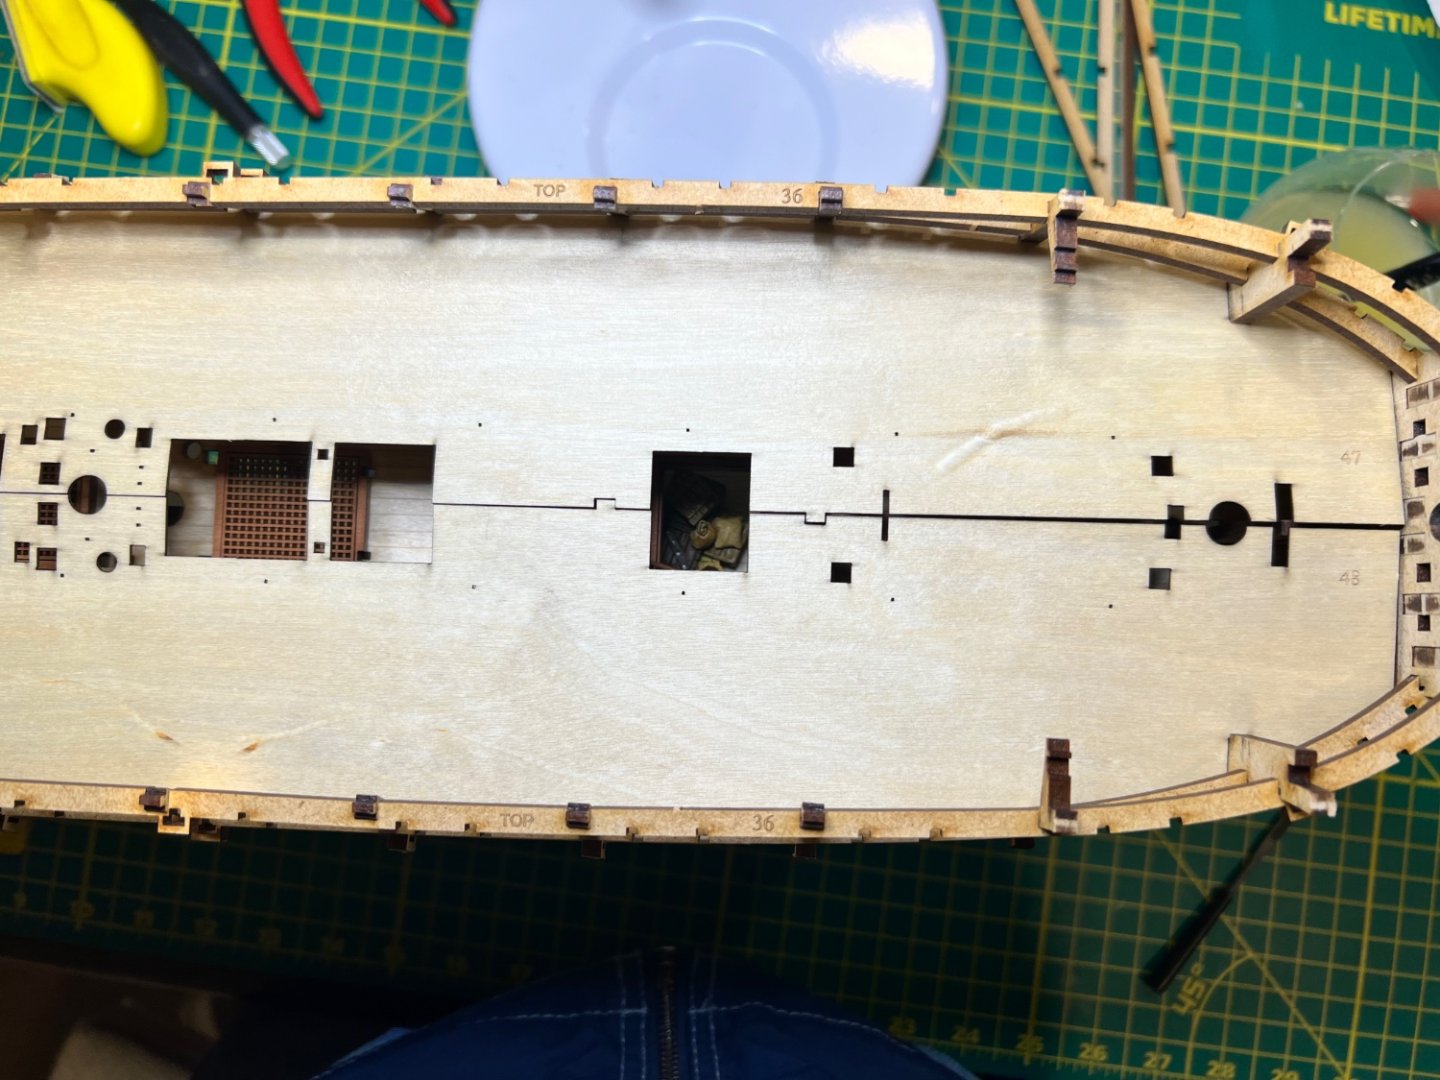
Chris & James, thank you for the responses. I fettled with the sub ply Gun Deck more and moved both sides much closer to flush. The rest of the distance should be made up by jeweler's file as James suggested. =] The picture below shows a better fit. I wasn't able to fit it perfectly yet because some bulkheads were a smidge closer than others in the middle (not seen) preventing it from connecting all the way. I will definitely make sure all is flush before I permanently lay down the sub ply and discuss the results at that step. The picture also shows the jeweler's files. I will use them on the edges where the ears fit into the bulkhead. This a a relief.
-
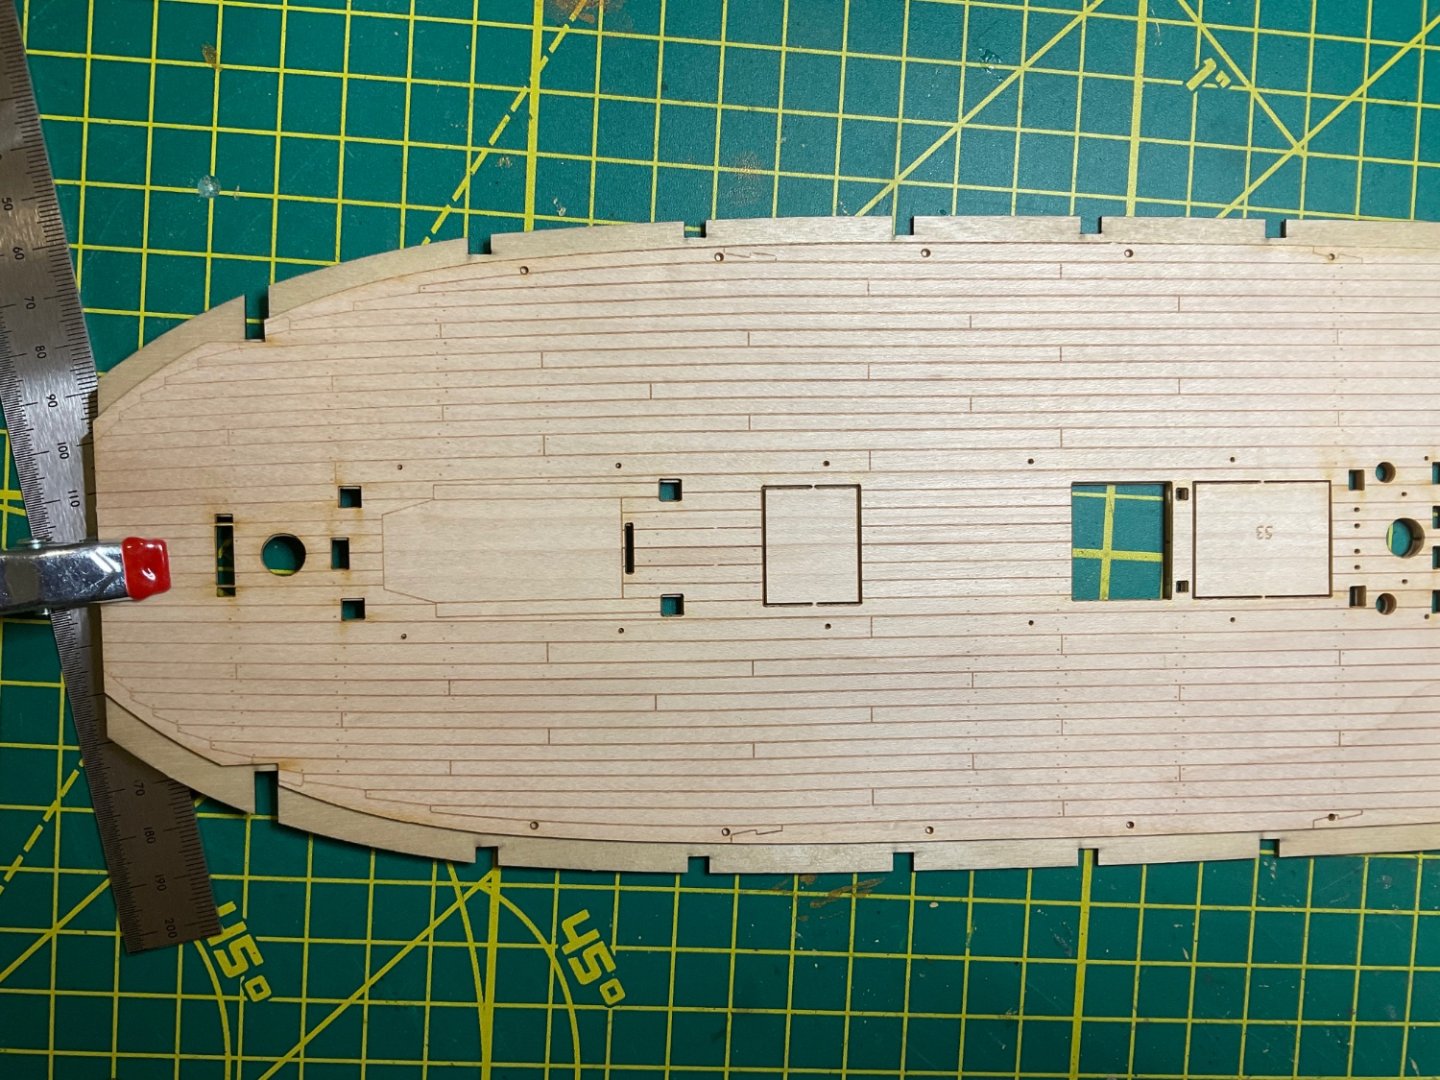
Hey, quick question @chris watton. My Gun Deck Patterns #47 & #48 don’t seem to fit quite right. Before I make any alterations, would you have a quick look at these 2 pictures and give me your advice? They are both slotted comfortably back as far as they will go, but they seem to overlap too much by about 4mm in total. The gun deck veneer ends about 2mm short of the slots on either side of the base pattern, but it fits just perfectly on the model. Thank you!
-
Post Two: Getting Started I made the cradle but don't use it. I bought a Keel Klamper Swivel Vice from Micro-Mark instead. Building the hull went easily at first. So many builders broke the delicate pieces, and I swore I would be more careful. I proceeded to break the stern assembly as soon as I attached it to the false keel. I'll reiterate, you've got to be careful with this set. Below is setting the stern: My brief moment with the cradle while waiting for the keel klamper to arrive. You can see my efforts to save the stern. It fixed up well later on. This is an awkward photo. Moving on, I attached all the bulkheads. They required a very gentle mallet tap to get flush. Slipping on the lower deck, I learned what "fet'lin" means. It attached very nicely, but I had to maneuver each bulkhead 2-3 times to slowly work it down without any more breaks. Success! Note: Nothing is glued yet. All these parts will be removed in further steps. Orlop Preparations: an Alteration Here I am looking at my lower deck while examining B.E.'s work. He opened two ladder-ways down to the orlop on the fore and aft extreme openings. Below you can see where alterations need to take place on bulkhead #4 as well as on the false keel. The false keel needs adjusted in the same areas as well as on the aft side. I highlighted the openings in blue and the alterations in red. The goal of this alteration is to open up a view from the upper decks all the way down to the orlop. This is probably one of the coolest views in my mind and well worth the effort. Here is a view from the aft of the Gun deck. I am going to remove this red section of the false keel and build a small landing to simulate the orlop just as is done with the kit on the fore side. Here is the fore opening. I don't think I installed the orlop landing yet in this picture. It's a bit dark down there. Preparing the Fore for the Orlop I removed the lower deck port for this next step. This picture shows bulkhead #4 with the orlop landing in place. I made pencil marks (circled in red) and show how I drew my cut lines. The next 3 pictures show altering bulkhead #4. This cut looks exactly like B.E.'s I found this alteration much easier because I watched such a strong modeler (Blue Ensign) have such success with this. There is no way I would try this on my own, and I am quite sure this required far more time to research for B.E. than it did for me to copy. So thank you for the plans =] (I wish I had drawn the red line just a little lower, as I had to sand this down to be flush with the orlop platform.) I bought this scroll saw in hopes that it would be useful with this model. I am quickly learning that this should be a tool in every household. (Just keep the key hidden from the children.) I then drew my false keel cut lines with the piece I cut off of bulkhead #4 and a straight edge. For the aft cut, I lowered the false keel to match the height of the fore orlop platform. My hope is the orlop steps go down equally as far on both sides. (I'm actually waiting for the orlop ladders to arrive in a second parts order I made to Chris W. More on this later.) Looking at B.E.'s log, the two ladders appear to be the same, so I made this alteration with confidence. Red shows the fore alteration. Here is a picture of the finished false keel with the 2 alterations. Ok, enough for now. In my next post, I will show my assembly of the orlop landings, bulkheads, and lower deck. Cheers =]
-
Post One: Unboxing There is not too much to say that hasn't already been said about unboxing. One thing I will note, I didn't anticipate the smell of the wood. It is distinct and pleasant to me. I rather like this, as smells have a way of bringing me into a state of mind. Here is my work station. There are a couple old projects still on the back: One thing I didn't expect is how tiny the parts are. The build logs all show close up shots, and I developed the false impression of size. Several of these pieces are extremely tiny and yet keep nice details. Here is a shot of the fittings: Also, I purchased the Pearwood Block Set, which is an add-on to the kit. Looking at the great detail of the pearwood set, I am not disappointed. Here is a closeup of this set: Everything else looks akin to other descriptions. Amazing detail, very well packaged (Thank you Mrs. W.). Out of the four kits I have owned, this is of the highest quality.
About us
Modelshipworld - Advancing Ship Modeling through Research
SSL Secured
Your security is important for us so this Website is SSL-Secured
NRG Mailing Address
Nautical Research Guild
237 South Lincoln Street
Westmont IL, 60559-1917
Model Ship World ® and the MSW logo are Registered Trademarks, and belong to the Nautical Research Guild (United States Patent and Trademark Office: No. 6,929,264 & No. 6,929,274, registered Dec. 20, 2022)
Helpful Links
About the NRG
If you enjoy building ship models that are historically accurate as well as beautiful, then The Nautical Research Guild (NRG) is just right for you.
The Guild is a non-profit educational organization whose mission is to “Advance Ship Modeling Through Research”. We provide support to our members in their efforts to raise the quality of their model ships.
The Nautical Research Guild has published our world-renowned quarterly magazine, The Nautical Research Journal, since 1955. The pages of the Journal are full of articles by accomplished ship modelers who show you how they create those exquisite details on their models, and by maritime historians who show you the correct details to build. The Journal is available in both print and digital editions. Go to the NRG web site (www.thenrg.org) to download a complimentary digital copy of the Journal. The NRG also publishes plan sets, books and compilations of back issues of the Journal and the former Ships in Scale and Model Ship Builder magazines.


