Erdict
-
Posts
51 -
Joined
-
Last visited
-
 mtaylor reacted to a post in a topic:
HMS Sphinx 1775 by Glenn-UK - FINISHED - Vanguard Models - 1:64 - V2 Kit by Glenn Shelton
mtaylor reacted to a post in a topic:
HMS Sphinx 1775 by Glenn-UK - FINISHED - Vanguard Models - 1:64 - V2 Kit by Glenn Shelton
-
 Glenn-UK reacted to a post in a topic:
HMS Sphinx 1775 by Glenn-UK - FINISHED - Vanguard Models - 1:64 - V2 Kit by Glenn Shelton
Glenn-UK reacted to a post in a topic:
HMS Sphinx 1775 by Glenn-UK - FINISHED - Vanguard Models - 1:64 - V2 Kit by Glenn Shelton
-
 What a great looking ship Glen. That’s something to show for generations. Definitely taking some tips from your log.
- 476 replies
-
- 2
-
-
-
- sphinx
- vanguard models
- (and 1 more)
-
Erdict reacted to a post in a topic:
HMS Sphinx 1775 by Glenn-UK - FINISHED - Vanguard Models - 1:64 - V2 Kit by Glenn Shelton
-
Erdict reacted to a post in a topic:
HMS Sphinx 1775 by Glenn-UK - FINISHED - Vanguard Models - 1:64 - V2 Kit by Glenn Shelton
-
Erdict reacted to a post in a topic:
HMS Sphinx by Cjames - Vanguard Models - 1:64
-
Erdict reacted to a post in a topic:
HMS Sphinx 1775 by rvchima - Vanguard Models - 1:64 - 20 Gun Sixth Rate Frigate
-
Erdict reacted to a post in a topic:
HMS Sphinx 1775 by rvchima - Vanguard Models - 1:64 - 20 Gun Sixth Rate Frigate
-
Erdict reacted to a post in a topic:
HMS Sphinx 1775 by rvchima - Vanguard Models - 1:64 - 20 Gun Sixth Rate Frigate
-
KARAVOKIRIS reacted to a post in a topic:
HMS Sphinx 1775 by Erdict - Vanguard Models - 1:64 scale
-
KARAVOKIRIS reacted to a post in a topic:
HMS Sphinx 1775 by Erdict - Vanguard Models - 1:64 scale
-
KARAVOKIRIS reacted to a post in a topic:
HMS Sphinx 1775 by Erdict - Vanguard Models - 1:64 scale
-
chris watton reacted to a post in a topic:
HMS Sphinx 1775 by Erdict - Vanguard Models - 1:64 scale
-
Glenn-UK reacted to a post in a topic:
HMS Sphinx 1775 by Erdict - Vanguard Models - 1:64 scale
-
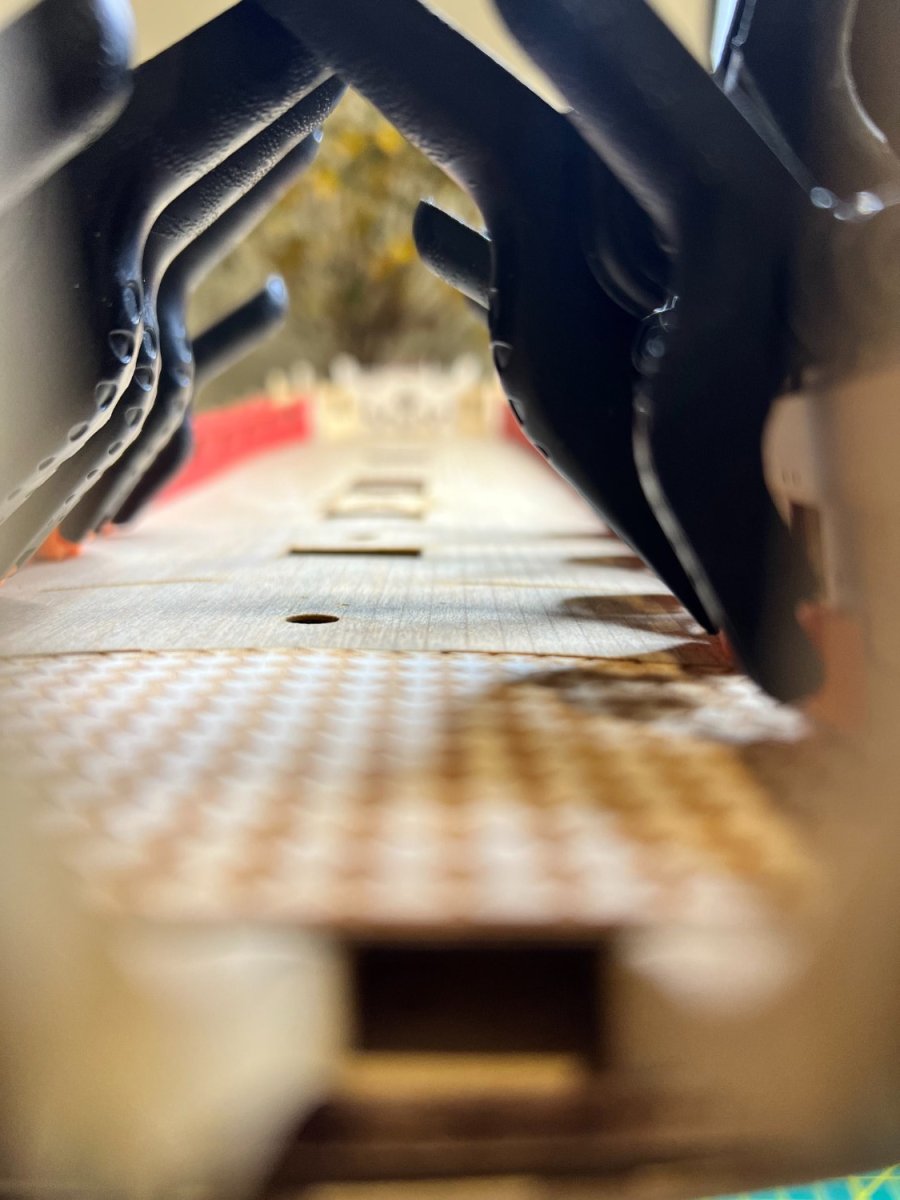
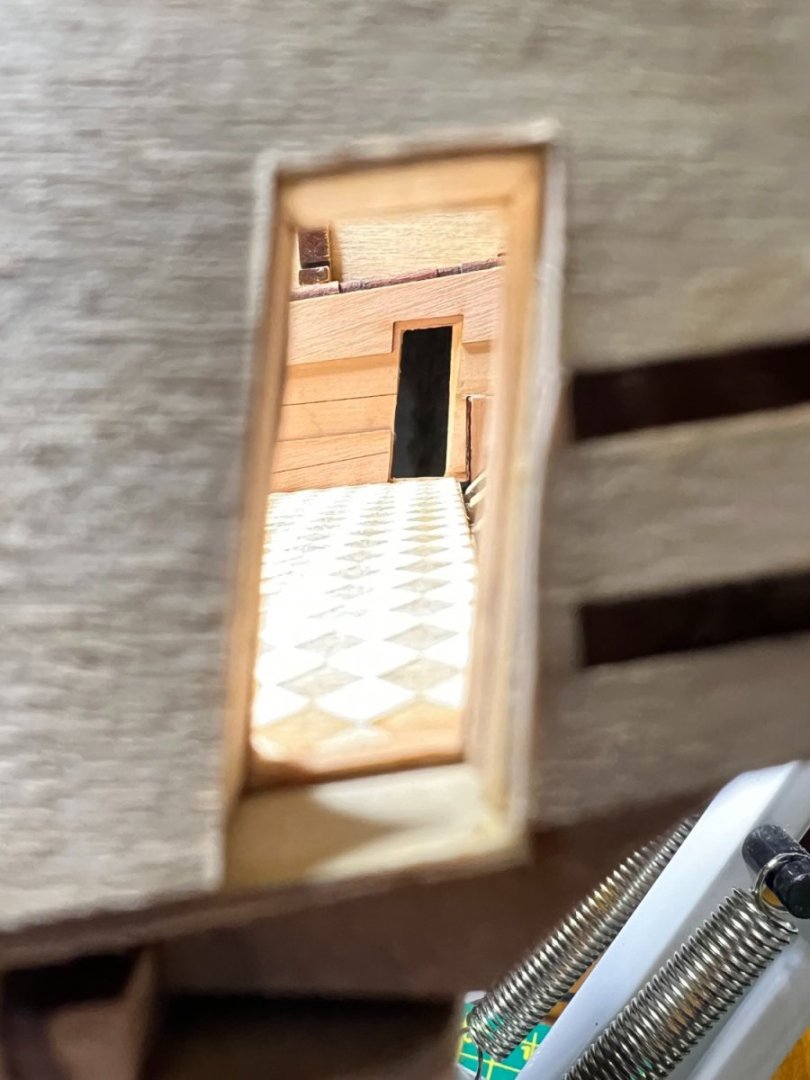
Thanks for stopping by B.E. Always a fan. I’m opening the upper deck floors more, inspired by your Sphinx. I had an idea to add a transparent overlay just underneath the deck, but I’m not thrilled with the level of reflection it creates in the end. I’ll mess around with it a bit

-
 AJohnson reacted to a post in a topic:
HMS Sphinx 1775 by Erdict - Vanguard Models - 1:64 scale
AJohnson reacted to a post in a topic:
HMS Sphinx 1775 by Erdict - Vanguard Models - 1:64 scale
-
mugje reacted to a post in a topic:
HMS Sphinx 1775 by Erdict - Vanguard Models - 1:64 scale
-
TJM reacted to a post in a topic:
HMS Sphinx 1775 by Erdict - Vanguard Models - 1:64 scale
-
Thank you both!
-
Erdict reacted to a post in a topic:
Saint Philippe 1693 by CRI-CRI - scale 1/72 - French warship from Lemineur monograph
-
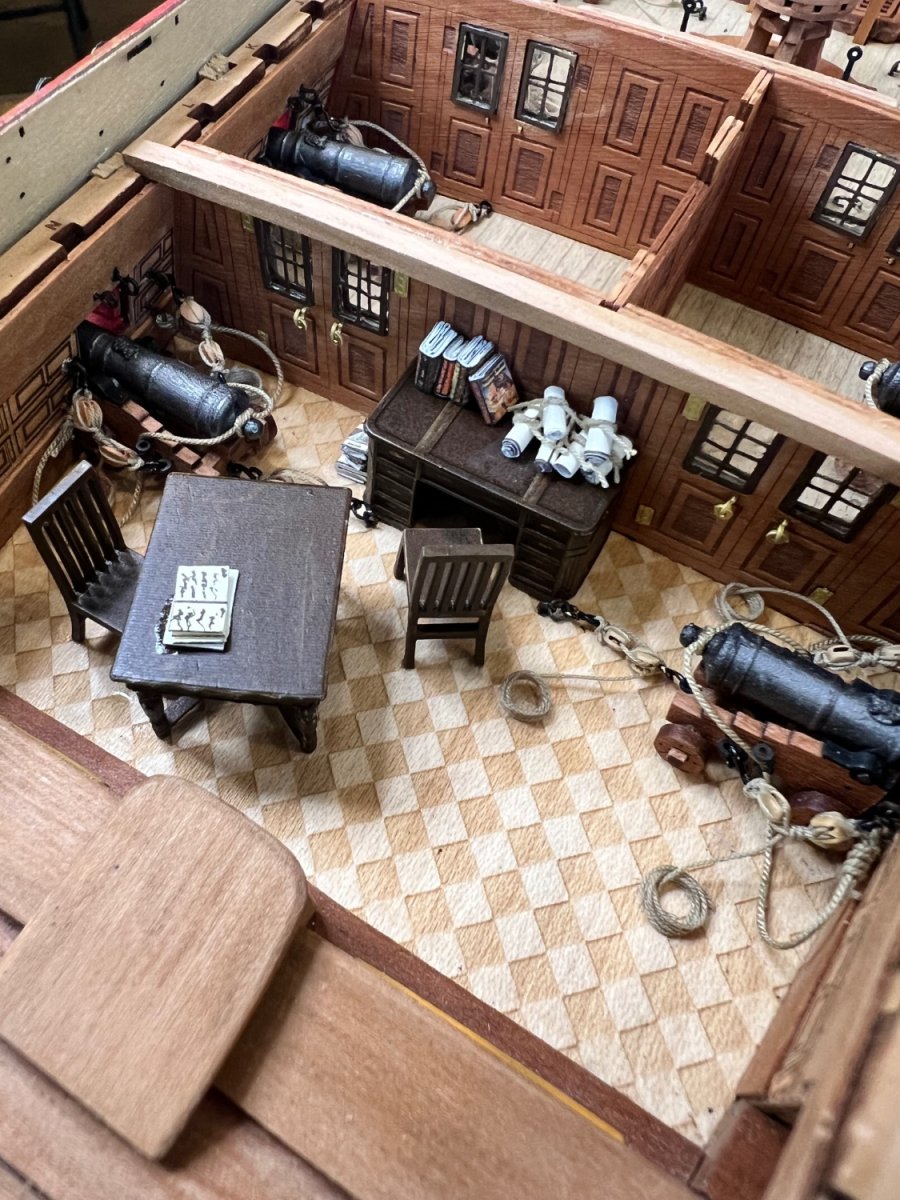
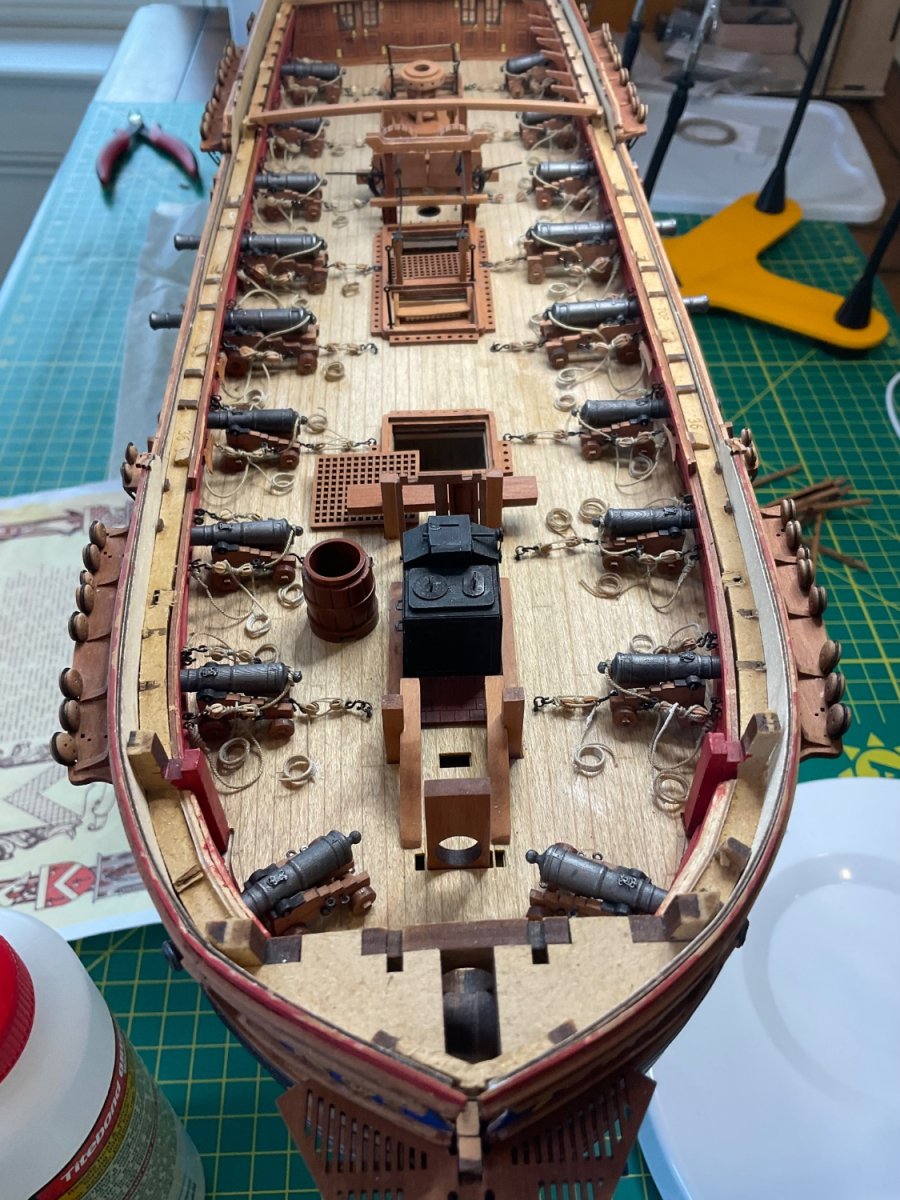
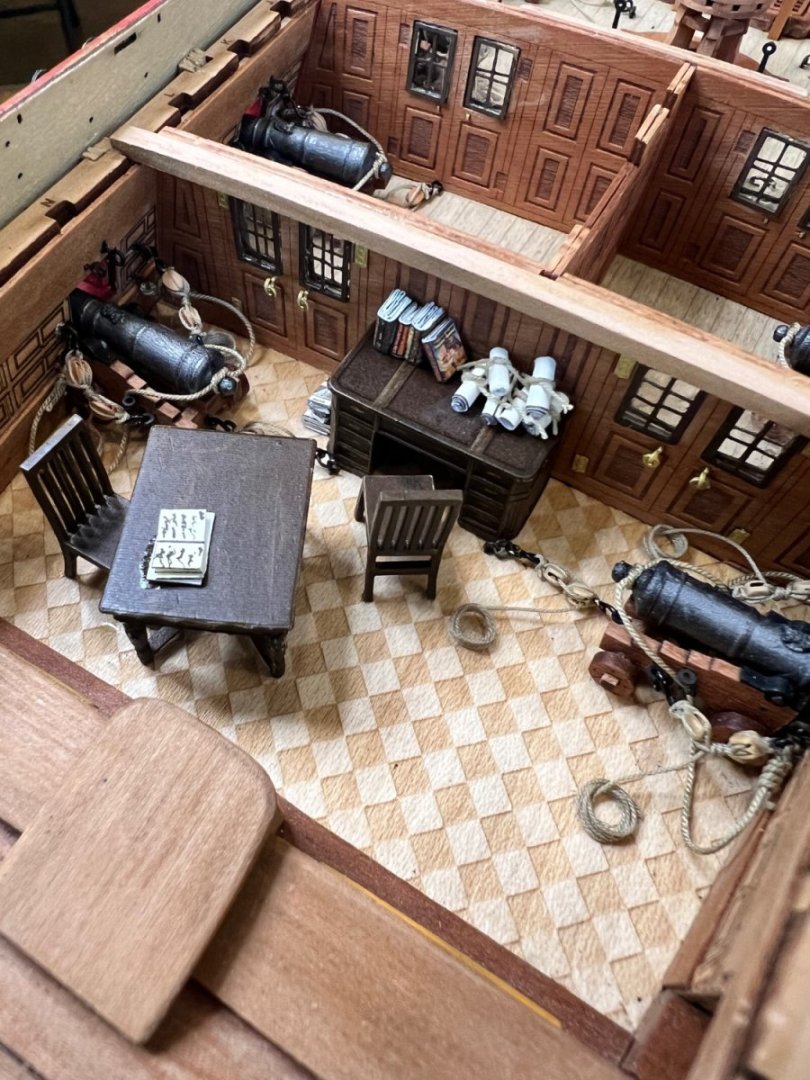
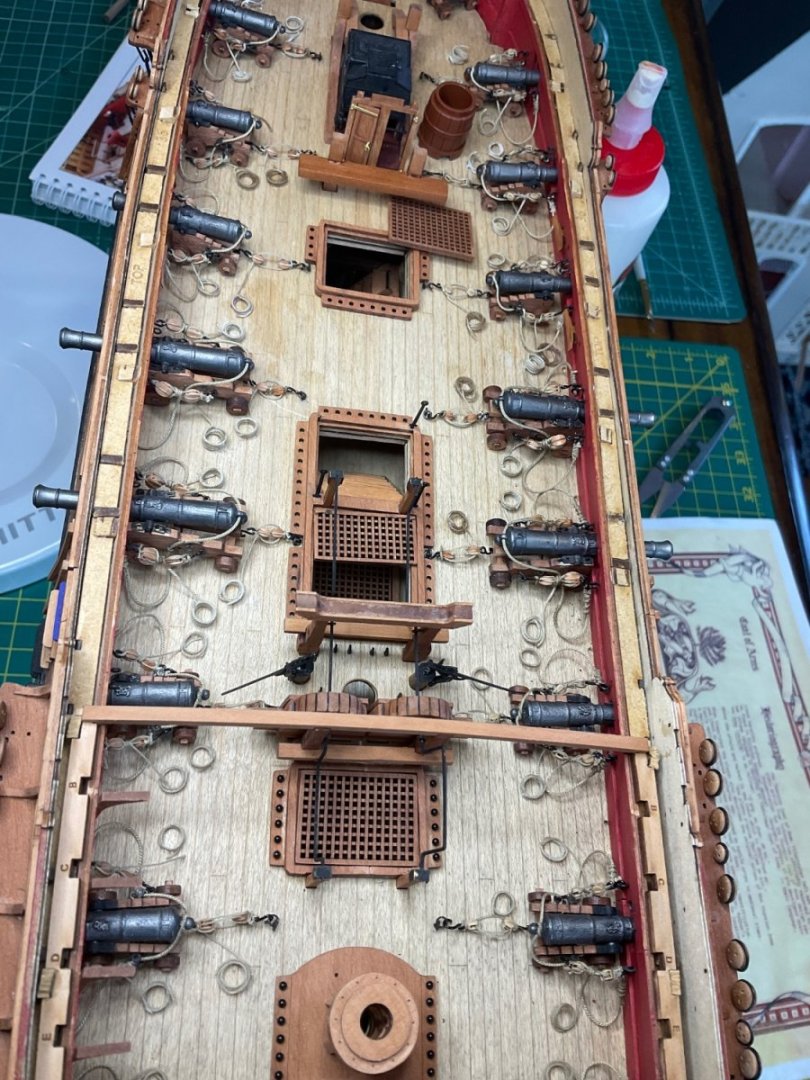
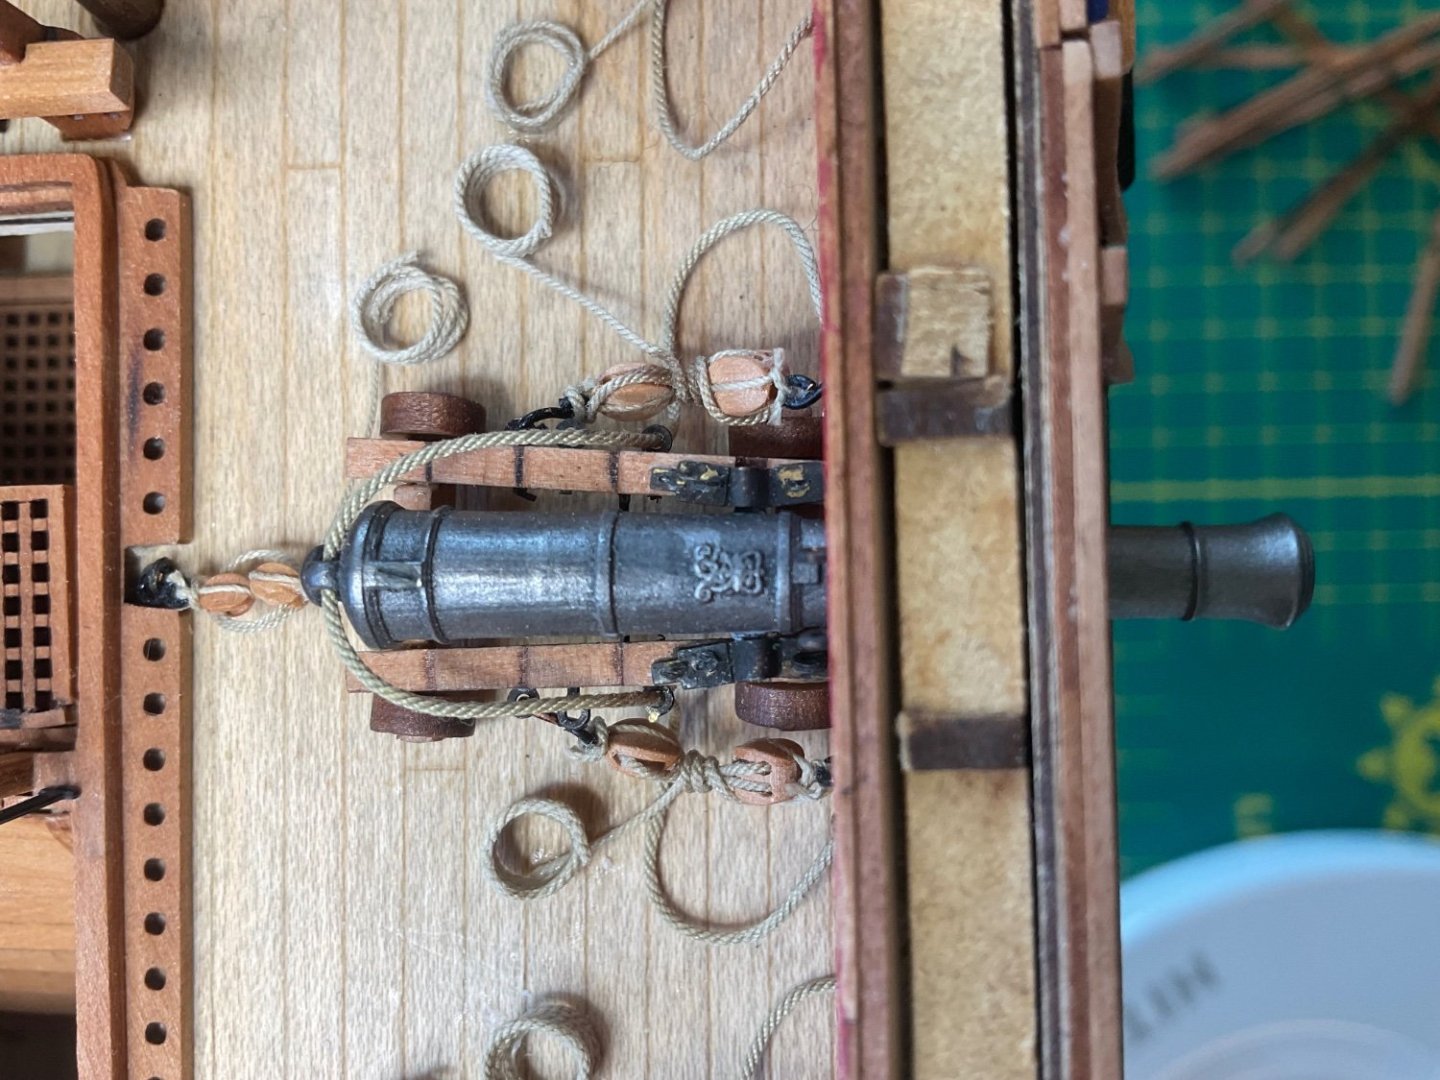
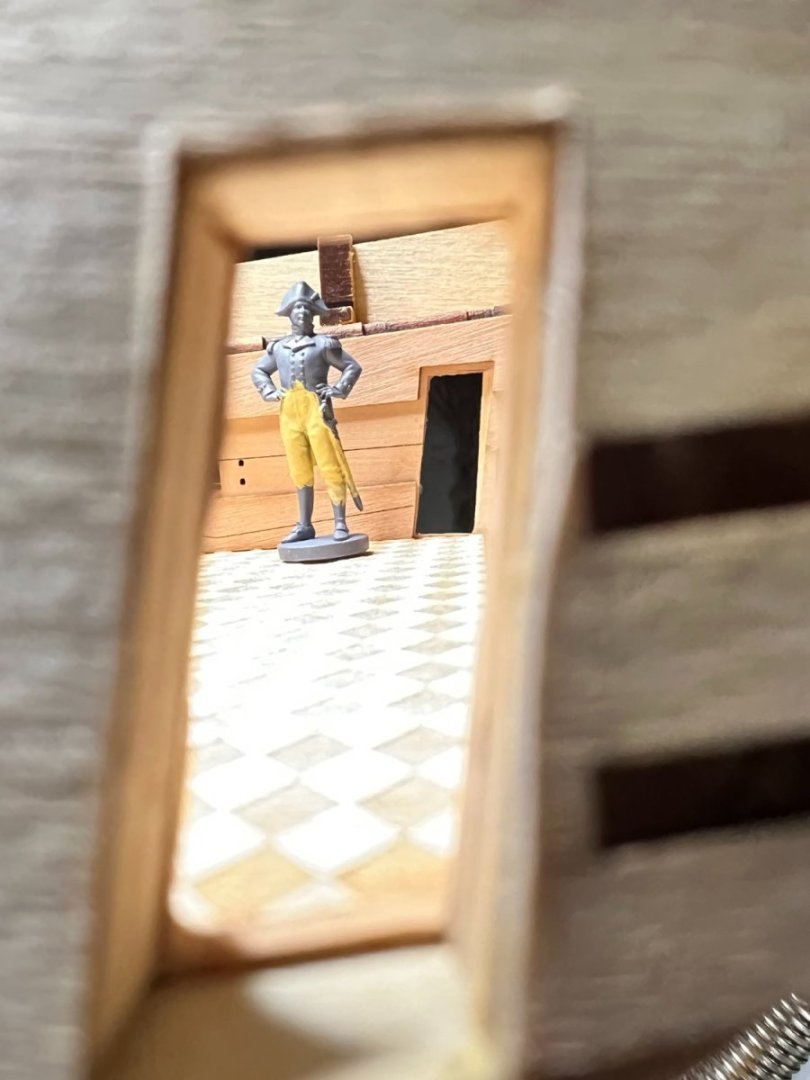
Post Fourteen: Cannons It has been a long time since my last post, for two reasons: 1) I took six months off, which is normal for me (mostly family things), 2) I finally finished the cannons, and they were much more difficult than I imagined. I decided to add the optional rigging. This was by far the most challenging step I think I have faced. It took about 30 minutes for each rig set, 1.5 hours for each cannon. I enjoyed finding carriage gun rigging parts, but man were they small and challenging to work with. Here are some pictures of the cannon set up. This is a close up of one completed cannon. I used Vallejo silver dust pigment to color them. I also added the king’s crest to the top of each cannon. Picture before rigging. And here they are all rigged up. I added two larger cannons to the midship and placed two extra at the fore. Those last two I’m not bothering to rig because, I don’t think they’ll be seen with the upper deck. As a little extra, I completed the captain’s quarters. The books were so small you can’t distinguish them, but the front book on his desk is Treasure Island, and the top book beside the floor is Moby Dick =]. I’ve got a special plan for how I would like to set up the upper deck to better showcase these quarters.

-
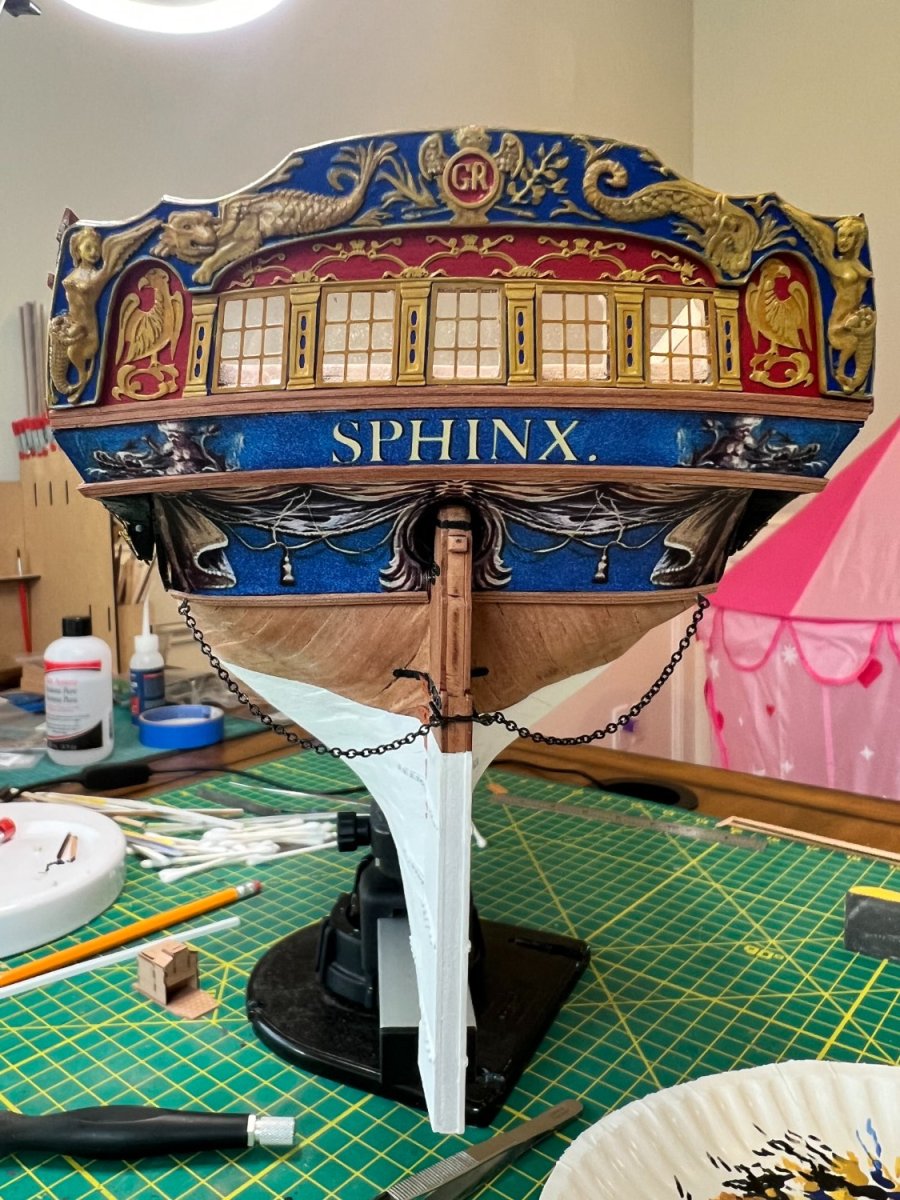
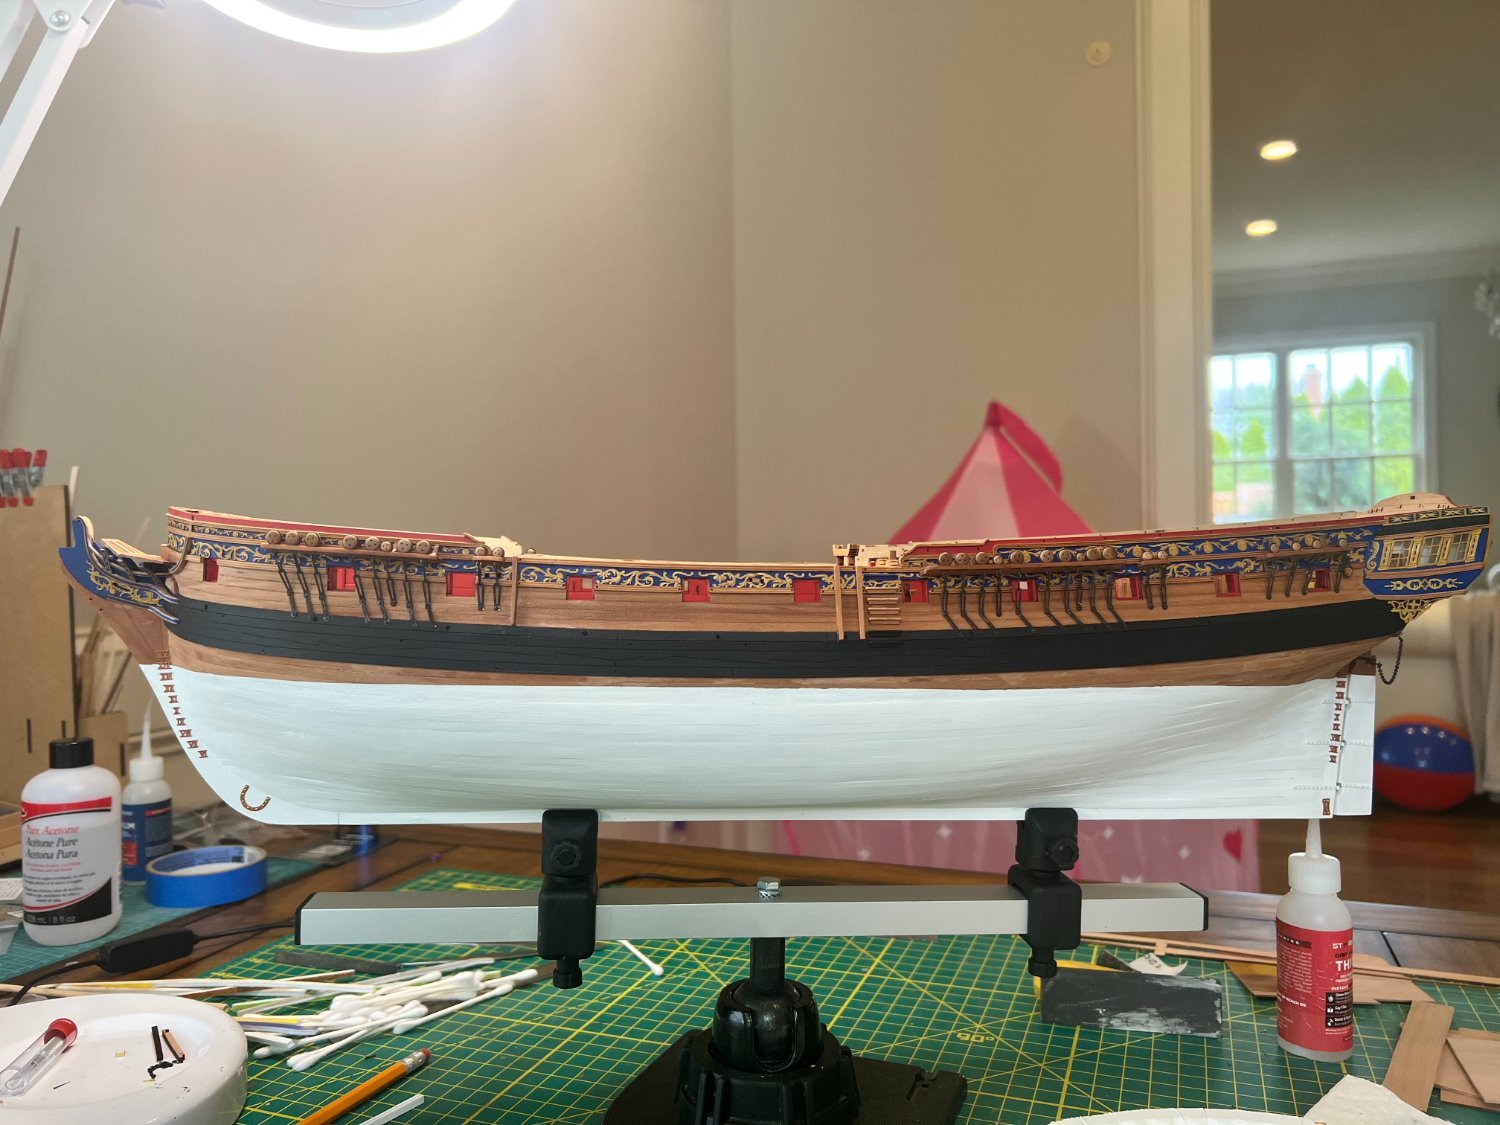
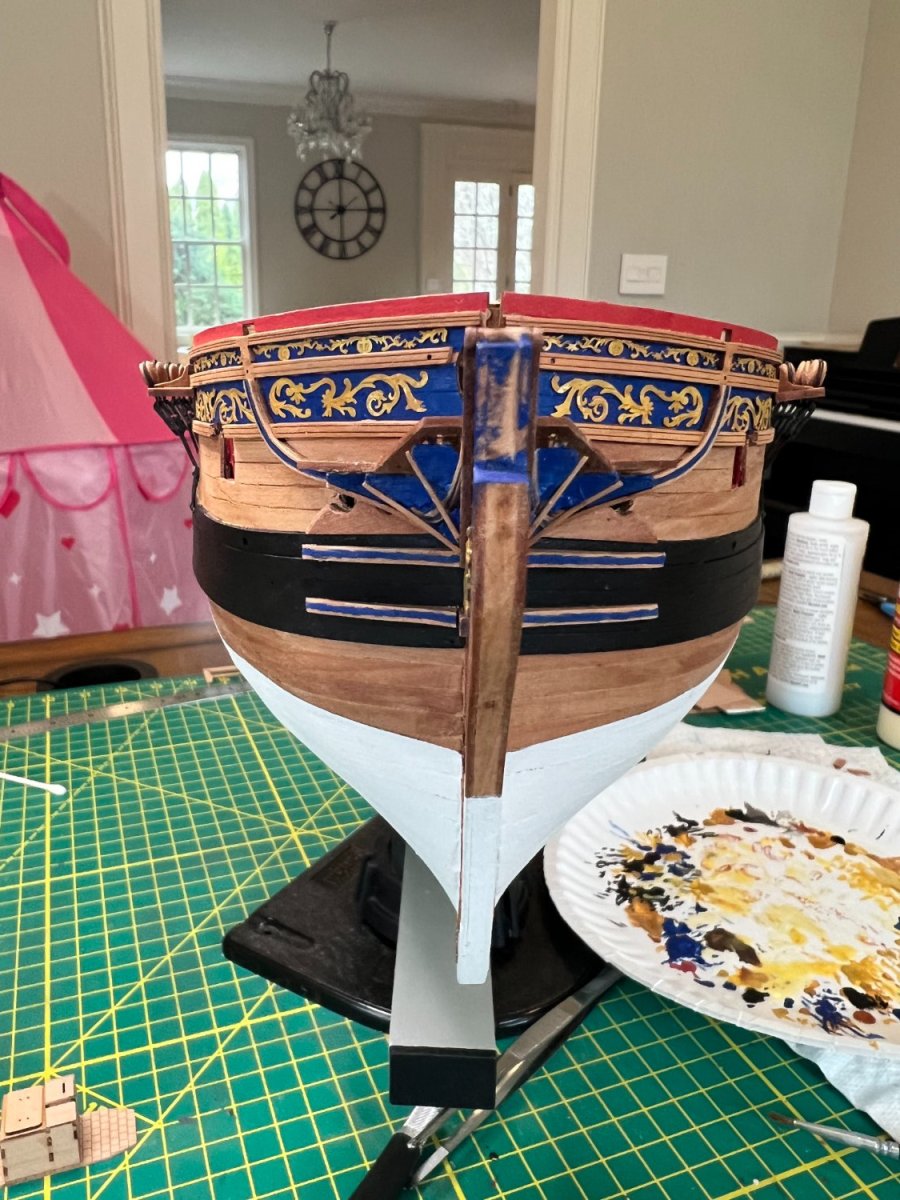
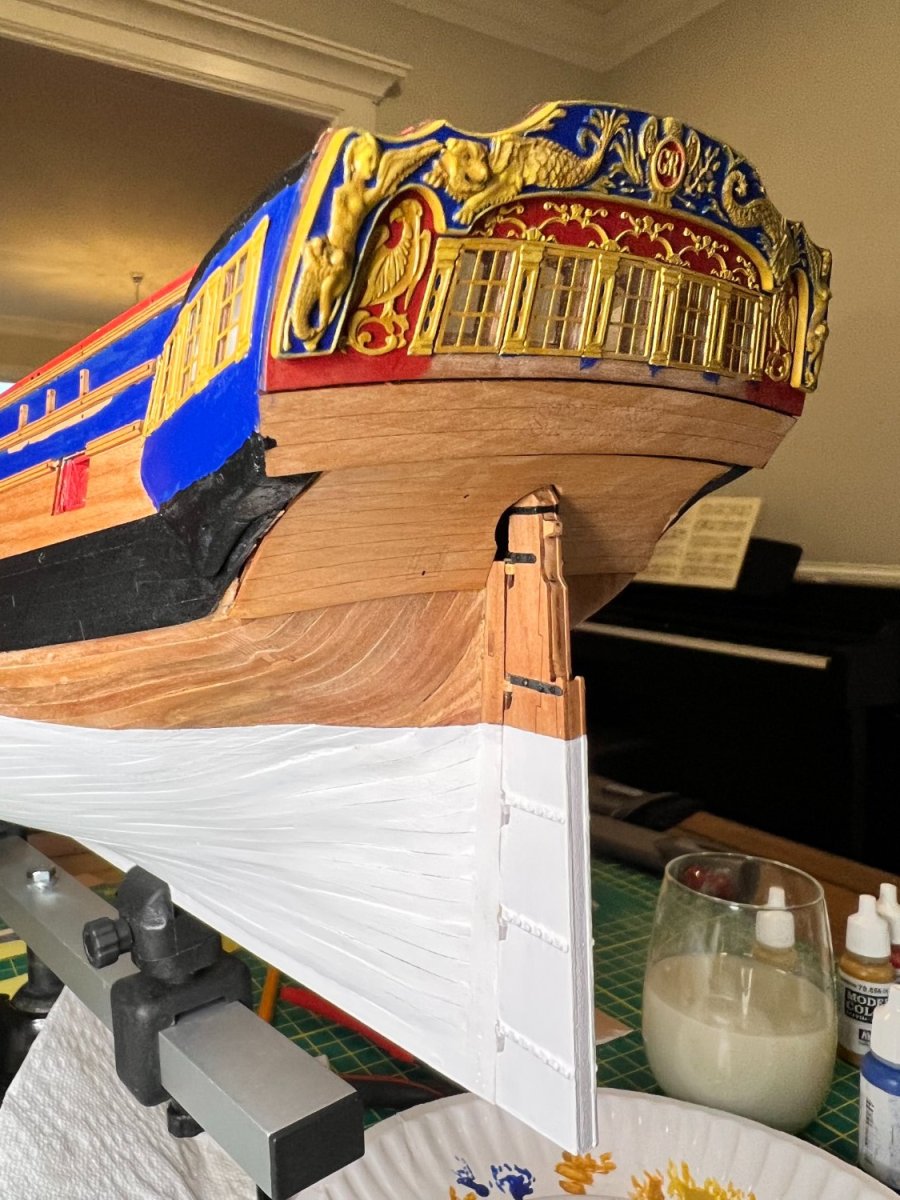
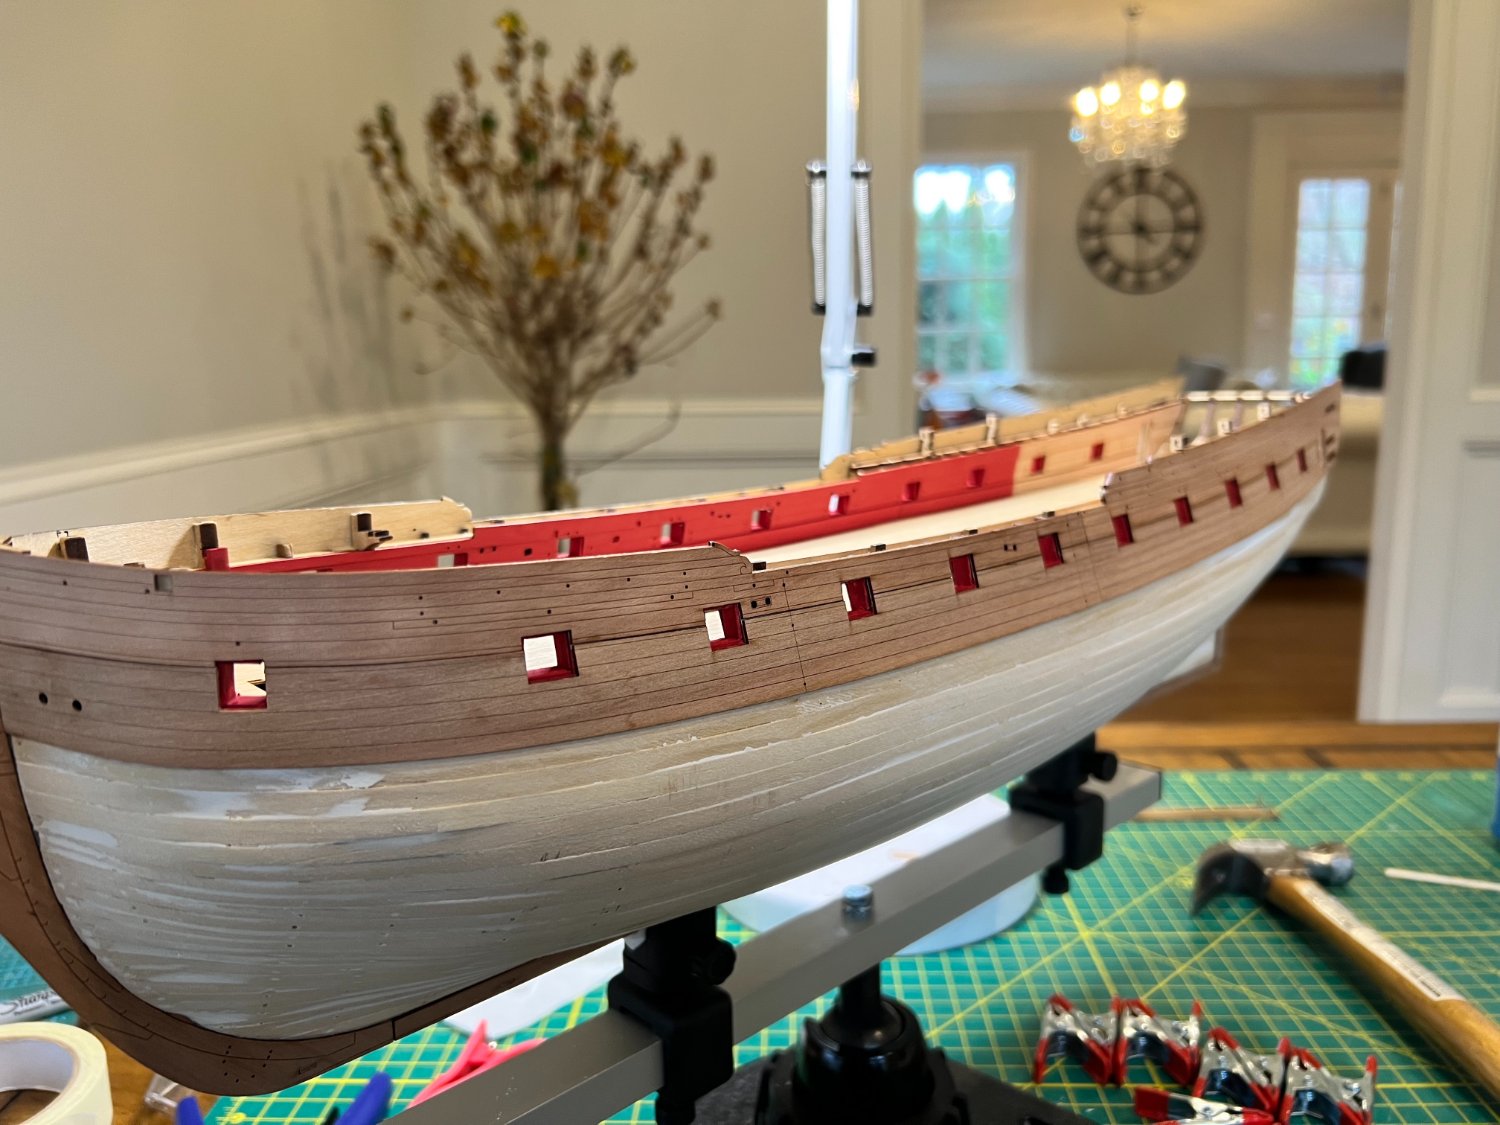
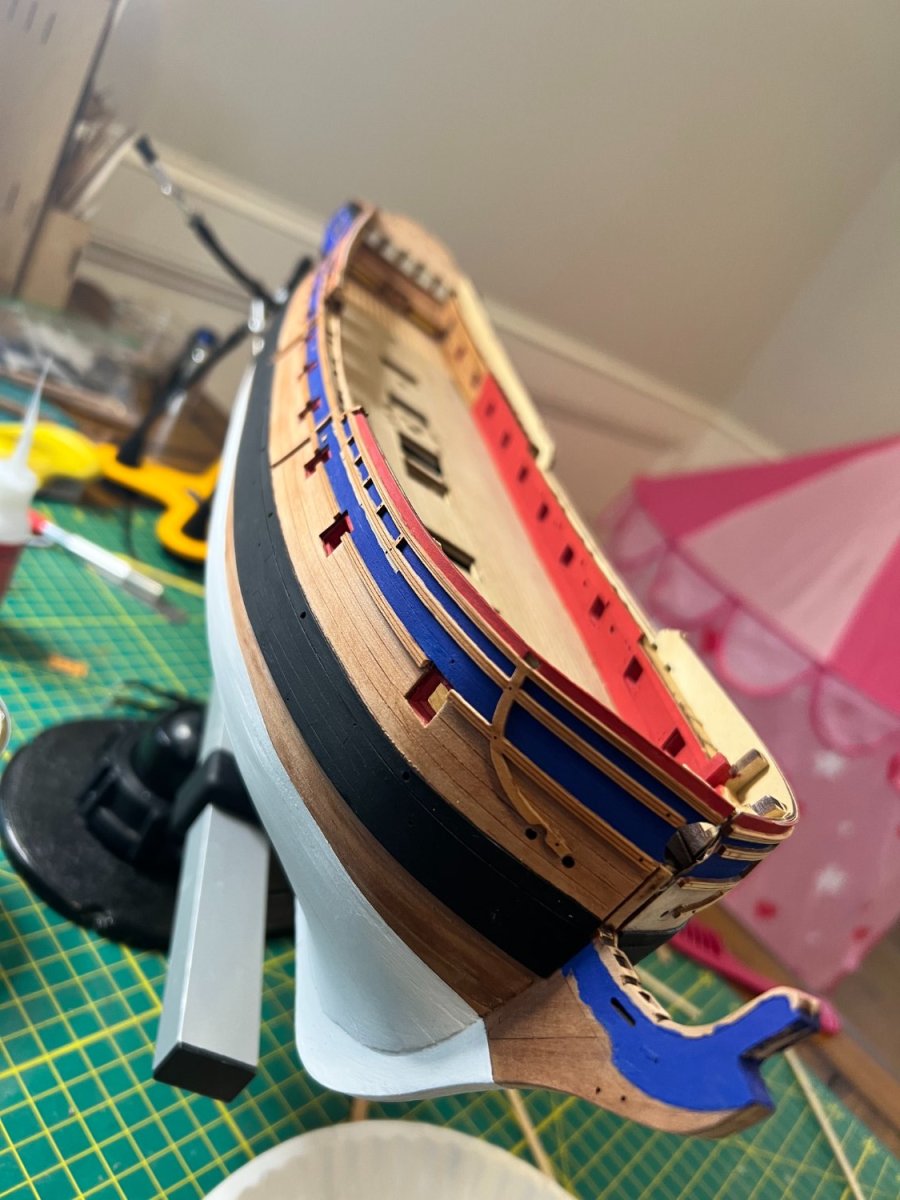
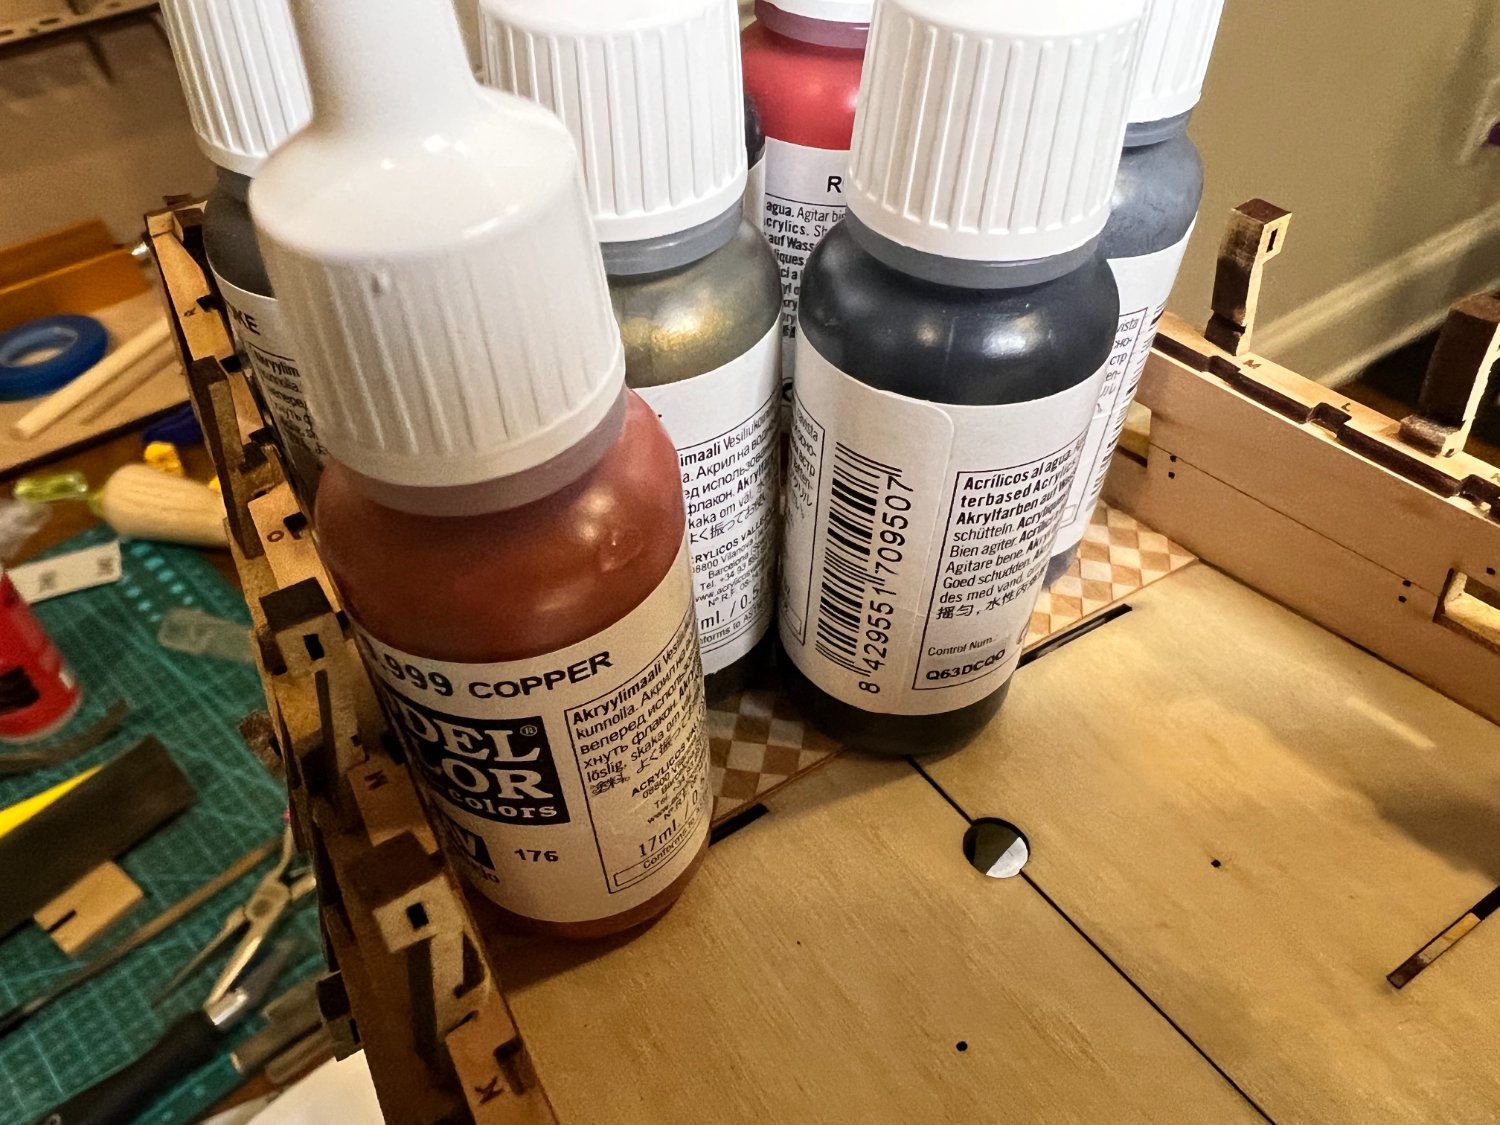
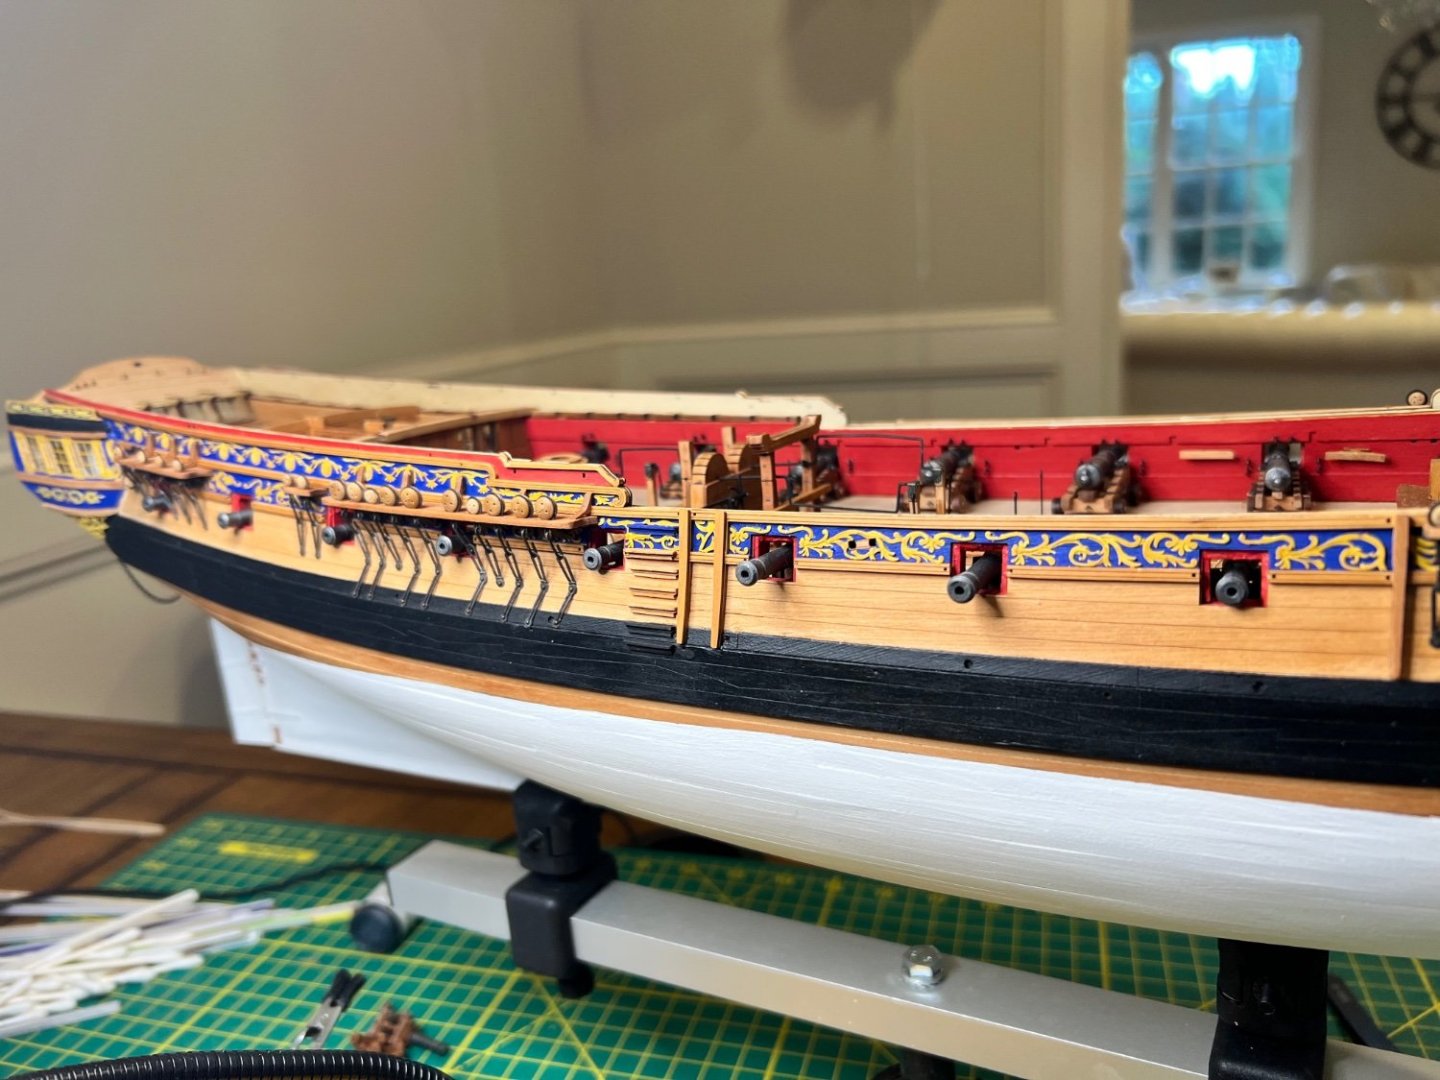
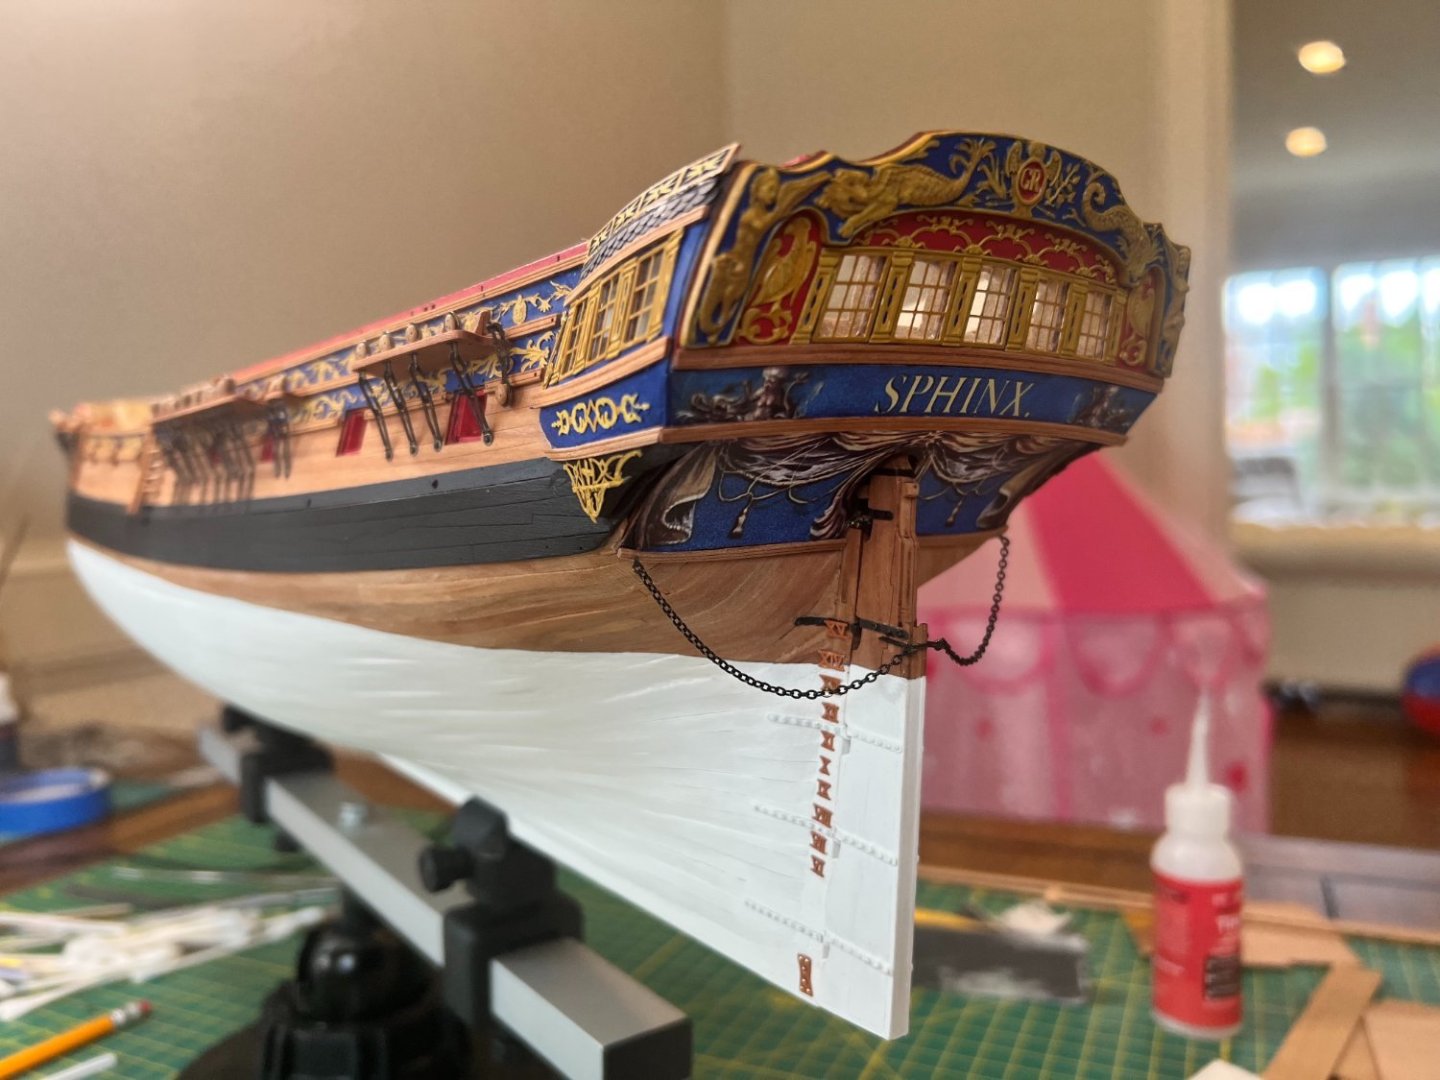
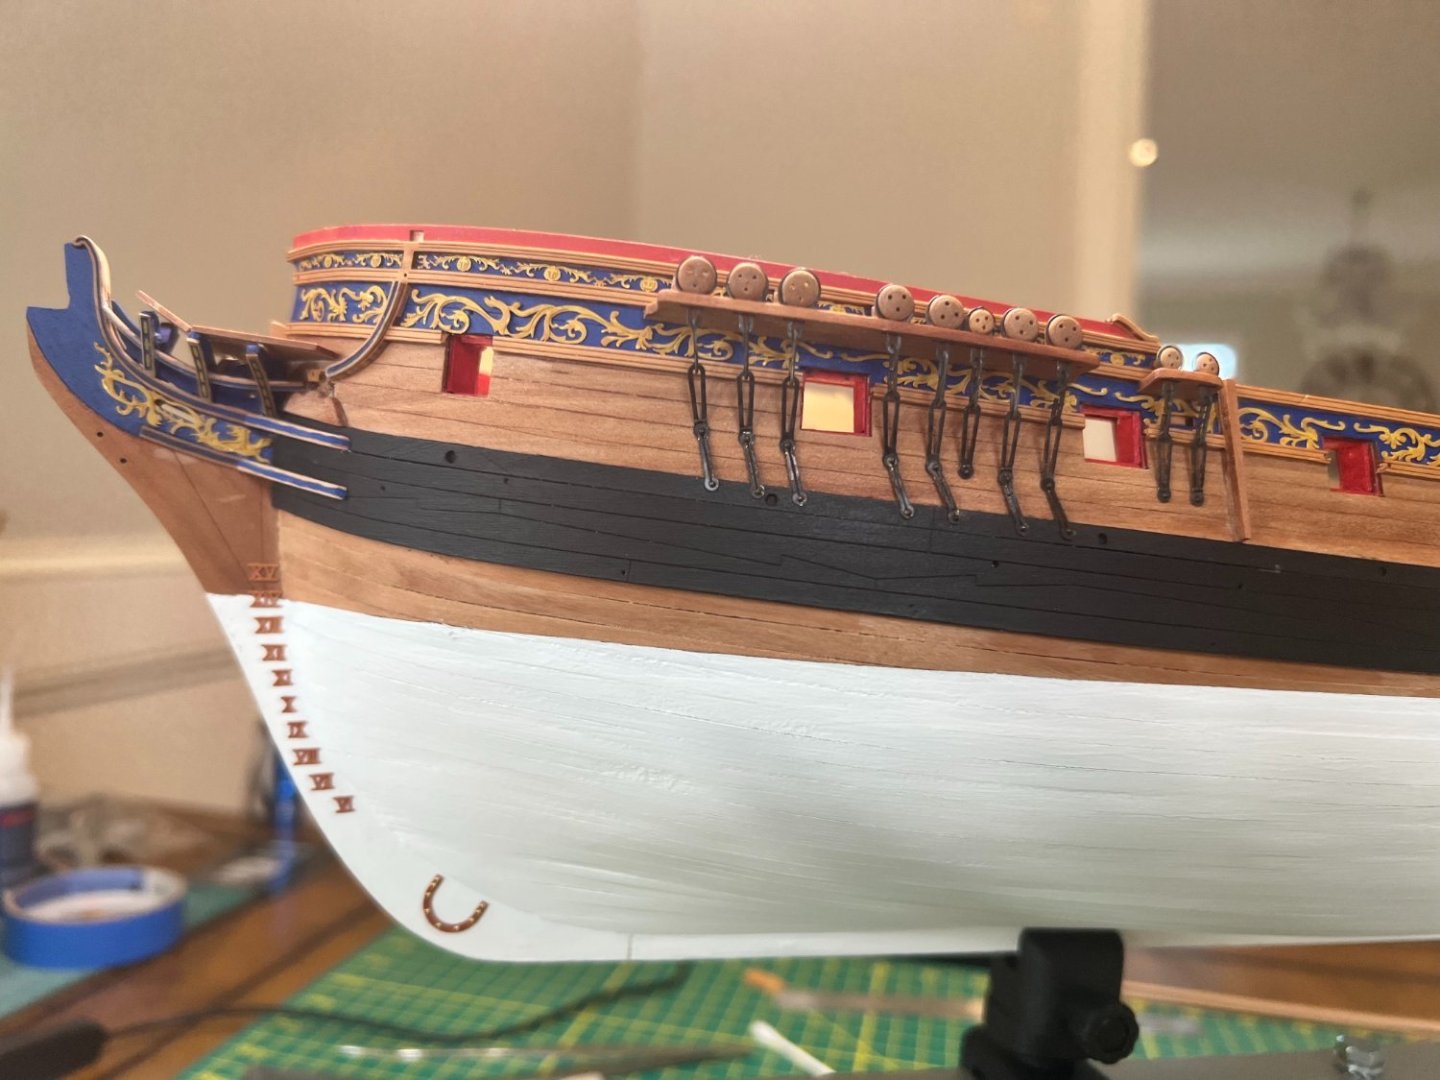
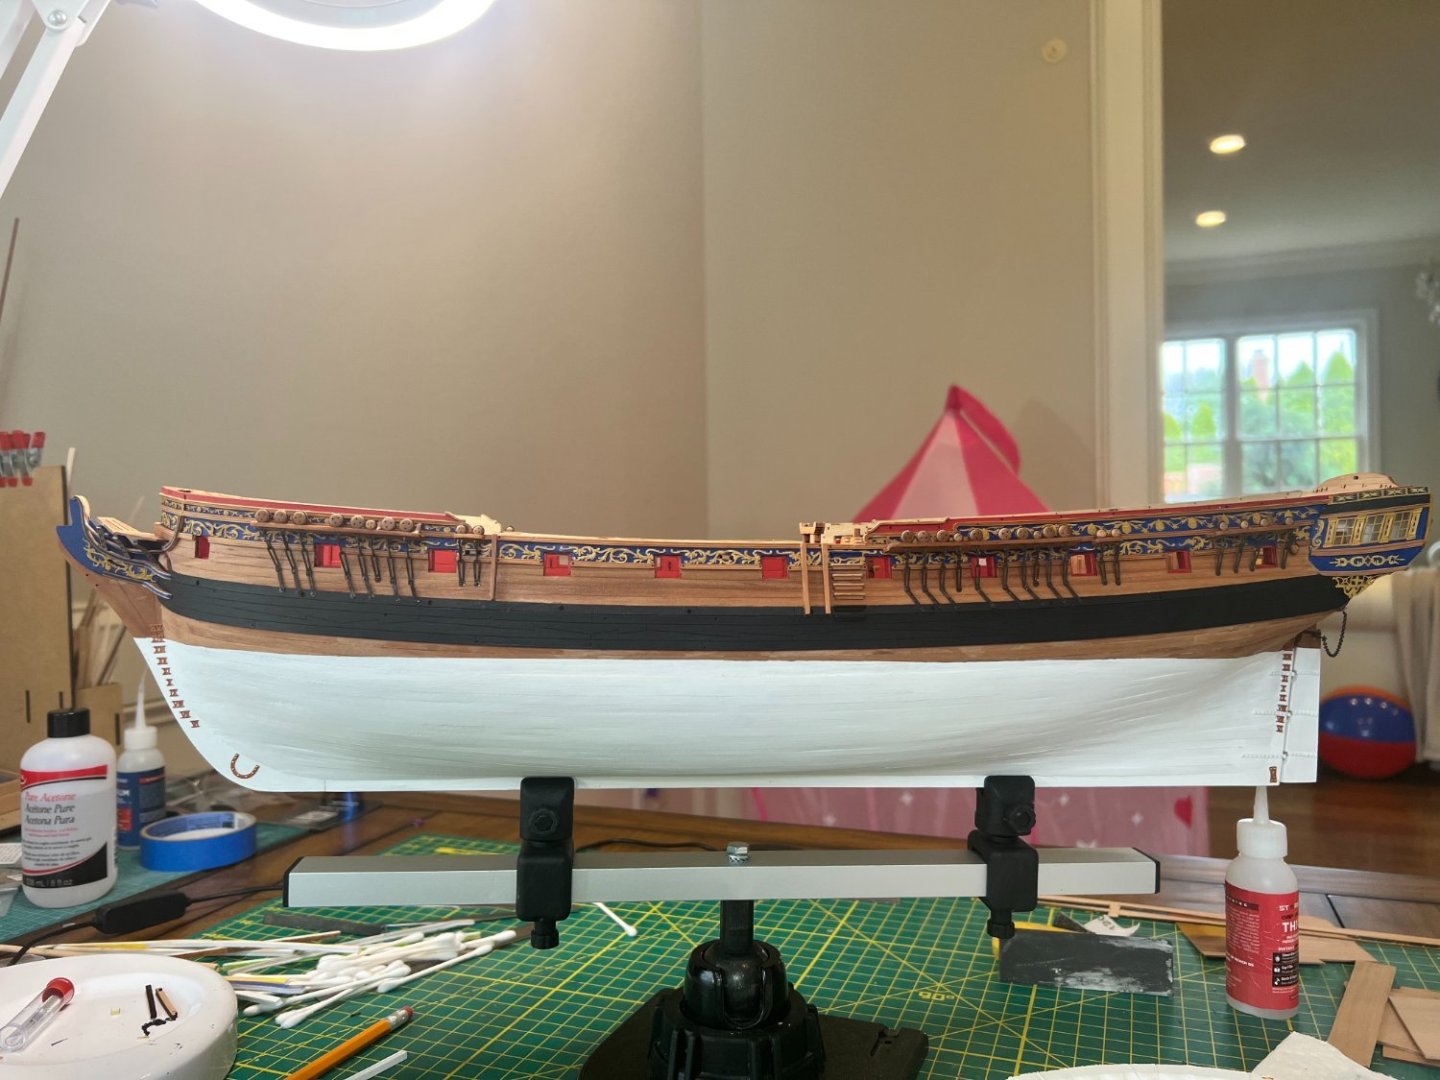
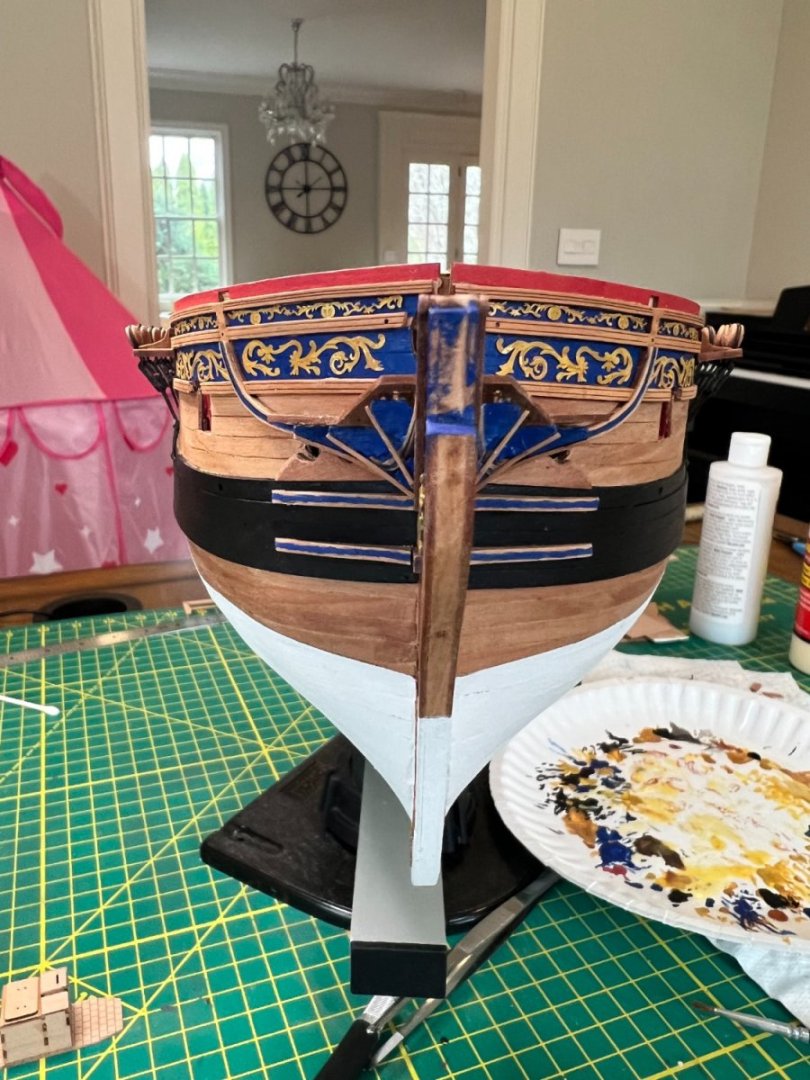
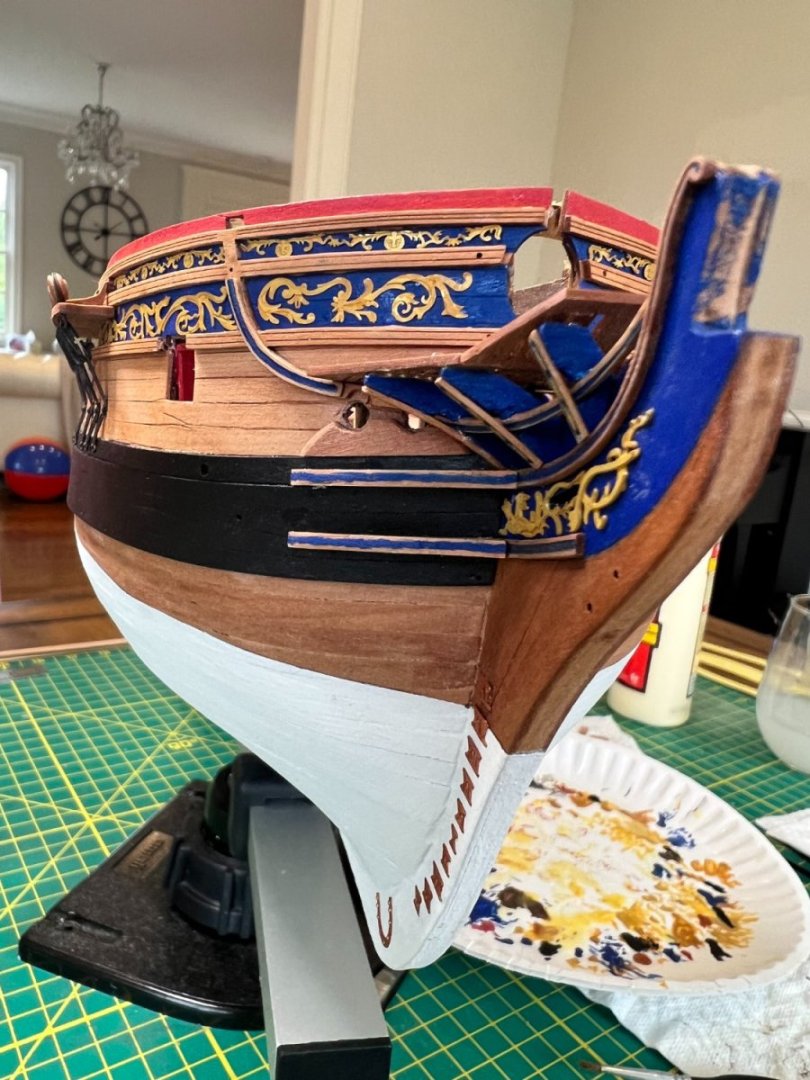
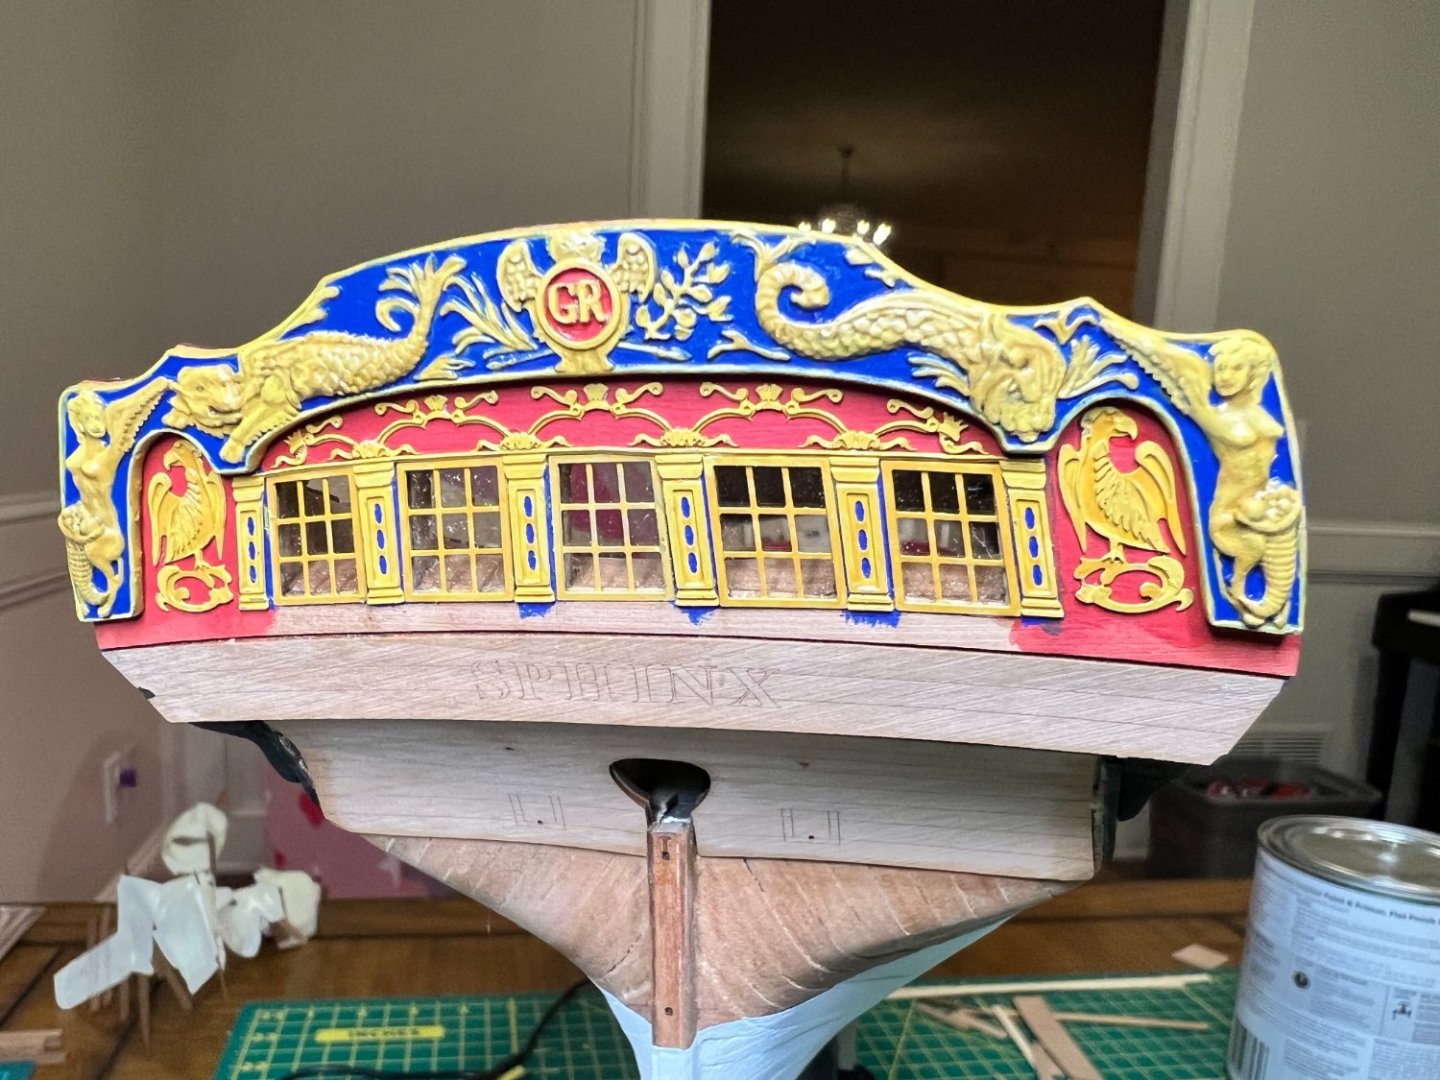
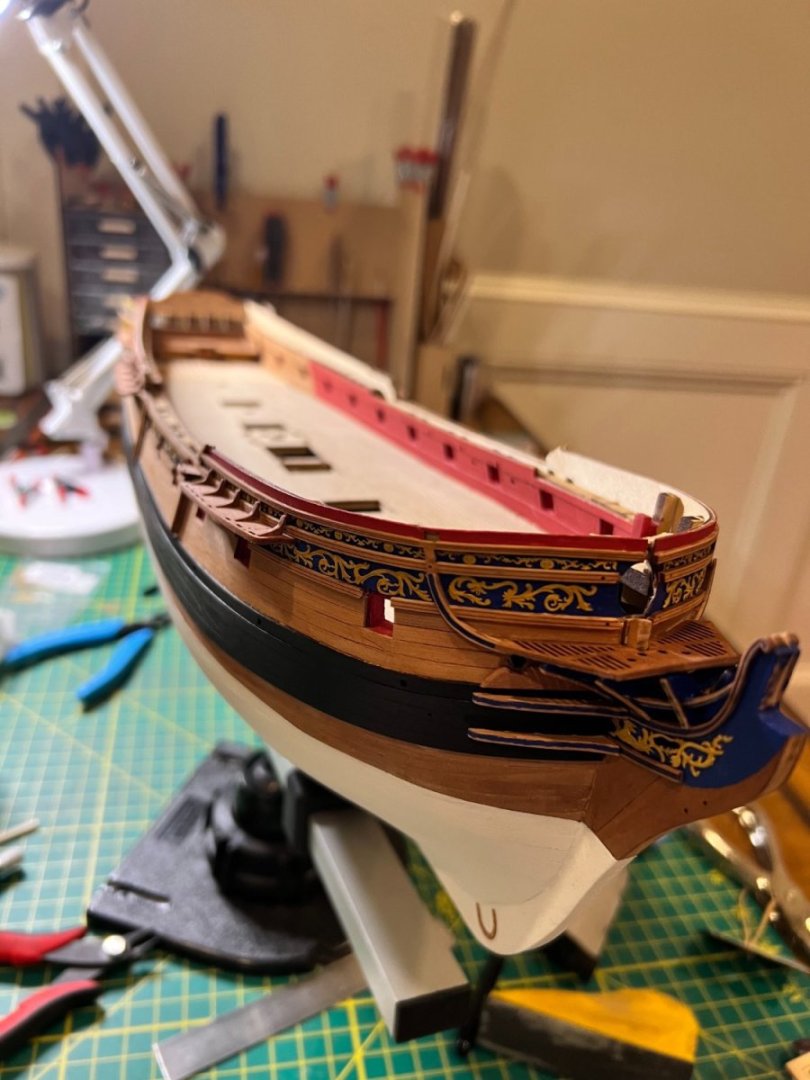
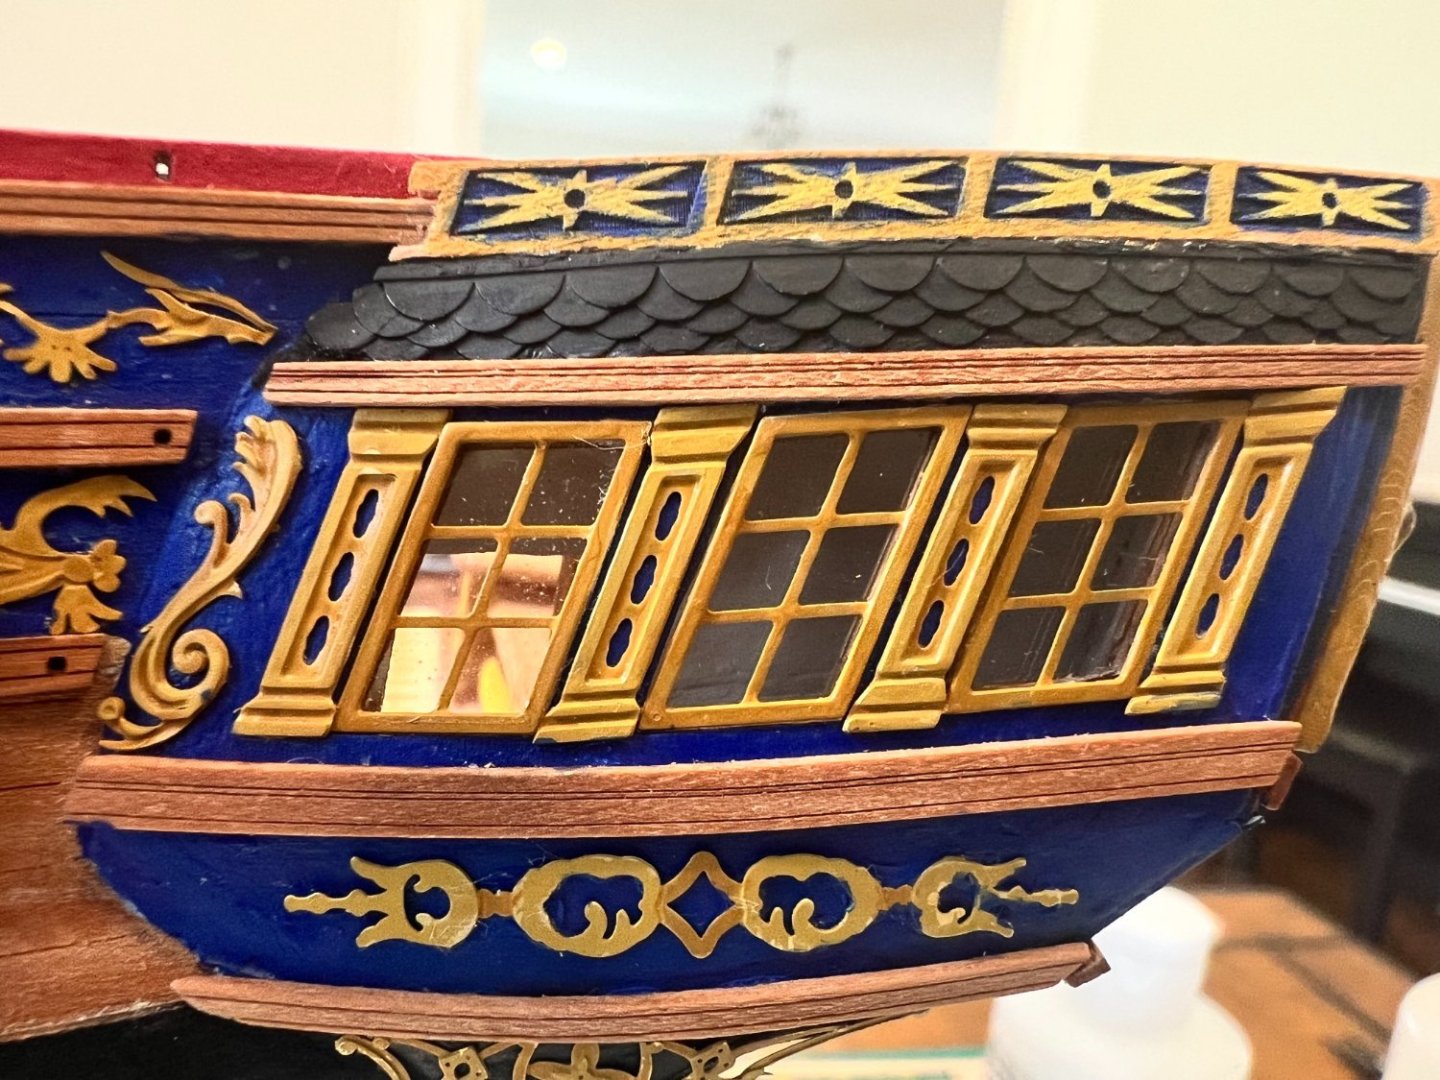
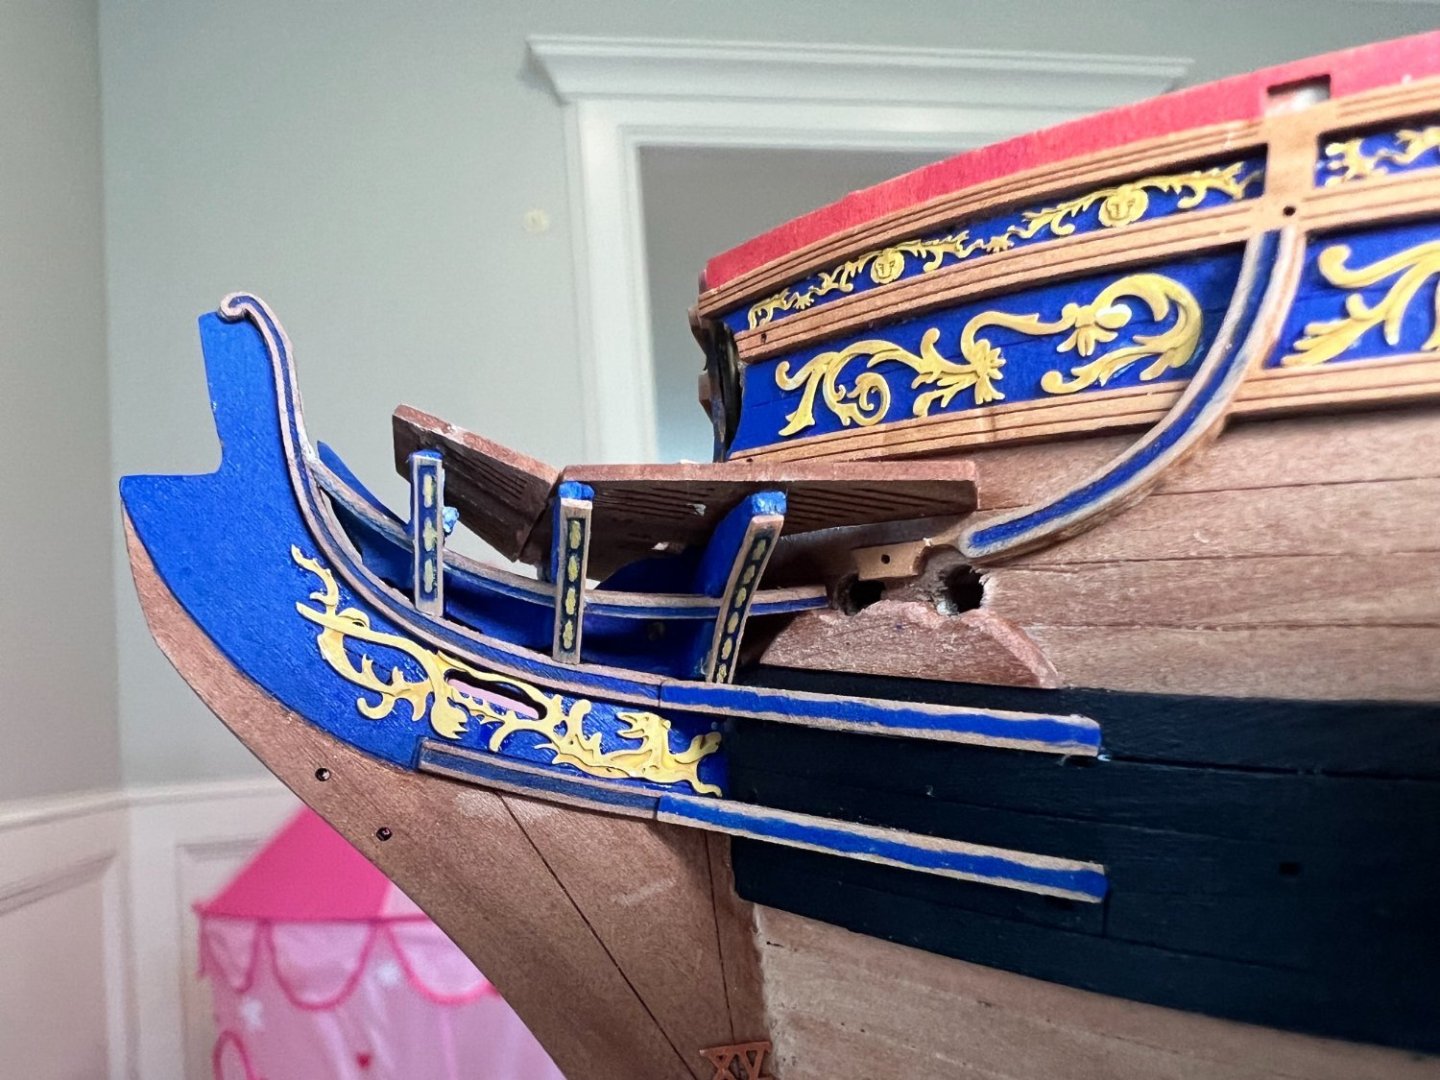
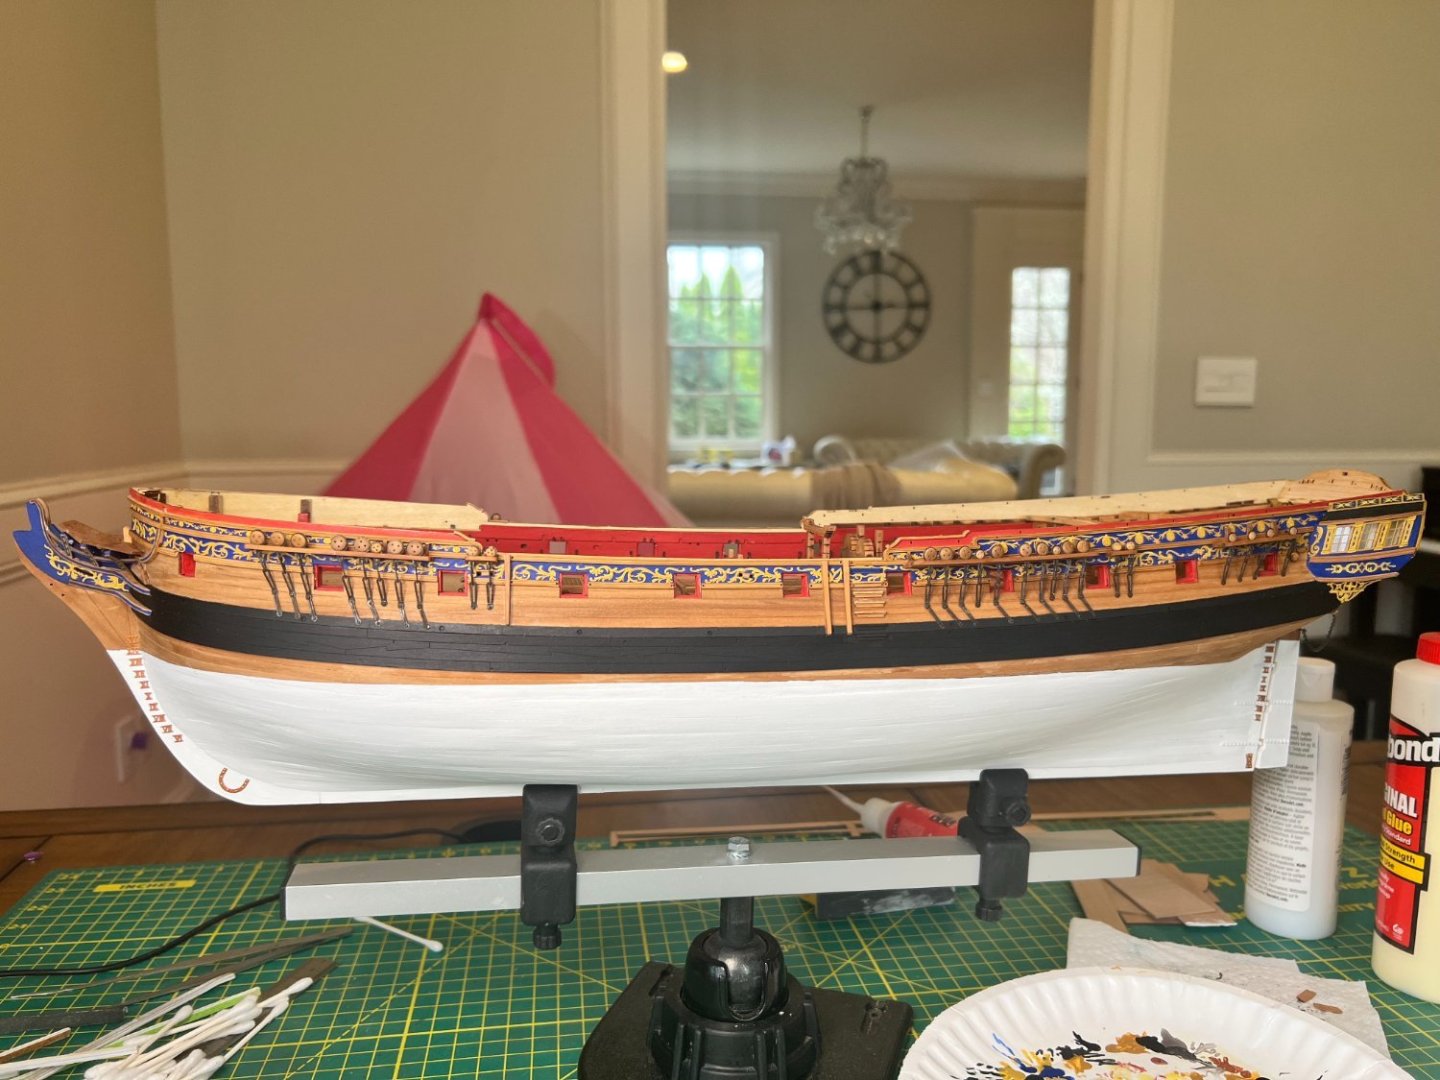
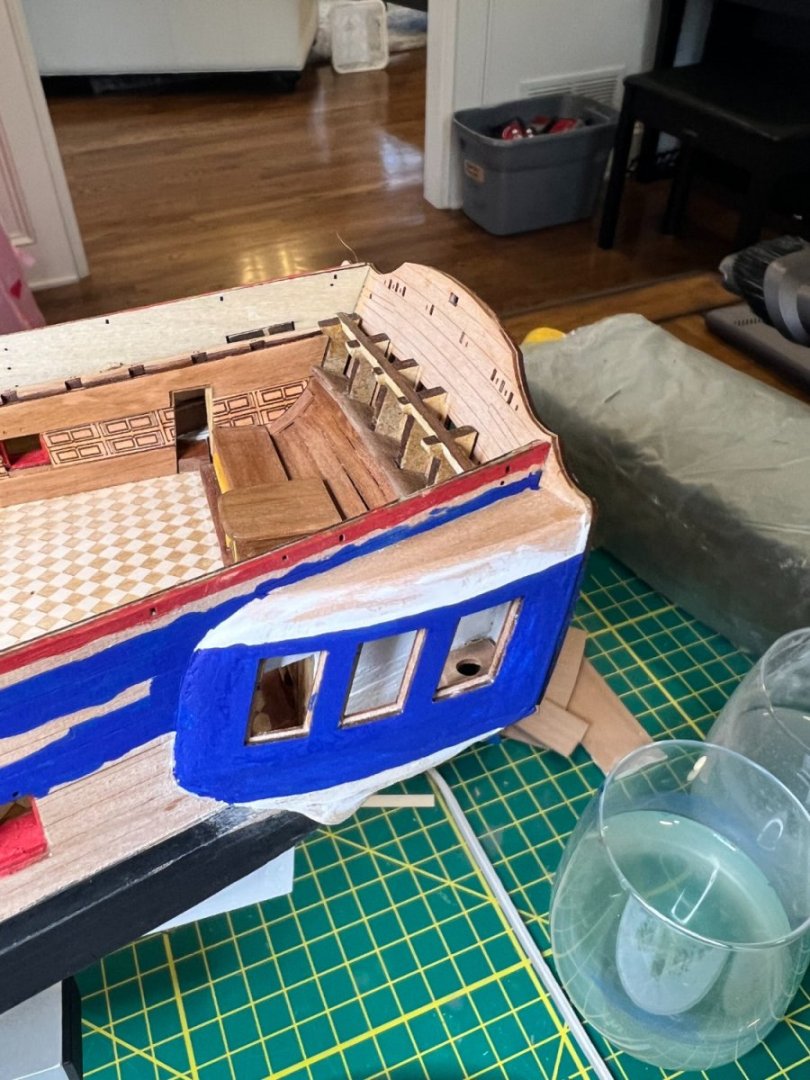
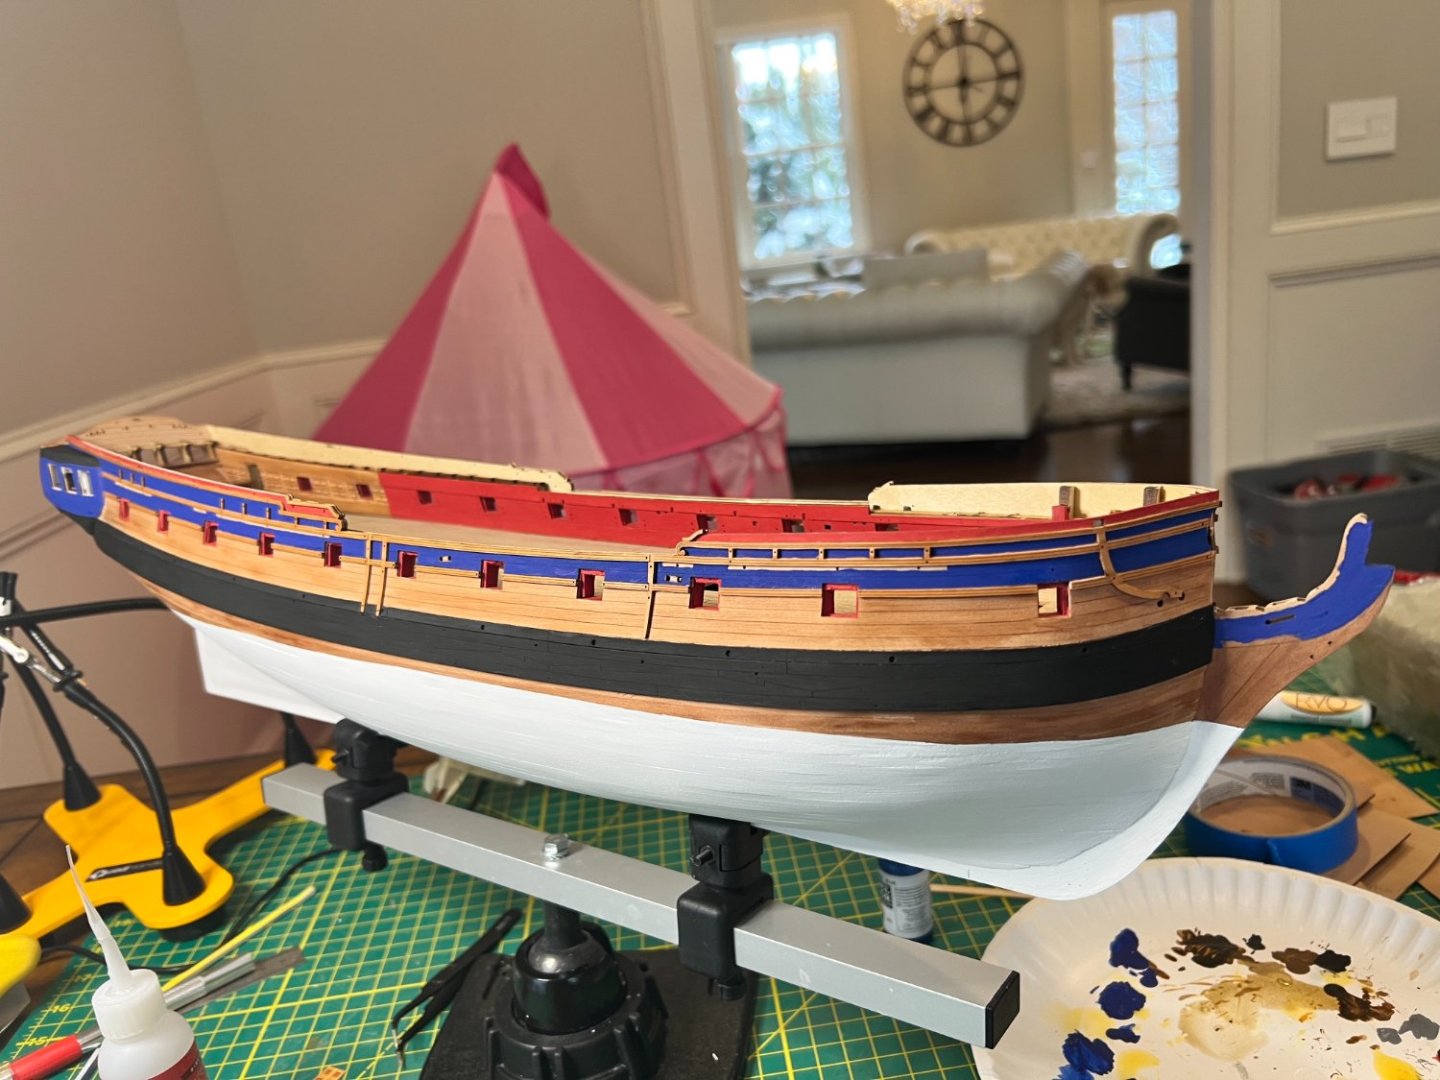
Post Thirteen: Completing Outside of the ship I have now finished the detail work of the outer ship. My impressions of the ship so far are that while the model fits together much more nicely than any previous model I've made, the level of detail increases the complexity level. In many ways this model is less difficult than my previous model the HMS Dianna because the amount of carving and "good enoughing" I had to do to make that model go together was a challenge. These parts are by far better quality, and they fit together so much better. Still, the shear amount of details added to this model offsets the easier fitting, making this model equally as challenging but in very different ways. Personally, I really enjoy the detail work. I picked up figure painting between models, and I find this skill directly applicable to Vanguard models. I am not keeping the exact colors of the kit. Instead I have borrowed from other builders on this site creating it in the fashion that suits my taste. I am willing to deviate from historical accuracy to a degree if I like the aesthetic alteration. For the yellows I followed Blue Ensign with the Ochres. I didn't like the ivory white as much for the high detail coat, so I left it out for the most part. Here I have hung the anchor. I used the Syren fittings, as I prefer the swivel. Adding these side details was a new challenge for me. I like using this PE material. It's perfect for painting, as it is layered. My biggest problems here was preventing the CE glue from turning the blue paint white and stationing them on accurately. It was tedious to lay them out, and I had a lot of touch up work after it was done. Wow! This close up makes my "great" painting job look rather sloppy. One thing I'm a little unsure of is the "leafy" piece next to the windows. Is that supposed to go there? I see some modelers add it, while others place it in different spots or not at all. I think I made it look nice enough in the end. Here the channels have been added. I found them rather normal to install. Here is the completed rear. It took a lot of time to get the Sphinx decal the colors I wanted. In the end, I bought high quality paper, a new printer (we needed it), and printed the photo twice overtop itself. This created a much richer color that resembles the blue paint. I am very happy with this outcome. =] The roman numerals proved tricky for me. I had to touch them up after CE gluing them on, as I couldn't help pulling off chunks of copper paint while gluing. These pieces are so small! Detailing the nose of the ship, I really like what Blue Ensign did (if you can't tell, I'm a big fan of his work!) I painted in blue all the middle lines to add an extra elegance to the design. Below is side shot of the nose: Finally, the completed outside! The deadeyes were a real treat! Their design was great to work with. I blackened all the PE parts in this kit with Brass Black. That was new for me as well. (I also started the inside, but I'll save those pictures for the next post.) One final note: I have used mostly Natural color wood finish stain on the parts. I love the aesthetics of this finish brings. Thanks Hollowneck for the advice.


-
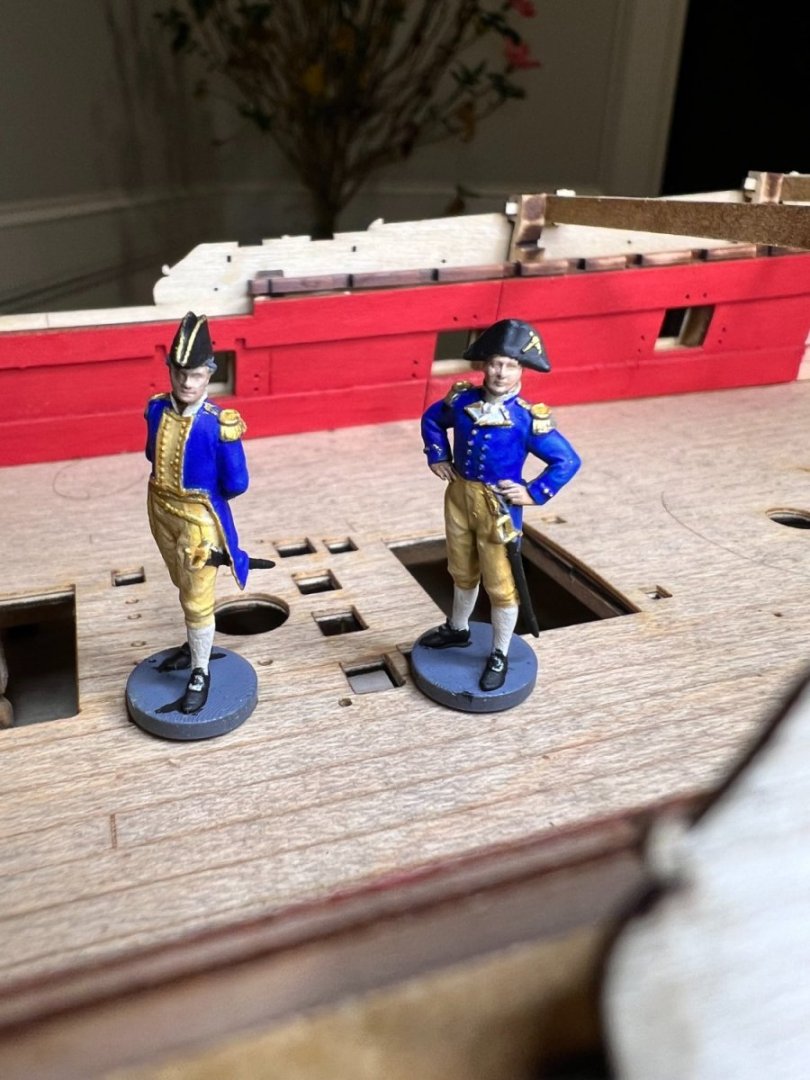
Hey Clogger, Thank you! I bought the figures from the Vanguard. Chris Watton has put extraordinary effort into every model and figure he makes. You can't go wrong, if it's in your budget. https://vanguardmodels.co.uk/
-
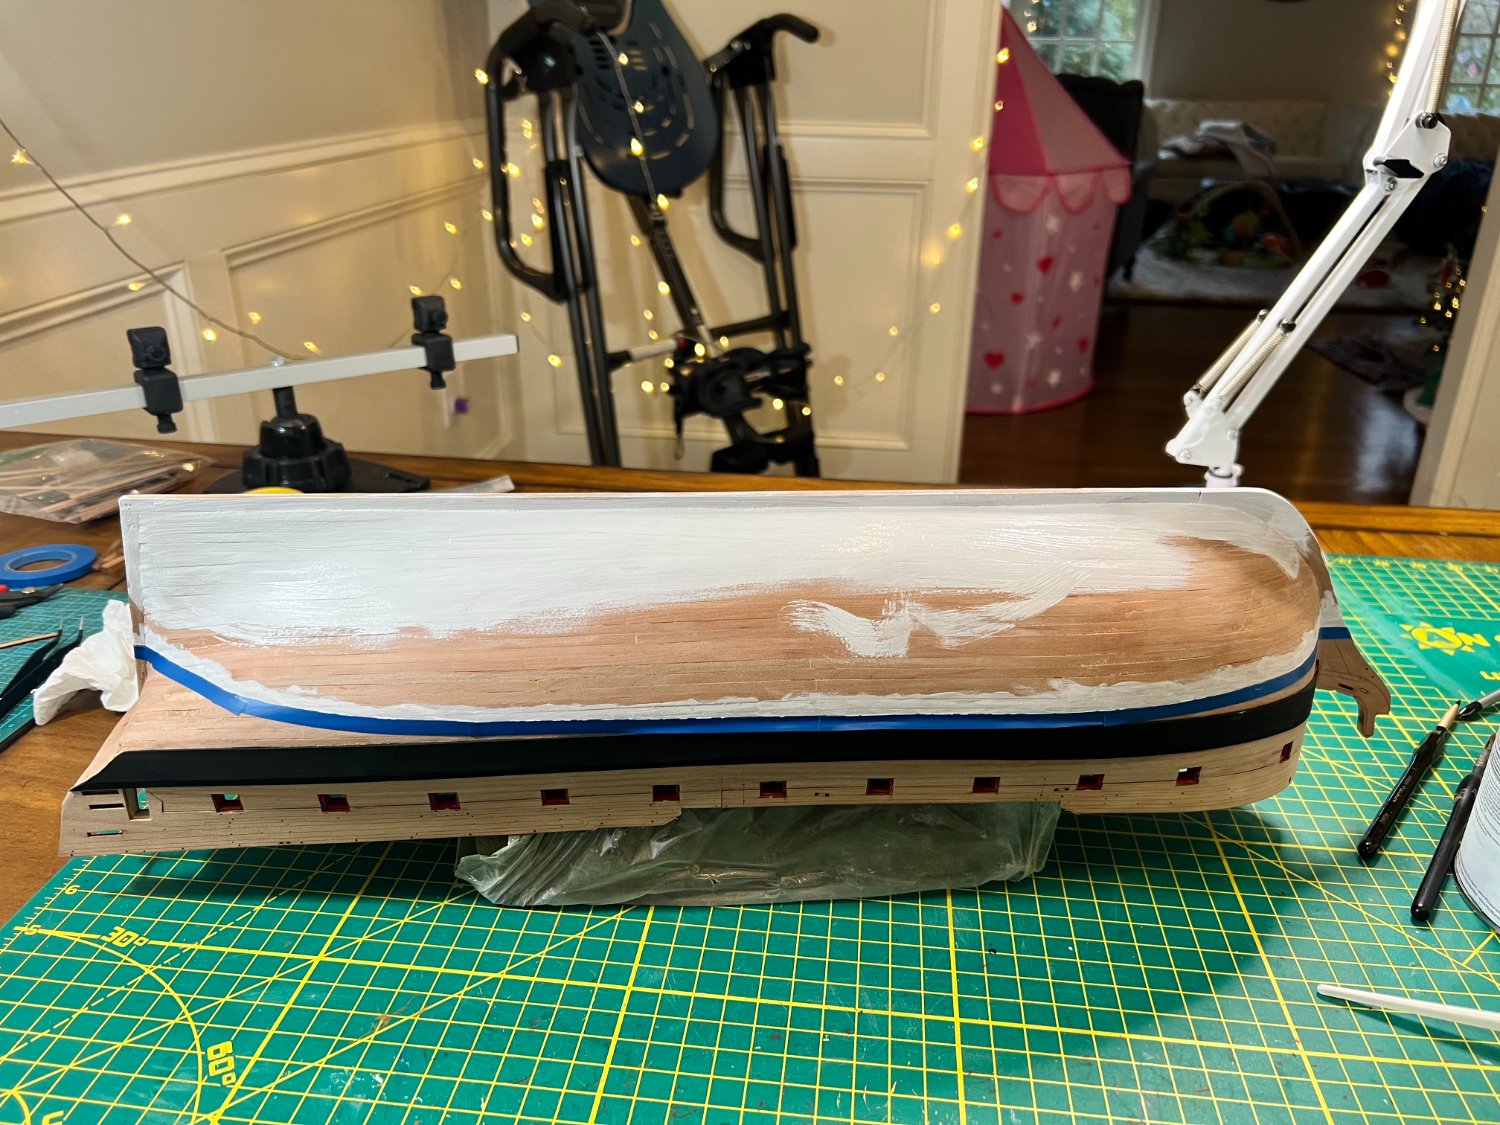
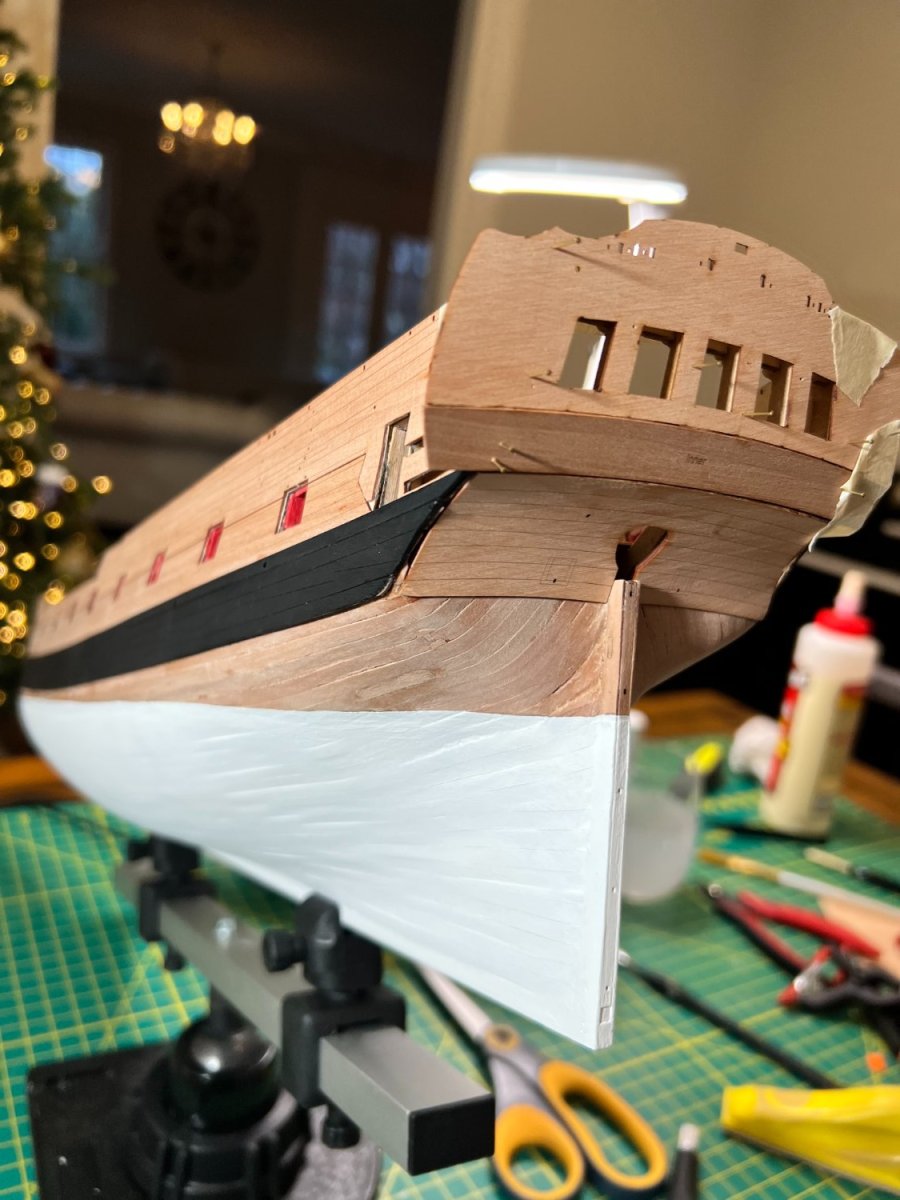
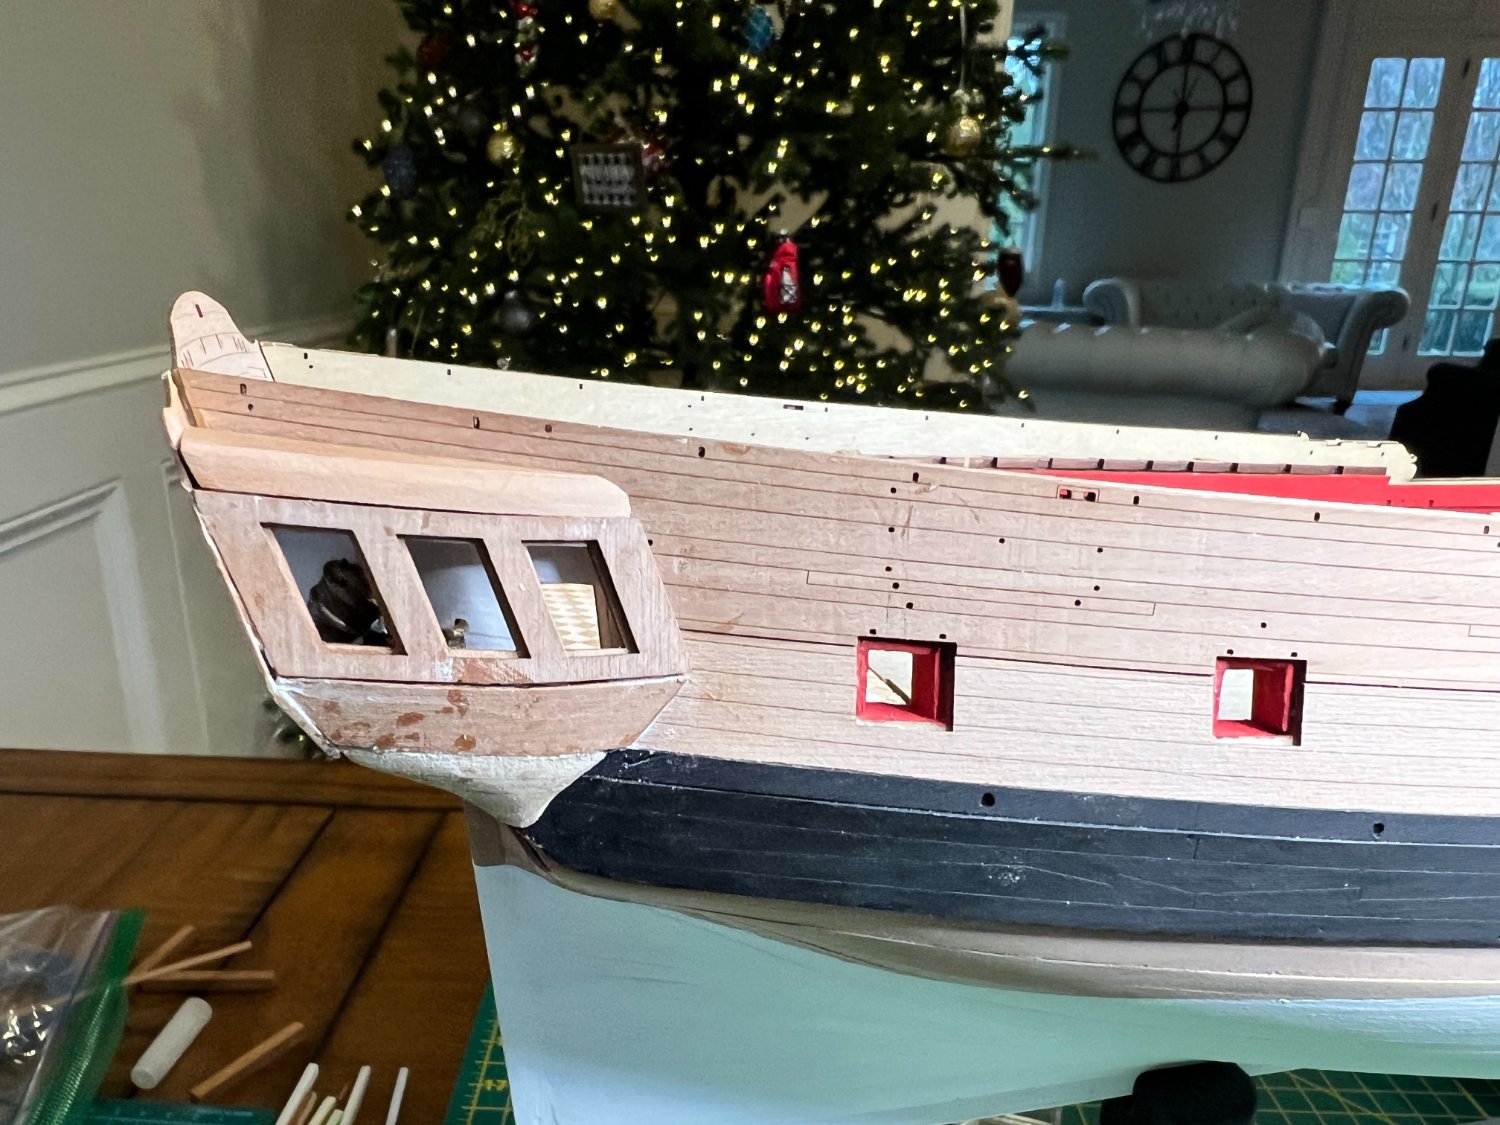
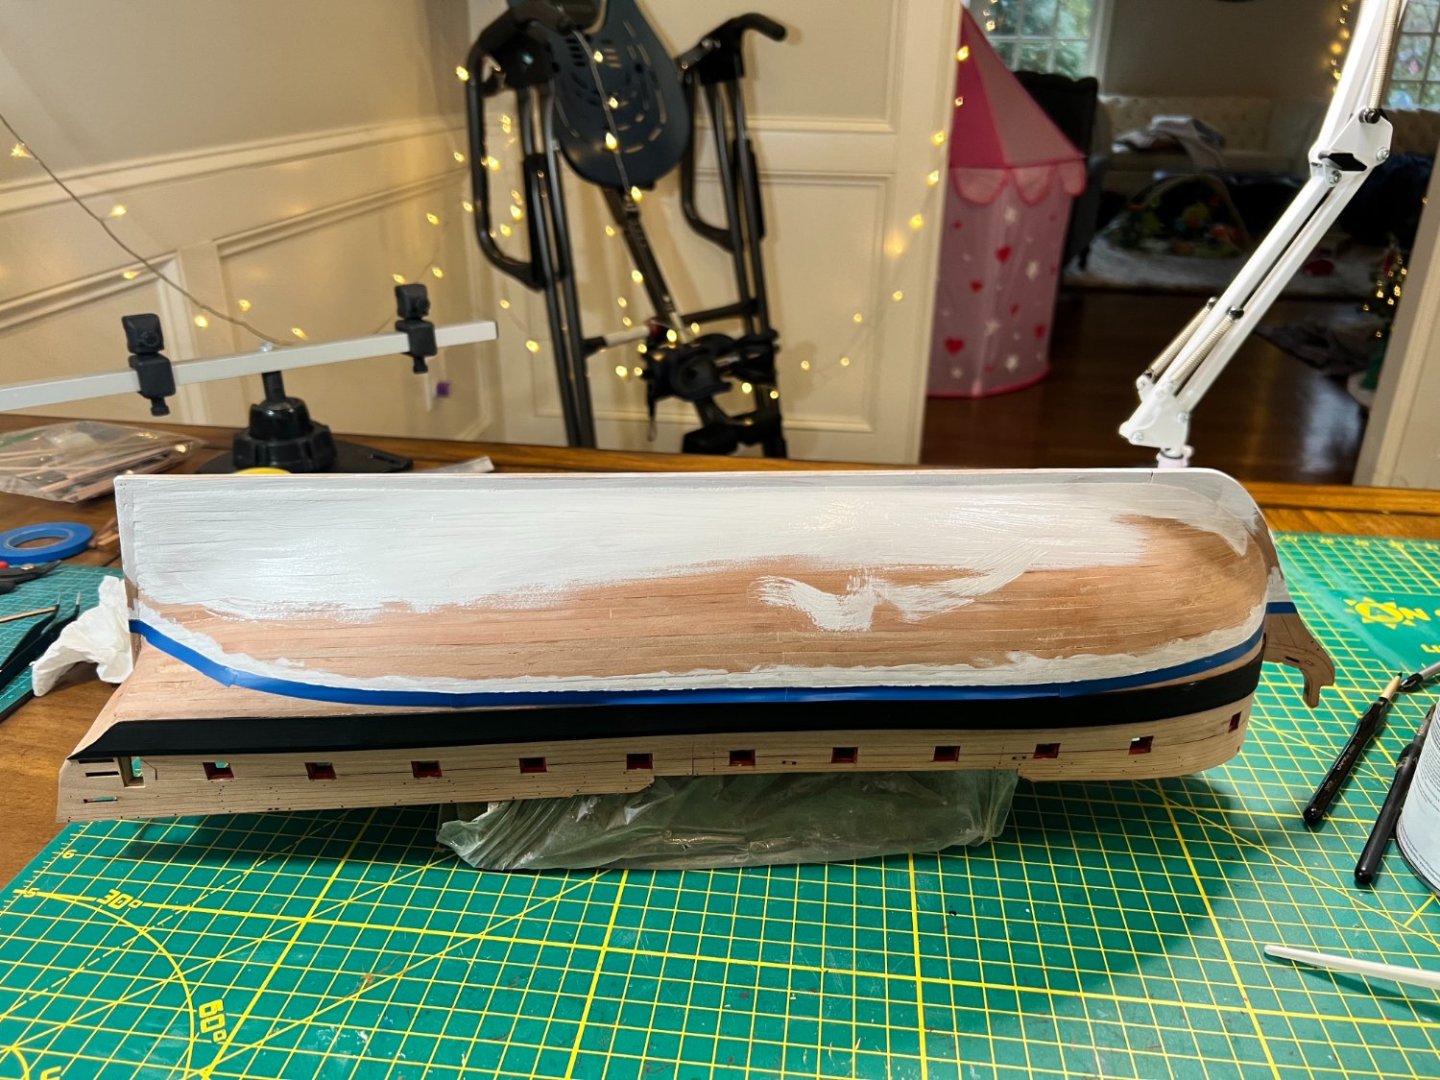
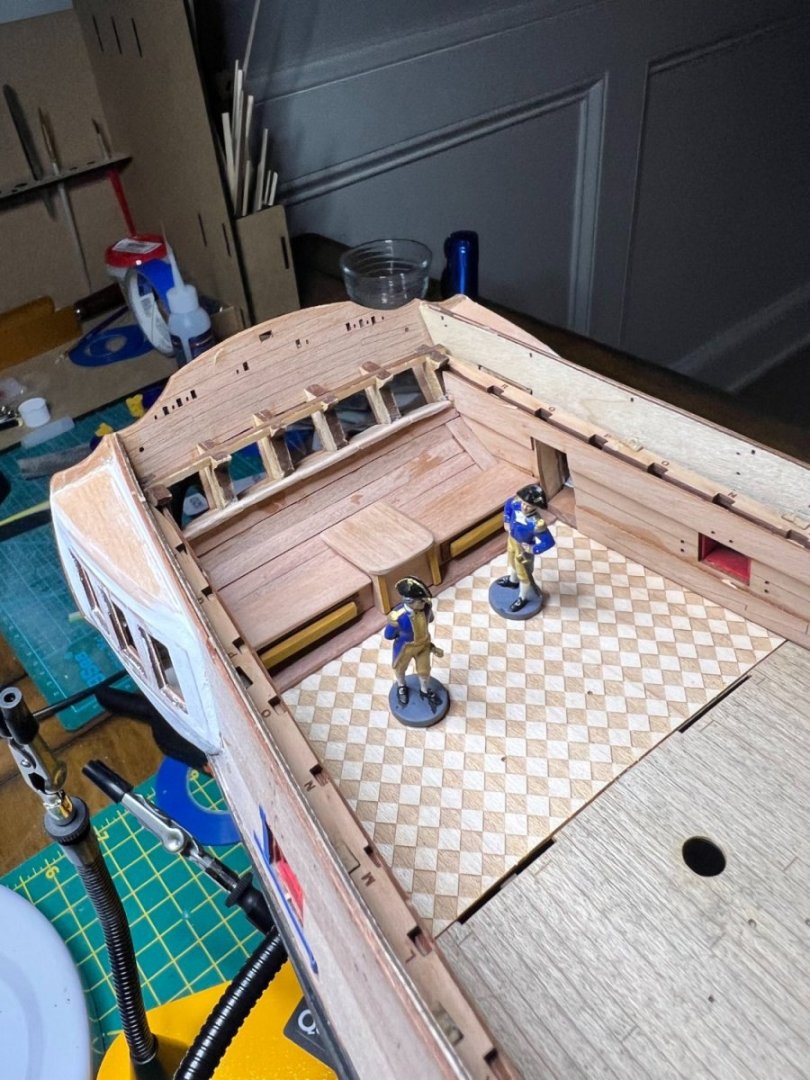
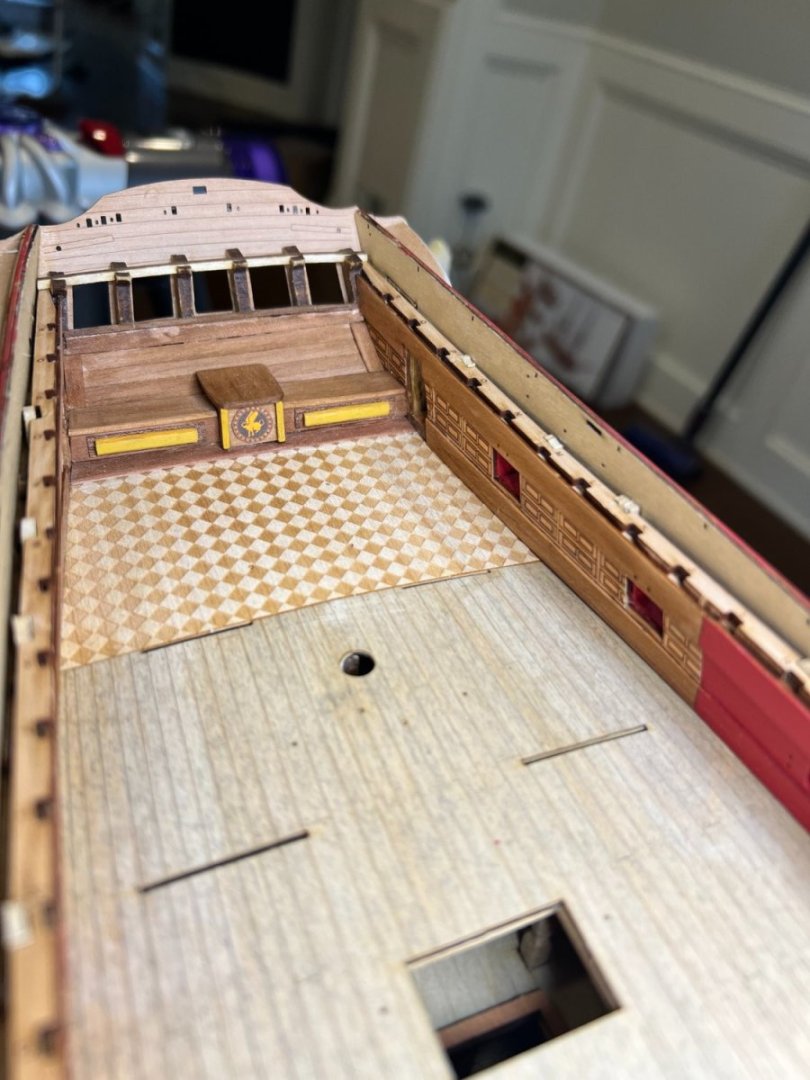
Post Twelve: Many Updates In keeping with my poor ability to keep up with this journal, I have taken relatively few pictures and have not posted in a timely manner. Still, I have many updates worth sharing. Many of these have been inspired by Blue Ensign. I I felt my pear planking veneer showed too many errors, so I decided to paint the lower end white per the instructions. Here, I opened the quarterdecks following B.E's design. The deck on the starboard side is for storage, so I painted a few buckets and glued them in. It was the only storage items I had that fit that small space. Of course, the port side has the seat of ease for the captain. Next I completed the captain's quarters. First, I painstakingly crated the bench. Then I detailed the quarters with stain and decals that I copied from the books or B.E.'s build log. Next I turned to detailing the sides of the ship. Here are current photos of the build. I use Natural colored stain for the unpainted wood areas. My daughter's princess tent sets in the background =]


-
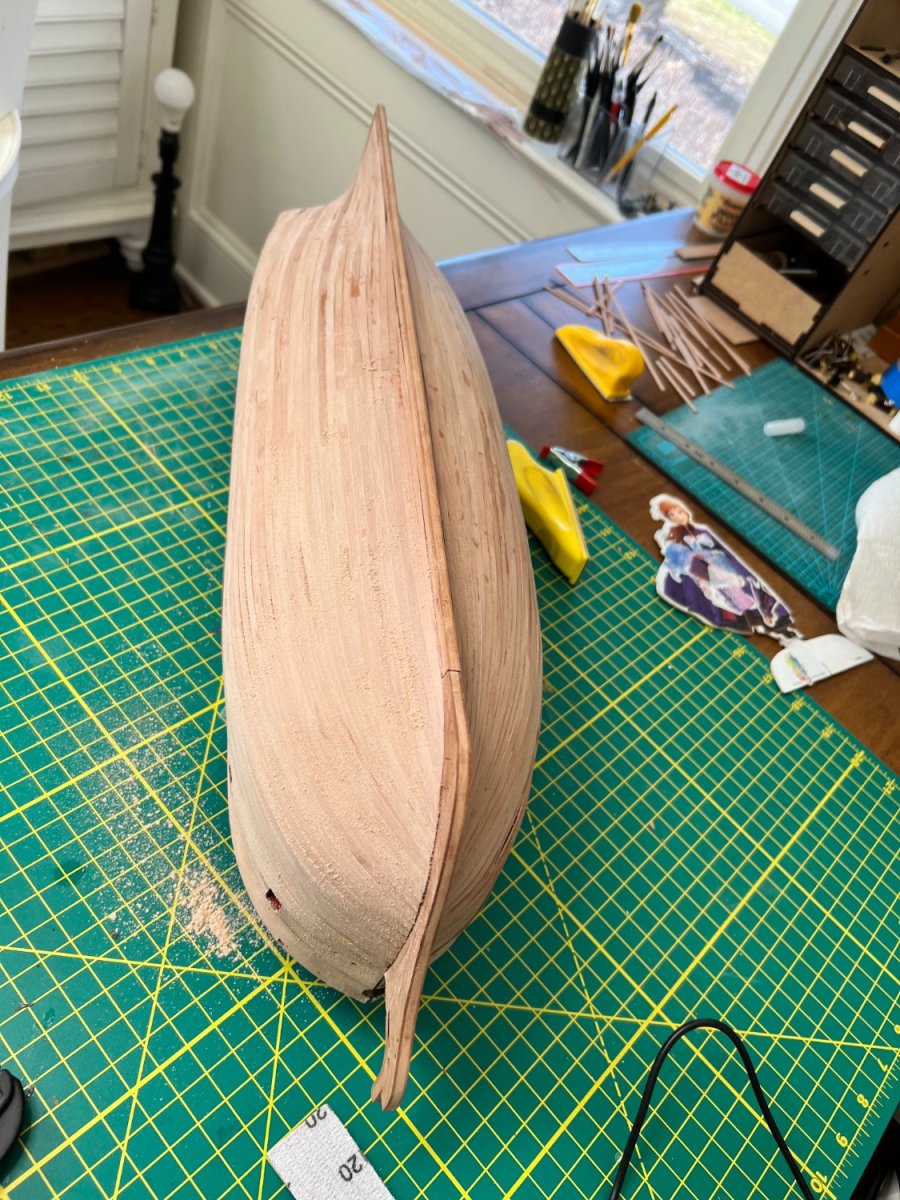
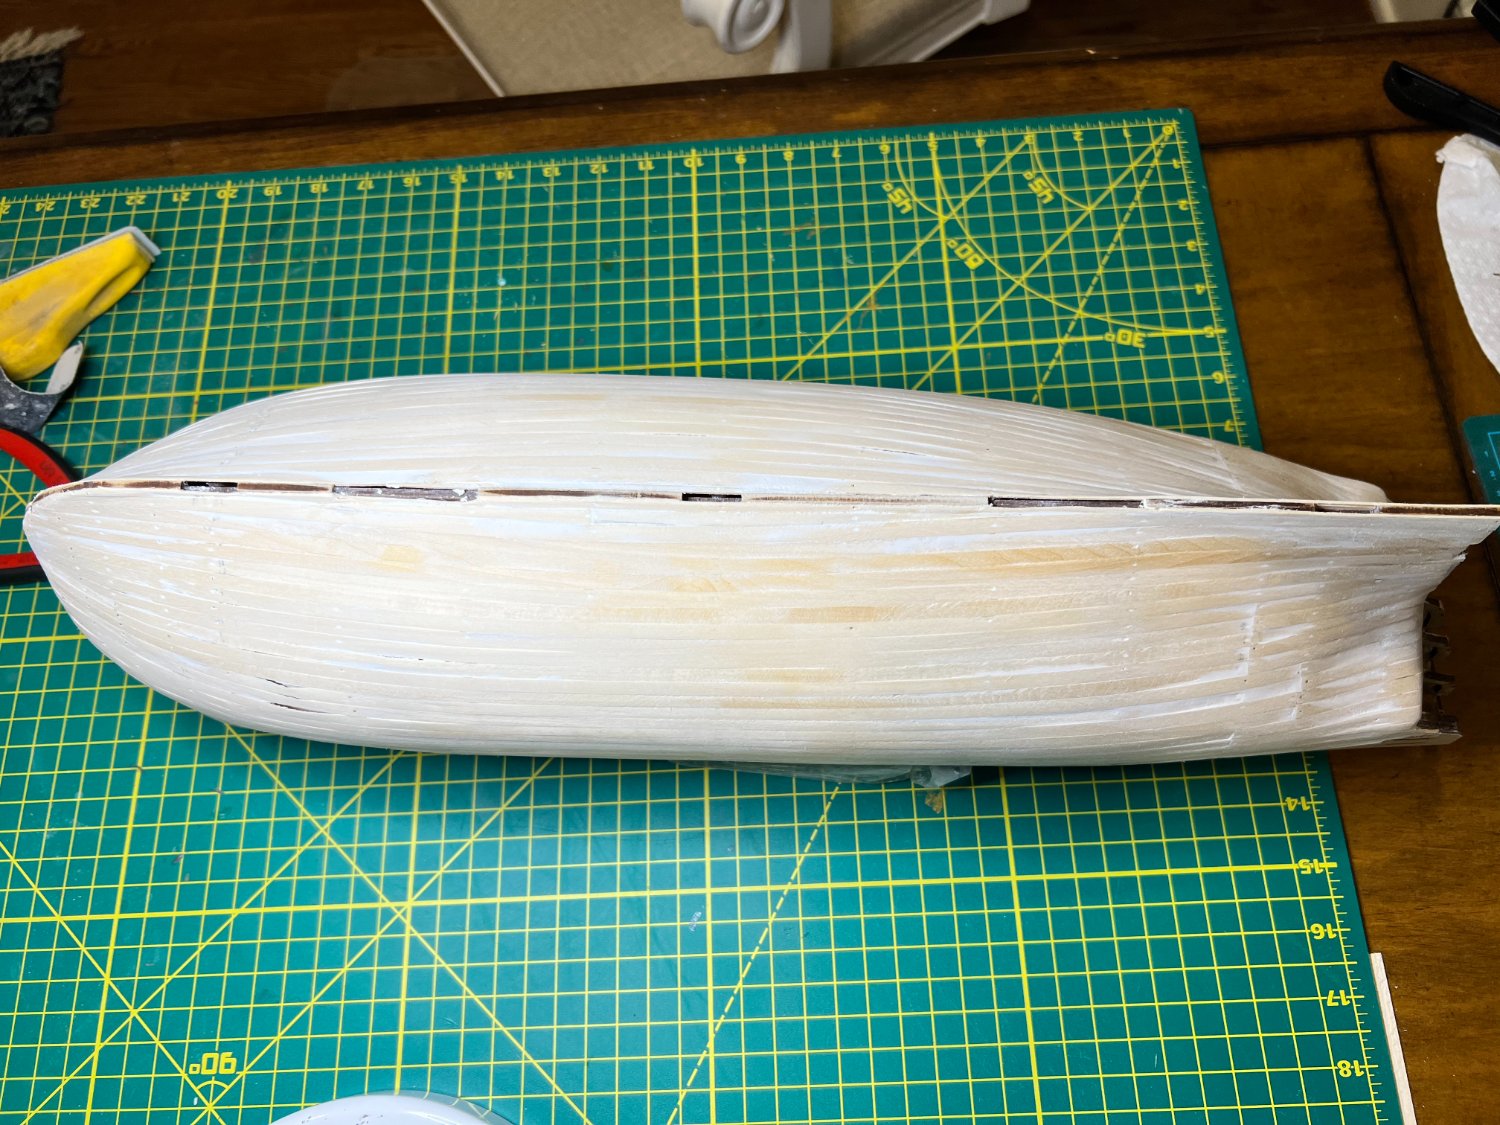
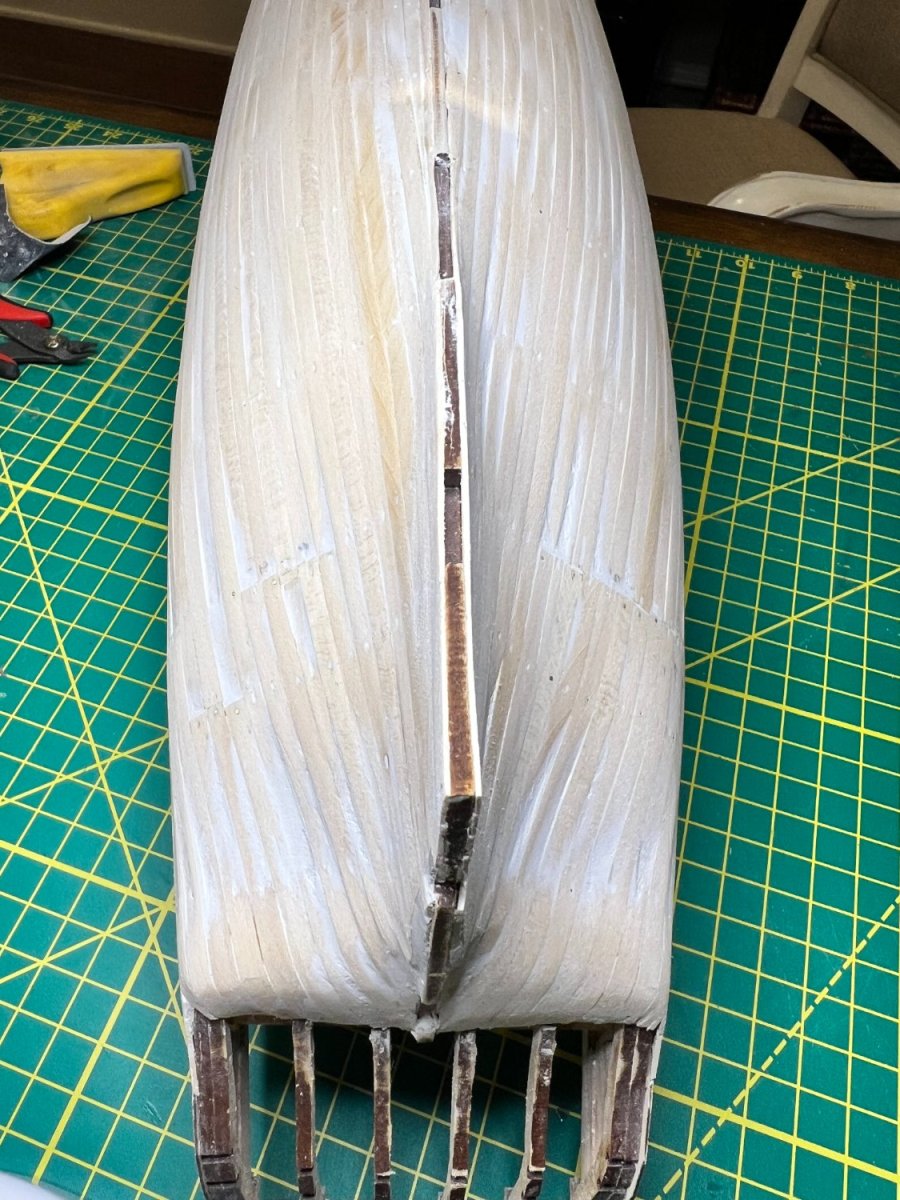
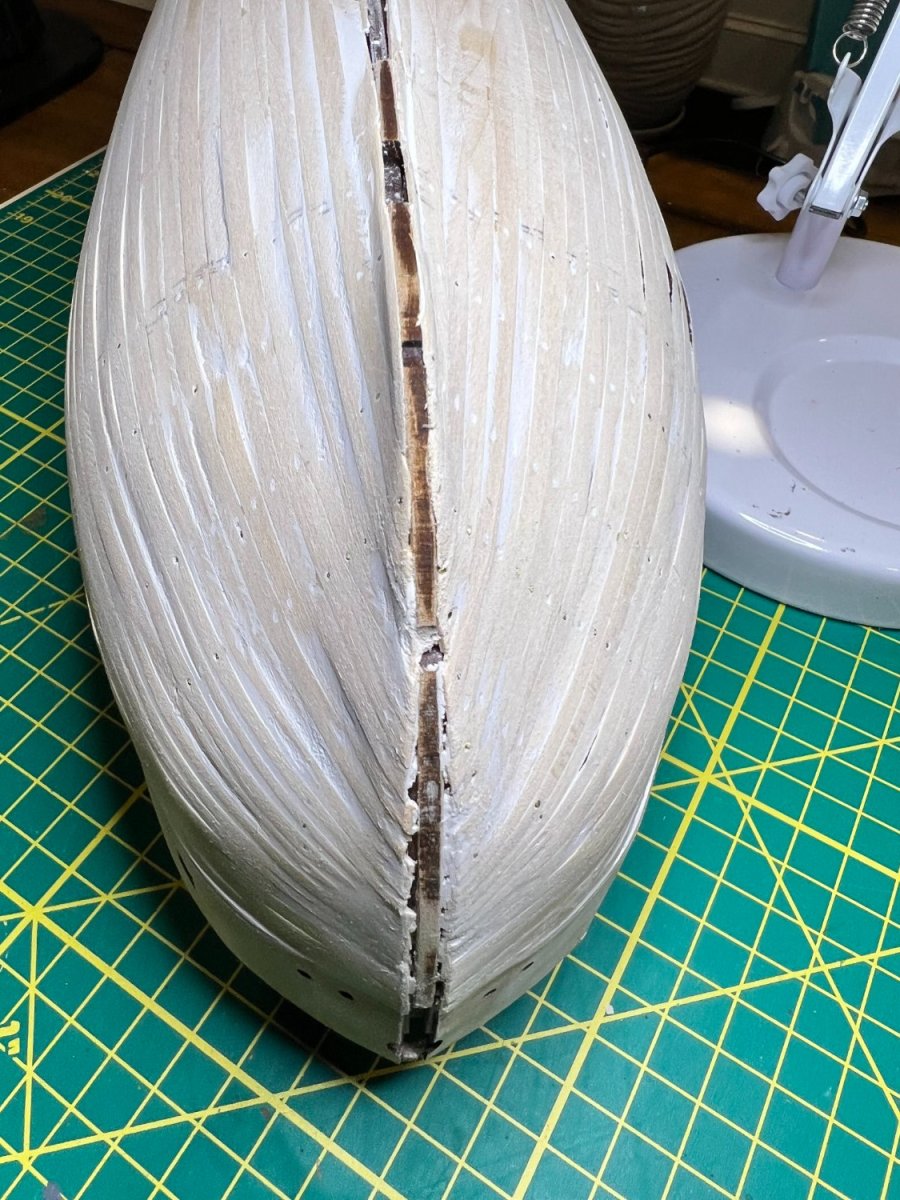
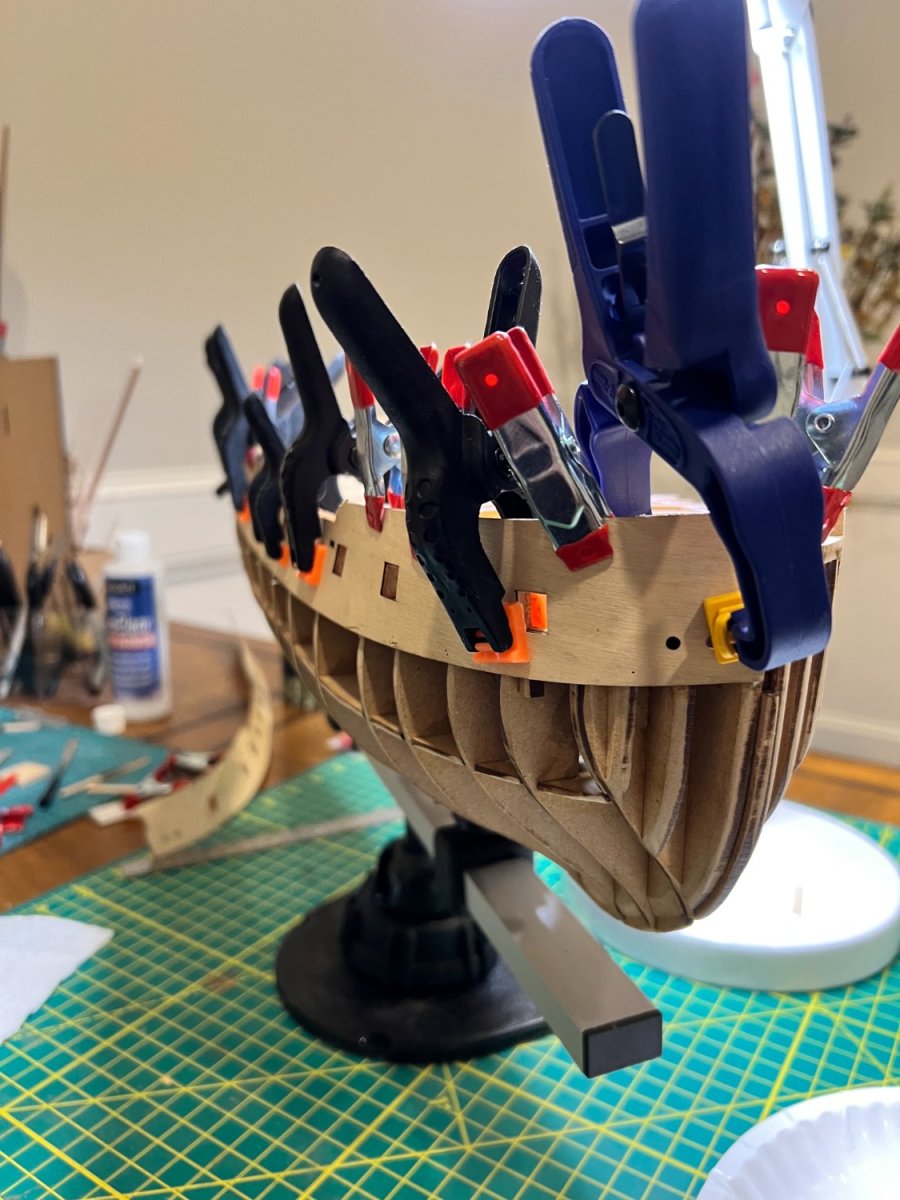
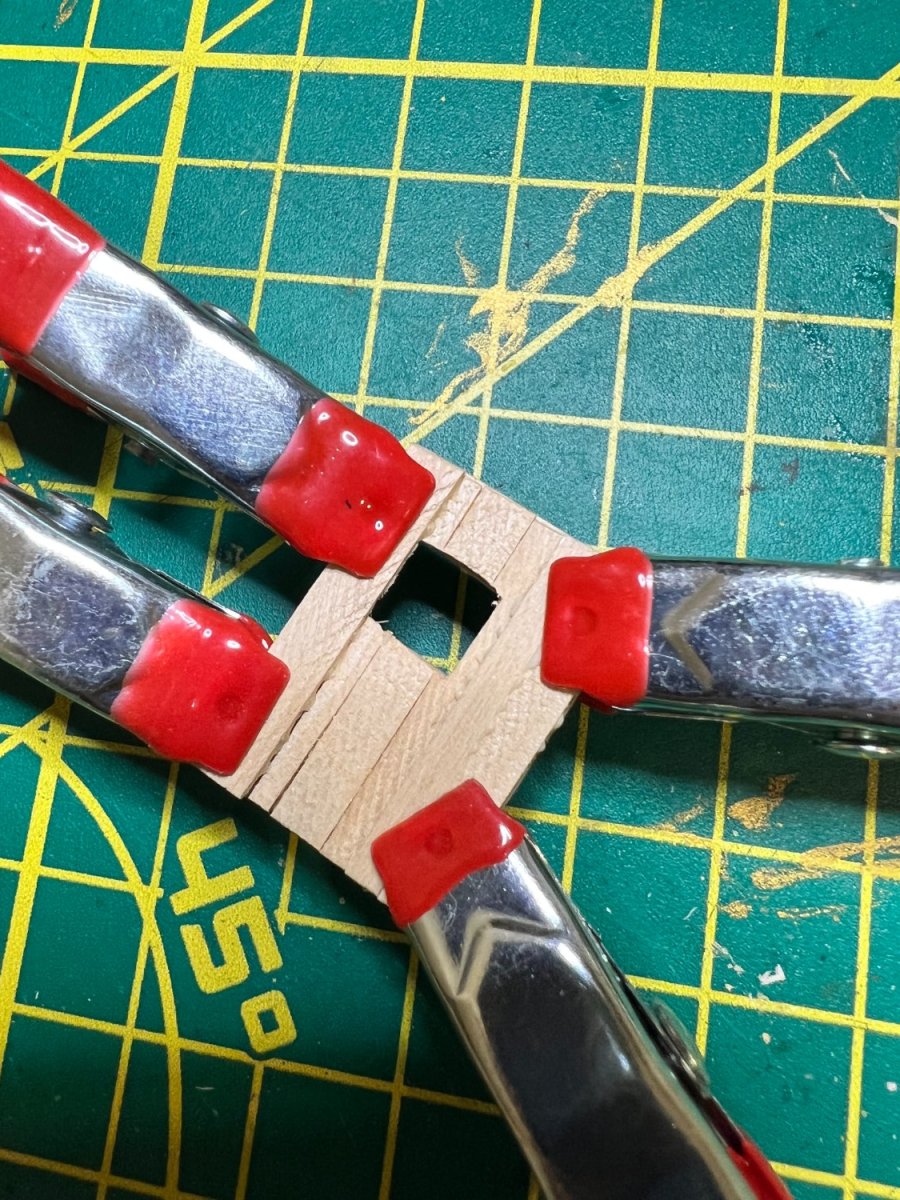
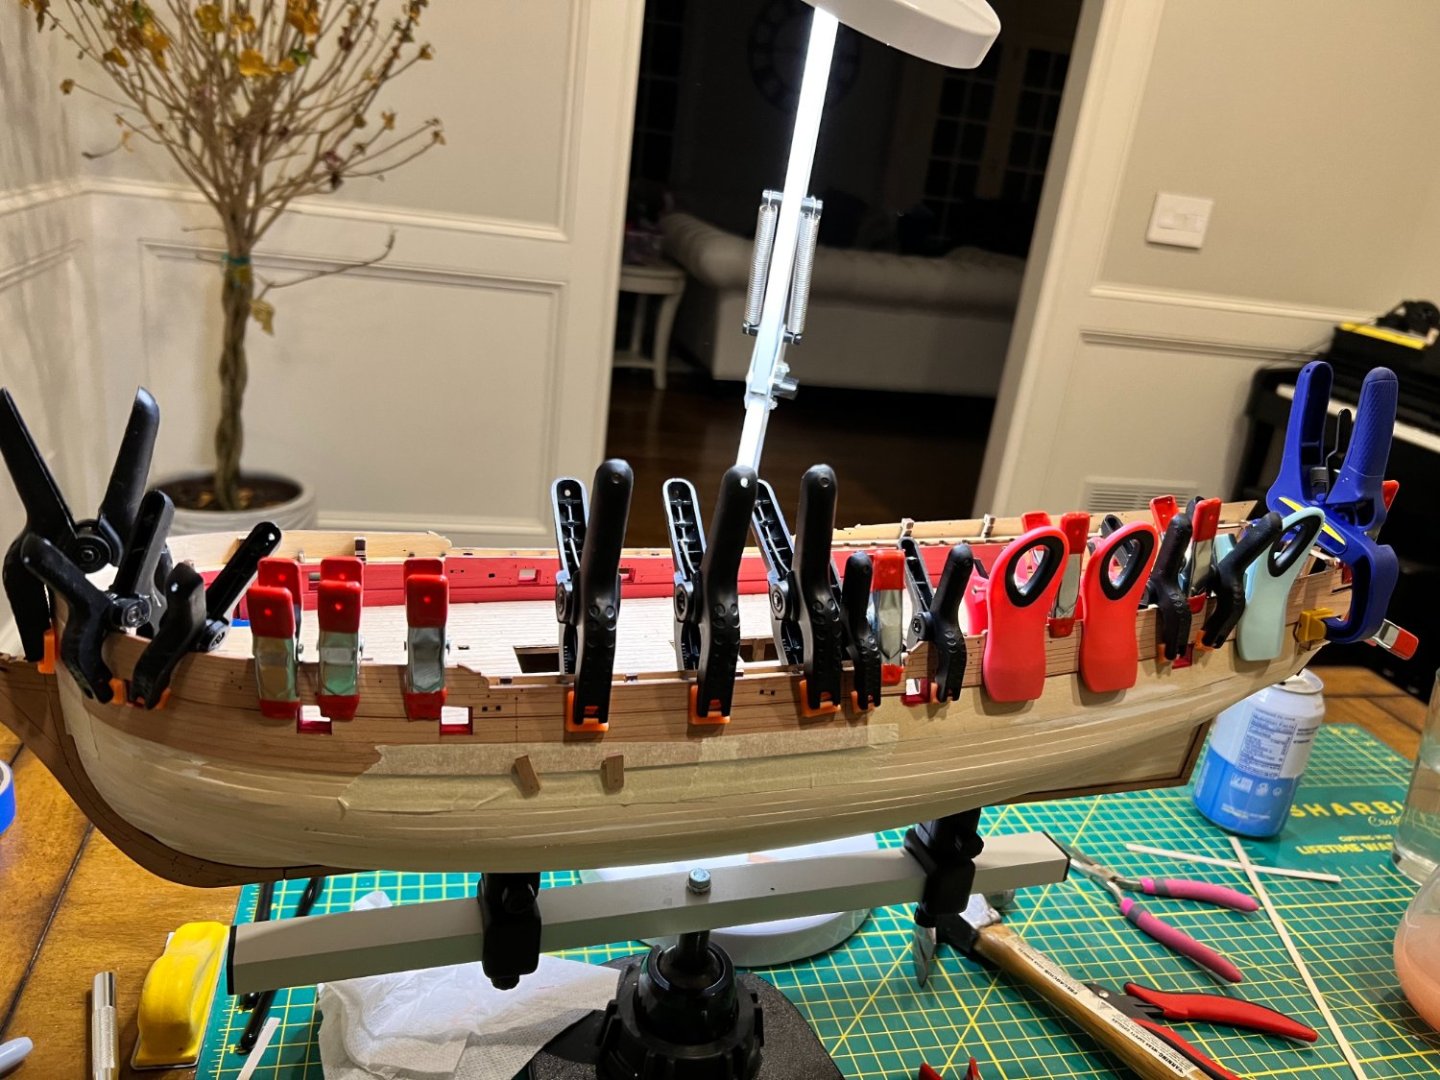
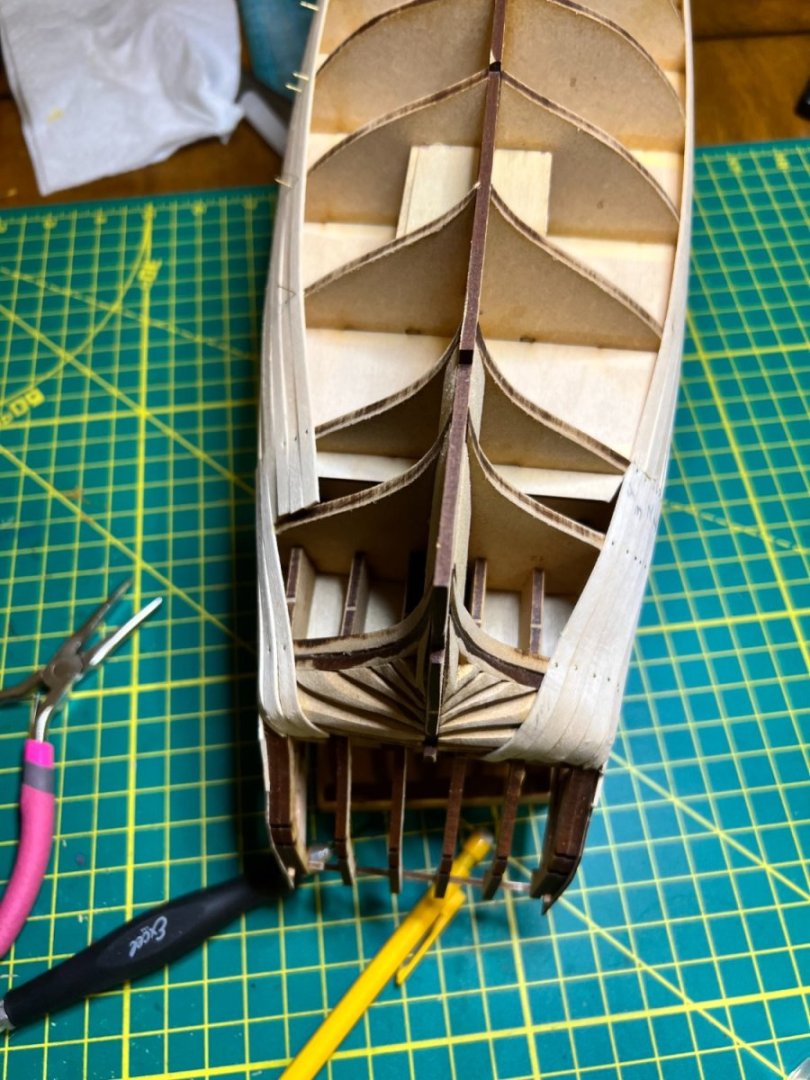
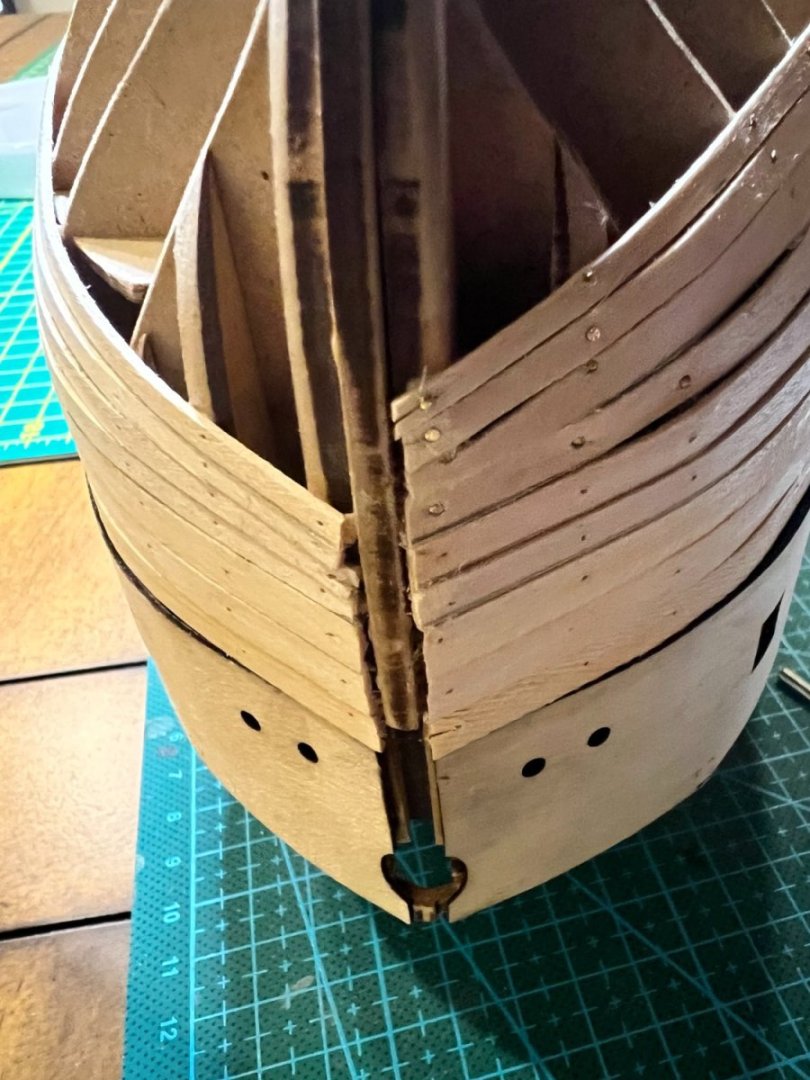
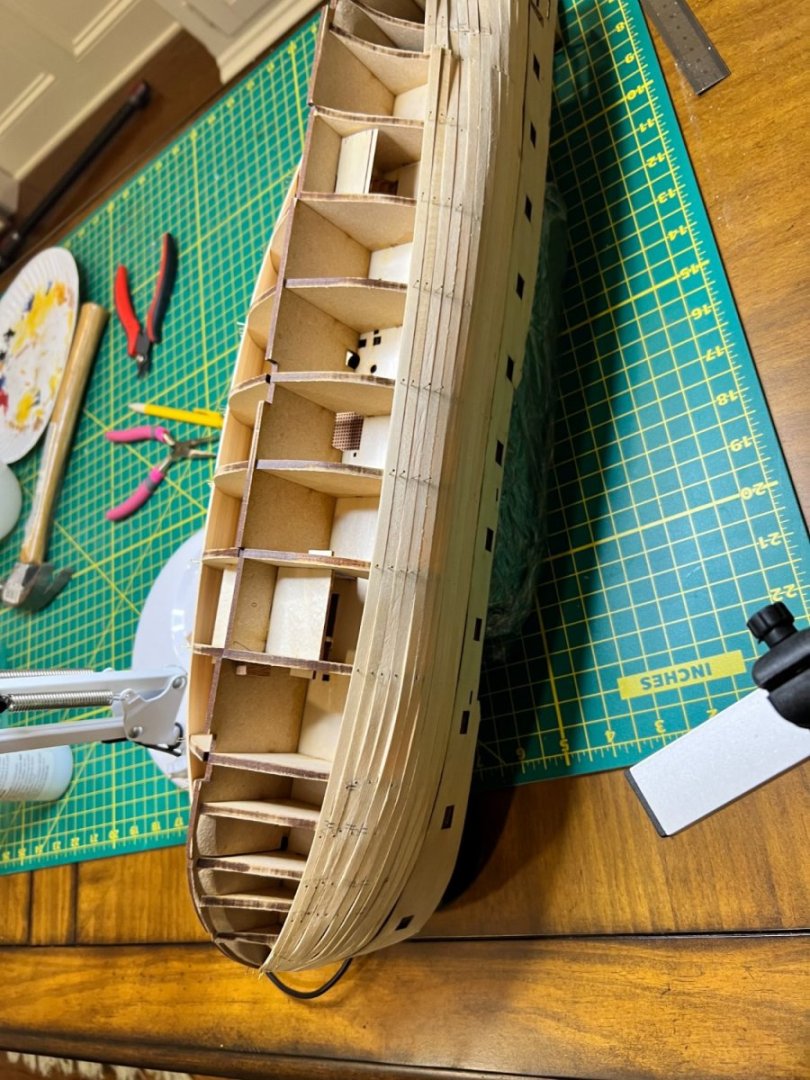
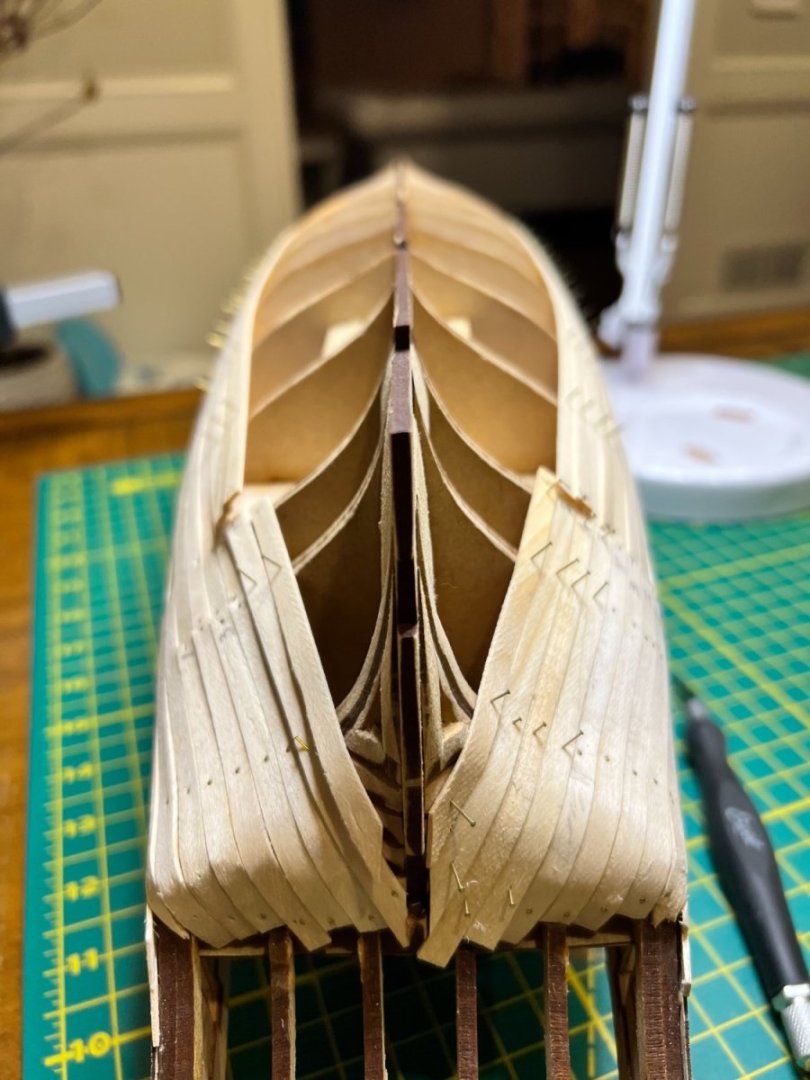
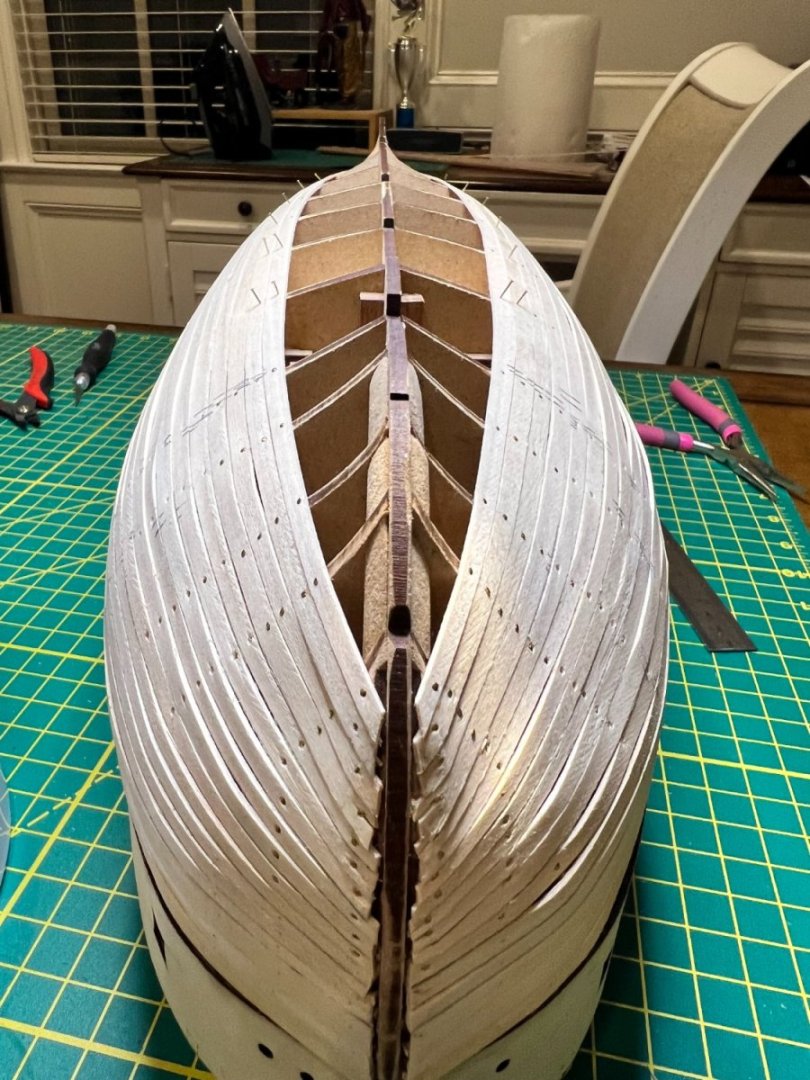
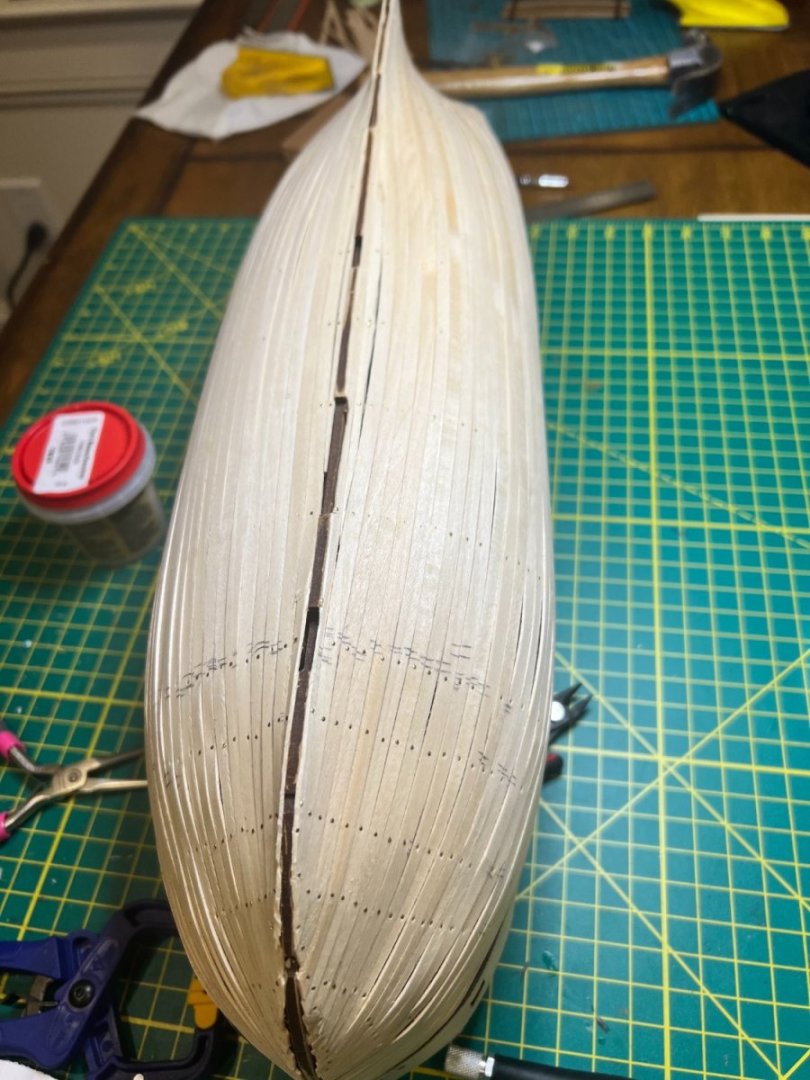
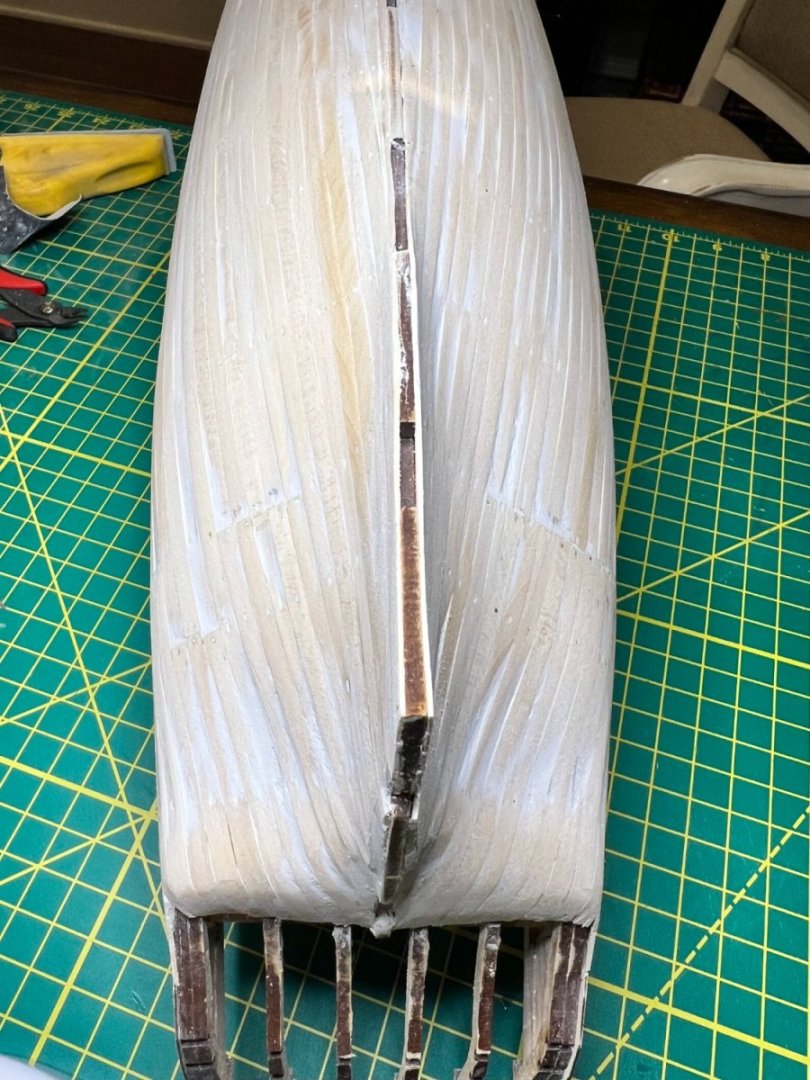
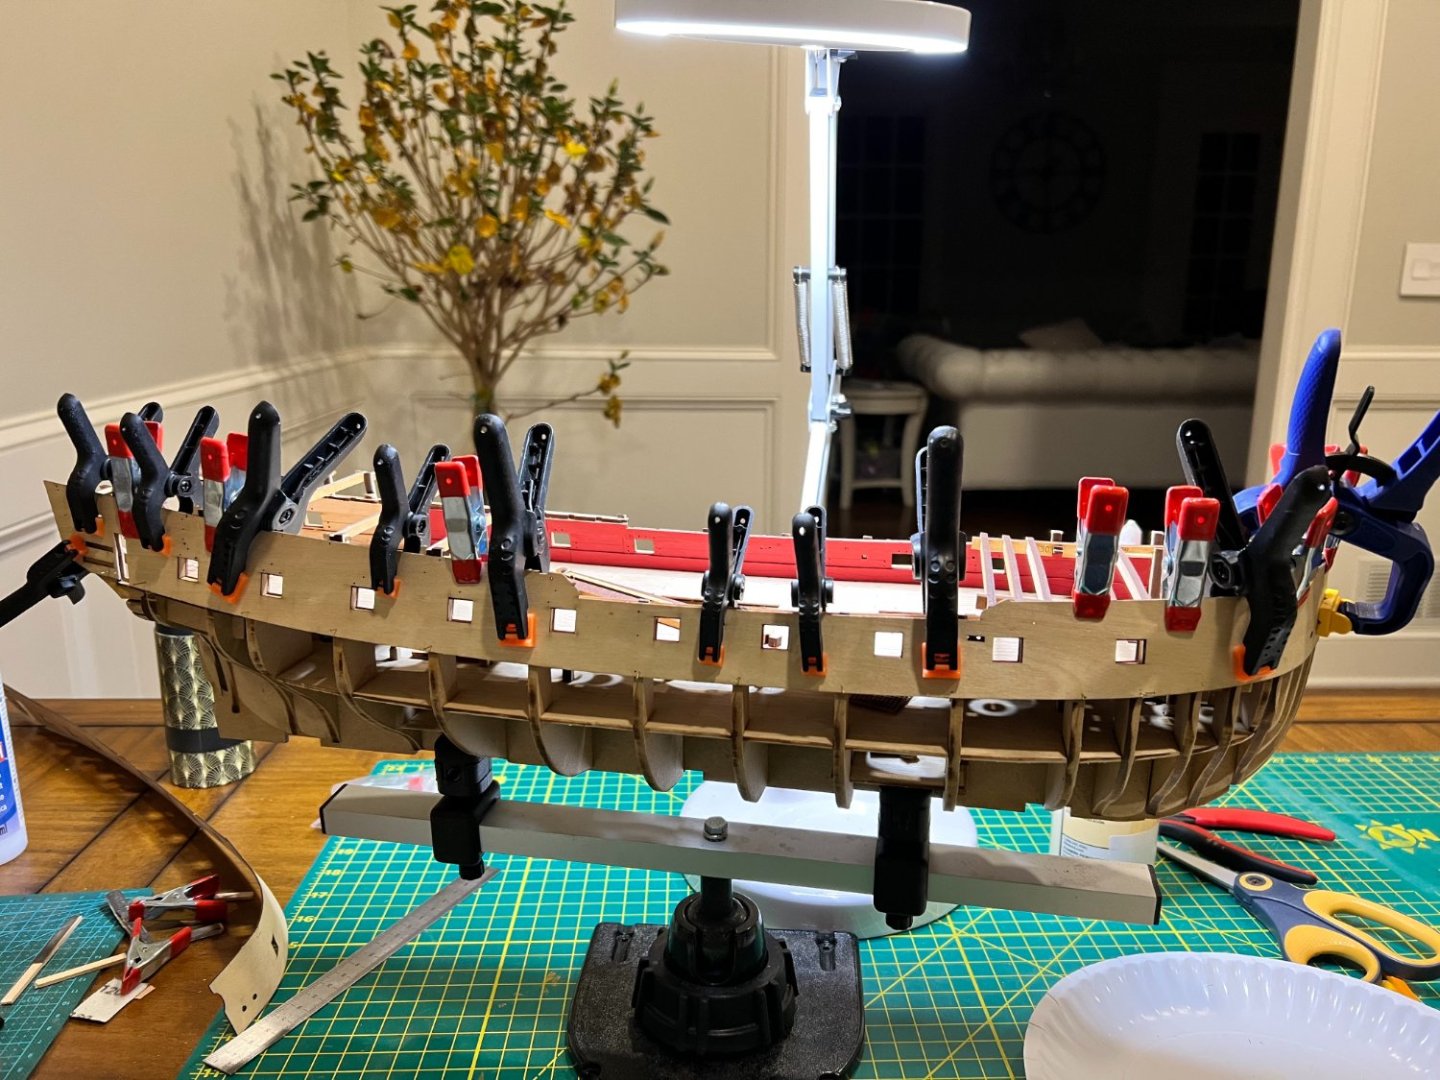
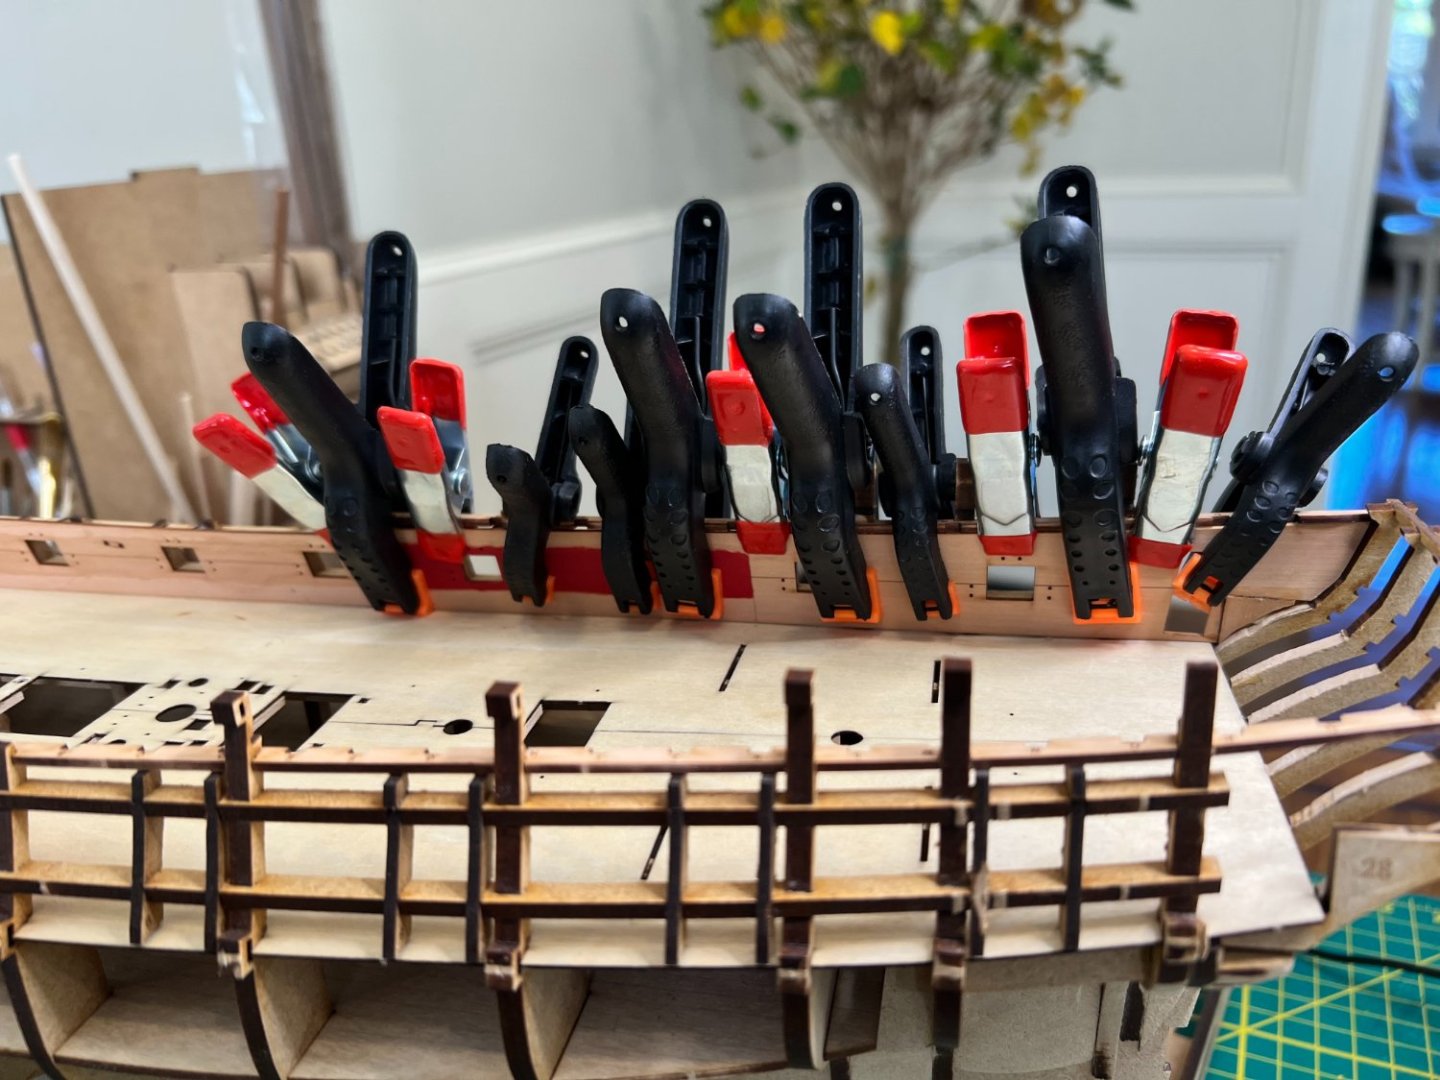
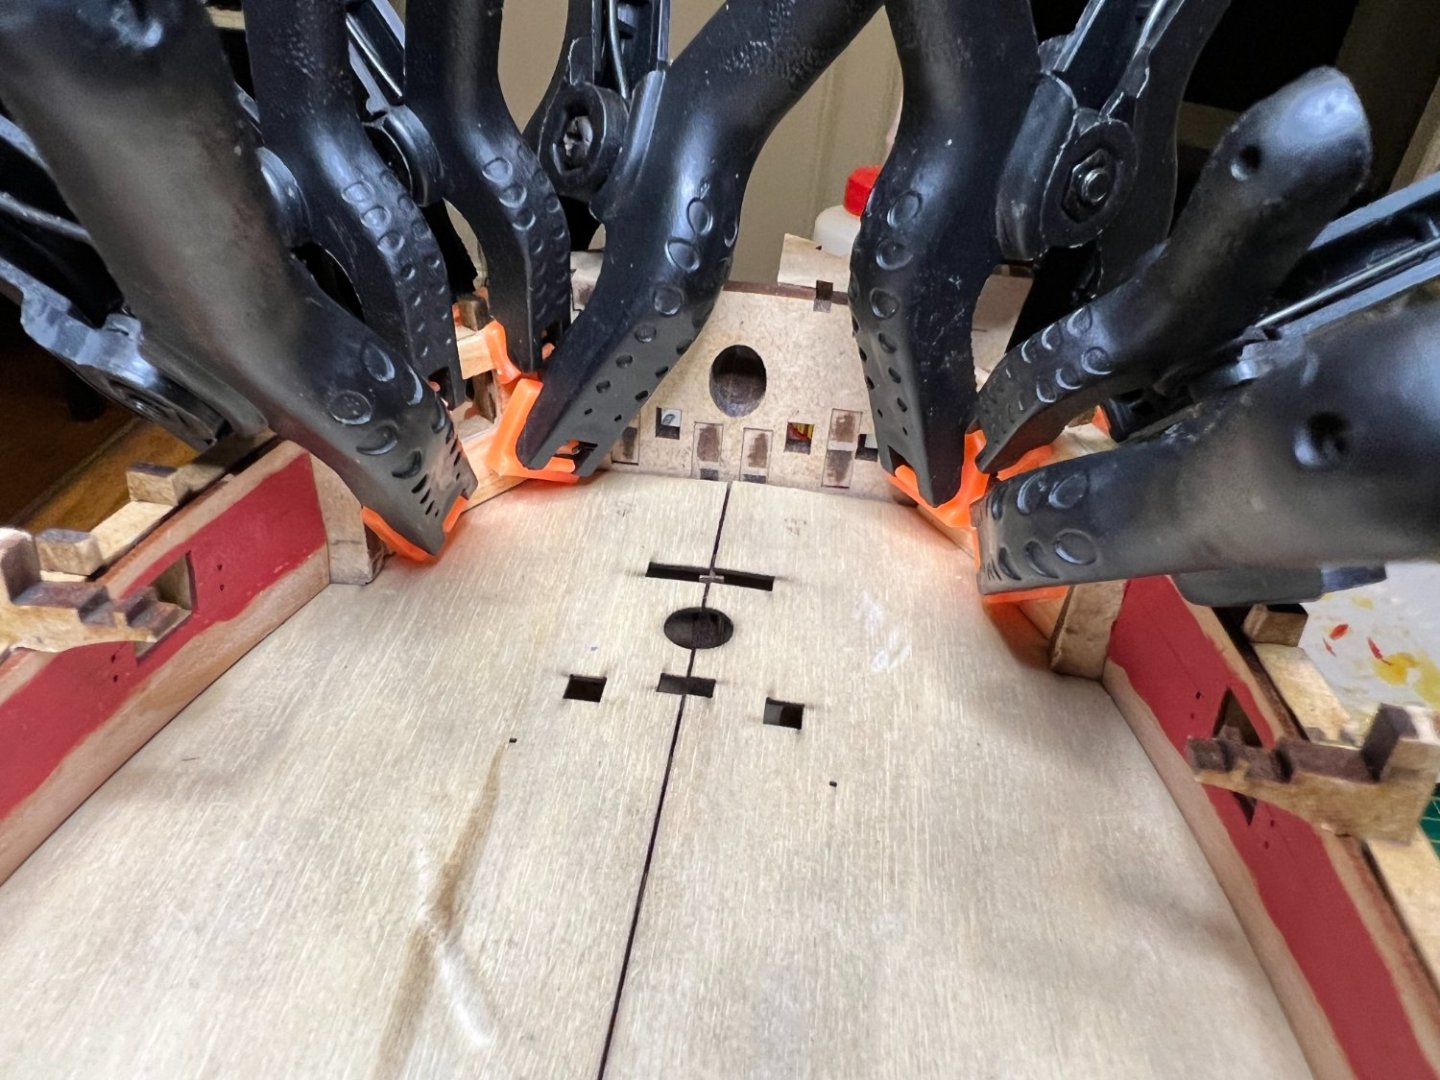
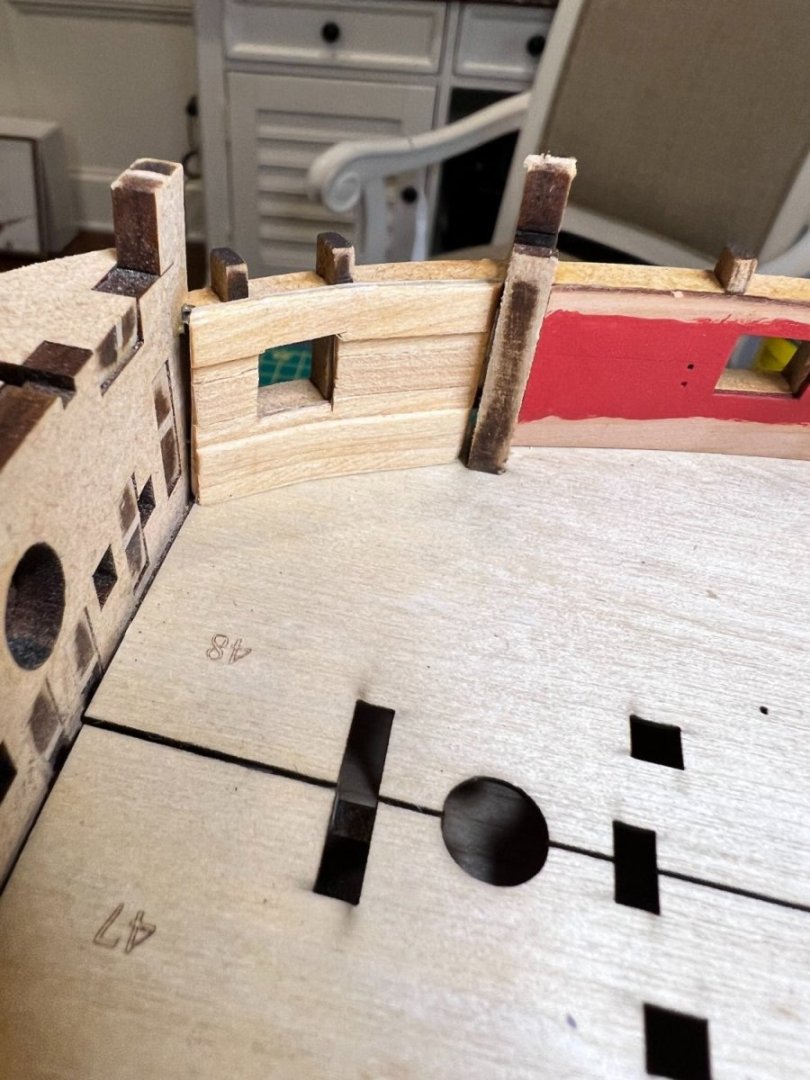
Post Eleven: Planking *sigh* Yes, this is a long process. I think it took me about 1.5-2 weeks. I lost steam on this step. I forced myself to get 4 per night after I made it about half way. I started matching each side to ensure they were even with each other. I found these thinner planks (about 1/2 the thickness of what I'm used to) were so much easier to work with. Bending was easy. I soak and iron with a laundry iron, but I found a plank bender worked fine on the fore side. I only needed to soak and iron on the aft. I applied a liberal amount of natural wood filler to seal the cracks when the helmet was completed. Sanding was a breeze. I just keep my hand-held Dyson by my side. I cut the planks short of the aft to have an easier time of bending the planks. The aft side requires a sharp curve. The fore side required some careful measurements to ensure they matched on each side and kept pace with the main body of the planking. By the halfway mark, I set one plank on each side. This made it easier to close the helmet in. Here you can see I made pencil marks before I made my fore-side cuts to make sure I aligned correctly. Completed Helmet Added wood filler and sanded: There are still several bumps, but they are soft and gradual. I may go back and sand more. I'm not worried about the little gaps showing in the first and third picture below because they lay down flat quite easily. When I place the veneer, I will have no problem with those. Generally, I am happy with the helmet so far. I do believe the veneer will smooth things out quite nicely when the time comes.


-
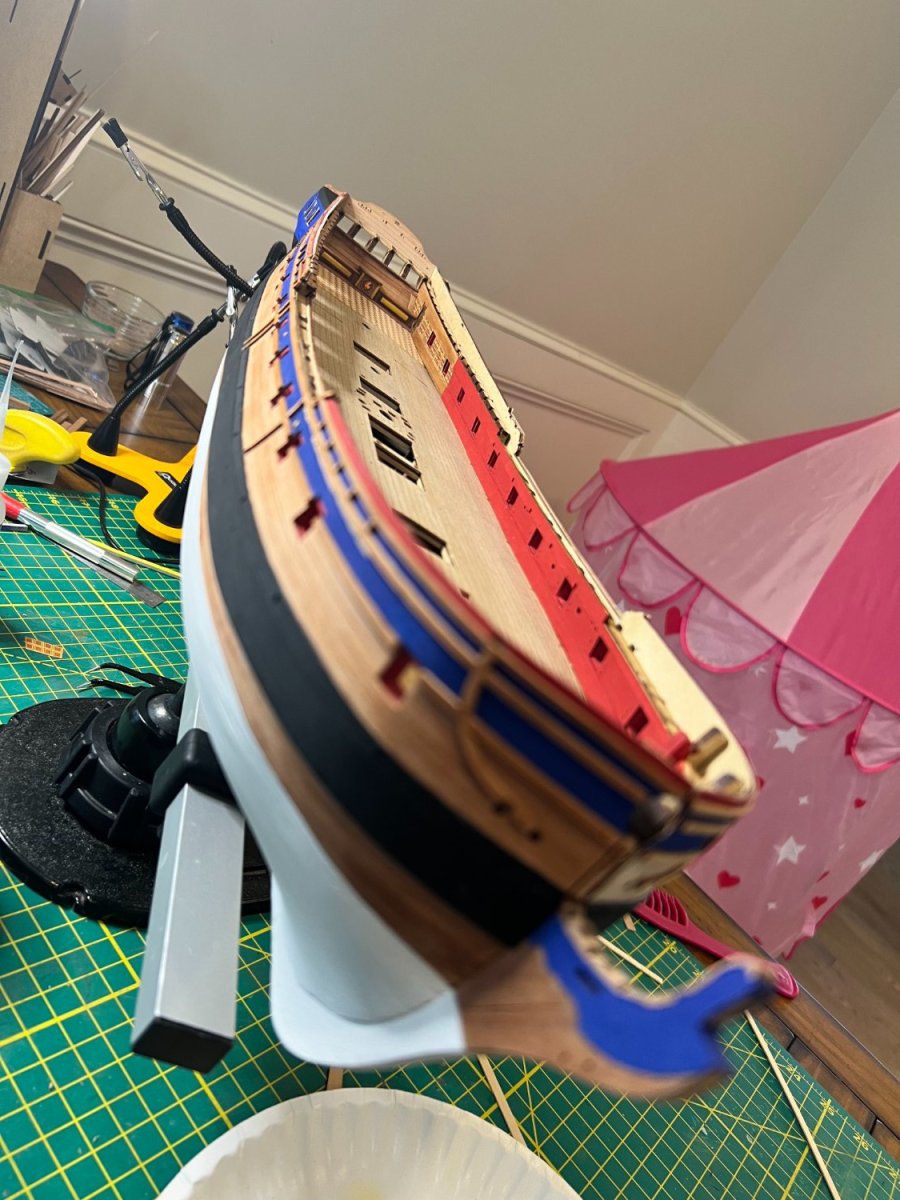
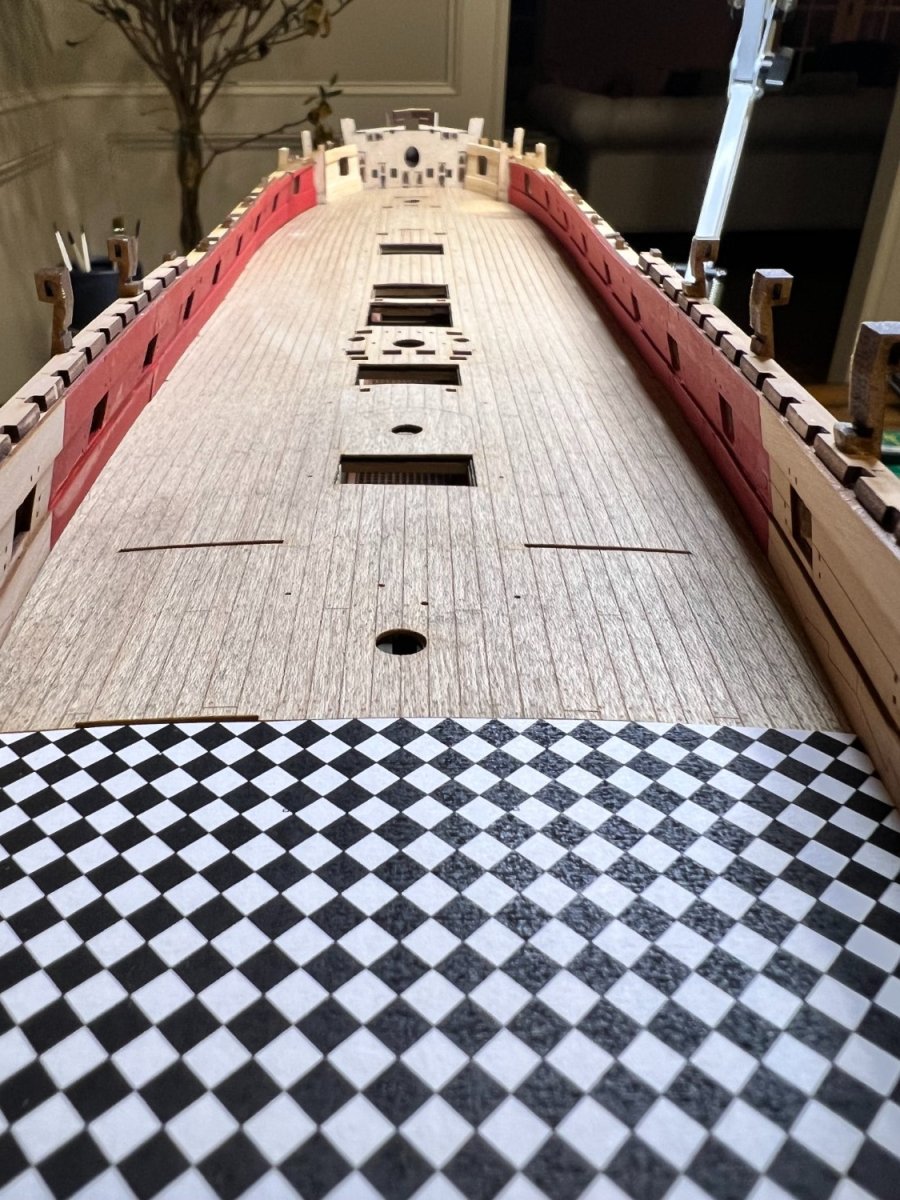
Post Ten: Gun Deck and Hull Side Pattern I absolutely formed the hull side pattern backwards. These are the mistakes I make. Glaring errors that are completely avoidable. I wanted to get them curved before the kid's bedtime to work on the ship later on. Well, you know how the saying goes: Haste makes waste. Luckily, they measure perfectly backwards and forwards. I just don't get the laser etchings to guide me. I agree with B.E. and was actually rooting for him to use the black and white checkered pattern. I will be using this myself.


-
Post Nine: The Captain and the Pilot I just completed reading Shogun, so here is the captain of the ship and the pilot Blackthorn. I thought I would make some fun and interesting views.
-
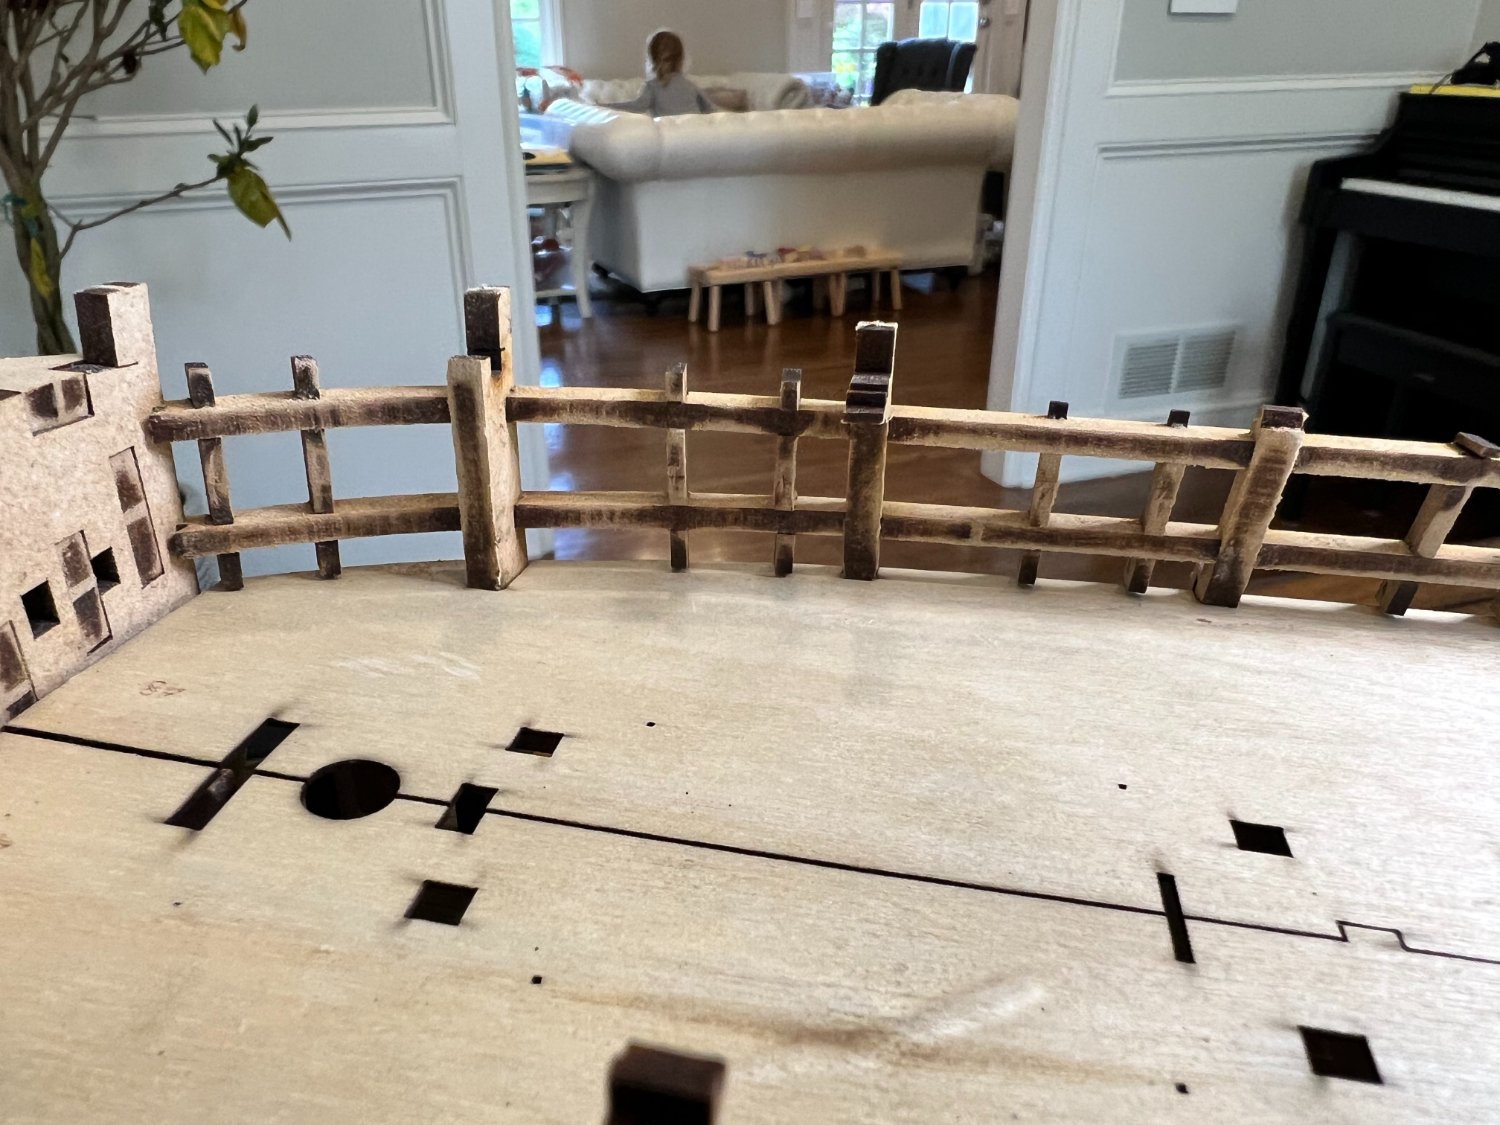
Post Eight Turns out I am not good at keeping up with my journal. I have a lot of updates, but I am going to have to switch to more generic logs or I will never complete this journal. Forgive me. I write for a living, and I seldom find the strength to add a log at the end of my week. Here are updates for the bulwarks. You can see I created a pattern that follows after B.E. for the for deck.


-
Erdict reacted to a post in a topic:
HMS Sphinx 1775 by Hollowneck - FINISHED - Vanguard Models - 1:64
-
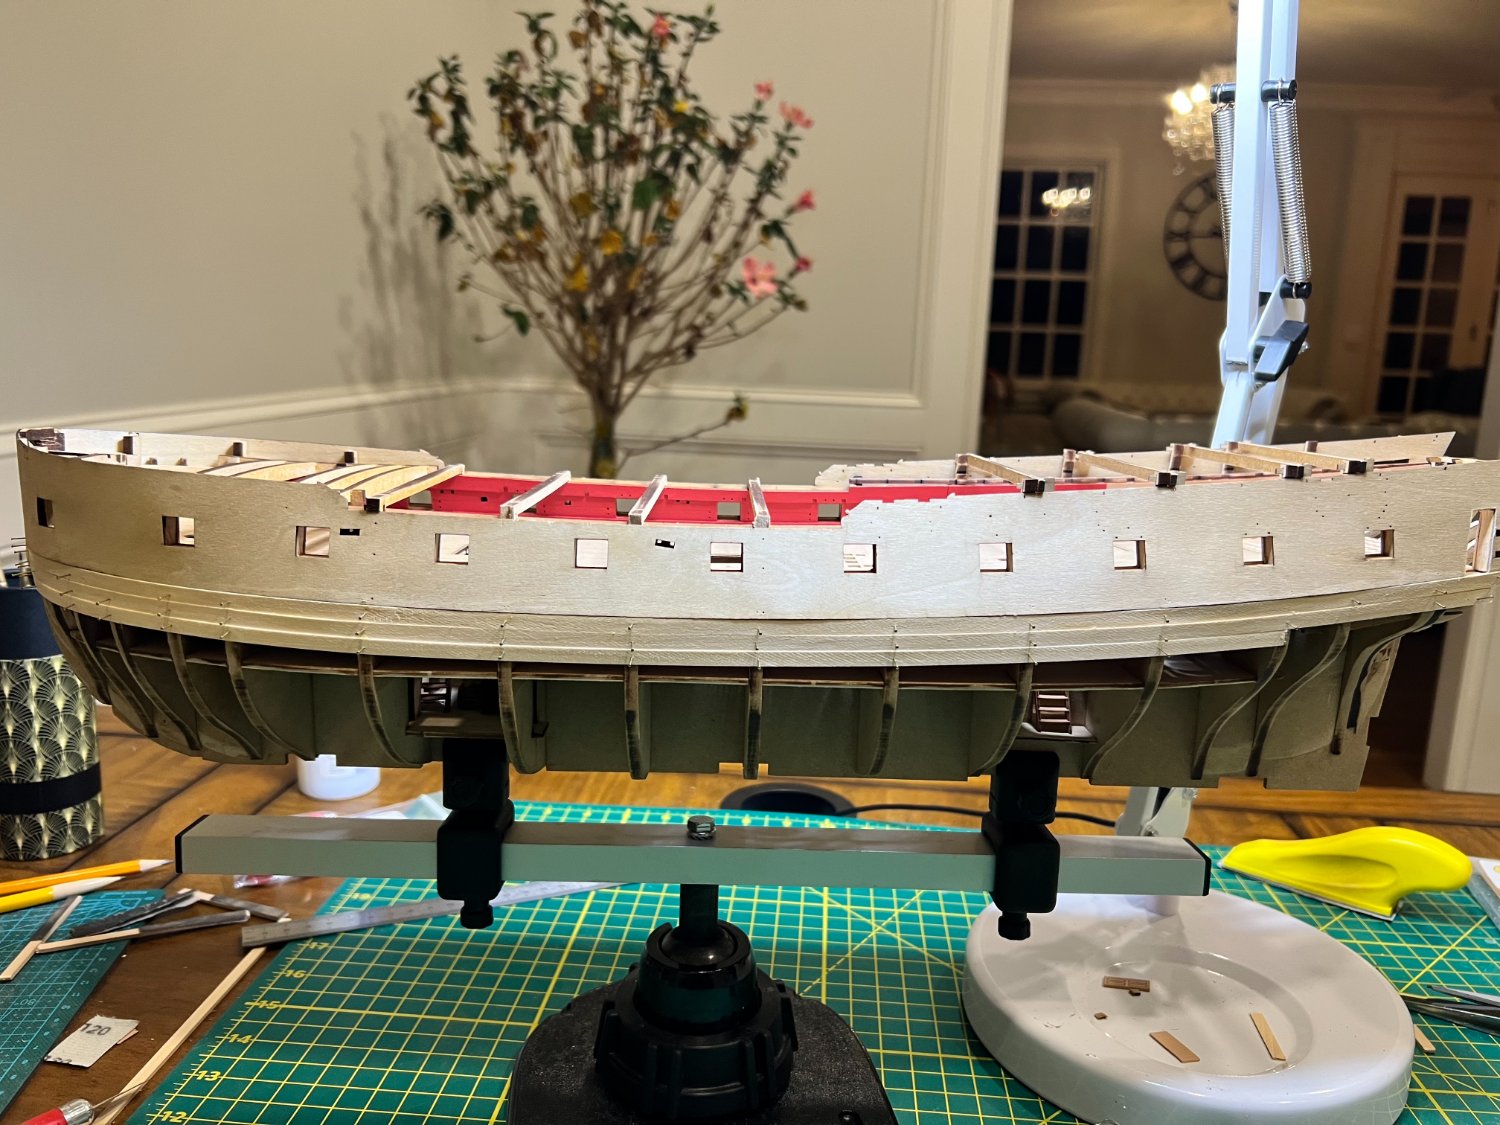
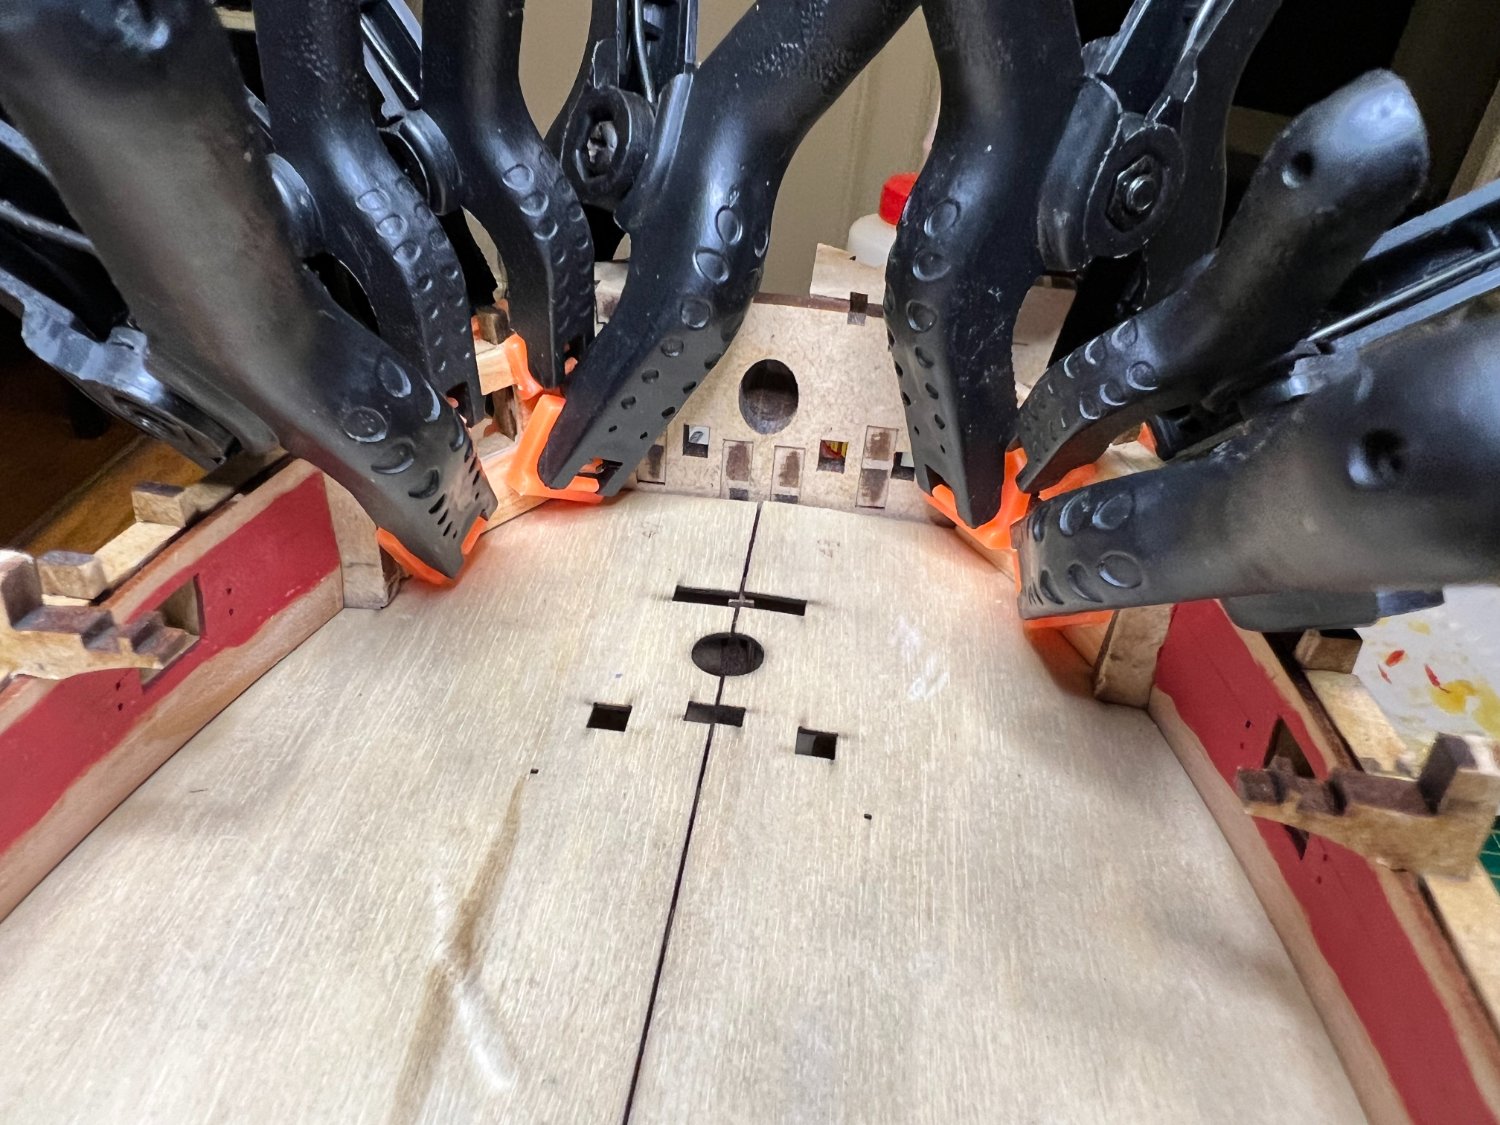
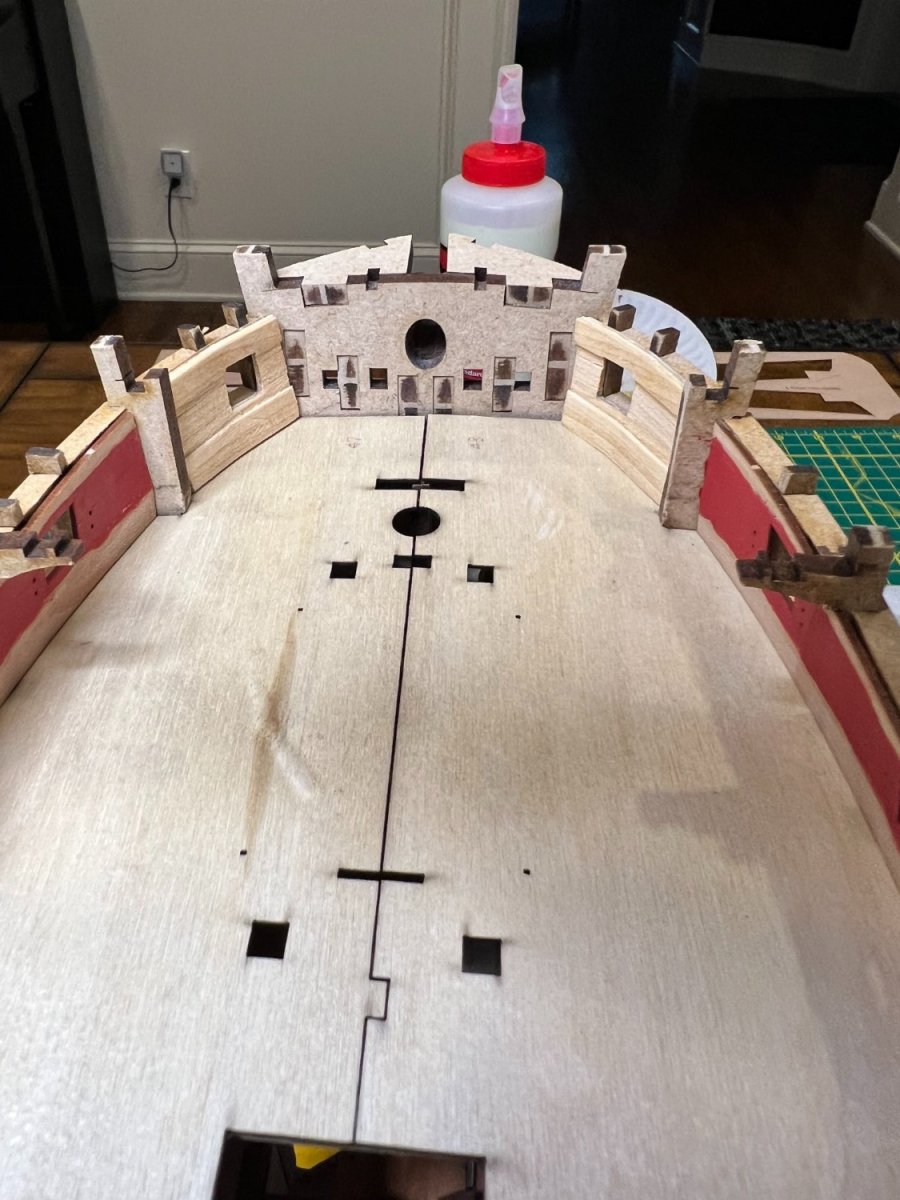
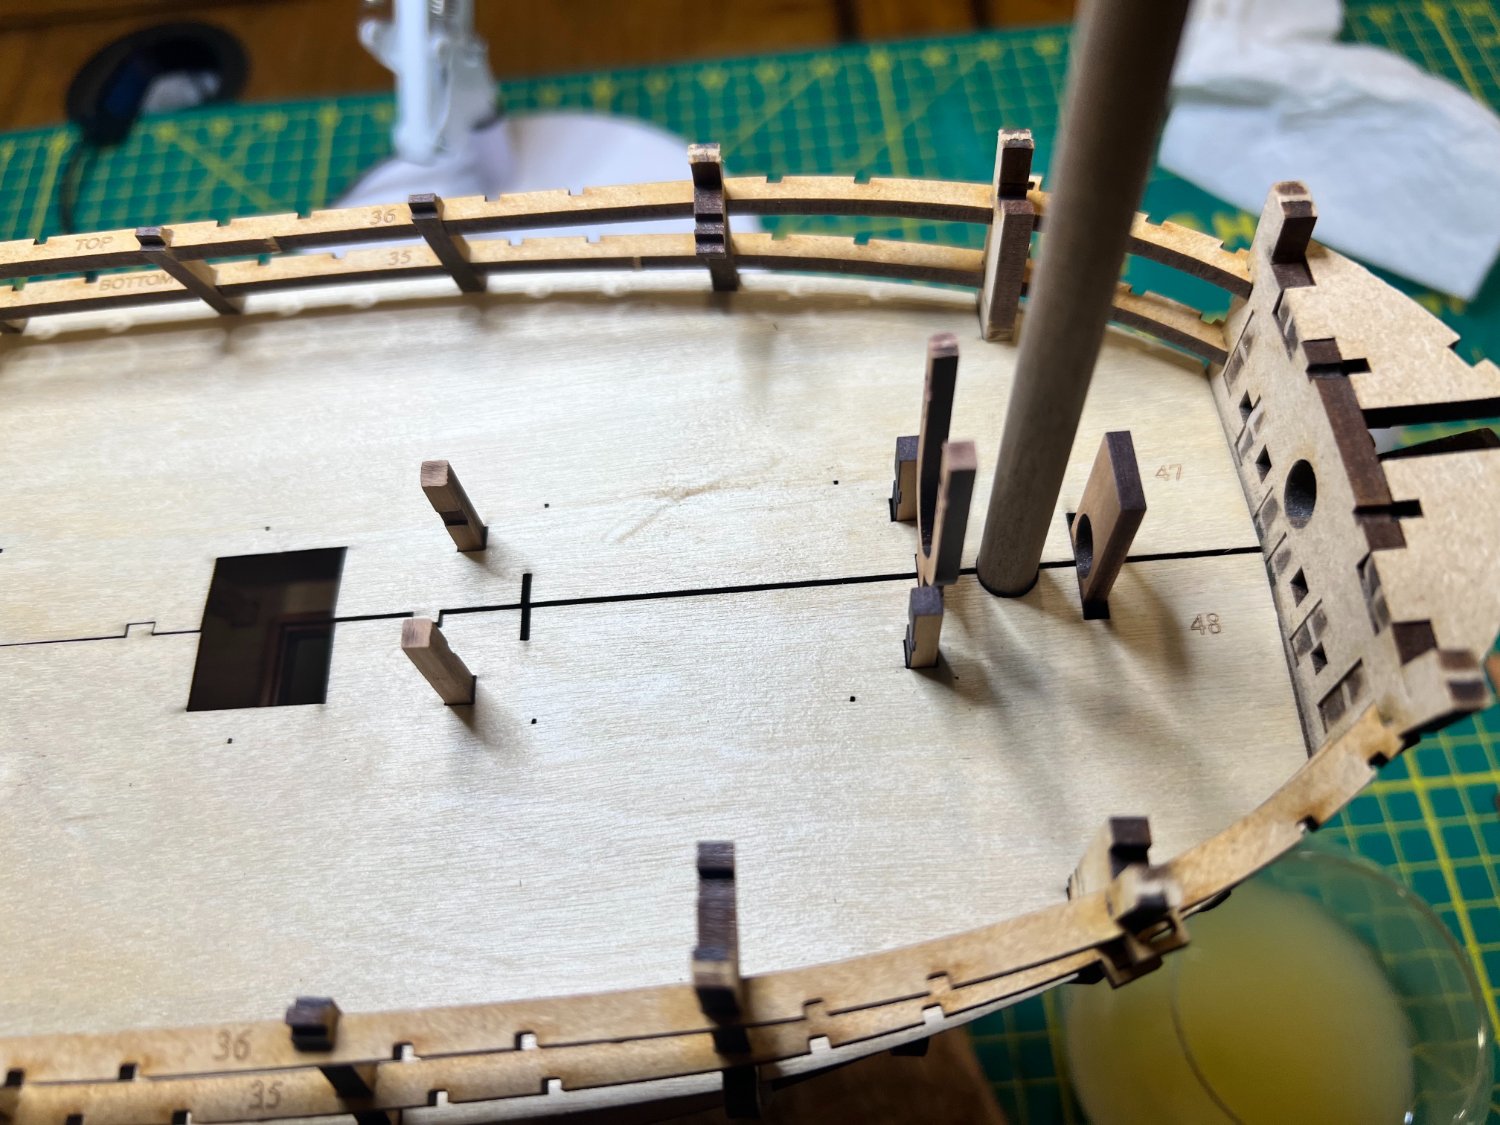
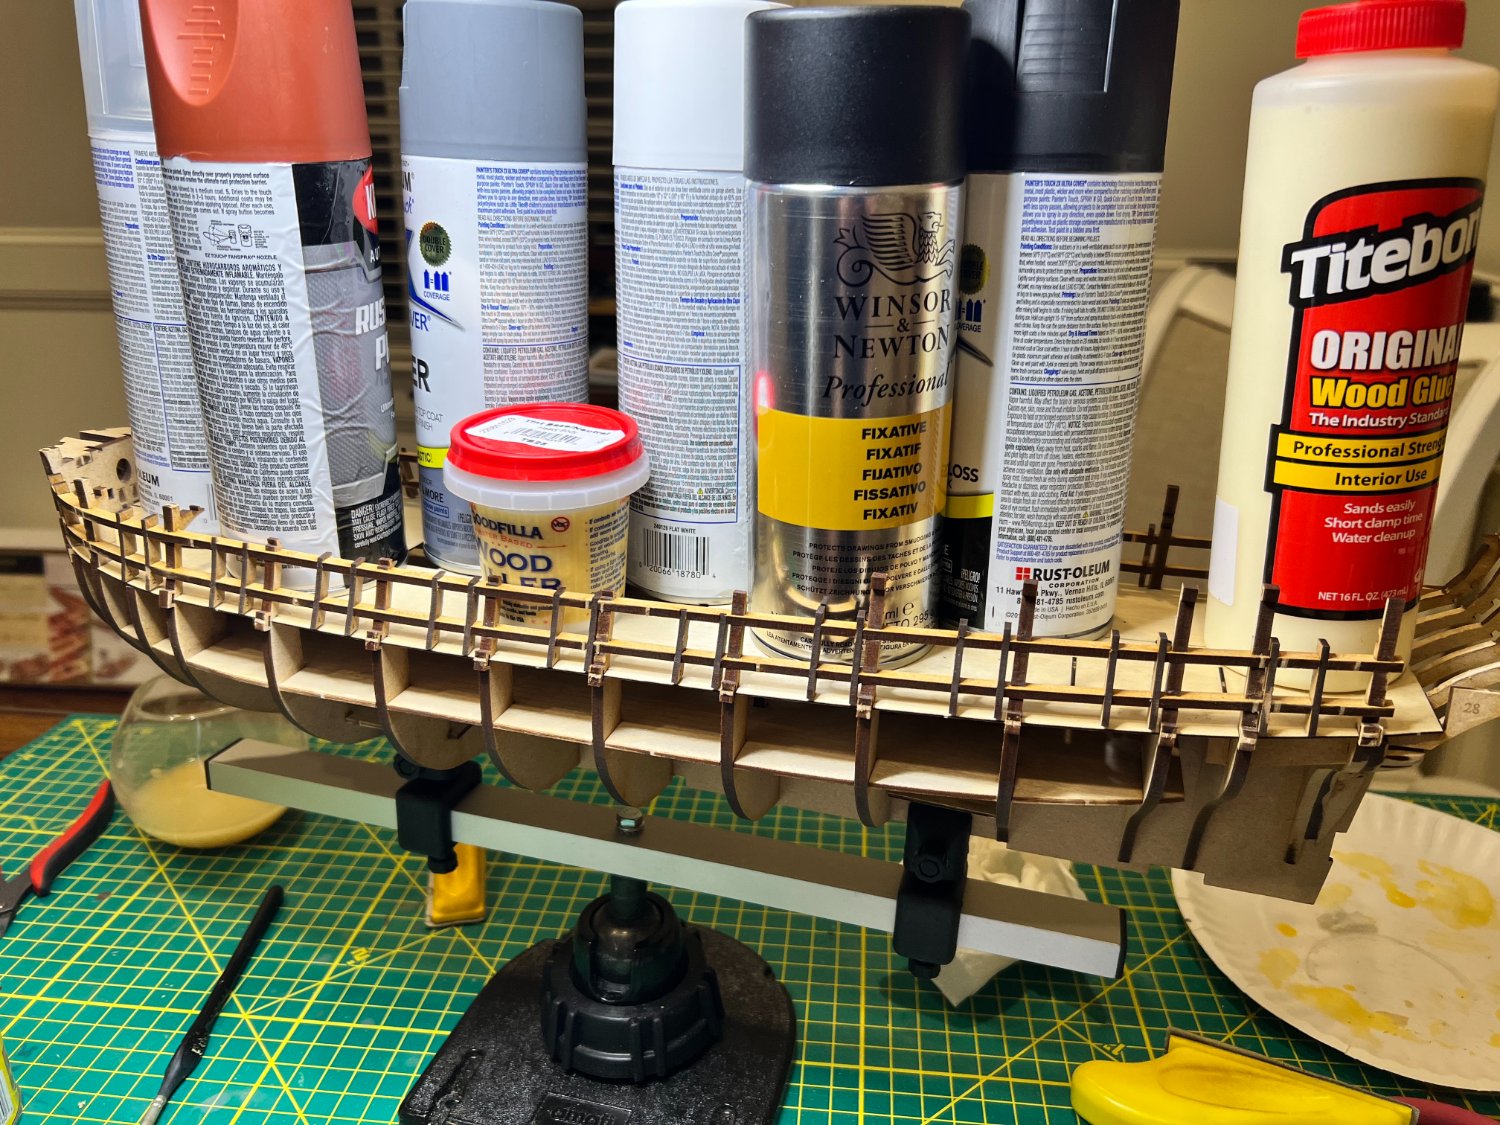
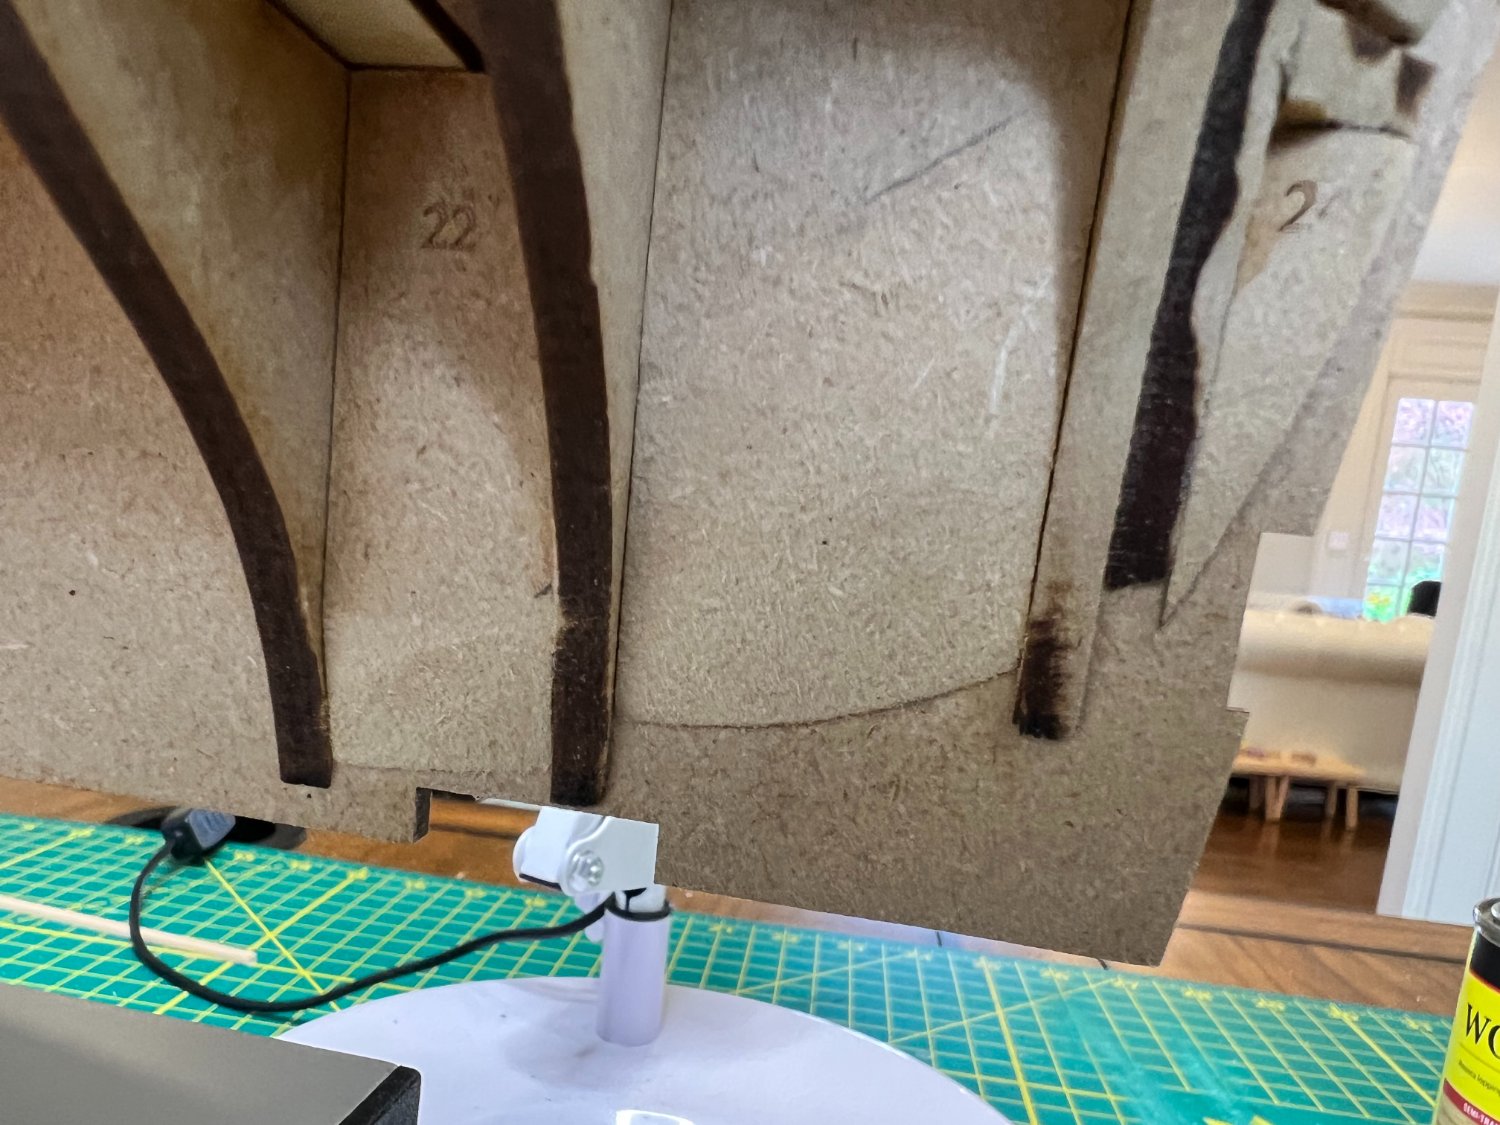
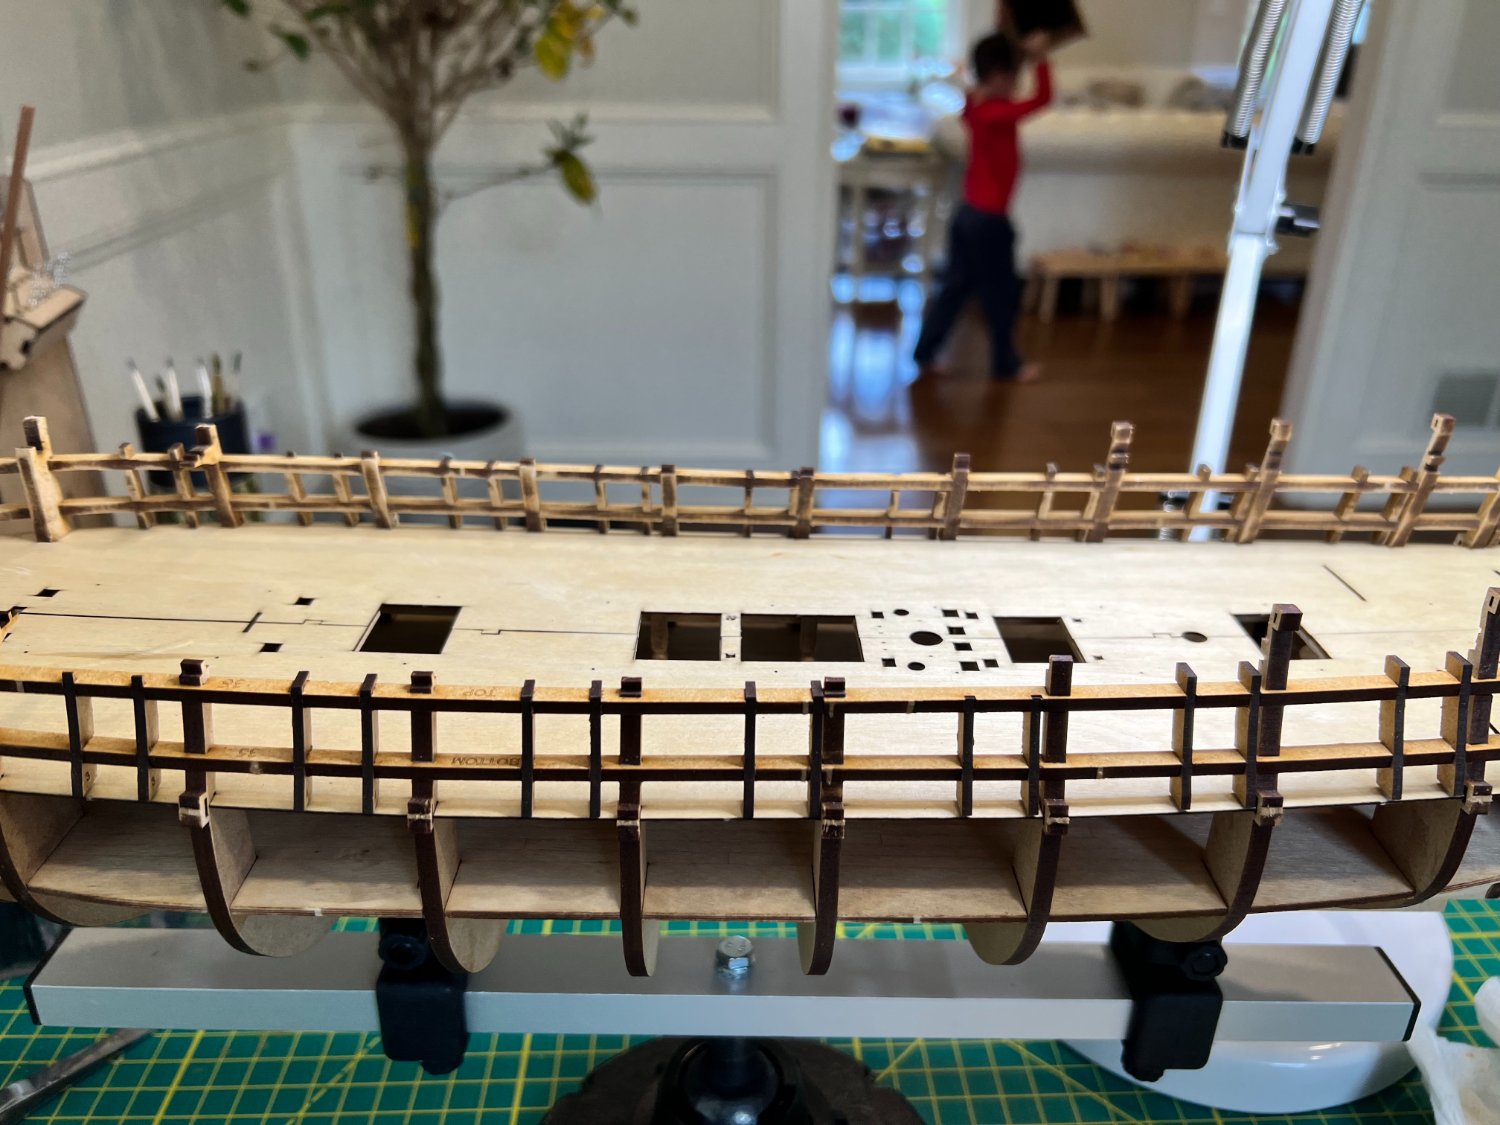
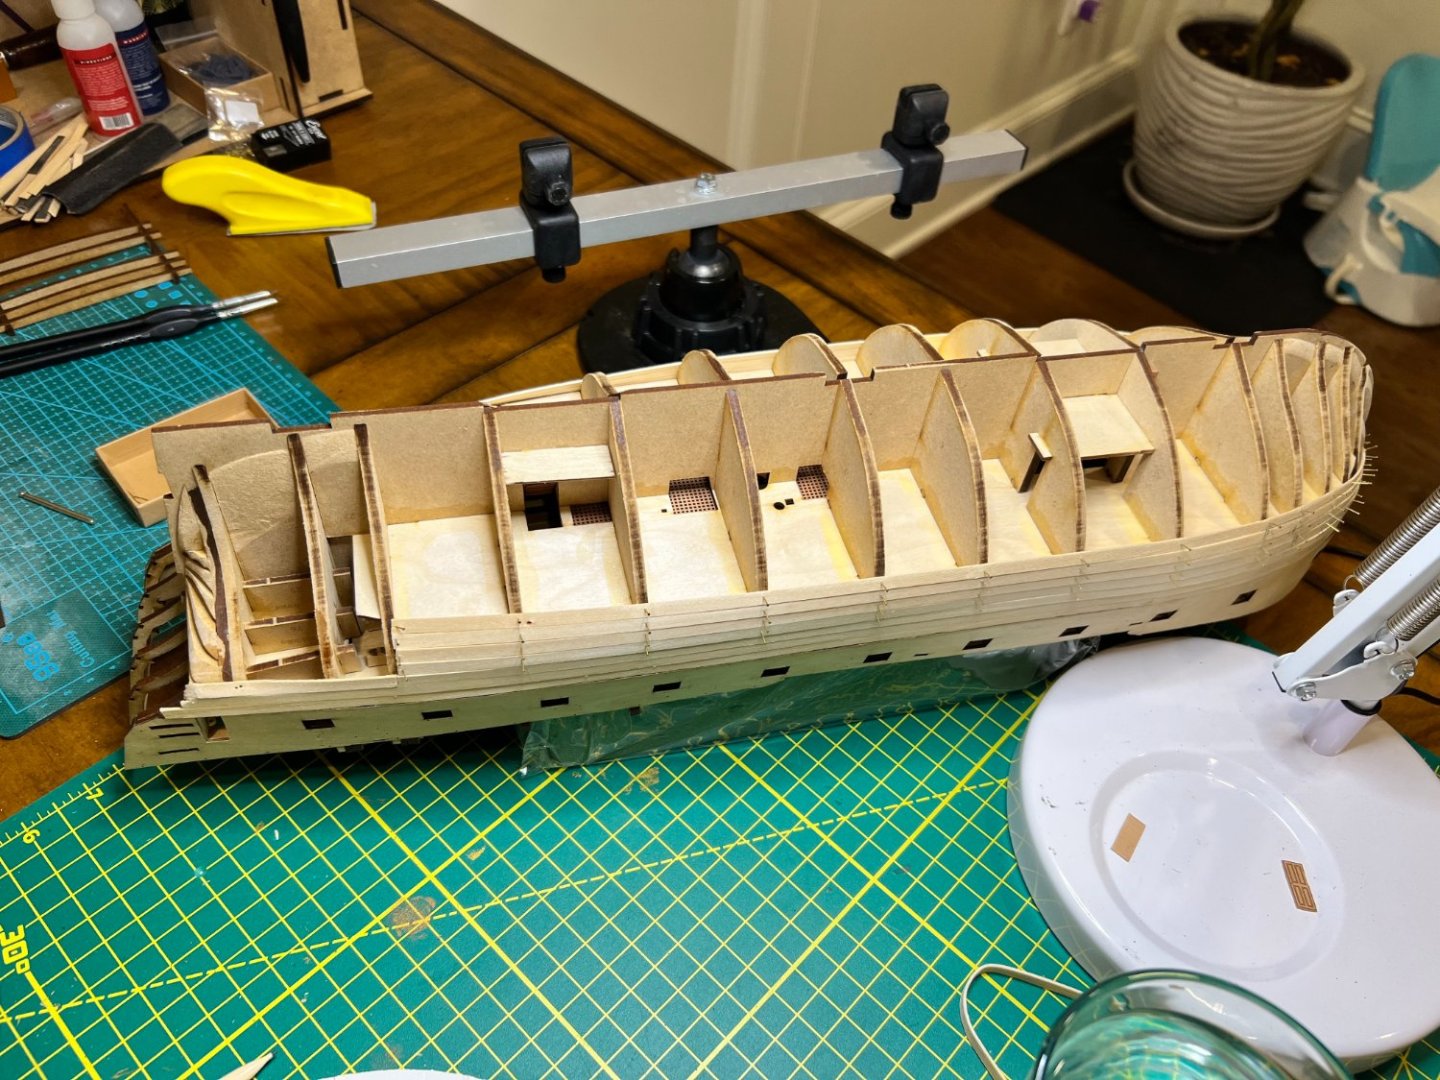
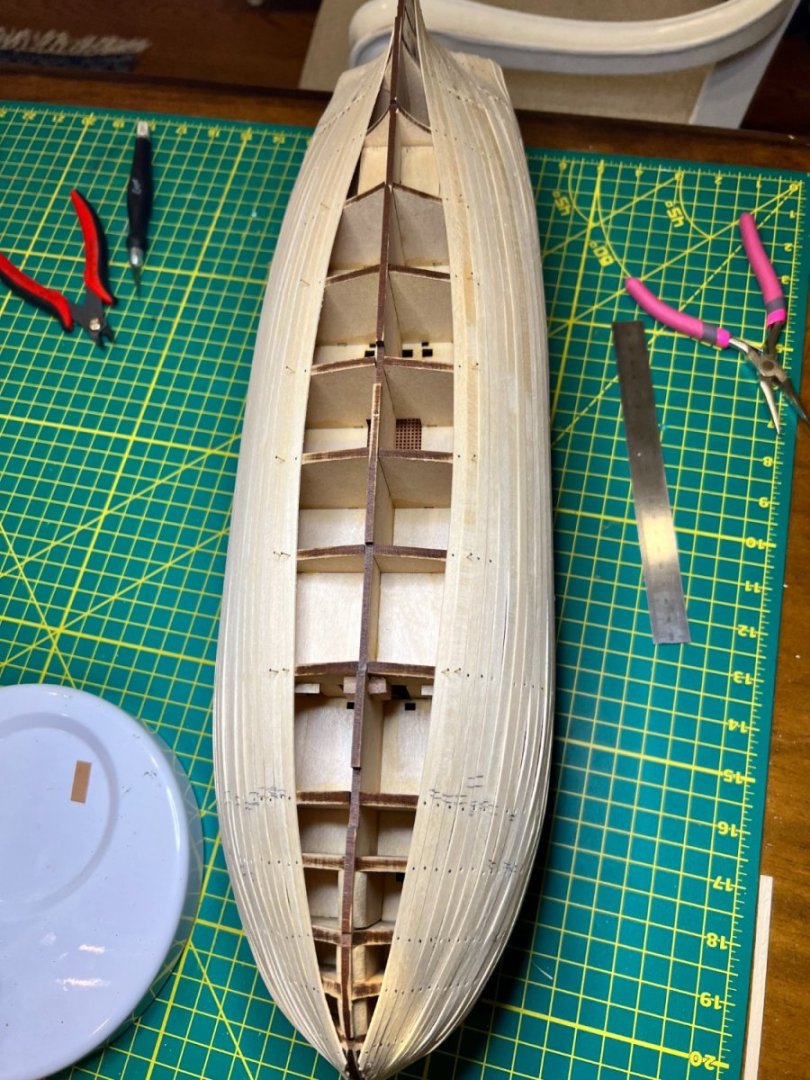
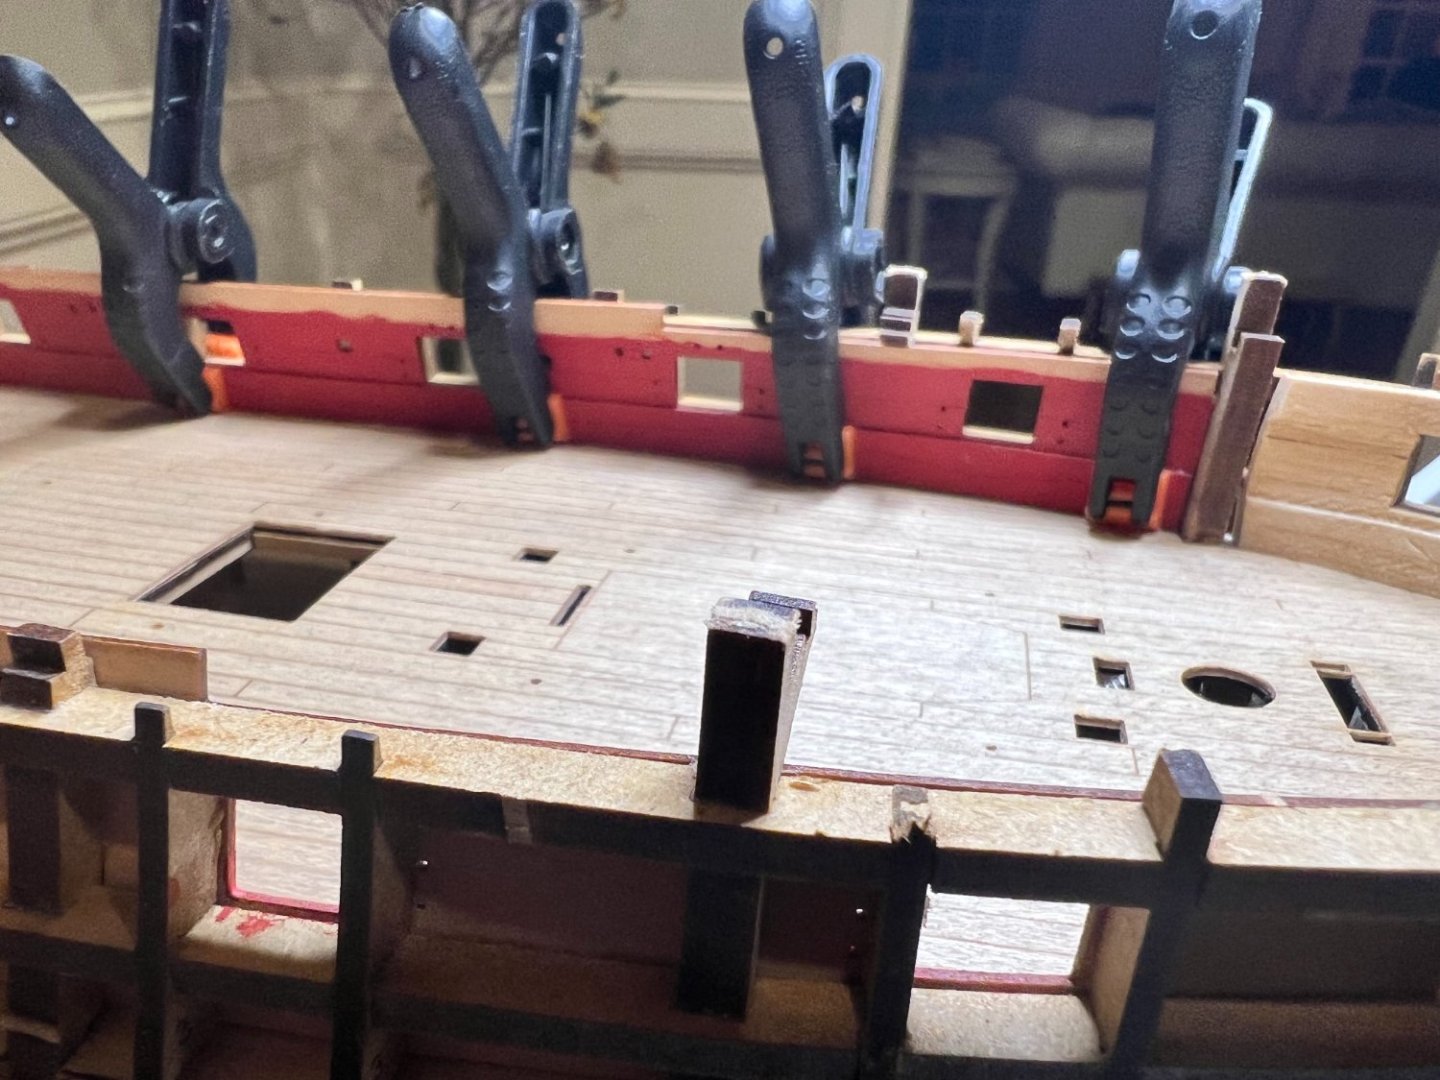
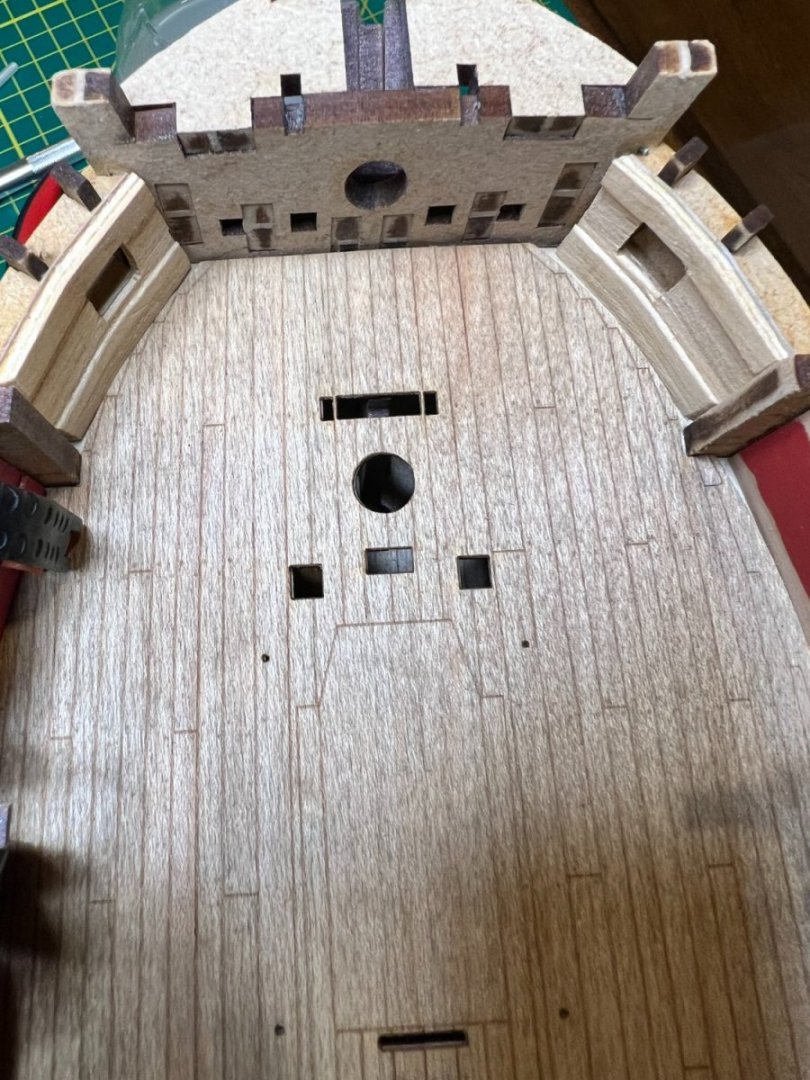
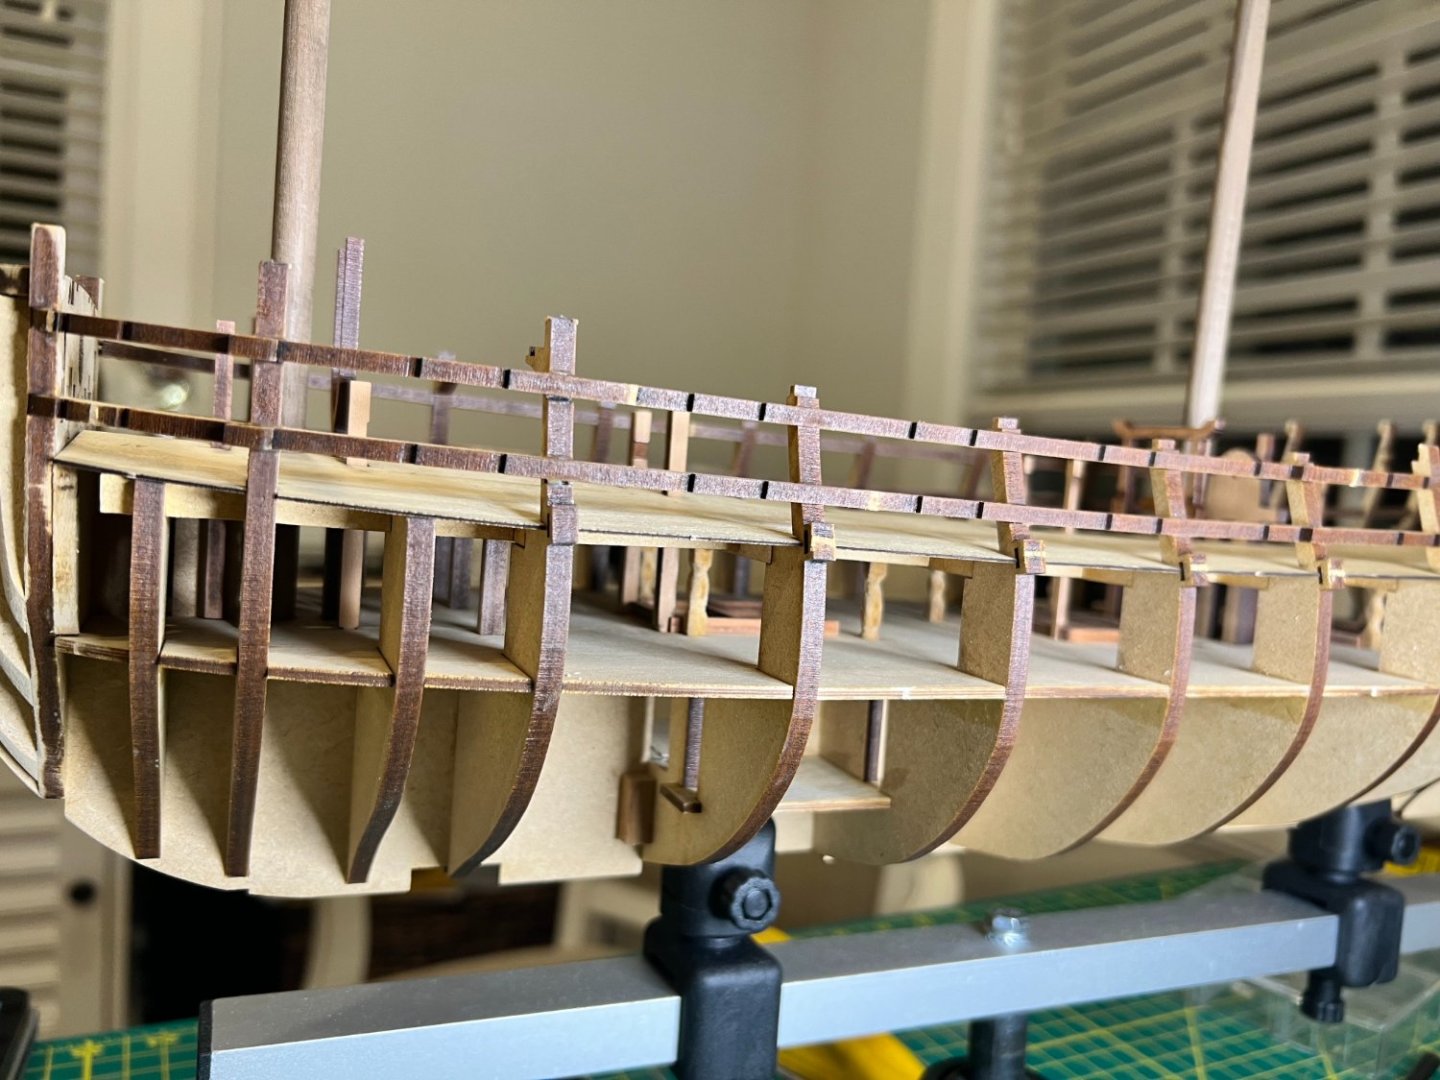
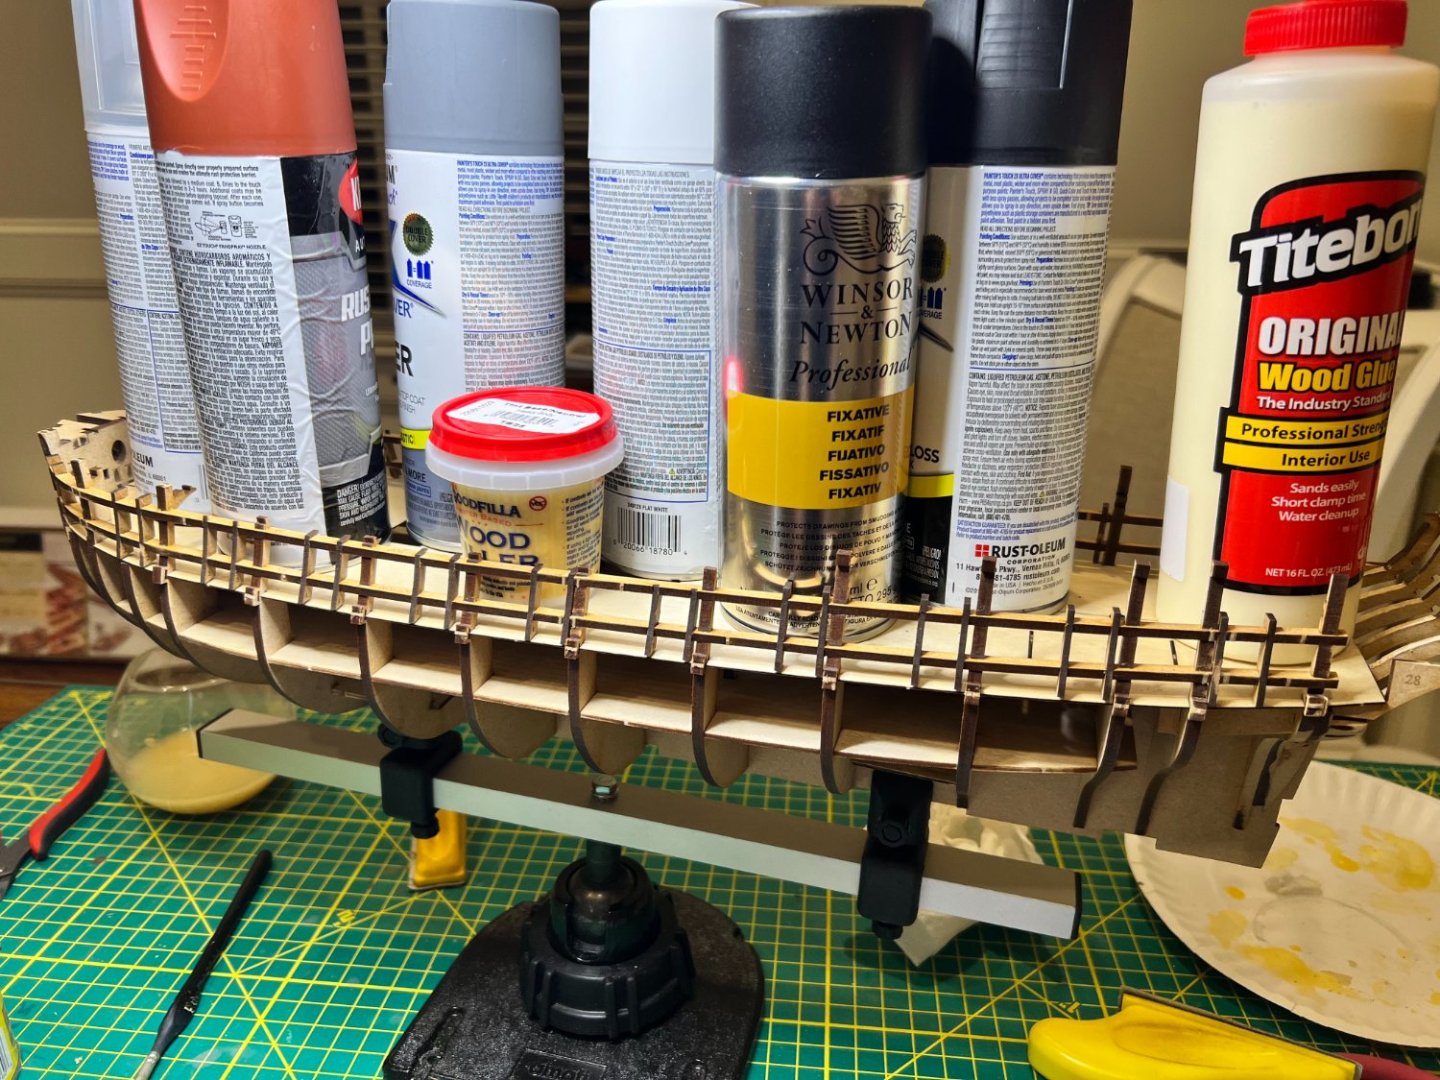
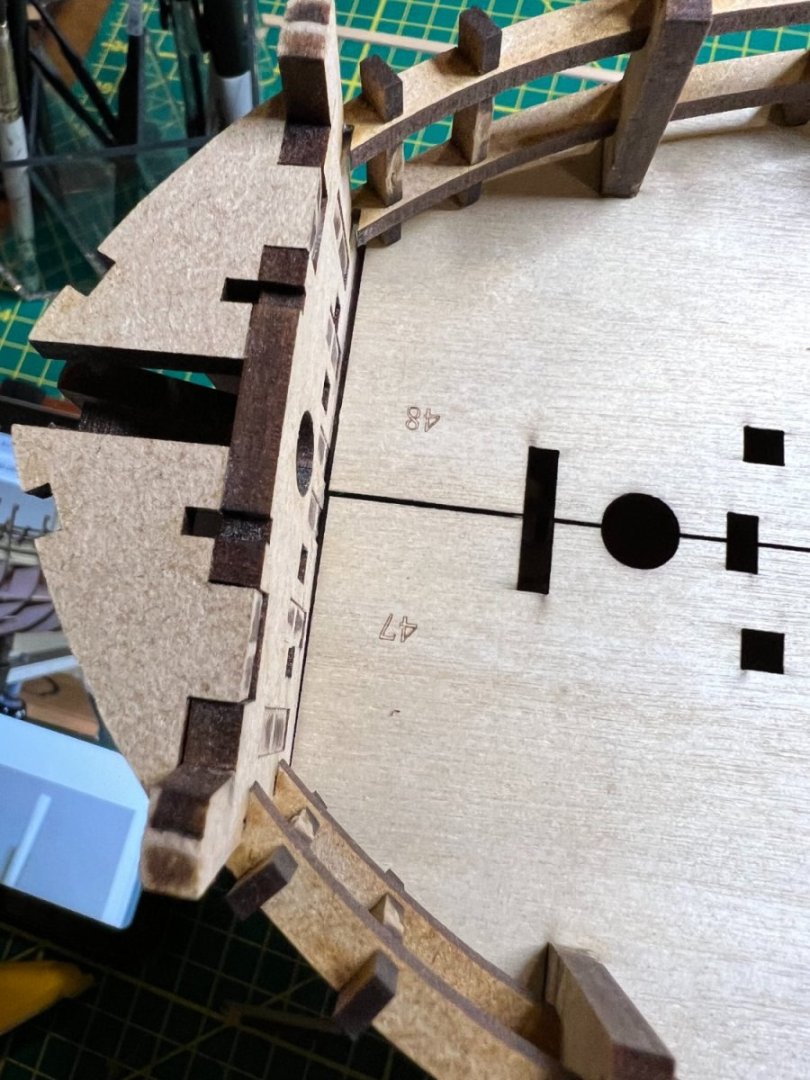
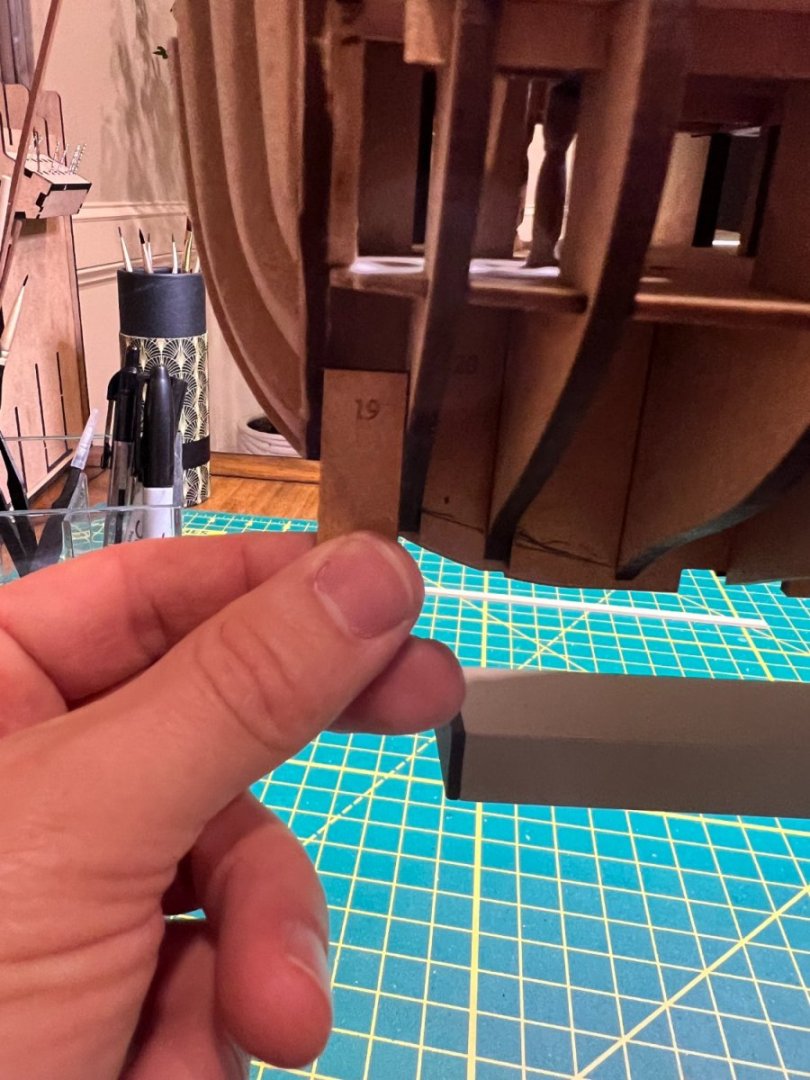
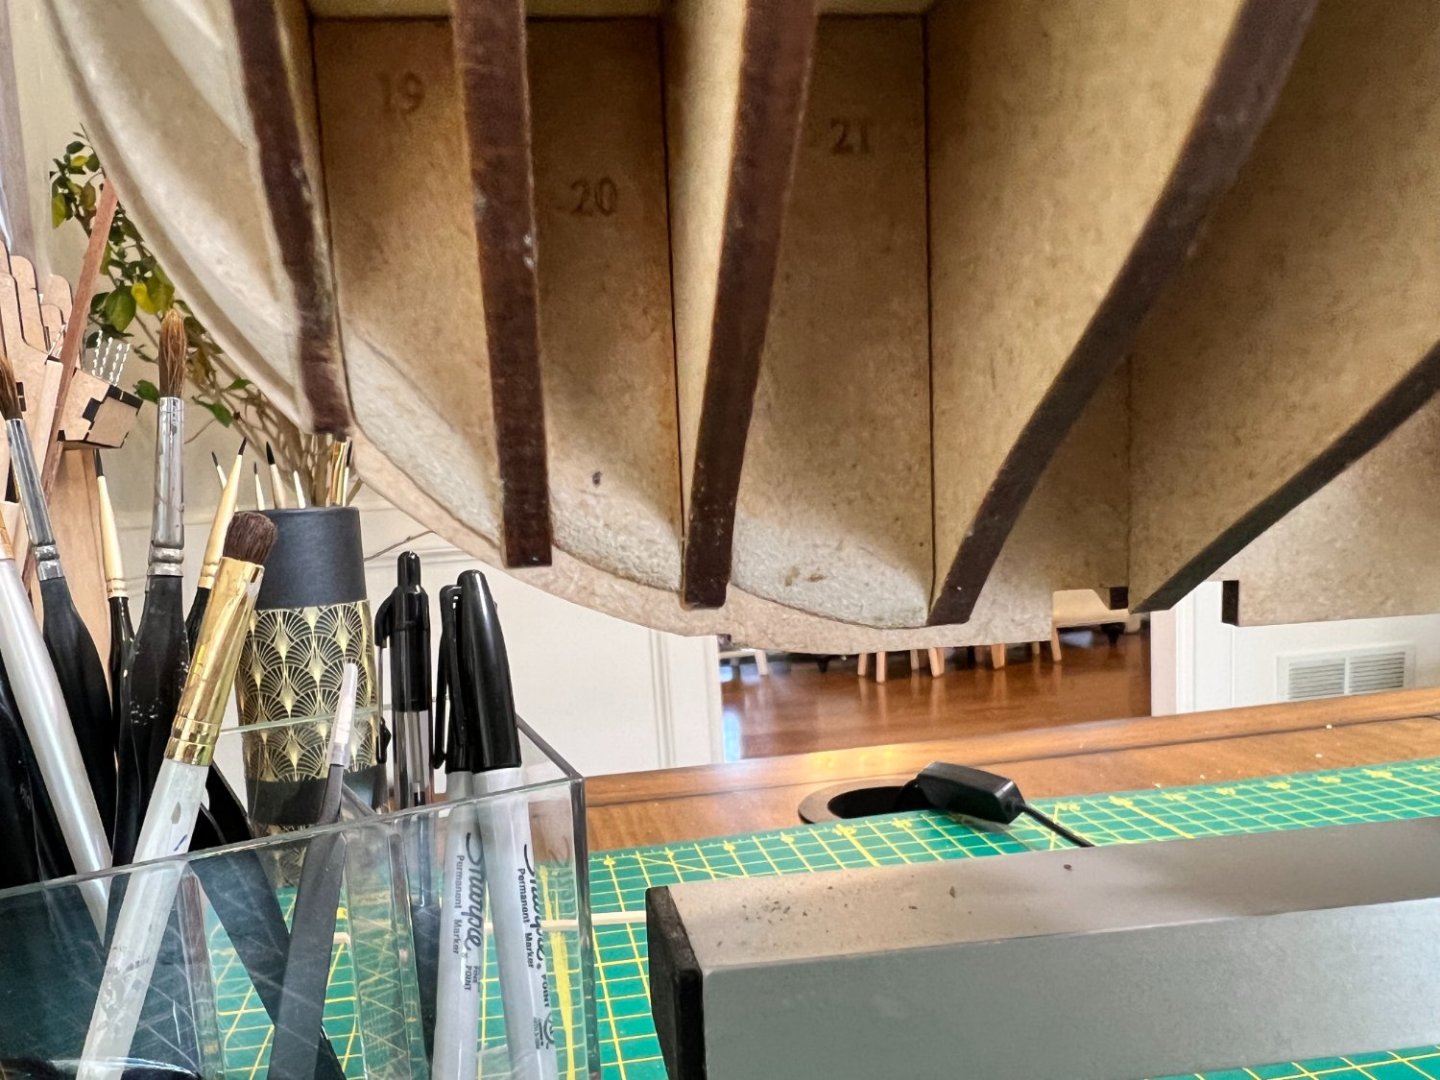
Post Seven: Gun Deck, Gun Port Frames, & Bow Planking Patterns Before I glued down the gun deck underlay, I followed others in tasting the fit of the various pieces that attach through the gun deck. Here are three views that show the attachments. They all fit fairly nicely, as I continue to find using this kit. Satisfied, I glued down the gun deck. Here are a couple views of the gun port frames. They fit in fairly nicely. Though, I feel I pushed them in a little too far. I ended up having to sand down these frames more to get them flush as a result. Apparently my children made it into these photos. I think we were preparing for nap time =] I ended up sanding these quite a bit more in order to get them flush. It wasn't terrible, but I'm grateful I keep a hand vac ready for all the saw dust that gets about. Finally, I beveled the bow planking patterns. This MDF material sands very nicely. I had no trouble at all getting these to a satisfactory shape. The first picture below shows some squaring issues I had with the bulkheads. I'm not too worried about it, but there may be a little discrepancy with one or two bulkheads. With this completed, I am now ready to lay the inner bulwark frame.


-
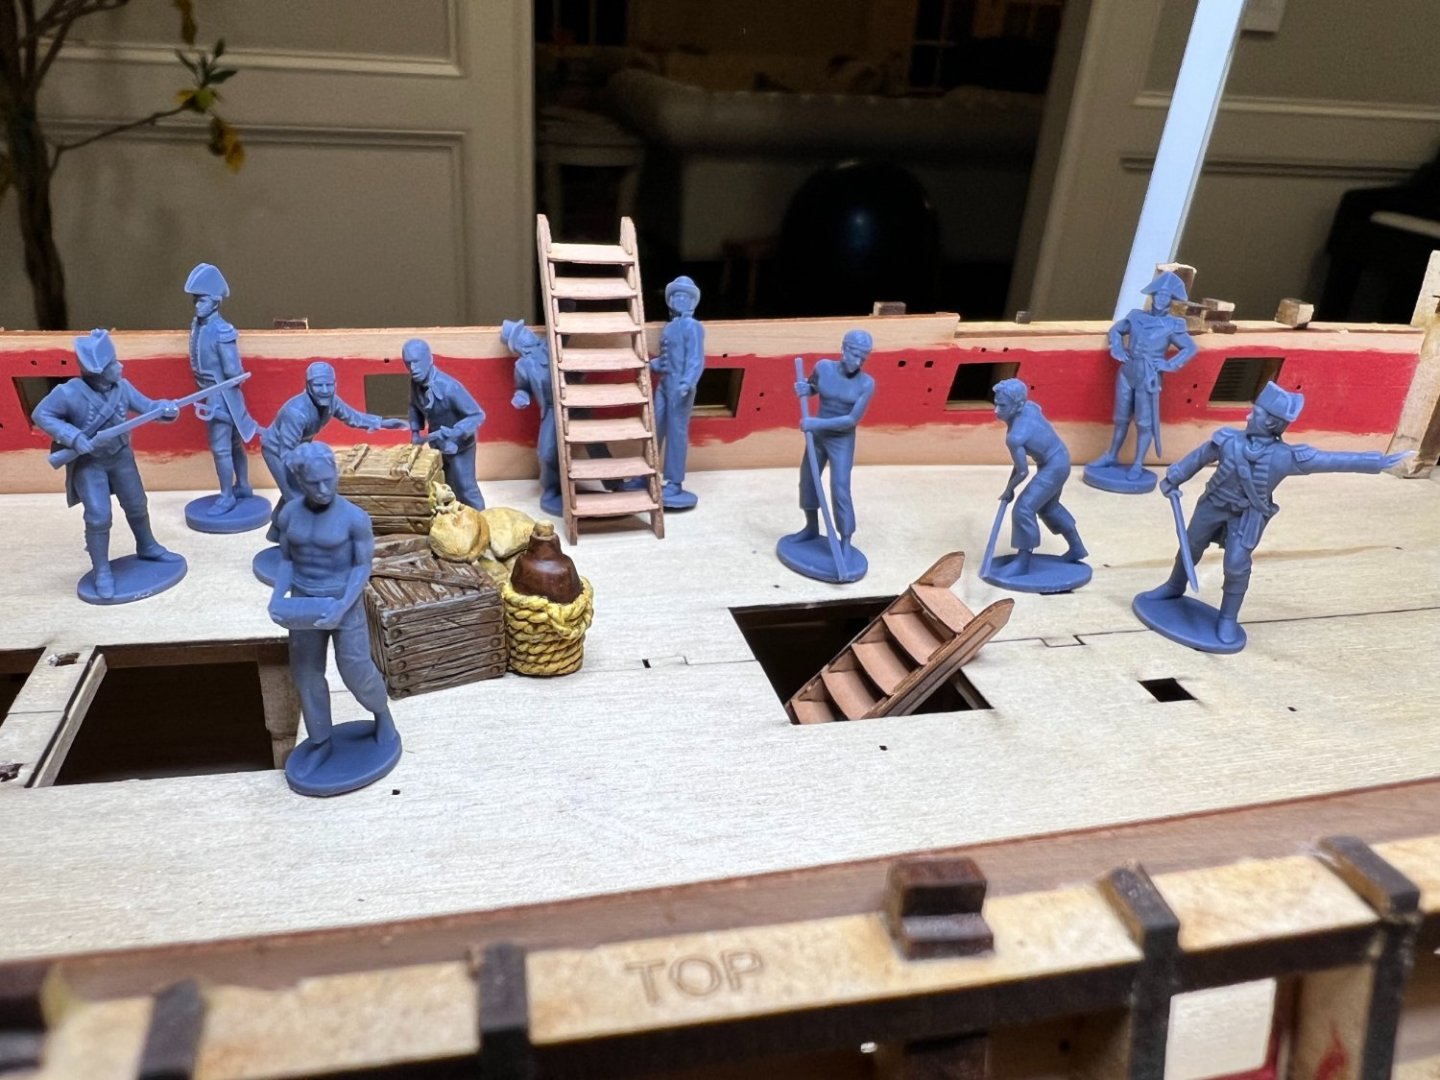
Great news! My crew arrived with the orlop ladders. The officers got the men on it straight away. They also brought more wood supplies and a priceless manual on rigging when the time comes for the sails.
-
Diana by Kyak - OcCre - 1/85
Erdict replied to Kyak's topic in - Kit build logs for subjects built from 1751 - 1800
Hey Kyak, this is wonderful progress on a great model. I finished this one last July. I admire the job you've done so far. I'll be following your log. -
Erdict reacted to a post in a topic:
Diana by Kyak - OcCre - 1/85
-
Erdict reacted to a post in a topic:
HMS Sphinx 1775 by Blue Ensign - FINISHED - Vanguard Models - 1:64 scale
-
Your build continues to amaze me. Thanks for keeping such detailed logs! I follow them religiously. Your's too Hollowneck.
- 858 replies
-
- 4
-
-
- Sphinx
- Vanguard Models
- (and 1 more)