LCdr Dave
-
Posts
109 -
Joined
-
Last visited
-
 Shipyard sid reacted to a post in a topic:
Mayflower 1620 by rlwhitt - Model Shipways - 1:76
Shipyard sid reacted to a post in a topic:
Mayflower 1620 by rlwhitt - Model Shipways - 1:76
-
captgino reacted to a post in a topic:
Mayflower by captgino - FINISHED - Model Shipways - 5/32 Scale
-
Baker reacted to a post in a topic:
Mayflower by LCdr Dave - Billing Boats - 1:60
-
TOM G reacted to a post in a topic:
Mayflower by LCdr Dave - Billing Boats - 1:60
-
ccoyle reacted to a post in a topic:
Mayflower by LCdr Dave - Billing Boats - 1:60
-
Knocklouder reacted to a post in a topic:
Mayflower by LCdr Dave - Billing Boats - 1:60
-
 I think I have it figured out. Thanks so much for all your help. You guys are awesome. This project would have been binned long ago without you. 😁
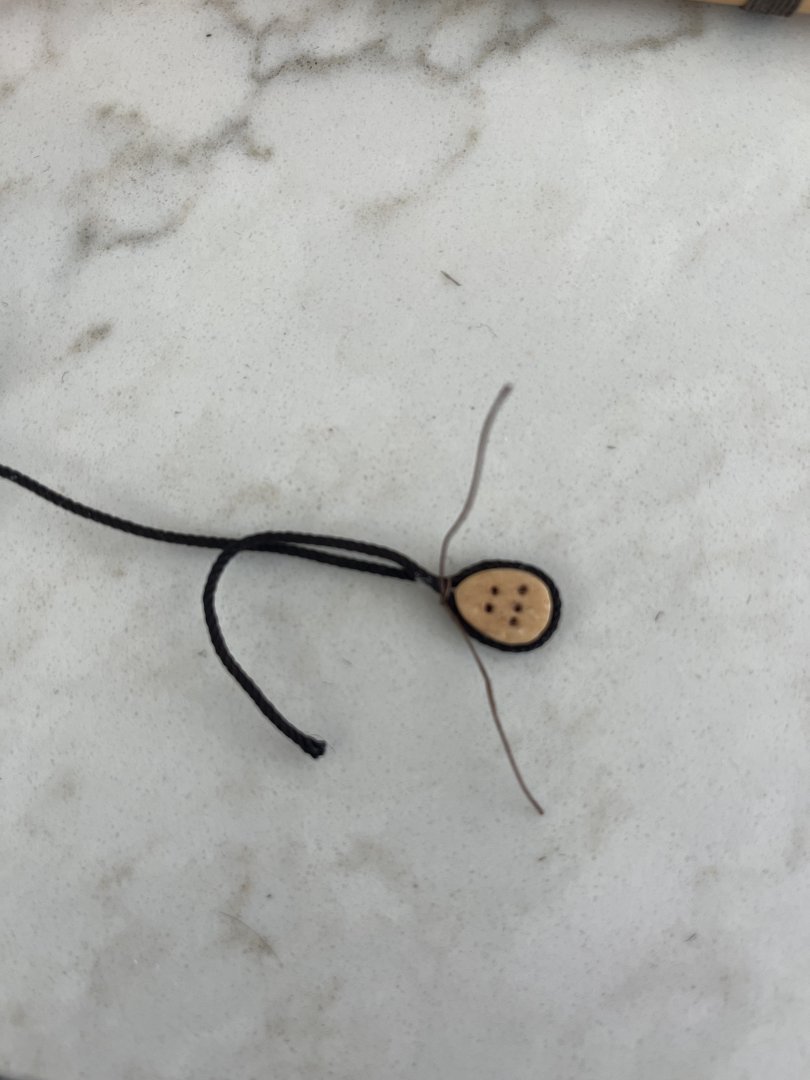


-
LCdr Dave reacted to a post in a topic:
Mayflower by LCdr Dave - Billing Boats - 1:60
-
Baker reacted to a post in a topic:
Mayflower by LCdr Dave - Billing Boats - 1:60
-
Knocklouder reacted to a post in a topic:
Mayflower by LCdr Dave - Billing Boats - 1:60
-
Gentlemen, thank you so much! I will make this work and it will probably be some kind of combination of these ideas. cheers, Dave
-
Patrick, if you haven’t, maybe you should. So…..I won’t be wrapping the rope but how did you actually go about tying the deadeye in? BTW, I really like your hole pattern Dave
-
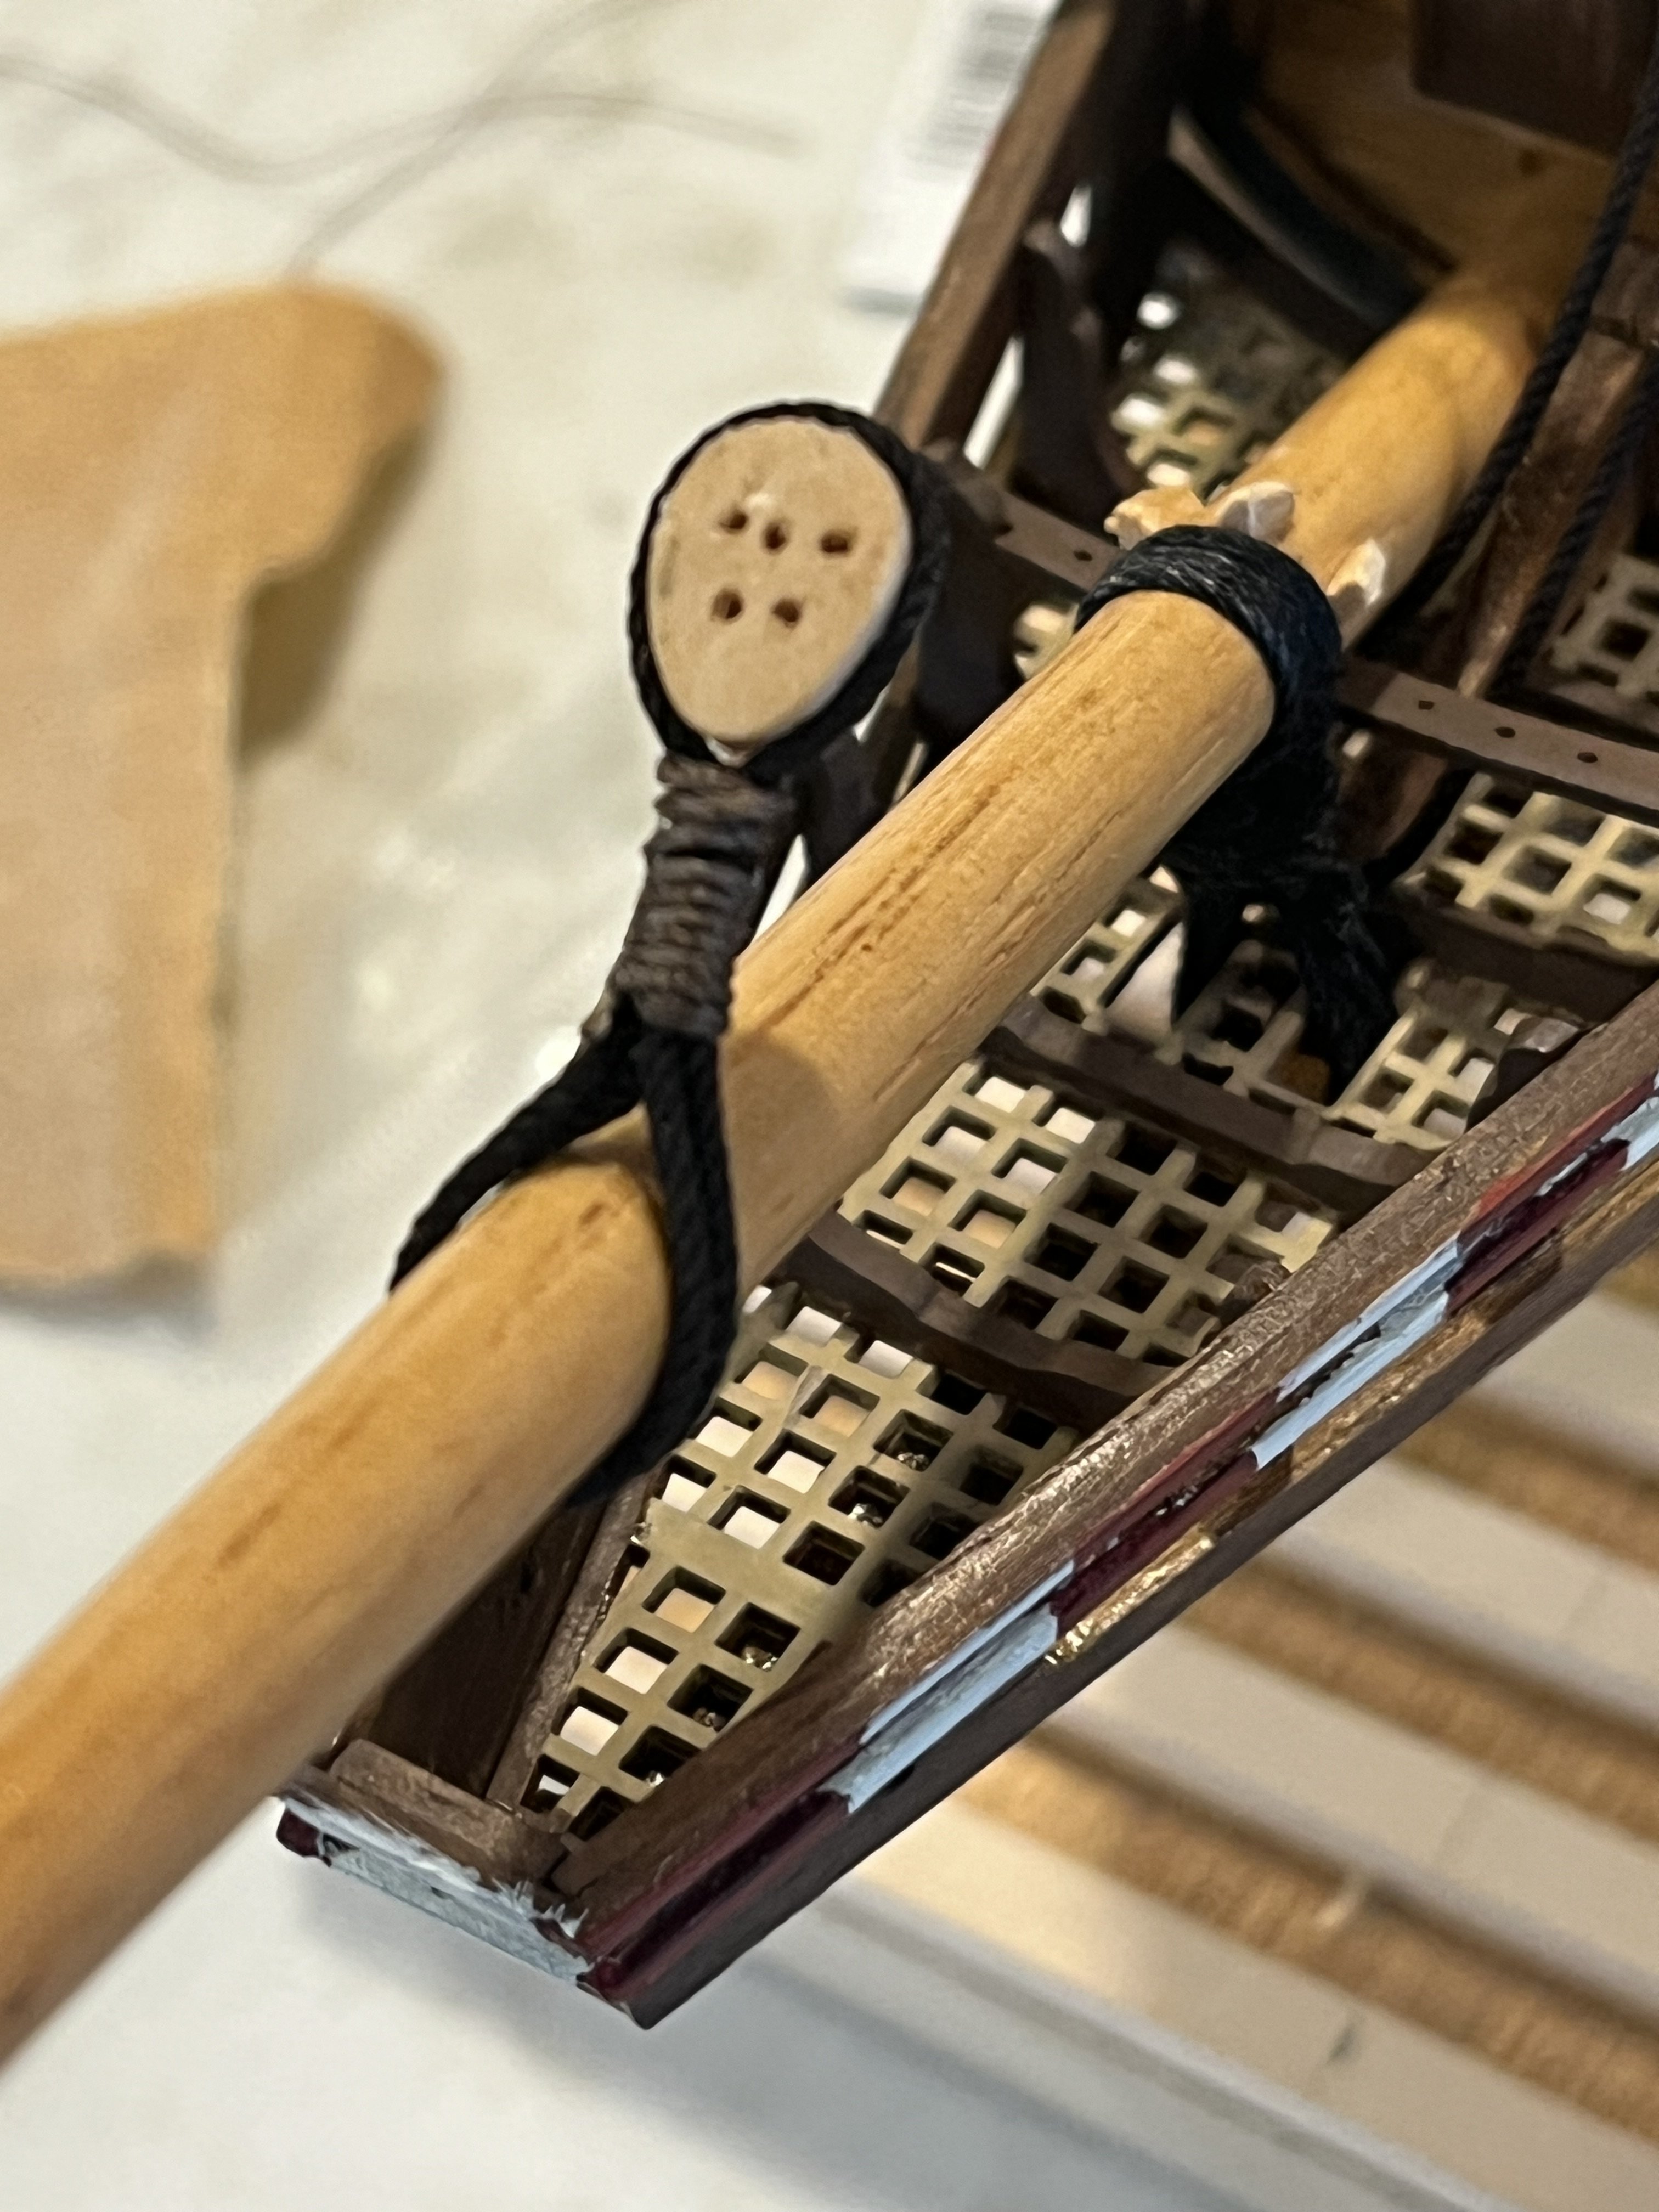
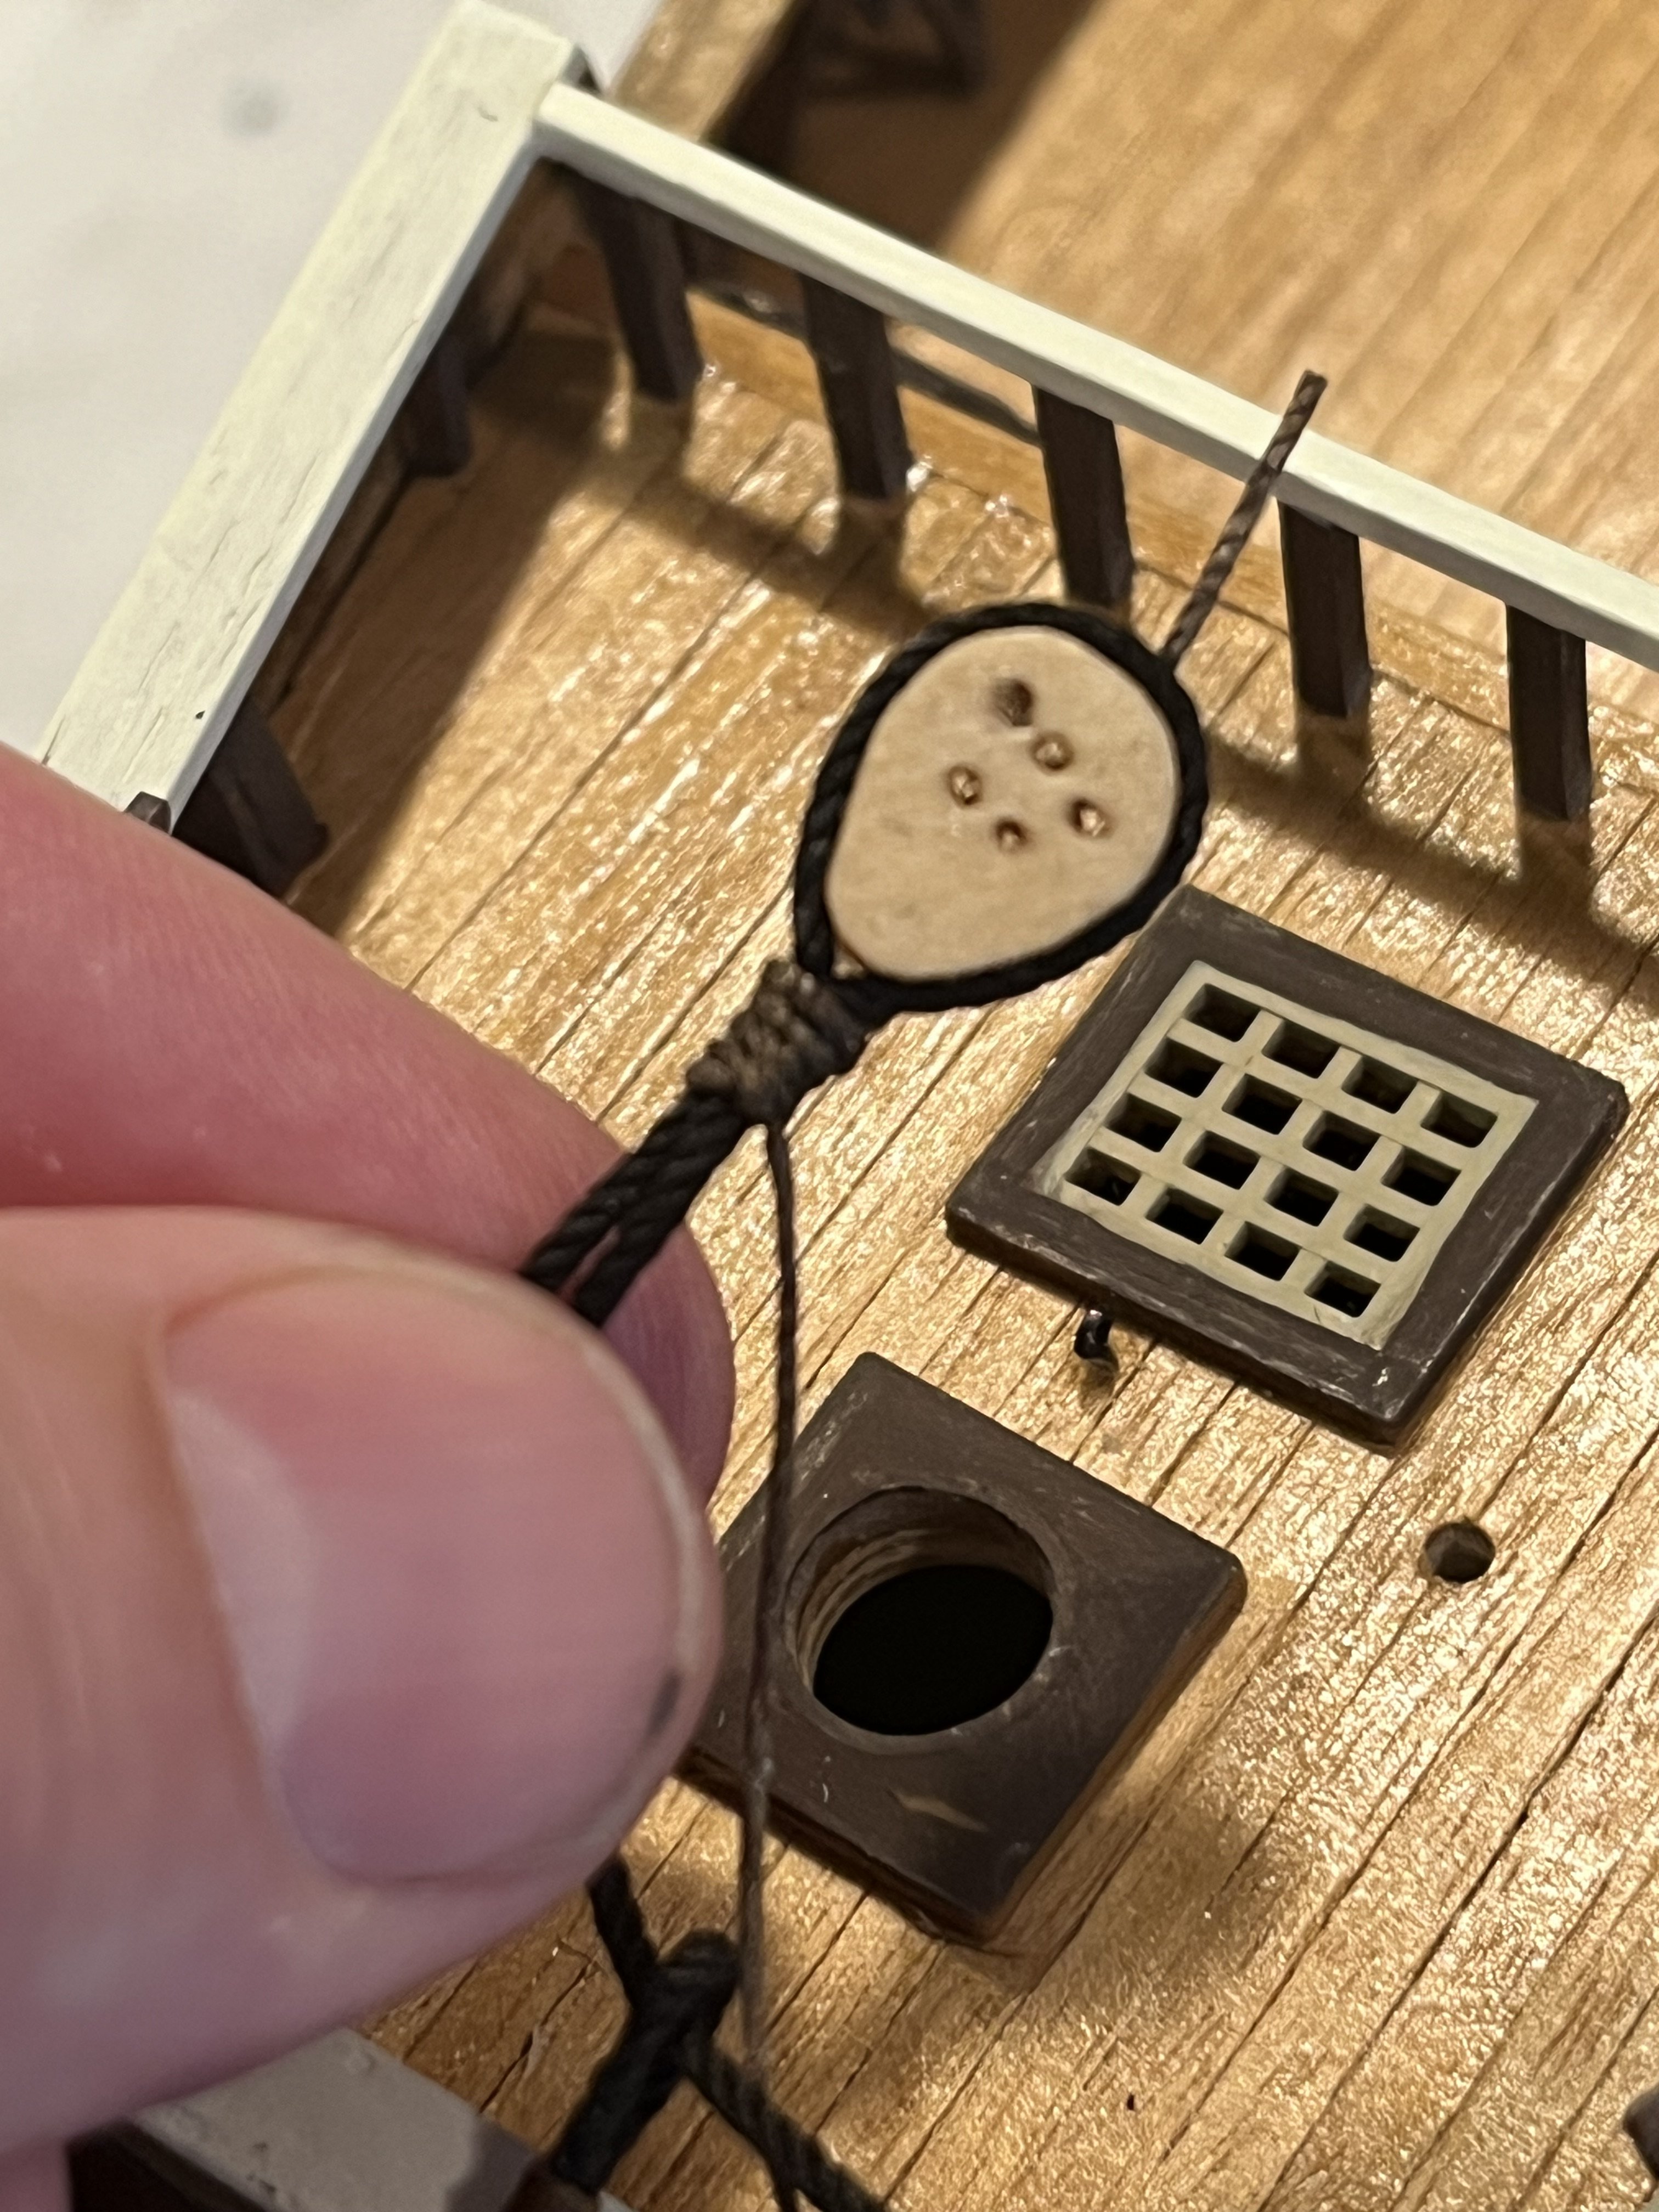
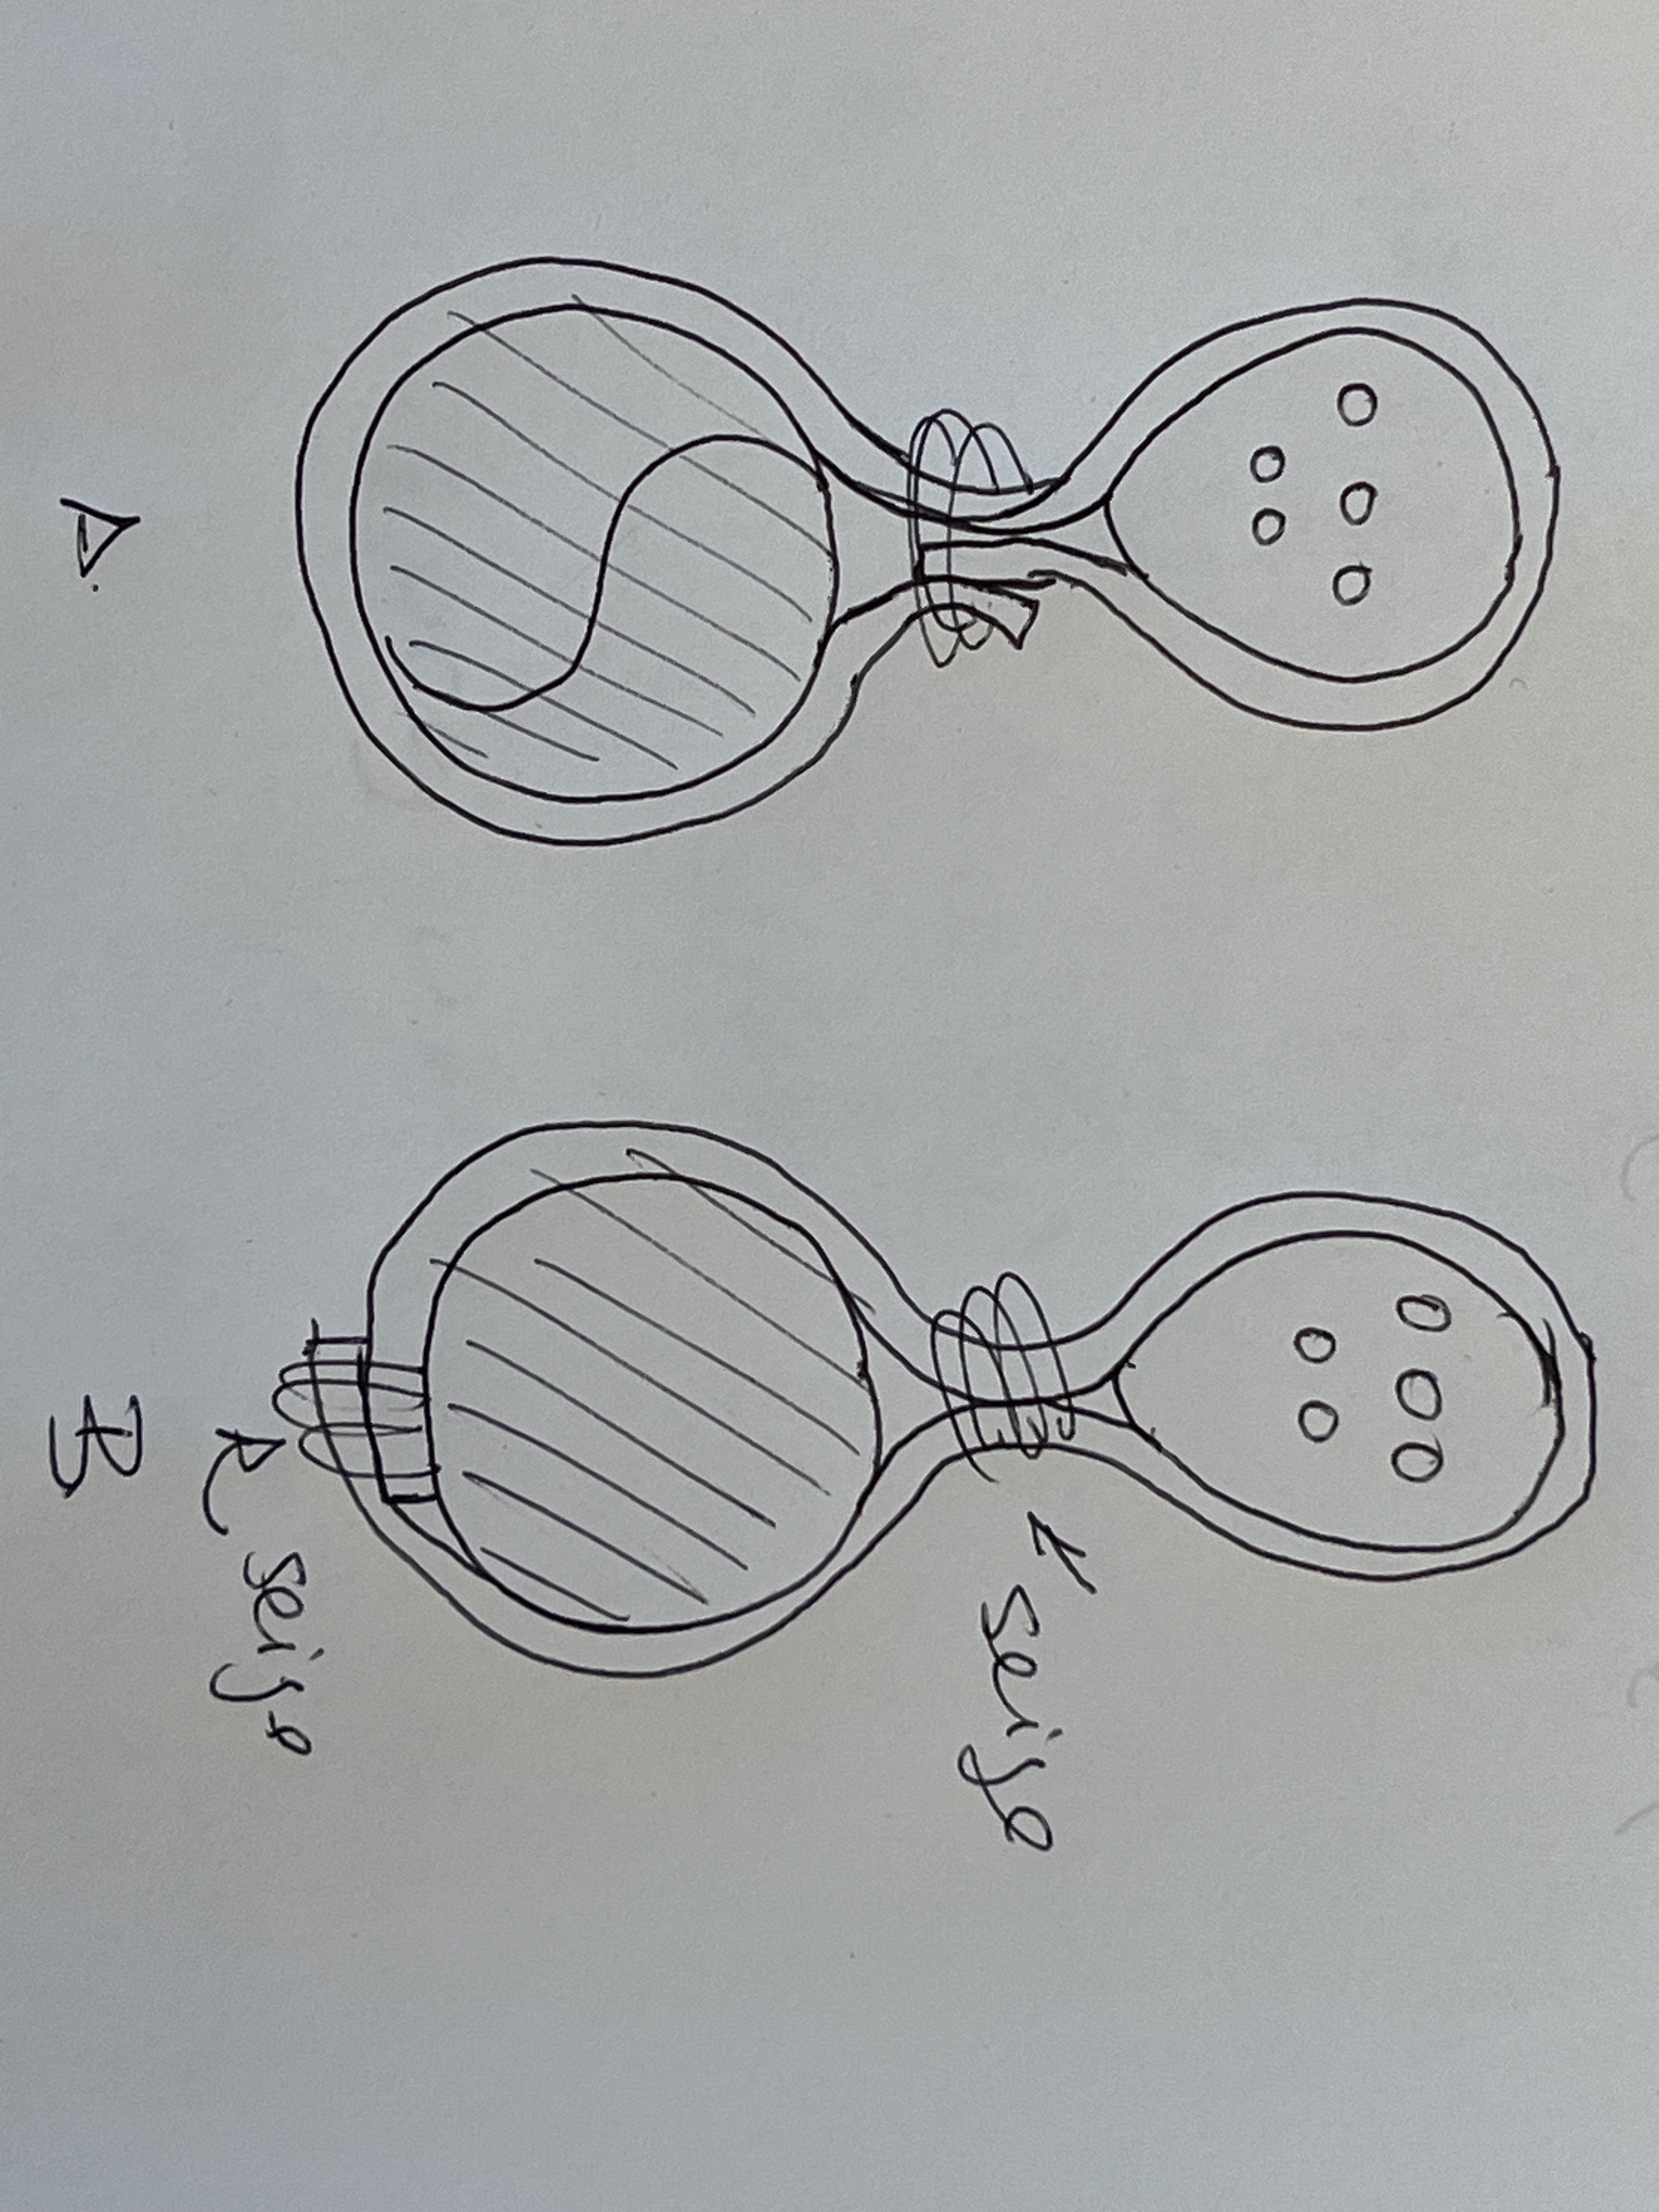
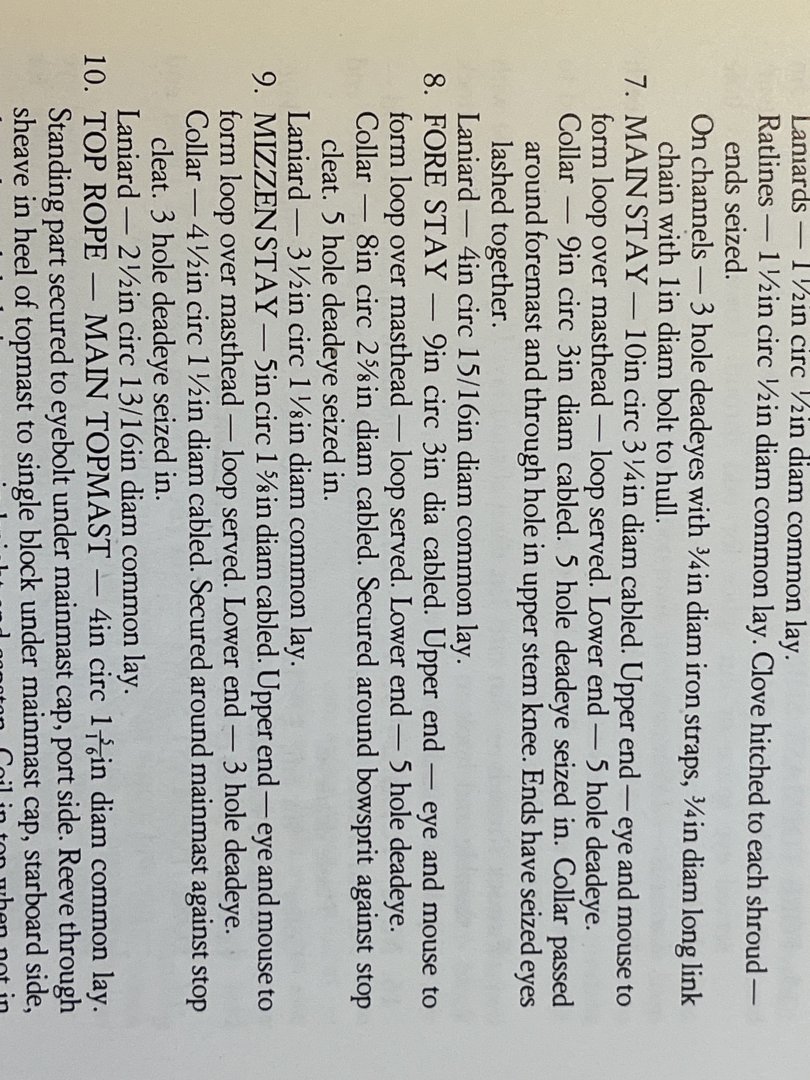
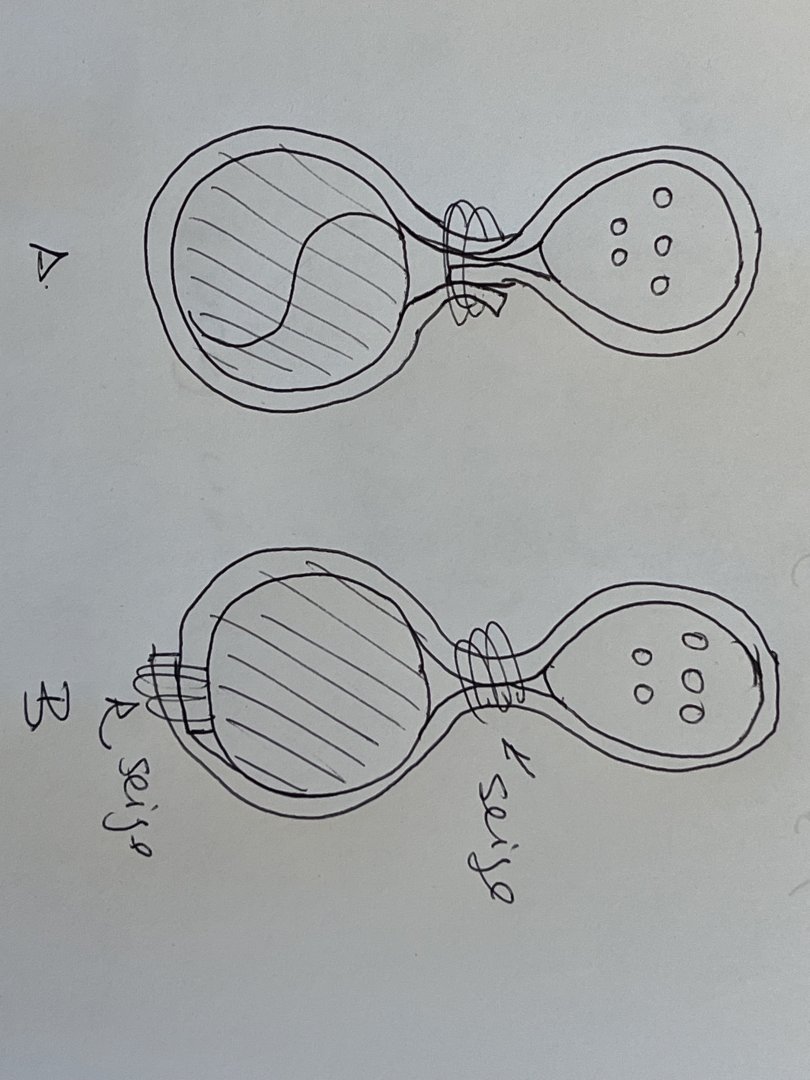
I’m just starting the rigging on my Billing Mayflower, which has a dearth of instruction or info. The forestay collar, according to Baker, is “secured around the bowsprit with a deadeye seized in”. I cannot see how to actually tie this. I tried (and maybe my piece of rope was too short) but after an hour of fumbling I just had two severely frayed ends and nothing tied. Should I make a loop, and seize the ends together and then insert the deadeye and seize it in? I was trying to seize the two ends at the bottom of the deadeye but maybe it needs two steps… thanks for looking. Dave
-
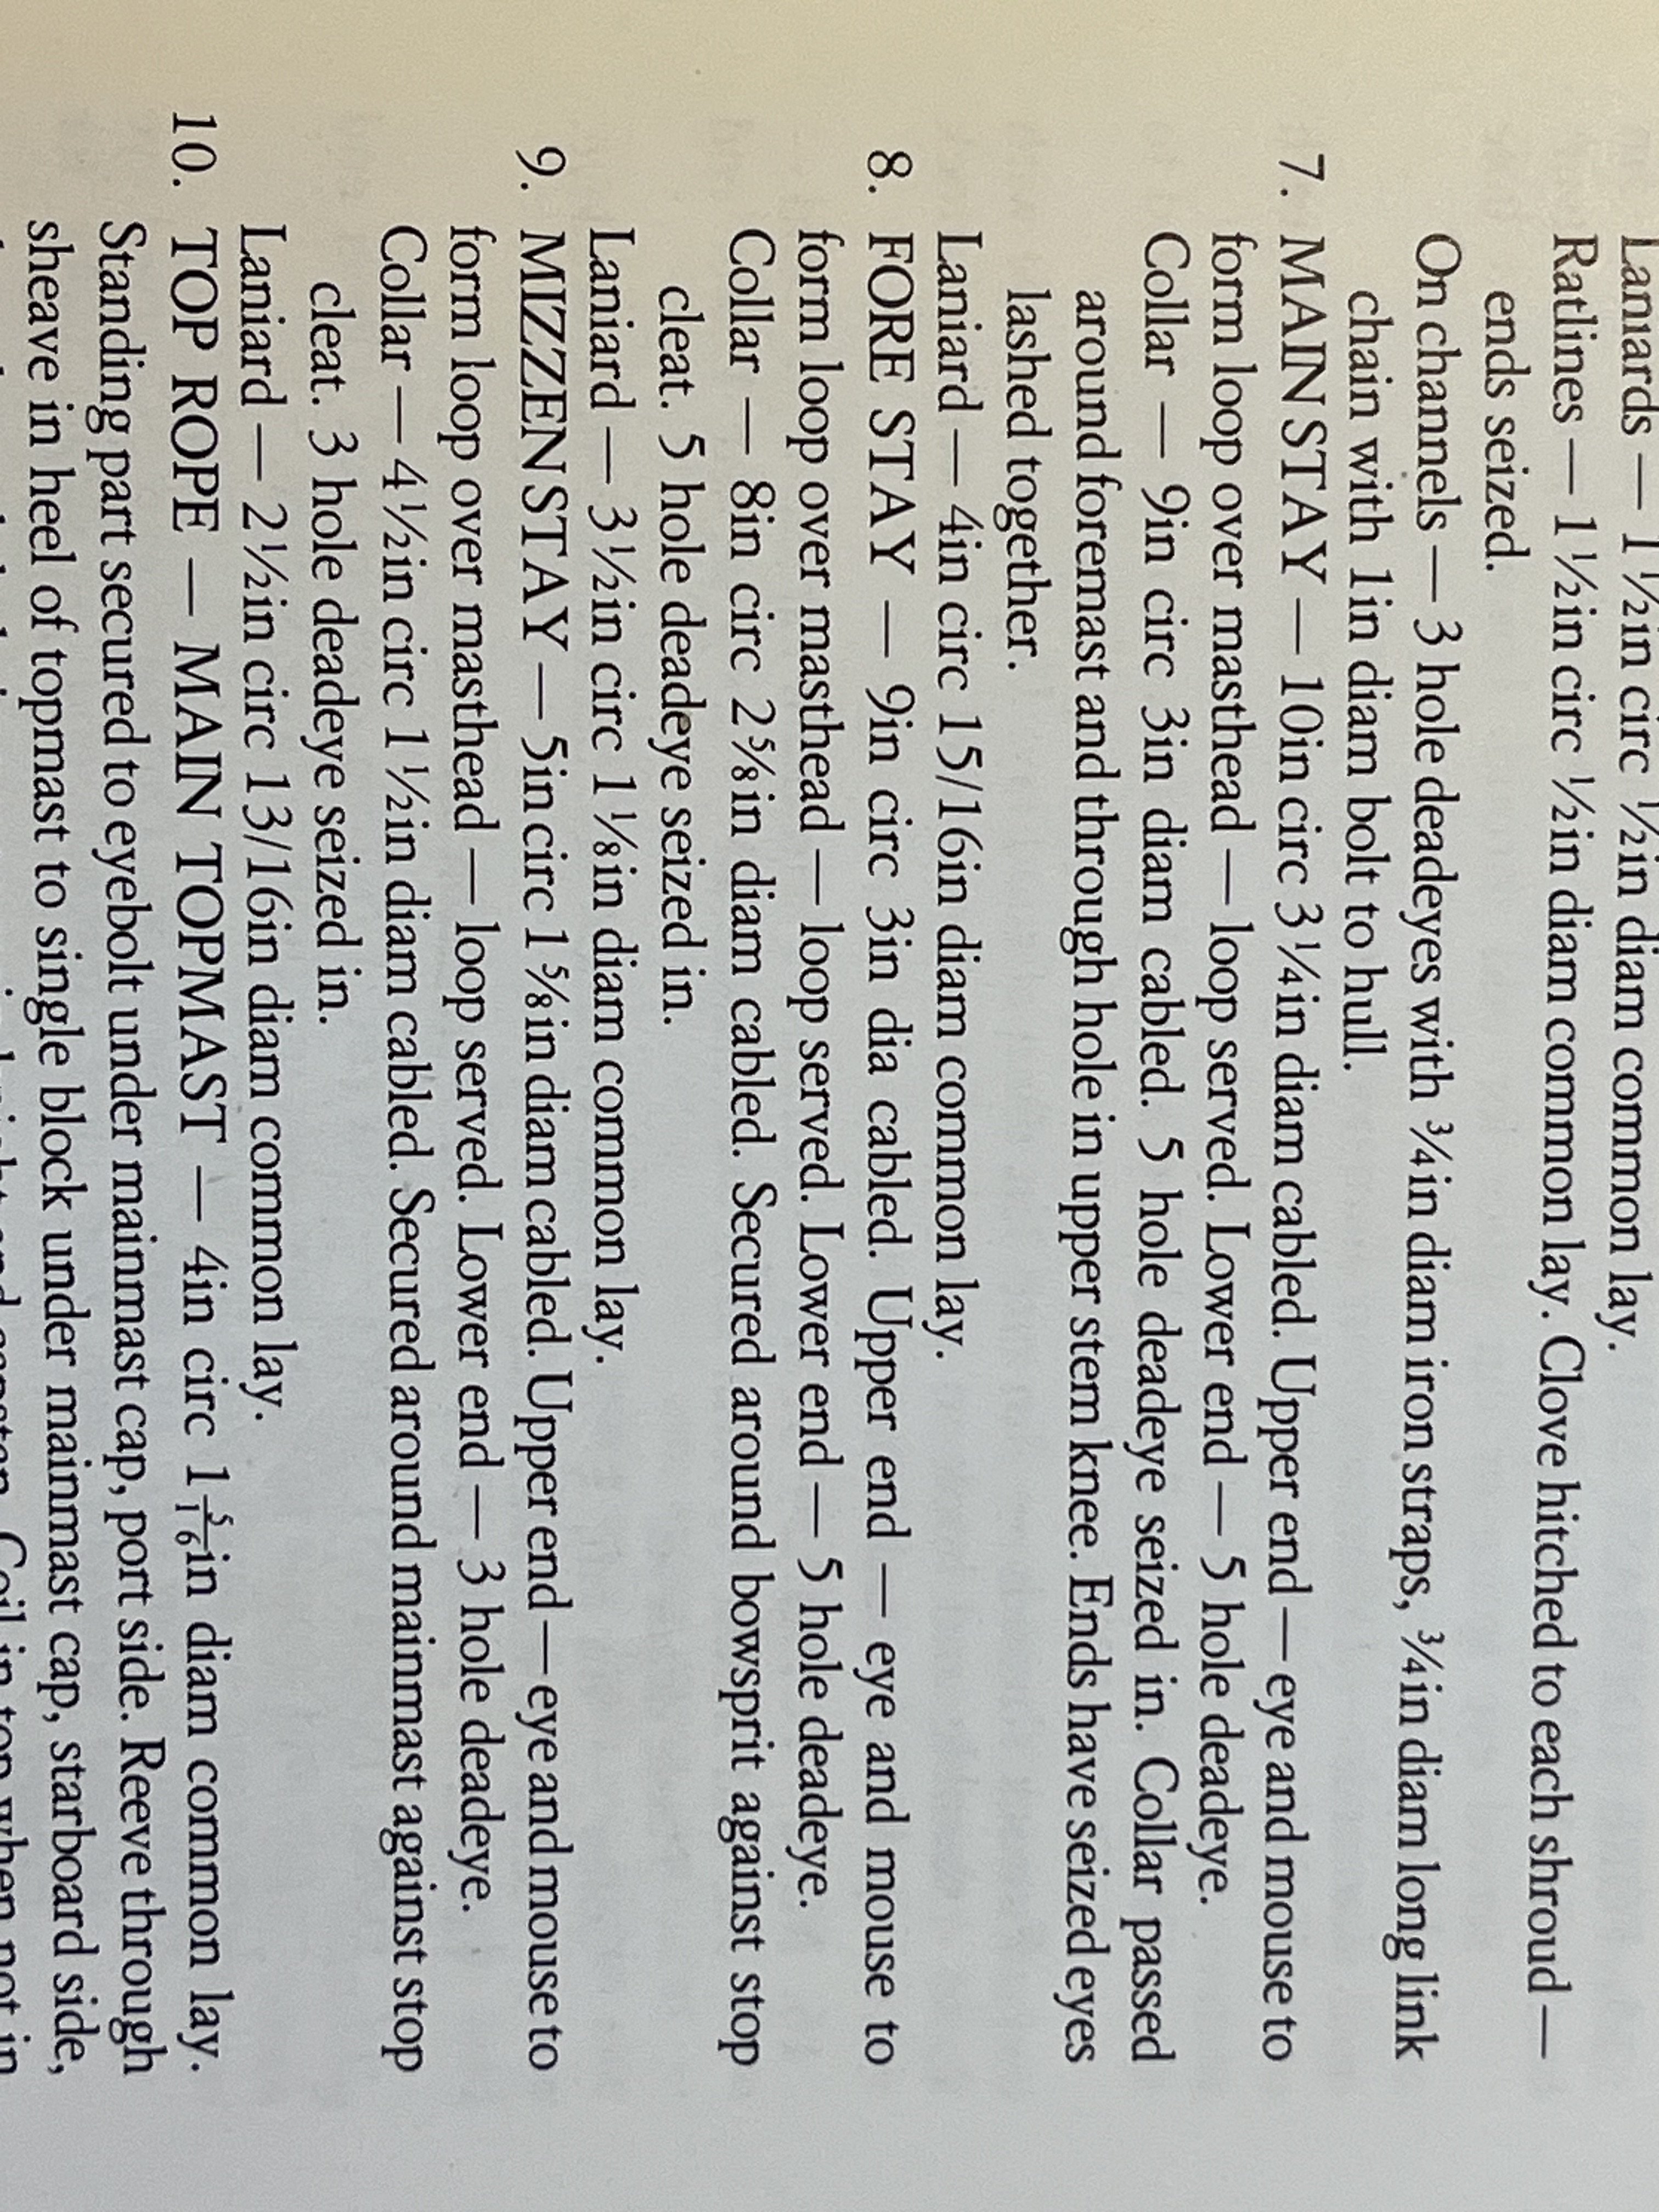
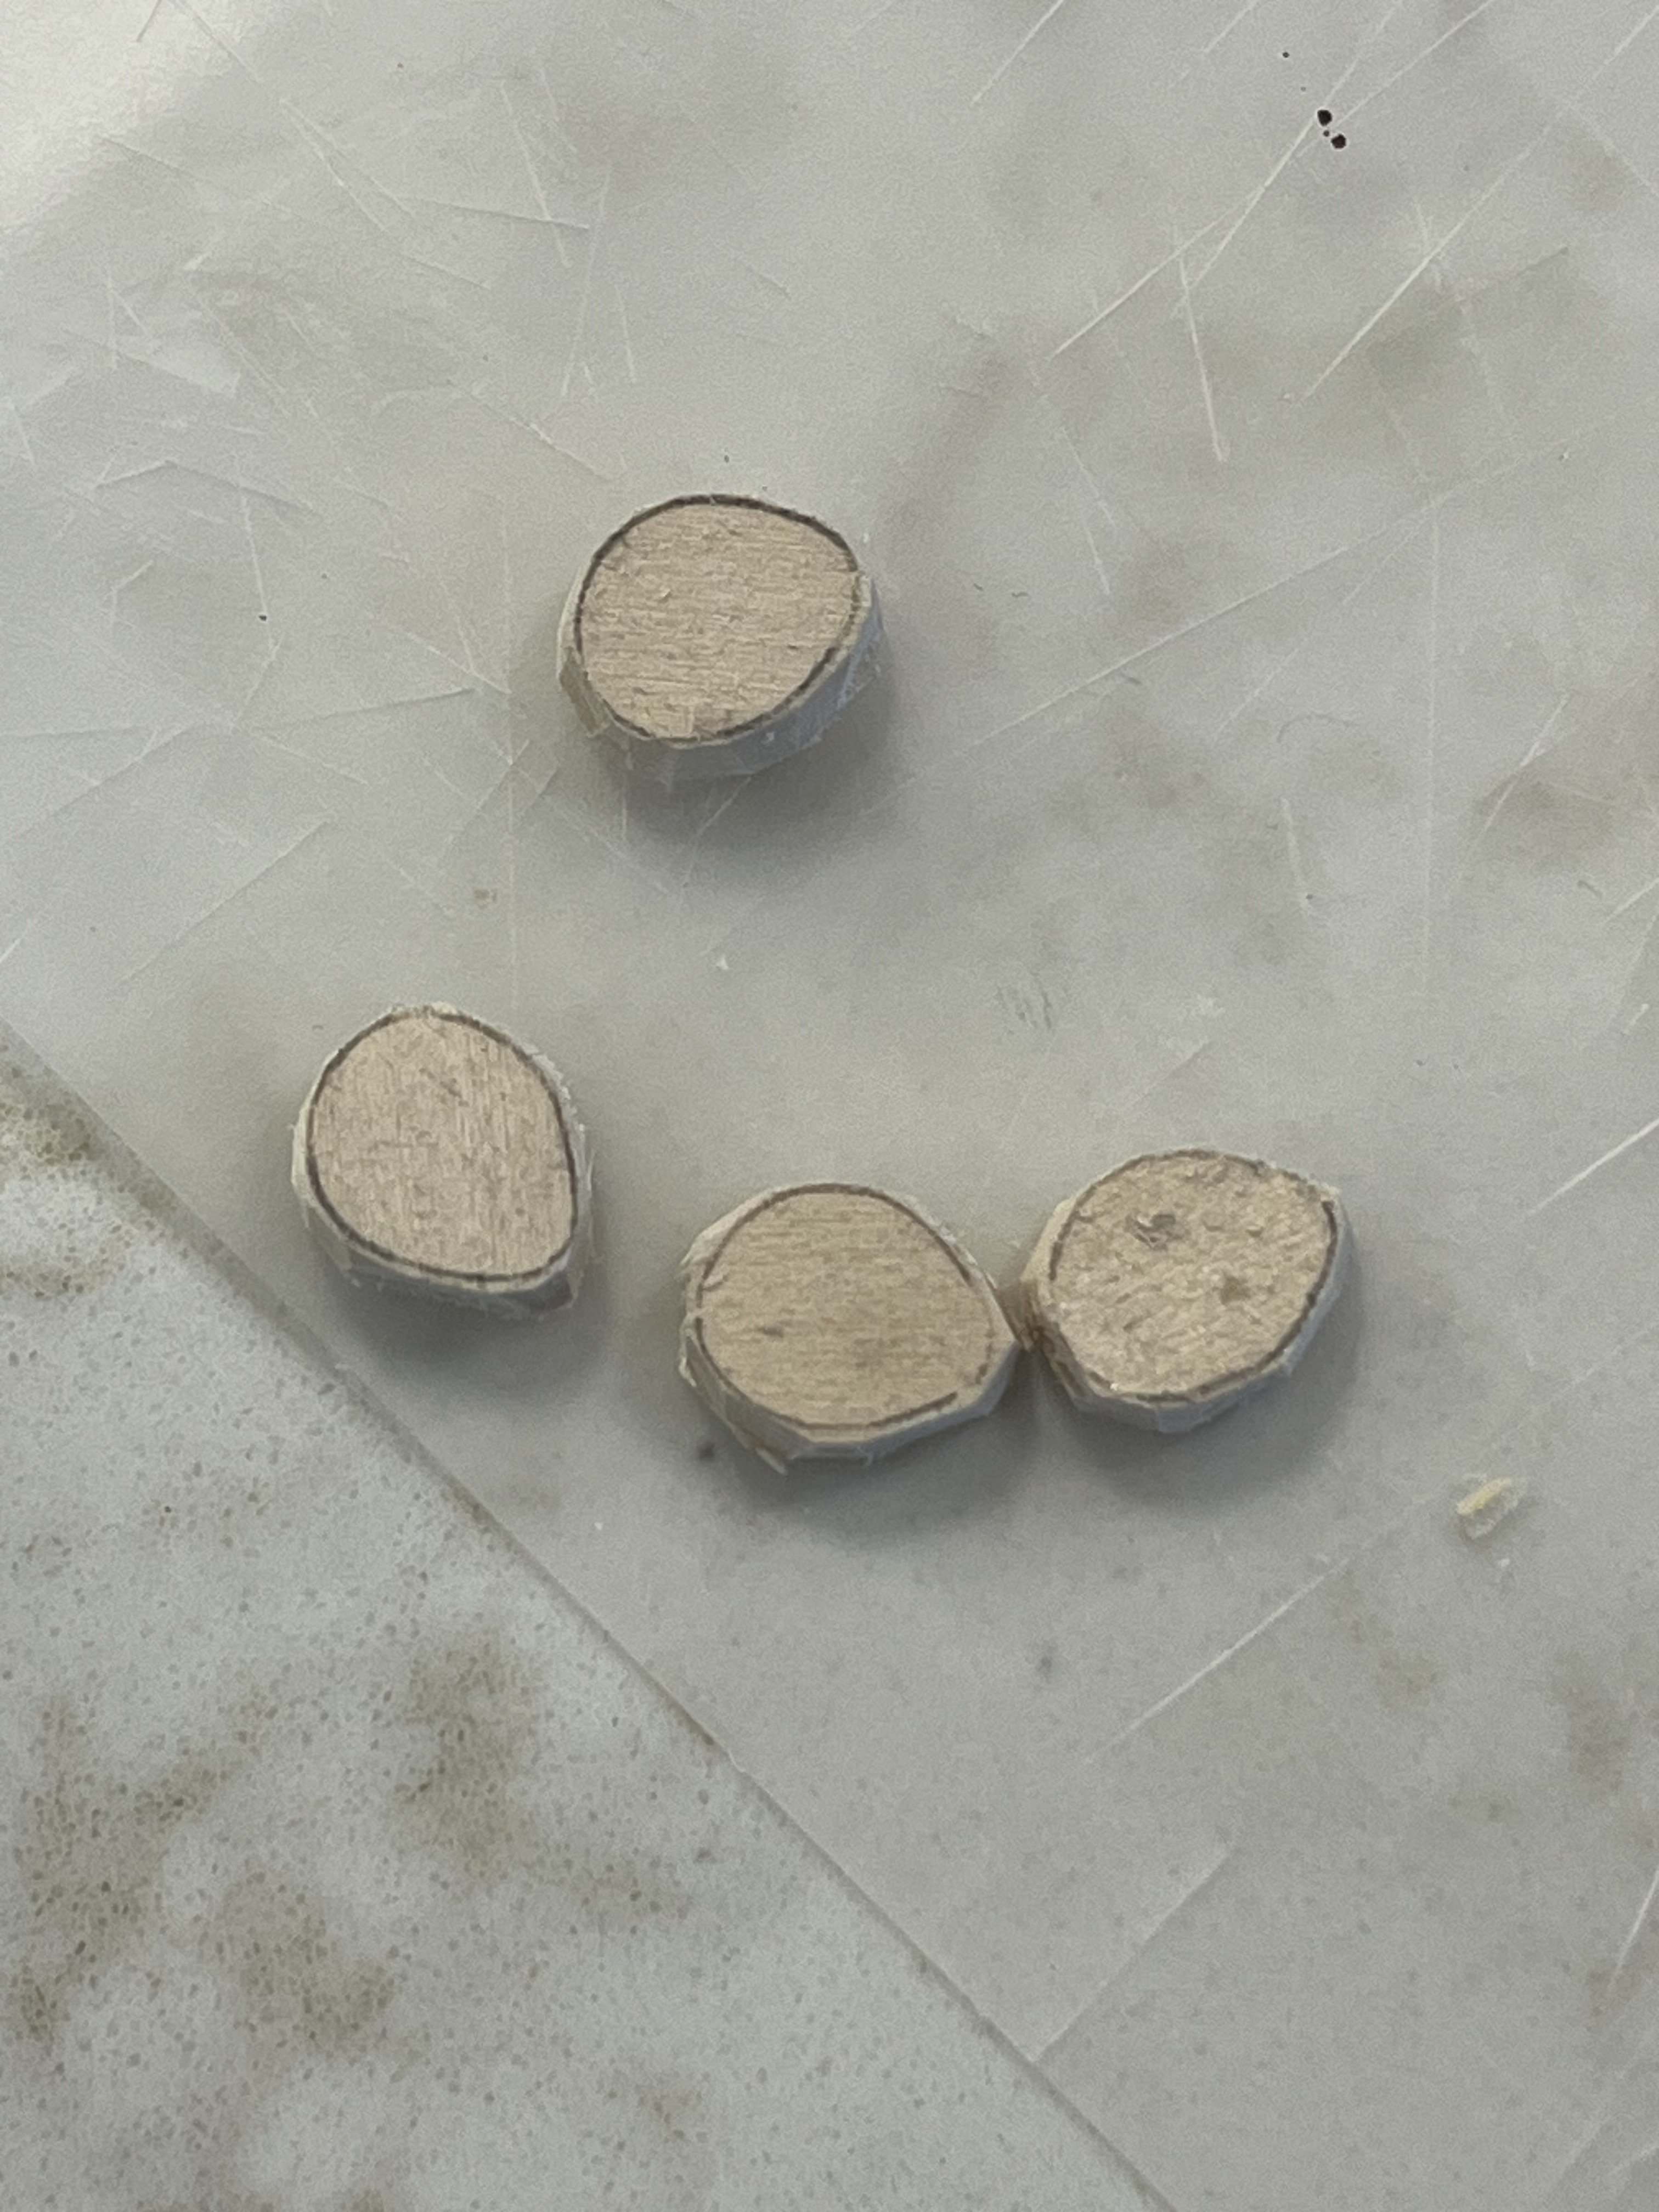
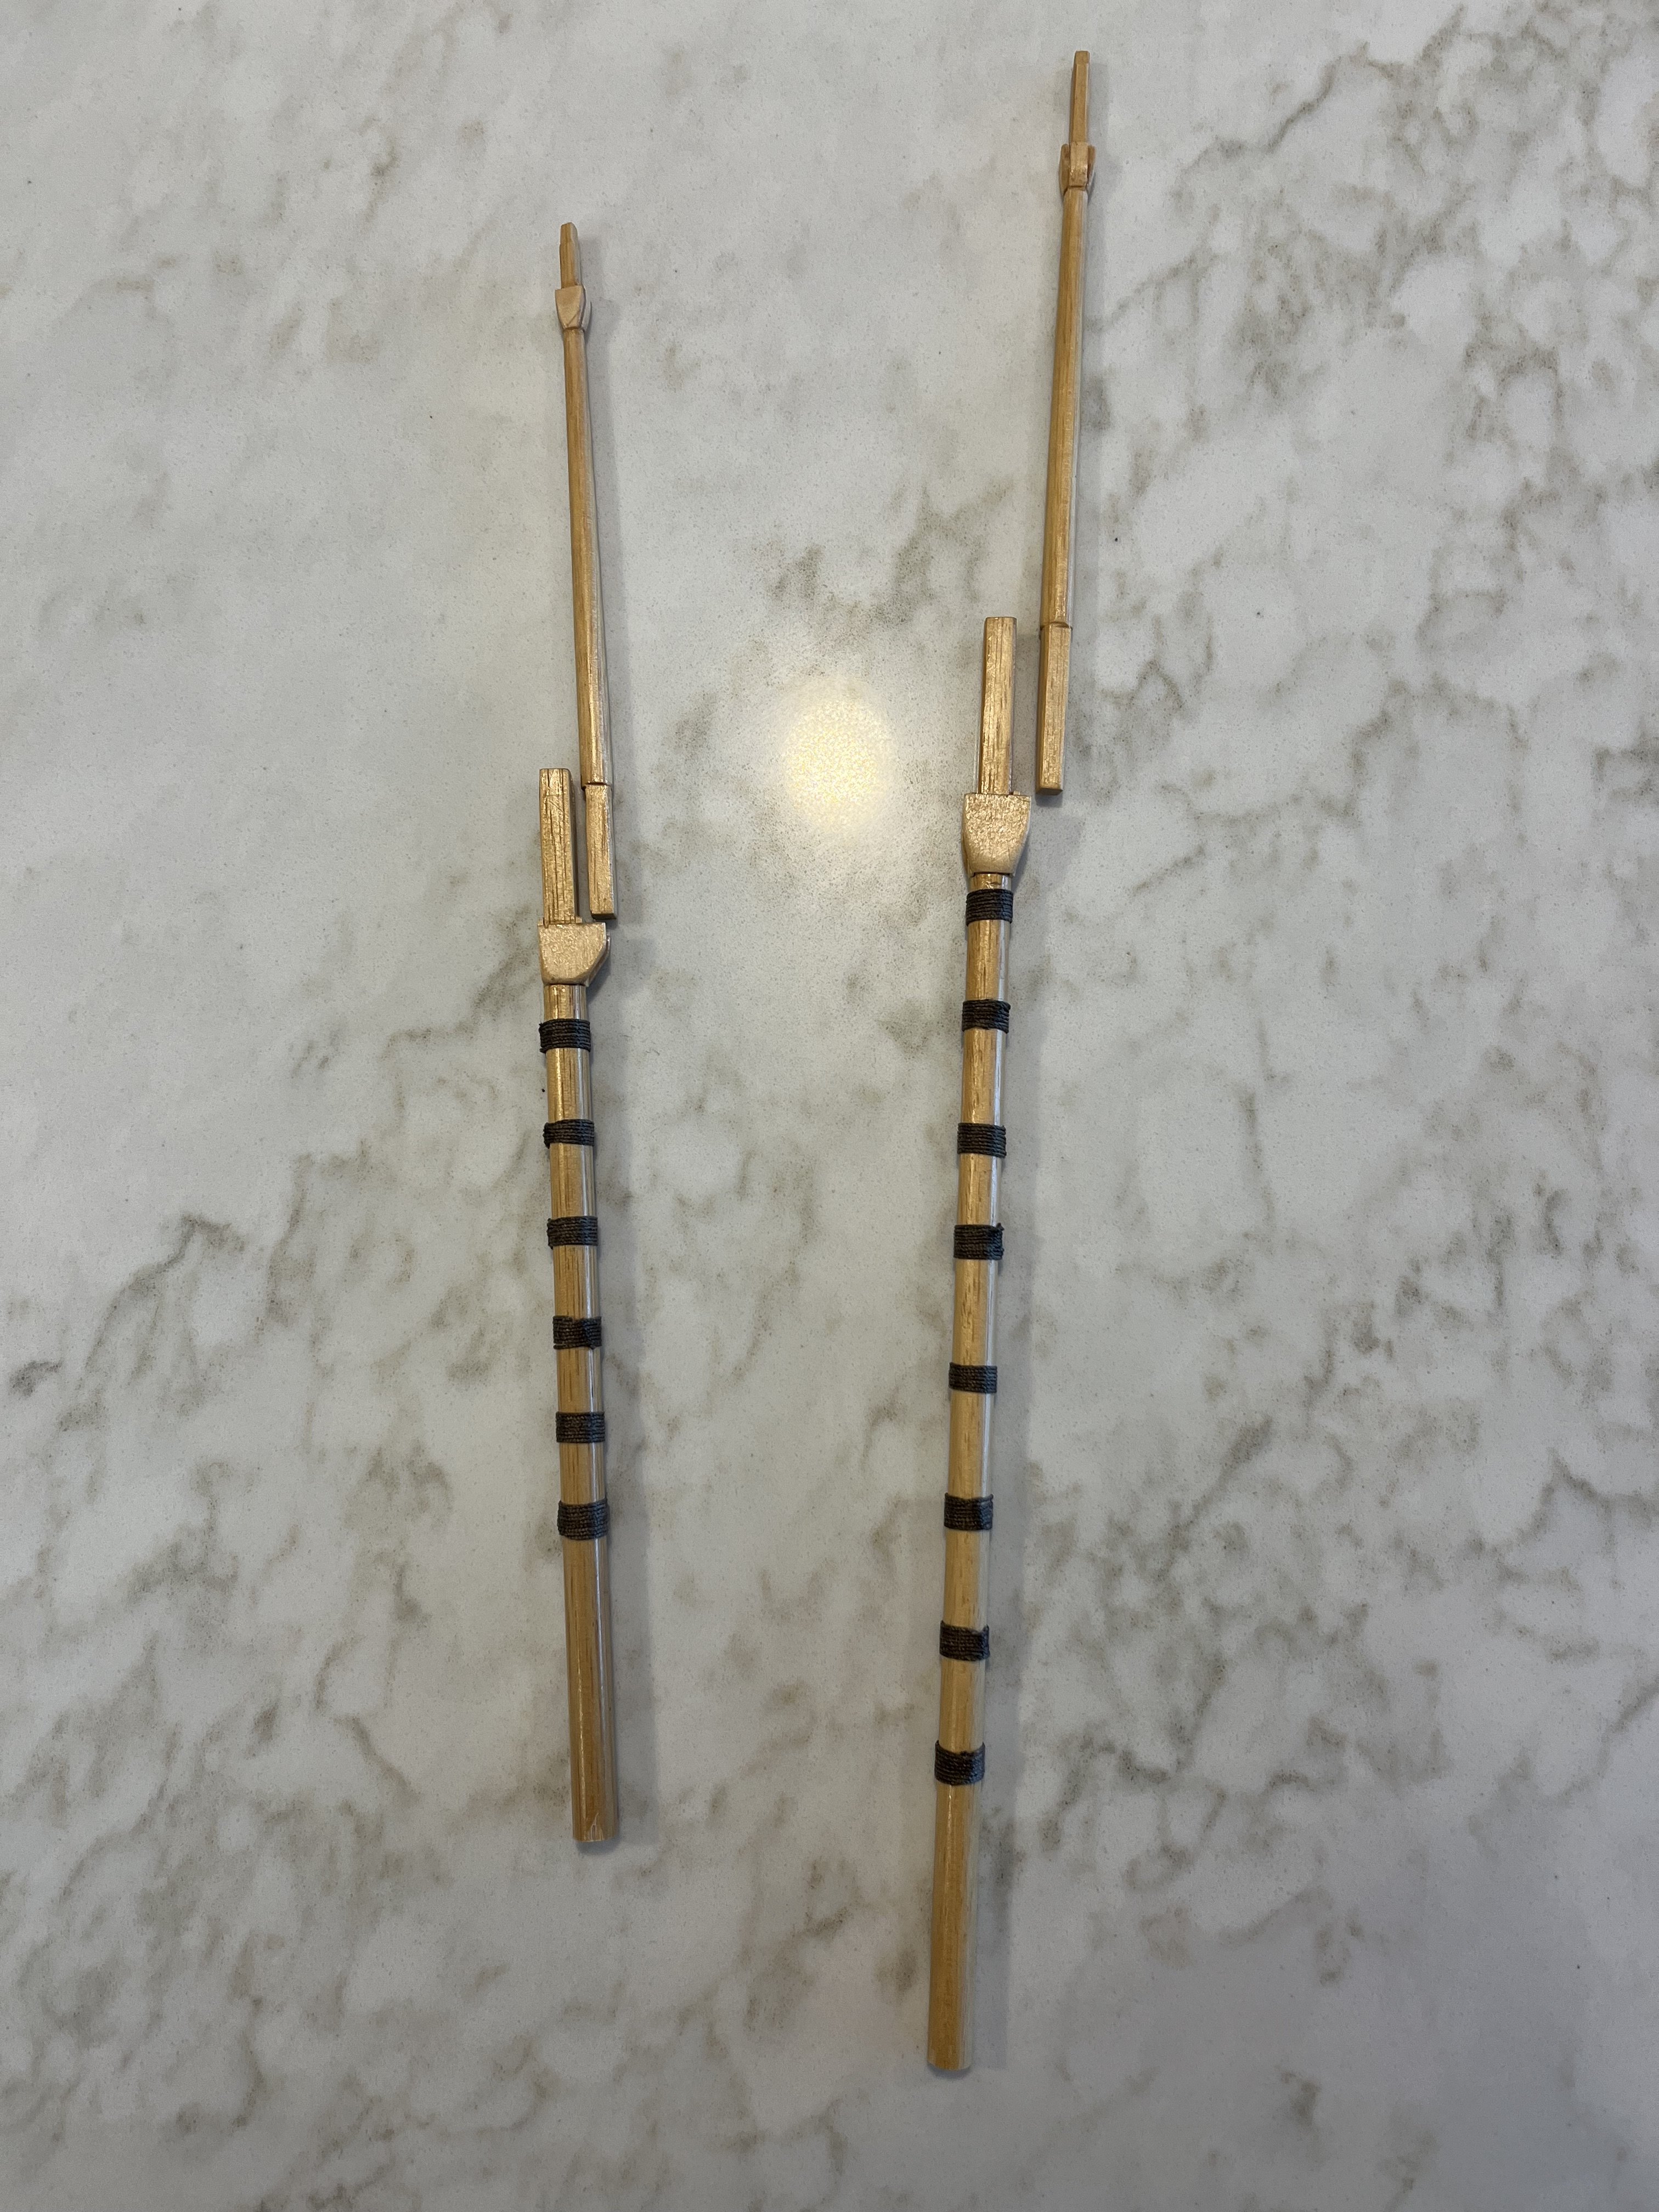
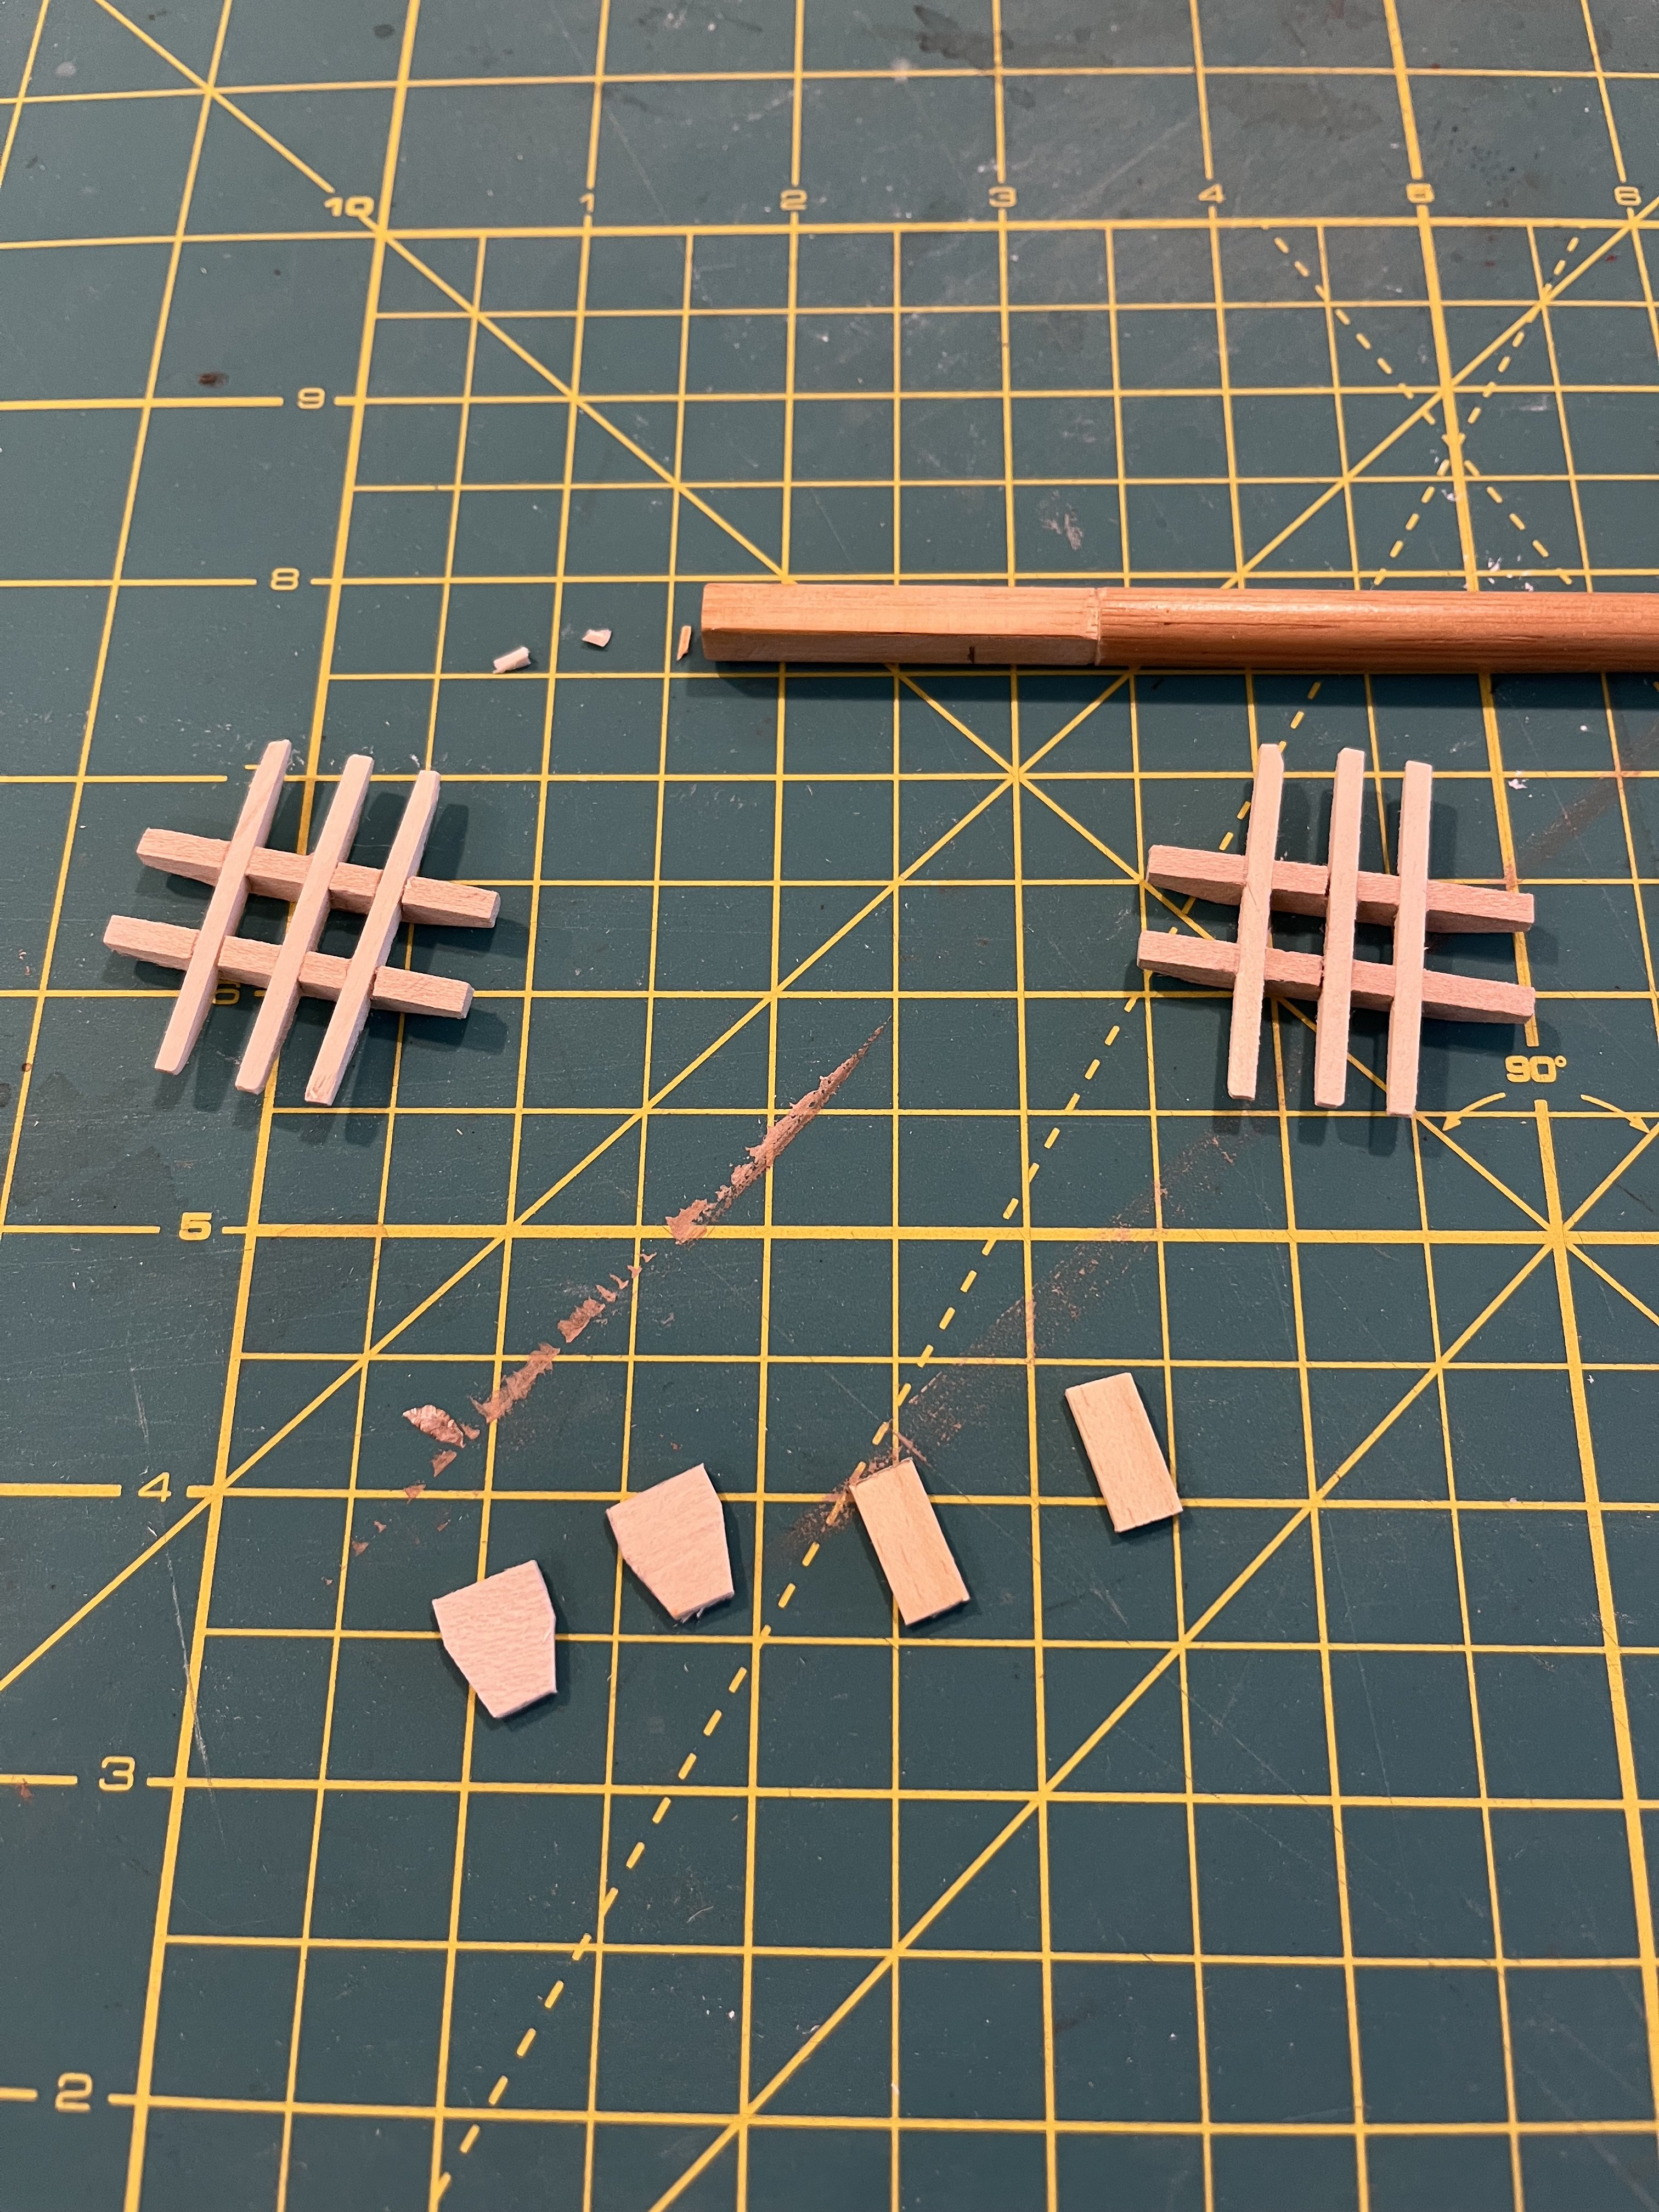
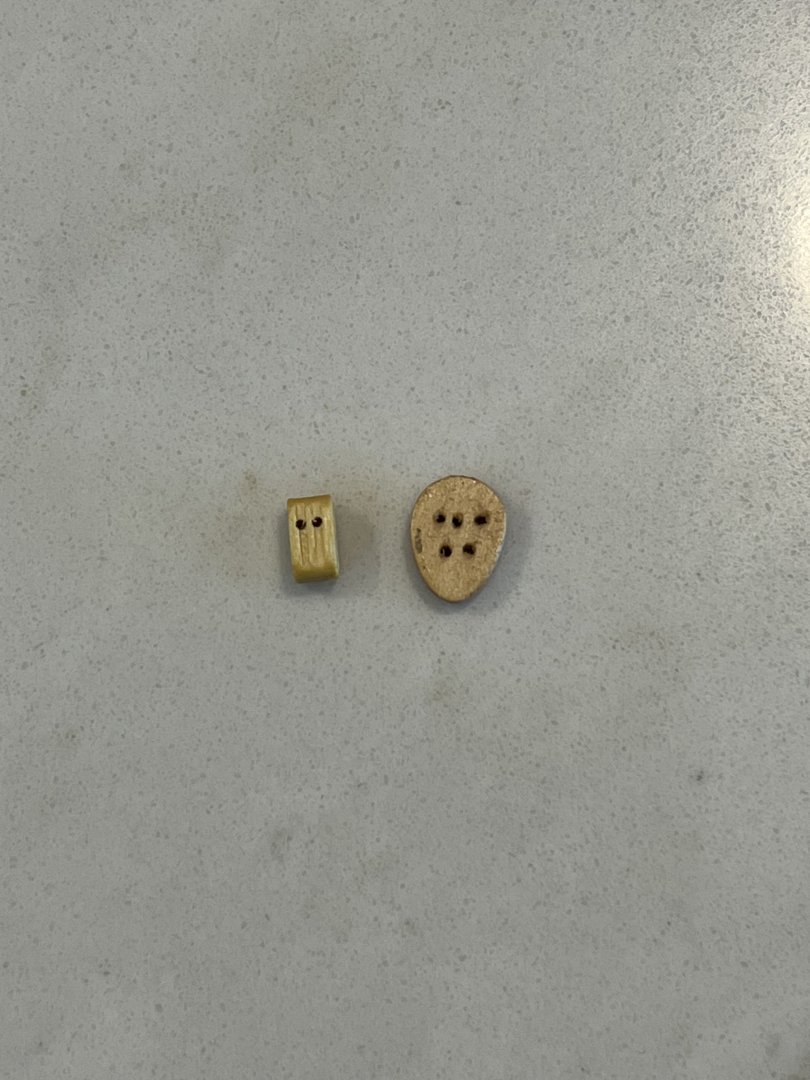
I redid the gammoning in what should be a better-scaled rope size. Then I finished up the masts (minus cleats) and I still have to decide on how the yards are to be hung. I think ropes through the hounds are the way to go vs jeers. Anderson does mention jeers but I can’t figure out the arrangement. I am unwilling to completely redesign the model and am not looking for an accurate replica so I am OK with carrying some inaccuracies forward. I did opt to make new deadeyes for the stays since these are obvious. I laminated two pieces of wood, drew a pattern based on Anderson’s measurements, and filed them to shape. The finished one compared to the kit-provided. Thanks for looking. Cheers, Dave


-
Looks so clean! Masterfully executed! cheers, Dave
-
Kirill, you have outdone yourself again! Thank you so much for the info and guidance. Taking the time to scan those drawings and provide the detailed instructions takes time and effort - I can’t say thank you enough. I’m learning so much about rigging and model ship building - it’s awesome. Bob, thanks for keeping an eye out for me. You did a great job finishing your MF. I can only hope to come close. Cheers, Dave
-
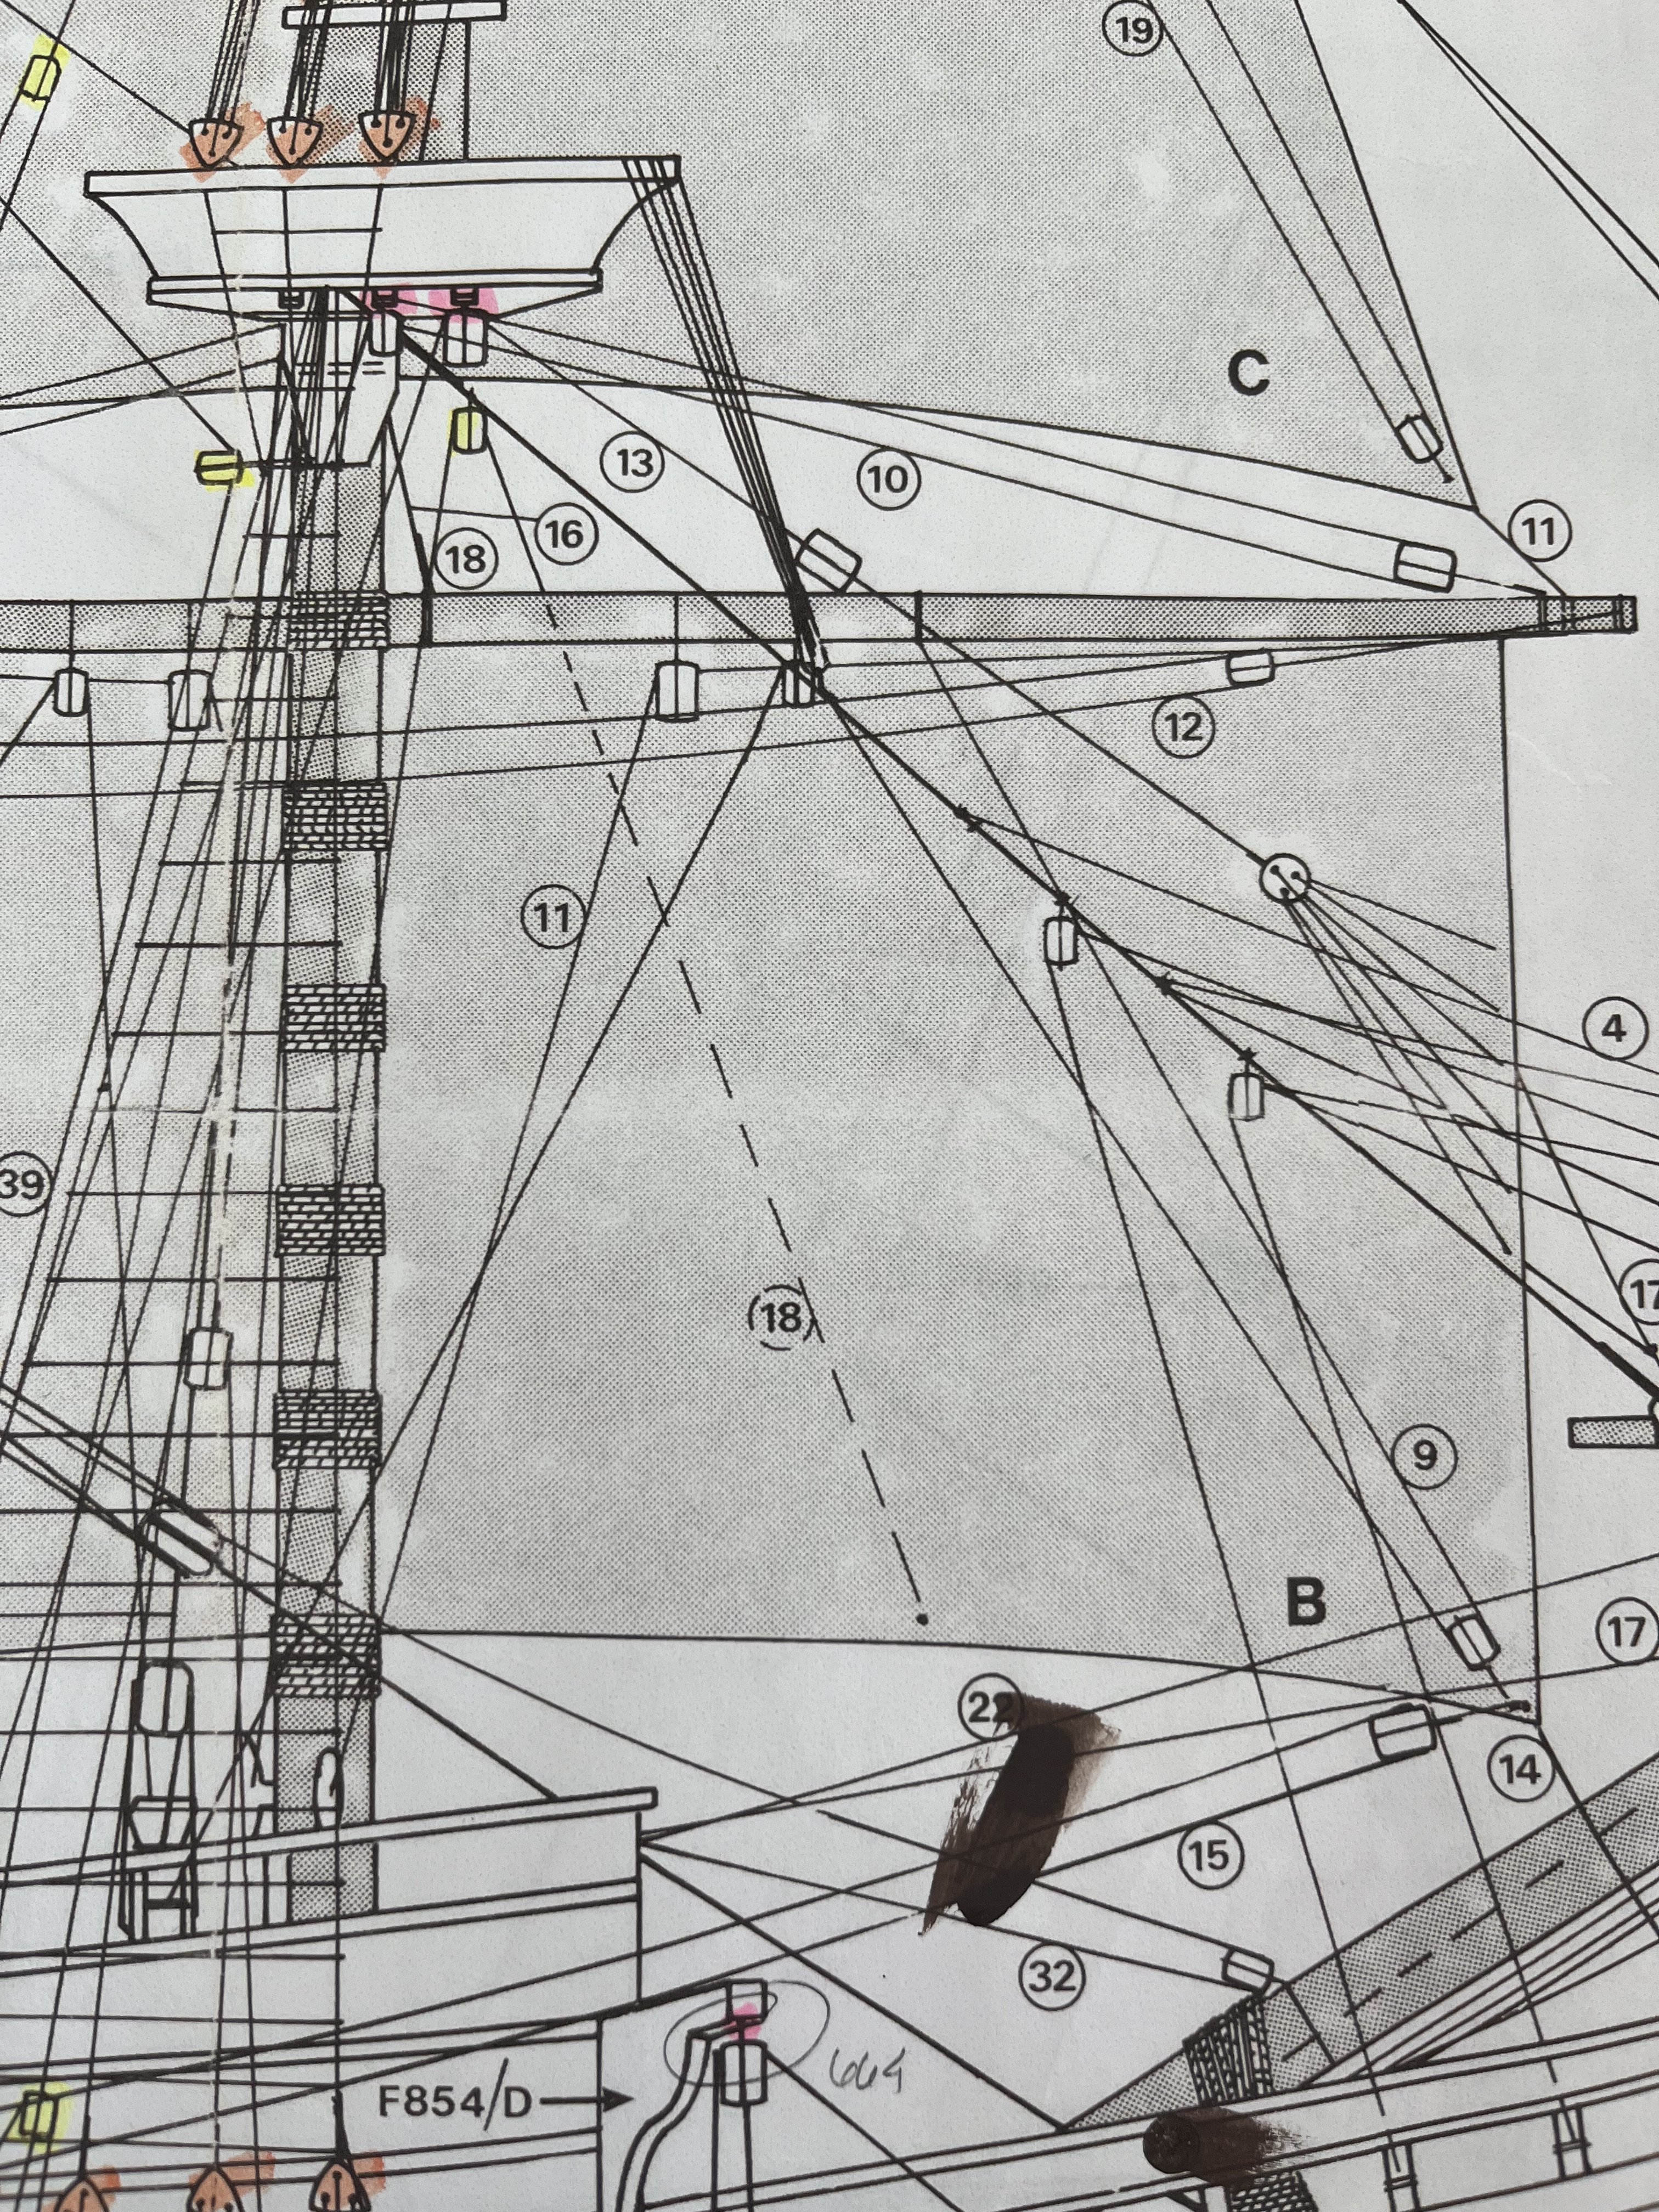
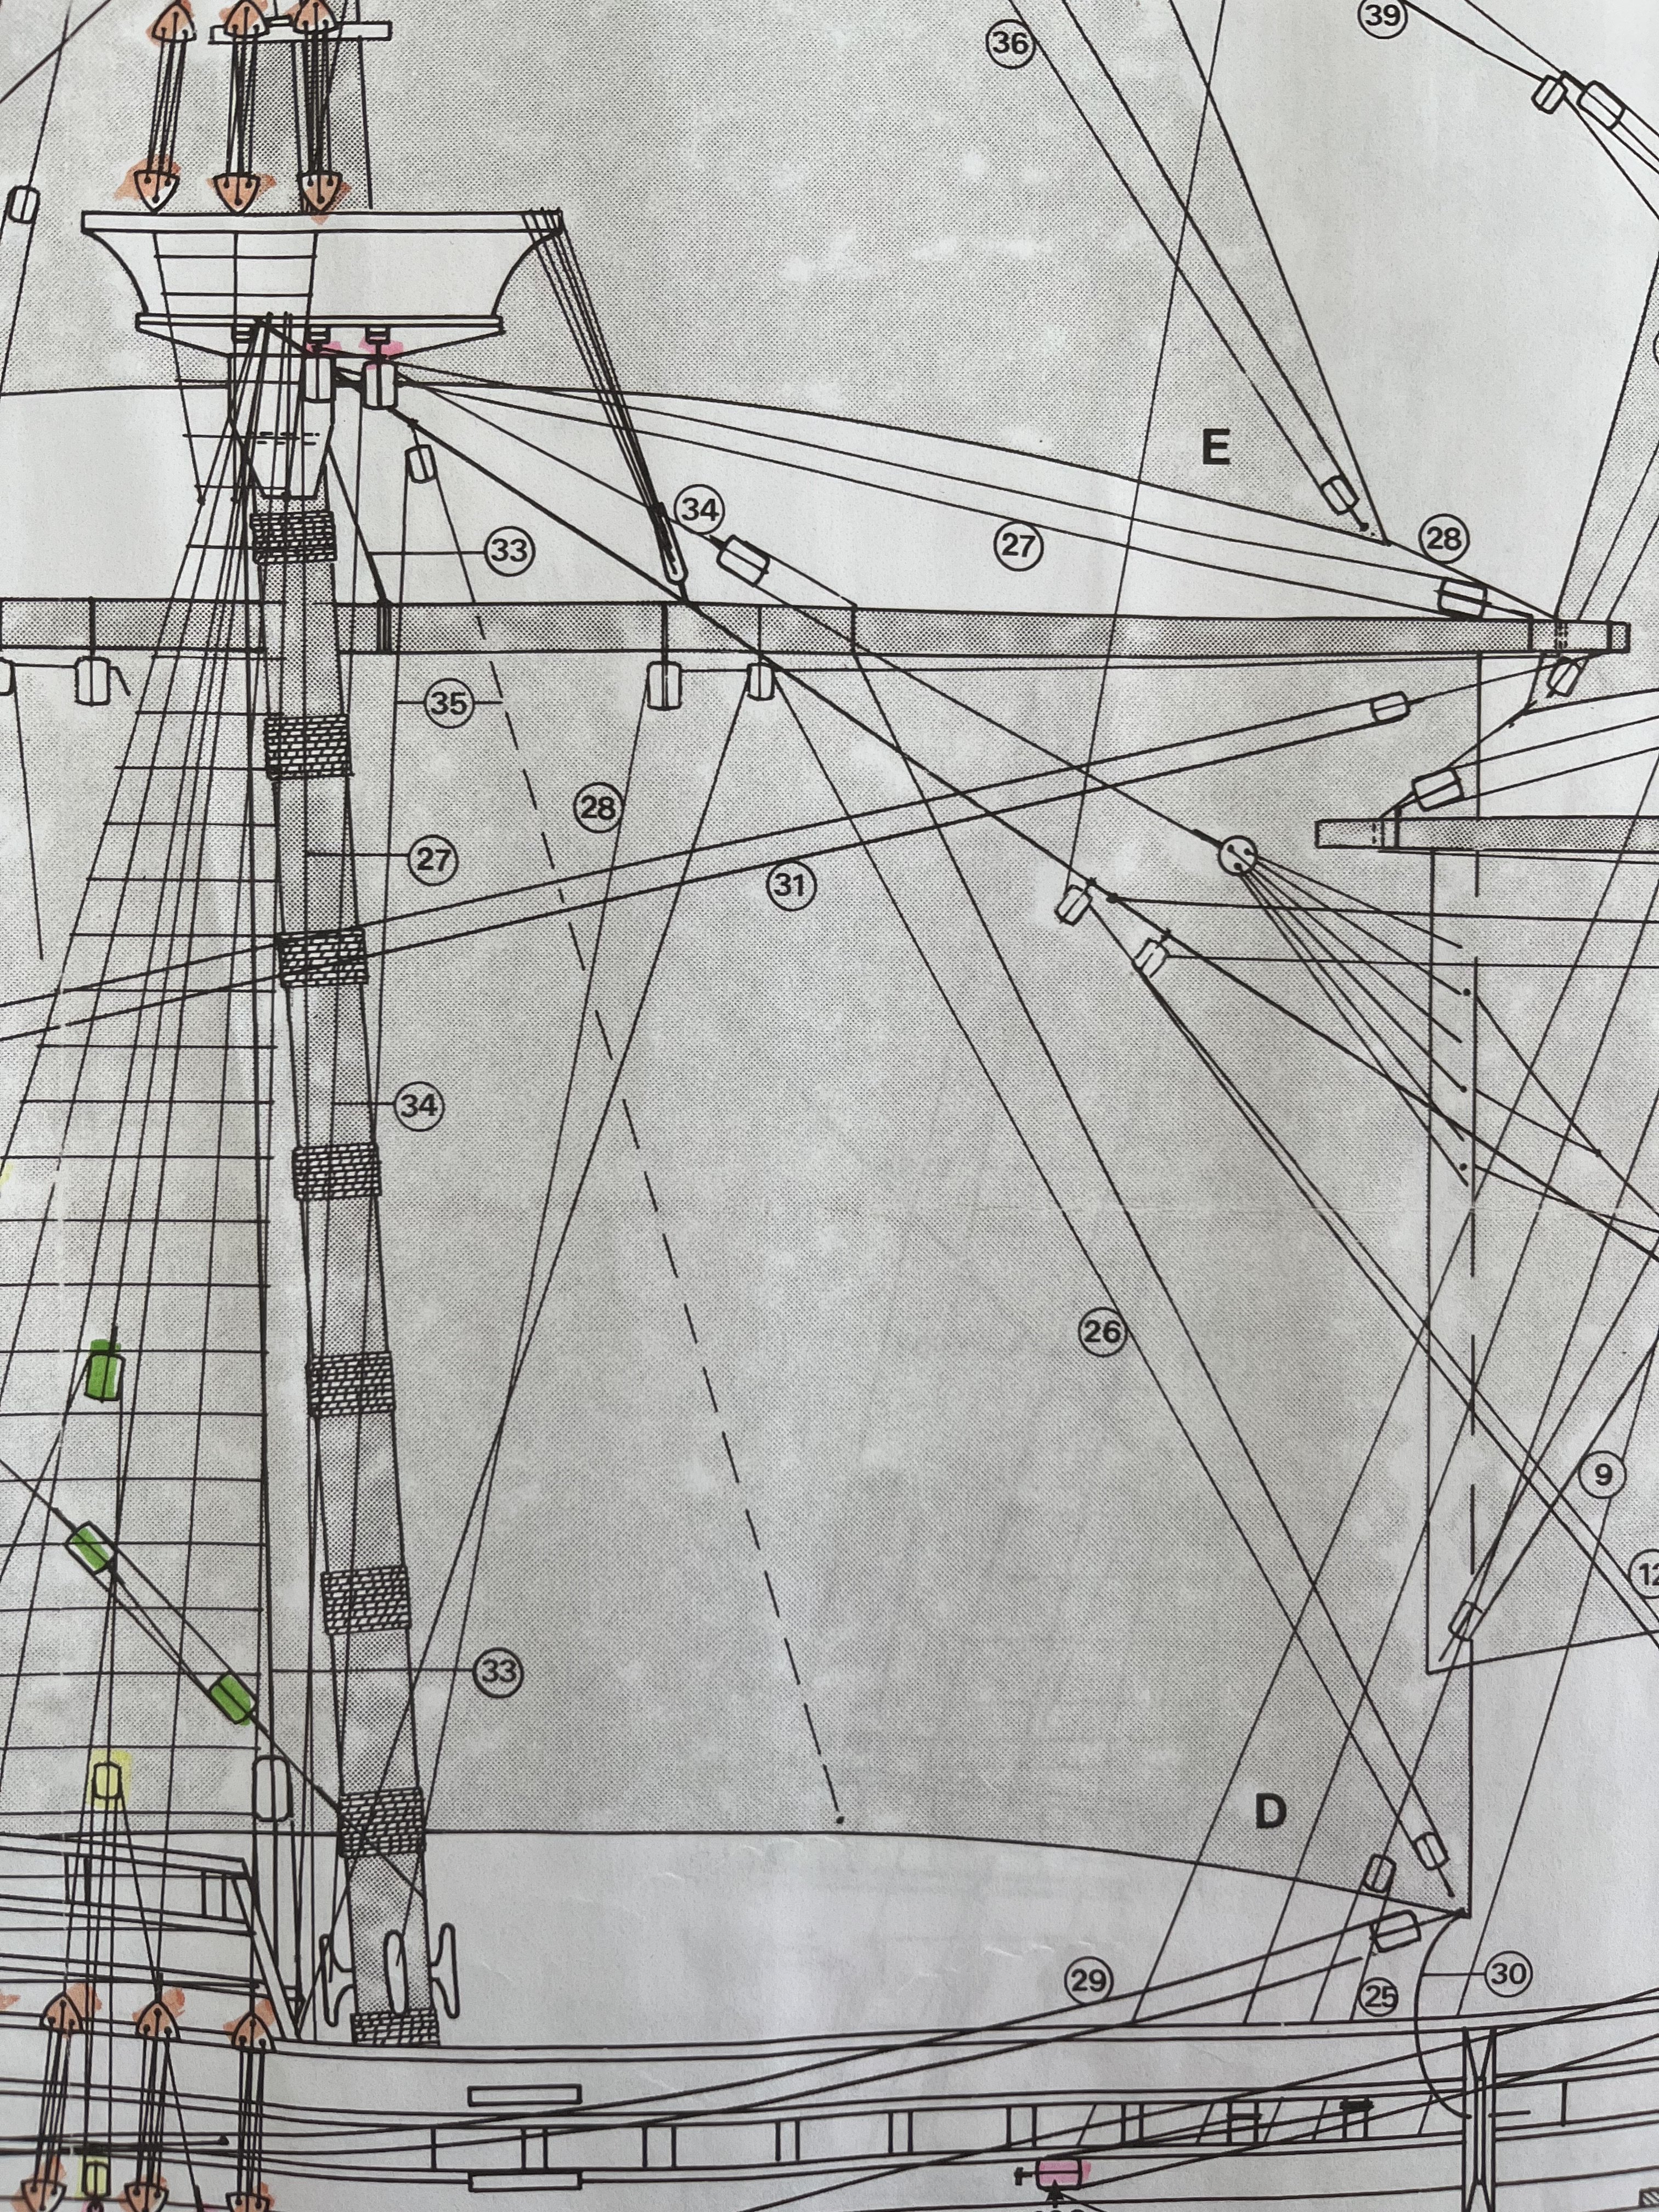
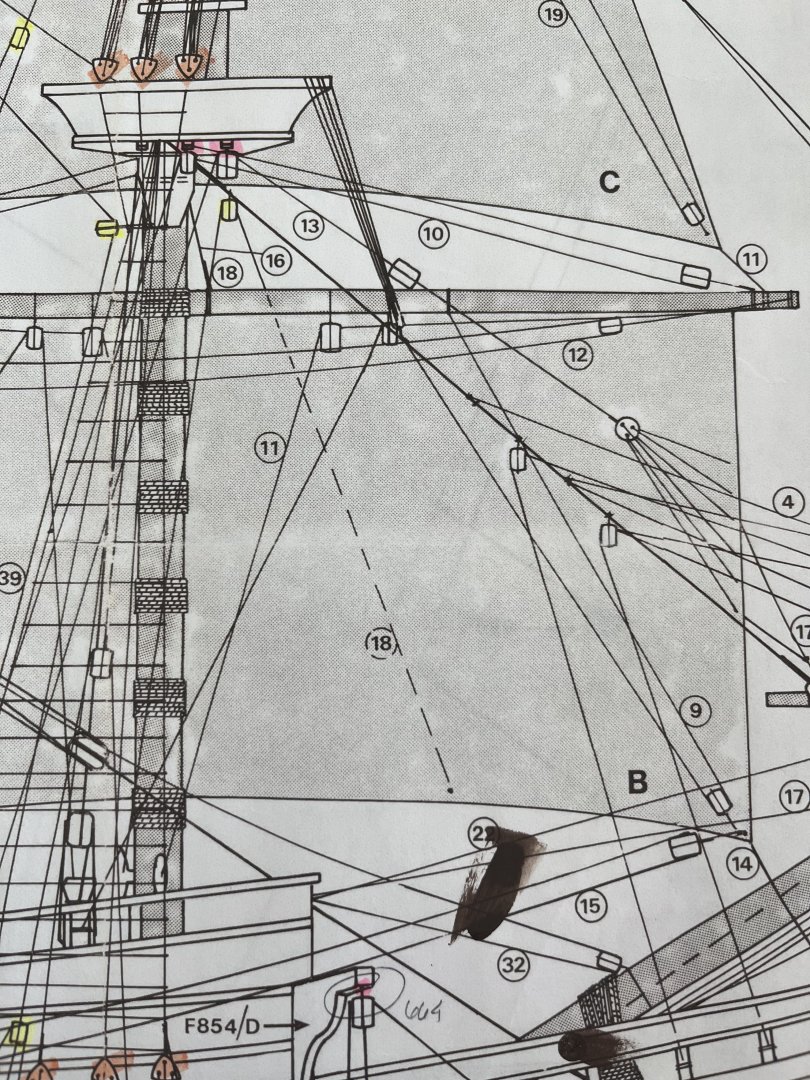
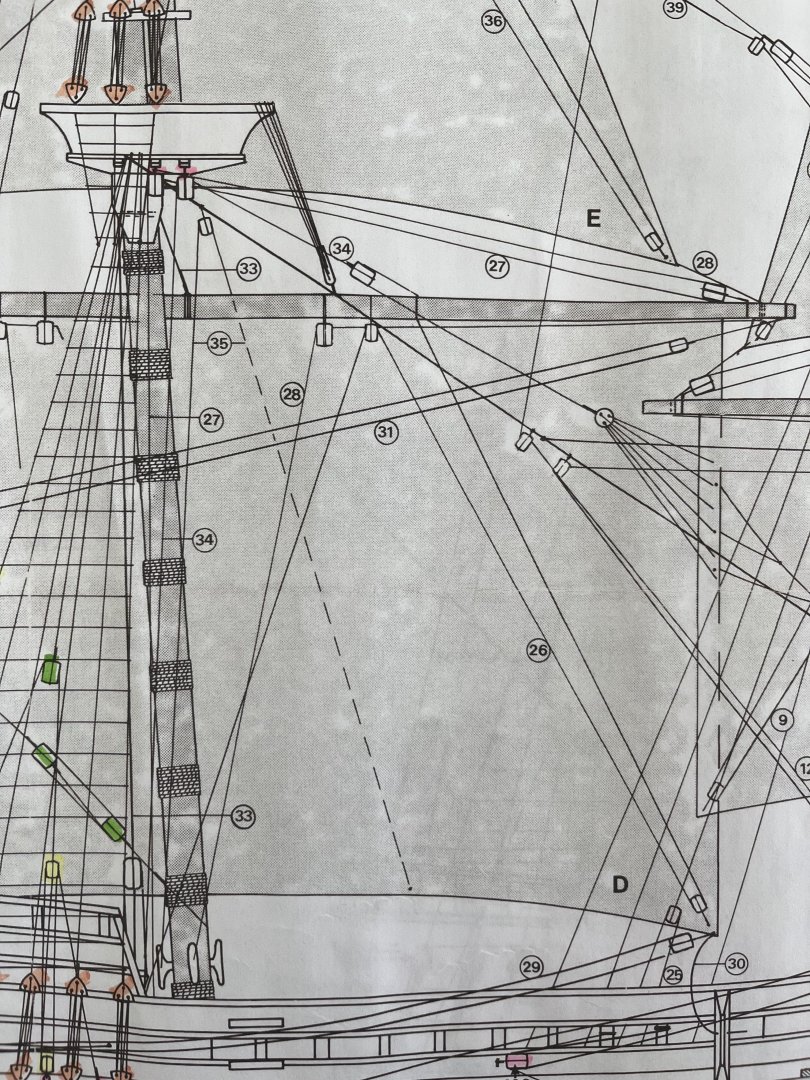
If only I could read German! 🙂 One of the blocks takes line #27 (brace?) which is anchored somehow under the top, I think. The other one takes #34 I think, which seems to be a tackle ? on the foremast, these would be #10 and 13 I think. Trying to figure out how much I need to attach before stepping the masts so I don’t end up trying to tie tiny knots in hidden spots. I have attached pics of my drawings. thanks for looking, Dave
-
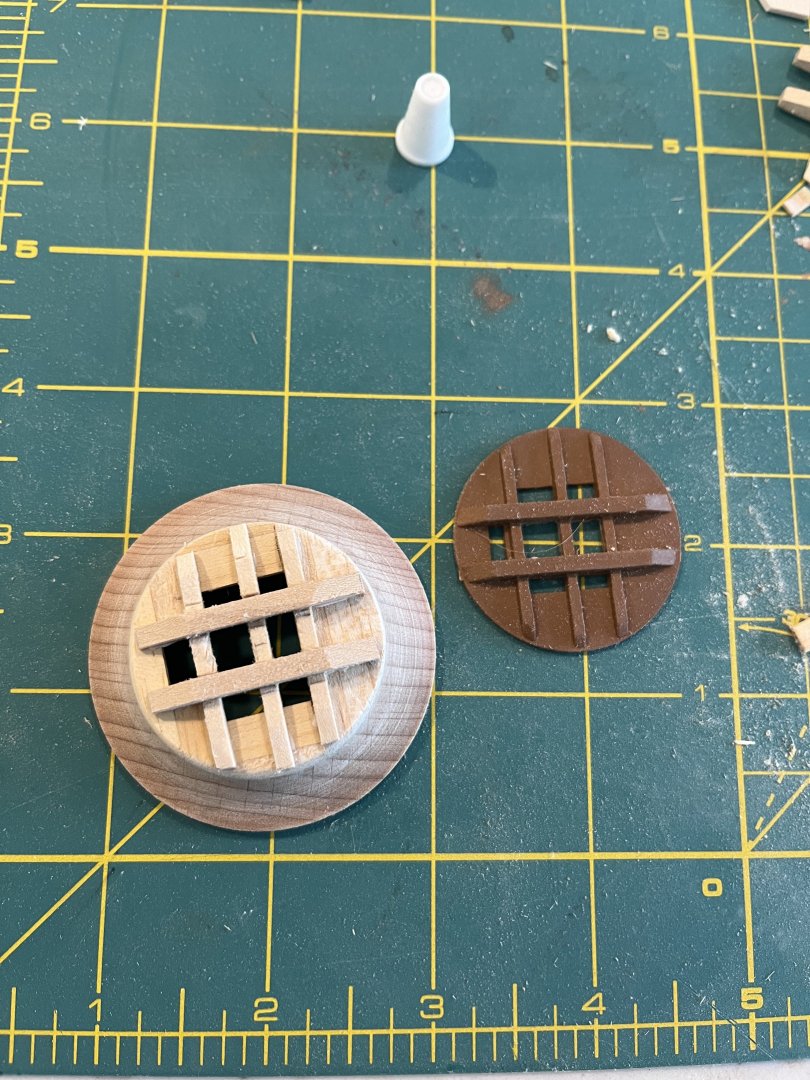
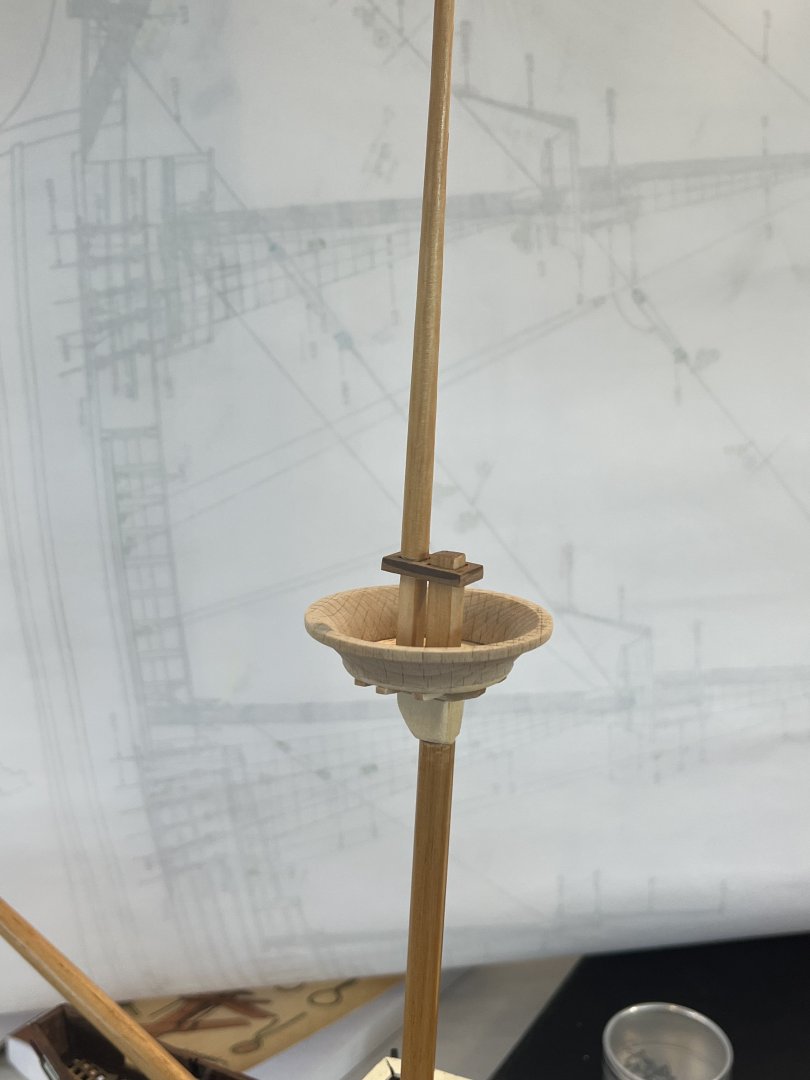
I finished the Fore and Main tops. I realized after that the first one got a mix of bass and balsa wood - hopefully it won’t be noticeable once it is finished. The extra effort in replacing the plastic floor and trestle trees are worth it, I think. The rigging drawing shows a couple of blocks hanging from the bottom of the trestle tree with now part numbers. They seem to be part of the running rigging attached to the spars. I think using eyebolts to attach the blocks will be the way to go - there is no indication on the drawing. I don’t know what they are called so the Anderson book doesn’t help. Maybe another perusal of the Shipways instructions will help. Thanks for looking. Dave
-
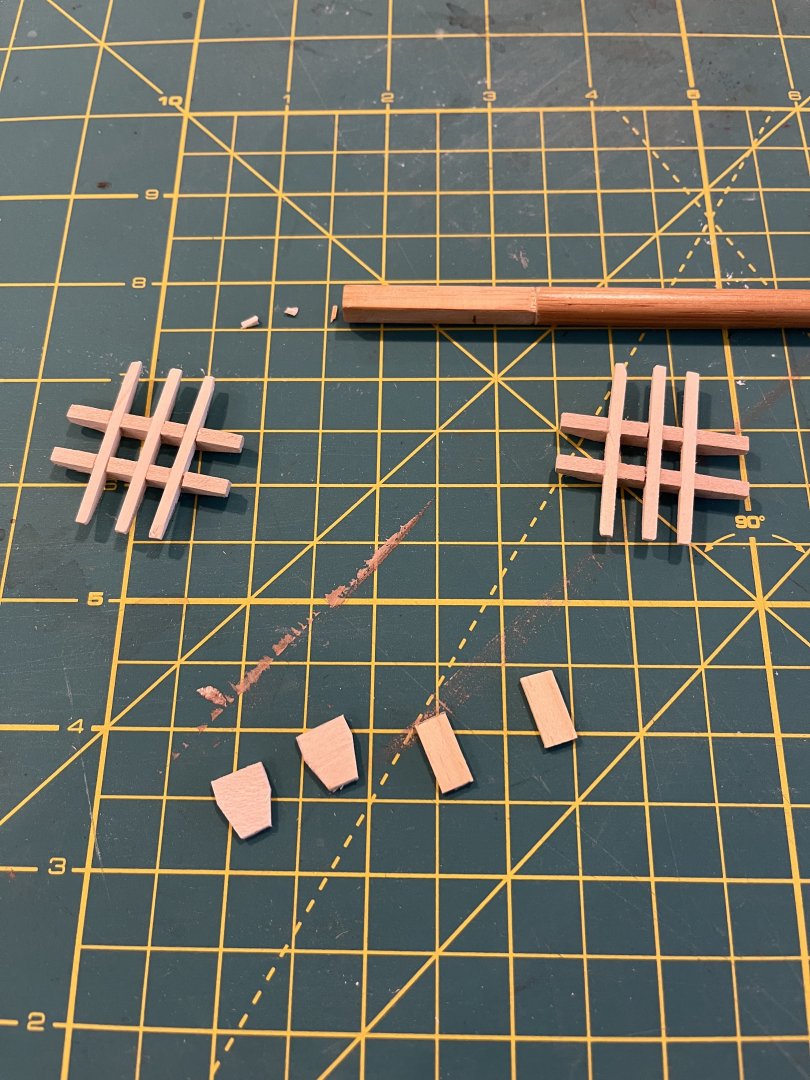
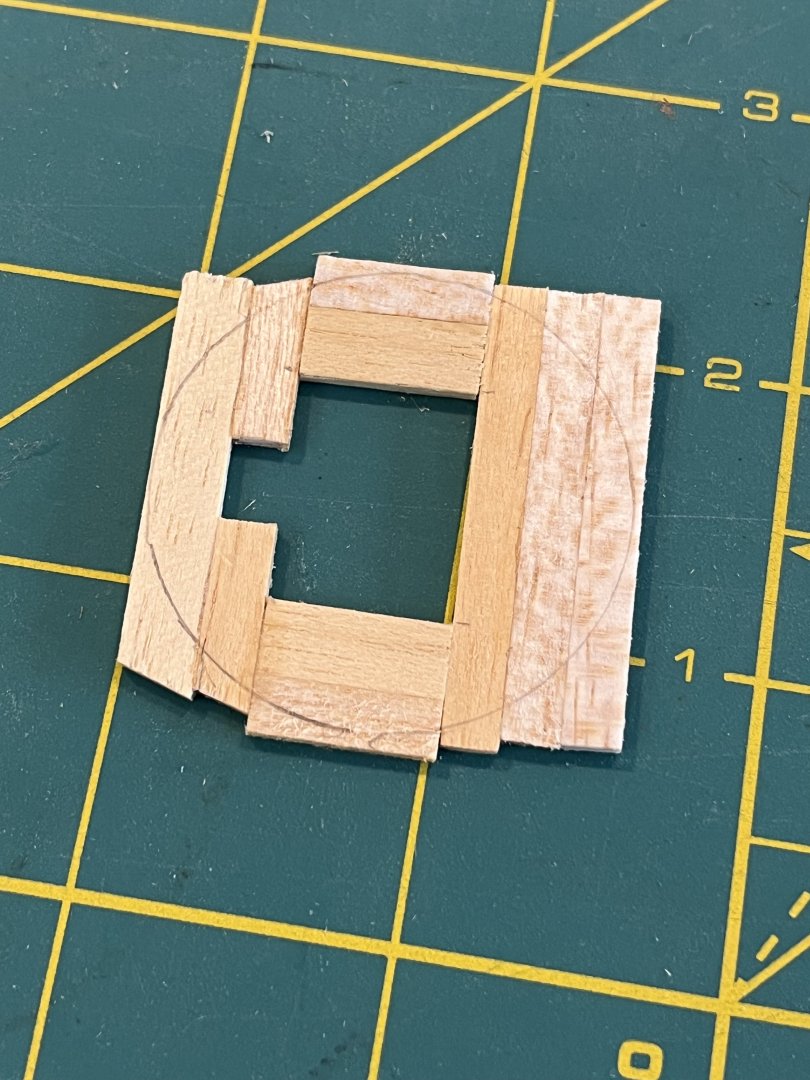
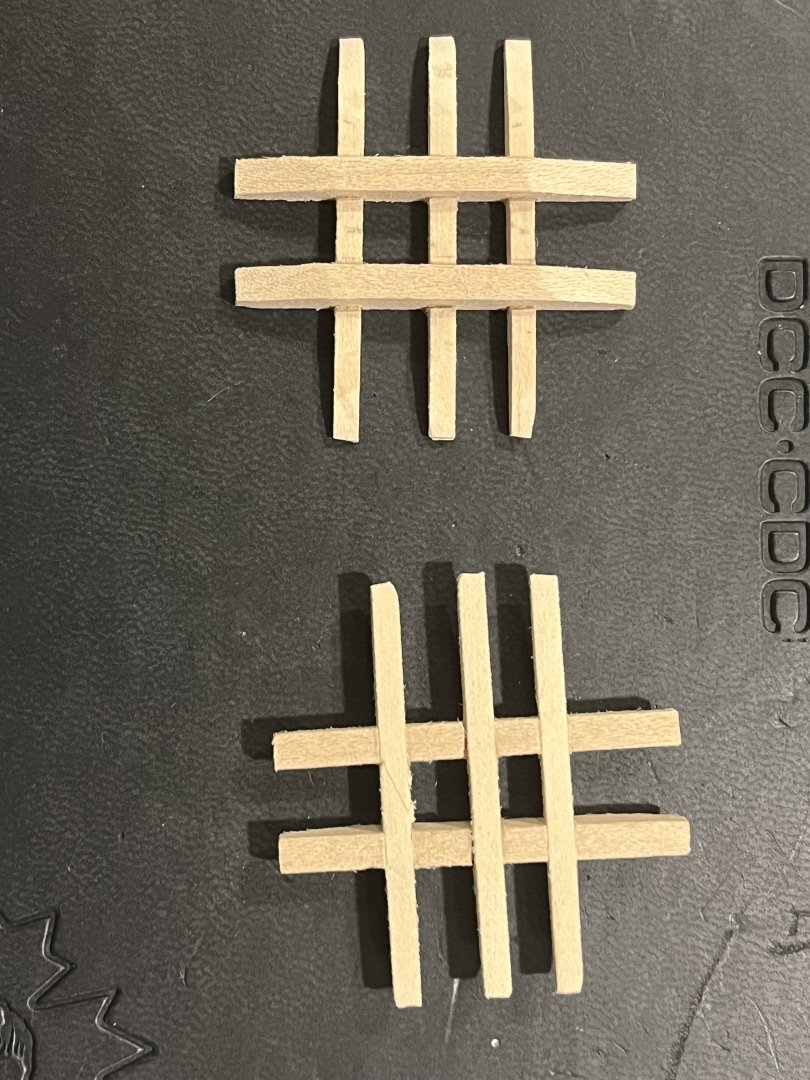
The last several weeks I have been reading books on rigging. Got my hands on William Baker’s “The Mayflower”, RC Anderson’s “Rigging of Ships in the Days of the Spritsail Topmast”, Lennarth Petersson’s “Step-by-Step Guide to the Intricacies of Square-Rig”. Moving towards getting the rigging started I decided to remake the plastic tops out of wood. Here I have the trestle trees and cross trees made. Next will be a floor. Thanks for looking, Dave
-
Kirill, that is a wealth of information, thank you. I like the idea of having a few sizes of rope. I went with rope size provided in the kit and then sourced a dark brown version of it. I should have realized that, like everything else in the kit, it would be inaccurate. Back to the drawing board, I guess. thanks for checking in, Dave
-
Patrick, I do have the model shipways instructions (I had forgotten I had them -doh). They are very helpful, but only if one reads them…. thanks for looking in, Dave
-
Kirill, thank you. I should have looked at that first. I may have to pull it out and put in a longer piece of rope so I can double it up. cheers, Dave
-
Patrick, thanks for the links to your builds - very informative. If I may inquire, what metal wire did you use to make the chains for the Pelican deadeyes? Your work is, by the way, awe-inspiring. Cheers, Dave