


DocRob
-
Posts
1,296 -
Joined
-
Last visited
Content Type
Profiles
Forums
Gallery
Events
Everything posted by DocRob
-
 You are absolutely right Yves, it´s always a pleasure to see how fellow modelers skillful work on their models. It´s not only entertaining but I learned a lot through the build logs of others, even if the subjects are of a kind, I may never tackle myself. I once ventured into wooden ship modelling building Vanguard´s Duchess of Kingston in three month sans rigging and had immense fun doing it. When I ever finish the rigging, a task I´m really afraid of, I have the HMS Sphinx as my next wooden ship on line or maybe a heavy weathered Fifie fishing vessel from Amati. I sometimes looked at the CAF kits, but decided, it´s far over my skill level, but who knows, maybe in a decade or two... Cheers Rob
 -
Very fine figure painting skills you show here Alan. You make it look like a much bigger figure and I always have to remember its only 75 mm. Cheers Rob
-
What a masterpiece, Yves. It´s a joy to follow your great build and log, even, when I never will have the courage to build something similar. Cheers Rob
-
You are right Yves, the exhausts look like Alien entrails and they are slippery as eels, when test fitting. It must be hard to design the exhausts with the idea of getting all twelve tubes at the same length. Cheers Rob
-
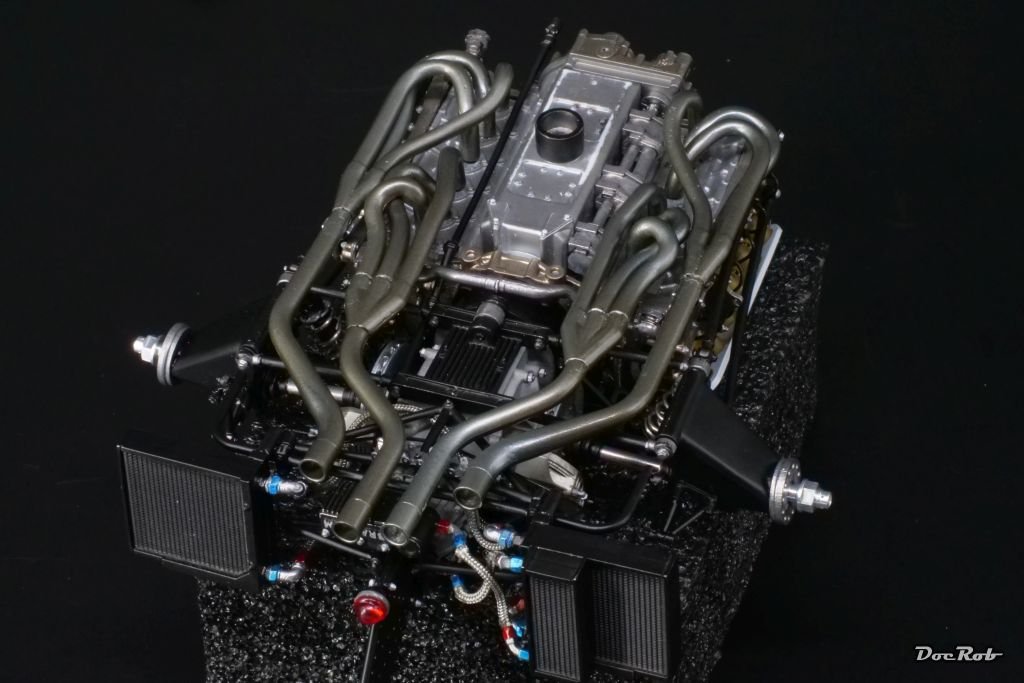
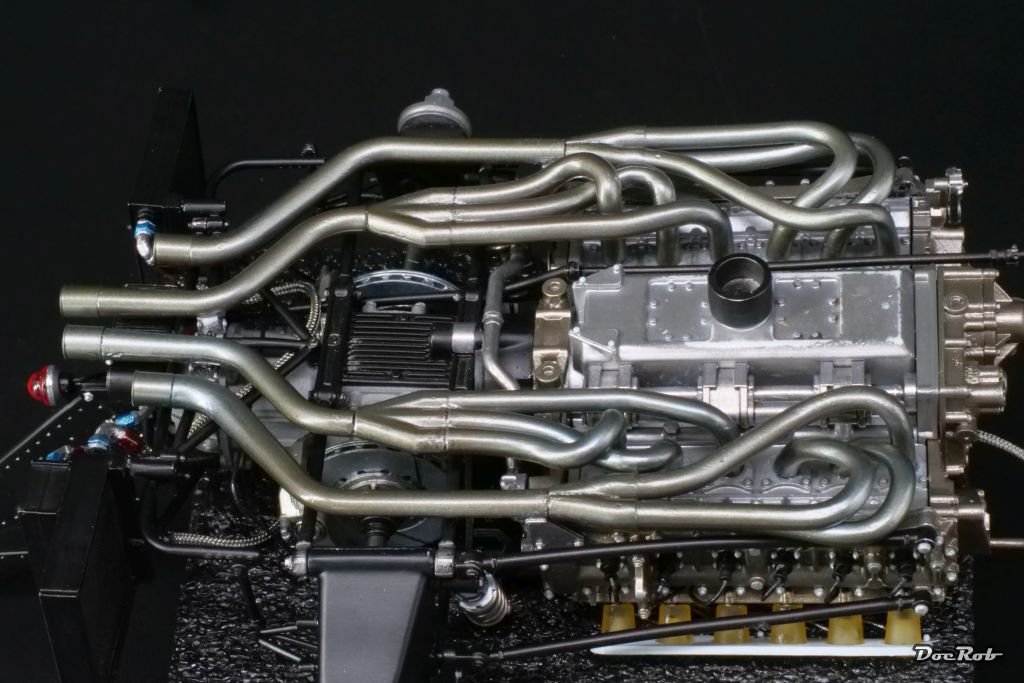
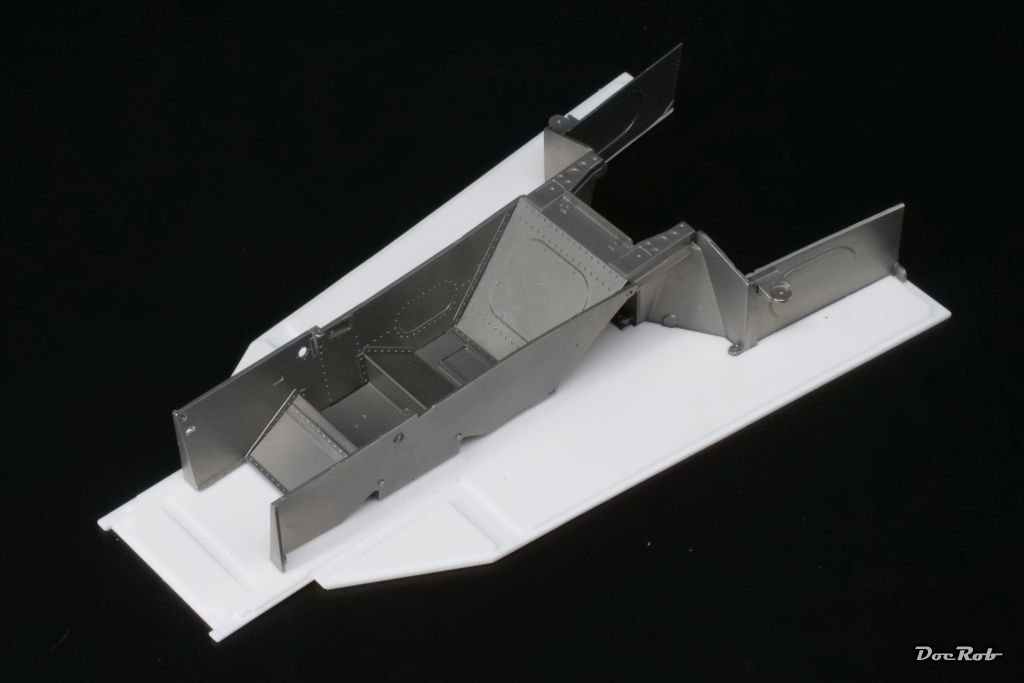
After a little pause, caused by one of my birthday presents, a week trip to the beautiful town of Valencia, I continue with the Brabham. I left the kit with the prep work for the exhausts just started and dreaded continuation, as F1 car exhausts can be a nightmare to build up. I cleaned all the parts and grouped them, followed by drilling all needed connecting holes. I then test fit the manifolds and glued the parts together with CA. MFH claims silver for the exhausts, but what I saw on pictures led me to think of brownish stainless steel. I used metal etch primer, followed by AK´s exhaust manifold and accentuated it with metallic blue for heat staining. While assembling, I tried to install the always dreaded coil springs before ore after inserting the exhaust, but failed. If I have a good idea, how to install these, I do it later or improvise somehow. As a preview, I started to prepare the monocoque parts, which need to be finished in polished aluminum. I´m unsure, If I airbrush the aluminum or if I polish it, which will be difficult due to the shape of the parts. Cheers Rob

- 68 replies
-
- 10
-

-

-
The tyres and rims look very promising Craig, especially for a first try. With the body and doors, I´m not so sure. lots of visible fragments, which will be nightmare to remove without losing detail. At least, it looks so in your pics. It seems you can do about everything with a 3D printer right now, but I vaguely followed some discussions about resin types, software glitches, etc. and decided for myself, that I will not plunge into it. I have too many time consuming hobbies to add another, but as a hobby 3D animation producer and CAD user many years ago, I´m not sure, if I can resist forever. To see your good work doesn´t make it easier to let the dive into "new" technology pass. Cheers Rob
-
Thank you Craig, I don´t follow the MFH paint recommendations to the letter, as I don´t have any Mr. Color paints. Generally, I found the paint instructions from MFH well researched, but I try to use photos for reference as well, wherever possible. I have some go-to colors, like Tamiya LP-5 semi matte black and LP silver for detail painting of nuts and bolts. For metal colors, I use primarily Ak´s Extreme metallic paints, which are spraying very good and fine grained and are more durable than Alclads. For aluminum tones, where MFH claims silver, I use the appropriate paint from AK´s range. For metal parts, I generally refer to pics and my knowledge about materials (I was a metal engineer in a former life), to get the tone right. Cheers Rob
-
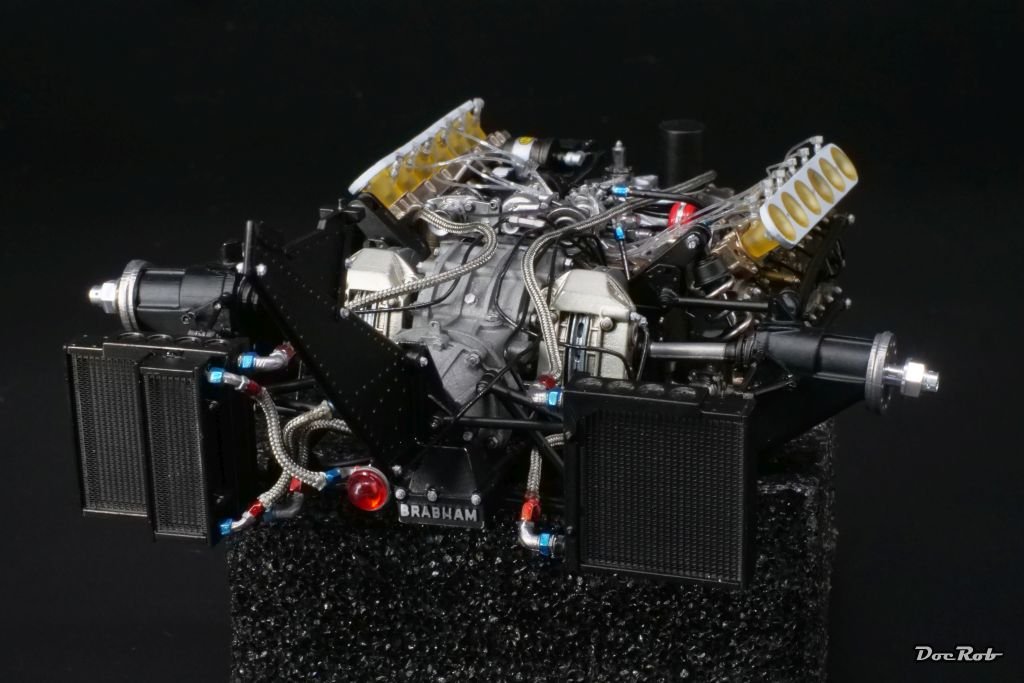
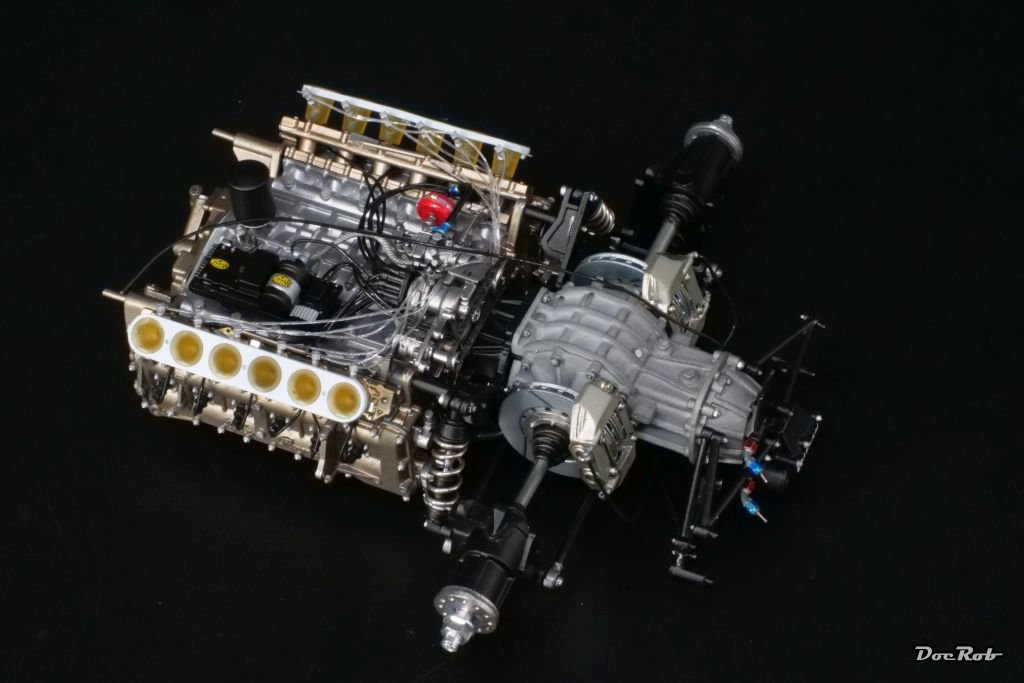
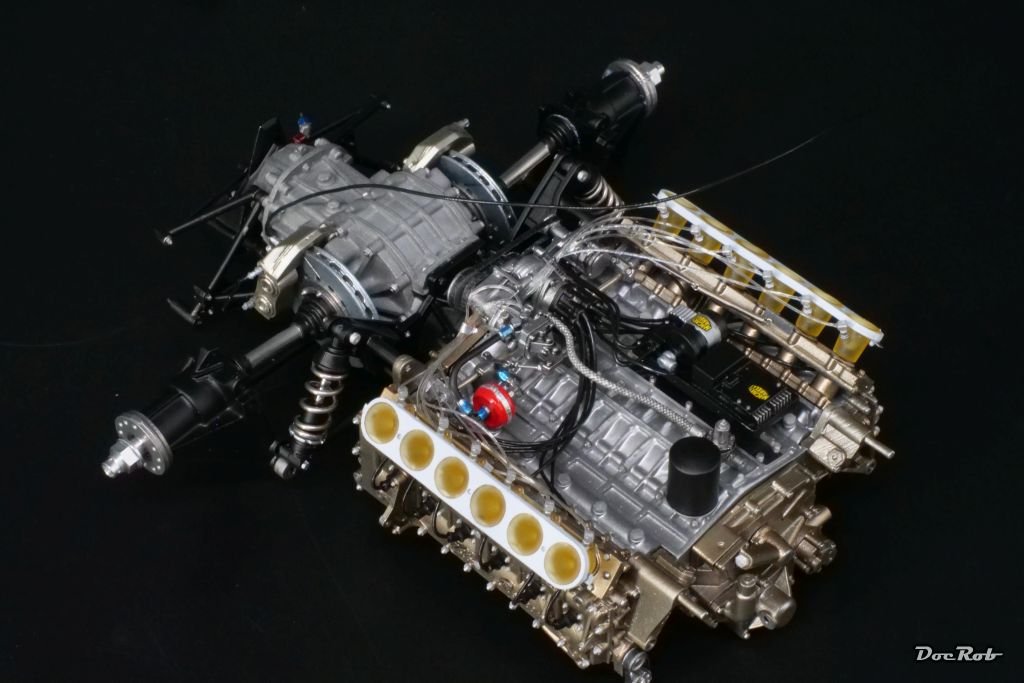
Chapter 9 of 20 in the manual is done and the rear section got finished sans the wing. Connecting the gearbox with the engine proved a little tricky due to numerous connection points, there is the suspension with adjustment bars, side rods and a shaft to connect all at the same time, trying to insert the screws for fixing everything. In the end it worked. Another annoying part were the brake lines. The angled tube fittings provided by MFH were badly cast and I used resin ones from the spare box, but two of them broke and needed to be drilled out again. I also substituted the white cast braided lines from MFH with braided textile hoses from Top Studio, which were far easier to work with. The cast ones need to be lengthened and bent, then drilled out with a 0,5 mm drill bit at the ends, to accept the fittings. Needless to say, that wiggling some of them in is nerve testing. The textile Top Studio stuff only needs to to be lengthened and then stuck on the 0,5 mm rods of the fittings with a drop of CA. Even my relatively liquid go to CA doesn´t soak and darken the braided hose. Cheers Rob
- 68 replies
-
- 13
-
-
-
What a classic beauty, Craig. Your Ferrari came out perfect with it´s high shine finish and great detail all around. Cheers Rob
-
Very nice Porsche and a really quick build, Gary. CF decals can be a pain and I never had to wrap them around a tiny mirror. Cheers Rob
-
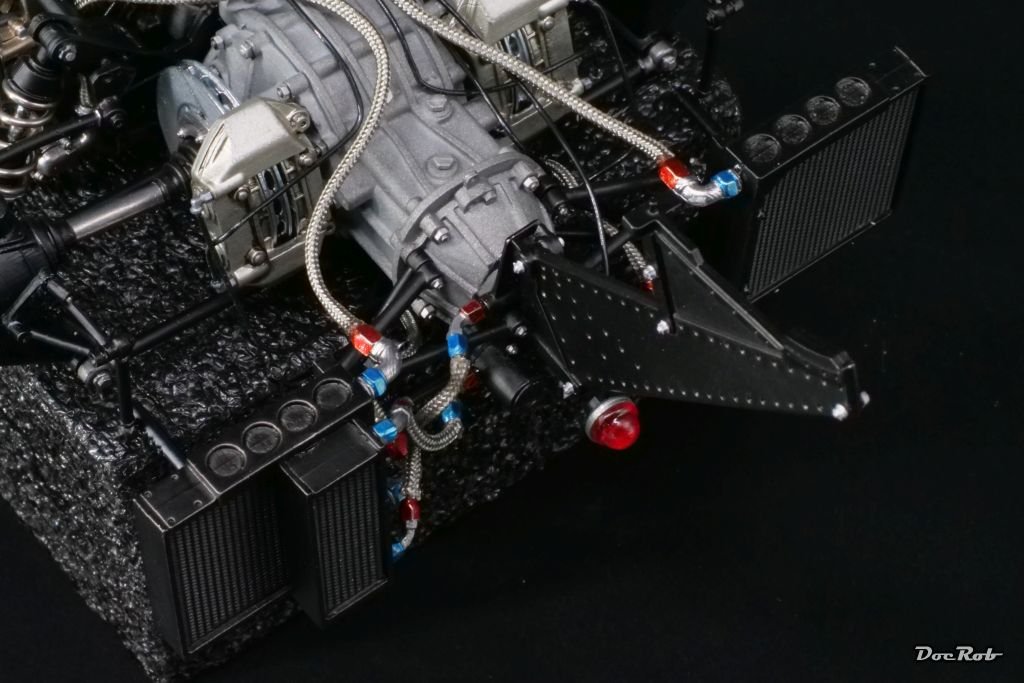
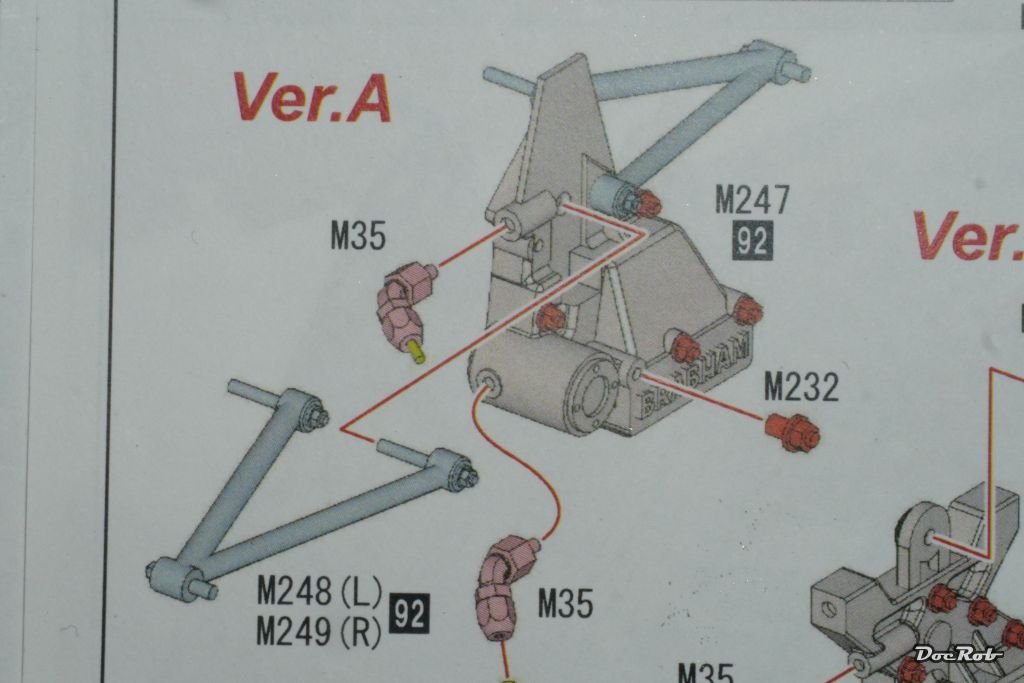
I finished the gearbox assembly step and started with the braking tubes. The fittings were badly casted by MFH, so I substituted them with resin ones. I stopped with the tubing and wiring for now, as I think, it´s easier to do it later, where it becomes more clear, which hose leads where. If there is anybody out there building the same "Press Version" of the BT45 be aware, there is a mistake in the manual, which can only be discovered, when analyzing later steps. Part 248 (9) doesn´t go into the shown hole, but in the one to the left. It took me a while to figure out, how the supports for the coolers (248 (9)) will properly sit. The shown hole accepts the rear wing support later. Cheers Rob
- 68 replies
-
- 10
-
-
Indeed Yves, there are several advantages, but ease of maintenance and heat distribution were speaking against it. I love the DS, what an innovative beauty, there are so many modern ideas implemented, it would last for a decade with other manufacturers. I had to really laugh, when Mercedes announced the first steerable headlights around the century mark. The DS is my favorite car and I would buy one, but the terrain, where I live and the possibility for proper maintenance is not given, unfortunately. BTW: The Brabham BT45 was the first car, with carbon/carbon brakes used in an actual race. Mine has steel disks though. Cheers Rob
-
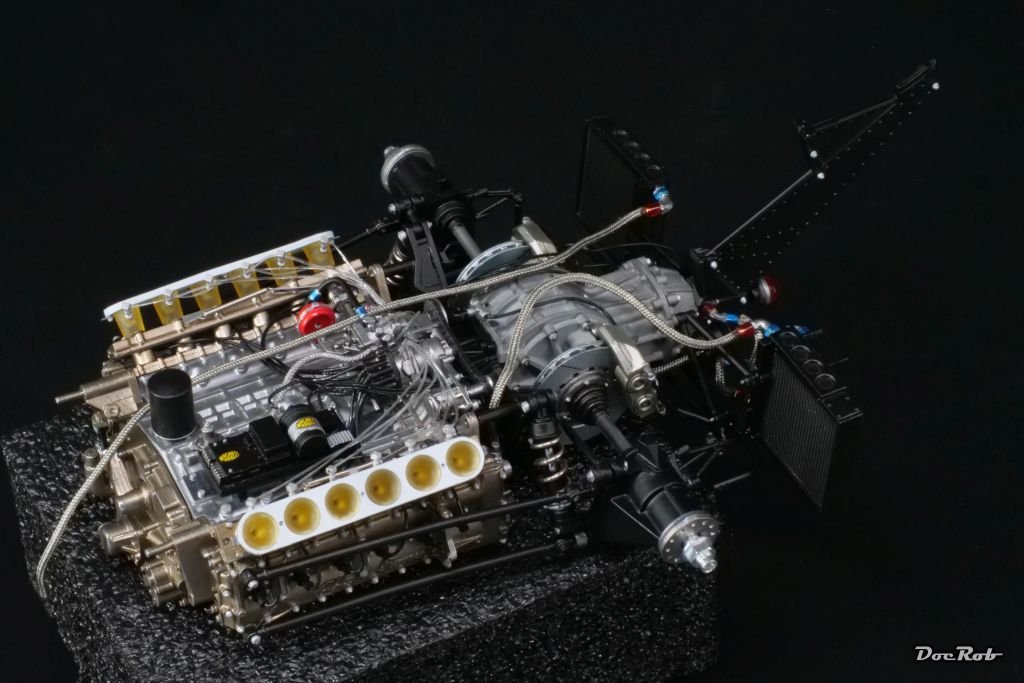
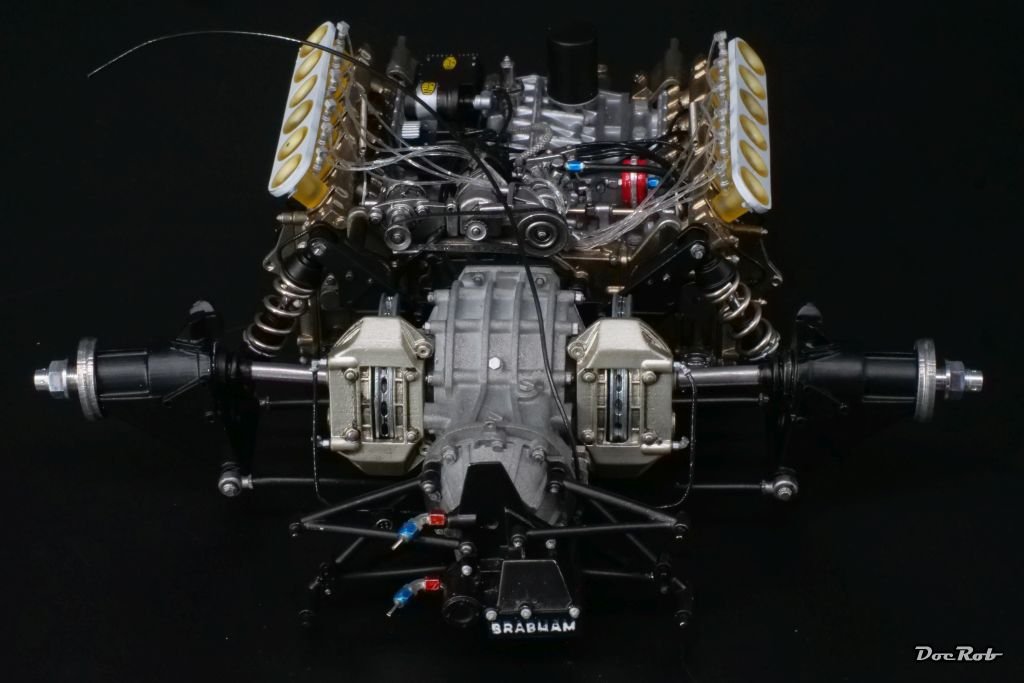
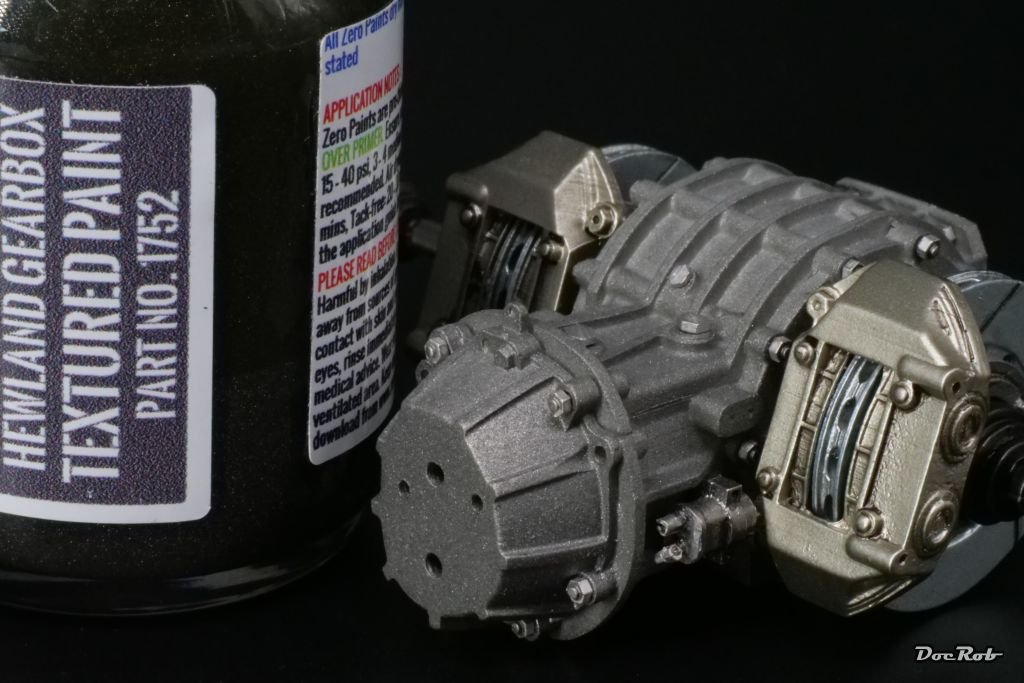
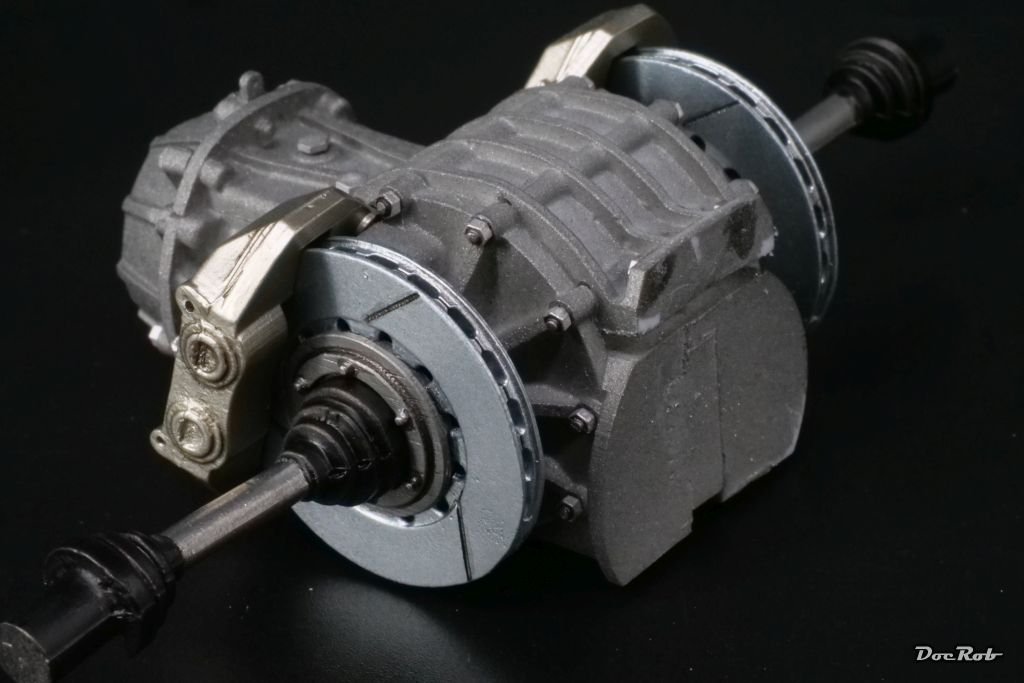
Next was the suspension, which is directly attached to the engine. The damper rods were painted with AK´s chrome marker and look really chromish, not like the to my experience really bad Molotow marker. This was followed by prep work and drilling for the gearbox section, where a lot of bolts and screws are to be added. For painting the gearbox, I used Zero Paints Hewland Gearbox Texture paint for the first time, because it is a Hewland gearbox and have to say, I like the result, at least for a 1/12 kit. I followed the recommendation of using a larger nozzle on my airbrush (0,4 mm) and raised the air pressure to almost 3 bar or 40 psi, to prevent clogging. The brake disks were sprayed with Extreme Color stainless steel, therefore the slight bluish tint and the calipers were sprayed with duralumin. Cheers Rob
- 68 replies
-
- 10
-
-
-
Wow, what a fantastic looking Ferrari, Craig. The blood red paint job is gorgeous and the white trimming on the seats is the cherry on the cake, like Dan said. The USCP wheels are clearly better than the supplied ones. BTW: I checked the wire spoke wheels with my Fujimi 1/24 Ferrari GTO and decided against the USVP wheels, because mine have aluminum rims and layered etched spokes, which look extremely fine. Cheers Rob
-
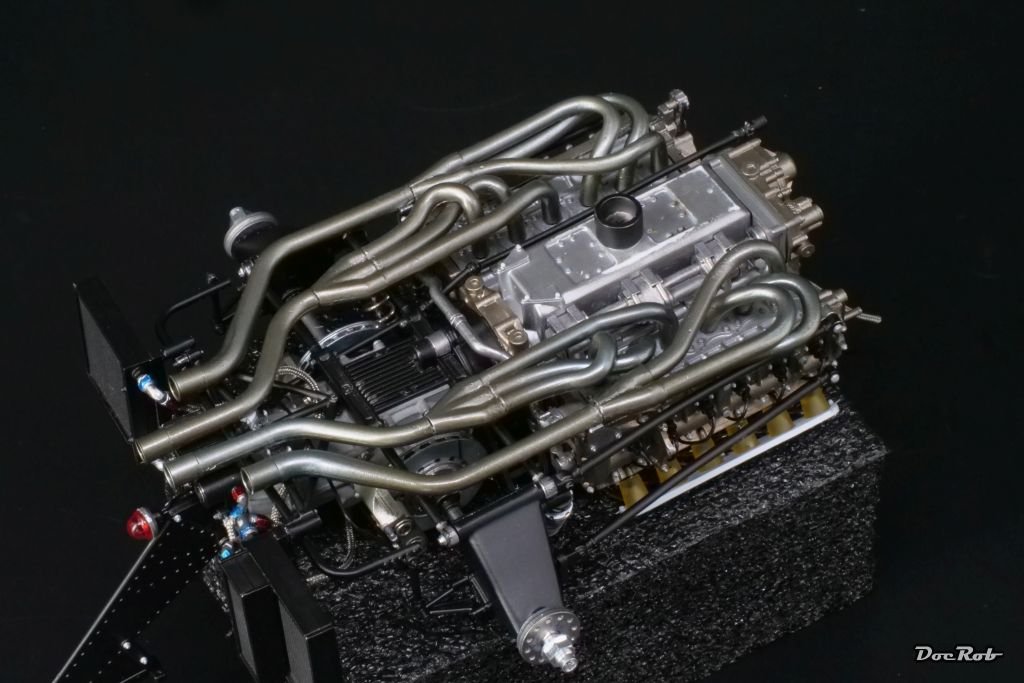
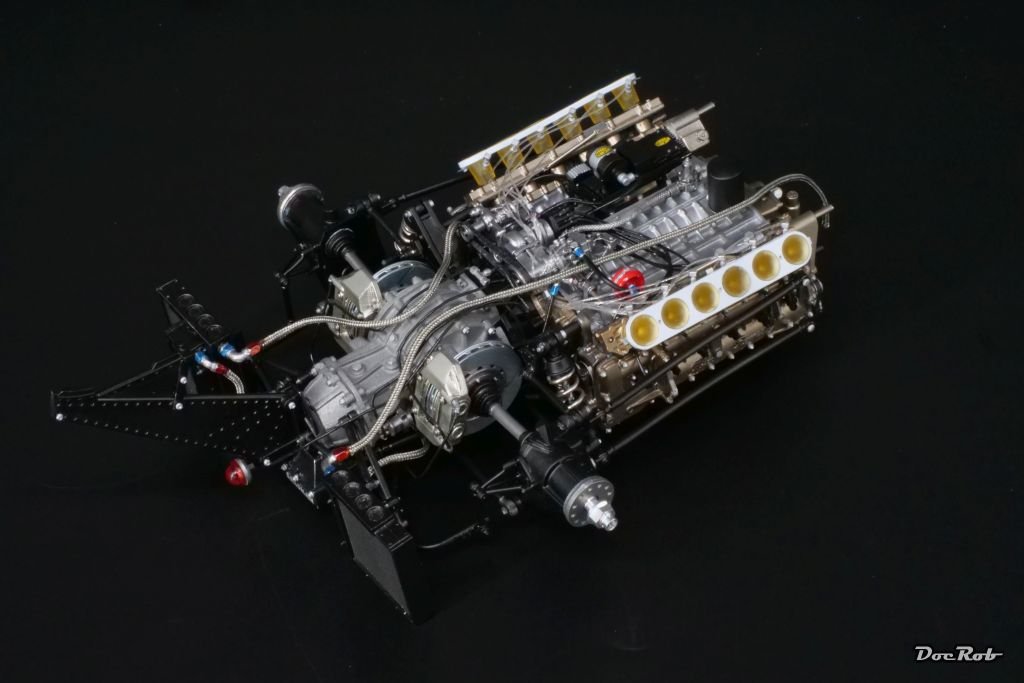
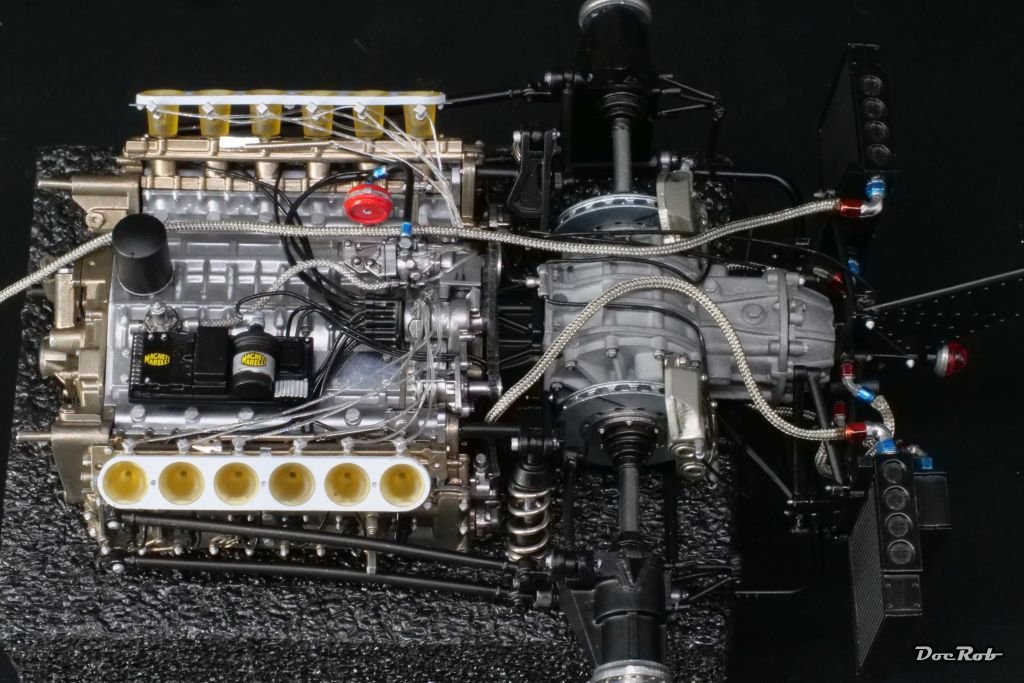
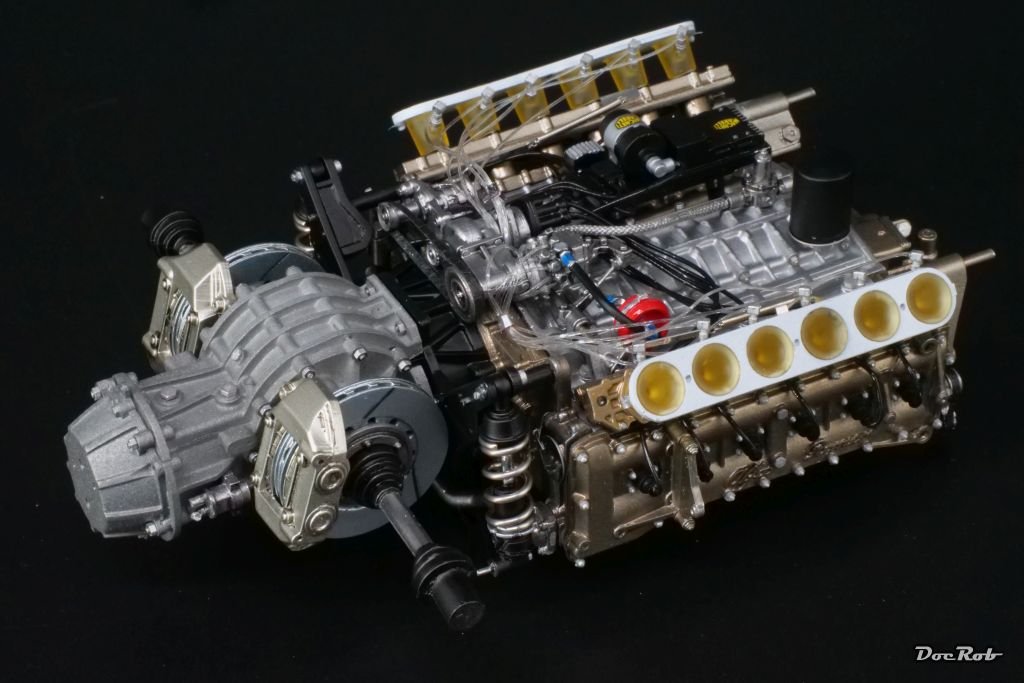
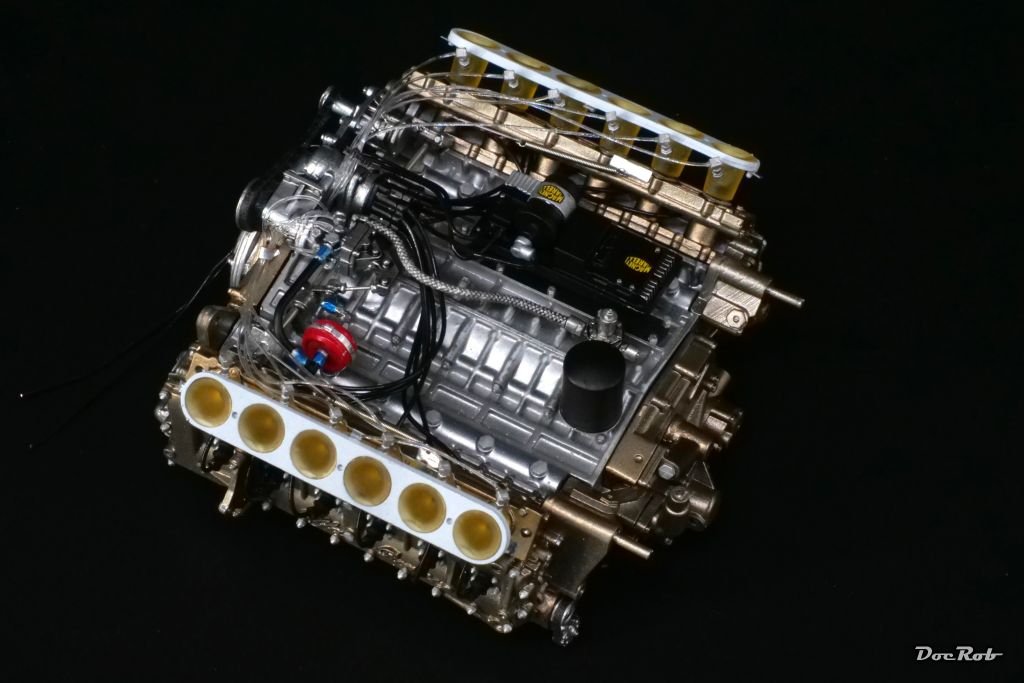
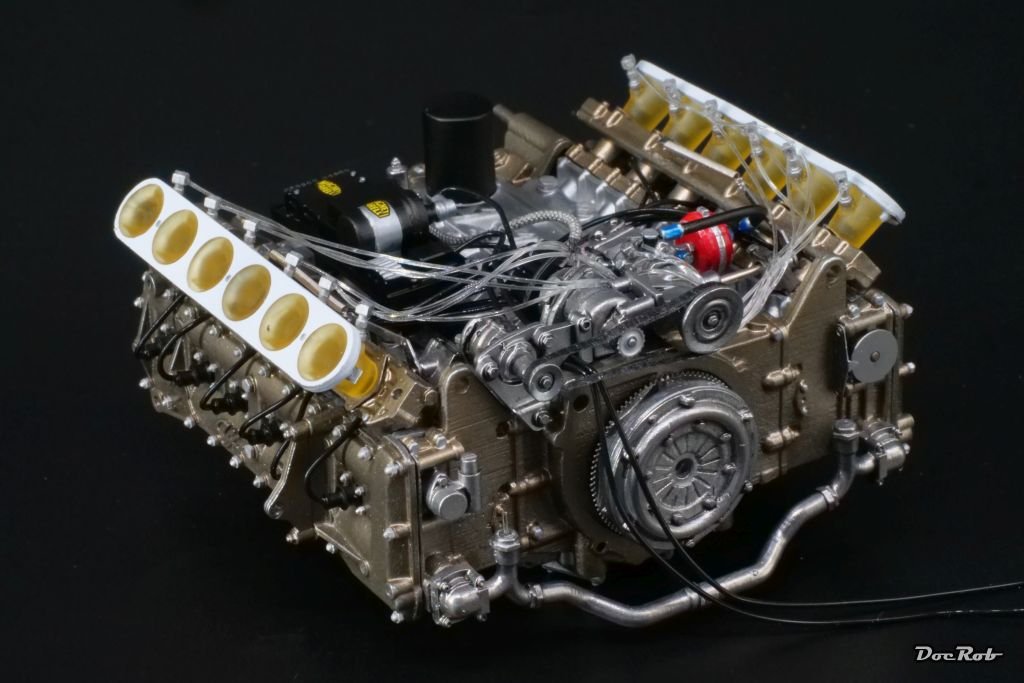
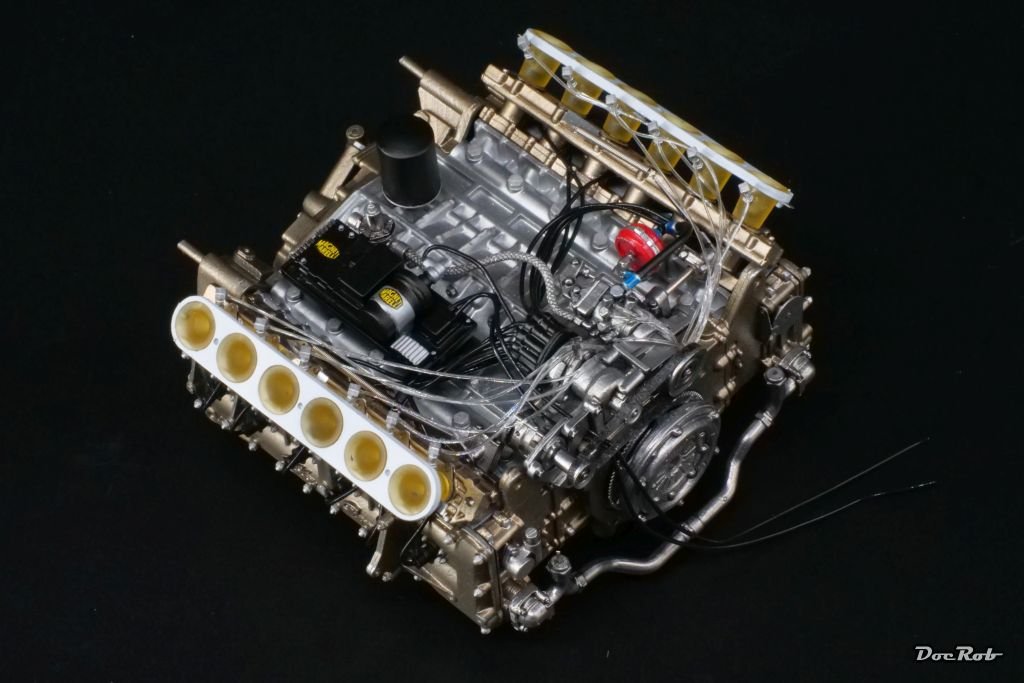
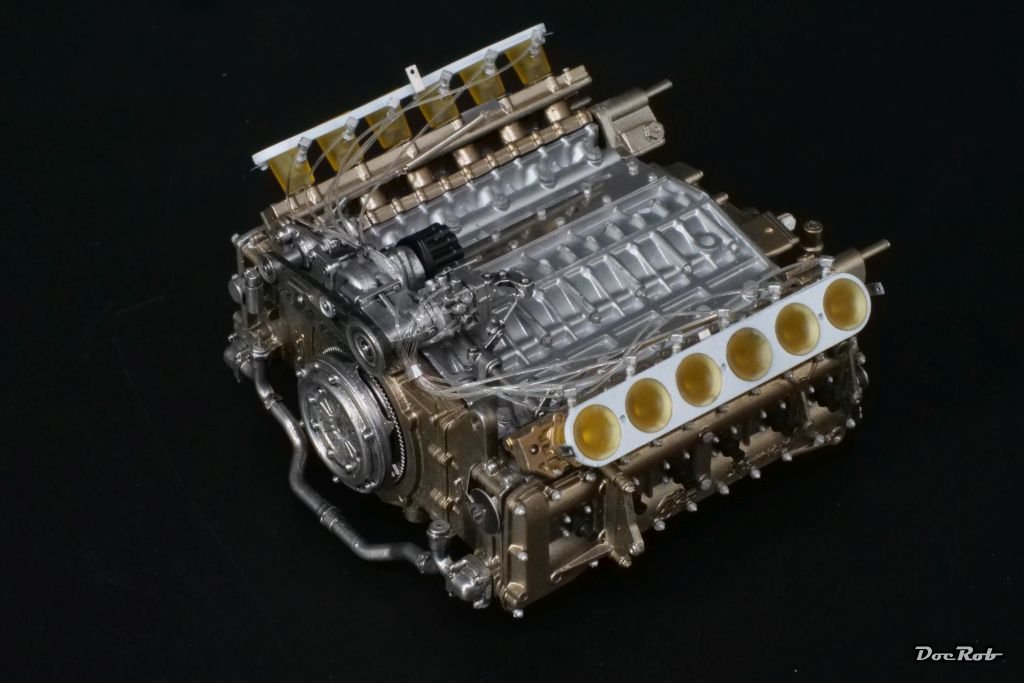
Today, I finished the engine so far. There will be some more wires and tubes added later, but this will happen after installing the gearbox and body. In comparison with the transparent fuel lines, the addition of the wiring was relatively simple. Electronics and some other parts got added on top of the engine. For the first time, I used markers for detail painting, like screwheads and bolts, in this case a silver Playmarker from AK, which covered well, even over black paint. I may add cable binders to the fuel lines and ignition wiring, but the ones, I tried failed miserably. They were 3D printed flexible decals from MFH and I managed to break four and got one installed and then gave up, so definitely no recommendation here. I think, I will use etched ones. Another thing, I don´t like about the MFH manual is that there are no wiring length given and far worse, some wires or tubes lead to nowhere in the picture of the manual, which leaves you browsing through the pages and looking for the right connection, which probably isn´t there and the wire ends hidden somewhere in the body. A bit more clearness would be appreciated. Cheers Rob

- 68 replies
-
- 10
-
-
-
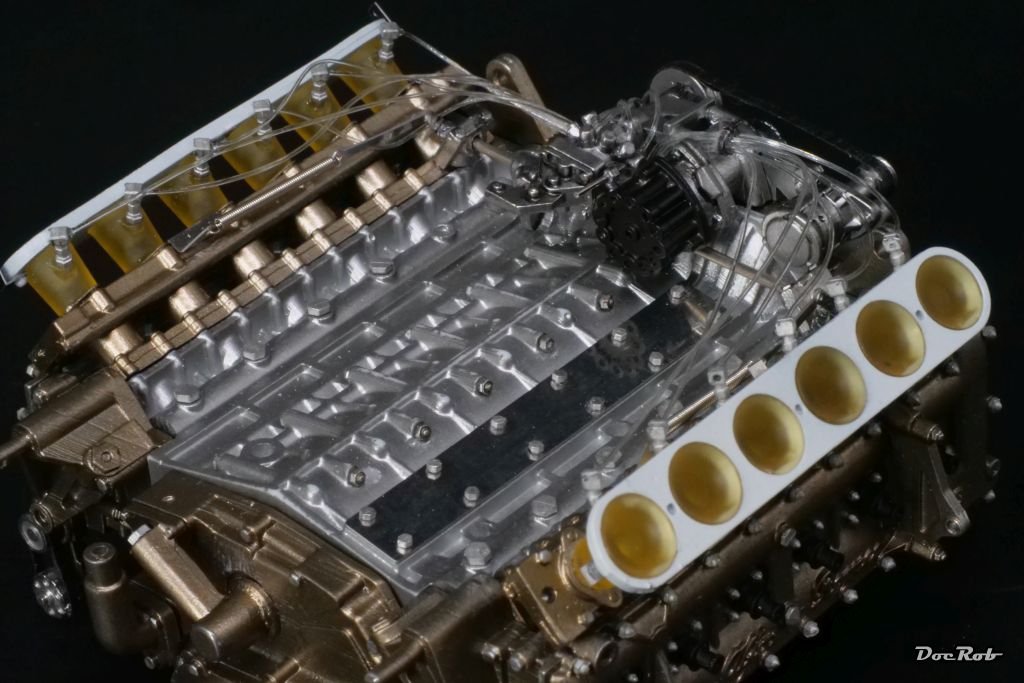
After checking all my MFH 1/12 kits about completeness, which was an exhausting task, I managed to continue with the Brabham. The clear yellow air funnels got installed, along with the clear fuel lines and accessories. This was a fiddly task, because it was difficult to determine the correct length of the fuel tubing. I also installed the belts on the frontend, which were replicated by black self adhesive tape. The white painted bracket parts on top of the funnels have angular PE parts glued on, to accept the fairings later. It was definitely a mistake to install them now, as figured in the manual, as I managed to break some. Cheers Rob
- 68 replies
-
- 10
-
-
That sounds interesting Craig, I never heard of the method and would be interested to see some results. Cheers Rob
-
Thank you Craig, I recently mailed my three critique points to MFH, but got no response until today. Unfortunately, I forgot to mention, that searchable PDF´s are preferable, which makes it easier to identify parts in the manual. The last days, I paused the Brabham build, because a fellow modeler PM-ed me and told me about missing and wrong parts in two MFH kits he owns. I had two eye straining days, to browse through my remaining four 1/12 kits but found no parts missing, luckily. It was no fun, but it had to be done anyway, sooner or later. With my two finished builds, there are seven now, without a single part missing, except for one rivet in the actual BT45 build. This is an error by design, because the manual shows thirteen of these rivets, where only twelve are supplied and are listed on the parts list. With my Brabham BT 52b kit, I found many of the white metal parts bent. Not a big problem, but it stands out, as it only happened to occur with this kit. BTW: Have you seen the new DB4 GTZ pics on the MFH homepage. What a mouthwatering kit and I guess, as the prototype is readily built, the shipping may start soon, which would be a great self present to my 60th birthday in the beginning of June. Cheers Rob
-
Thank you Ken, building the engine is pure joy, the fit is very good and with each added detail it looks more busy and realistic. Cheers Rob
-
That would have been the right Porsche for the man who called himself "Purple Joda from Minnesota", Gary . I like it as it is so un-Porsche. I guess a bit of polishing will help to let the paintjob sparkle. I use a very highly thinned mix for the last coat of clear, to achieve the perfect surface and some fellow modelers even claim, to hit the last coat with only leveling thinner when still wet, but I haven´t tried that. Cheers Rob
-
Simply stunning Cheers Rob
-
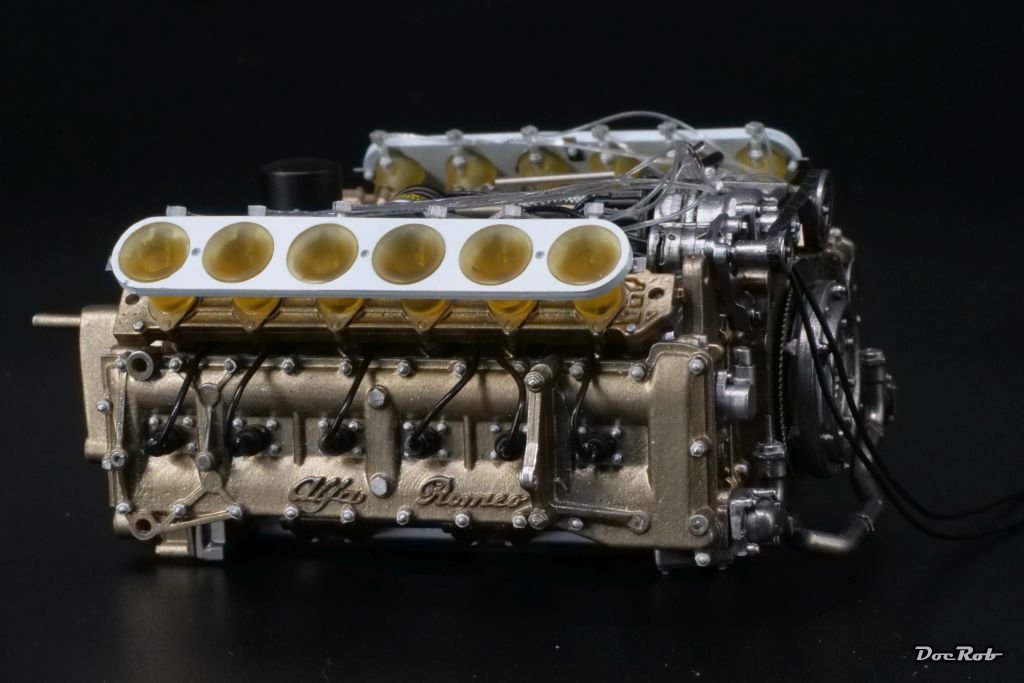
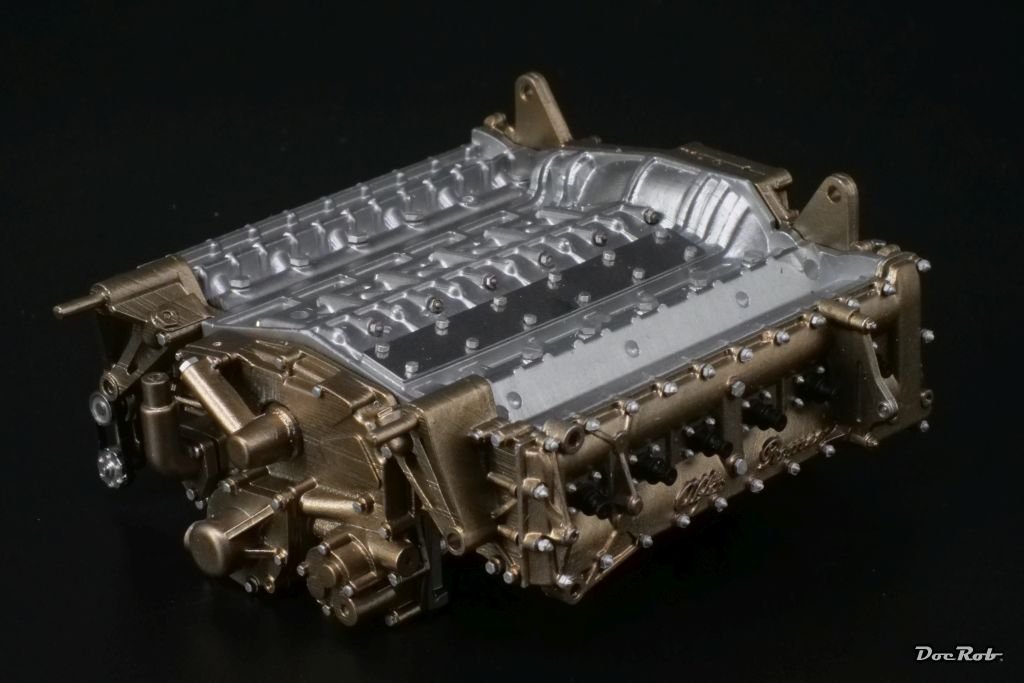
Cylinder bank number two is ready, again lots of riveting, always hoping that no rivets ping out of the tweezers. The rubber spark plug connectors got glued in and were drilled to accept the wiring. This time, I used Tamiya metal primer for the first time, brushed onto the parts and it seems, that the metallic paint adheres well on the white metal. BTW: Tamiya should use the MFH method for replicating belts. There are single cast belt wheels, the belt itself is made from self adhesive black tape. One thing, I learned with MFH kits is the addition of springs. It´s always better to add the spring to the unmounted parts and glue these into place then. I will bore you with more pictures, showing my progress with the engine, but you know, it´s easy to scroll . Cheers Rob
- 68 replies
-
- 11
-
-
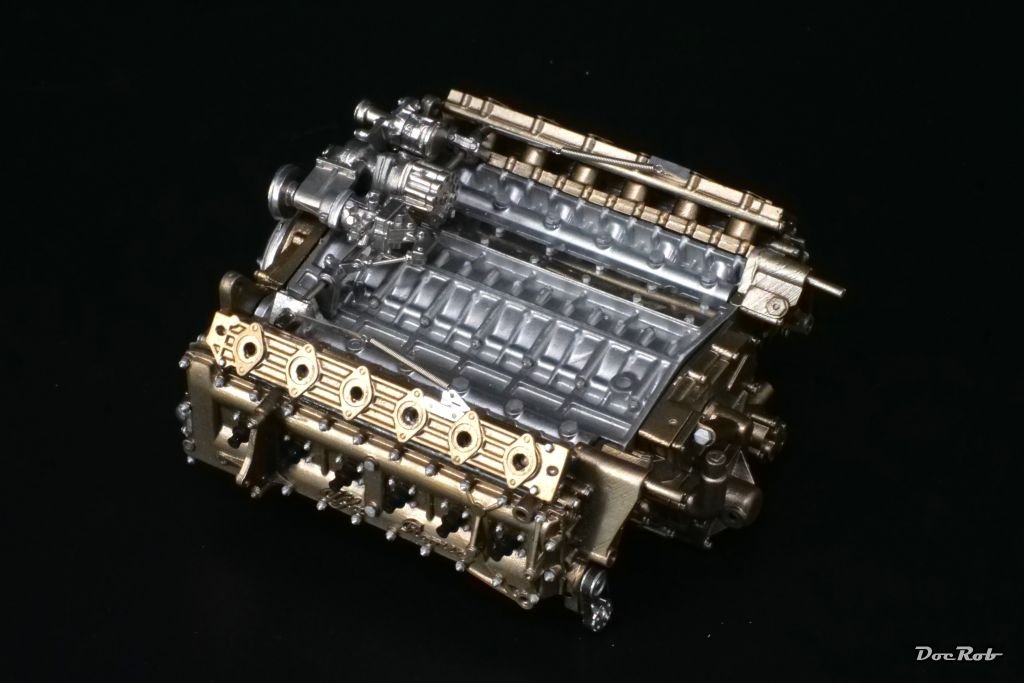
One bank of cylinders is prepared, still six to go on the other side. You have to love to apply tiny white metal rivets with this kit, as there are hundreds. The engine was sprayed with AK Extreme Metals dark aluminum, the covers, front and rear, were a bit more complicated. The manual calls for a mix of copper and gold and my first try was with AK´s jet exhaust, which felt to dark and to bronze, followed by pale jet exhaust, which lacked the slightly reddish tone. Finally, I choose Ak´s pale brass, which looks good to my, compared with photos. Afterwards, I painted all the casted nuts and boltheads silver and applied all the necessary rivets with fine tweezers into their pre drilled holes, always expecting the "ping" sound of a flying rivet. Finally, I accentuated white metal with black panel liner and brass colored parts with brown panel liner. Cheers Rob

- 68 replies
-
- 12
-
-
I would use Alclad chrome on Tamiya LP-1 gloss black, my go to chrome team, when no further masking or weathering is in play, because Alclad chrome is very fragile. The difficulty is a consistent coverage without applying too much chrome, which reduces the shine. BTW: I don´t know the Revell chrome spray. Cheers Rob
-
The wire wheels from USCP look great Craig. I really like to see them under some Alclad or in your case sprayed in Revell. I will evaluate the supplied PE and turned aluminum rims for my Fujimi Ferrari 250 GTO and possibly buy these too. Cheers Rob
