


DocRob
-
Posts
1,296 -
Joined
-
Last visited
Content Type
Profiles
Forums
Gallery
Events
Everything posted by DocRob
-

Honda RC166 by DocRob - FINISHED - Tamiya - 1/12 - multimedia
DocRob replied to DocRob's topic in Non-ship/categorised builds
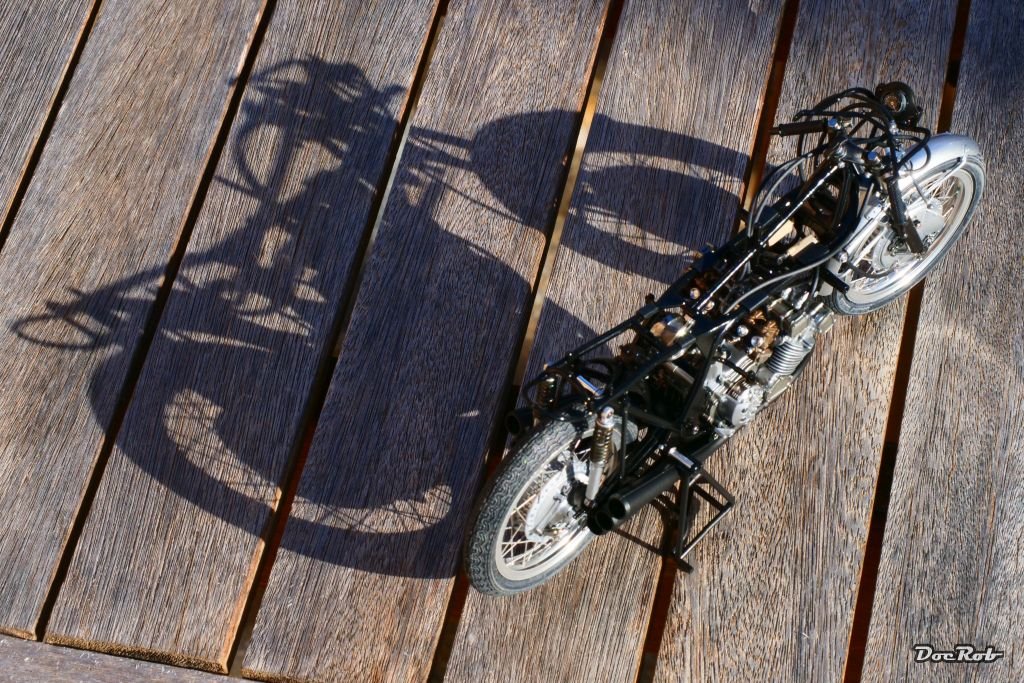
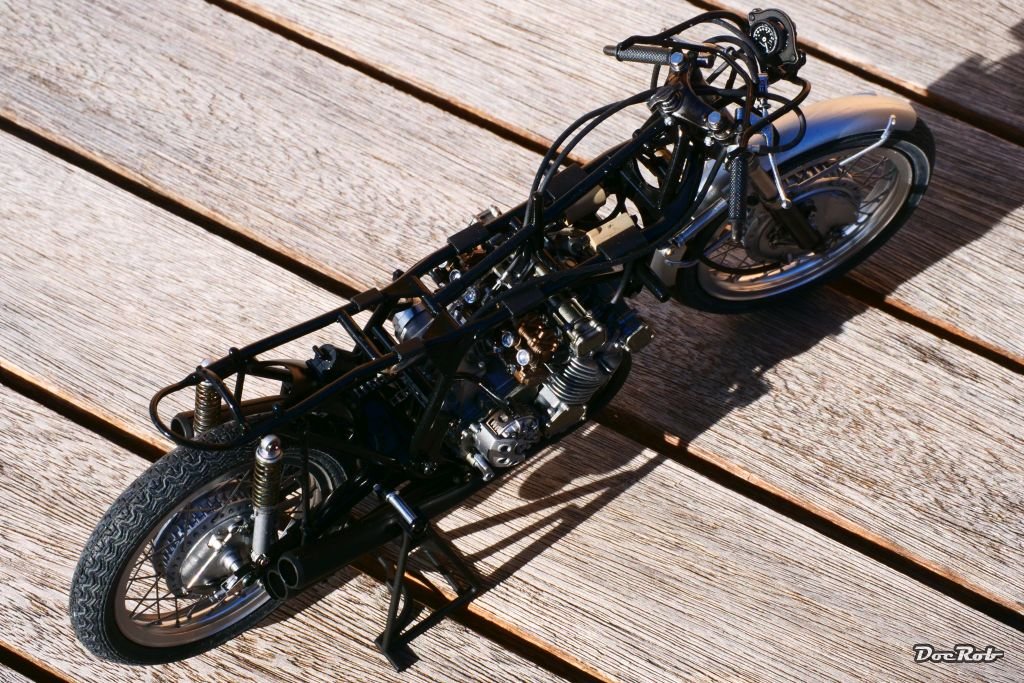
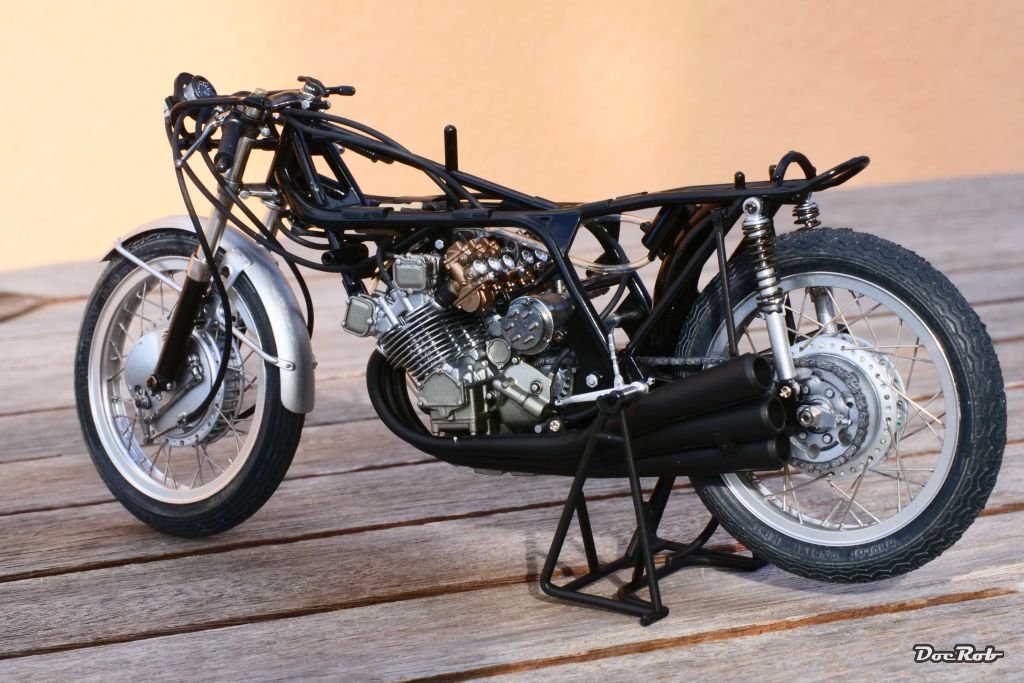
The sun is shining for a change, so out with the Honda and my camera. Cheers Rob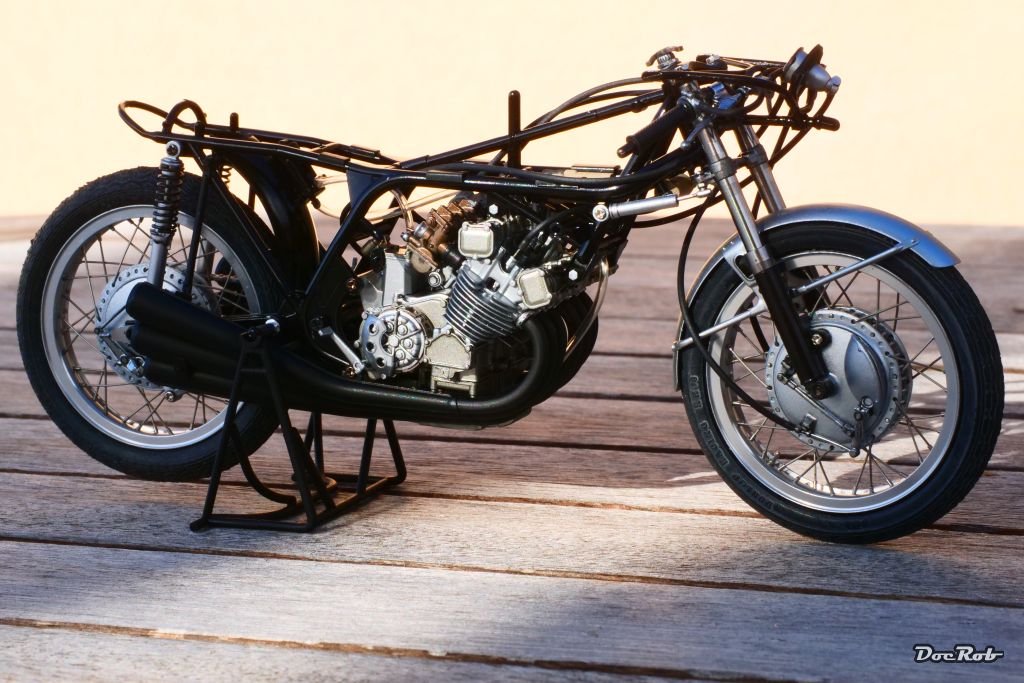
-
Honda RC166 by DocRob - FINISHED - Tamiya - 1/12 - multimedia
DocRob replied to DocRob's topic in Non-ship/categorised builds
Thank you Craig, the build is nearly too fast to enjoy, I´m not even two weeks in and can see the finish line. I´ve studied the manual and made a plan, how to approach with other builds in this short time . Cheers Rob -
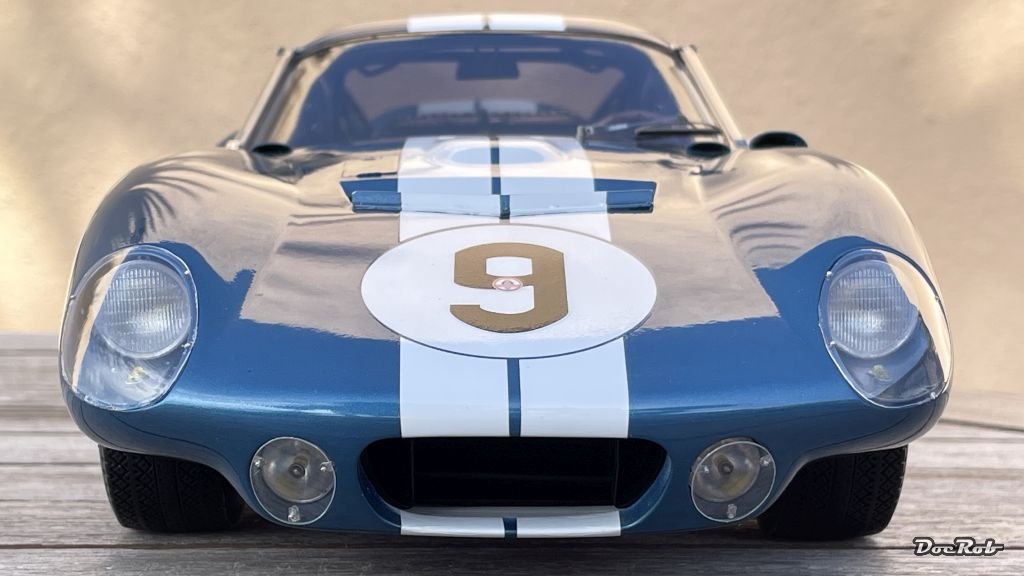
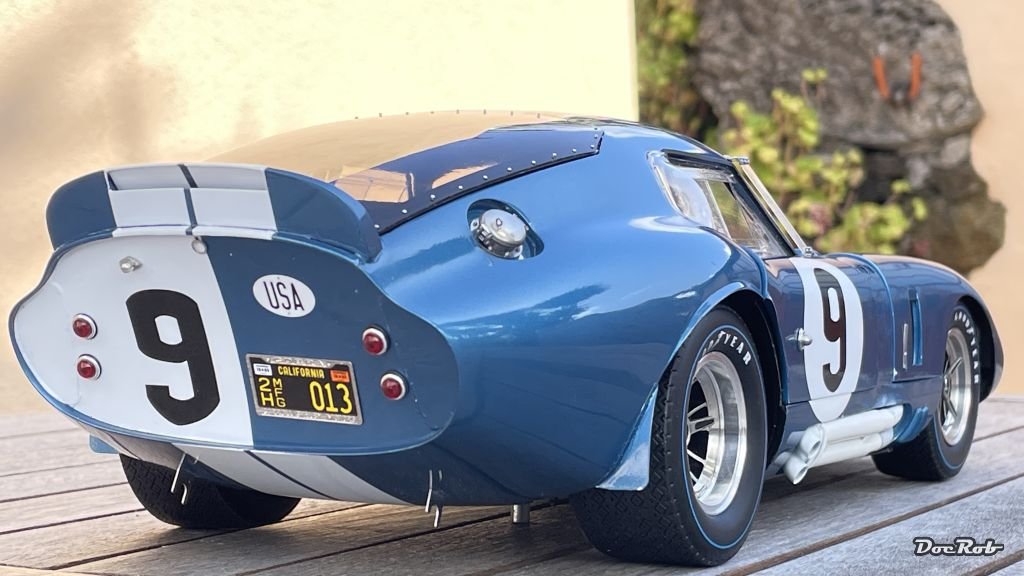
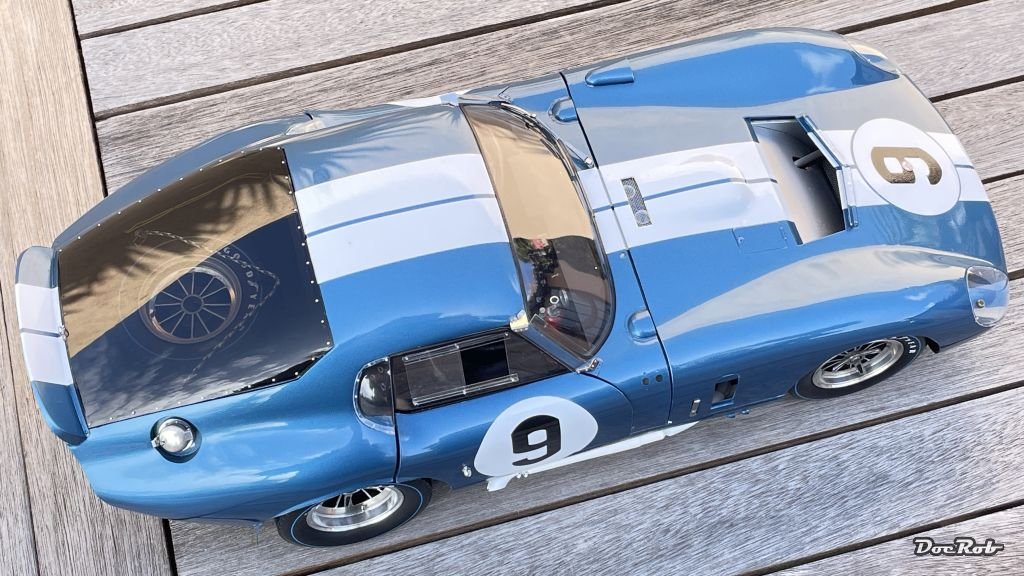
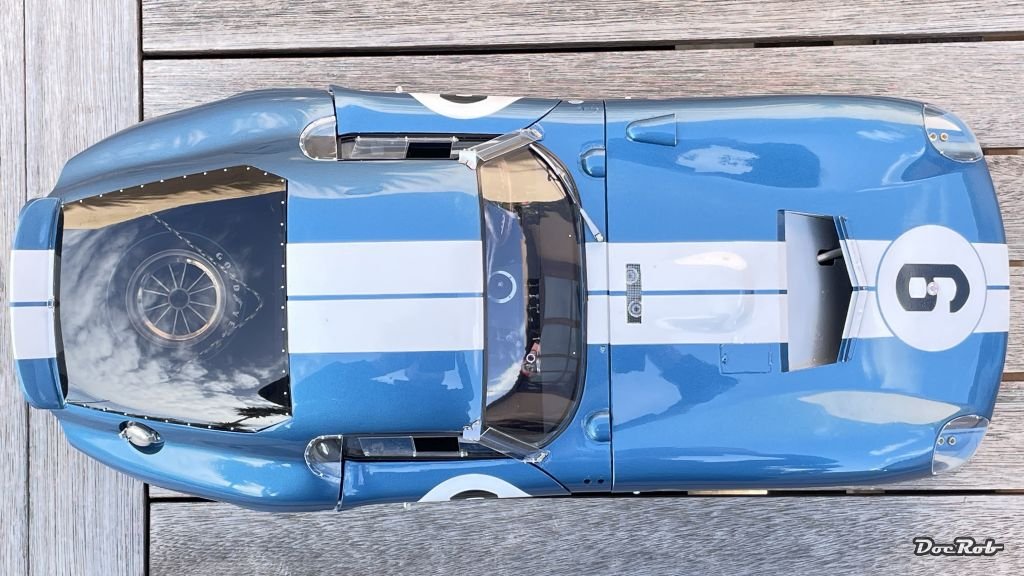
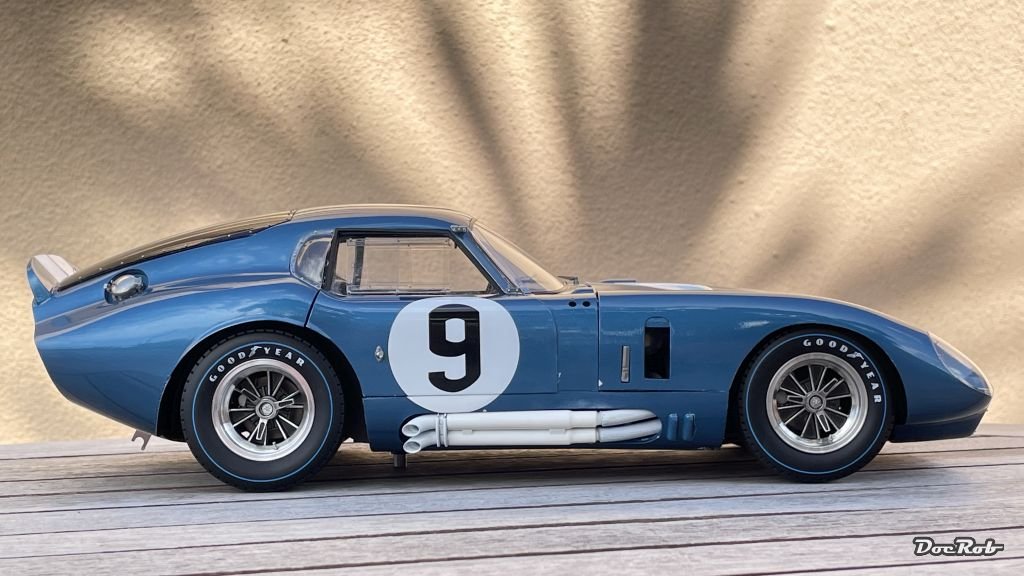
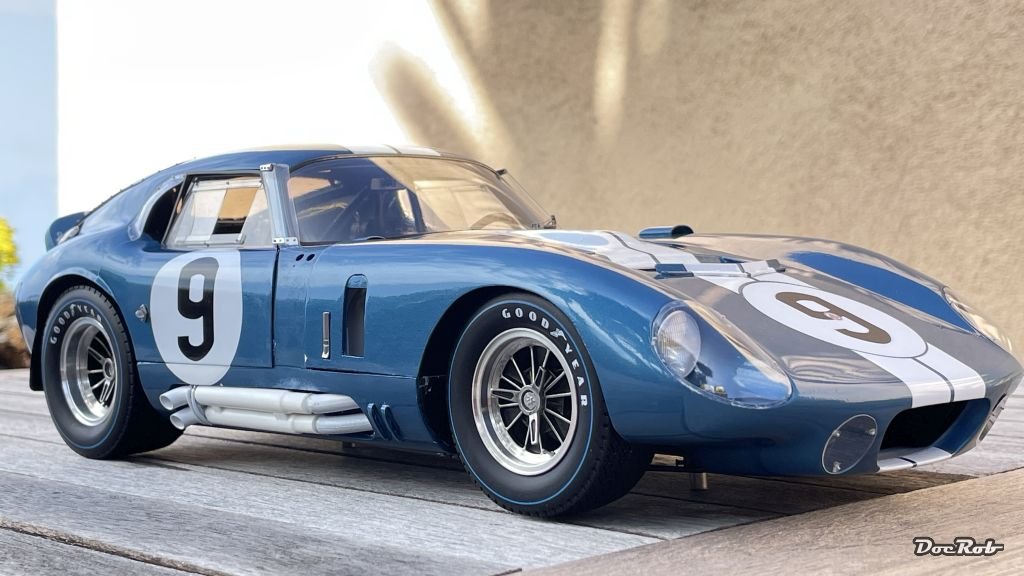
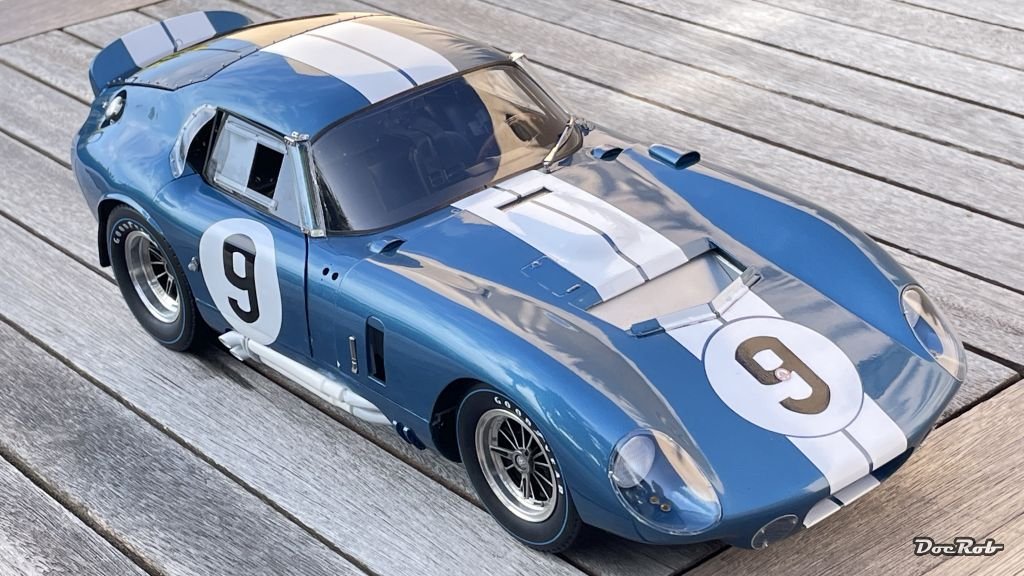
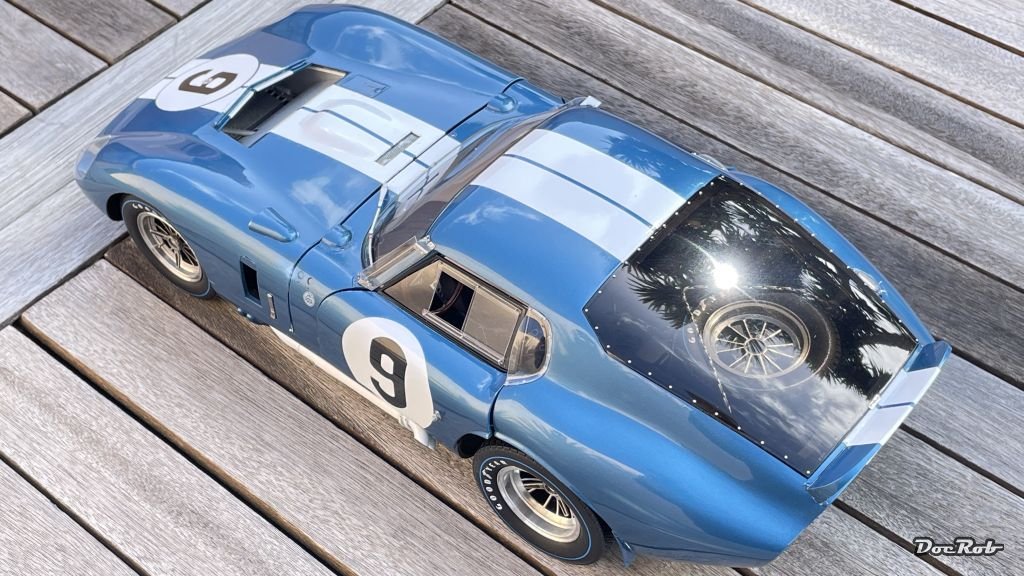
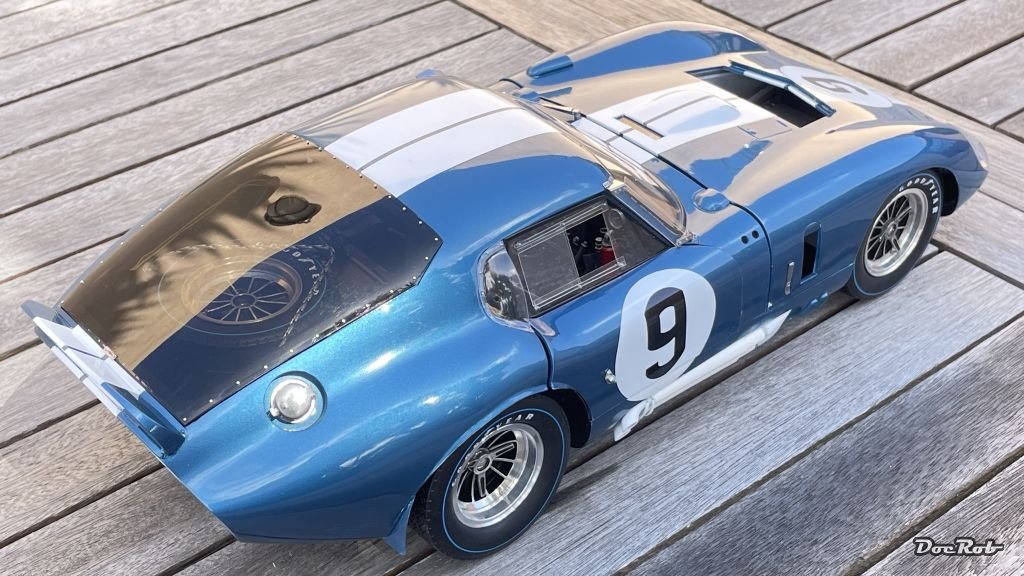
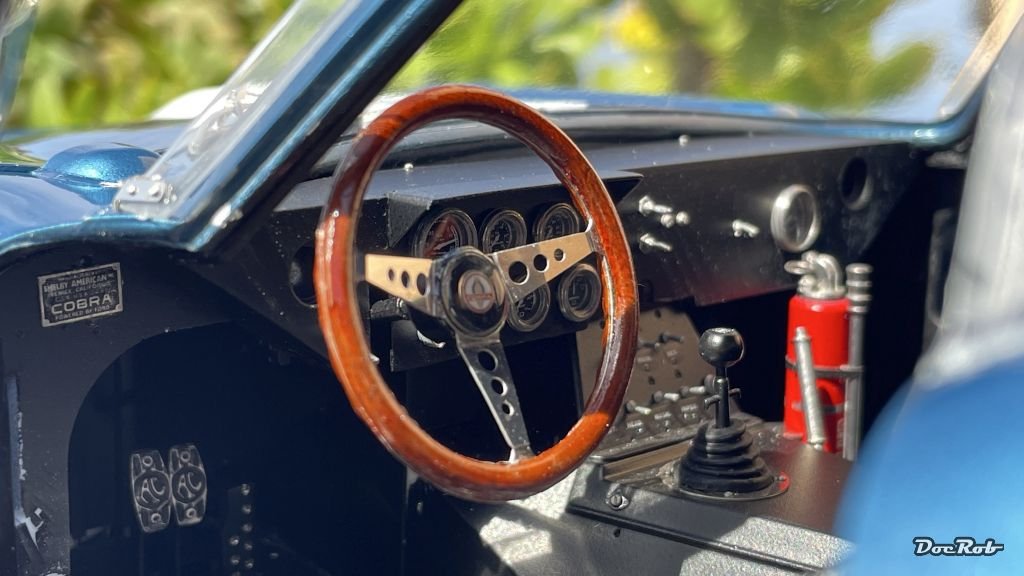
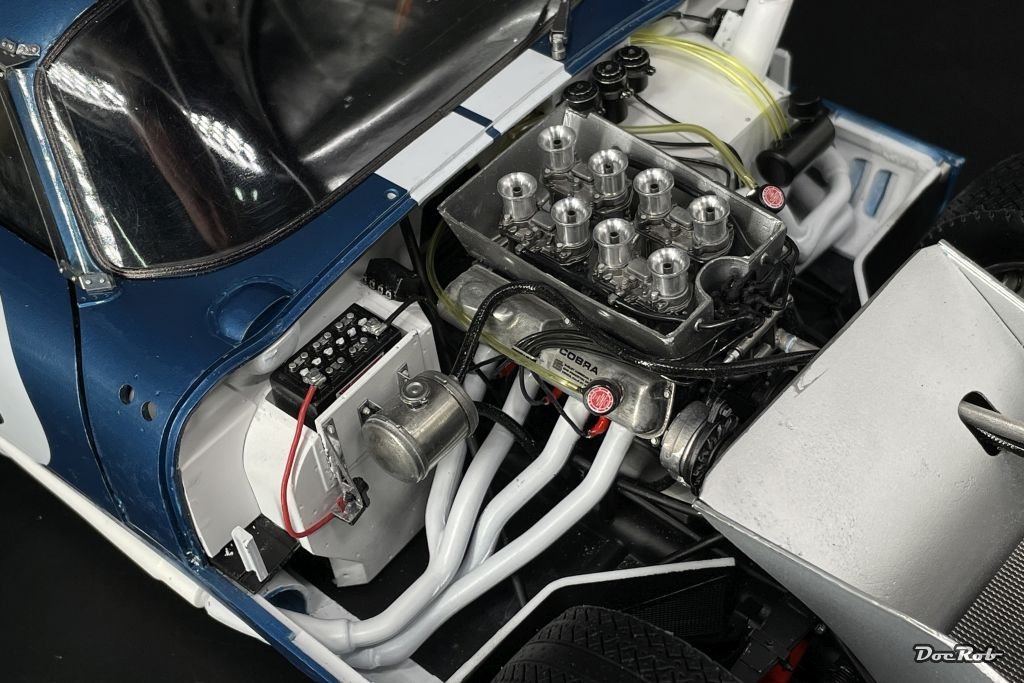
There was a little sunshine outside and I decided to add some natural light pics of the Cobra Coupe. Cheers Rob
- 225 replies
-
- 12
-

-

-
Looks great, Craig. I´d like to see some outdoor photos. I´m actually waiting for some better weather myself, to take some outdoor shots with the Honda and Cobra Coupe. No luck so far, it rains and rains. Have I mentioned that spring is the worst time of the year on the islands of eternal spring . Cheers Rob
-
Honda RC166 by DocRob - FINISHED - Tamiya - 1/12 - multimedia
DocRob replied to DocRob's topic in Non-ship/categorised builds
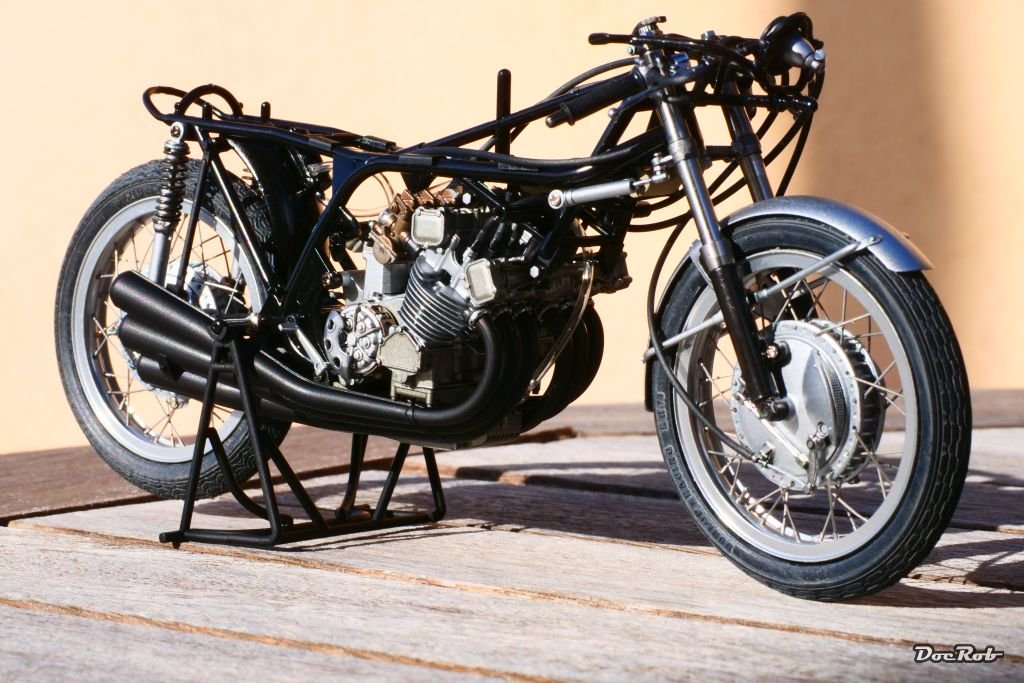
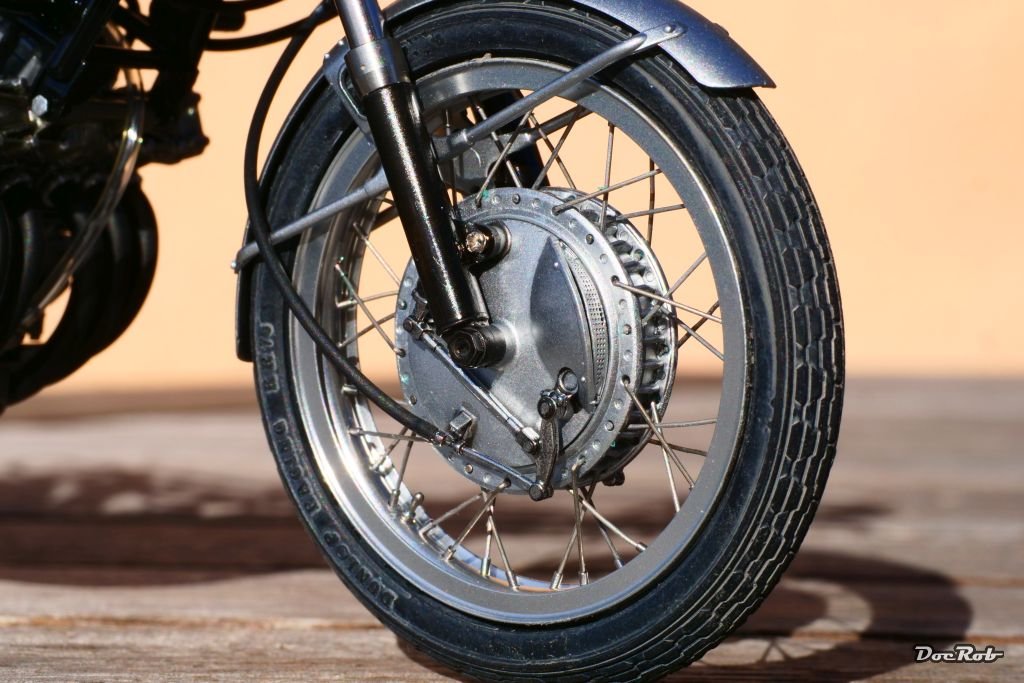
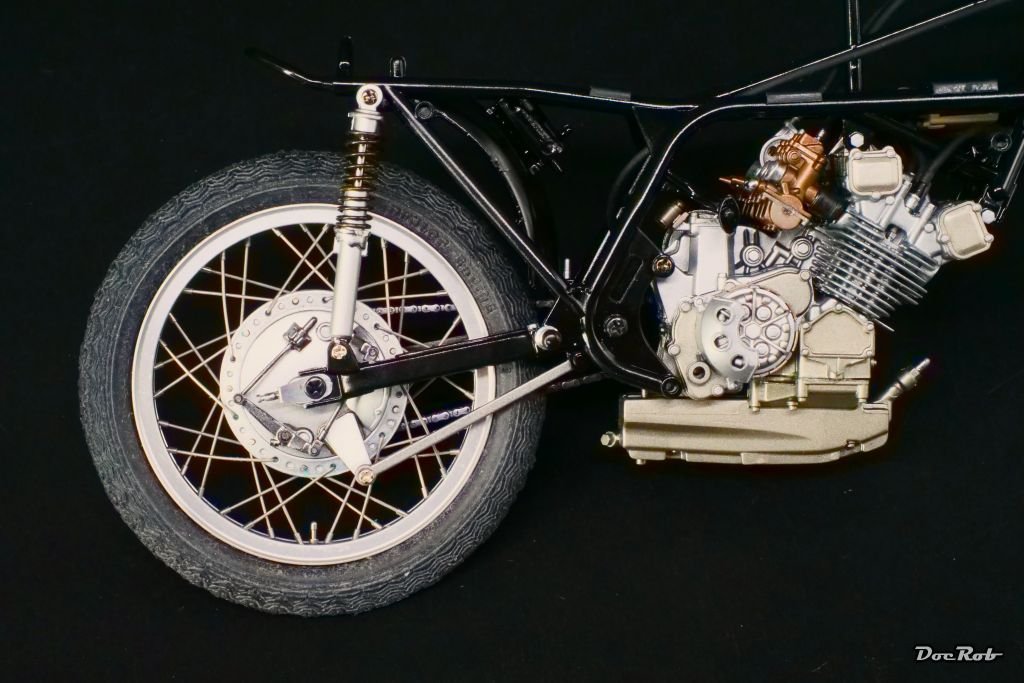
The Honda starts to look like a bike, slowly. I completed the front section, adding adding brakes, fender and front wheel, The tyre was aged a bit, using Flory grey clay wash, to accentuate the profile and branding. I added the cockpit, which only has only one dial, guess what, a rev counter. I also attached most of the tubing, but there might be changes for better fit under the fairing. BTW. fairing and tank were airbrushed in alu-silver and bright red. Cheers Rob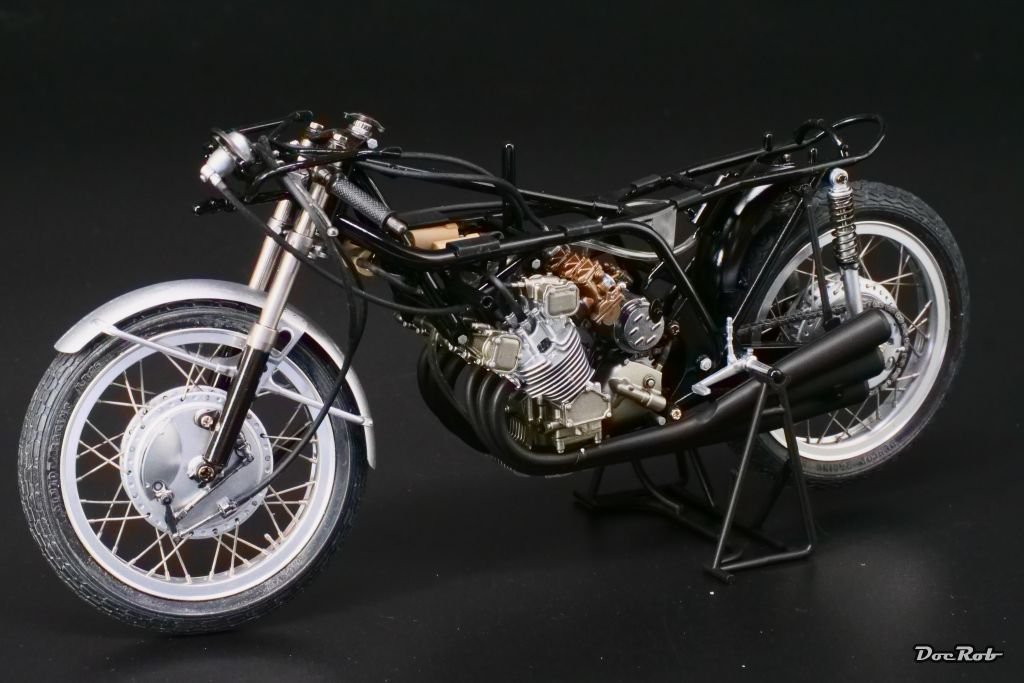

-
No encouragements from me unfortunately, David, as I still struggle with the rigging of my Dok. Your work looks great to my eye and I may get the push from viewing your beautiful rigging and seriously start mine. Cheers Rob
-
Very nice, like shipman, I love the Lightning, an elegant brute, specially in natural metal, which you reproduced very realistic. Cheers Rob
-
Honda RC166 by DocRob - FINISHED - Tamiya - 1/12 - multimedia
DocRob replied to DocRob's topic in Non-ship/categorised builds
Thank you, the good with Tamiya kits, it´s relatively easy to shine, building them, the bad, if you fail to achieve a good result, its only yourself to blame Cheers Rob -
Honda RC166 by DocRob - FINISHED - Tamiya - 1/12 - multimedia
DocRob replied to DocRob's topic in Non-ship/categorised builds
Thank you shipman, agreed about the steering damper, the fit is a bit loose and I will fix it as soon, as I finish the front section. For now, it´s a tiny push with the finger to get it right temporarily. Cheers Rob -
Honda RC166 by DocRob - FINISHED - Tamiya - 1/12 - multimedia
DocRob replied to DocRob's topic in Non-ship/categorised builds
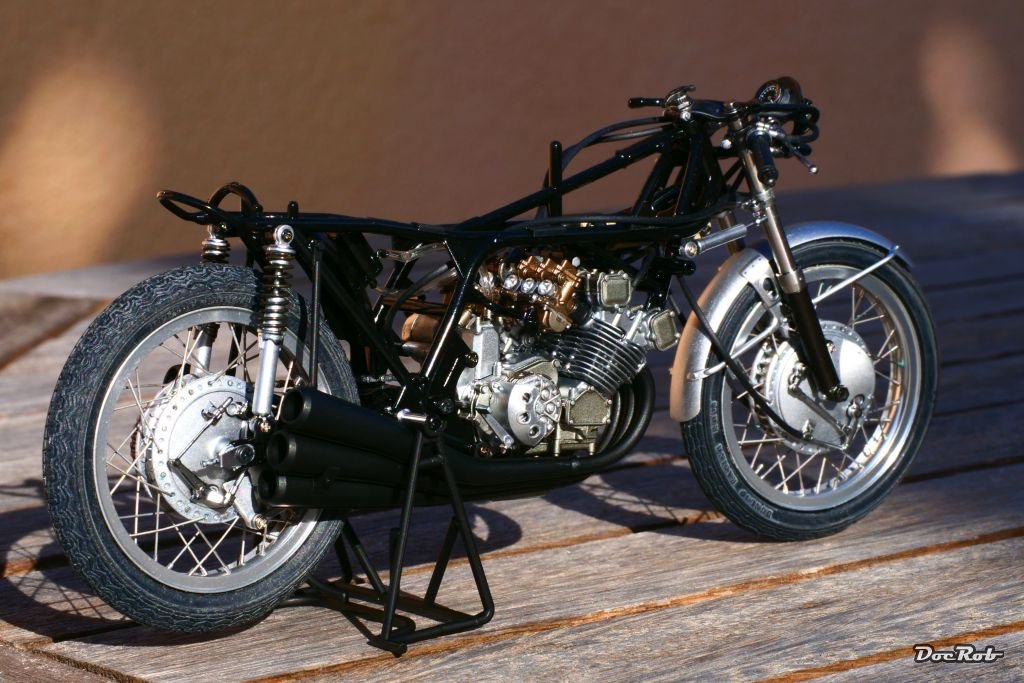
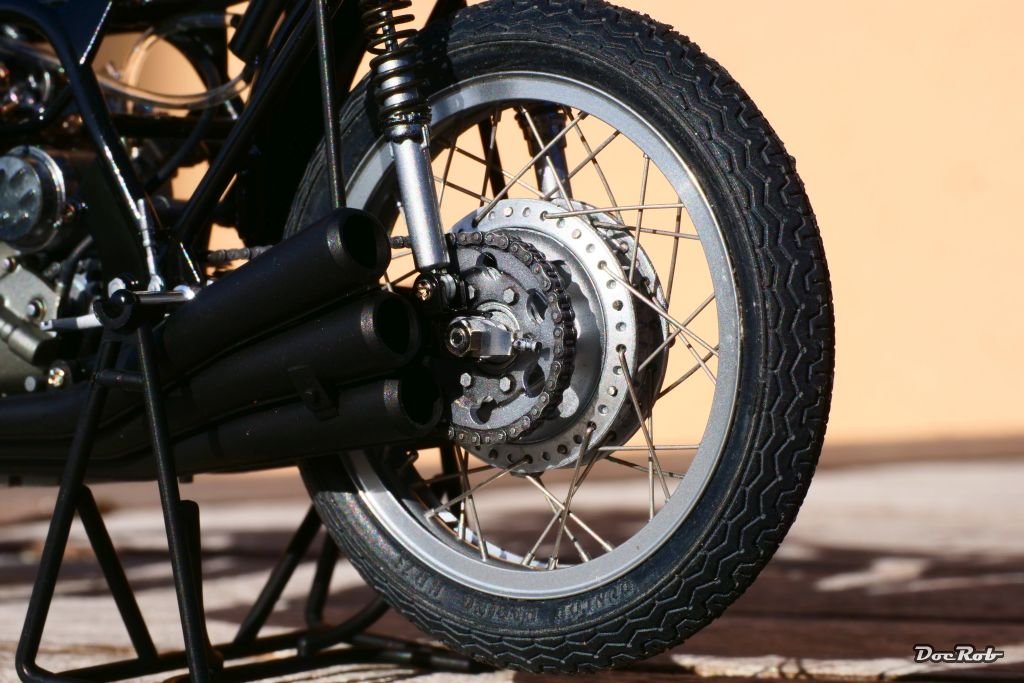
Lots of sub assemblies got finished over the last days. The mighty six in six exhaust was airbrushed in semi matte black (Tamiya LP-5) and added with some fittings, build to the bike. When I glued together the three per side exhausts, I fitted them temporary into the engine block, while the glue was still not fully cured, to have the proper spacings and layout. The fit was perfect again. I even managed to exchange the sides for the exhausts wondering about, how to lay deep into the curves, but found out my mistake in time . Another addition was the front fork, which is a working full metal affair. The area around the handle bars looks a bit wild for now, but that will change soon. Cheers Rob


- 44 replies
-
- 10
-
-
-
Honda RC166 by DocRob - FINISHED - Tamiya - 1/12 - multimedia
DocRob replied to DocRob's topic in Non-ship/categorised builds
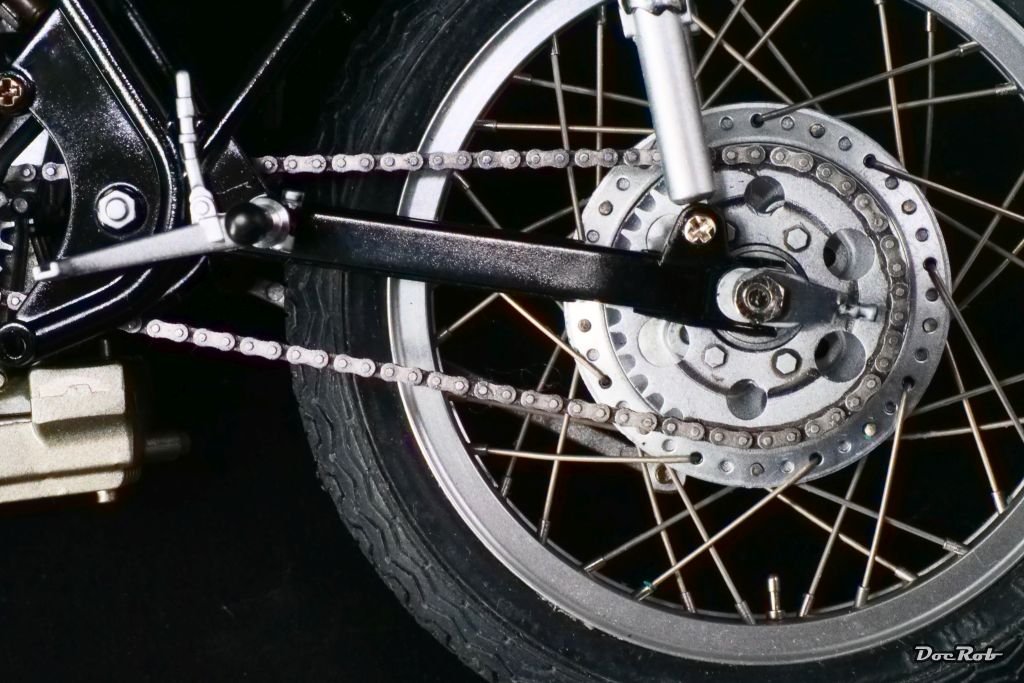
Thank you Dan, I had bought the Tamiya PE-chainset, but was really happy, when I saw Falcon Model releasing a 3D printed set, which I used. The detail is fantastic and my treatment with panel liner, followed with rubbed on chrome pigment, made it look good. With bike kits, it is all about material appearance, specially with metals. They have to look right with their individual colors and sheens in these larger scales. Cheers Rob -
Honda RC166 by DocRob - FINISHED - Tamiya - 1/12 - multimedia
DocRob replied to DocRob's topic in Non-ship/categorised builds
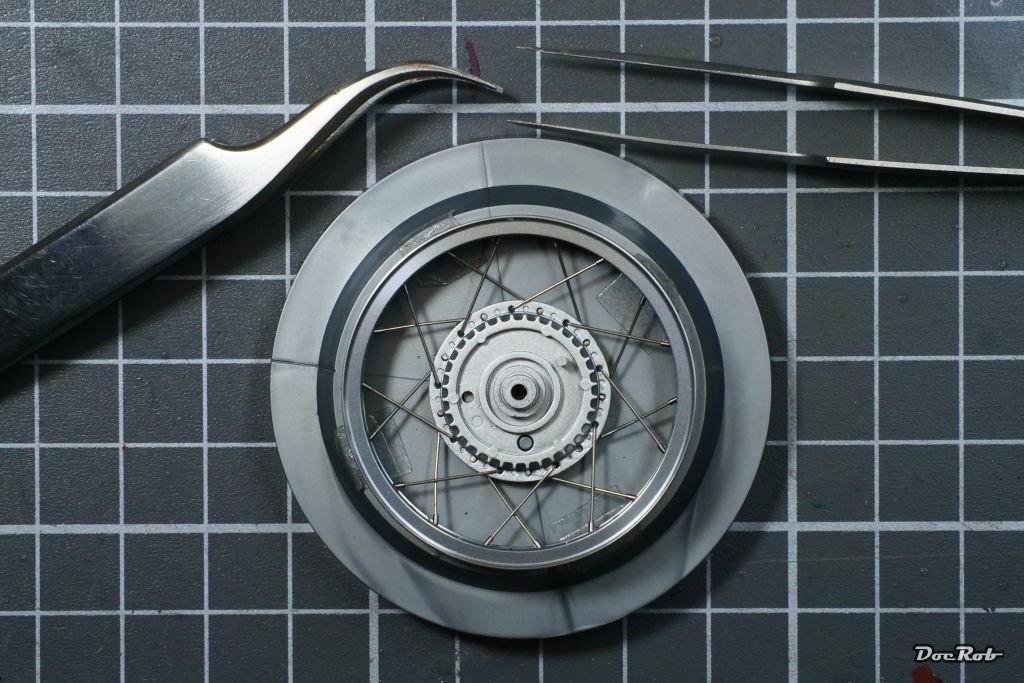
Thank you Craig, the liquid mask worked really well, holding the spokes in place, but easily movable. I chose the thickest, I had, Mr. Masking Sol Neo. Tamiya recommended using their craft glue, which is in fact white glue, to keep the spokes where they should be. I feared visible residues and therefore came up with the idea of using liquid mask. For adding the spoke nipples, I started with very sharp tweezers, but found, the method recommended in the manual was even better. I used some double sided adhesive tape on the flat backside of a toothpick, to pick the spoke nipples pushed them carefully into their holes and wiggled at the spoke with tweezers, until the spoke nipple slid in. Other than you, I had eight spoke nipples and some spokes left in the end. Cheers Rob -
Honda RC166 by DocRob - FINISHED - Tamiya - 1/12 - multimedia
DocRob replied to DocRob's topic in Non-ship/categorised builds
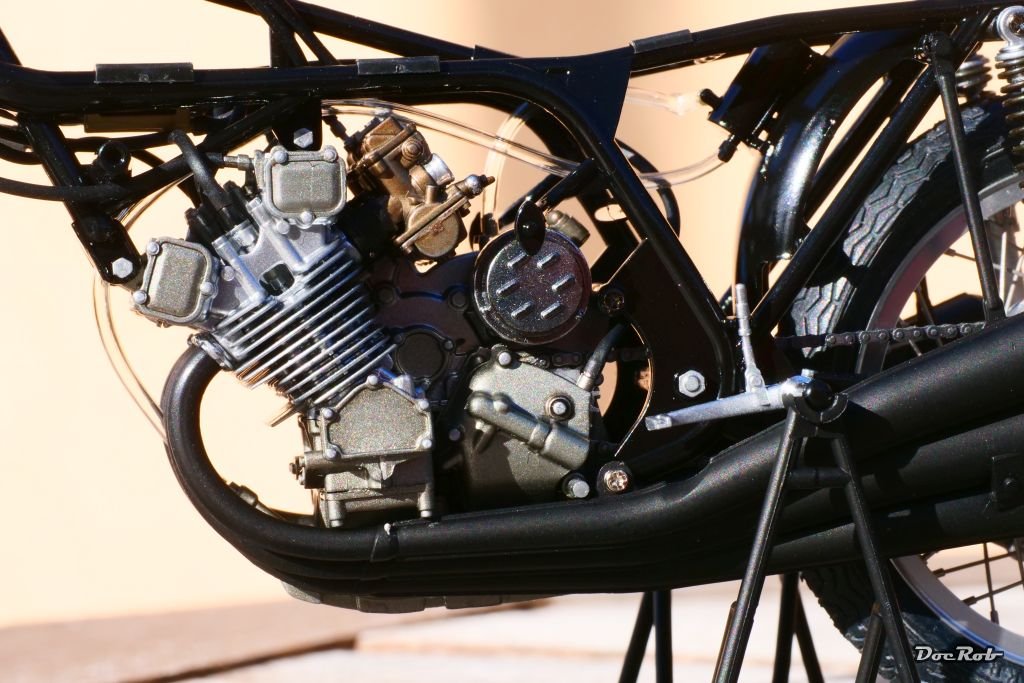
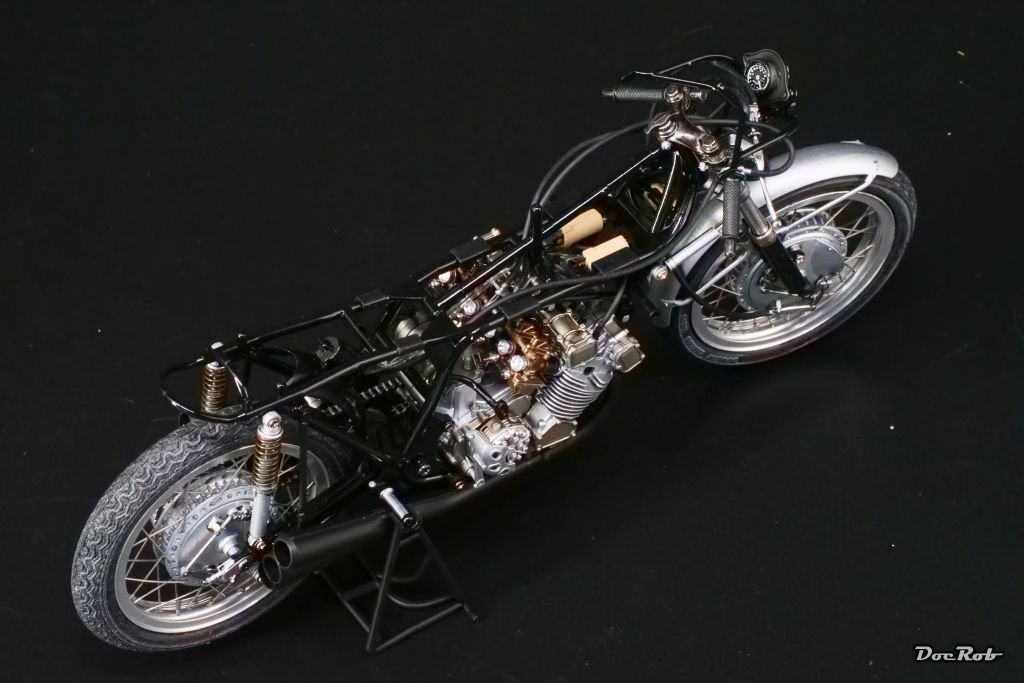
What I especially like about bike kits are the different metal finishes, you need to let it look realistic. Here, I used aluminum, titanium a mix from jet exhaust and copper and chrome, all from the AK Extreme Metal range. Chrome got a undercoat of gloss black, the others were sprayed directly onto the plastic. I was lazy, avoiding masking and sprayed the 3D printed chain in aluminum complete with the chain sprockets. The chain should look like steel and was therefore treated wit a heavy dose of black panel liner, followed by Uschi chrome pigments, which I rubbed in. The tyres received a treatment with a grey Flory wash, to enhance the detail and let them look a little less plastic like. The fit and engineering is still fantastic and putting together the kit is pure joy. Cheers Rob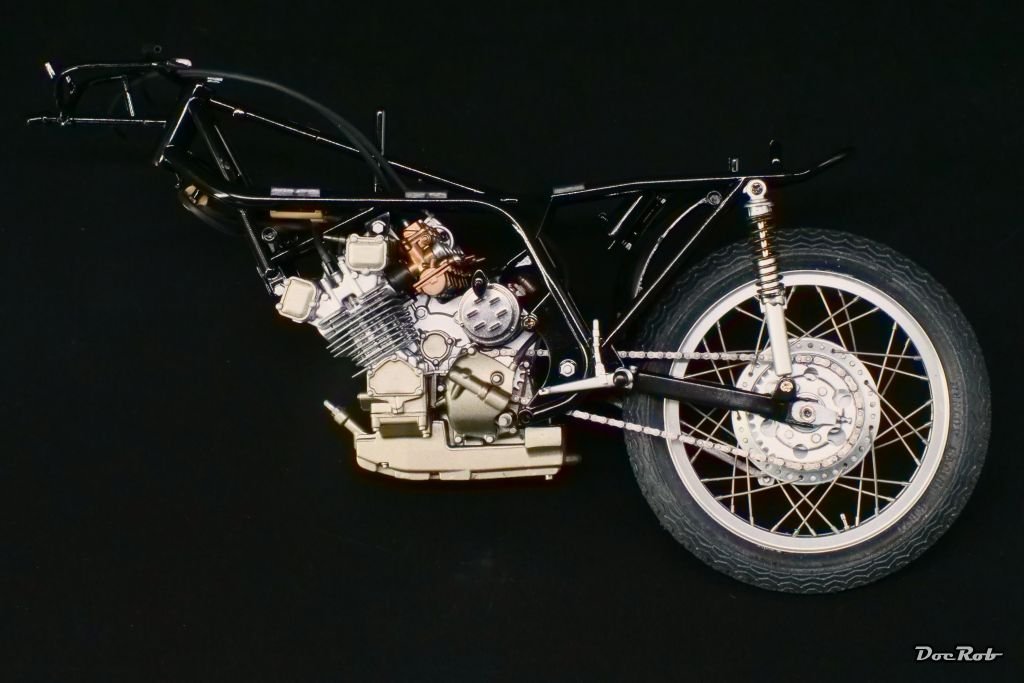
- 44 replies
-
- 15
-
-
-
Your Lysander came out beautiful, Andrew. The matte finish looks perfect. I don´t know, why I always have to think about "The Adventures of Tintin", besides the secret stuff in France, when I see a Lysander. Can´t wait for your Gannet, as I have on in my stash as well. Cheers Rob
-
The tiny tank came out great, Alan, lots of detail to catch the eye. Cheers Rob
-
Looking good Craig, I found a hairdryer very helpful to lay down unruly decals. Makes the process much faster. It´s especially helpful with overlapping carbon fiber decals. Cheers Rob
-
Honda RC166 by DocRob - FINISHED - Tamiya - 1/12 - multimedia
DocRob replied to DocRob's topic in Non-ship/categorised builds
Today, I finished the second wheel, but somehow, it was a chore. I had lots of difficulties to fiddle in the shorter spokes, one half being a fraction of a millimeter to short, the other half too long, that they needed heavy bending, to get them into the rims holes. Anyway, it´s done now and looks better than the plastic wheels for sure. Cheers Rob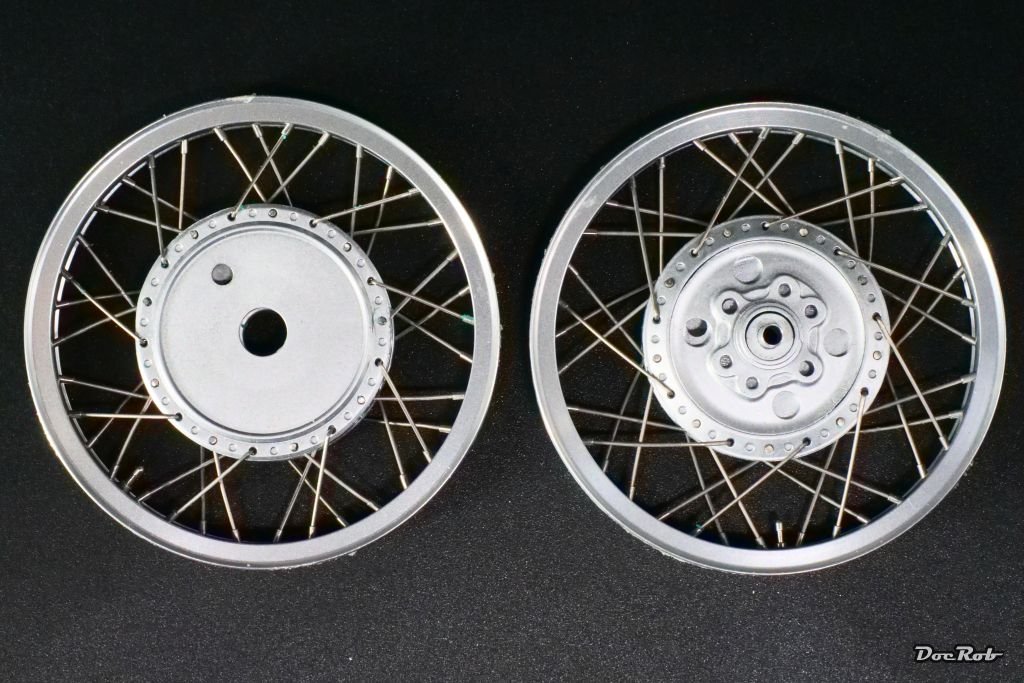
- 44 replies
-
- 11
-
-
-
Nice progress Craig. The paintjob looks pretty good. I use the same process for painting the gloss black Tamiya lacquer (and others). I don´t wait very long for the last coat. My thinking is, the high percentage of leveling thinner levels not only the last coat, but melts into the one before and evens everything. A guy, over on LSM claimed, that his last coat is sometimes pure leveling thinner. He learned that while airbrushing real cars. I haven´t tried that until now. The blackness, well, I had difficulties with the semi flat black interior of the Cobra Coupe at times. It was hard to see, where to place the parts, especially those which were fitted with the body already mounted on the chassis. I thought about the Meng Audi R8 as well, while there was a very good offer, but I can´t overcome my German background, where I always thought about Audi´s as the typical civil servant car . Cheers Rob
-
Honda RC166 by DocRob - FINISHED - Tamiya - 1/12 - multimedia
DocRob replied to DocRob's topic in Non-ship/categorised builds
Today, I finished the front wheel any difficulties and started with the rear wheel. After fiddling the spokes into the rim, I secured them with liquid mask and set the rim and spoked hub into the rim. Next, I inserted the spokes carefully into their holes in the rim, where some needed slight bending. Then the troubles began, while I tried to add the firs spoke nipple, some spokes flipped out of their holes in the rim, nasty. It was caused by slight movement of the hub in the jig and therefor, I used some blue tac to fix the hub like shown on the picture. During applying the nipples, a straining task, two spokes came completely loose from the hub, caused by too small heads, which slipped through the hole. Somehow, I got them fiddled in with a lot of swearing. On the pic below, one is still missing, but I fixed it now. Cheers Rob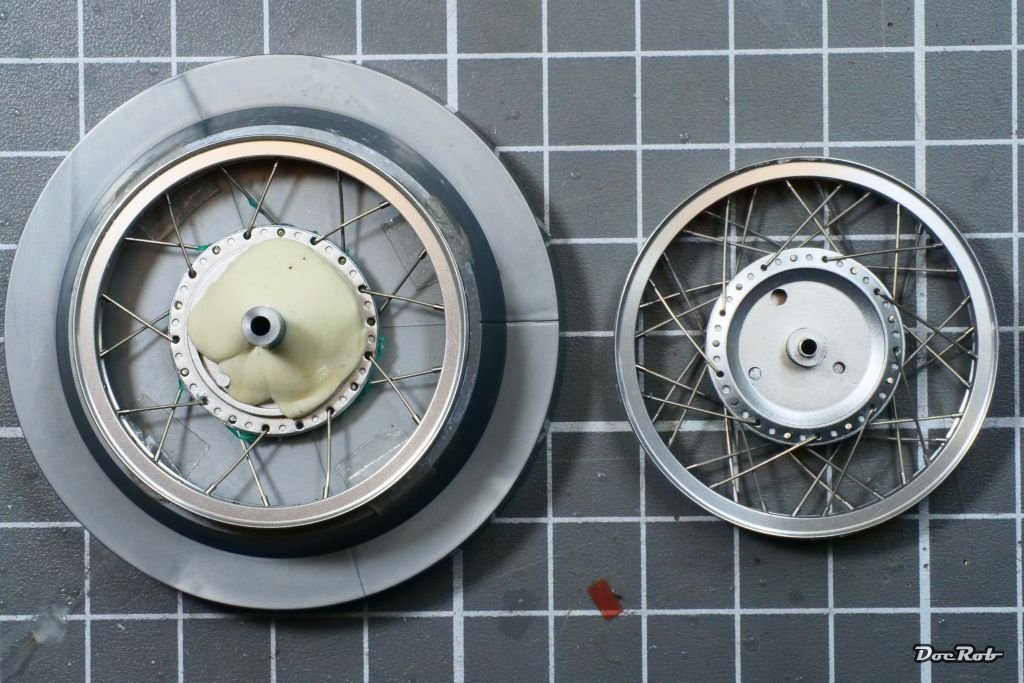
- 44 replies
-
- 10
-
-
-
The Halberstadt is a beauty, Dave. Given the circumstances it was build under, it´s nearly unbelievable how great it turned out. I wish you the very best for your recovery. Cheers Rob
-
Honda RC166 by DocRob - FINISHED - Tamiya - 1/12 - multimedia
DocRob replied to DocRob's topic in Non-ship/categorised builds
Next, I started with the wheels, an extra set made by Tamiya to substitute the not too shabby kit wheels. But what looks better than plastic, right, metal. The rims are turned and the spokes are pre lengthened and pre bent. I recommend to study the manual very thoroughly and check twice, as it is easy to make mistakes. There is a line engraved into the jig for alignment with the valve and I nearly interpreted a cast blemish for the marking. First you add the spokes to the ABS hub and roughly align them correctly. The manual calls for using whit glue to fix them temporarily, but I thought, I try masking fluid instead, Worked great and will be easy to remove. After the second of four sets are aligned in the opposite direction, it´s time to put the rim and the spoked hub into the jig. With a pair of tweezer and very light bending of the spokes, you insert them into the rims holes. Finally, you add the spoke nipples from the outside. I used an old, very sharp pair of tweezers for that, holding the nipples by their middle hole and inserted them. Sometimes, a little wiggling with the spoke was necessary to insert the nipple properly. Then the nipples were secured with CA and whoops, half a wheel is finished. Cheers Rob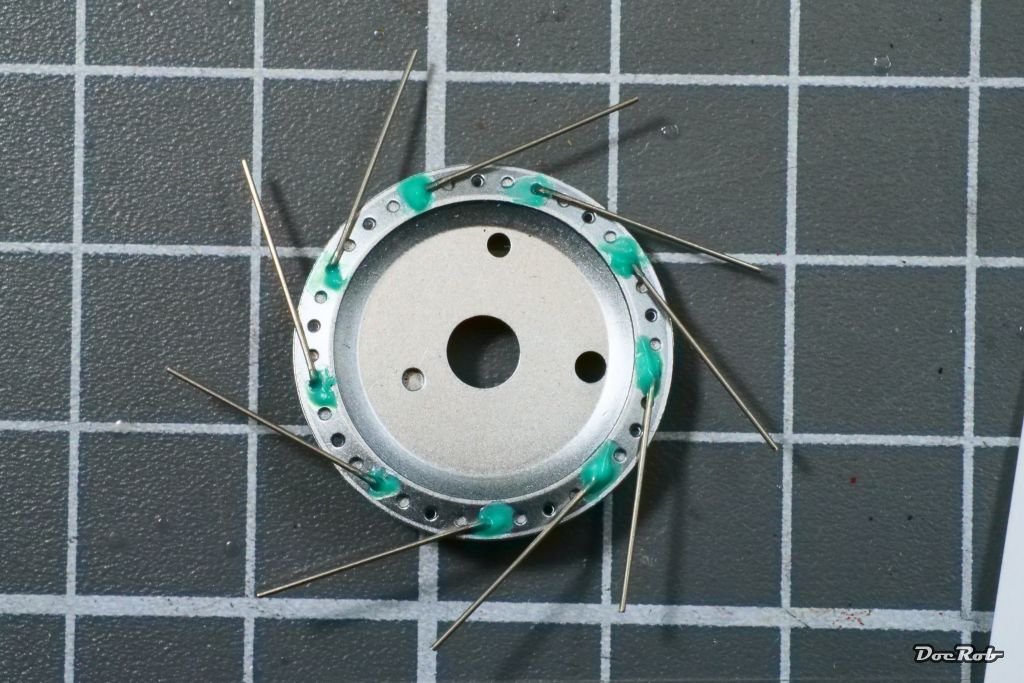

- 44 replies
-
- 10
-
-
-
Honda RC166 by DocRob - FINISHED - Tamiya - 1/12 - multimedia
DocRob replied to DocRob's topic in Non-ship/categorised builds
I need a brain update, Craig, I didn´t remember your build, but had posted in it . I will re-read it, specially for the wheels, which are next on my schedule. Cheers Rob -
Honda RC166 by DocRob - FINISHED - Tamiya - 1/12 - multimedia
DocRob replied to DocRob's topic in Non-ship/categorised builds
Good to have you on the backseat, Craig, but wait, its a one seater. Good that you also built one, you know, when questions arise... . The Tamiya RC166 seems to be a very popular kit, I haven´t realized before, but there are a lot of builds around, but I really would like to see yours. I already found the key for the chain set, I ignore it and use the Falcon Models, I bought a little later. Building up of the chain was also the most miserable part of the MFH Crocker build, so if there is a way around, I take it. Like your experience, the main problem was to close the chain. In case of the MFH chain there is a great risk to break the chain somewhere during closing and there is no easy way to repair it. Cheers Rob -
Honda RC166 by DocRob - FINISHED - Tamiya - 1/12 - multimedia
DocRob replied to DocRob's topic in Non-ship/categorised builds
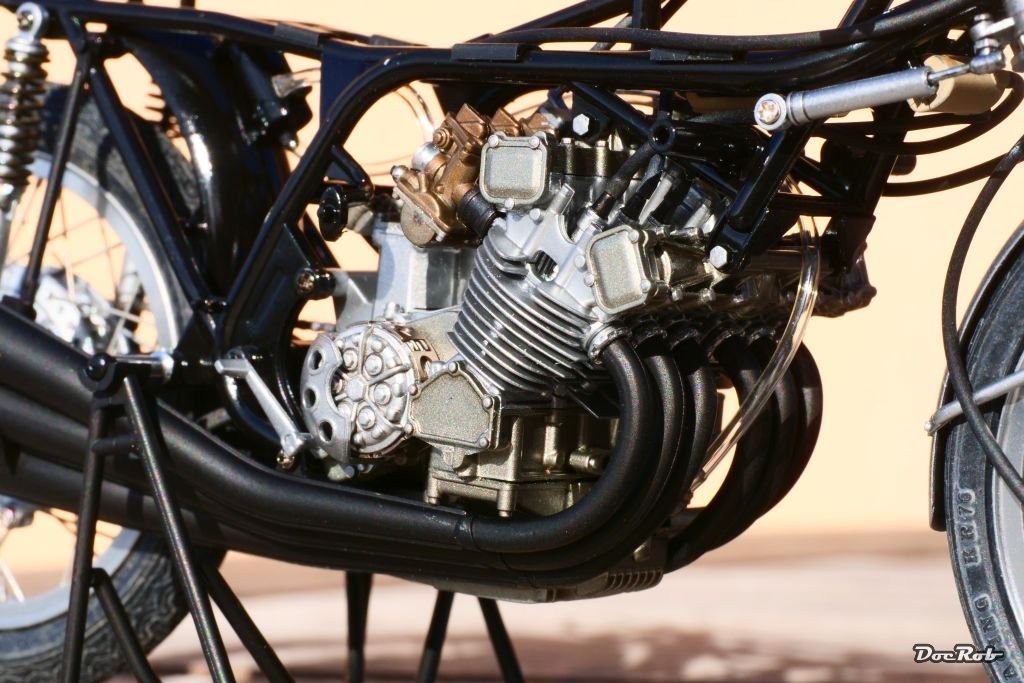
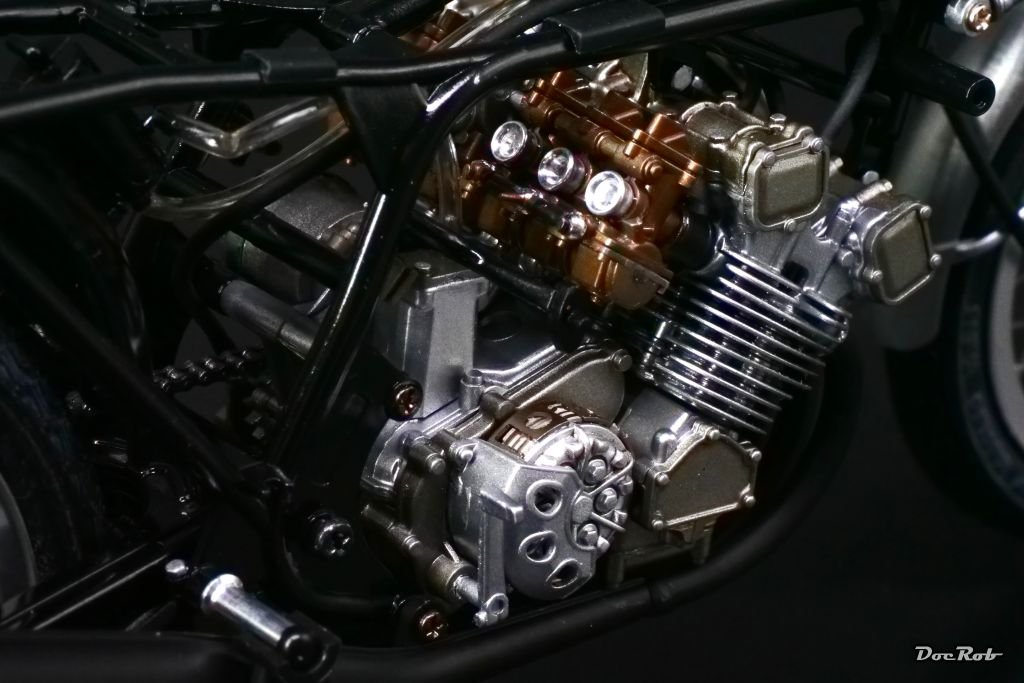
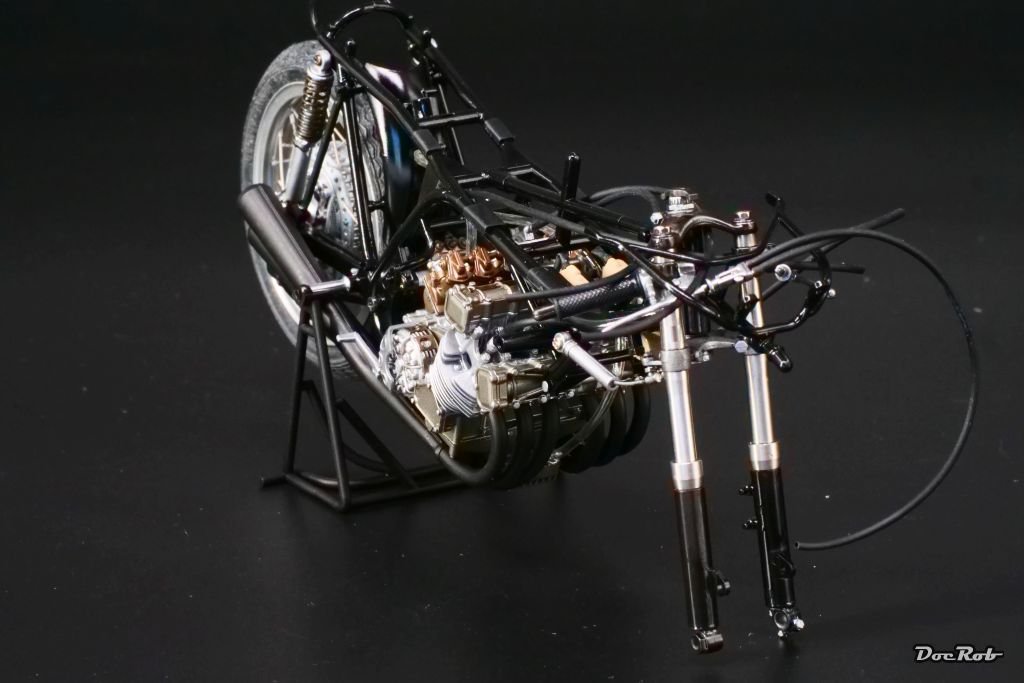
The engine got a bad hair day with the tubing. I used the supplied vinyl tube, albeit it may be a bit on the thick side, but I want a relatively quick build and not hassle with preparing all the connectors with tiny brass rods. Not much of it will be visible, anyway. The frame was sprayed with Tamiya LP gloss black, which again was perfect with it´s shiny finish. The light brown "things" might be capacitors, if I´m not wrong, which will be connected with the spark plug wires. The footrests are made from turned aluminum and are supplied with the original kit, nice touch, Tamiya. Cheers Rob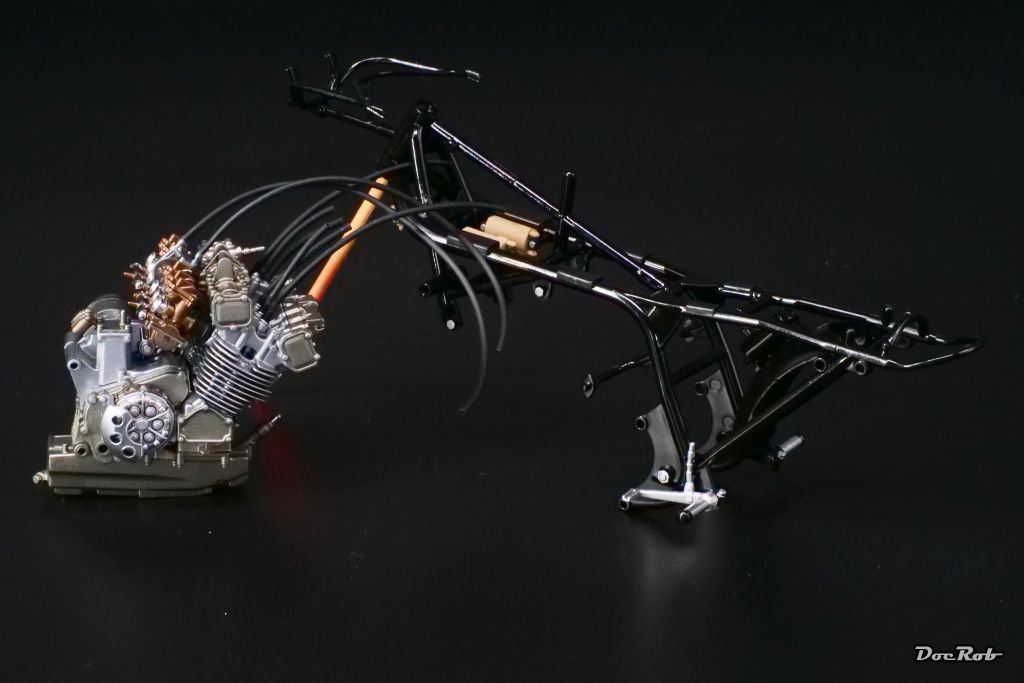
- 44 replies
-
- 12
-
-
-
Honda RC166 by DocRob - FINISHED - Tamiya - 1/12 - multimedia
DocRob replied to DocRob's topic in Non-ship/categorised builds
Thank you Ken, I tried to match the colors to the reference photos I have. I think, scale wise they look halfway correct. Cheers Rob

