HOLIDAY DONATION DRIVE - SUPPORT MSW - DO YOUR PART TO KEEP THIS GREAT FORUM GOING! (Only 20 donations so far - C'mon guys!)
×

Coyote_6
-
Posts
512 -
Joined
-
Last visited
Content Type
Profiles
Forums
Gallery
Events
Everything posted by Coyote_6
-
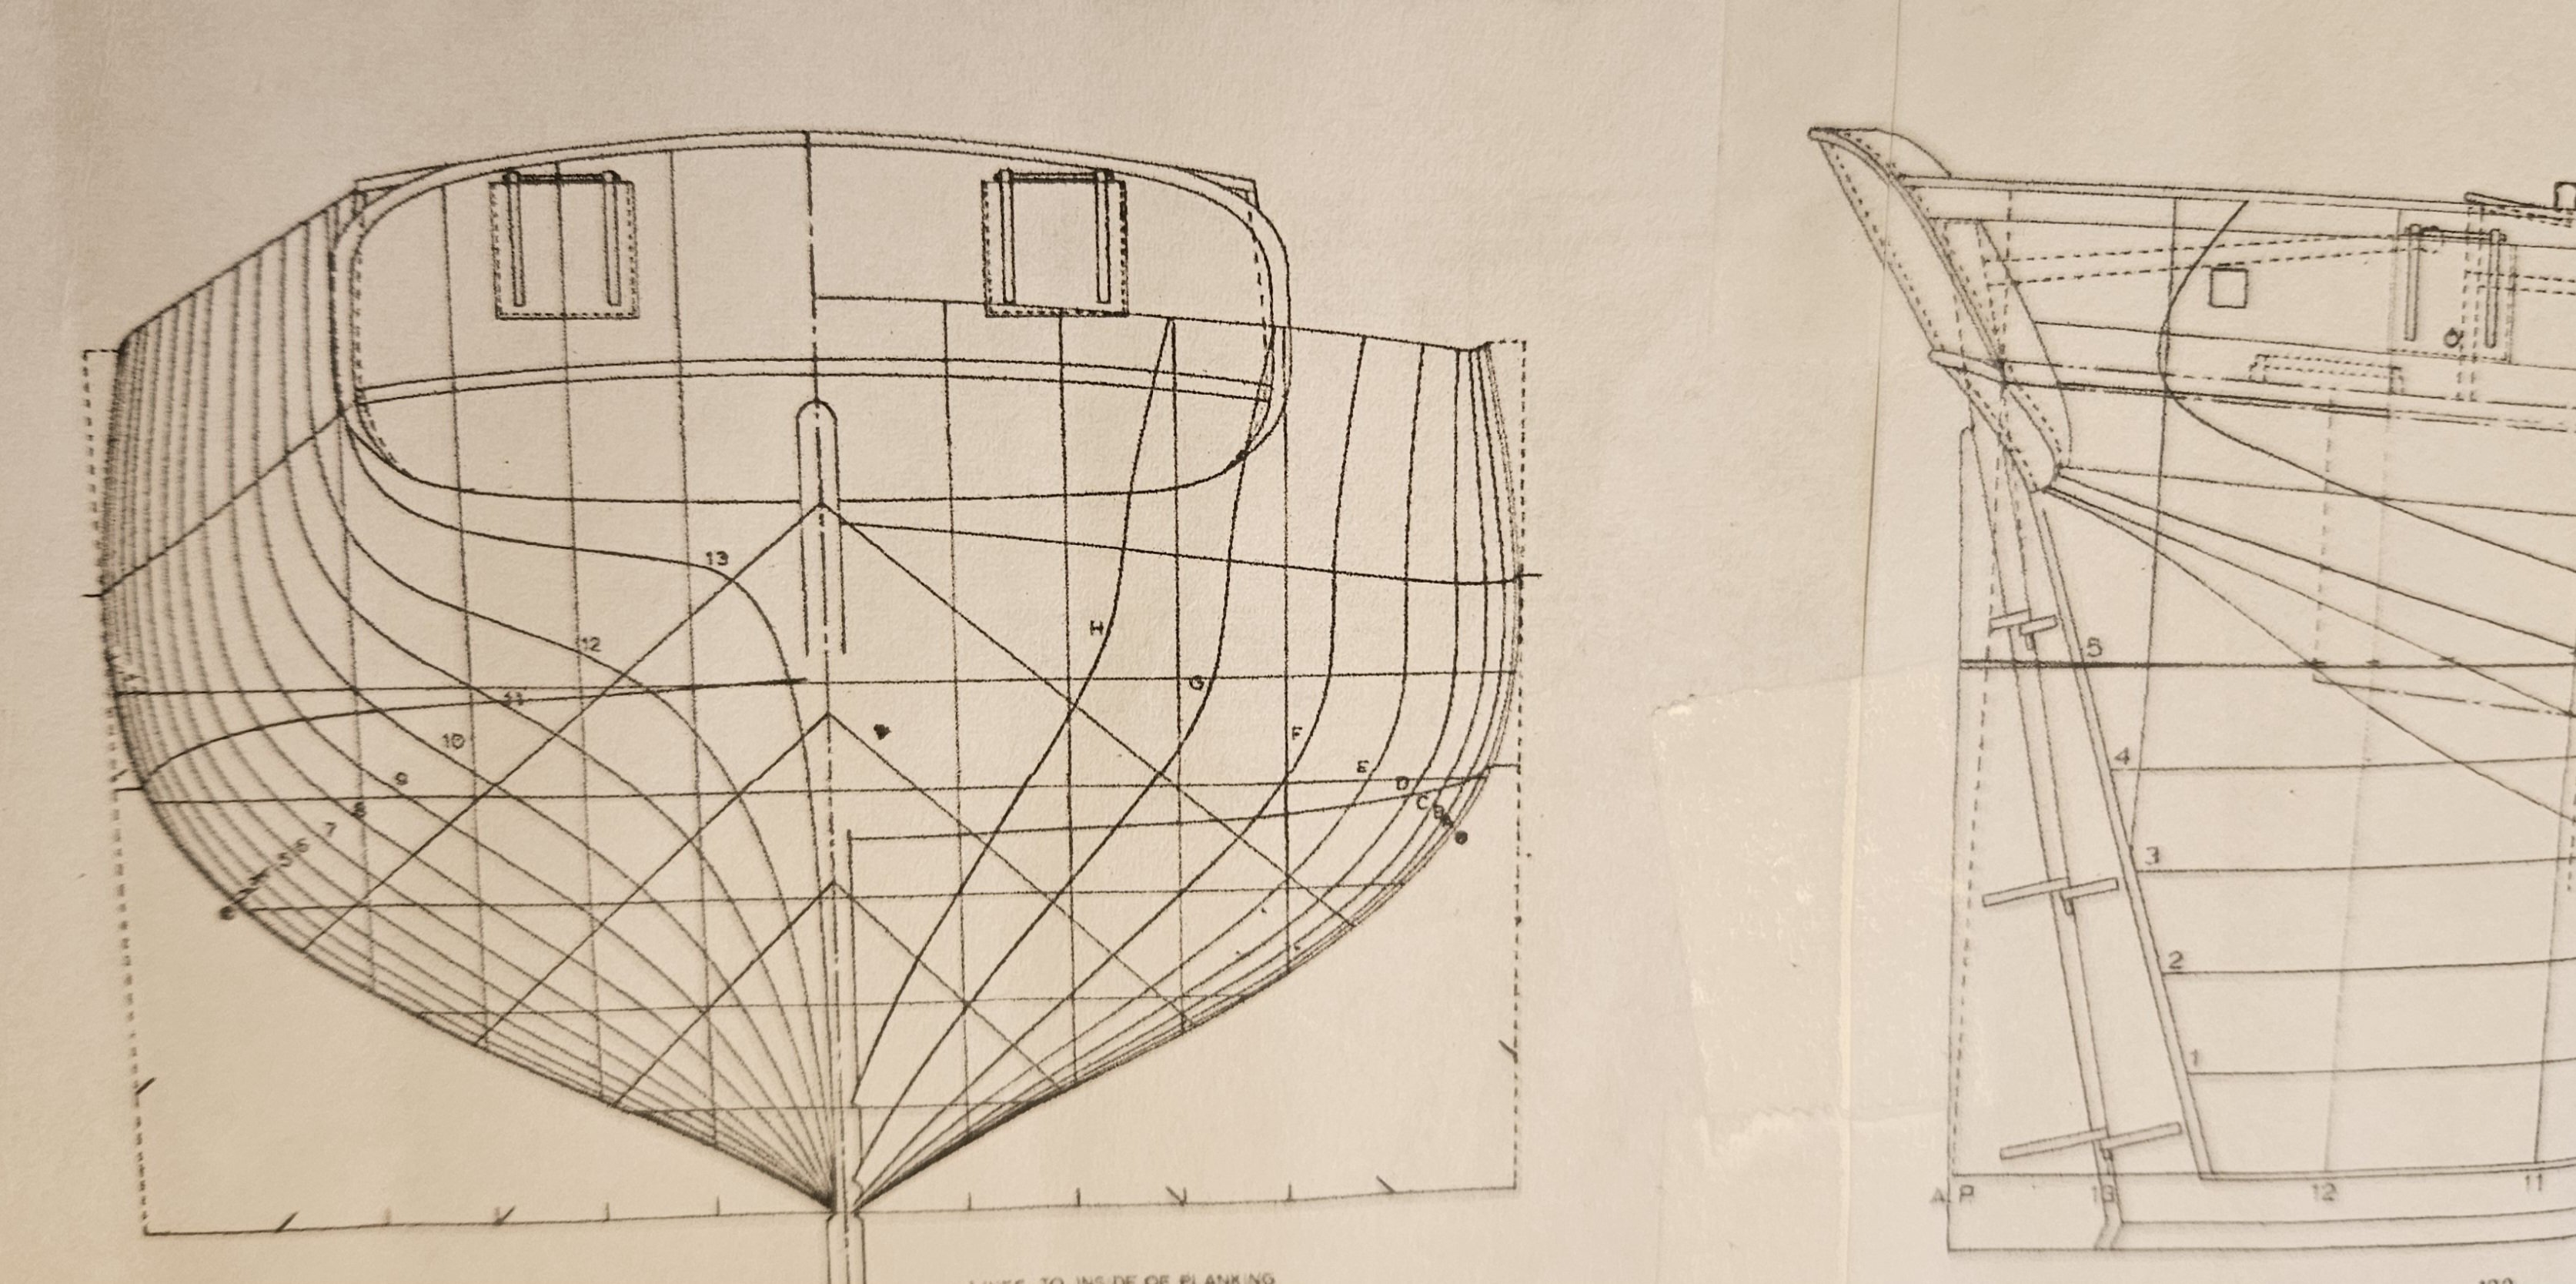
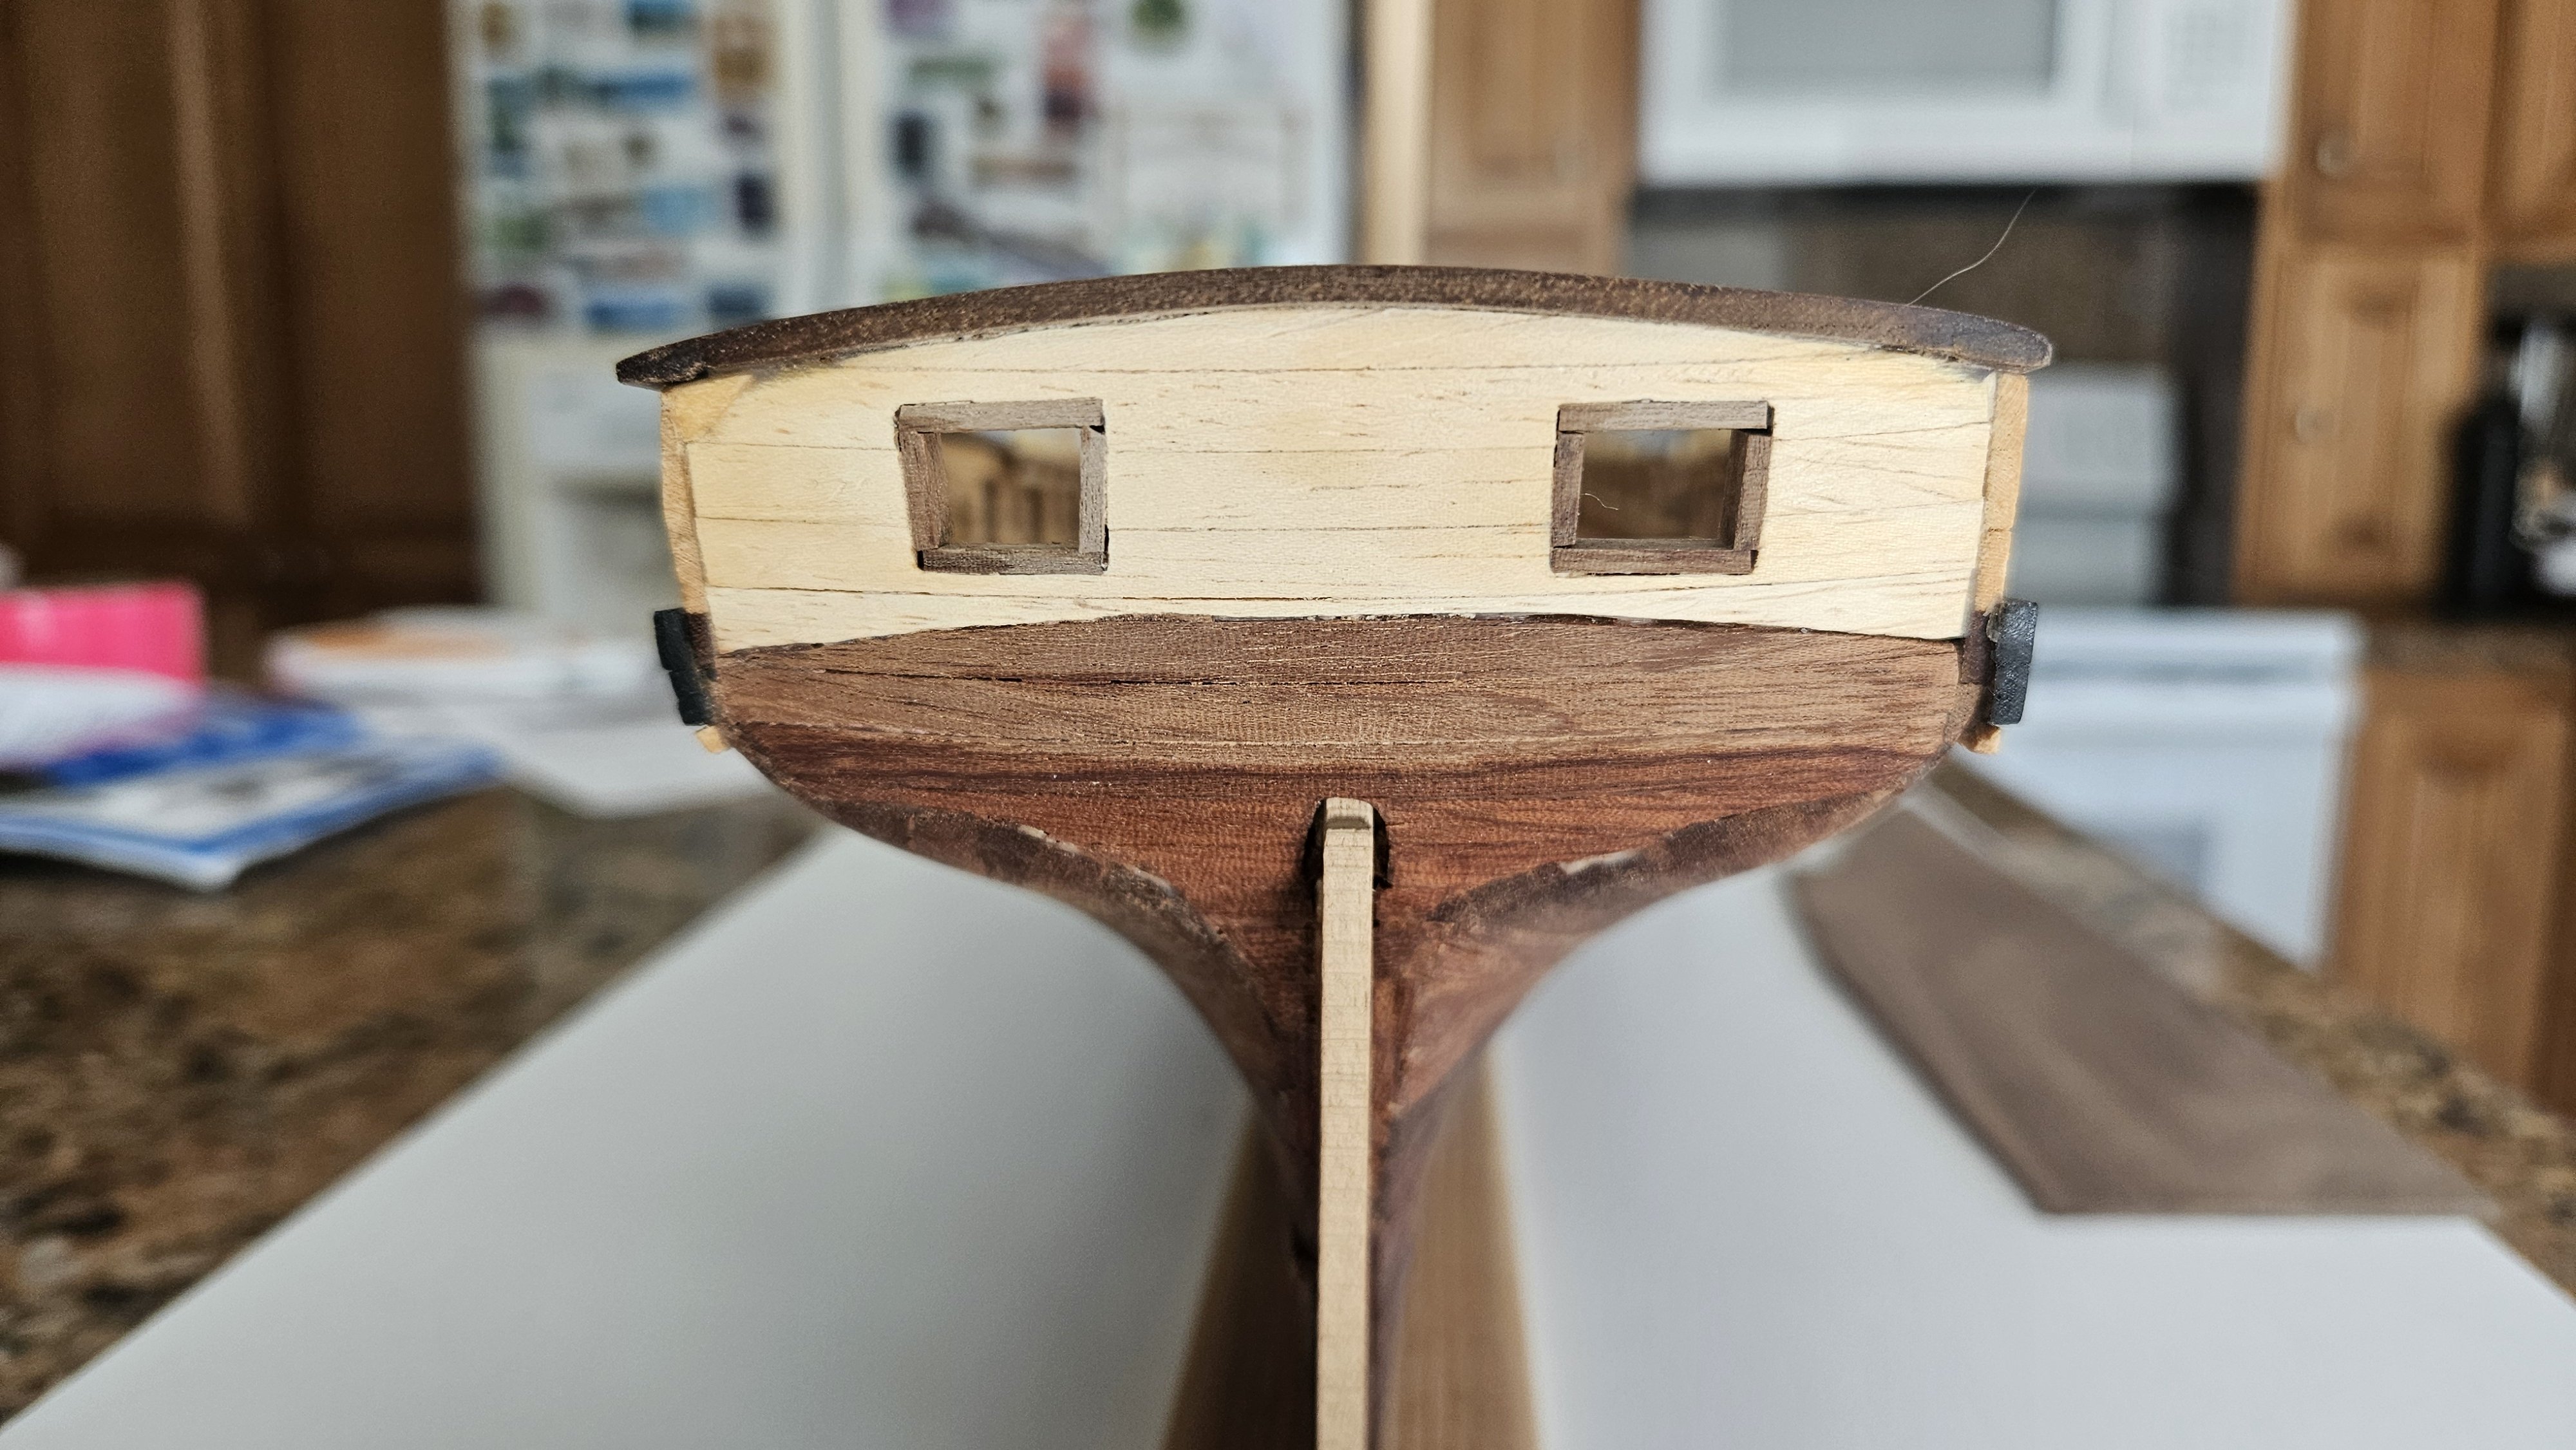
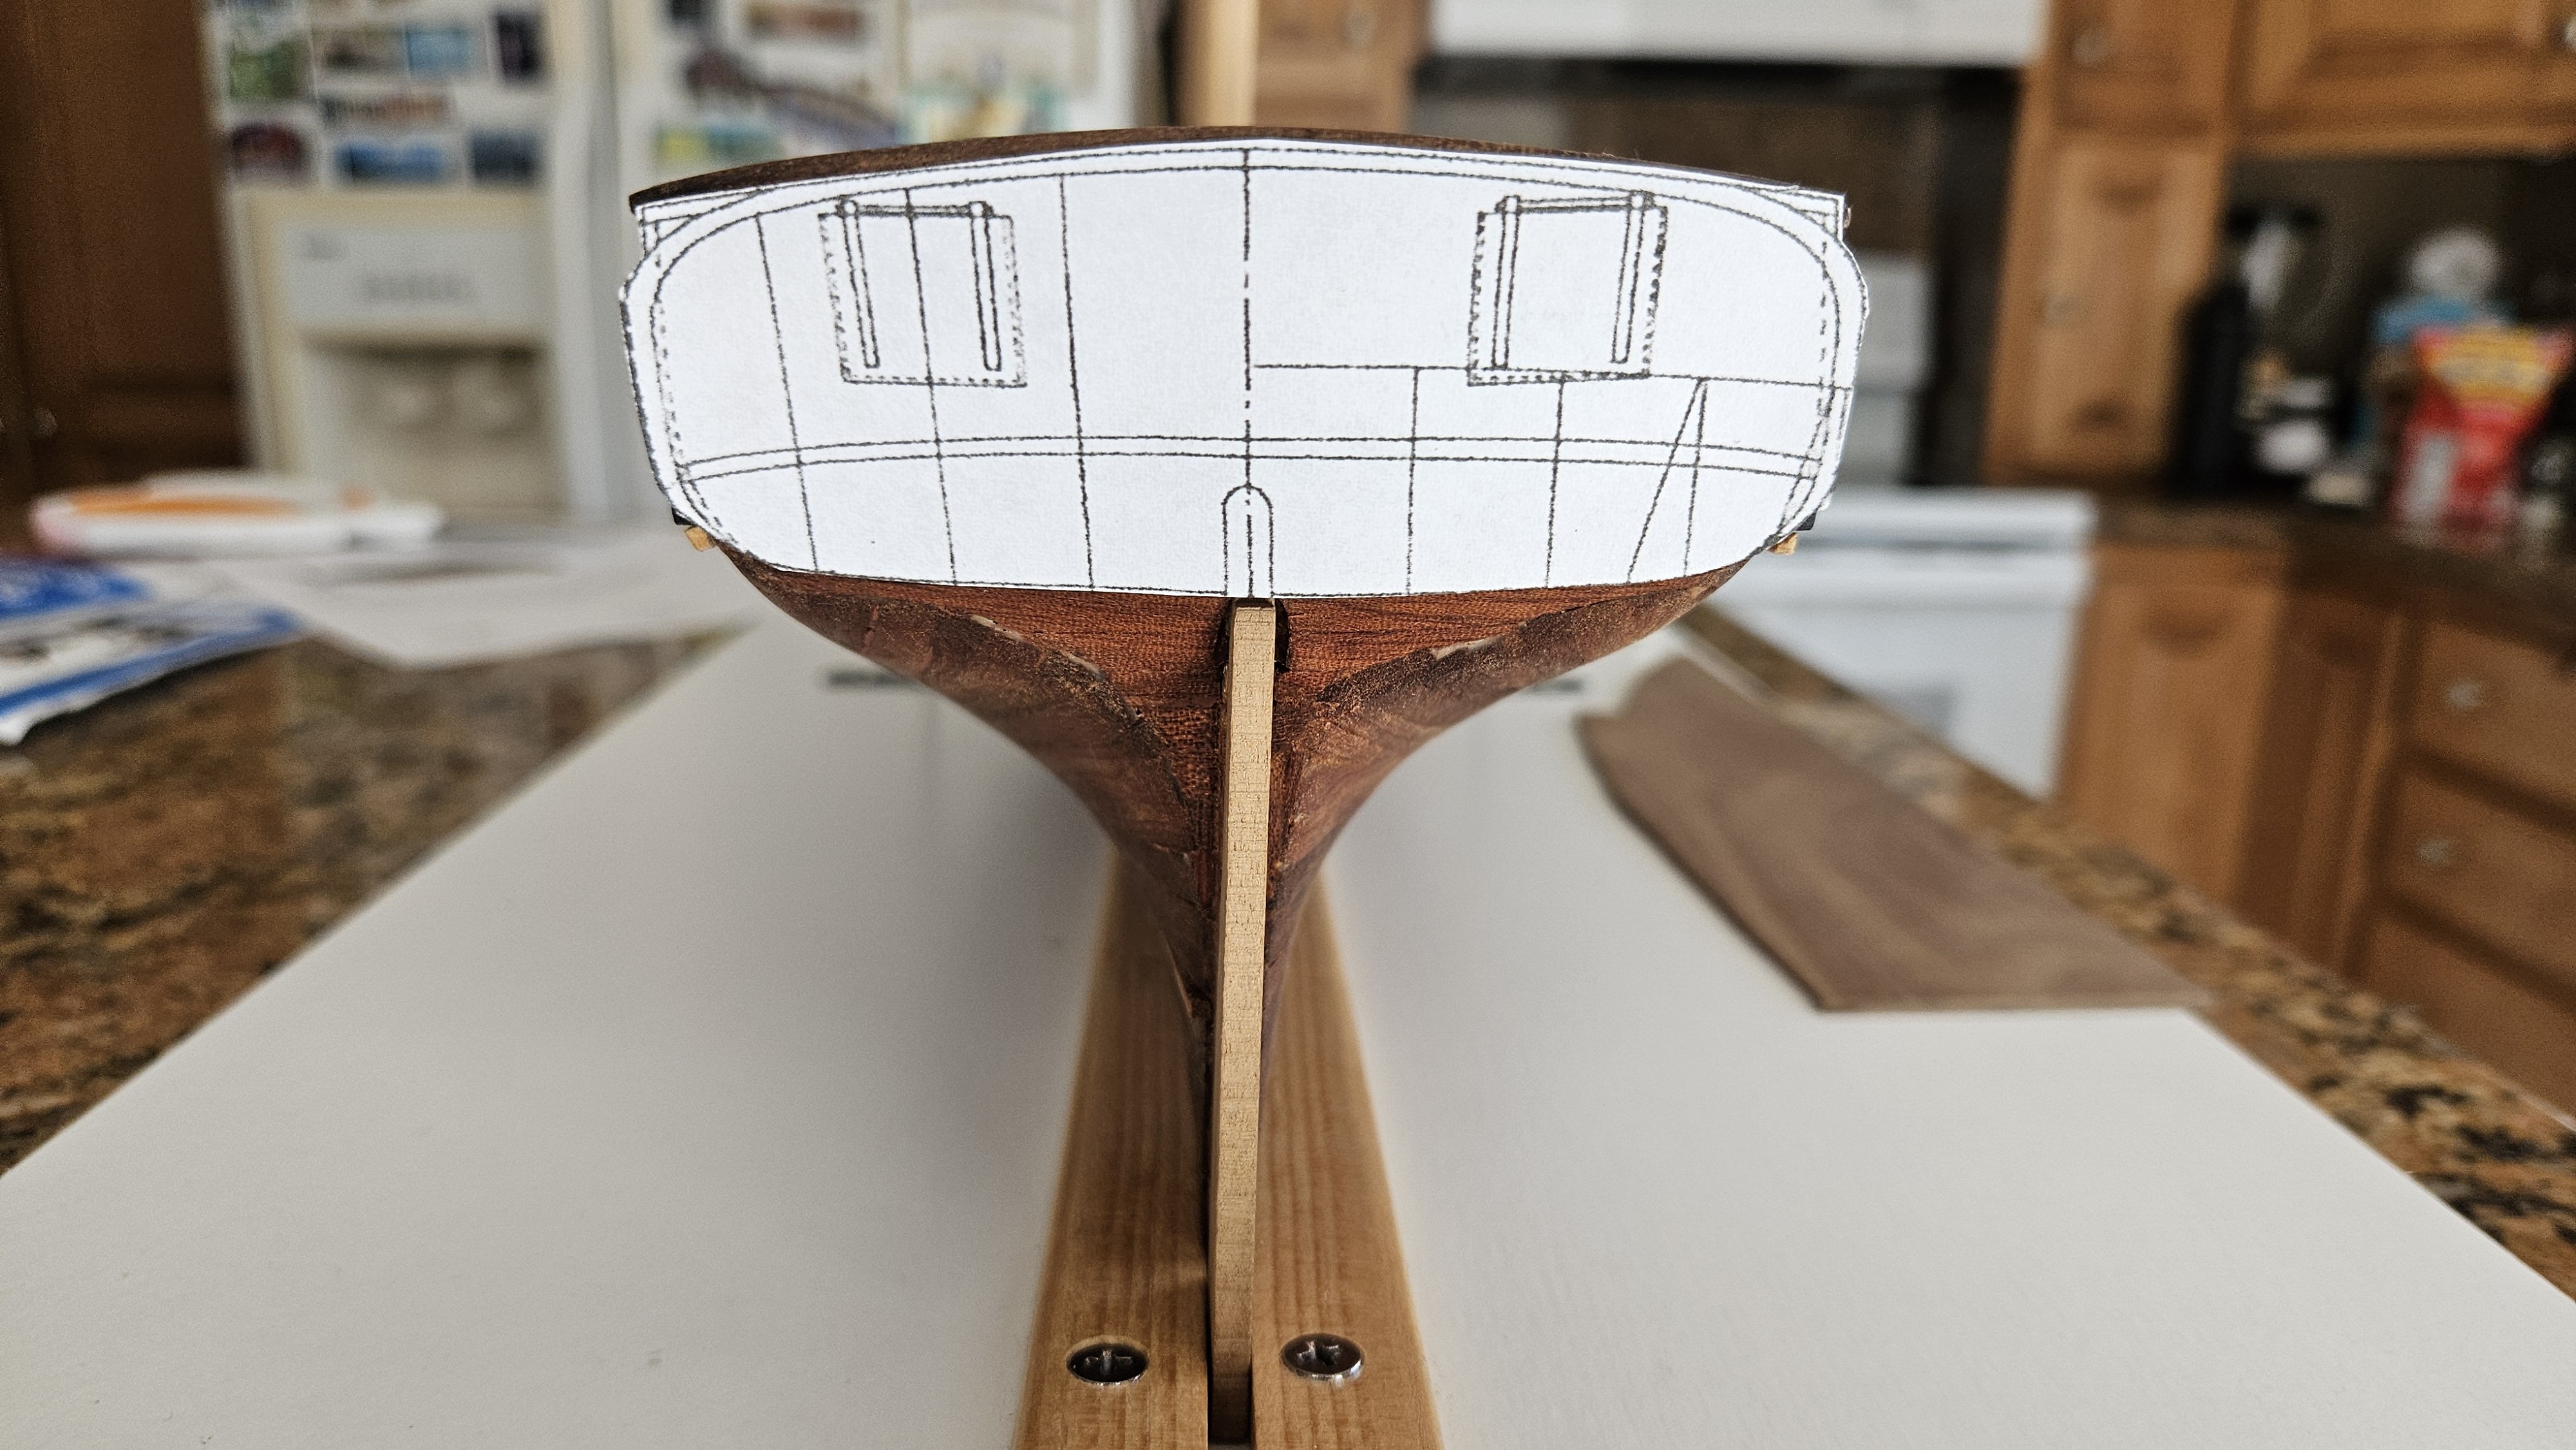
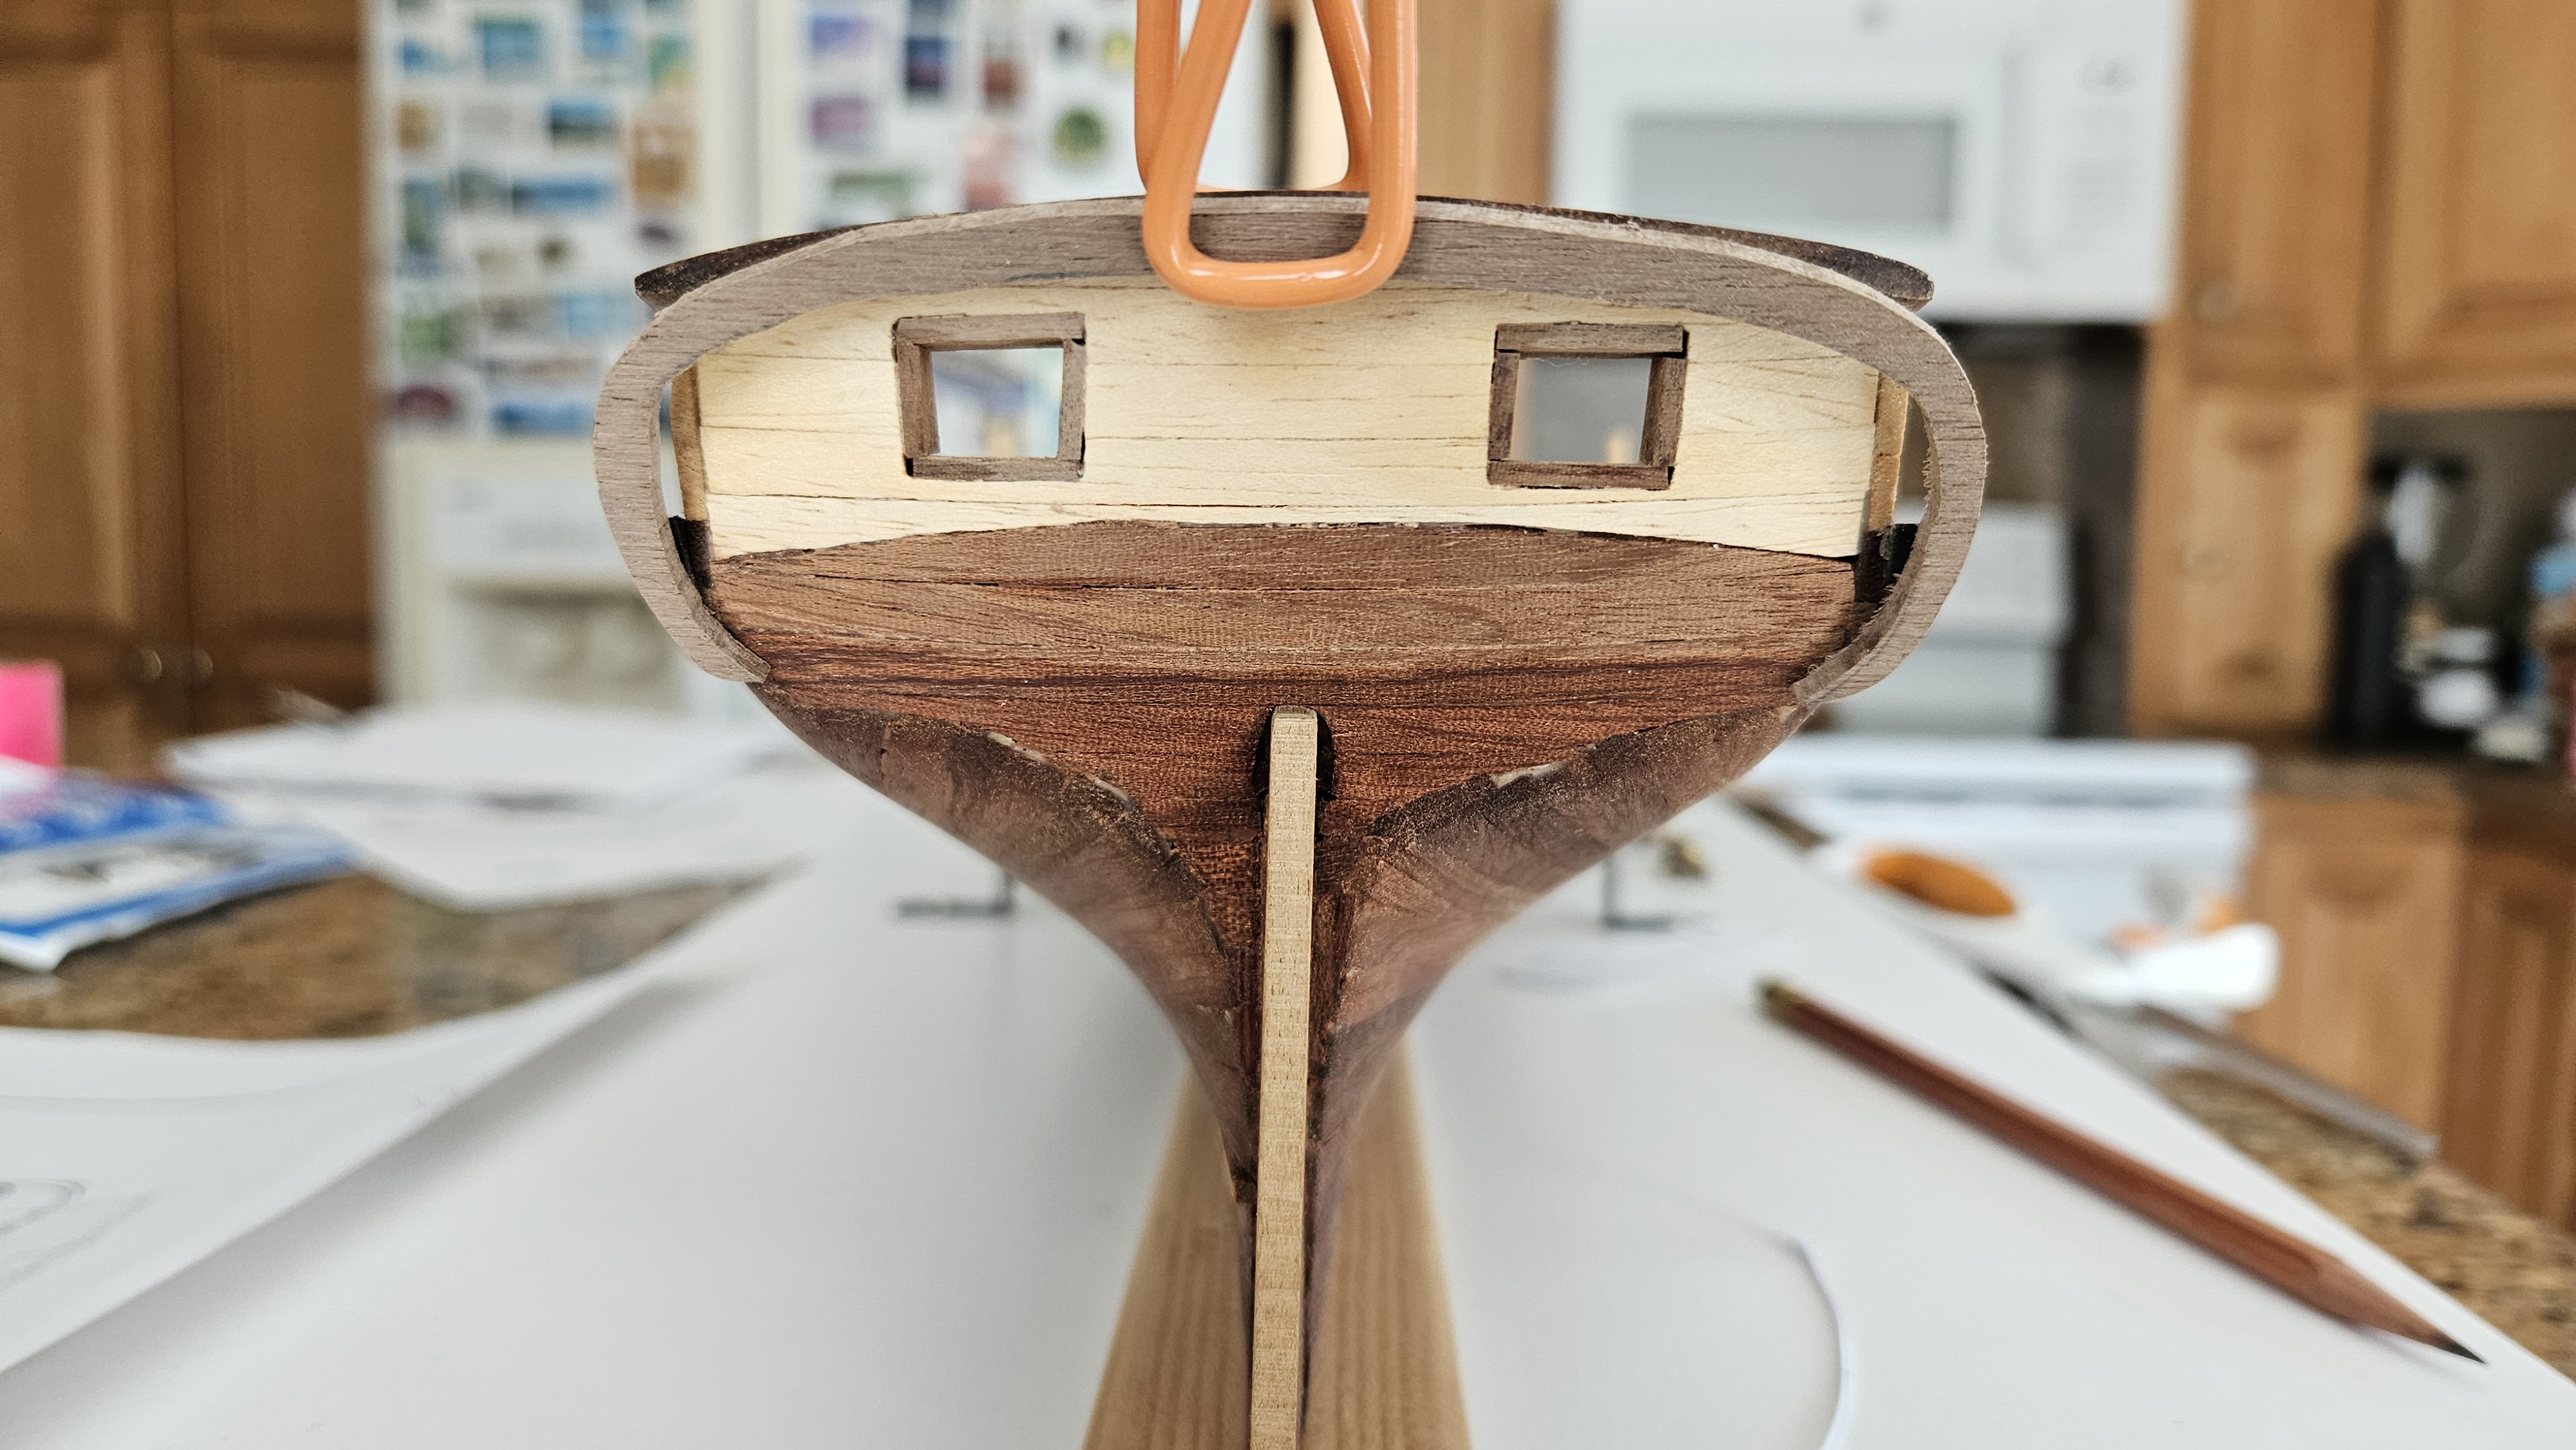
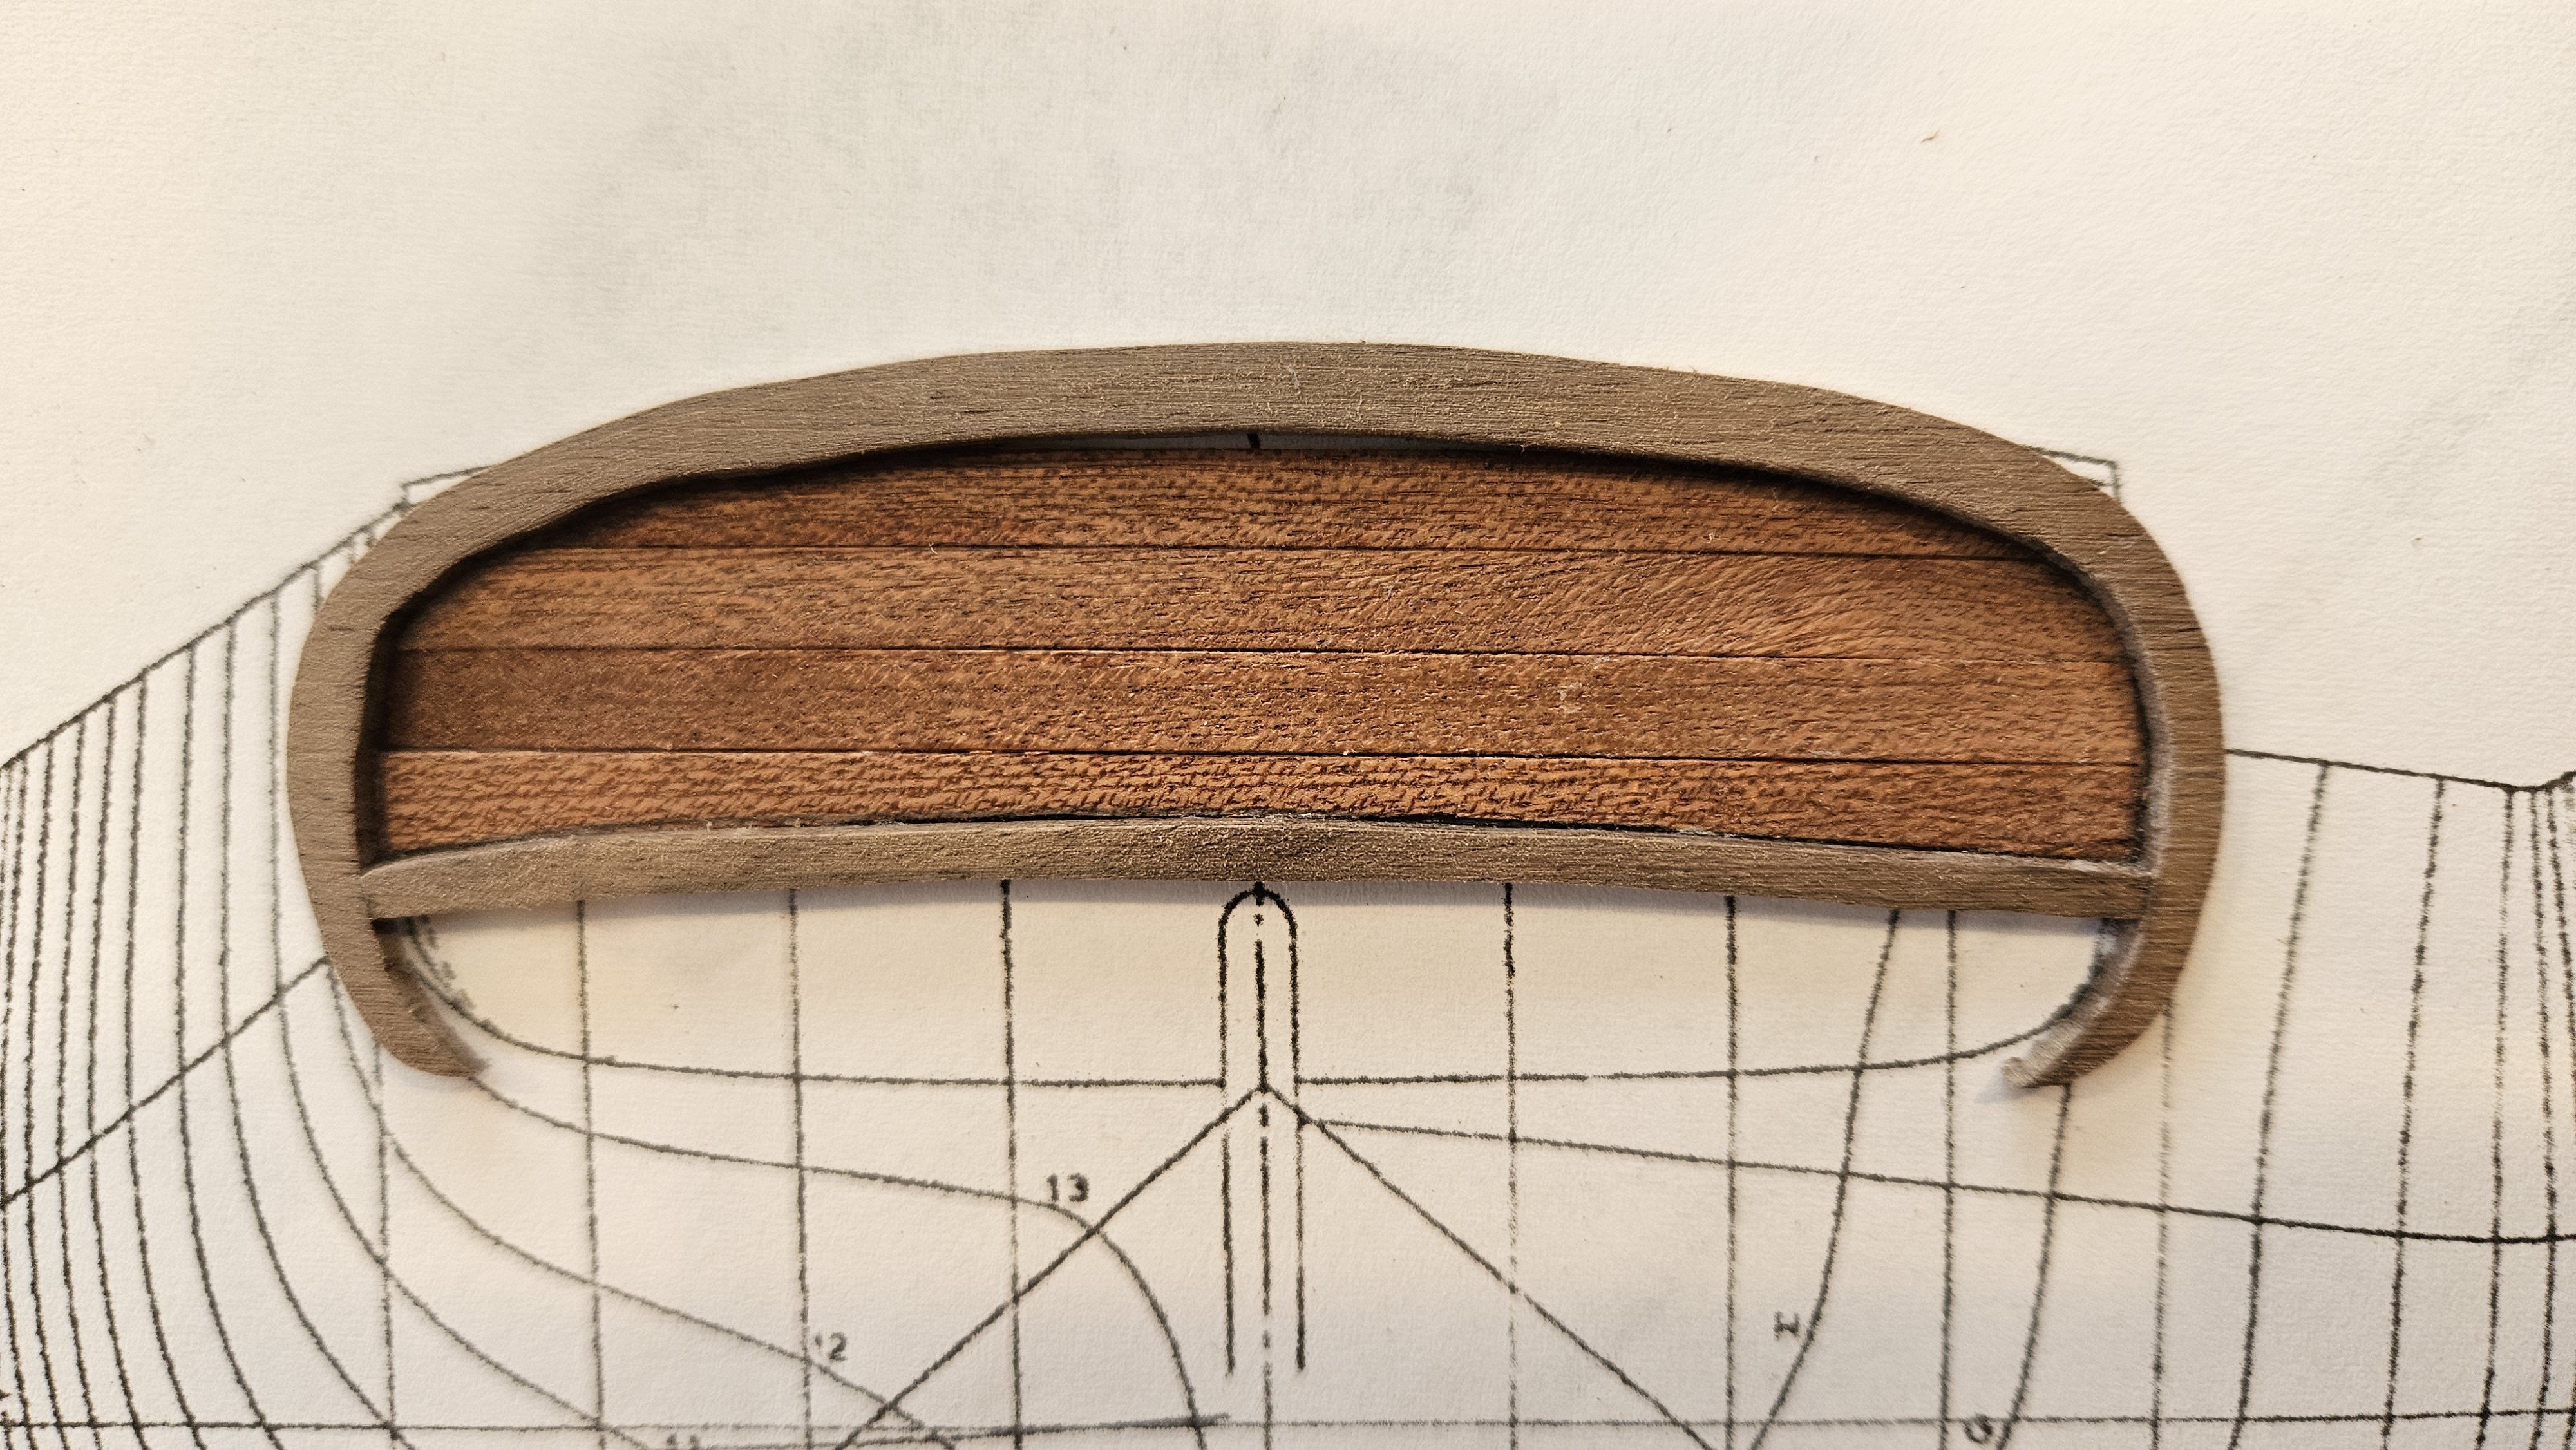
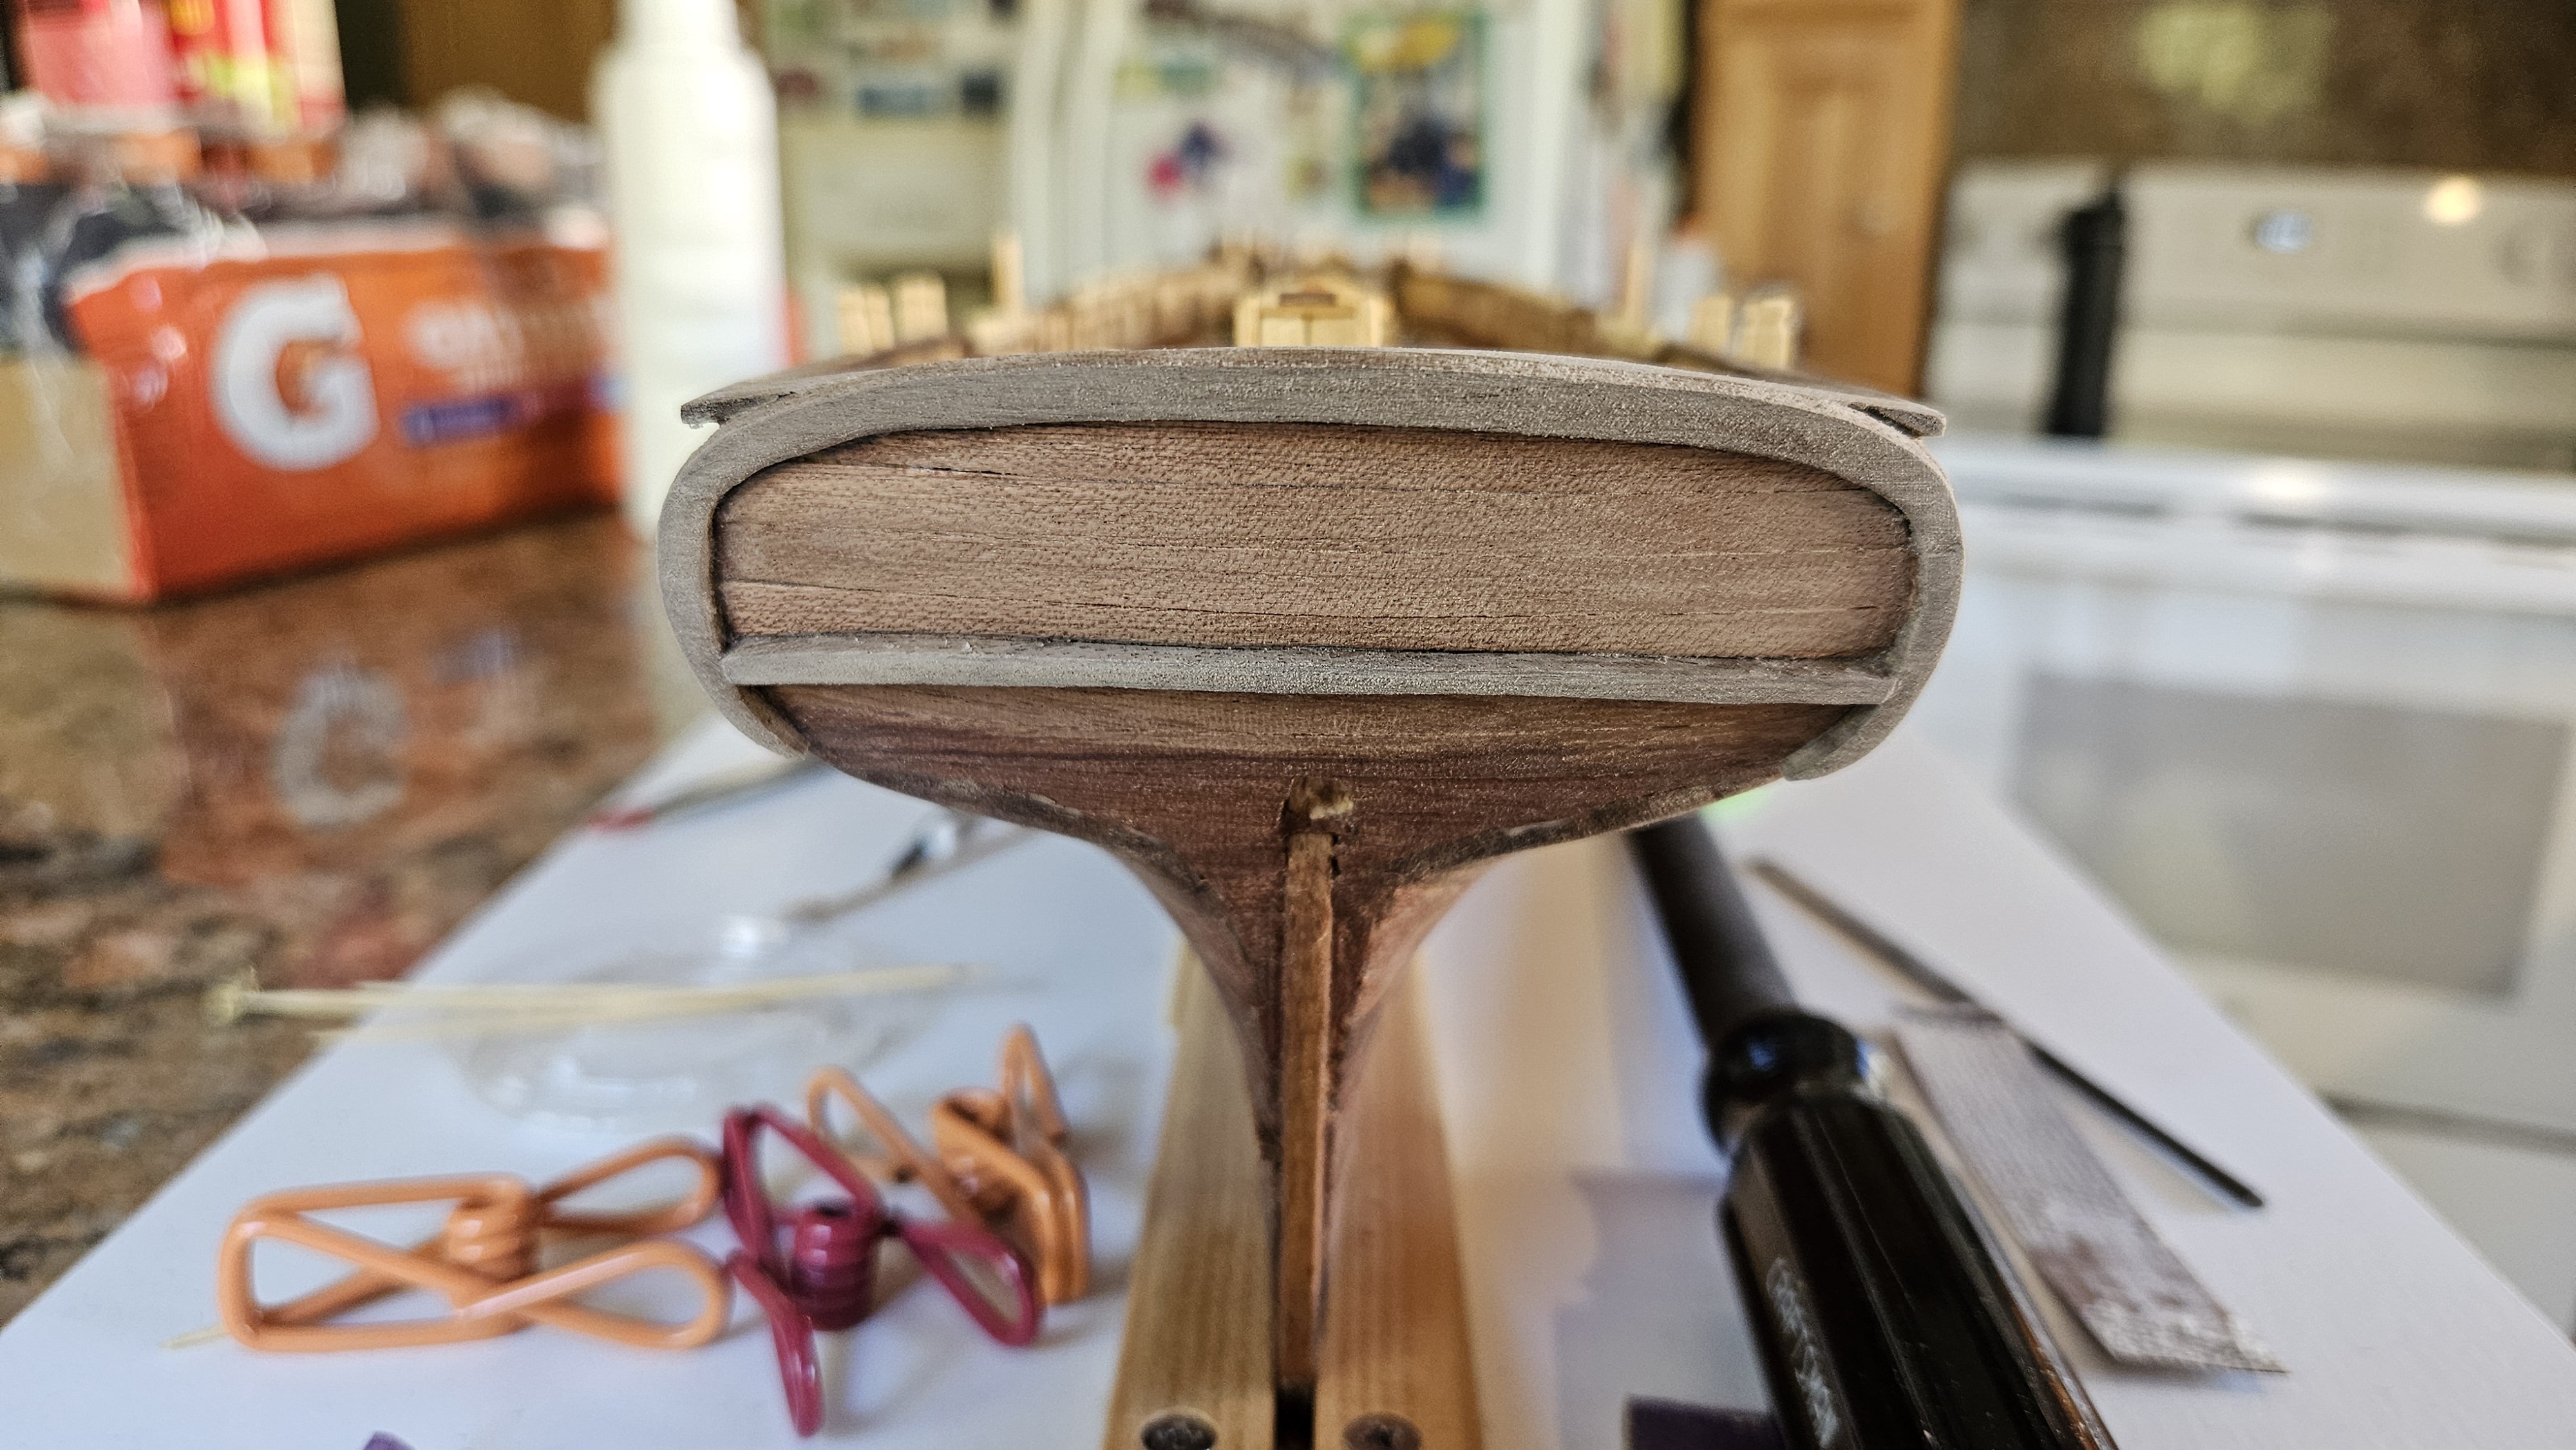
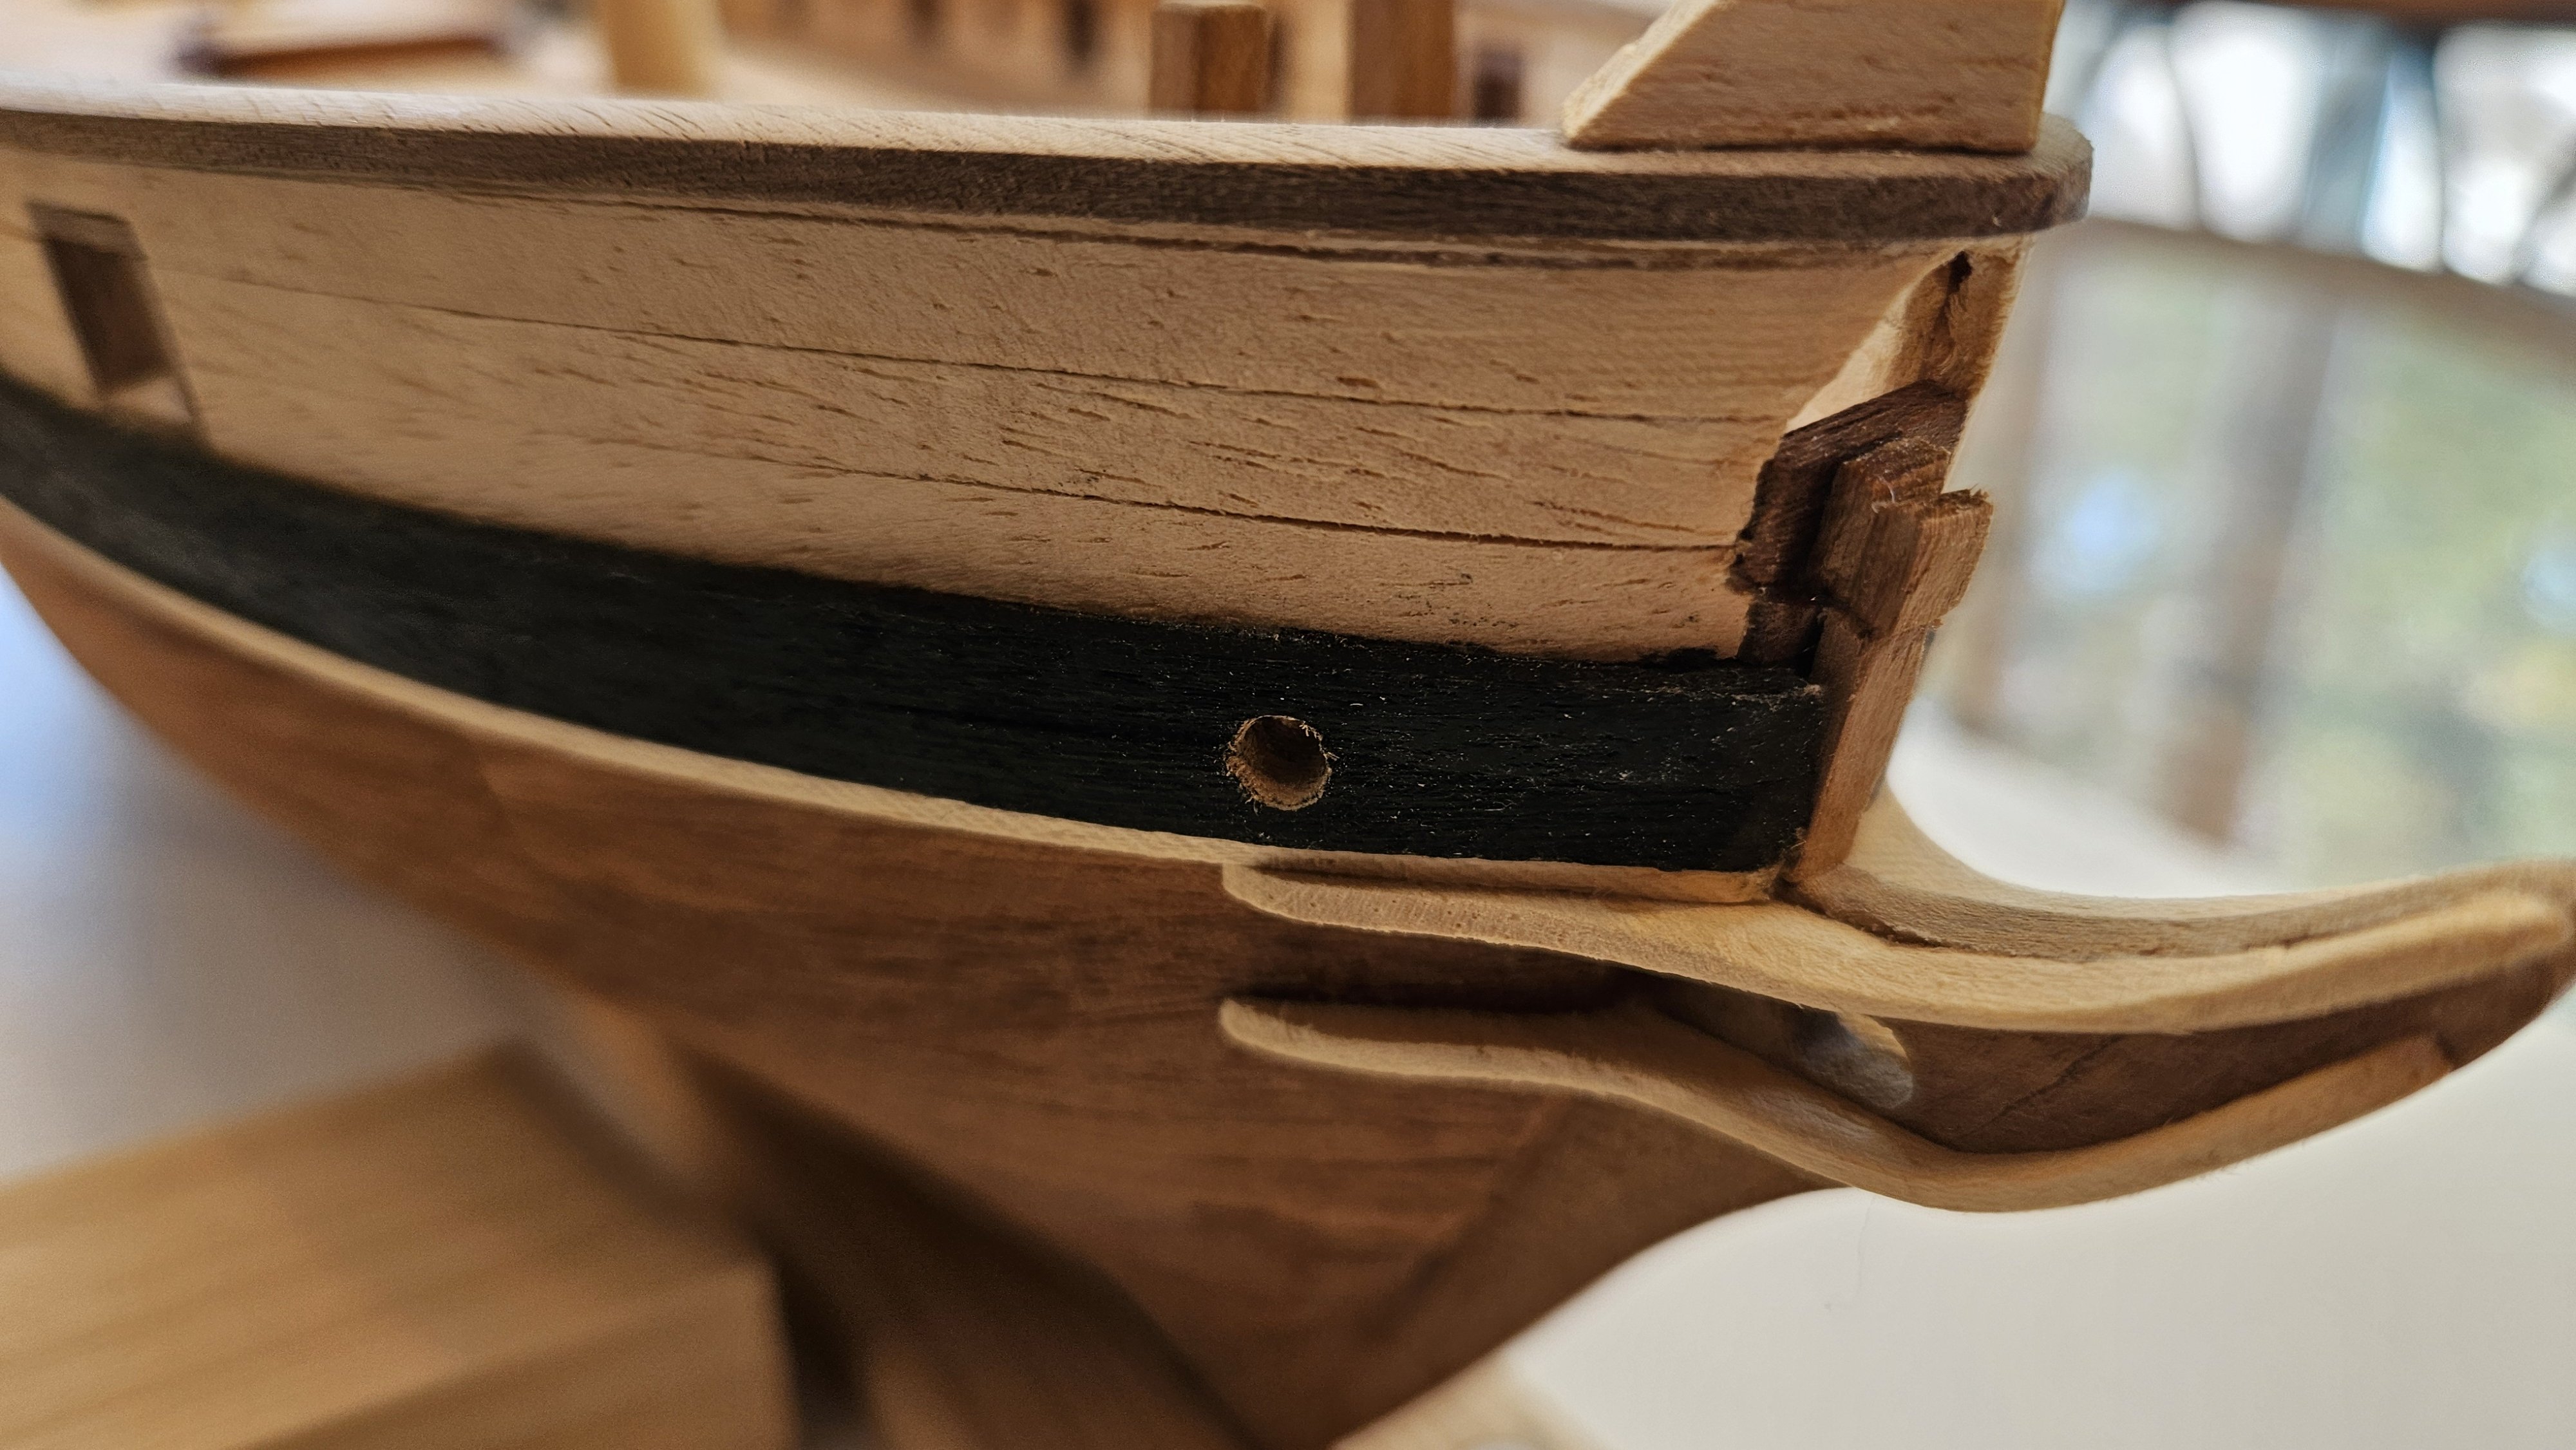
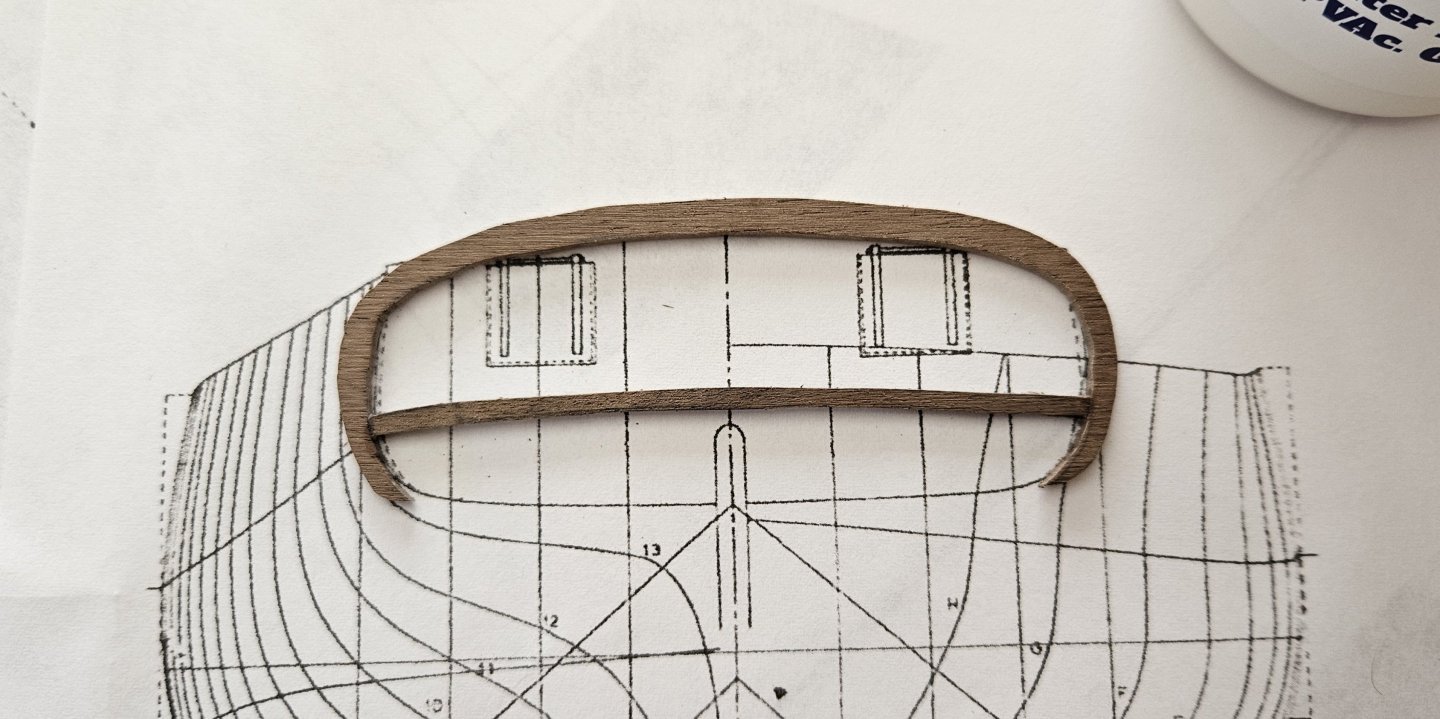
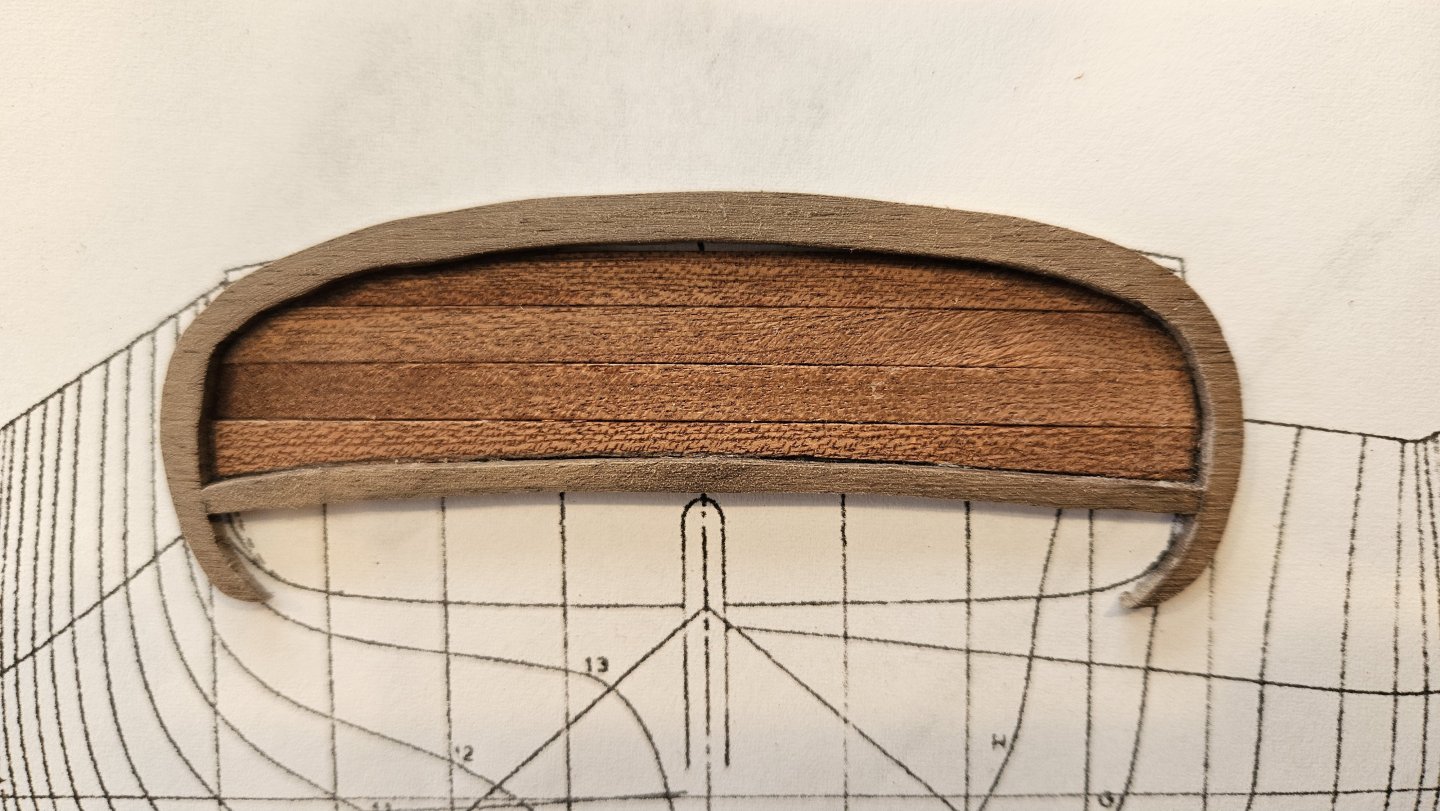
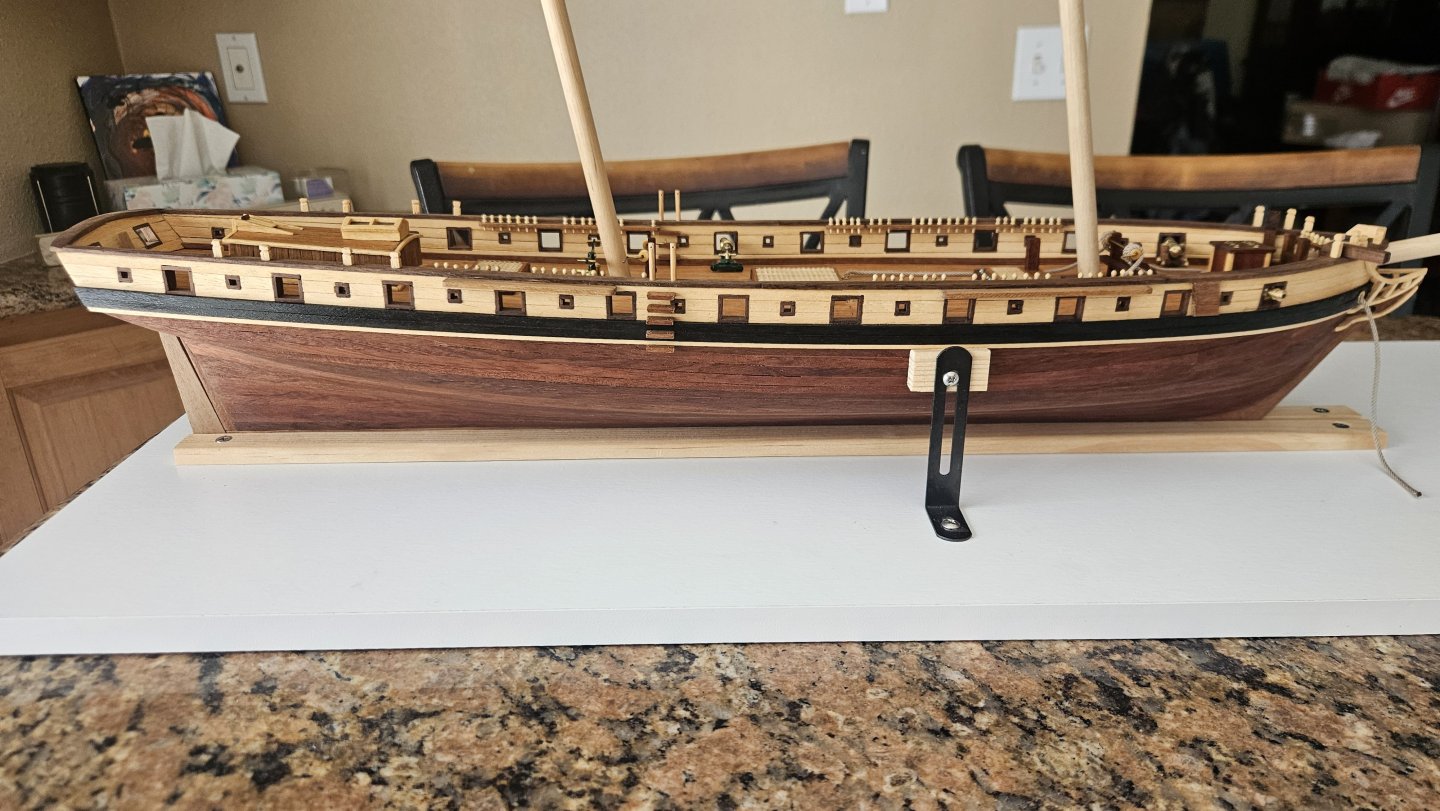
 Trying to get the transom stern close to correct may be the most challenging project to date. We'll give Chapelle and the Royal Navy the nod as far as what she should look like. So we start with: A little scaling with the copier... Scroll saw and test fit... Building out to plan... Creative Clamping 101... (Good thing the mooring bitts are serviceable!) Et voila! (I do realize the port gunport lid is too small. If it wasn't for rework...) Thanks for checking things out. Doesn't seem to stick up quite as high as the plans and doesn't seem to be as thin, but it does seem to match the build style to date and is much closer than Constructo intended. I am pleased - we'll see how she finishes with Danish Oil. Steve
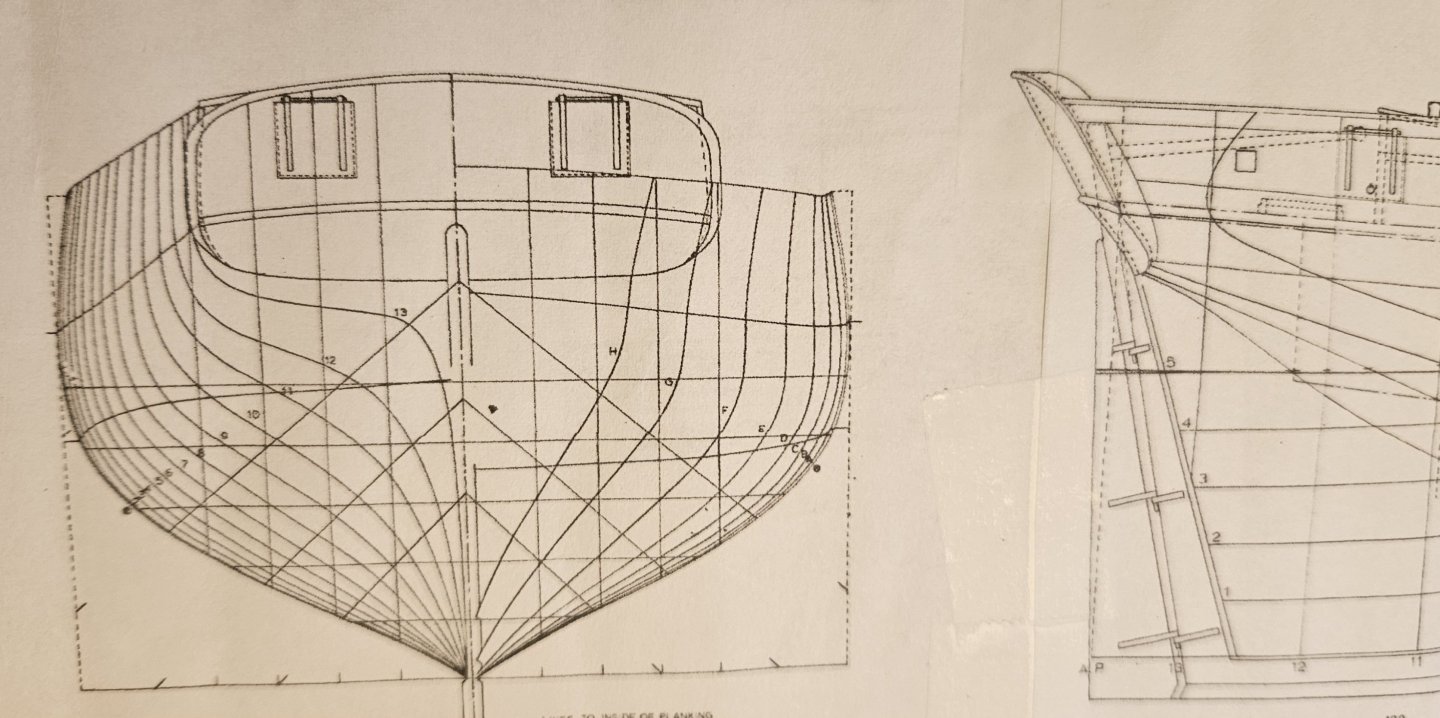


-
Wow Chris! Hard to believe this is card! The dimensionality (is that a word?) is just amazing. Very nice work. Steve
- 146 replies
-
- 5
-

-
- Speeljacht
- Seahorse
- (and 2 more)
-
That 3D vibe is awesome! Nicely done sir - paint looks perfect! Steve
- 146 replies
-
- 5
-
-
- Speeljacht
- Seahorse
- (and 2 more)
-
That is gonna be a challenge!! Amazing cutting so far. If they don't match up perfectly and some card shows on the backside do you color (touch up) with colored pencils or something or just let it go? One of our wooden ship modellers did a card model and he said it was so much more challenging than wood. I believe him. Great work Chris! Steve
- 146 replies
-
- 4
-
-
- Speeljacht
- Seahorse
- (and 2 more)
-
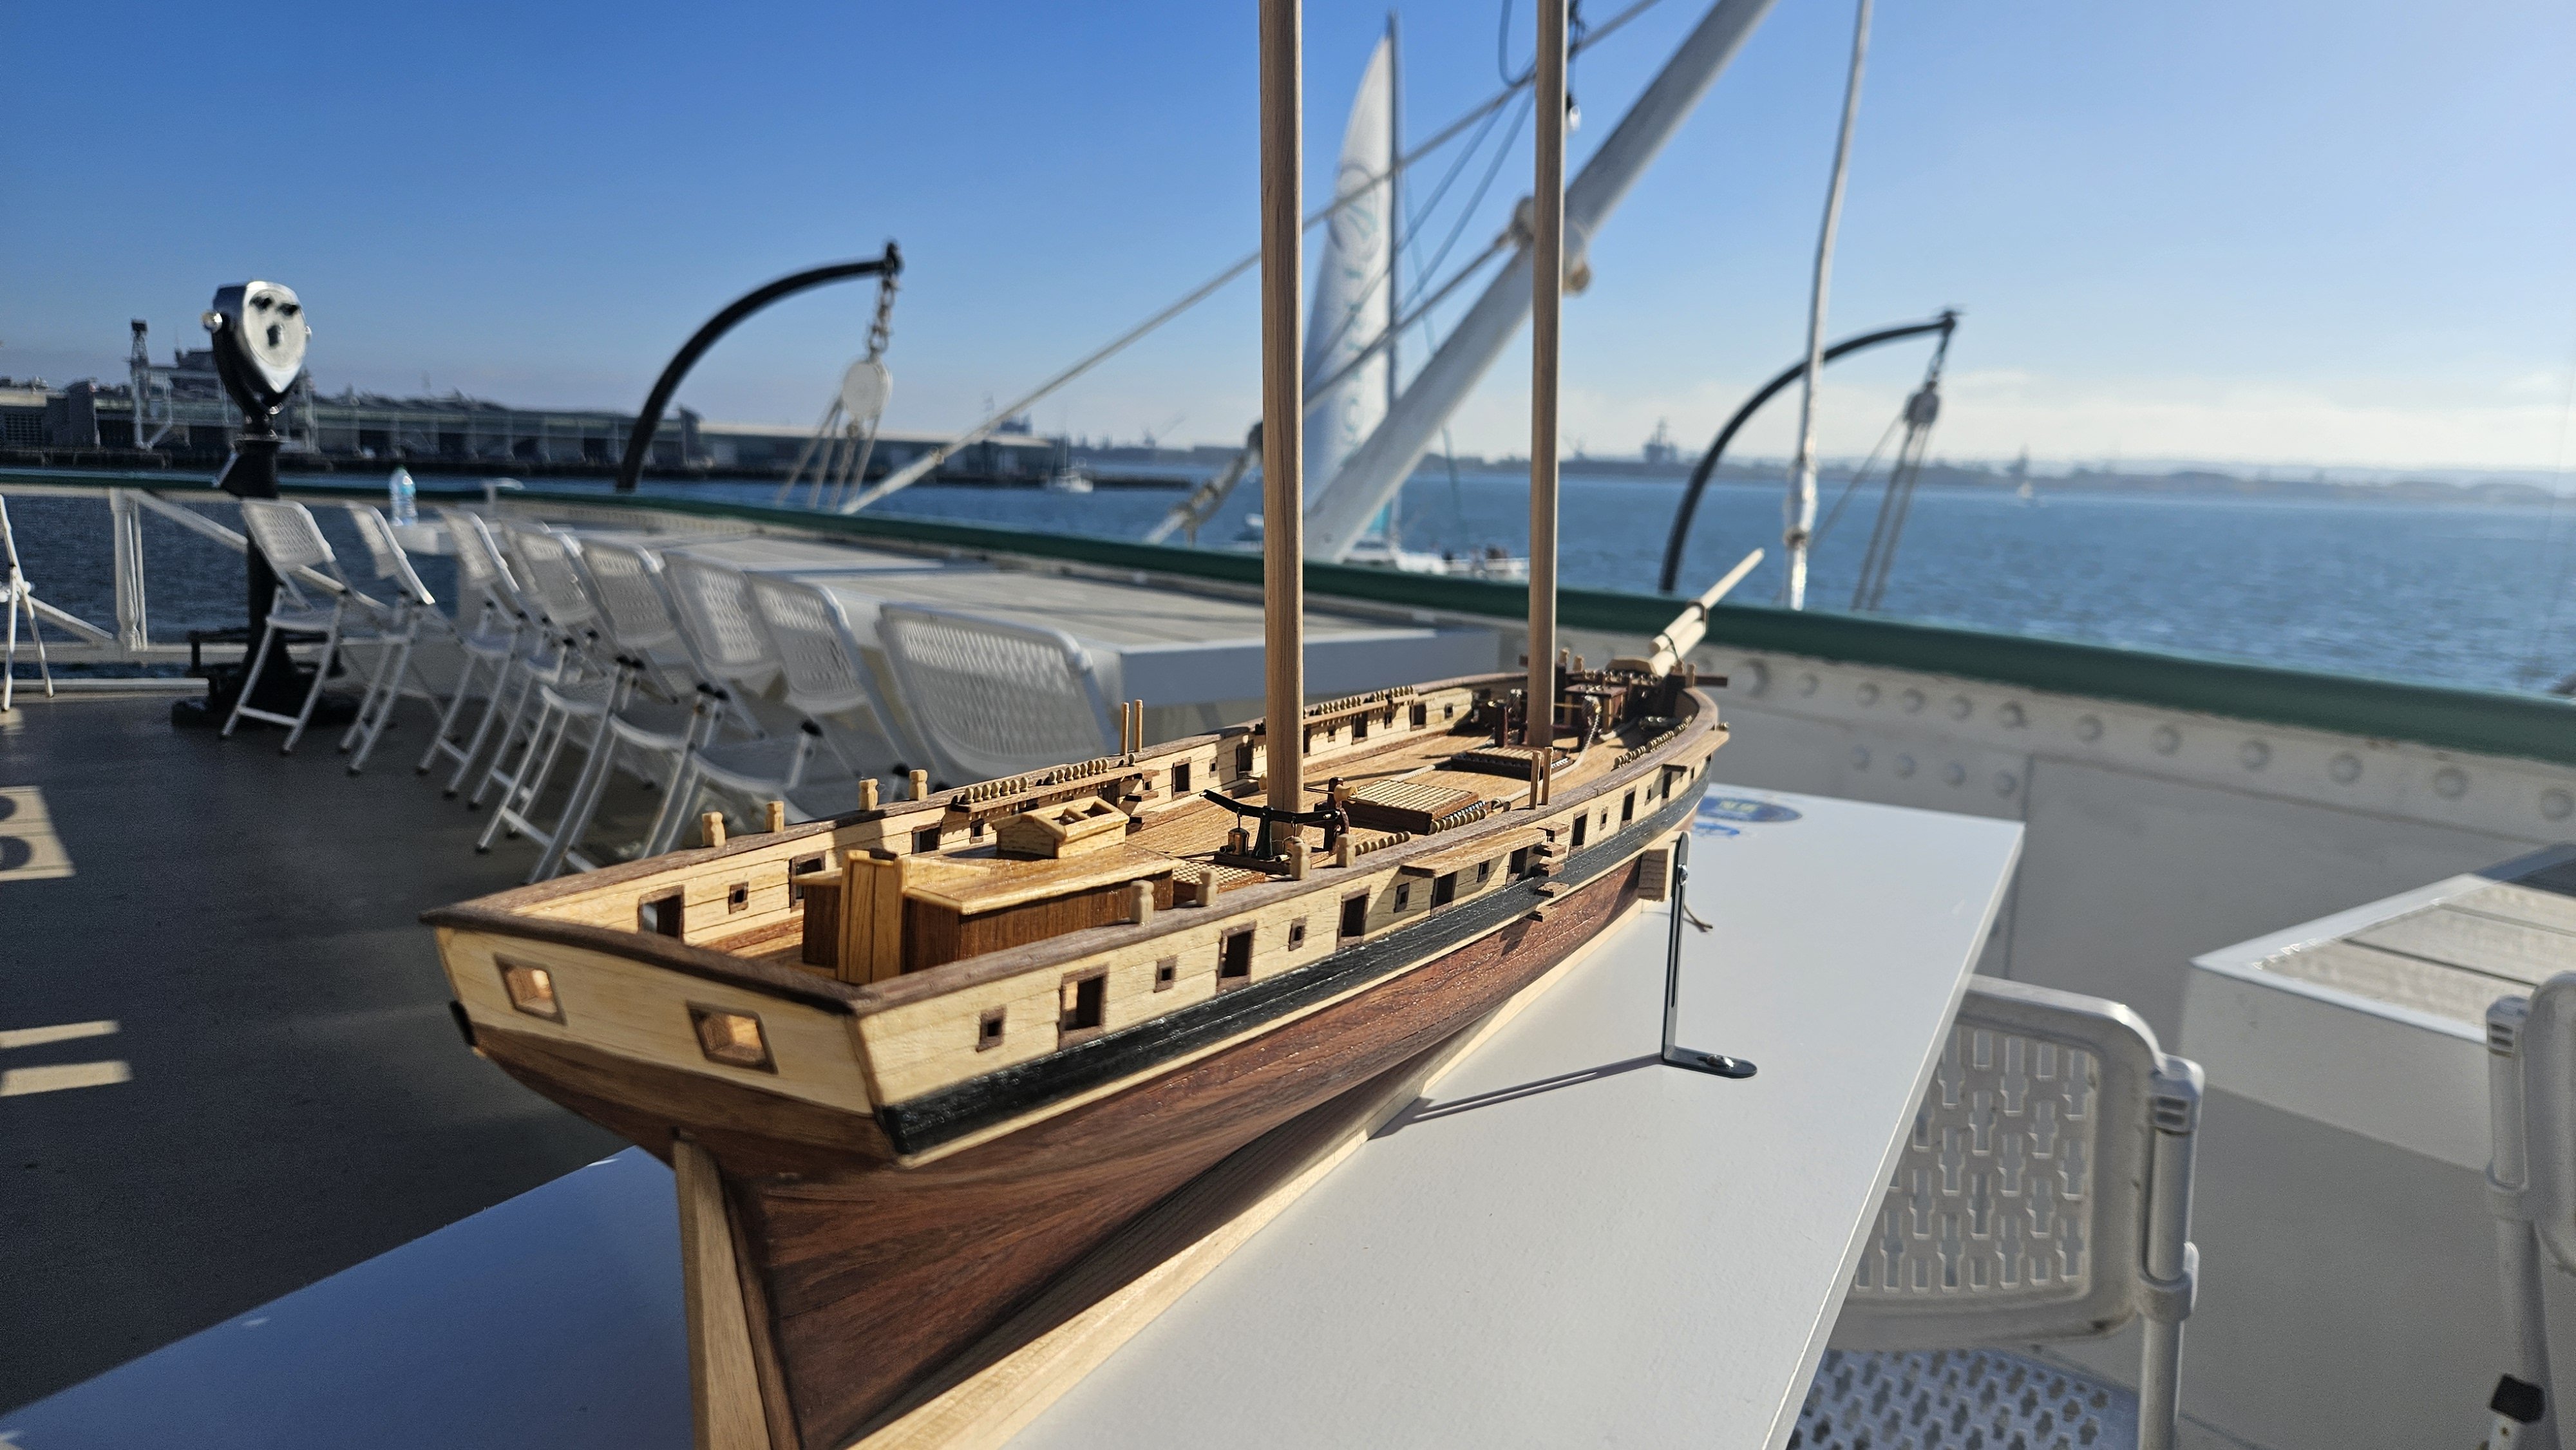
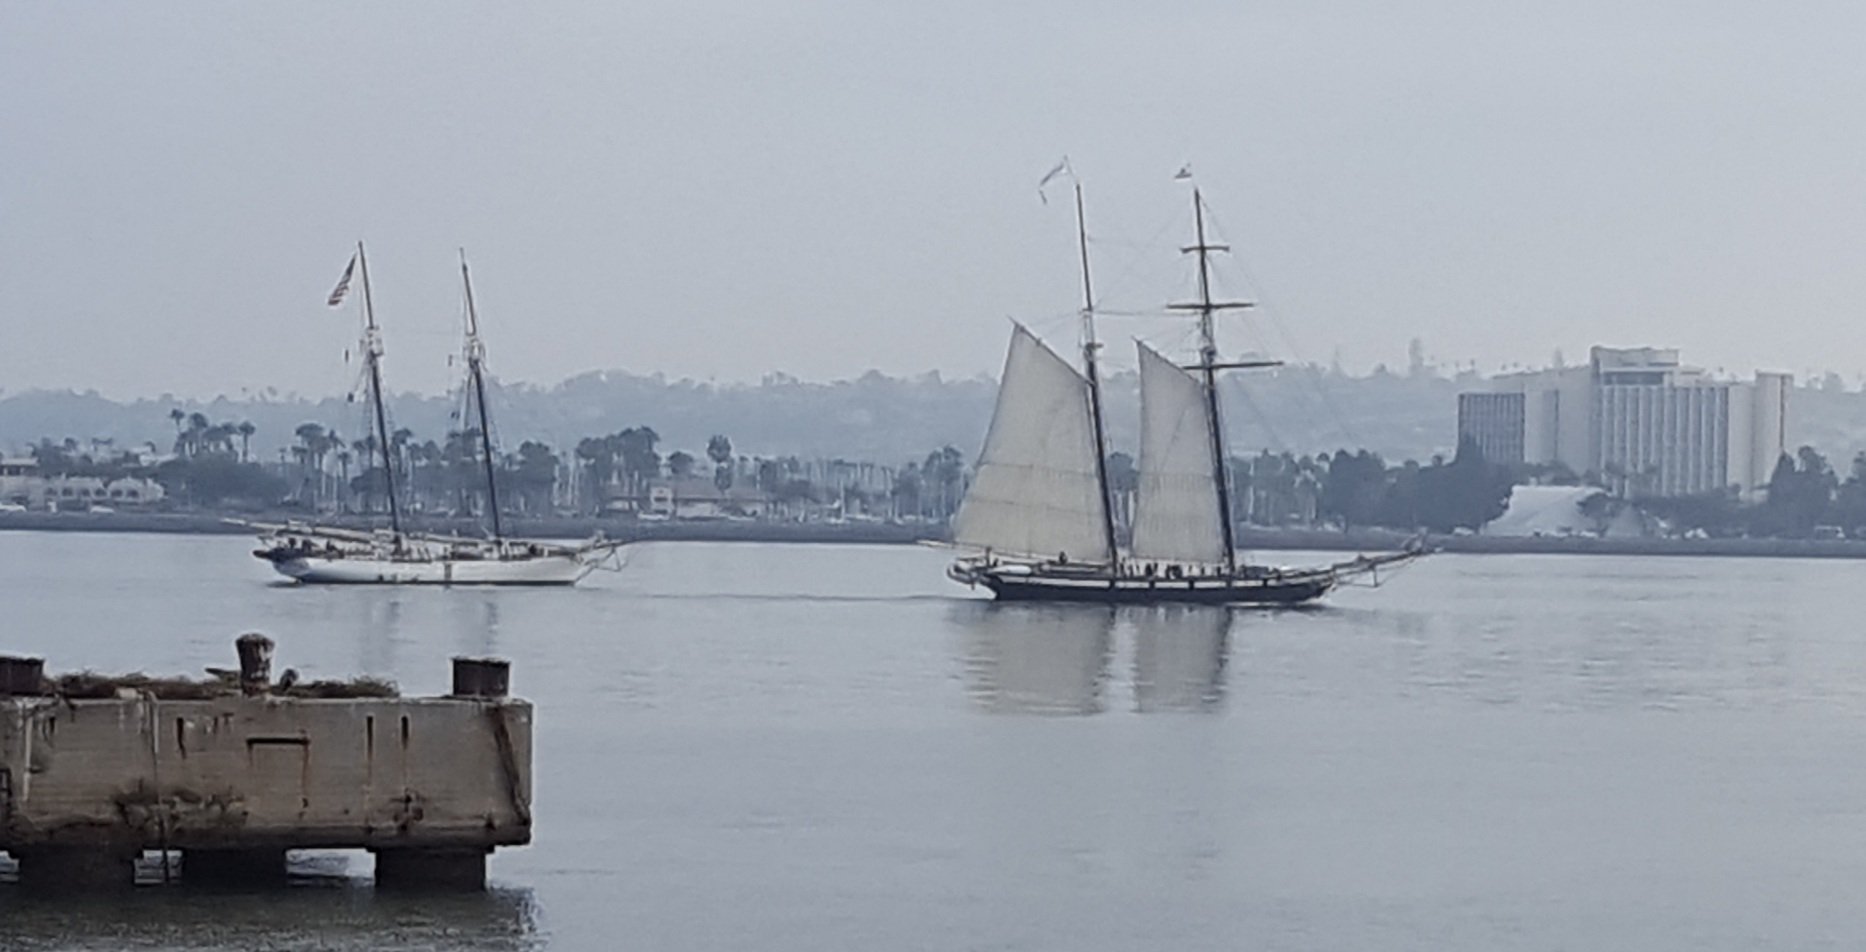
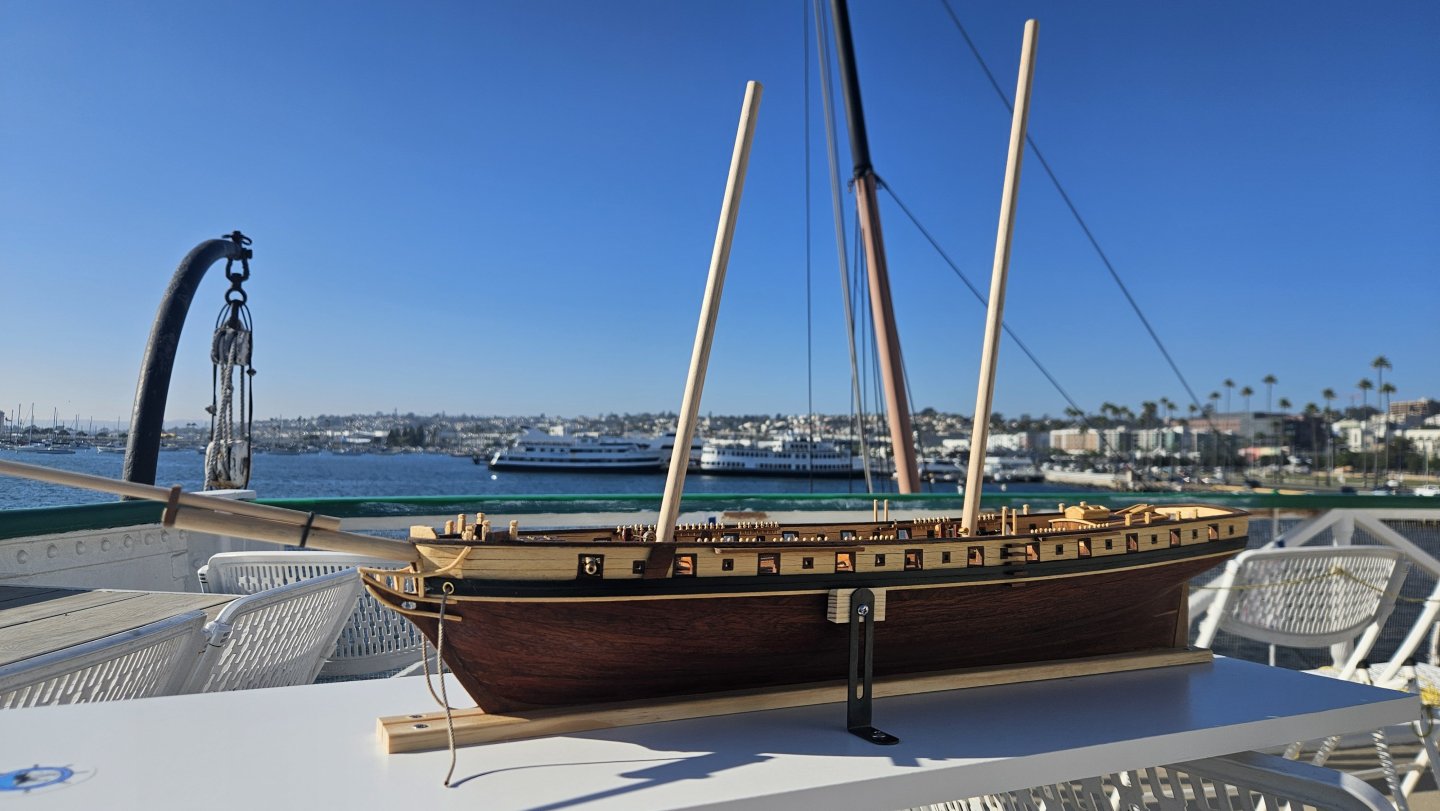
The Prince gets around. San Diego for the monthly club meeting in this case. I'll just leave these here 'cause the wood looks nice in the late afternoon sun! Stay tuned for a big change to the transom stern as the decor gets added soon!

-
Welcome aboard! Good group of people here to help as needed. Steve
-
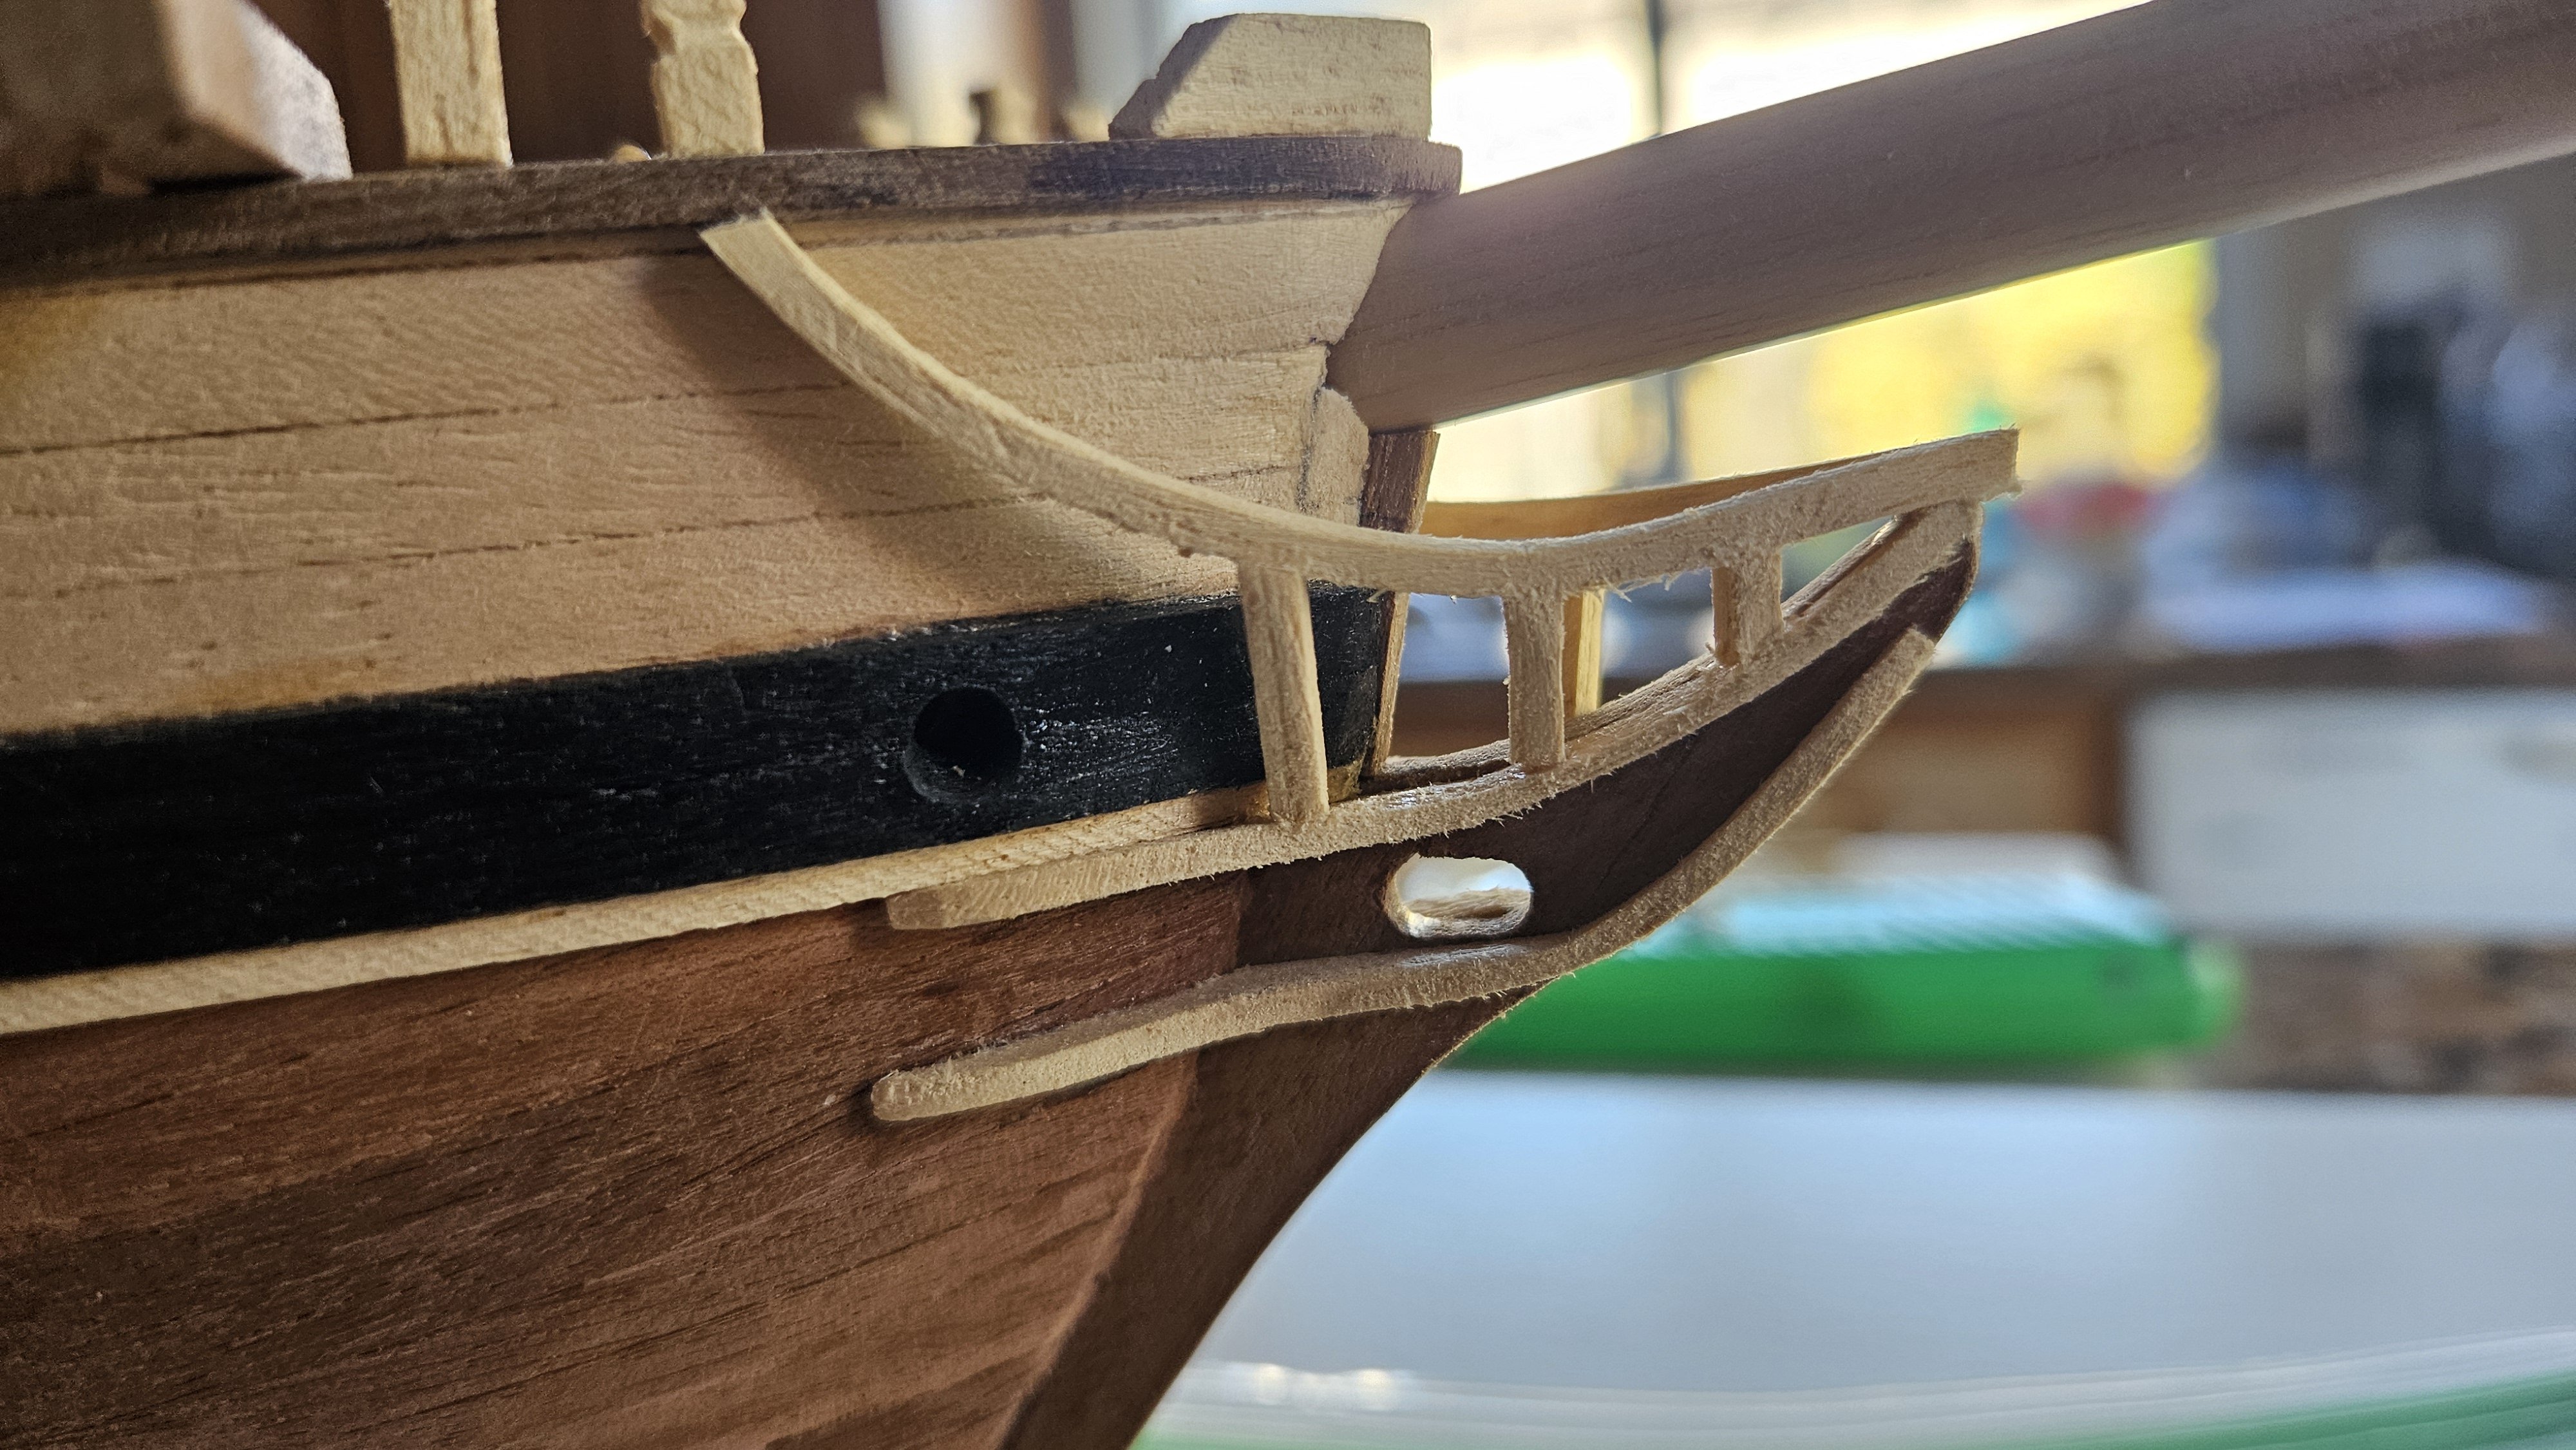
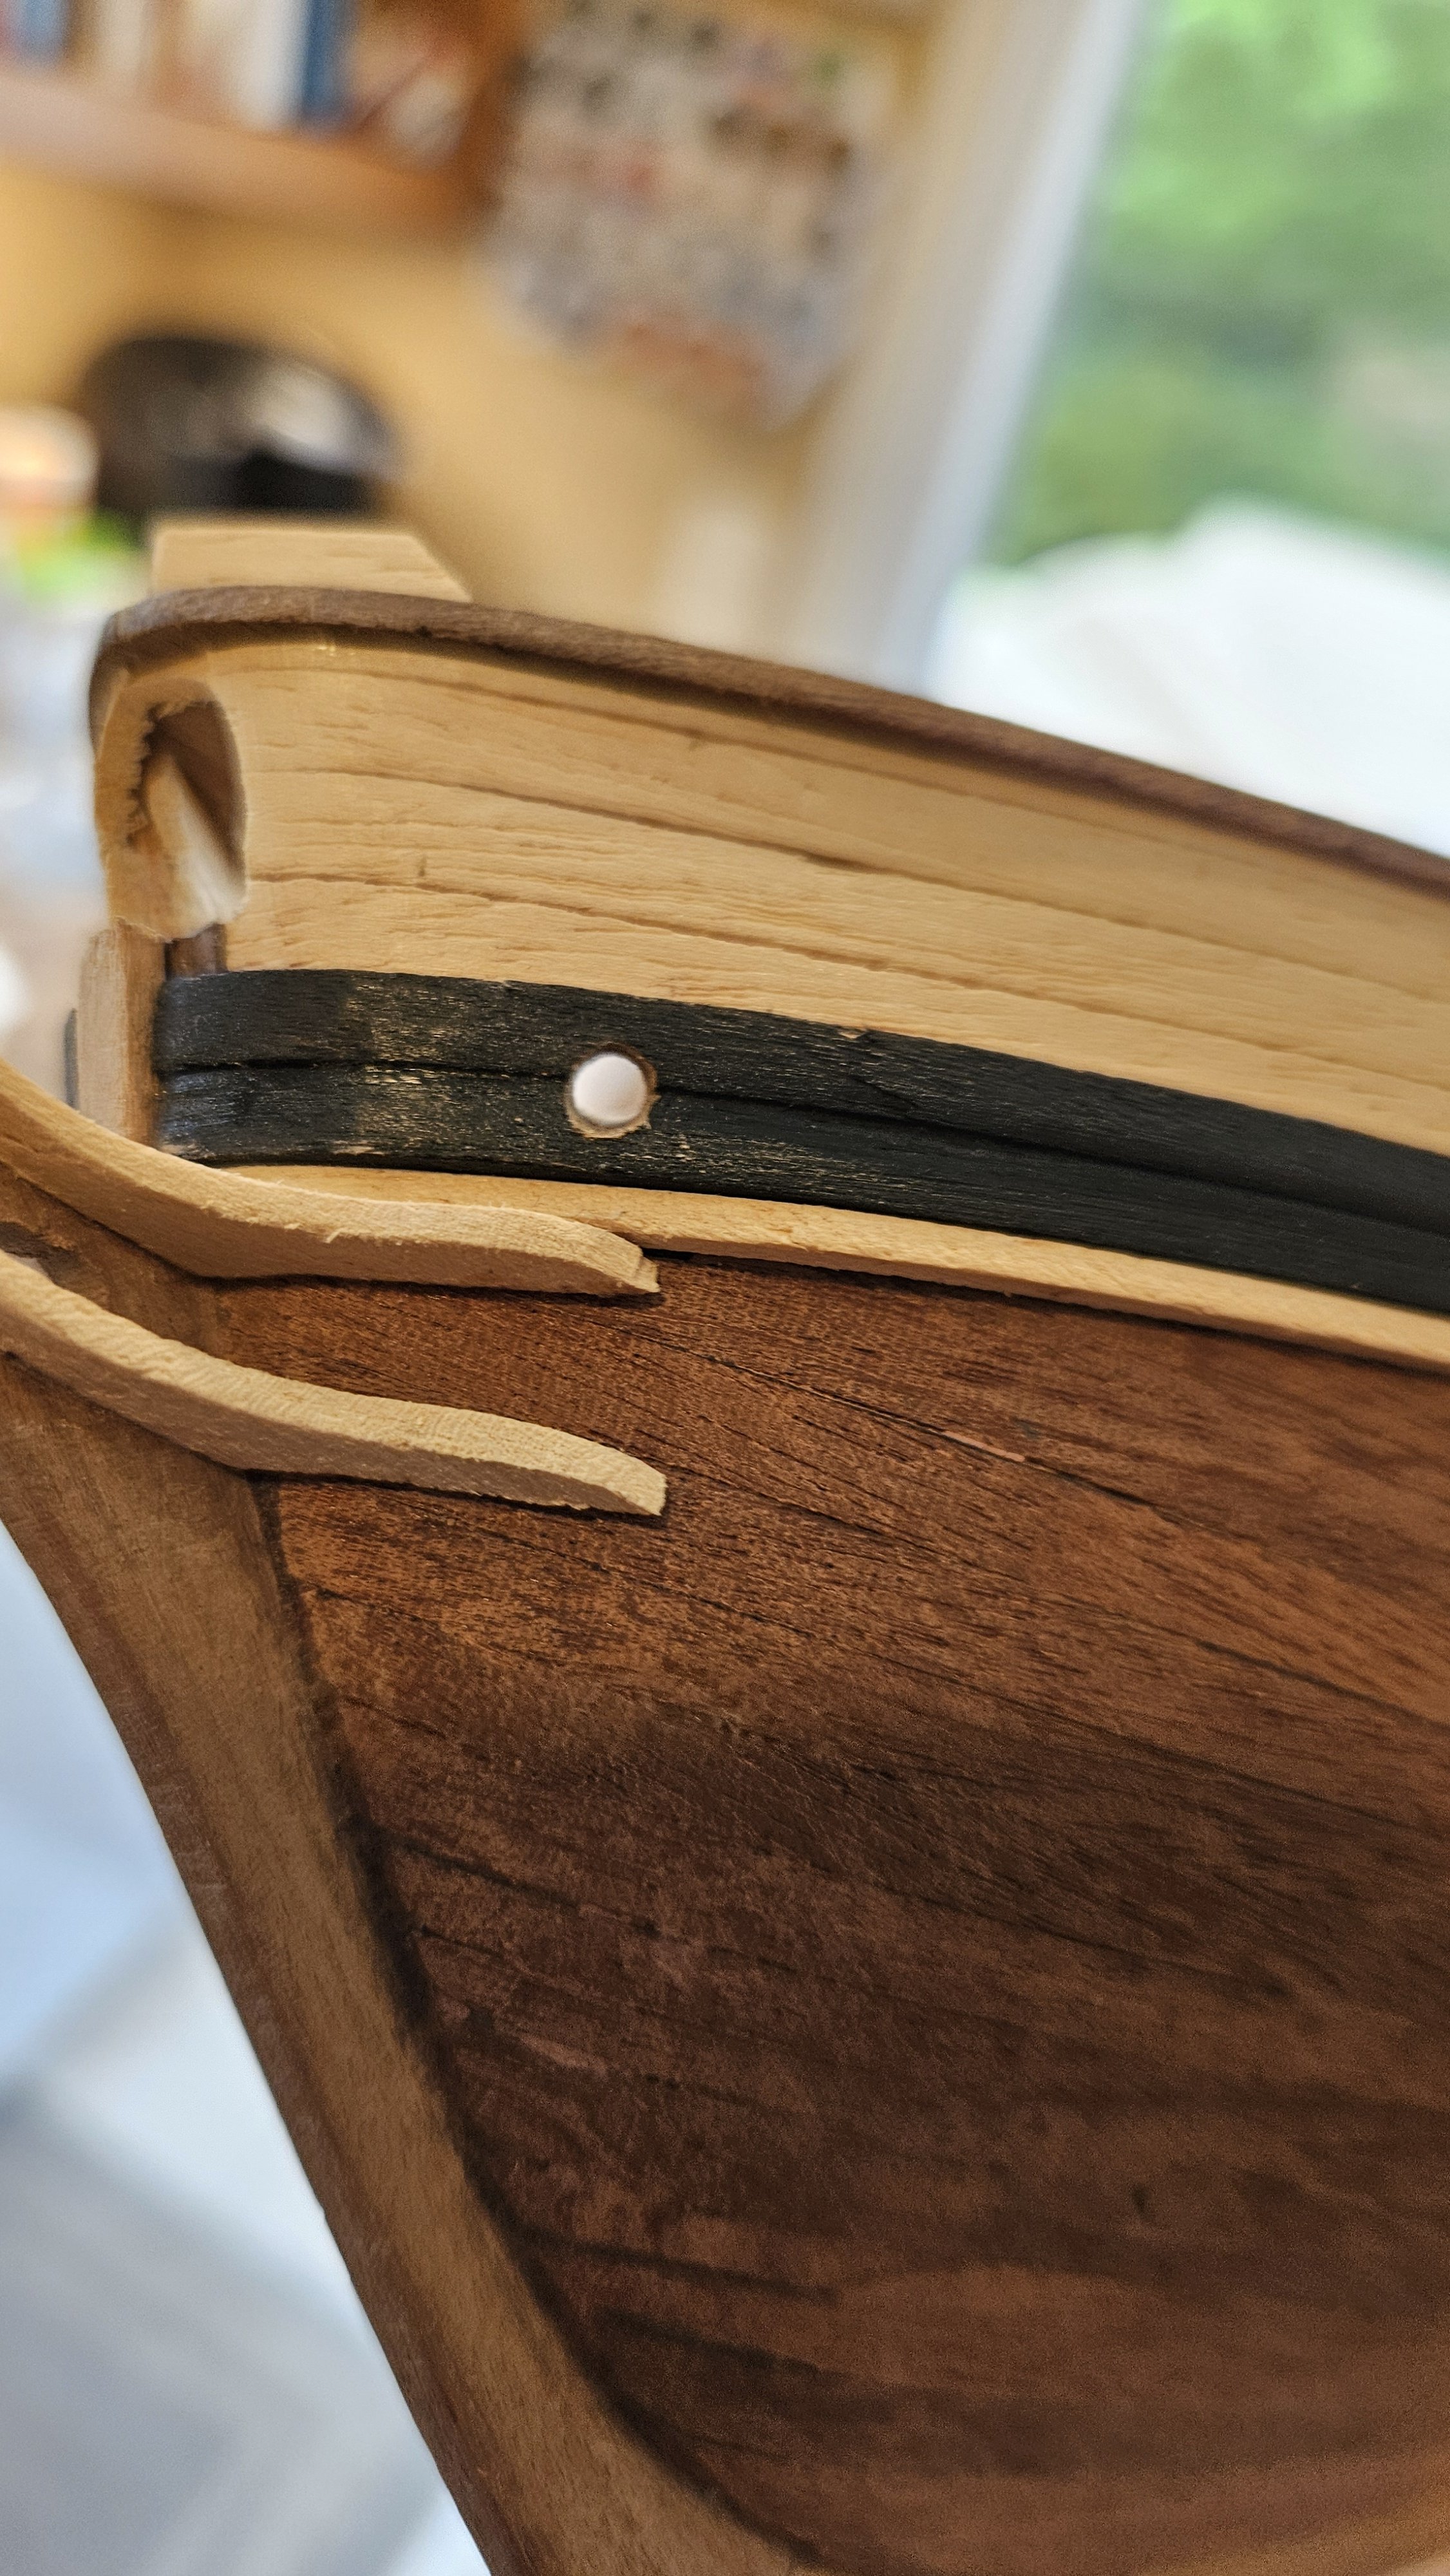
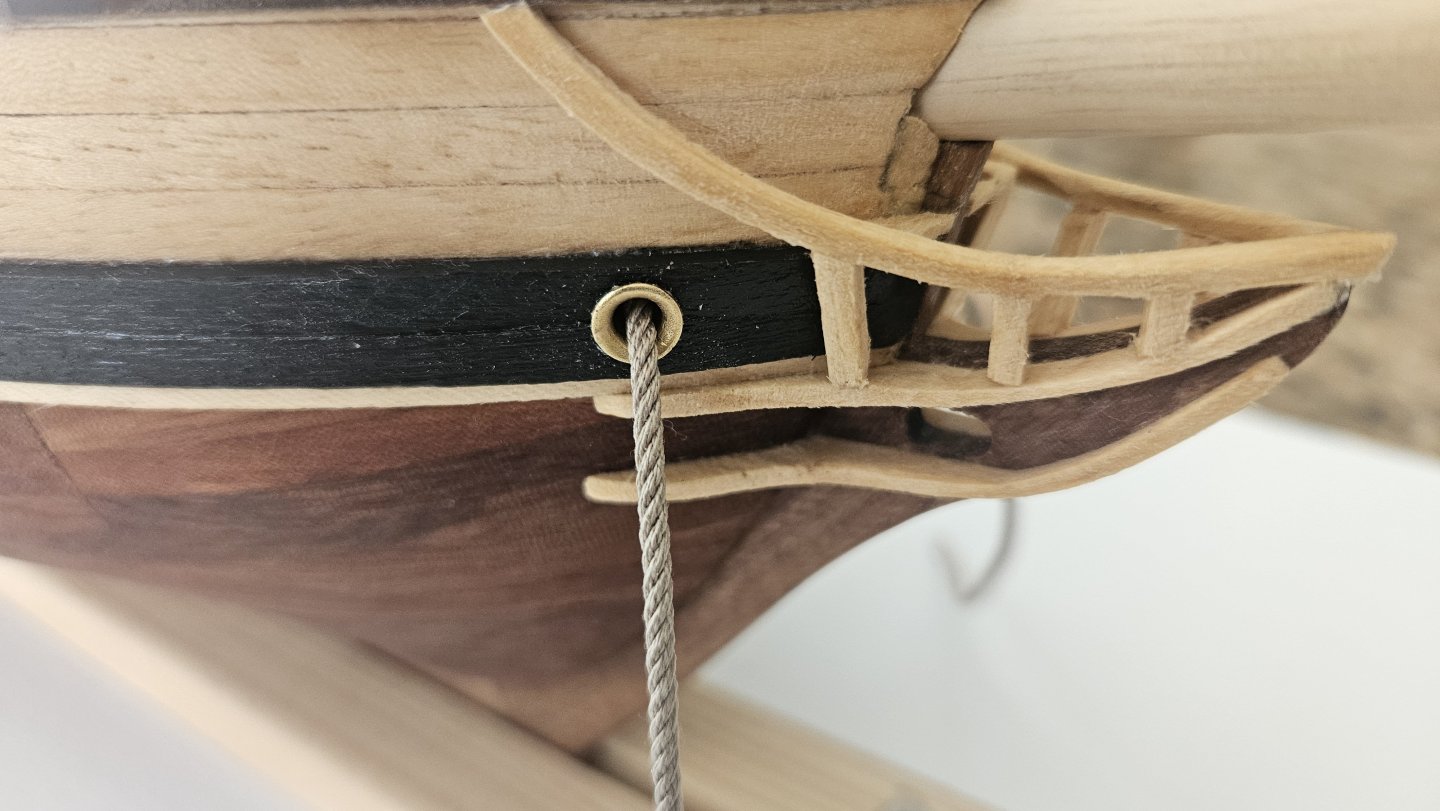
Speaking of contrasting wood, a quick update - everything except spars has at least one coat of danish oil - so this will be the general appearance of the ship as far as coloring when she is completed. I also sourced some hollow brass rivets for circuit boards and used them as guides in the hawse holes and where the anchor ropes travel below decks. I think they look right on the deck but hope they don't look toy-like or cheap in the hawse holes at the bow.

-
@GrandpaPhil Thanks! That would put you about 2.8 inches at 1/72. In researching this I notice Constructo leaves gun port covers off a bit (Enterprise 1799 for another example). I think this is an artistic choice to clean up the bulwarks, display the contrasting wood port framing, and show off those beautiful brass cannons they include. I am really torn at this juncture whether to go the "artistic" route or strive for a more "realistic" approach. (Don't tell anyone, but we're talking about a natural wood model here that doesn't even have any scuppers - and I am not going down that rabbit hole after the fact! ) I must admit the contrasting wood aspects are a big part of what drew me to this kit 2 decades ago. What to do?
-
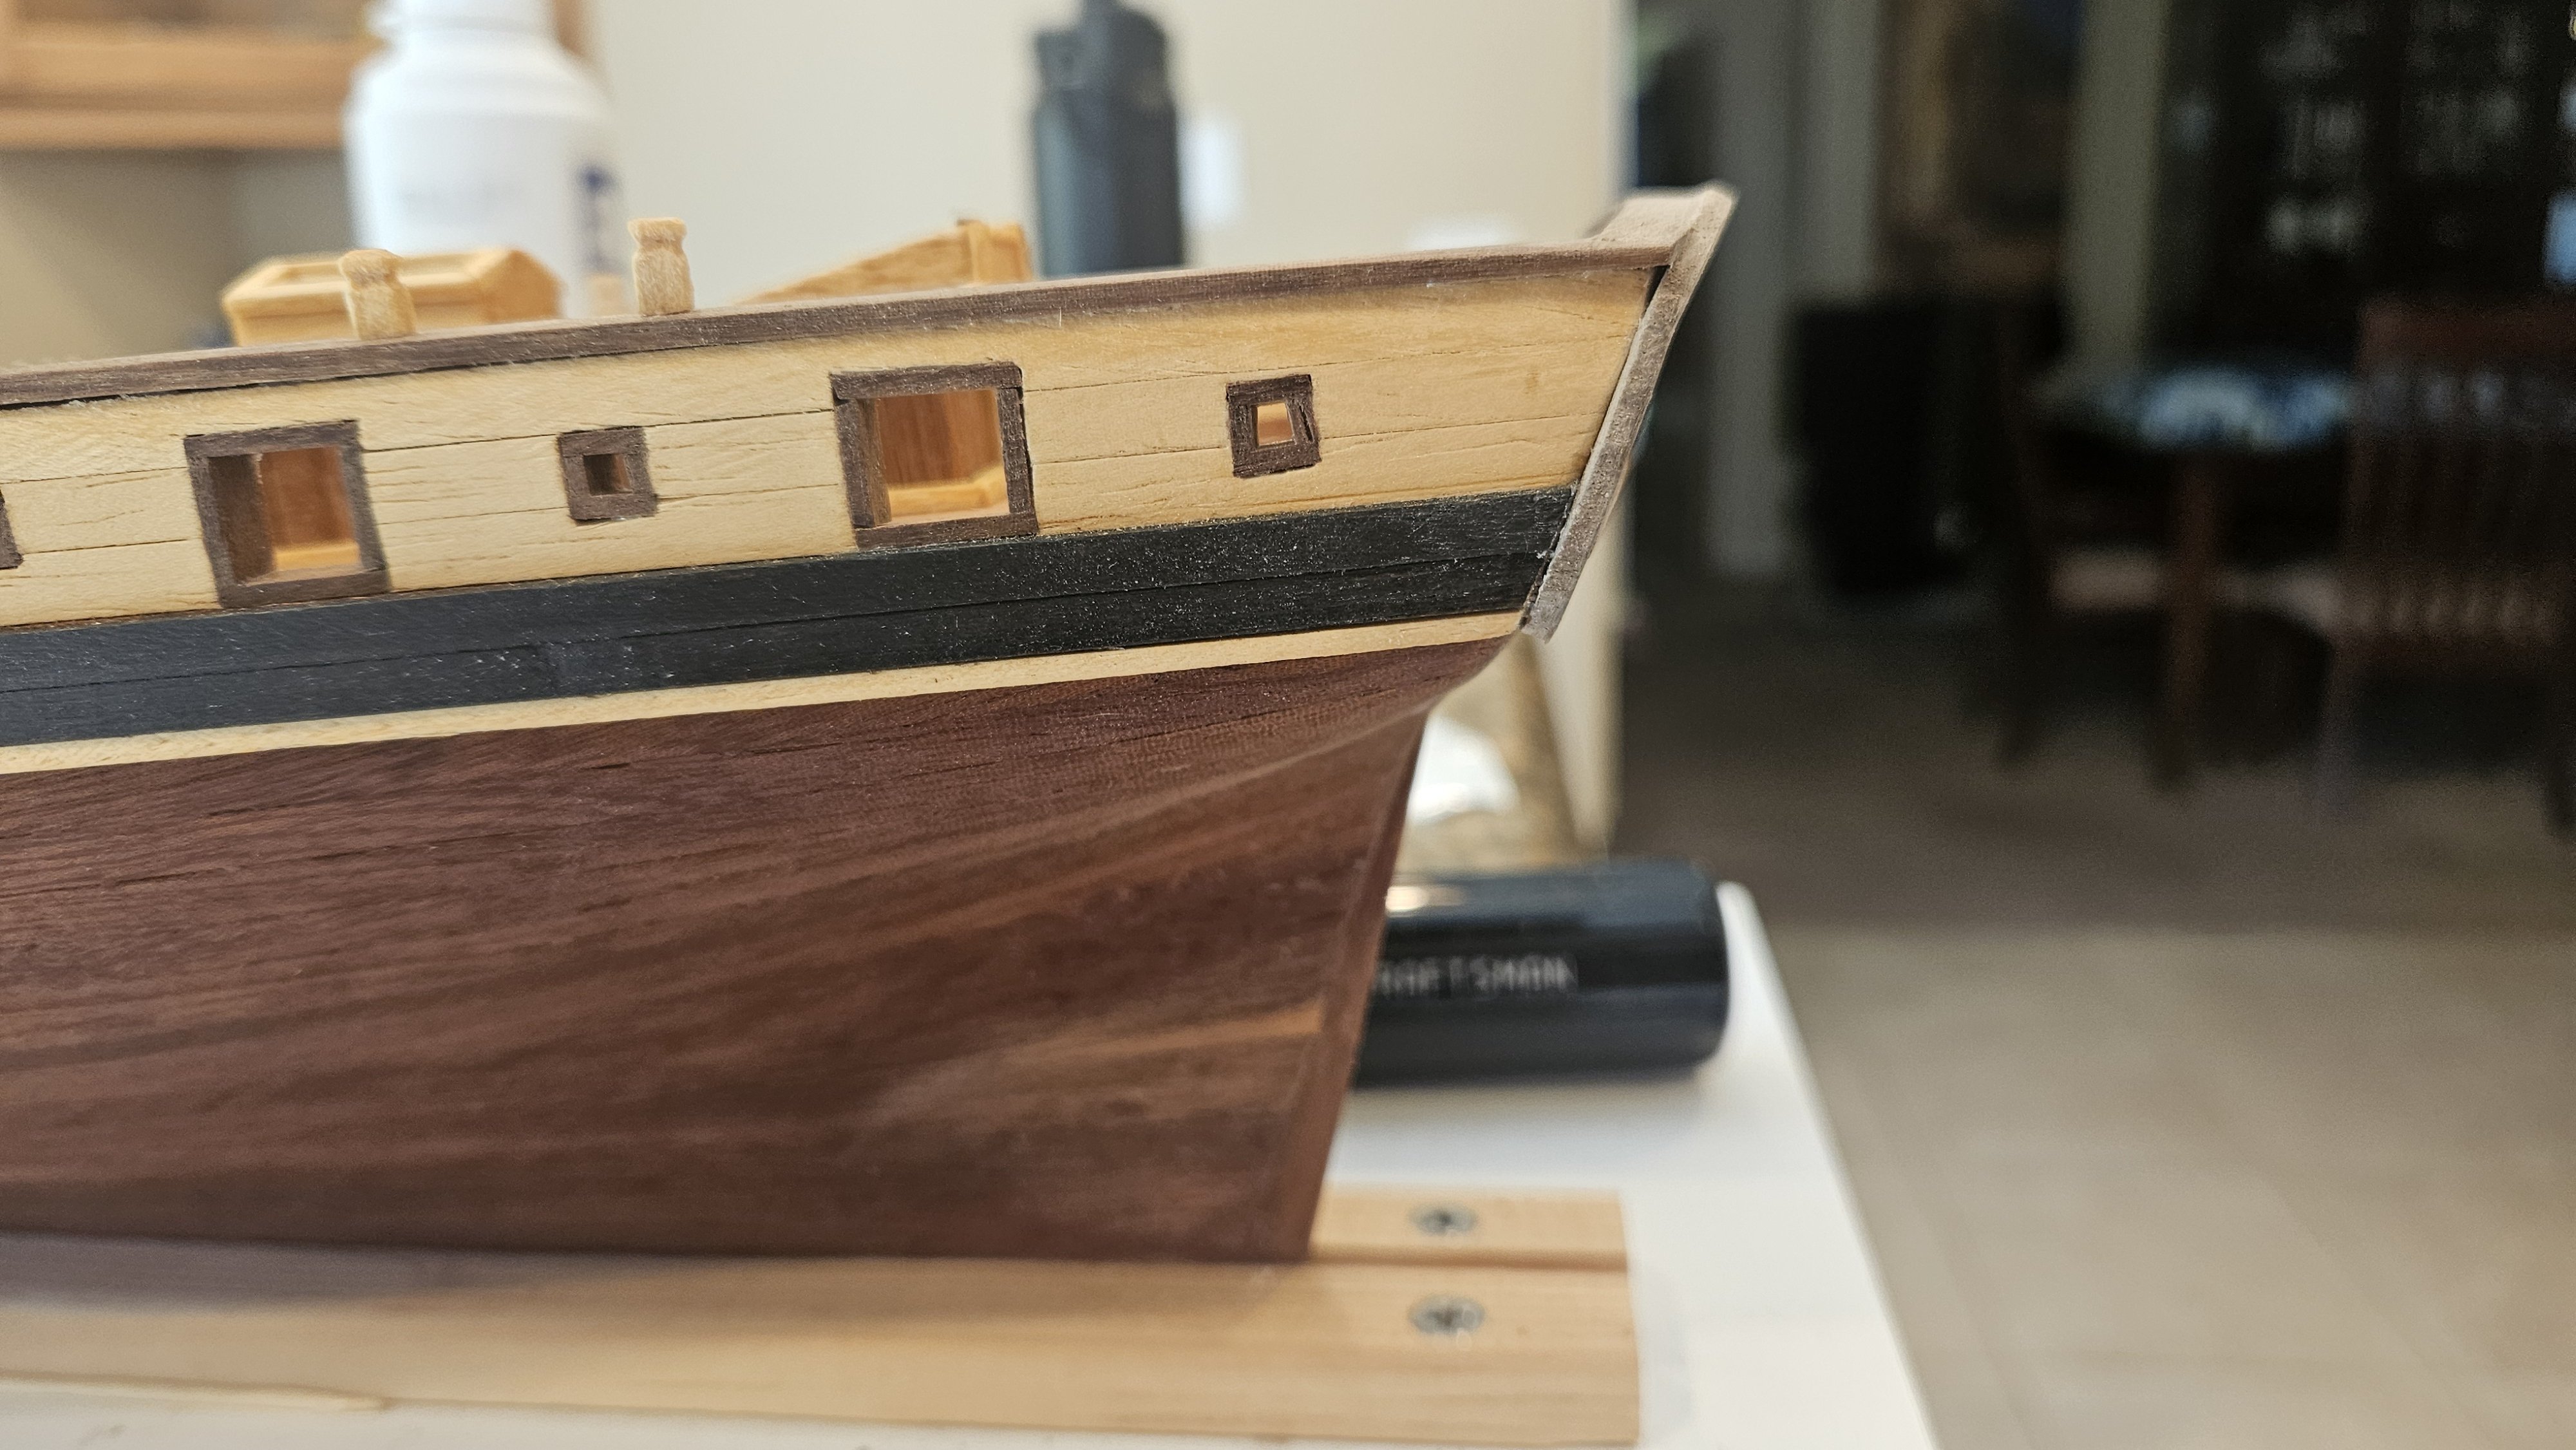
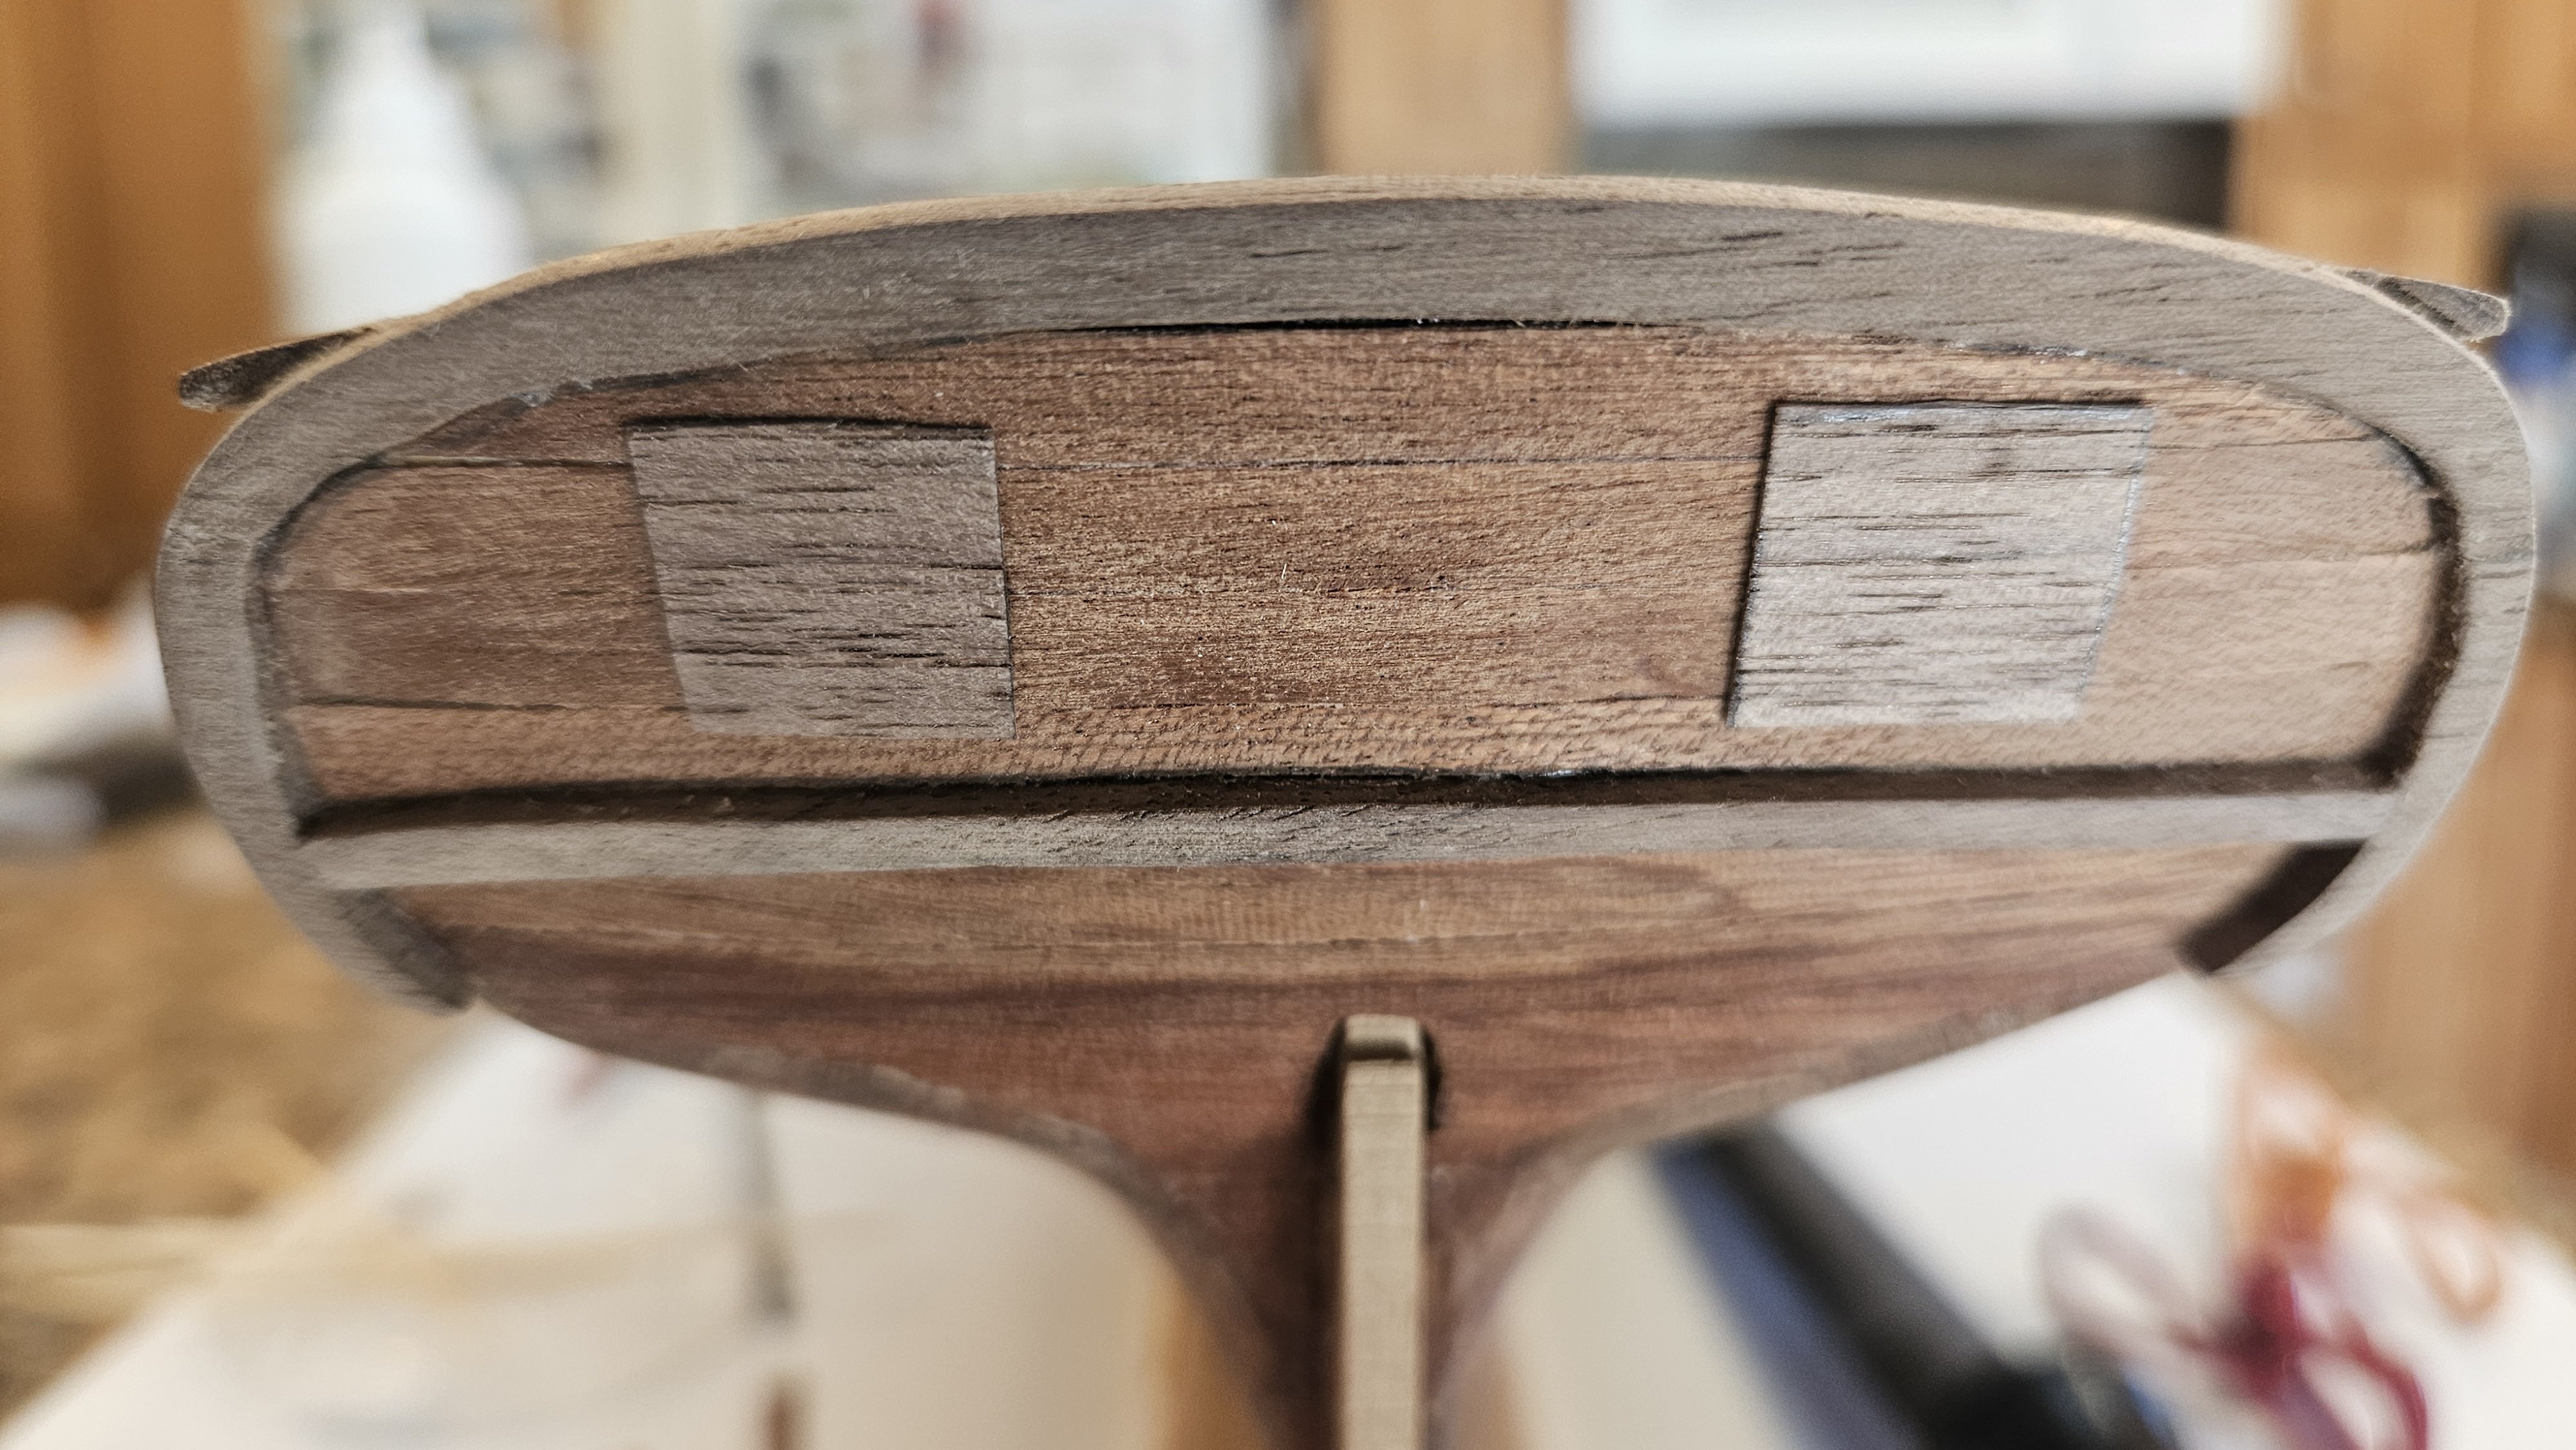
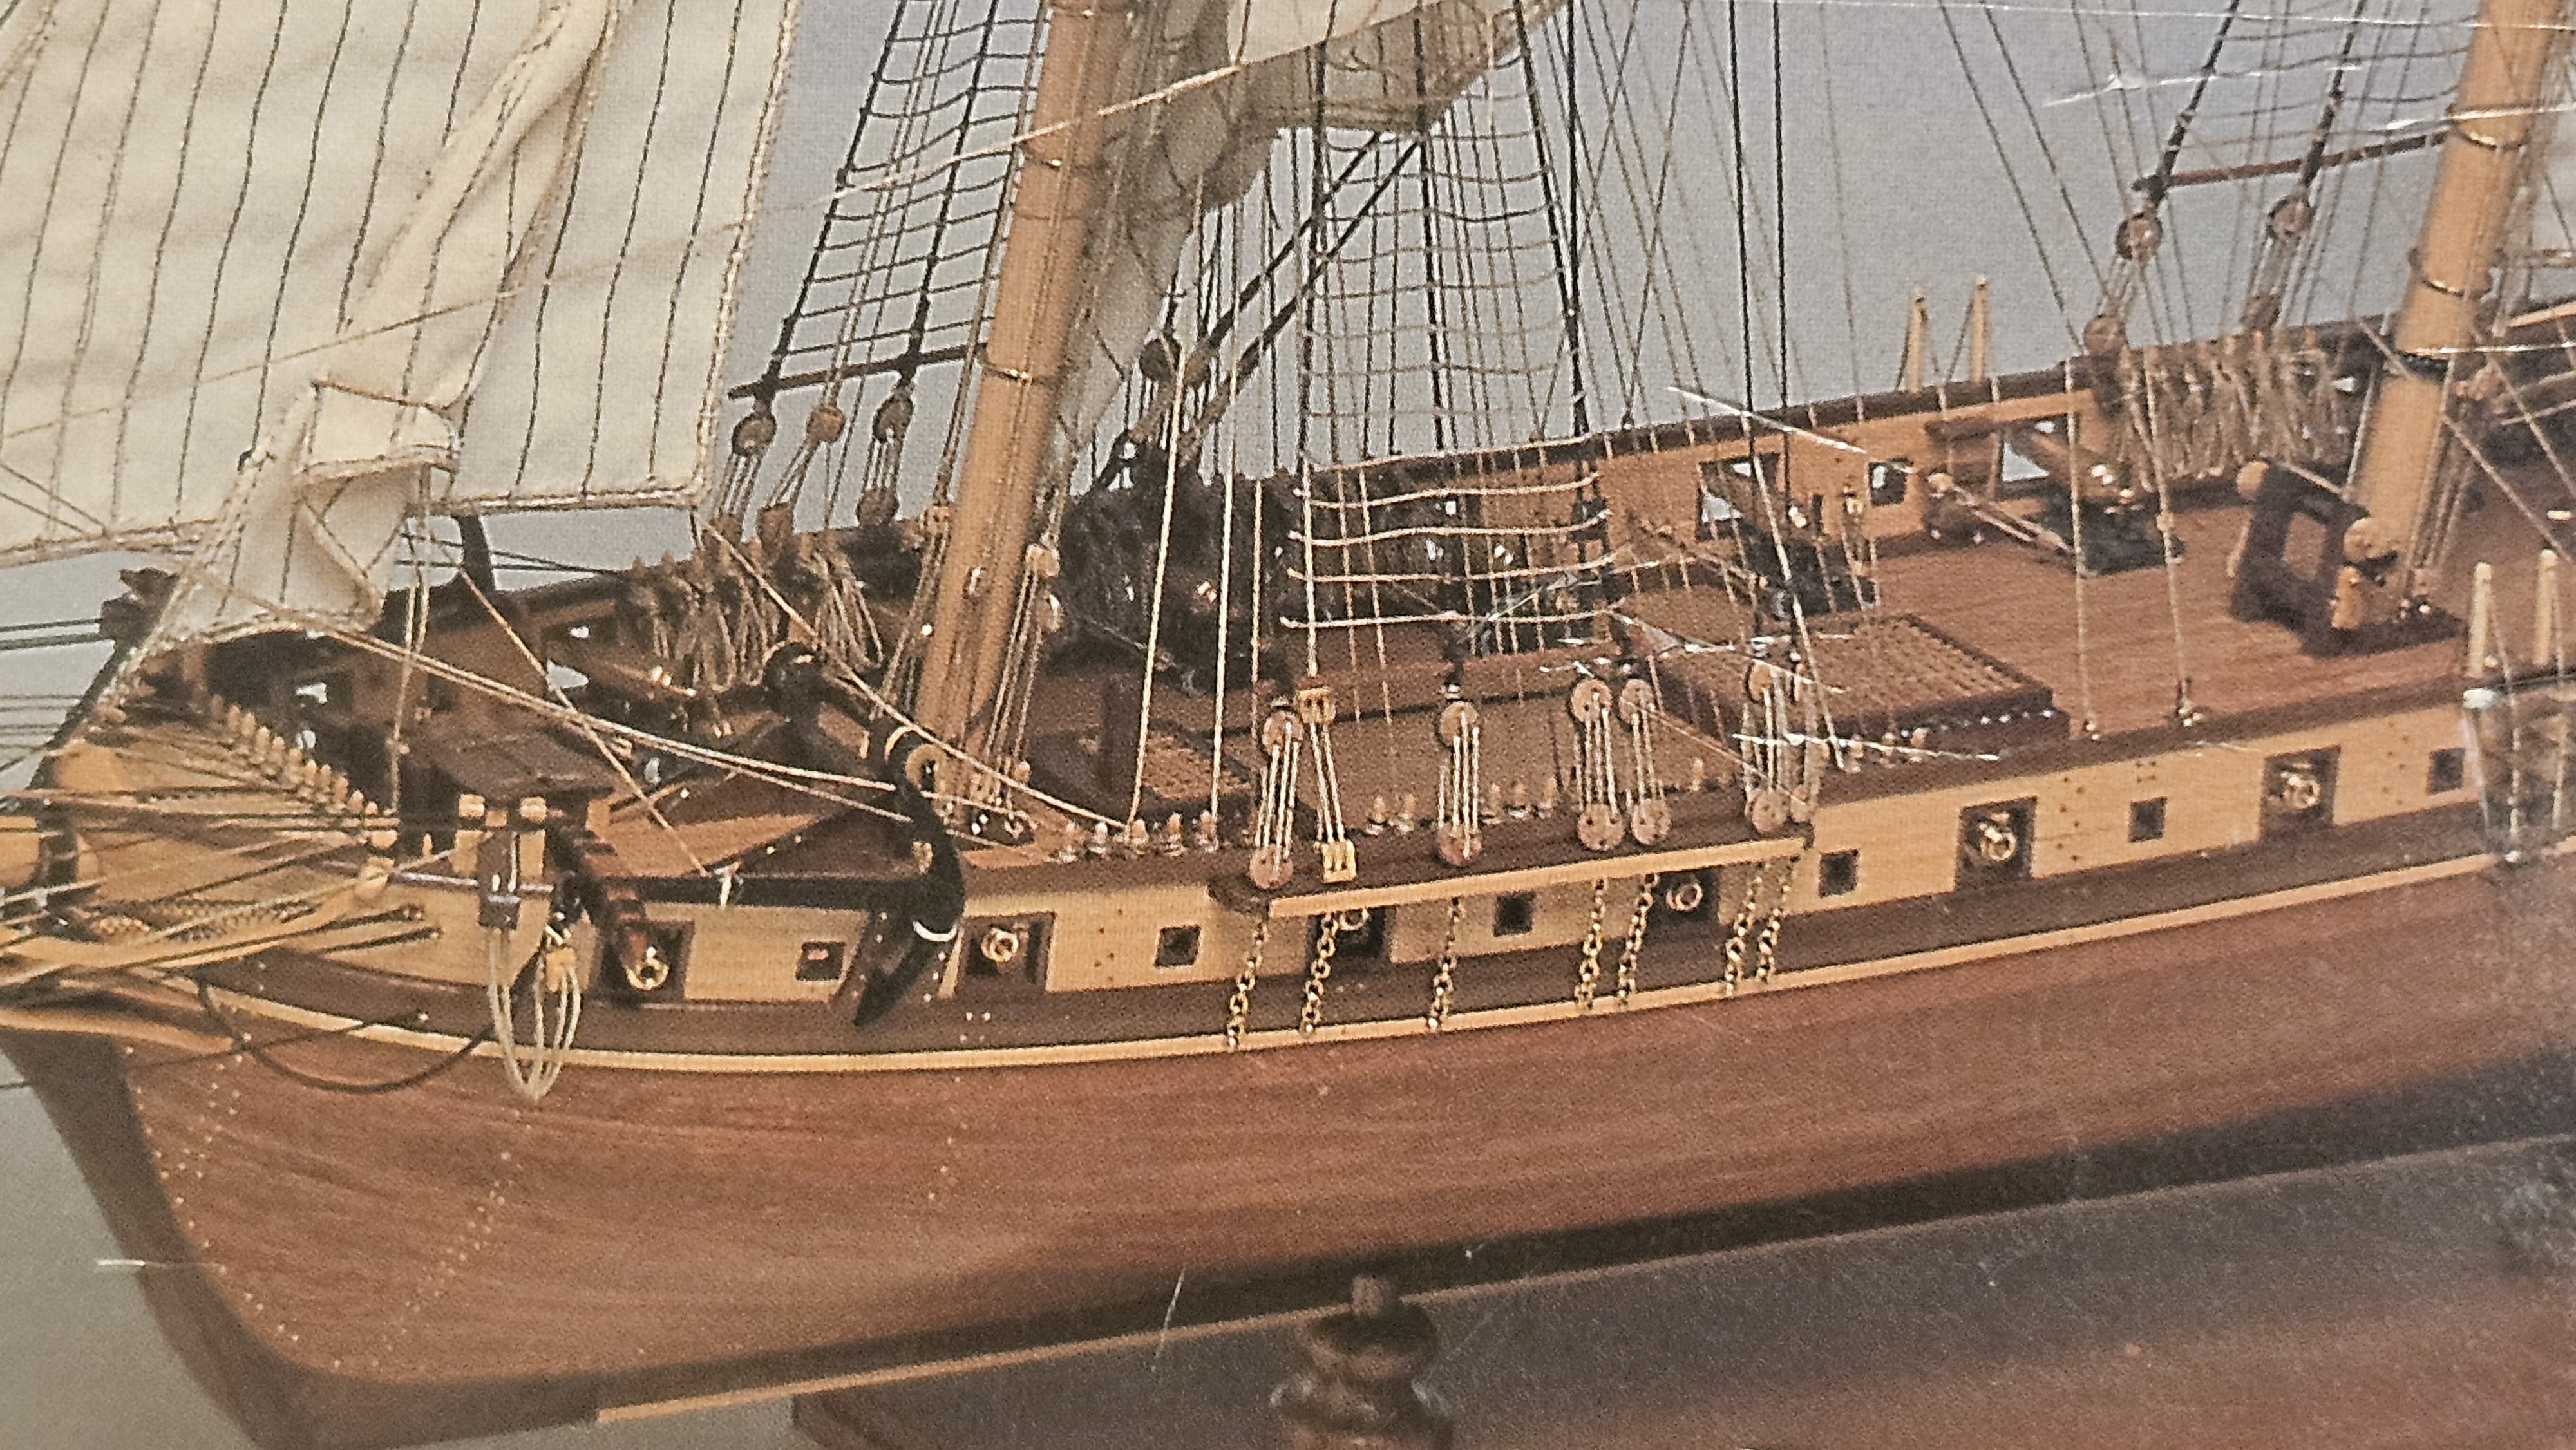
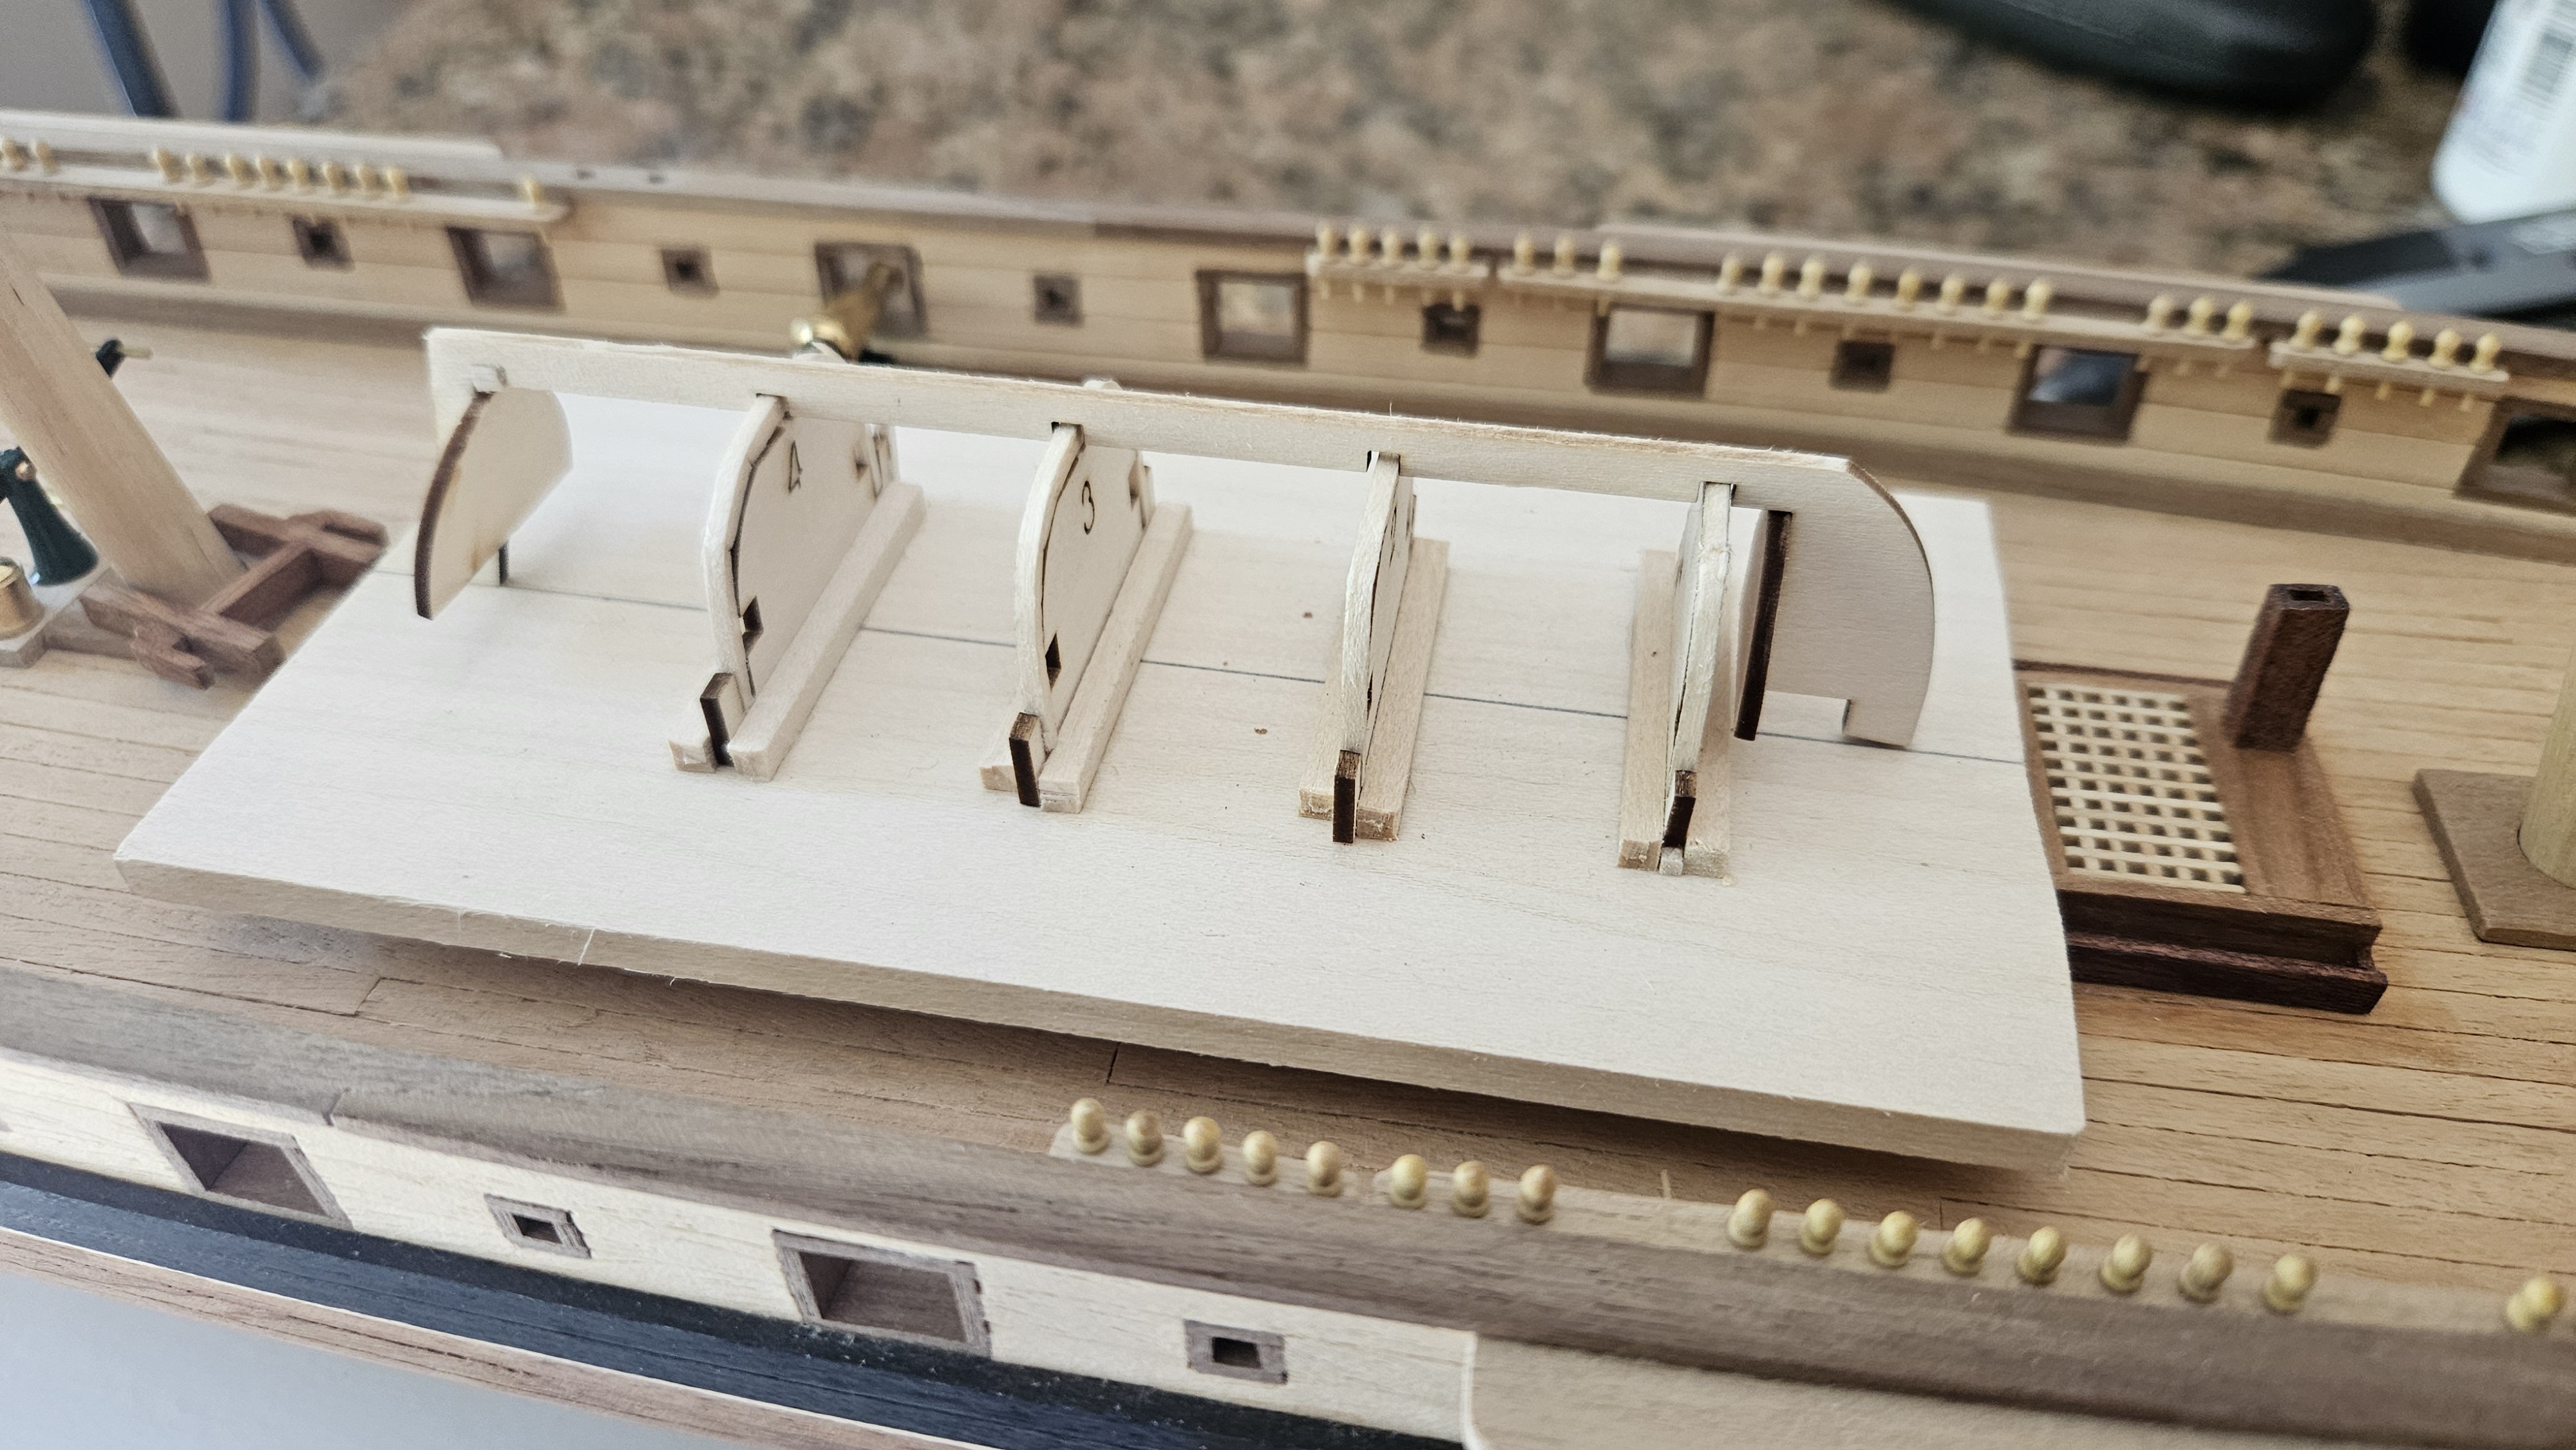
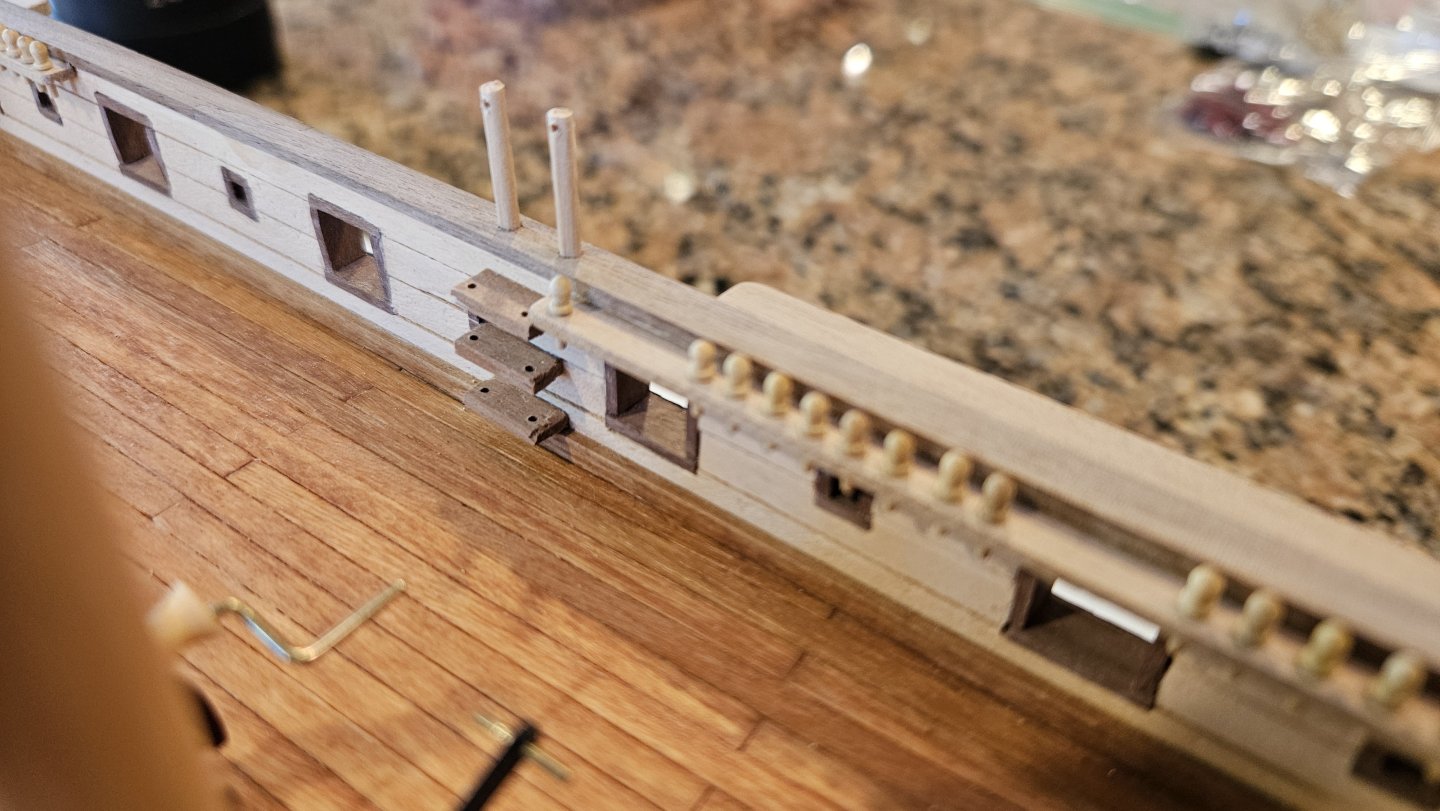
A request for more thoughts: I need to complete the woodwork on the hull so I can get finish on it. The issue is that this particular kit is more art than realistic - to wit, the kit only has 6 gunport covers for 24 gunports (aft 2 each side, 2 stern ports). Any port with a cannon has no lid. Of course the historical data on the PdN shows gunport covers. So a request for opinions - should I build it like the kit (6 aft covers only), or should I fabricate covers for all the gunports? If we do, how thick would you make them? 2 scale inches maybe? I framed the gunports to the kit plans so any lids would be proud of the bulkheads. 2 scale inches would be a little less than a mm thick on the model. If I did add gunports, the ports with guns would be fixed open. Anyway, any thoughts or opinions on my dilema appreciated! Thanks in advance folks.


-
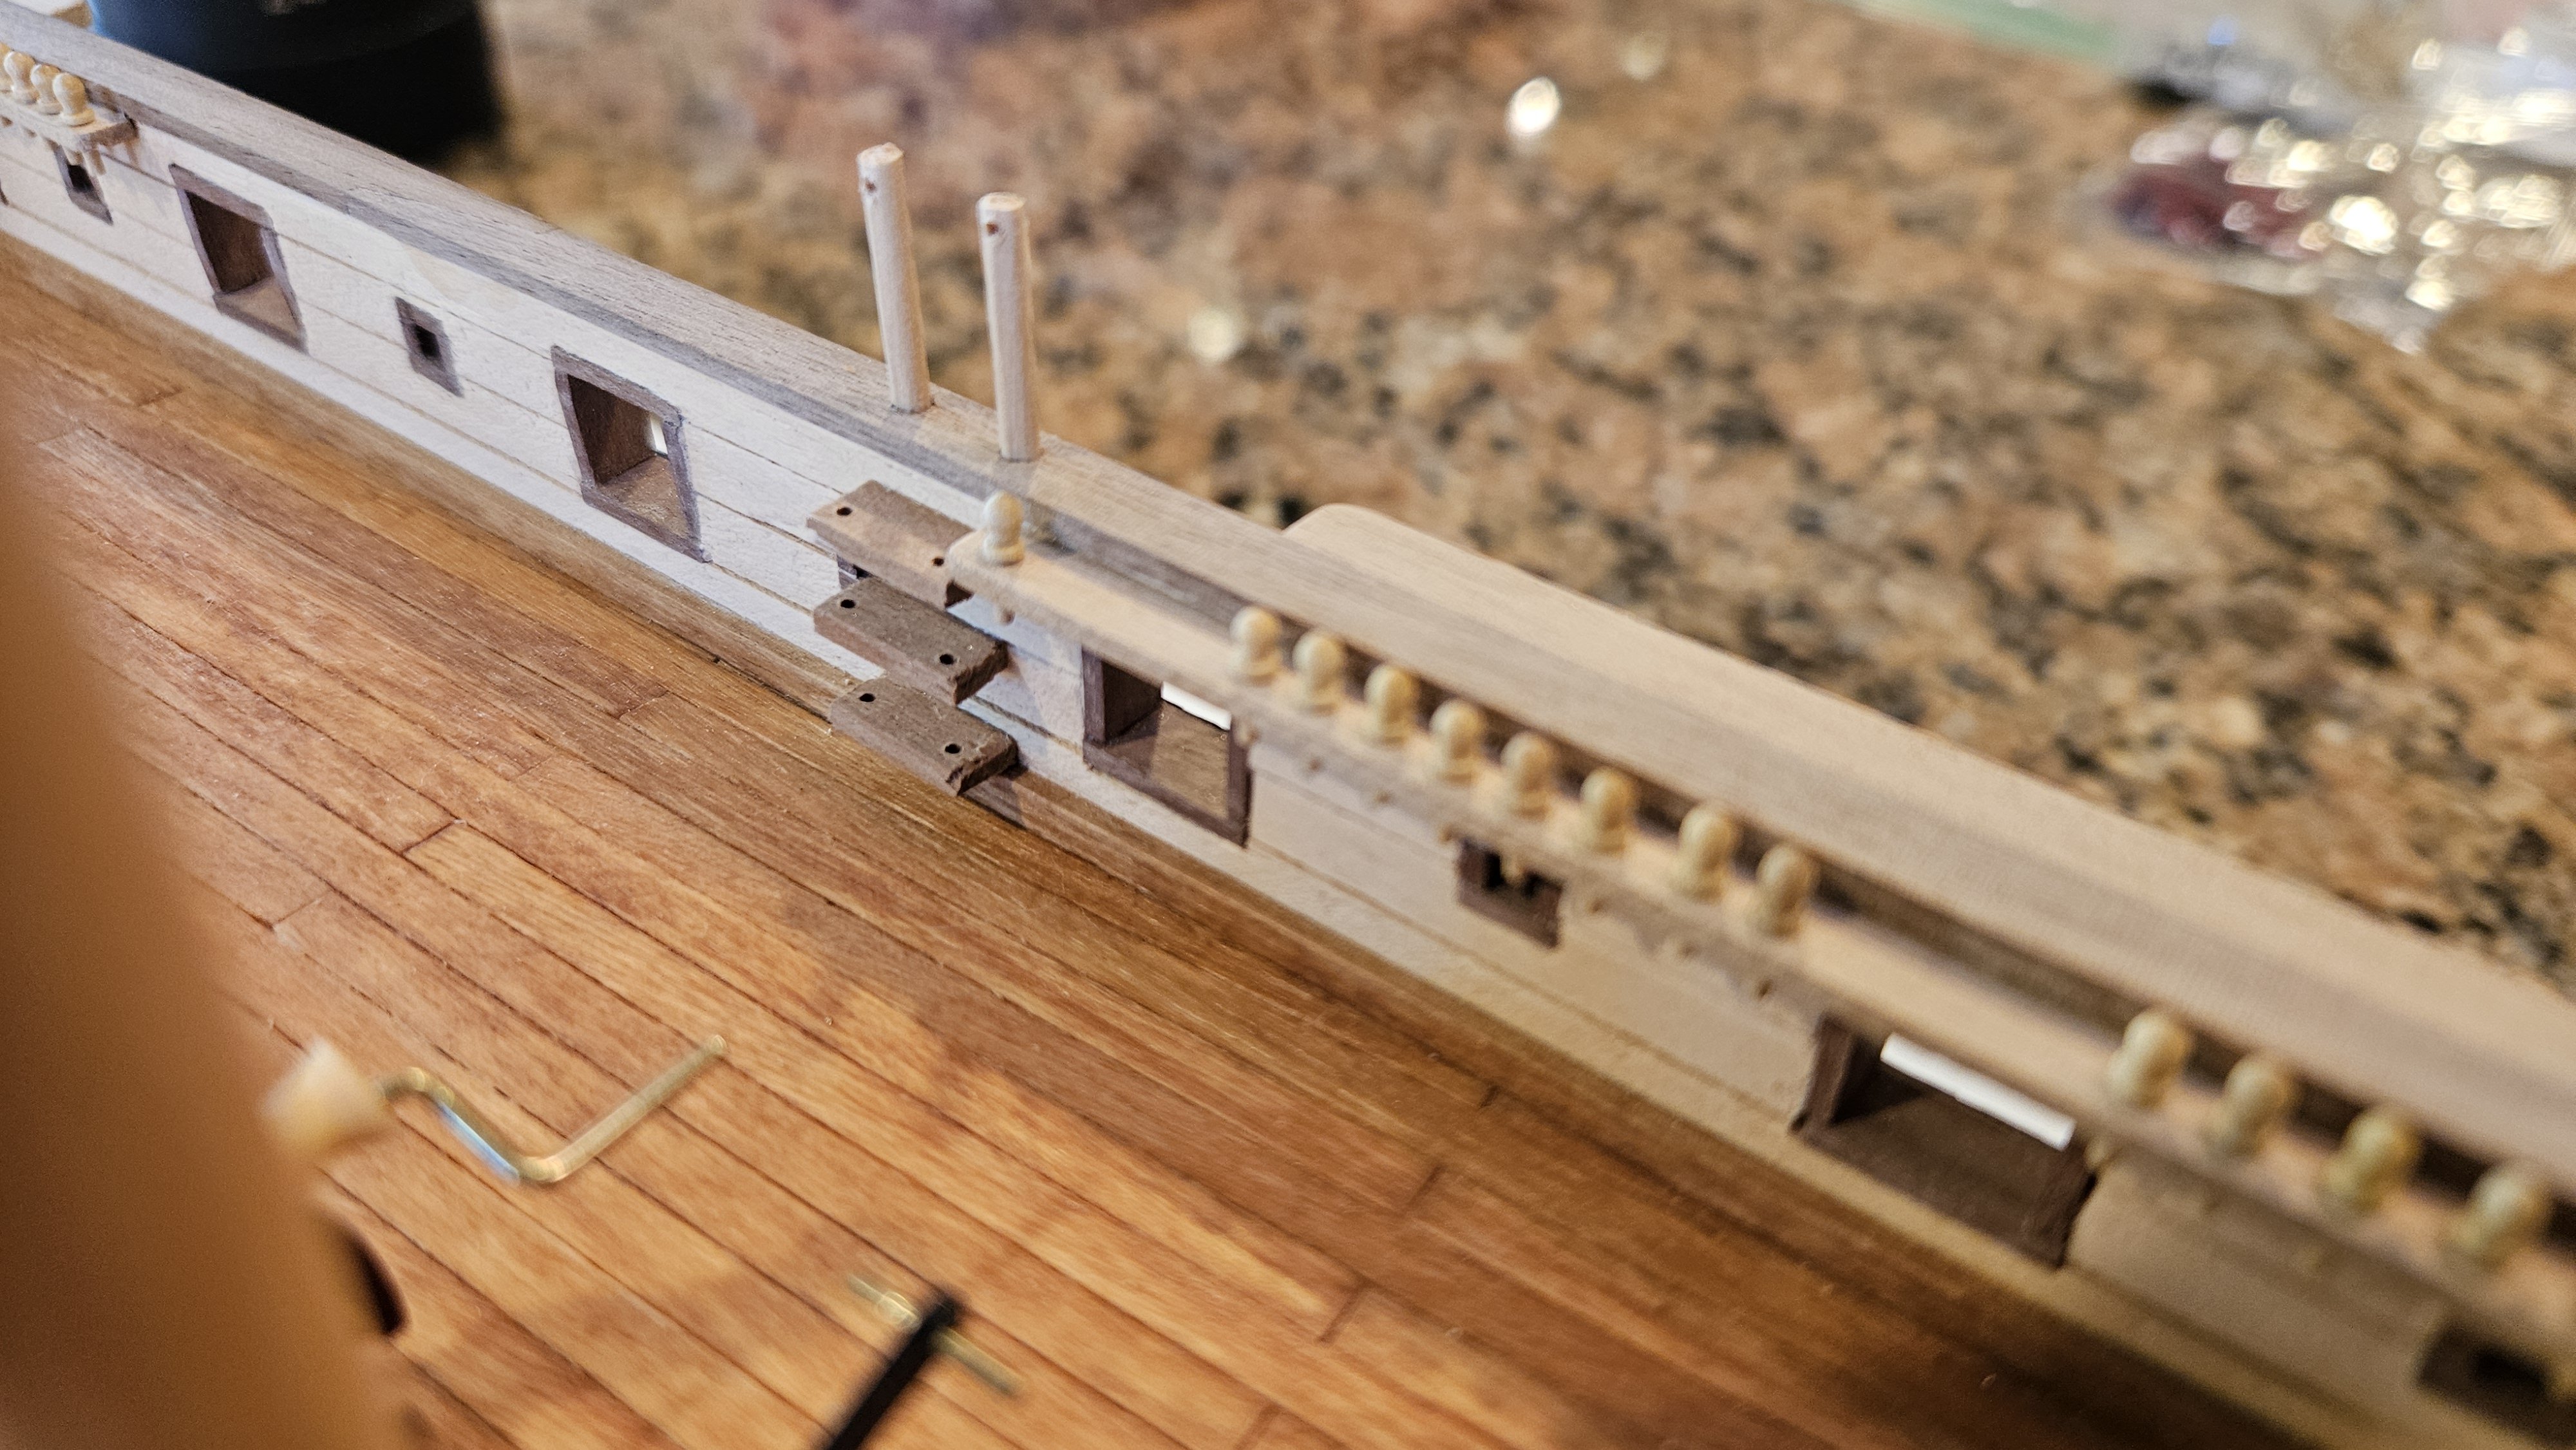
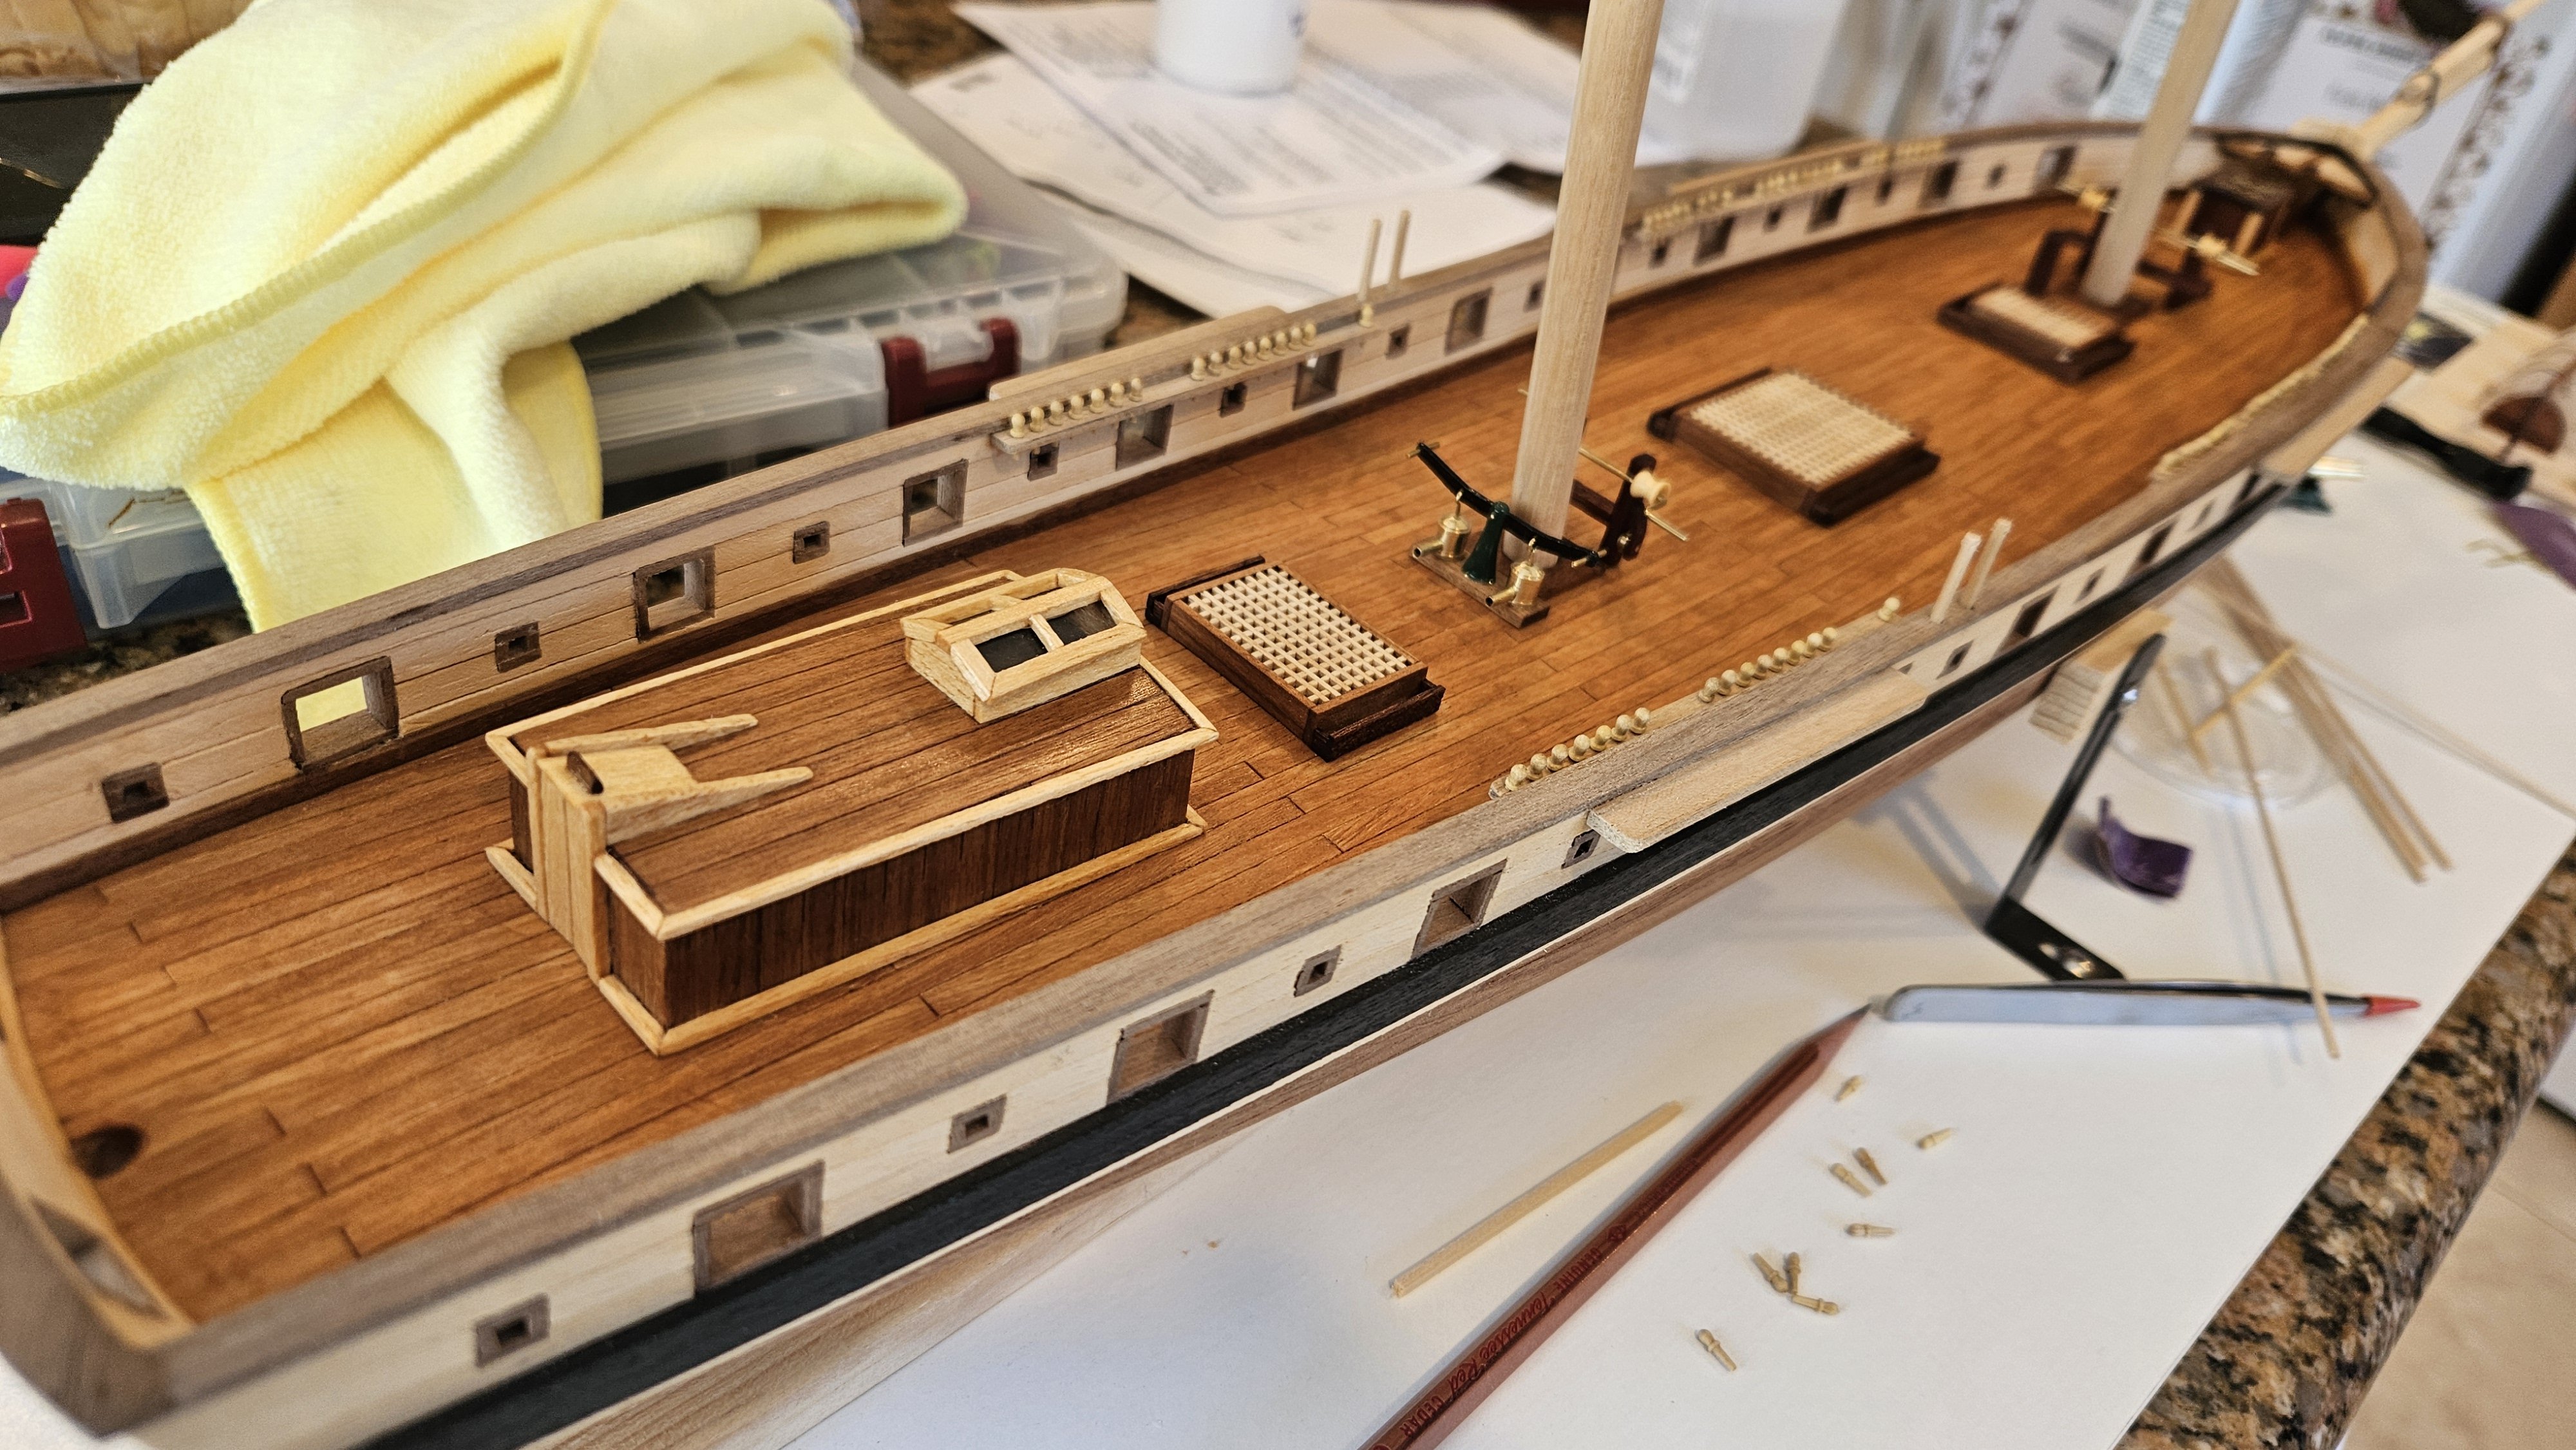
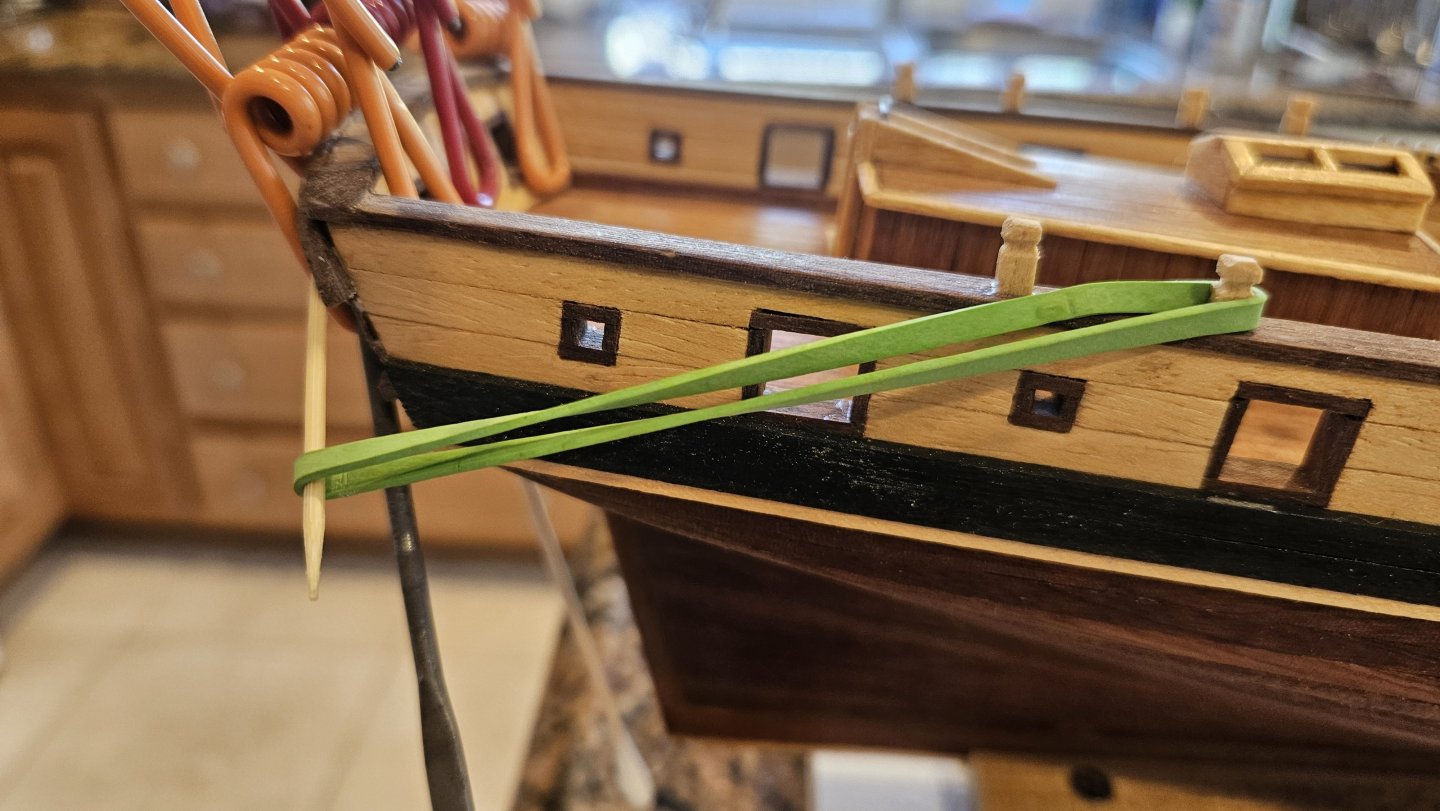
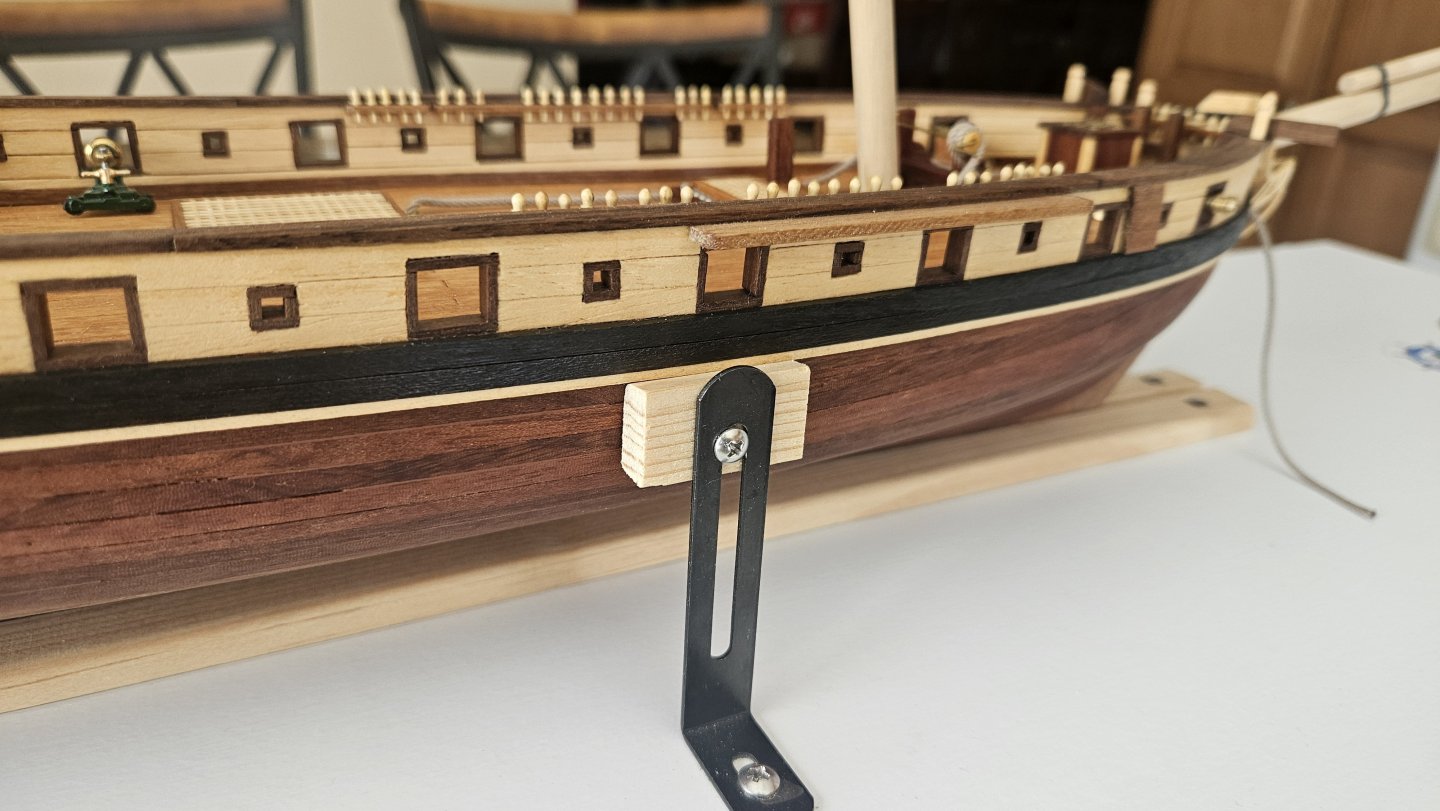
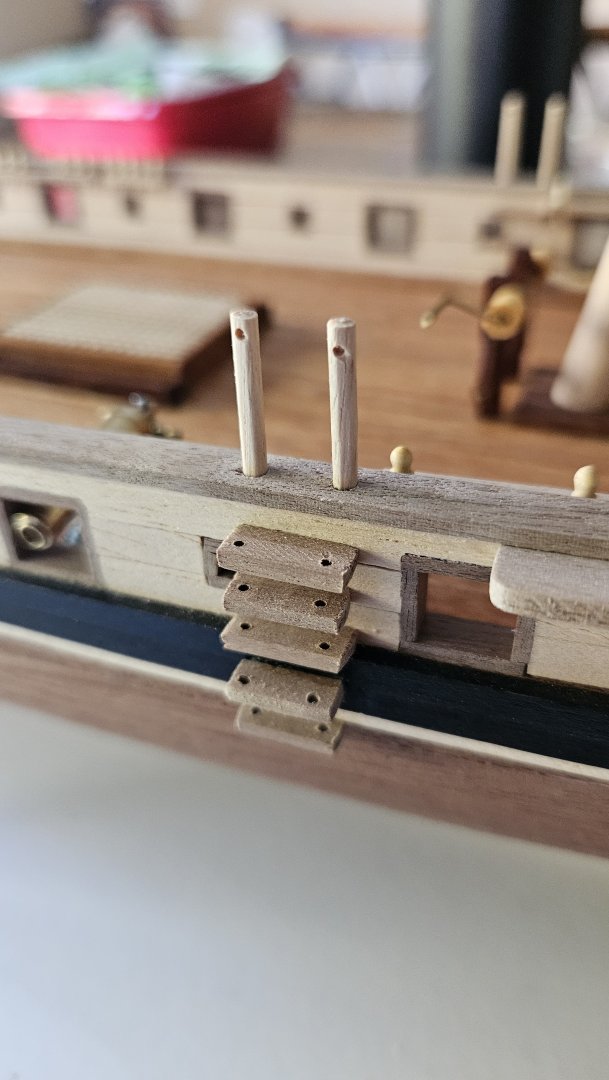
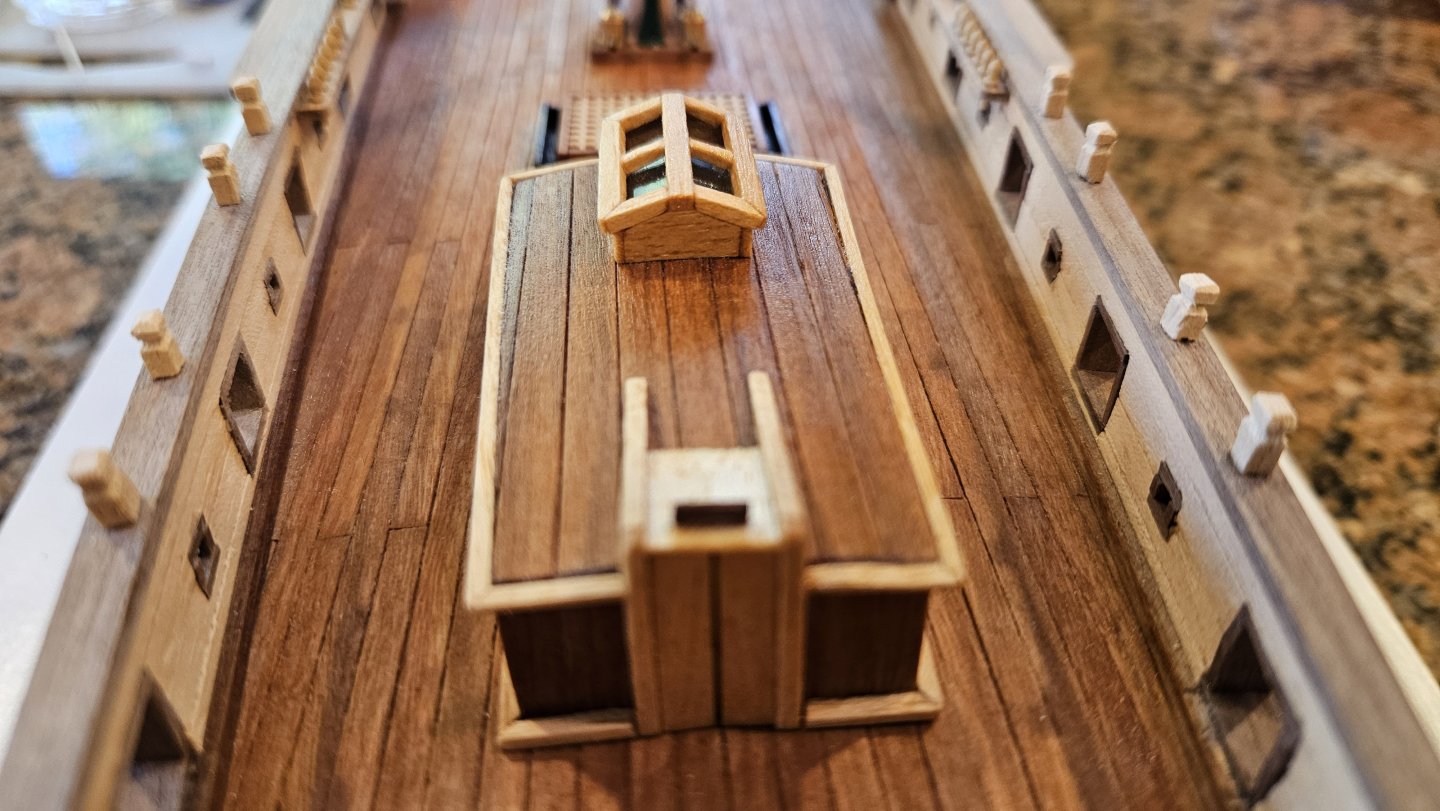
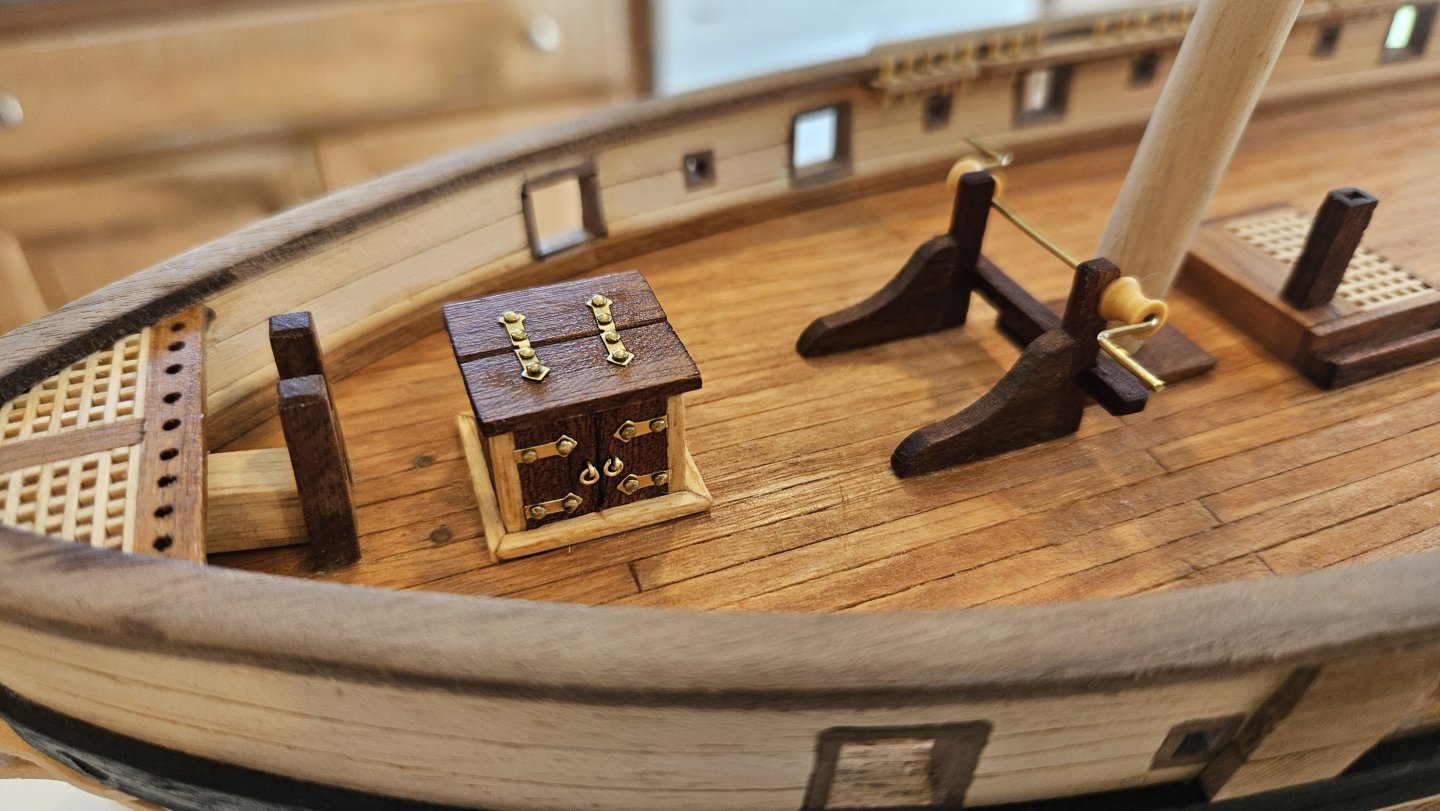
A progress update - many things but each so small! So let's begin our tour at the new port and starboard boarding stairs - much easier to climb aboard now, although the hand ropes will have to wait until finishes are applied. And the internal steps... Some work on the headrails - and installation of the seats of ease. Some aft mooring bitts on the rail - Added some cannonballs and spec'd an anchor rope (Syren). And finally the cat davits and forward mooring bitts installed. So many little things to keep one busy! Thanks for coming aboard and checking things out. Steve


-
@@Dr PR Thanks for the link to your schooner thread. It is amazing how much research can be involved in understanding how old sailing vessels worked. That will be very helpful going forward. Your work and research are just superb! Steve
-
@Dr PR Wow Phil. What a great book. Just started working with my new copy - so much info! And of course I have been trying to sort out bowsprit rigging and gammoning, and there it is presented on page 169, including rope diameter. Even Steel's rope length rule is included. I think I am going to enjoy this one - thanks for the tip, assistance and kind words. Great recommendation! Steve
-
@GrandpaPhil All my favorite builders checking in. Thanks!
-
@Gregory @ccoyle Thanks gentlemen - sounds like I will be good either way then. Nice to be able to benefit from your experience! I appreciate it. Steve
-
@Chuck Seiler You are having county fair flashbacks. Made some good progress working on our ships there!
-
Also, does anyone have any thoughts on attaching these beasties and making them fast to the decks and bulwarks? They are brass. I have been trying to avoid CA lest it deteriorate over time. PVA may not bite the brass but will definitely grab the wood. I will definitely drill small pilot holes so there will be a slight interference (like a nail or tack). What do you guys do? My searches were not forthcoming. I definitely don't want them pulling out during rigging. Thanks, Steve

-
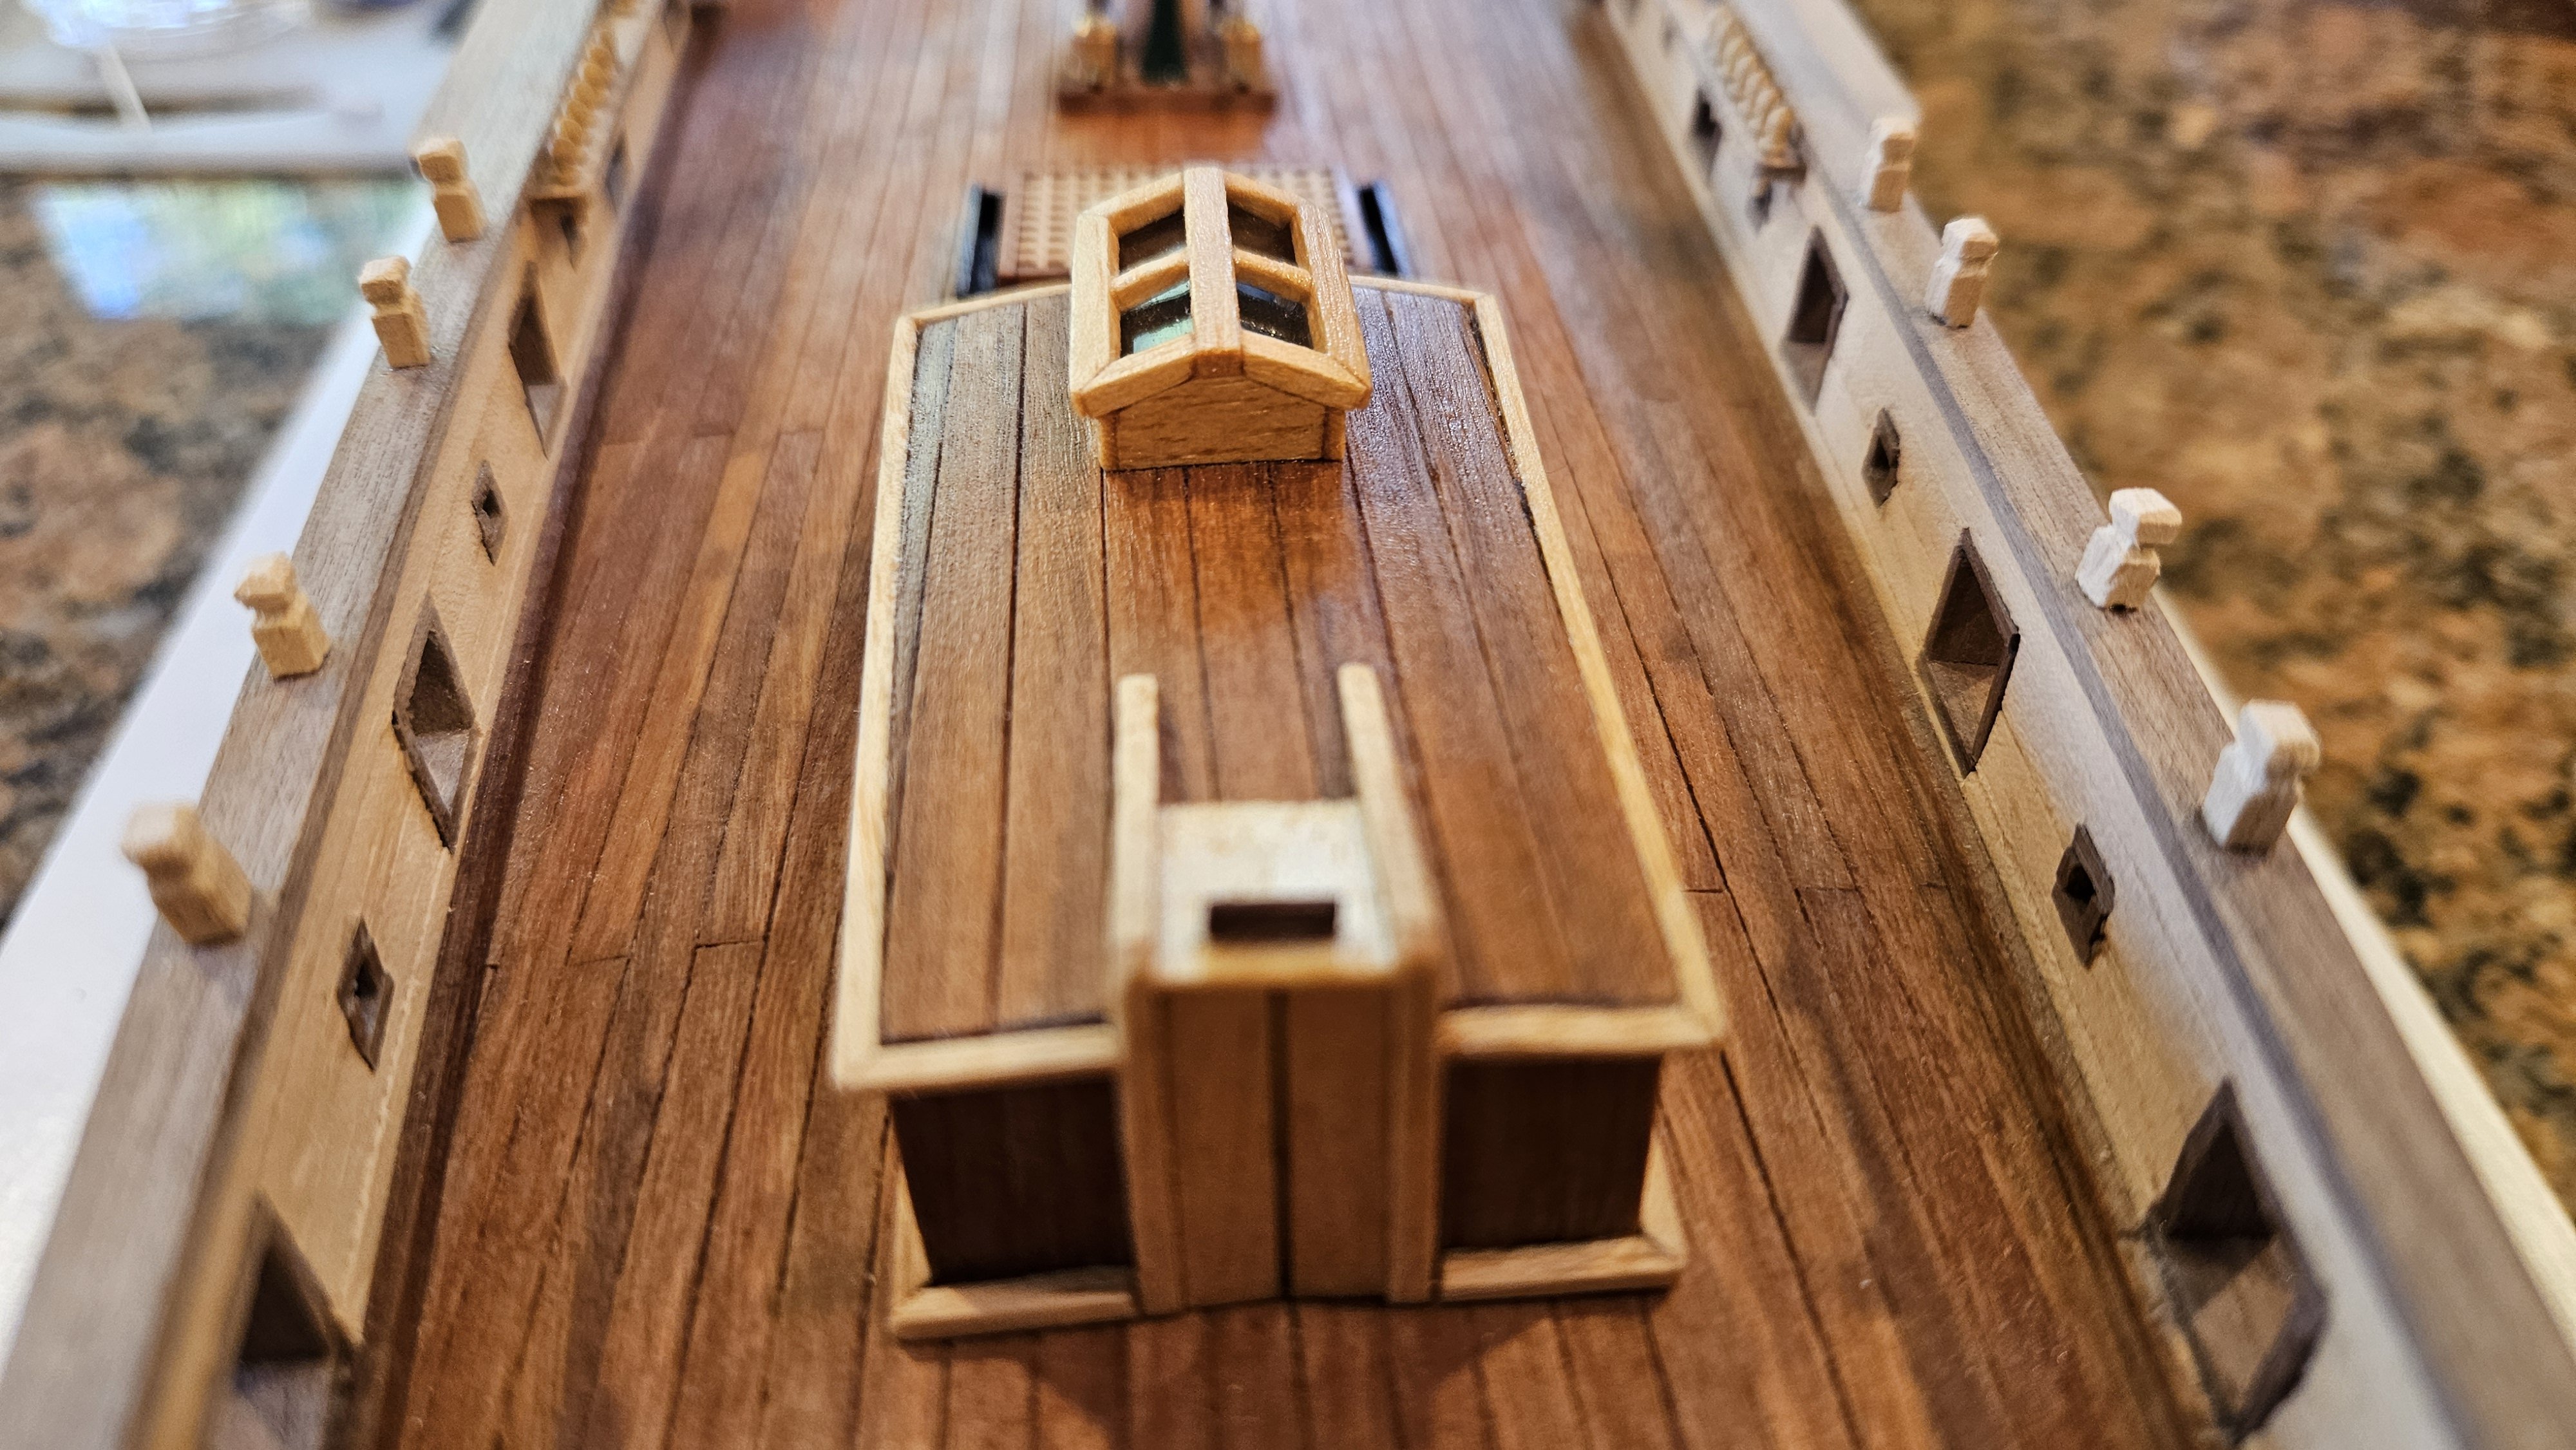
So a milestone of sorts - I feel all the wooden deck assemblies are complete and installed so I decided to start finishing the deck with Watco Danish Oil for protection. The color change was huge with the oil - there is no turning back. I will follow up with Watco Wipe On Poly in satin once the danish oil fully cures. Or maybe not - the deck has a nice aged working boat look to it right now. Decisions decisions! It took quite a bit of research to figure out how the forward companionway was supposed to work - added door hardware on the port side. Steady as she goes then. Thanks for looking.


-
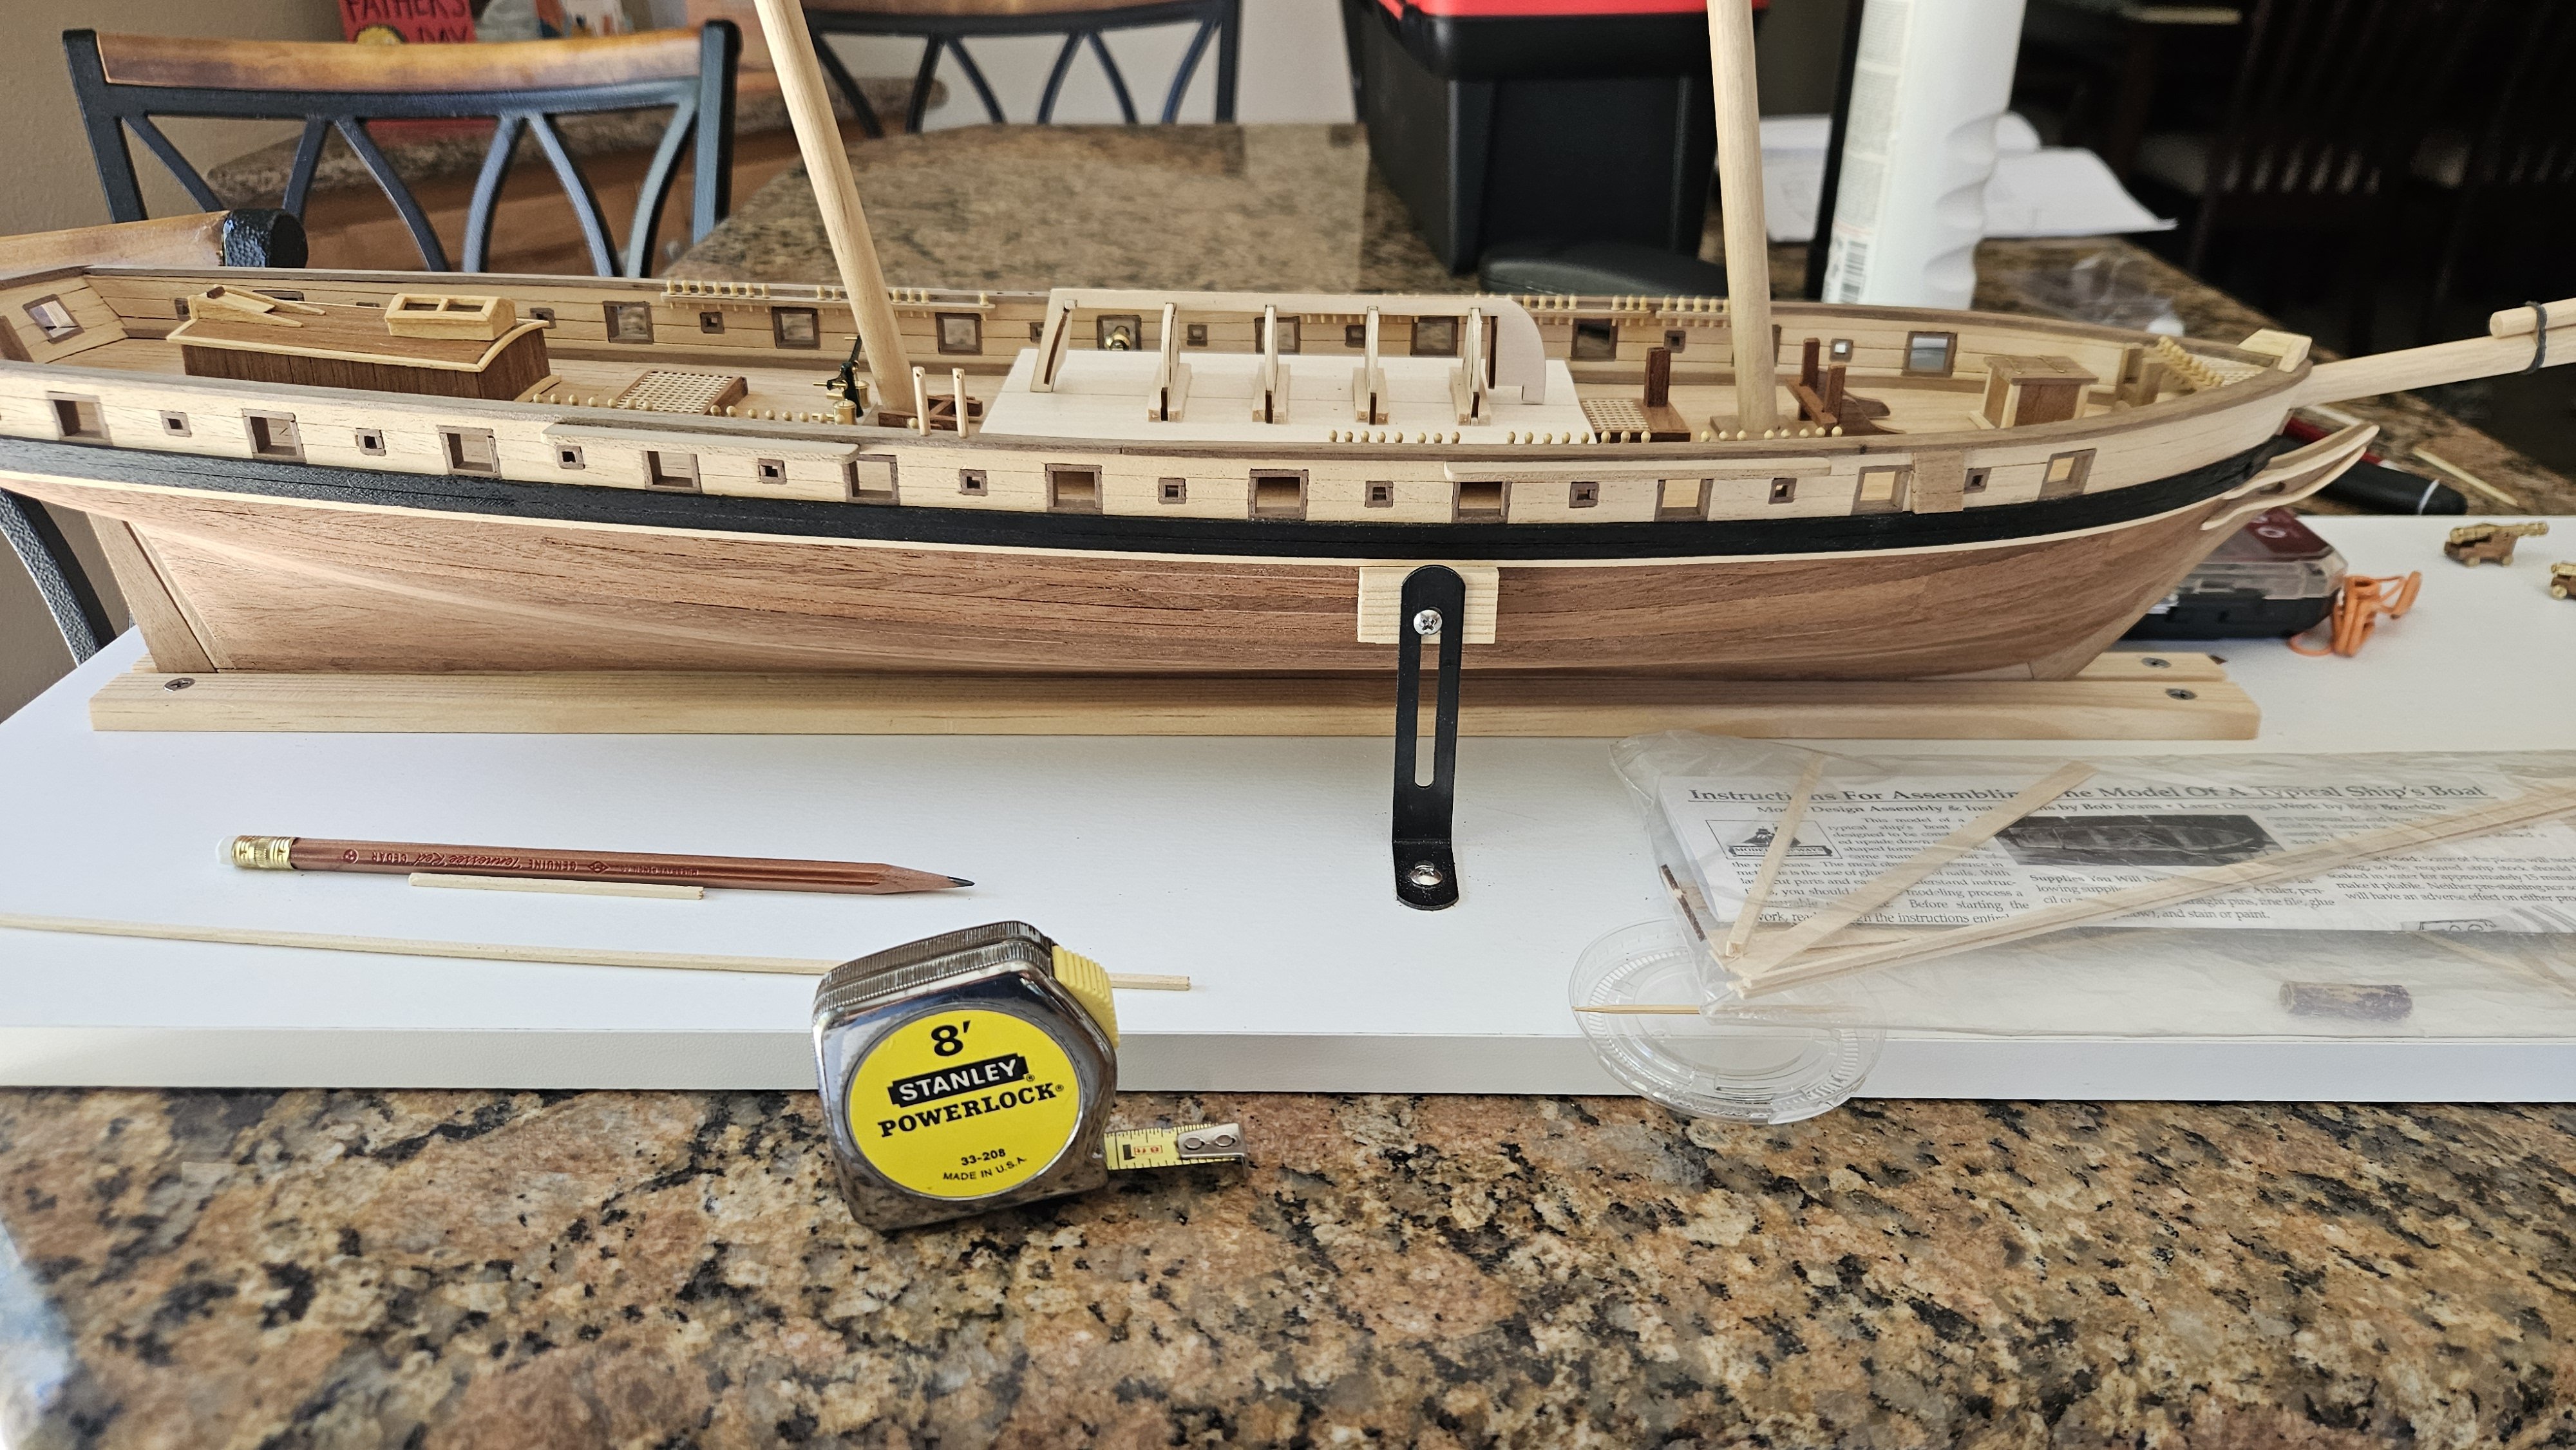
Still working on populating the deck and adding boarding stairs (one of the Constructo kit's features that adds a nice bit of character in my opinion). While that goes on I thought we'd try out one of Model Shipways' Ship's Boat kits. In this case the 5 and 3/16" offering. Here's how that's going (the boat is built on a build board, but this is approximately where it'd be lashed down). Chapelle suggests the PdN carried a 26 ft launch, and 20 and 16 ft cutters. The 5 3/16" kit actully measures 5 5/16", which scales (at 1/58) to 25.7 ft - close enough to represent the 26 ft launch. If all goes well we'll try a couple smaller ones as well. Two stacked amidship and one on stern davits. Gonna need some stain so it doesn't look too plain. Thanks for looking. Steve


-
Keep moving forward! They look great. Steve
-
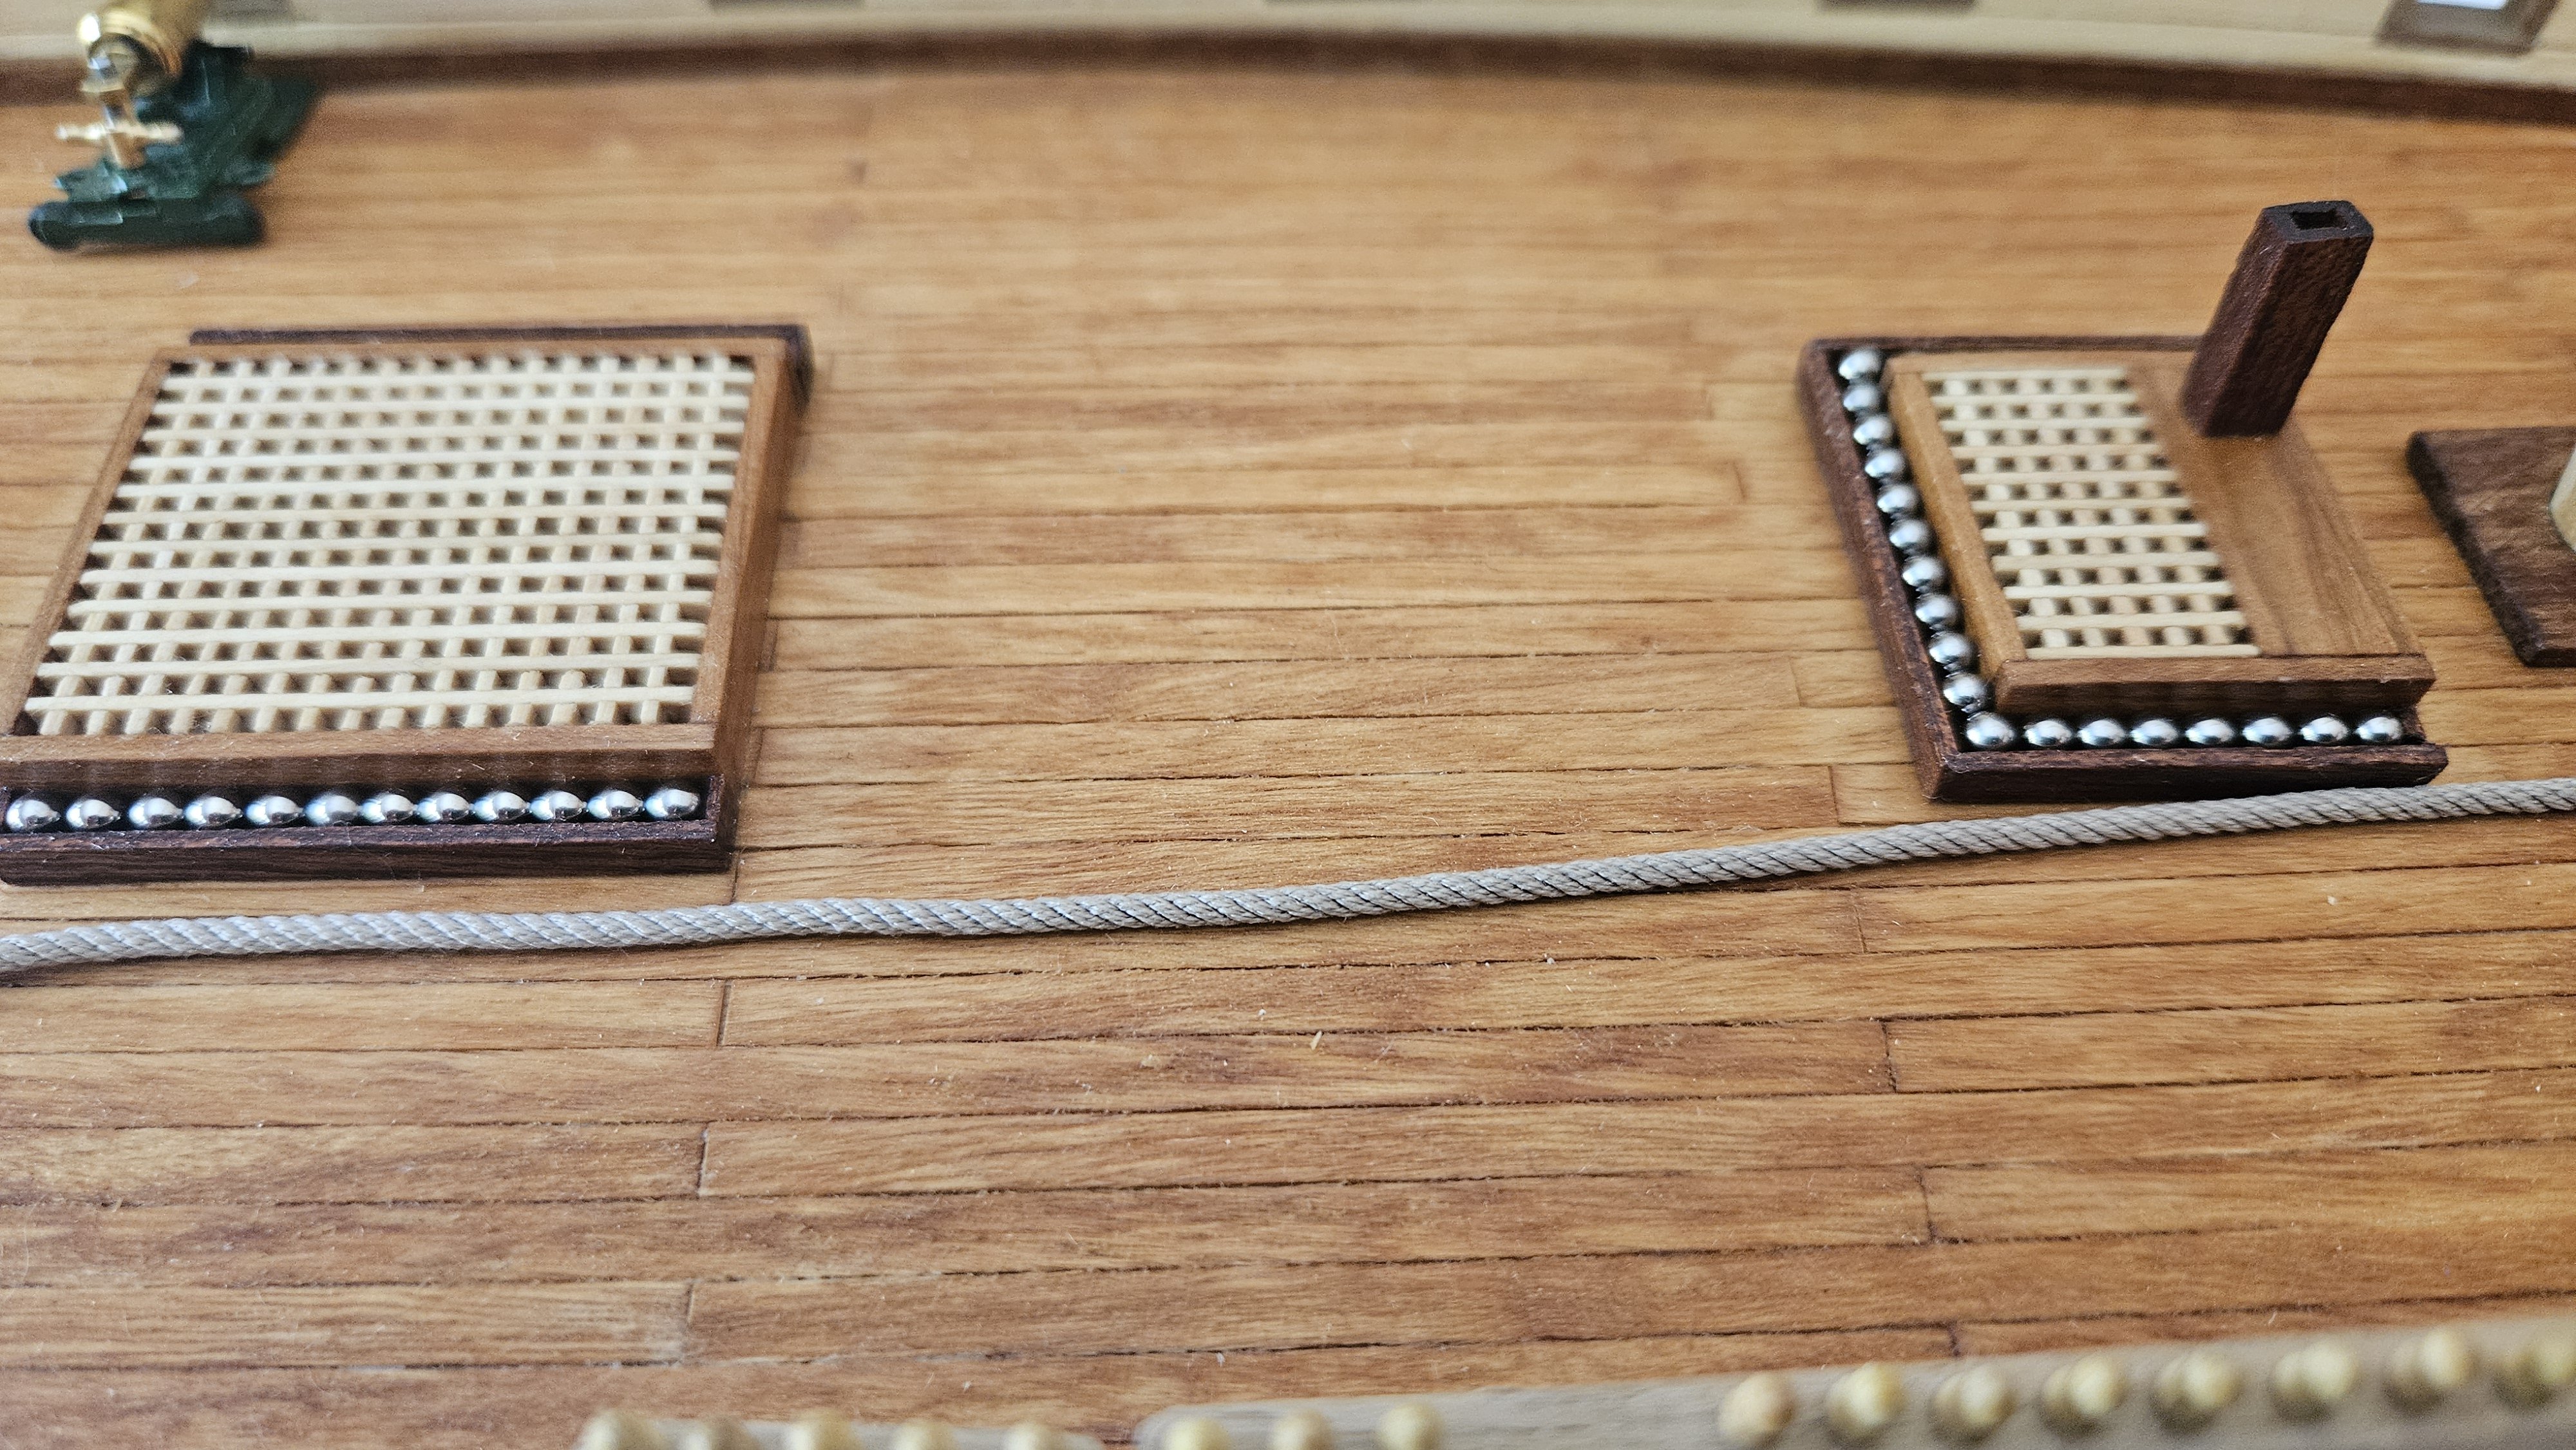
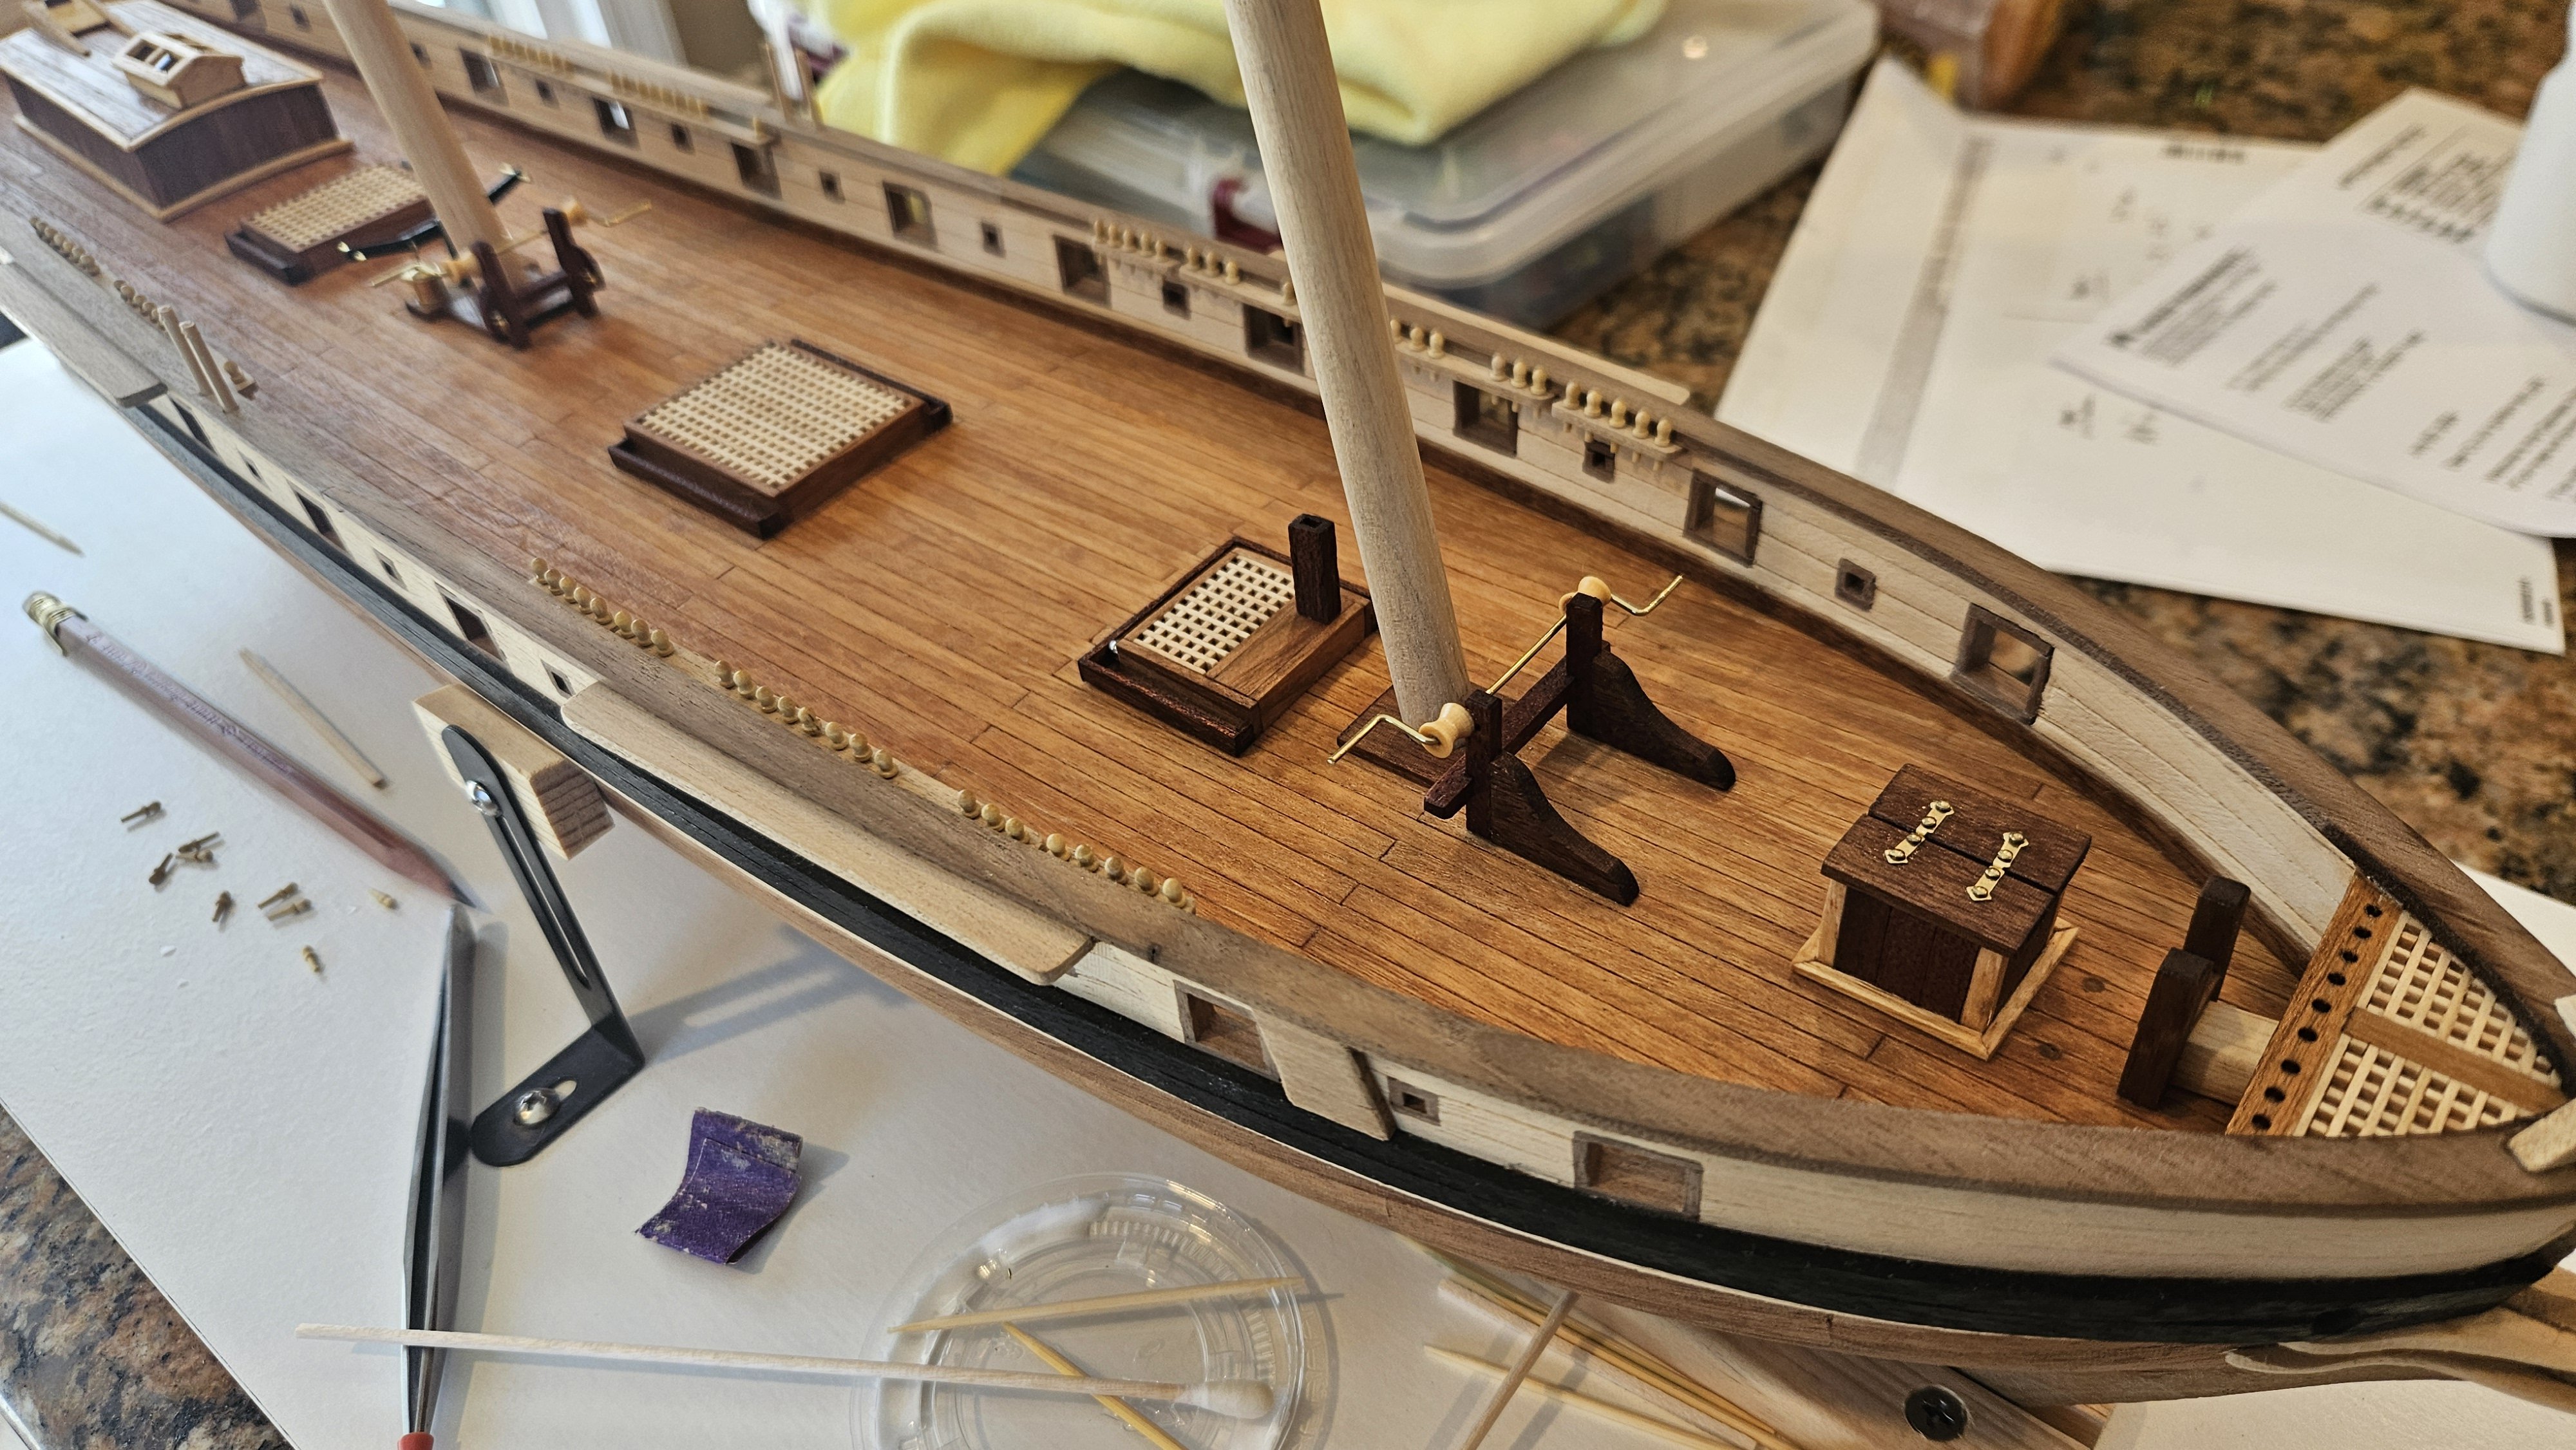
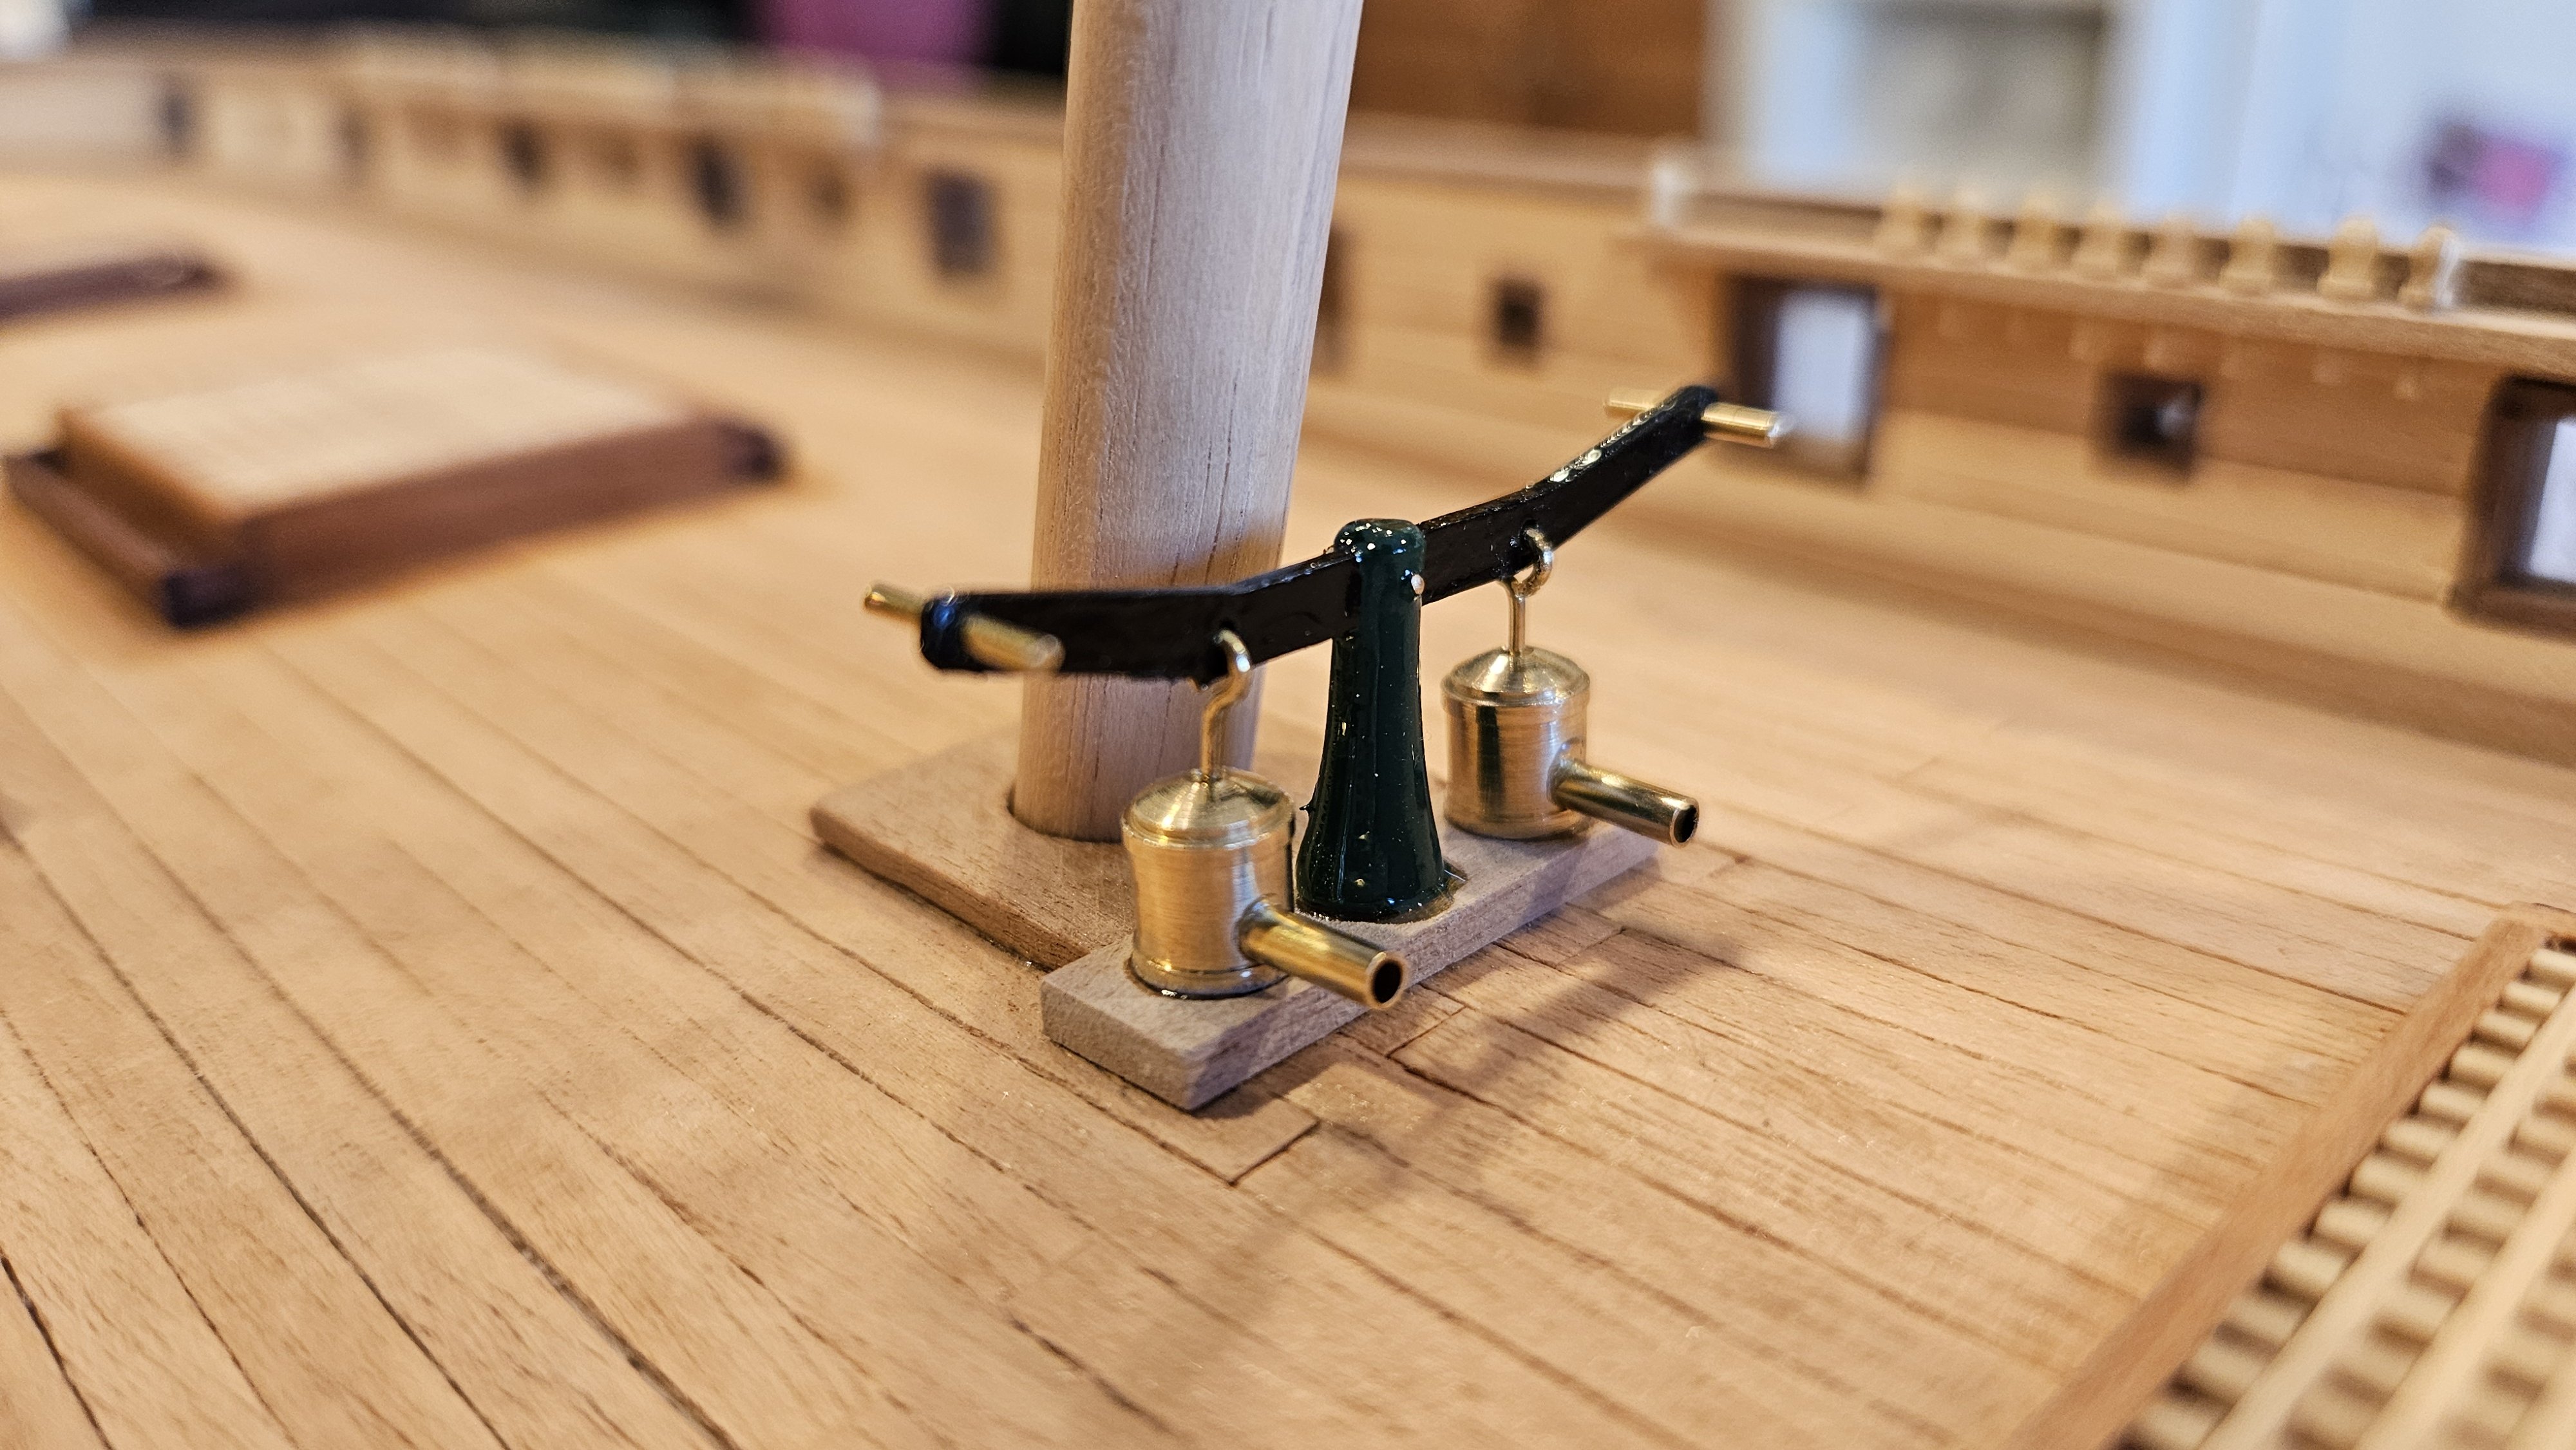
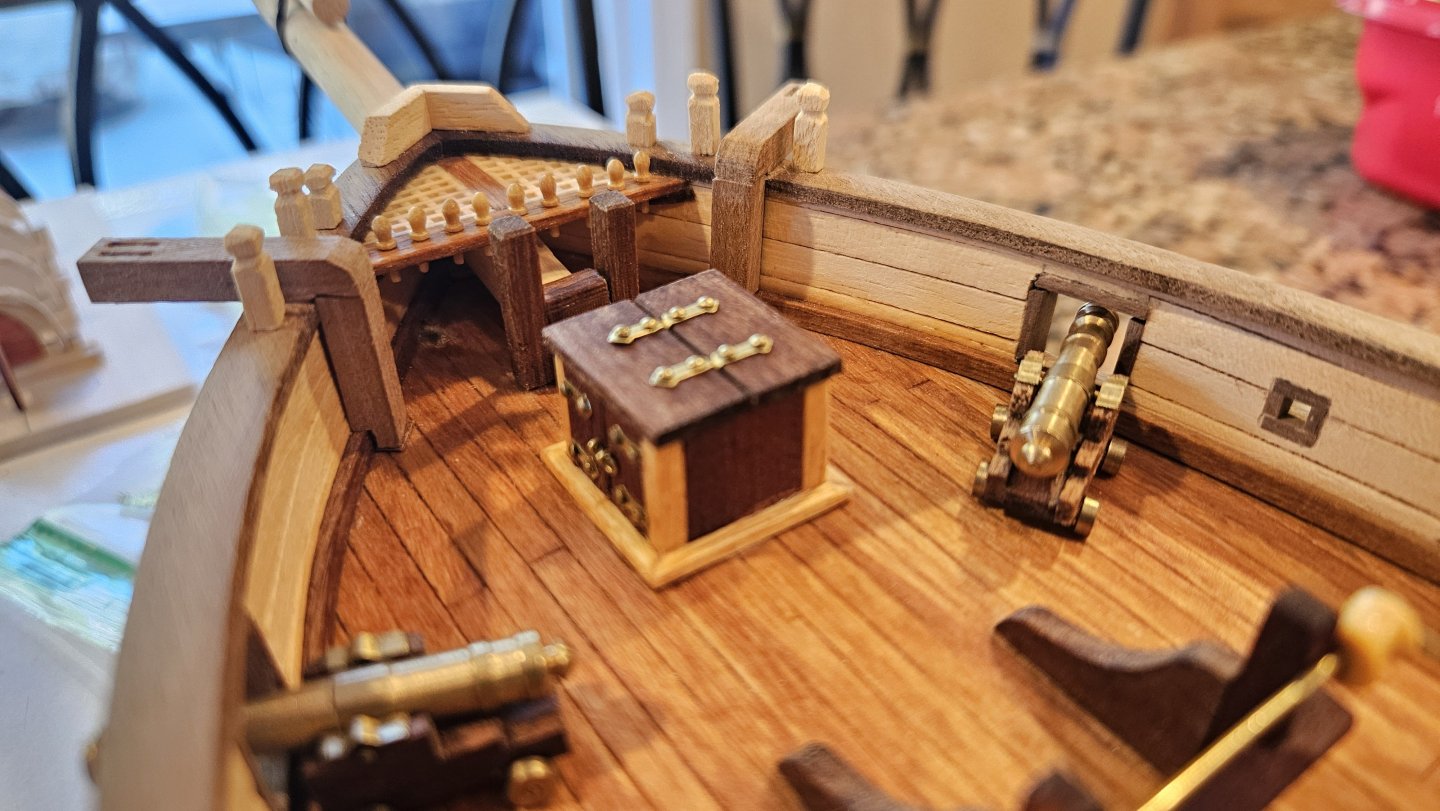
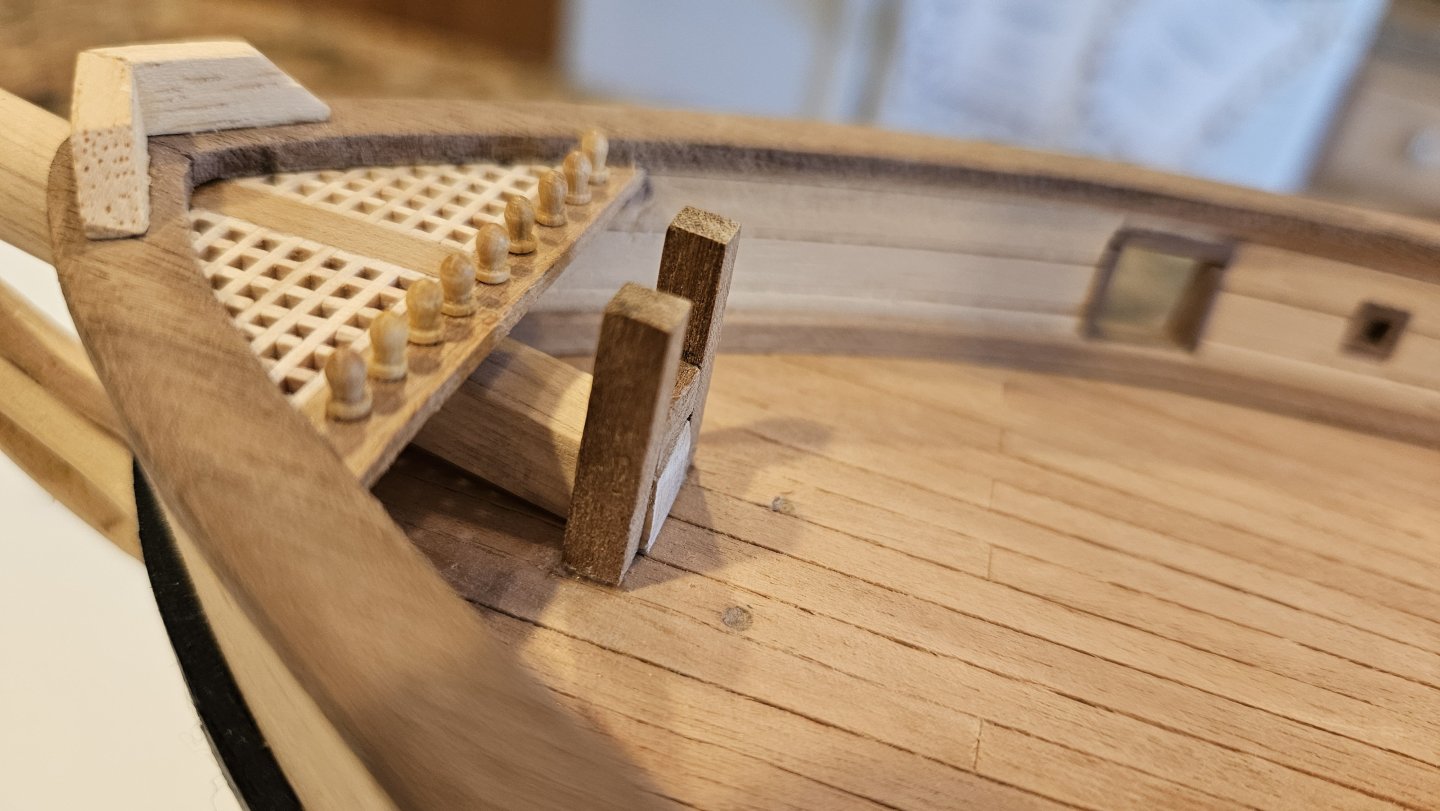
Bowsprit before: Bowsprit after: Grand difference. I think it looks more elegant this way for sure. The bowsprit bitts required two tries to get them squared up and a good tight fit. Also fabricated the grates and belaying pin rail at the bow: Painted, polished and assembled the pumps. Mounted the pumps according to Chapelle/Royal Navy. Constructo had them much farther aft. So shiny!! Thanks for looking. Steve


-
“Capt. Eddie” A-7 Corsair II by GrandpaPhil - 1/48
Coyote_6 replied to GrandpaPhil's topic in Non-ship/categorised builds
That looks fabulous - awesome color choices. Much sharper than the beginning state for sure. Well done Phil. Nice interlude. -
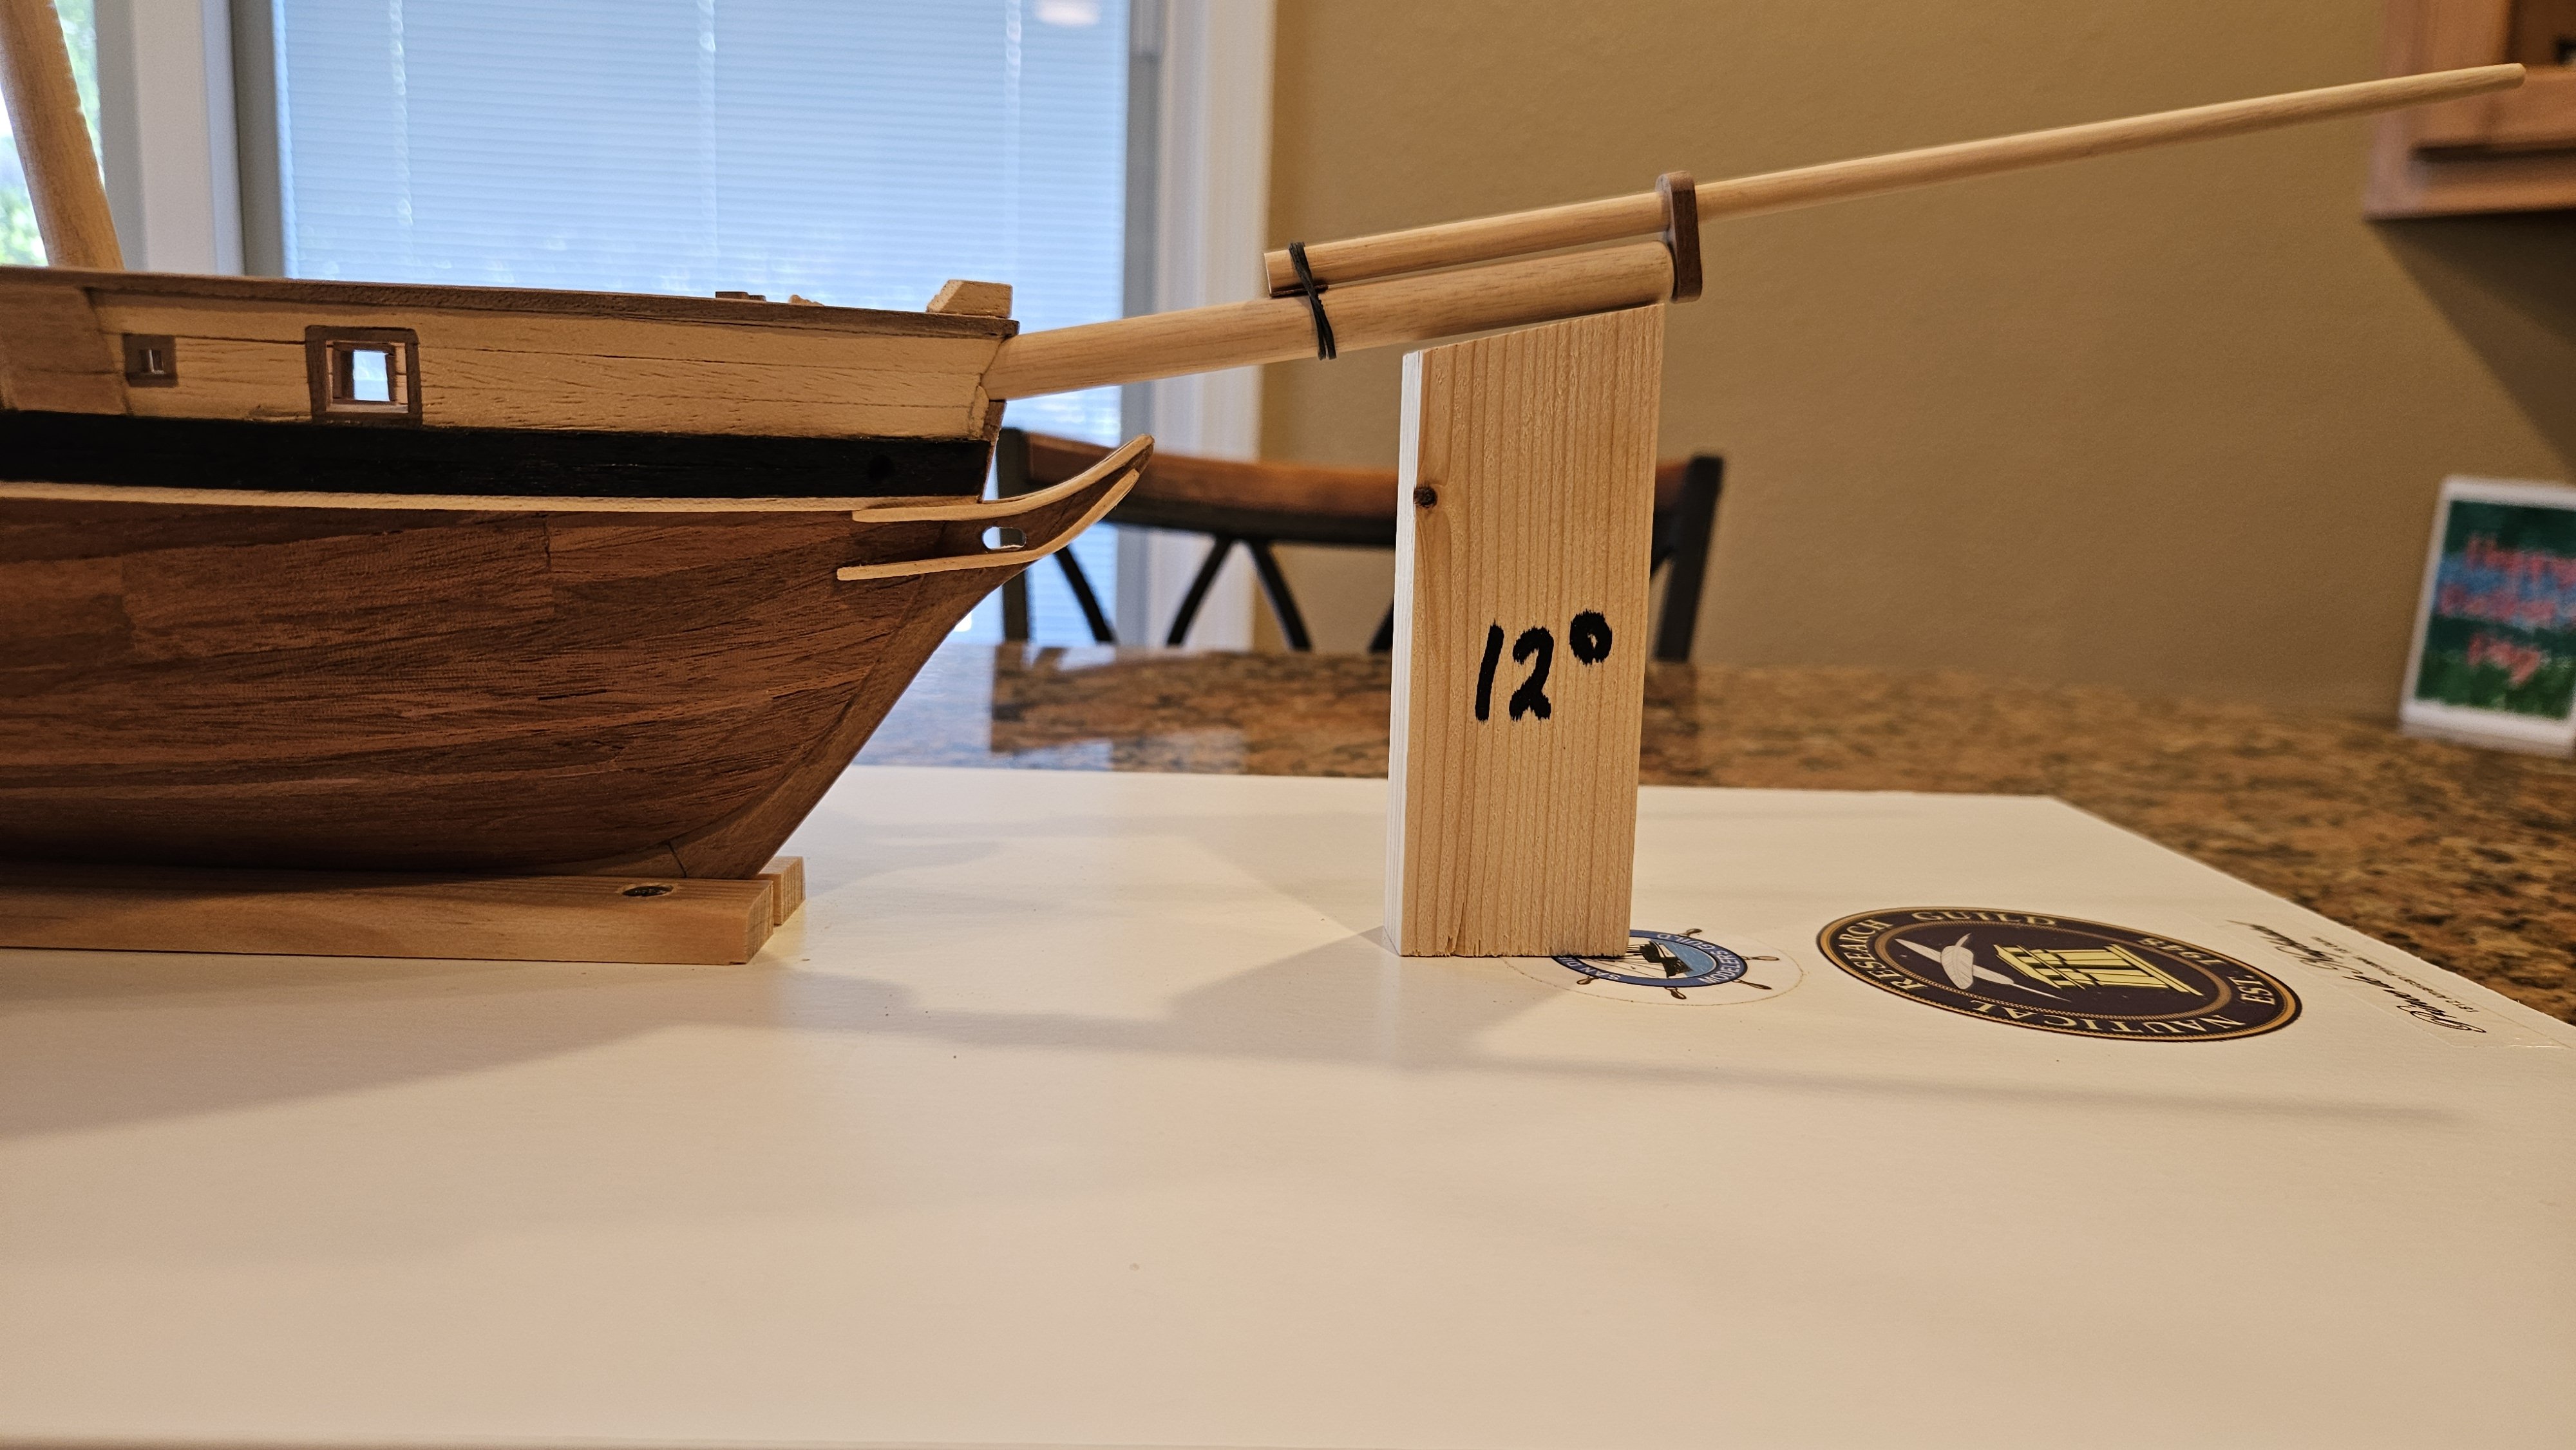
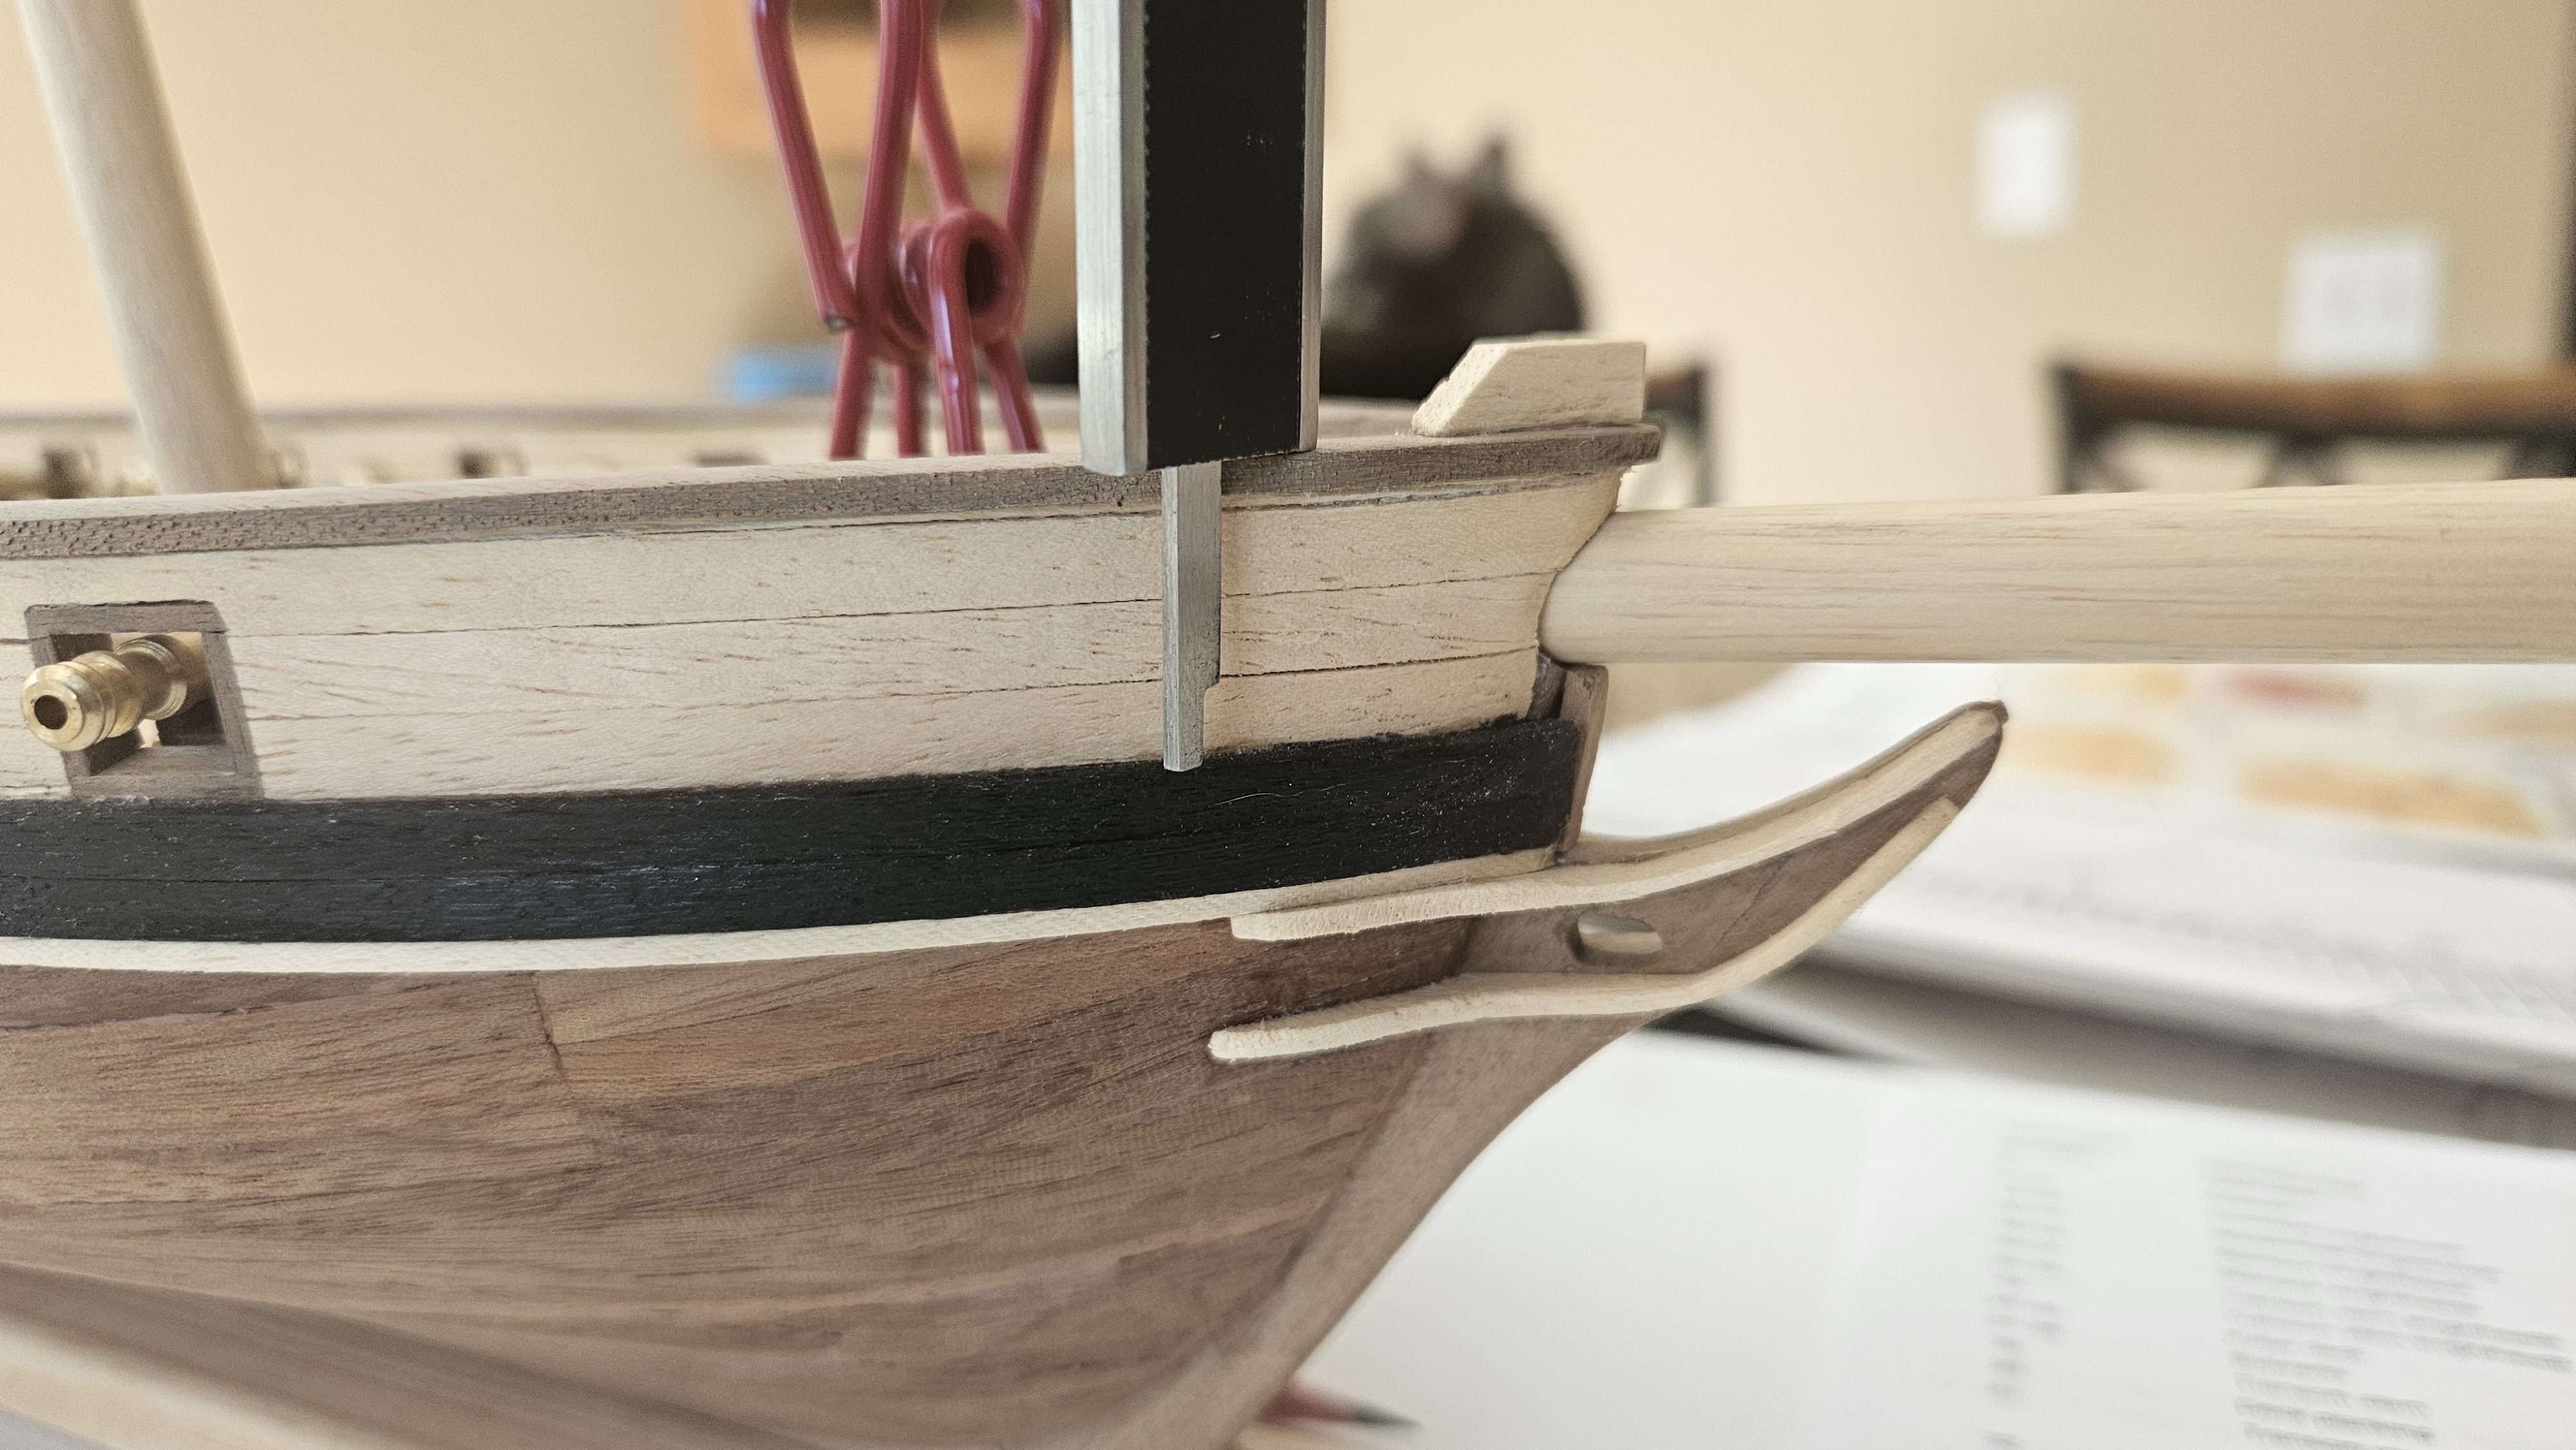
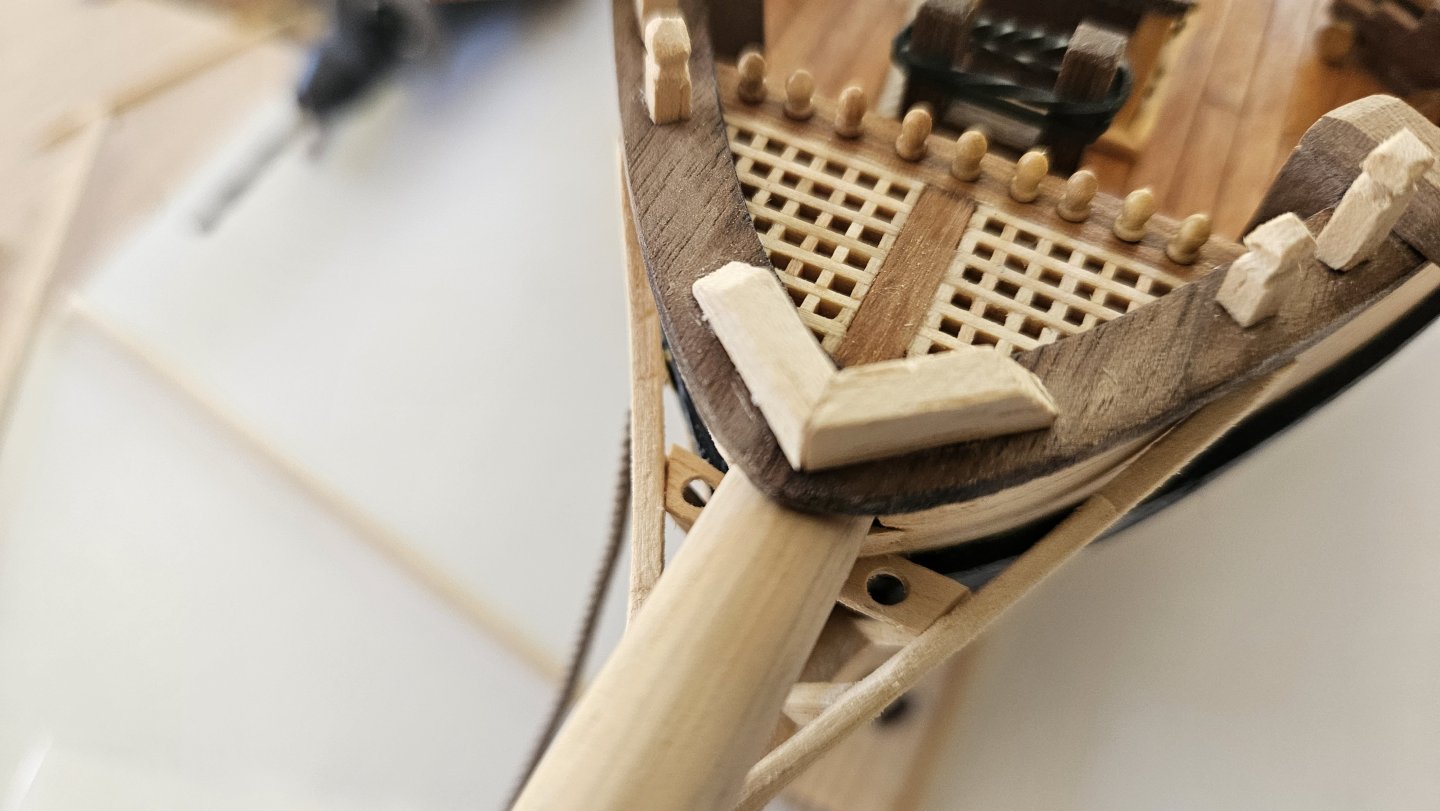
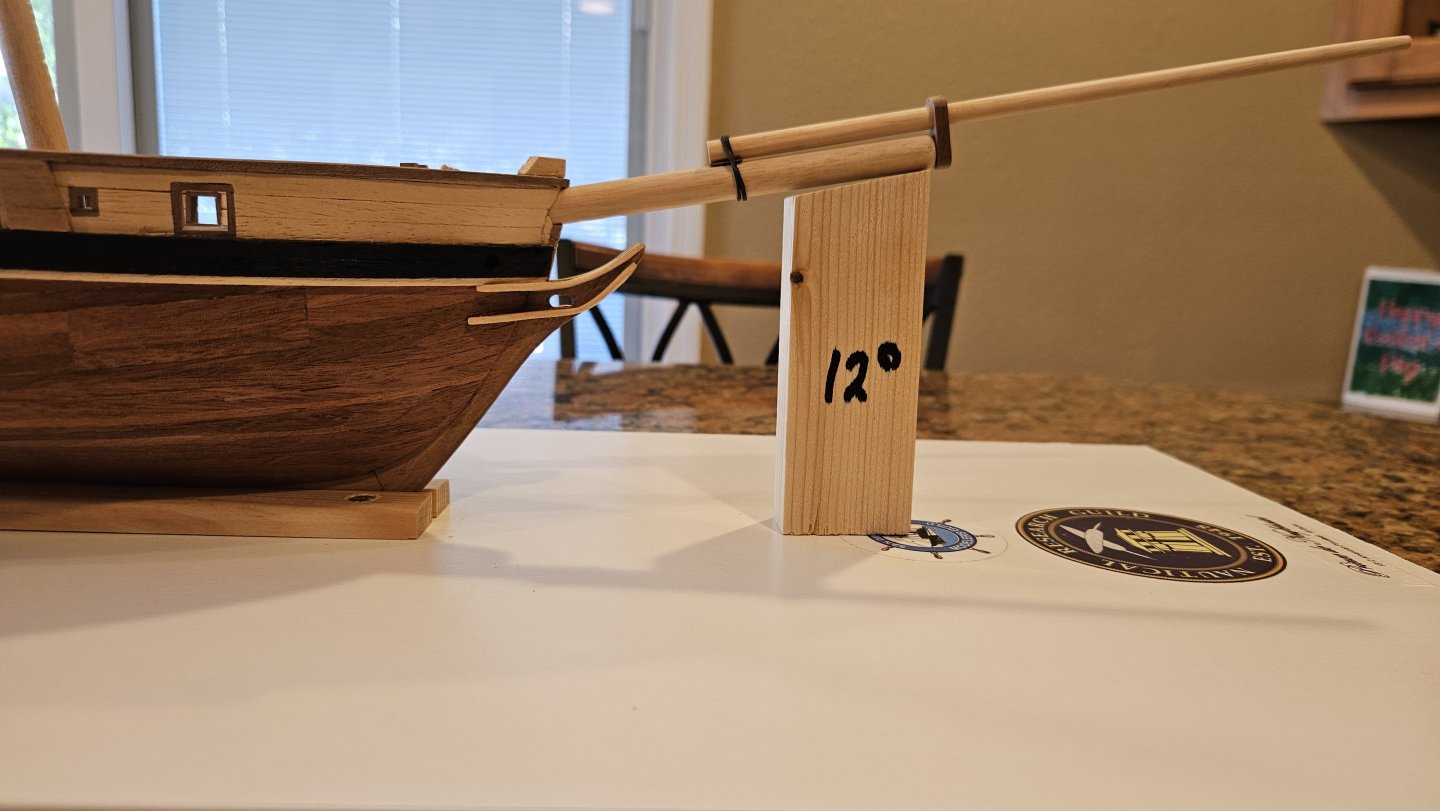
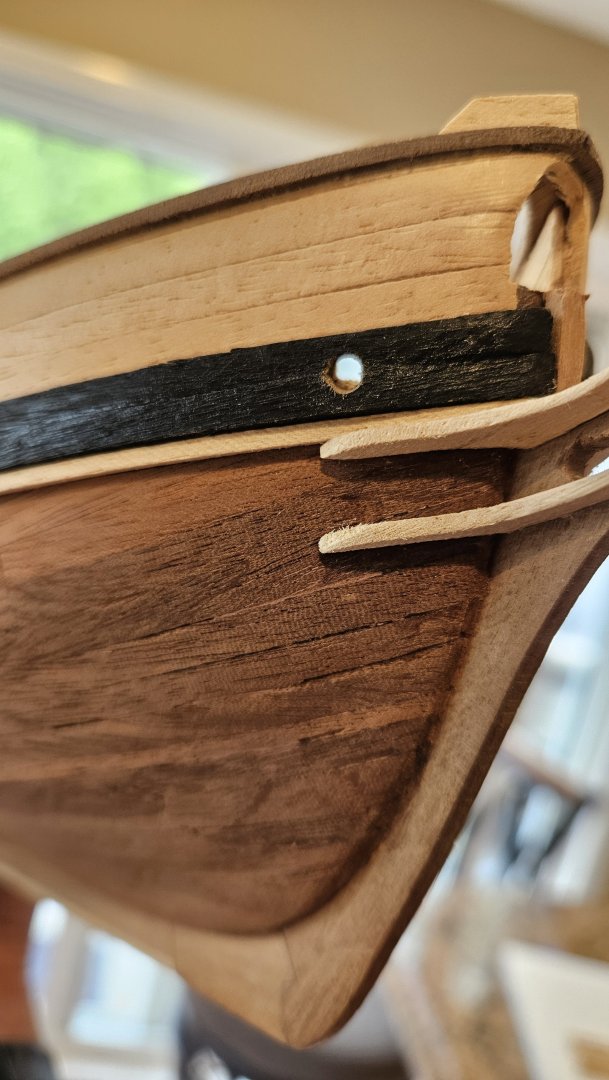
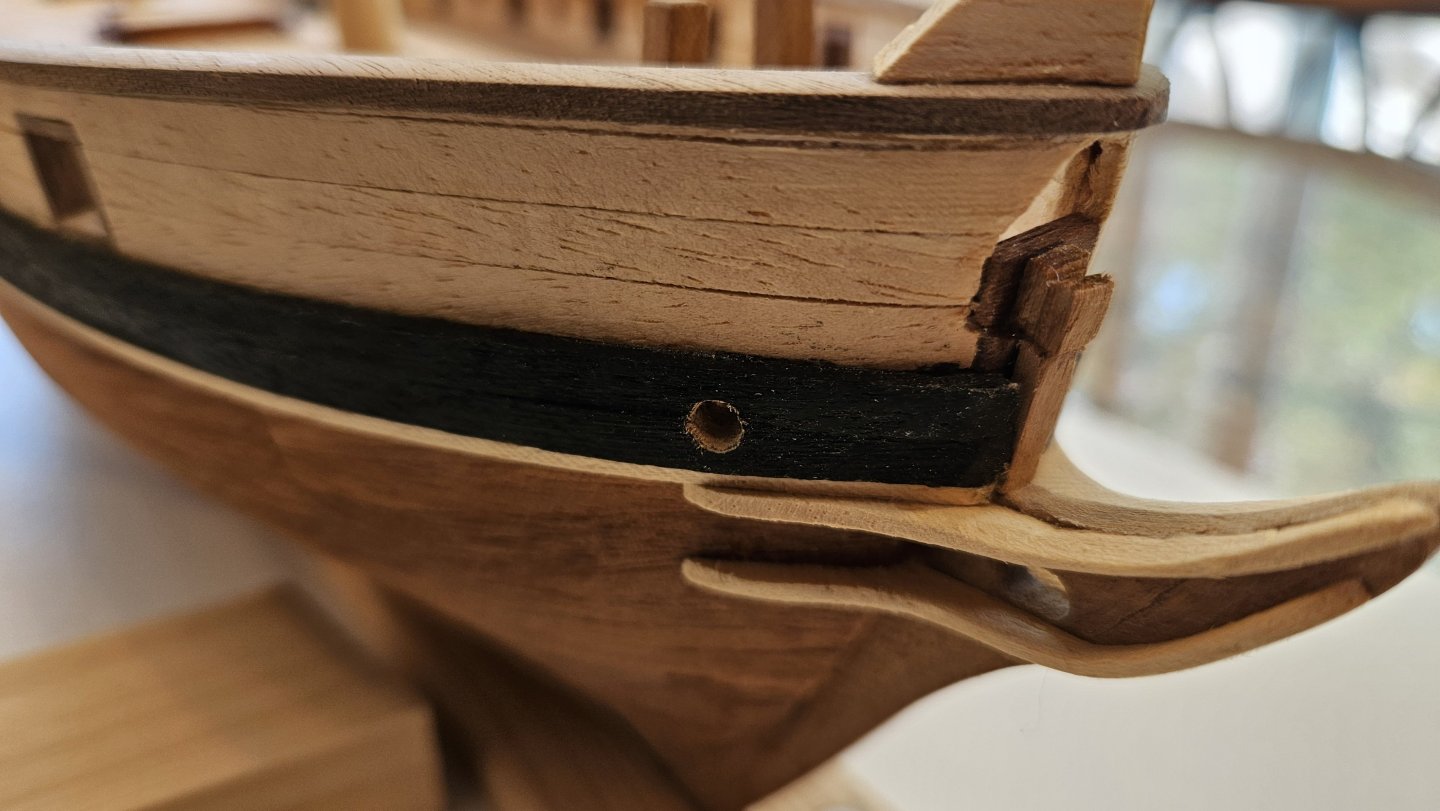
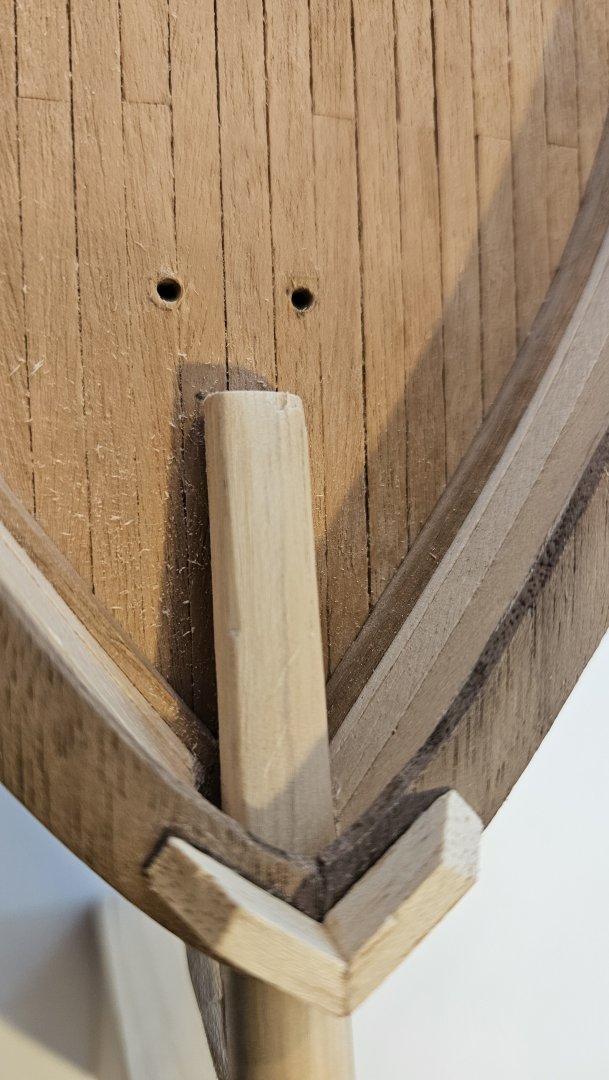
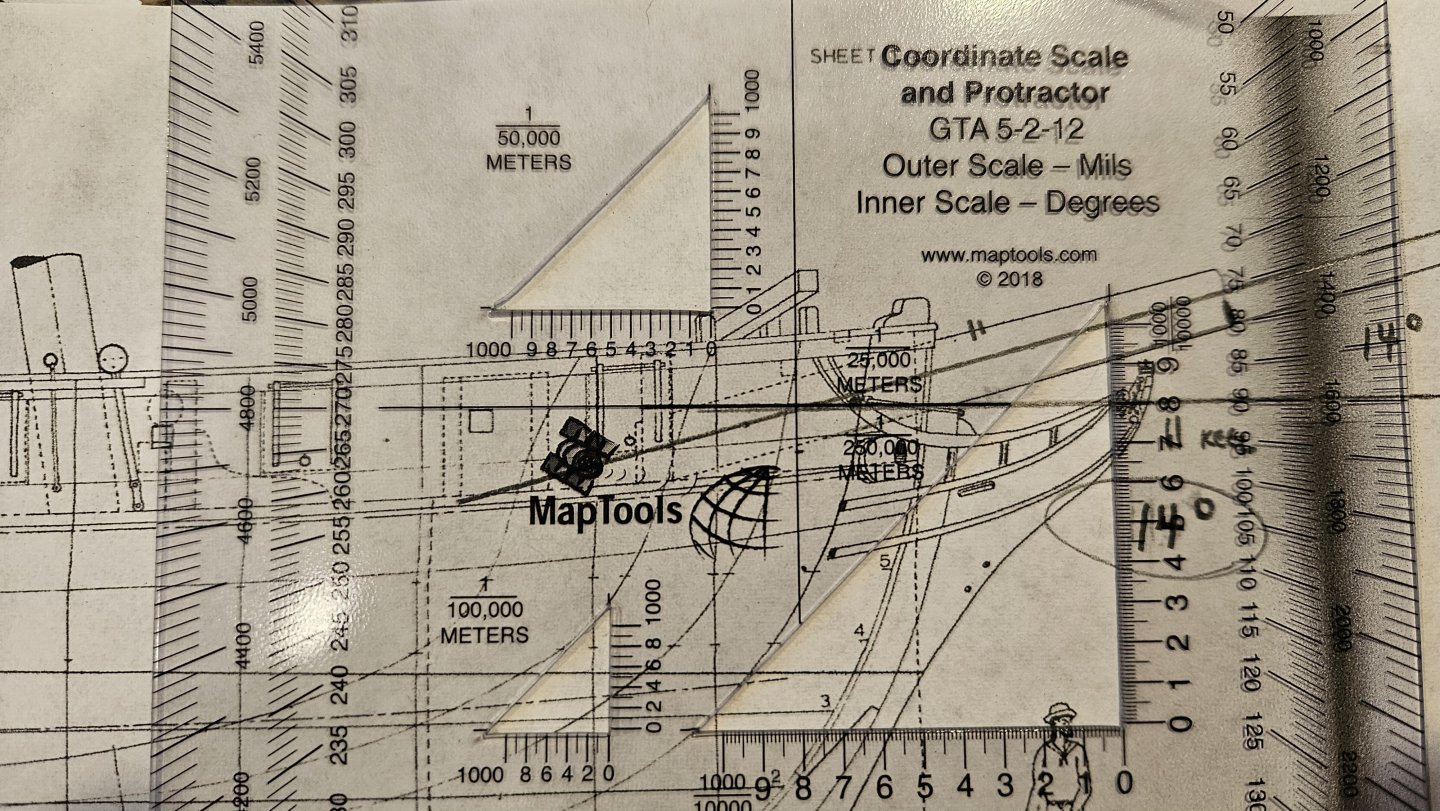
While reconstructing the structure around the bowsprit, I drilled the port and starboard hawse holes. If I'm being honest I was just afraid to drill into the hull at this point. Relocating the bowsprit mounting point (bitts?) from Constructo's to Chapelle's location. (Did not need two extra holes in my deck planking, but in for a penny, in for a pound.) Building out the bowsprit support structure. We'll see if it's acceptable when filed/sanded. Not gonna physically be able to make 14 degrees with the given rail height, so 12 degrees will have to do. Noticeably better than 7.5 degrees though!

-
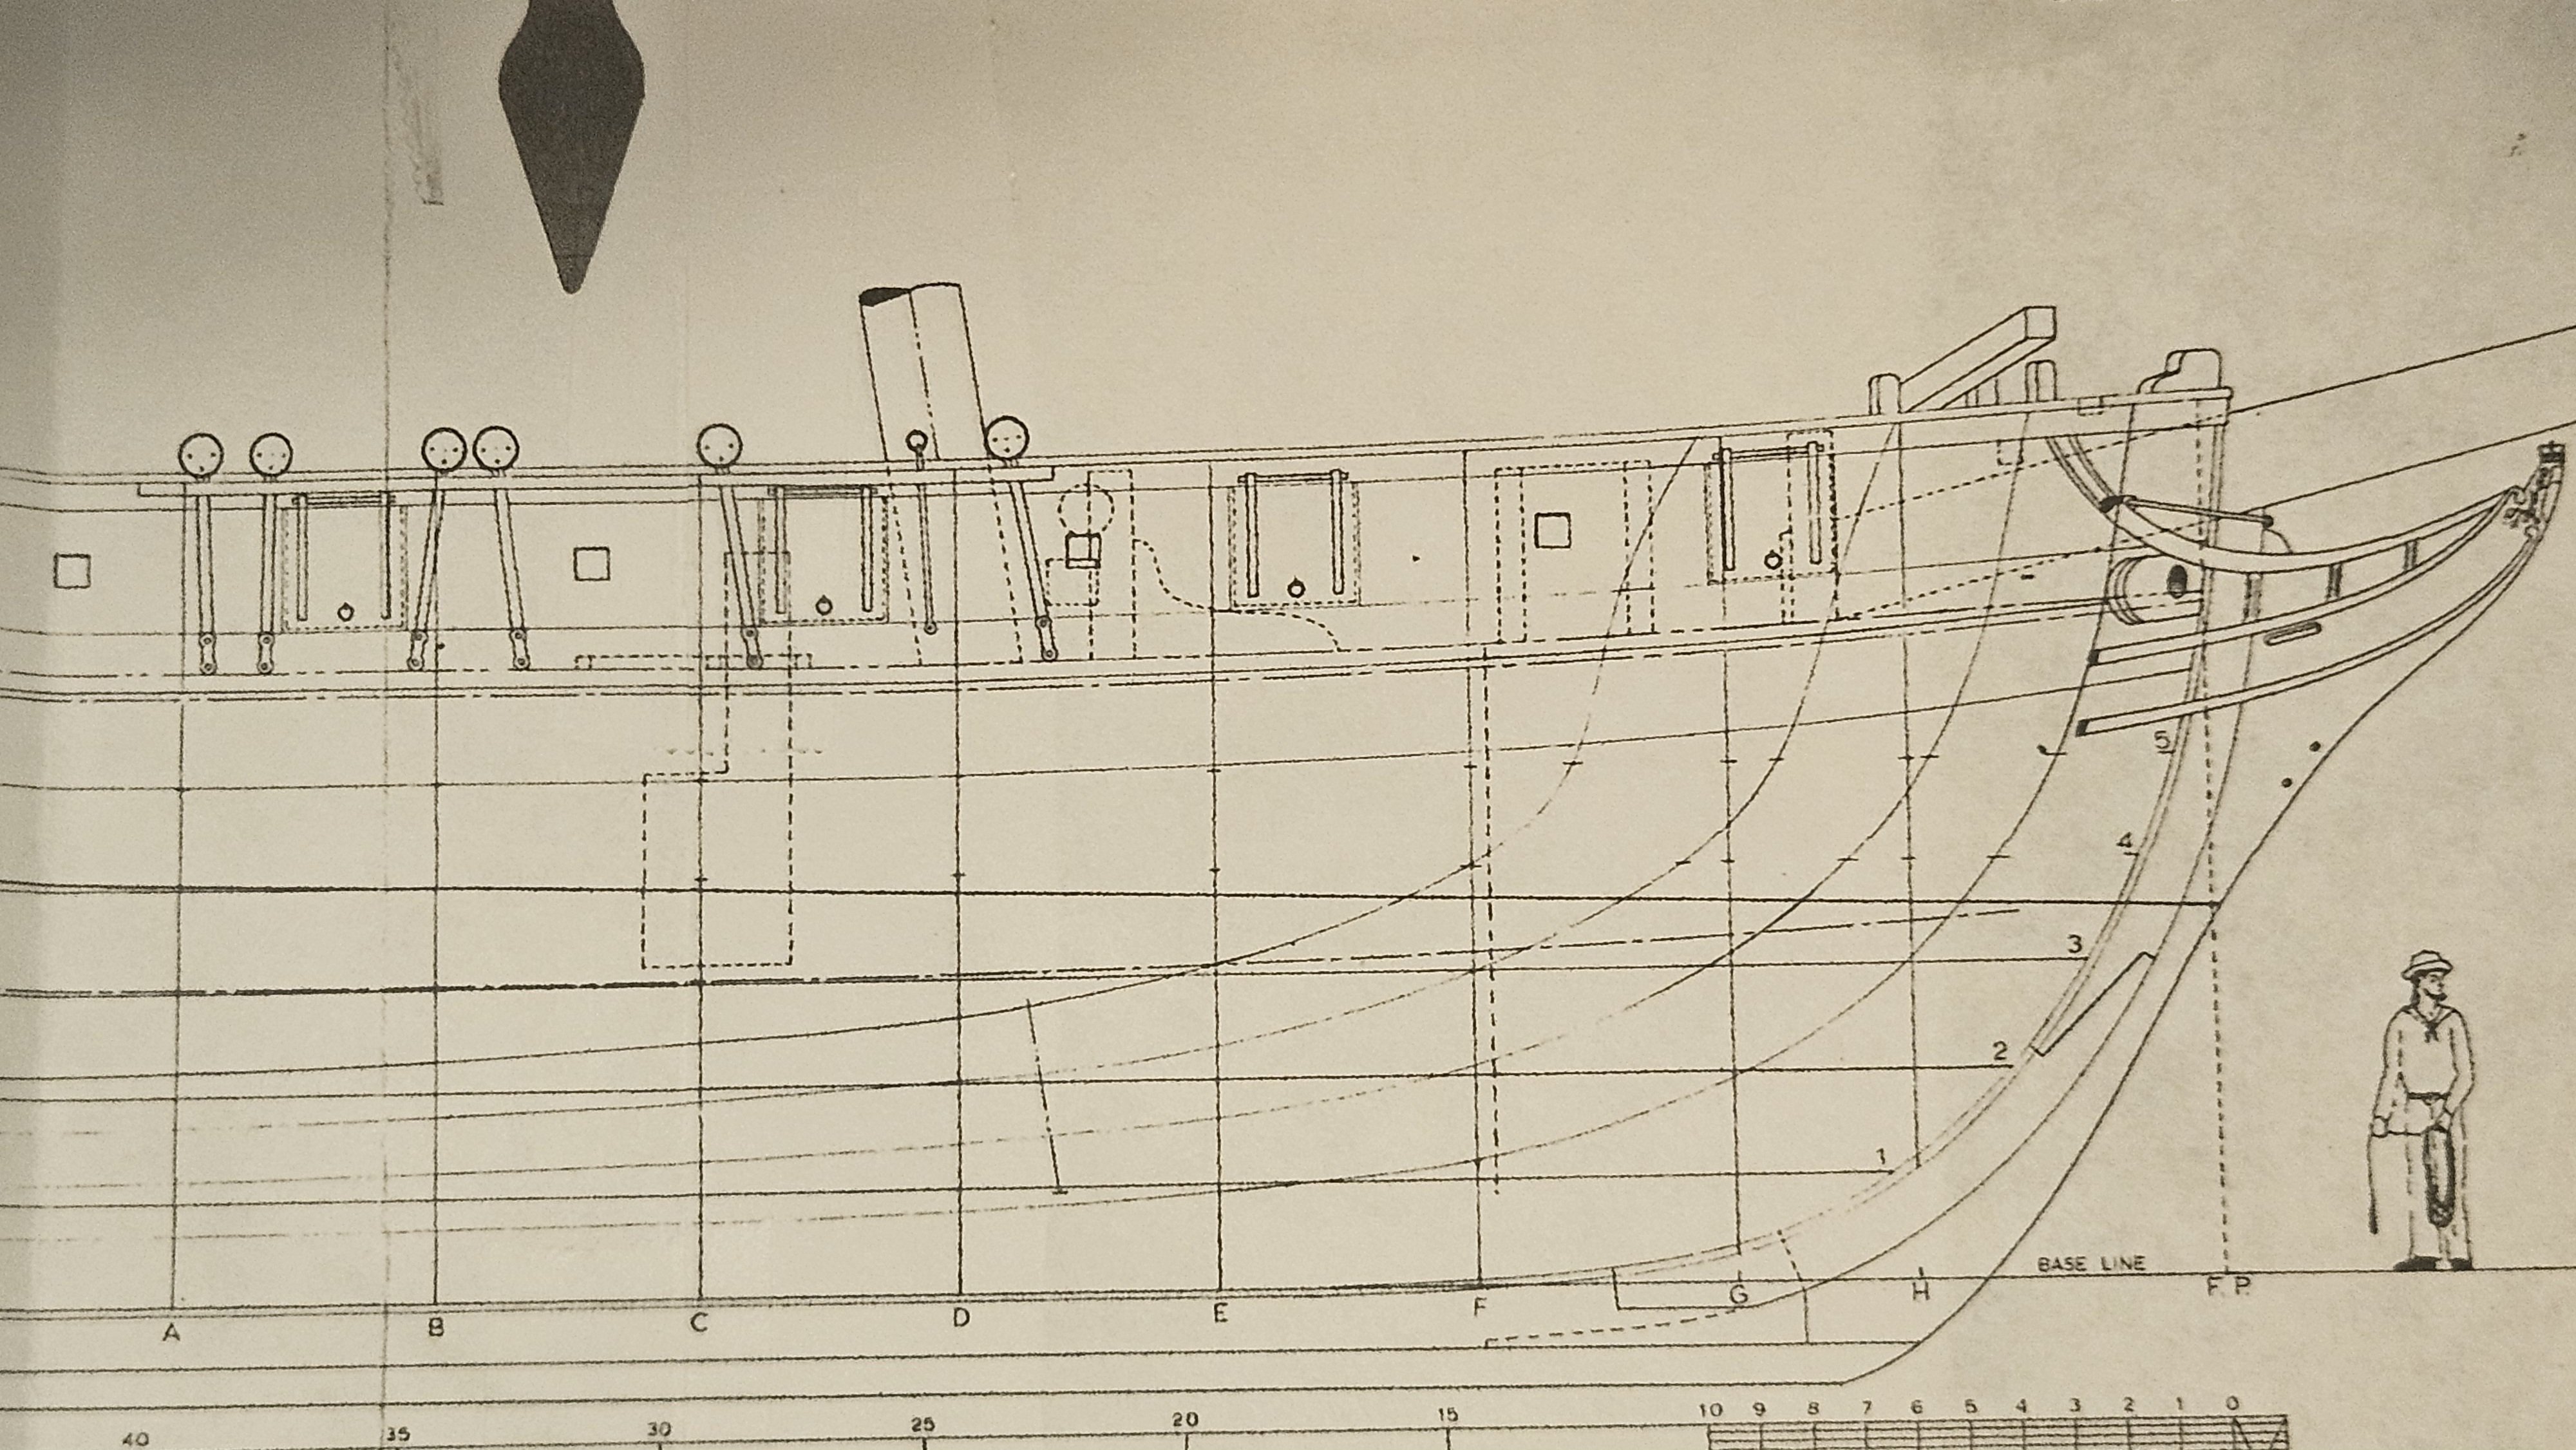
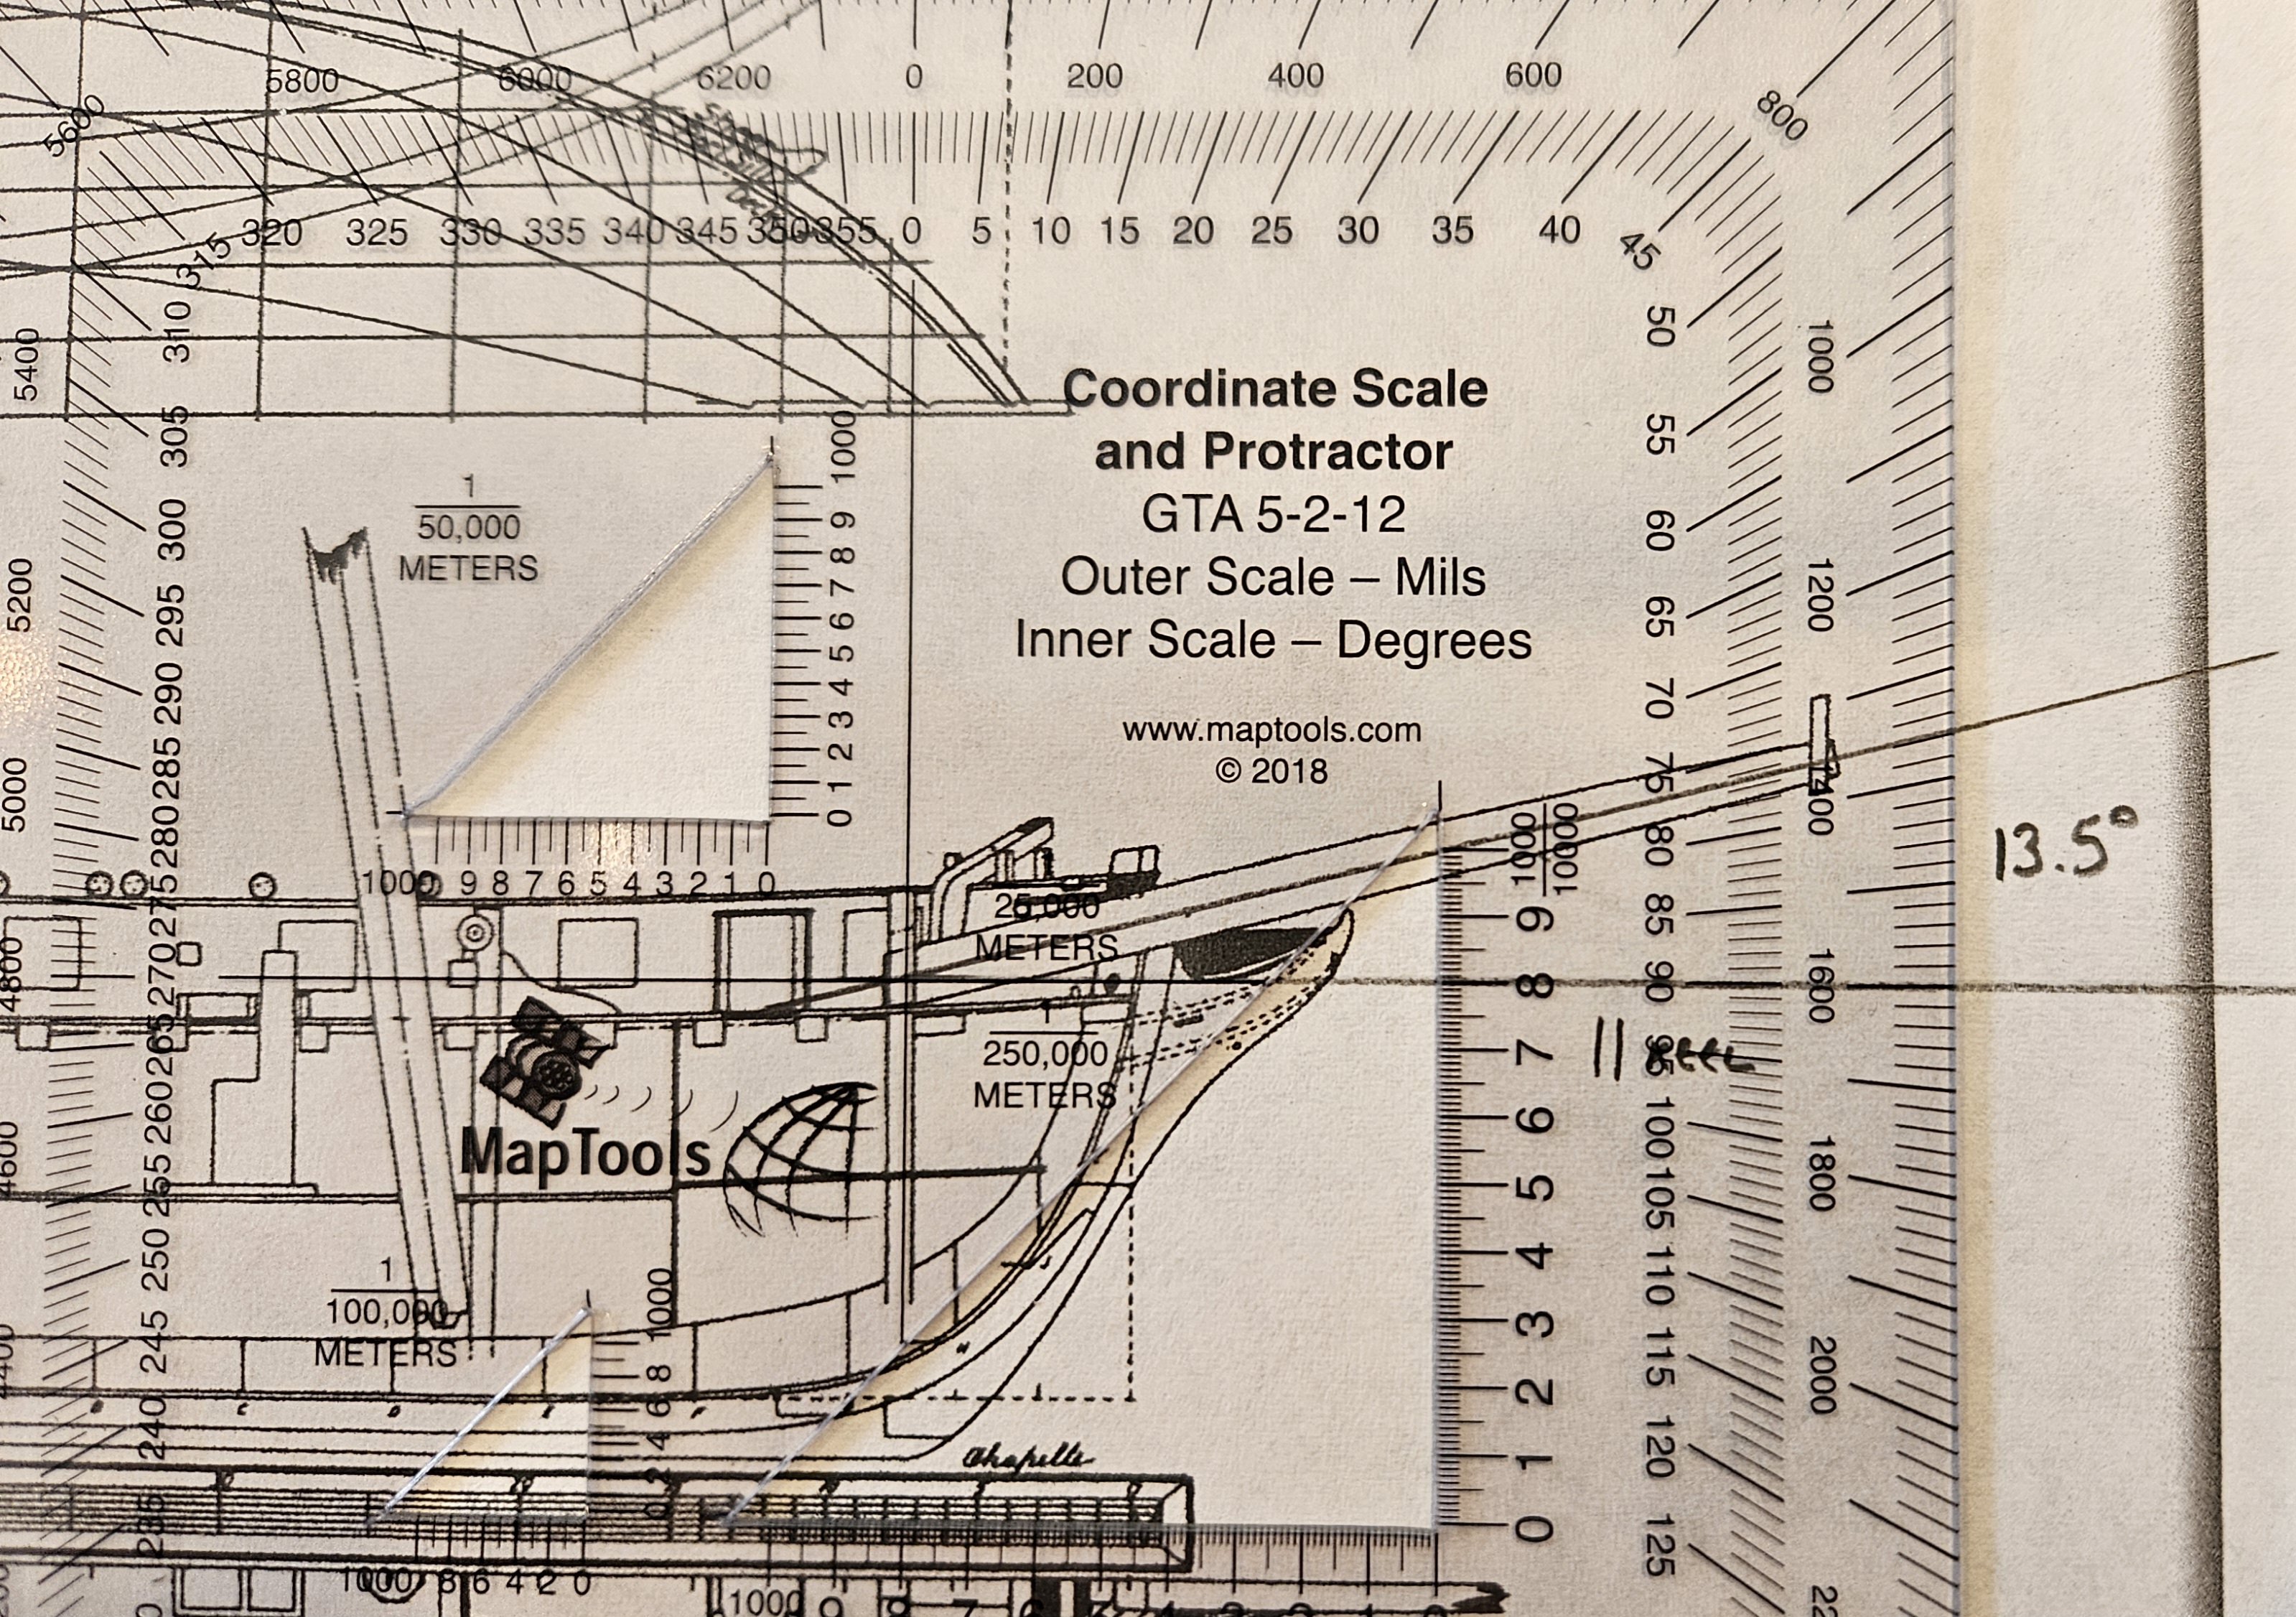
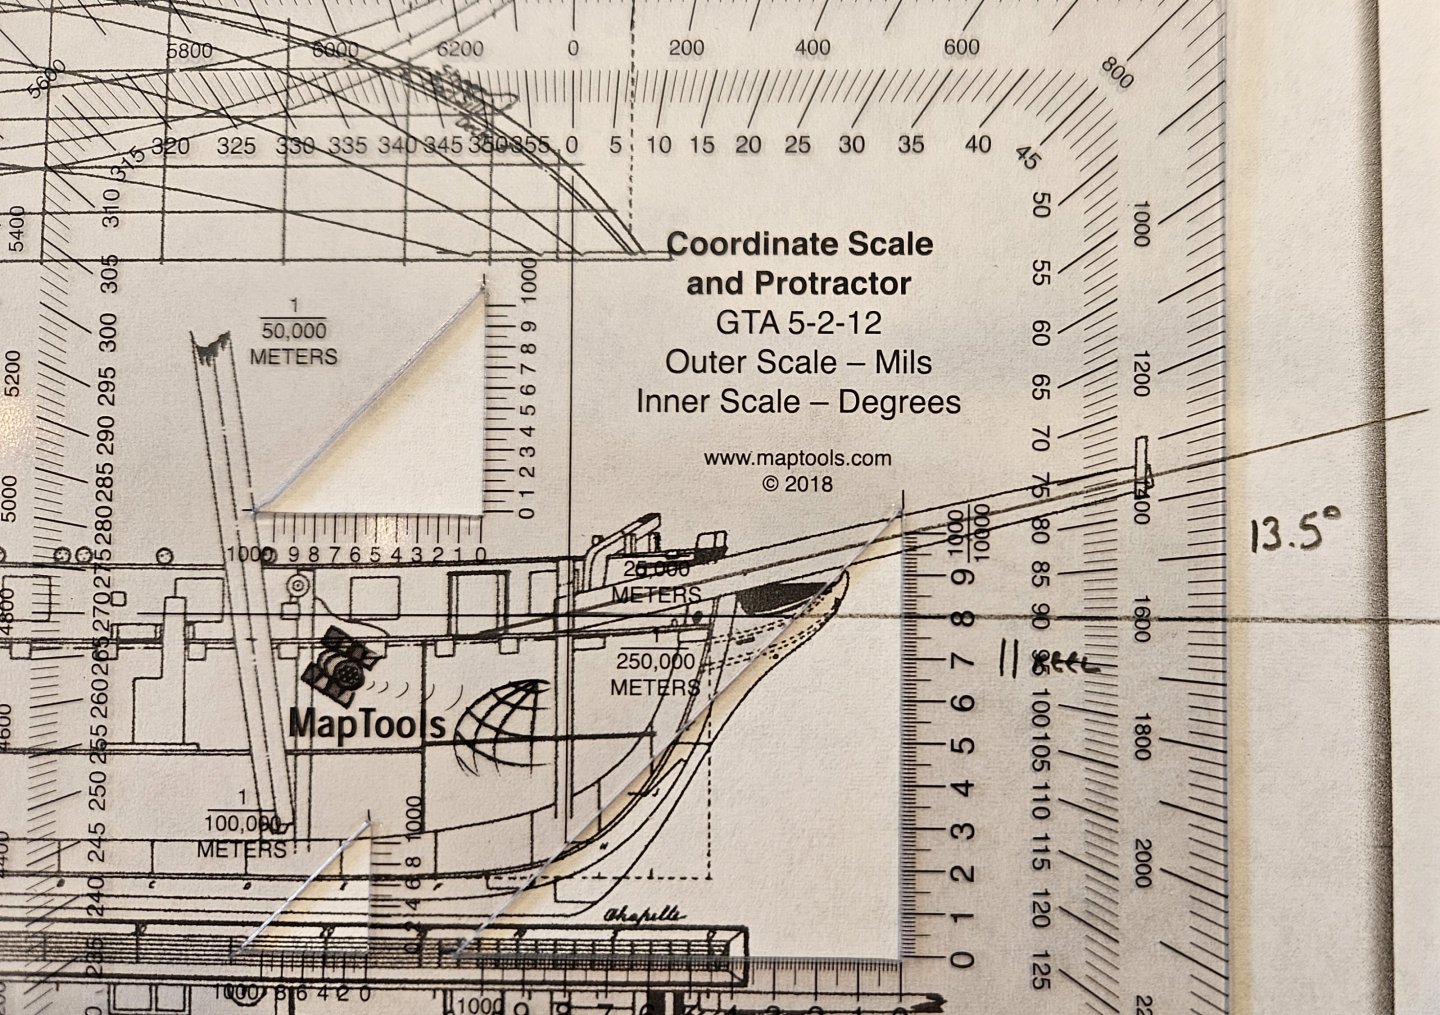
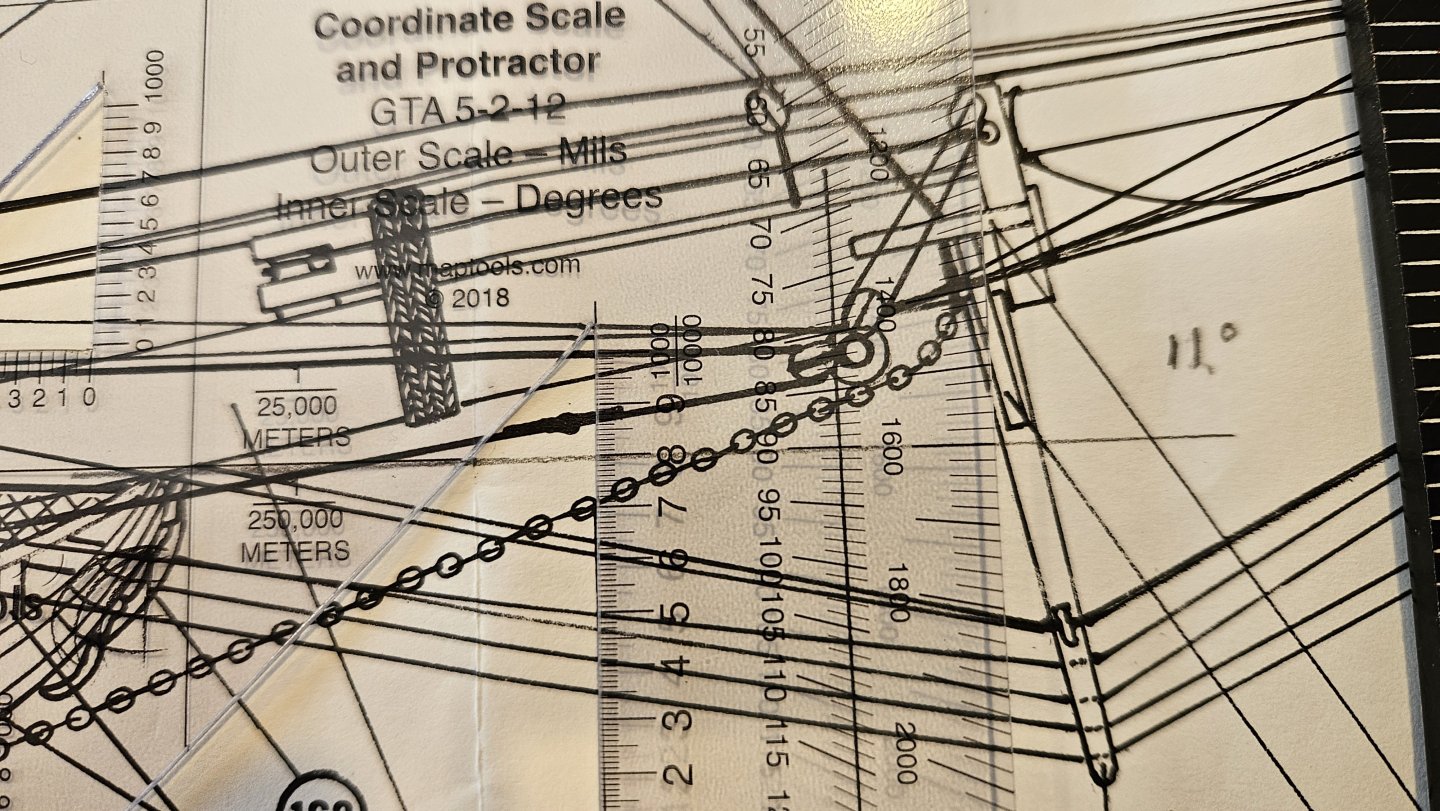
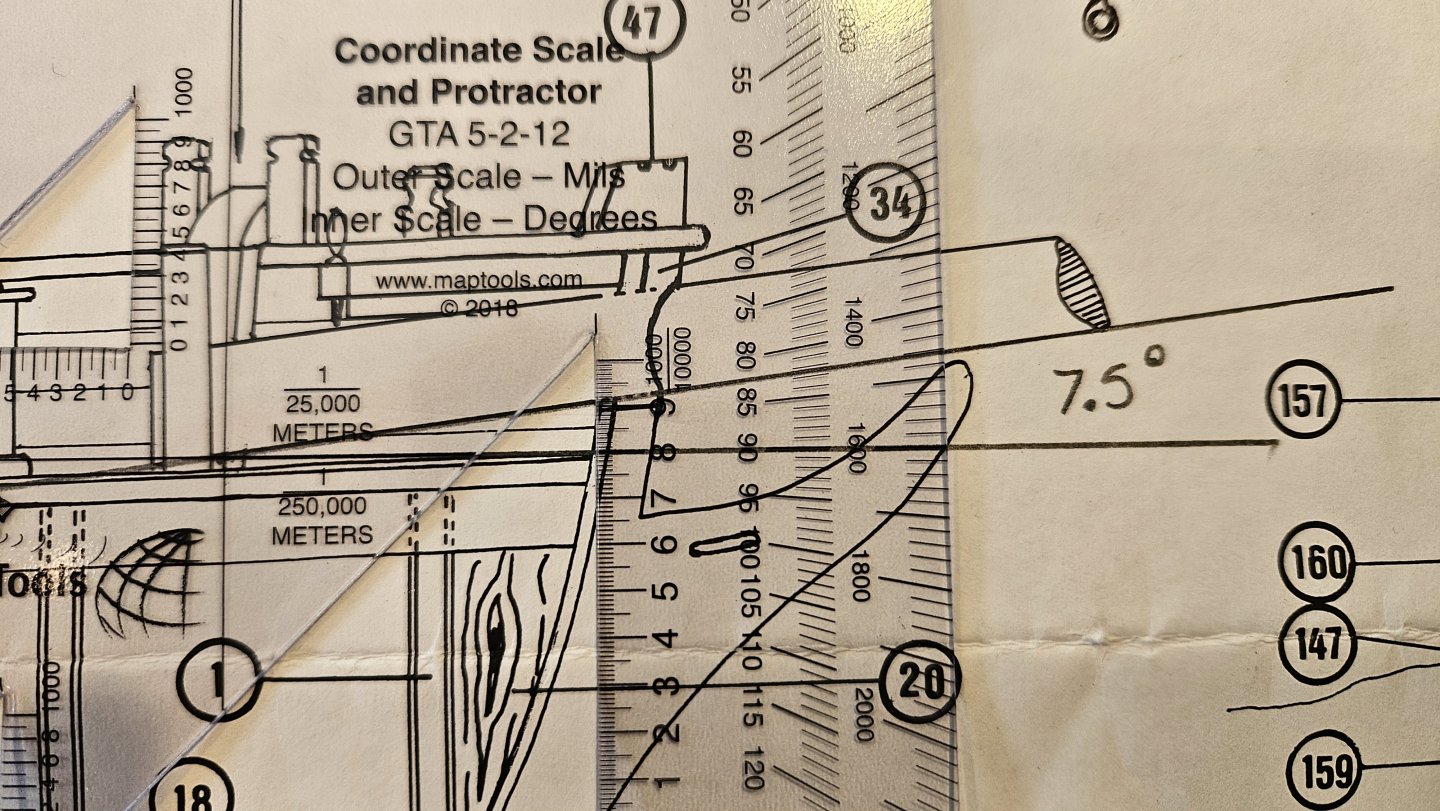
Bowsprit angle. Shouldn't really be an issue. Brought the PdN to the local club meeting and one of the pros says "are you sure that bowsprit angle is right?" (Thanks Mike!) Of course it is. I followed the Constructo plans. See here - sheet 1, 7.5 degrees relative to the keel. Oh, wait a minute. Sheet 2 of the Constructo plans shows 11 degrees... Alas, back to Chapelle. "The History of American Sailing Ships" from 1935: 13.5 degrees. "The Search for Speed Under Sail" from 1967: 14 degrees. So off to make a 14 degree jig and praying I can get my bowsprit that high. Oh Constructo... (Good thing I didn't glue it in!)

-
Wow that looks nice Phil. The symmetry is awesome.