chris watton
-
Posts
2,335 -
Joined
-
Last visited
Content Type
Profiles
Forums
Gallery
Events
Everything posted by chris watton
-
 Well done so far, deck detail looks good. One thing I would suggest (based on experience) is to apply masking tape to the bow platform decking, to protect it. This is because by the time you are ready to finally finish that area, the hull will have gone through a lot of abuse with the two lots of planking, gluing and sanding. If fact, it may be worth re-planking the front half round deck after you have completed the first planking. This is because the lighter first planking wood edges will be seen on the finished model, whereas if you re-plank after completing the first planking, the edges will be finished off with the same colour second planking.
 -
Always use a matt varnish.
-
The sculpting's are 100% digital. The STL files are then passed onto my resin caster, who then 3-d prints the masters into tangible form which are then used to make the moulds for the resin production castings. These should be virtually identical in both size and detail to the 3-d printed master. So will remain at the required scale, in this case, 64th, and not something like 1:78th by the time they are passed onto the customer if using cast white metal..
-
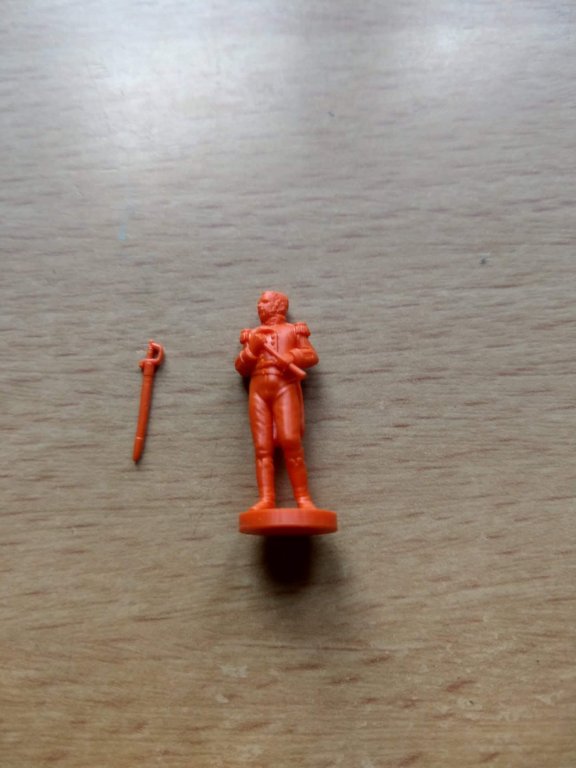
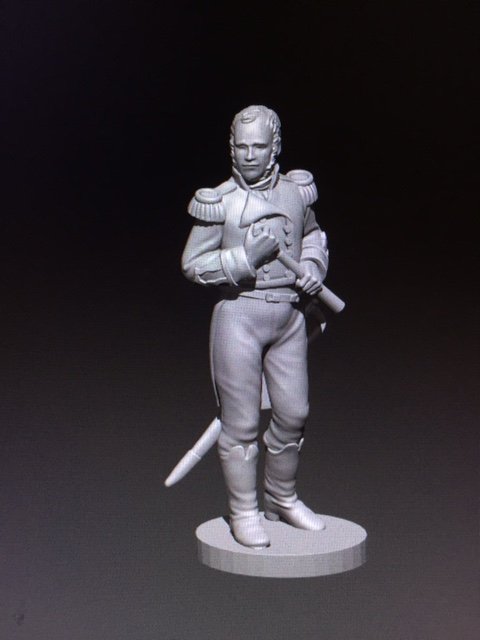
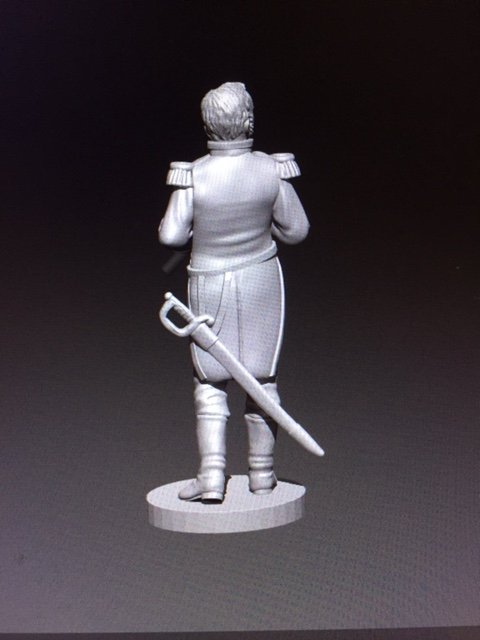
Cheers, I am not a fan of too many figures on scale models unless a diorama, but I liked the idea of having a known commander that is connected with the vessel that also helps shows the scale of the ship in relation to a person. I do plan to have a Nelson next, followed by Pellew. Having said that, it may be fun to have an able seamen figure and name him 'Jack Nasty Face'!
-
Just received a pic of the 3-d printed 64th scale Cochrane figure. I will keep the base as they will be resin cast (more expensive than white metal, but next to no shrinkage, which I think is important) , so if people want to fix directly to the deck, the base can be filed off.
-
I am waiting for final invoices to come in, no price yet, but I am aware that it needs to be reasonable..
-
That is beautiful!, and looks perfect to me. I will get some 48th figures done, not quite yet, as I have to watch my pennies, I have budgeted enough or the development of the first three kits, and after this, I am hoping I sell enough to invest all profits back into the rest of the developments I want to do. Quite close. I did have to make a couple of compromises to ensure less experienced modeller's wouldn't end up pulling their hair out, but nothing that any experienced modeller wouldn't be able to change, and certainly nothing major. All fittings and lines were taken from the book. Would be great if it weren't enough! Brilliant!
-
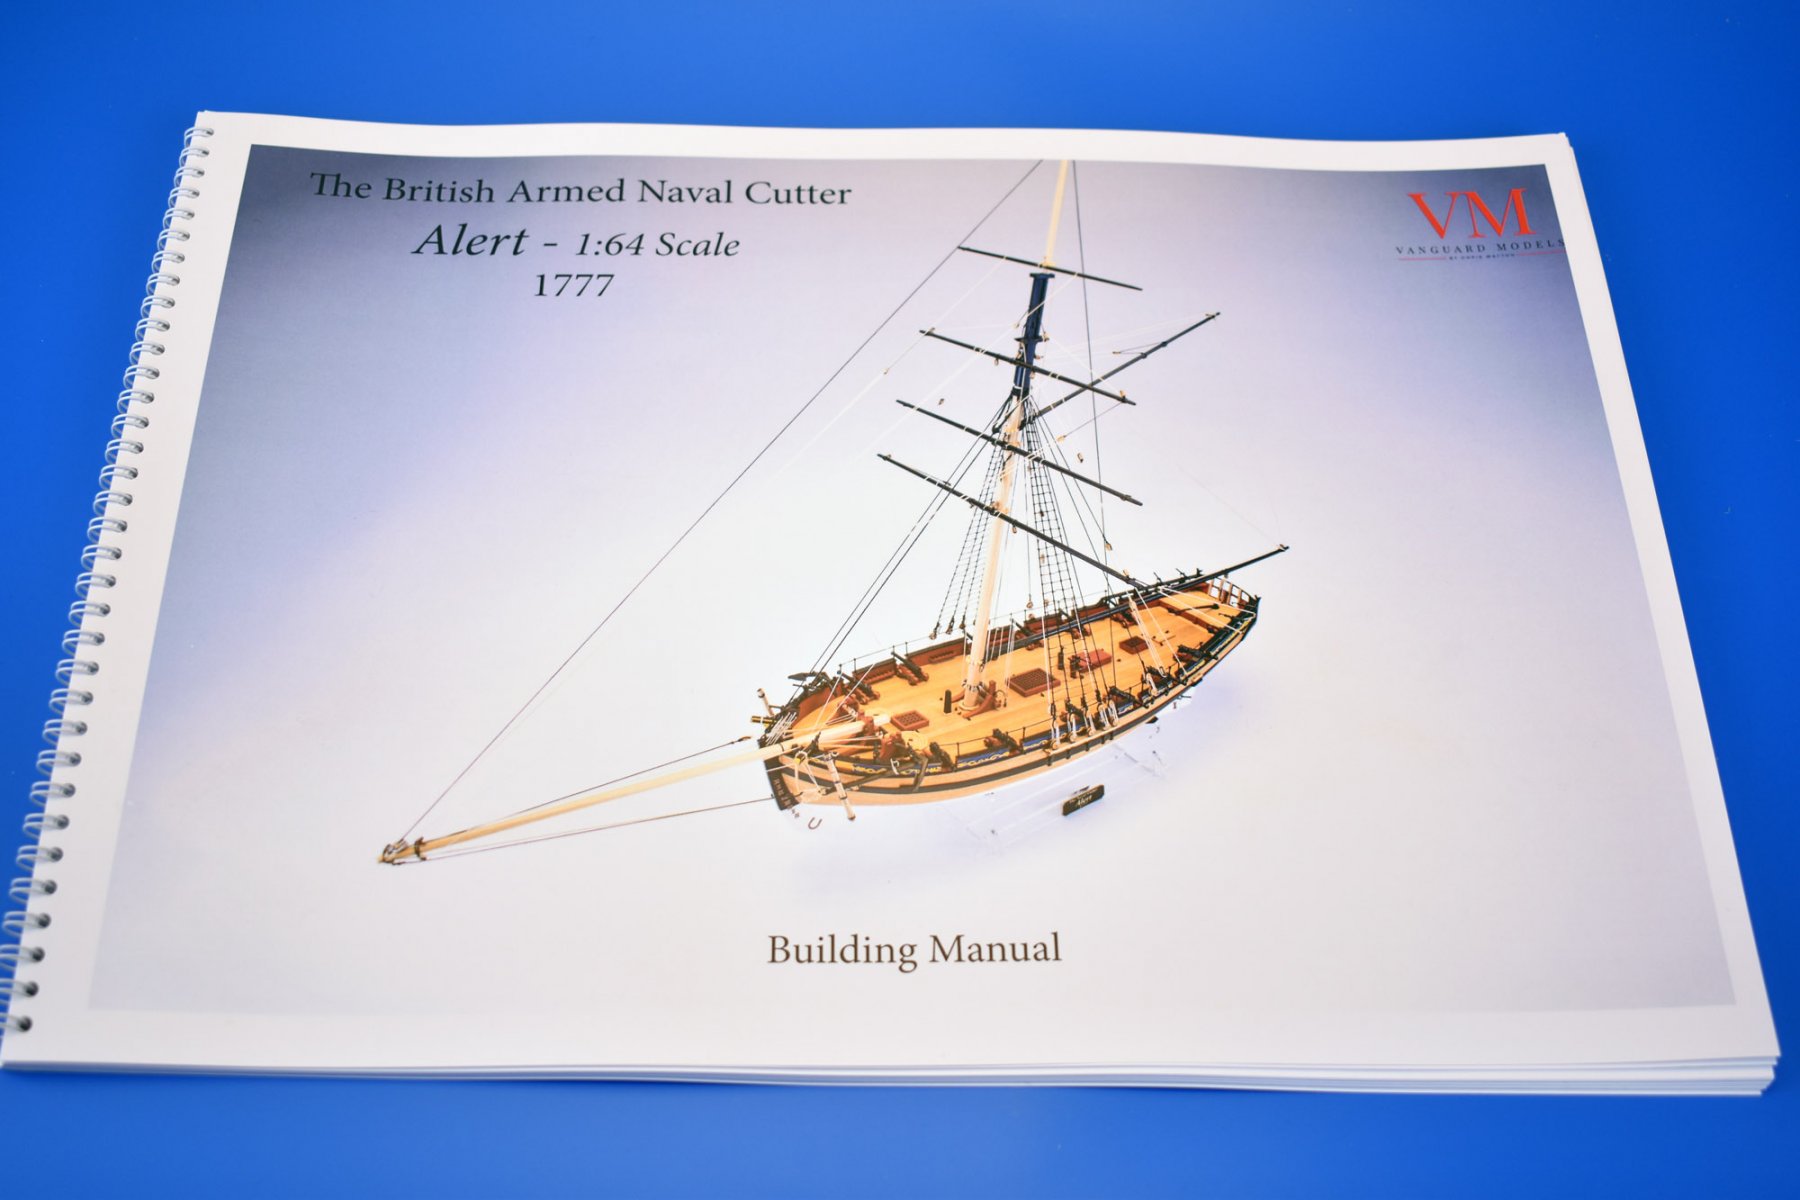
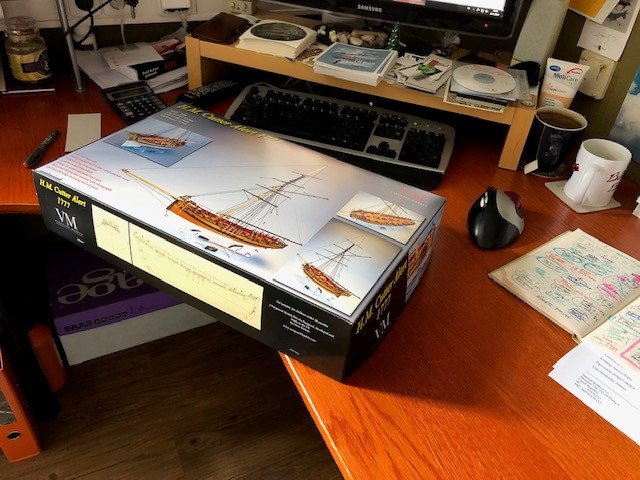
Just had an email from the box printing company, Alert boxes are now ready for me to pick them up..

-
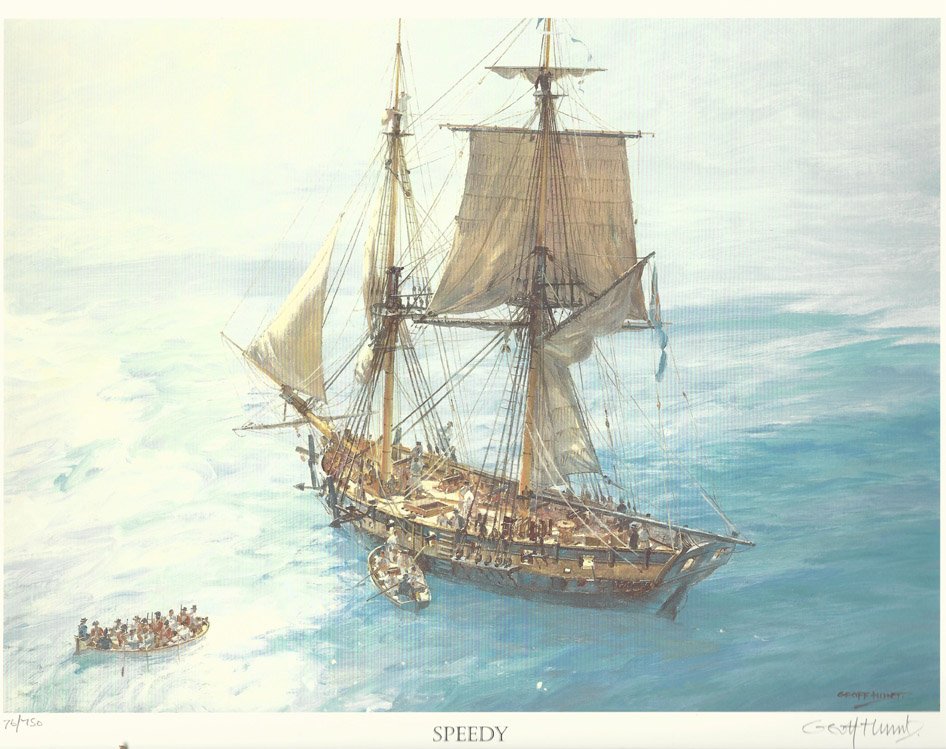
Just thought I'd mention that I am developing Speedy as she probably appeared under the command of Cochrane in the early 1800's and not as launched in 1782. I think this excellent painting (which I purchased a signed copy of) shows her quite well in her later guise, with a few later mast and rig implementations (flying jib boom, iron bands only on lower masts and dolphin striker)
-
Hi, (Just back from day job..) I do not want to do pre orders until I have everything for the kit here with me. It should take no more than a week to have everything here, and we can start putting the kits together, but I do not want to add a pre order until I am certain of release/shipping dates. The kits will be available to order via my new website (Thanks to Steve Urwin, a long standing MSW member): https://vanguardmodels.com/ This will grow as more products are added - there will be the figures available in a couple of month's time, Speedy by September I hope, along with more fittings (18 foot cutter kit in 64th, copper plates (PE) and maybe scale hand pumps (PE for scale detail), and some wood strip. But for now, I am working all hours I can on the brig sloop Speedy and then, when the Alert materials arrive, I shall have to switch to that, but all other times, I am trying my best to get more kits out as quick as I can (which still isn't quick due to the amount of work, even for the smaller kits). I sometimes think it would be nice to have someone else build the prototype kits, but then I realise this is an important part of development, as I can identify major problems and deal with them on the fly. Right now, I think it's bed time.. Cheers, Chris
-
OK, will get some 48th scale figures done too, but after the first batch.
-
Thank you guys, I am told the laser and PE are being shipped to me within the week, so will be able to start to put kits together by the end of next week (if my boxes turn up..) I had the Speedy captain figure done, and plan to have Nelson and Pellew done too, in both 64th and 72nd scale.
-
I always use cyano for stuff like that. However, if all else fails and I am unhappy with the result, I resort to using thin card or thick paper for the rudder straps, painted and cut to the appropriate colour/thickness, and applied using PVA wood glue. This method probably give a much better scale appearance, too (depending on scale, of course - large scale stuff should be fixed using pins anyway). This is why I stopped using copper/brass strip for the blackened iron mast straps, black cartridge paper does a much better job in both ease of application and appearance. the same applies (sometimes) to rudder straps. In my own humble opinion, of course..
-
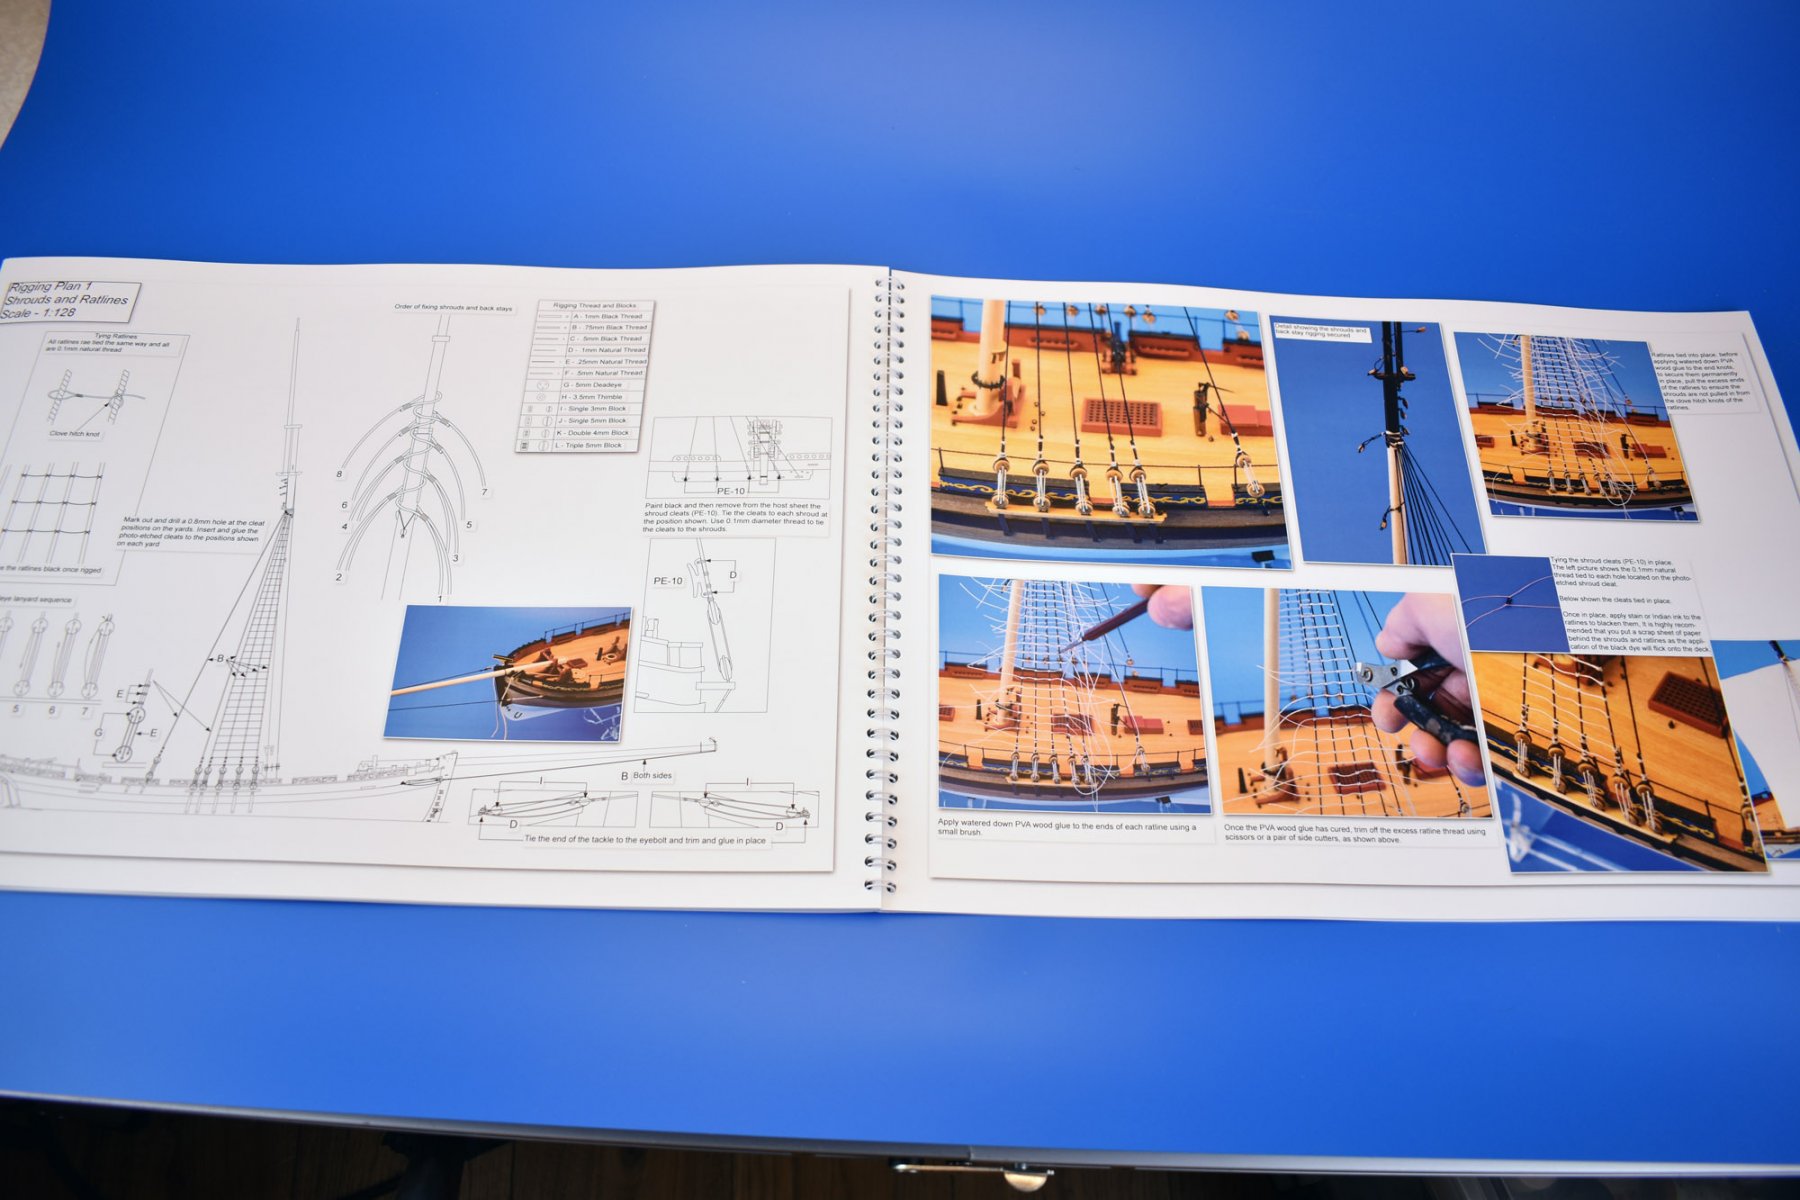
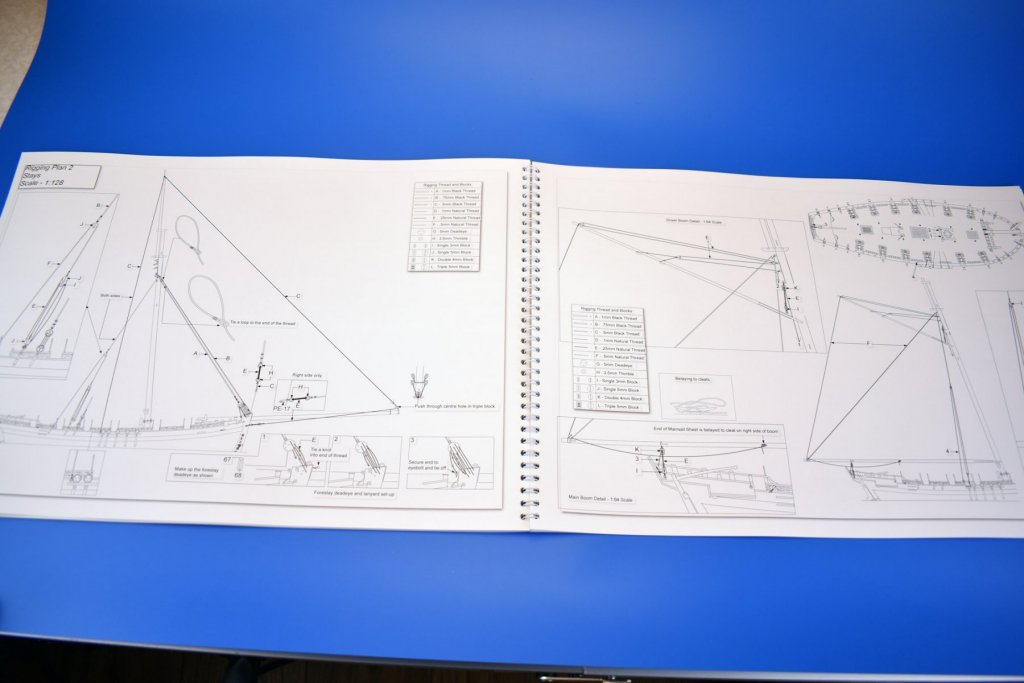
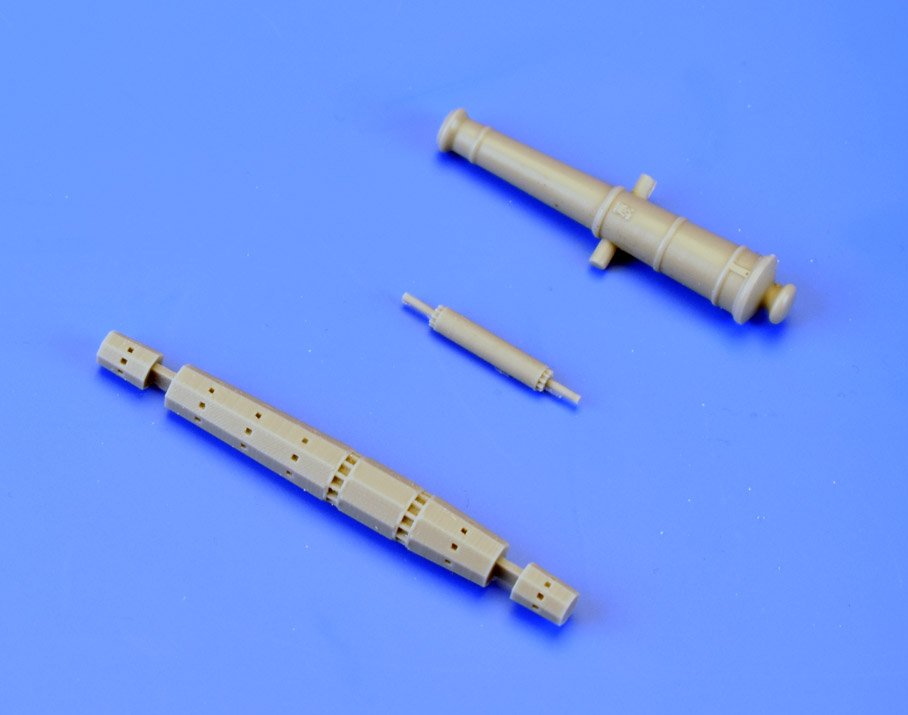
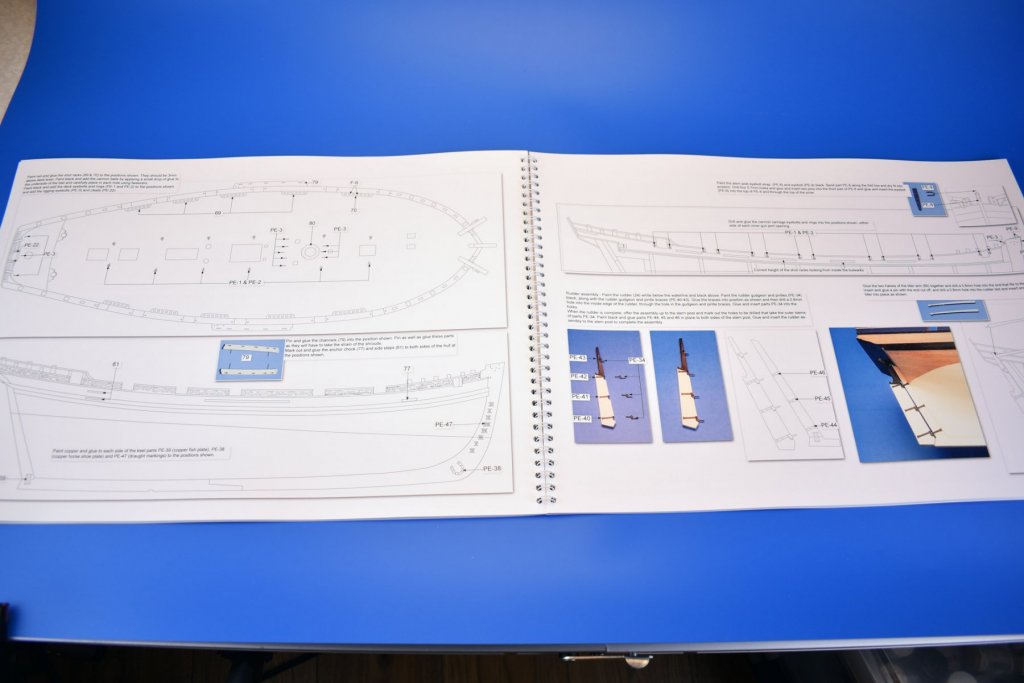
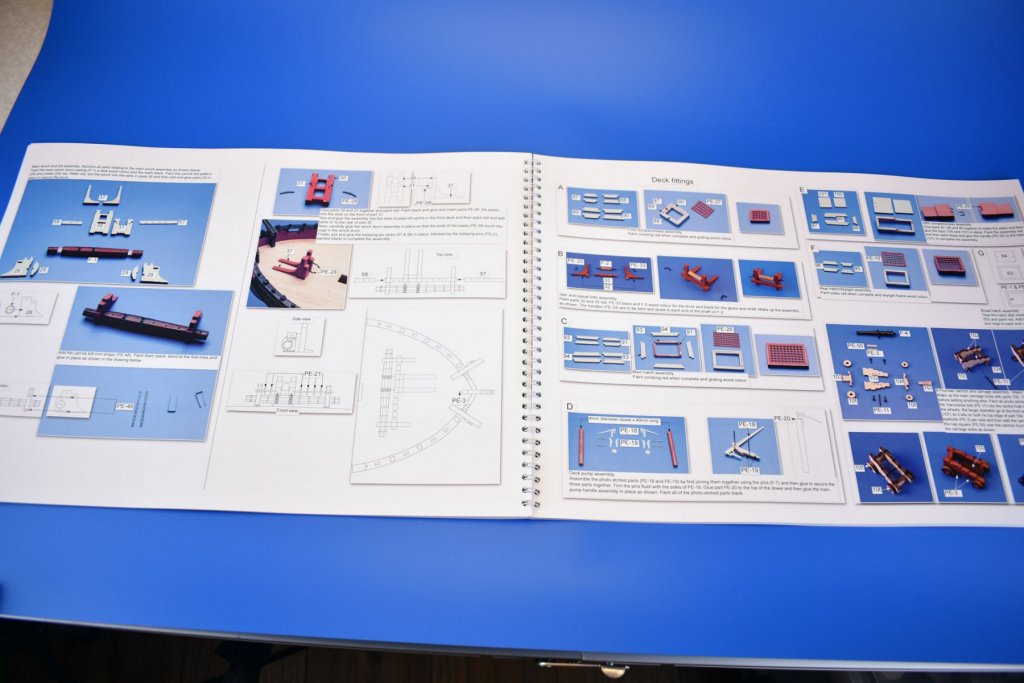
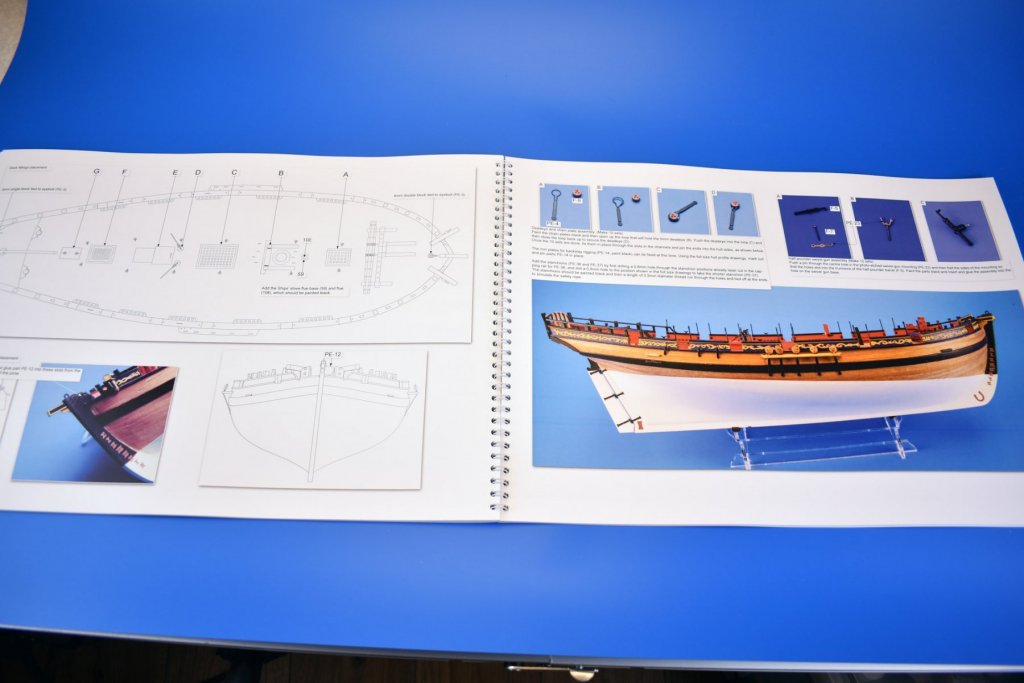
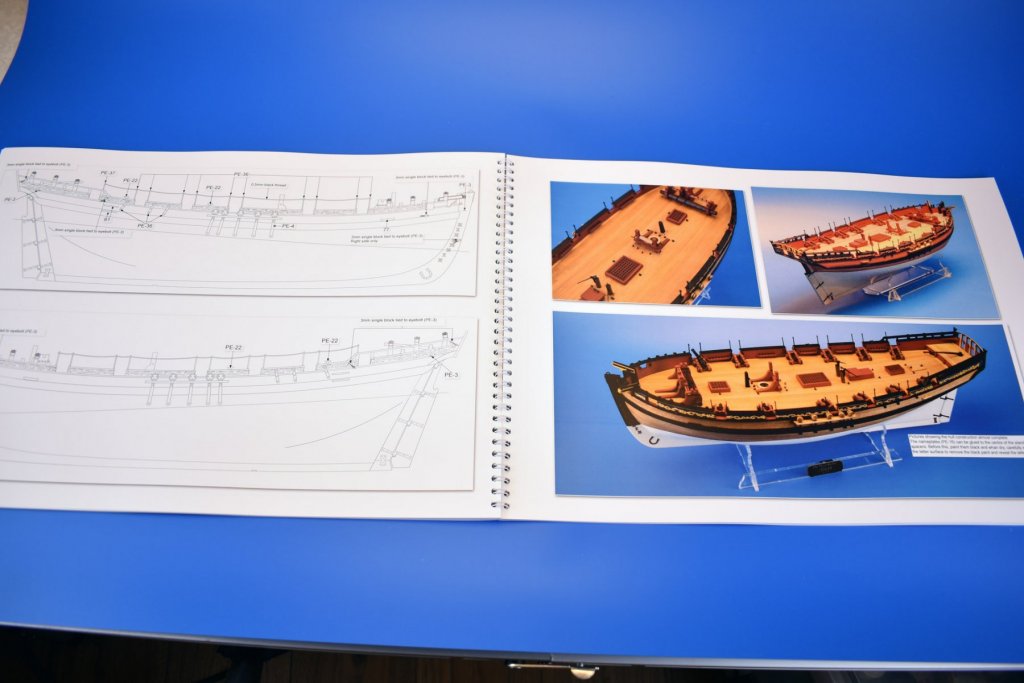
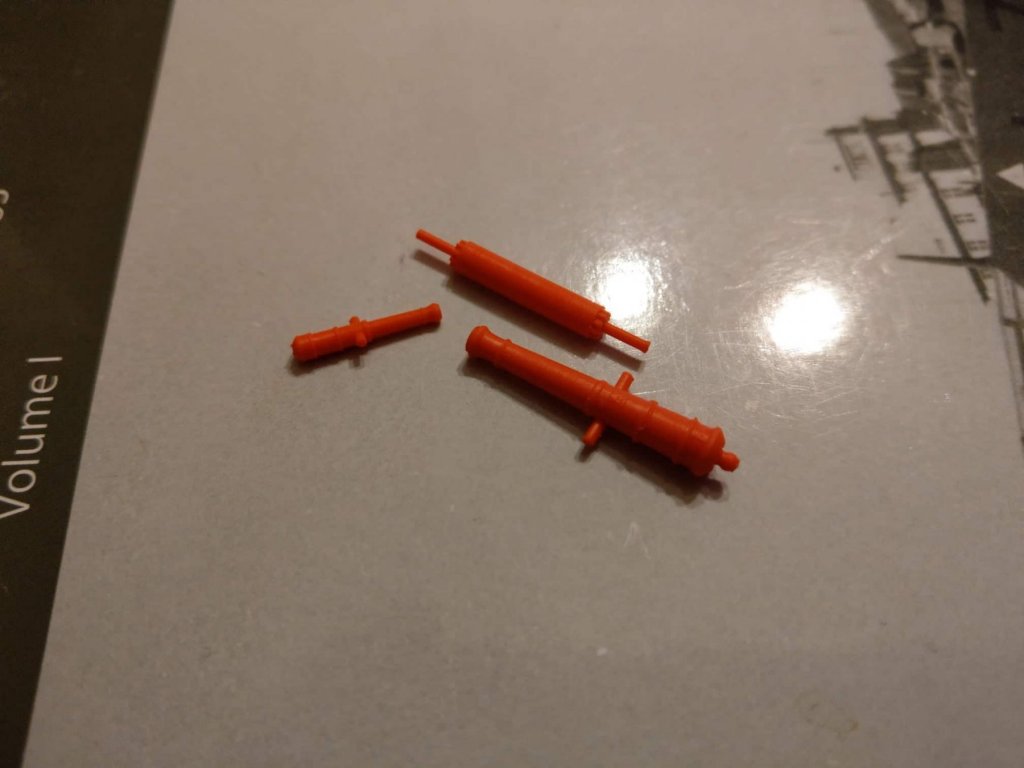
Here are some more pics of the manual and, another delivery today. I received the cast resin parts for the Alert, the large drum winch (which was originally designed using many parts in laser cut wood and PE, but decided against as it was quite complicated to build up), and the smaller mast bitts winch. Also, a sample of a 24 pounder cannon for Bristol.

-
Thanks Ben, I did read that the poop was shortened to just aft of the mizzen (Frigates of the Napoleonic Wars, Robert Gardiner). It states that another gun port was worked into the quarterdeck bulwarks, I am assuming they would be at or near abreast of the main mast, and a carronade would have been fitted, as the recoil isn't so dramatic. I may do a half port, and keep the original levels of the plans, as that looks better. On the Alert front, I had my instruction and plan manuals arrive today (A3 size), and they look better than I ever dared hope, looks quite 'classy'. Having said that they weren't cheap. One thing that I always hated with instruction manuals is the minute size of the text, you will have no problems trying to read the text in this..

-
Hi Ben, Thanks for the info. I suspect it may be better not to overdo the decoration then, and just have the bare minimum. I would seriously doubt they would have spent too much on extra carvings for the stern when changed to a razee, more so when we realise she was converted due to a severe shortage in large frigates, and was to be ready for commission as soon as possible. I do note that outer most windows are very close the edge of the stern, so no figure would be either side. Best guess for figurehead and stern décor is the order of the day (as it was with Agamemnon almost two decades ago) - but full figurehead or just a bust....
-
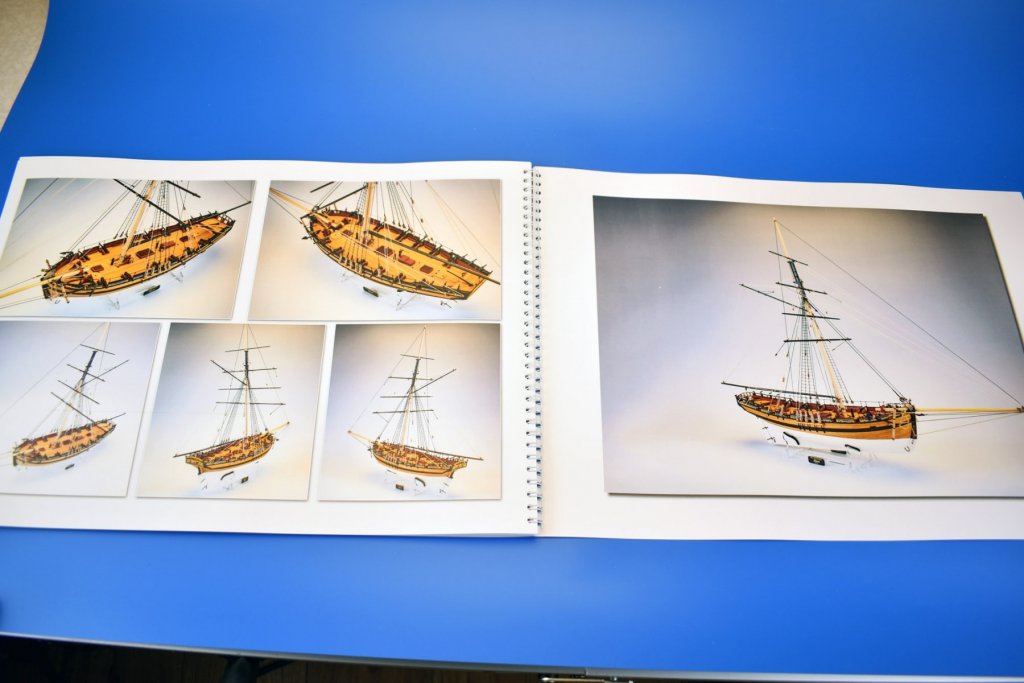
Superb model, I can see a lot of love and devotion has gone into every aspect of that build, well done!
-
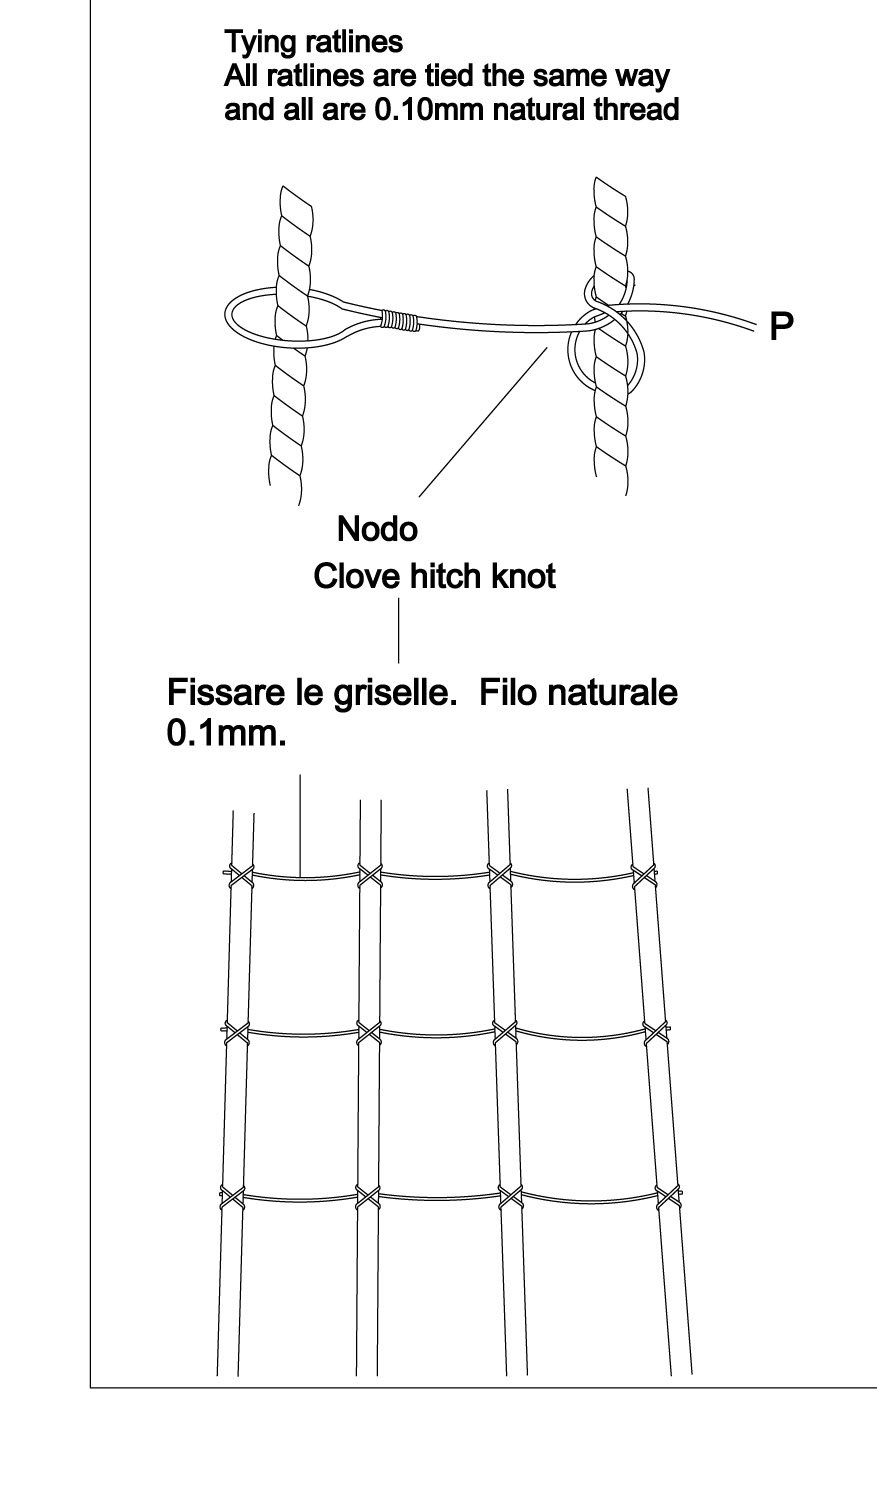
I would also like to add that you only apply the diluted PVA glue to the ends of the ratlines, where you trim off the excess, there is no need to add it to every knot. You can then carefully pull/manipulate the ratlines to that the shrouds do not appear to be pulled in. I have always used PVA (except for applying CA to the ends of rigging to stiffen it to help get it through deadeyes/blocks/eyebolts) because the models needed to travel a long way, and the chance of mast and spar damage was high. If every part was stuck with CA, the damage would be much worse. As it was, it was only the rigging lines that worked loose on occasion, leaving the masts and spars intact - which would be much more difficult to replace/repair.
-
I think TomJonas may be referring to strips, wood strips? I do remember this method of building up the gun port inner surrounds and it was always a nightmare due to the lack of surface to glue the four sides to the inner edges of the planking. All I can suggest is patience, or leave them off if you think the end result may look worse with them on.
-
No, never use cyano for rigging. use watered down PVA wood glue and brush it onto the knots. Wait to cure and then trim the excess. Also, use clove hitch knots for the ratlines. But do not use super glue!

- 48 replies
-
- 11
-

-
These are the 3-D printed parts I designed for Speedy which will be resin cast to keep the detail and proper size, 4-Pounder and half-Pounder barrels and small main bitt winch (There is a photo etched part that fits into the end of the smaller barrel):
-
Thank you Chuck. Good job we don't add in our own development time, otherwise the costs would be stratospheric! lol Thanks, that was my thinking behind the figures, too. After Bristol, I am torn between a 64th scale Bellona or the 'super frigate' Indefatigable, with the latter more appealing right now. I have been trying to find anything for the figurehead and stern decoration for Pellew's ship, but contemporary information is quite sparse. If anyone can unearth anything I could use for these parts (figurehead especially), that would be appreciated.
-
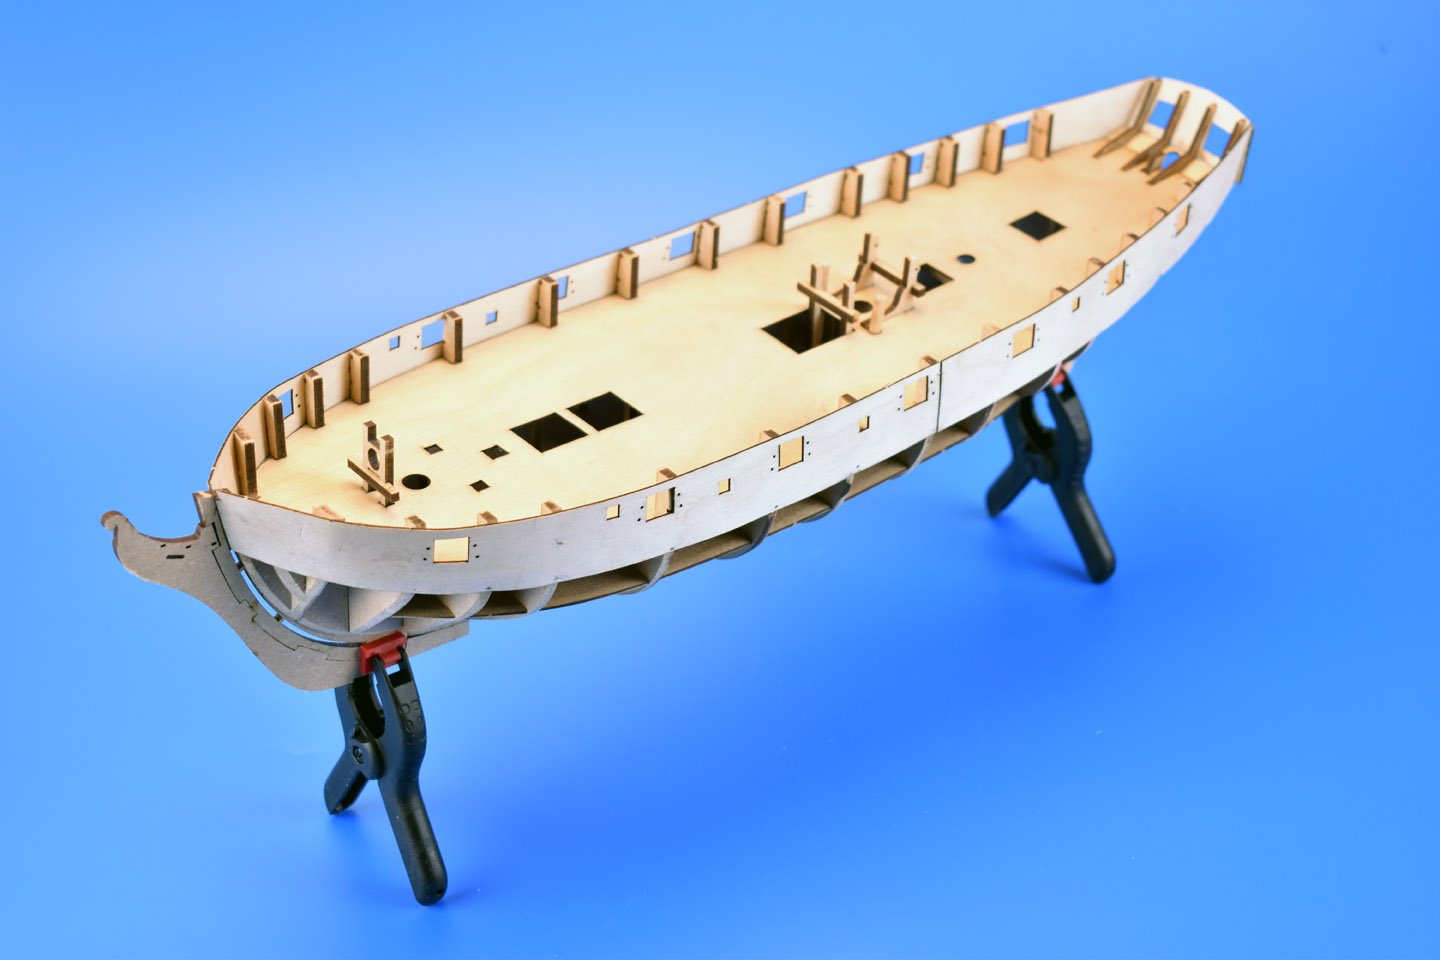
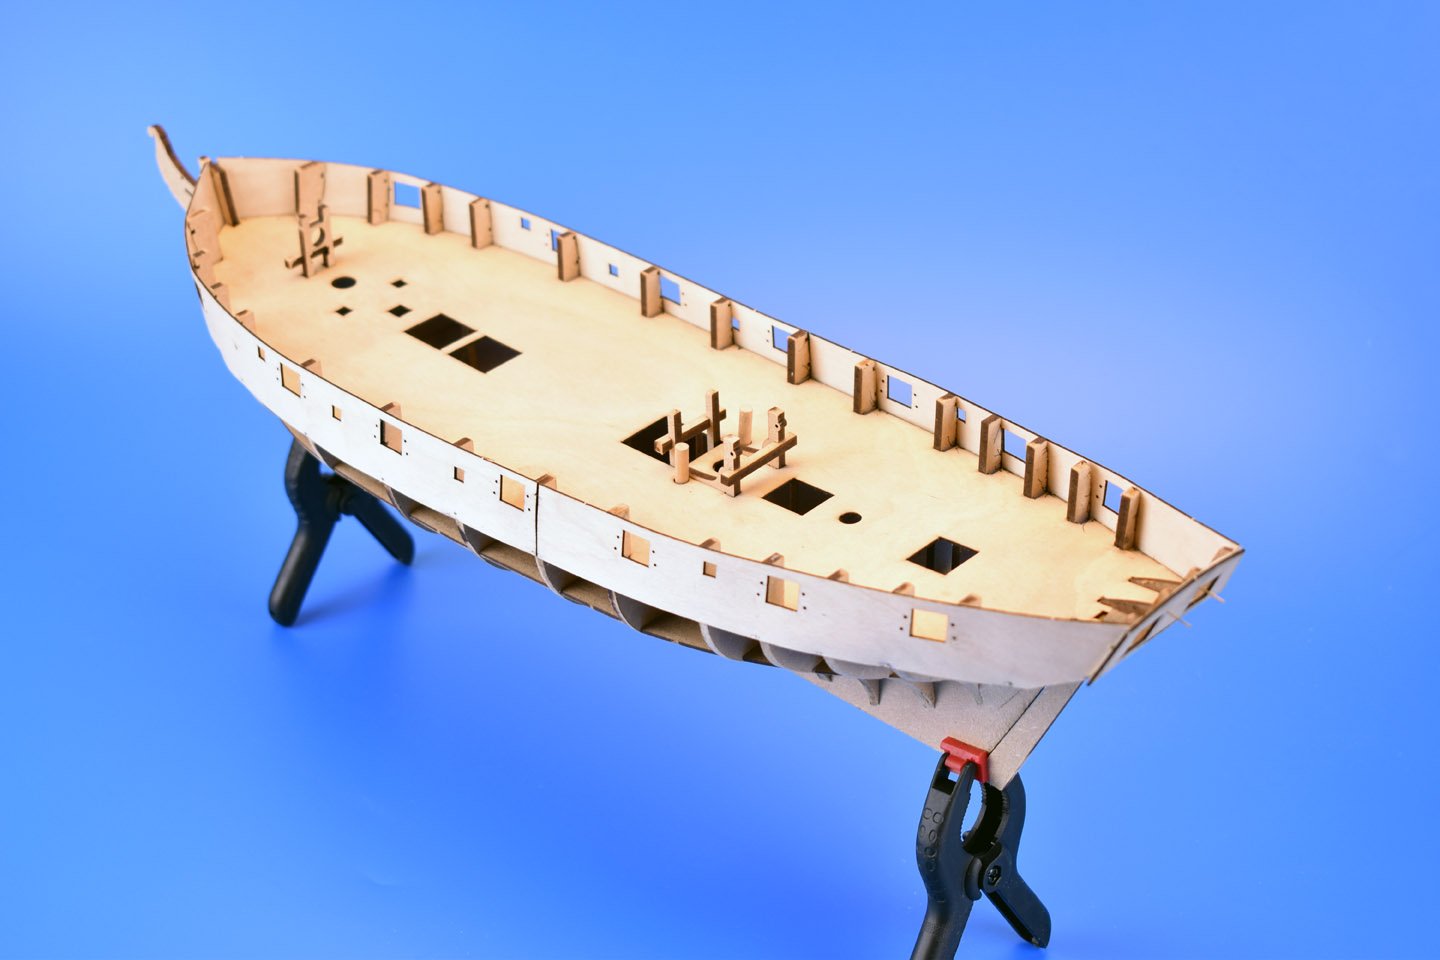
Thank you. I must stress that this is a pre-prototype (the gun port pattern is missing its hawse holes still - I use these to try ideas and see if any stick), and when drawing the details onto the pattern in CAD, I added the eyebolt holes in case I find a way to make these holes work. For example, I figured the second planking could go as high as the lower edges of the gun ports, then remove the bulkhead tabs above deck level, plank the inside, and then drill the holes from the outside in, and then finish off the outer planking. I will try this, and if it doesn't work, I will design some templates instead. It should work, though. As I mentioned, I do not much like gun port patterns so much, and much prefer the new method with longitudinal and vertical frames slotting together to make the port timbers - but the bulkhead tabs would have to be 2mm thick max to do this, and I suspect many builders would be frustrated with the fragility, and many tabs broken whilst planking. I do now include a nice slot in the bows to take the planking up to the planking lines as per the original plans, I tried this with Alert and worked really well, so I shall use that for all future kits. Oh, forgot to mention, I am having a 64th scale sculpture of Lord Cochrane made for Speedy (digital so I can change the scale if I want), what do you guys think about this, like having say, Pellew for Indefatigable and Nelson for Bristol (as he did serve on it). Not just generic sailor figures, but ones sculpted from actual paintings of the men, with the correct heights (Nelson was 5 foot 4 and Cochrane was over 6 feet tall)? I could do them in 72nd, 64th and 48th scale. ETA - Also forgot to say, Speedy will have a copper bottom..
-
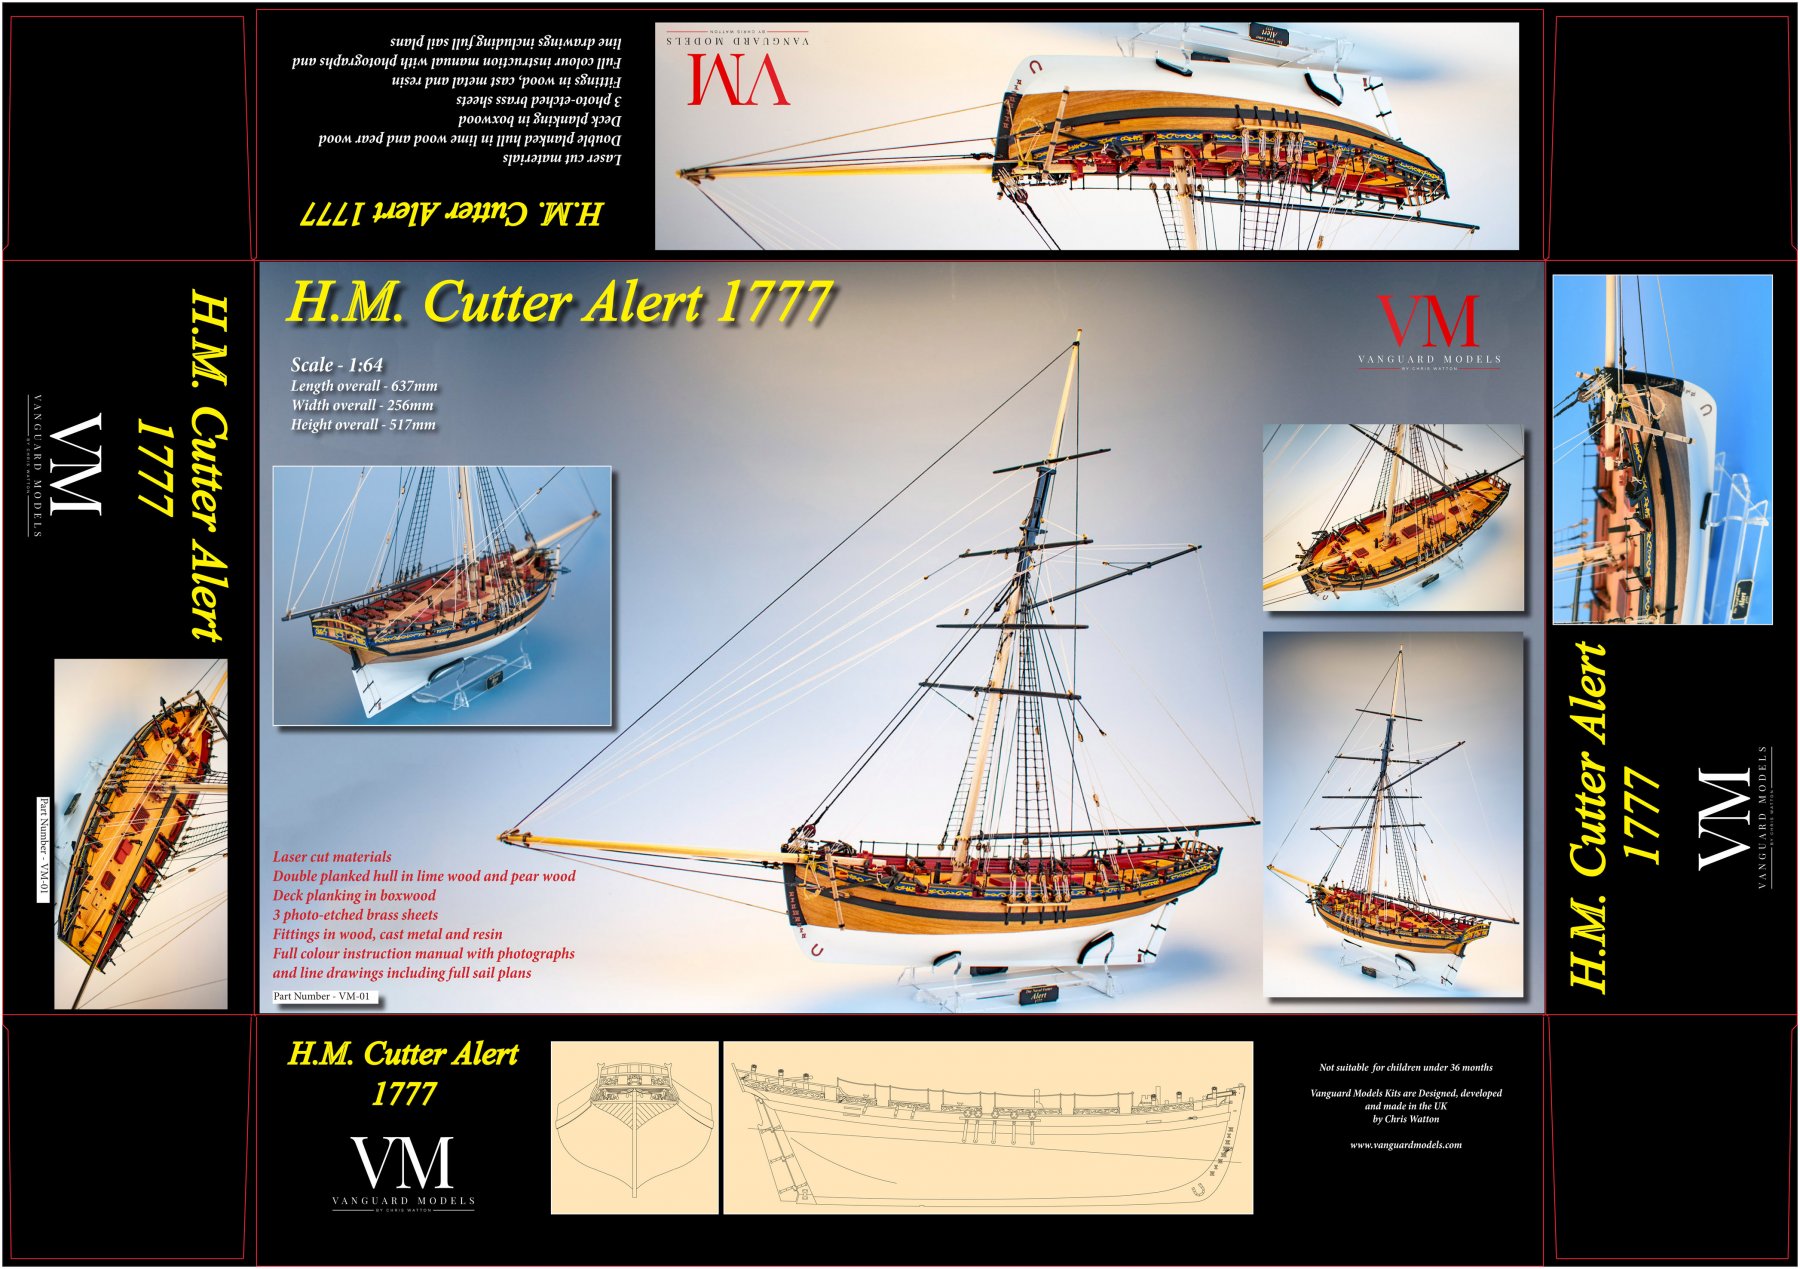
Hello, It has been a while but I promise I have been busy. It has not been easy developing new kits whilst holding down a full time job, but I am enjoying the experience and hope that one day, I can quit the day job and concentrate solely on the Vanguard Models range. OK, first to be released, which I am hoping will be in two or three weeks, is the Armed Cutter Alert. I am just waiting for everything to be delivered, so I can put the kits together in the boxes. I should have a final price soon, once I receive my final invoice for the laser cutting and photo etched parts. I have attached a pic of the box art that I did for Alert. The manual is being printed right now (56 A3 colour pages). I did start the designs for HMS Bristol, as this was to be my next kit. However, whilst reading one of my books during tea breaks at work, I learnt of the small 14 gun brig Speedy (1782), and her exploits when commanded by Lord Cochrane. I ordered the plans and decided to do this next. It seemed to make more sense, as I will be able to release this by the end of Summer (I hope). Because of the very fine lines, I have used a lot more bulkheads than is usual for this size of kit (15 bulkheads). After this, I will hopefully have some money come in instead of all going out, and will concentrate of Bristol, followed most probably with a heavy frigate. I will add a couple of pics of the Speedy prototype hull in a following update. I had the parts laser cut locally, as these are 'sacrificial' parts and used only to check fit and make sure the gun port pattern fits exactly as it should. I did intend to have the gun ports framed, as the Victory model, but realised the frames would have to be way too thin to achieve scale thickness of the bulwarks, once the inner and outer planking strips were factored in. This is the new website (still work in progress until I finalise costs of Alert: https://vanguardmodels.com/ And a big thank you to Steve Urwin, who has done all of that for me, which I appreciate very much. Also a big thank you to Jim Hatch, who has helped with contacts for boxes and resin casting suppliers. Without MSW, I would not have even started down this path, so thank you! Chris