chris watton
-
Posts
2,336 -
Joined
-
Last visited
Content Type
Profiles
Forums
Gallery
Events
Everything posted by chris watton
-
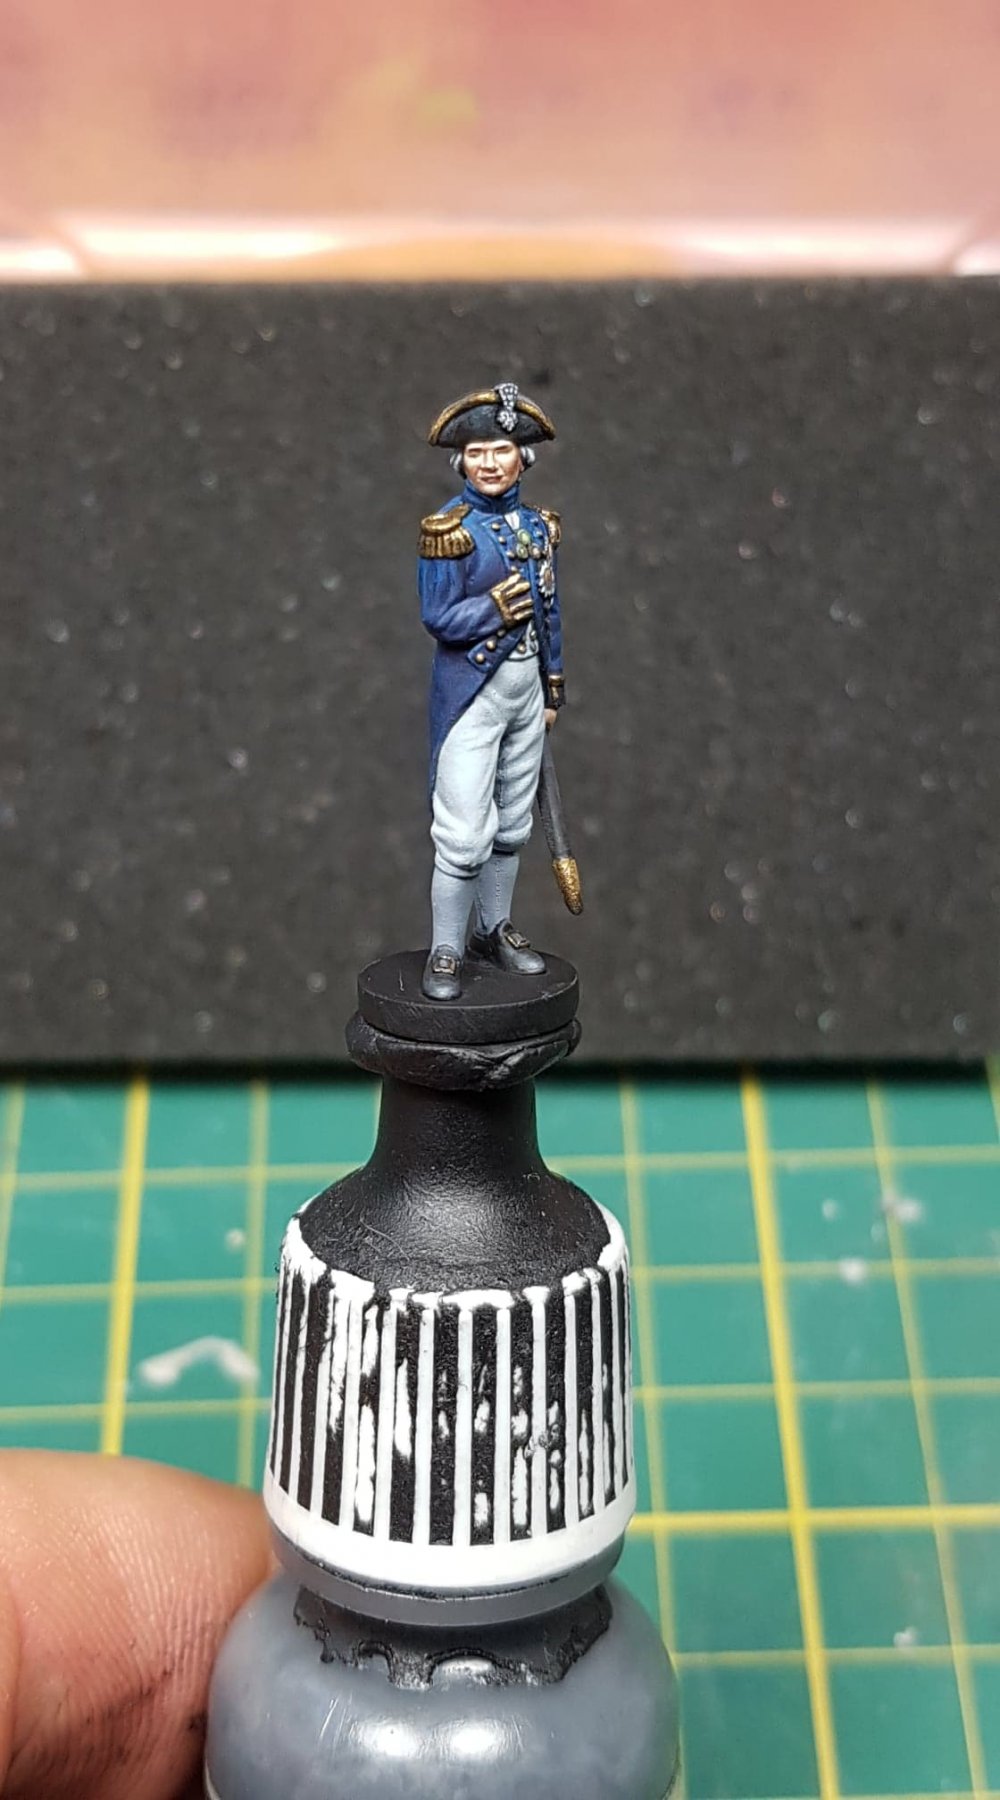
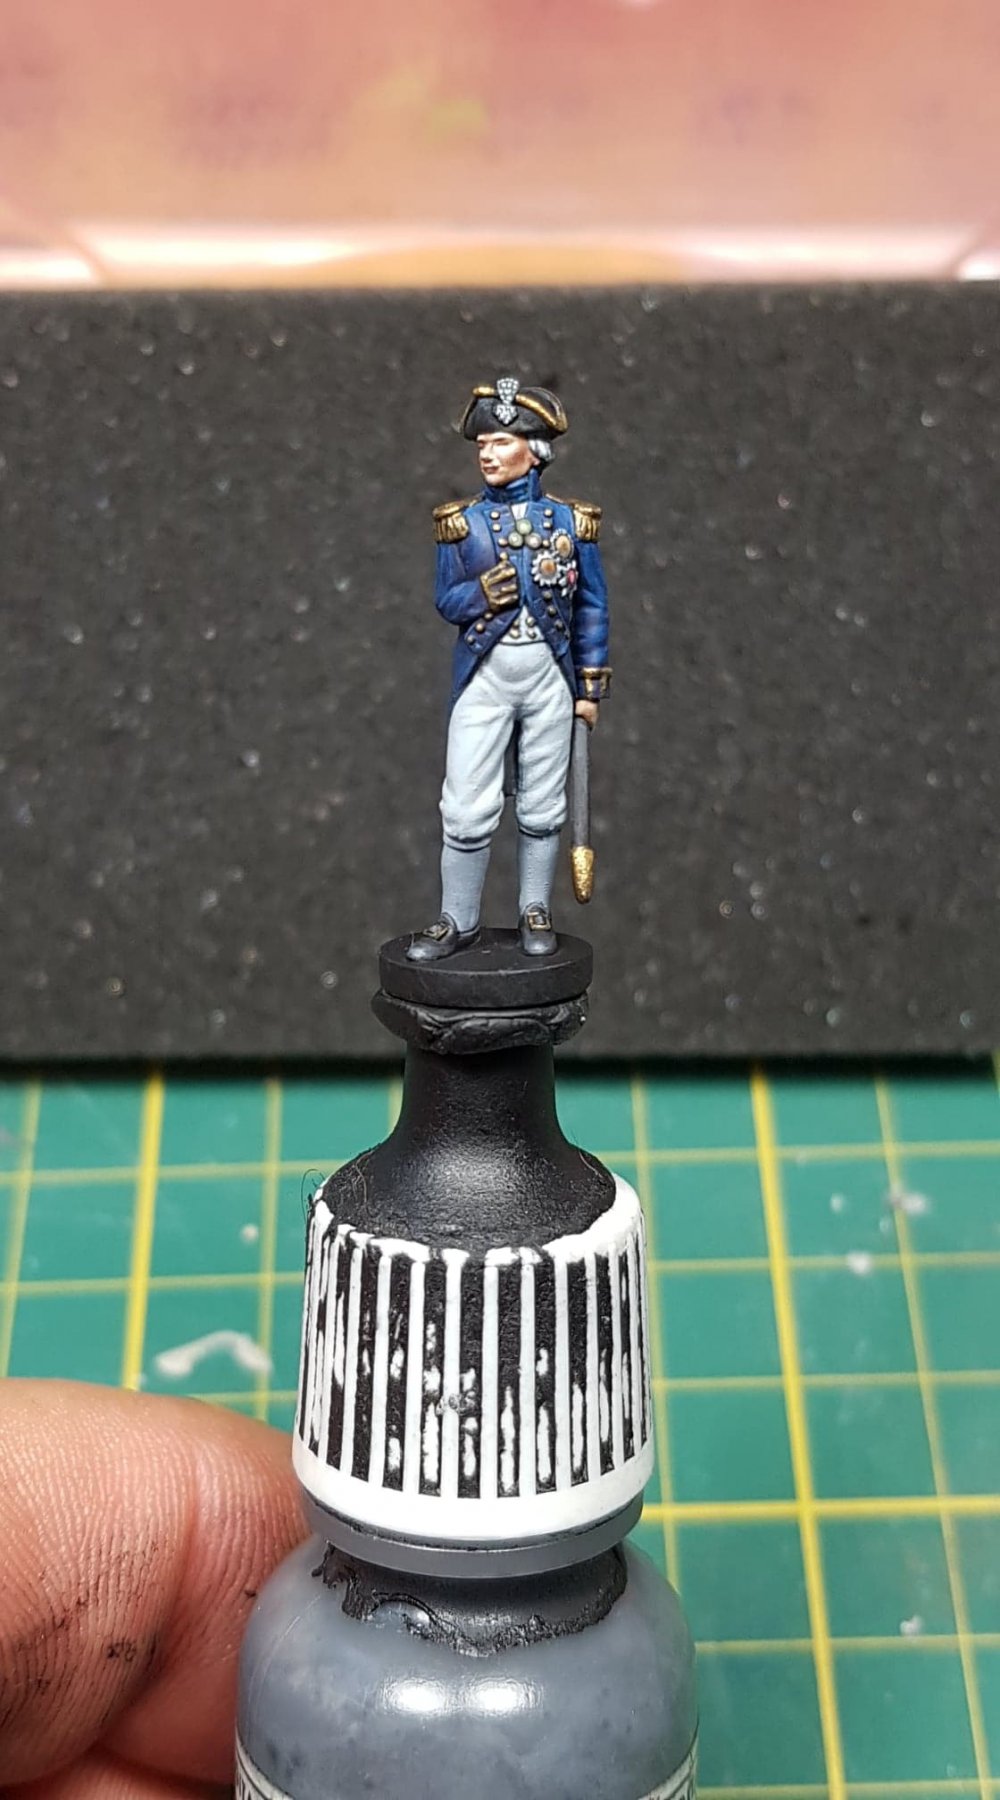
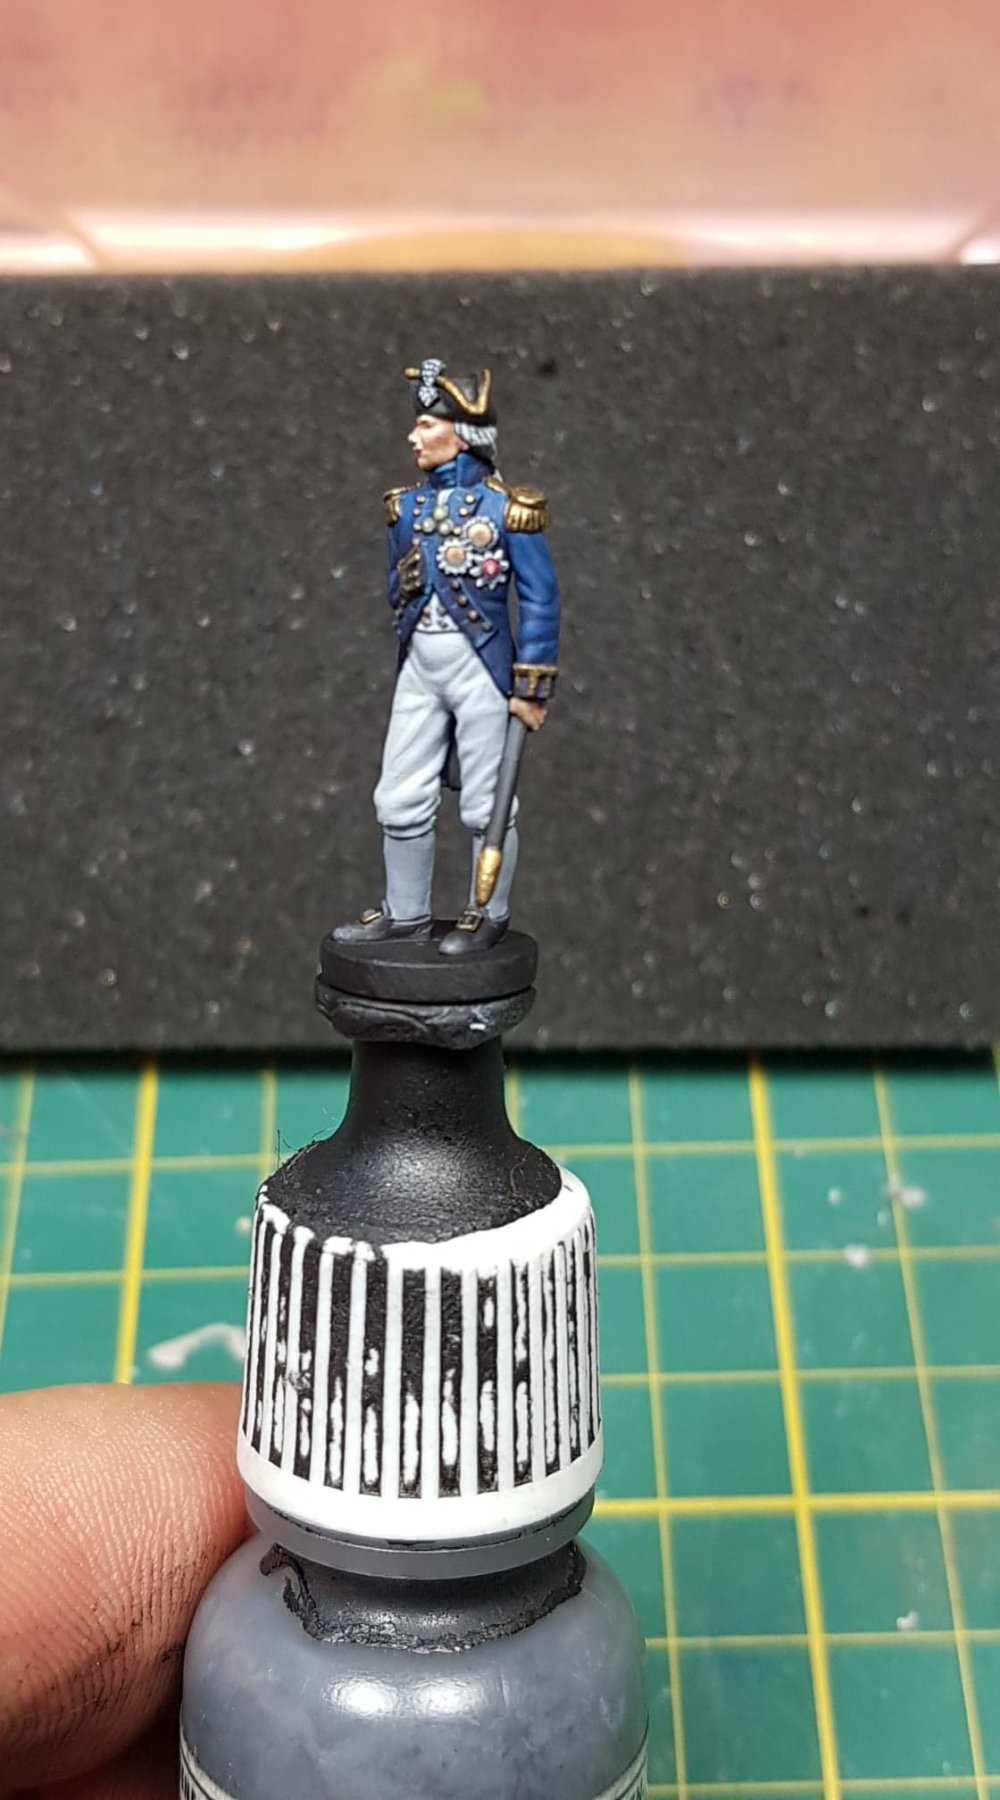
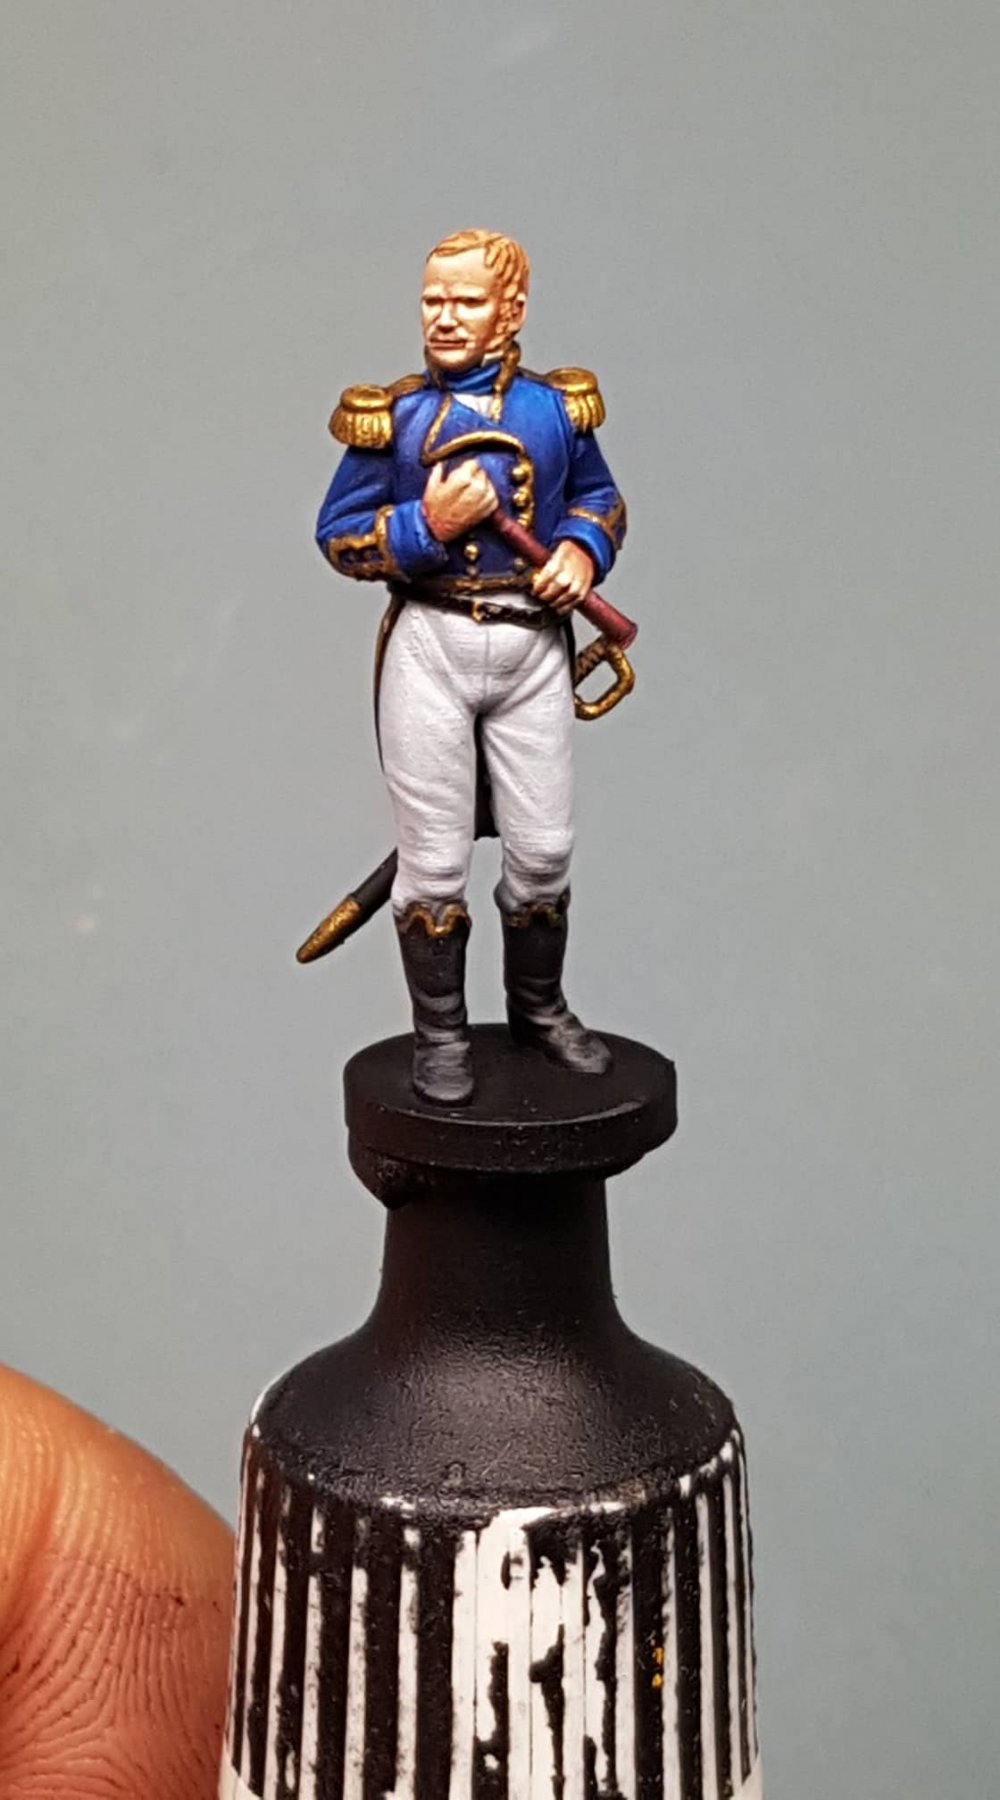
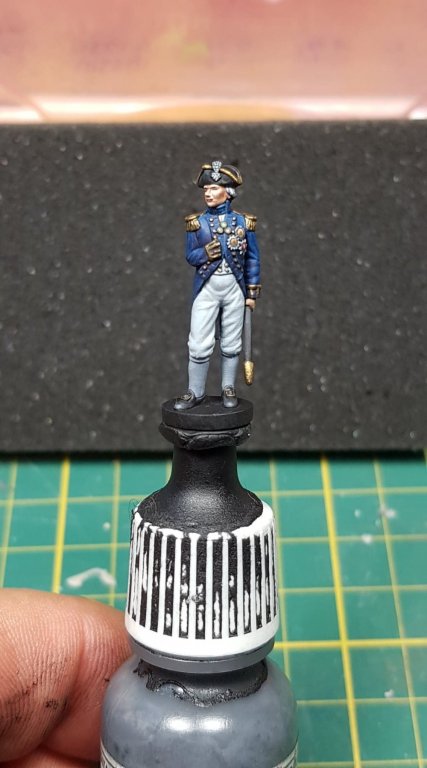
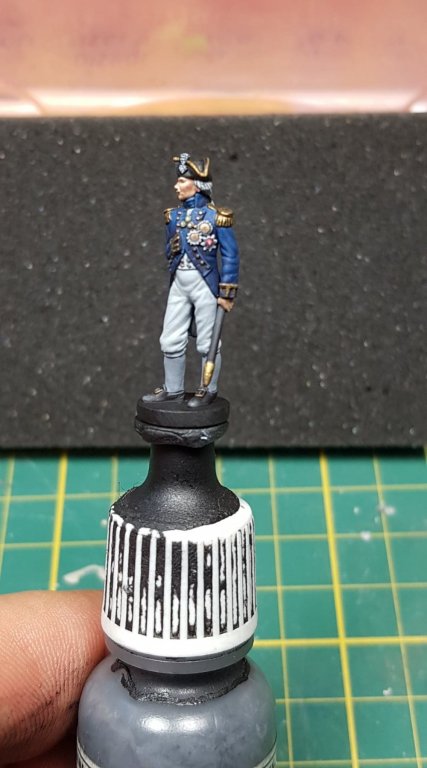
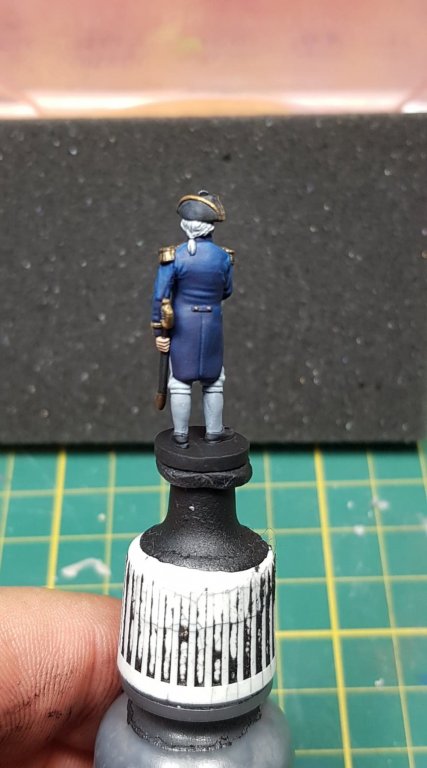
 Just had some pics of the painted Nelson figure, should arrive tomorrow (not the painted one, though...)
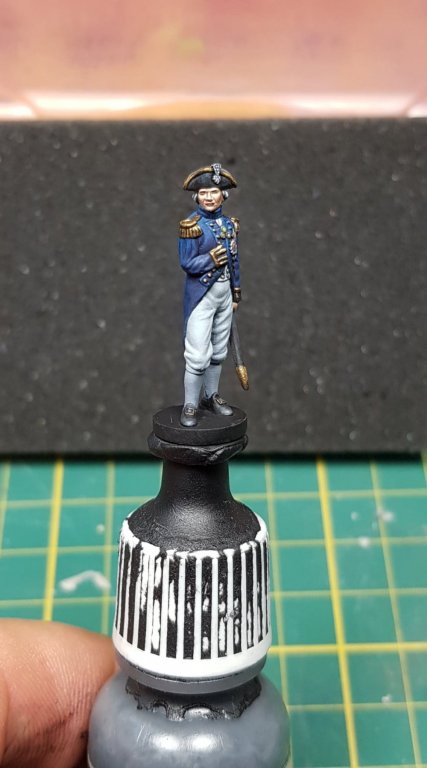
-
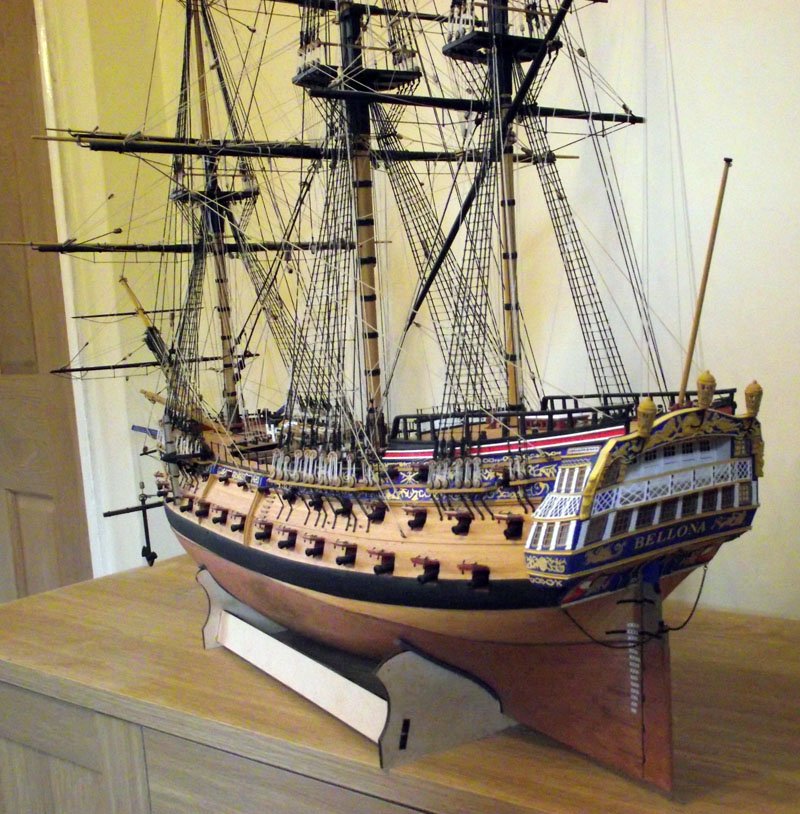
I do have a 64th scale Bellona earmarked for my new range of kits, after buying copies of the original plans. I think Amati should make up 25 full victory kits, for those that will pay, and then think about the 4 parts. May be better if they split it deck by deck.
-
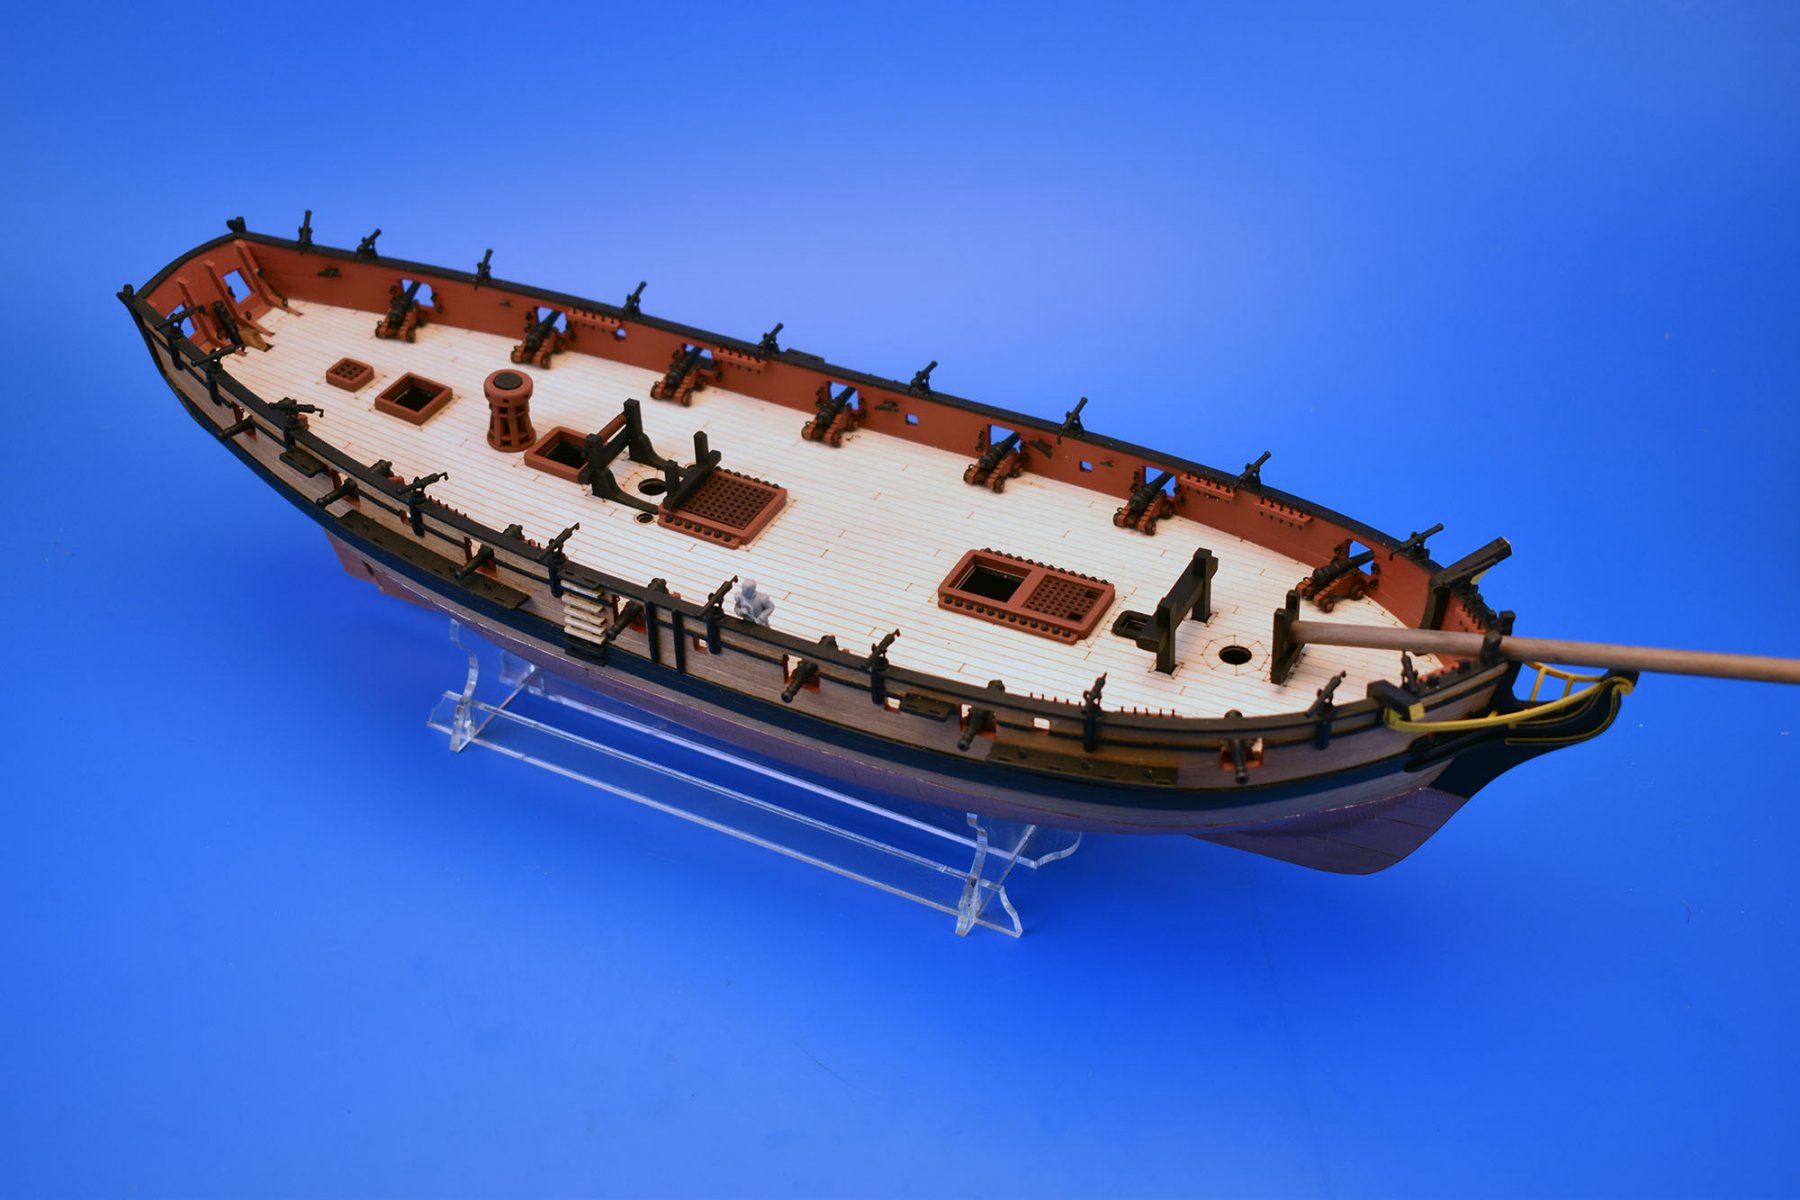
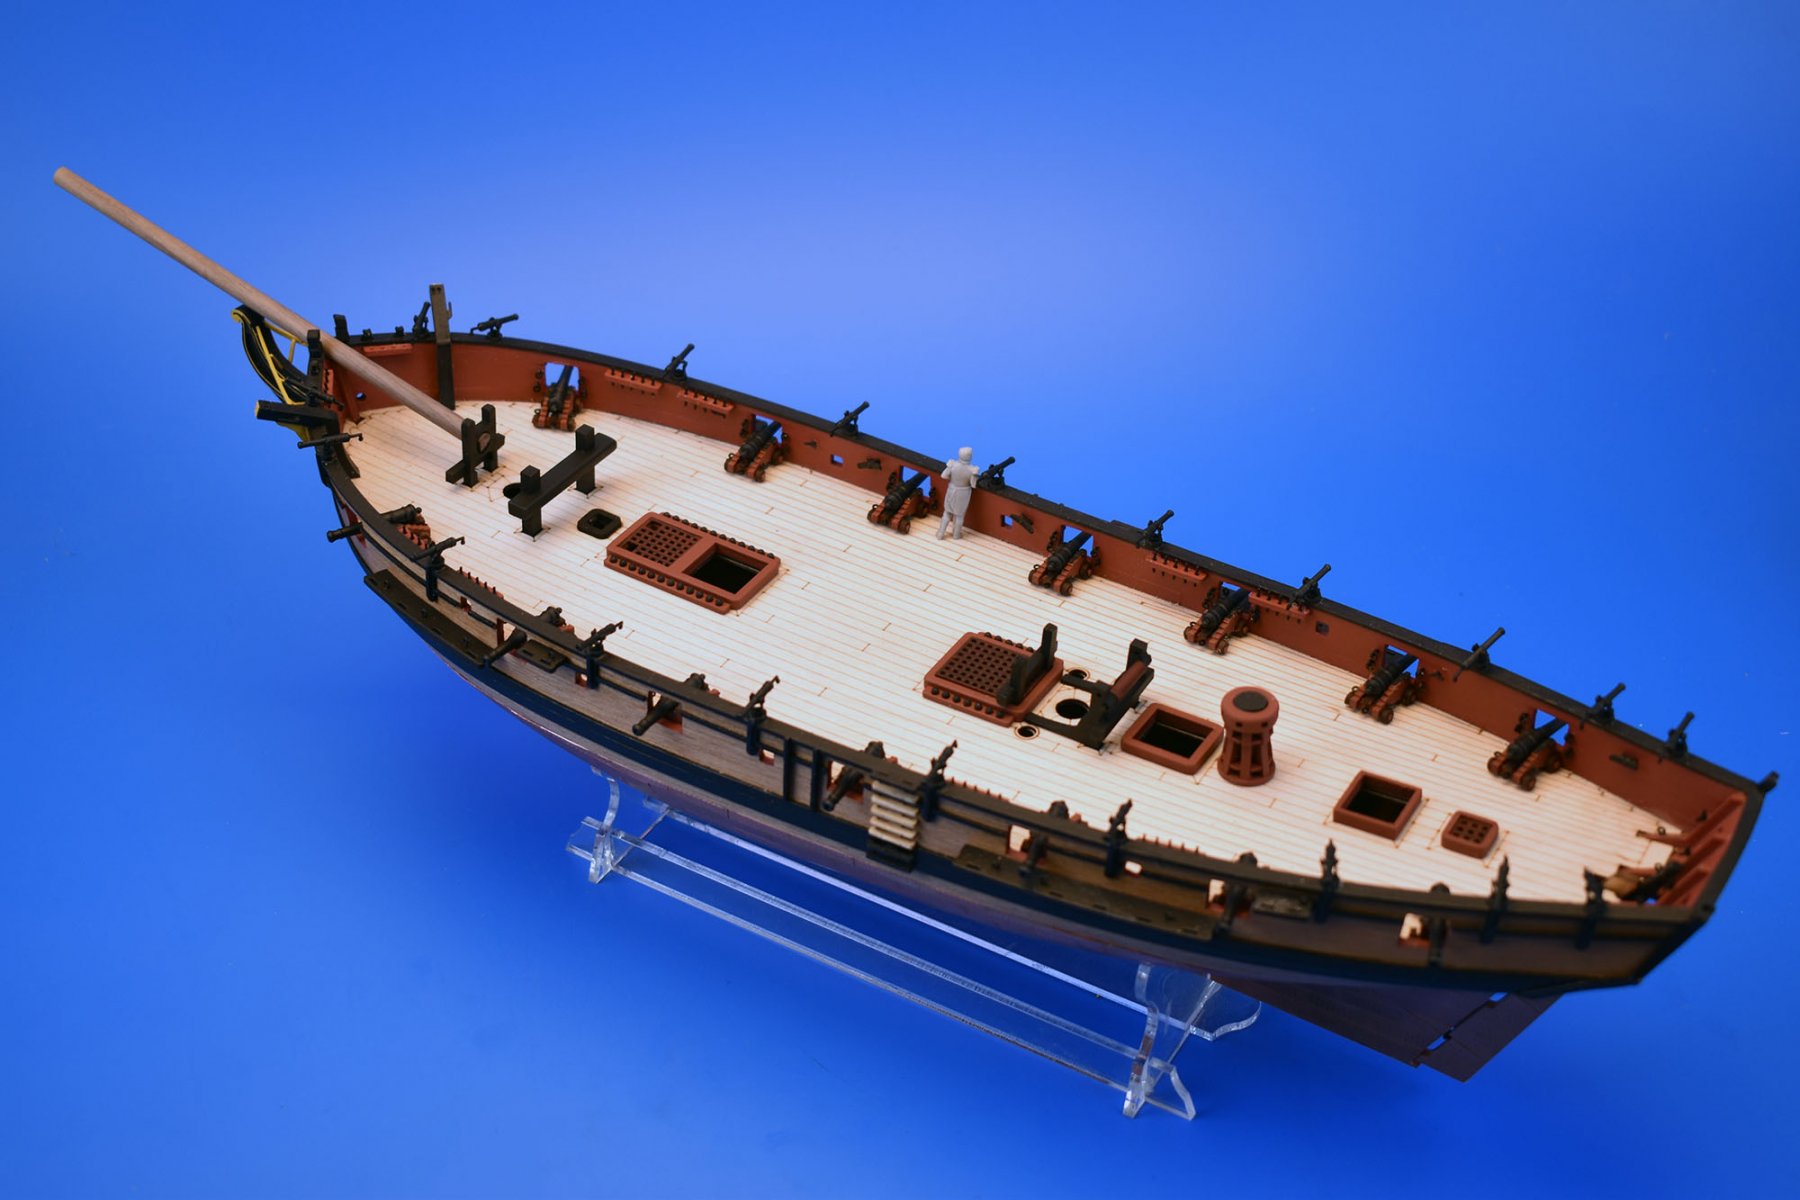
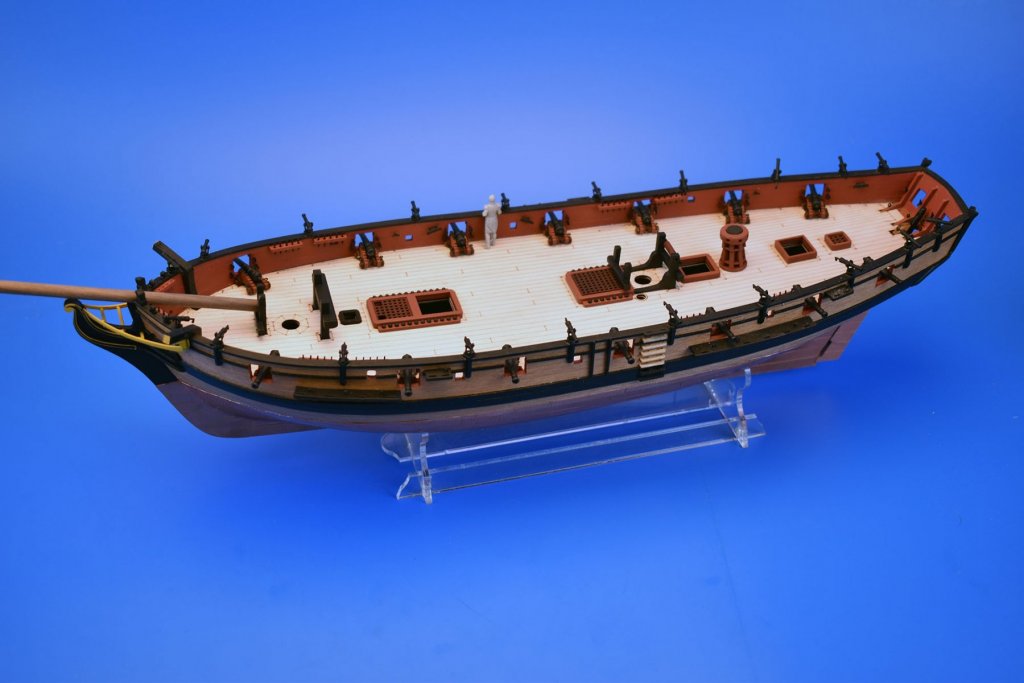
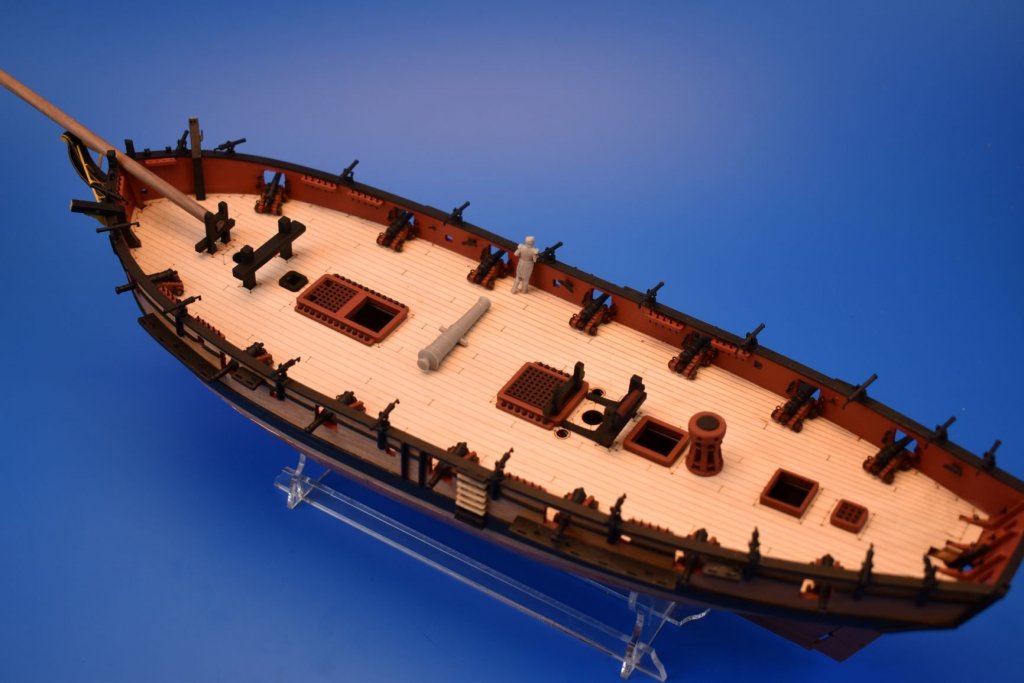
I have done almost all I can for now, as I am still waiting for a missing 0.4mm photo etched brass sheet, which was missing with the main shipment. This contains a lot of parts, including deadeye strops and chain plates, hand pump detail etc. I have brush varnished the outer planking, but am waiting to spray varnish the rest of the hull once everything is in place and touched up. All deck fittings are not yet glued in place, so alignment may look a little off.. The only parts glued are the inner bulwark eyebolts and cleats. I have added a few spare wheels and axles for the 4-pounder gun carriages on the cut file, as they are rather small and easily lost. On one of the pics, I have placed the Bristol's 24-pounder barrel on the deck for size comparison with the tiny 4-pounders. I know that Cochrane asked for (and was granted) a 12-pounder gun to add to Speedy's arsenal, but it turned out the gun ports were too small to accommodate. I also know that not every swivel gun post was populated, but figured if I didn't do this, some may think I was being cheap..


-
I will at some point. I cannot right now though, as I am still licking the wounds from the invoice I just paid for the figures (Nelson in 2 scales) and the production resin cast 4 pounder and half pounder cannon for Speedy - plus some HMS Bristol stuff.. Cannons are great though, I measured them with my digital Vernier, comparing them to my raw CAD drawings and they seem to have no shrinkage whatsoever, so fit all parts they are designed to fit perfectly..
-
Just had news that Lord Nelson cast resin figures are on their way, should be arriving on Monday, in 64th and 72nd scale
-
The hull is definitely NOT clinker, it is not a cutter. It has cutter-like lines, but it is actually a 'Brig-Sloop', one of the first of this type. Or are you confusing the Alert with the Speedy? If you are referring to Alert, I decided not to show the hull clinker planed as this is very difficult to do well for most people. If someone who has experience in such planking feels comfortable laying the planking clinker style, they can. I notice a lot of people are under the assumption that the waterline level of copper plates were parallel to the waterline. In some cases, this is true, they were, but usually on much later vessels. At least, from what I have seen. I know the Mercury (Victory Models Russian brig) had the plates parallel to the waterline, but that is early 19th Century, not the last quarter of the 18th Century. But again, there is nothing stopping the modeller coppering the hull however they wish.
-
Which varnish??
chris watton replied to Edwardkenway's topic in Painting, finishing and weathering products and techniques
I have always used Ronseal Mattcoat clear varnish (polyurethane), as this gives a perfect 'eggshell' finish. recently though, I have discovered The Army Painter 'Anti-Shine' matt varnish, which is also excellent. I find it is better to spray the varnish on once most parts are in place. -
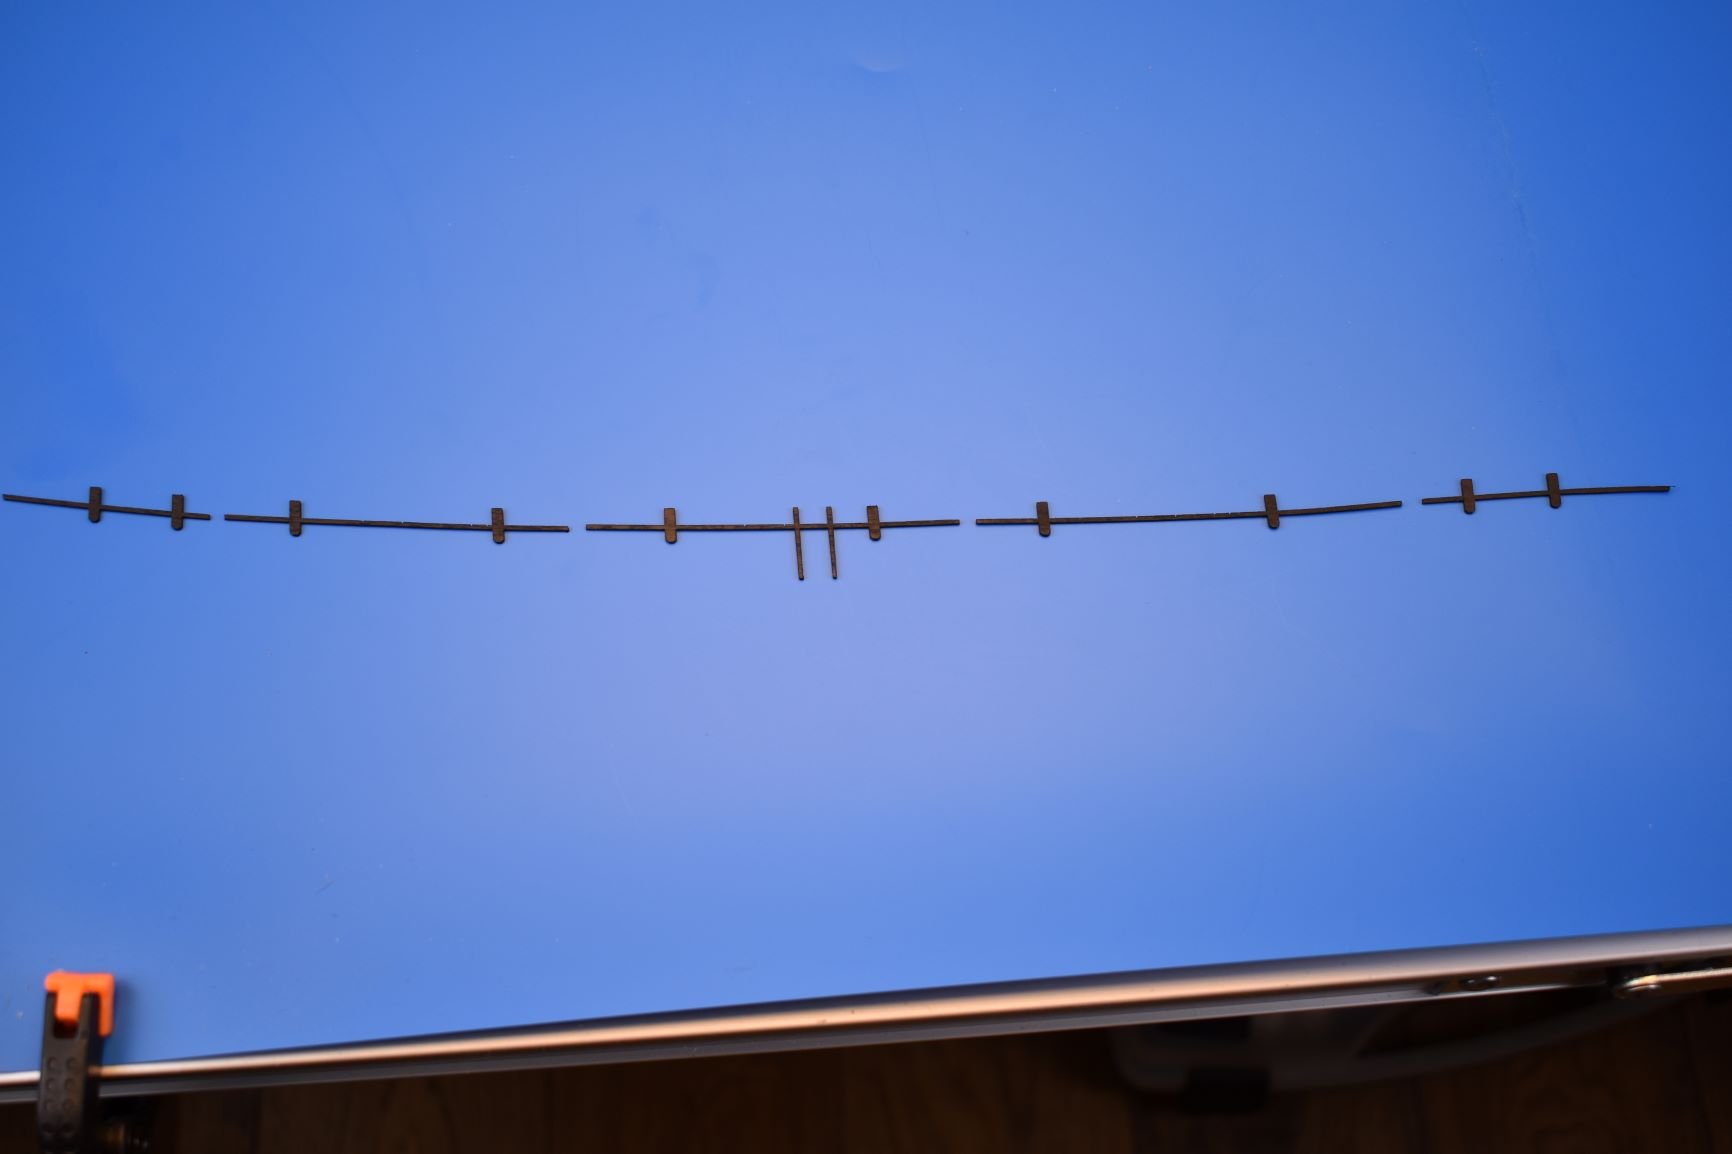
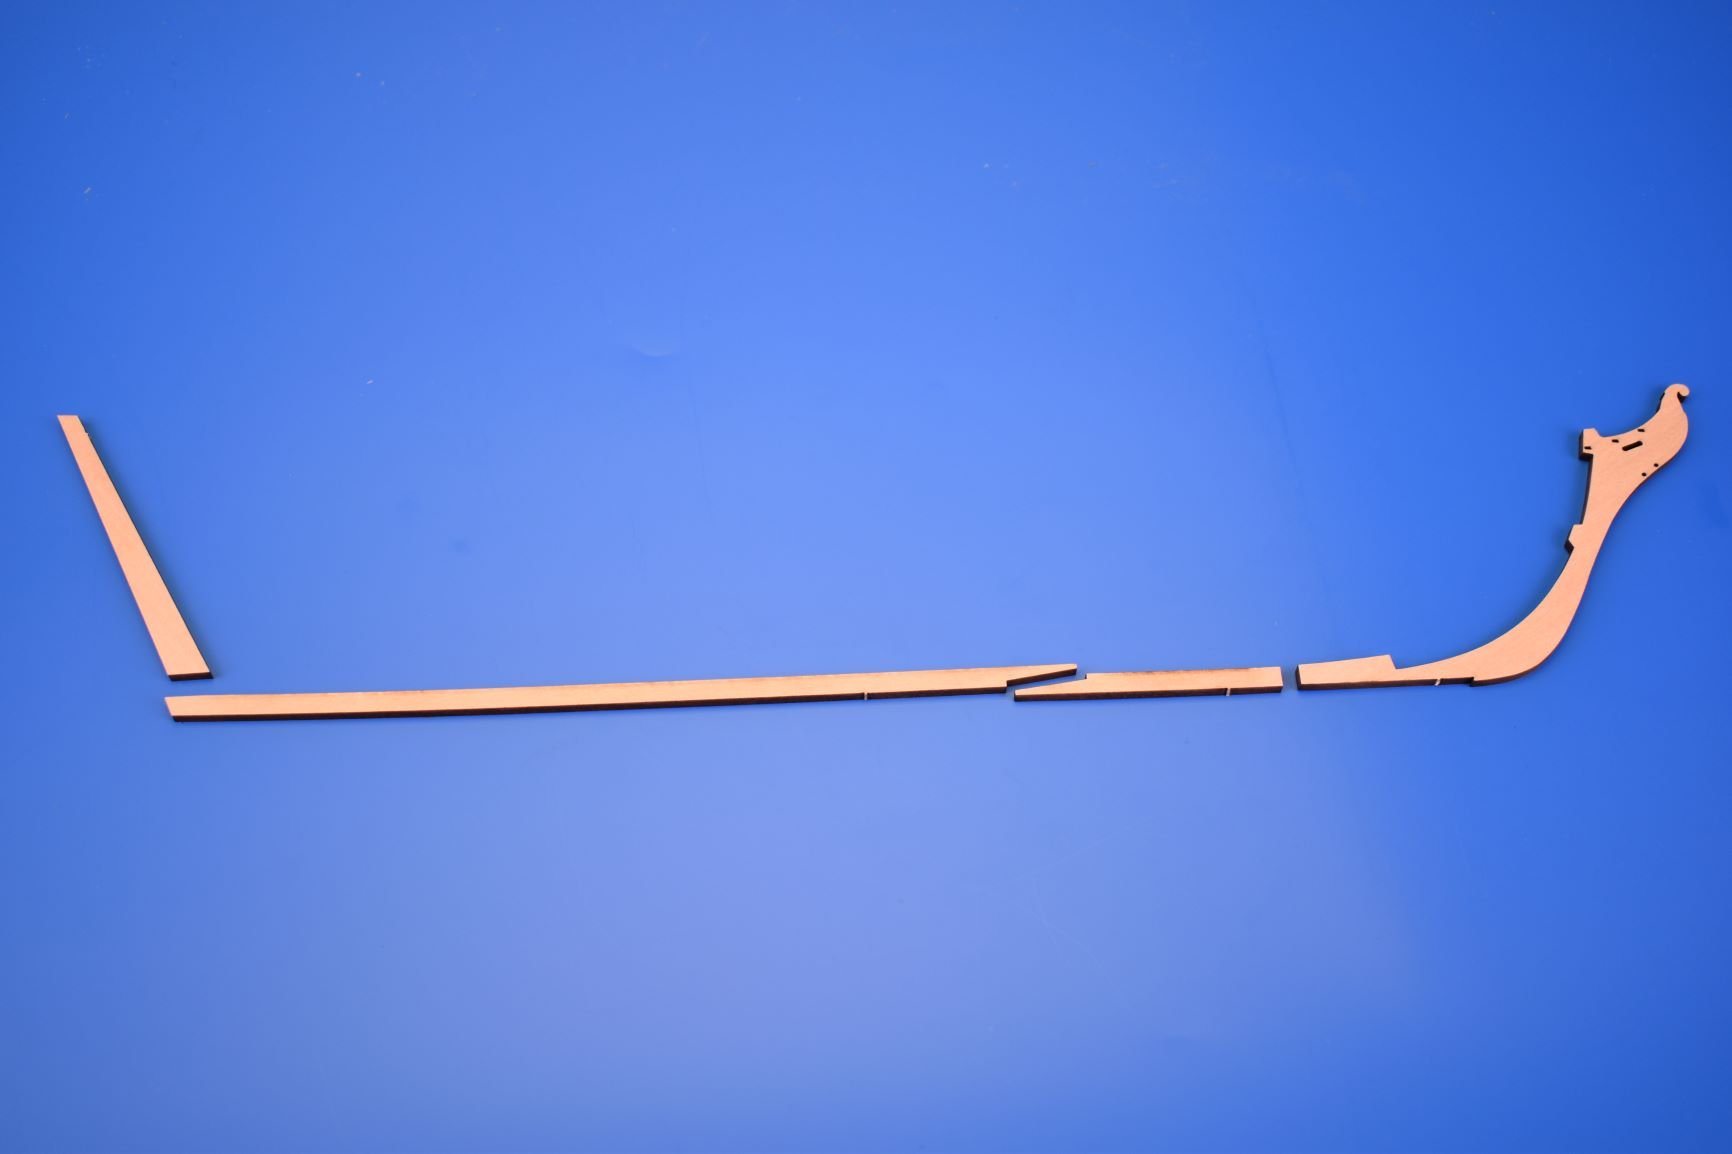
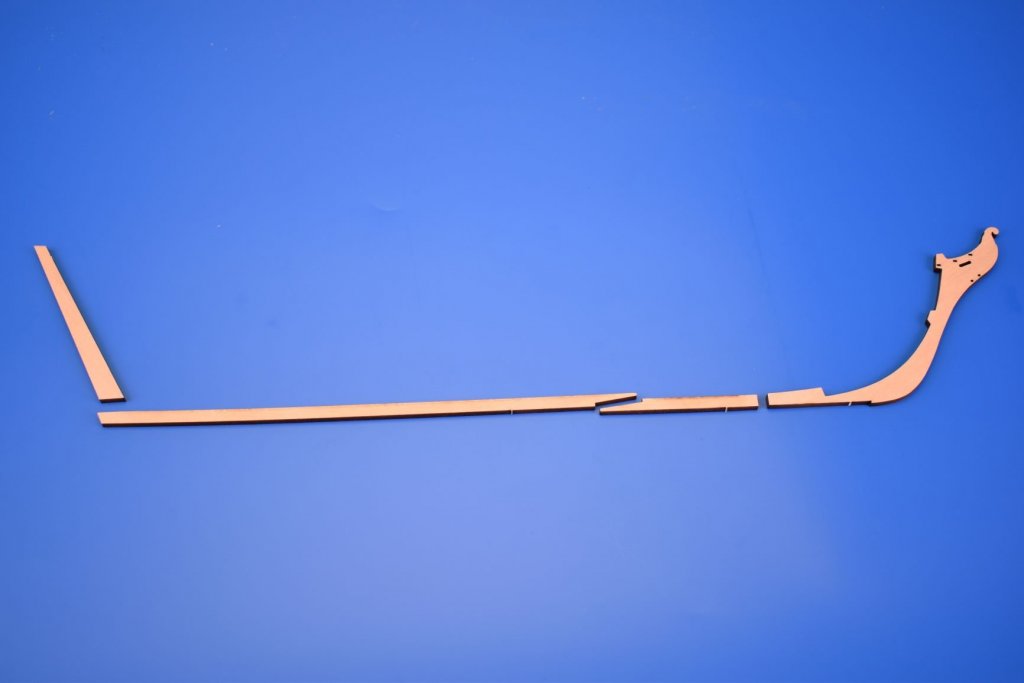
OK, I have been working on the Speedy prototype. All has gone well. I think the most fiddly area was the headrails. As I mentioned, because I didn't want the 'V' rails to look too oversize, I did them in 0.6mm photo etch, they are pushed and glued into the slots in the prow and then bent up. The headrail is then fixed in place and then the 'V' rails bent down to the headrail position and glued in place. The scale size is worth the extra bit of fiddling, I feel. Have added some pics showing the designs of the upper rail, with the swivel gun pillars integrated with the rail, so they can be painted before adding to the hull, with the top edge of the swivel gun pillars resting against the gunwale, so the distance from the gunwale to the upper rail remains constant. This worked out better than I hoped, and was really easy to fix into position (never know fully how some things will look until I try them for the first time..) The other pics are where I am up to now. They are a little rough as further touching up and varnishing is still to be done. I have just removed the masking tape from the deck.


-
It should work now Spyglass usually sorts out everything on the site, so I am still very much a learner...
-
My Master Korabel shipment finally arrived and now available on my website. I have the ship kits and blocks and deadeyes up at the moment, but still need to add the sail sets and the small ship's boats kits. Kits: https://vanguardmodels.com/mk-kits Pear wood blocks and deadeyes: https://vanguardmodels.com/blocks-2 Speedy's looking pretty cool, building so far has been a painless pleasure. Will take some update pics soon, just waiting for my black spray paint to arrive..
-
I did Bellona prototype using Tanganyika

-
I didn't actually build a lot of the prototype Pegasus model, the in house Amati modeller did, as I was asked to start another project (and the parts didn't really need checking as the major parts were that of Fly). I was slightly narked with this, as I had earmarked Tanganyika for the hull planking as, at that particular time, Amati had an unusually darker shade of walnut strip stock. Walnut looks good for 16th and 17th Century subjects (or for models that are fully painted, like Victory or Vanguard), but too dark for later periods. But this is just my personal preference. As for boxwood, it is simply way too expensive for (relatively) high volume commercial kits.
-
I hate the look of Pegasus, though, I wanted the second planking in a lighter wood, that model is way too dark. If anyone reads this and is thinking of buying one, use a lighter wood for the second planking, it will look so much better. ETA - I have plans for Atalanta...
-
Pegasus has a much cooler figurehead!
-
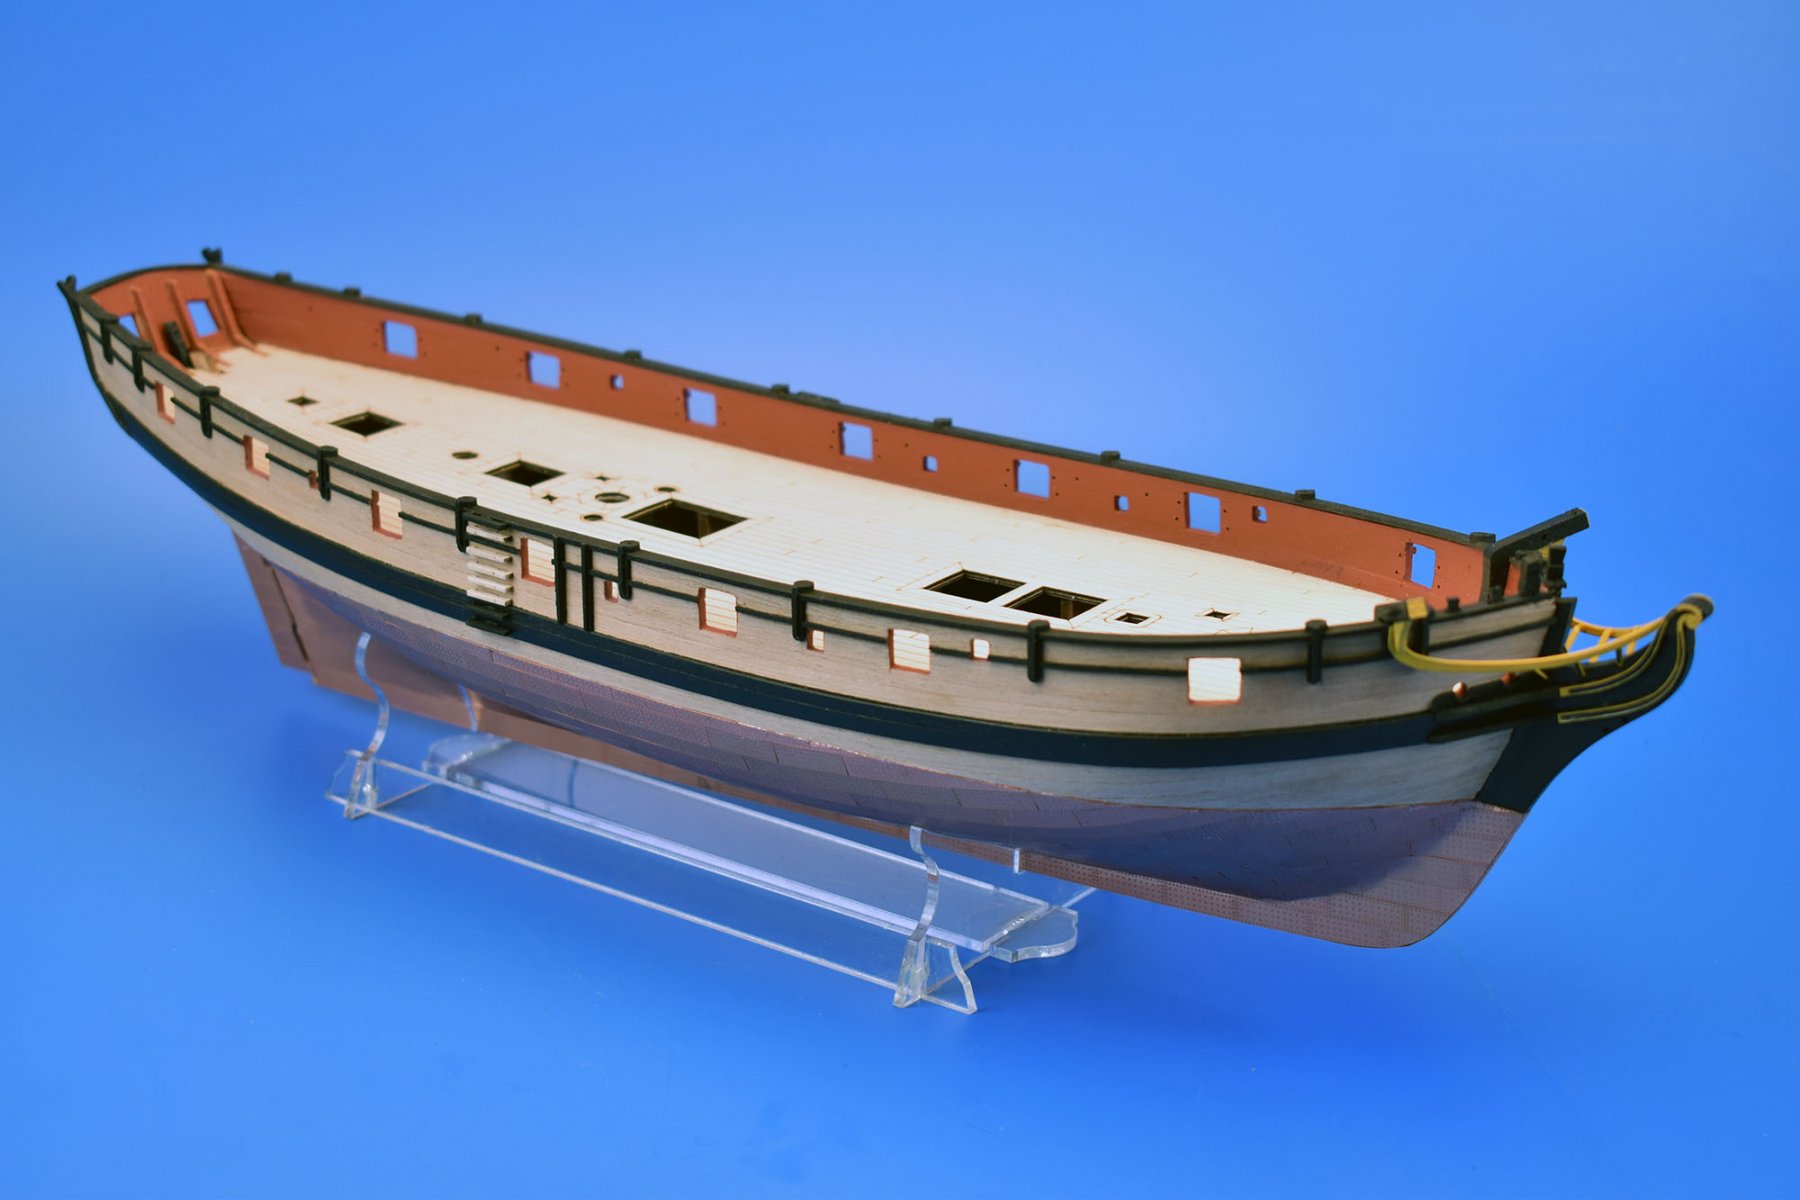
OK, coppering finished (will post pics later this week) and hull masked and black paint applied to the main wale and prow. I do not want to paint the hull too much as I like the 'warmth' of the natural wood when varnished. I have been thinking a lot about the rabet's for future kits, and how best to implement them. I never really look at other kits, I never have. What I have found over the past couple of weeks is that kits with rabet's always are of the single planked variety, and not double planked, which confounds the issue slightly. Personally, I do not like single planked hulls because the bulkheads/frames are sometimes too far apart, meaning the planking in between the frames can have gaps if the planks are not pre-bent to perfection. I see 'proper' framed models, with framing very close together that does have the proper thickness of single planking. This works, I think, because the very close spacing of the frames act like the first layer of planking as seen on commercial double planked kits. Anyway, I digress, back to the rabet's. I have thought about the possibilities of having the main false keel, say, 6mm thick. Then, adding a 3mm thick pre-cut strip running the whole length of the keel, from the prow to the upper stern area. Then having the exposed keel, prow and stern post back in 6mm thickness wood. A jig would have to be included to ensure the 3mm keel is equidistant when attached to the 6mm keel. The trouble is, because it will be double planked, the slot needs to be quite wide, and wider in some areas than others. This is because I cannot just add up the thicknesses of the 1.5 and 1mm planking and use that. The front planking terminates at an angle, so the end of the planks will be angled, making the thickness a lot more than either 1.5 or 1mm. Anyway, this is the area I have been thinking about, trying to make it work for double planked kits...
-
Cyano gel, just a dab in the middle. One of those sheets of plates is enough to do one complete side plus another couple of rows of the other side, so two will be included.
-
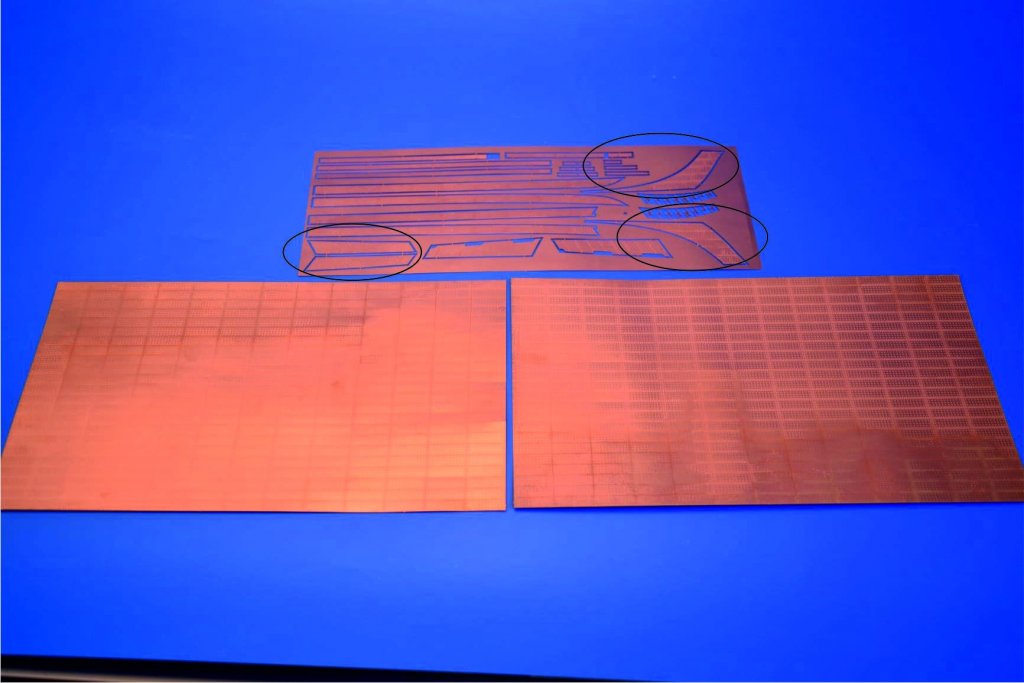
A professional model figure painter, the guy who does my resin castings put me in touch with him. At least now I have pictures for proper paint reference. I think the Nelson figure is being done next week. About 75% done for the copper plating for Speedy. I did decide to not include the pre made stern post and prow plate patterns. I thought it would be a good idea to have these pre-made as they would give the correct waterline level both fore and aft, plus the ends would not have to be trimmed. However, thinking on this some more, I decided against it (the circled patterns in the pic will not be in the kits), the plates still have to be trimmed, and I know that you need to trim them perfectly so as not to stand out too much where they meet between planking and keel/prow. This area could so easily turn into an eyesore. It is better to allow the plate to run fully to the edges, both fore and aft. (IMOHO of course..) The copper plate rudder pattern, plus the slightly curved lower keel copper plates pattern are to be kept, however.
-
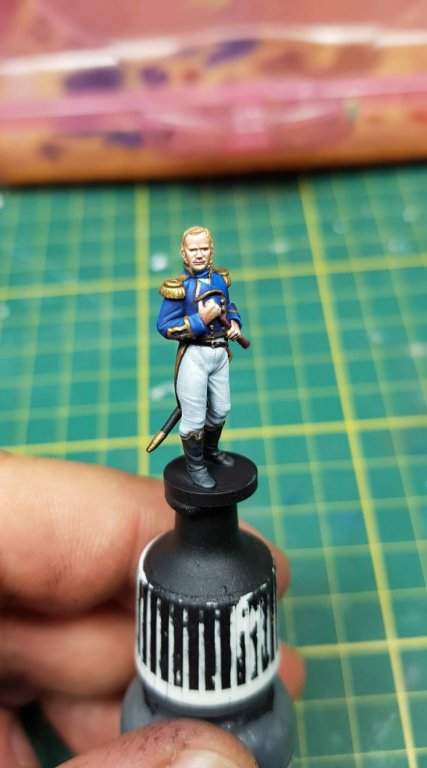
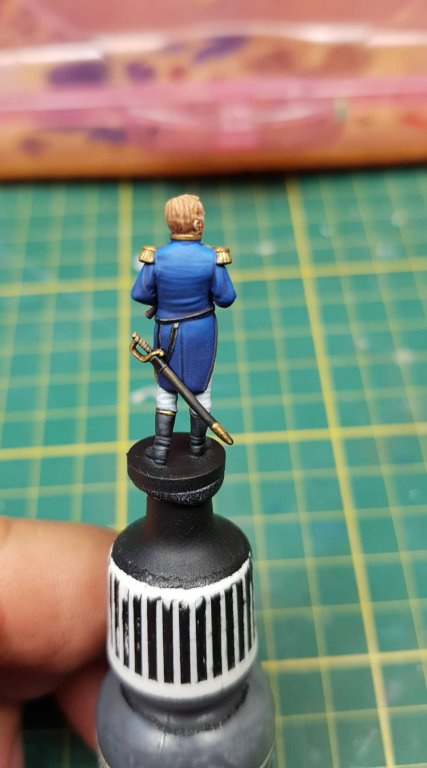
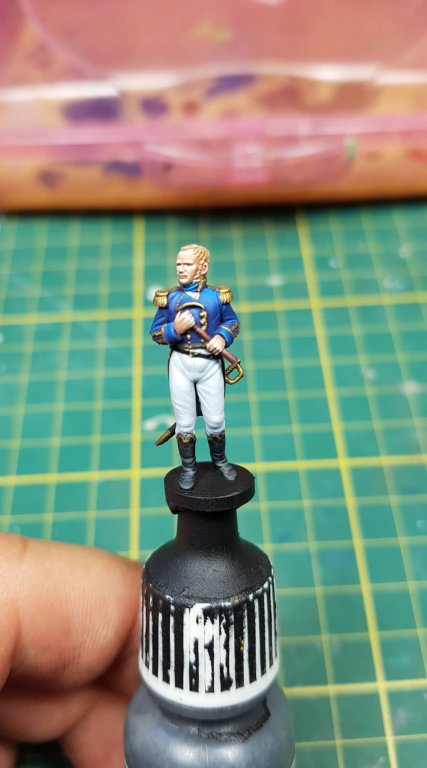
Just received some pics of the painted Cochrane figure, Nelson is next. I am just copper plating at the moment...

-
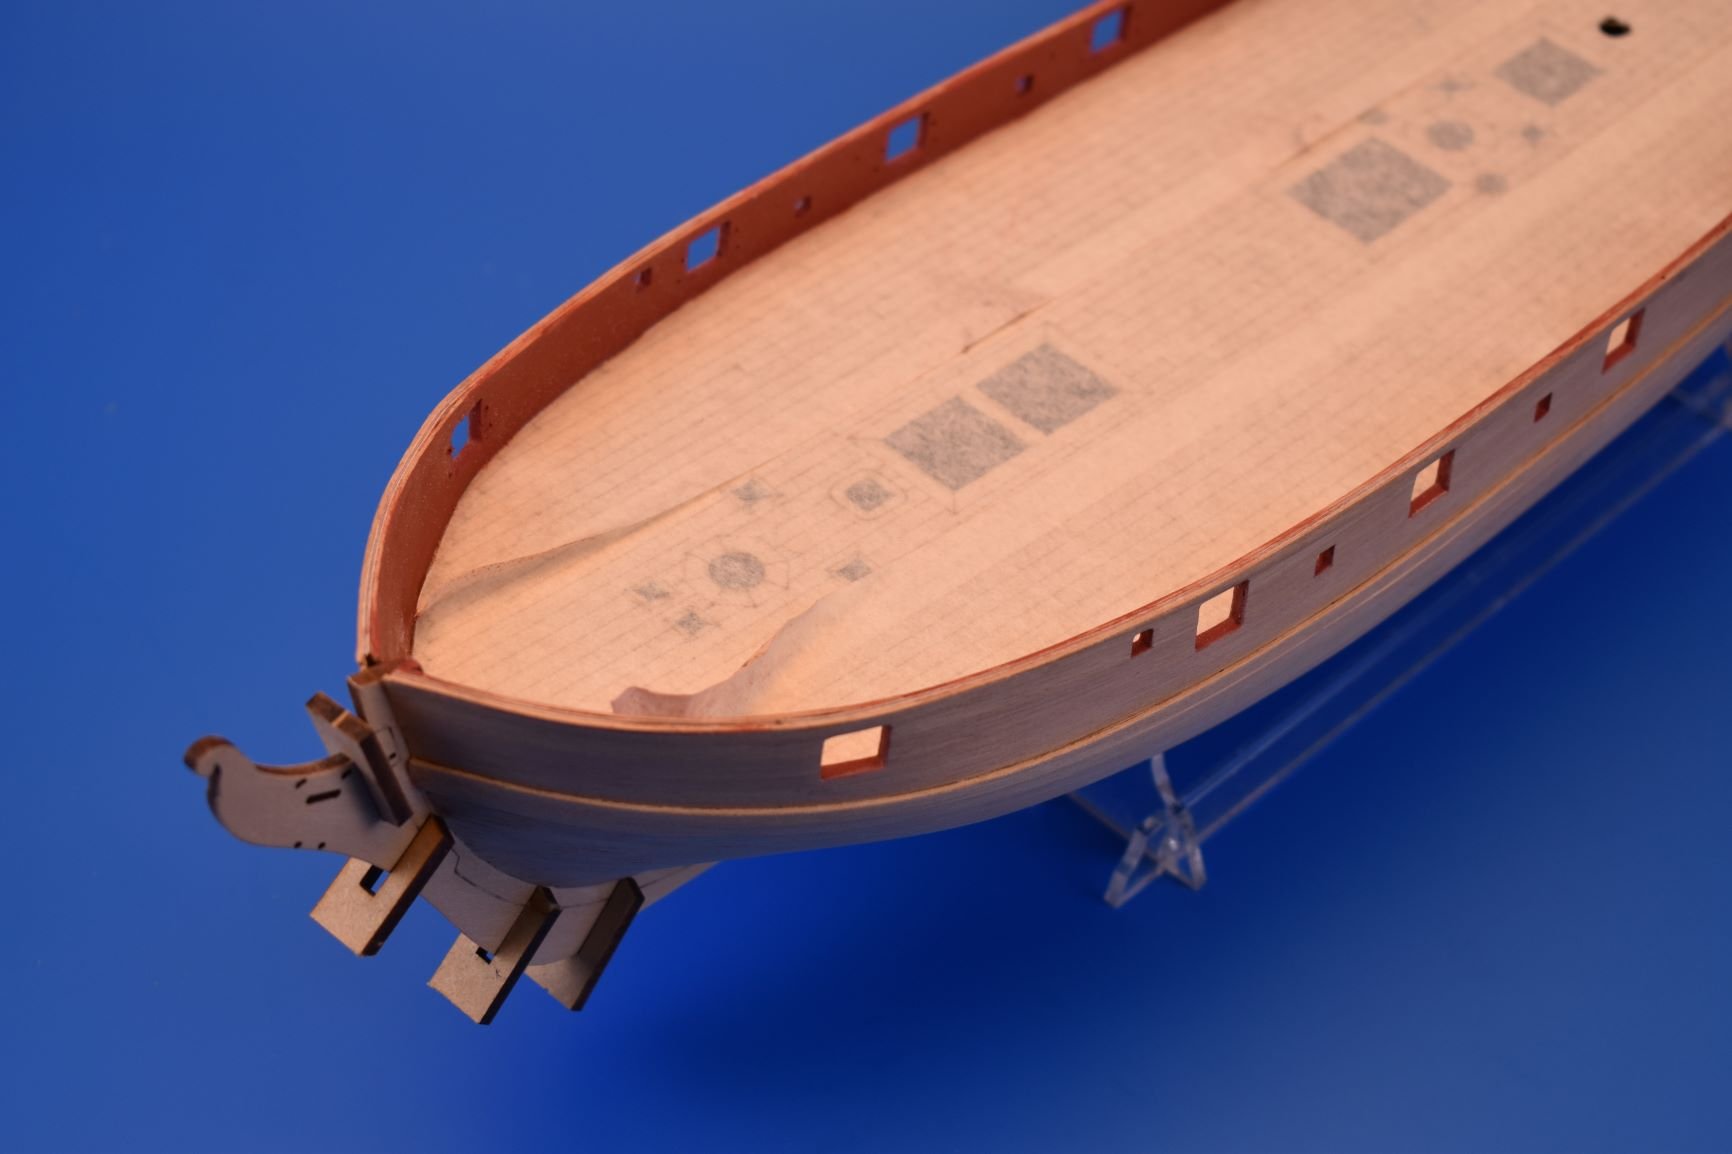
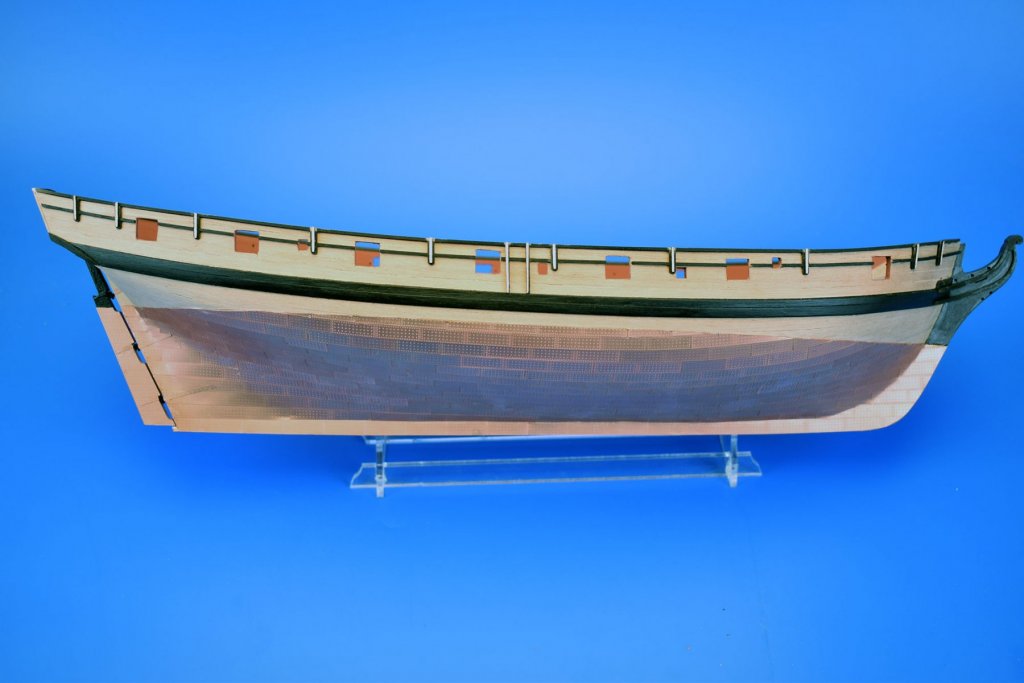
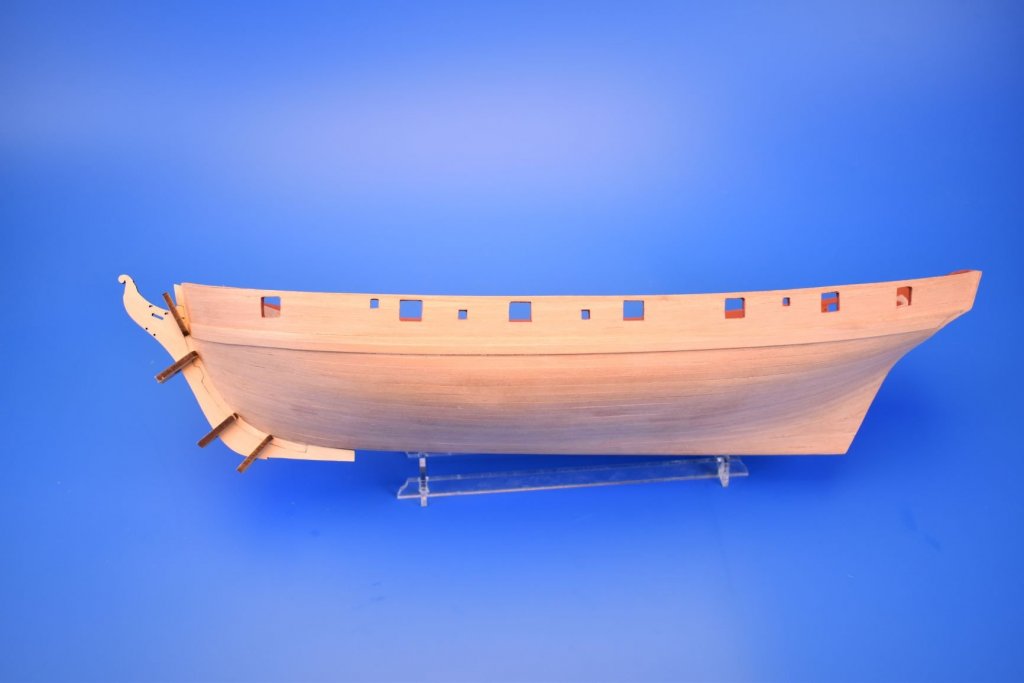
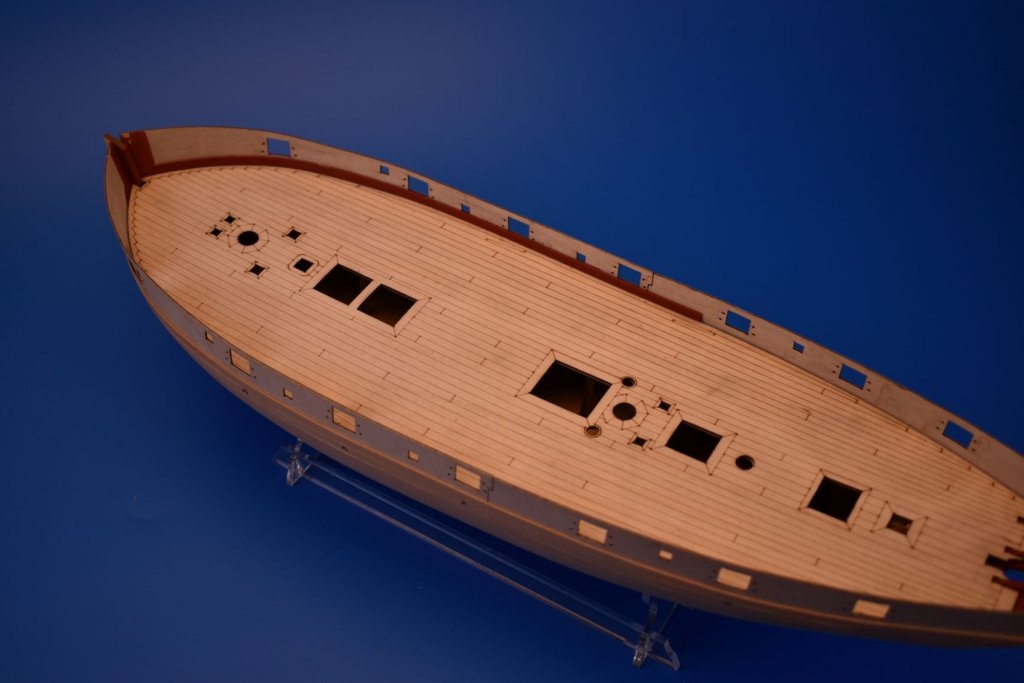
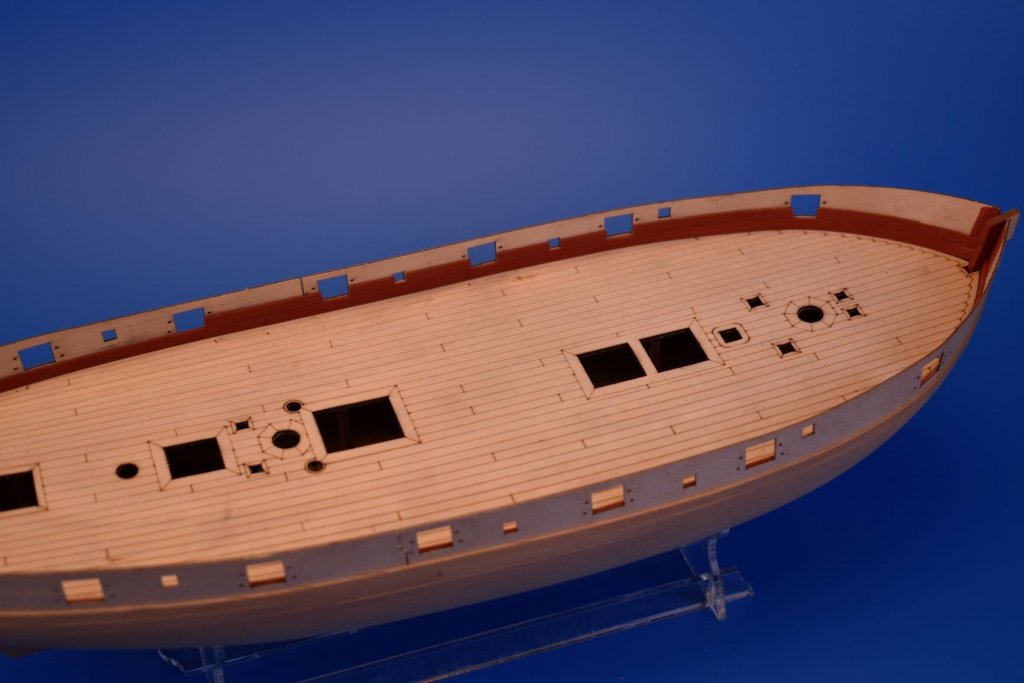
For Speedy, it's been boring stuff like painting the inner bulwarks red. Still use a mix of Humbrol for the red, so takes a lot longer to dry between coats. Planking complete, along with main wale, and have just added the prow. I have added a few 'alignment jigs' with the 3mm MDF to help ensure the prow remains straight whilst the glue cures - nothing worse than a wonky prow! Like the Alert, the keel is not completely straight at the bottom, but has a slight curve.. I think I shall leave the masking tape over the deck for as long as possible.
-
Cheers, I didn't think these stern frames would be an issue, as I know that when they are in place, the stern counter is then glued in place onto them, leaving only the 'stubs' of the frames showing. originally, and when building the prototype, the upper parts that the upper stern board fits to were the full height of the stern board. But I shortened them to the height of the hull planking instead, as I knew they would be too easily broken. I think I photoshopped mine for the construction pictures in the manual, so they appear shorter. I do not think I be adding the slotted rabbet line on all future kits after Speedy, though, seems to be more trouble than it's worth
-
I haven't received the MDF stern frames yet. As soon as I have them, I will post them off. I suspect that most stern frames will be fine, but some may break. If the stern counter and stern board are glued sooner rather than later to the frames, they should be fine. I have put one together using the limewood parts myself, and I had no problems - but I am sure some will have problems, which is why I did actually specify MDF for these parts, and am not happy I was sent these parts in limewood.
-
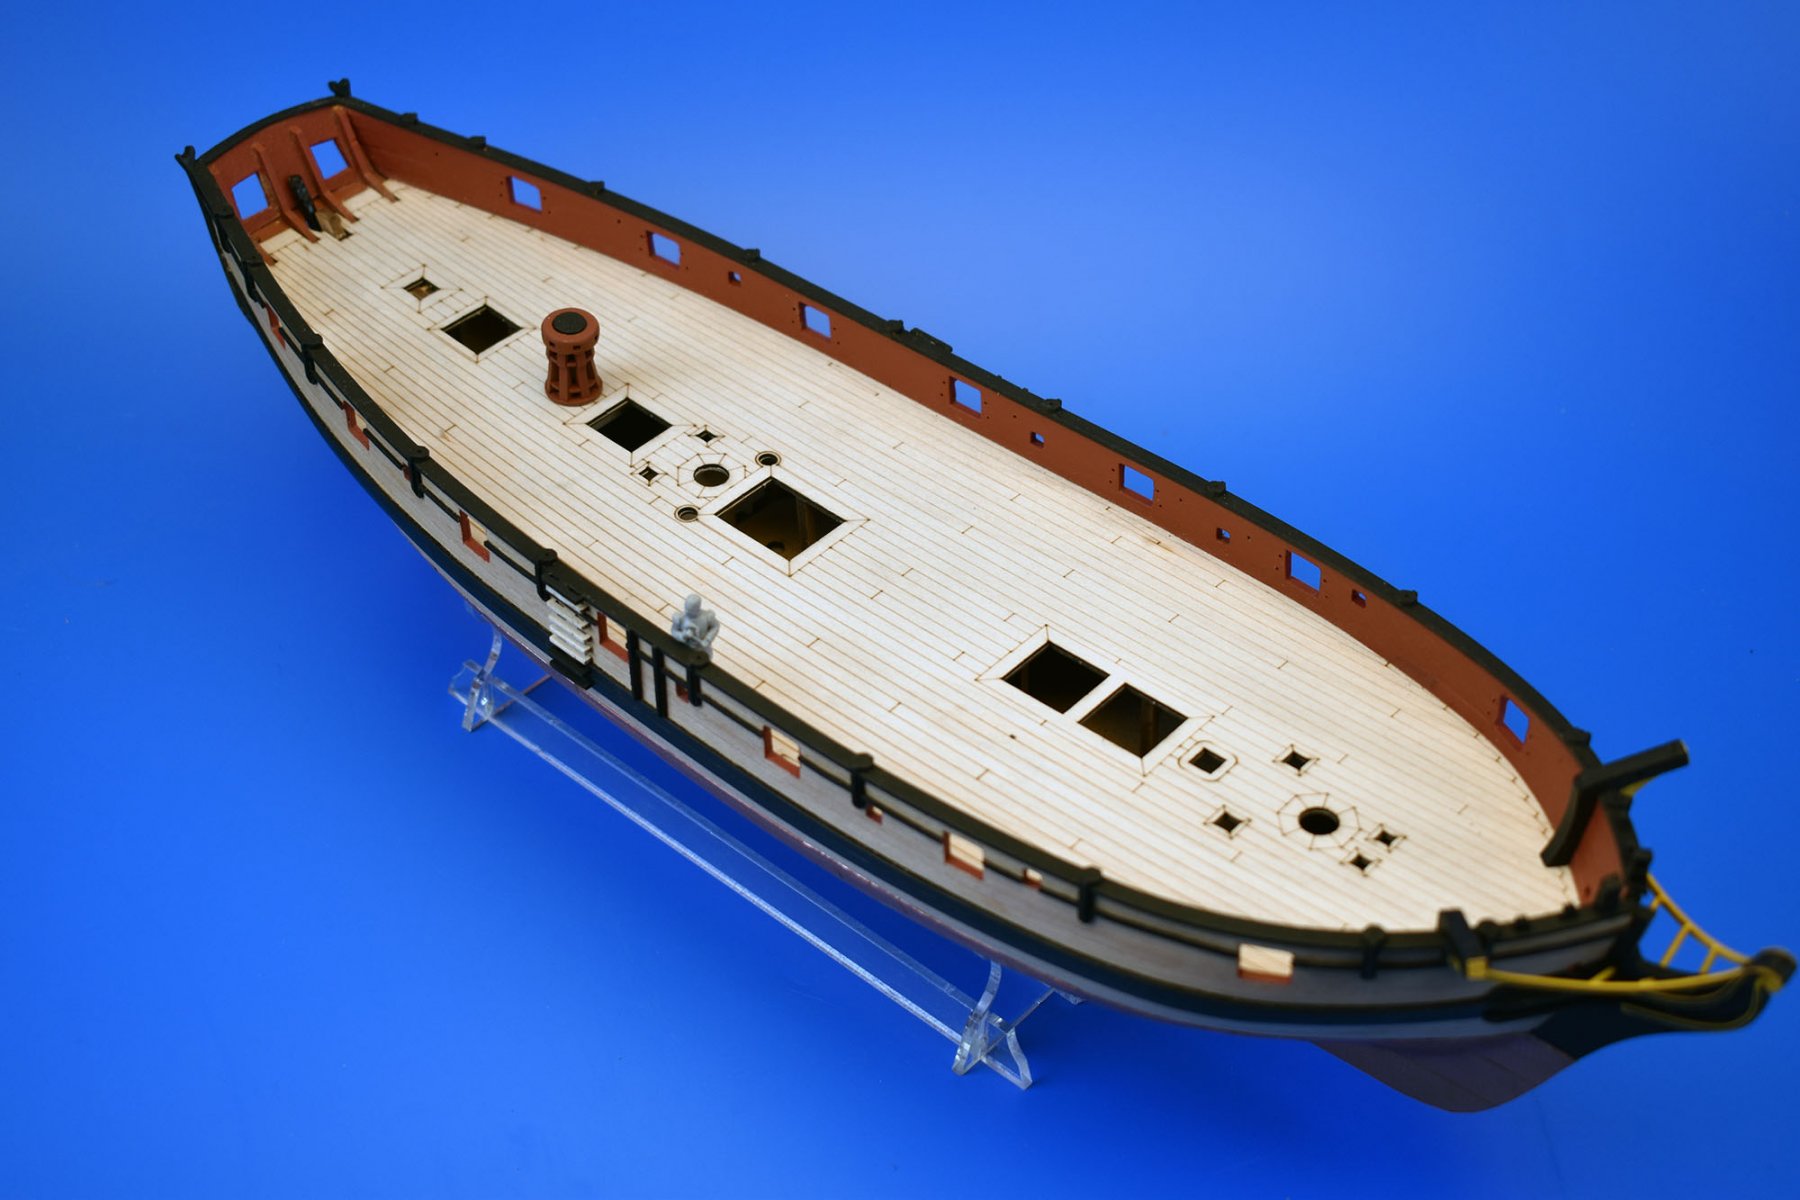
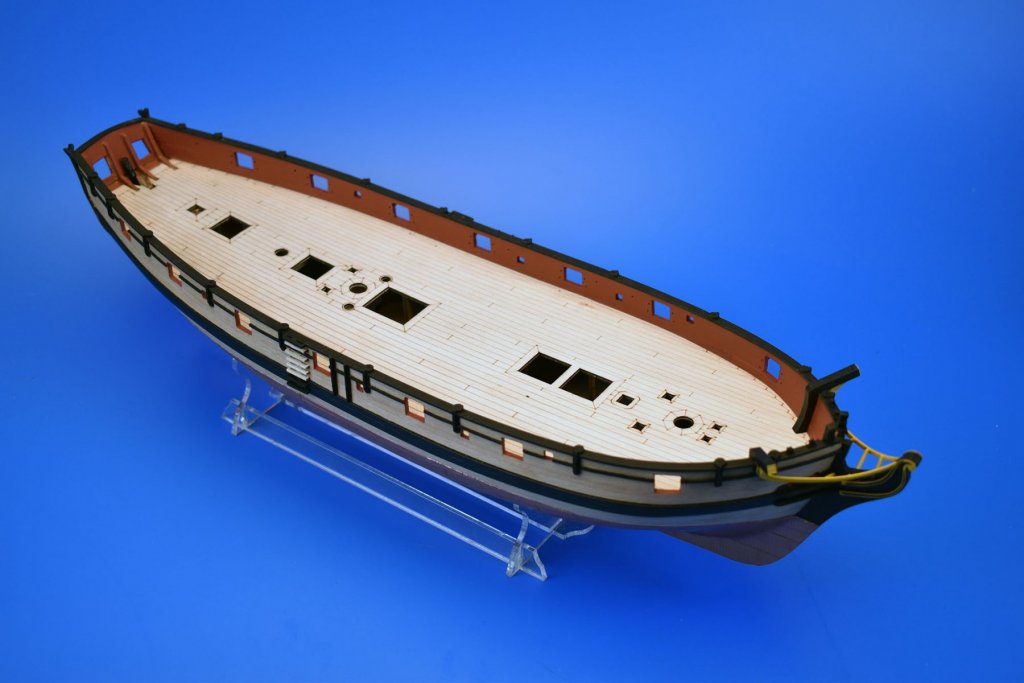
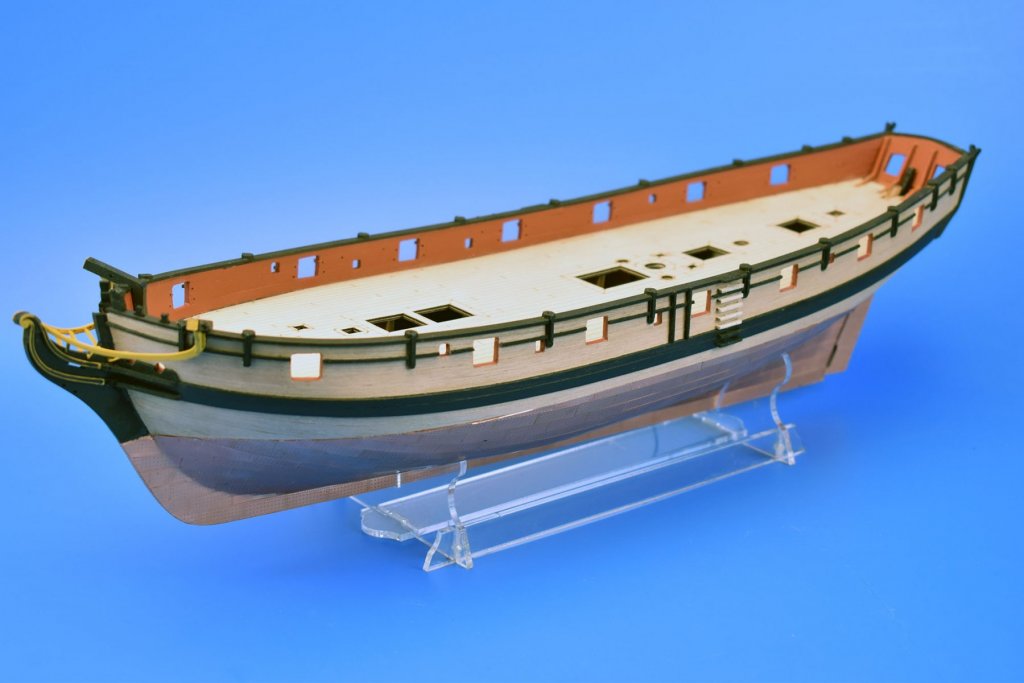
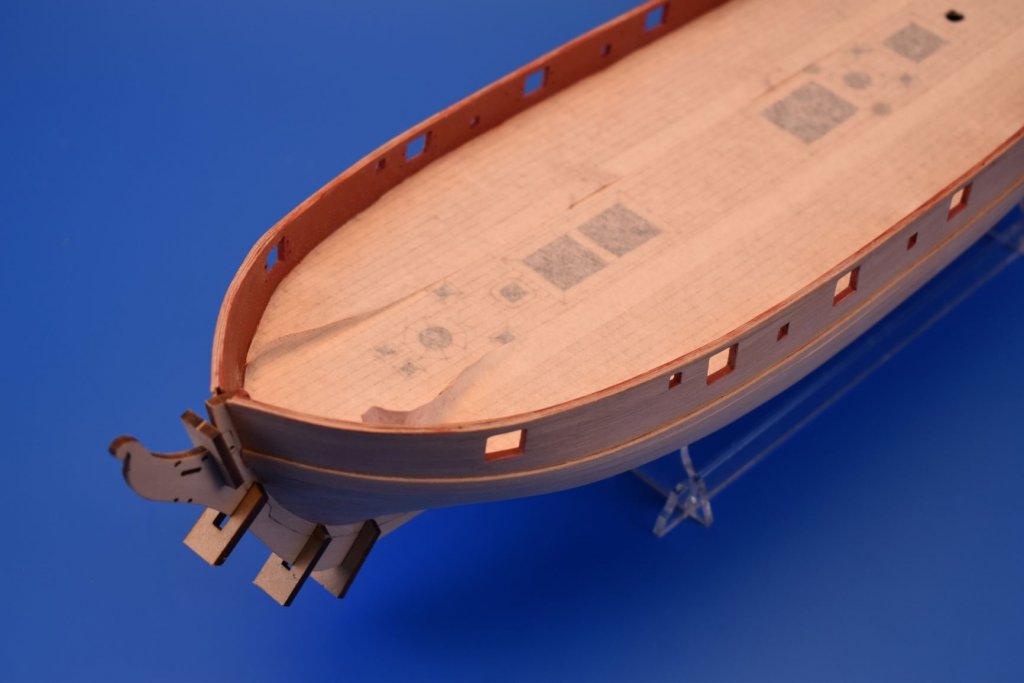
When I got home from work this morning, before going to bed, I glued the deck in place, so it had plenty of time to cure. This morning, I planked the inner bulwarks, painting the planks first (although they will need painting again), so I have a nice clean line between deck edge and lowest plank on the bulwark. I will now mask off the deck, as it will be so easy to damage it, and then sand the inner bulwarks smooth and re-paint after filing out the sweep and gun port openings.

-
I have F-360 but haven't really used it yet, Interesting to read that the program is slow when lots of info in on the file you're working with. I get this with my program (TC Platinum 2019). By the time I have all of the designs and drawings for plans on one fine, it is very sluggish and a chore to work with, so then have to separate the drawings to different files. I am wondering if it is the size of the plans you are using? I now bring in my scanned plans in as PDF, making the file a lot smaller and better to work with, having better line definition compared to JPEG.
-
Cheers! I never intended to do another Speedy, but just do this one up to a certain stage, but realised I could not due to the first prototype showing the stern board glued into position after the second planking was complete. So have no choice but to carry on with this one. Perhaps I will finish the other (pear wood) version as Speedy's sister, Flirt. I did think it a mistake to not fix the keel, stern post and prow in place yet, but feel the prow will be vulnerable until all hull planking is finished and sanded - and I cannot add the keel and stern post until the prow is in place. Planking the inner bulwarks next. Using single strips will be tricky, as the stern is closed off so planks need to be perfect in length. A better solution may be to cut the single planks in half and glue one at the front to half way, and measure up and glue the other half from the stern to the end of the front plank. If I were building this for a commission, or for myself as a display model, I may take more time, but I just need to build it to look decent for box art. Plus, I know that if I can build it this quick without much trouble, slap it together, as it were, then almost anyone will be able to build it. I have seen what some of you guys can do, and it's much better than some of my efforts.
-
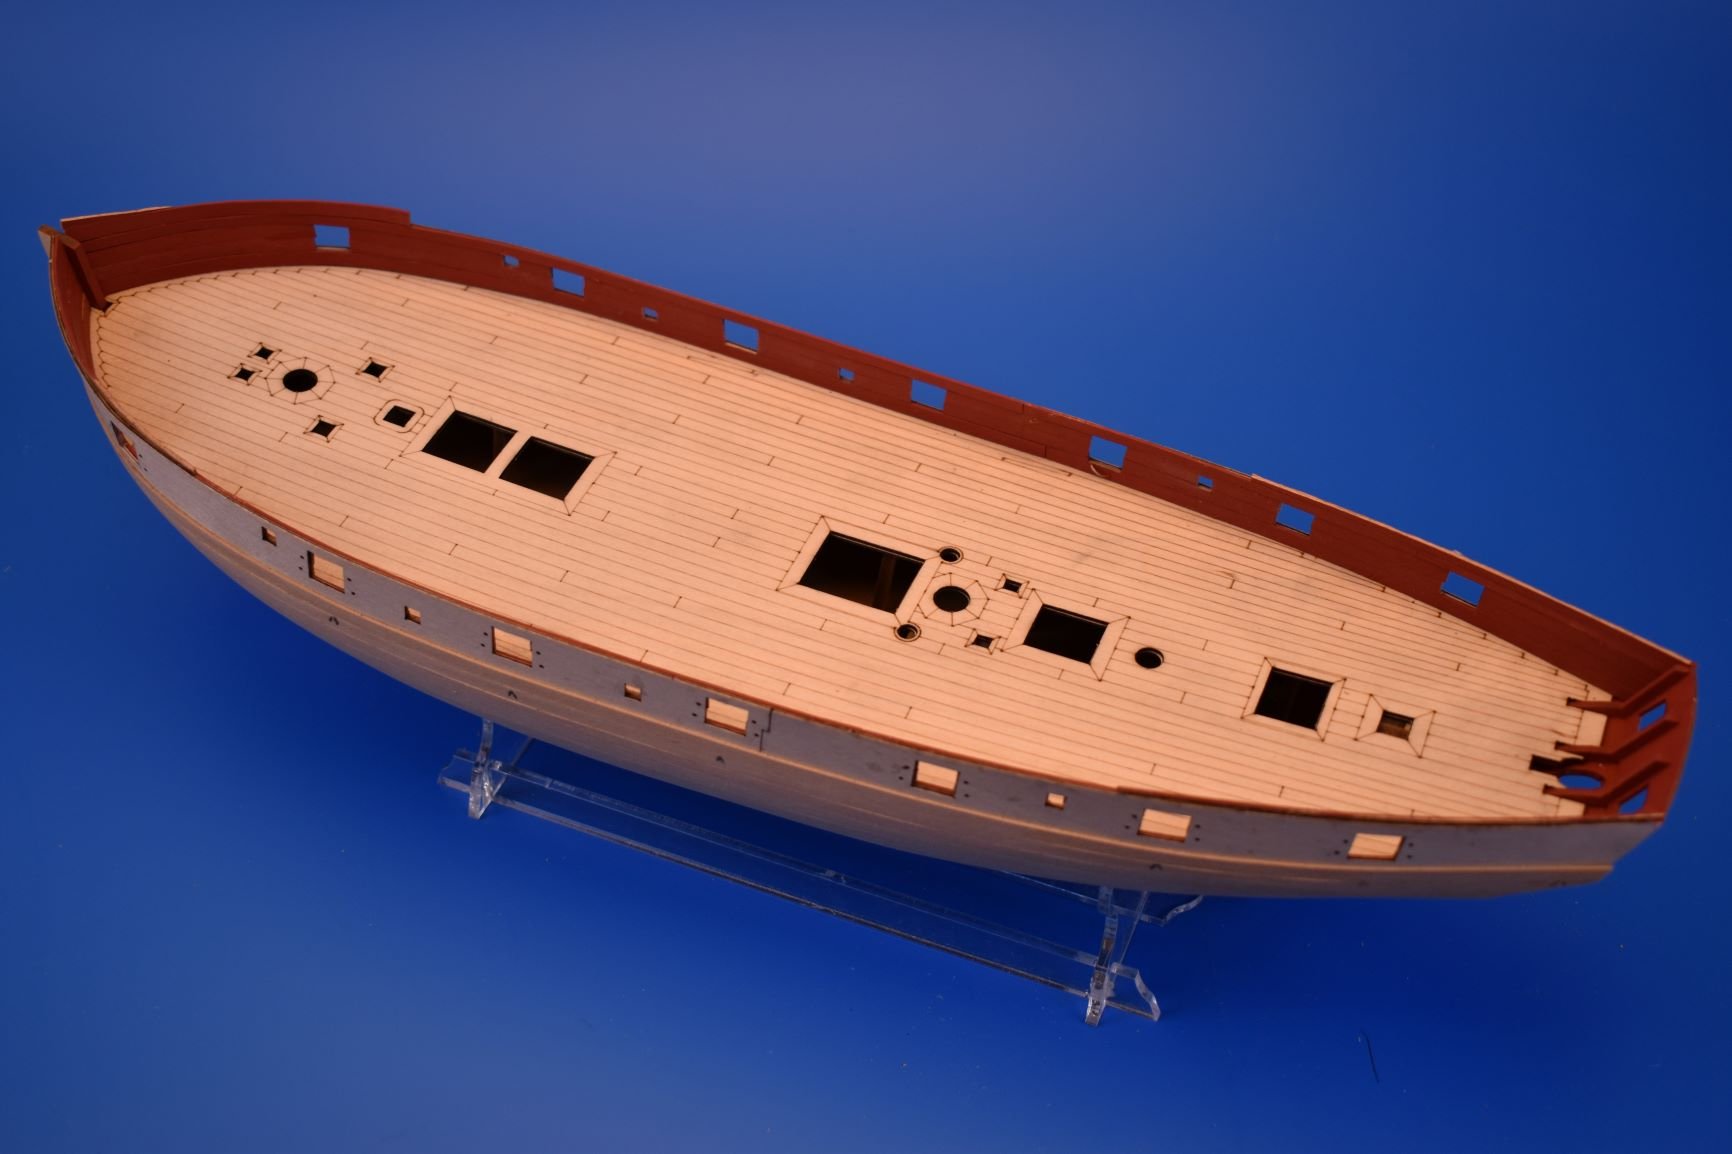
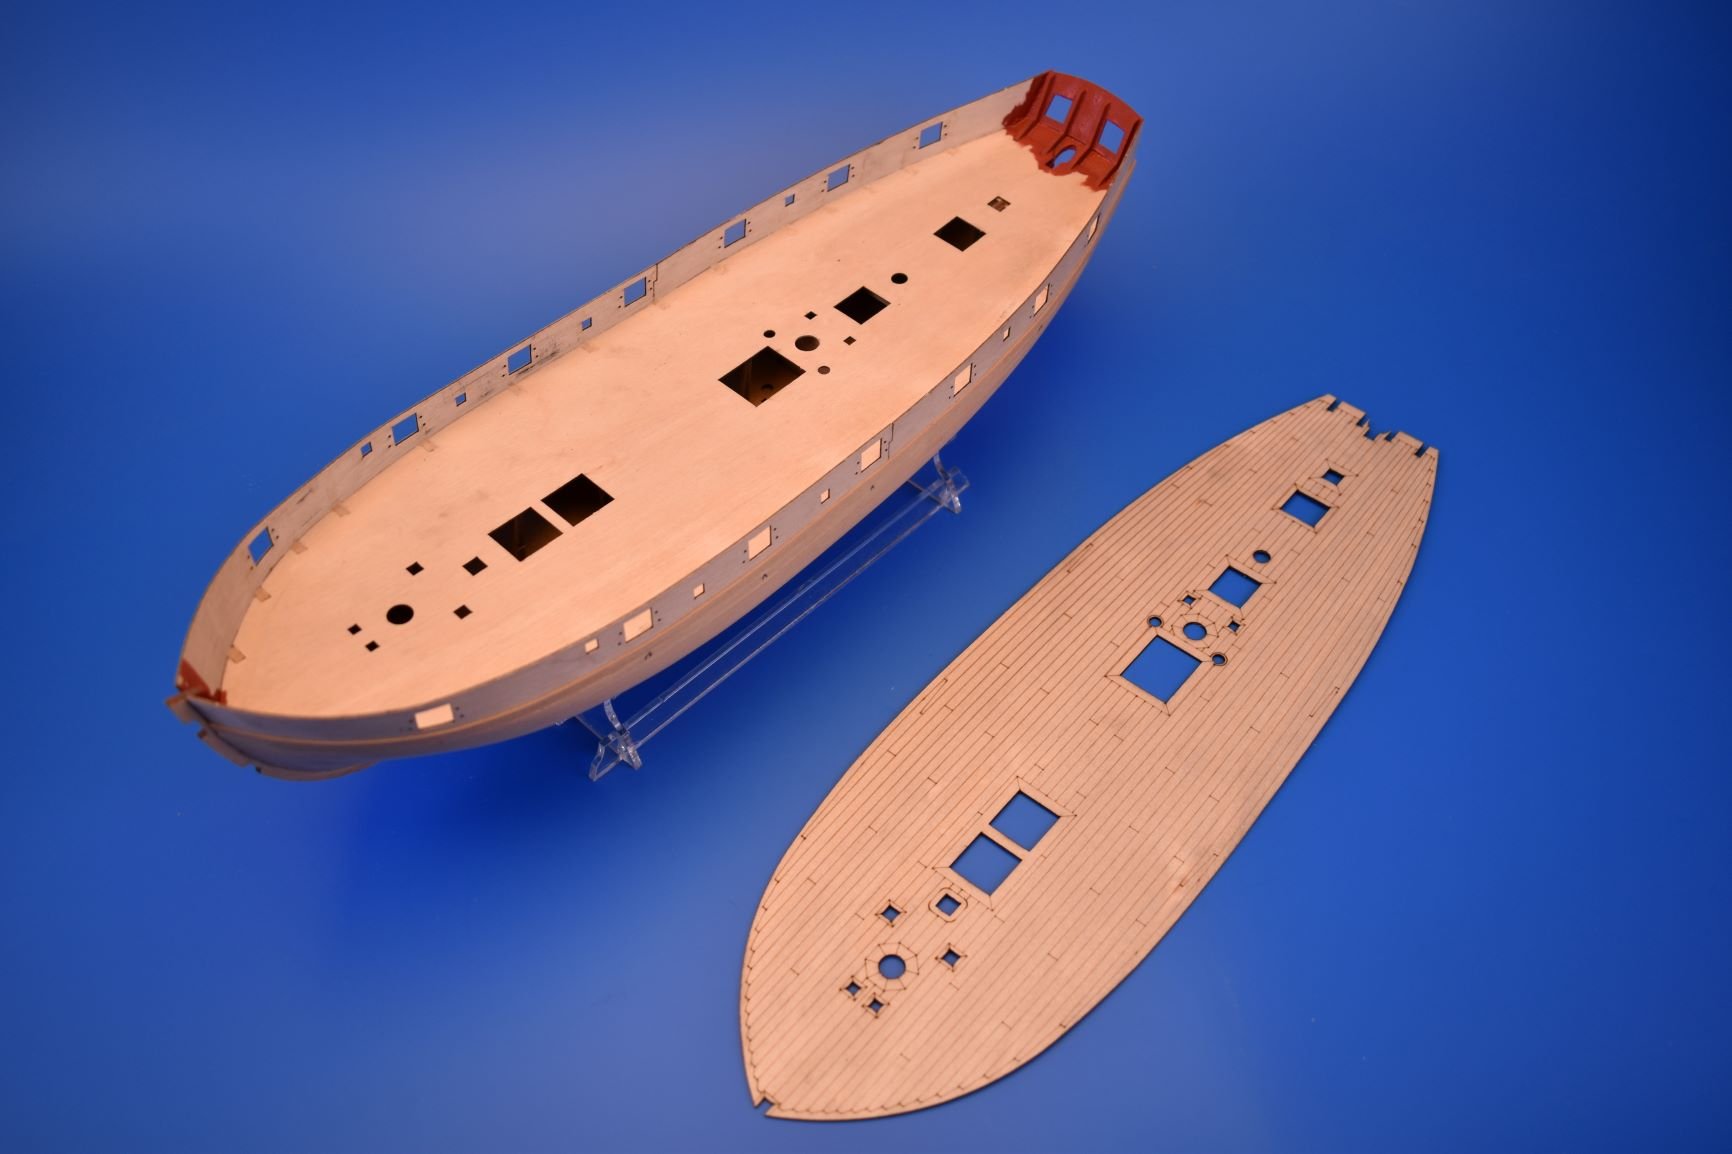
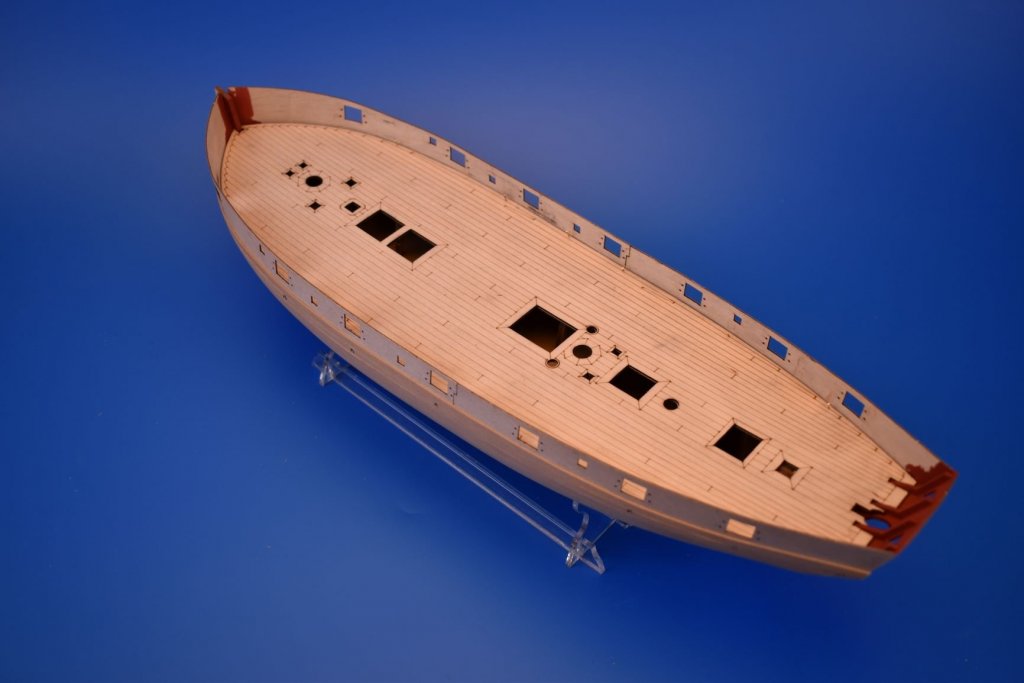
Last post before work.. Bulkhead tabs removed and sanded flush with top edge of deck, and some parts painted red before the pre cut and laser engraved deck is glued in place. This is the time where you chose to use this deck or want to plank it yourself...