Paul Salomone
-
Posts
188 -
Joined
-
Last visited
Content Type
Profiles
Forums
Gallery
Events
Everything posted by Paul Salomone
-
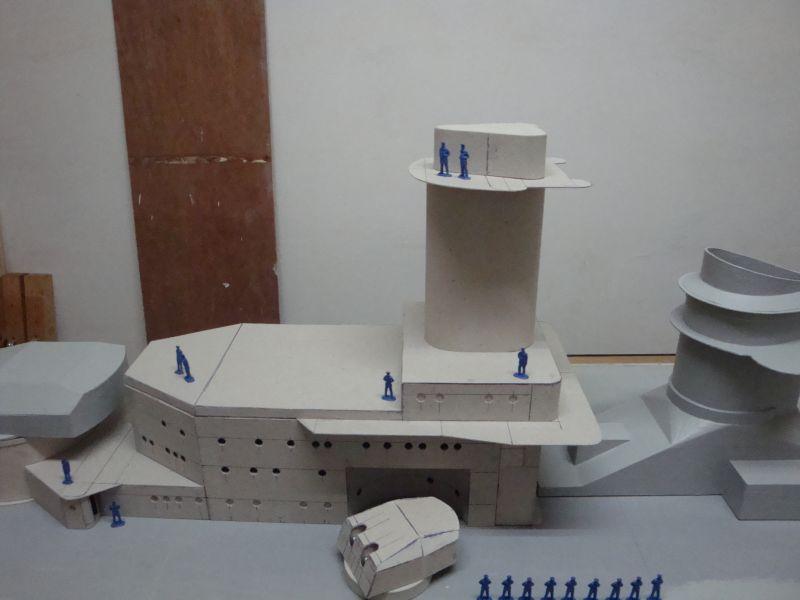
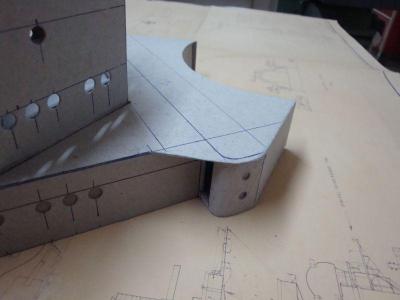
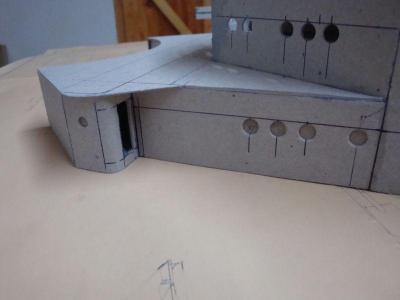
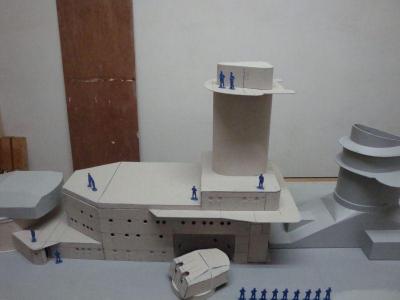
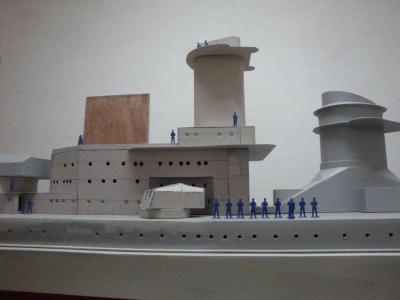
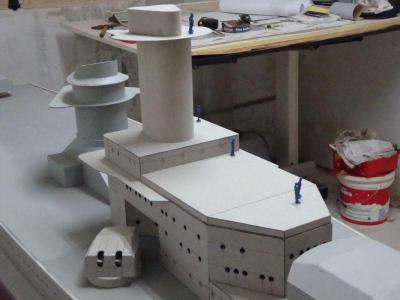
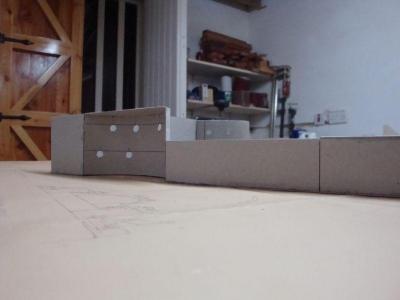
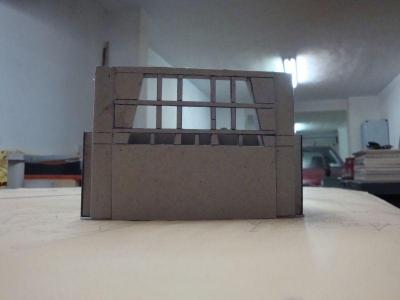
 Hi guys, The last part related with the construction of the forward superstructure. Here goes. The final reinforcements put in place. A close up view of the circular corner. The circular corner on the other side. A close up view. Starting off with the final part. The top piece, which shall be the deck on which the armoured bridge and the open bridge shall be placed; together with the tower and radar. The panel walls being fitted in, together with the stiffeners and reinforcements. Another view. A generic view of the whole assembly to date. A close up view. A rear view A side view, with some figures on parade, showing the element of greatness of this ship. A front view. An elevational view. Shall post more pictures as soon as I find some spare time. Unfortunately, I am at work and have to produce some shop drawings for approval this week - so that makes me a very busy operations manager.


-
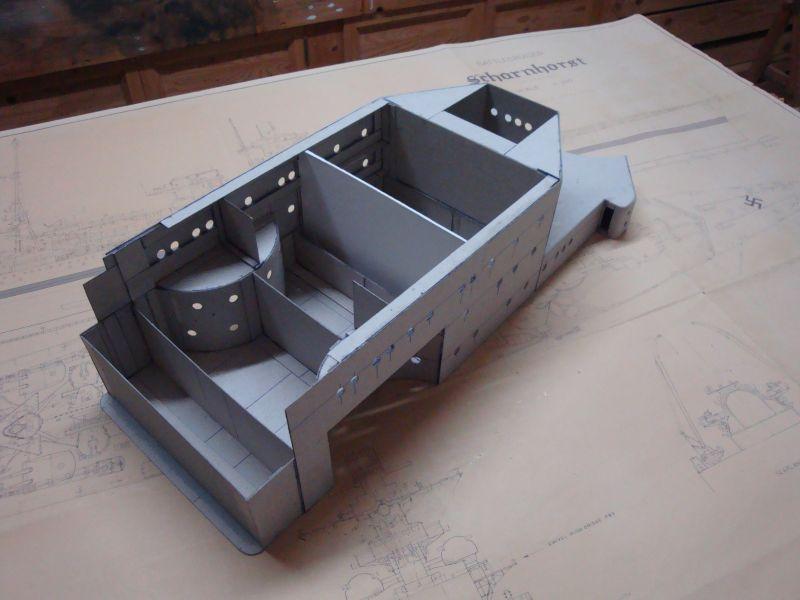
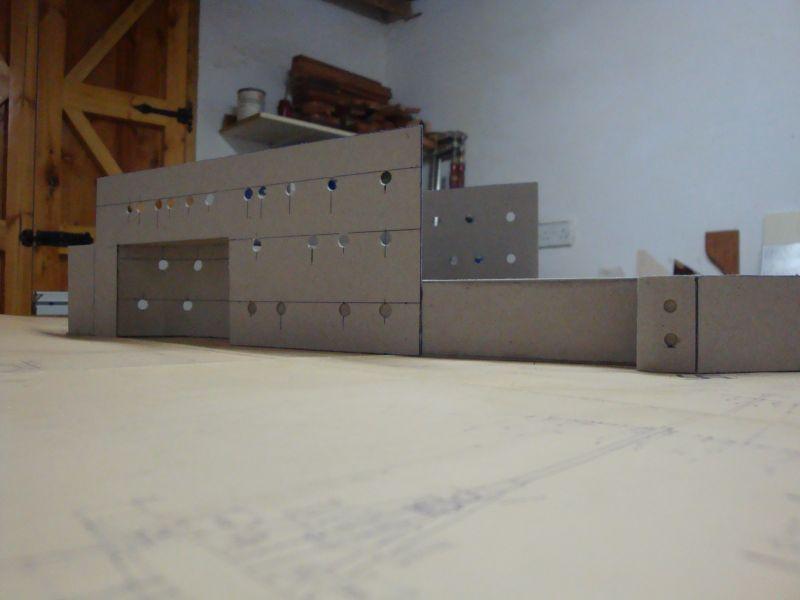
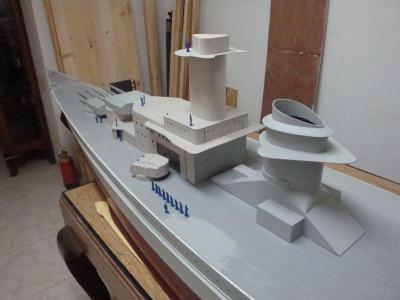
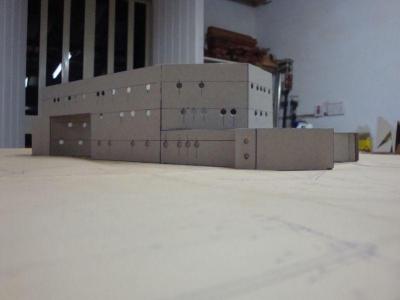
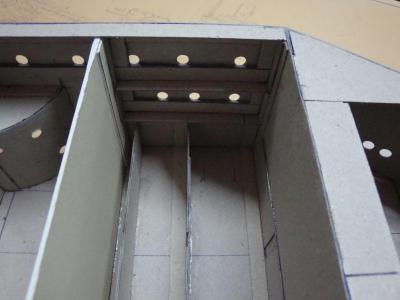
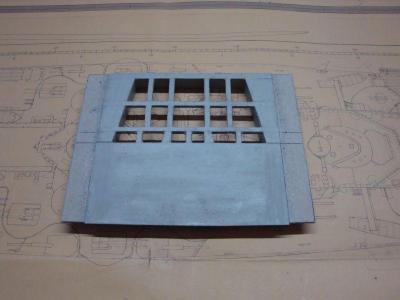
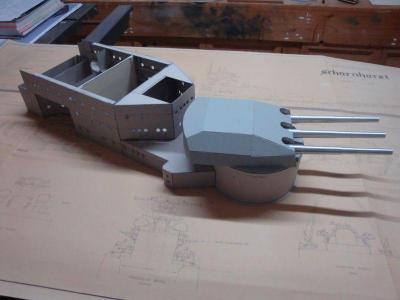
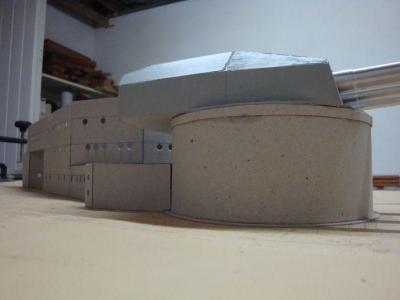
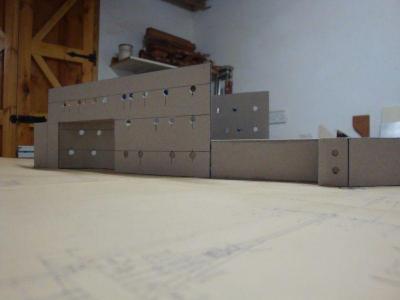
Hello all, The third part related with the construction of the forward superstructure. The second skin of the outer walls, well under way. A front view. A side view. A close up shot, showing the amount of stiffeners and reinforcing struts. These were not just placed there for fun. These were fitted in strategic places, in order to keep the structure steady, while eliminating any future unpleasant distortion. A close up view of the reinforcing used for the rear. The finishing process underway. A clear view of the width of the ventilation ducts. An elevational view of the superstructure with turret "Bruno" in place, together with it's corresponding barbette. An imposing side view. A view from the rear of the turret. The last part shall follow soon.


-
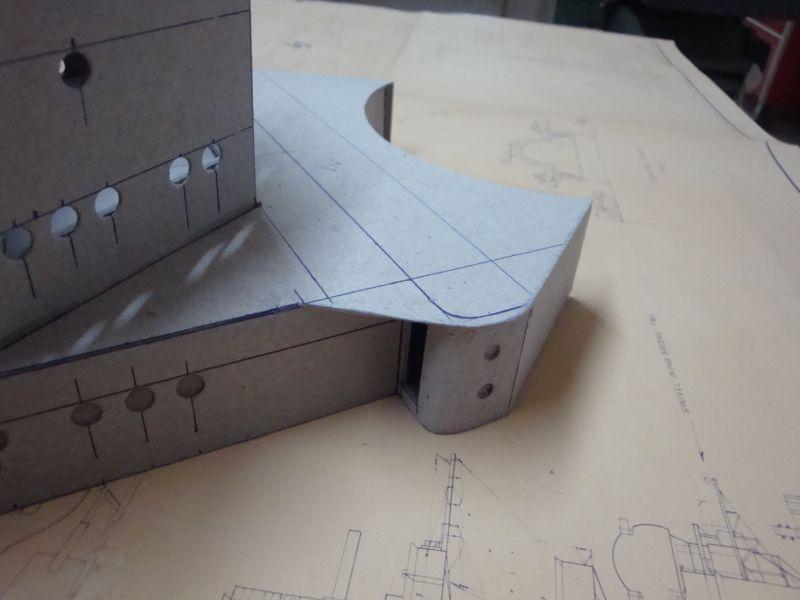
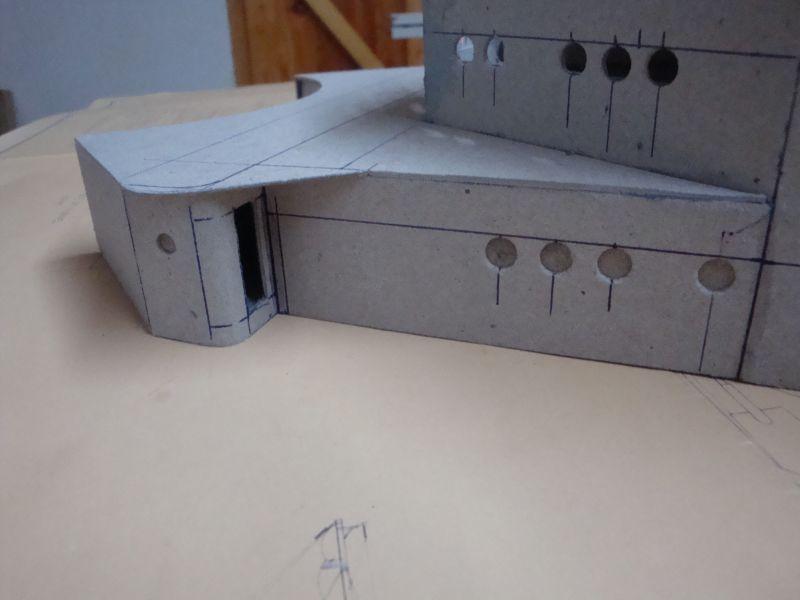
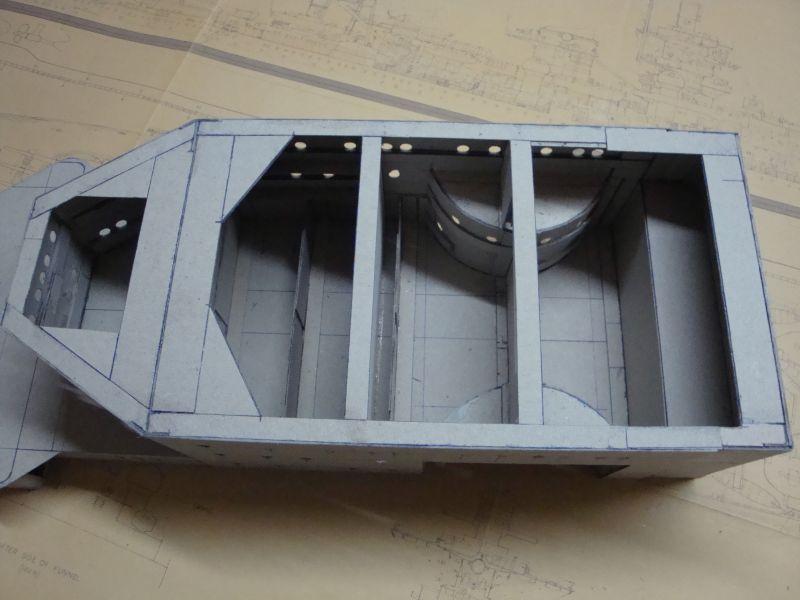
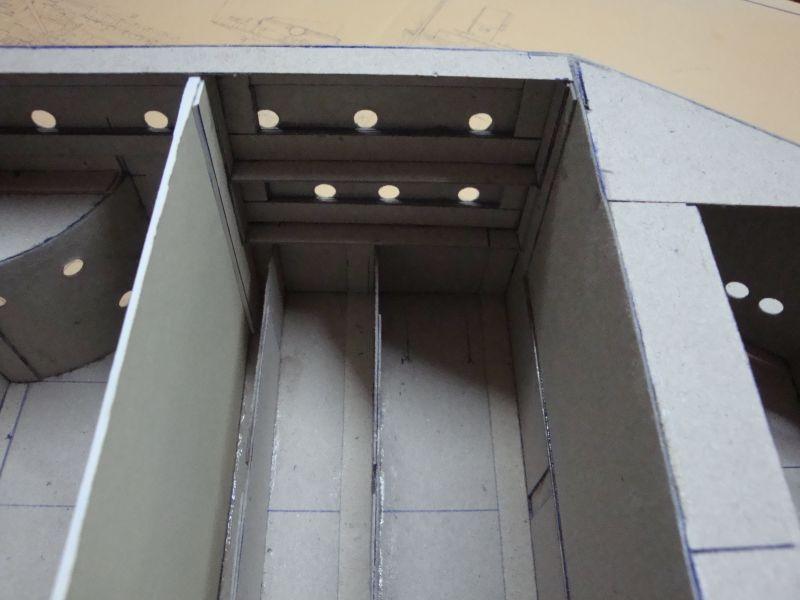
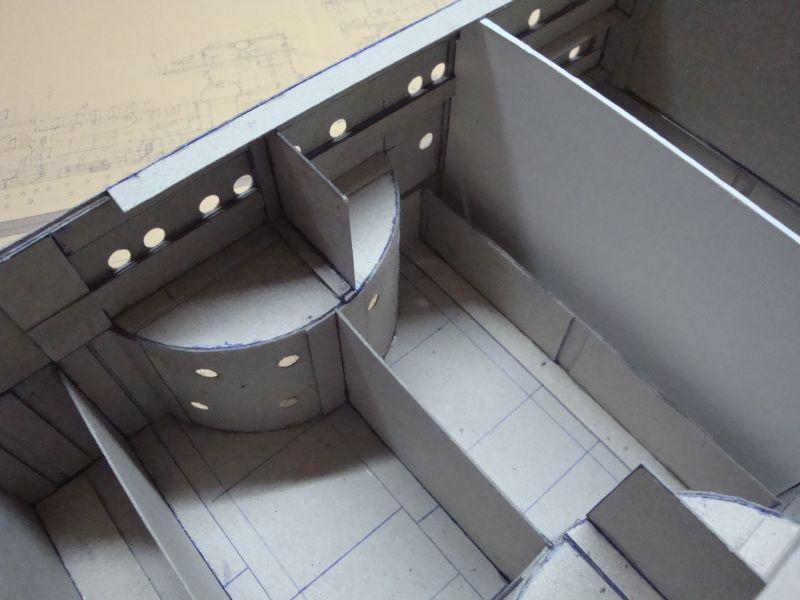
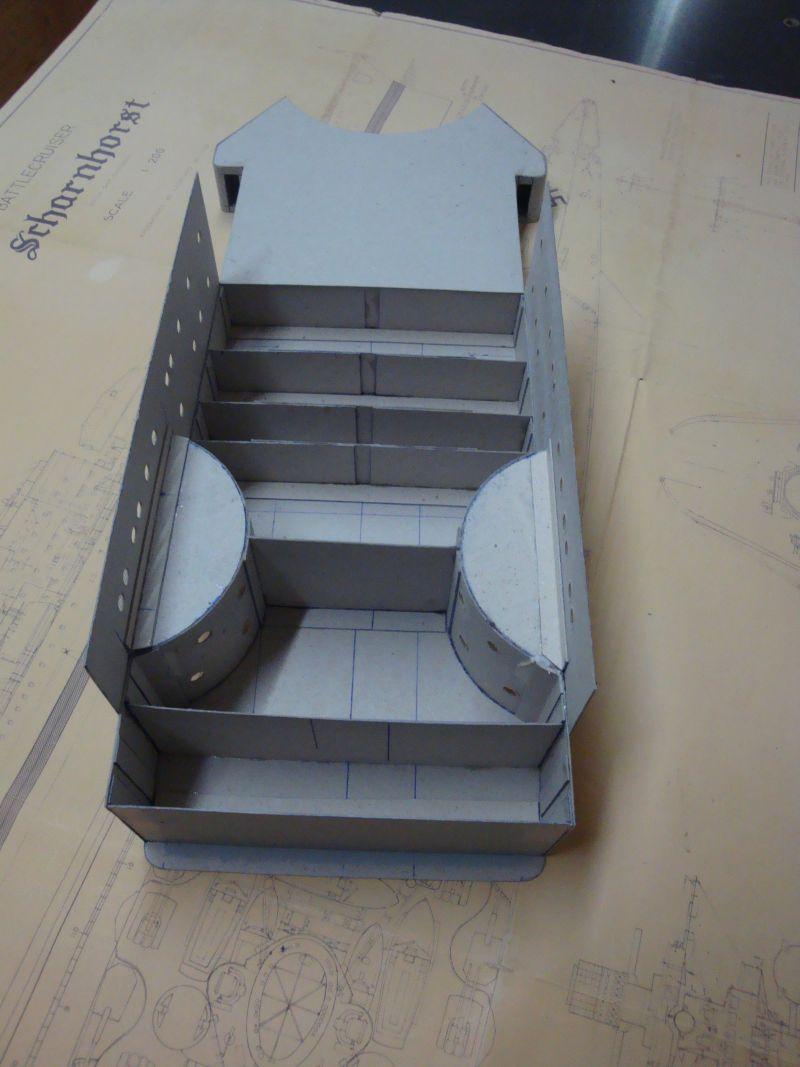
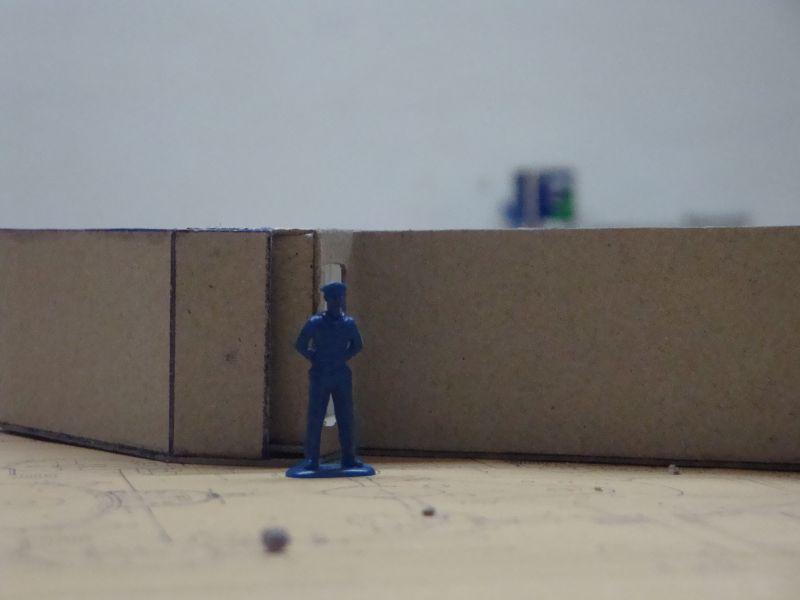
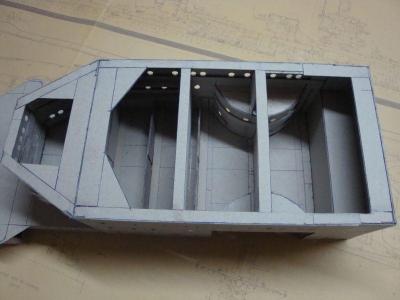
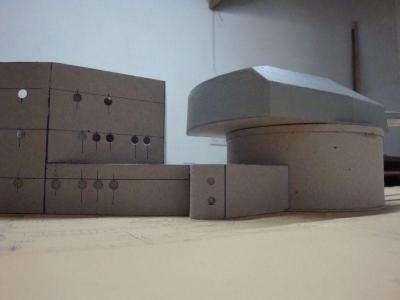
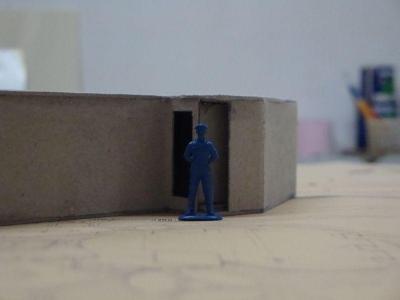
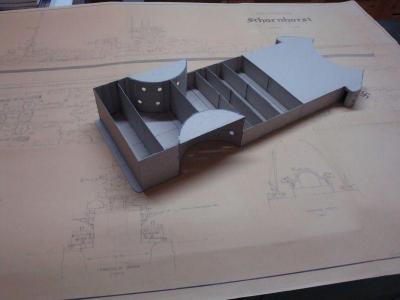
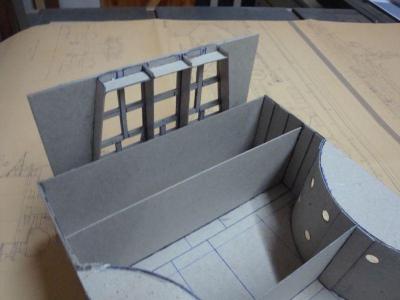
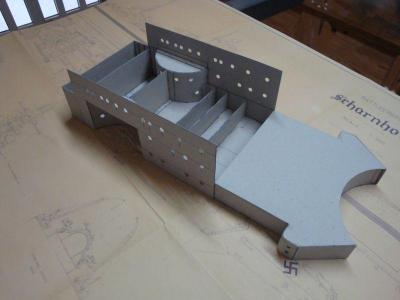
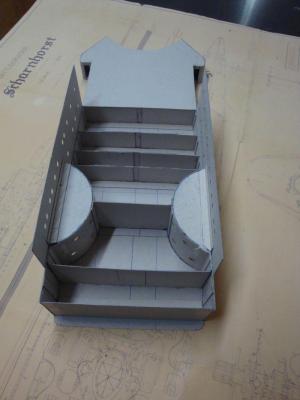
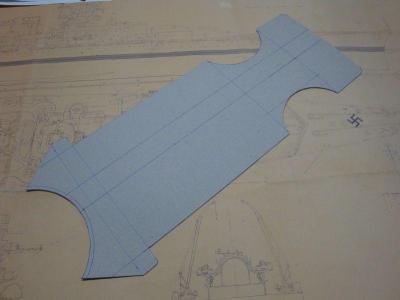
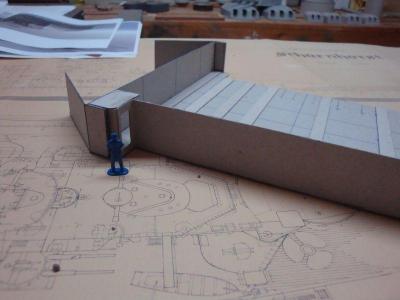
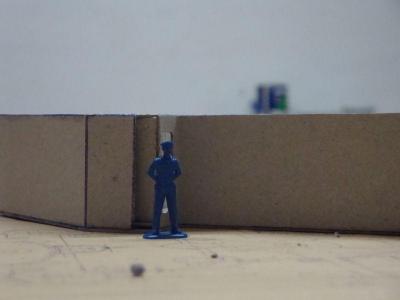
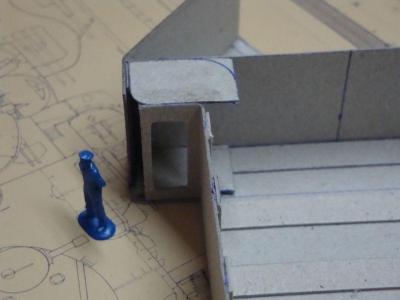
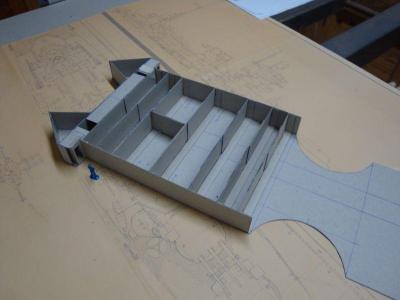
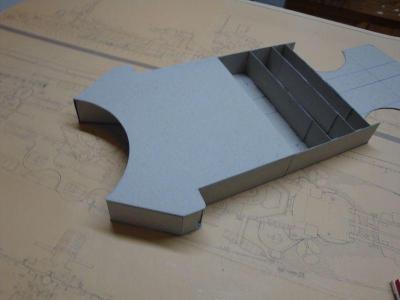
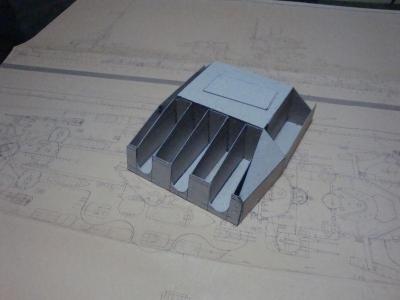
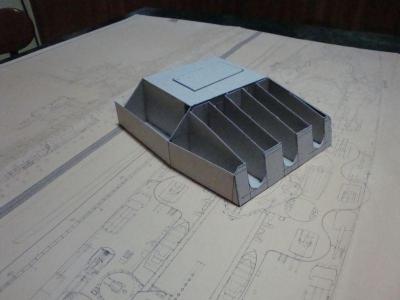
Hello all, The second part related with the construction of the forward superstructure. A top view of the assembly. A 1:72nd scale figure placed adjacent to the assembly. The circular recess located on both sides of the forward superstructure. This allows the secondary turrets to traverse. A side view of the progress. A top view. A view of the rear side of the forward superstructure. All the fresh air ventilation ducts inlets, leading to the boiler and engine rooms, were located here. A rear view, also showing the width of the ducting itself. A close up view. The start of the finish. The second wall skin fitted in place. A side view. A top view. The third part shall follow soon.


-
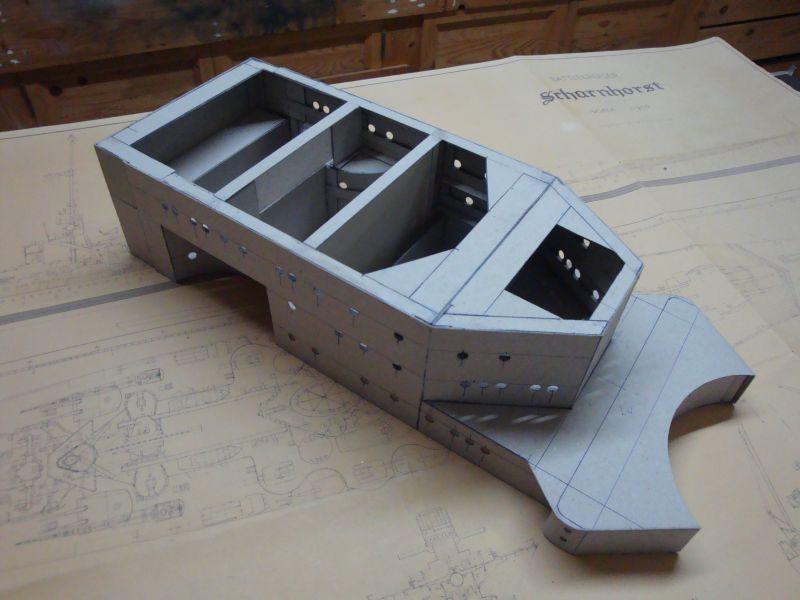
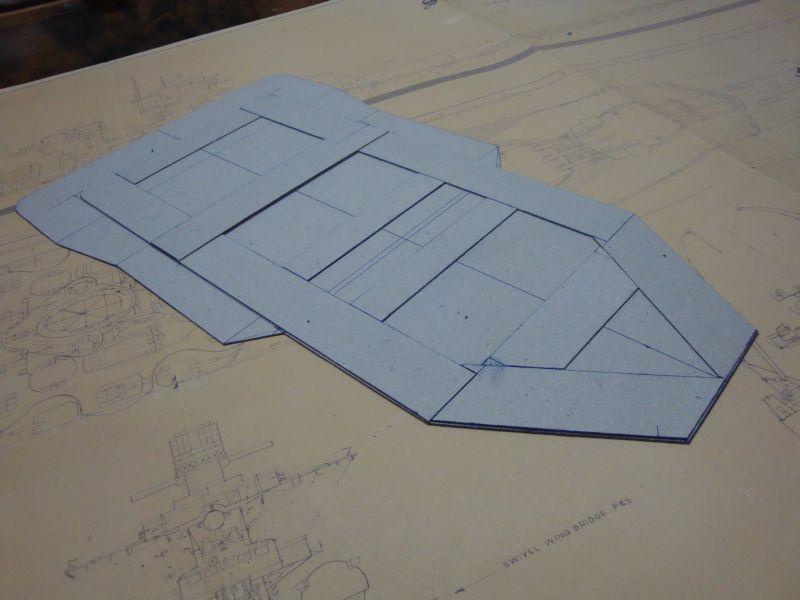
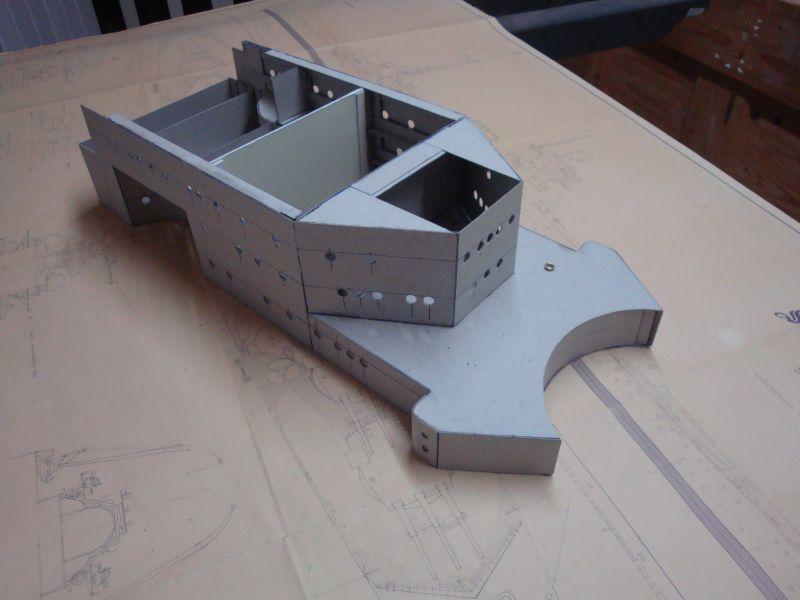
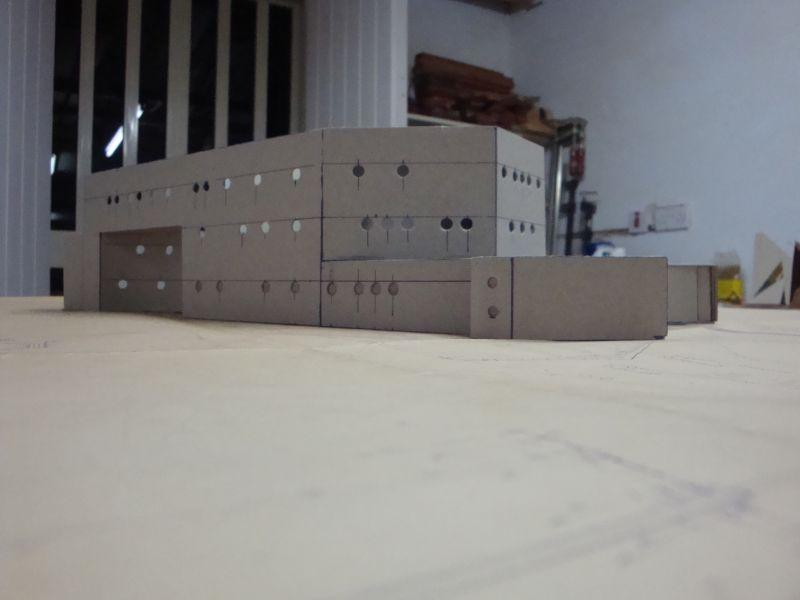
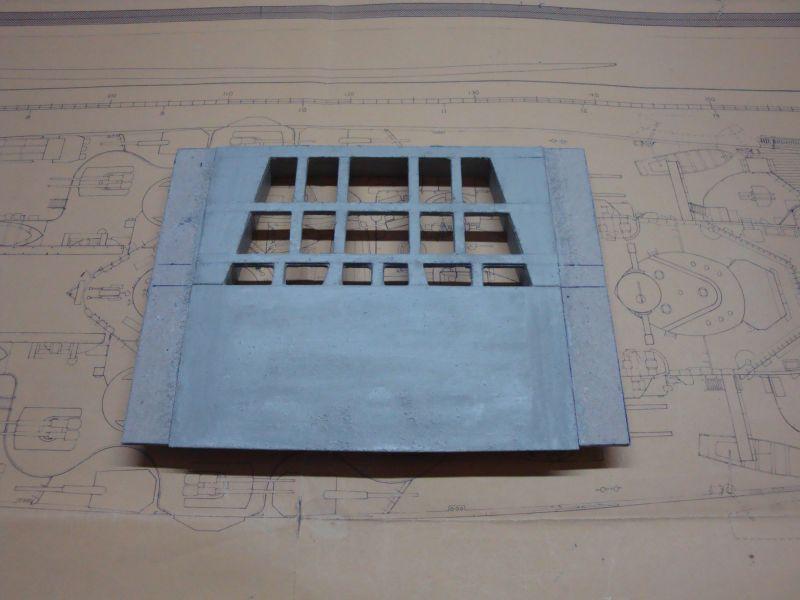
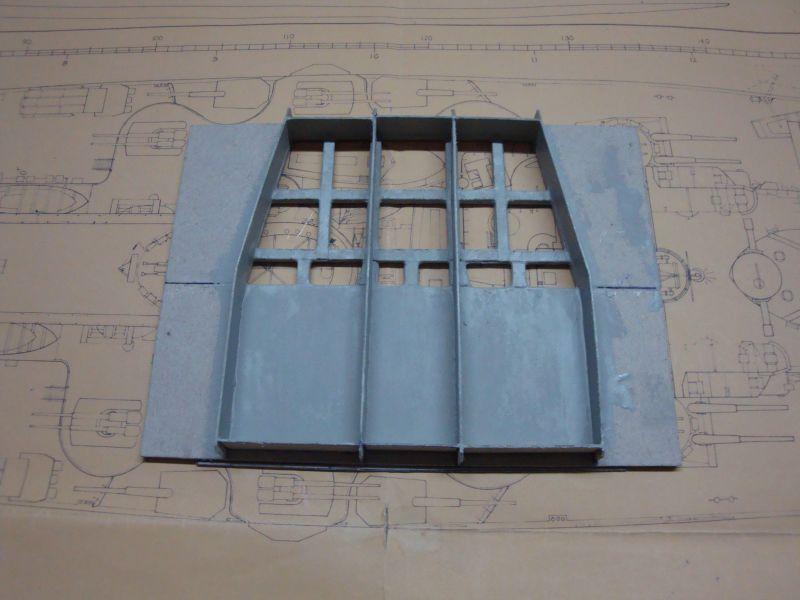
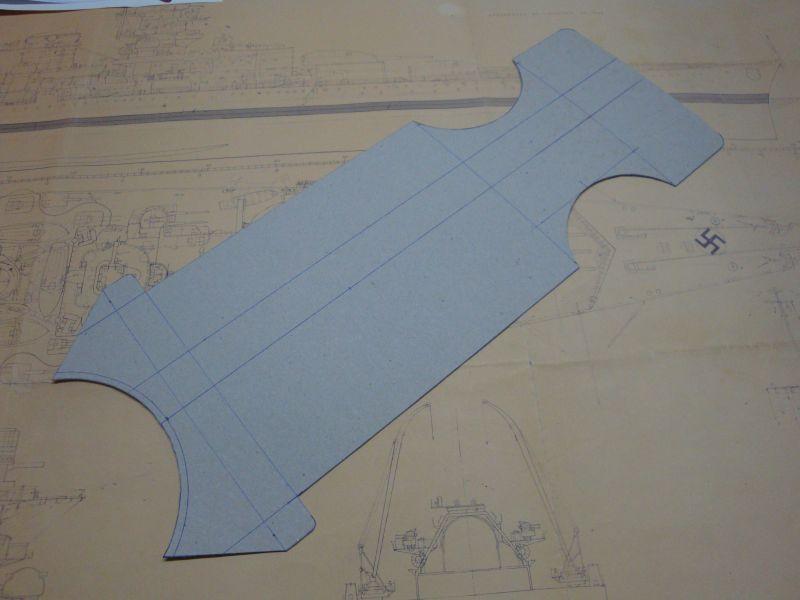
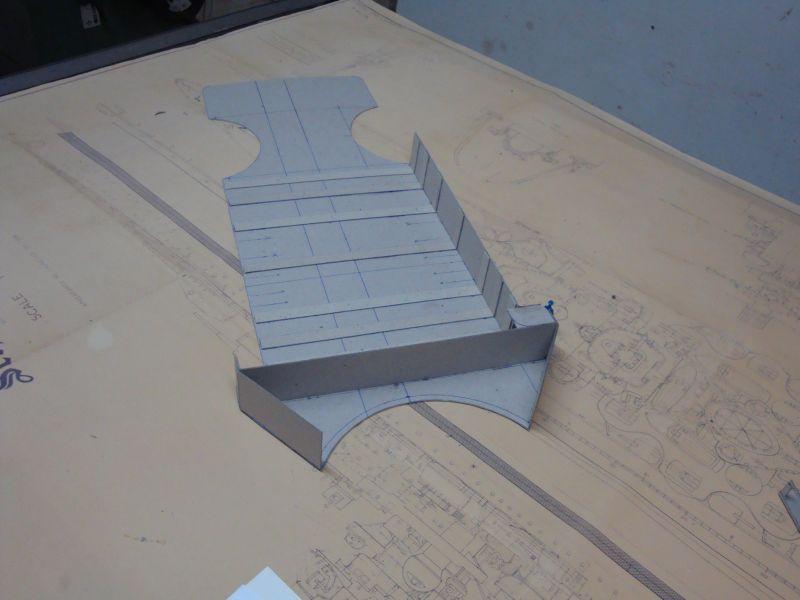
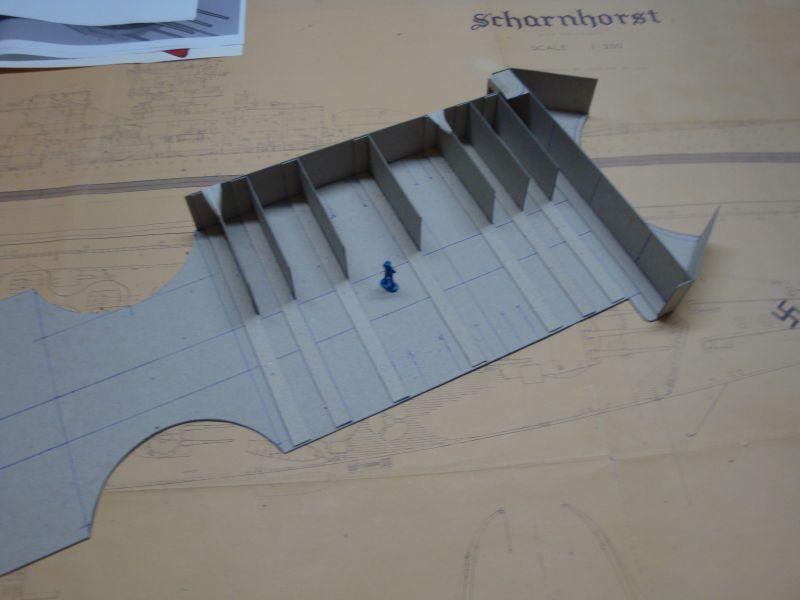
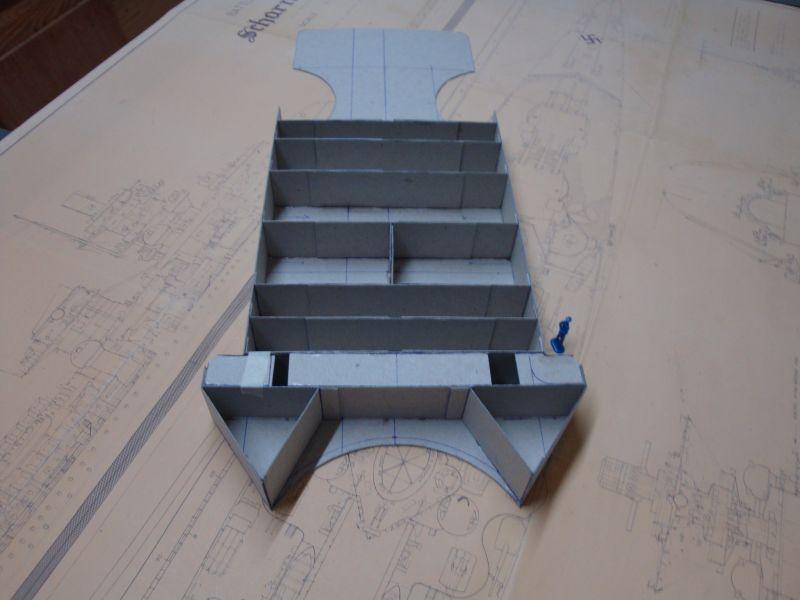
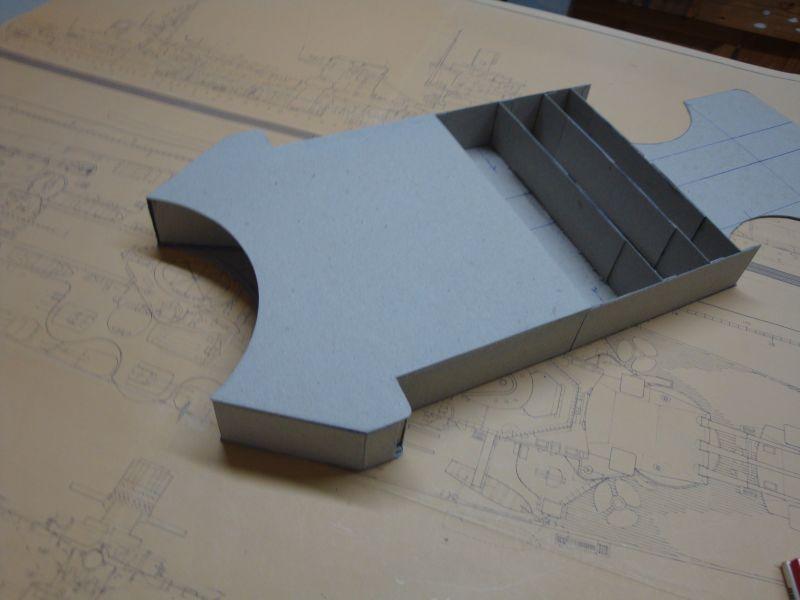
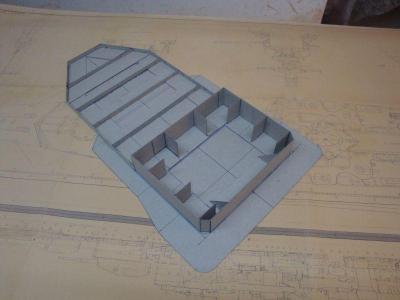
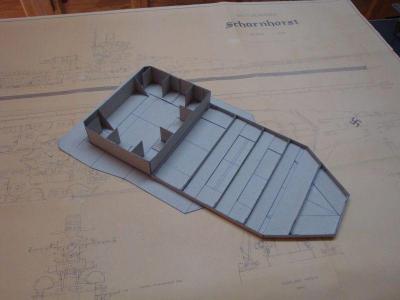
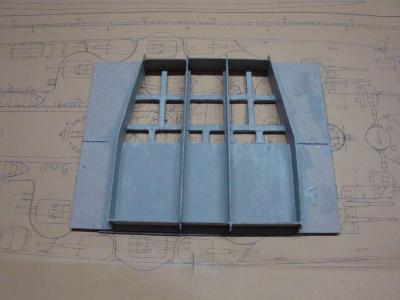
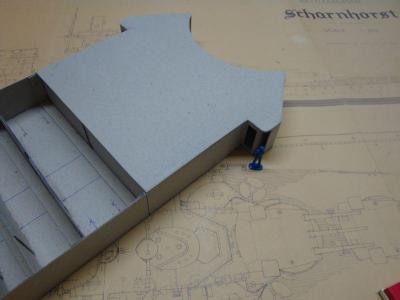
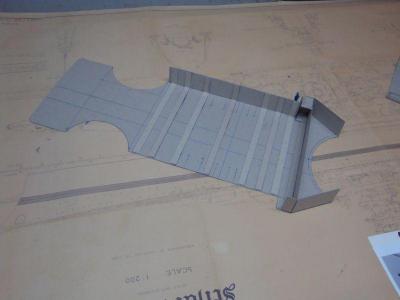
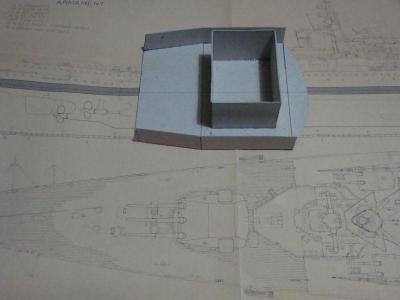
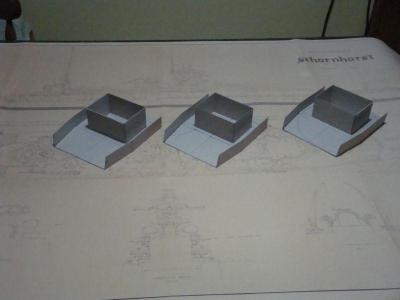
Good morning all, Thank you all for the kind words. Today I am posting the progress pictures related with the construction of the forward superstructure. As usual, the medium used for the main build is 1mm thick cardboard. Hers goes. The base of the forward superstructure, awaiting continuation. The beginning - the start of putting in place the outer skin. A 1:72nd scale figure placed adjacent to the assembly for comparison of scale. A close up view. A view showing the alignment strips for the reinforcements. An elevational front view. Starting off with the reinforcing webs. The two outer skin walls and reinforcing webs in place. A generic view. The top part, fitted in place. The second part shall follow soon.


-
Hello Jim, It's always a pleasure to see your work. The English das quite a variety of cutters, and this is a fine example of good old English Naval Architecture. I cannot really give my opinion, as my line of builds is 1850 to 1945, but I do recognise good work. Well done Jim, you have created a small jewel. I echo, what the other have said, I cannot wait to see her ready for action. I have the billing boats Wasa, Denmark and the German WW1 sailing auxiliary cruiser. Still in their boxes. I must find some time to get these started.
-
Hello Klaus, I can only express what I really feel, - a fine build indeed, and from what I see, you did your bit of research as well. Shall follow this build.
-
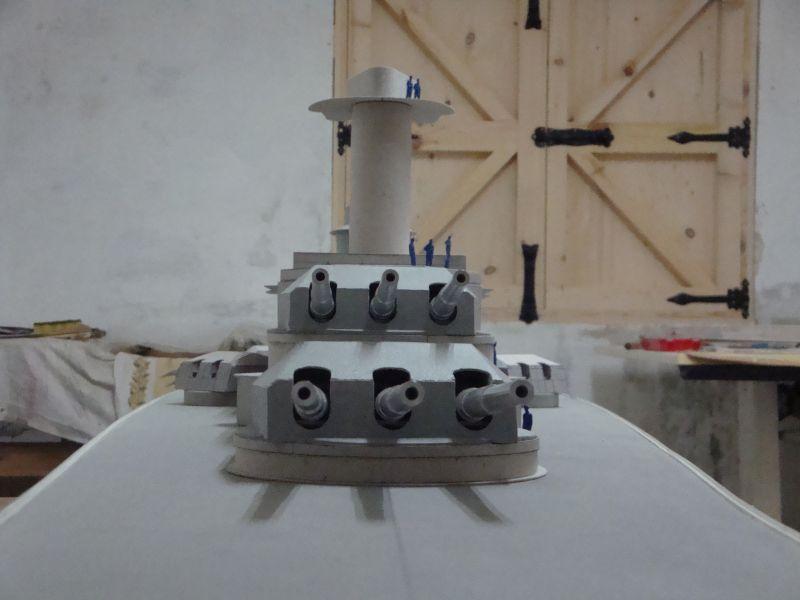
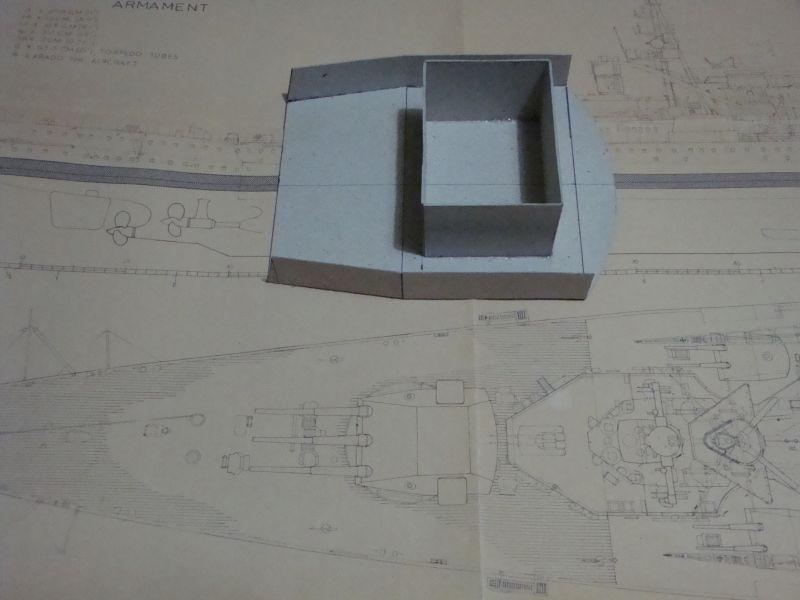
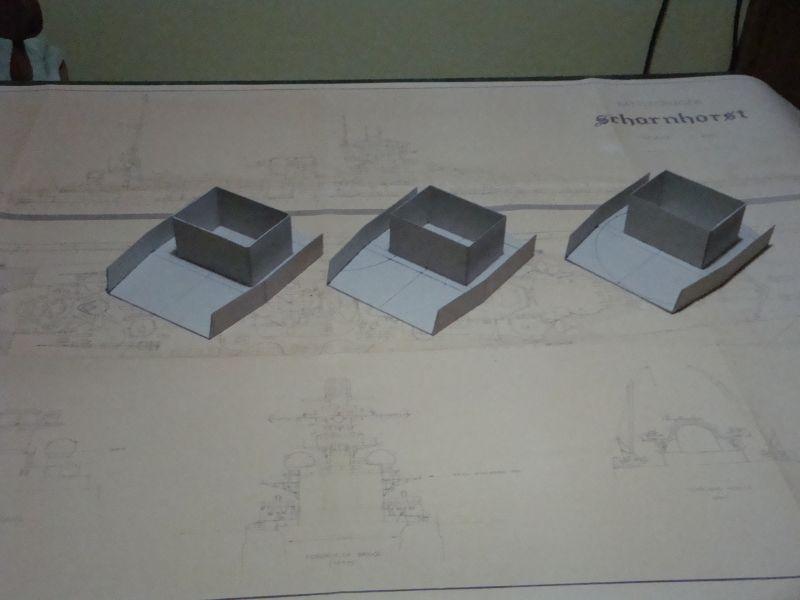
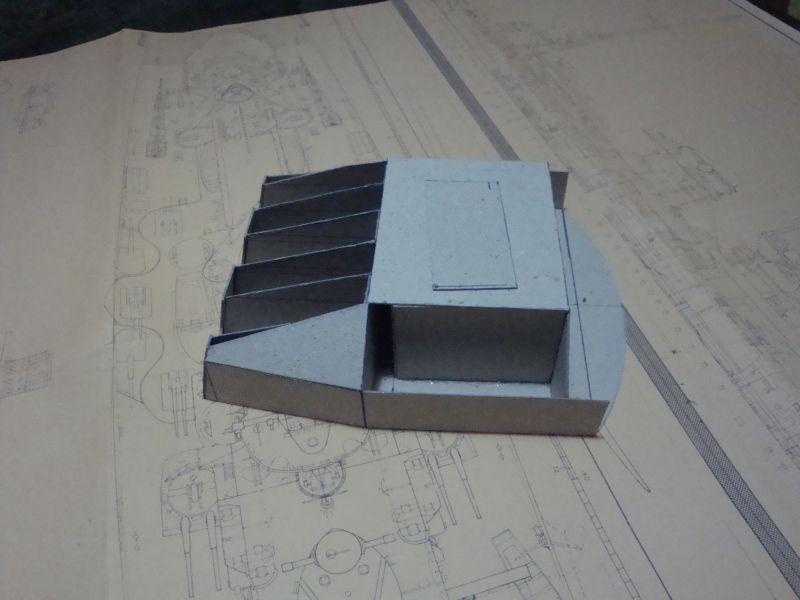
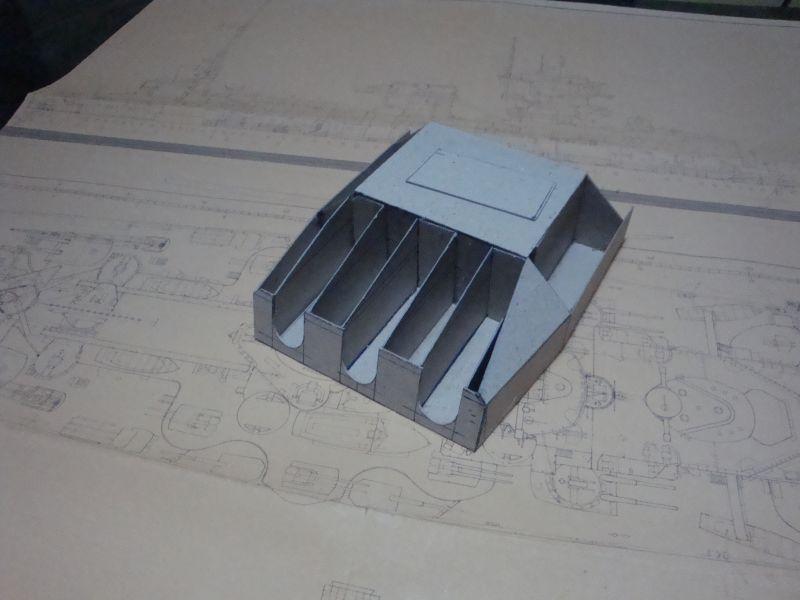
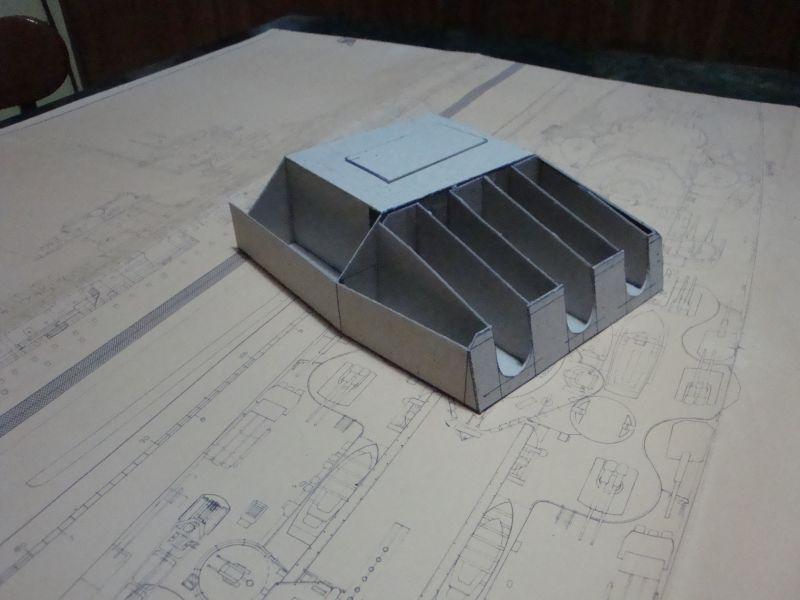
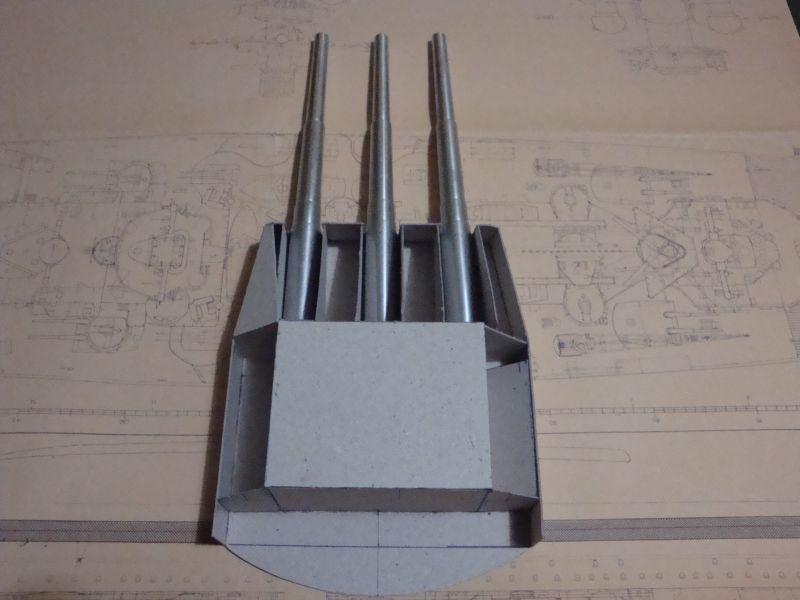
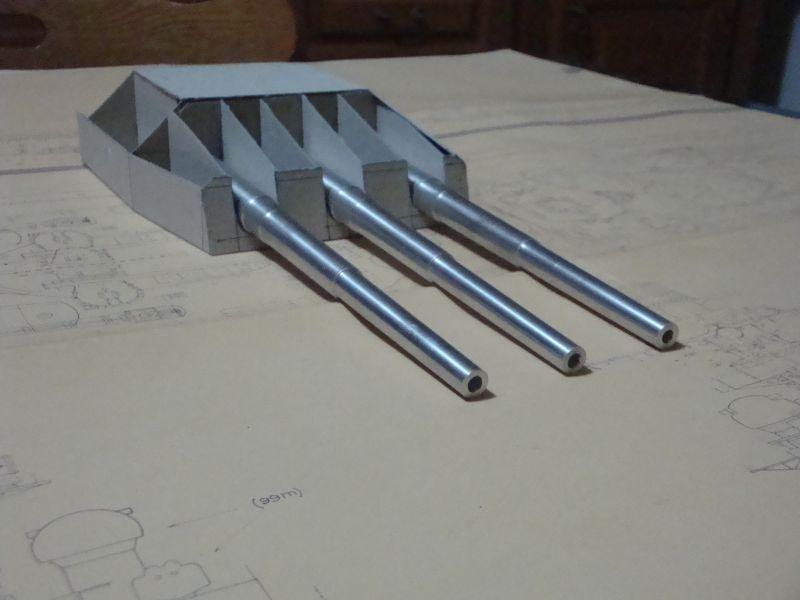
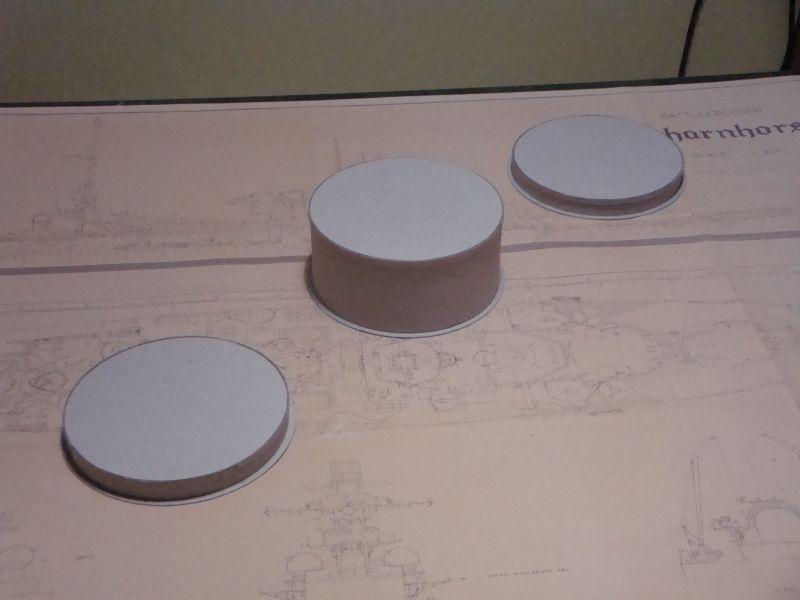
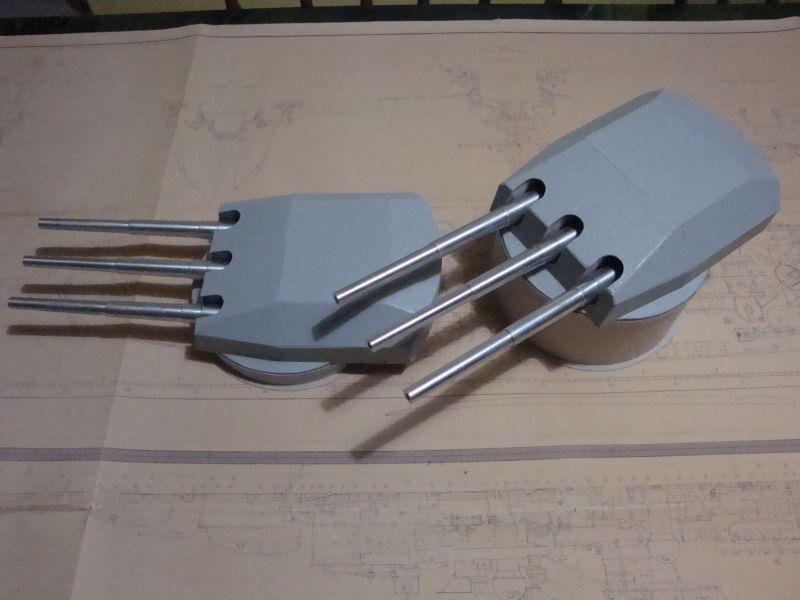
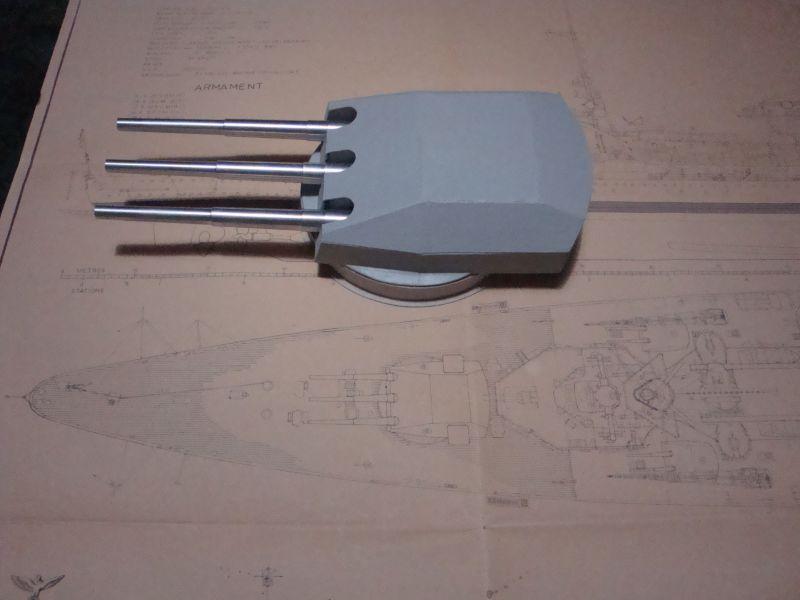
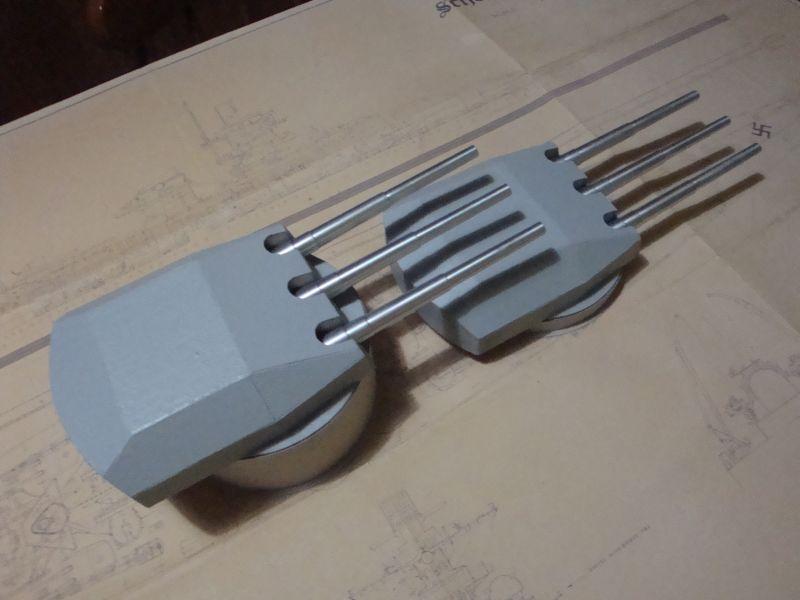
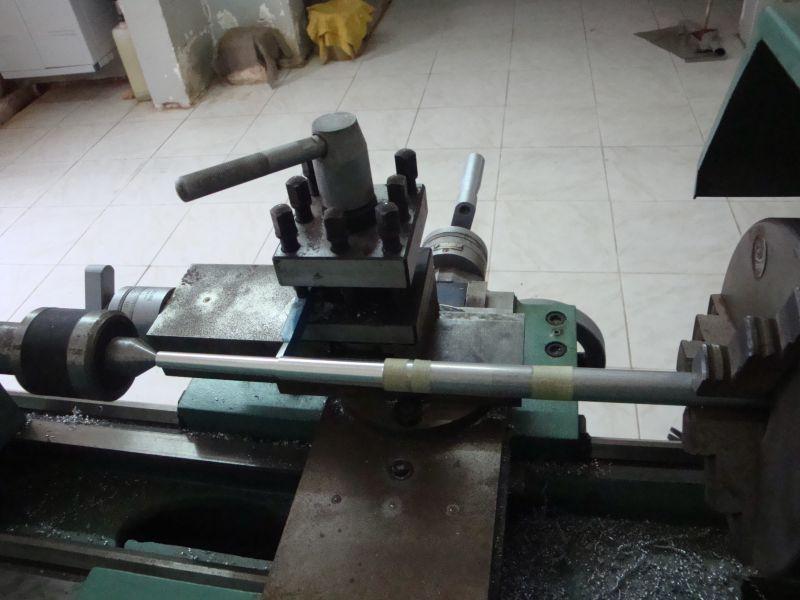
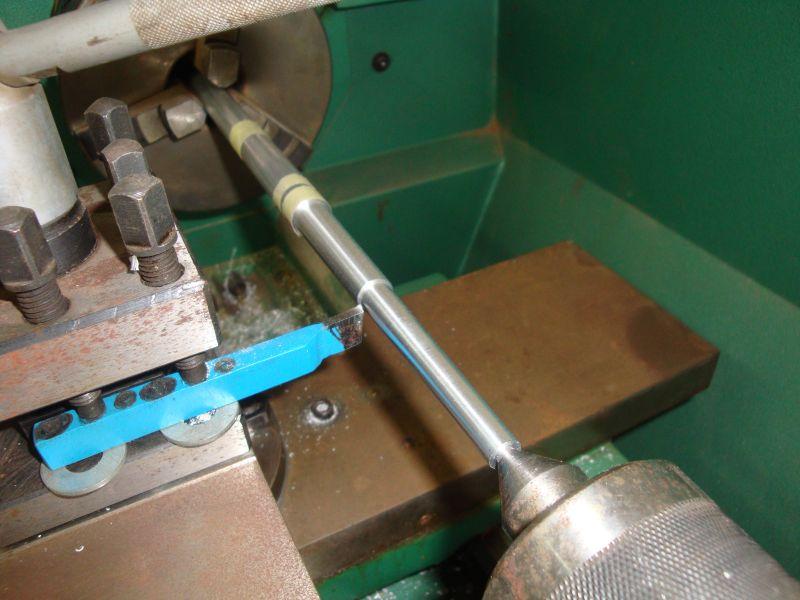
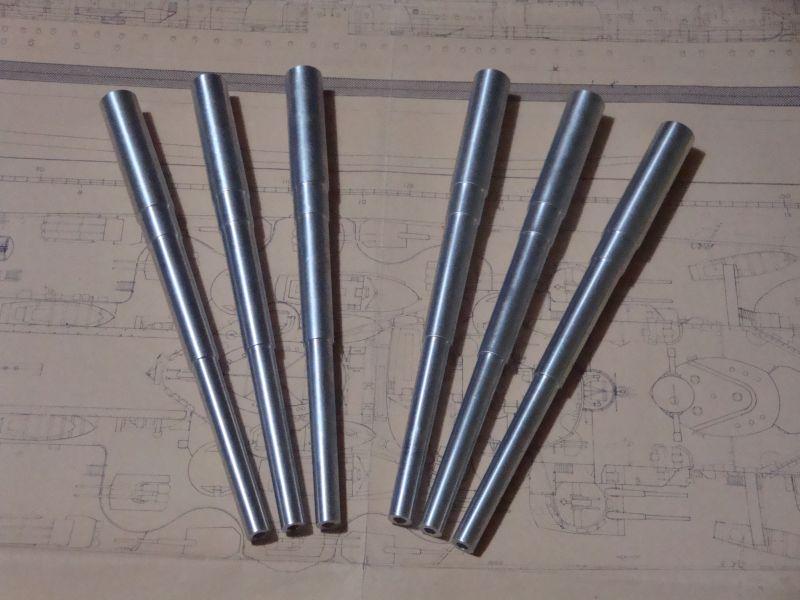
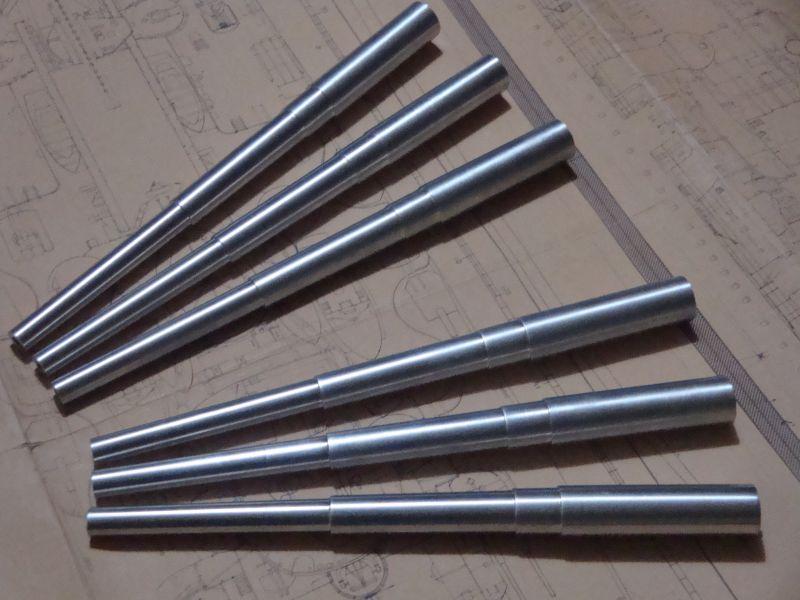
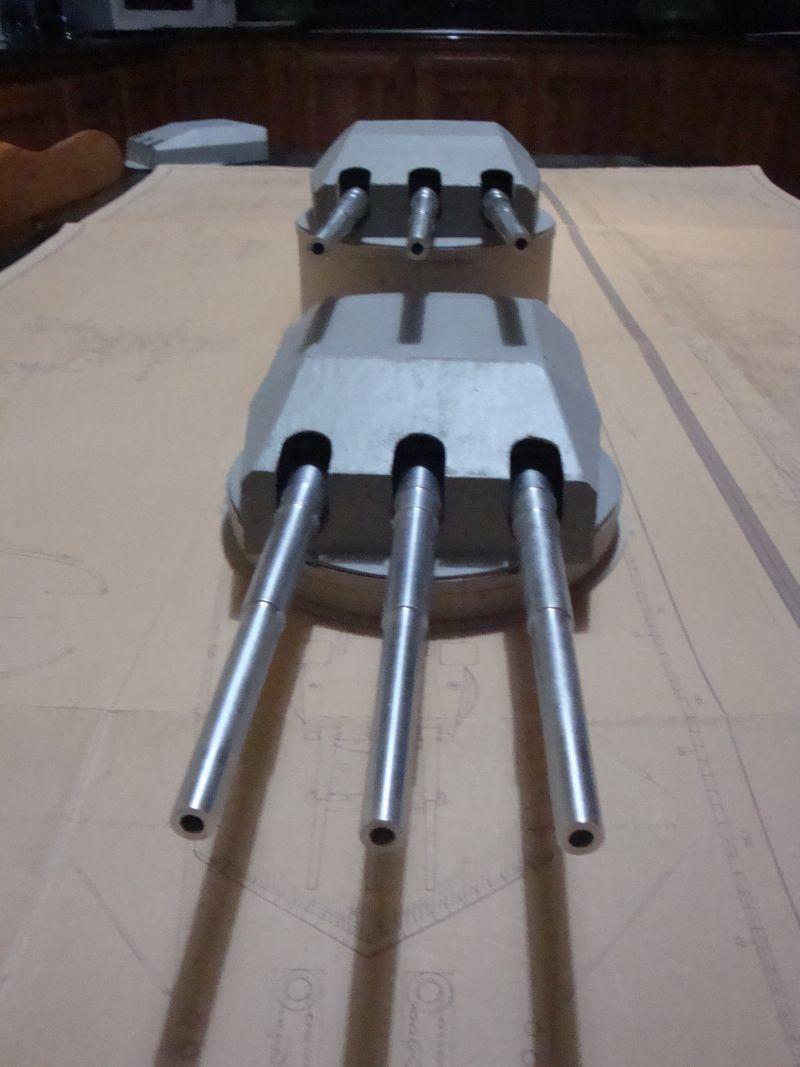
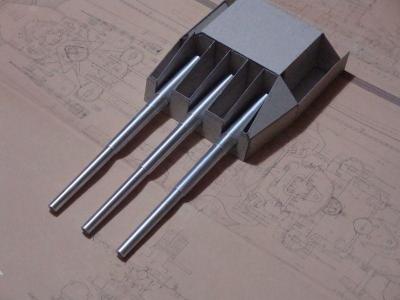
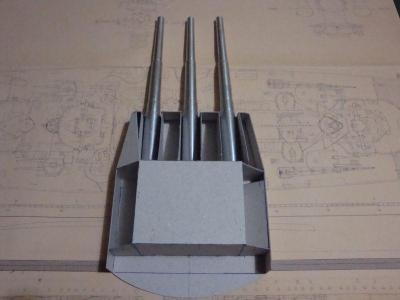
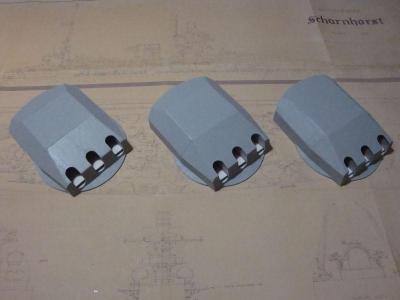
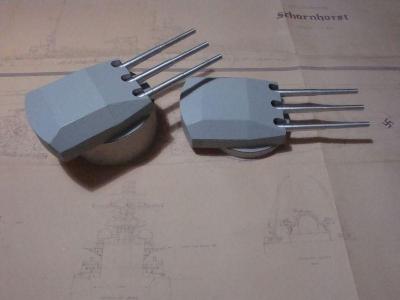
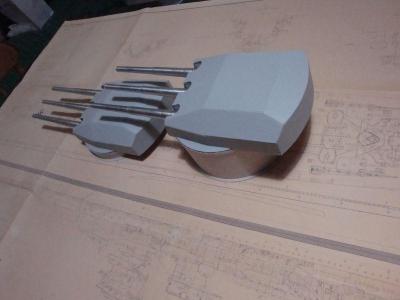
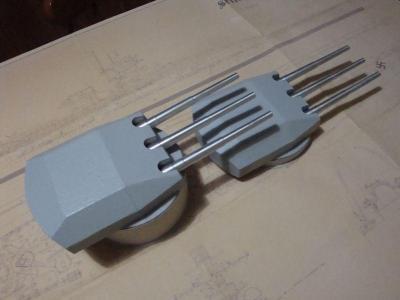
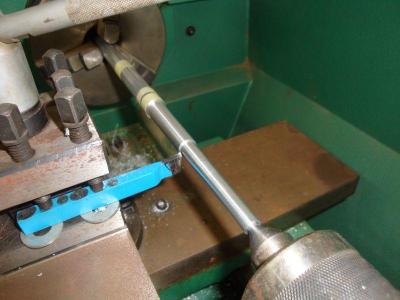
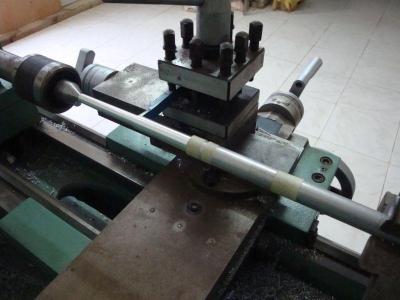
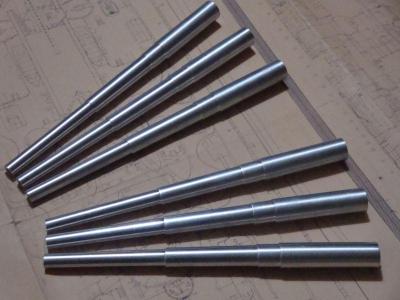
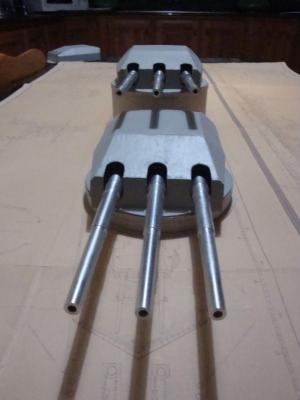
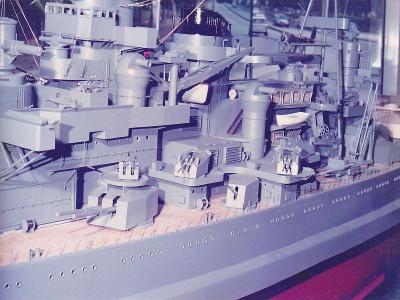
Hi Guys, Got some more time, so I am posting some pictures related to the construction of the main gun turrets. As always, the main construction is carried out with 1mm thick cardboard, while the guns are made from aluminium and turned on my lathe. Starting off - the base of the main turret The three main bases, awaiting the next step. Closing off the top part. An elevational view. A view from the other side. Placing the barrels in place to check for correct fitting. A top view of the turret in progress. An elevational view. The three main turrets ready for finishing and detailing. The three barbettes, which shall finally house the turrets. A top view of Anton and Bruno turrets with the guns in place. A view from the other side. Ceasar turret with the gun barrels in place. A general view of Anton and Bruno turrets. Another view. The barrels in production, being turned on the lathe. A view of the barrel - note the barrel taper. Another view of the barrel in production. The first six barrels ready. A close up view of the barrels. A front elevation of the main turrets in place. Another view. An elevational view of the turrets.


-
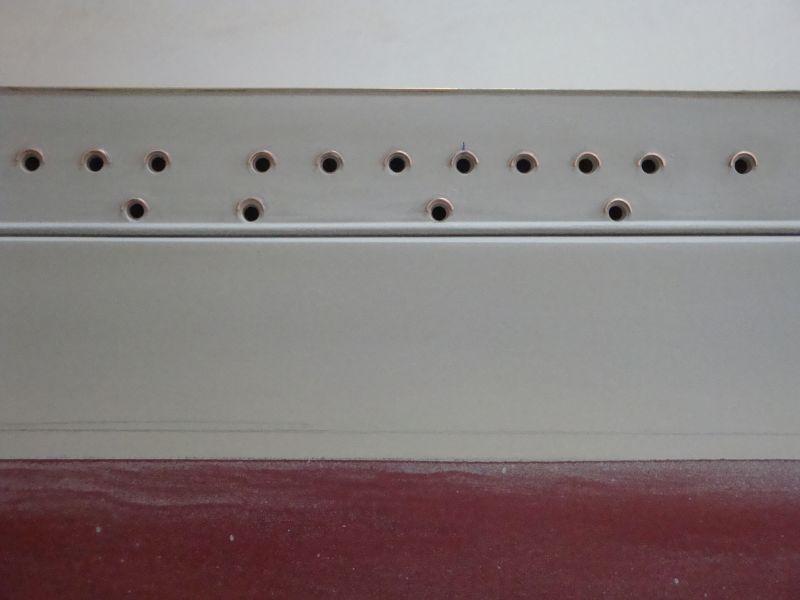
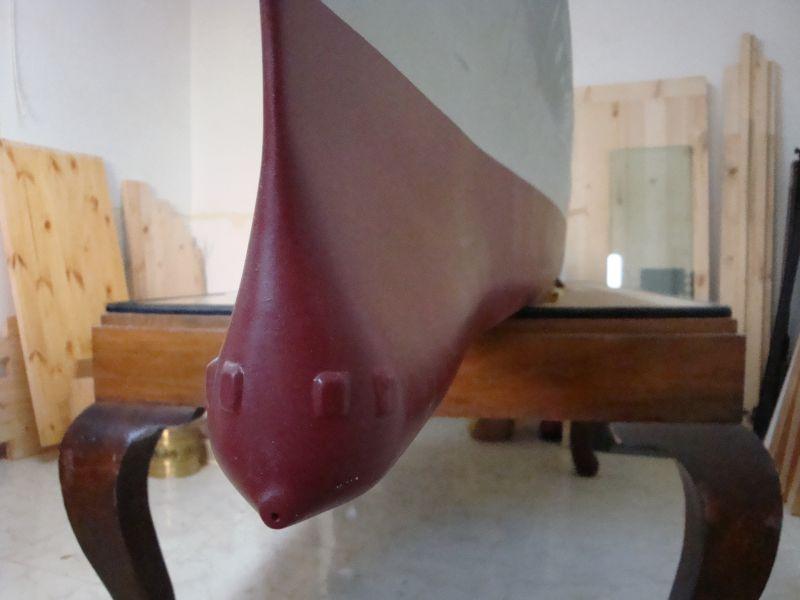
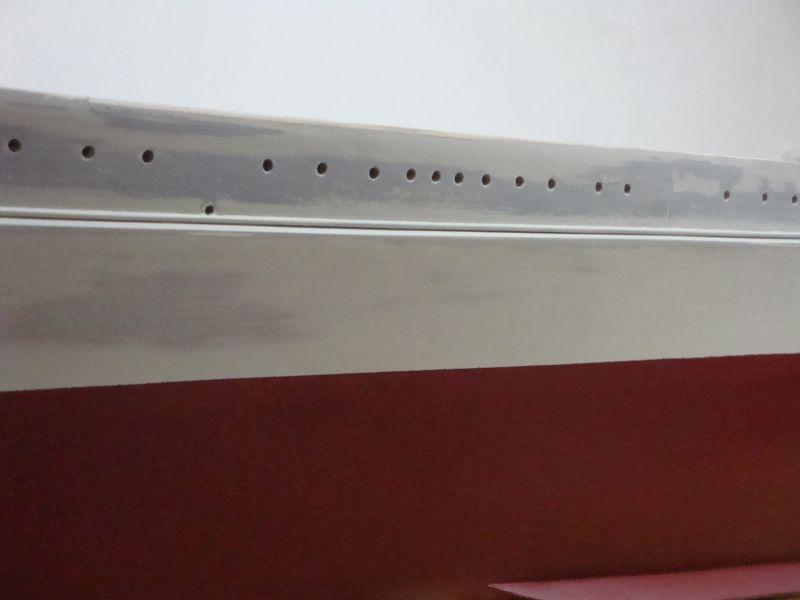
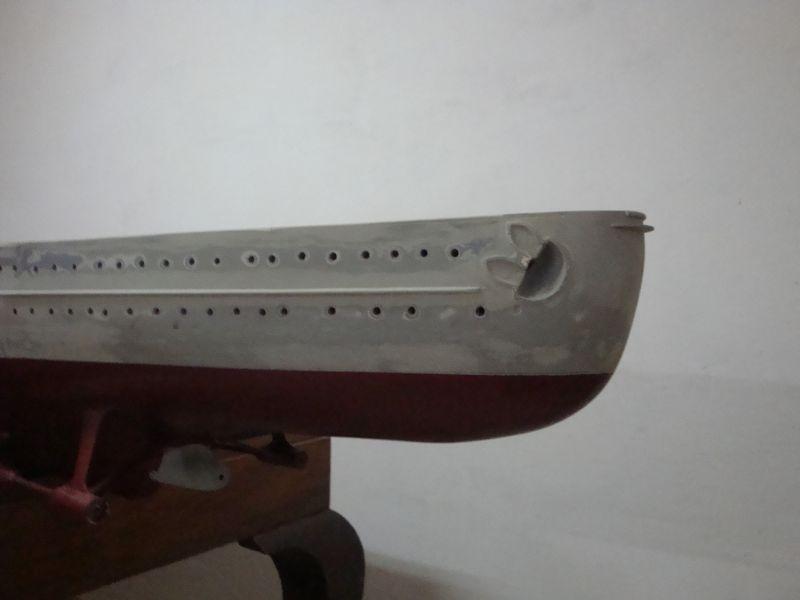
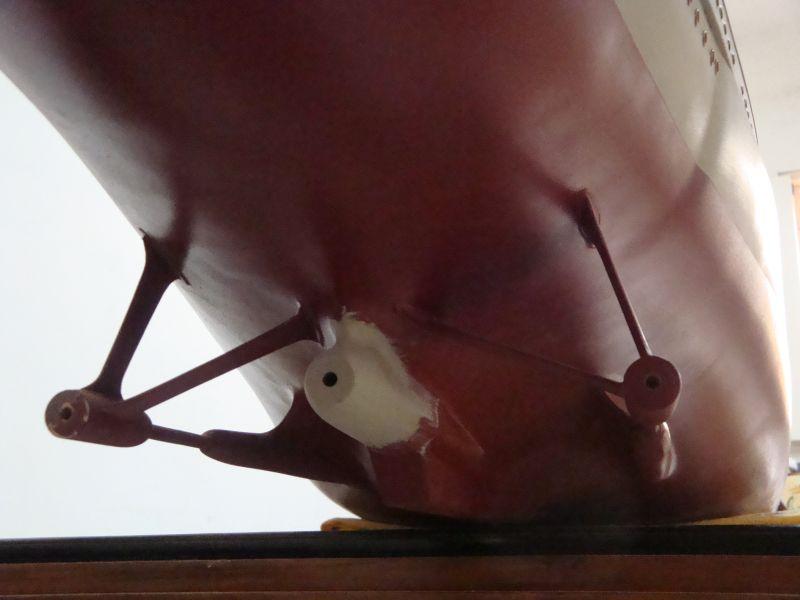
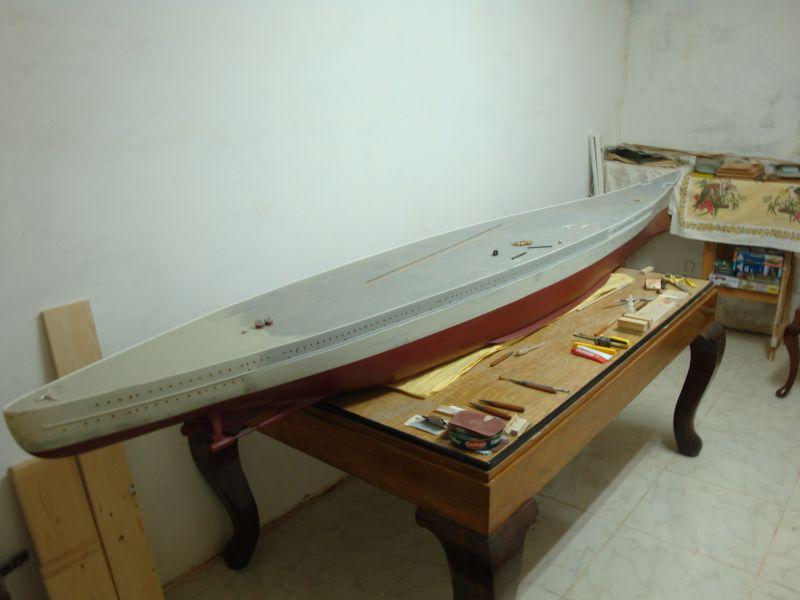
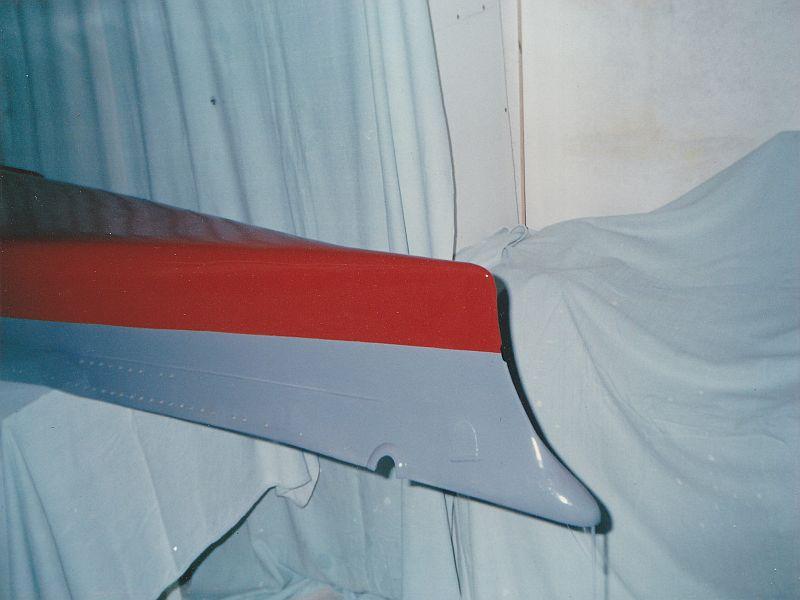
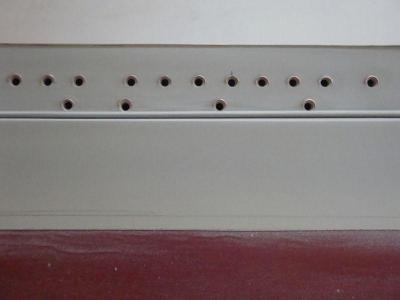
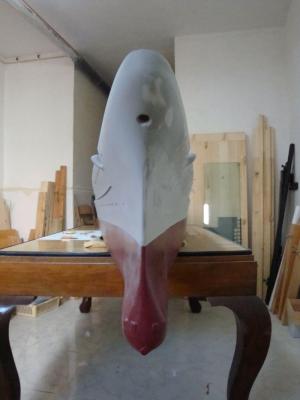
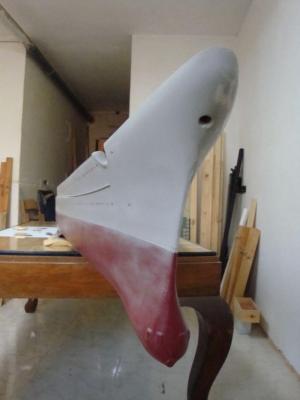
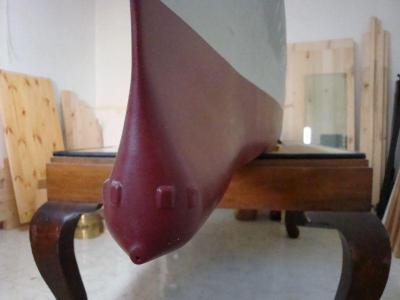
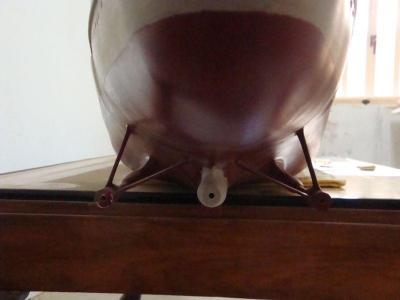
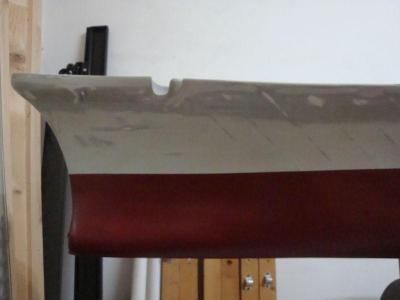
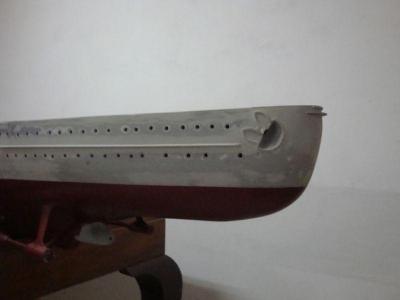
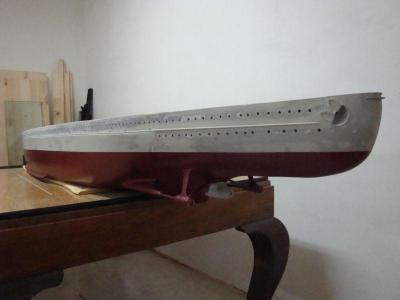
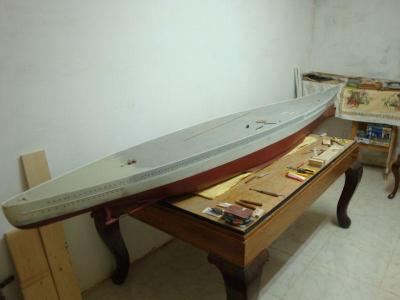
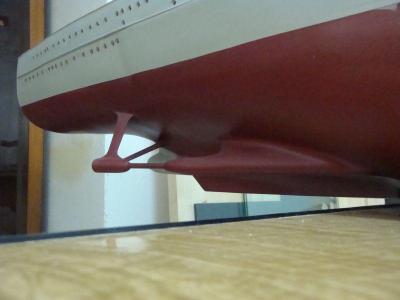
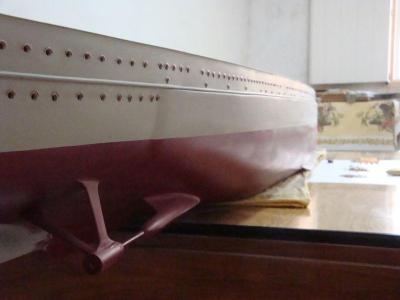
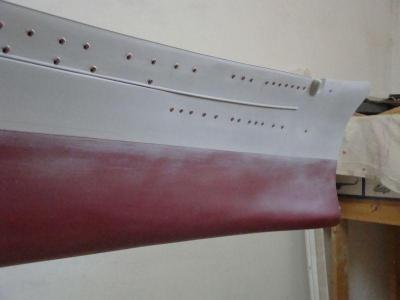
Hello Mark, Thanks for looking in. I started off with this build, years ago at the age of 18. At that time there was no internet, but only a few books and magazines. To obtain a copy of scale plans, we used to send money order via a post office to the company or publisher; and if lucky, receive the package within 4 to 5 weeks. Today research is a joy, as help is found just around the corner, while the internet has eased loads of pain. So you can now understand, that at that time I had to work whit what I had in hand, which was, a few books, a set of scale plans as supplied by David McGregor, a 1:400 Heller scale model of the Scharnhorst, and a few pictures. The overall result was not bad at all, but trying to get a better result is better than accepting the old errors. So here it goes - a new facelift for a fine vessel. After all, today, middle aged women, attend clinics for a face lift. So why not for a fine lady like the Scharnhorst. More pictures of the hull. A close view of the portholes, displaying the eyebrows. A general view of the corrected bows. An elevational view revealing the sleek lines of the hull. A close up view of the bows, showing the access doors leading to the echo sounder of the ship. A view of the stern, showing the array of the two propeller shafts and the "A" brackets. The full length of the hull. Works in progress on the other side of the hull. Sanding down the access paint, revealing the overlapping laminated cardboard strips. The stern of the ship, showing the rear anchor stowage pocket. A view of the underside of the rear side of the hull. An elevational view of the hull, as looking from the stern. When looking at these pictures, please note the thickness for the additional armour, and how it finishes off at the stern side of the hull. This was typical of the German vessels of that period. Later ships like the Bismarck and the Tirpitz had their additional armour plating totally embedded in the hull, to increase speed and enhance the streamlines of the ship. Shall be posting more pictures soon.


-
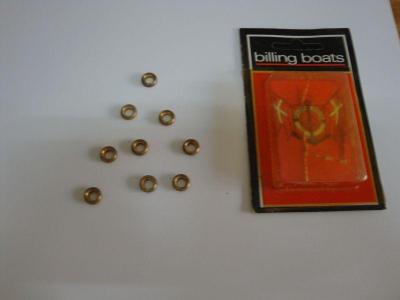
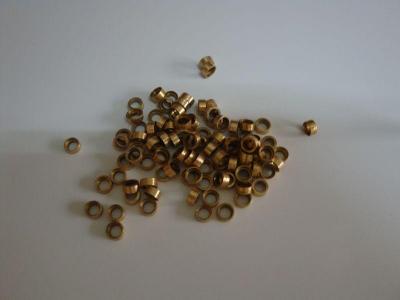
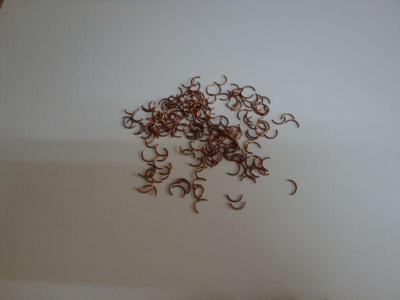
Good morning all, Hello Ben, Mark and Popeye, thanks for looking in. Actually no Popeye - I rebuilt the whole of the superstucture, as I prefer to have a correct thing, instead of having to arrange after the model is ready. Today I am going to plolst the pictures related to the corrections involved in the hull. The hull as a whol and with the correct beam and hull lines. The portholes as supplied by Biling Boats. The same port holes, modified on the lathe to eliminate the falange, as the German portholes had no flange. The porthole eyebrows, made from copper wire. The brass popellor hubs, turned on my lathe A view of the prop shaft. A view of the correct "A" bracket. A view of the hull side displaying the proper portholes. Shall be posting more soon, as it's time to go to work. Catch you later.

-
Hello all, Thanks for your warm and kind comments. Shall be posting more pictures this evening.
-
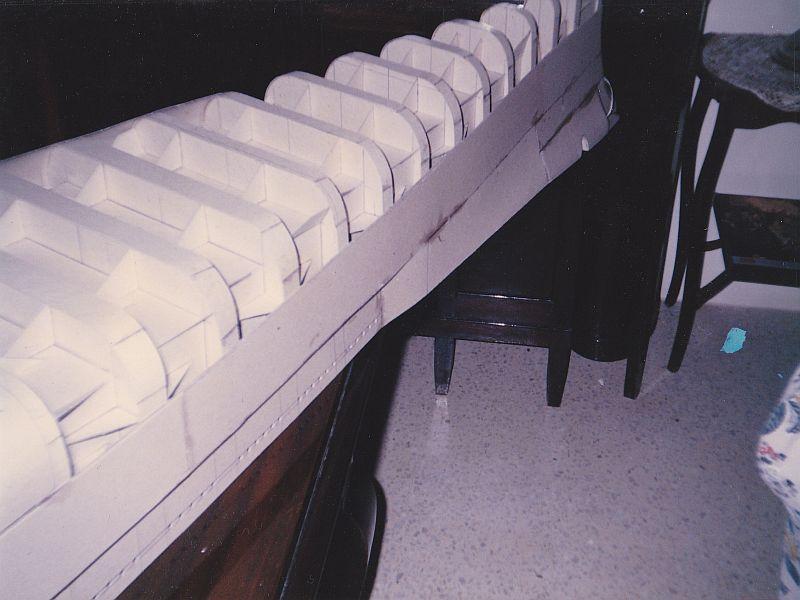
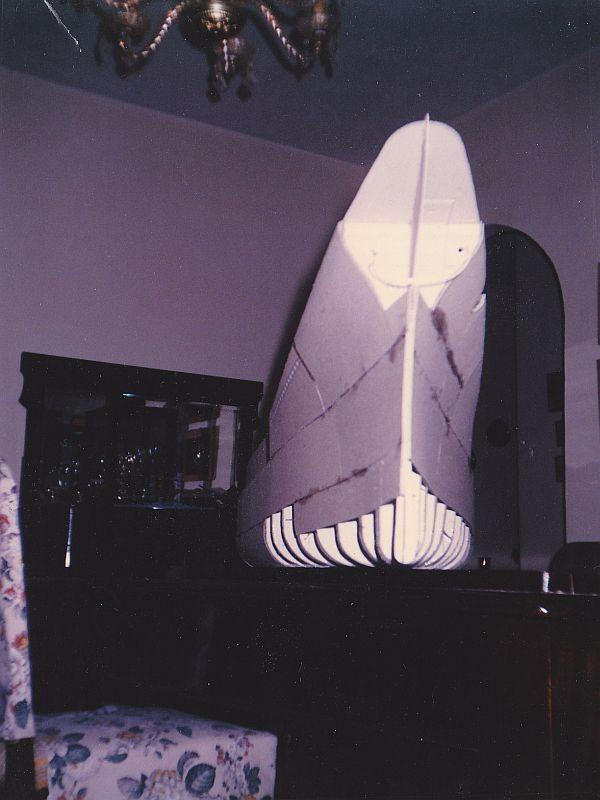
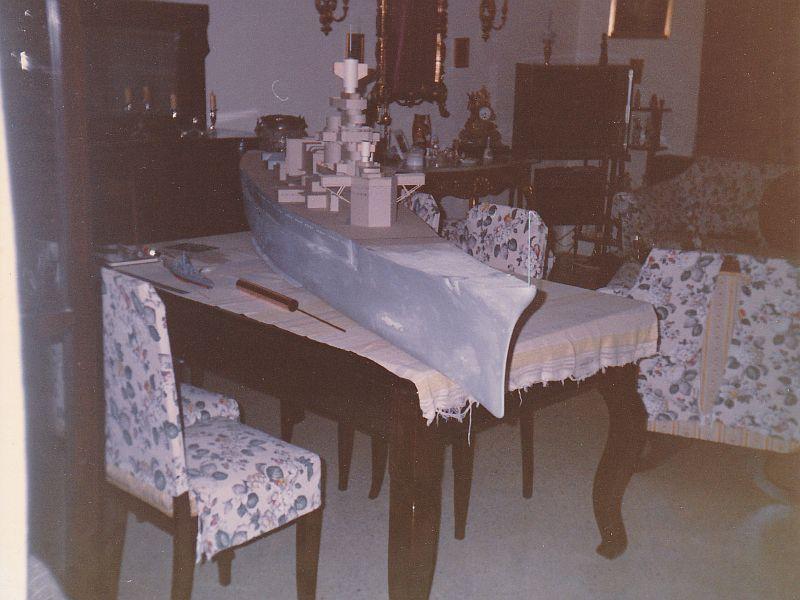
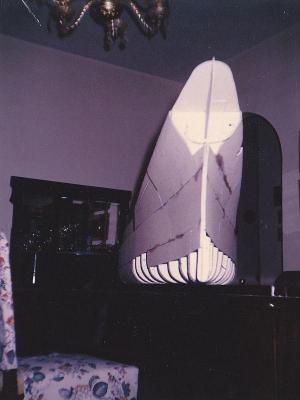
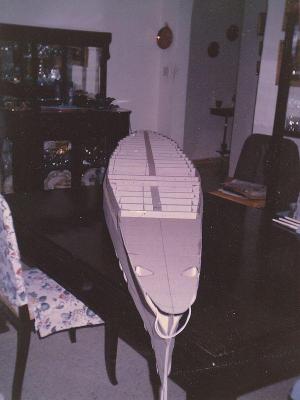
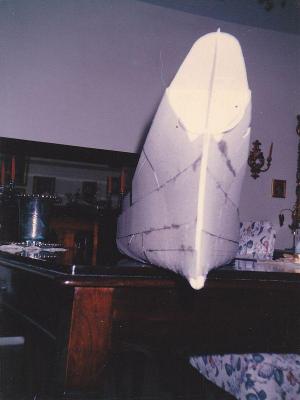
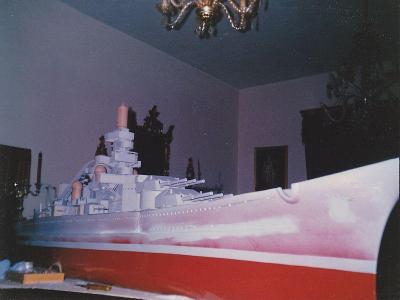
Hello all, So let's start posting the original build pictures. For those who did not see this build before, I would like to give a brief description of the model itself. I have been into scale modelling since the age of six. At first, I assembled scale model kits, ranging from armour to ships to aircraft, but as time went by, I fell in love with ships - especially German, Italian, Japanese, Russian, Austrian, and French navies for periods 1850 to 1945. This was the true age of the battleships and their development. I always had a soft spot for three gunned turreted ships, and I have to admit that one of the most beautiful ships ever built apart from the famous IJN Yamato, is the German heavy battlecruiser - the DKM Scharnhorst, as depicted in her last dazzle camouflage version in March/April of 1943. The ship is in 1:72nd scale and measures some 3 mtrs 26cm ( 10 feet 9 1/2 inches). The hull together with the superstructure are entirely constructed from laminated 1mm thick cardboard, while the detailing is entirely scratch built using multi medium, like styrene, copper, brass, spring steel, PVC rods, timber, aluminium and resin. I have started the model at the age of 20, but had to lay off a bit, as I had to build the house and construct the furniture - well it's duty before play. only recently I decided to scrap off the already built superstructure, to rebuild it again, and correct the errors found in the hull. These pictures were taken quite a few years ago, but I managed to scan them. A clear view of the method used to create the ship's frames, braces and stiffeners. A front view, showing clearly the sleek bows of the ship. A top view. The ship's hull closed up with the first layer of cardboard. 4 to 6 more layers to go. The bows of the ship ready, with some of the superstructure in place. This picture clearly shows that at that time, I turned my mother's sitting and dining room into a dockyard. Finishing in progress. Finishing in gloss, before applying the satin finish. A view of the detailing, when this ship was exhibited 20 years ago. Now all of the superstructure is scrapped away, and I have started all from the beginning. With the information I have today, The ship will have the correct detailing and finish, as you will see. Will post more pictures later on today or tomorrow.


-
Good morning all, Ok - Ok, I shall repost all the build pictures from the start. It's going to be a long way, but I fully agree with you. It will be a real pity to start off with the new progress pics. The people out there, will not make heads and tails of what the build consists of. I will try to start posting today.
-
Good morning to you all fine fellows, So, this is the new look of our forum. Well let's get back to work and start posting again. Just one question - is my original build log stored somewhere, or do I have to repost all the progress pictures?