HOLIDAY DONATION DRIVE - SUPPORT MSW - DO YOUR PART TO KEEP THIS GREAT FORUM GOING! (Only 13 donations so far - C'mon guys!)
×


Paul Salomone
-
Posts
188 -
Joined
-
Last visited
Content Type
Profiles
Forums
Gallery
Events
Everything posted by Paul Salomone
-
 Hello Piet, Wow, now that is a beautiful hull. Your woodwork and finish is quite impressive. We all know that wood can be problematic. The whole structure is now taking shape. I must find some time to fit in a WW1 German sub as well. The subs of that era were a wonderful sight even if the hull was nearly totally submerged. Well done.
 -
Good morning all, Thank you all for visiting my build and for the ever lasting encouraging words - they are the keep on going pills for such a project. Hello Brian, yes I shall be finishing the model with an airbrush, keeping a standard pressure of 1.2 bars. The finish paint must be satin, in order to give a smooth finish with quick drying capabilities. More then that the paint must be all weather resistant, and diluted with cellulose thinner. Mix percentage is 60% paint with 40% thinner. Keep the airbrush at a distance of 12 to 16cm away from the model, depending on the type of piece, plus always keep a watch out on the trigger. Hello Sjors, I would really like to wire it up, but time is not on my side. Hello Grant, mark, Sherry and 4whelr - thanks a lot for your kind comments.
-
Hello Sjors, Thanks a lot. Unfortunately no - the searchlight is meant to be just a static model. if I had to light up all the ship, it would take me another 3 years to the planned three to get it ready.
-
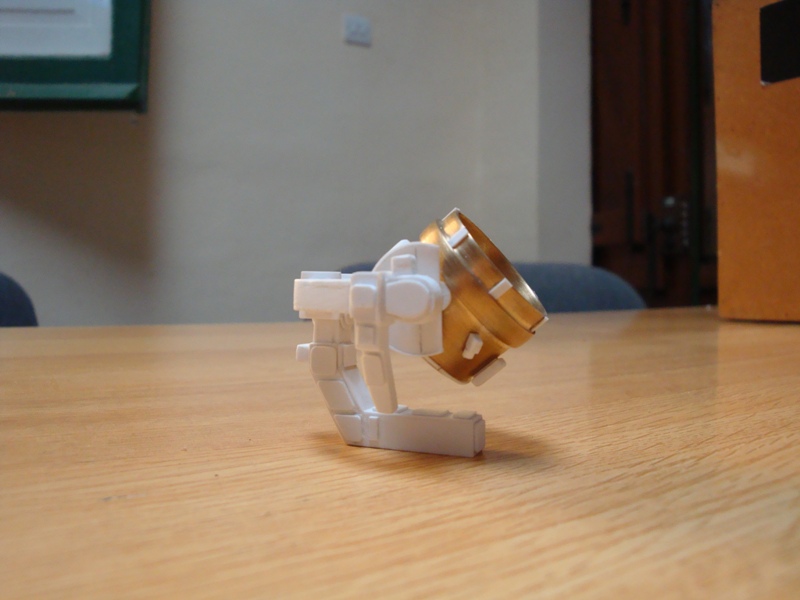
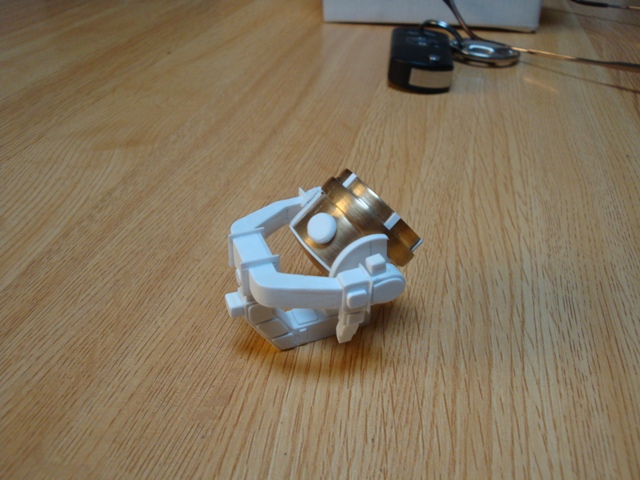
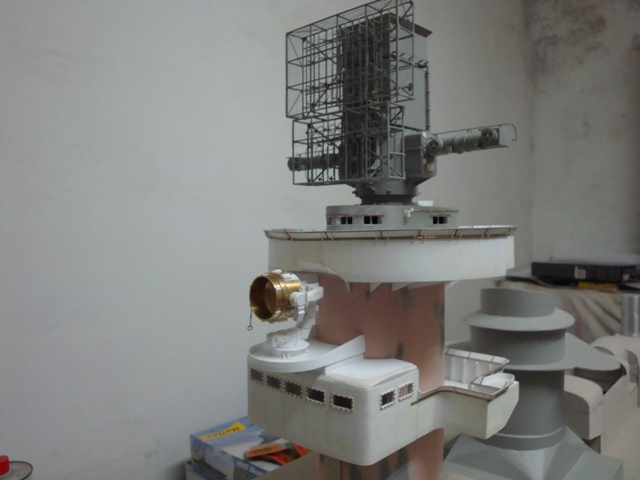
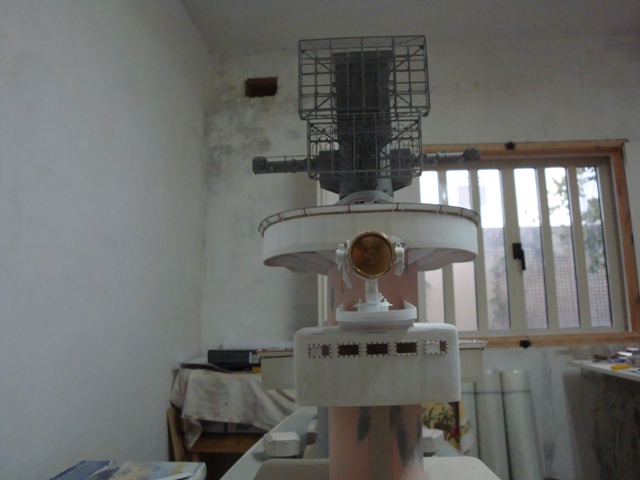
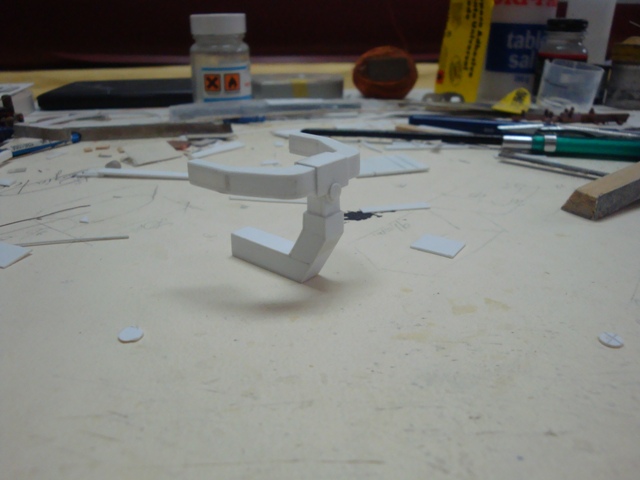
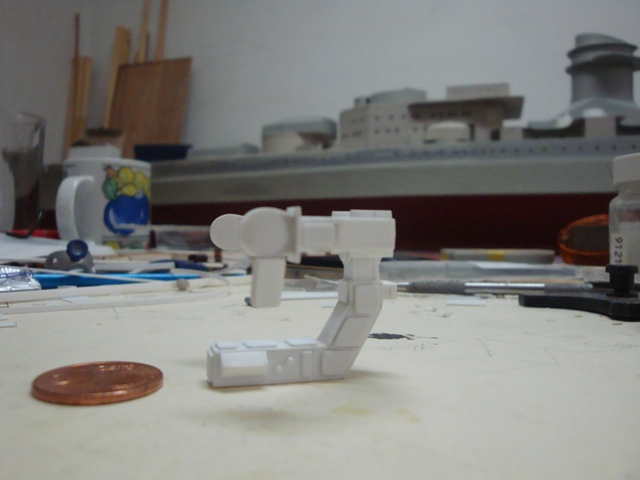
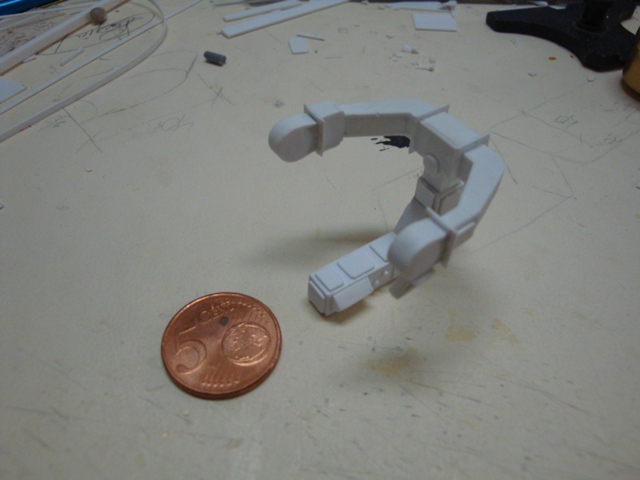
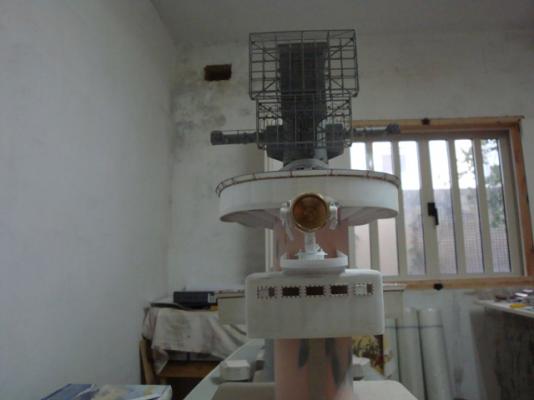
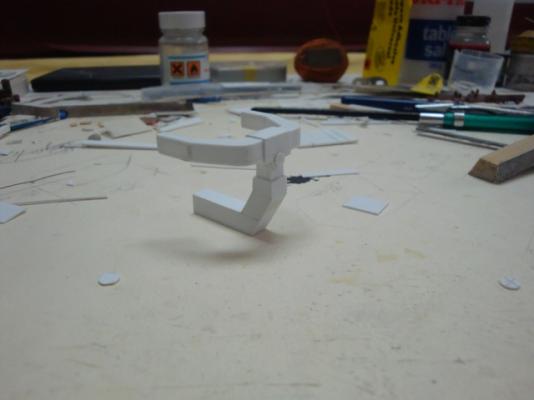
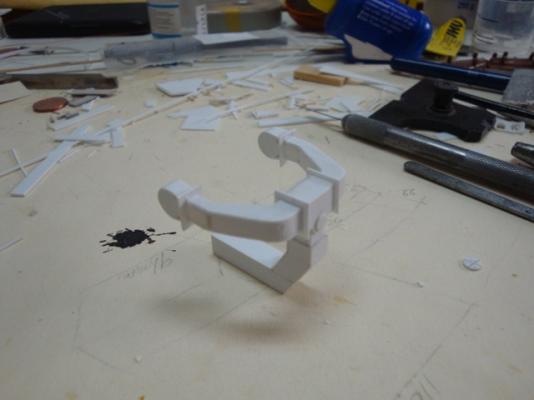
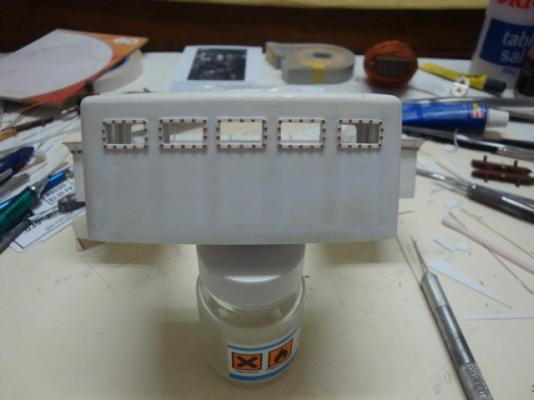
Good morning all, The searchlight assembly is approaching it's final stages as well. But still more detailing to go in. Some pictures showing the progress so far. The support structure. The light housing with some of the detailing. The light housing put in place - just for the photo shot. A view from the rear. The searchlight installation, approaching it's final stages. A view from the side. A view from the rear. The future look when finished. A view from the front - nothing is fixed in place yet, just set up for the photo shot. Shall be posting more next week.


-
Hello Michael, Grant, Adrieke, Brian Mobbsie and Larry - Wow, do you mind if I go for politics, I really would appreciate your votes. I promise you all loads of modeling facilities and boating ponds. To tell you the truth Mobbsie, modestly speaking, I do feel a bit proud, but the hard work and hours of relentless research, are bit by bit taking their toll as well. The only good thing about it is that al lot of things were standard on all ships of the DKM, so if no information is available in the Scharnhorst sections, they may be found in other ships sections. But anyway - bit by bit getting there. Hello Larry, sorry to hear that you were ill, I hope that you are well now. Take things easy, we only get older by the day and not younger, so please just enjoy life. I still would like to see you again in Malta. Give my best regards to the Mrs. and the dog.
-
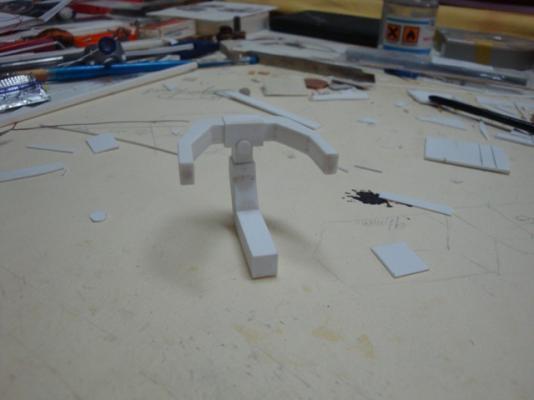
Good morning all, Some more updates related to the construction of the tower searchlight. Here goes: A view of the search light installation from the left hand side. A view of the search light installation from the right hand side. The support structure taking shape. Another view. More details added. A view from the rear. Starting off with the detailing. The detailing well underway. An elevational view. Shall be posting more pictures some time this week.


-
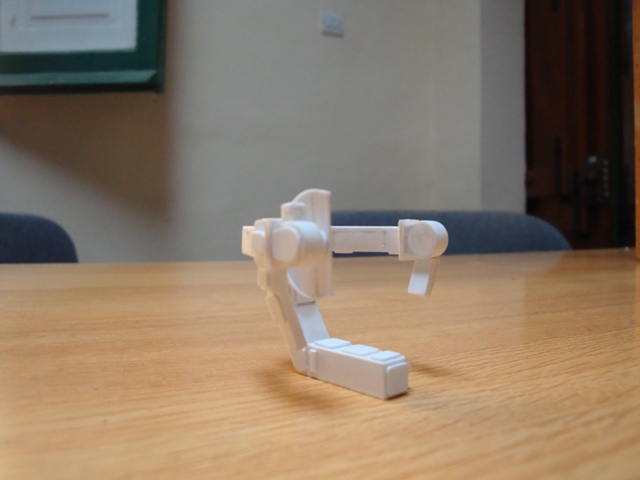
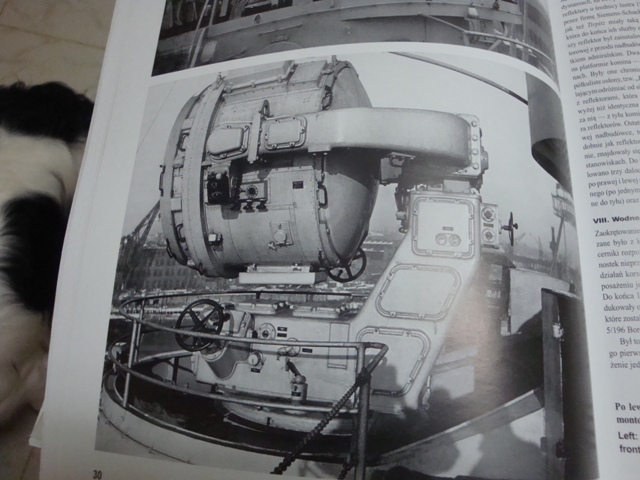
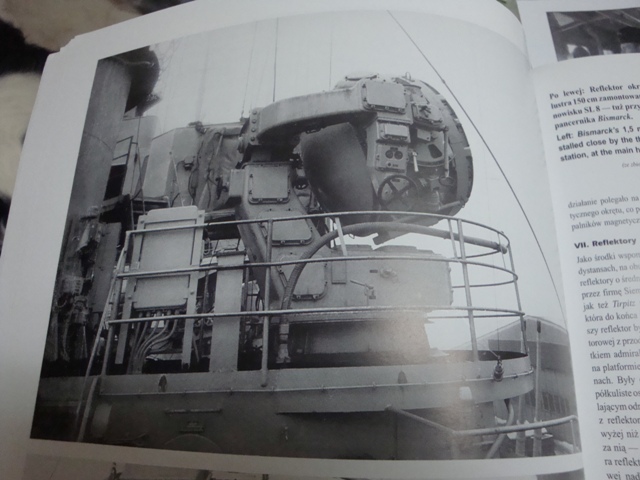
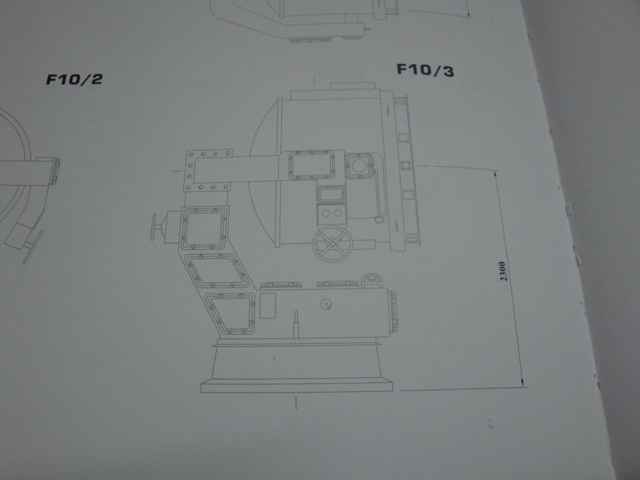
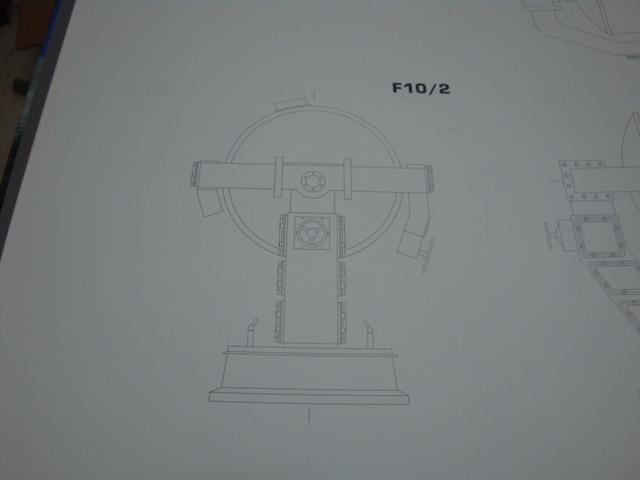
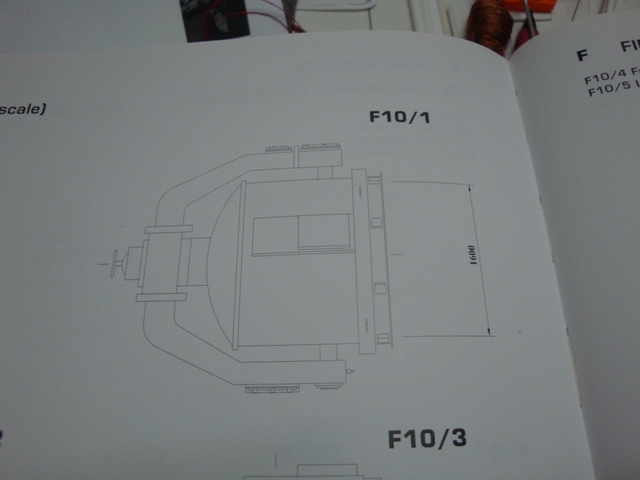
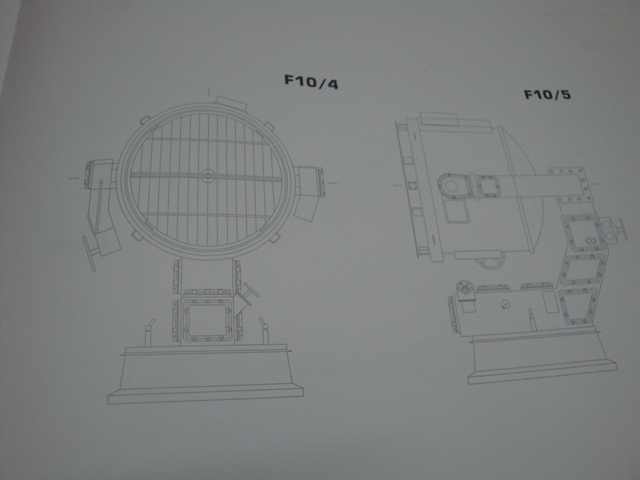
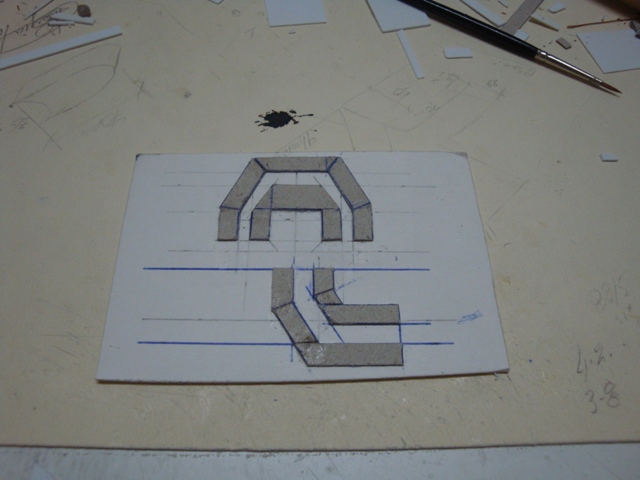
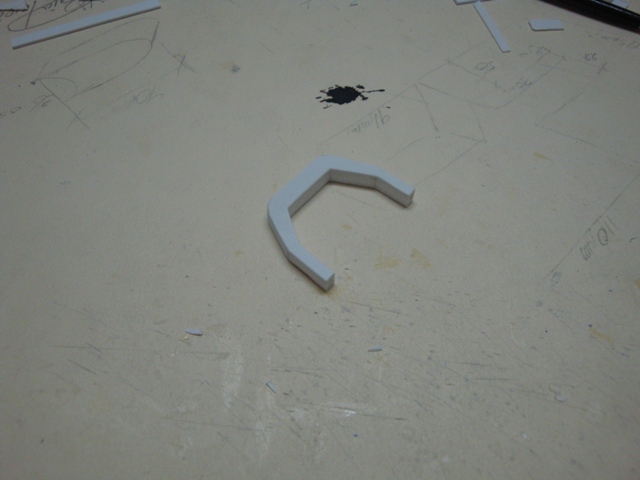
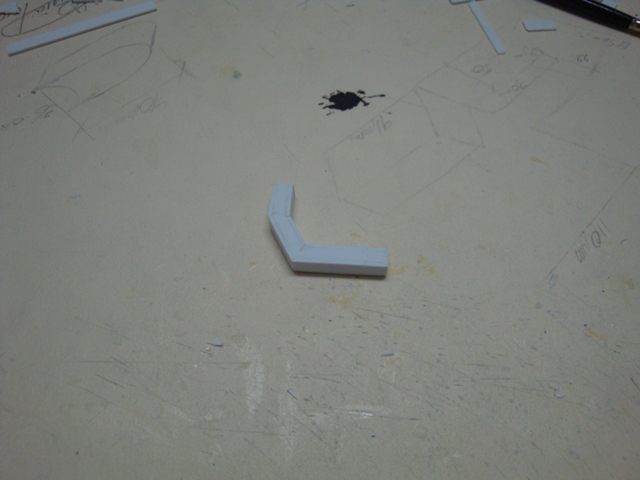
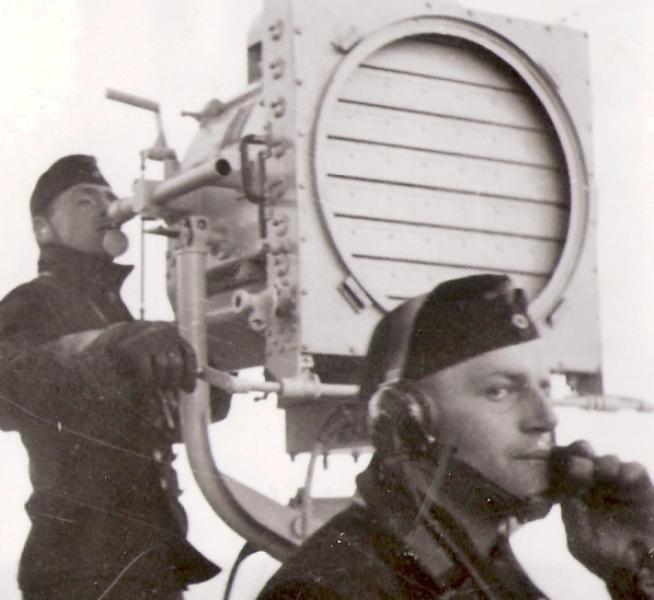
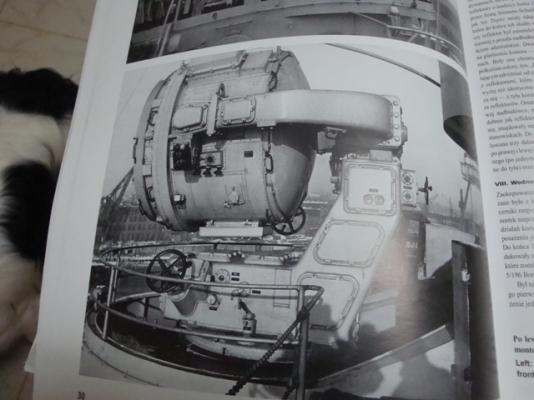
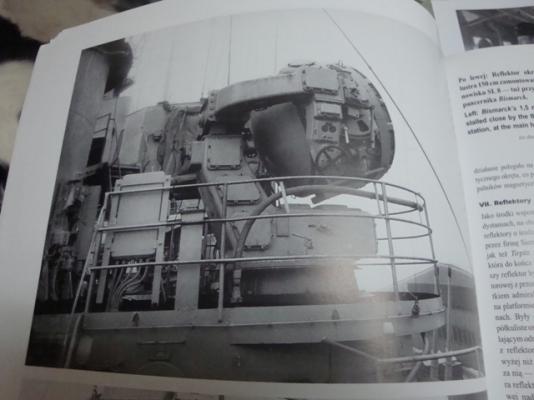
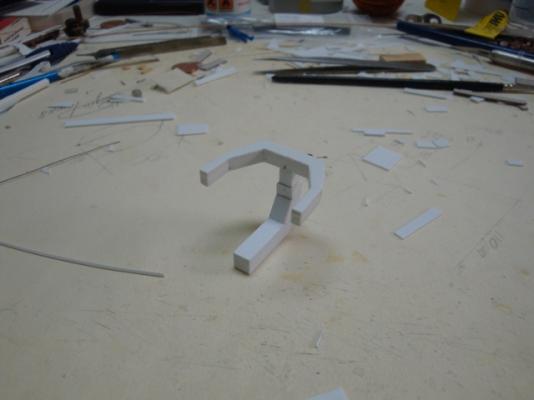
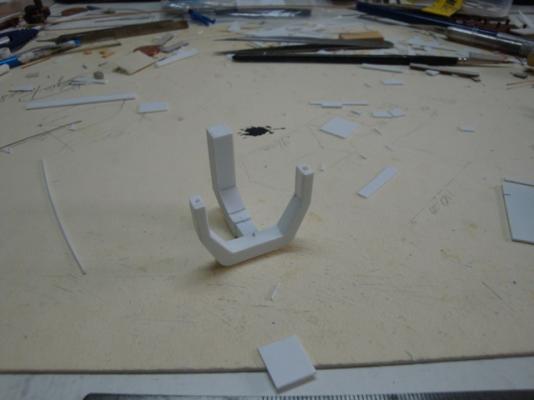
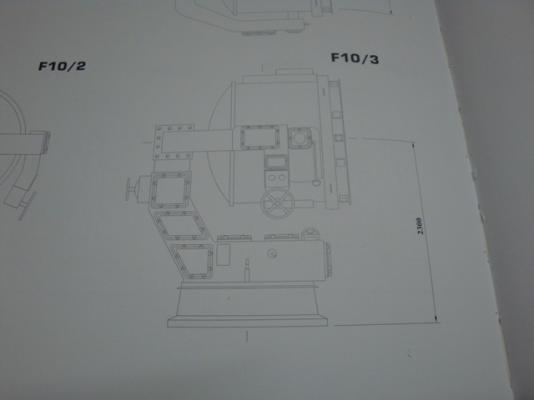
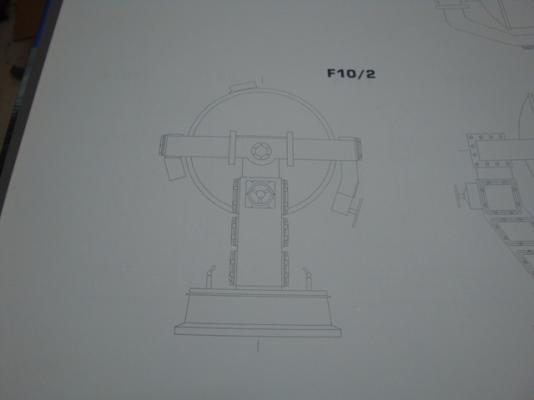
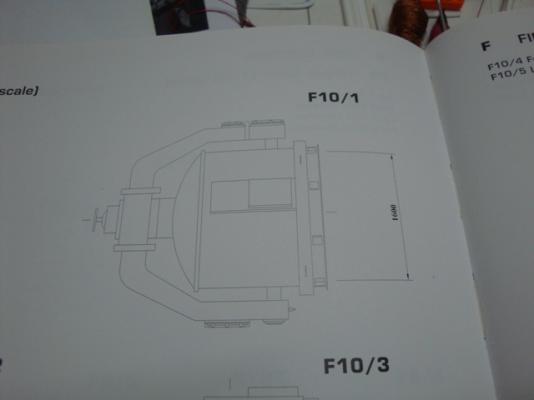
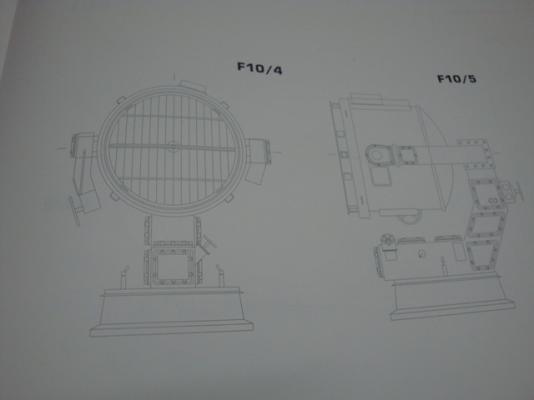
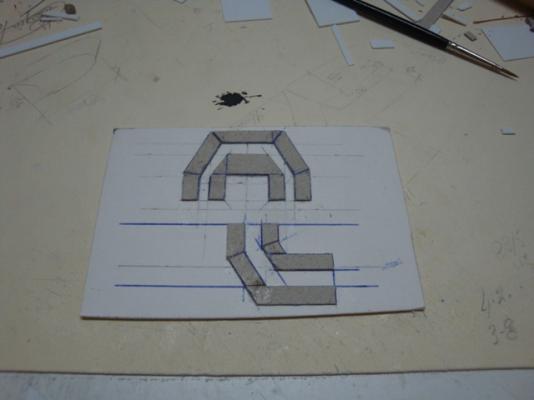
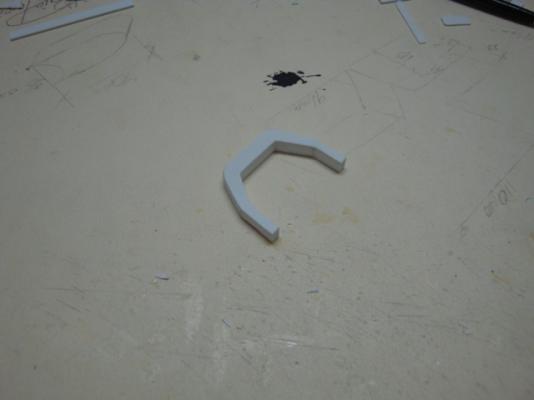
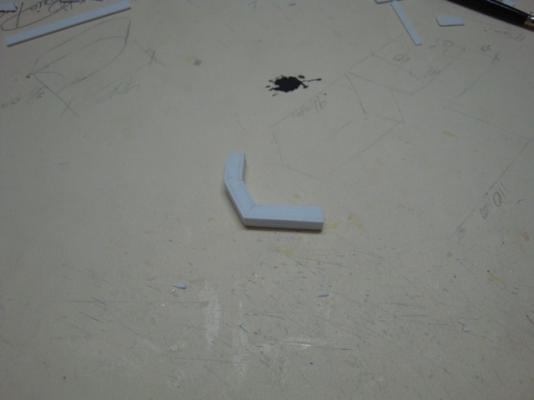
Good morning all, Hello Augie, Johann and Daniel, thanks for looking in and for the kind words. as advised, I am posting some more pictures related to the tower searchlight construction. Here goes: Some scale plans of the 160cm searchlight taken from the "Anatomy of the ship - Bismarck". Due to the fact that I shall be needing 5 of these assemblies, I made a simple cardboard jig, to ensure the same measurements for both the support arms and the support foot. The first set of support arms needed for the searchlight housing. The support duckfoot, which supports both the arms and the searchlight housing. Shall be posting more pictures next week.
-
Thanks Kevin.
-
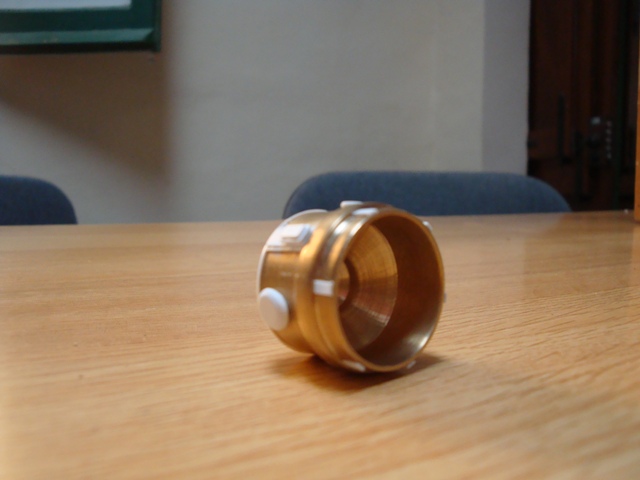
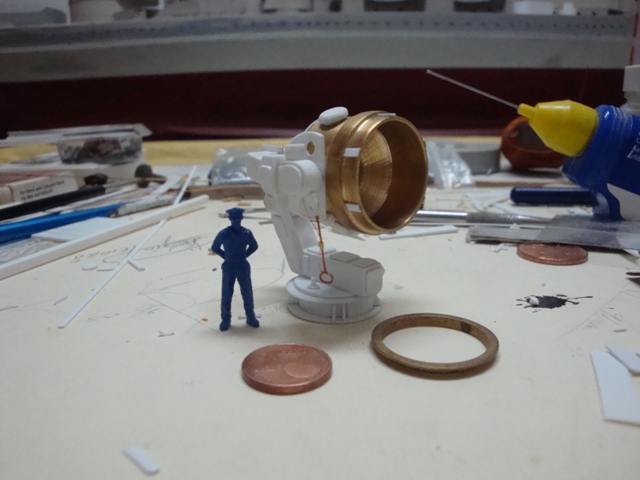
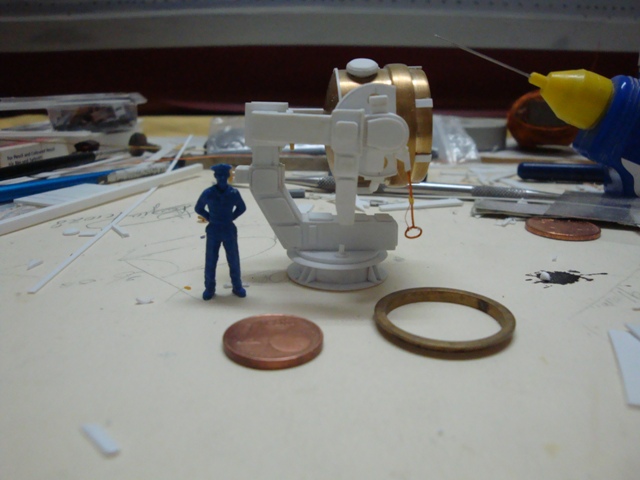
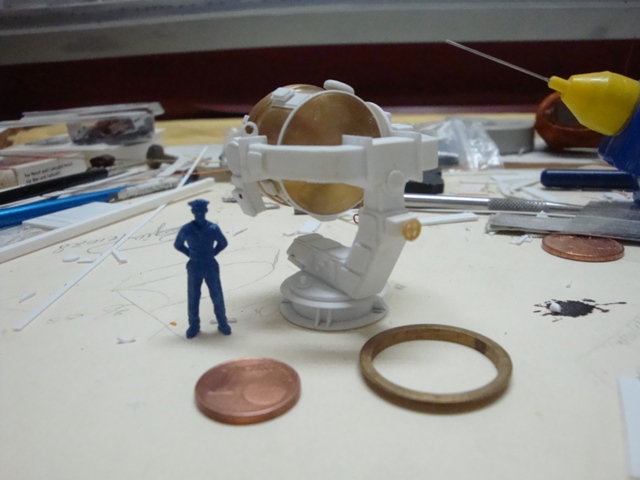
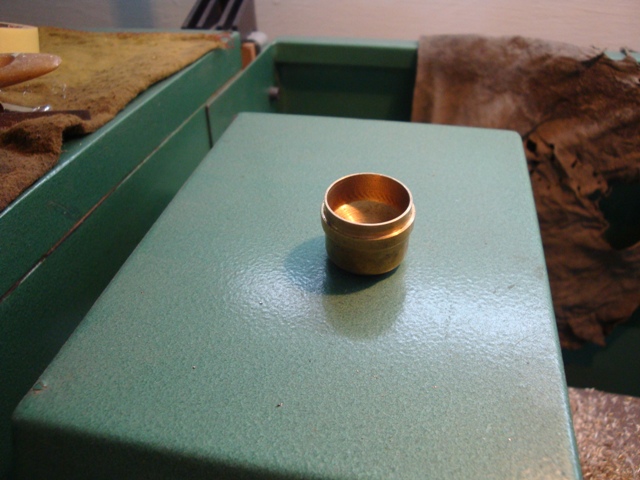
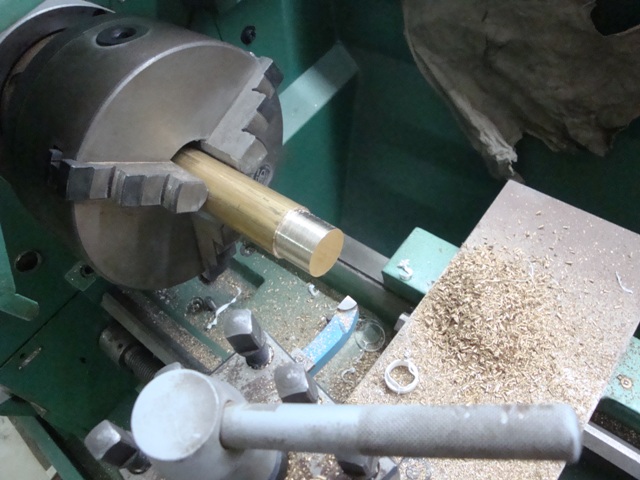
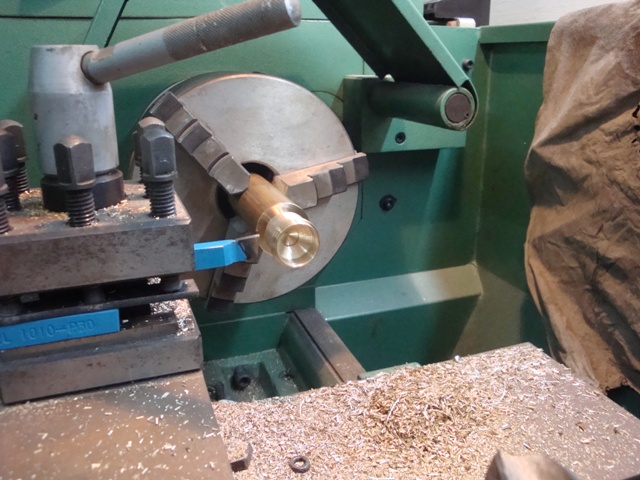
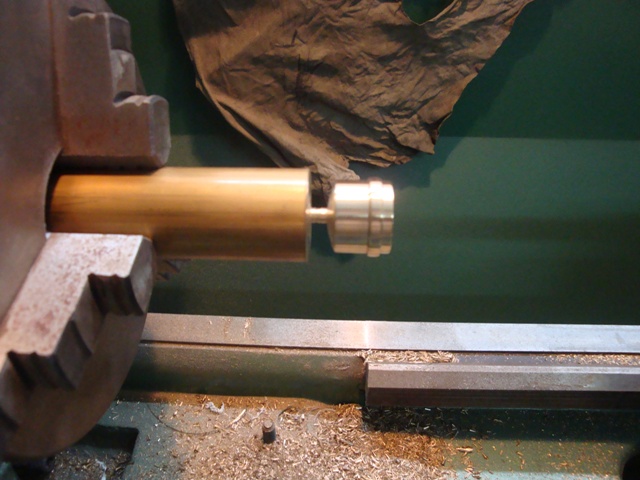
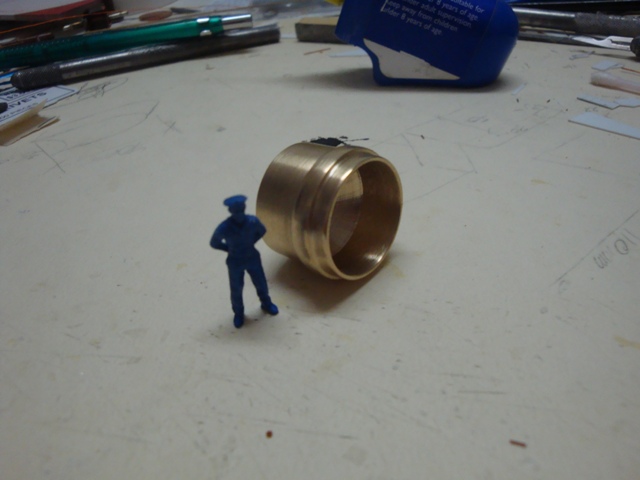
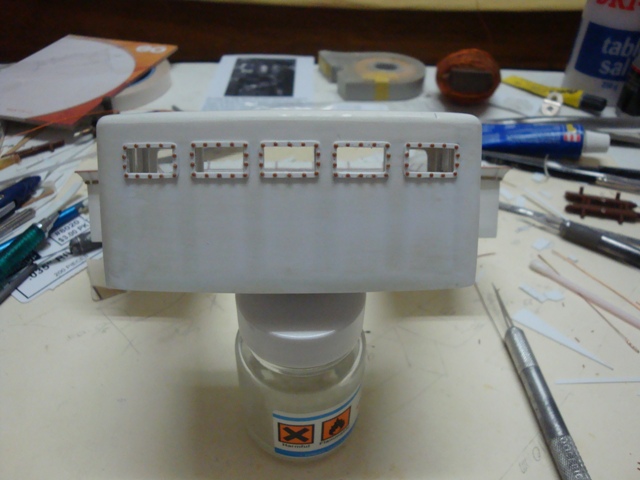
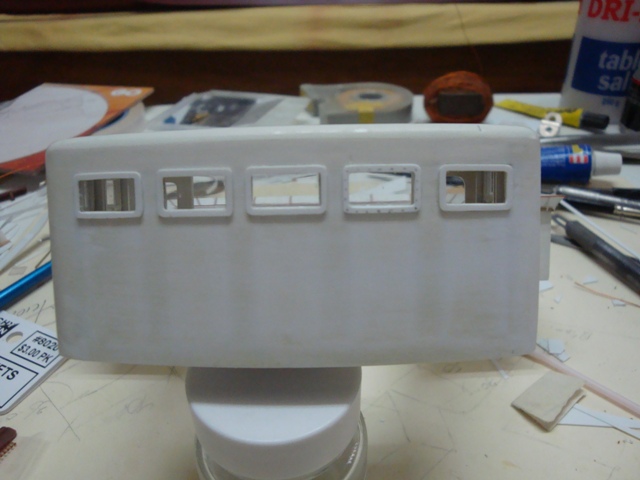
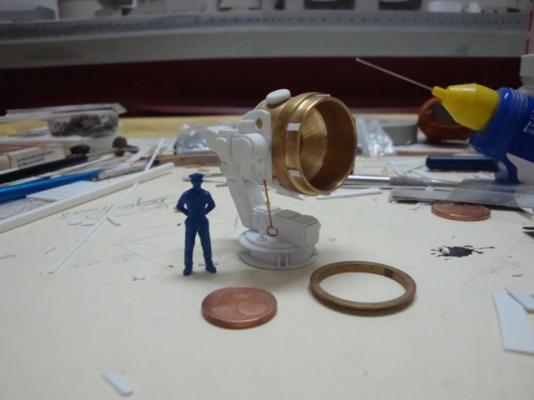
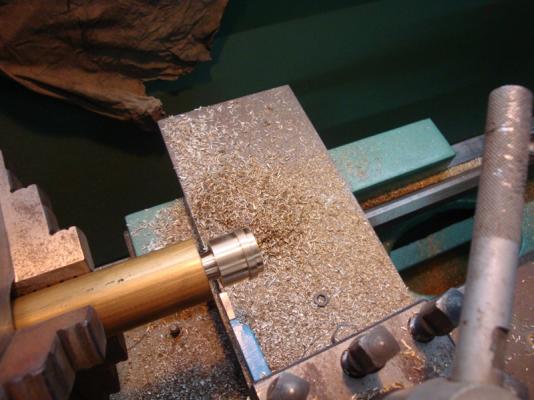
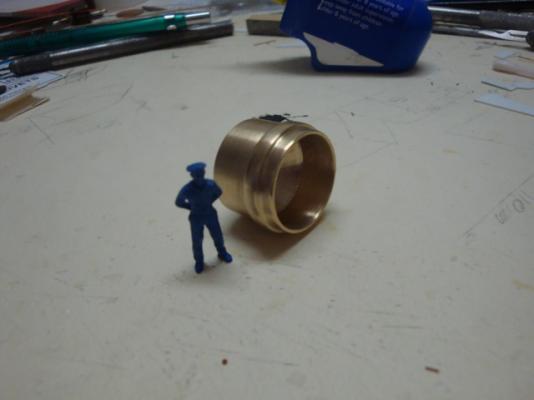
Good morning all, Hello Christian and Ben, thanks for looking in. It's always a pleasure to see your posts. as advised, I have now turned the tables towards the construction of the ship's searchlight installations. There were five of them. For the time being, I shall be working only on the one related to the tower and bridge. Here goes: The master - I produced this a couple of years ago. A 32mm diameter brass rod in place. Have to turn it to a diameter to 25mm. The turning is well underway. A view from the end. The inside of the search light was drilled off with a 22mm diameter HSS twist drill. Ready for cutting off. The searchlight housing, placed adjacent to a 1:72nd scale figure. Shall be posting more further on this week.


-
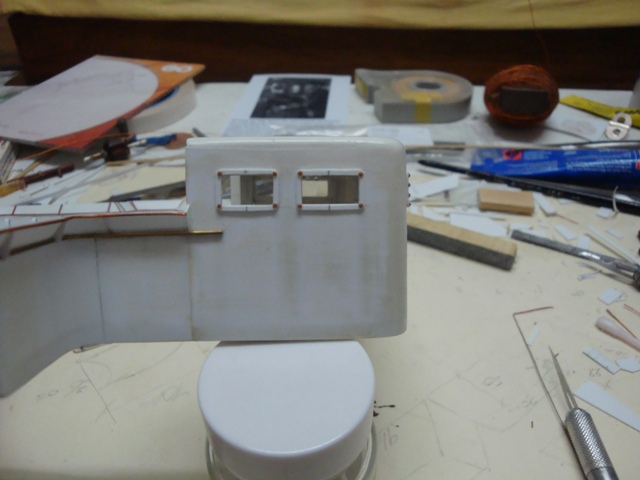
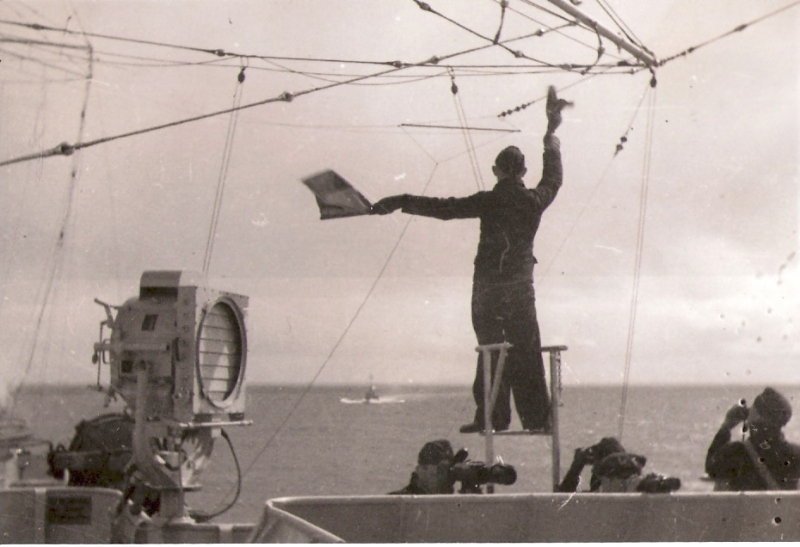
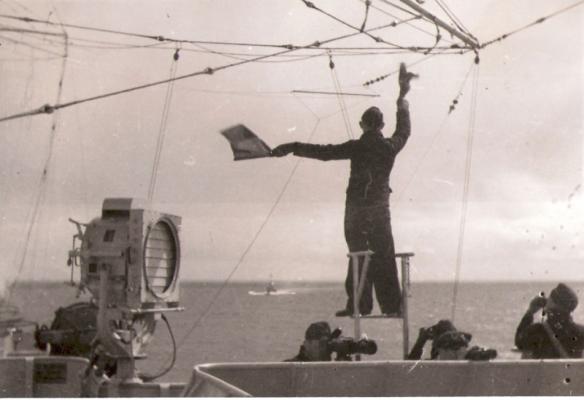
Good morning all, Some more progress pictures, related with the work on the admiral's bridge. Should be able to finish off the window frame riveting by tomorrow. During the weekend I shall be investing some time to carry out some work on the five in number searchlights required for the ship. Below are a couple of rare pictures of the signal lamp as installed on the Scharnhorst. There were two of these, one on each side of the admiral's bridge. I shall be working on these as soon as I have finished off with the search light platforms.

-
Hello Popeye, I just came across this build. Ah - you will have to eat quite a lot of spinach to heave the sails up. Your woodwork skills are always a pleasure to see my friend. Good job.
-
Hello Sjors, I see that you are getting a bit too good for the needle - or is the needle getting the better of it ????????? Don't worry and don't rush things. It's the result that counts. You are doing a fine job.
-
Hello Sjors, I follow in silence as well. My line is steel ships, and don't know much about sailing ships of the period. But this I can say - You are doing a very beautiful job. Well Done
-
I can only concord with all the others. The application of the weathering is just stunning. You really hit the nail on it's head.
-
Hello Piet, The internal was pretty much like the German Type 7C U-boat, with the exception the versio with the mine laying capability was the type 7D; which was longer then the other types to be able to house the mine laying storage tubes; just behind the coning tower. Yes I have two U-boats, just started them, and will not do any more work on them, before the Scharnhorst is ready. Keep it up mate, you are doing a brilliant job - we need some steel boats build logs.
-
Hello Brian, Trying to pull my leg? - Well sincerely speaking, I am trying to finish her off by 2016.
-
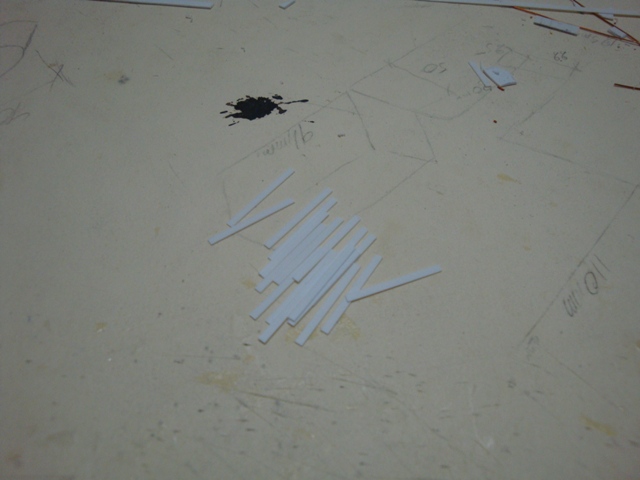
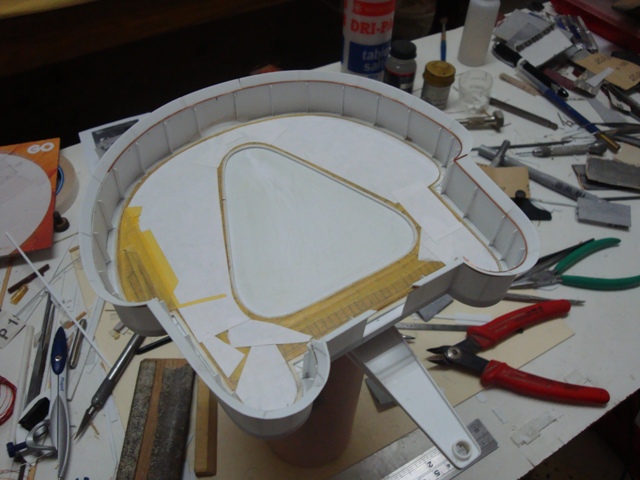
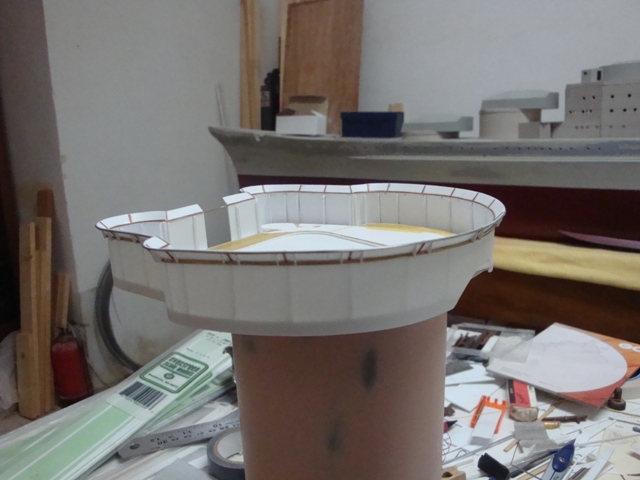
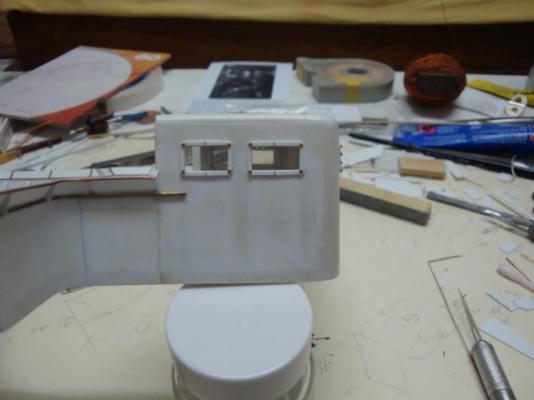
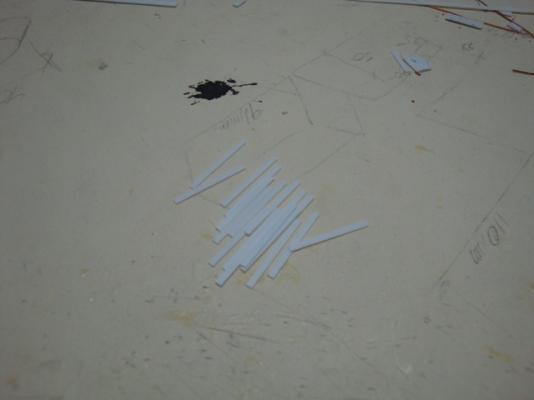
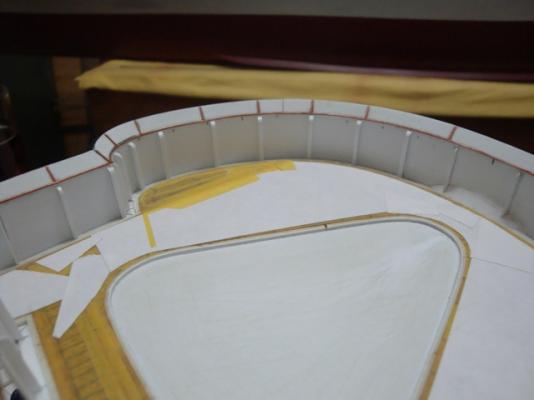
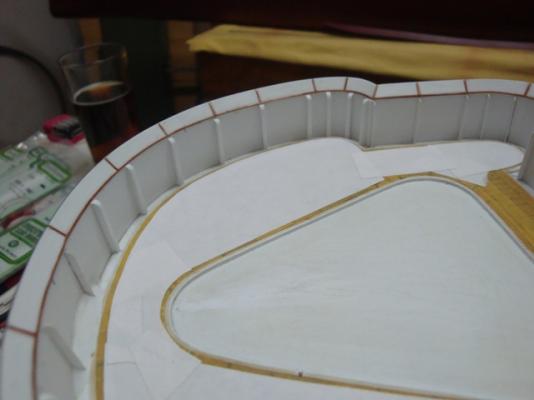
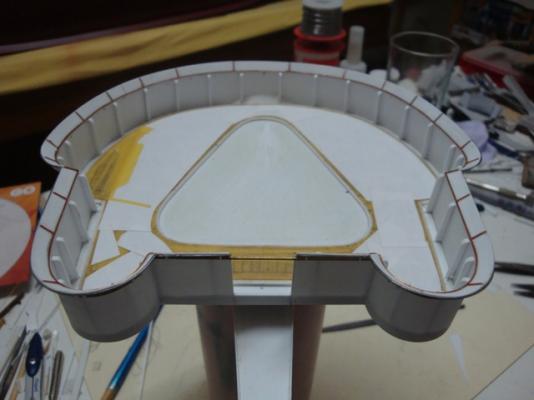
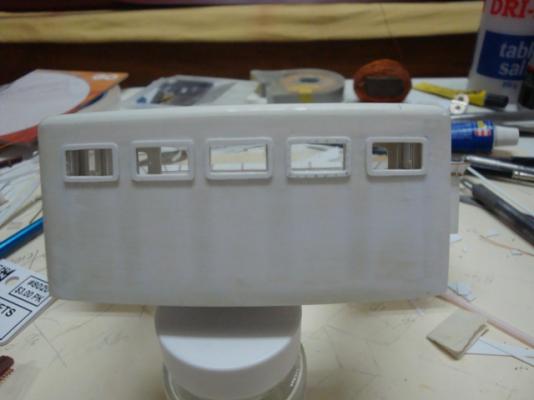
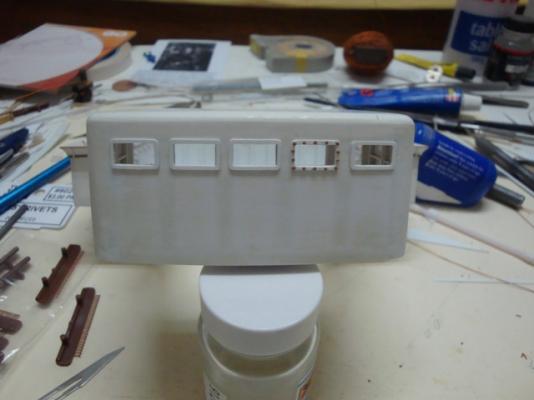
Good morning all, last Sunday, I carried out some work on the fore top observation platform, and the admirals bridge. Here goes. Evergreen strips - 1.5mm x 0.28mm thick, required to obtain the "Tee" section for the parapet wall support structure. Fitting in the first pieces. Finalizing the starboard side. A view from the front. A view from the rear. Next in line, the tee sections for the admiral's bridge. The rear section is ready. Job, over and done with. The rivets required for the window frames, supplied by Tichy Train Group. The rivets, only 0.8mm in diameter. Marking out with a pencil. The first Window frame. Shall be able to post more pictures by next Thursday.


-
Make that x 2 - I agree with Popeye. The planking is a wonder and the finish is just beautiful. I would try to stain it first.
-
hello Piet, I missed this log and just ran into it now. Wow, now that is something different to see. I just love subs. I always wants to build a WW1 German cruiser sub, but got lost in the Scharnhorst build. Keep it up Piet, You are doing some good work. Did this class of subs have ballast water inlet ports to help in diving?
-
Your wood work is so clean and neat - just how do you manage to produce such clean sections and bits? what type of wood do you use?
-
Hello Wayne, Thanks for looking in. I came across your build, and can say that you are doing a fine job of it as well.
-
Hello Wayne, Just bumped into your build log. some good construction work indeed. Small scale is always difficult, but you are managing quite well. Keep it up mate. I shall follow this log.
-
Hello Sherry, Welcome back - I see that you are back at work. Keep the pictures coming. Want to see more work.
-
Hello Popeye, Many thanks for looking in - I am tying to get the detailing as correct as possible, but sometimes, I find it very difficult to get the correct information and to work out the detailing correctly. For example - only today, I managed to get hold of some pictures showing the correct type of support structures stiffeners for the open observation platform parapet wall. sketch attached. 0307_001.pdf
-
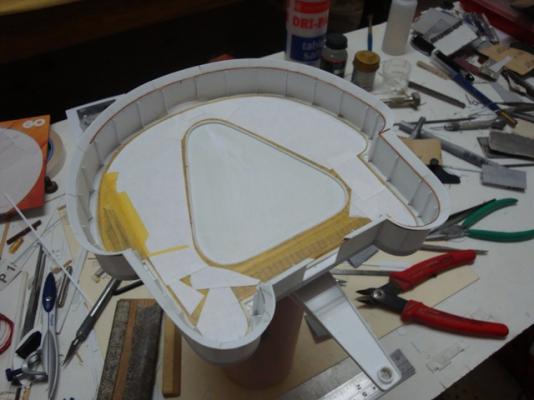
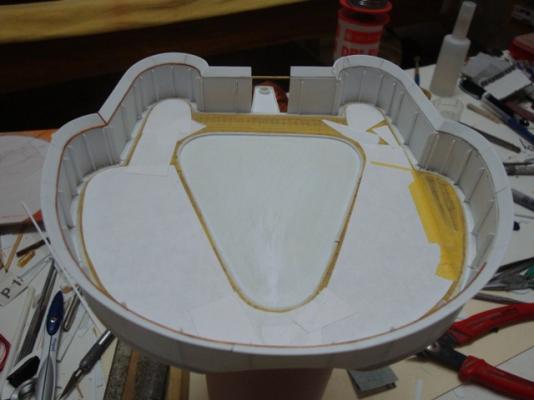
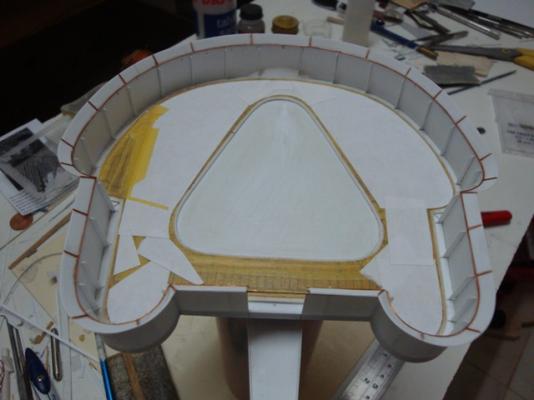
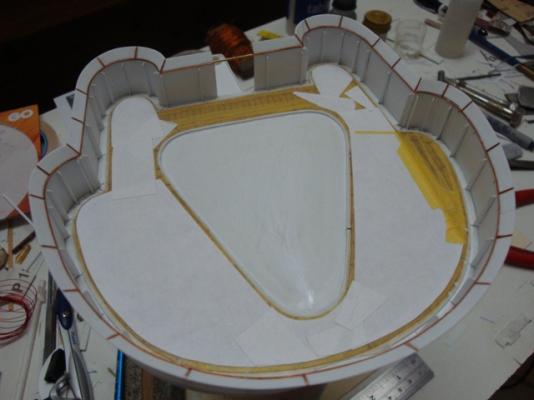
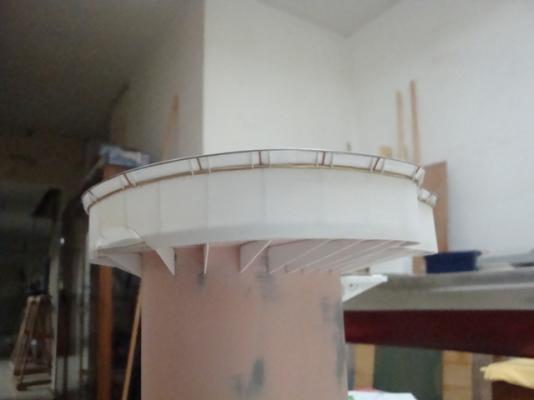
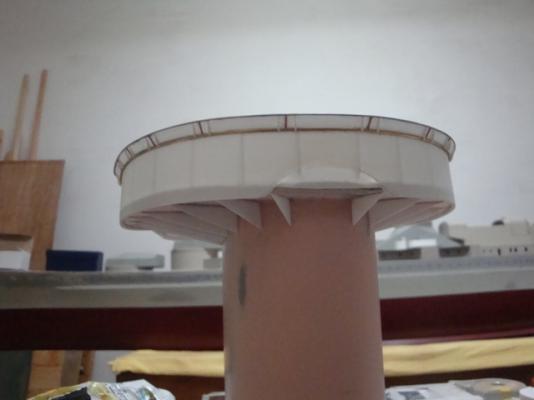
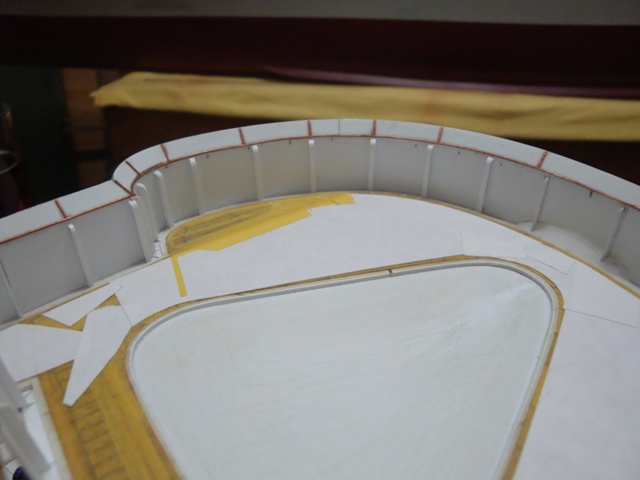
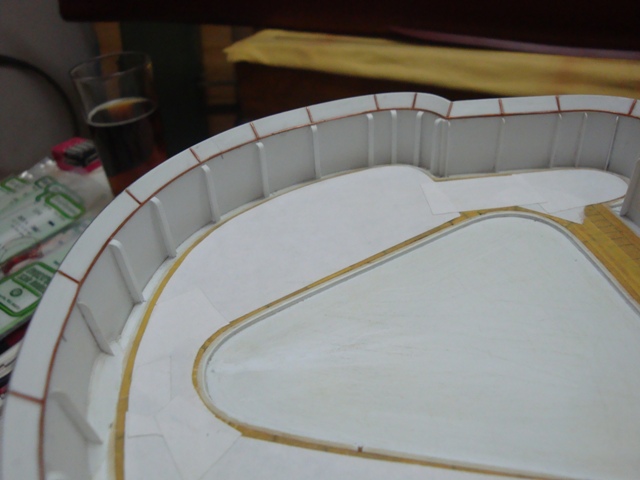
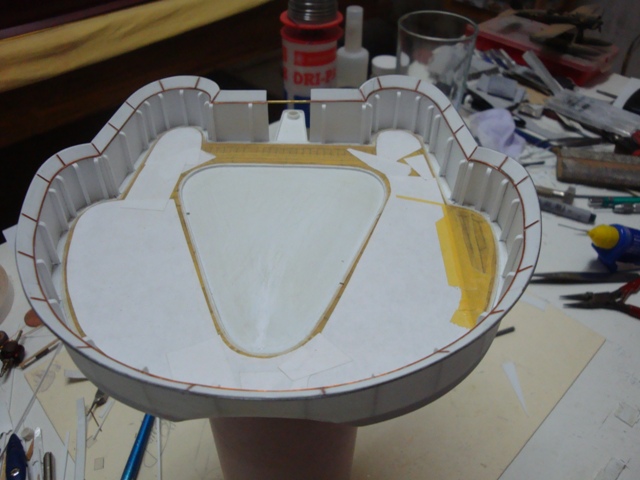
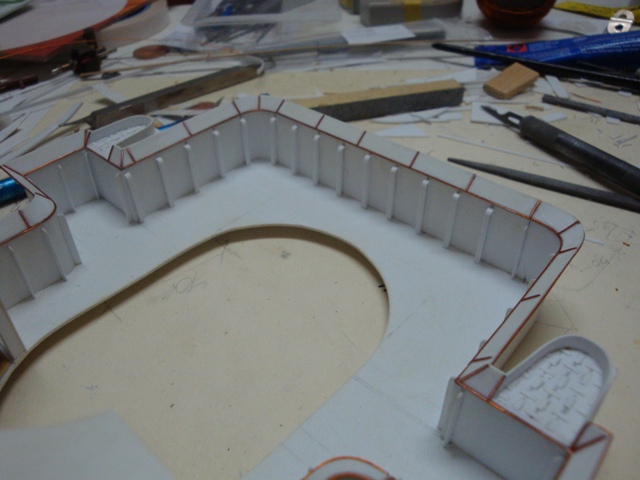
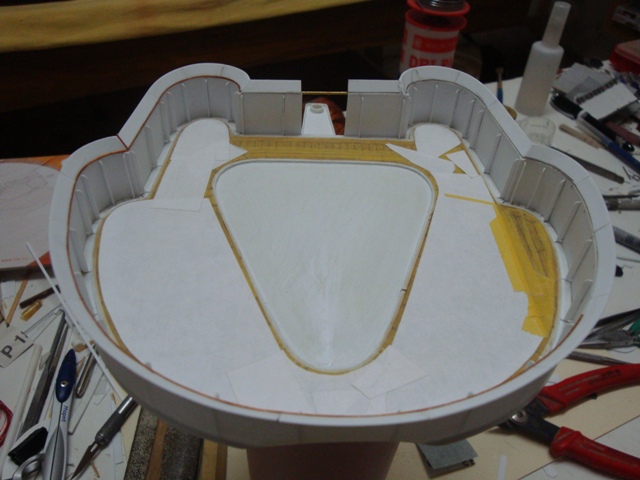
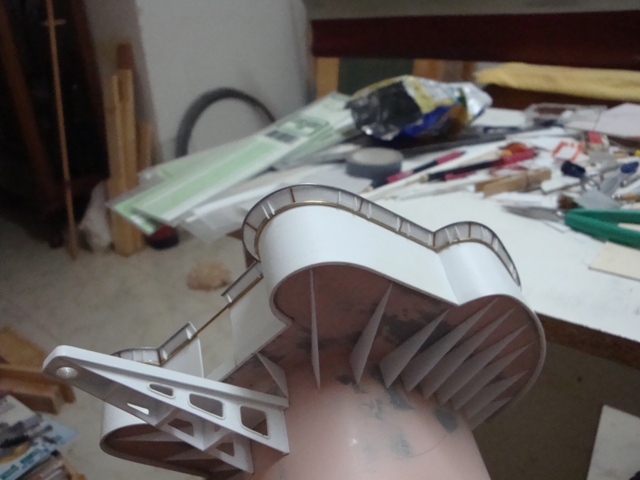
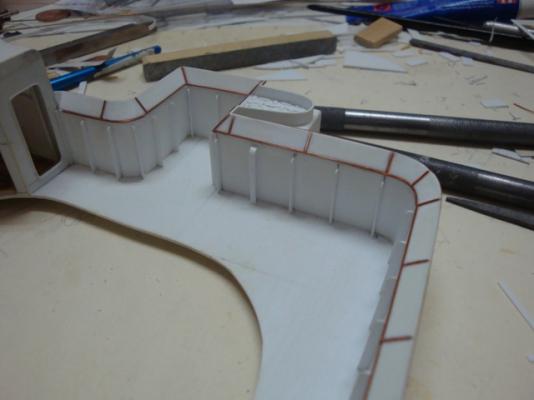
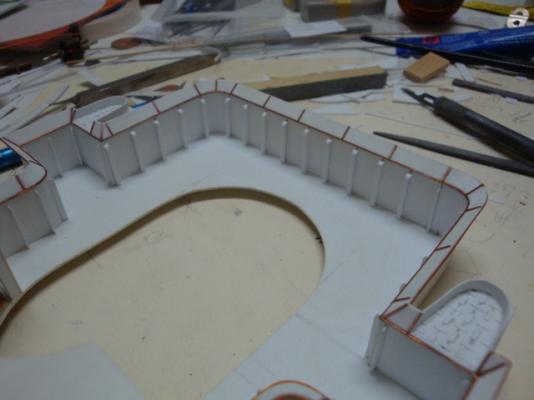
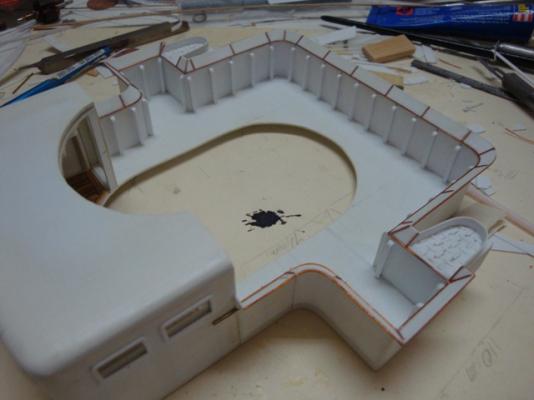
Good morning all, Hello Ben and Johann, thanks for looking in and for the kind words. I literally spent Saturday afternoon and evening + Sunday - full day to finish off the foretop observation platform wind breaker shields. I can say that it was a nerve cracking job, and the worst part of it, is that there is still more detailing works to be carried out for the same area. Here goes: The full set of wind breakers are now fitted in place and trimmed to size. Starting the fitting of the shield liners. A view from the front, showing the complexity of the wind breaker shields. A general view of the internal liners. A view from the front. A generic view of the external liners and hinge arm supports. Another view of the same. A view from the bottom rear. A generic view. Shall be able to post more pictures by next Thursday.