


VitusBering
-
Posts
297 -
Joined
-
Last visited
Content Type
Profiles
Forums
Gallery
Events
Everything posted by VitusBering
-
 I've been overly chatty in this thread but I haven't forgotten this is a build log. Nor have I been idle awaiting delivery of the replacement veneer deck (which got delivered ahead of schedule just moments ago - yay!). My pin painting jig worked out as well as I had hoped. The left pin rails are done except for the winches - they'll wait until the cement on the pins is fully set. I think I'll work on the deck, starting with the smaller pieces. I sure like the look of the oak better than the beech.
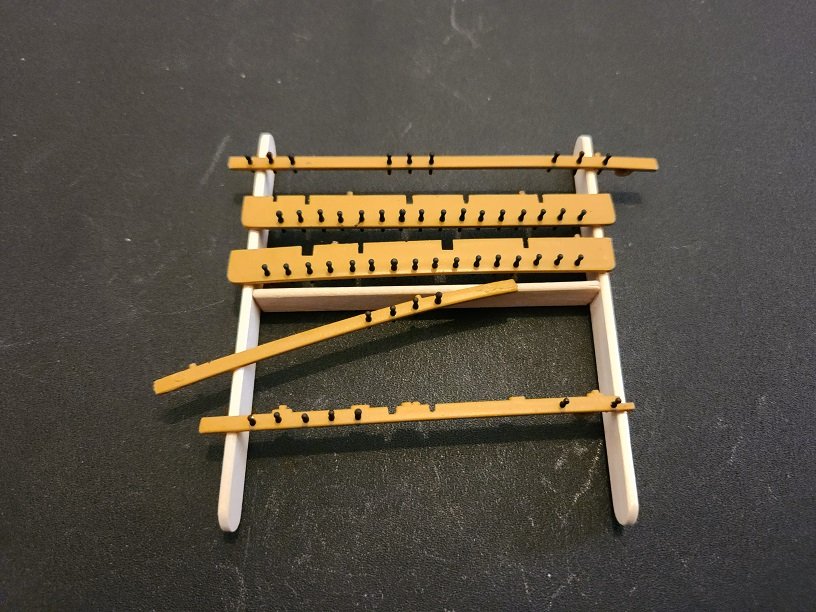
- 248 replies
-
- 4
-

-
- Cutty Sark
- Revell
- (and 2 more)
-
I agree with all you wrote, shipman. I've not been, of course, but I do want to go even if she bears little resemblance to the gorgeous working tea clipper she once was. The fire was tragic, the restoration - well, it was well-intentioned. The same can be said of the Star of India in San Diego. That, too, was a historically important vessel but nautical nerds like me take exception to what has been done to her.
- 248 replies
-
- 1
-
-
- Cutty Sark
- Revell
- (and 2 more)
-
Oh, I could not agree more. Not just the sights but the sounds, even the smells, of an up close and personal experience with a tall ship is incomparable. I'm envious, I haven't been to Greenwich. I will visit one day, I've bargained for that with She Who Is Queen Of The Castle. She wants to go to Portugal this summer and I've agreed. Greenwich -- soon.
-
Thank you Ian, for your kind words and valuable info. I didn't mean to denigrate plastic models in general, some are awesome. I will quite likely look into the Heller Victory as a next build. In my preliminary studies I have learned of jackstays - but I do thank you profusely and I'm sure I'll have plenty of other questions too as this project progresses. I need to research Hackney more. He seems to have a mixed reception among reviewers but, in my opinion, every author has value. Thank you again. I am very happy to have found and joined this community.
-
I recognized the serving thing - not that one specifically, that one looks unique, but like a Sterling engine, it doesn't matter how it is constructed, the function is evident with a bit of inspection. Serving your own lines is impressive - beyond my skill at the moment. I don't think a plastic model is worthy of that kind of effort. When and if I attempt a museum quality wood model I may attempt it. I also think that should that time come I'll probably invest in a 3d printer. But that's a ways down the road. You took over six years working weekends to complete the Cutty Sark (I have studied your build log, btw. Very nicely done) and it may take me at least half that long working regularly to finish this model. This is my first ship model since the '80s. I've built R/C planes both from kits and scratch but even though they're semi-scale, they don't take the level of craftsmanship, expertise, and knowledge a tall ship demands. That's a prime reason I'm here - to learn.
- 248 replies
-
- 1
-
-
- Cutty Sark
- Revell
- (and 2 more)
-
That's a great looking model, Harry, and thank you very much for the info. Wow, really nice pic.
- 248 replies
-
- 1
-
-
- Cutty Sark
- Revell
- (and 2 more)
-
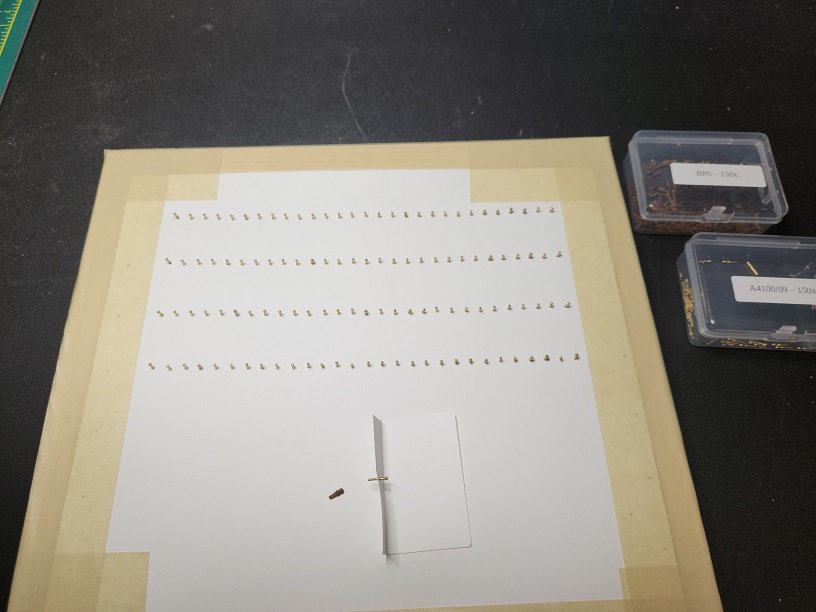
Thanks Shipman. Unfortunately those are currently out of stock - and the site doesn't mention size or how many drawings are included. Since the ones included in the book have been updated, it would only be a matter of curiosity for me to compare them in detail. At the price Modelers Central is asking, I'm not that curious 😉 While I'm awaiting arrival of the veneer decking I've not been totally idle. I've cleaned and prepped the masts (only the lower part, joining the half shells and dealing with the never-ending flash). I've also painted the deck houses (they turned out great), and I'm now setting up to paint the brass belaying pins black. I don't want to deal with trying to chemically blacken them, that hasn't worked out well for me in the past. Here's my pin painting jig. When the heads are done, I should be able to flip the paper and do the pin parts (example / proof of concept shown on the folded paper). I don't know what weight the paper is but it is slightly heavier than regular copier paper and not as heavy as card stock. It's something my wife picked chose for her art. I marked the spots and poked pilot holes with a map pin. I included one of the wooden pins to show why I am not fond of them. They're too fat and too short.
- 248 replies
-
- 1
-
-
- Cutty Sark
- Revell
- (and 2 more)
-
Wow, HOF. I don't think I have room for three B0 size plans. I'll leave them at their published size and use a magnifying glass if need be. I did order both the Sail and General Arrangement plans to complement the Rigging plan. They will look great in arrangement on the walls. It almost seems a shame to leave them in the craft room where only a few eyes will see them. I'll try to convince the boss to let me find wall space in one of the living areas. Btw, folks... it is perfectly OK to use my name (Darryl). I chose the Vitus Bering handle as a nod to my previous life in the Arctic.
- 248 replies
-
- 1
-

-
- Cutty Sark
- Revell
- (and 2 more)
-
Thanks HOF, that's very encouraging. That's the same vendor I got mine from. How large did you make the Campbell plans - wait - the ones from the book or the one(s) from the Royal Museum? The museum ones are pretty big already (758x567 mm or approx. 30x22 in.) so I am assuming the ones from the book. So the question remains in any case, I think)... how big did you make them? I will have to juggle other artwork to make room for the Museum plans if I get both the Rigging and Sail plans. This brings back memories of scratch building a 1/4 scale de Havilland Chipmunk in Art Scholl livery in my garage. I had full scale plans that took up three of the walls and part of the ceiling. I tried to have them reduced but no one would take the job.
-
It is perfectly OK to call me by my name (Darryl). The Vitus Bering forum handle is a passing reference to my previous life in the Arctic.
-
Thank you both very much for the info - it is quite valuable. The e-book does have images but they are very small. l will get the two volume physical set. I found a first edition set in what booksellers call fine condition with all plates for a surprisingly reasonable price. Thank you again. I've also been looking a bit more closely at the Royal Museums Greenwich's Sail Plan by Campbell. Though I'm not sure I'll study it in the same detail as the Rigging Plan, the two of them will look great on my wall.
- 248 replies
-
- 2
-
-
- Cutty Sark
- Revell
- (and 2 more)
-
Ok, smart aleck 🙂. I know how to find them. I am just not sure what to find. For example, Longridge has published several tomes on the ship. Should I get the 2 volume set or the Last of the Tea Clippers, or ???. The same sort of question applies for the other authors as well. You folks have ostensibly read the authors and know which of their books I should have in my library. [edit] I ended up getting two resources so far: The “Cutty Sark”: The Last of the Famous Clippers [Combined Edition of Two Volumes] by Longridge as an e-book and Rigging plan for 'Cutty Sark' (1869) by G.F. Campbell from Royal Museums Greenwich Prints (I passed on the sail plan) I'm still researching Underhill.
- 248 replies
-
- 1
-
-
- Cutty Sark
- Revell
- (and 2 more)
-
After reading, viewing, and studying the marvelous logs here I've totally revised my thinking on this build. I will indeed attempt to include as much historical detail as I am able. It is a tall order, but it promises to be rewarding. But, I need a bit of help, folks. I see references to documentation that I am having trouble finding (I think). I read here references to plans and other resources by Campbell, Underhill, and Longridge. What are the titles of these documents/books? Where might I find them?
-
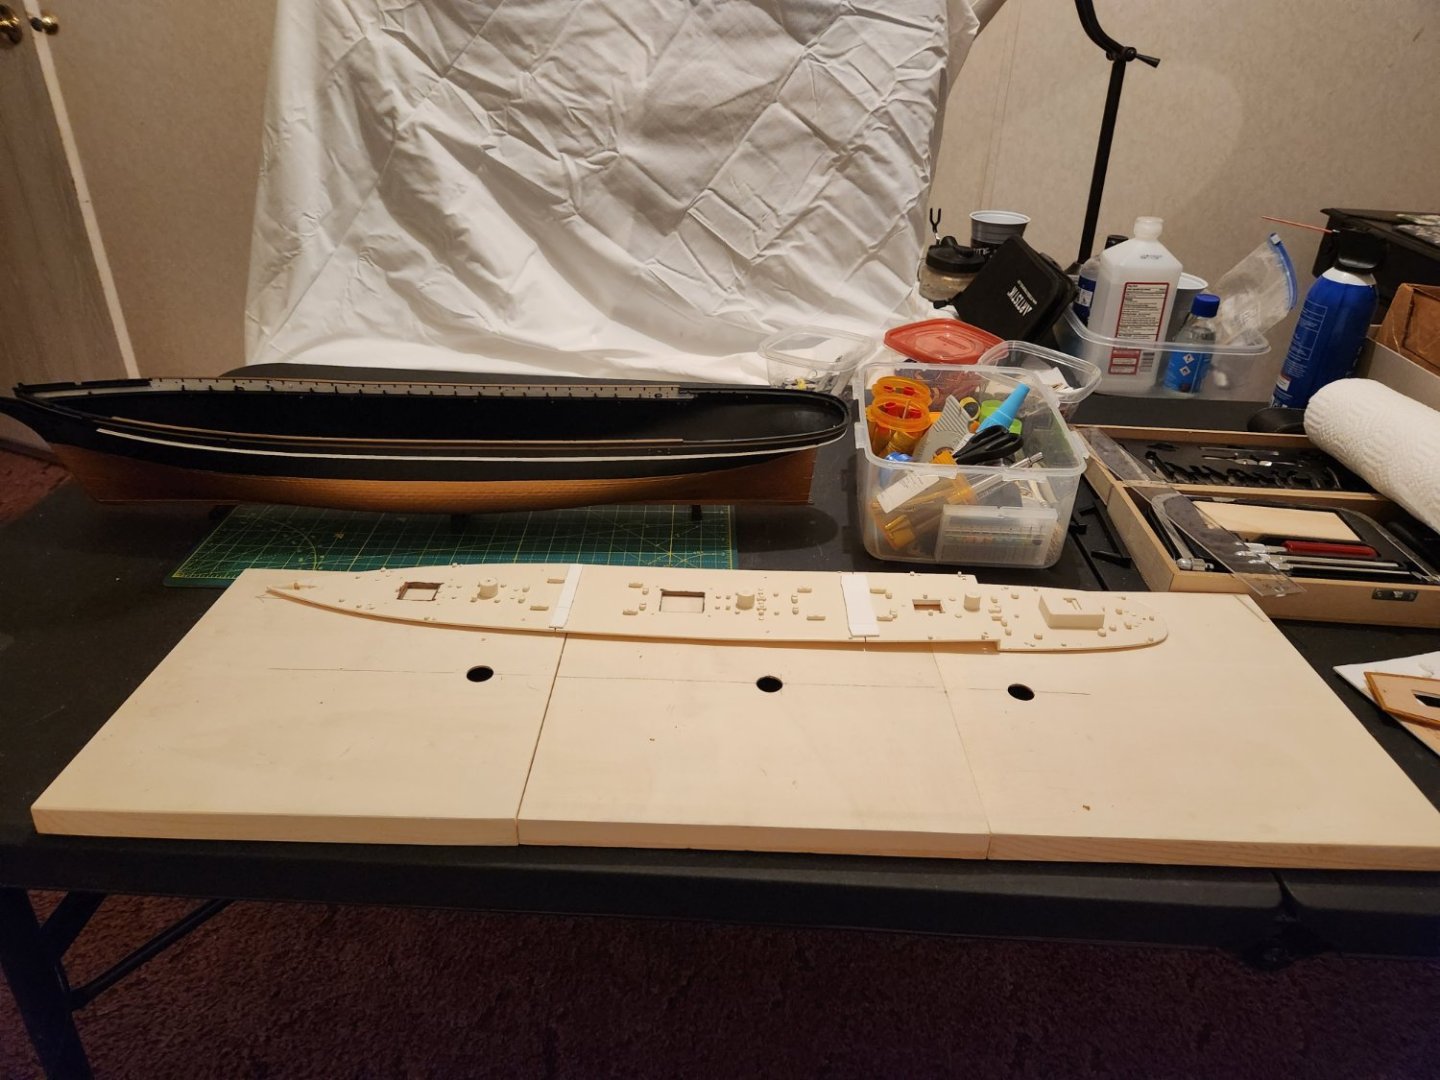
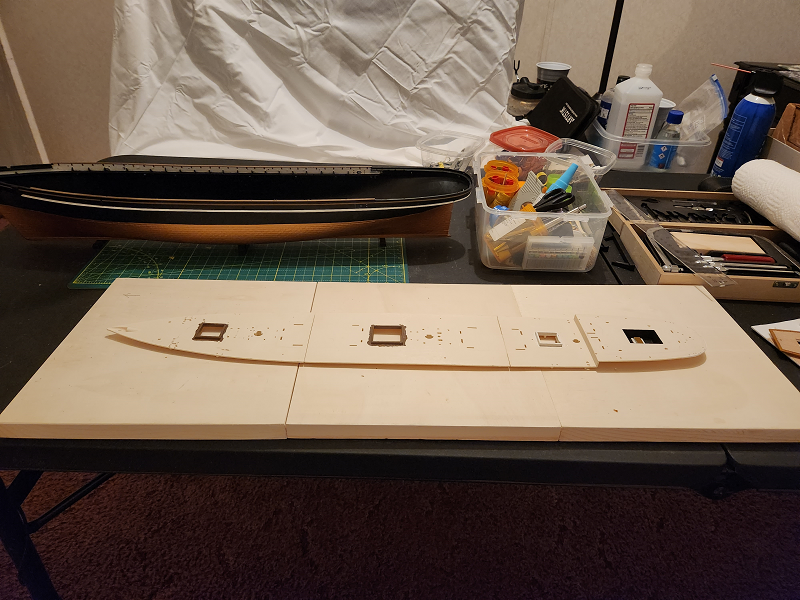
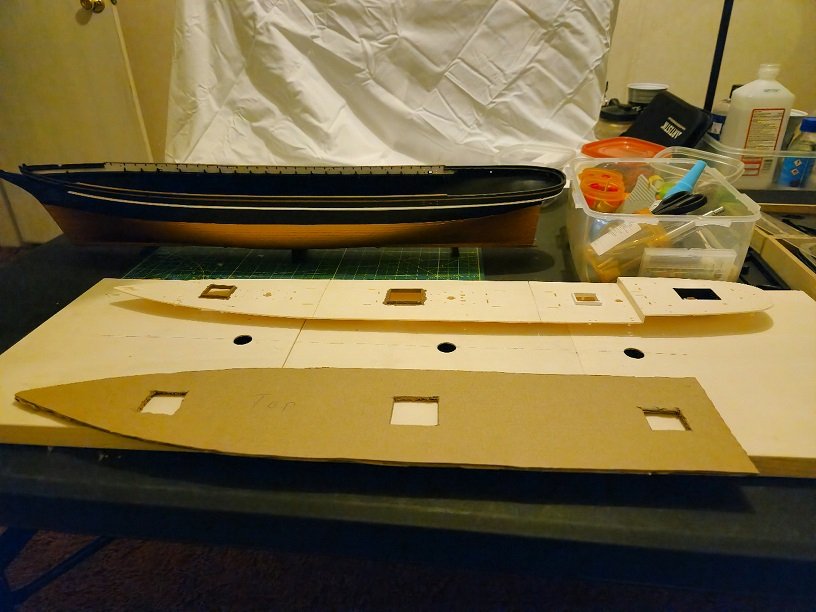
I have made an embarrassing rookie mistake. I mis-read or misinterpreted Radimir's (HISModel) instructions for preparing the wood veneer deck for gluing to the plastic deck. I was certain the instructions tell us to treat the wood with varnish before gluing to the plastic. There is a tiny bit of room for interpretation but I won't belabor the point. Varnishing before gluing, it turns out, is a fatal error. In retrospect I should have known this would happen. I could make a lot of fairly weak excuses (I've never dealt with veneer, etc.) but the bottom line is that I really should have known better. This deck is toast, there's no way to flatten the pieces without them cracking (I tried a couple). So it is a setback but there is a hidden up side to all this. When I initially ordered the wood deck I inadvertently chose the beech deck when I actually prefer the oak version. I didn't sweat that detail, the beech does look nice. I've ordered the oak version from Radimir and, of course, won't make that mistake again. I'll make all new mistakes 😉 It should arrive in a week or so. I've also made a jig from easel boxes to allow the large plastic deck to sit flat for gluing. The deck has mast sockets that won't allow it to sit flat which is an inconvenience when I am ready to glue the larger piece of veneer to the deck. The deck pieces are joined/reinforced with scrap to ensure proper alignment. The age of this model means the deck has changed size ever so slightly and if I joined them one to another the deck houses would no longer fit and, of course, other problems fitting the deck to the hull would arise, so I used the deck houses as alignment tools. The resulting tiny gaps will be covered by the veneer. The hold and companionway openings are painted - only their rims will be visible after veneer application. Here's the deck in the jig. btw that's my makeshift airbrush booth in the background. So once the glue is applied and the veneer is set into position I need a way to make sure good contact is made all 'round. I made a cardboard template to fit on top of the veneer after it is glued, and will set another couple of those easel boxes on top of that, and weight the whole shebang down. Here it is sort of sandwiched - offset for illustration reasons but you get the idea, I hope. The hardest part now is waiting for delivery of the new veneer. There are other things I could possibly do in other areas of the model and I may keep myself busy that way for a time.


- 248 replies
-
- 5
-
-
- Cutty Sark
- Revell
- (and 2 more)
-
The differences are subtle, from what I can see, but evident, I think. The Revell model seems to be a bit broad in the beam. I don't have either of the plans so I'm relying on on-line depictions that may not be at all accurate. It seems my bookshelf is due for some additions. I've re-visited my thoughts on adding windows and running lights. I think that may be straying a bit too far. I finished the bump rails and top rail painting and am working on the deck. When that is covered in veneer and installed, I'll post another pic. [edit] Unexpected delay - perhaps up to two weeks. Will return asap.
- 248 replies
-
- 2
-
-
- Cutty Sark
- Revell
- (and 2 more)
-
I agree Cirdan. The Thermopylae is a bit of a pet peeve. That poor vessel (which of course actually won the famous race) has been treated badly by history, by the public, by its owners, and by model makers. The power of marketing has shown its hand and the loser Cutty Sark has had exorbitantly lavish sums spent on its preservation and restoration. The Thermopylae as most of us know met an ignominious end as a gunnery target. As you mention her Revell model was also essentially cloned from the Cutty Sark. btw I have a print of the Sorensen Thermopylae painting in my shop. I doubt its accuracy as well but it is a very pretty depiction. I'll take my liberties with the Cutty Sark with no regrets.
- 248 replies
-
- 1
-
-
- Cutty Sark
- Revell
- (and 2 more)
-
I found a drawing of an early stern decoration for this ship - one featuring a cavorting Nannie Dee. It is posted at the Royal Museum Greenwich's site in an Object Focus section (https://www.rmg.co.uk/stories/blog/conservation/object-focus-star-india-stern-decoration) https://www.rmg.co.uk/sites/default/files/cuttysark/wp-content/uploads/sites/13/2015/05/Stern-design-for-CS-by-Linton.jpg The article has a number of very interesting anecdotes about the past and current stern decorations. The current Star of India and associated filigree is nearly microscopic at the scale of this model but Radimir Beseda at HISModel has reproduced it in fine detail. However, note the full scale image... https://www.rmg.co.uk/sites/default/files/cuttysark/wp-content/uploads/sites/13/2015/05/L6301-001.jpg The red fill behind the star proper and the blue ring pose interesting challenges. In the photo-etched decoration for the model there are voids where the red should be, which is something of a boon. If I paint a piece of silkspan with red paint I may be able to place it behind the star and, if I am lucky, the paint may actually "bulge" a tiny bit and fill the voids. Even if it does not, it should be visible in the voids. The blue is a matter of luck. My painting skills at that level of detail may be deficient - we'll see. It also appears elsewhere in the decoration so I pray my hands remain steady. As for Nannie Dee, there's no way I could reproduce that decoration. My daughter is an artist however, and I'll show it to her and convey the scale if for no other reason to hear her laugh derisively and maniacally.
-
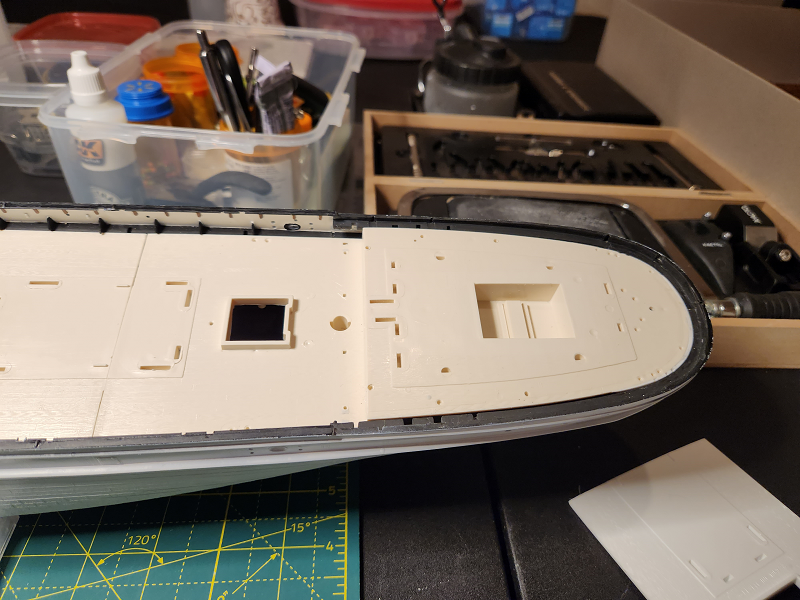
Much better, no? I will do the bump rails next. The copper line really is sharp, scaling the image gives it a bit of the jaggies. I don't think I'm all that fond of the kit-recommended color for the stand beams. I need to think on that one for a while. So I have been thinking dangerous thoughts... This model, like so many others, suffers from historical inaccuracies. Some can be overcome with accessories and ingenuity, Others not so much. But, you know, I didn't go into this to create a historically accurate model (is that even possible?) Sure it is a lofty goal but not one I want to set for myself. I'll make a nod to the insanely talented shipwrights who built this ship and add some things that are glaringly missing in the kit. Oh, yeah - those dangerous thoughts? I'm considering putting really small windows in a few of the deck houses, and probably wiring up an LED in each house that won't be visible, but the light will illuminate the windows. I may partially cover some doors with some sort of translucent material, I don't know yet. I may also wire up the running lights. I've found a great source for both the right size porthole style windows and the running lights. I've seen other running lights that are too bright but I know how to tame any of them if necessary. I know these things are not canon. Not even remotely. I hope I don't get thrown out of the Guild as a heretic 😉 I will take a cue from all of you and get some books on this marvelous vessel. I am sure that will be enlightening and very valuable.
- 248 replies
-
- 4
-
-
- Cutty Sark
- Revell
- (and 2 more)
-
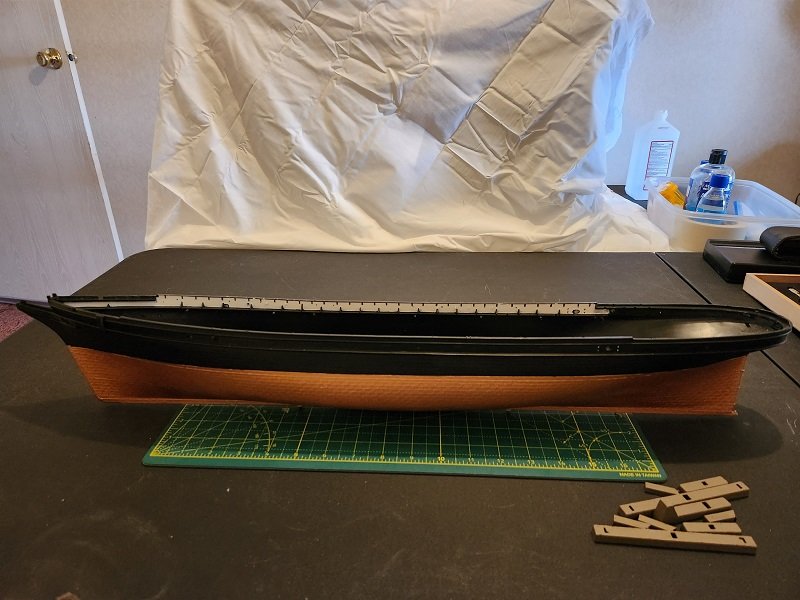
Thanks LeoM, All the best to you, too! A bit of progress to report. I finally got putty delivered so I joined the hull halves and the stern hull join seam is gone. This looks all kinds of wrong but it is just primer. I've not used primer on a plastic model, but I've also not used acrylic paint, either. So this is all new to me. A minor rant and a serious question - I am not sure whether this problem is particular to the Revell paints or is a systemic thing with all acrylics but when I thin down a batch for brushing (vs. airbrushing) the paint in the mix container skins over very quickly as I am working, I find I have to stir often to break up the skin and also be very careful to avoid getting the resulting clumps on my brush. Any advice you folks may have to help ameliorate the problem would be very welcome. I also dry fit the deck. As is common with this model, there is a gap at the stern that is too large for putty. Like many others here, I made a shim that will be painted later. Seams at the join (they're not glued yet) are irrelevant, the wood deck will cover them. Gaps at the edges disappear when the hull is gently clamped. Primer overspray will be touched up as well. Tomorrow I'll paint the hull (black and copper). The bump rails will come next, after a thorough drying. [edit] Ok, I did some research on slowing acrylic paints and it seems that for me the downsides of any of the methods outweigh the advantages so I'll muddle through as best I can by brushing aside (pun intended) the inevitable skin. This, and the pigment to carrier ratio of acrylics is almost enough to make me go back to enamel. Acrylics do very well in the airbrush though and I love cleaning up with water vs. mineral spirits.
- 248 replies
-
- 4
-
-
- Cutty Sark
- Revell
- (and 2 more)
-
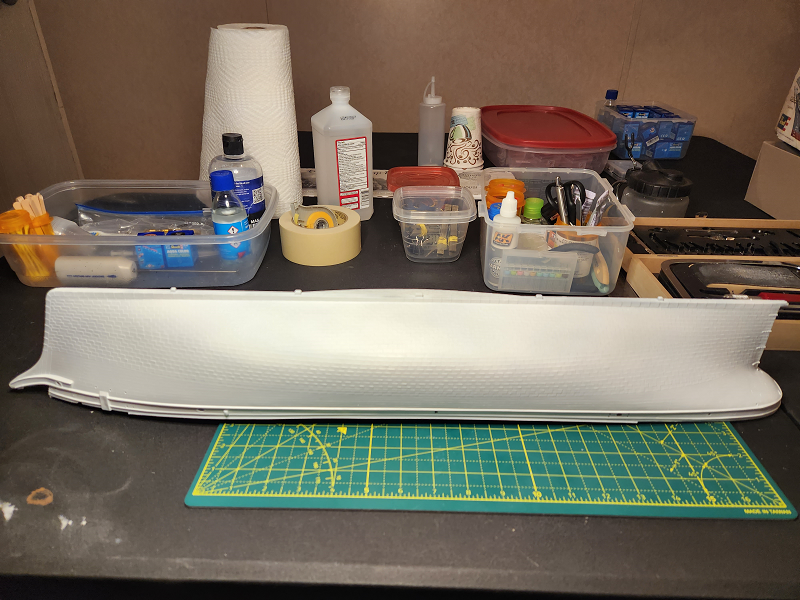
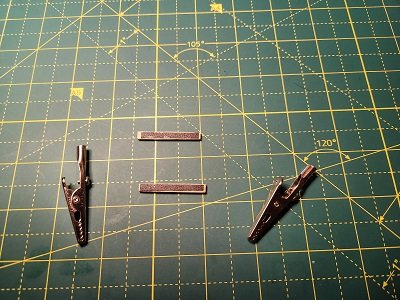
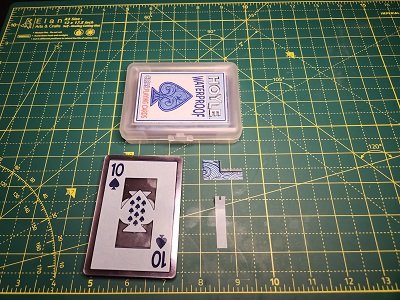
Well, Murphy is certainly alive and well. FedEx lost a package that contains stuff I am depending on to start this build (putty, primer, a few other little things). The supplier did make it right with an expedited re-shipment but it will be a week at least. In the mean time I've been studying and I am pretty much overwhelmed by the level of craftsmanship, expertise, and historical knowledge shown by modelers here. I won't name names, I don't want to leave anyone out. Suffice it to say you all have incredible talent. The bar is way too high for me, I can't possibly attain the level of realism and detail shown by many here, but I'll muddle through and hopefully make a pretty ship. Some prep work I've been doing - I made one of those really cool ratline tension tools detailed in the masting, rigging, and sails forum. This is a brilliant idea. I've also made some painting dams using a set of plastic playing cards. The cards are totally useless as a set of playing cards. Being plastic as soon as you try to shuffle them they tiddly-wink everywhere. But they make good paint dams and I can get good clean lines with them. I am going to paint the inner part of the top of the hull while I'm waiting and trying to maintain my patience.
- 248 replies
-
- 4
-
-
- Cutty Sark
- Revell
- (and 2 more)
-
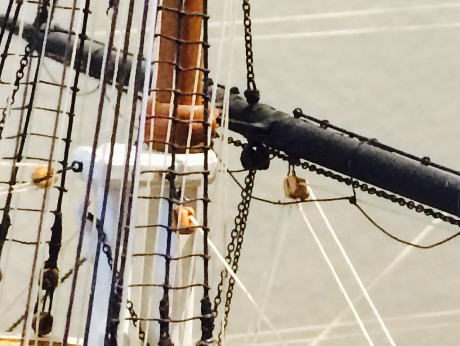
A short update - I'm still waiting on delivery of a few essentials. (Inigo Montoya voice) I hate waiting. But such are the woes of living in an ultra-rural town. The middle of Jan. seems like a reasonable target for beginning work in earnest. In the mean time I've been studying other folks' builds and have learned a bunch, and made a few choices for customizing this kit. One of those choices is the addition of foot ropes and those lines across the top of the yards that I think are hand rails or lines (?). The original is not equipped with those but I like the look. (photo attrib Richard Gentile) I'll be adding chain sheets, hanks on the jibs and stays, and a few other custom goodies as well. I found the niftiest set of micro drill bits ever. The set has bits from a millimeter down to a tenth of a millimeter (!!!) - the tiniest I've ever seen. Perfect for setting those microscopic eyelets.
- 248 replies
-
- 2
-
-
- Cutty Sark
- Revell
- (and 2 more)
-
Rather than delete the above post, I'll let it stand as a testament to trial and error. With emphasis on the error part. Very, very fortunately I have a backup set of hull halves from the 05422 kit that have a much better fit. I considered a mix 'n' match approach but the age of the H-399 kit has changed the parts ever so slightly. The 05422 halves fit much better. But, all of the flash trimming I've done on the H-399 halves is for naught. So, round two. The question of primer is still valid however. I'll be checking in as family time allows but I will be taking a break from this project until after the New Year. Until then, thank you everyone for all you are and do, and have a wonderful holiday.
- 248 replies
-
- 2
-
-
- Cutty Sark
- Revell
- (and 2 more)
-
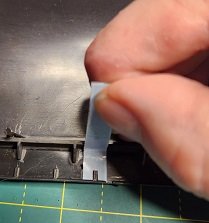
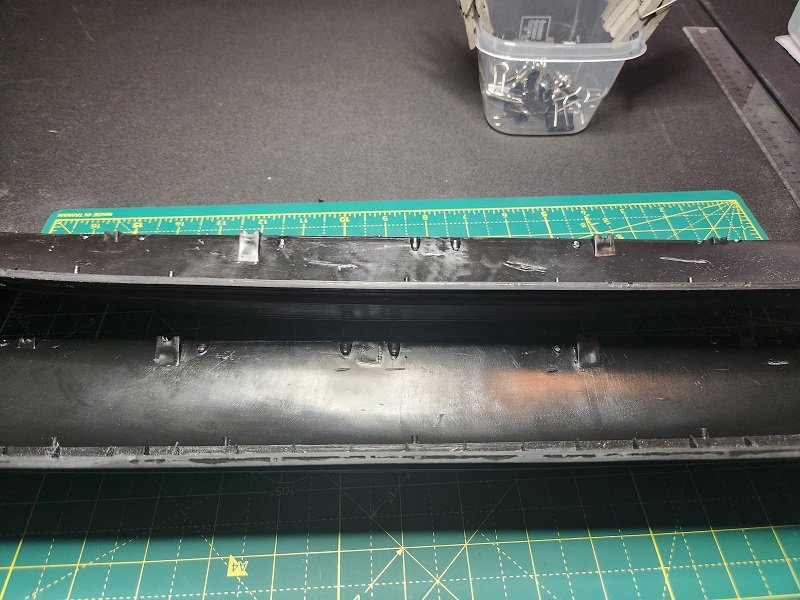
I've been dry-fitting the hull, sanding some areas and trimming flash. It is far from done. The stern joint is going to need some putty because I can't fix the gaps with trimming or sandpaper. Ignore the misalignment, I can fix that easily enough - the halves are simply held with clips at the moment. The deck rails seem to be a bit problematic. I think the camera makes these lands and grooves appear deeper than they really are. The unevenness is not detectable with my fingers but I think it may be visible after painting. They are certainly not significant enough to warrant putty but I have heard that primer hides a multitude of sins. I've never used primer on a plastic model, and have had no issues with adhesion (so far). If I use primer on the hull, will it obscure the wood grain and copper plating detail as well? Is there a better approach? Oh! And happy holidays to everyone!

- 248 replies
-
- 1
-
-
- Cutty Sark
- Revell
- (and 2 more)
