VitusBering
-
Posts
297 -
Joined
-
Last visited
Content Type
Profiles
Forums
Gallery
Events
Everything posted by VitusBering
-
 Have you tried the AK site itself? I don't know about generations but it seems that the manufacturer should have the latest... https://ak-interactive.com/product-category/paints/
 -
These are so finely tipped that they will cause a bleed if you happen to get poked by them. Definitely the finest metal tipped tweezers I've ever used. They come with protective sleeves and I am glad of it. https://www.amazon.com/dp/B092VT3YVD?ref=ppx_yo2ov_dt_b_product_details&th=1
-
Thanks Mike - that is my Plan B. I would rather have a removeable plug but I'll hardwire it if necessary. An RJ45 Ethernet connector is a possibility but I am going to keep trying to find something less obnoxious 🙂 [edit] I did find some USB-C connectors that look nice and are not overly large. Problem probably solved.
-
I just used Birchwood Casey Brass Black on a test batch of tiny brass parts (leftover stanchions, fittings, etc.) and I am very pleased with the result. It was my first time blackening and it worked out really well. 50/50 mix of blackener and distilled water after cleaning the parts with IPA. In both cases, I shook up the container really well. I rinsed in distilled water and left the parts to dry on a lint-free shop towel.
-
How are you planning to get power through the hull for lighting? For my own Cutty Sark build I only need 5 contacts for getting power to the nav lights and three deck houses and I am having trouble locating a suitable through-hull connector. I did find one from Miniatronics that was almost good enough - tiny and aesthetically pleasing but only 4 contacts max. I could put a couple or all of the houses on one circuit but I don't want to, so.., what are you using?
-
Definitely check out Hof00's build log, he's a master. Also have a look at Bruma's CS build log - he reinforced the pin rails with bracing against the main rail. In my build, I may do the same, but I did find that glue along the length of the pin rail was quite strong. I did however, and will do again, replace the plastic belaying pins with blackened brass. Just out of curiosity, what are yours made from (I'm not familiar with that kit)?
-
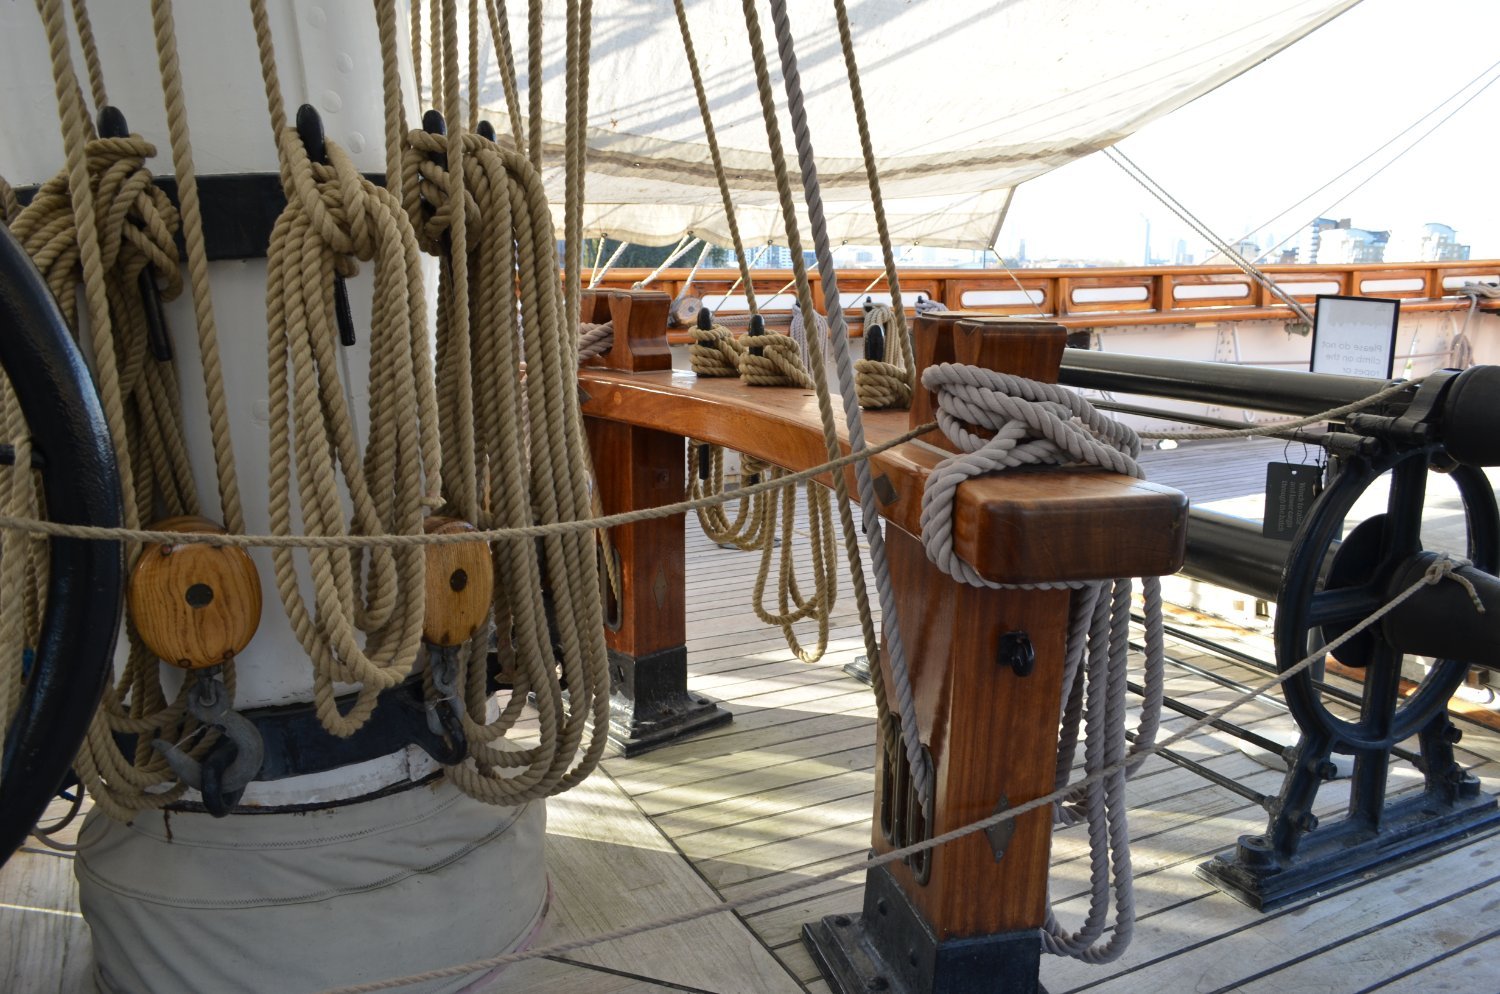
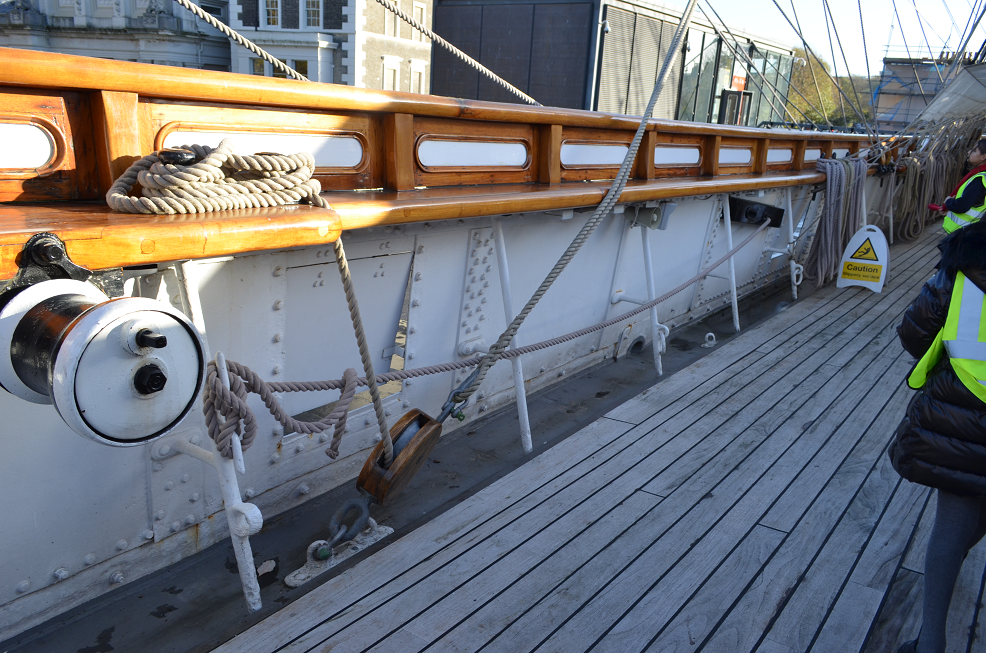
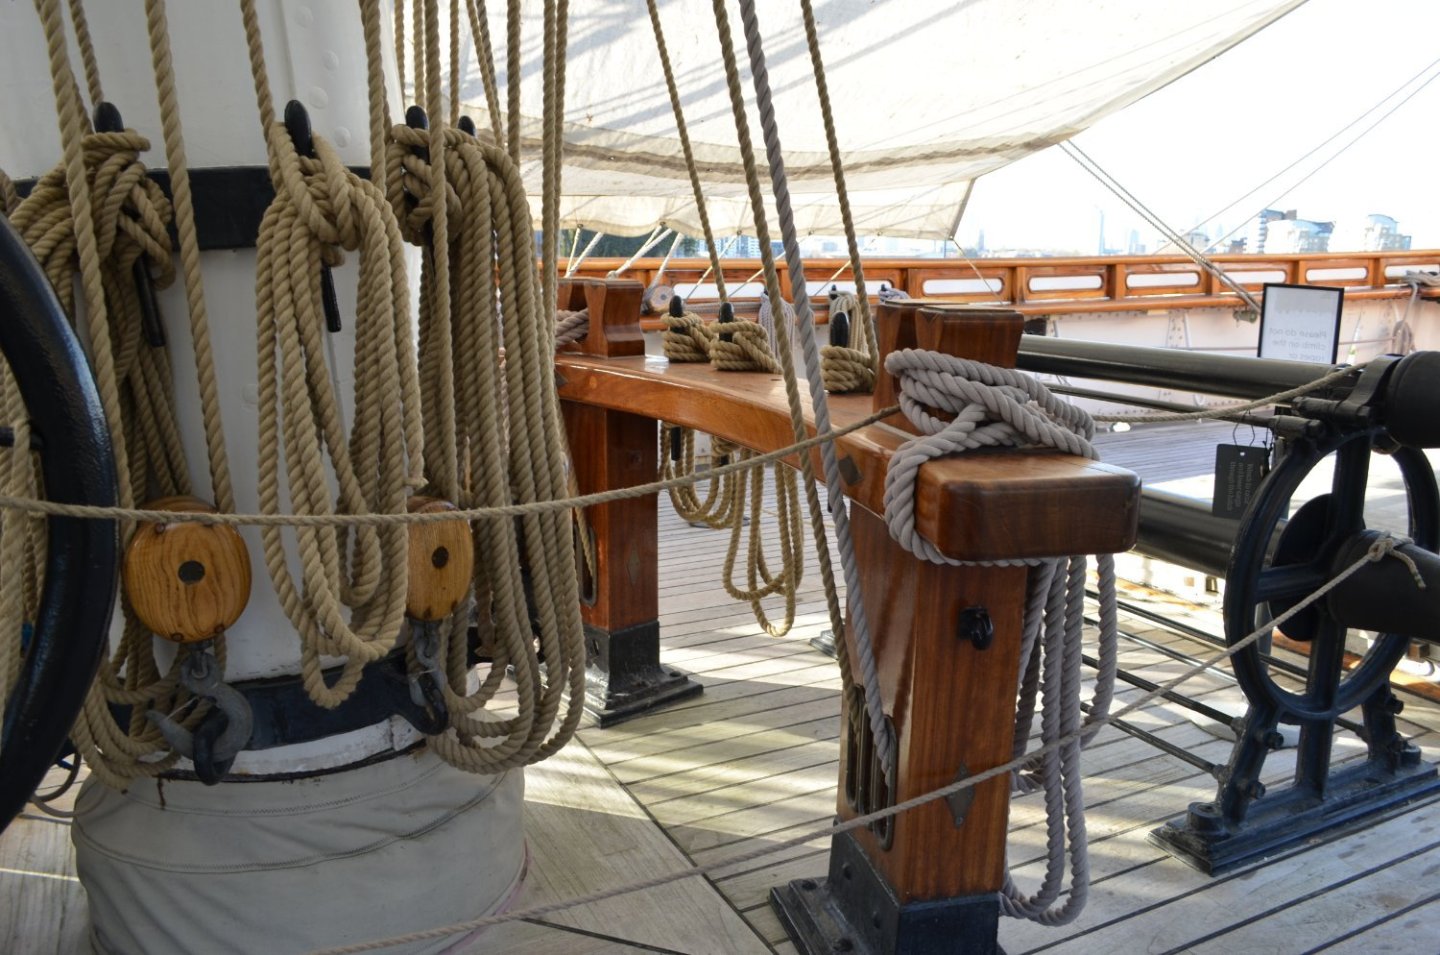
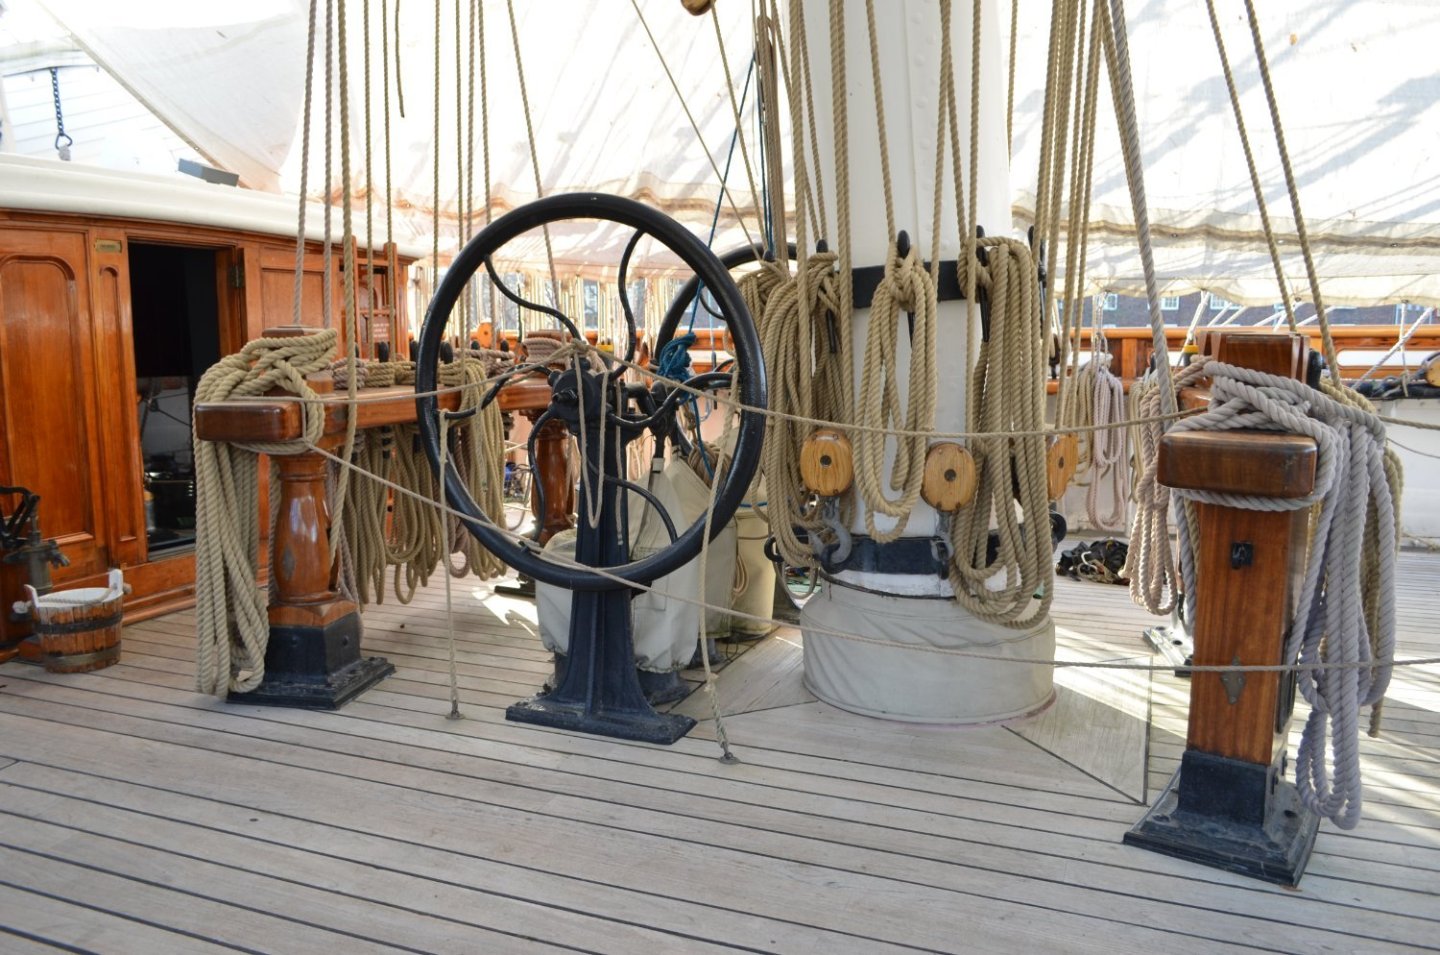
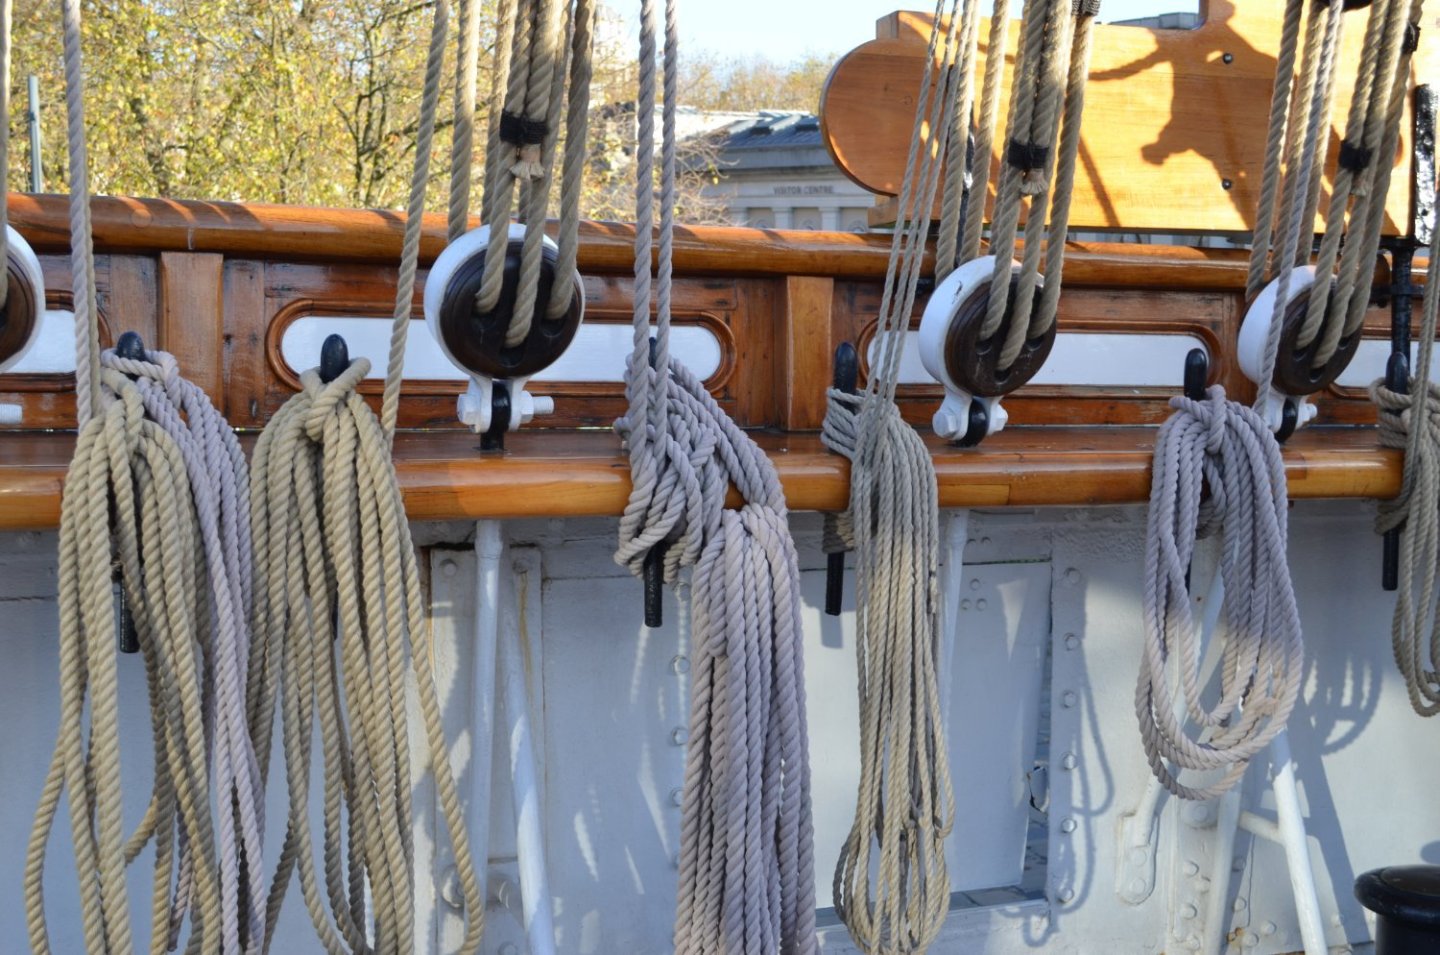
Aye. Here's an example from the full scale ship. And clippers, with their built-for-speed hull geometry, were known for being some of the "wettest" ships on the sea. Dangerous, too, in rough seas. It sure makes for a handsome vessel though, in my opinion.
- 47 replies
-
- 2
-

-
- Cutty Sark
- Artesania Latina
- (and 1 more)
-
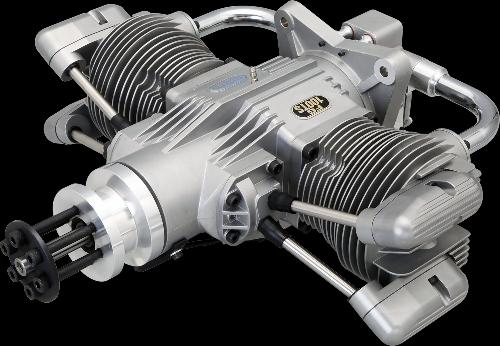
I took one of these apart because a hard landing in mud goobered up the innards. It doesn't have reference marks for rocker and valve timing so I couldn't get it back together right after dozens of tries. I put the hundreds of parts in a bag and took it to my flying club meeting. Those ever-so-helpful folks gathered around, clucked their tongues and, to a man, said "you poor b*****d". I sent it off to Saito and they re-assembled it at no charge aside from shipping. The only thing I can find to illustrate the small scale is a video.
-
Following with interest. Beautiful work so far.
- 47 replies
-
- 1
-
-
- Cutty Sark
- Artesania Latina
- (and 1 more)
-
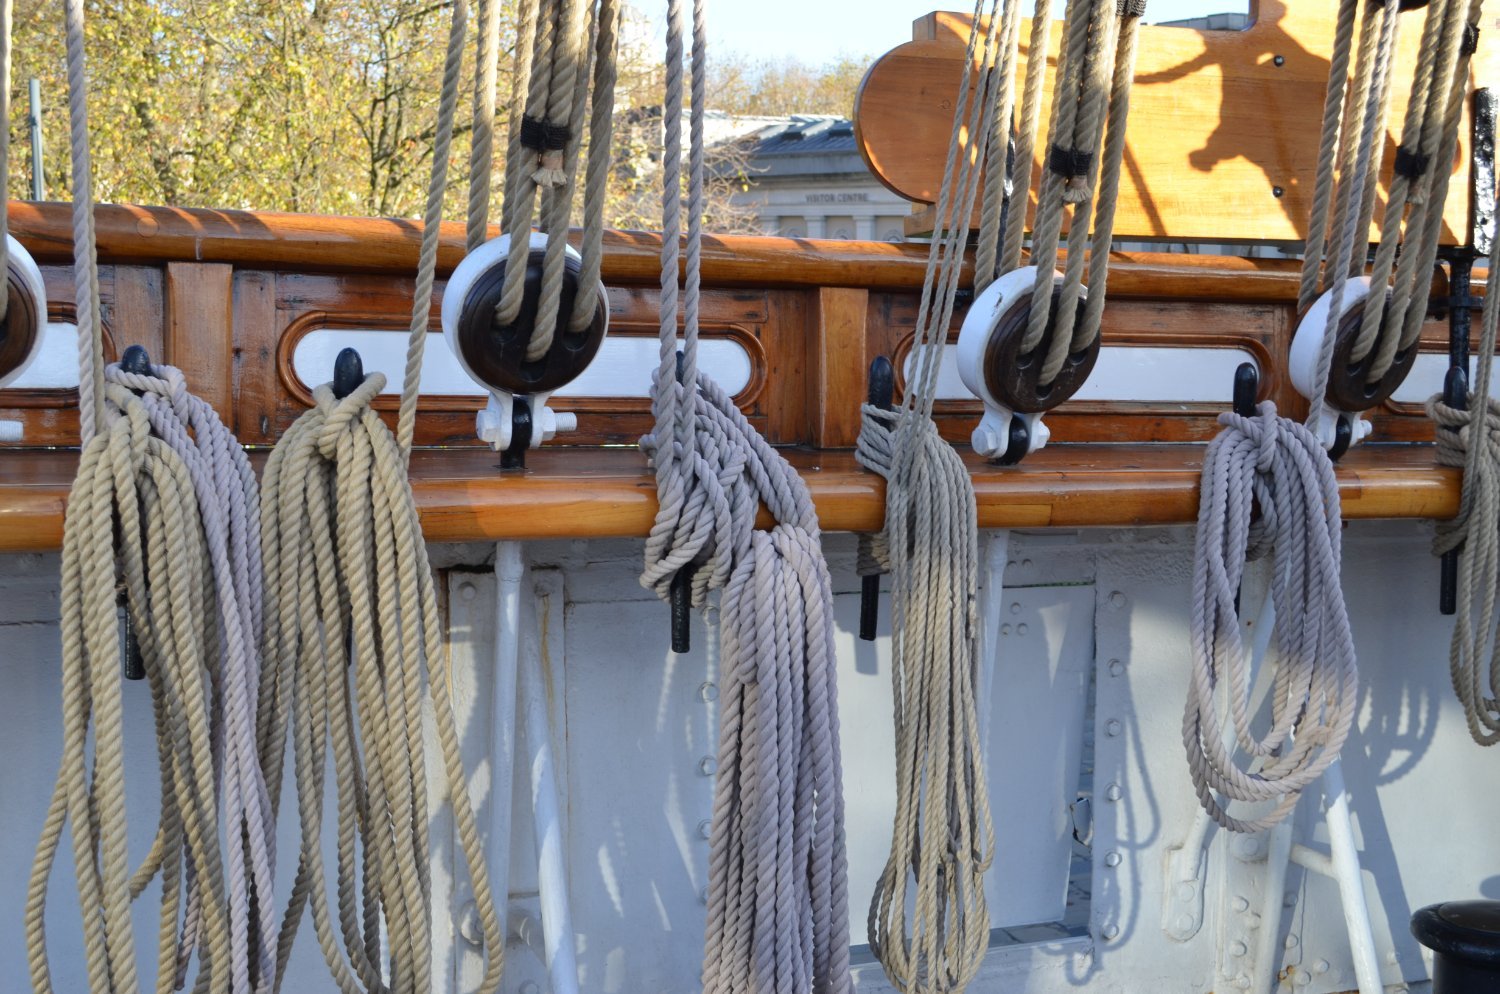
Addendum... the full scale vessel actually has two mast bands - one with the thumb cleats as in the model, another with eyes. I haven't deciphered details about what is anchored to most of them. Also, too... many of the lower deadeyes are attached to their chain plates with metal bands painted white. It isn't practical to replicate this on the model but I am considering some ideas. I thought maybe a small gauge insulated wire (white insulation) could simulate the metal bands but that means reworking my ideas for attaching the deadeyes to the pin rail. It is something I'll mull over. I could also simply use white rope, or paint whatever rope I do use. Lots to consider.
- 248 replies
-
- 1
-
-
- Cutty Sark
- Revell
- (and 2 more)
-
Great info, Snug Harbor Johnny, thank you again. I, too, will stay with the molded spars with some modification - Flemish horses, footropes, and jackstays (last time I did those with flat strips, this time they'll be round - I'm still not fond of using brass wire for those, the Evergreen rod should do nicely). I plan to follow Hackney and Underhill fairly closely when it comes to running rigging, using chain where appropriate and lots of custom blocks and pulleys, I really like how Bruma did his, and Hof00 as well. There are other great examples around here, too. The molded sheaves seem plenty large enough to accommodate rigging options. The mast band is fairly sturdy and will suffice for me depending on the gauge of the rope I'm using for that - we'll see. I have plenty of padeyes in various sizes (some PE, others stamped) if I want or need to put some on the mast or in the deck. I would be cautious about putting them in the deck near the mast bases, those locations are crowded already 😉 That being said, have a look at Richard Gentile's Flying Cloud model, where the bases of the masts have a lot of padeyes with blocks and sheets attached. But that vessel doesn't have fife rails so they're kind of necessary, I think. It is a quite nicely done model. https://www.flickr.com/photos/135292470@N02/albums/ When it comes time to deal with the spars I do want to use chain for the yard slings and those will have to be set up before the mast parts are assembled. There is an eye on the mast where they attach but it isn't big enough for chain and it is fairly inaccessible when the cheeks have been installed. I think I plan to run rope through the eye and the slot in the cheeks to prep for the chain before the cheeks are installed. Just another one of those things that didn't manifest until it was too late in my last build. There are, if I recall correctly, a few other instances where putting eyes on the mast may be necessary or at least convenient. I'm not sure about that yet, but I will know them when and if I see them. I'll certainly share with you via the build log any insights or revelations I may gain or encounter, and I do thank you very much for your sharing of your own. I agree with you completely about waiting to glue in the masts until very late. Removing them after standing rigging is installed would be non-trivial but doable, and the Tamiya glue wicks into spaces and welds the plastic so when it does come time to set them, they don't need to be removed.
- 248 replies
-
- 1
-
-
- Cutty Sark
- Revell
- (and 2 more)
-
Agreed, wholeheartedly.
-
That may be the most important lesson I learned from this truncated build. Every component - the decks, the rails, the masts, everything - needs to be carefully thought out with as much foresight as possible. I agree with you totally about pre-installing many of the deck components before the decks are installed - it goes for the main deck as well as the fo'c'sle and poop. I'll be paying even more attention to the pin rails this time than last time. I did install brass pins last time but I painted them, this time I'll blacken them. Also, I've revised my plans for the blocks and deadeyes that are attached to the rails - I'll drill holes in specific places in the rails before they're installed to allow for fastening the deadeyes and/or blocks - all before the pin rails are attached to the main rail. [edit] More on the pin rail thing. Last time I shaved off the kit-formed pins and drilled holes for the brass pins. That worked out OK but the deadeye and block installation was more problematic. I am considering scratch-building pin rails from Evergreen sheets of the appropriate thickness - all I need is an accurate shape and I can do that easily enough. Then I can mark and drill holes for the pins and other components and not have to wrestle with the existing pins. I'll still have to remove the plastic pins in the fife and other rails, but that certainly is doable. I won't glue in the fife rails, either, until time to rig. There are lots of pre-assembly things like that. I'll assemble the masts piecemeal, lashing shrouds and installing blocks and deadeyes and other rigging components in the tops and crosstrees before the next segment is installed - that sort of thing. Same goes for spars. I put mine on tragically early last time to disastrous result. I want to configure them well and also have virtually all of the standing rigging done before the spars are attached. Padeyes in the deck are a bit less of a problem for me, the kit ones worked out well last time - they didn't pull out or break. I also completely agree with you about the books! Hackney is a good resource and I have found that the Underhill Masting and Rigging book to be a true treasure trove, as are the two volumes of the Longridge books.
- 248 replies
-
- 1
-
-
- Cutty Sark
- Revell
- (and 2 more)
-
It helps immensely, thank you very much for the details. Again, you're doing wonderful work!
-
Thank you Snug Harbor Johnny and I'll be following your Thermopylae build with great interest. I am, to be honest, more fond of that ship than I am the Cutty Sark (the full scale versions of them). Her lines were more attractive, her story is more interesting, lots of reasons. It is tragic that she's been treated so poorly by history, her owners, and model kit makers. I've learned an immense amount during this build. I do hope I can apply those lessons to positive result.
- 248 replies
-
- 1
-
-
- Cutty Sark
- Revell
- (and 2 more)
-
What brand / model of voltage regulators are those? There are dozens of choices on Amazon with subtle differences. Also, if you're so inclined, I'd like to know what LEDs you use and whether you added resistors to the leads. Thank you, and I love the work you've done so far.
-
Enamels (especially Testors) work really well in airbrushes. Are the Tamiya acrylics you use the oil-based ones? I've heard they're good. The main gripe I have with water based acrylics is instantaneous drying time. It manifests in two very annoying ways. First, a skin forms over it in a mixing container (again, almost instantaneously). That skin has to be "scooted" out of the way (filtering doesn't work) before the underlying paint can be used in any way. Second is tip clogging and granulation in airbrush use. The nozzles clog very quickly regardless of thinned consistency and the sprayed paint is very sensitive to the distance from the subject. One half an inch too far away and I get pebbles on the surface. I've learned to deal with these annoyances, mostly, but they're still very aggravating. I complain bitterly about Revell paints and they deserve it - they're the worst of the lot by far - but all acrylics (the water based ones, that is) have the same shortcomings. Revell compounds the problem with terrible quality control. I have said before, I have ostensibly brand new boxes of paint that are quite literally the consistency of peanut butter.
-
One step ahead of you, my friend. I've salvaged about all I can from the carcass and leftover parts but I've saved it all. I unloaded the whole works from the trash bag I had it all in and transferred it to a box. As for the stanchions, I've ordered a whole new set from HiSModel -- two in fact since Radimir packs just enough (with a single one as a spare). I also got a couple more sets of brass belaying pins, too. I still have some unused ones but more is good, especially since I plan on blackening those. I won't blacken the stanchions, I probably won't even paint them. Like you, am quite fond of the look despite it not being "right".
-
Thank you George, these are definitely things to consider. Your advice and others have convinced me that priming the sprues is probably a bad idea. I primed the hull the first time around and it didn't seem to make much of a difference. I am not going to brush many parts at all - it is unavoidable in some cases but brushes and I do not get along at all. I'll airbrush every part I possibly can. I will clean all parts well with a mild solution of dish soapy water and also clean them with IPA just before painting - all the while wearing gloves and using surgical-room clean instruments. Ok, that's overkill but the general idea is to be really careful about oils and other contaminants. As for Testors paints, I'm still on the fence about enamel - I am leaning that way though. Cleanup is a big pain and that's a factor, as is drying time but adhesion, color selection, durability, and great airbrush performance are definite selling points for enamel. A paint pen may come in handy. I've seen them advertised but never used one. I'll keep it in mind if tricky situations arise. Thank you very much for your kinds words and support.
-
Thank you Bob - this will prove very valuable. I'm shopping for paints as I write this, no decision yet except to avoid Revell. Several other brands seem reasonably attractive. I am leaning heavily toward staying with acrylic paints because of the convenience but enamels are still an option. The instruction variations feel familiar - but I have my own approaches using a combination of techniques "borrowed" from other build logs here and some of my own invention. One of the biggest deviations from my aborted attempt is to not assemble most things until absolutely necessary. Everything, from the hull proper to masts, spars, pin rails, even deck gear - everything - need to be carefully cleaned, trimmed, and examined / prepared for subsequent steps. I'll also heed far more closely advice from experts here. I am confident this time around will be far better. Kits have been shipped, arriving soon. I'll need to wait longer for some of the accessories - the Czech Republic is a ways away 😉 I'll have tons of questions before I even open the boxes. For instance, I'm considering priming every part - the hull and the sprues in their entirety. Is that a good idea or no?
-
Thanks George. My wife suggested a Viking funeral and I must confess the notion was attractive. But, I did salvage what I could from the carcass and I did keep it (in a trash bag because I don't want to see it). If I feel it will help, I'll un-bag it and have a look when the need arises. Thank you for your advice and kind words.
- 248 replies
-
- 2
-
-
- Cutty Sark
- Revell
- (and 2 more)
-
Thank you very much Harry. The new kits are scheduled to arrive on the 20th, bit more than a week from now, nominally. I can at least start a new log then, but only trivial prep work will get done as I need to wait on delivery of other stuff. I'm in no hurry though (item number four on my list of things not to do). Thank you again!
- 248 replies
-
- 1
-
-
- Cutty Sark
- Revell
- (and 2 more)
-
Thank you all again for your kind words and support. I will re-name this build log to append the abandonment and will start a new one when it gets properly under way. [edit] I am unsure how to change the build log title. The only action available seems to be to delete the log. I'll try messaging one of the moderators to see about other options.
- 248 replies
-
- 2
-

-
-
- Cutty Sark
- Revell
- (and 2 more)
-
After much soul-searching, wringing of hands, lots of spirited discussions with my better half, and a cascade of disheartening setbacks in the build process, I have reluctantly decided to abandon this build. The model is probably salvageable but frankly I don't want to try. It isn't mortally wounded per se but I did accidently knock loose a couple of spars and I also inadvertently cut more than one ratline shroud while trimming excess rope. The reasons I am not excited about devoting time and effort into repairing and continuing this build are many and varied. Top of the list is that I'm very unhappy with the paint. The pigments are awful (I mean baby diaper color awful), the Revell brand of paints are not consistent and regularly unusable right out of the box. Some other paint problems are of my own making such as using a brush where an airbrush would produce far more pleasing result. There is more, of course. I have over twenty pages of notes about what to do and what not to do for the next build. Blackening brass instead of painting it, heeding other builders' advice more diligently (!!!), severely restrict my use of CA glue, and a host of others. Many of the mistakes I've made I've done by being too hasty and forging ahead in areas where I knew I needed to study first. The kit has flaws, to be sure, but they're generally well known and examples of overcoming them are common in these build logs. I've already ordered two new kits (both are the 2017 05422 version). I've also ordered a cherry-picked subset of HiSModel accessories - some I've consumed in this build and some that I think I may need more. I haven't decided on paint yet - I'm leaning toward Vallejo but that's not carved in stone yet. I feel quite badly about this, mostly because I feel I've somehow let you folks down. I know that's not the case still the feelings persist. I hope you all know you have been and I'm certain will continue to be an incredibly invaluable resource and source of inspiration and enlightenment. I don't know what to do with this build log. My inclination is to delete it but I don't know what the rules or protocols are for this sort of situation. I will certainly begin a new build log when I embark on round two, but I am unsure of when that will begin.