


VitusBering
-
Posts
297 -
Joined
-
Last visited
Content Type
Profiles
Forums
Gallery
Events
Everything posted by VitusBering
-
 Oh, my yes. I'll be starting on the foremast ratlines today and that means wiring up 20 of those tiny wooden deadeyes. I do have a nice jig I've cobbled together and a plan for installing them - but you know what they say about plans. It will all work out, I'm sure. Thank you again.
- 248 replies
-
- 3
-

-
- Cutty Sark
- Revell
- (and 2 more)
-
Thanks George. I've started at the bow, with the foremast stays and head gear rigging. I may take an alternating approach and go aft after these few are done. Though I haven't started on shrouds or ratlines yet, access seems fairly easy so far. I didn't install the trailboards yet and I'm glad I didn't - there are eyes under there that would be nigh impossible to reach. I also haven't glued down the fife rails, there are a few stays that would be hard to reach otherwise. This is great fun. I am sure I'm doing some things that are not canon - I have a semi-limited set of rigging ropes (the Amati set that was supplied by HISModel). The ones I'm using look right and I suppose that counts.
- 248 replies
-
- 1
-
-
- Cutty Sark
- Revell
- (and 2 more)
-
Hey, another bubblehead. I spent six years on boomers from '77 to '83. Welcome aboard.
-
Oh, well OK then. I don't think the yards will get in the way, at least until I start working the running rigging. I did consider adding blocks, pulleys, and maybe more before installing the yards but there are too many unknowns for me. Maybe next time, when I am more sure of what gets connected where, that will be the way to go. For now, I'll hope for the best and learn as I go.
- 248 replies
-
- 3
-
-
- Cutty Sark
- Revell
- (and 2 more)
-
Thanks Harry! Running rigging and braces will definitely be after standing rigging and ratlines. Starting from aft - that wouldn't have been my first choice but when I think on it, it makes sense. I am not sure what works for me, by the way -- I've never really done this before. I did build this kit almost 40 years ago but it was, quite frankly, a mess. It looked OK but only to a naïve eye. I'm glad you folks are here and so willing to share expertise, I couldn't do it without you. This model is not destined for a display case, either. Oh, I'll do my best and it will most definitely be better than the last but I have lot of notes about what to do and, more importantly, what not to do next time. That being said, I am having more fun doing this than any other hobby I've ever tried. So... onward and thank you again.
- 248 replies
-
- 2
-
-
- Cutty Sark
- Revell
- (and 2 more)
-
Now the fun begins in earnest. I'm unsure whether to start on ratlines or standing rigging first.
- 248 replies
-
- 3
-
-
- Cutty Sark
- Revell
- (and 2 more)
-
I do have the Underhill book and I'm studying it even as I read your post. Thank you very much for the info. I'll try to use the books and museum drawings I have to answer questions but I am sure glad you and the rest of the folks here are... here 😉 Thanks again!
- 248 replies
-
- 1
-
-
- Cutty Sark
- Revell
- (and 2 more)
-
Thanks Ian. I think I'm just trying to get over the jitters. I am going to attach the spars and go from there, probably starting with the stays. I'll have questions - for example the instructions don't show how the lower foremast stays that run from padeyes on the fo'c'sle to just under the mast top are tied off to the mast. I need to look closely at other build logs and I'll figure it out eventually.
-
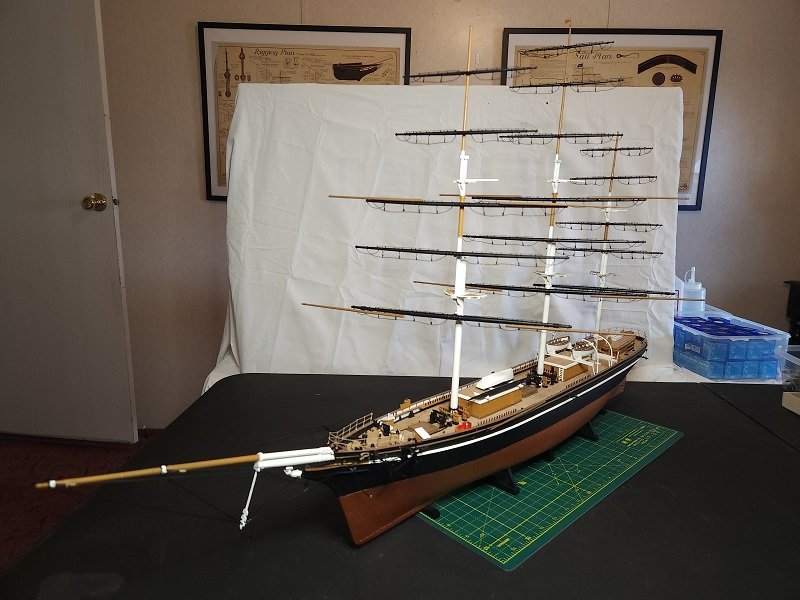
All of the spars are finally gussied up with jackstays, footropes, and Flemish horses. The masts are planted. I'm hesitant to attach the spars to the masts right now, it seems too soon. Something tells me I should be working on stays or ratlines or both before attaching the spars. None of the kit instructions are of any use, neither old nor new. What do you folks think?
-
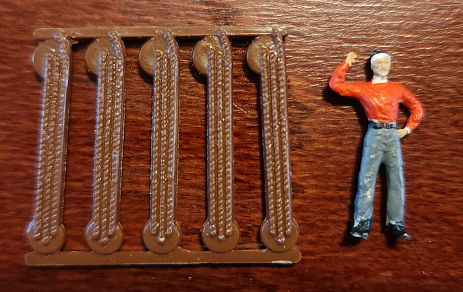
Thanks Ian! The rails in my example above are for the ratlines and they are really long. The others are shorter but none of that matters since I'm not using them. Here's a comparison with one of the guys from the kit. I painted him for practice and to use him as a guide to ensure my footropes weren't inordinately outsized. Since I'm not using the kit parts I can space the rails as far or near as I need. You were pretty spot on at 7 ft. or so, it seems.
- 248 replies
-
- 2
-
-
- Cutty Sark
- Revell
- (and 2 more)
-
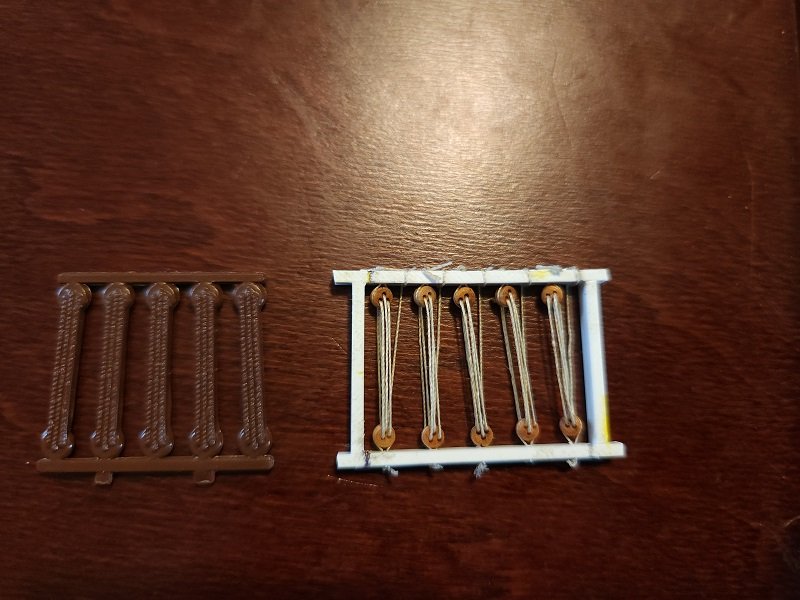
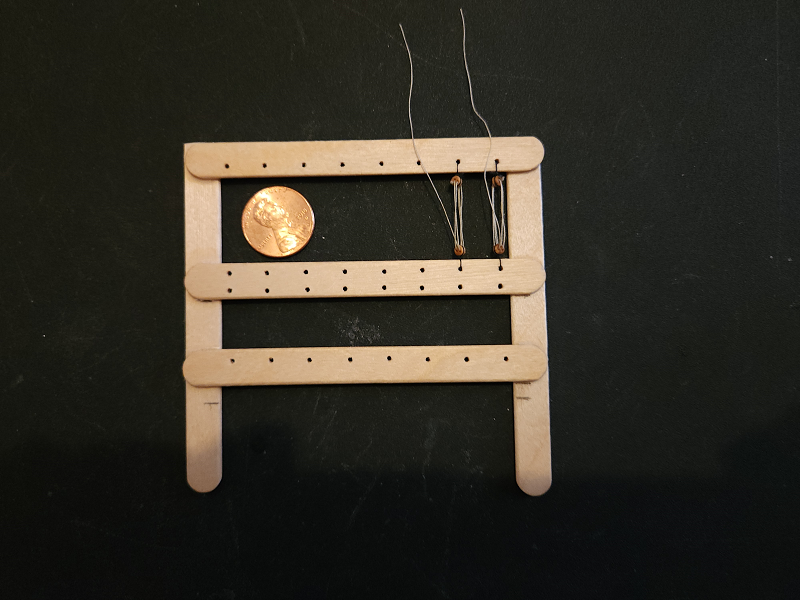
So I'm in a holding pattern of sorts again - waiting on PE pad eyes to finish the stirrups for footropes. They're about half done but I ran out of those tiny pad eyes. I'm also waiting on styrene strips but that's not a blocking delivery. They're for the deadeyes that will line the railing once the rigging gets under way in earnest. This is my deadeye jig MKII. This one shows much more promise than the last. The top rail will be about a third of this thickness. The bottom will have tabs added to align the rail, and both top and bottom will be trimmed at the marked lengths, discarding the vertical spacers. The kit's faux deadeye setup is pictured for comparison. The rails will be painted and the whole kaboodle will be tidied up of course.
- 248 replies
-
- 2
-
-
- Cutty Sark
- Revell
- (and 2 more)
-
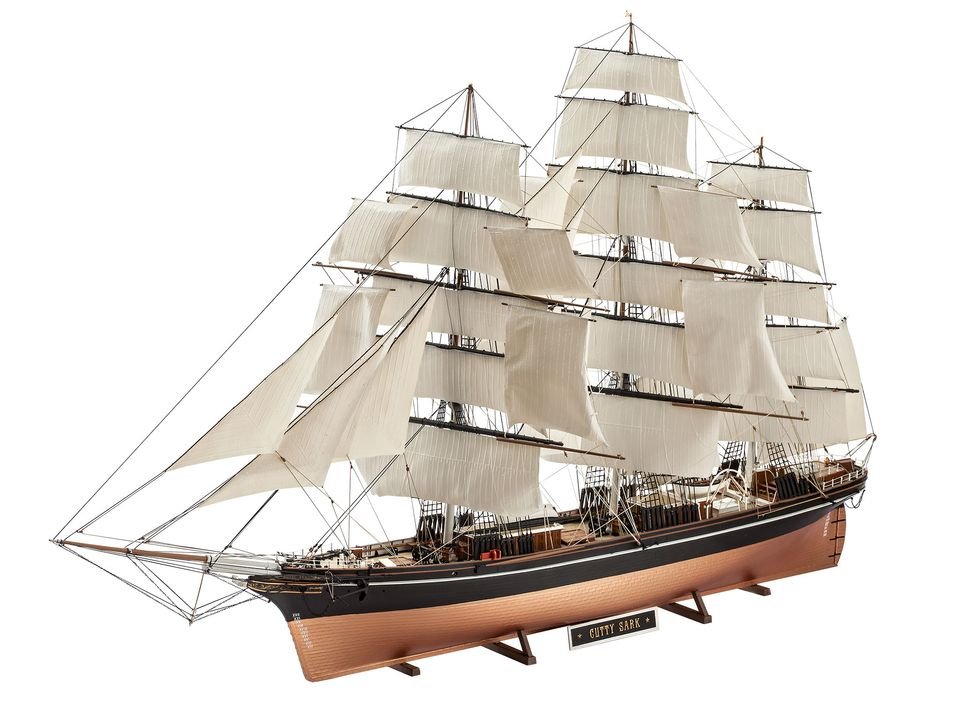
Thanks folks; I will re-think adding blocks and pulleys before mounting the yards. I will have to do quite a bit of study - both in books and build logs, to determine which blocks to use and where to put them. I've mentioned that I've built this Revell Cutty Sark before, in the mid-'80s. It was a hasty build and I didn't have a clue about the vessel or anything about model ship building. It was an accident. Here's how it happened. In the early '80s I was a vain and clueless yuppie embroiled in the dot-com boom in the S.F. bay area. (I grew out of it, eventually). One of the side effects of that lifestyle was the peer pressure to have All The Things. One concession I made to that pressure was buying a new car. I got a brand new Mazda RX-7 GSL-SE. I bought it as a status symbol but pretty rapidly fell in love with the car. It was a pure joy to drive. I eventually sold it when driving a tiny sports car became impractical but I never lost my love for that auto. But I digress. A few months into ownership of that car I went shopping hobby shops for a plastic model of it to display on the mantel. (I did say I was a vain bugger, didn't I). I looked high and low to no avail. However, one big box caught my eye. I'd never seen a model ship that large and for that reason alone I bought the kit and built it - again, rather hastily. It was barely presentable when finished but I kept it around. I wasn't very sad when it was destroyed by fire but I did mention to my wife more than once that the build process was one of the highlights of that time (we hadn't met yet). I was looking just the other day on a hobby site for a new set of tweezers. My current ones are not hobby-centric and a bit unwieldly. To my surprise I found an ad for an '83 RX-7. Mine was an '85 but the bodies are identical. So I've snapped it up and it will languish on the shelf until I get around to finding the time and inclination to put it together. I'm not exactly sure why I did that - nostalgia maybe. At some point, I'm going to have to find a way to duplicate the root beer color of my RX-7 and maybe make some customizations to create an identical replica - moon roof, body insignia, Pirelli tires, etc. Sorry for the long winded non sequitur. Back to the shop, where I have three spars fixed up with Flemish horses and footropes. Thirteen more to go...

- 248 replies
-
- 6
-
-
- Cutty Sark
- Revell
- (and 2 more)
-
Good to be aboard. Greetings from Alberta, Canada.
VitusBering replied to Al Litchfield's topic in New member Introductions
Sorry to butt in -- HAMMS is the Historic American Merchant Marine Survey. They're a branch of the Smithsonian Institution (that's the S.I. part). https://sova.si.edu/record/NMAH.AC.0240 https://americanhistory.si.edu/archives The Institution is a great resource. -
Paint finally arrived day before yesterday. My spars have been painted and are now dry so I'll be adding Flemish horses and footropes prior to installing them on the masts. I've studied several build logs here and noted that a few folks add blocks and pulleys to the spars before mounting them but with my inexperience regarding the rigging of this ship I'll add those as they become necessary. And Underhill's "Masting and Rigging the Clipper Ship and Ocean Carrier" arrived as well. That thing is a true gem.
- 248 replies
-
- 1
-
-
- Cutty Sark
- Revell
- (and 2 more)
-
Good to be aboard. Greetings from Alberta, Canada.
VitusBering replied to Al Litchfield's topic in New member Introductions
I did a Google search for four-masted barkentine Fullerton. I found a number of articles referencing the Fullerton - a court filing detailing a collision between a freight car ferryboat named Transit and the Fullerton, which is described as a four-masted barkentine 235 feet in length in this article and as a ship of the same configuration acting as an oil freighter operated by Union Oil in another article. The articles hint at available images but I didn't go very far down the rabbit hole. The court document is very interesting reading. Oh, and welcome aboard! -
I looked through the Longridge books and the issue doesn't seem to be addressed directly. In Vol. 2 chapter 2 he does mention that Kipping's "Treatise on Masting and Rigging" has details from which most of the measurements and design elements Longridge uses are drawn. He also says it is not an exact science, that commercial vessels varied from builder to builder in masting and rigging elements based on experimentation and experience. If I had to guess, and I can certainly do no more than that, I'd say the variance was unintentional in the drawings.
-
In this kit, the lower stuns'l booms are below the spar and the upper ones are above the spar.
-
Thanks George. My jackstays are largely cosmetic. They're made from .010 x .020 styrene strips attached to pins that Revell molded to the tops of the spars. The pins are very small and offer no real structural support. I'm going to make it look like the sails are attached to the jackstays but it will be a lie. (shhh, don't tell). 🙂 Letting the stirrups hang from the spars will be fairly historically accurate - perhaps not for this vessel but the period, at least. I'm going to make them from rope - the test I've done shows that the rope (when stiffened) hangs just where I tell it to do. The eyes at the end are marvelous little (and I do mean little) metal eyes from HISModel as part of the accessory package for this kit. [edit] as an aside - I do plan to make another instance of this kit at some future time. I've been taking notes about what to do differently then and the jackstays are on the list along with a growing list of other changes.
- 248 replies
-
- 1
-
-
- Cutty Sark
- Revell
- (and 2 more)
-
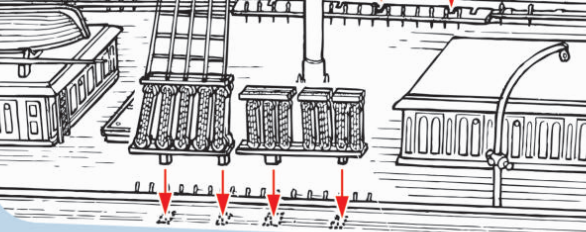
Thanks for the clarification Rob. I'll make sure the horses are anchored at or near the end of the spar. I knew that test stirrup was too long, and mentioned it I think. The footropes will be appropriately shallow. Oof, that first illustration. Way too close to having green water over the bow and those souls are in the rigging. It is a dangerous way of life.
-
Proof-of-concept test for a deadeye jig. These are the two most common lengths in this model. I'm not sure about the usefulness of the jig quite yet, it will be some time before I'll be installing deadeyes . I'm just sort of tooling around waiting on paint delivery (early in the week, yay!) so I can get spars mounted. Yet more foolin' around. A practice horse and stirrup on a scrap spar. The stirrup is a bit long but that's why we practice.

- 248 replies
-
- 7
-
-
- Cutty Sark
- Revell
- (and 2 more)
-
That's an intriguing idea but well beyond my skills - I can't imagine rigging on spars that may change angle and therefore lengths and positions of myriad elements. The parts are certainly capable with minor modification, but I am definitely not up for it. I have and will continue to study others' builds - they're incredibly valuable. I can't hope to match the craftsmanship in those builds, at least not in this round, but the learning experiences from this build will not go to waste.
- 248 replies
-
- 1
-
-
- Cutty Sark
- Revell
- (and 2 more)
-
Thanks Rob. This should be a fun challenge getting it right.
-
I do intend to rig it with sails. Browsing the Longridge books it appears that you have the right of it - the upper yards are marginally more on the wind than the lower ones while under way. I'm not sure I'll accomplish that tiny difference between them but I don't believe it would be noticeable in any case. I do agree that the angled offset does look better, and will mount the spars in that fashion.
-
The first half of my backordered paint shipment (white and a couple of shades of brown) arrived yesterday so I was able to get the masts painted and assembled. The second half (black, silk finish) has been shipped so it won't be long before I'm able to finally mount the spars. On that note, I'm unsure whether to set the spars perpendicular to the centerline, or offset at an angle. The 1974 kit instructions show them set perpendicular and the 2017 kit instructions show these positions as optional but give no guidance at all about which to choose. I'm leaning toward an offset, what do you folks think?
