VitusBering
-
Posts
297 -
Joined
-
Last visited
Content Type
Profiles
Forums
Gallery
Events
Everything posted by VitusBering
-
 Wow, Rob. Five times. That's something to look forward to. I am having the time of my life building this thing even though I'm making every rookie mistake possible and probably even inventing a few new ones. I already have a fair book of notes for next time. Your build logs are an invaluable resource. Your work is beautiful. I will add the Flemish horses and footropes. I joined the NRG because of my interest - even fascination - with clippers and windjammers. I completely agree they are the epitome of sailing vessels.
- 248 replies
-
- 3
-

-
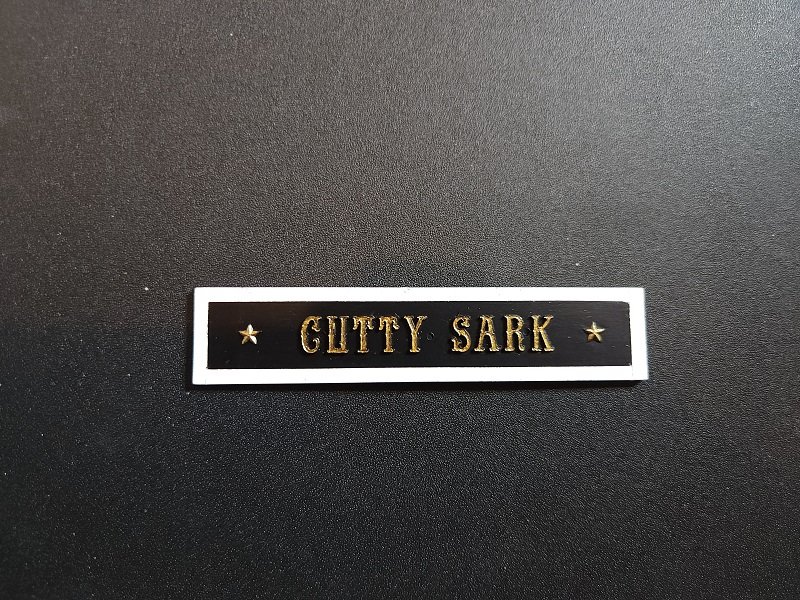
- Cutty Sark
- Revell
- (and 2 more)
-
I haven't done that particular operation but when I need to snug a knot up close to something I start with a simple overhand and put a pin in the resulting loop. As I take up the slack I guide the pin close to where the knot will live and it usually works out well. If I don't get it close enough on the first try, I wiggle the pin to loosen the overhand knot and try again. Once I'm happy with it I usually dab it with a touch of CA to seal the deal.
-
Great news. The Longridge books arrived today. As advertised, they are in near perfect condition (they were listed as Fine in bookseller's parlance and I totally agree). The plates in the rear pockets of both volumes are complete and in truly excellent condition. I've barely skimmed a few pages but one thing is abundantly clear. My current build, as much joy as it is bringing me, is a rehearsal. That doesn't mean I won't put every effort possible into this build, I certainly will. But, next time, there is a laundry list of things I'll do differently. That's looking too far forward, I have a ship in front of me that I adore and need to finish. If I can ever get the bloomin' paint. (Some of it has shipped but will take a week or more to arrive). Still waiting on the Underhill book but I think it will be here before the end of the week. As an aside, I'm waffling about the Flemish Horses and footropes. Since I'm planning to add cloth sails, I'm just not sure about the ropes. I haven't made a decision, I'm just mulling it.
- 248 replies
-
- 4
-
-
- Cutty Sark
- Revell
- (and 2 more)
-
Thank you both very much. I sort of answered my own question with help from folks and images here -- see the discussion in my build log. The bottom line is a consensus (meaning an educated guess 😉) that the sheaves are probably generic multiple use, as shipman suggests, where they can be used to gain more leverage for hauling, whatever the load. At any rate, no lines from my rigging are likely to find themselves there. Thanks again!

- 399 replies
-
- 4
-
-

-
- cutty sark
- revell
- (and 2 more)
-
I don't have a good recommendation, only a caution. I've gone through two sets of CNC Micro PCB bits so far, one from XYQ, the other from Walfront. I've broken several bits in each set and, maybe foolishly, obtained another. My current third set is from Lothee but I suspect that all three are from the same manufacturer. All of these bits are extremely brittle. They work fine in a pin vise if I'm very careful not to apply any side force at all. They claim to be for CNC applications but I cannot for the life of me believe that even at very high speeds these bits would last more than seconds in a milling machine. I'm also in the hunt for better bits so I'll be following this thread with interest. If I find a better solution, I'll let us all know. For now, I would recommend a bench drill press and avoid both pin vises and certainly portable drills. I don't know about Proxxon but it looks capable. I'm also looking at the MicroMark line.
-
Thank you Bob and Ian, that's valuable info. I am champing at the bit waiting for my Underhill and Longridge books. The sellers say the Royal Mail has mostly recovered but tracking info is still sparse - both orders seem to be in limbo. The sellers are responsive though so I trust them to get the books here eventually. It does make sense to reave through the pillars for better heaving. More than one rope per pin... oof. It is a fair bet that's not happening on the model.
- 248 replies
-
- 1
-
-
- Cutty Sark
- Revell
- (and 2 more)
-
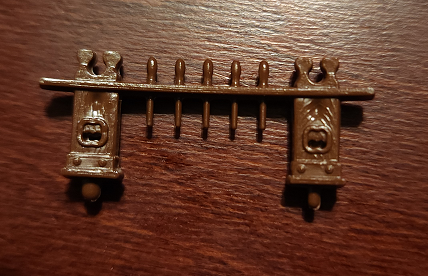
I hope to be learning from you for a long time to come, though I'm not certain I can attain your skill level. Here's an example of the question I asked in Bruma's build log about clearing the holes in fife rail legs. This is the front and back of one of the rails, two others are similar. The forth, inexplicably, has round legs. I'm not sure what, if any, material should be removed here. There are very small through holes (covered by flash initially) that I've cleared with a micro drill bit. I haven't seen the legs used in the rigging detail I have, though bear in mind I'm still waiting on Longridge and Underhill books. It is a bit blurry 'cause I took these with my phone but the small round things in the holes on the left are ejector pin cruft. Cleaning these out to the edges of the outline would be quite a pain. It appears that only the smaller already-existing holes are appropriate. [edit] there is this, from images posted here I can't yet find where those lines come from (yet). Still researching.


-
Yours is awesome too, Harry - just a different kit and you have done a stellar job of it.
- 248 replies
-
- 1
-
-
- Cutty Sark
- Revell
- (and 2 more)
-
[...] I know it has been years, but I've been studying your build log and phenomenal work and this paragraph confuses me a little bit. I took your advice and have not installed the fife rails permanently yet - they're just sitting unglued on the deck for now. But I am unclear about how much material to remove from the fife rail legs and, in fact, why it is important. You say later on it will be clear but I can't find a mention elsewhere in the build log. Thank you for any info you may be able to provide.
- 399 replies
-
- 2
-
-
- cutty sark
- revell
- (and 2 more)
-
Considering that yours is the standard by which all others are judged, these are very kind and inspirational words. Thank you!
- 248 replies
-
- 1
-
-
- Cutty Sark
- Revell
- (and 2 more)
-
I'm following your work with great interest - it is very inspirational. I'm motivated now to delve into 3D printing, something I've never done but it appears to be in the cards. The photos you've posted have been an invaluable resource, thank you profusely for those. I do hope you recover quickly and as comfortably as possible. Best regards.
-
I use this set of Amati ropes (recommended by Radimir at HISModel). Choosing which to use for particular lines is a puzzle. I try to use images I've found around this site as a guide and I'm sure my choices are wildly wrong but I choose what I like. That being said, I do like the Amati ropes. The ones supplied in the kits I have (1974 and 2017) are, frankly, horrible. They are made from the most uncooperative material imaginable. For what it's worth, I generally use the RB-25/20 for tying blocks to pad eyes and blocks to each other. I used the RB-100/20 for the bow sprit stays and that's about as far as I've progressed so far in my rigging efforts.
-
I can live with this. In fact, I like it. This is one of the poorly molded spars from the spare kit. I didn't bother cleaning the flash and after installing the rails I painted it to make it all one color. Grey is one of the colors I have on hand that I'm not using for anything else. I do have .020 styrene rods on order but in all likelihood I'll stick with the sticks 😉
- 248 replies
-
- 6
-
-
- Cutty Sark
- Revell
- (and 2 more)
-
The jackstay strips arrived today, will test what they look like on one of the spare kit's spars. They won't be painted yet - both of my suppliers (one domestic the other European) have black paint backordered. Most of my books still haven't arrived, I'm getting mildly concerned. I did get the Hackney book but not Longridge or Underhill. I'll reach out to AbeBooks on Monday. I did get the drawings from the museum - they're great. Still in the tubes because frames won't get here until next Friday. Head gear rigging is coming along nicely. My seizing skills need work, I think. And I surprised myself. I was sure I'd make a total mess of this, especially with a metallic paint. It turned out OK, though. I don't want to paint the stars gold. Some other color -- blue maybe. I relented - the stars are gold.
- 248 replies
-
- 6
-
-

-
- Cutty Sark
- Revell
- (and 2 more)
-
Bruma's build is astounding. That sort of detail is well beyond my modeling skills. Part of my reason for this build is to develop and hone those skills - but it happens gradually. I do intend, most likely, to build another CS at some point but this one is really for the fun of it. I know about the fragility, there are plenty of parts in this kit that don't bear any jostling. The bell is held on by a prayer. Thank you again most kindly for your thoughts and advice.
- 248 replies
-
- 3
-
-
- Cutty Sark
- Revell
- (and 2 more)
-
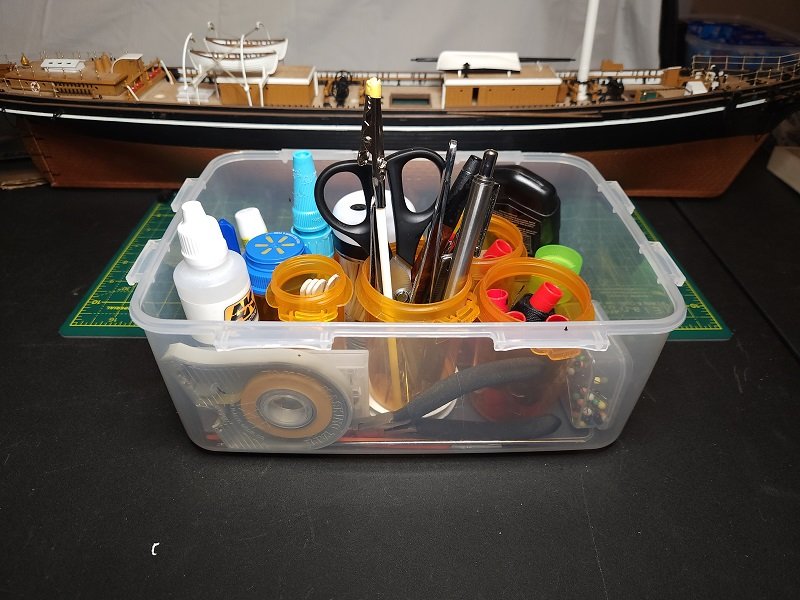
I use empty pill containers for my tweezers and scissors, a few other things. I use the bottles for lots of stuff in the shop. They come in a wide variety of shapes and sizes, I can almost always find one that fits my needs. The Tupperware comes in pretty handy too, to organize the smaller containers. I got a bunch of 'em around the shop.
- 59 replies
-
- 4
-
-
- Swift
- Artesania Latina
- (and 1 more)
-
Thanks shipman - I did look around at online photos of the ship and also archives here (wow Kevin-the-lubber posted a ton of 'em) and I'm afraid I got a bit lost. My fault, surely, so I fell back on the tried and true method of asking the experts. I think my confusion stemmed from the dearth of overhead or vertical views of the head rigging. Lots of side views but they obscure some detail. Again, I'm sure I simply missed the obvious and I'm also sure it won't be the last time ;-}
- 248 replies
-
- 2
-
-
- Cutty Sark
- Revell
- (and 2 more)
-
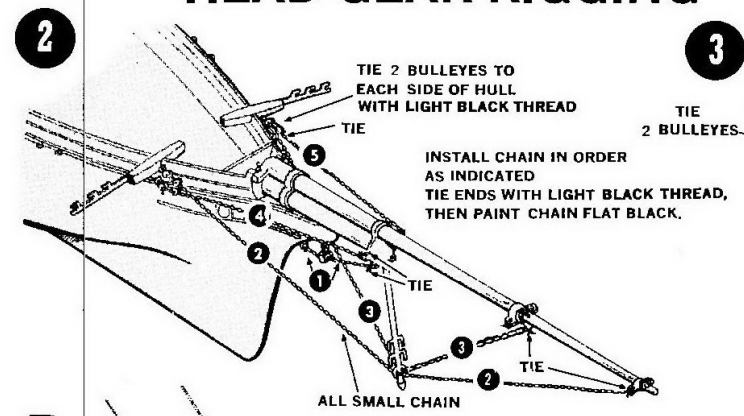
Thanks Ian! I know about the stays, the illustrations in all the instructions and documentation I have agree. My question, that you have answered well, is about the martingales. So two it is, it shall be done. It is fiddly dealing with the pins but that's part of the deal with modeling, no? It is for me, at least.
- 248 replies
-
- 1
-
-
- Cutty Sark
- Revell
- (and 2 more)
-
Thank you Snug Harbor Johnny. I'll see how the strips look in my tests since they're almost here, but I think I agree that some sort of cylindrical thing - wire or plastic - might look better. I was, and sort of still am, a bit apprehensive about attaching a round thing atop a flat surface at that scale. I also agree with you about the gap - yet they appear on several spars in the same places in both kits. An oversight? Maybe. At any rate, I can add them and probably will. Thank you very much for the info and advice.
- 248 replies
-
- 1
-
-
- Cutty Sark
- Revell
- (and 2 more)
-
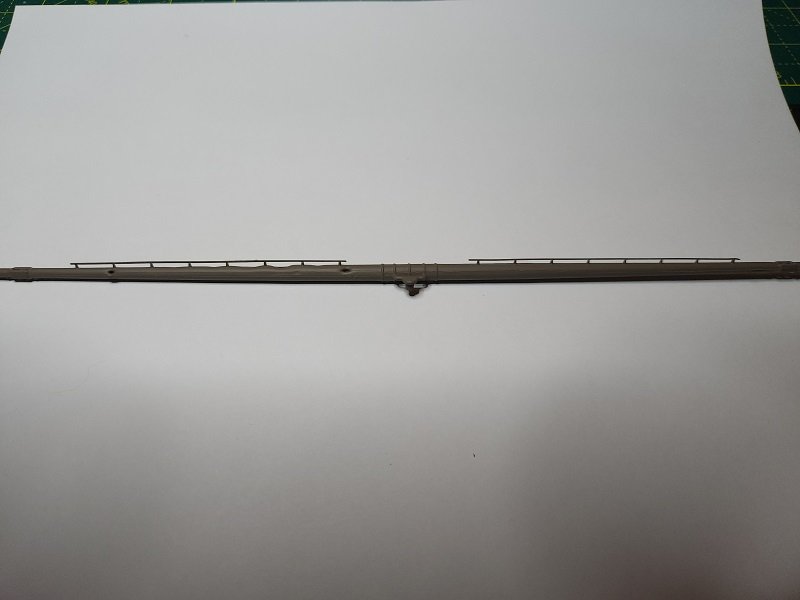
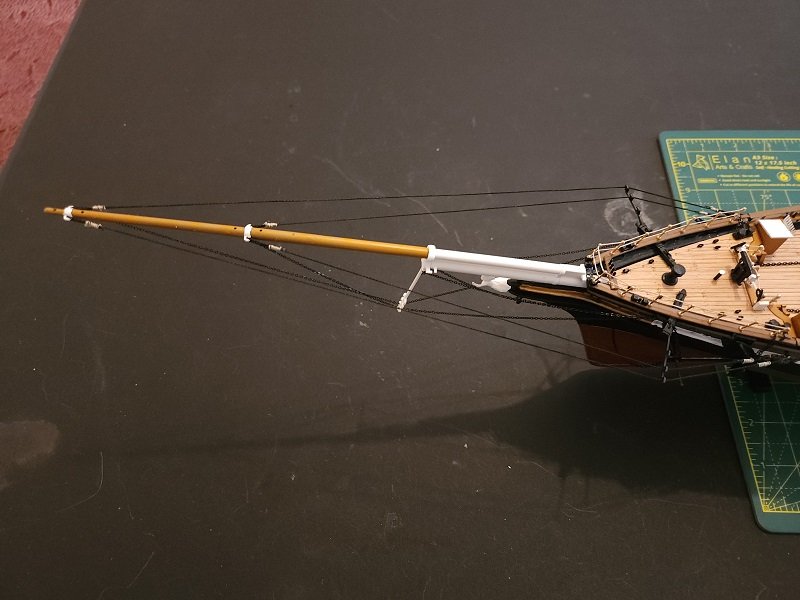
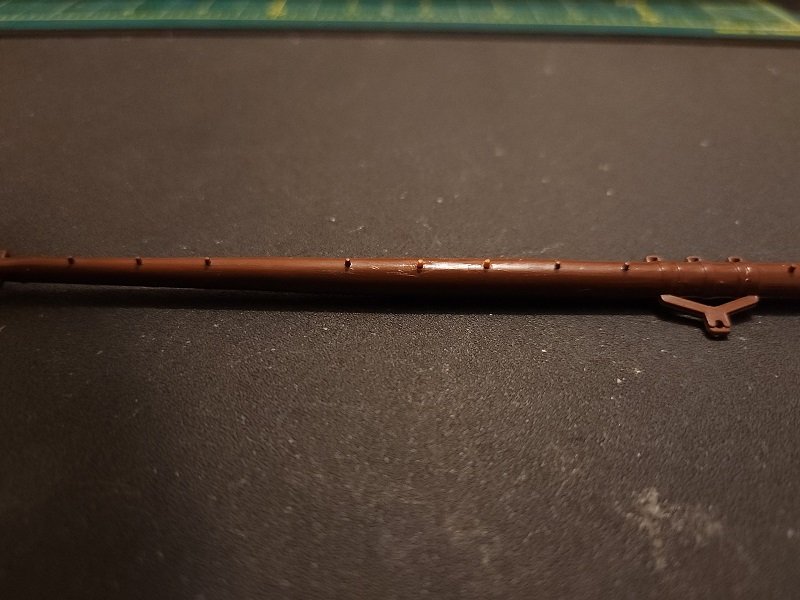
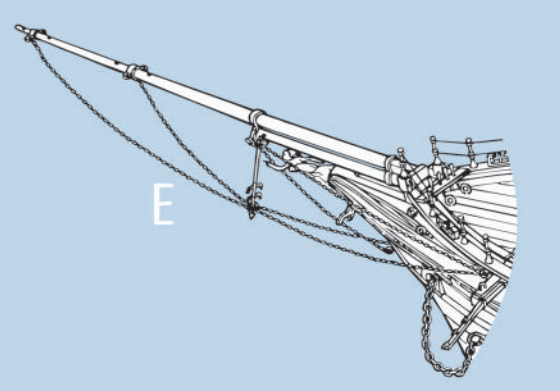
I've been keeping busy while waiting on paint - but that just brings up more questions and problems. First, and this is mostly just news, not a question (that comes at the end of this lengthy post). The spars in this kit have pins or standoffs (I guess that is what they may be called) that seem to be designed for jackstays. Revell neglected to finish the job and actually add the stays. I guess I understand the reasoning, they would be even more fragile than the standoffs. Given the age of the kit (the sprues have been rattling around in the box for more than forty years) some of the tiny pins have broken off. I have a backup 2017 version kit but it has an even bigger problem. The two sprues that hold the majority of spars on the newer kit are terribly molded and the spars themselves are unusable. Here's an example. I could probably get a replacement sprue from Revell but that's a lot of time and trouble. The pins on the newer kit's spars are mostly intact (a few are also missing, so this seems to be a systemic problem). But, necessity being what it is, I trimmed the requisite number of those pins from the newer kit's borked spars and replaced the missing ones on my spars. The lighter colored pins are replacements. The apparent space is intentional, no pin is supposed to be installed there. I've ordered some Evergreen styrene strips in .010x.020 size (the smallest I could find) to hopefully lay across the tops of these pins and voila, jackstays. The strips arrive tomorrow. I intend to test the process on some of the throwaway spars to see how it looks and behaves. I'll let you all know how it goes. I know this isn't the norm for jackstays - on most vessels they seem to be usually made of cable run through pad eyes. I did briefly consider removing all the standoffs and micro-drilling holes for the tiny pad eyes that came from HISModel but only briefly. That would work well for the larger spars but the smaller ones would pose a real problem. I'll also be adding footropes and Flemish Horses. I think I'll use one of the methods I've found here - making stirrups by reinforcing black thread with CA and attaching one of those little pad eyes to the ends. It should work out well, I have a bunch of different gauges of black rigging thread/rope courtesy of Radimir. Ok all of that is just a status update, mostly. Here's my current dilemma. I want to start the head rigging but I'm a little confused. The instructions for both the 2017 and 1974 versions of the kit have some rather rudimentary instructions for the martingale chains - one each side running from just forward of the catheads to attachment points on the boom. However, the plans I have from the museum show a more interesting arrangement. These appear to show two chains on each side running from just under the trail board to the boom. How do you folks think the chains should be rigged?

- 248 replies
-
- 3
-
-
- Cutty Sark
- Revell
- (and 2 more)
-
Amazing work. I am green with envy. There is no way I could possibly do anything close to this fabulous job. Really, really well done. Oh, and I hope you recover completely, quickly, and as comfortably as possible.
- 1,508 replies
-
- 1
-
-
- Le Soleil Royal
- Heller
- (and 1 more)
-
Better, I think with larger blocks. The rigging is not at all realistic but a fairly close facsimile.
- 248 replies
-
- 6
-
-
- Cutty Sark
- Revell
- (and 2 more)
-
Thank you Harry, you're very kind. I will be patient. I look forward to your adventures as well - a new airbrush is a big deal.
- 248 replies
-
- 1
-
-
- Cutty Sark
- Revell
- (and 2 more)
-
It appears I'll be on hiatus for a while (2-4 weeks) awaiting delivery of paint. The entire planet seems to have run out of black and white Revell acrylic paint. I've said before I detest this brand of paint but I'm too far into the project to switch horses now. I've ordered from a supplier who claims to have a stash but has to pick it from a warehouse. Errgh. These paints do not store well over long periods of time so I hope they haven't been stored for too long. Some of the boxes I have contain paint the consistency of peanut butter. I've been mostly able to restore those to a usable state with a few exceptions where I've simply discarded them. I'll touch up what I can, and tinker with cleaning flash on upcoming parts, and keep myself sort of busy in the mean time. I'm exploring ideas for making jackstays, too. I have found some material that may fit the bill nicely. I think I will re-rig the boat davits. I used some of those marvelous wooden blocks but the ones I used are too small, I think. I am also still waiting on books and drawings. I did receive the Noel Hackney book and that's been interesting reading. I'm waiting for Longridge and Underhill, and for sets of drawings from the Royal Museums Greenwich. All have been shipped, finally, but the process is very slow.
- 248 replies
-
- 2
-
-
- Cutty Sark
- Revell
- (and 2 more)