


VitusBering
-
Posts
297 -
Joined
-
Last visited
Content Type
Profiles
Forums
Gallery
Events
Everything posted by VitusBering
-
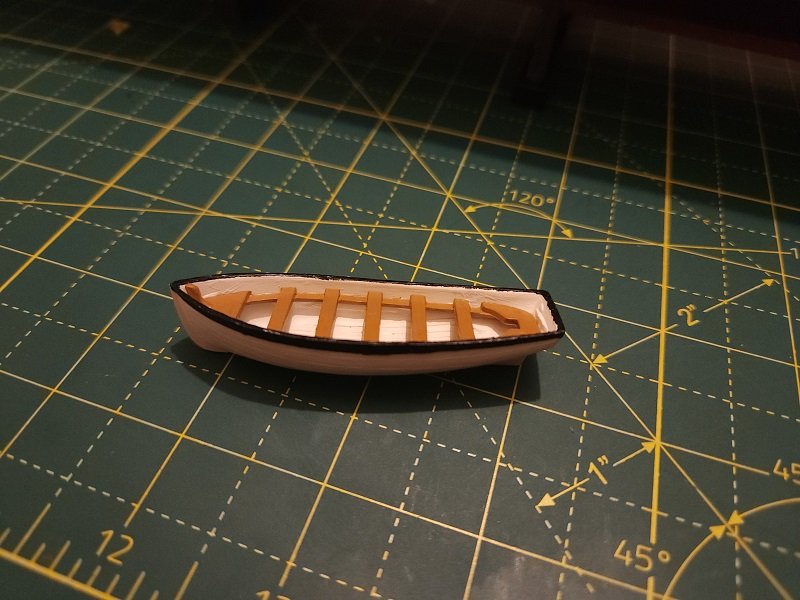
 Lifeboats are on. I rigged them as closely as I know how with the documentation and pics I have so far. They can be re-rigged if necessary but this looks pretty close. Employing some artistic license I did put some tiny pad eyes on the bow and stern of the boats.
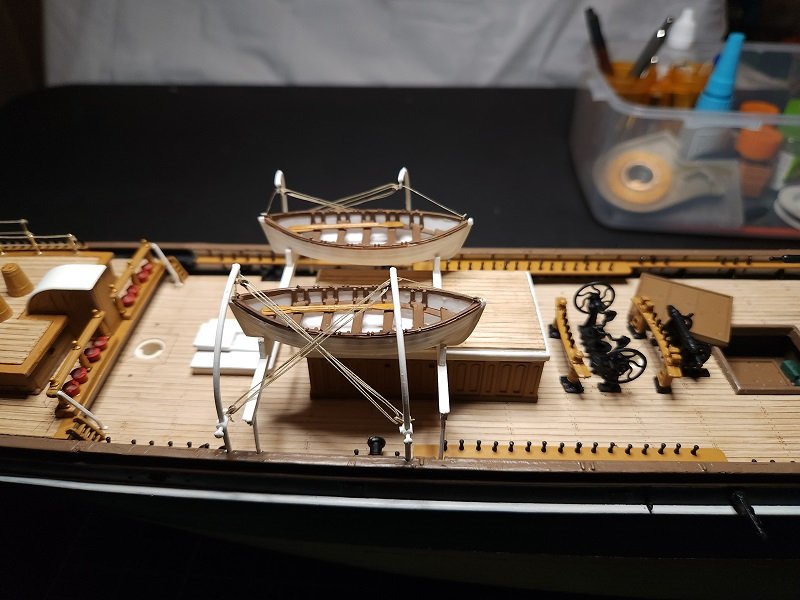
- 248 replies
-
- 4
-

-
- Cutty Sark
- Revell
- (and 2 more)
-
Thanks shipman. I've ordered some in a couple of the smallest guages I could find.
- 248 replies
-
- 1
-
-
- Cutty Sark
- Revell
- (and 2 more)
-
I am quite admittedly a n00b about these things. I will look more closely at brass solutions. I really need to study this because my brain is telling me that there's no way even a fine wire is malleable enough for a railing. I am sure I'm wrong but I will study. I saw the jeweler today and he has no brass but he does have fine gold wire. Hmm...
-
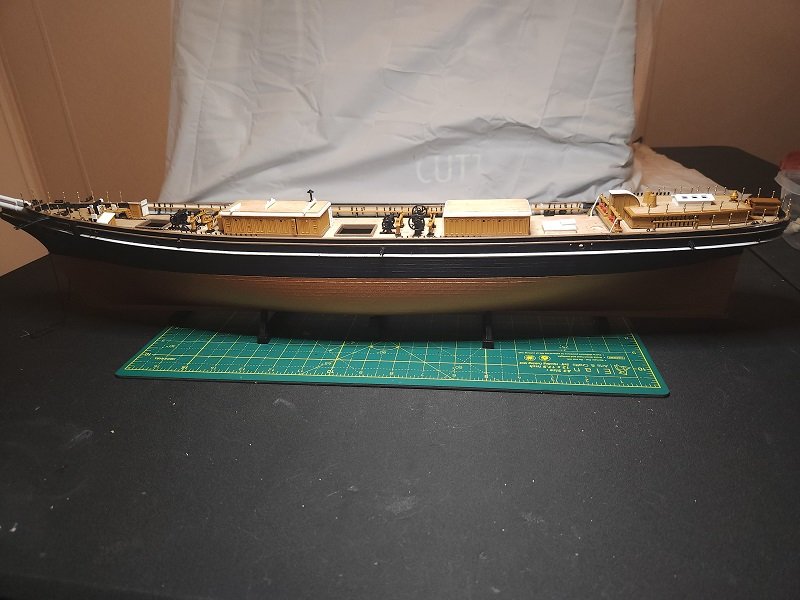
I think some explanation is in order. I started this build as a nostalgic exercise. I built this kit (hastily) more than 35 years ago and my wife happened to find that exact version last year and gifted me (bless her soul). I didn't intend at the outset to make a museum quality model and, indeed, did not think it was possible that this kit could be built in any realistic fashion. Then I came here, and saw these astounding build logs and realized the potential in this model. The talent on display here - not just this model but across the board - is phenomenal. So this has been, so far, a very fun thing to do. It is good for my well being - retirement has been uncomfortable for me. I putter with home improvement but that is not very fulfilling. Building this model, however, is great for my mental health. I say that before starting the rigging, of course :-} As I get further into this, I've come to realize that this build may just be a trial run. Sure, it is a wonderful thing to do and the result will be an aesthetically pleasing model worthy of display on a shelf. But I've learned so much - mostly from folks here and some from my own bumbling - that I now know that with some concerted effort I could produce something worthy of a display case. This is not a throw-away build. I've invested a lot of effort and will continue to do so and I hope to end up with a much-better-than-average example of this marvelous vessel. I am, though, taking notes about what I may do differently if I do it again. Whether I will actually do it again is unknown, but it is rattling around in my head. Until then, I'll find a lot of joy and fulfillment in the building and especially the learning, Thank you all for all you are and do.
- 248 replies
-
- 6
-

-
-
- Cutty Sark
- Revell
- (and 2 more)
-
Thank you Ian. I thought I looked at K&S but clearly not enough. Thanks for the tips and your kind words, I'll keep looking.
-
Thank you shipman, that's a good tip and kind words. Stripped wire does seem like a viable option though I think I'll explore others first. I am sorry to say that authenticity is not at the very top of my priorities - I've taken some liberties already and I'm sure there will be more - but that's not to say I don't consider it important, I do.
- 248 replies
-
- 1
-
-
- Cutty Sark
- Revell
- (and 2 more)
-
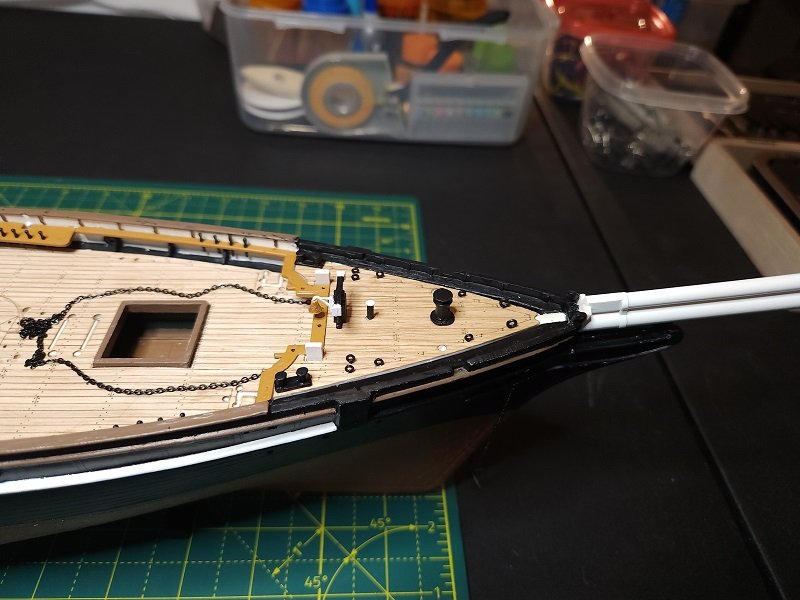
Thank you Bob. Haberdashery? This is a back woods mountain community of a barely over a thousand folks. We're lucky to have a grocer and mercantile 🙂 We do have a jeweler in a nearby town - the place we call the Big Town but it, too, is small by most standards. I'm going in there today sometime so I'll stop in the shop and ask him. Thank you for the tip about the anchor chain run, I will consider it. Re-routing the chain is a moderately risky endeavor because it snakes through the deck under the fo'c'sle but I may give it a go - I need to think on it a while. I'm also not too happy with using rope in the anchor storage - I'll replace that with small chain soon, maybe today.
-
I think the thread will work out OK. I'm still shopping for very thin and stiff brass wire though but I'm not having much luck. Harry, do you possibly have a link to where I might find that? Next up - rigging the boat davits. The 2017 kit instructions have them rigged each to its own, but I'm going to do it the way the full scale ship and the 1974 instructions show, in an X pattern.
- 248 replies
-
- 4
-
-
- Cutty Sark
- Revell
- (and 2 more)
-
She truly is a beauty.
-
I like that look, too. I will look into KS Products. In addition to threading the stanchions, I believe I'll also need very thin and stiff brass wire to create jackstays. Thanks for the tips, and for your kind words.
- 248 replies
-
- 3
-
-
- Cutty Sark
- Revell
- (and 2 more)
-
I'm loving these brass stanchions. They'll look even better when threaded - that will happen soon.

- 248 replies
-
- 7
-
-
- Cutty Sark
- Revell
- (and 2 more)
-
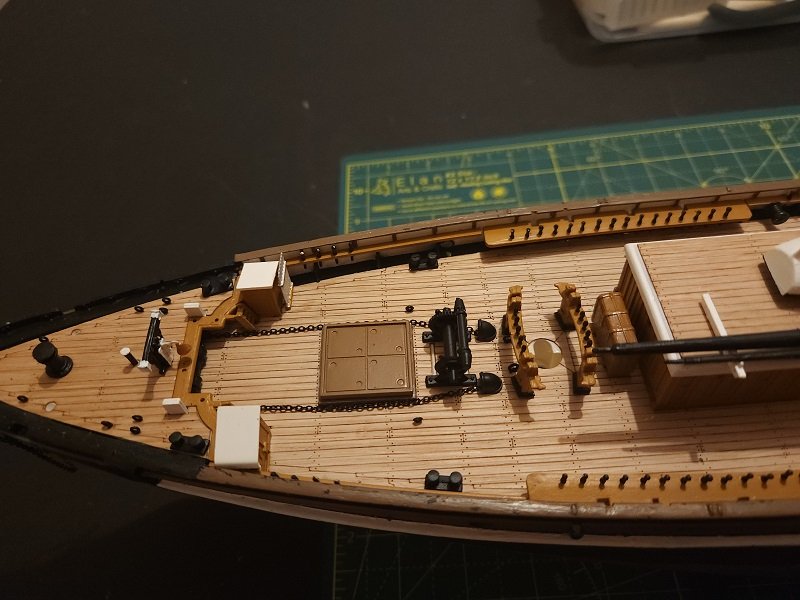
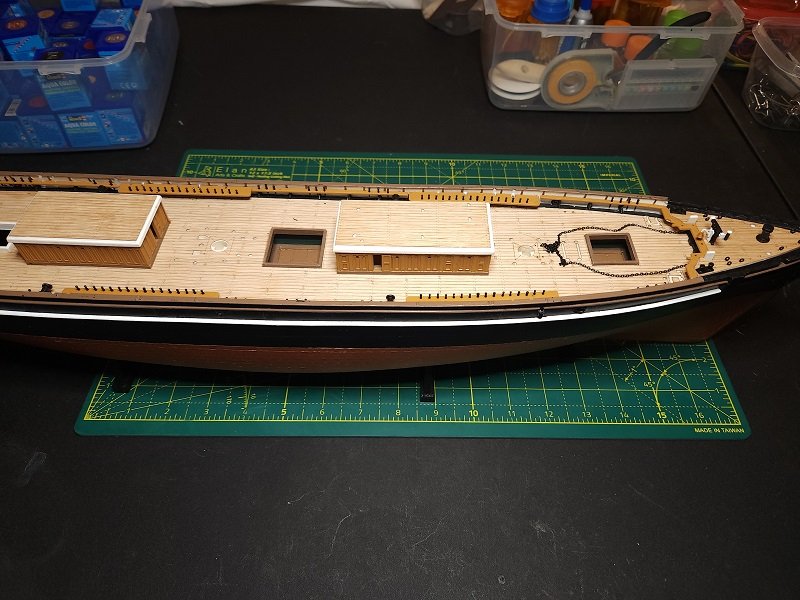
Thank you all for your kind words. Thanks Bob. I still haven't received the drawings and books I've ordered - they're on their way according to the tracking info but it may be a while (a week or two) before they arrive. I'm going to leave the jolly boat unglued - on the skids but just resting there. A similar oddity is the hold covers. There is detail beneath them so what is the point of even having the covers included? They do say not to glue them and I won't, of course. I may leave them resting offset from the openings.
-
Steadily working my way aft. I fear this post may become a bit wordy, I'm feeling rather rantish. First though, and this is not a rant, simply a puzzle. Why, if this boat is to be stored upside down and, if I interpret the instructions correctly, glued in place (I ignored that and just set it there - same with the spars for now), why do they want me to detail it? Ok.. so I have a difficult relationship with traditional paint brushes - I don't hate them but I suspect they hate me. I have never had great results with brushes - brush marks, overruns, all the usual rookie problems that even my daughter's coaching can't fix. This is my first foray into using acrylic paints. Heretofore I've used enamel and while I really like the results, the thinning, mixing, and cleanup are painful, whether brushes or airbrush. I was attracted to acrylic for the convenience and I am sort of regretting the decision. Enamel was - not forgiving but maybe more tolerant of my techniques than acrylics. The acrylics set up and skin over in the mixing cups almost instantly. Stirring has to be done carefully in that case, to prevent clumps from making their way into the mix proper. I've tried retarders, they come with their own set of challenges in the applied paint. I have no experience with any brand other than Revell. I chose that because of the kit recommendations, and I'm also sort of regretting that decision. I've heard other brands may be better but it is too late in the game to switch now because of the colors. About those colors - their colors are... I'm going to be diplomatic and say terrible. Also the carrier to pigment ratio is wildly different from color to color, as is the consistency. It may have something to do with the age of the particular boxes, I don't know. I didn't experience any of this sort of random inconsistency in several brands of enamels. If I do this or another kit in the future I'm going to avoid Revell paints and probably switch back to enamel. But that's for the future. I never intended for this to be a museum quality model. I mostly want the joy of building it - with the goal of having an aesthetically pleasing if not precision scale model. In the R/C world we call that standoff scale. It will pass for scale if you don't look too closely. Alright, rant over. Any shortcomings in the look of this model are mine to own, and I will cop to being a lazy sort. If I do this or another kit again I will not touch a paint brush and I'll airbrush every painted part no matter how small.
- 248 replies
-
- 5
-
-
- Cutty Sark
- Revell
- (and 2 more)
-
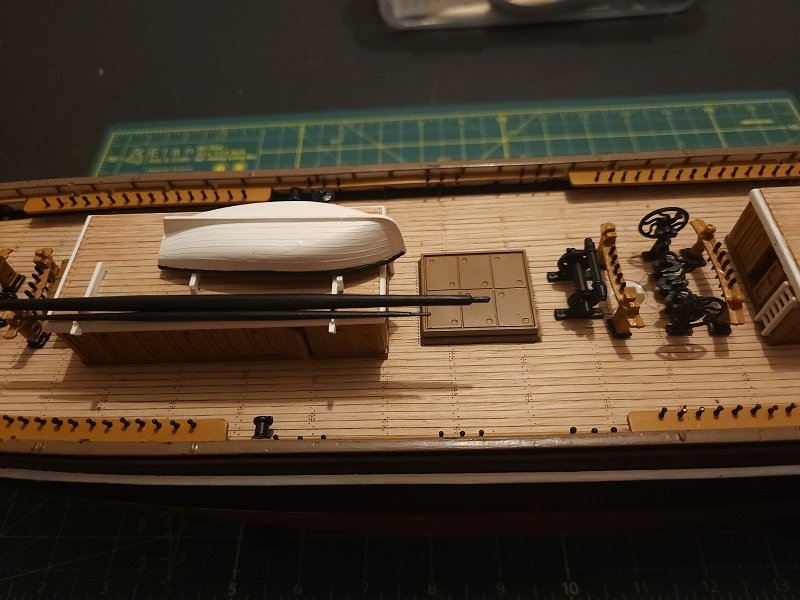
I went with the plastic eyes for several reasons - aesthetics, my skill level, availability, maybe more. After installing and letting the glue set up I threaded a few and pulled a moderate strain on each with no disastrous result. I will probably reinforce some of the mast parts and will very likely replace at least some of the spars - they don't look like they will lend themselves to reinforcement (or other customization I have planned, either). I do plan to make her a taut ship so I do hope this plan works well.
- 248 replies
-
- 5
-
-
- Cutty Sark
- Revell
- (and 2 more)
-
Value-for-Money Airbrush
VitusBering replied to BANYAN's topic in Painting, finishing and weathering products and techniques
I'm probably not the best person to ask. I rely on others' opinions and recommendations (my daughter in particular) but I'm not an expert. The basic features - gravity feed (top or side feed) or siphon, single vs. dual action - these are things I'm afraid you'll have to decide for yourself. There are plenty of tutorial and review videos available on the Internet. I do think brand is important. I happen to really like Harder and Steenbeck, a German company. kurtvd19 is associated with a very reputable company (Badger, an American company) - I would ask him as well, he's much more experienced than I. For what it's worth, I use a Harder and Steenbeck Infinity CRplus Two in One with 0.2 and 0.4 mm needles. It is a gravity feed style. -
I'm afraid that won't work out. After more investigation and testing I've found that the two sizes of non-kit eyes I have are wrong for this model. The smaller ones are way too small to use as deck eyes and the larger are a bit too large - close, but they don't look right when dry fit. Also, they will not lend themselves to anchoring by bending over the shanks, they either break or cause me to get nervous about damaging the deck. I could shop around for replacements but the plastic eyes in the kit will suffice. The glue I'm using is one that melts and fuses the plastic at the joint so the resulting installation is as strong as if it were molded in so I have confidence it will be strong enough, Because the veneer adds some thickness to the deck I may need to lengthen the shafts on the eyes to get them to set proud of the wood, but that, again, is a simple task with the welding type glue. I haven't determined that it will be necessary yet, it is just a possibility at this point.
-
Thank you kirill4, those will be very useful!
-
I get that, but more info is always good. I have on order all the sources folks here have mentioned. I'll have plenty of time to study - rigging is a long way in the future for this build. Lots of stuff to do first.
- 248 replies
-
- 3
-
-
- Cutty Sark
- Revell
- (and 2 more)
-
That's great advice, thank you very much. I was wondering how much stress a straight shanked eye might hold. I have good adhesives but folding the ends is a good idea. Oh, I'll really need the info on the block sets, especially for chain sheets and halyards. In the case of chains, there is precious little detail available on exactly how they're rigged. I've mentally stitched together images I've found but the more info, the better! Thank you again.
- 248 replies
-
- 3
-
-
- Cutty Sark
- Revell
- (and 2 more)
-
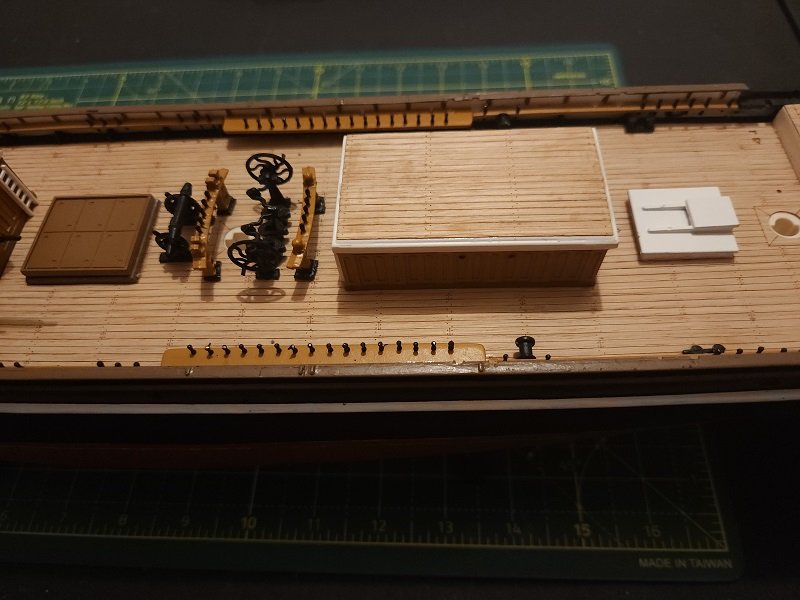
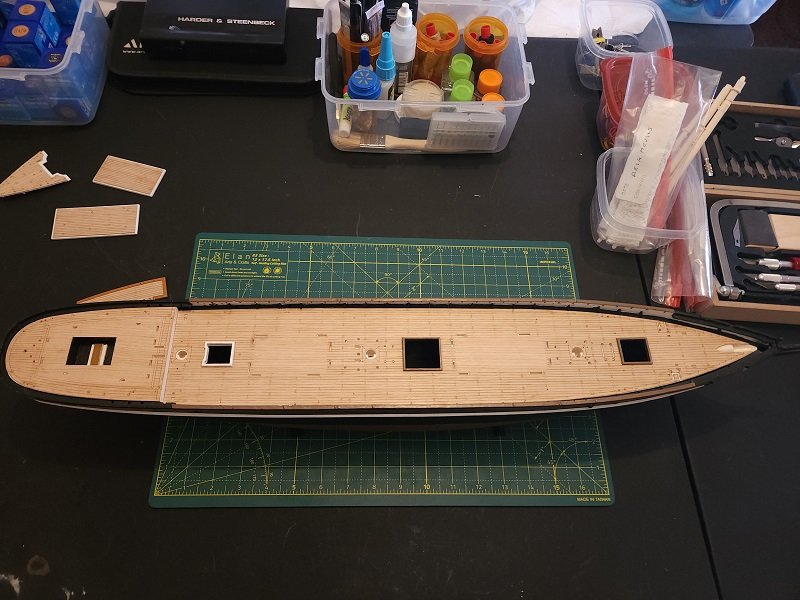
Progress... the veneer is glued on, the deck is only dry-fit at the moment, I'll add the hold boxes, clamp it up and glue it in later today.
- 248 replies
-
- 1
-
-
- Cutty Sark
- Revell
- (and 2 more)
-
Value-for-Money Airbrush
VitusBering replied to BANYAN's topic in Painting, finishing and weathering products and techniques
My daughter is a pro artist and she warned me about low-end brushes. She has tossed half a dozen in the bin over the last few years. Vivo makes an OK compressor but personally I would shy away from the brushes on her recommendation. I don't know about NEOECO, but a $40 airbrush seems too good to be true... I guess it couldn't hurt to try it, at that price it is essentially disposable. The barrel looks startlingly similar to my $300+ Harder and Steenbeck Infinity but I'm pretty sure that's where the similarity ends. I have been more than happy with my brush, it is a joy to use. -
Well, yes and no. The rails proper are from the kit, I just snipped off the heads and tails of the pins, drilled holes where they were, and set the newly painted brass pins (those are from HISModel). The new pins are slightly longer and definitely stronger (of course) than the ones in the kit. I almost didn't paint them but now I'm sure glad I did. Thank you for your kind words. At some future date I may again attempt the chemical blackening thing but I am gun-shy after several failed attempts in the past. Thank you Bob. I don't know yet what info I will have, or need, but I'll let you know and thank you very much for the offer. The Royal Mail was cyber-attacked and is halted for a few days until they're sure they've dealt with the problem so my books and drawings may be delayed. Not a concern, I'm a patient sort. (That's a lie 😉 Oh no! I do hope the damage is not too significant. I have pets (dogs and cats) so I do worry about that sort of thing. Take care, and thank you again.
- 248 replies
-
- 1
-
-
- Cutty Sark
- Revell
- (and 2 more)