HOLIDAY DONATION DRIVE - SUPPORT MSW - DO YOUR PART TO KEEP THIS GREAT FORUM GOING! (Only 20 donations so far - C'mon guys!)
×


Bryan Woods
-
Posts
544 -
Joined
-
Last visited
Content Type
Profiles
Forums
Gallery
Events
Everything posted by Bryan Woods
-
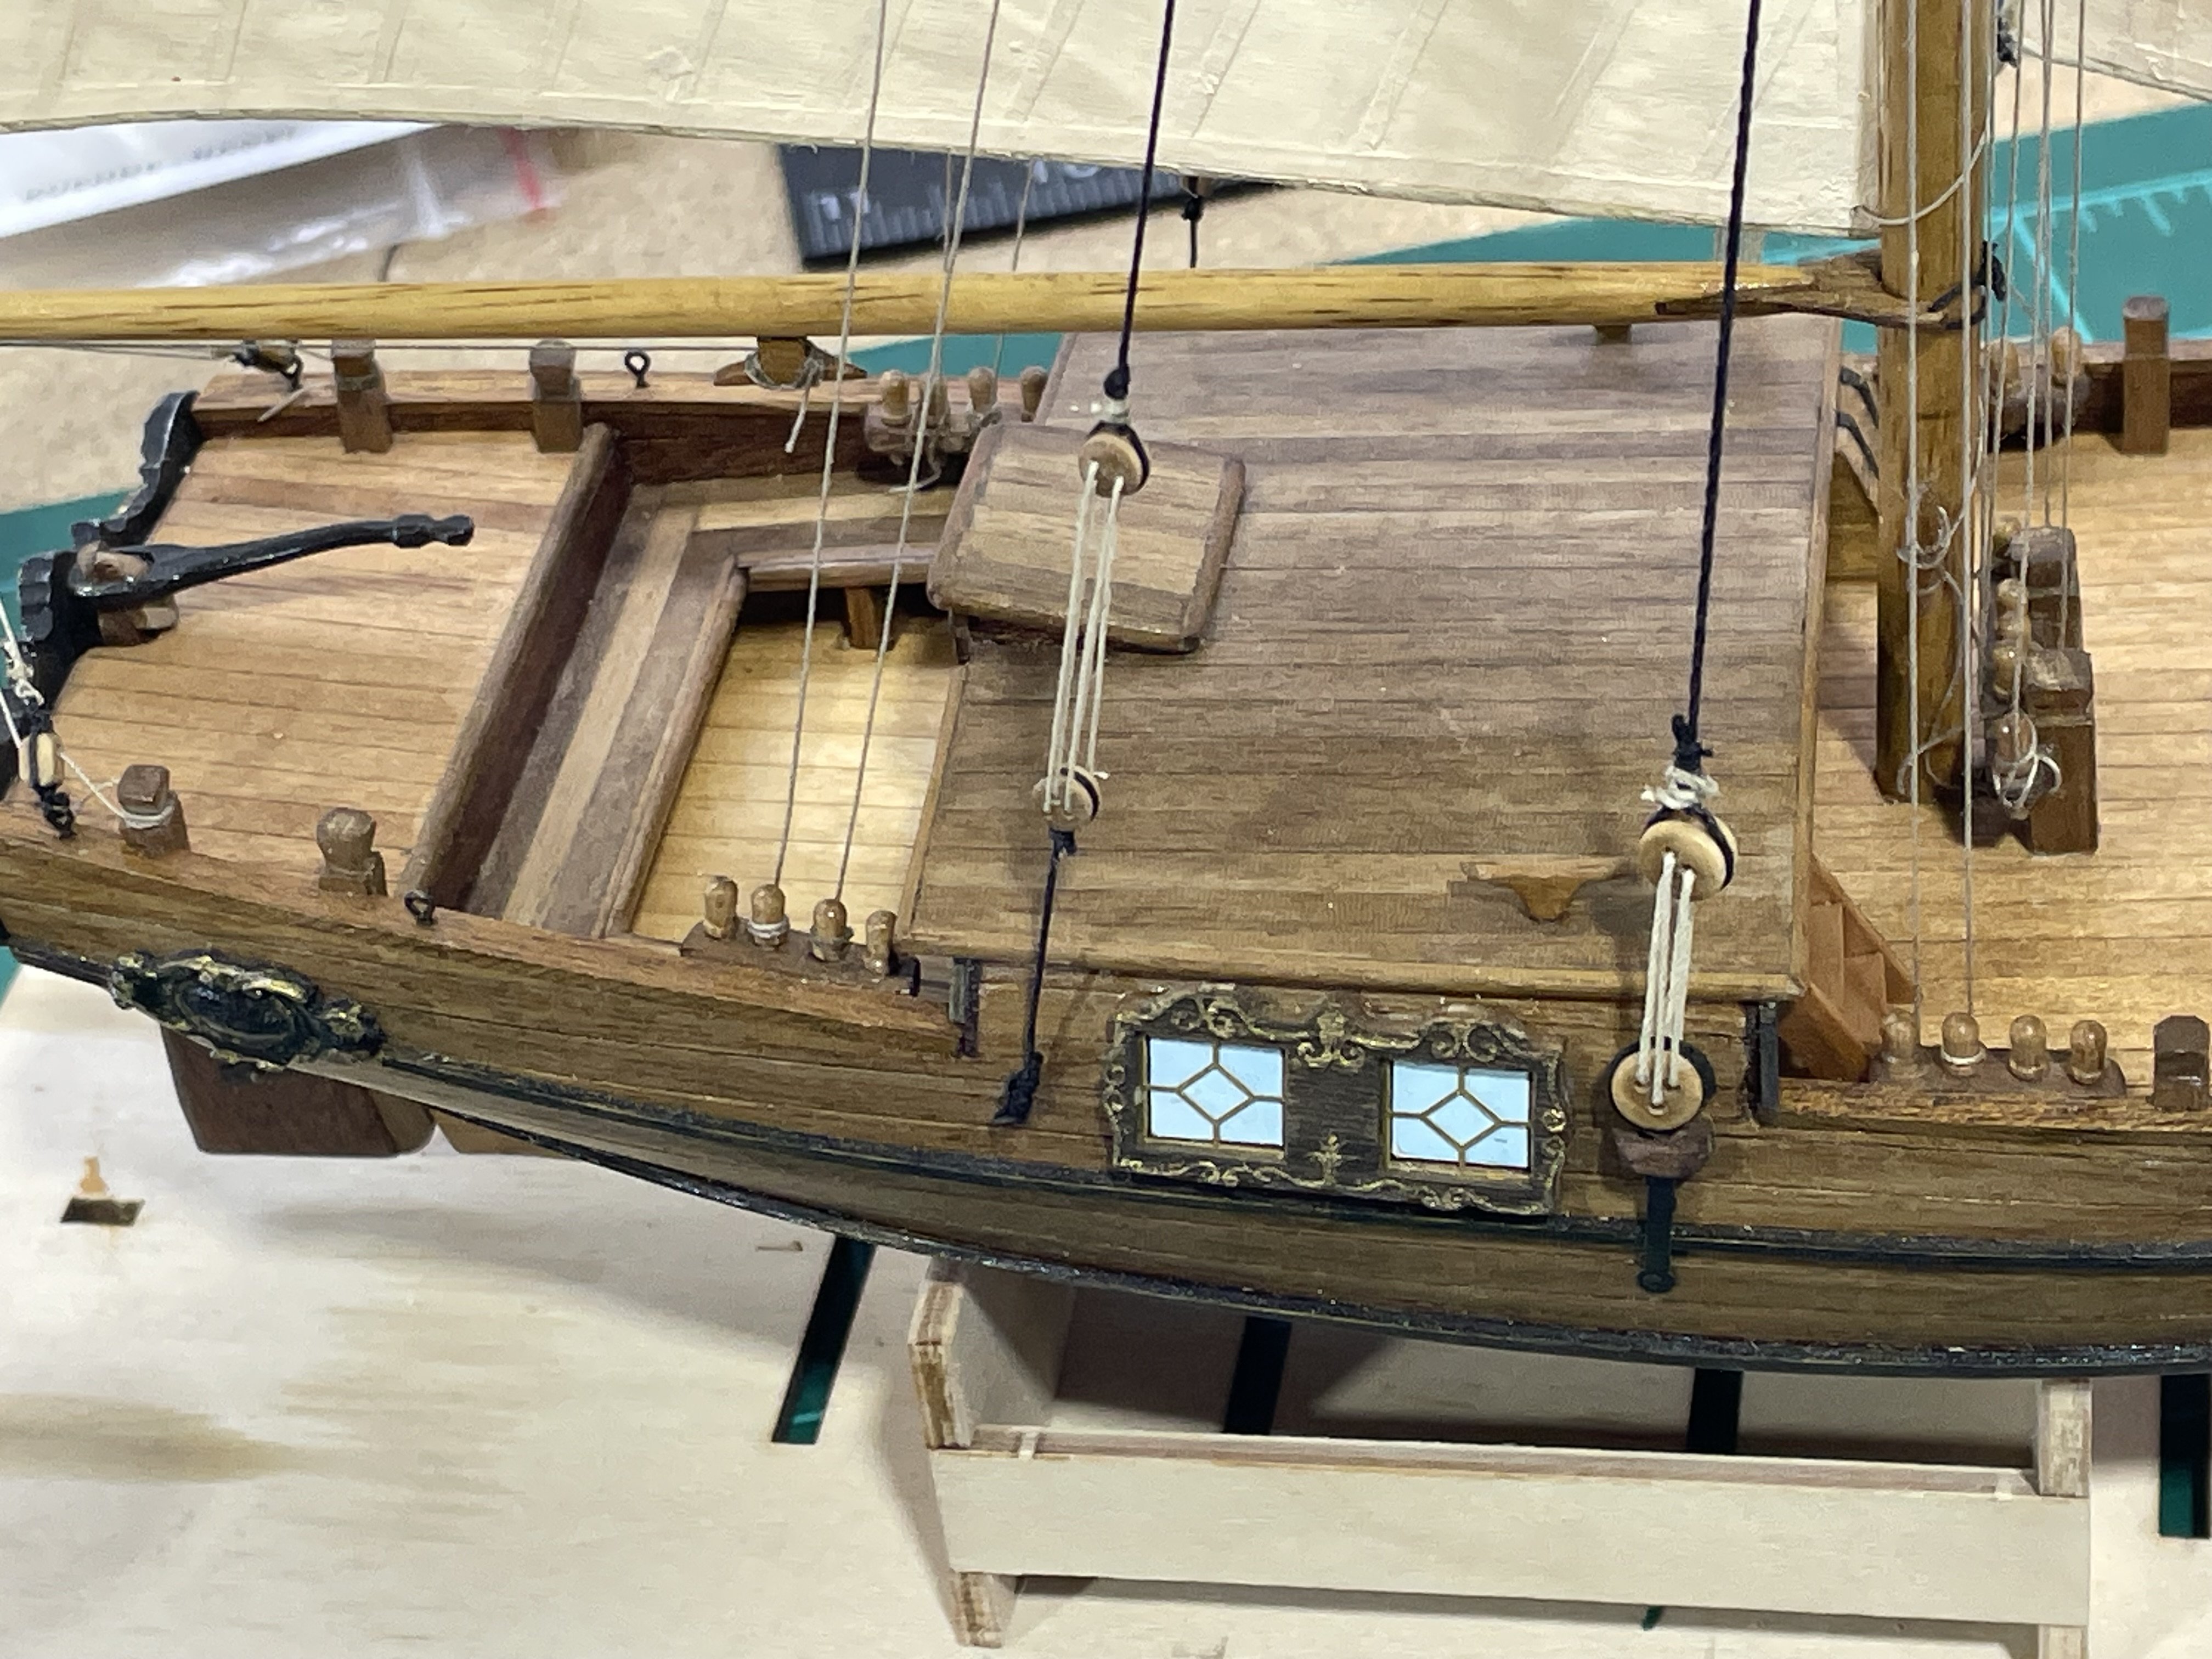
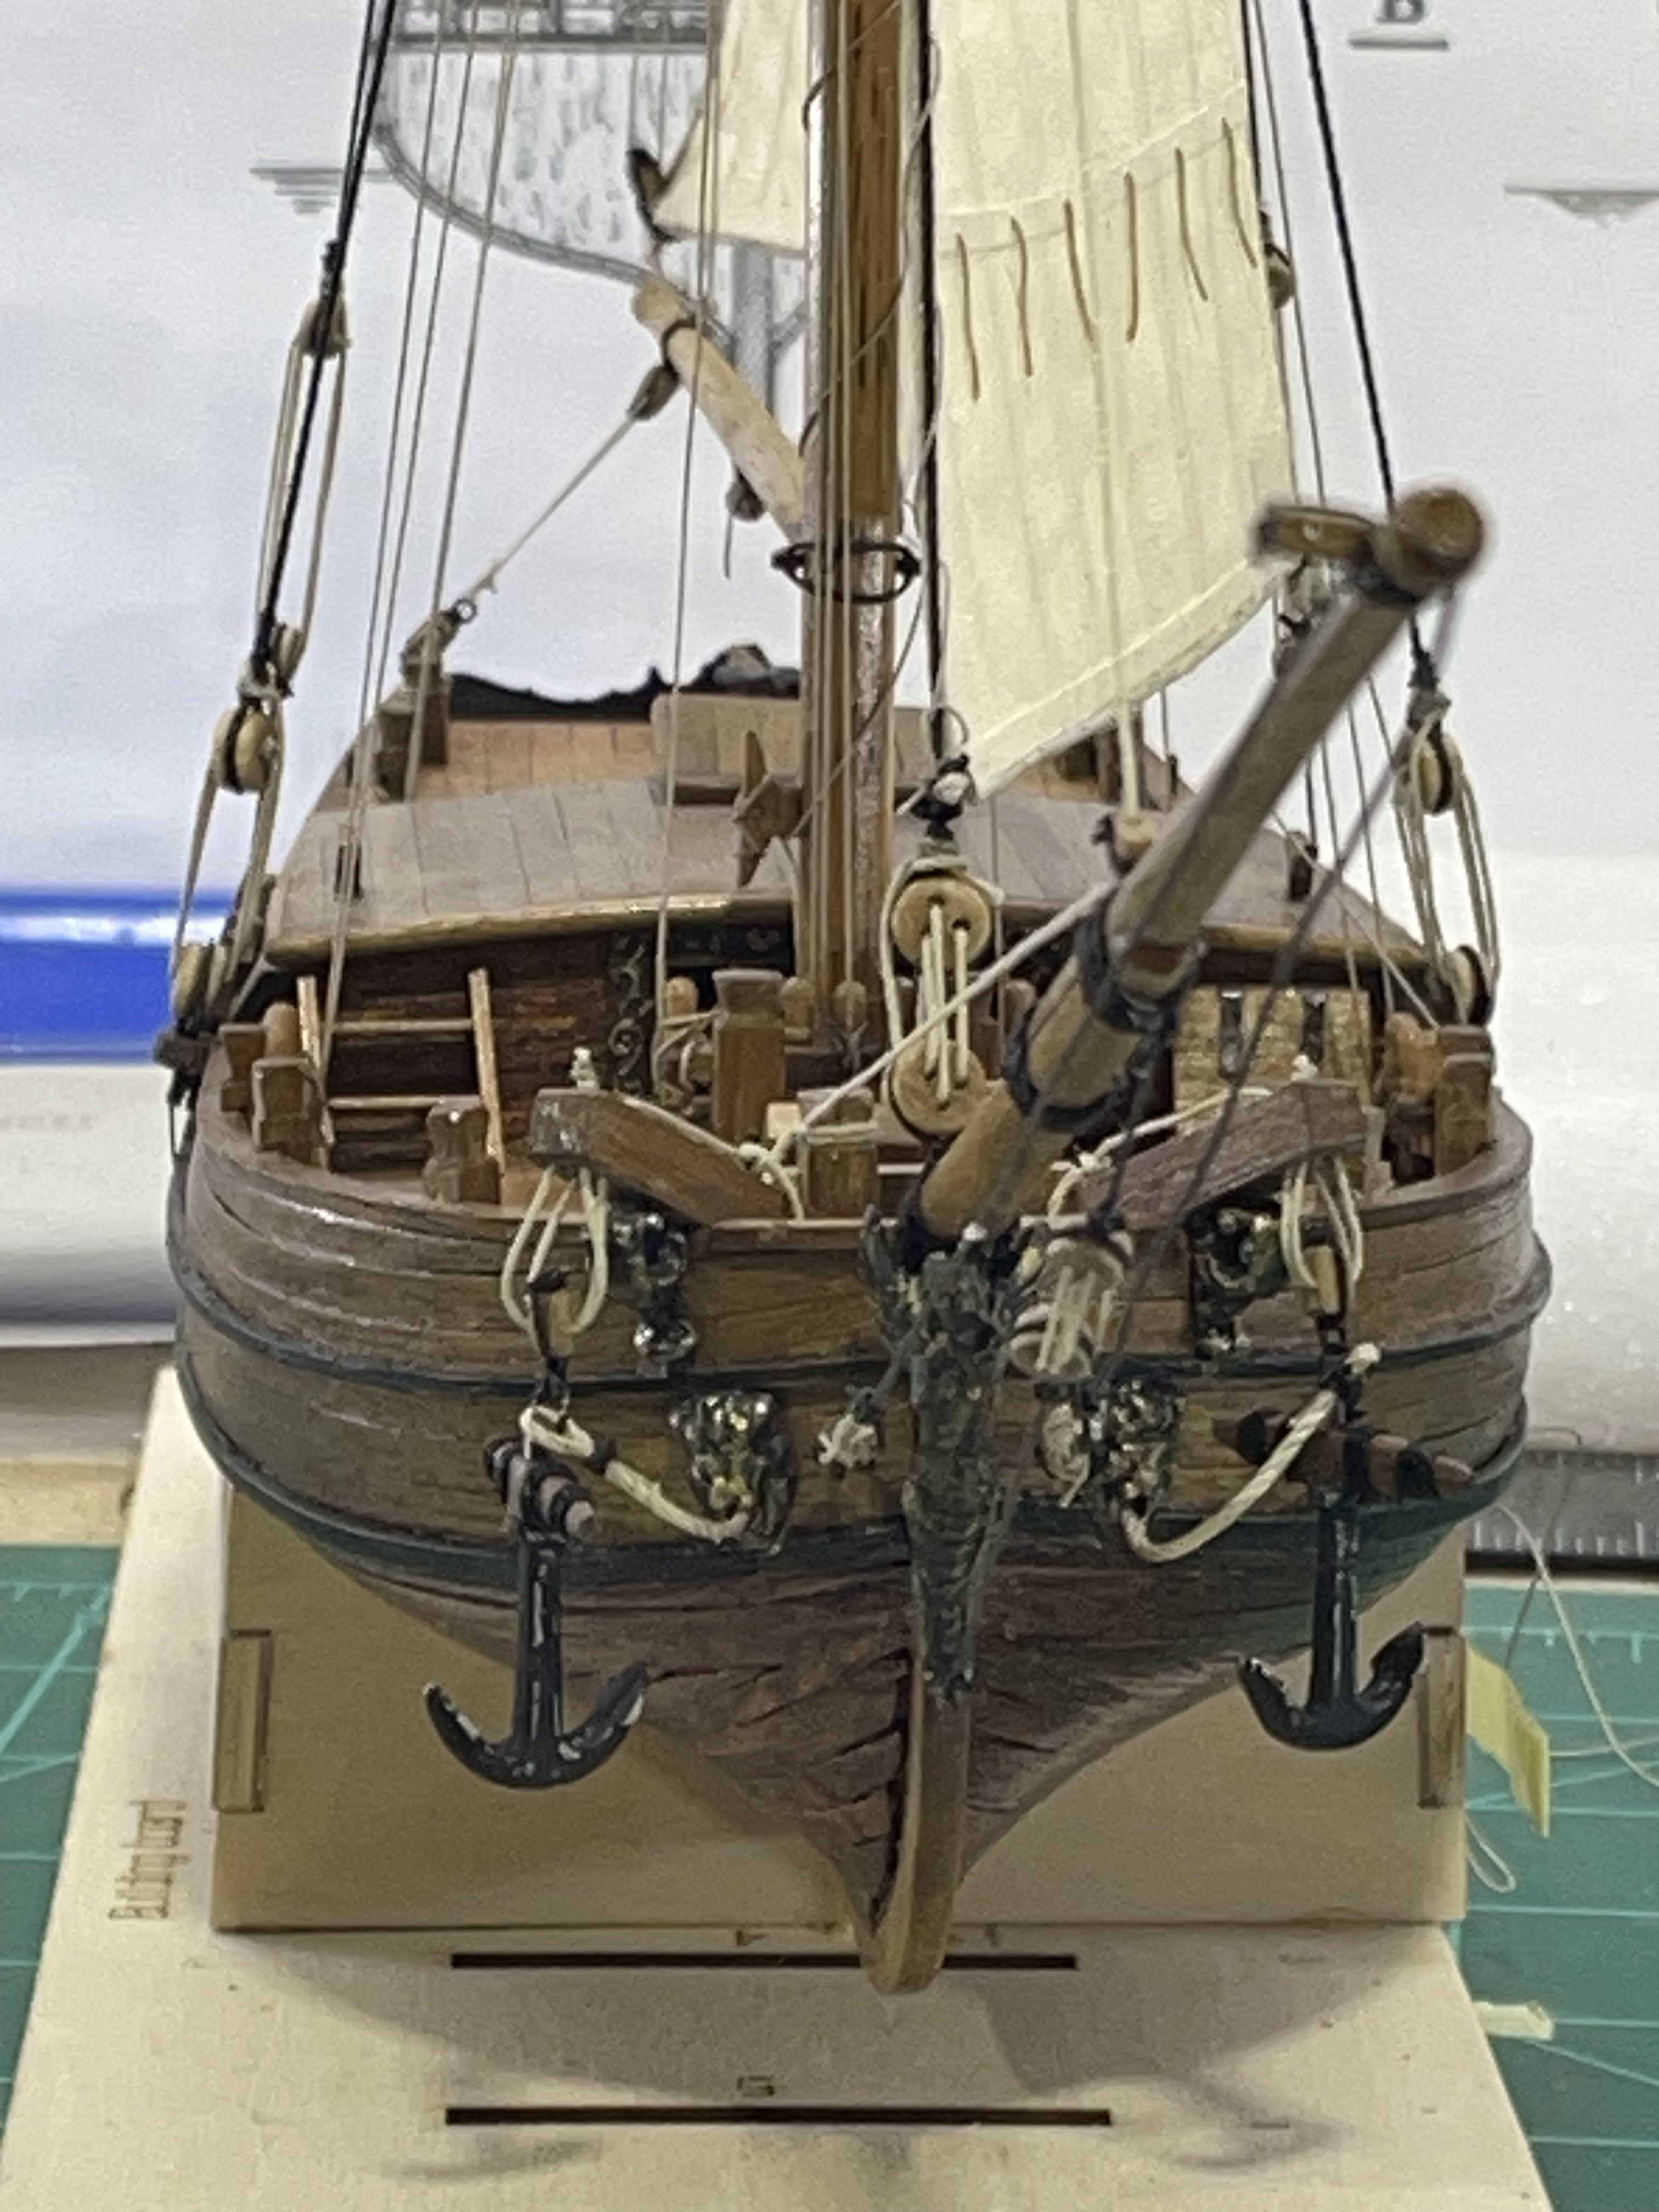
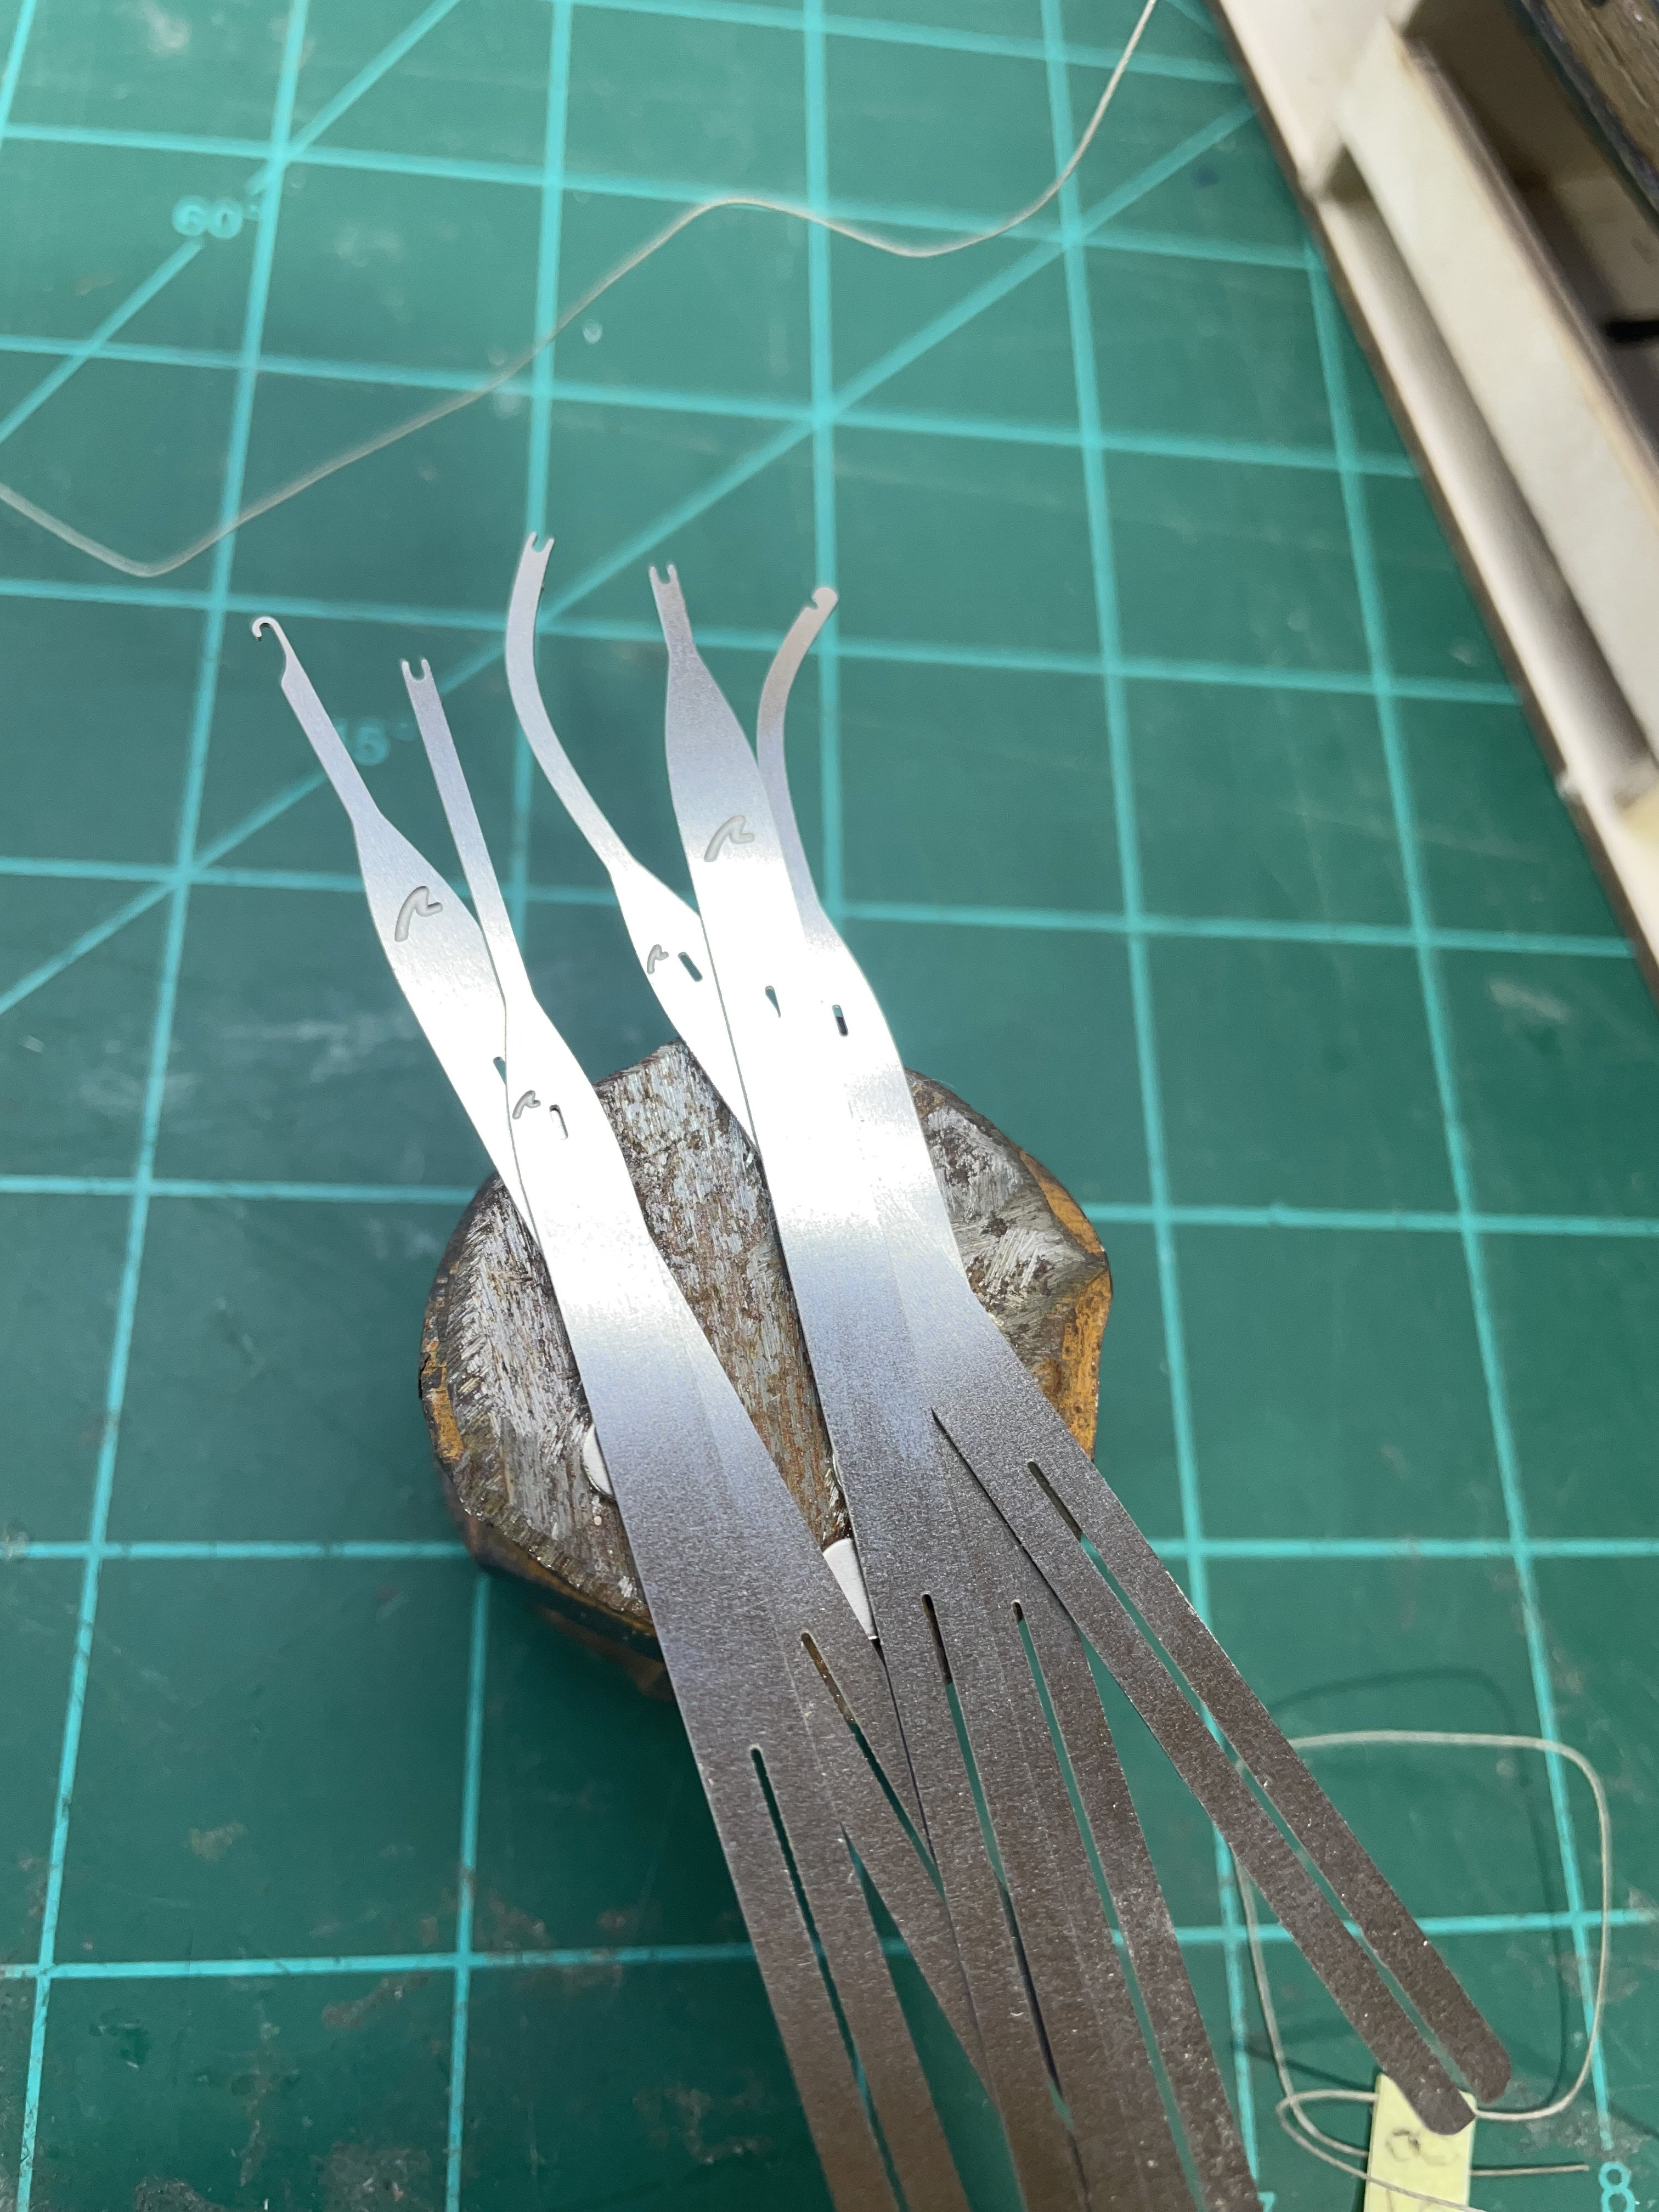
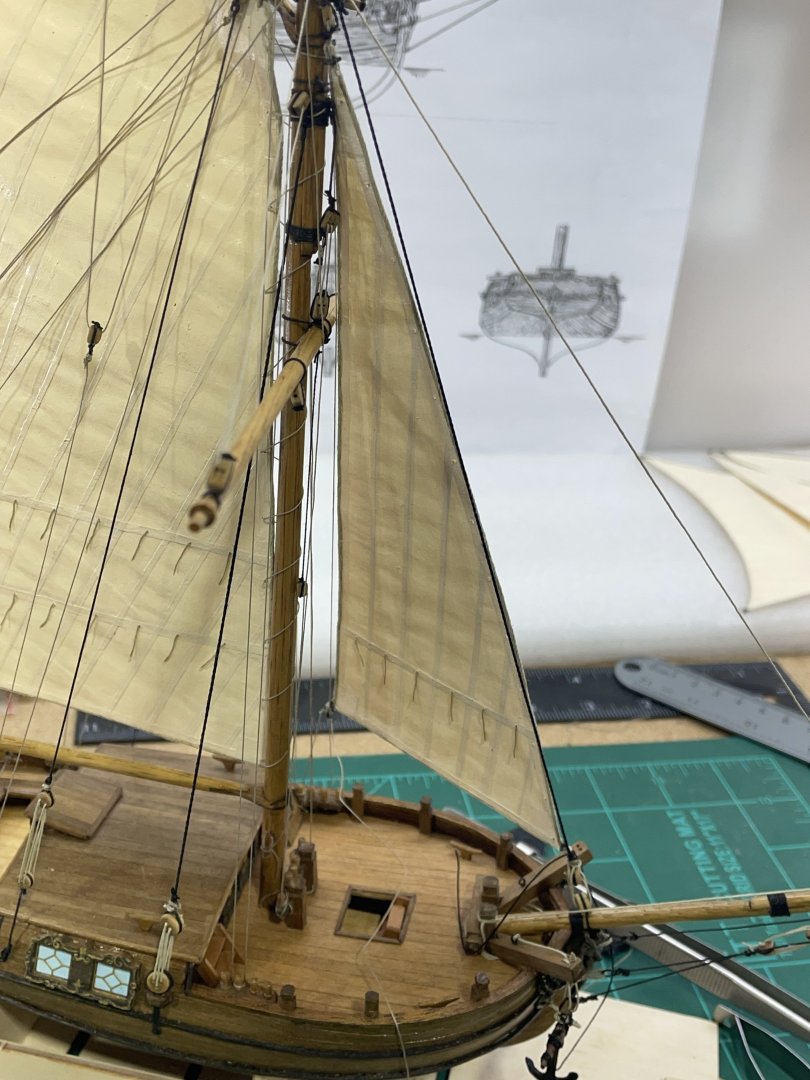
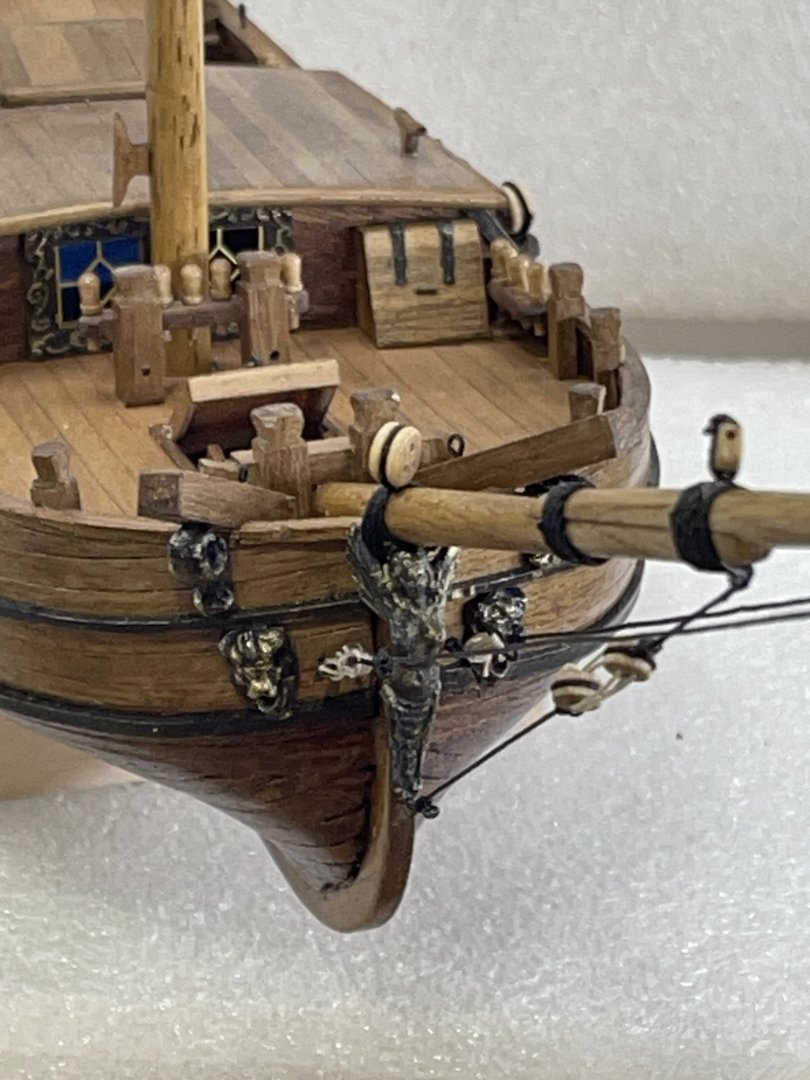
 The next thing I worked on was securing all the lines on the main sail and lower yard of the top sail. These rigging tools were super helpful tying the lines to the pins. After that went the jib sail. It was laced to the four stay and the anchors hung. next, I’ll raise the middle jib sail.


- 80 replies
-
- 10
-

-
Jacques, what a brave, dedicated and skillful modeler you are! That information on the wood will sure add to your build. It could make it hard to gift though:-)
- 20 replies
-
- 4
-

-
-
- NRG Capstan
- NRG
- (and 1 more)
-
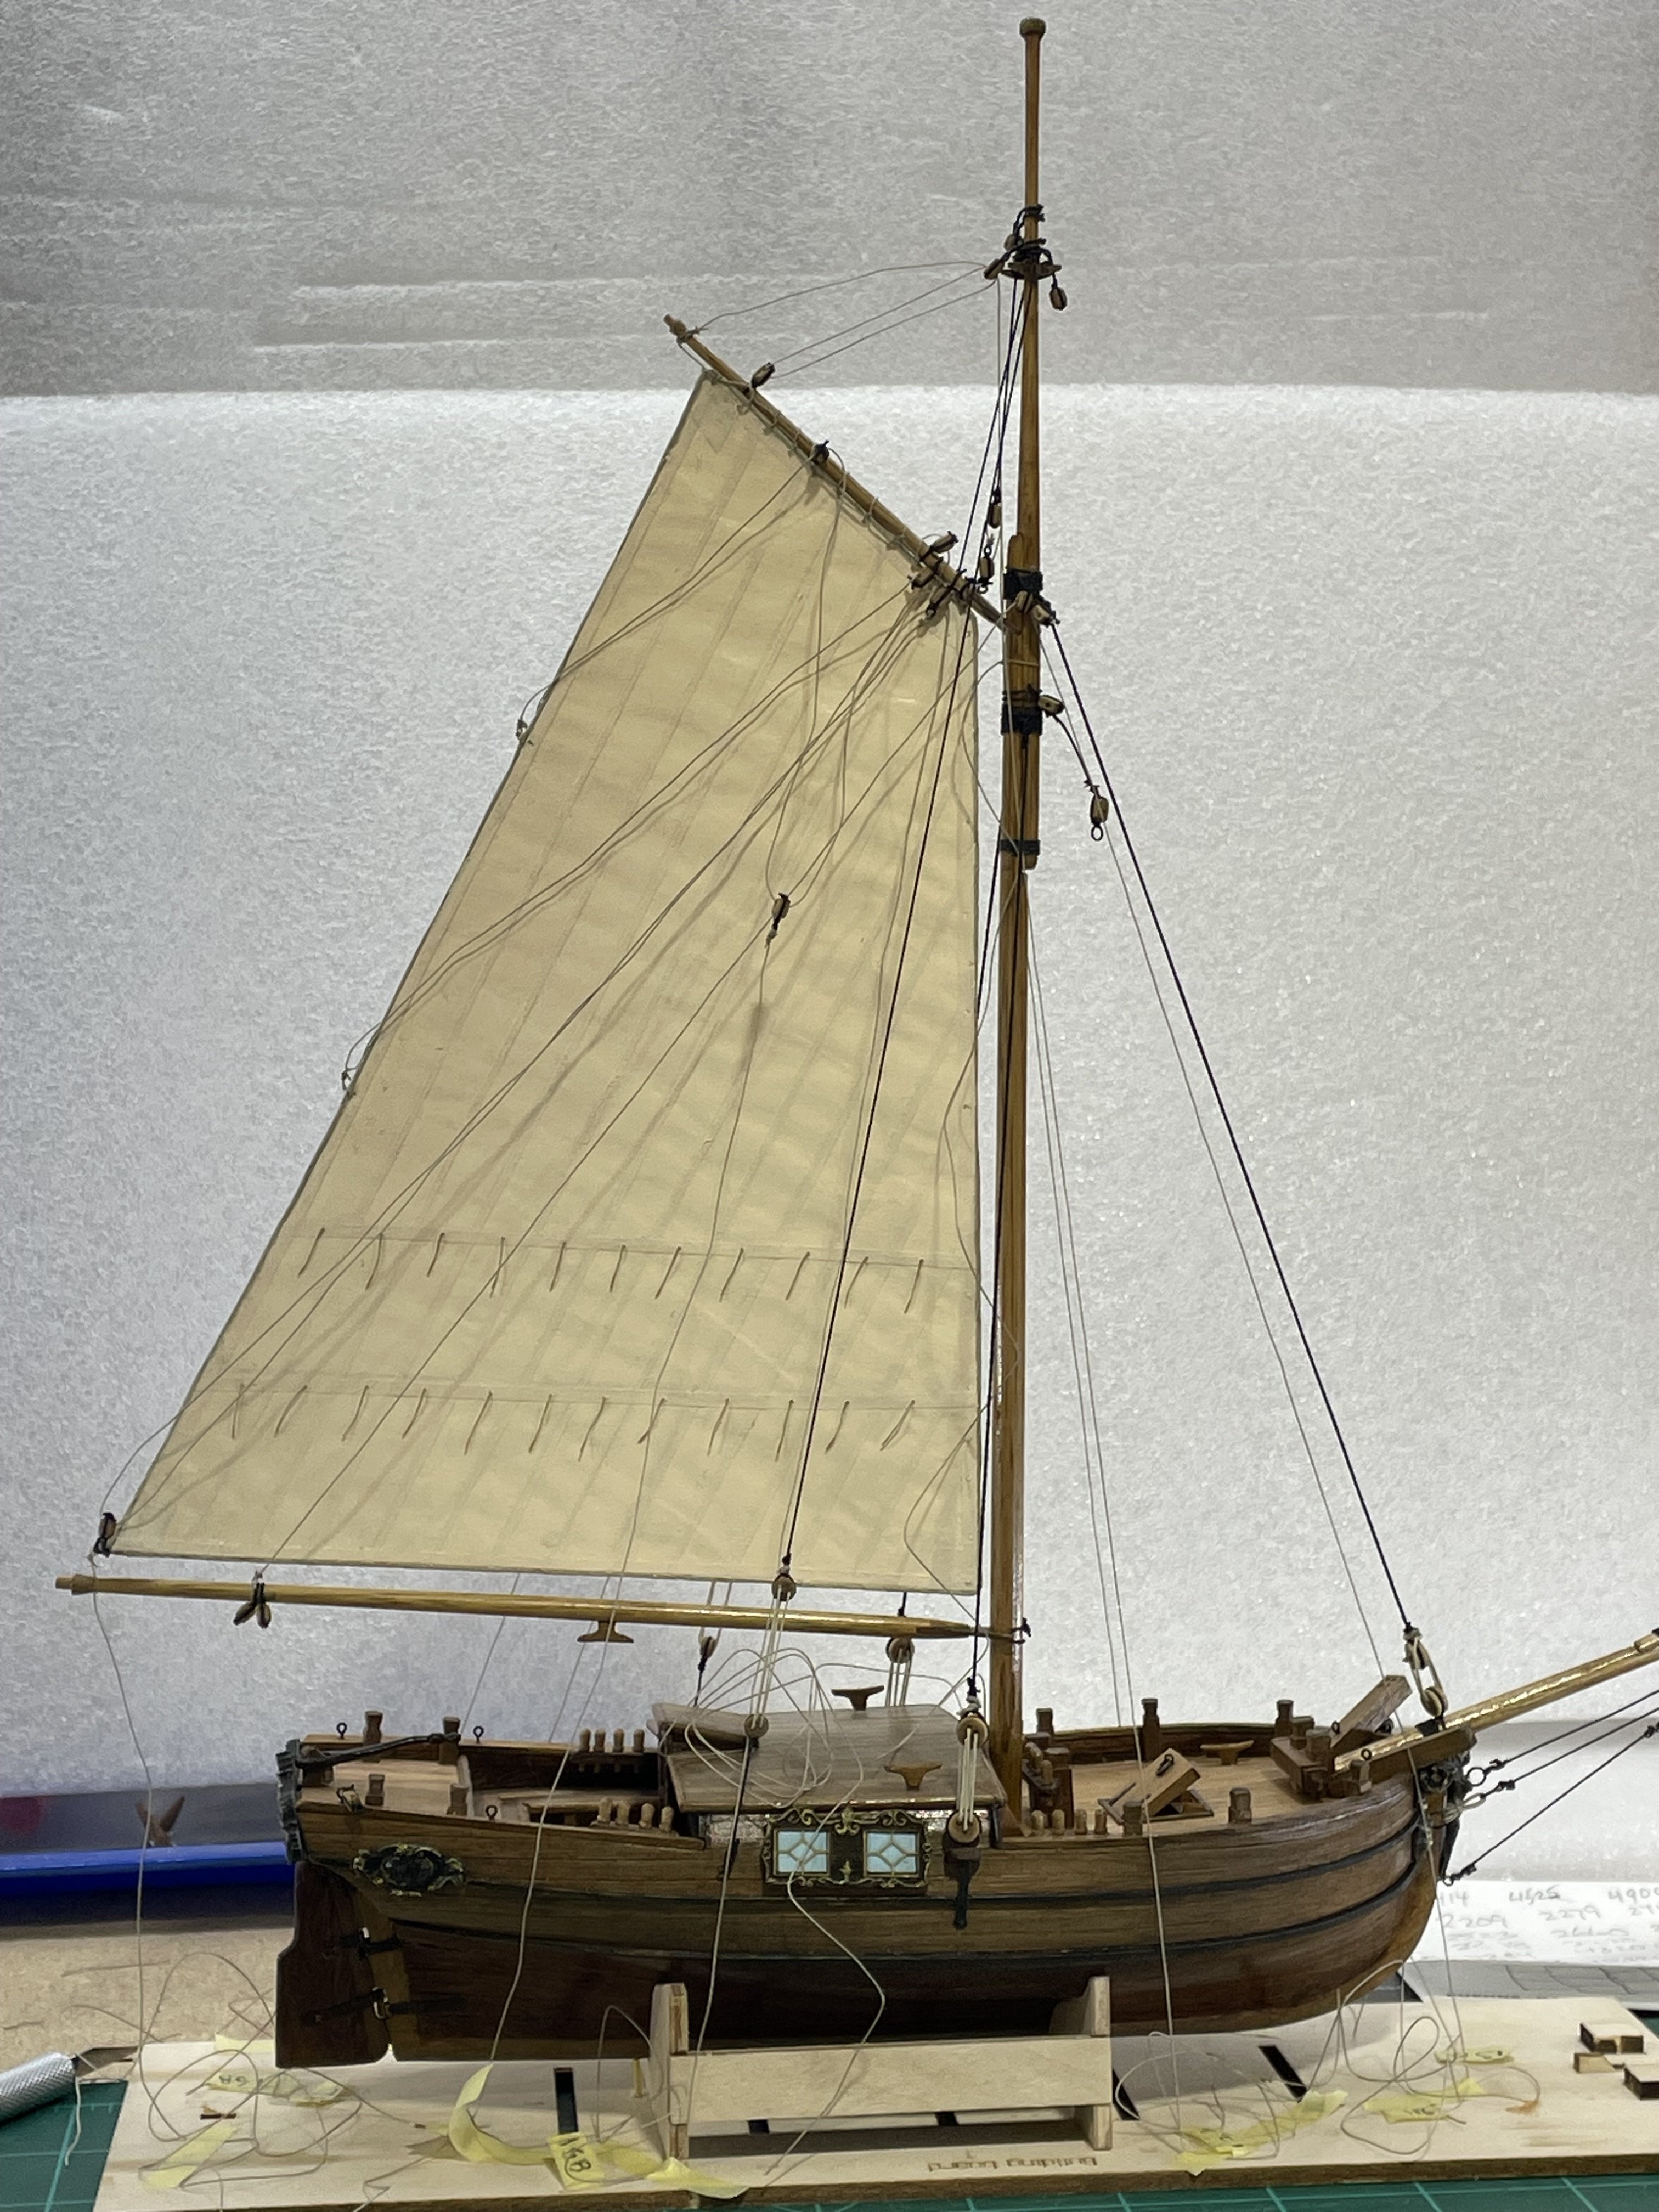
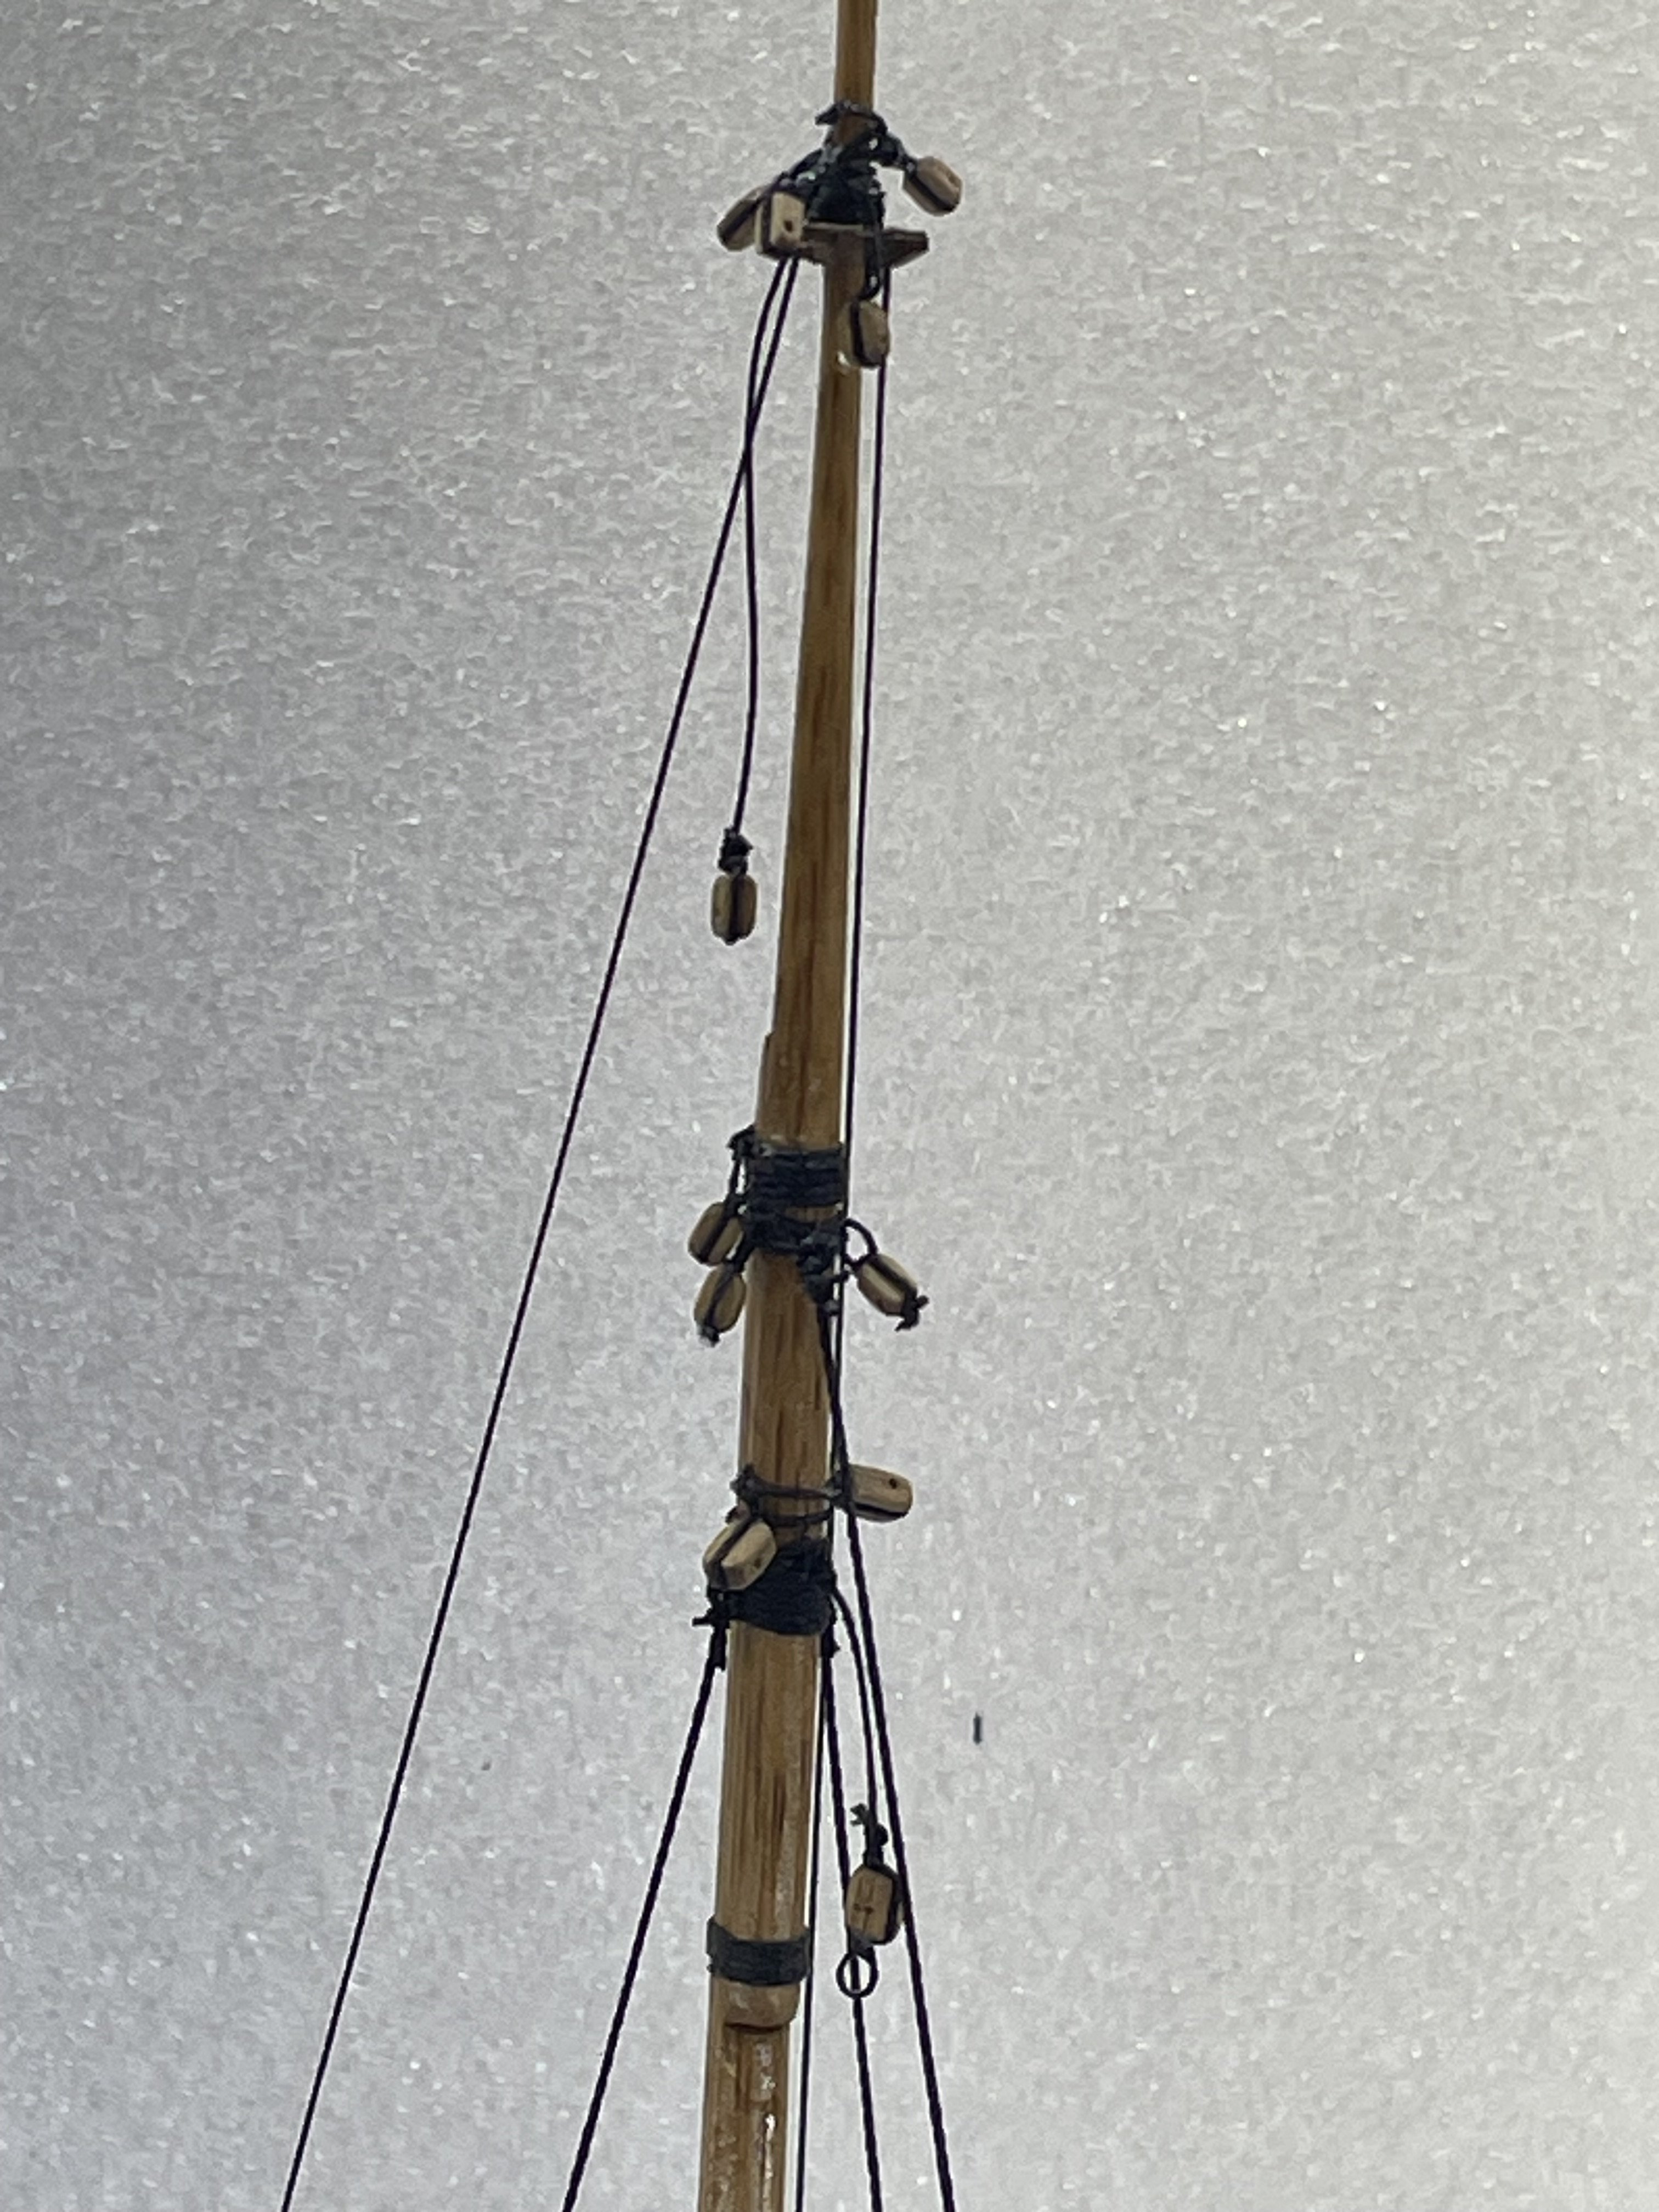
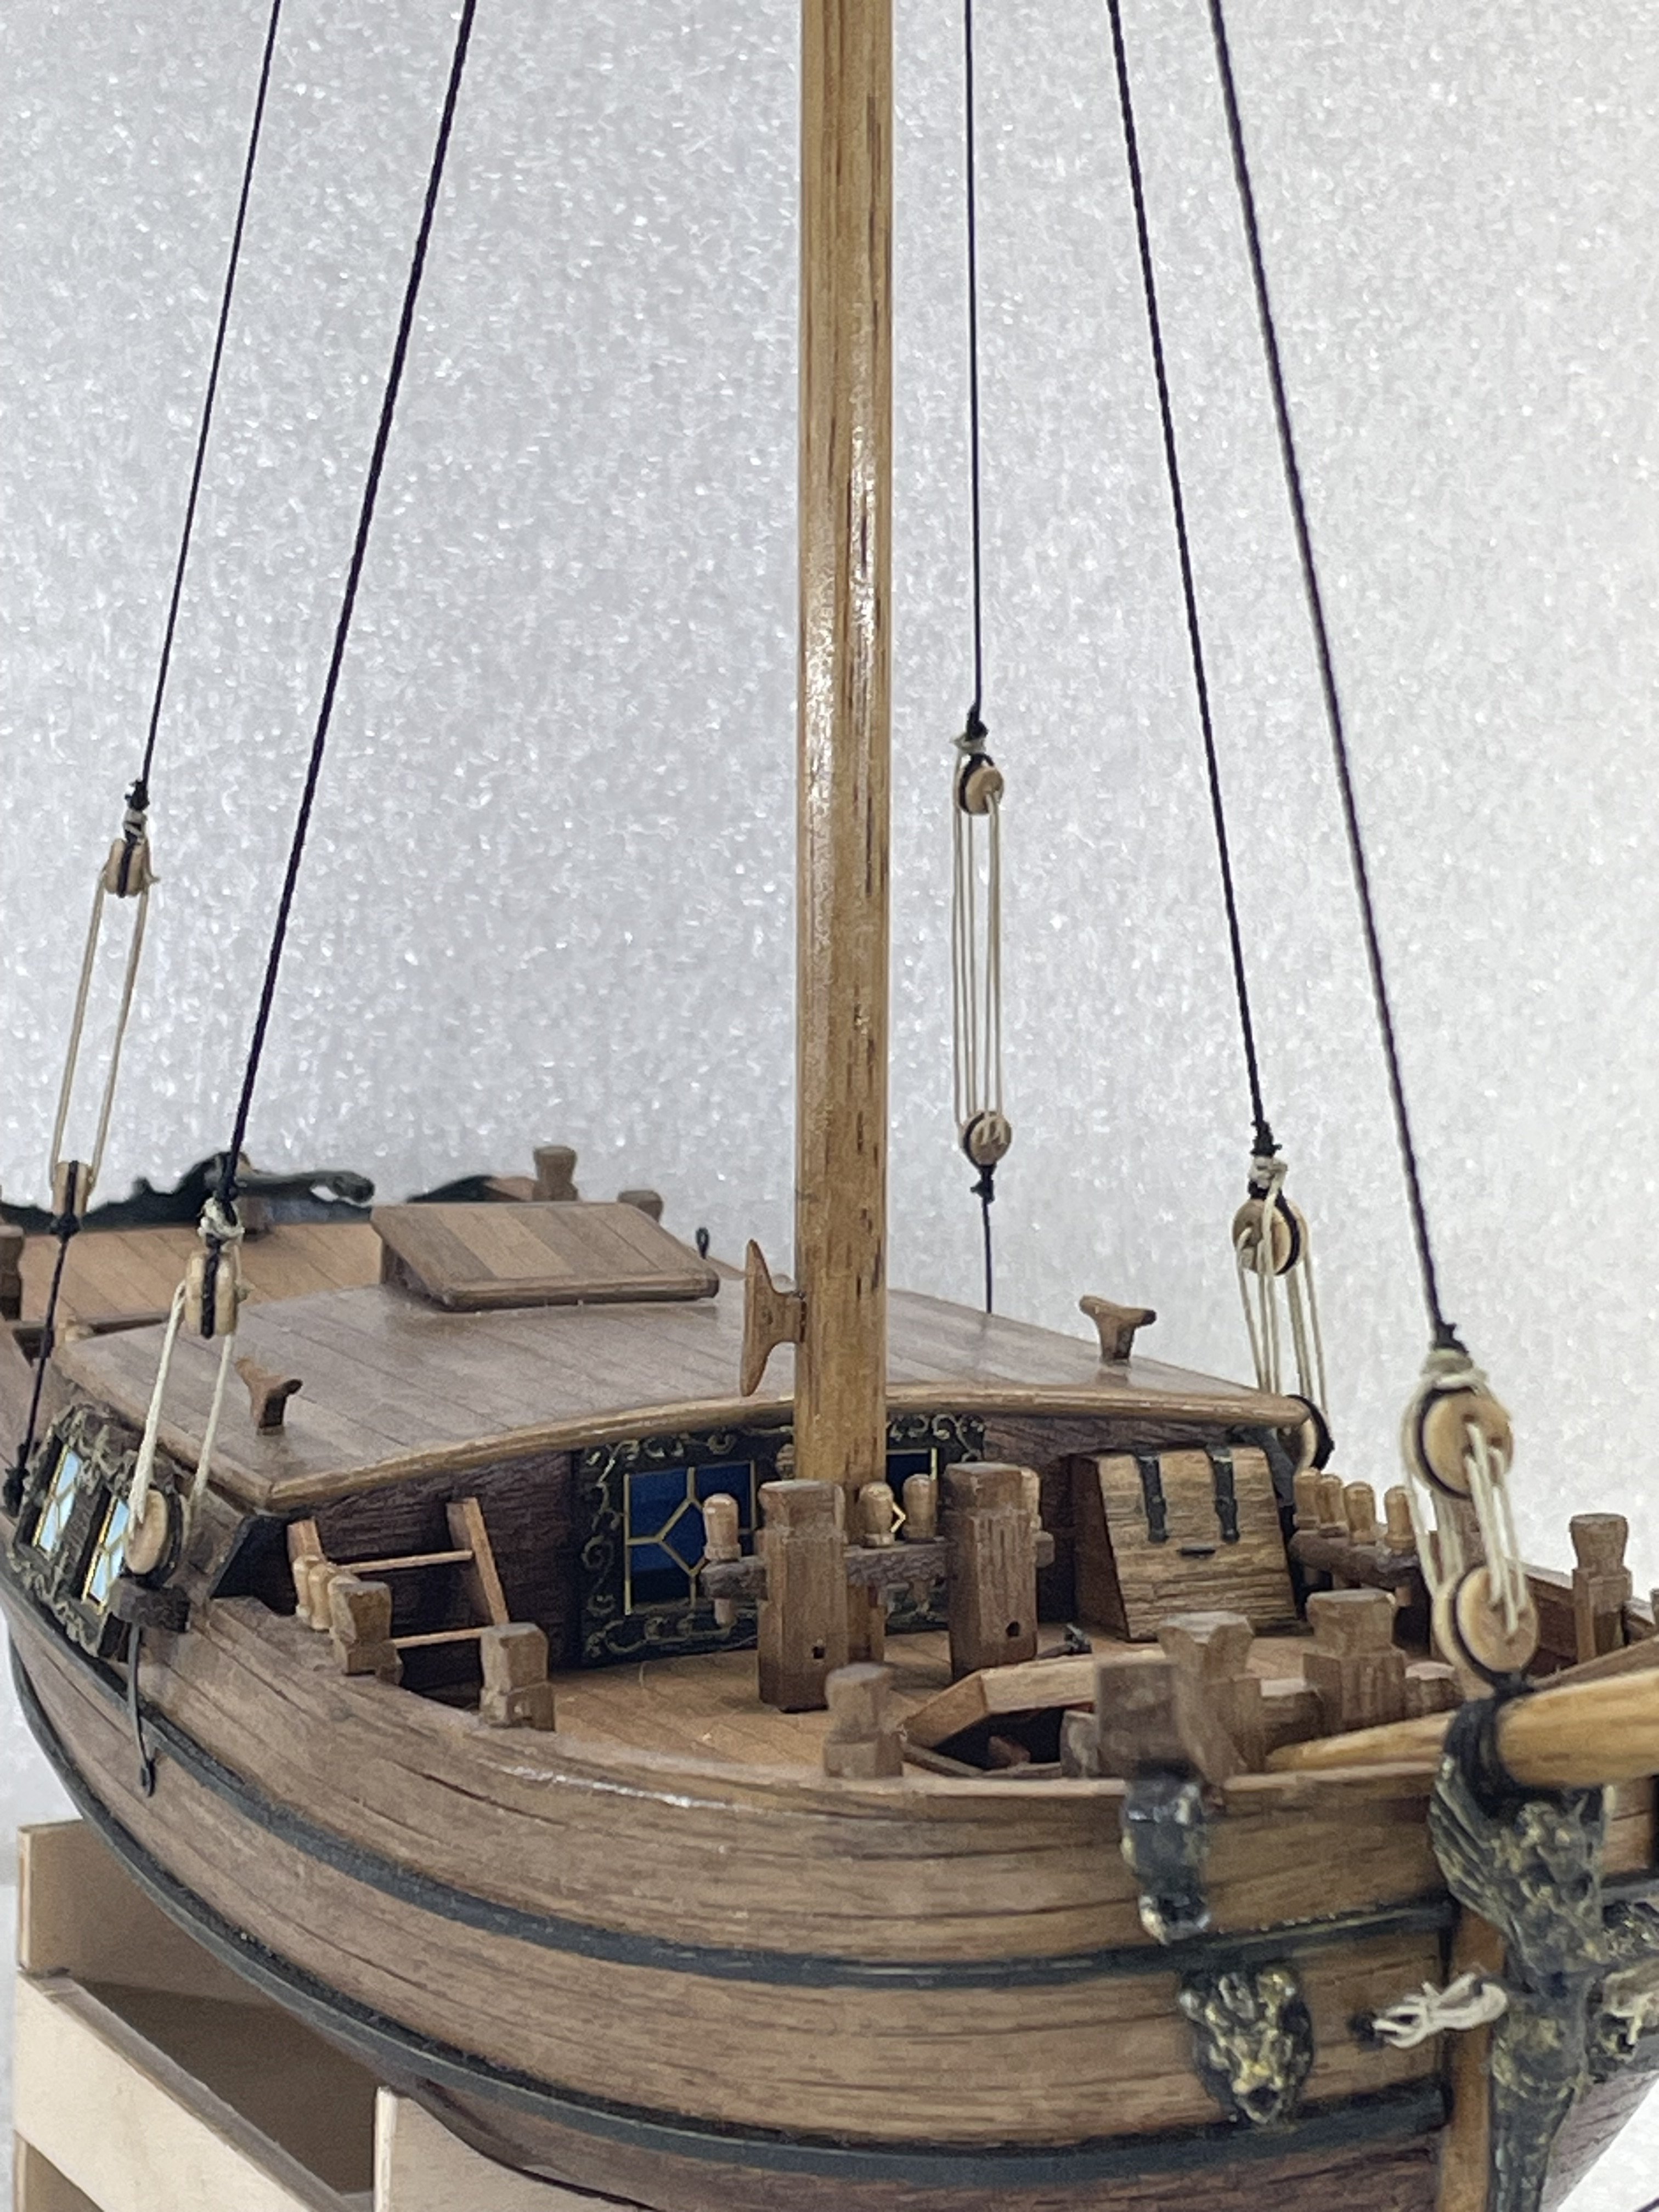
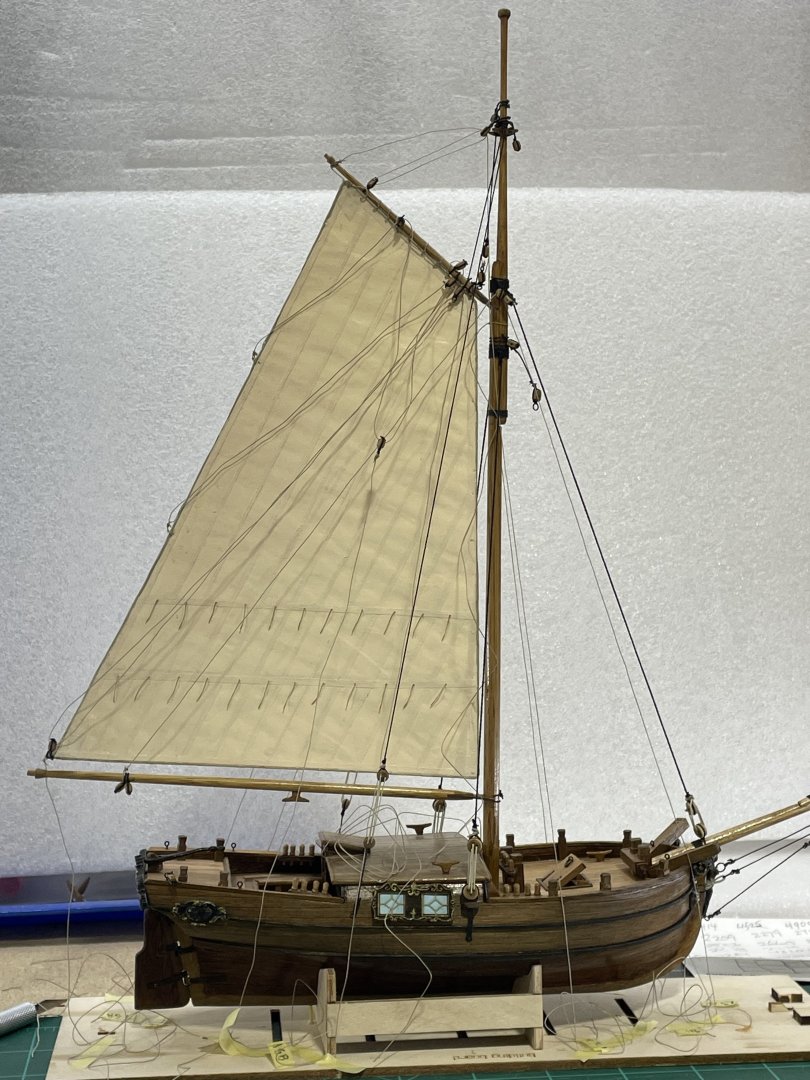
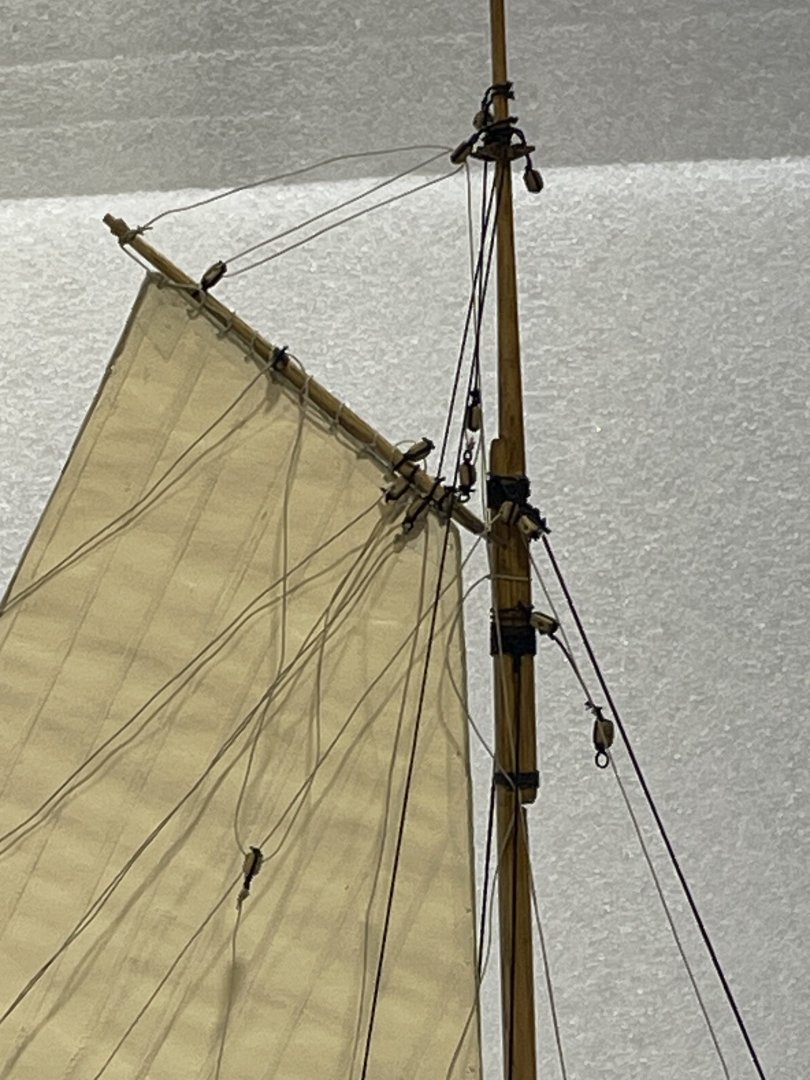
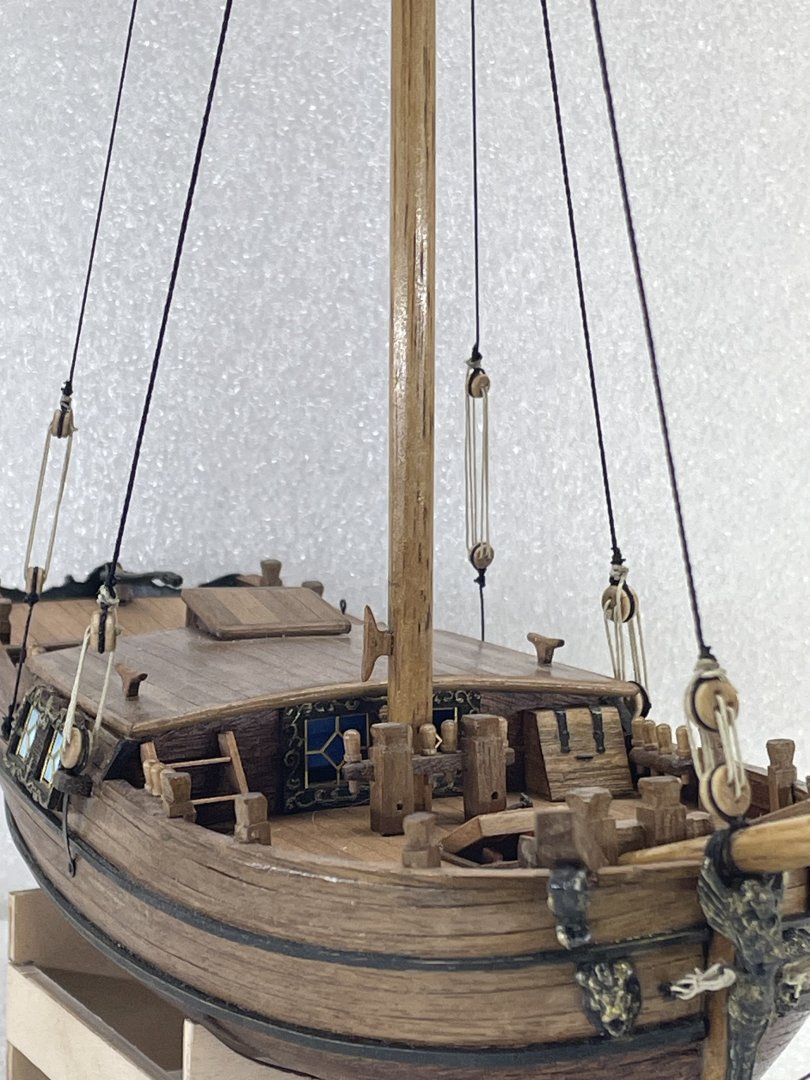
After raising the main sail I did a look over, then I went back and fixed all the lines that twisted around something. I thought I better get the lower yard for the top sail next. That’s where I needed an eyebolt in front of the of the mast, that I forgot. I drilled it on an angle and didn’t even have to bend it. I’m not going to glue it until I see that the yard and the top sail is going to work. Here’s the eyebolt. I need to decide how I’m going to tie it off. It’s just run through and taped off to the building board now.


-
So far so good, I got the main sail raised. I need to secure it to the mast. I drilled the keel and put brass rods in them. They stuck down further than the kit base. I glued the base to the old pram building board and drilled holes for the rods so it could set all the way down. That gave me room to tape the leads to the board and tie them off later. I have marked each line with its destination. I’m sure there will be some confusion later, but maybe not as much:-)

- 80 replies
-
- 10
-
-
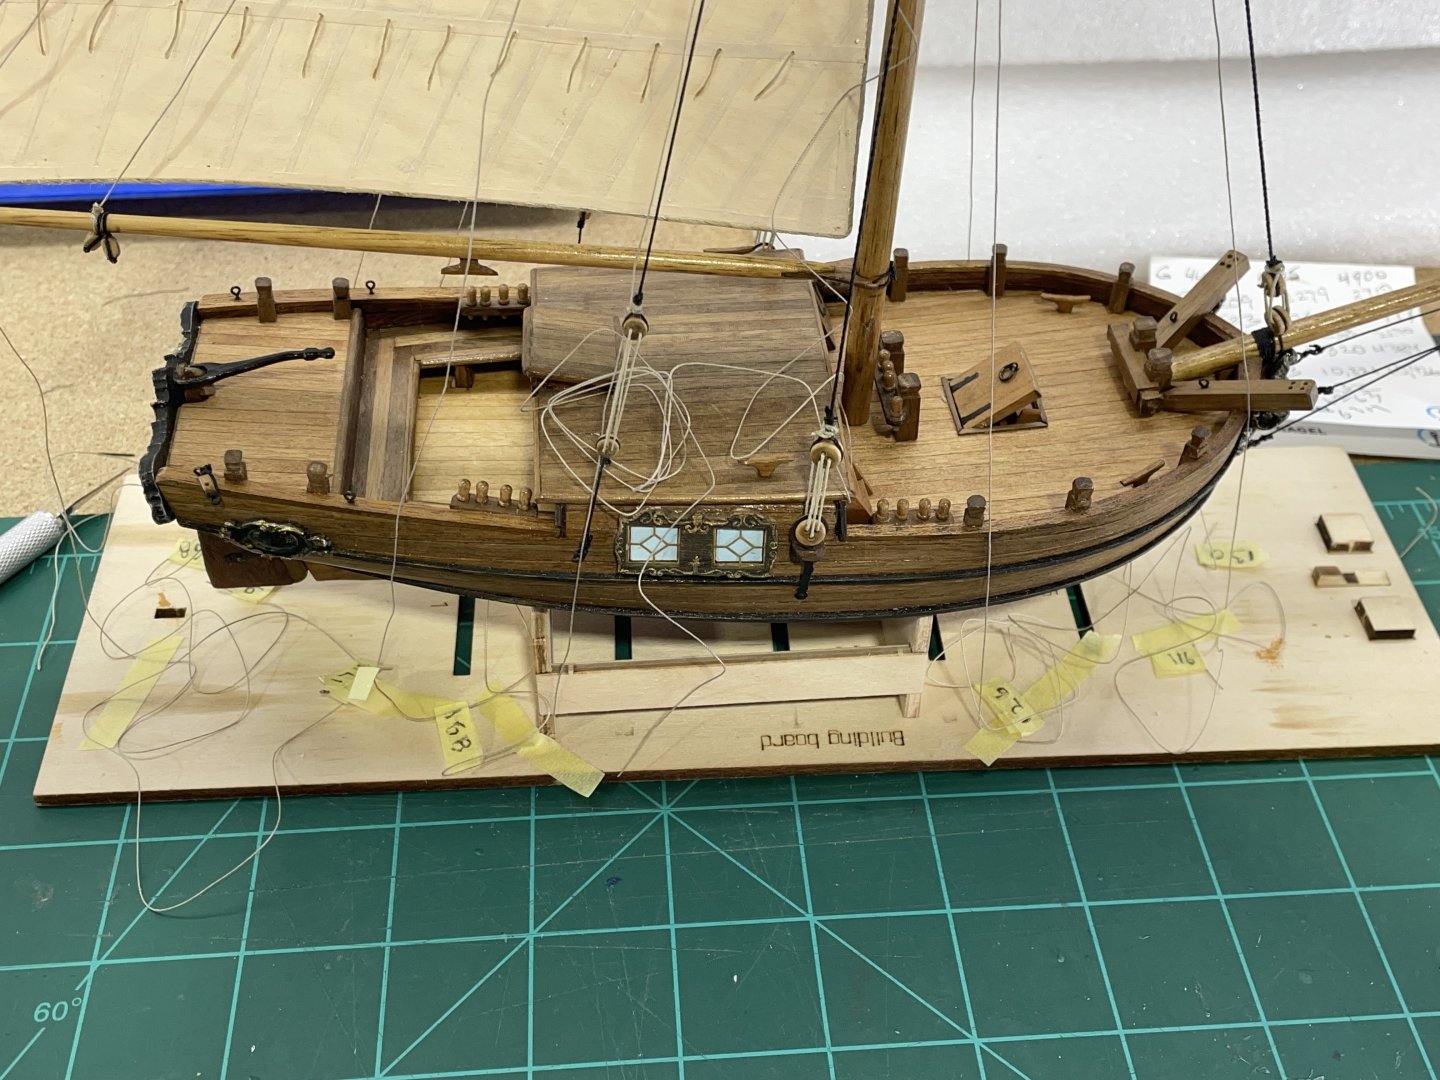
I tied as much as I thought I could on the main sail, while it was on the work bench. hopefully the next post I’ll have it raised. I do need to take some action on the pedestals before I get carried away with the sails.
-
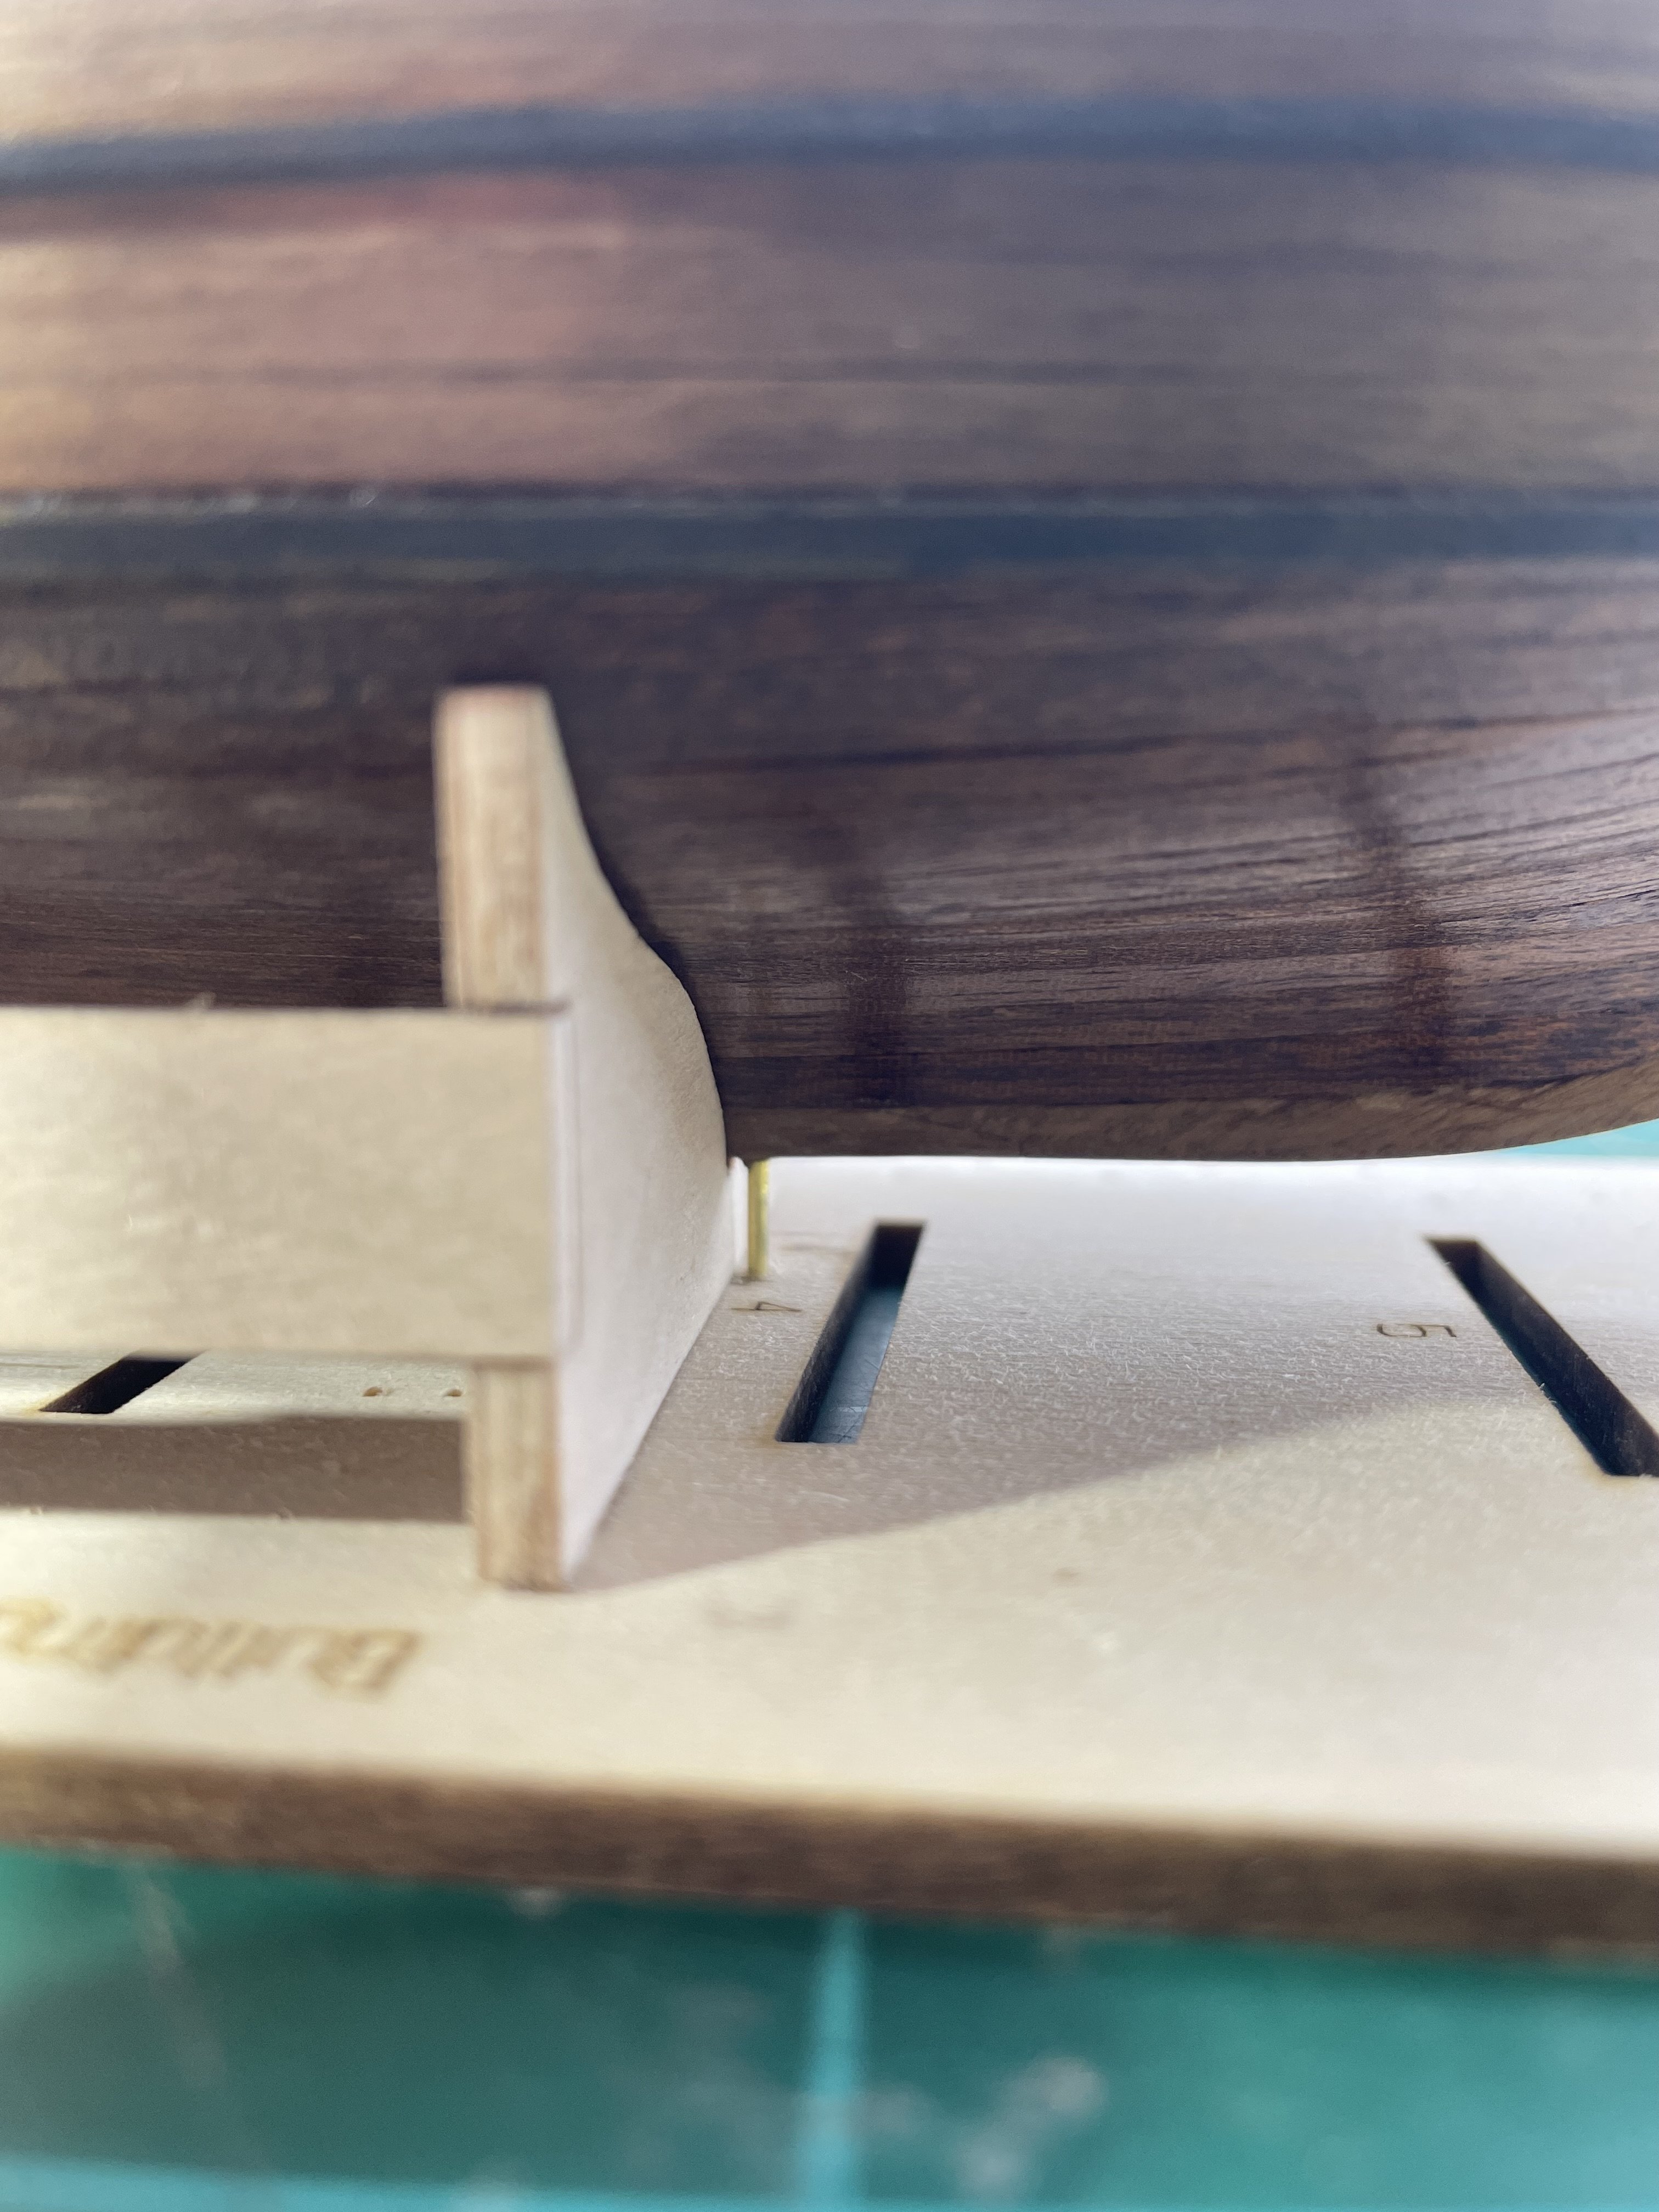
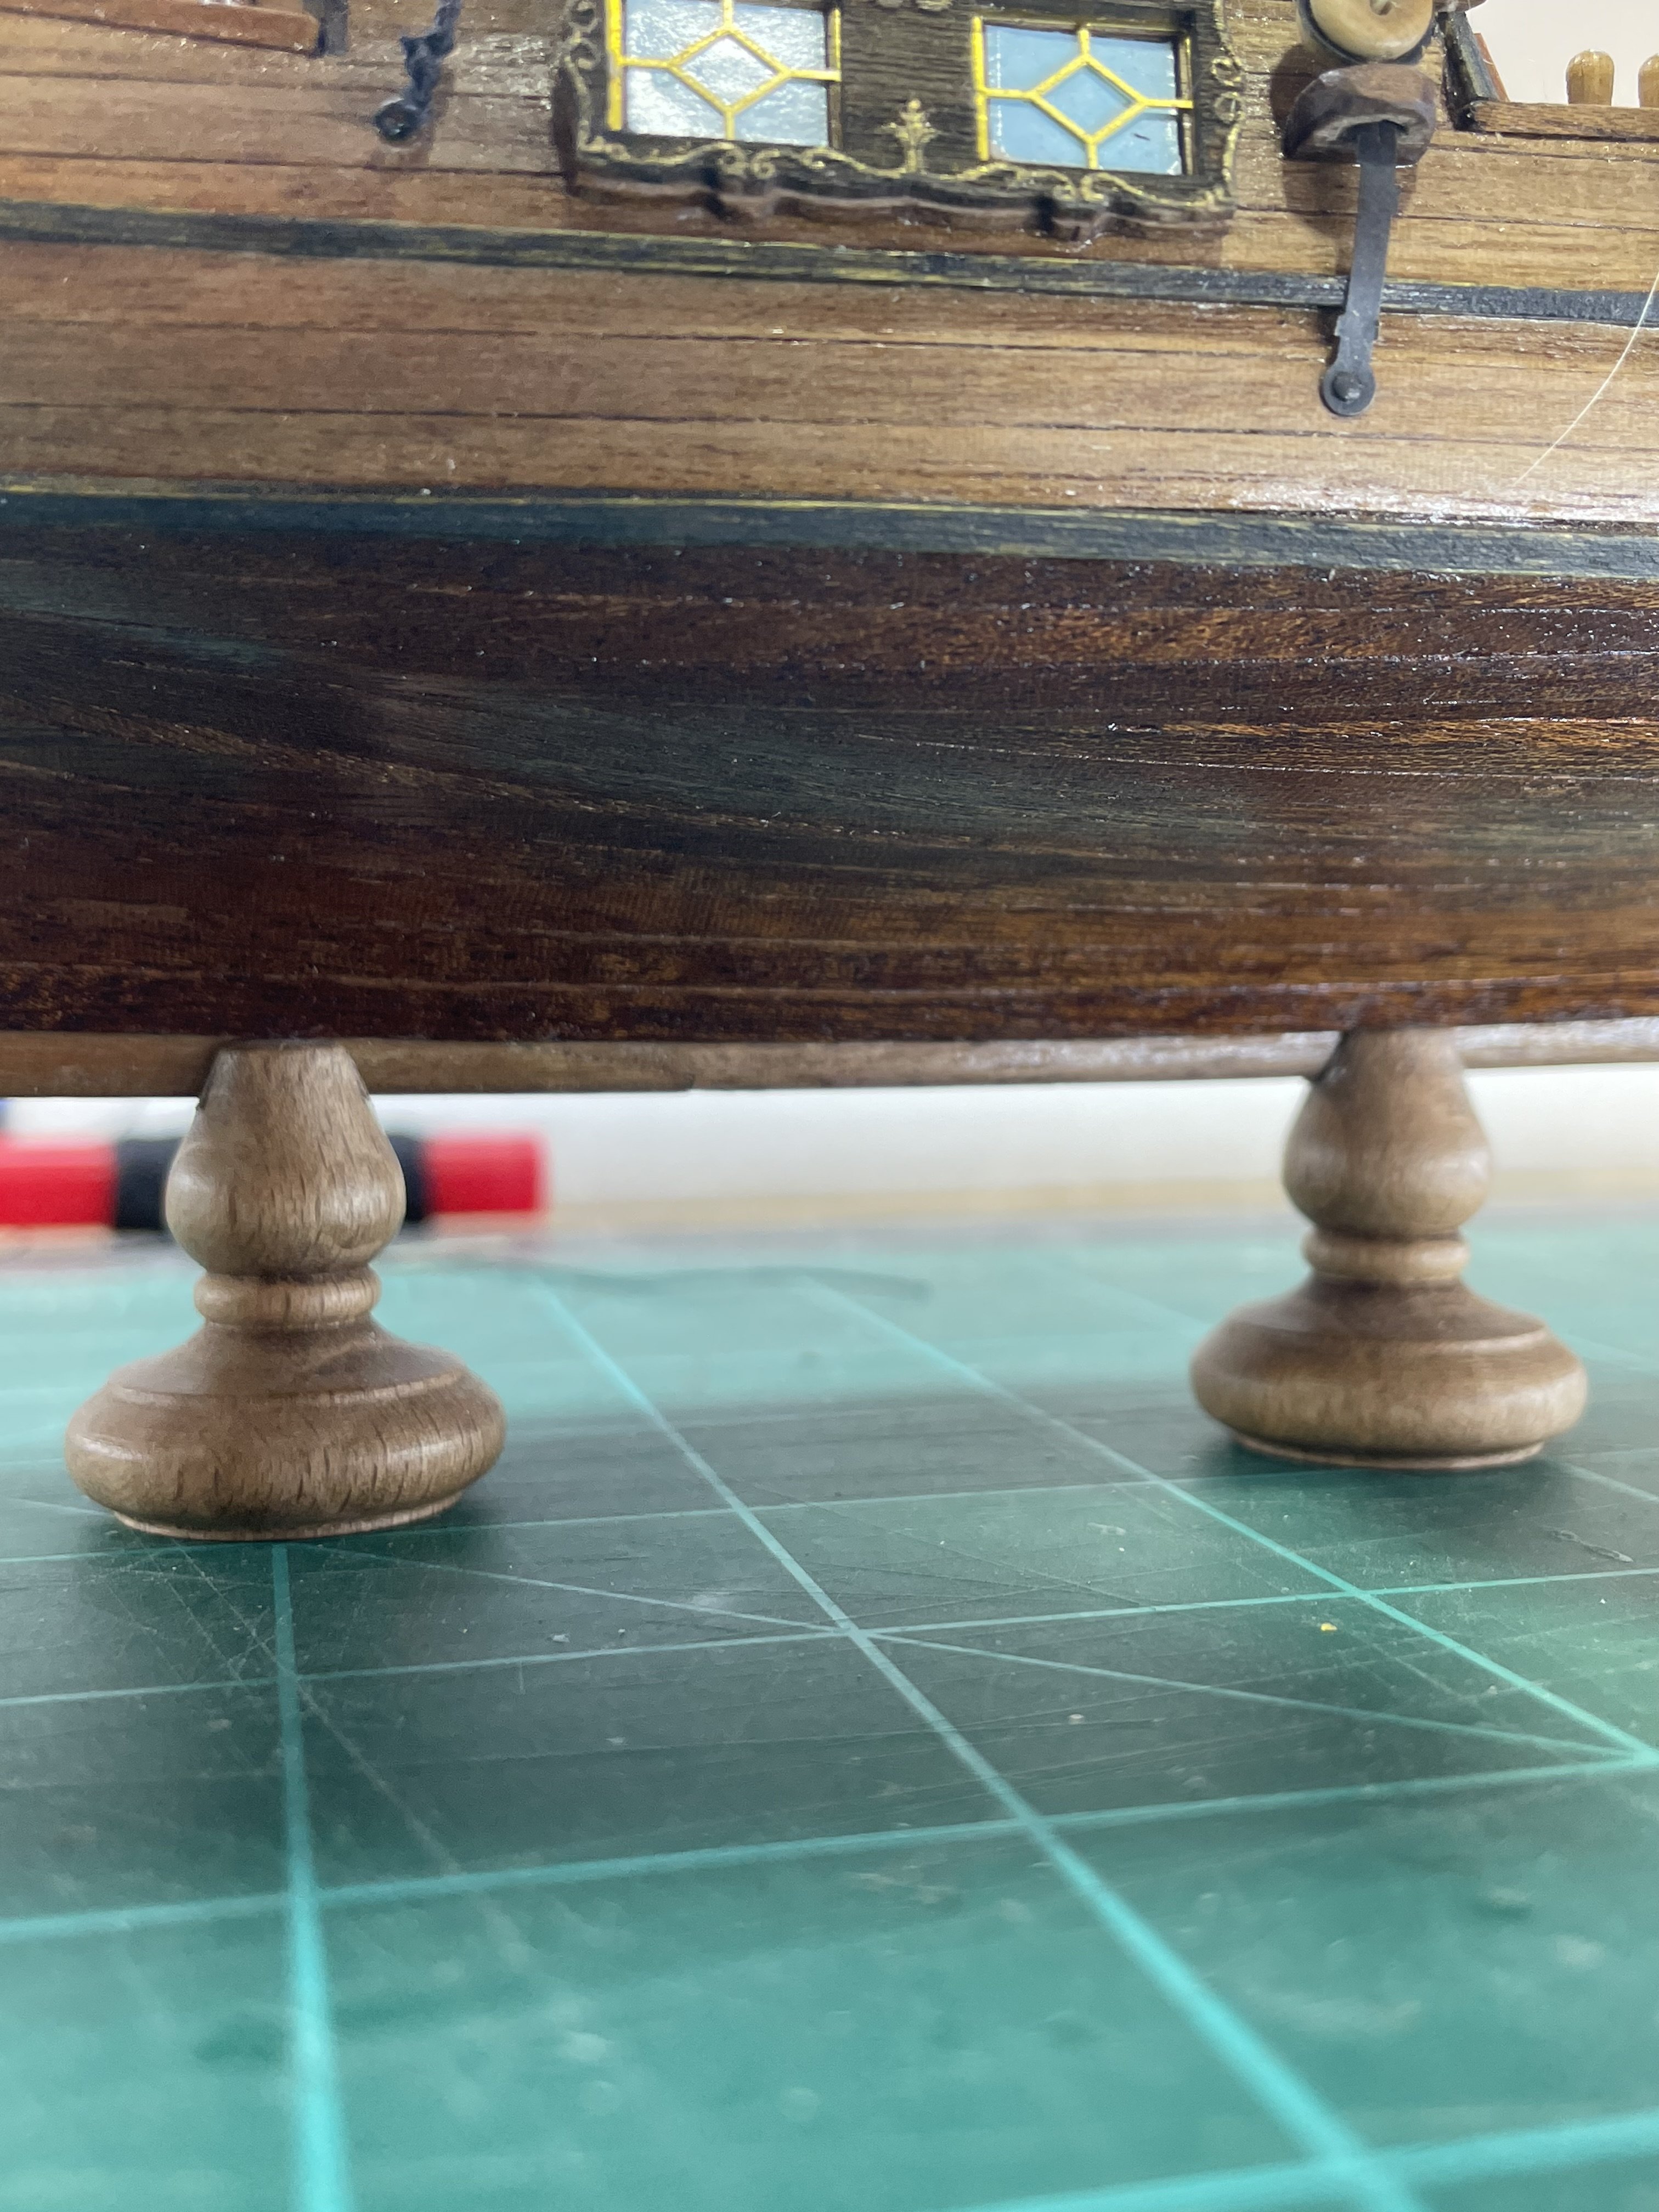
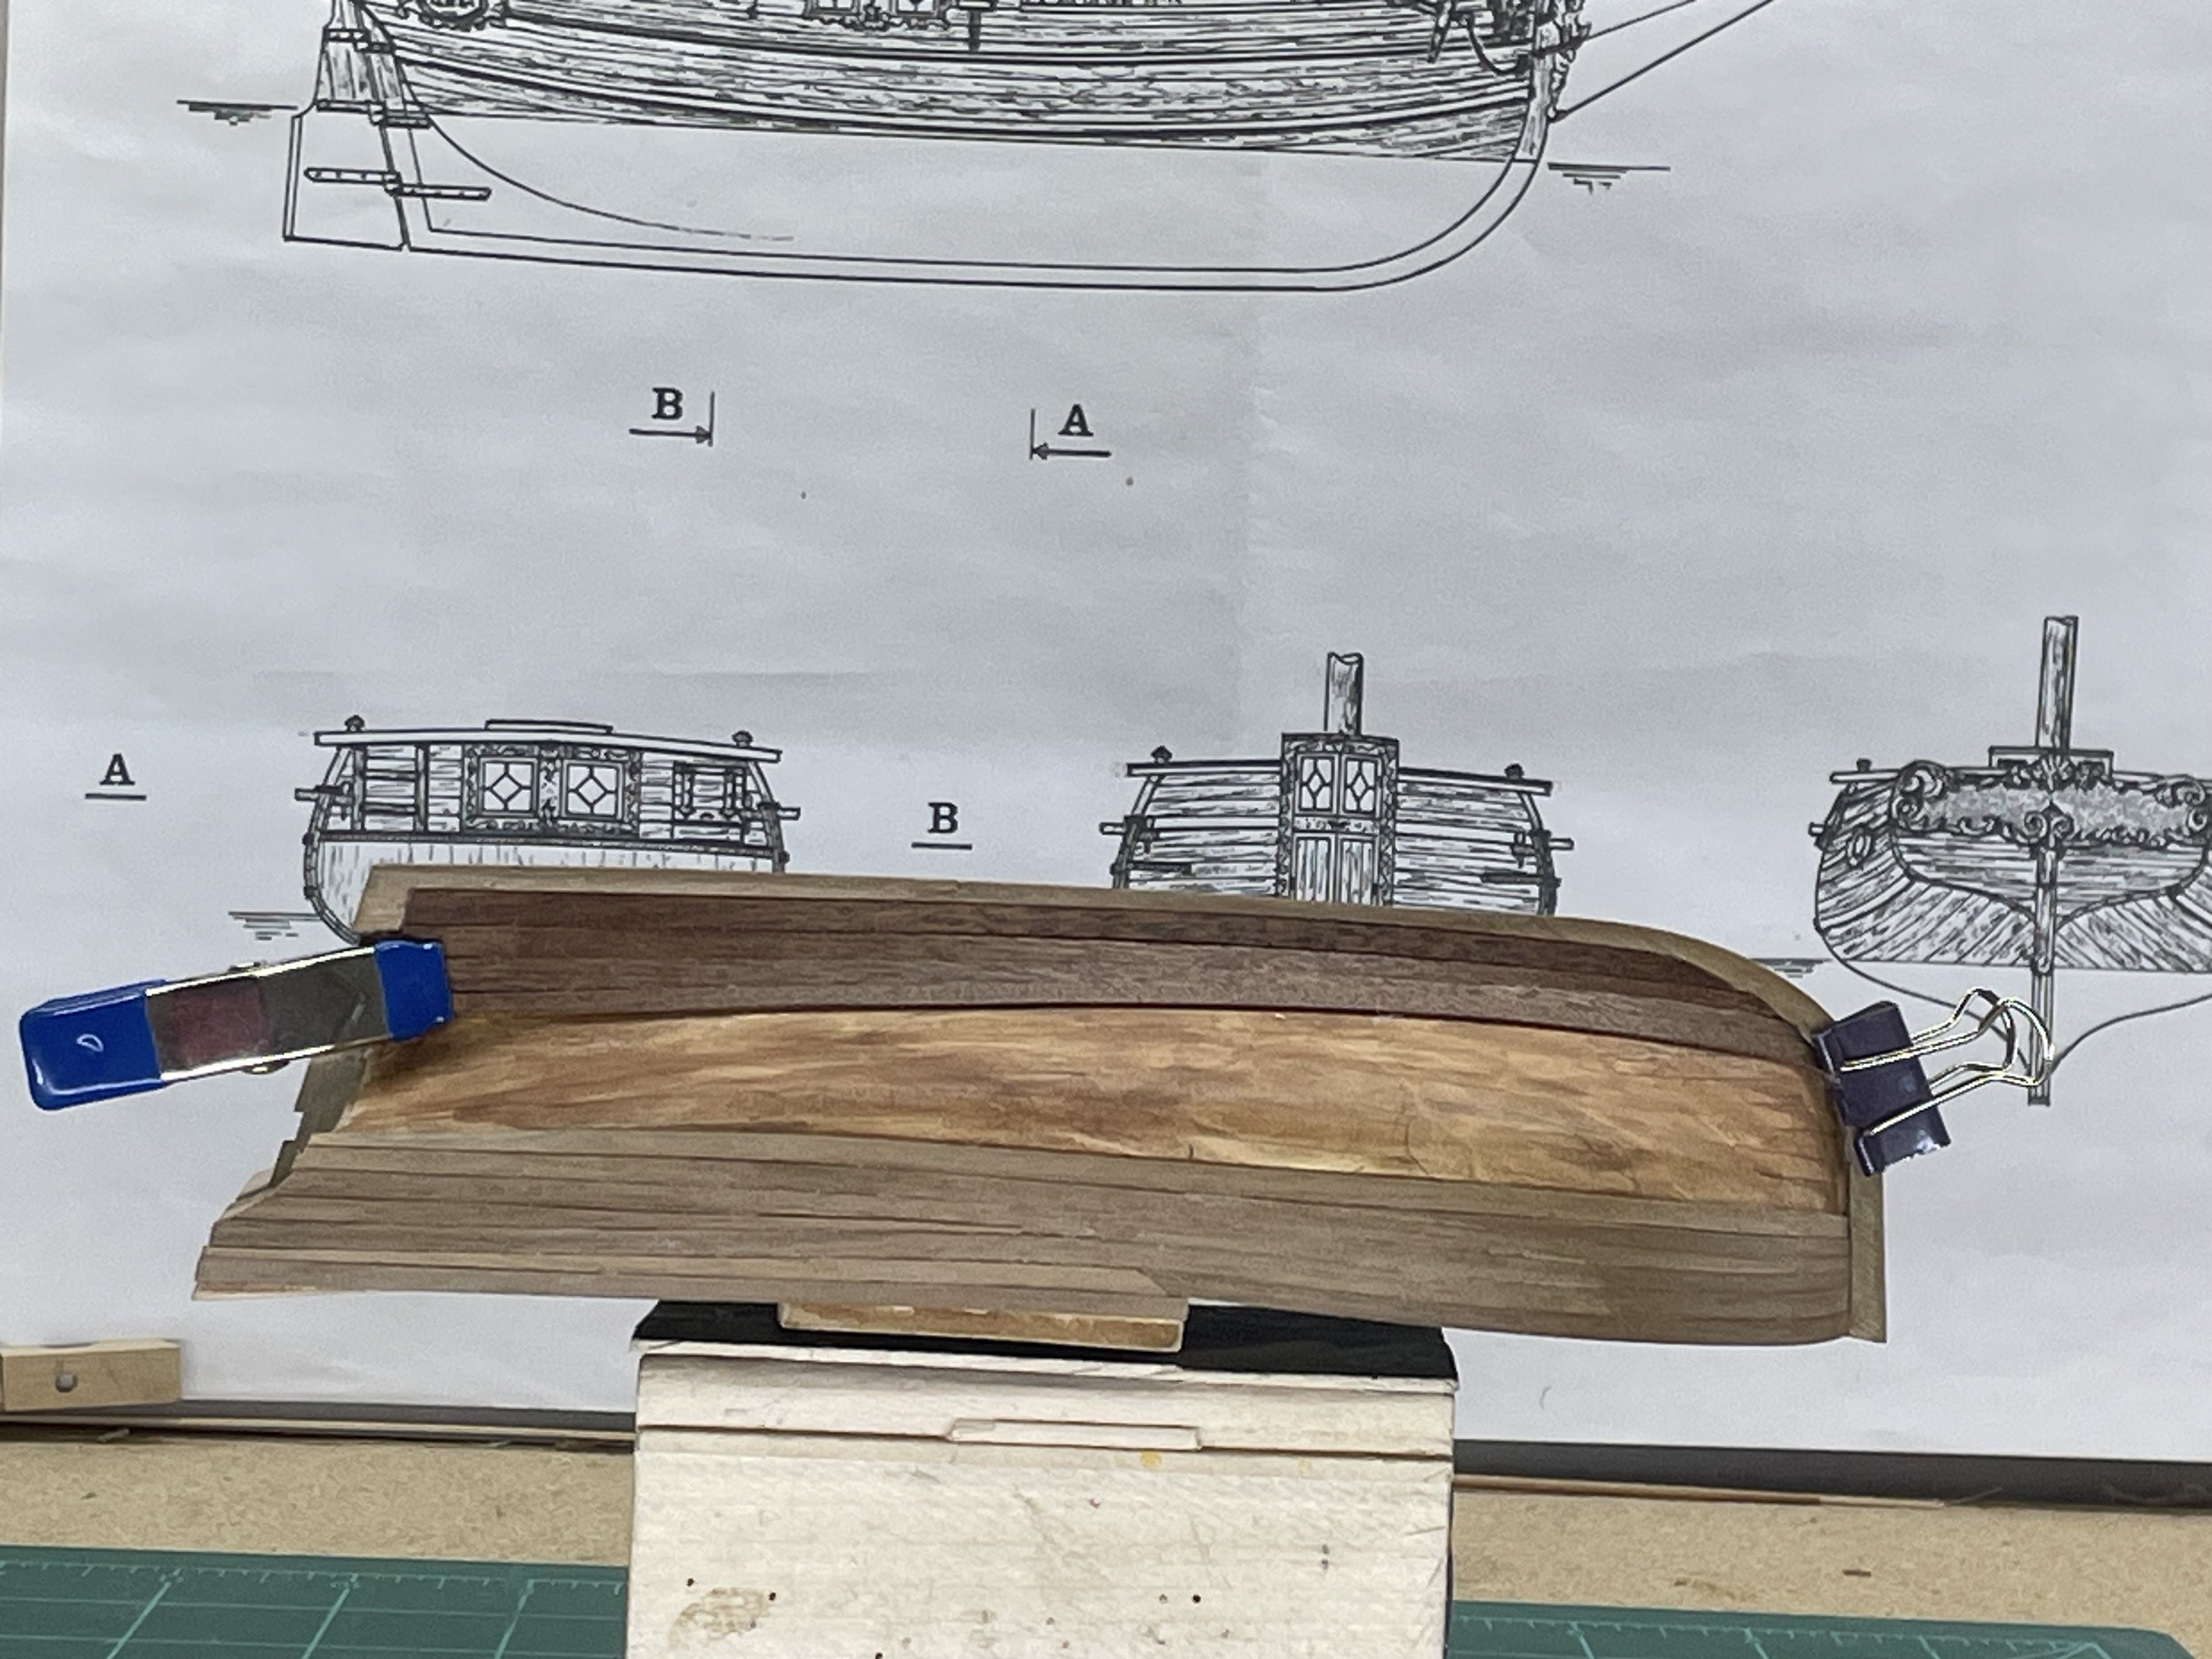
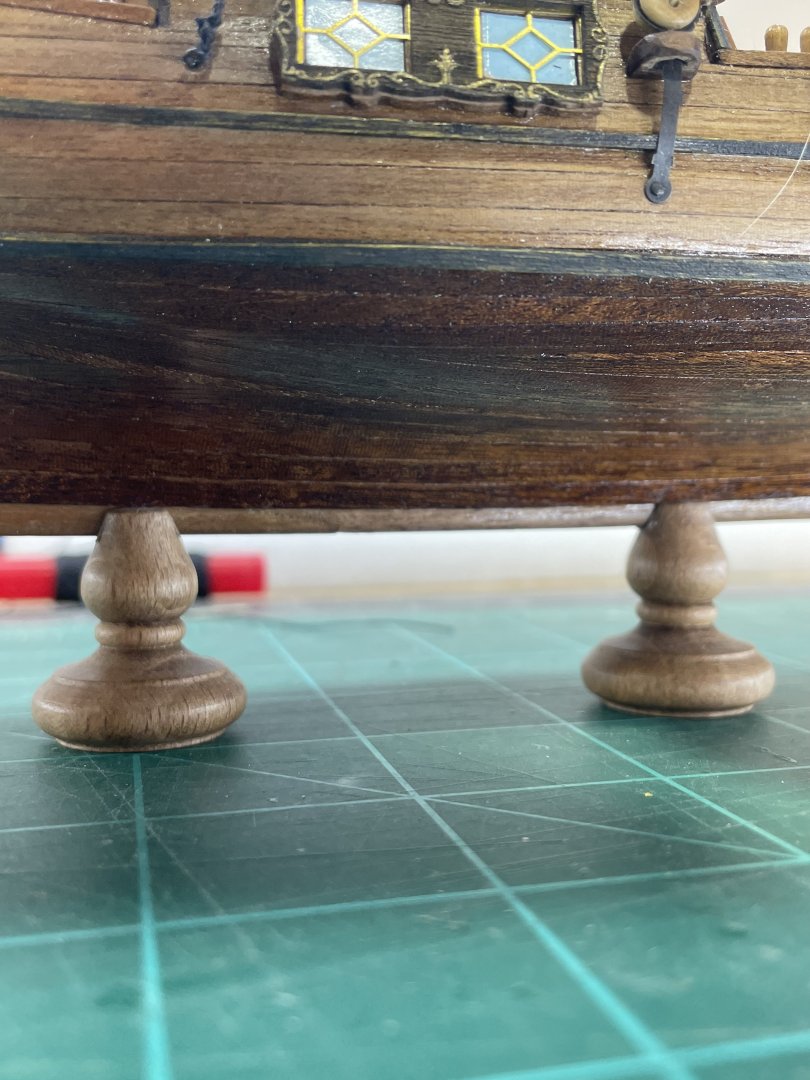
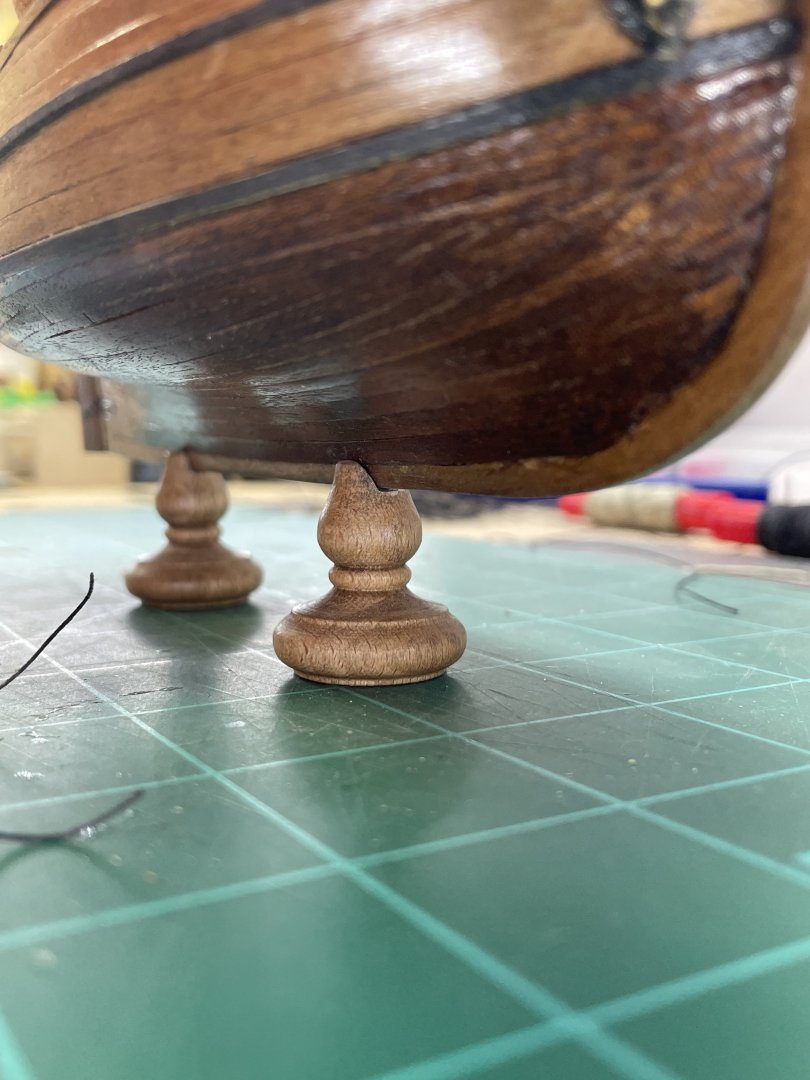
This week I’ve tried to tie all the blocks on the mast and the stays. It got easier each time I sat down. one question I’ve been thinking about is the stand. The one that came with the kit has been good because it sets sturdy for me to work on it. But I thinks it hides the nice curve of the bottom of the boat. I added several pedestals the last time I ordered a kit. I liked the brass ones but because when I was fairing the hull long ago, I rounded the bottom of the keel at the bow. I tried grinding the brass to fit but it didn’t look very structural. So I went to wood. My question is , will I be able to just glue these on, after they are attached to a board. The stern fits pretty tight, l didn’t mess that end up as bad:-) But the bow is a bit wobbly, because it’s not a perfect fit and isn’t ever going to be. Should I try to drill through the top of the pedestal and through the keel and put a brass rod? Here’s a better shot of the bow. The next thing I’m planning on doing is tying the blocks on the yards.

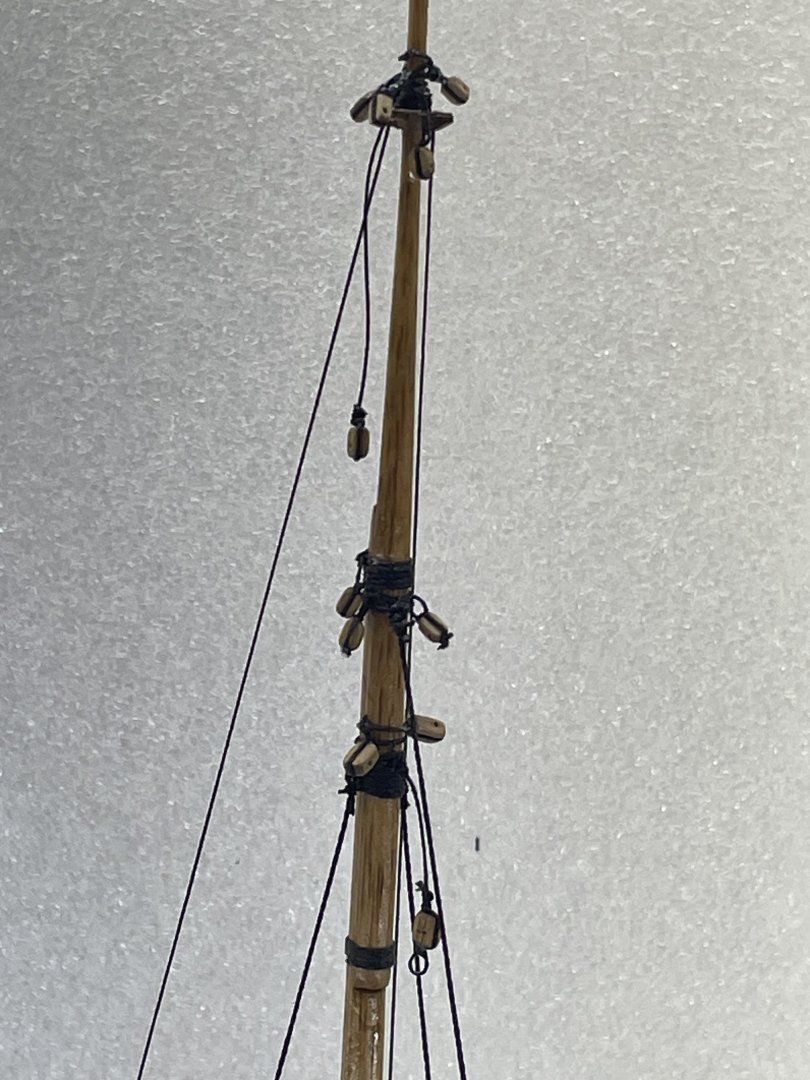
-
Everything is looking good Olli. There is an eyebolt in the deck, just in front of the mast it’s #139. I didn’t see it till now. I didn’t leave enough room. I may can angle it and then bend it up, we’ll see.
-
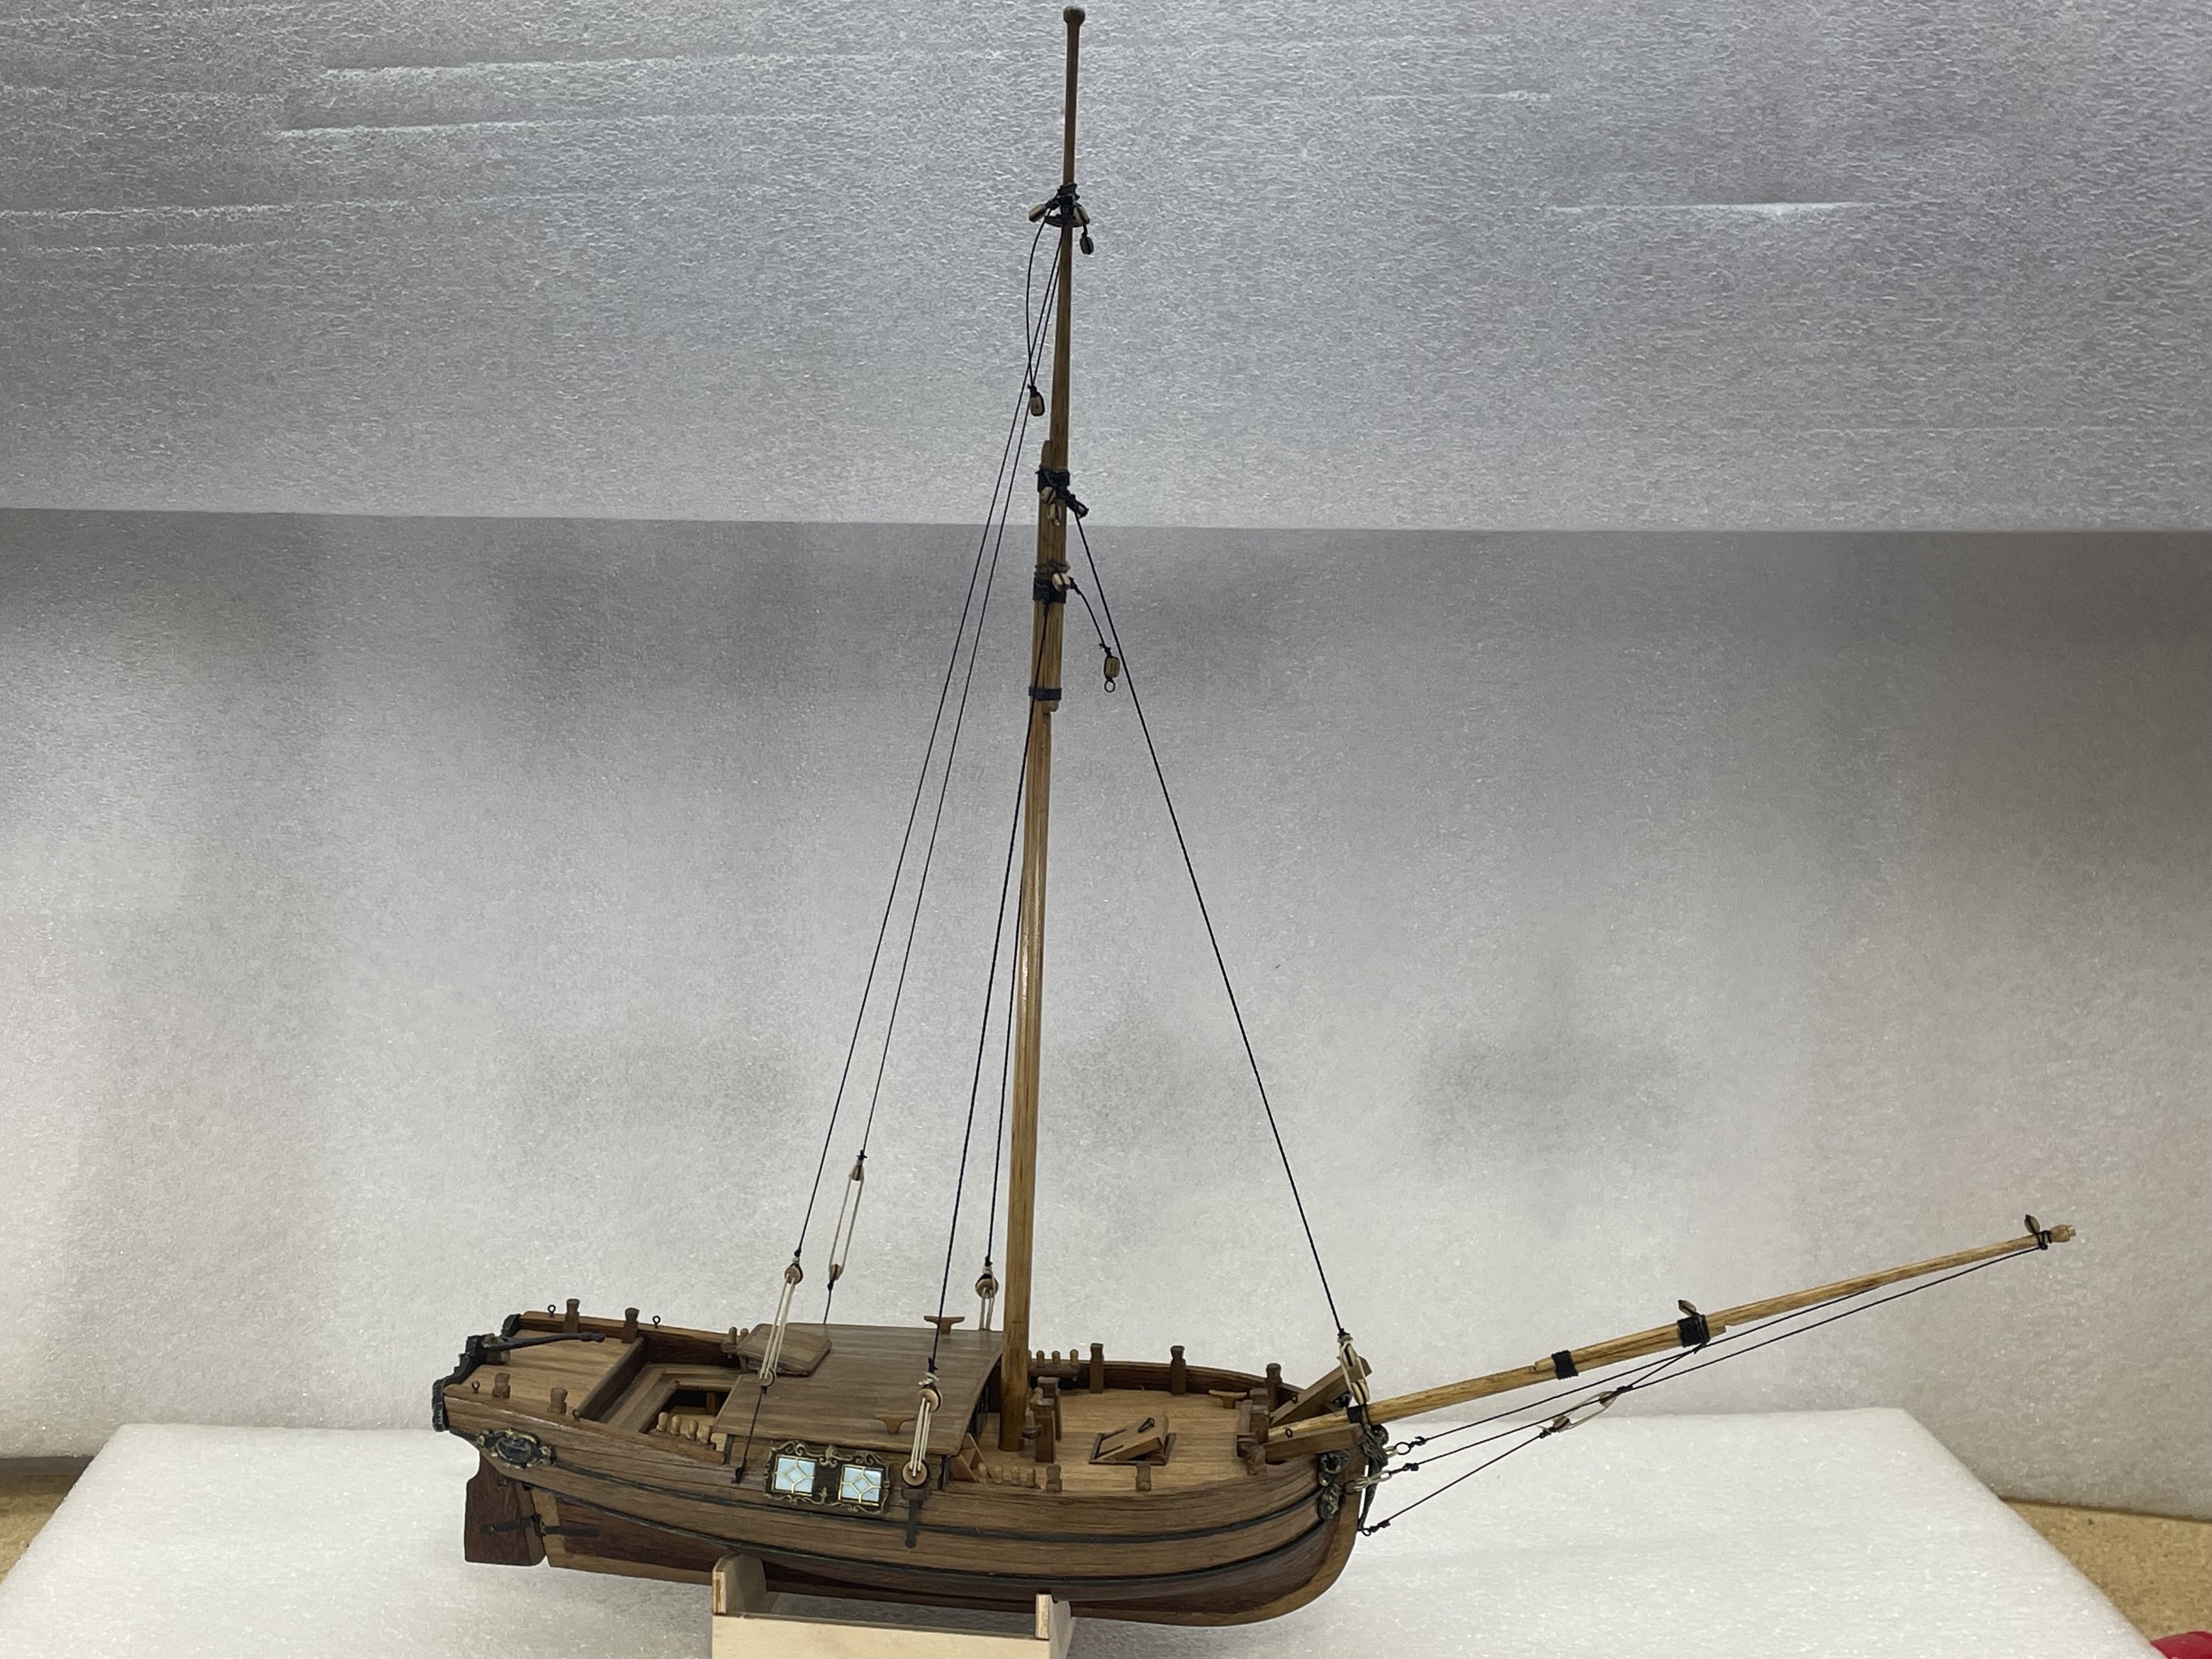
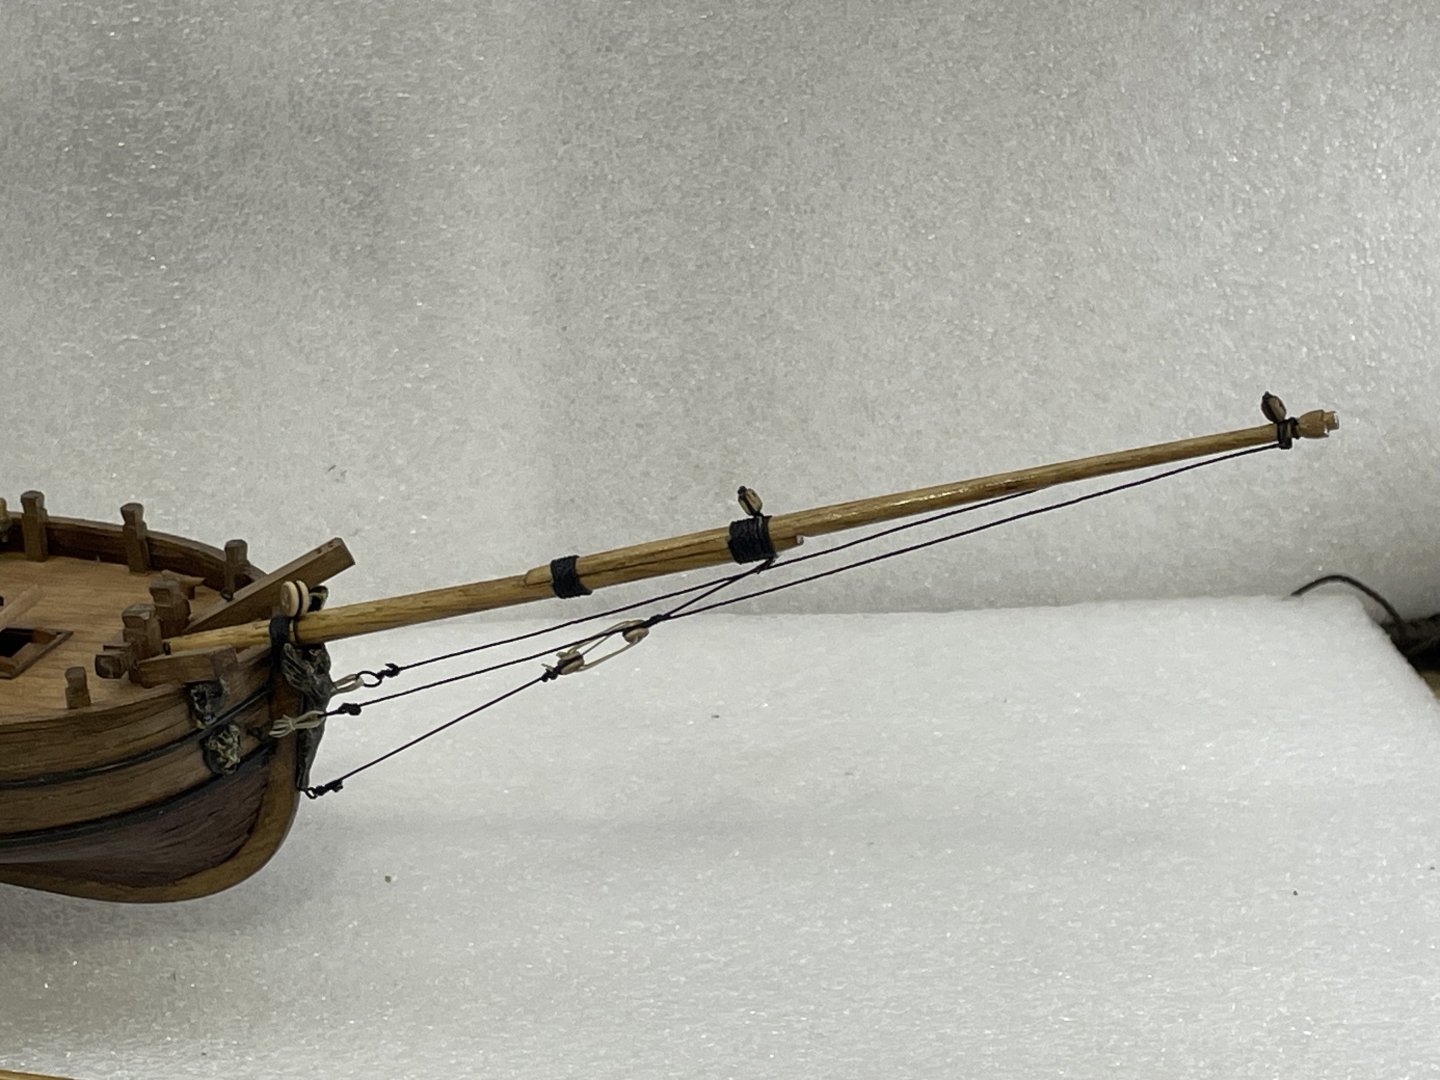
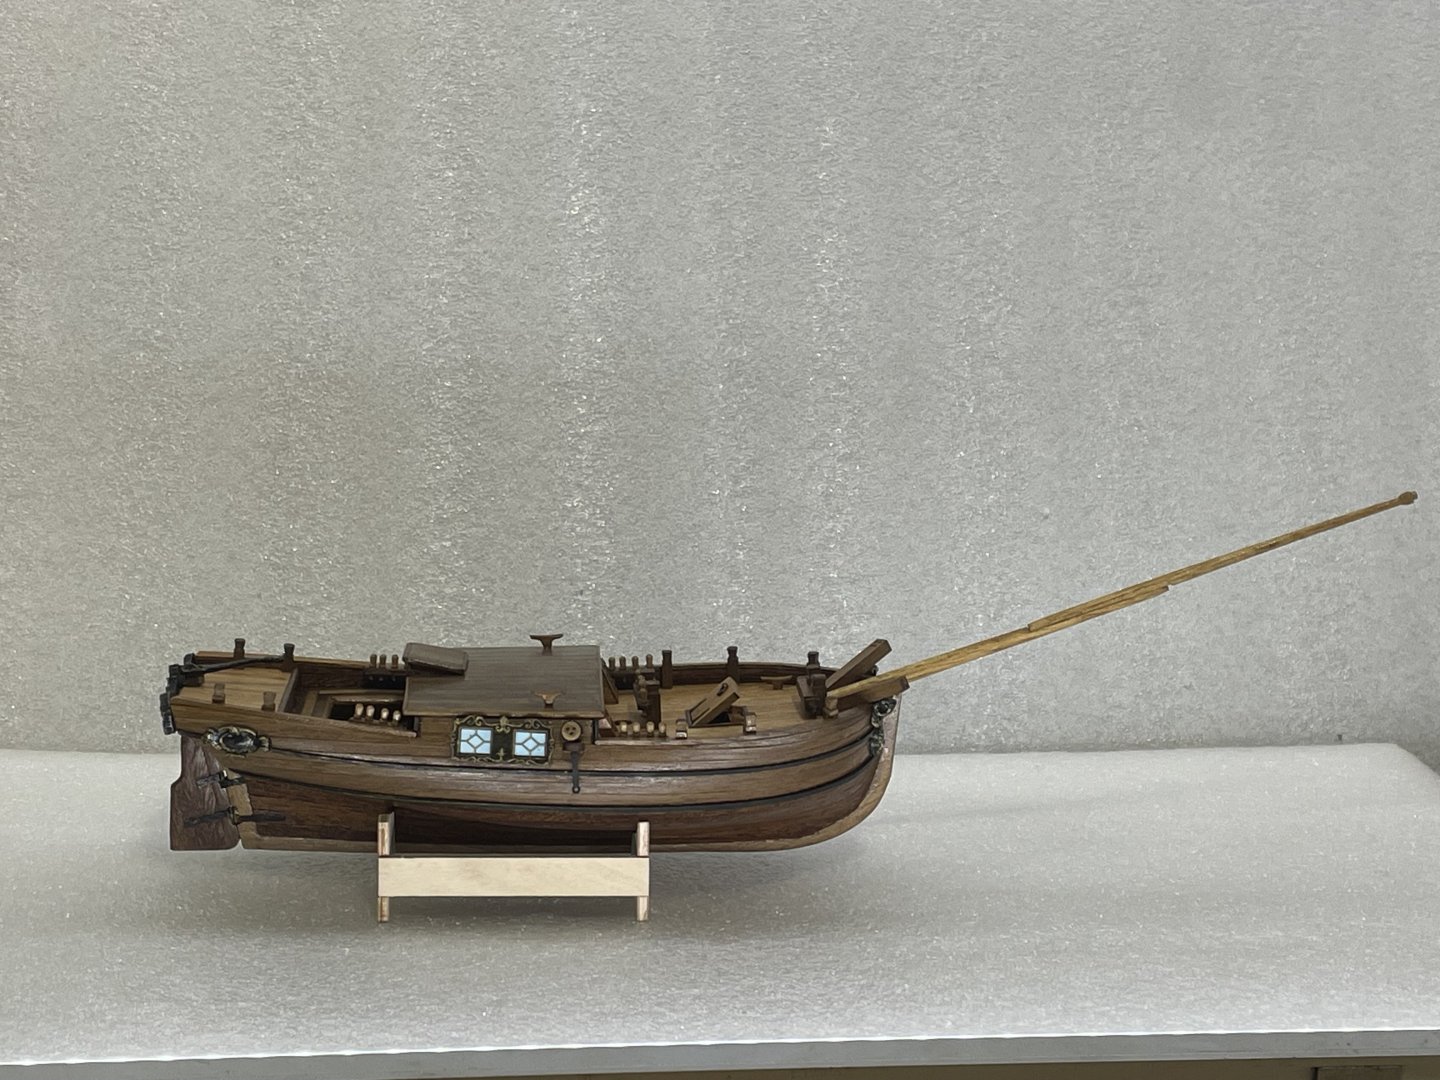
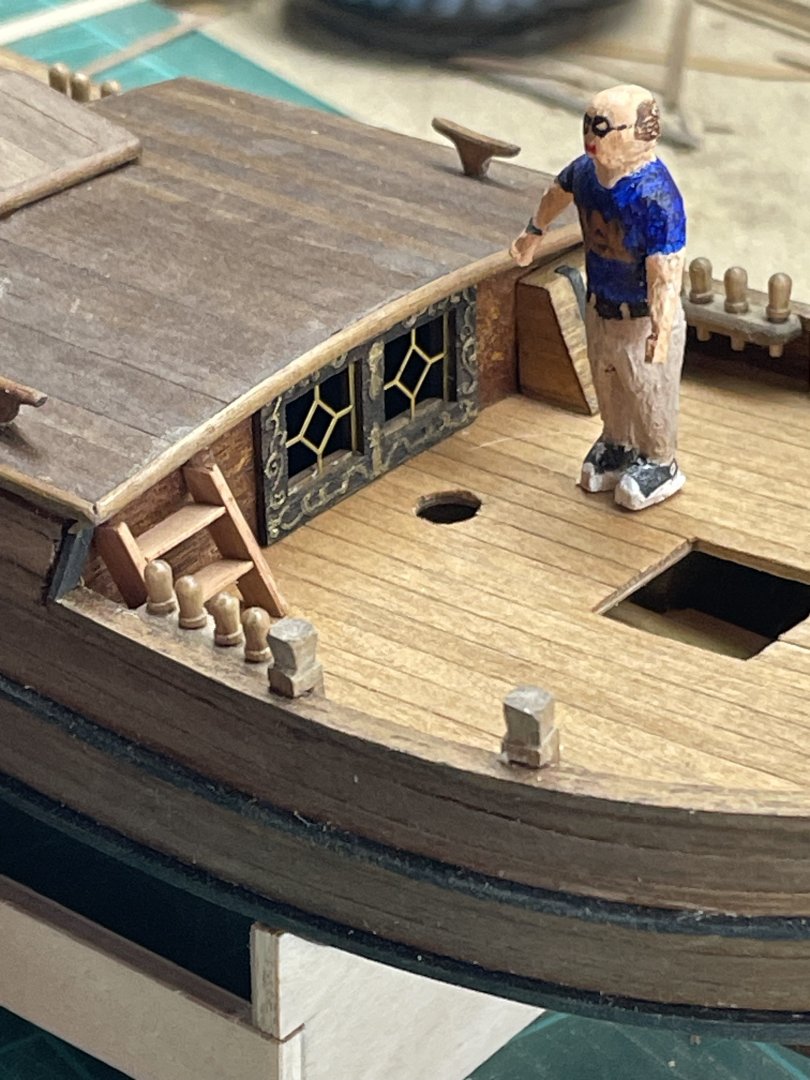
After pulling off the Gretel for a month, to insulate and finish my wife’s garage, aka the old shipyard. I am super relieved to get back to scale building . 4’ x 8’ sheets of plywood and 15’x 4’ blankets of insulation are zero fun. When I stopped last month I was about to start the rigging. Everytime I go from planking to sails and sail to rigging, it takes me days to acclimate my brain and build up enough confidence to get back started again. I started on the bowsprit because I could see the end 🙂 I still have work to do to get the sails ready and I need plenty of time to keep studying the plans on the rigging. The only thing that’s bothering me is the possibility I will put something up that’s in my way:-) Here I’m trying to get these reefing ropes in the main sail.
- 80 replies
-
- 10
-
-

-
Looks Great! Olli.
-
It all looks great Jacques, you’re way out of my league to offer any suggestions. But the frame reminds me of John Smith’s shallop. It had jigs to build the frames and a jig to set the frames. And I wondered through out that part of the build if I would ever get passed it:-) I can’t imagine doing it by scratch.
- 134 replies
-
- 3
-
-

-
- ancre
- Bateau de Lanveoc
- (and 2 more)
-
Looking good:-) I’m on hold with the Gretel, until I get the inside of my wife’s garage finished.
-
Once you get your back taken care of, I think you need to give up the yard work and just model:-)
- 44 replies
-
- 2
-
-
-
- maine peapod
- peapod
- (and 4 more)
-
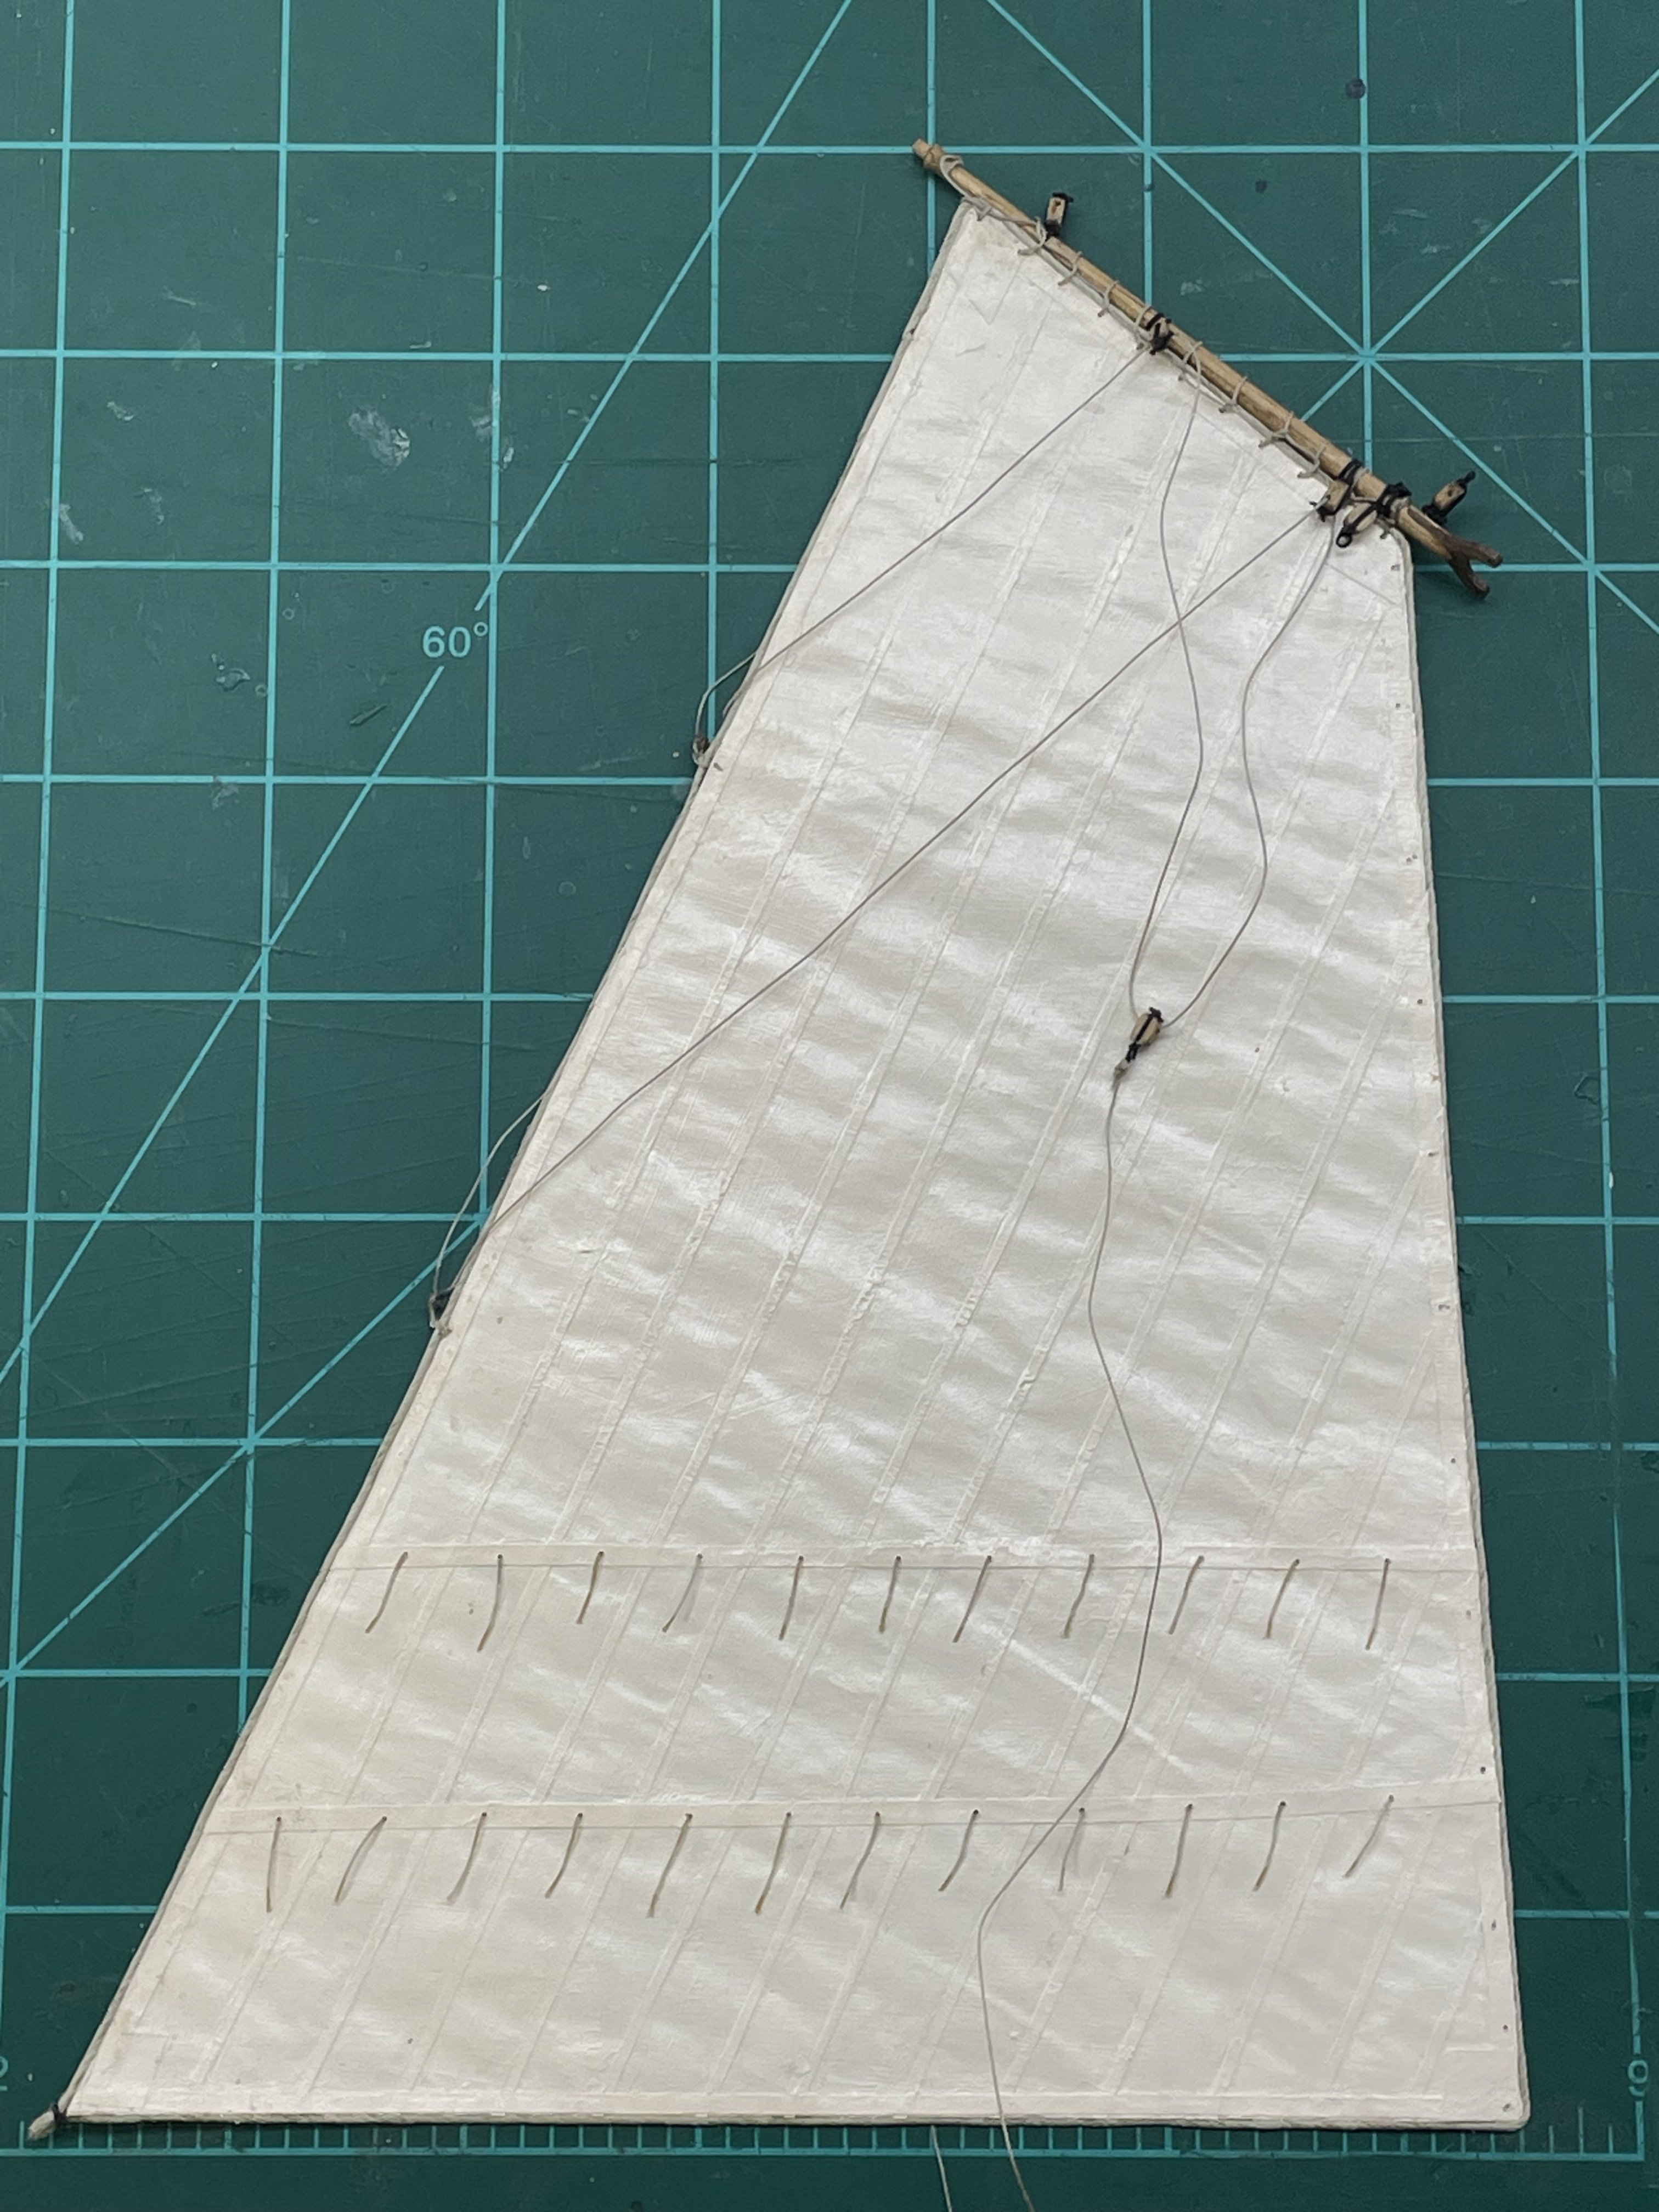
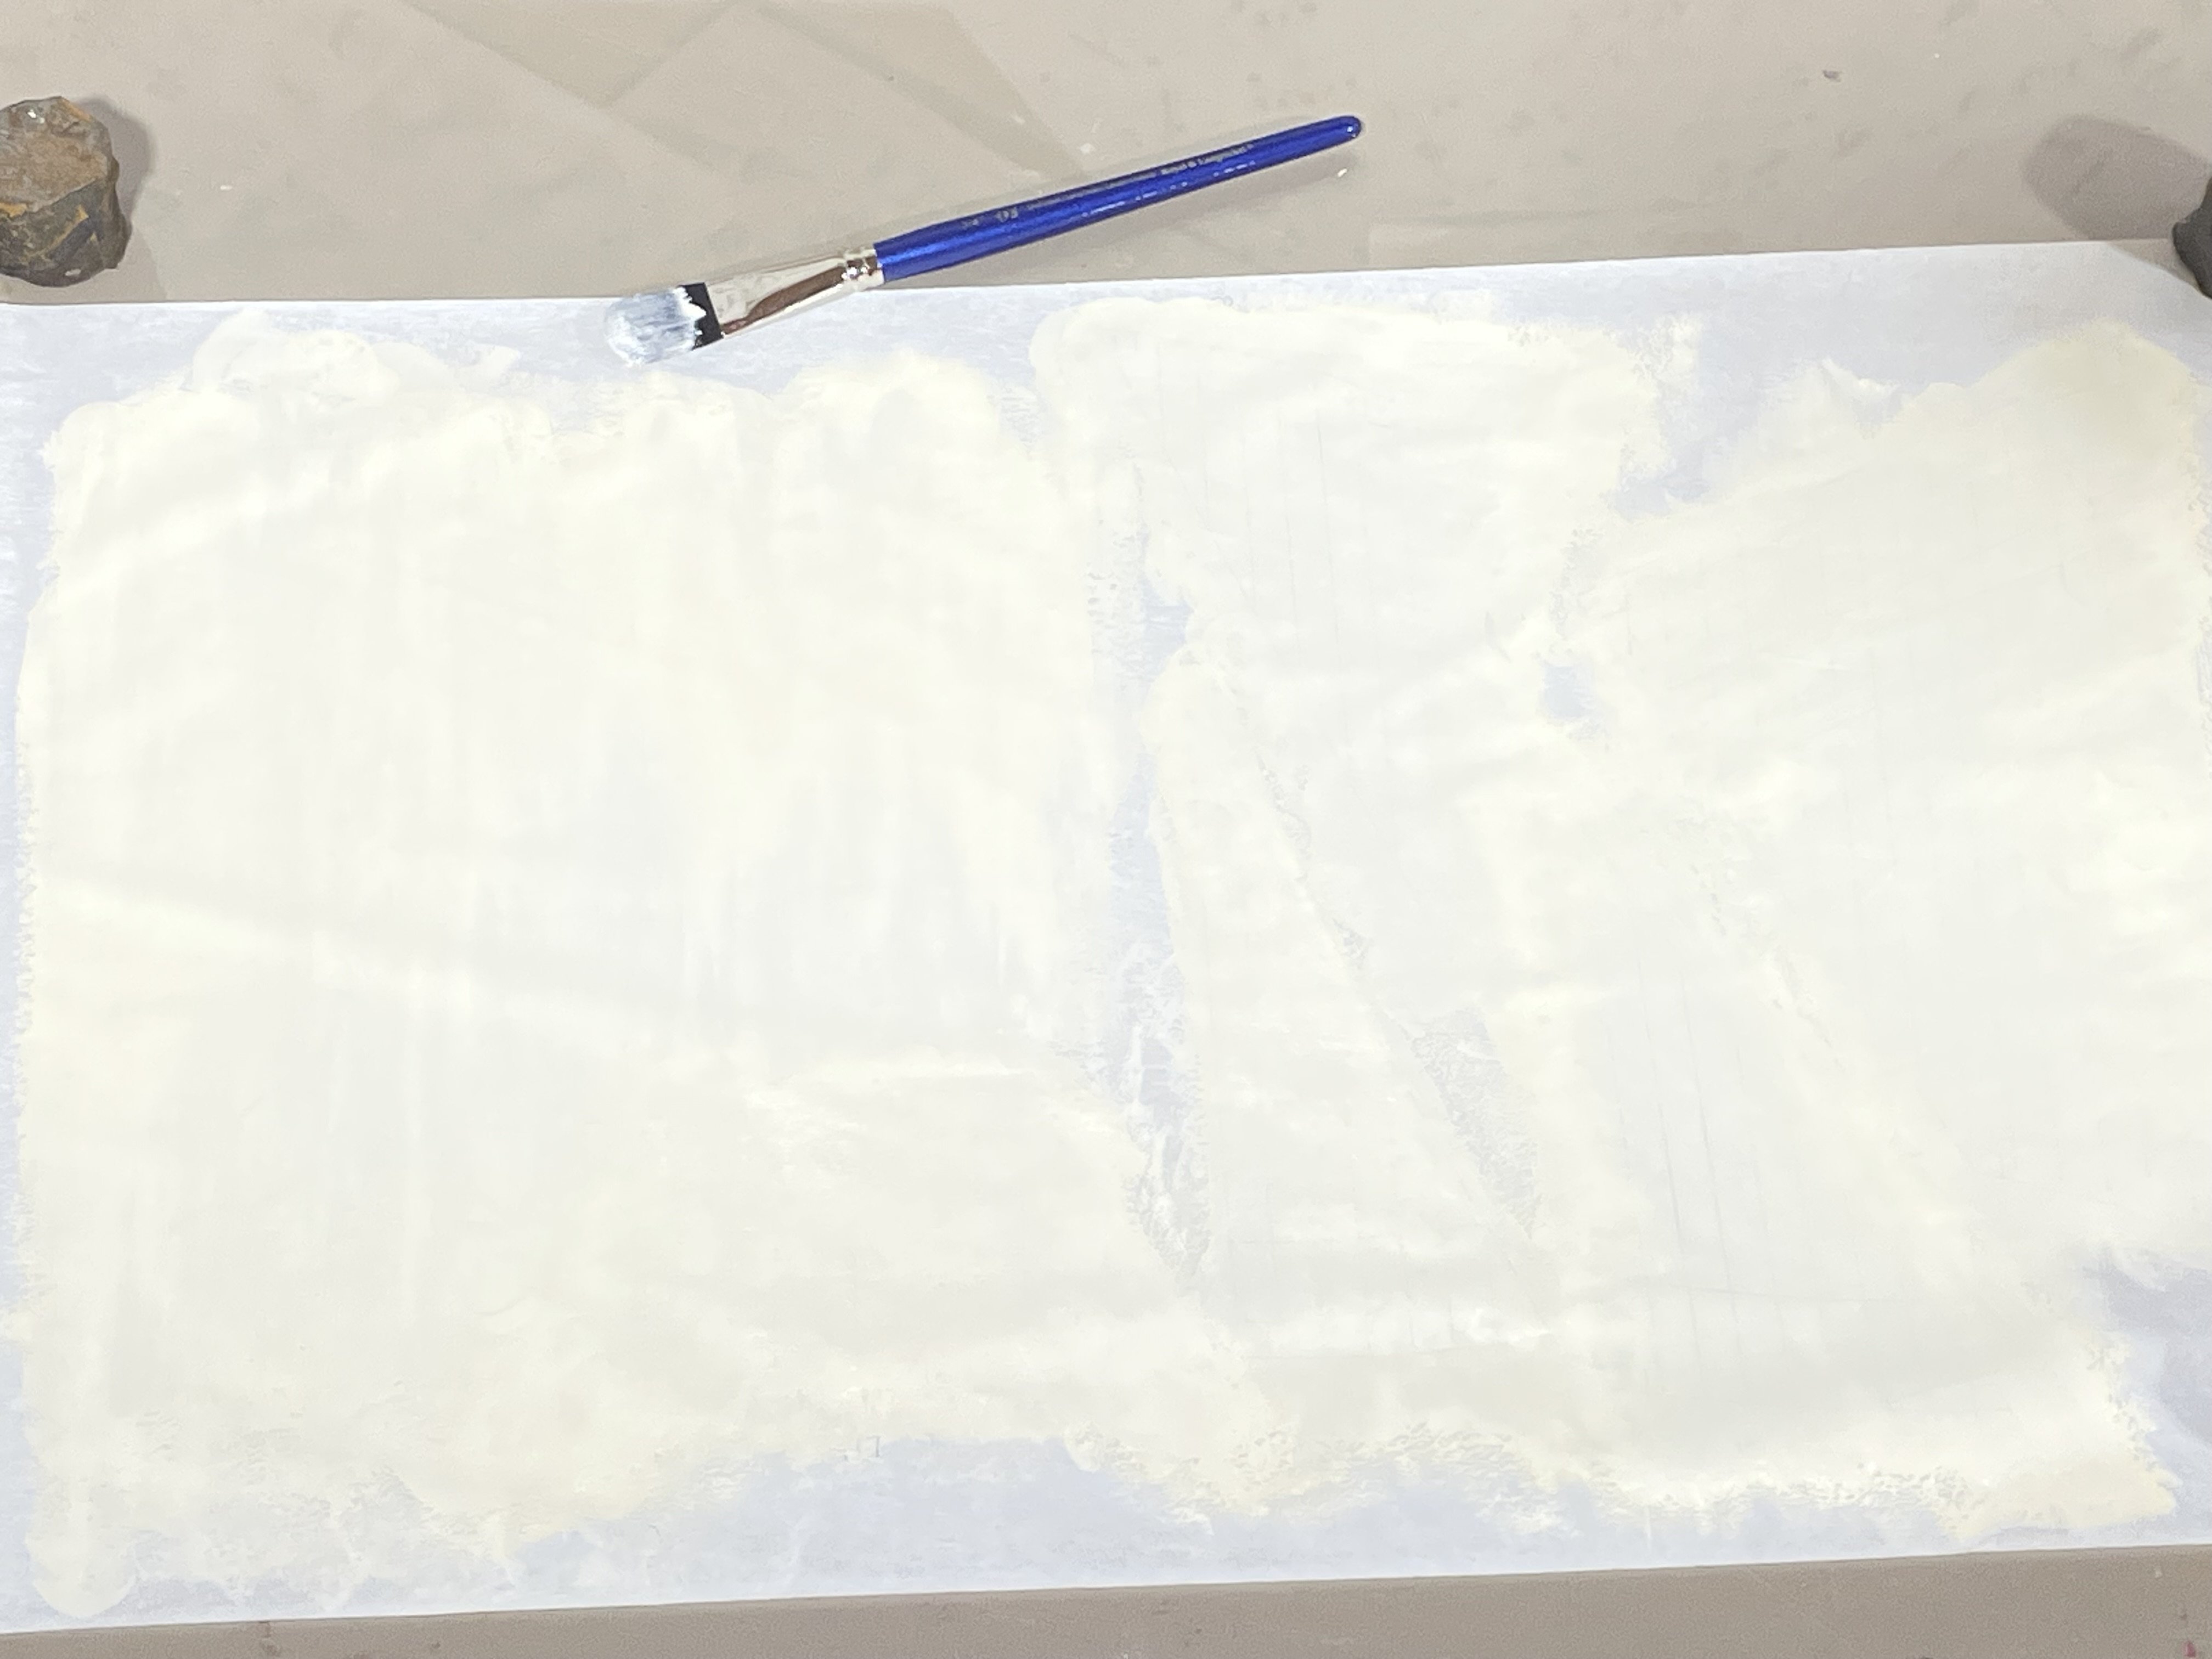
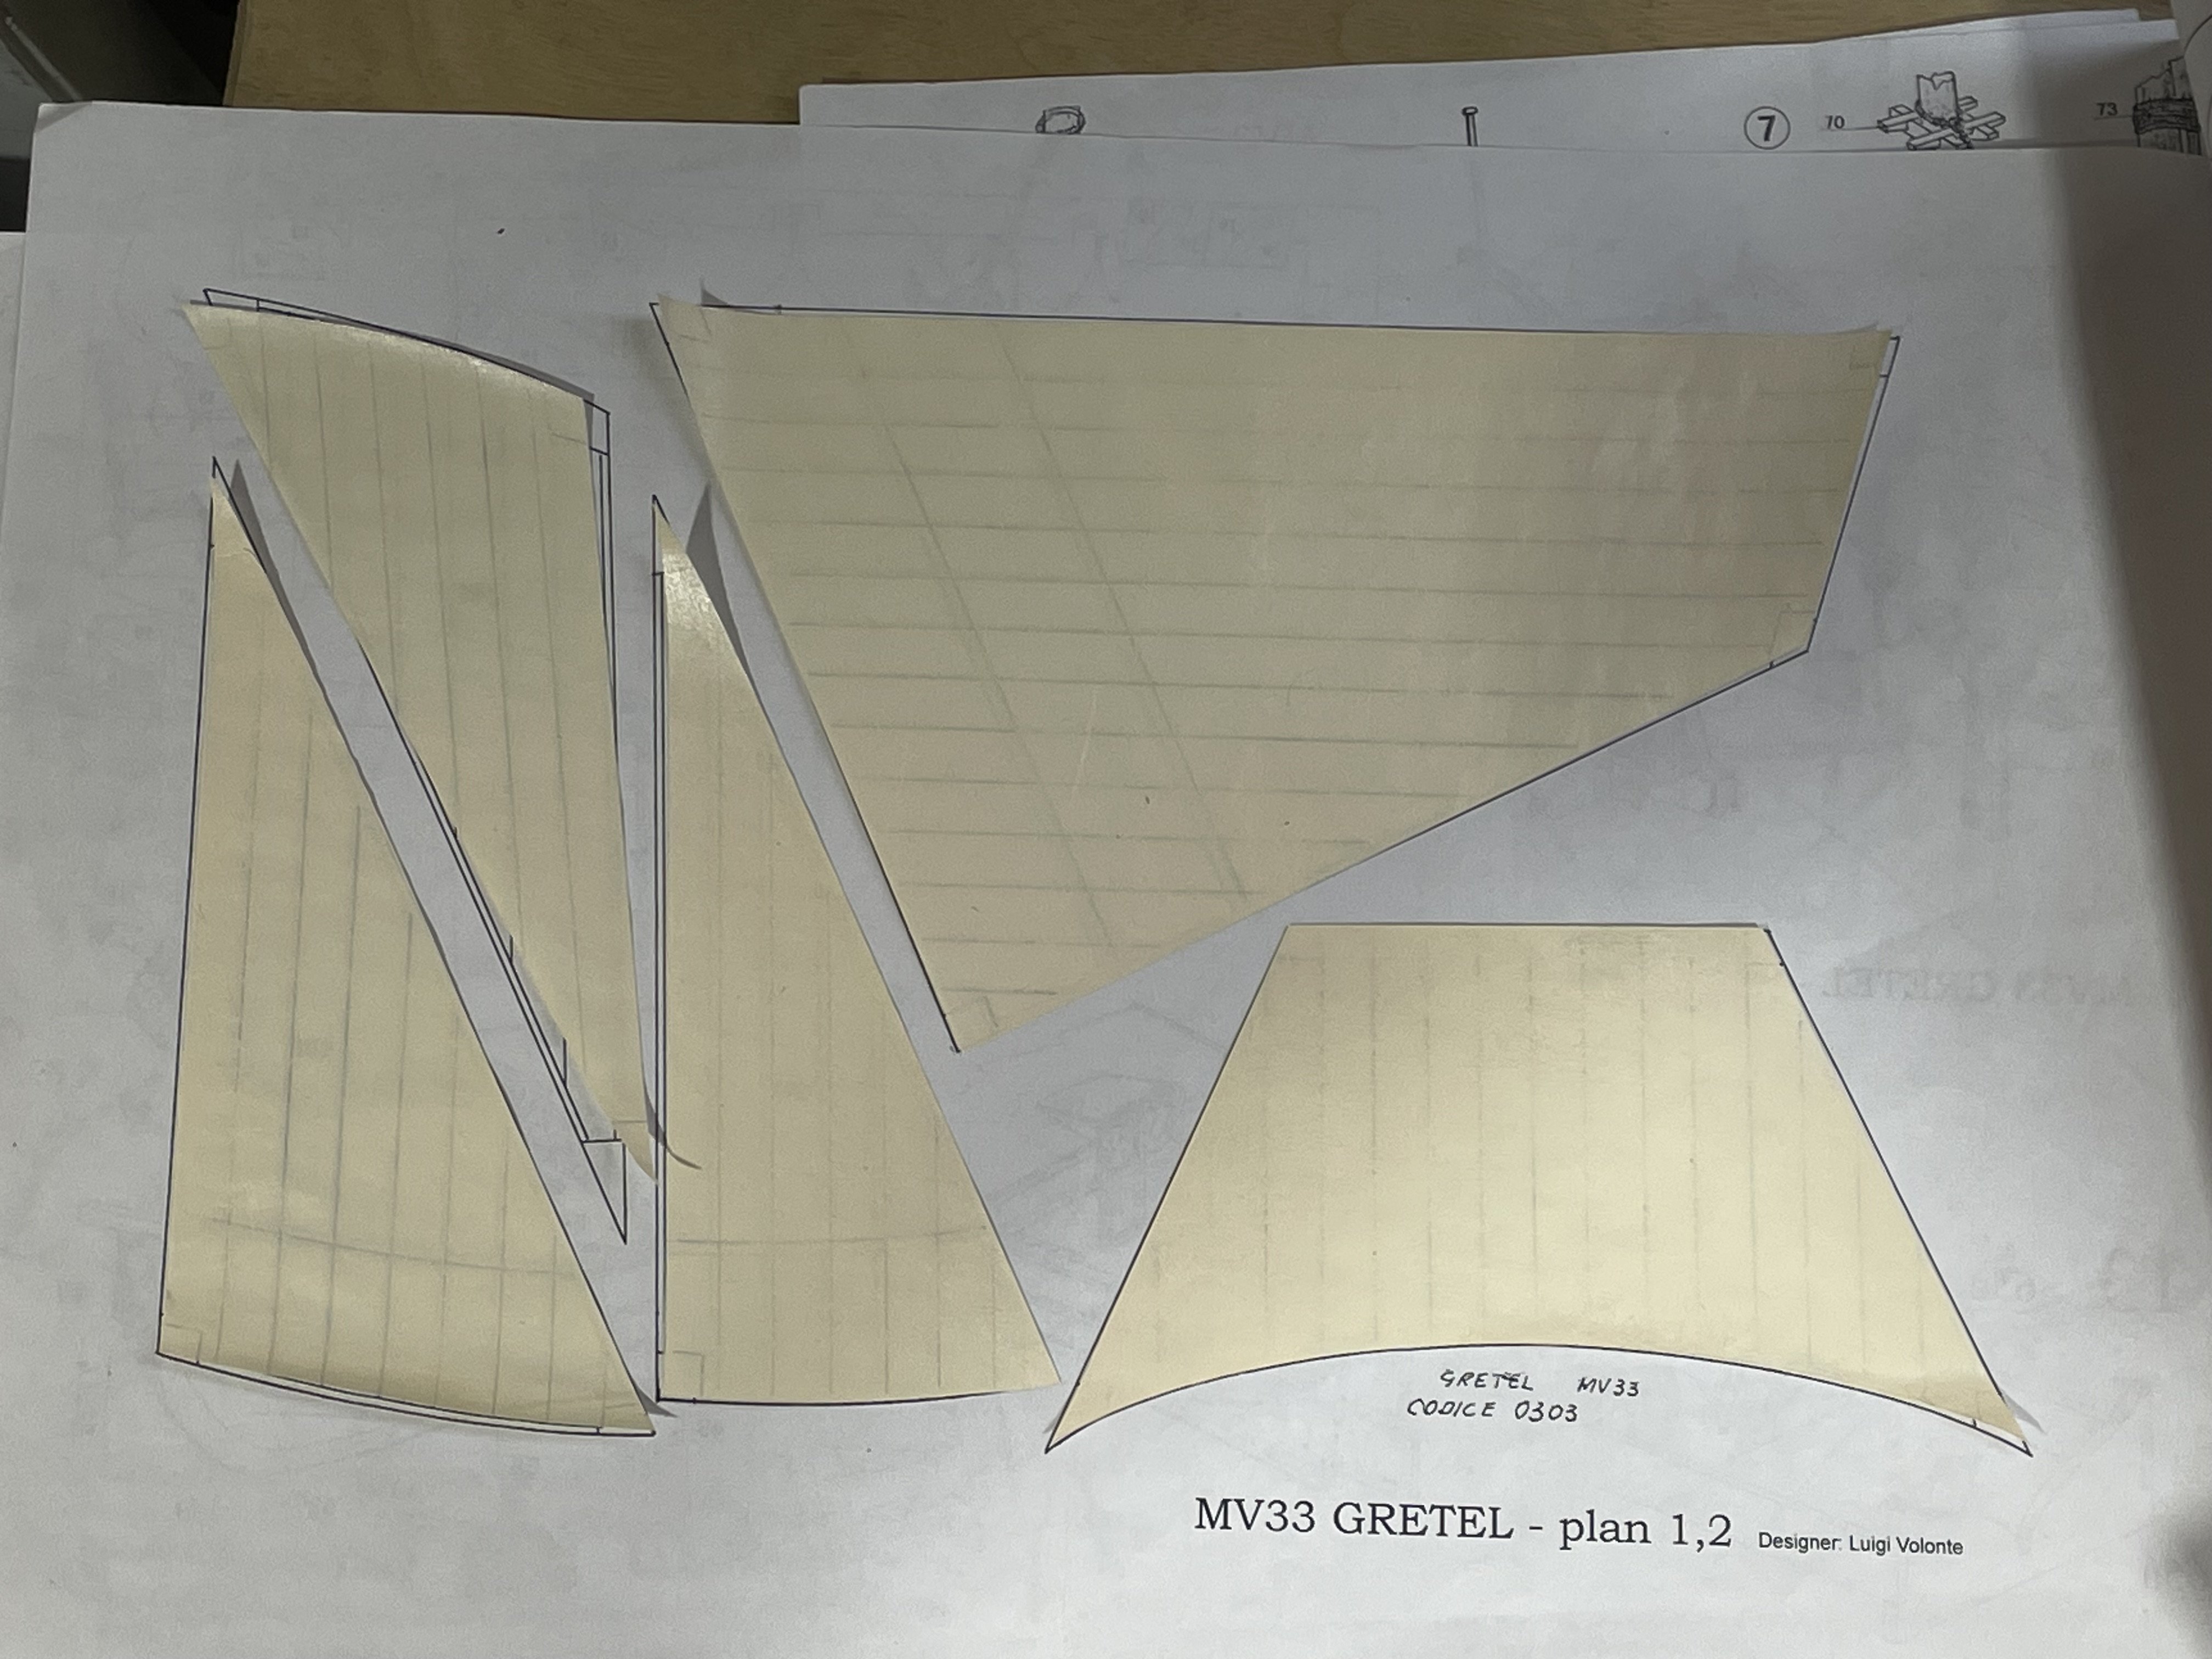
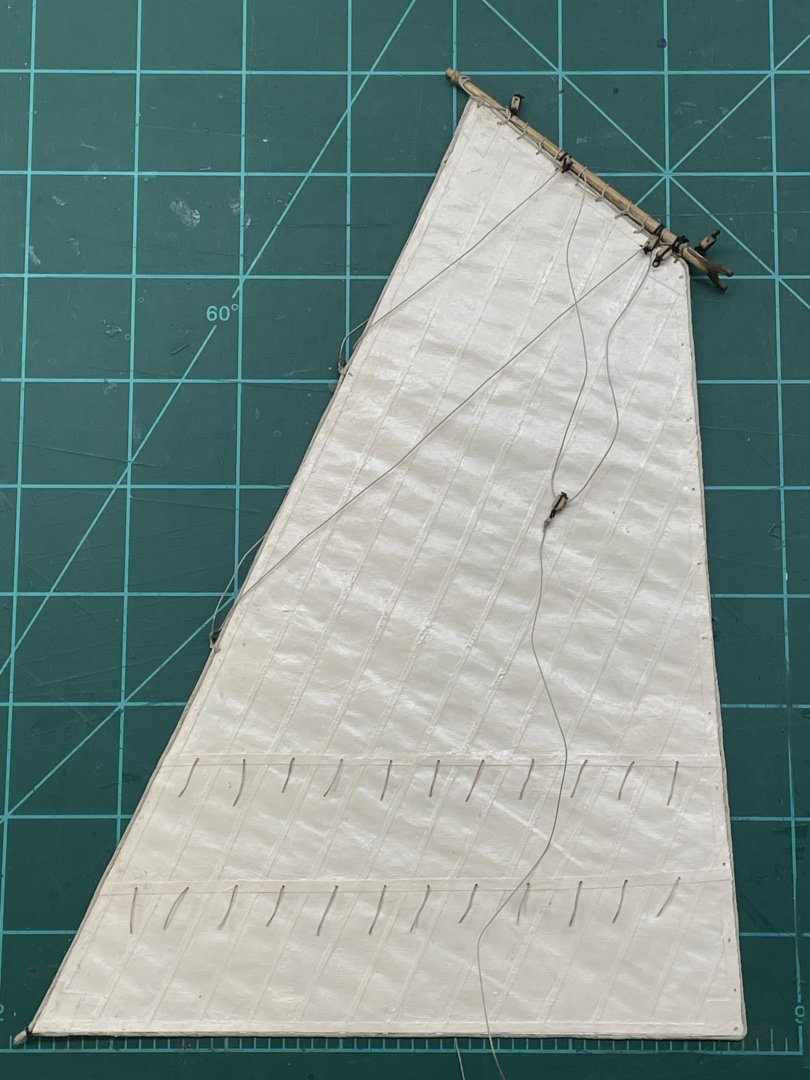
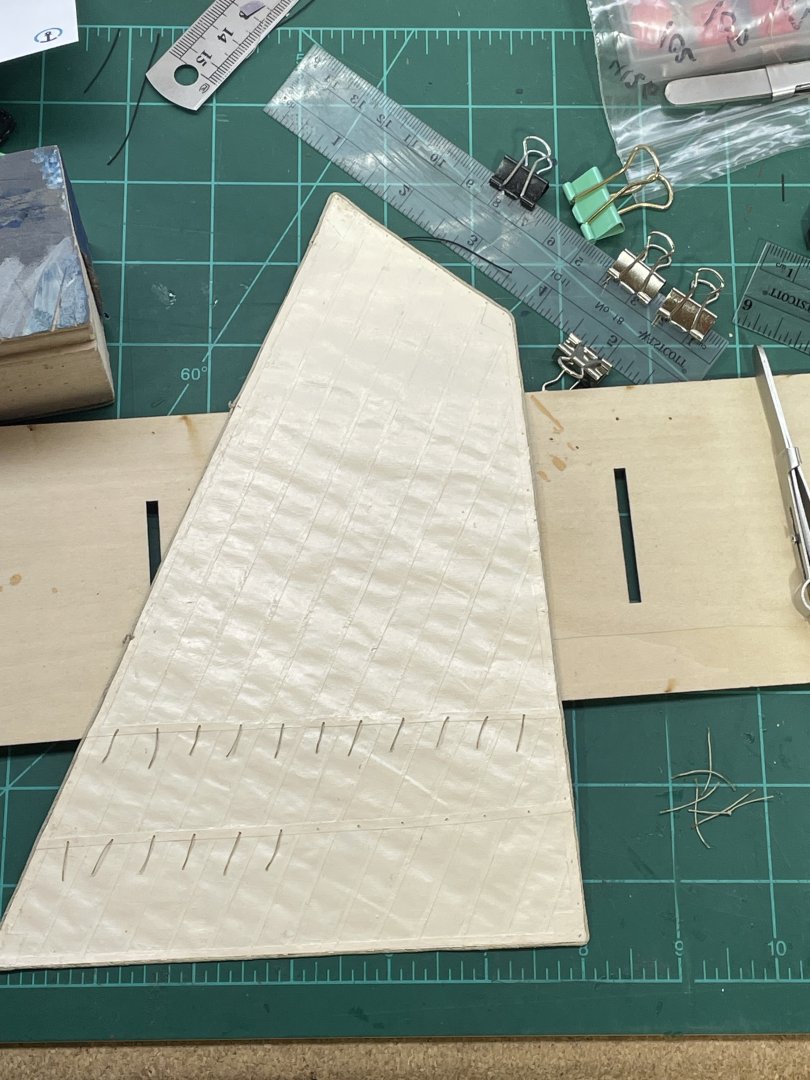
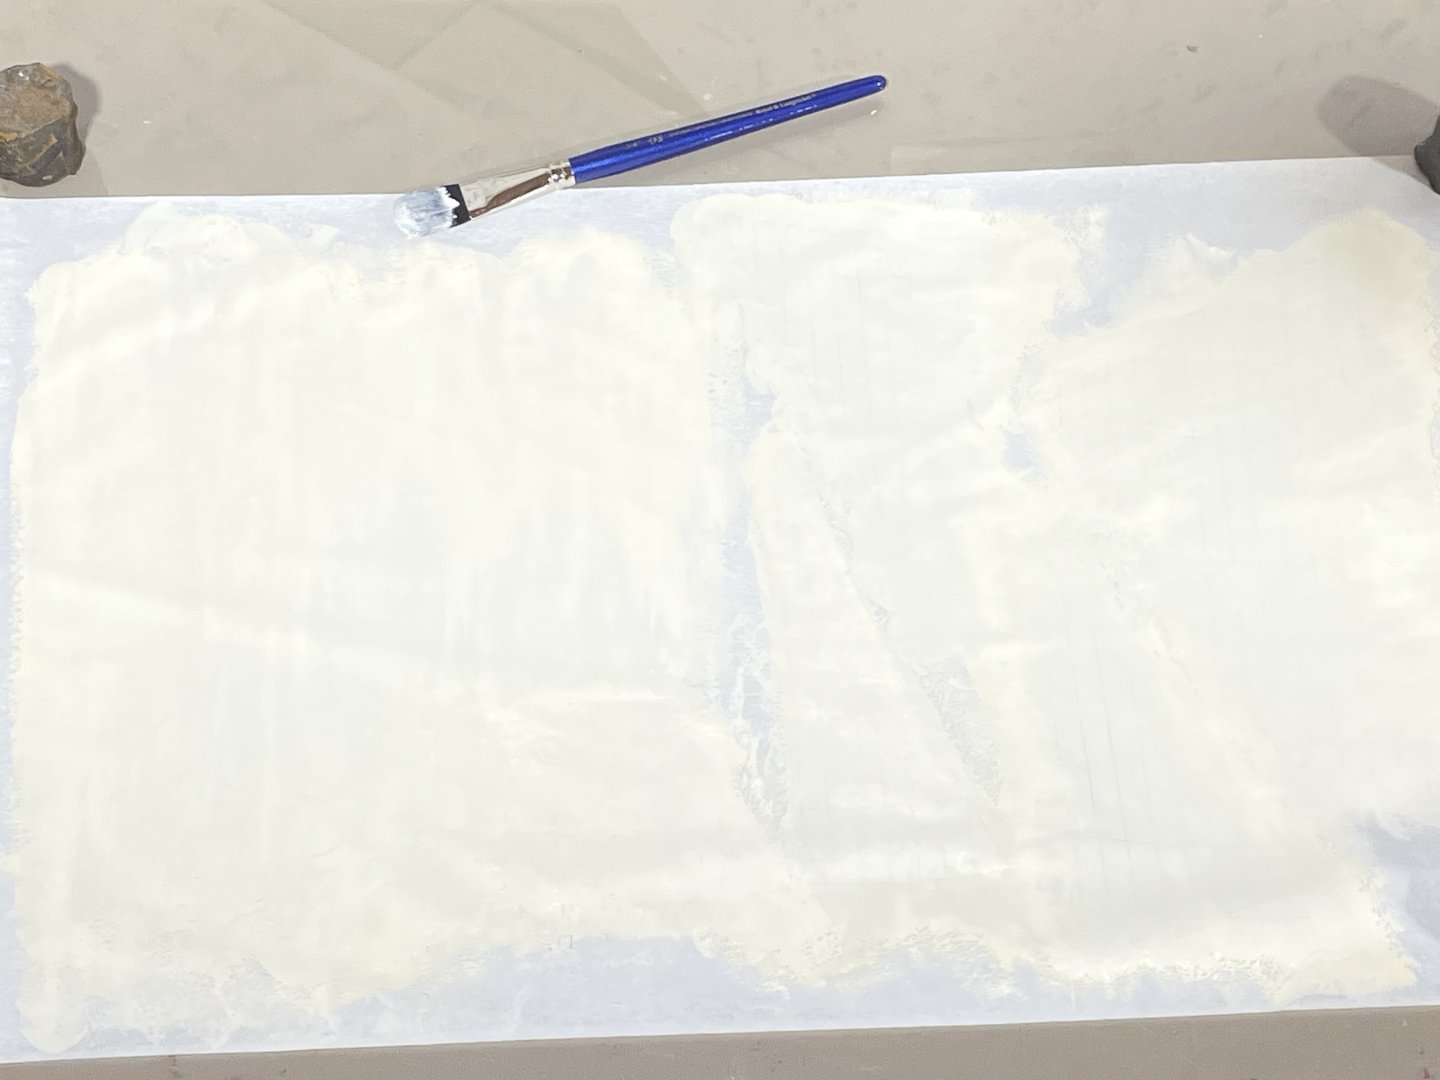
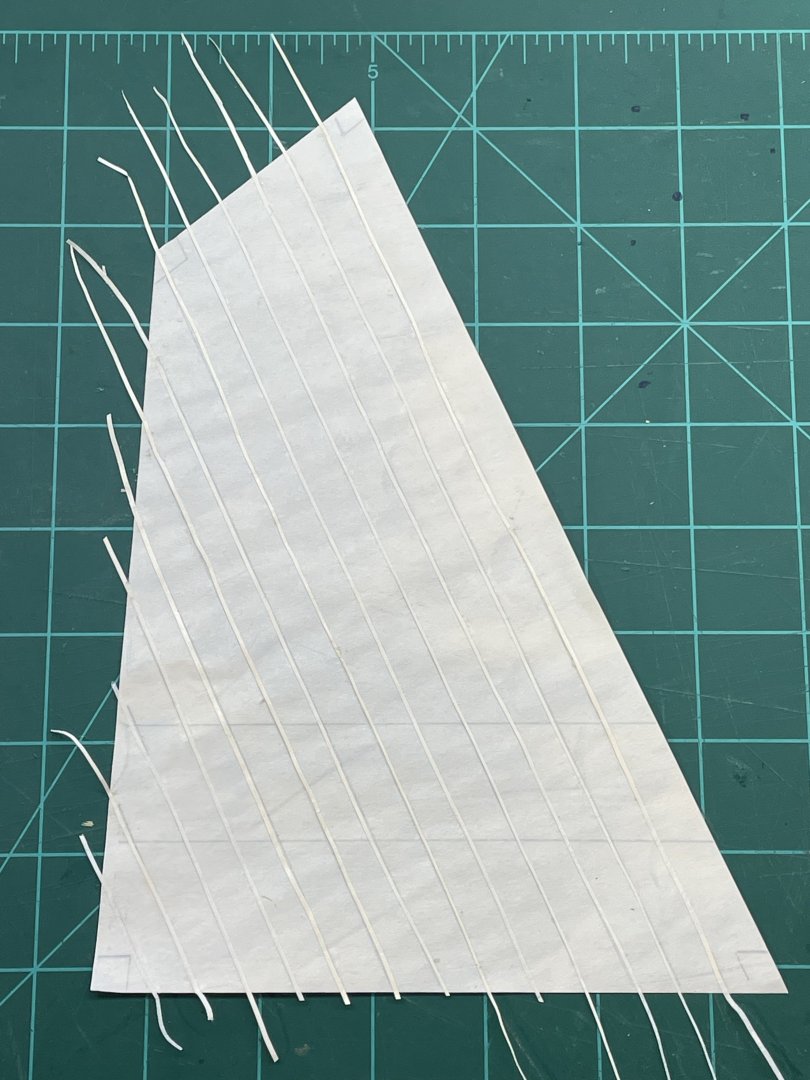
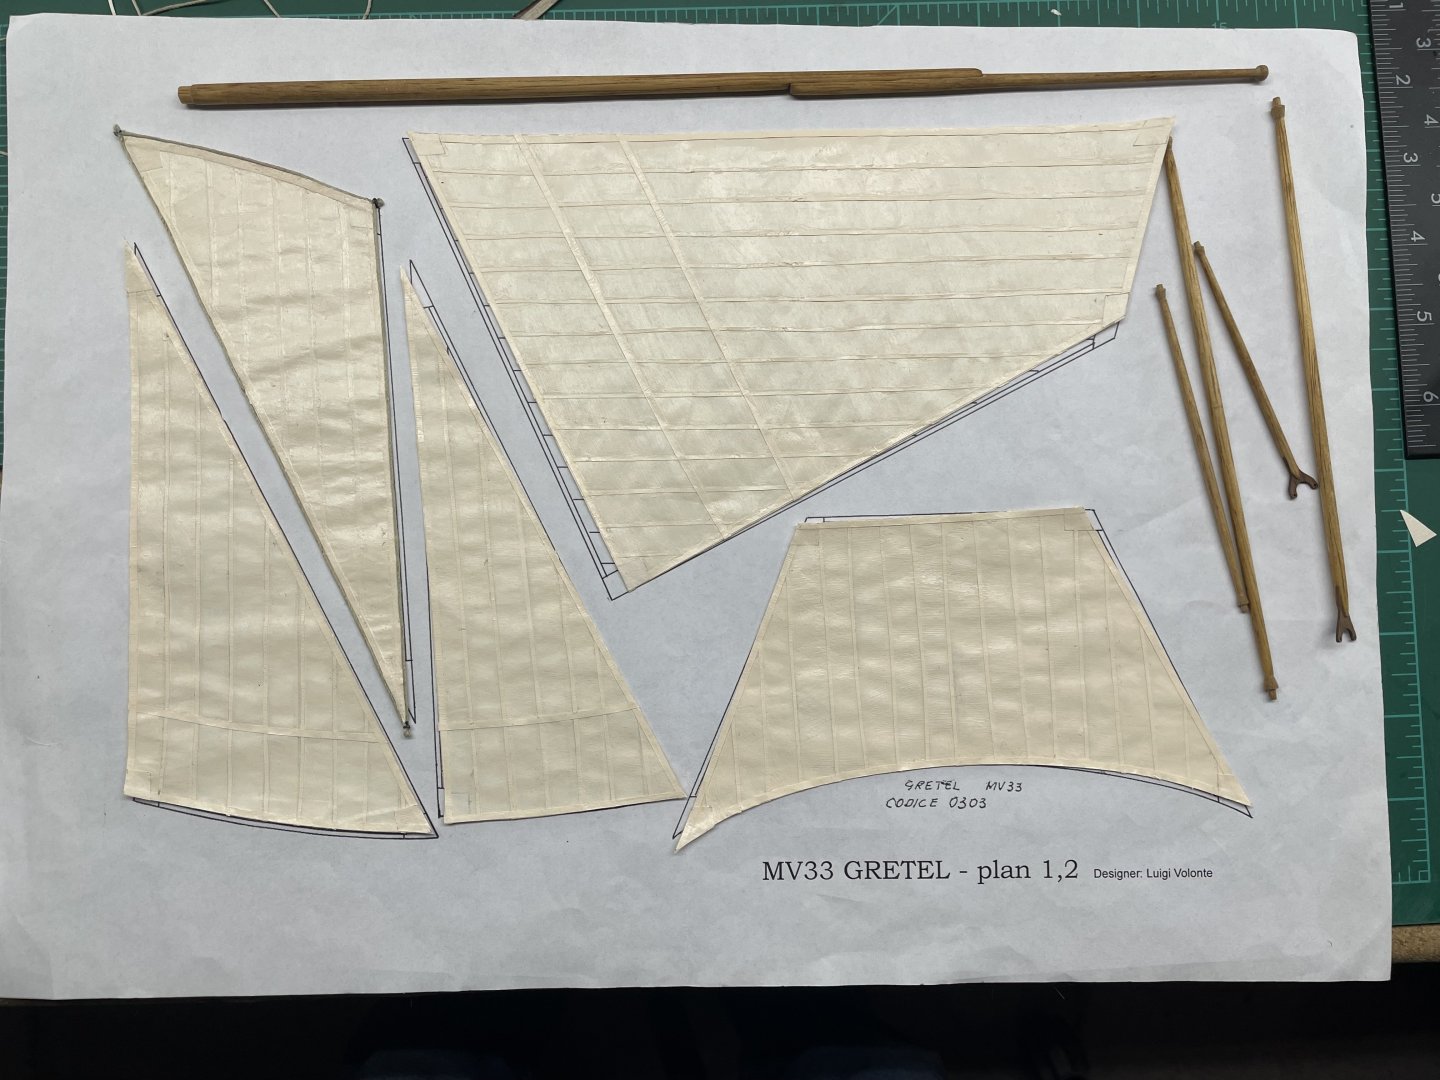
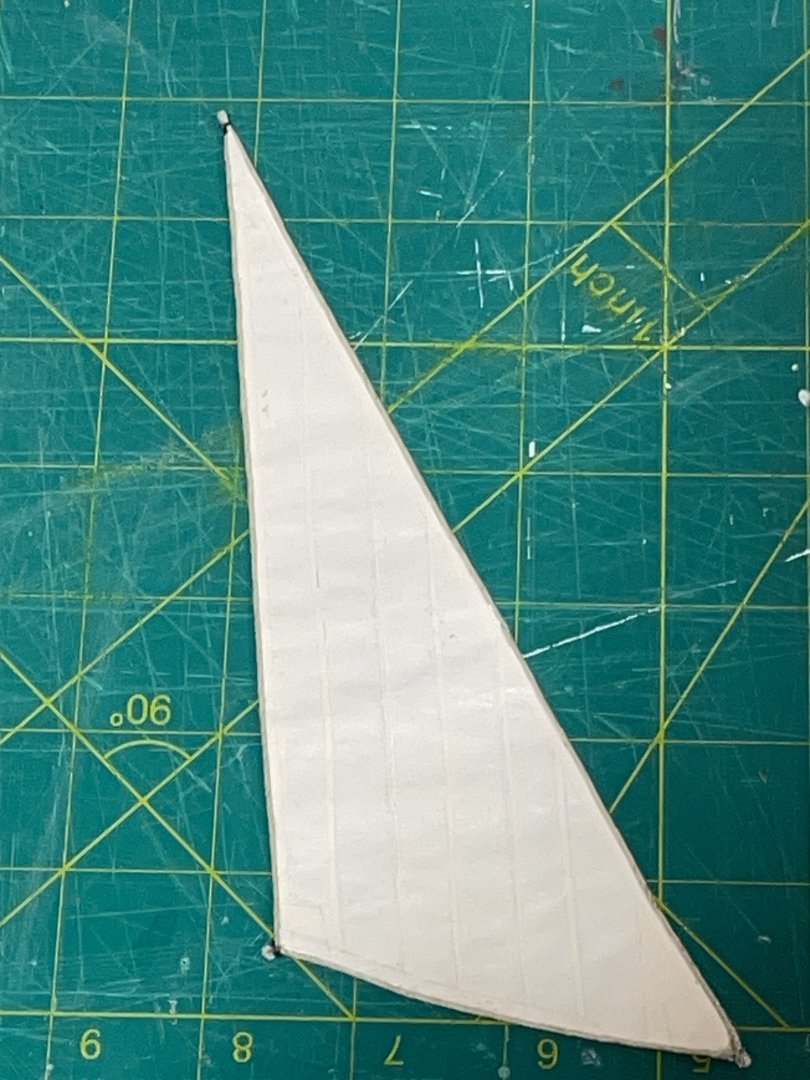
I’ve been shaping the yards and boom. Also making the sails. This teabag paper is working good for me. It doesn’t require a new skill:-) First I trace the sails on the paper then paint one side to give it a little stiffness. After a few days of drying, so it’s not tacky. I cut them out. next I cut strips for the seams, hems and corner supports. After all that’s done I paint over both sides. Then glue a rope around the sides. I still have four more sails to glue this rope on.


-
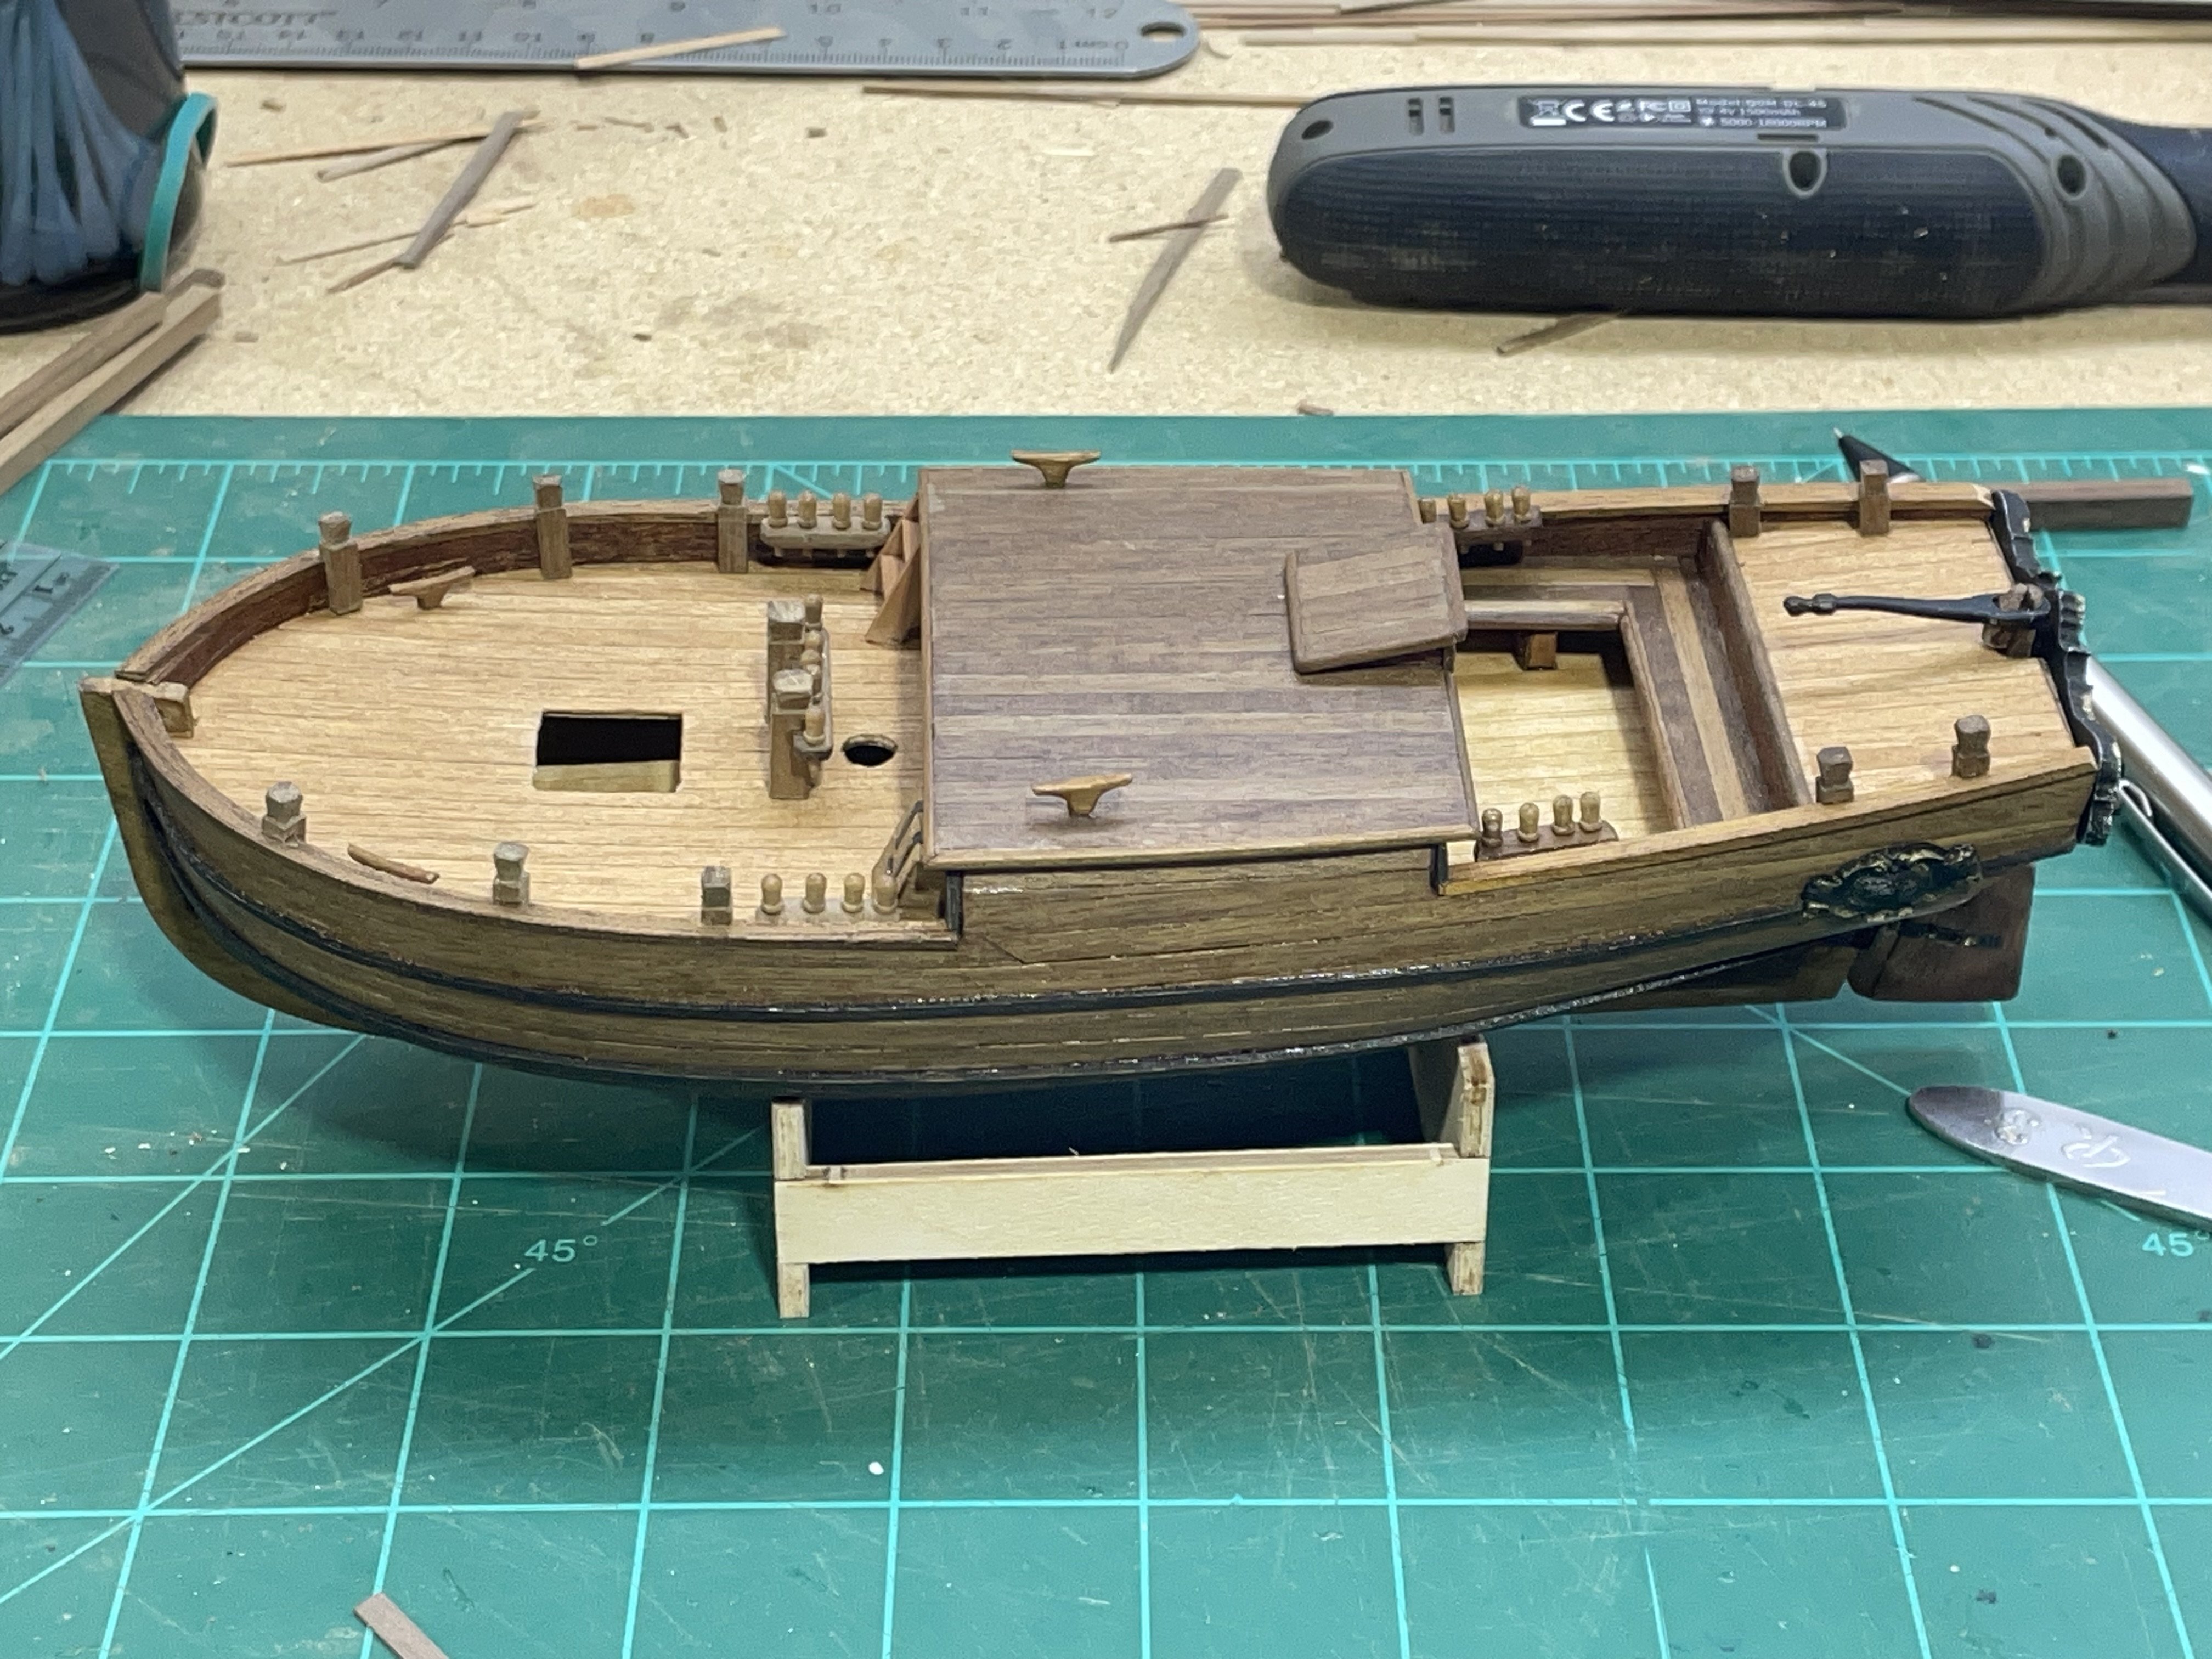
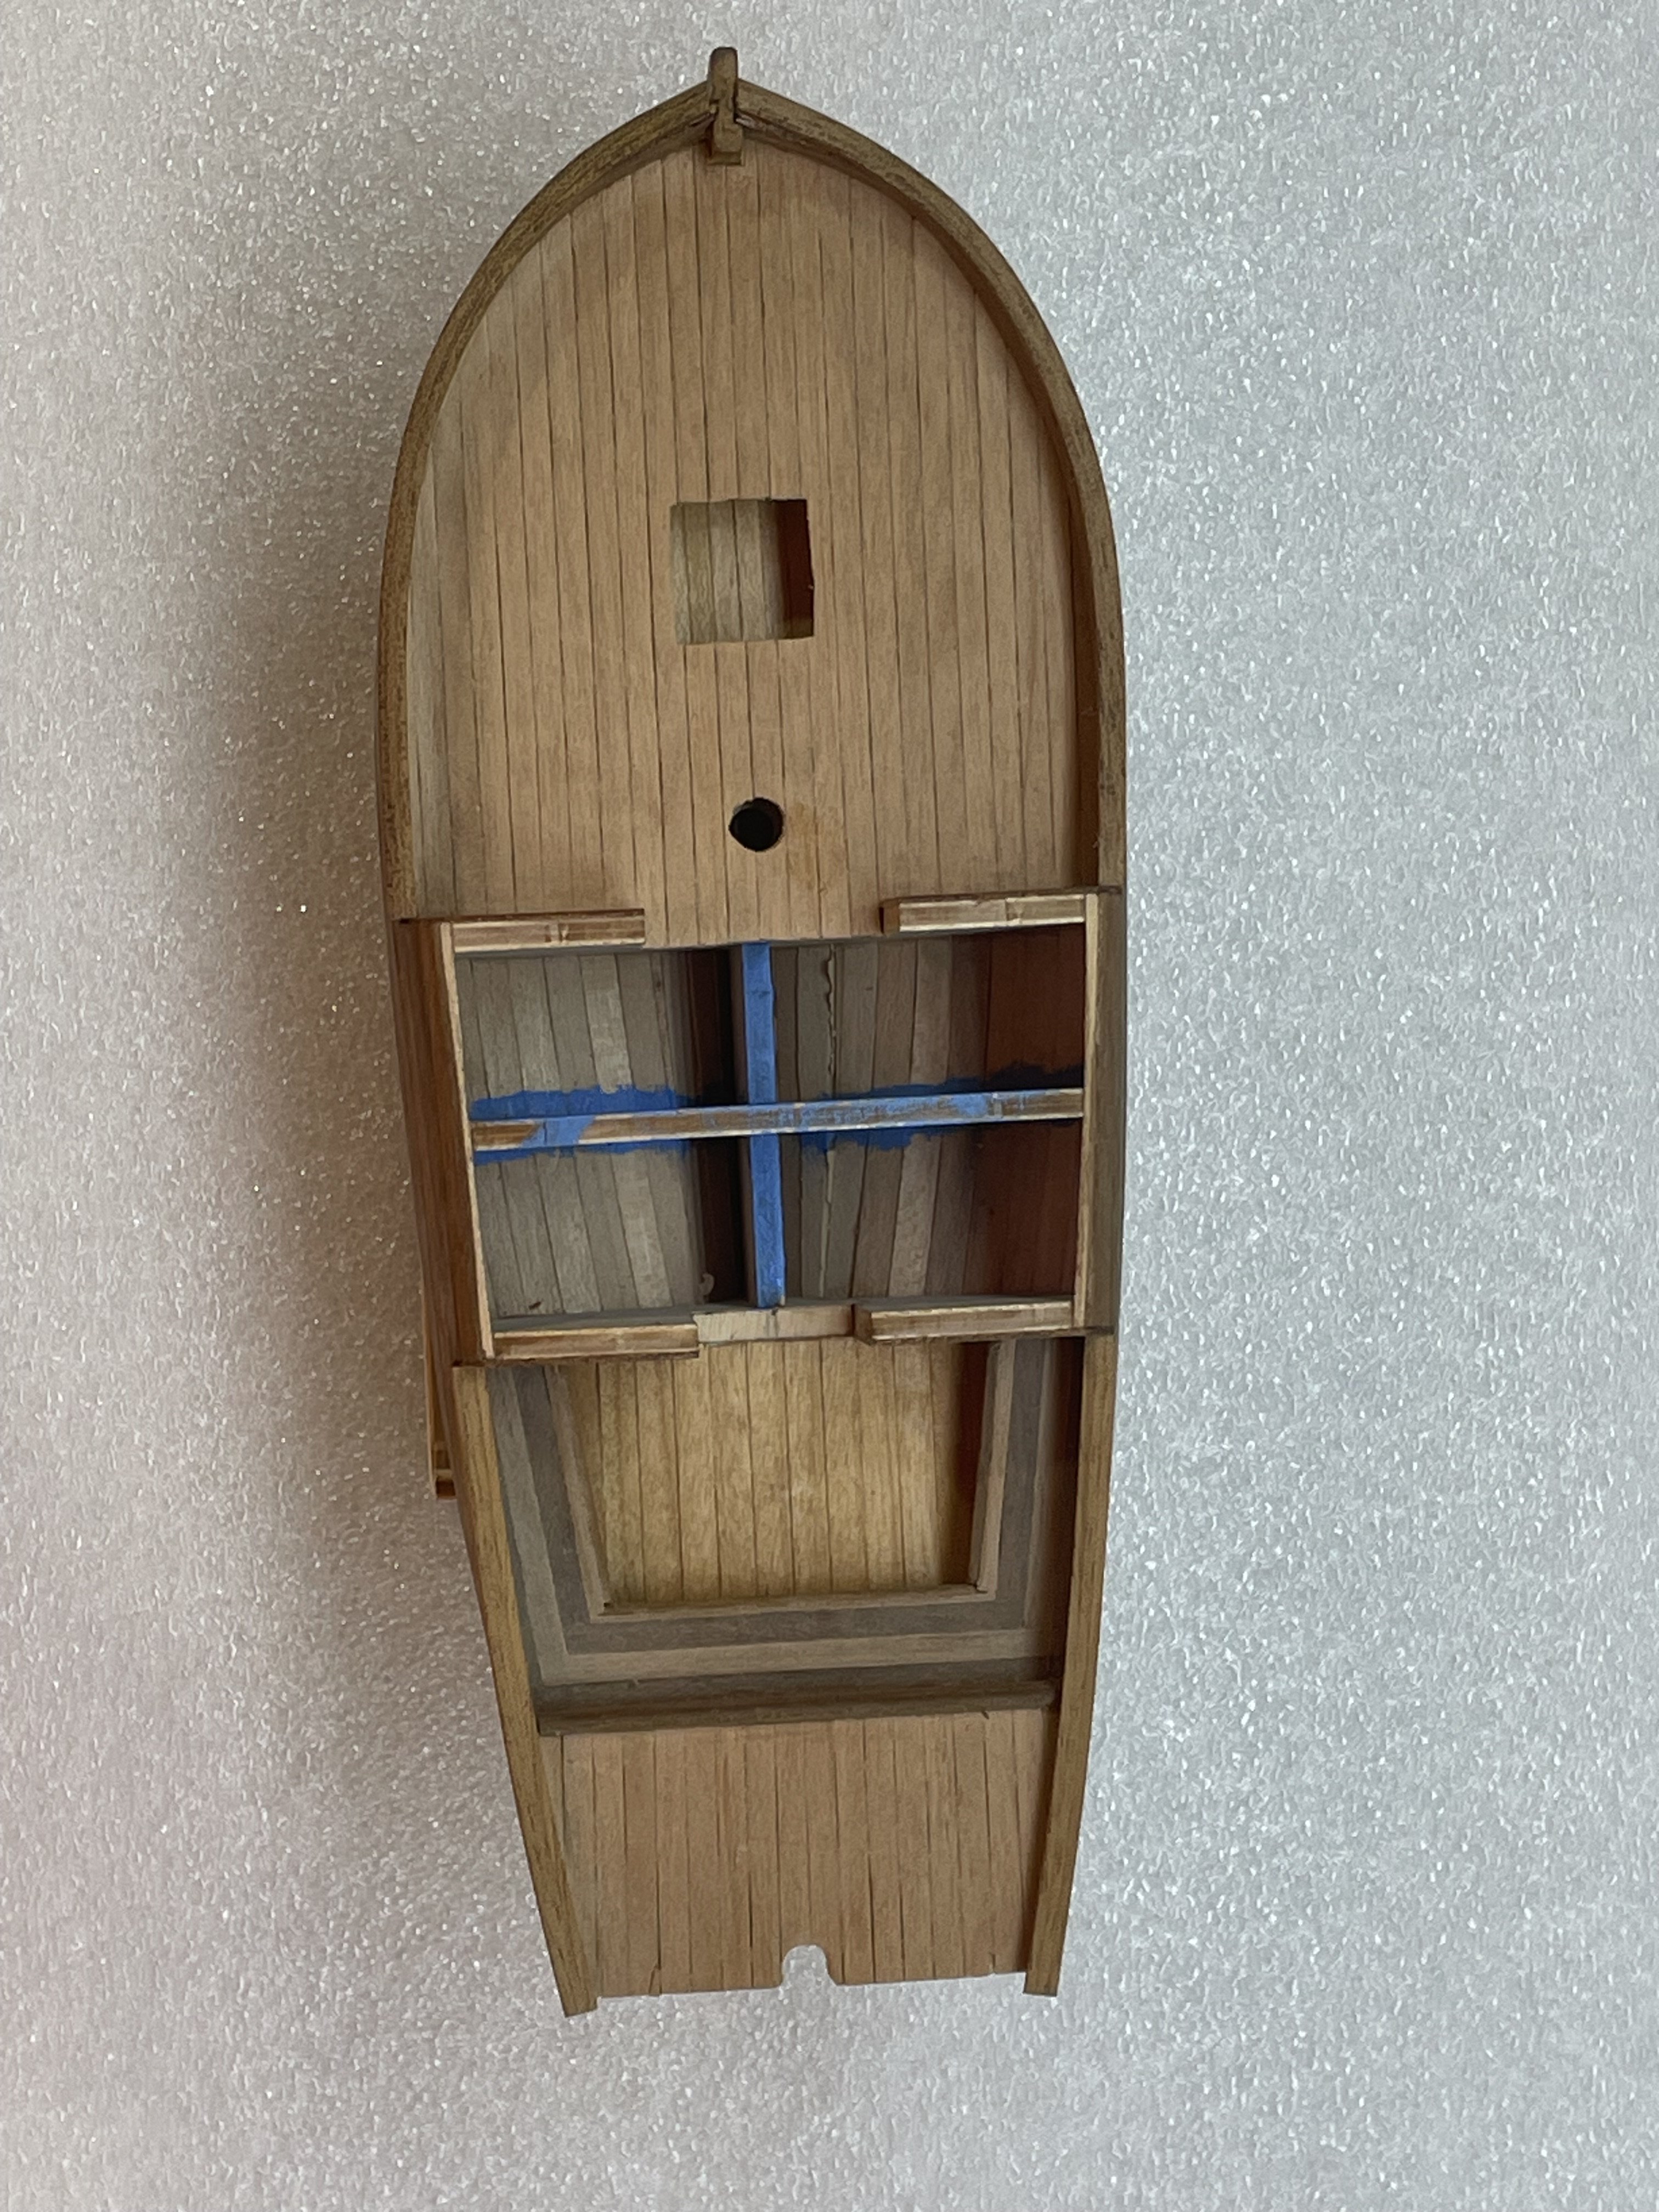
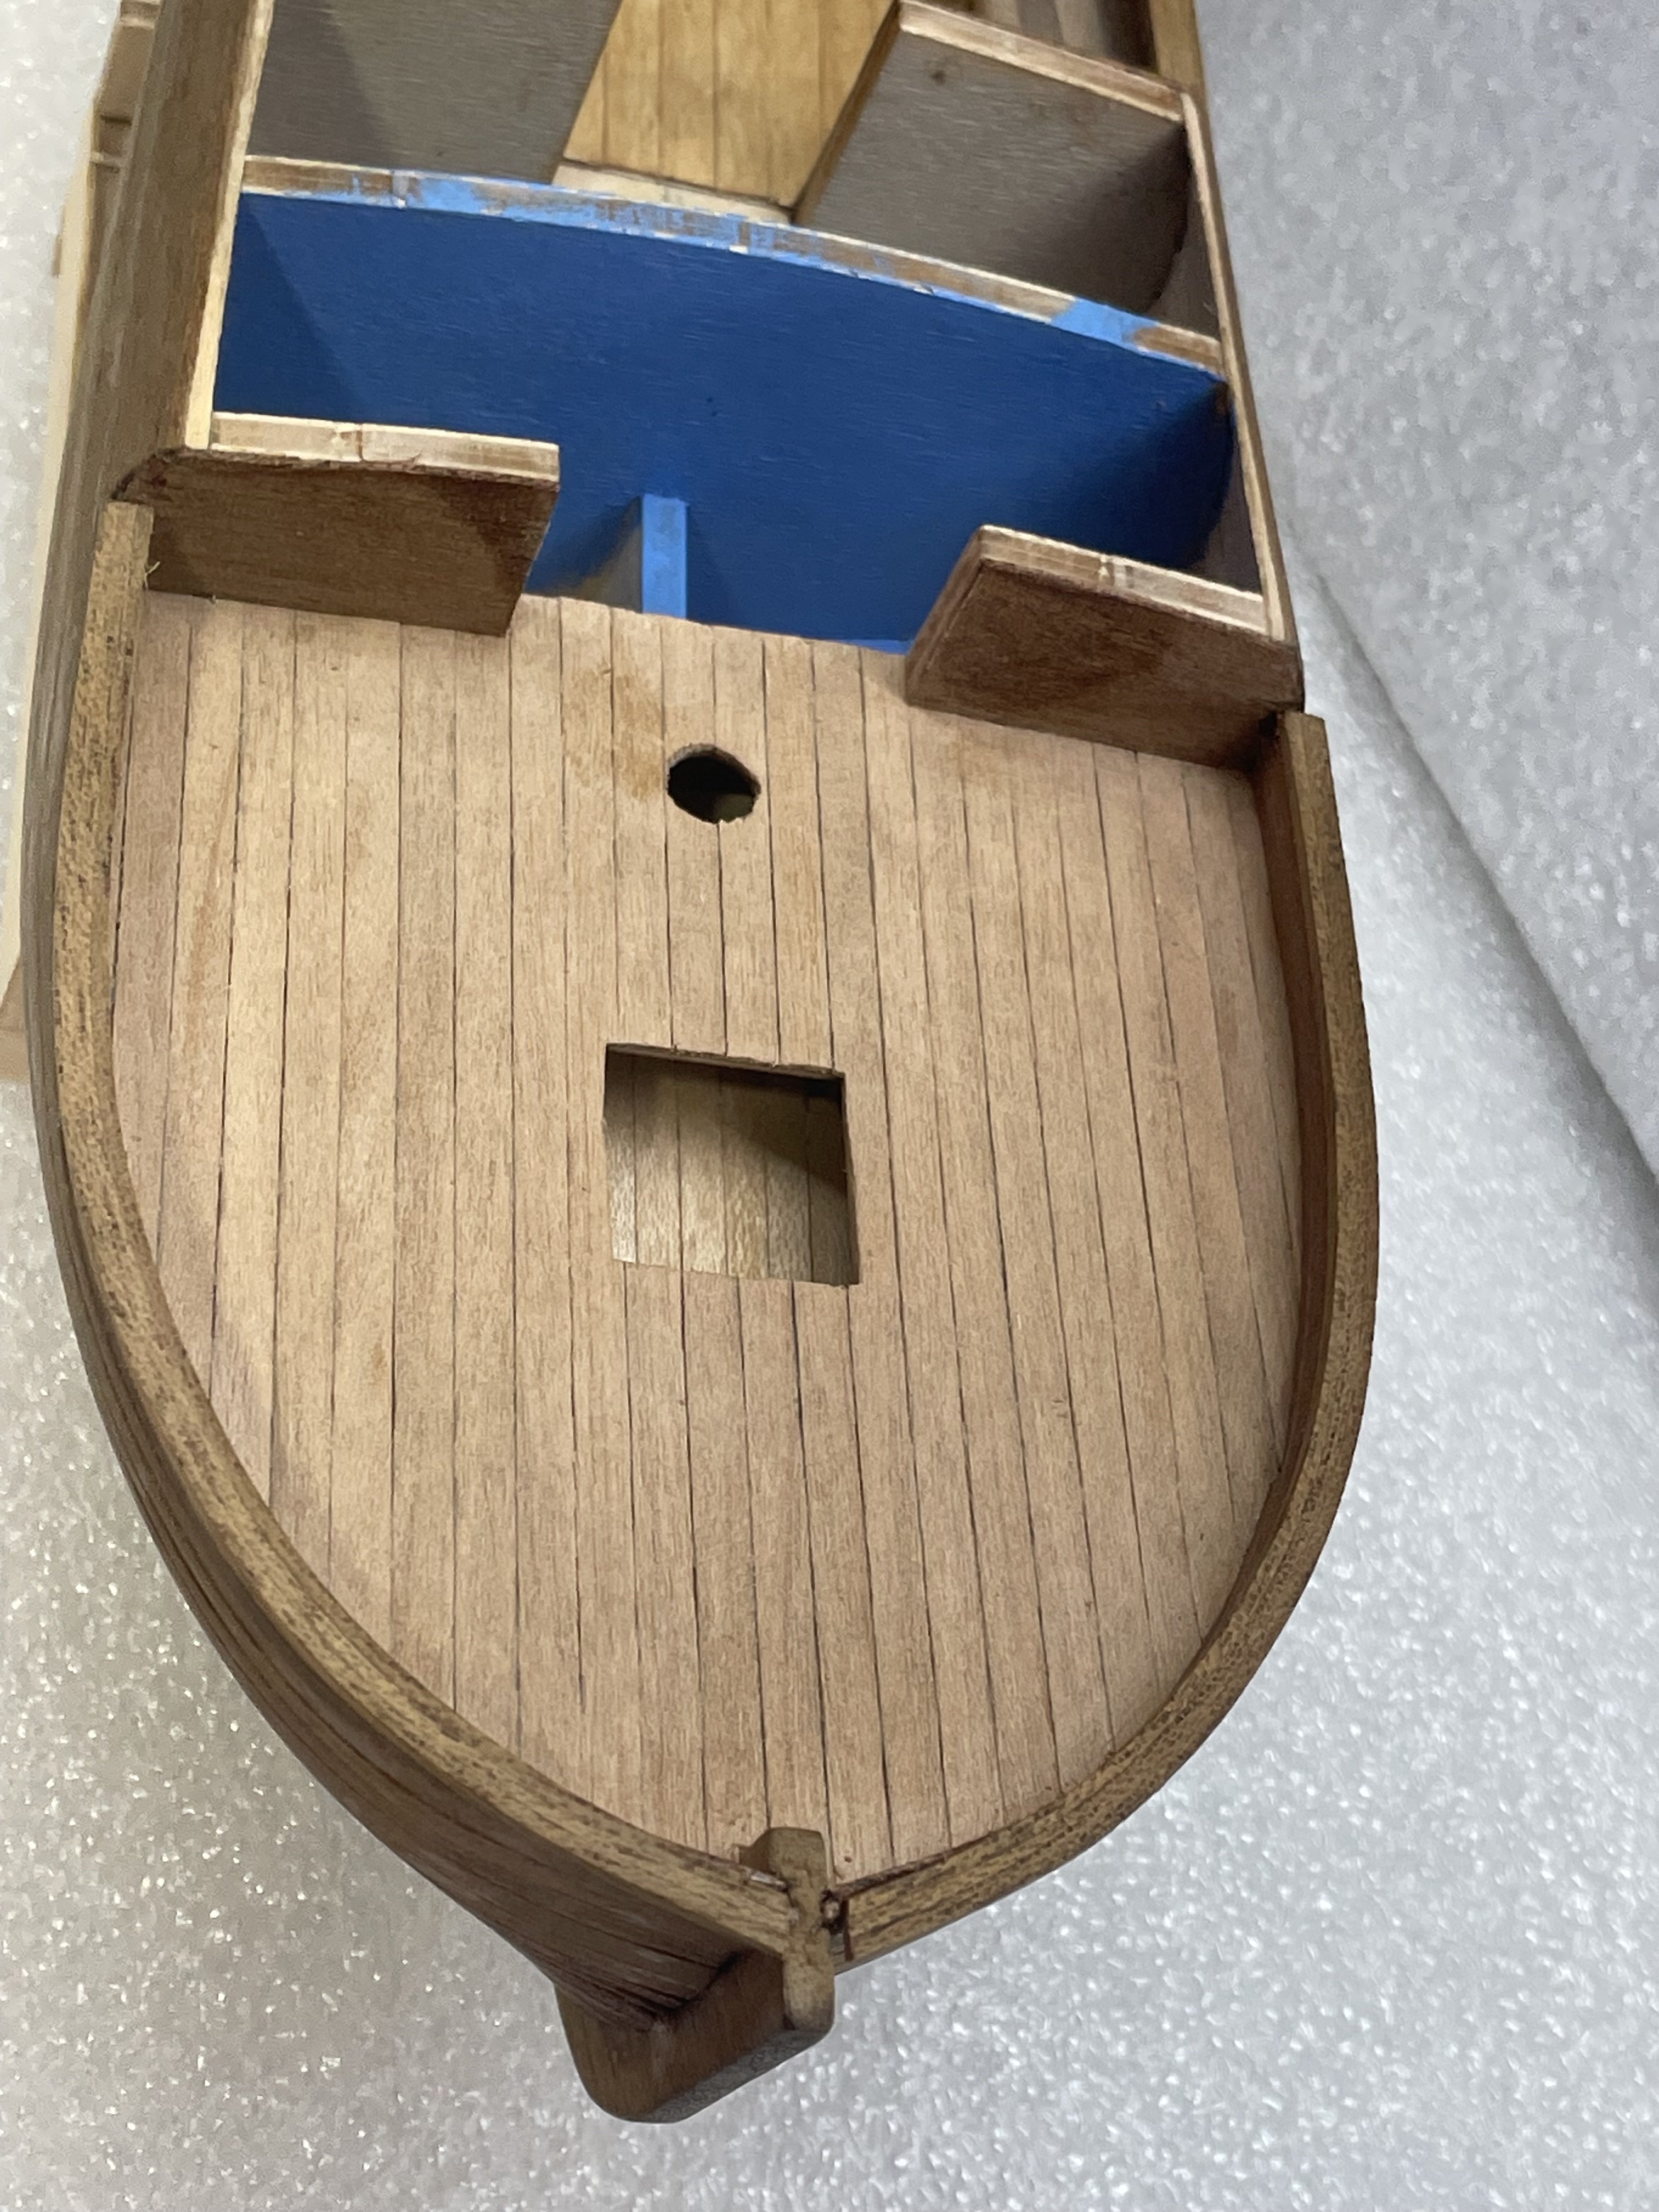
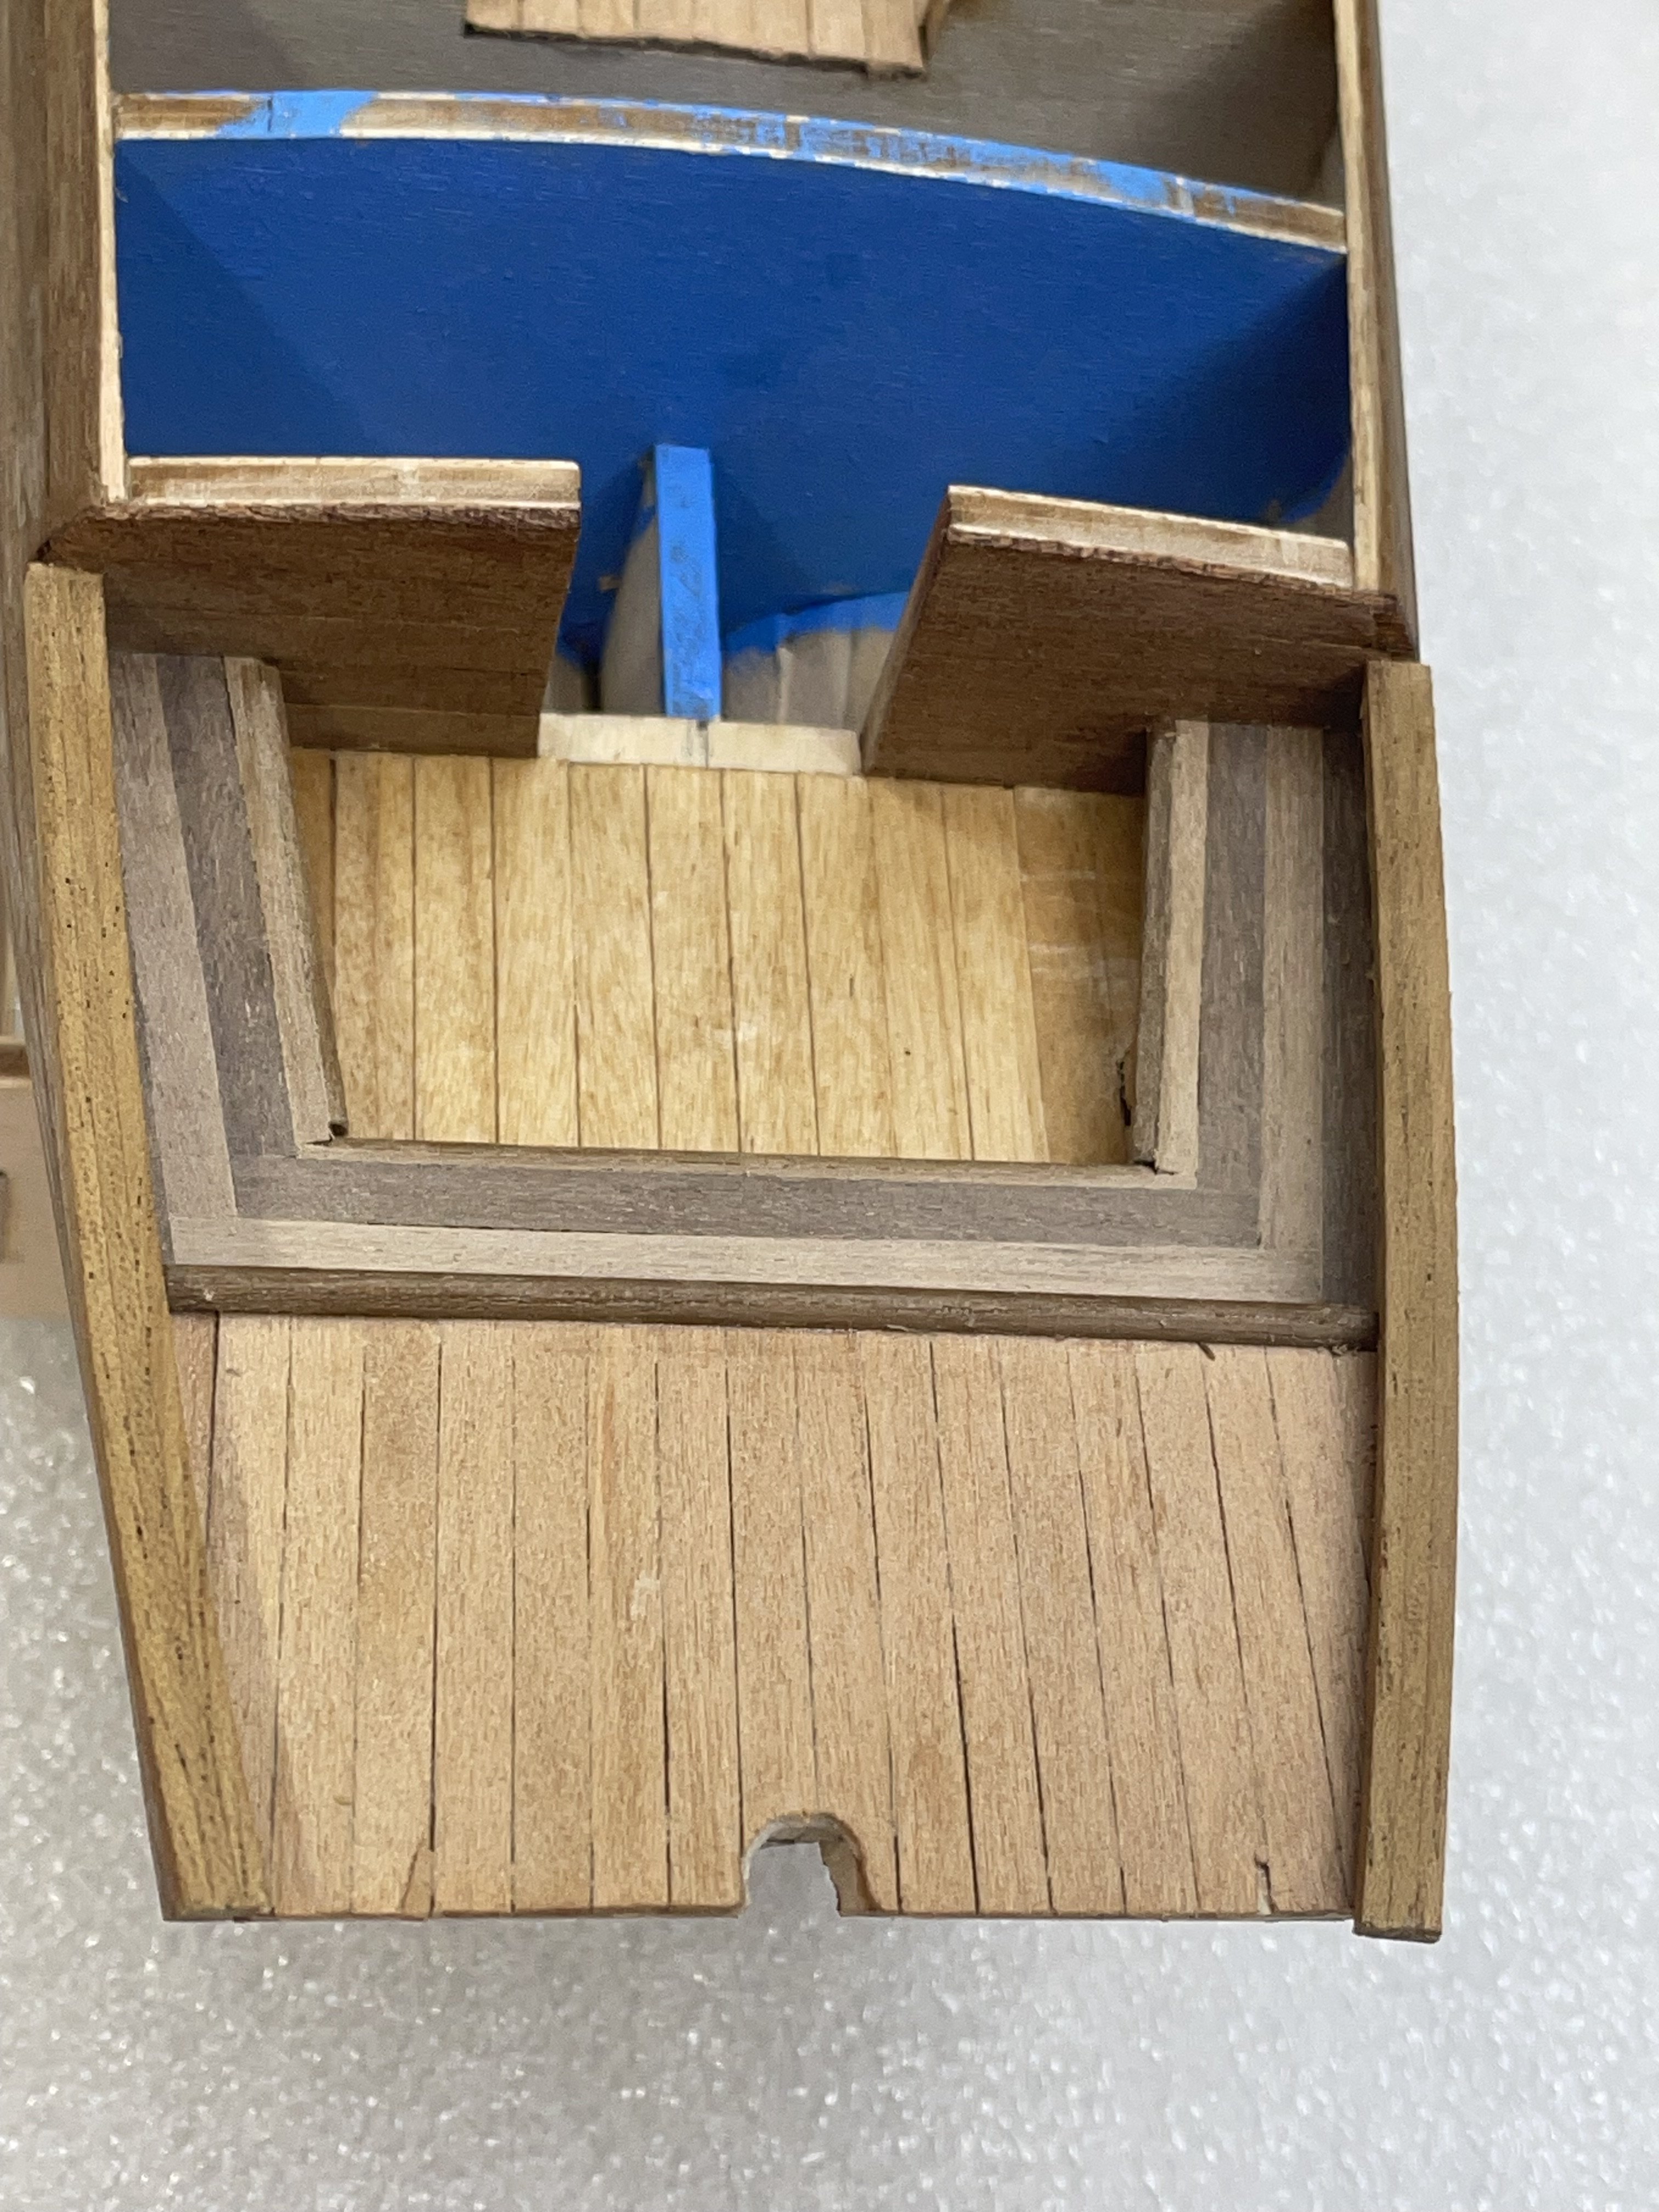
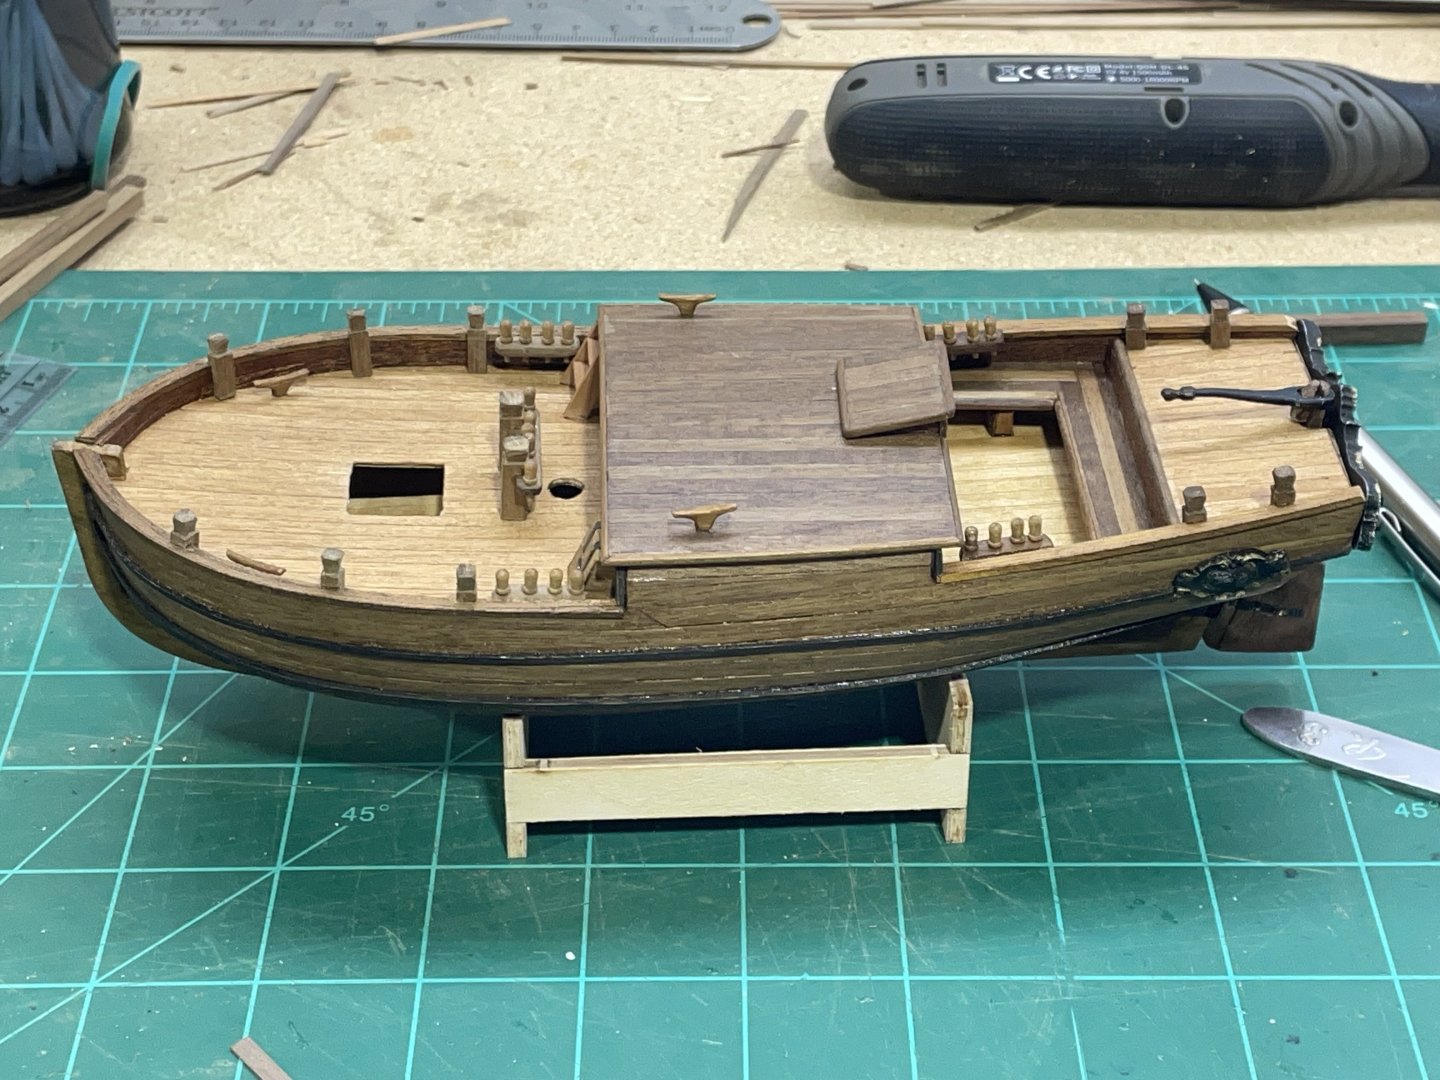
This week I tried to get everything glued down except the things that maybe in my way when the rigging begins. Pretty much all the measurements for the different parts are given. And the supplied wood has been a very good quality, in a novelist opinion:-) Here’s a few shots.

-
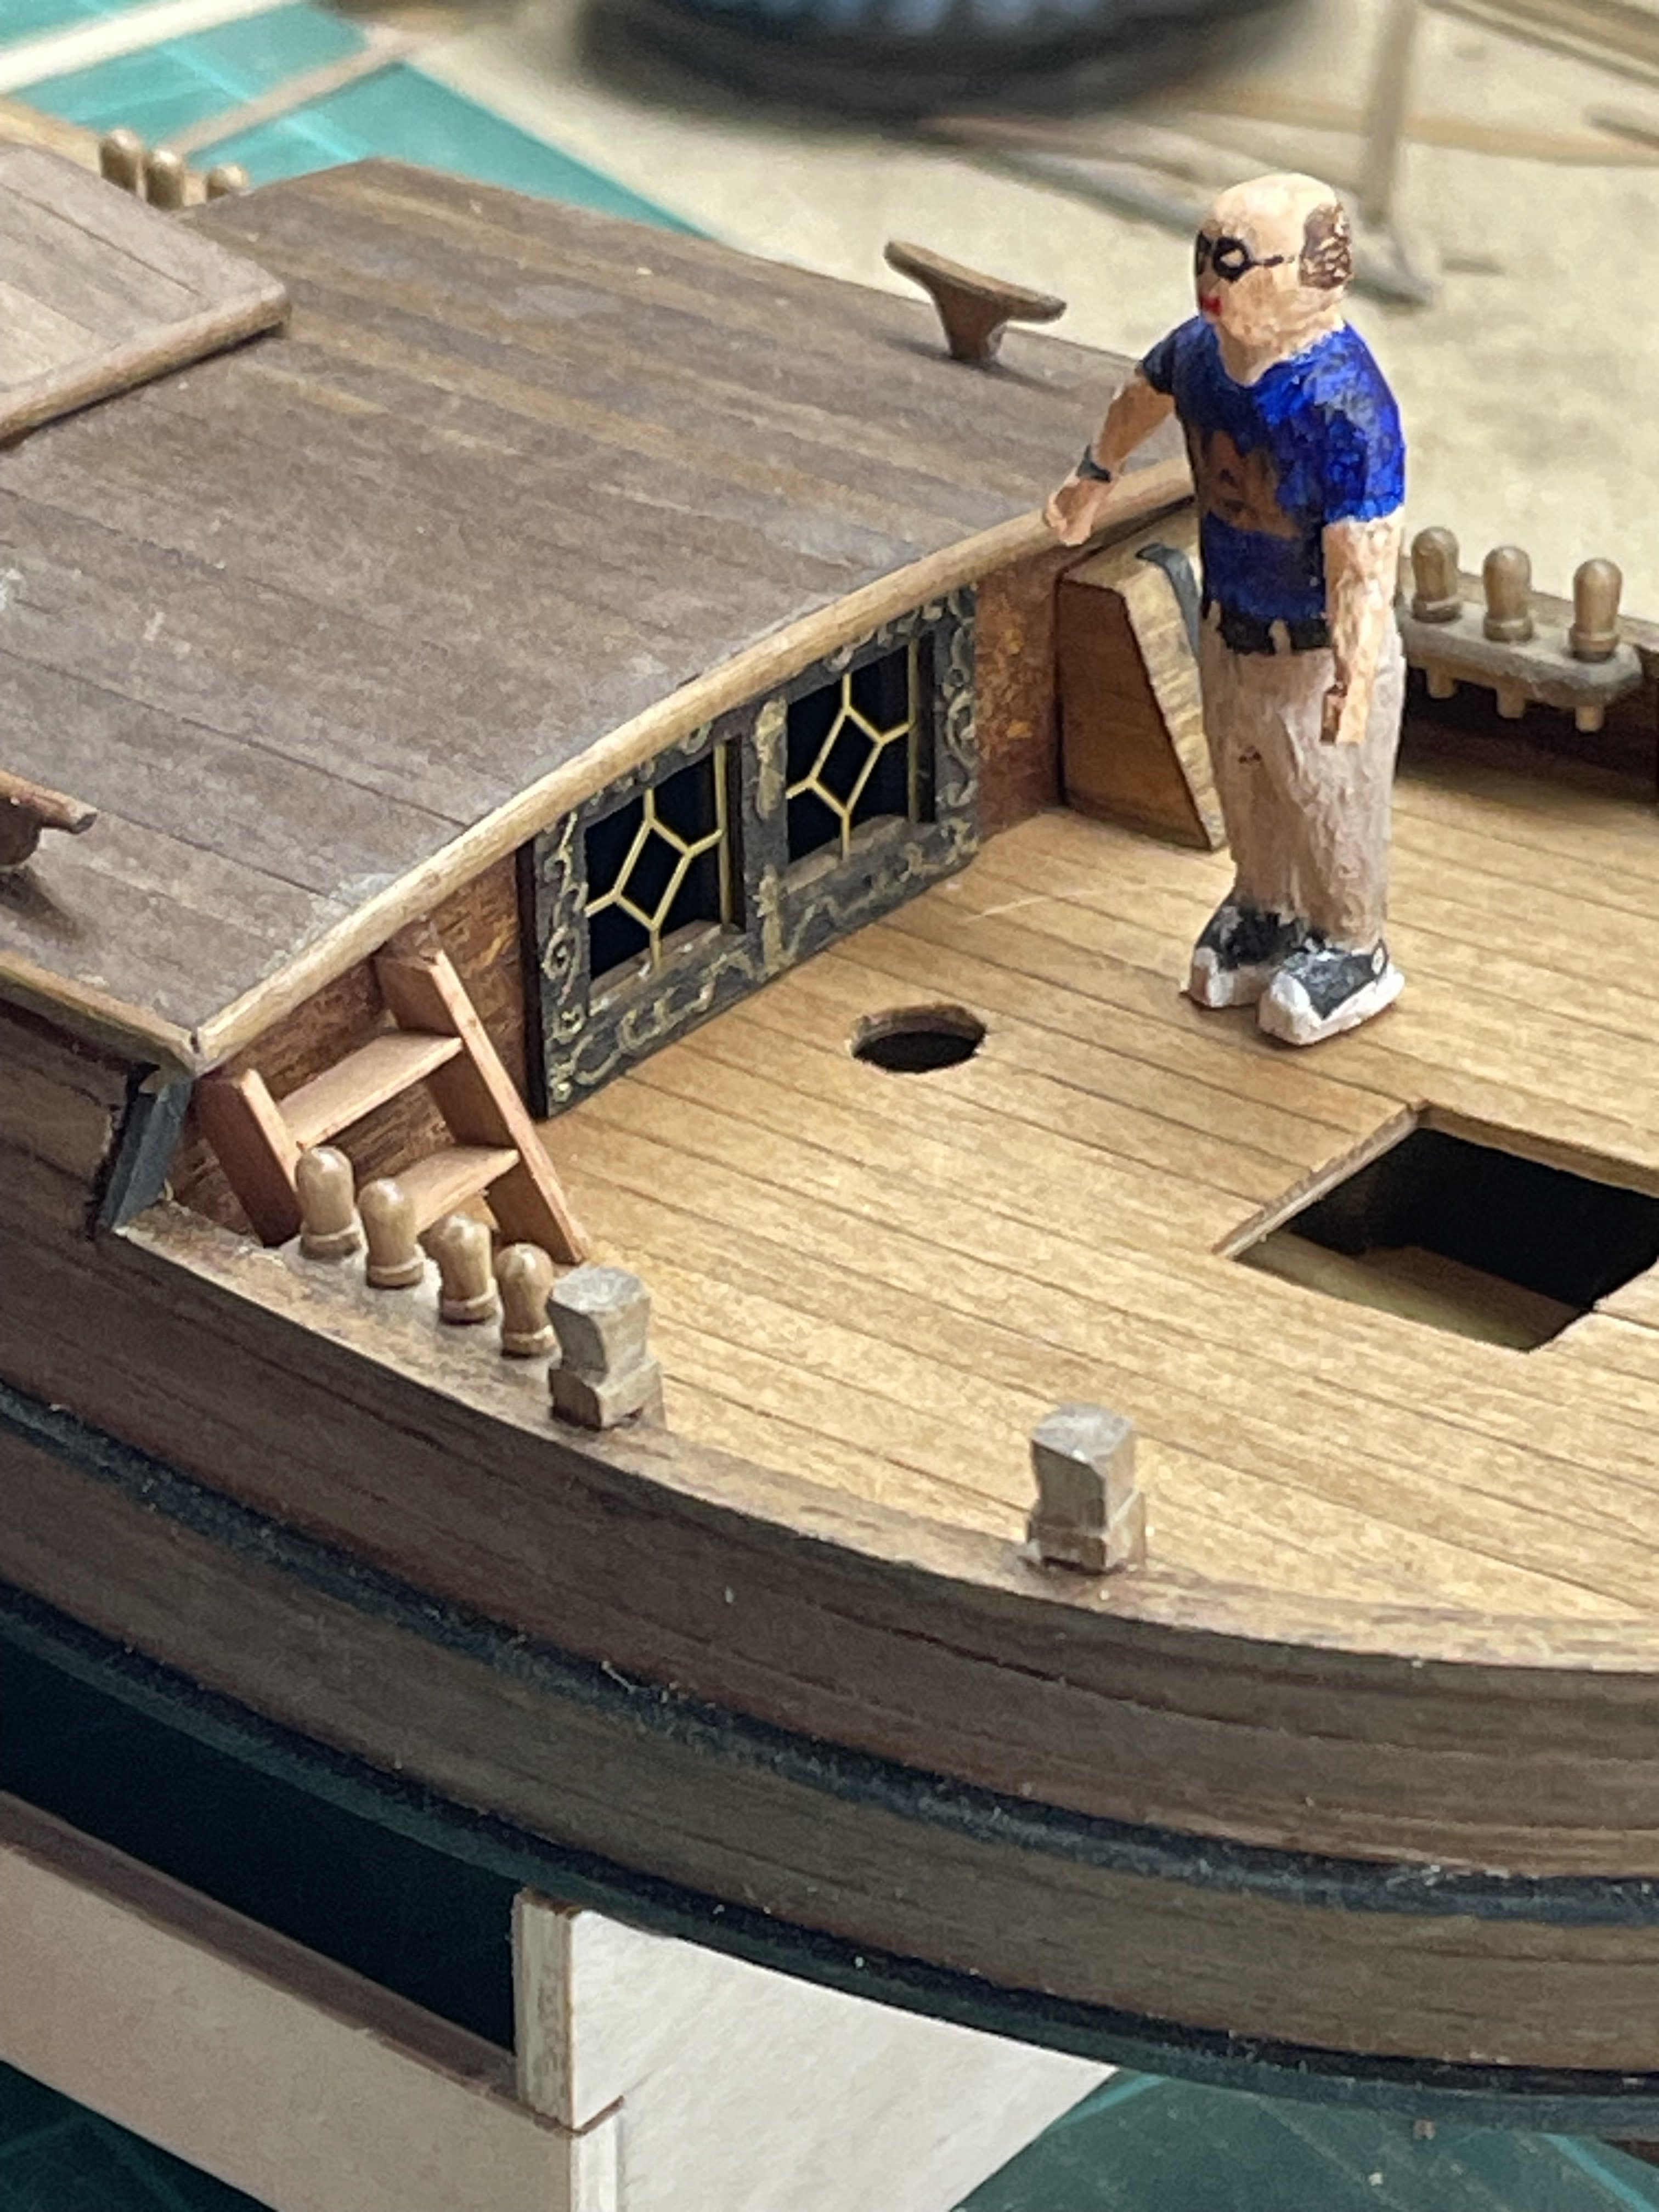
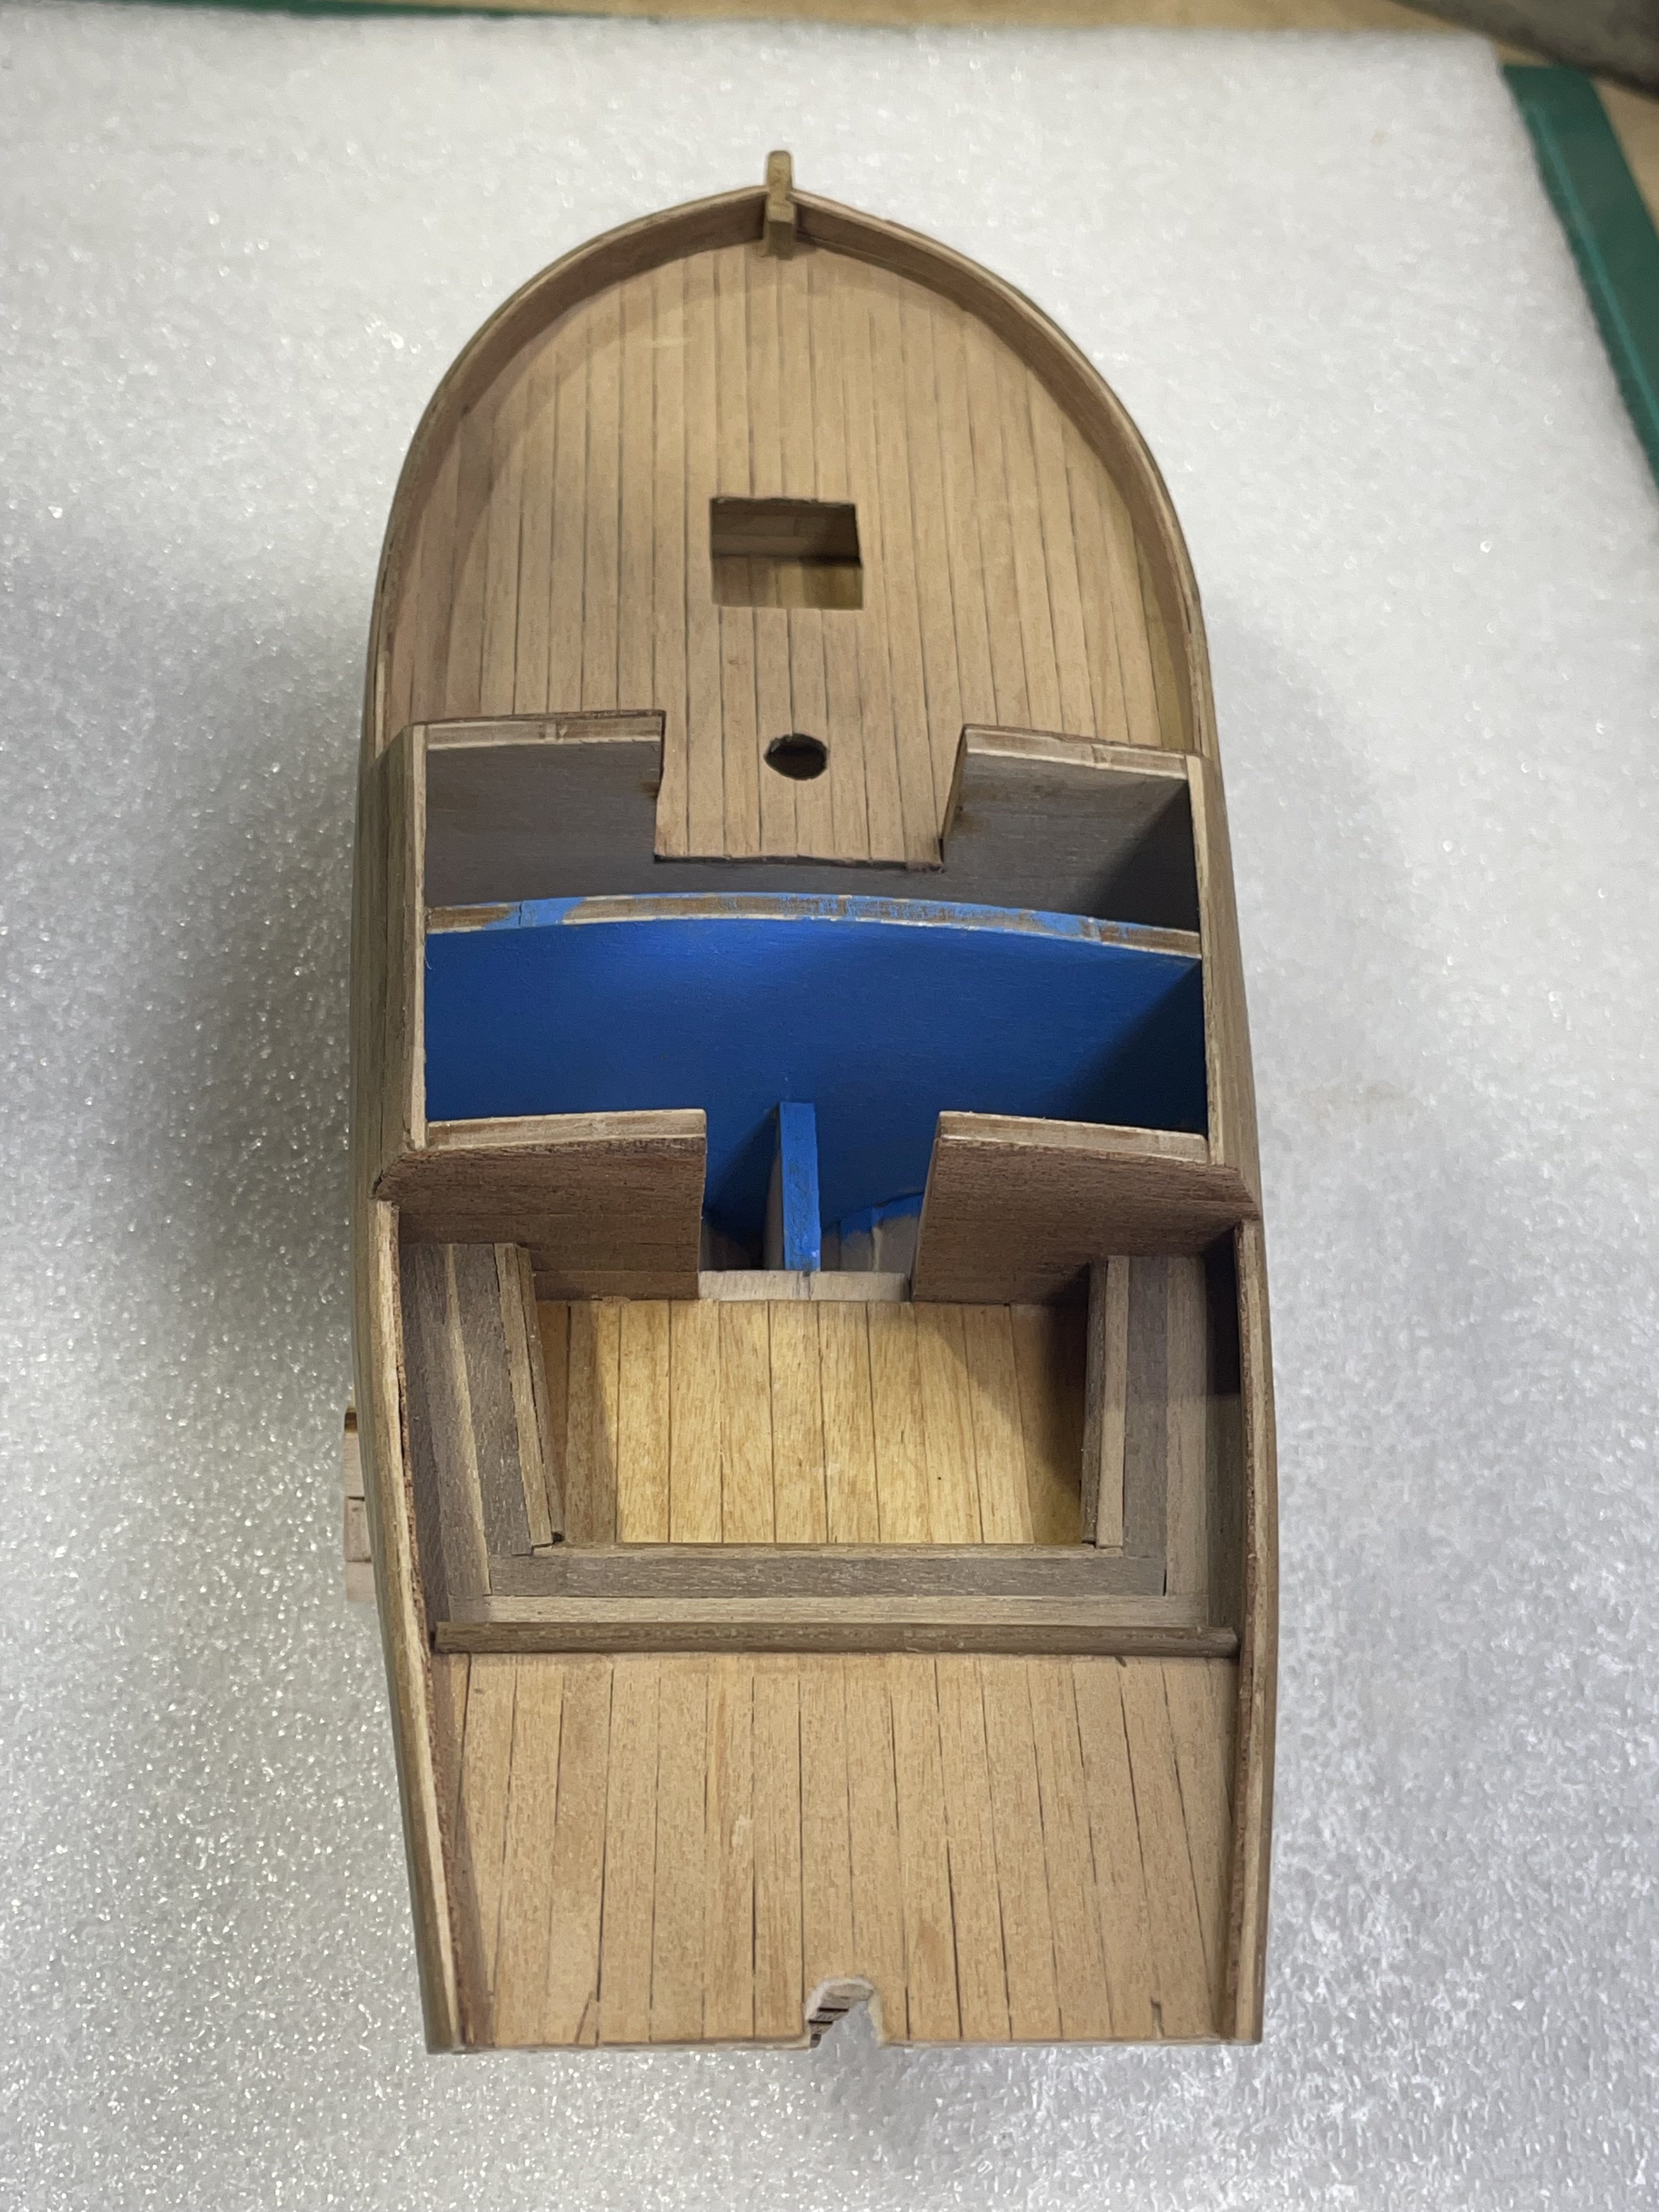
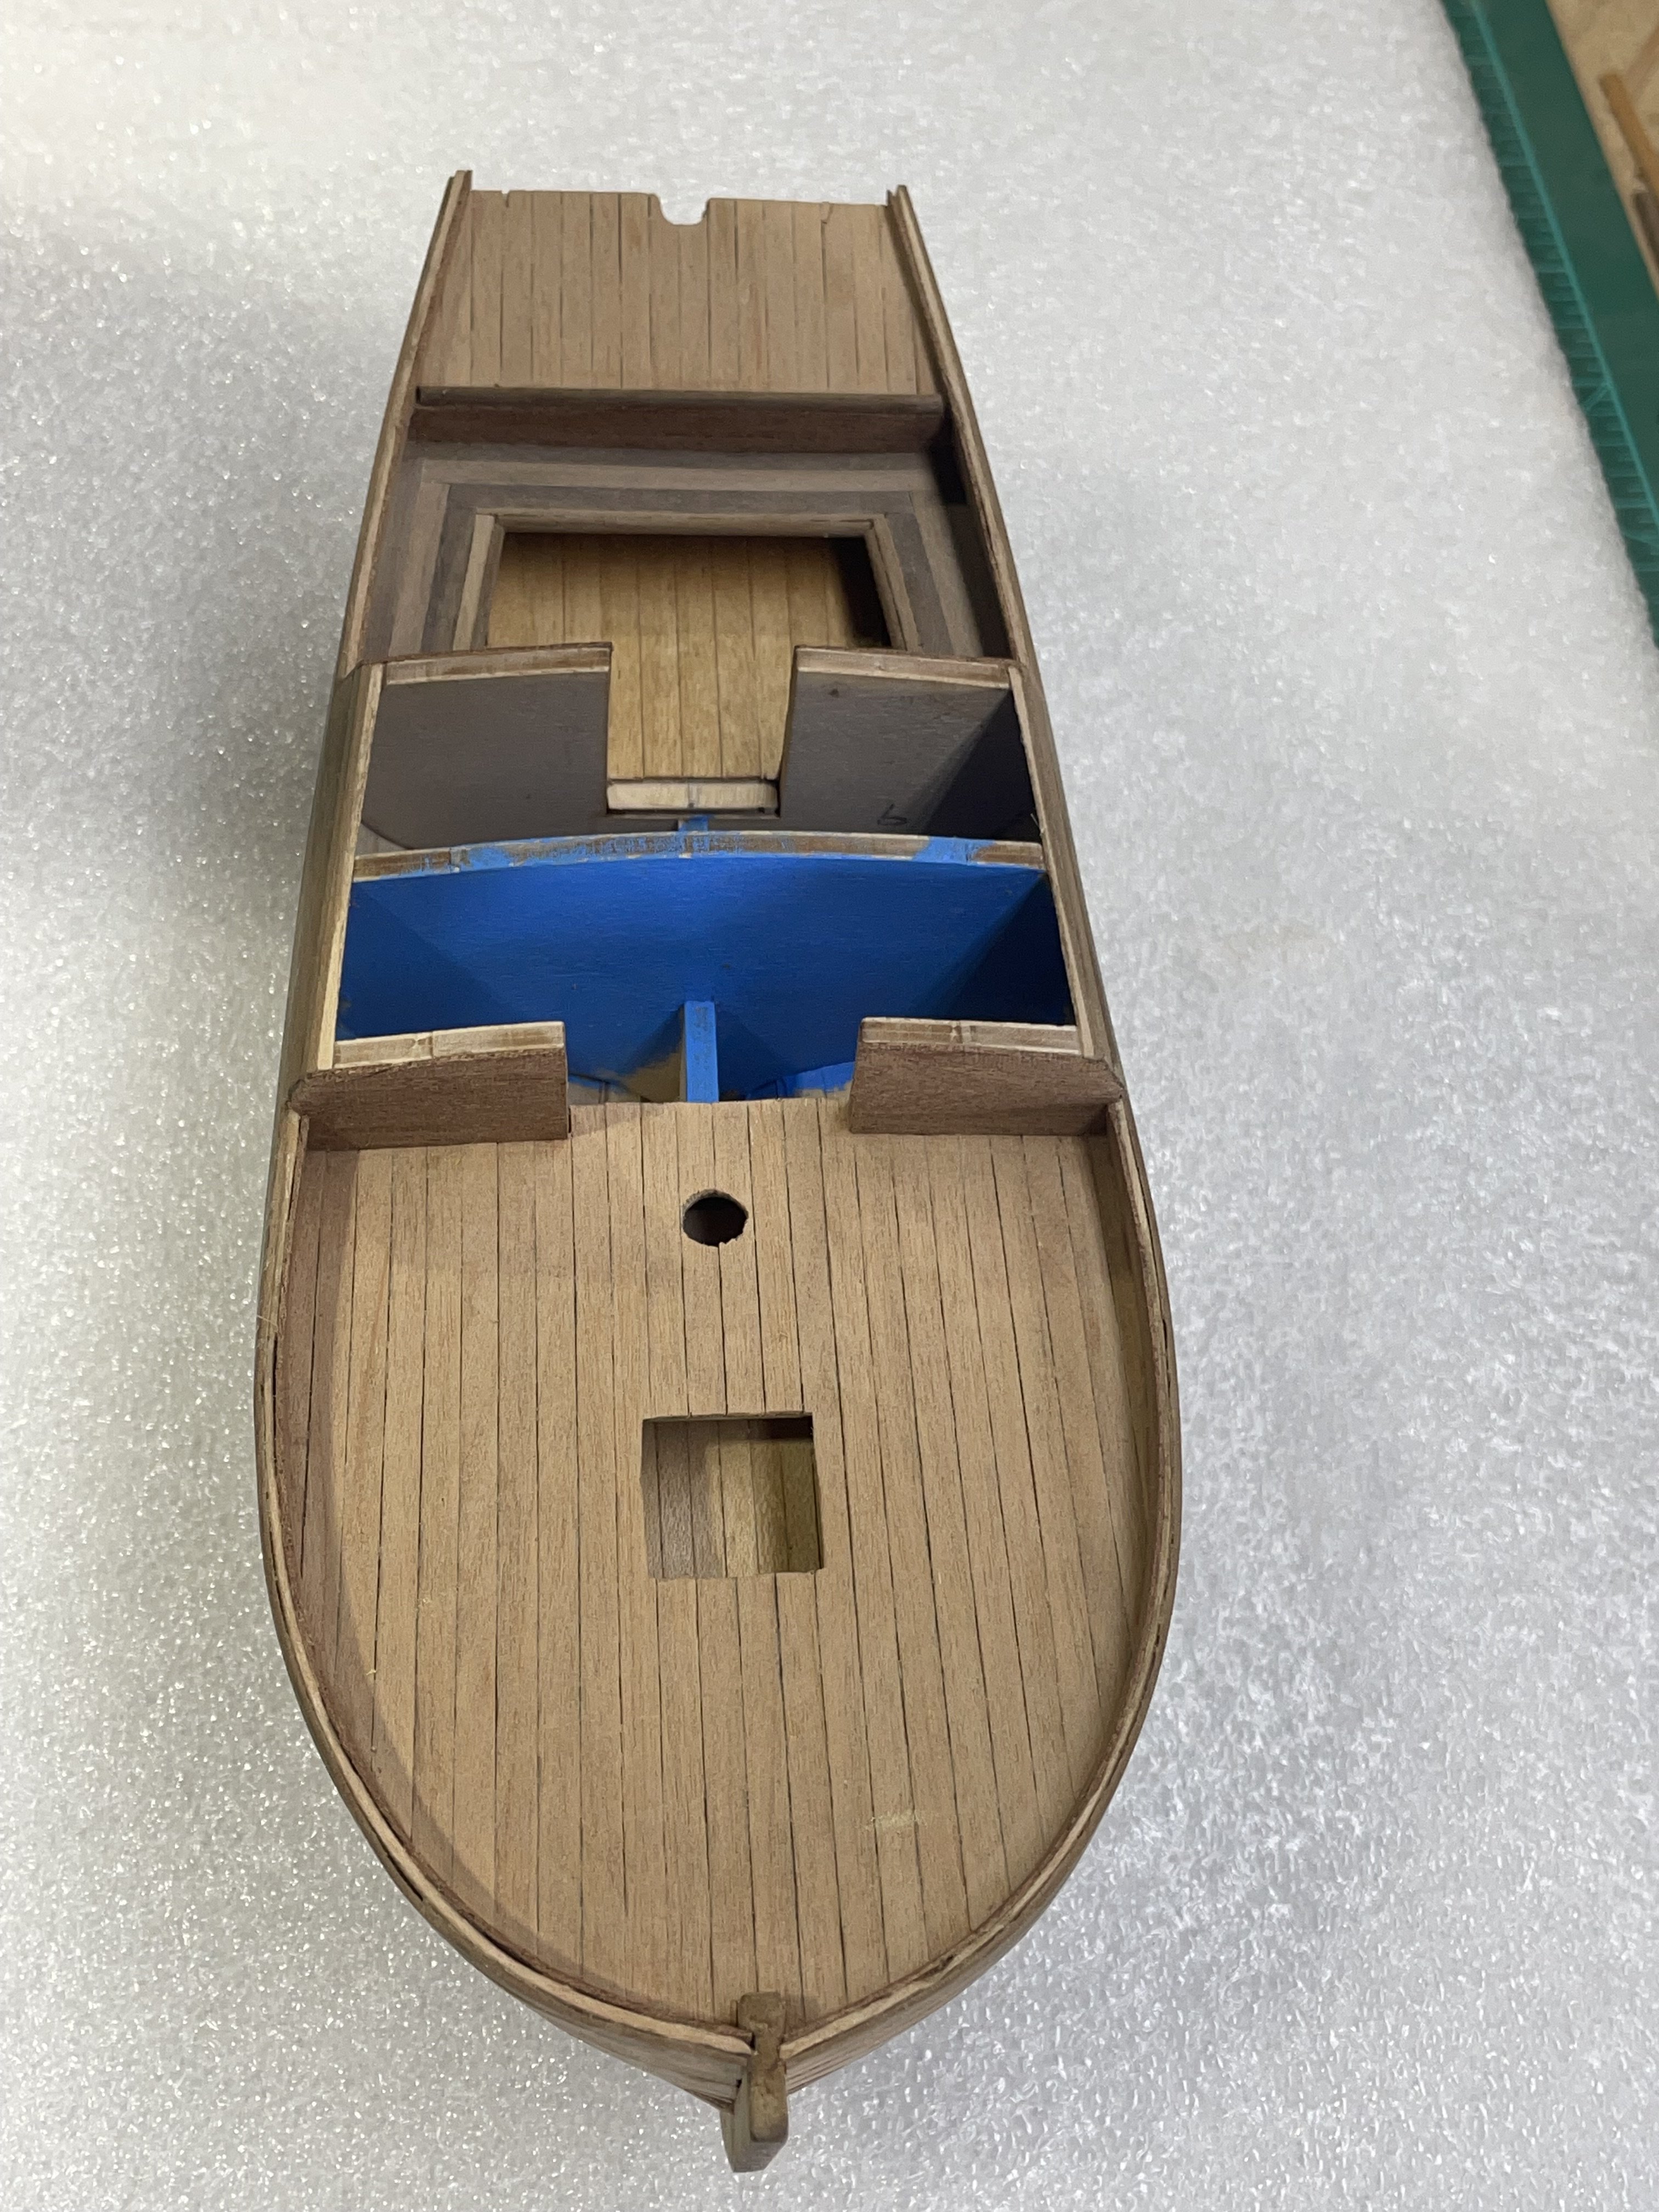
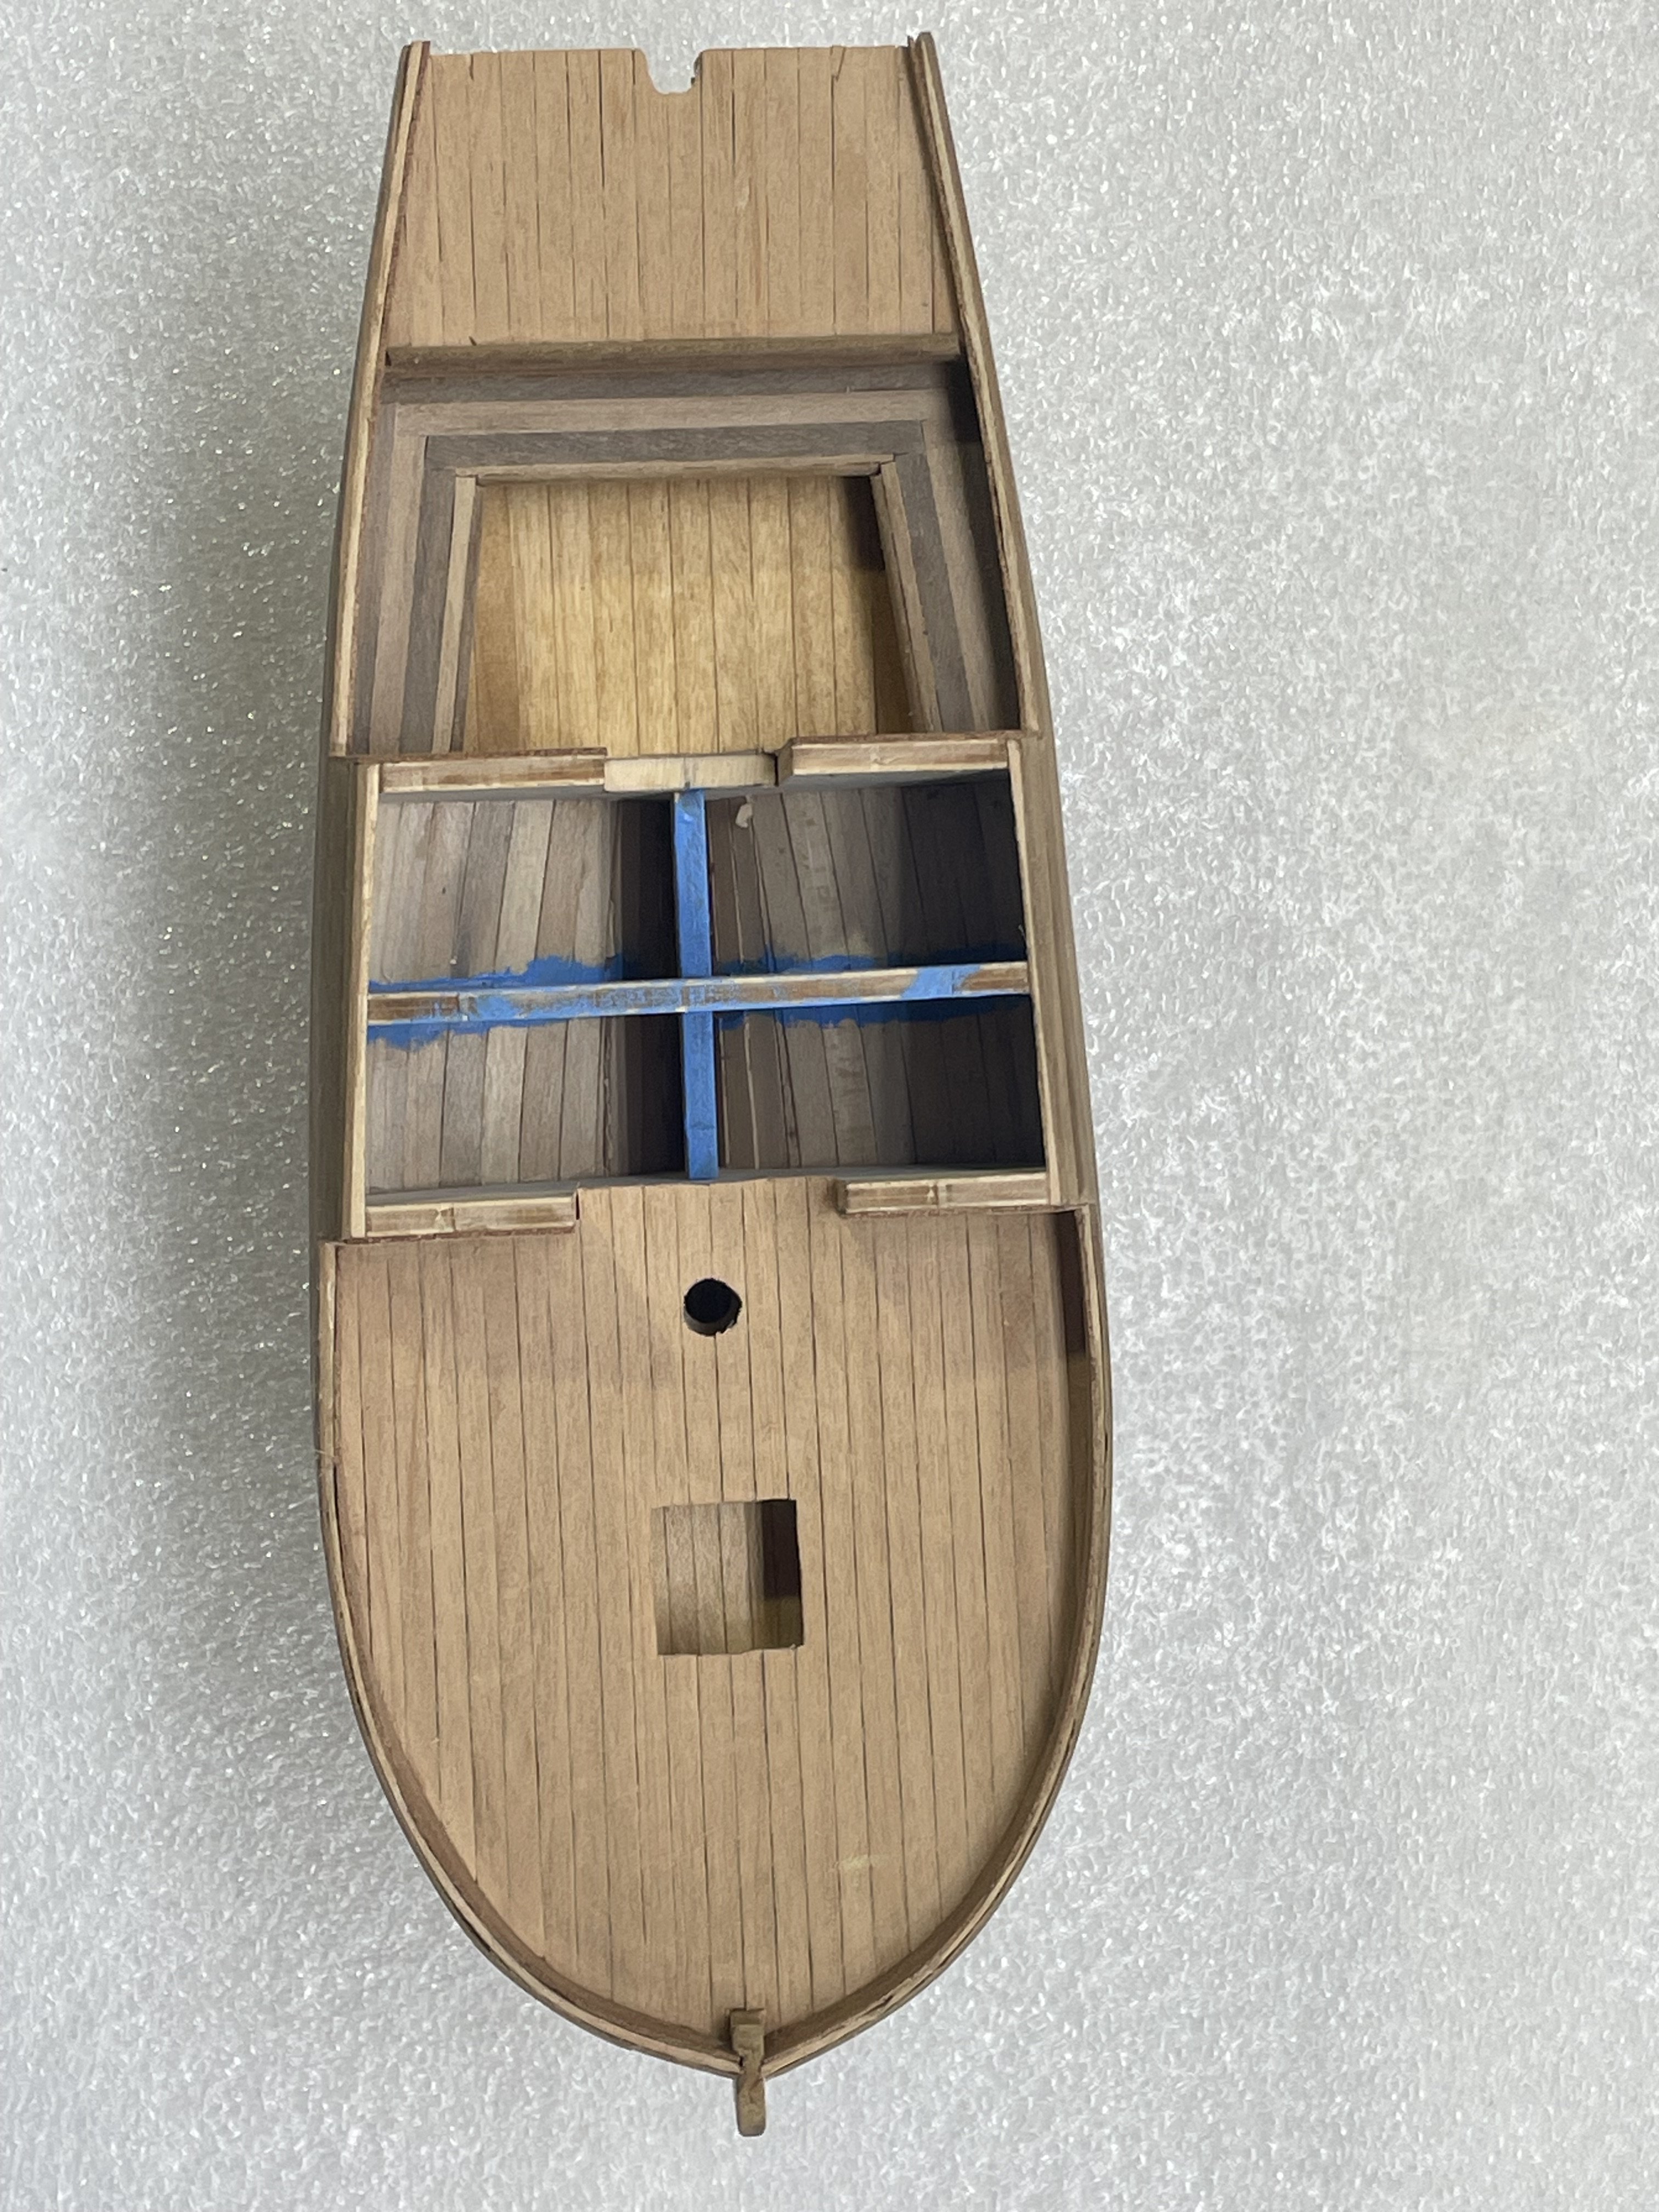
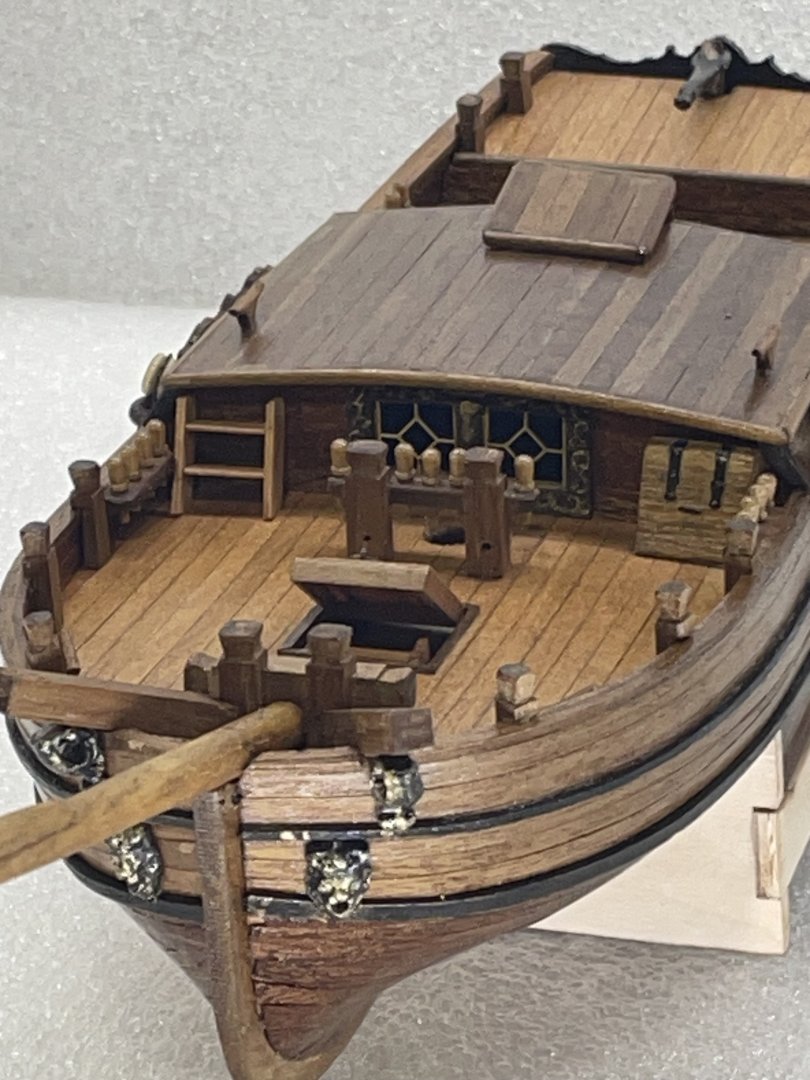
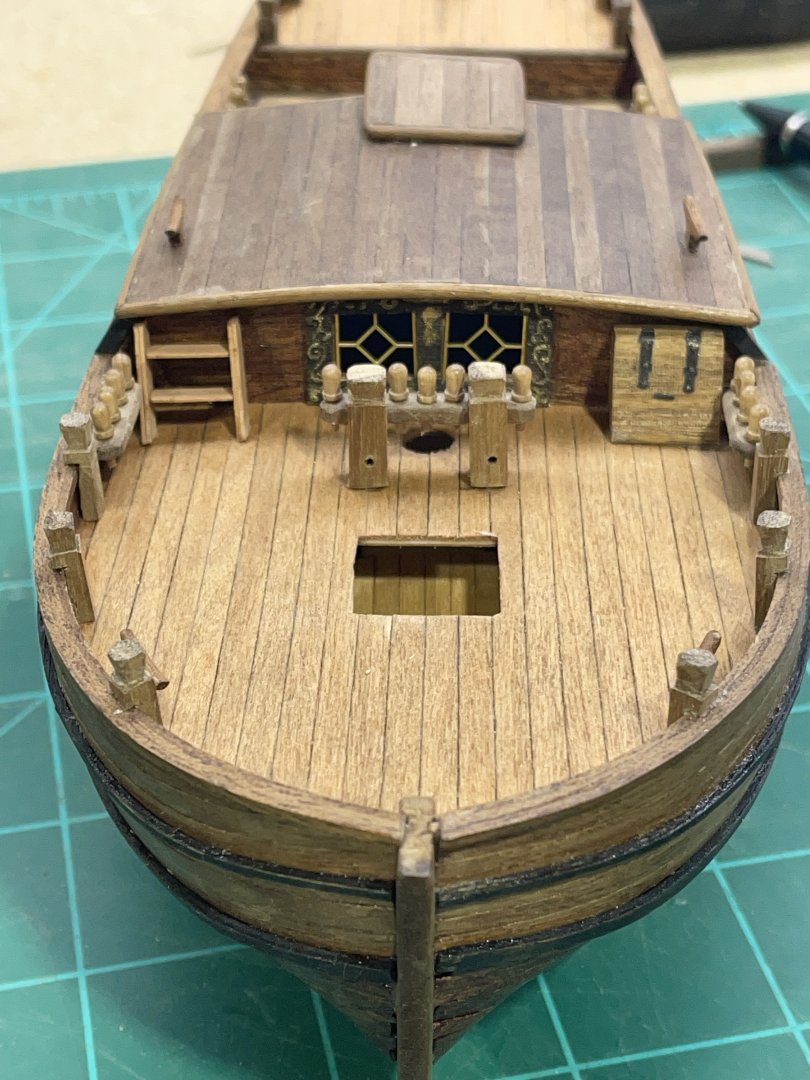
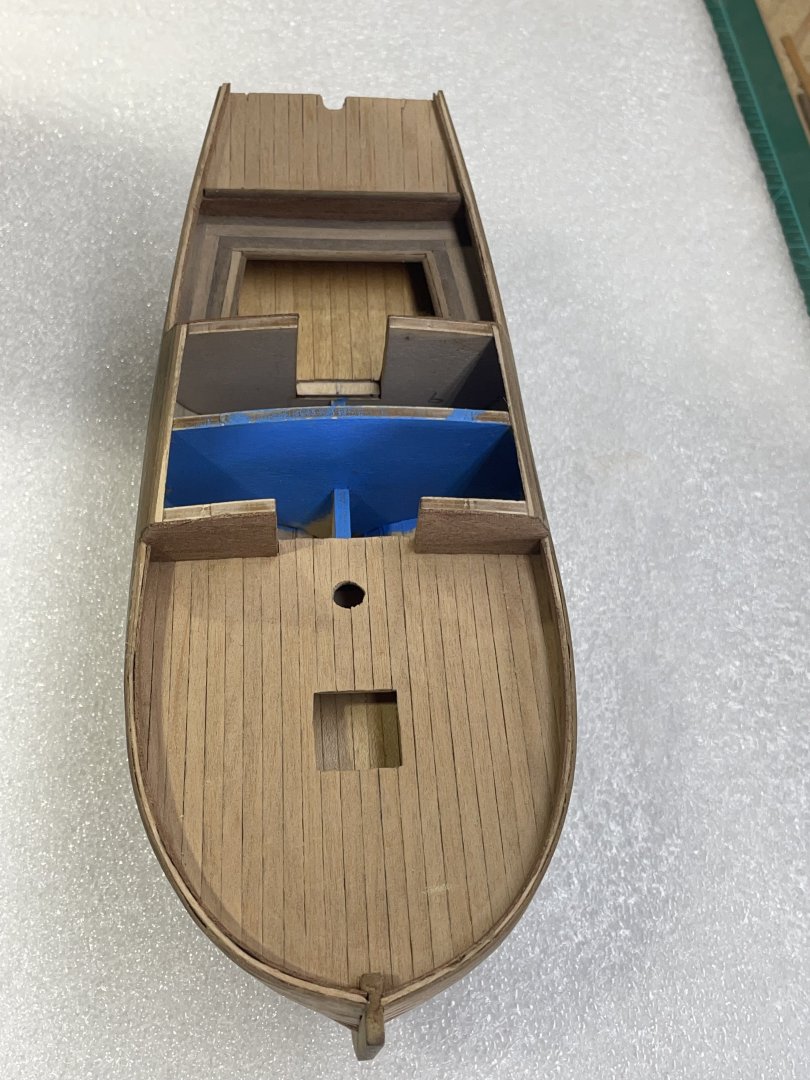
The last week I’ve been making all the little things that go on the deck. i still have the side windows and the bow to finish. Then I’ll be starting on the mast and yards. Oh, here’s Josh checking out the progress earlier this week:-)

-
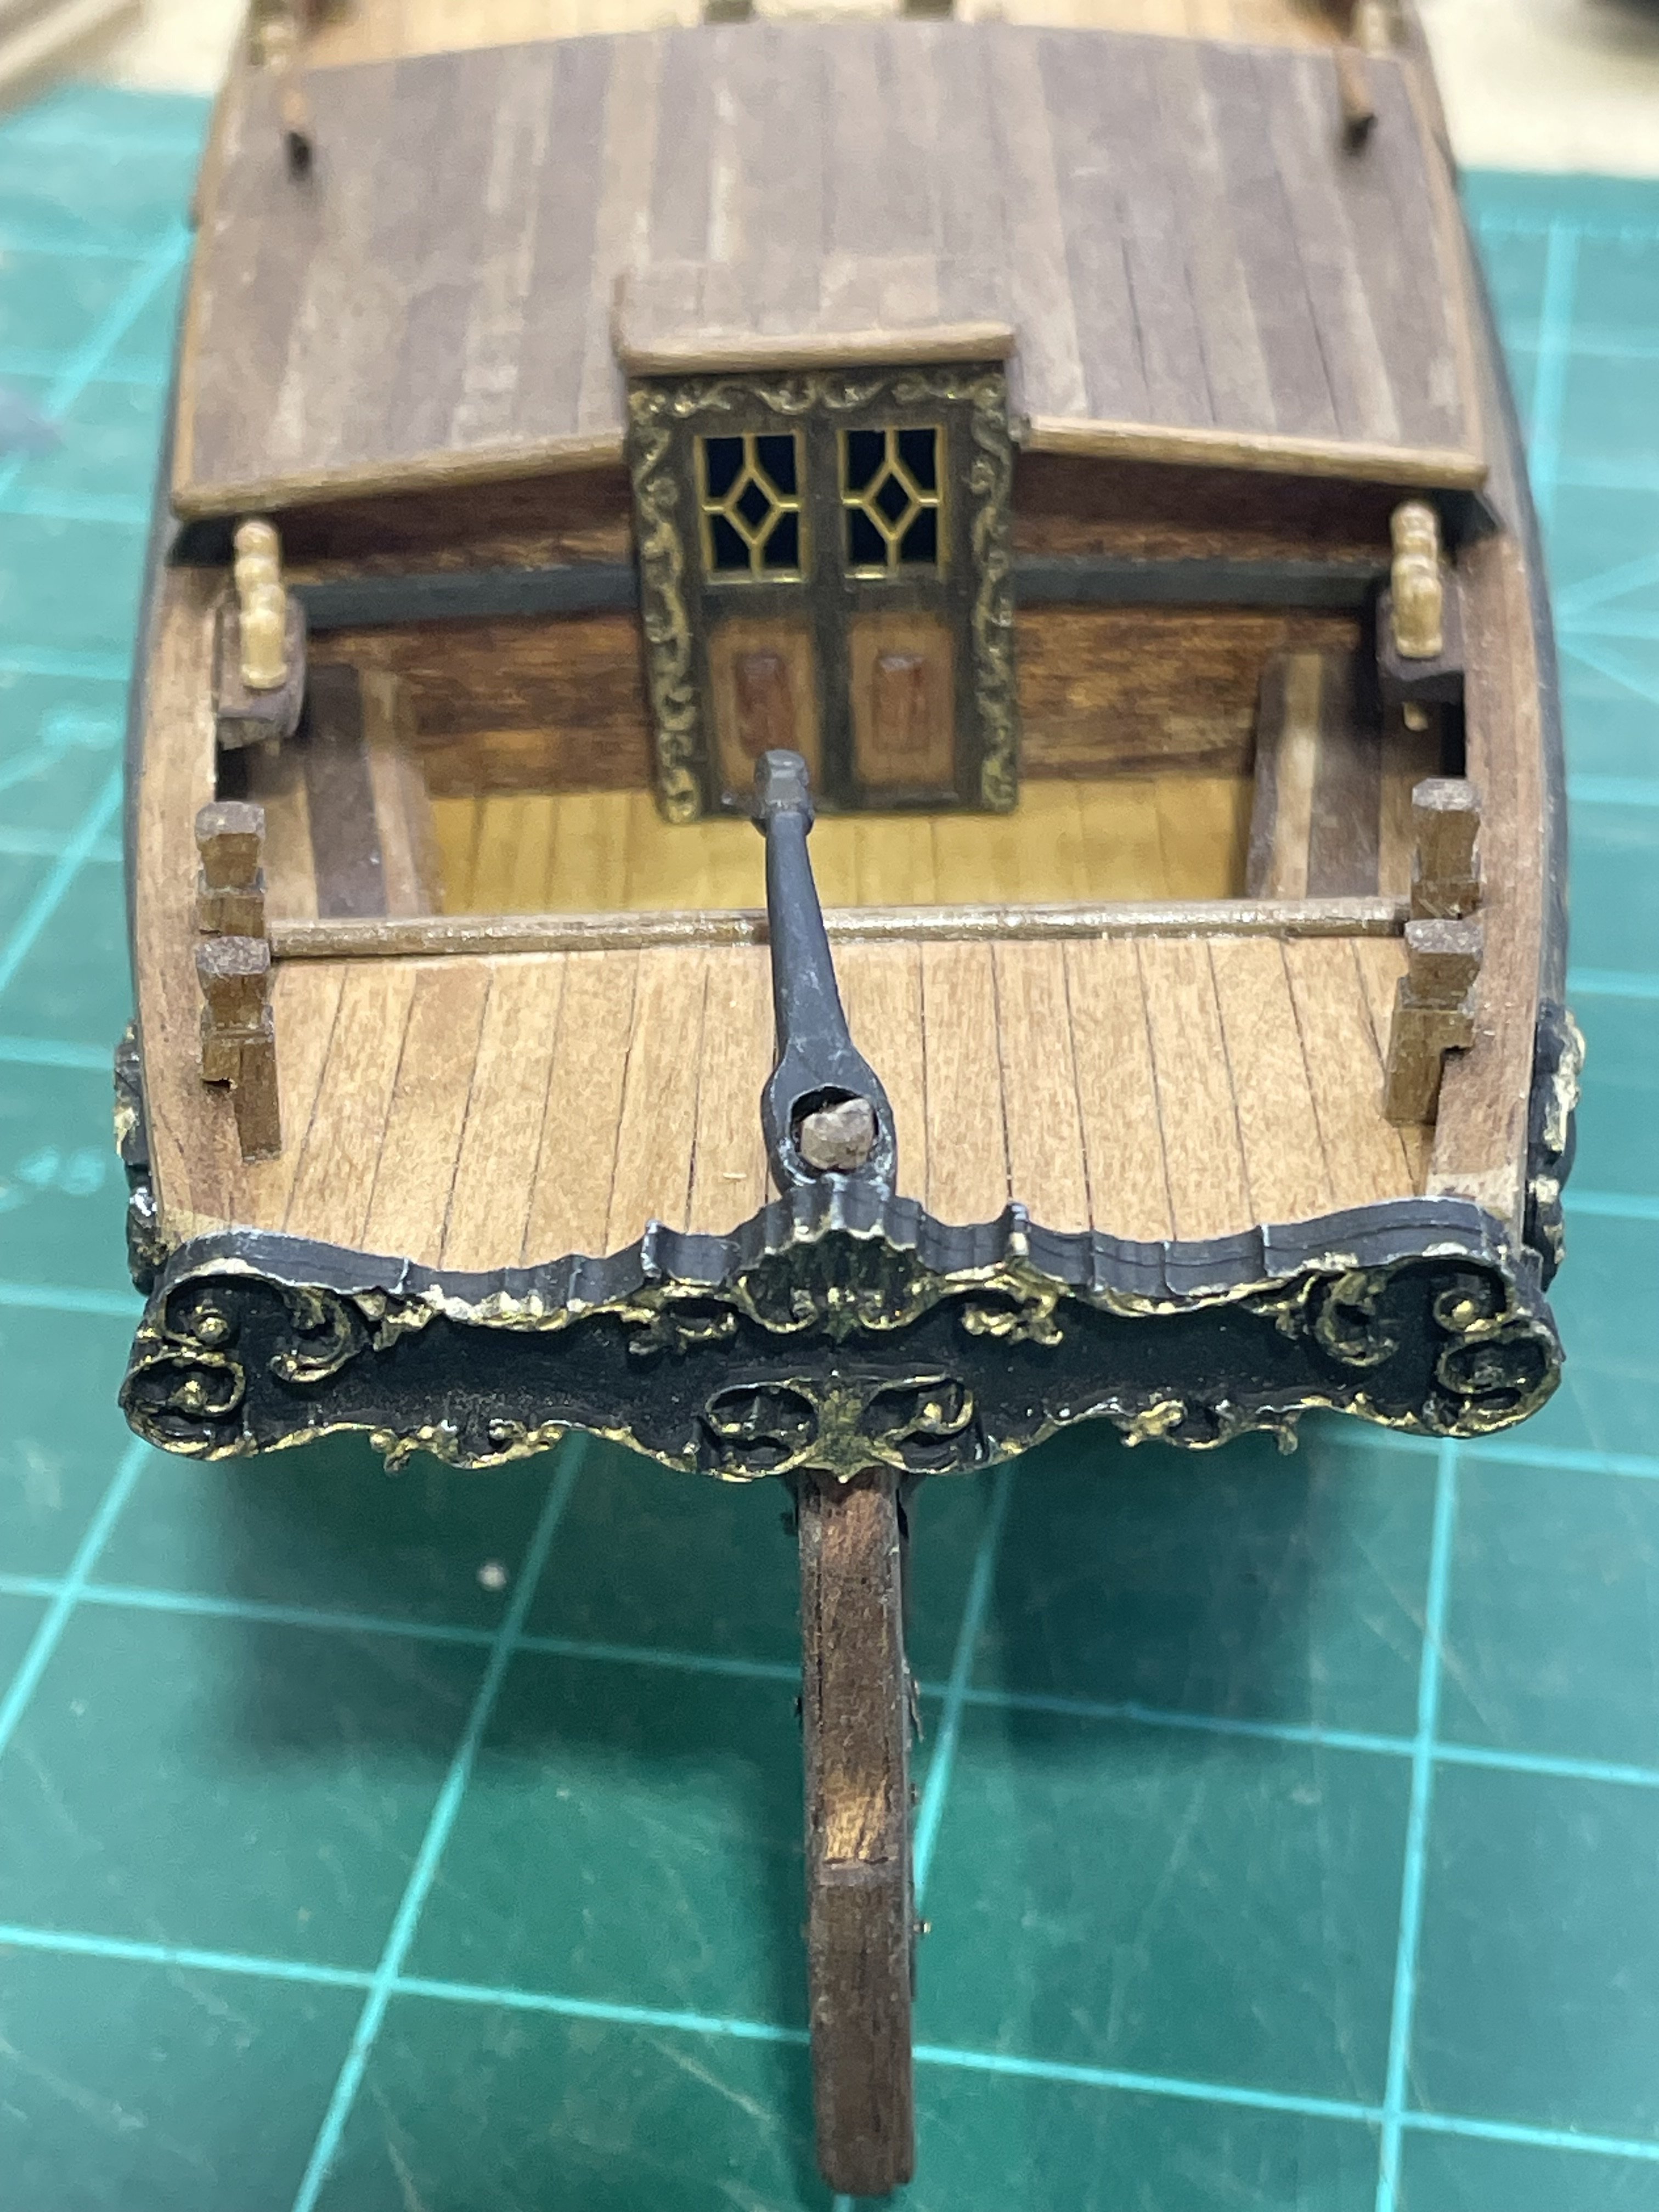
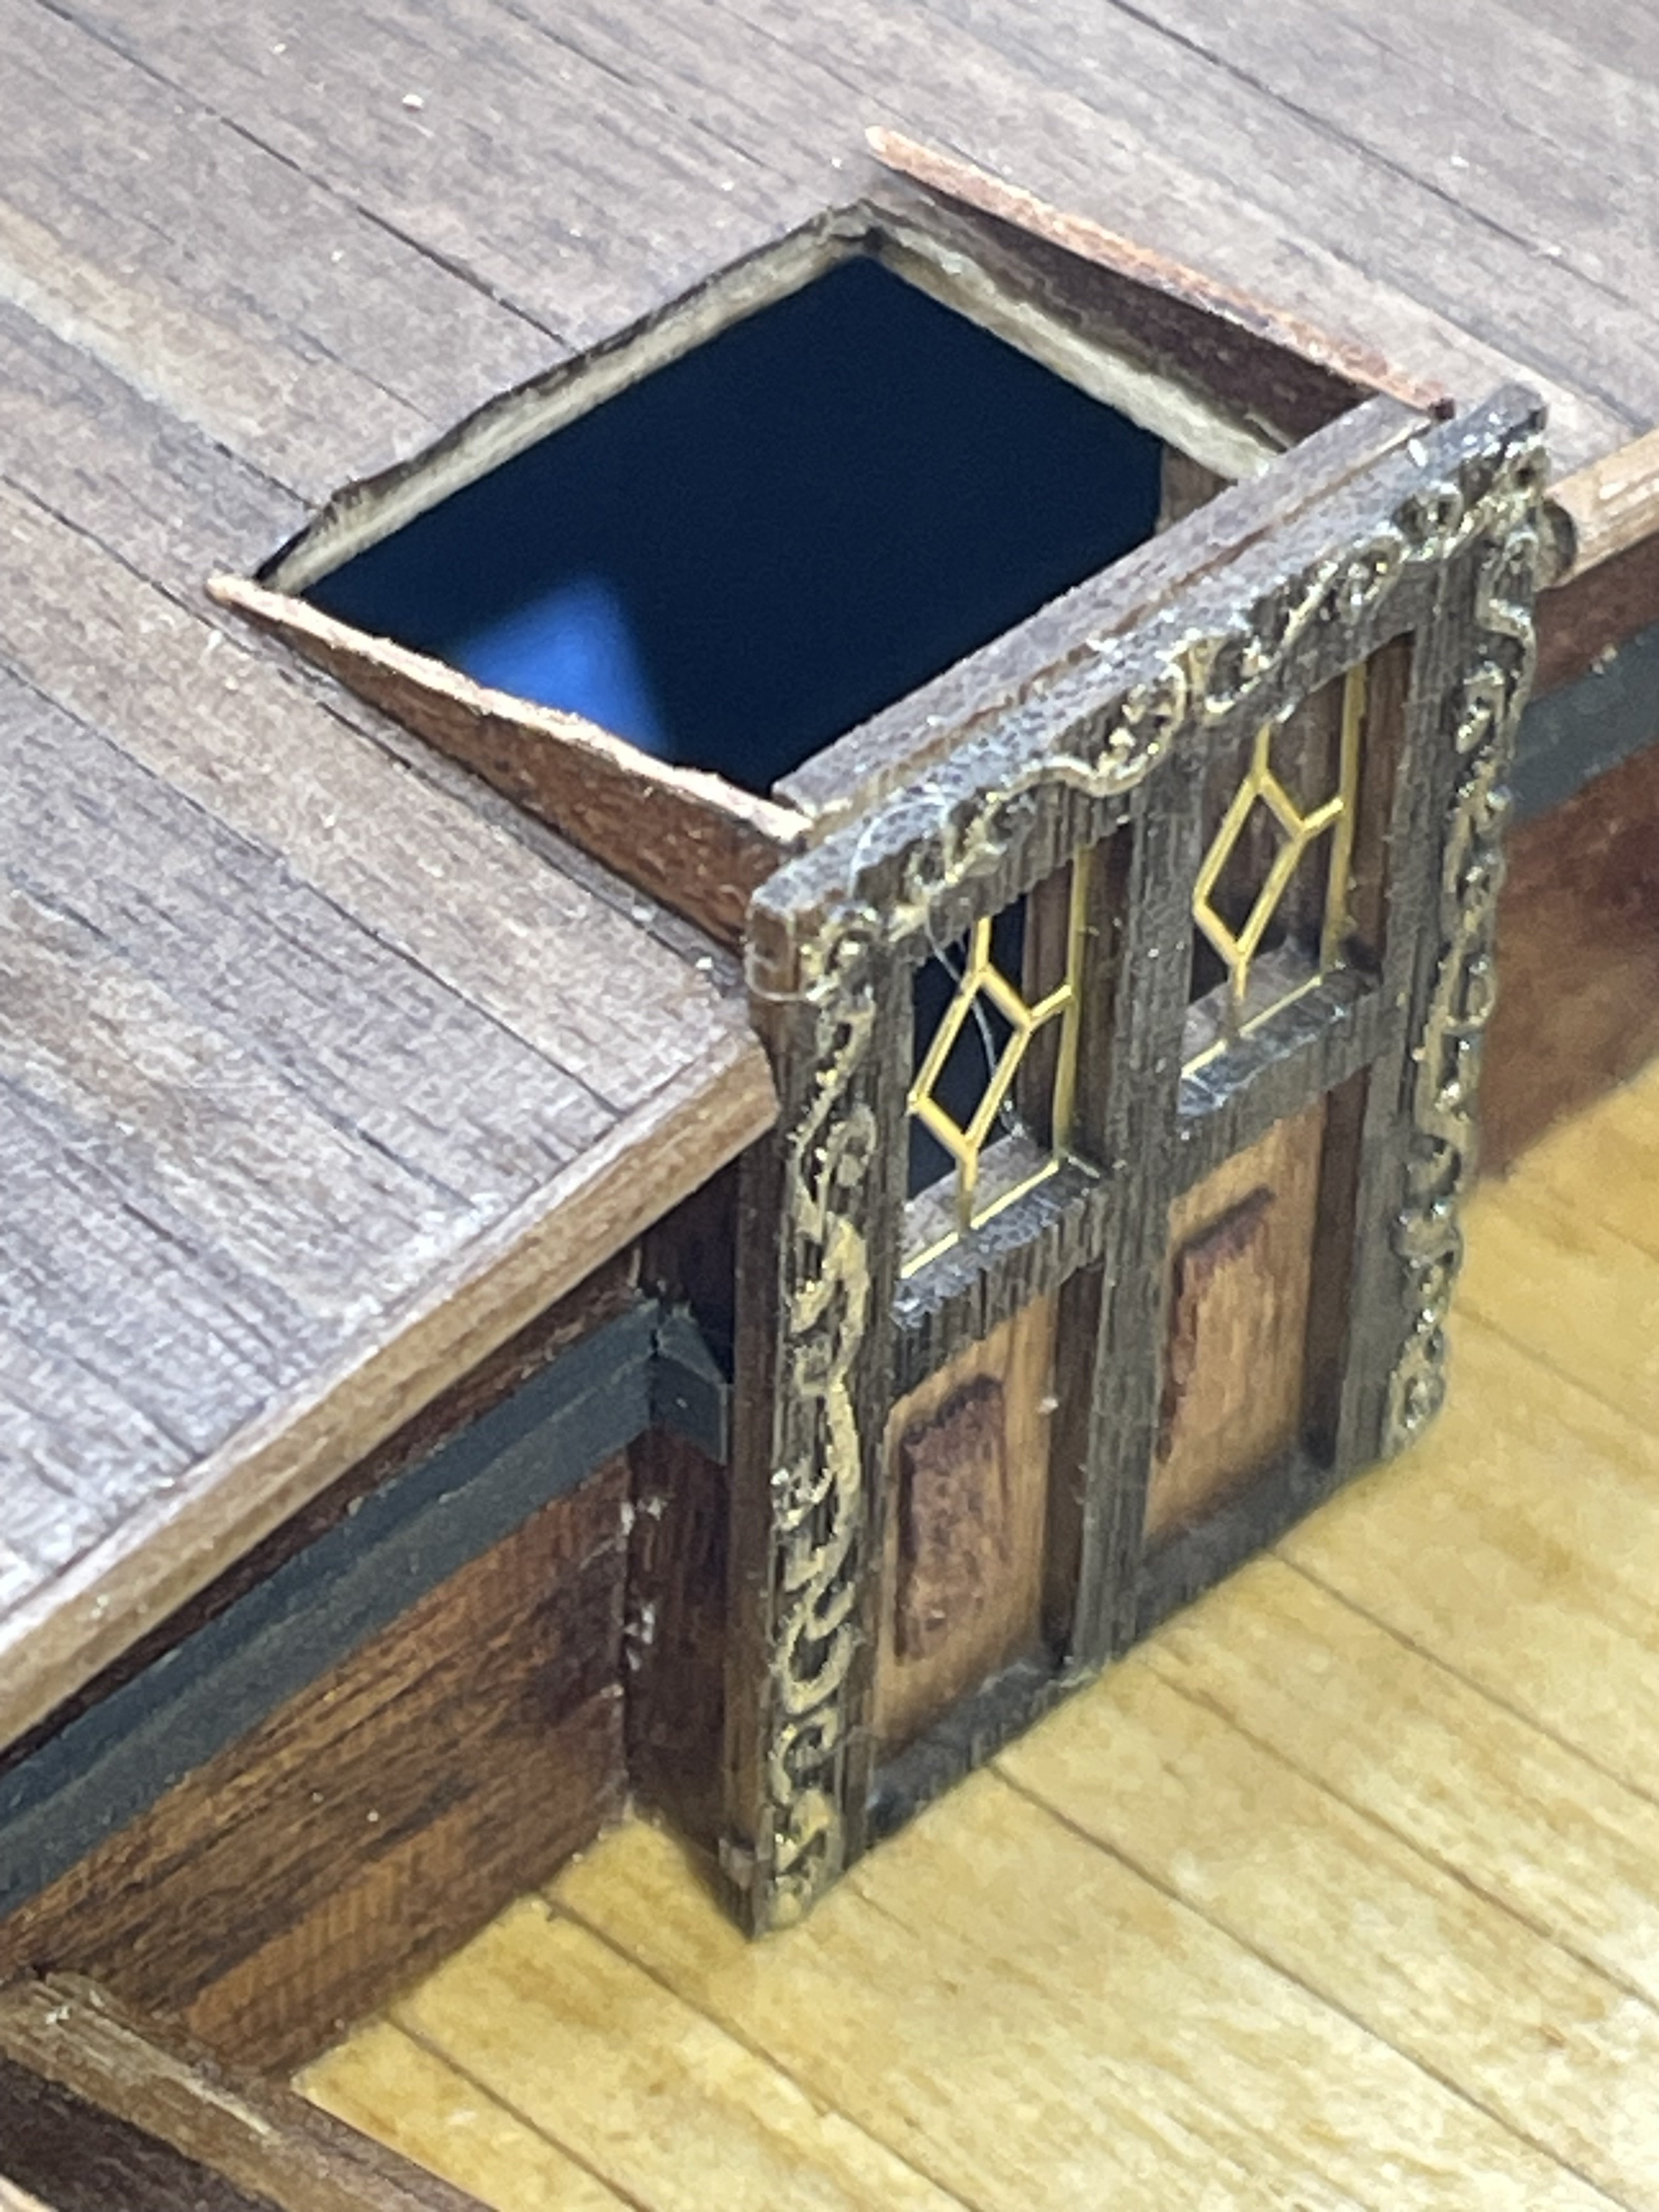
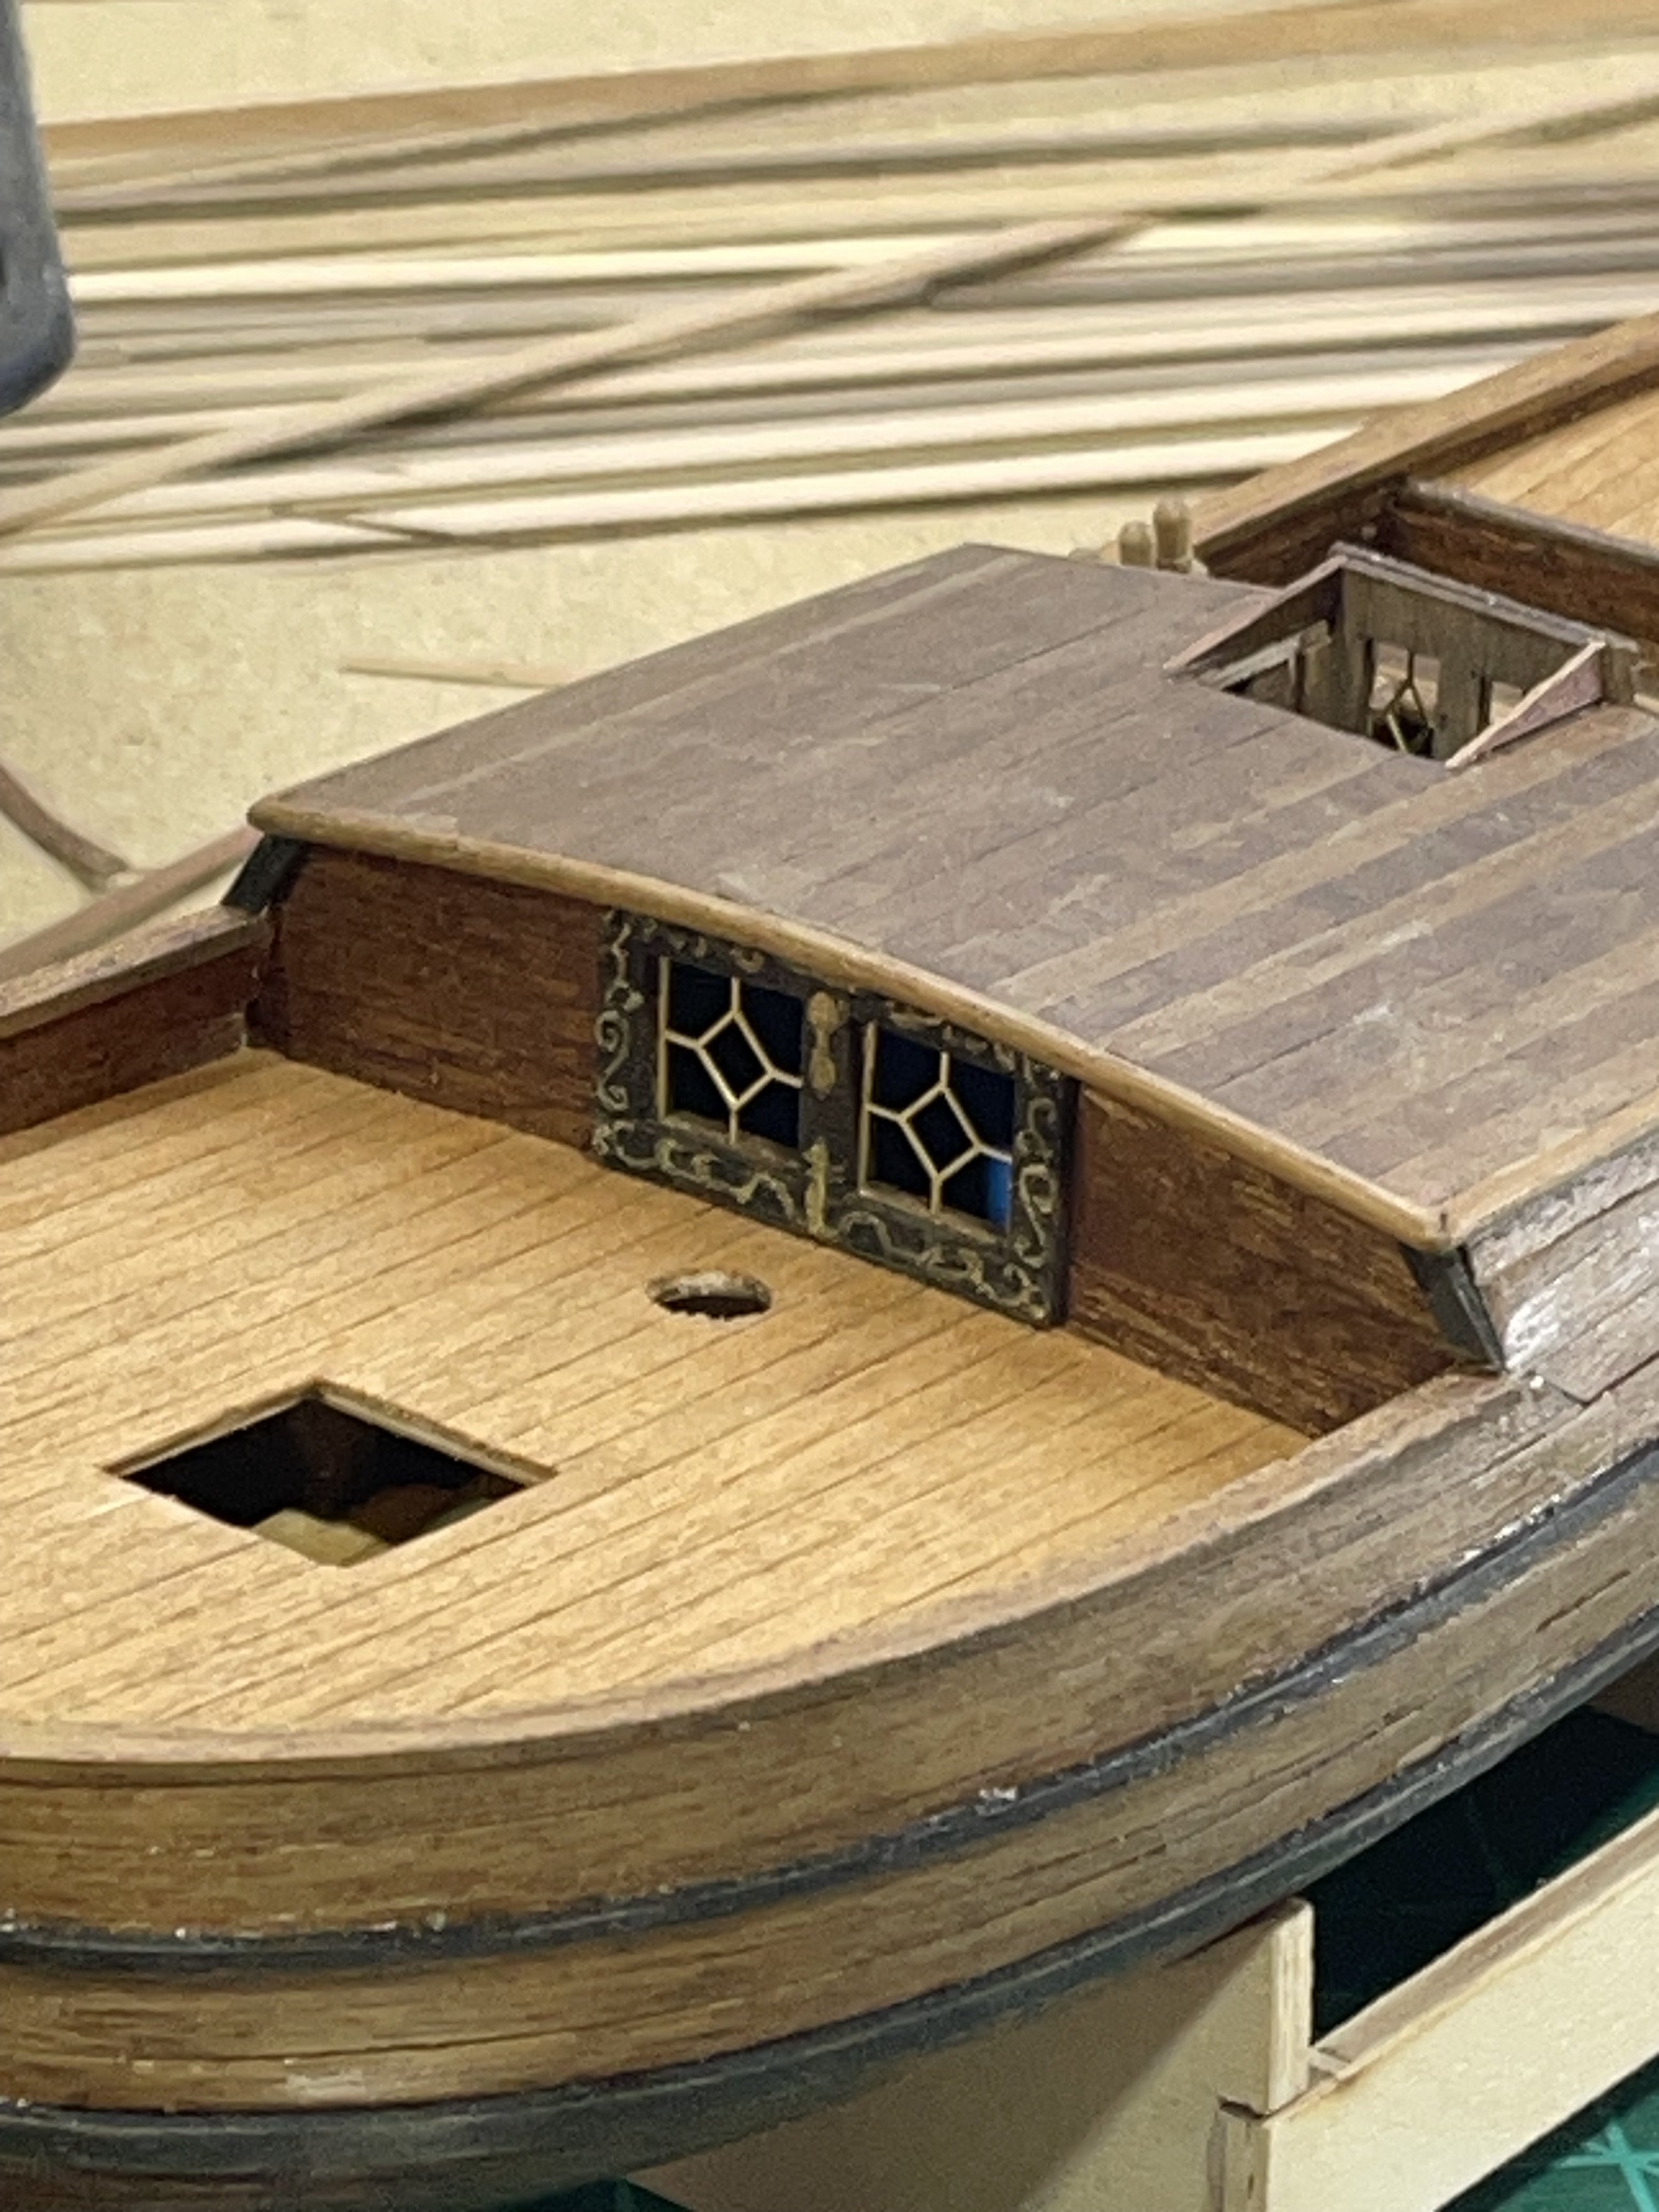
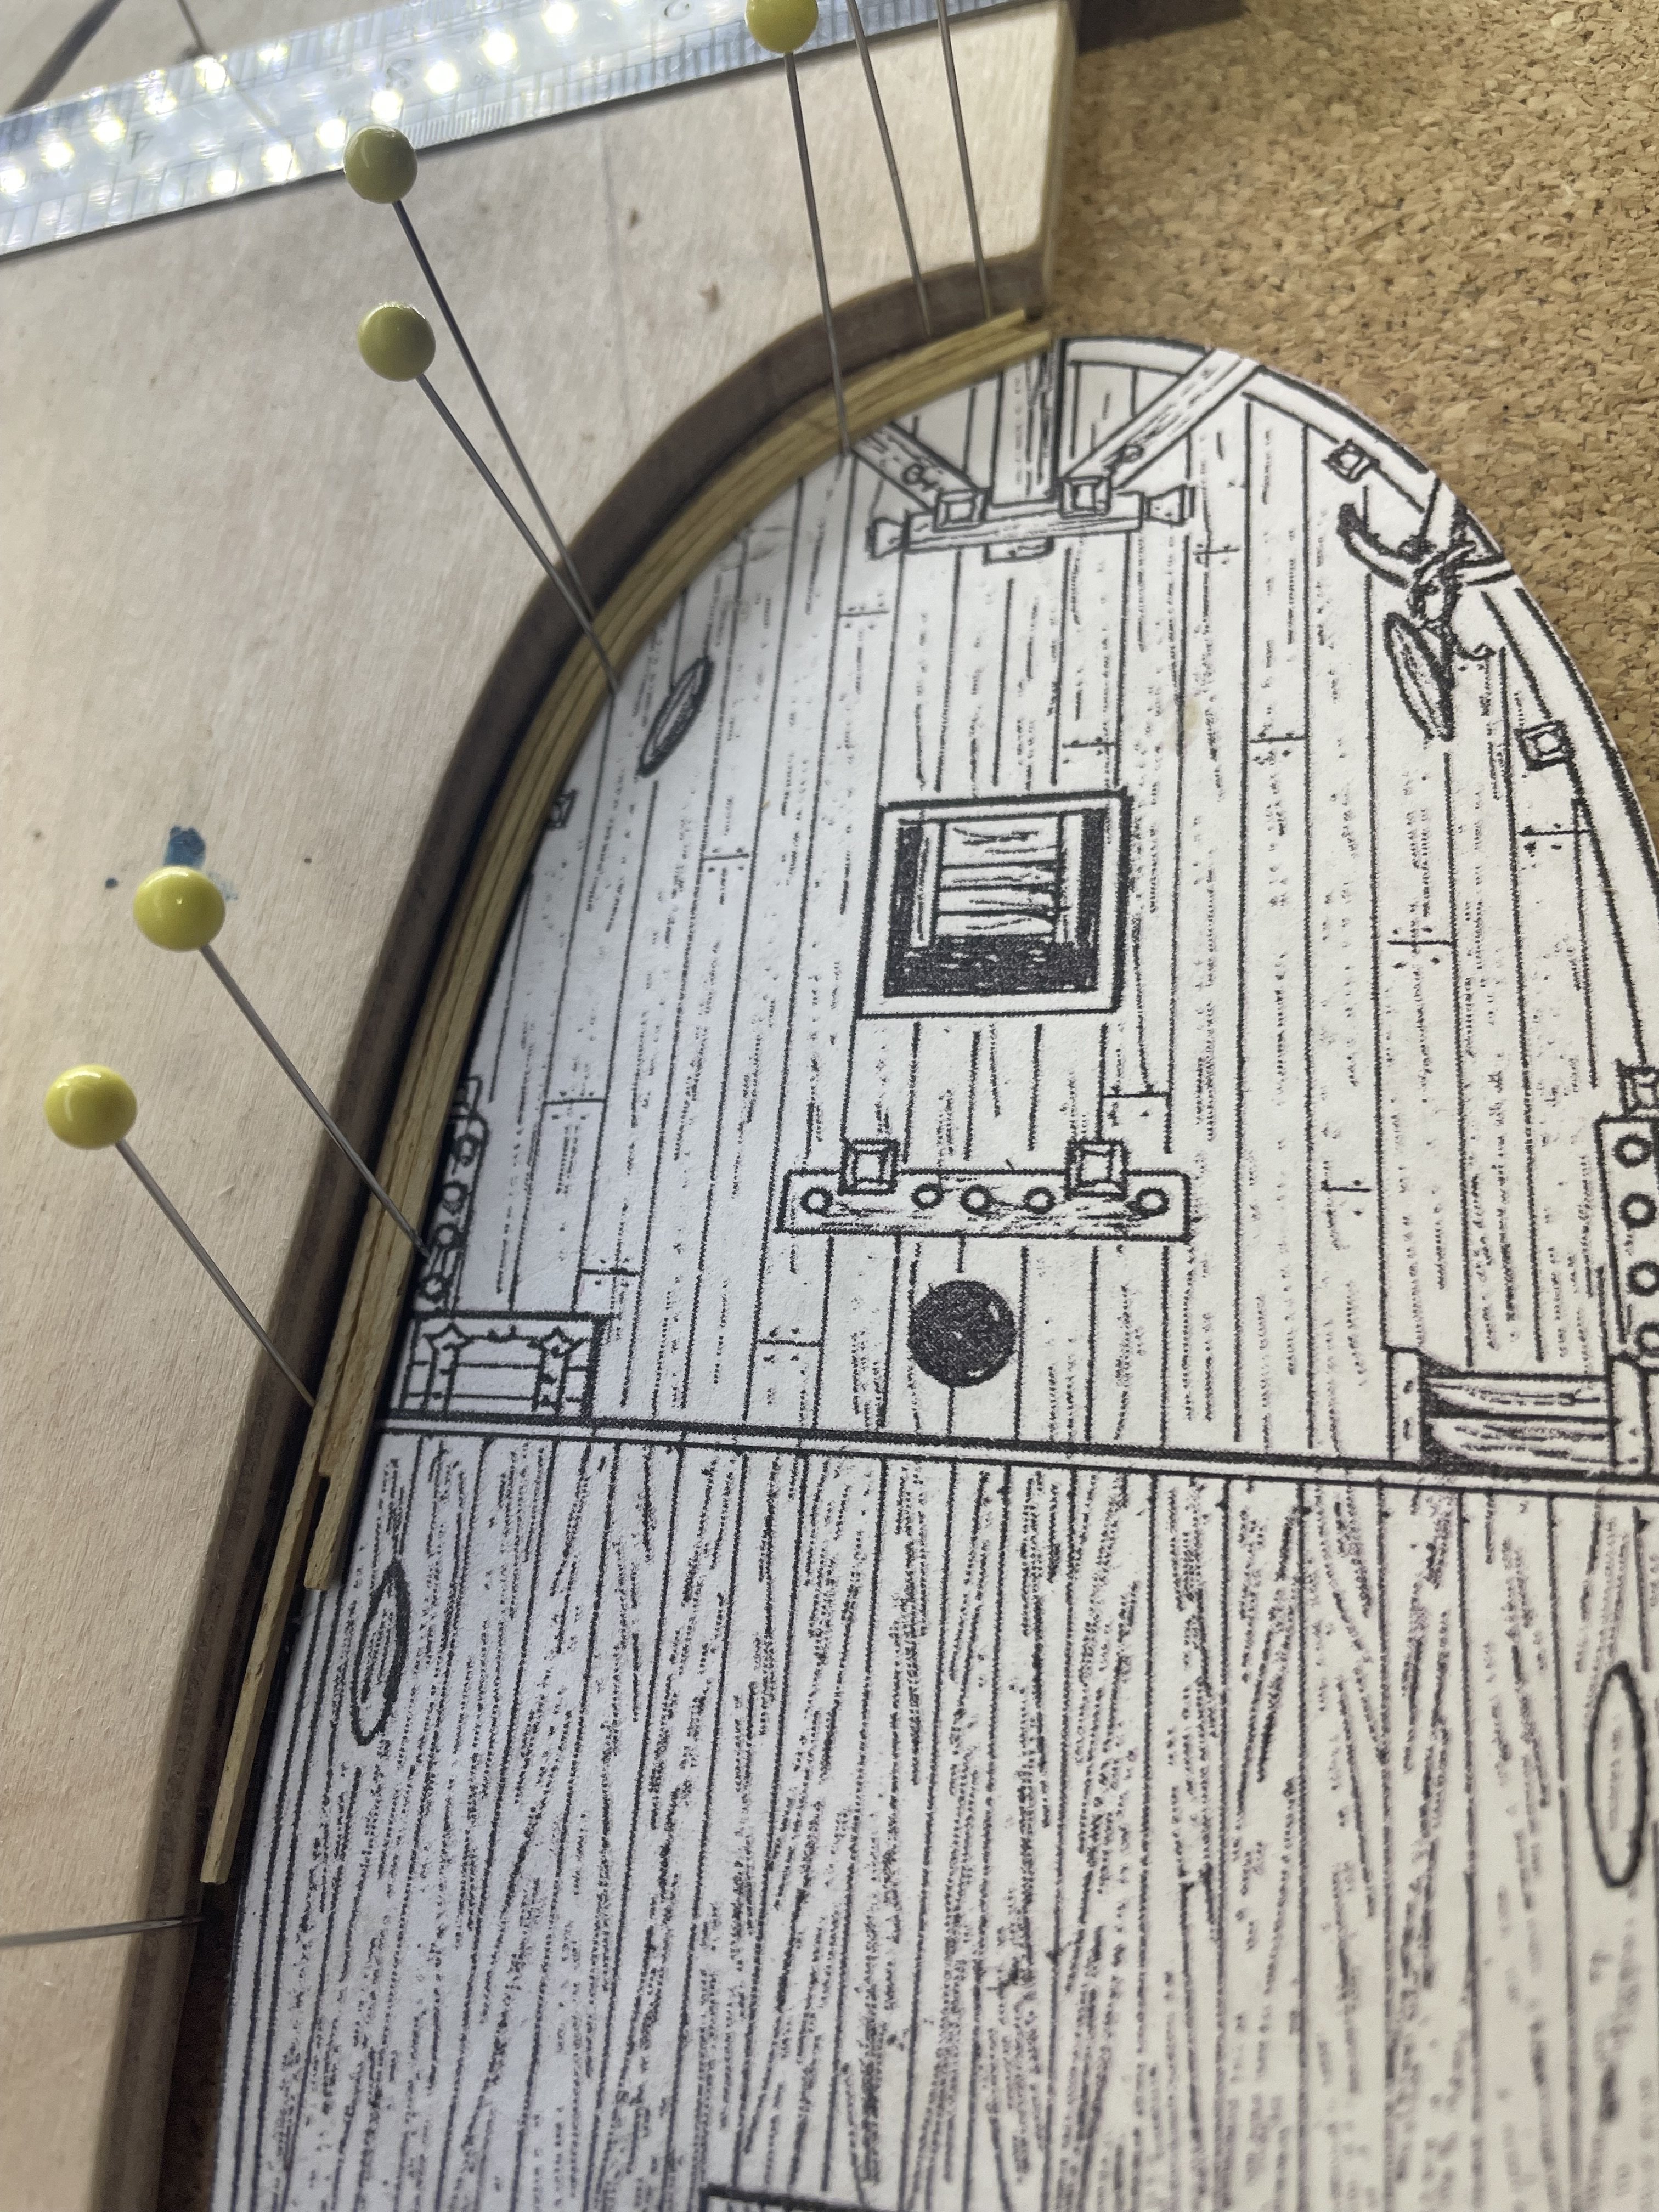
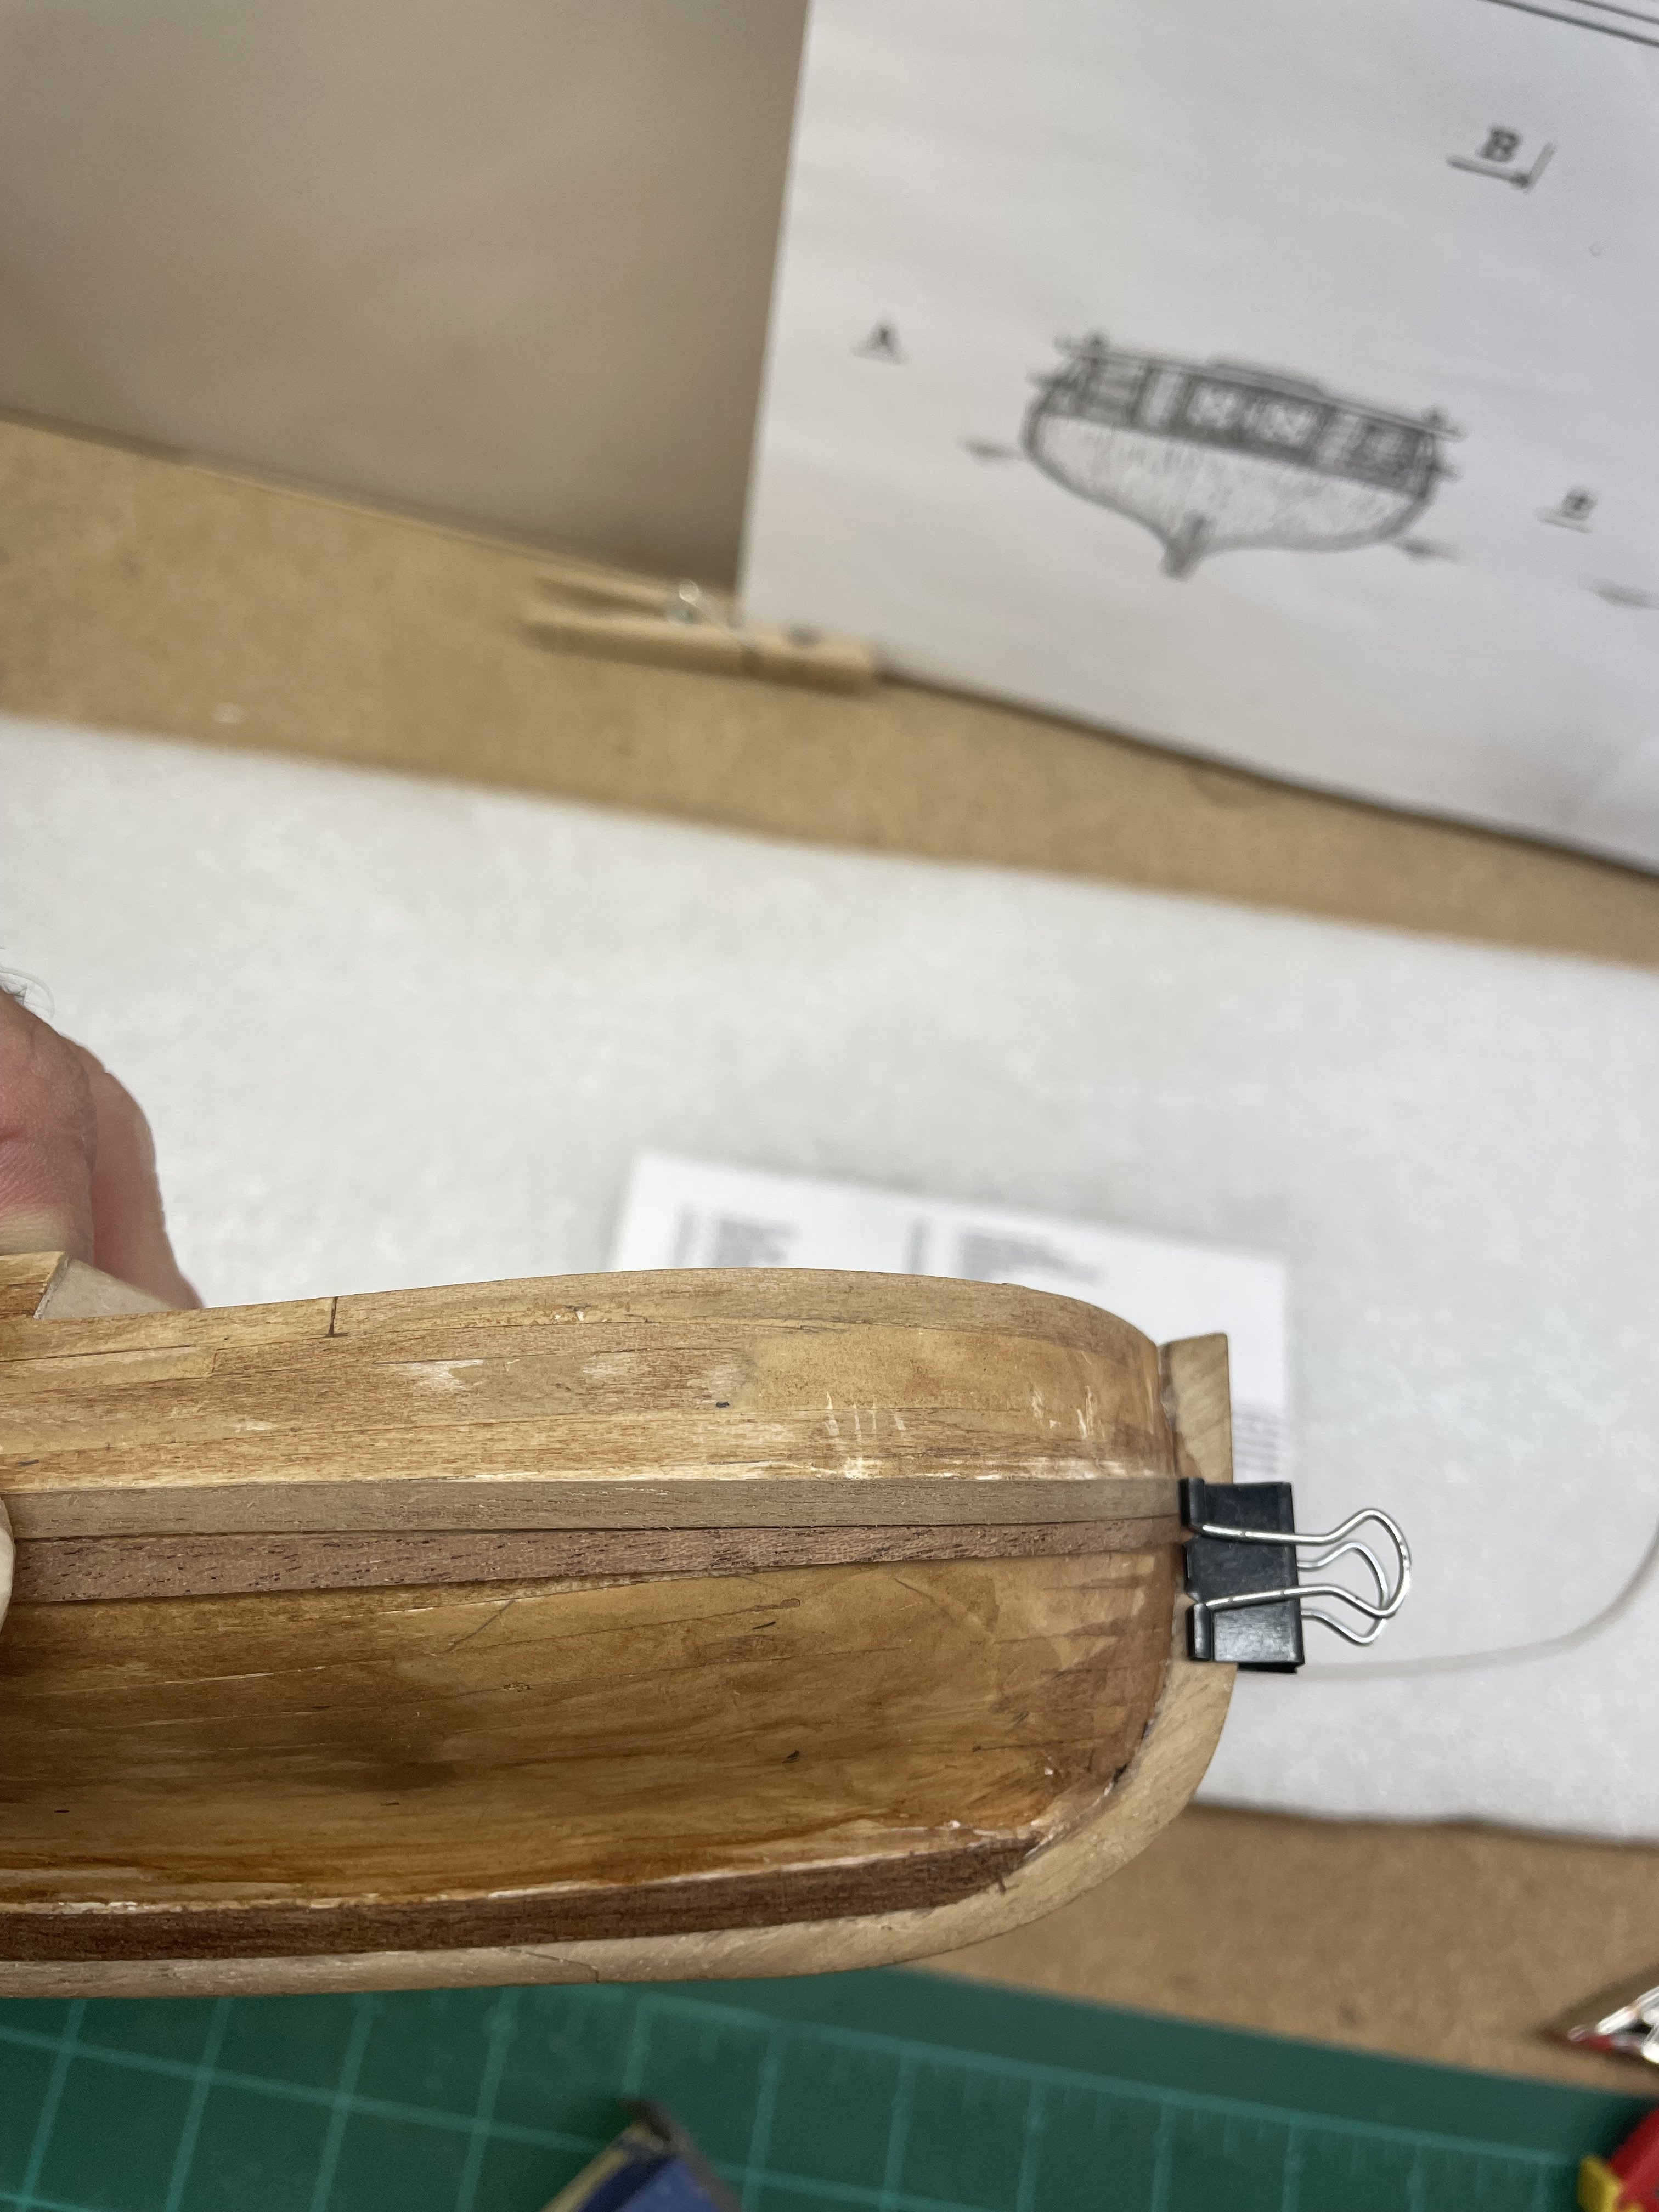
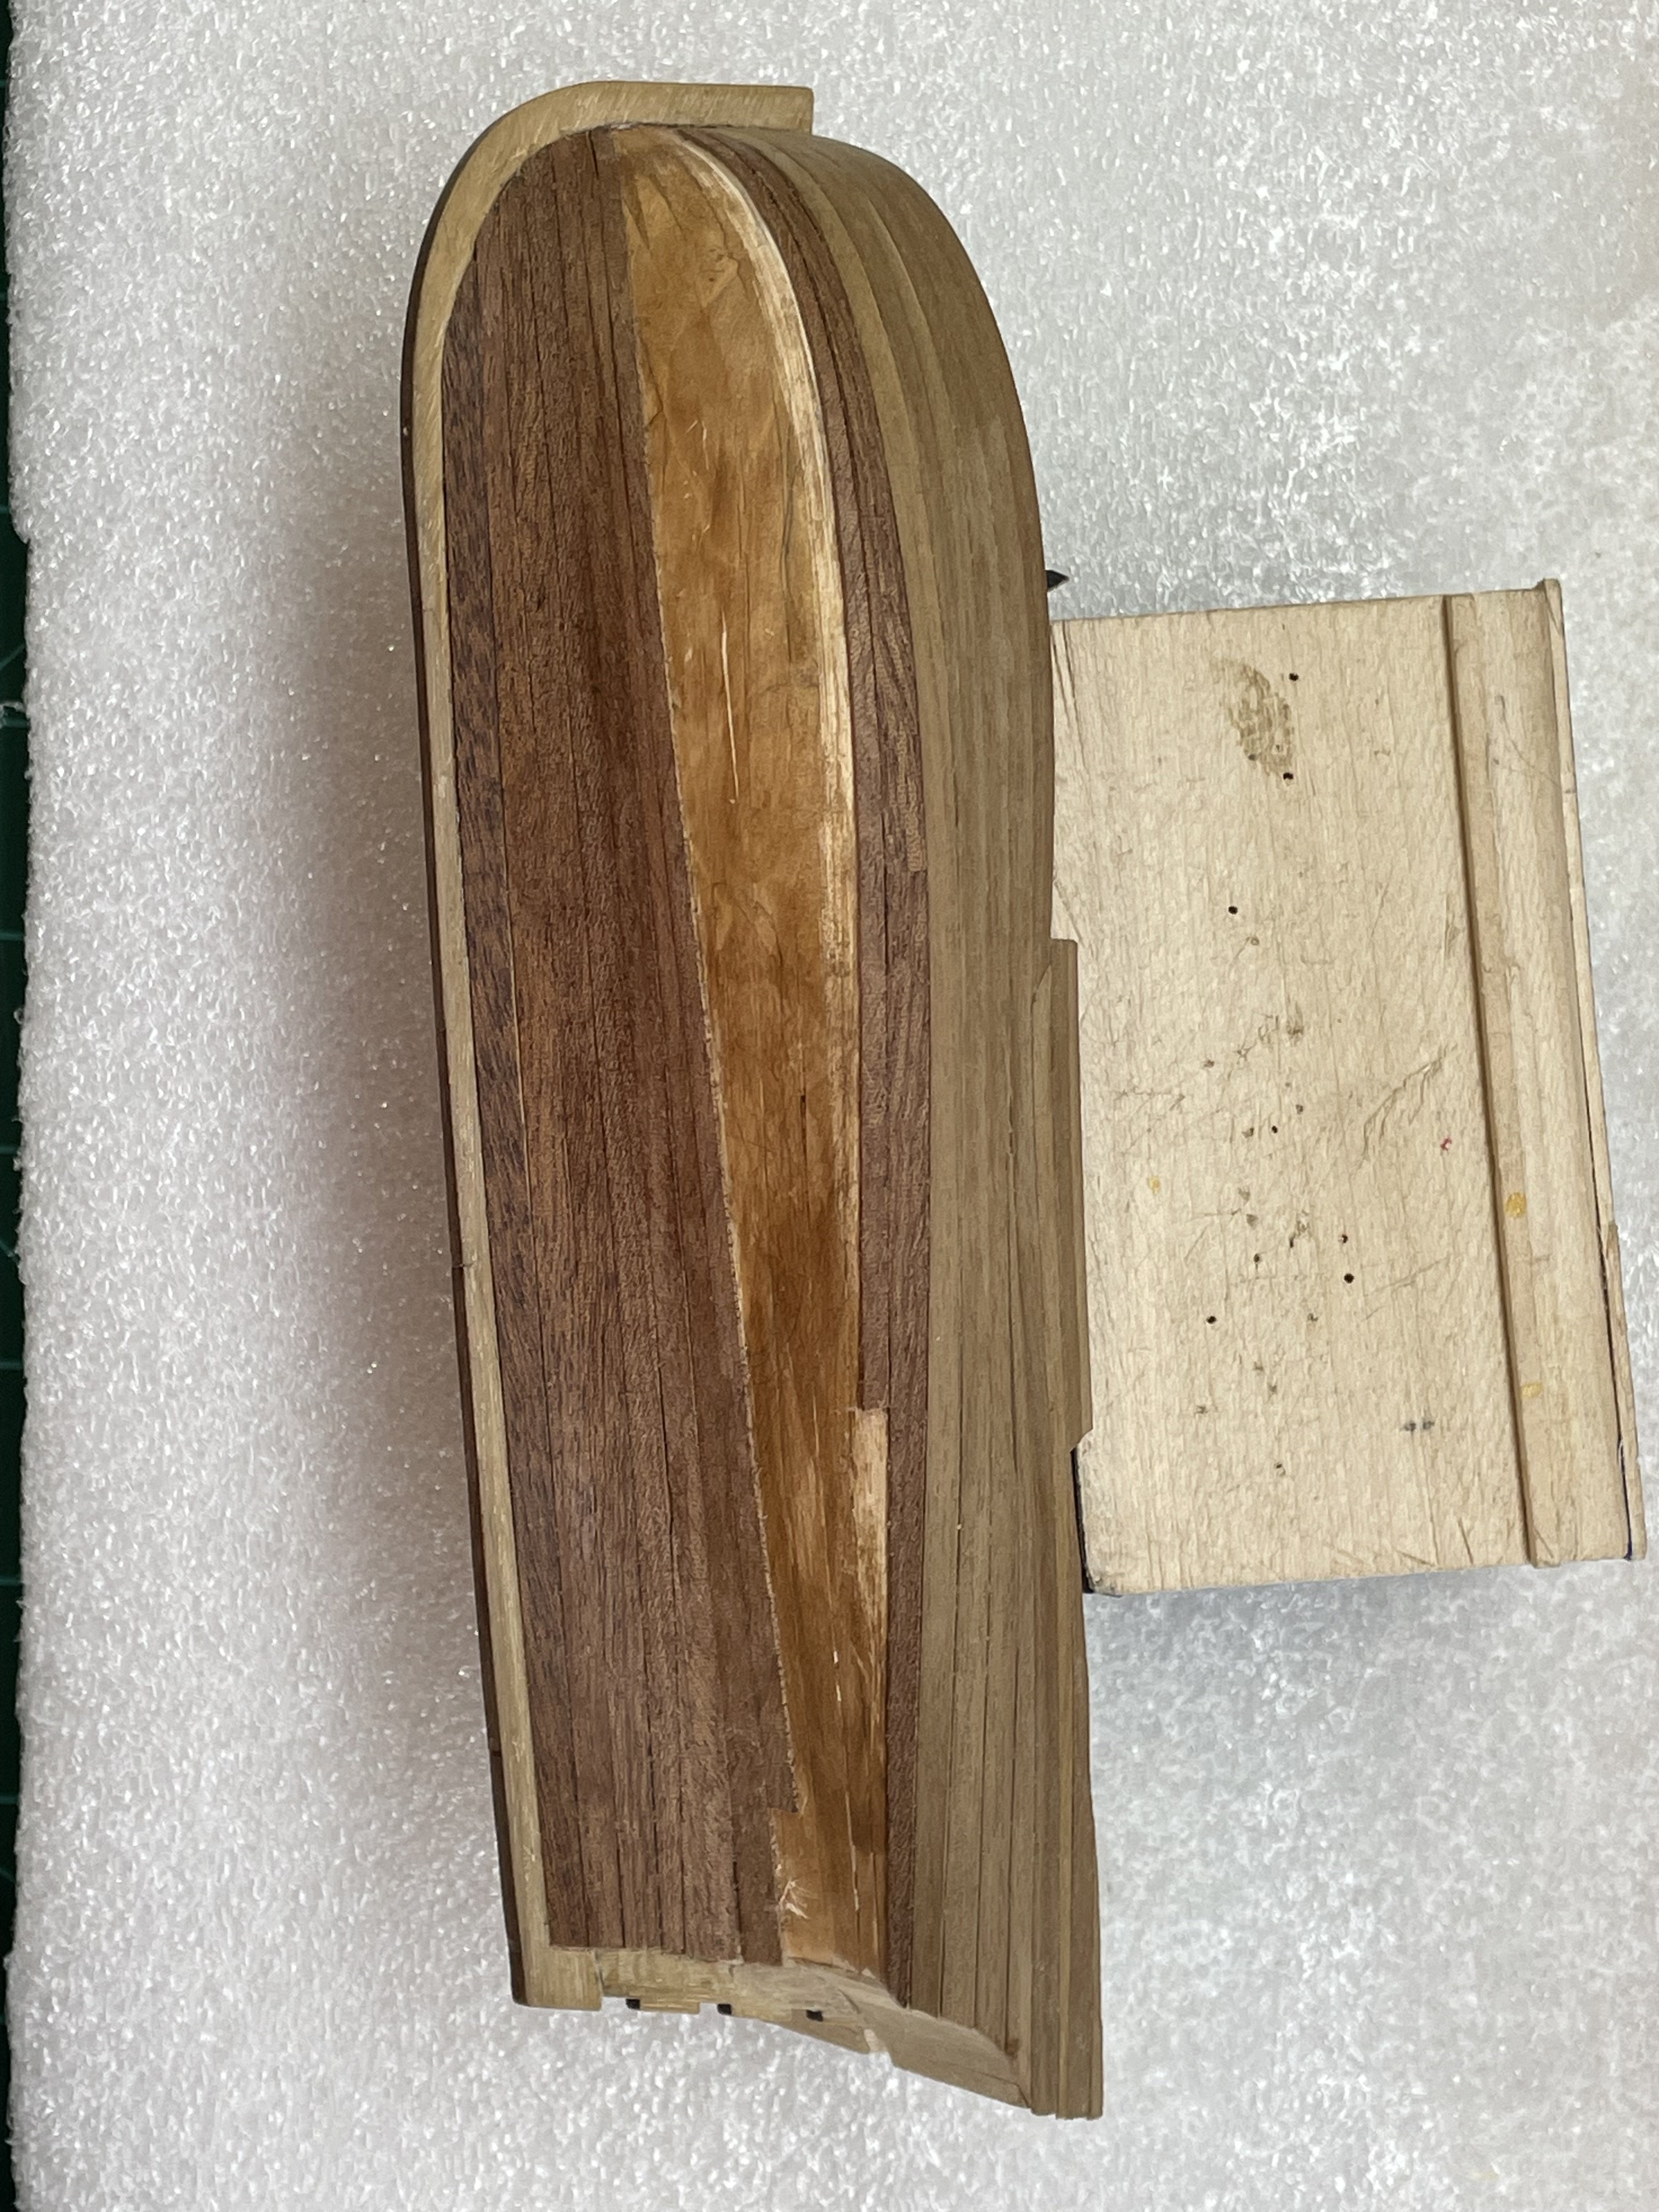
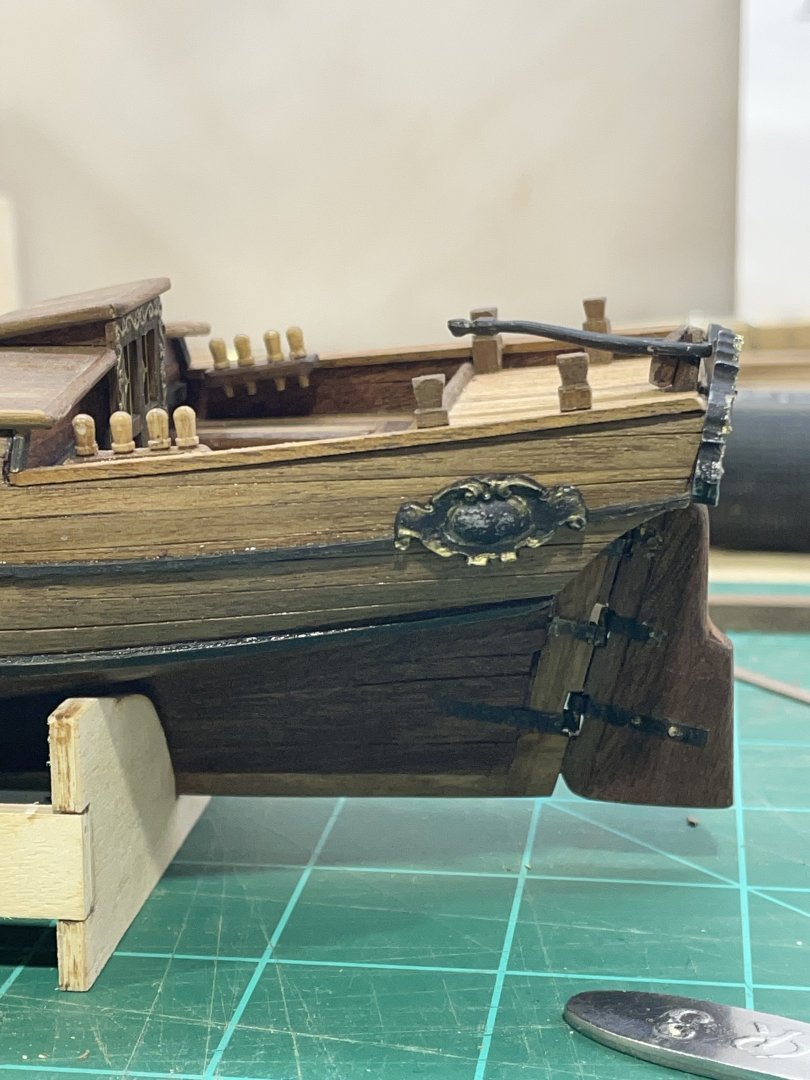
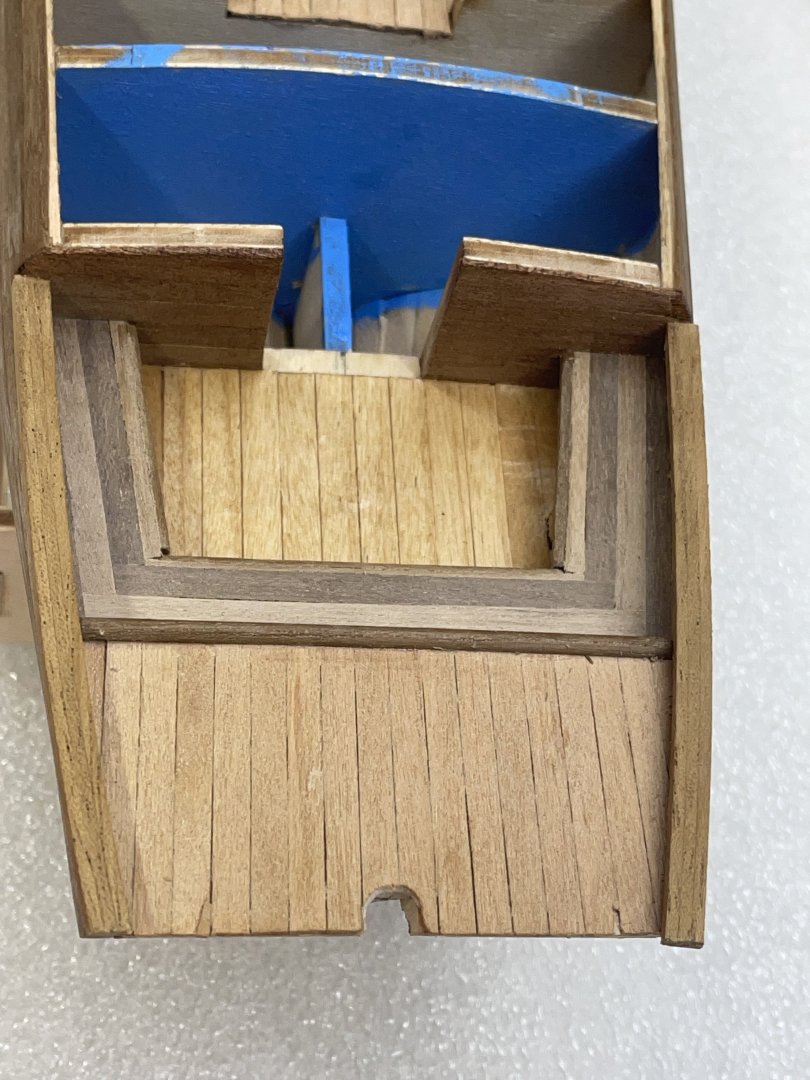
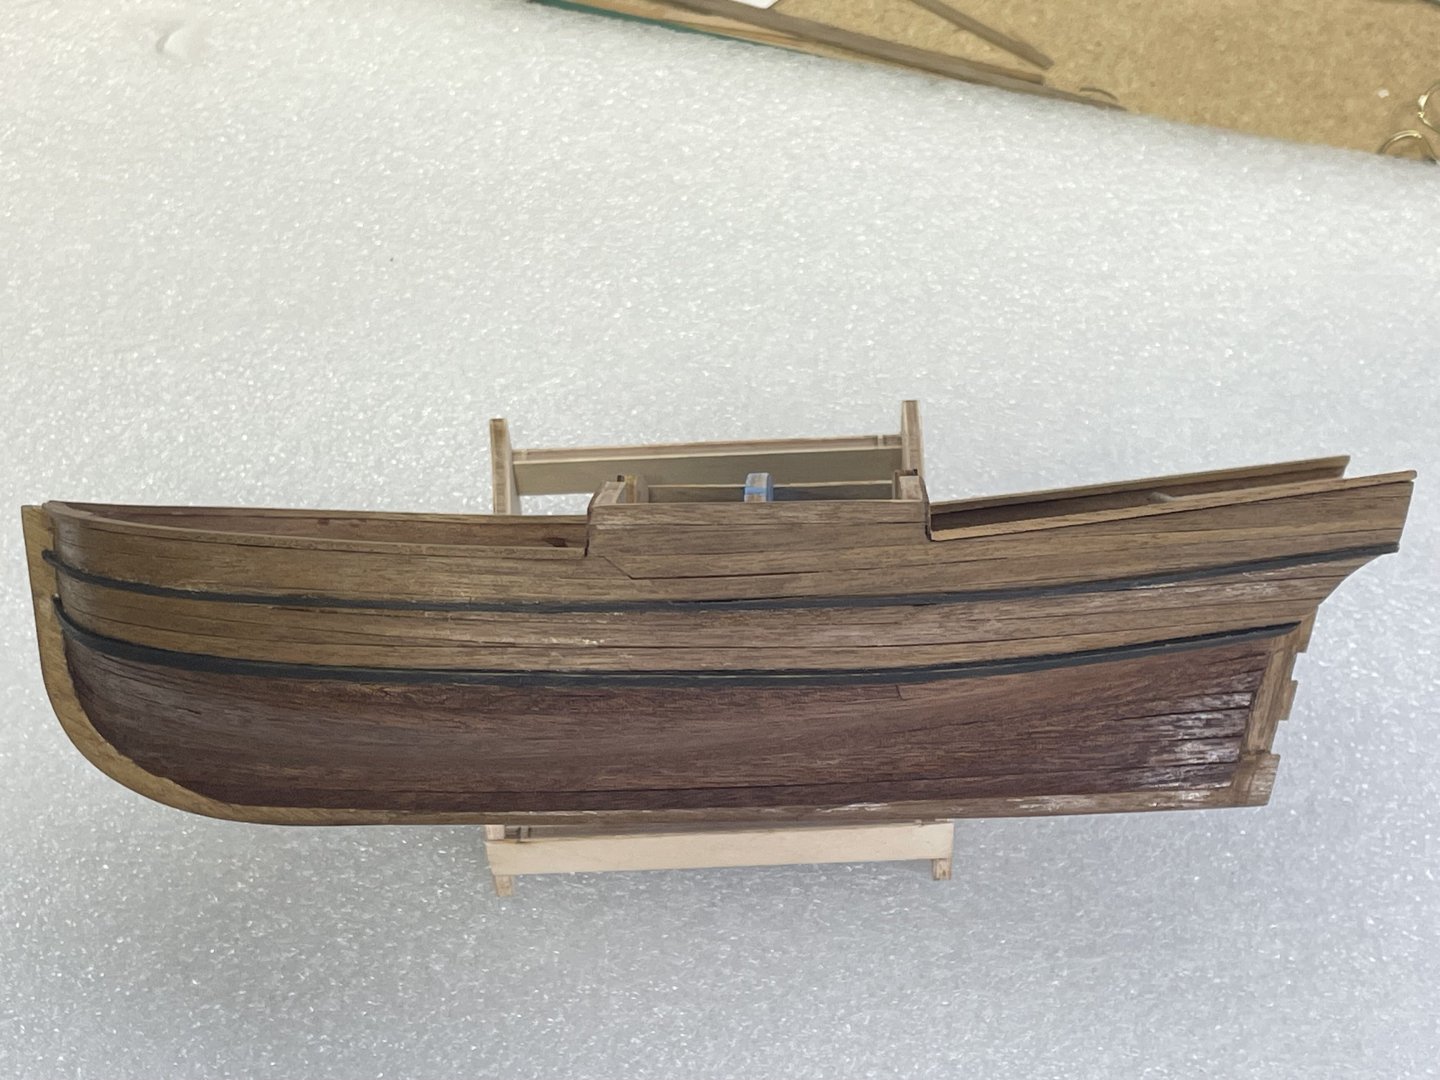
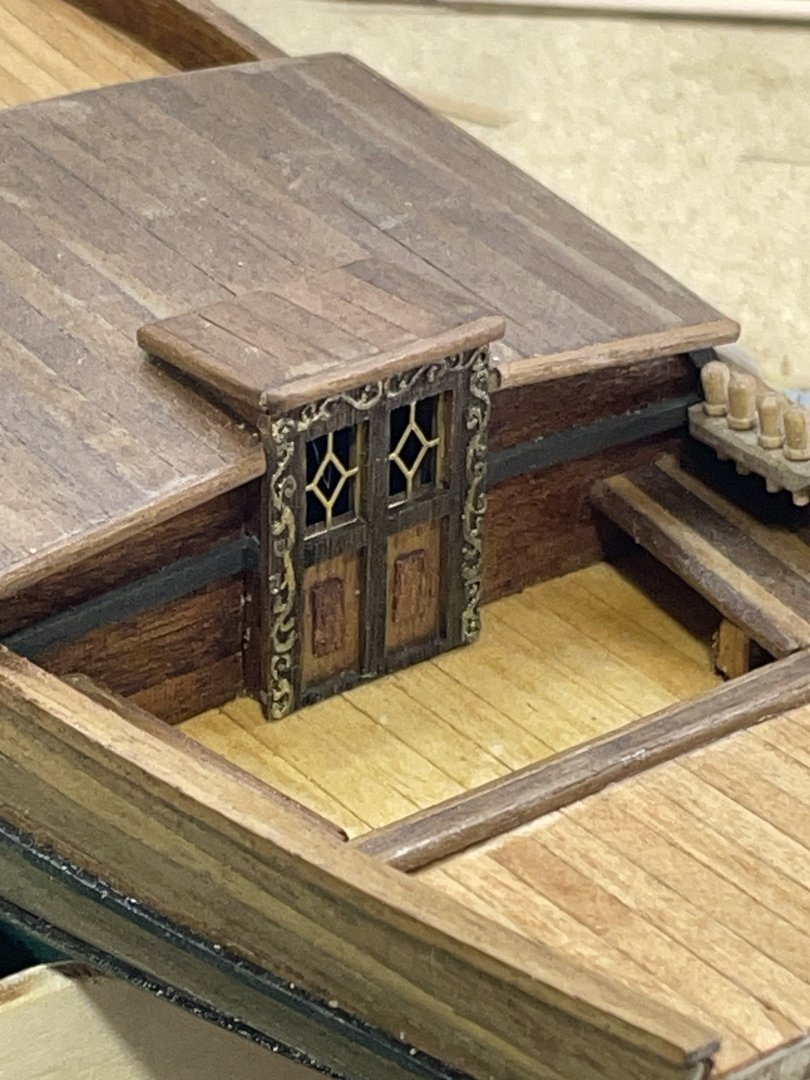
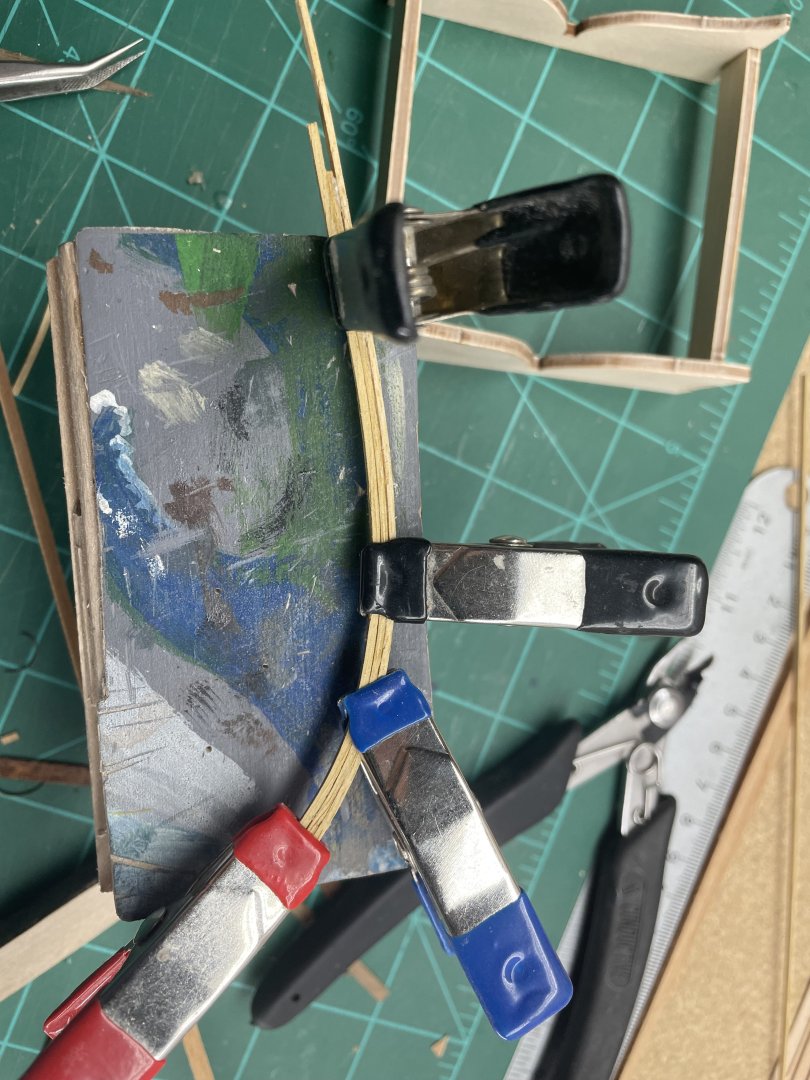
First off, I’d like to retract “the stapling the work to the bench”. It was a desperate attempt with ugly results. I had some other kind of wood. I can’t remember the name, I had never heard of it:-) Anyway it was 1 x 2 mm, instead of 1 x 1 mm. I bent them first then using pins glued them together. I sanded them down to about 1.2mm. It was difficult to keep the 1 x 1 flat after being bend, to glue them together. So I’d do that again if needs be. Here’s some shots of the top rail. I work on the strips on the side. Maybe one day I can try and learn the names of the parts I’m building:-) Just to change I looked in to the hinges for the rudder. They are .1mm brass. One finger spasm would turn them into a brass nugget. I decided then I will glue them together. Then glue them on the rudder. Then glue the wood on rudder to the hull. Maybe it will stay on at least till it makes it to Auburn Alabama. The doors and windows were a nice challenge. I did them only a few minutes at a time over several weeks. Here’s where I’m at now. Thinking I’ll finish the rudder and see if I can get the cast metal stern piece to stick to the wood.


-
The Mossy Shipyard by Bryan Woods - 1:1
Bryan Woods replied to Bryan Woods's topic in Non-ship/categorised builds
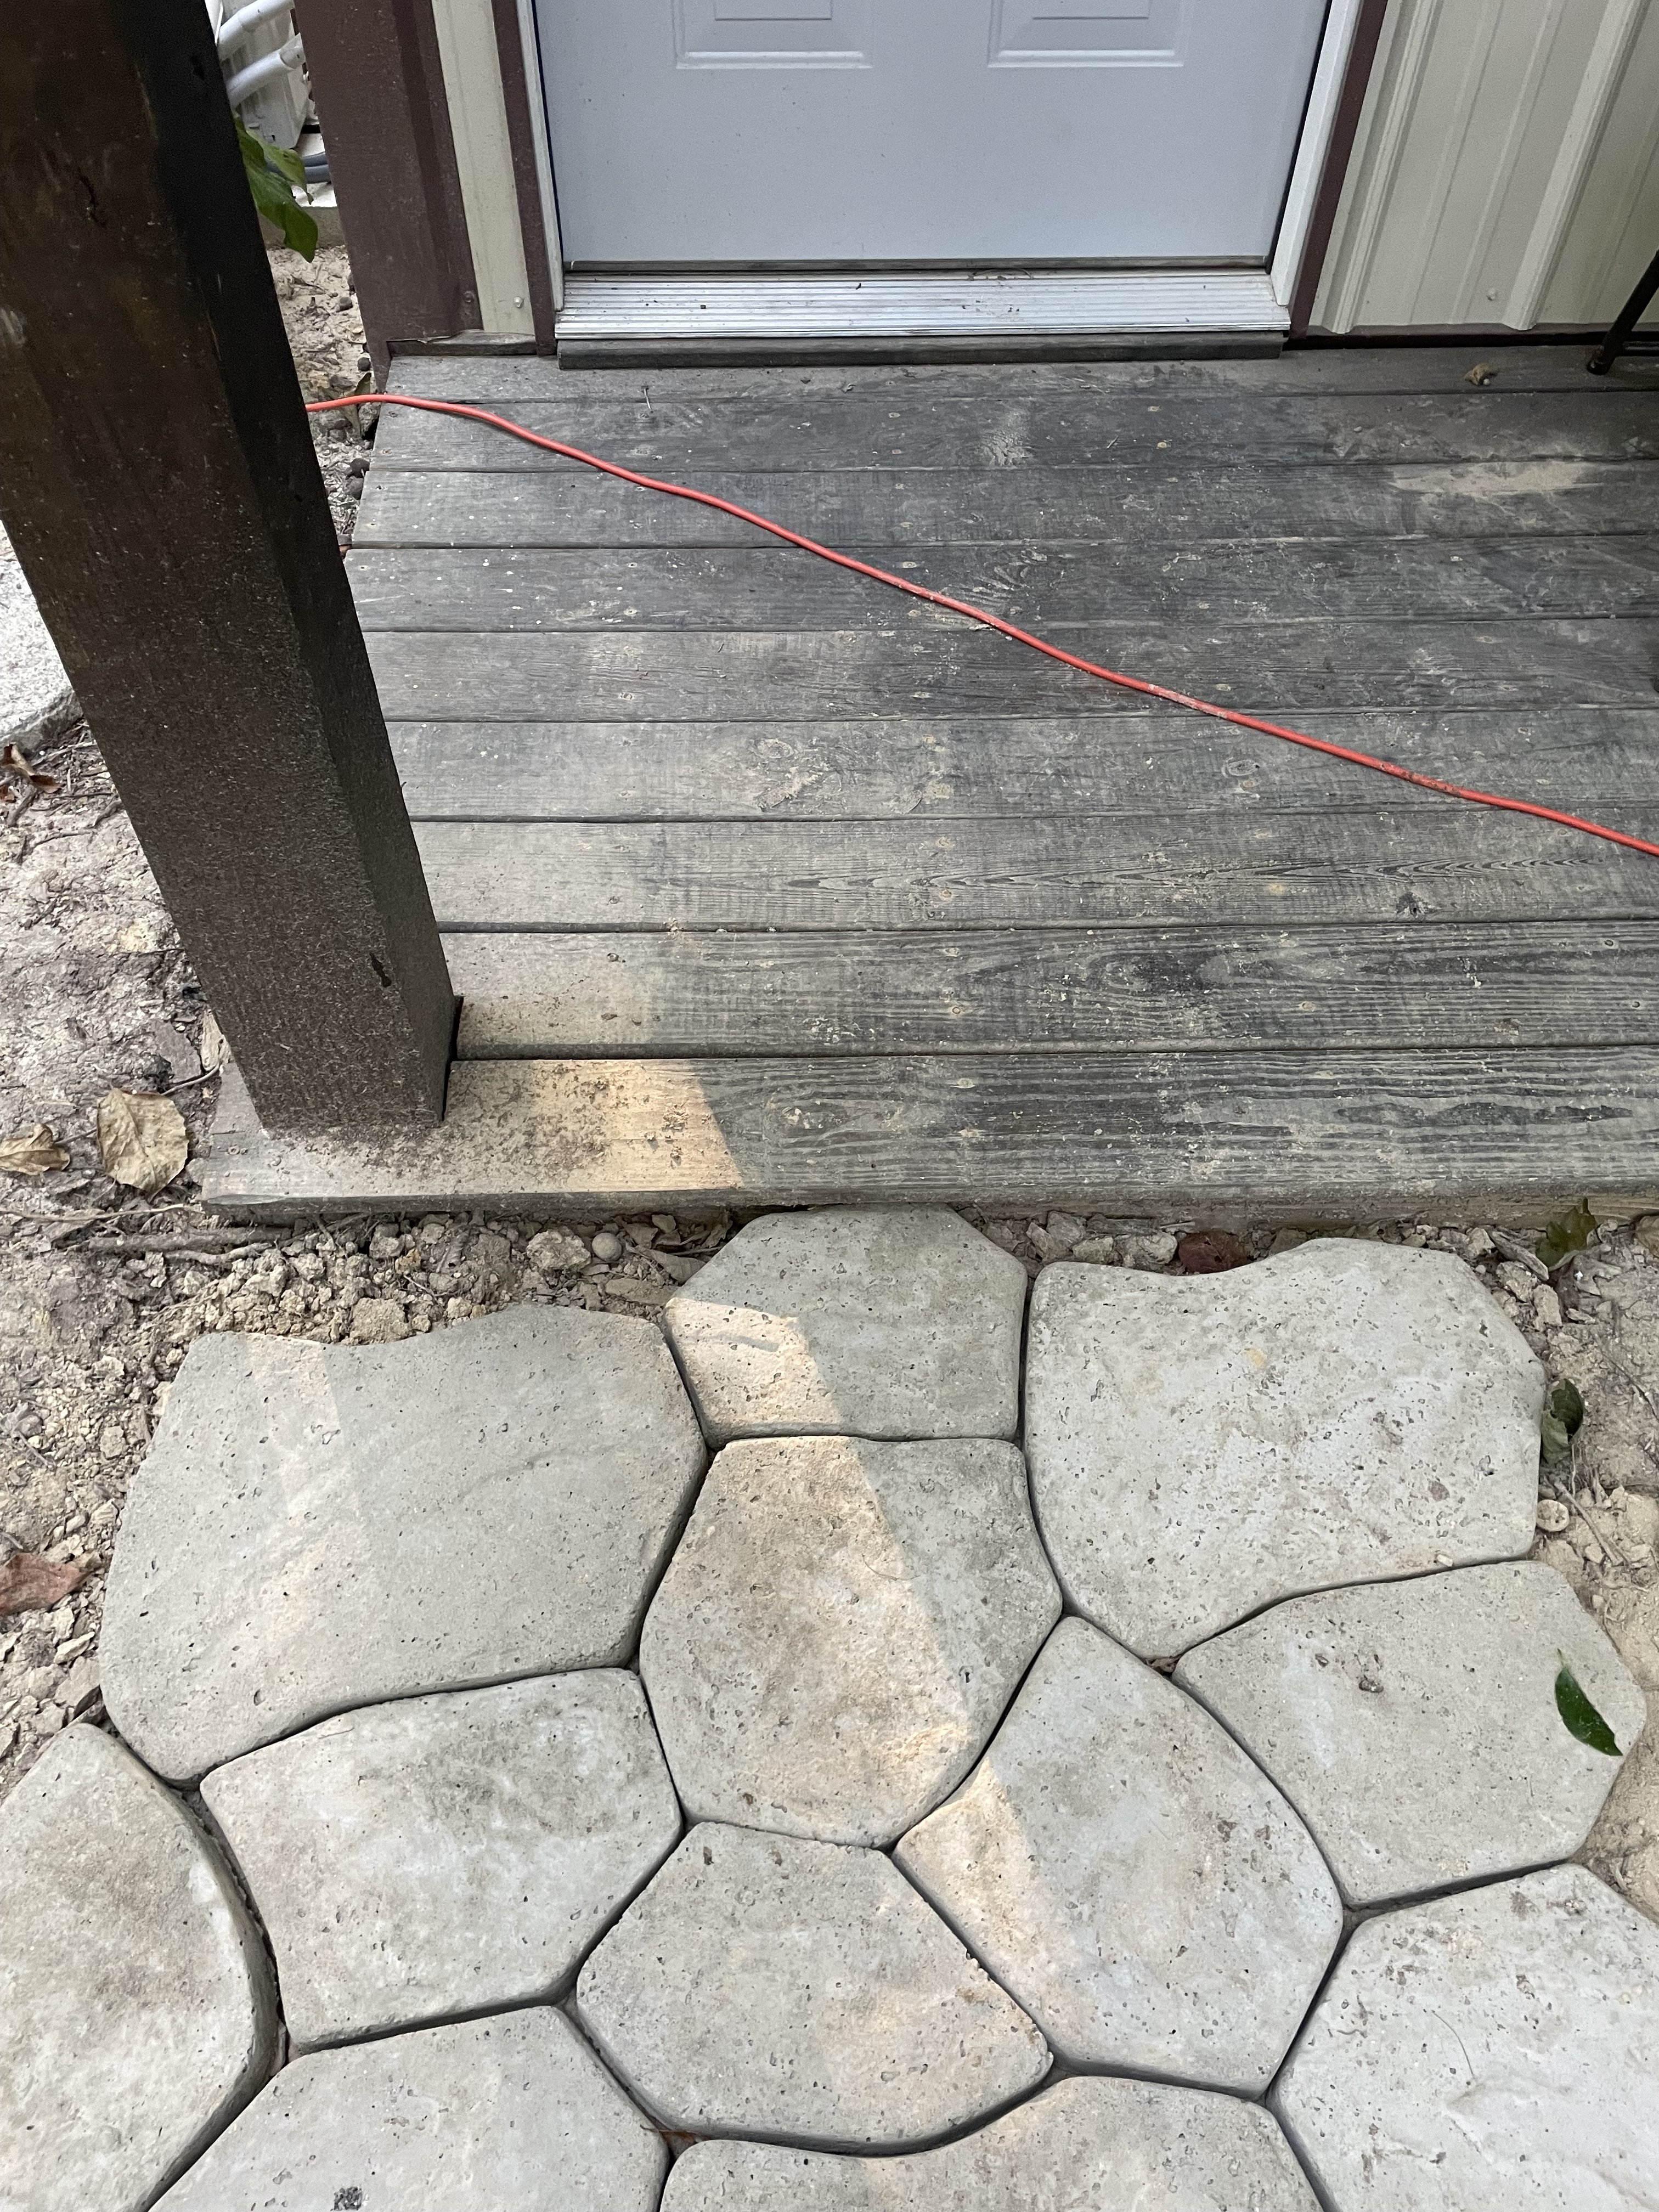
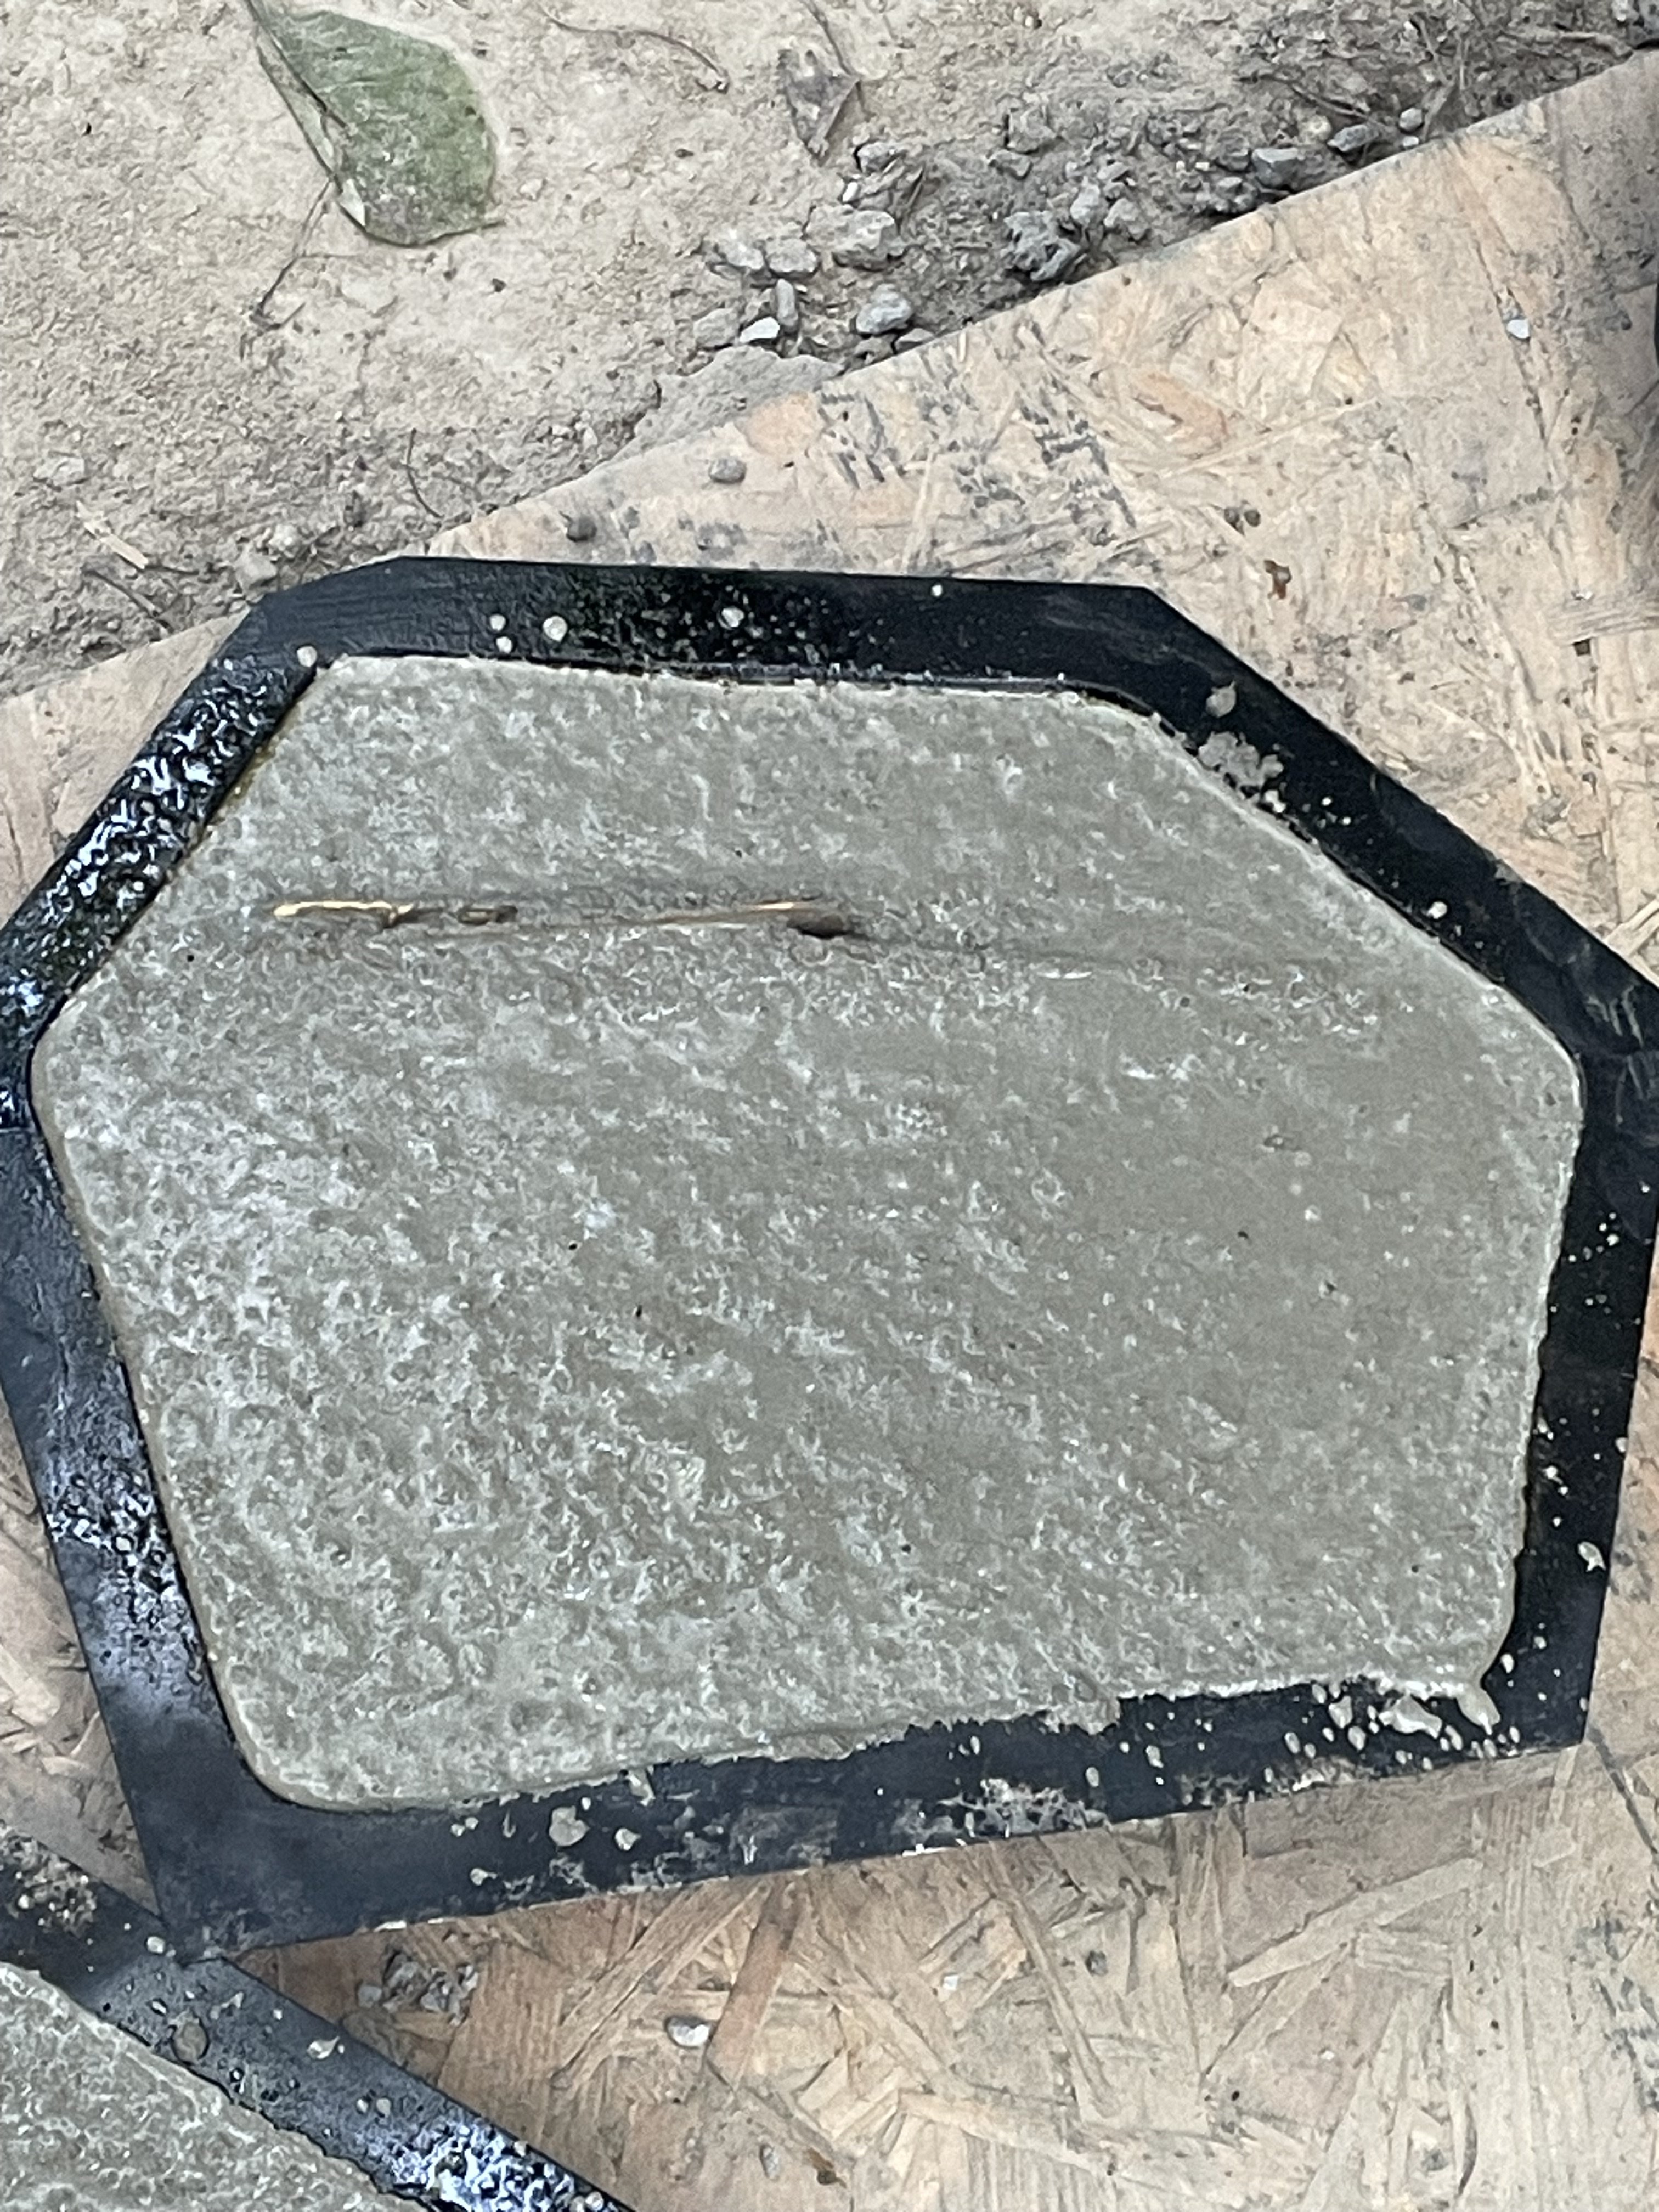
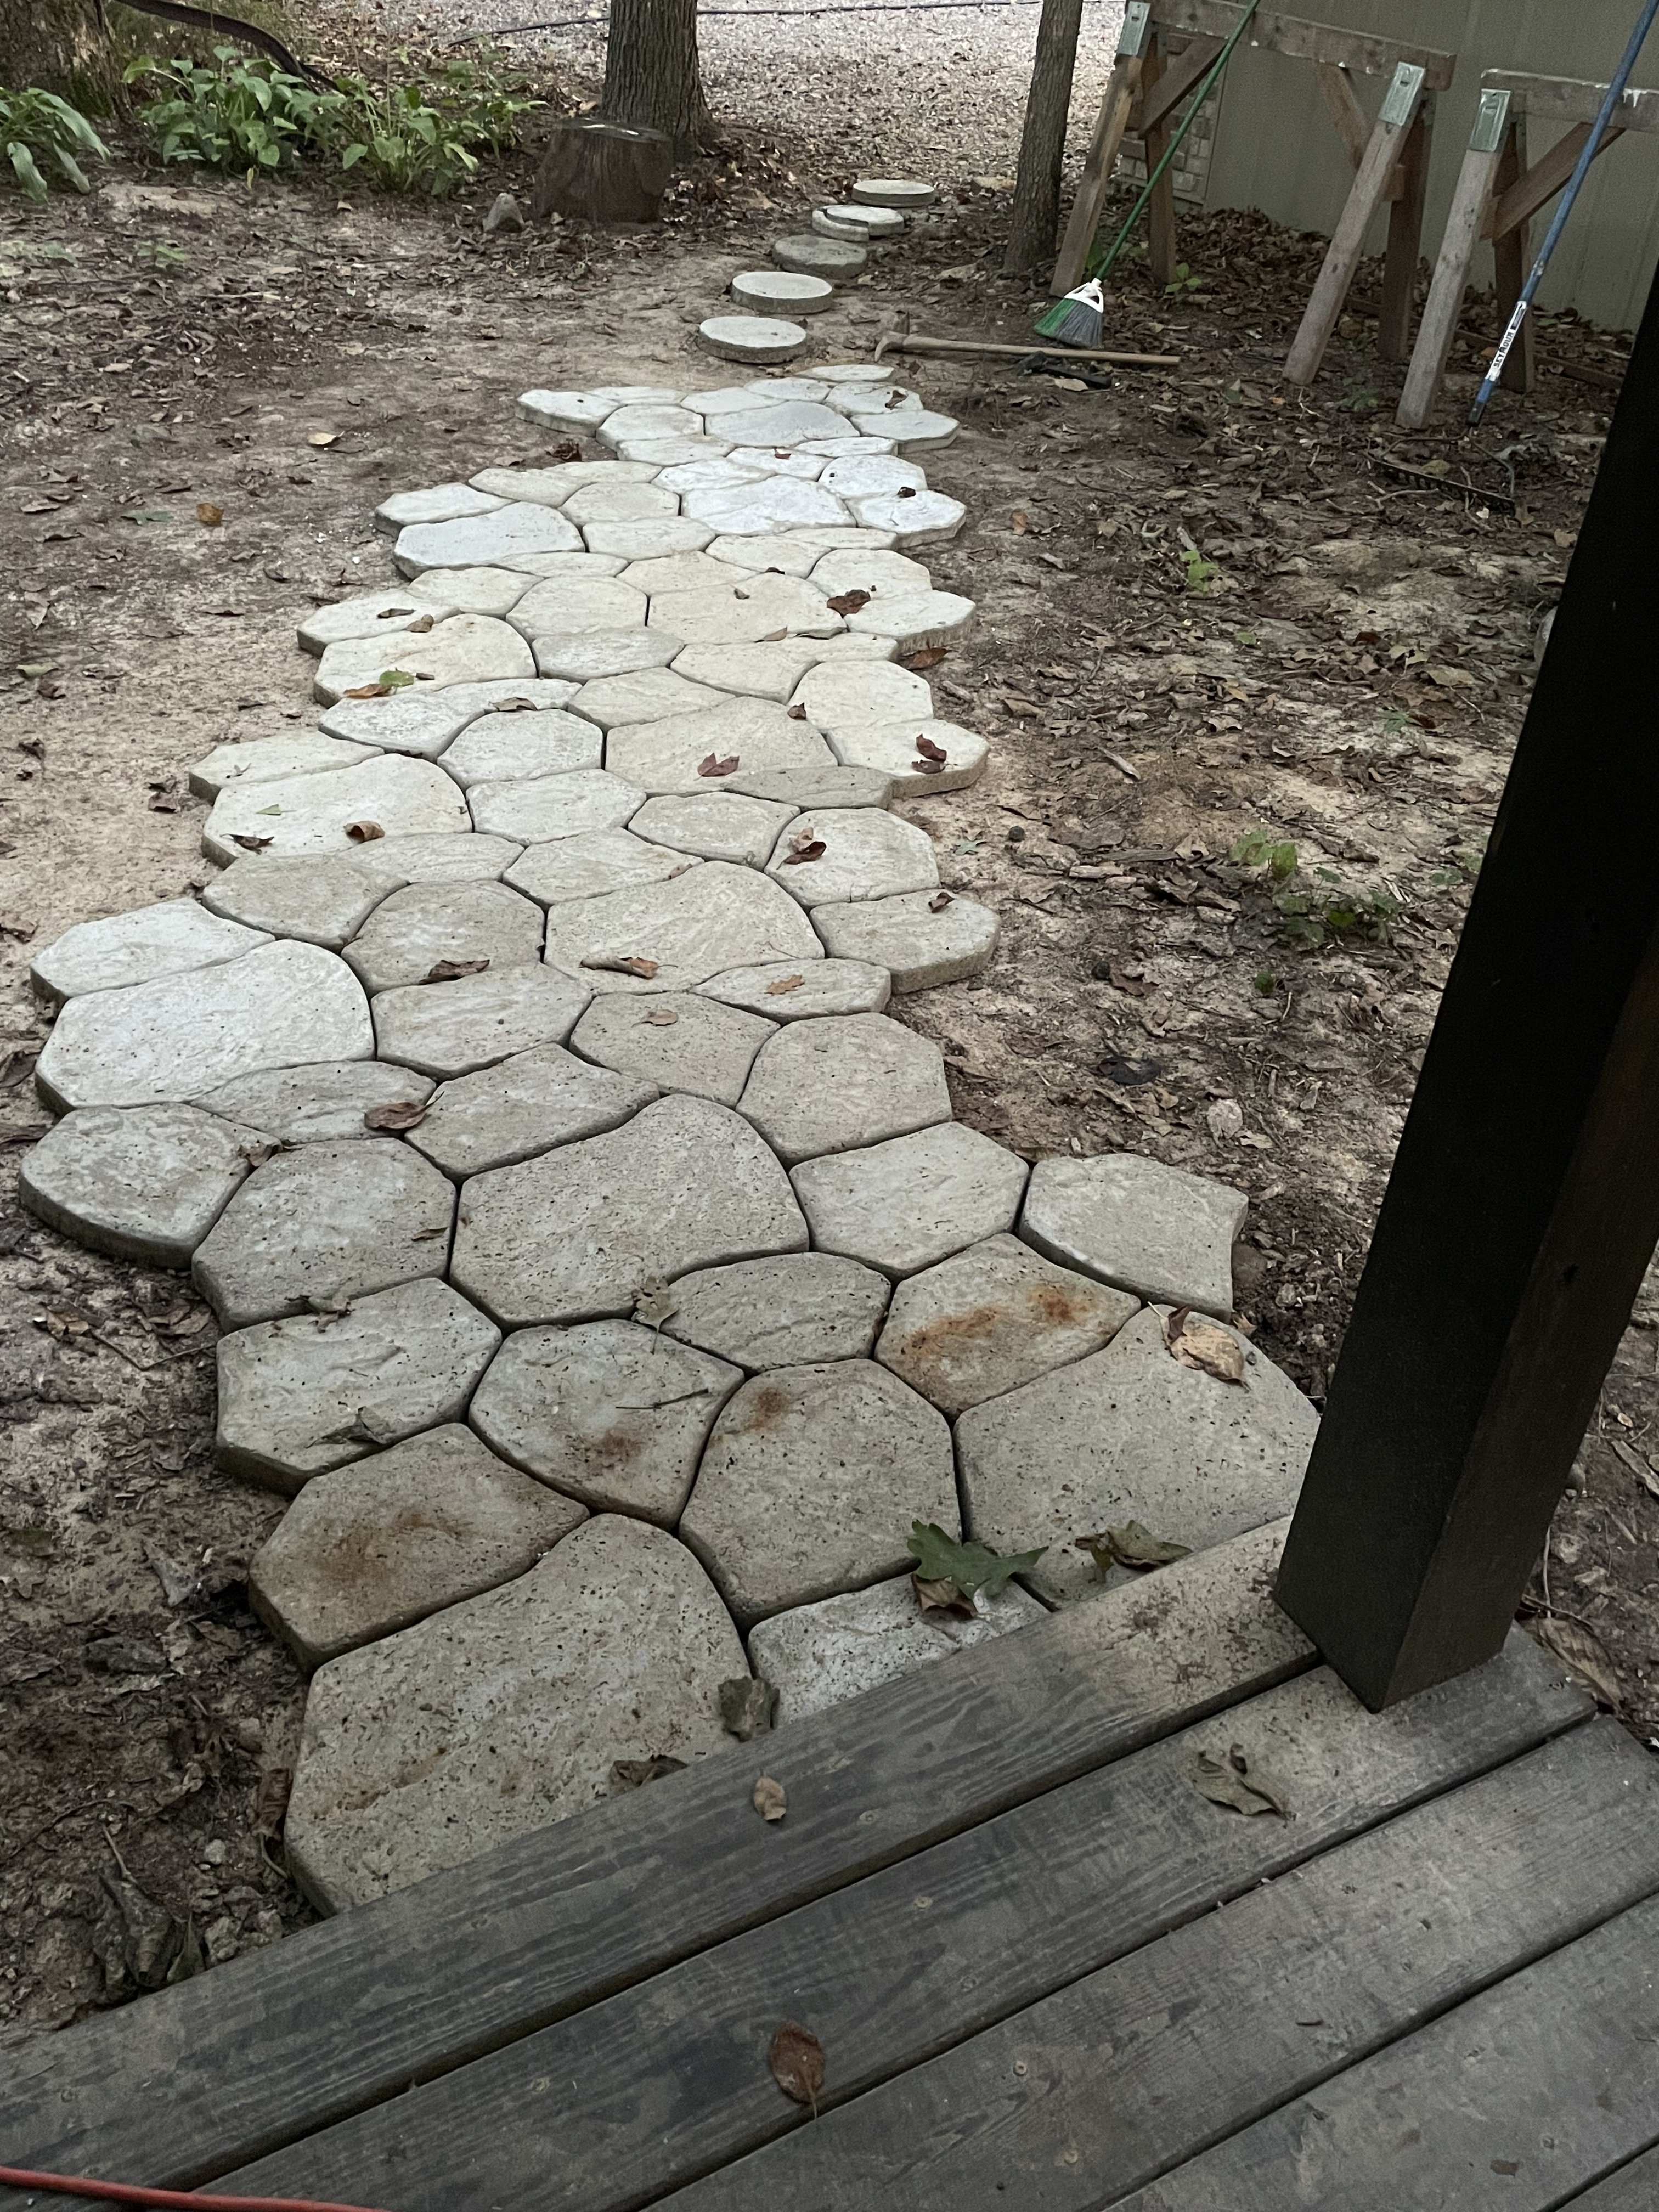
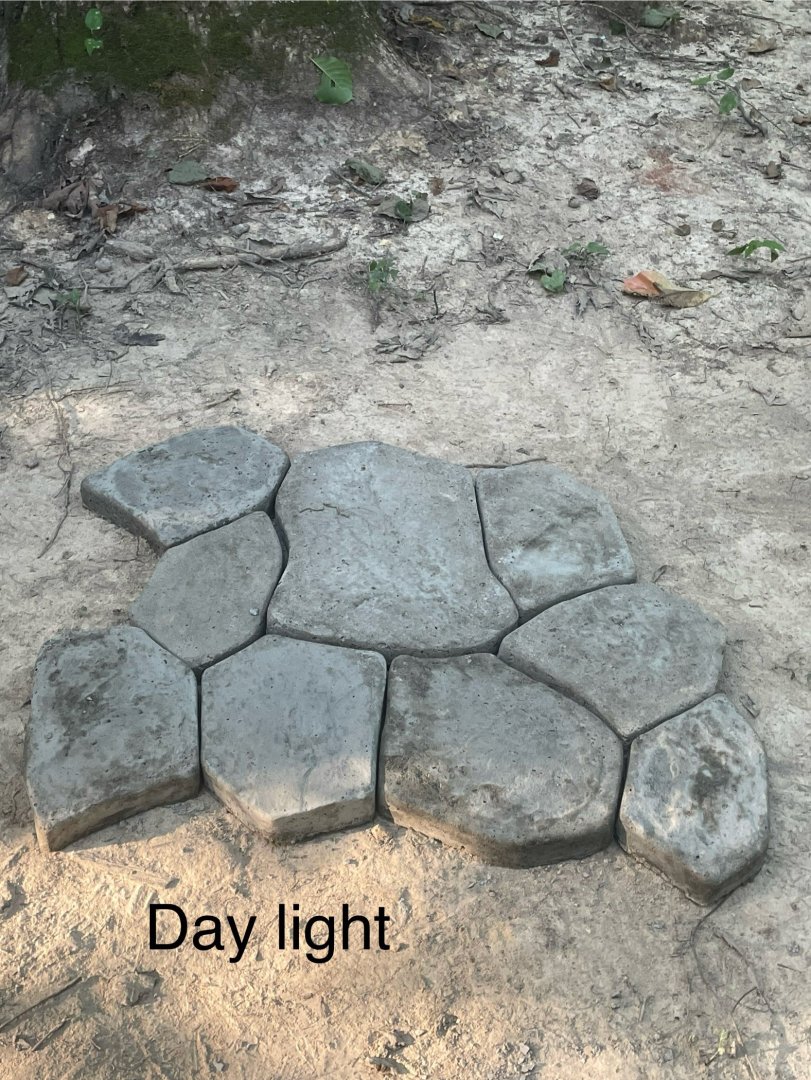
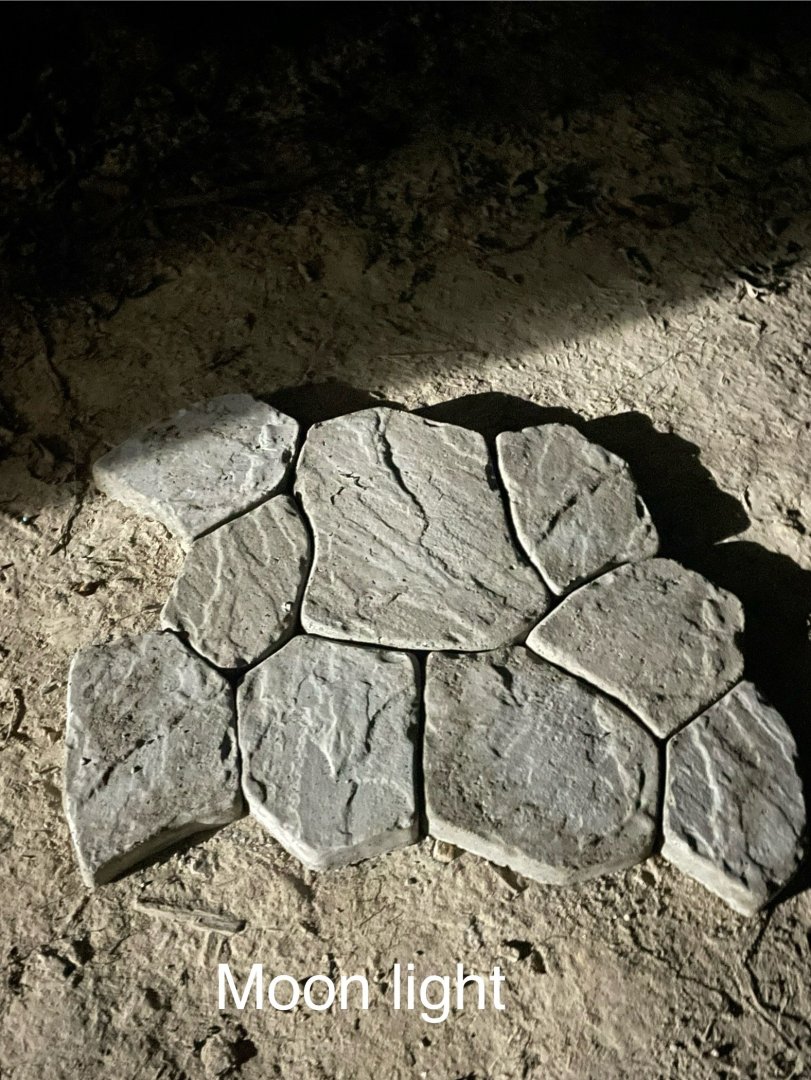
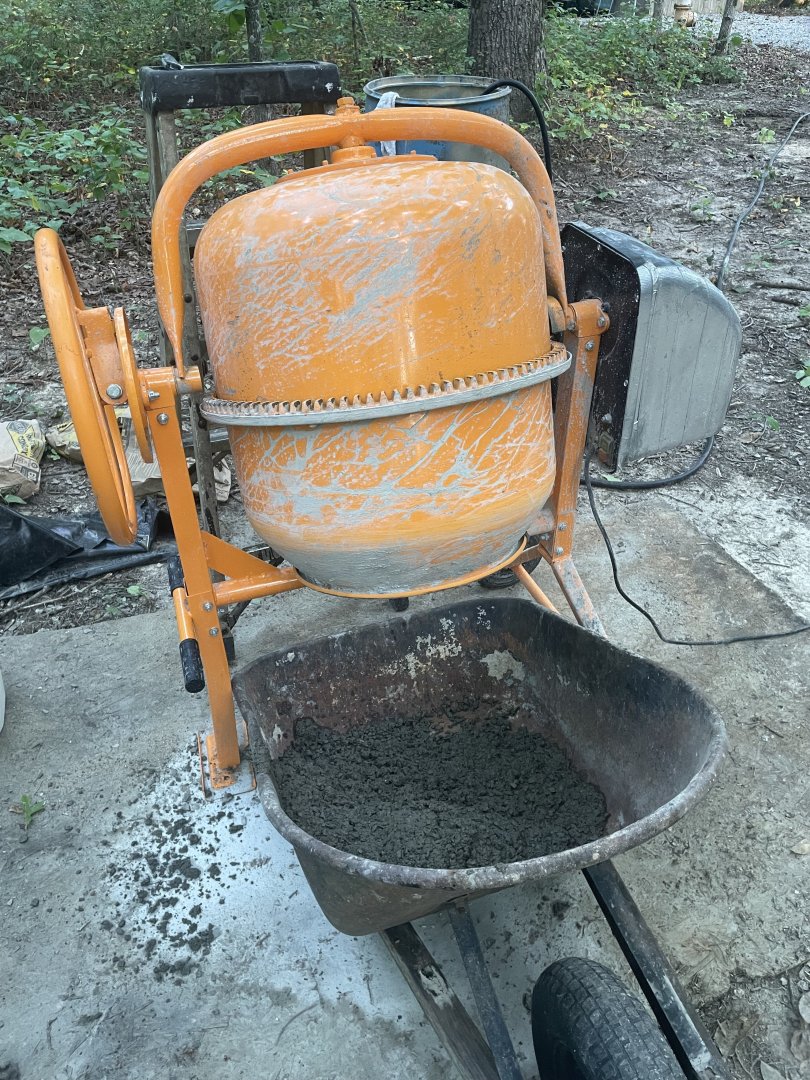
Work on the flagstone walk has slowly made progress. I set my inexpensive mixer up and modified a broken wheelbarrow, so it would set under the mixer and not require my wife to hold the handles up on it while I dumped it. Then I just drug it over a few feet to the molds. They turned out pretty good. I’ve gotten better at not getting it too wet or too dry. In the sunlight they still look like concrete. Nature will stain them like it does everything else around the yard. But the moonlight really shows the texture. I’ve been at it for 14 days of mixing an eighty pound bag per day. That fills all six stones and a bit left over. I use it just to patch pour a round stone that I’m sure I can find a place that could use one:-) At first the stones were challenging to fit together. They just came in a box with zero paper work or diagram. So here’s where I started. To push them up closer to the deck I used a straight edge to see where that middle stone needed removed. On my next pour I pushed wood strips in the cement where I needed it cut. I think I may have 12 more days to mix. What I’m dreading is, having to remove them all, to semi level the ground. I didn’t do it to start with because I really had no idea where it was going to lead. After about 5 days worth I could visualize the pattern. I may need to move it north or south a little bit to work around those trees where it will stop.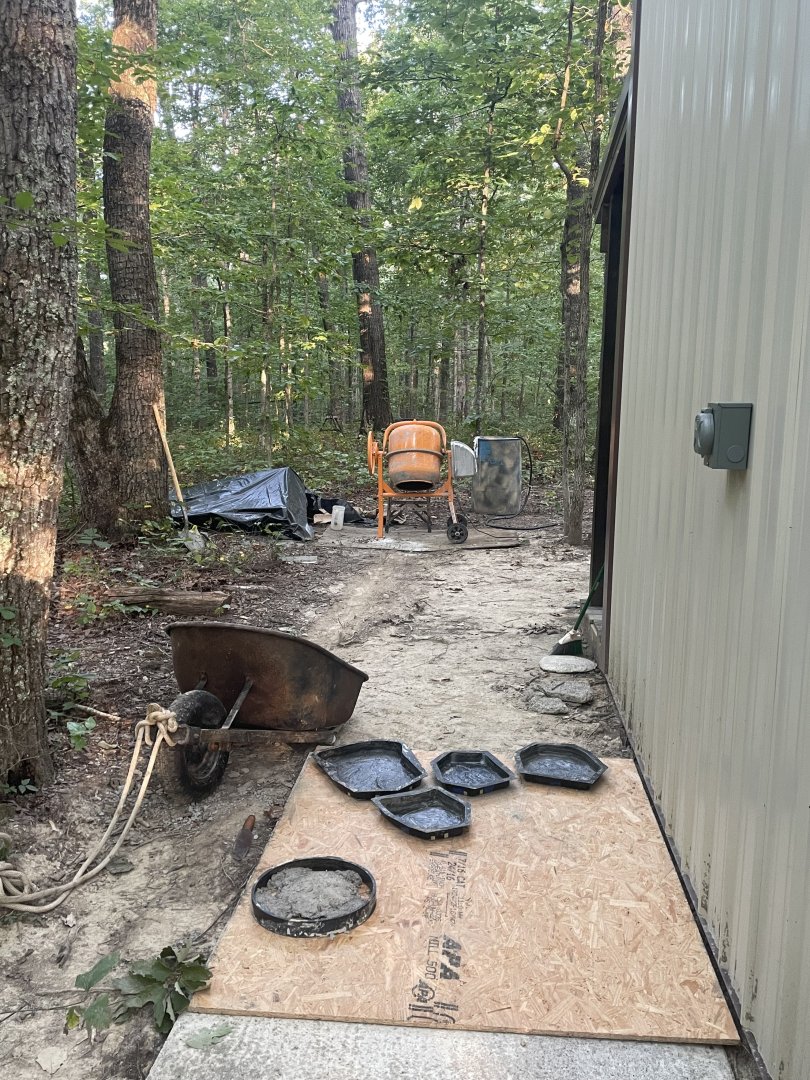


- 42 replies
-
- 12
-
-
-
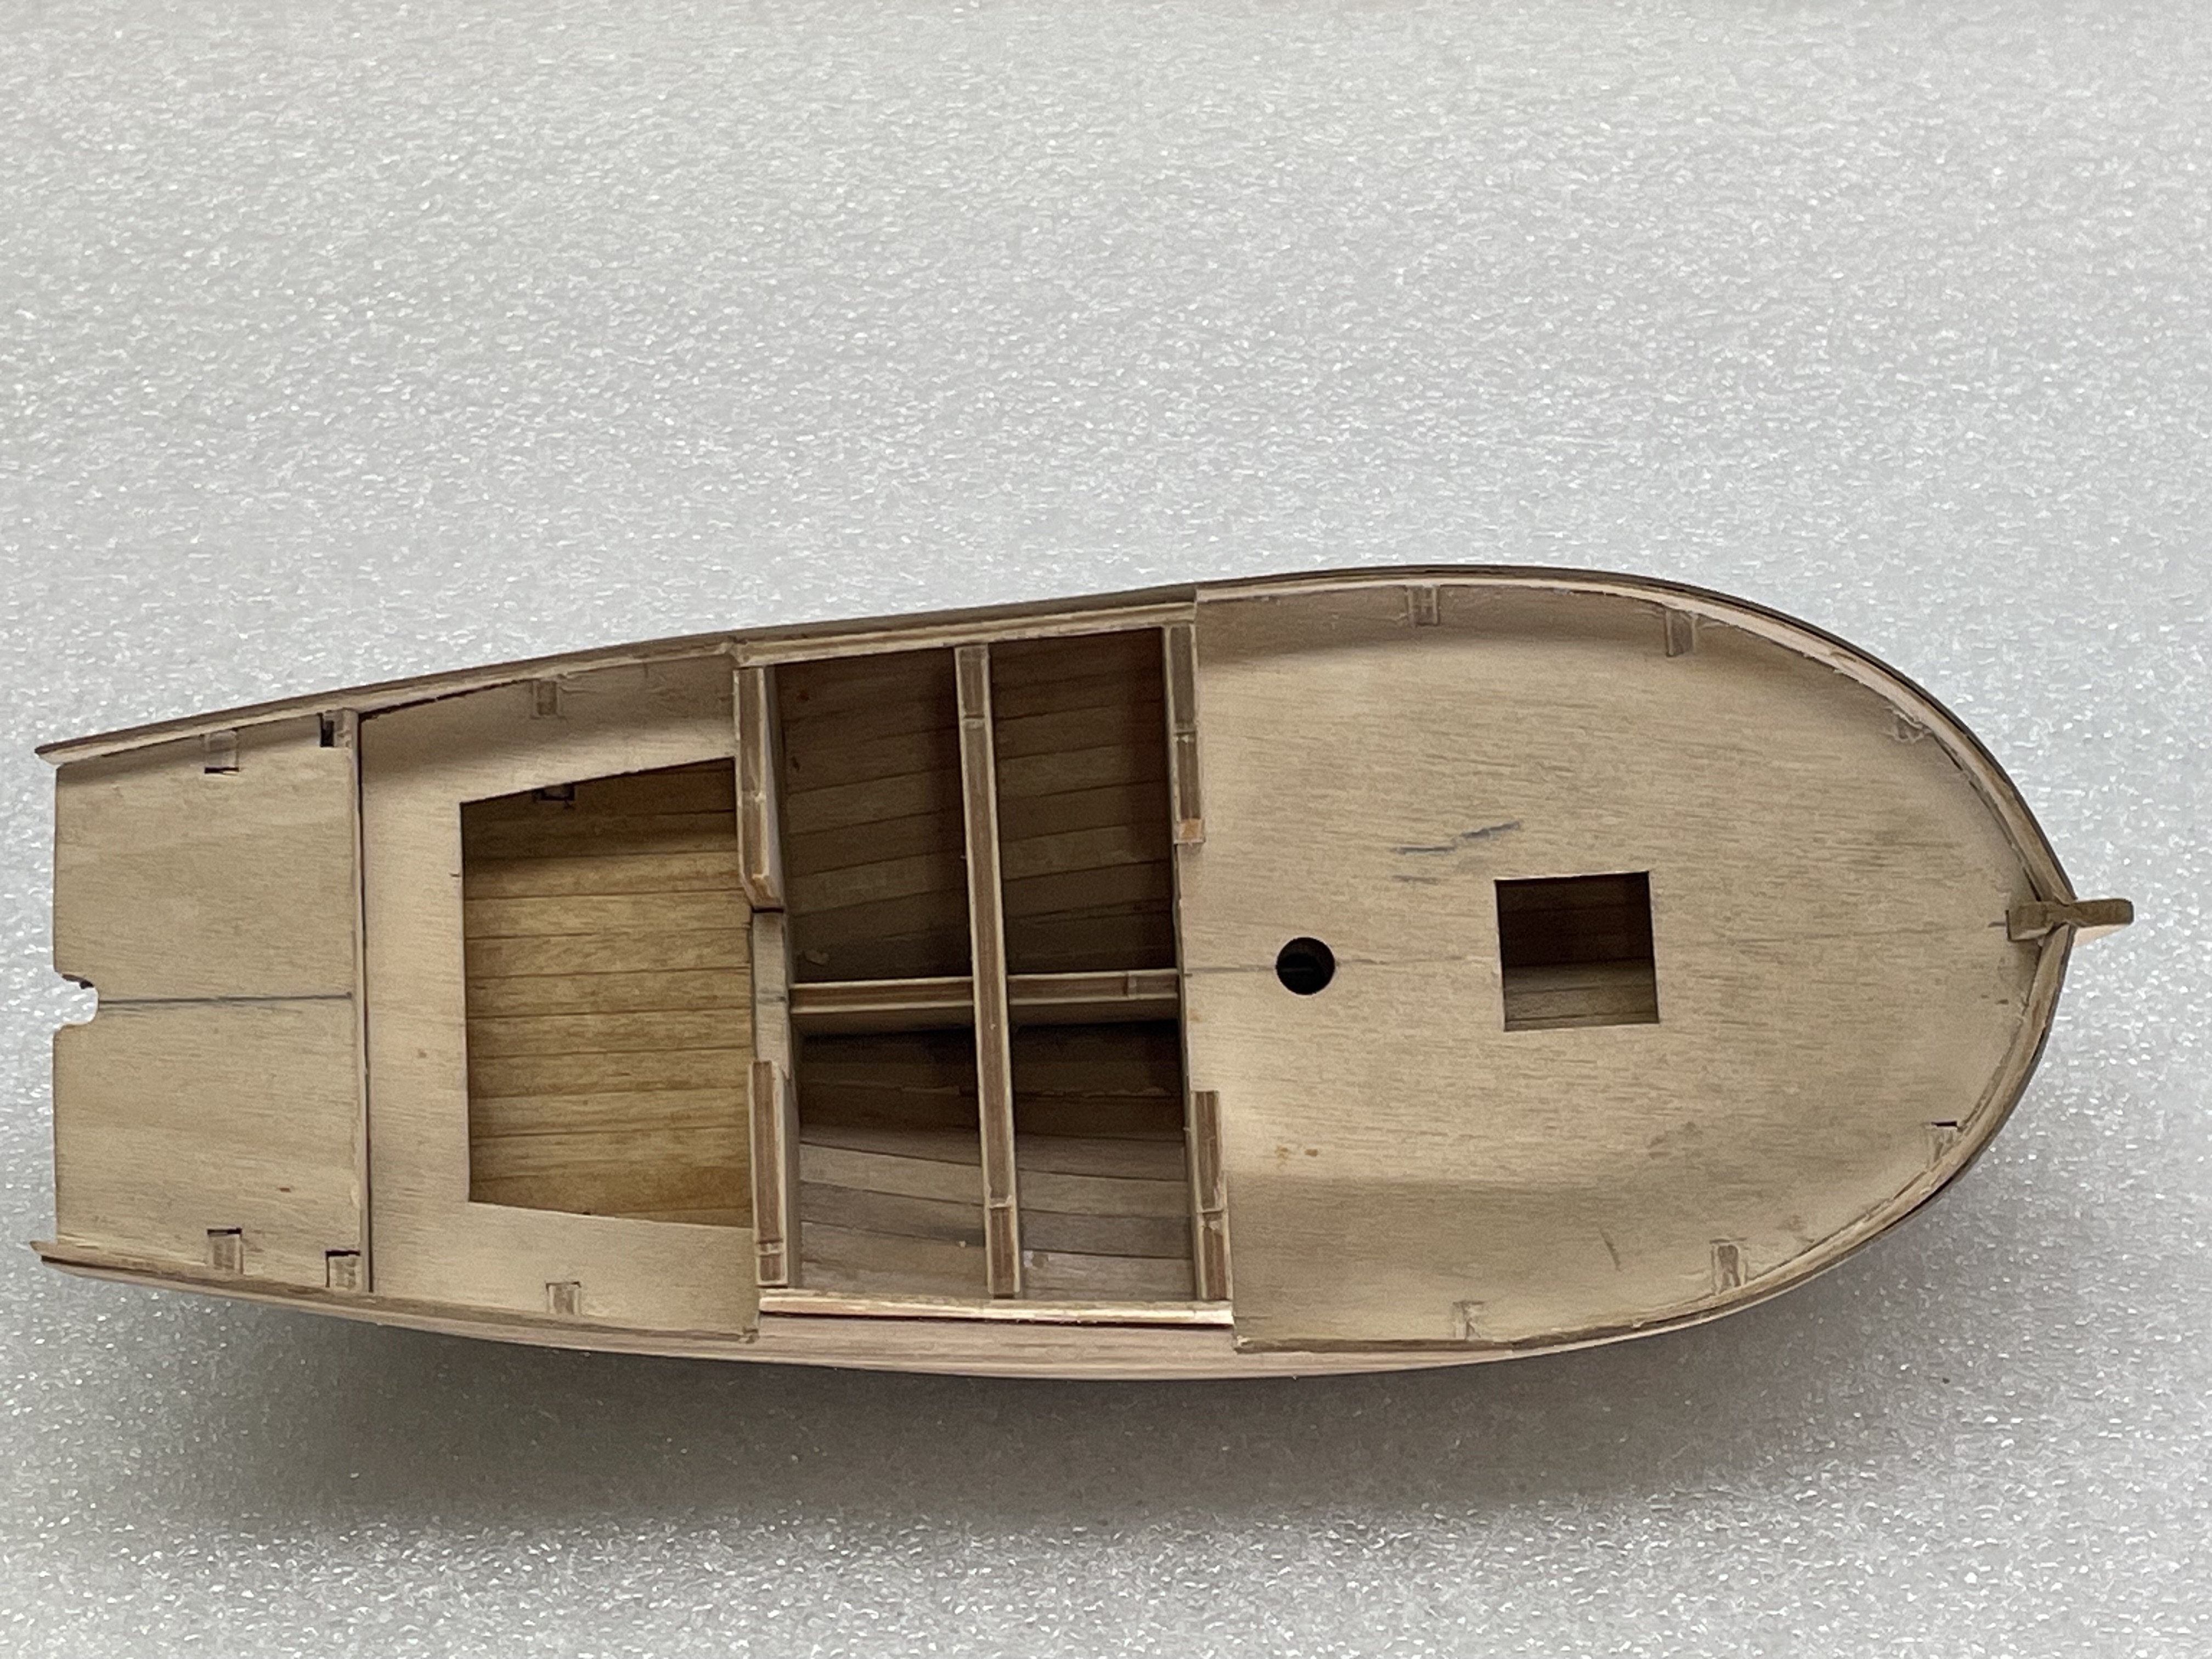
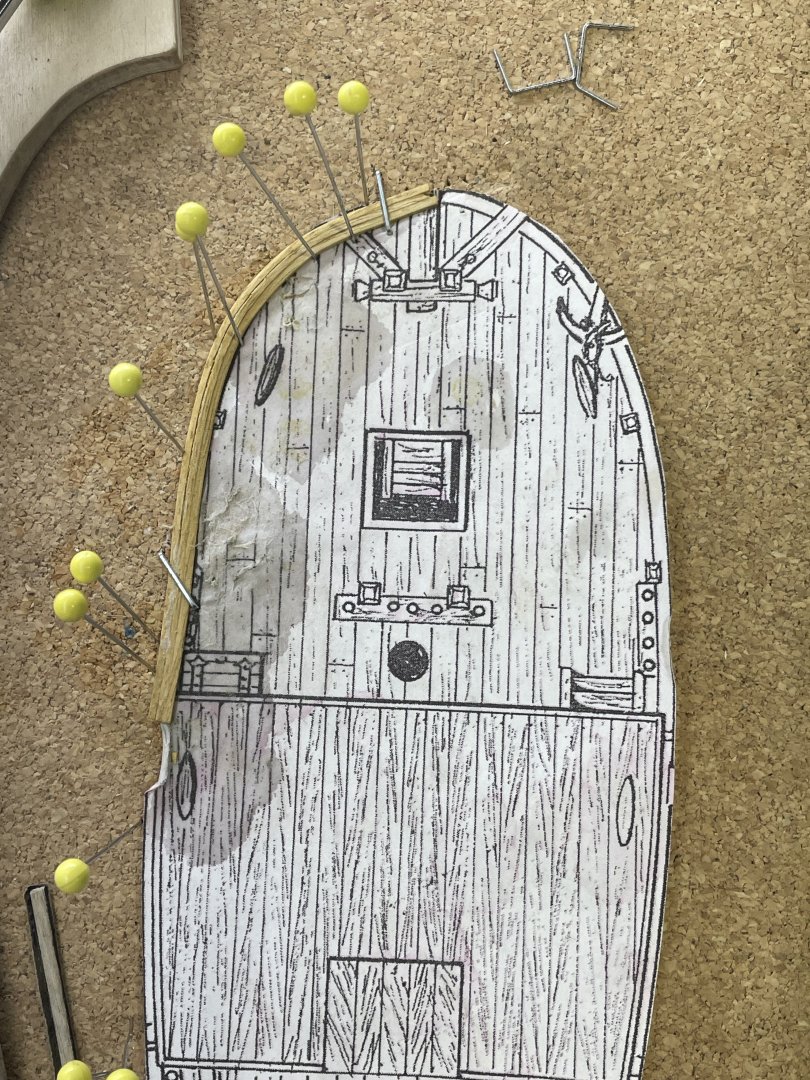
For the last few weeks,( except for 4 days and nights that I stayed with my brother to help him build a tree house for his grandson) I worked on the veneer topside. The top rail is made up of three 1 x 1 strips bent and glued together. They didn’t retain their shape after glueing them together, so I tried bending them glued. This worked on one side but the other seemed to fight me. So I just stapled it down to my work bench overnight. Next up, I need to make all the little things that glue to the deck, doors, windows.


-
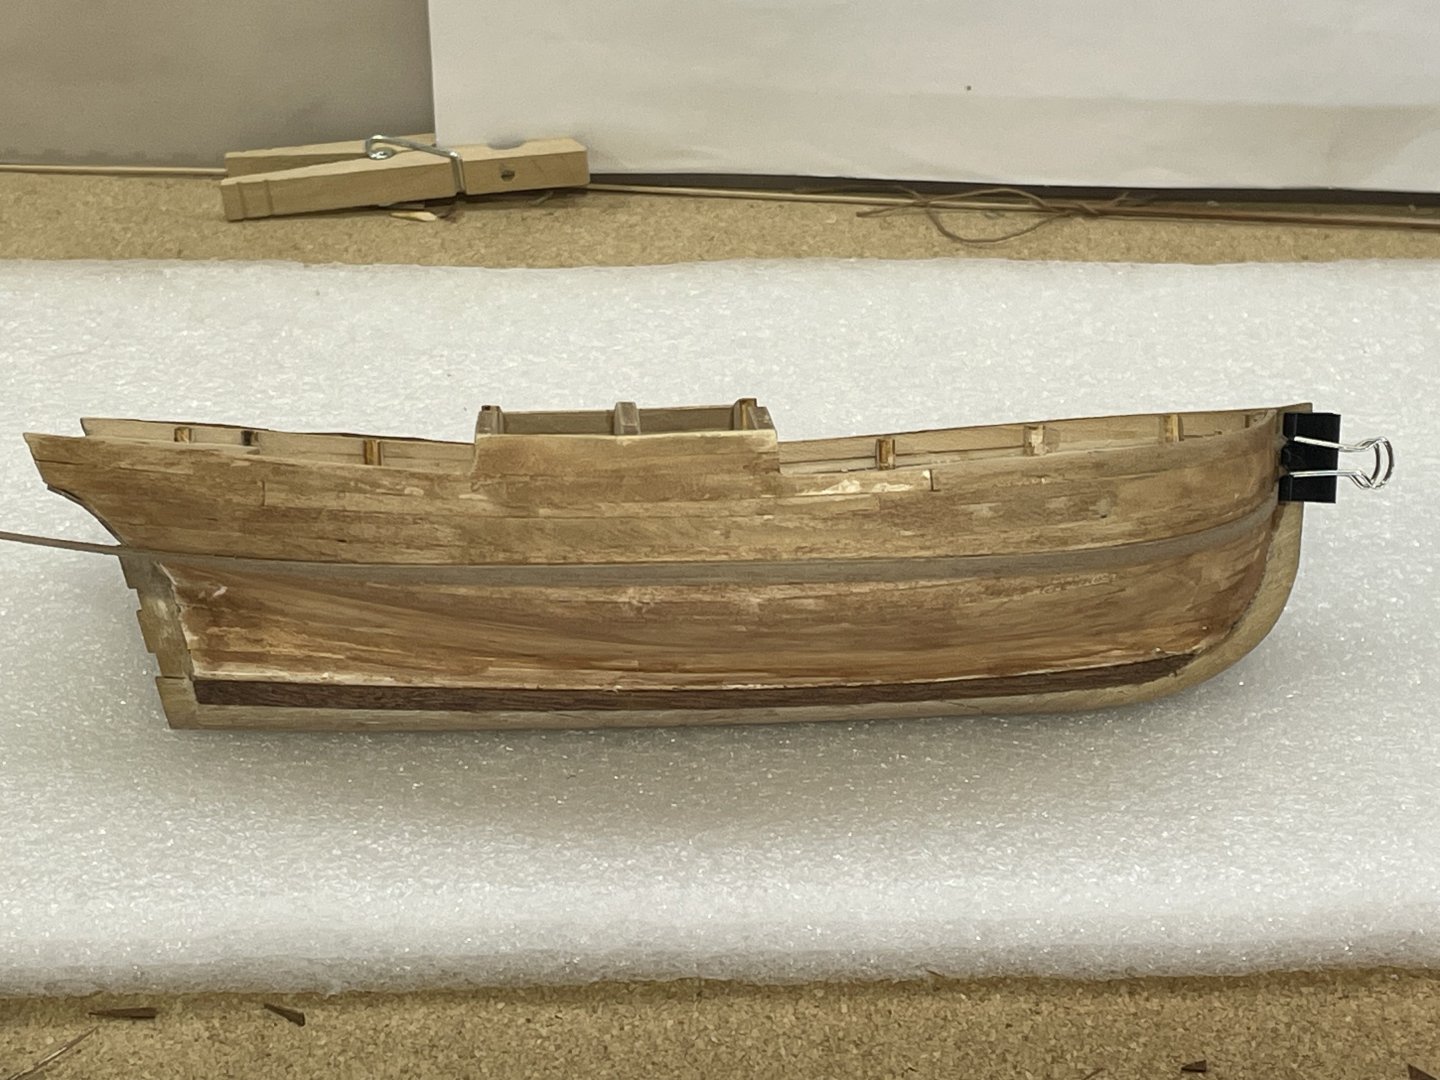
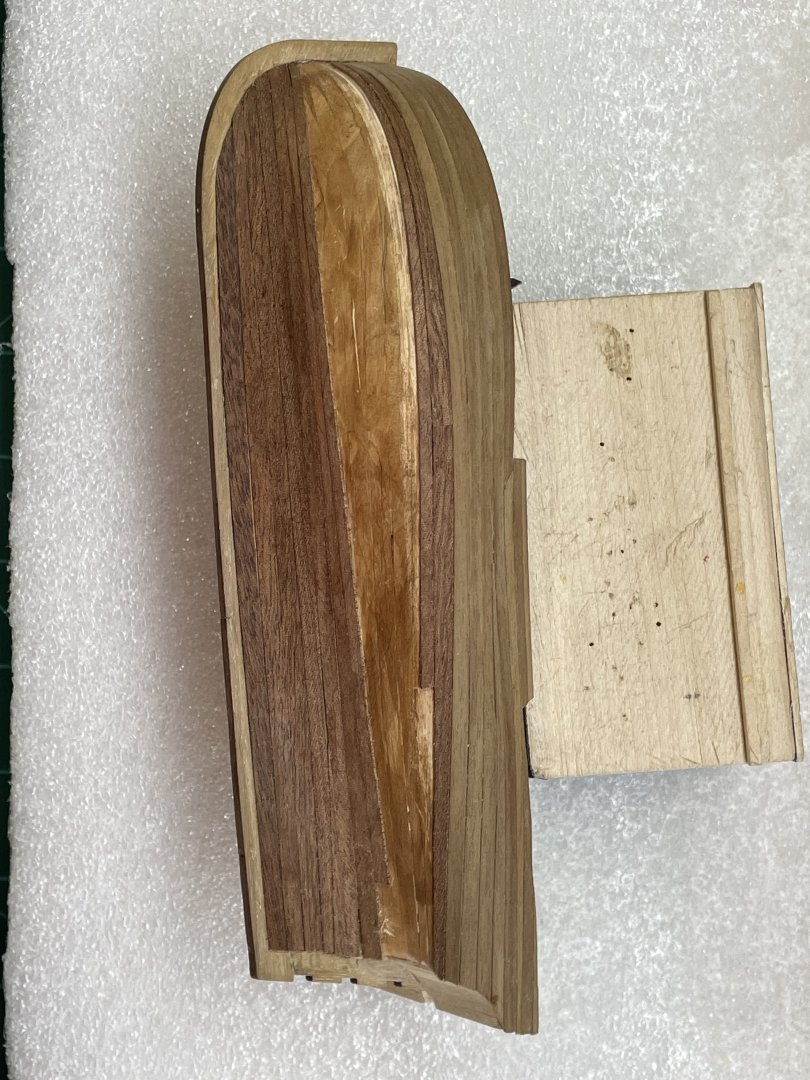
I finished the second planking. I pretty much just decided which plank to do next and what shape it needed to be. Thinking to whole time there’s a better way of doing it:-) But it all turned out. I’ve also removed the bulk head ends above the deck. I’ll be ready to start the deck planking as soon as I decide what wood to use on what area.


-
Welcome to the forum!
-
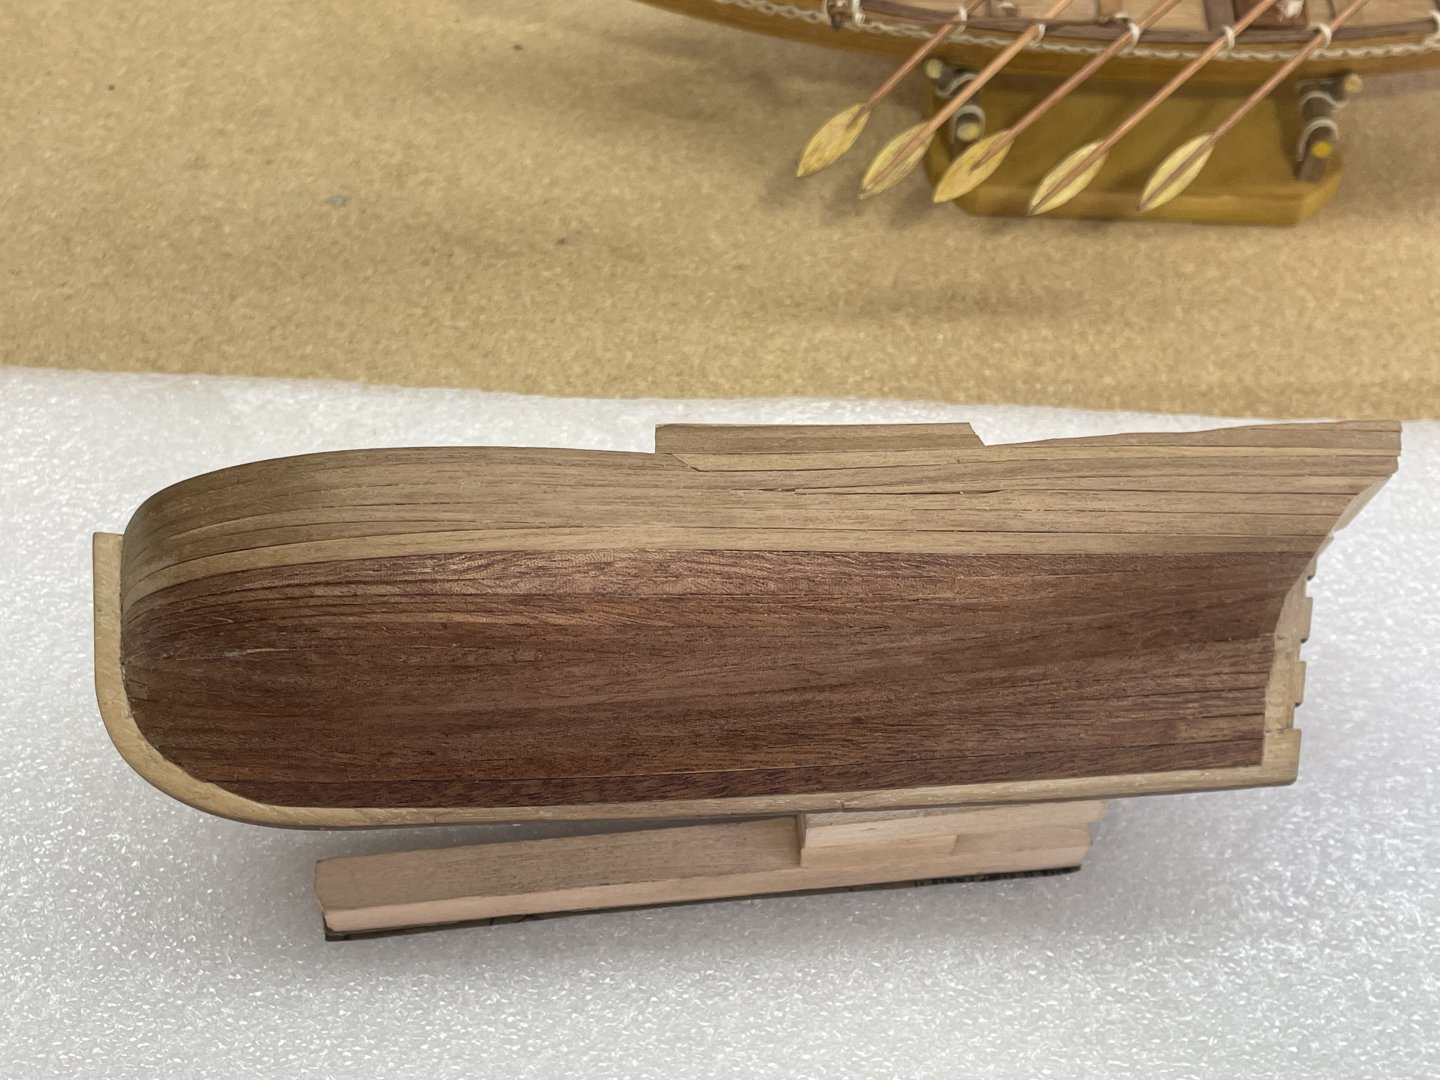
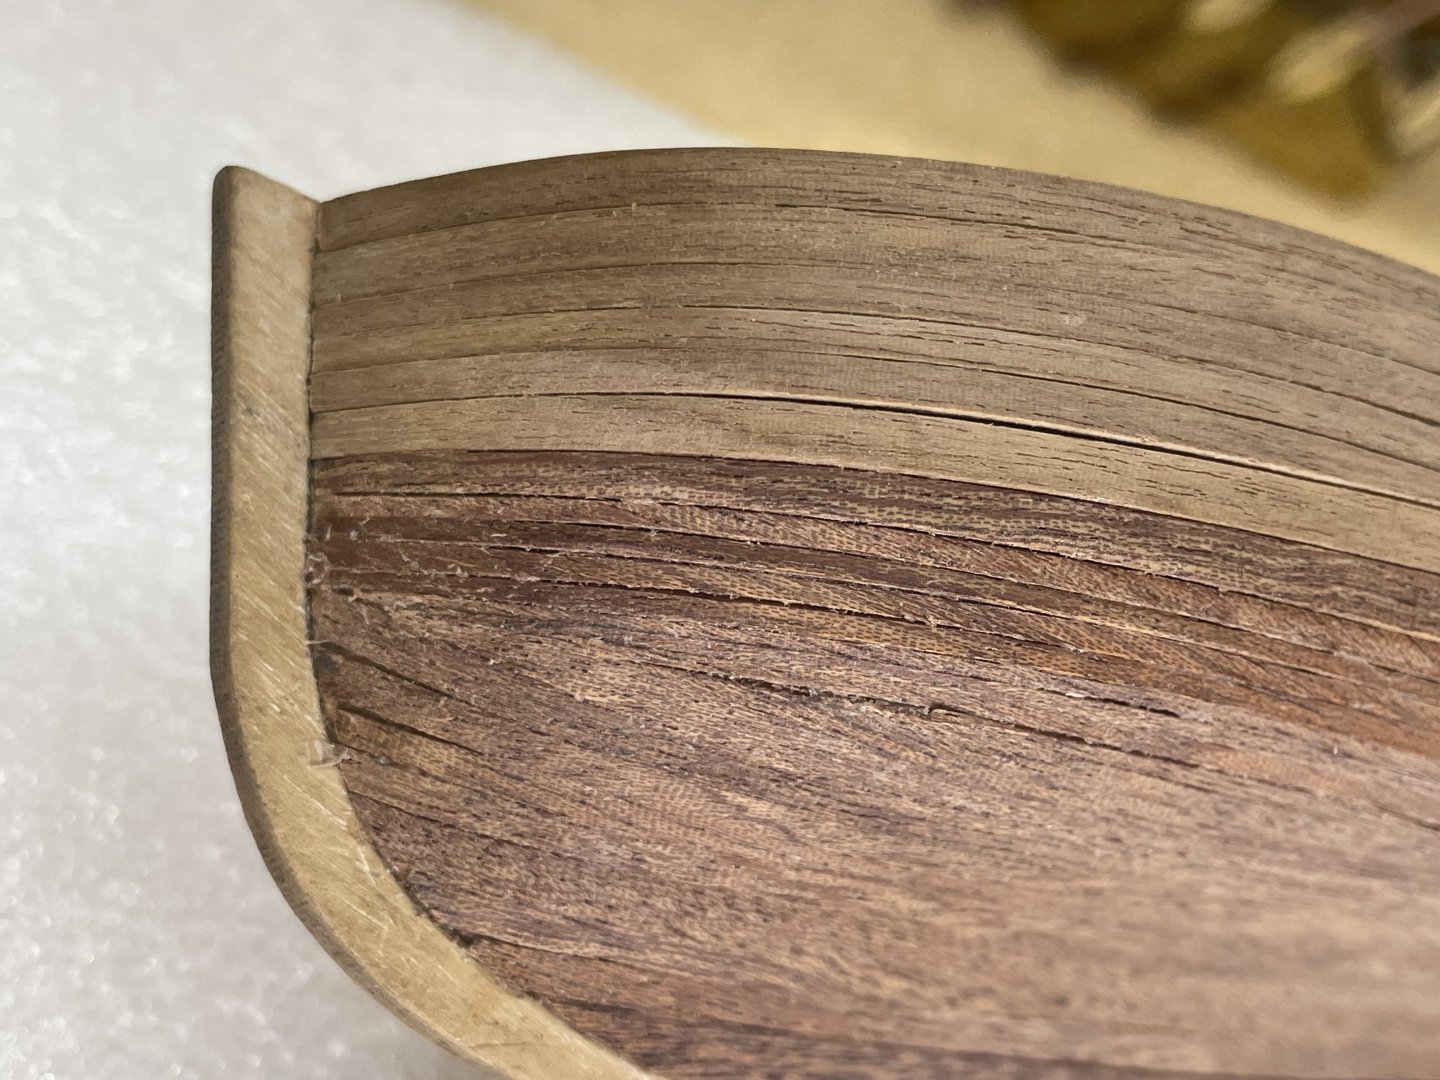
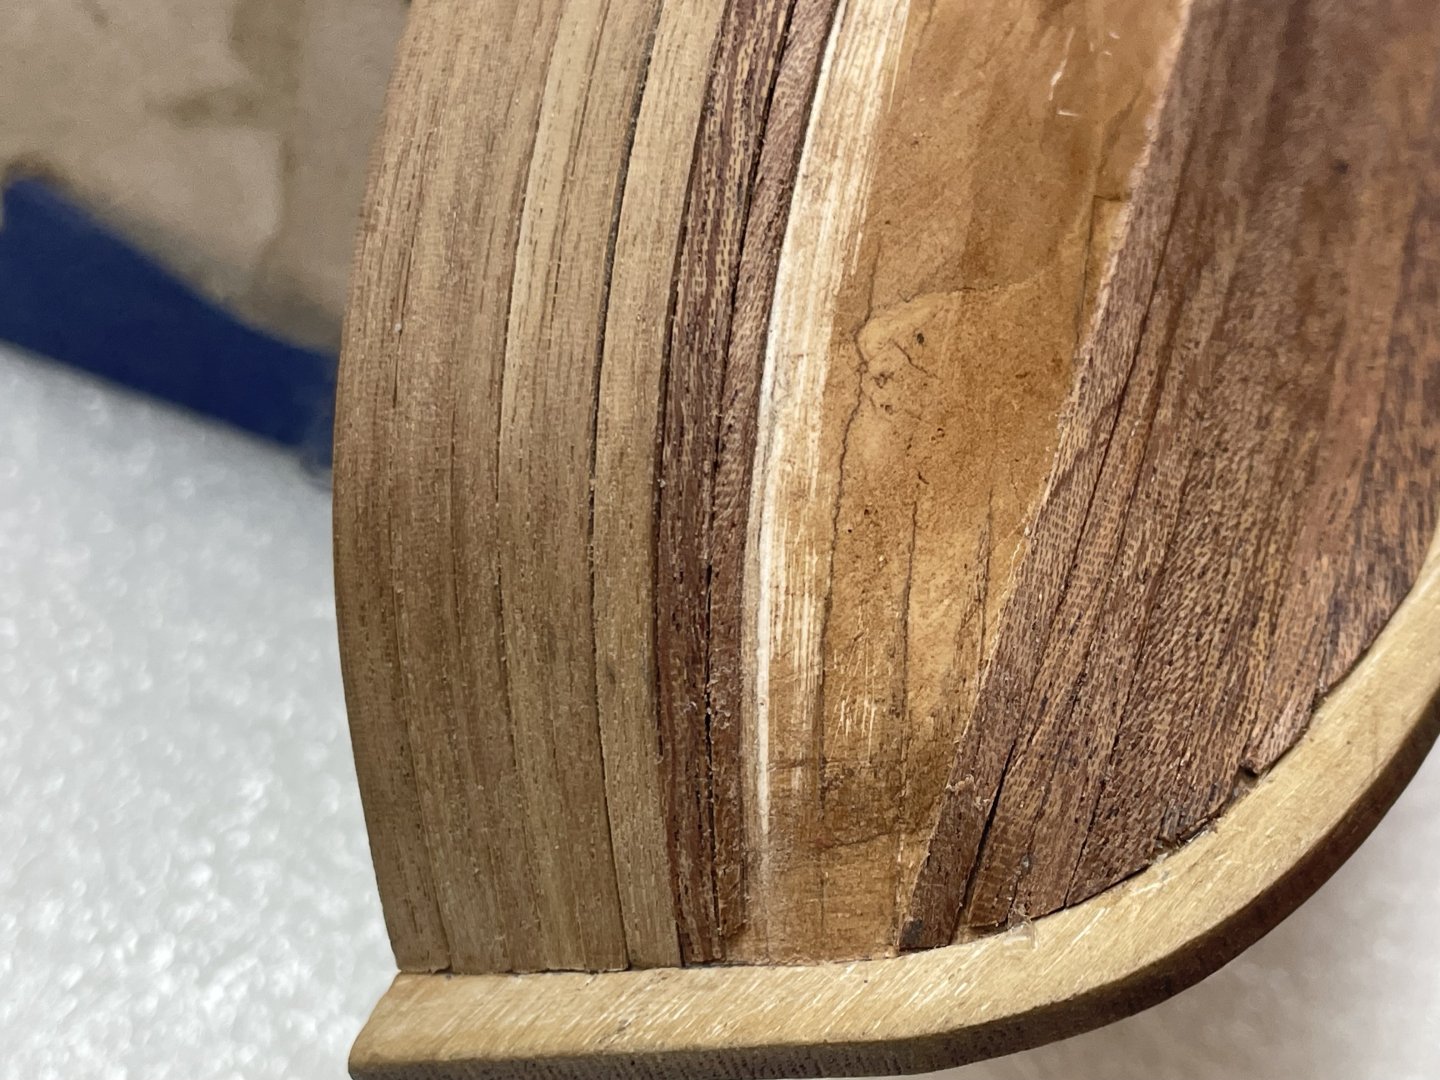
Thanks Eric, It’s my first veneer. Hopefully I can match the starboard side. I chose to start with the bottom mahogany strip so it will at least match:-) Below, which I’ll probably do later. I tapered the 4mm plank to 2mm and ended it at about 8cm. We’ll see if that works.

-
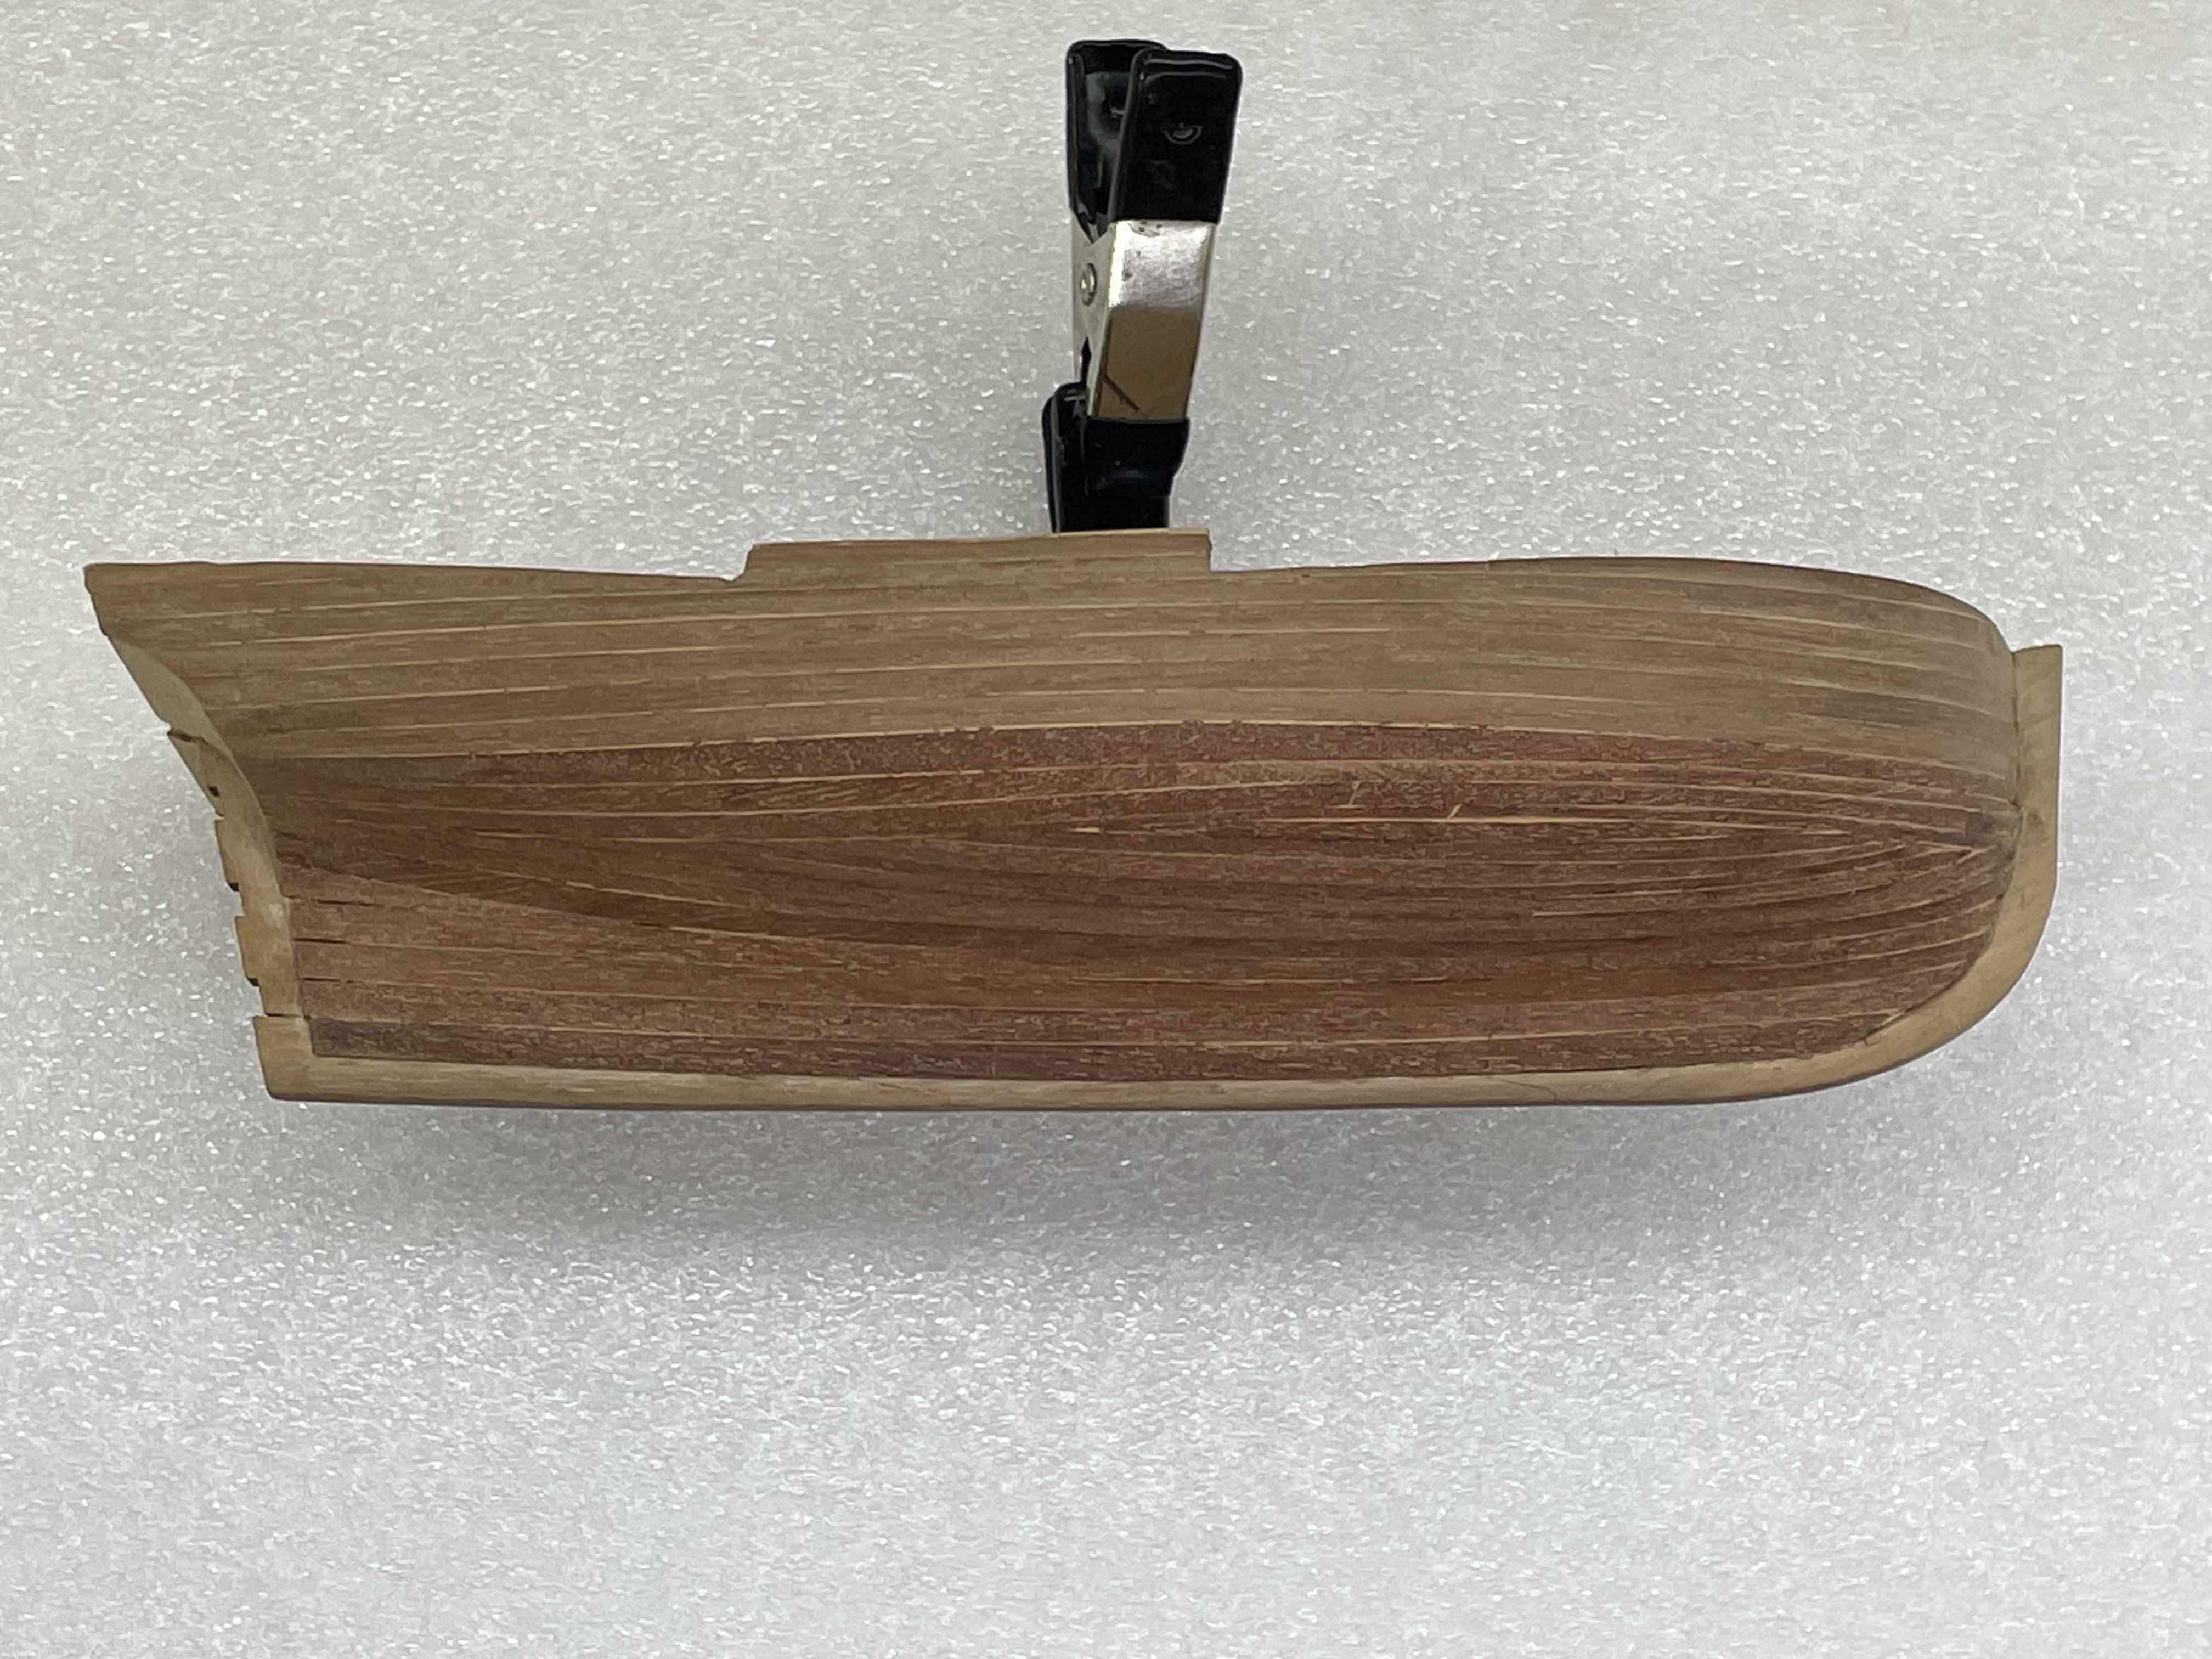
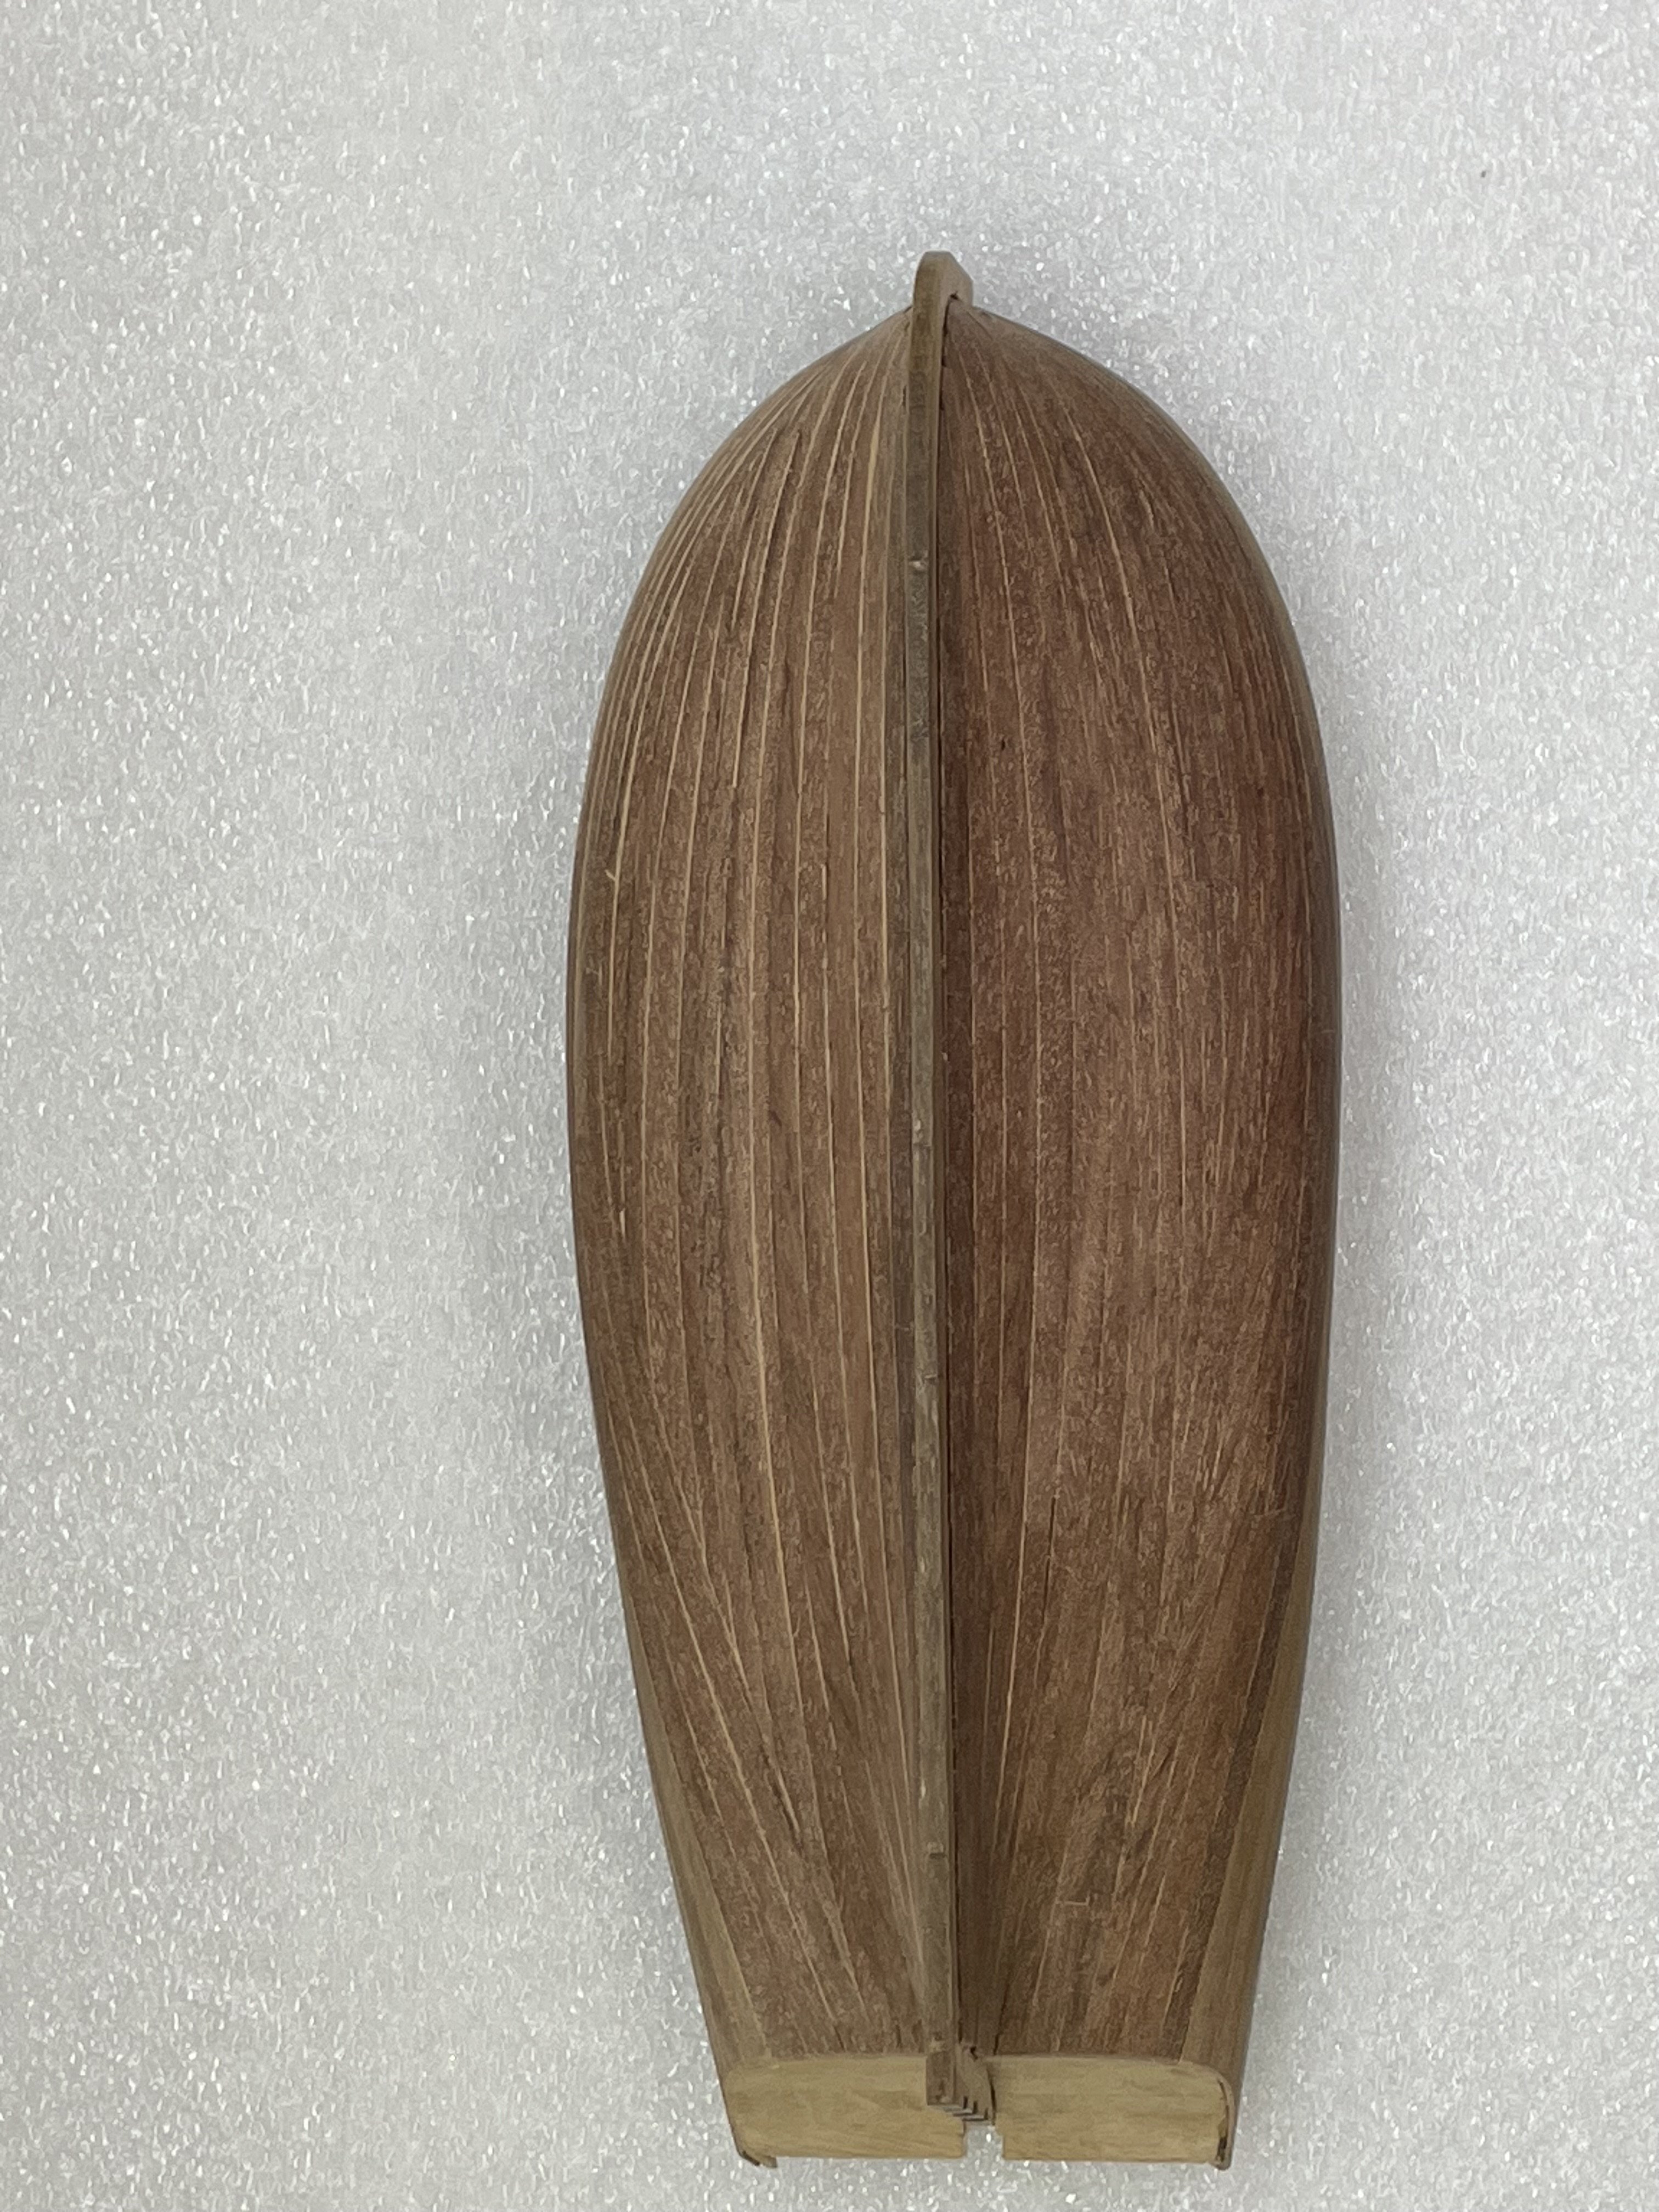
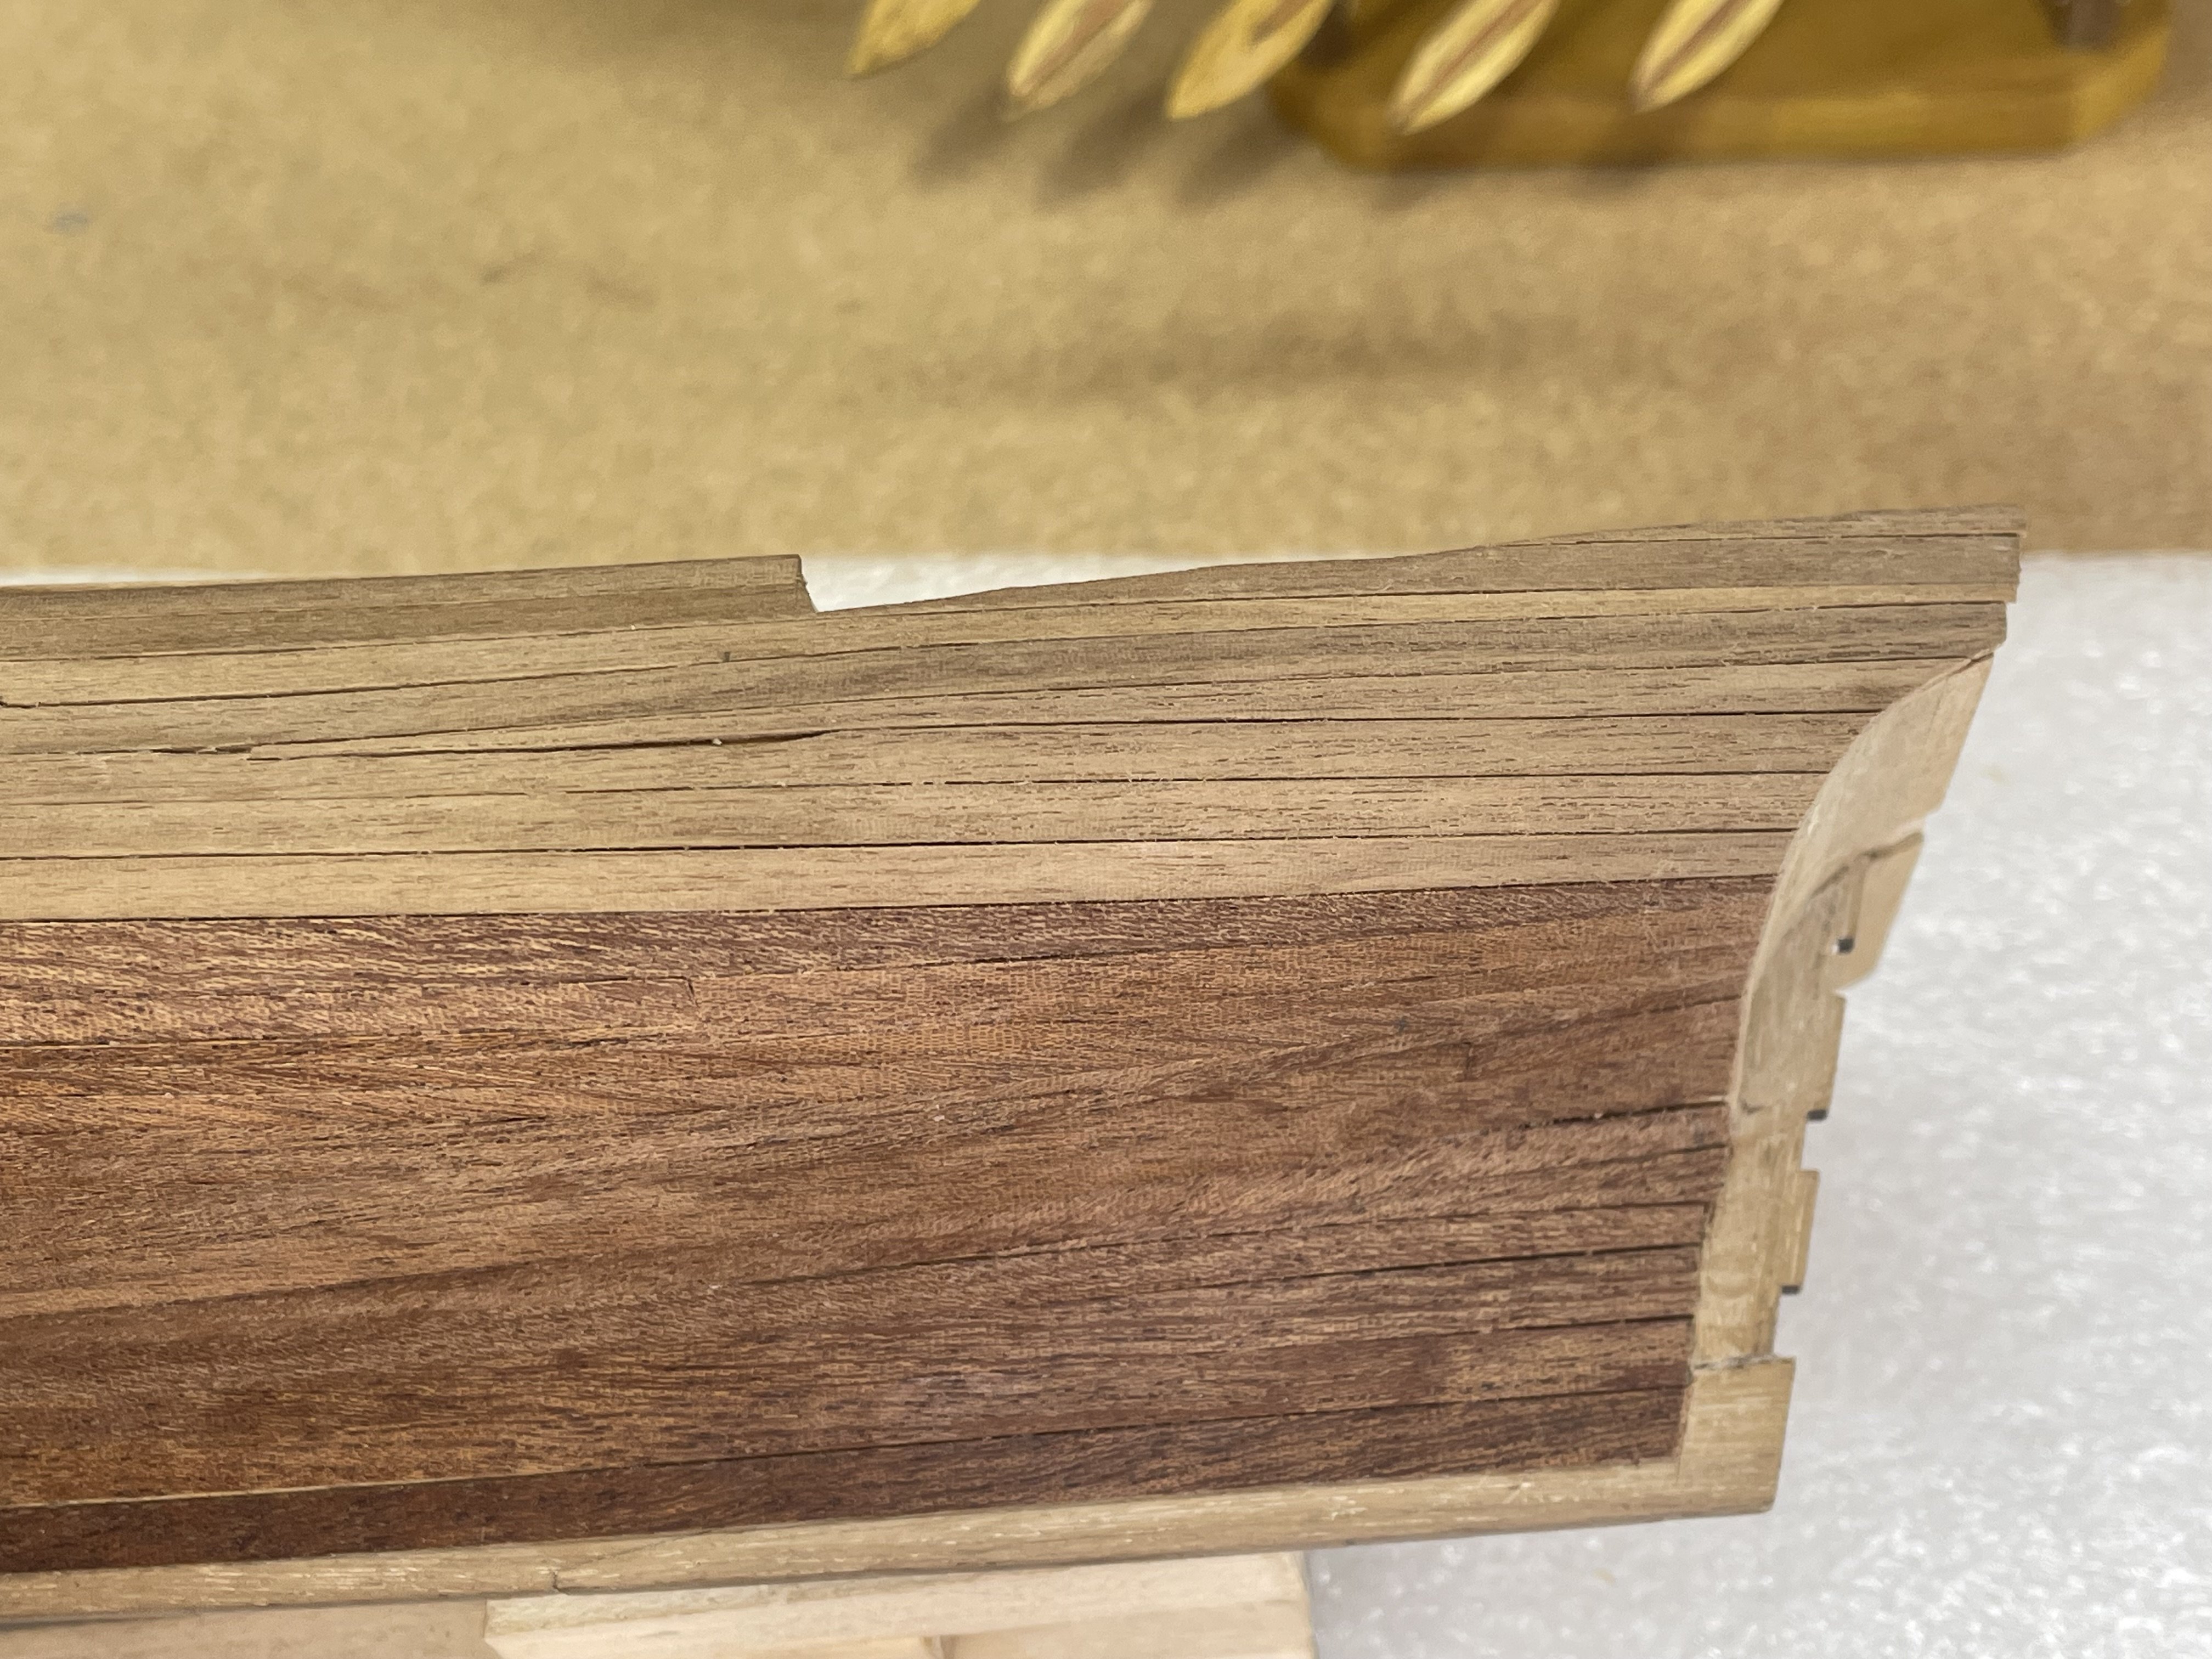
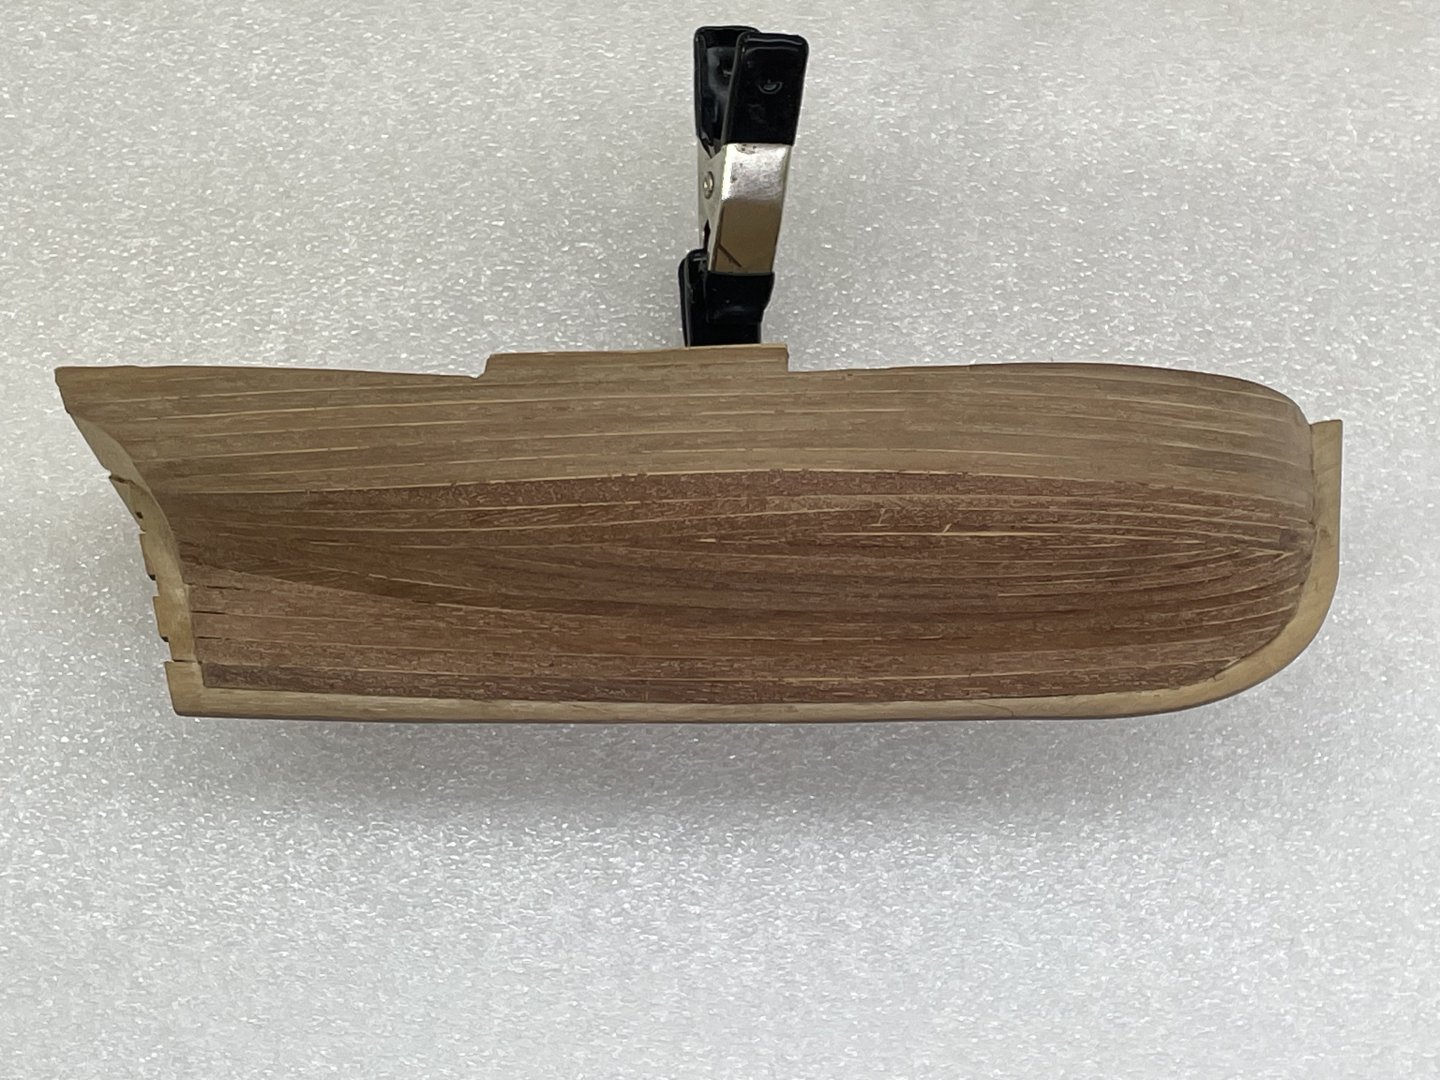
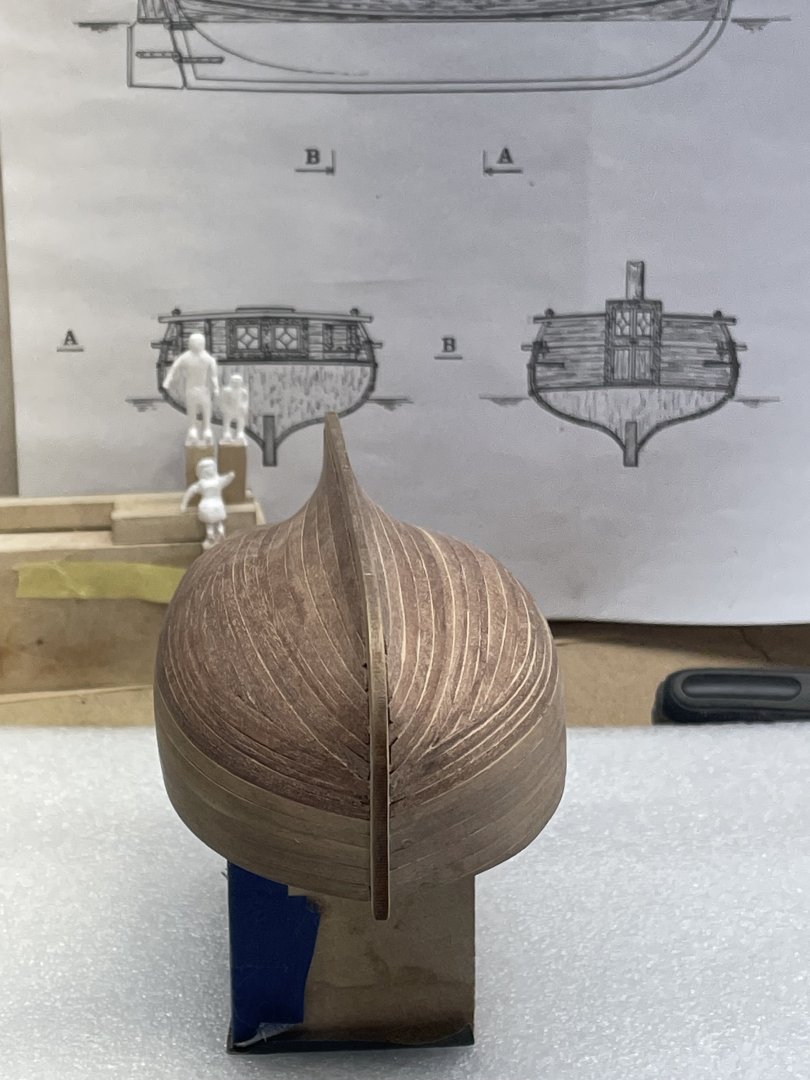
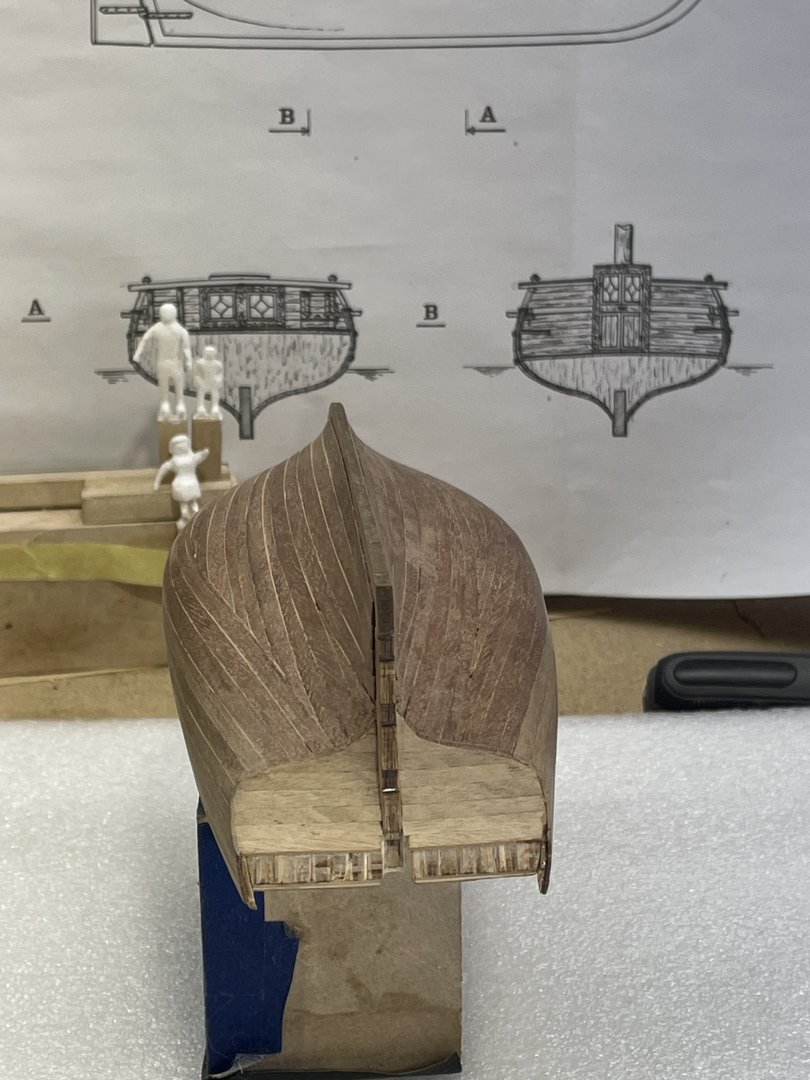
By grace I finished the port side planking. This little boat had me thinking I was planking a ball:-)

-
Everything started so good:-) Then the reality of my lack of knowledge set in. I think I’ve worked myself into a tight squeeze:-) Right now my only plan is to go thin at the bow. That’s probably going to end up as a weird shape in the middle. And I hope the edges aren’t up so far they can’t be sanded down. But until a better plan, or any plan comes to mind, I’m going to keep cutting and gluing.
-
Gretel is back on the bench. I’ve gain no more knowledge on planking , so I’m determined to learn by error. I’ve set down several times at it. Sometimes a plank gets glued and sometimes I walk away. Here’s where I’m at. Comments are welcome:-) I do measure, but I don’t know why, I just guess at the taper size. I’m only doing the port side now, just in case. Maybe one side will look ok.