HOLIDAY DONATION DRIVE - SUPPORT MSW - DO YOUR PART TO KEEP THIS GREAT FORUM GOING! (Only 72 donations so far out of 49,000 members - Can we at least get 100? C'mon guys!)
×


Bryan Woods
-
Posts
551 -
Joined
-
Last visited
Content Type
Profiles
Forums
Gallery
Events
Everything posted by Bryan Woods
-
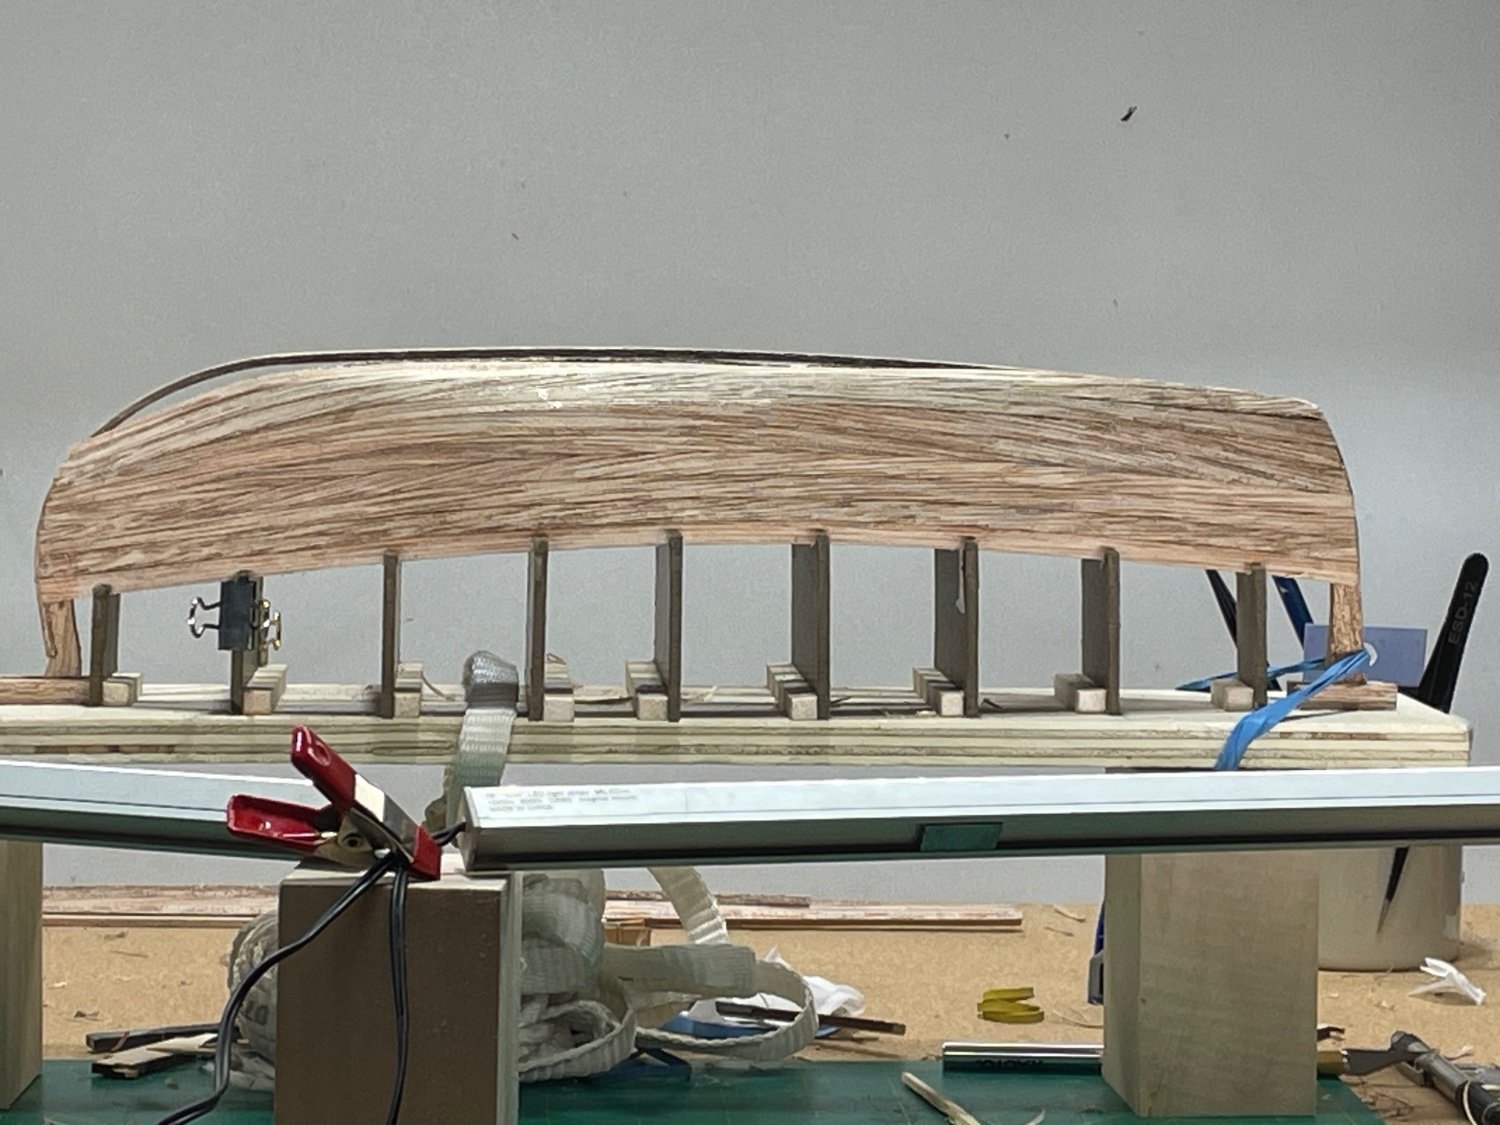
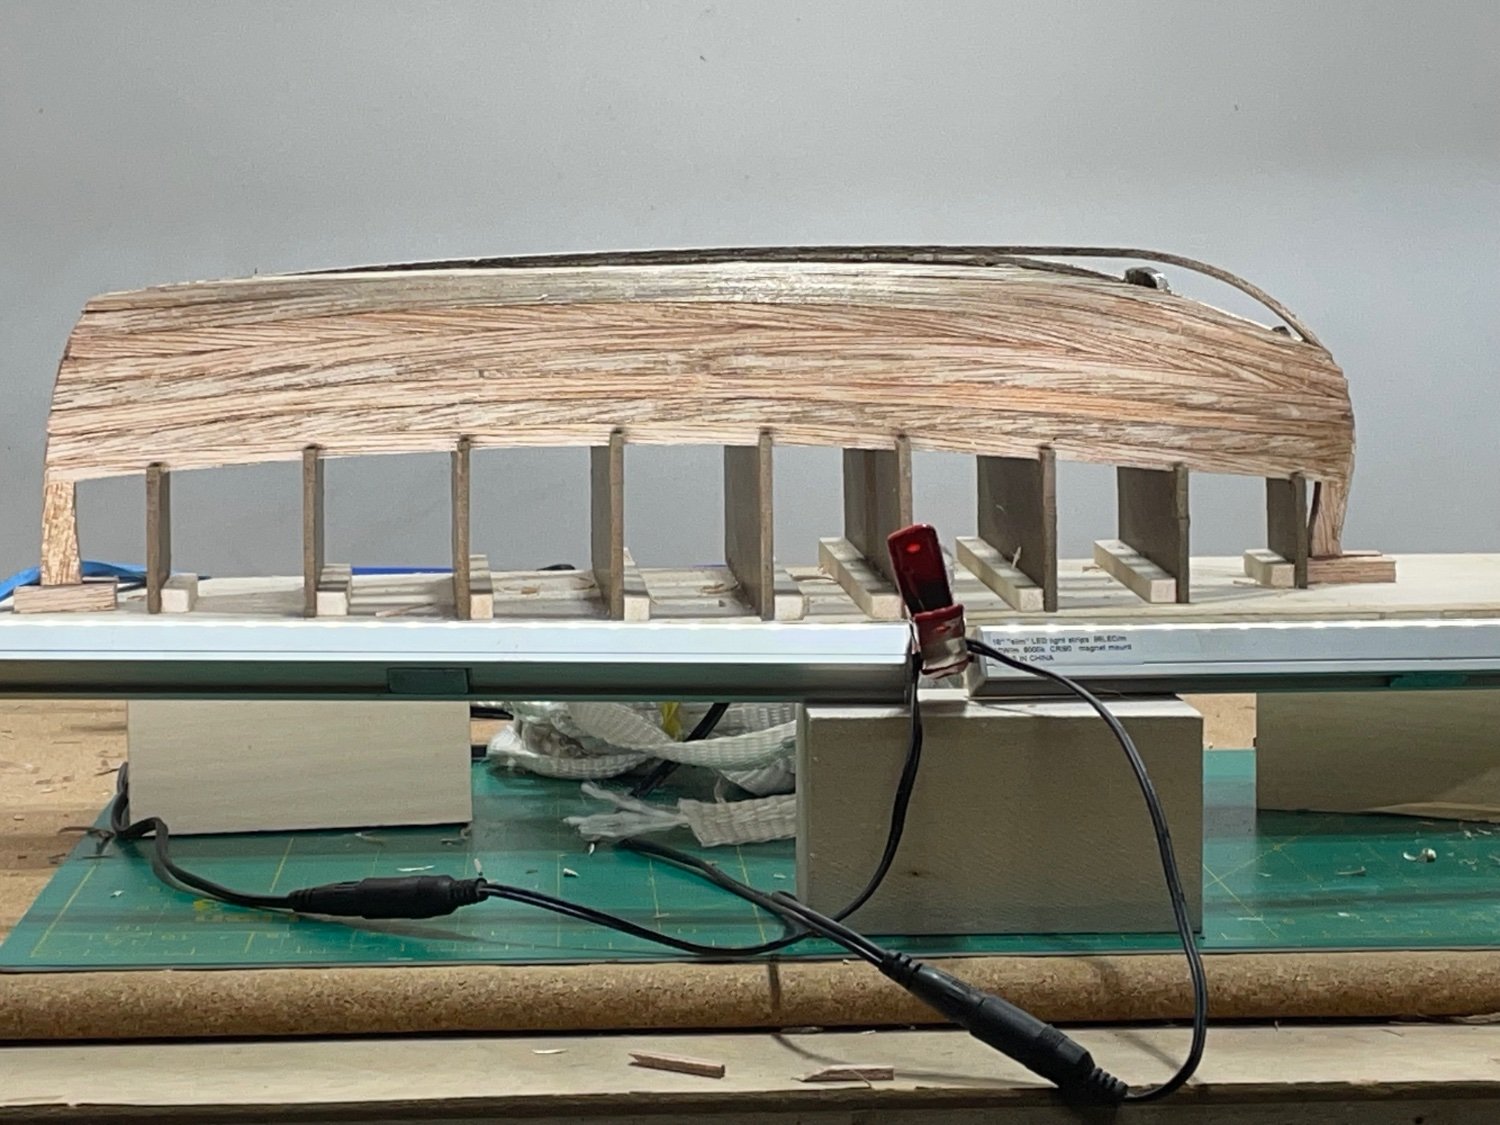
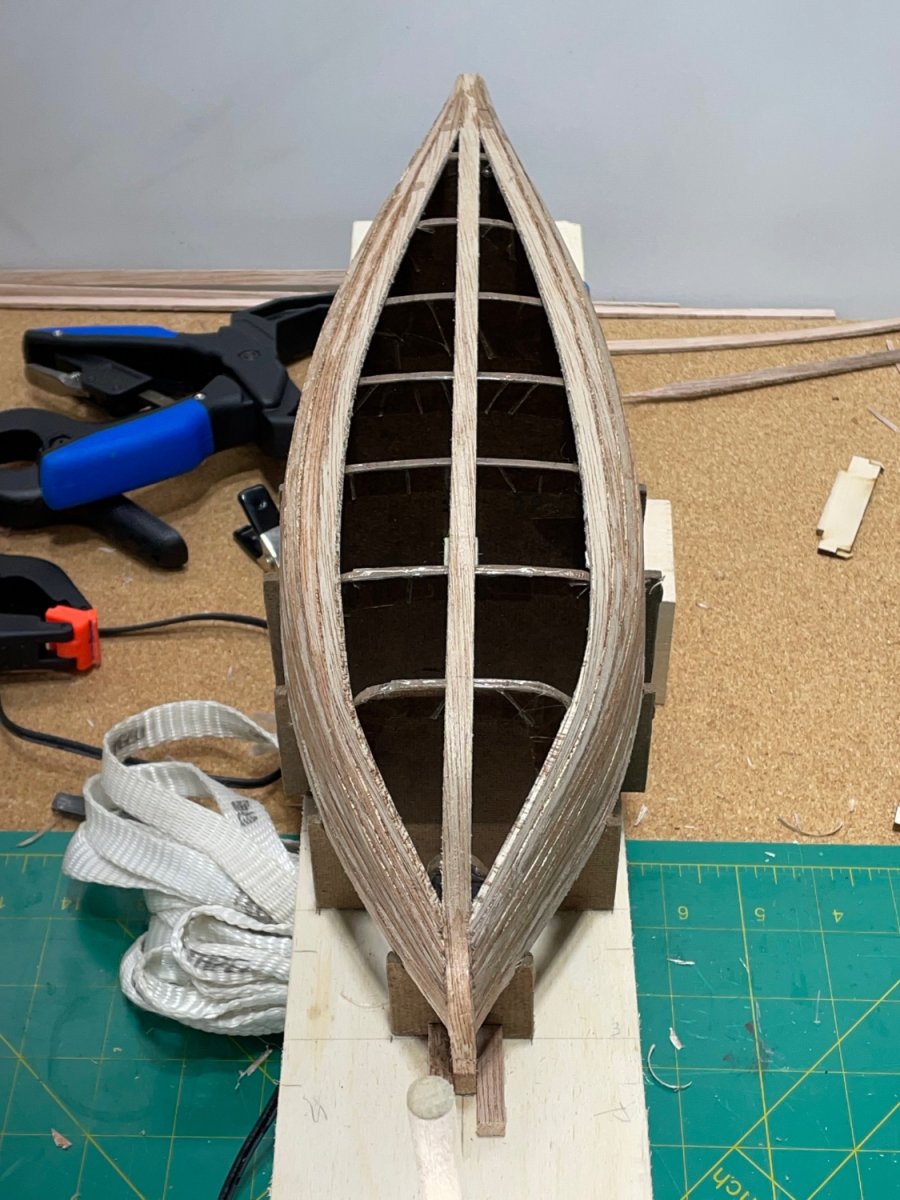
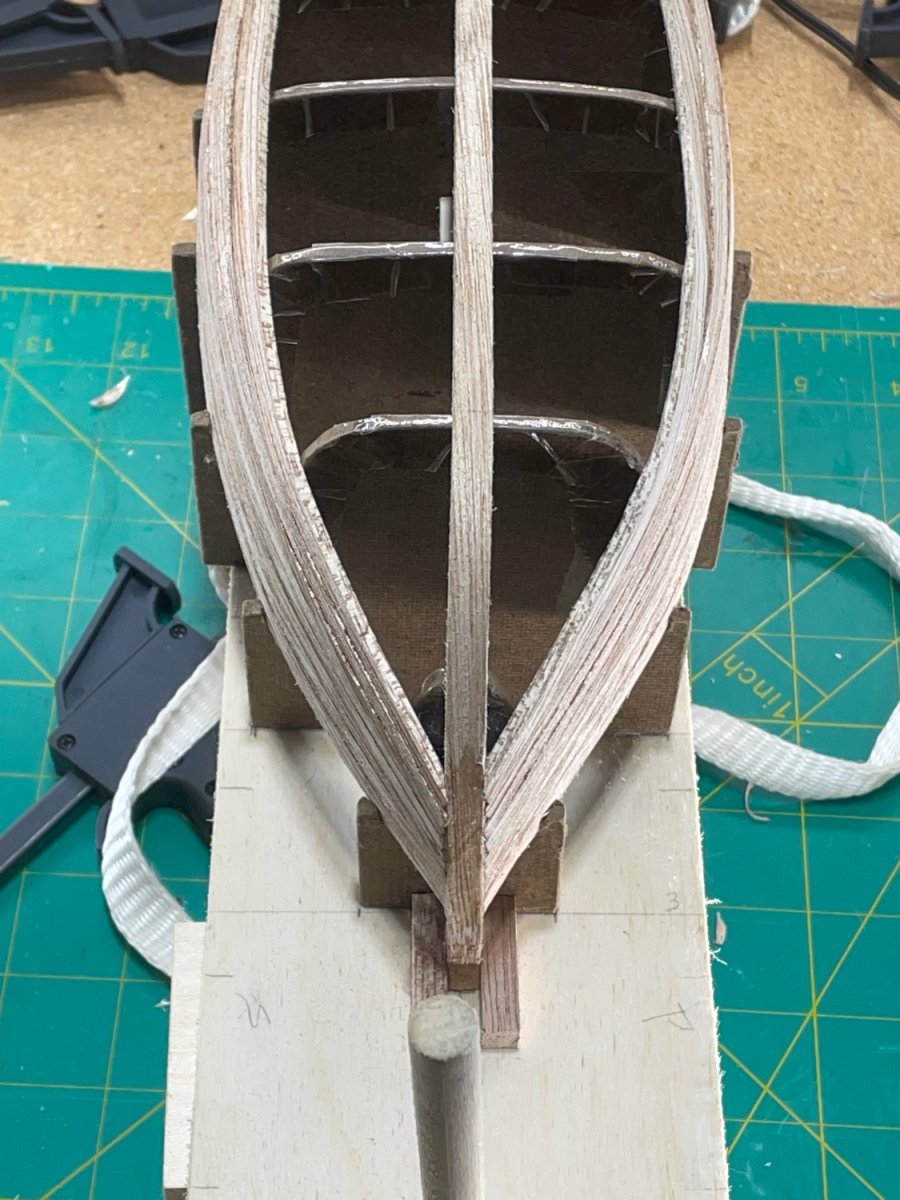
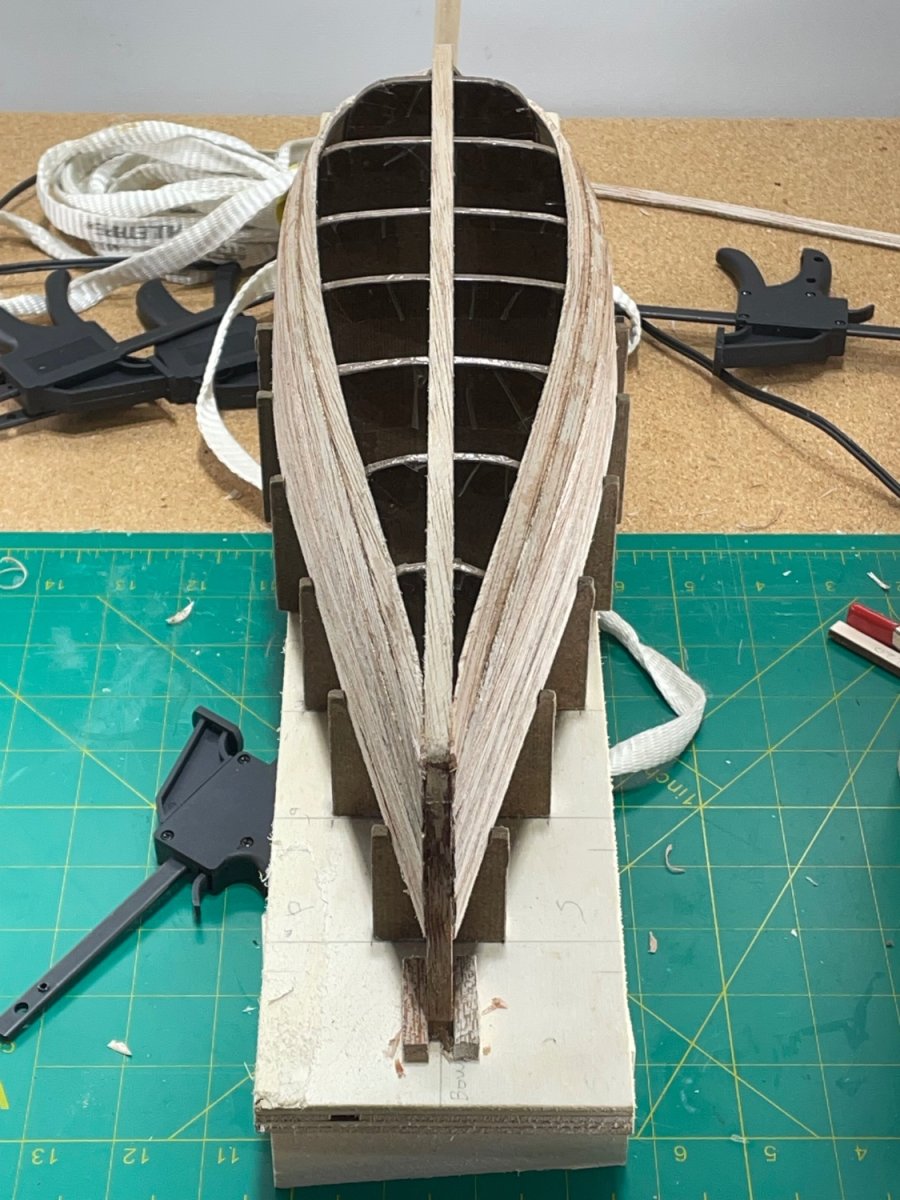
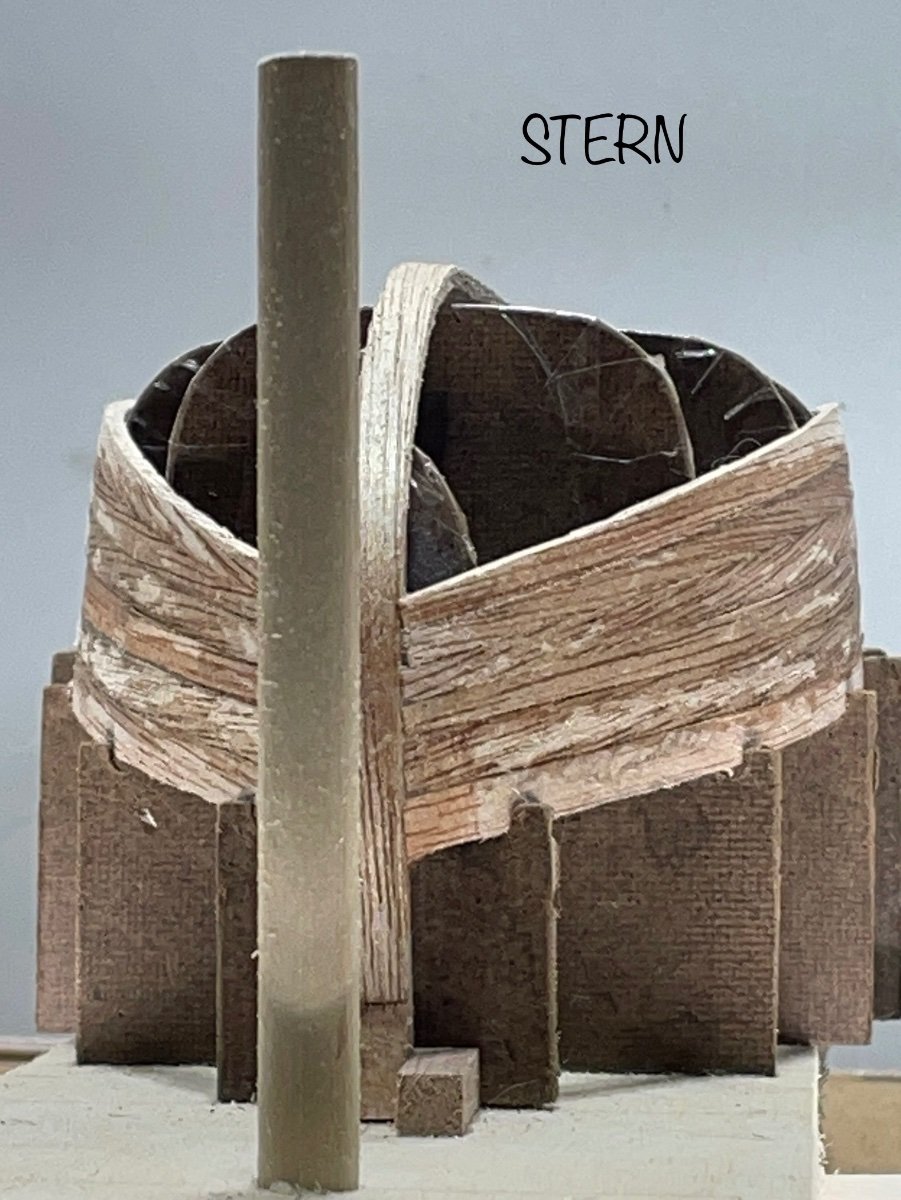
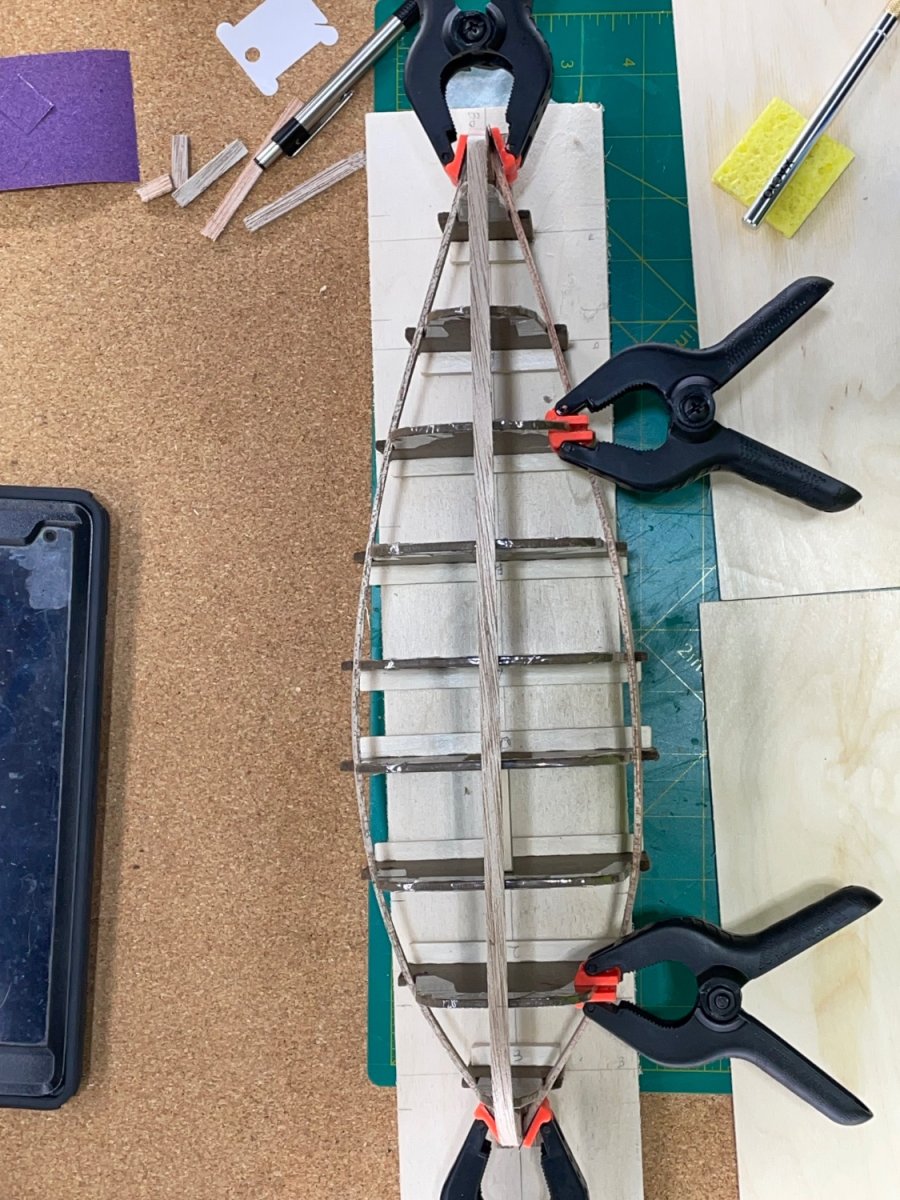
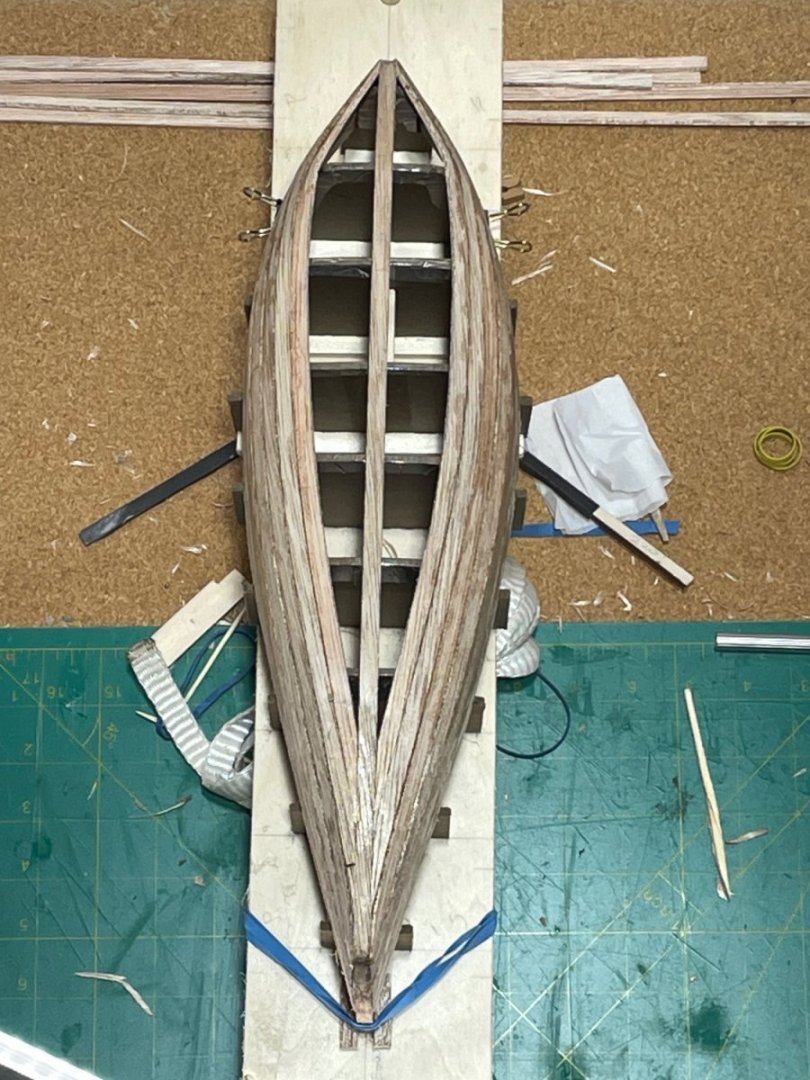
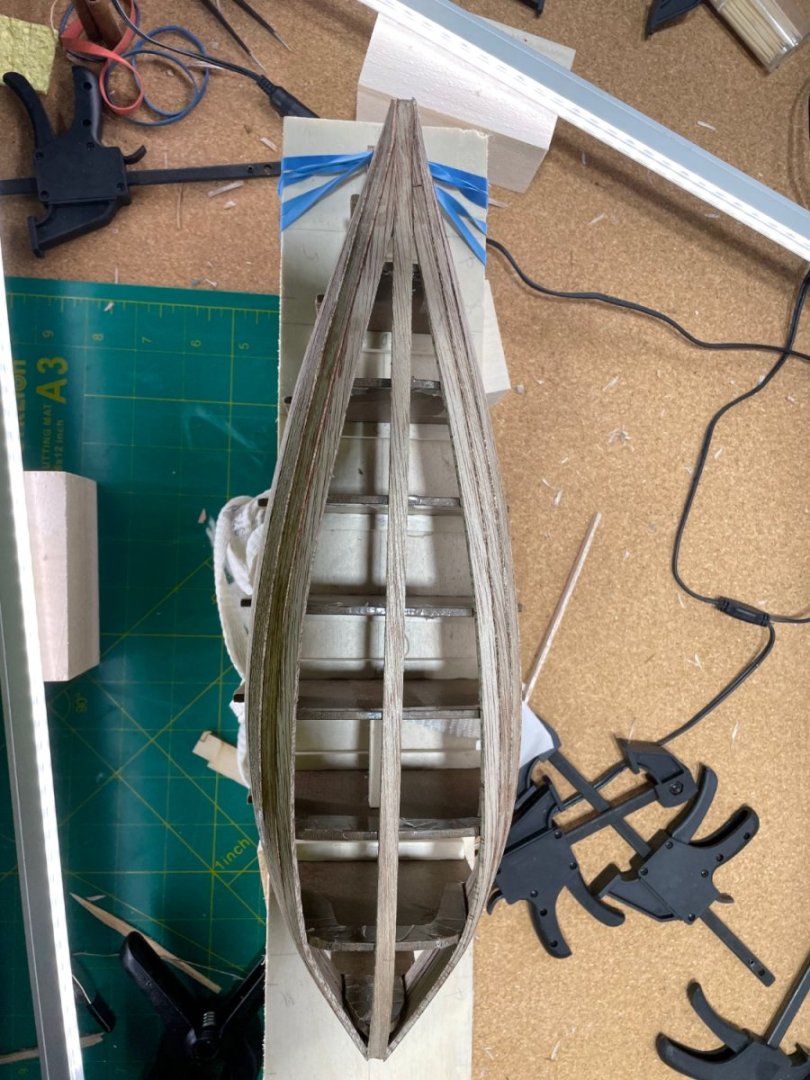
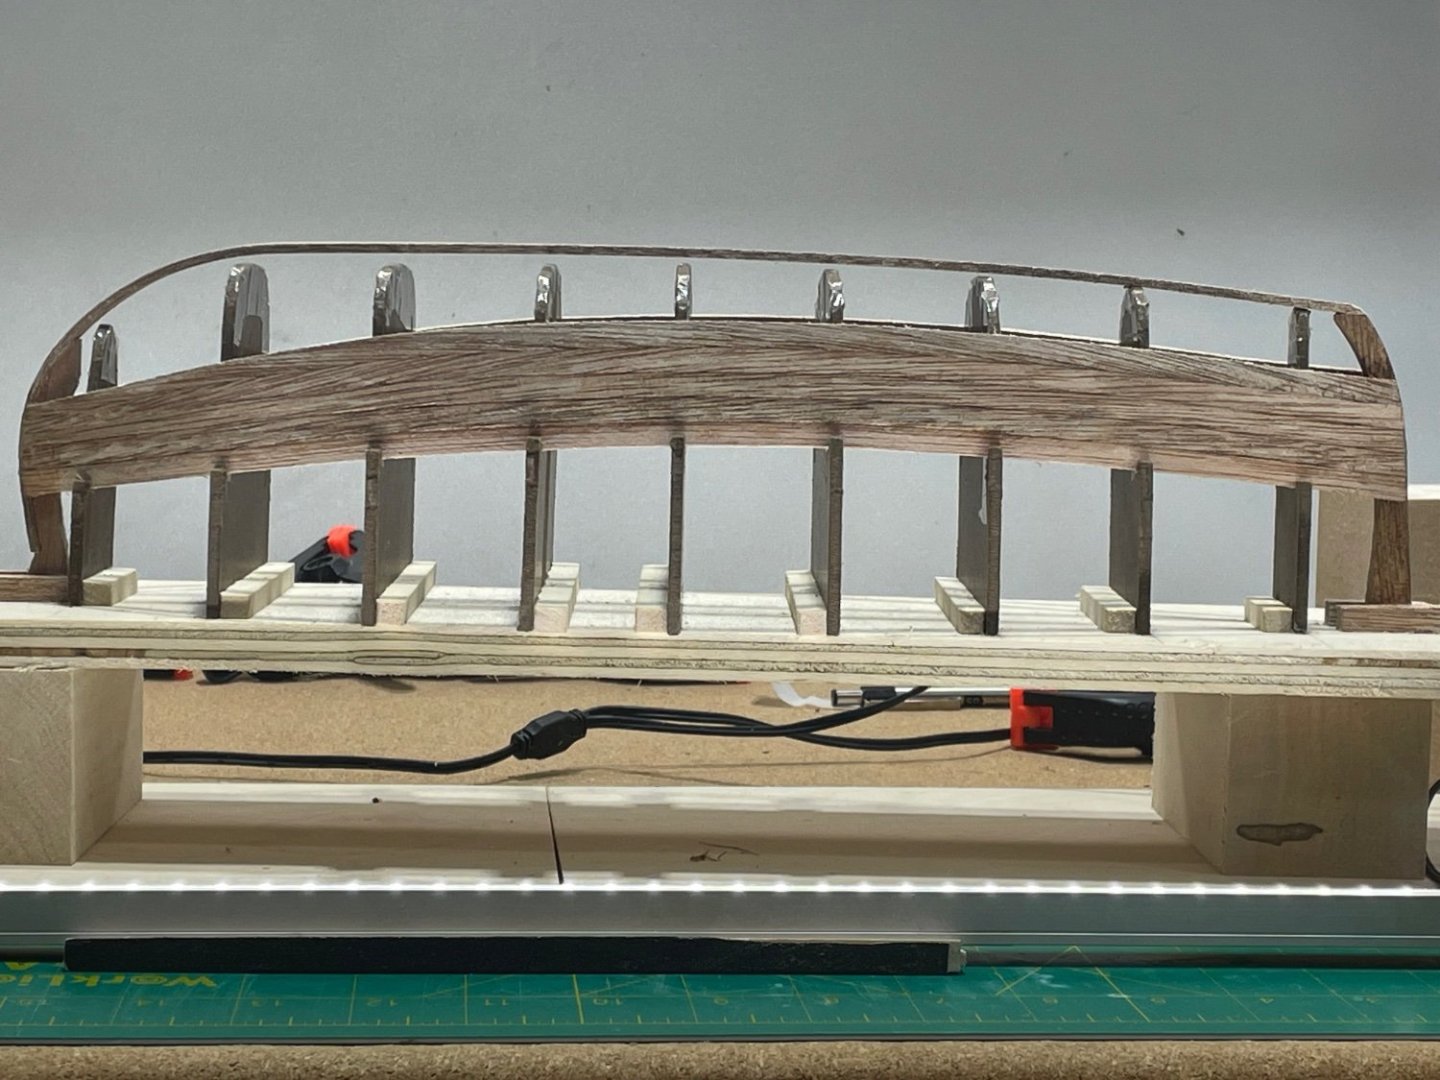
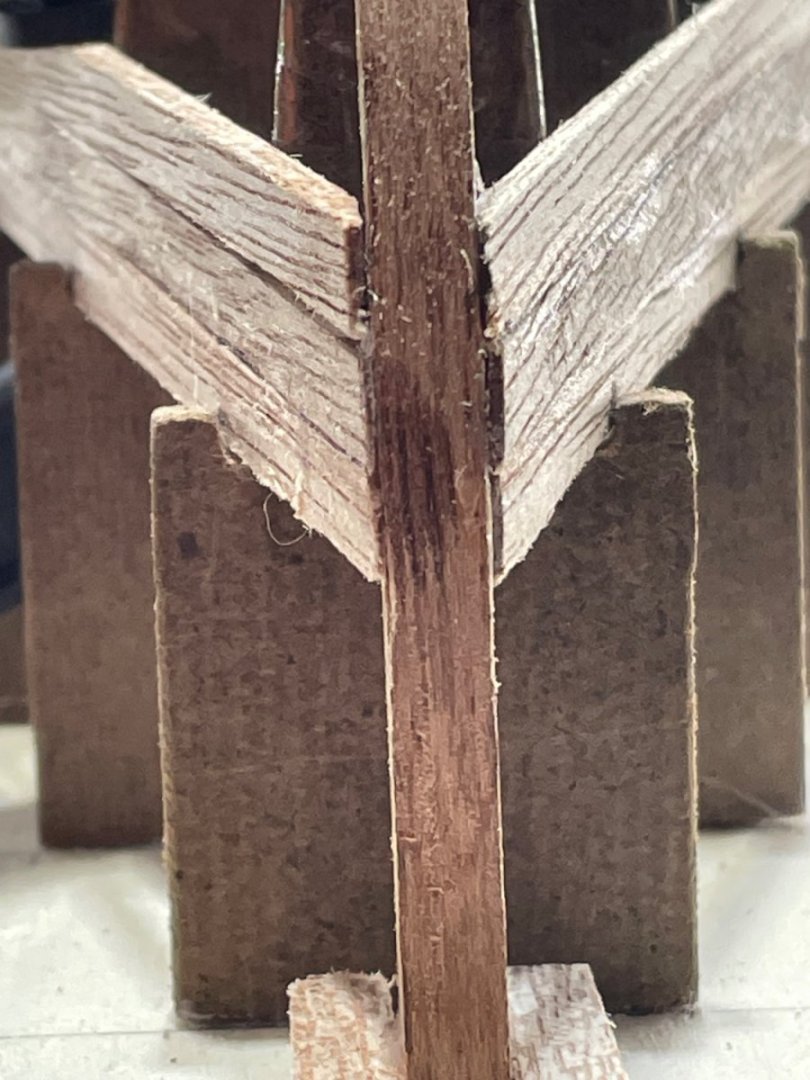
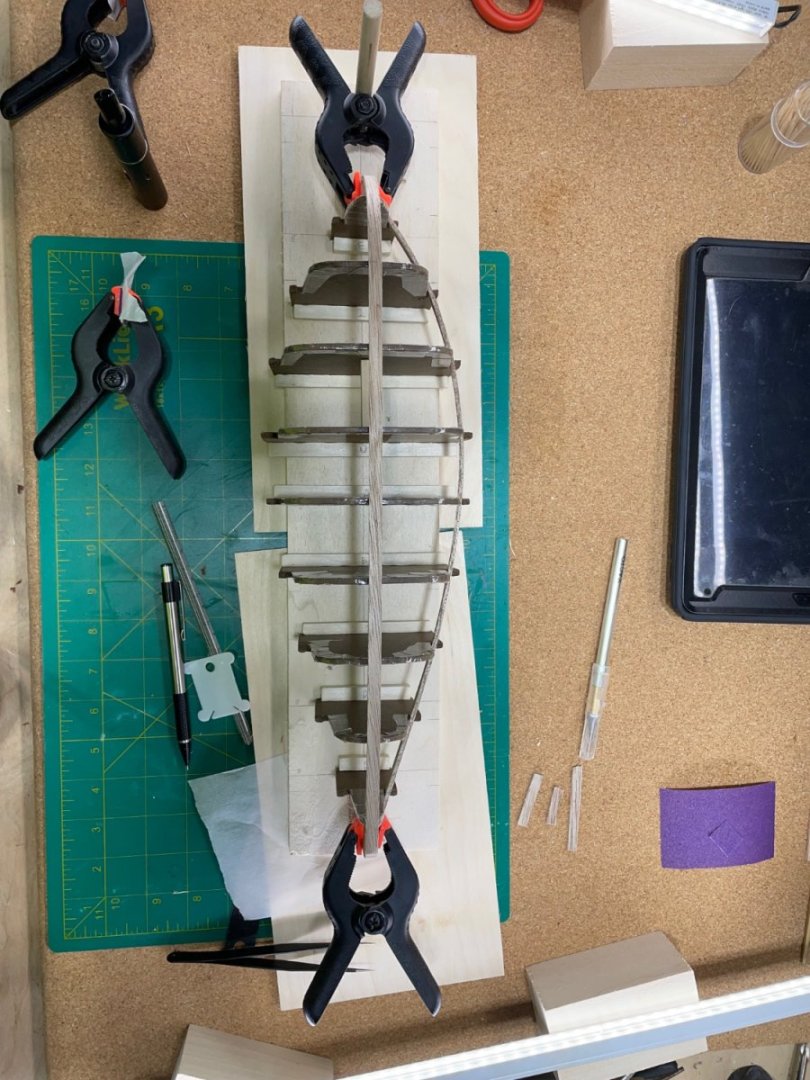
 This morning planks 10 were ready to glue. First I glued the stern ends to the keel. Then to weld the bow ends and side seam together with thin CA. I did have a bit of a morning distraction, when a shipyard visitor introduced herself to me as I got started. If you want to hear about that, you can go to Visitors at the shipyard


- 134 replies
-
- 6
-

-
- sea of galilee boat
- SE Miller
- (and 1 more)
-
Thank you so much Louie for commenting. The wood is mahogany. It’s soft and easy to work with. I did cover the edges of the strongback with packing tape. When the CA does dry on it, I can wiggle the frame and break the hold fairly easy.
- 134 replies
-
- 2
-
-
- sea of galilee boat
- SE Miller
- (and 1 more)
-
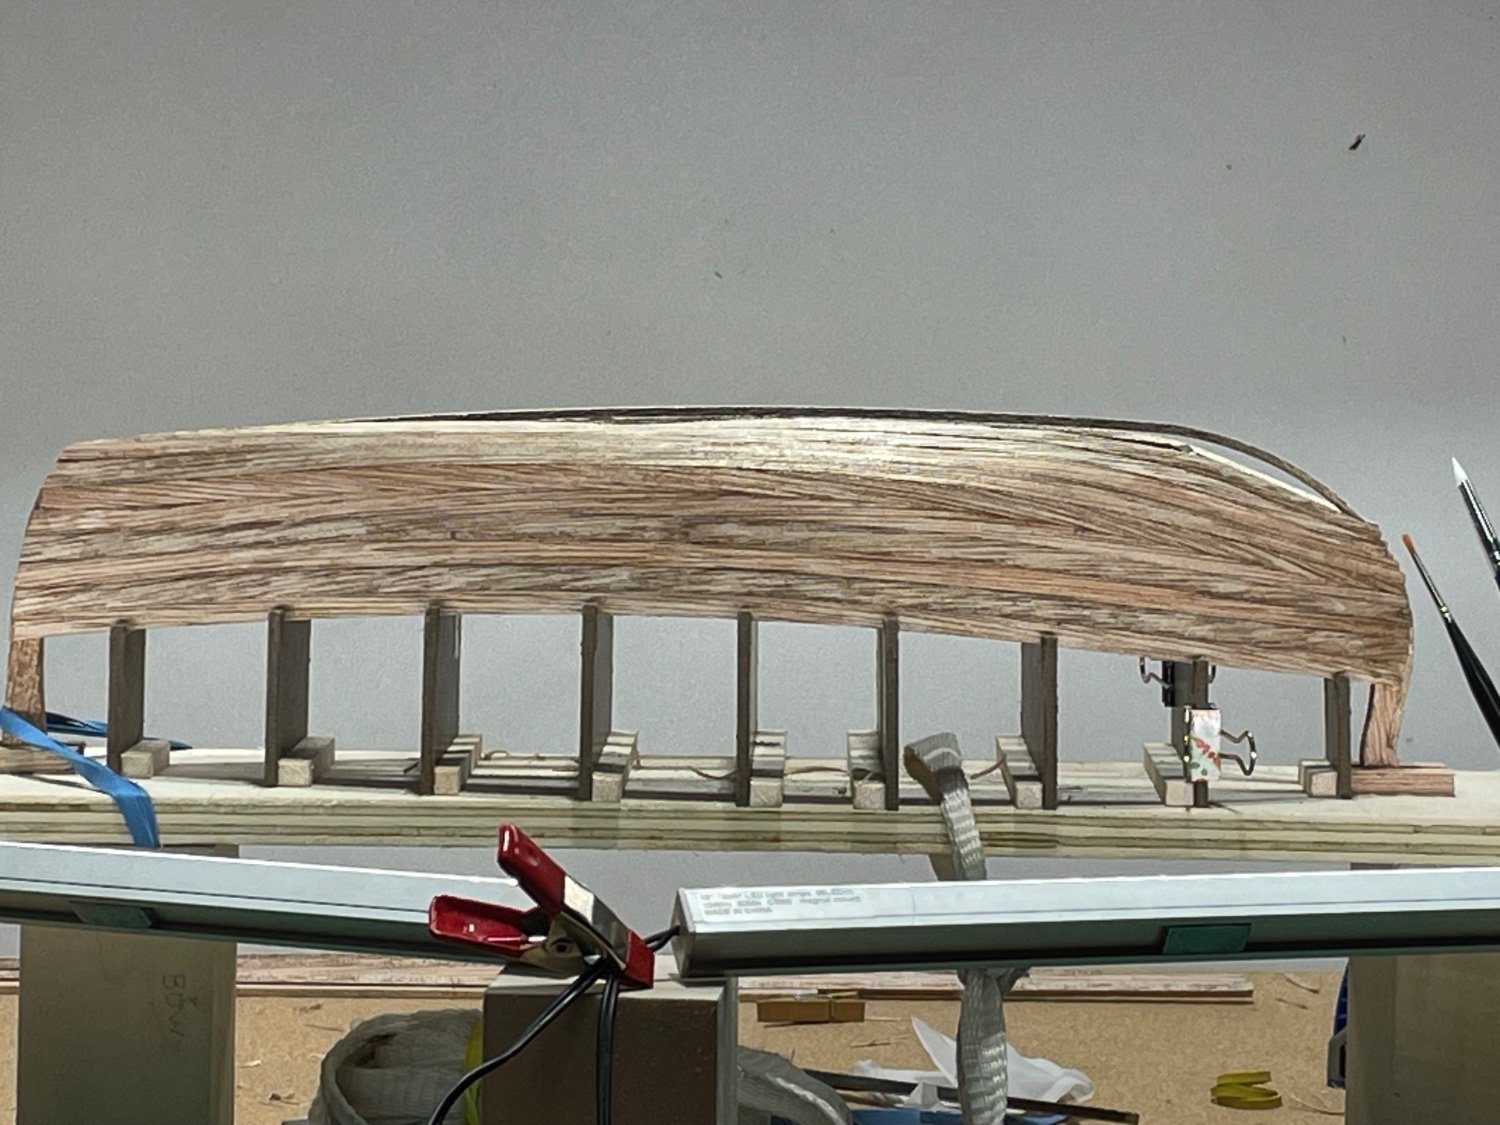
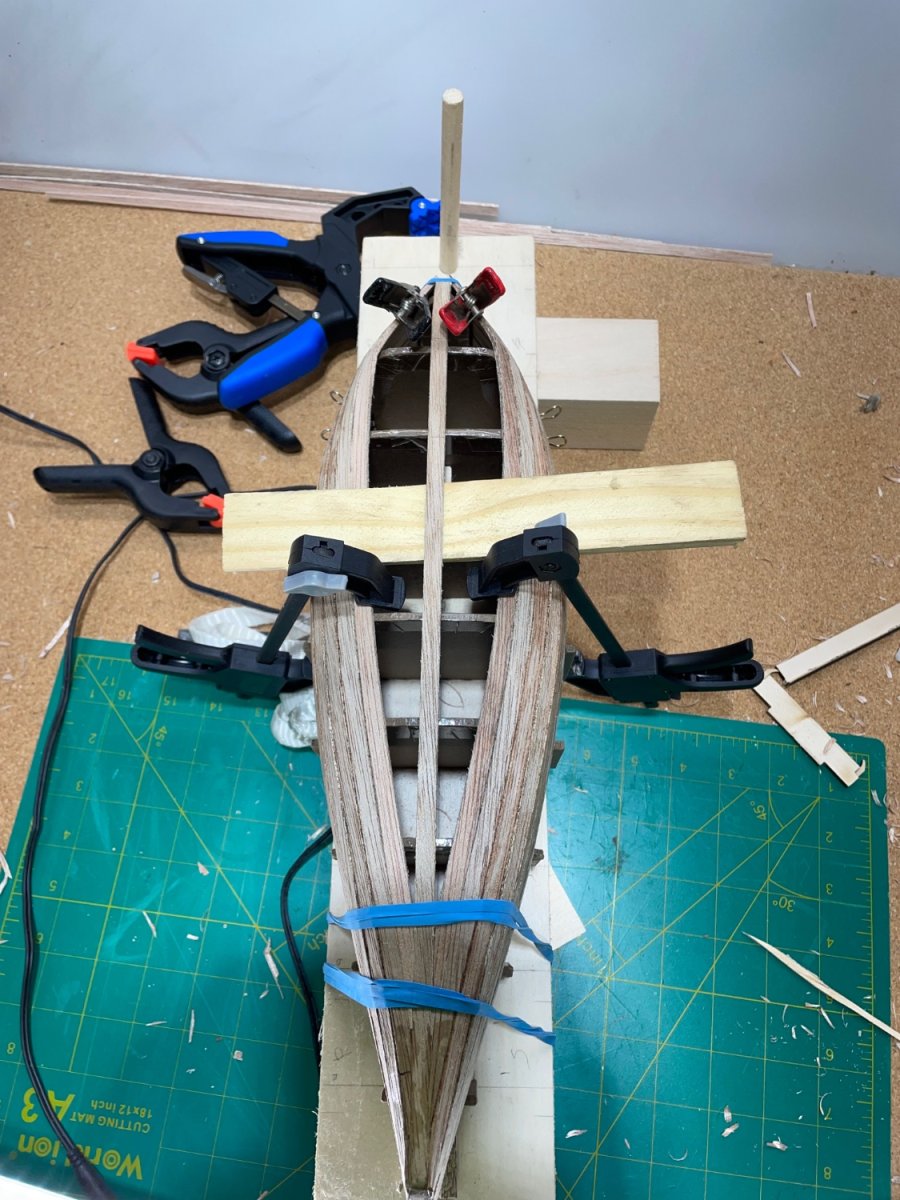
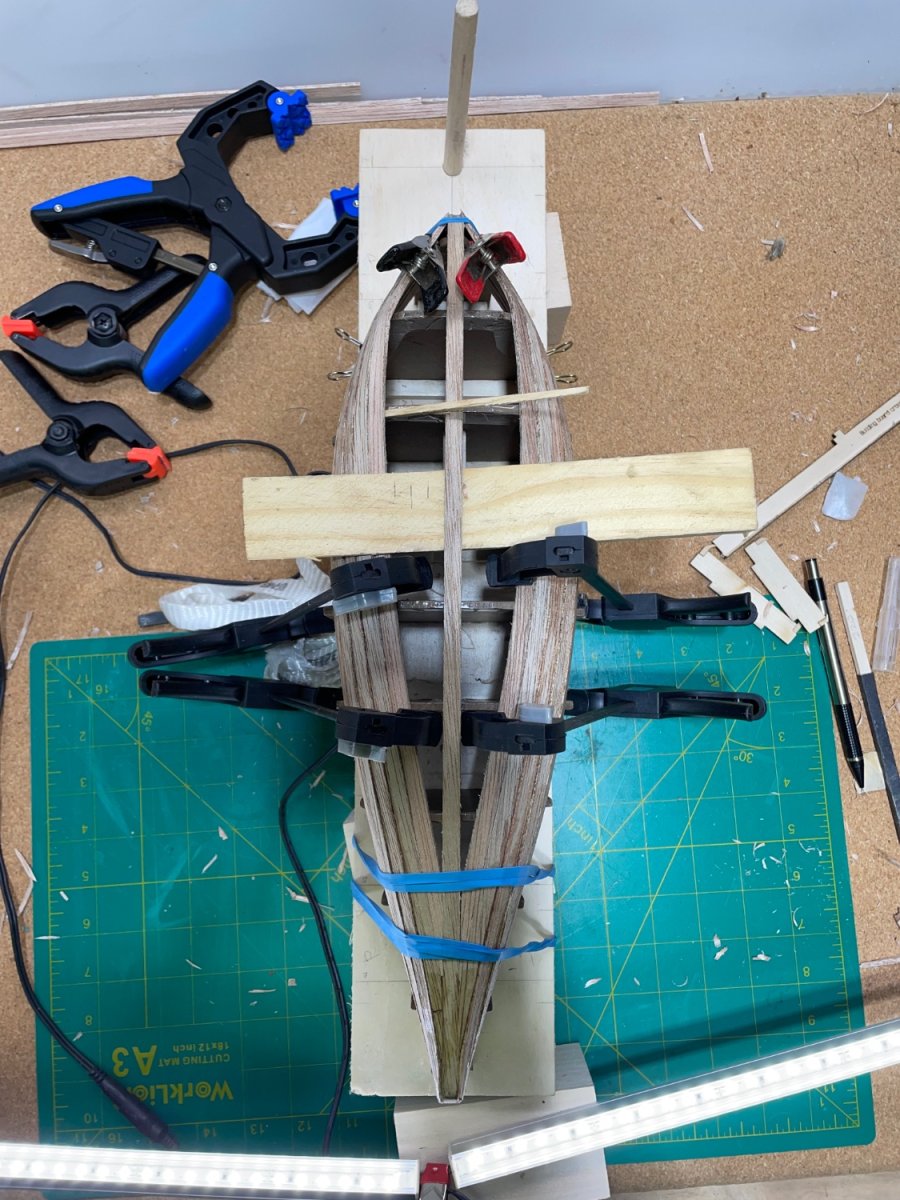
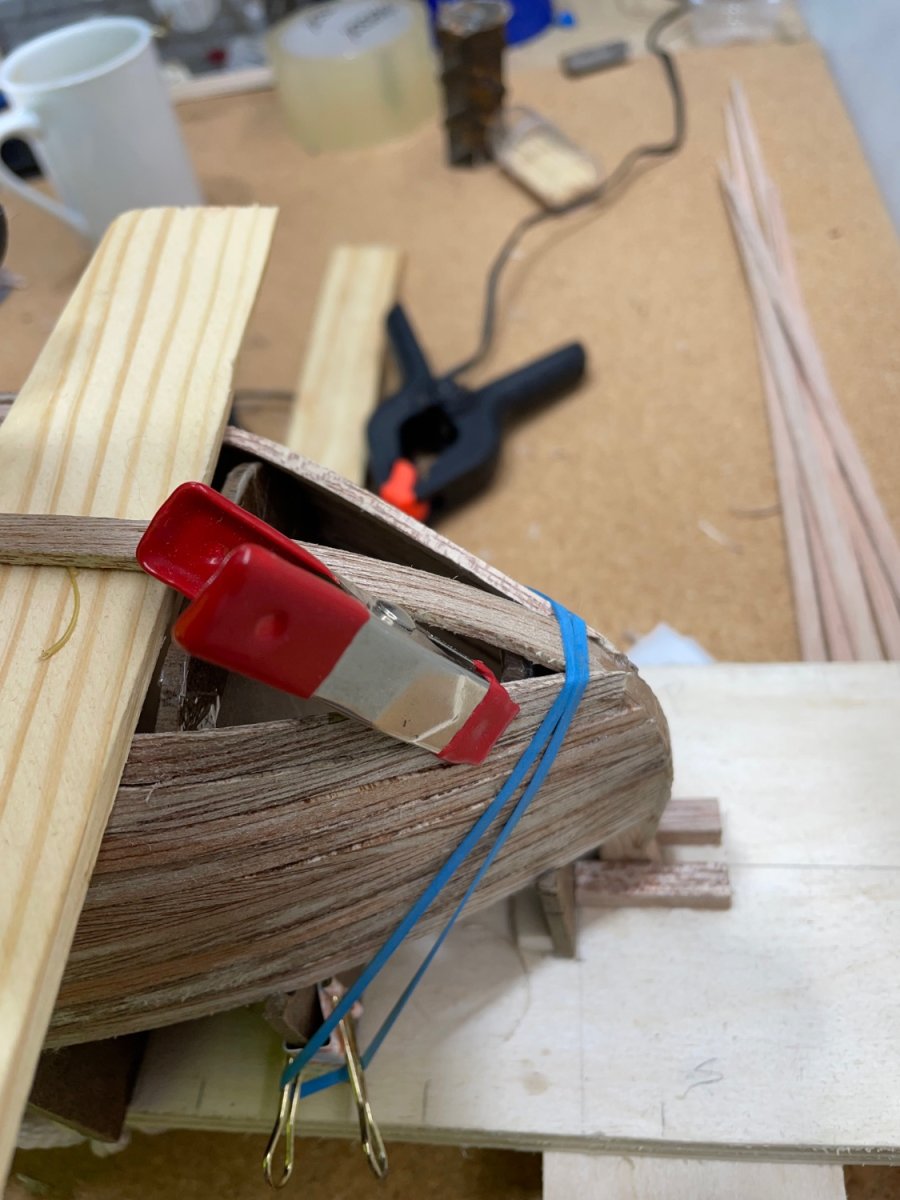
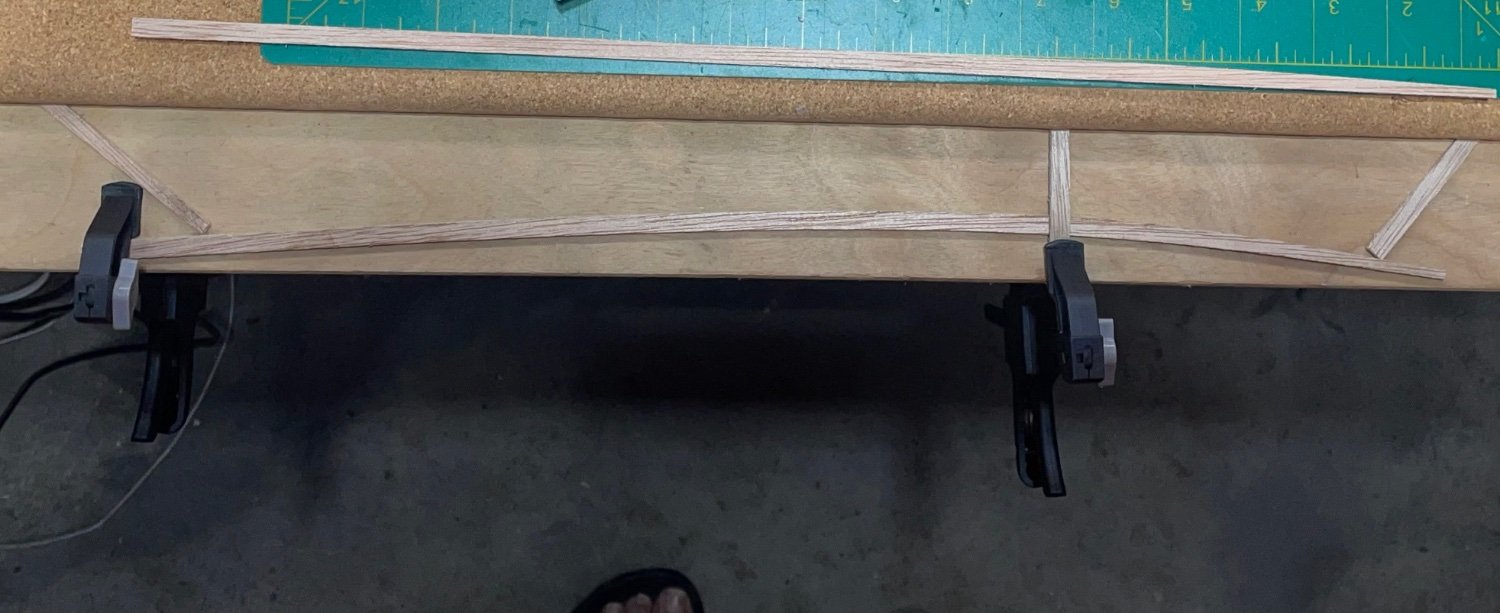
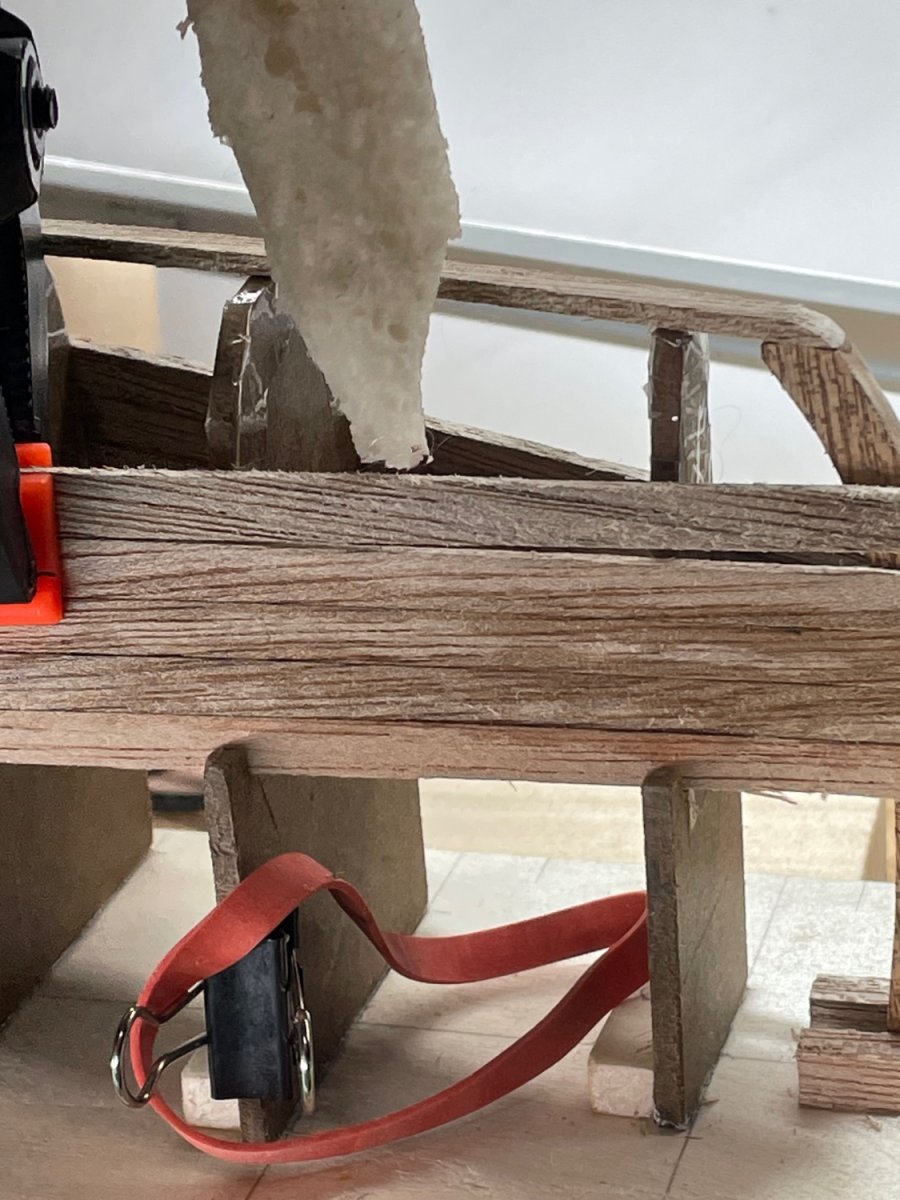
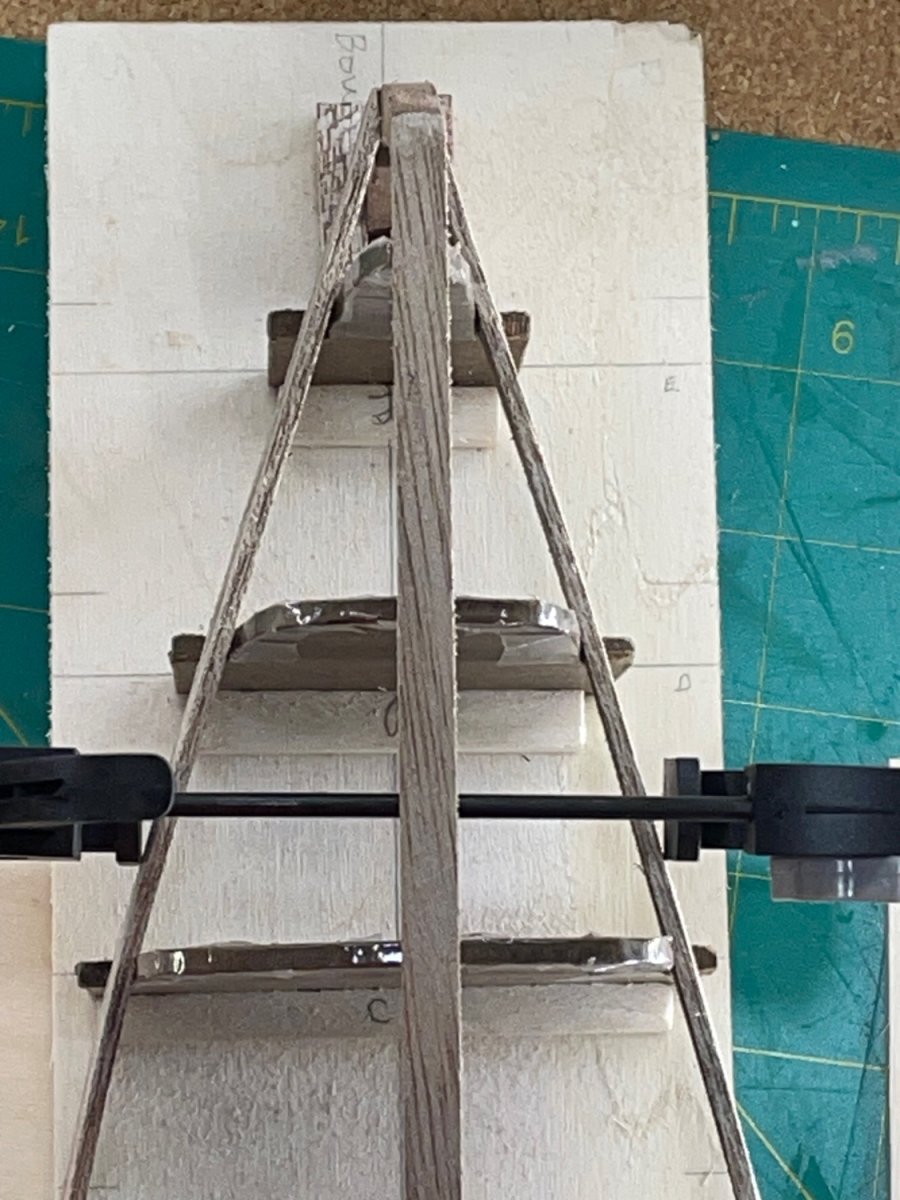
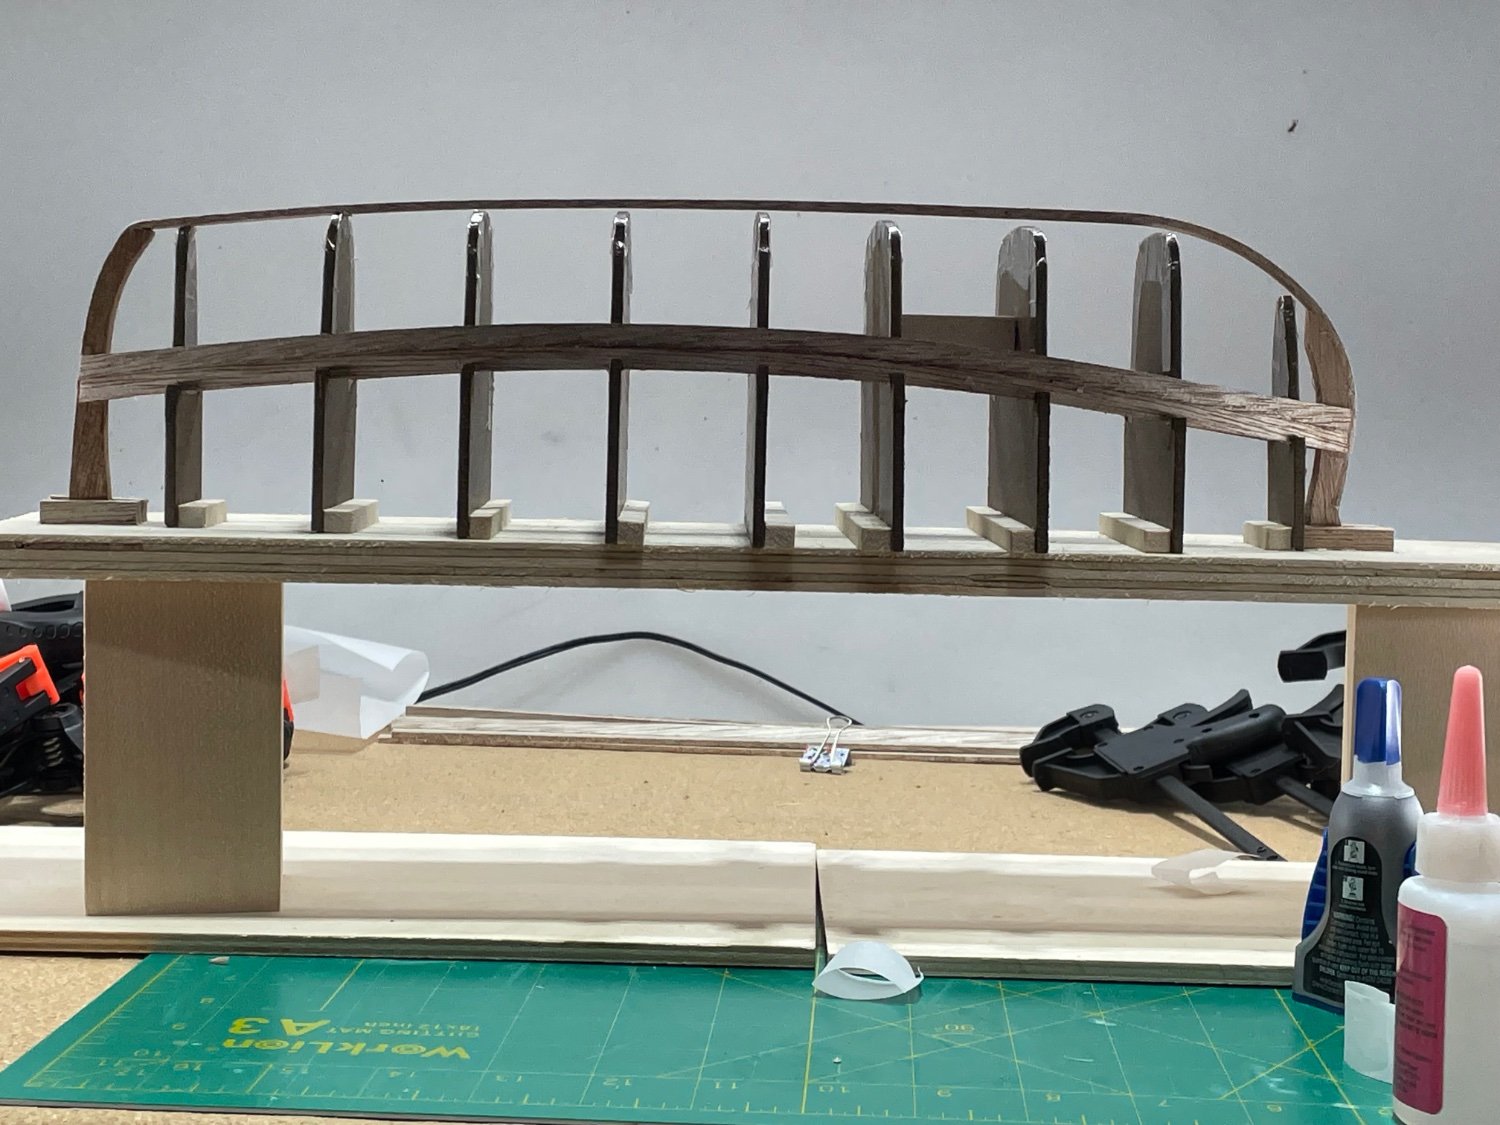
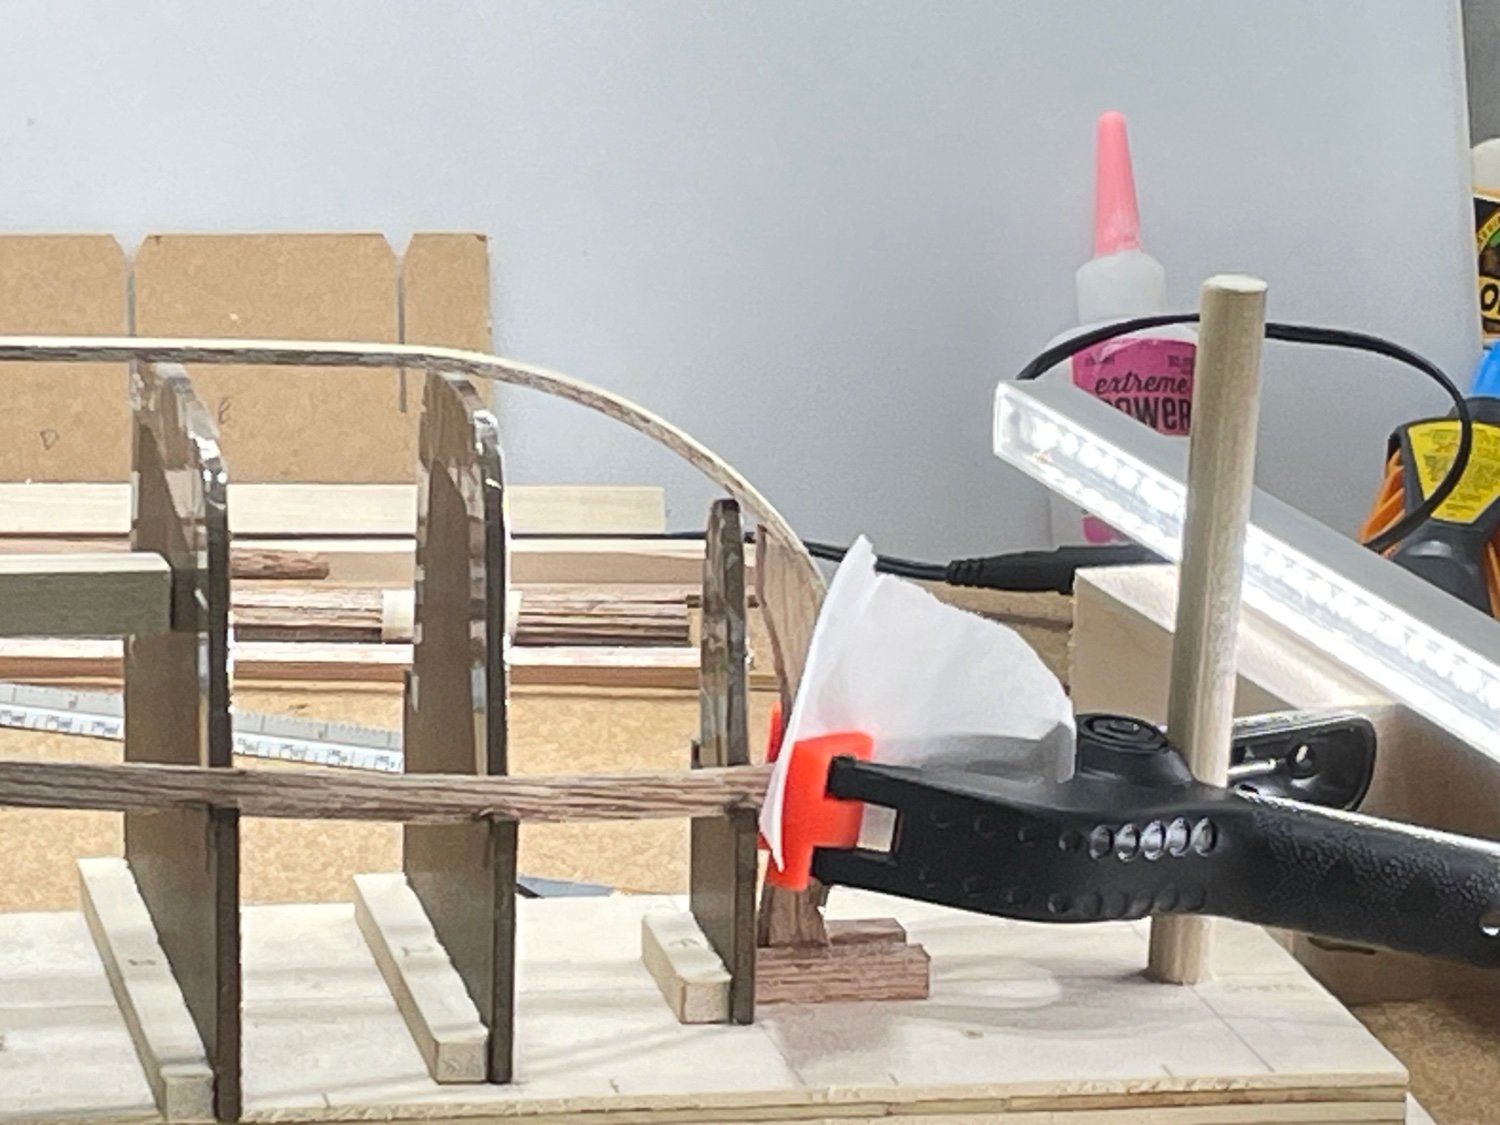
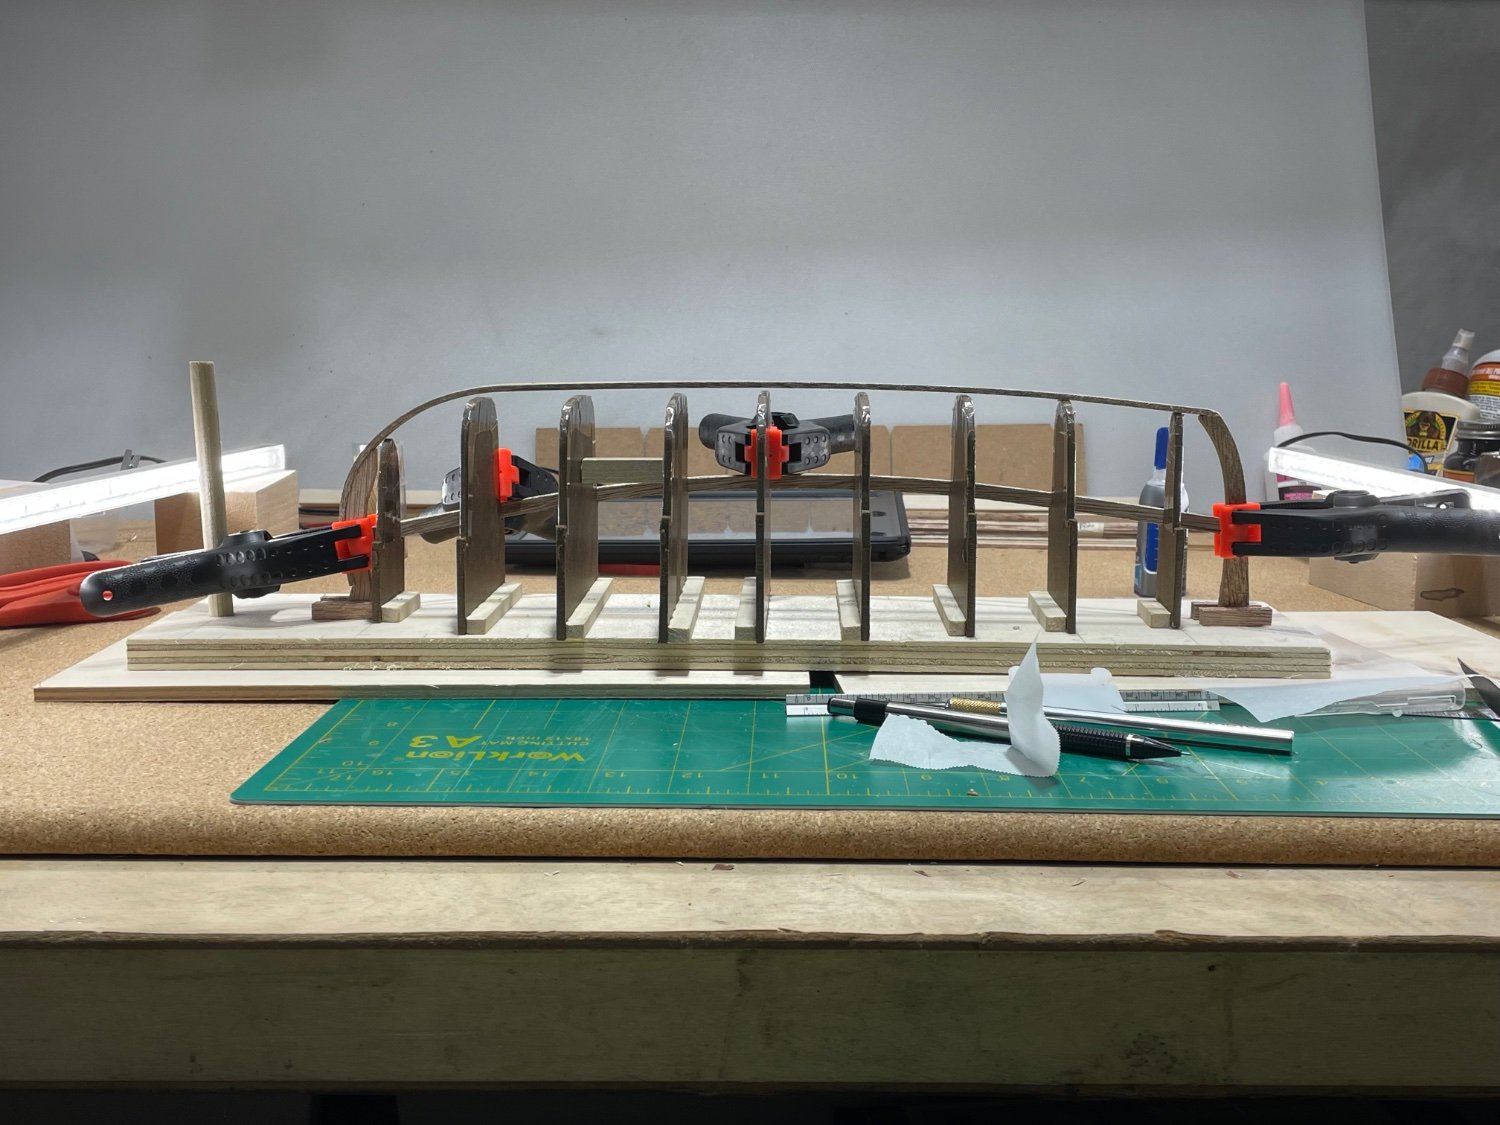
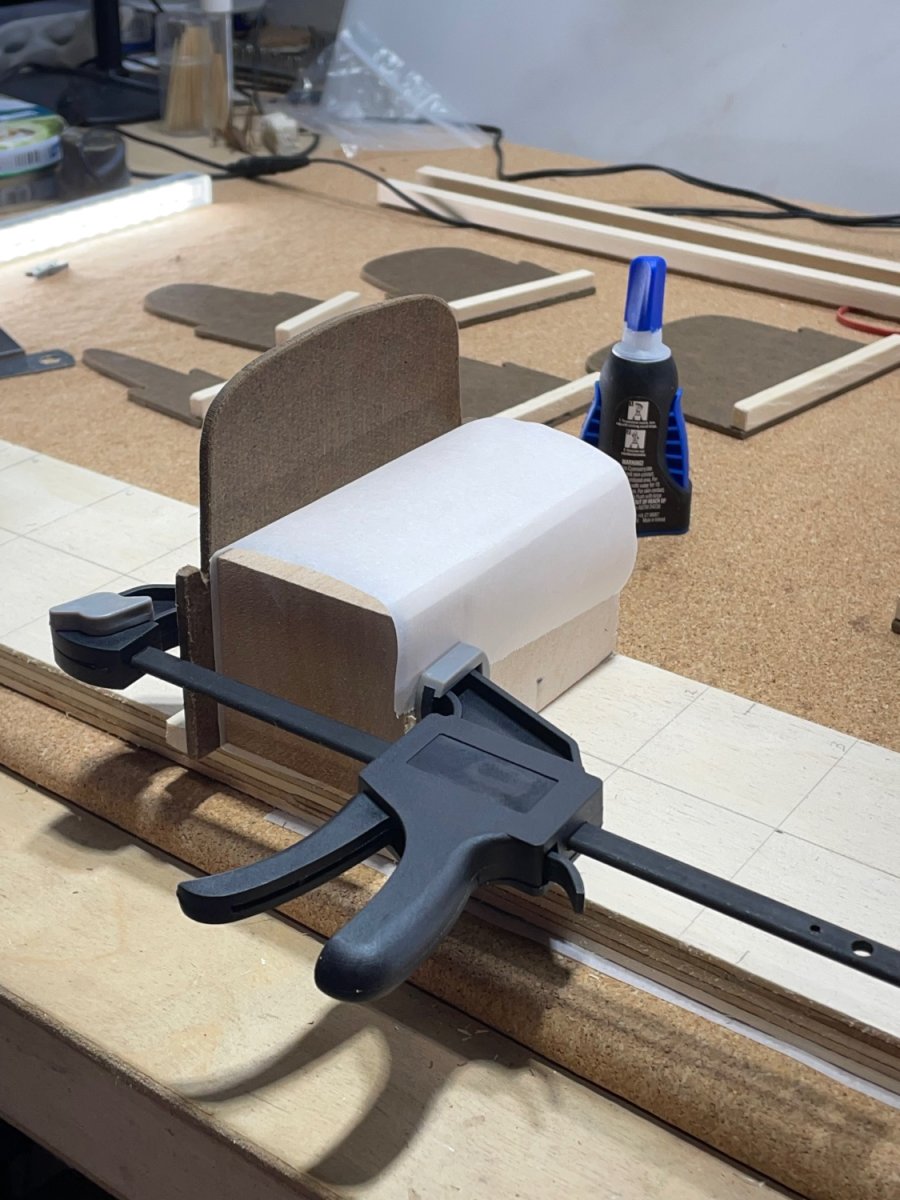
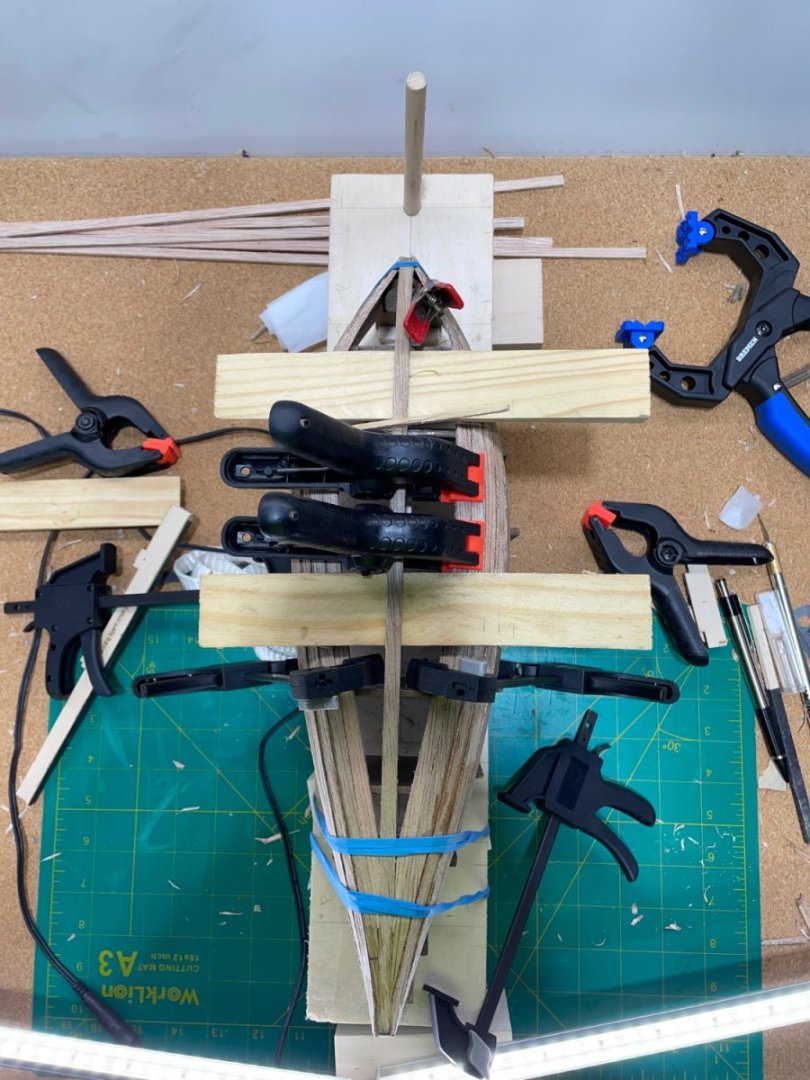
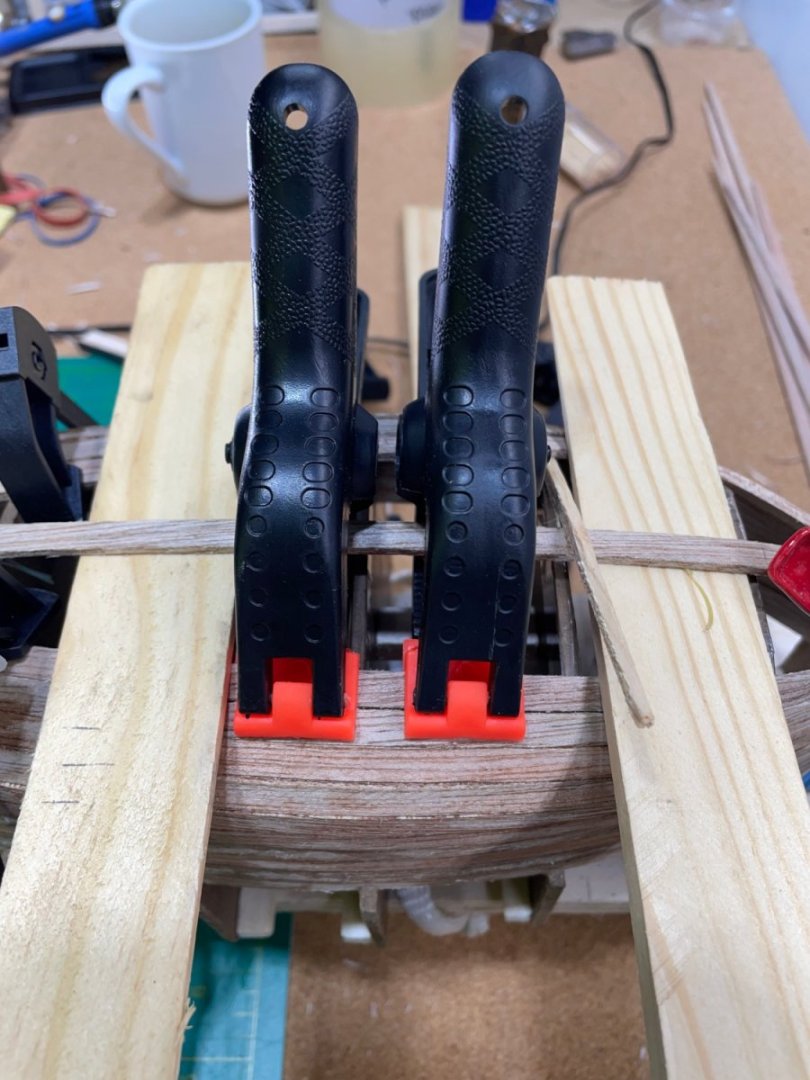
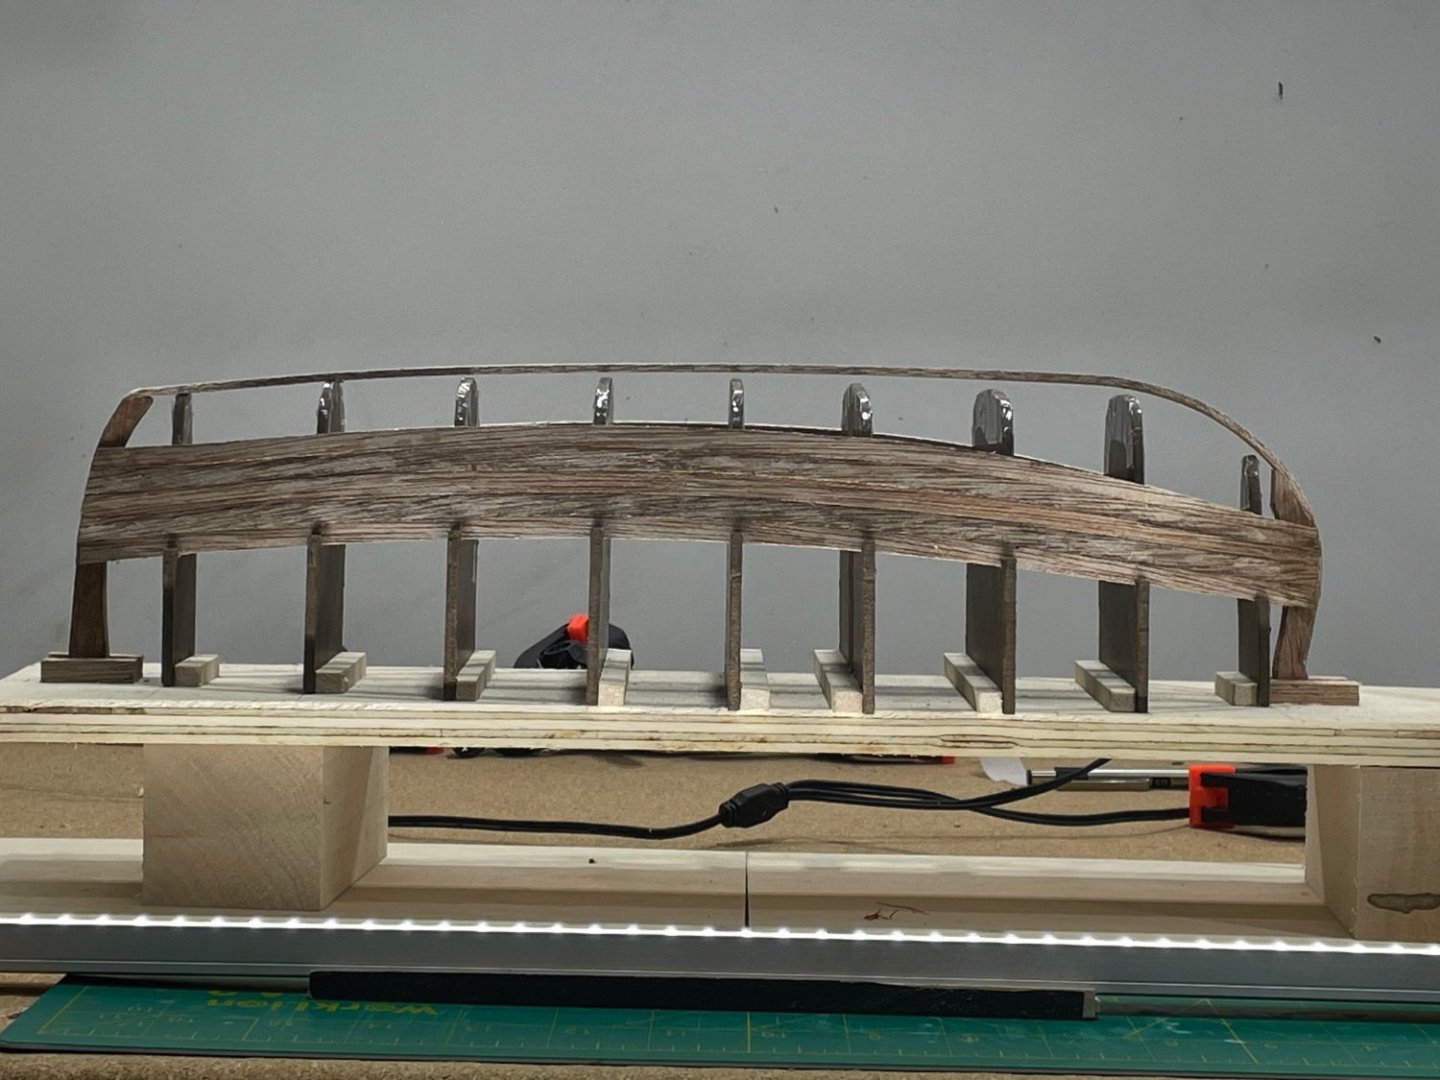
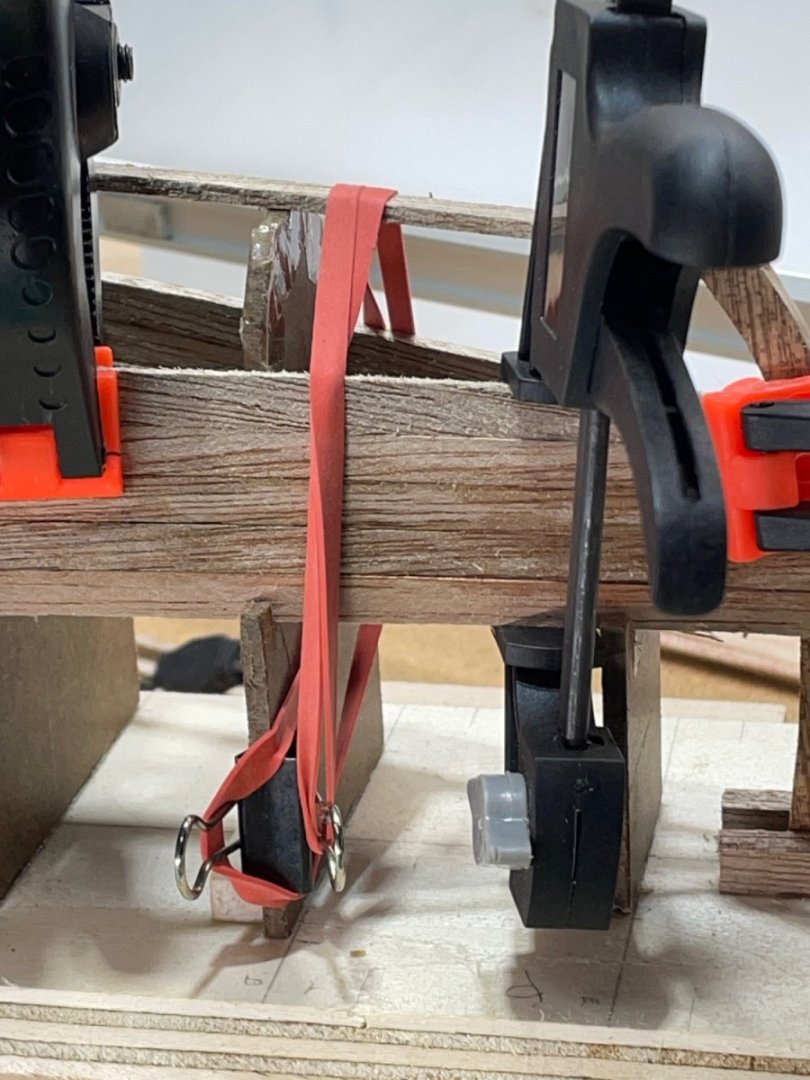
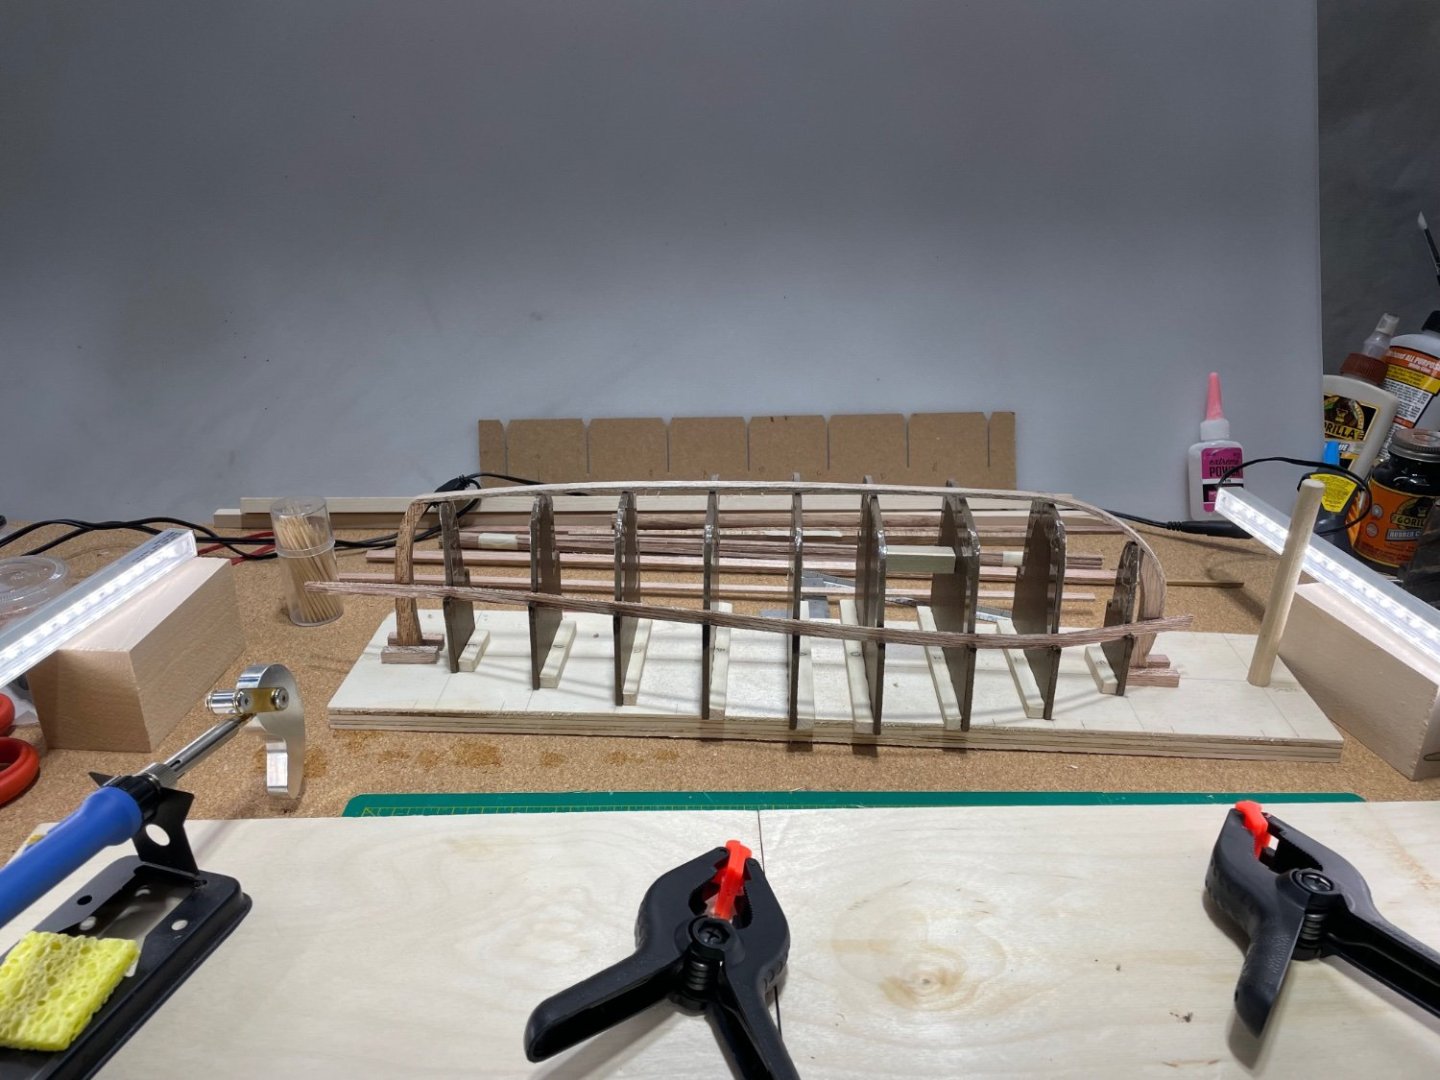
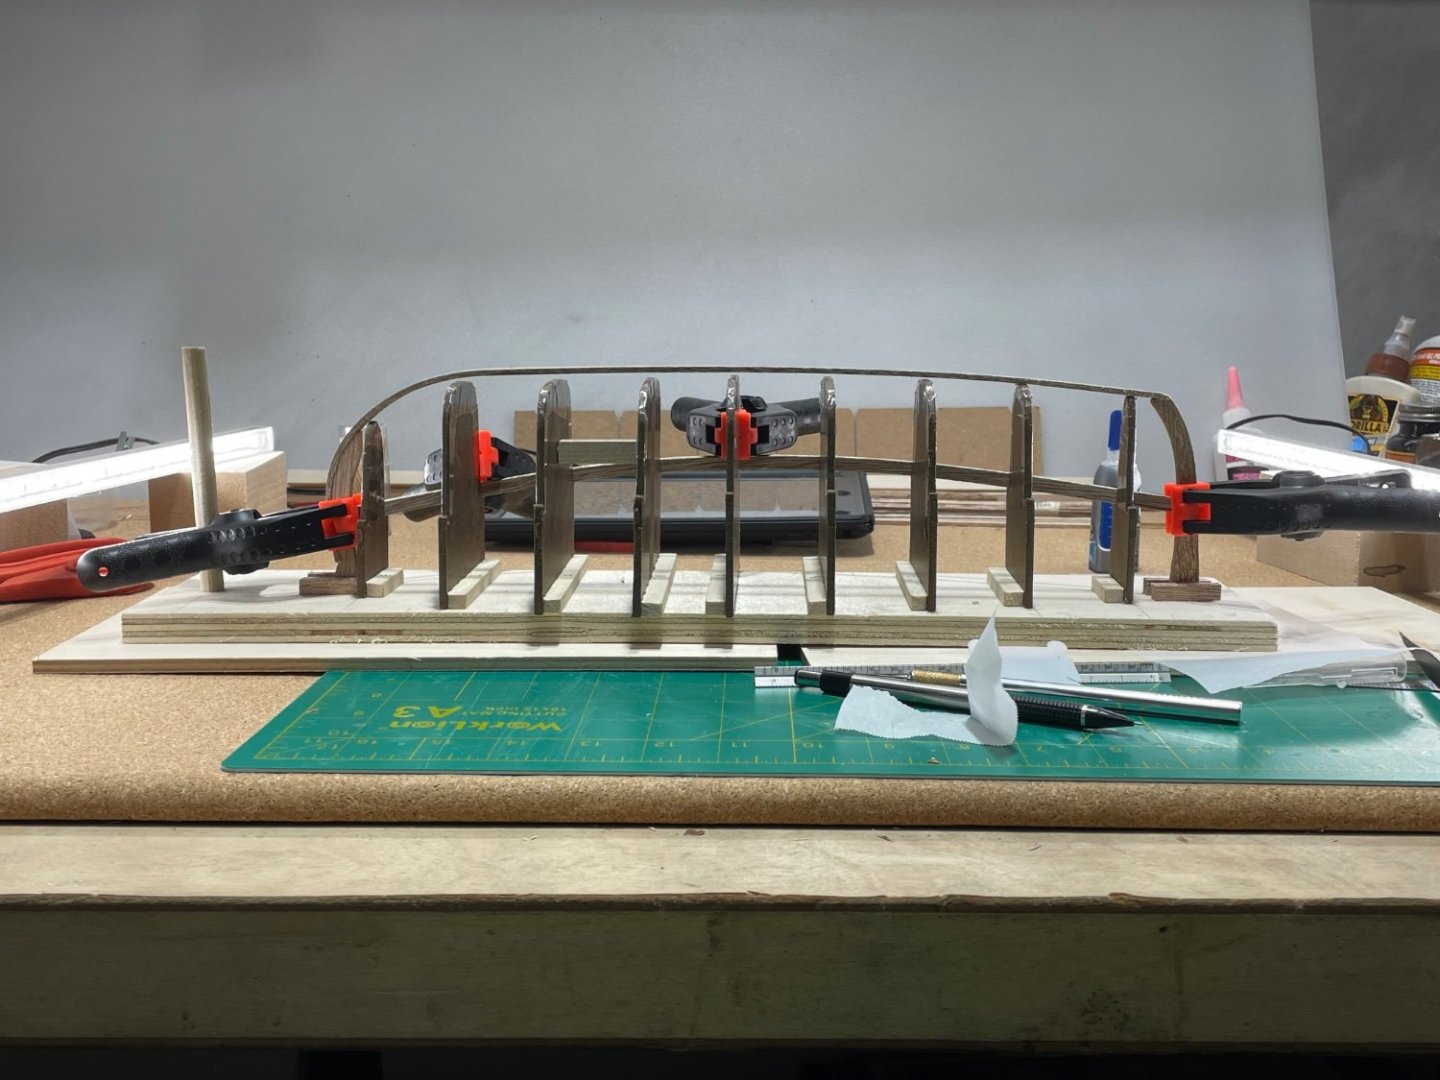
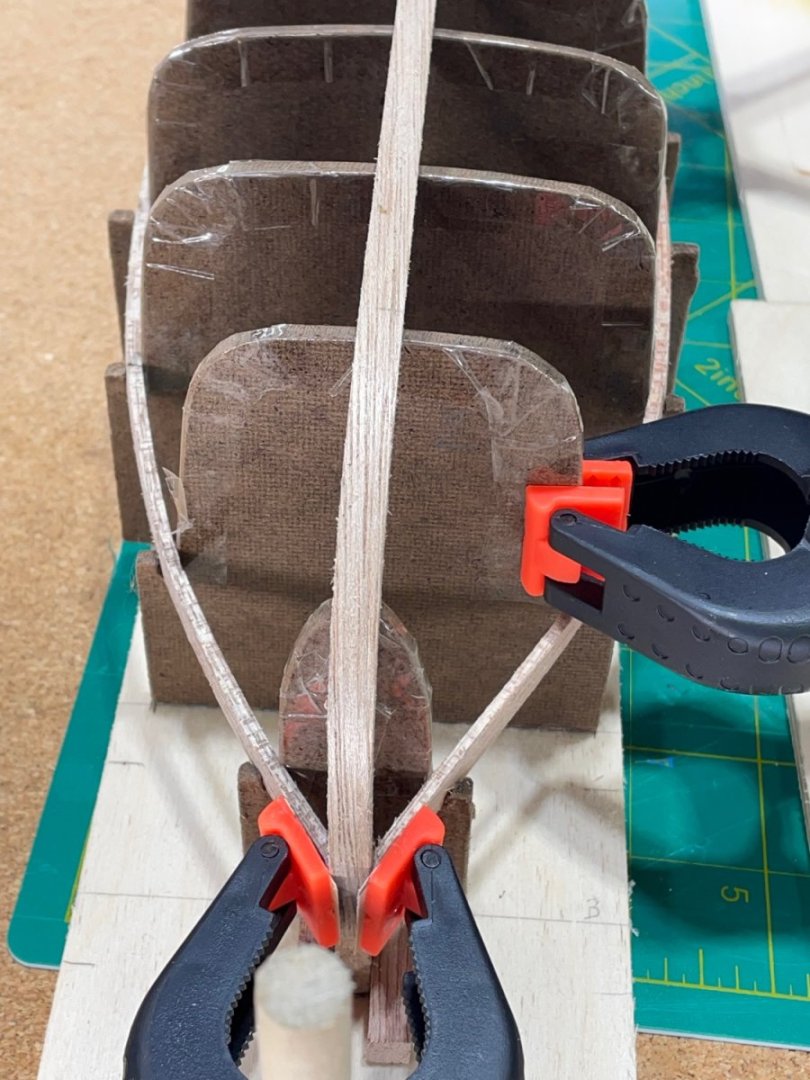
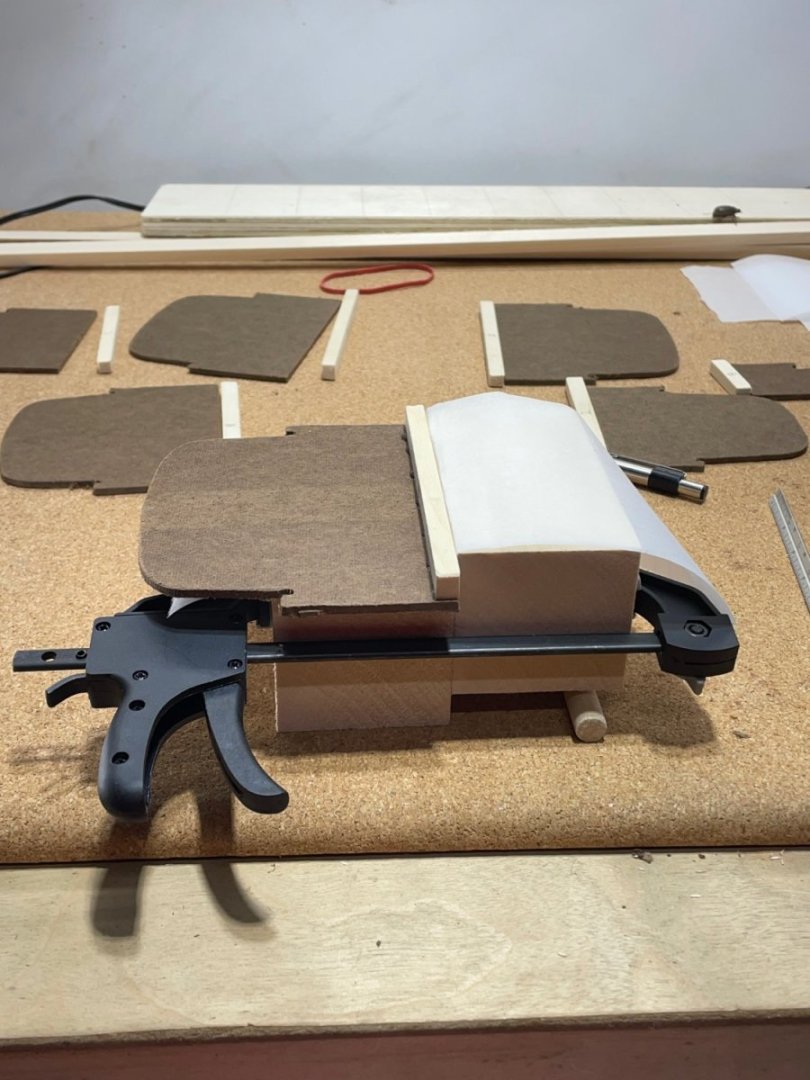
I soaked, bent and clamped both sides of nine. Then let them dry thoroughly before gluing them. Last night I put both #10 planks in to soak. Several hours of soaking has made the wood very flexible. It’s been easy to shape them. The challenge is to hold them while they dry. Here’s a few ways I tried. The longer I looked at it, the more I change the clamps around trying to find the best way. I placed a wooden shim under the keel hoping to help the wet plank lay flat. Maybe no issues will be caused by doing this.


- 134 replies
-
- 5
-
-
- sea of galilee boat
- SE Miller
- (and 1 more)
-
I’ve been kinda wiggling the frames shortly after a glue session. They would be glued if I hadn’t.
- 134 replies
-
- 2
-
-
- sea of galilee boat
- SE Miller
- (and 1 more)
-
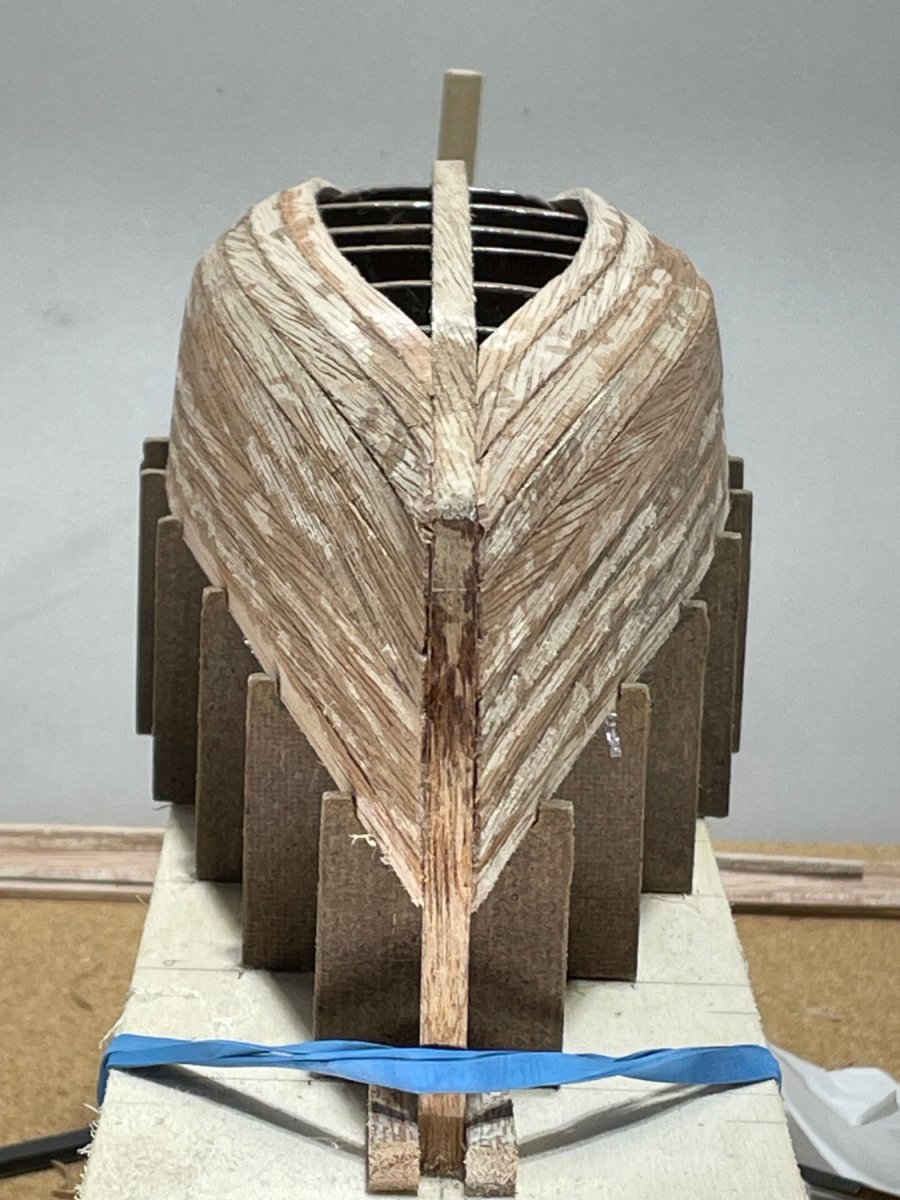
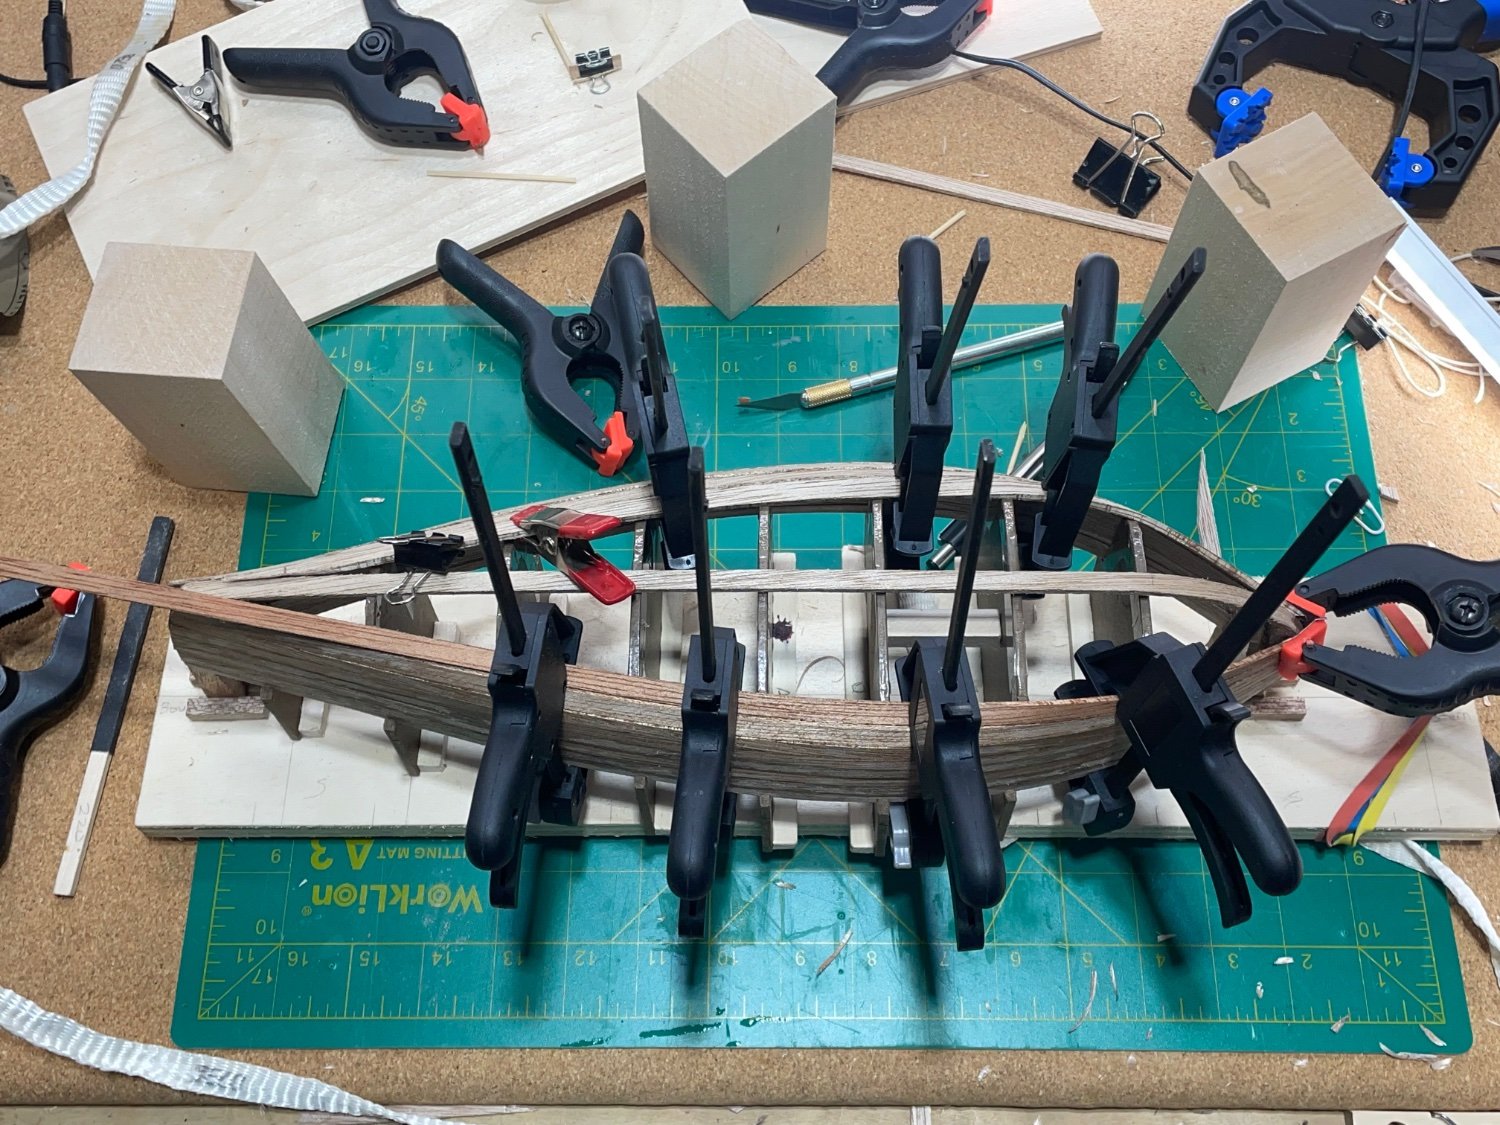
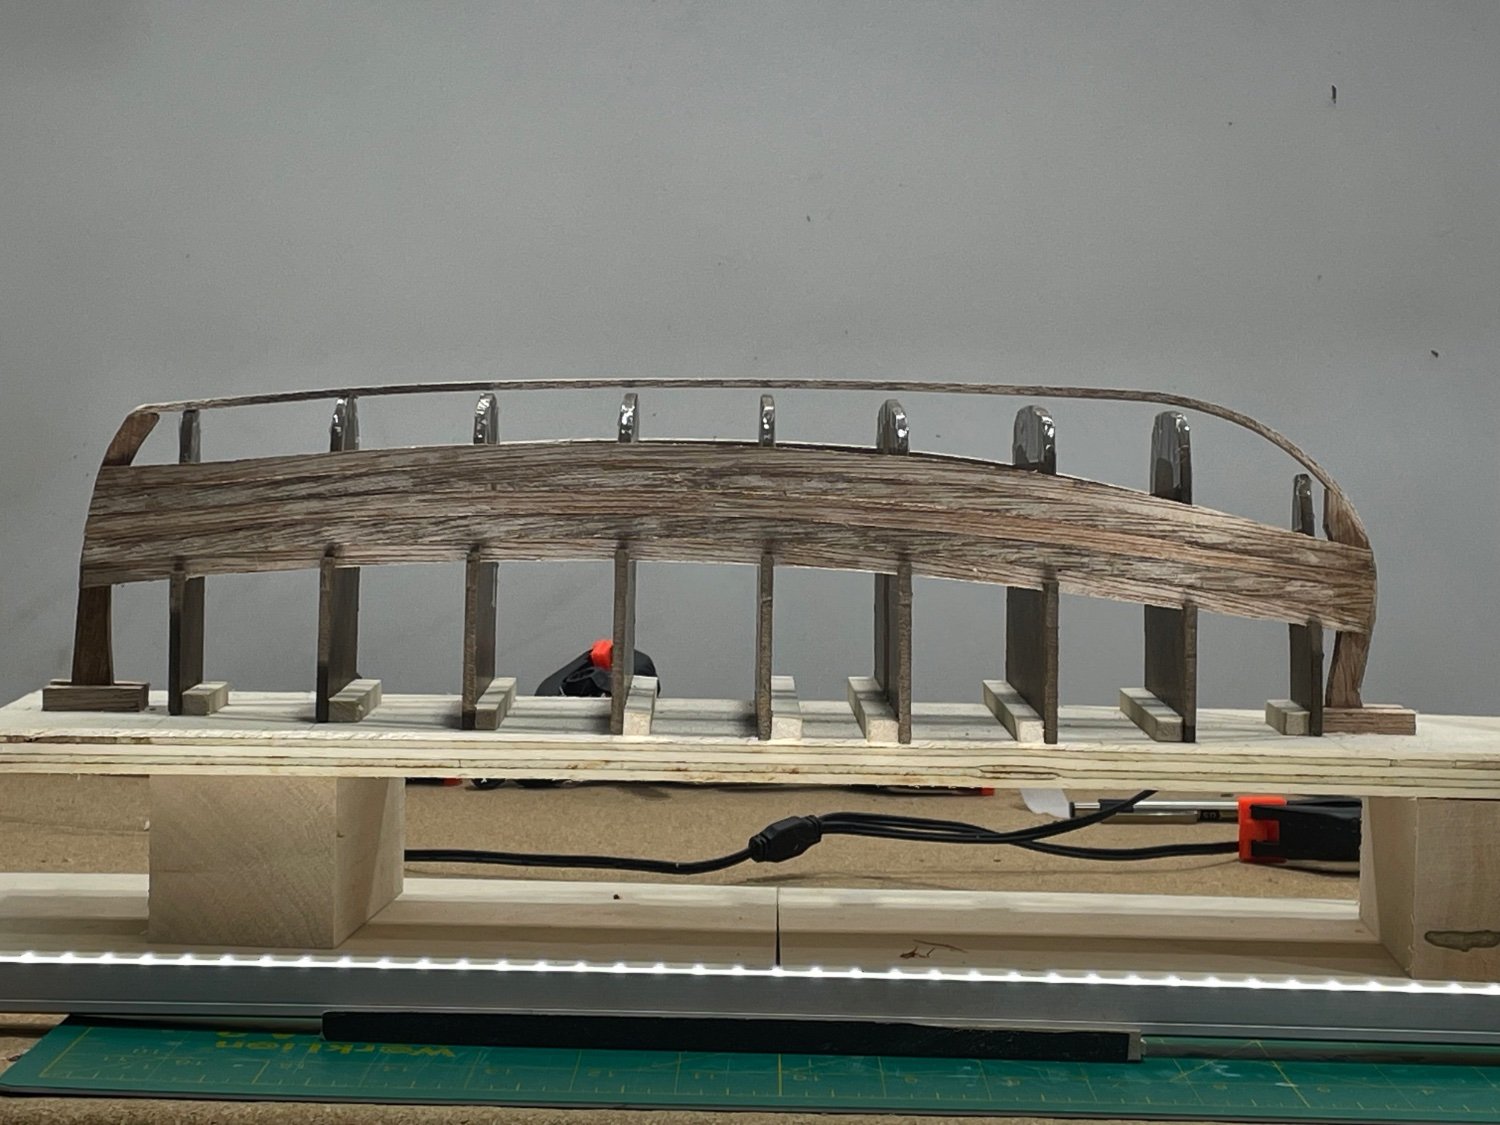
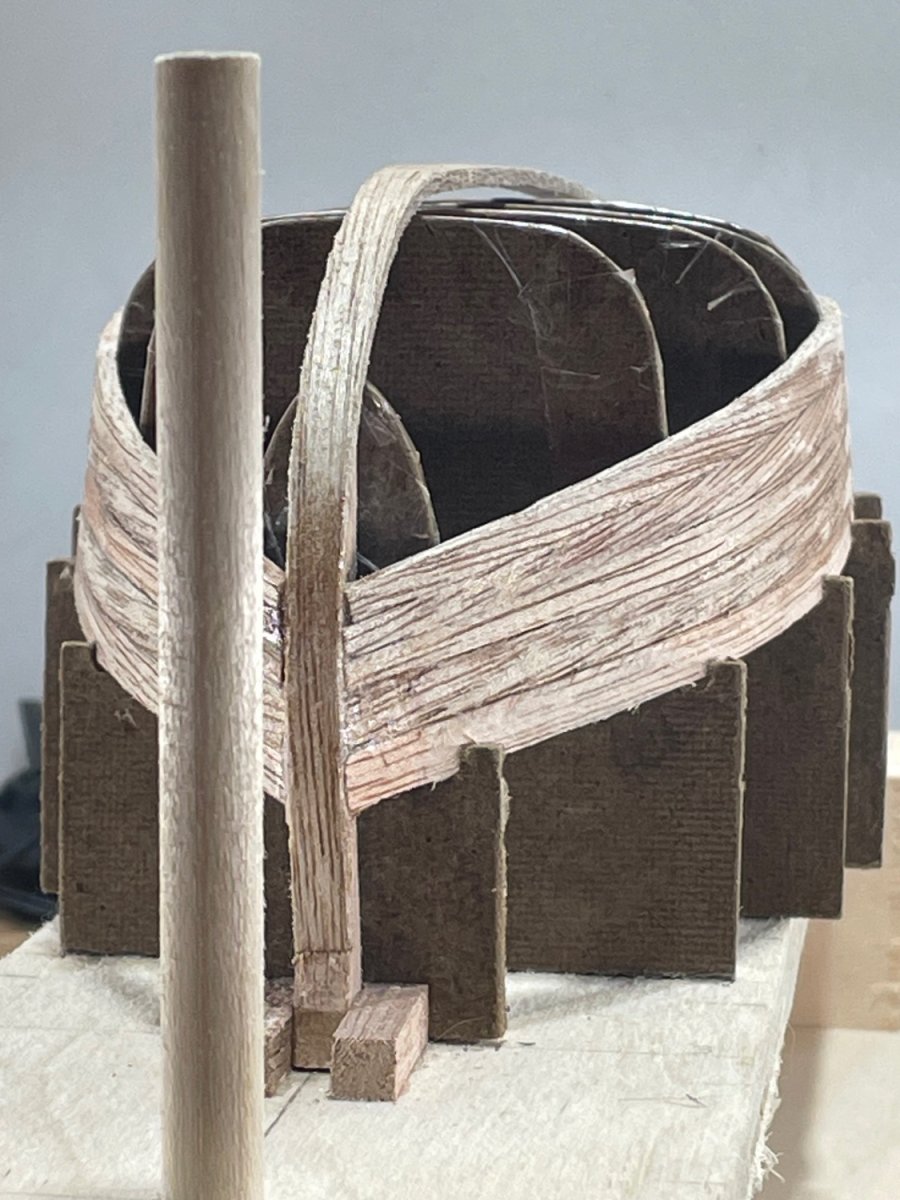
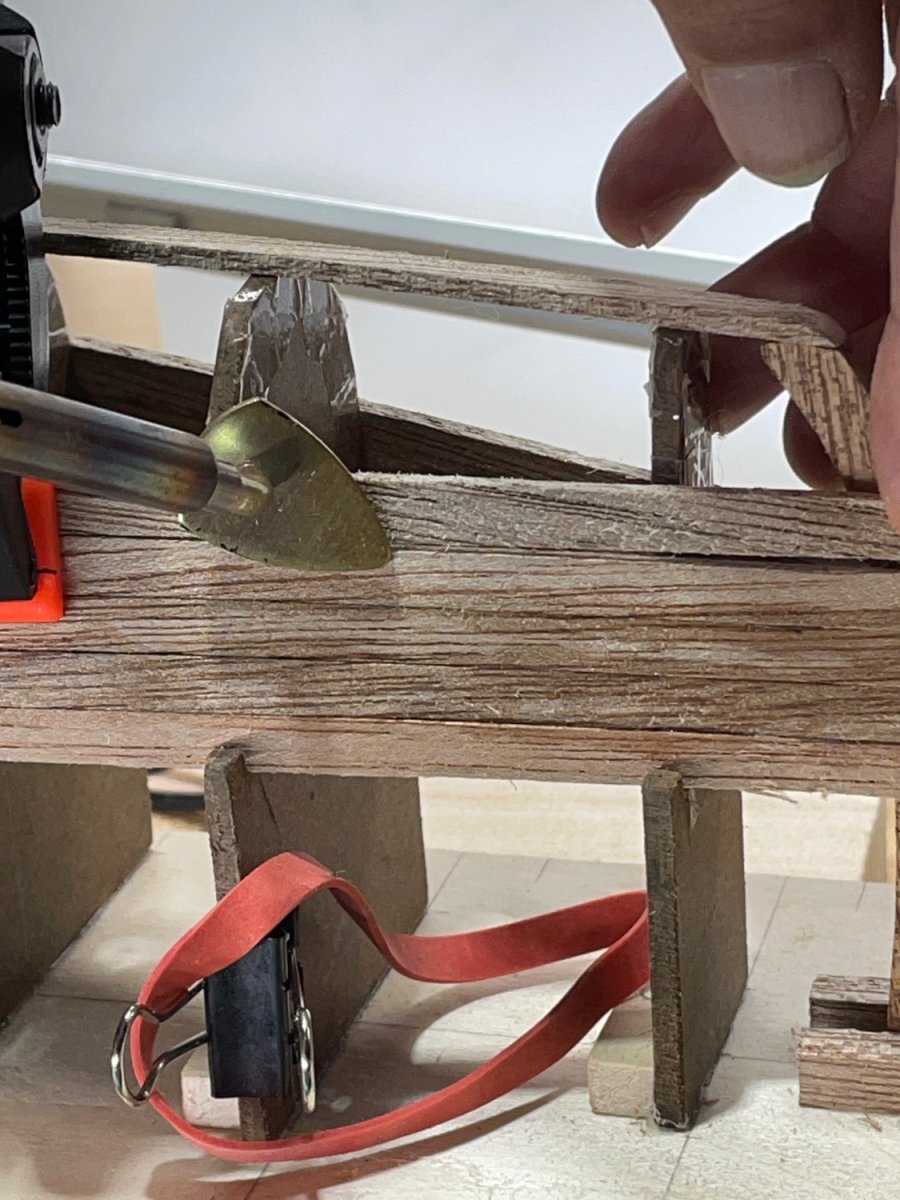
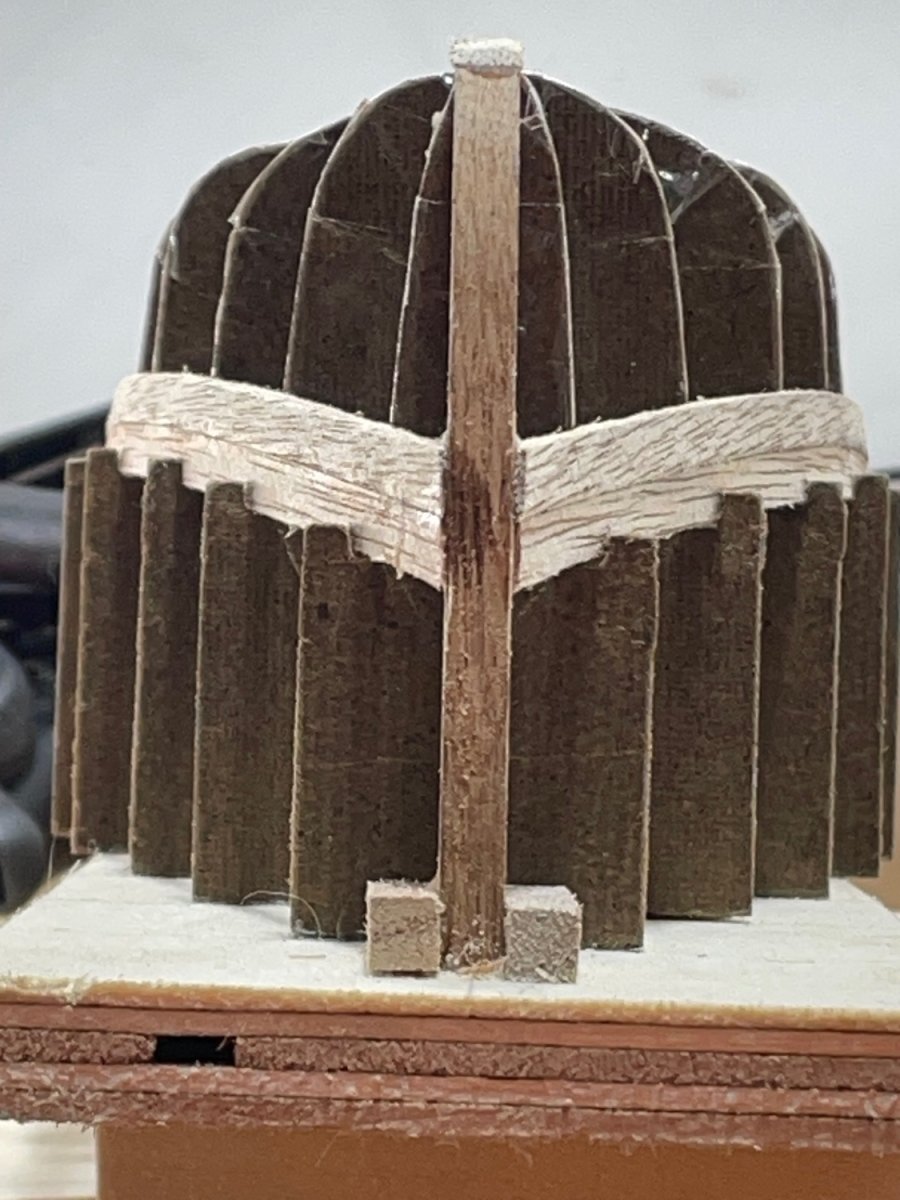
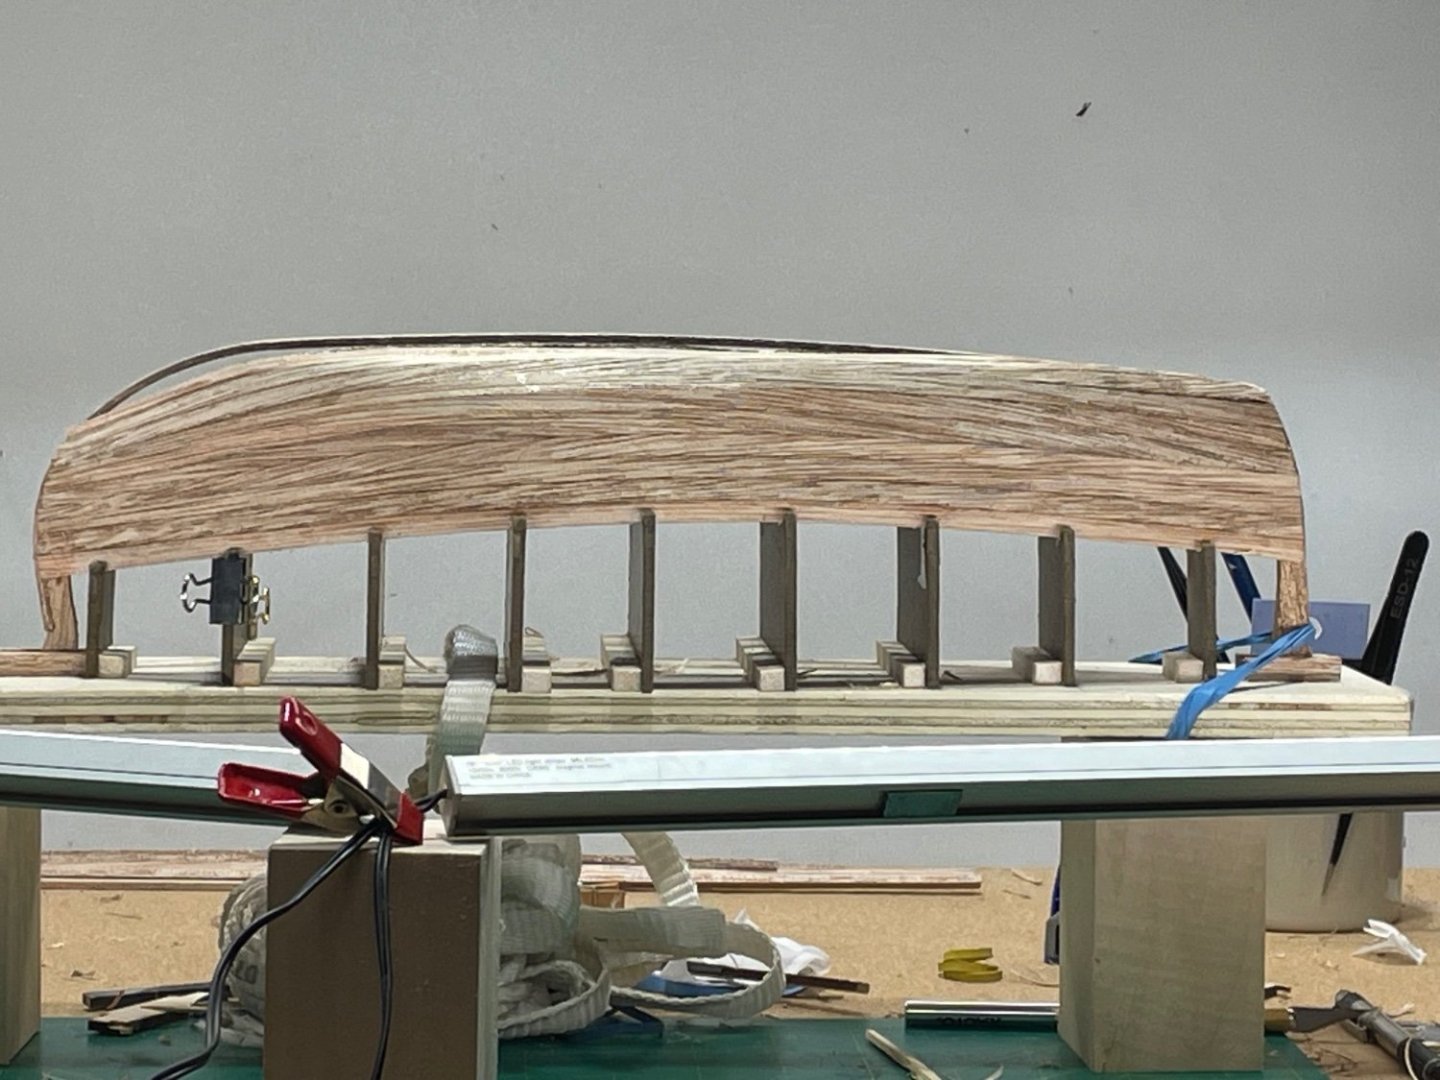
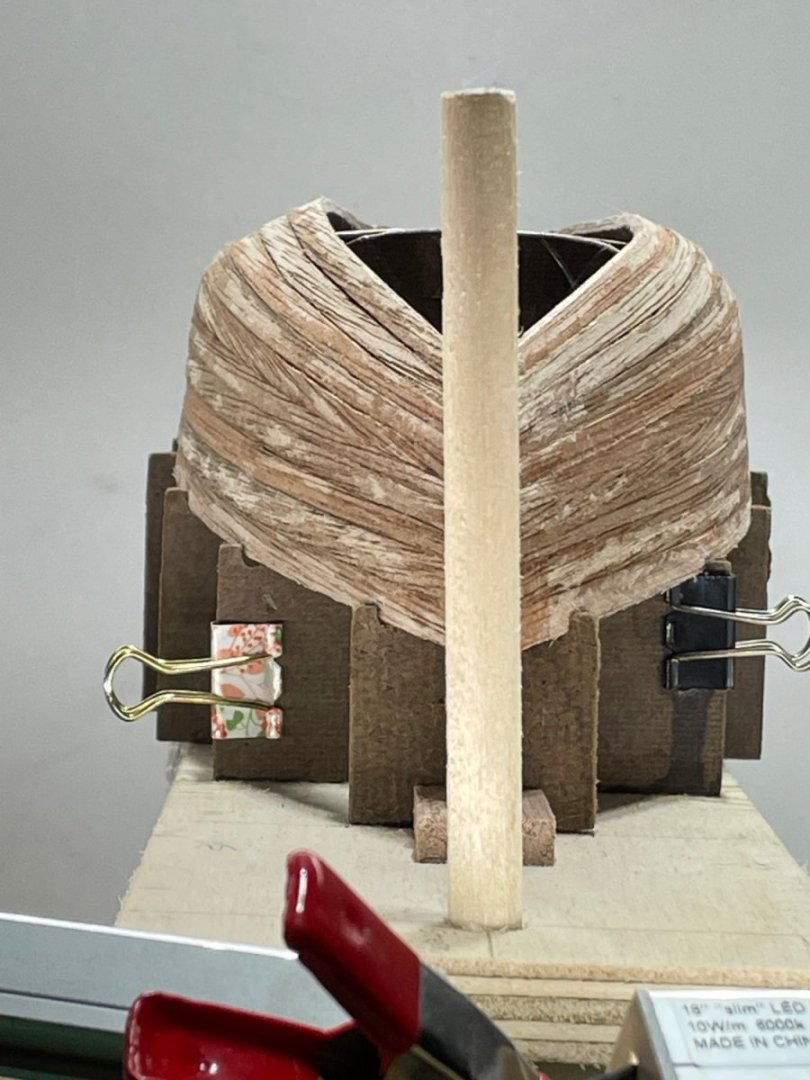
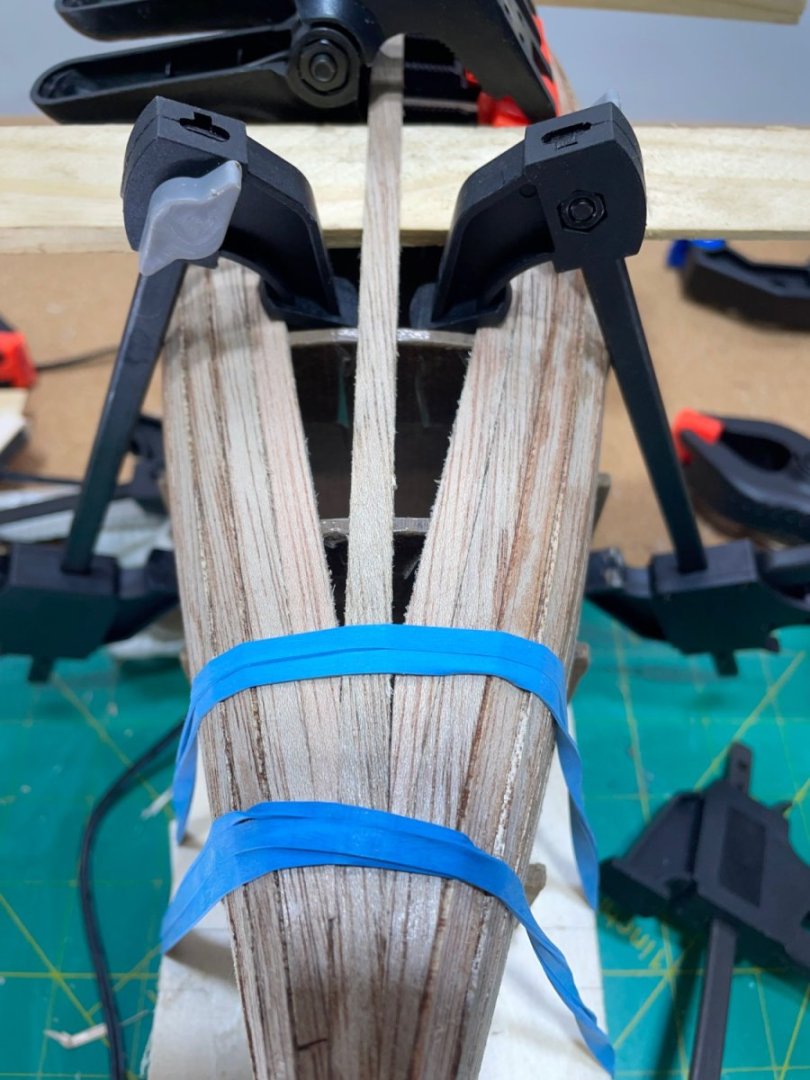
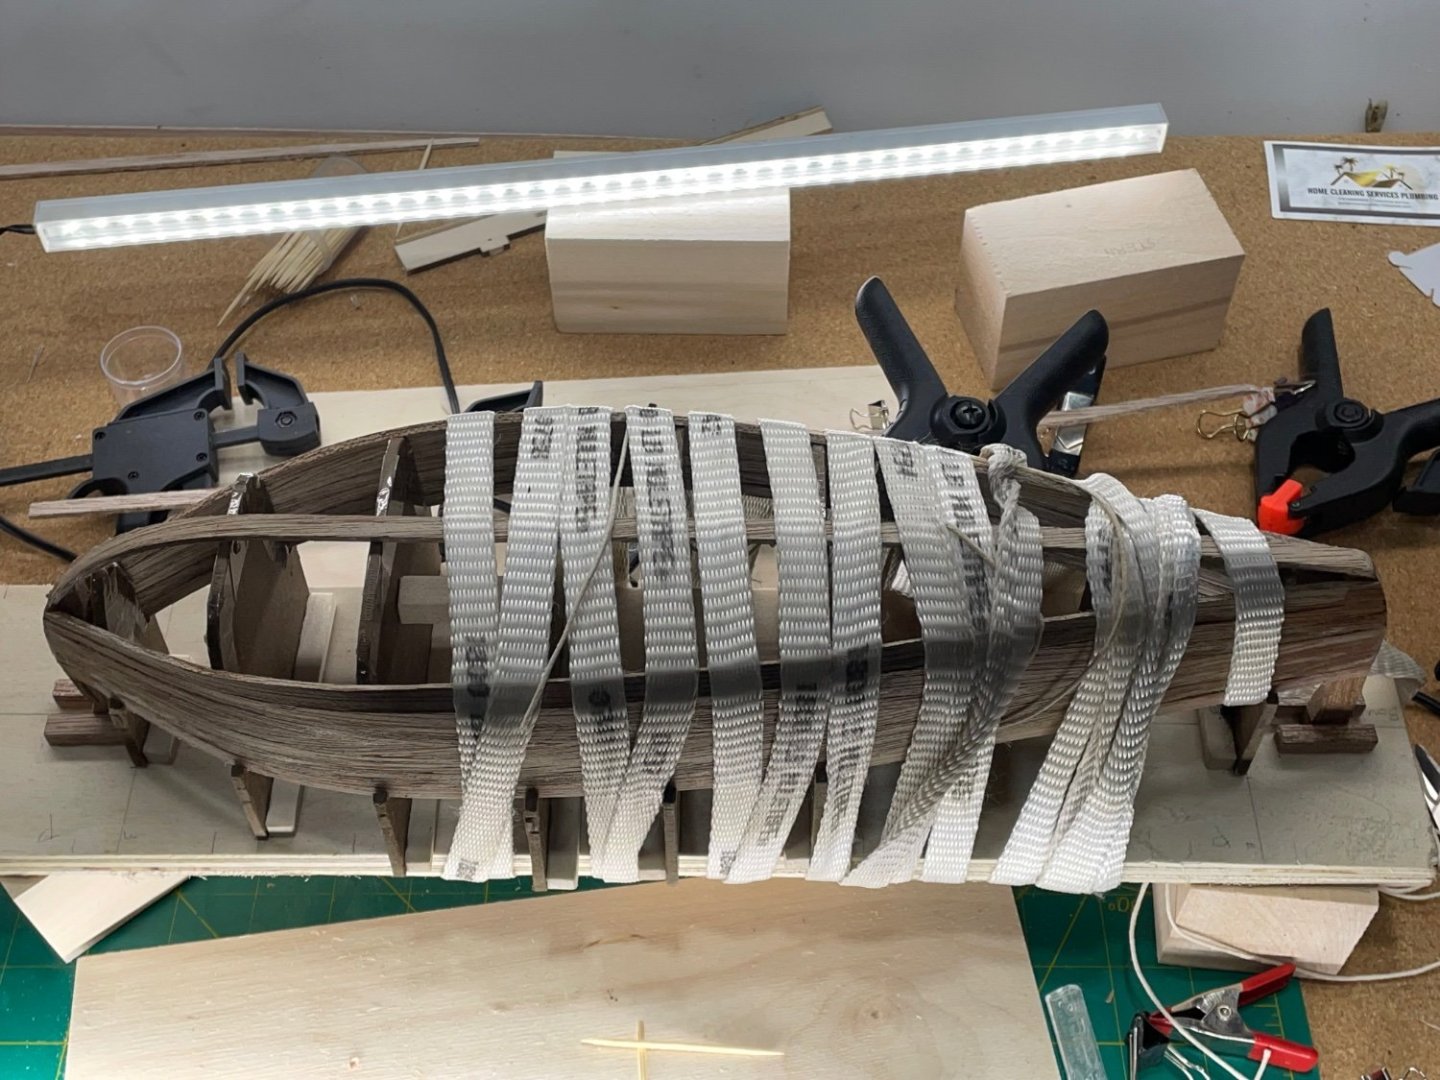
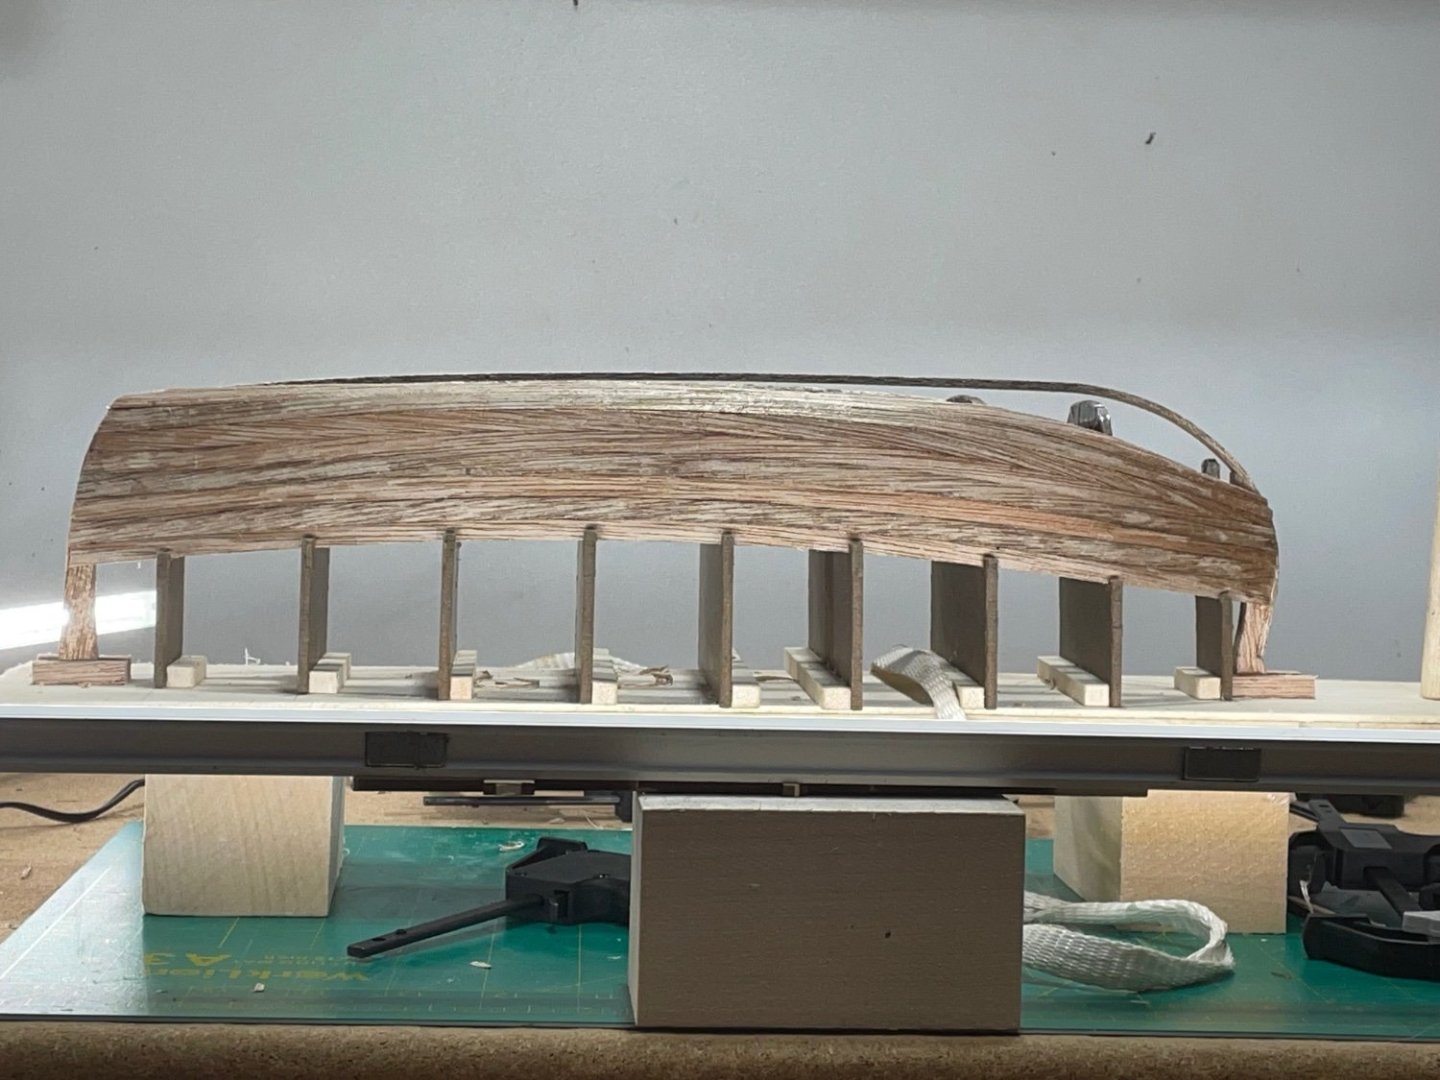
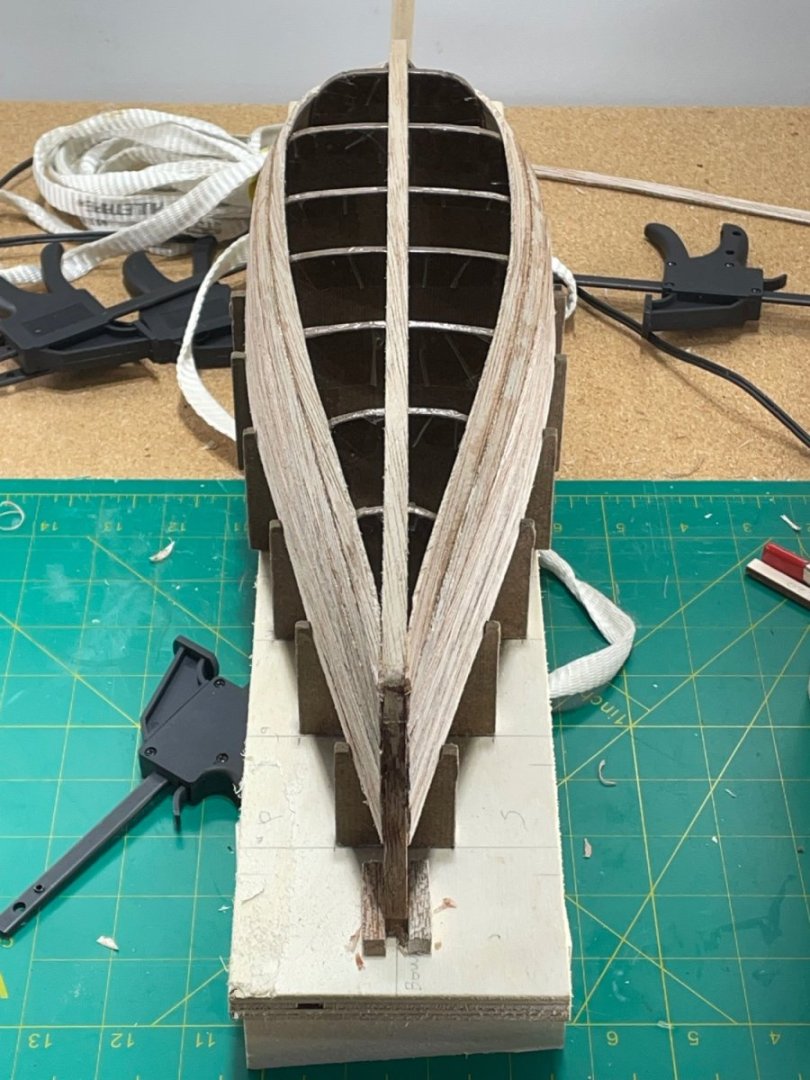
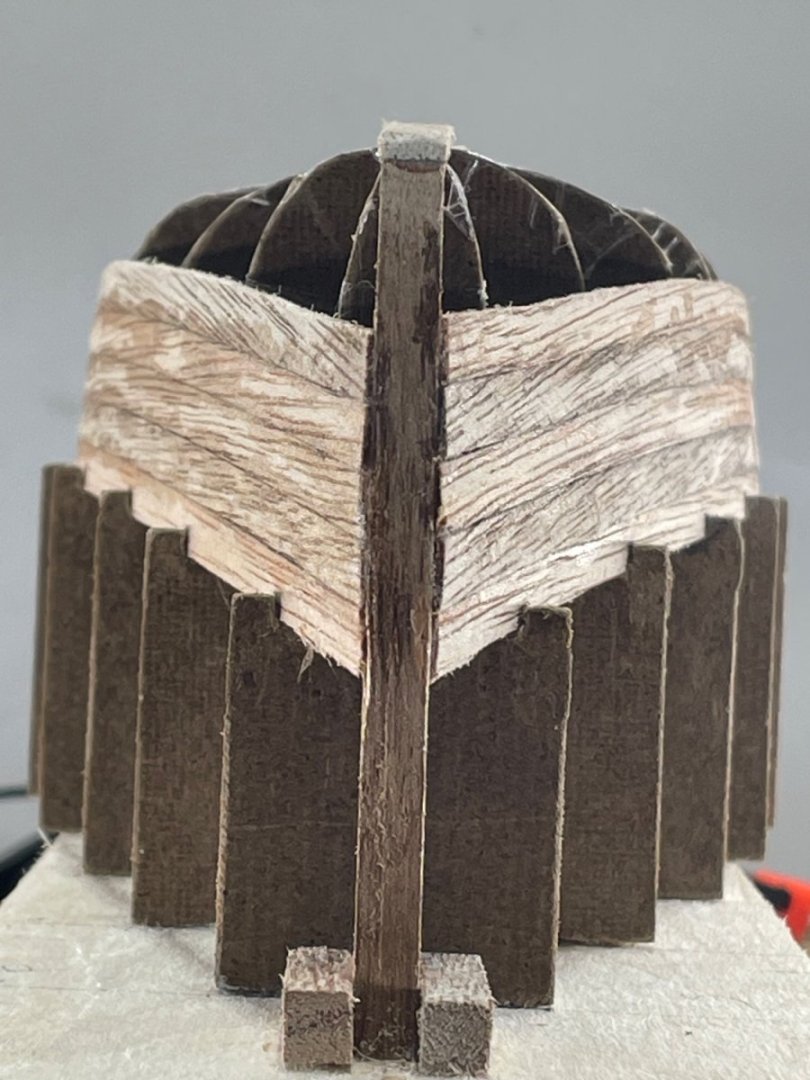
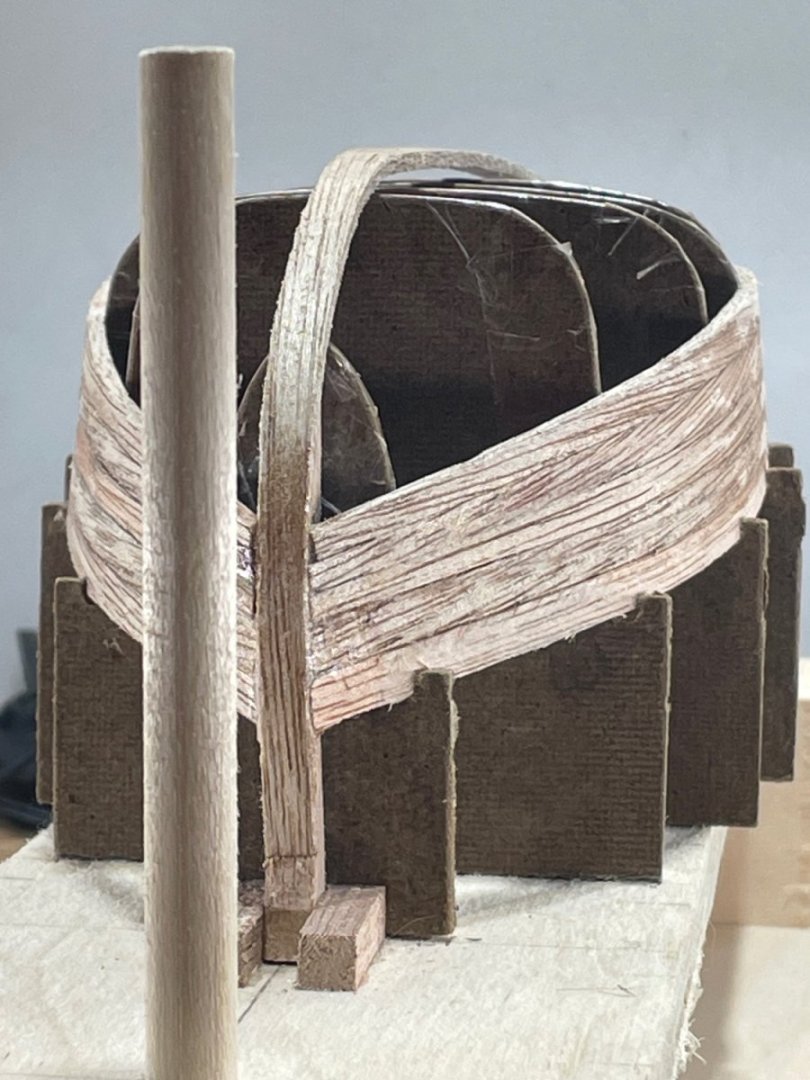
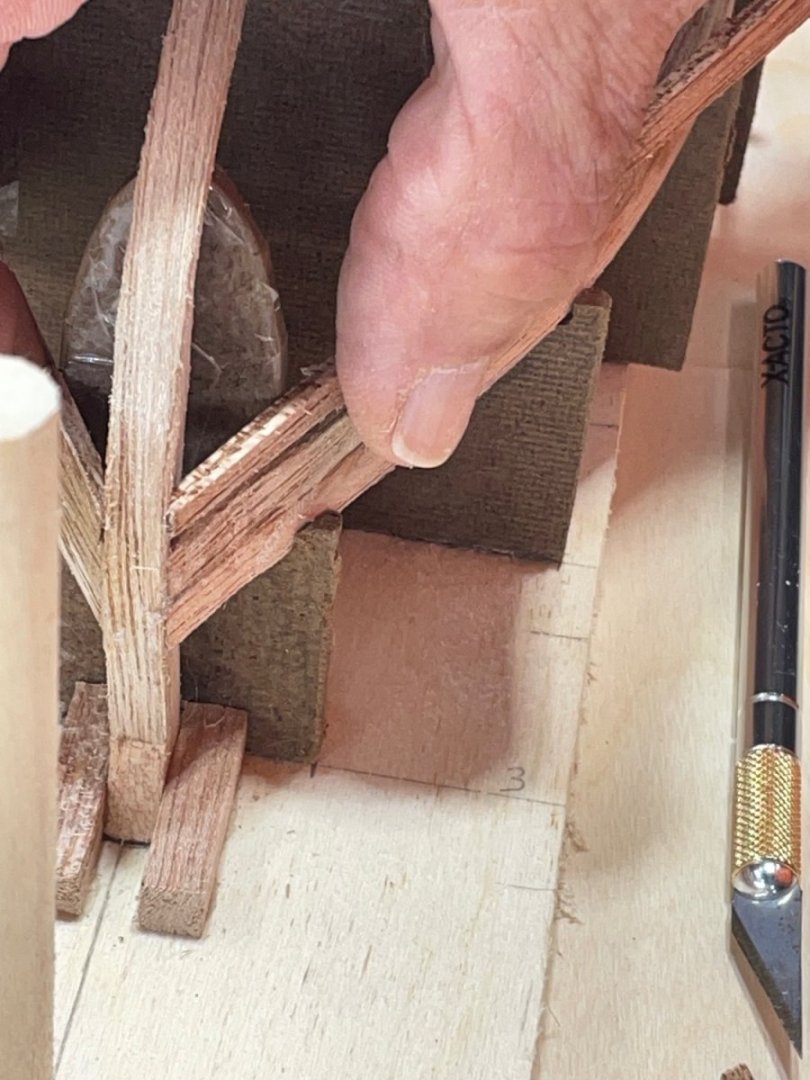
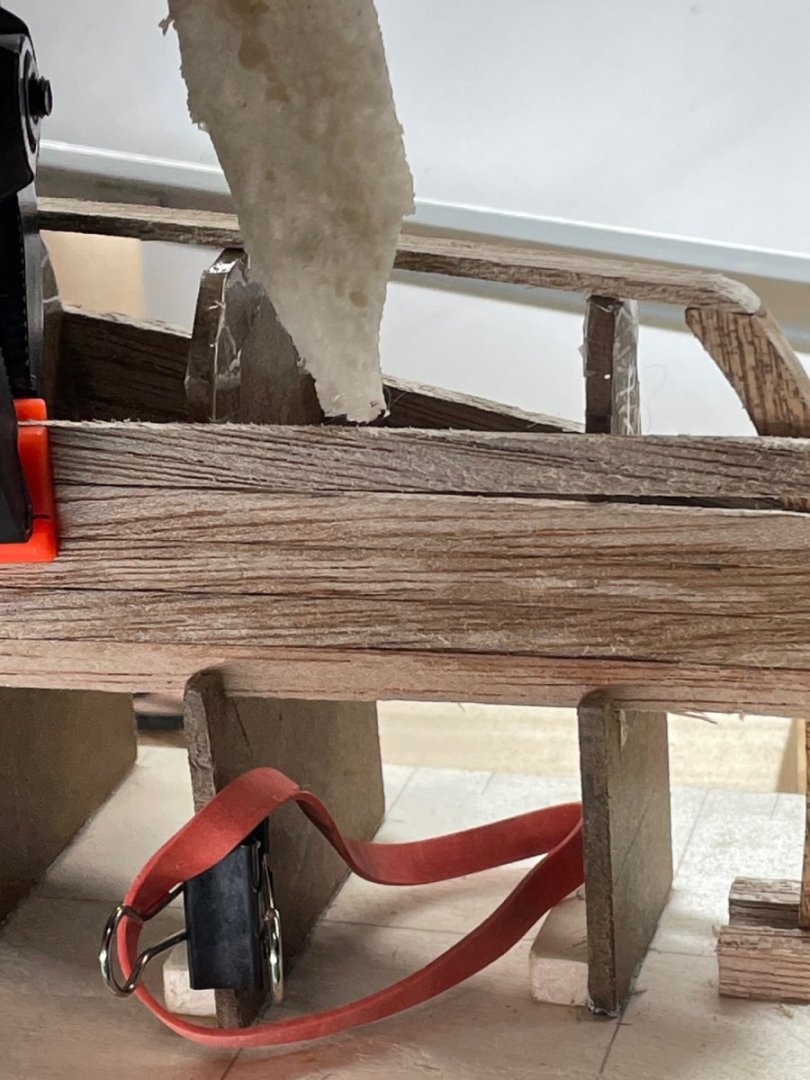
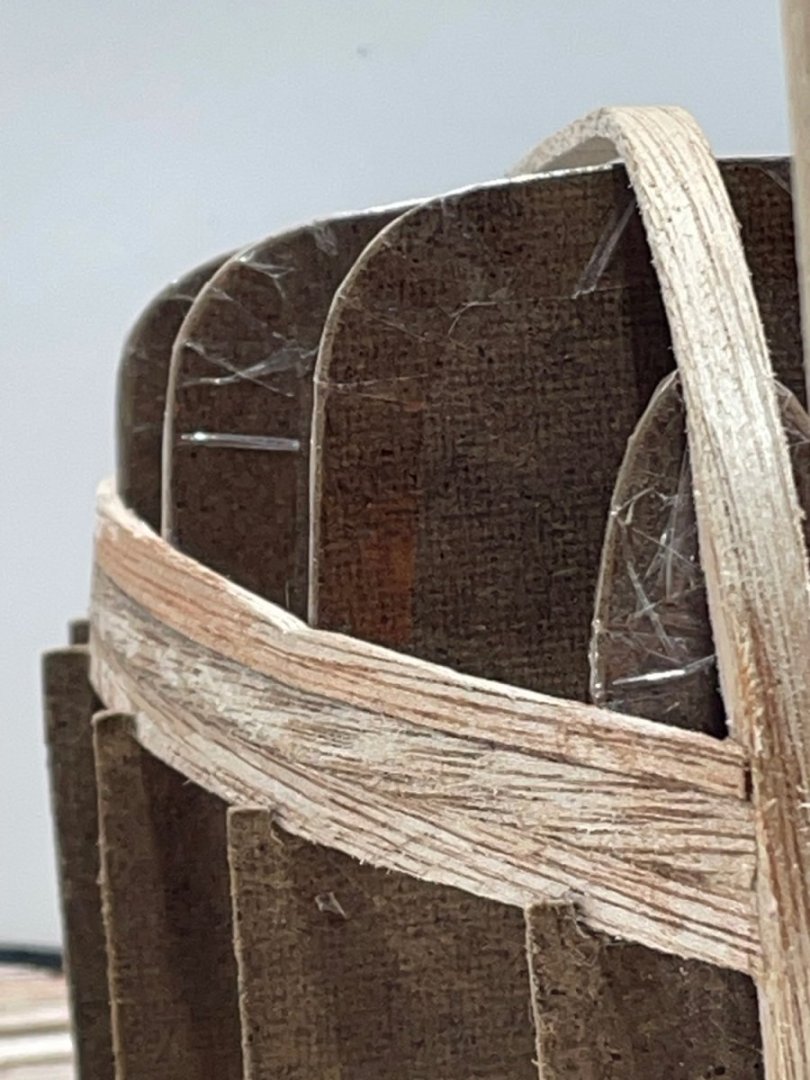
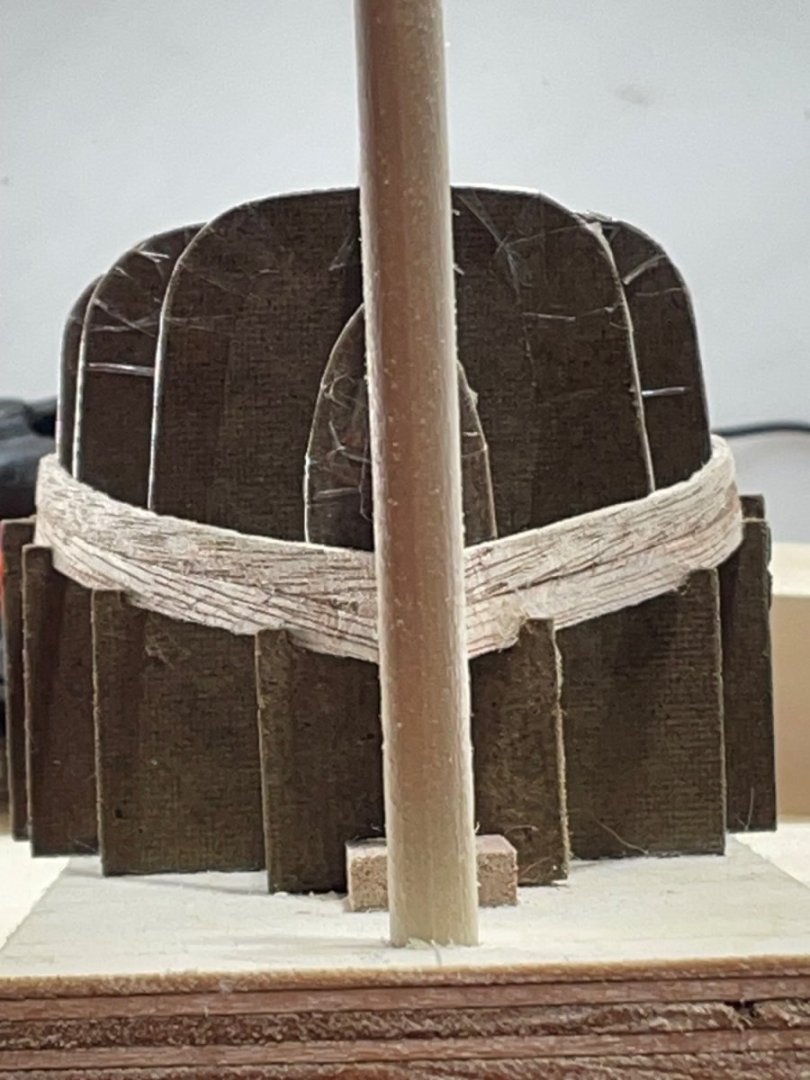
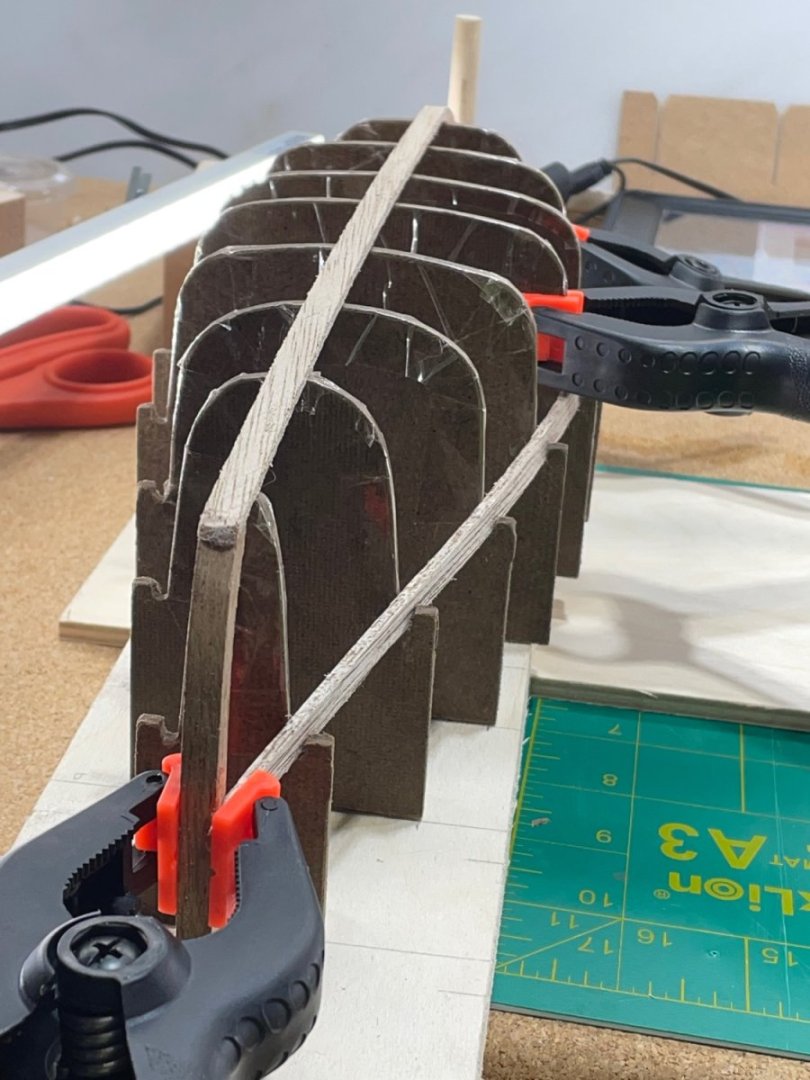
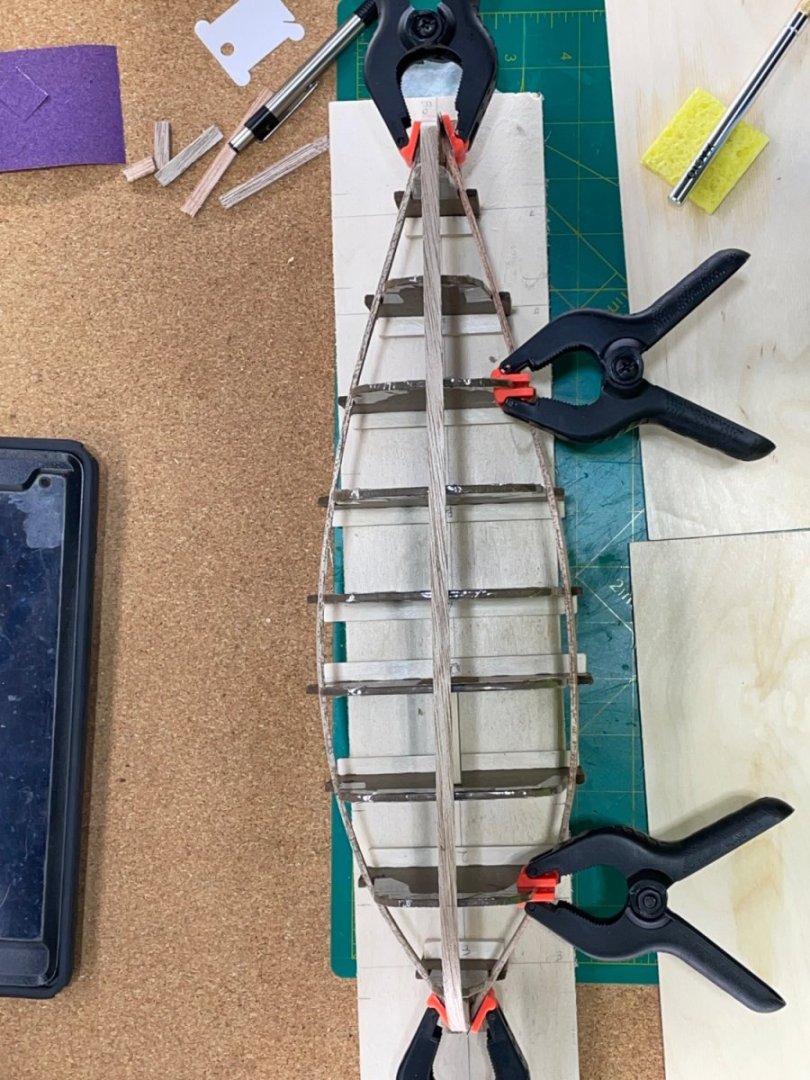
I noticed the sides near the bow were separating from the strong back. The next planks make the transition from the side to the bottom. I realized I need to tighten the hull up before I continue. I dampen the planks around the area that needed attention. I used a flat nylon pull rope to cinched it up and waited till it dried. I’ve found what works best for me for shaping the planks. I soak the plank in warm water and just gradually work it into the shape, clamping as I go if possible. After it’s dry I carve the bevel, and also the end at the bow that meets the keel. So plank eight goes on without any problems.


- 134 replies
-
- 5
-
-

-
- sea of galilee boat
- SE Miller
- (and 1 more)
-
Bob, your ships look so amazing! That display brings them all together. I can visualize all eyes that pass will slow to a stop, sail back in time and thank you for sharing your skilled craftsmanship:-)
-
The rigging is already starting to bring out the beauty in her. As with the backup, I totally relate:-) I did the same thing, except my next build is back ordered. The anticipation is almost as good:-)
-
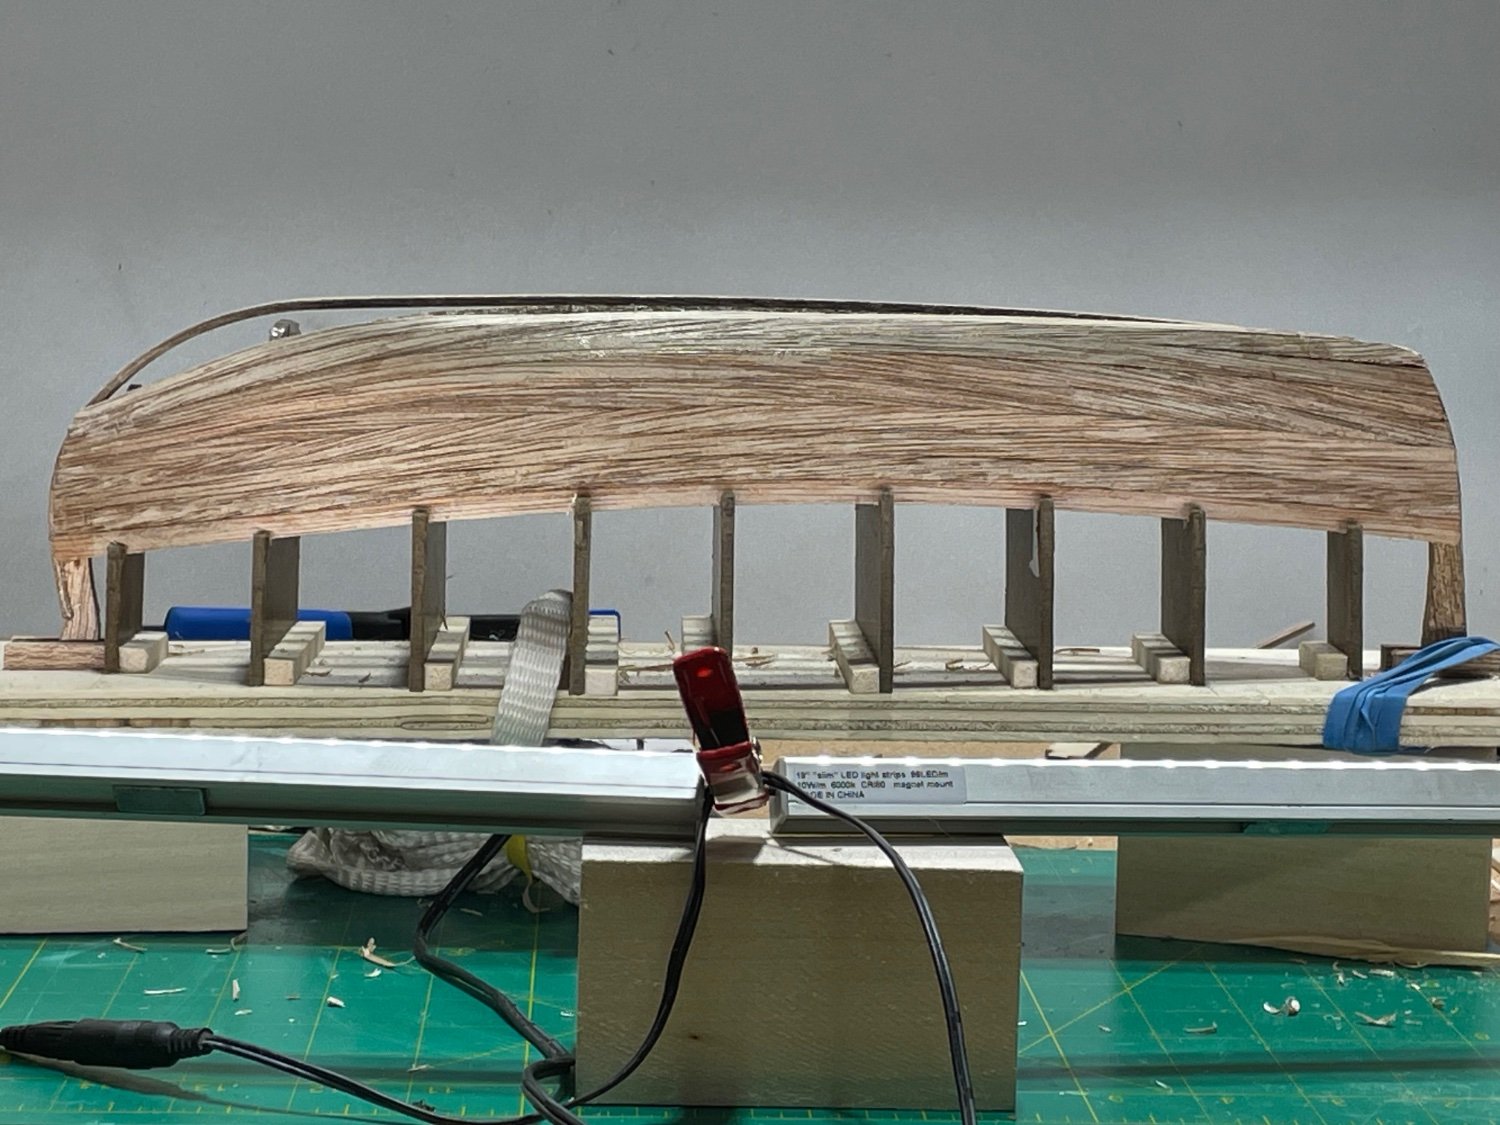
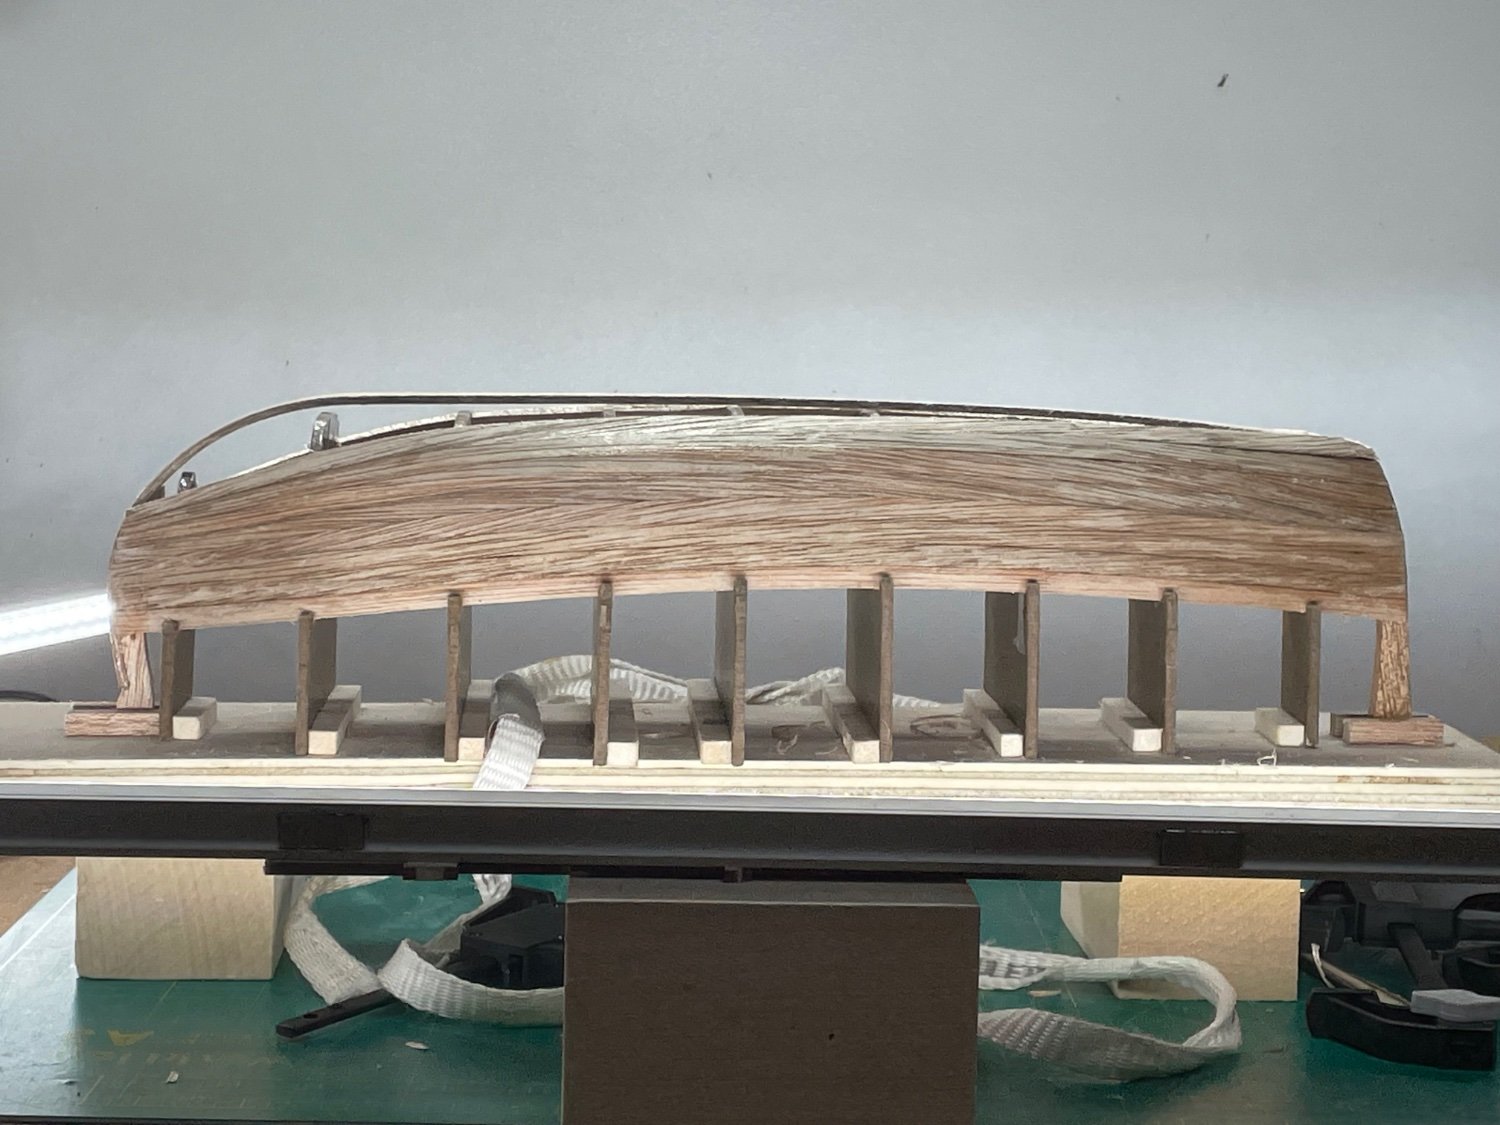
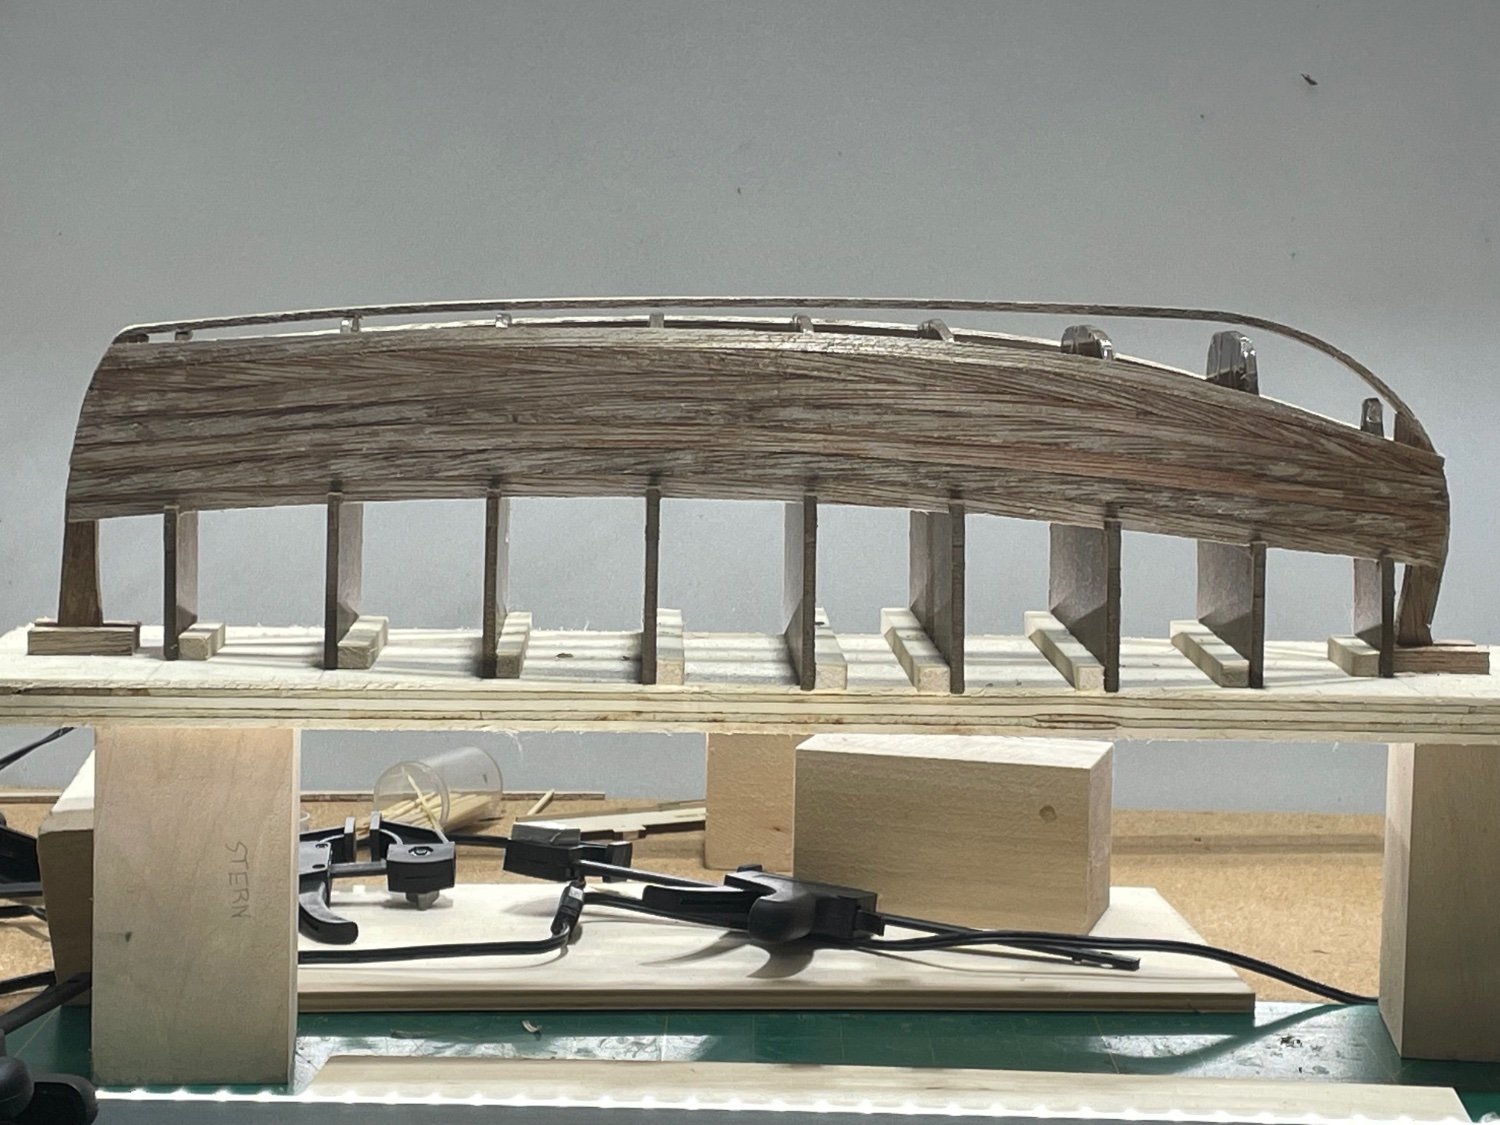
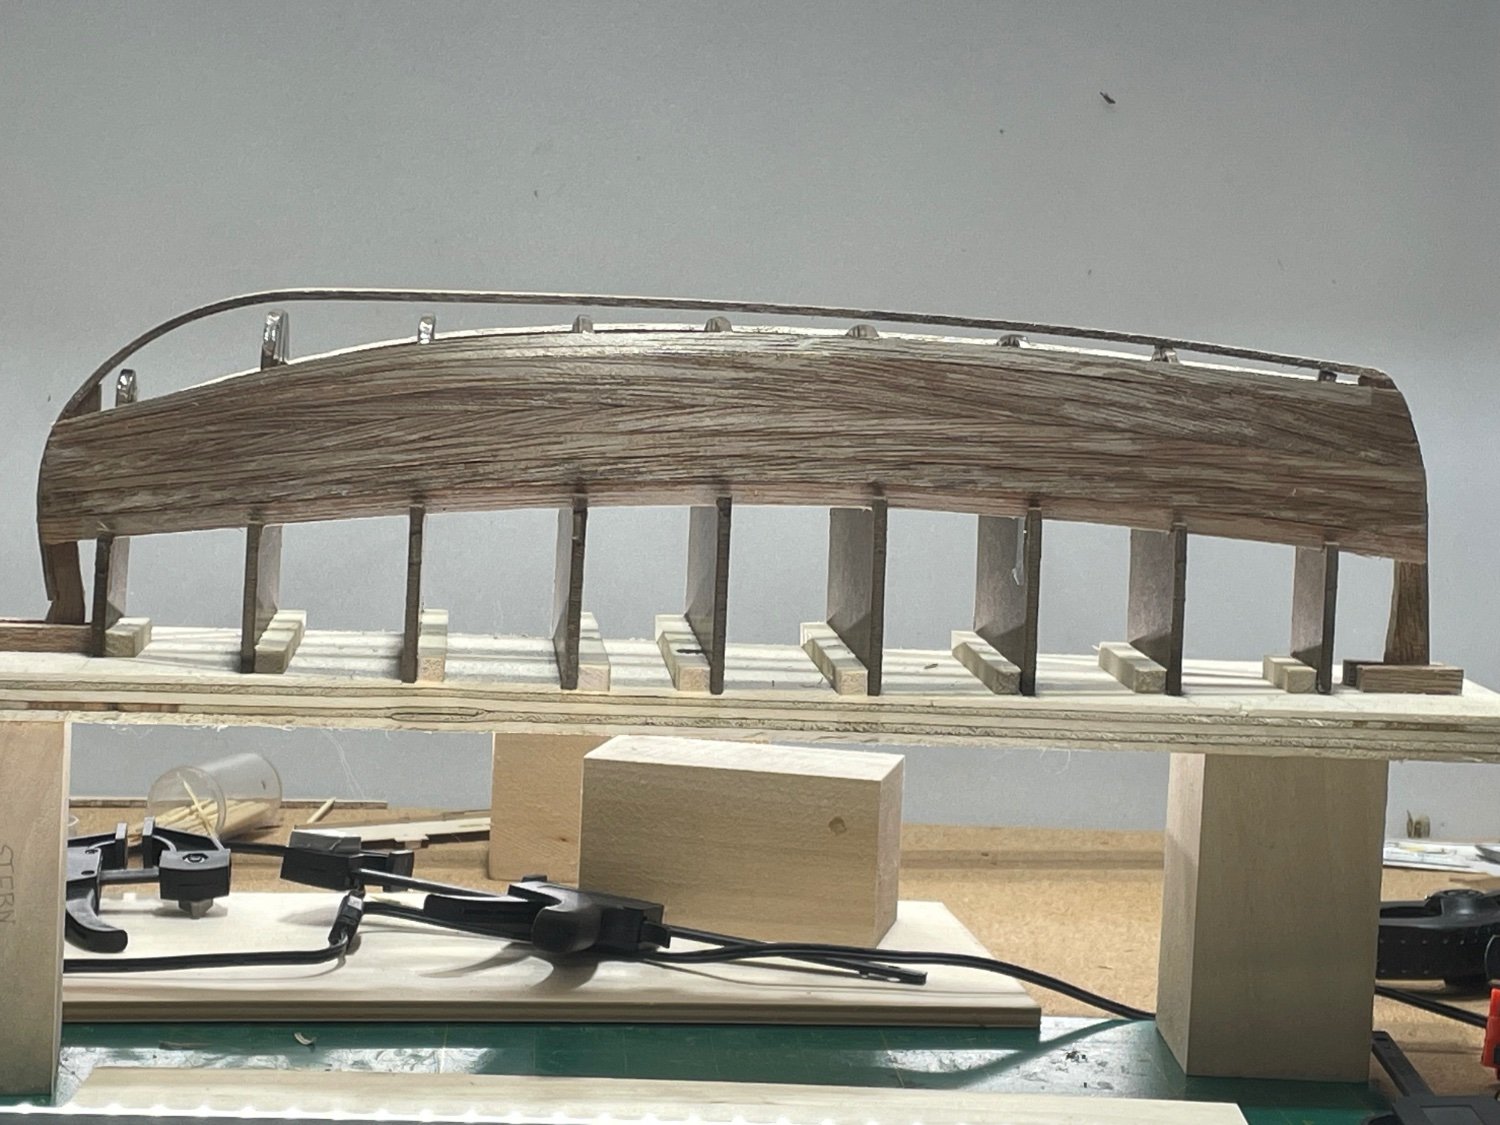
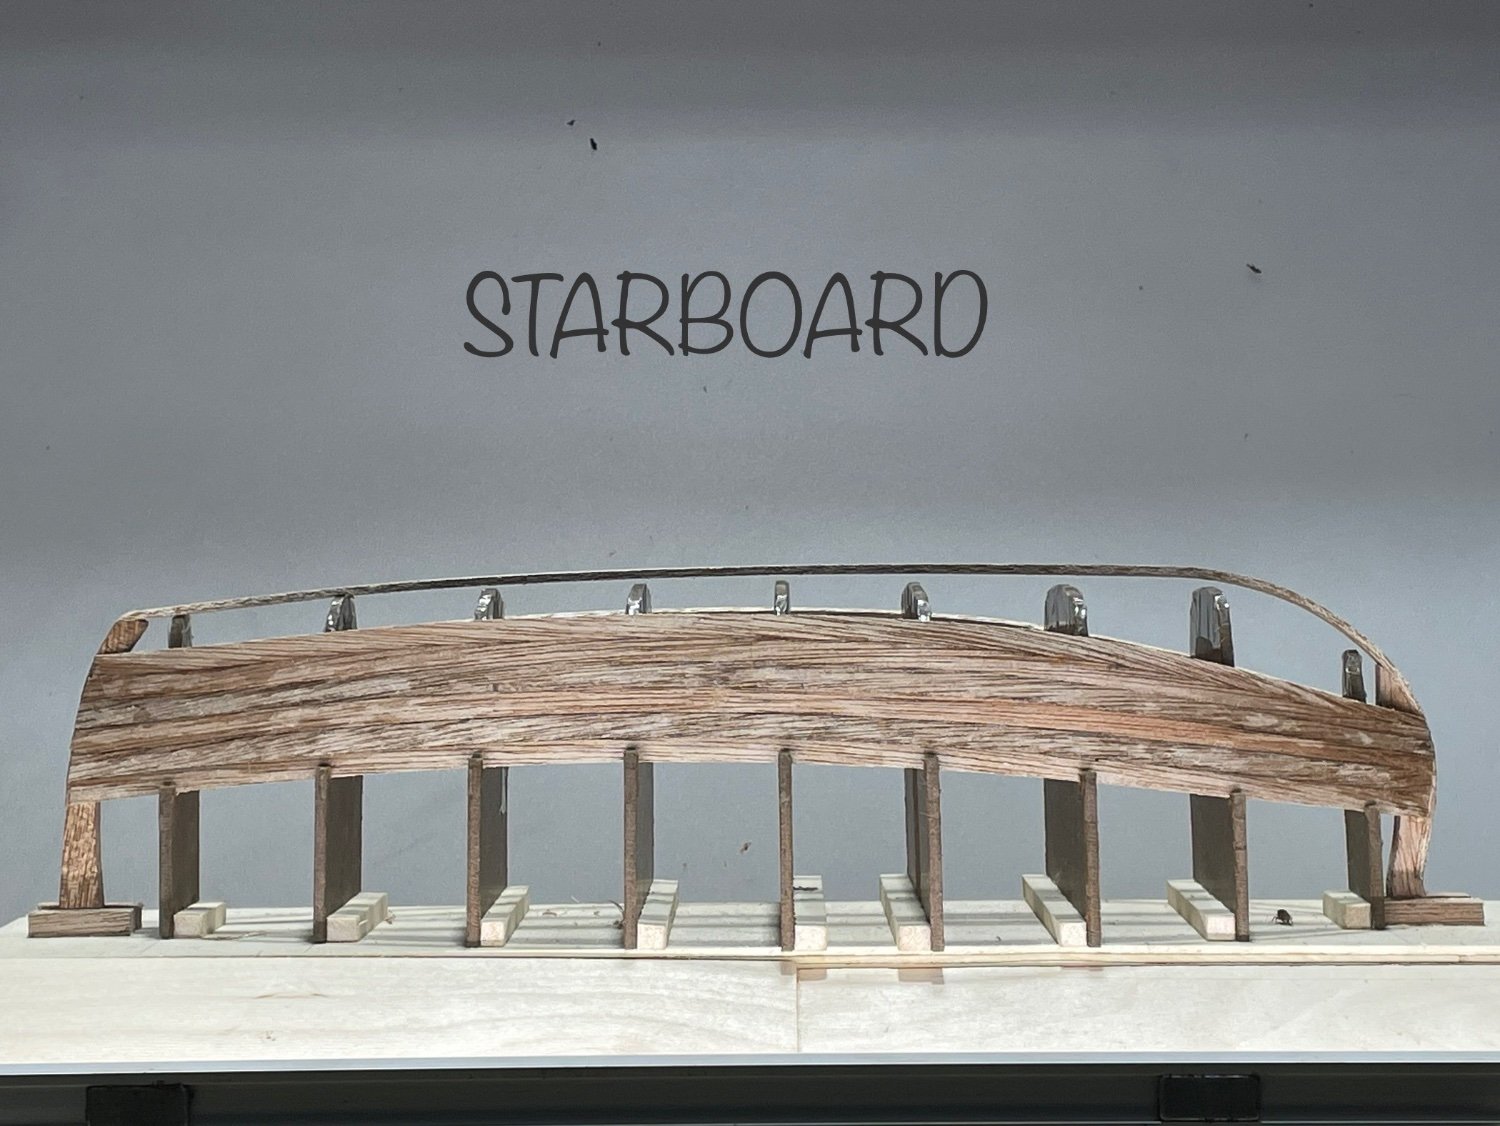
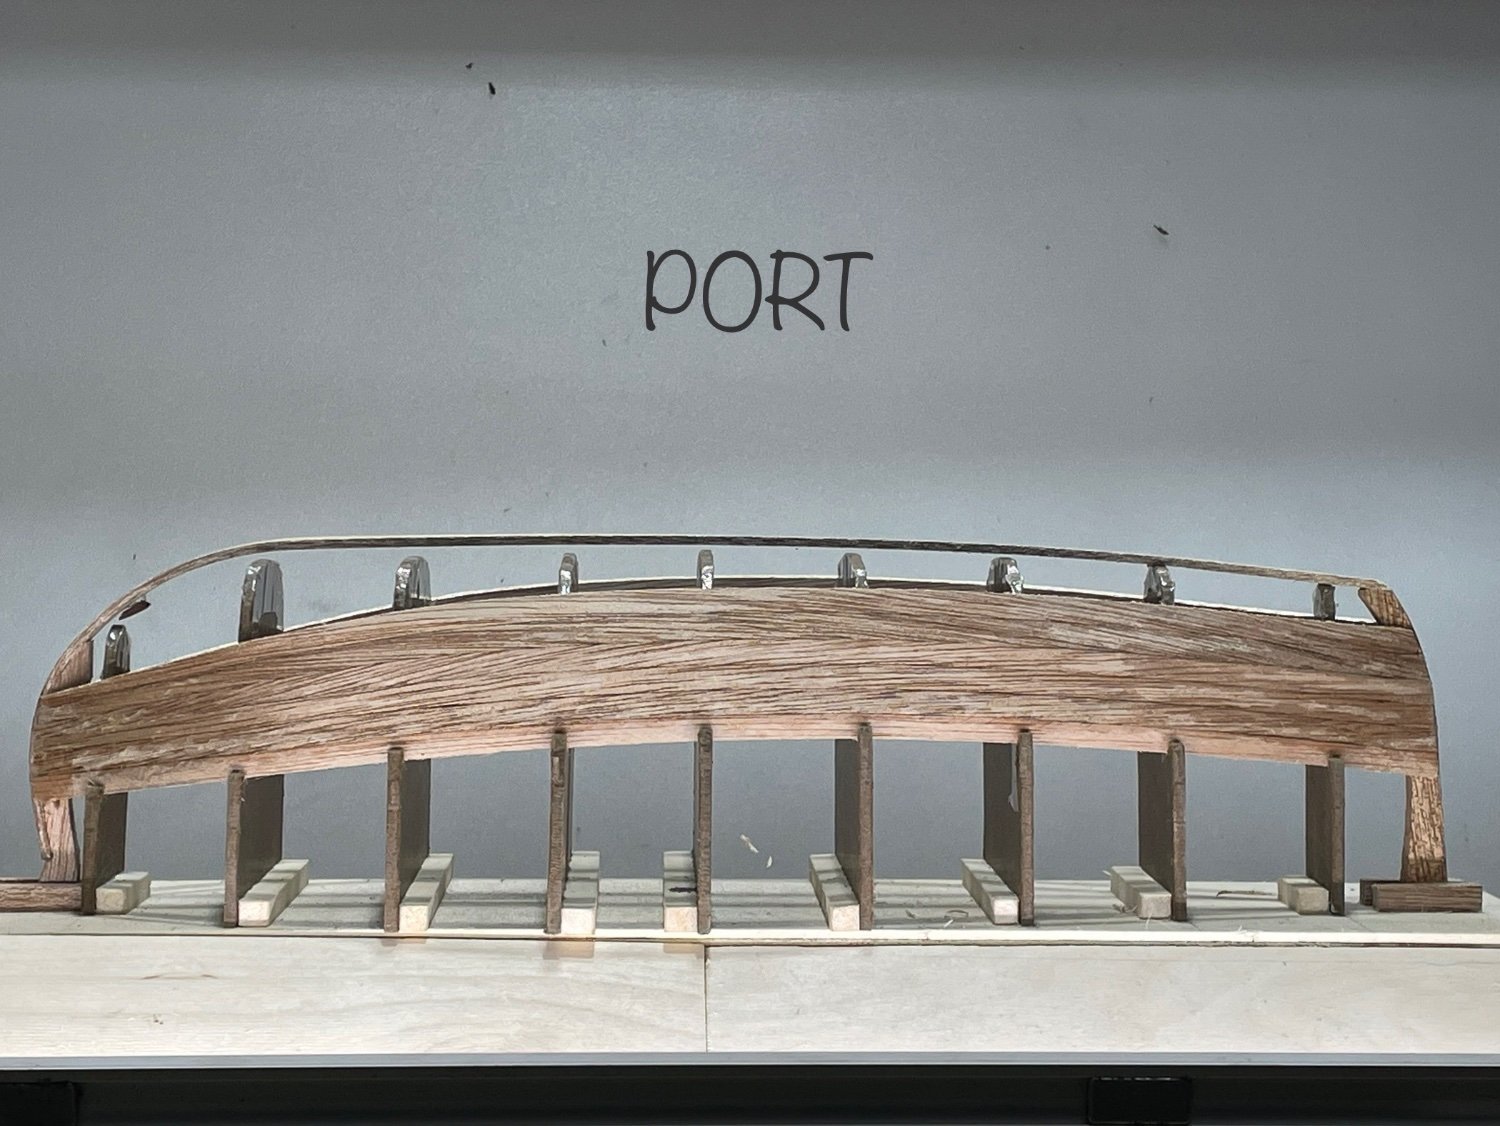
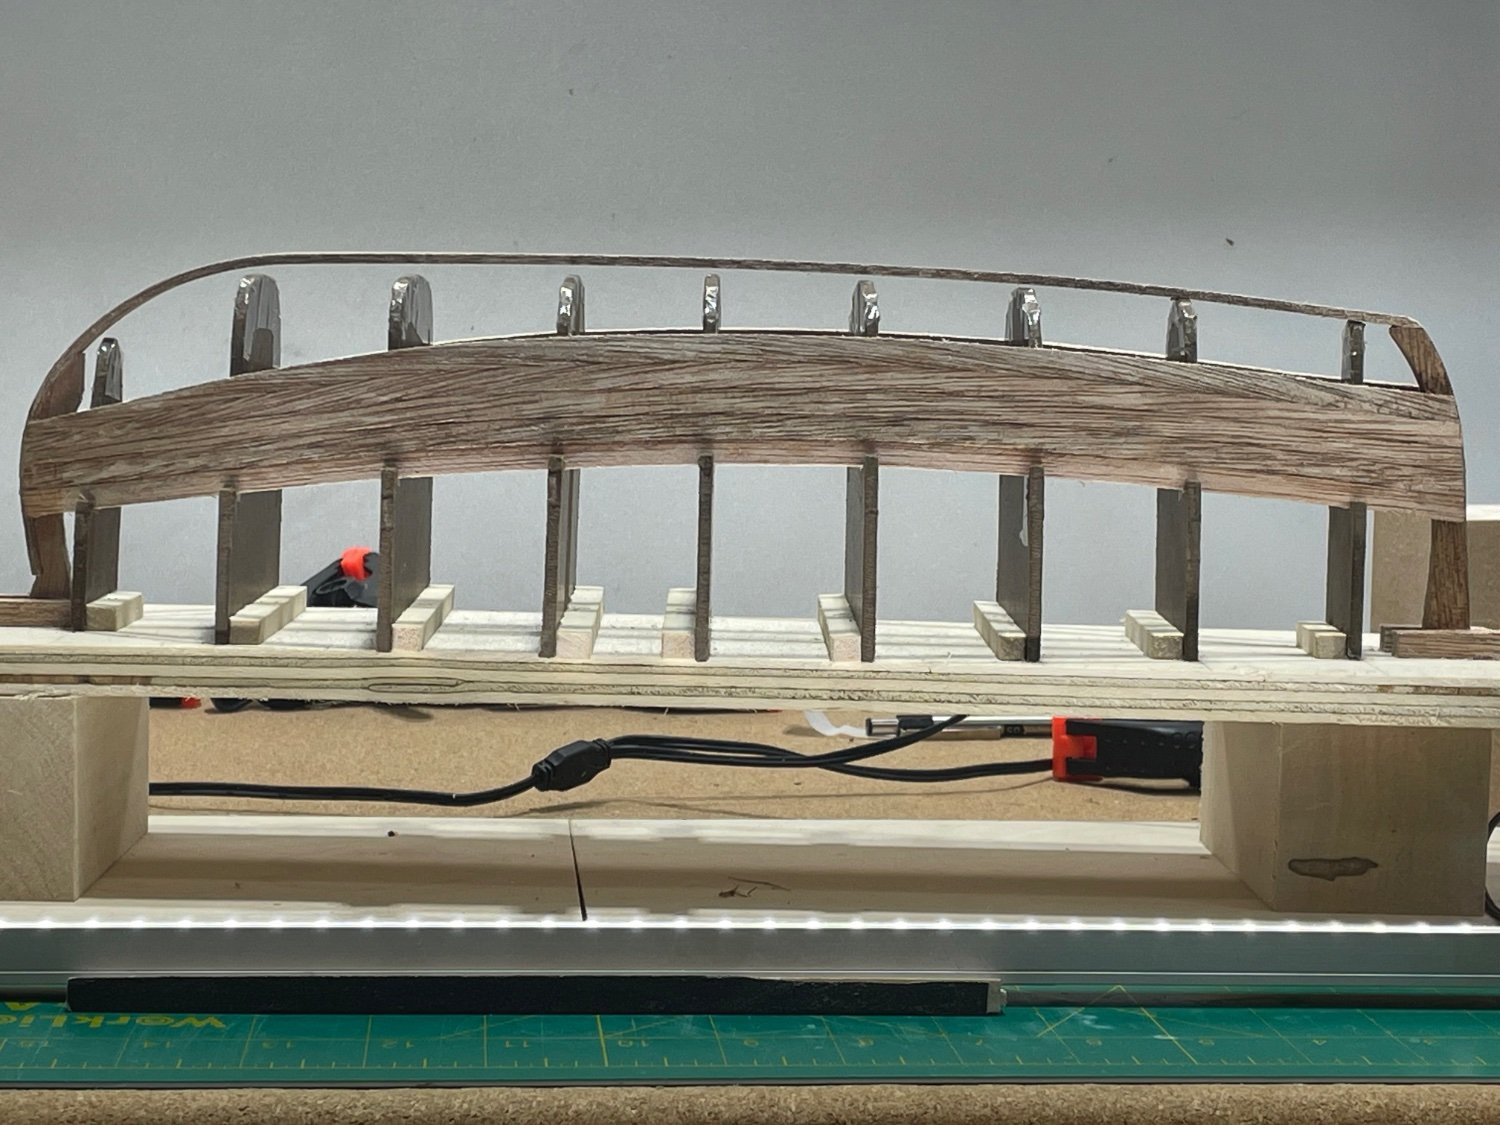
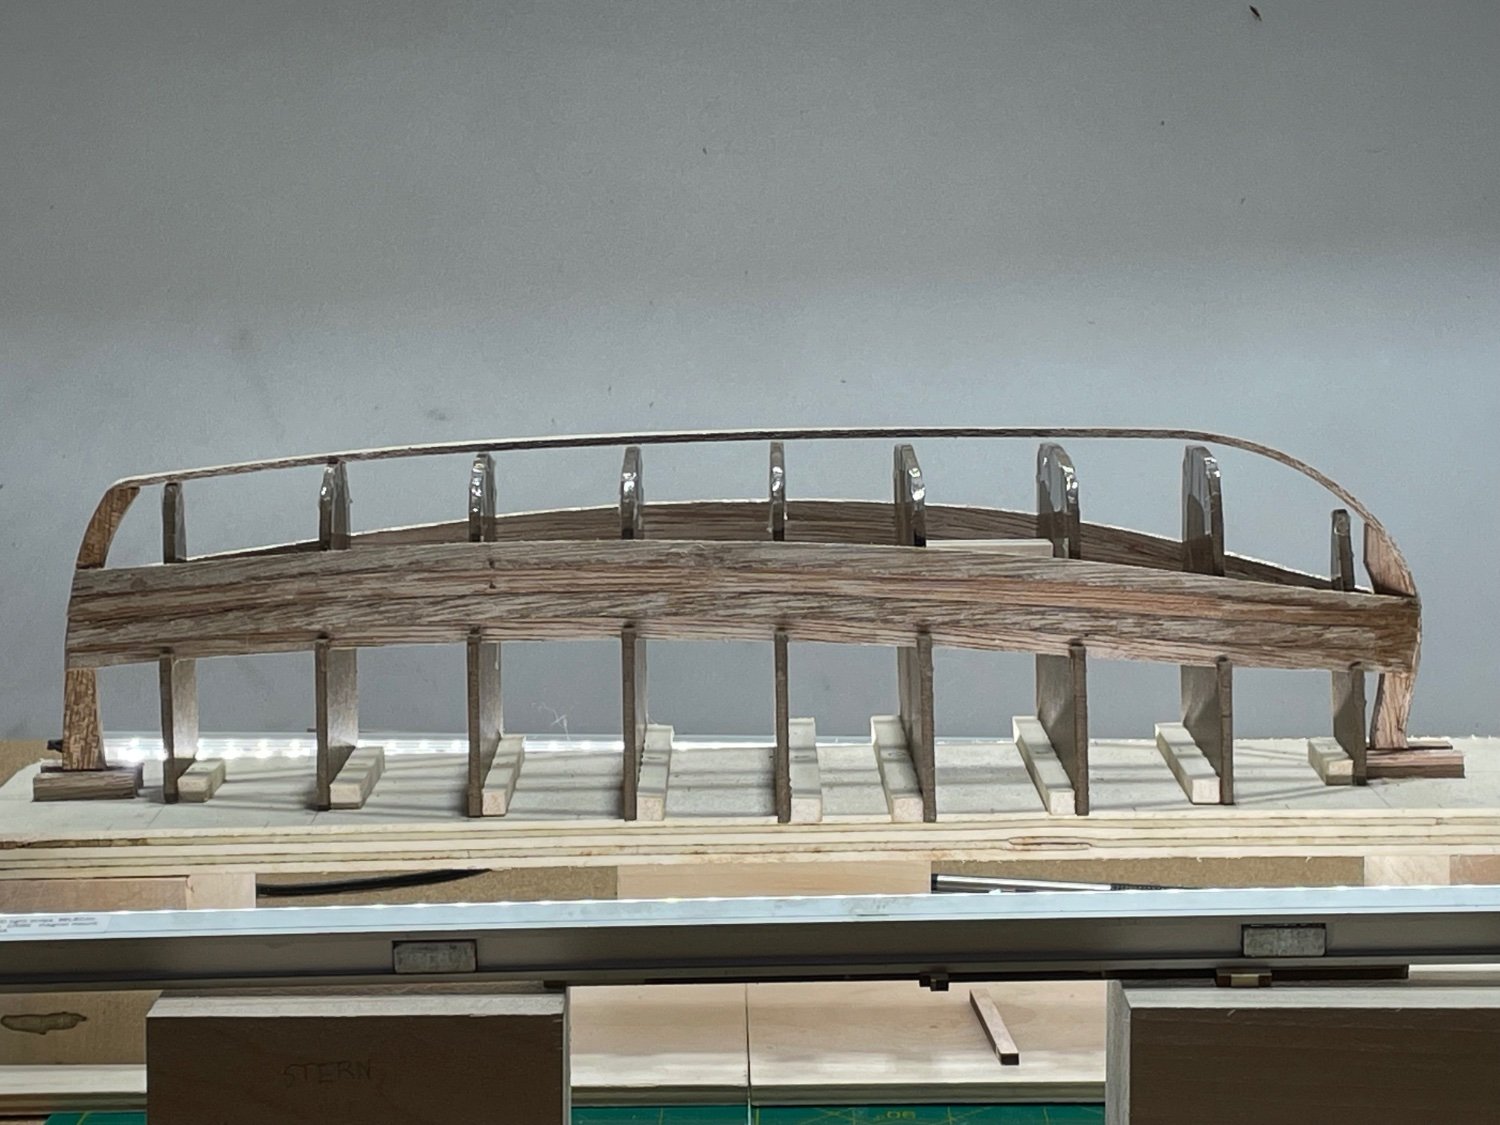
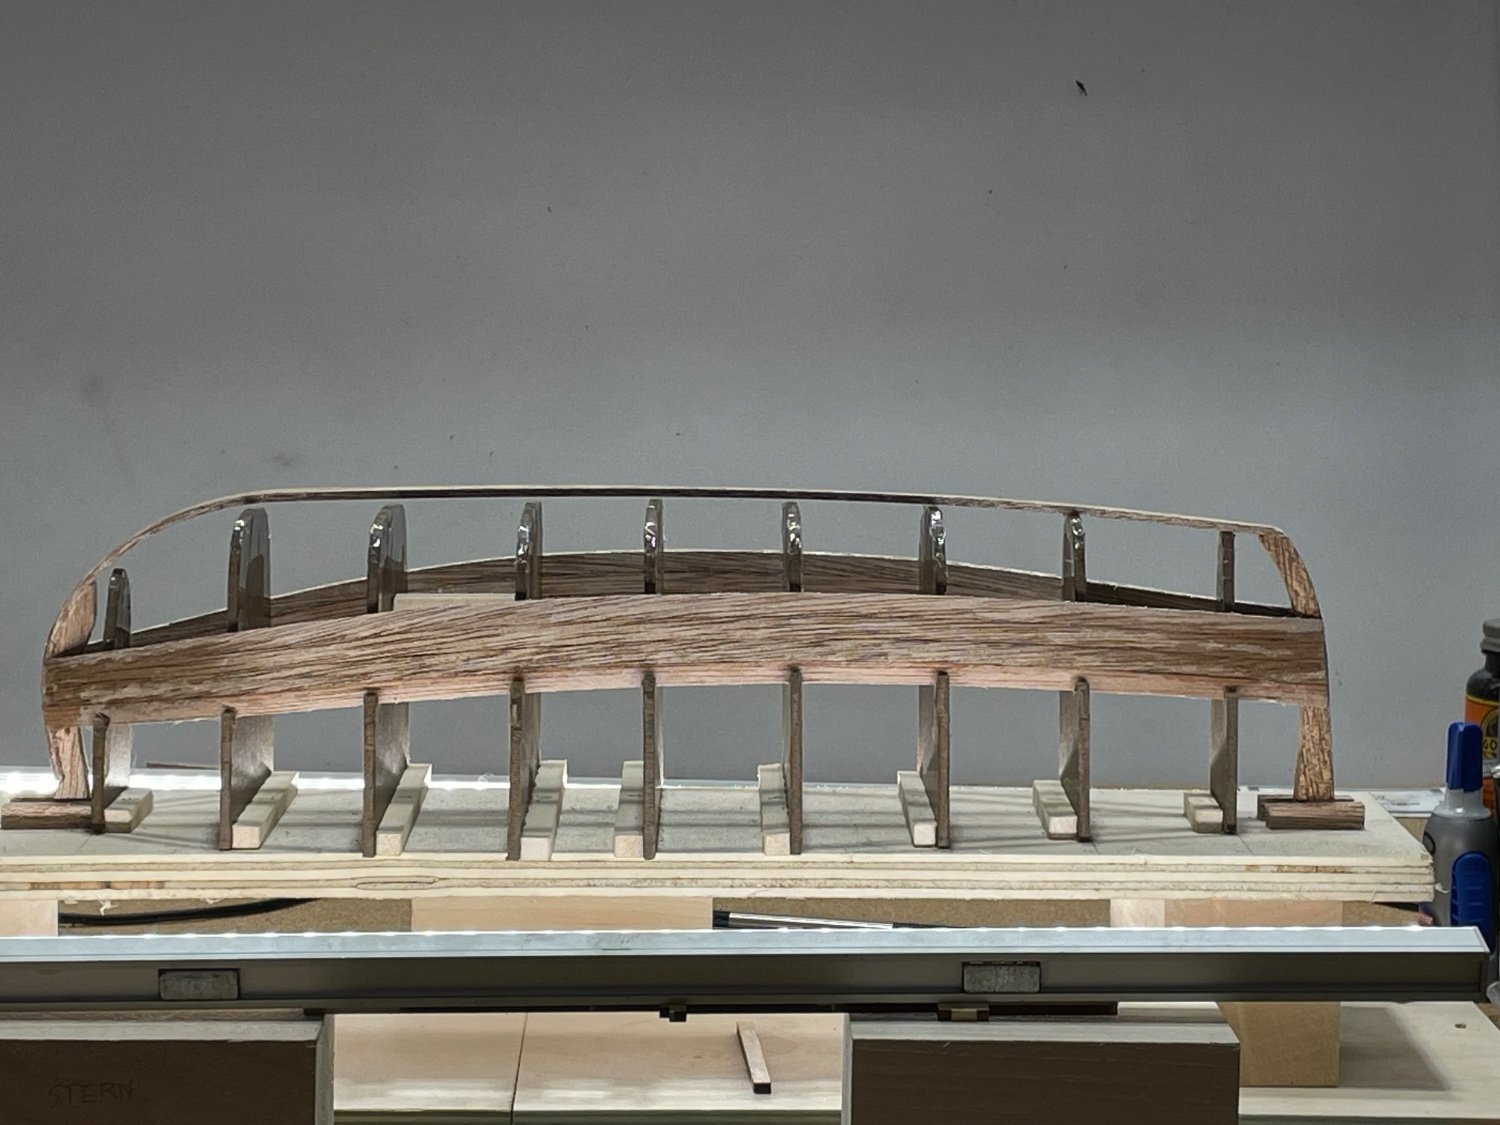
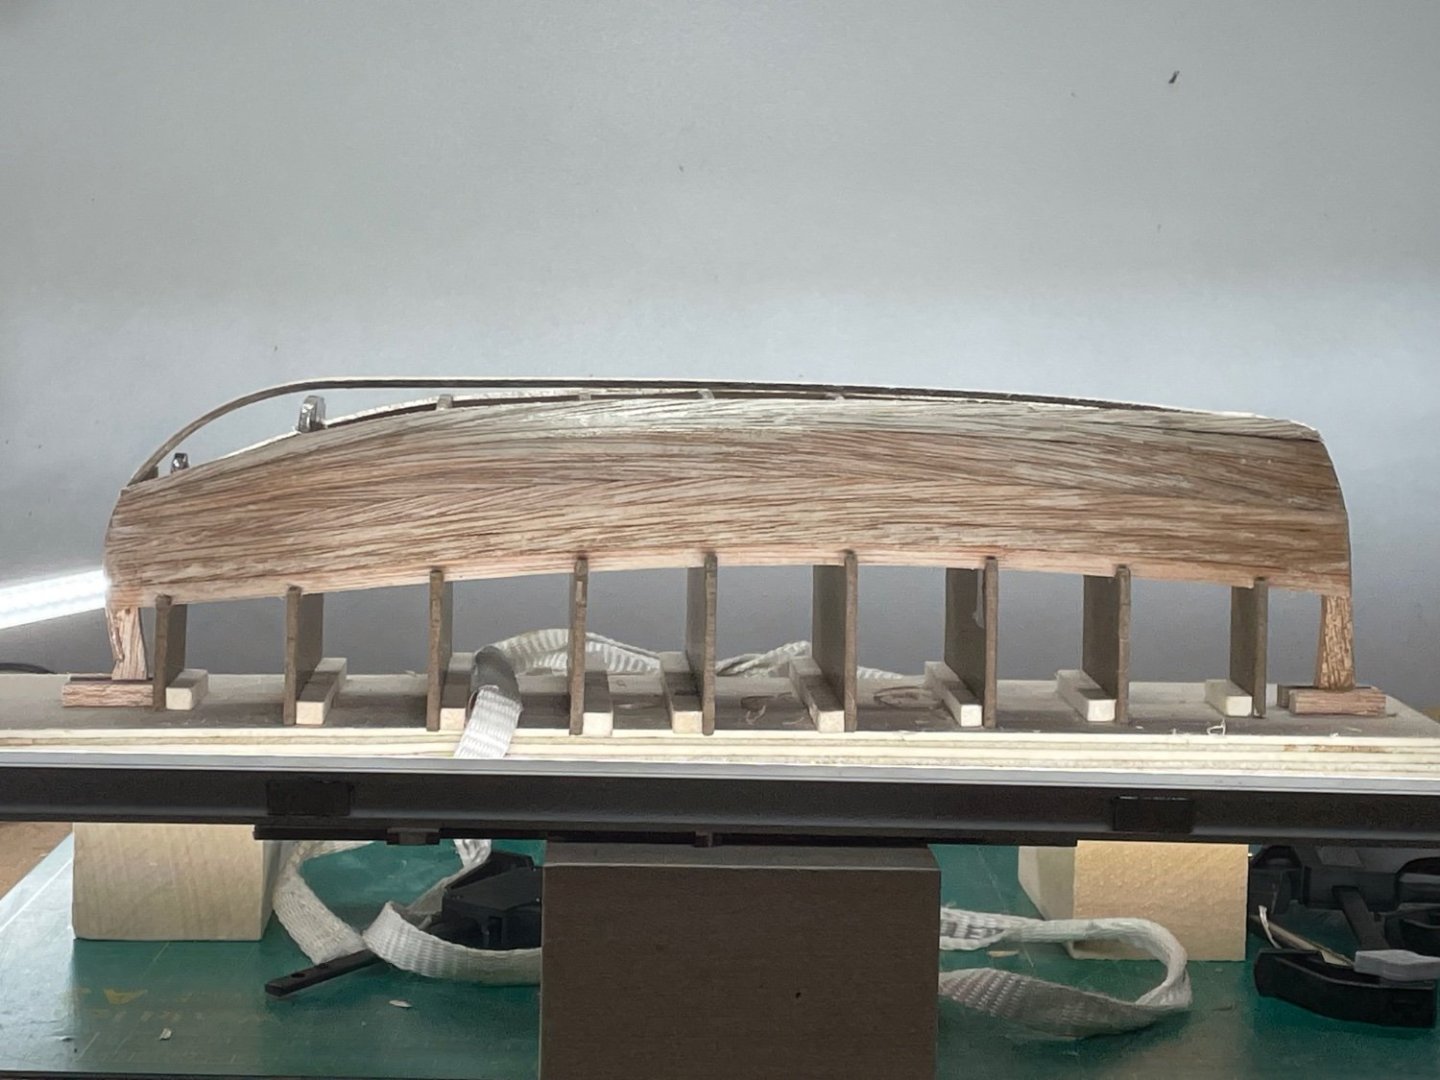
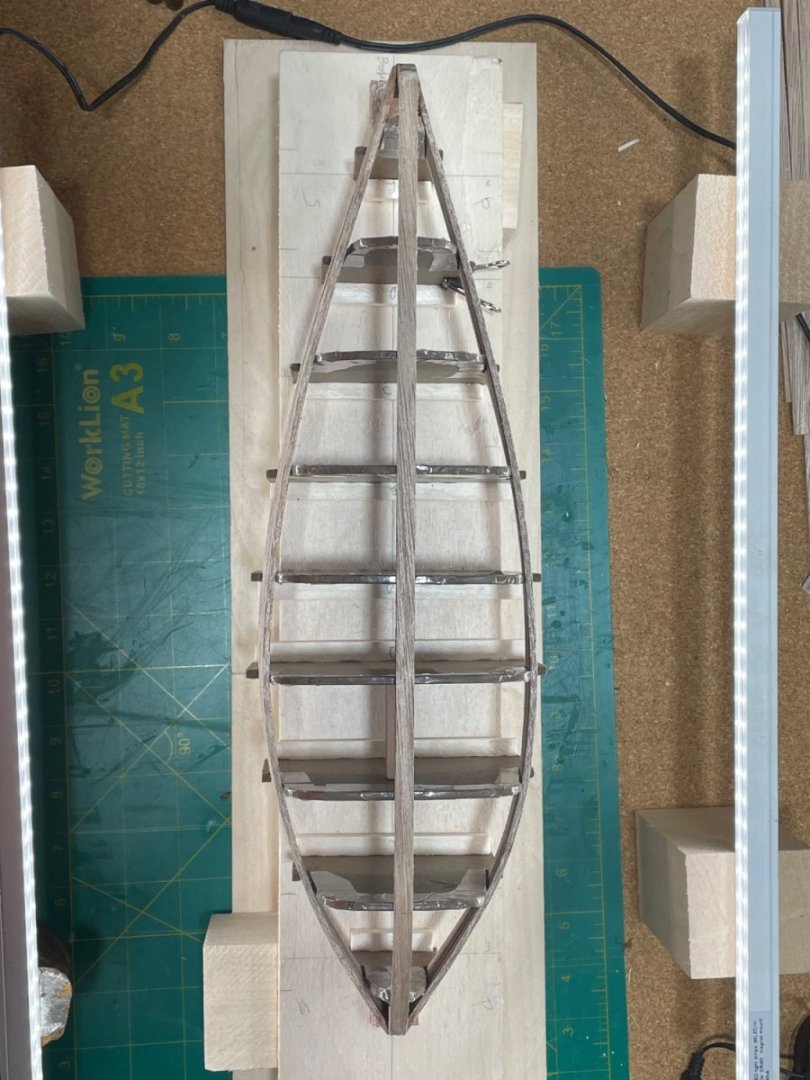
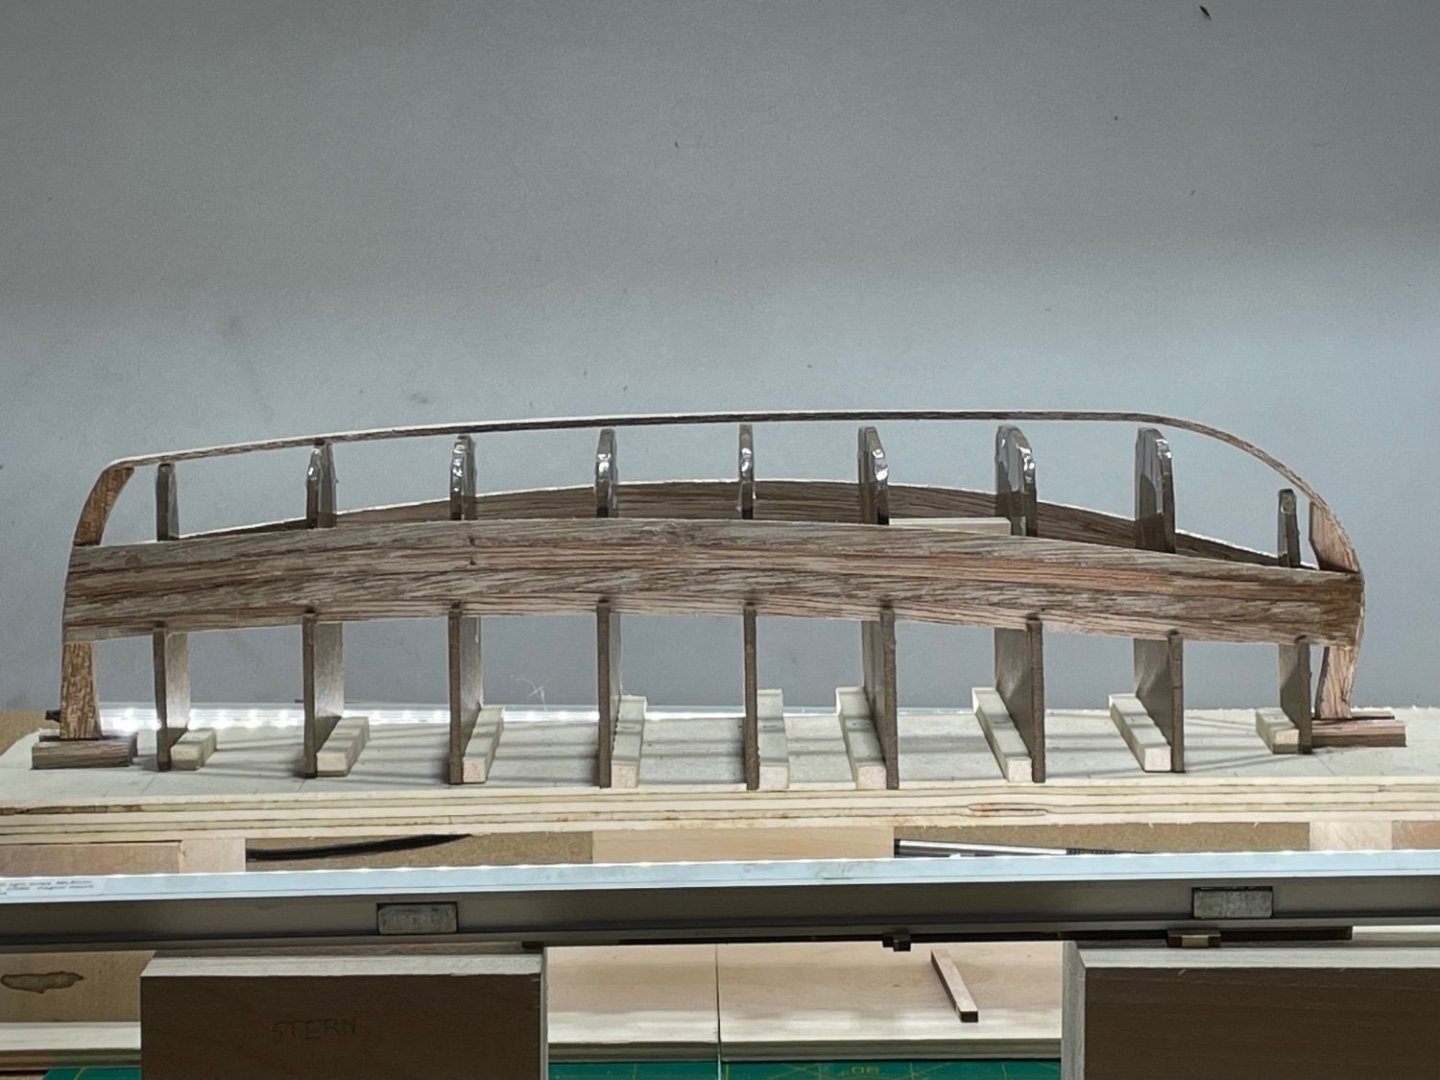
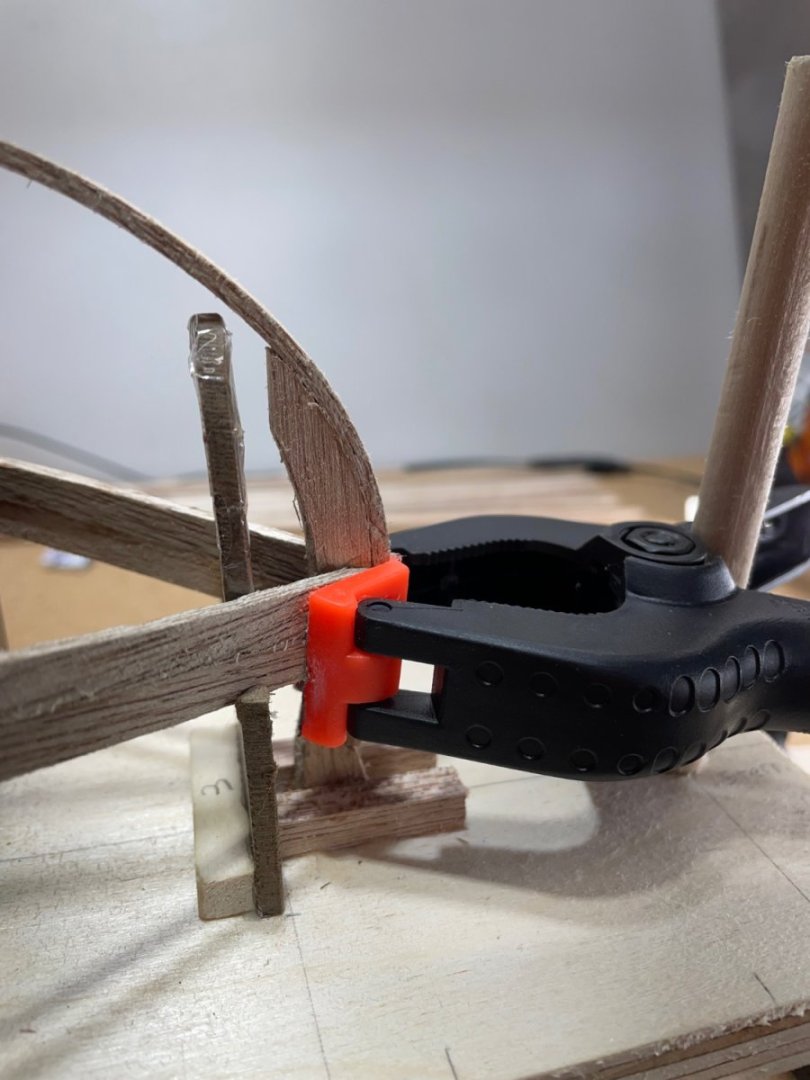
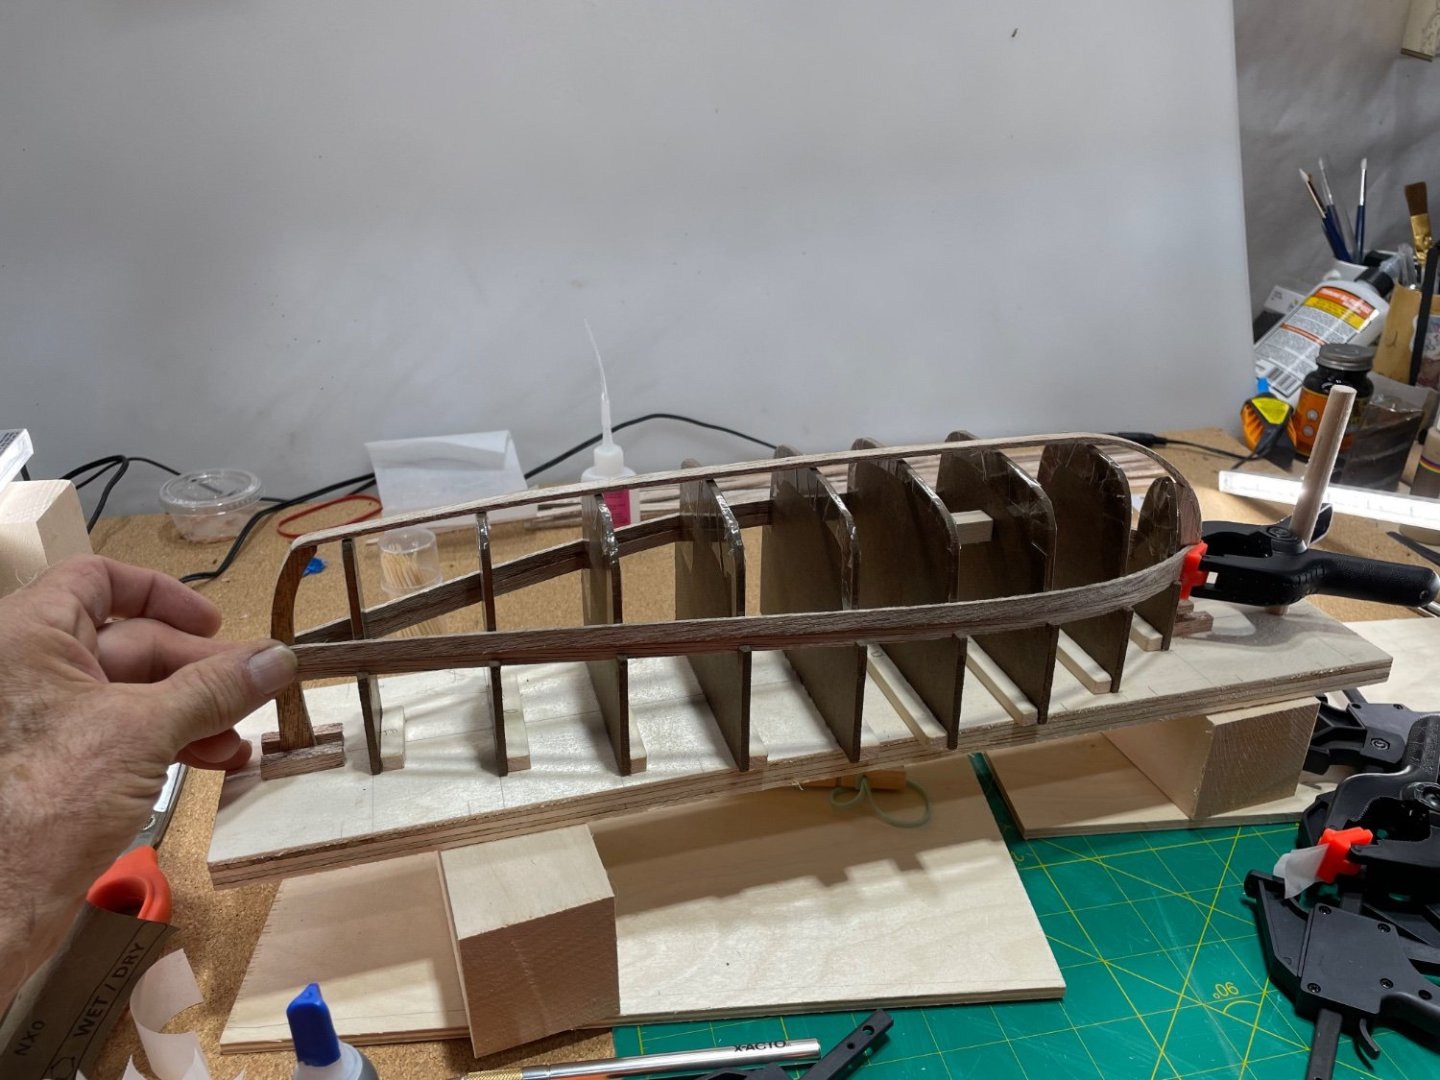
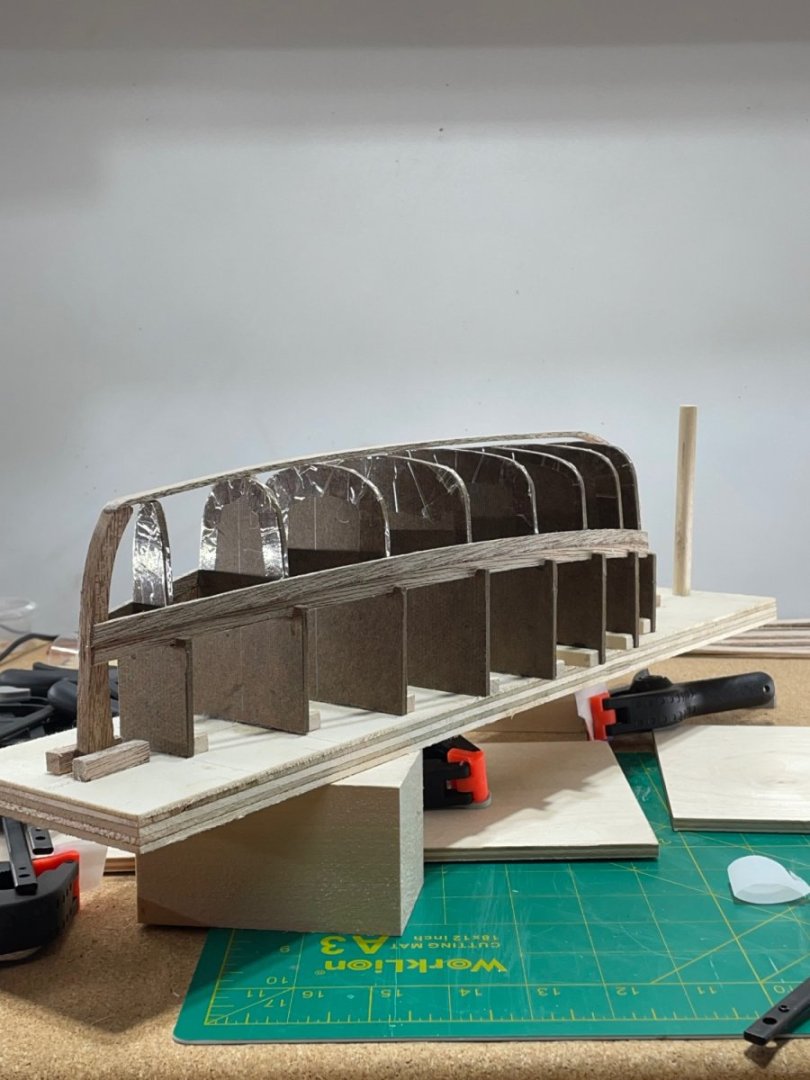
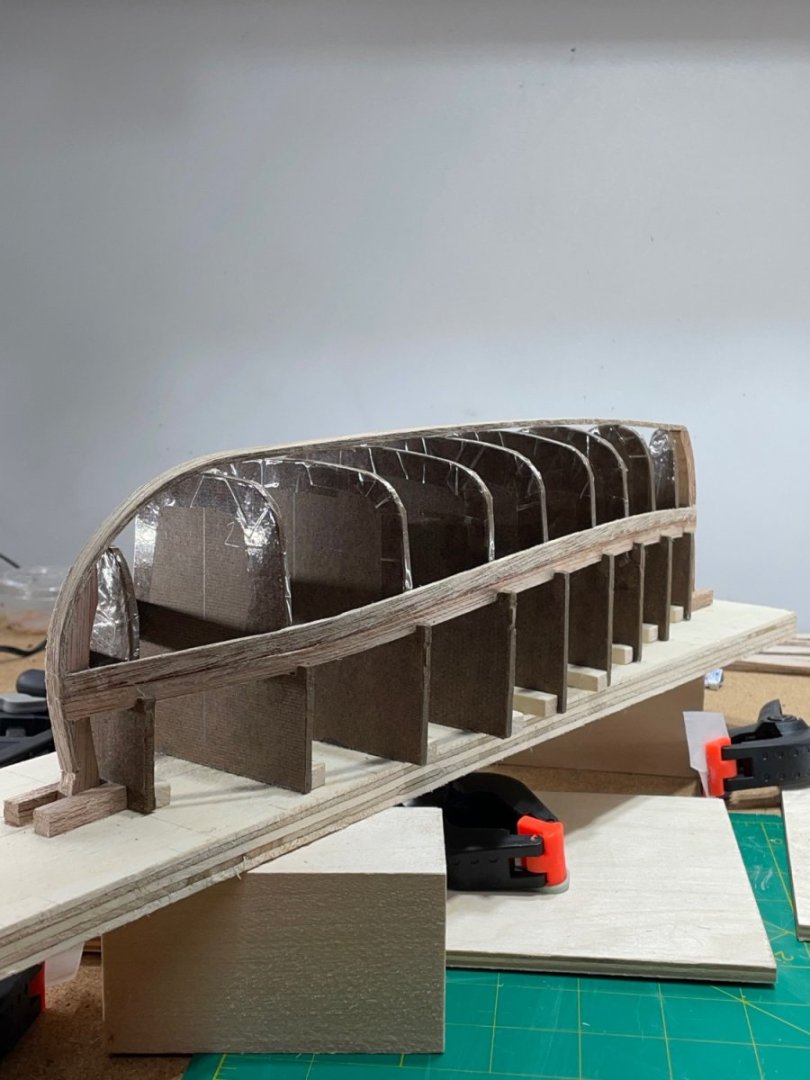
I see the advantage for a novice like me, to keep the log current with the build. I took the advice of @mtaylor and watched the related videos from the like he posted. I immediately set up my bending station. I had a heat gun but never thought about using it until he mentioned it:-) After eyeballing the shape of the curve, I applied heat and headed for bed:-) Early this morning, I removed the plank. It did spring back a tiny bit, but still retained its intended shape. It fit nicely on top of the previous plank, without needing the bottom pushed in. Here are the other views after 5 planks on either side have been laid. Just a word out there, after one more plank, they will start transitioning from the side to the bottom then back to the side. I know the meeting edges will need to be beveled. Not sure yet what to expect from the rest of the board:-)

- 134 replies
-
- 7
-
-
- sea of galilee boat
- SE Miller
- (and 1 more)
-
Thanks Mark, I’ve took a quick peek and it’s looks like they will be super helpful.
- 134 replies
-
- 1
-
-
- sea of galilee boat
- SE Miller
- (and 1 more)
-
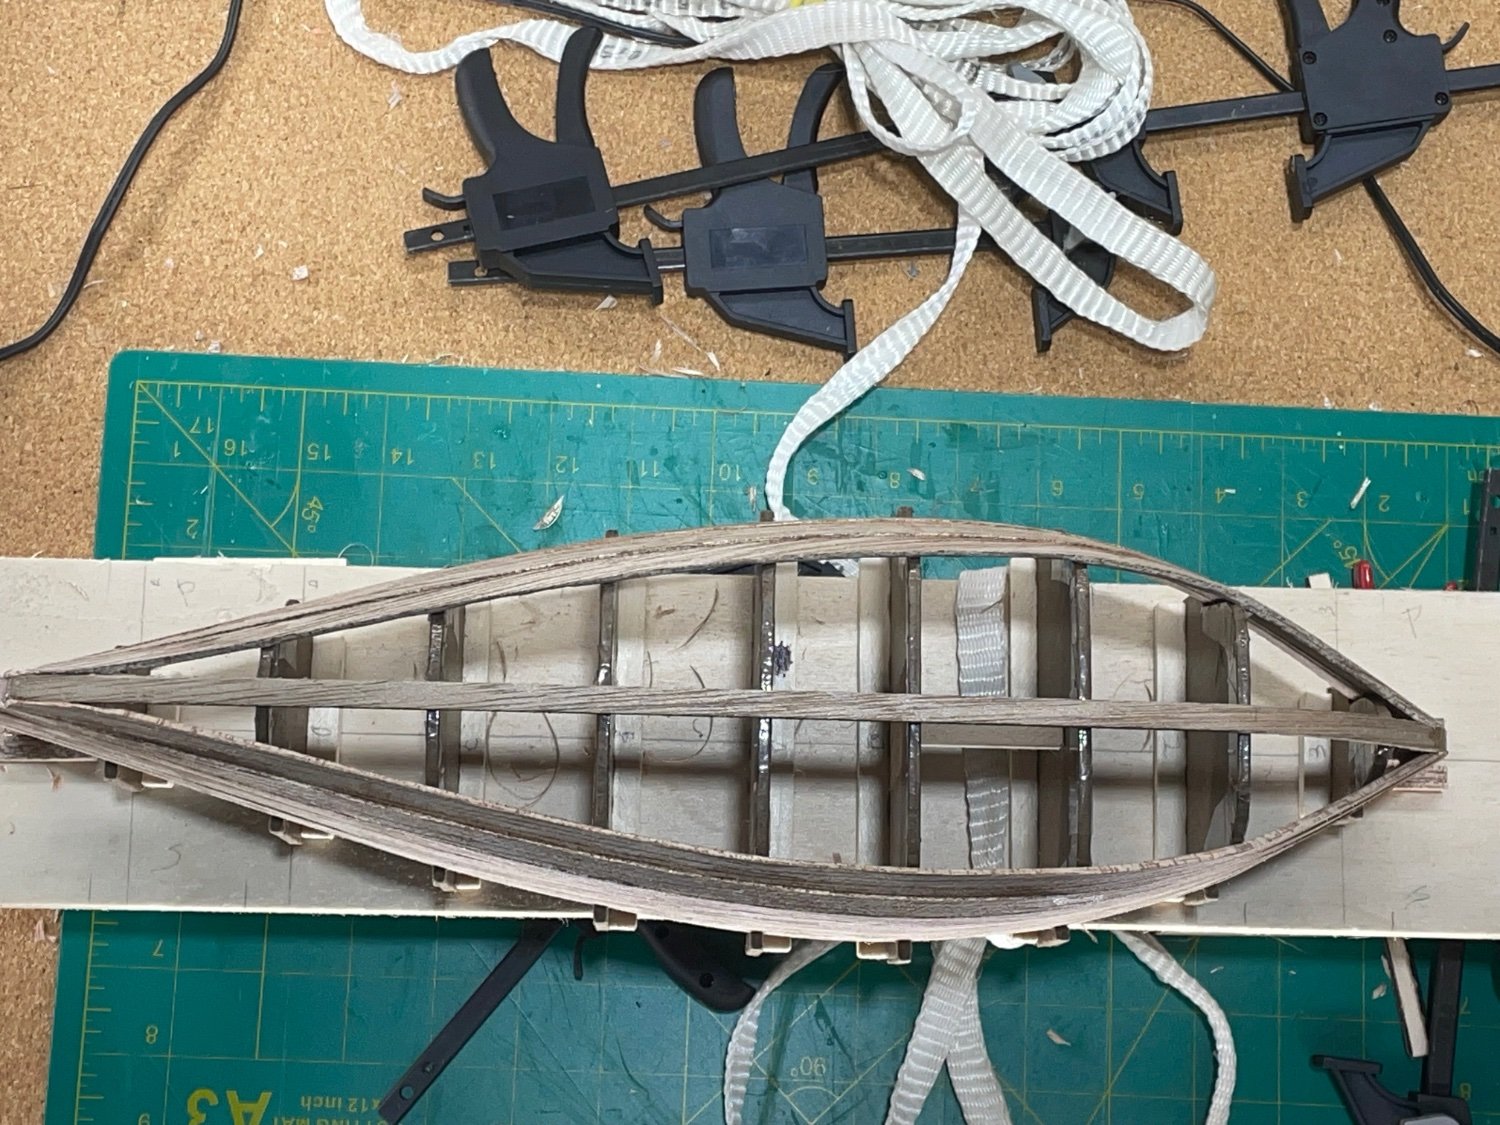
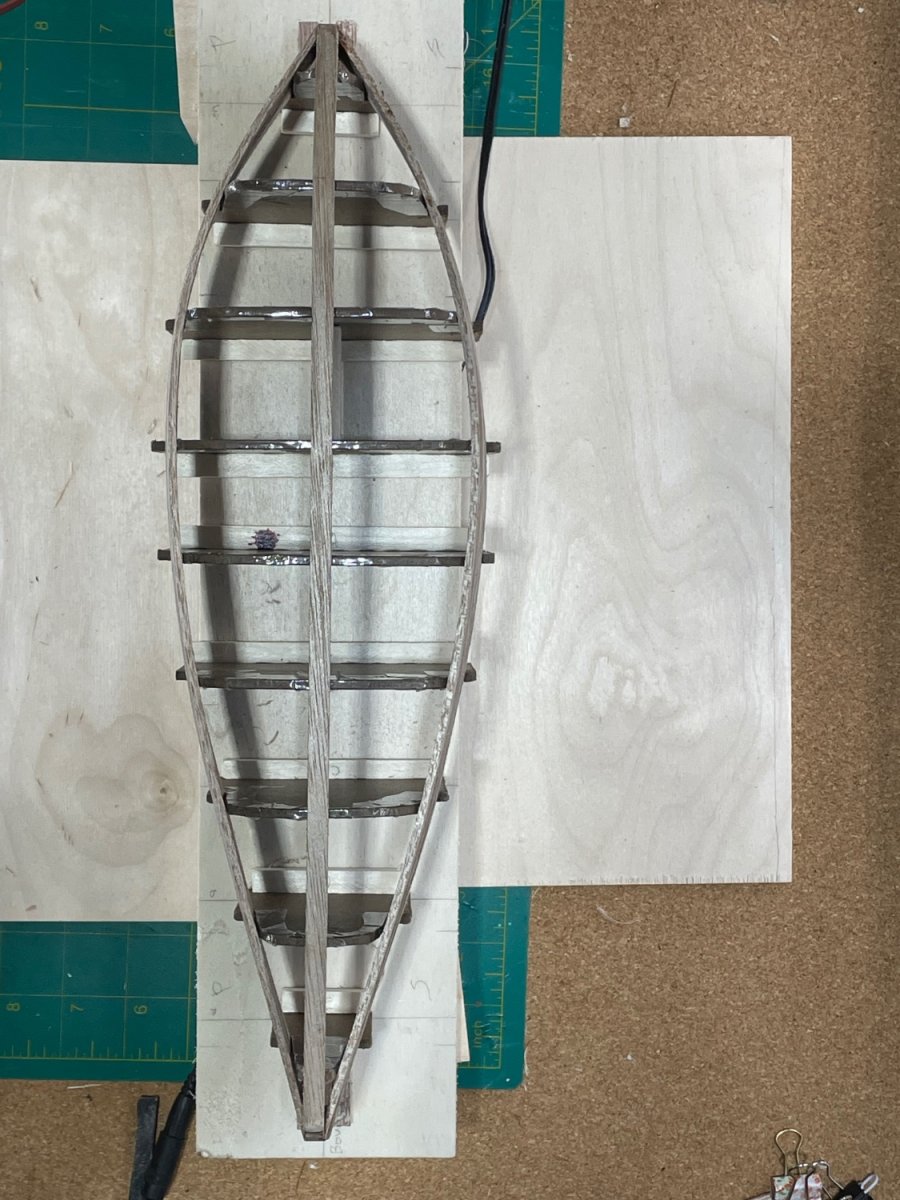
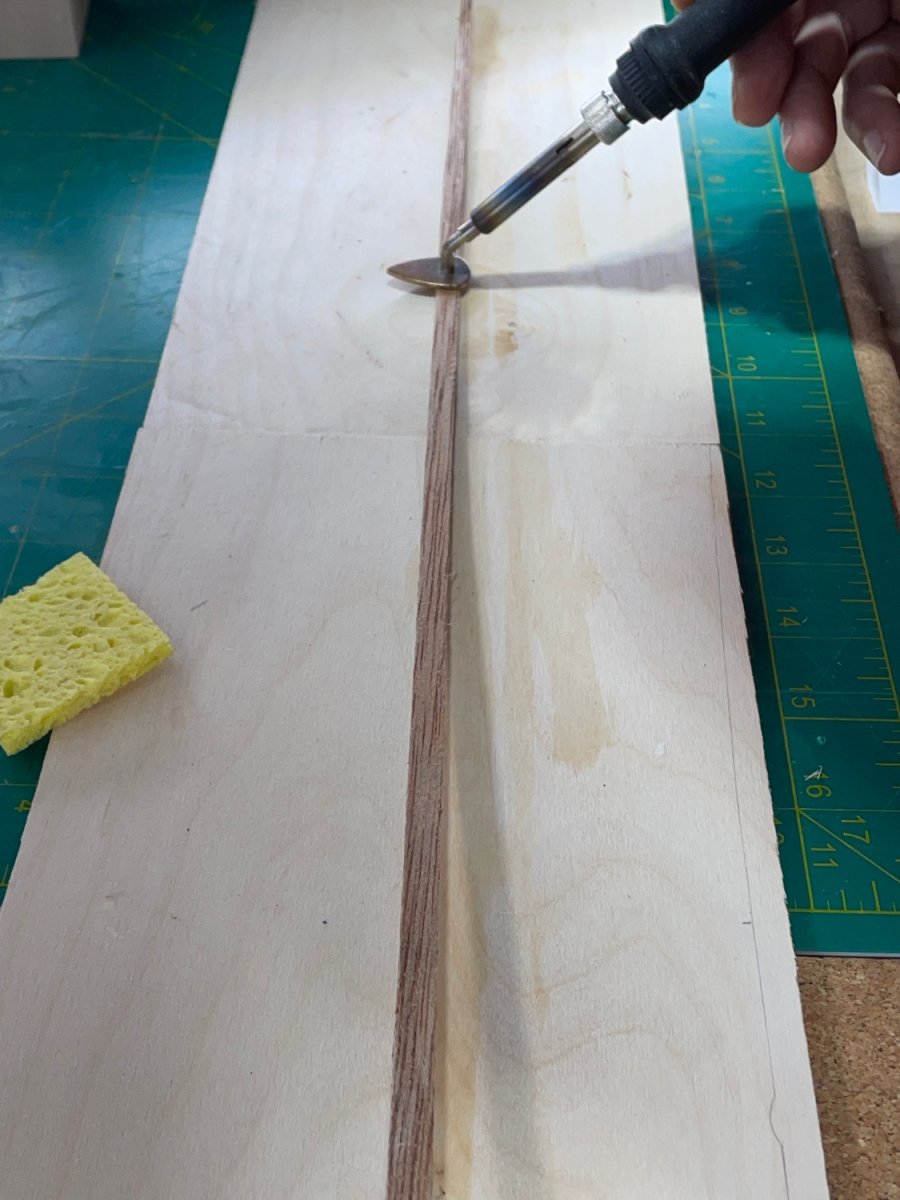
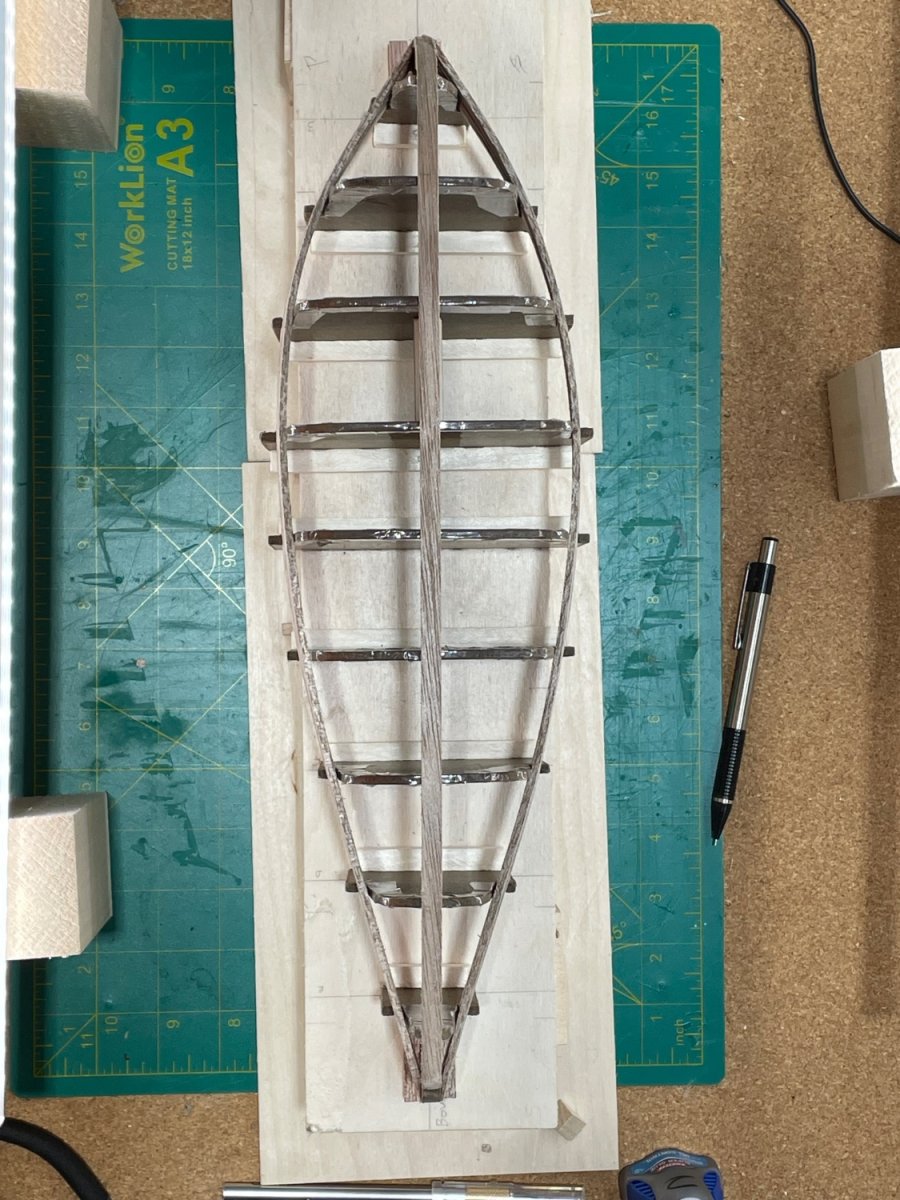
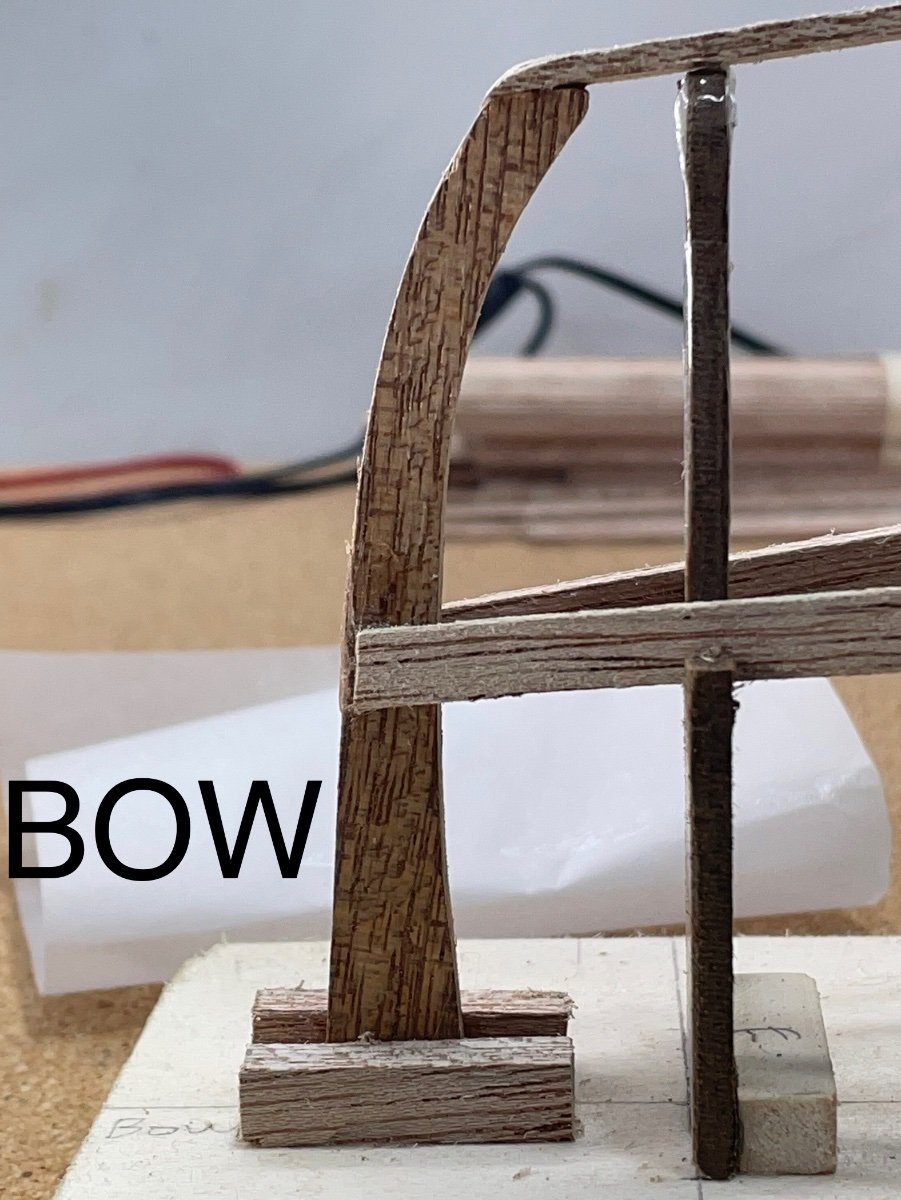
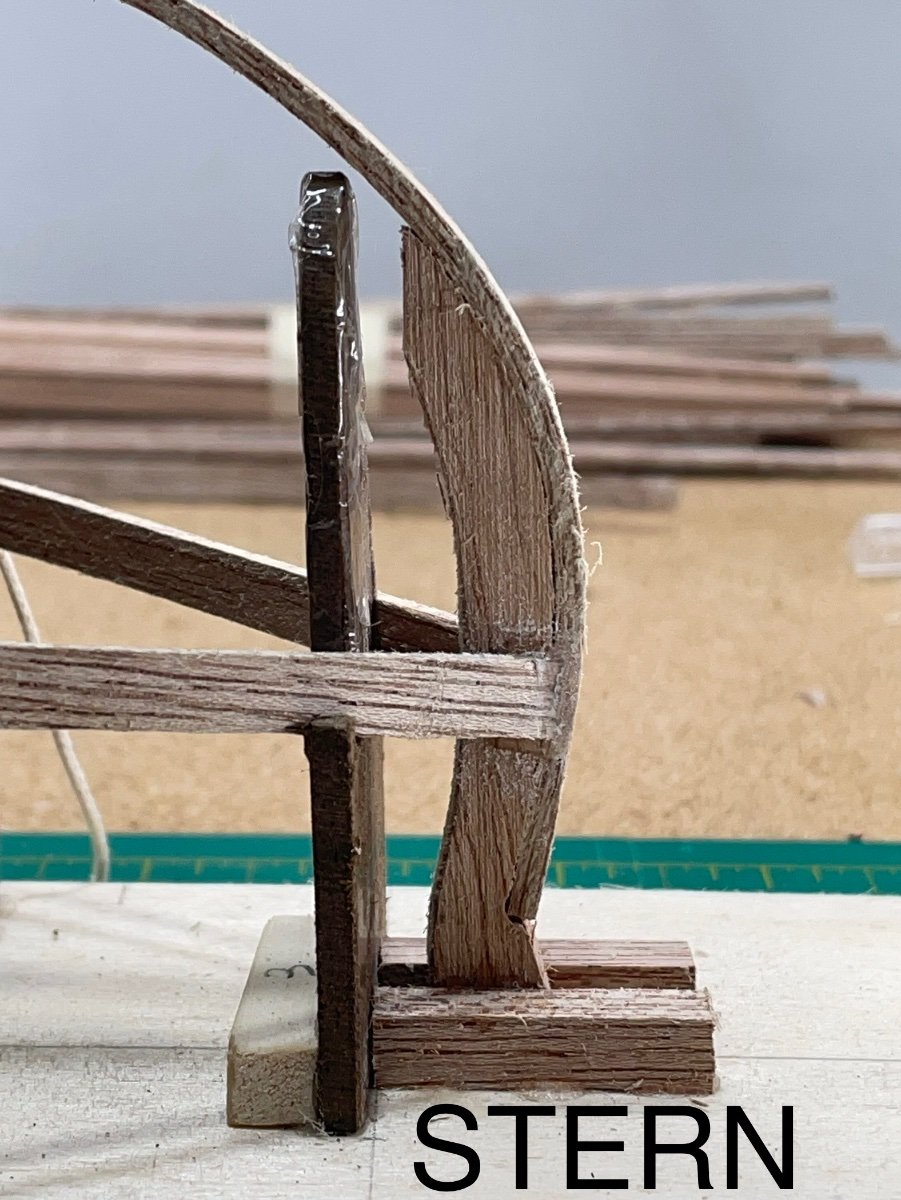
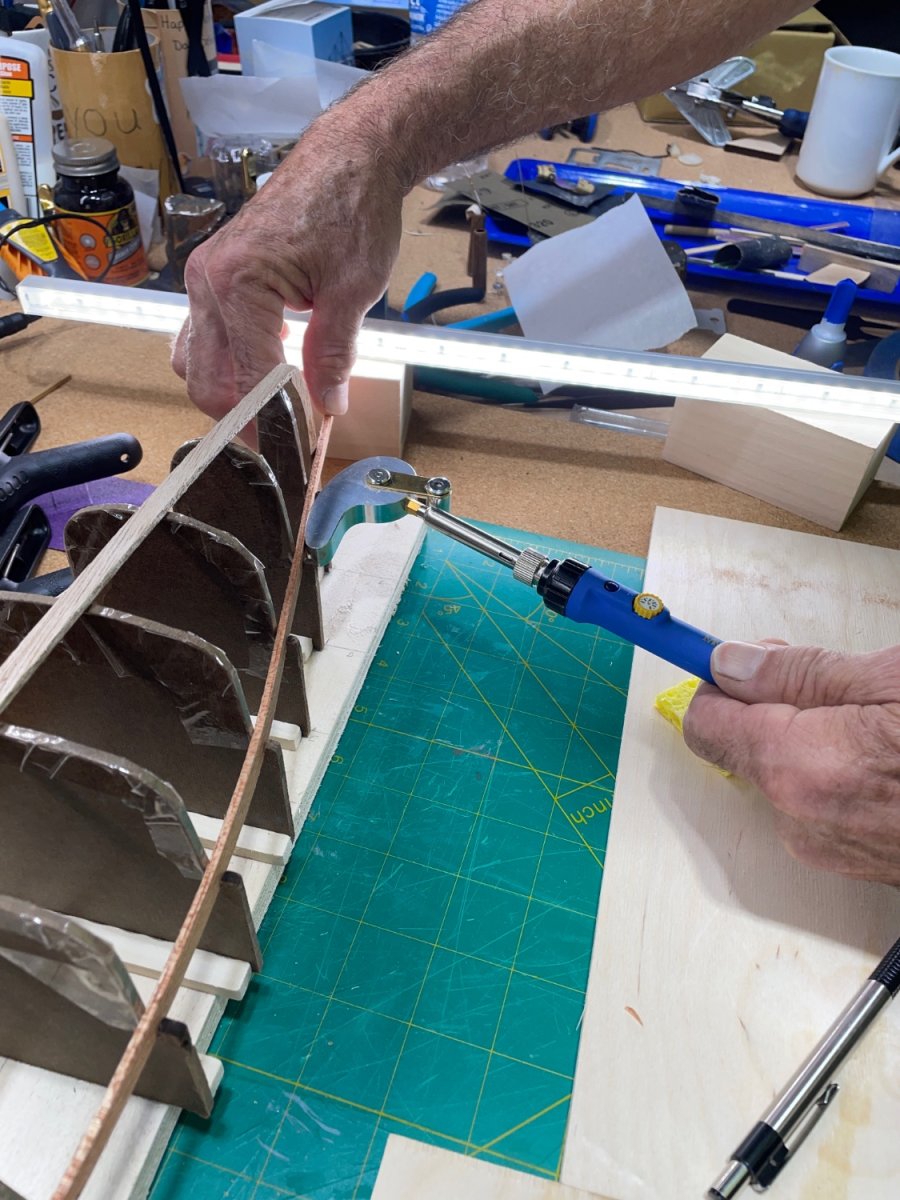
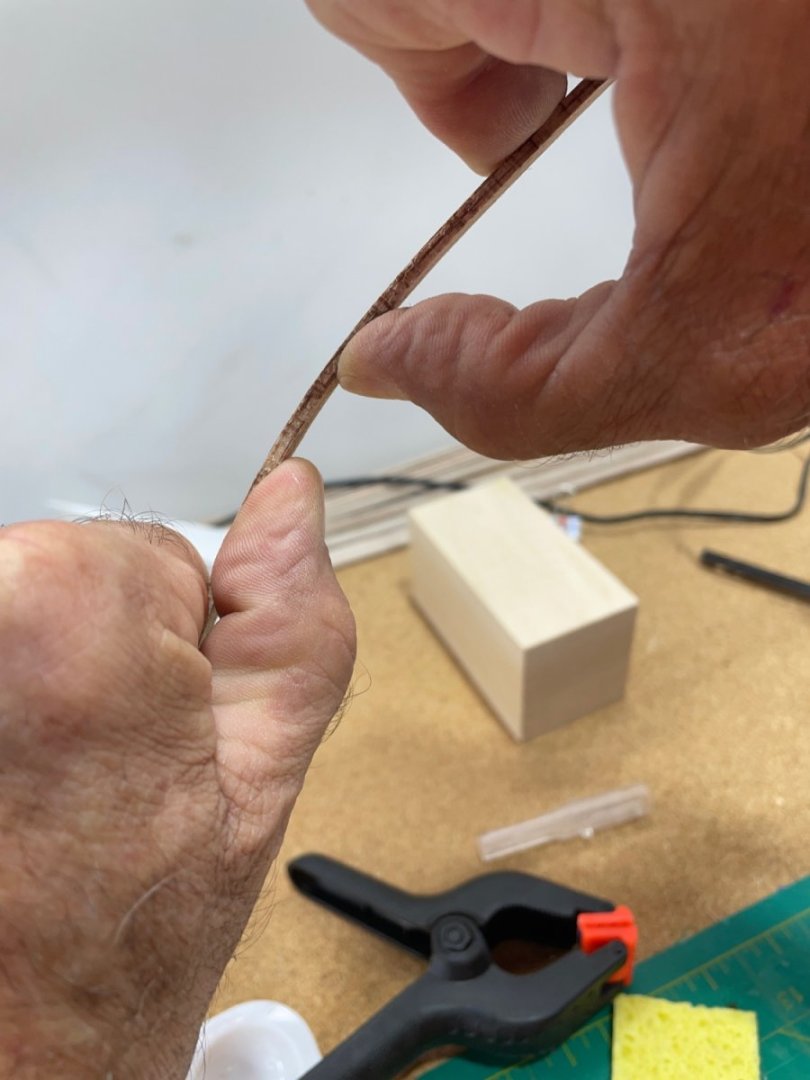
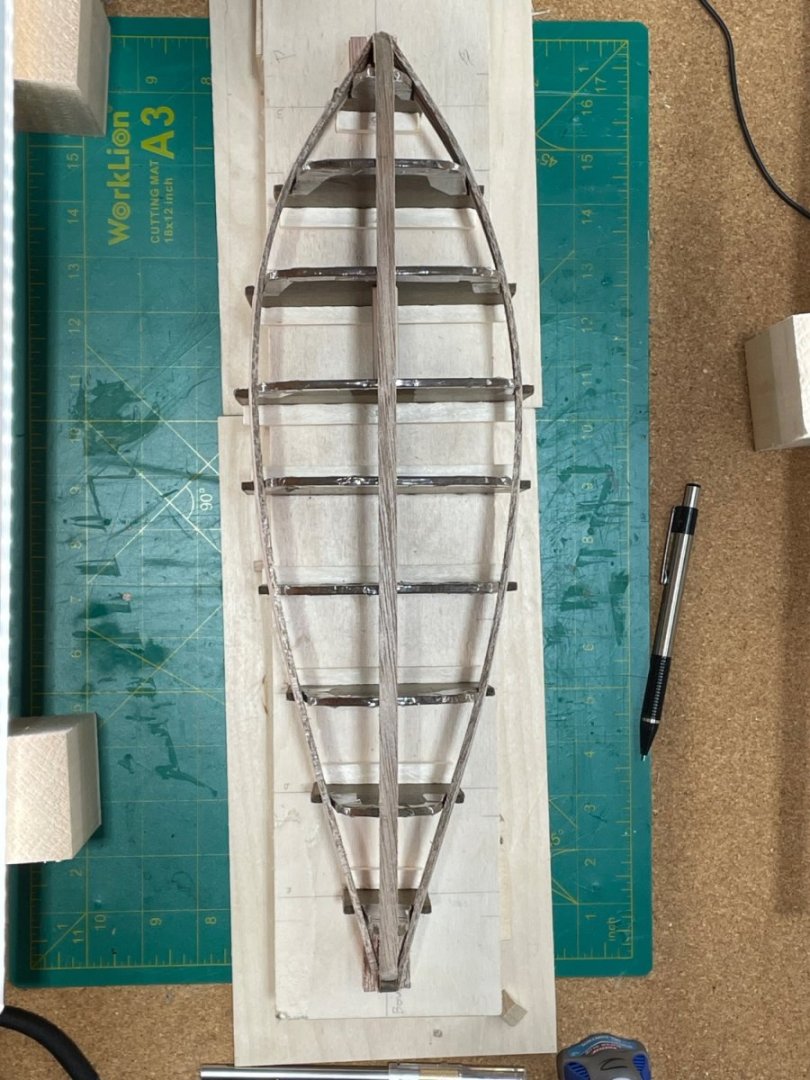
As I get started into this build, I’m finding it difficult to decide how I can display this log so it will be helpful for another. You basically are just bending and forming planks around the frame. The uniqueness of all the different logs maybe the way we clamp the wood. The experience I long for is learning how to soften the wood so it is more relaxed when fitted. Not in a bind when you are trying to glue it. Bear with me as I teach myself and gather helpful tips from others. I have been soaking the plank in hot water for different amounts of time, depending on my schedule on getting back out to the shipyard. First I spend minutes just lightly twisting and bending up and down the plank, not taking the wood near its bending limit. I’ve also used a heat iron. While the plank it wet, I run the iron over the plank while dropping water on it occasionally with a sponge. I can hear the water turn to steam, I’m hoping it’s helping loosen up the fibers. I took one plank and just kept trying different ways, wetting it bending it drying it over and over. It became so malleable you could bend it easily anyway and it would hold its shape. But was very weak. This taught me you can make the wood undesirable by breaking the inter fibers even when it’s still in one piece. The planks now are tapered on the stern end, with it facing the keel. After I have got the plank ready I cut the angle of the stern and clamp it. Then lay the plank on the previous, clamping as I move towards the bow. Bending around the frames so far has been simple. The challenge is the twist so each plank sets on top of the other with the sides flush. I tried using a sponge and dripping water on it while applying heat and twisting back and forth until it seems to set right. If careful you can dry the plank quicker running it lightly over it. I’m going to mostly post the shots of the build when the clamps are off. They seem to hid the part everyone wants to see. You have to watch the planks so they don’t drift away from the frame. The starboard side second frame from the bow on mine tends to do this. I done different things at times to combat this. and Here is the build with 3 planks on both sides. stern bow


- 134 replies
-
- 4
-
-
- sea of galilee boat
- SE Miller
- (and 1 more)
-
That’s looks great Joe! But remember, it’s not a toy:-)
-
Tonight I took the first planks on both sides ,that I have shaped and dried. I glued the end to the stern with a small dab of thick CA. Then to the bow. I have just received the thin CA tips that I will use to apply along the seam of the planks. The CA wicks into the wood. After the hull is finished, the entire hull will be coated with CA so the finish will be uniform. Then next planks are tapered. I plan on soaking them tonight, and bending them in the morning. They will need to dry and pass QC before they go on.


- 134 replies
-
- 6
-
-
- sea of galilee boat
- SE Miller
- (and 1 more)
-
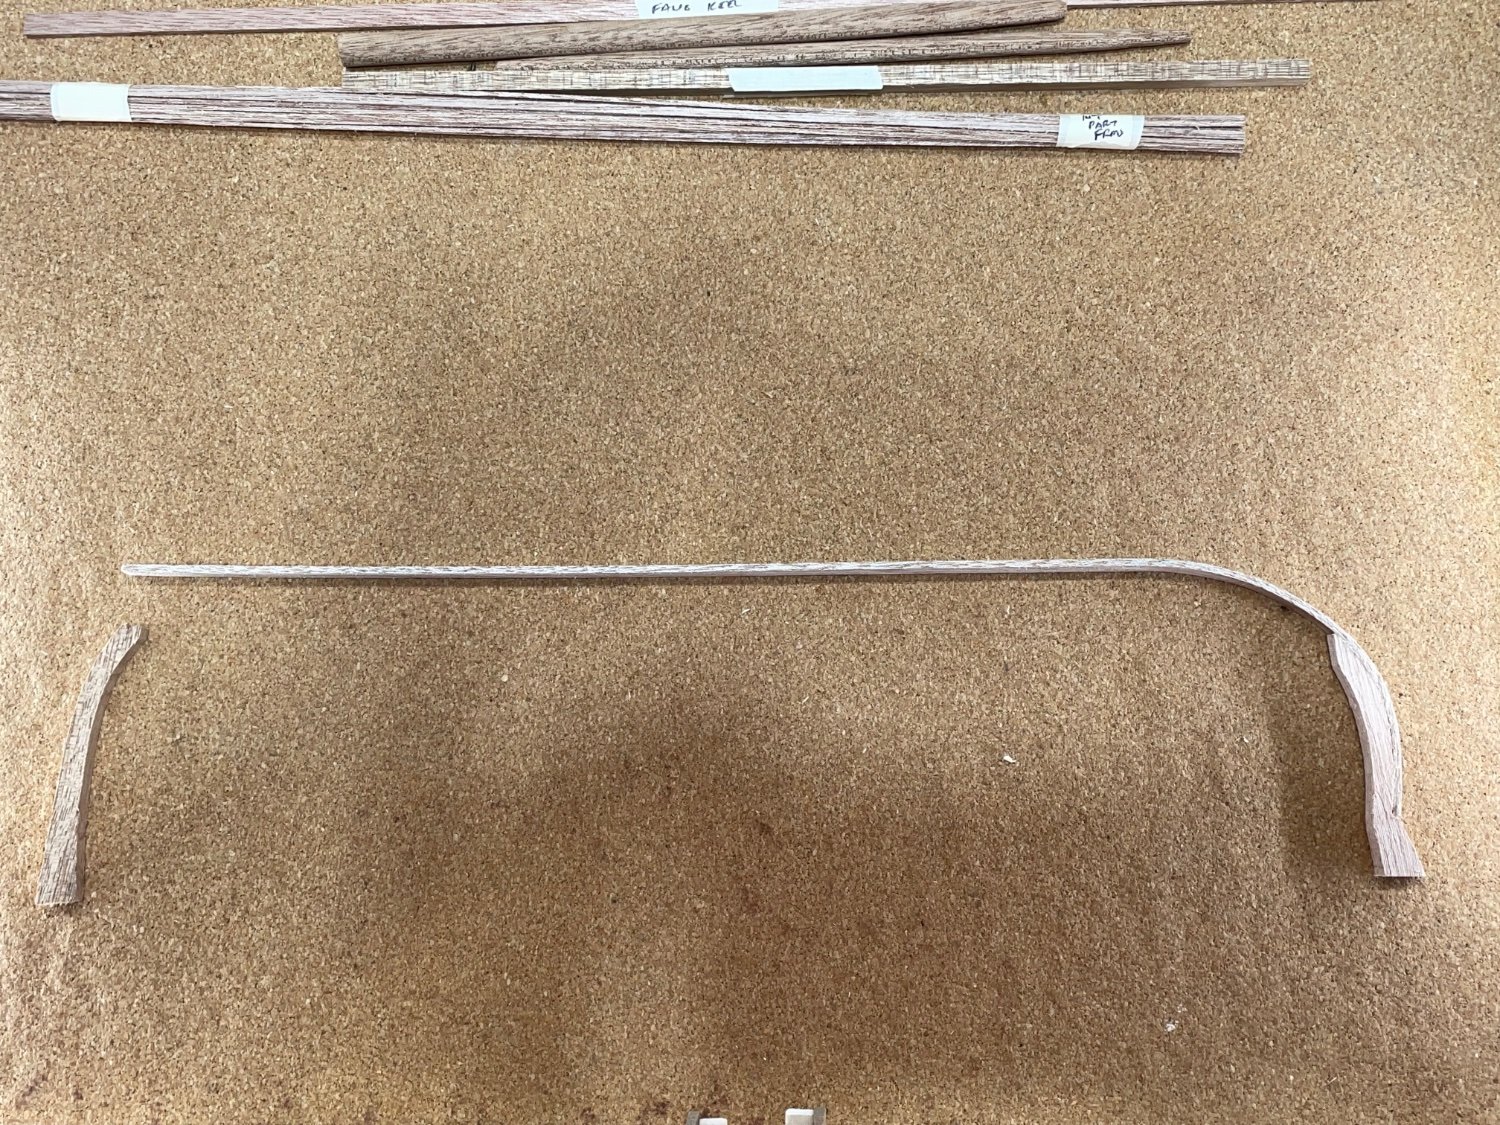
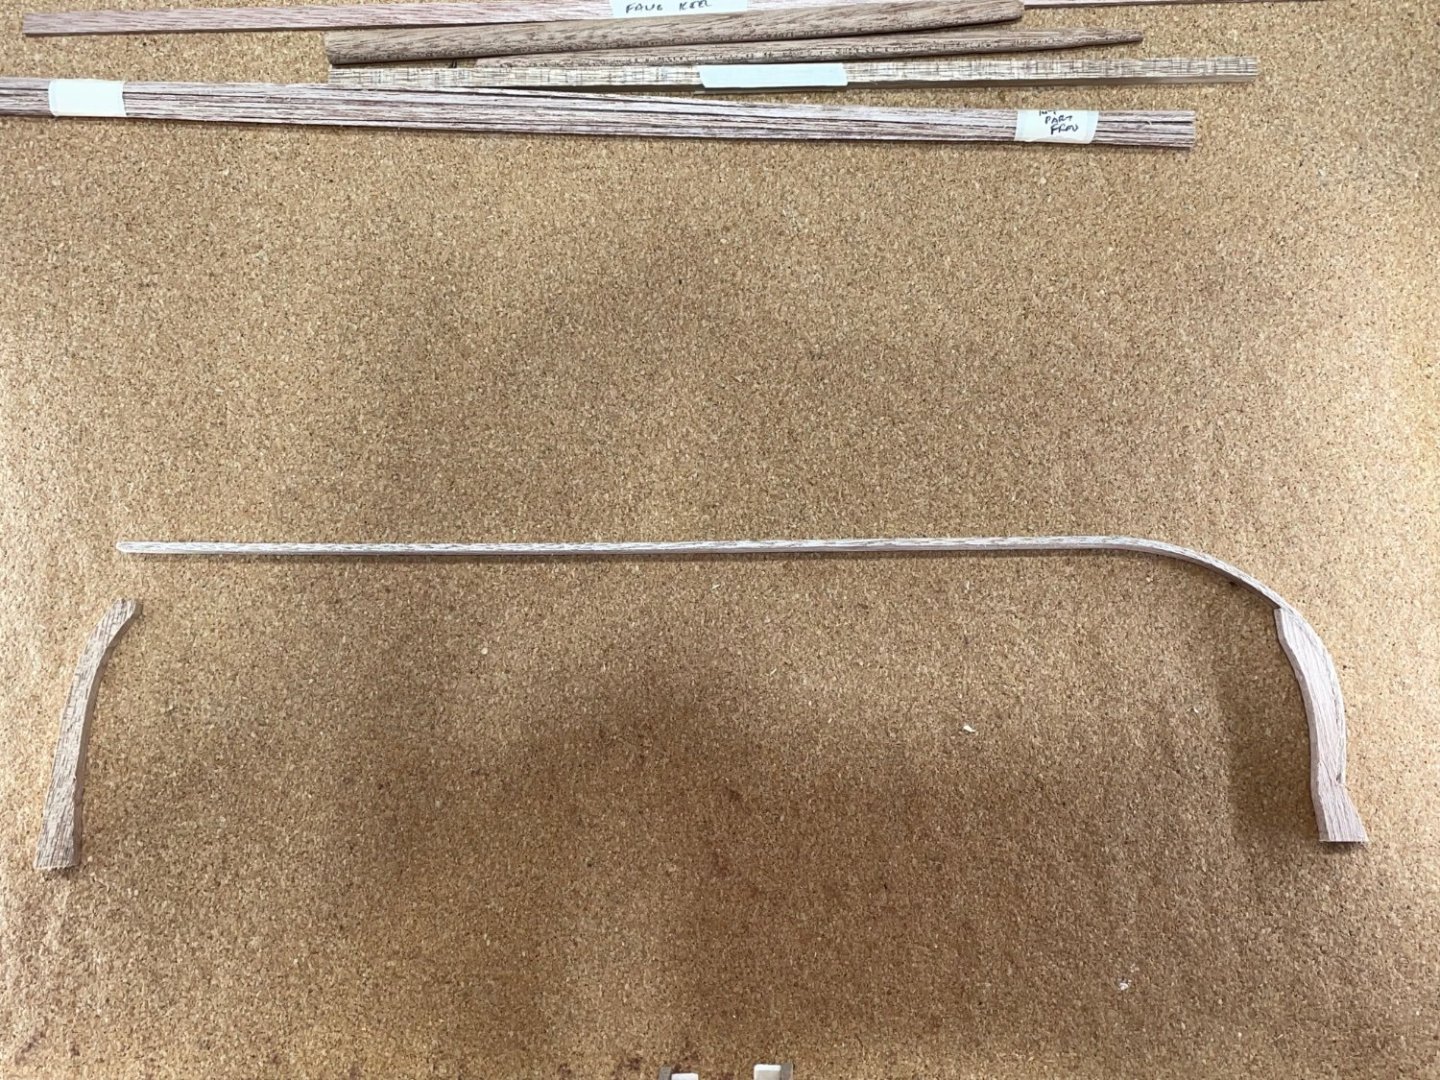
The keel has been pre-bent and attached to the stern piece. It needed trimmed down around 1/4” to fit the strongback. I squared the bottom as best I could to give a large area to be glued down to the strongback. The bow piece only needed the angles to be right where it meets the keel and glued to the strongback. The newer kits have grooves in the frames to hold the first plank tight against the strongback. I soaked the planks in hot water for a few hours and applied heat. I hope it will take some of the tension out of the boards after they’re glued on. When I was satisfied with how the first planks set I trimmed the ends and glued them to the stern and bow only. I repeated the other side.


- 134 replies
-
- 4
-
-
- sea of galilee boat
- SE Miller
- (and 1 more)
-
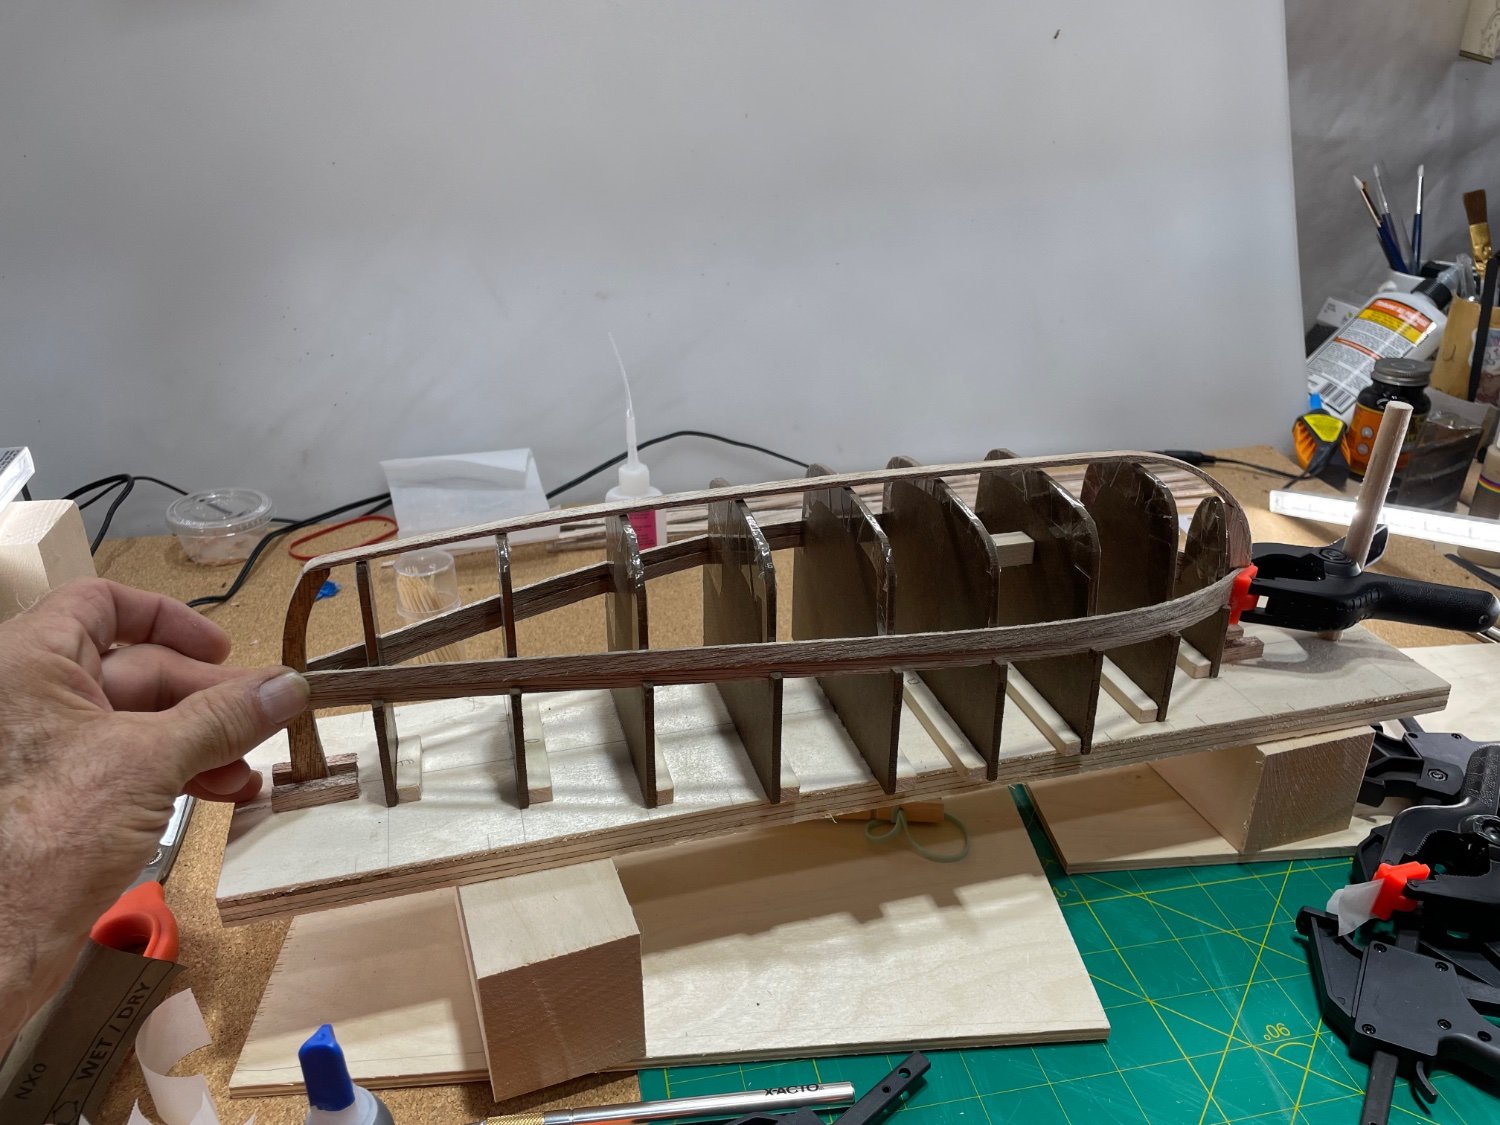
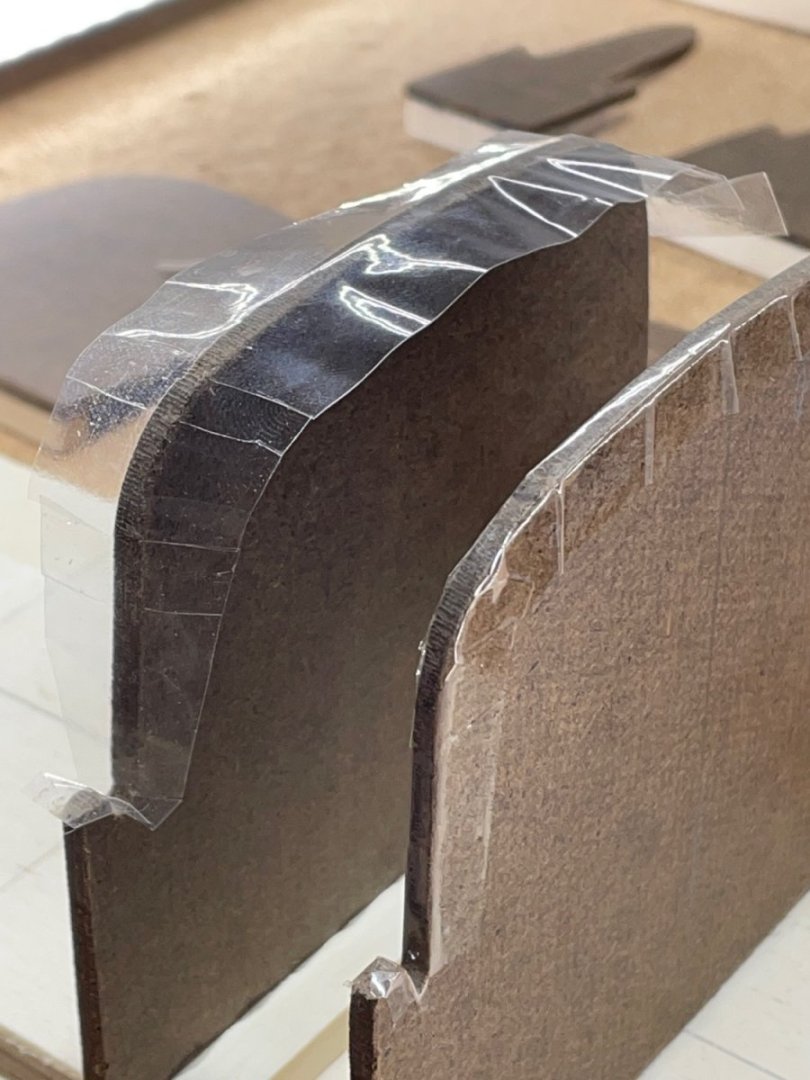
After gluing the two middle frames, I remembered all the different ways to try to keep the CA off the strongback. After a simple test of trying to glue wood to clear packing tape, I made the decision to use it, especially for the ease of installation. I found it easier to install this before gluing the frames. The strong back is ready and I have the confidence that I have accurately assembled the strongback, that will shape the wood into a beautiful hull of a boat that been hidden in my mind for over 6 decades:-) Next up is the keel, stern and bow pieces.


- 134 replies
-
- 7
-
-
- sea of galilee boat
- SE Miller
- (and 1 more)
-
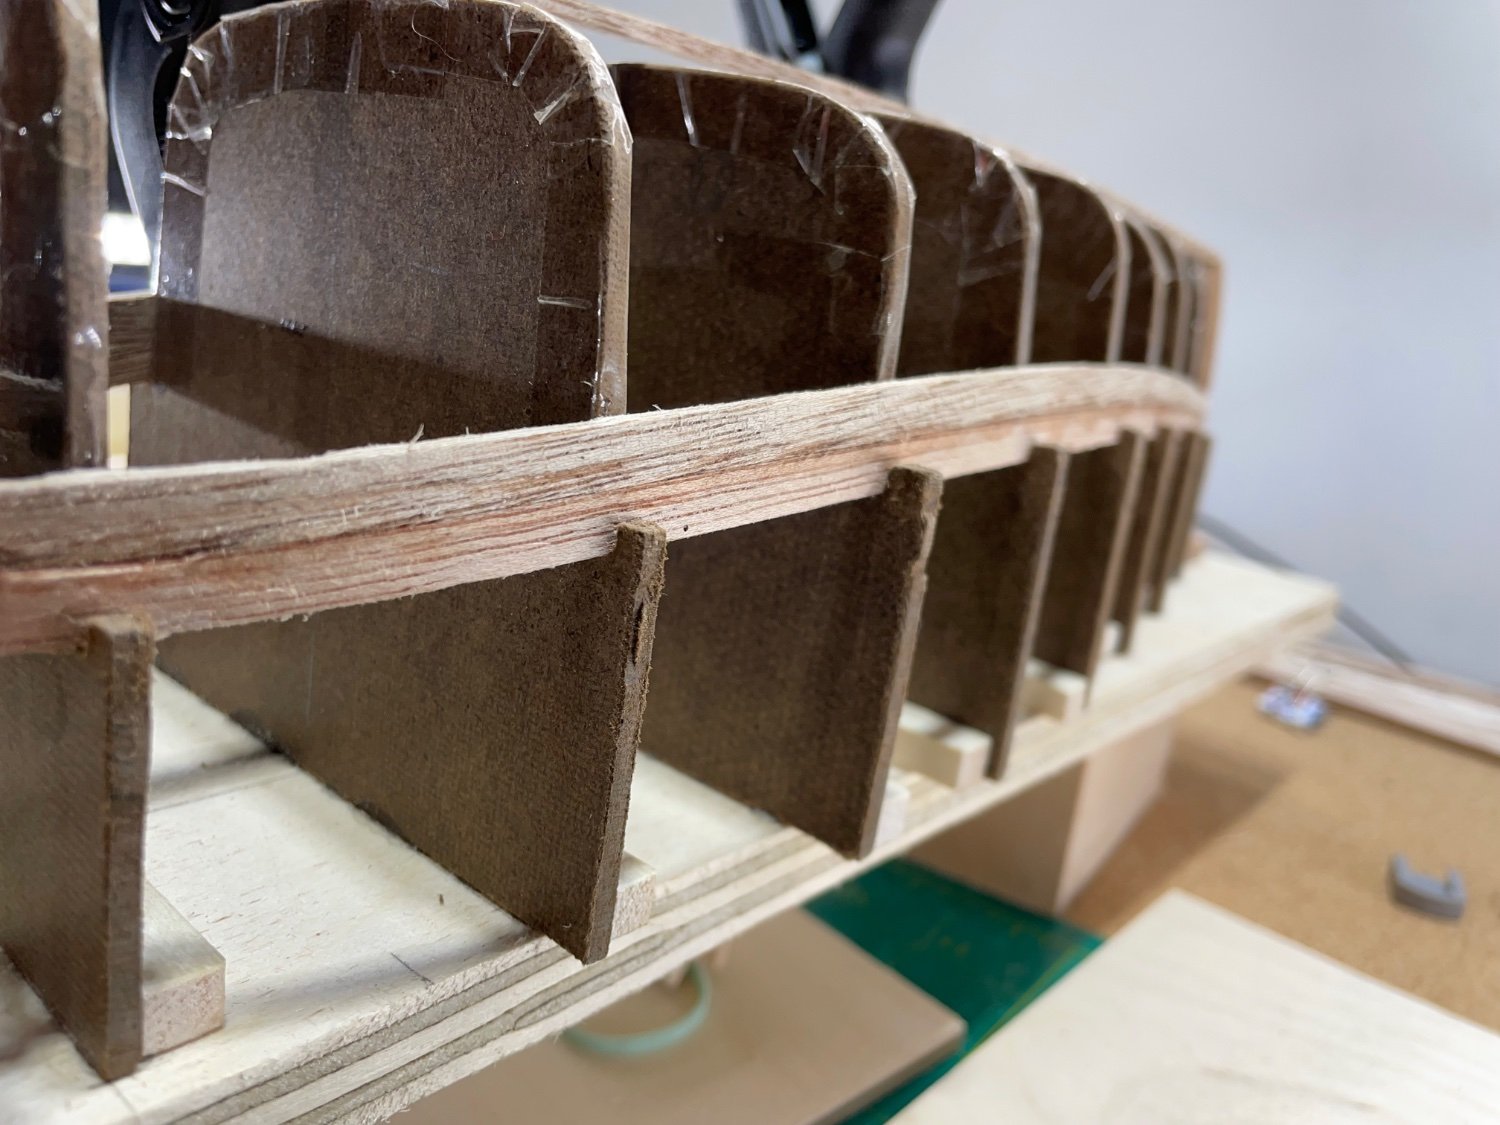
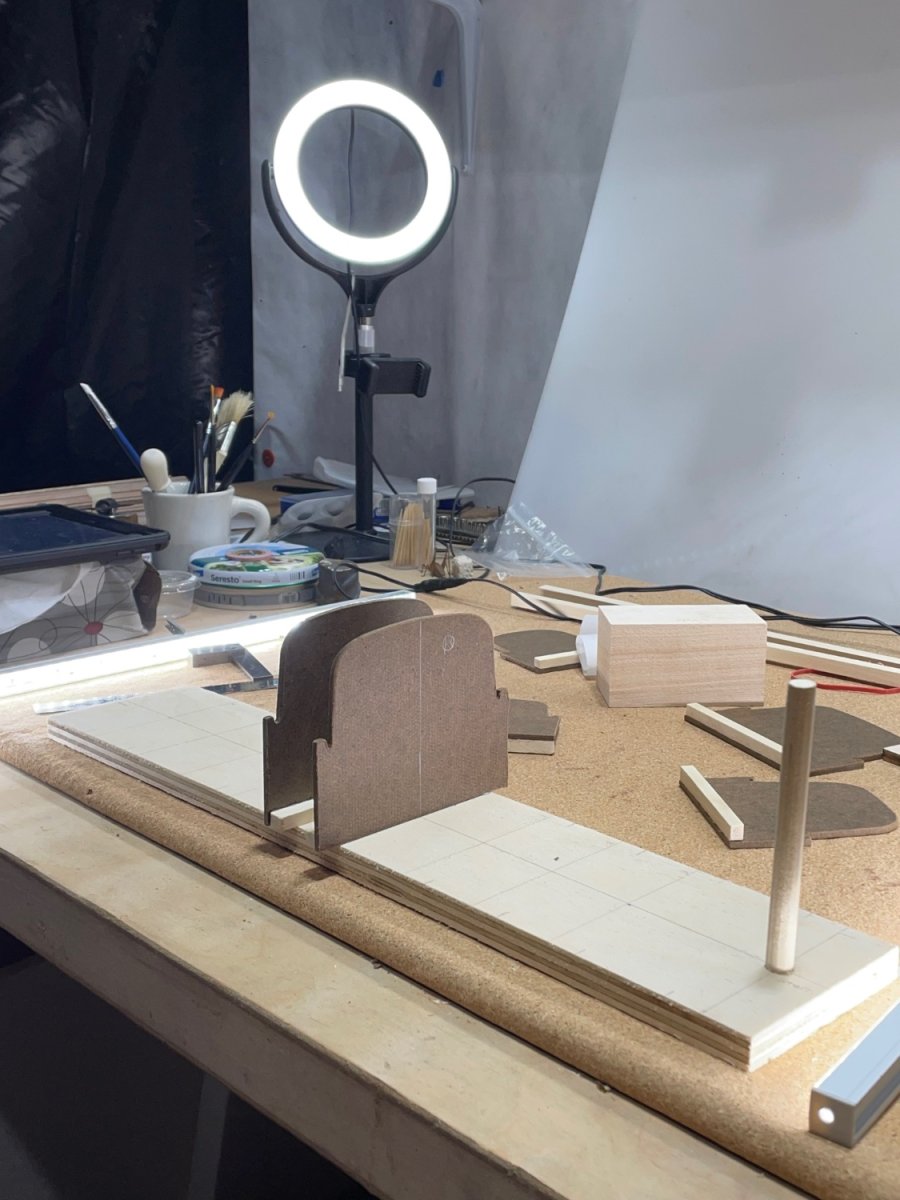
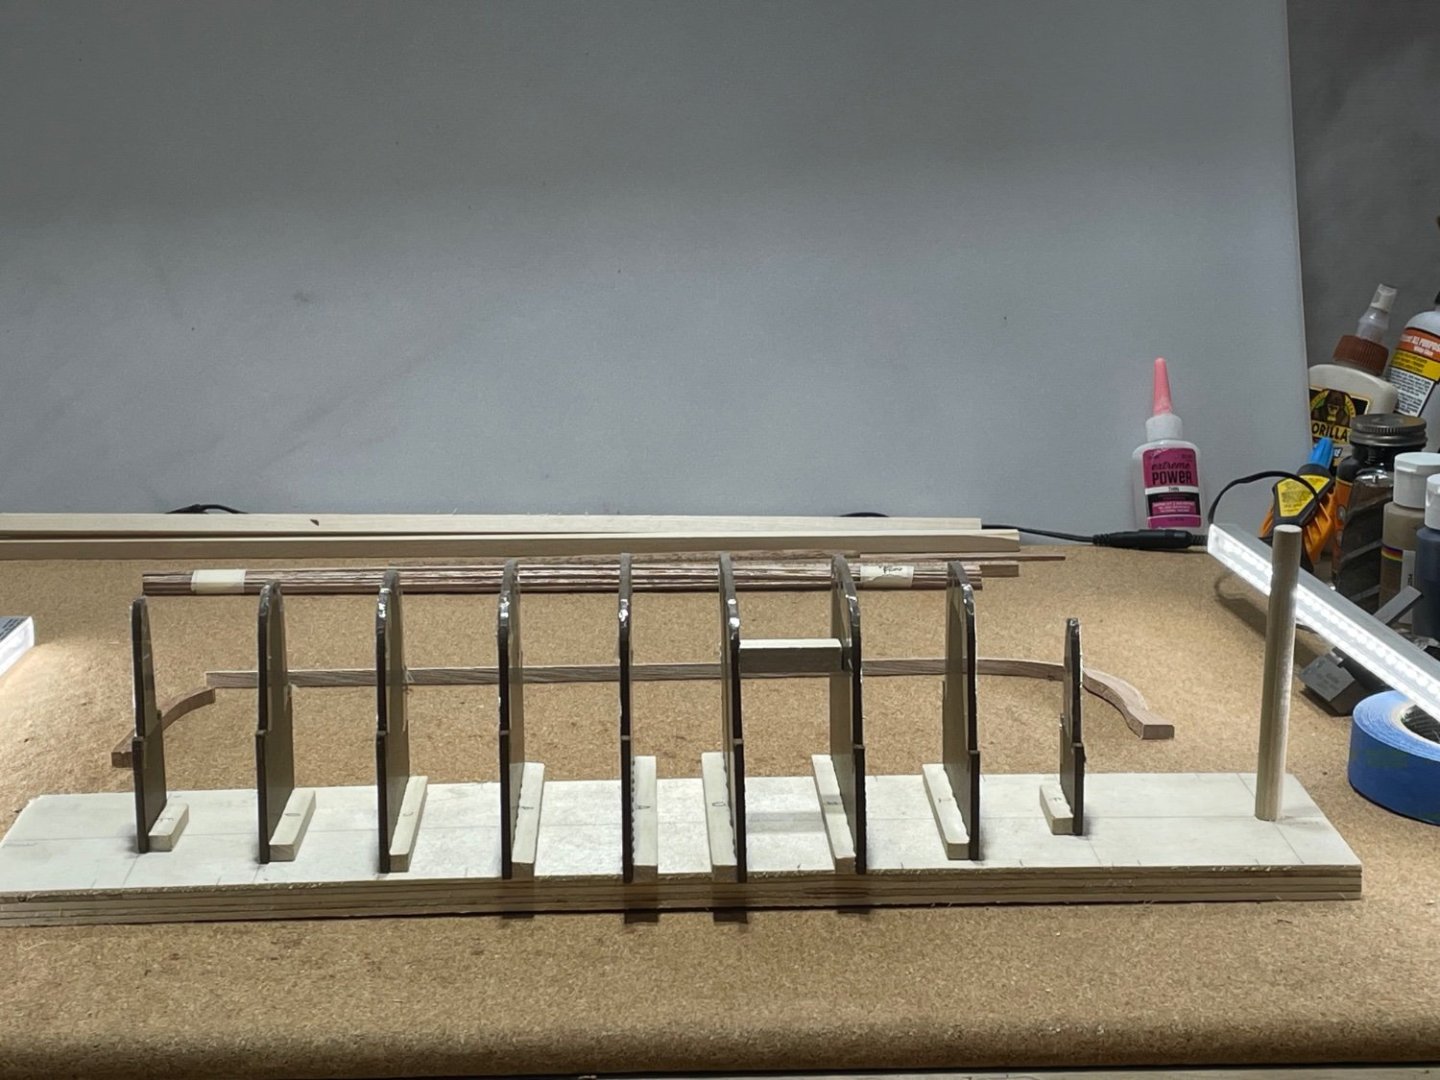
THE STRONGBACK After viewing over about 6 past build logs and kit suppled instructions. Not a whole was said about the strong back. Even I could feel the excitement of getting into that wonderful looking wood and build that boat. Scott Miller had the centerline and the locations of each frame marked on the plywood board. I decided to glue the frame support cleats on first. To keep the bottoms square I clamped two blocks together offset. Then lined the centerline up and clamped it square.

- 134 replies
-
- 5
-
-
- sea of galilee boat
- SE Miller
- (and 1 more)
-
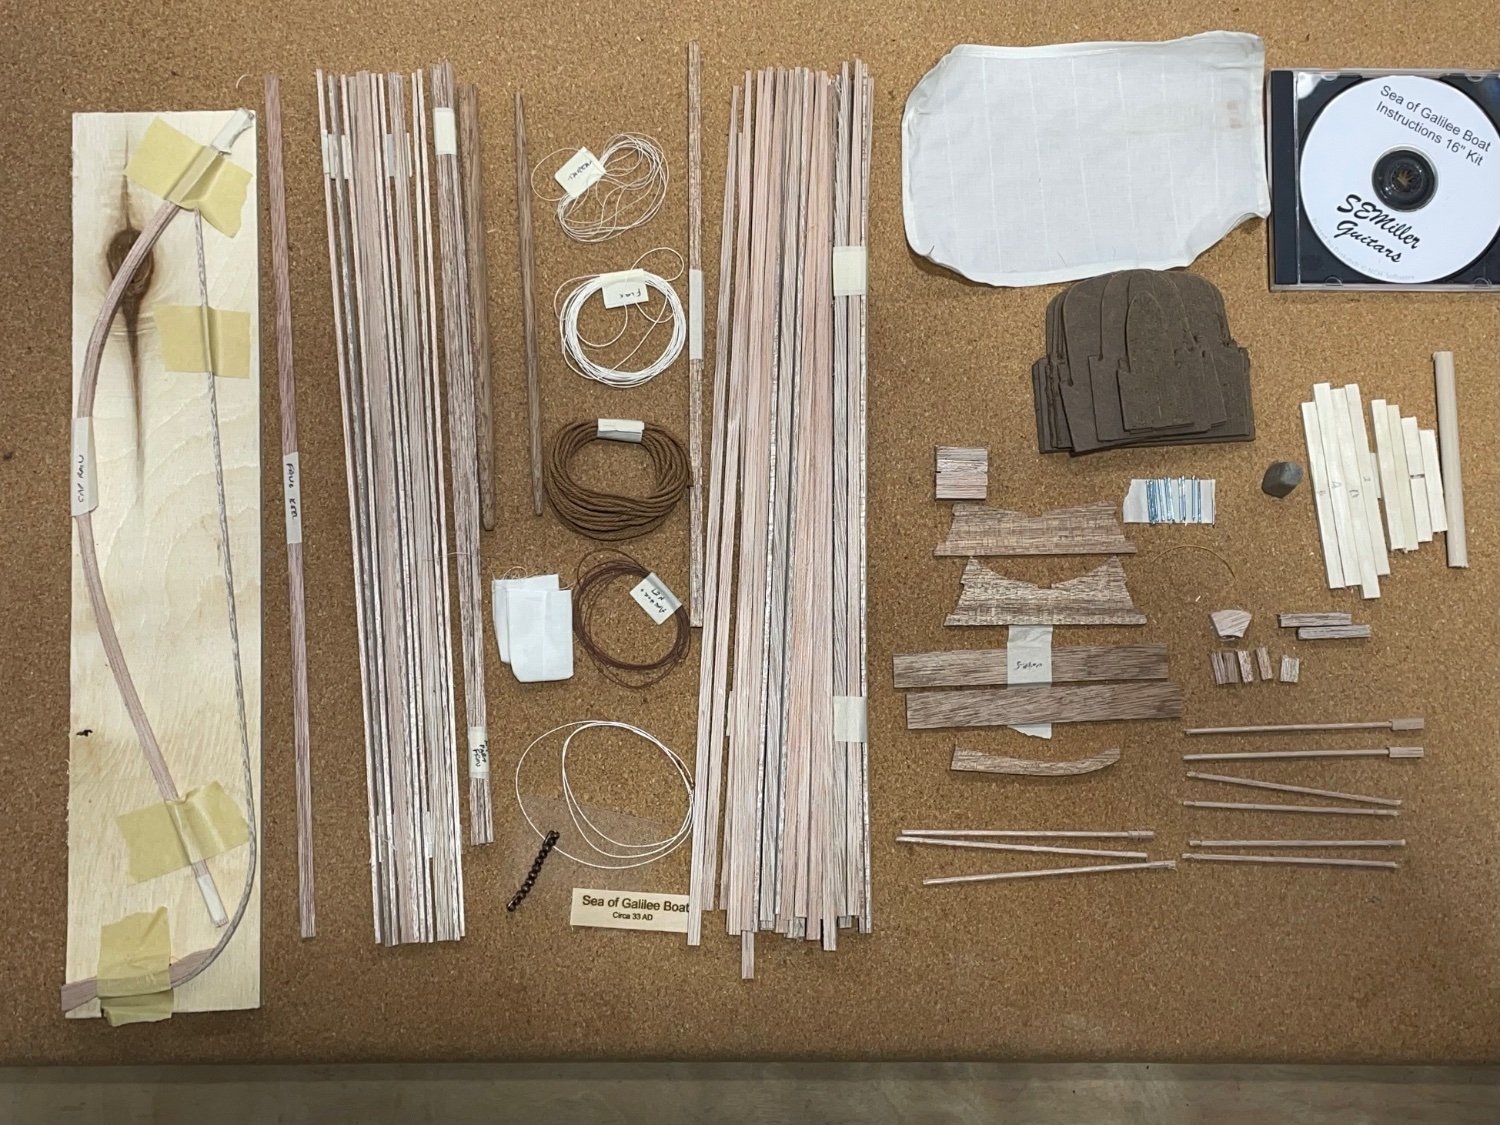
I was told stories my entire life of boats like this never imagining the possible details of the stage in which they were set. Now with the stories well planted in my mind, I get to become a shipwright of antiquity. With only 5 months of modeling experience, I will depend on my skills given to me by the Creator of all. I for sure want to mention Scott Miller for preparing the kit so one like me could start to build the boat.


- 134 replies
-
- 6
-
-
- sea of galilee boat
- SE Miller
- (and 1 more)
-
Jacques, it all looks super! When you are constantly thinking of ways to better your model,you are also teaching habits and giving ideas to all of us:-) Keep ‘em coming!
- 62 replies
-
- 3
-

-
-
- First Build
- Grand Banks Dory
- (and 2 more)
-
I think it adds excitement to the build, that is after you know your plan will succeed. Sanding the hull, I believe is the most relaxing part of the build 🙂
- 38 replies
-
- 1
-
-
- Model Shipways
- Shipwright Series
- (and 2 more)
-
Thank you druxey, you are right ! They needed to be tighter. That will just be the gauge for my next model that shows me that I have gained a bit more known how:-) Thank you Jacques, it was close. I didn’t try to carve the drains into the toe rail .
- 49 replies
-
- 2
-
-
- muscongus bay lobster smack
- Model Shipways
- (and 2 more)
-
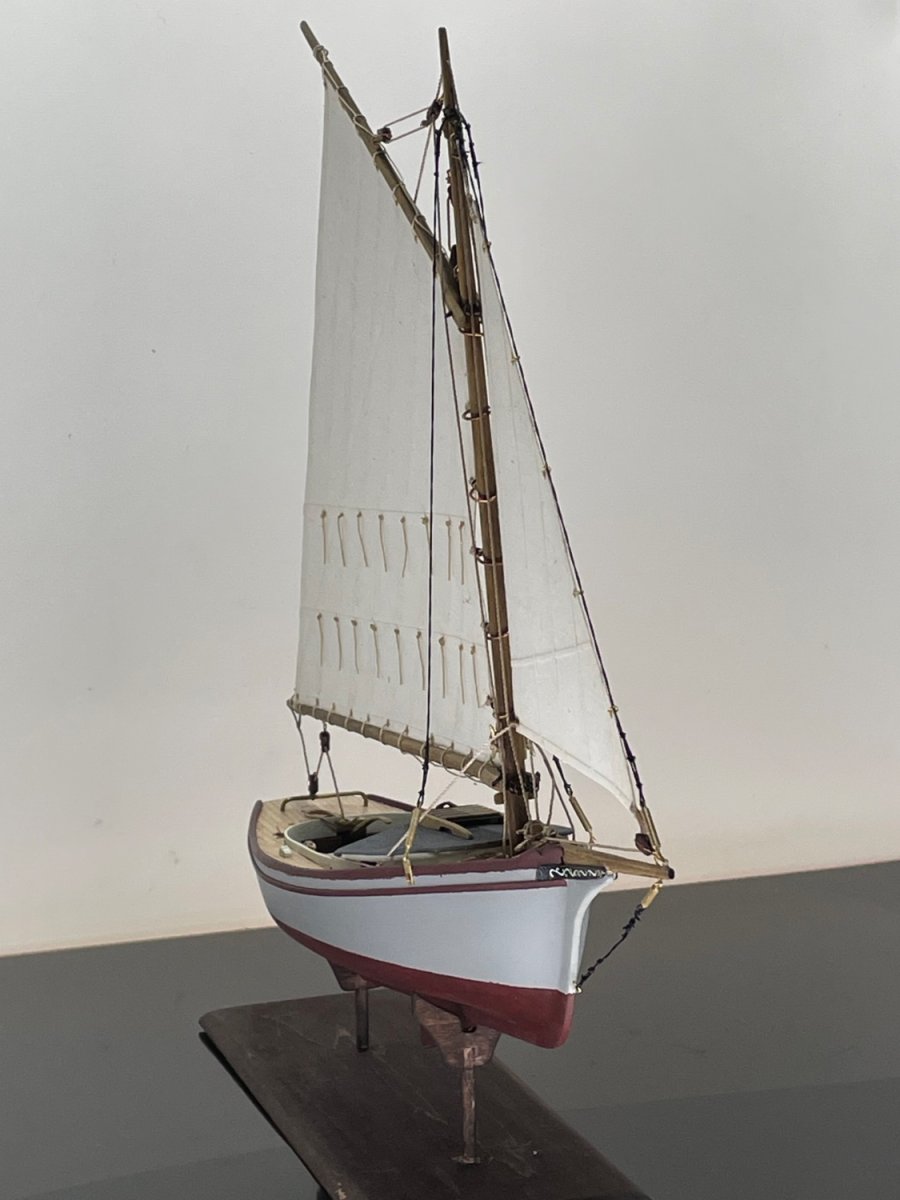
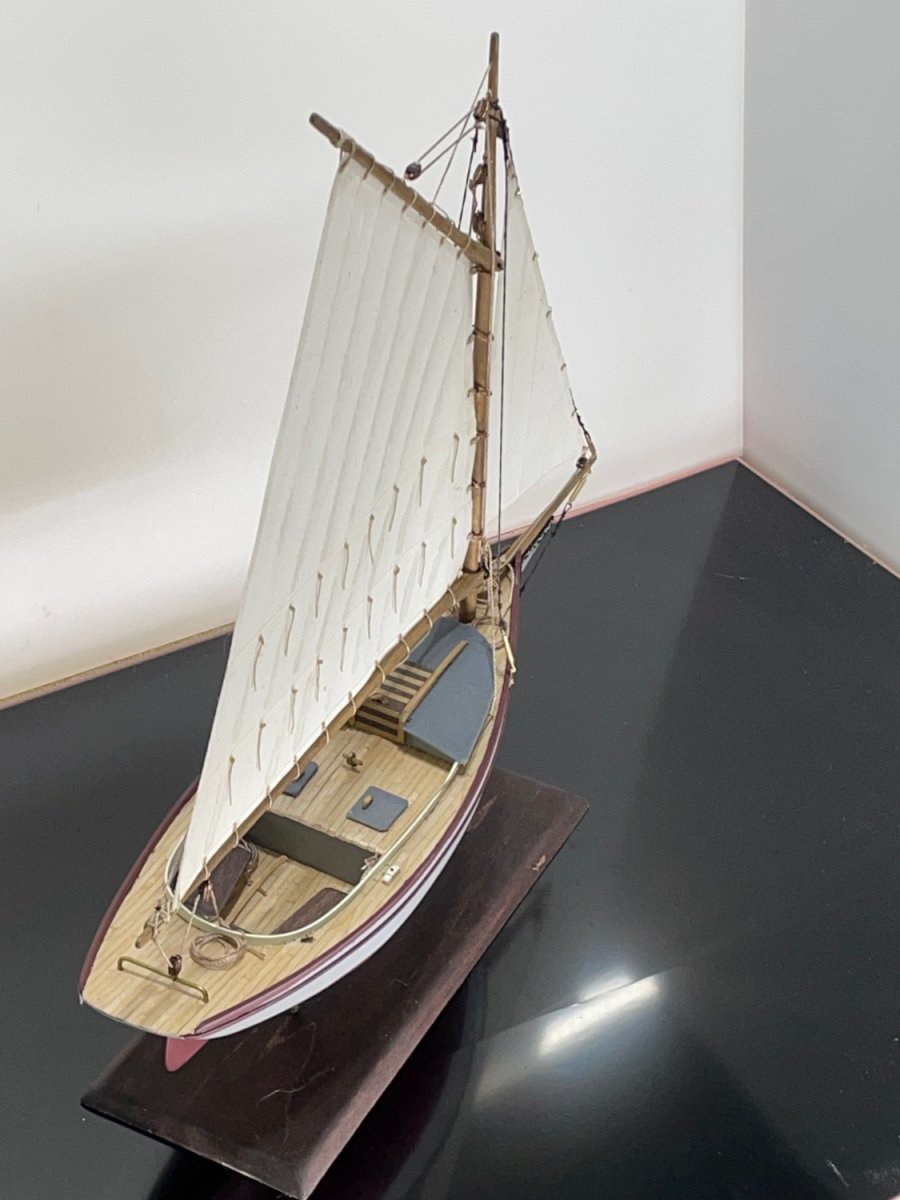
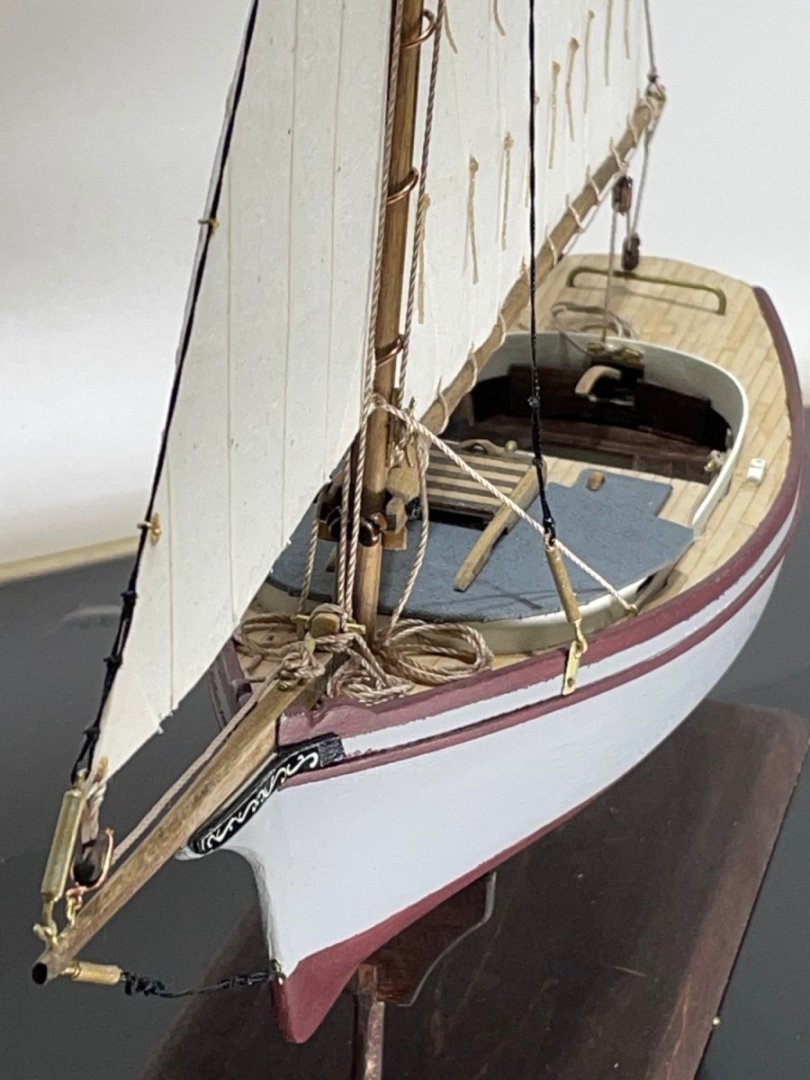
This afternoon I tied off the topping lift and tidied up the loose lines. That brought the build to completion. I would highly recommend this shipwright series for one like me, I am new to the hobby and have little experience with the wooden medium. It starts simple while you develop your skill. And this forum compliments, gives advice, and boosts your confidence. Thanks to everyone that was a part of my build. I hope along with all the other logs, someone will find something that will help:-)
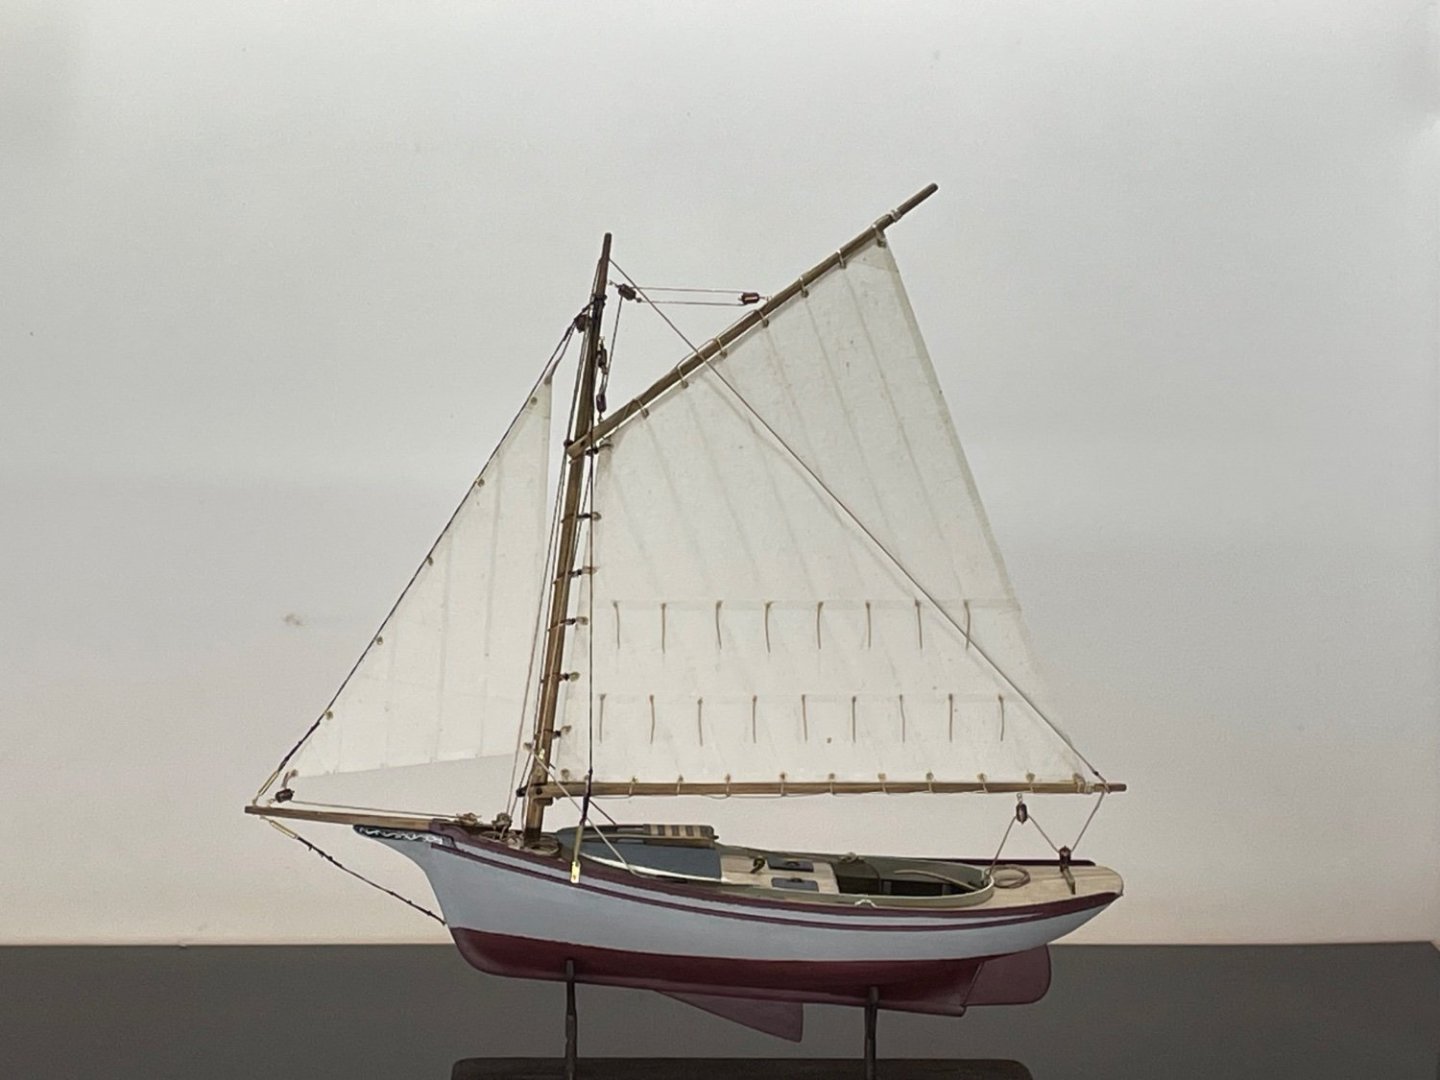
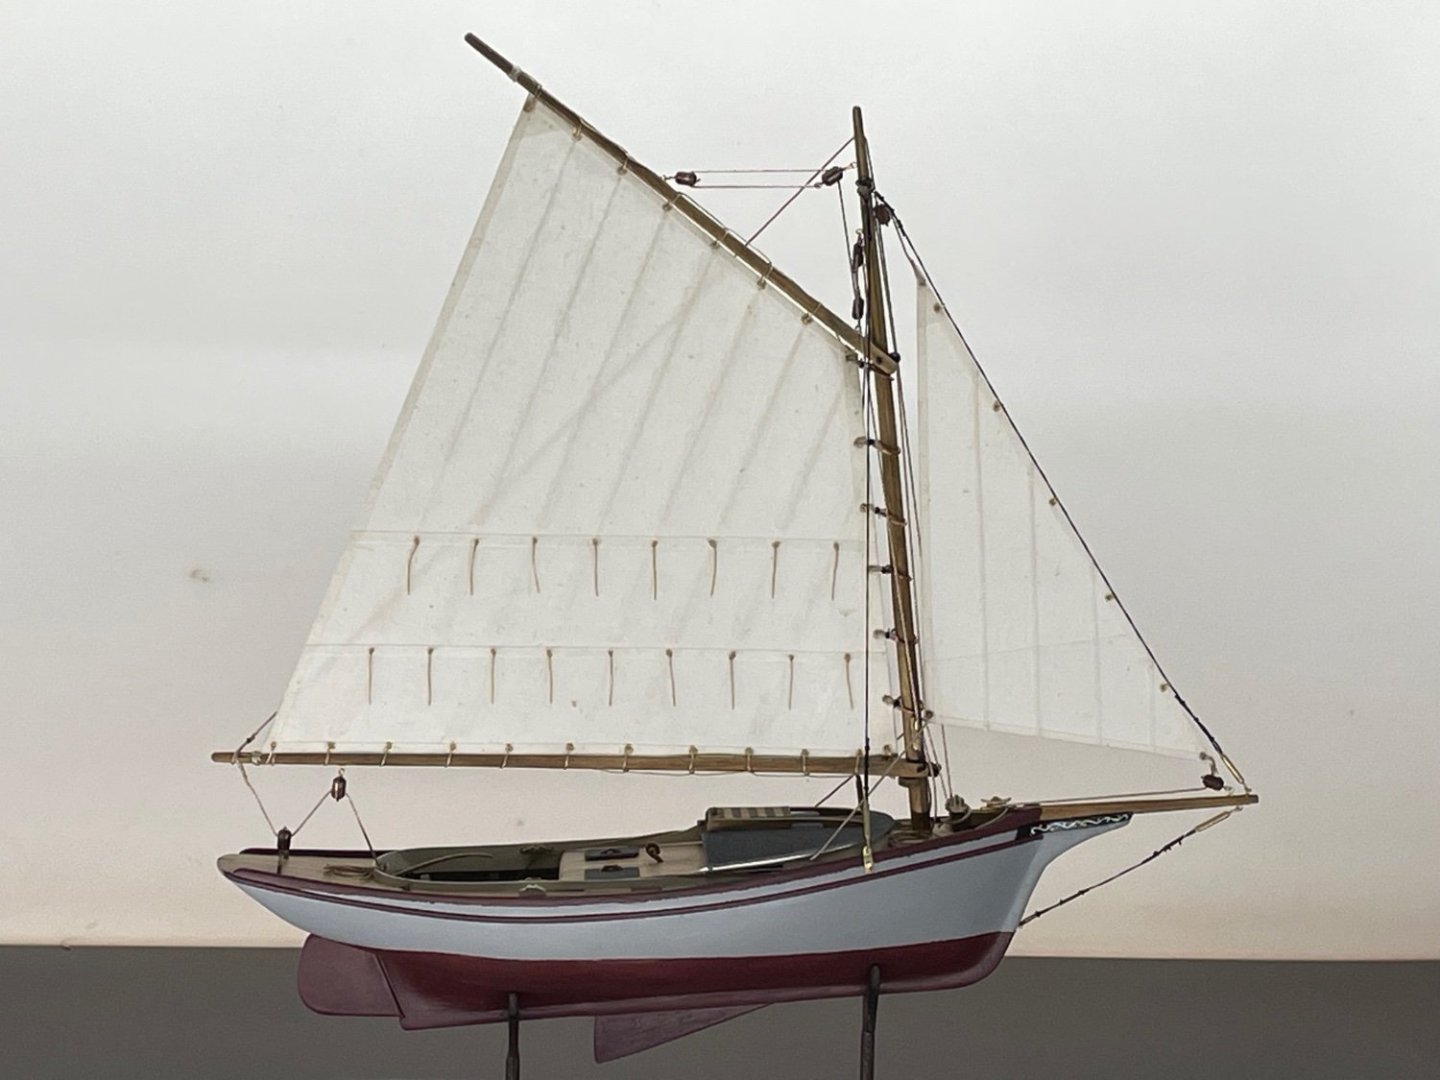

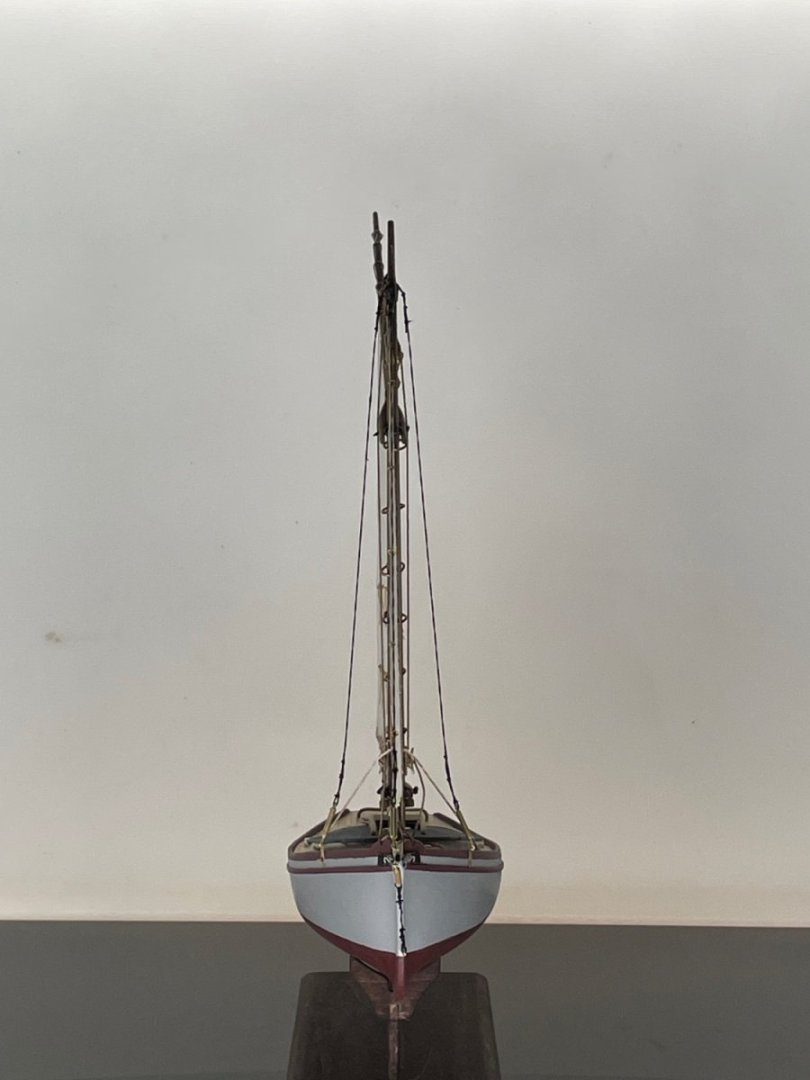
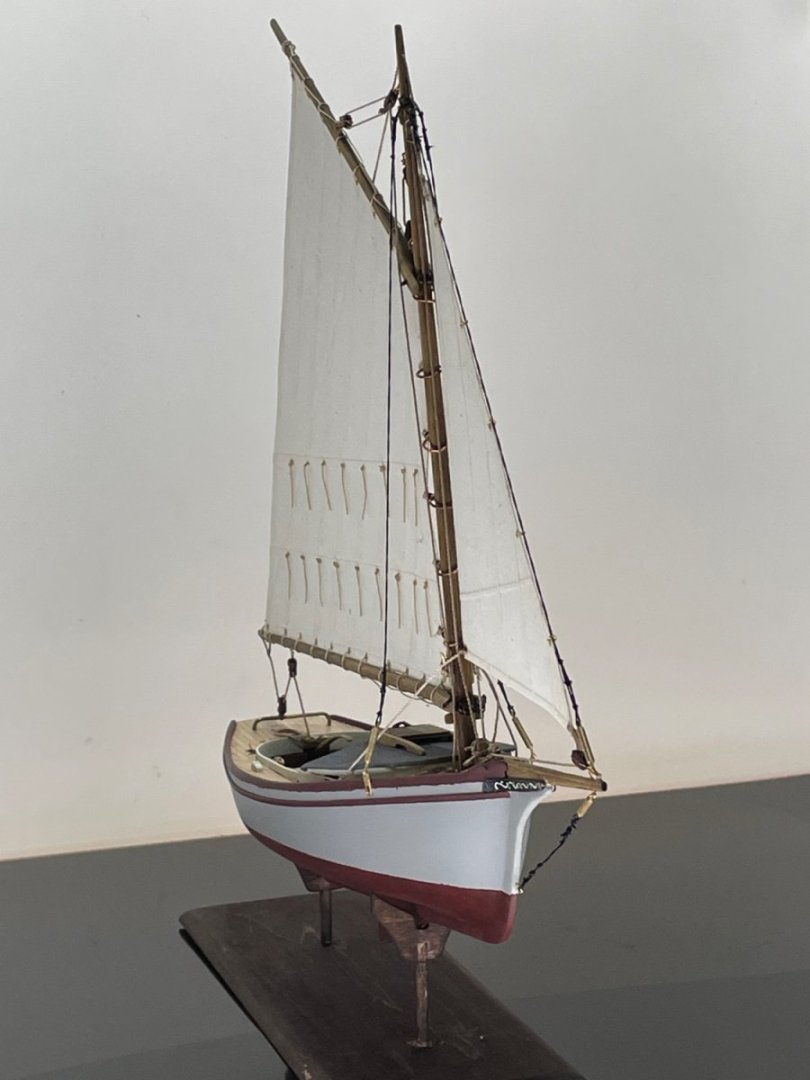

- 49 replies
-
- 13
-
-
-
- muscongus bay lobster smack
- Model Shipways
- (and 2 more)