HOLIDAY DONATION DRIVE - SUPPORT MSW - DO YOUR PART TO KEEP THIS GREAT FORUM GOING! (Only 24 donations so far out of 49,000 members - C'mon guys!)
×


Bryan Woods
-
Posts
545 -
Joined
-
Last visited
Content Type
Profiles
Forums
Gallery
Events
Everything posted by Bryan Woods
-
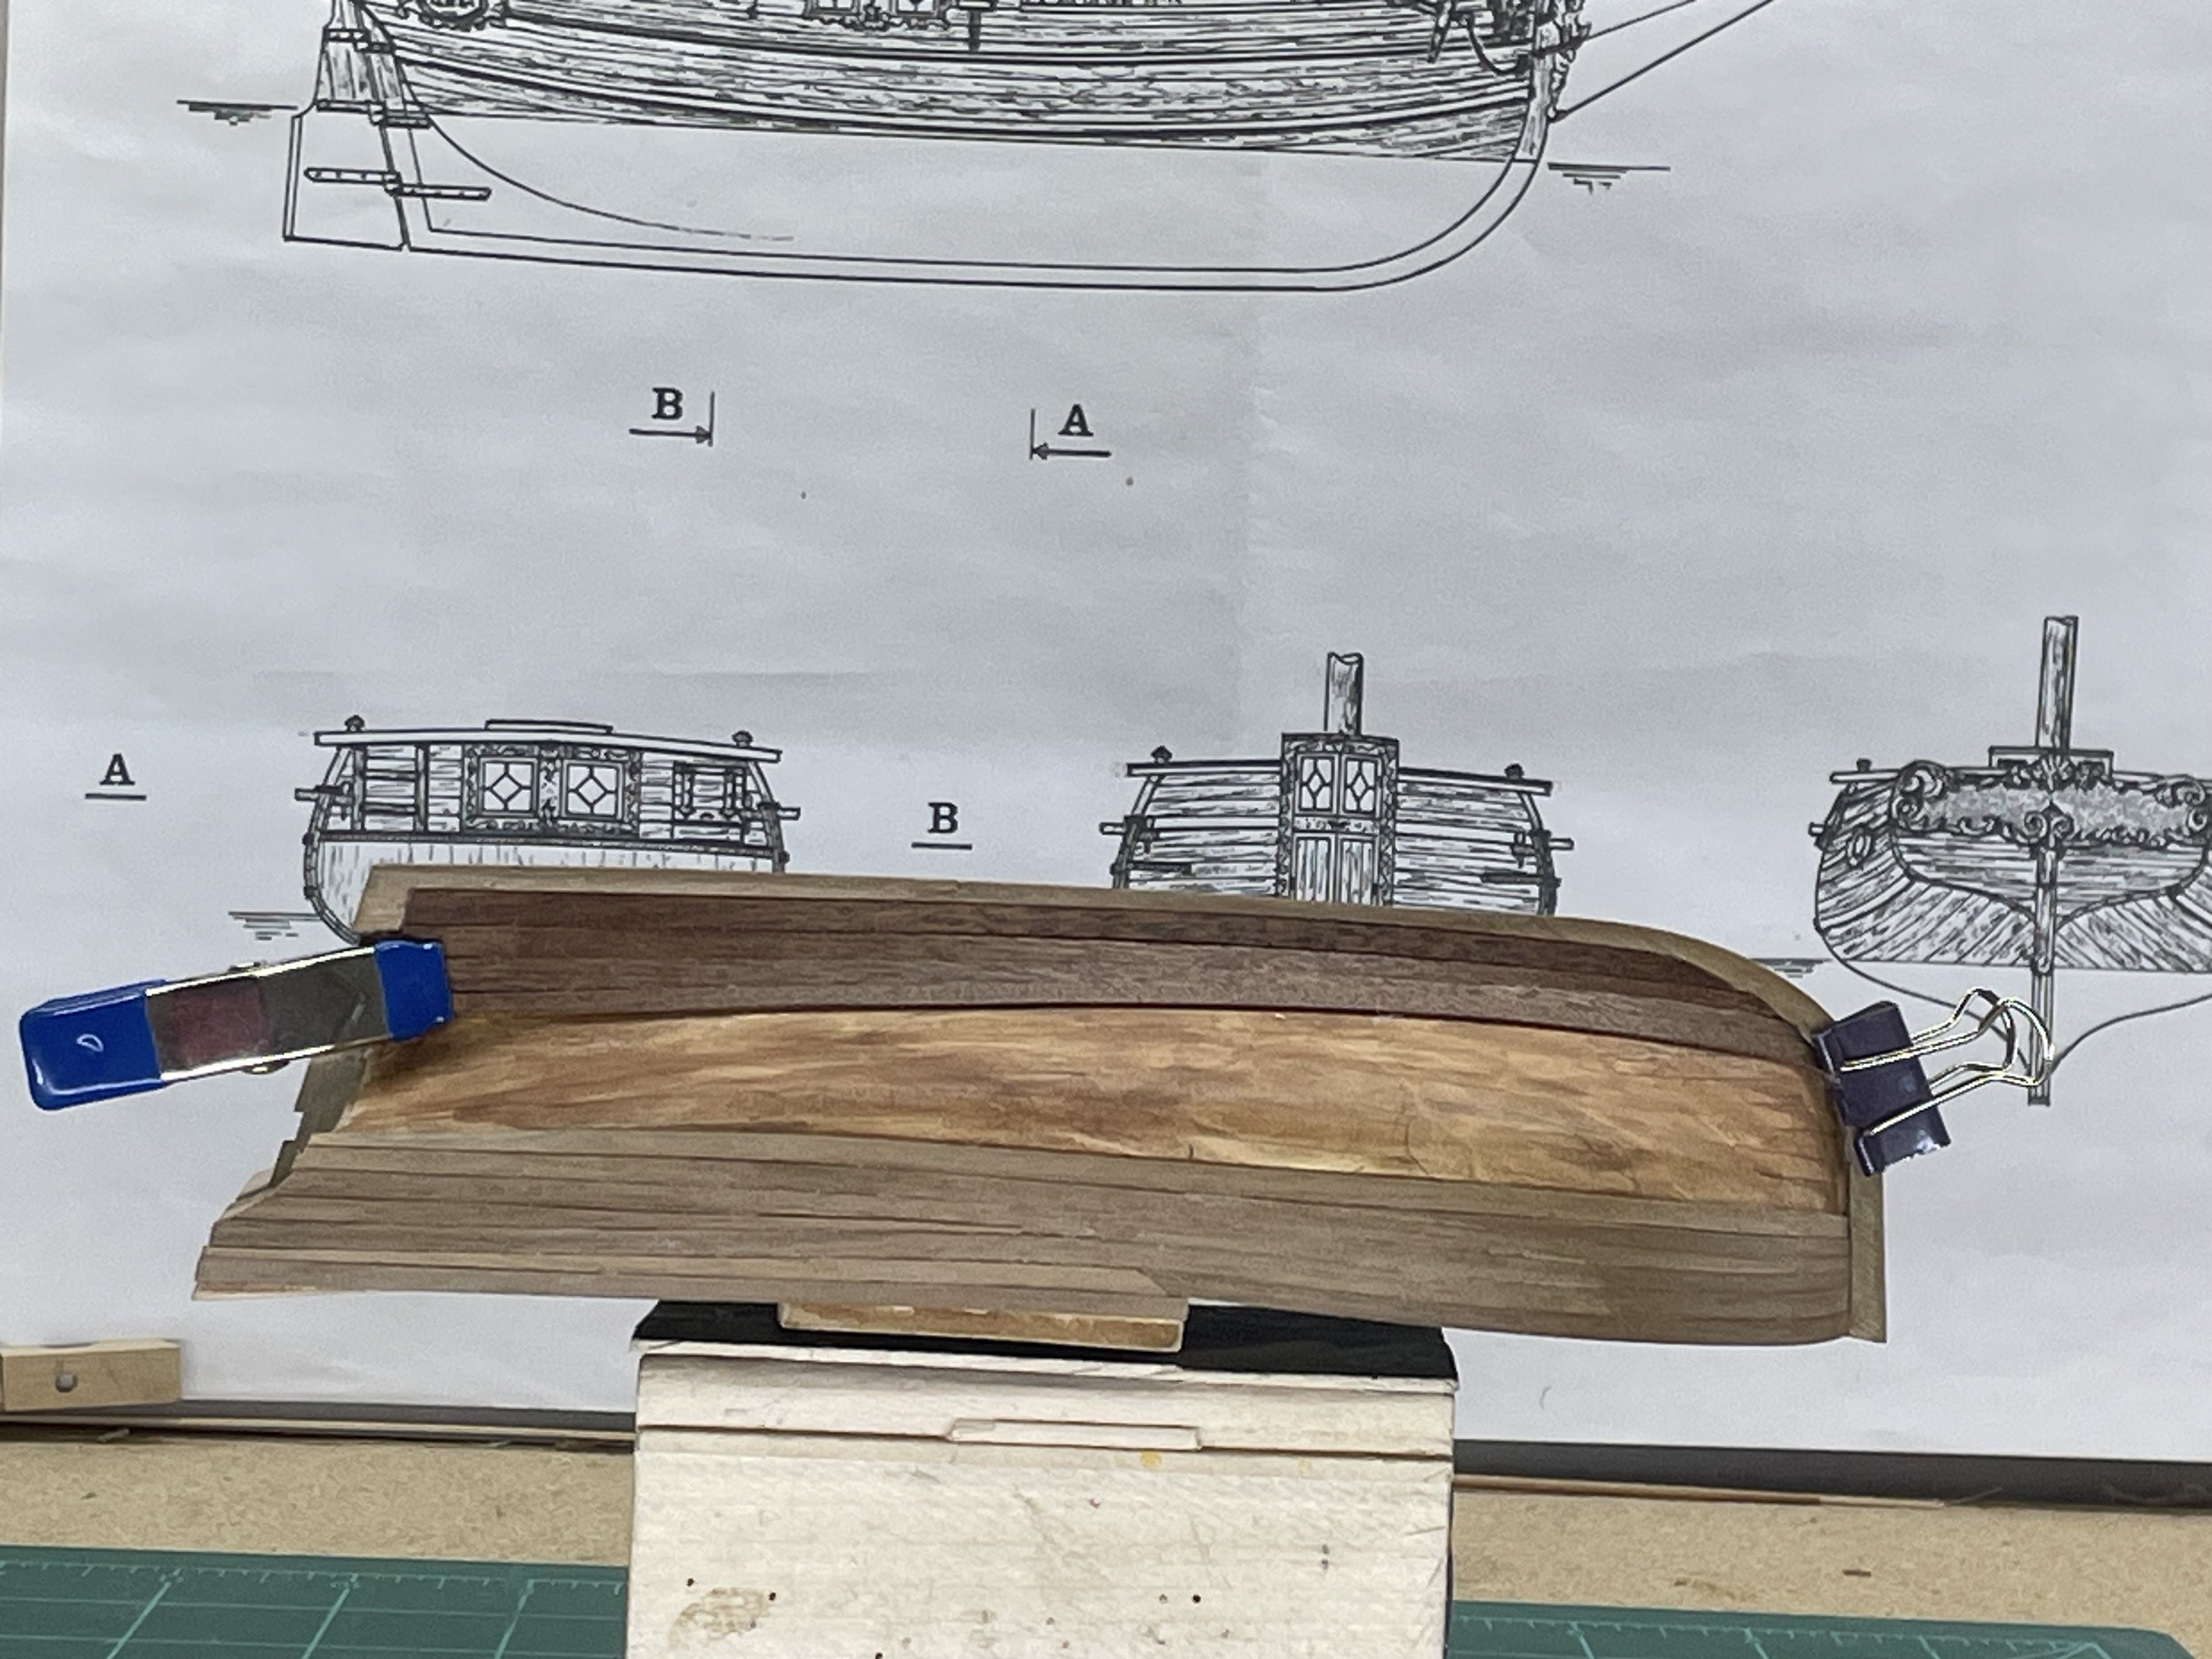
 Gretel is back on the bench. I’ve gain no more knowledge on planking , so I’m determined to learn by error. I’ve set down several times at it. Sometimes a plank gets glued and sometimes I walk away. Here’s where I’m at. Comments are welcome:-) I do measure, but I don’t know why, I just guess at the taper size. I’m only doing the port side now, just in case. Maybe one side will look ok.
-
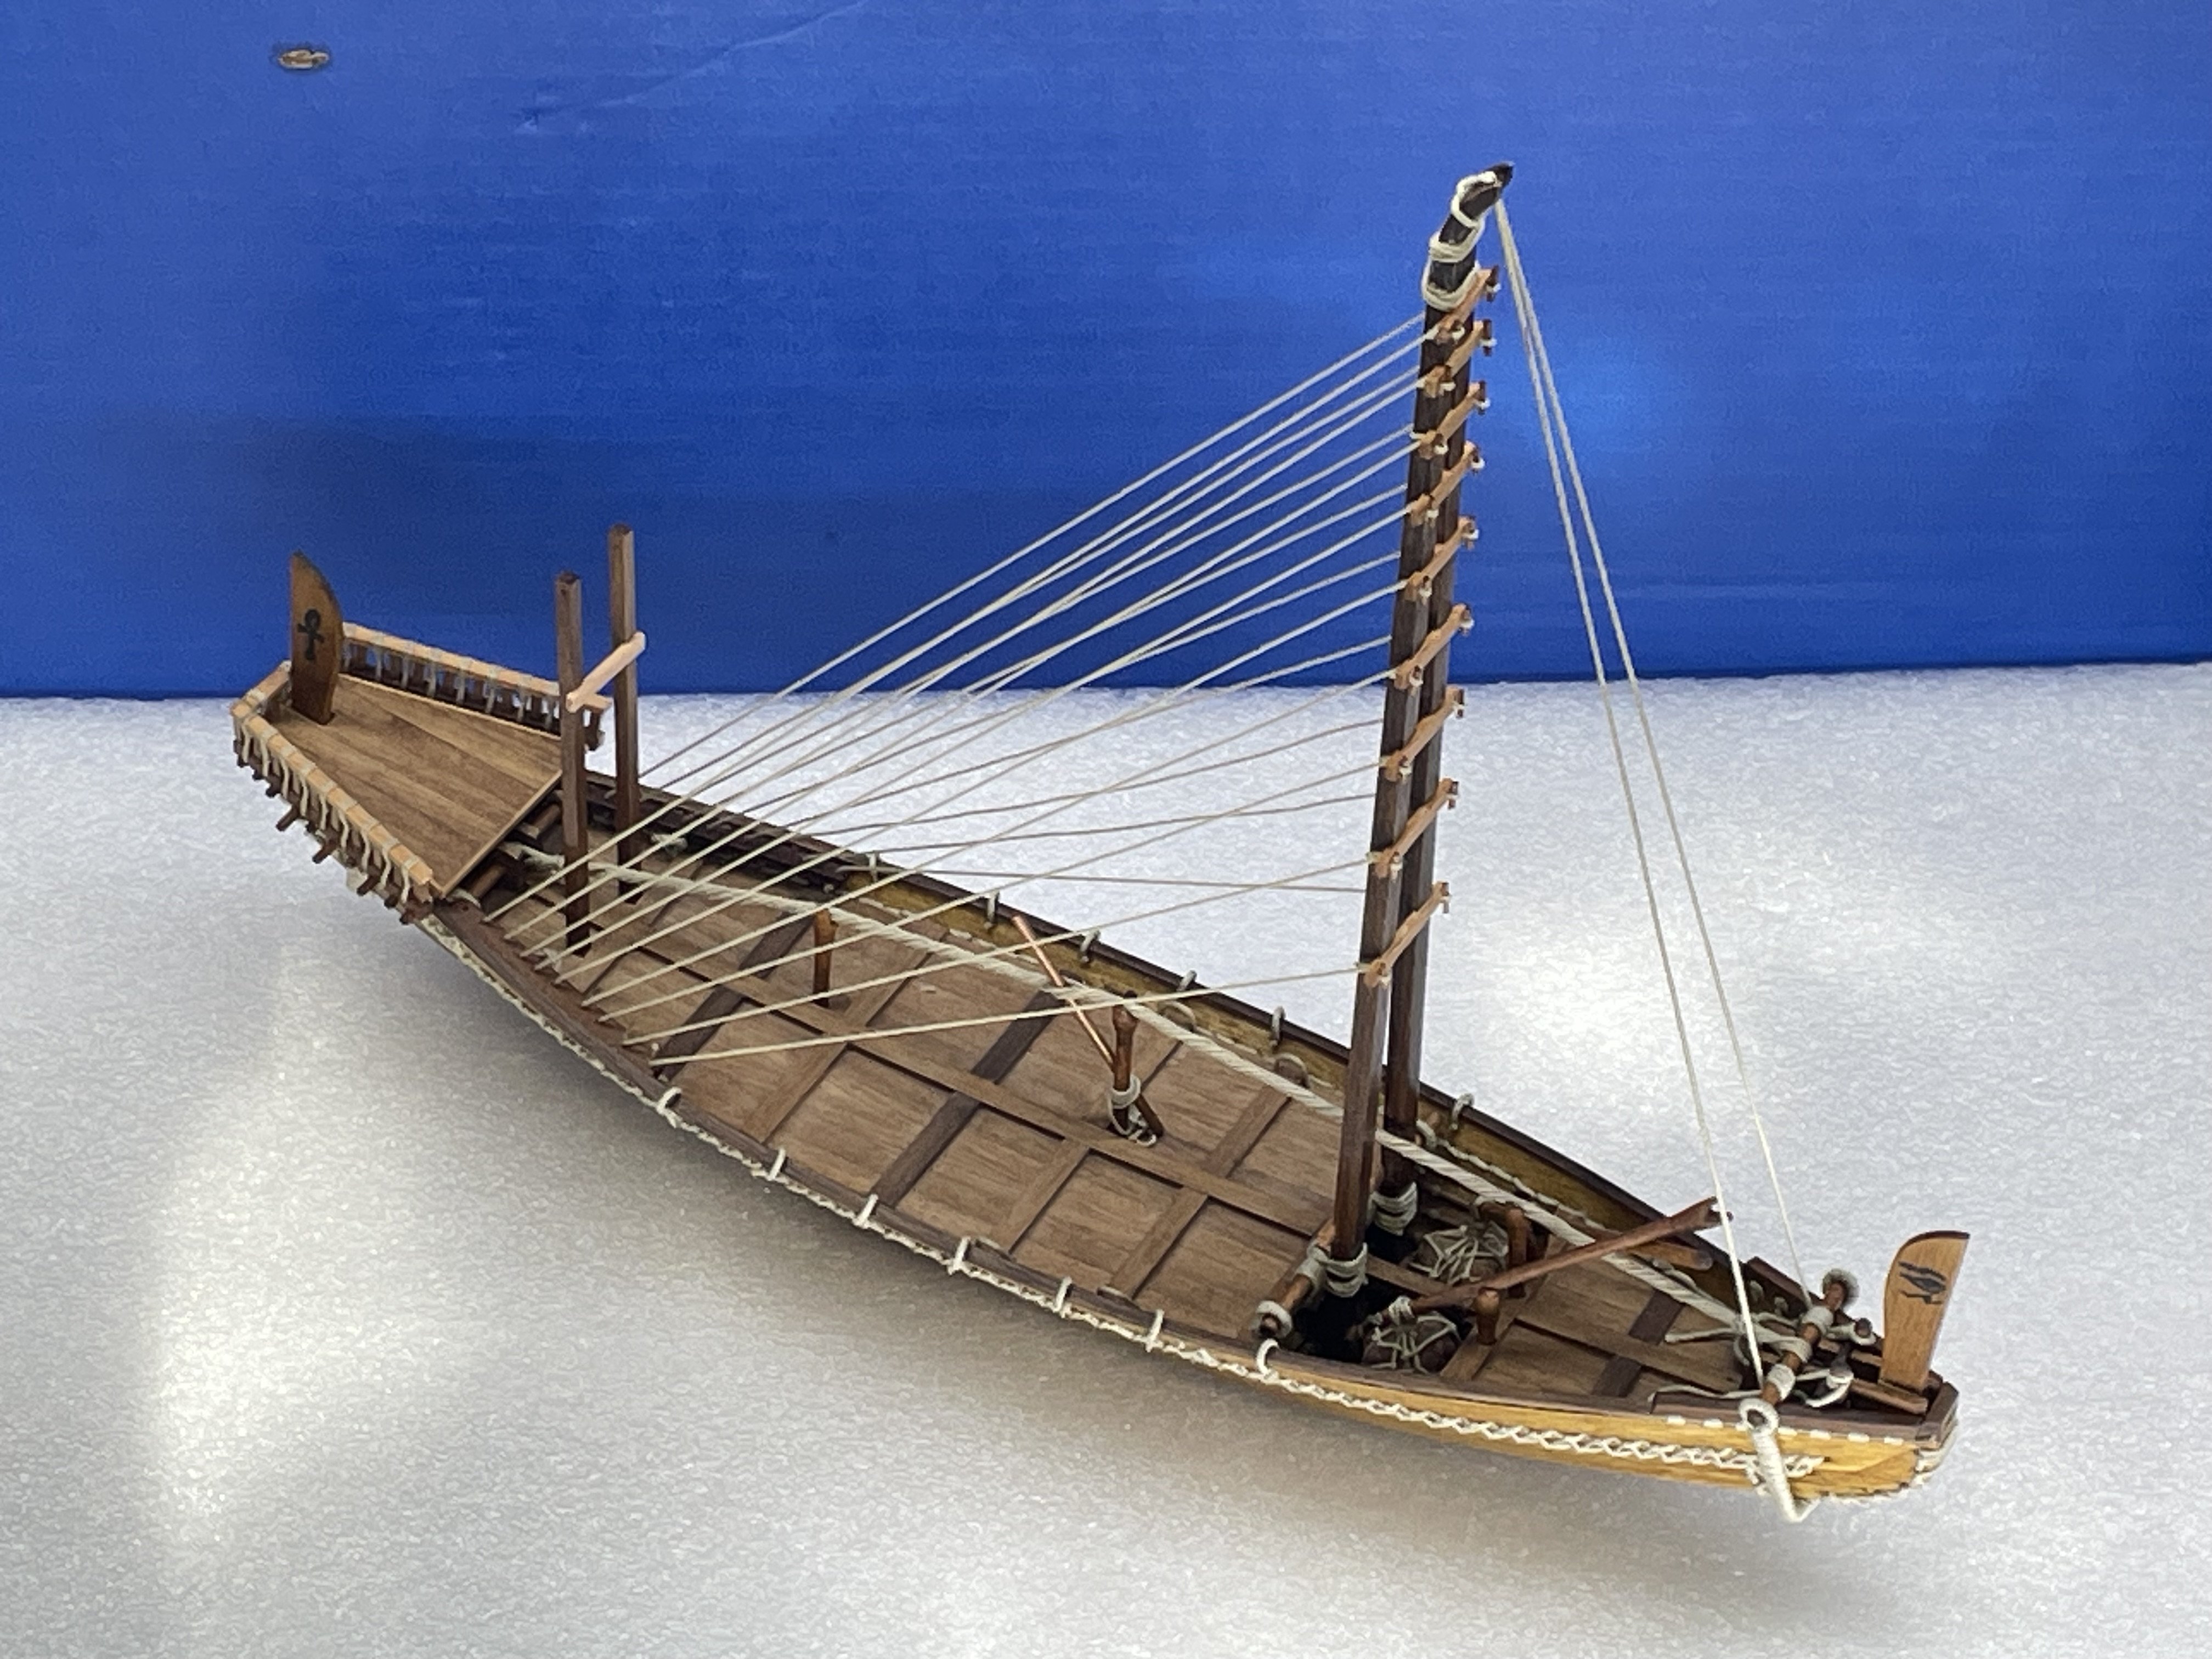
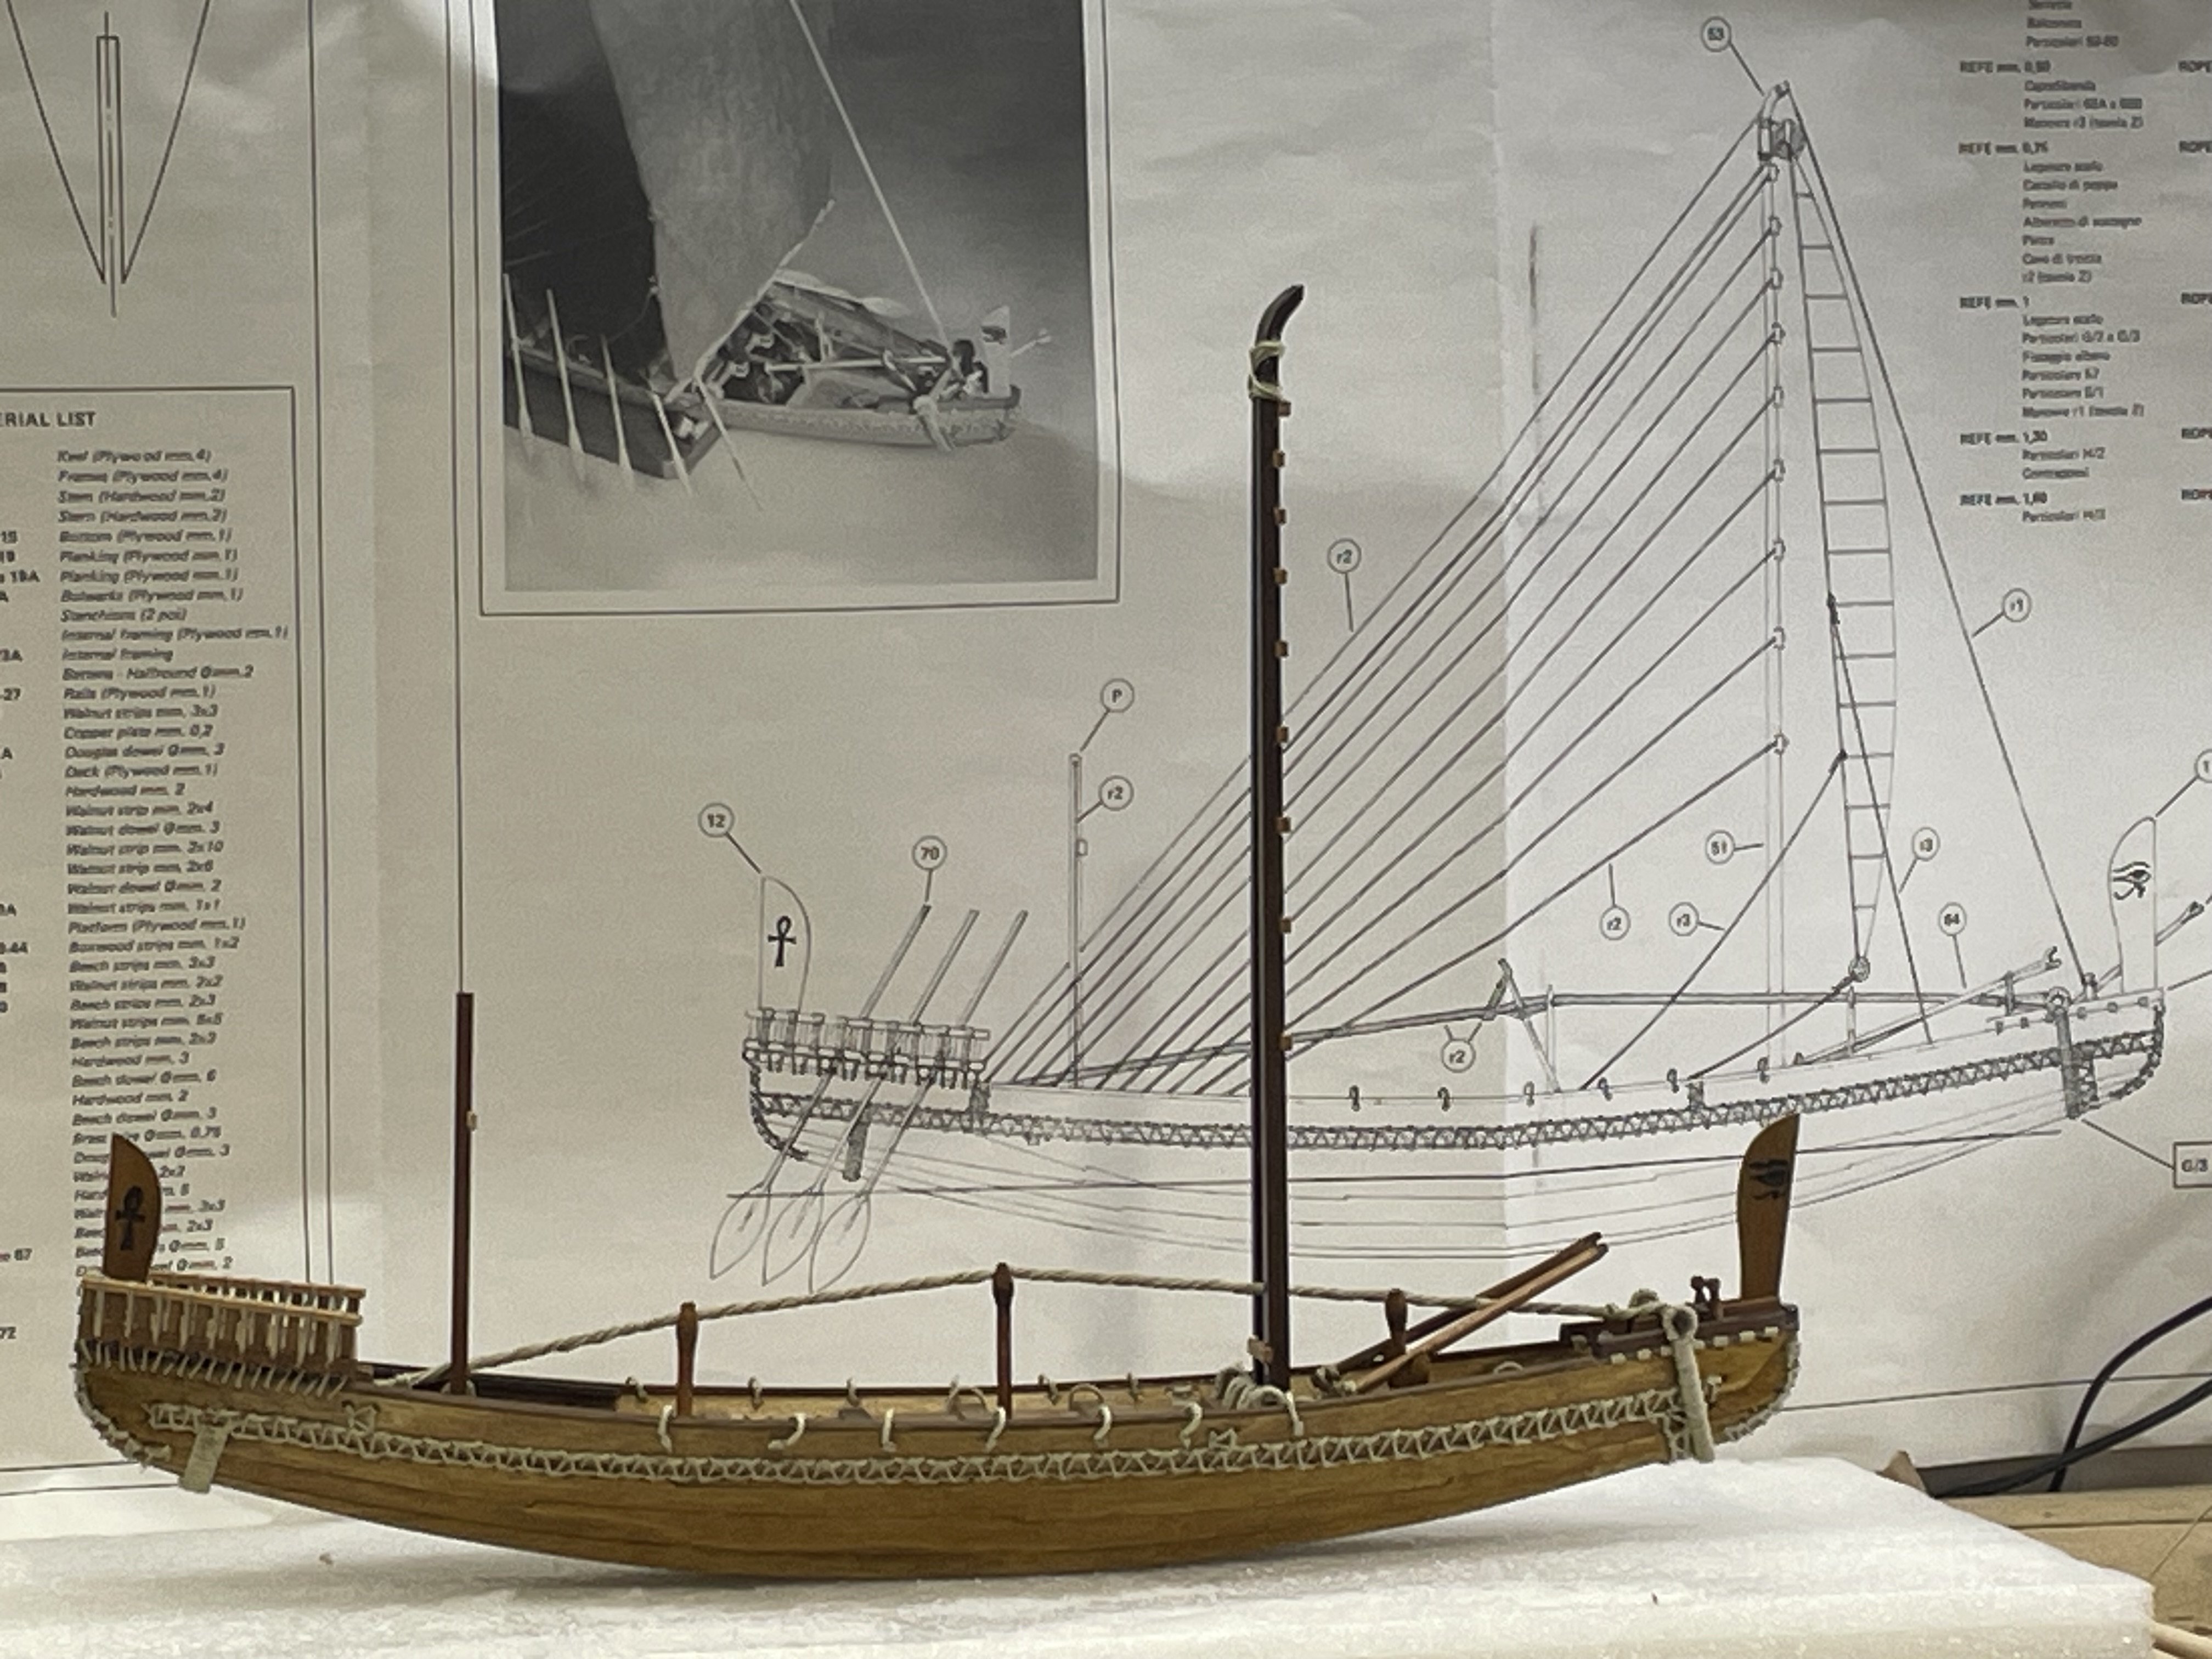
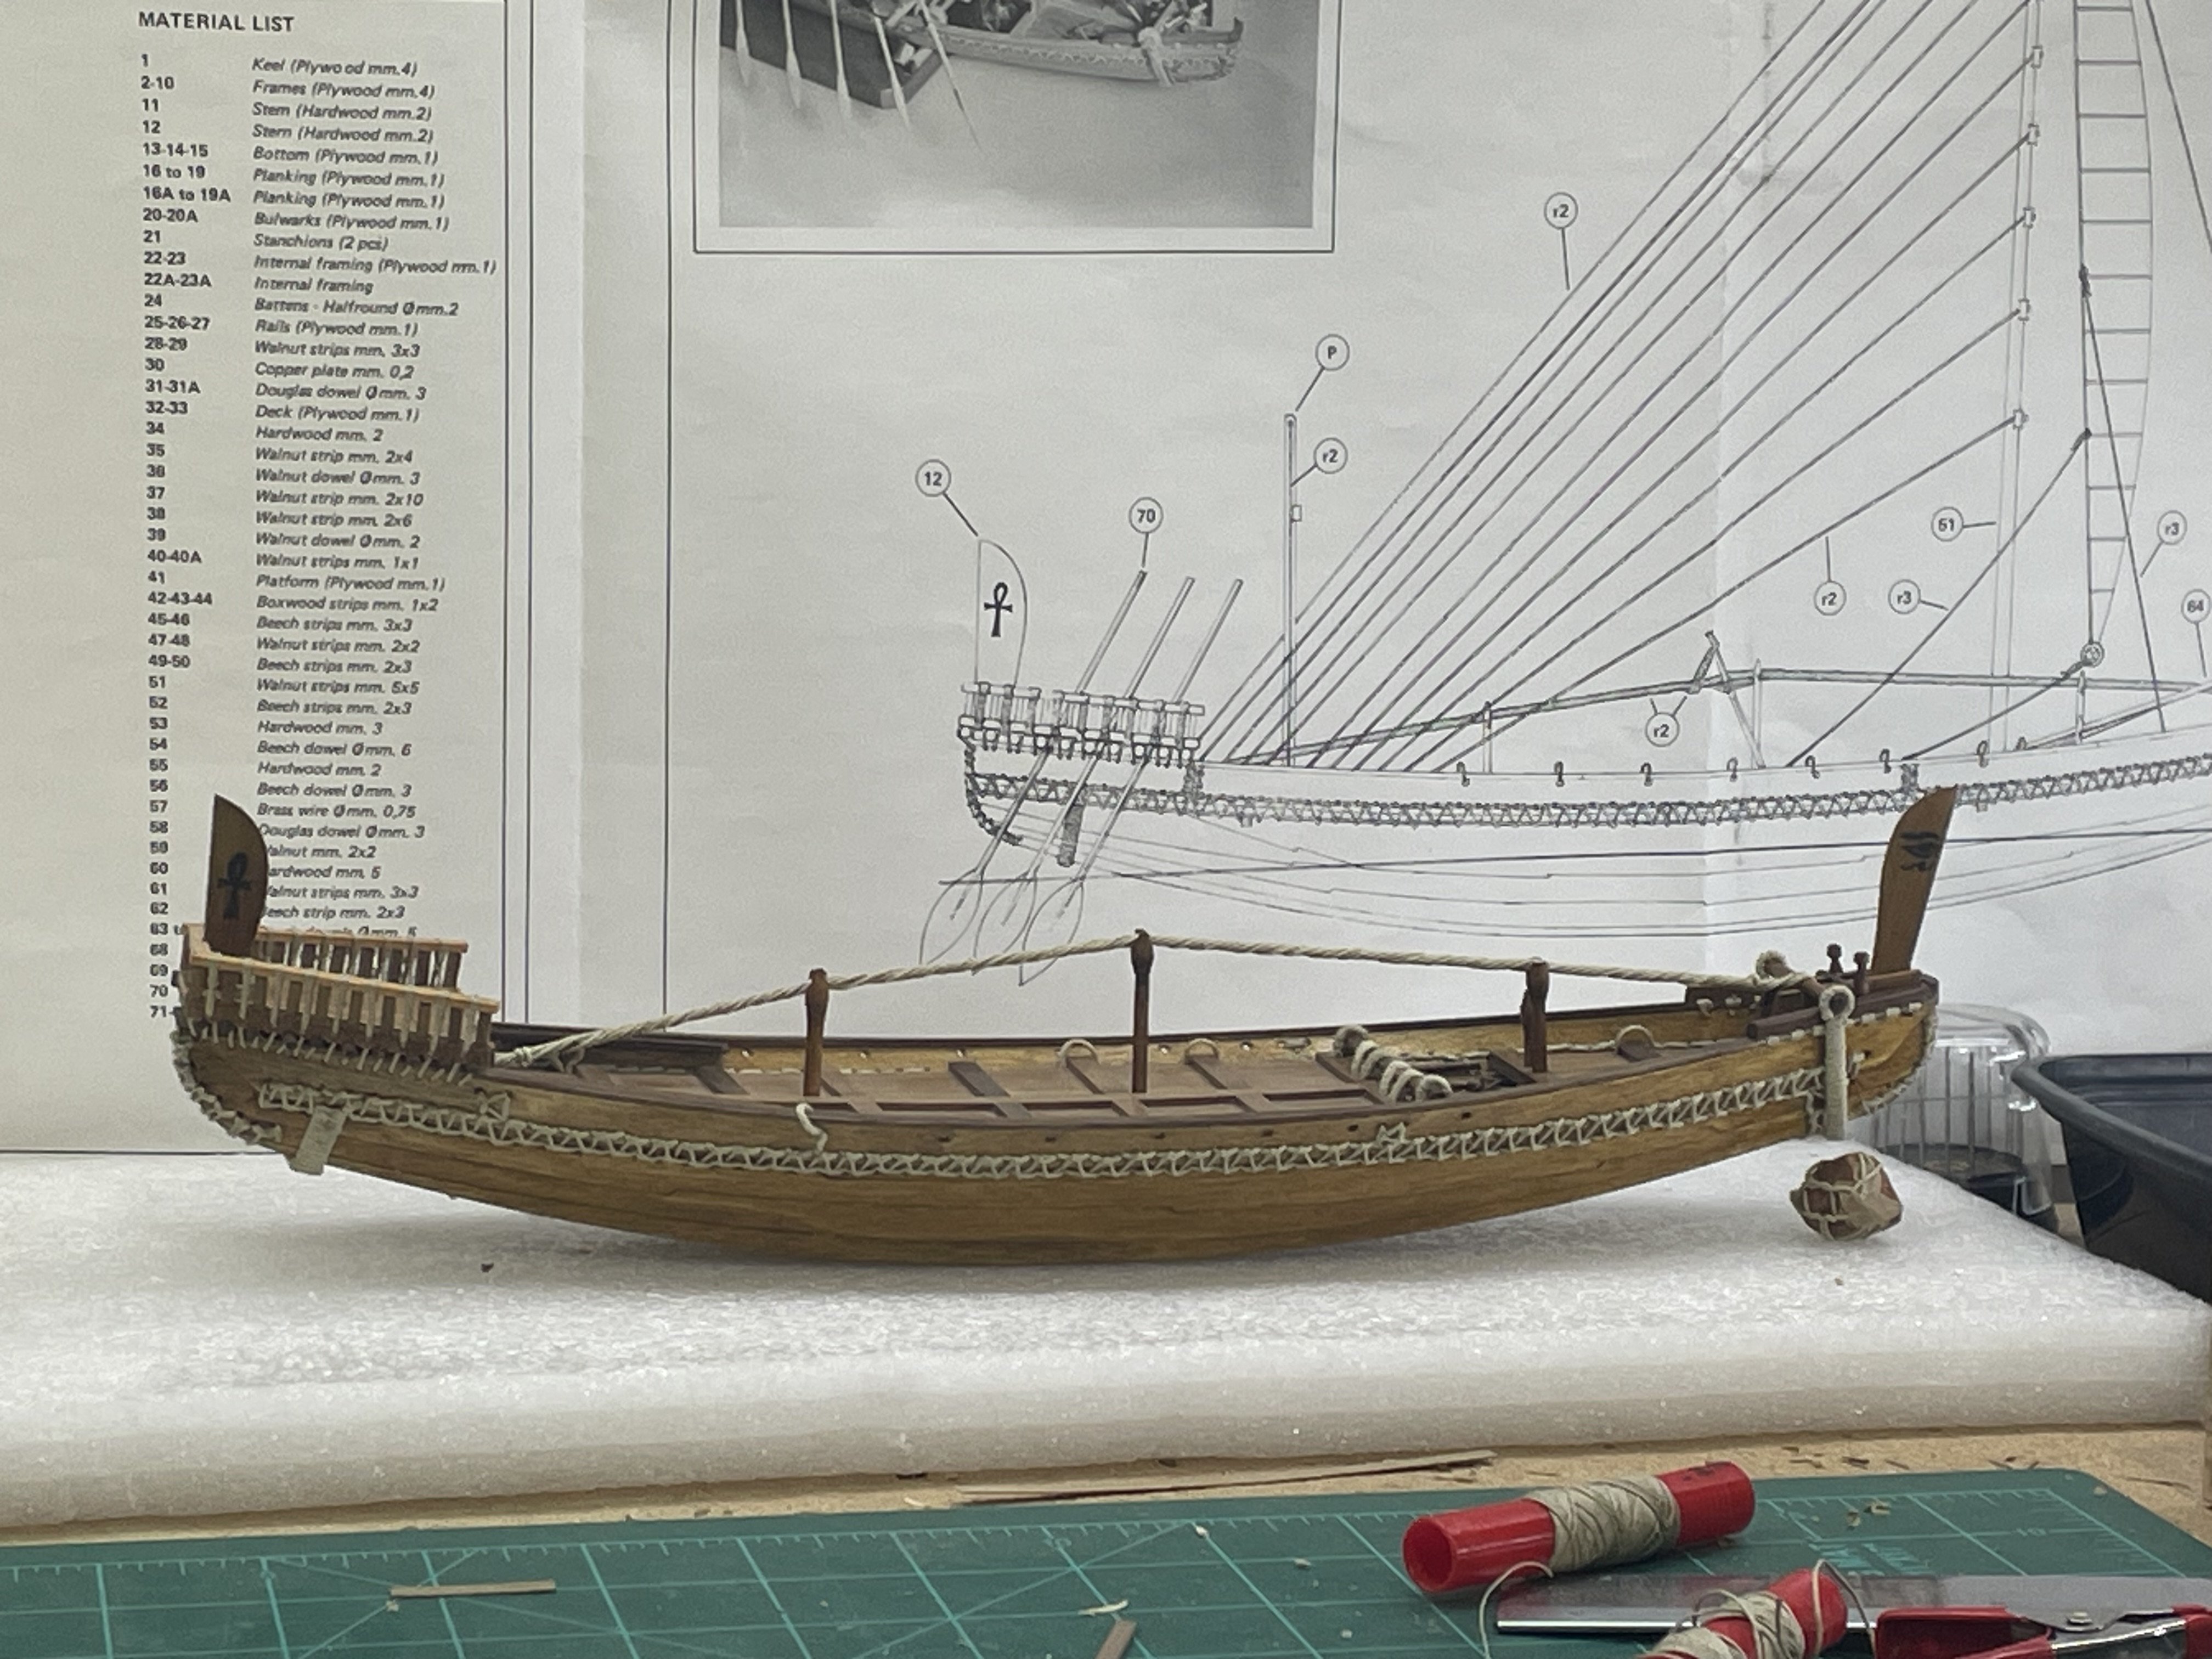
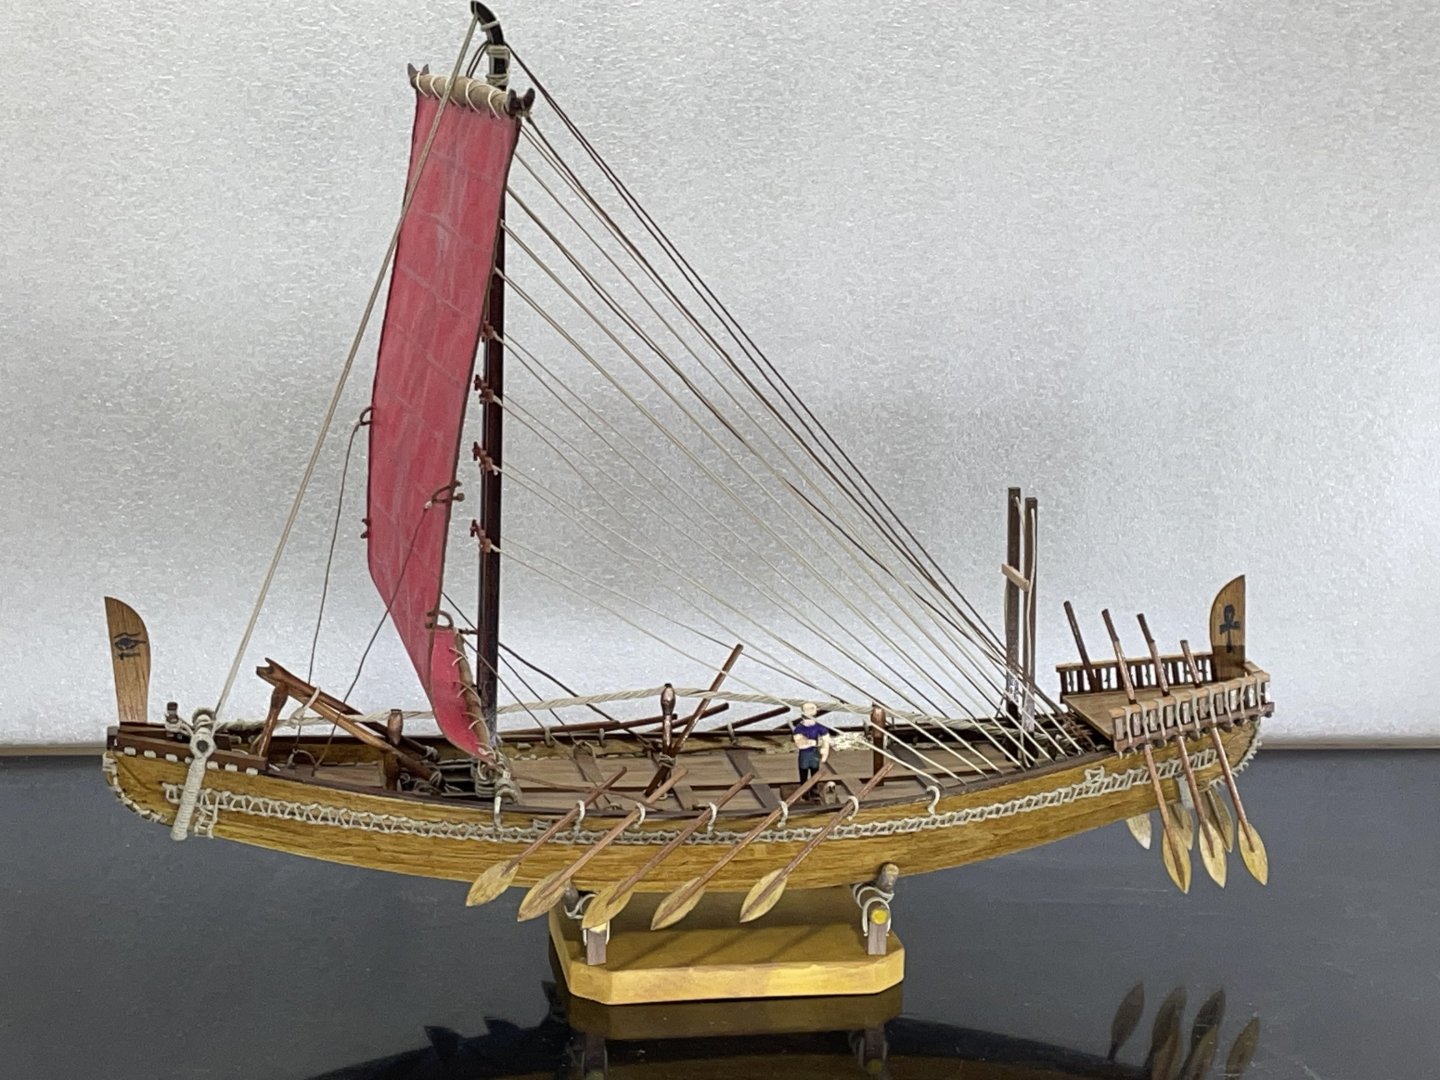
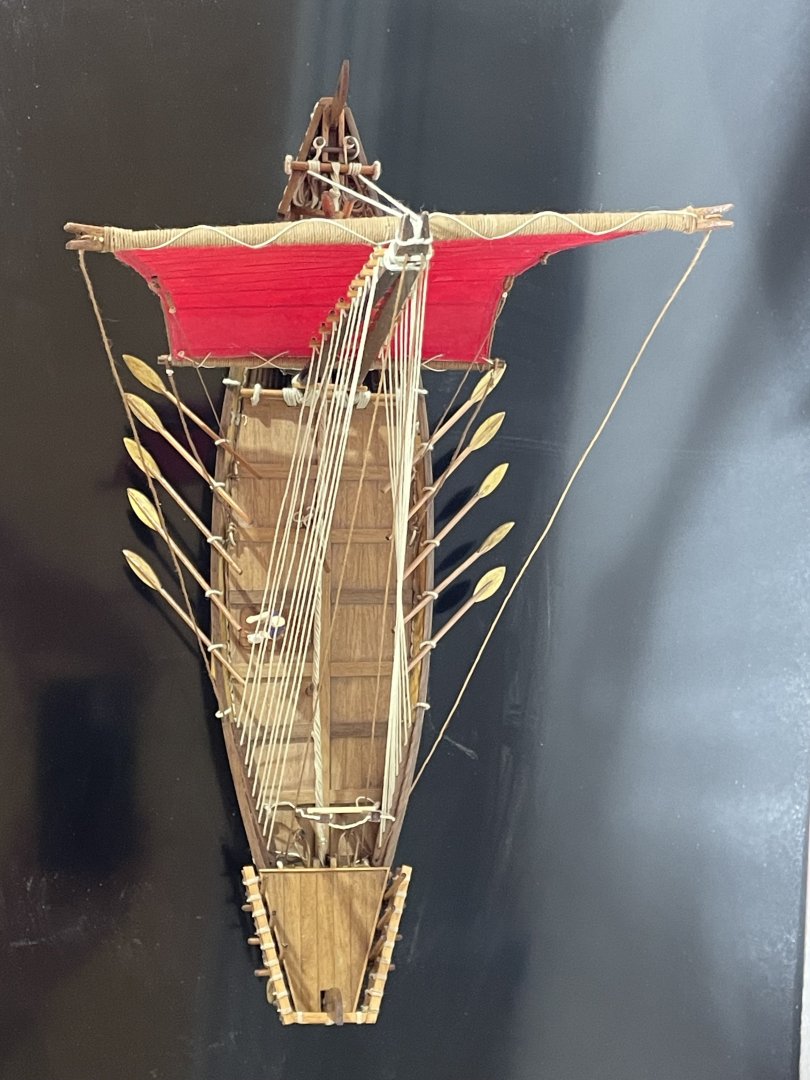
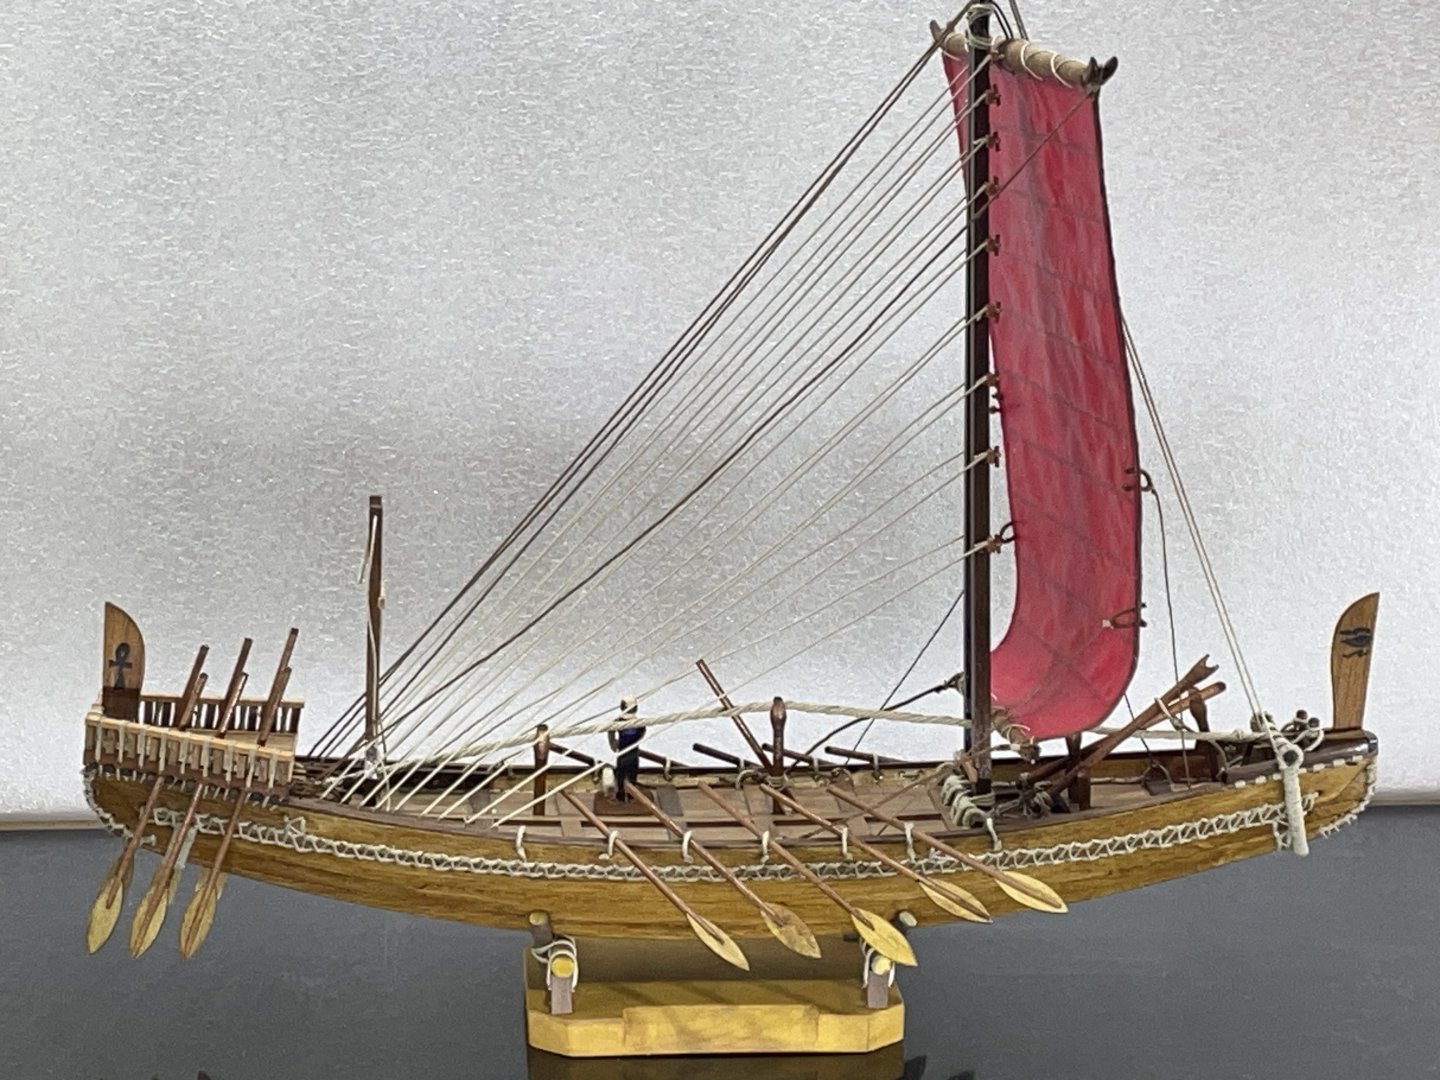
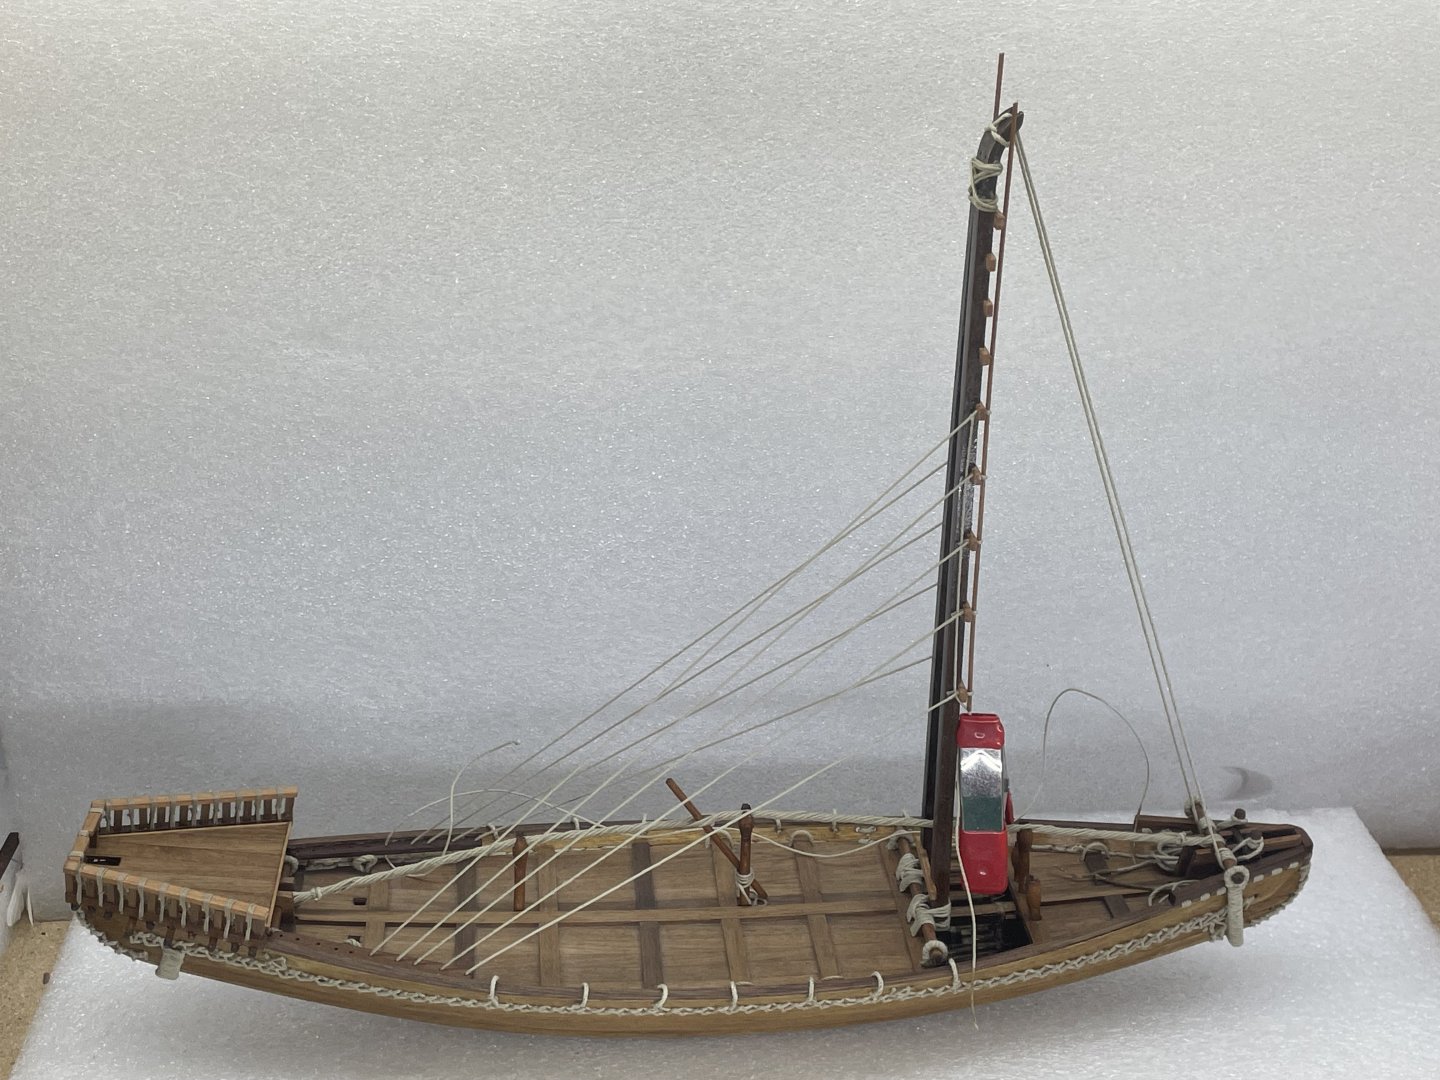
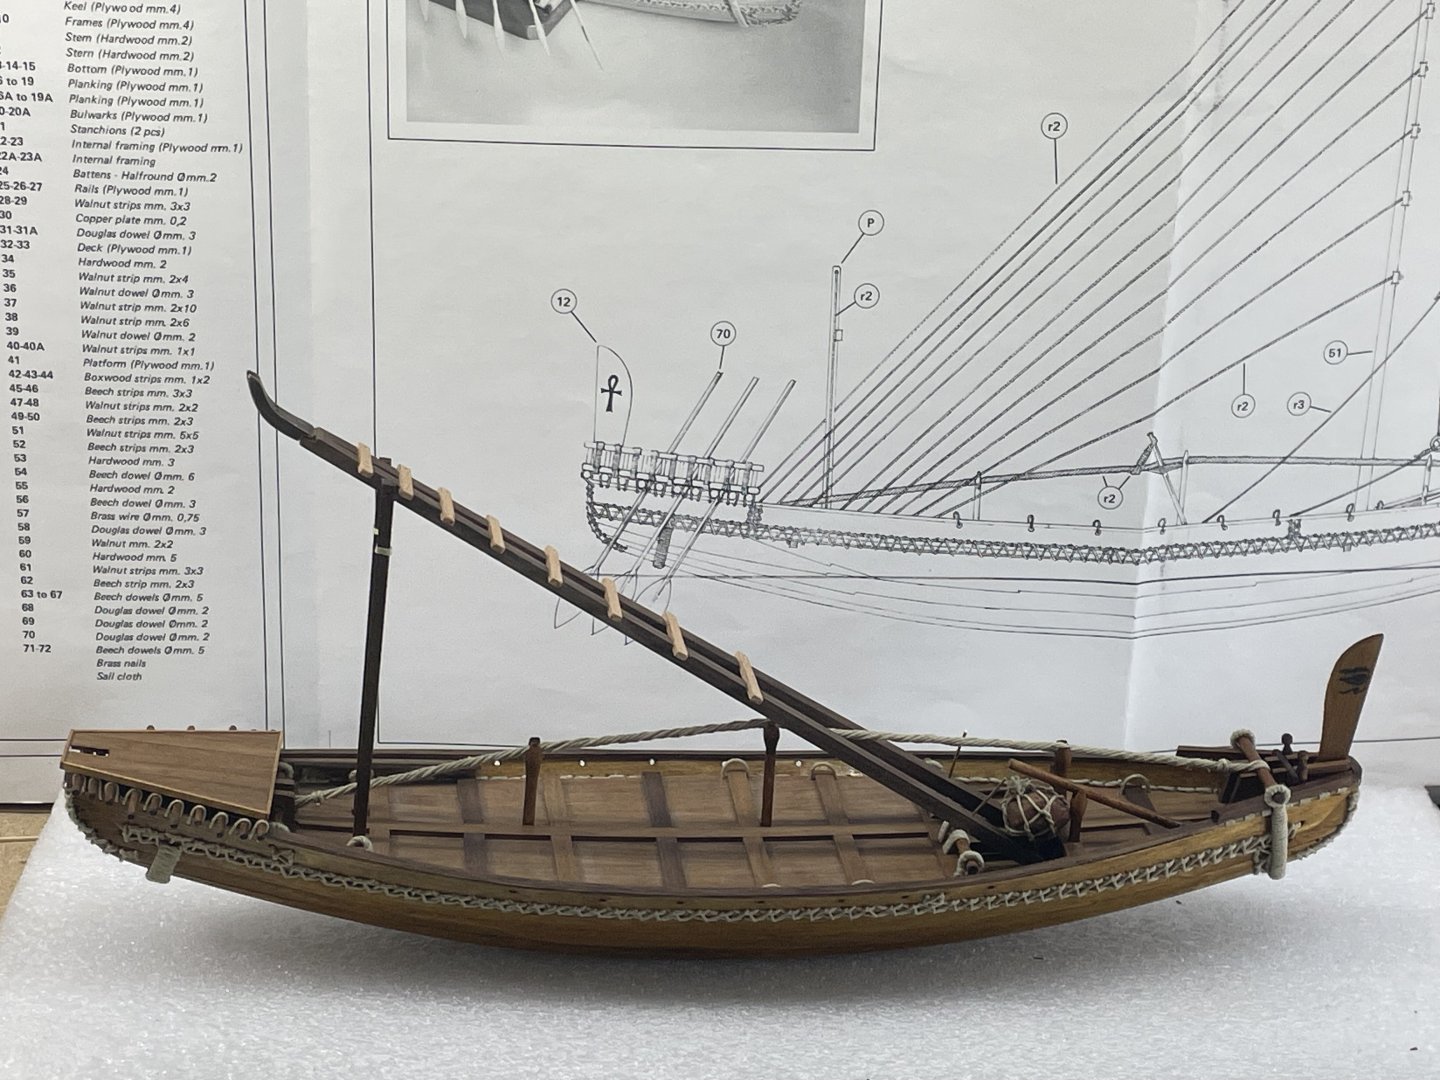
Well, kinda sad to see this one end. But there will always be another. I would rate this kit high for nice materials. There were some challenges, mainly figuring out how some stuff needs to be done. Here’s the finished pics. Thanks for all the comments, likes and views:-)


- 44 replies
-
- 11
-

-

-
- Nave Egizia
- Amati
- (and 1 more)
-
The Mossy Shipyard by Bryan Woods - 1:1
Bryan Woods replied to Bryan Woods's topic in Non-ship/categorised builds
Thank you Mike for your thoughtful words. I don’t know about the money, I try not deal with that:-) but the motivation will have Nave Egizia finished this week and I’ve already got started back on the Gretel, that I put on the shelf a while ago. -
The Mossy Shipyard by Bryan Woods - 1:1
Bryan Woods replied to Bryan Woods's topic in Non-ship/categorised builds
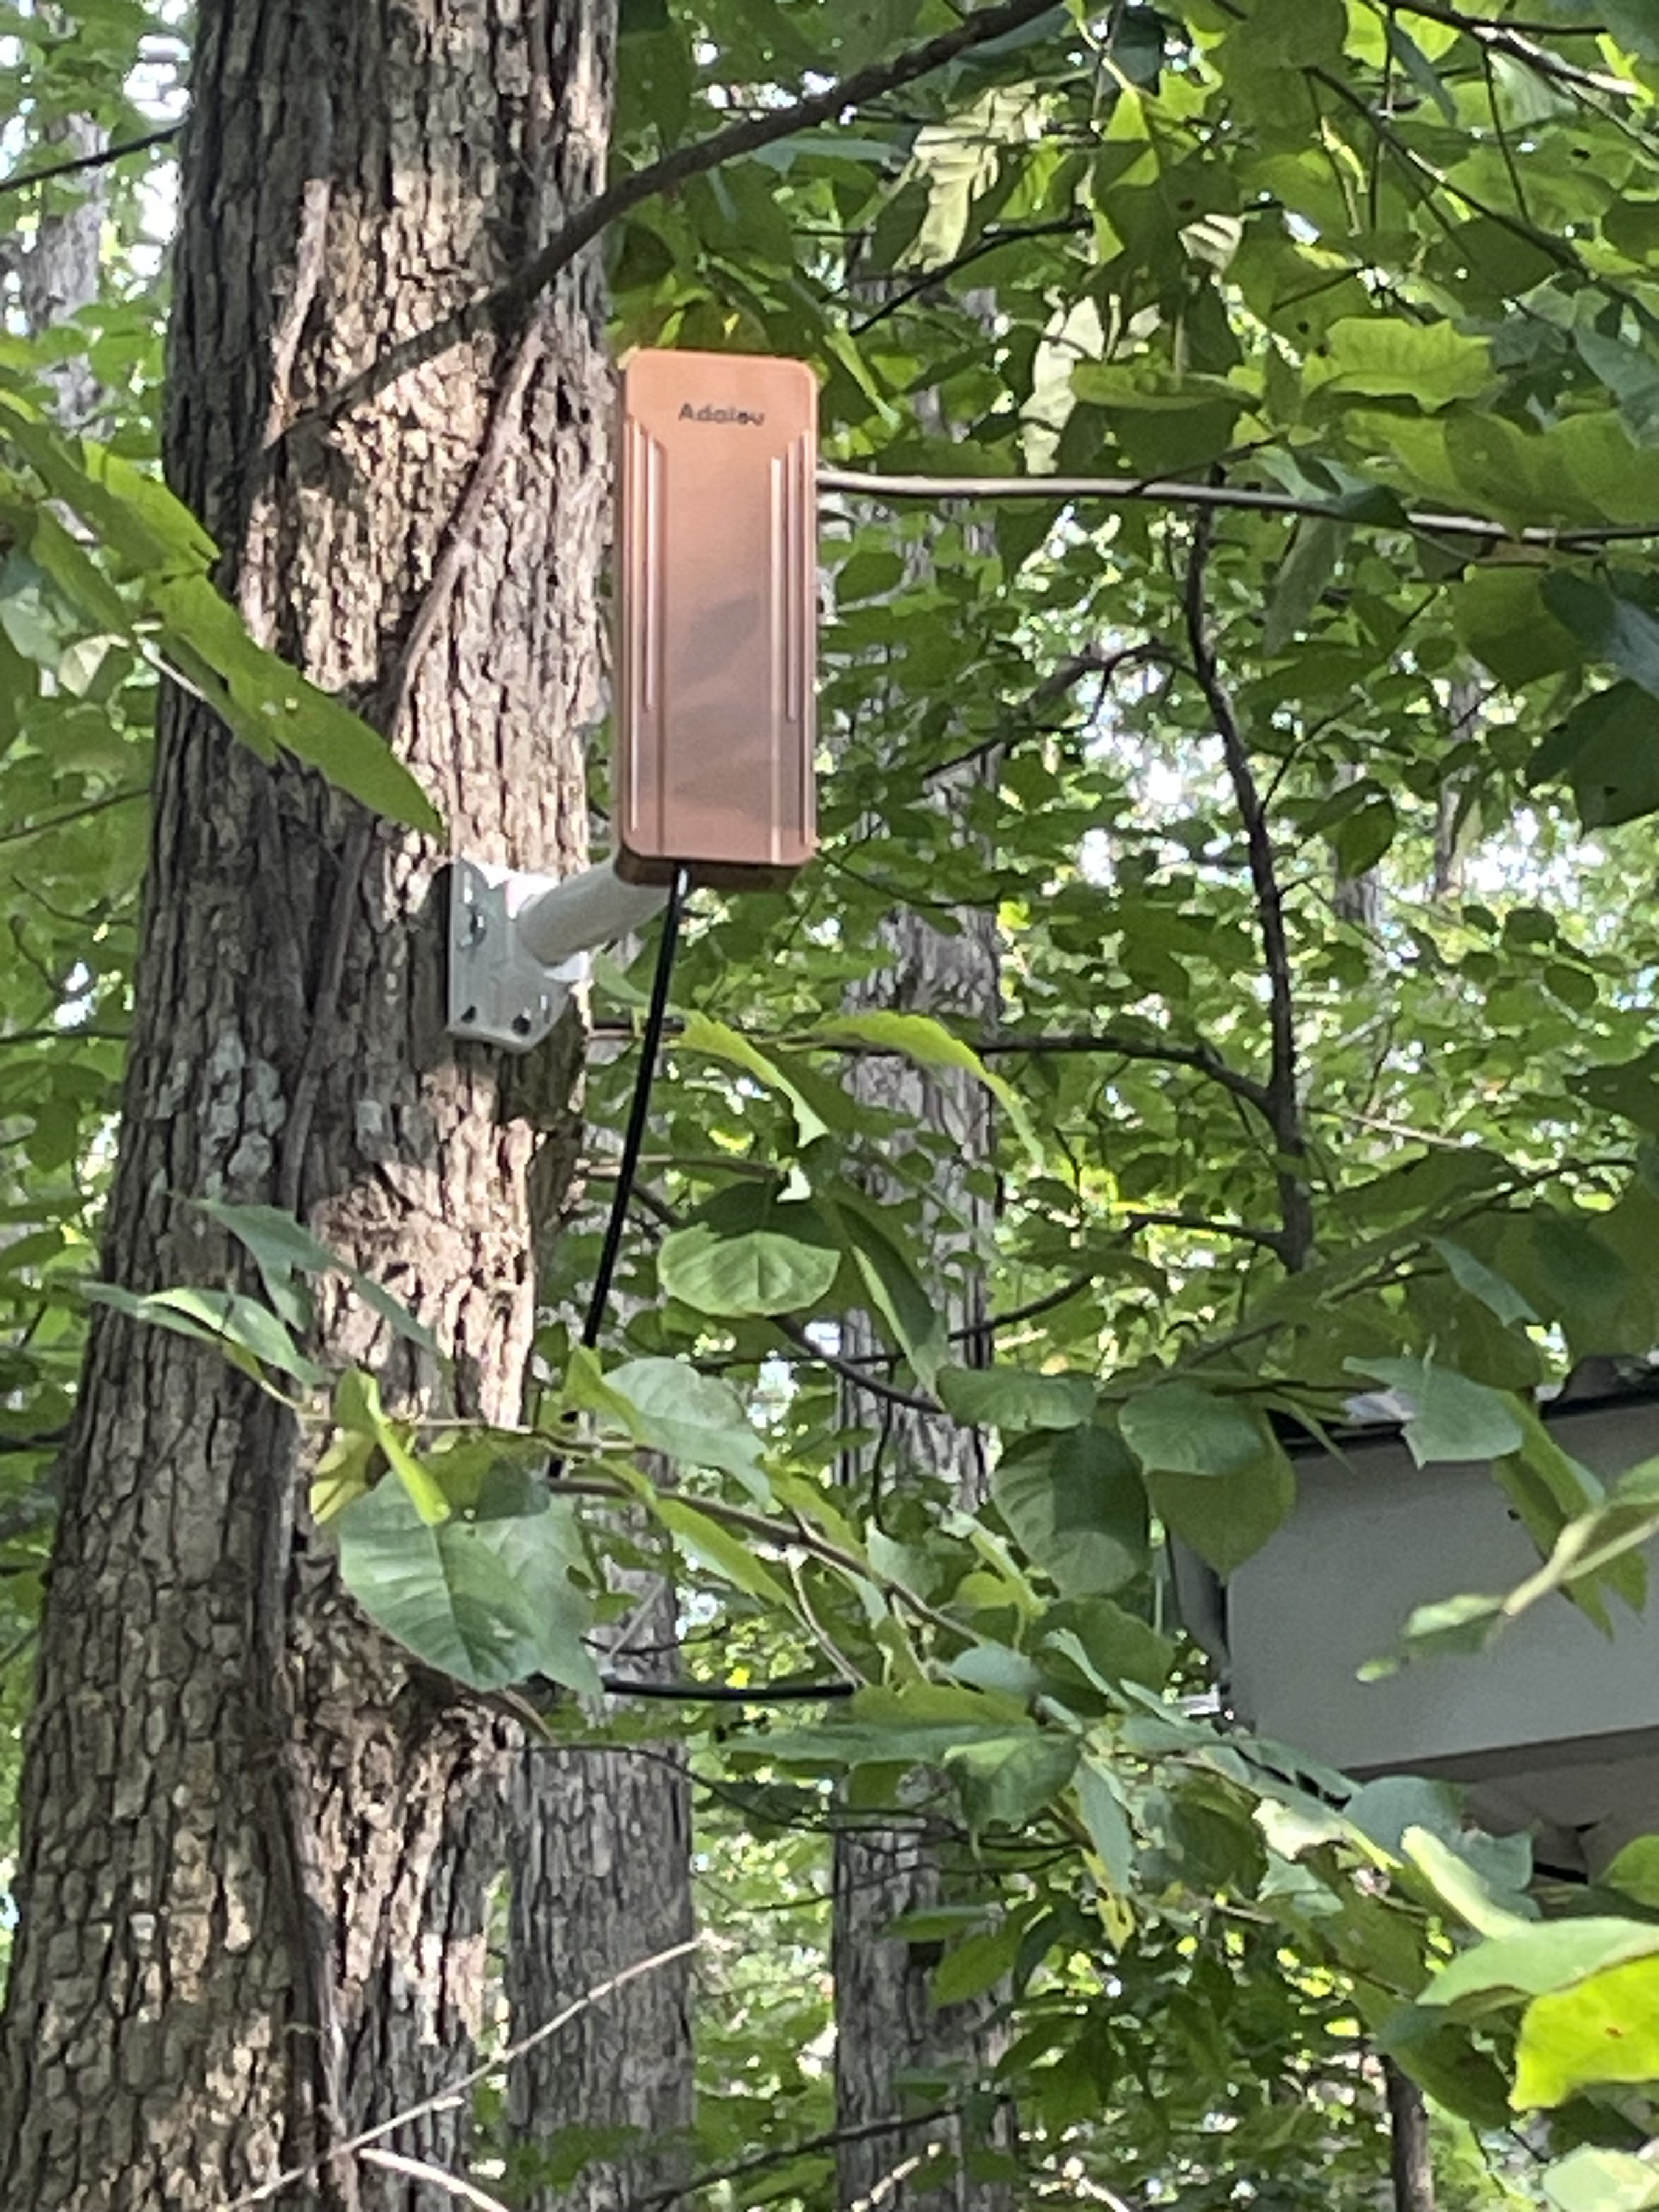
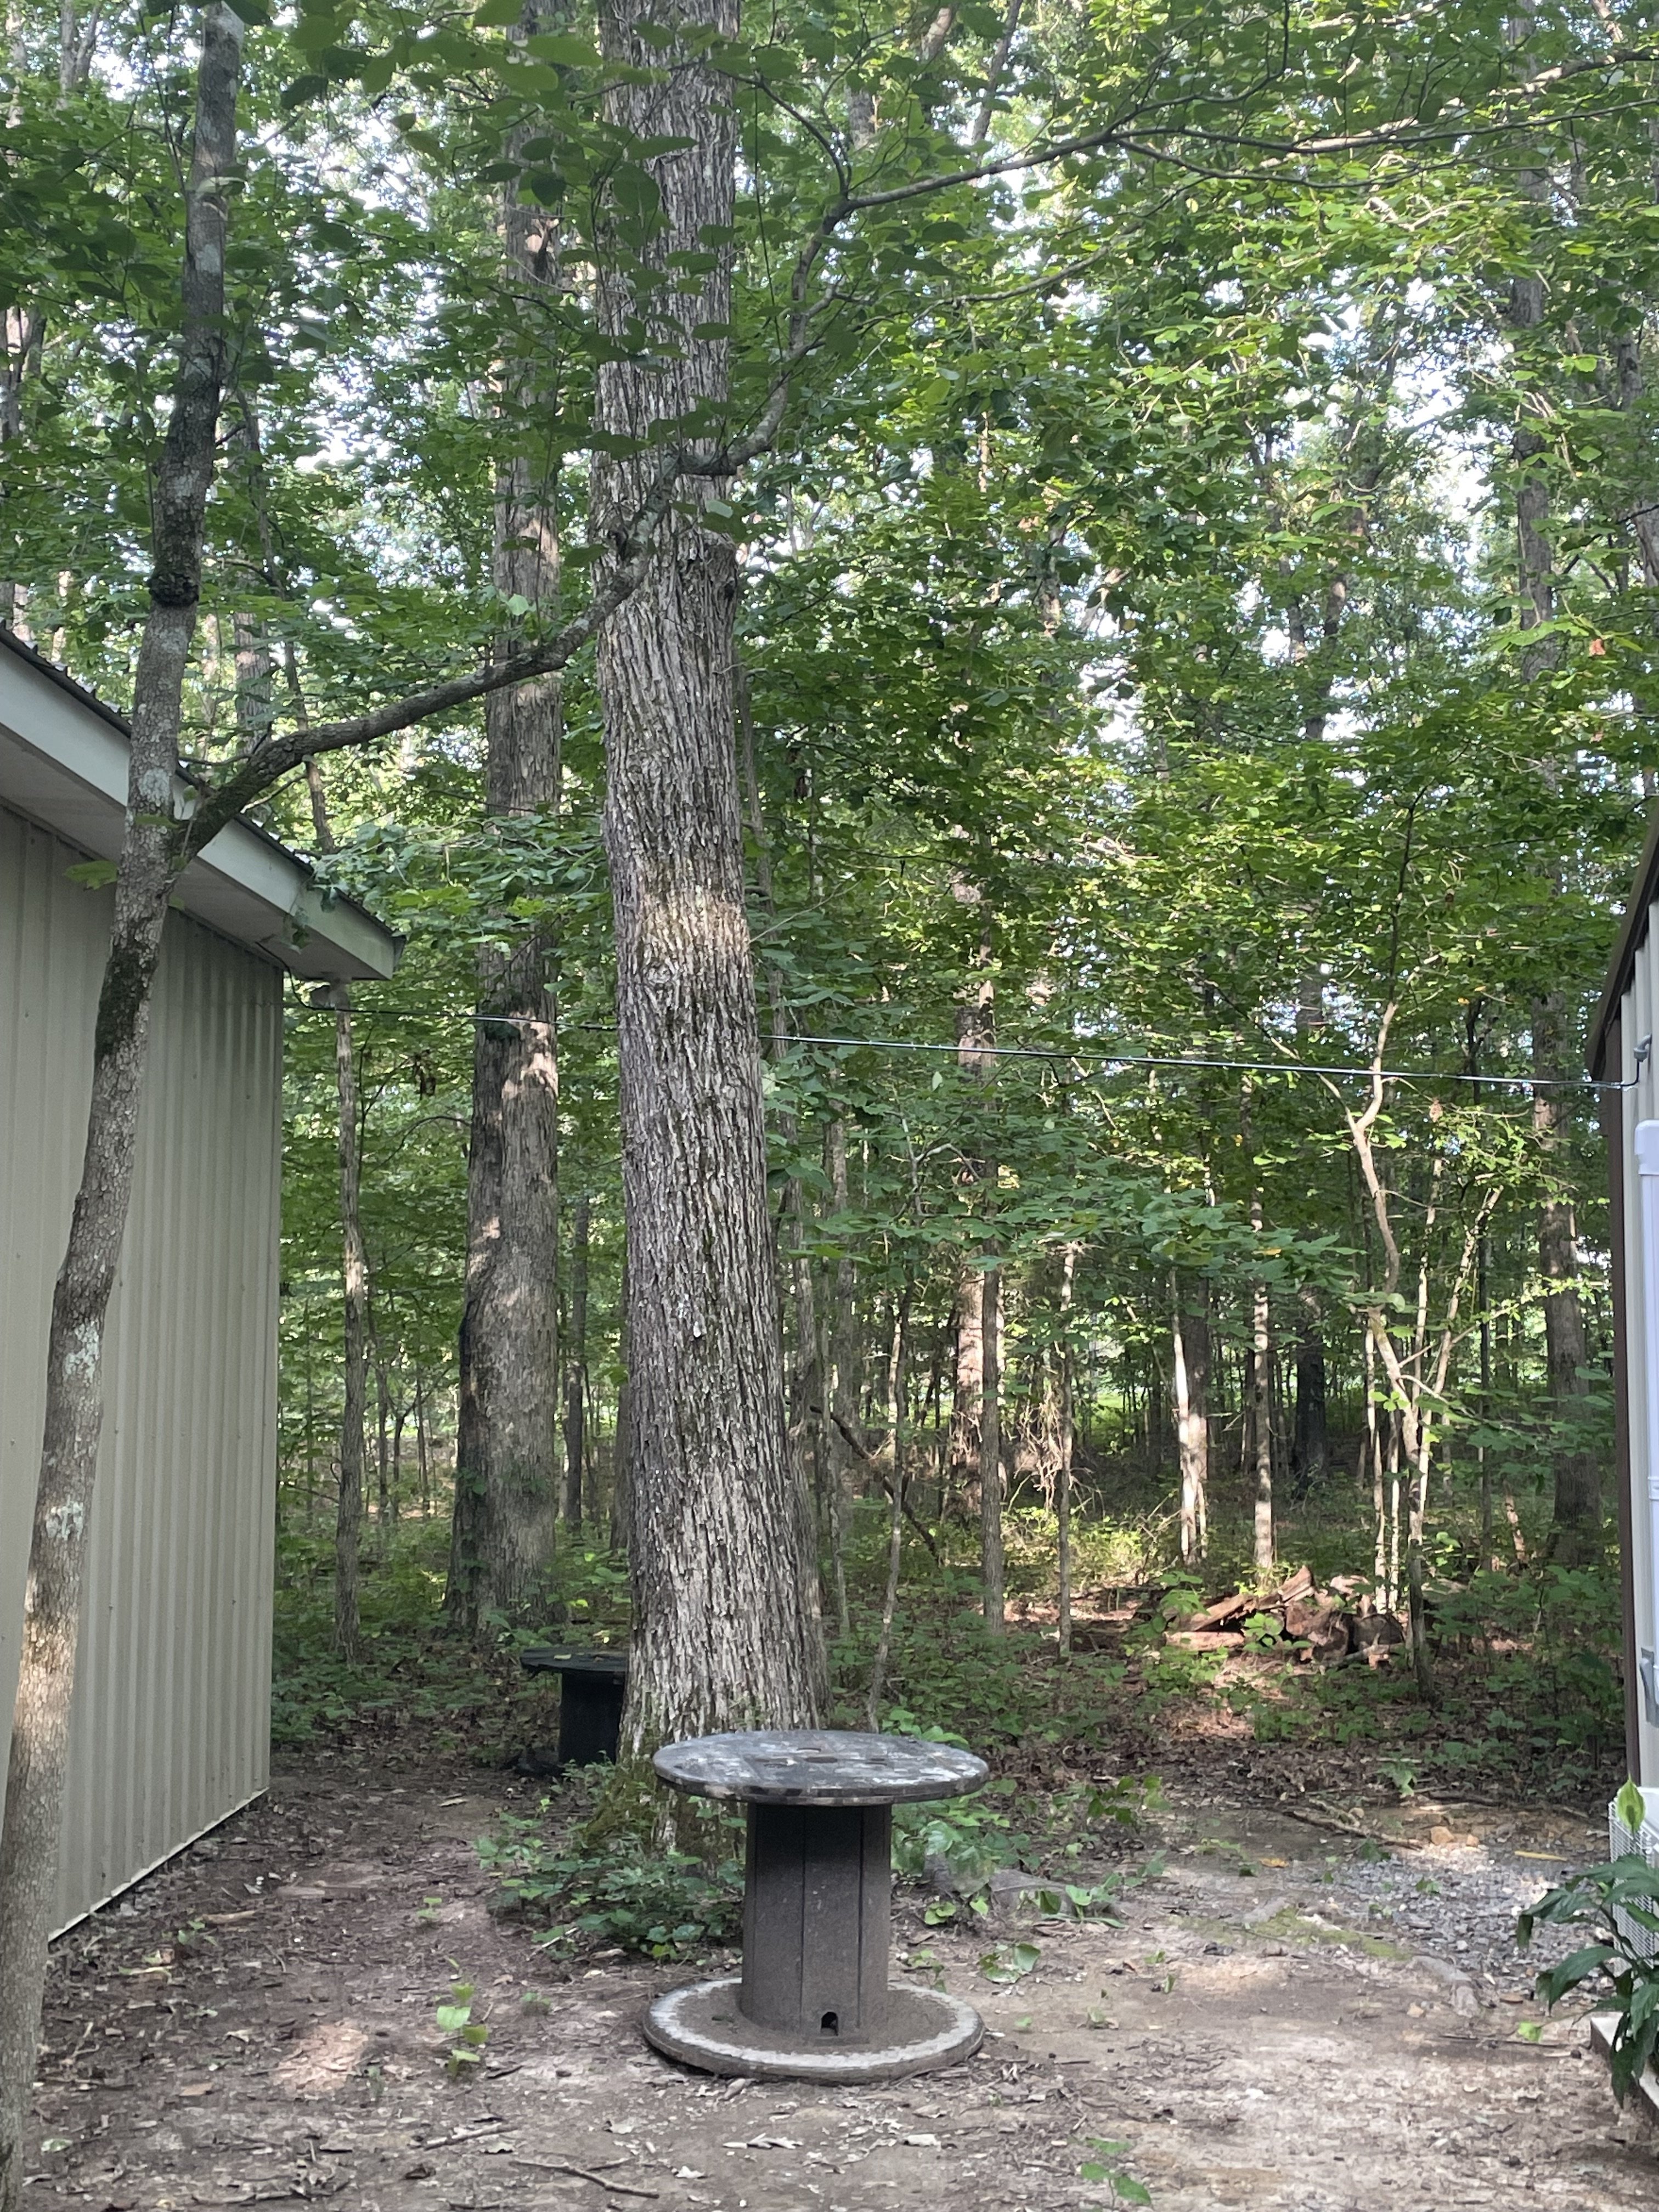
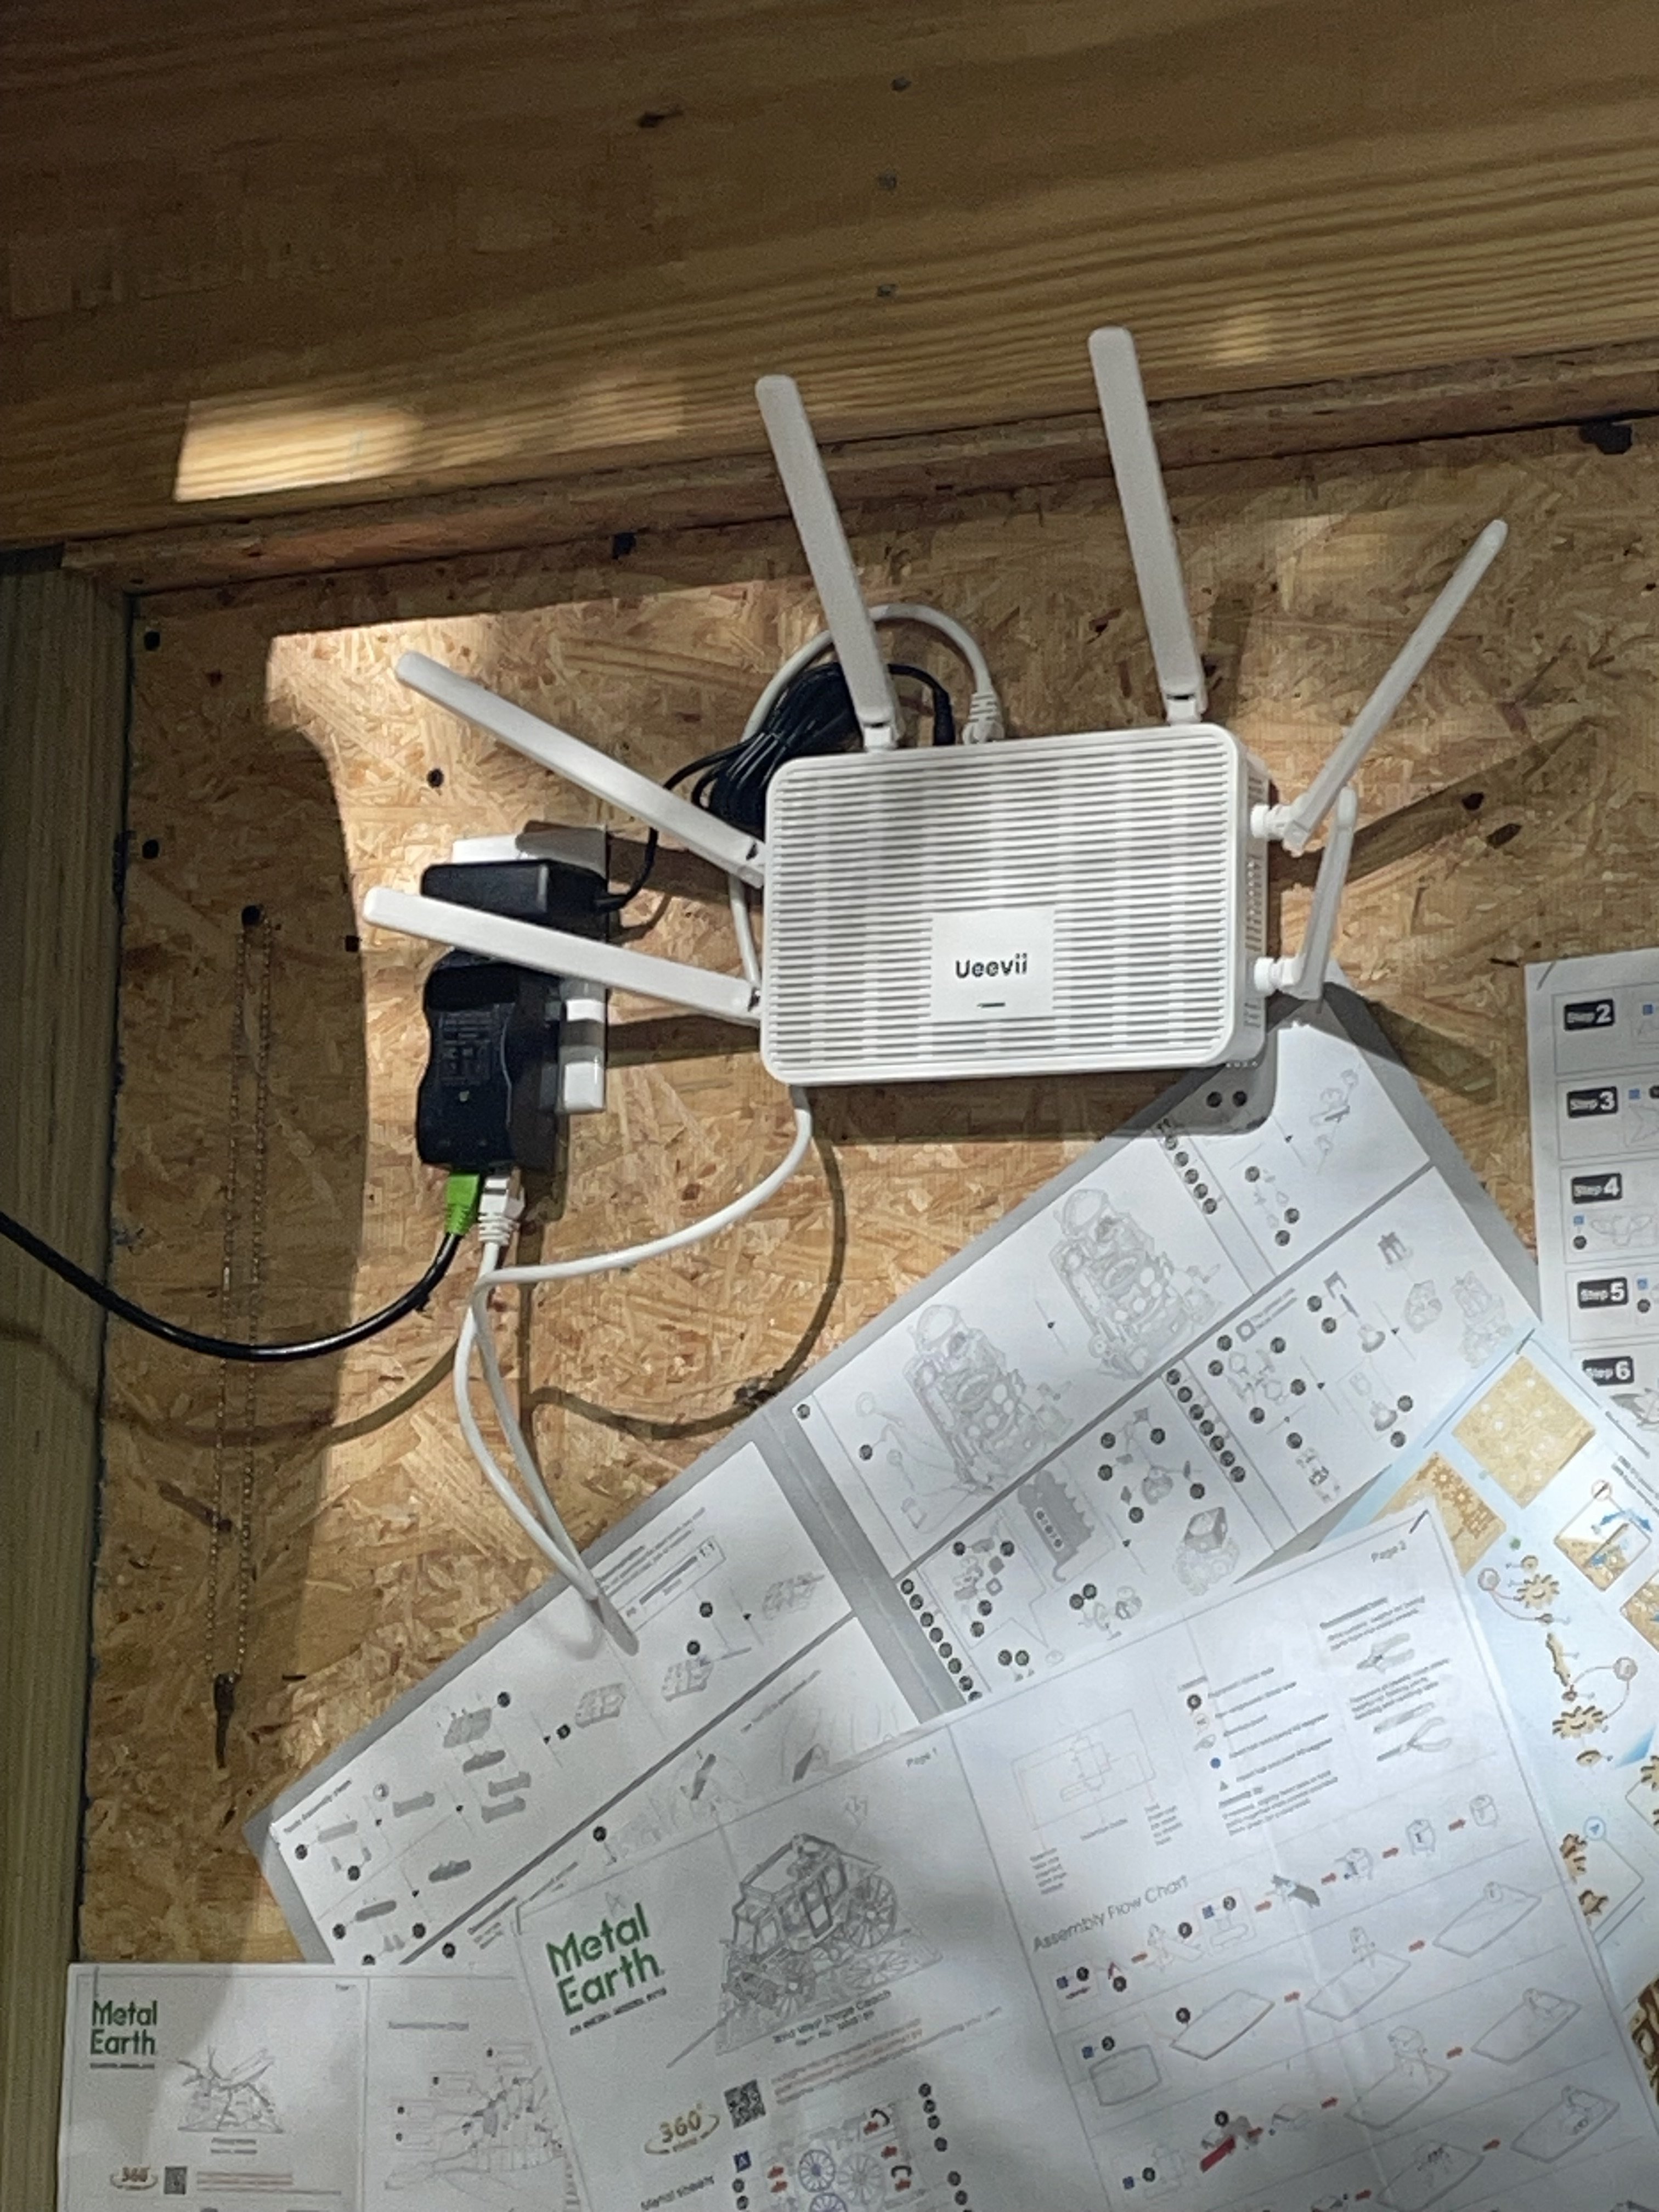
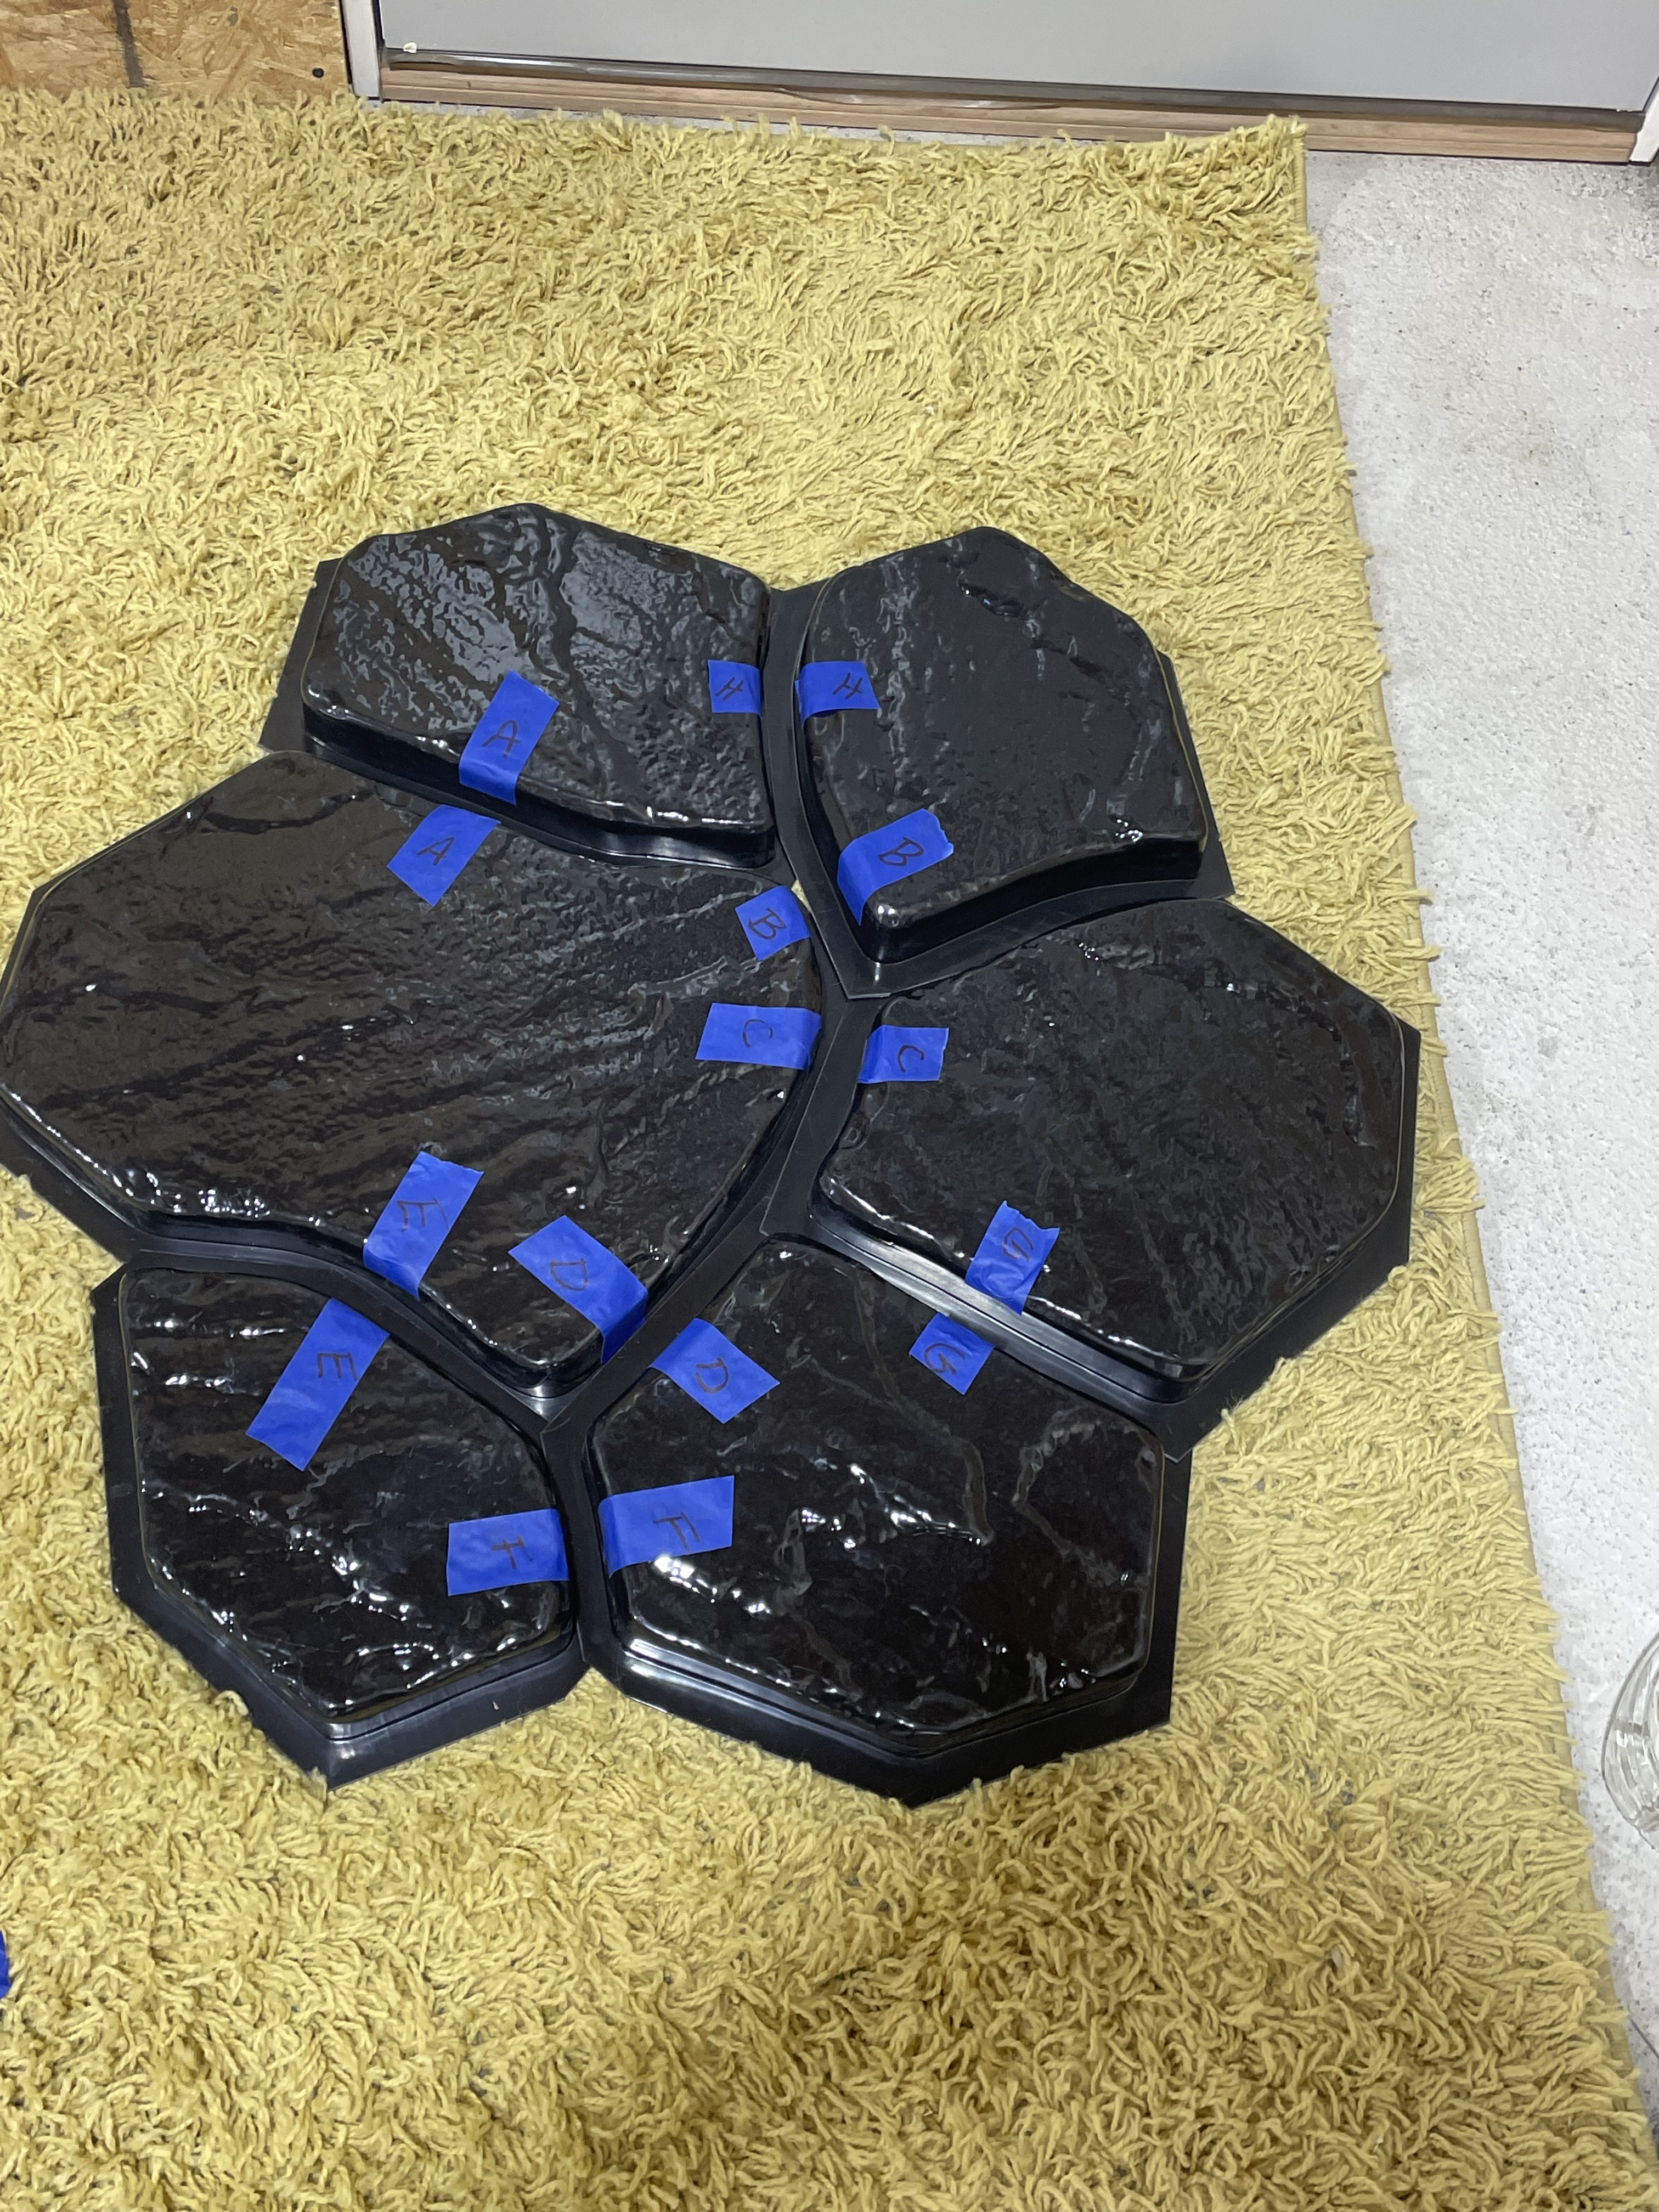
The Mossy Shipyard got another upgrade today. I installed an internet bridge. One was installed on the corner of the house and the other on a tree beside the garage. I went through the garage and put a tension line across to the shipyard. I knew I put that outlet up there for a reason:-) The next thing that I know we’ll do is a flagstone walk. I brought these molds back a while ago. I can see a lot of time involved just trying to put the puzzle together:-)


- 42 replies
-
- 10
-
-
-
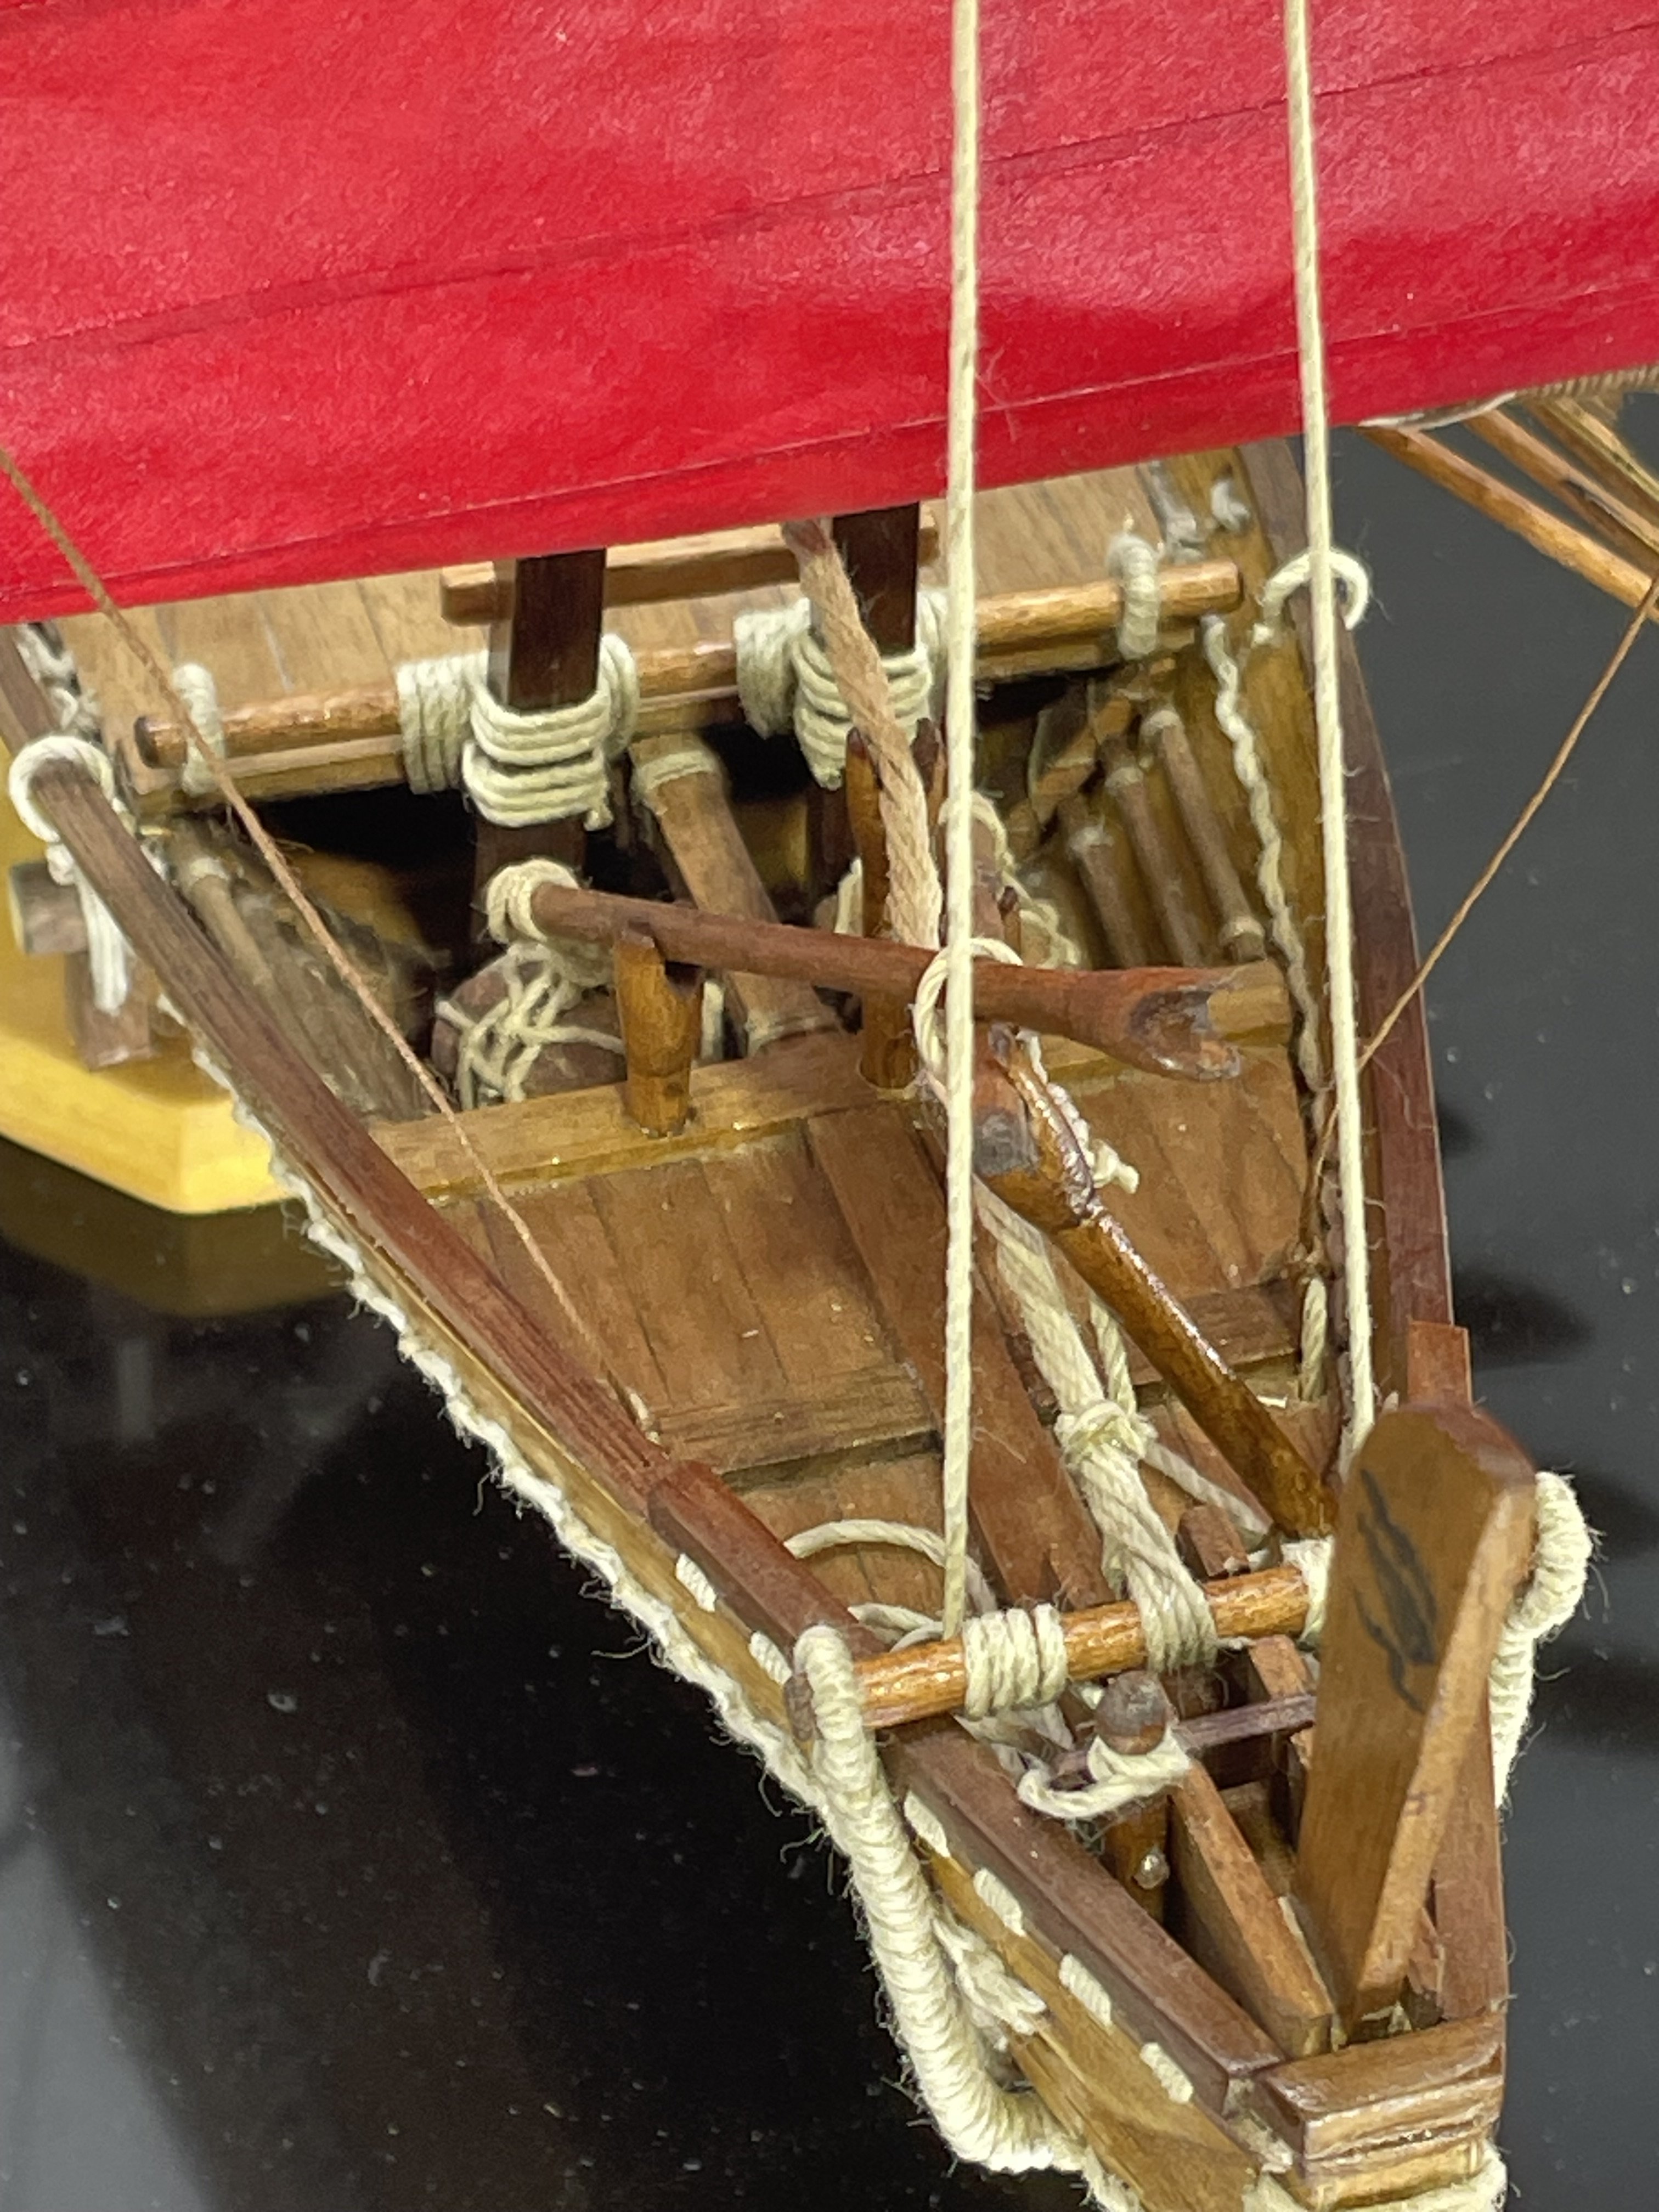
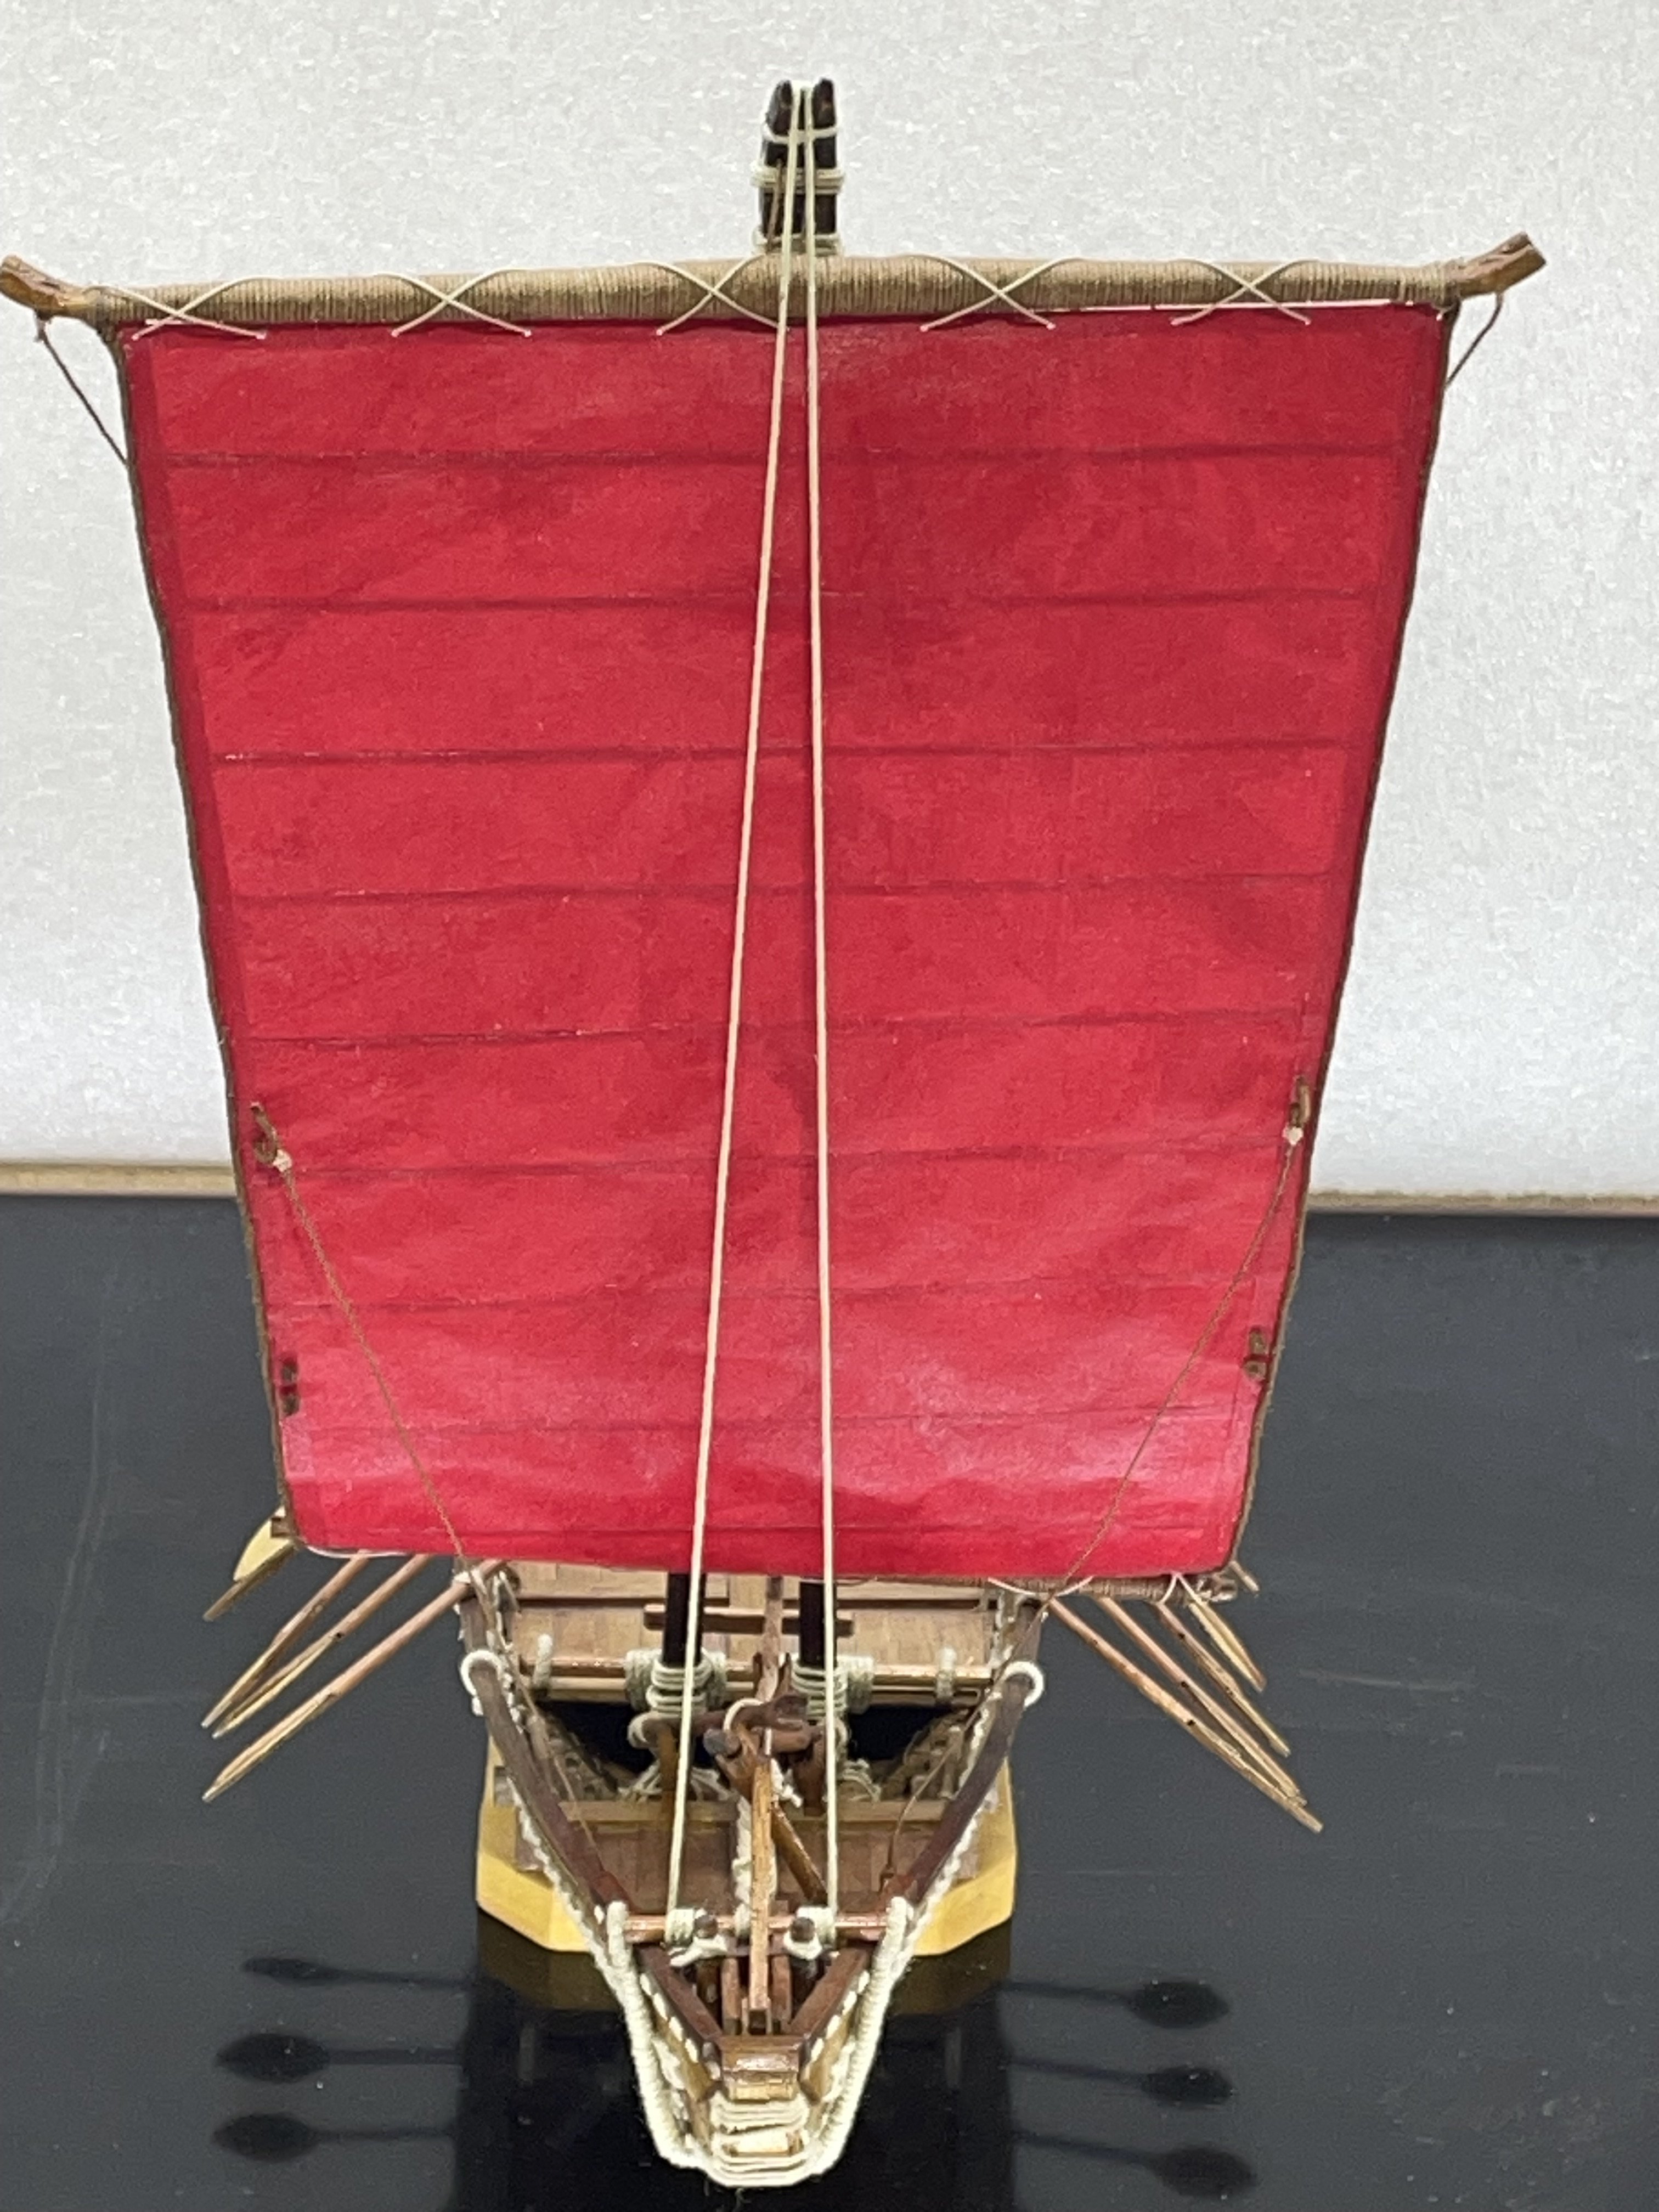
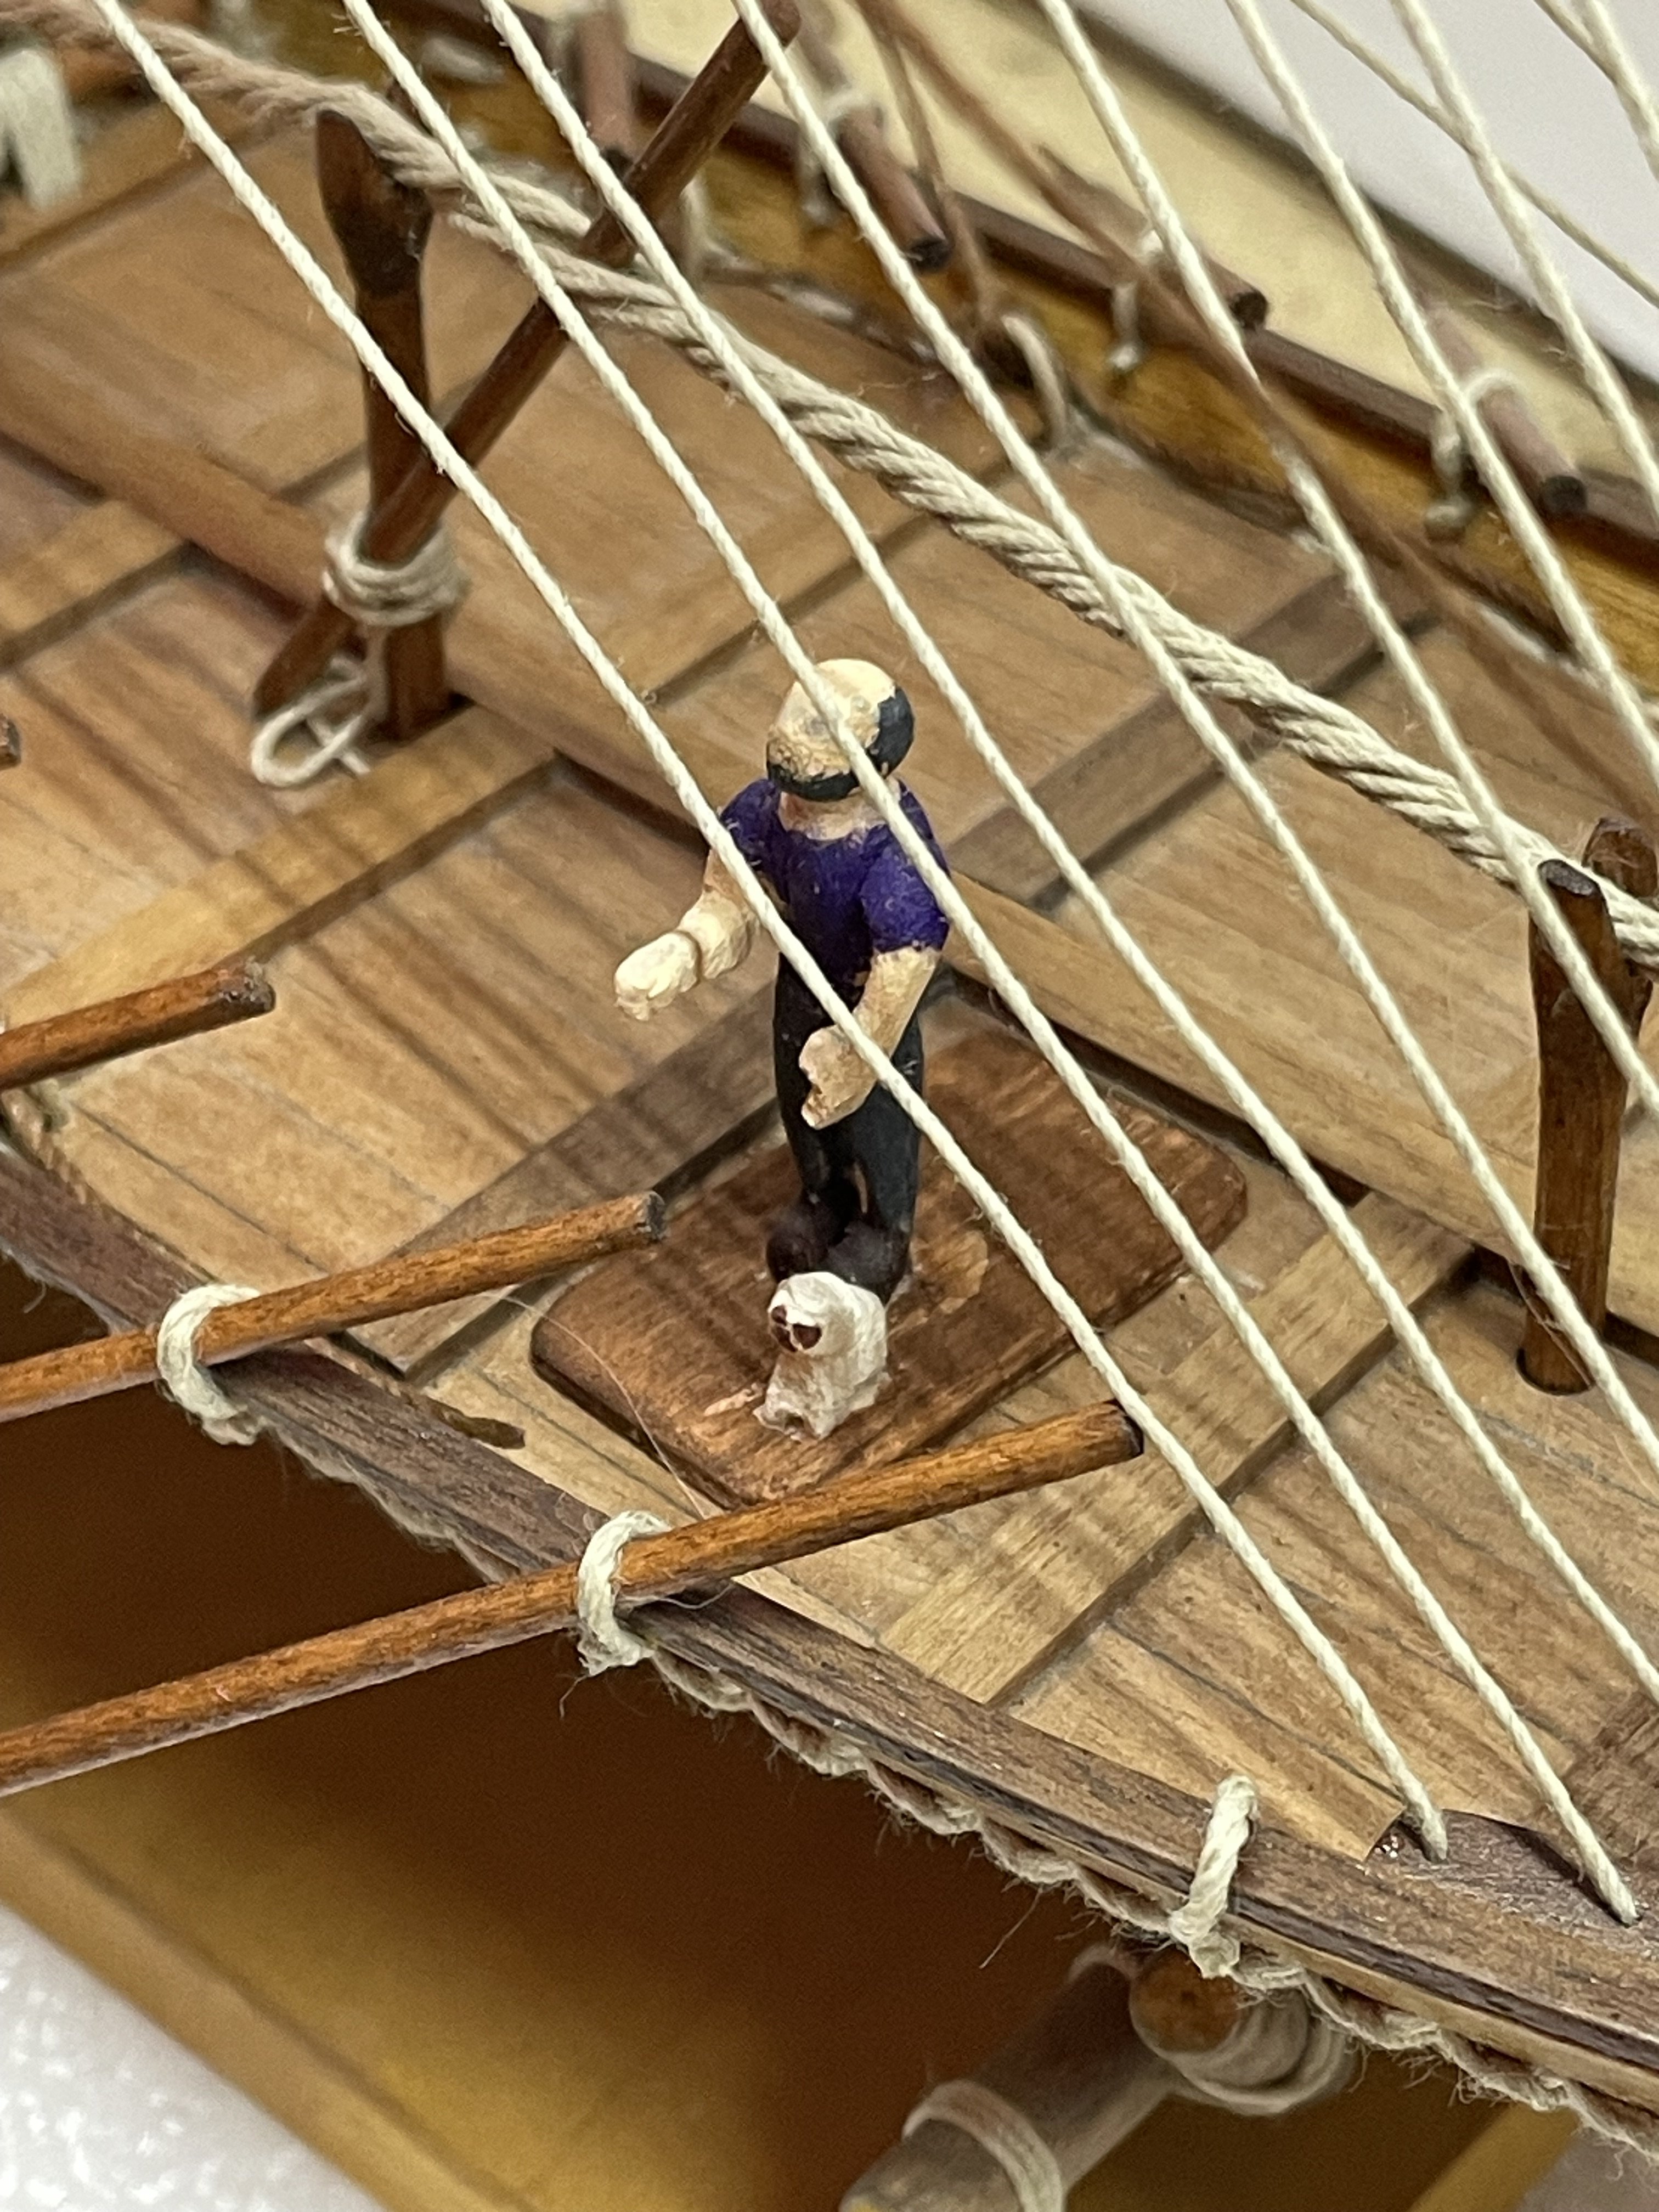
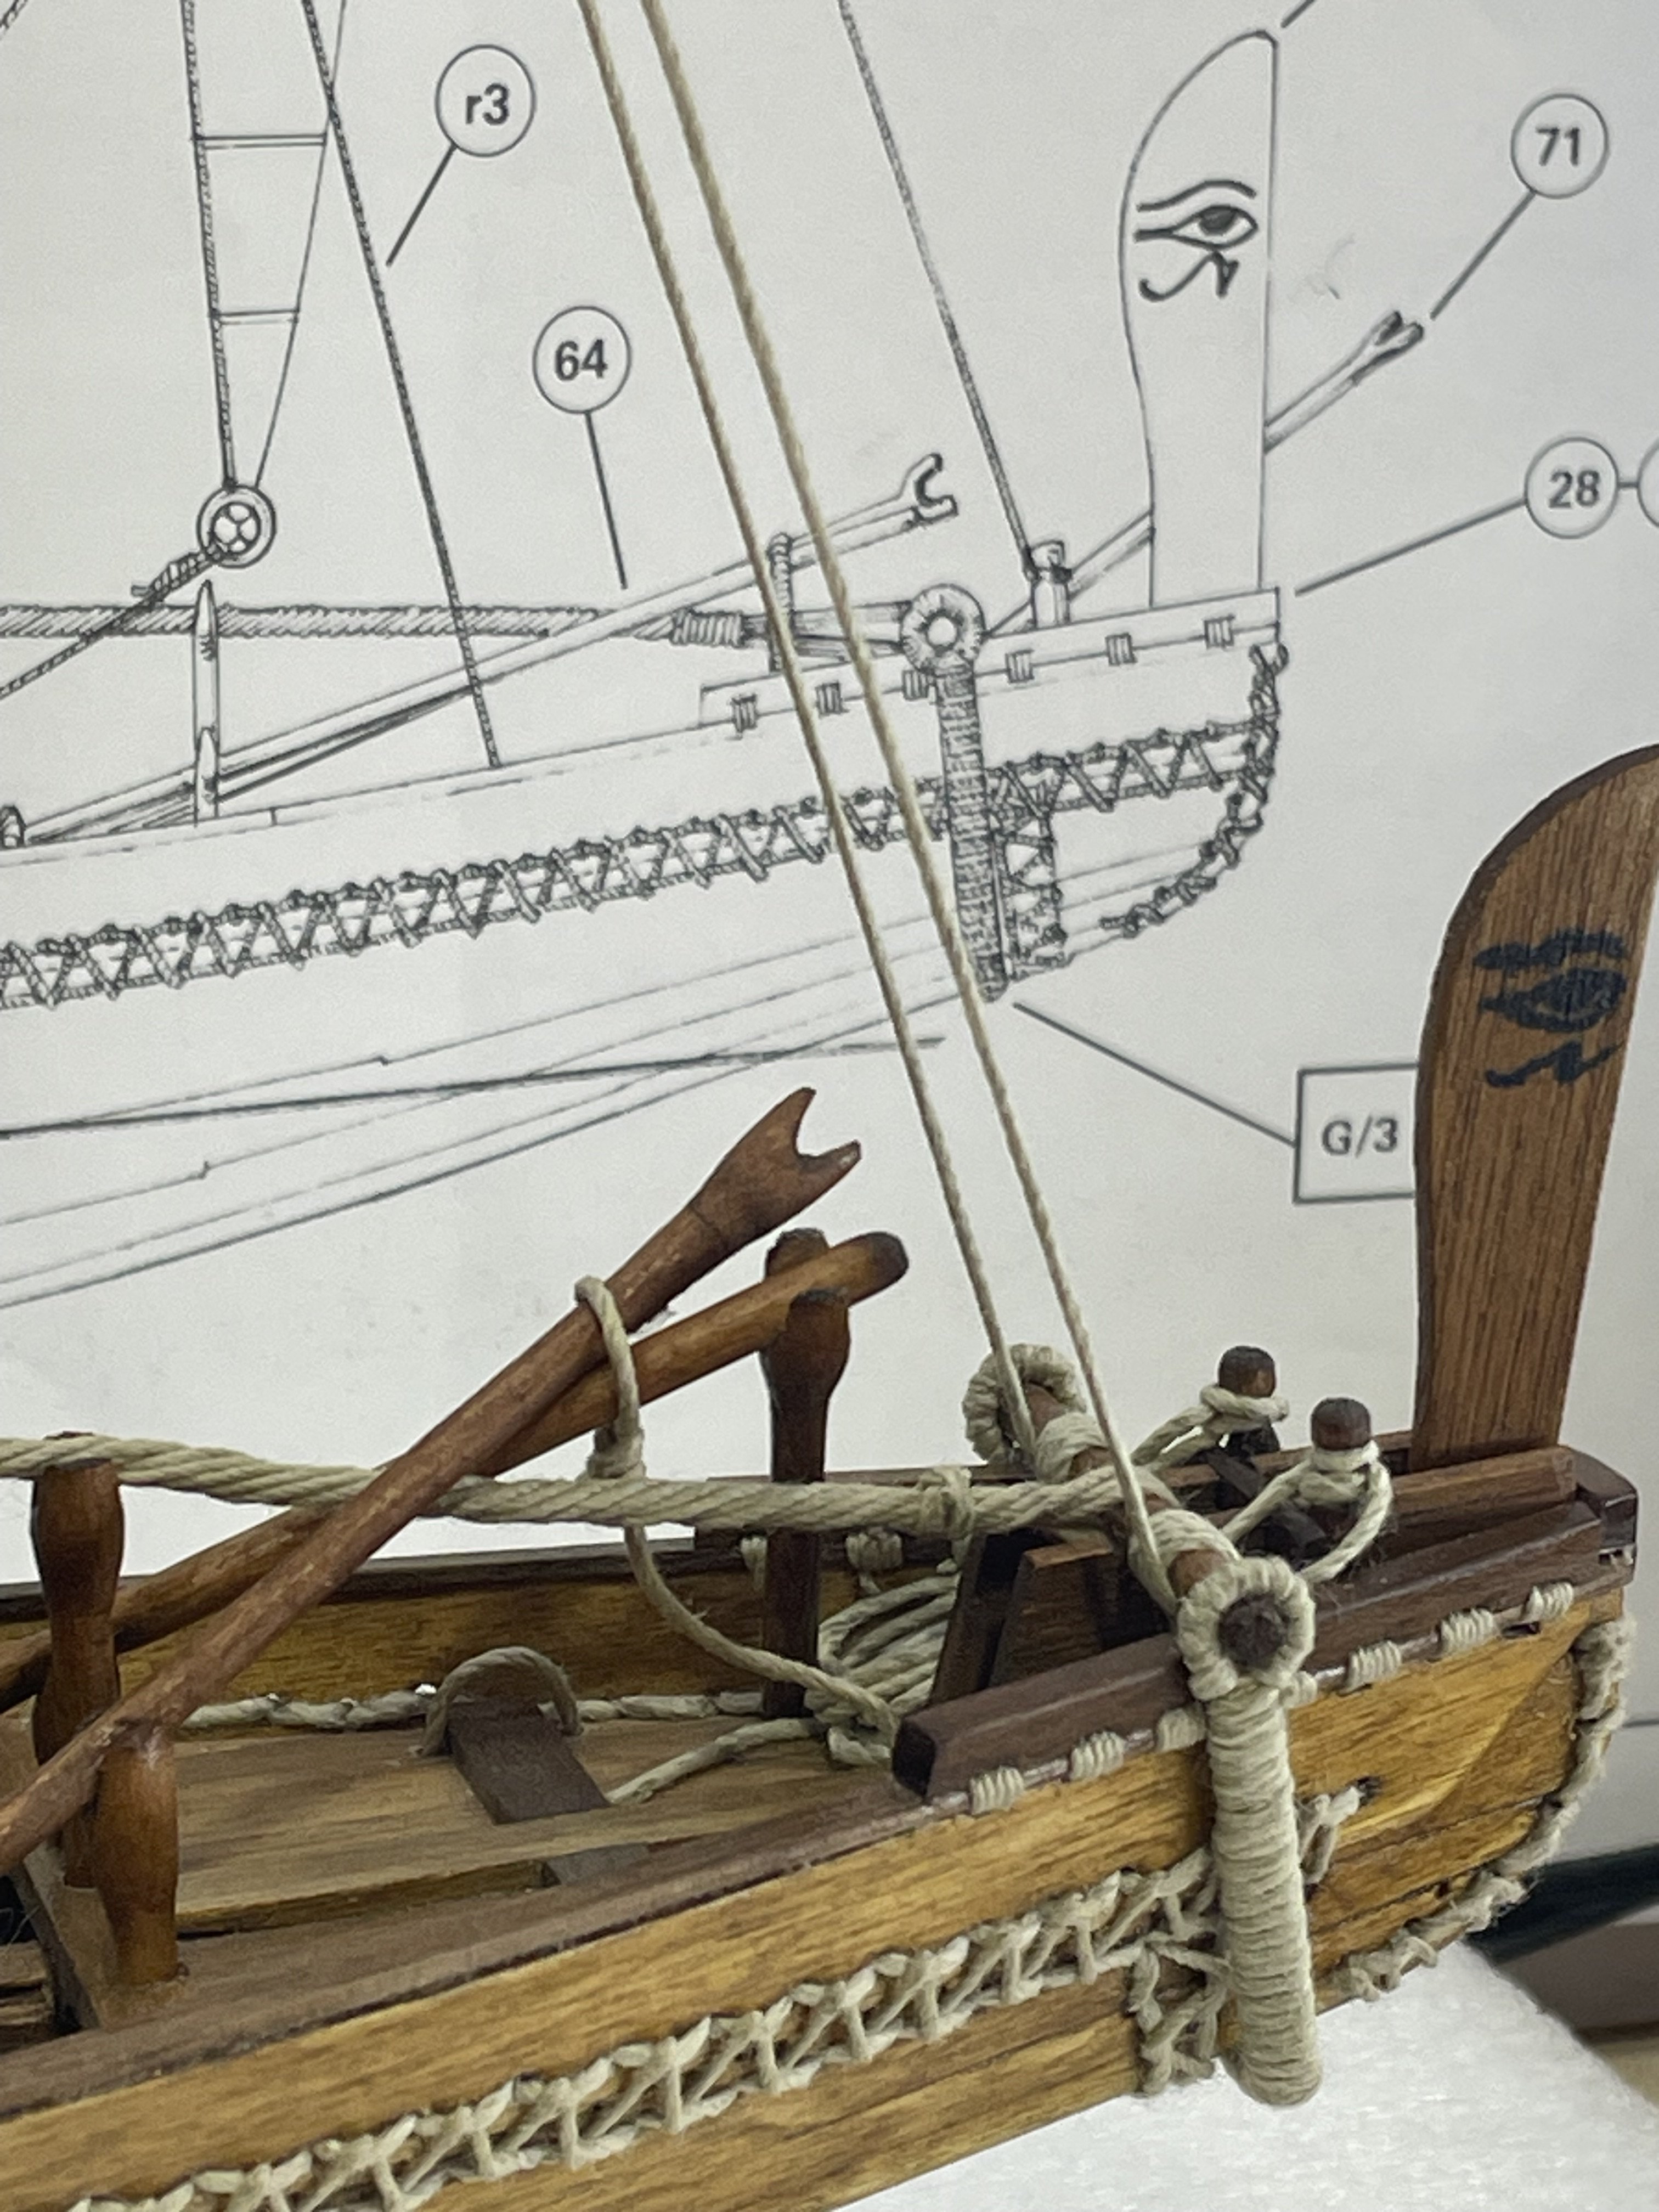
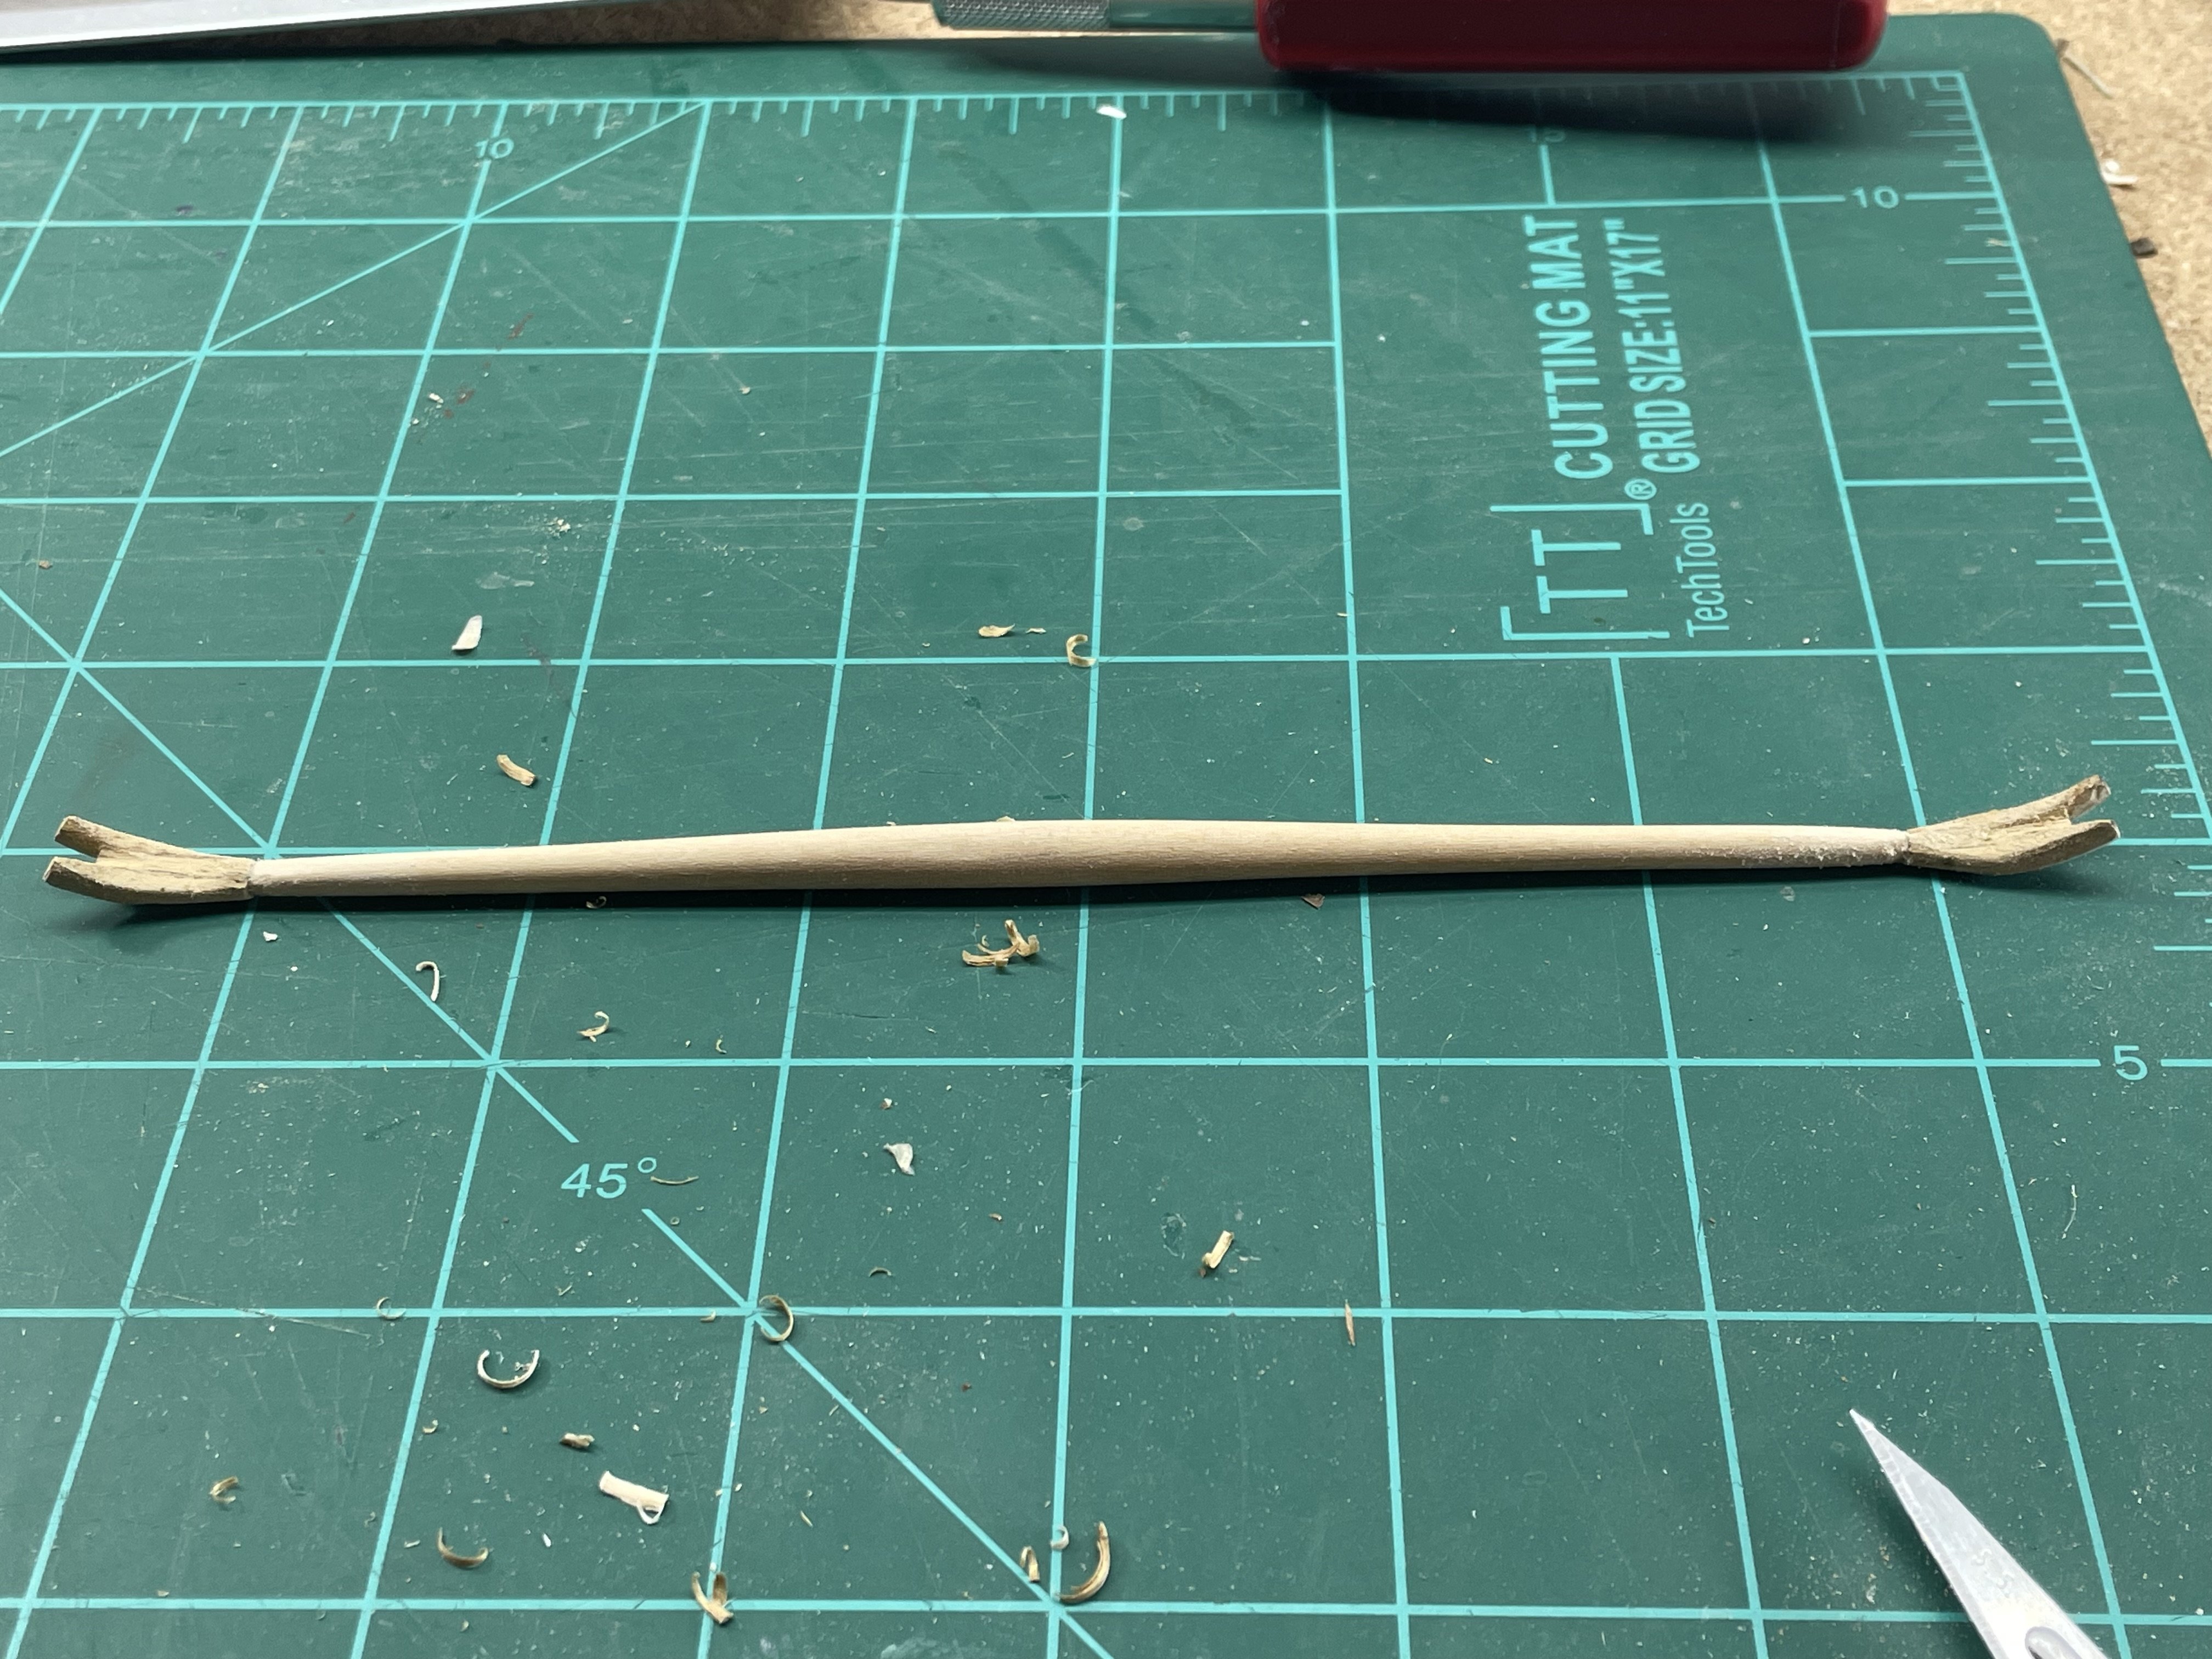
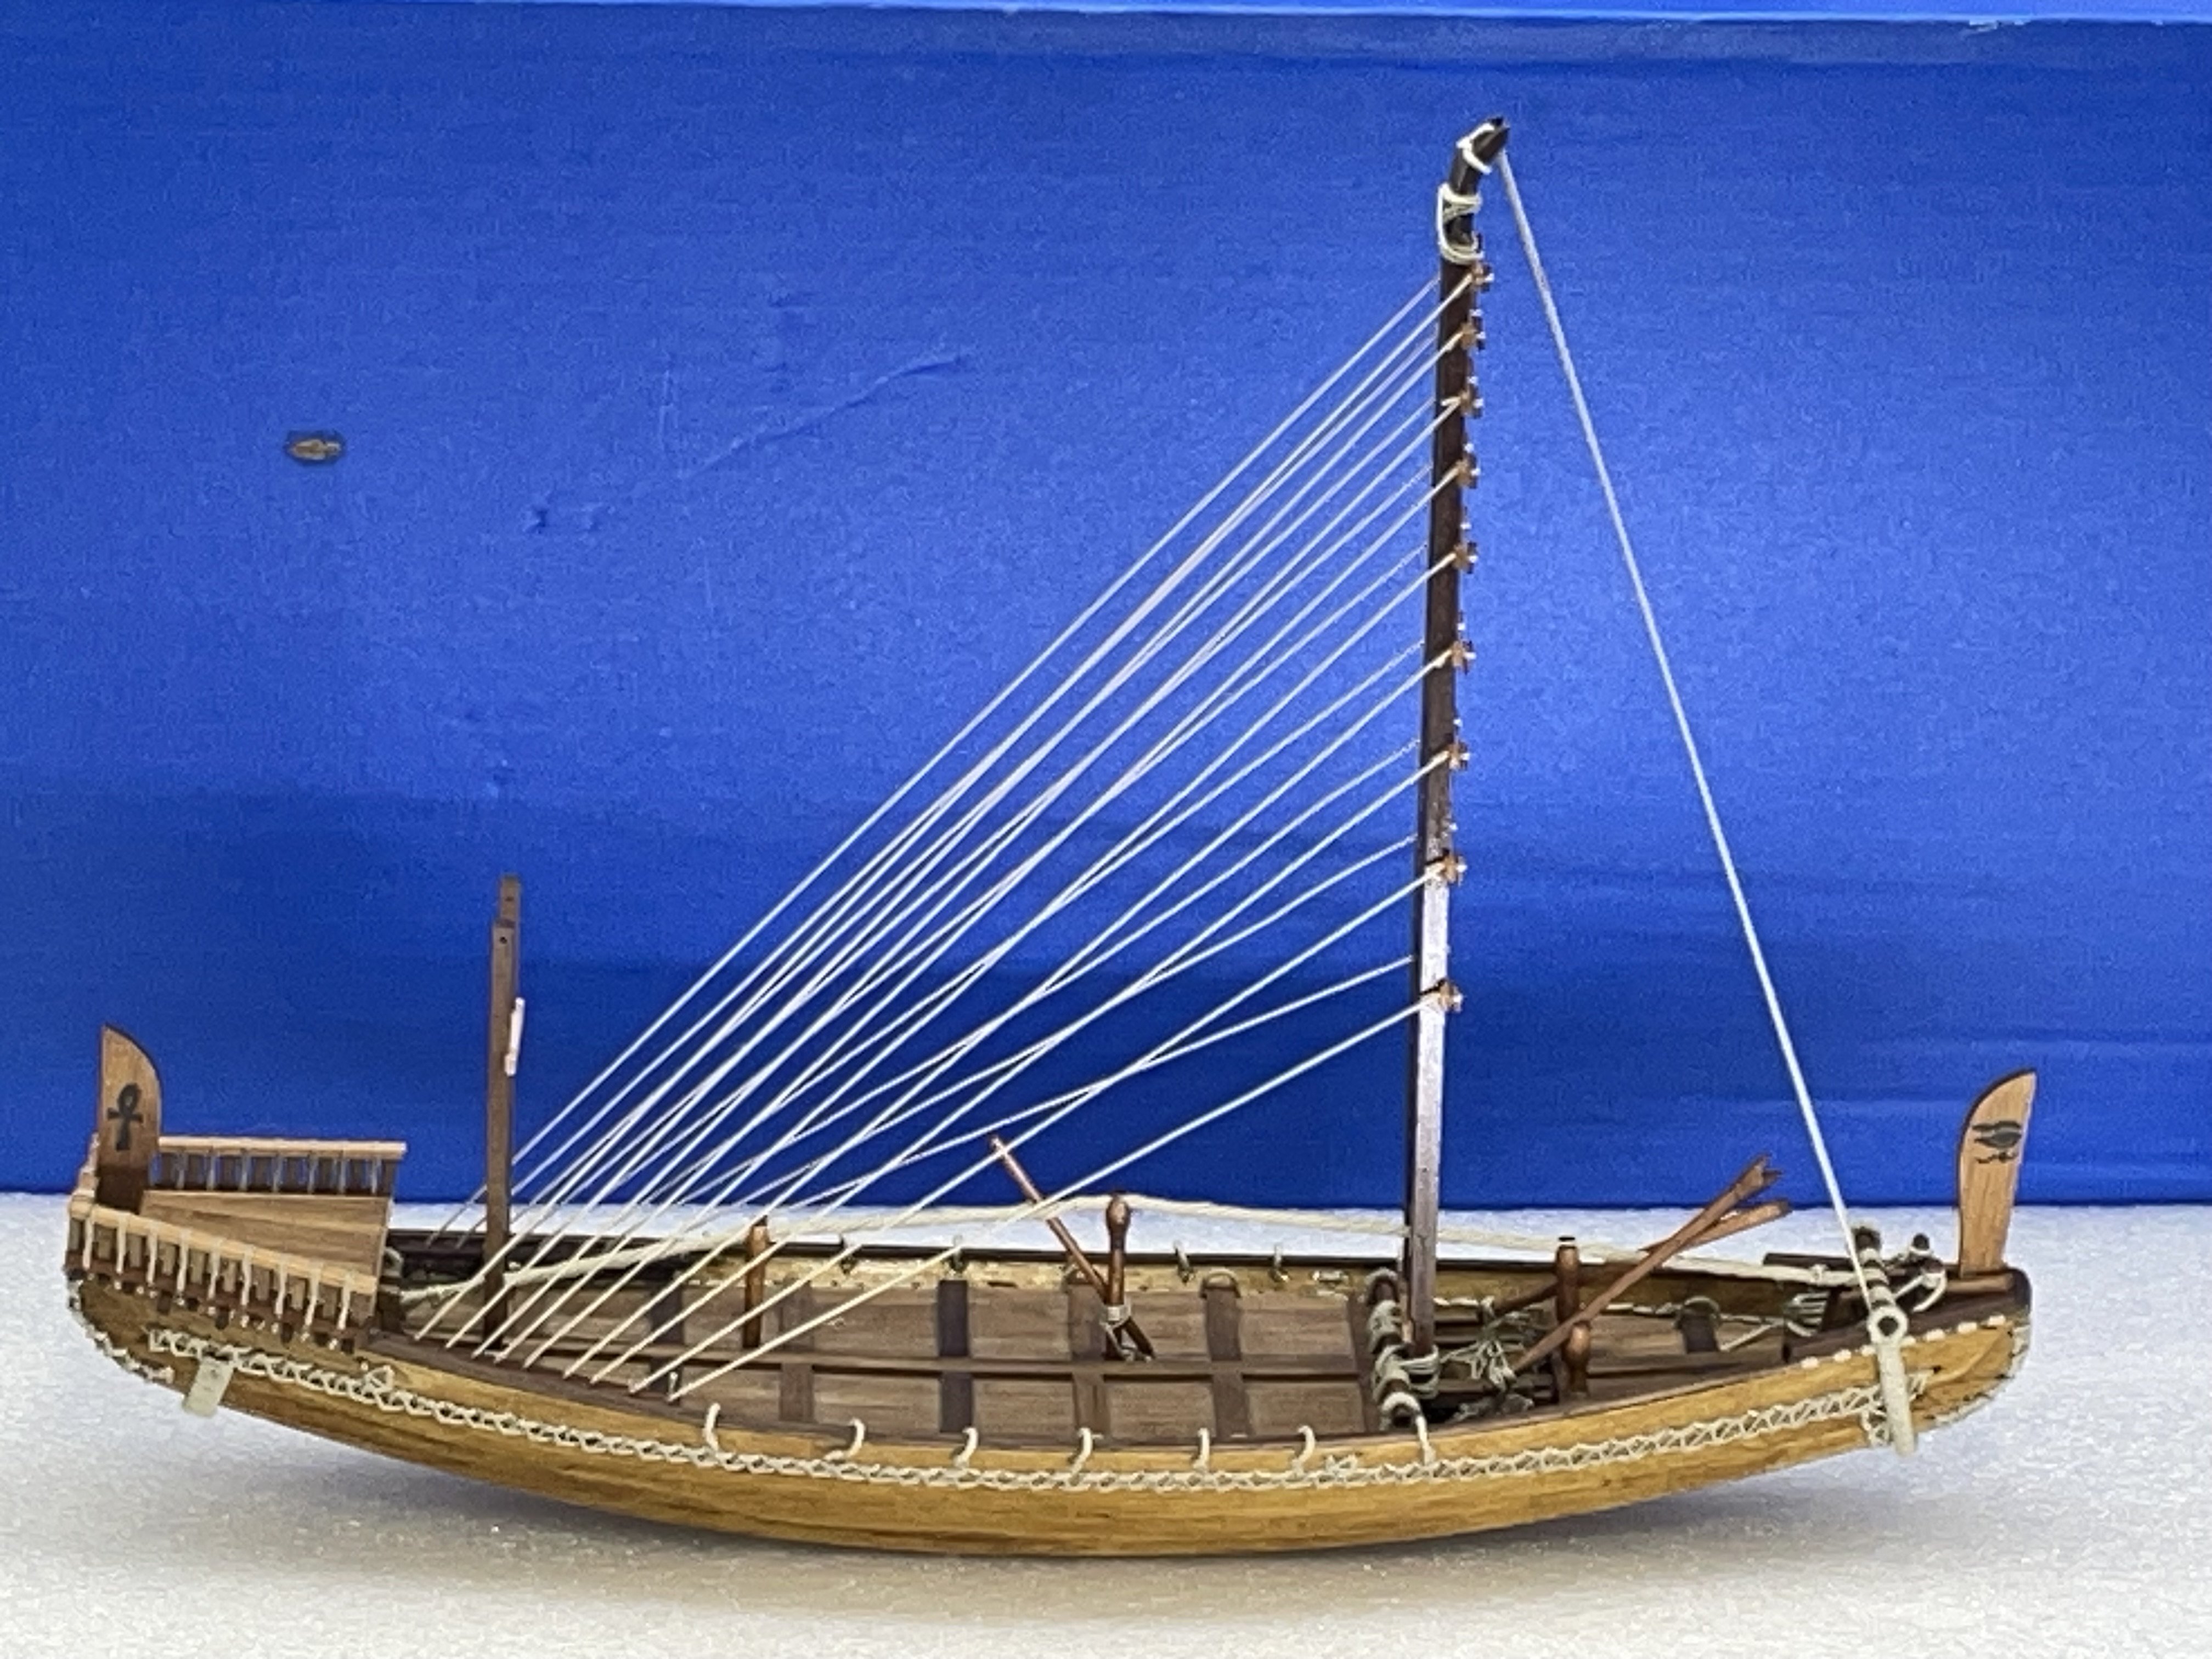
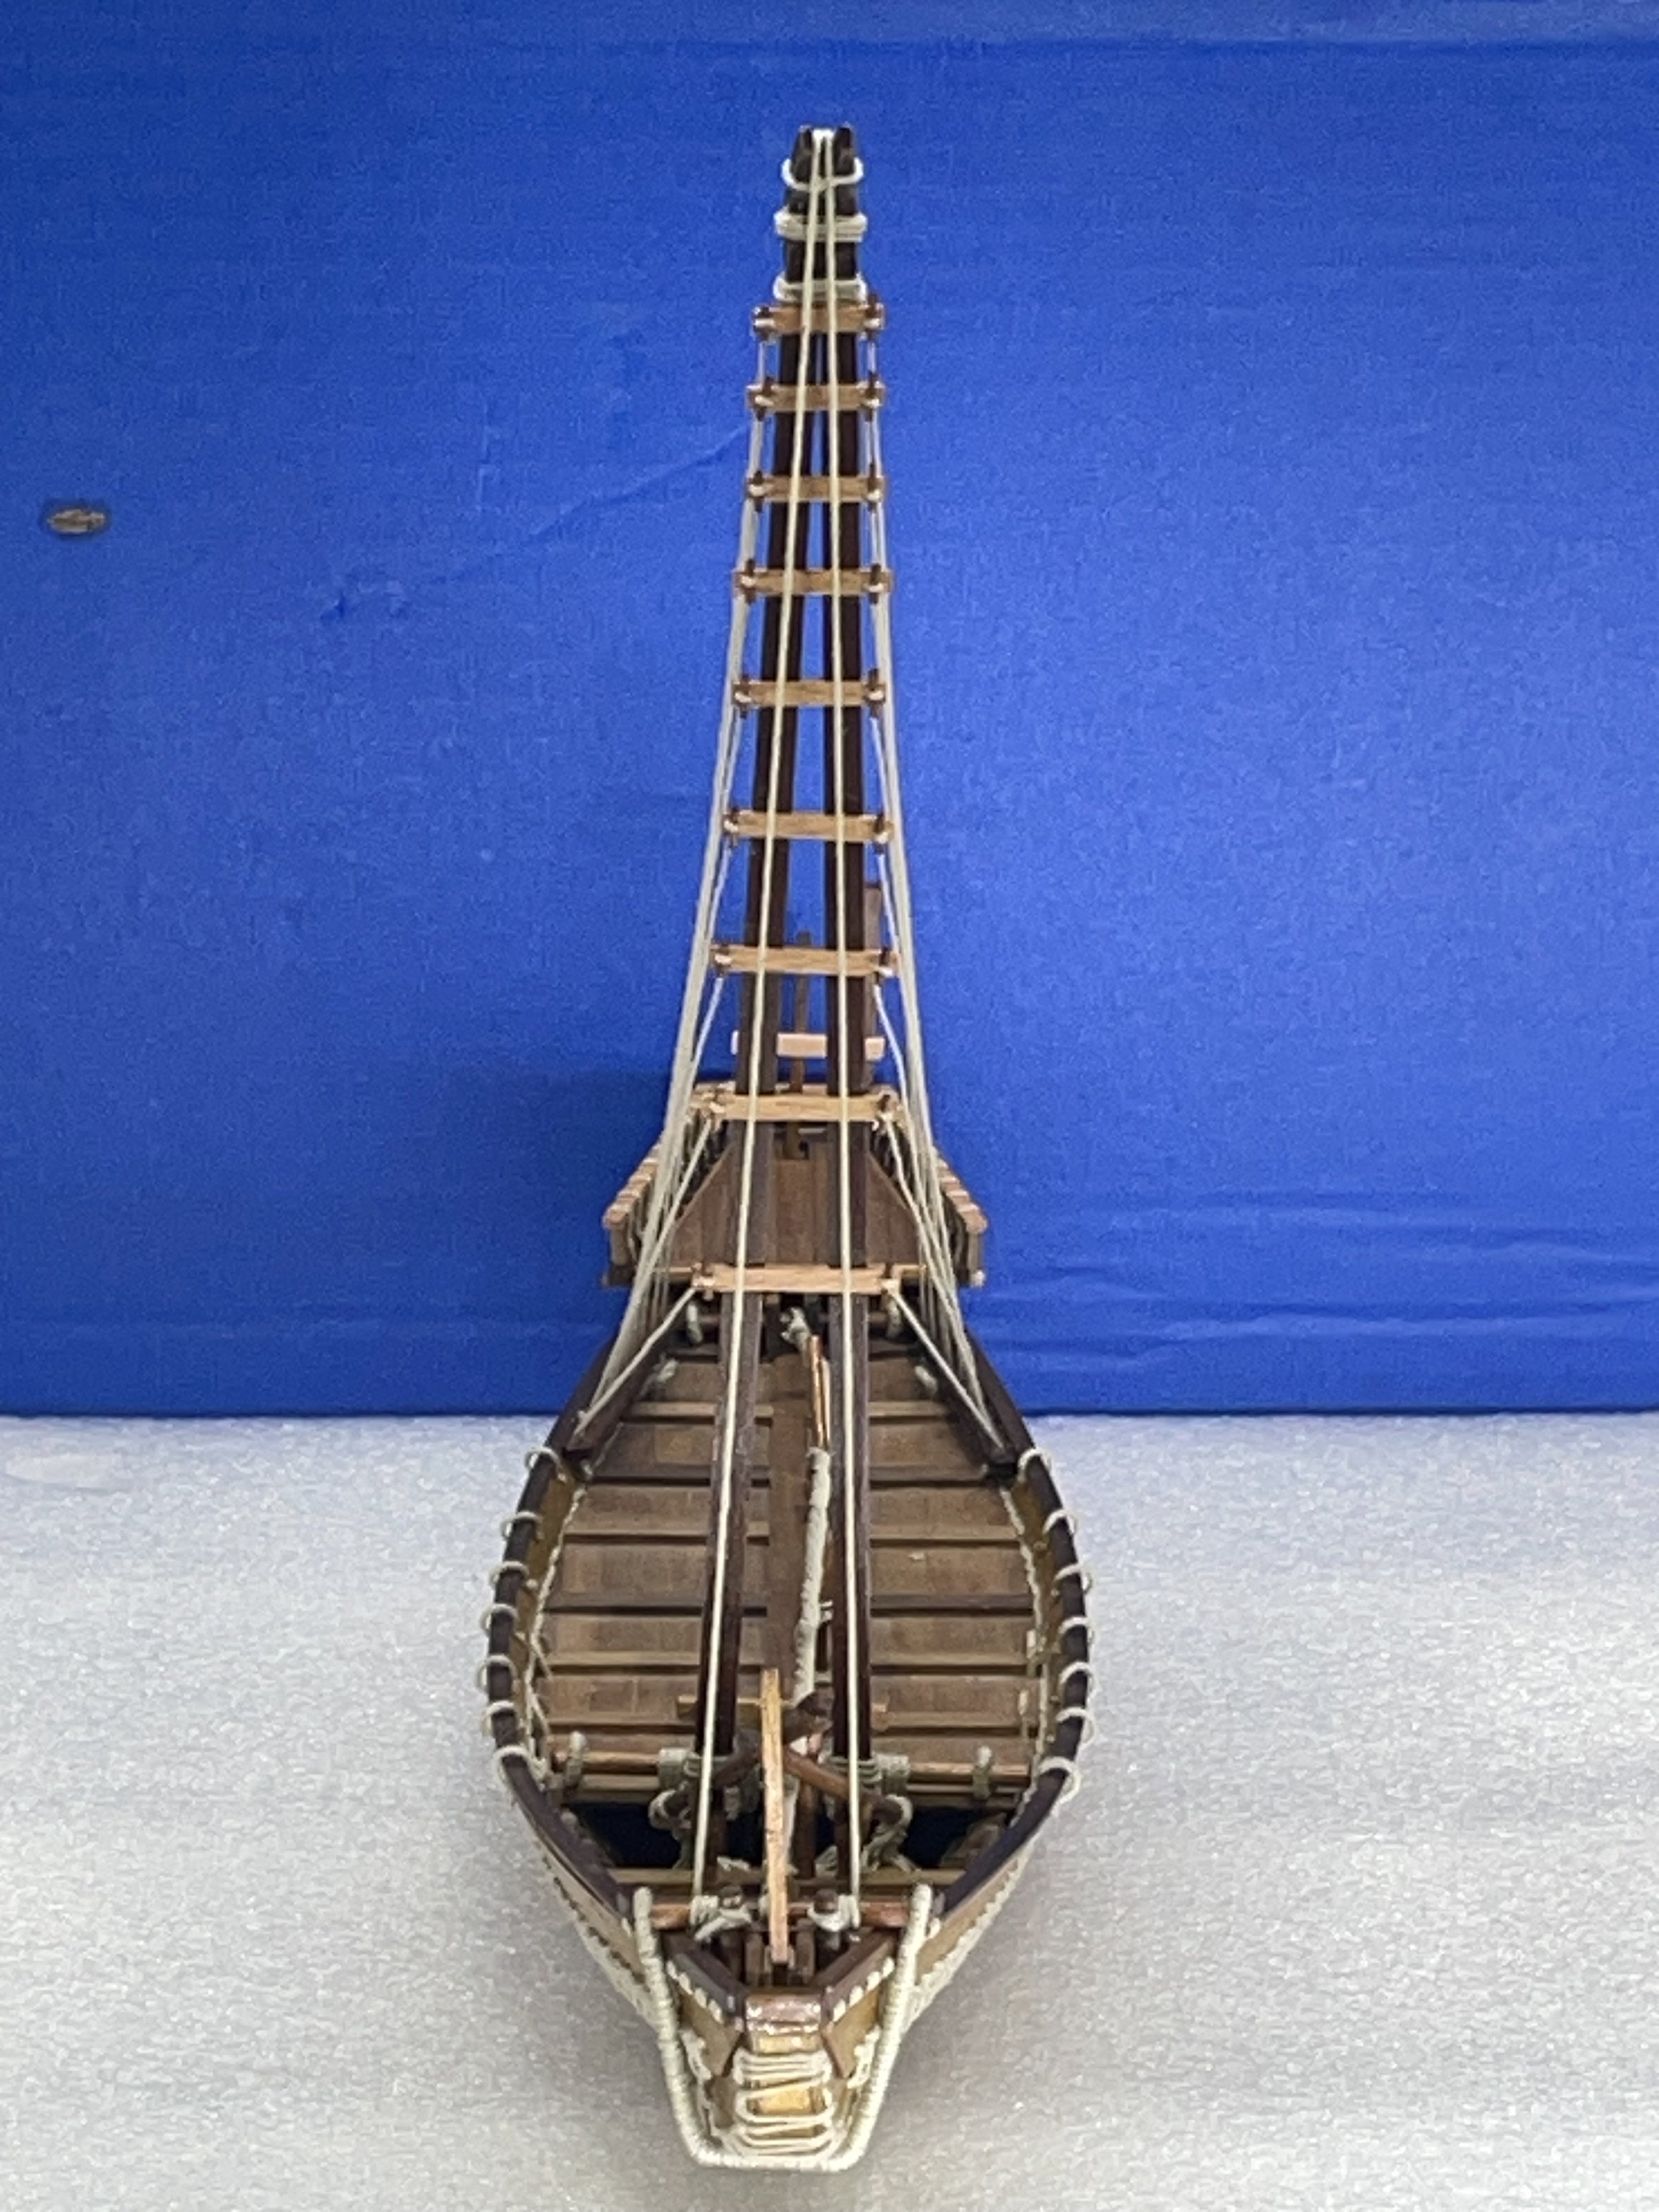
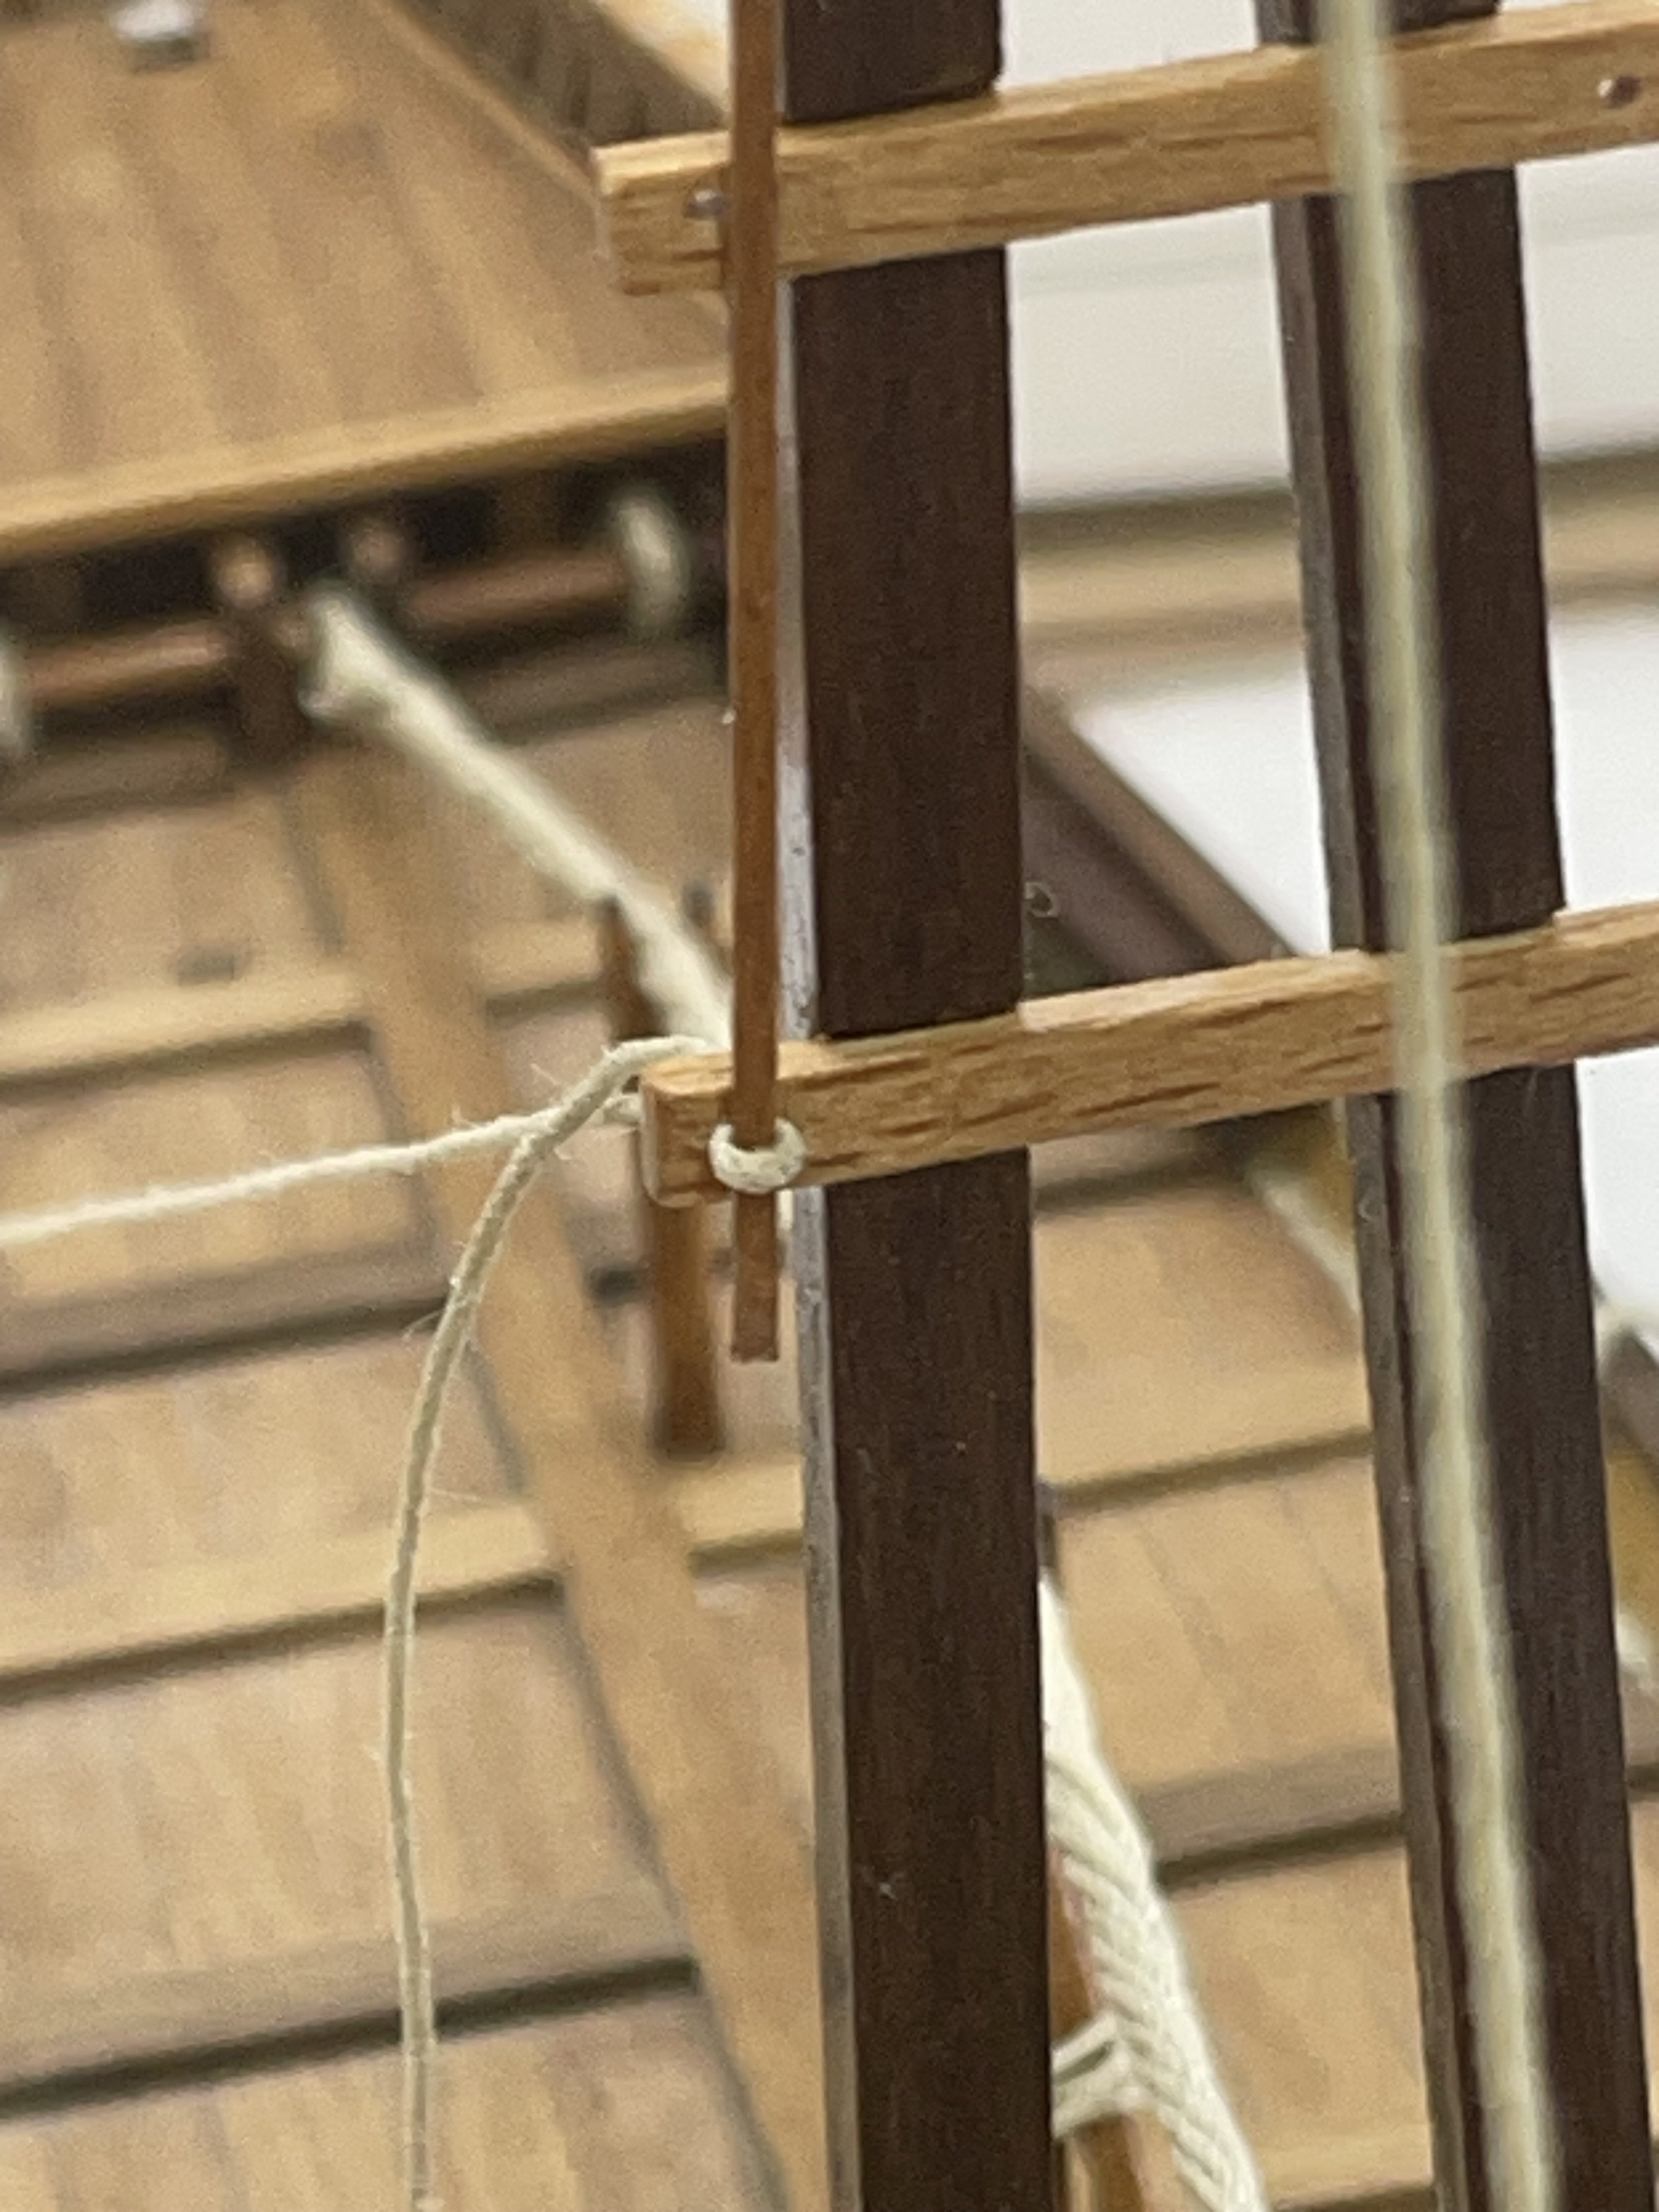
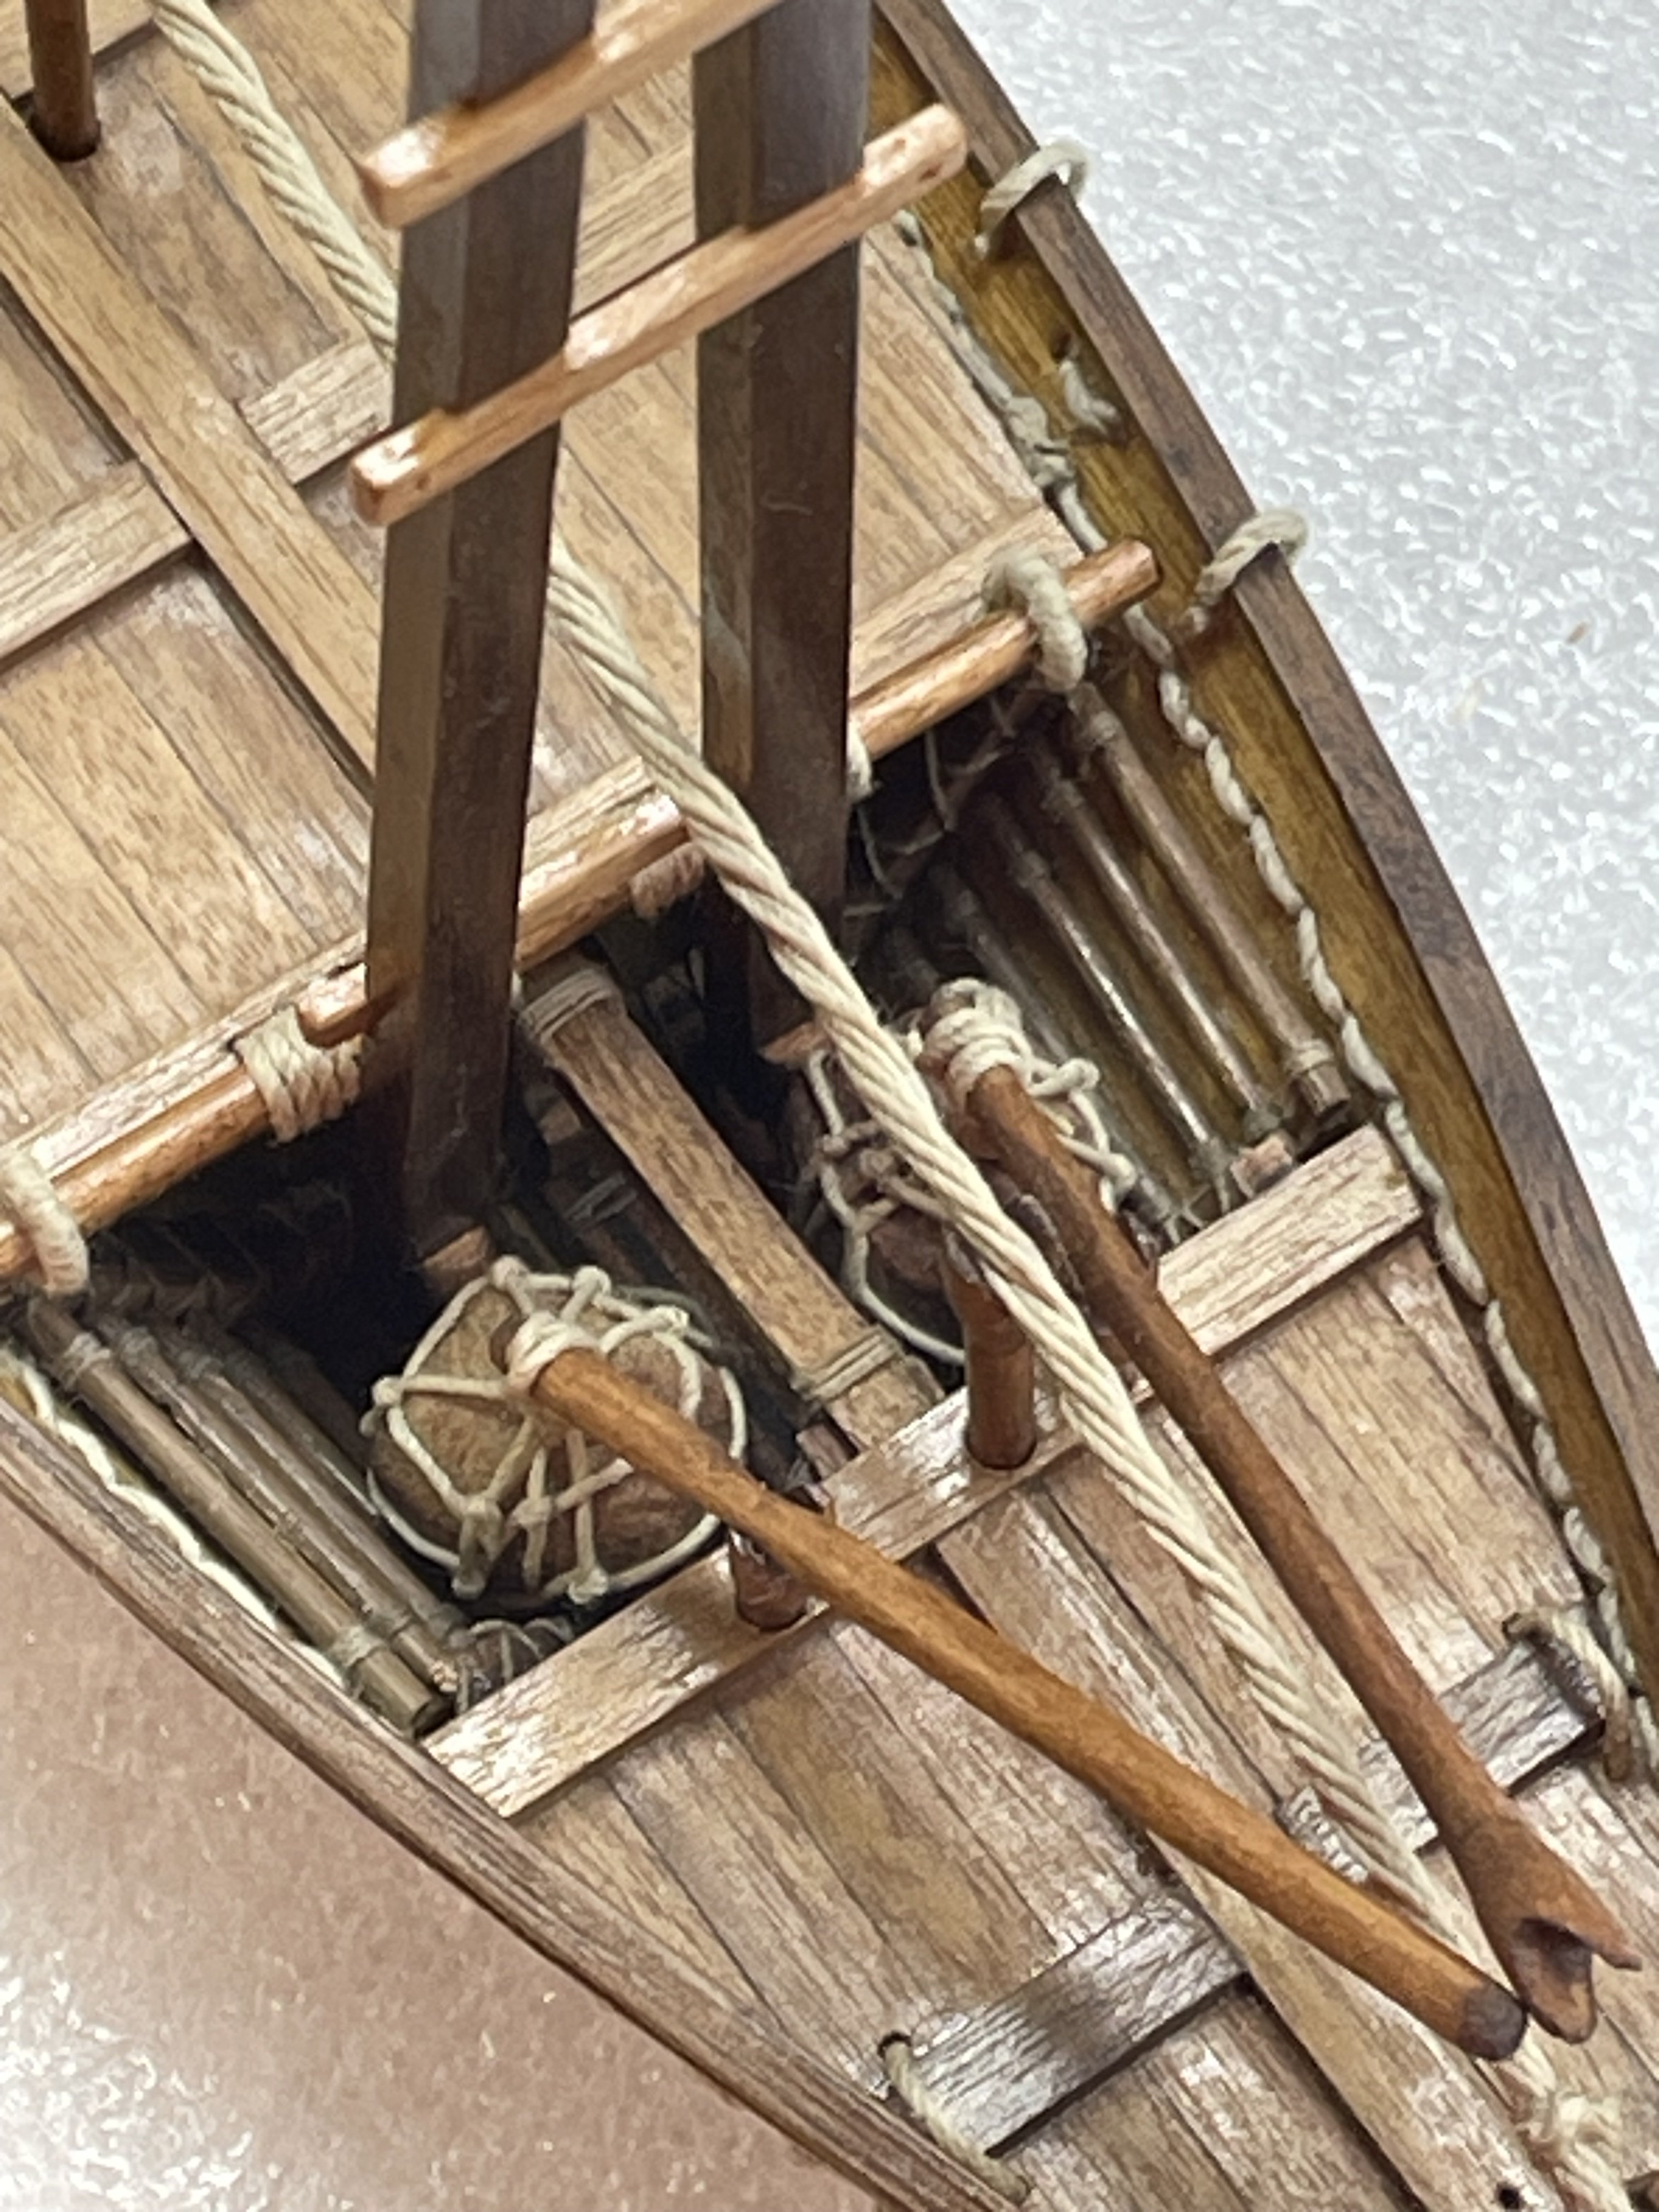
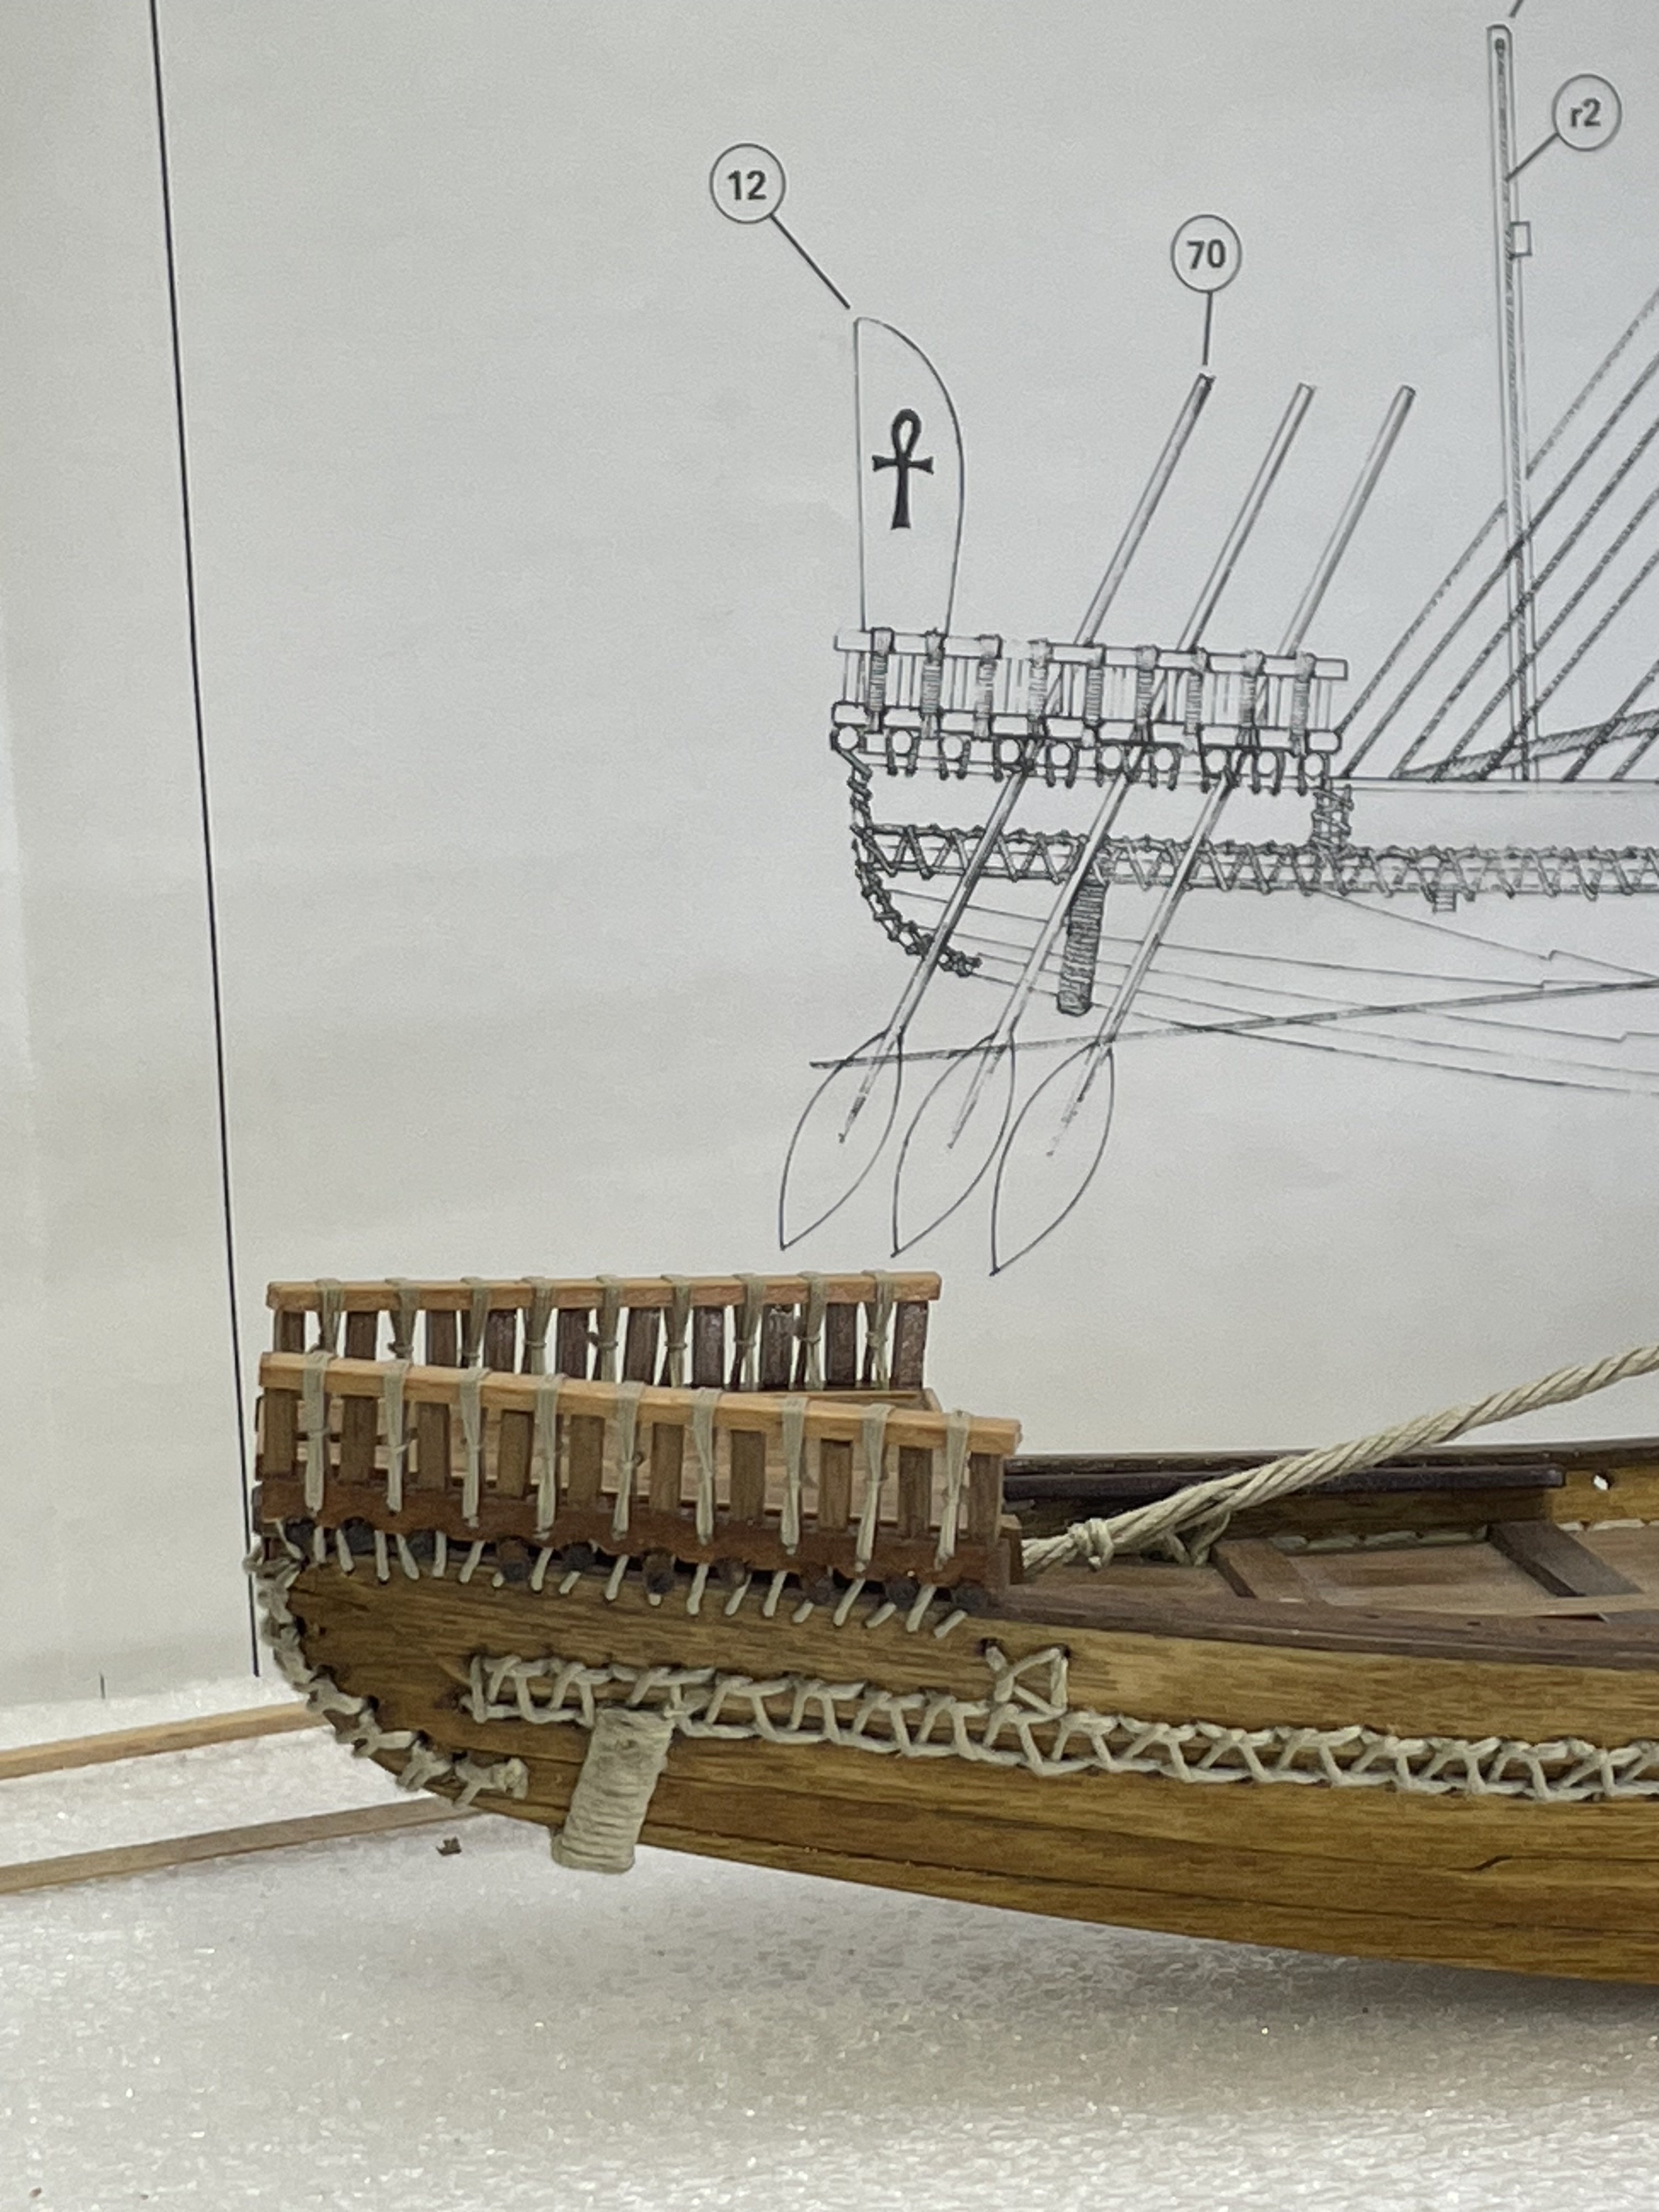
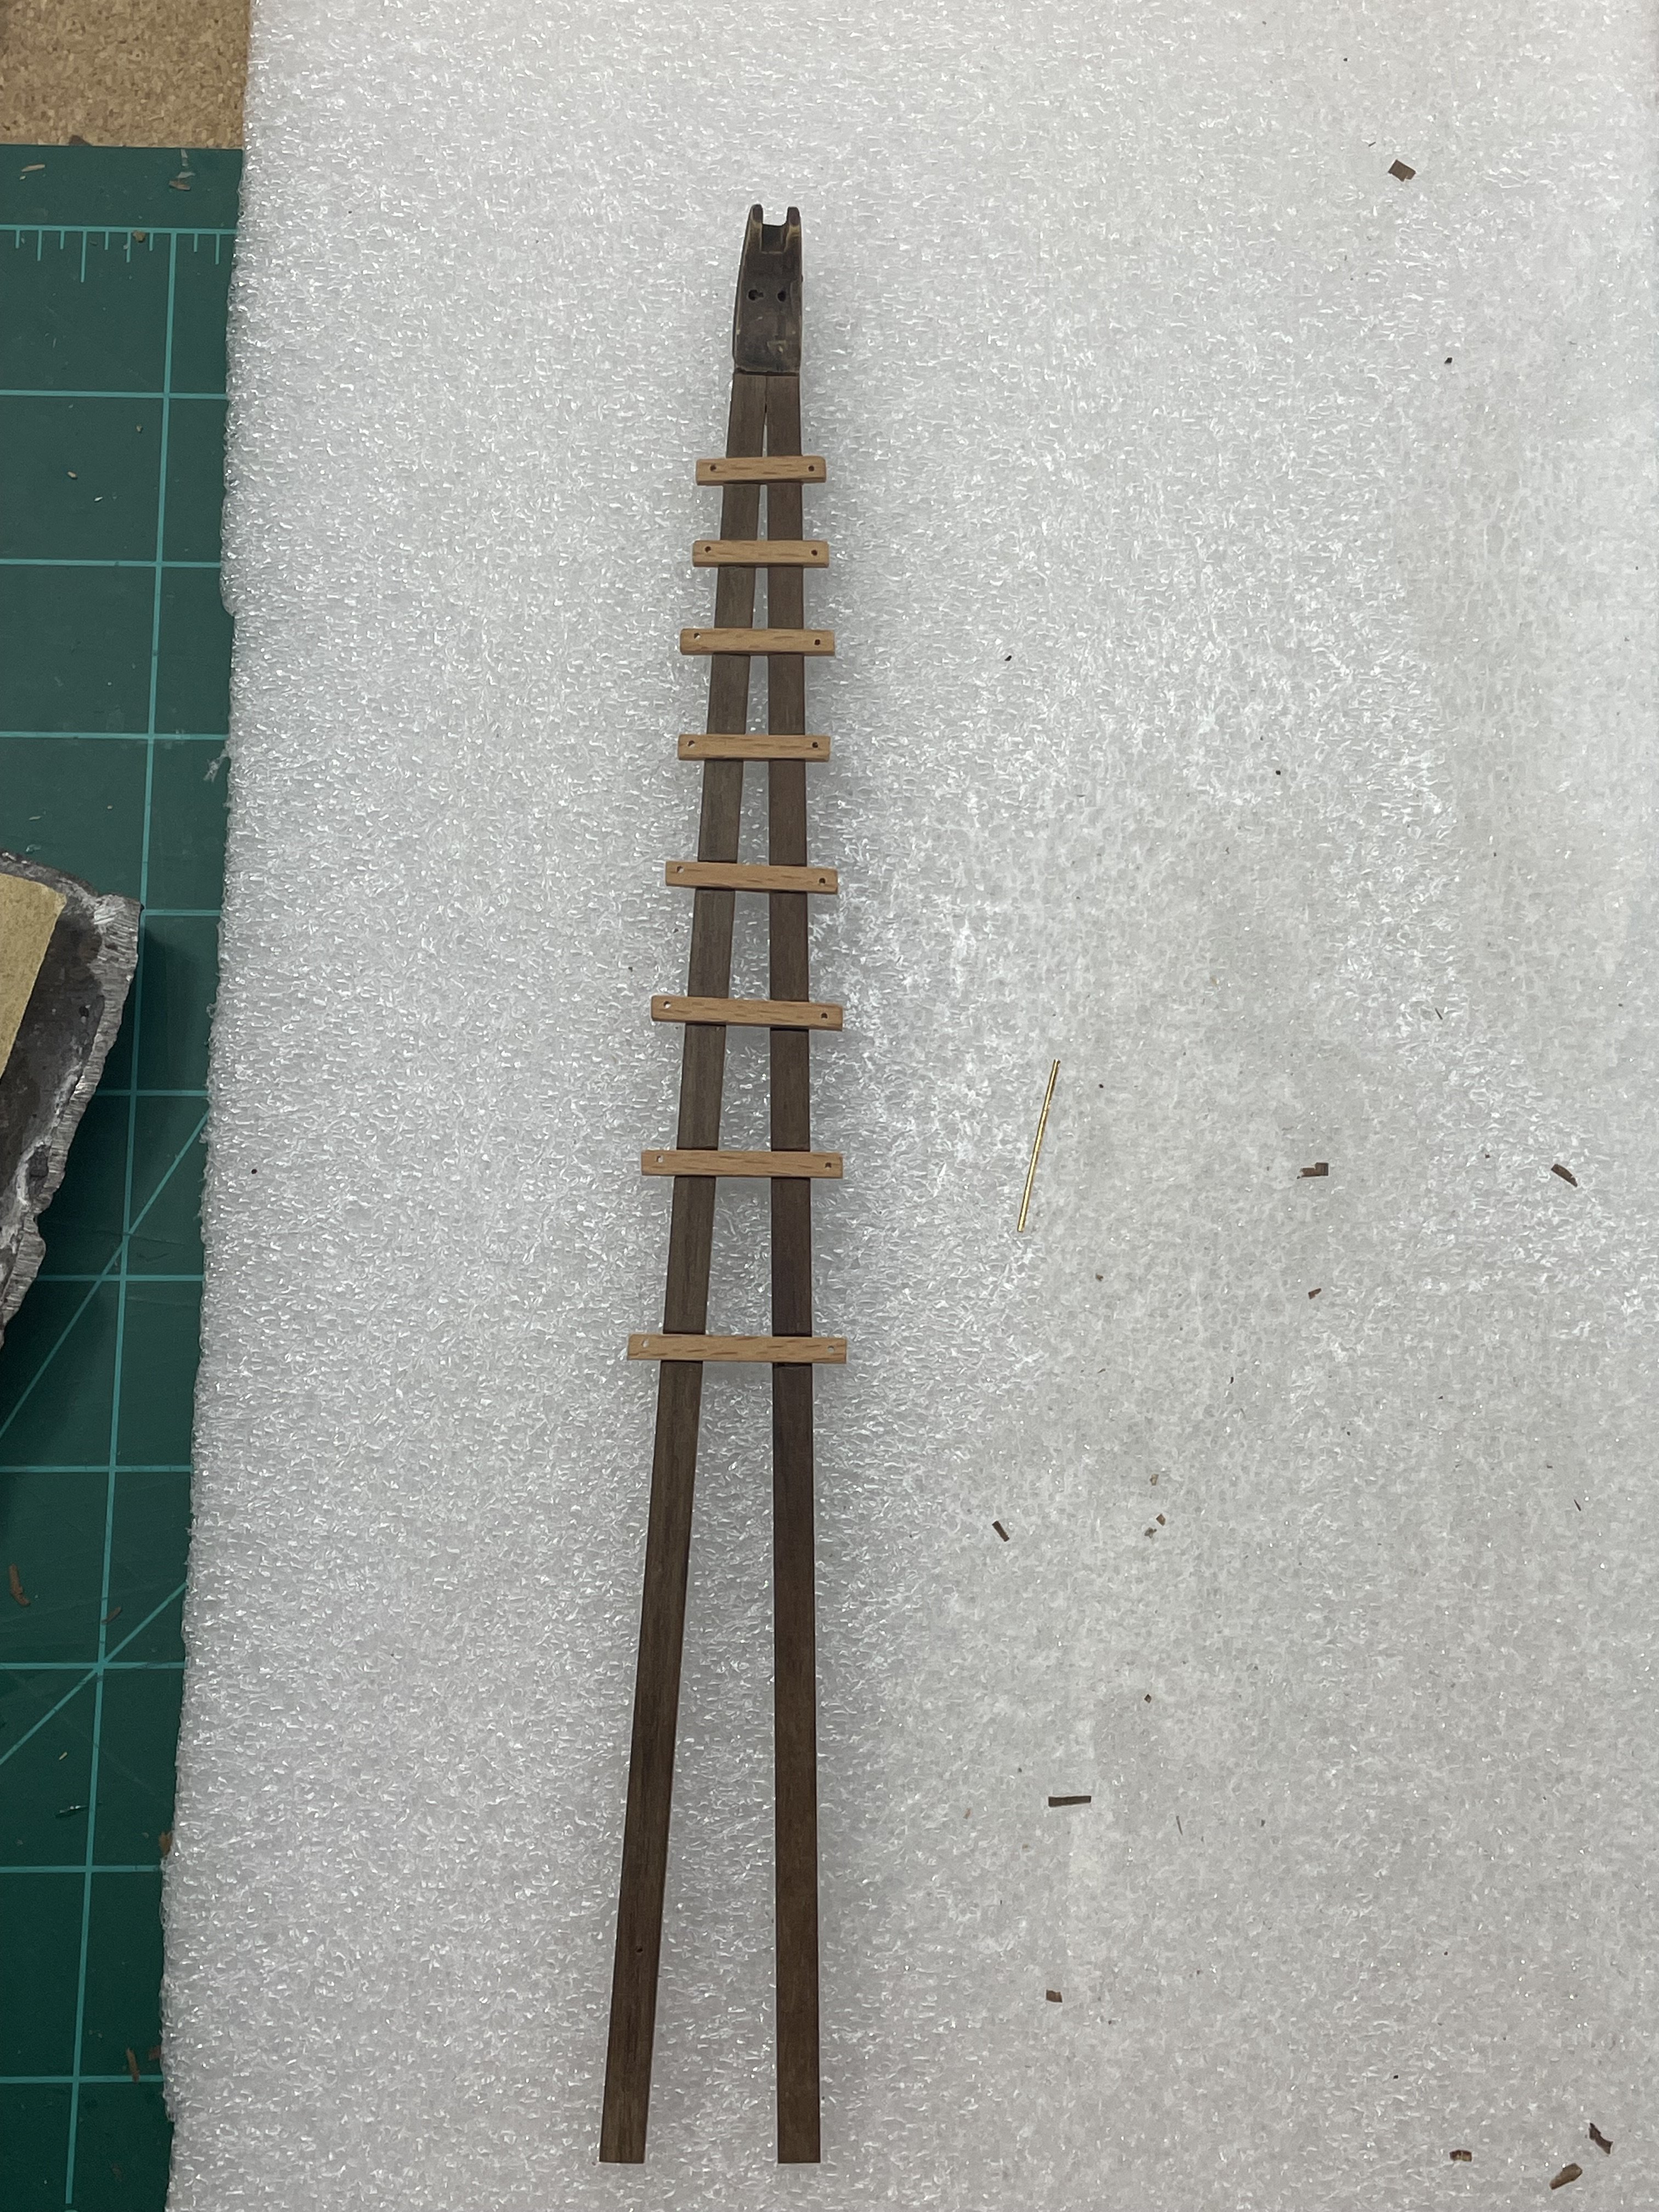
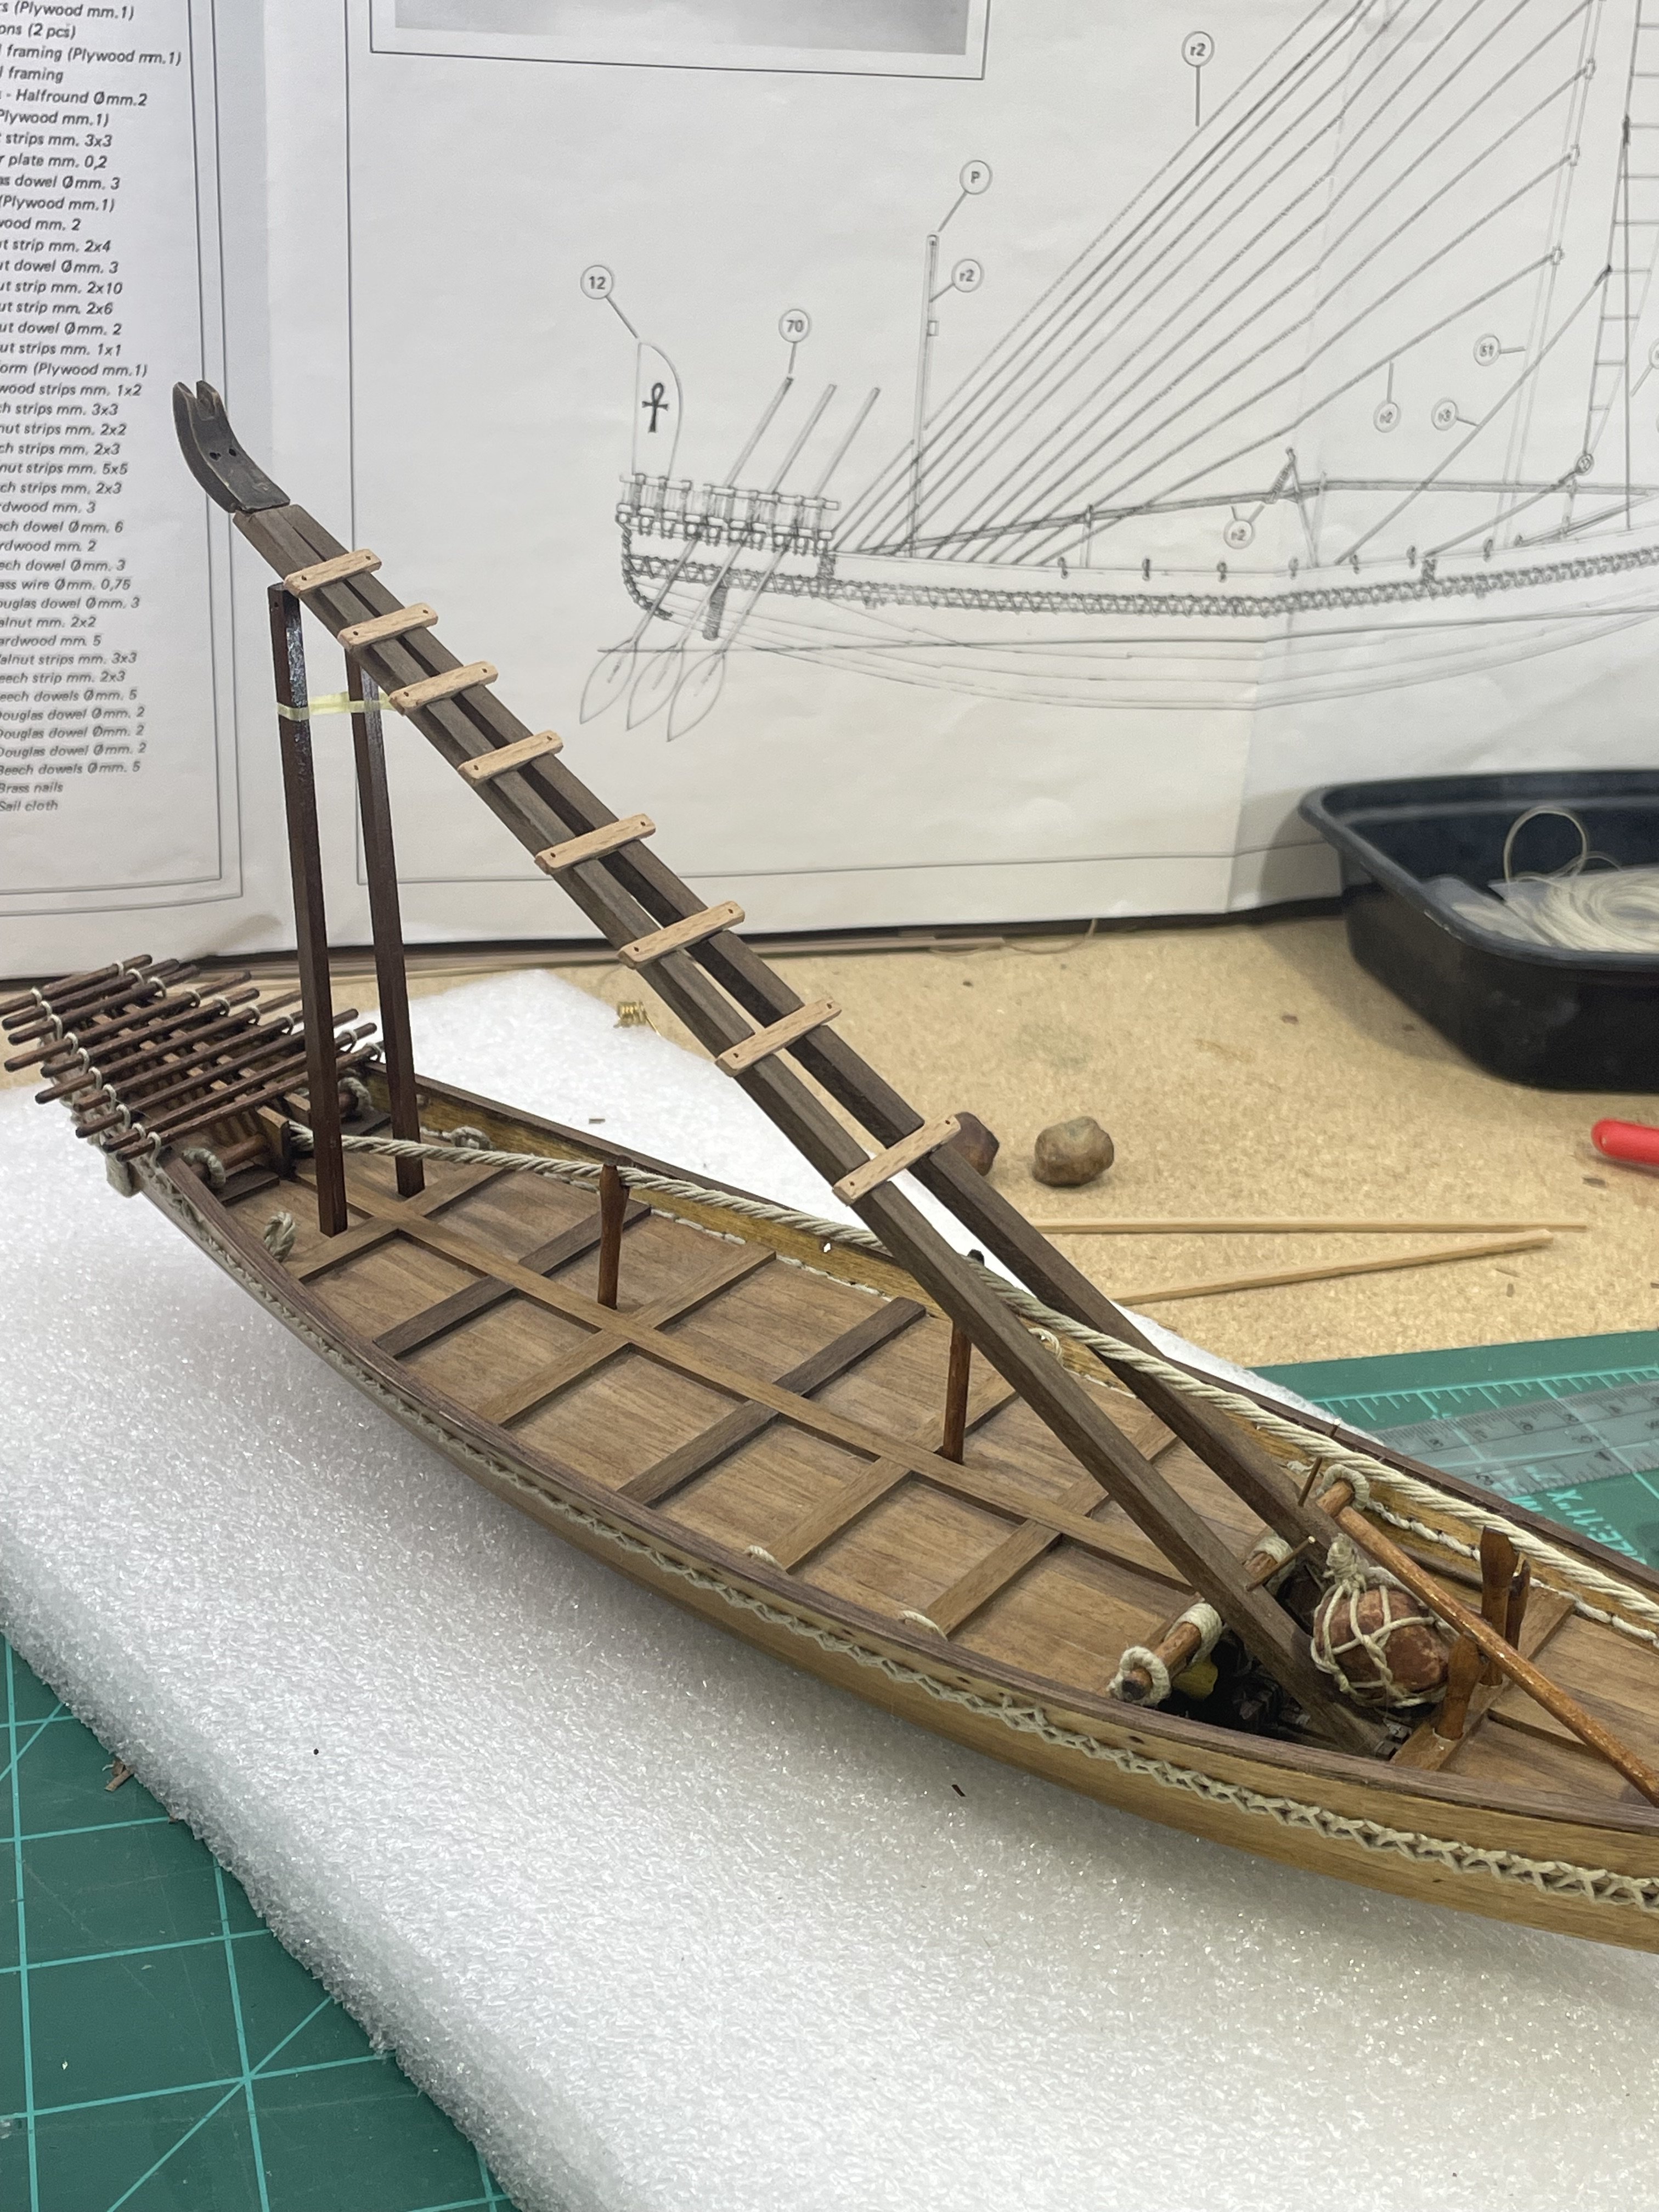
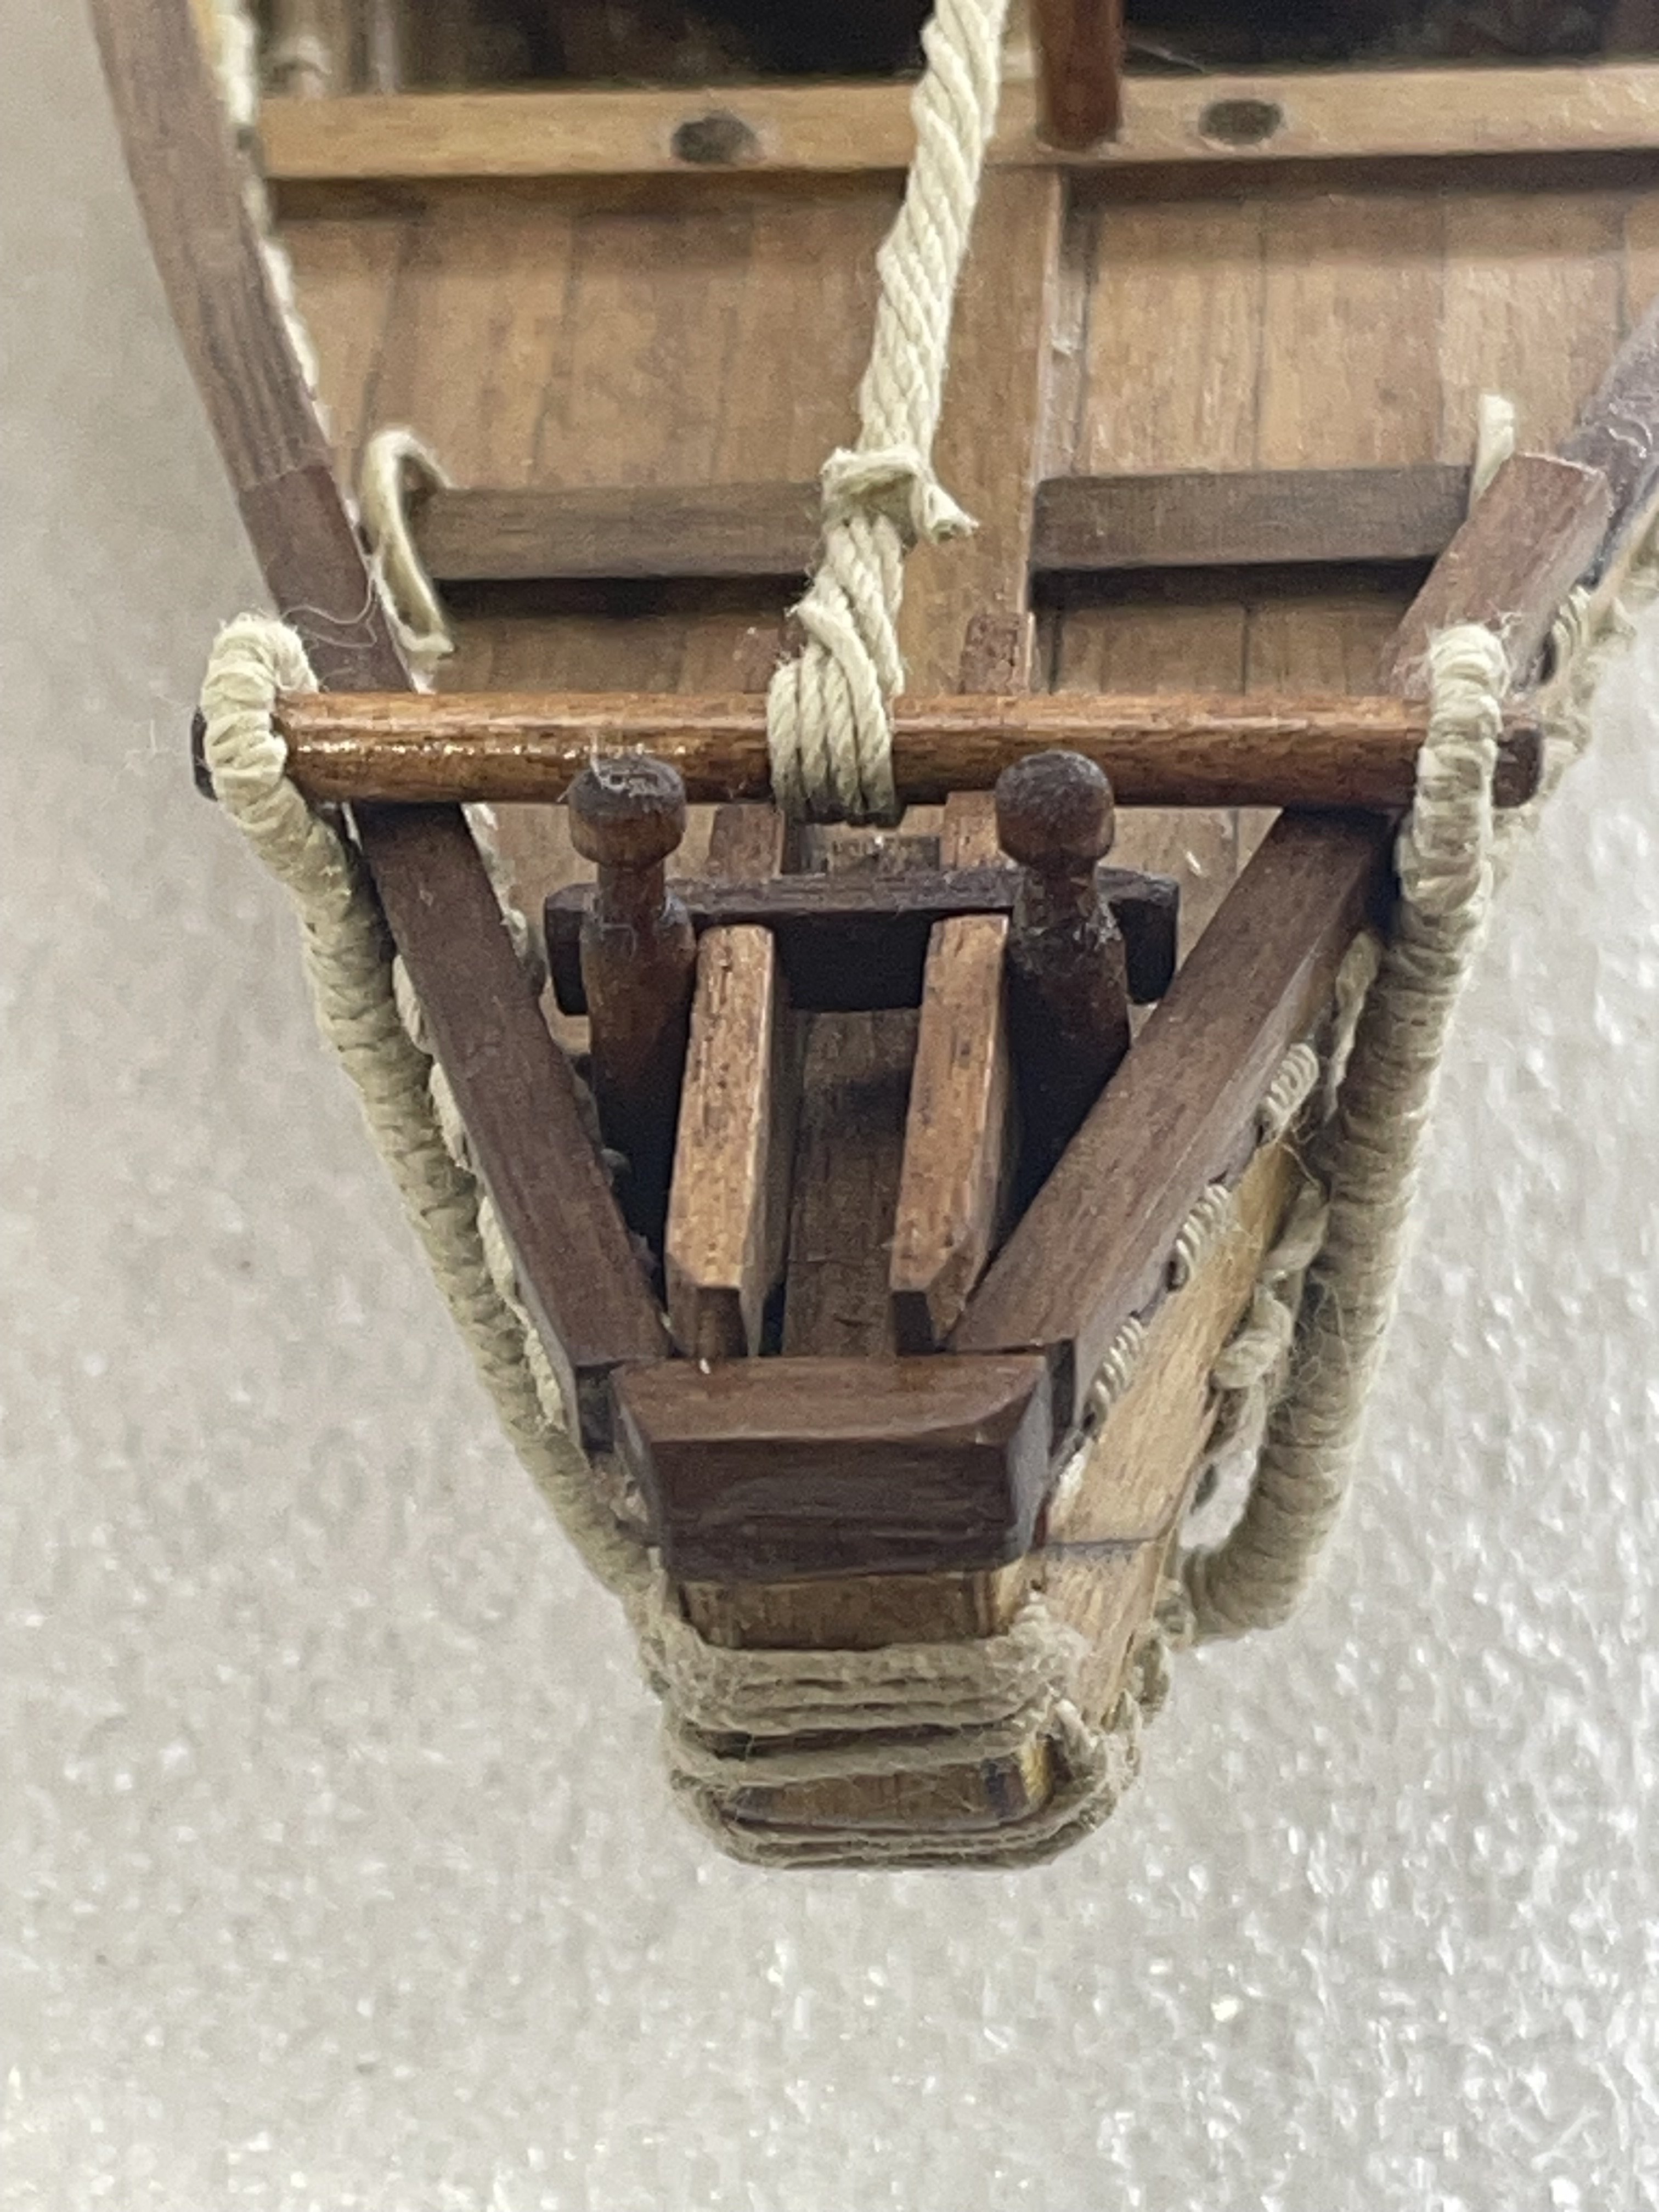
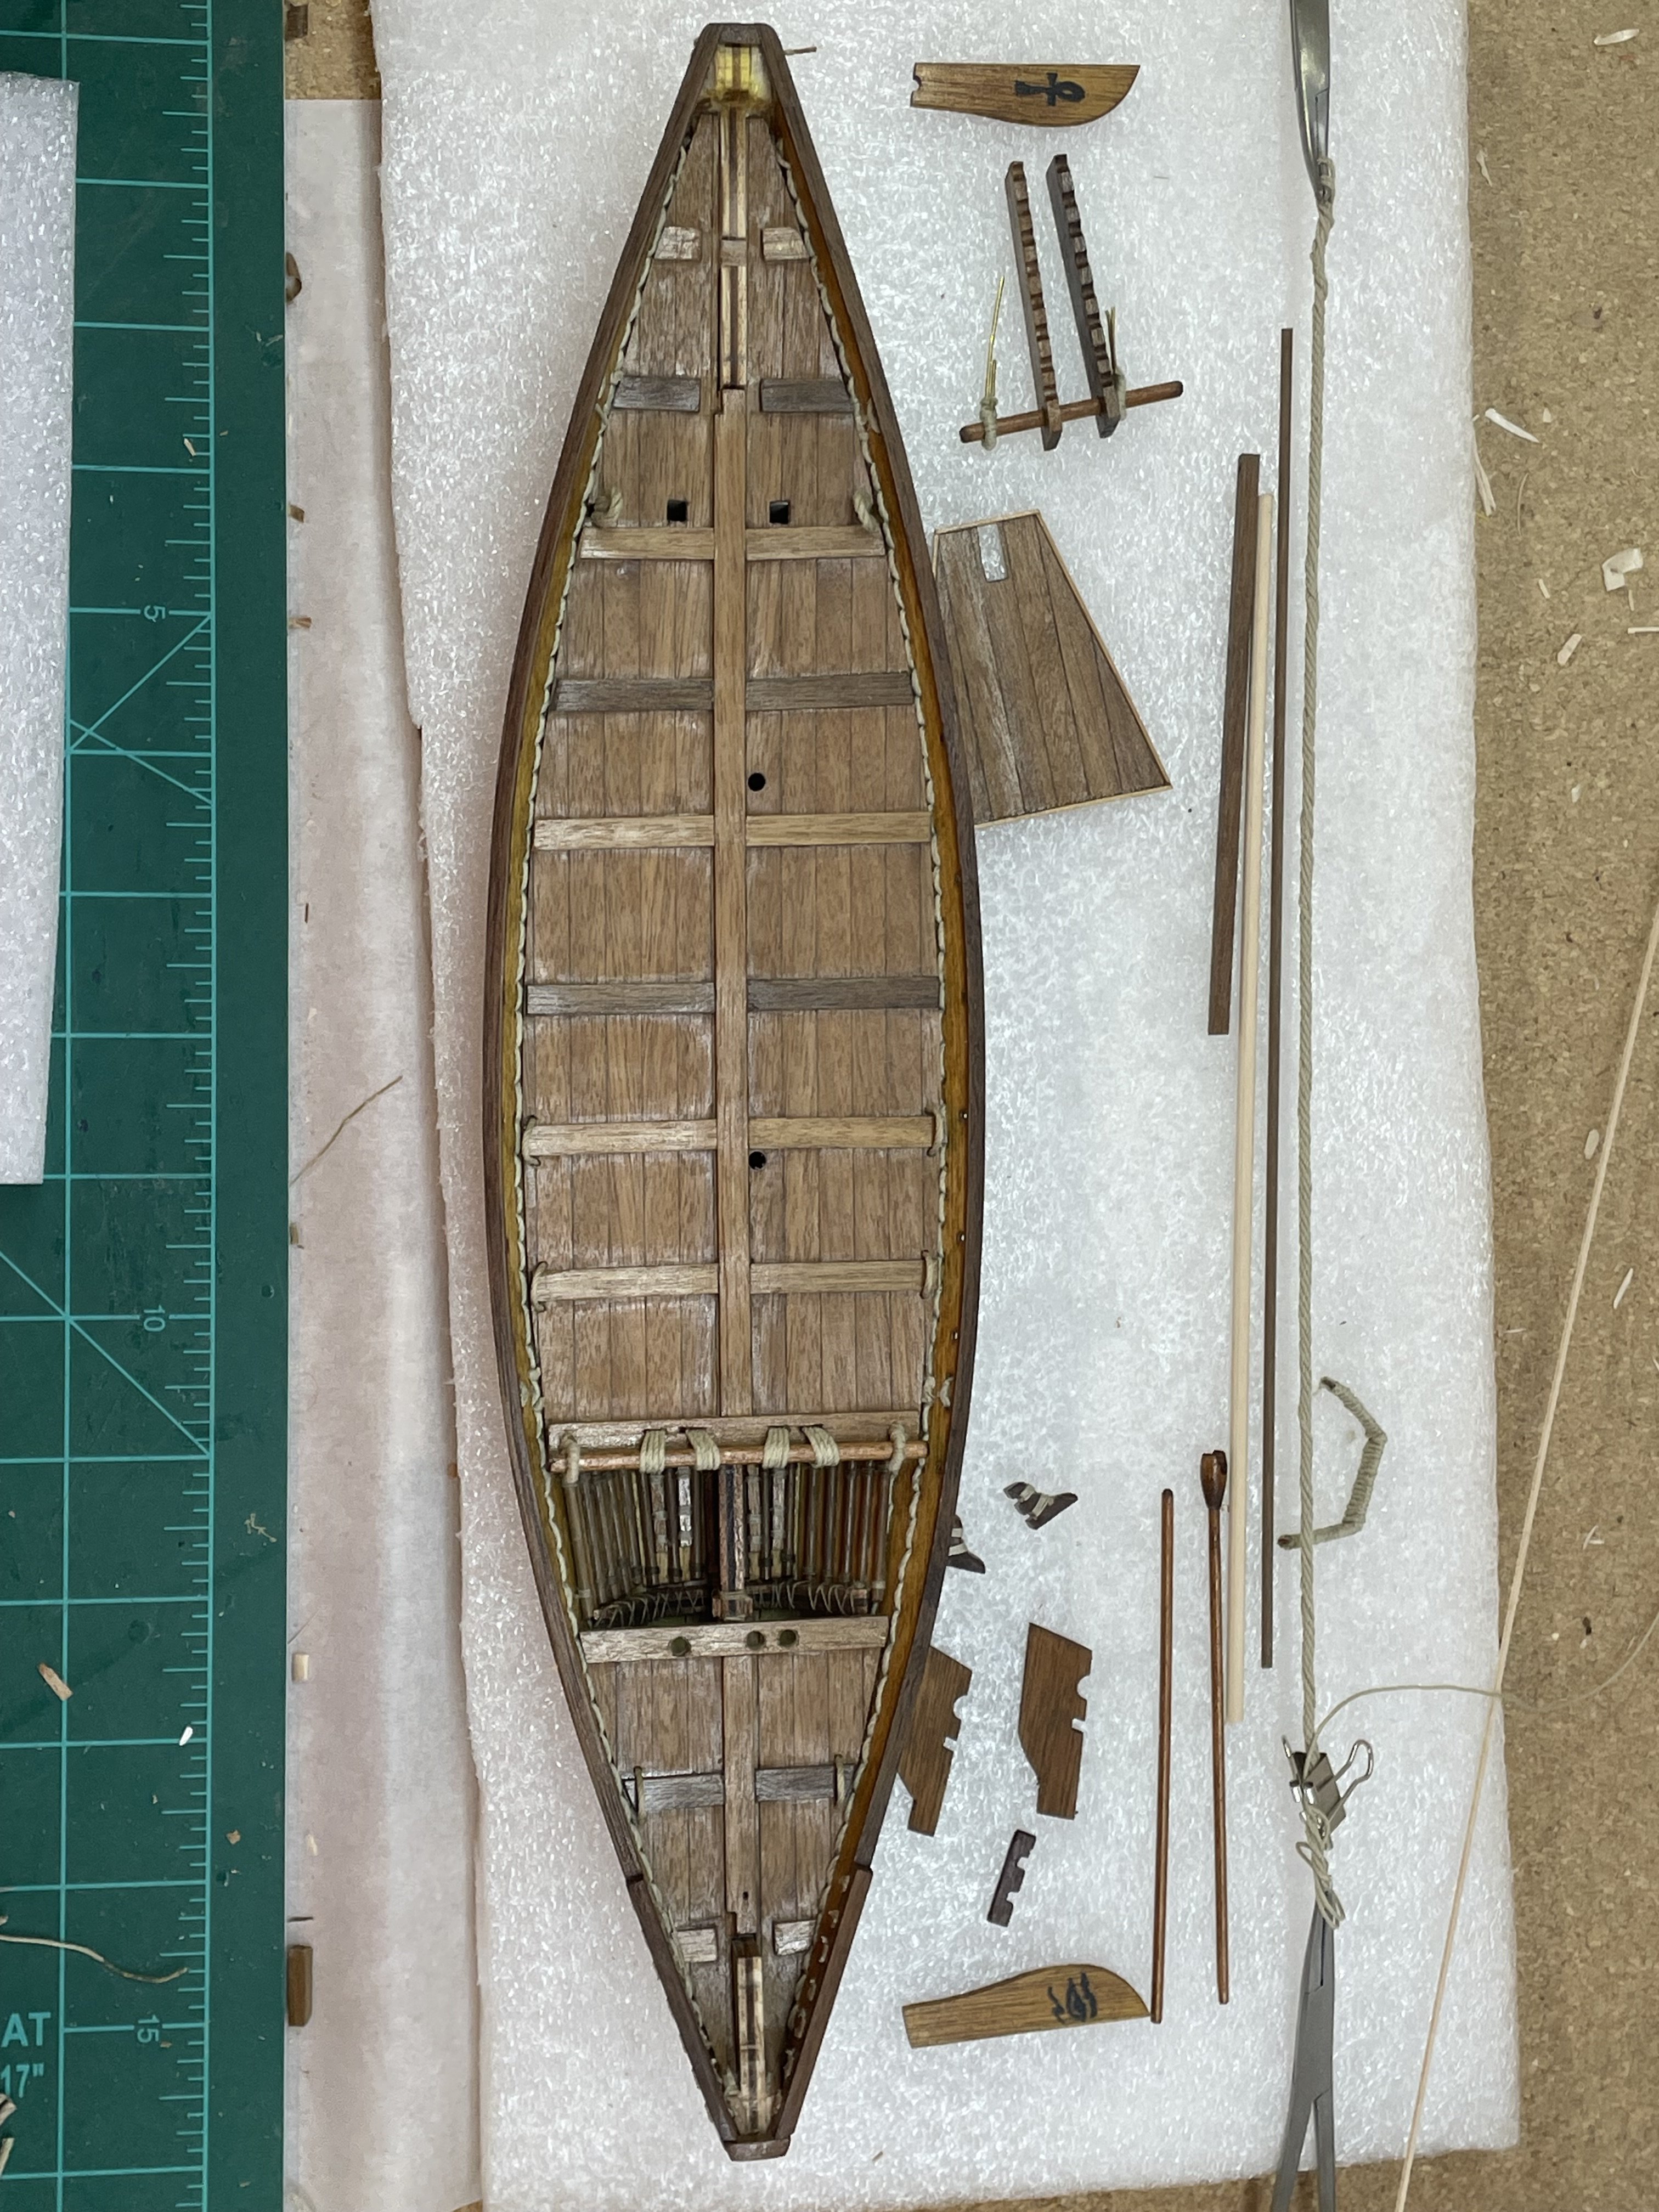
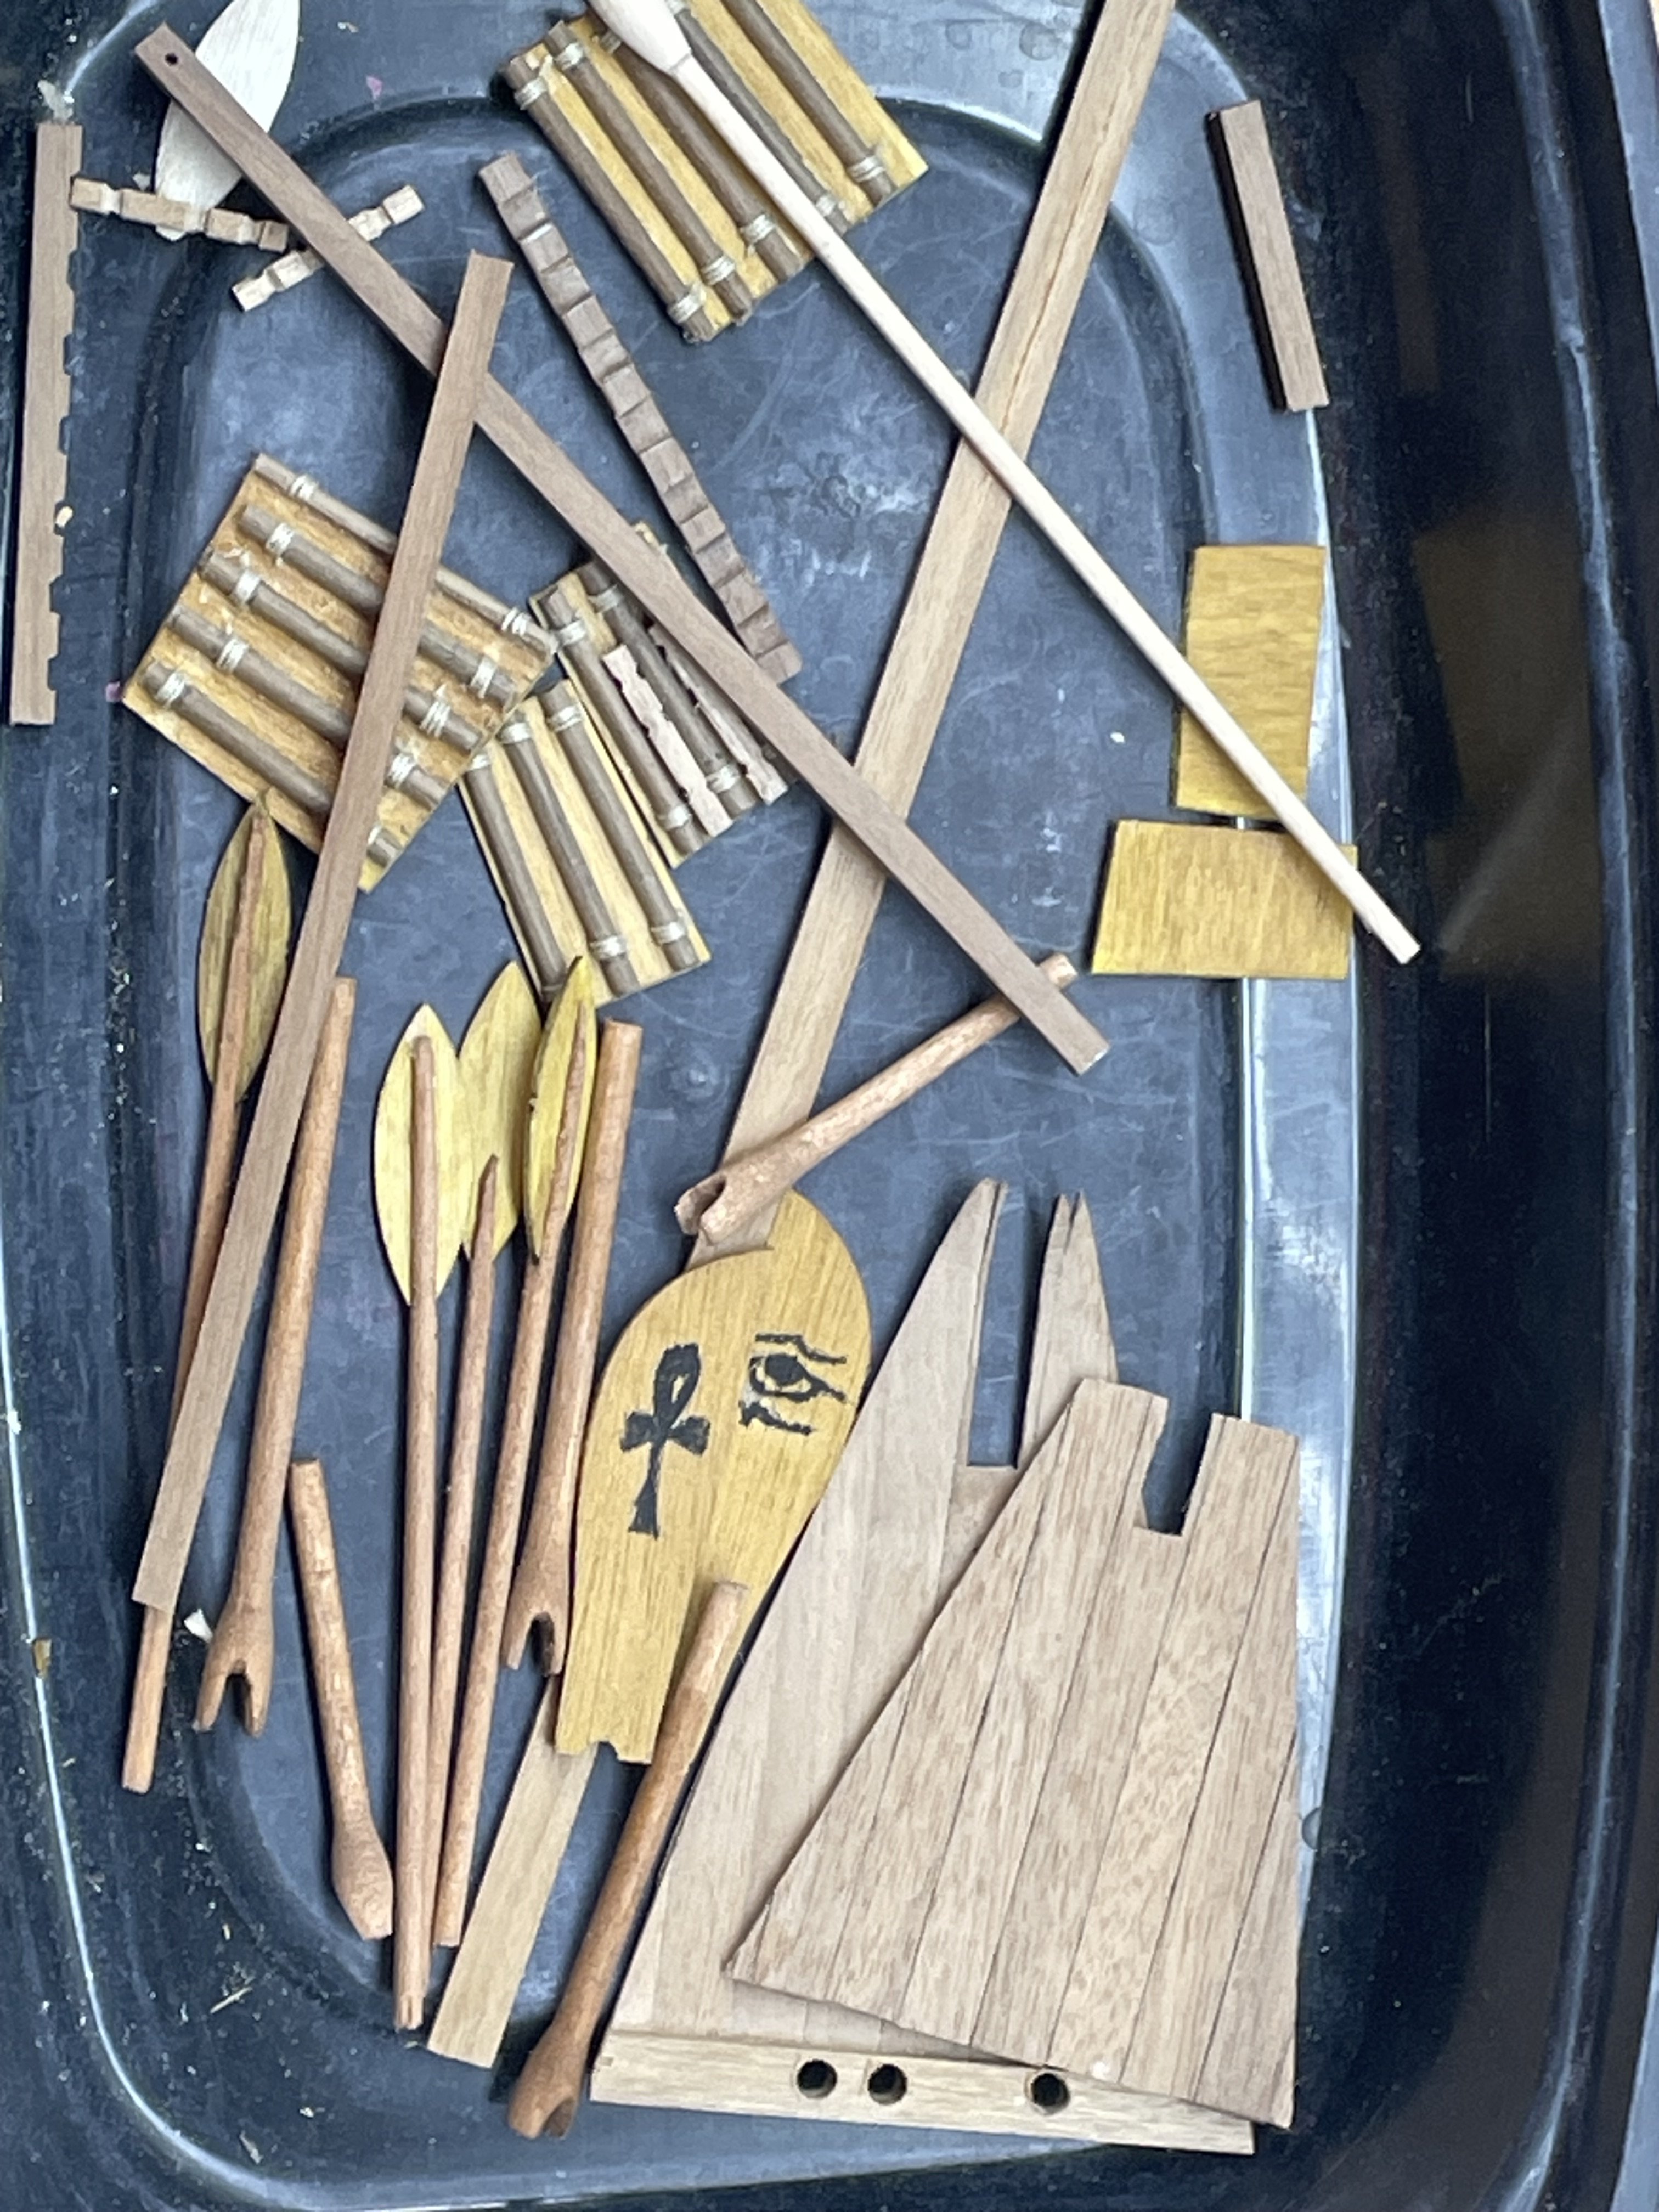
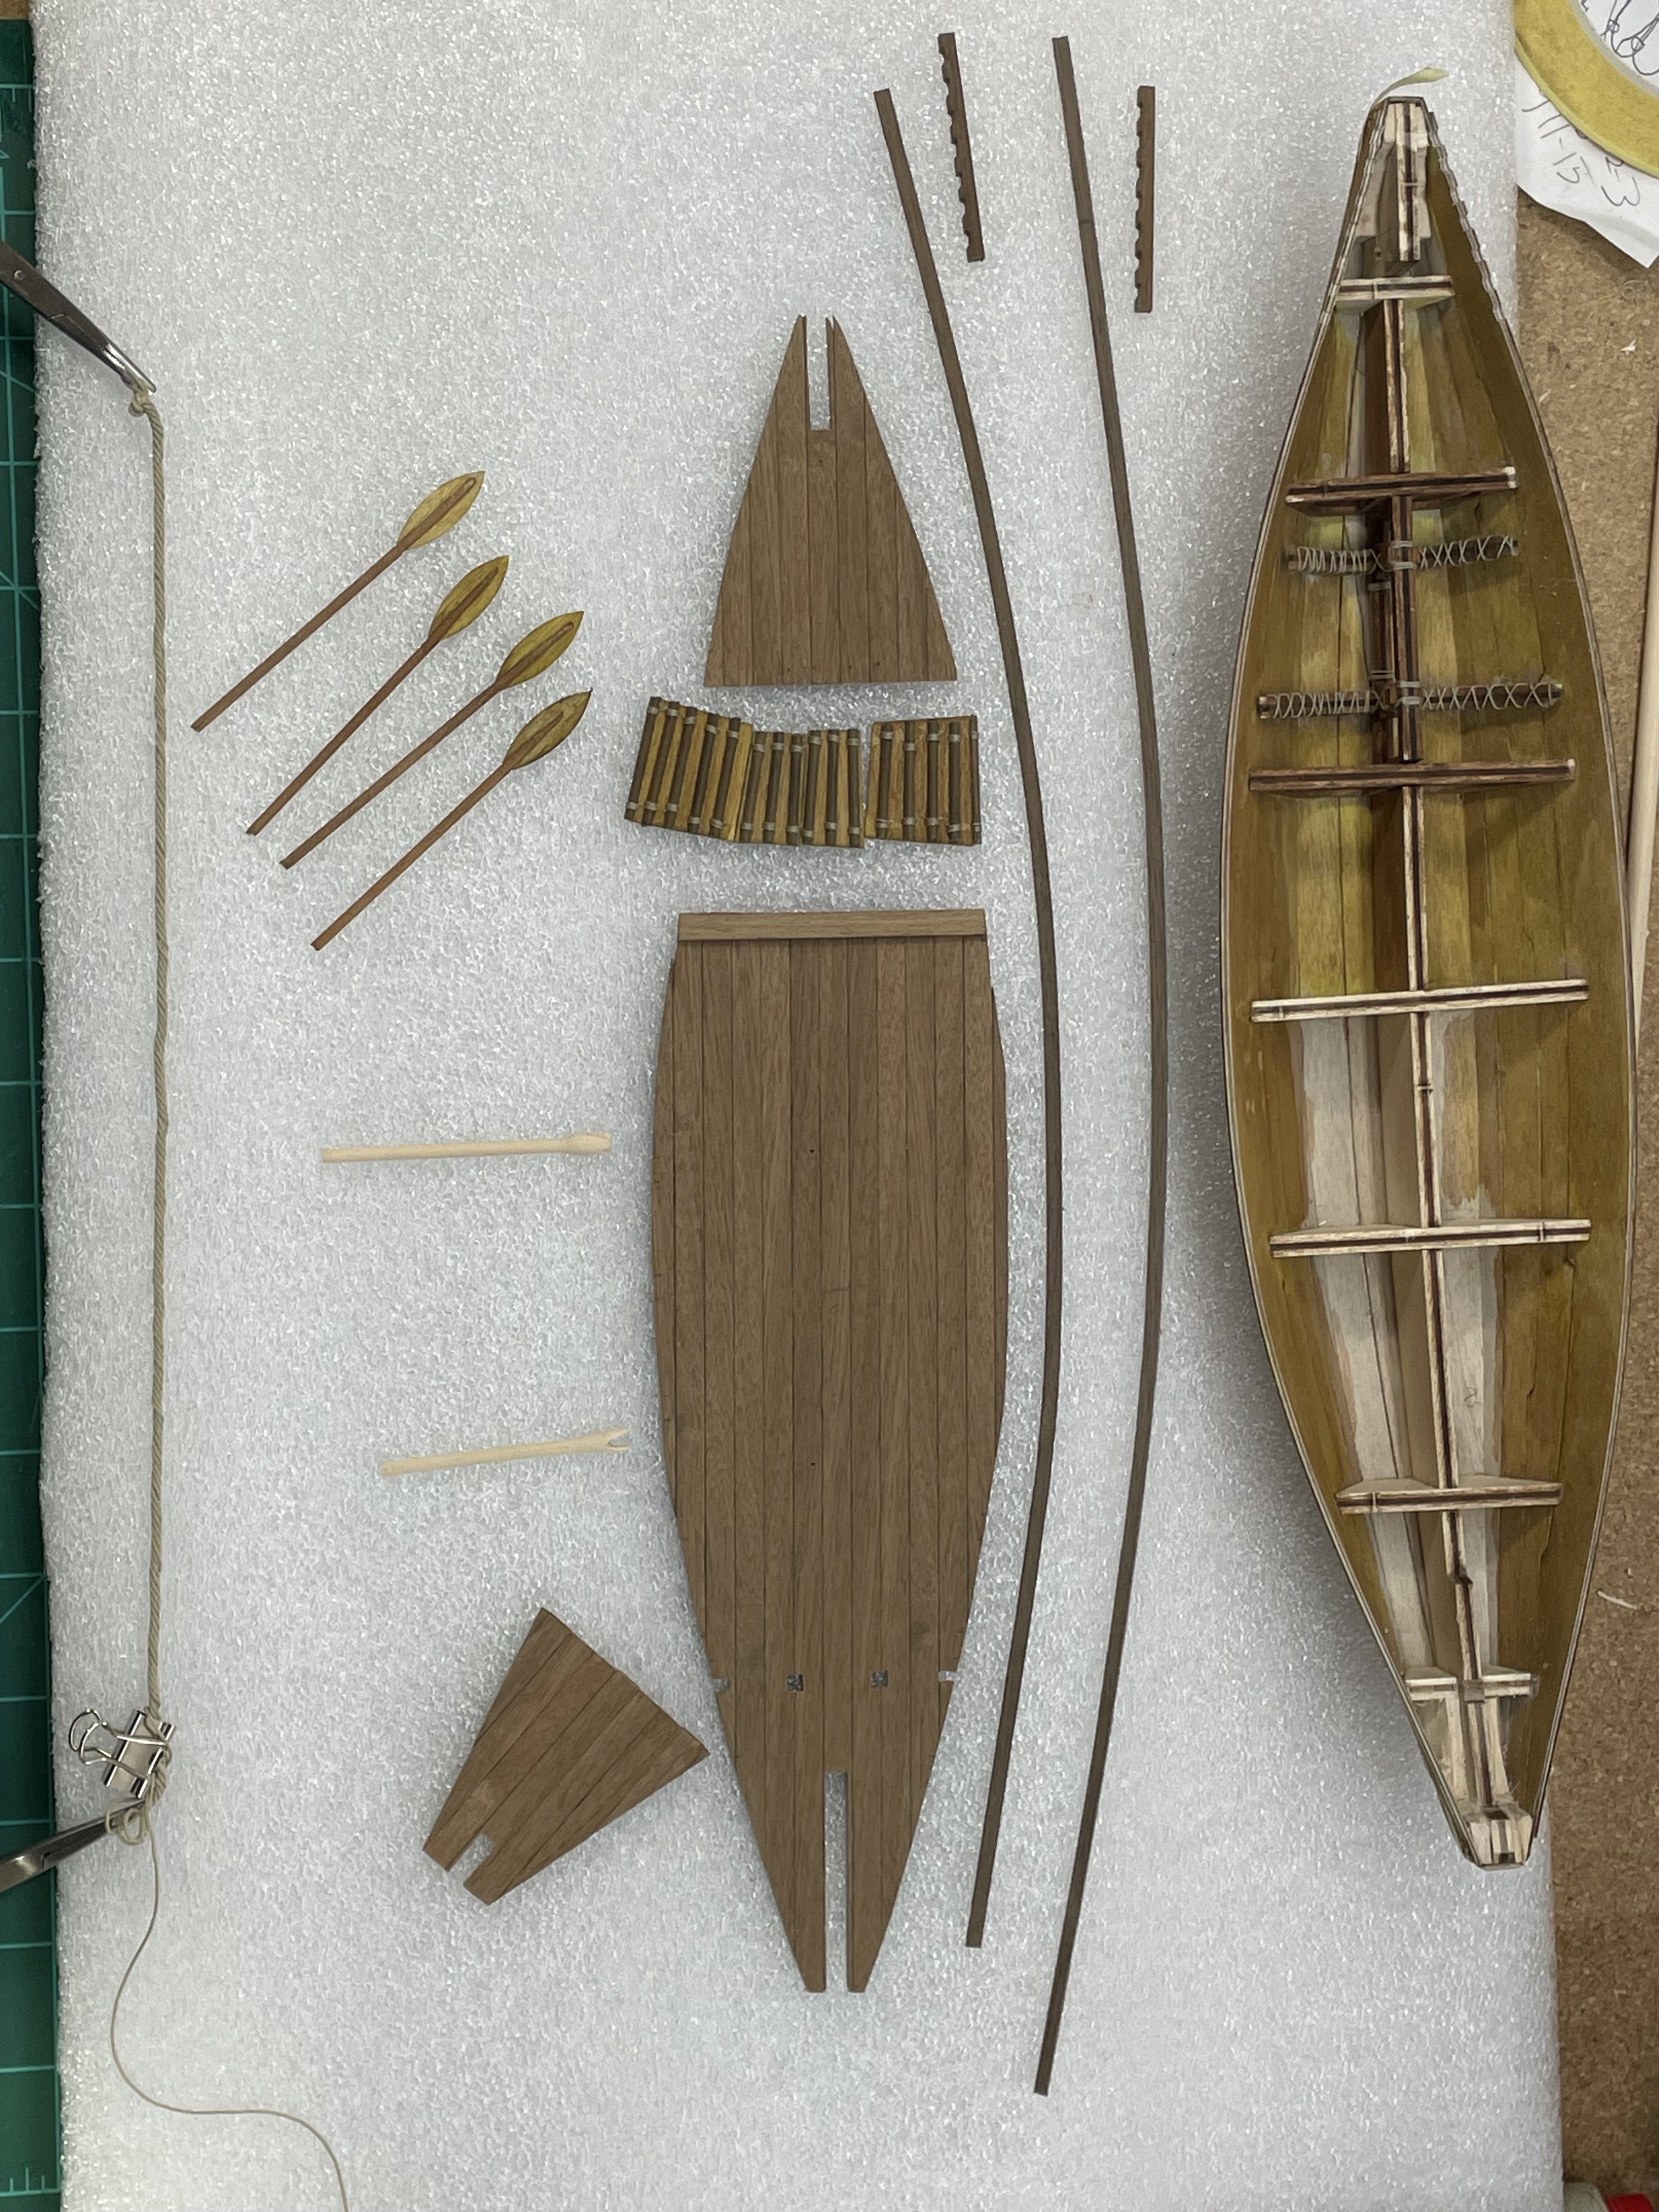
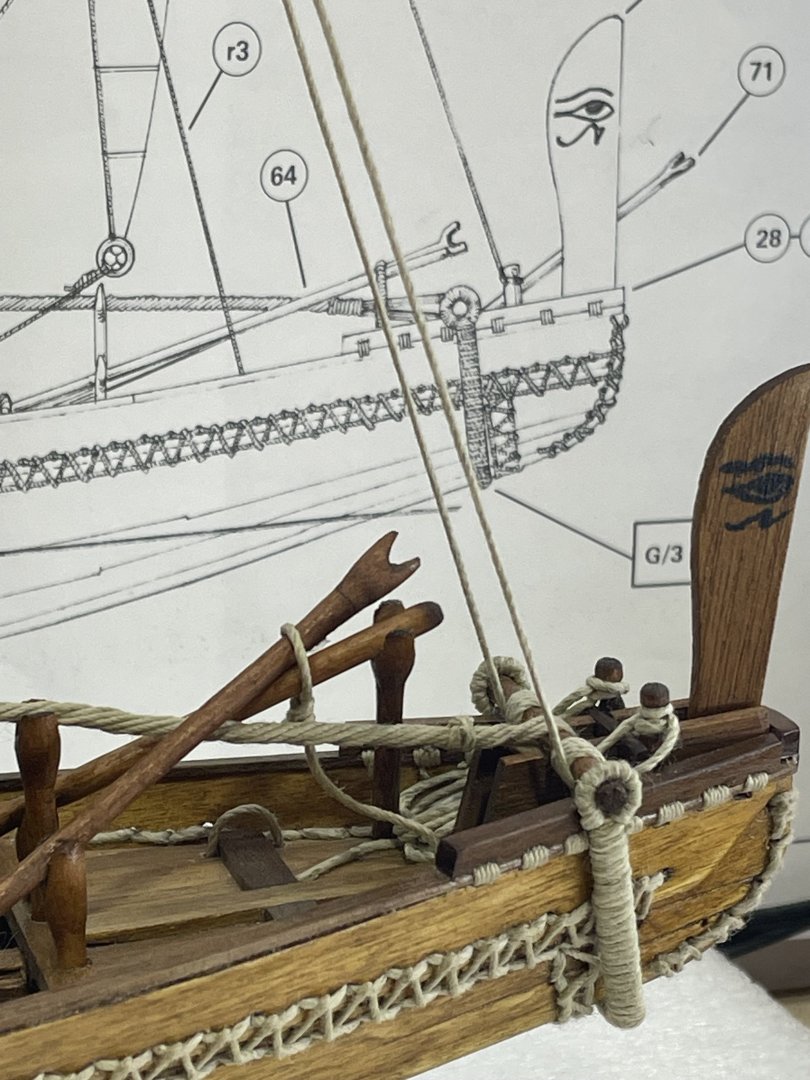
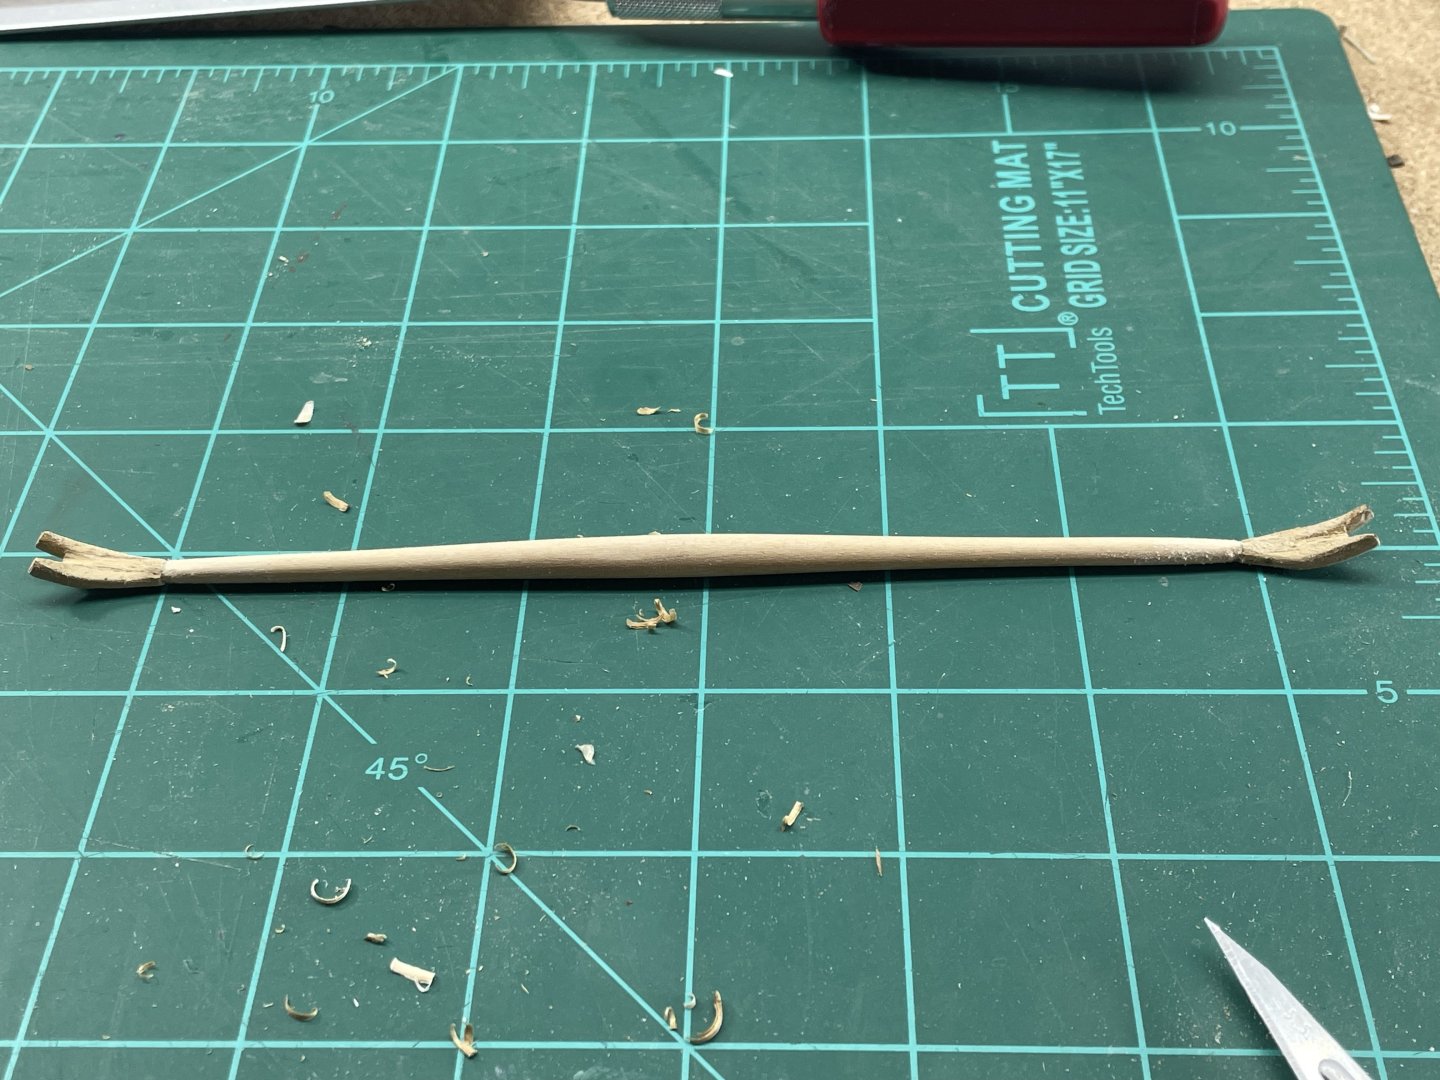
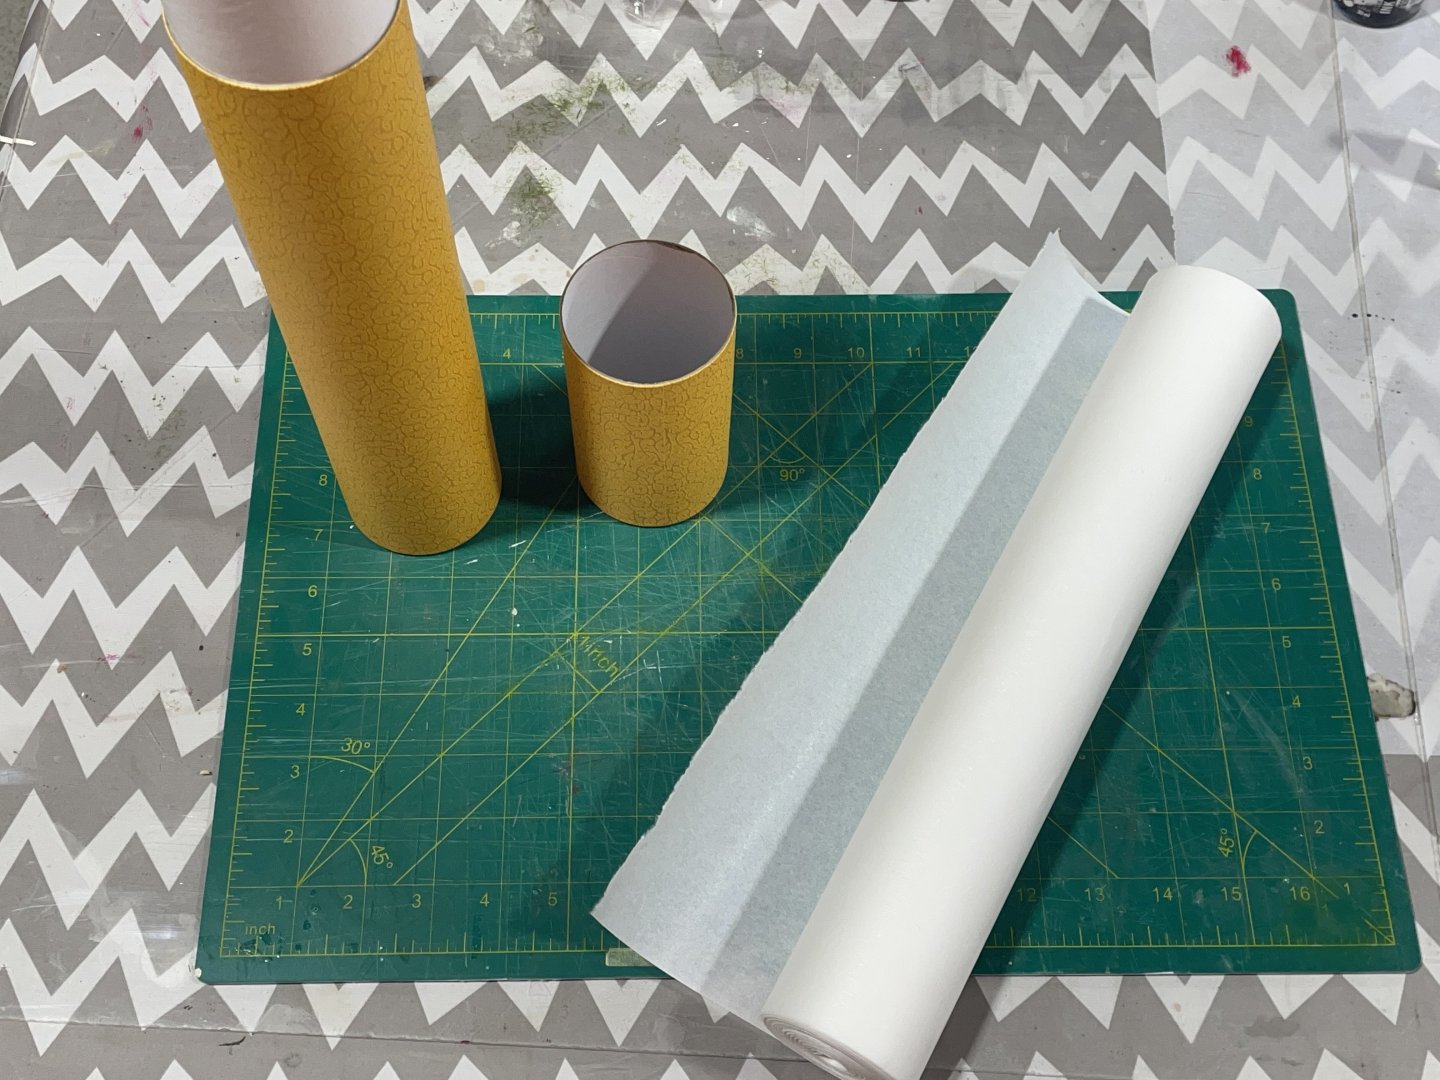
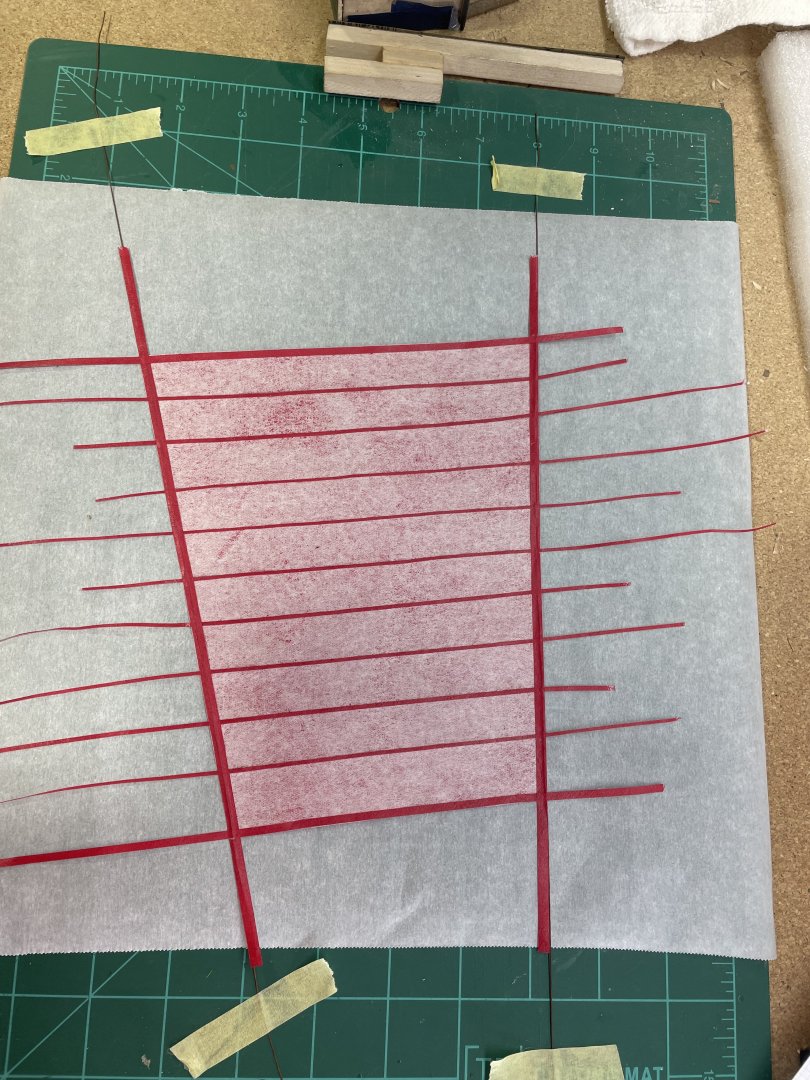
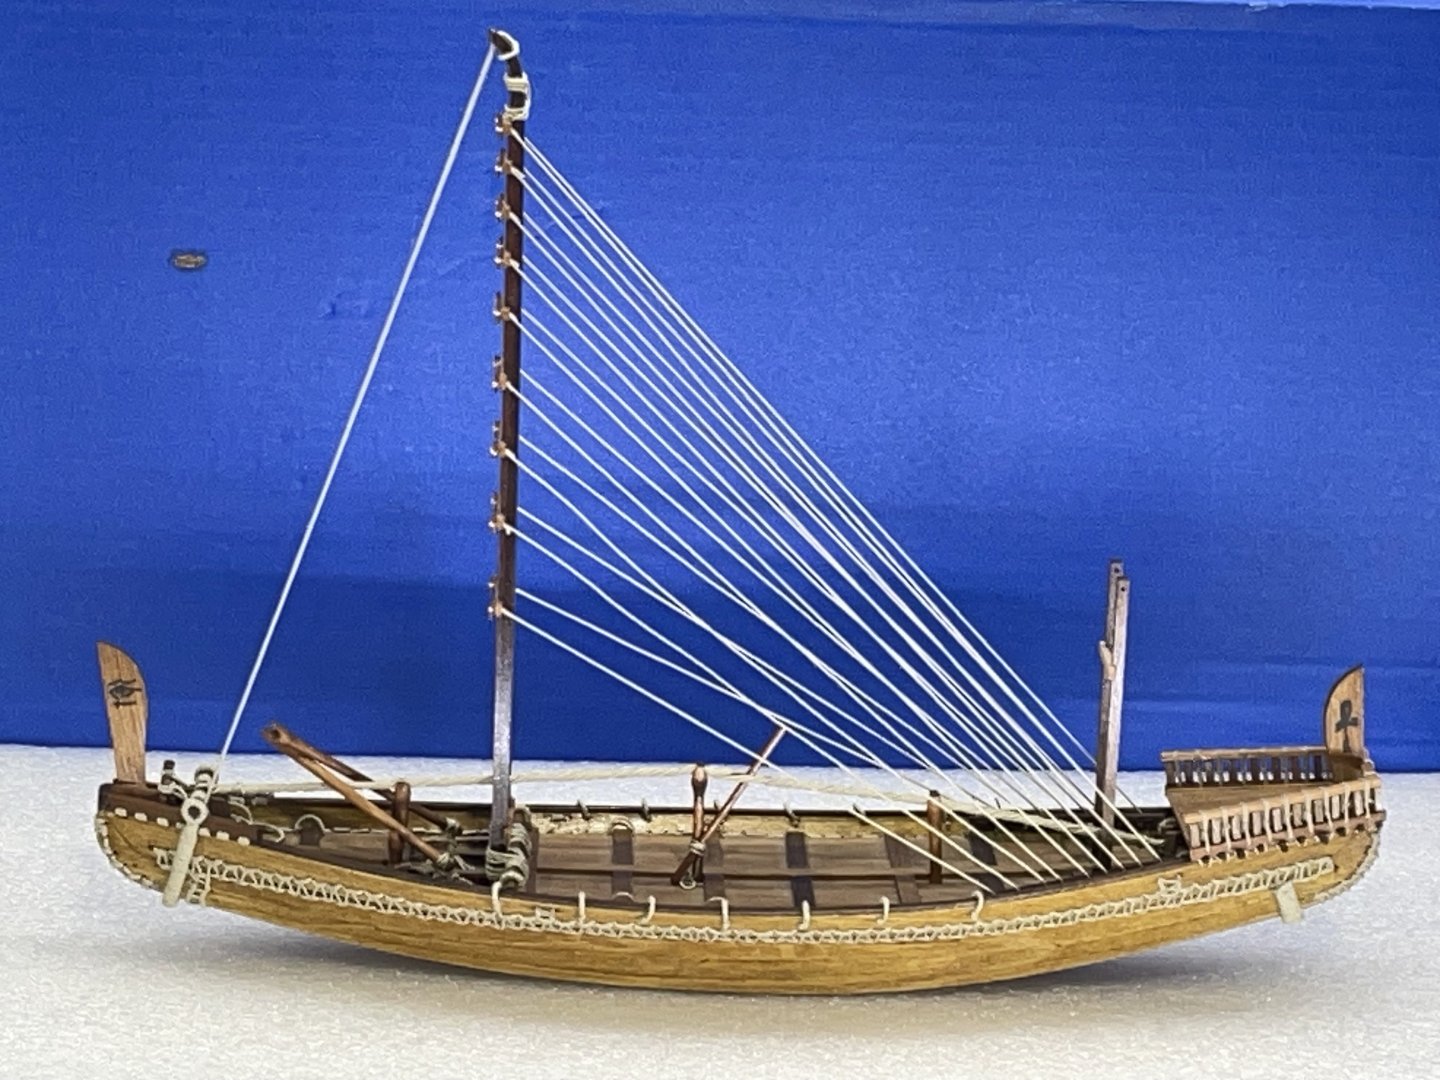
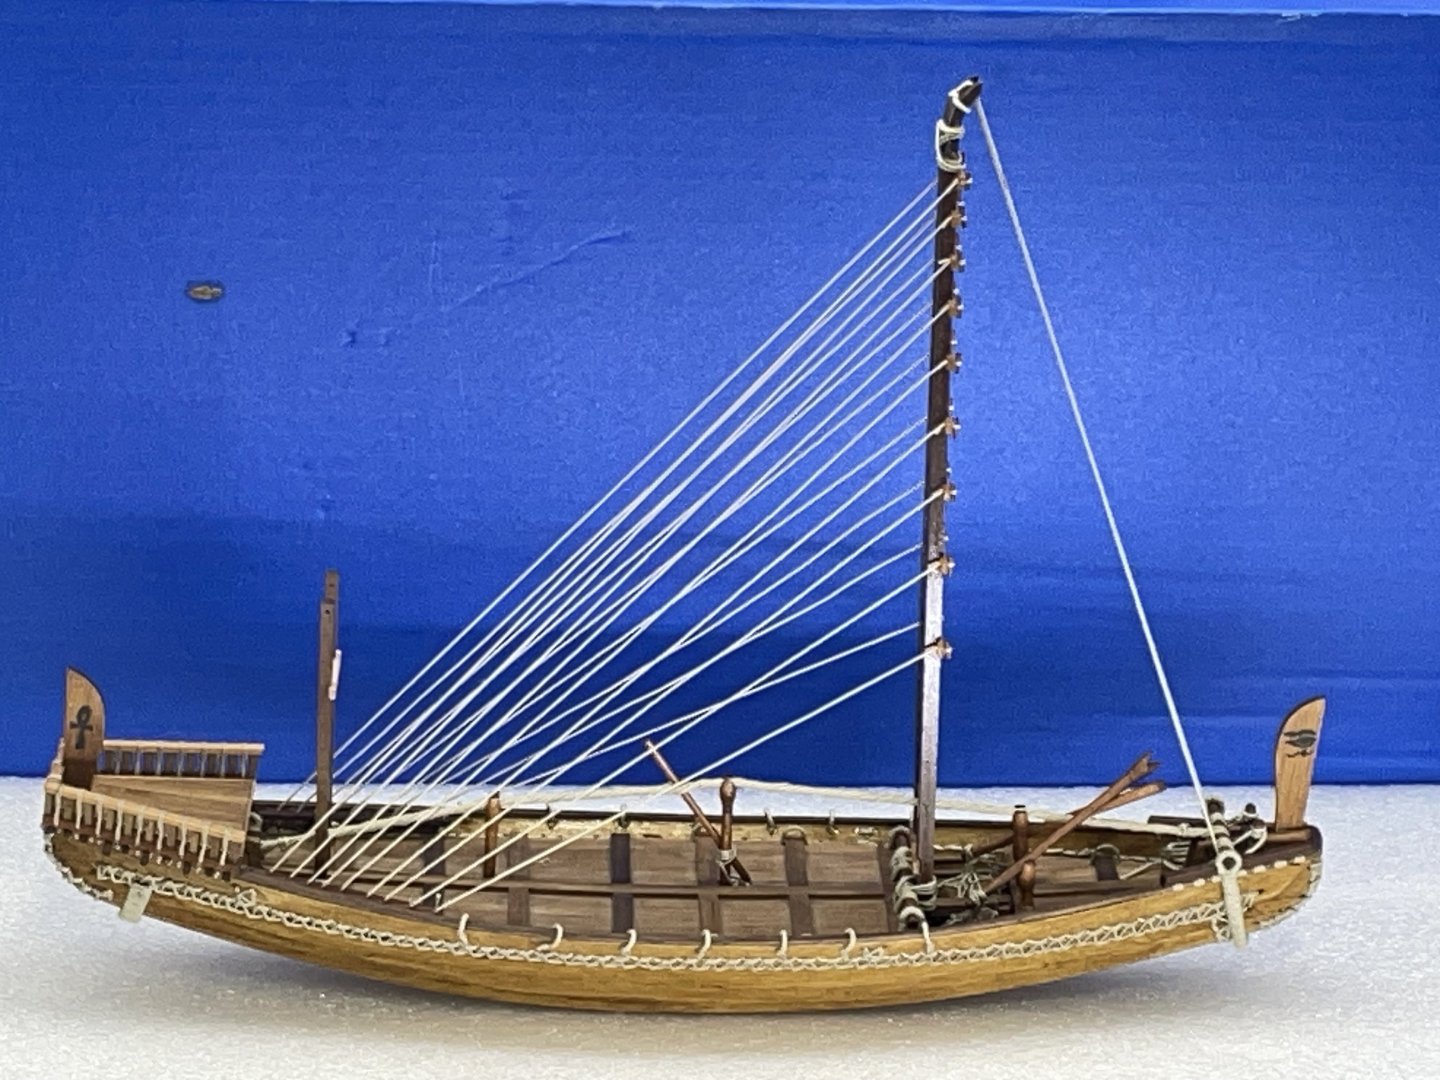
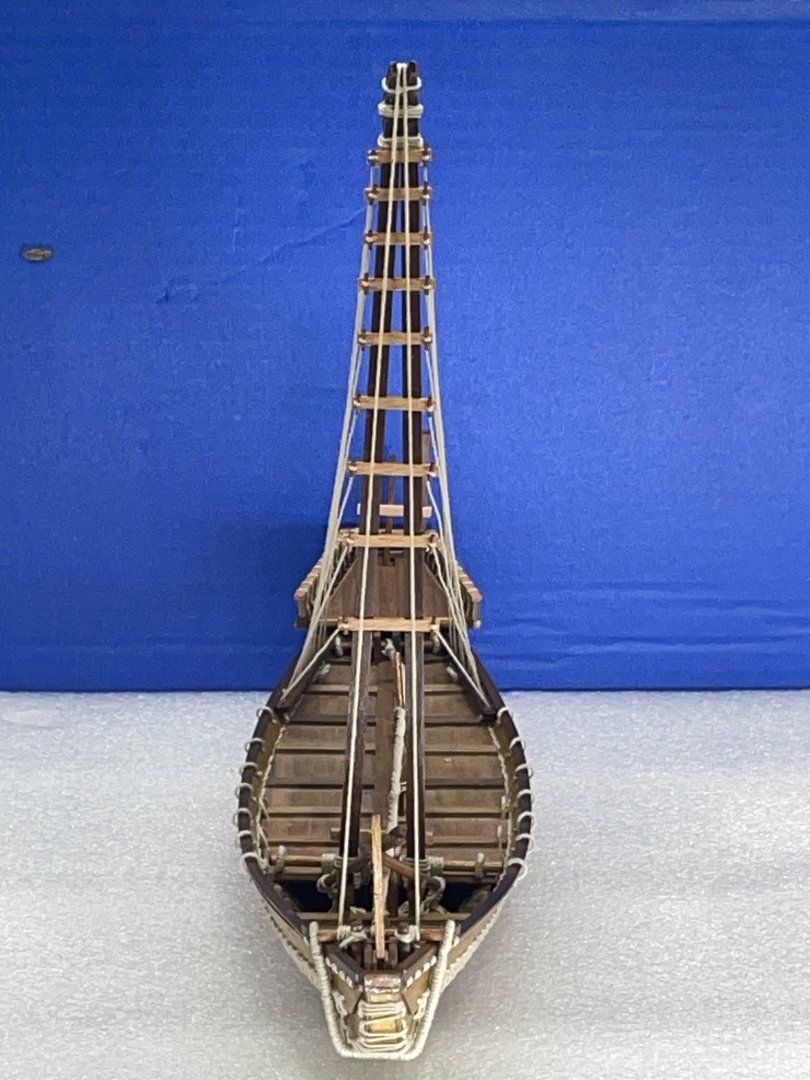
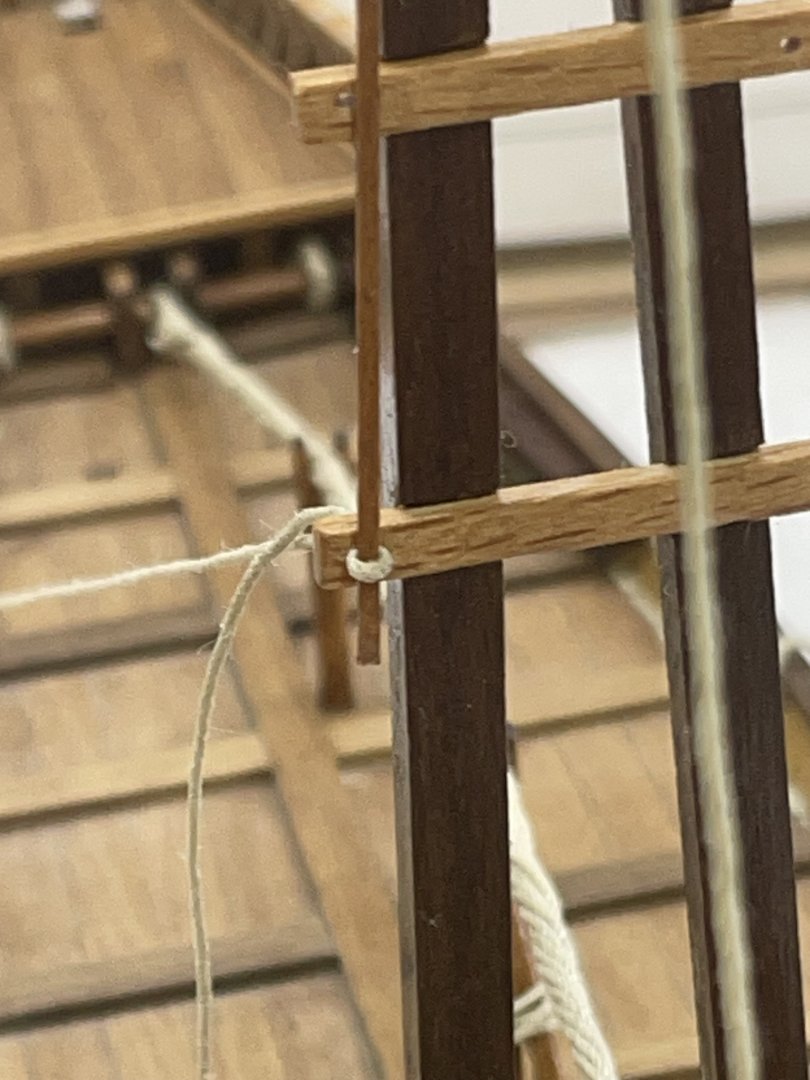
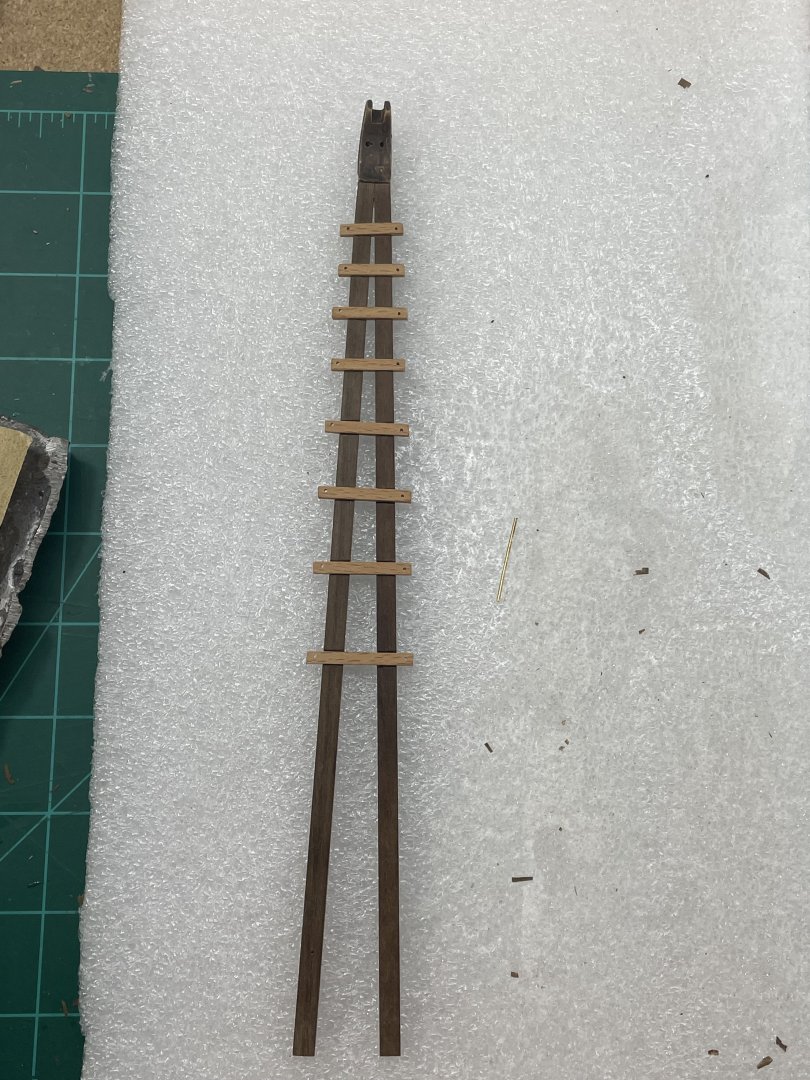
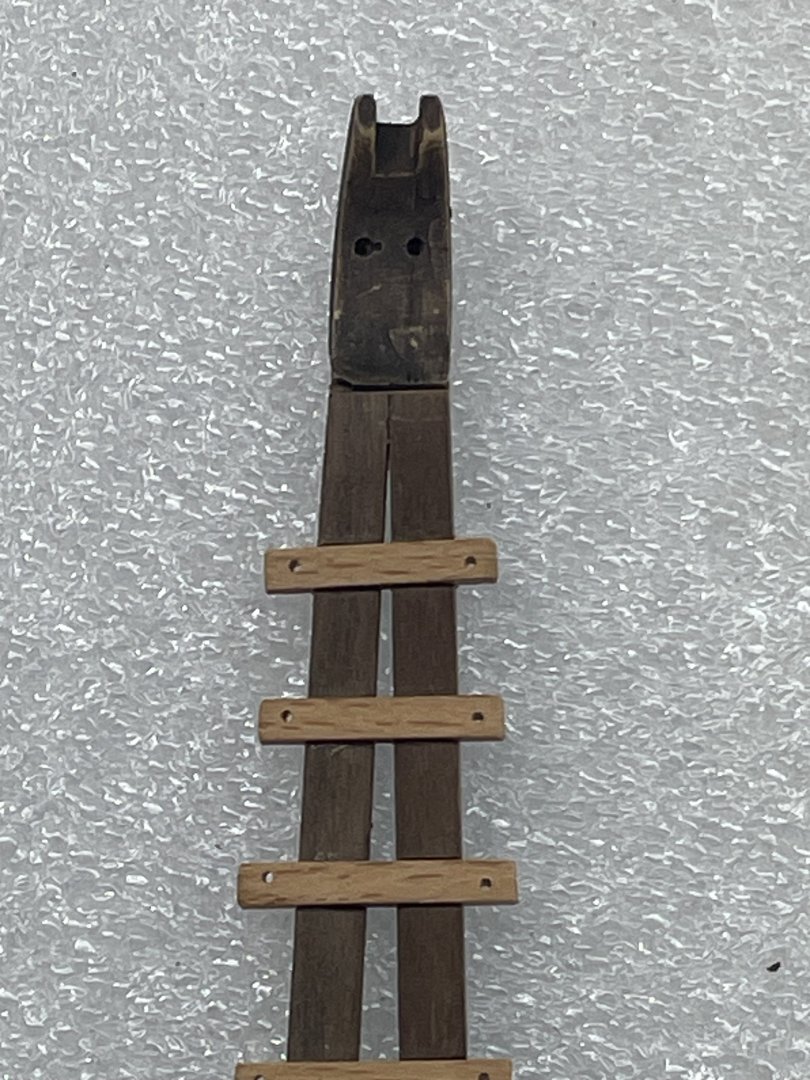
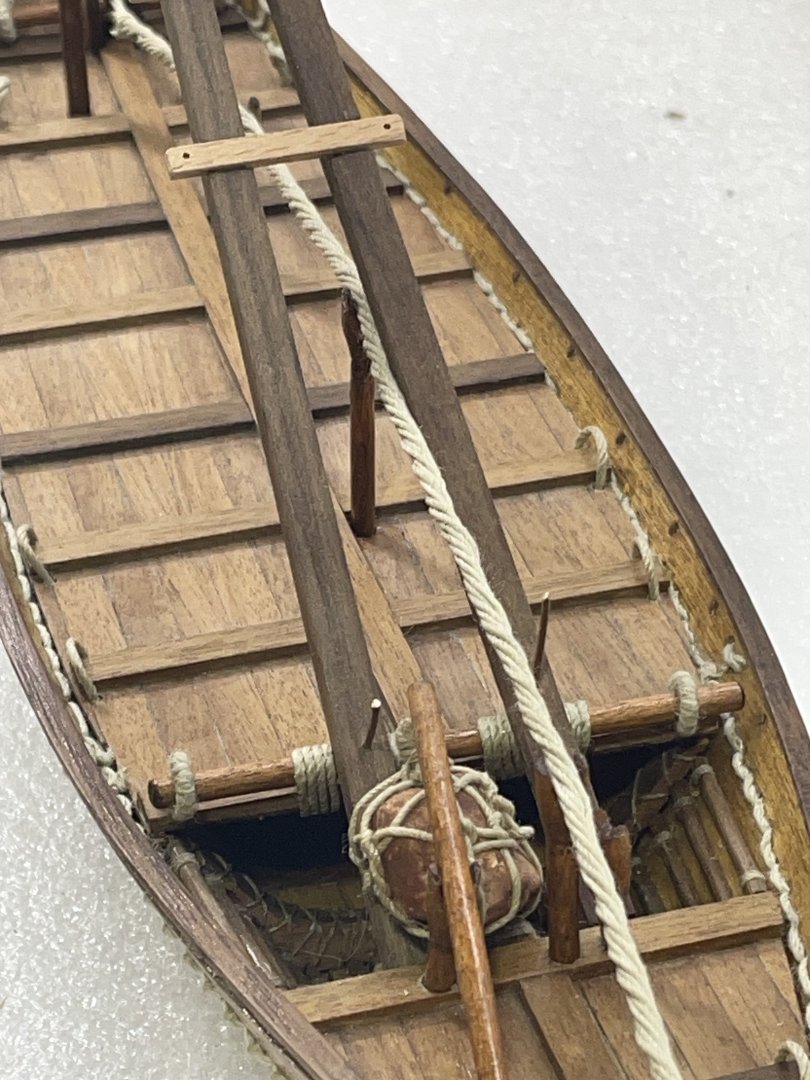
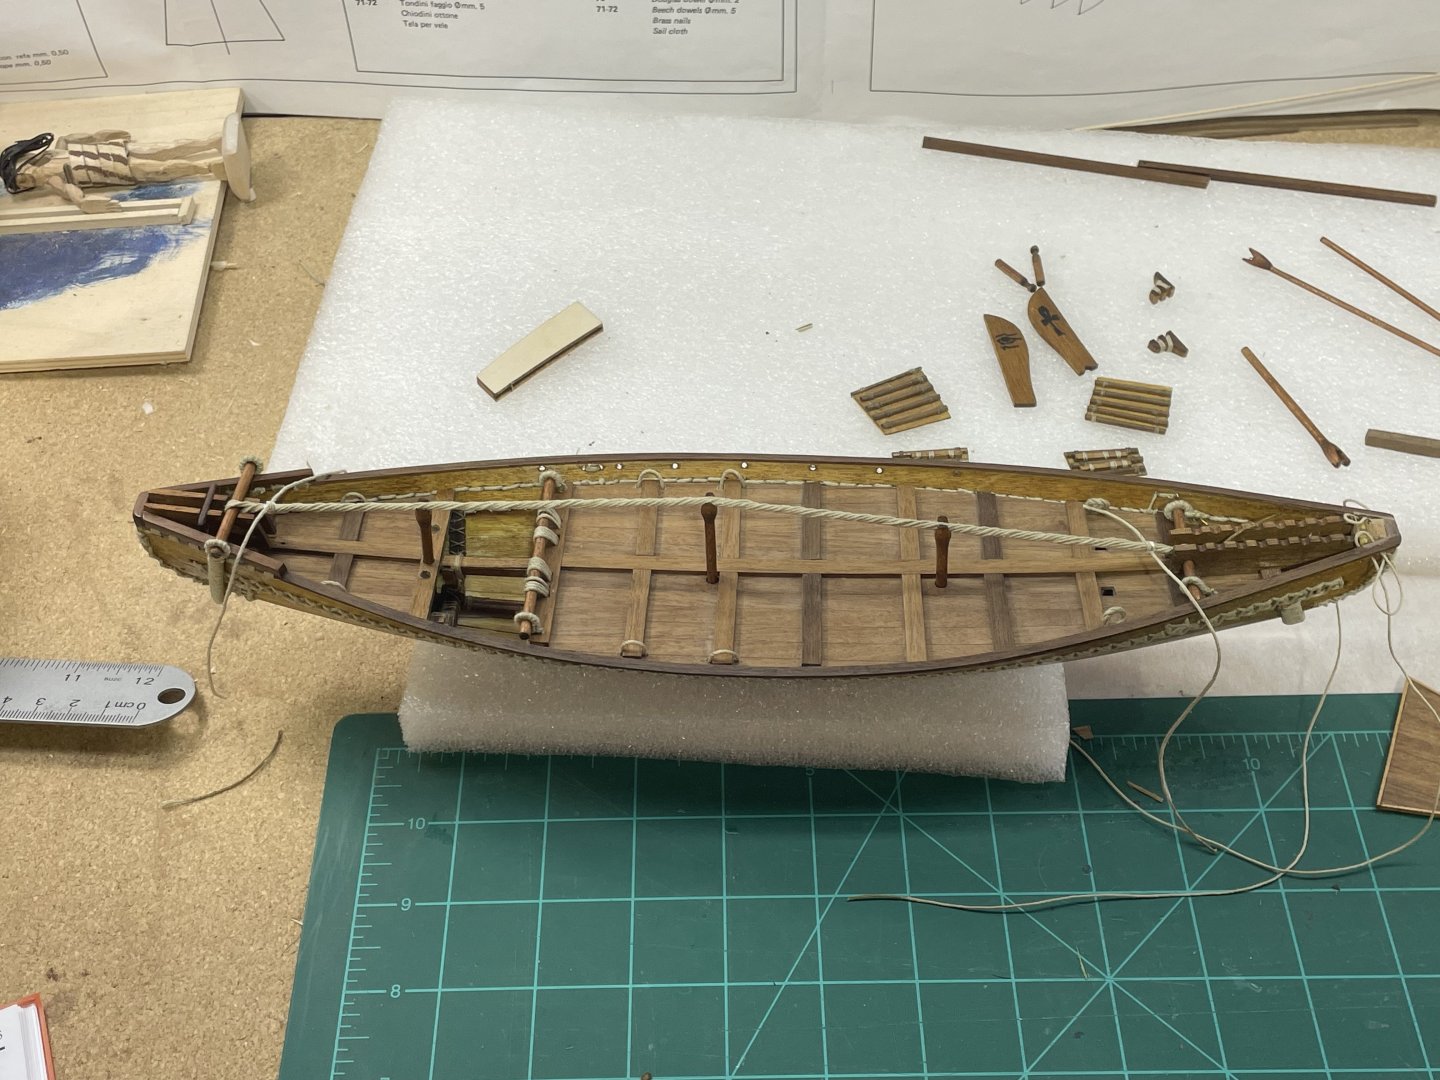
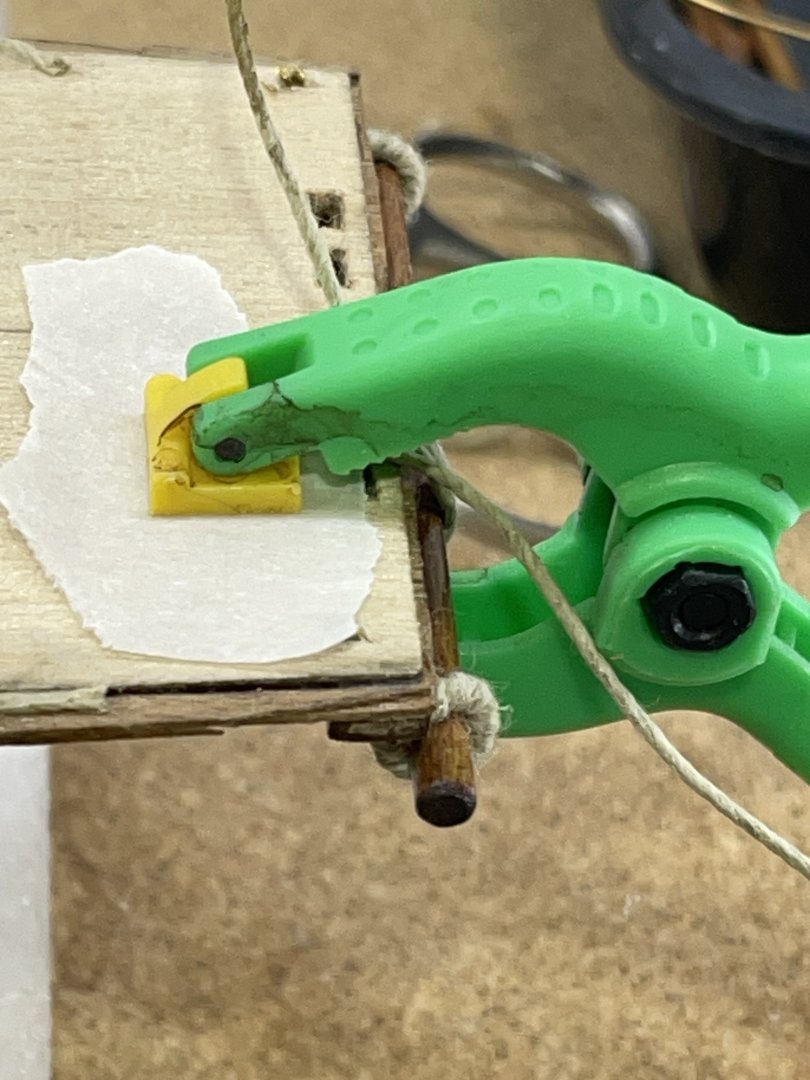
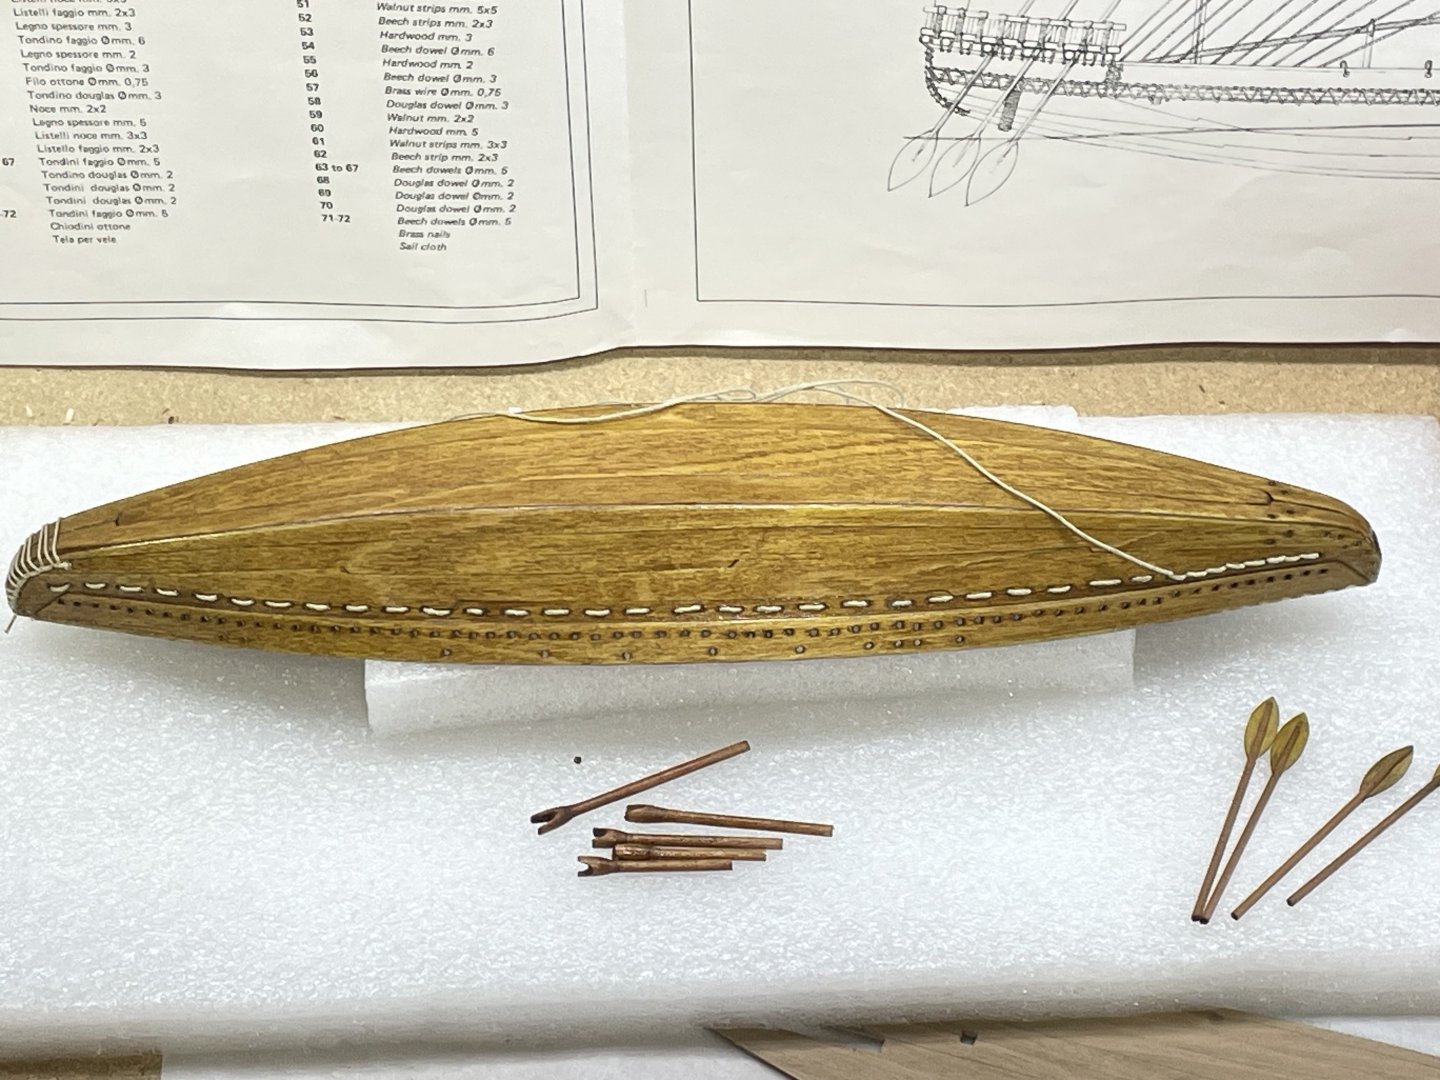
Trying to tie up a few loose ends before the deck gets crowded, I spent time on the boulders holding down the mast. I put a rope from the deck to keep them together. Then there’s part #71 top right on the plan. I don’t know what this is doing, but I cut it down and wedged it as a stop for the other two. The kit came with a piece on wood for the base but that’s all. I laid out all the left over wood and decided what would be the best to use. I ended up using dowels trying to make them look like palm logs. Pretty simple but it worked. Not for sure about a name plate at this time. The top yard was different because it was flat on the bottom and tapered on the top. The ends were made from 3 parts glued together then shaped and glued to the yard. After this it got wrapped with rope that I dyed a darker brown. For the sail I used artist tea paper I got in a roll. The last I had was on a board and the folds showed. I traced the sail and the seams on one side and painted the other with acrylic paint. Then cut it out. On the unpainted side I glued 1mm strips on the seams and 3mm on the sides. After they dried, I glued them on the painted side, using the others as a guide. On either side I glued a 1 mm bolt rope the same way I did the strips. After holes were drilled. I lashed the sail on both yards.


- 44 replies
-
- 8
-
-
- Nave Egizia
- Amati
- (and 1 more)
-
I would have guessed you’ve been doing this for decades. Great job!
- 34 replies
-
- 3
-
-
- muscongus bay lobster smack
- Model Shipways
- (and 1 more)
-
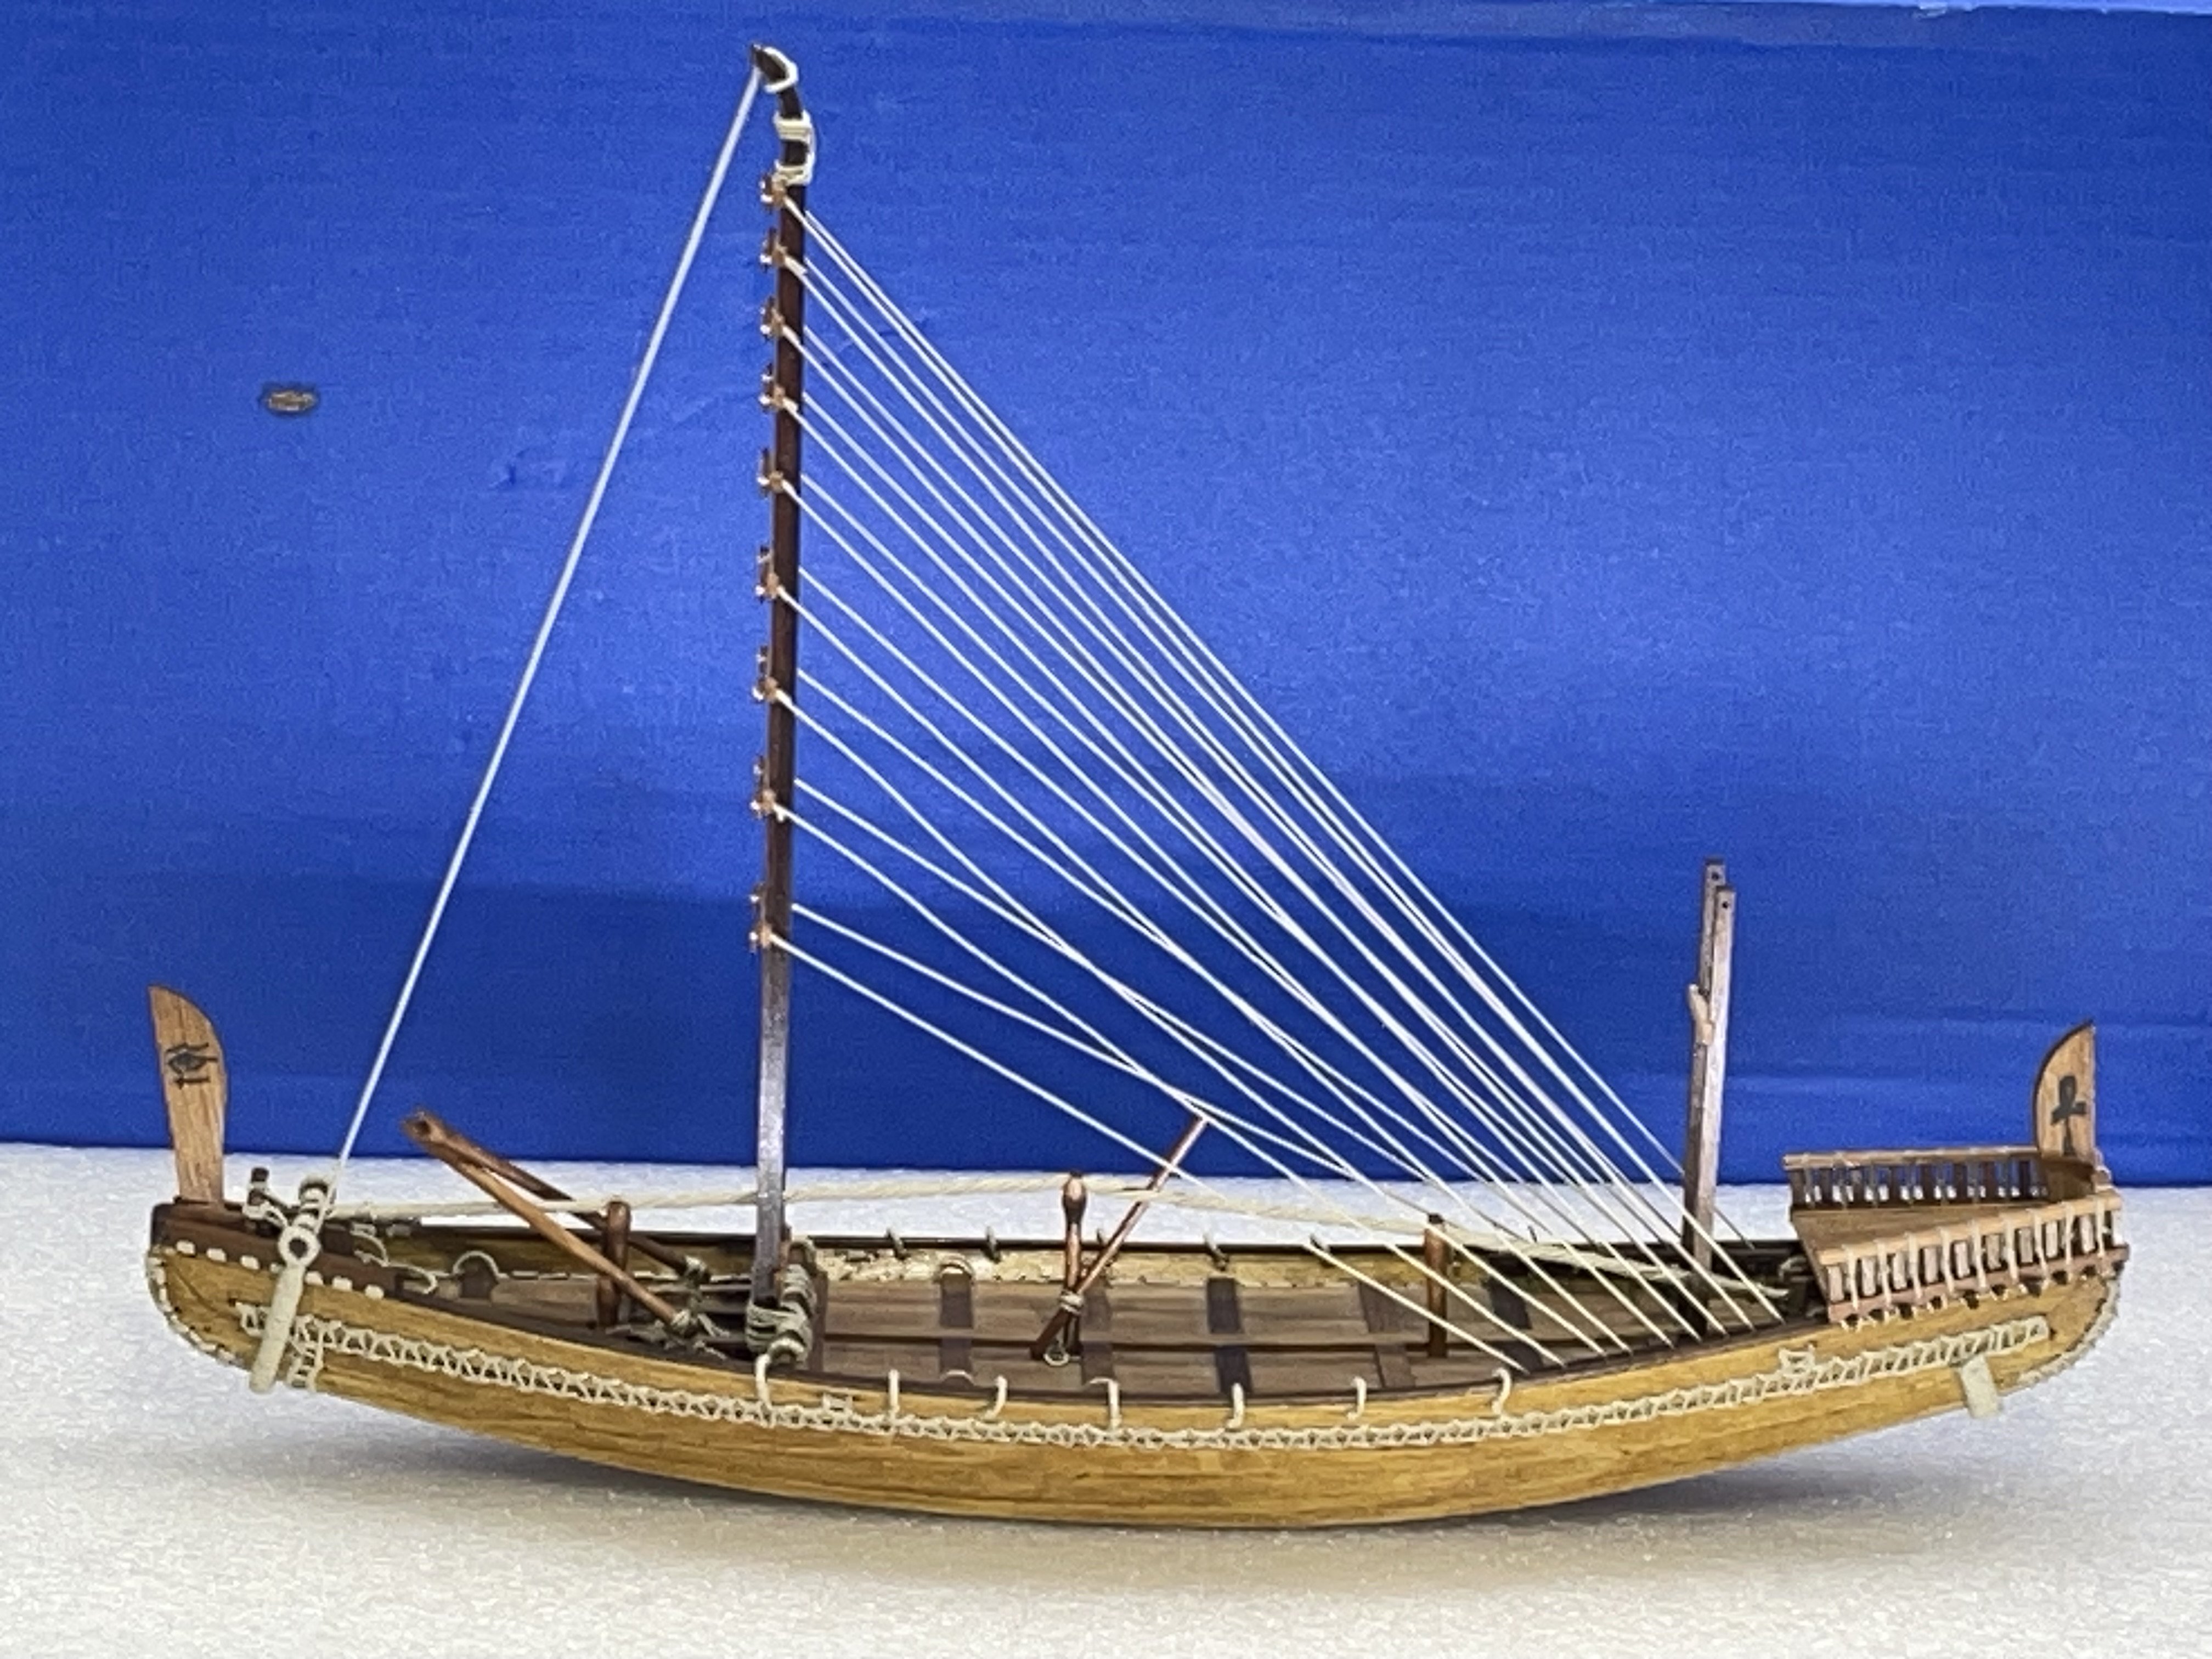
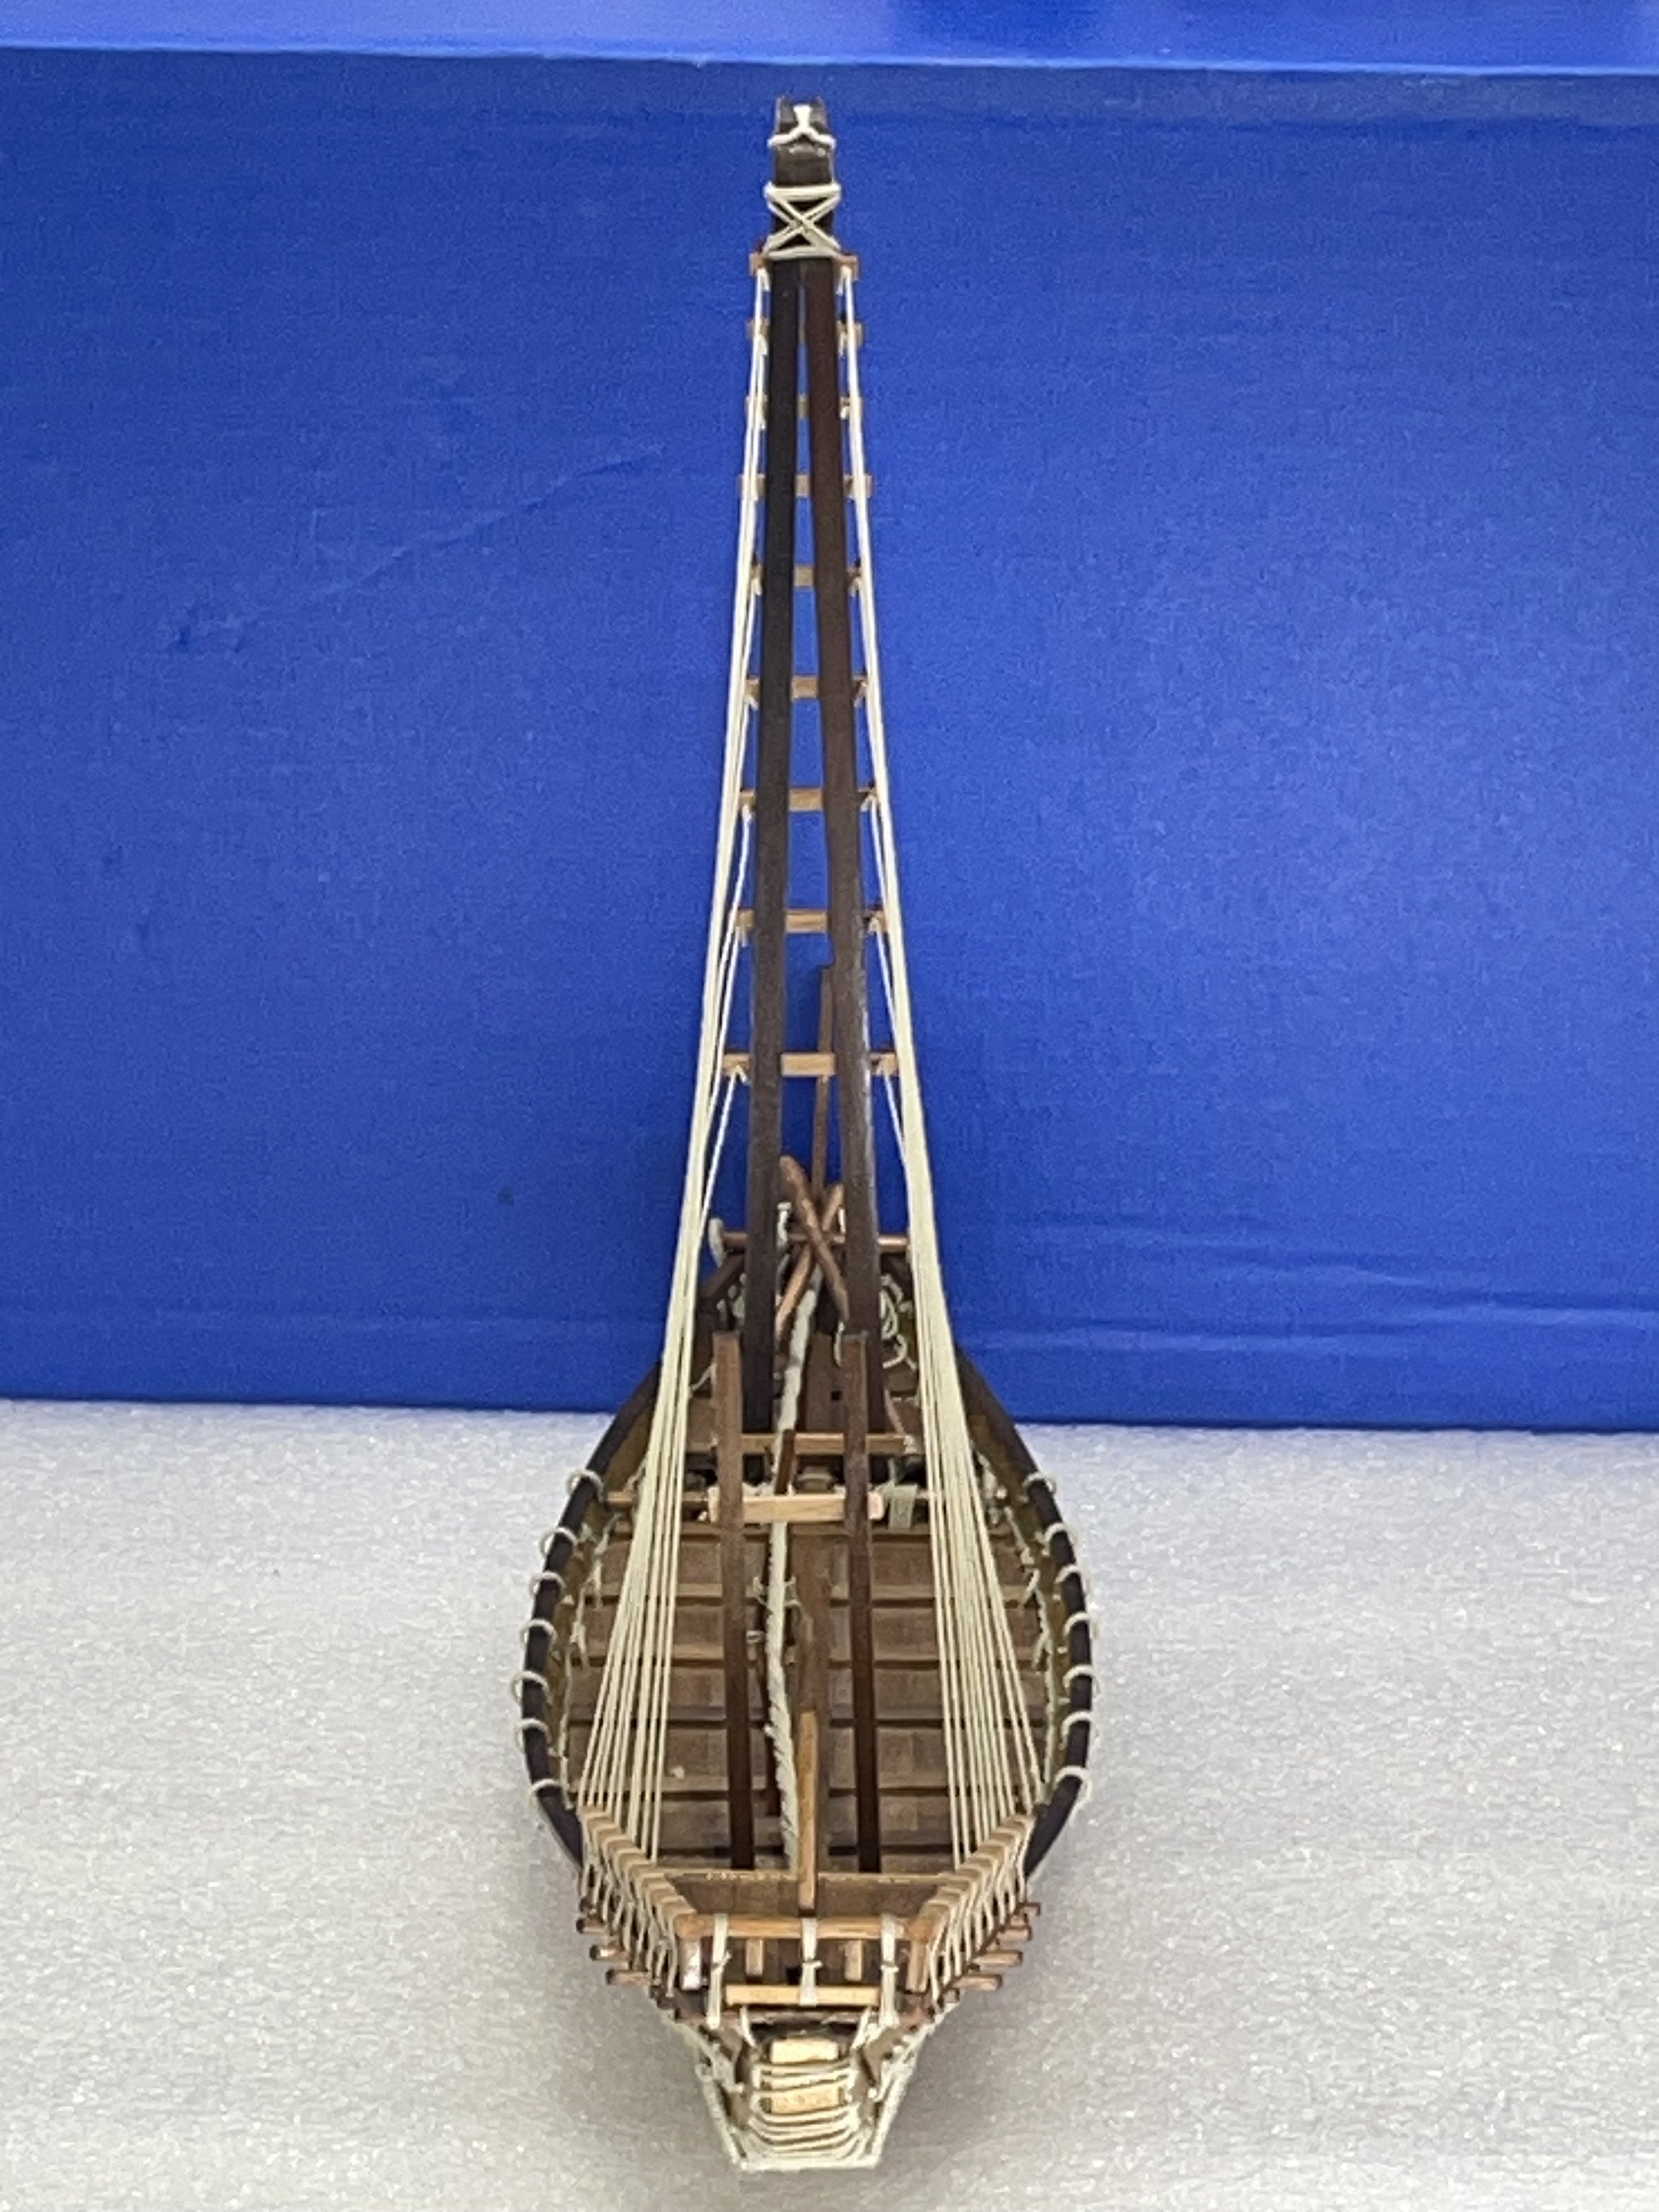
Standing rigging completed. I started on the lowers ones for the ease of installation. It would have been better to start at the top to keep the tension equal. Here is the kit supplied sail. Not liking the wide hem, probably going to make another.


- 44 replies
-
- 7
-
-
- Nave Egizia
- Amati
- (and 1 more)
-
Standing rigging halfway completed. I started with the fore stay. First, the plastic mast head was making it hard to tie the lines on. So I drilled two holes for them. Then I thought it work better to wrap them around the beam holding the truss then tie them to the pins. Plus my pins may not be glued strong enough to hold tension straight up:-)

- 44 replies
-
- 5
-
-
- Nave Egizia
- Amati
- (and 1 more)
-
Thanks Bob:-) the kit came with like 8 spools of thread:-) That one shot of the back of the stern shows more rope than wood:-) Next is about 20 standing rigging lines:-)
- 44 replies
-
- 1
-
-
- Nave Egizia
- Amati
- (and 1 more)
-
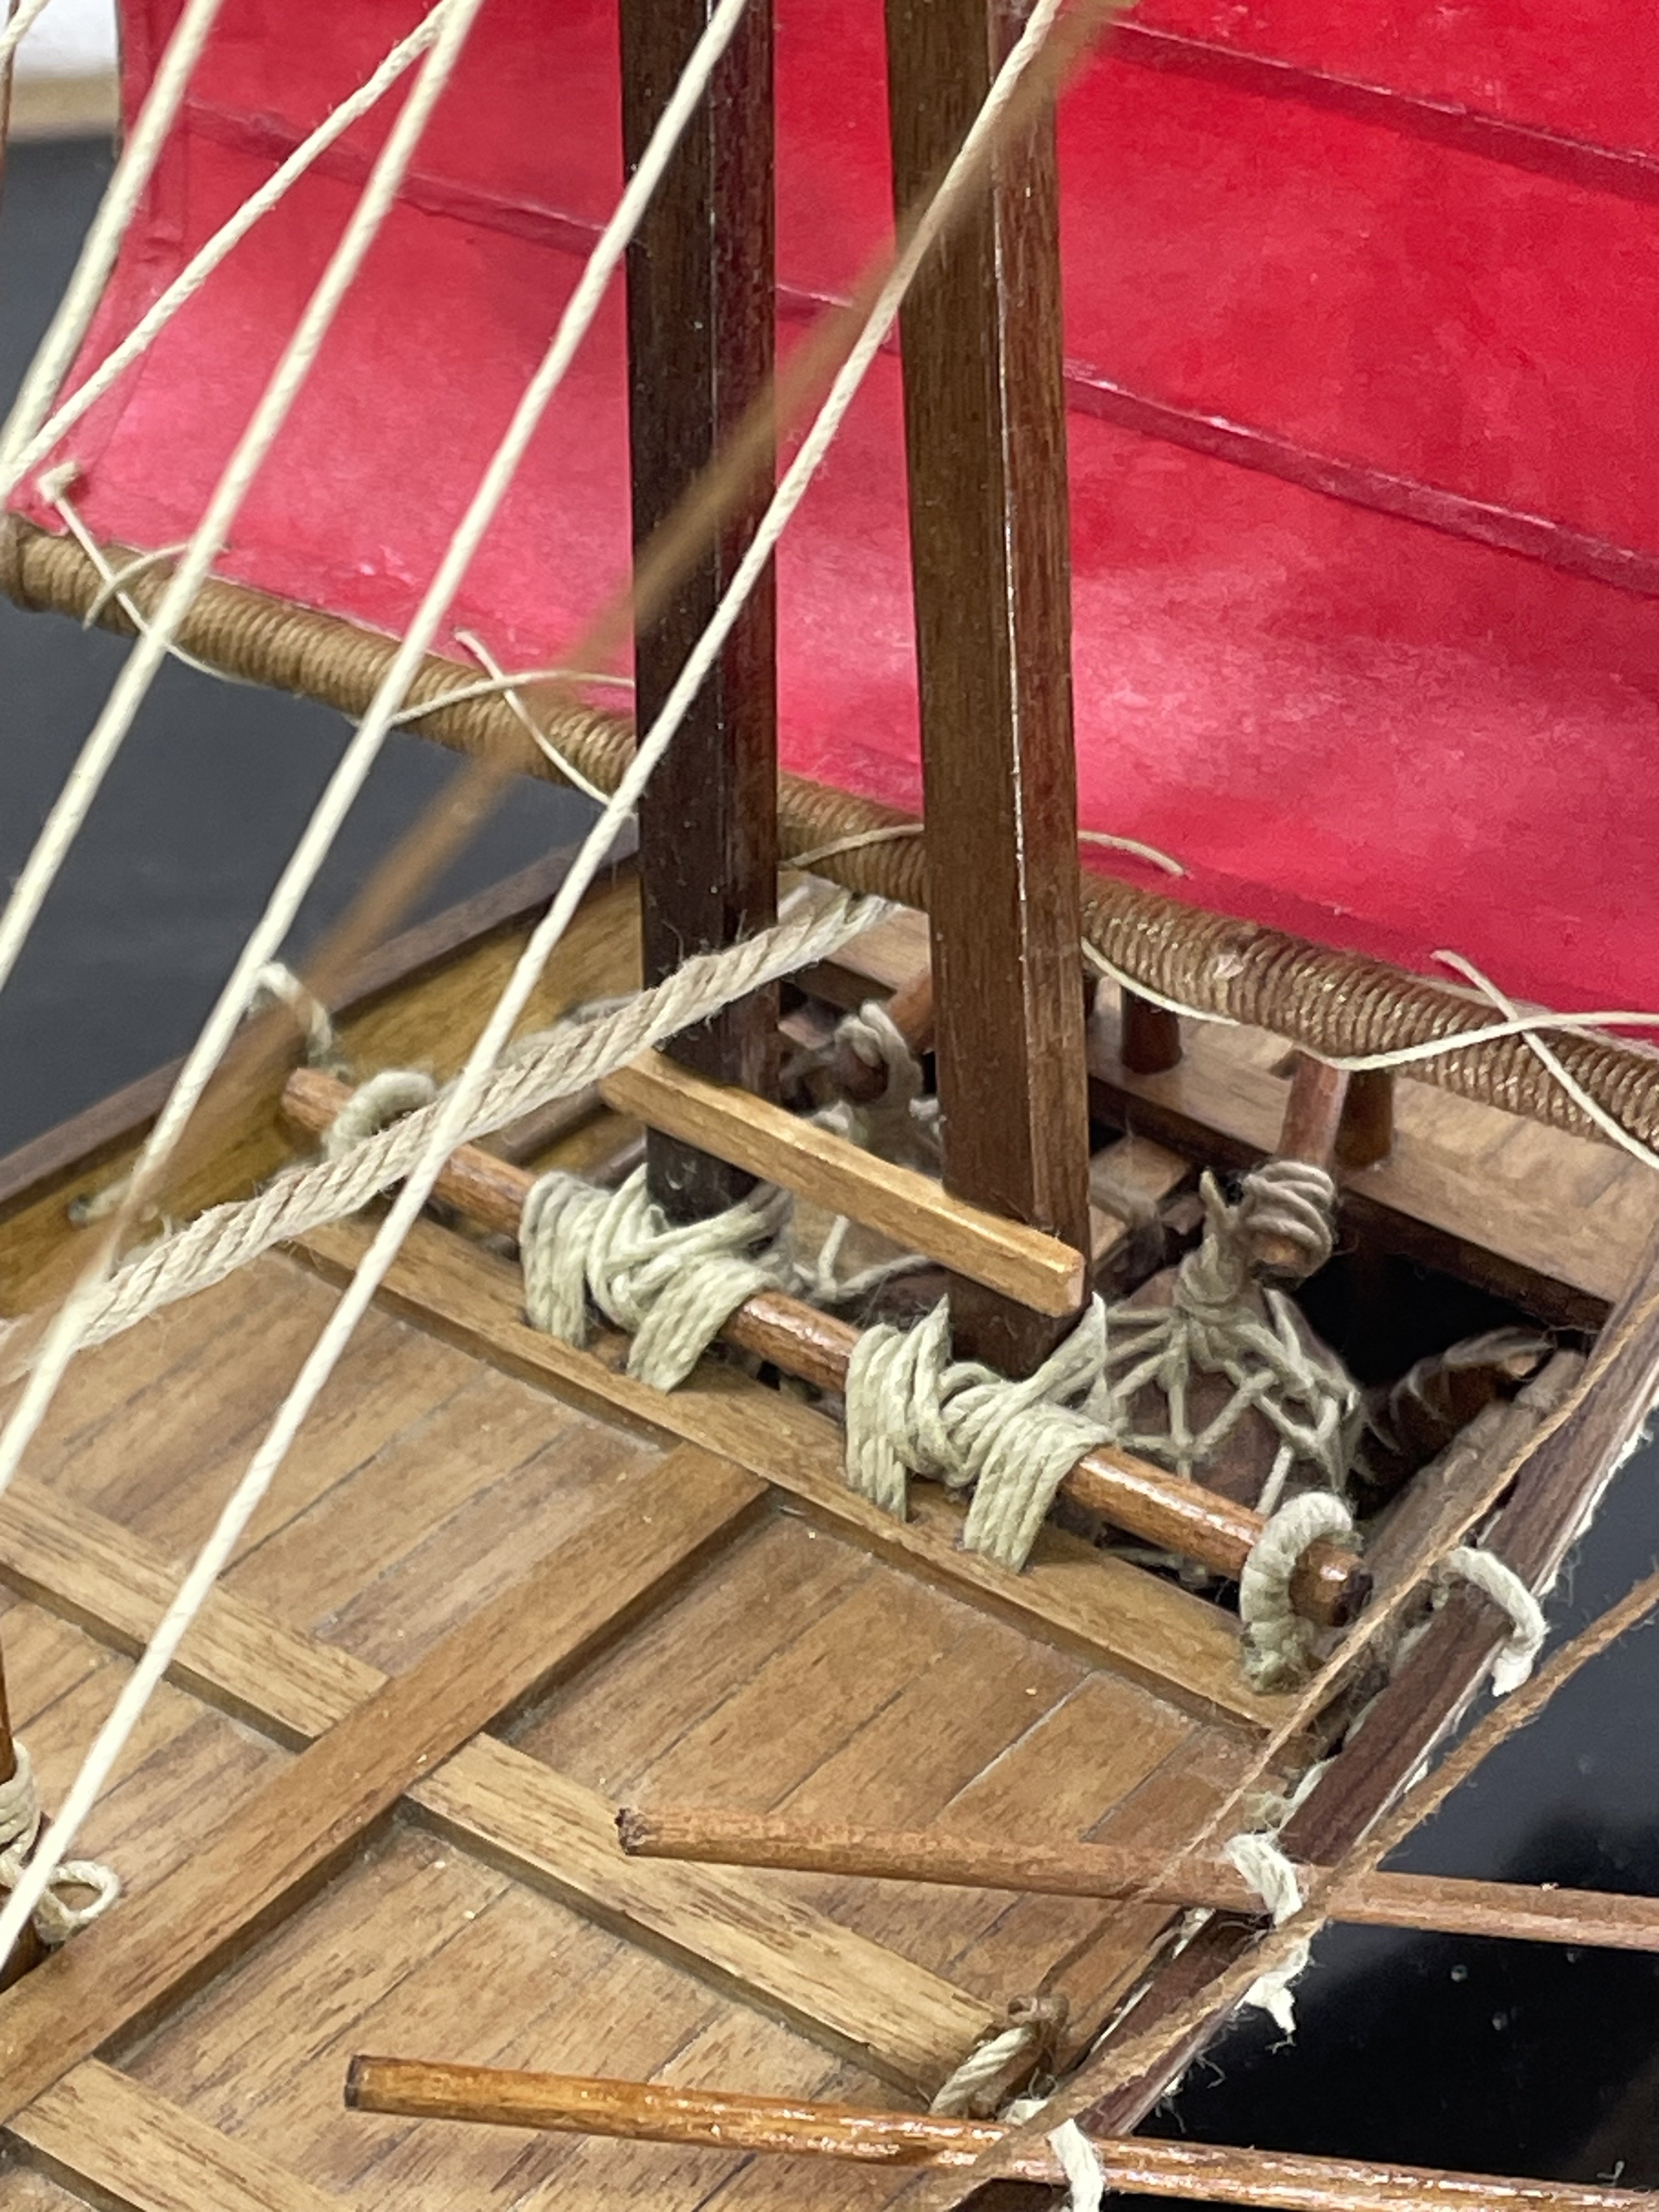
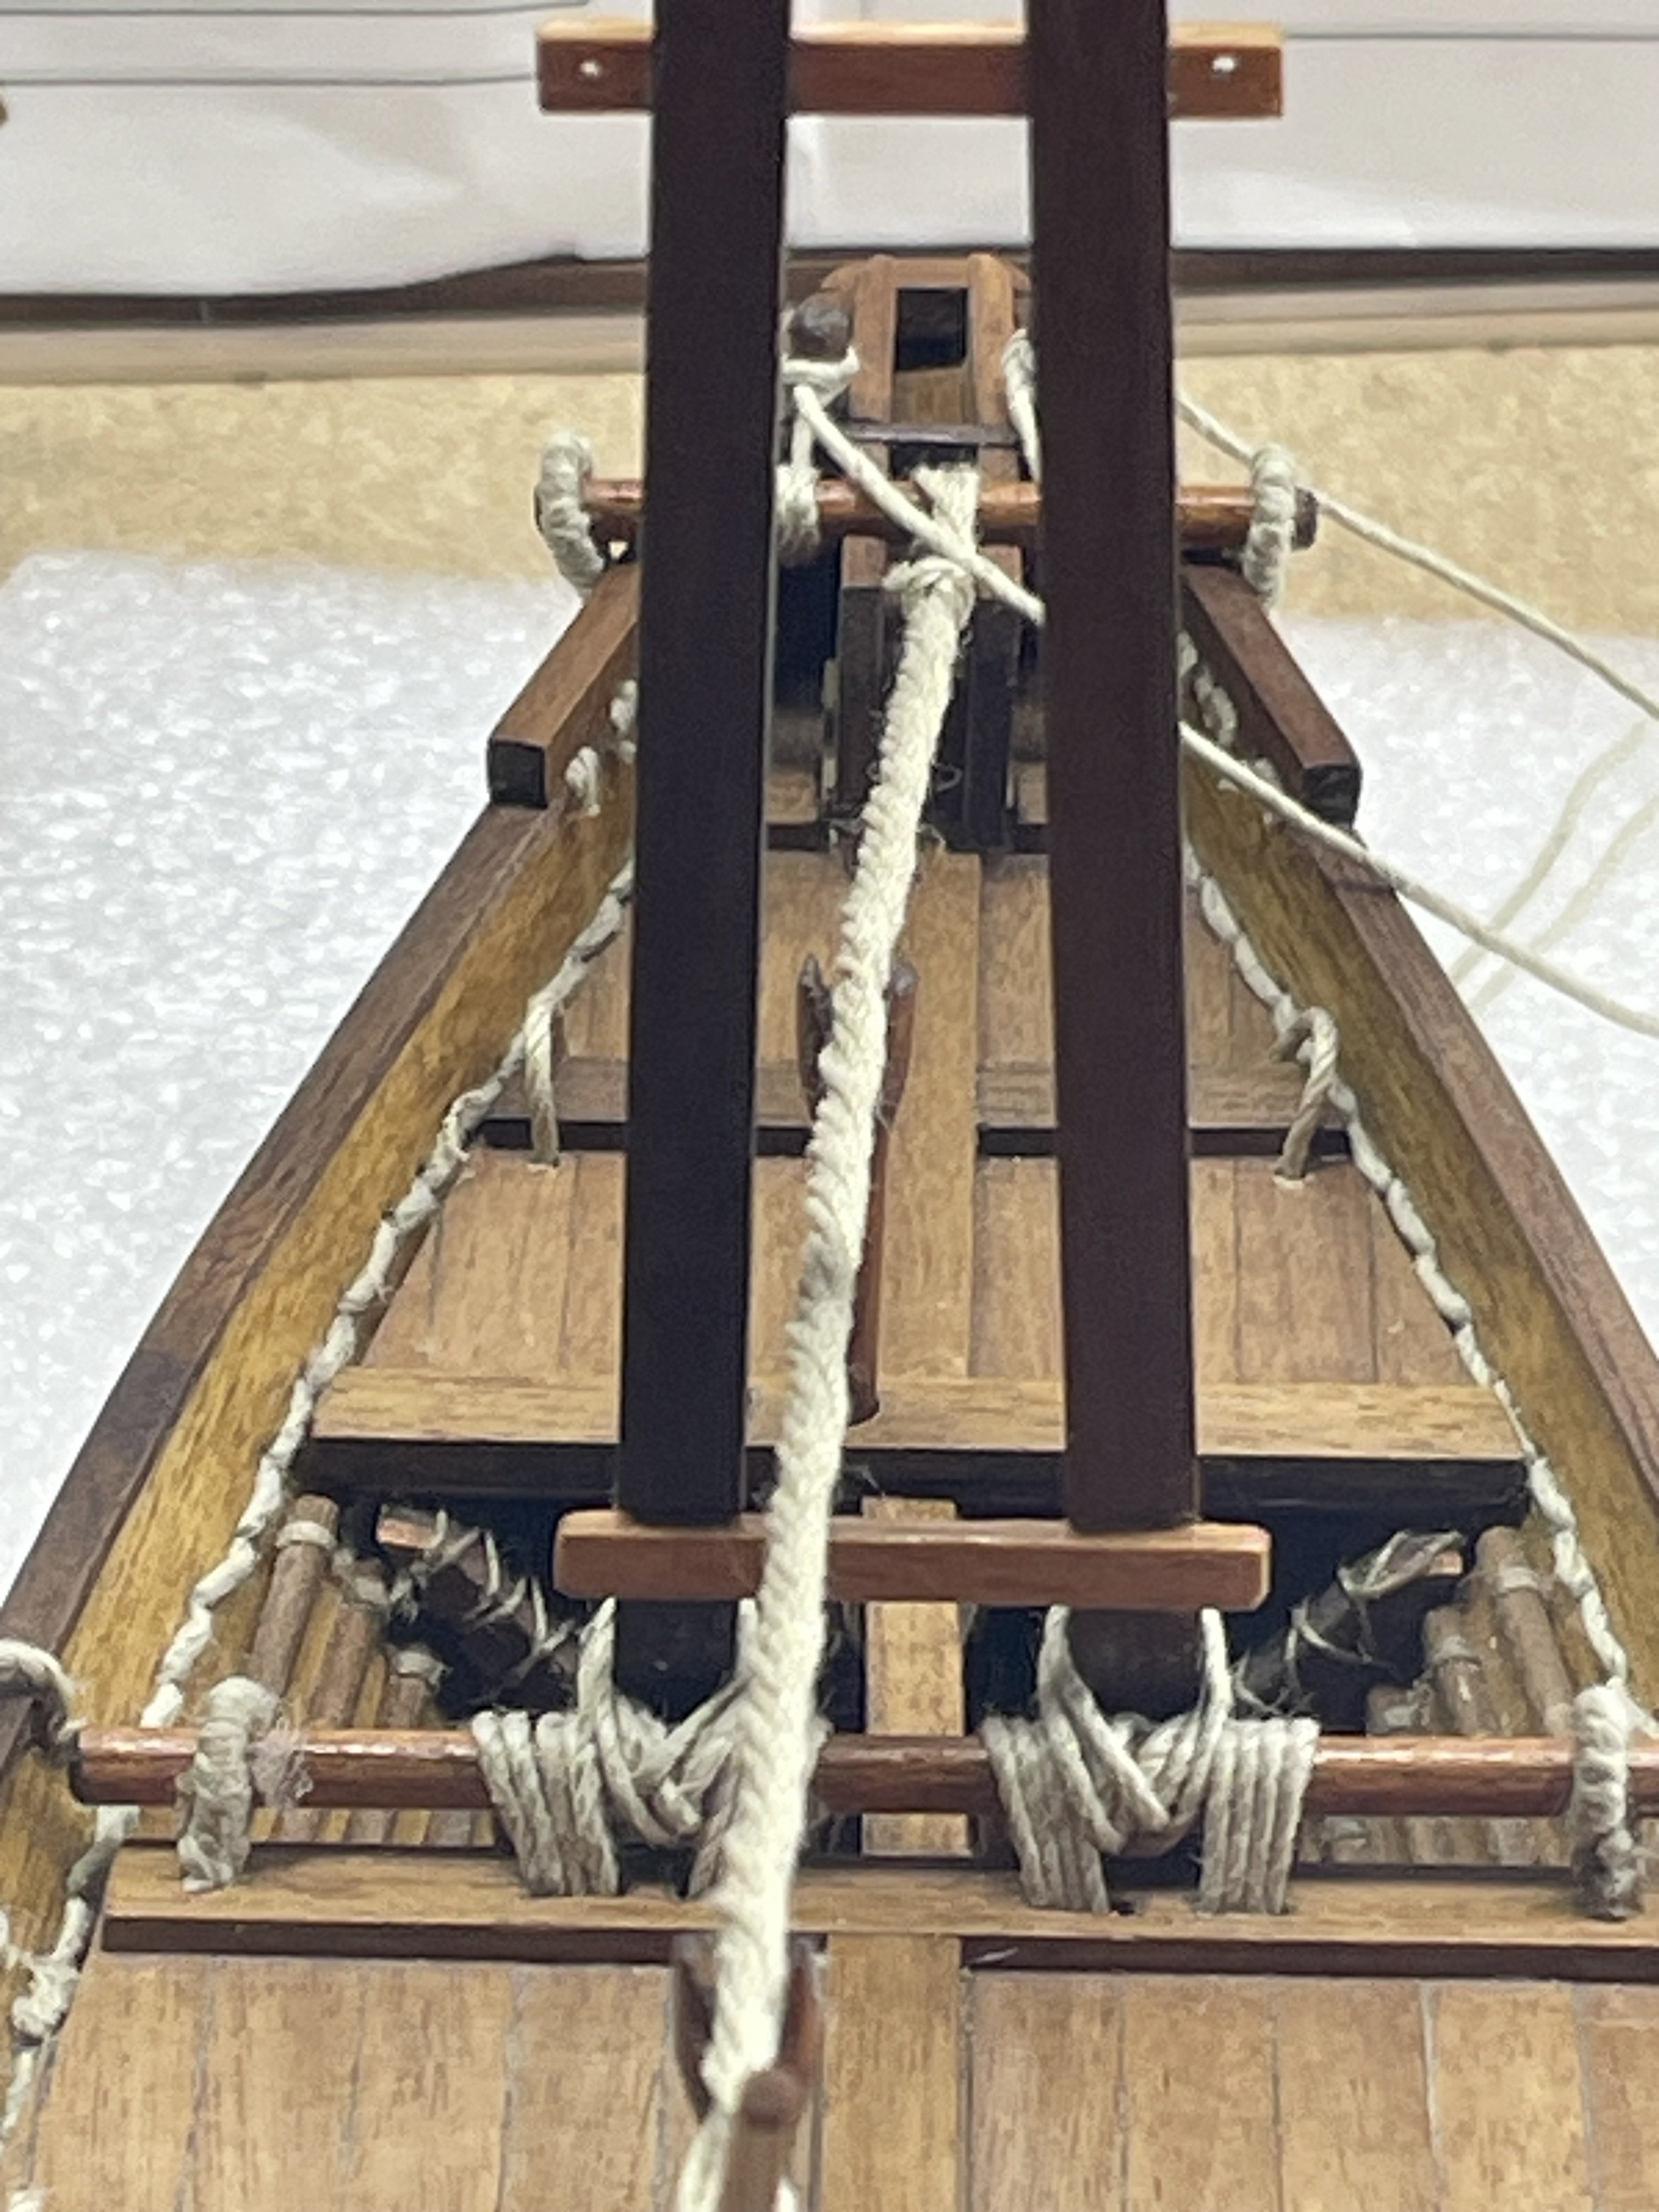
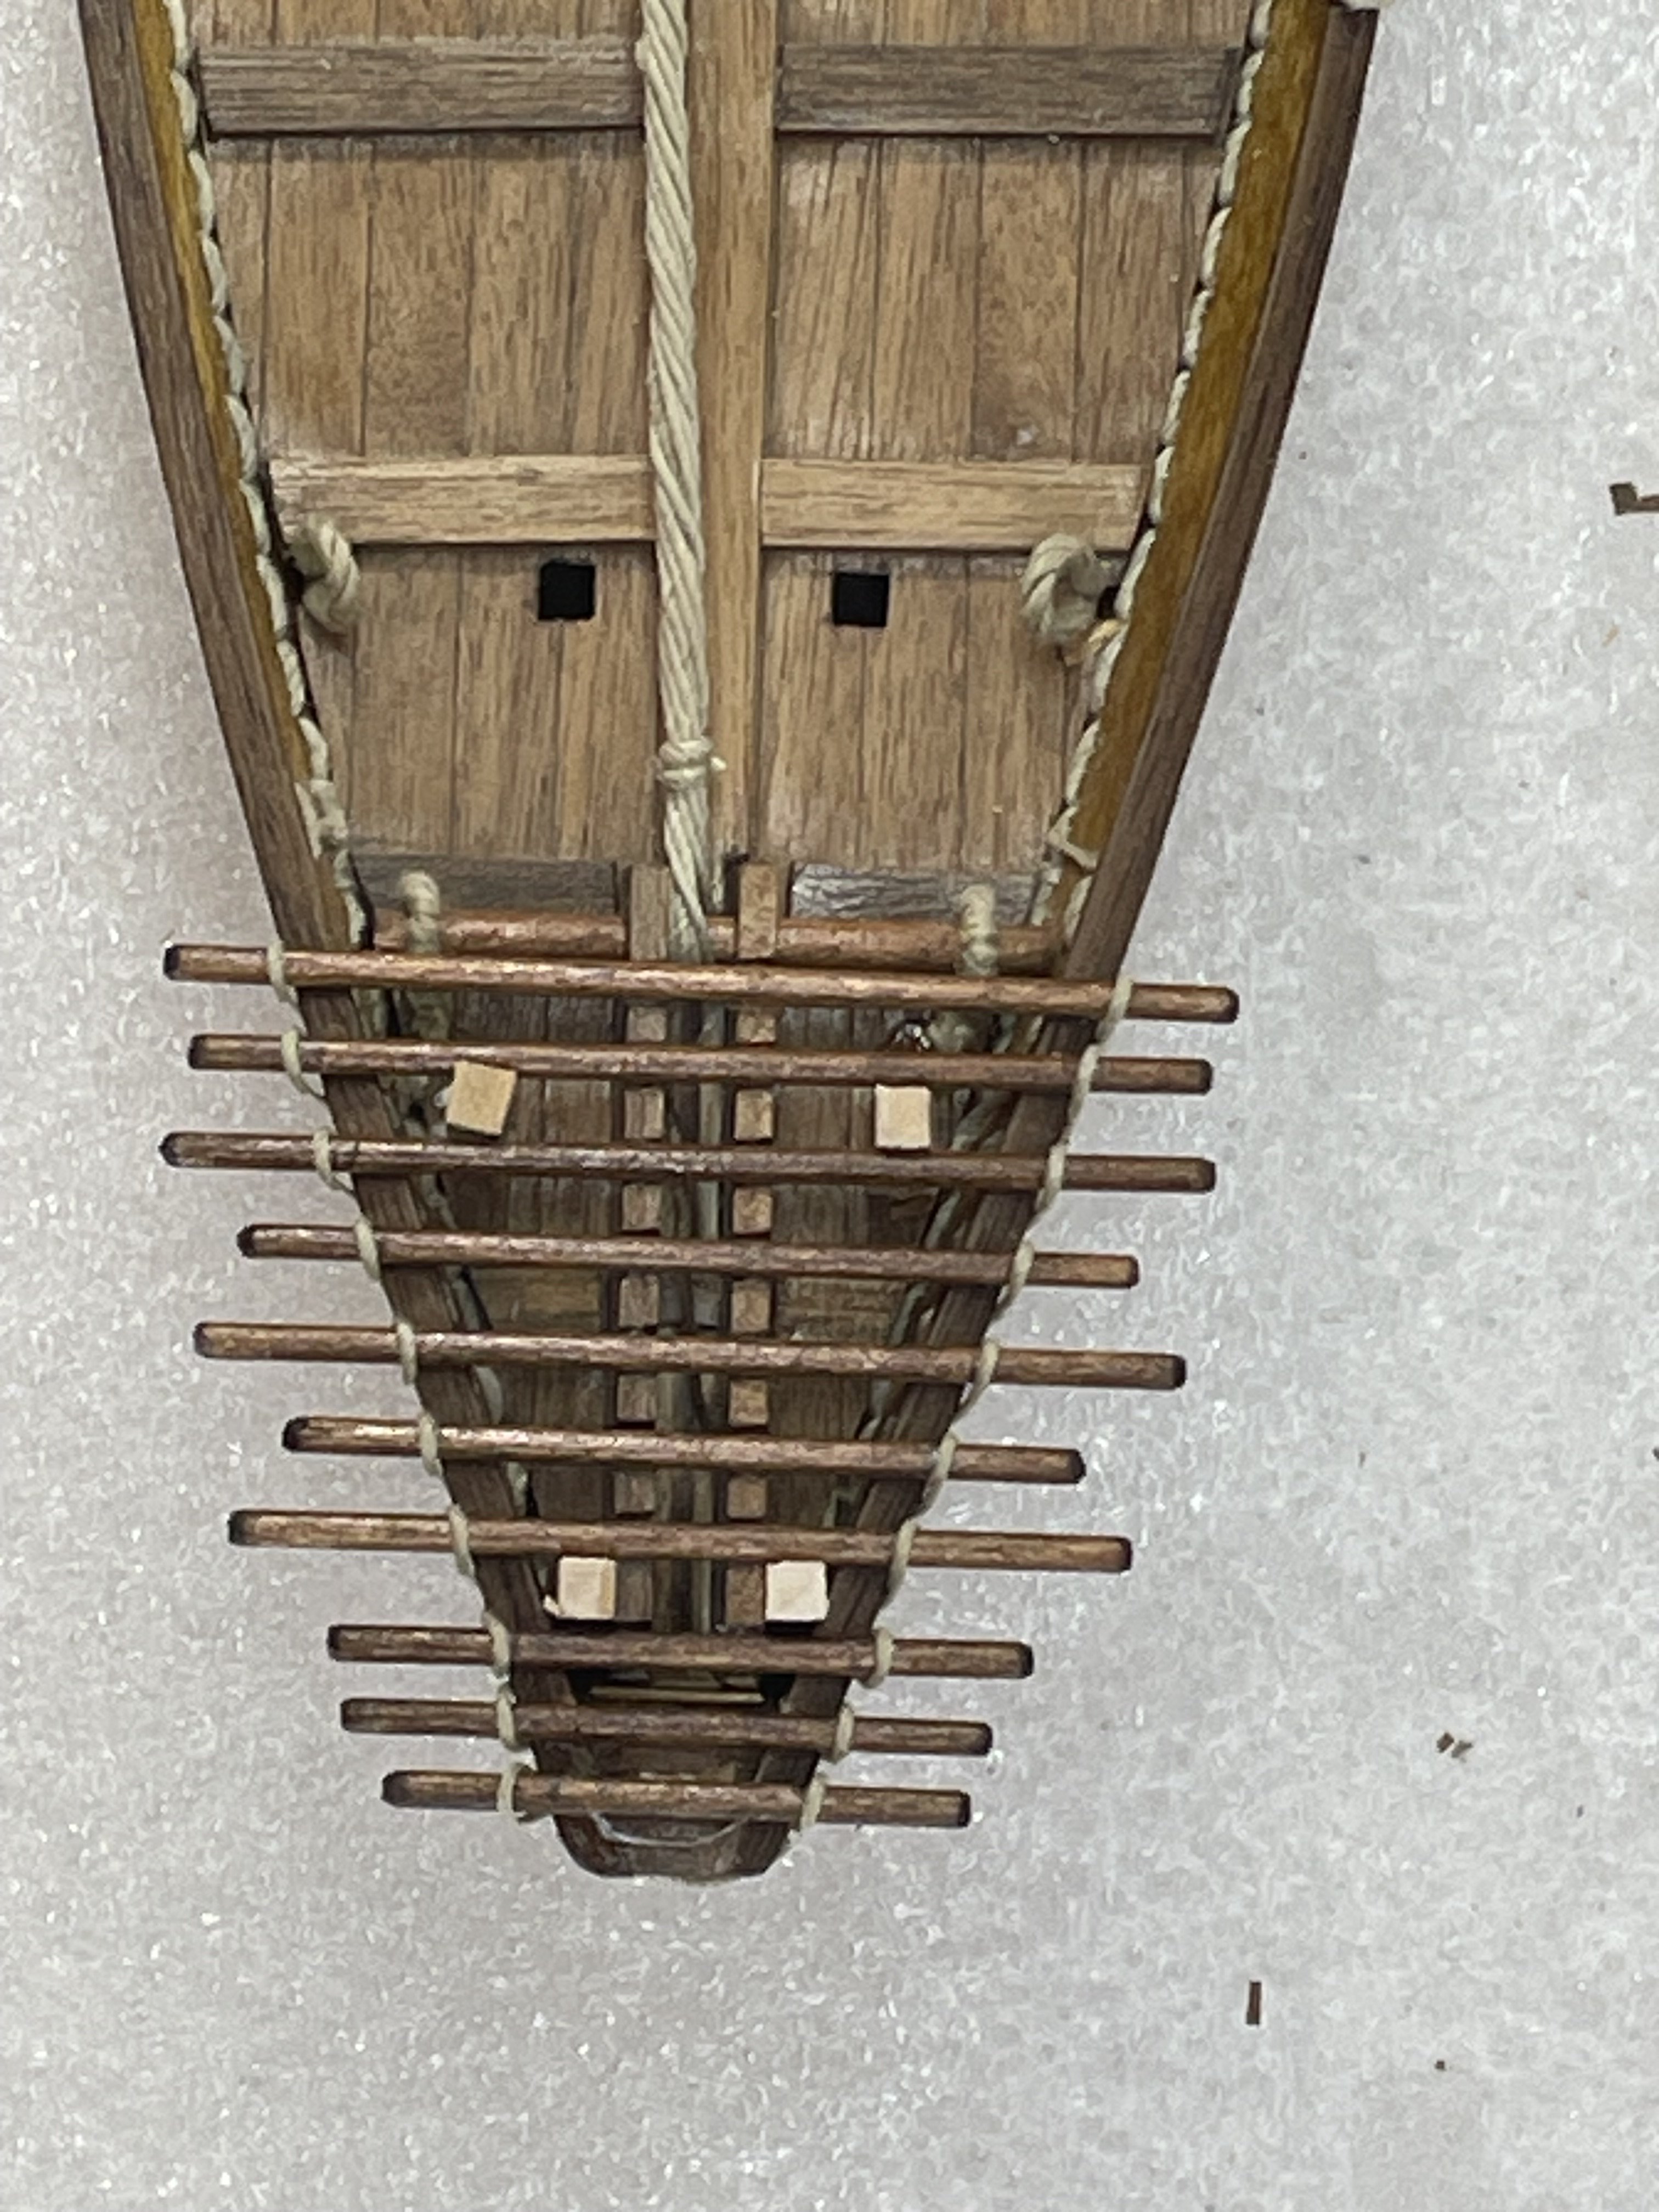
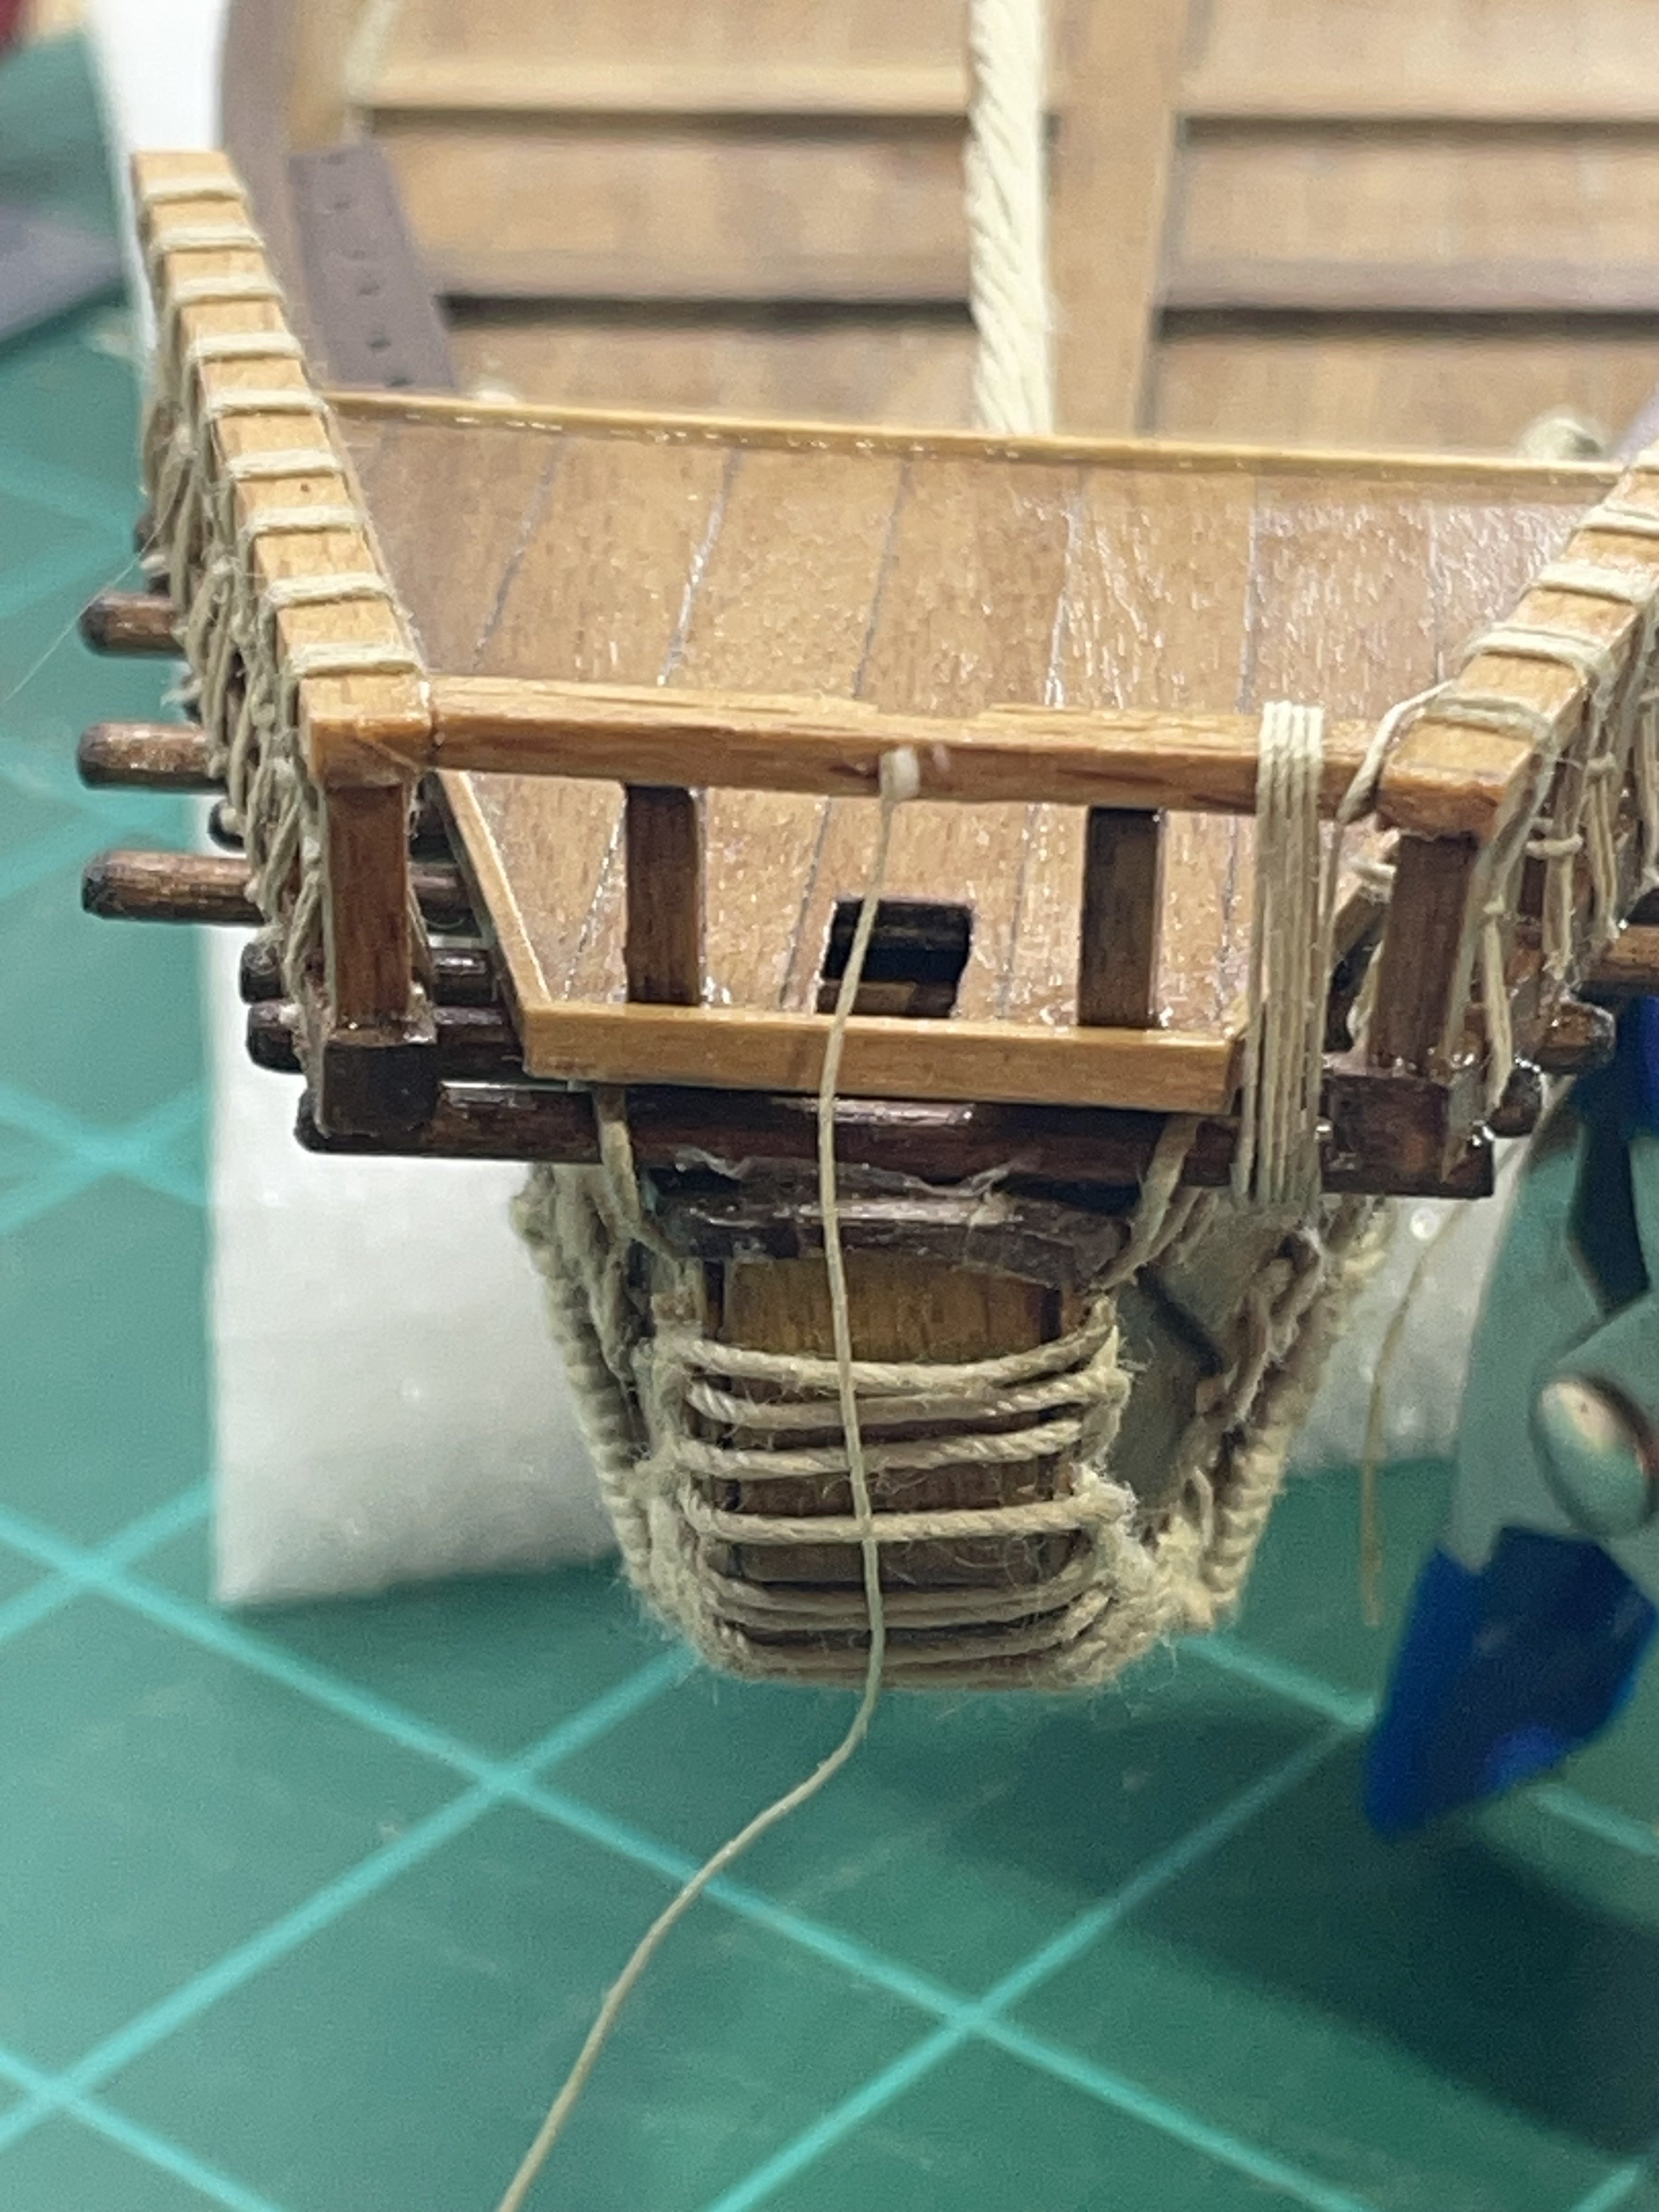
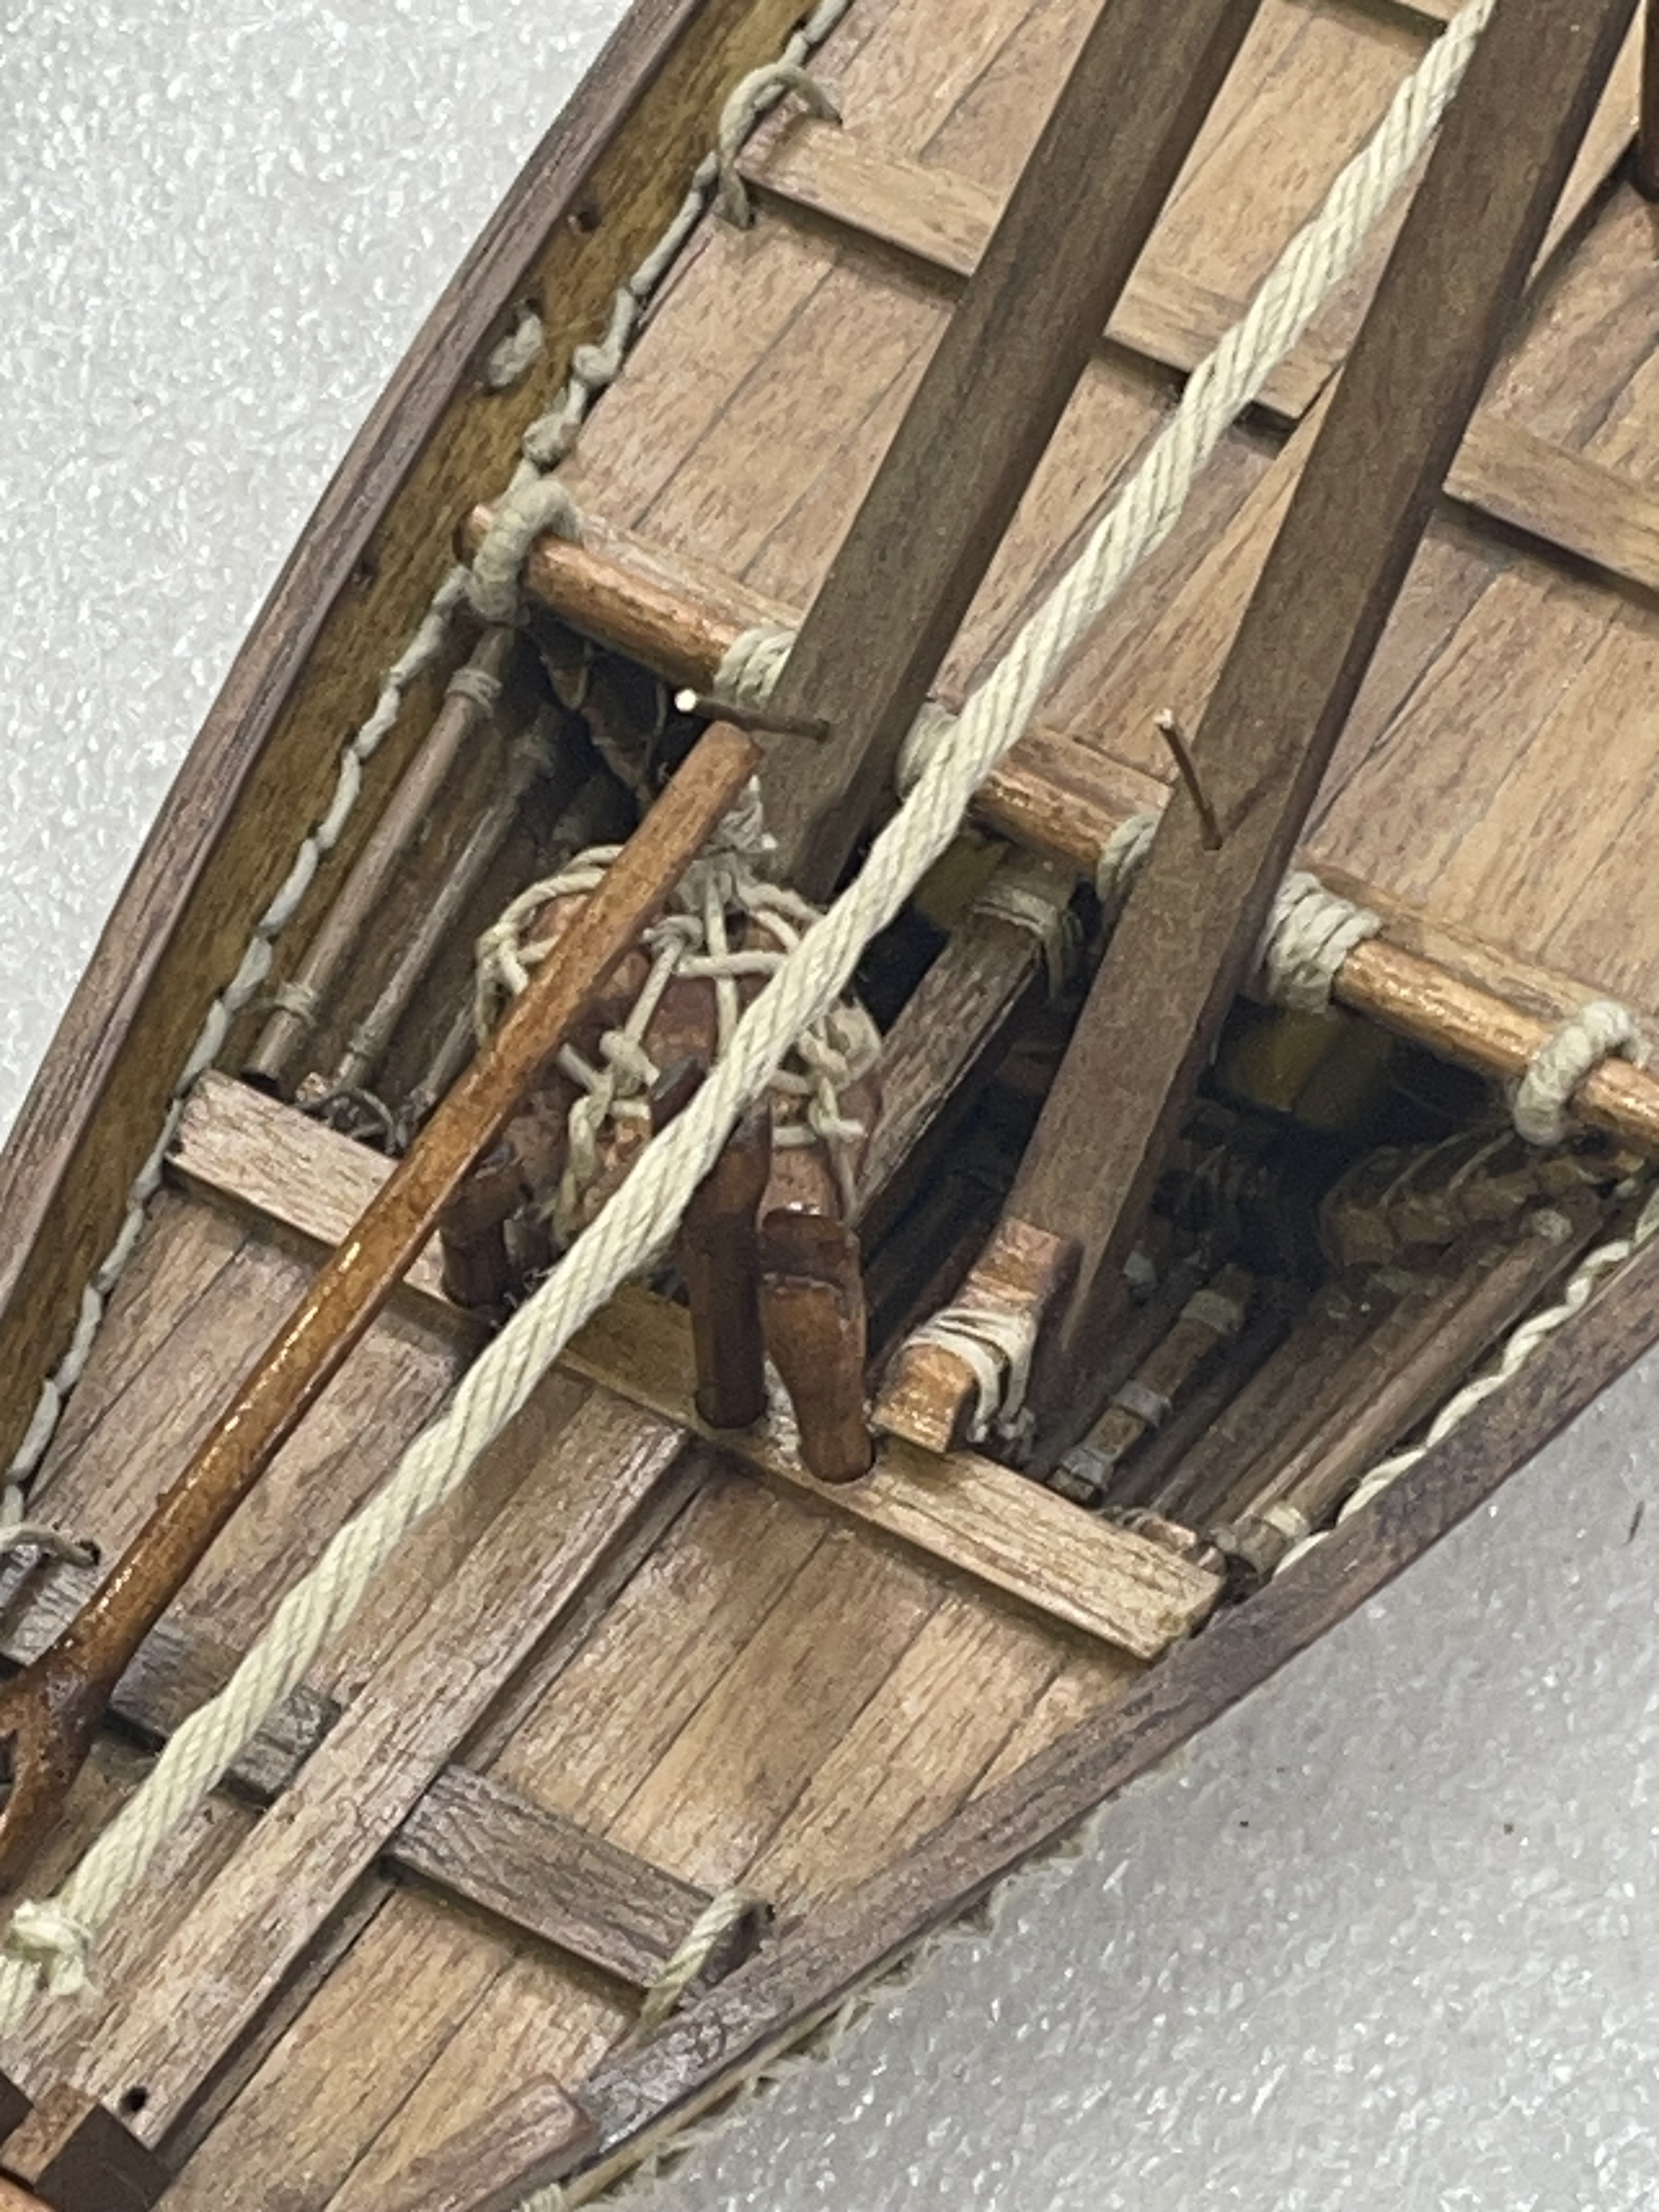
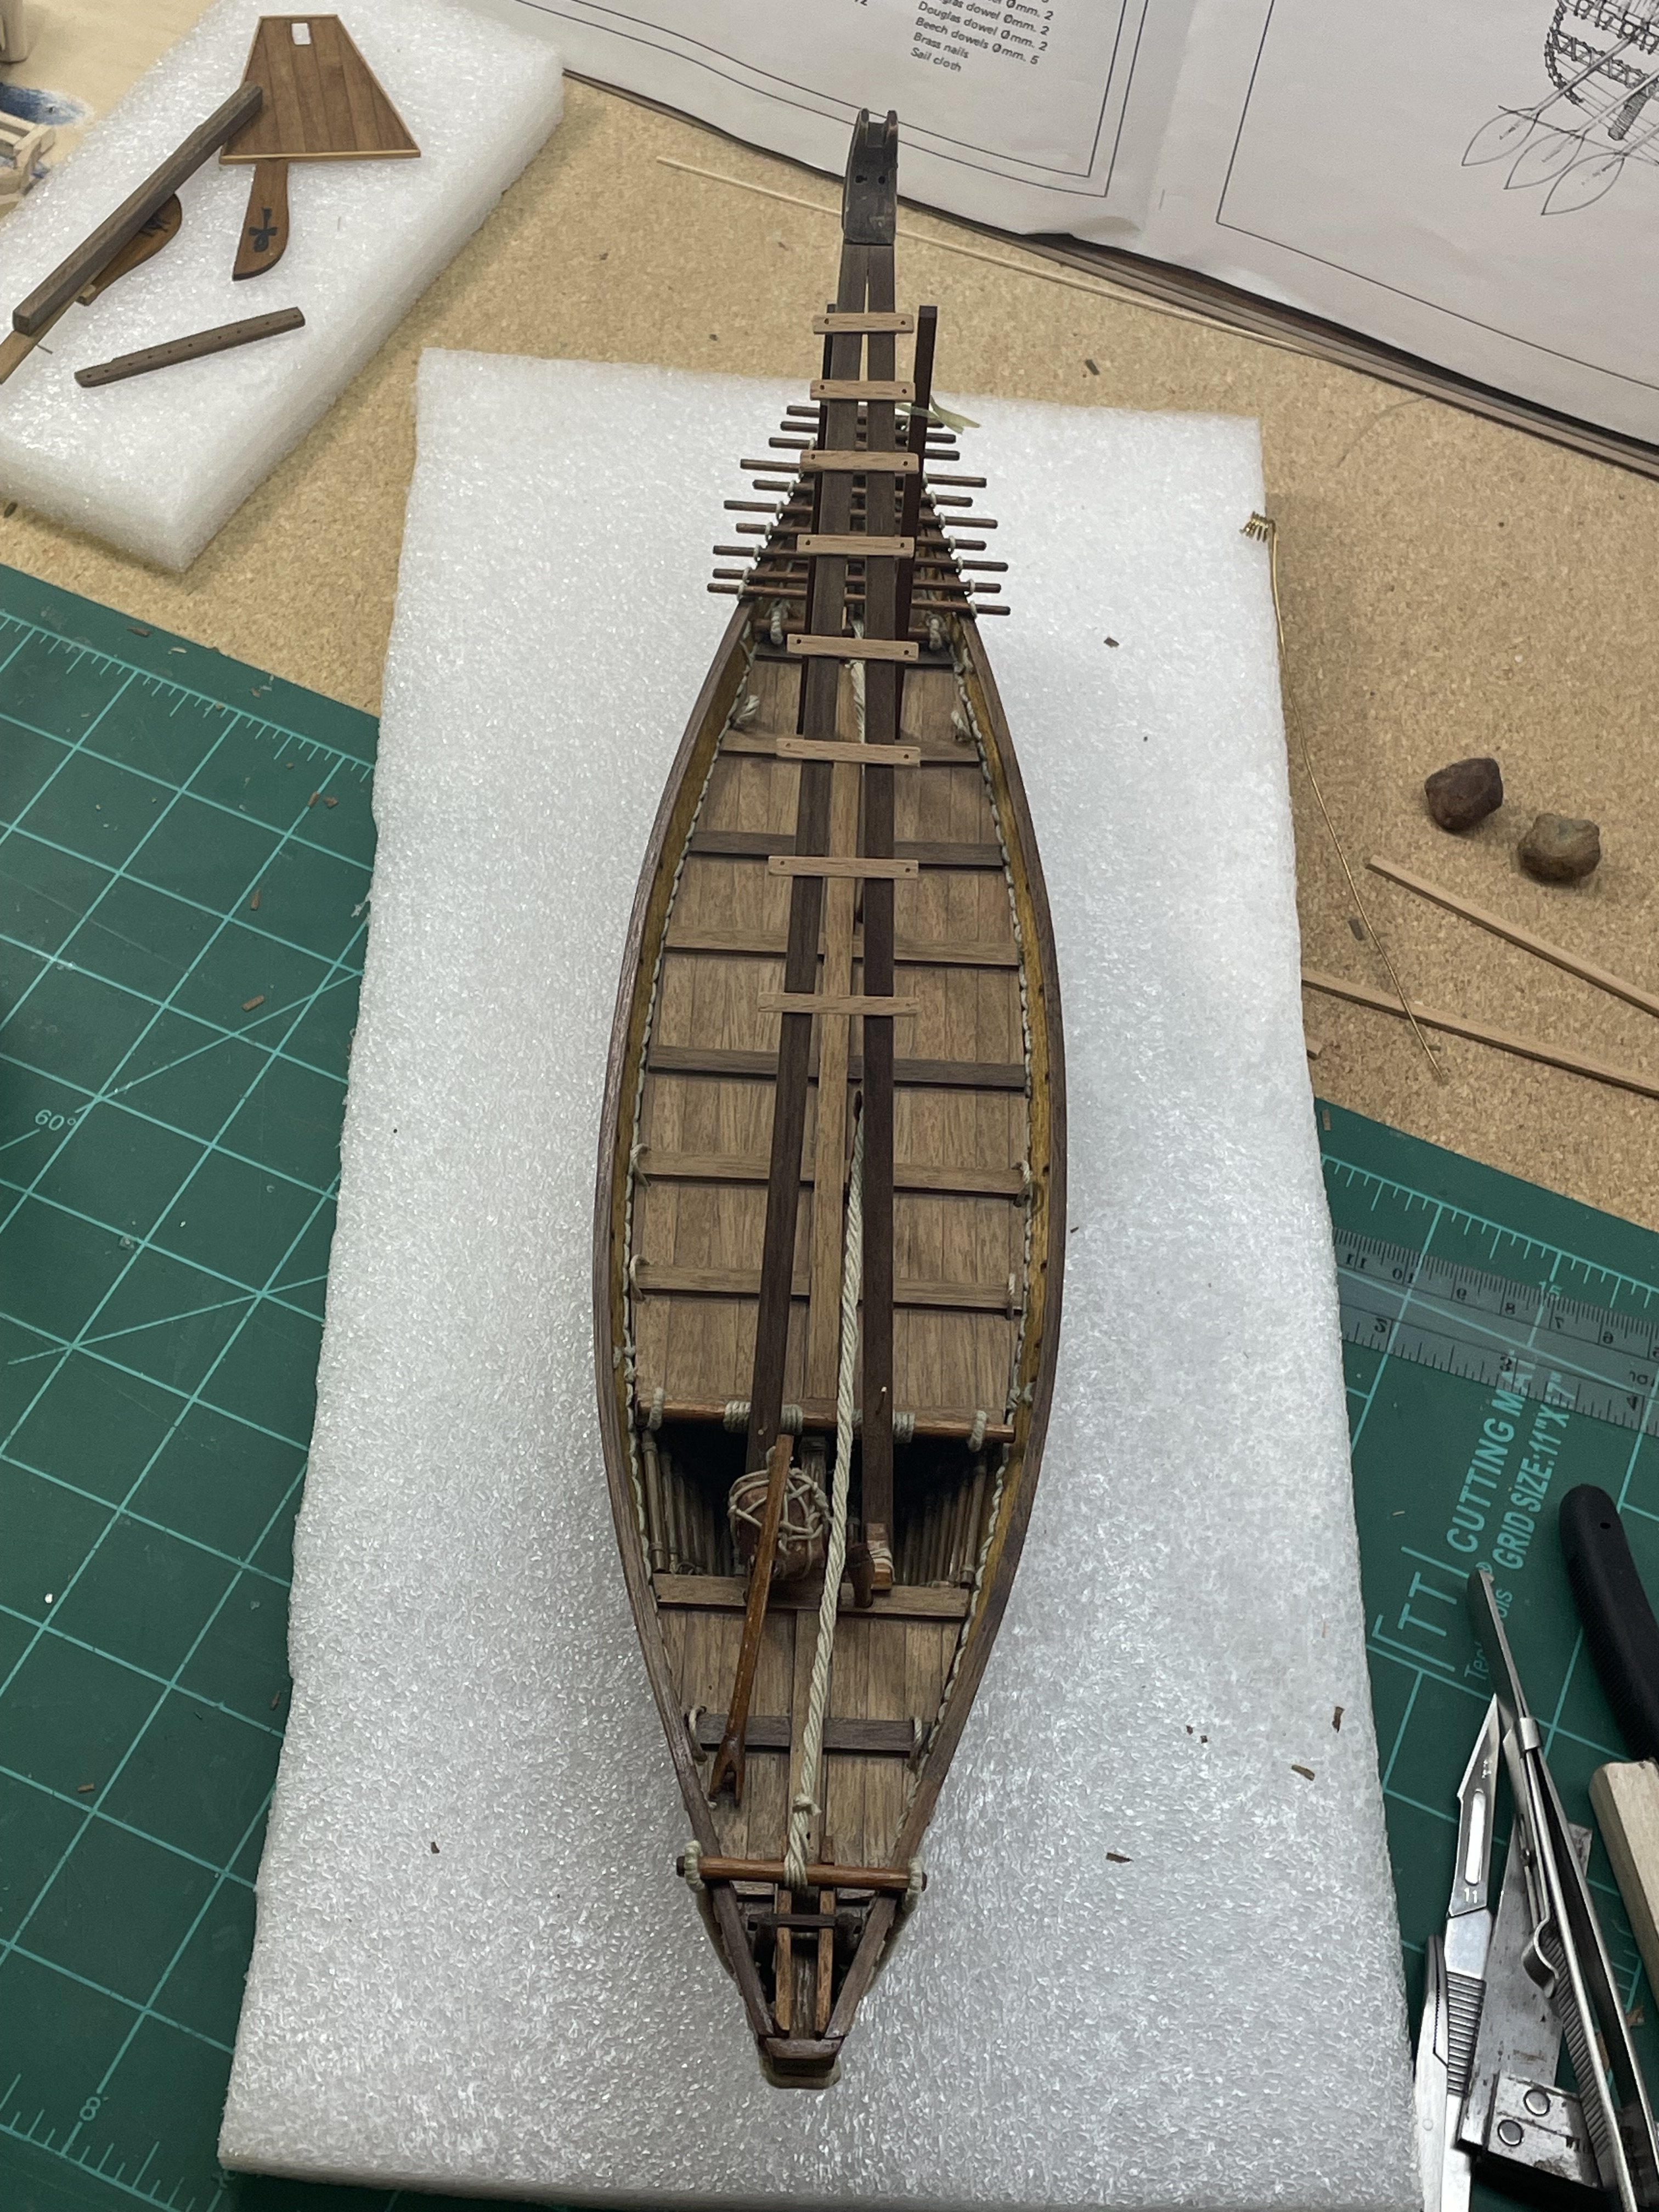
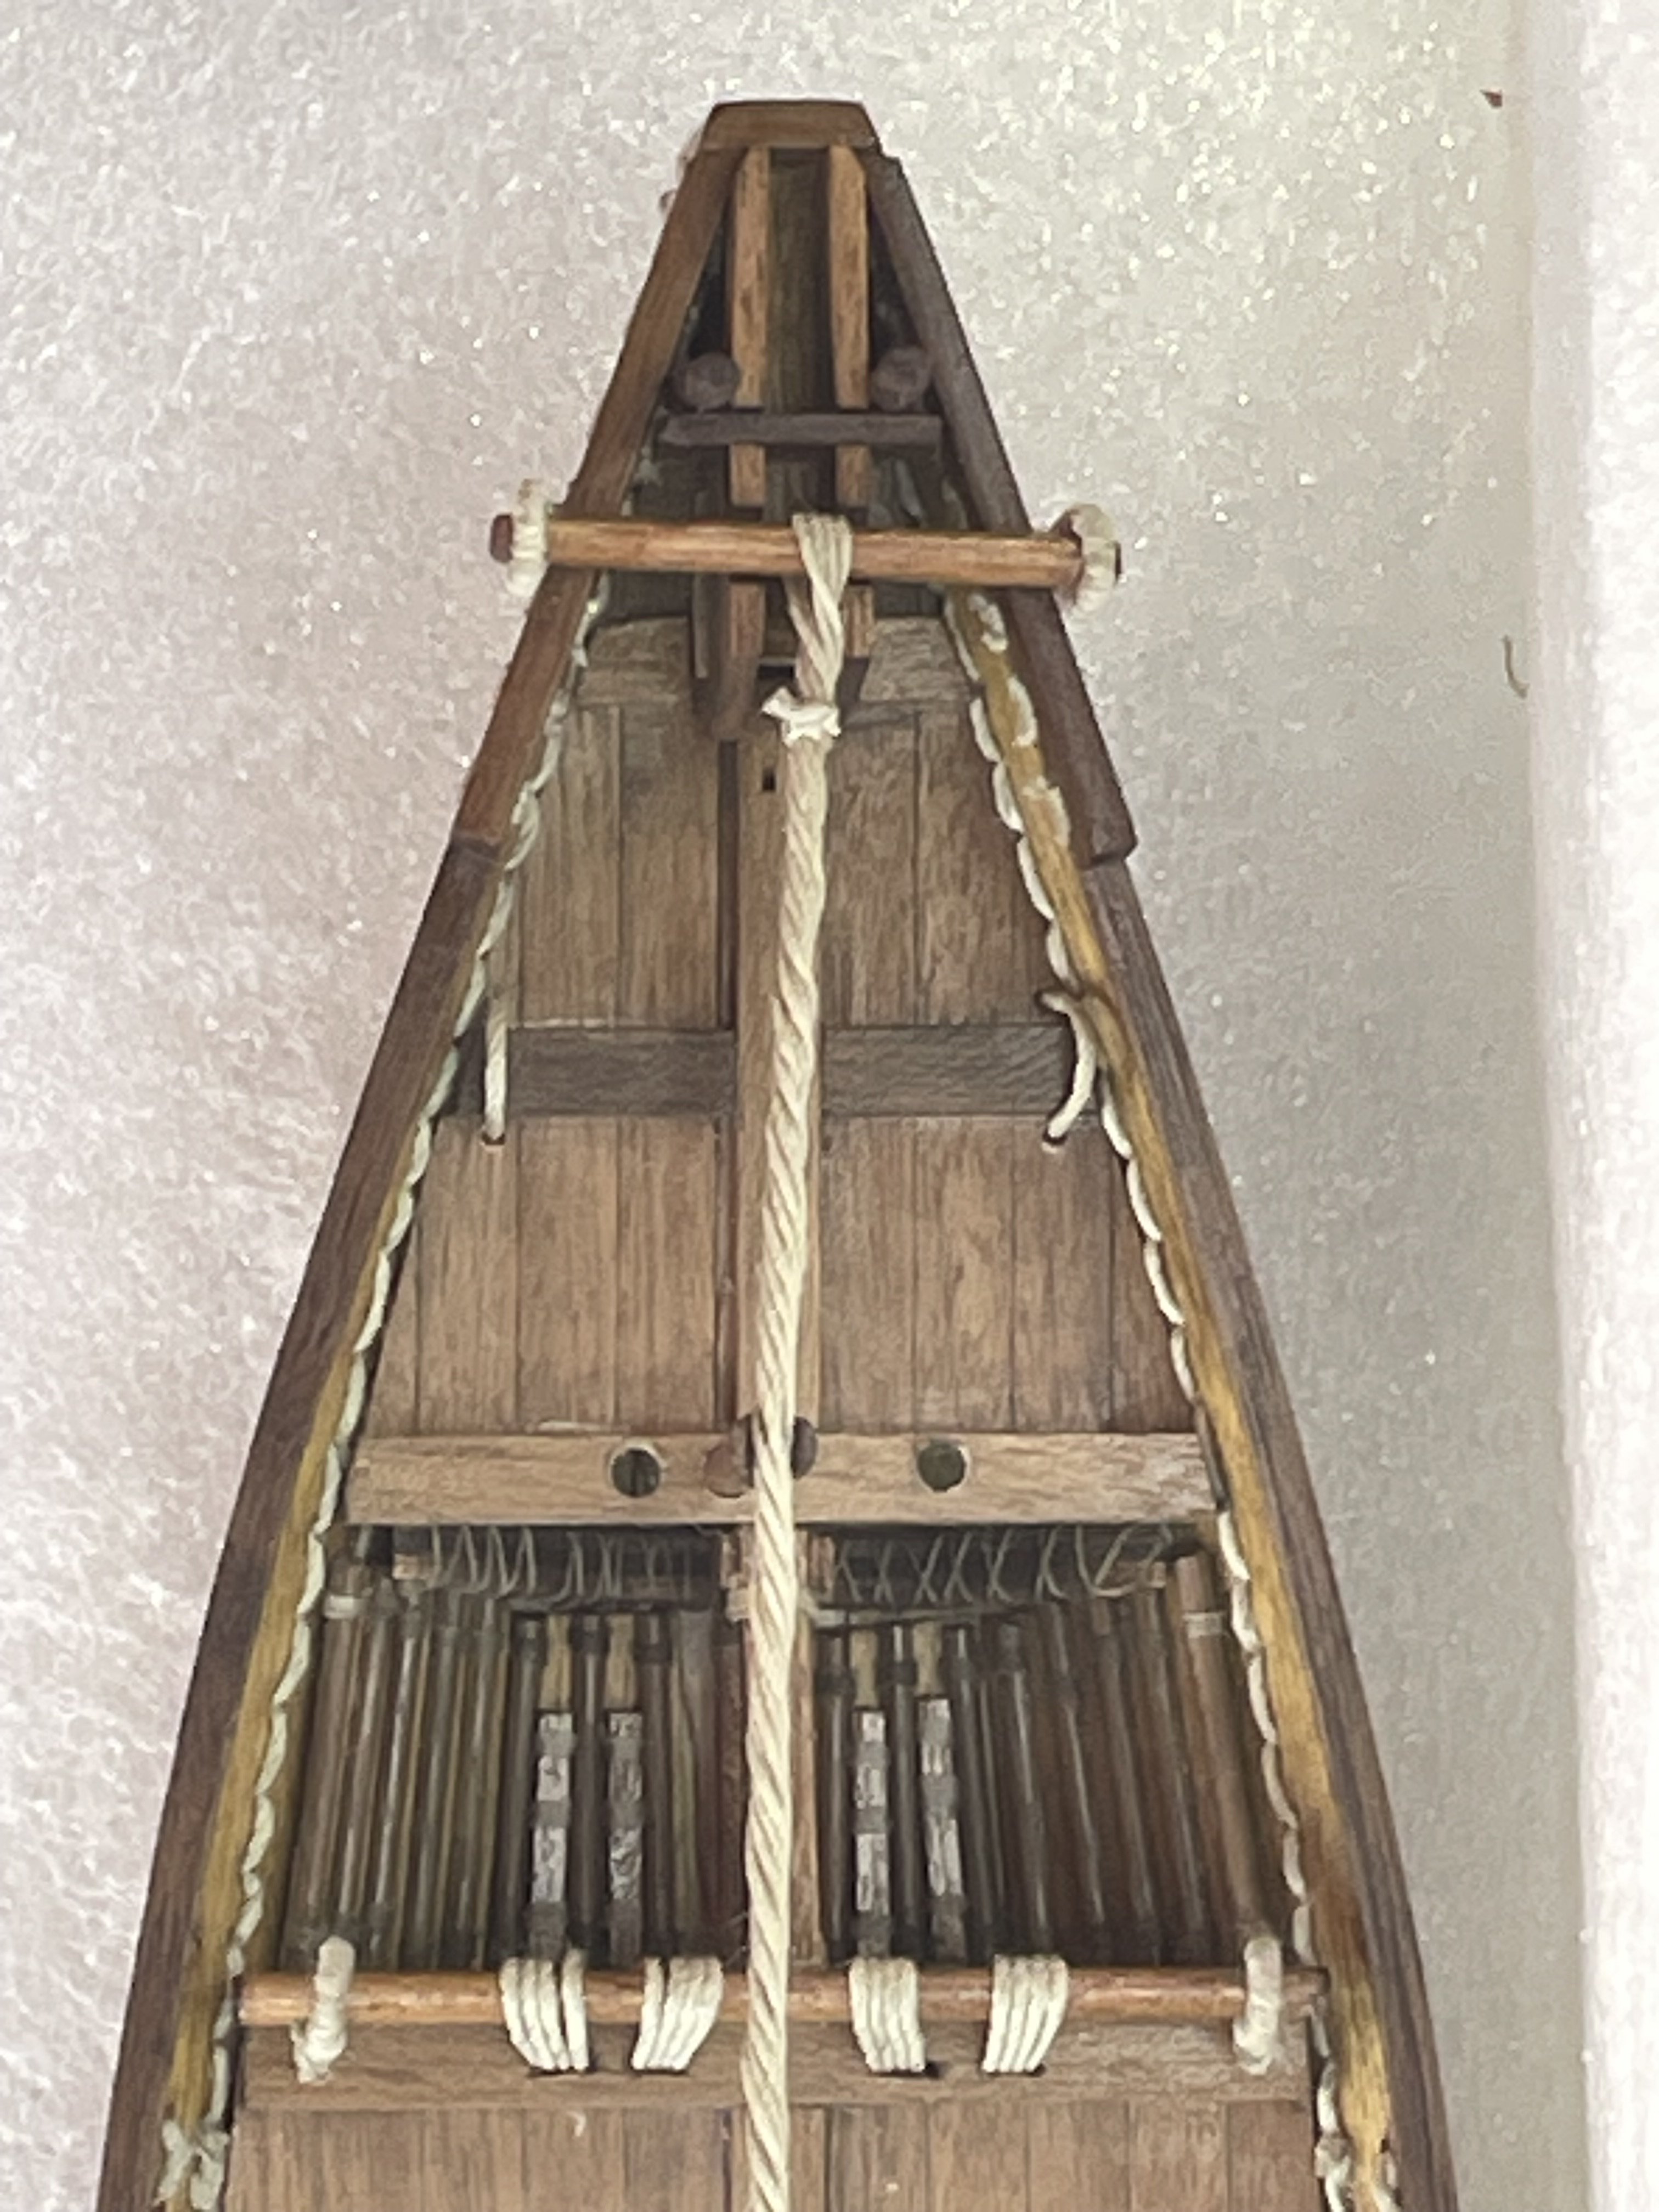
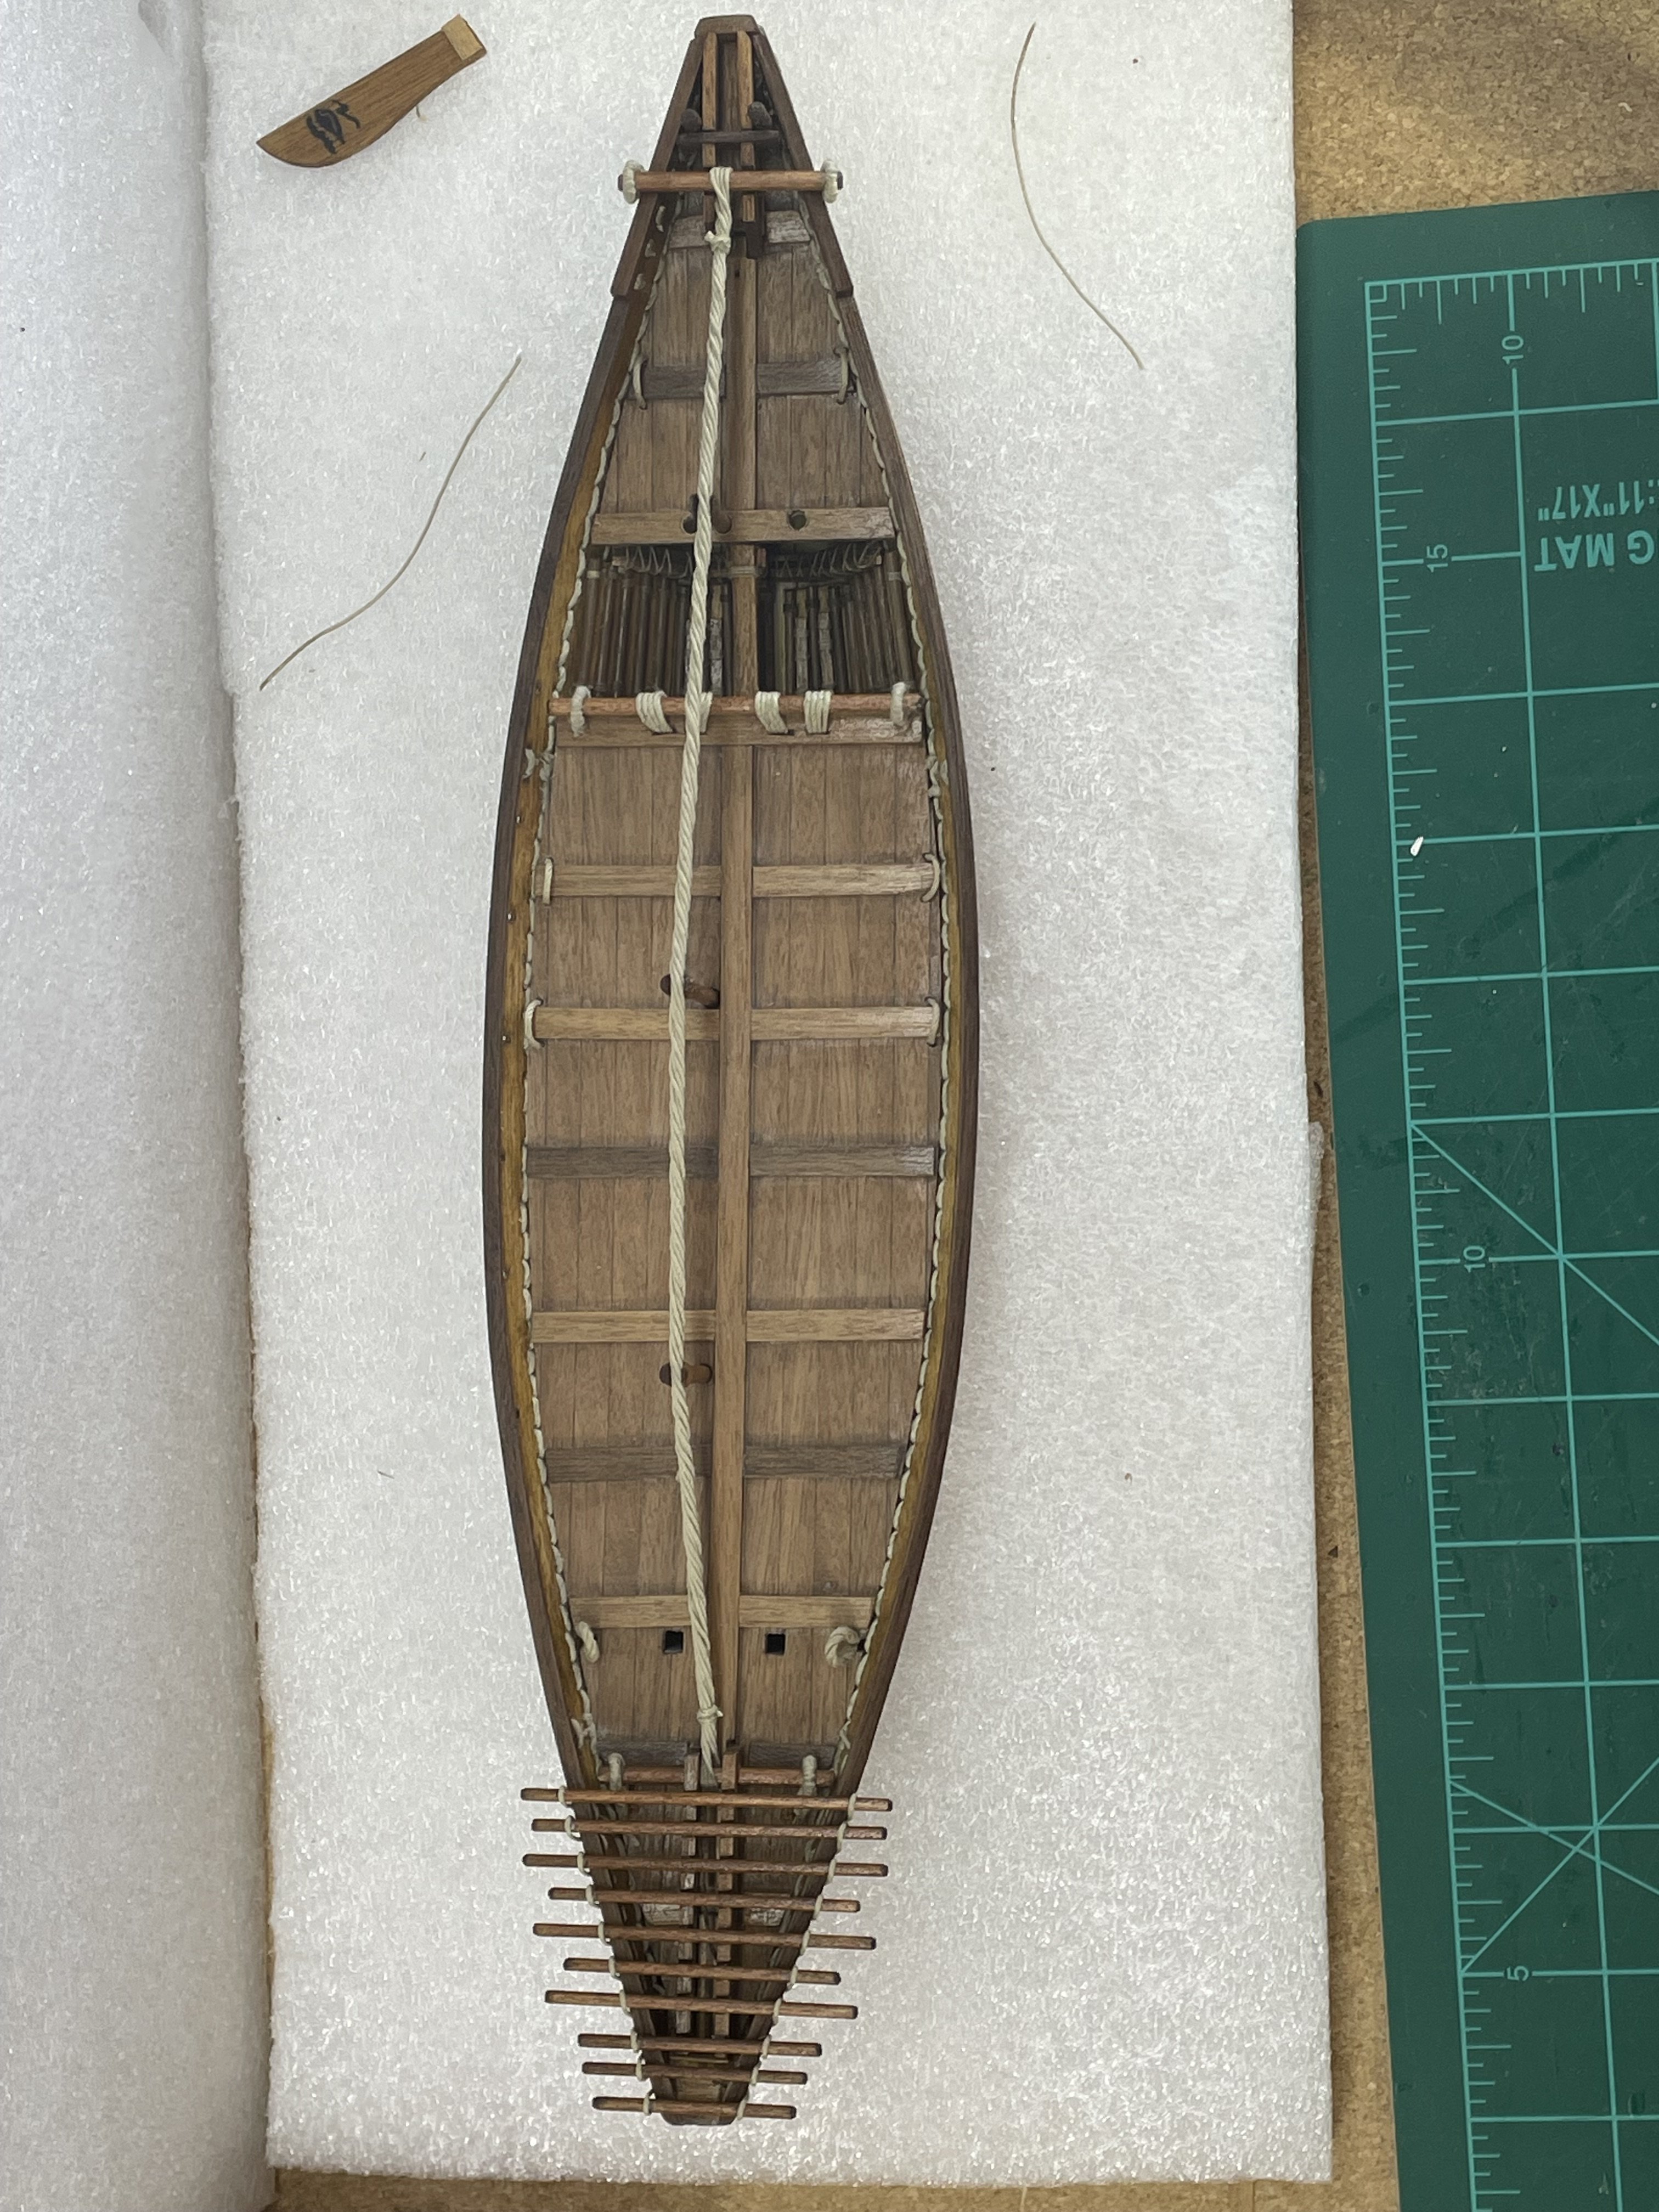
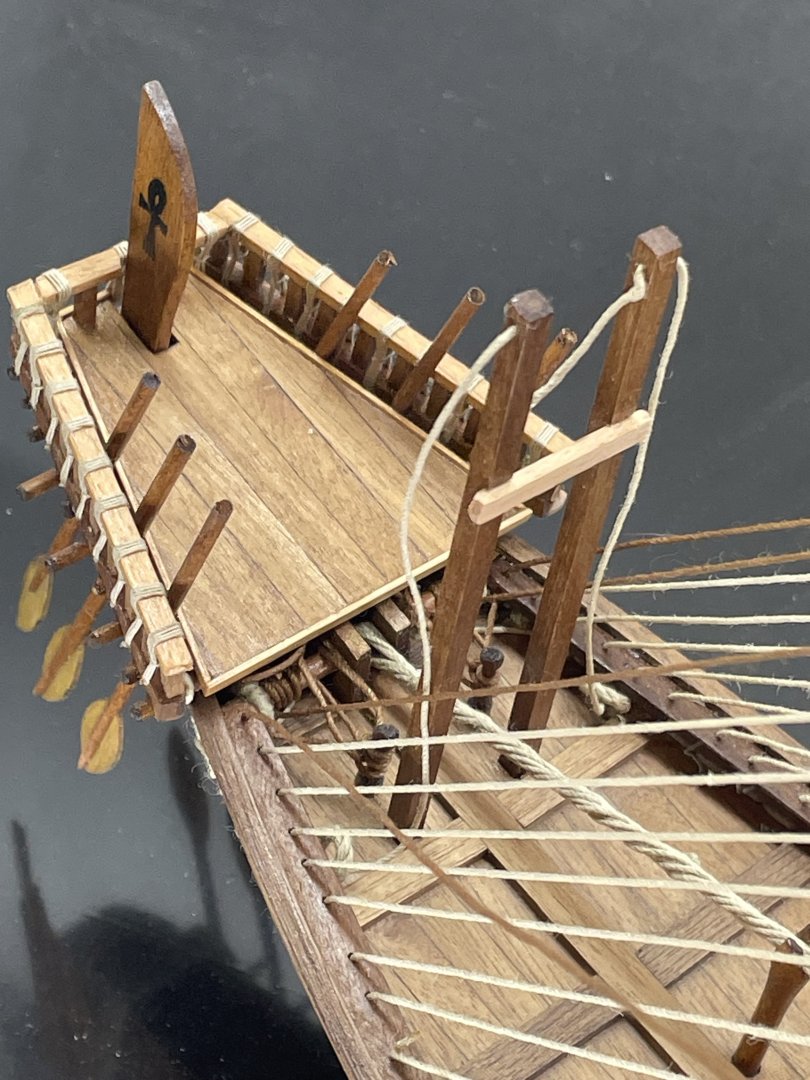
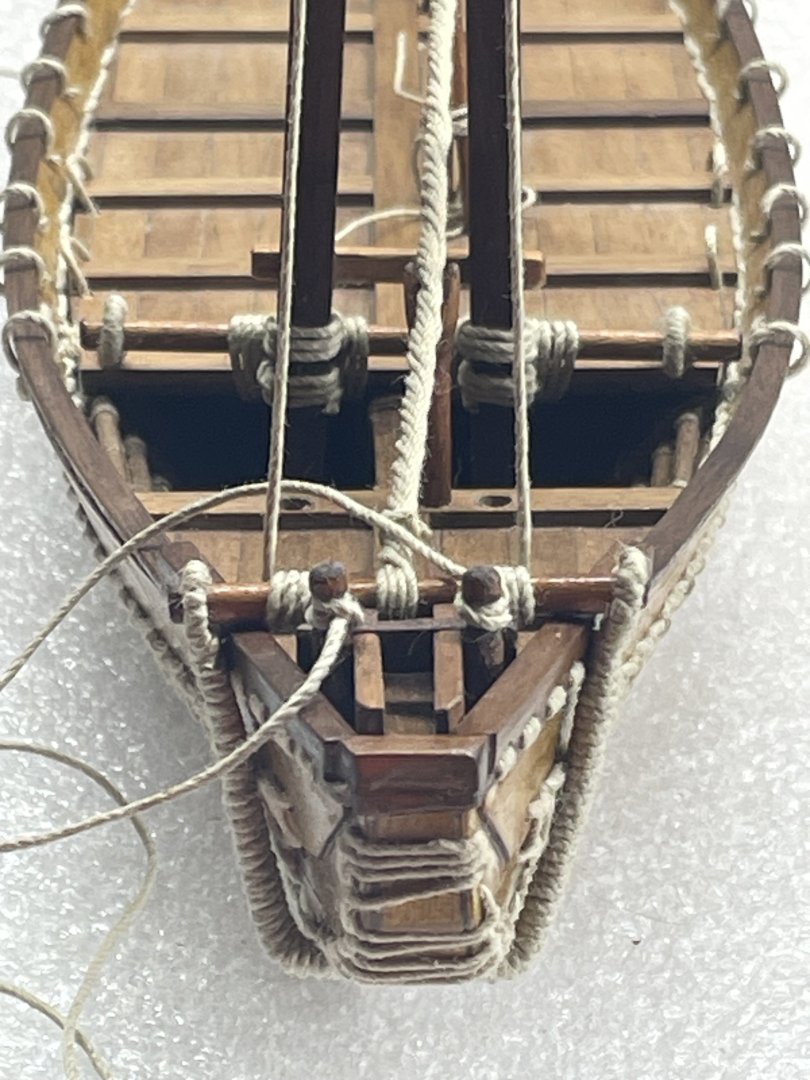
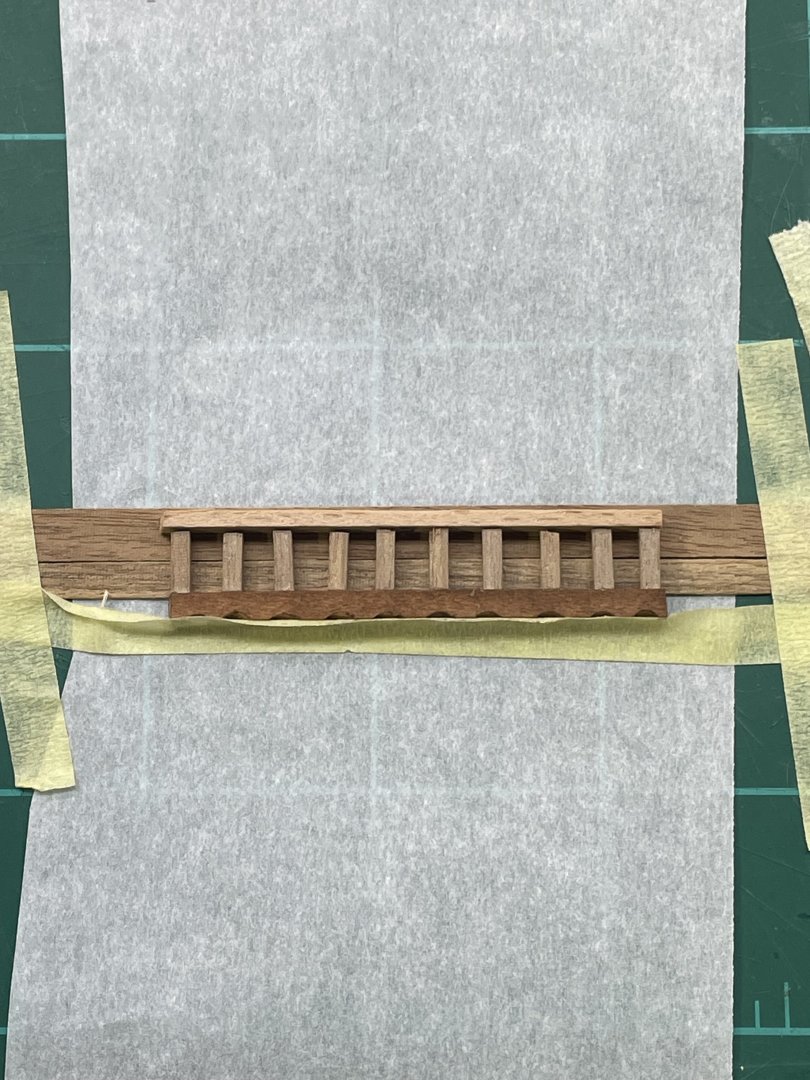
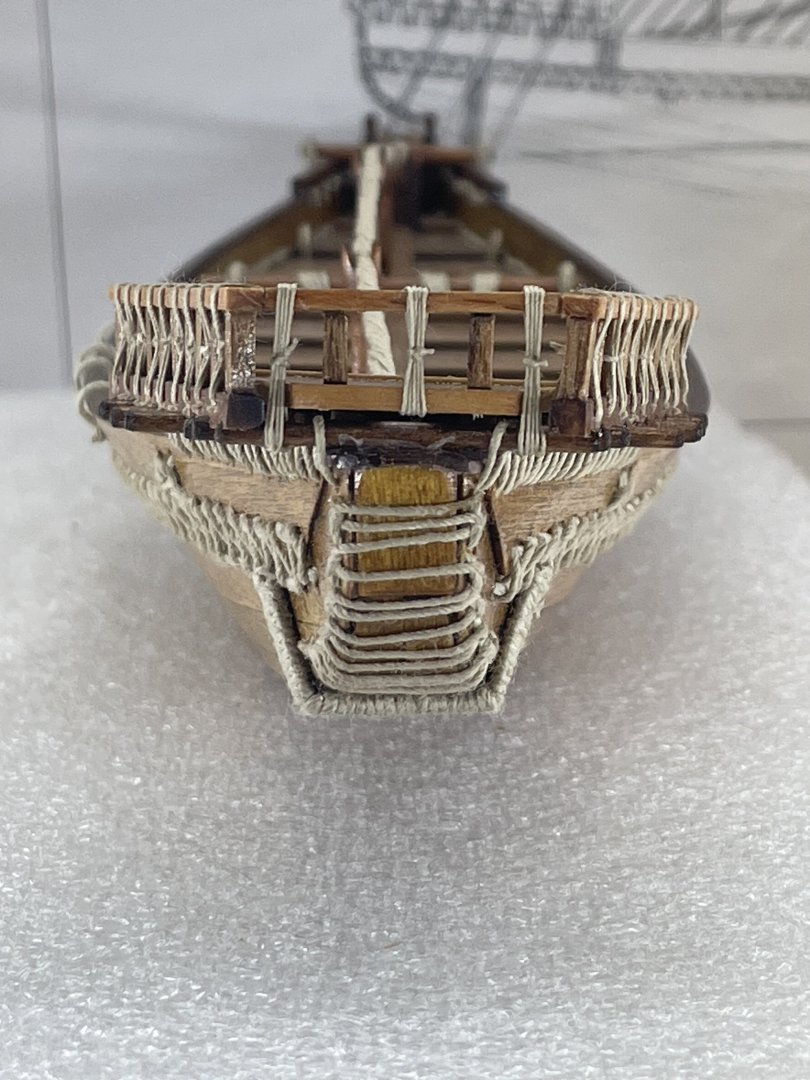
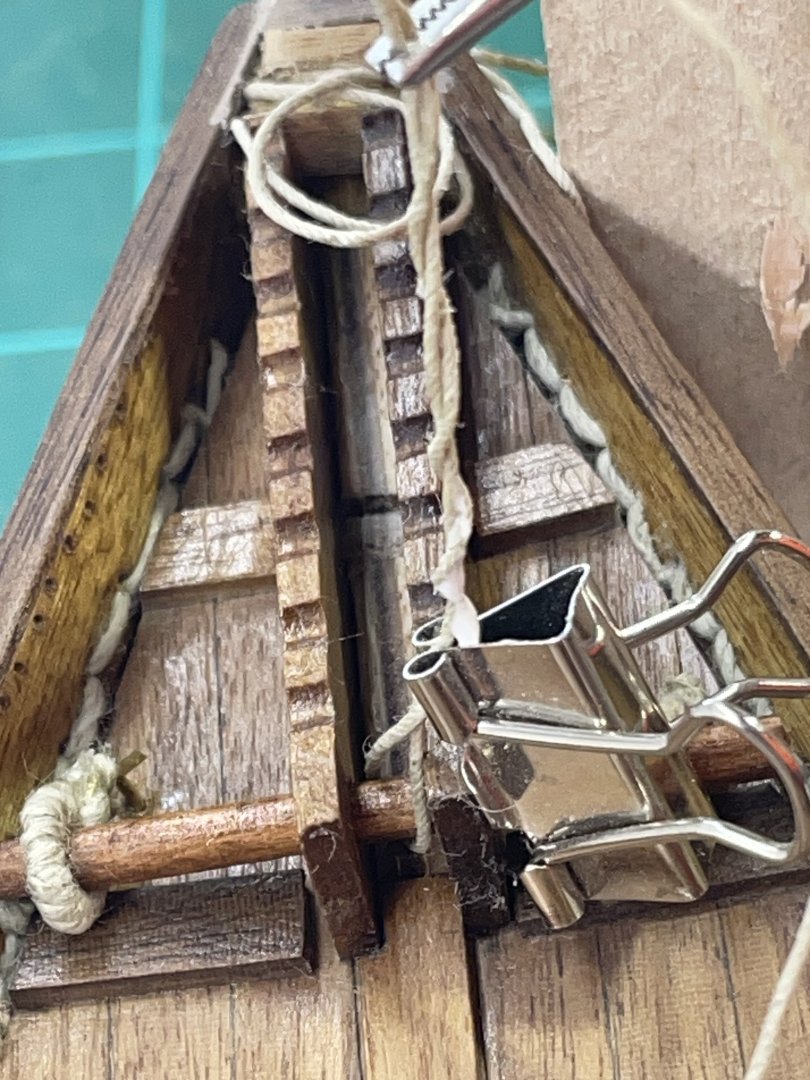
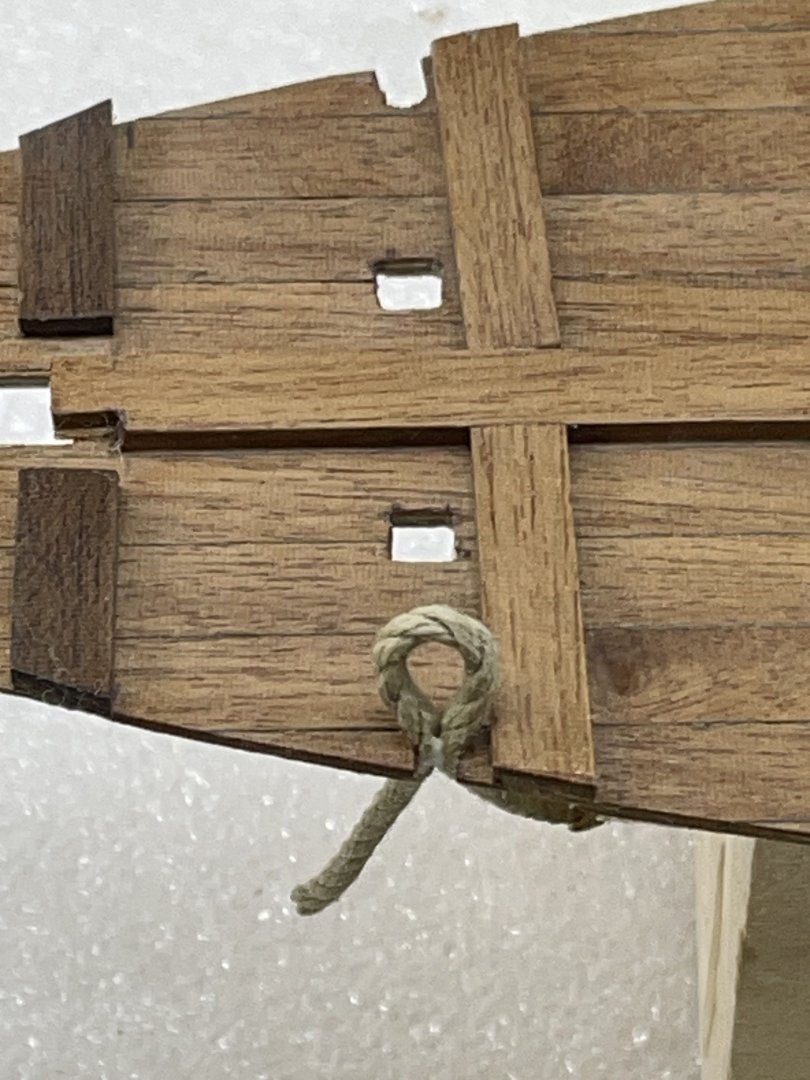
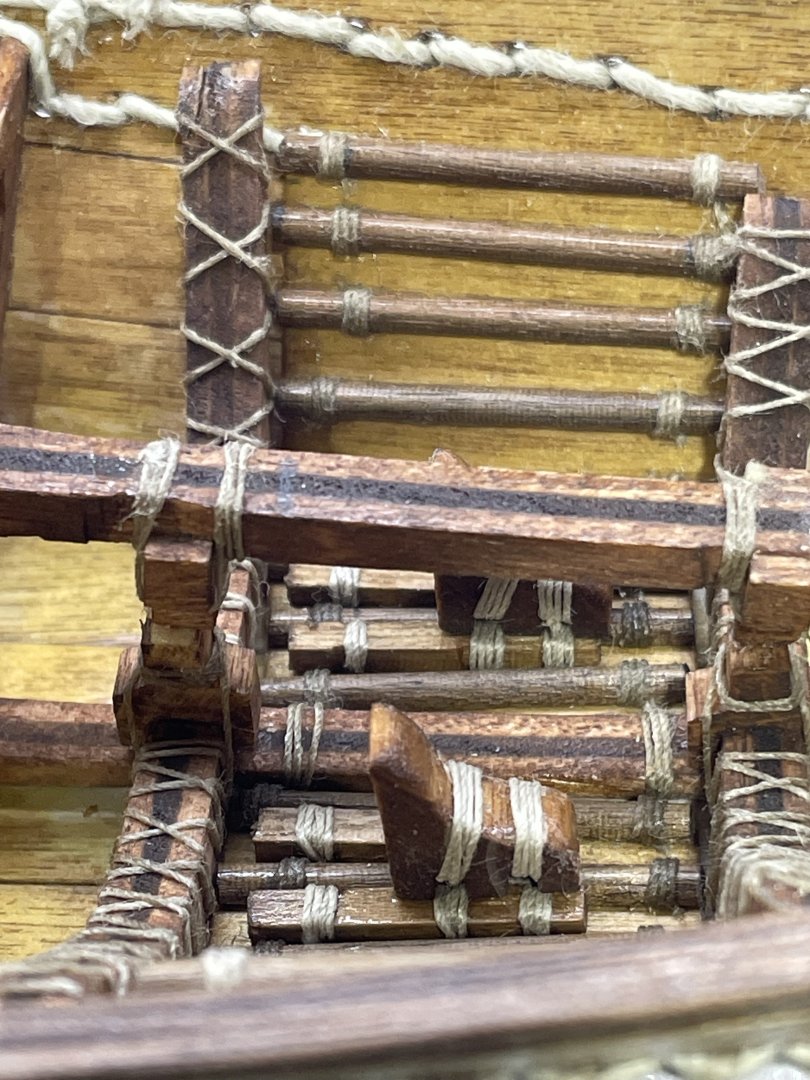
The next move on the build was the stern deck. Luckily we didn’t have anything going on all week, because I needed the time to figure this out. I started by setting four 3mm x 3mm blocks so I knew what I was gluing the deck to. On the bottom member of the rail, I filled a groove to give me more gluing surface. Doing this caused most of the logs to break the glue joints at the spine, leaving them only held in place by the ropes in the hull :-/ Later it will present a problem. I assembled the sides of the rails on the table, to try and keep them square. For the ropes cinching down the rail, I glued one end at the bottom. Because the grooves were on an angle, I drilled holes to run straight across. Plus I knew it was going to be hard enough to glue them on those logs, without a bunch of threads all in the way. I tried using PVA but the logs kept rolling and shifting the other side. I knew I was going to have to get them both put on at the same time using CA. I took a day to think about it while I was cleaning the PVA out of all the tiny spots. It all surprisingly worked out:-) The back in wasn’t very square, but I was going to make it work. That part done will make installing the mast look easy:-) This next week I plan on raising the mast.


- 44 replies
-
- 6
-
-
-
- Nave Egizia
- Amati
- (and 1 more)
-
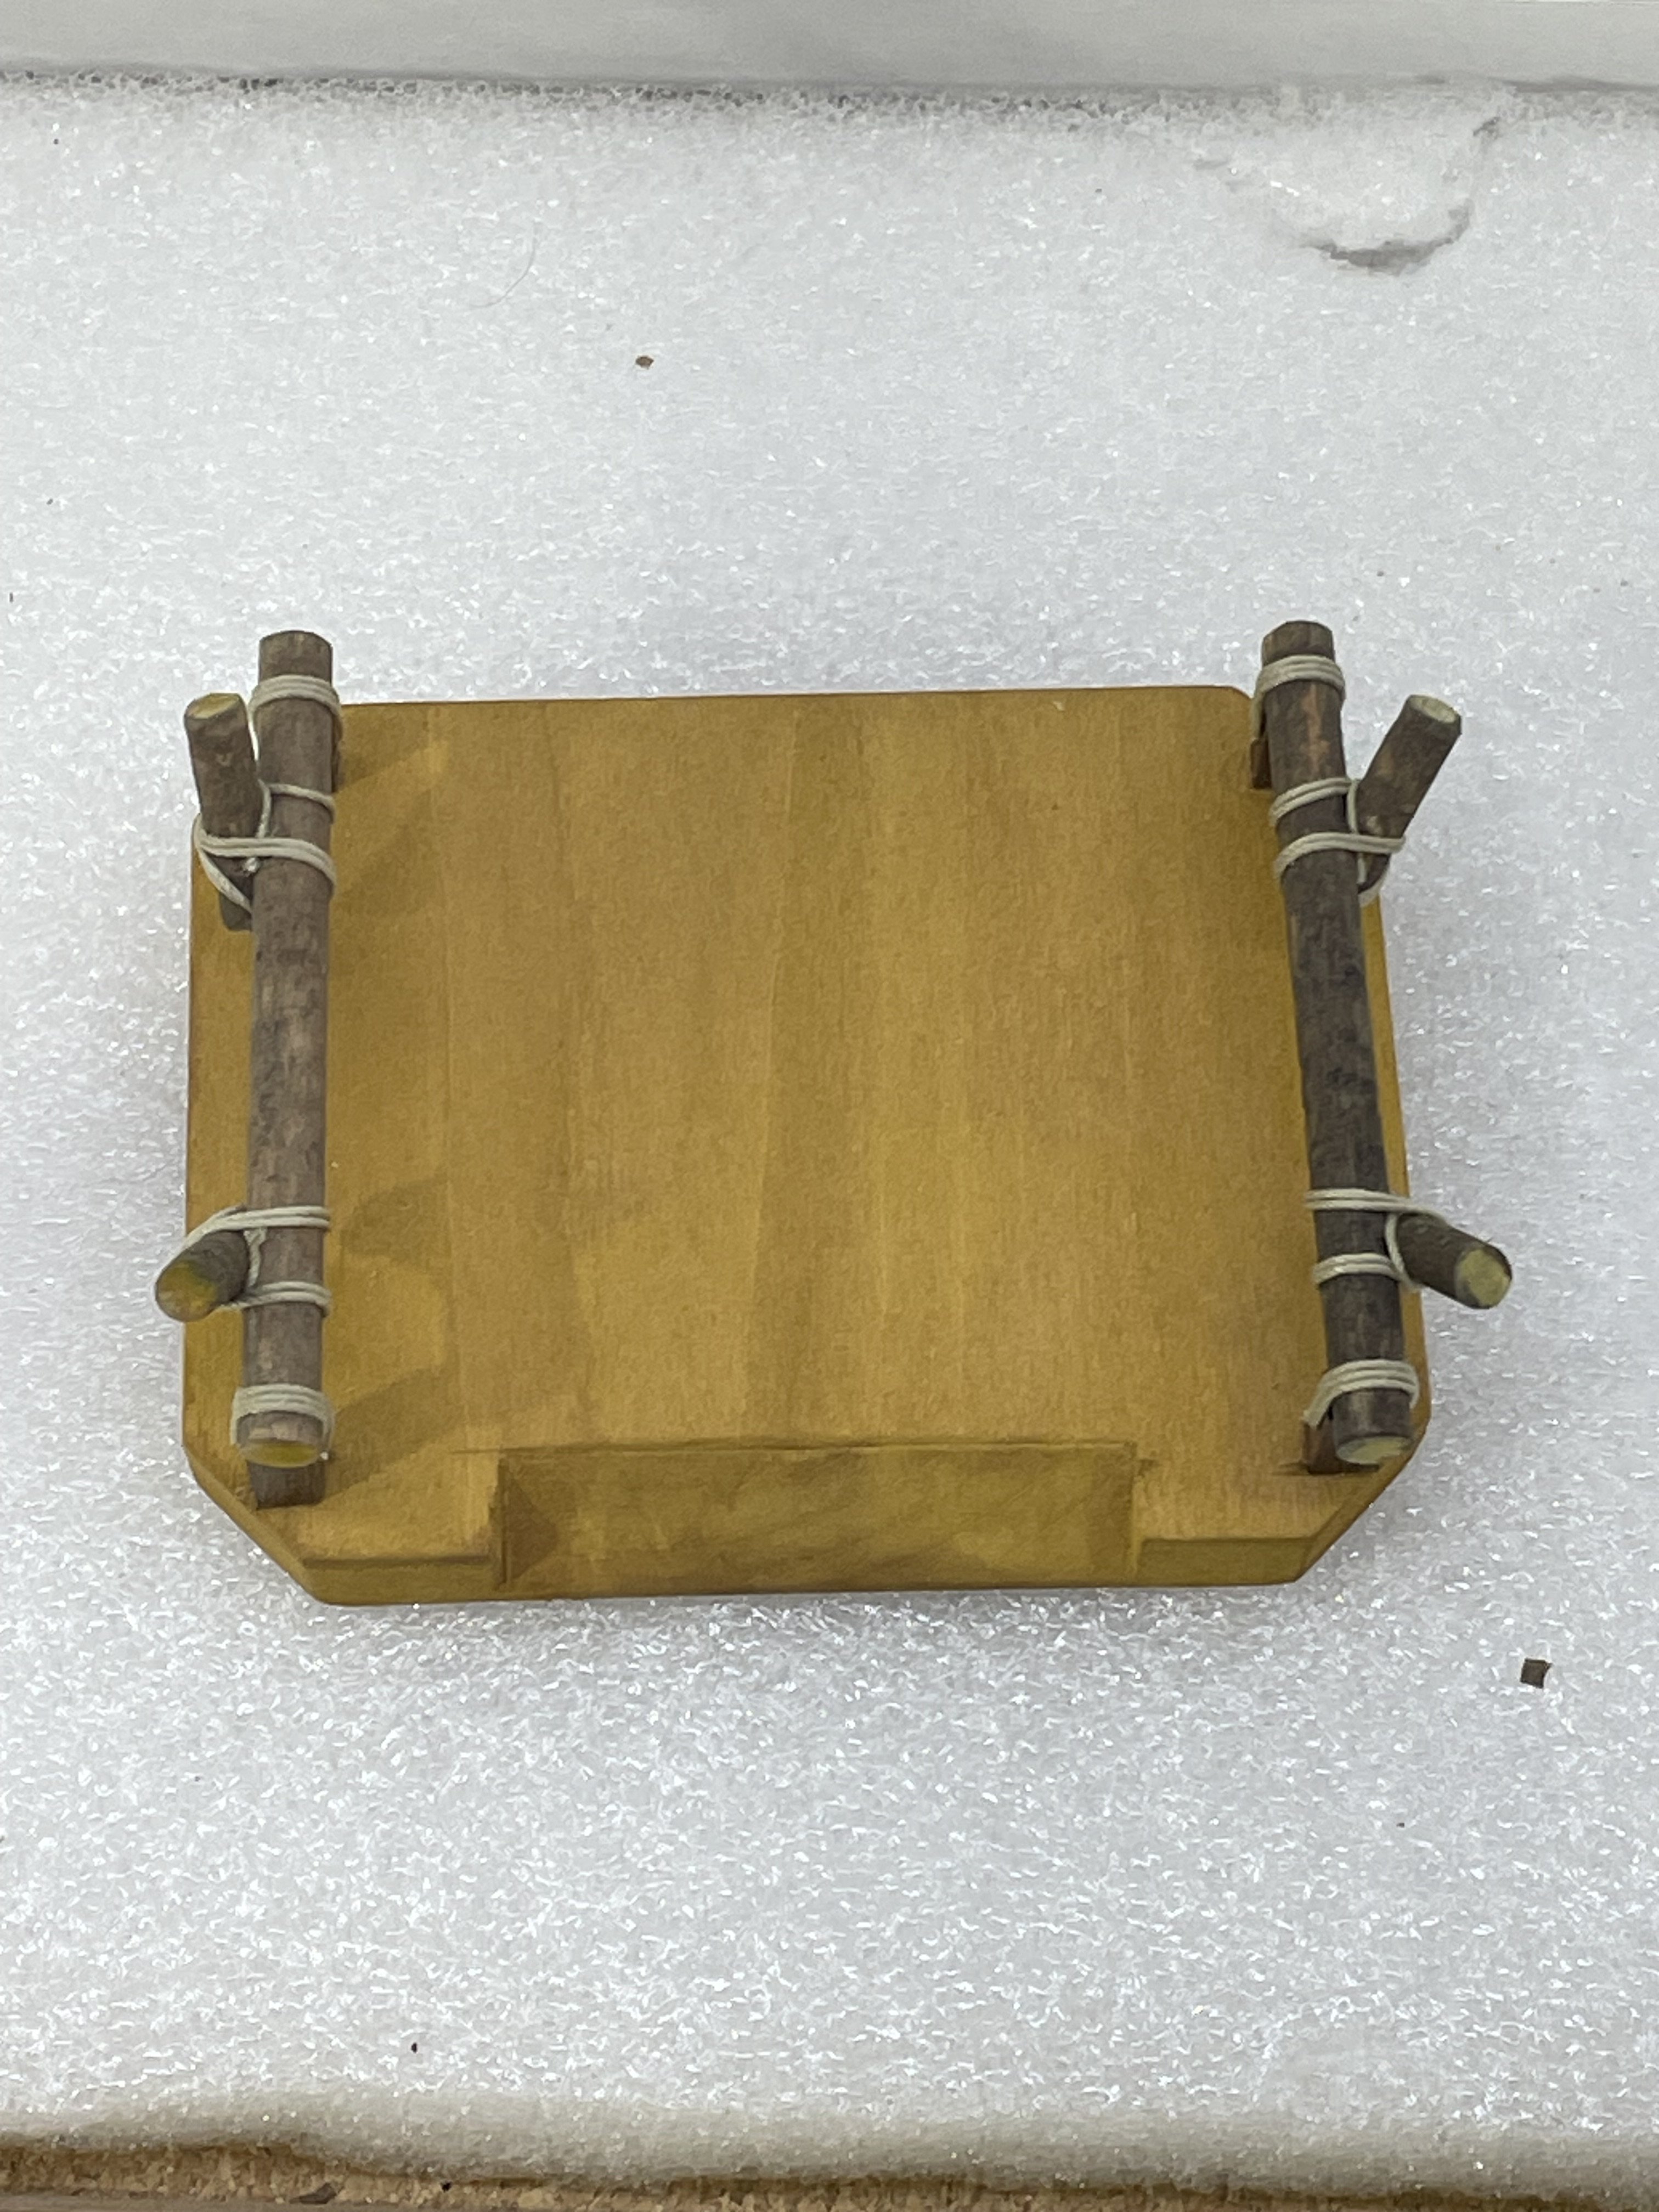
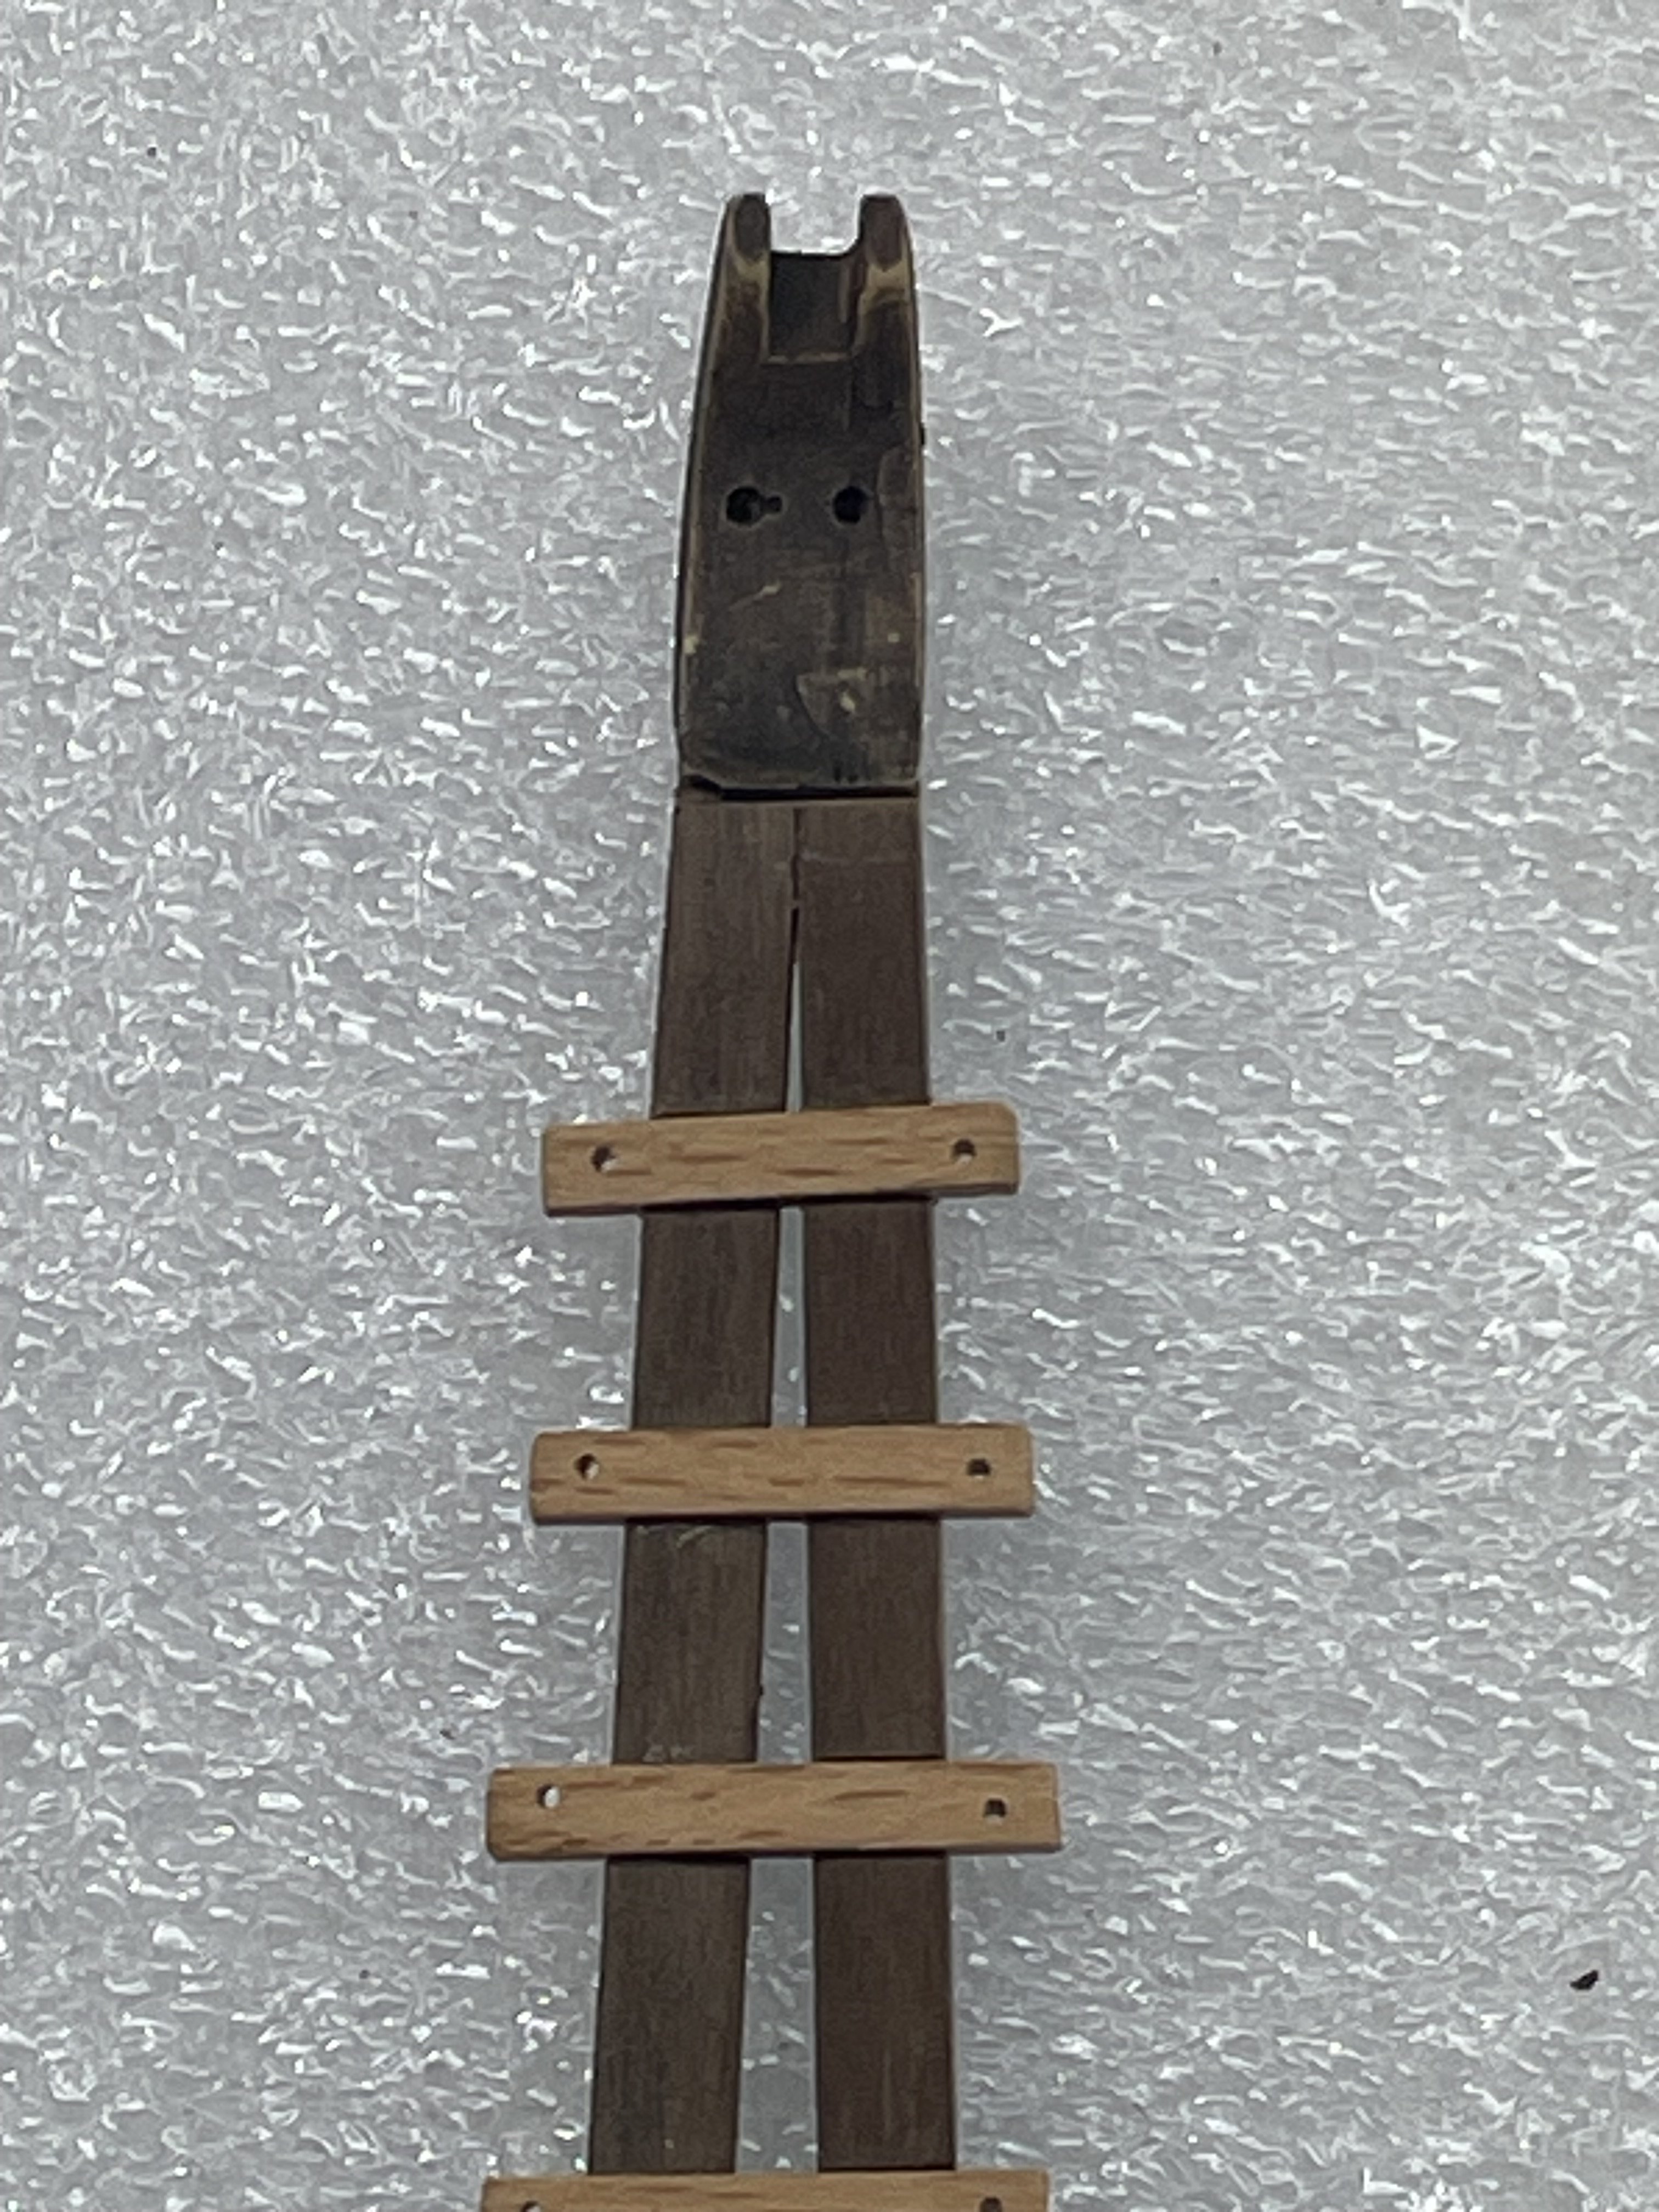
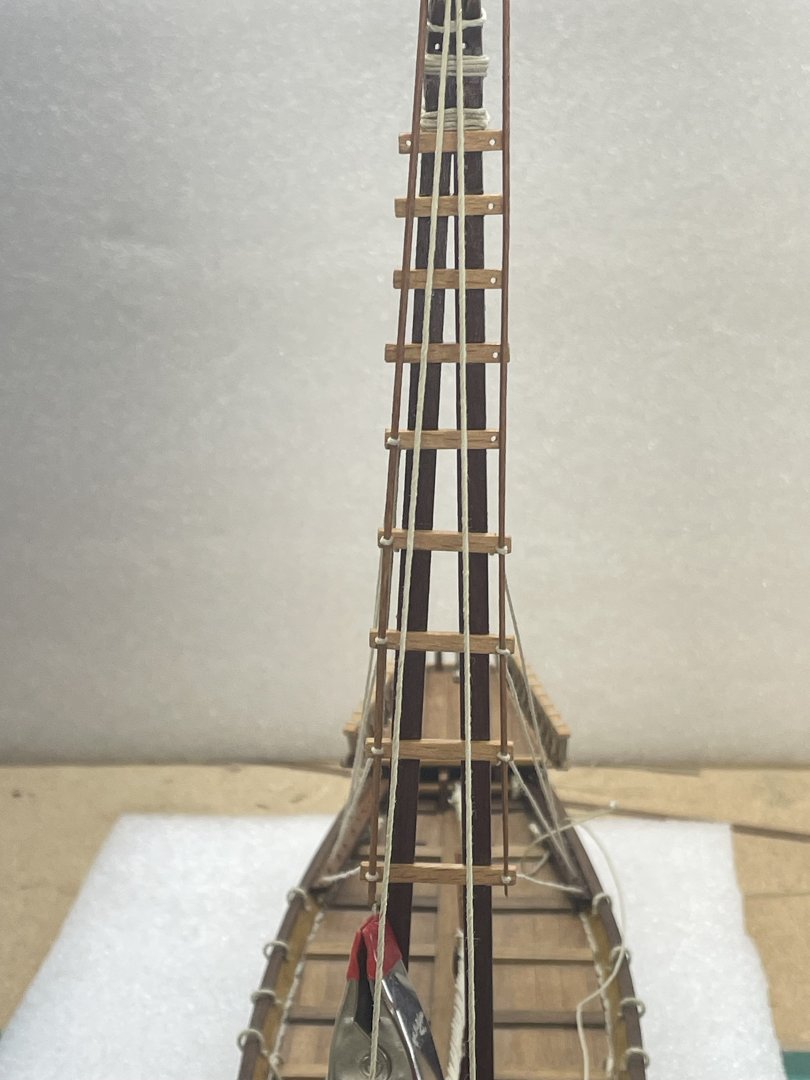
I’ve been working on the mast. I still have several things to do this it. I’ve been trying to visualize how all the rigging works. Even though the mast head hasn’t been glued on yet I had to put it on the boat to see if it would lay down. The mast head was plastic. I coated it with a thin coat of gesso and then painted it as close as I could to the wood. Here is some temporary shots while I was playing:-) I only have one rock ready. And the rods will have to be made after I figure out how long they need to be.


- 44 replies
-
- 6
-
-
- Nave Egizia
- Amati
- (and 1 more)
-
The Mossy Shipyard by Bryan Woods - 1:1
Bryan Woods replied to Bryan Woods's topic in Non-ship/categorised builds
The first of the moss has showed up:-)
-
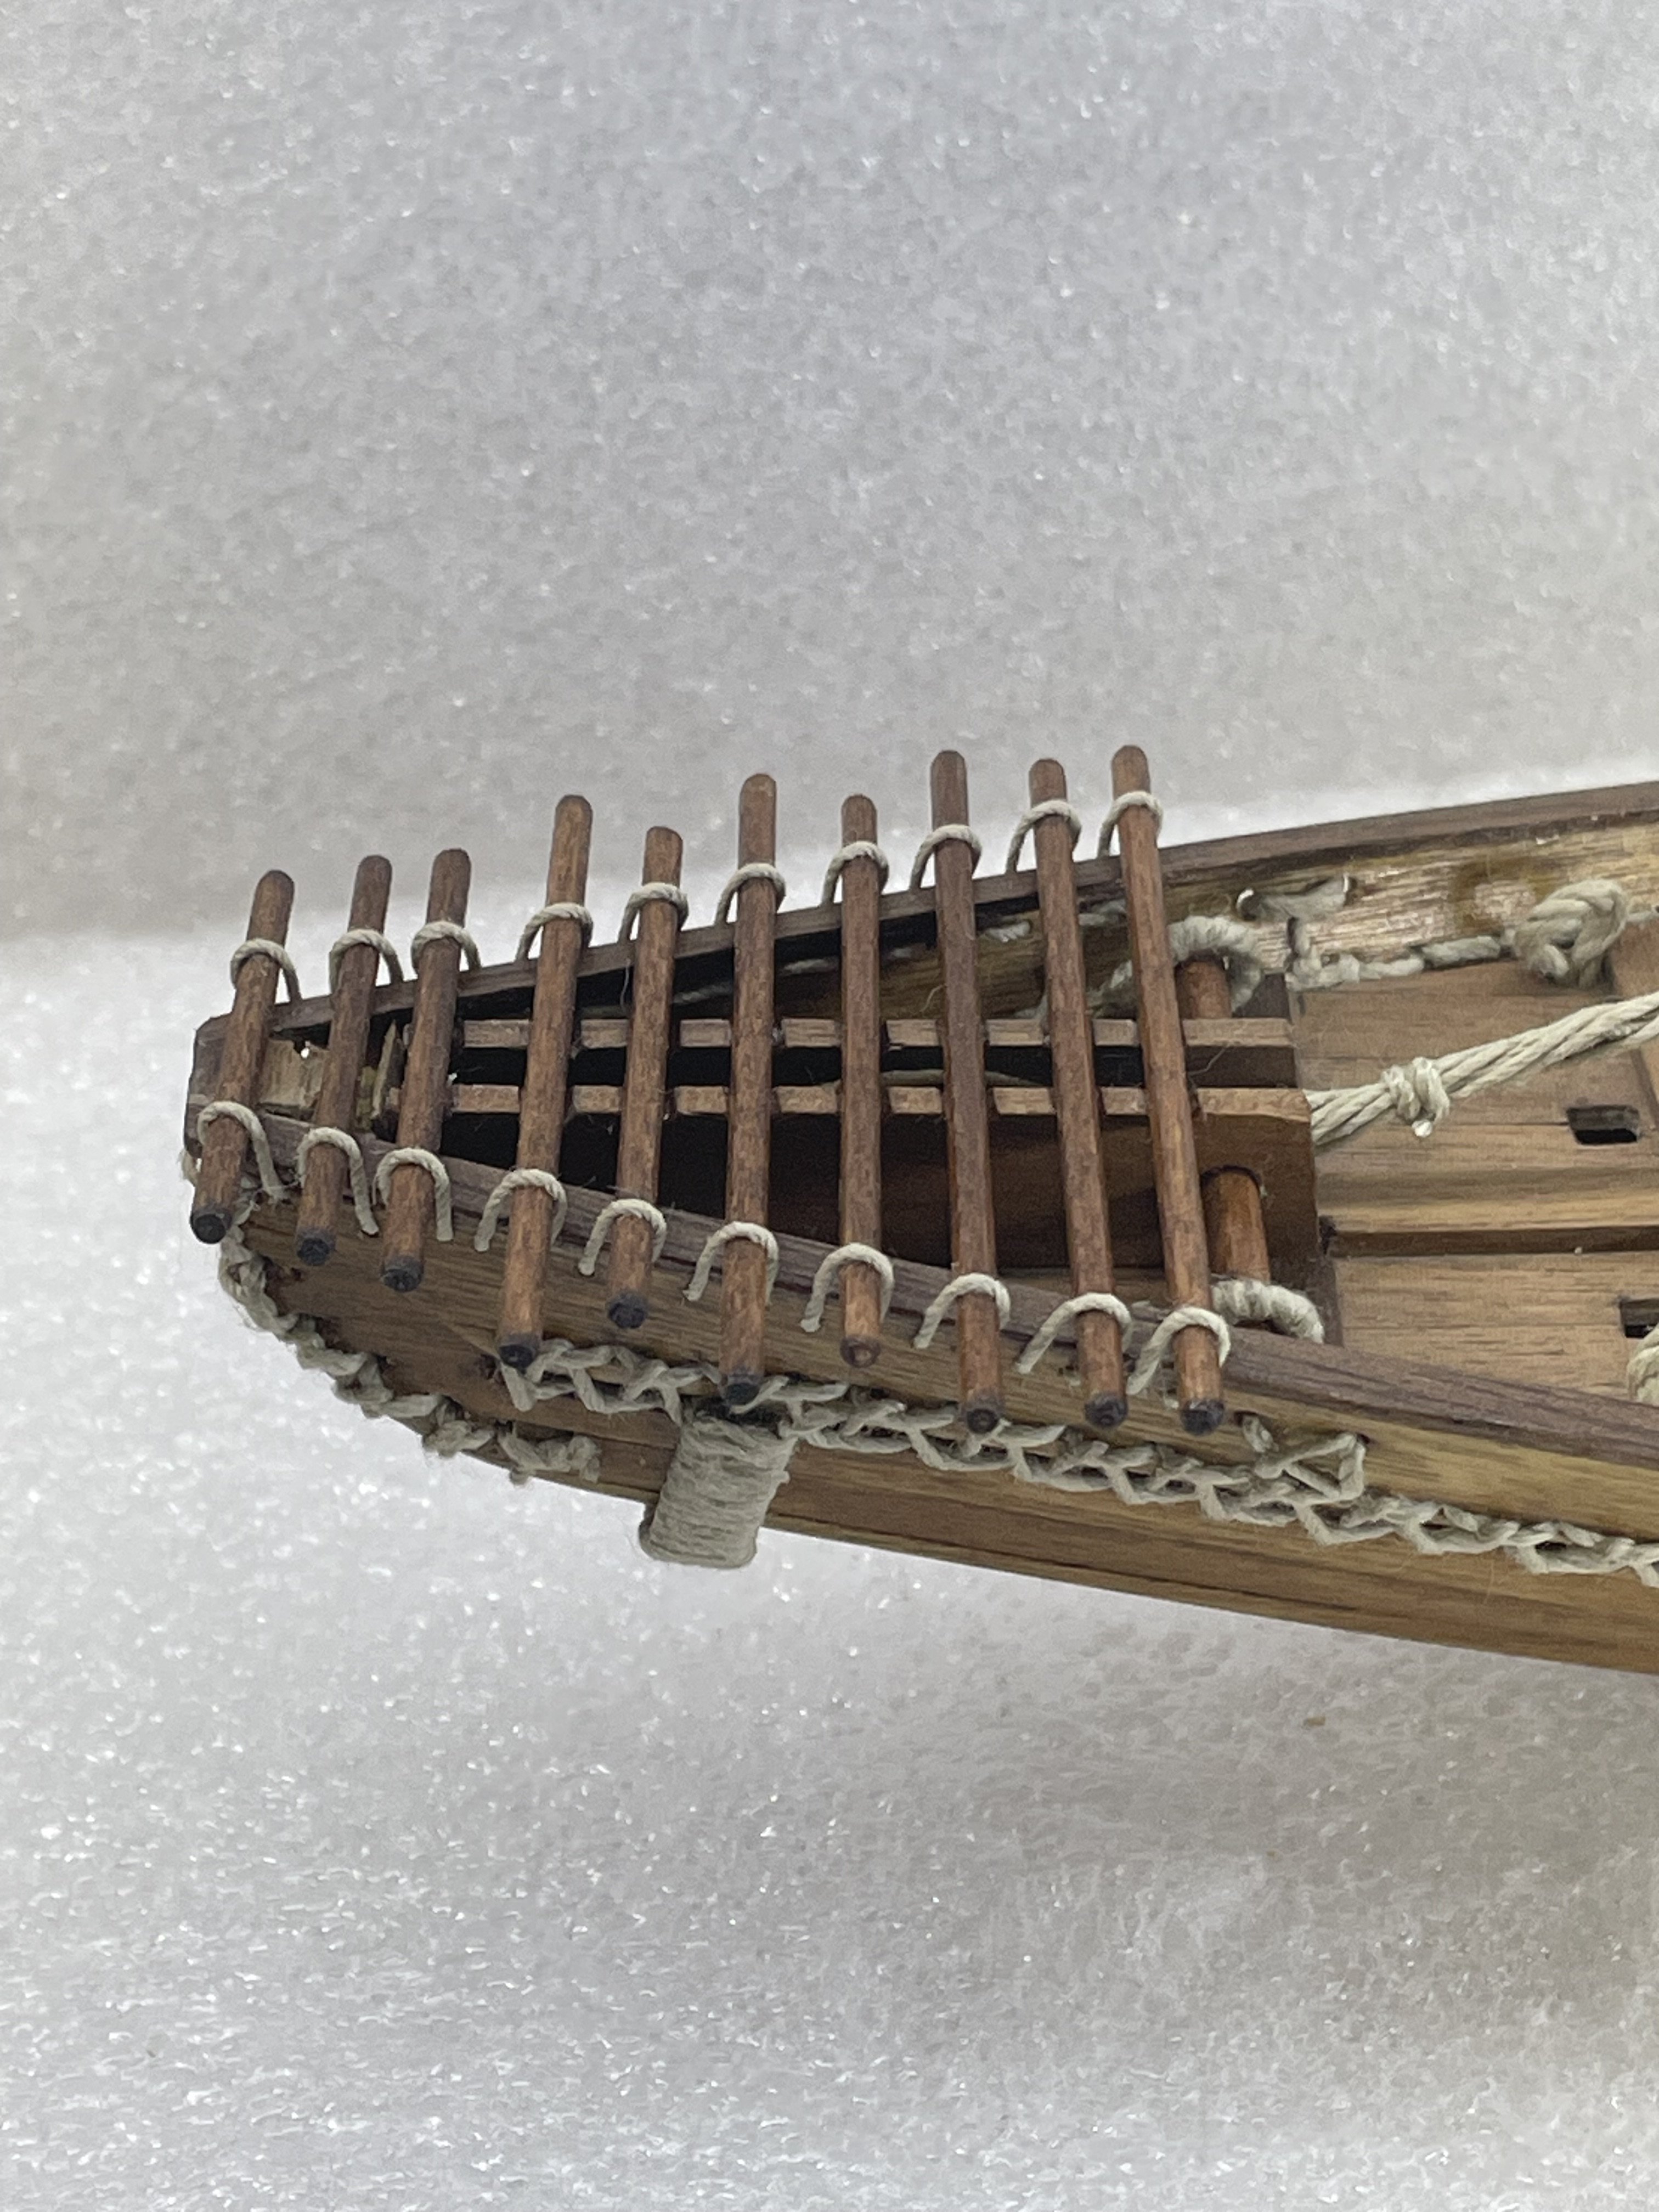
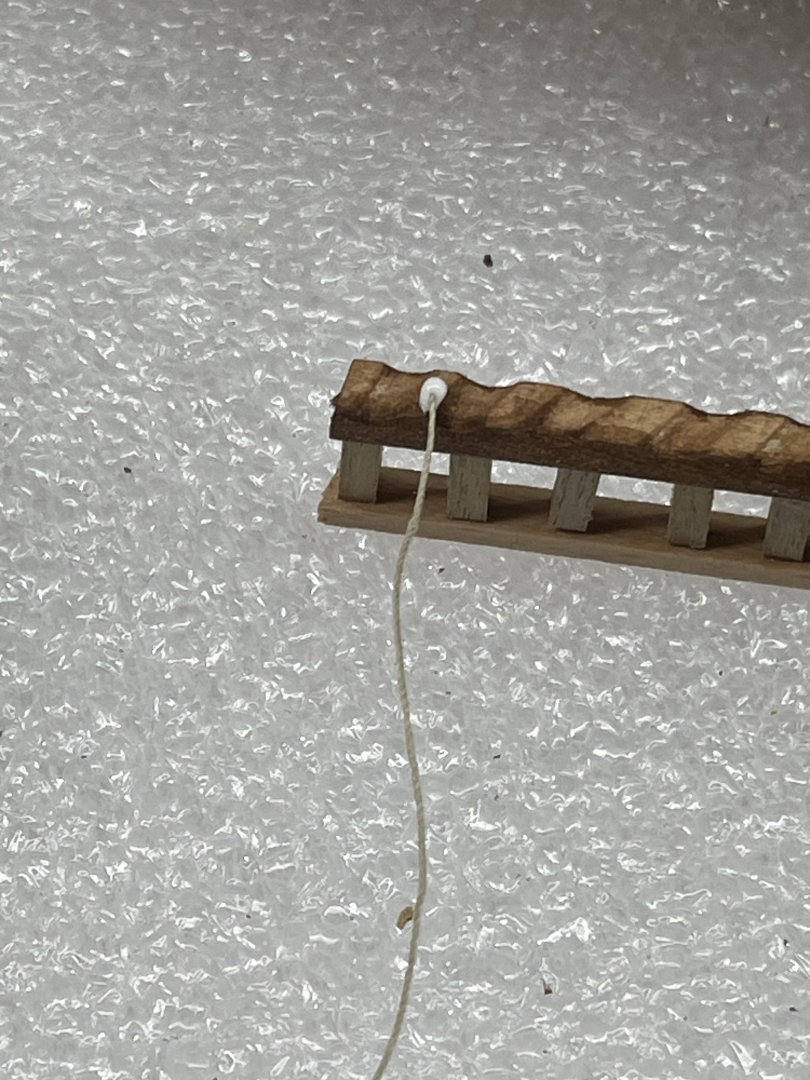
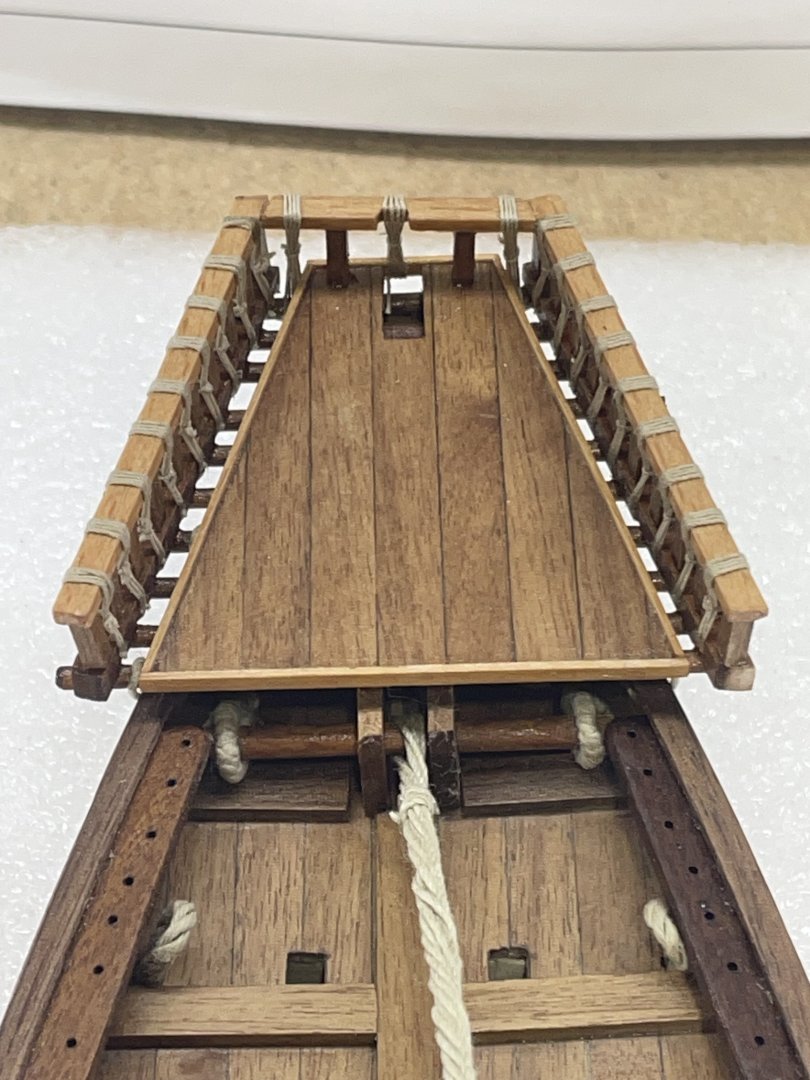
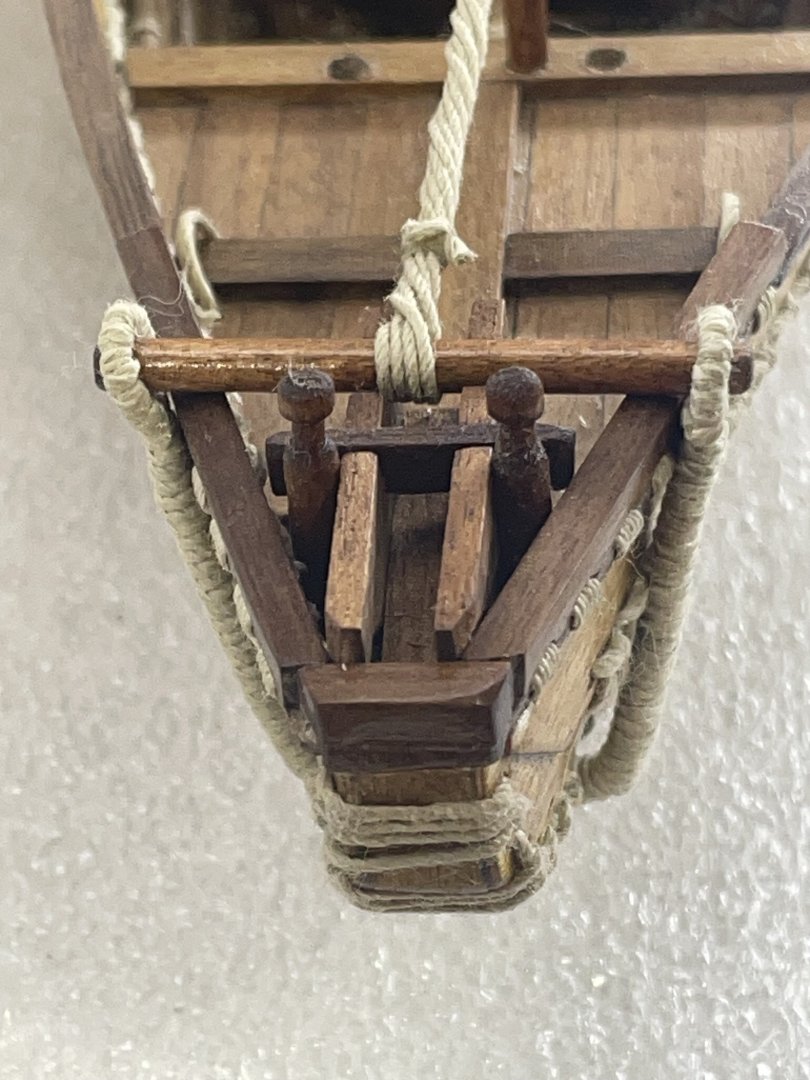
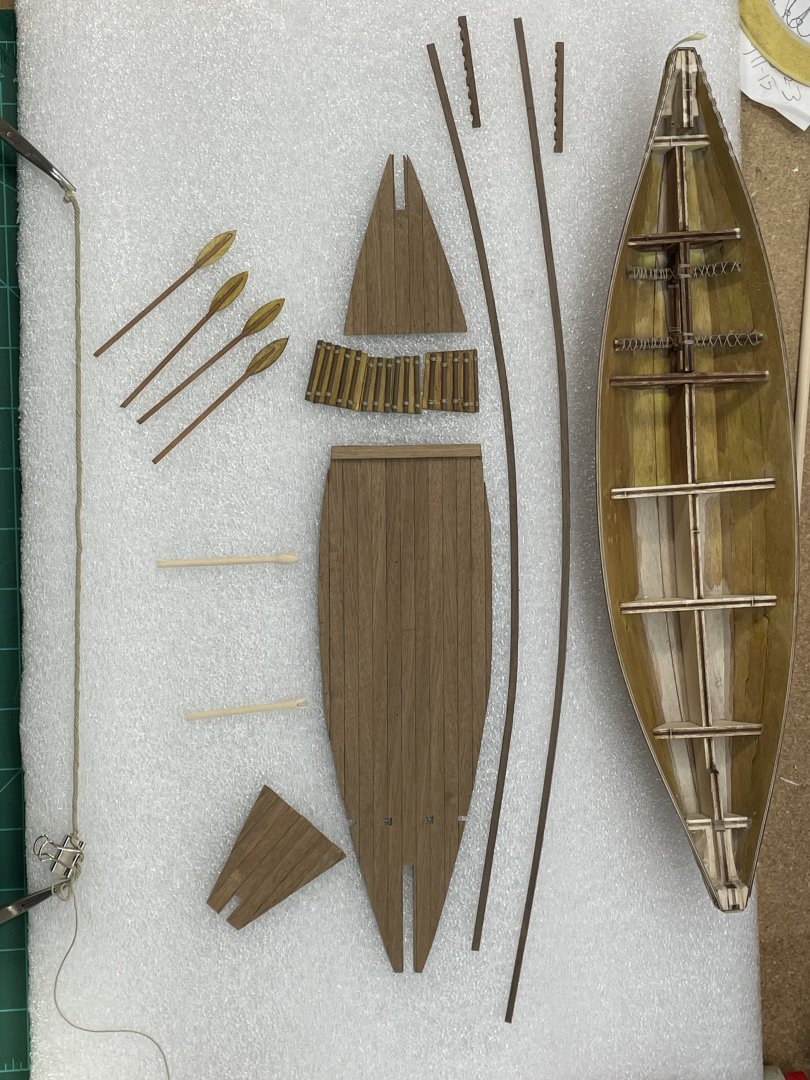
Work on the bow was next. I started on the stern deck. It sits on poles with a railing around it. As I was finishing the poles and figuring out where I was going to start, I noticed that the deck was going to make it hard to place the rope truss ( instead of a keel) So I started with the truss. I just looped a .75mm tread around the dowel, twisted it several times and put a squeeze of PVA on it. After that had set up a bit, I continued to loop the thread around both dowels. The dowel at the bow is only held on by the clip made from wire then wrapped with thread. I twisted the 8 strands till the length was right. Now the stern deck. This was quite challenging, but rewarding when finished:-) There’s lots to do at the stern deck but I’m going to wait to finish it after I get the standing rigging done.


- 44 replies
-
- 3
-
-
-
- Nave Egizia
- Amati
- (and 1 more)
-
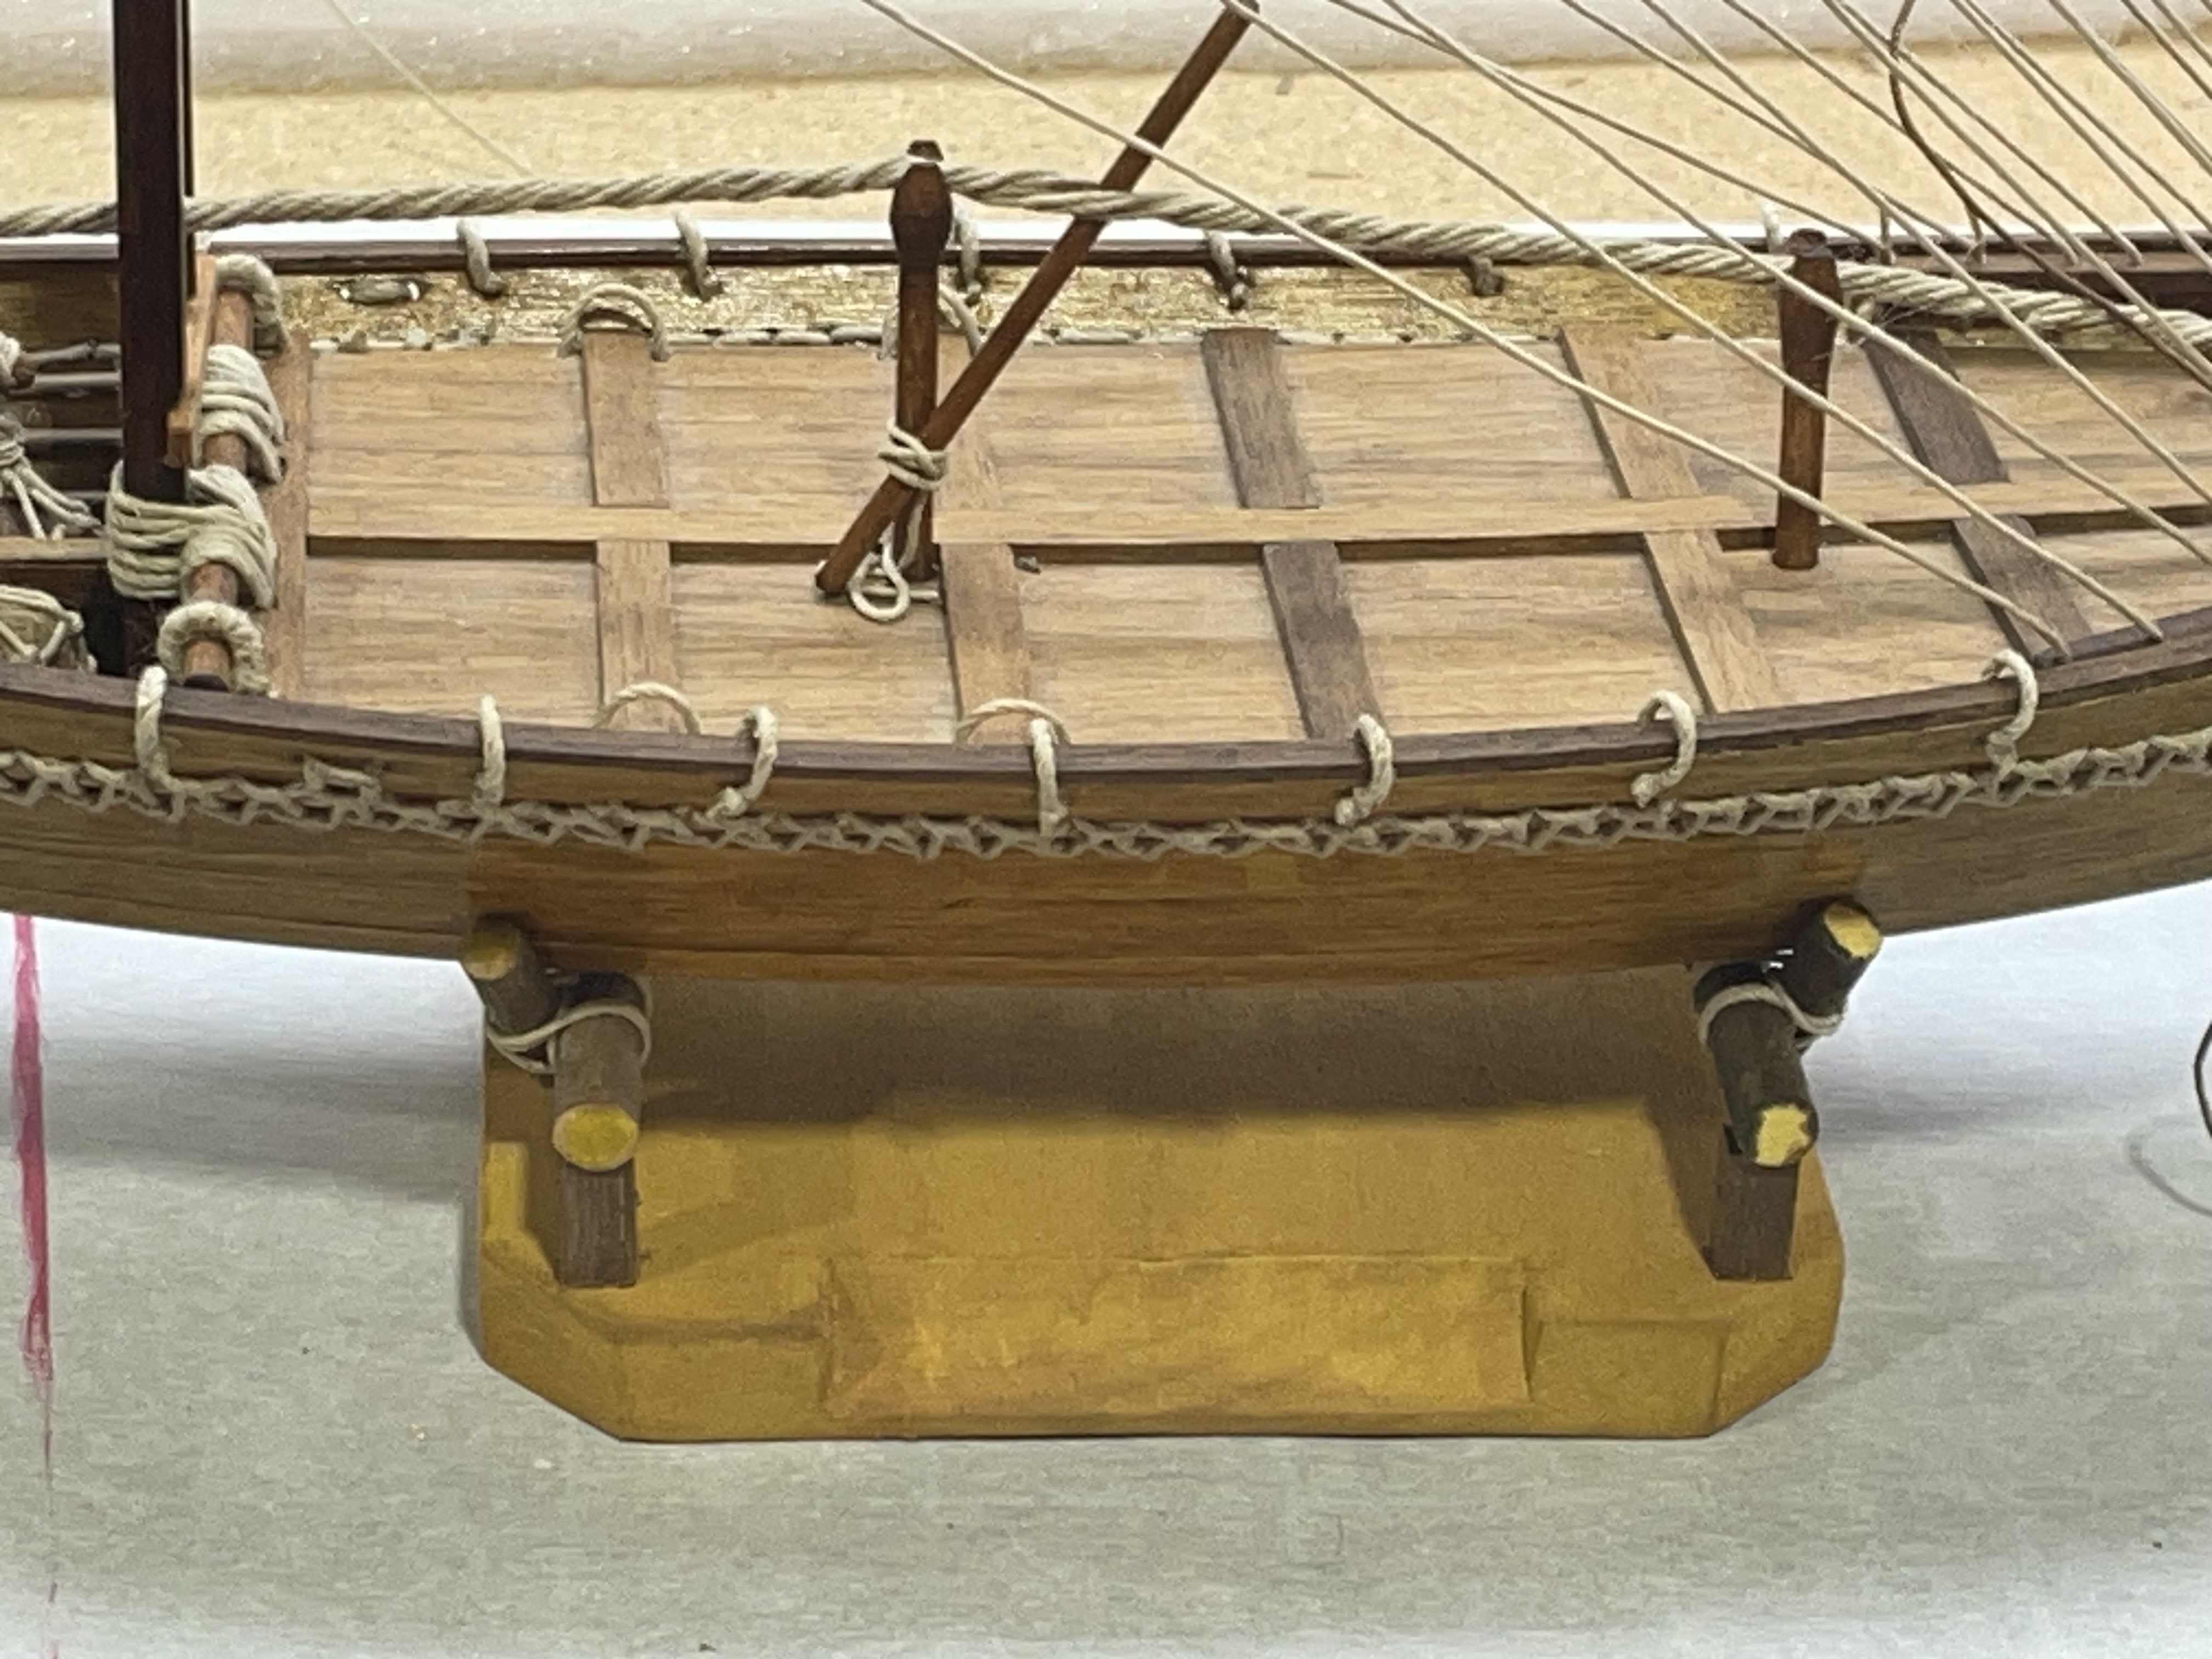
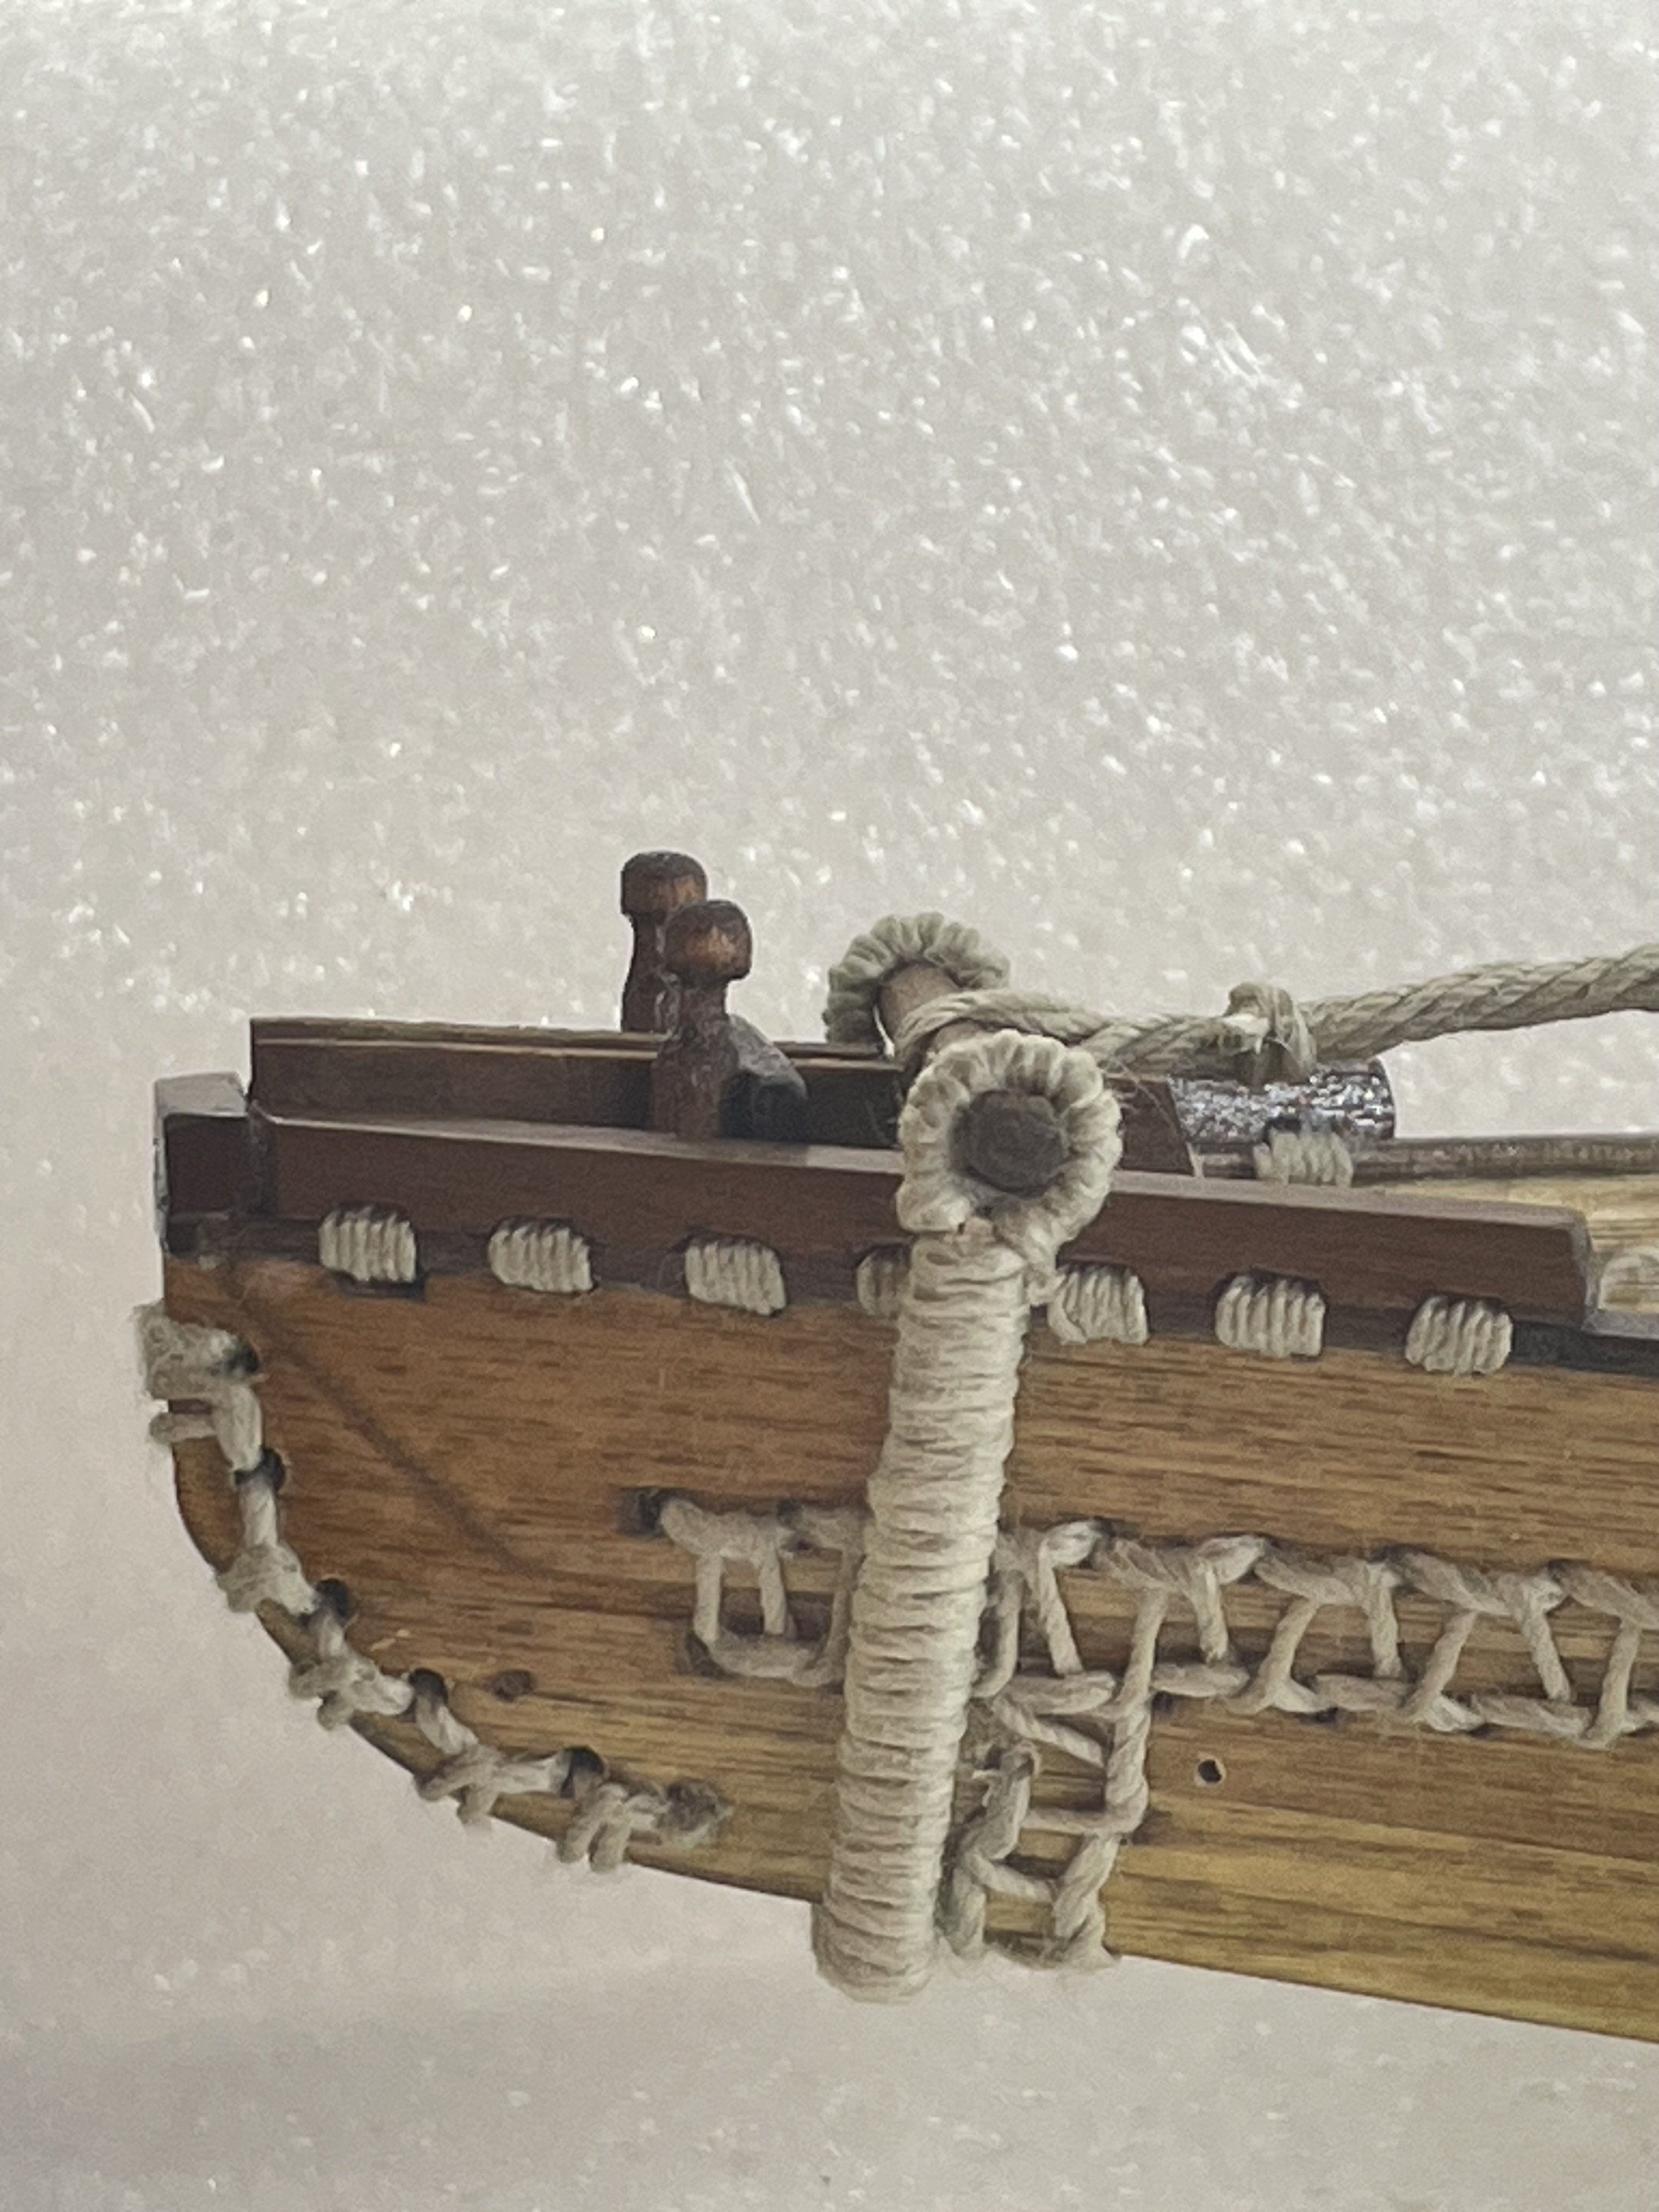
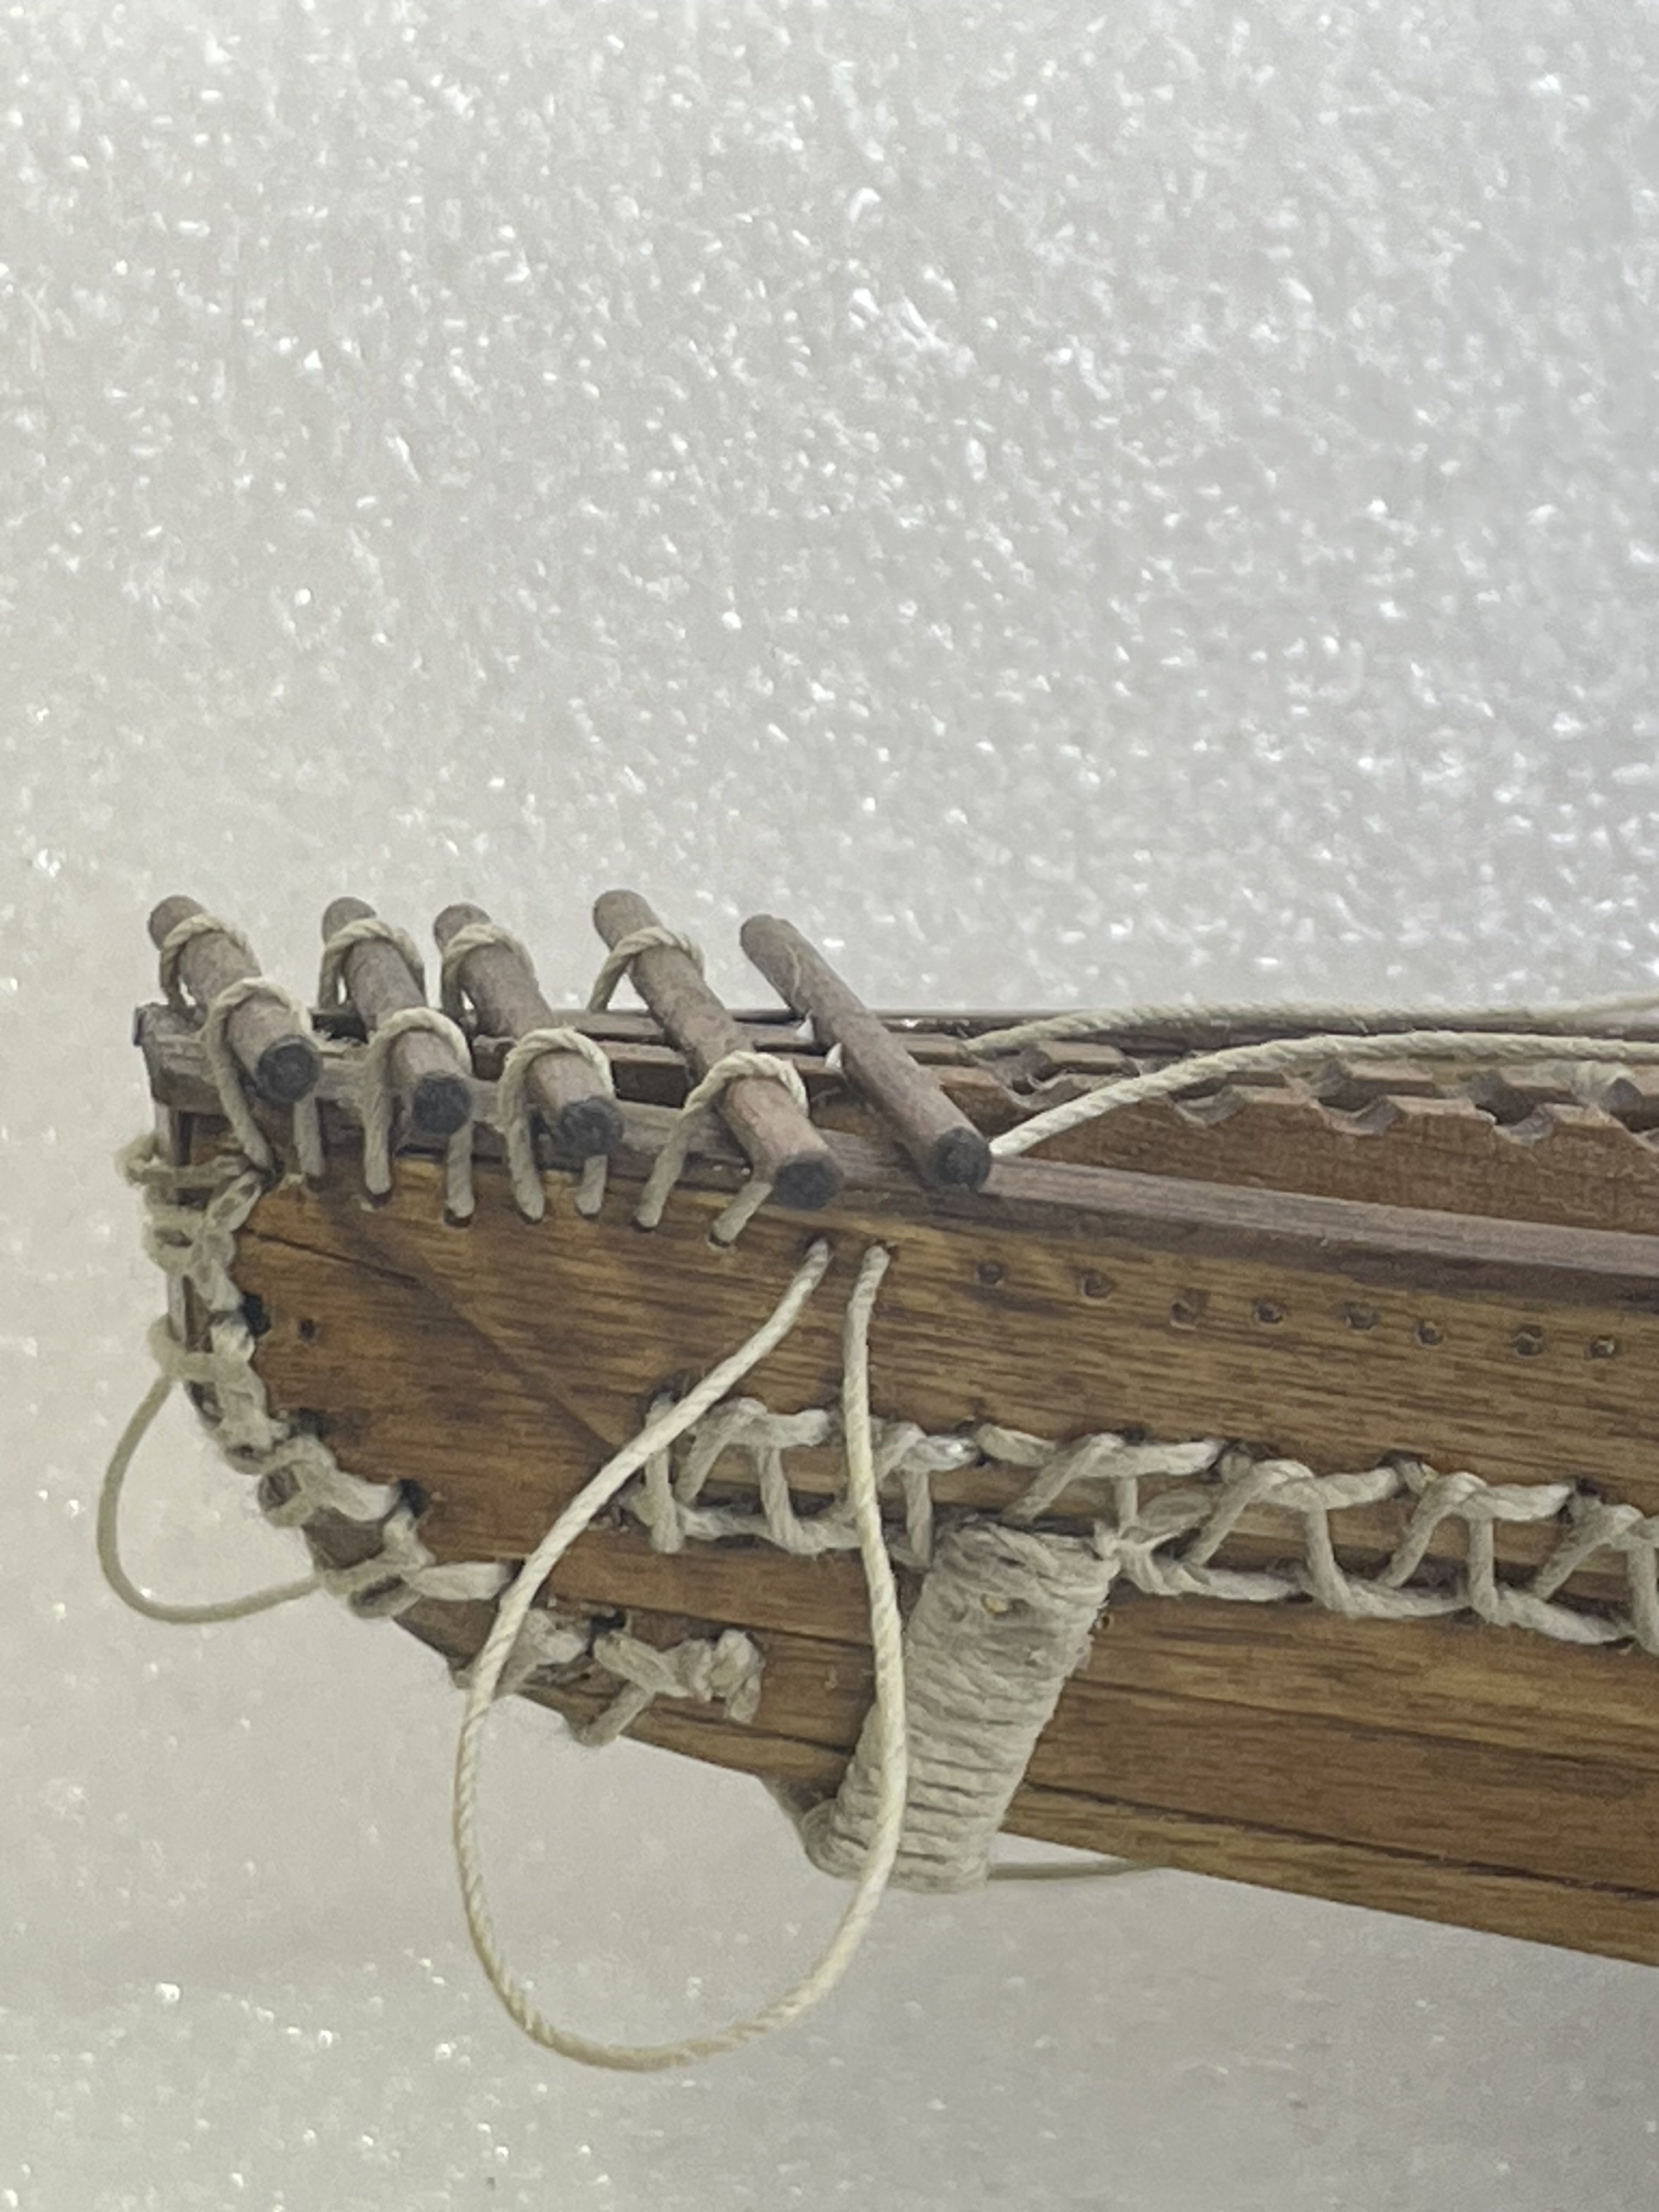
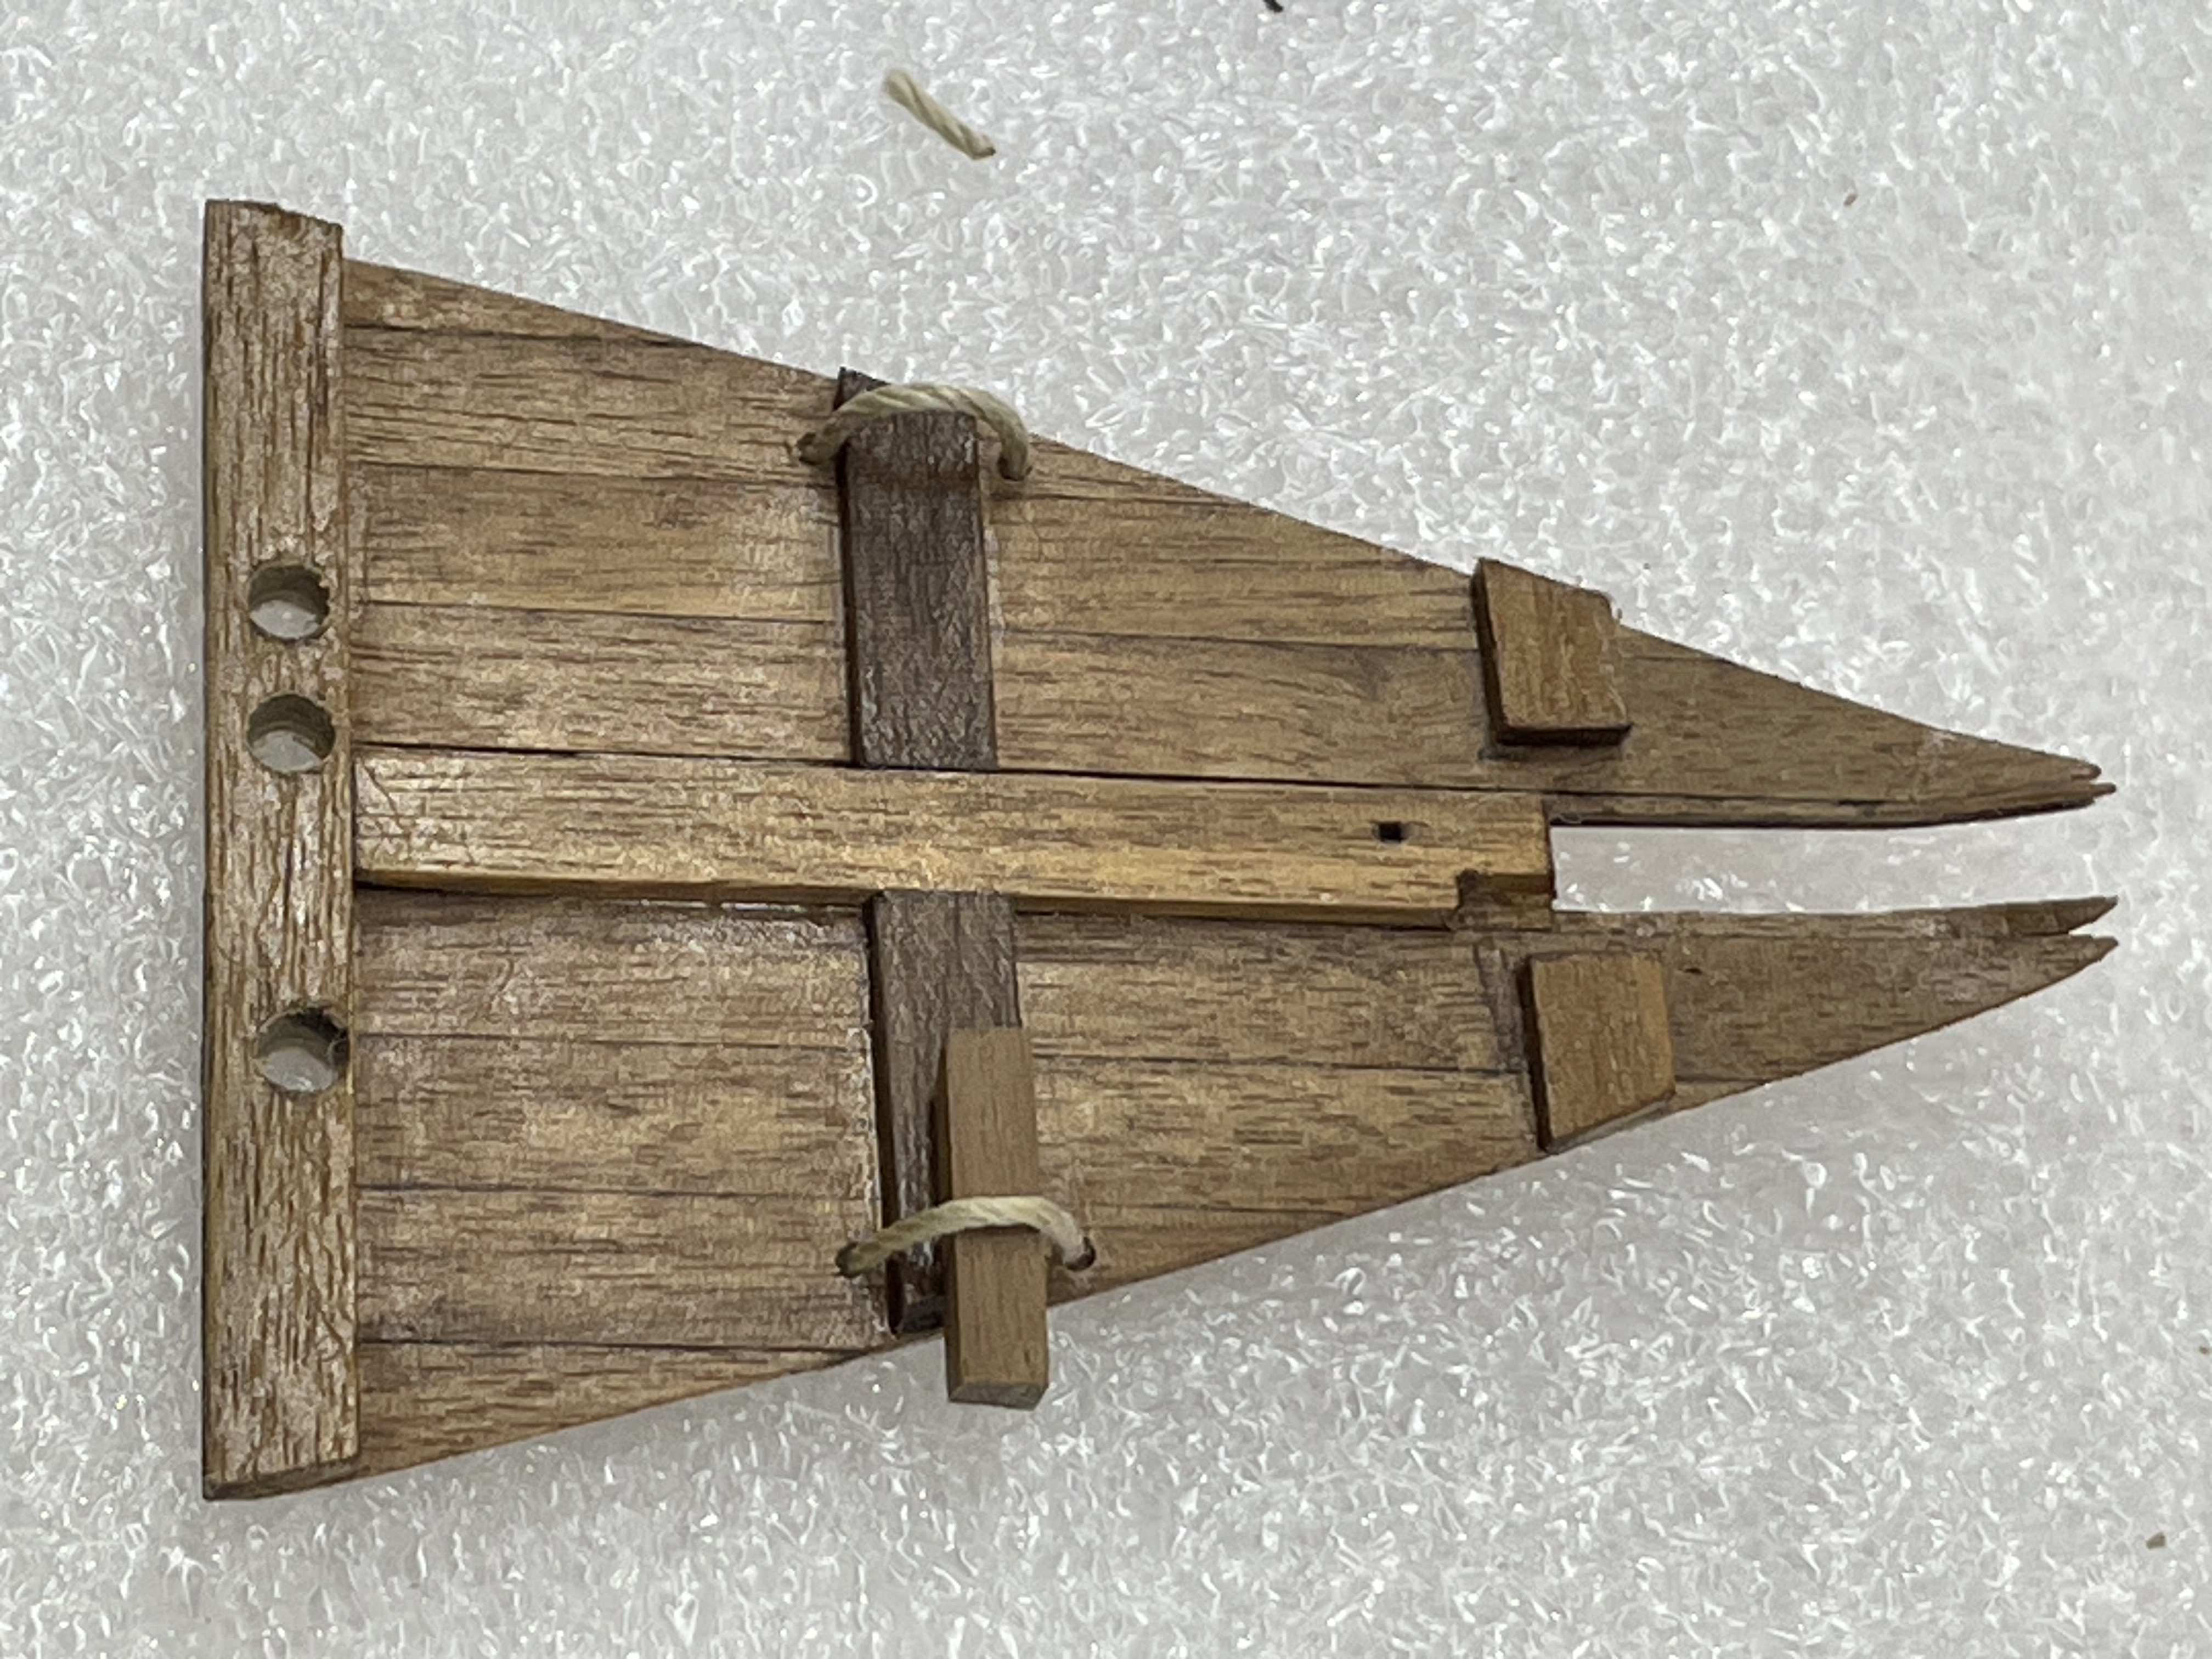
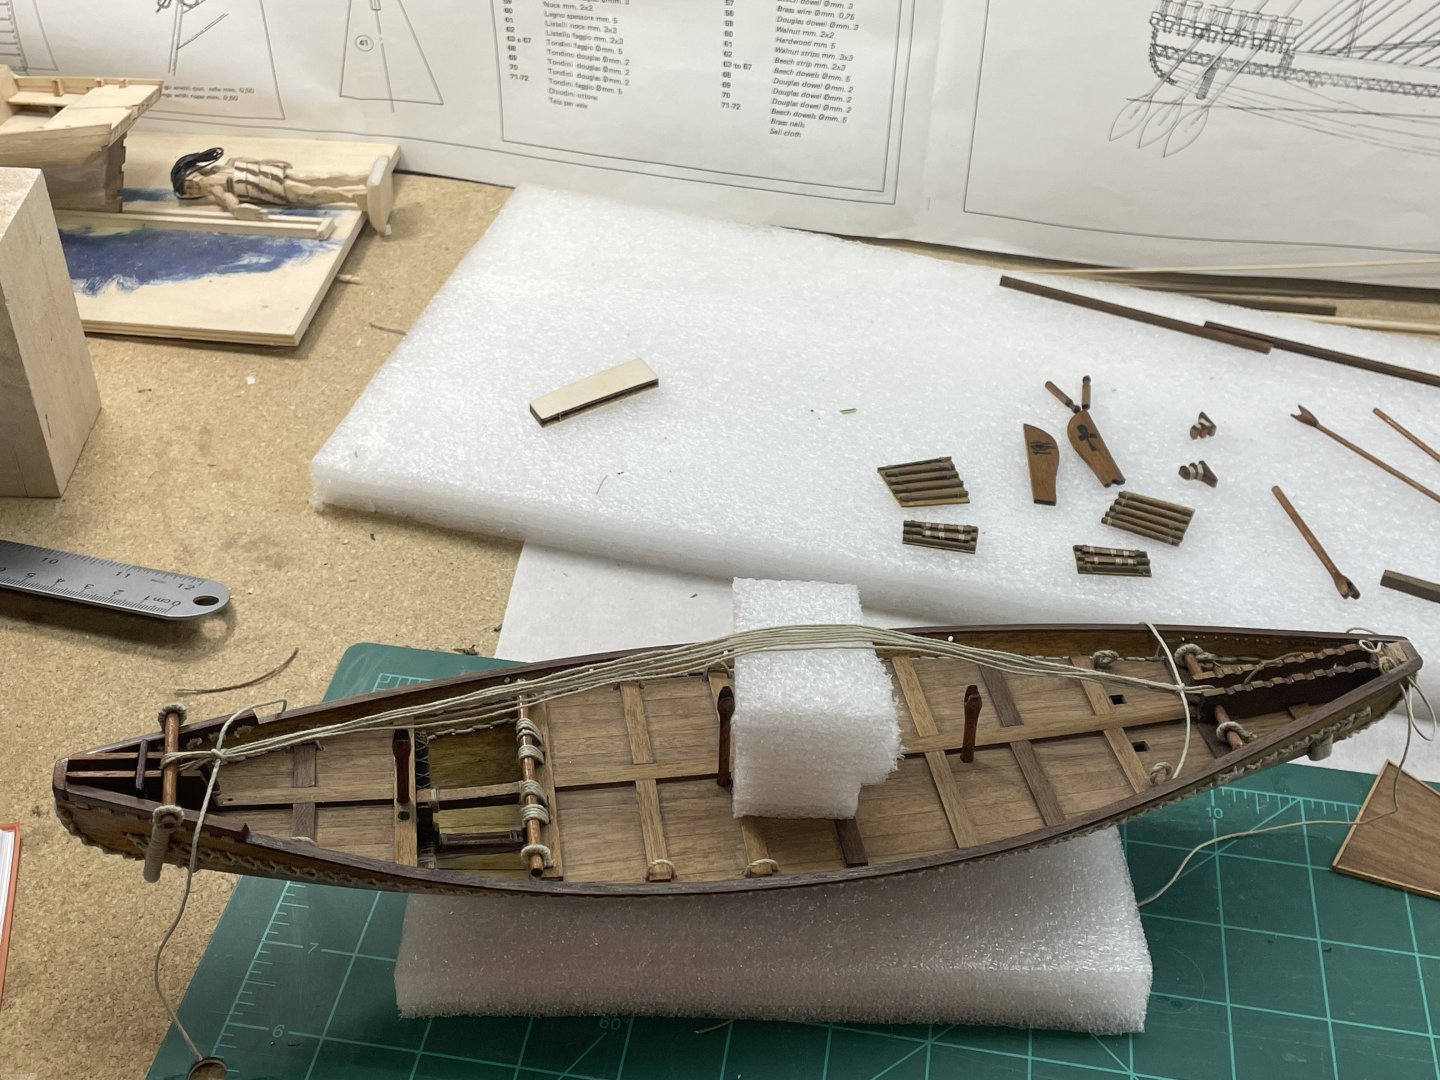
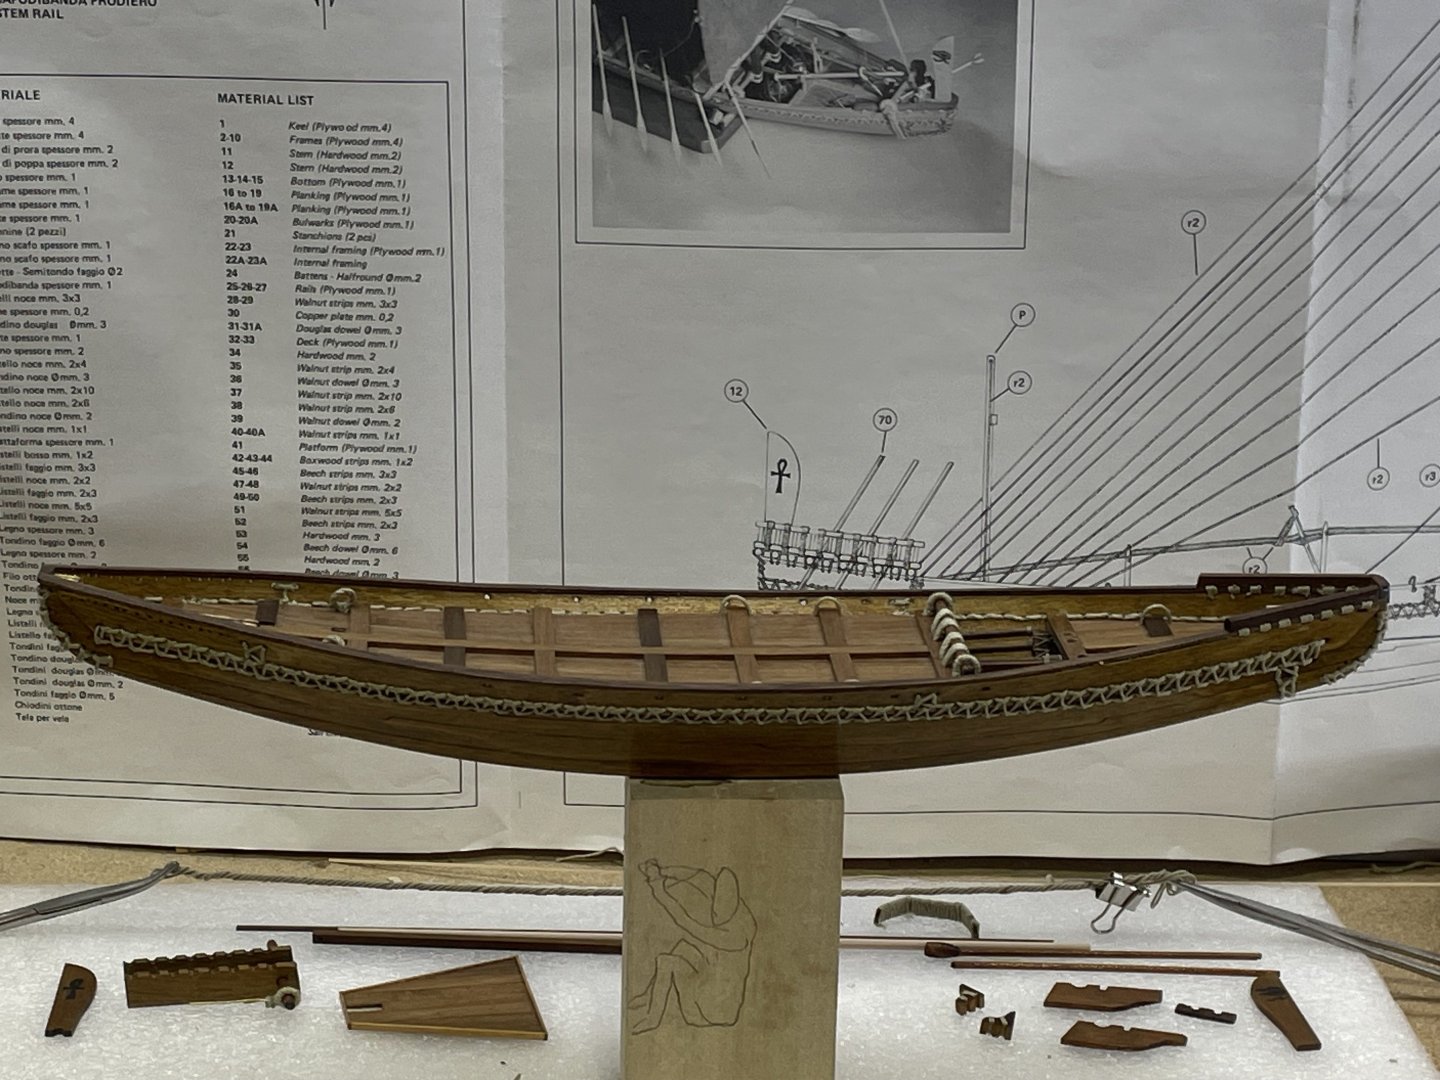
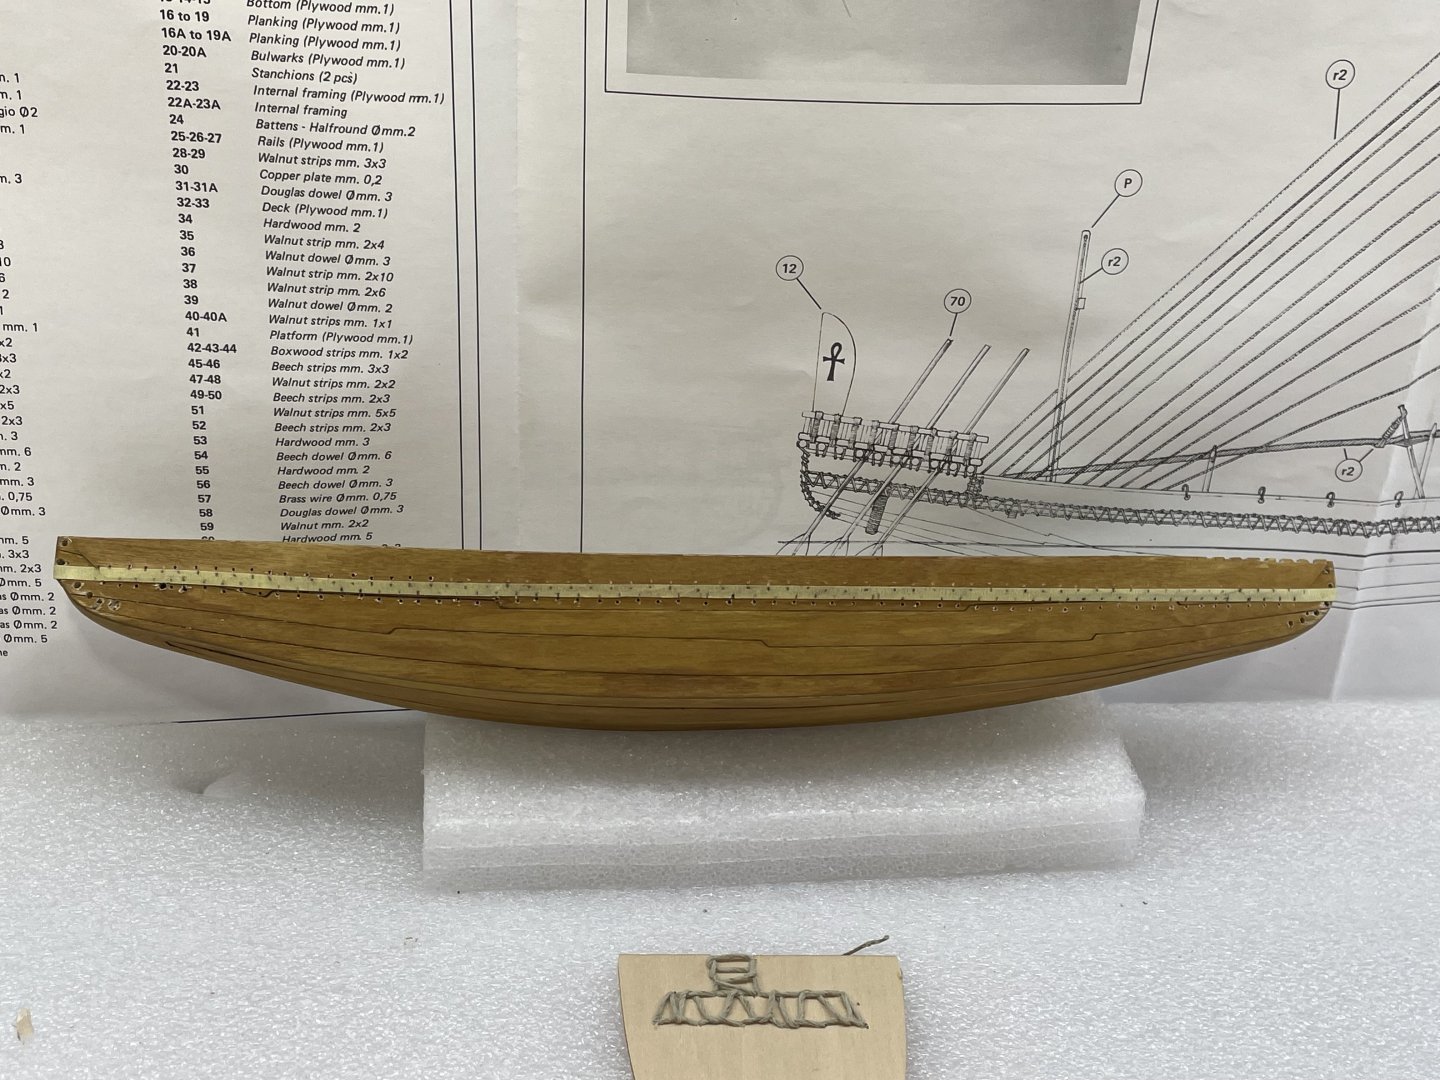
I got the cap rail on. The bow has a small piece on top with grooves that match the ones I filed in the hull. Loops of .5 mm thread went in these. The deck also has loops that needed to be put in before it was glue to the hull. This is at the bow. I used a 2x2 to standardize all the loops. Here’s a 1.3 rope at the stern. The mast is attached to a beam that will rotate to raise and lower it. It also has two boulders that rest on the knees at the base. The weight counter balances, so it doesn’t slam down on all the slave rowers. I hope to mimic this action before I glue the mast on. I have flipped back and forth through these instructions and much as I did a Sears and Robuck Christmas catalog:-) I’m still wondering if I’ve overlooked something. So here’s where it stands with the deck glued on.


- 44 replies
-
- 5
-
-
- Nave Egizia
- Amati
- (and 1 more)
-
The Mossy Shipyard by Bryan Woods - 1:1
Bryan Woods replied to Bryan Woods's topic in Non-ship/categorised builds
Big improvement today:-) The refrigeration man showed up to cut and vacuumed out the line set for the mini split. Forecast calls for cooler temperatures tomorrow:-)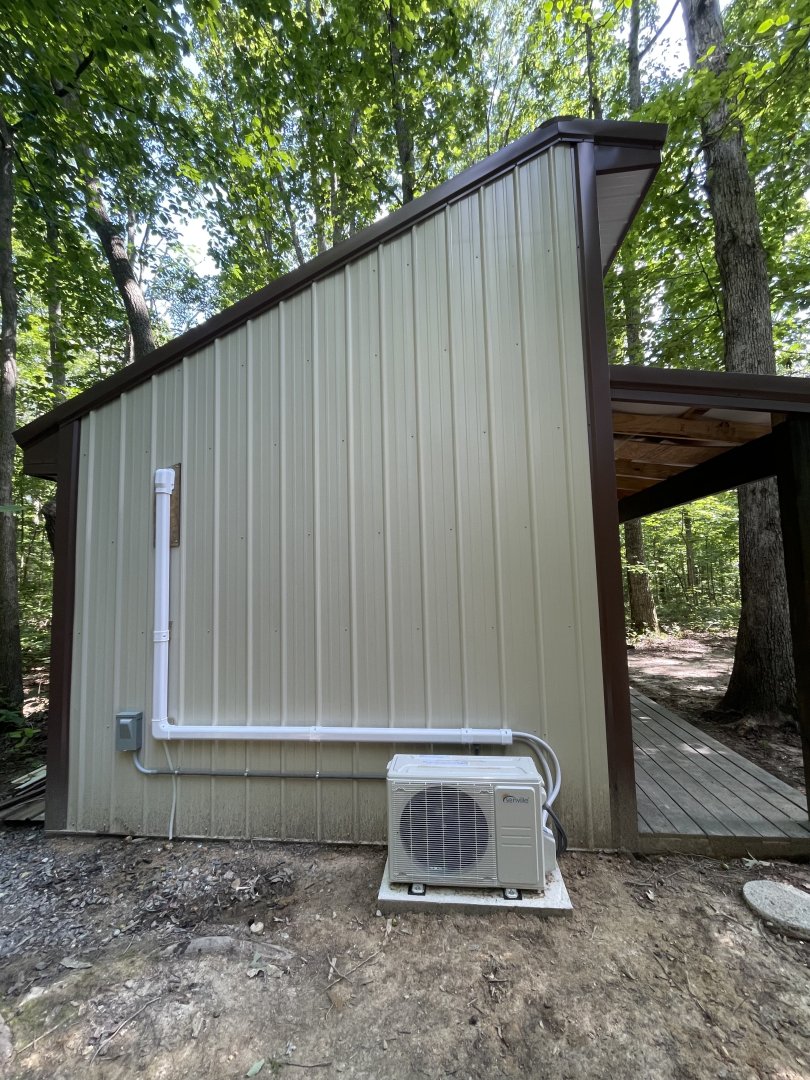
- 42 replies
-
- 10
-
-
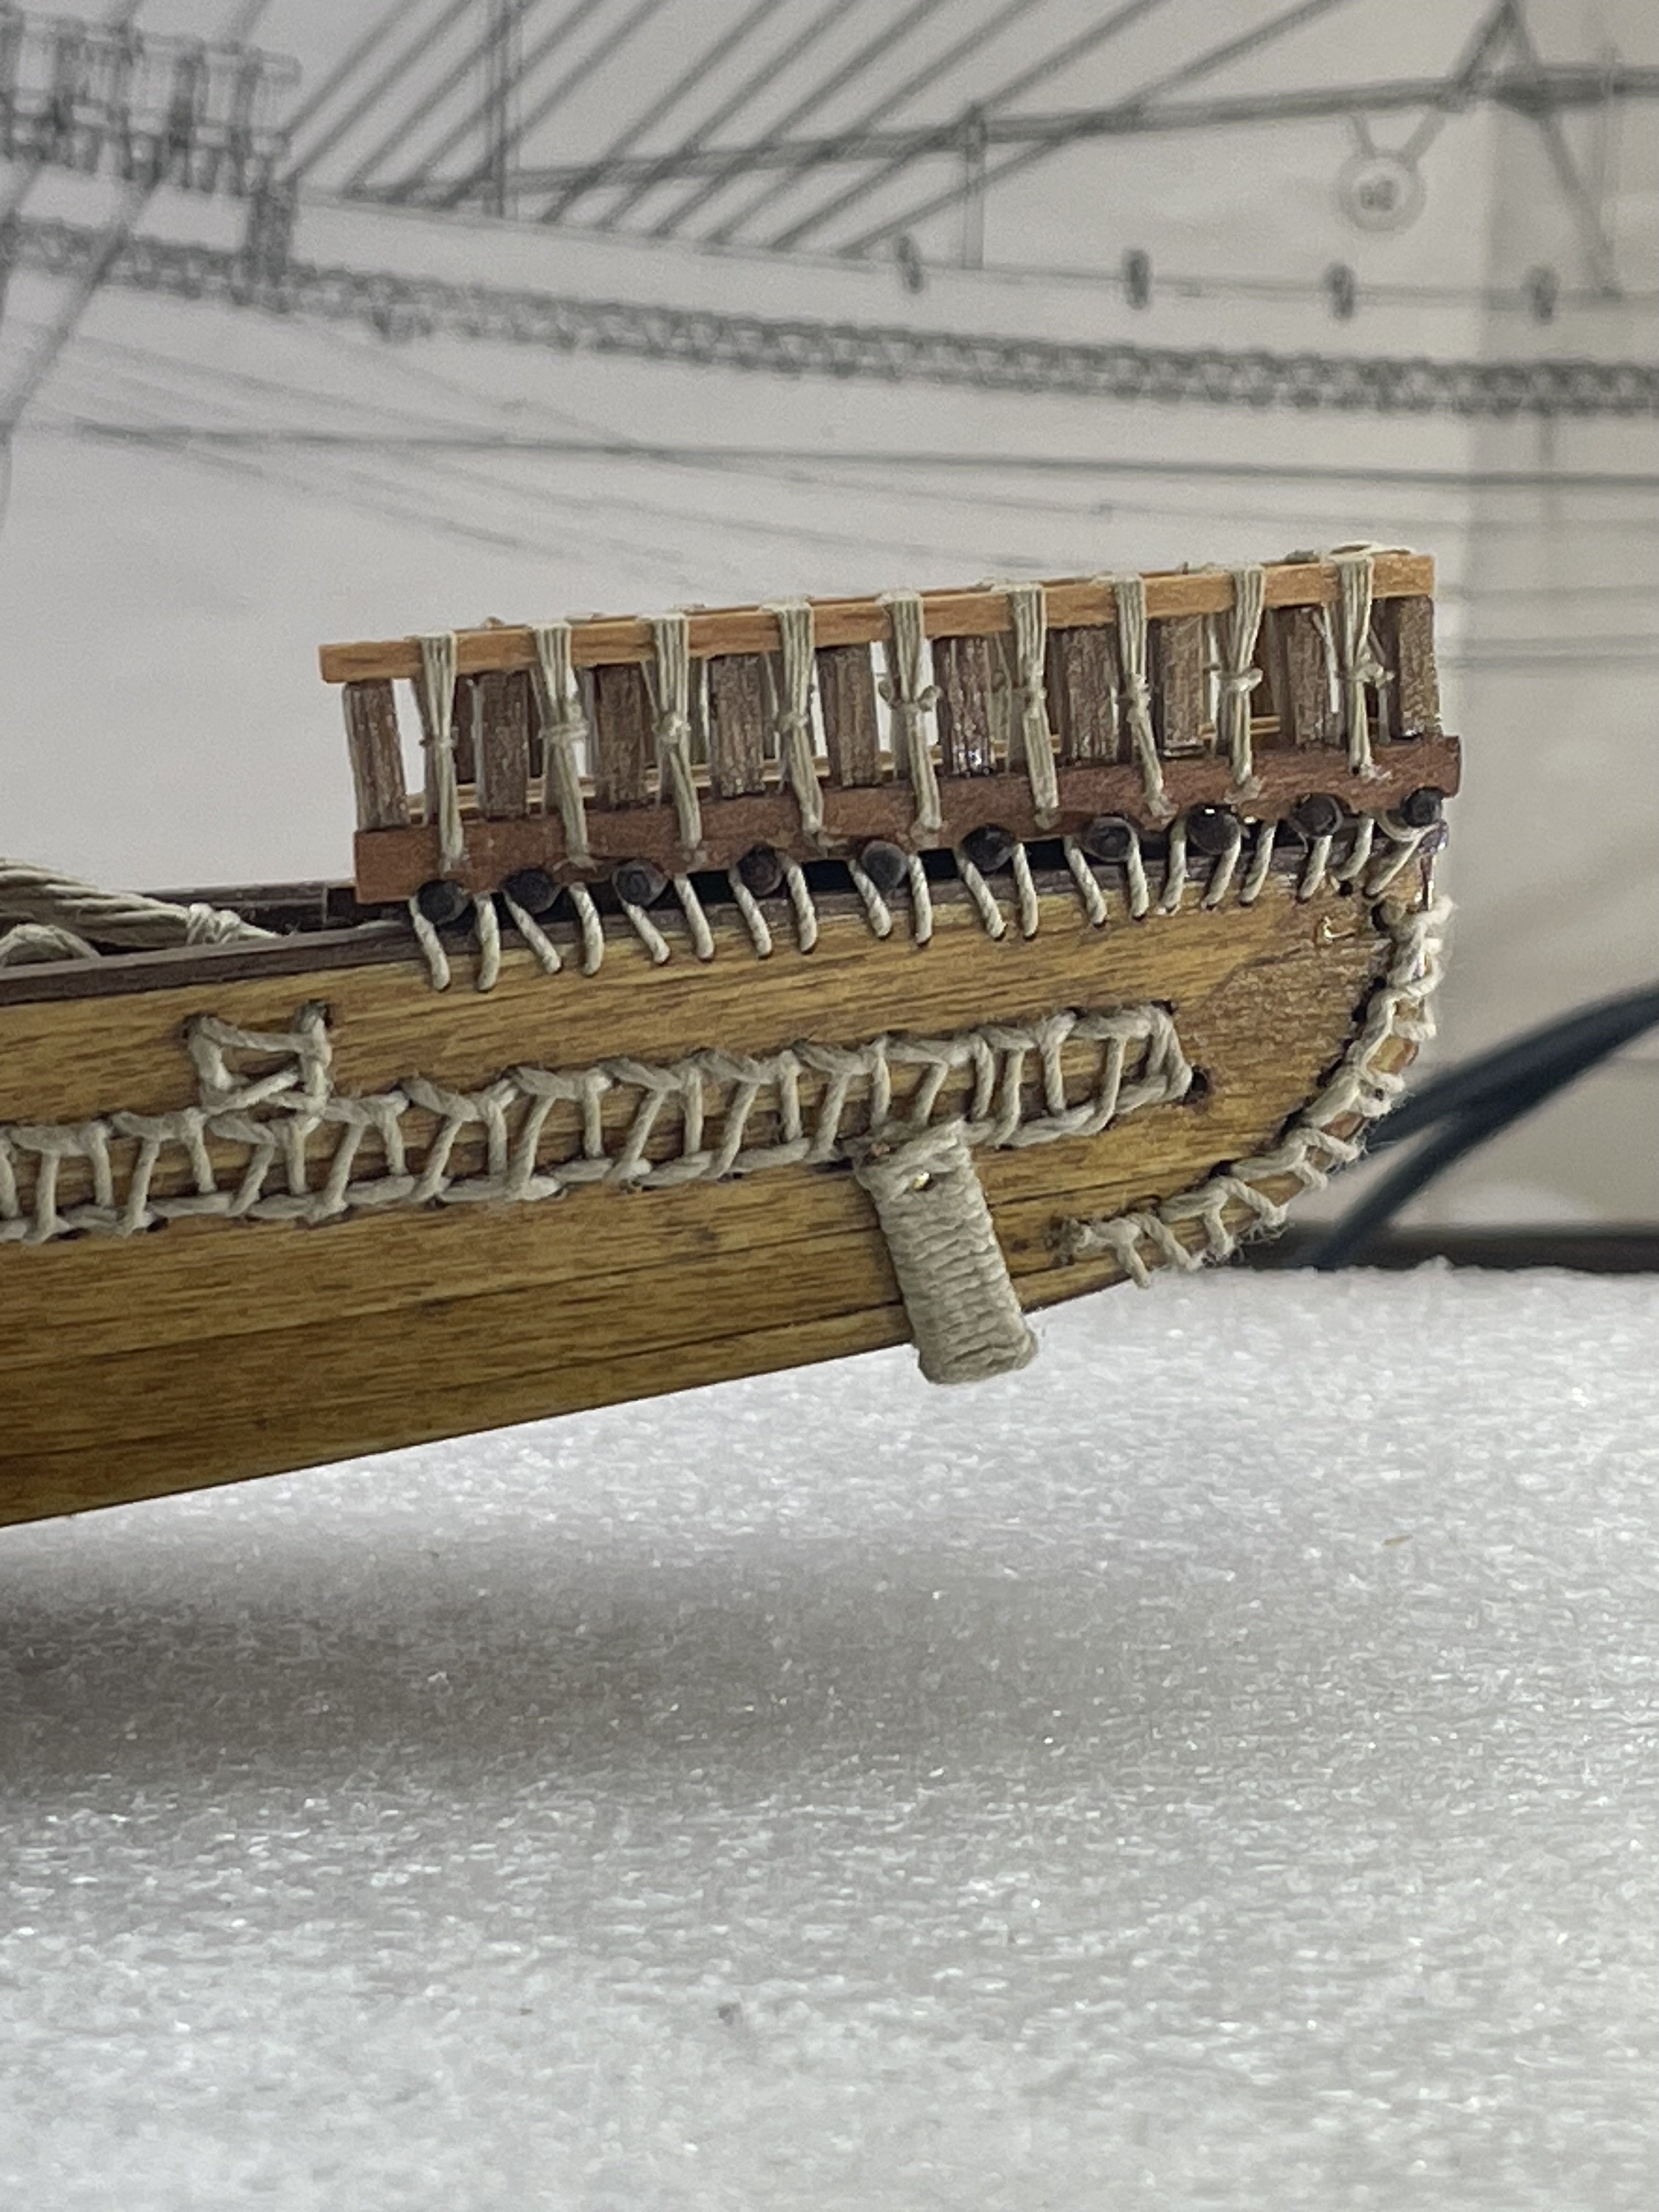
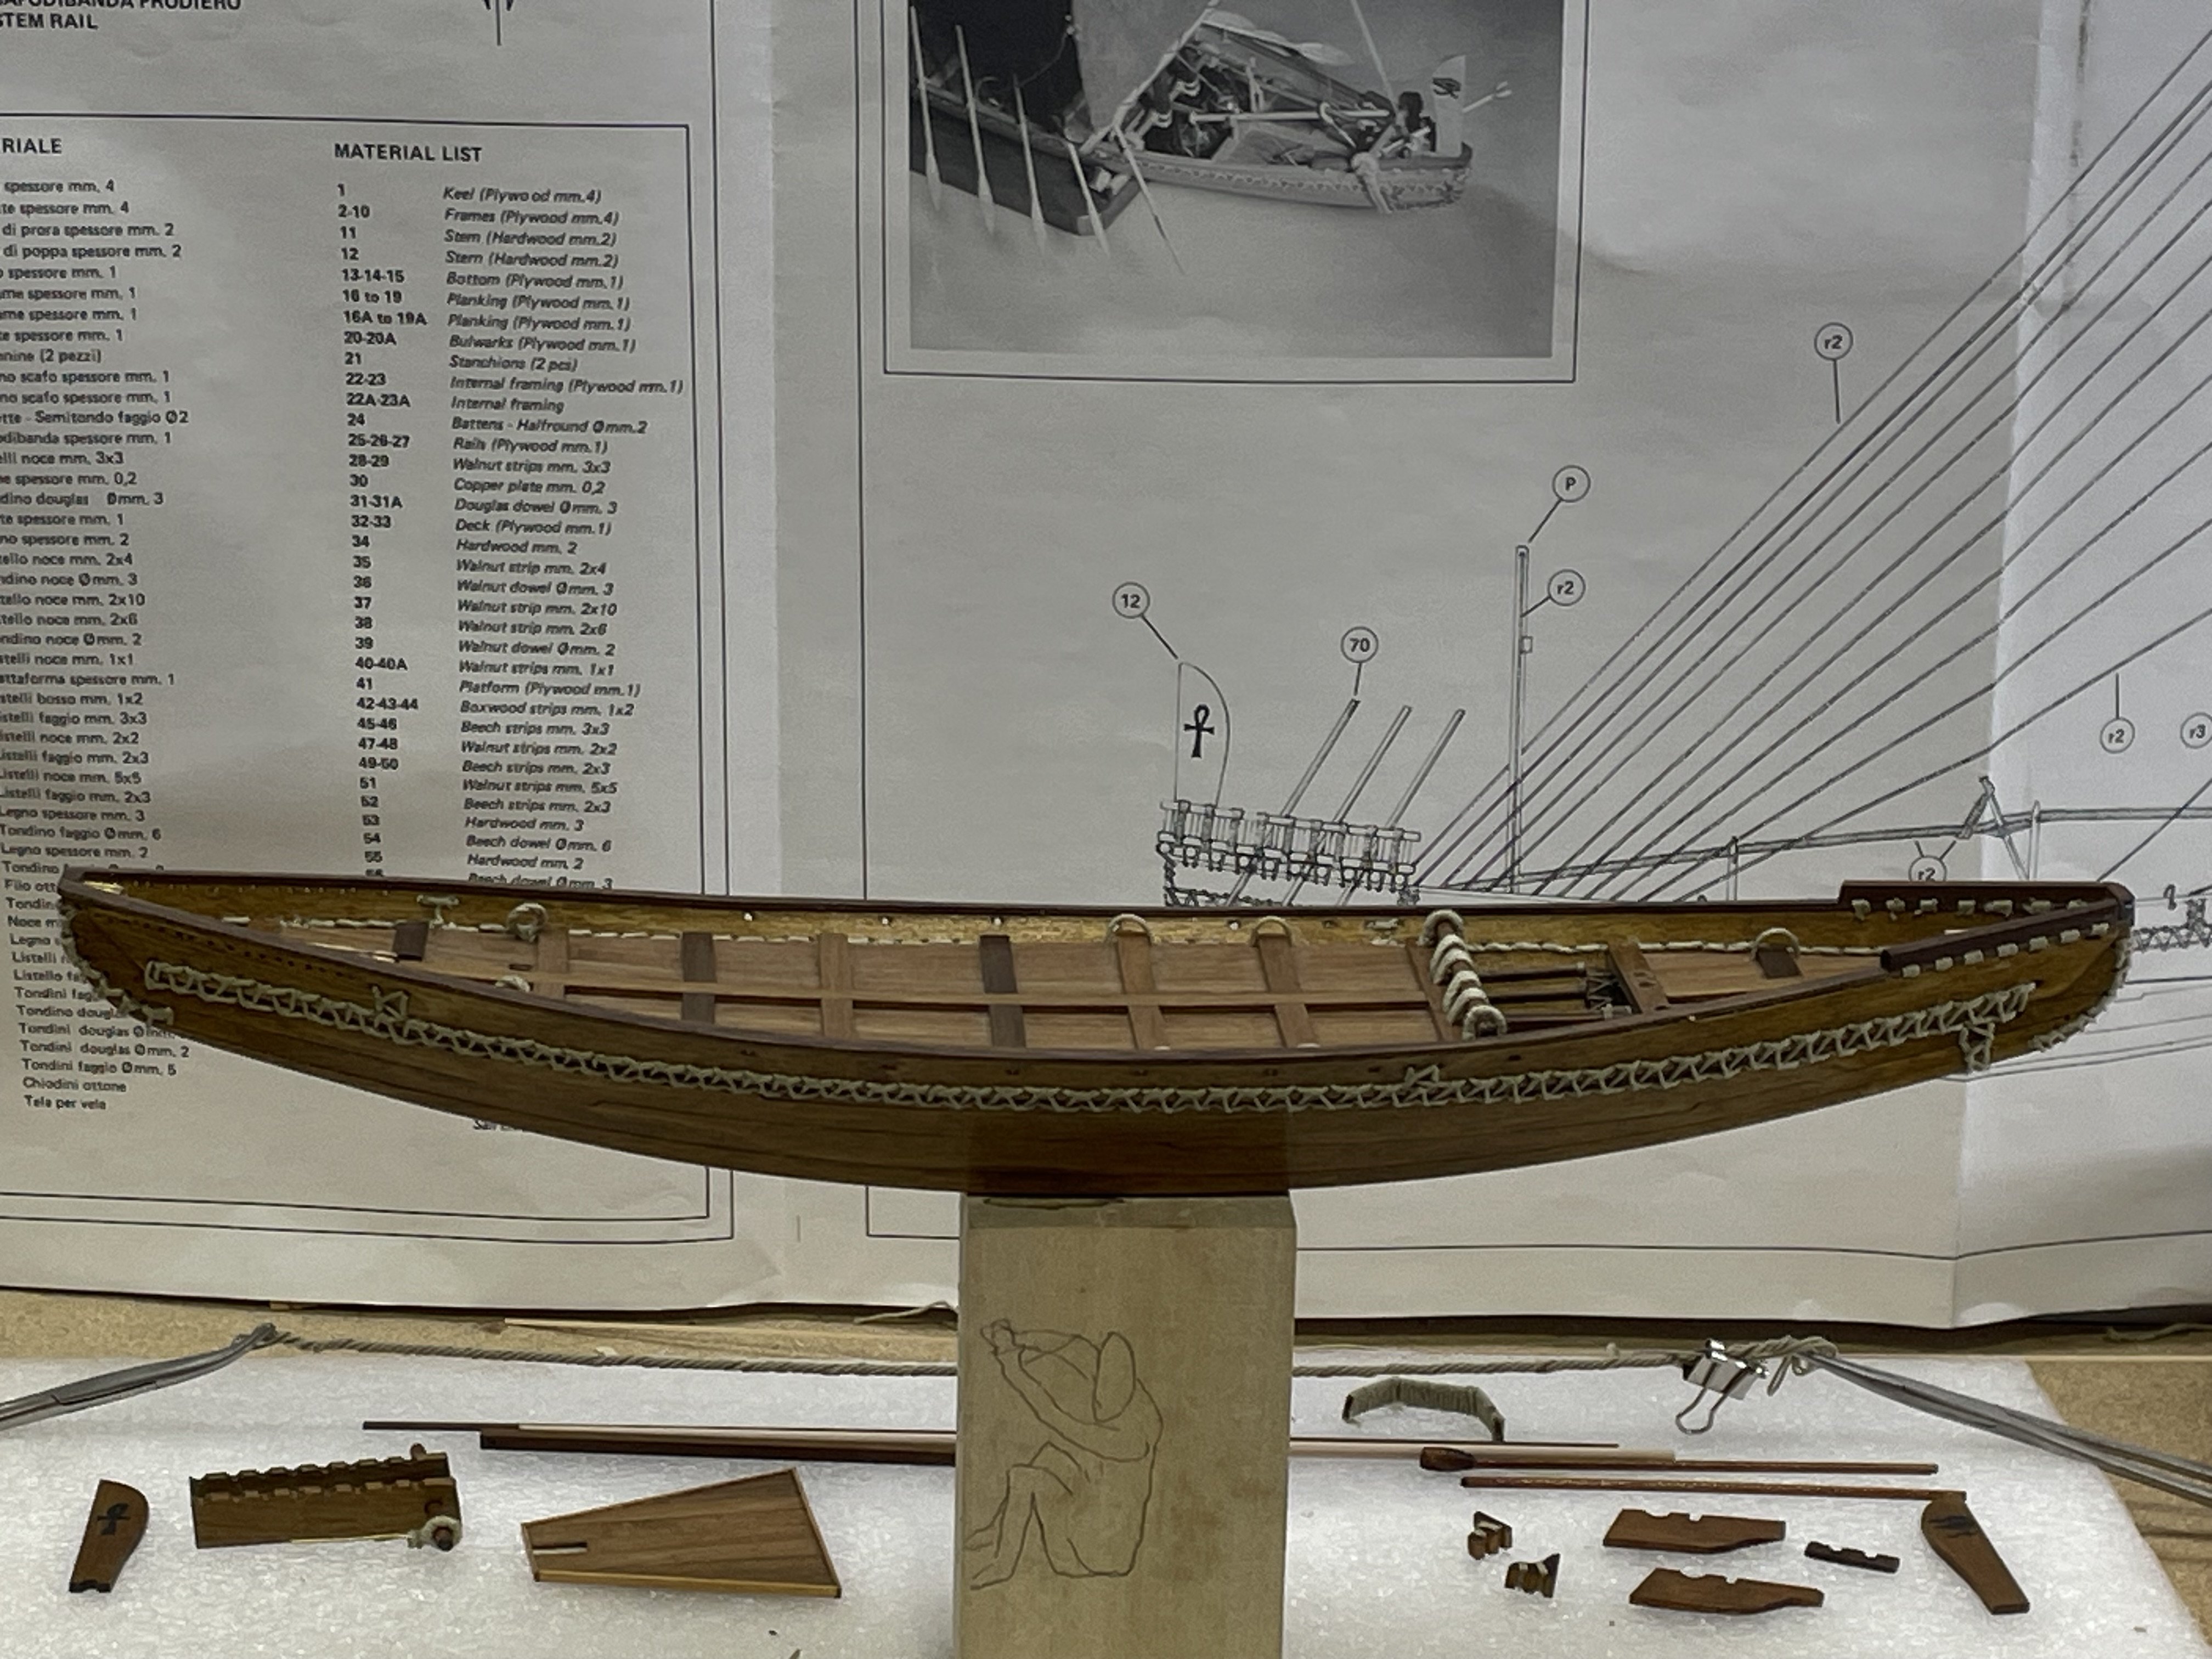
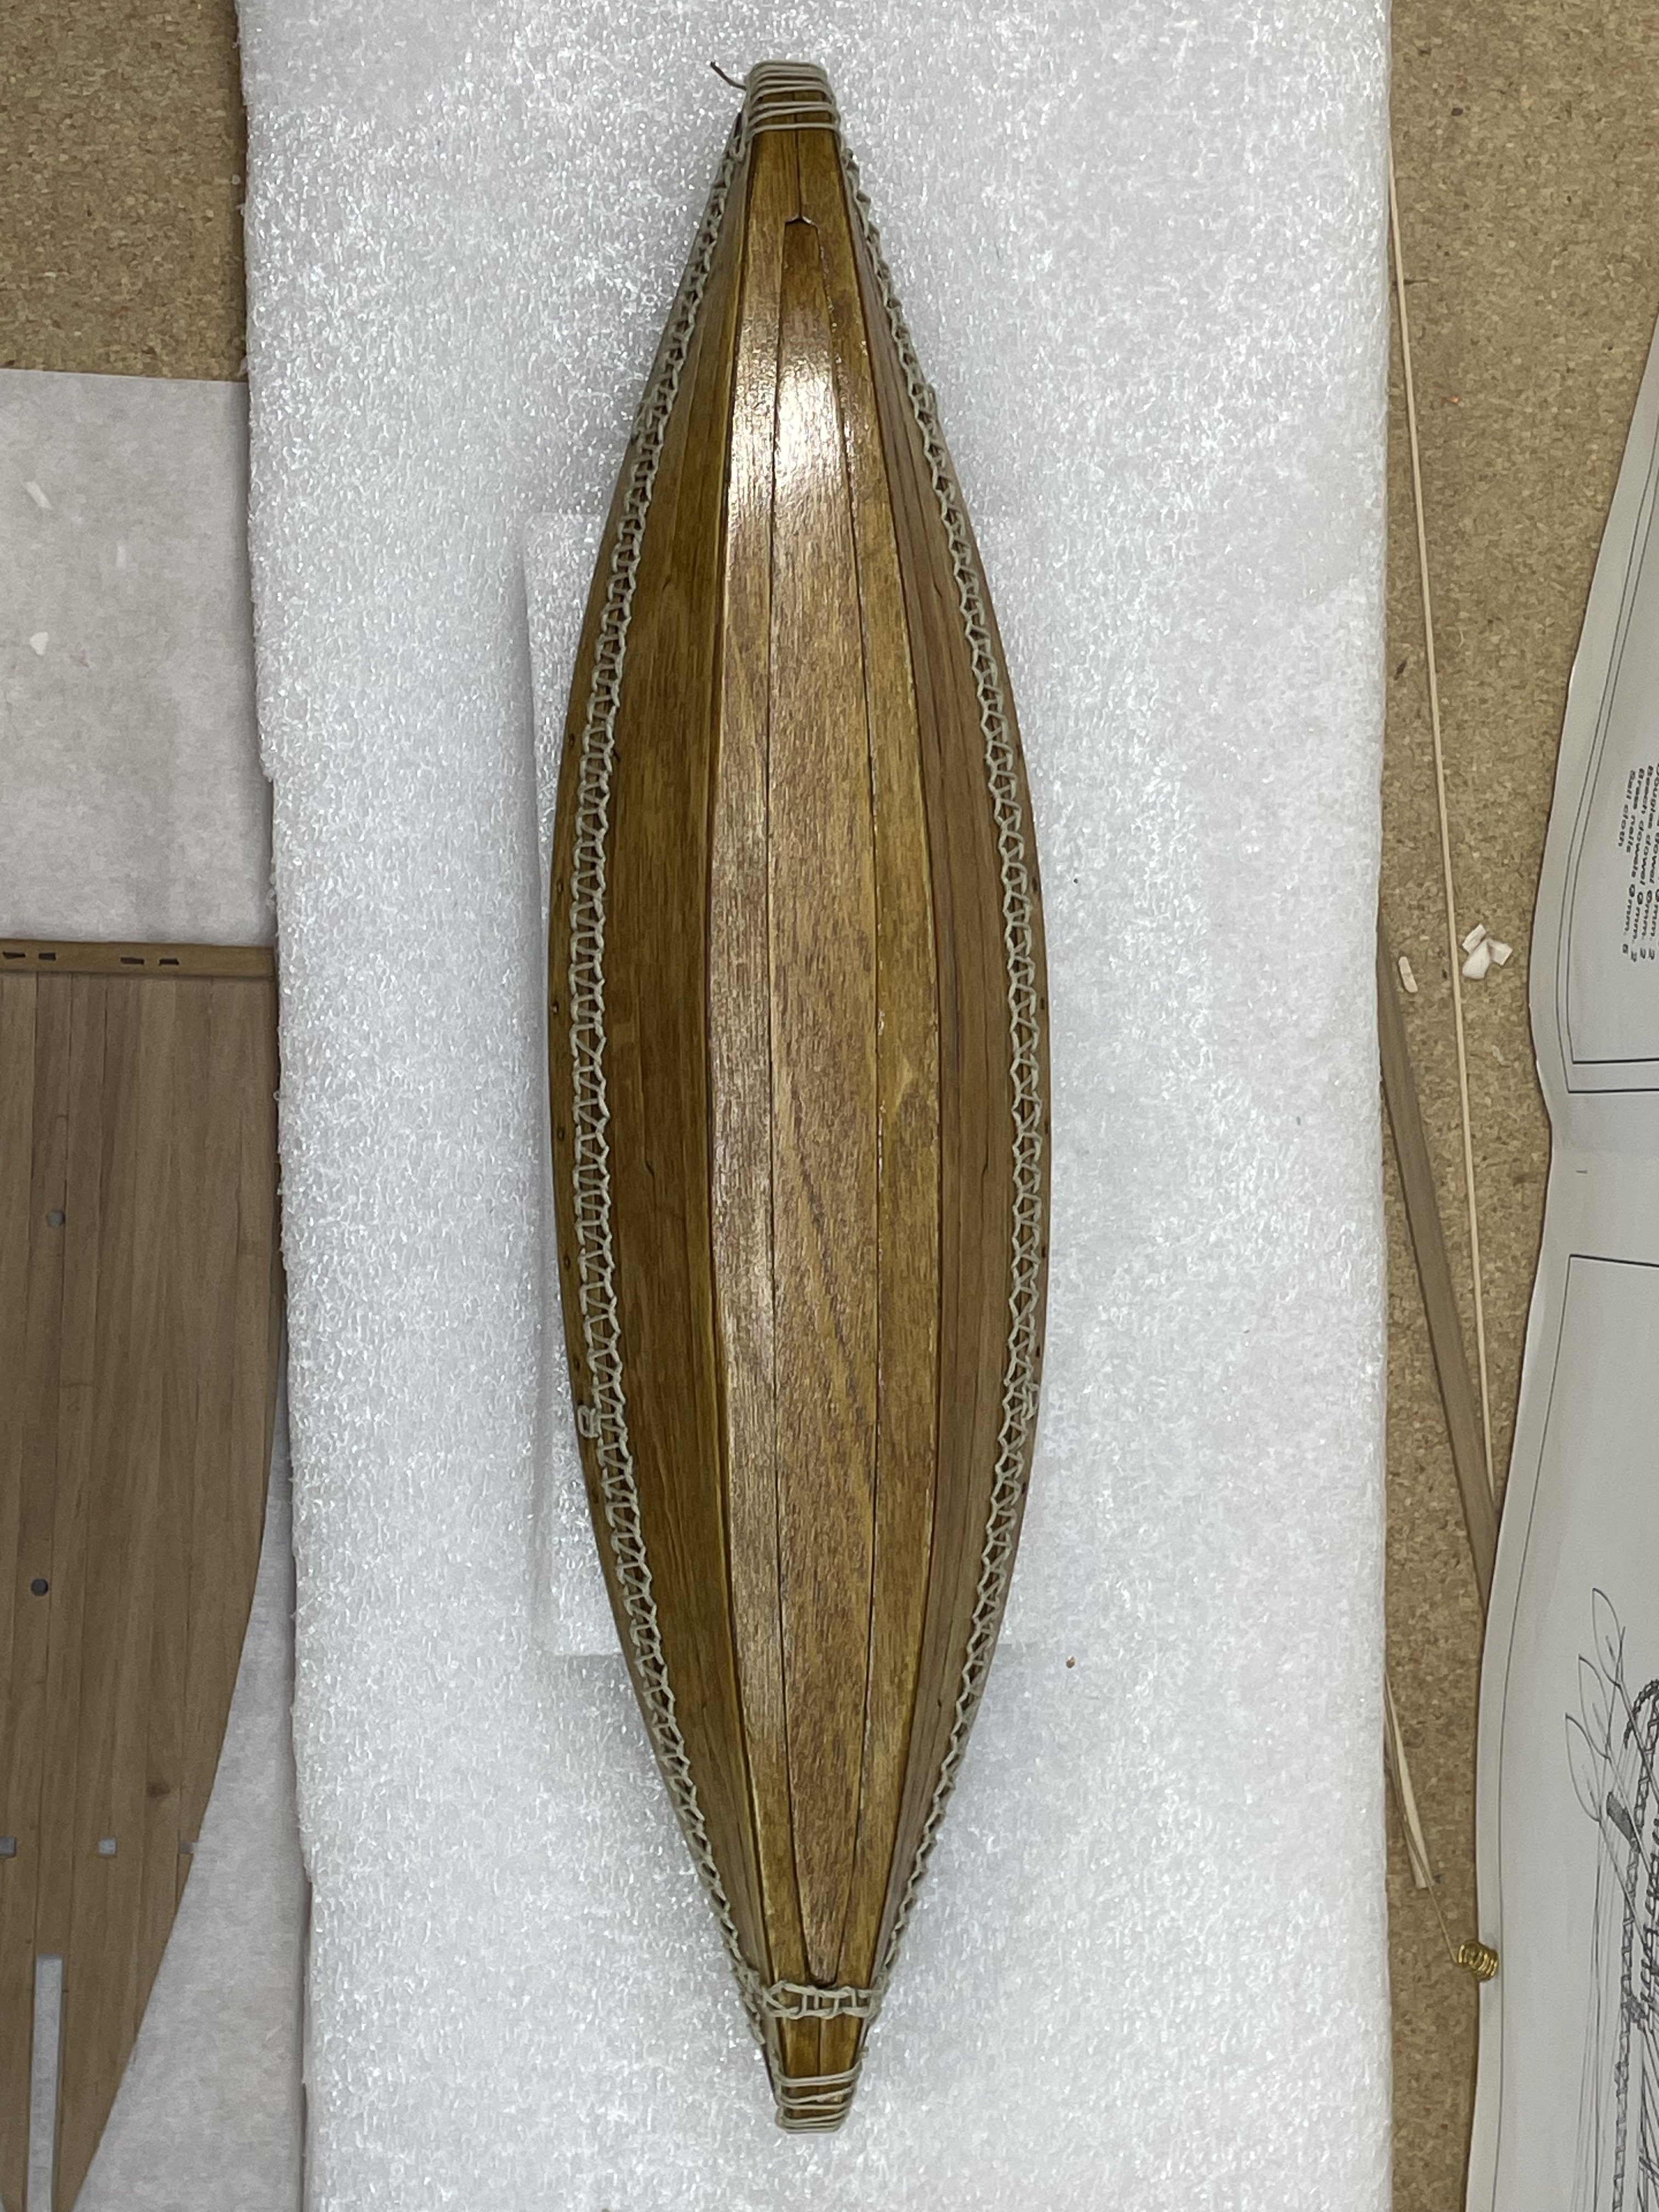
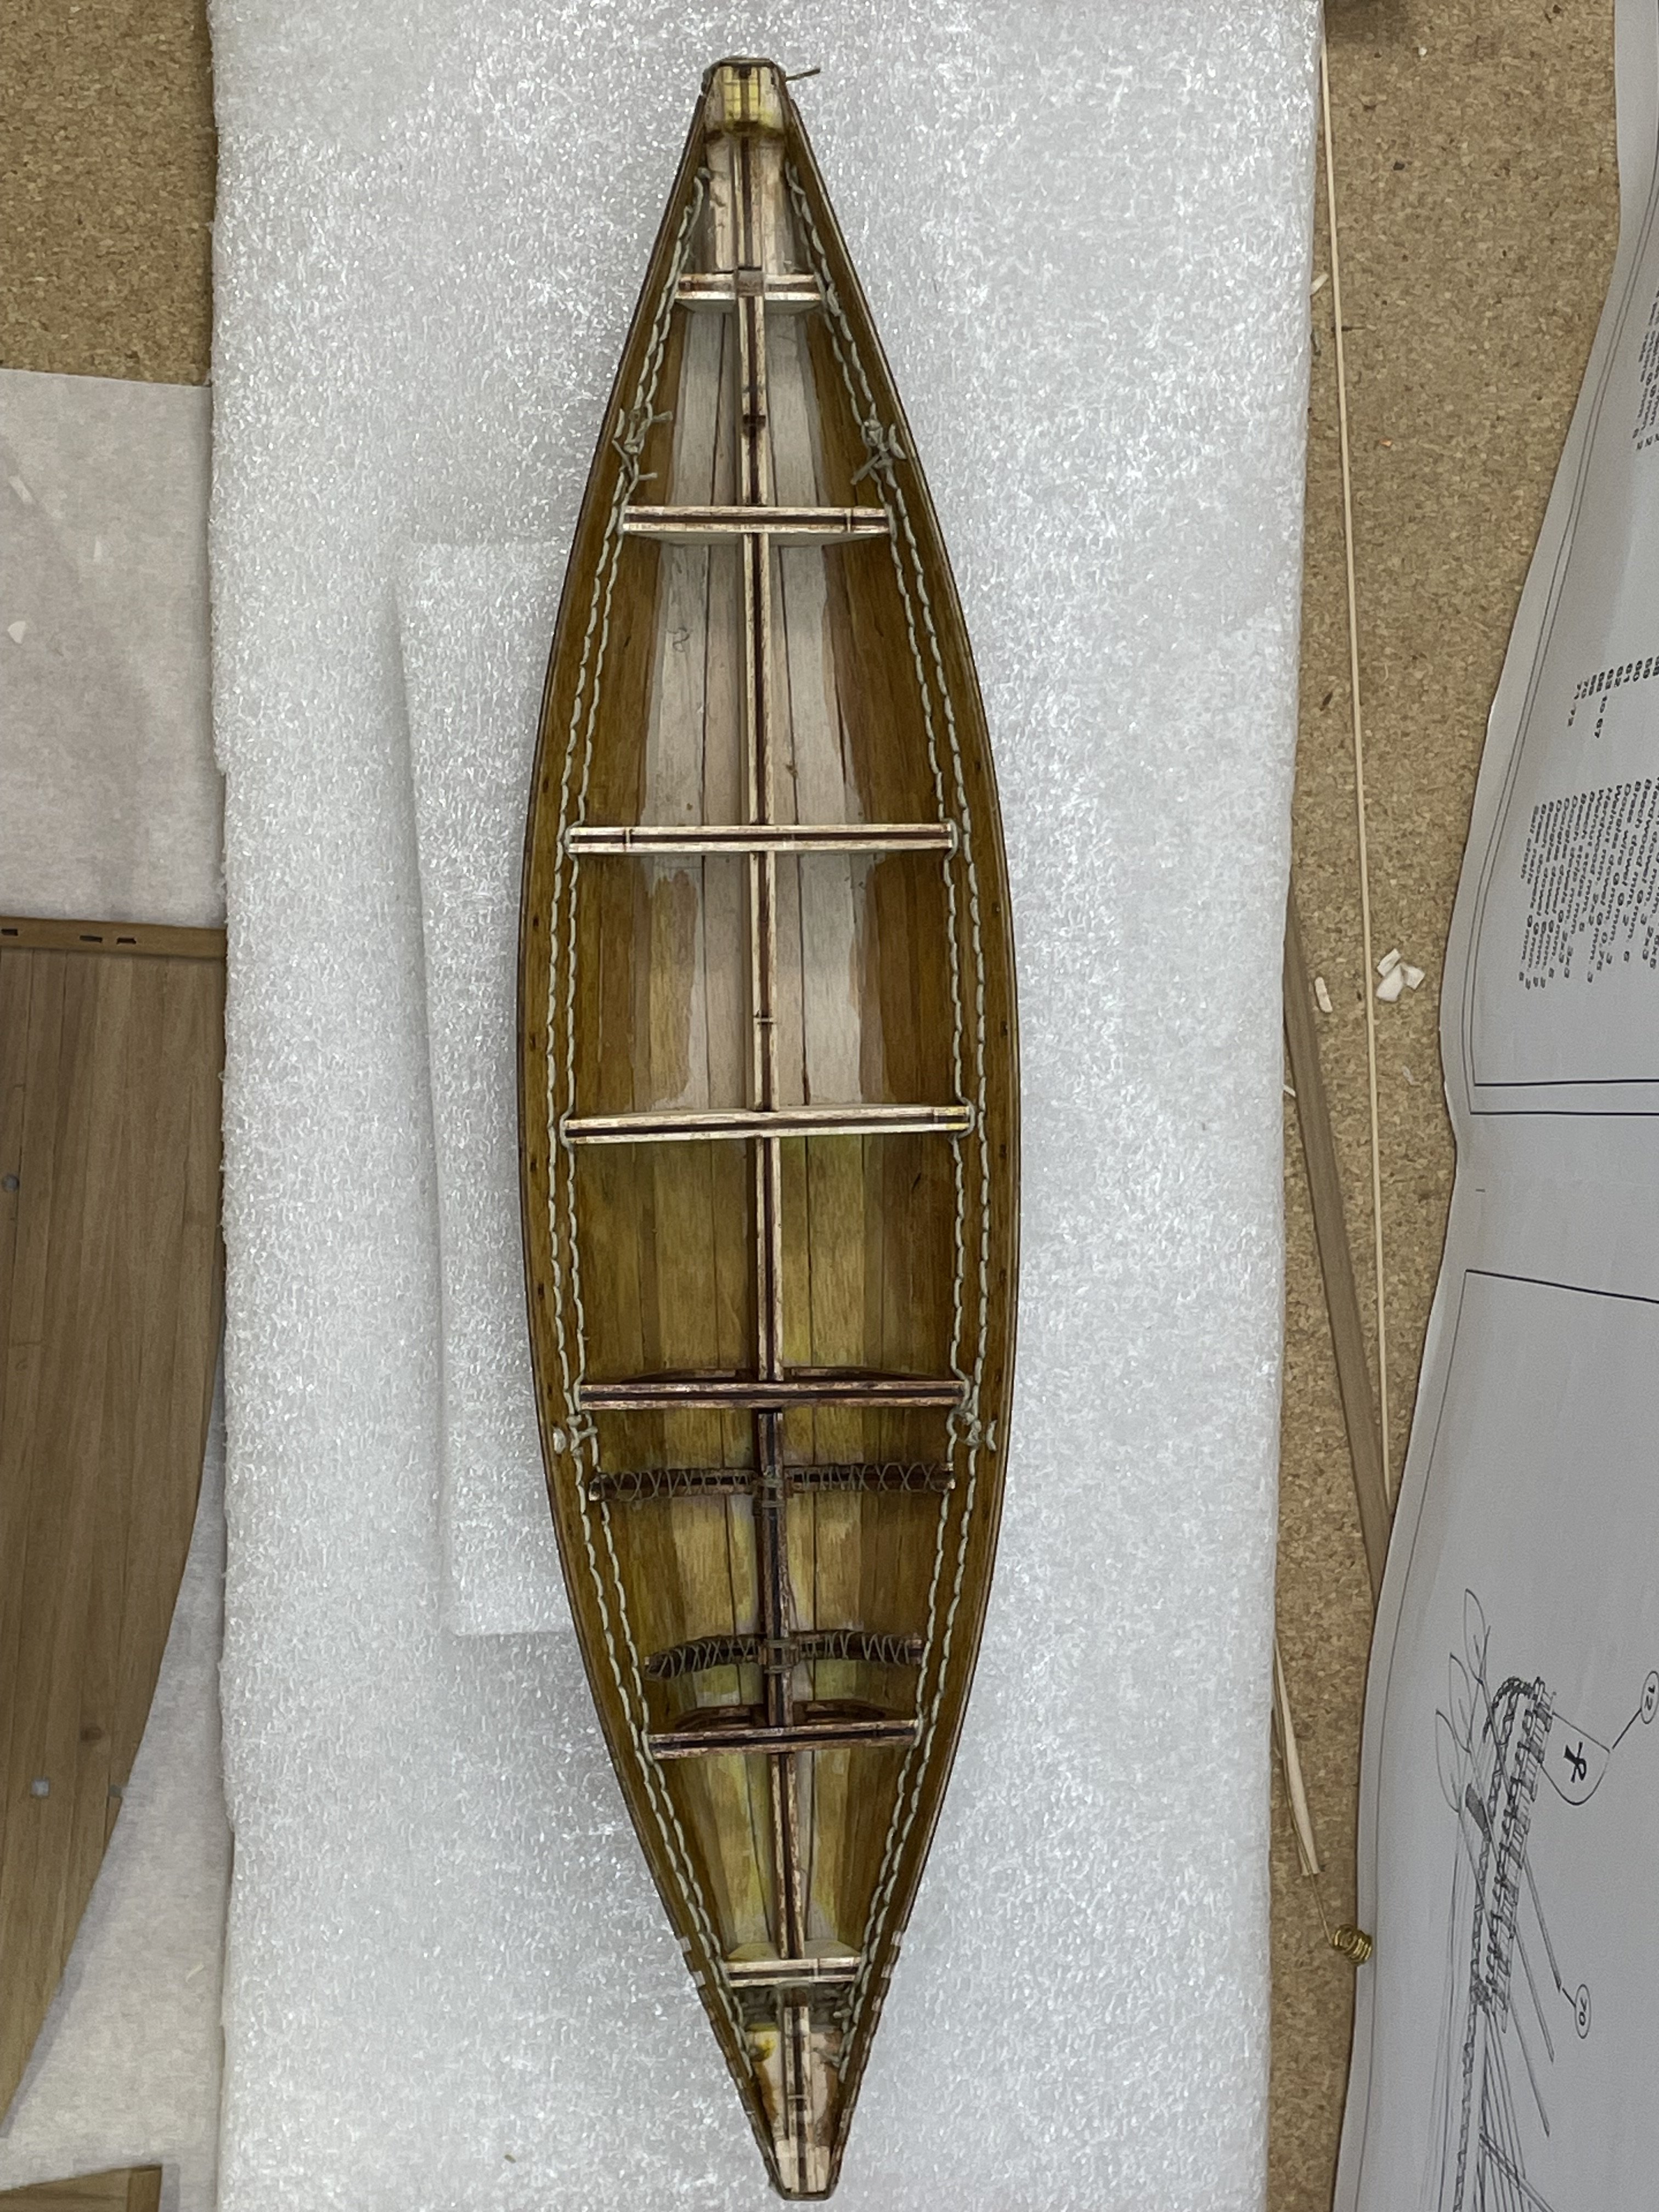
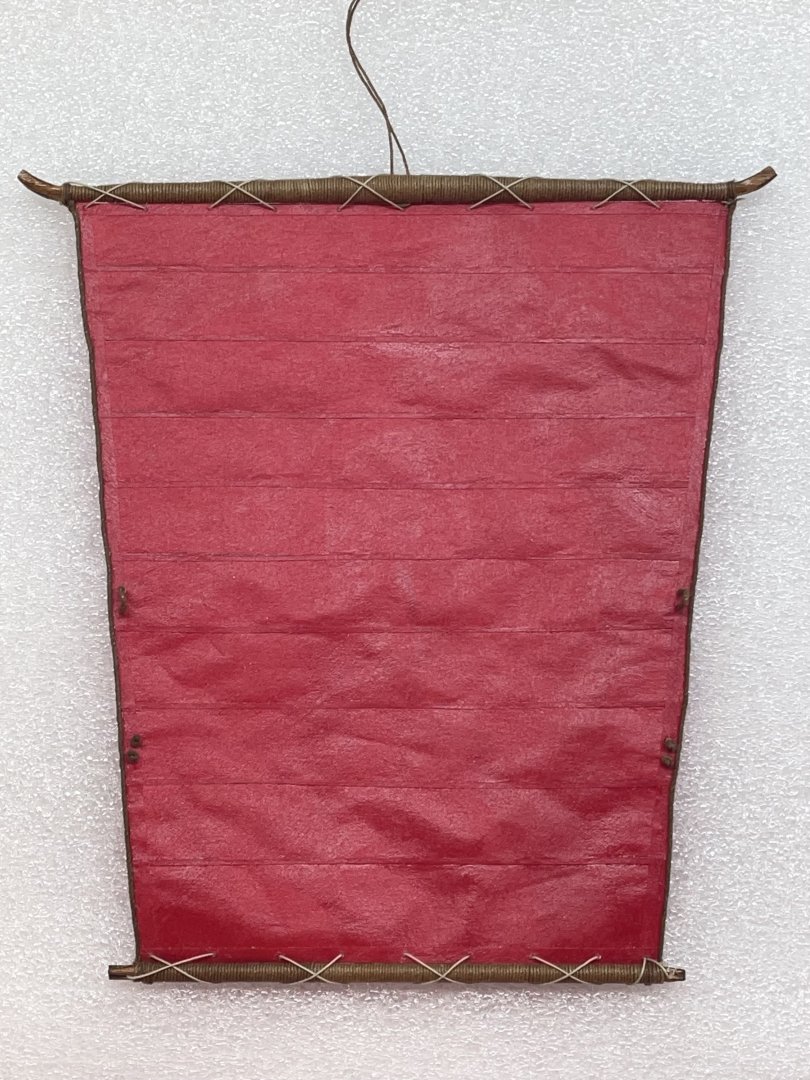
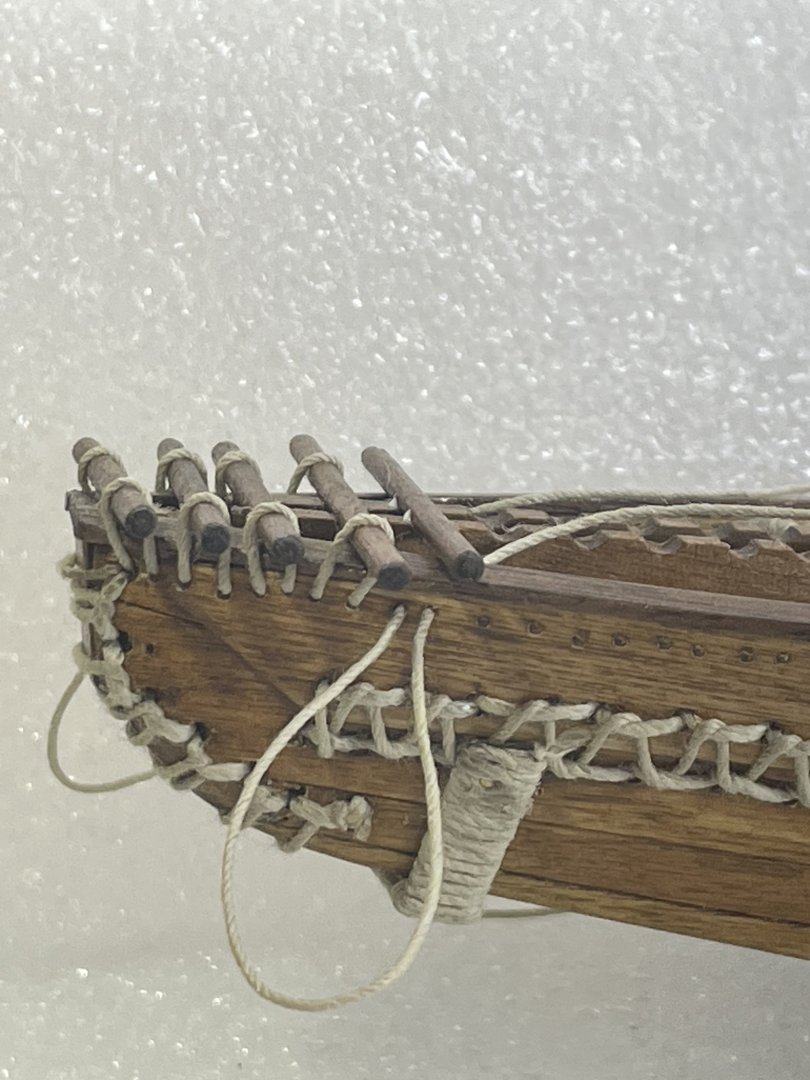
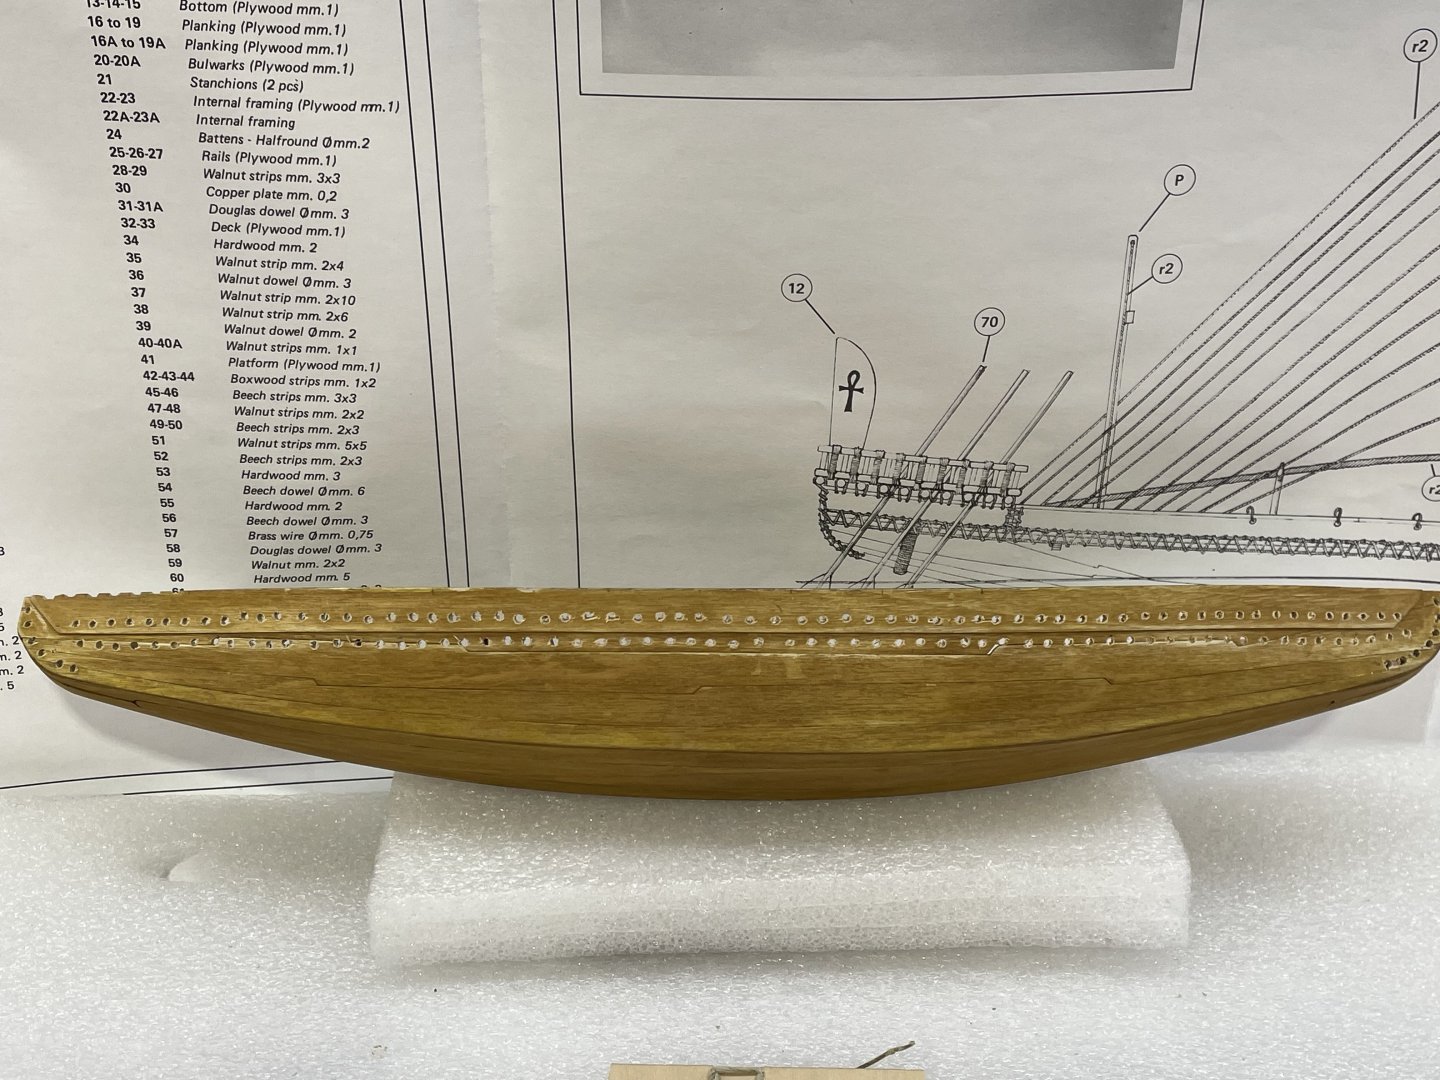
I finished the needle work on the hull today. It wasn’t hard, just slow:-) Next in my plan is the cap rail.


- 44 replies
-
- 3
-
-
- Nave Egizia
- Amati
- (and 1 more)
-
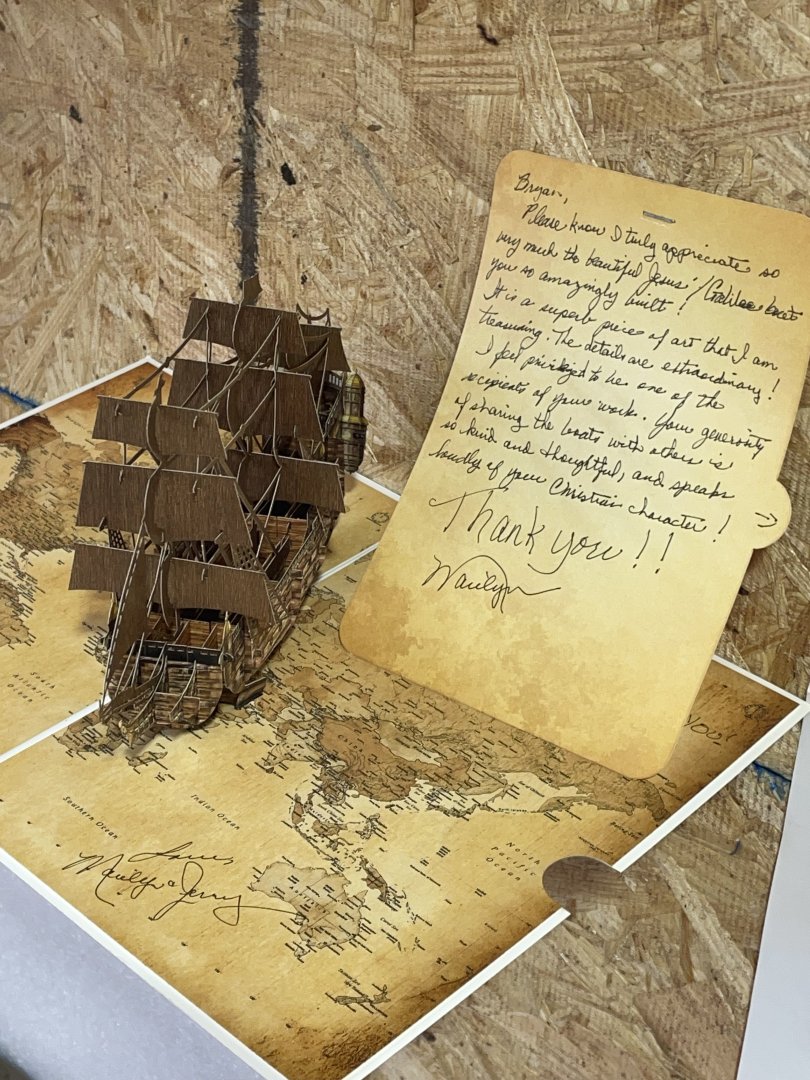
The one that received this boat, gave me in return several goodies:-) a great book and this wonderful pop up card. I bet it would be a great build:-)
-
Thanks rcmdrvr. I read your log probably many times before I ever started the build:-)
- 44 replies
-
- 1
-
-
- Nave Egizia
- Amati
- (and 1 more)
-
Thanks Bob, I’m high on top of a ridge, I just have to worry about the road washing out:-)
- 44 replies
-
- 1
-
-
- Nave Egizia
- Amati
- (and 1 more)
-
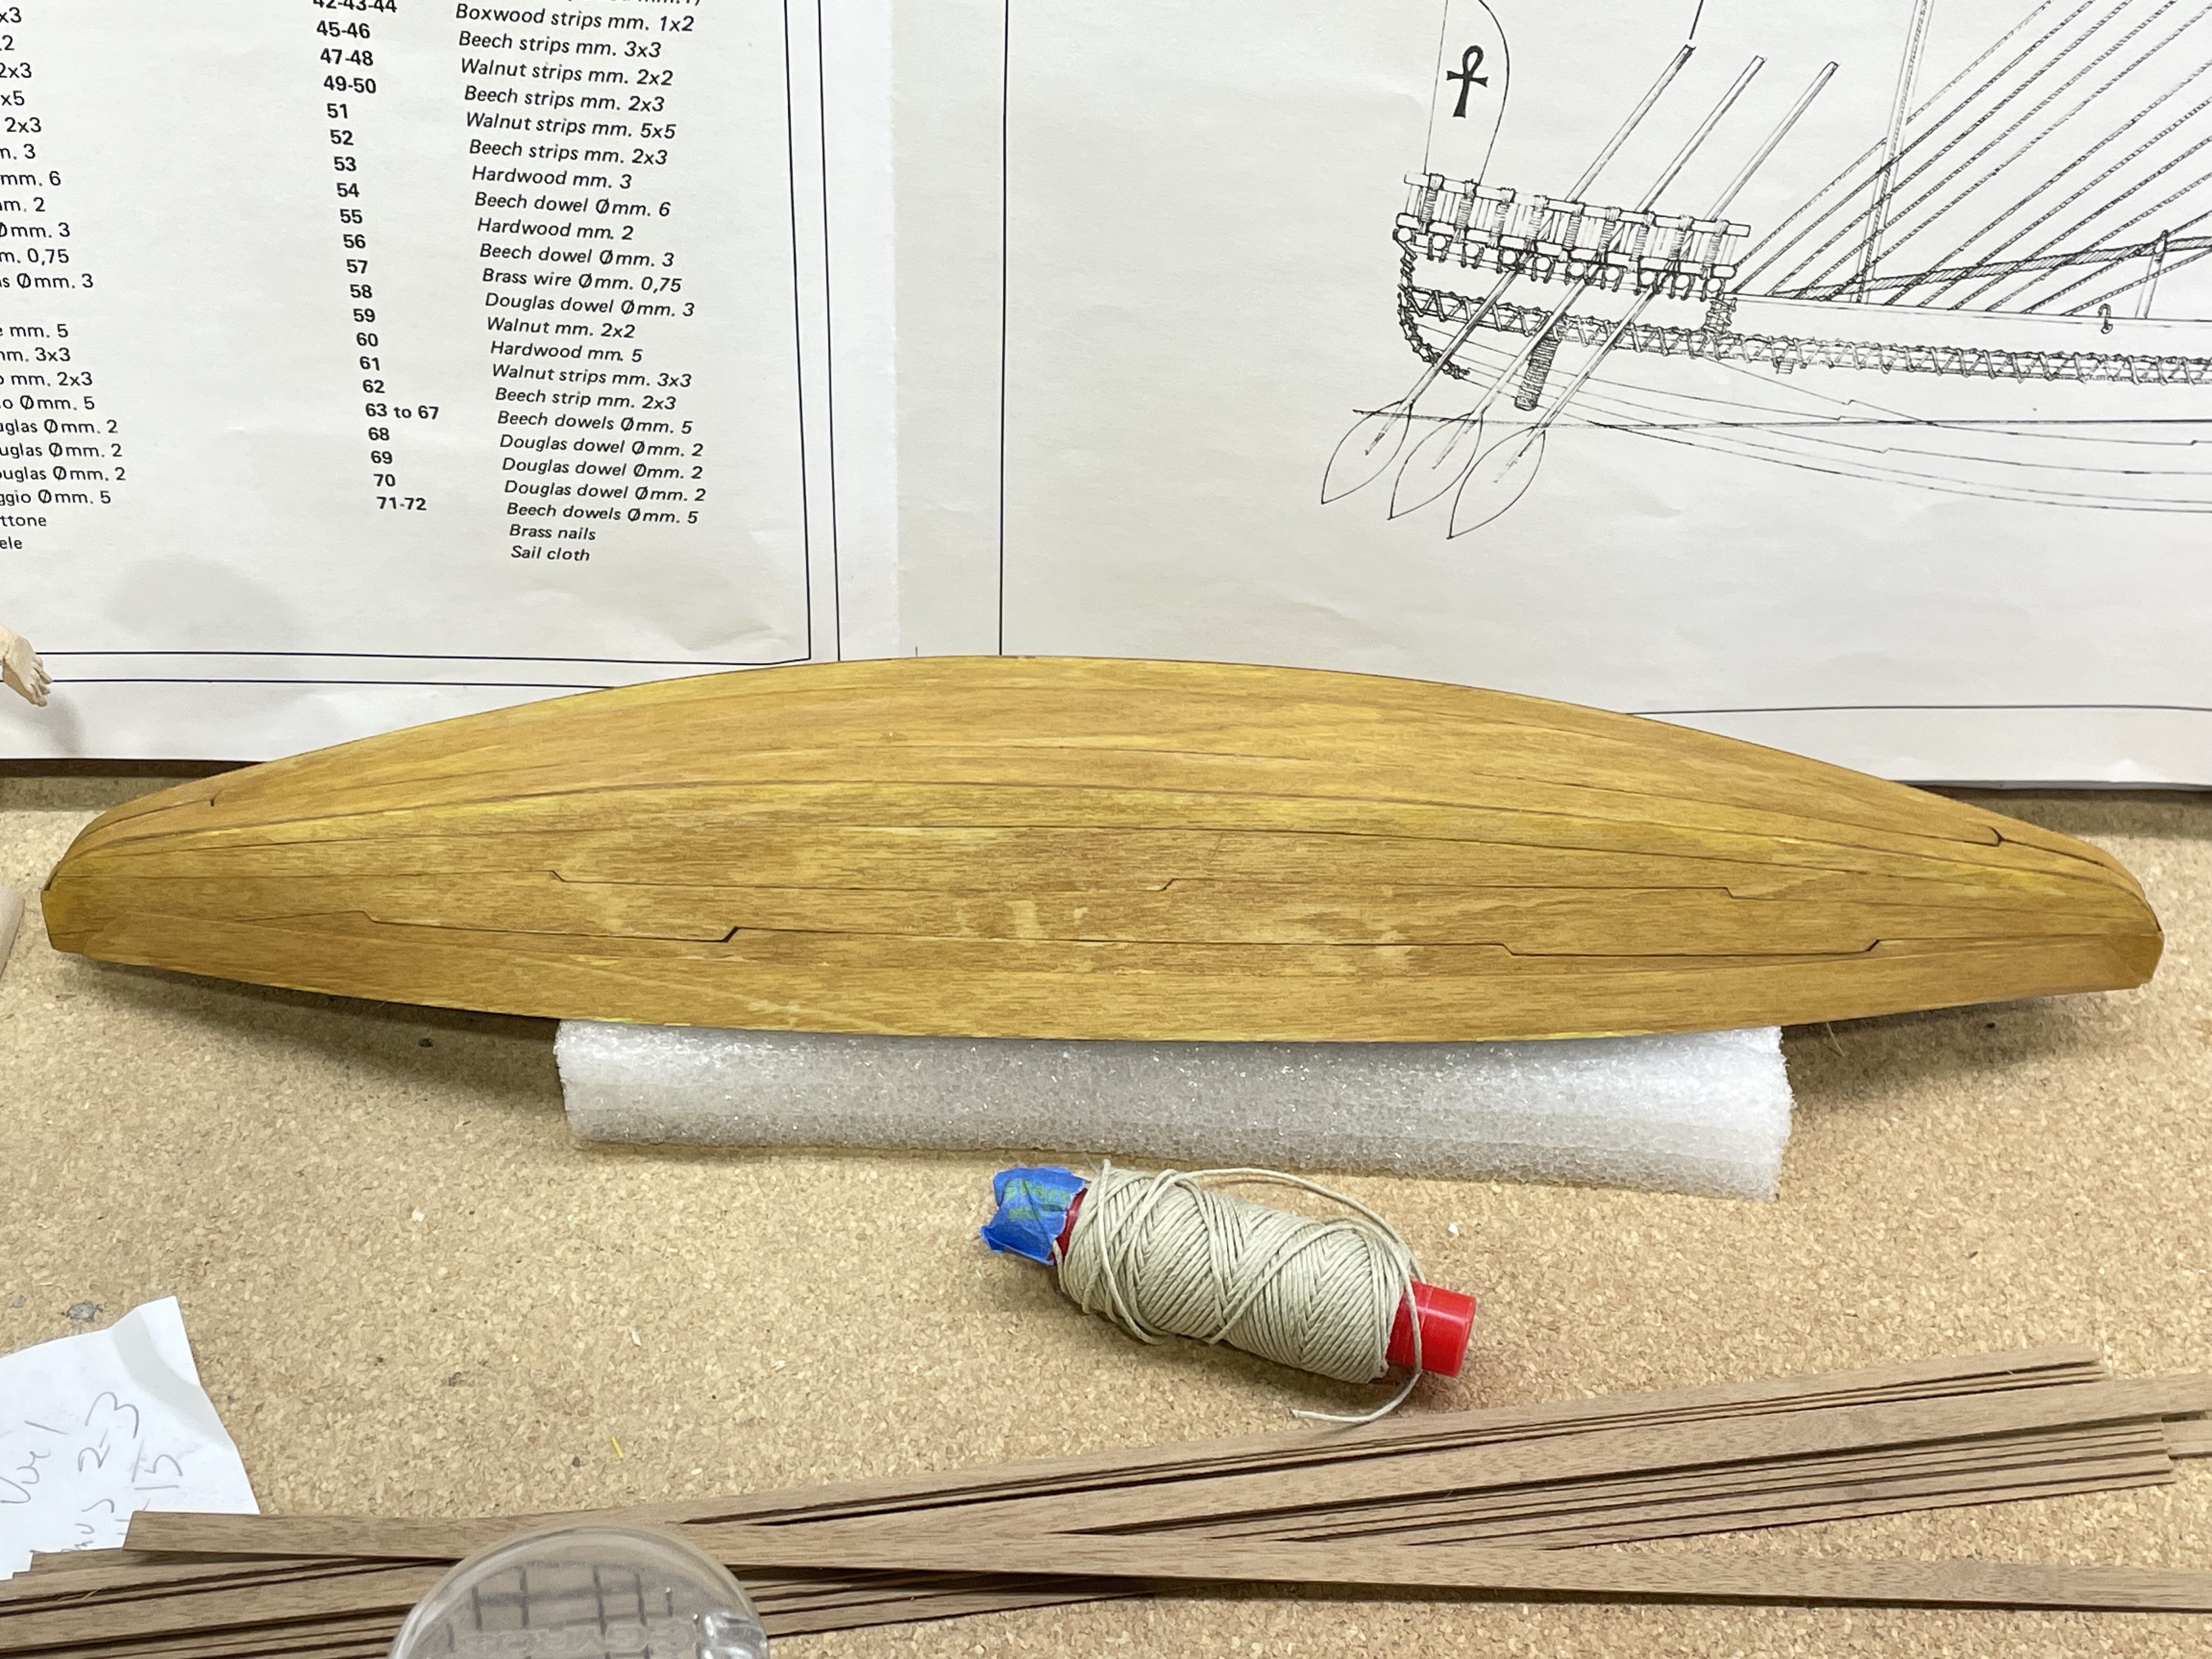
I got the finish on the hull, so that let me start the needle work. I started with the stern. Then I tried going down the starboard side. It was going smoothly but I had to stop to get ready to leave for the weekend. Next week should move the build quite a bit farther along. I’ve made a lot of the deck fittings.


- 44 replies
-
- 4
-
-
- Nave Egizia
- Amati
- (and 1 more)
-
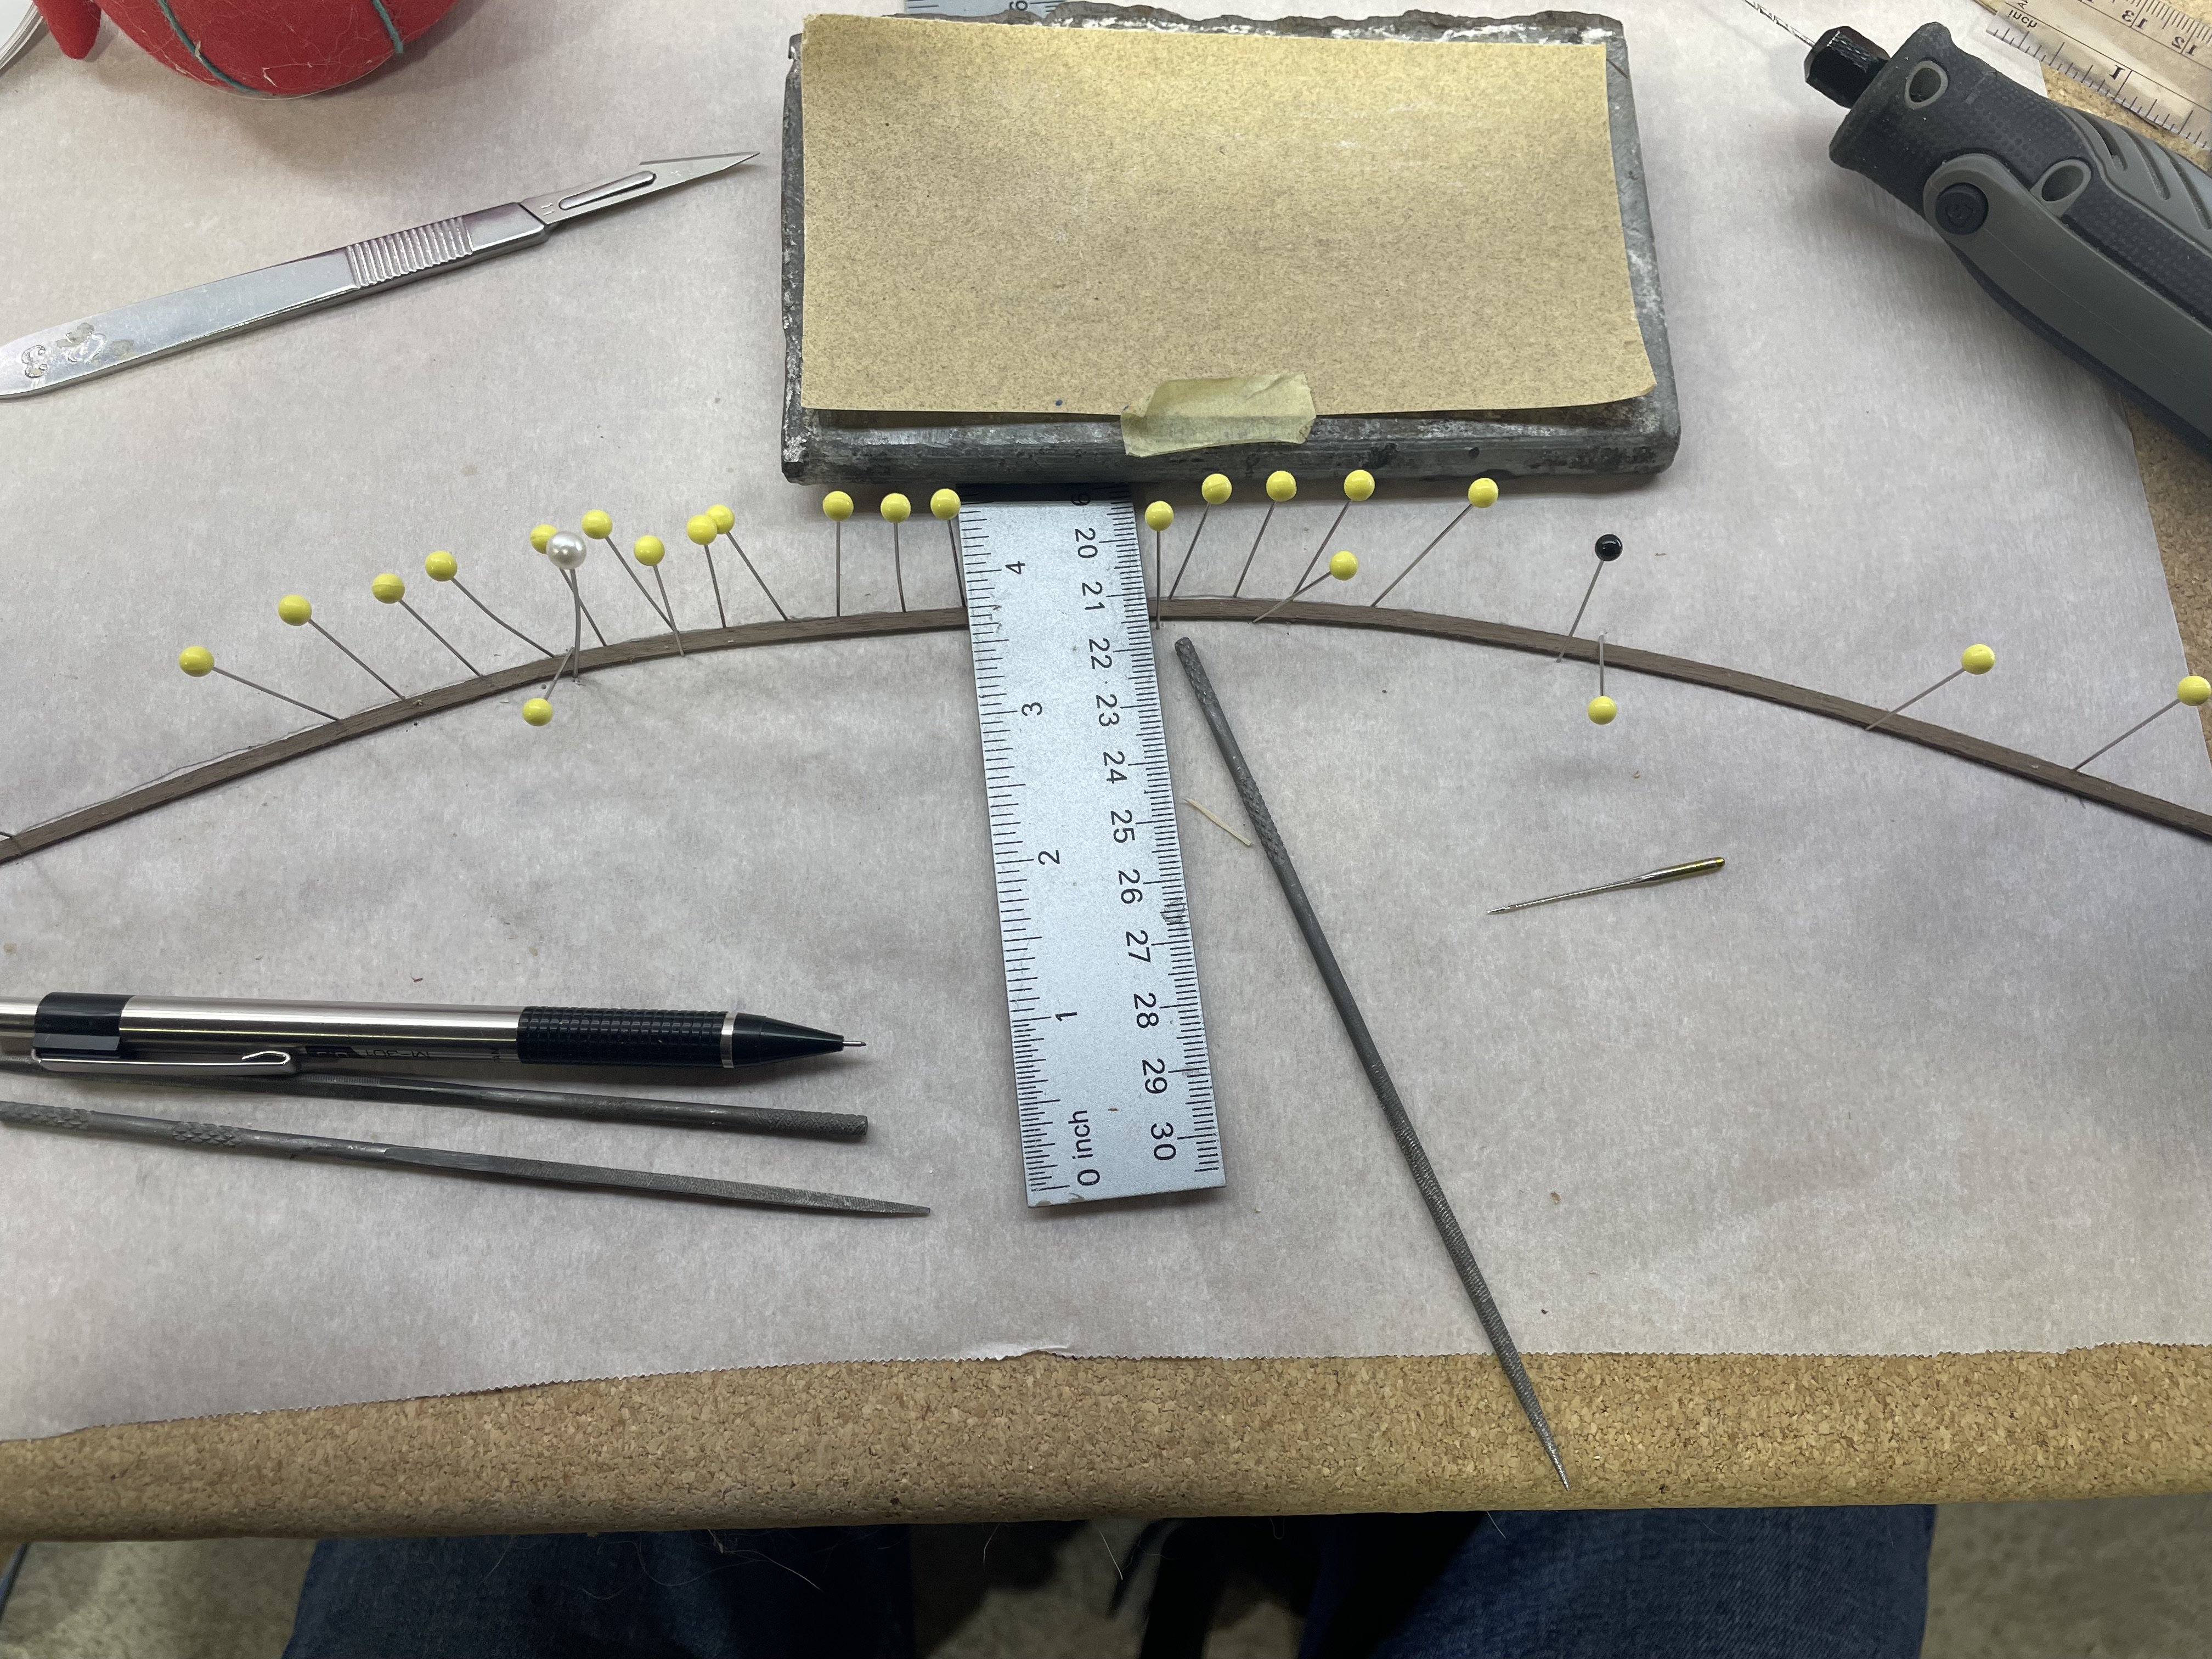
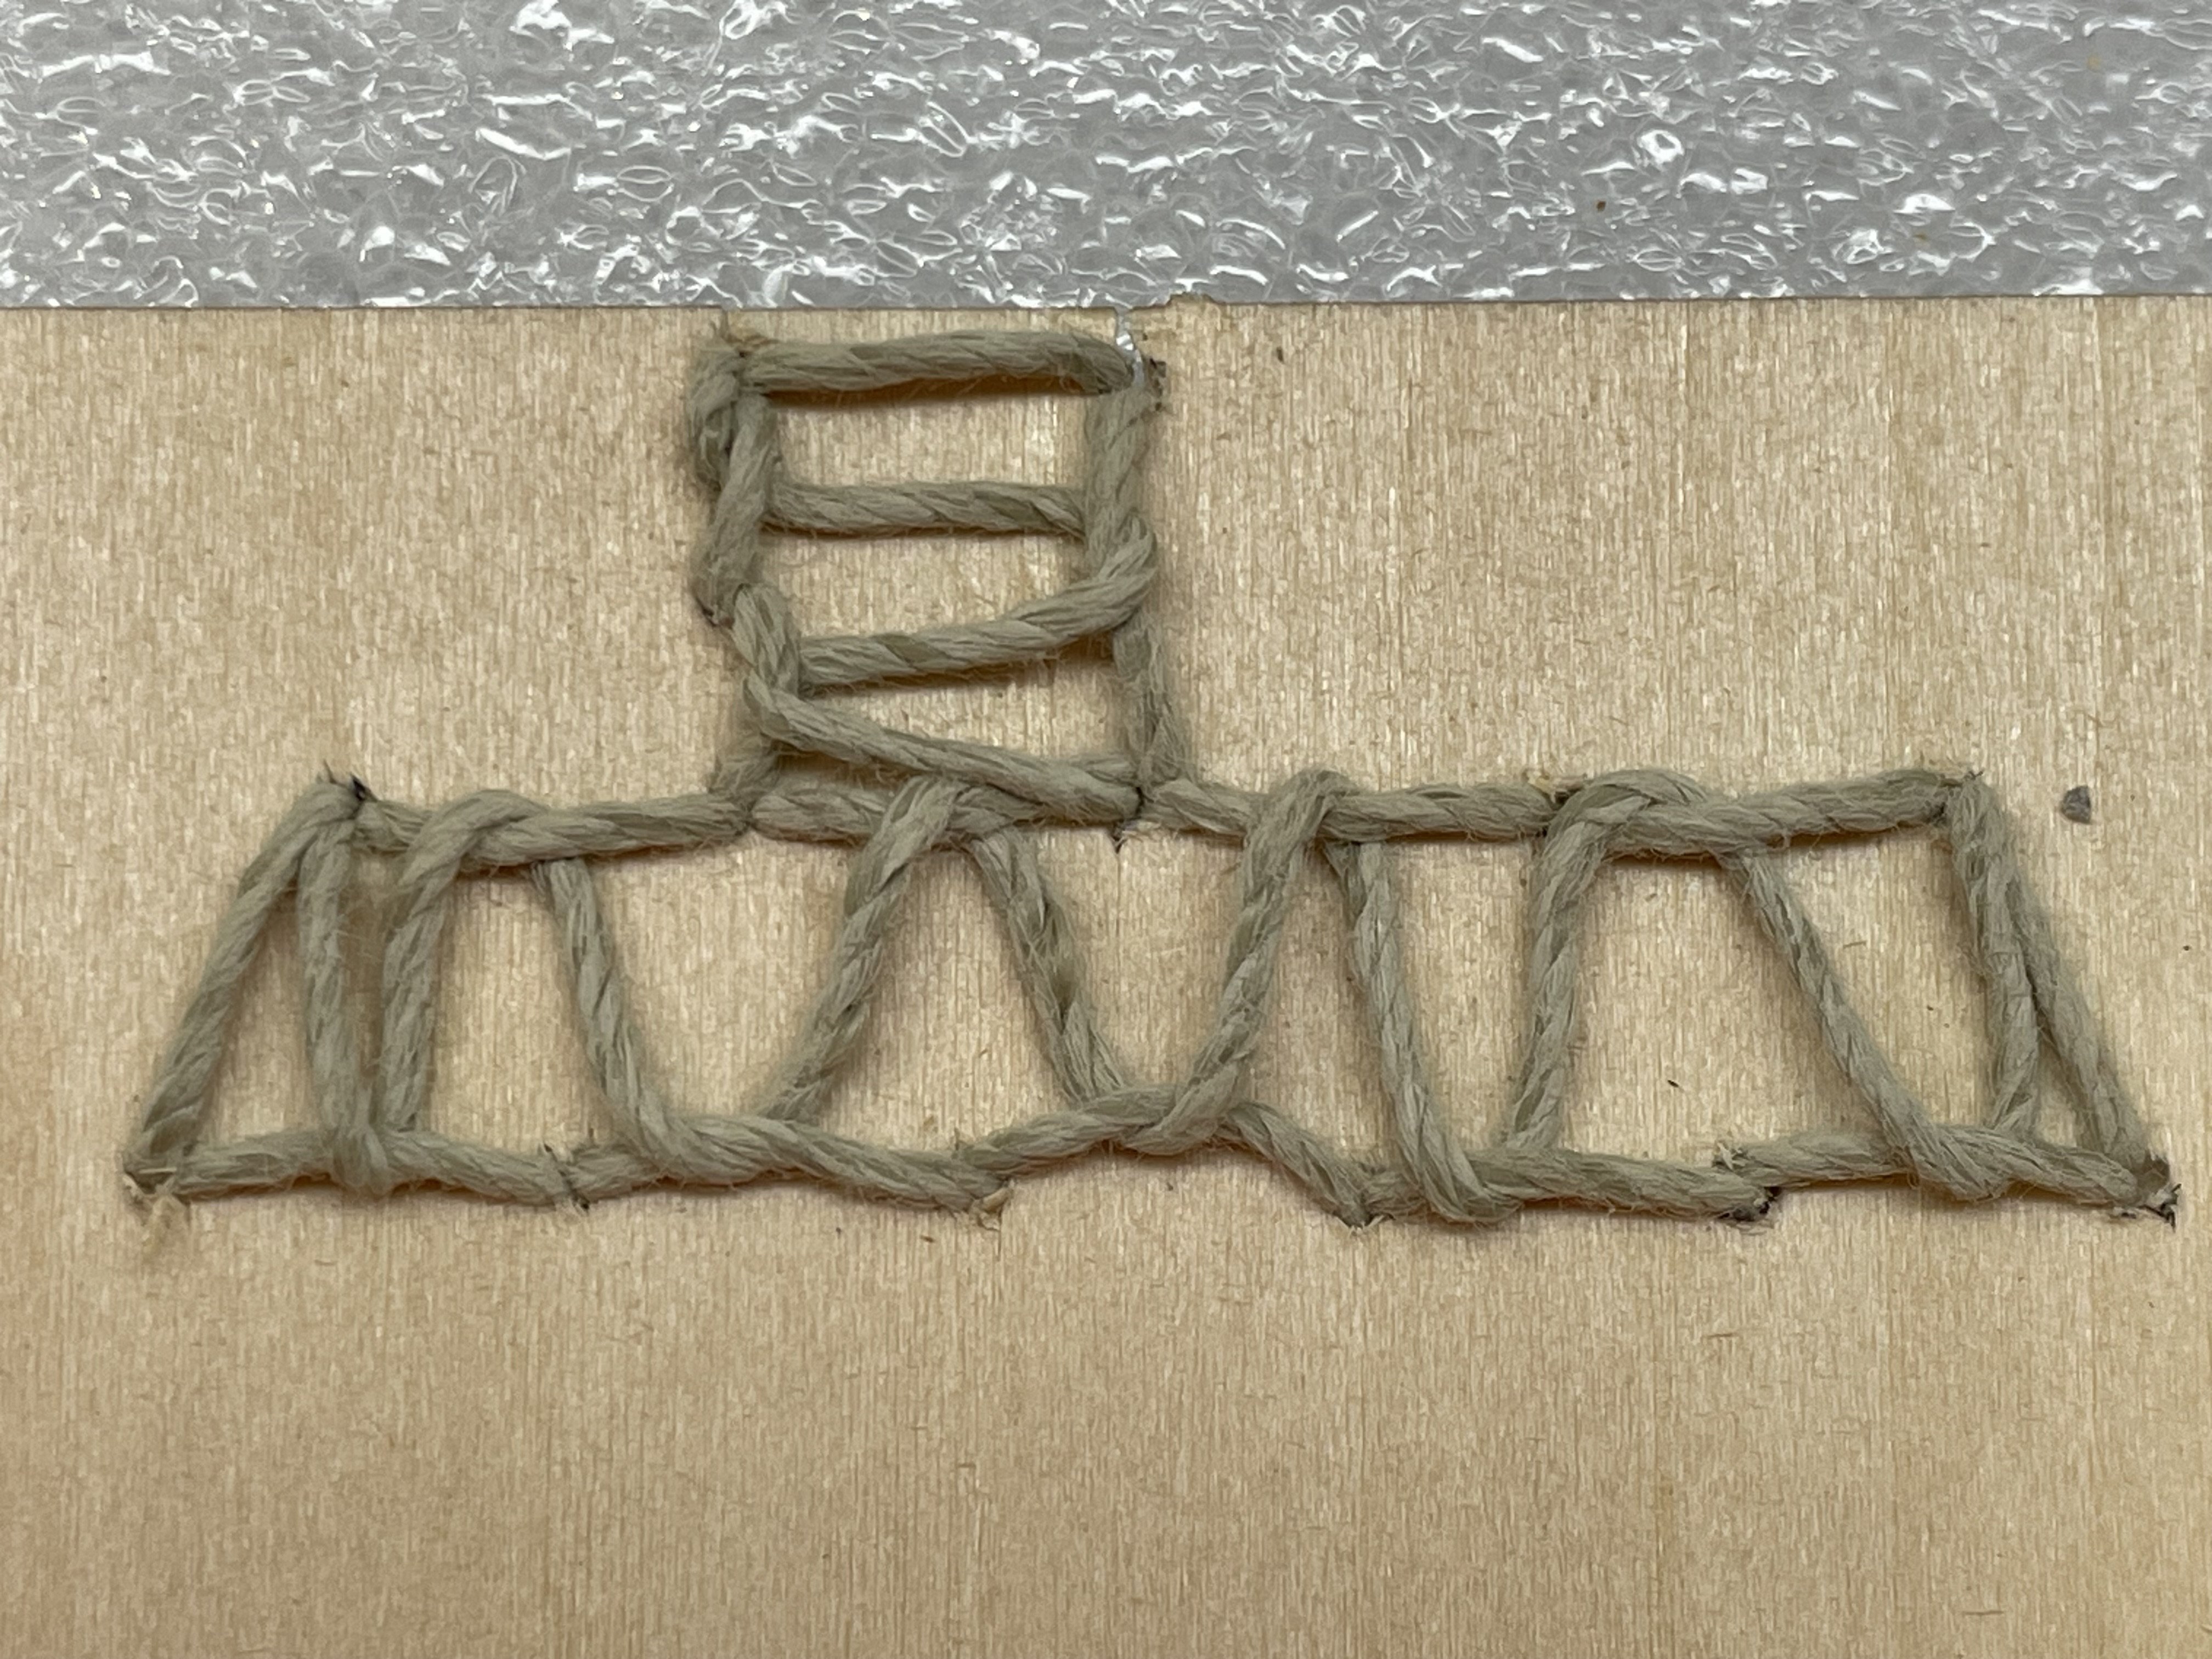
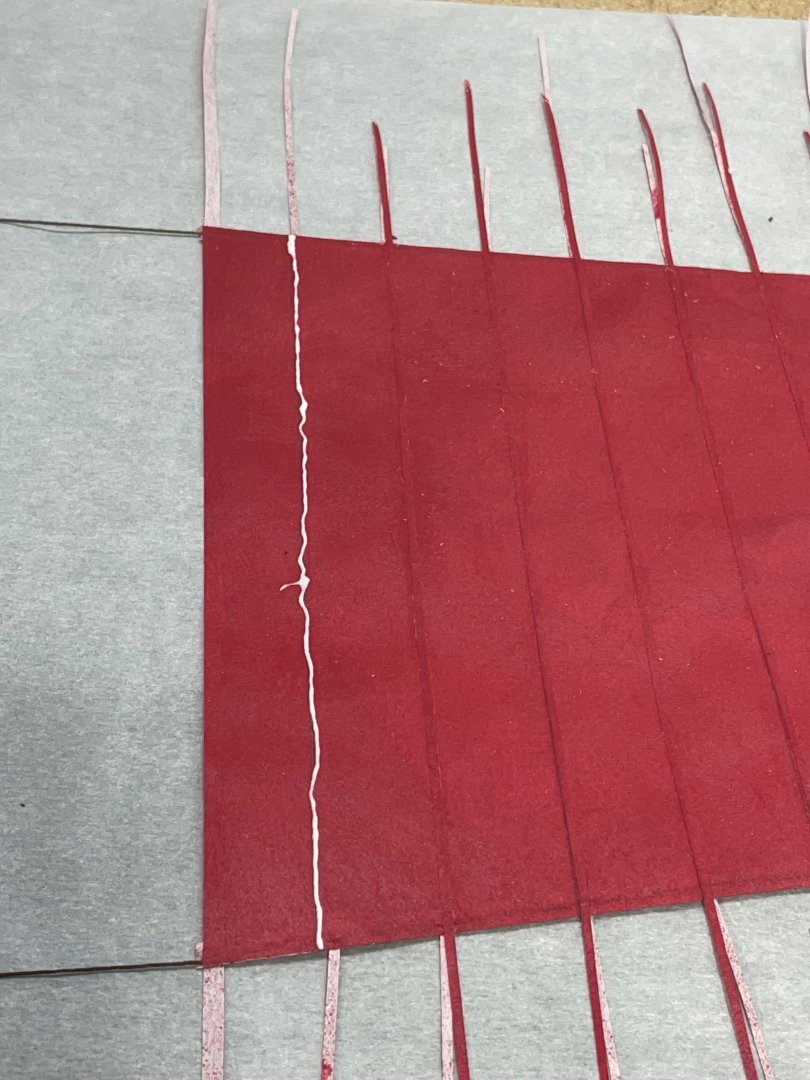
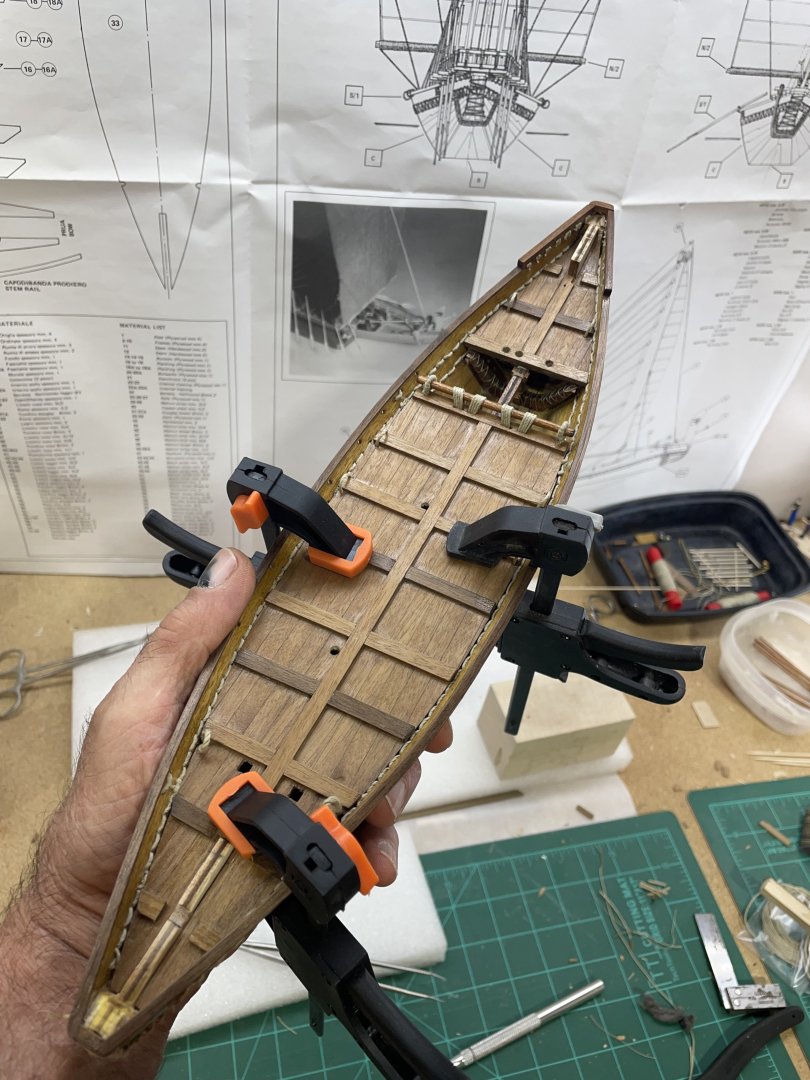
The top rail supplied with the kit was 3 small pieces of plywood for each side:-/ So I got a piece of 1mm x3 mm walnut to match the rest. I didn’t know how easy it was going to be to edge bend it to fit the hull. But to my surprise it was pretty easy. I sprayed it once with water and ran it through my hair straightener. Then laid it on a curve that I had traced and pinned it down as needed. While I was trying to figure out what to make next, I realized I was just procrastinating on finding the location of all the holes running horizontally down the hull. I used 4mm tape to mark both runs. The holes need to be 5mm apart, so I tried to just drill beside the tape. Plus the tape gums up the bit and that’s a pain to me. After punching a point I used a .8mm bit with a small cordless tool. Then used a 1.7 mm bit in my pin vice to enlarge them. ( that was the largest bit I had that fit in my pin vice) The rope is 1mm and pretty much every hole gets two ropes. After making a mock up of the needle work at double the scale. I saw there will be a few holes that has 3 and 4 ropes in one hole. Also there are holes to drill that hold the deck on the stern and holes that hold the ropes, that hold the oars. Then the next challenge is estimating the length of rope needed to do the needle work.


- 44 replies
-
- 6
-
-
- Nave Egizia
- Amati
- (and 1 more)
-
I like the Texas stone. It needs a touch of the artist in it. It plus I think the dish draws the eye away.
- 106 replies
-
- 3
-
-

-
- Kentoshi-Sen
- bottle
- (and 1 more)
-
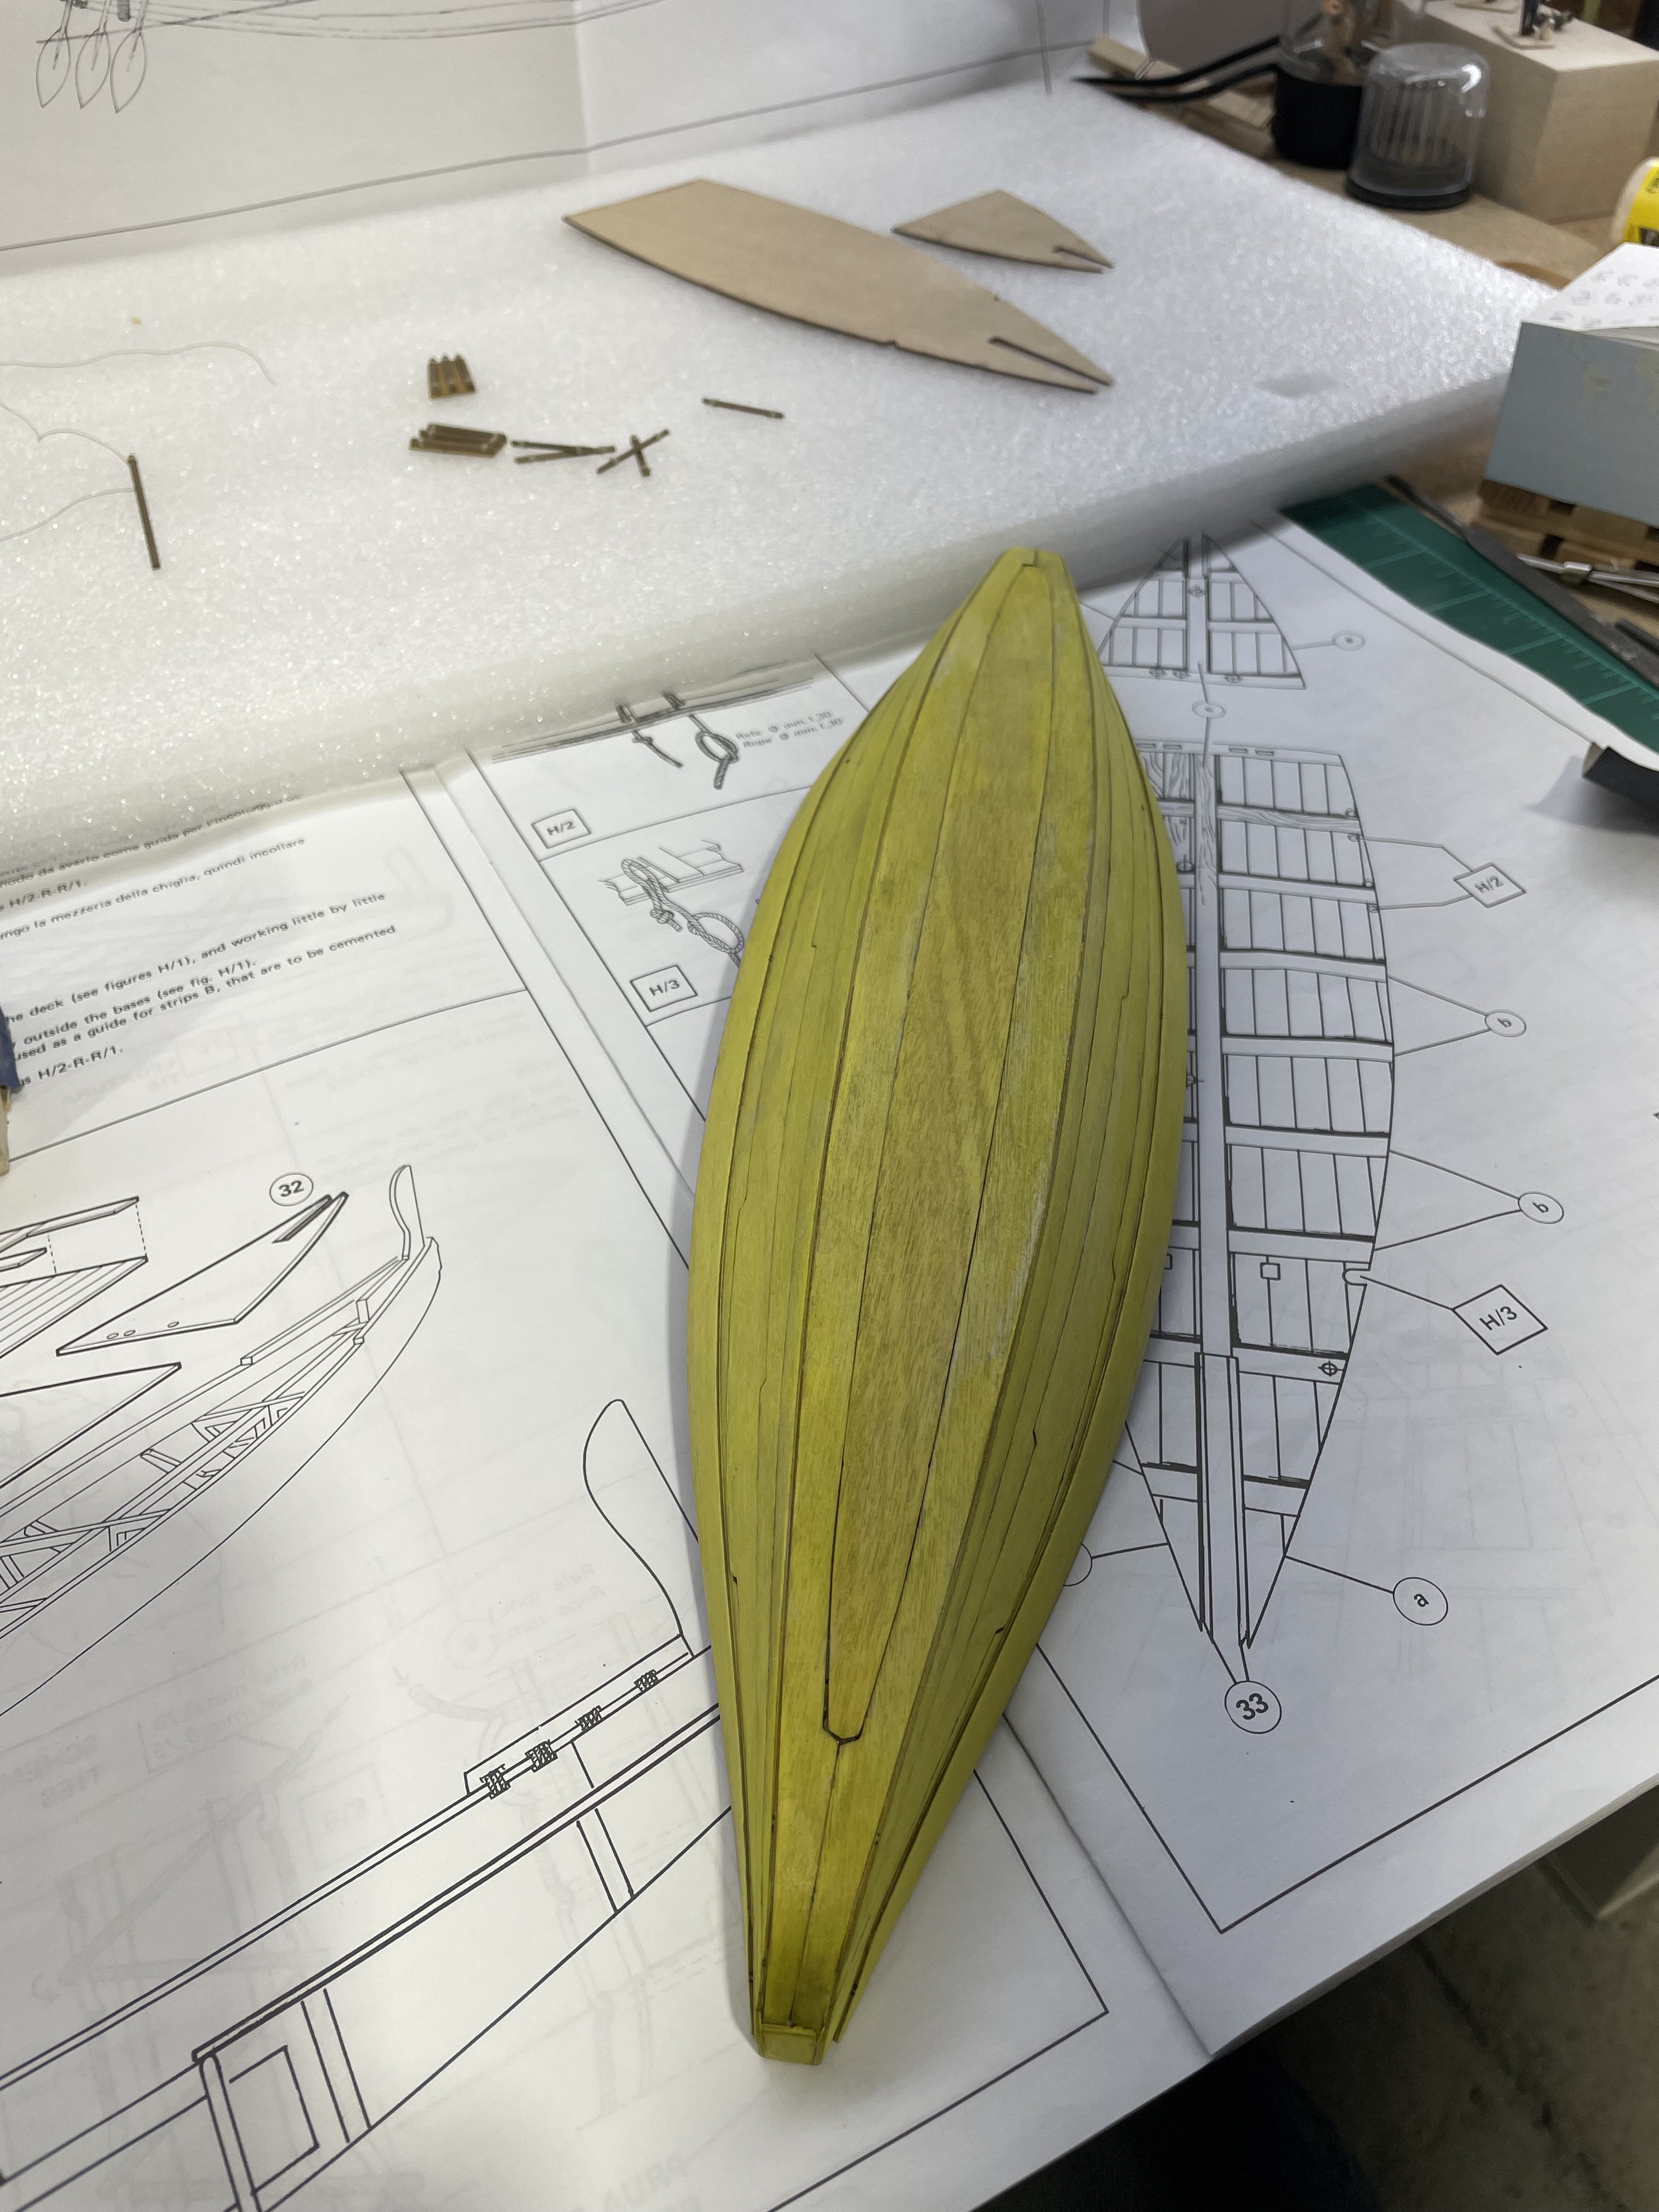
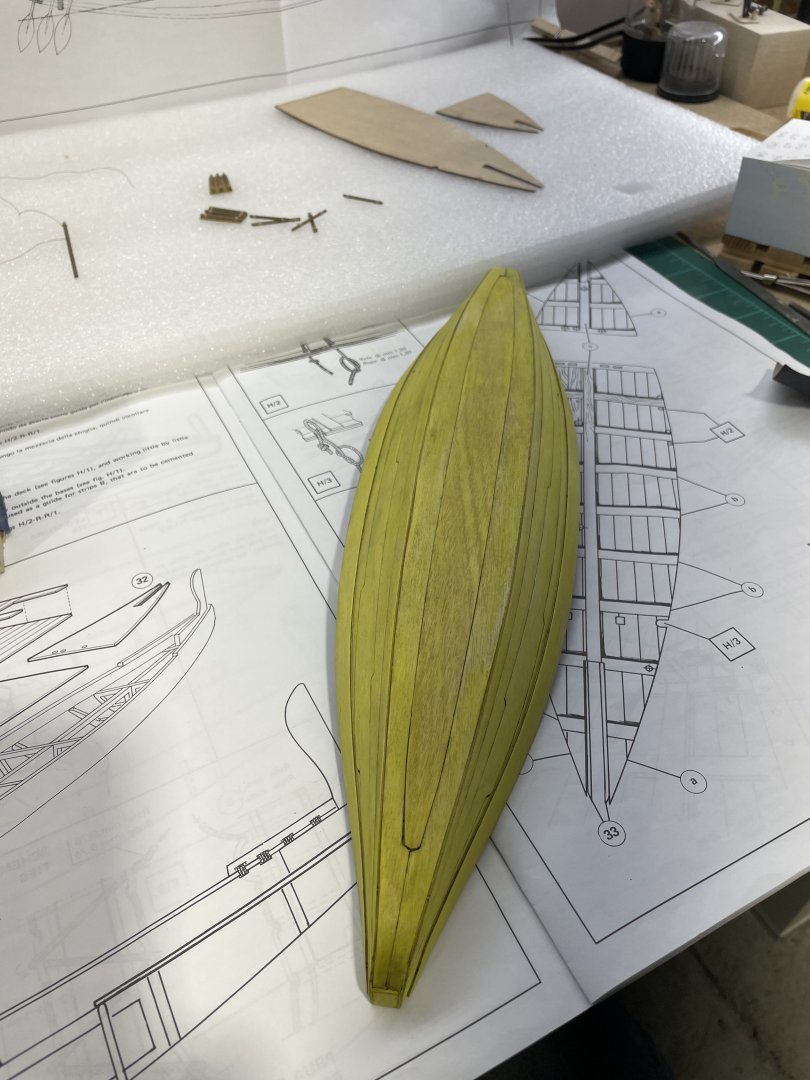
I got the hull painted. I just imagined the color of the original boat. I started with a yellow wash. Then a burnt umber wash. I’ve started planking the deck. Trying to figure out where all the holes go in it. I’m probably going to end up making the mast and all the other poles and things I need to have room for. The plans give very few dimensions, and just a few almost scaled details. The bow and stern blocks are in the way of the decks. I’ll have to carve out some of both.

- 44 replies
-
- 4
-
-
- Nave Egizia
- Amati
- (and 1 more)