HOLIDAY DONATION DRIVE - SUPPORT MSW - DO YOUR PART TO KEEP THIS GREAT FORUM GOING! (Only 72 donations so far out of 49,000 members - Can we at least get 100? C'mon guys!)
×


Bryan Woods
-
Posts
551 -
Joined
-
Last visited
Content Type
Profiles
Forums
Gallery
Events
Everything posted by Bryan Woods
-
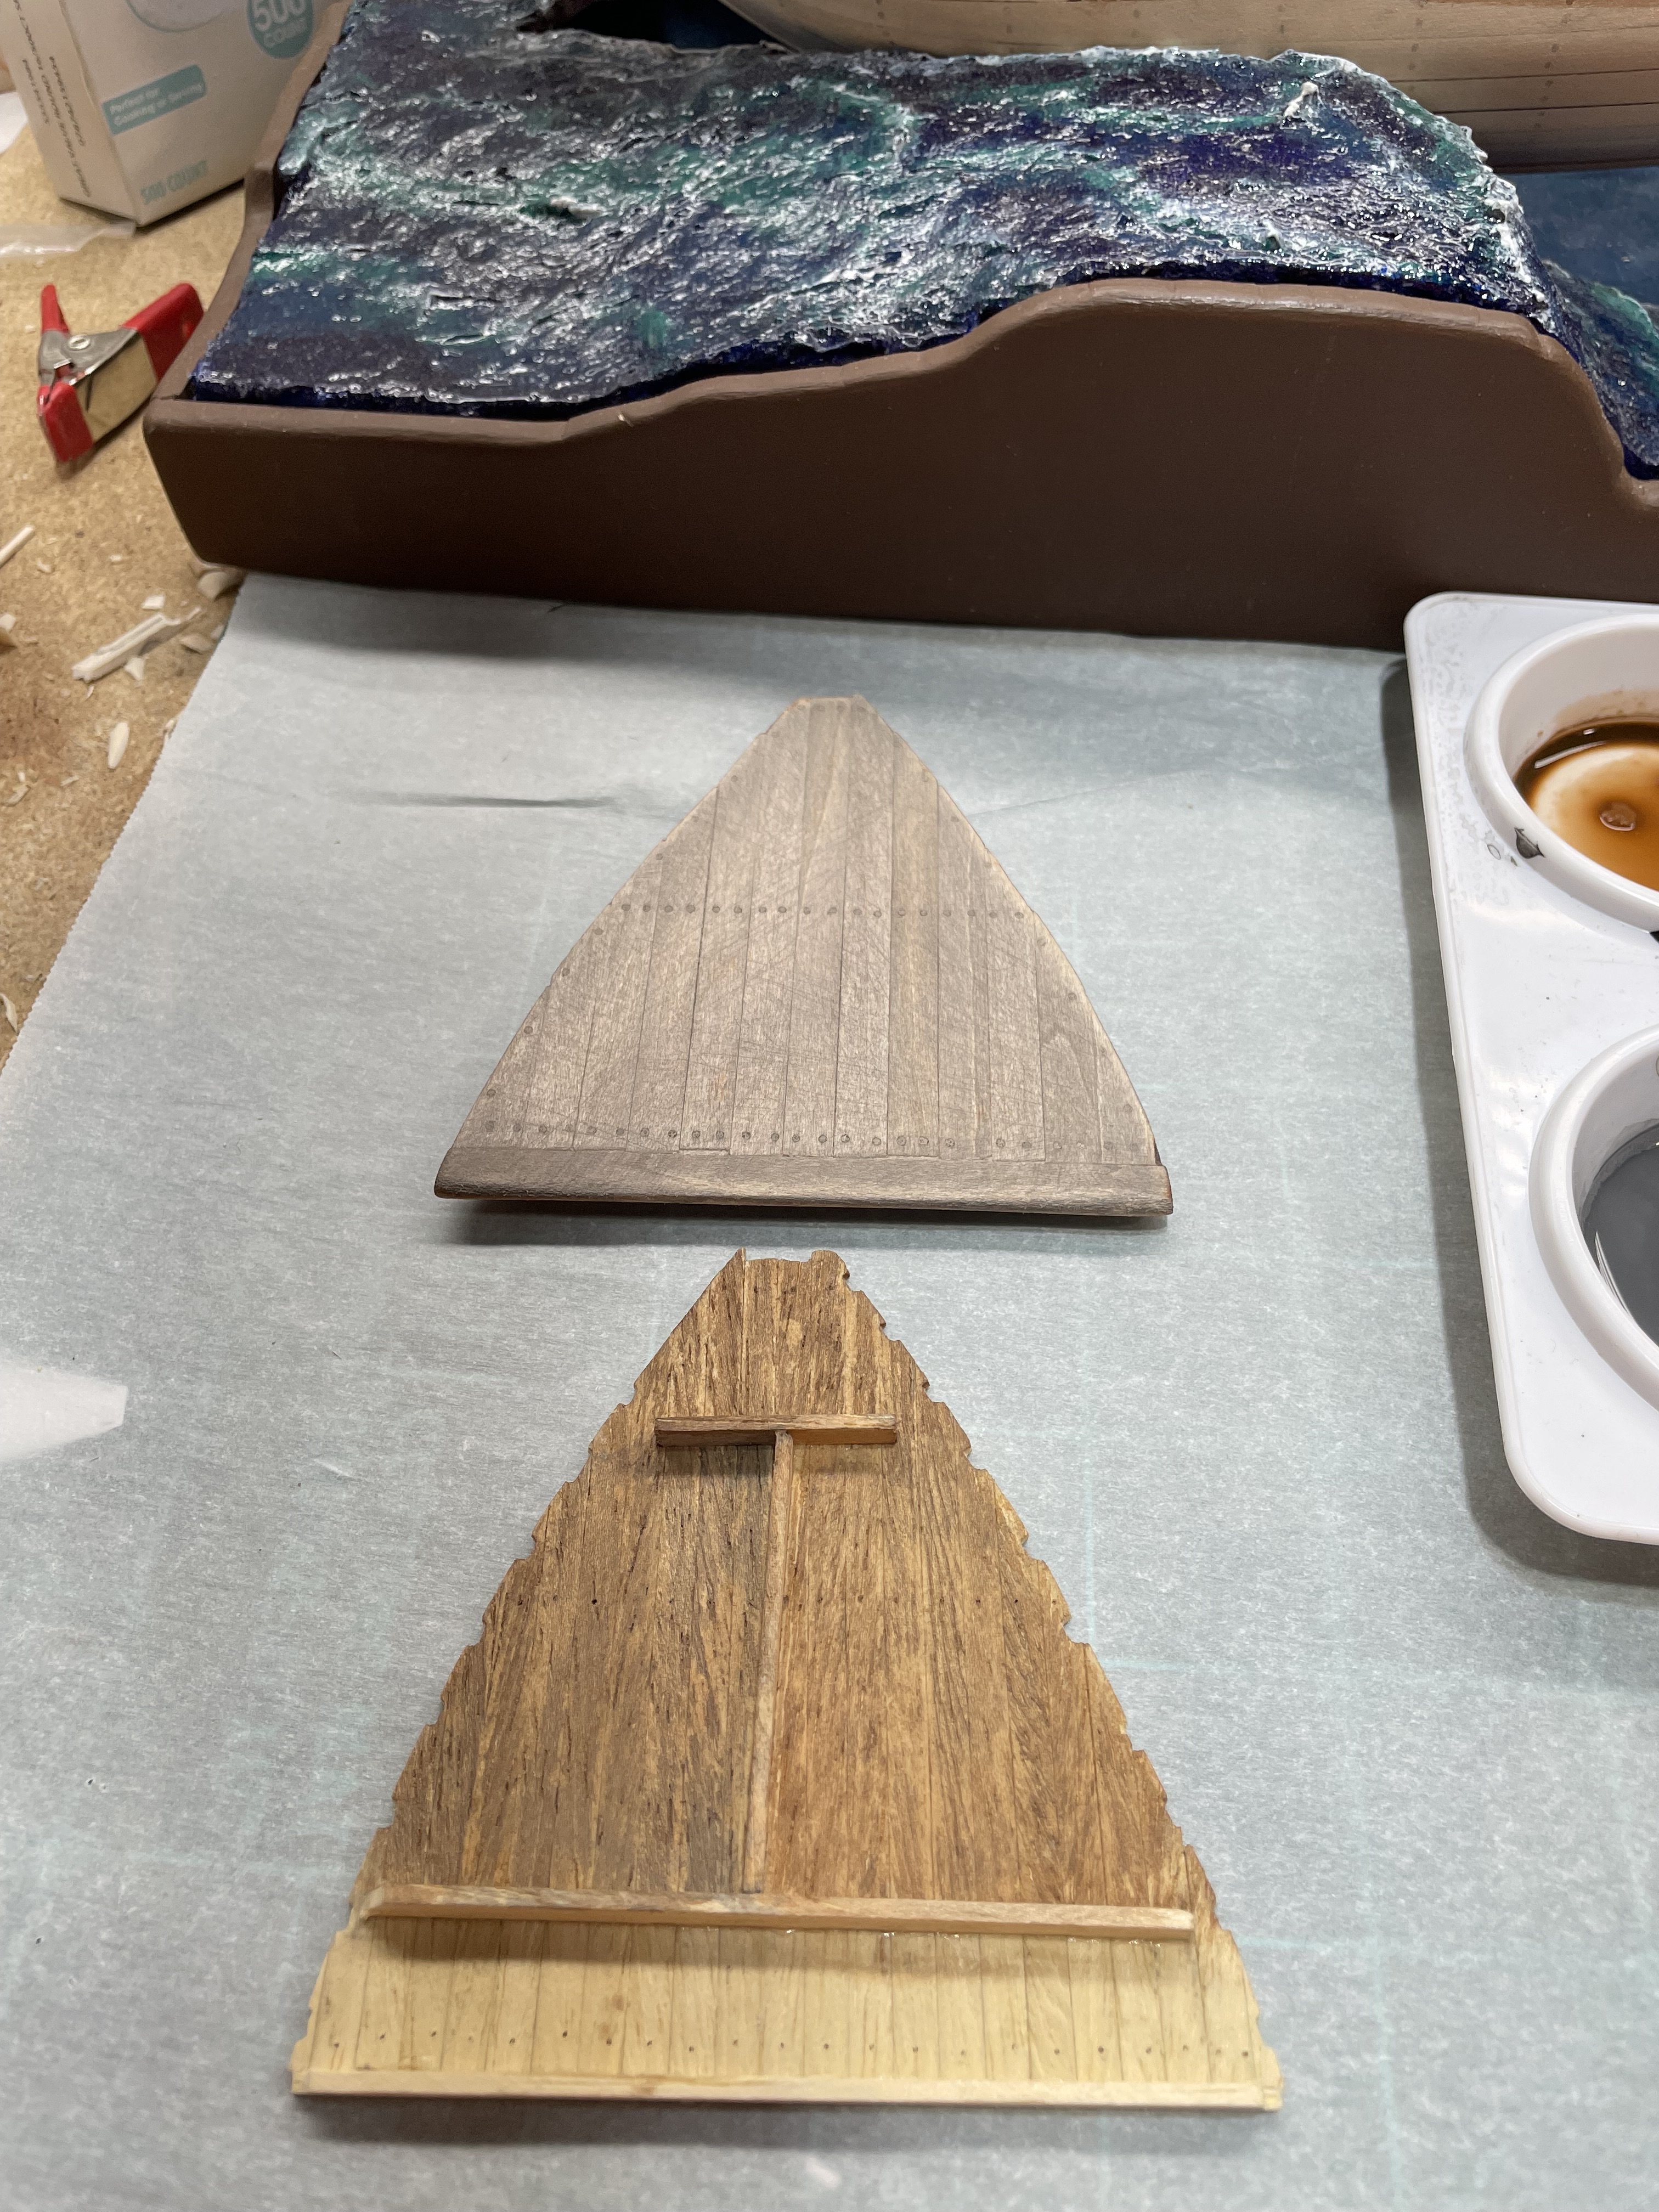
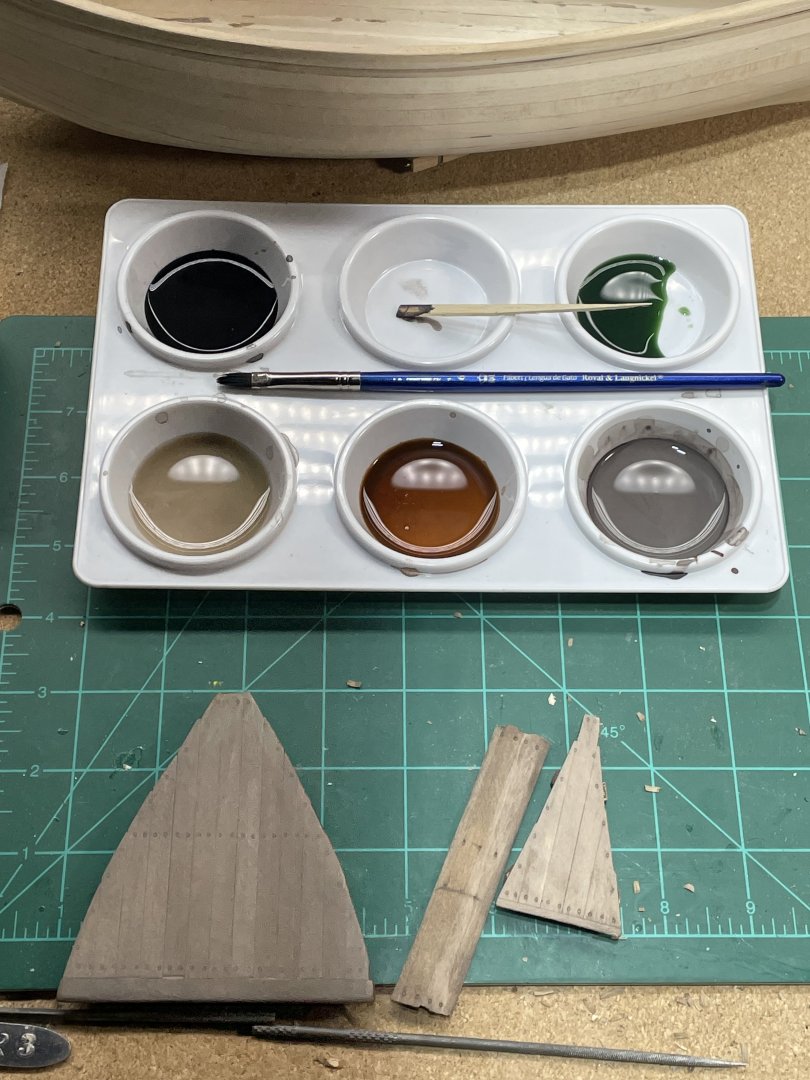
 No fancy technique used here. To start I started on the bottom side of the stern deck. I only used gray and burnt umber. I deluded them down about 10-15 drops of water to 1 drop of ink. I think I ended up doubling that on the gray. I was mixing white and black together and lost count:-). Another thing is the obechi definitely does different than the basswood. The top deck is the old basswood that I painted a few weeks ago. I didn’t go as gray on the new one, plus I didn’t sand it at all so that’s probably making a difference. Here I tried the bottom of the hull. The Top I put the burnt umber on first and the gray last. The bottom half was just the opposite. I don’t think it made a lot of difference. I probably put the gray on first, just so I don’t accidentally load it down, right off the bat 🙂
-
Well Keith, It looks like I’m just going to start my curve or probably my squiggle.
-
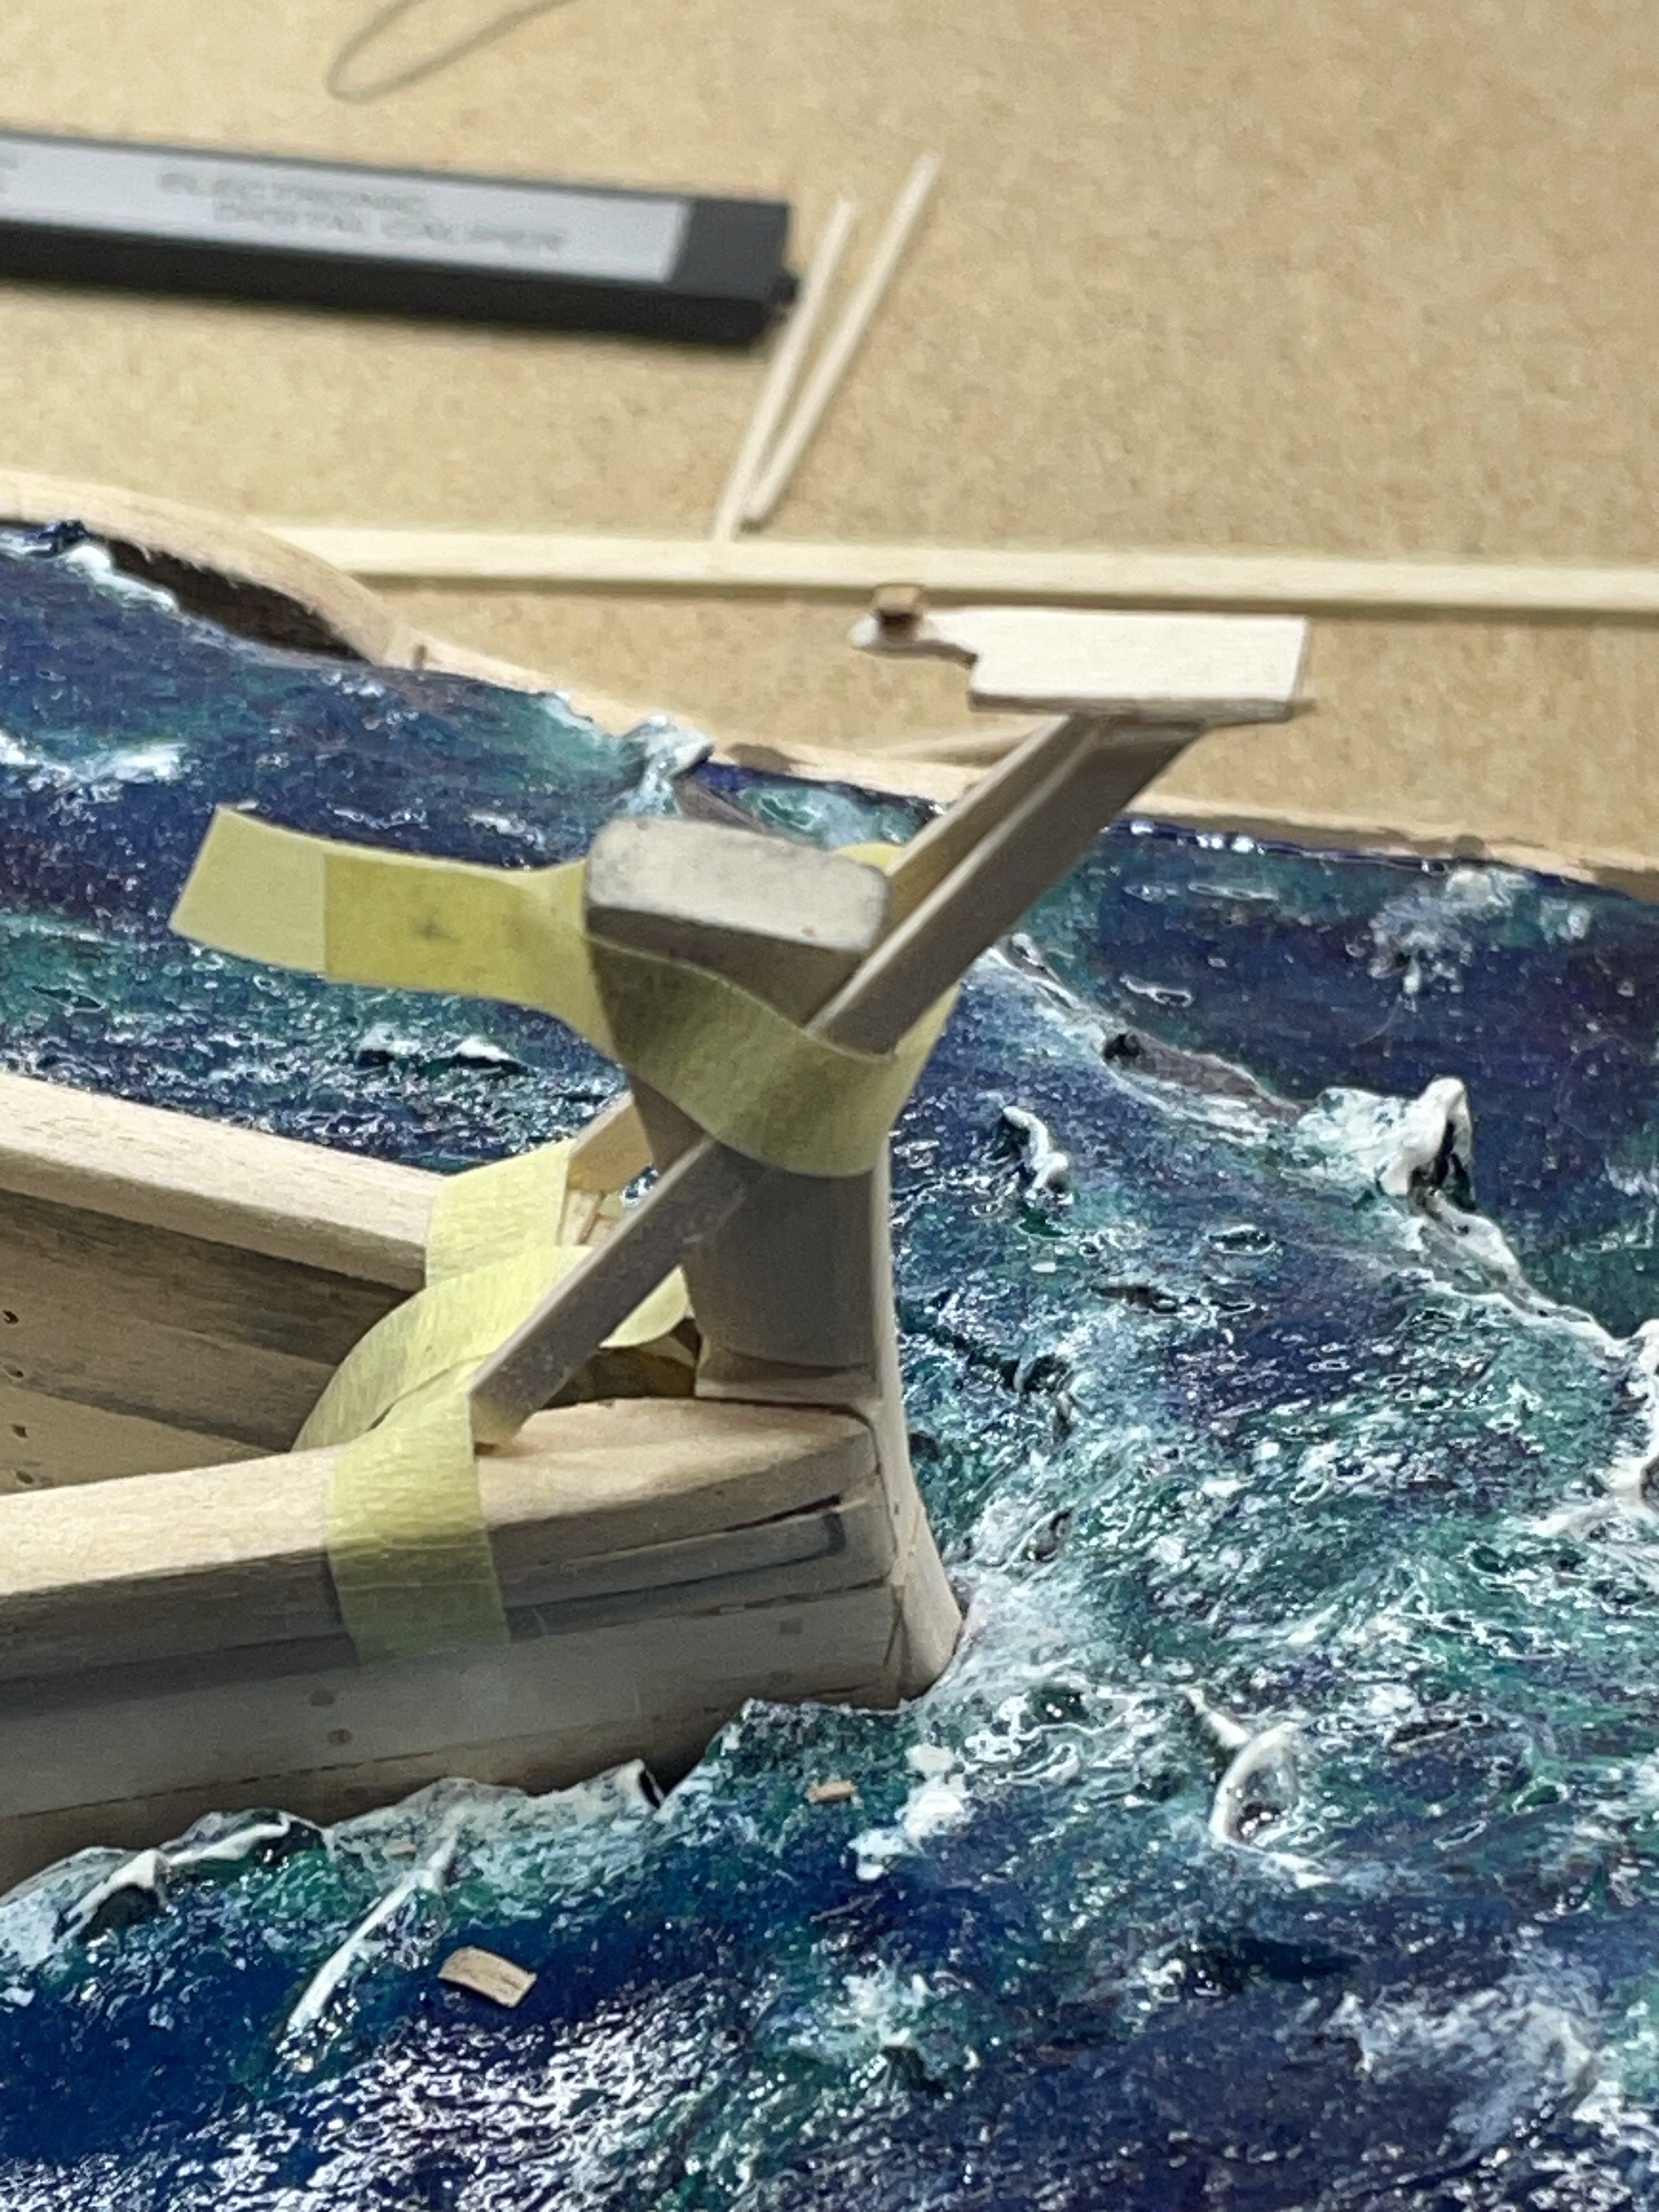
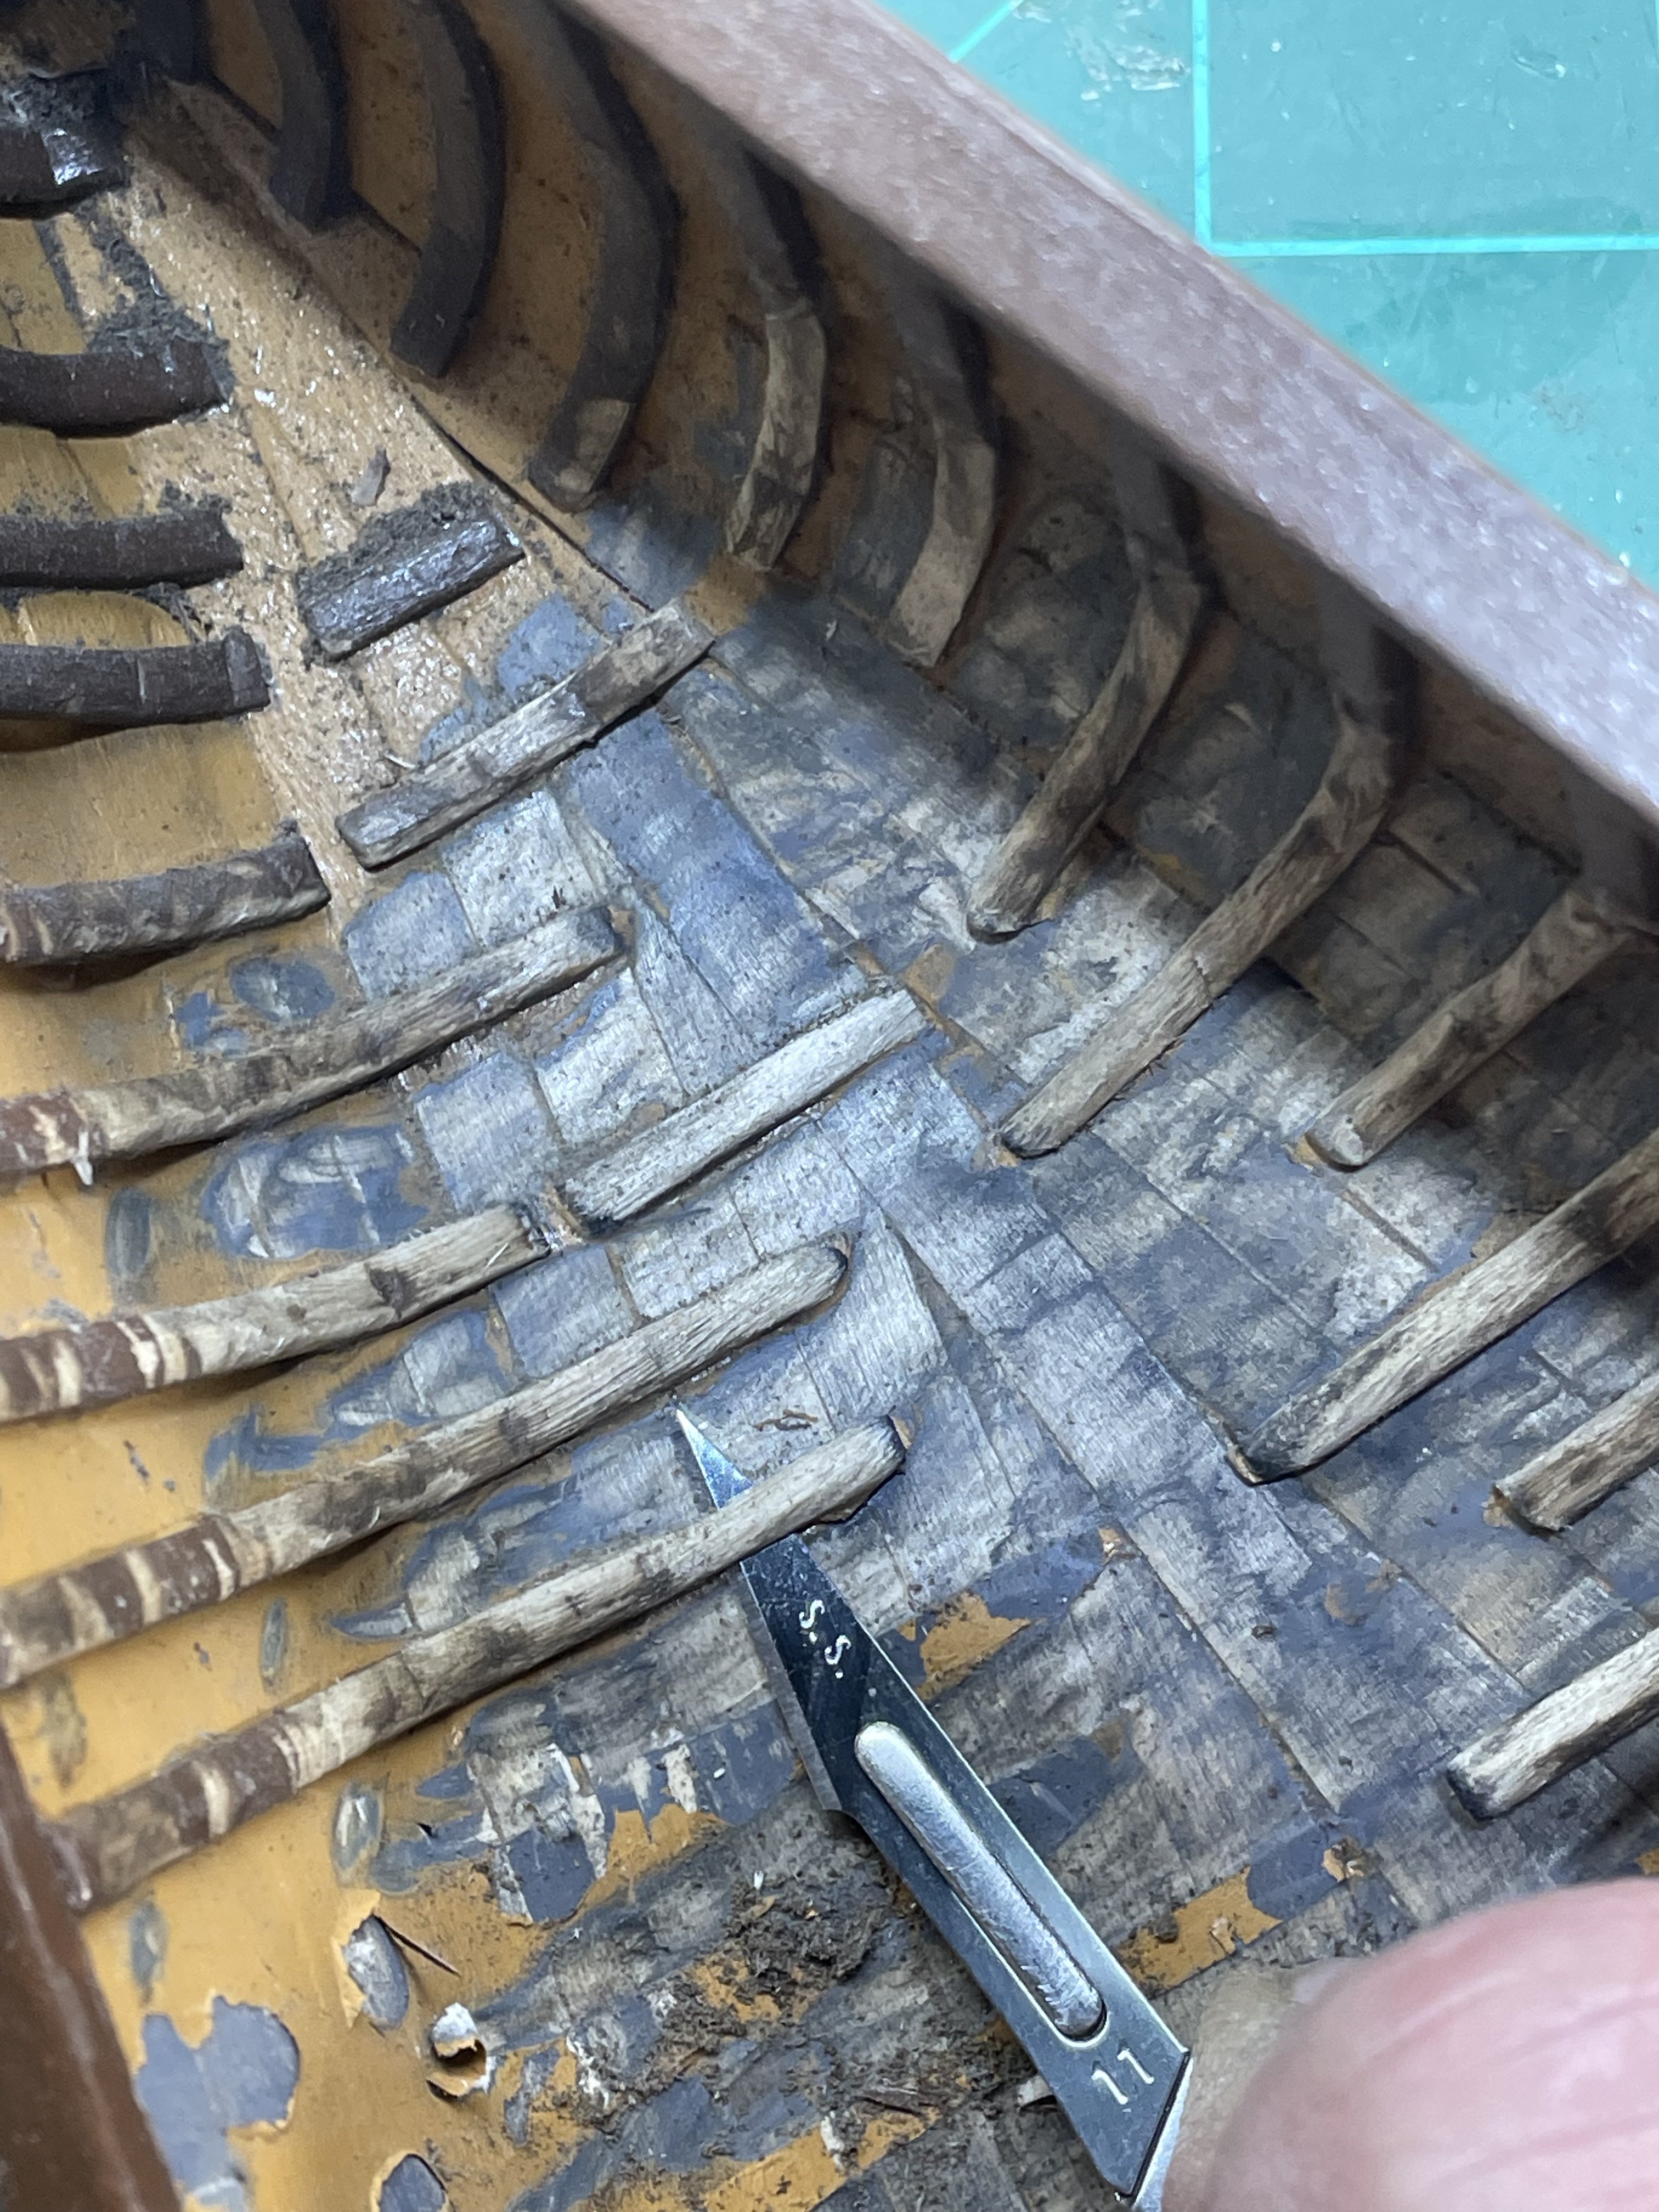
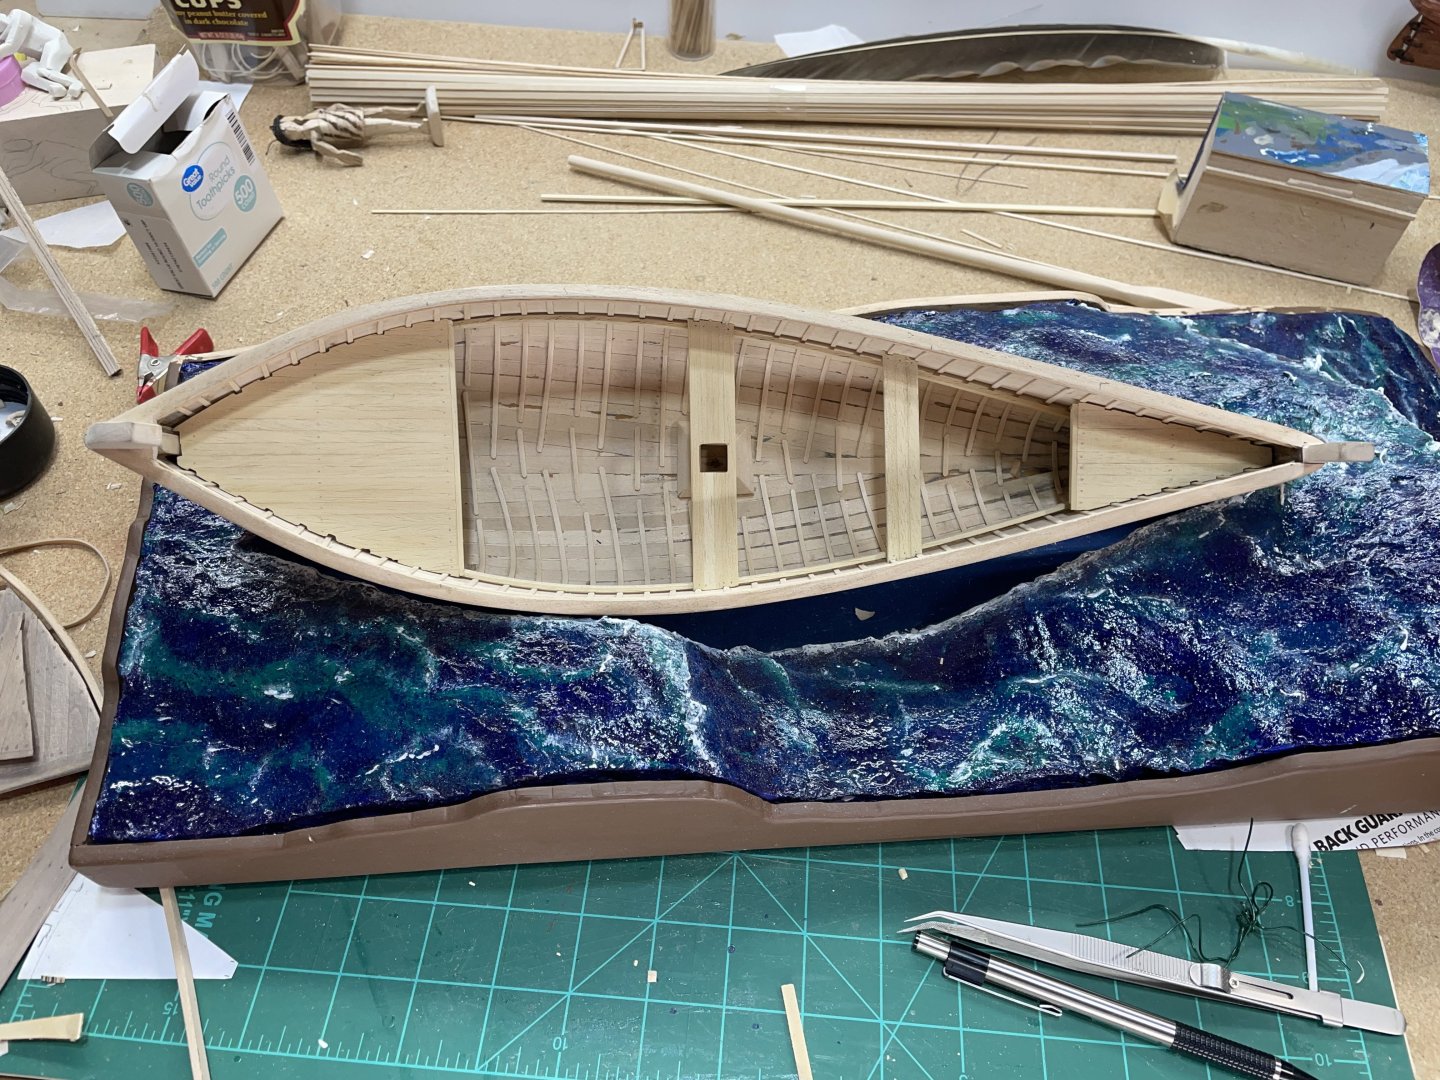
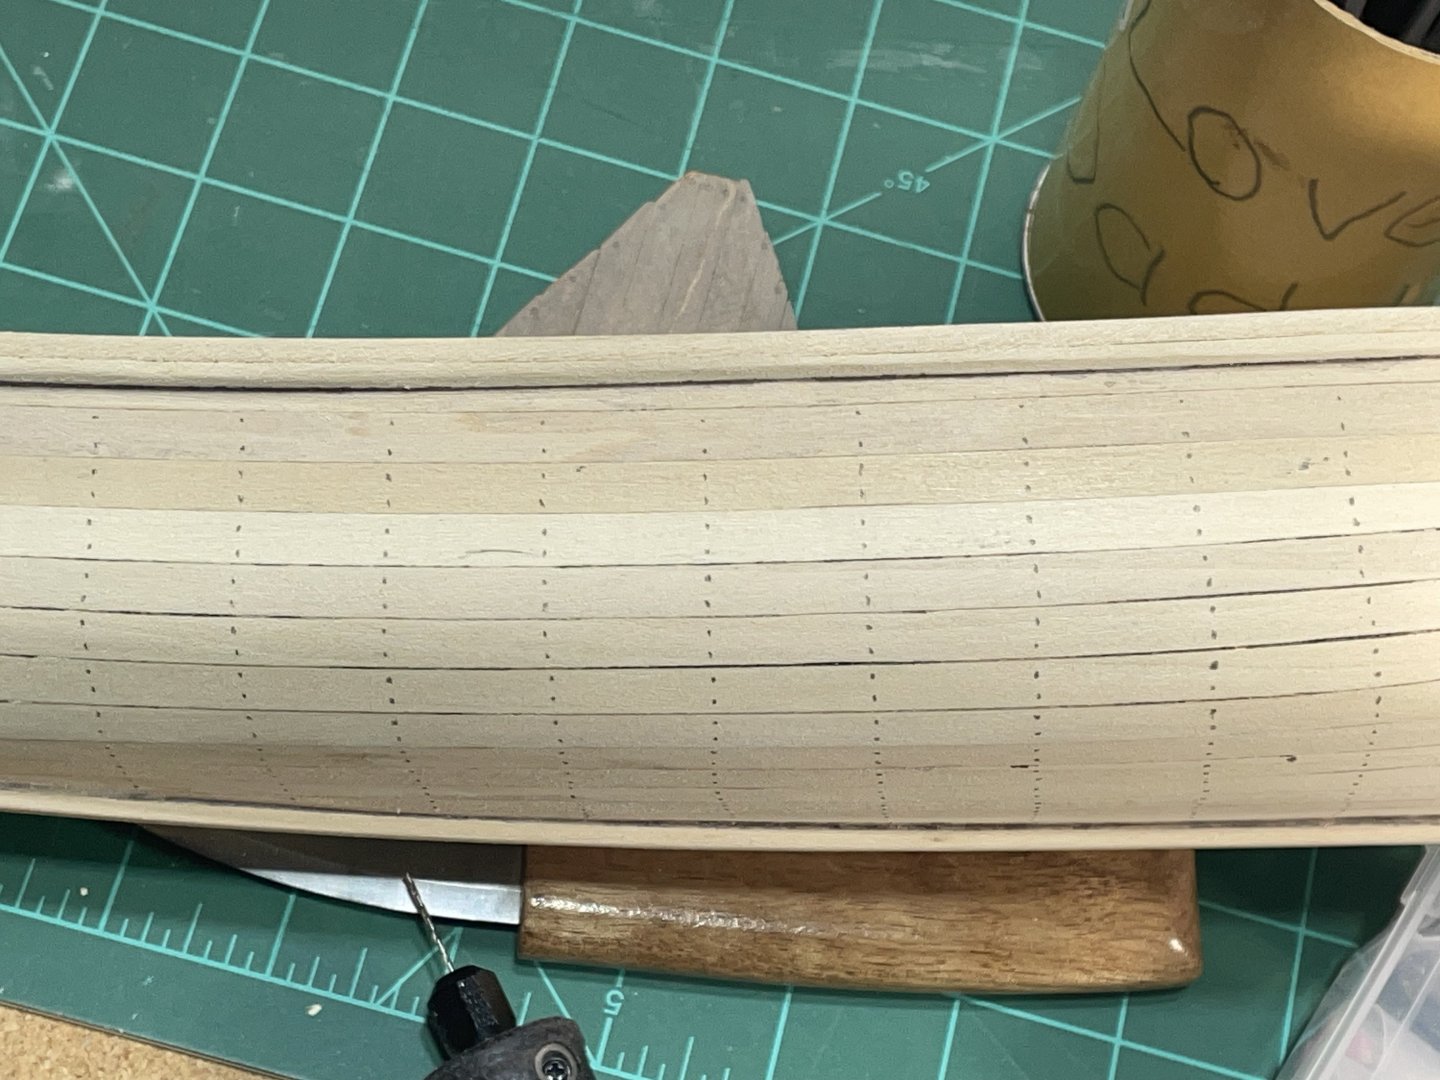
After I made the center thwart I was thinking 🤔 should make new decks so they matched the obechi wood I used from left over Le Martegaou. Here’s all of them just laid in the hull. The deck supports are just laid in also. I haven’t glued any of them on because I’m wondering, when I do the ink wash I don’t want it concentrating in all of the perpendicular cracks? Any opinions about this is very much welcome:-)
-
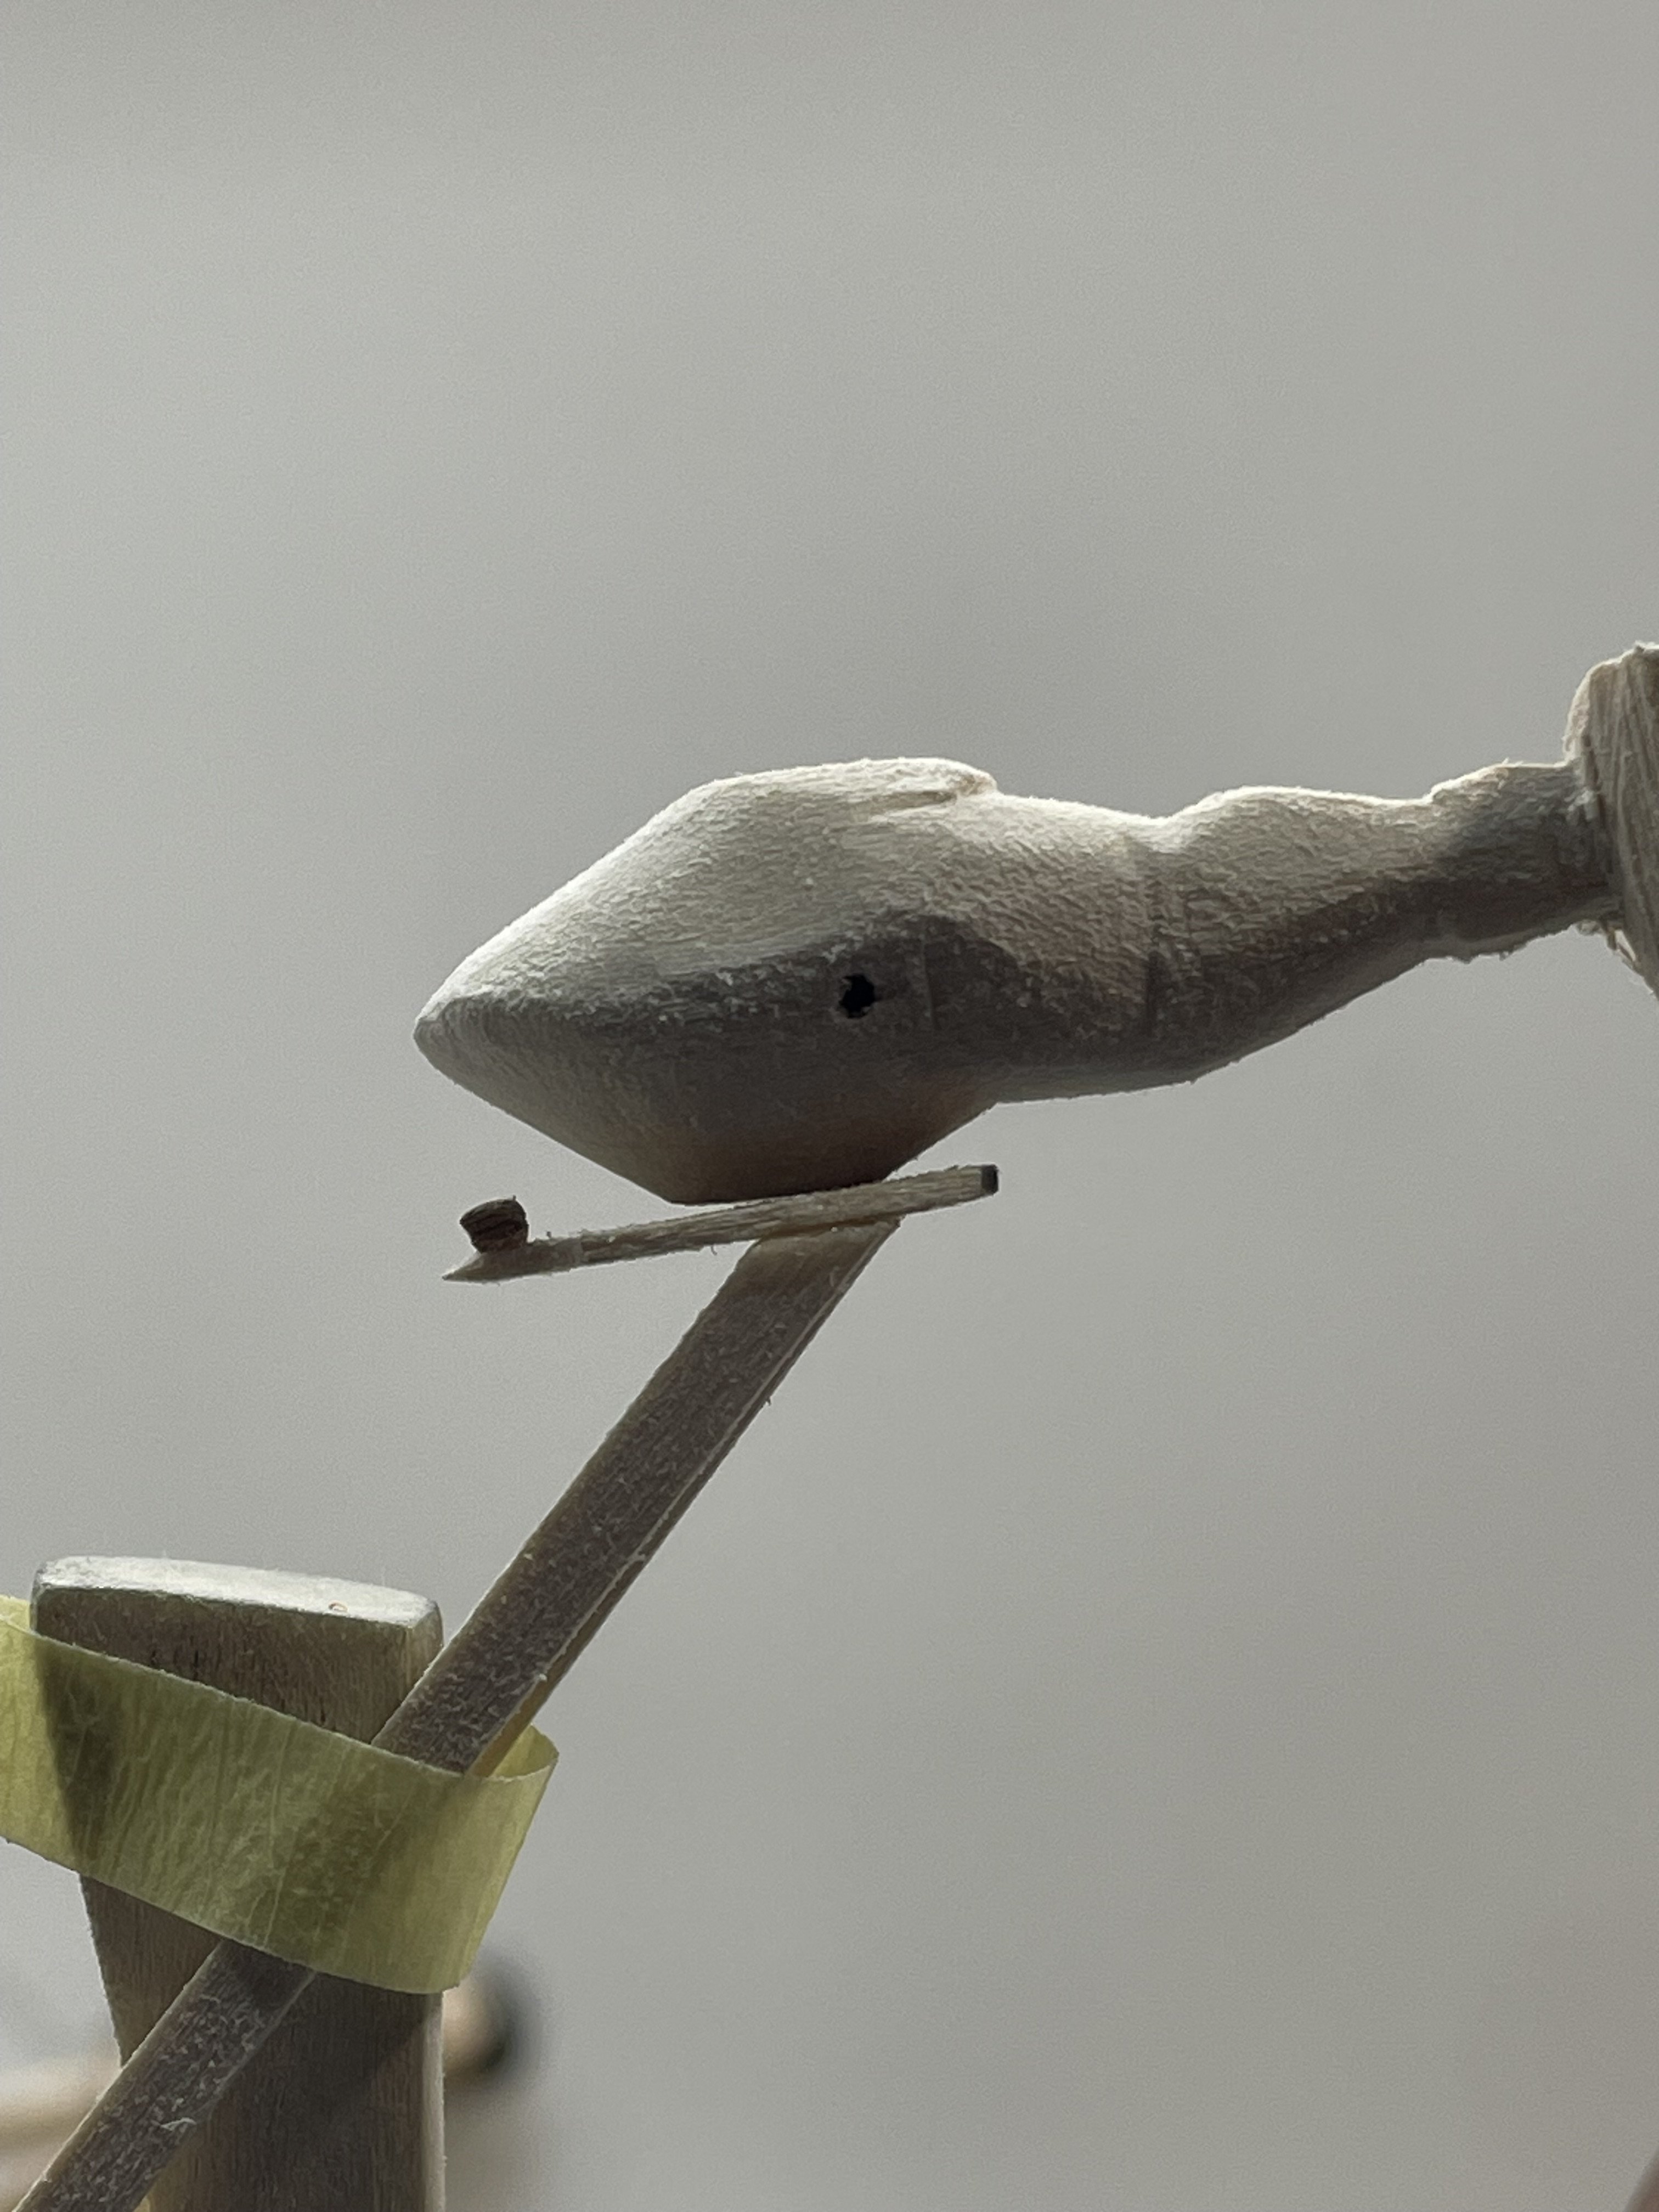
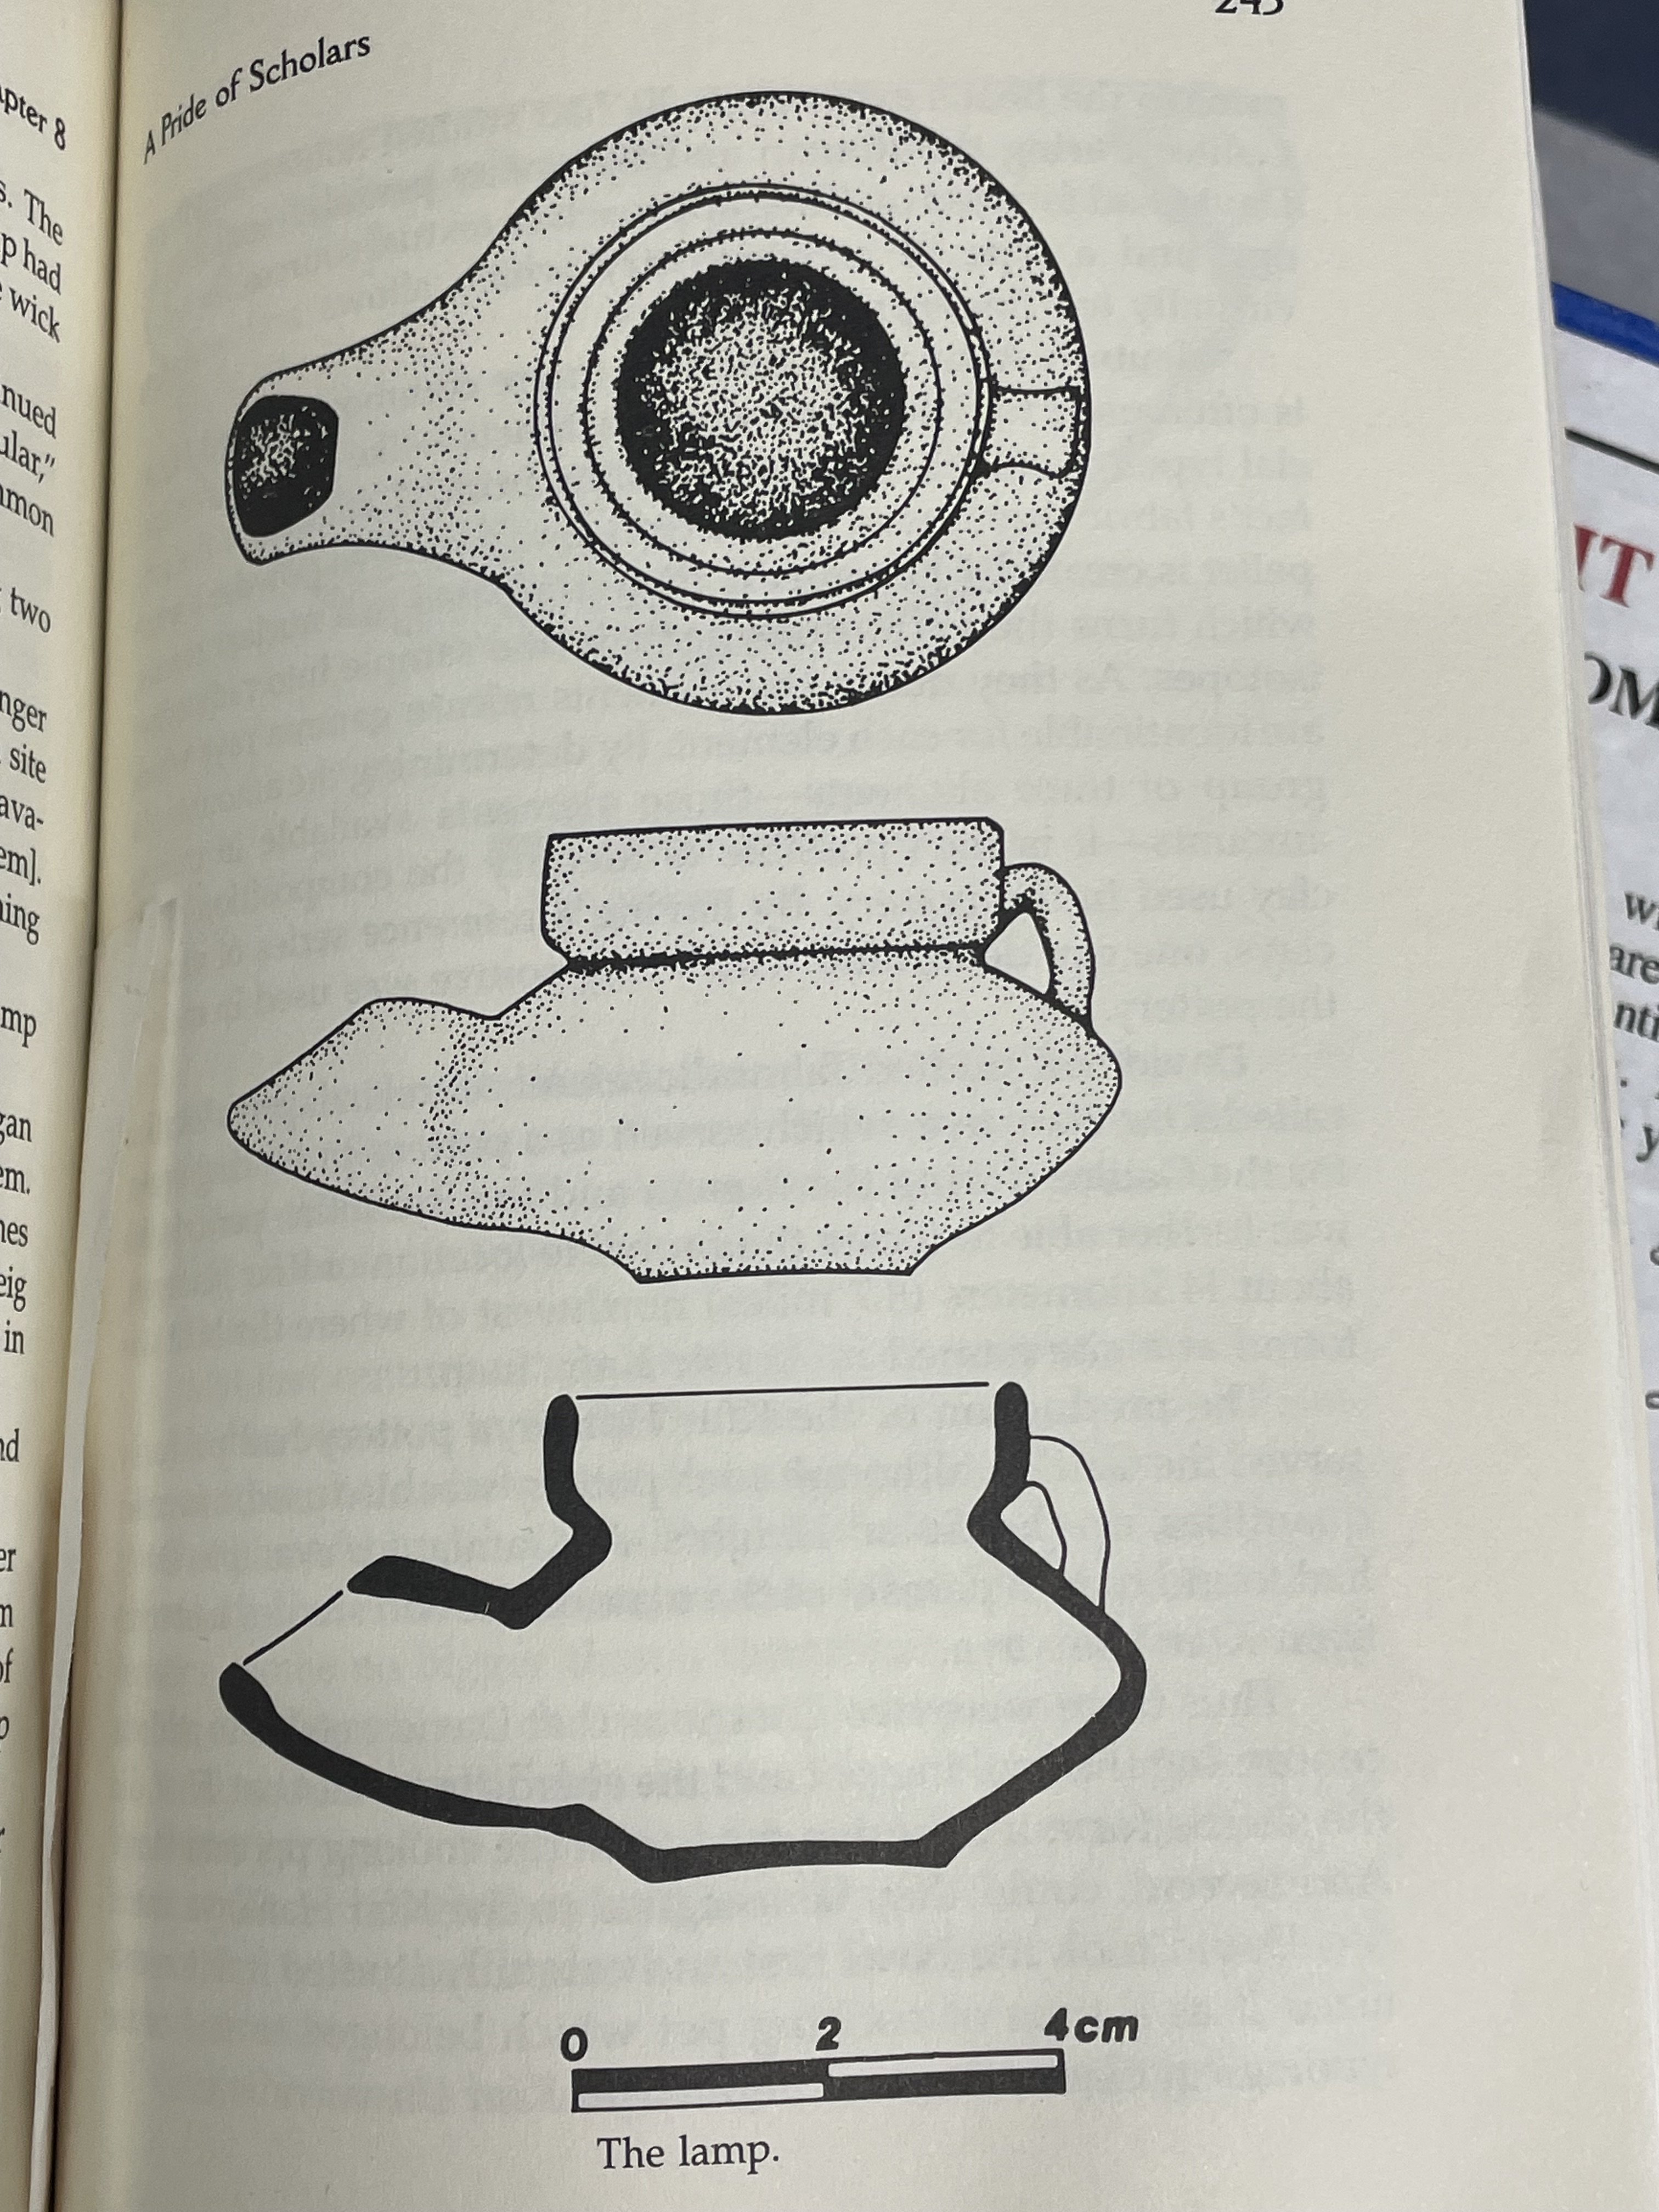
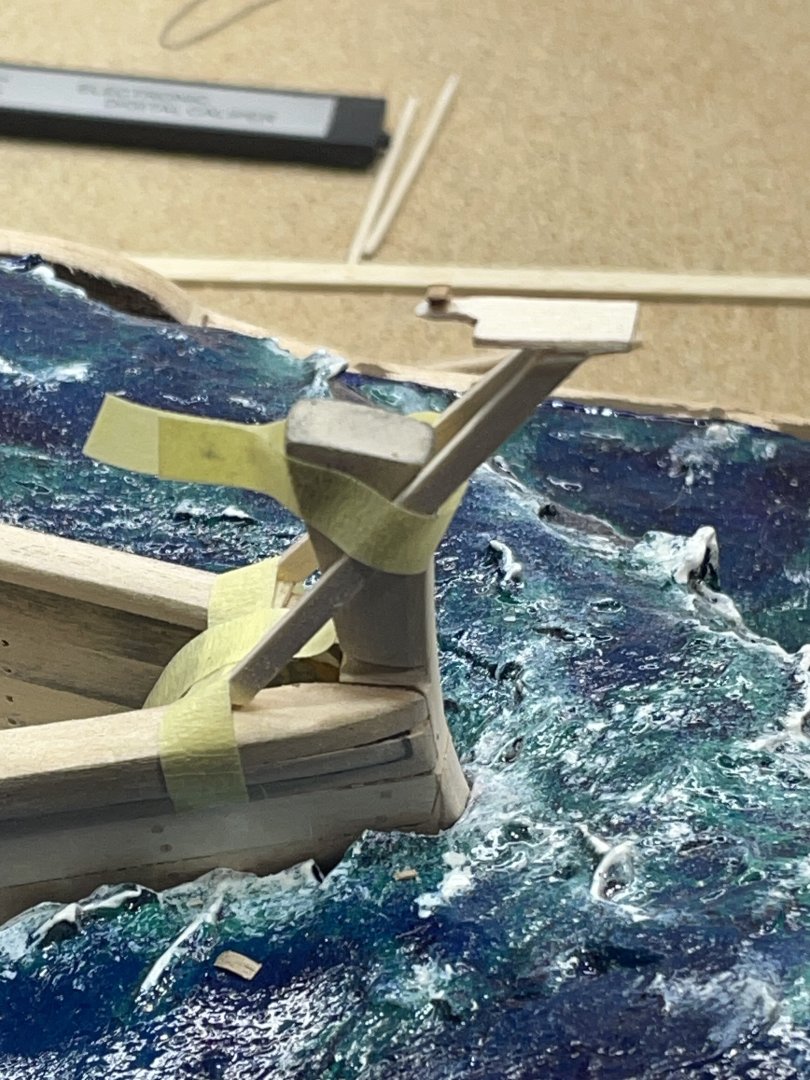
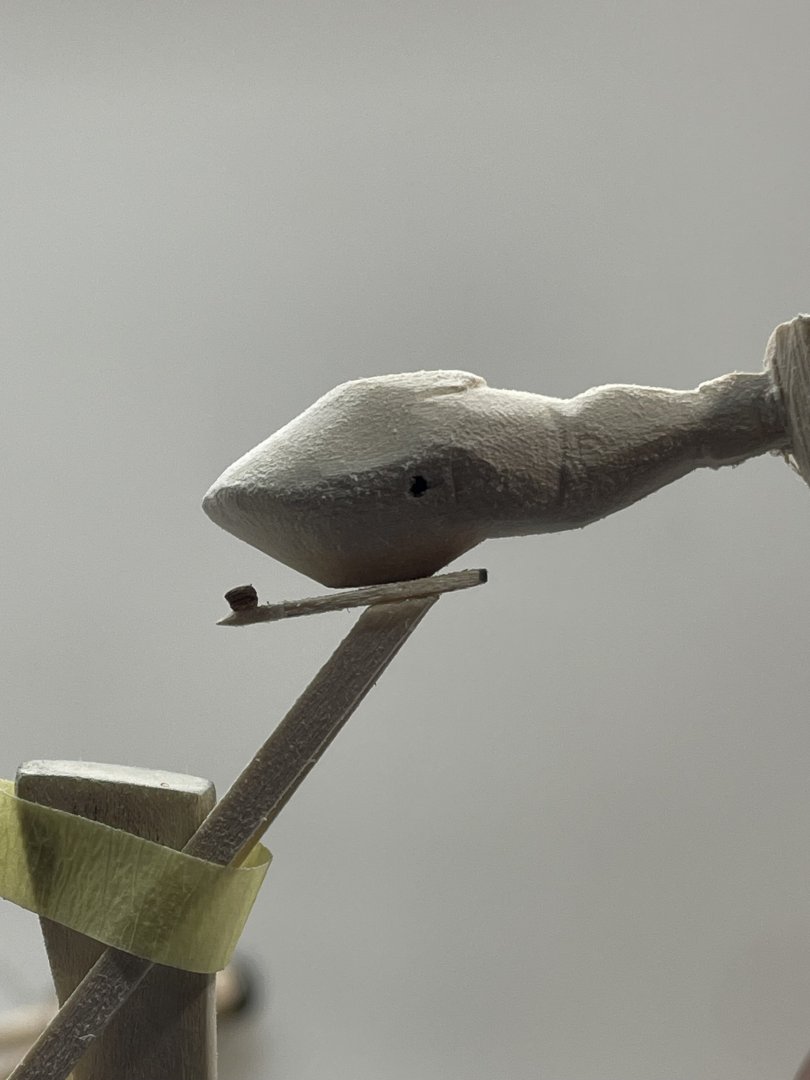
So I got off on a tangent while cutting and gluing the ribs on. I thought I might could shine a little light on this build 🙂 I started a prototype for a headlight or would it be a bowlight? I will need to build a basket or something around the shelf to hold the oil lamp. I have started the lamp. This one is wood, I’ll have to see if it’s going to work.

-
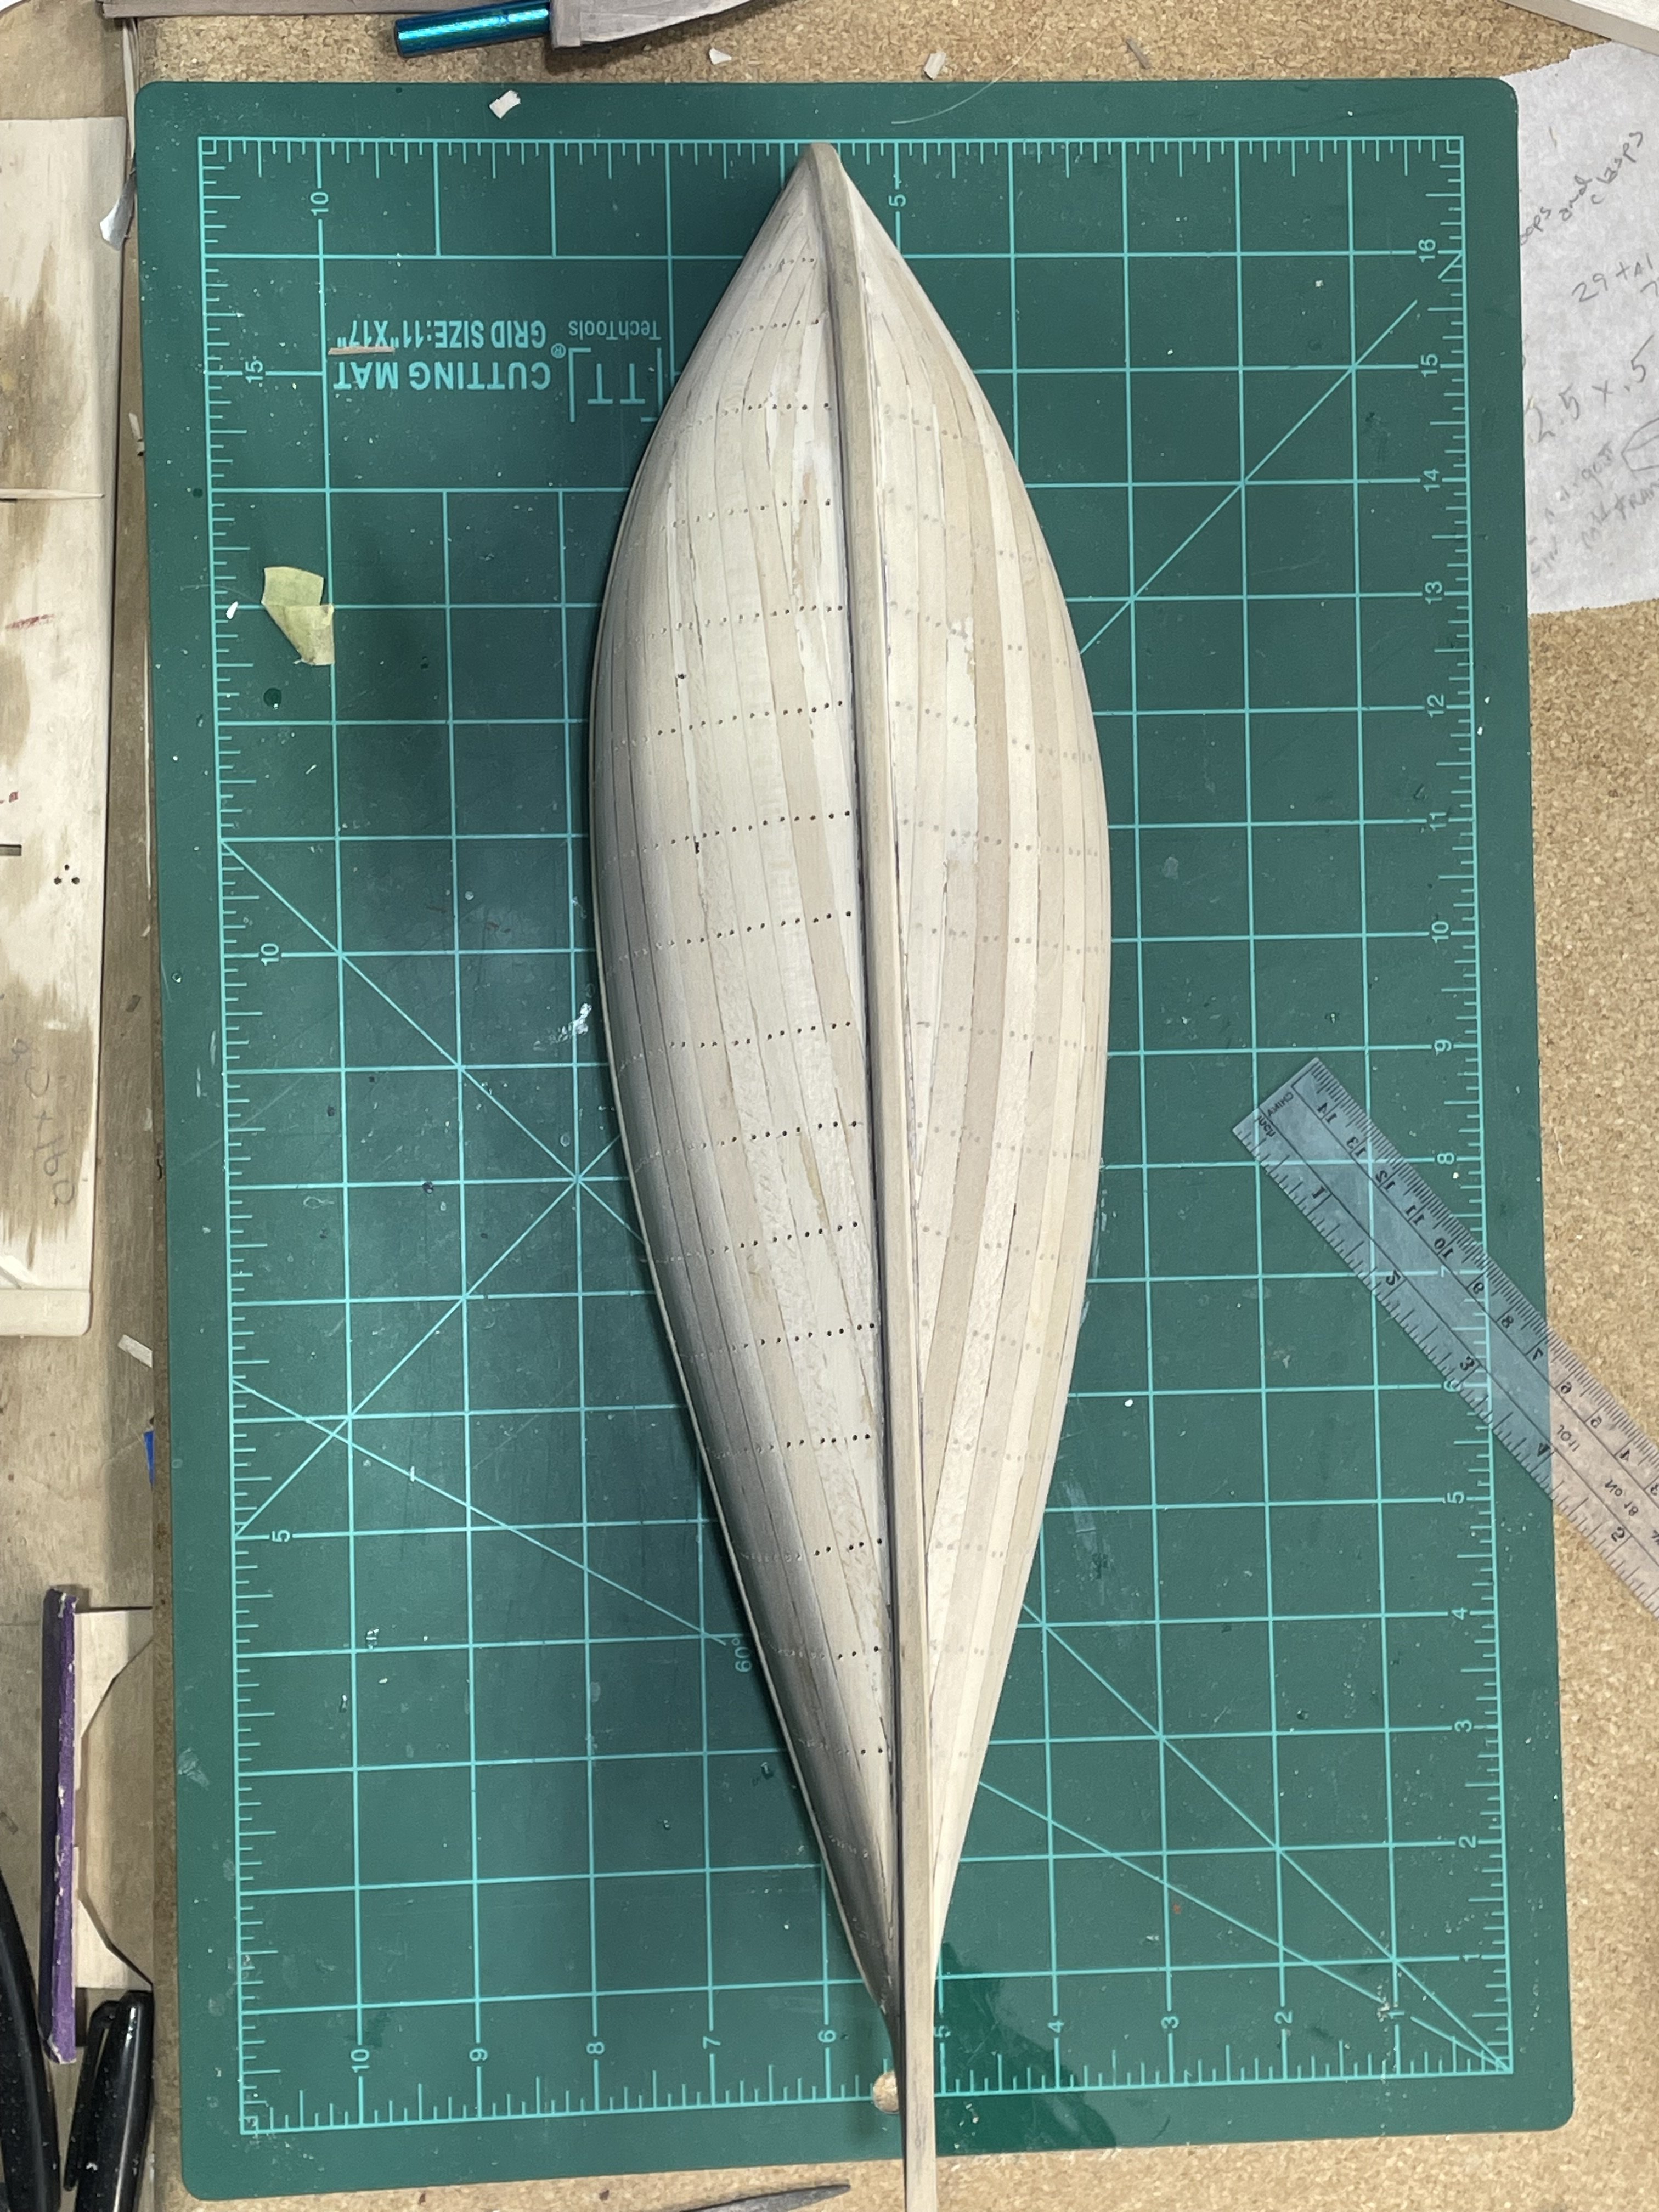
They found my basswood strips and notified me. While I was waiting I started making some deadeyes for the shrouds, by layering thin plywood from previous builds. I also made some belay pens and the oarlocks. Installing these ribs lets me see how nonsymmetrical I constructed the hull. I haven’t decided if I’m going to install floor boards. I’ll wait and see how the inside of the hull looks after the finish. Here’s where I’m at.

-
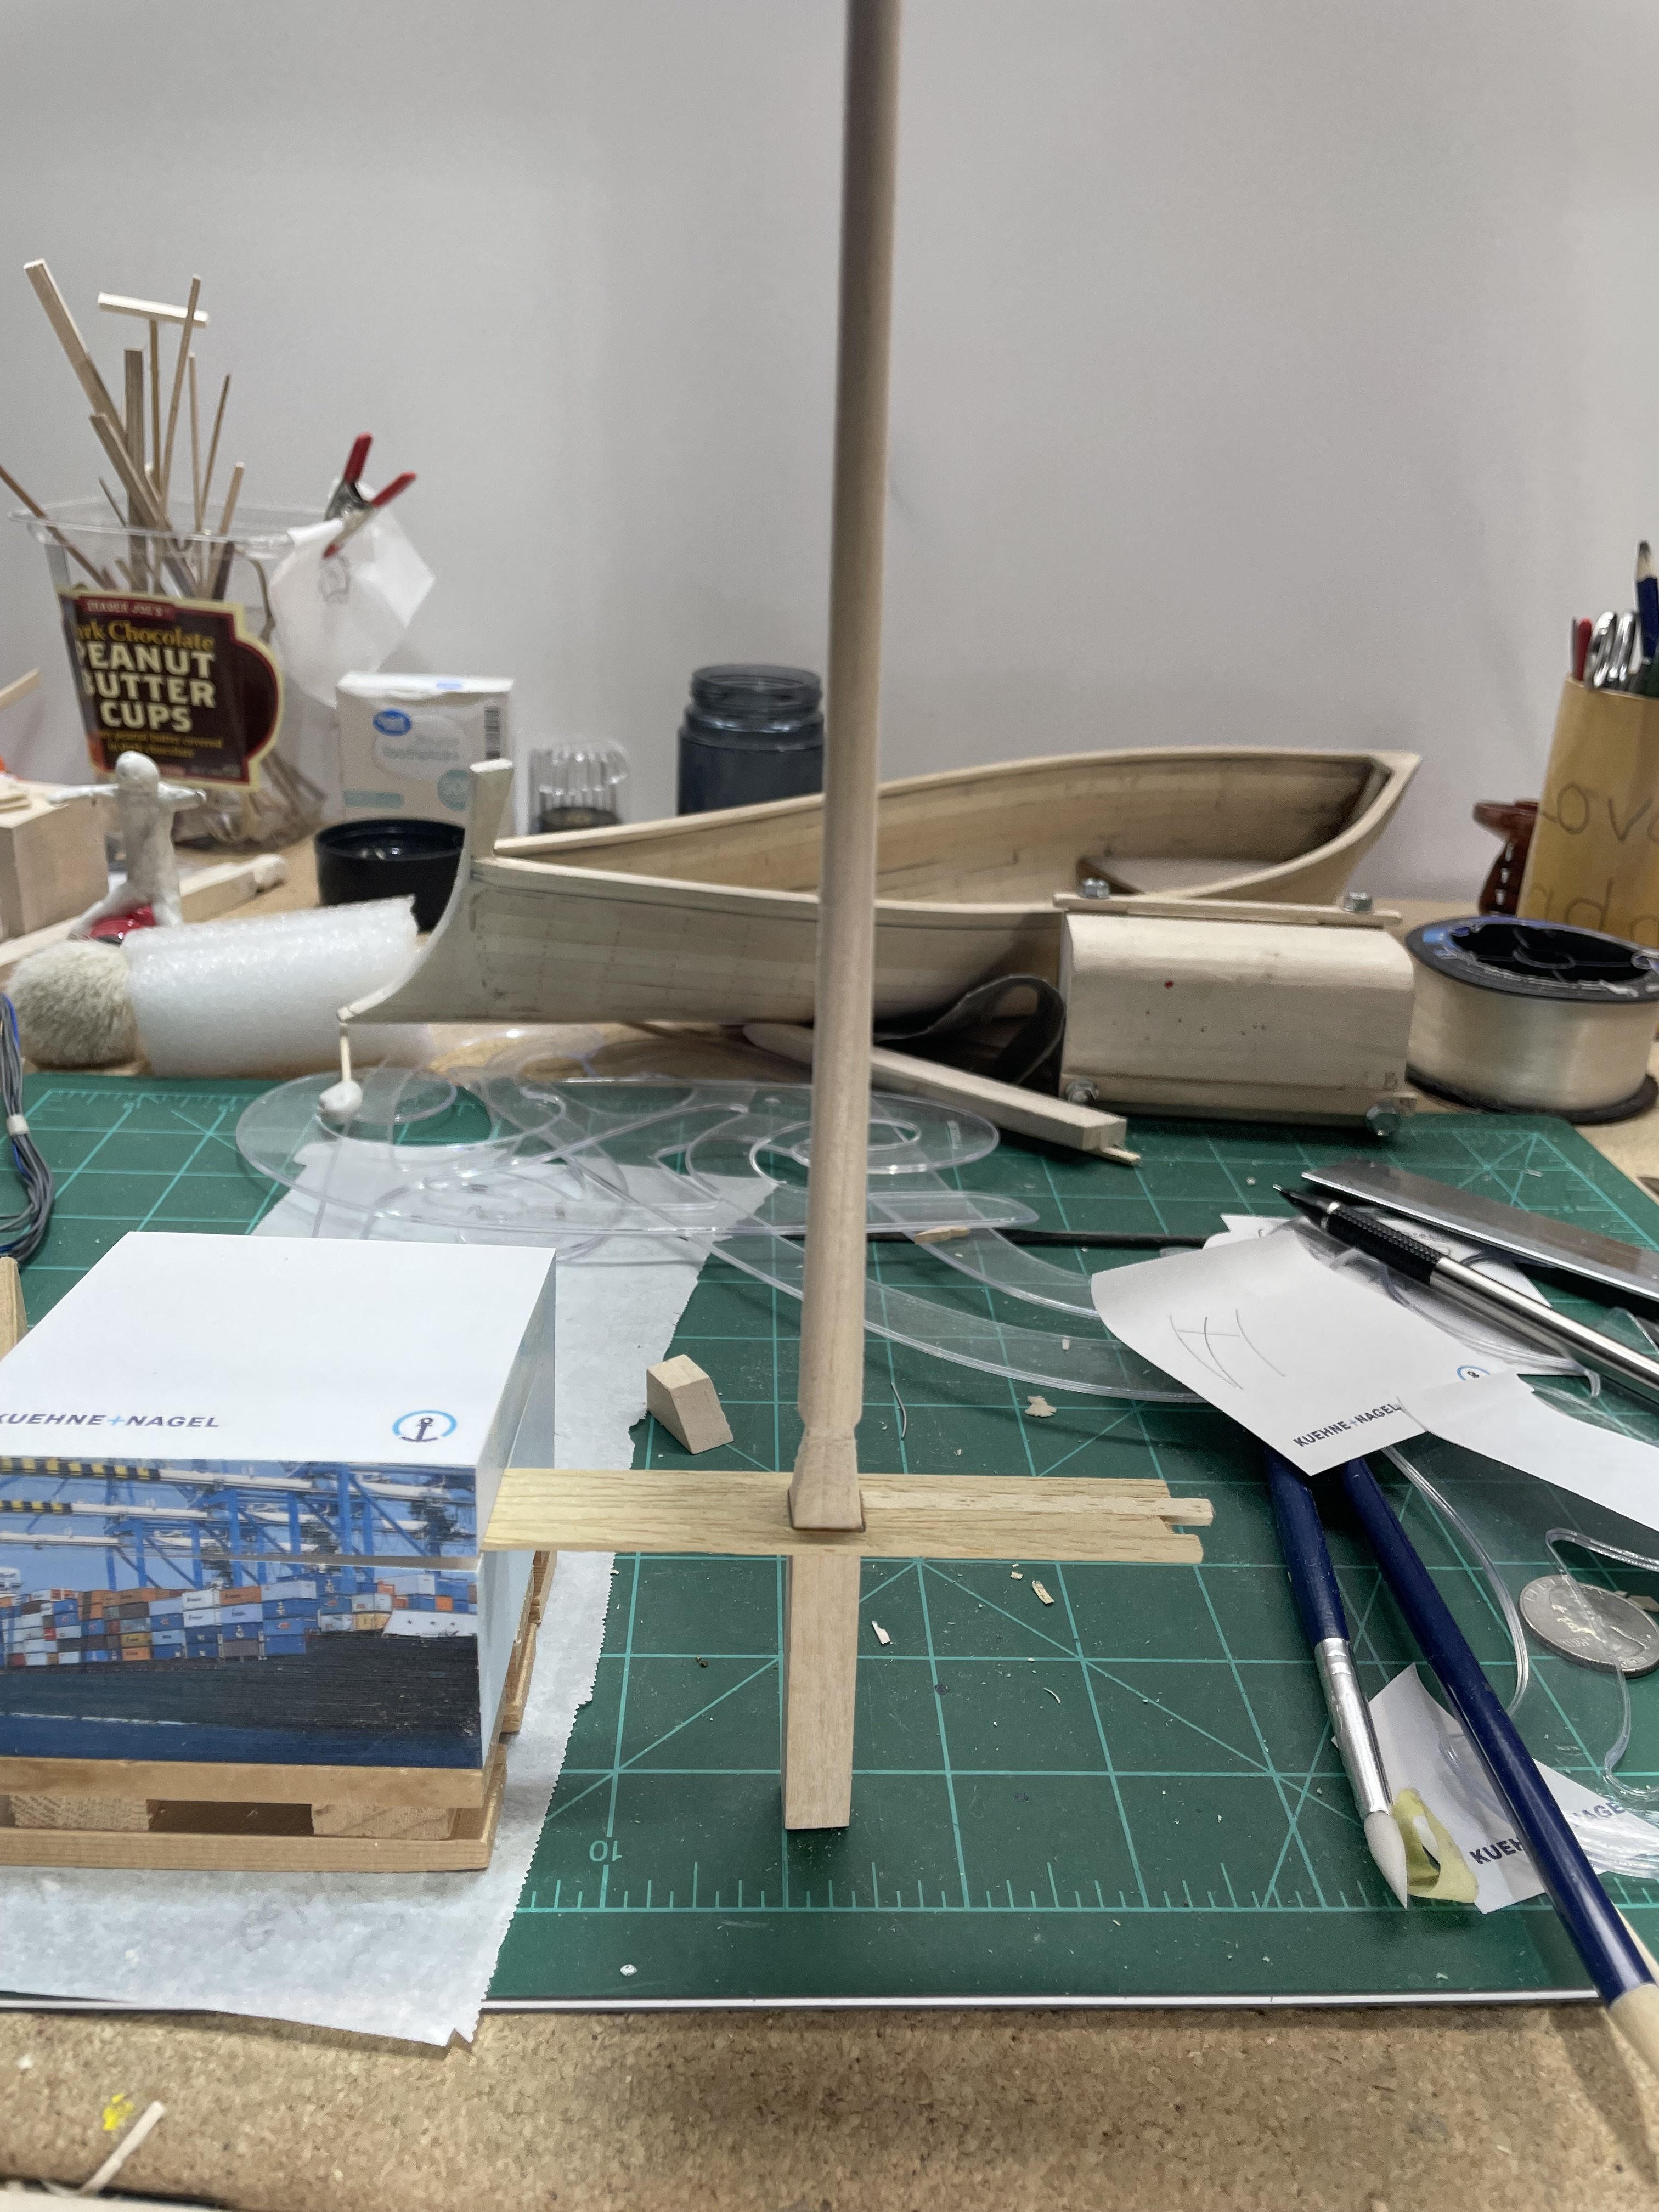
Well I ordered some wood strips to replace all the ribs two weeks ago. After a week I tracked them, they had the postage label but it hadn’t been picked up yet. I emailed them and they said they did pick them up:-) Now when I track them it says they are trying to find them:) So I’ve been trying to to find little things I can do. I made several different oarlocks I think I’m going to make them like this one. Then I made the mast step. and the thwart and started on the mast. It will be cut off on both ends. Today the contractor that’s going to build the roof and walls for the mossy shipyard came buy today. He said they will start Monday or Tuesday. That’s probably going to slow this build down considerably.


-
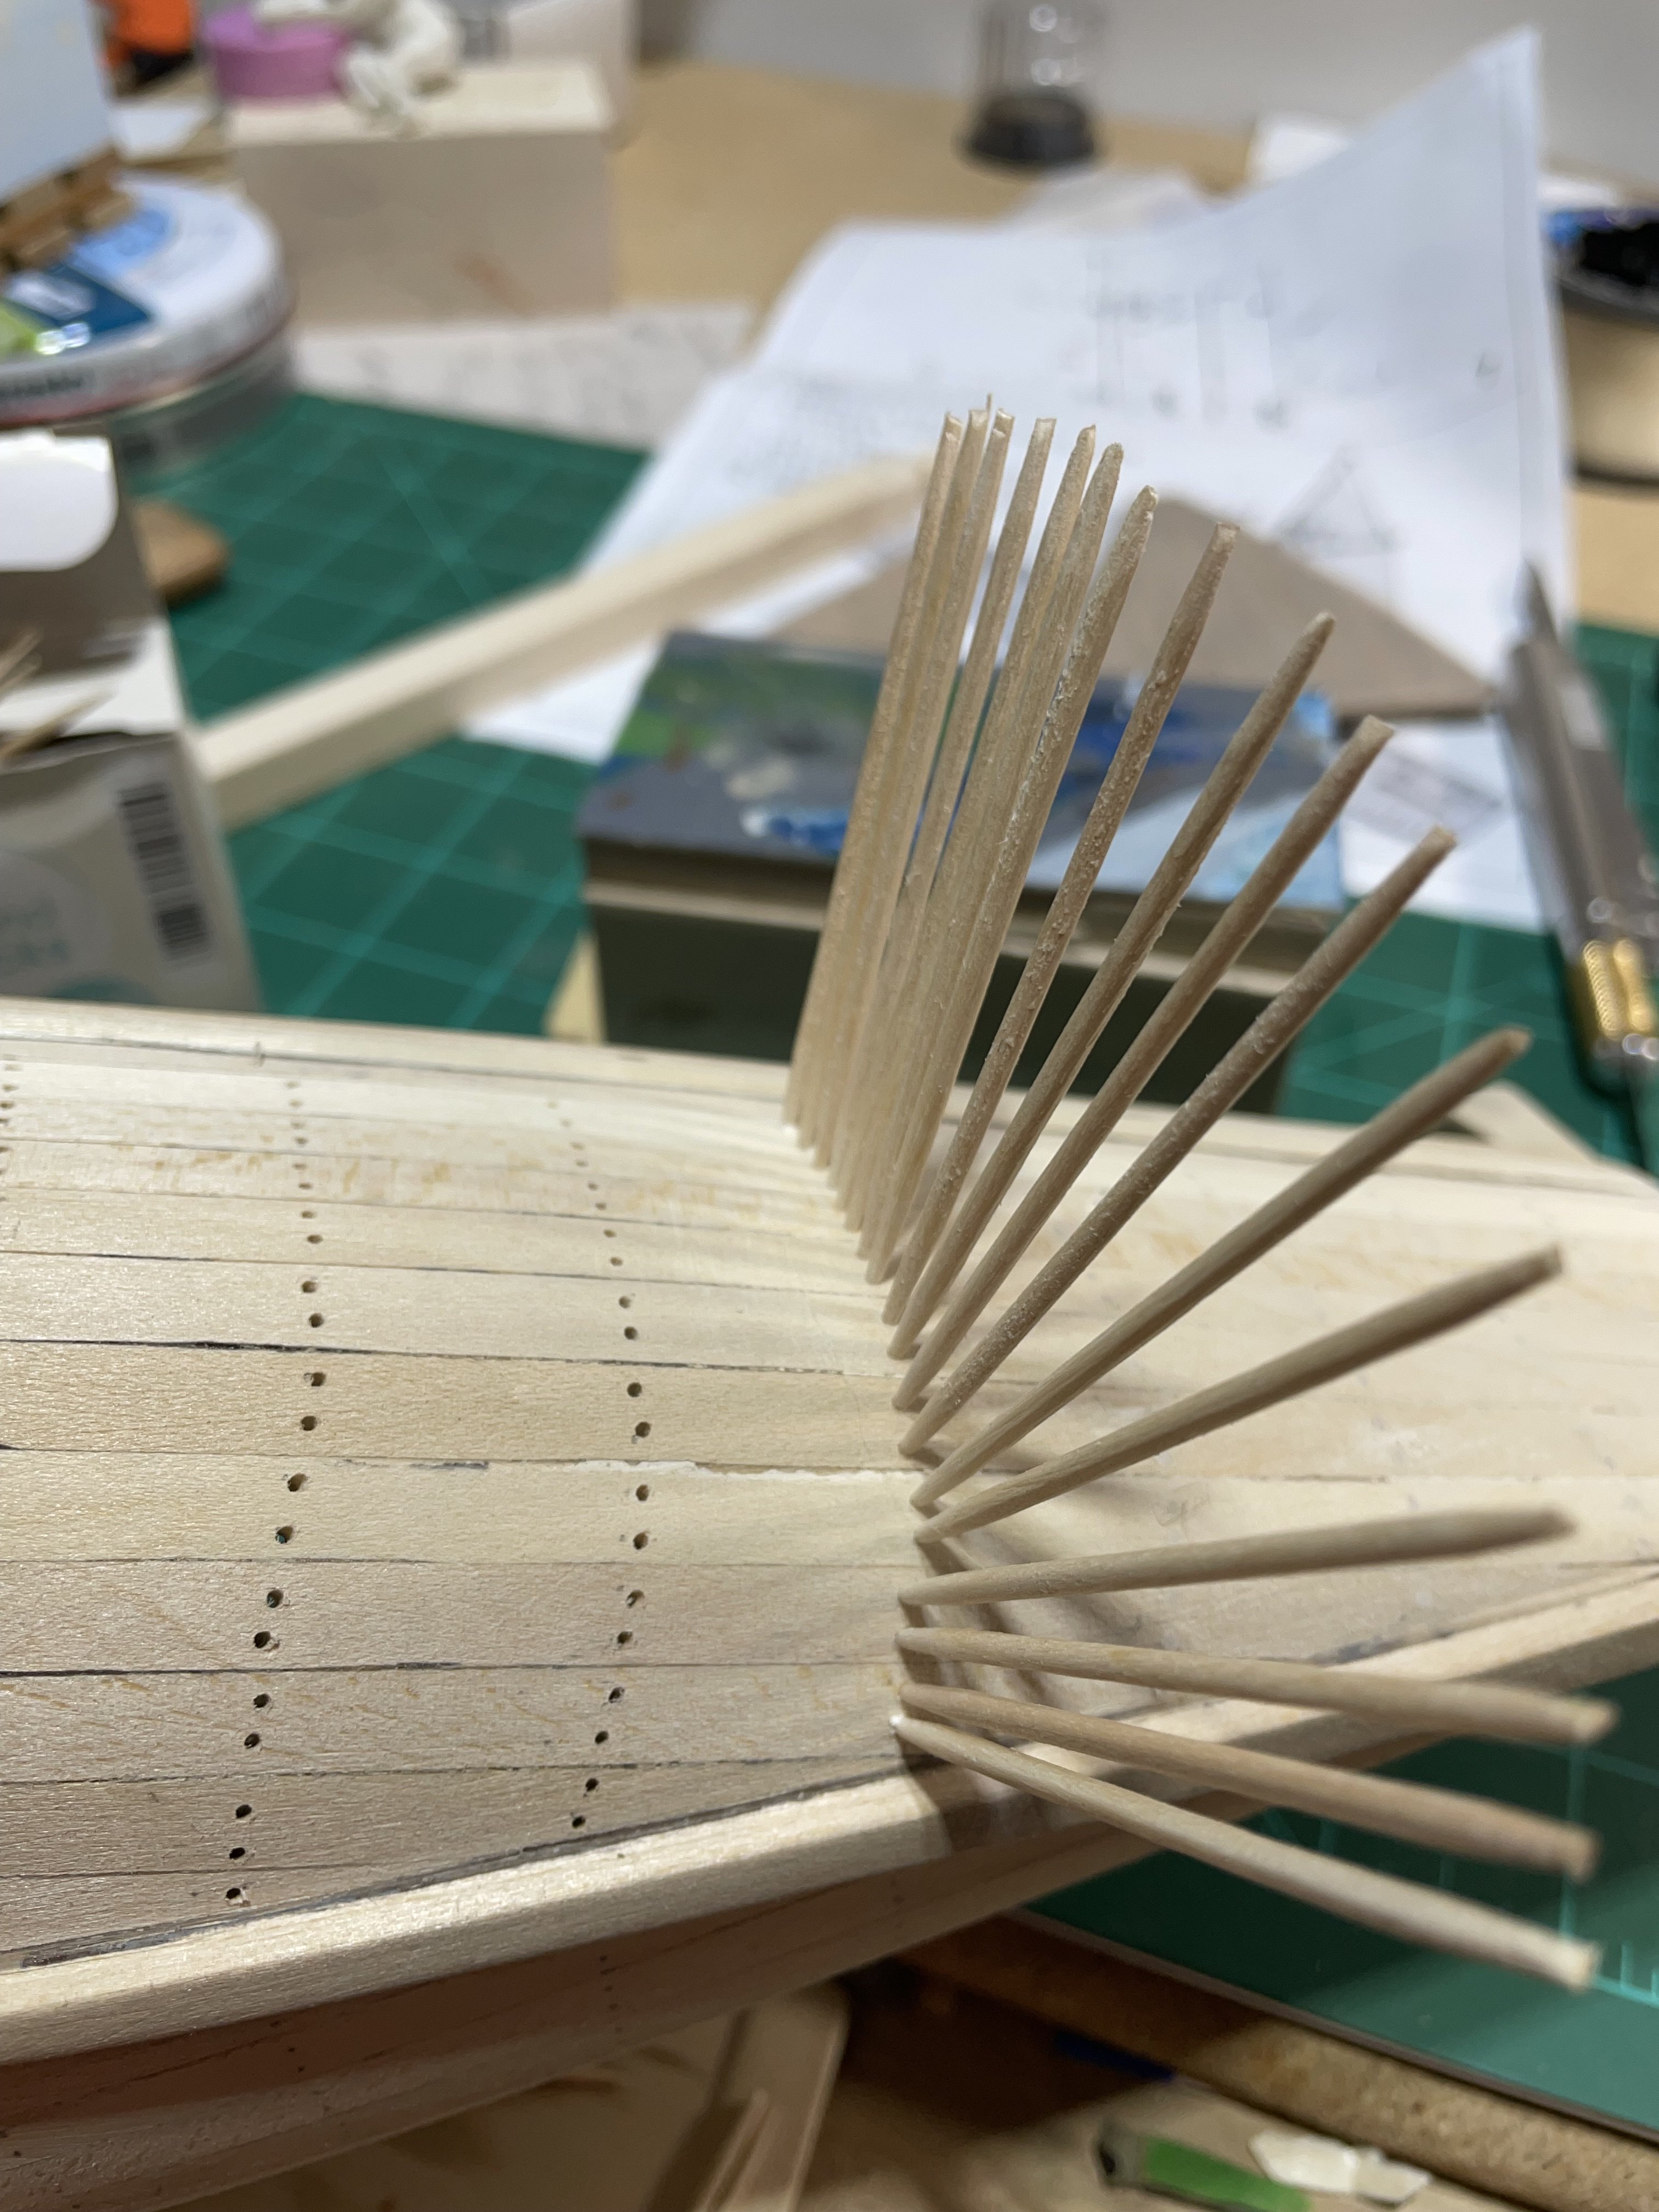
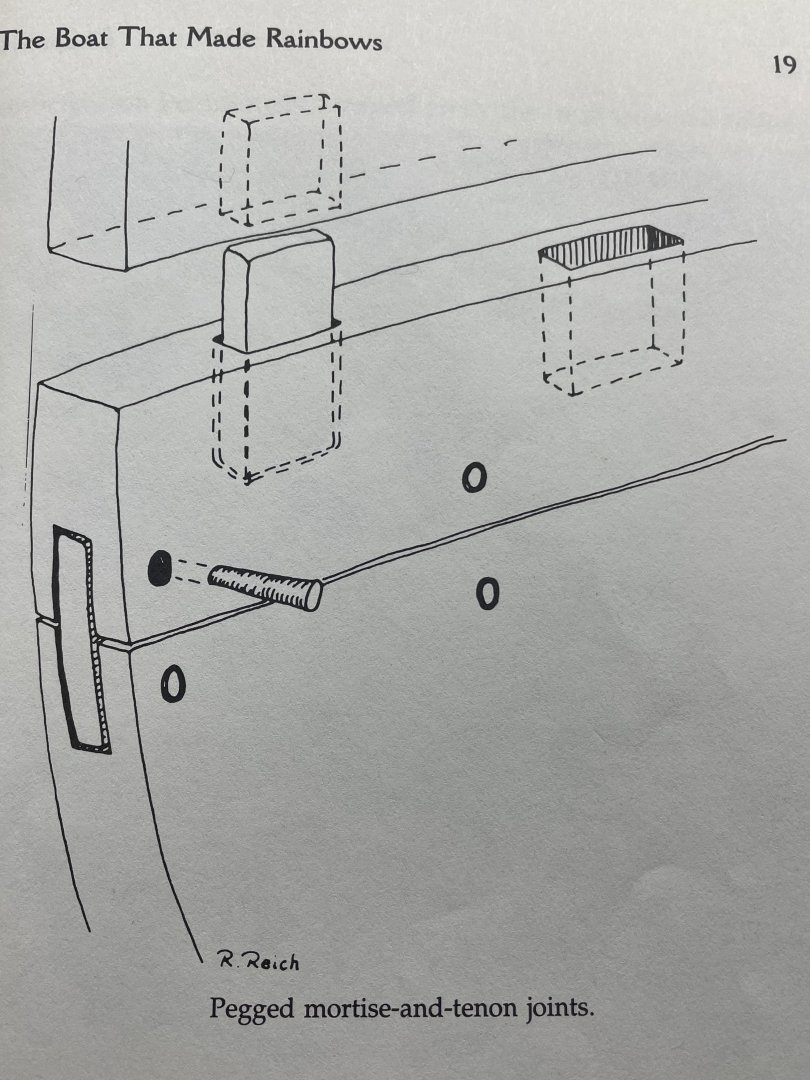
Today I got all the pegs in one side and the holes drilled in the other. Just doing the little I did. Thinking about the men that were carving the mortises on a thick plank to be bent, while lining up with the other plank:-0. I probably wouldn’t last long until they told me to go get some coffee:-)

-
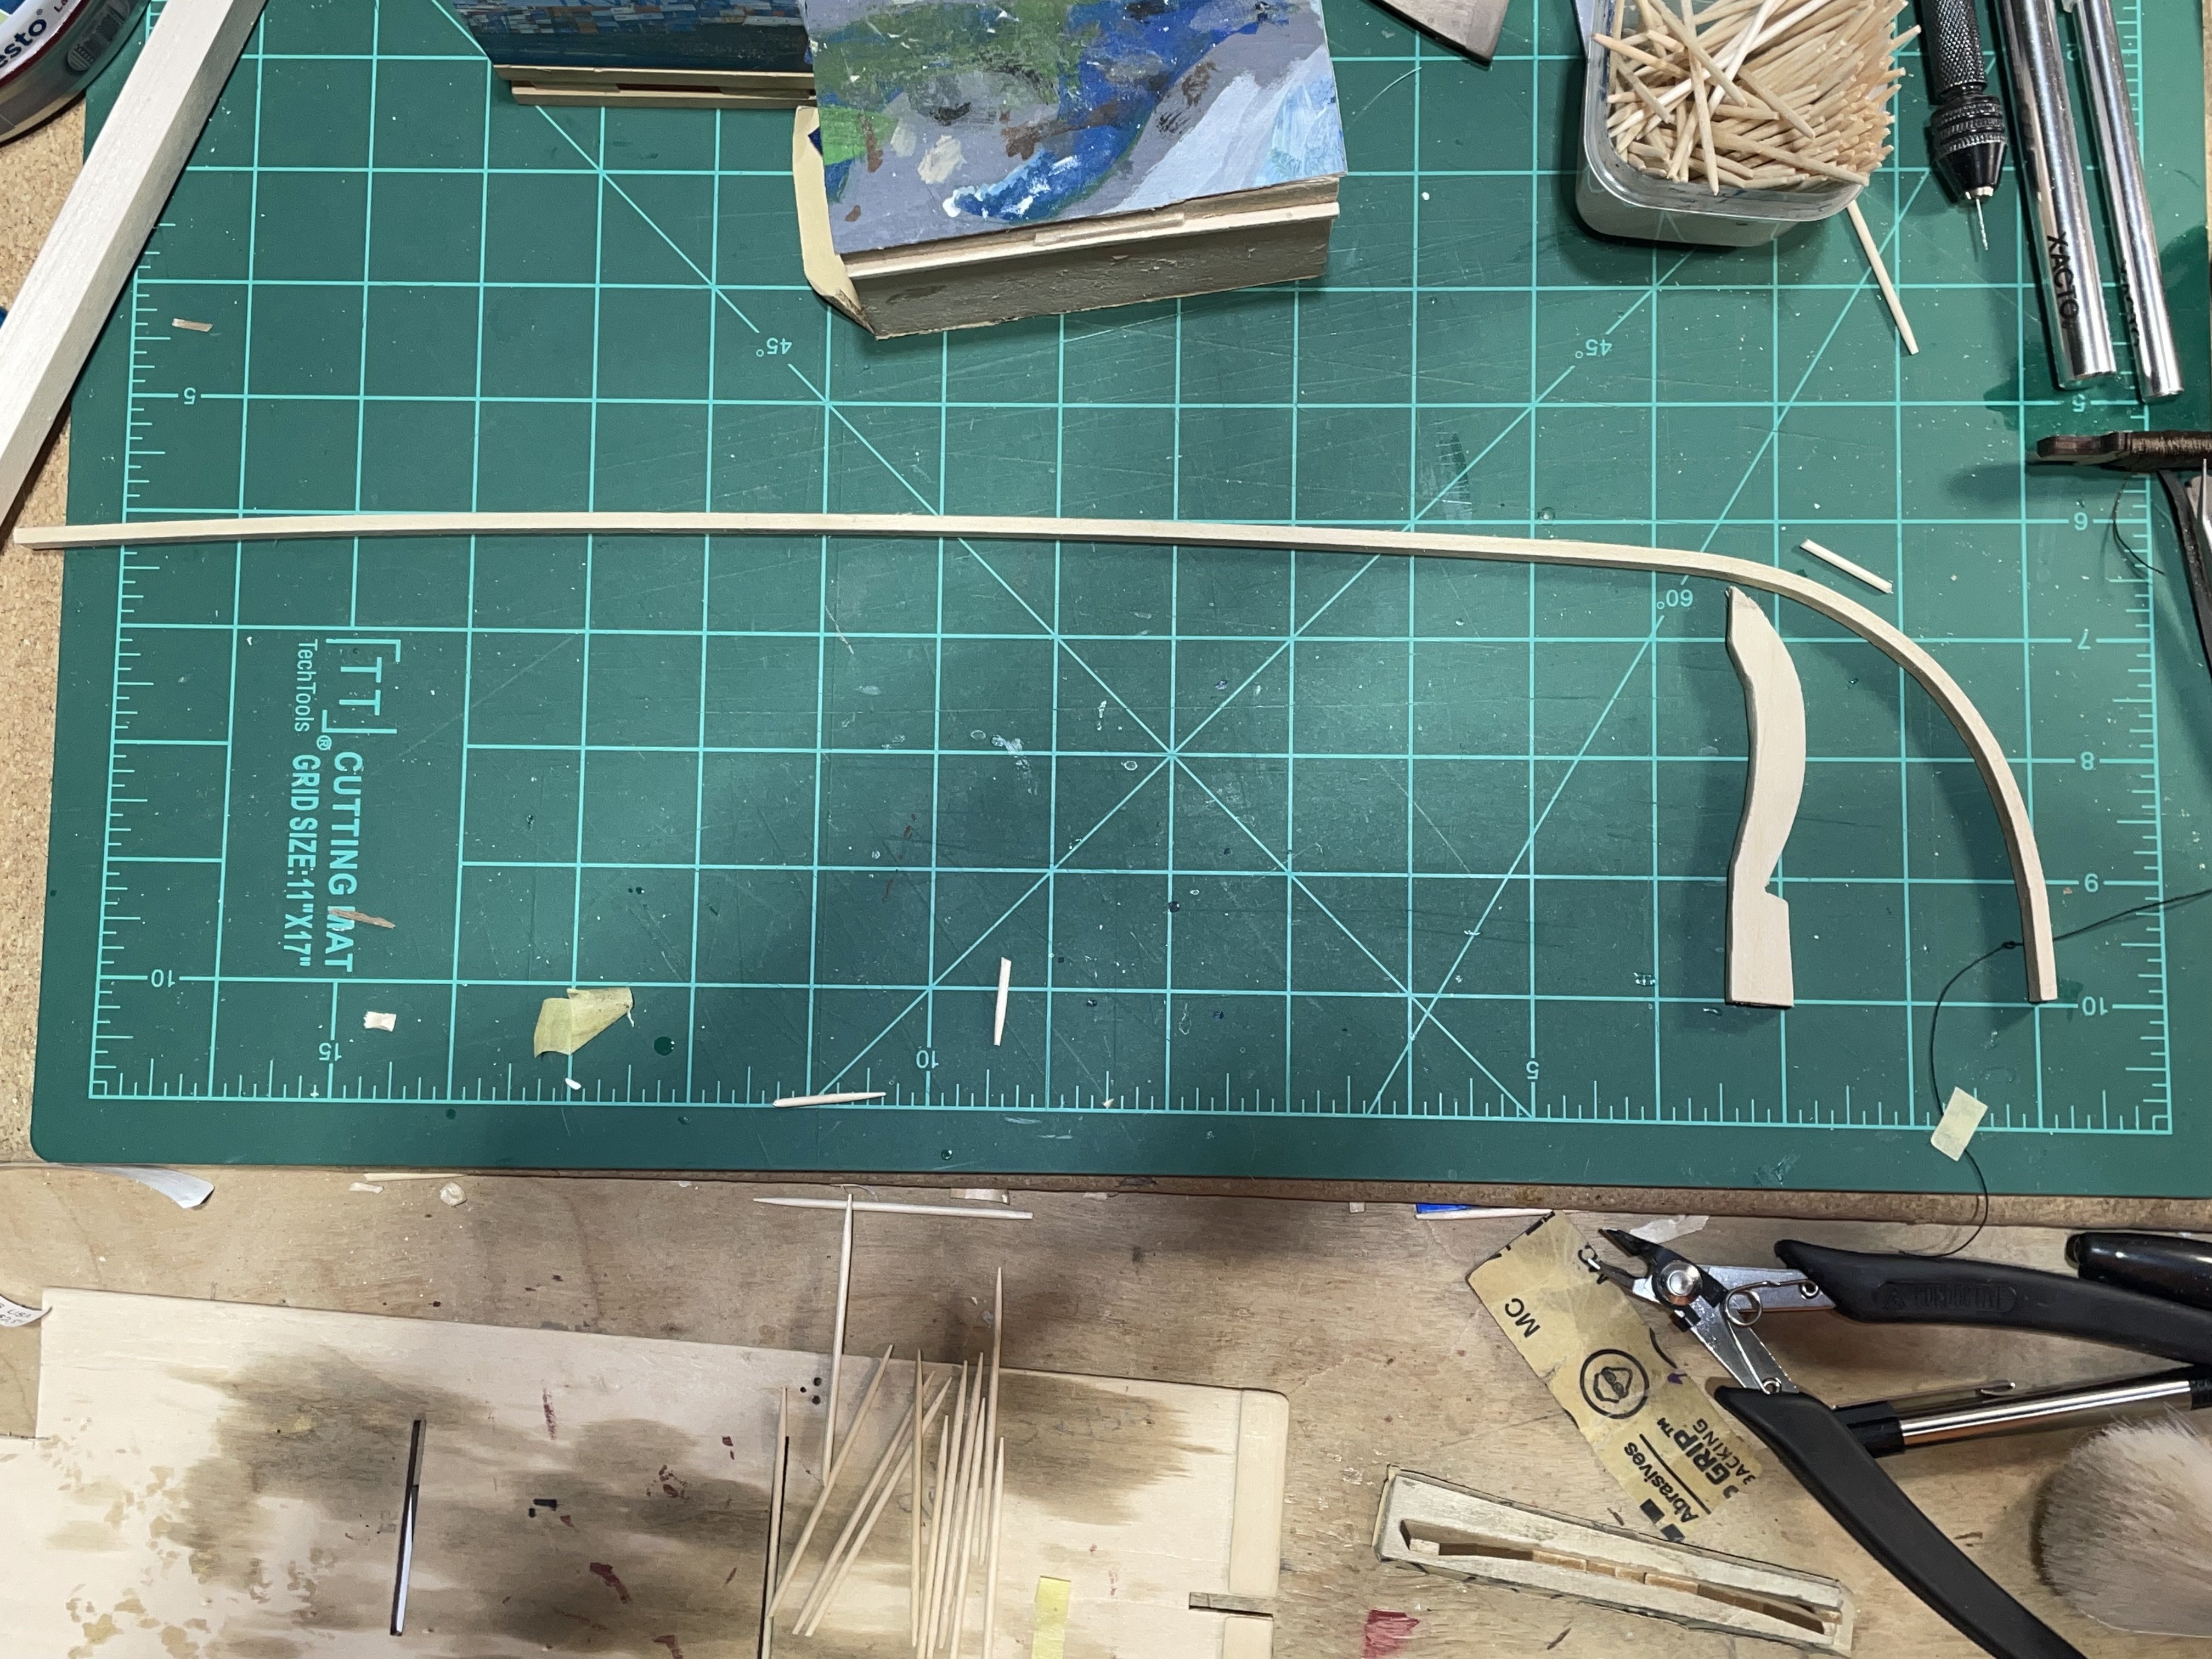
Bob, here is a keel that I bent for later use. It’s probably longer than it needs to be.

-
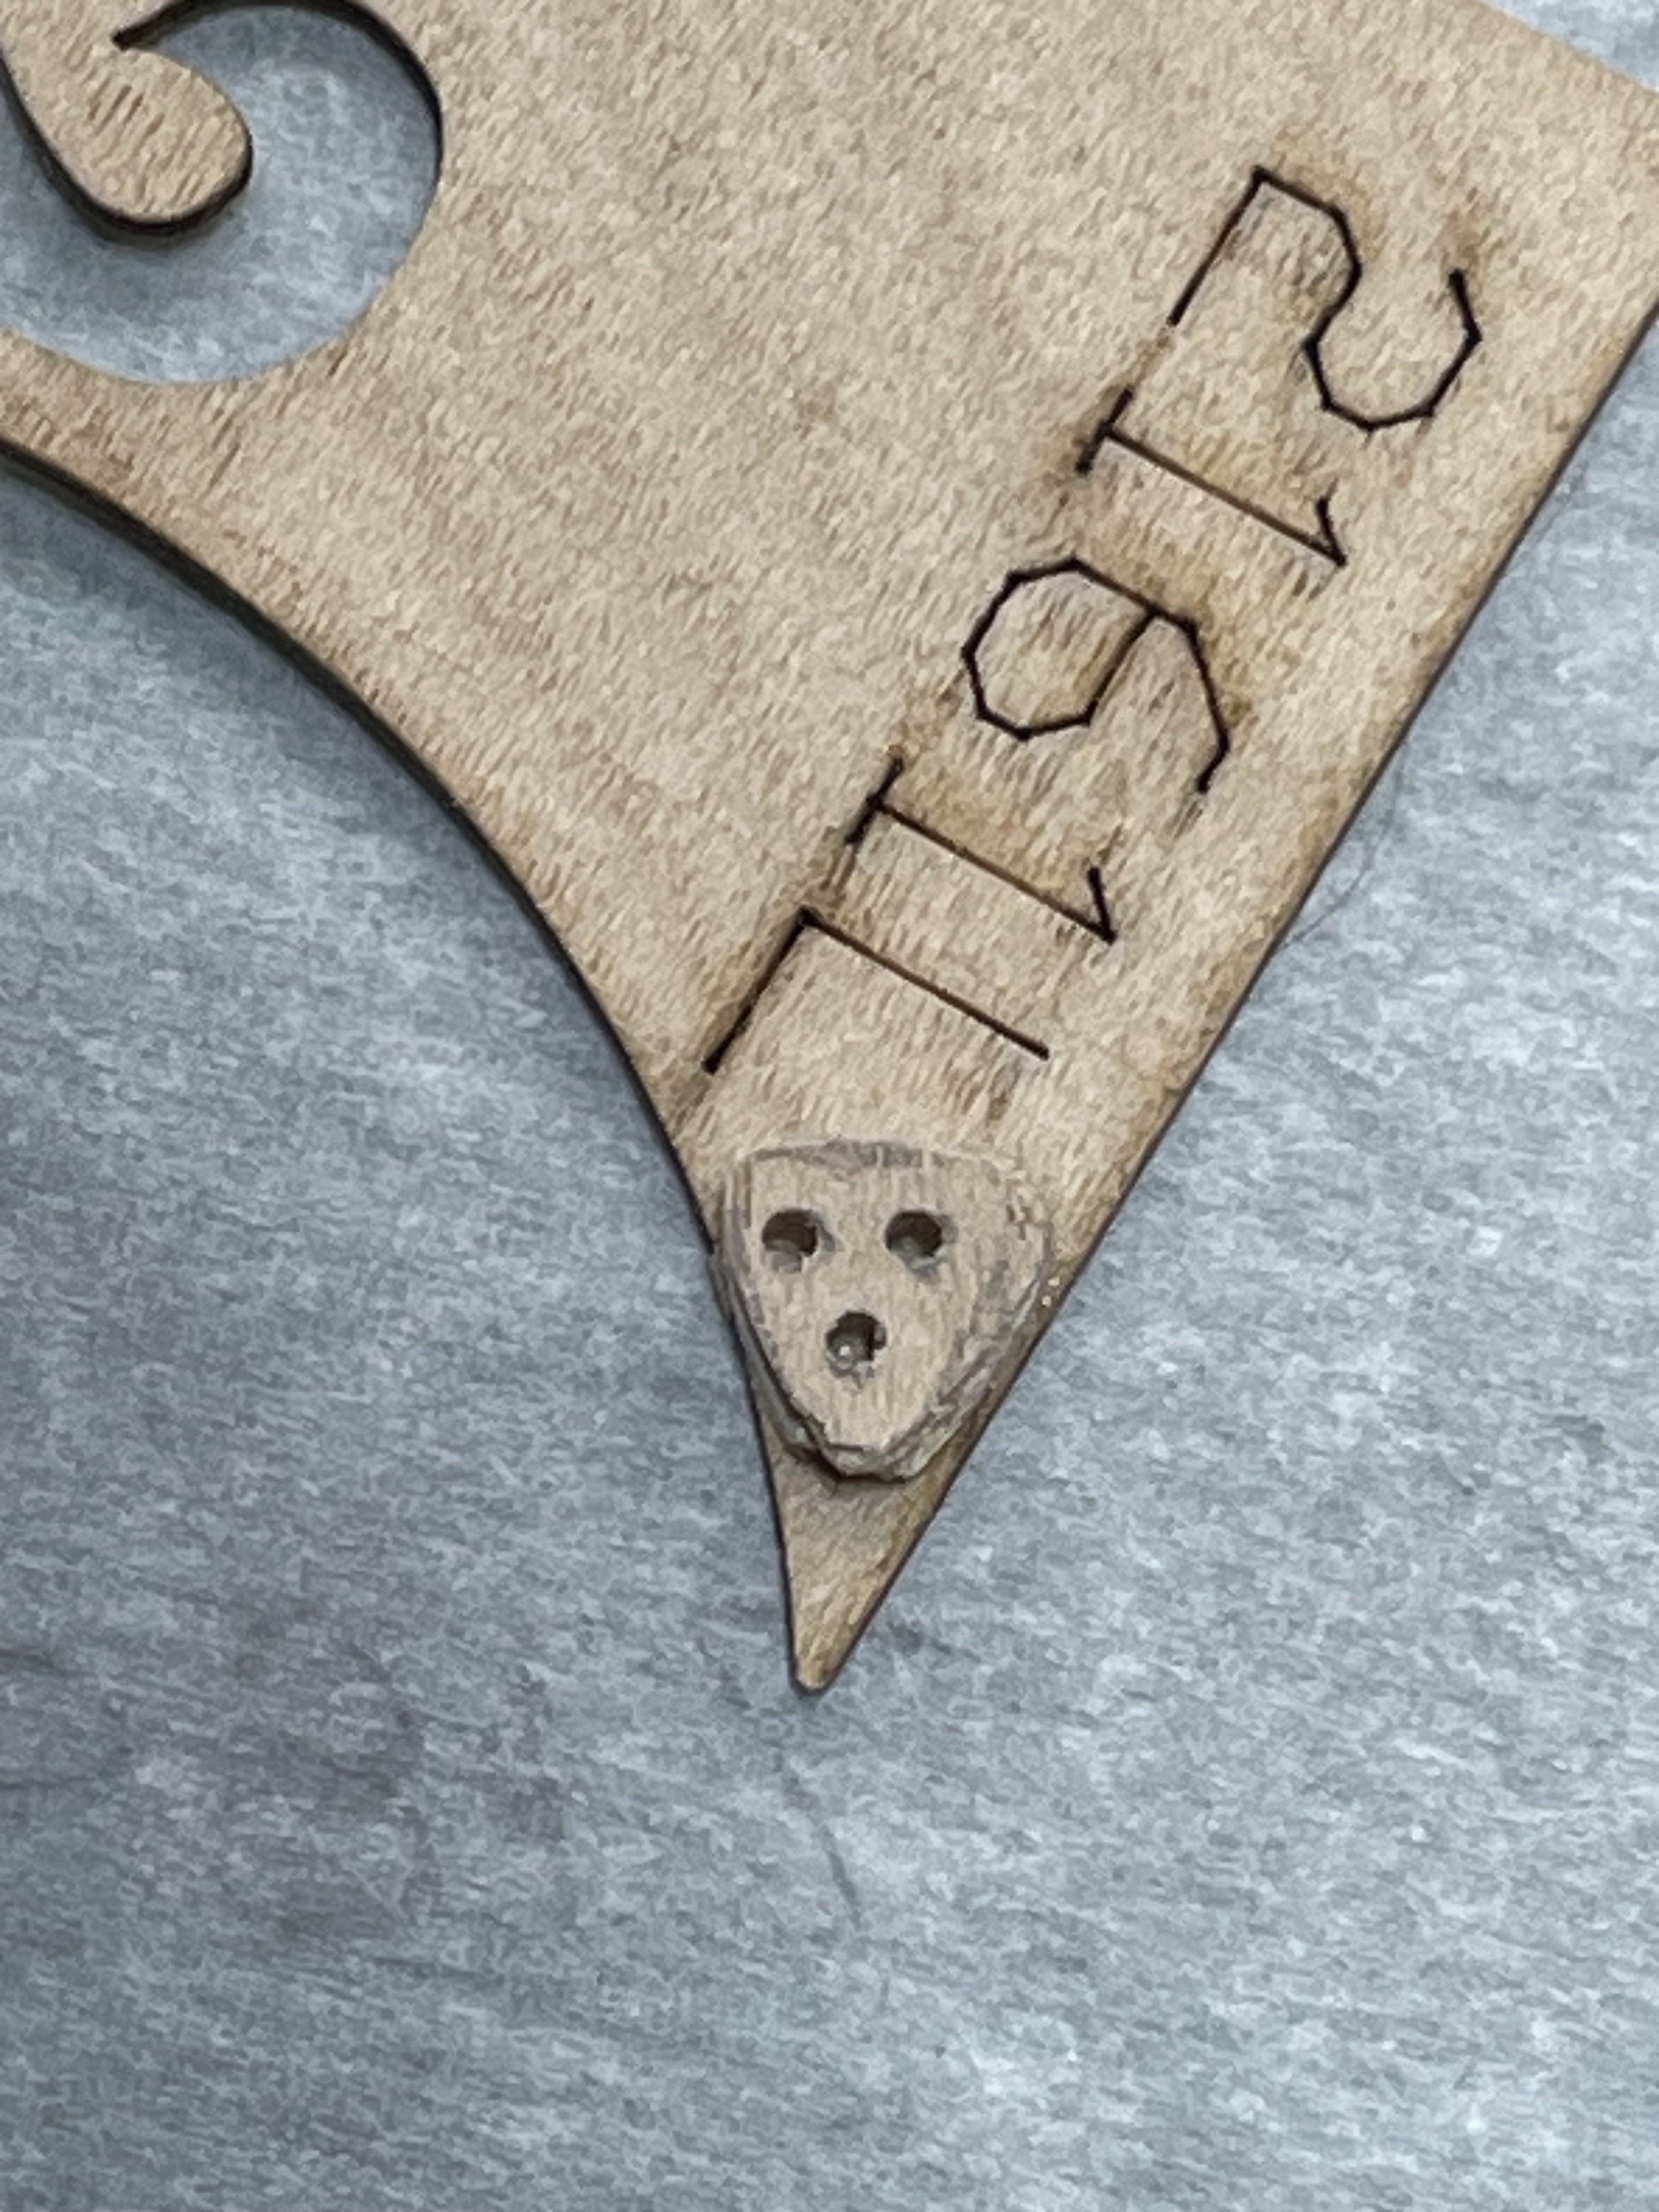
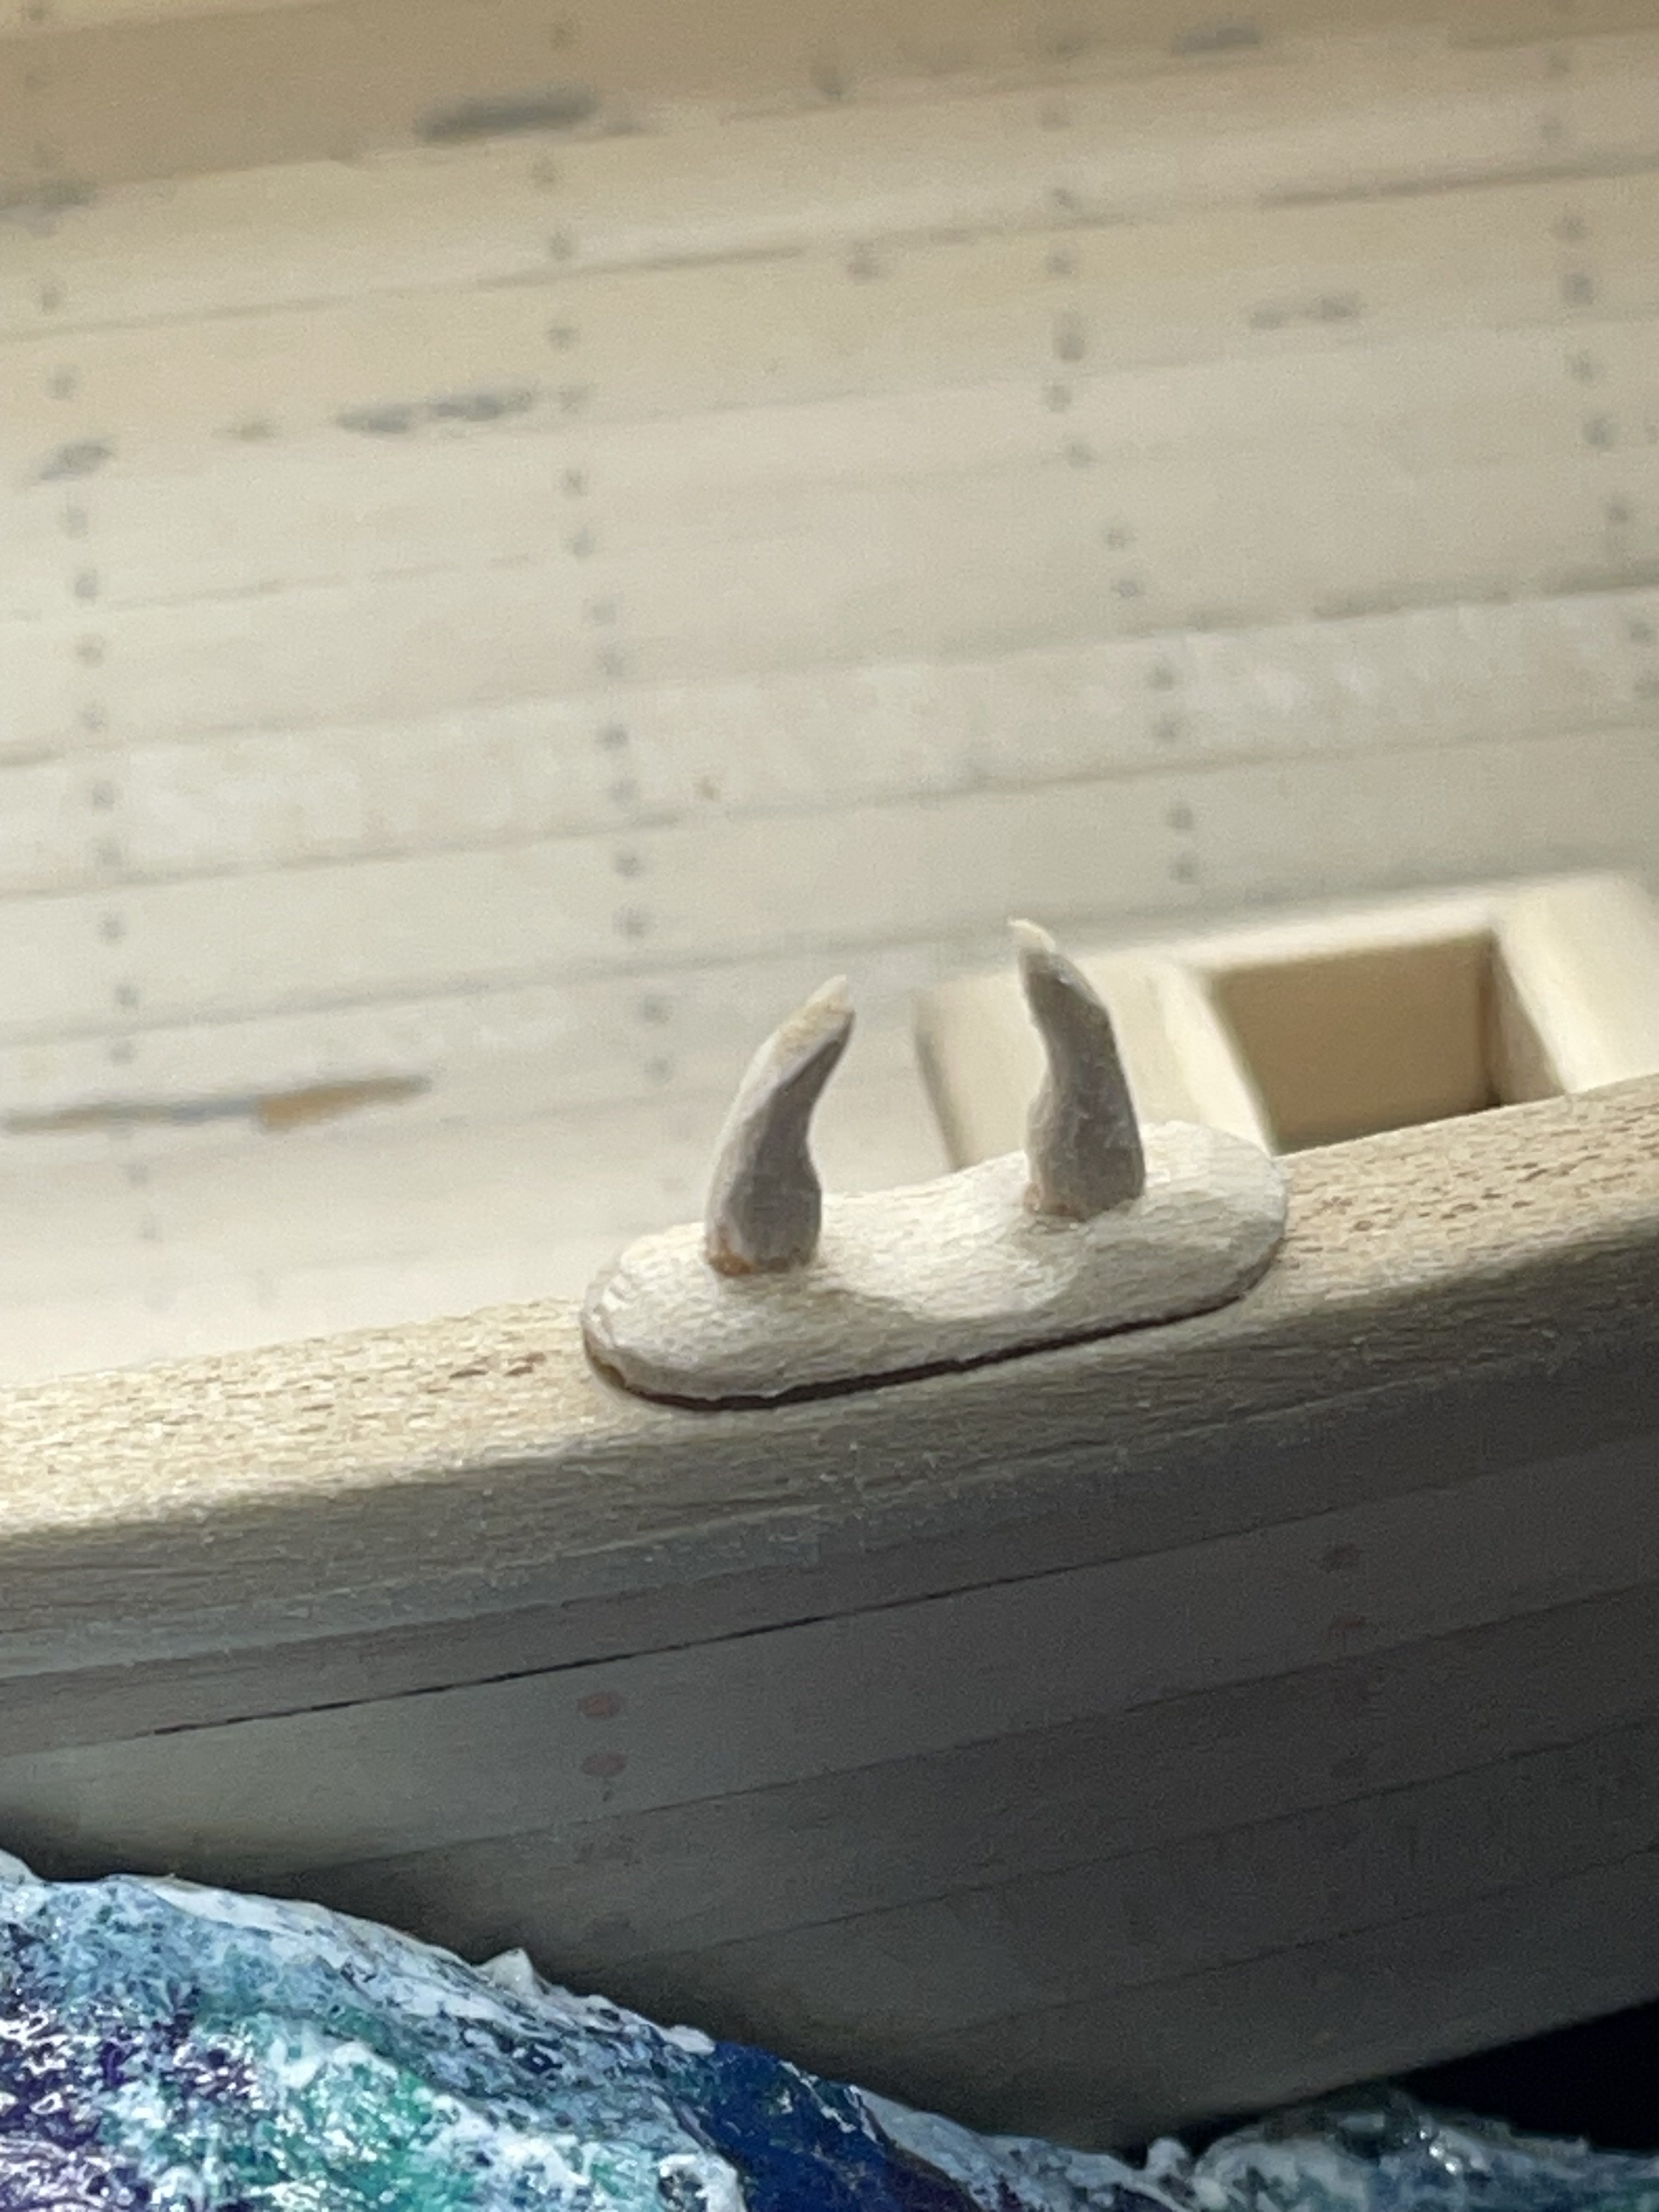
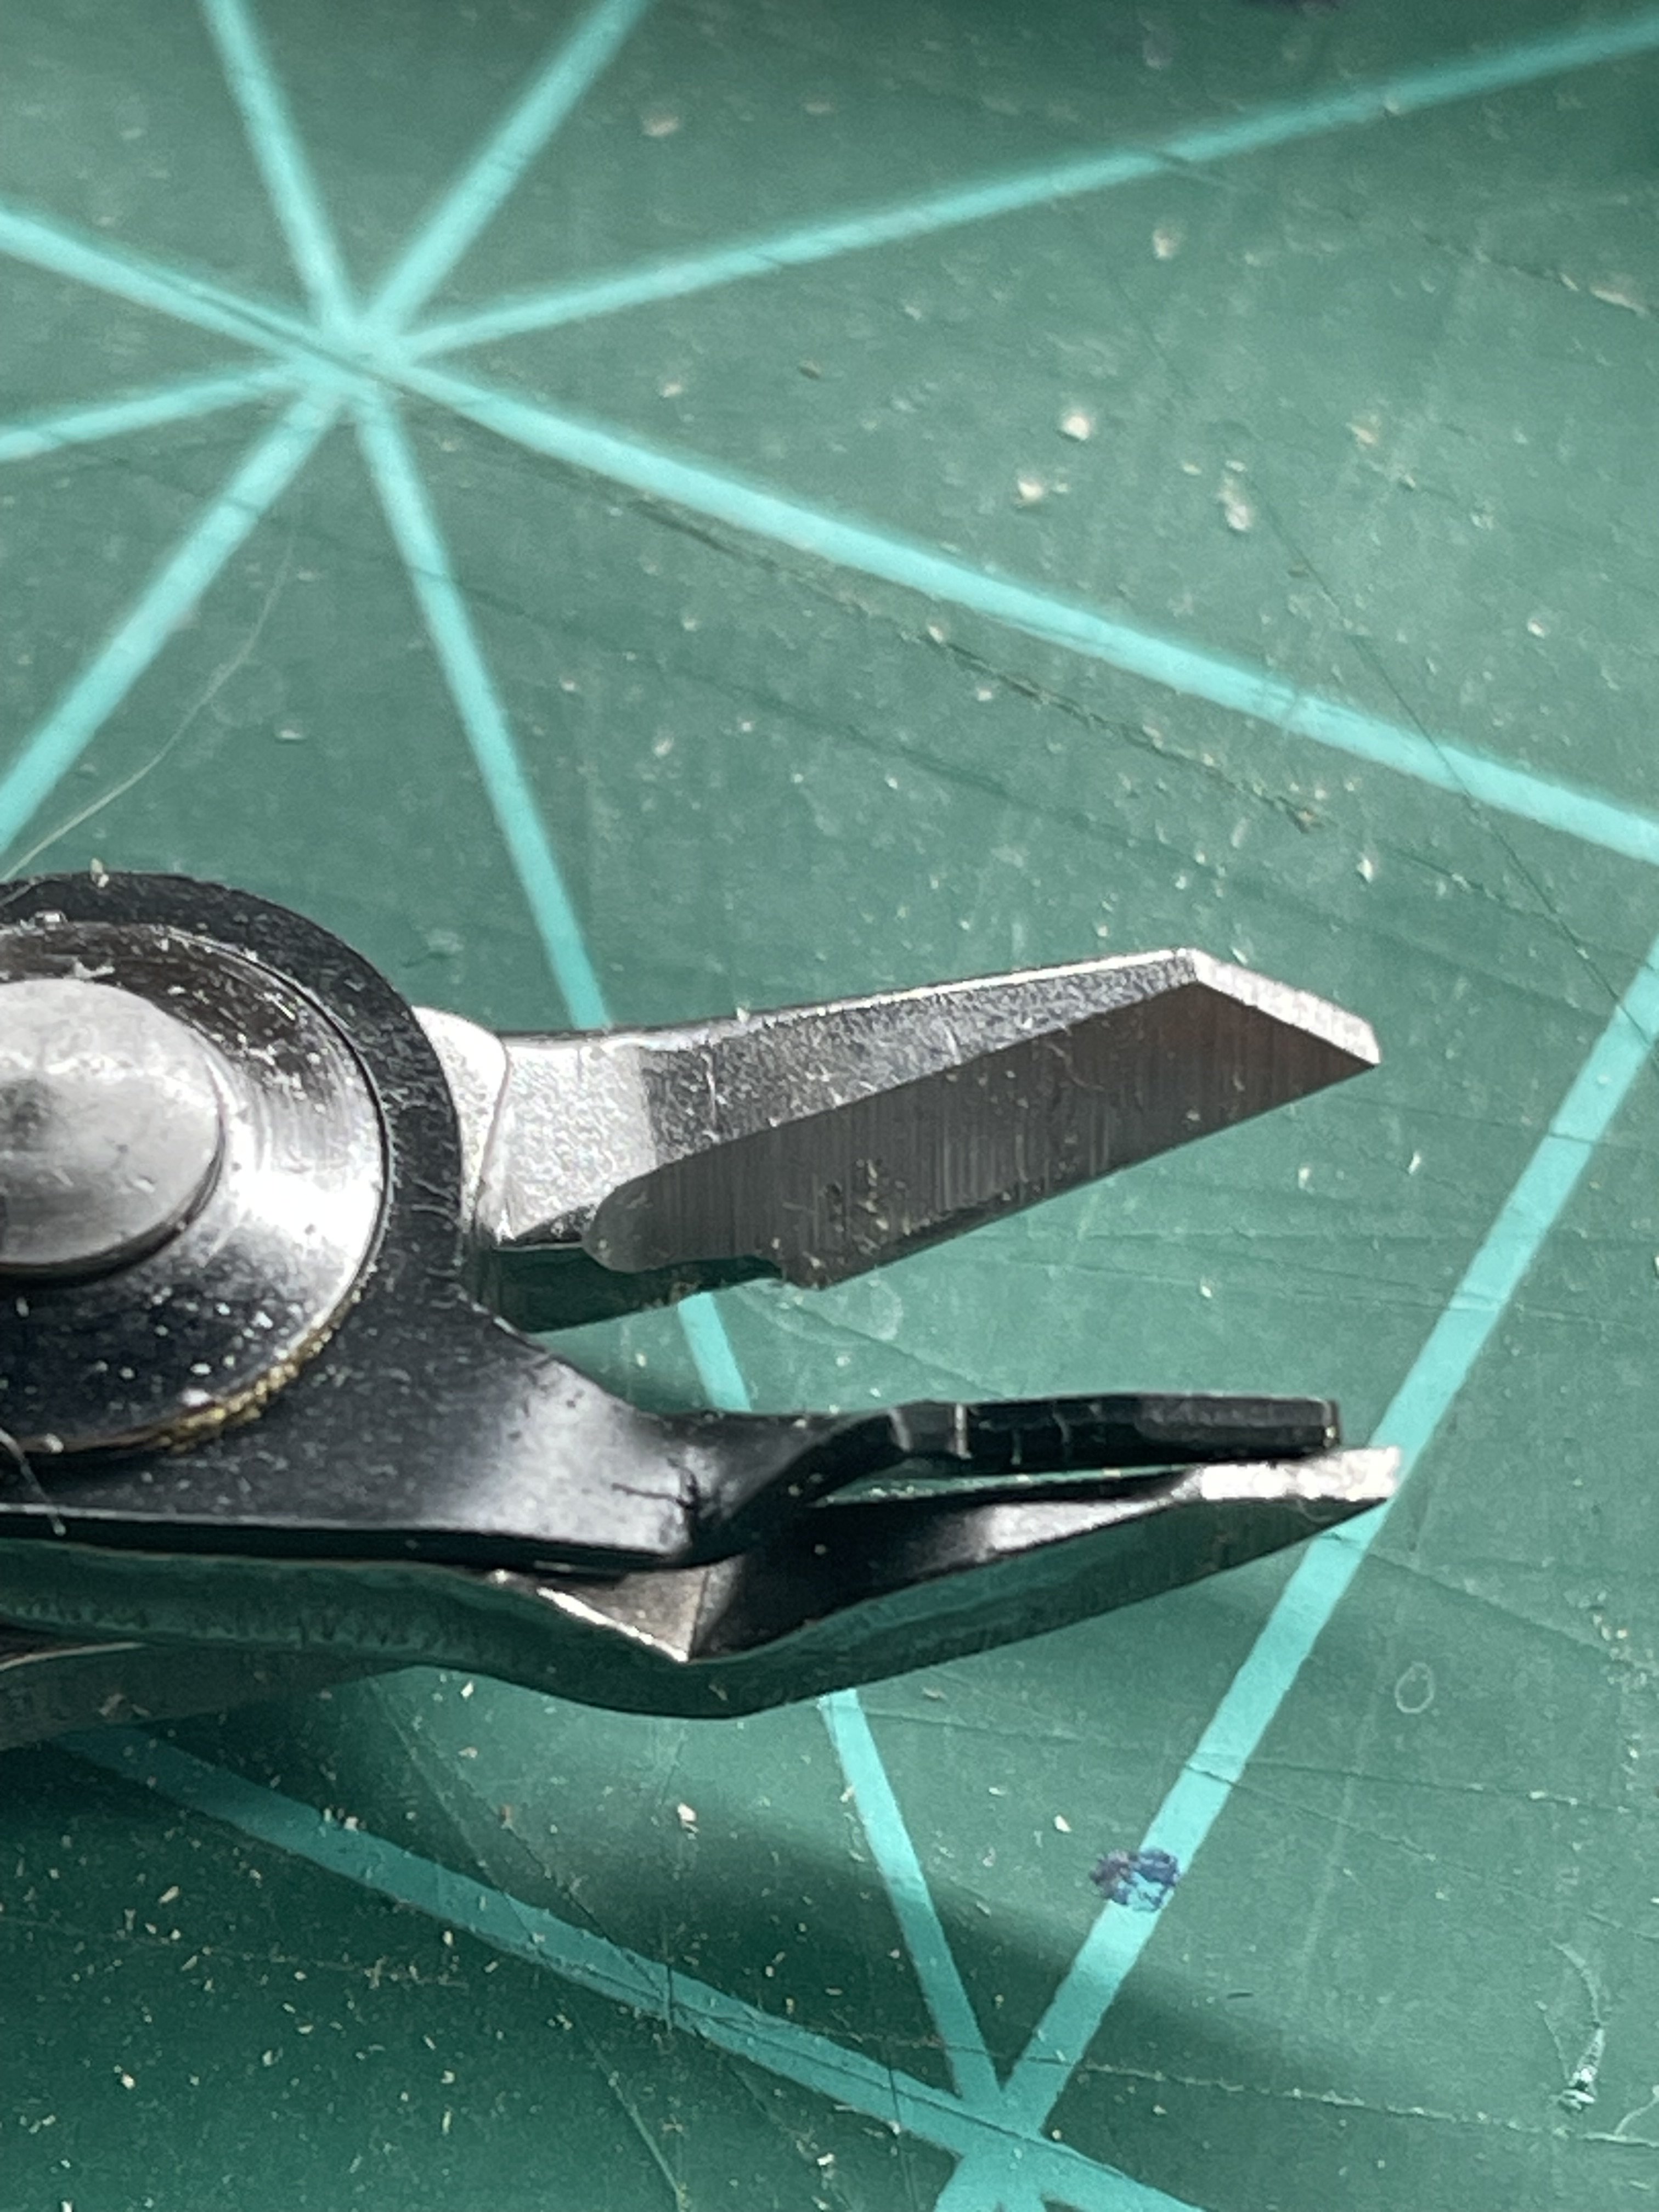
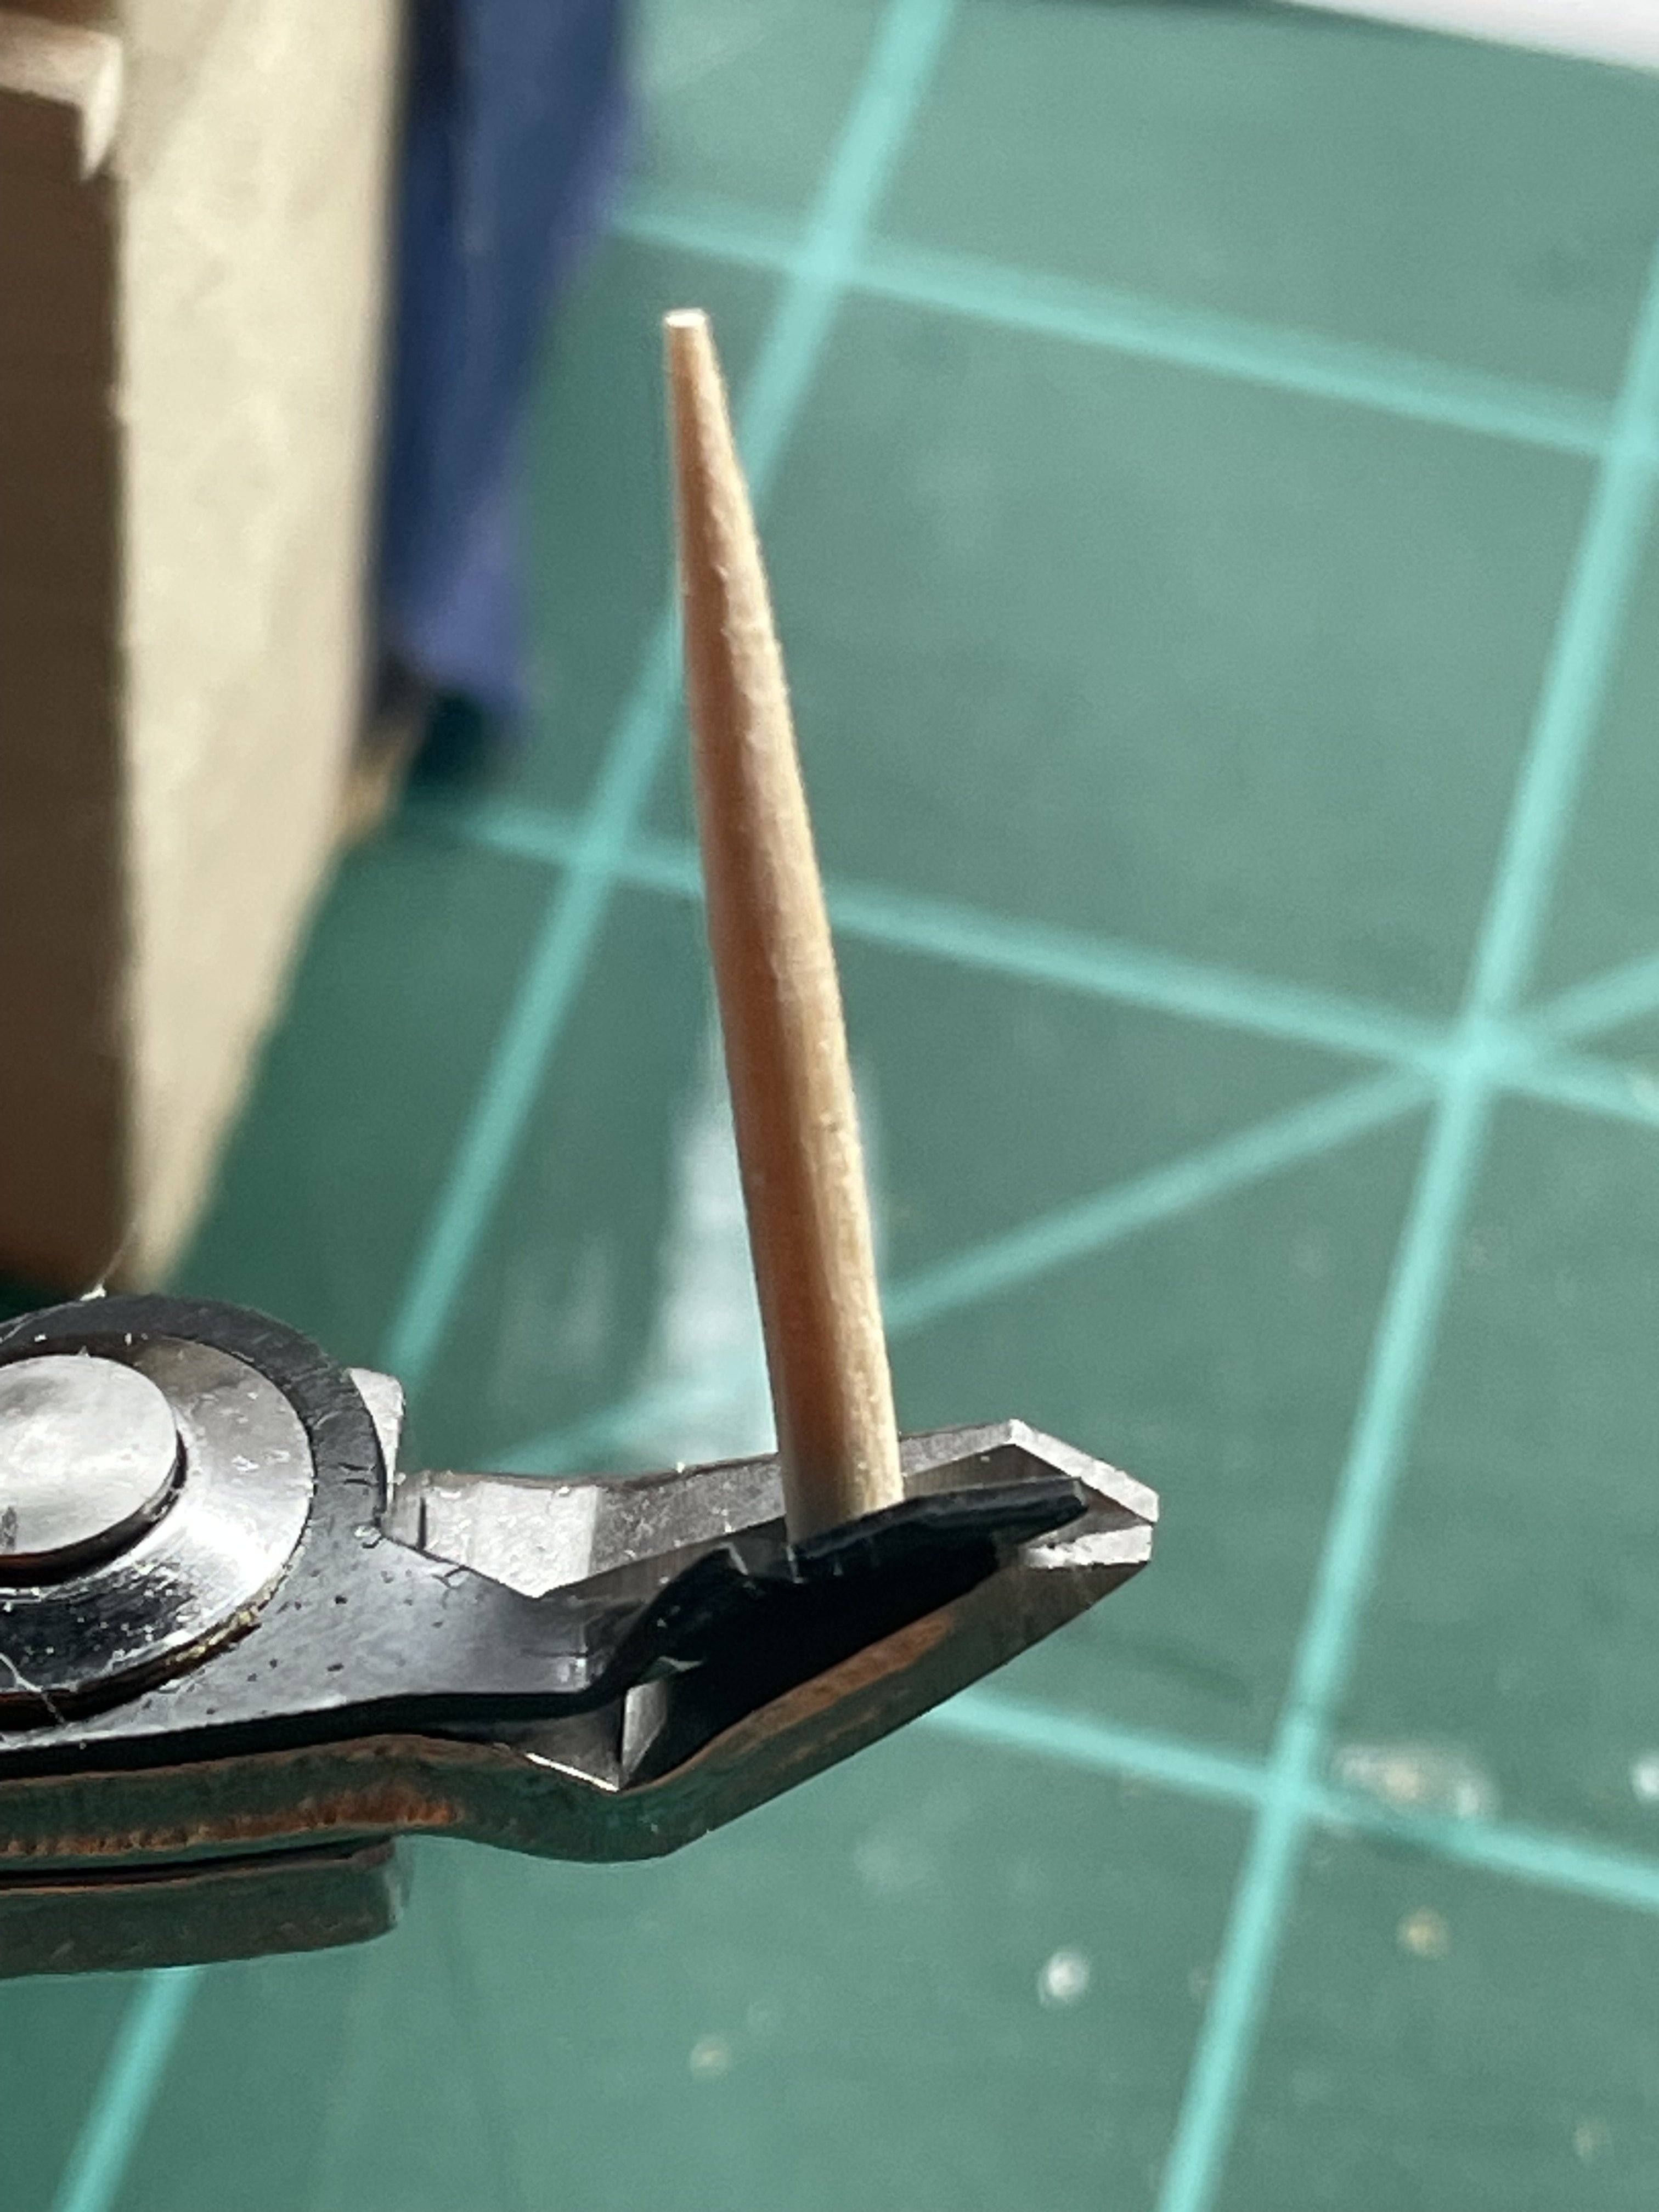
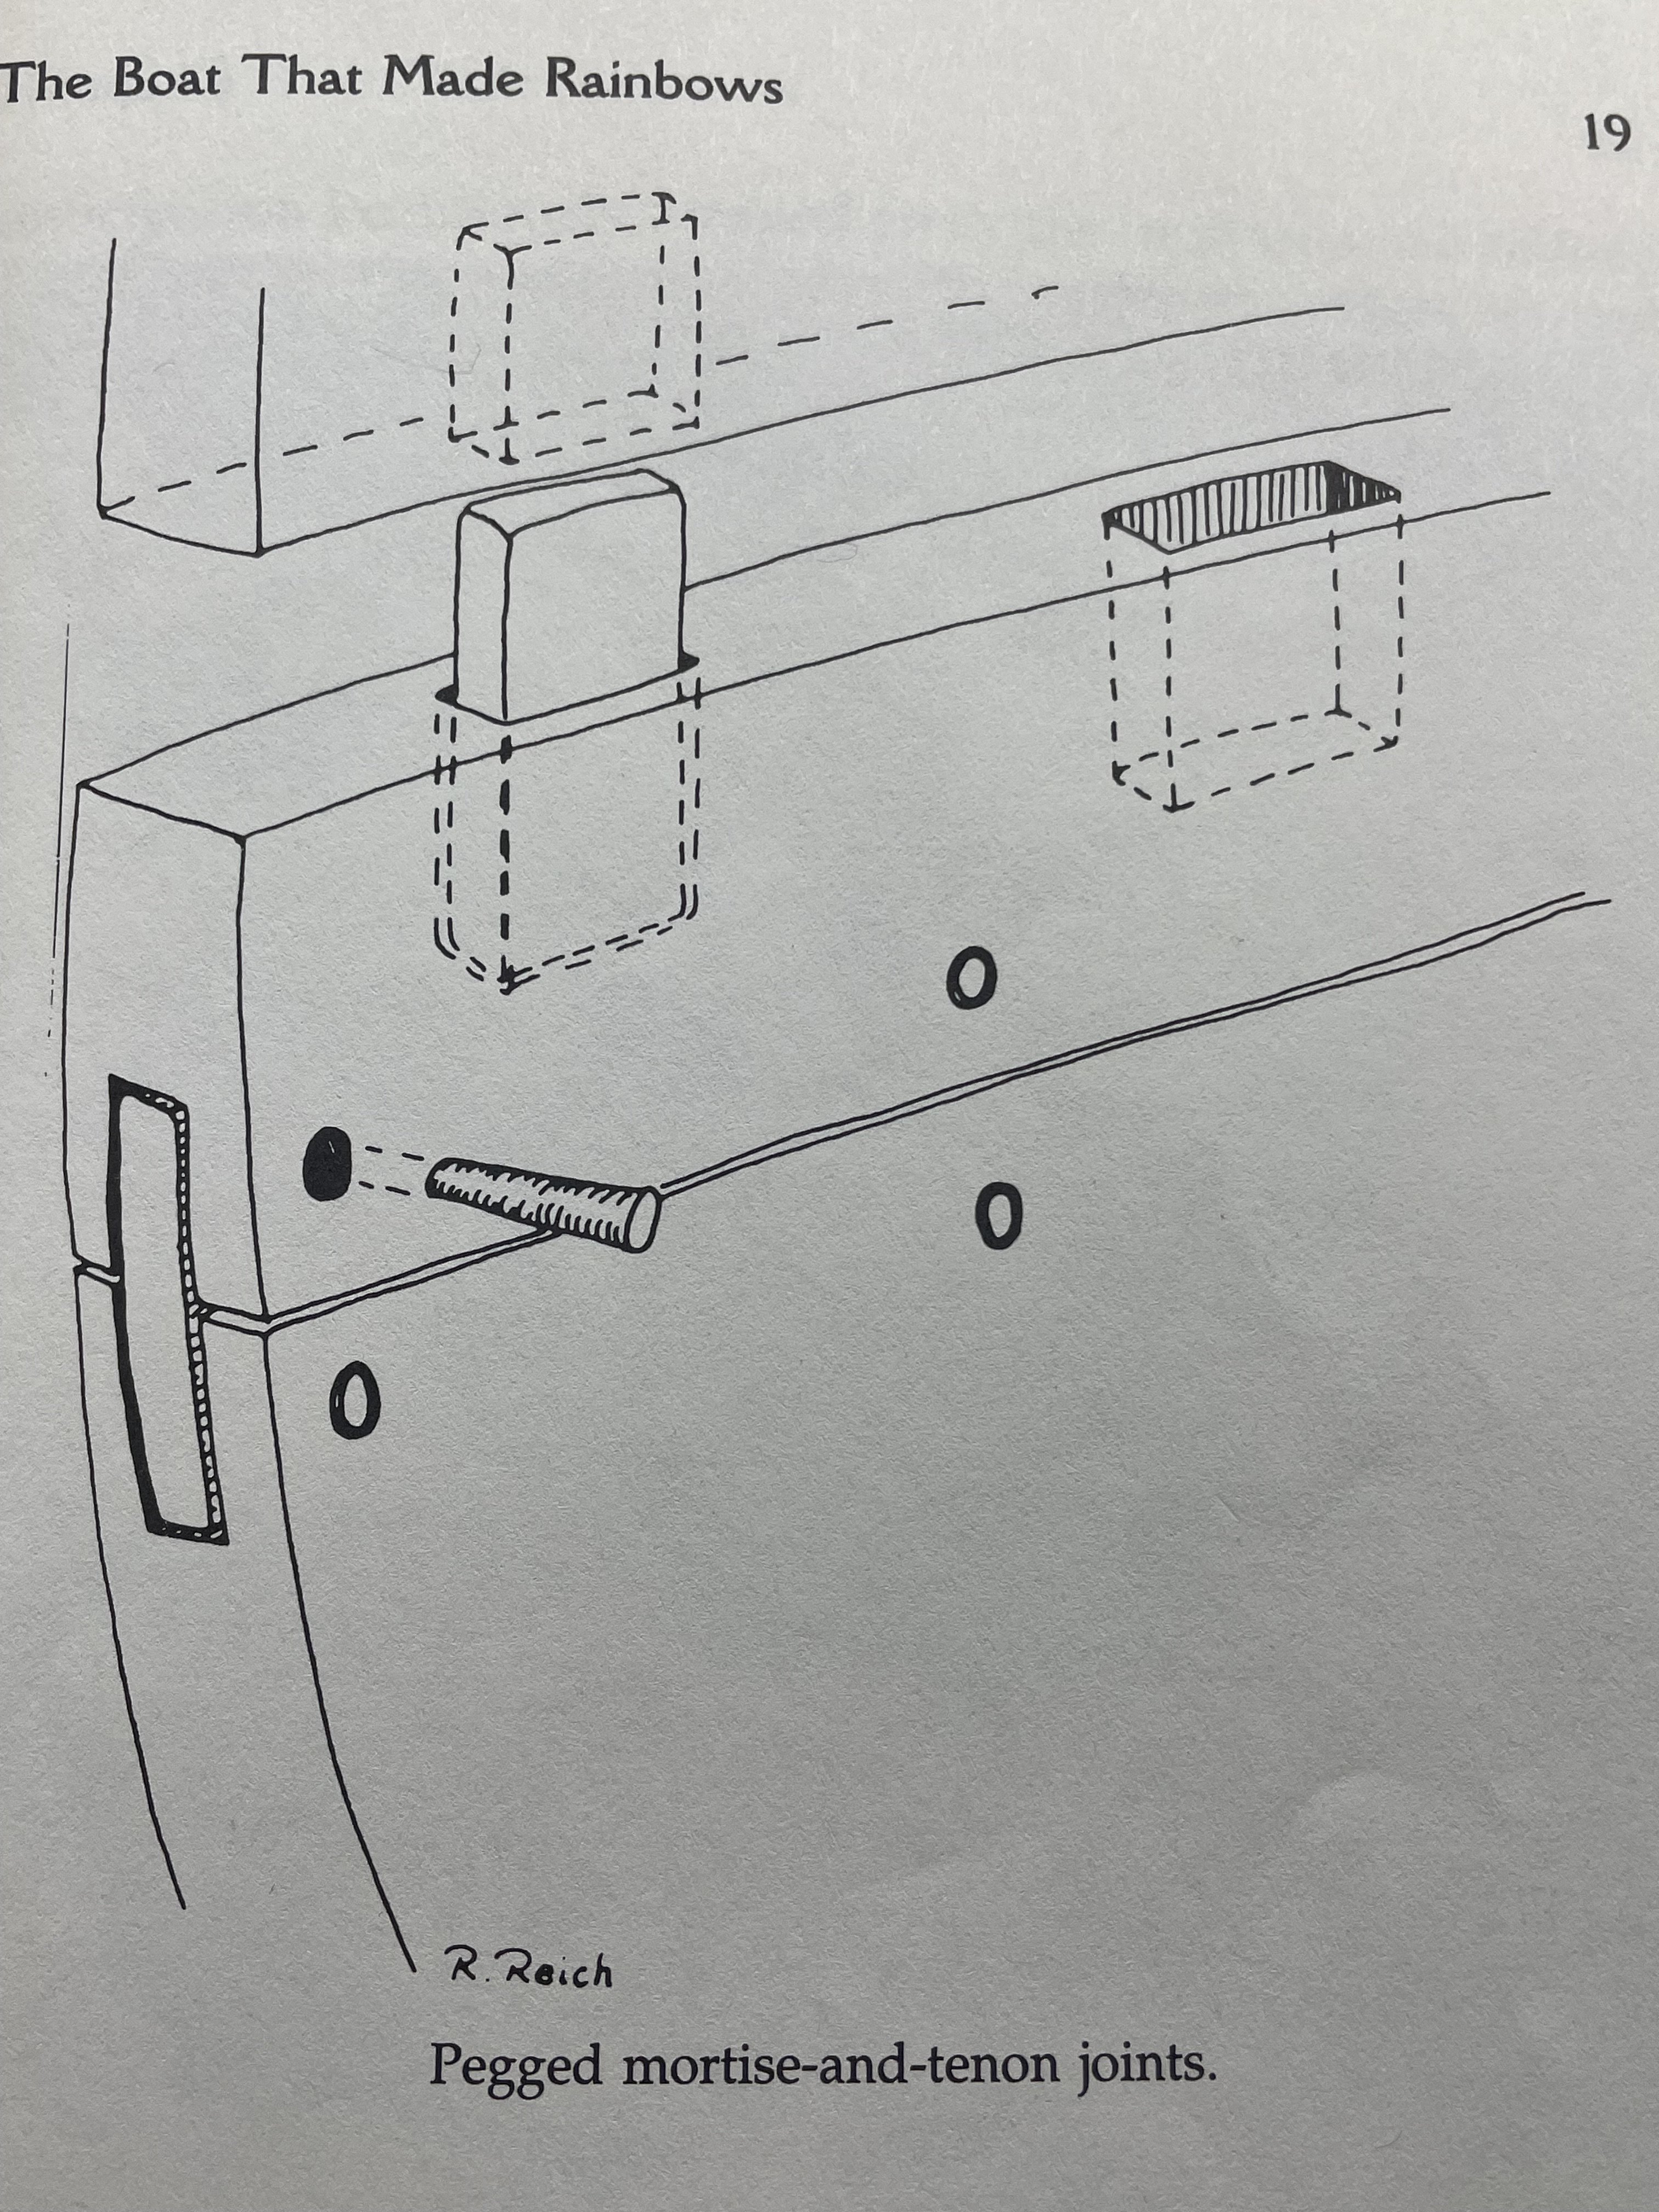
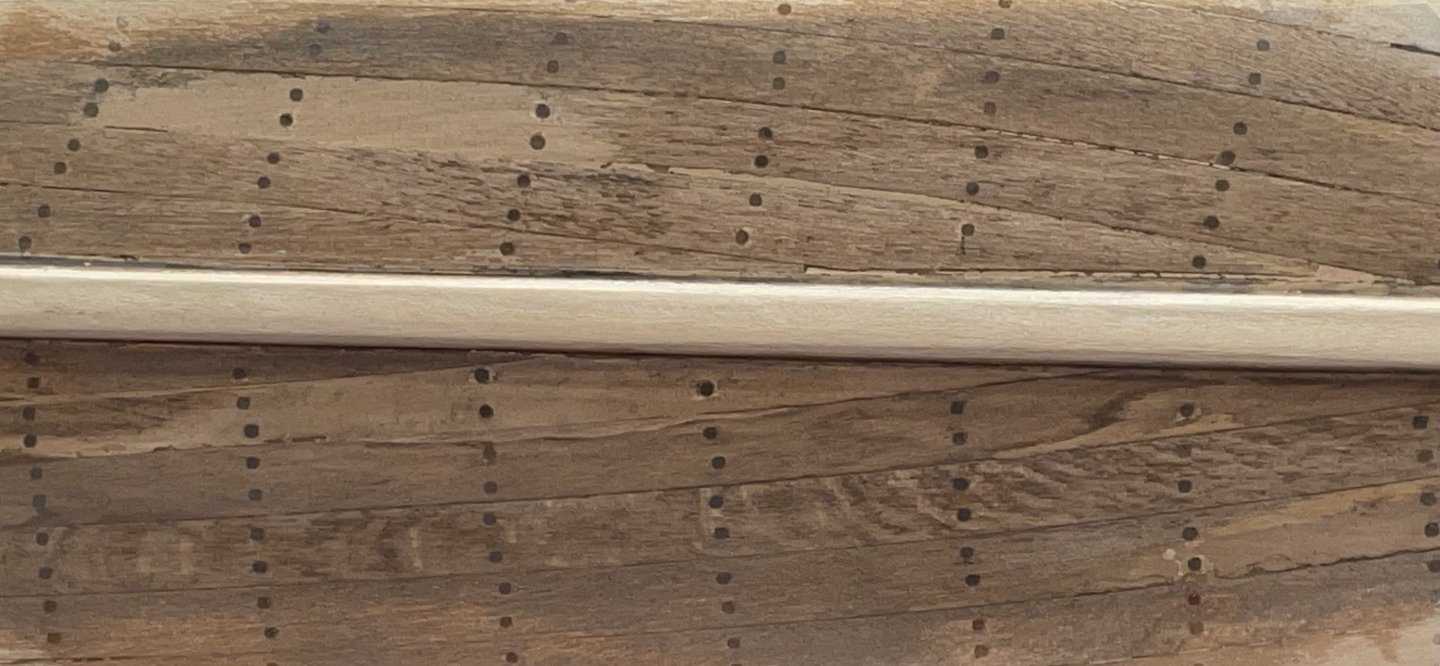
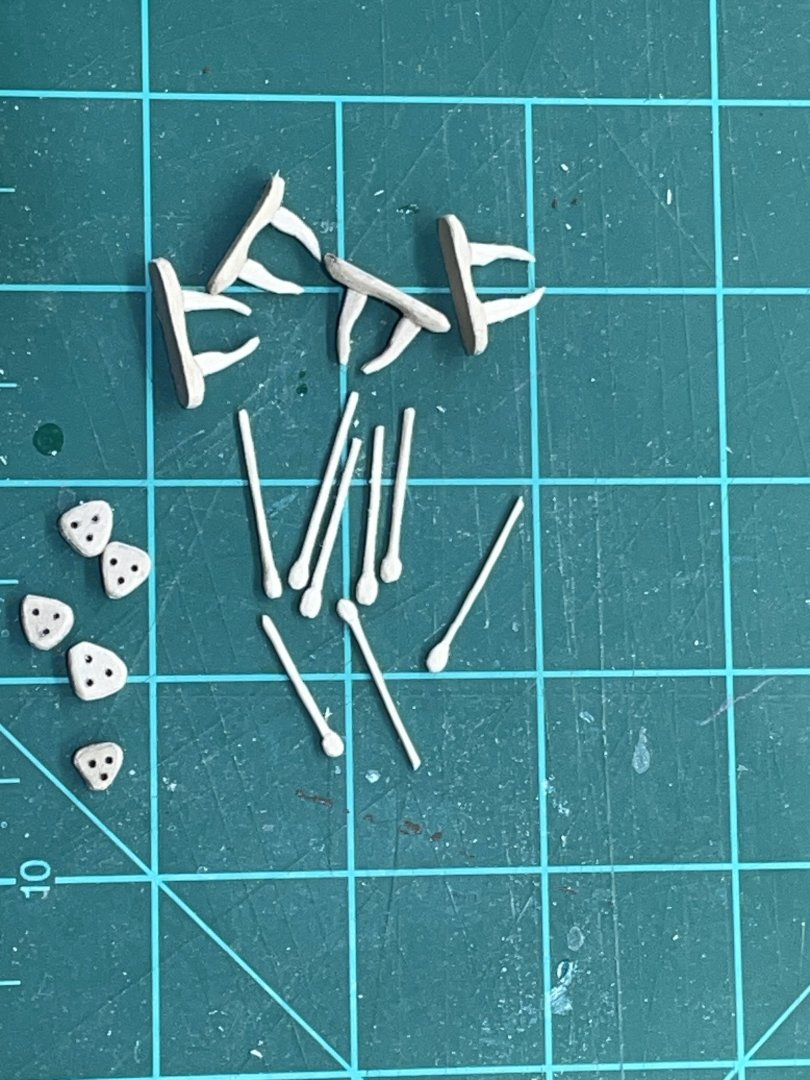
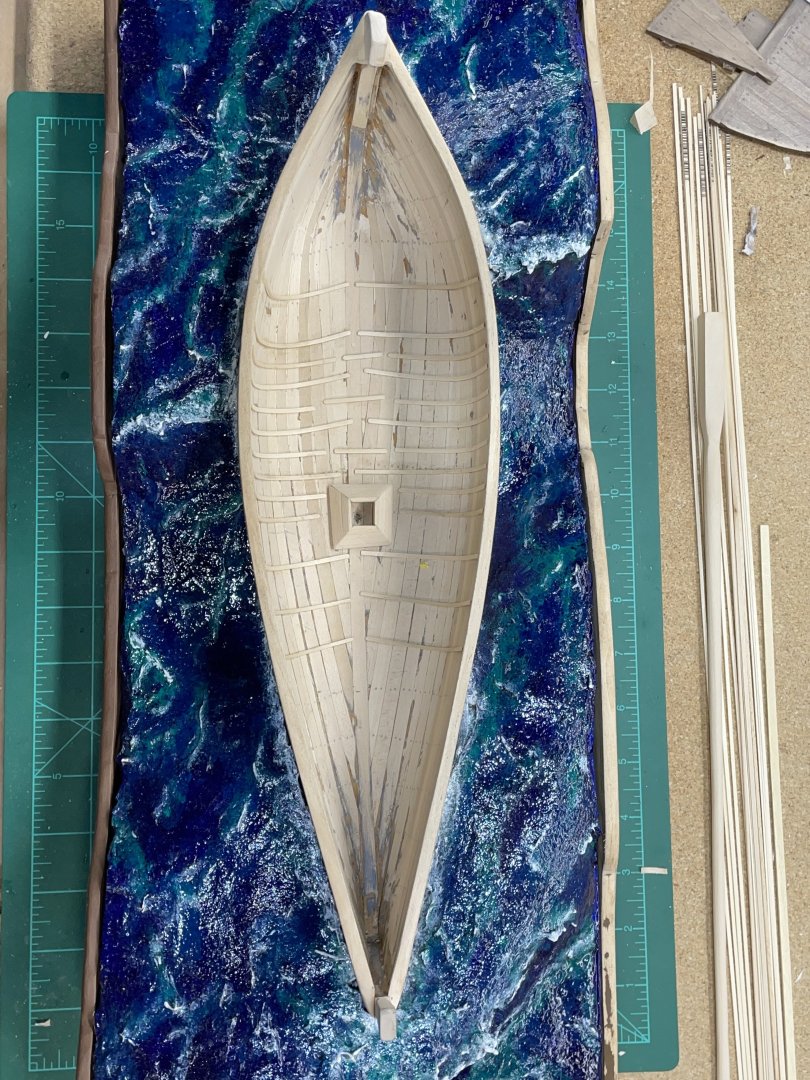
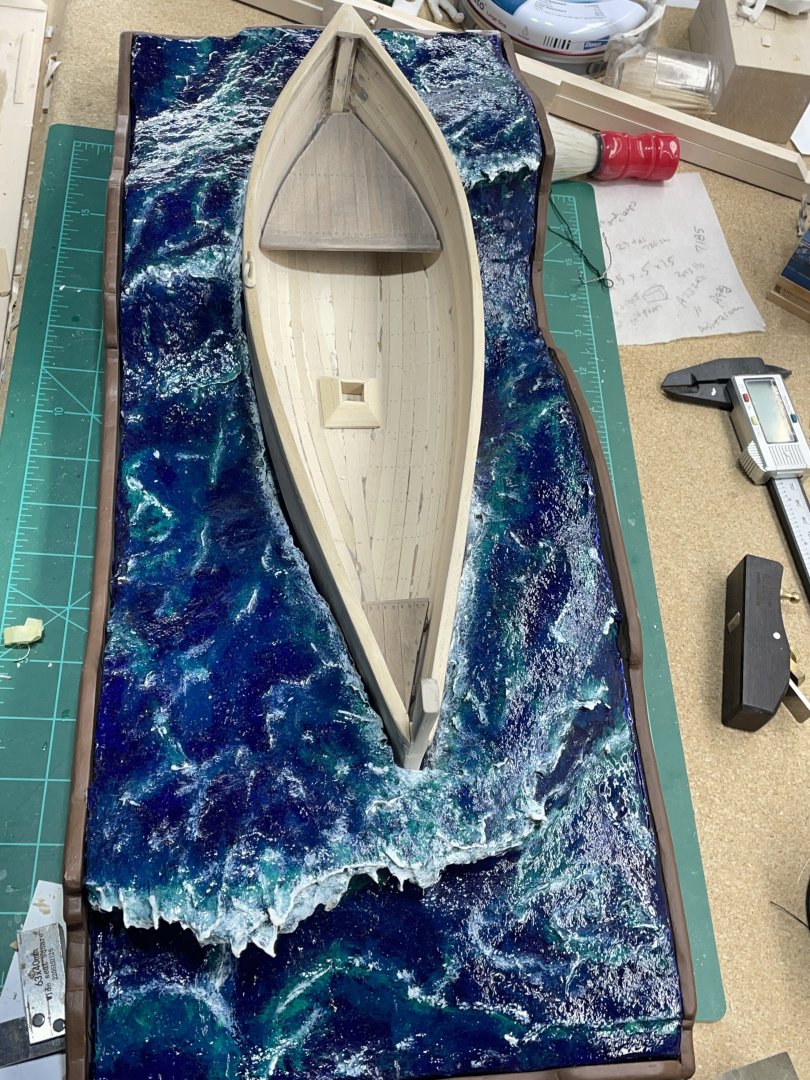
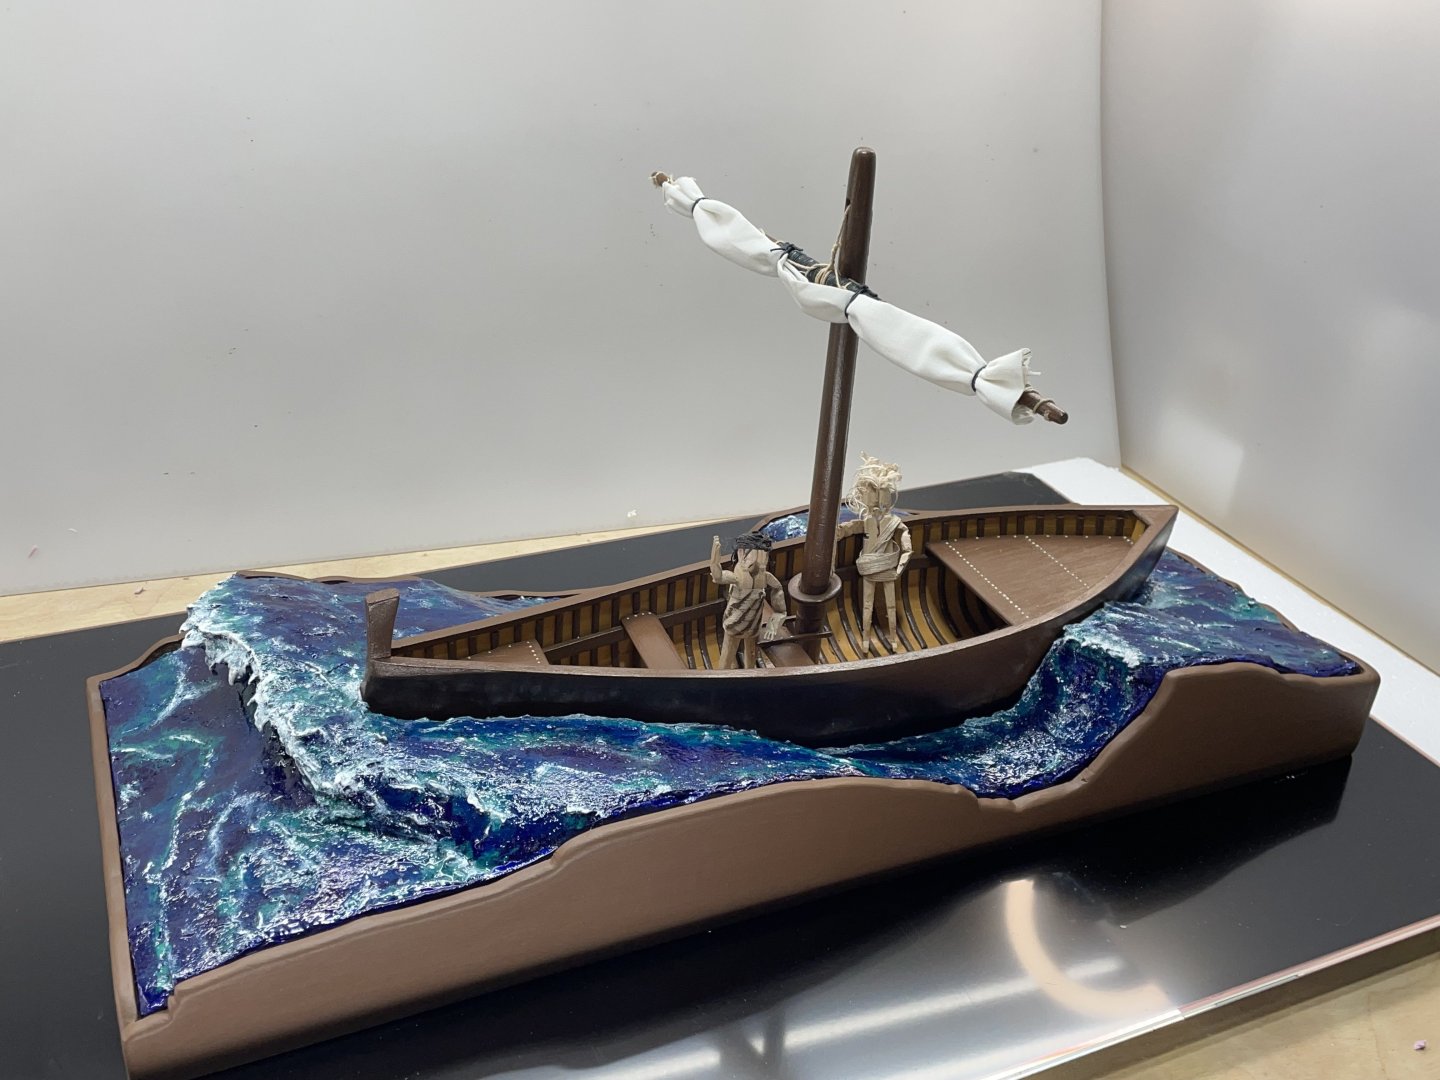
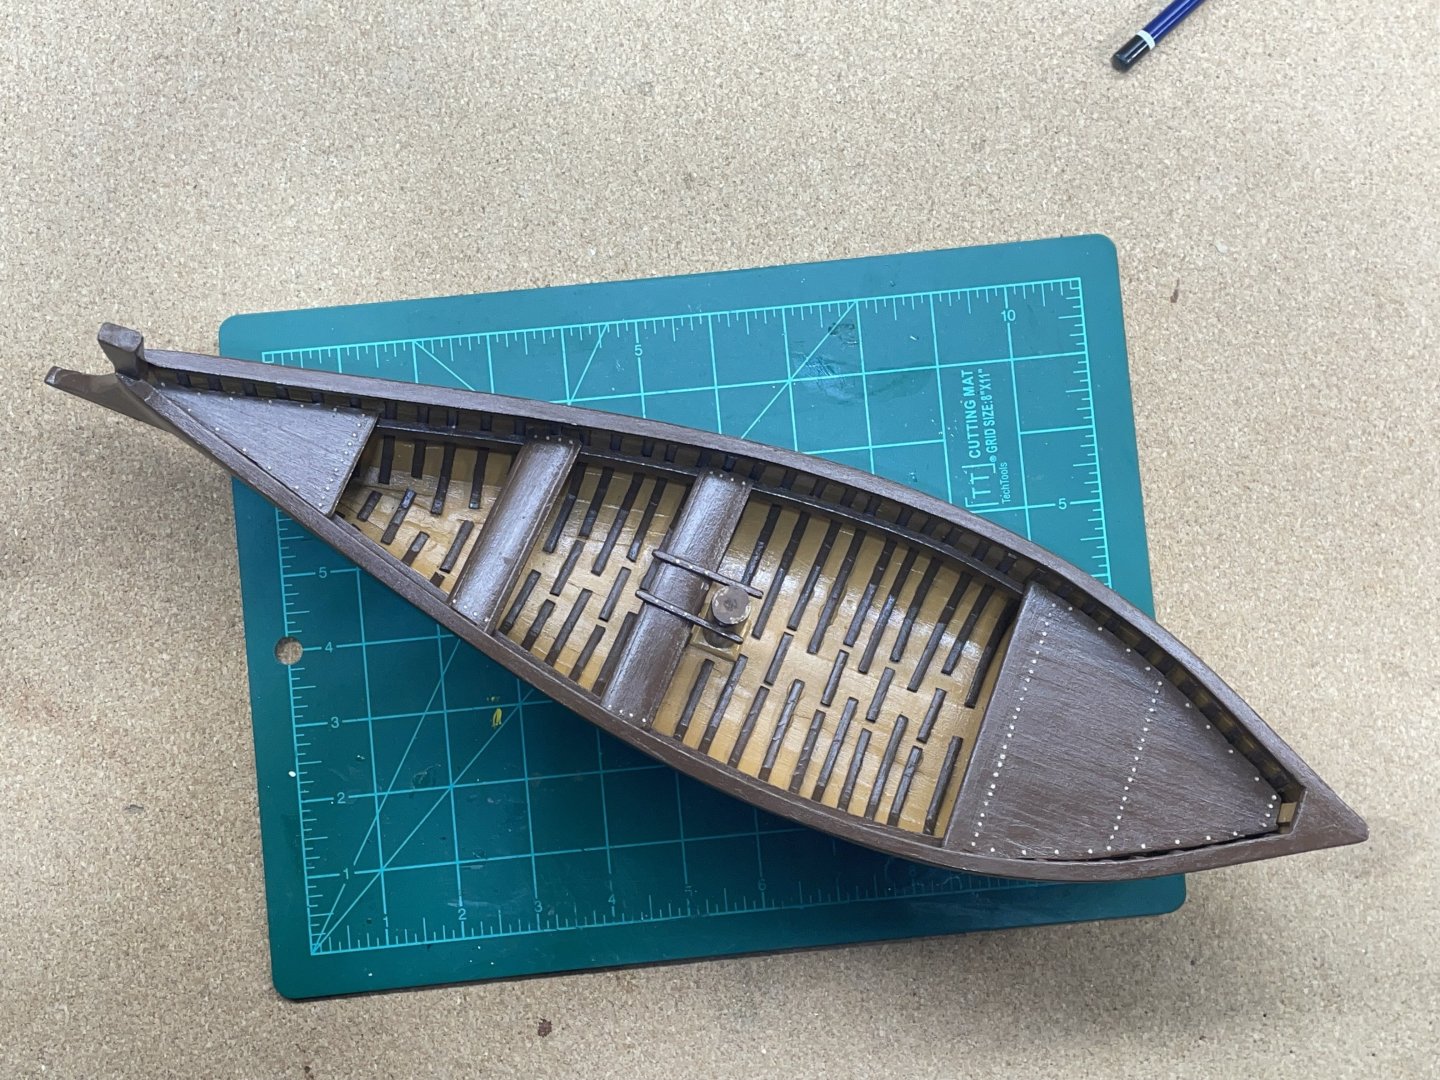
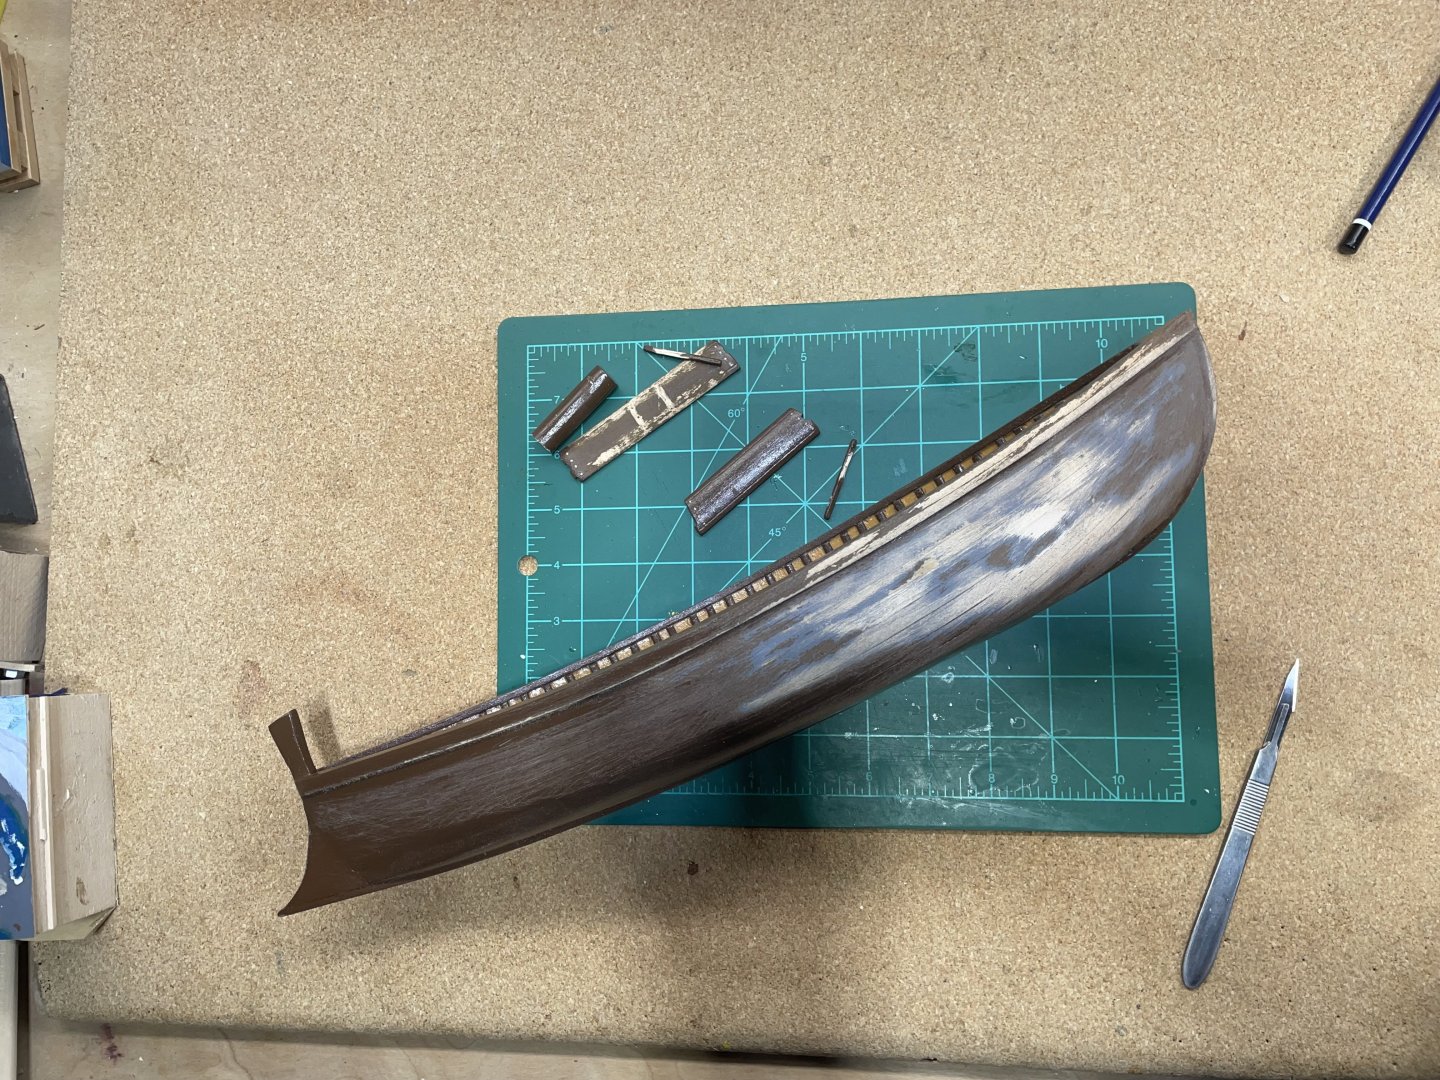
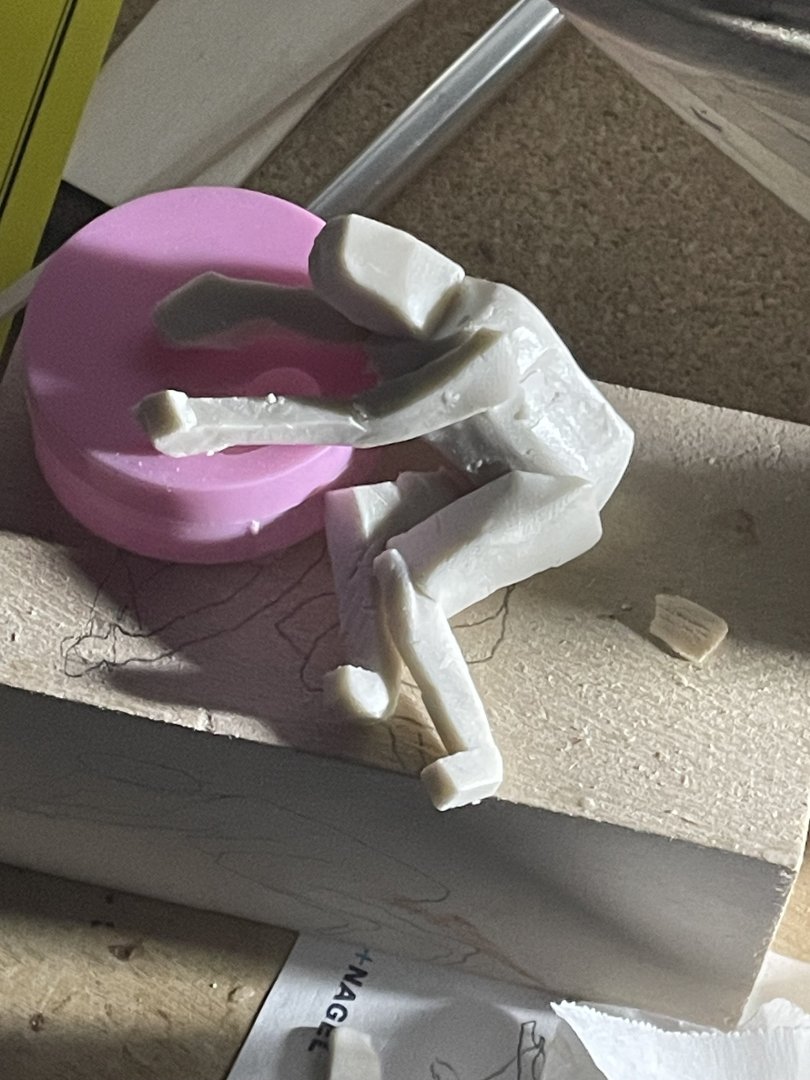
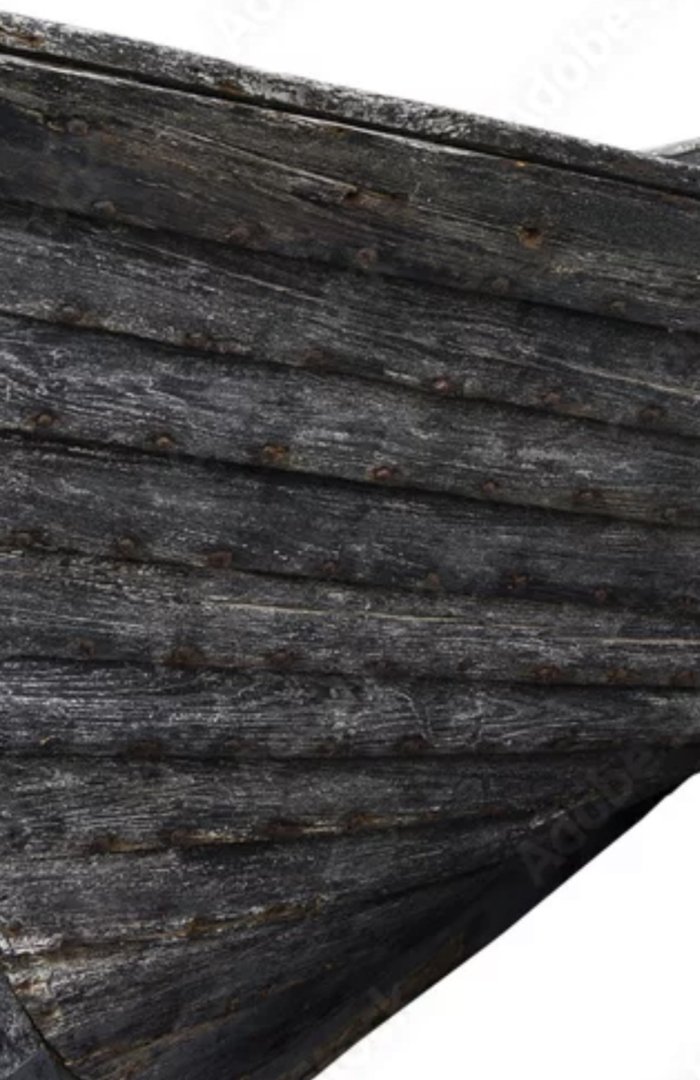
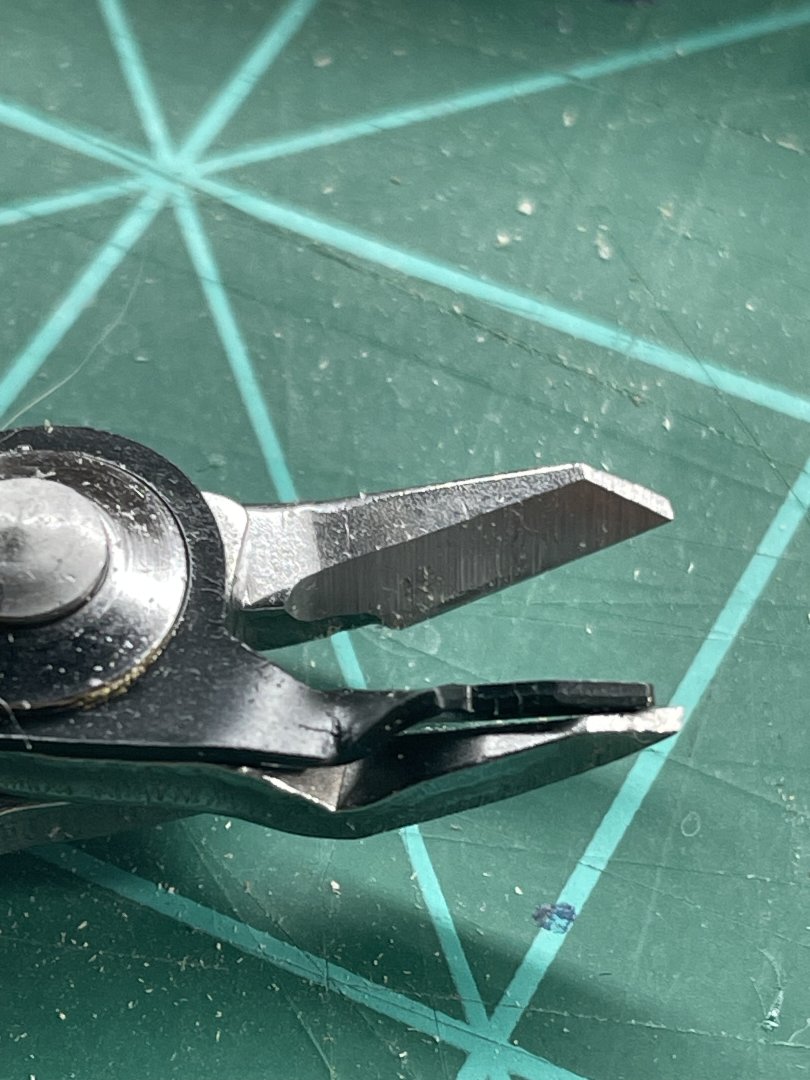
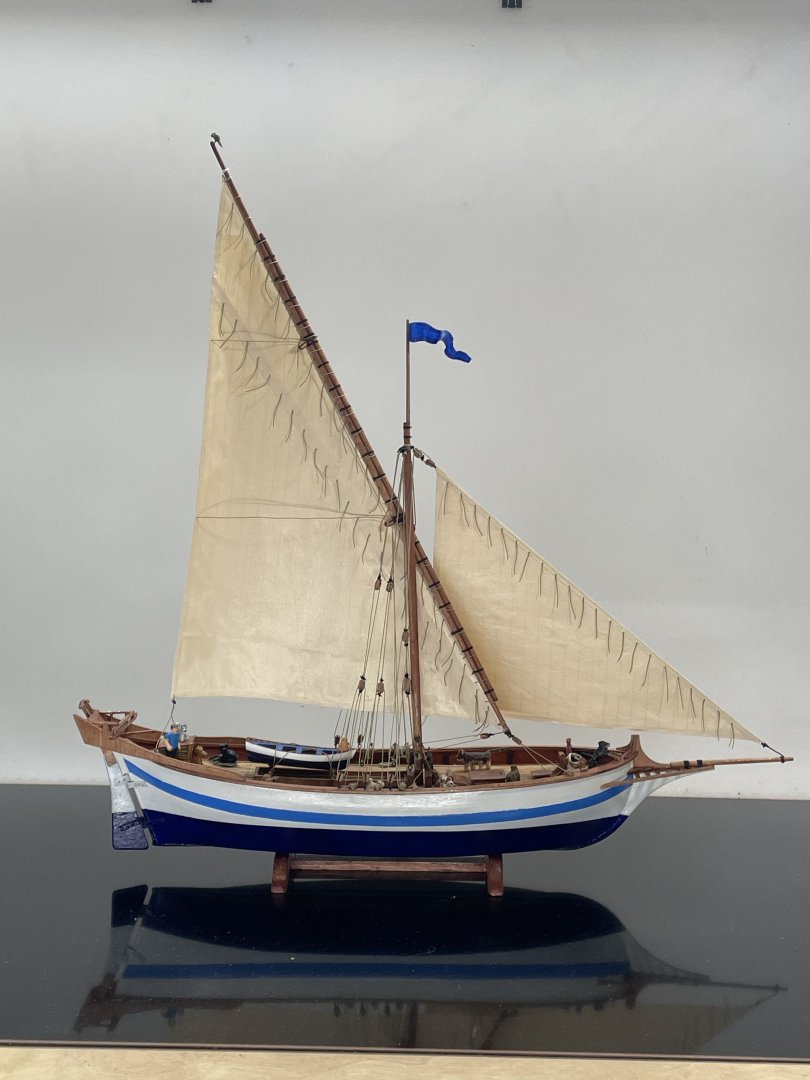
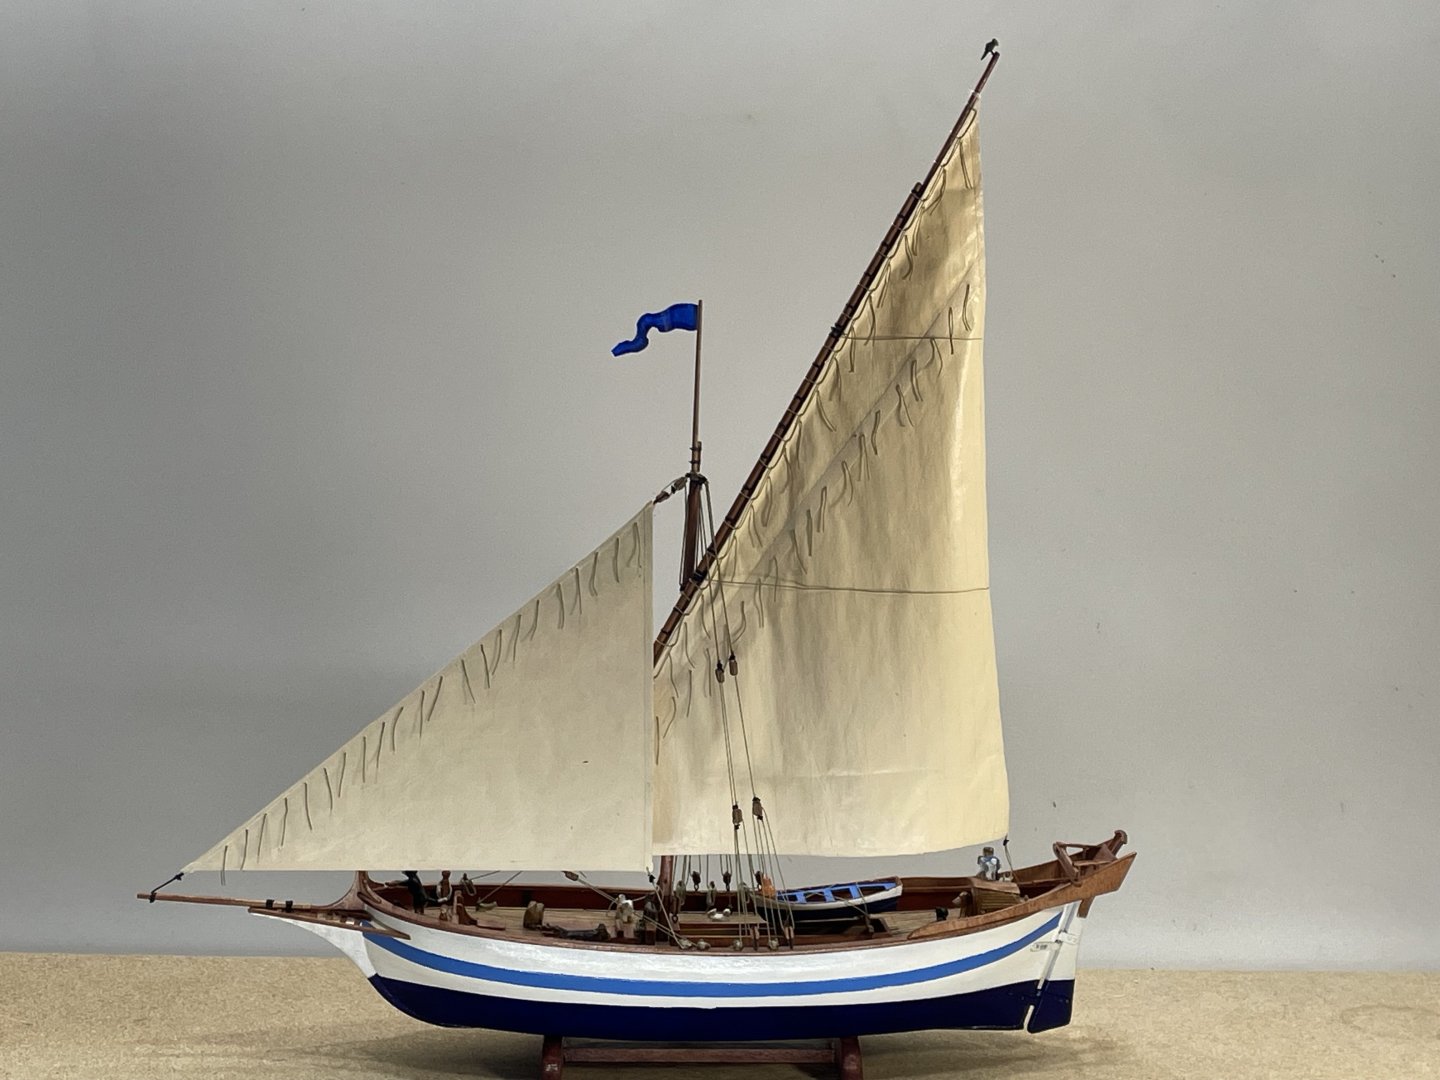
After building the Scott Miller SoG kit. I reused the strongback and purchased basswood strips from hobby lobby, to build another hull. It was my intention to provide a boat the grandkids would like to play with. Well come to find out, a first century wooden boat can not compete with any toy of this day and age:-) My plan is to strip all the paint off, and put a weathered natural wood look to it. I’ll also scale the mast and completely rig it. It’s been setting around taking up space and I know someone that would like to have it if I can make it look like nice decor. Here’s where I started. I had primed it and put about 6 coats of paint on it. That took some time to get sanded off. And the inside of the hull was worse. I was anxious to find out how I would get the weathered look kinda like this. After I removed the decks I tested my unskilled technique with acrylic dye wash. i am satisfied with the results. I only hope I can keep it consistent enough. Next I wanted to add more details to the hull so the Sea of Galilee doesn’t take the first impression. The boat was constructed using pegged mortise and tendon joints. I spotted them out in lines, even though they may not have been lined up. I thought it would look better if they were. Plus I will have to remake all the ribs and the peg holes will help me keep them halfway straight. The holes in the starboard side were drilled. I broke my flush wire cutters and waited till I went to a town big enough I could find another pair. I needed these to cut off the toothpicks I glued in. The flush cutters have a piece keeper on them that works great! So glad I broke those others:-) Knowing me, as soon as I finished all these pegs I’ll want to wash the outside of the hull. If it turns out, that will give me the encouragement to think of other details I might add to the rest of the build. I have been toying with the idea of carving figures. To get a 3 dimensional idea to start. I cut some clay pieces and stuck them together. This is supposed to be. Jesus sleeping through the storm:-)


-
That’s going to add a lot of detail to your build. I plan on doing a similar thing to a Sea of Galilee boat I built out of basswood.
-
Hey Jacques, I have used small pieces of copper tape and glue them on. then applied tiny drops of blacking solution just on the copper.
- 312 replies
-
- 4
-

-

-
- Chile
- Latin America
- (and 6 more)
-
I’m no where near ready for a build like this, but you are doing a wonderful job of preparing me. I would have never figured out what you were doing by the words you were writing. But your pictures teach me well:-) thank you Glen!
- 301 replies
-
- 4
-
-
-
- Constitution
- Bluejacket Shipcrafters
- (and 1 more)
-
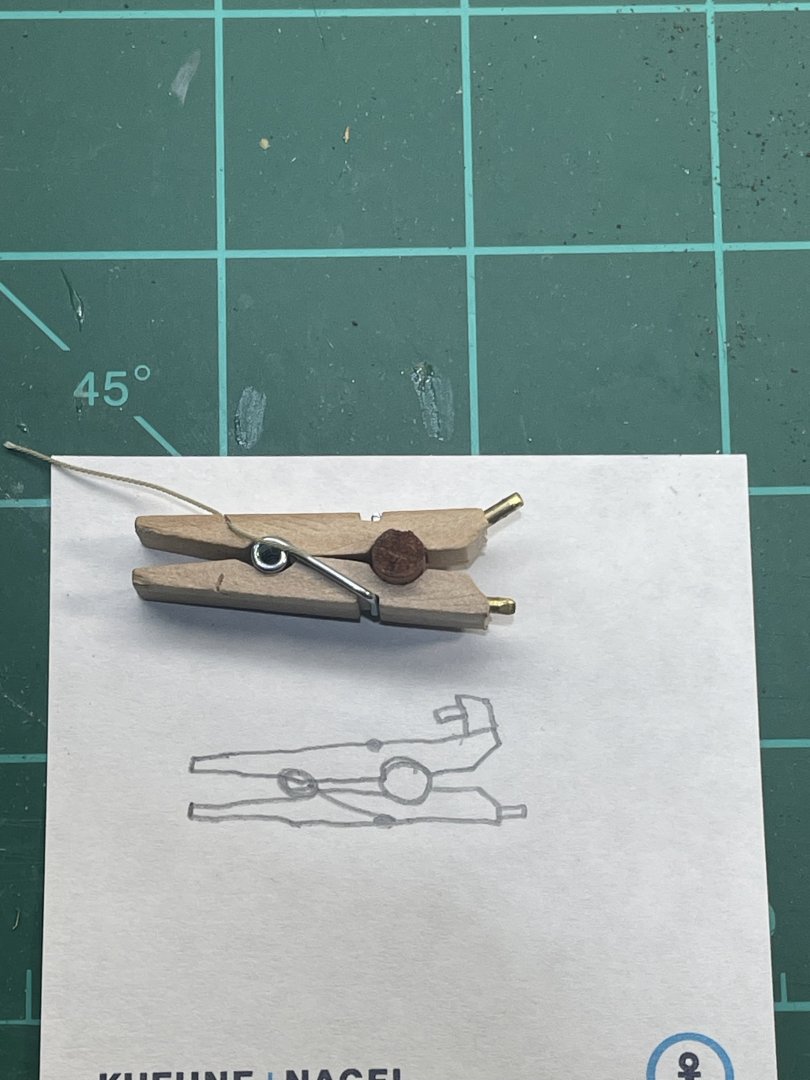
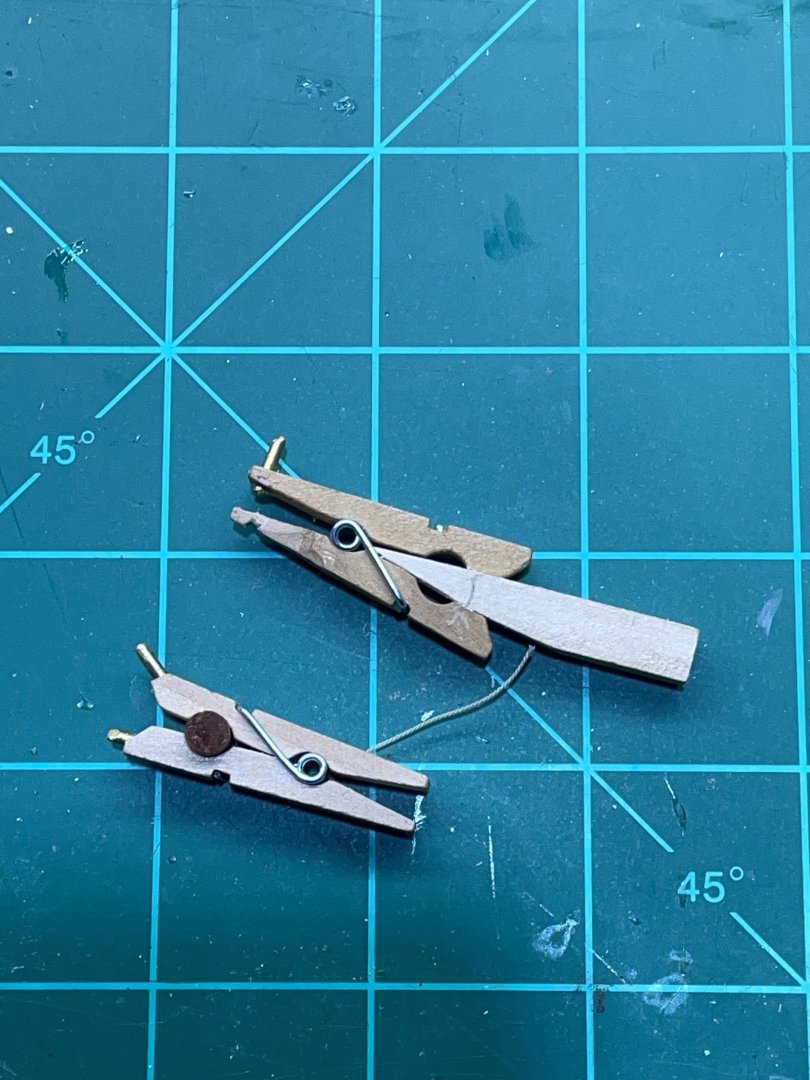
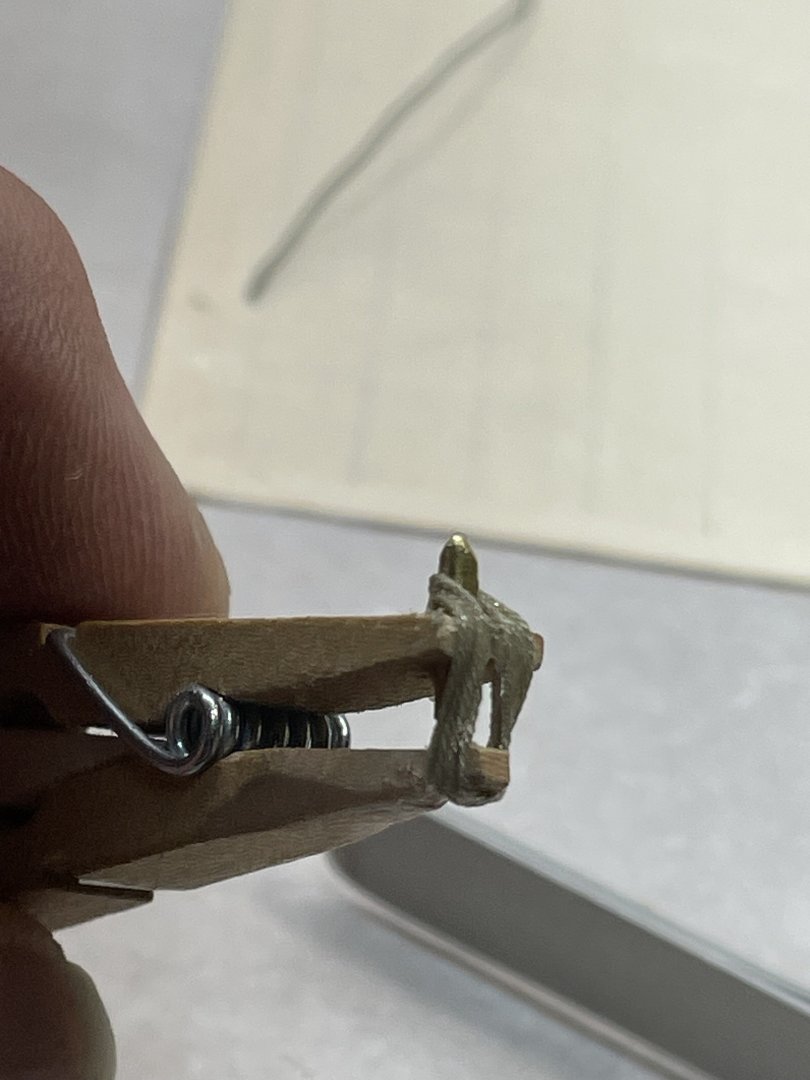
Here is one I made to hang down straight. After it’s dry I push out the dowel to release the bottom loops. Maybe you could modify it like this. You’ll need to pick the size of clothes pin that will fit the coils you need. Those flat coils I just patiently stick them down on painter tape and dab glue when it starts getting out of control. Then after it dries I go a little farther. I coat it completely when I’m done. Usually mess with it when I first set down, then it’s easier to put aside unfinished when I have other things to do:-)
- 59 replies
-
- 3
-
-
- muscongus bay lobster smack
- Model Shipways
- (and 2 more)
-
Palmerit, I built jigs and tried to mimic the size and the shape I was going to be putting them on.
- 59 replies
-
- 2
-
-
- muscongus bay lobster smack
- Model Shipways
- (and 2 more)
-
Very impressive Jacques’, both build and the presentation!
- 139 replies
-
- 2
-
-
-
- ancre
- Bateau de Lanveoc
- (and 2 more)
-
Thanks Palmerit. I used straight white glue and surgically, apply it with a syringe and a micro tip. You have to leave room to compress the clothes pin, so you can remove them after they dry. Both ends of the rope are pinched off at the other end.

- 55 replies
-
- 5
-
-
- Le Martegaou
- billing boats
- (and 1 more)
-
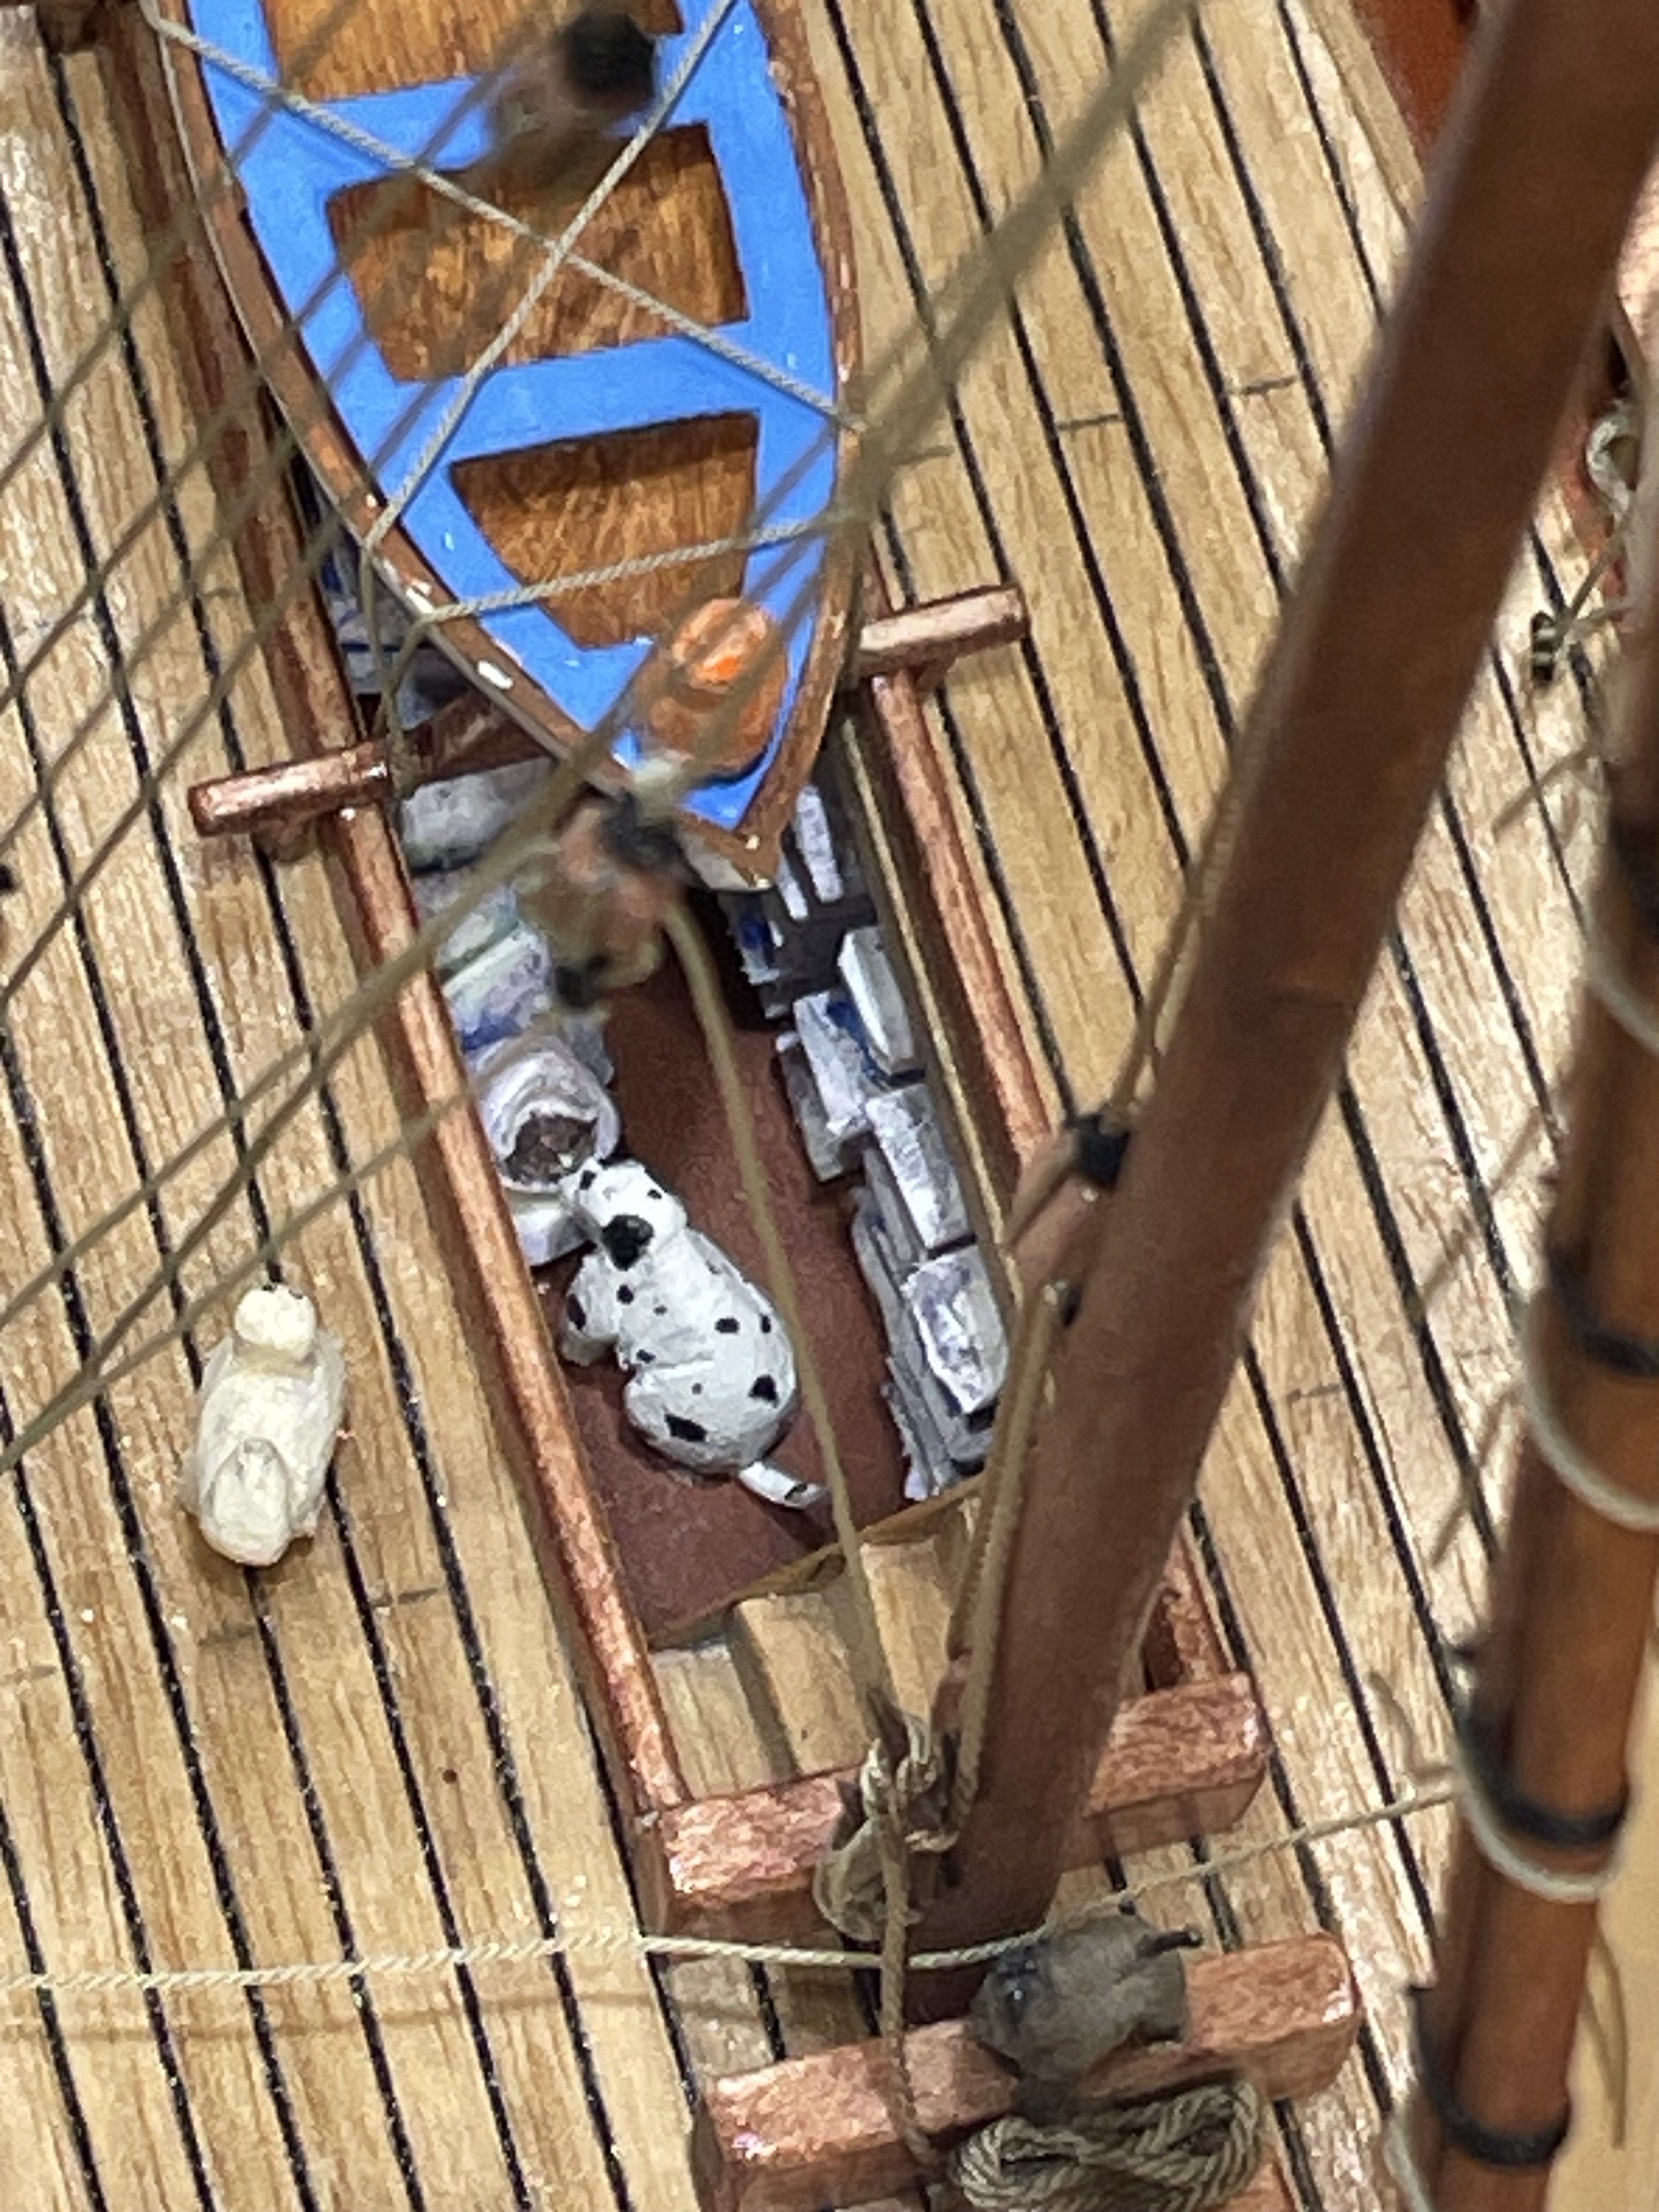
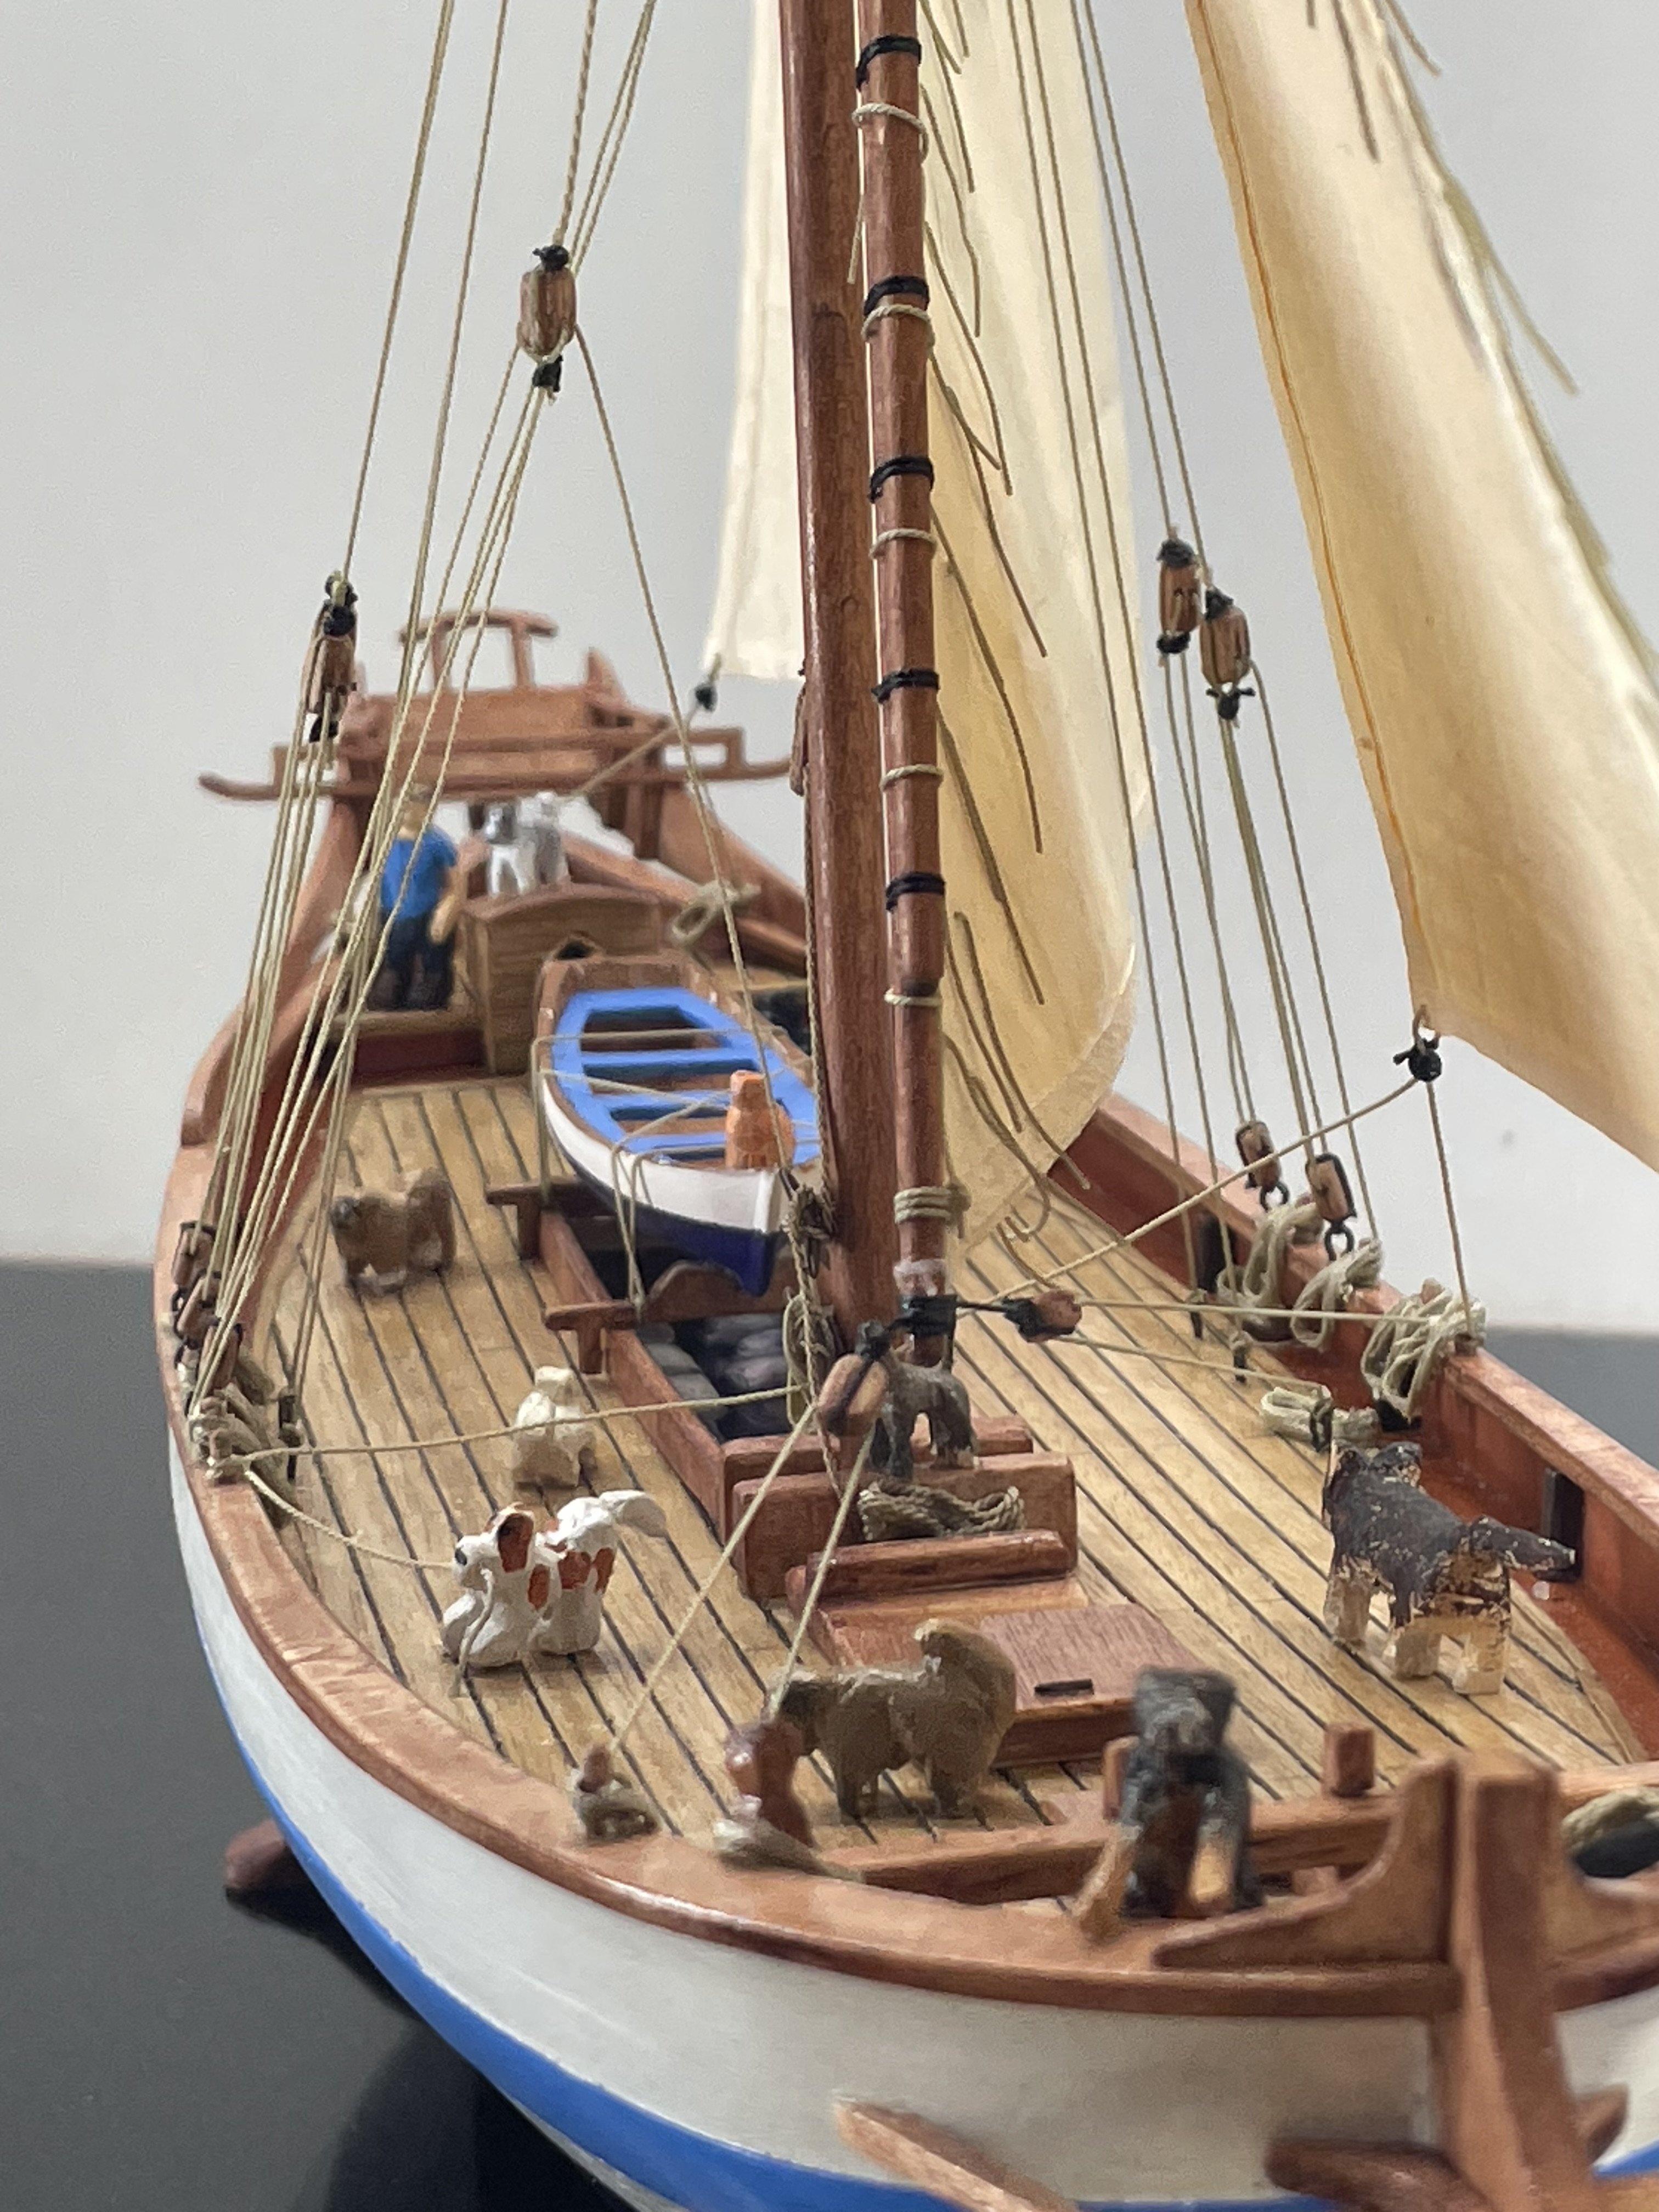
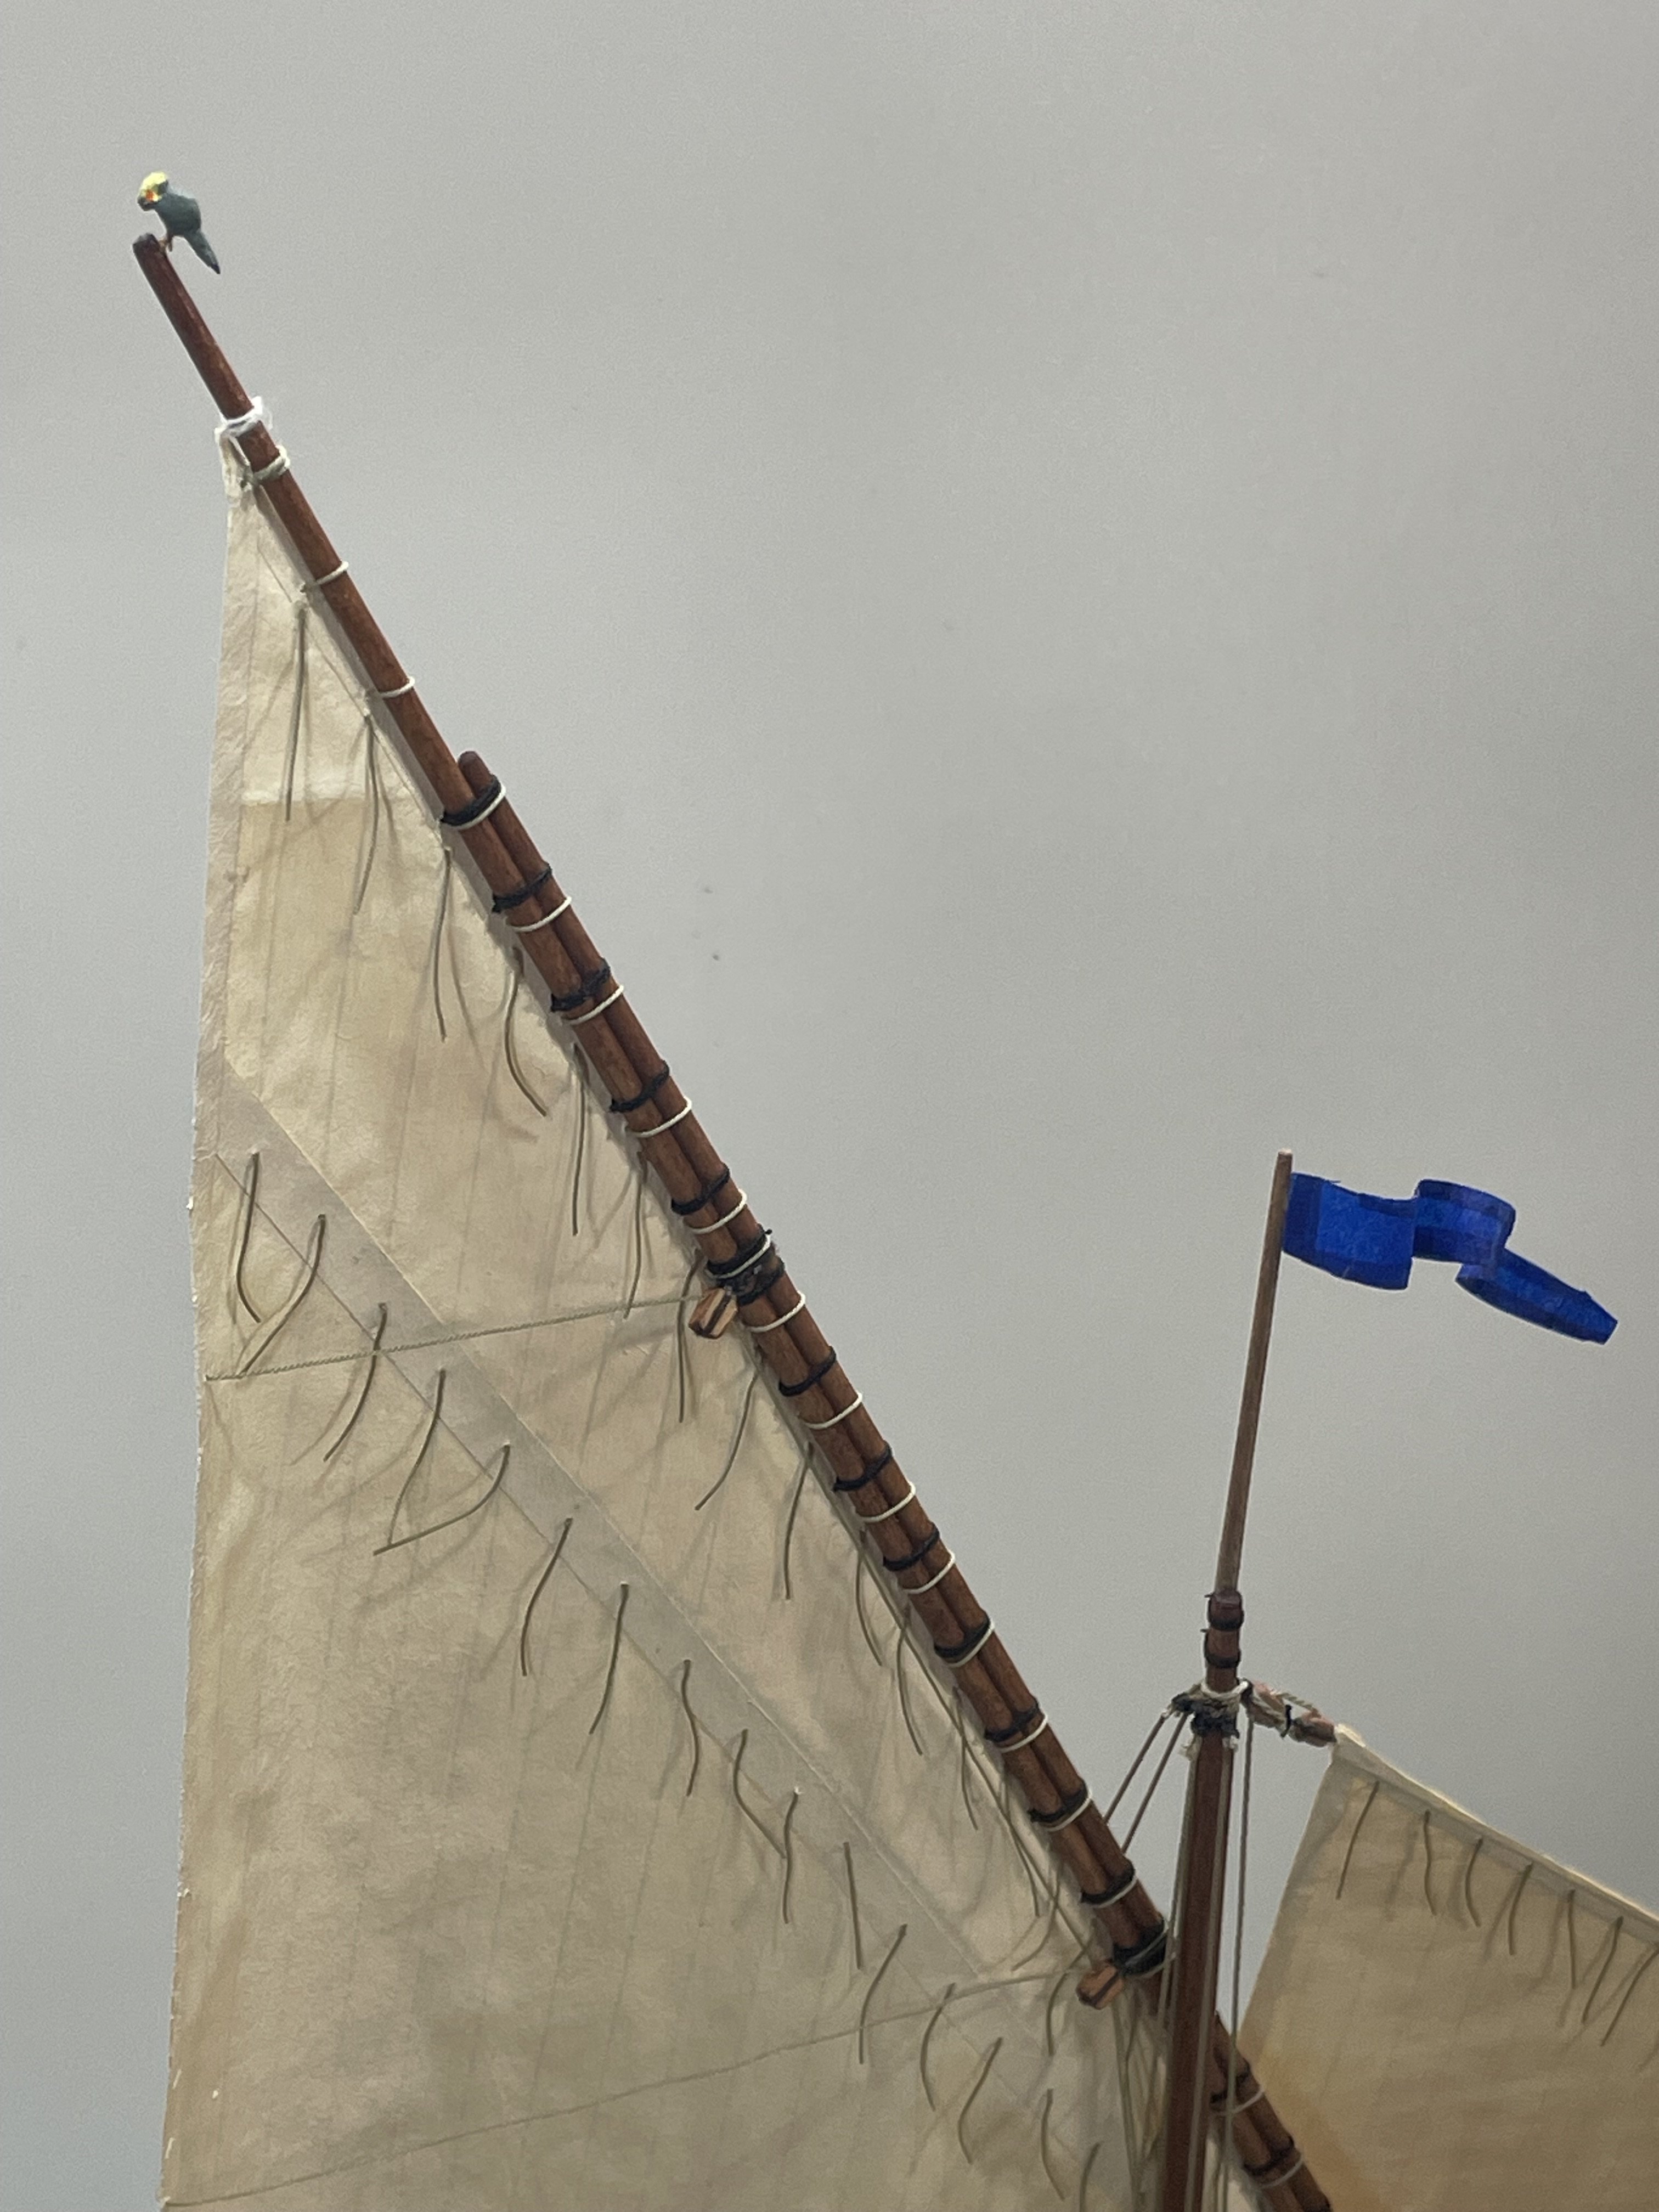
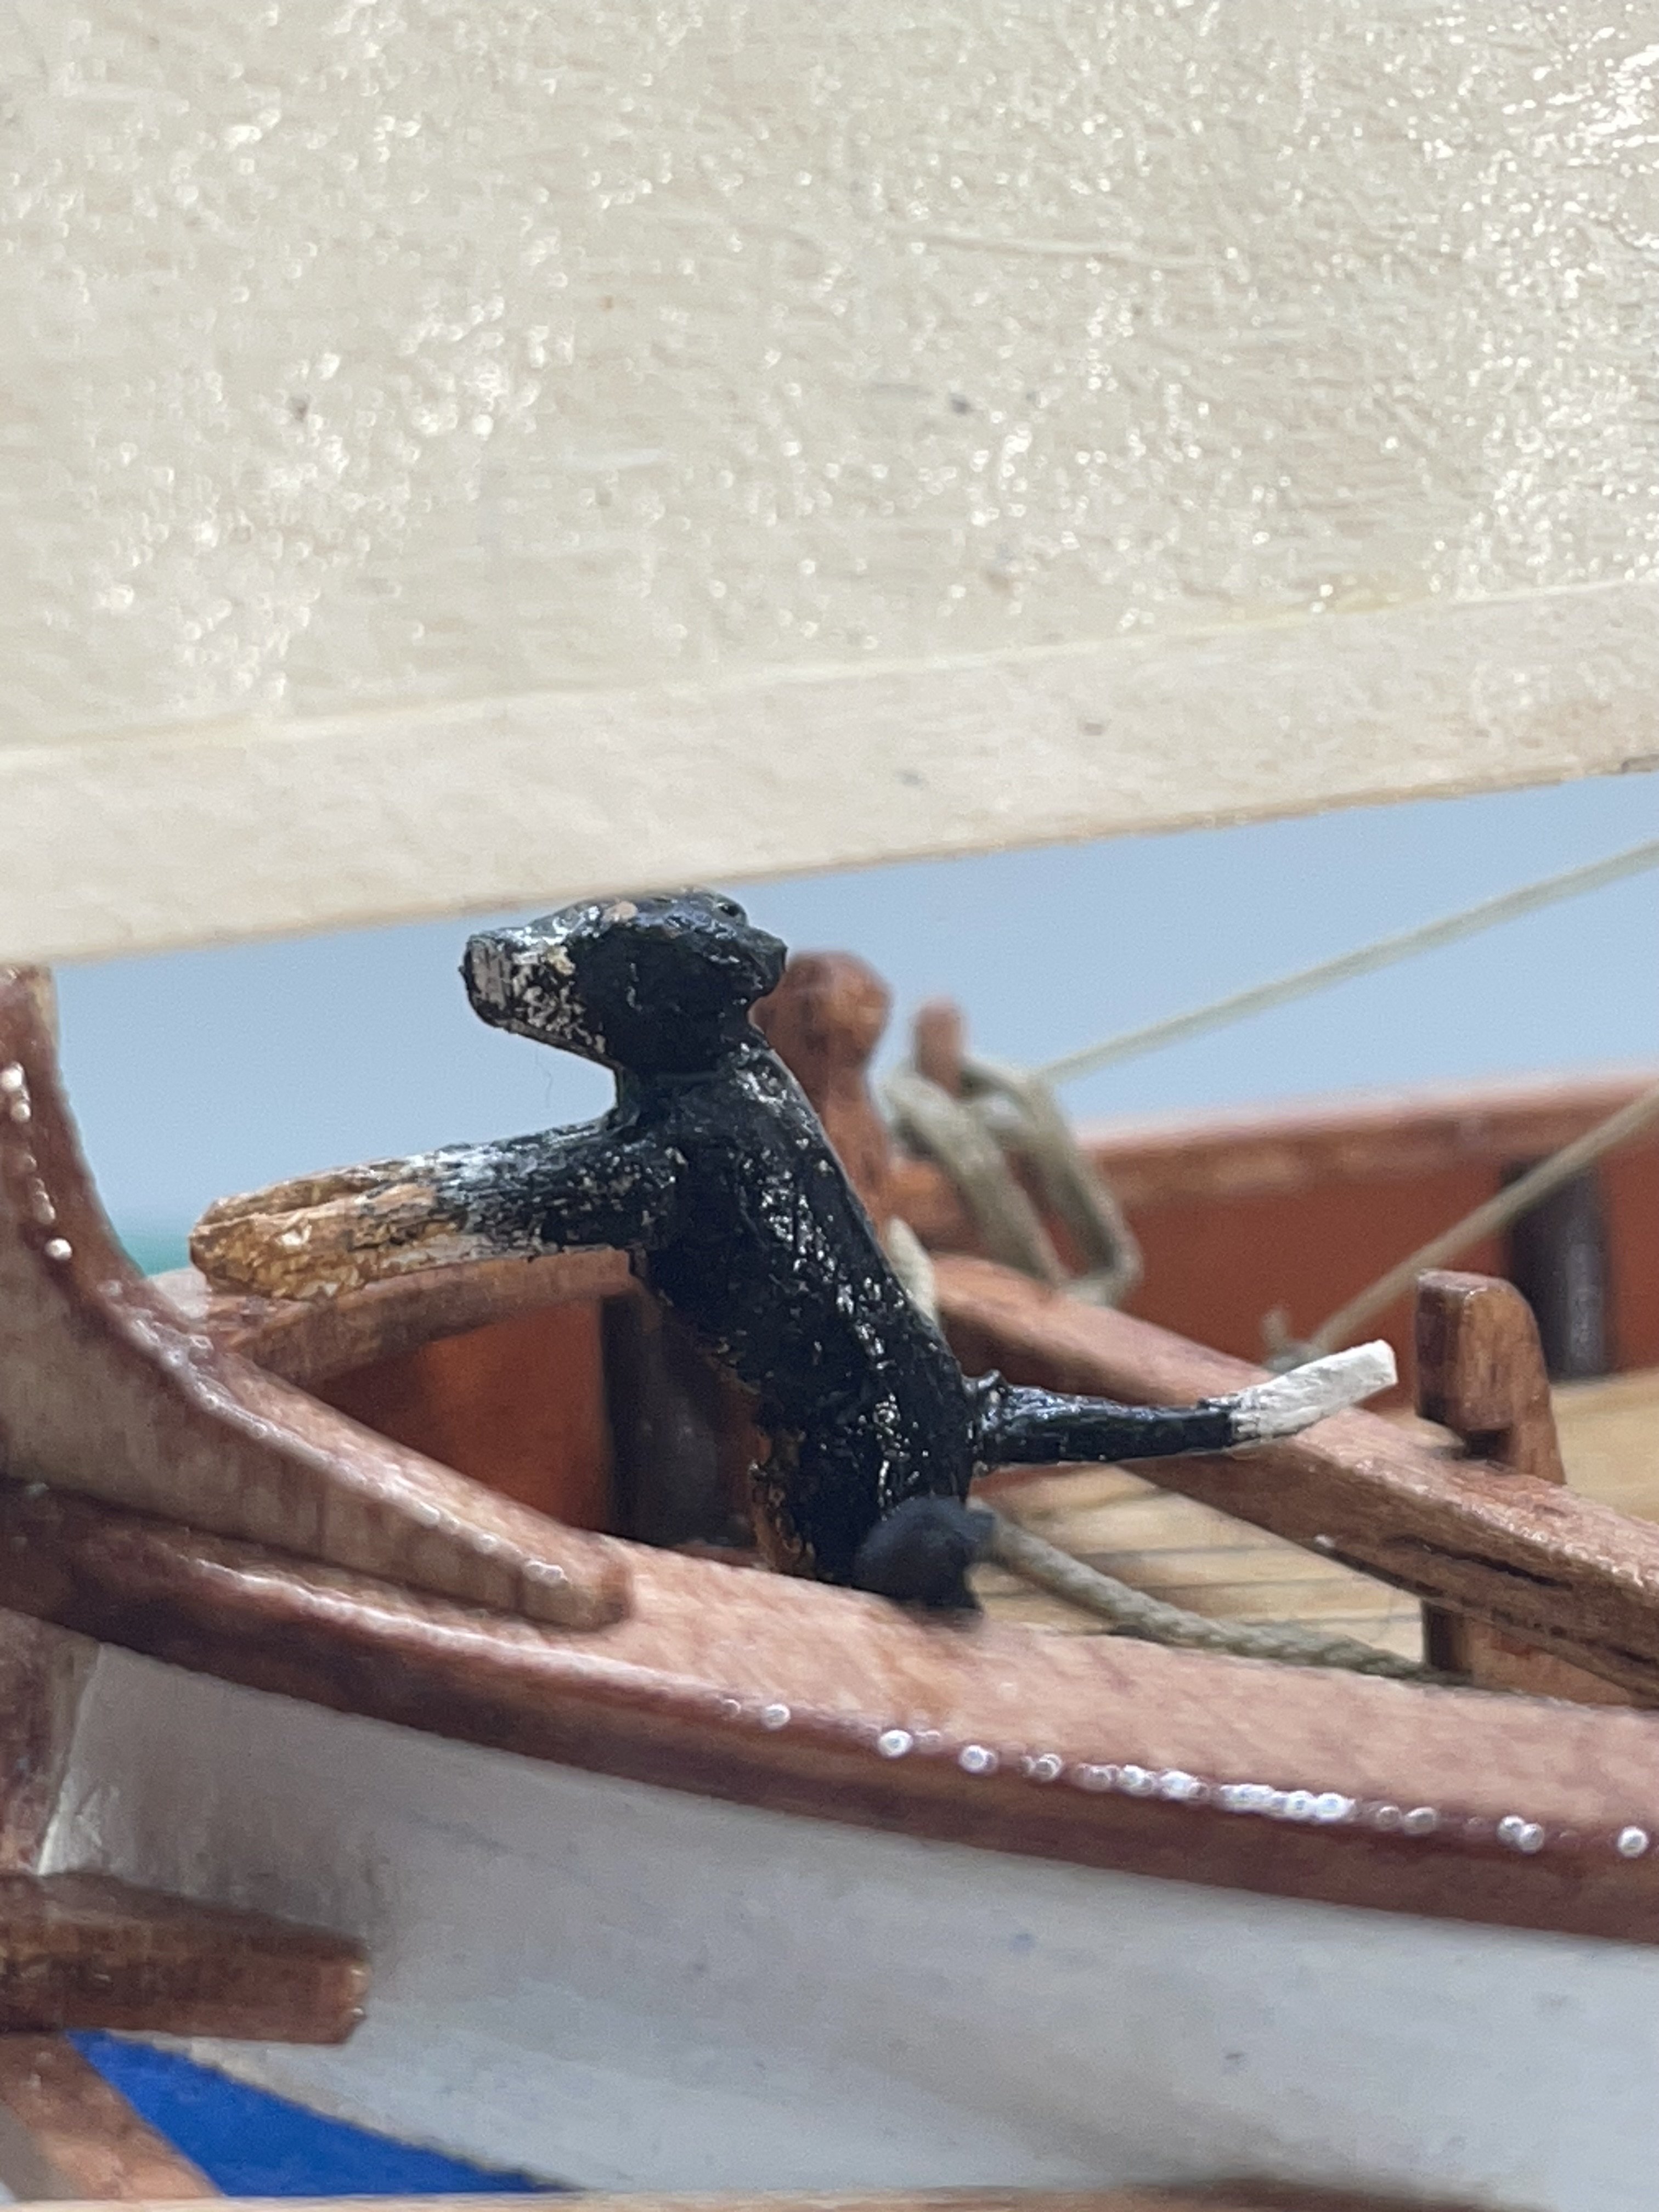
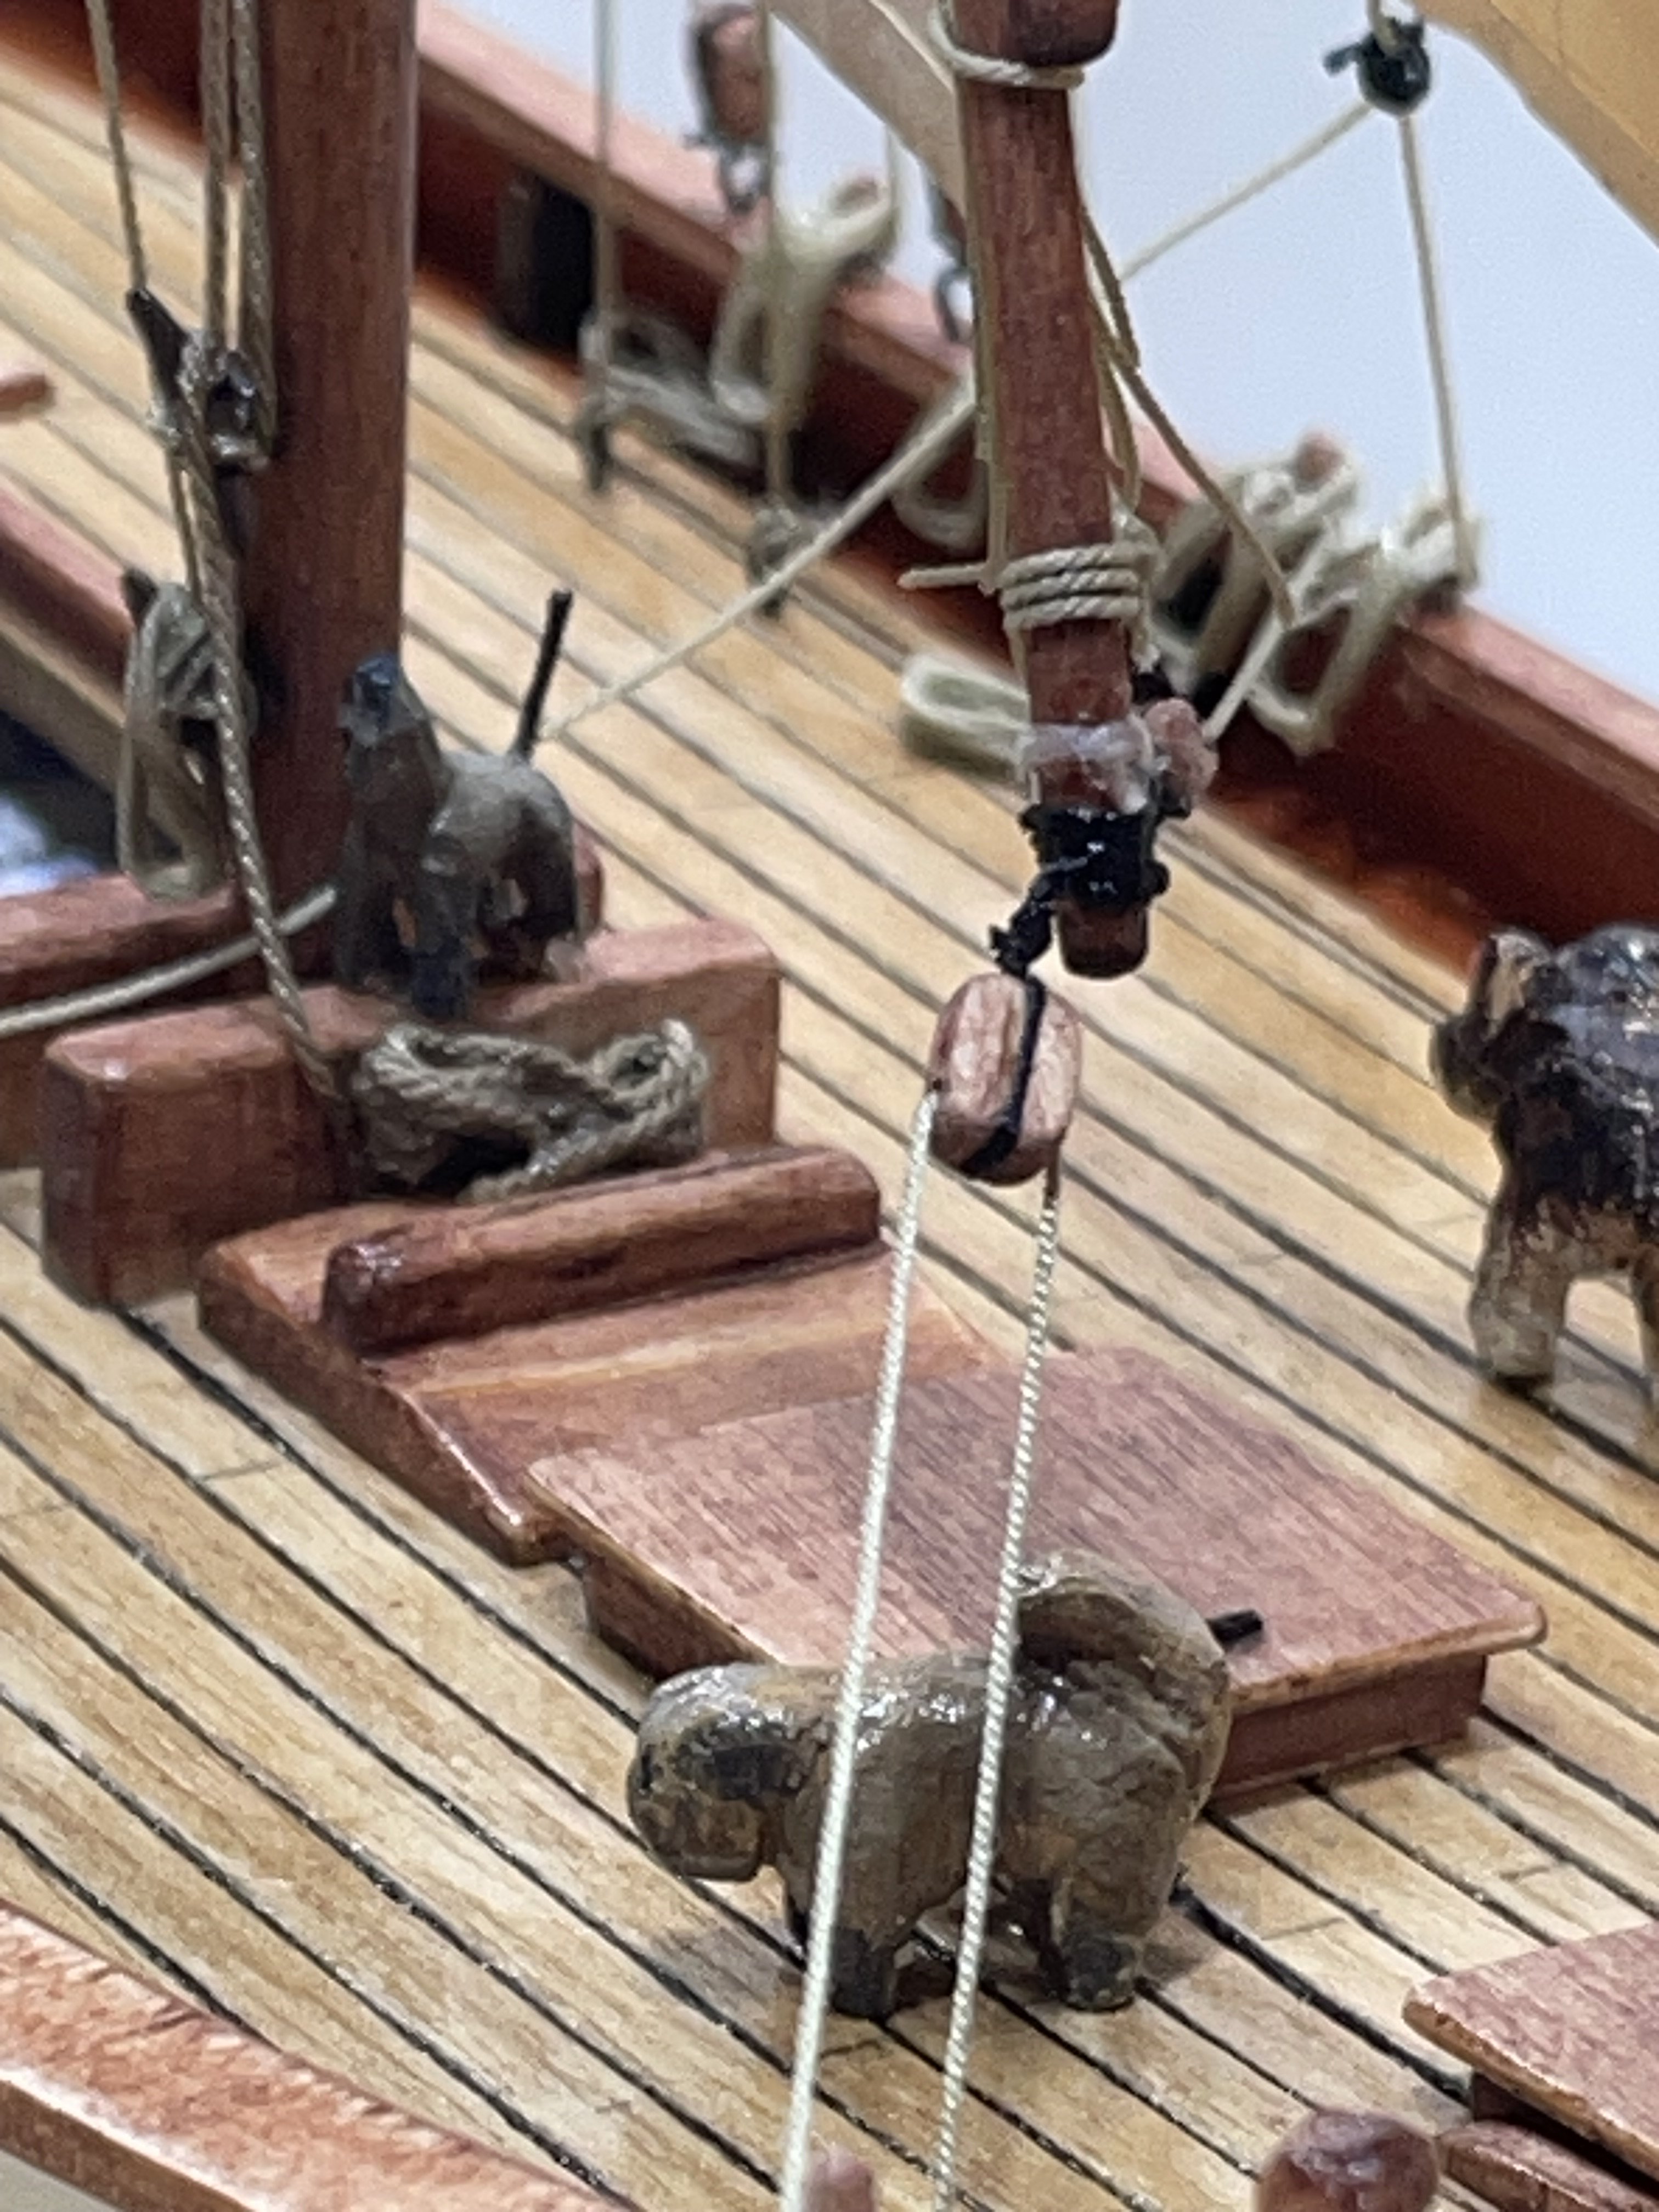
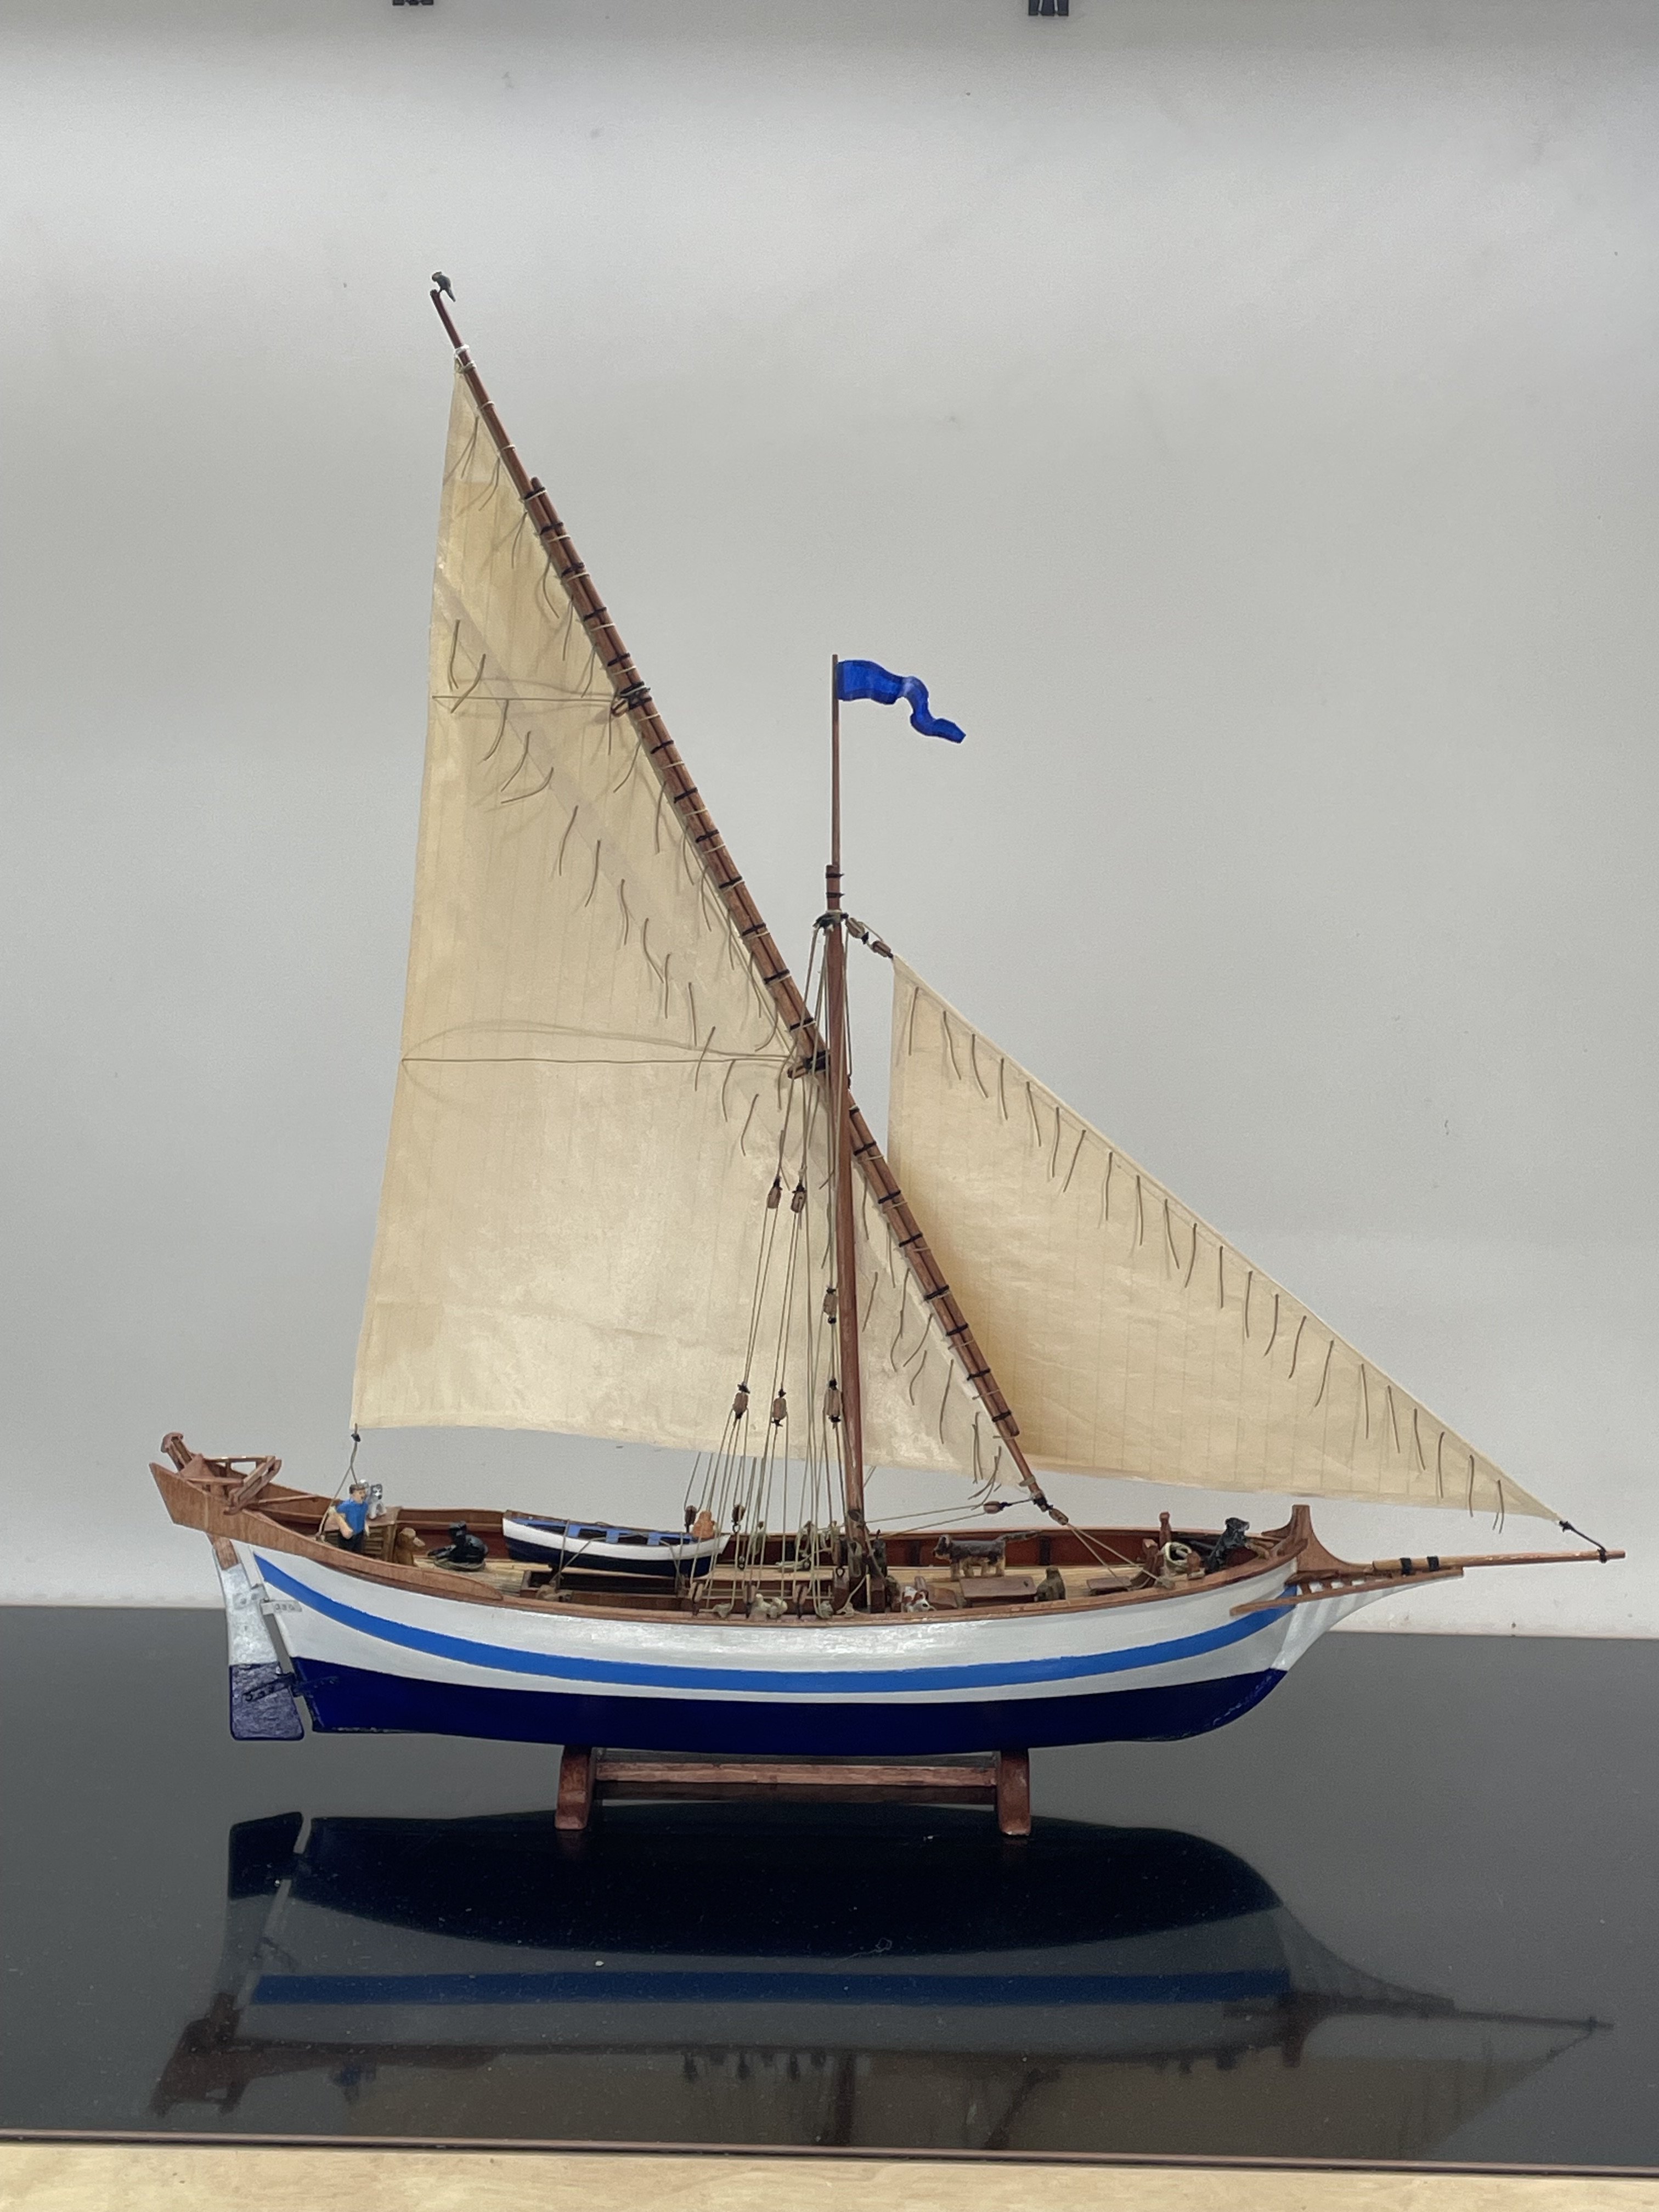
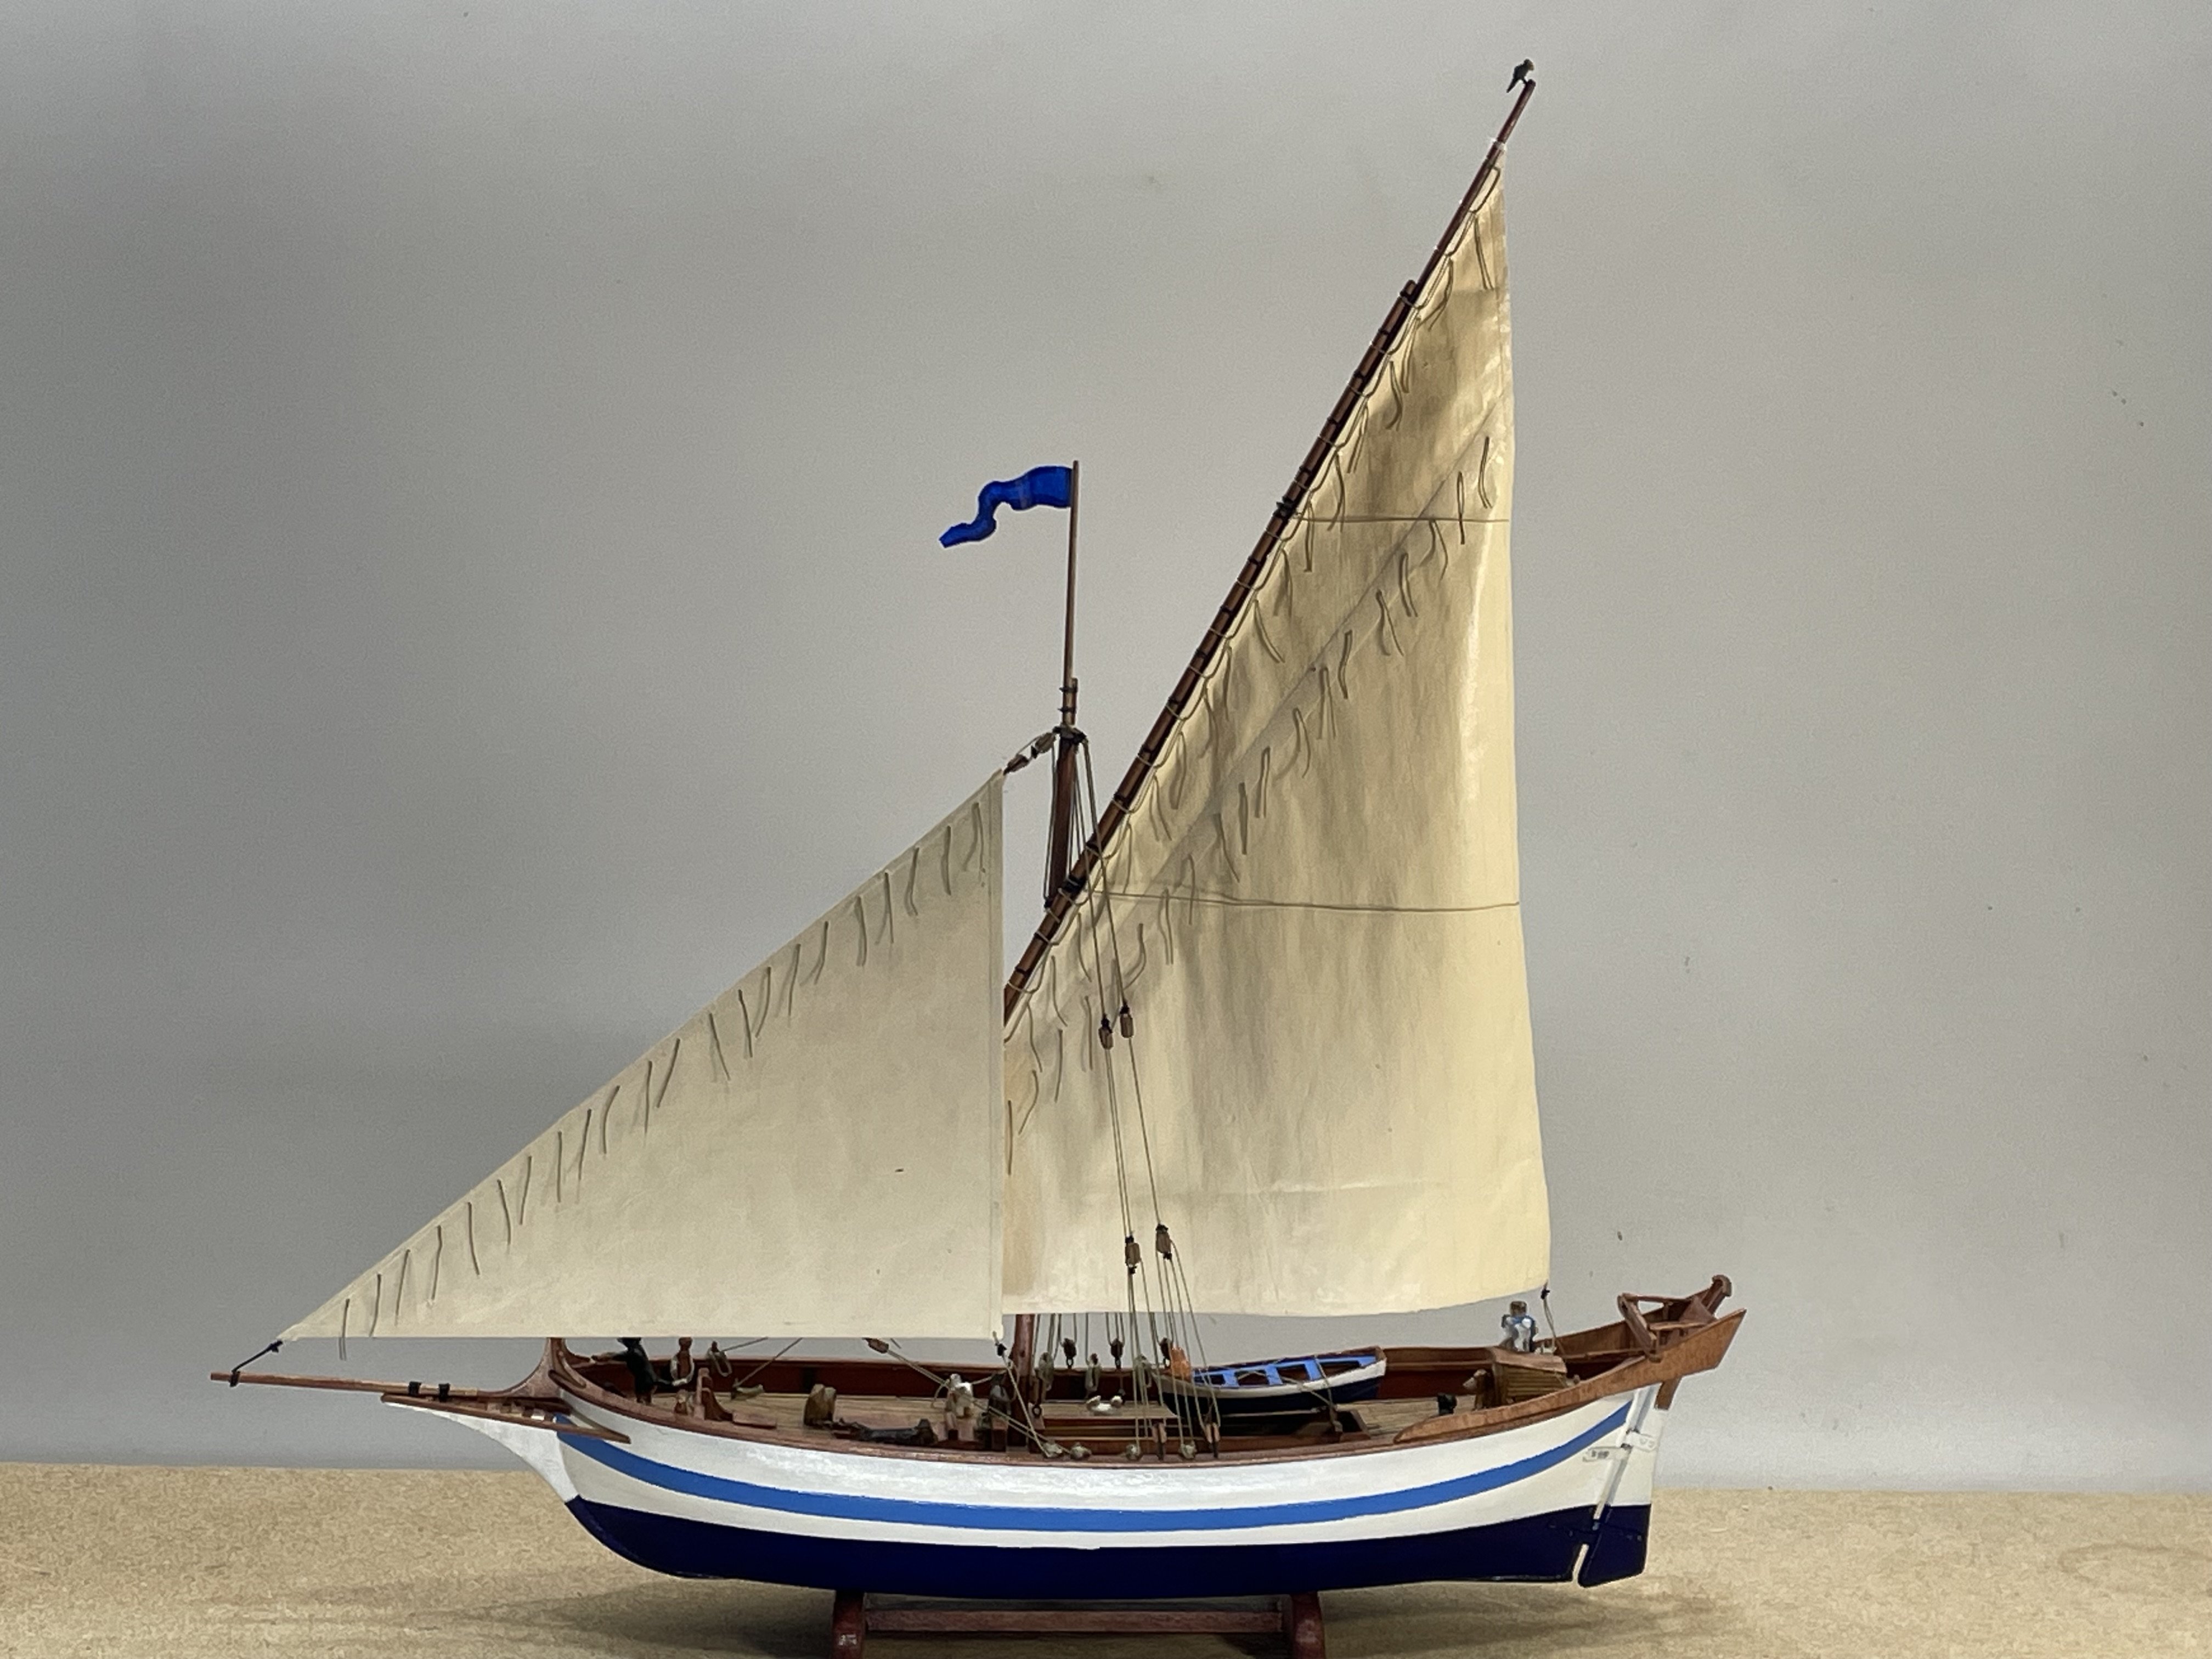
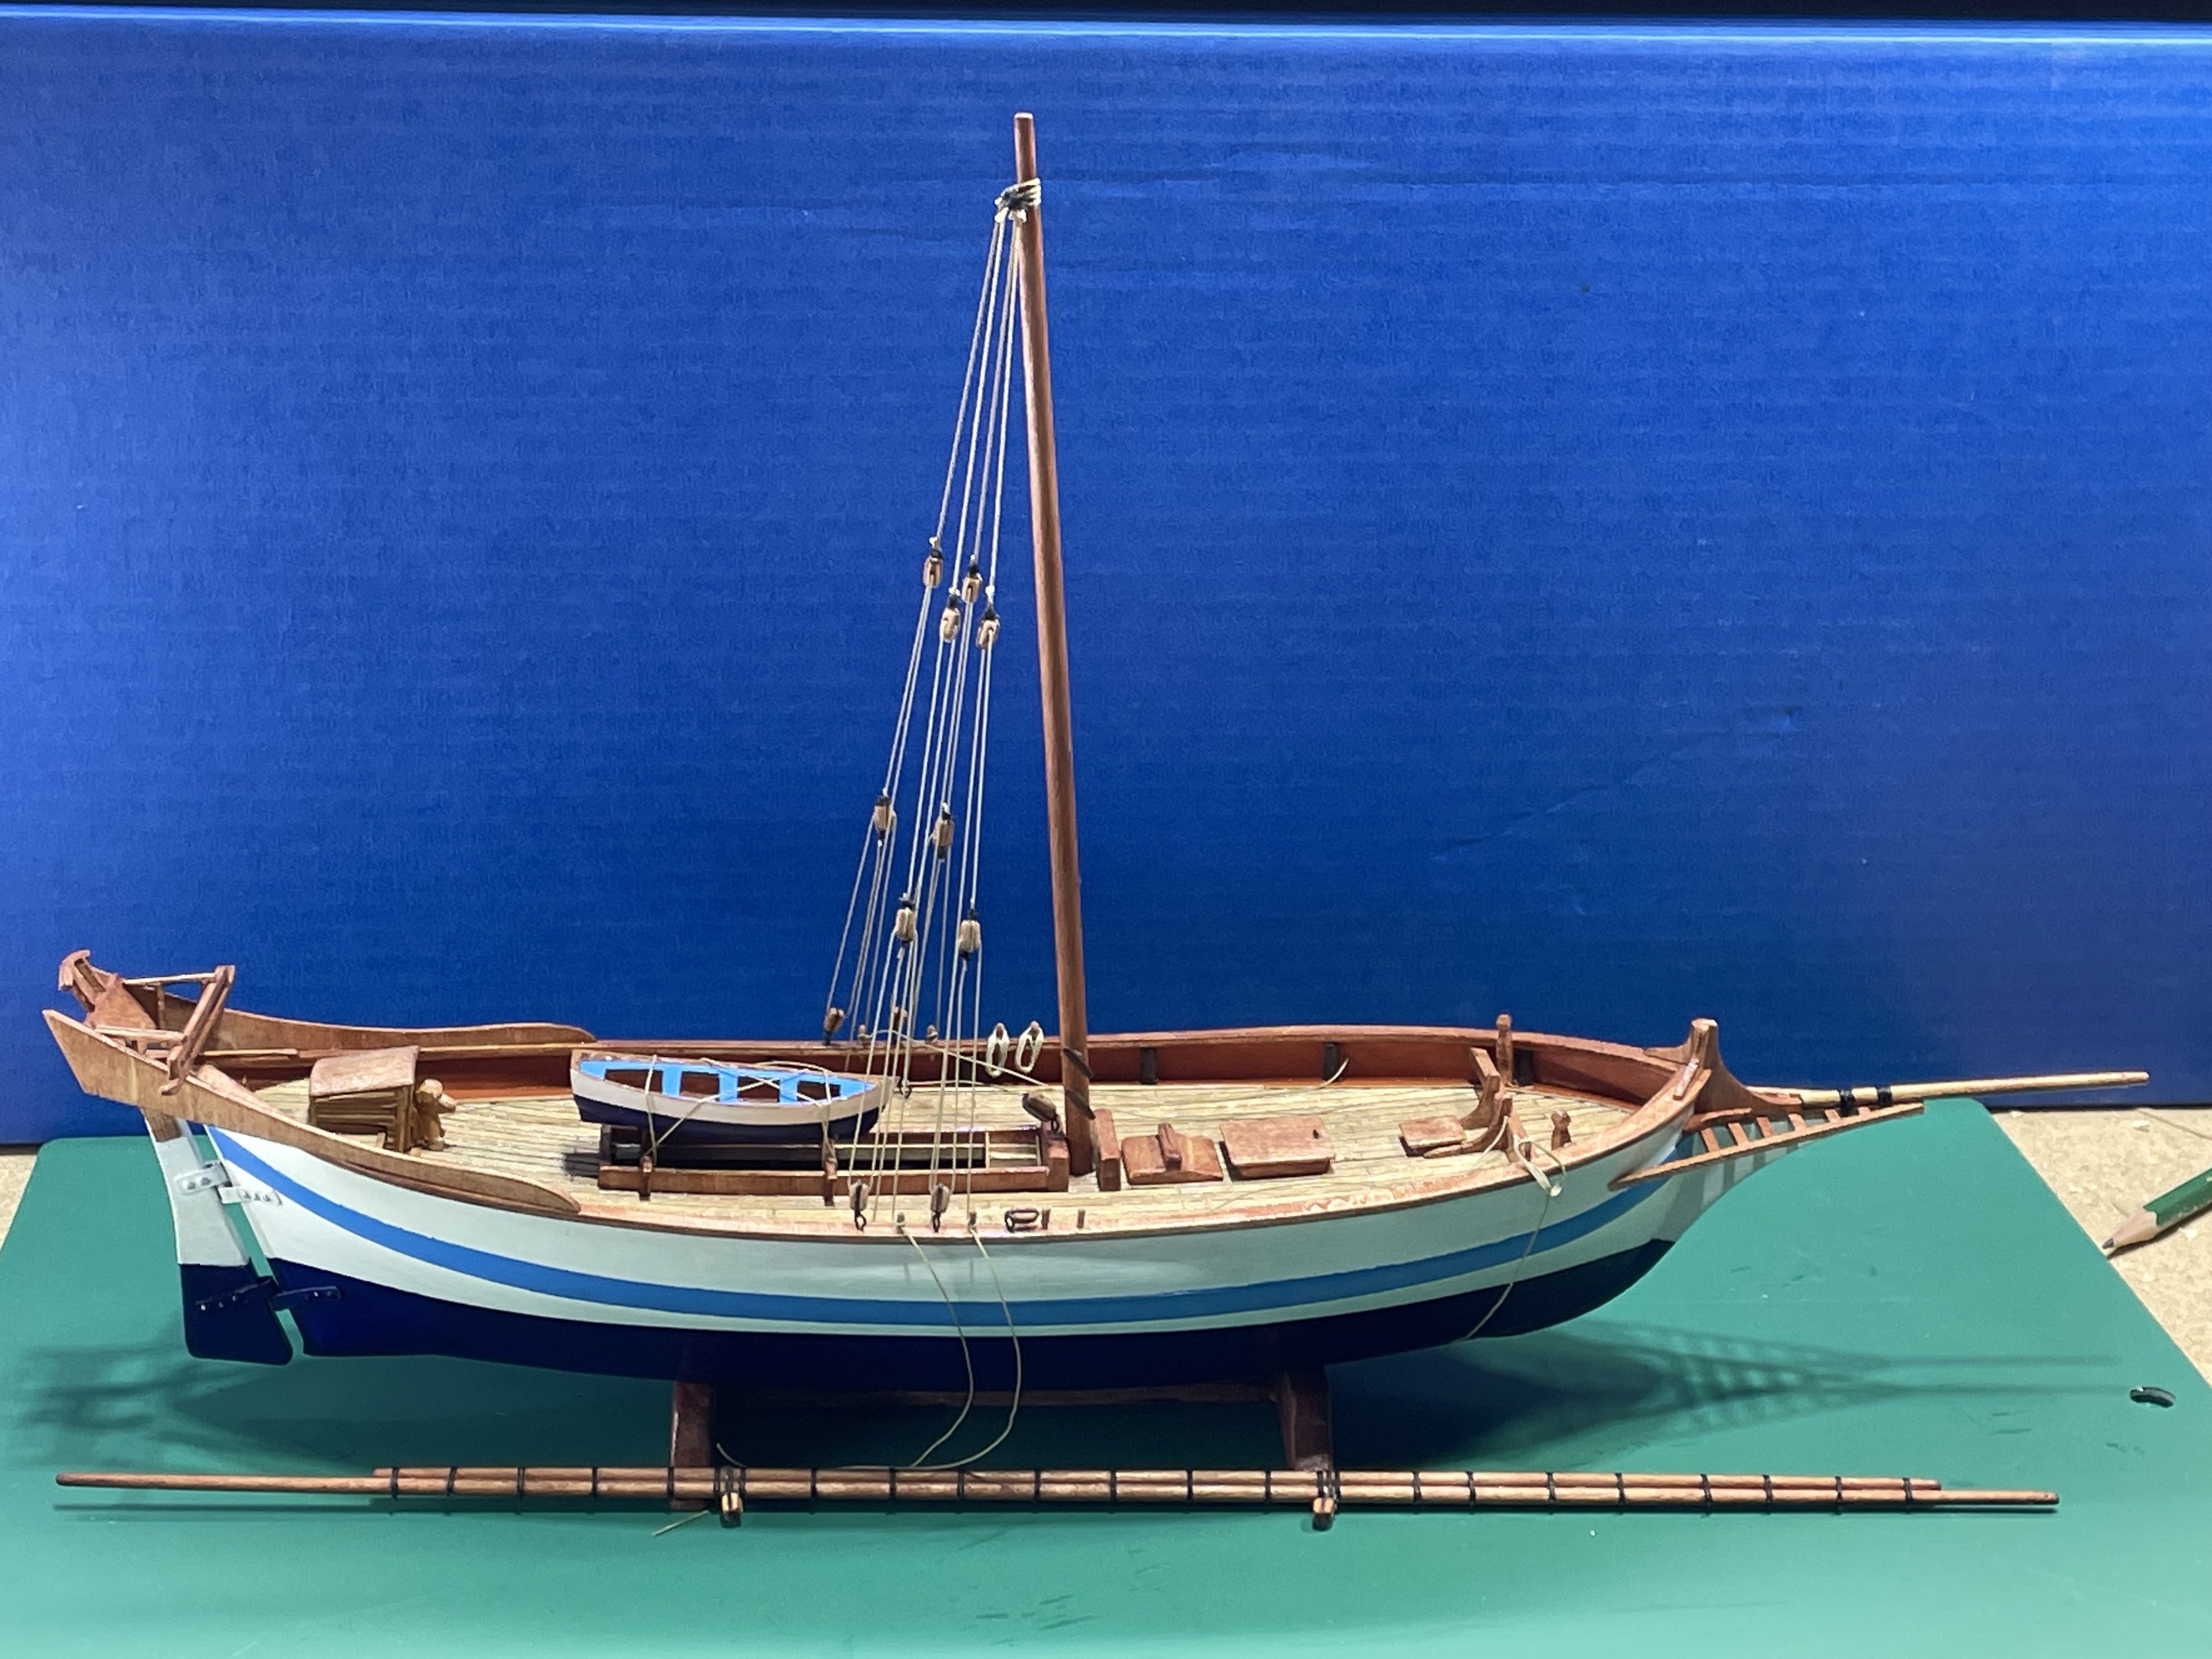
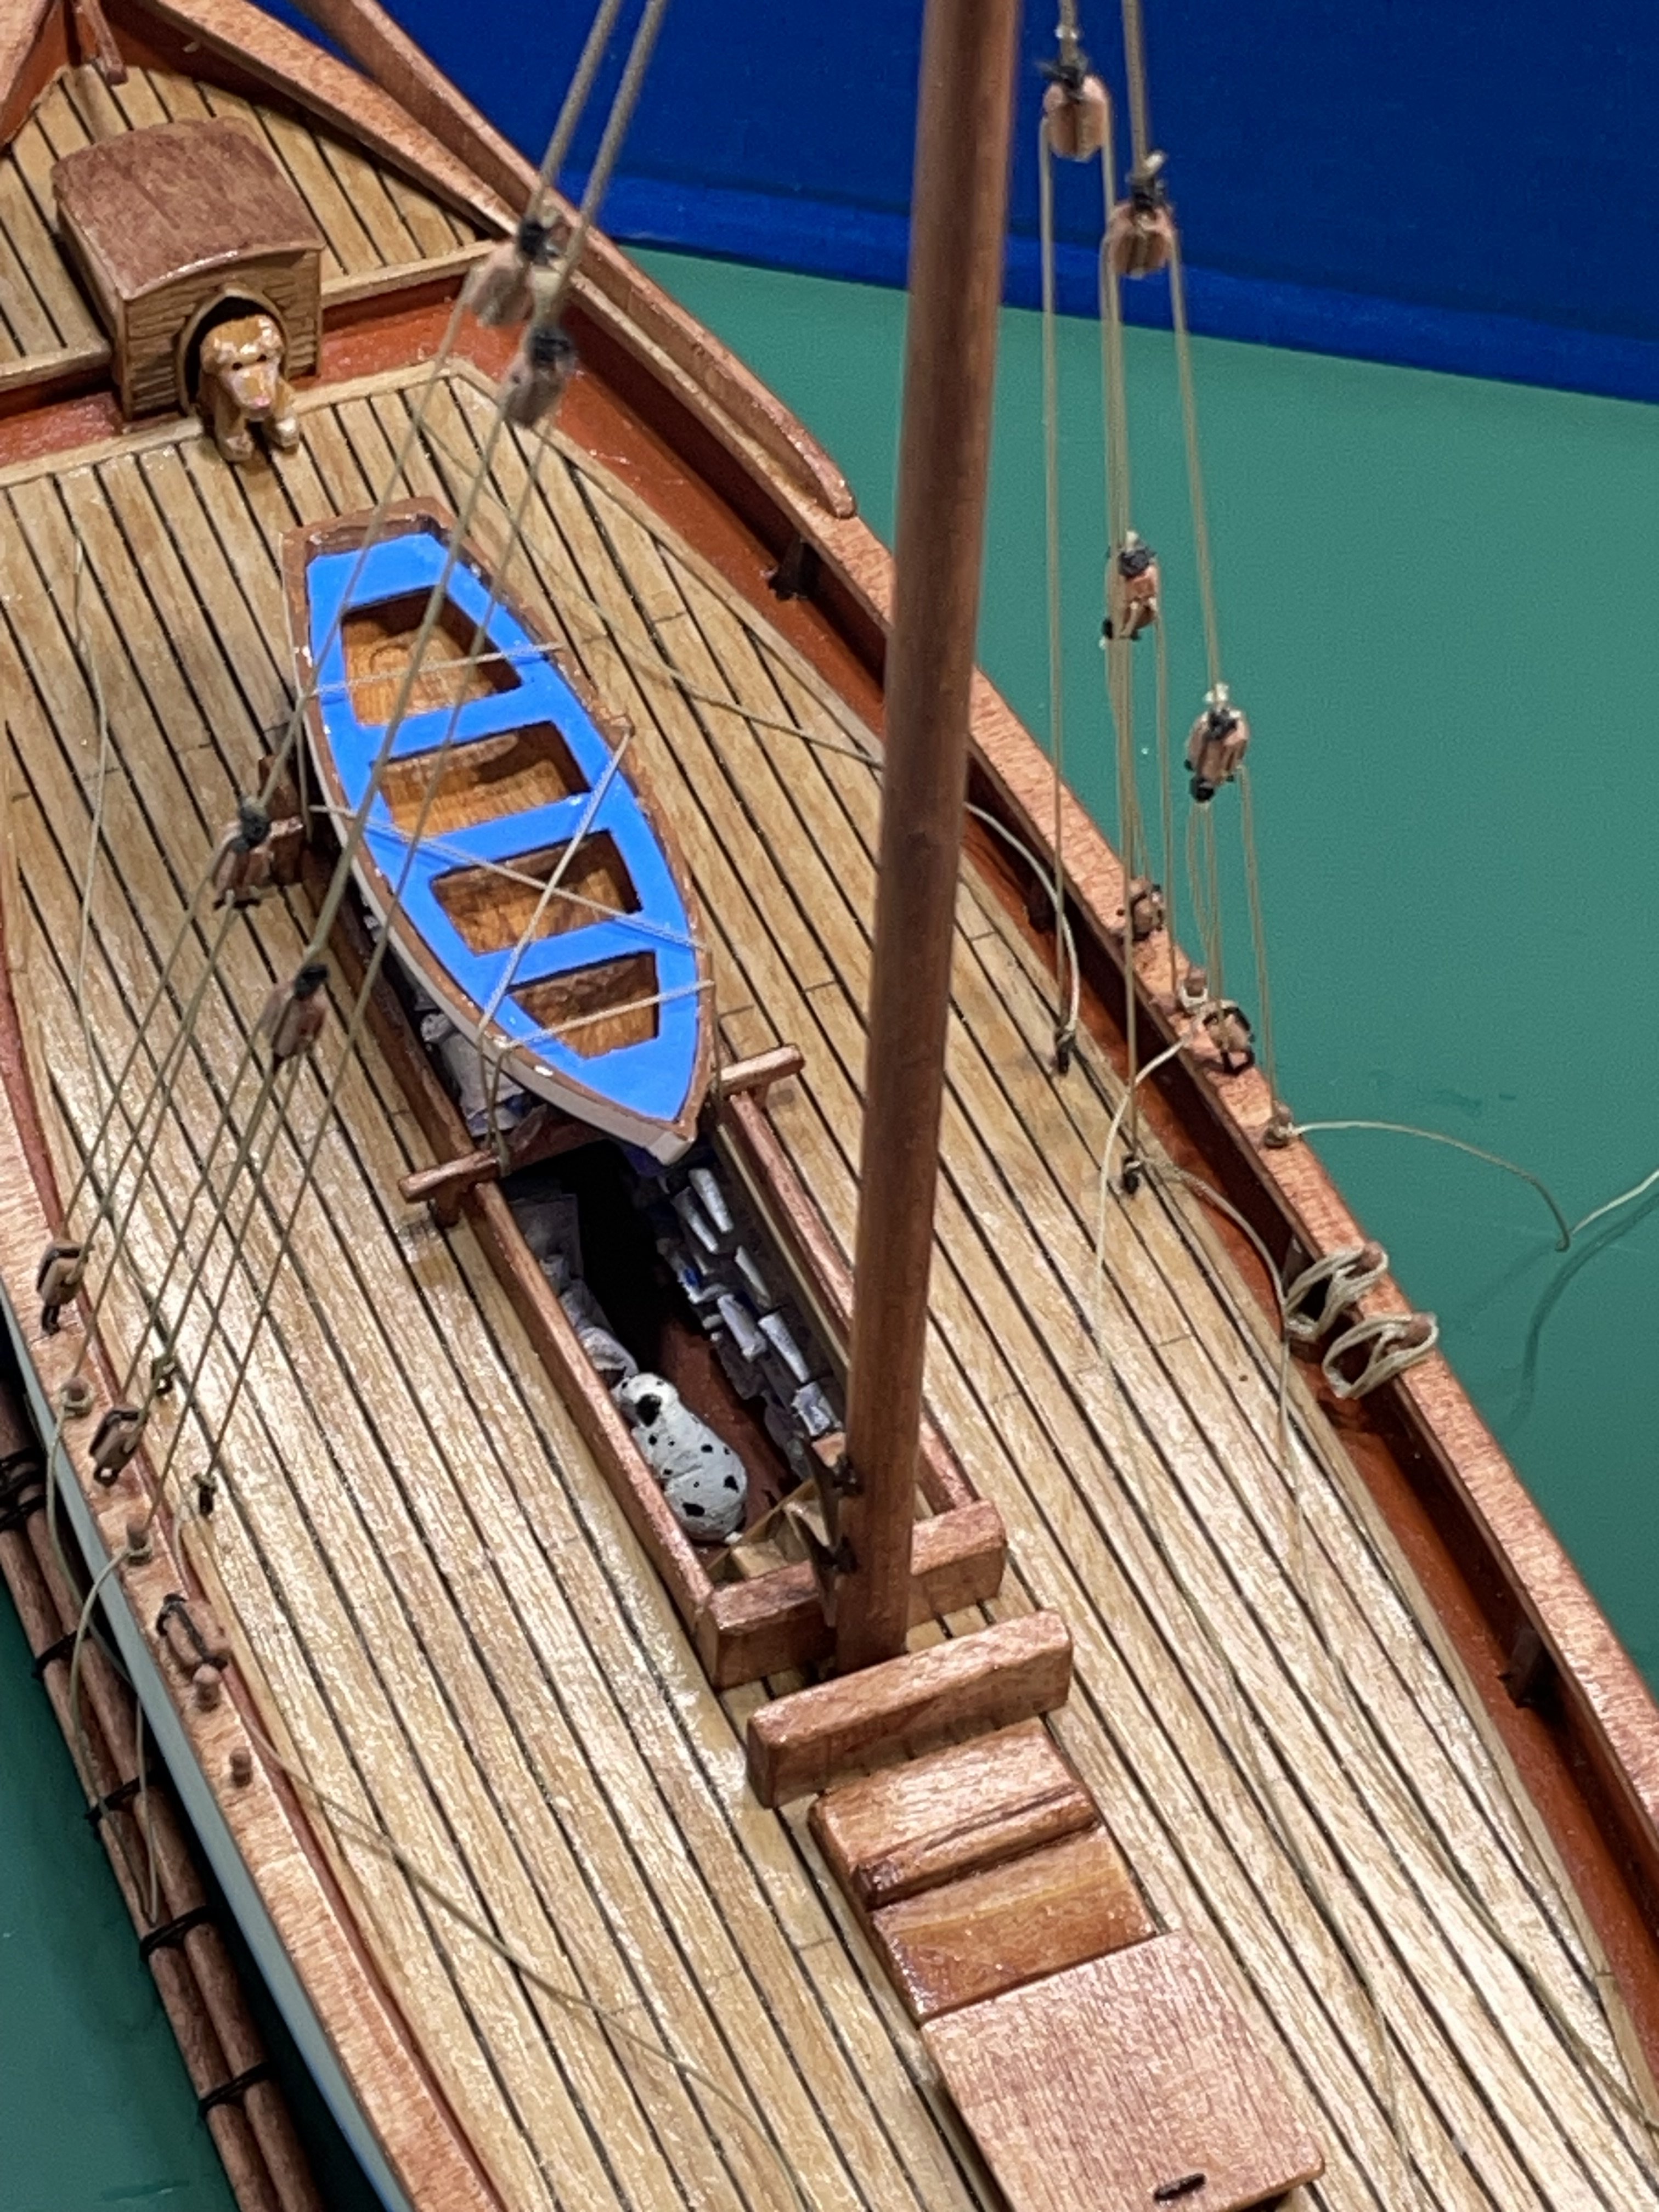
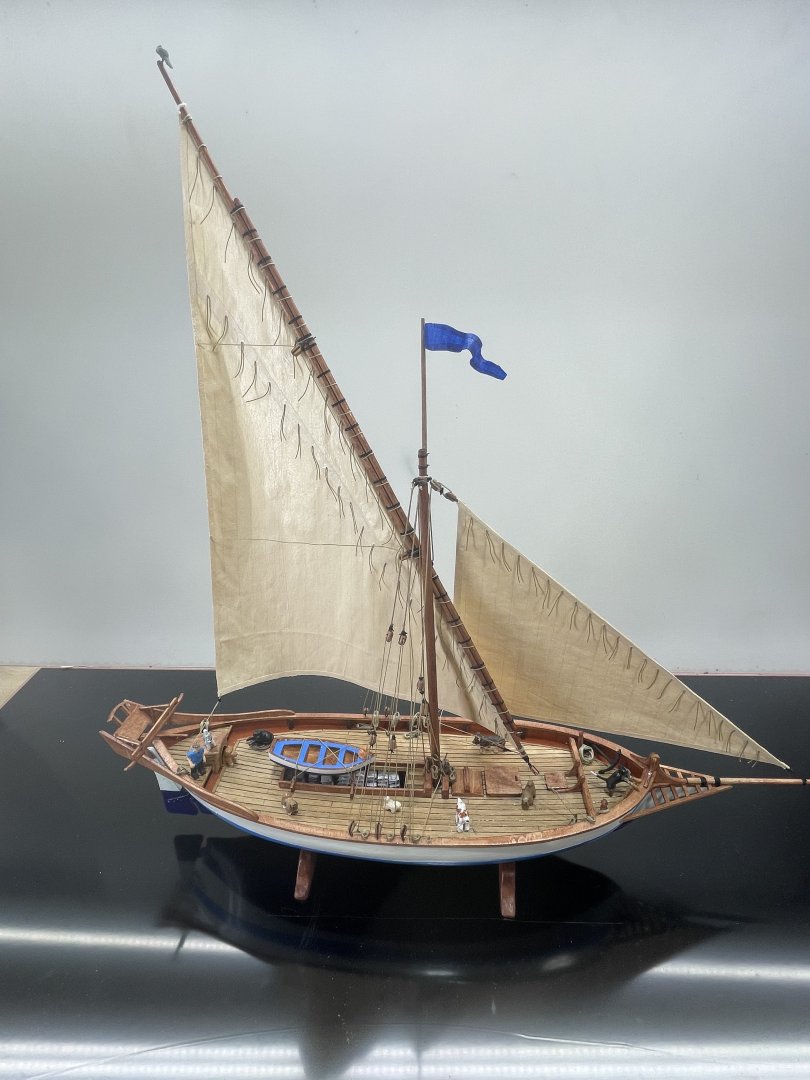
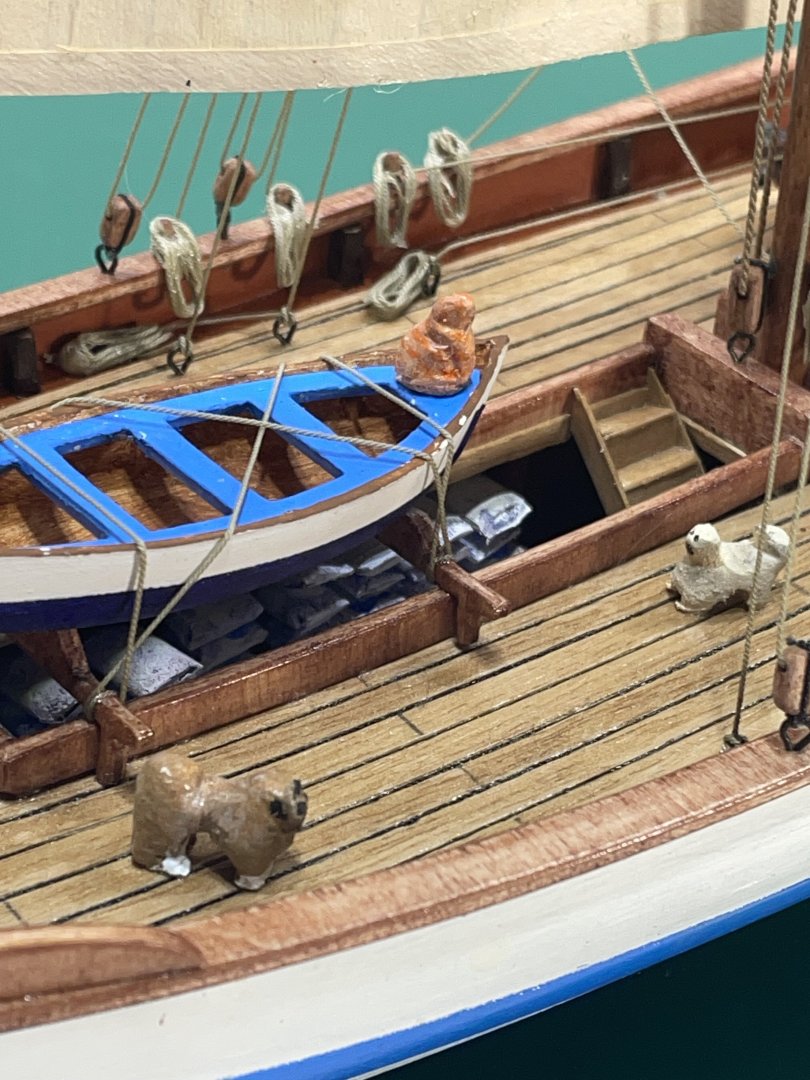
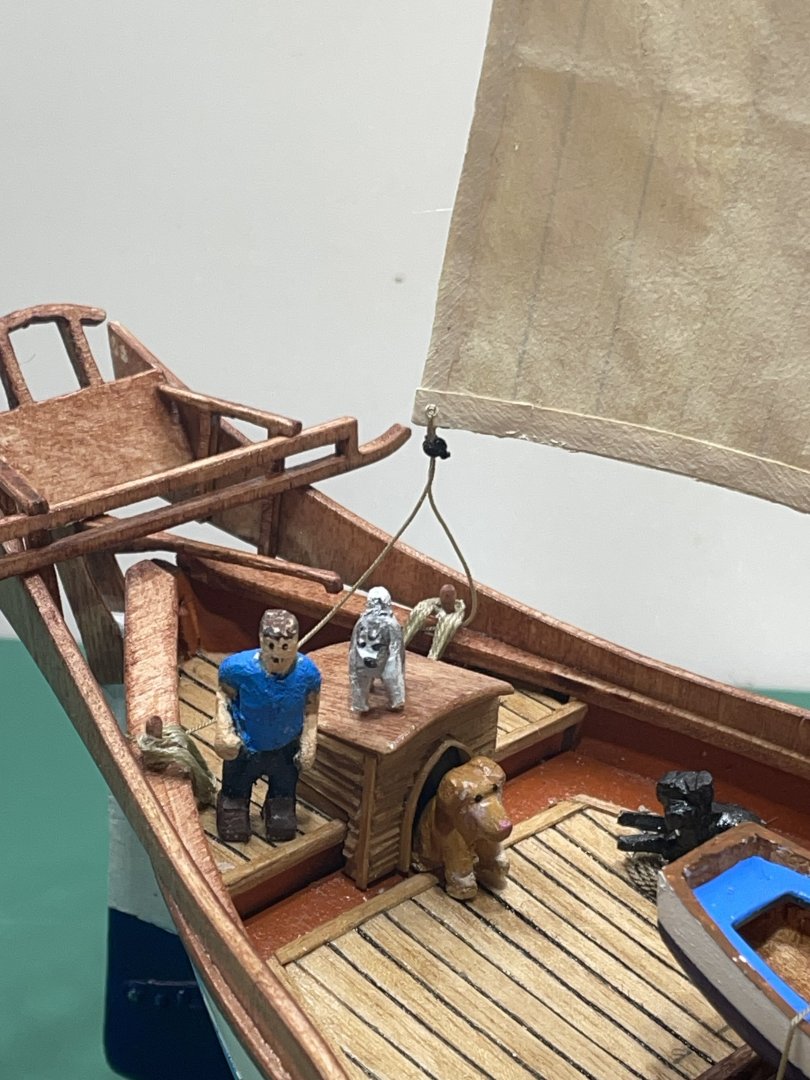
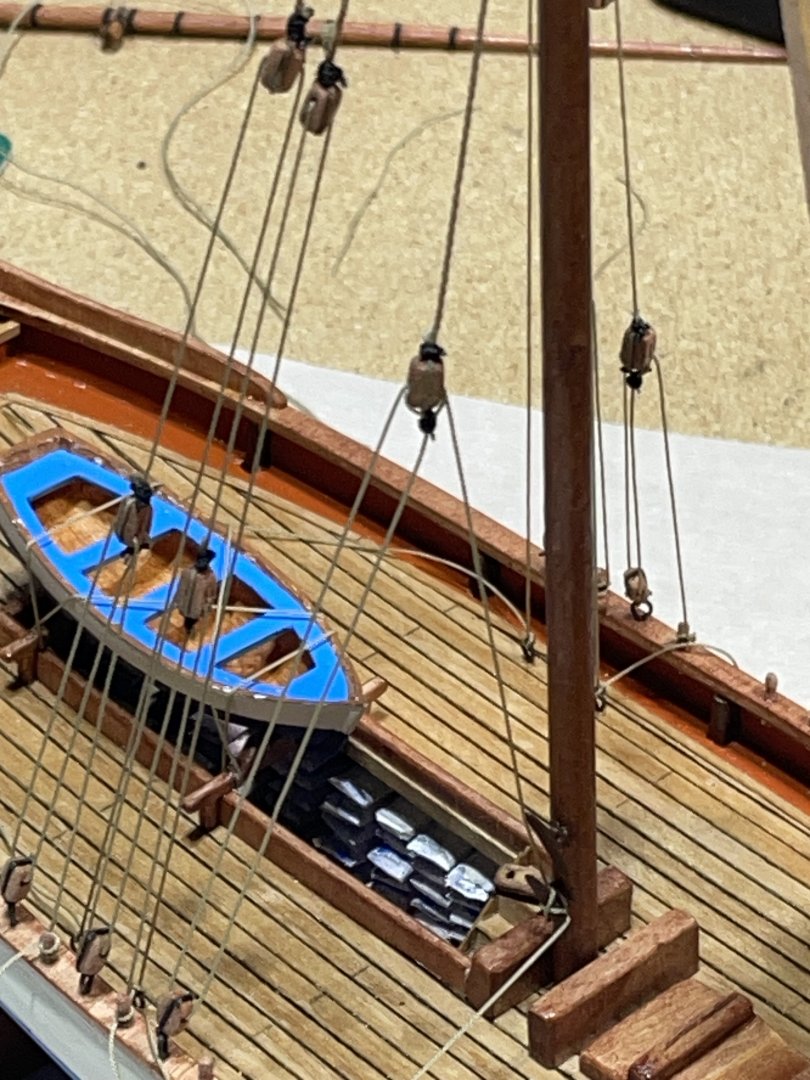
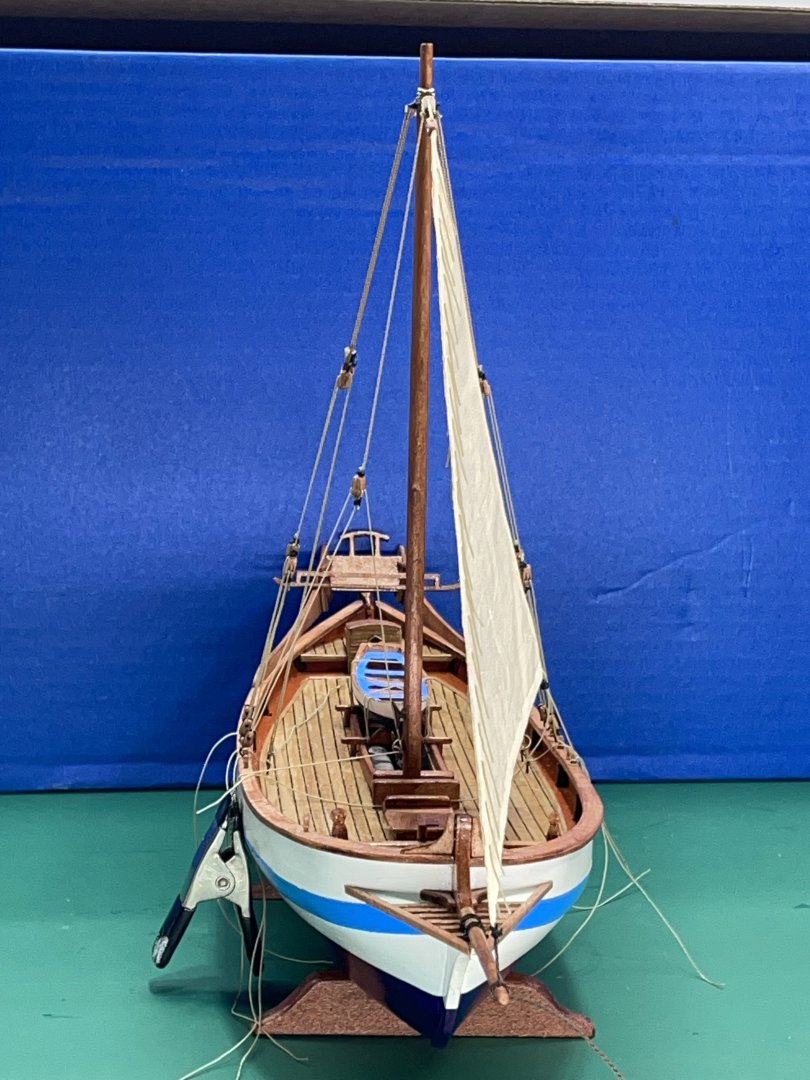
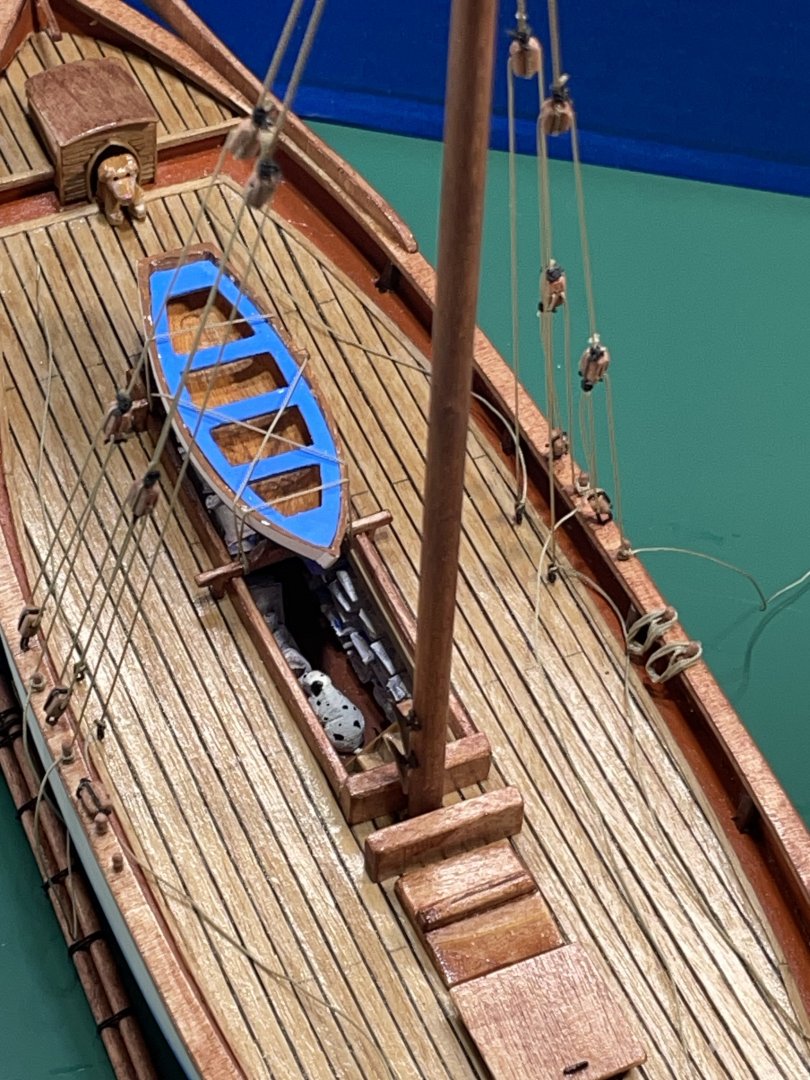
Most of my time spent on Le Martegaou the last 10 days has been cleaning up loose rope ends and making rope coils. The main sail went up pretty easy. Here are some jigs I used to make the rope coils. After that was done I carved a few more pets for the crew. I’d like to introduce the crew:-) From left to right, Captain Kurt, Landon Dogavon (Papillon), Chloe (Lab) and Ellie (Lab) Macy (Pekingese), Garfield (tabby), Maya (Pekingese) Sophia (cavalier, King Charles Spaniel) Top is Rea-Rea (Siamese), bottom Cullen (Shih Tzu) Marley (blue heeler) Top right Chief (German Shepherd), bottom right Spot (dalmatian). And last but not least, Goliath (cockatiel)Top left on picture below 🙂 So here’s the pics of what it’s really about. This was a really fun build. I wish they didn’t use plywood on the parts that showed to be stained. And the kit included some water slide decals (at least I thought they were) but they disintegrated before they even got close. Thanks everyone for the responses and likes.


- 55 replies
-
- 8
-
-

-
- Le Martegaou
- billing boats
- (and 1 more)
-
JC, your work is so clean! I’m anxious to see all the layers of finish you’re going use. I have on my shelf a fishing boat kit from Diorama World that I’d like to weather.
- 312 replies
-
- 5
-
-
-
- Chile
- Latin America
- (and 6 more)
-
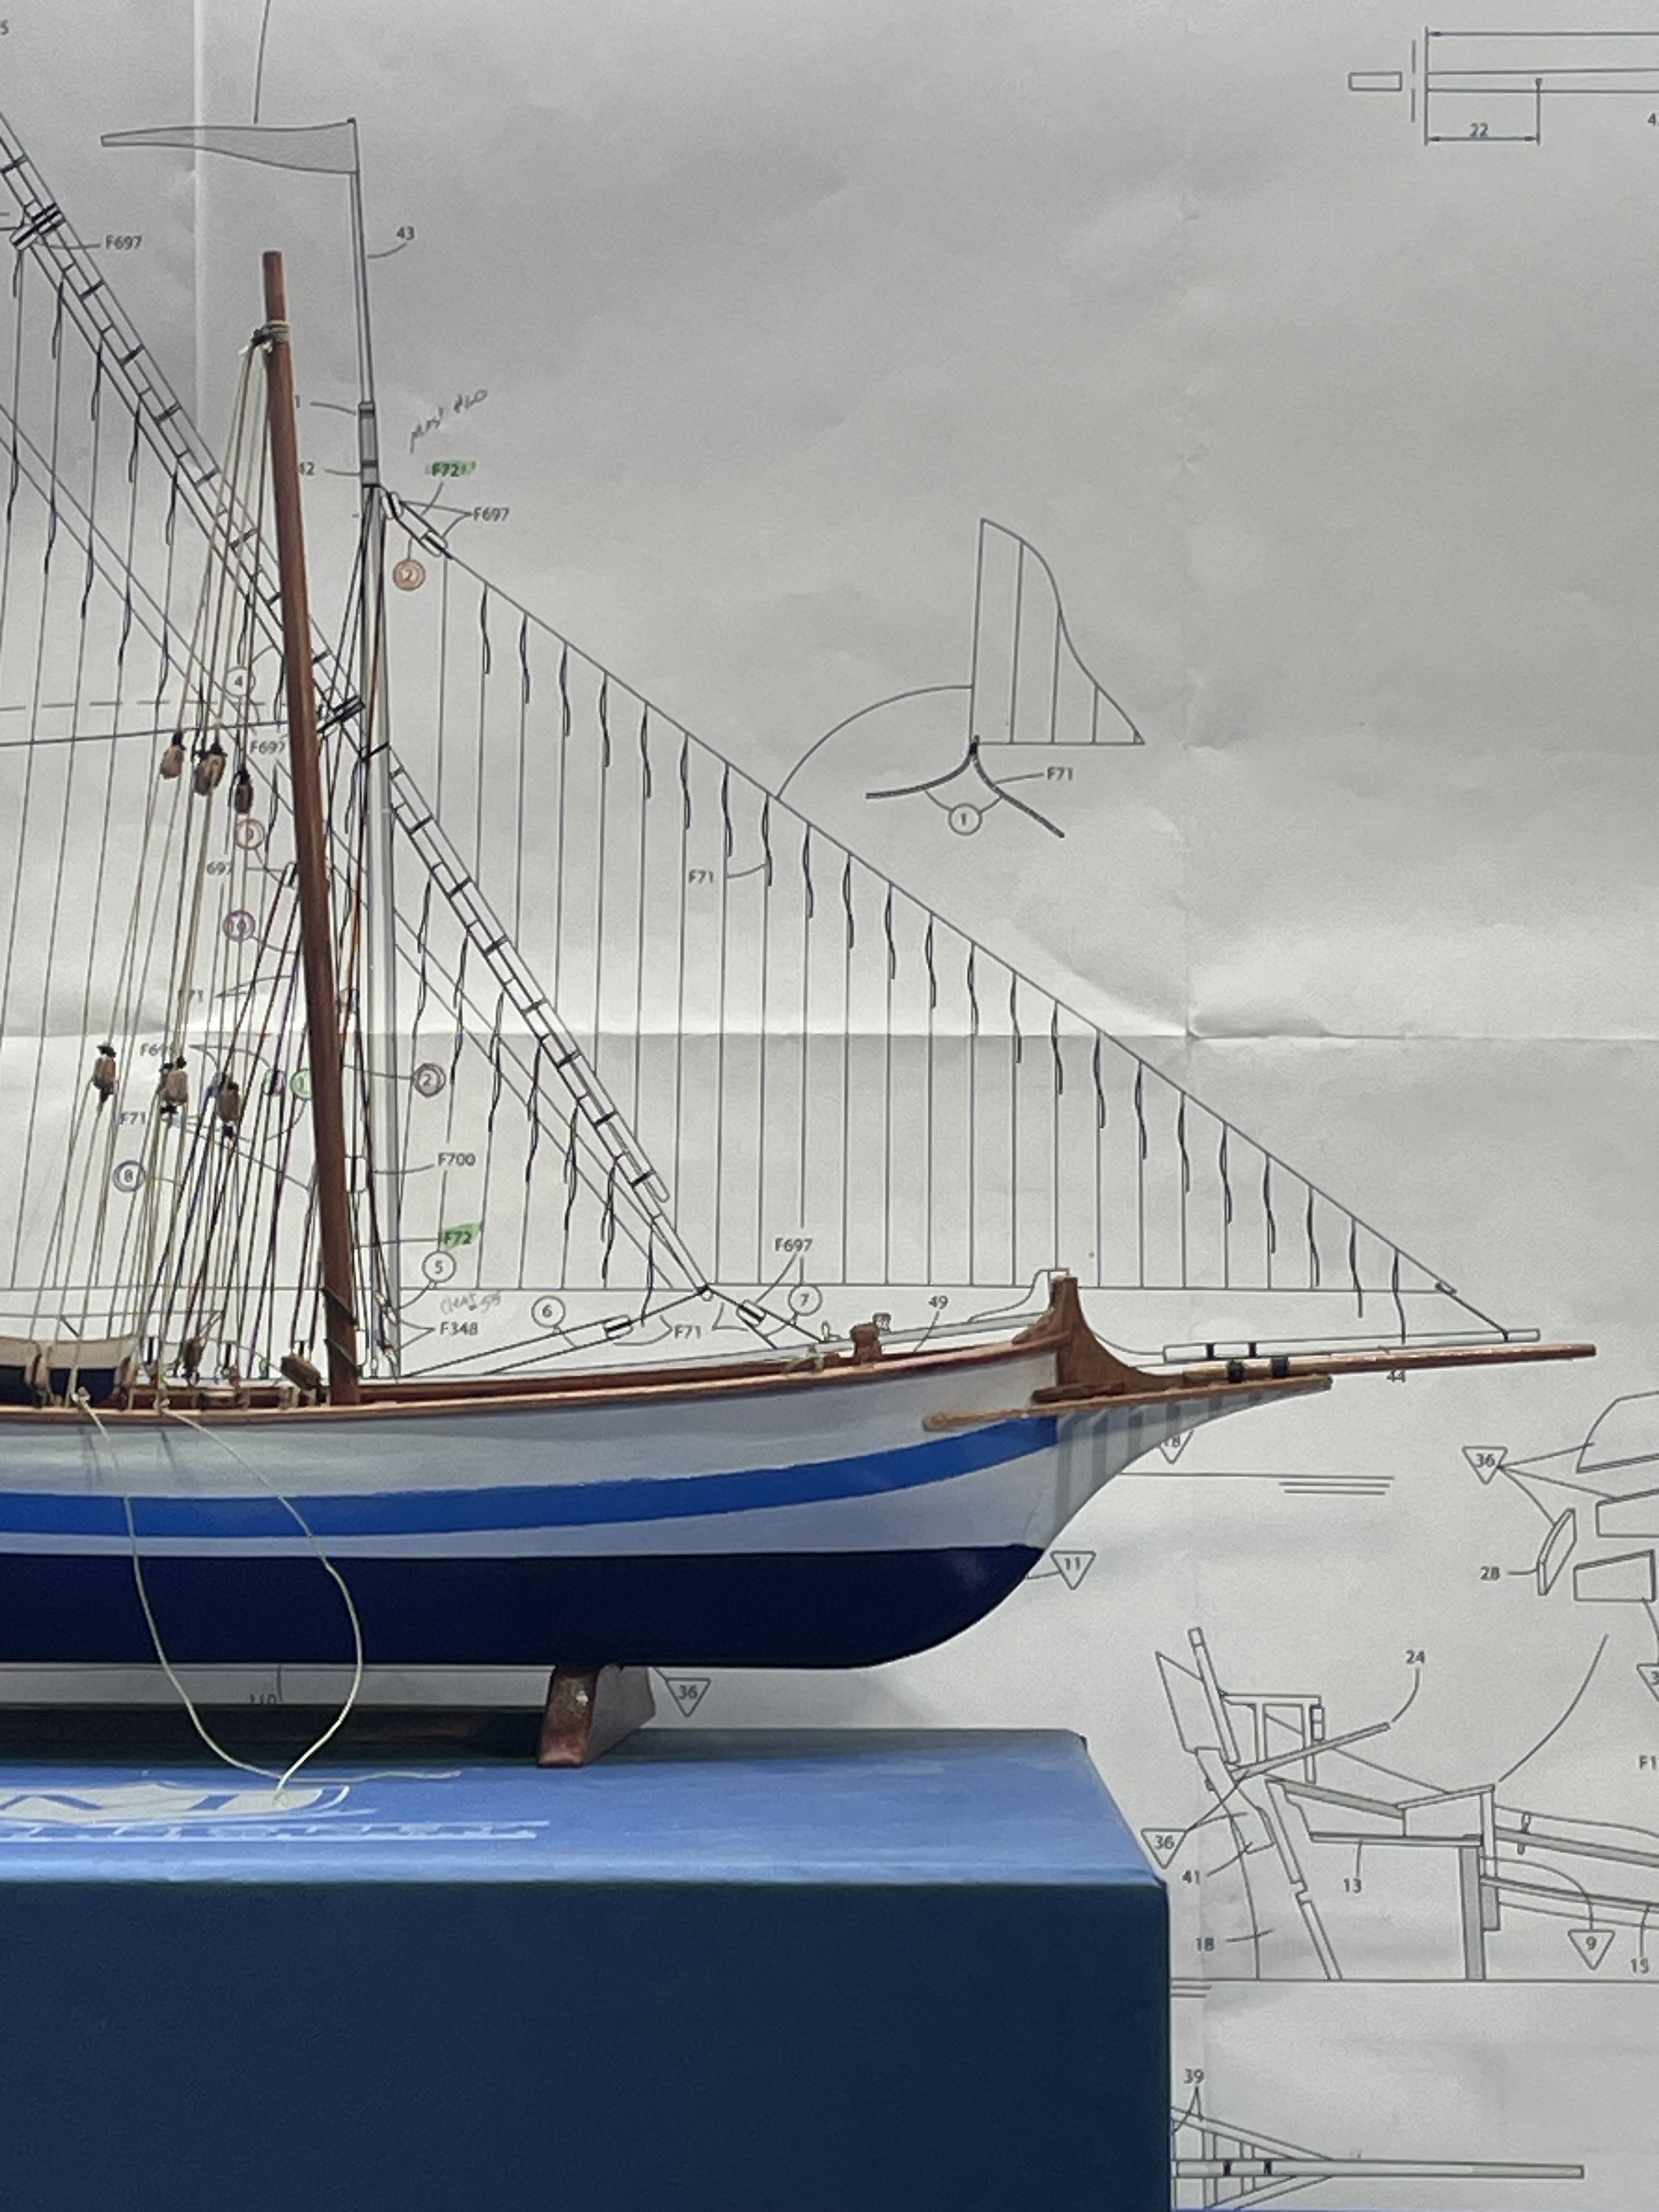
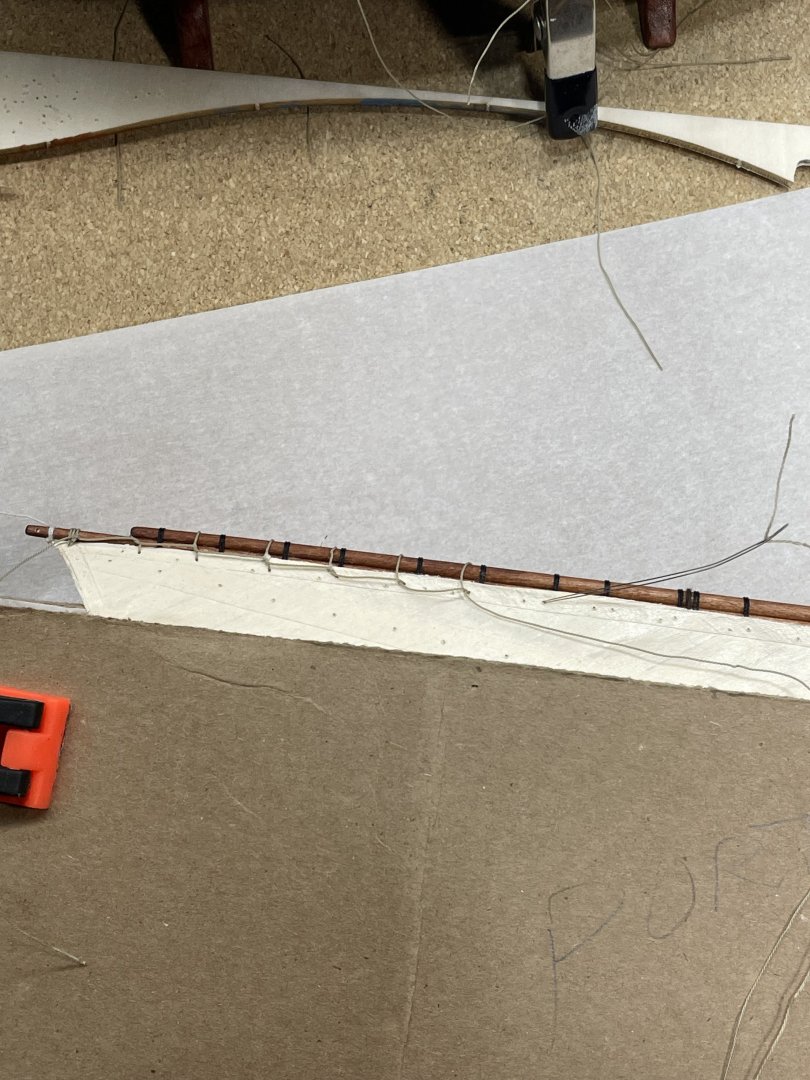
Work on the main sail has progressed. I punched holes for the reef points and for the lacing to the yard. When making the sails I glued a thread between the layers of tea paper, so the sail wouldn’t move up and down on the yard while I was trying to lace it. Then I placed the sail between the two pieces of cardboard to keep me from wrinkling it up, while I was lacing it up. I never can remember how to start and end the rope when doing this. Now I have all the reef points to put on, which half of them are right up against the yard. I thought I would mess these up if put them on before lacing the yard on. There are two ropes that draw the sail in, that run through the two blocks on the yard. Also, the rope that raises the main sail. Then I need to tie on two blocks on the lower end of the yard that will hold the yard down at the bow.
- 55 replies
-
- 3
-
-
- Le Martegaou
- billing boats
- (and 1 more)
-
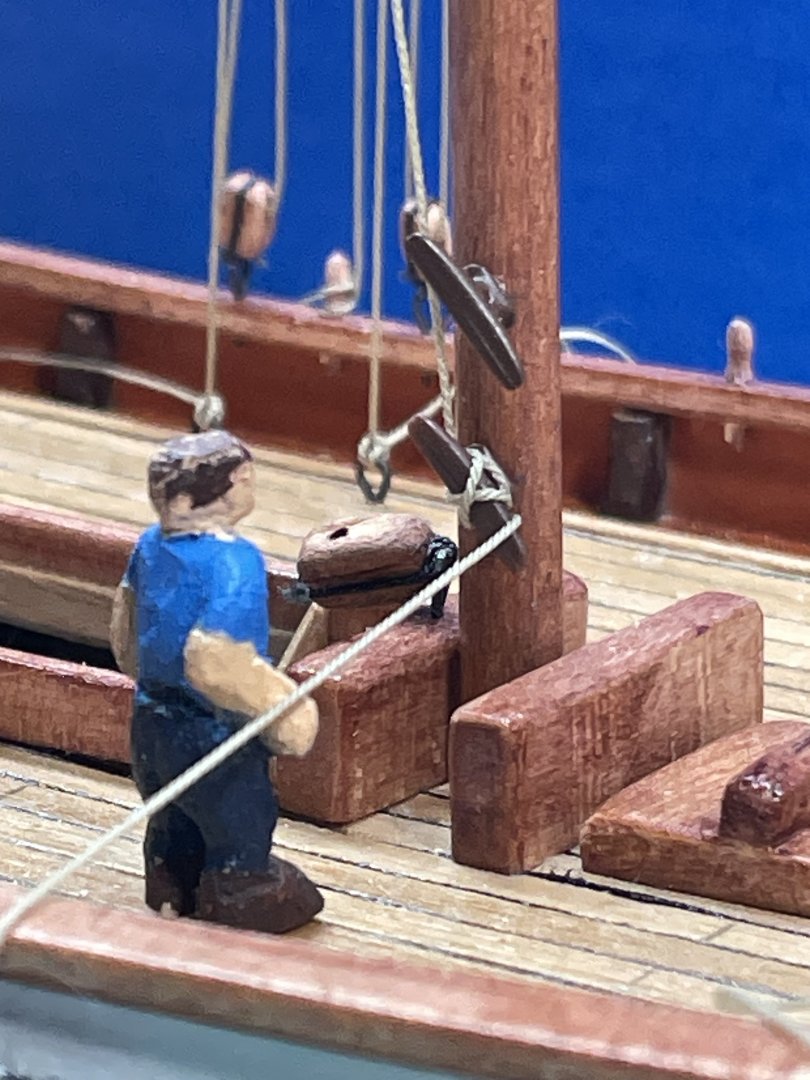
Just setting back after I set Capt. Kurt by the mast. It looks like he is wondering if those cleats are supposed to be so massive. That block for the main sail seems large too. But if they were much smaller I would be wondering how I was going to tie them on:-) Kurt is about 5’9” in 1:80
- 55 replies
-
- 4
-
-
- Le Martegaou
- billing boats
- (and 1 more)
-
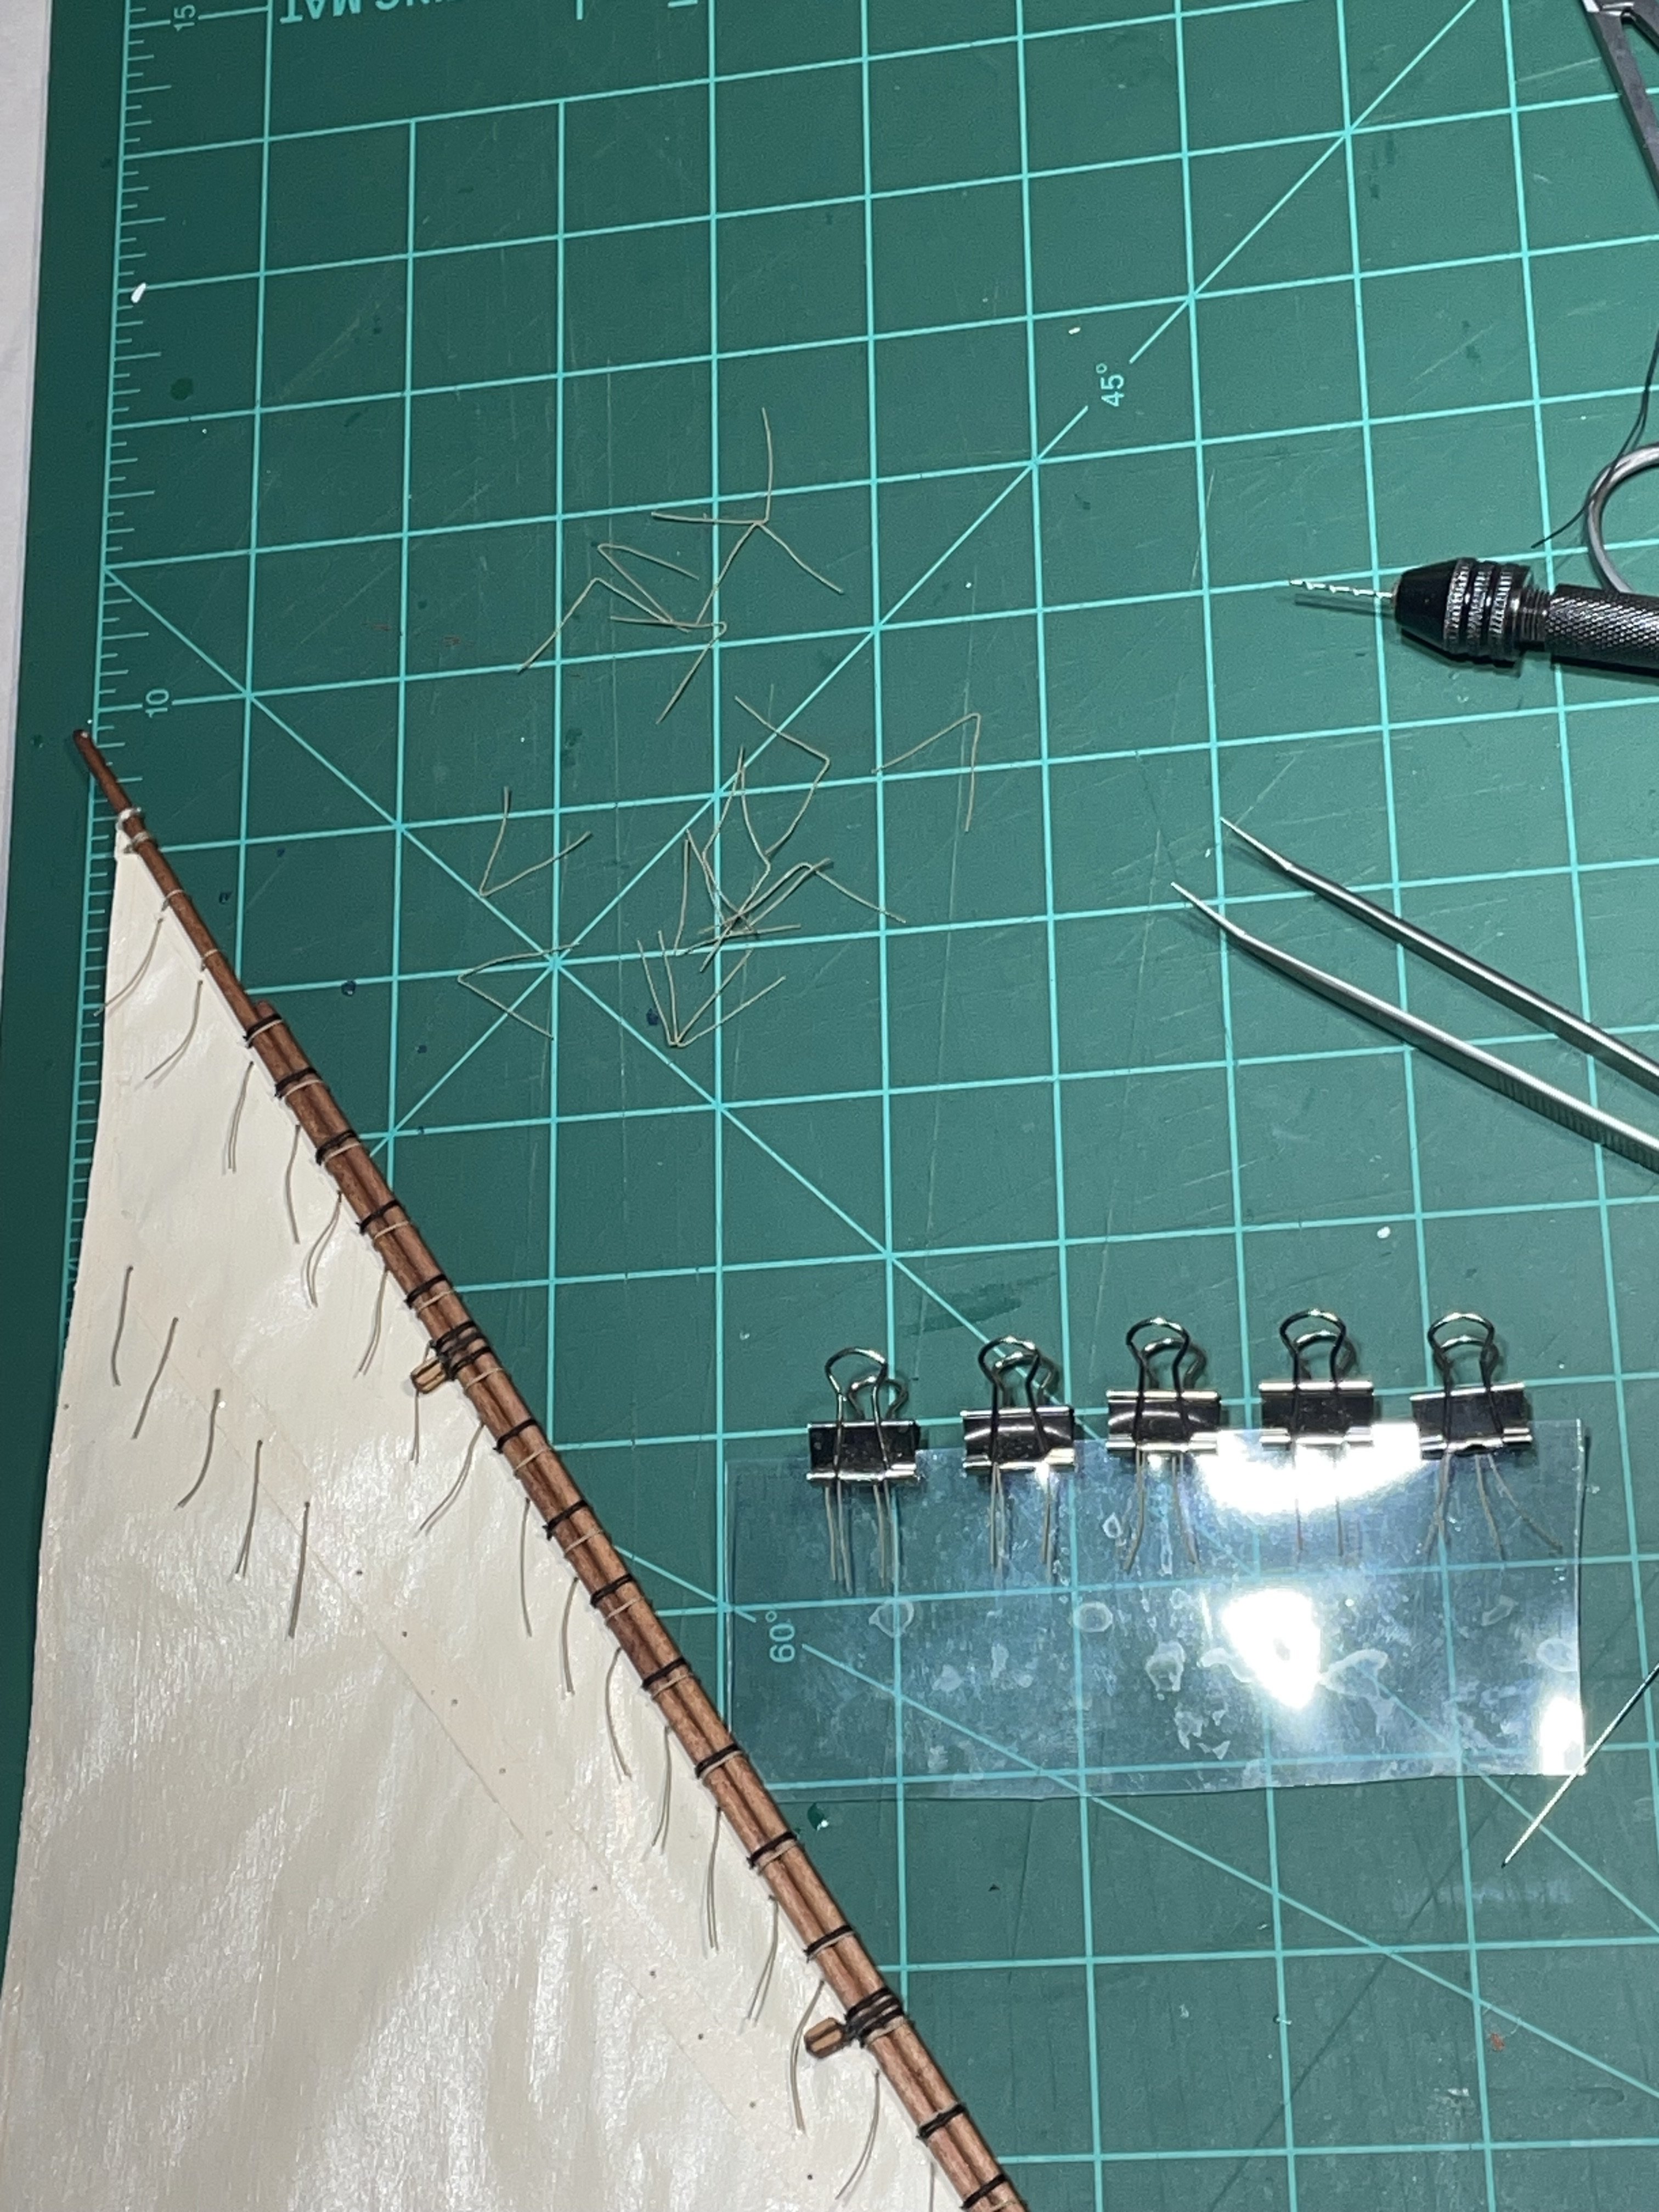
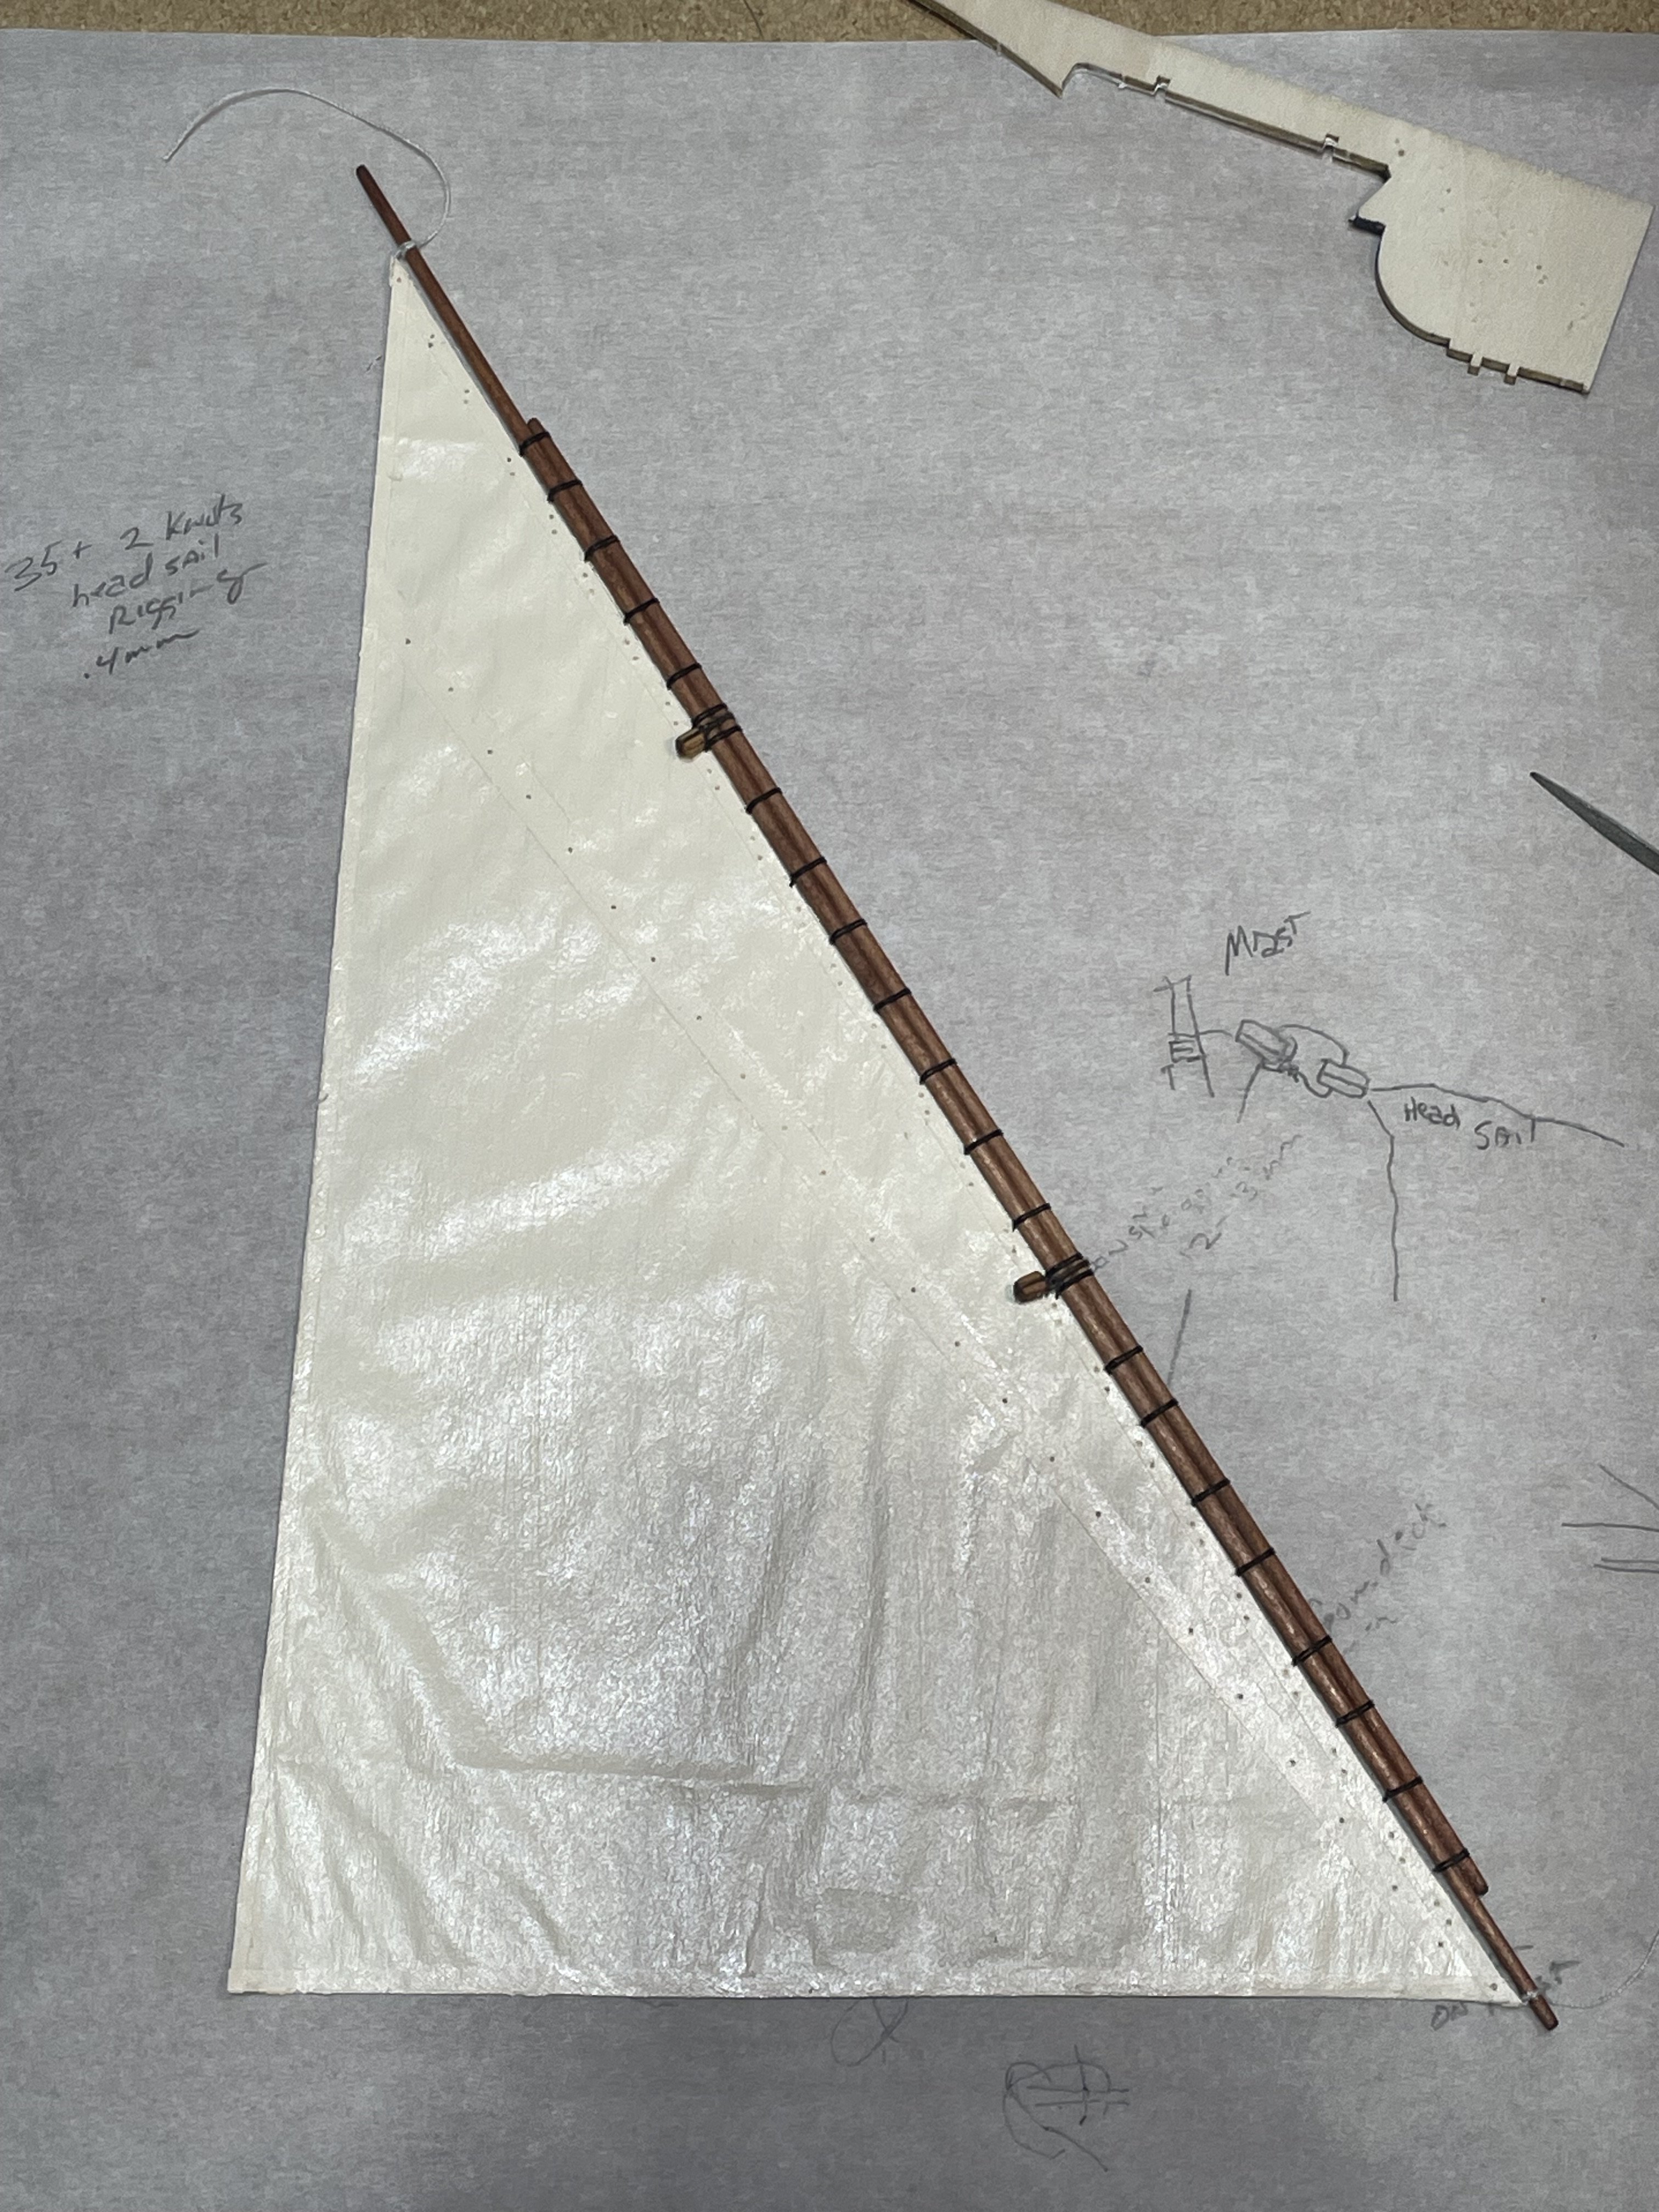
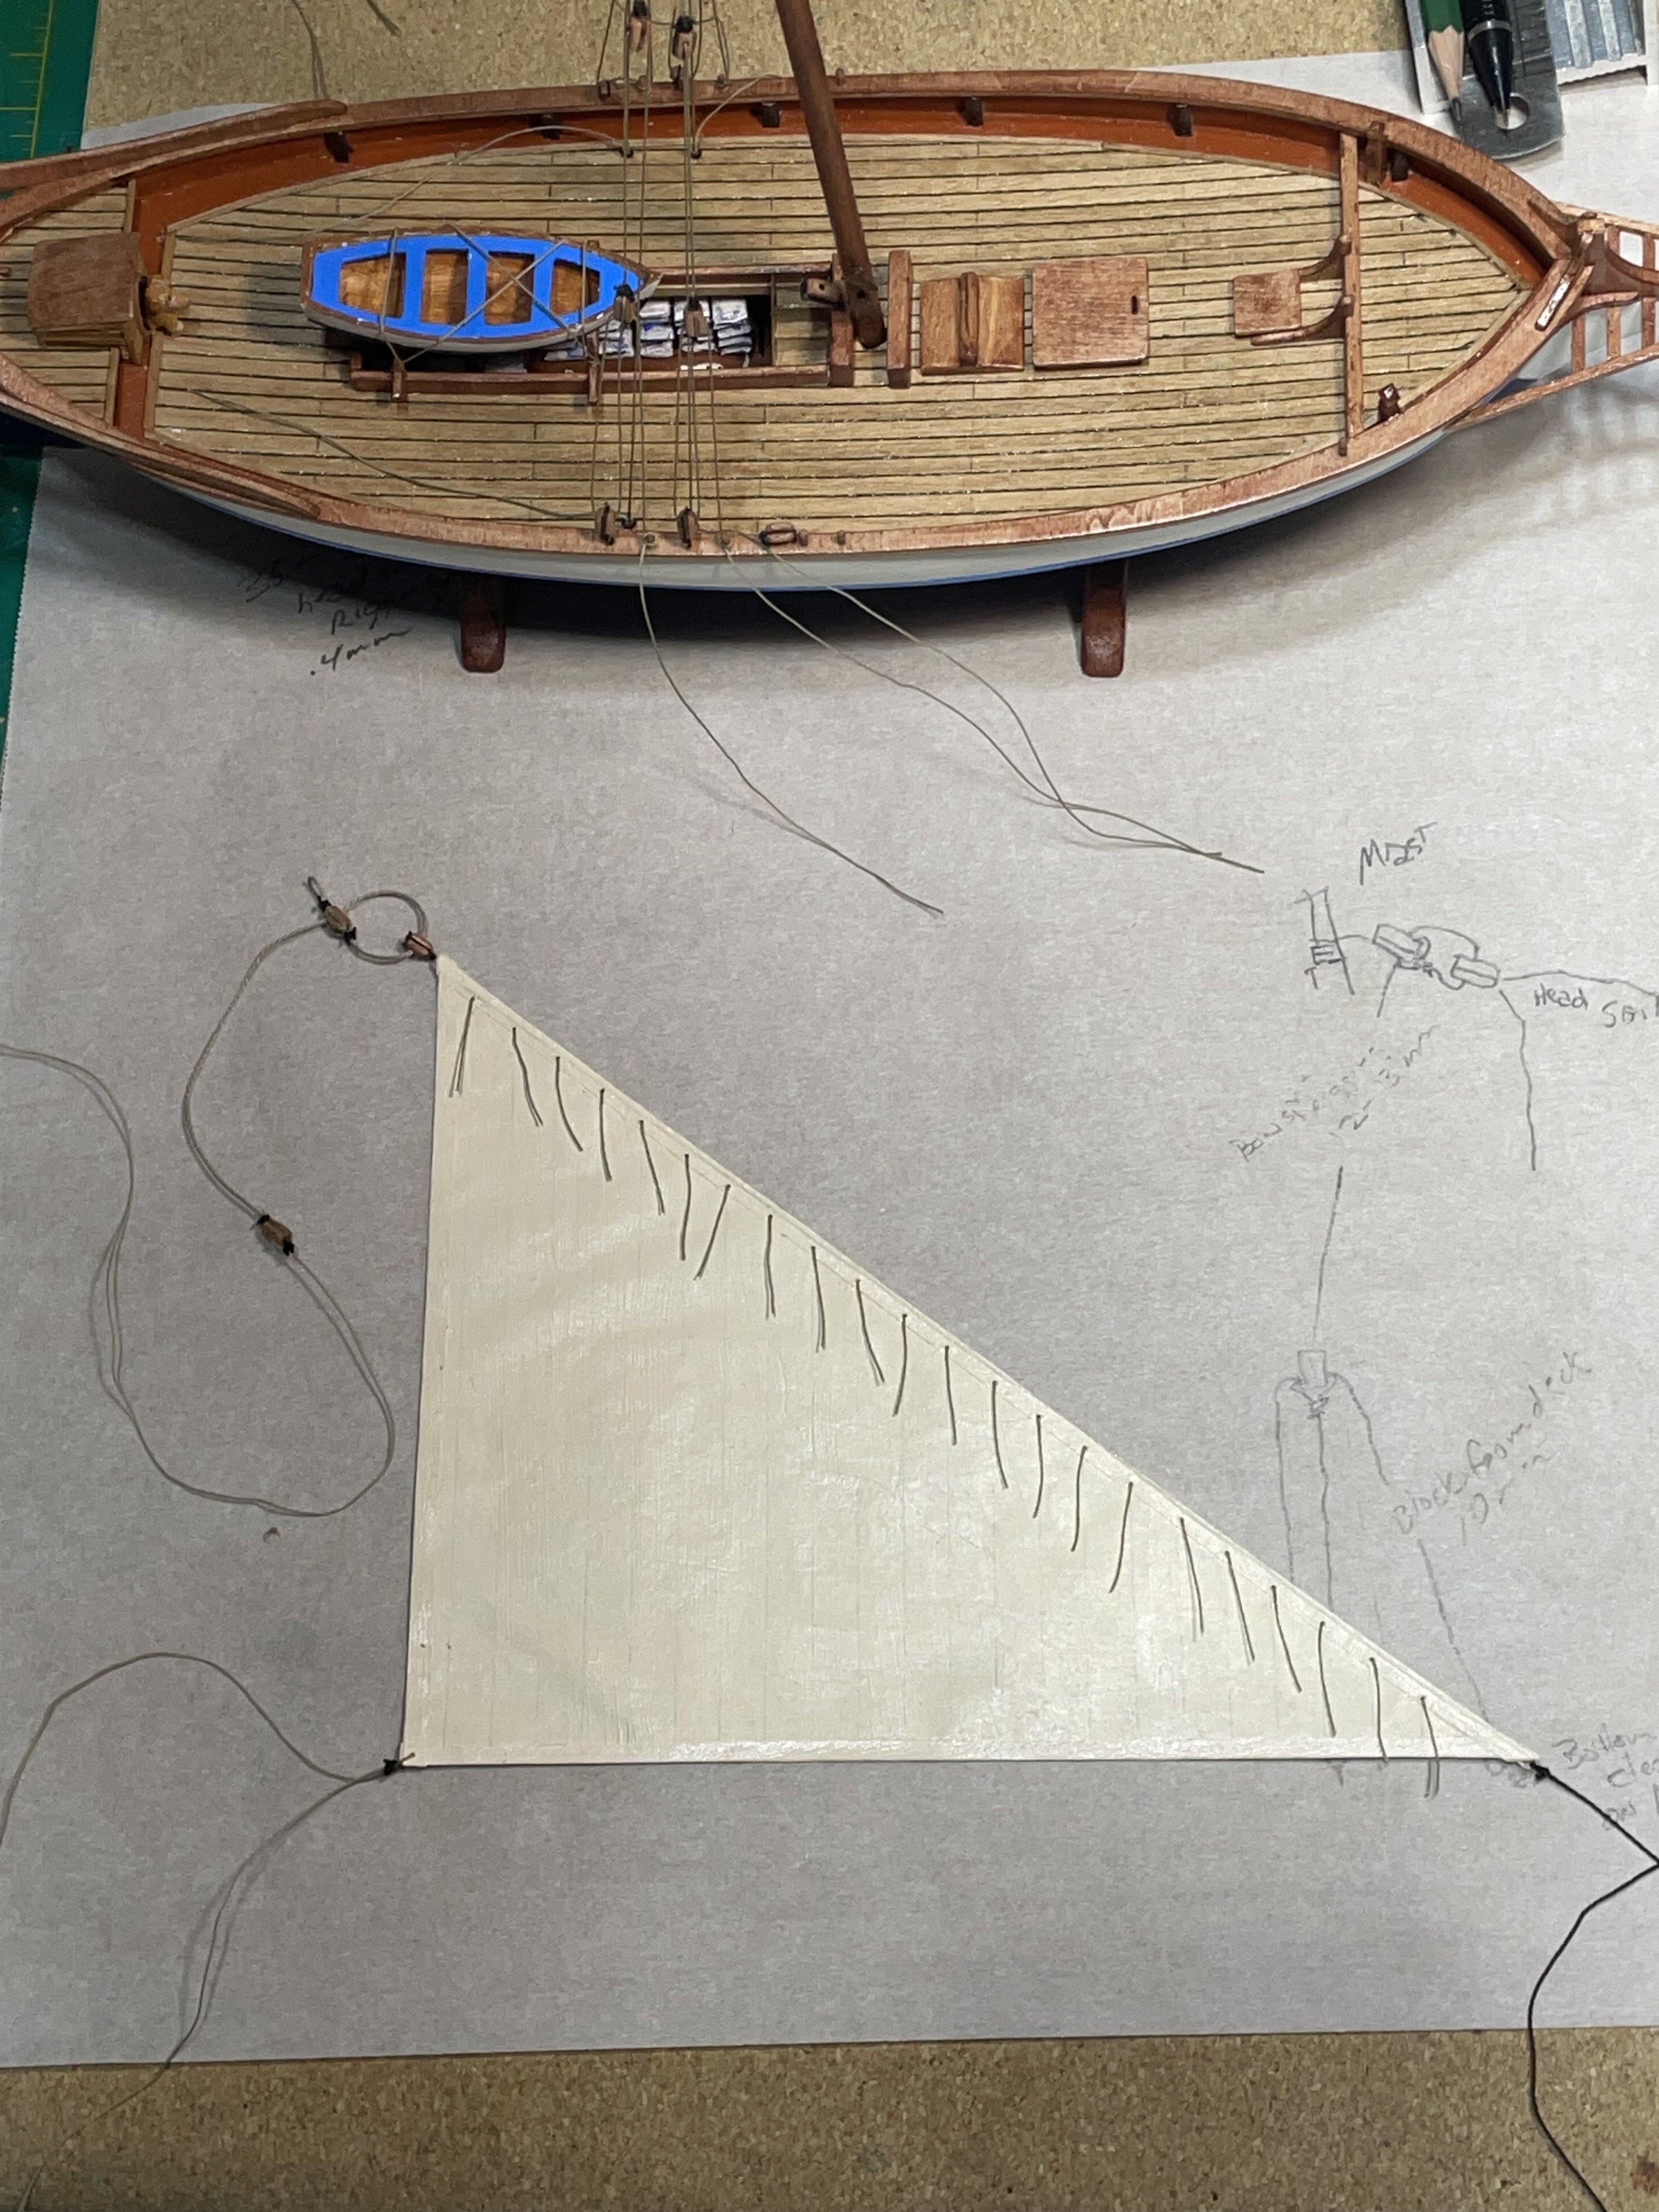
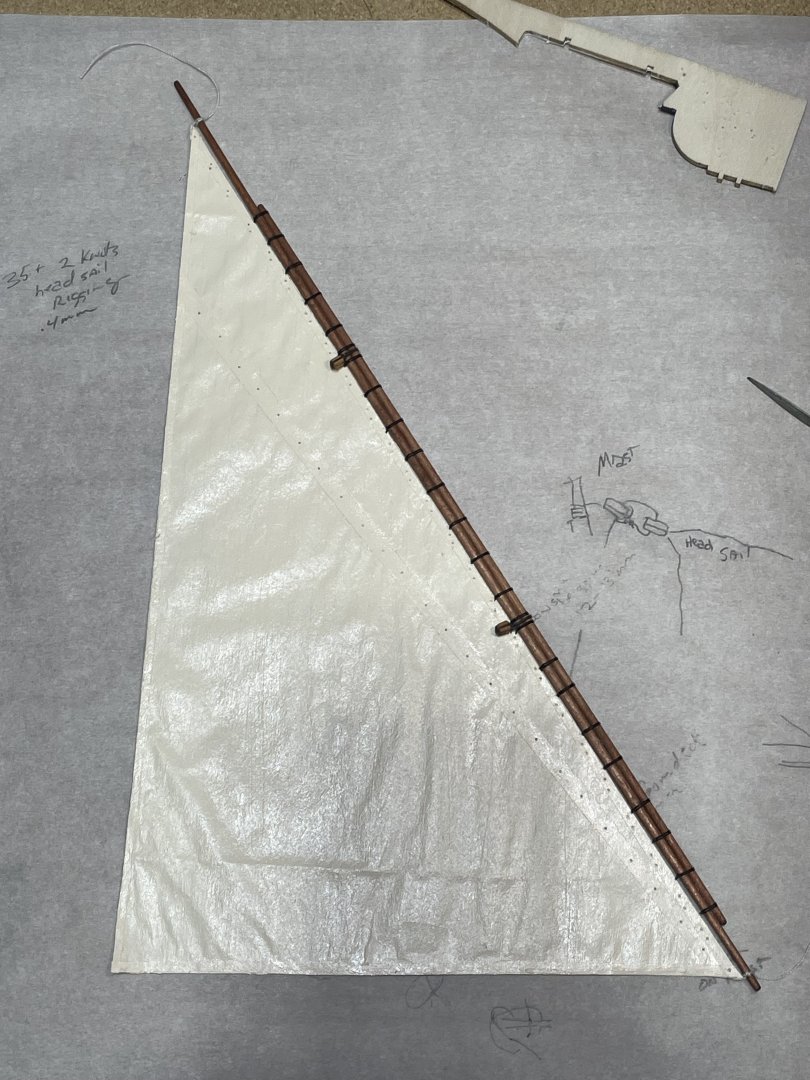
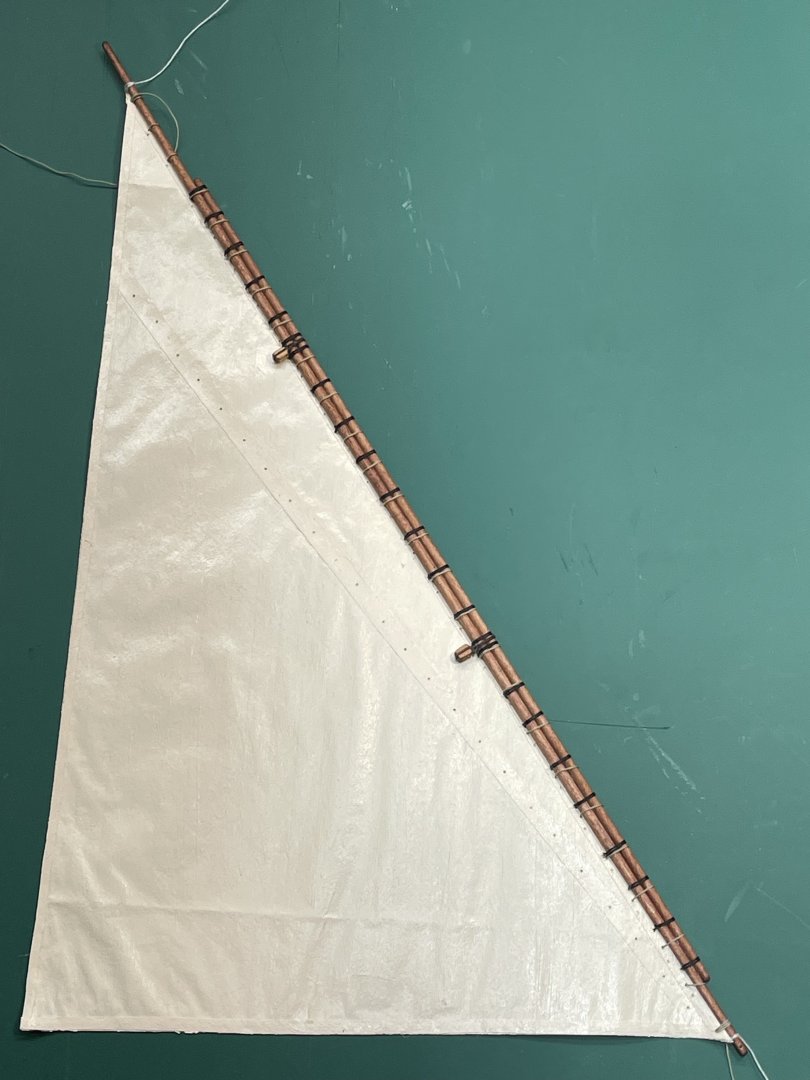
Finished the head sail yesterday. I must say I was anxiously waiting to see if it was going to fit. All went well. It pulled the mast forward a bit. I measured the top of the mast to the bowsprit and it was true to the plan. Now to finish the main sail.

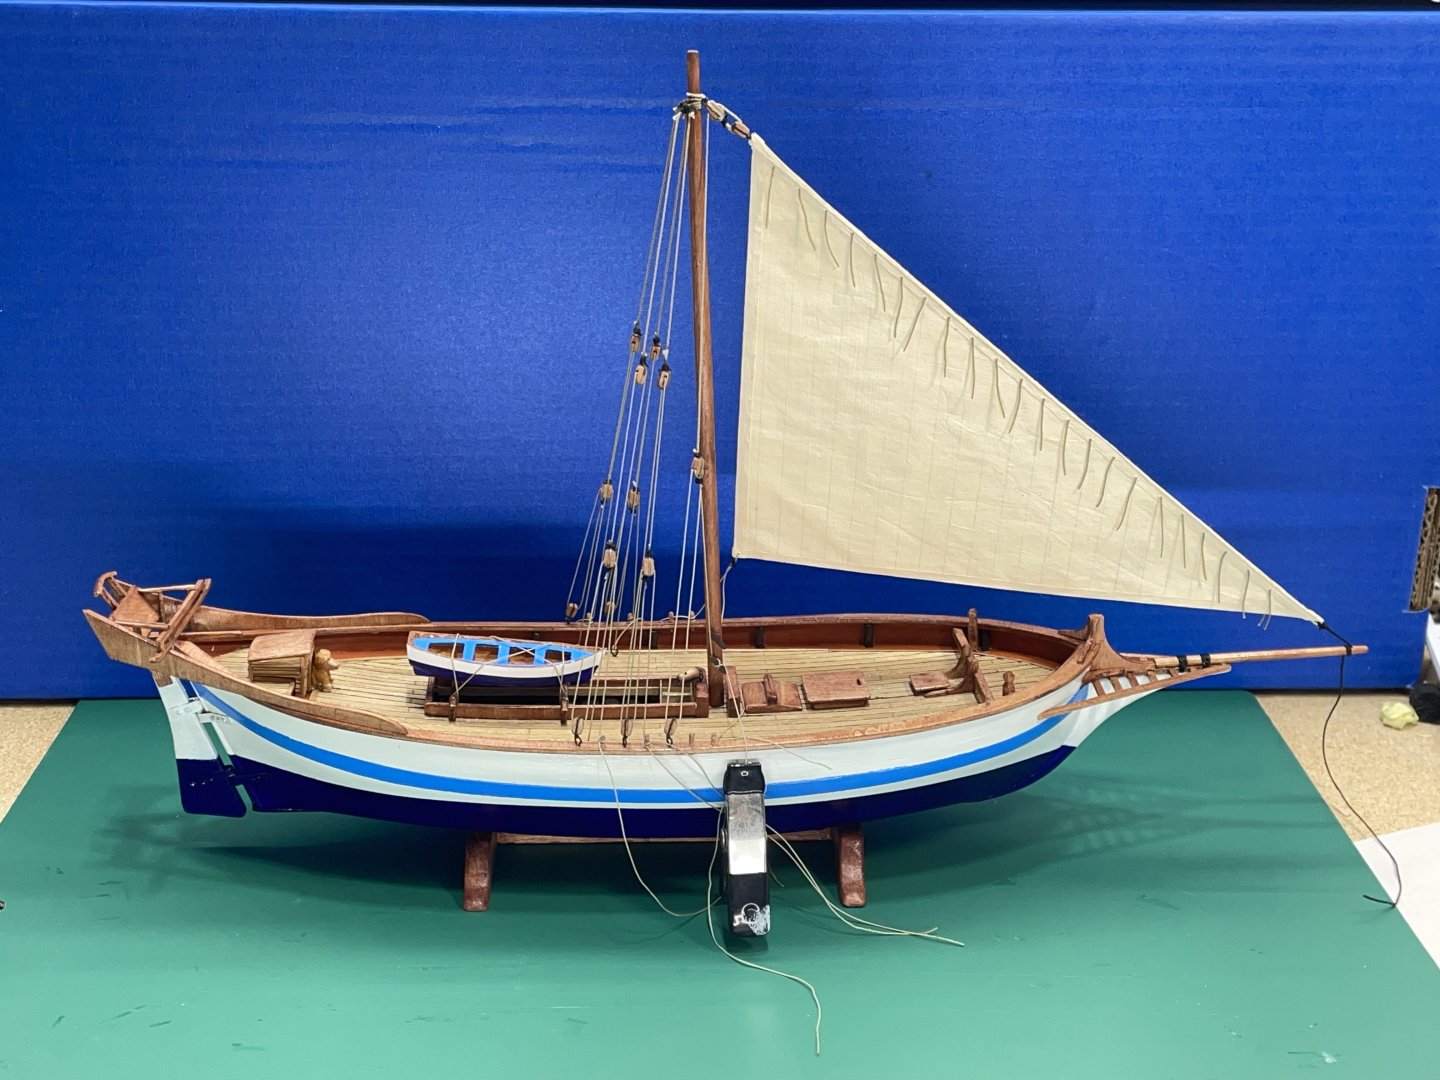
- 55 replies
-
- 6
-
-
- Le Martegaou
- billing boats
- (and 1 more)
-
Setting back studying the model and thinking of my next move, I noticed how the stays had the mast pulled back even though there is very little tension on the stays. I mainly just got them straight. It looks to me like I need to rig the head sail first so I can straighten the mast up a bit before the main sail goes on. Opinions are welcome:-)

- 55 replies
-
- 4
-
-
- Le Martegaou
- billing boats
- (and 1 more)
-
Standing rigging completed, now more work to be done on the sails and the yard.

- 55 replies
-
- 4
-
-
- Le Martegaou
- billing boats
- (and 1 more)