Michael P
-
Posts
48 -
Joined
-
Last visited
Recent Profile Visitors
862 profile views


-
 davyboy reacted to a post in a topic:
HMS Centurion 1732 by Michael P - scale 1:160
davyboy reacted to a post in a topic:
HMS Centurion 1732 by Michael P - scale 1:160
-
GrandpaPhil reacted to a post in a topic:
HMS Centurion 1732 by Michael P - scale 1:160
-
GrandpaPhil reacted to a post in a topic:
HMS Centurion 1732 by Michael P - scale 1:160
-
GrandpaPhil reacted to a post in a topic:
HMS Centurion 1732 by Michael P - scale 1:160
-
ccoyle reacted to a post in a topic:
HMS Centurion 1732 by Michael P - scale 1:160
-
dvm27 reacted to a post in a topic:
HMS Centurion 1732 by Michael P - scale 1:160
-
It’s a long time since my last posting. There’s been the garden to do, and I’m in no great hurry. Well, the planking of the lower part of the hull is now finished. I’ve used strips of lime, 2 mm X 0.5 mm. There’s not much choice as far as I can see, and this is fine. Scaled up, that size would mean planks roughly one foot wide, so it’s not too unrealistic. The planking is not as neat as I’d really like, of course. It’s had a coat of shellac, and will have another after yet more sanding. As it does not look too bad, there’s a temptation to leave it unpainted, but a final decision as to whether to paint it white can wait for a long time. Most contemporary models had white hulls, but there are some exceptions. Oh yes, you may notice the moulding at the stern. That's an experiment with Milliput, and I think I will go on using it. Carving wood at this scale is beyond me.
-
Thukydides reacted to a post in a topic:
HMS Centurion 1732 by Michael P - scale 1:160
-
JacquesCousteau reacted to a post in a topic:
HMS Centurion 1732 by Michael P - scale 1:160
-
JacquesCousteau reacted to a post in a topic:
HMS Centurion 1732 by Michael P - scale 1:160
-
Snug Harbor Johnny reacted to a post in a topic:
HMS Centurion 1732 by Michael P - scale 1:160
-
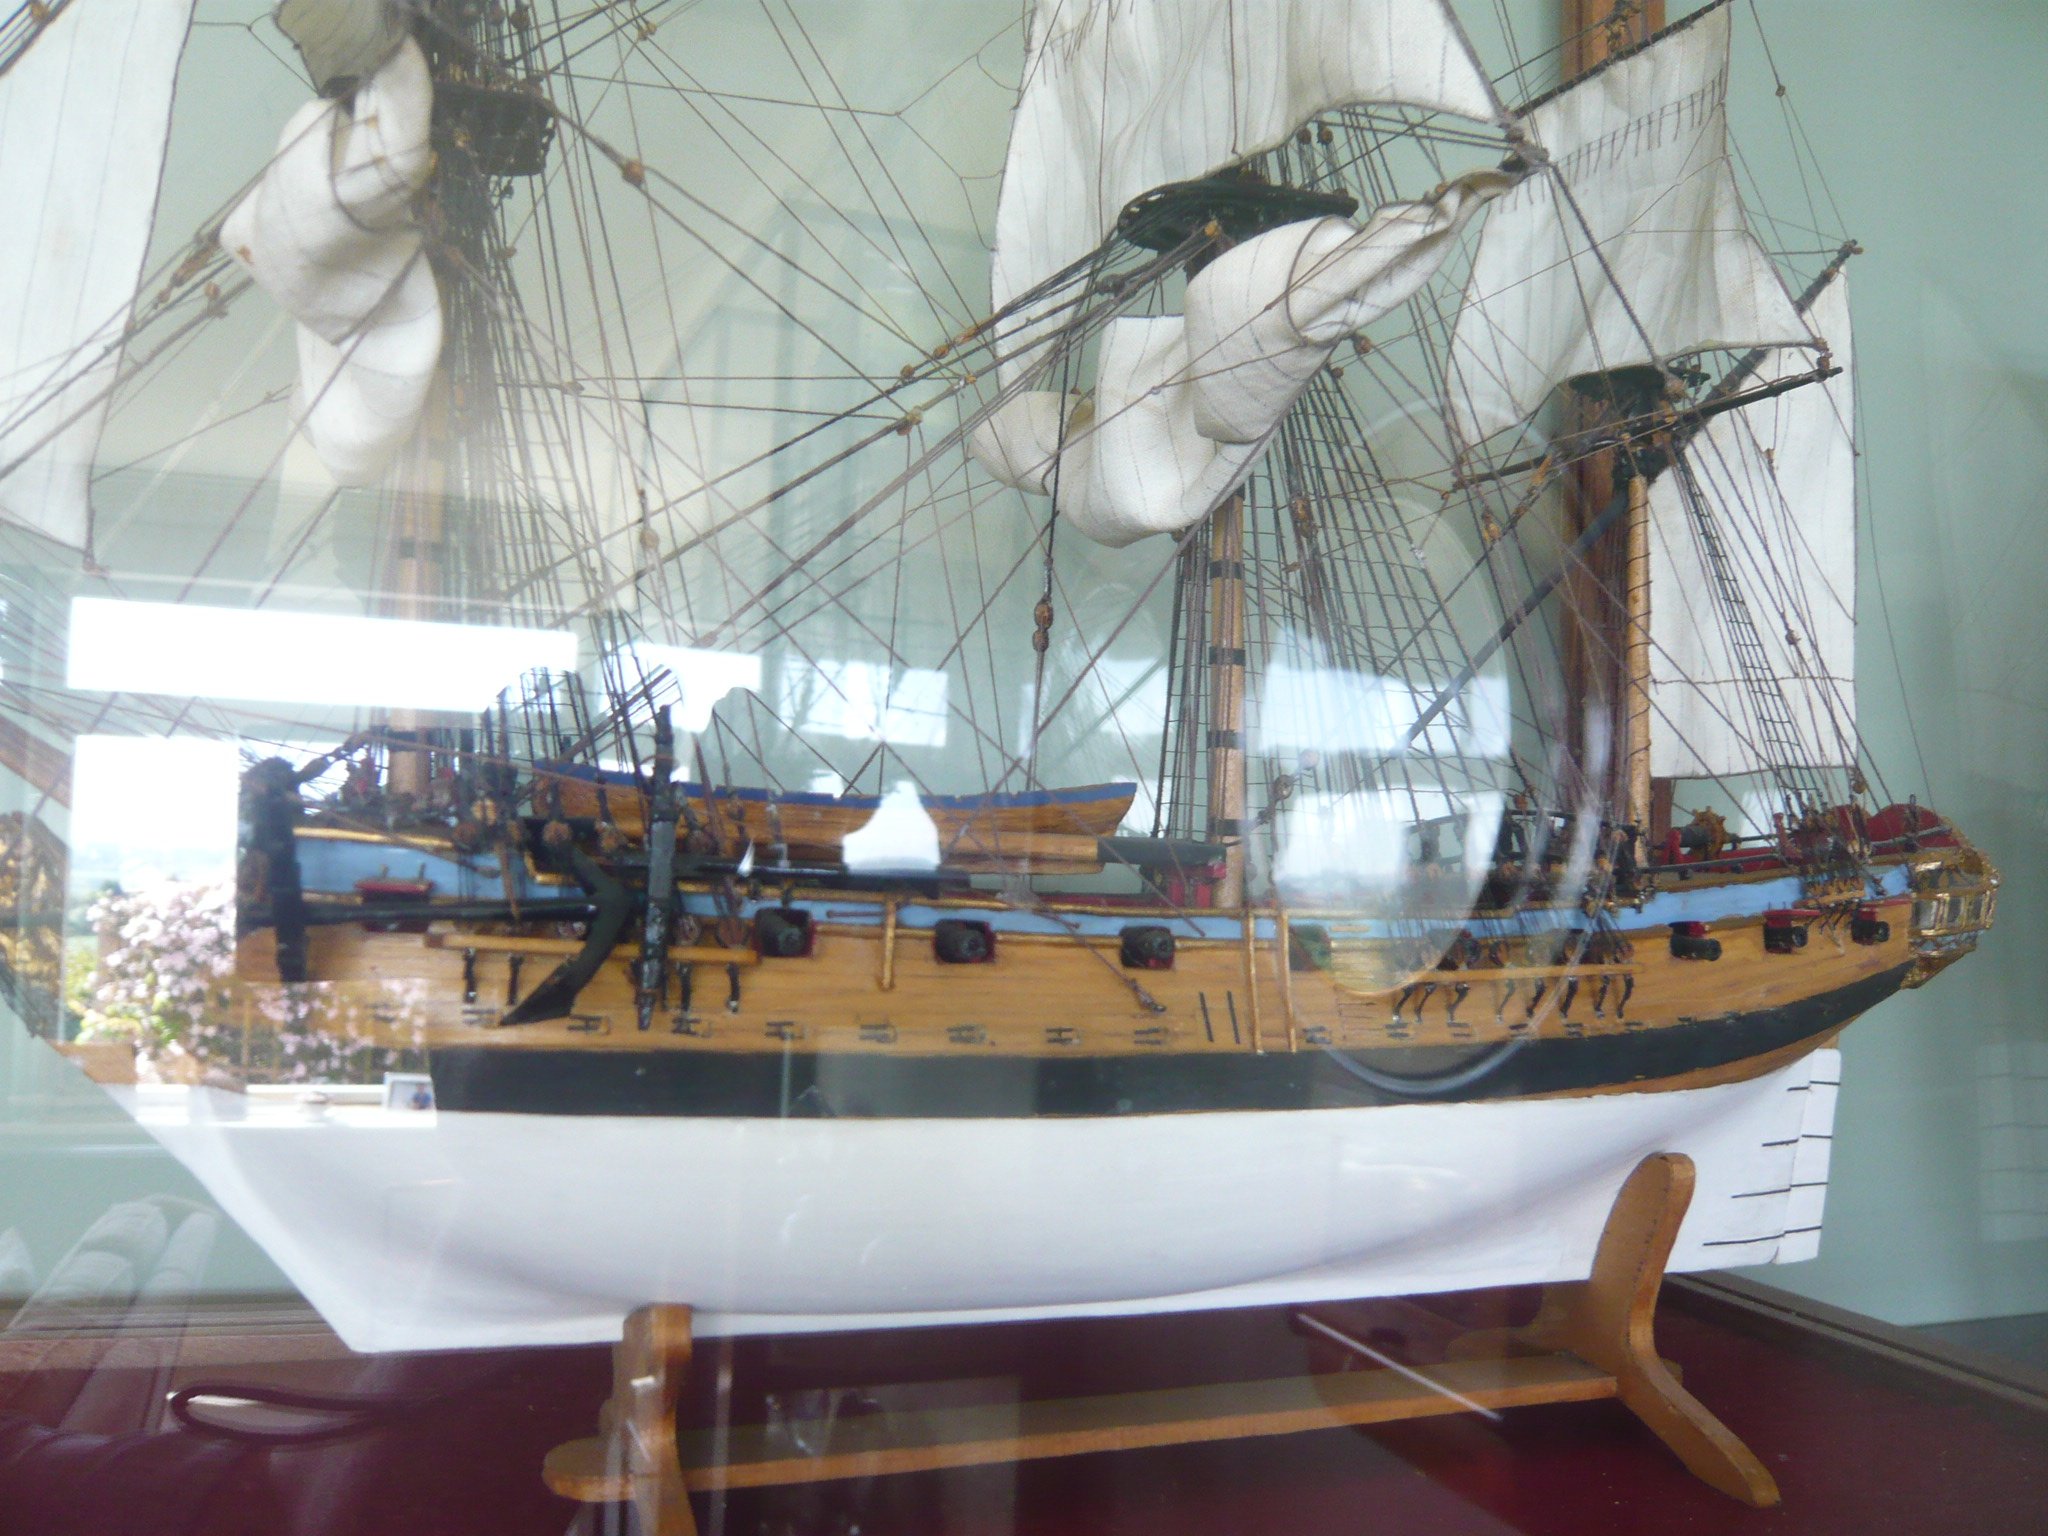
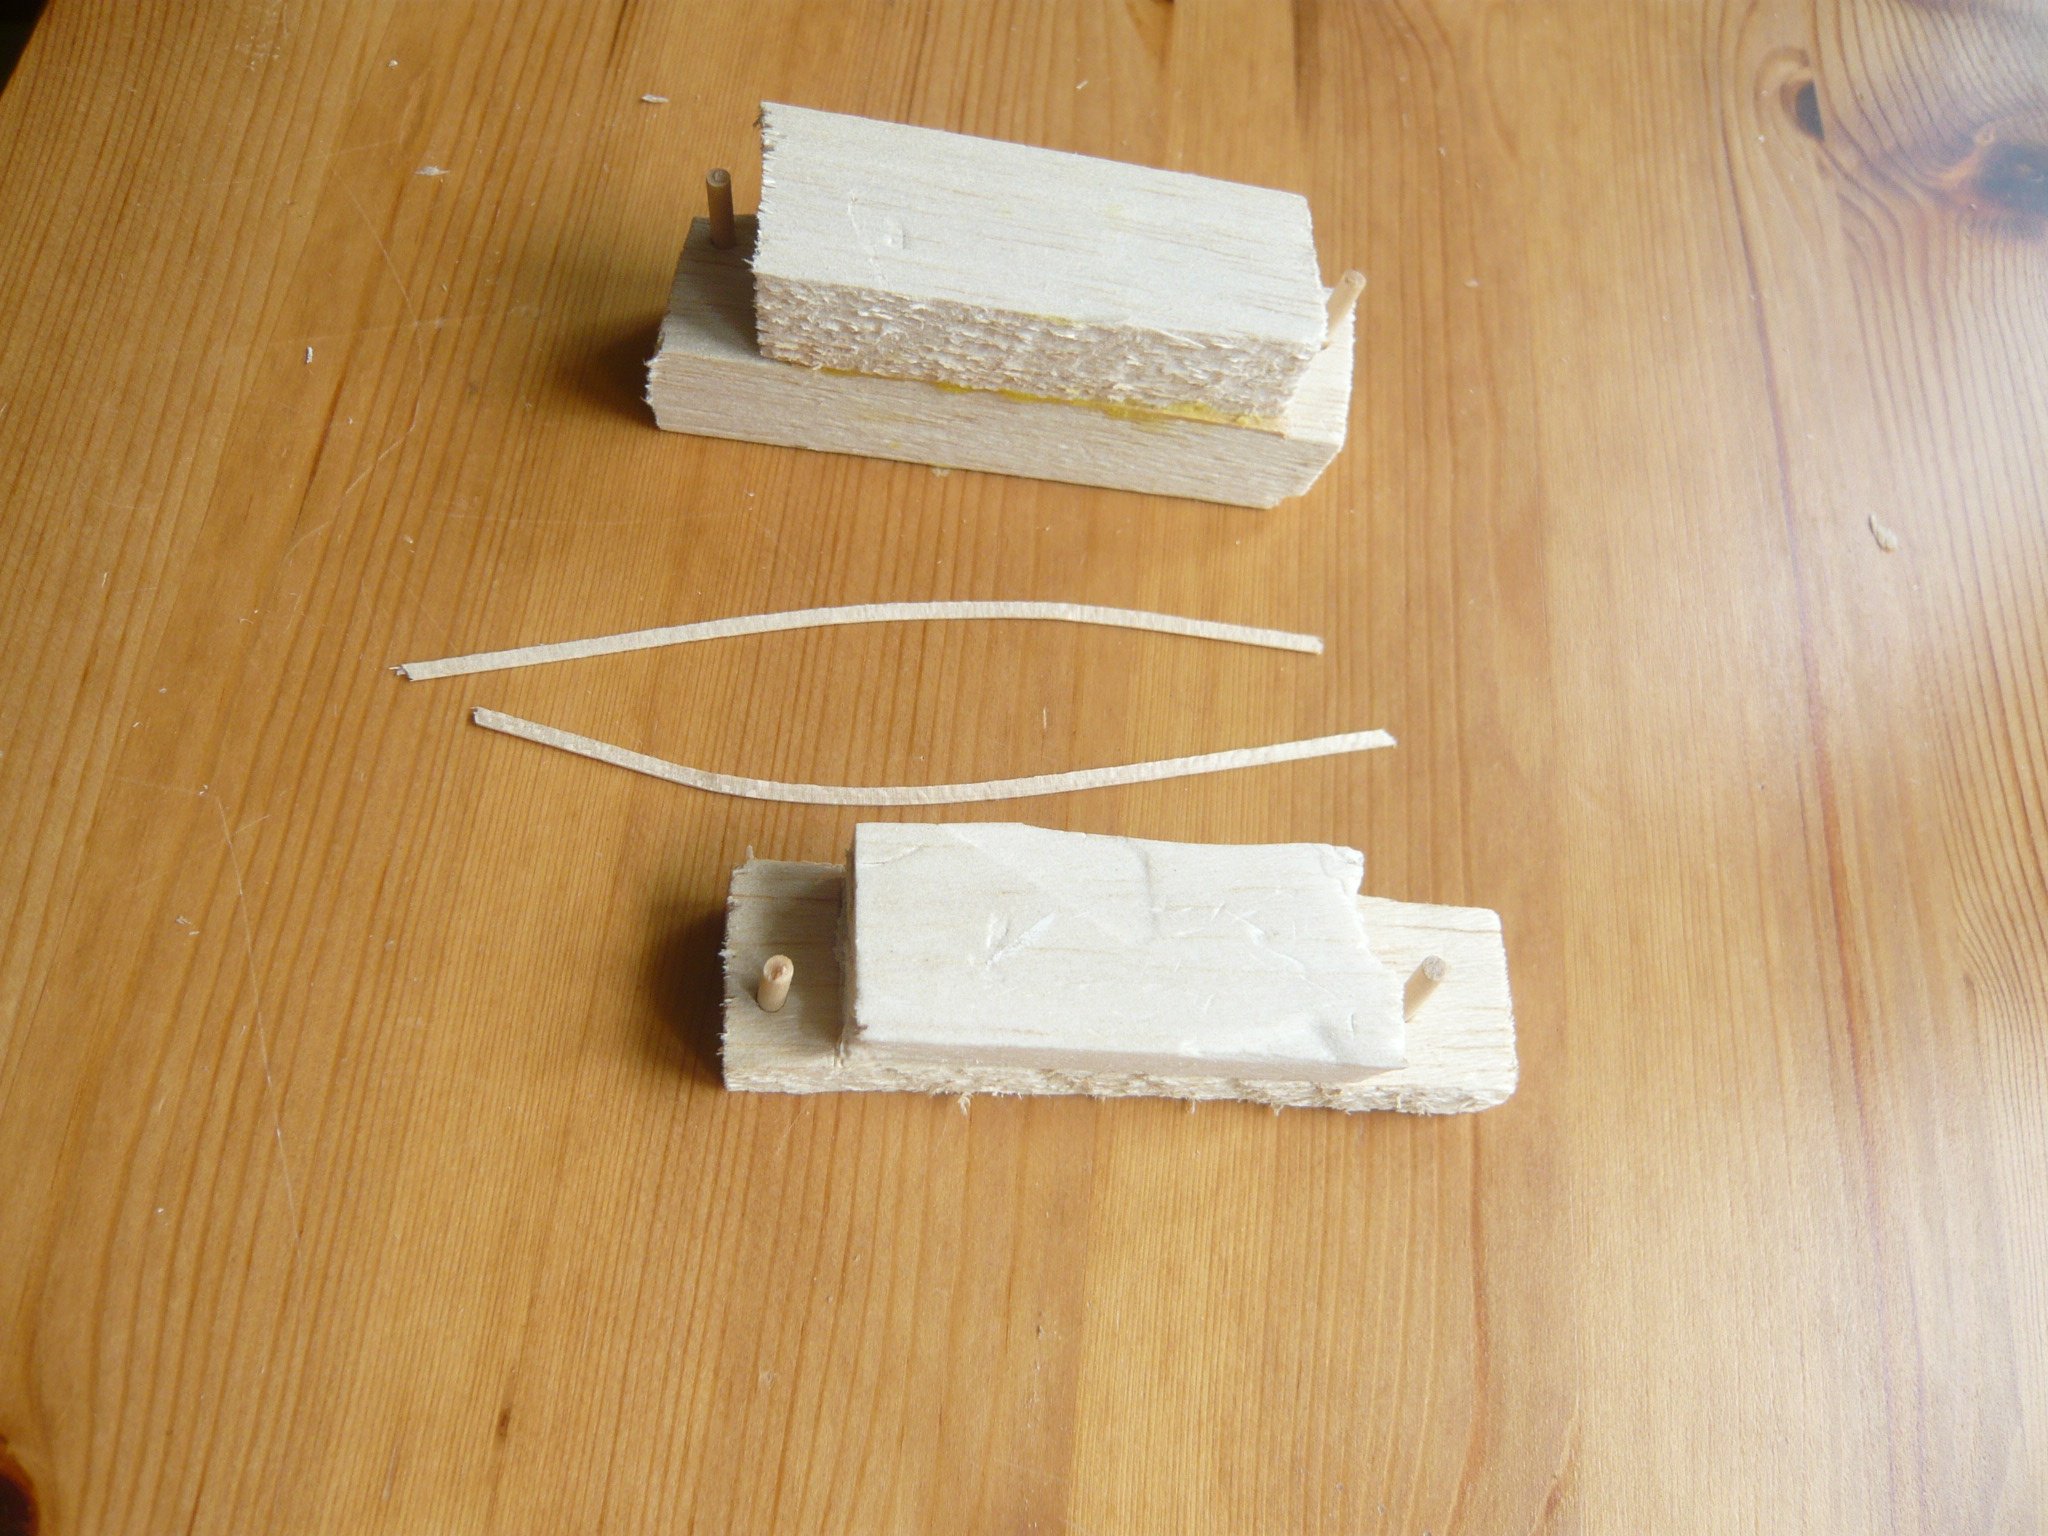
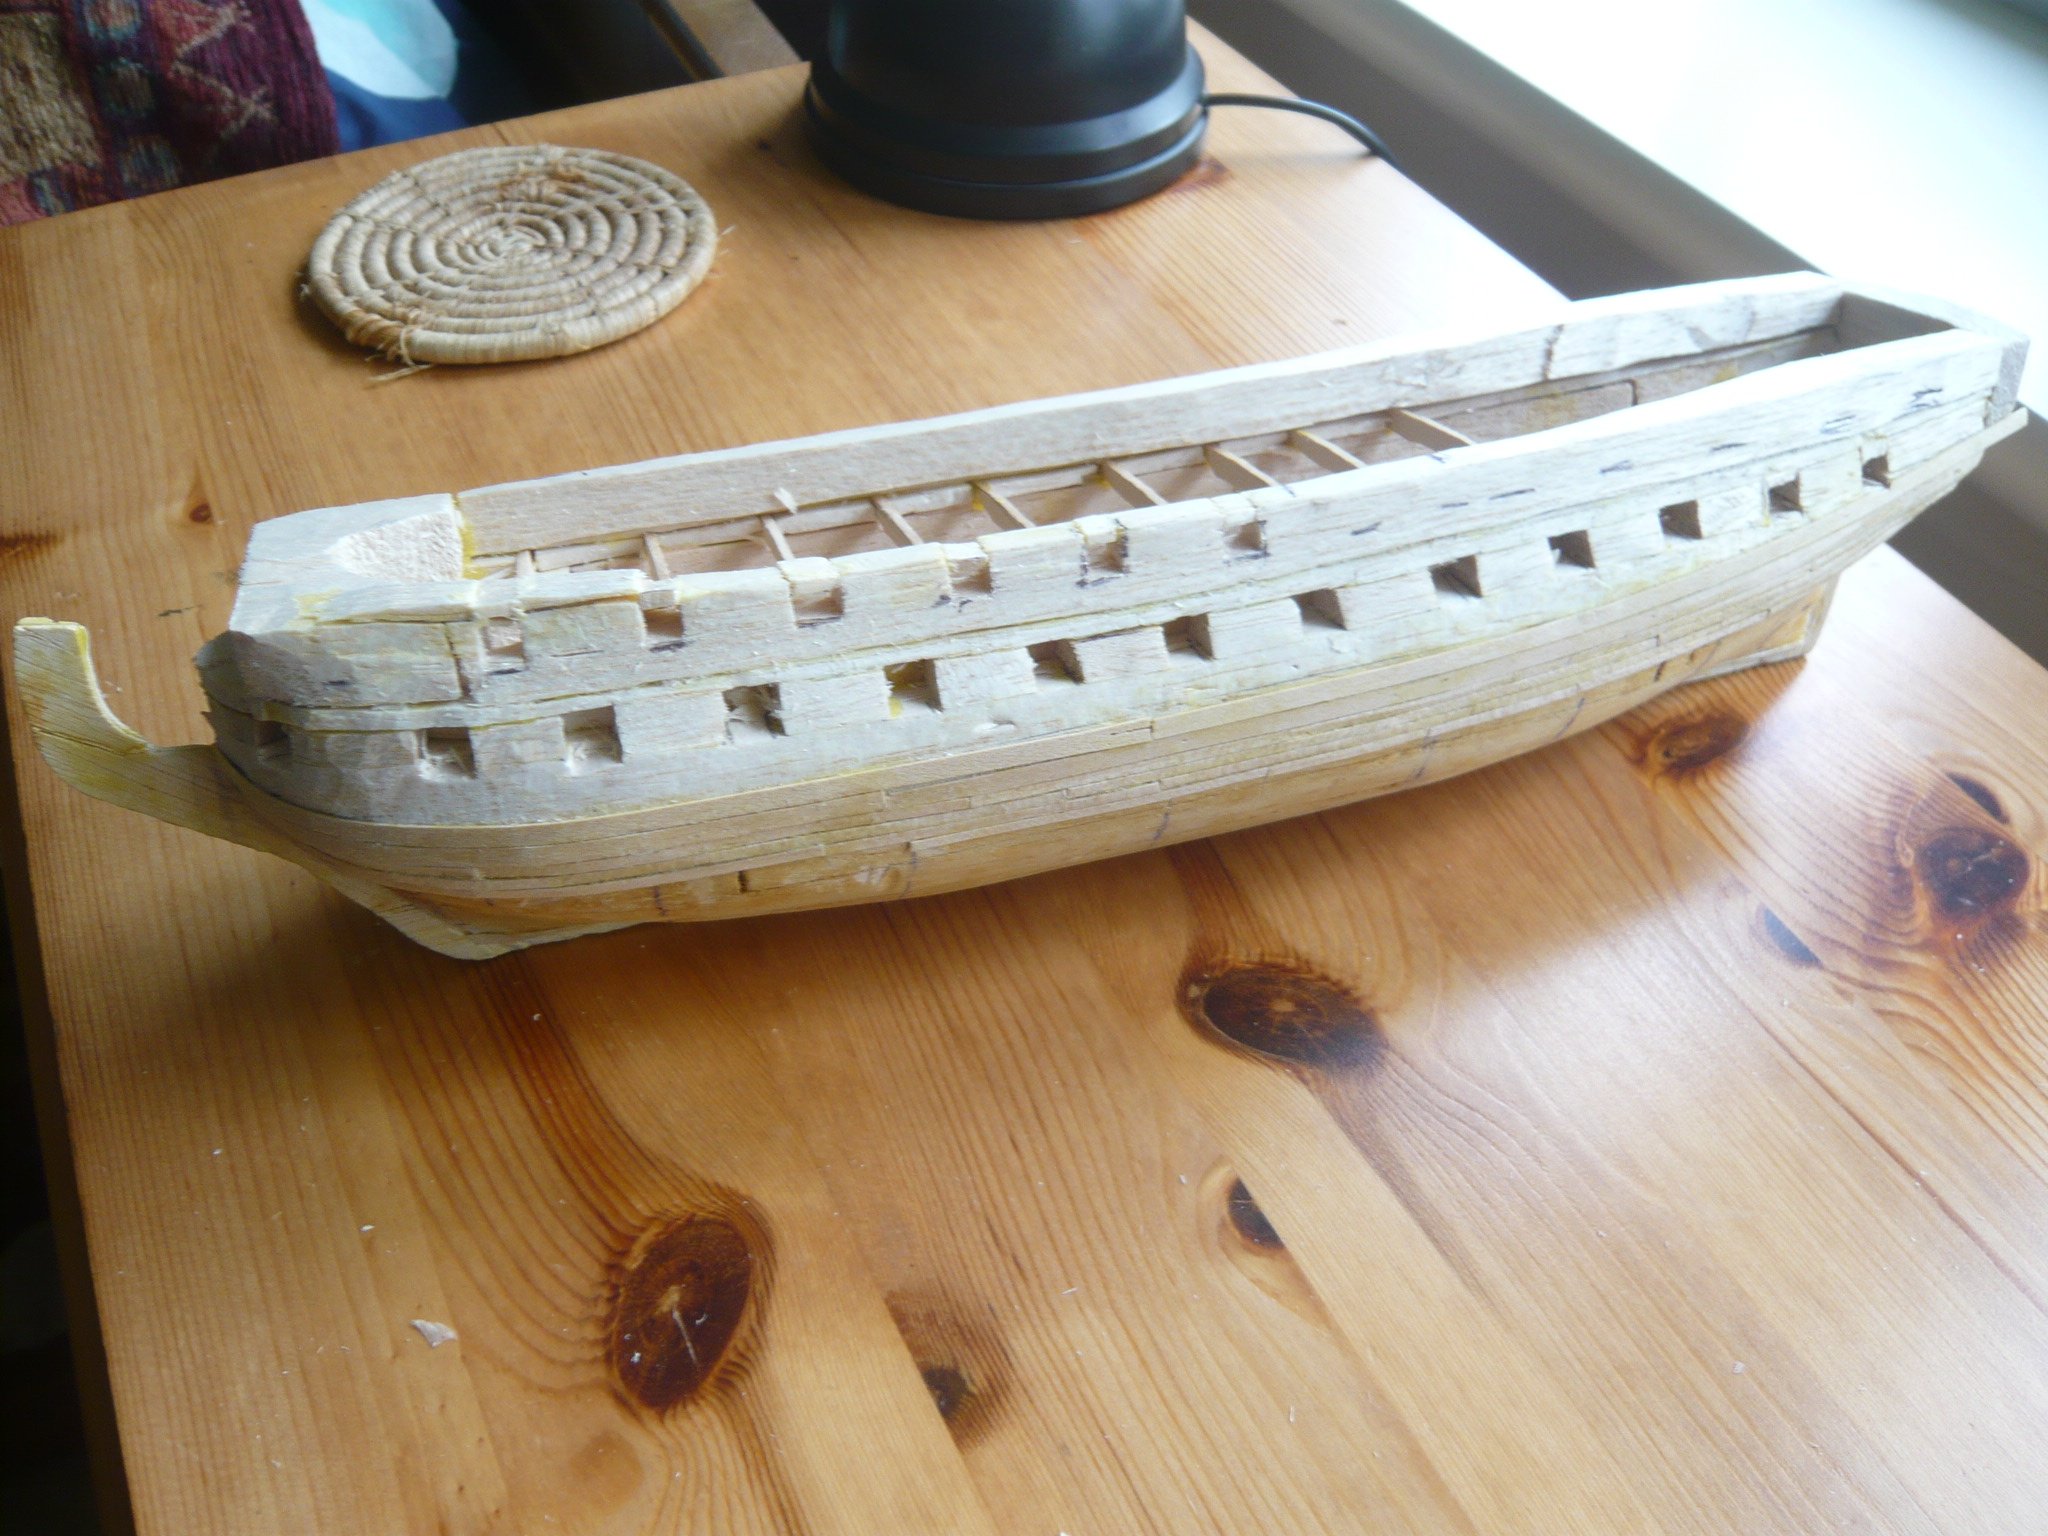
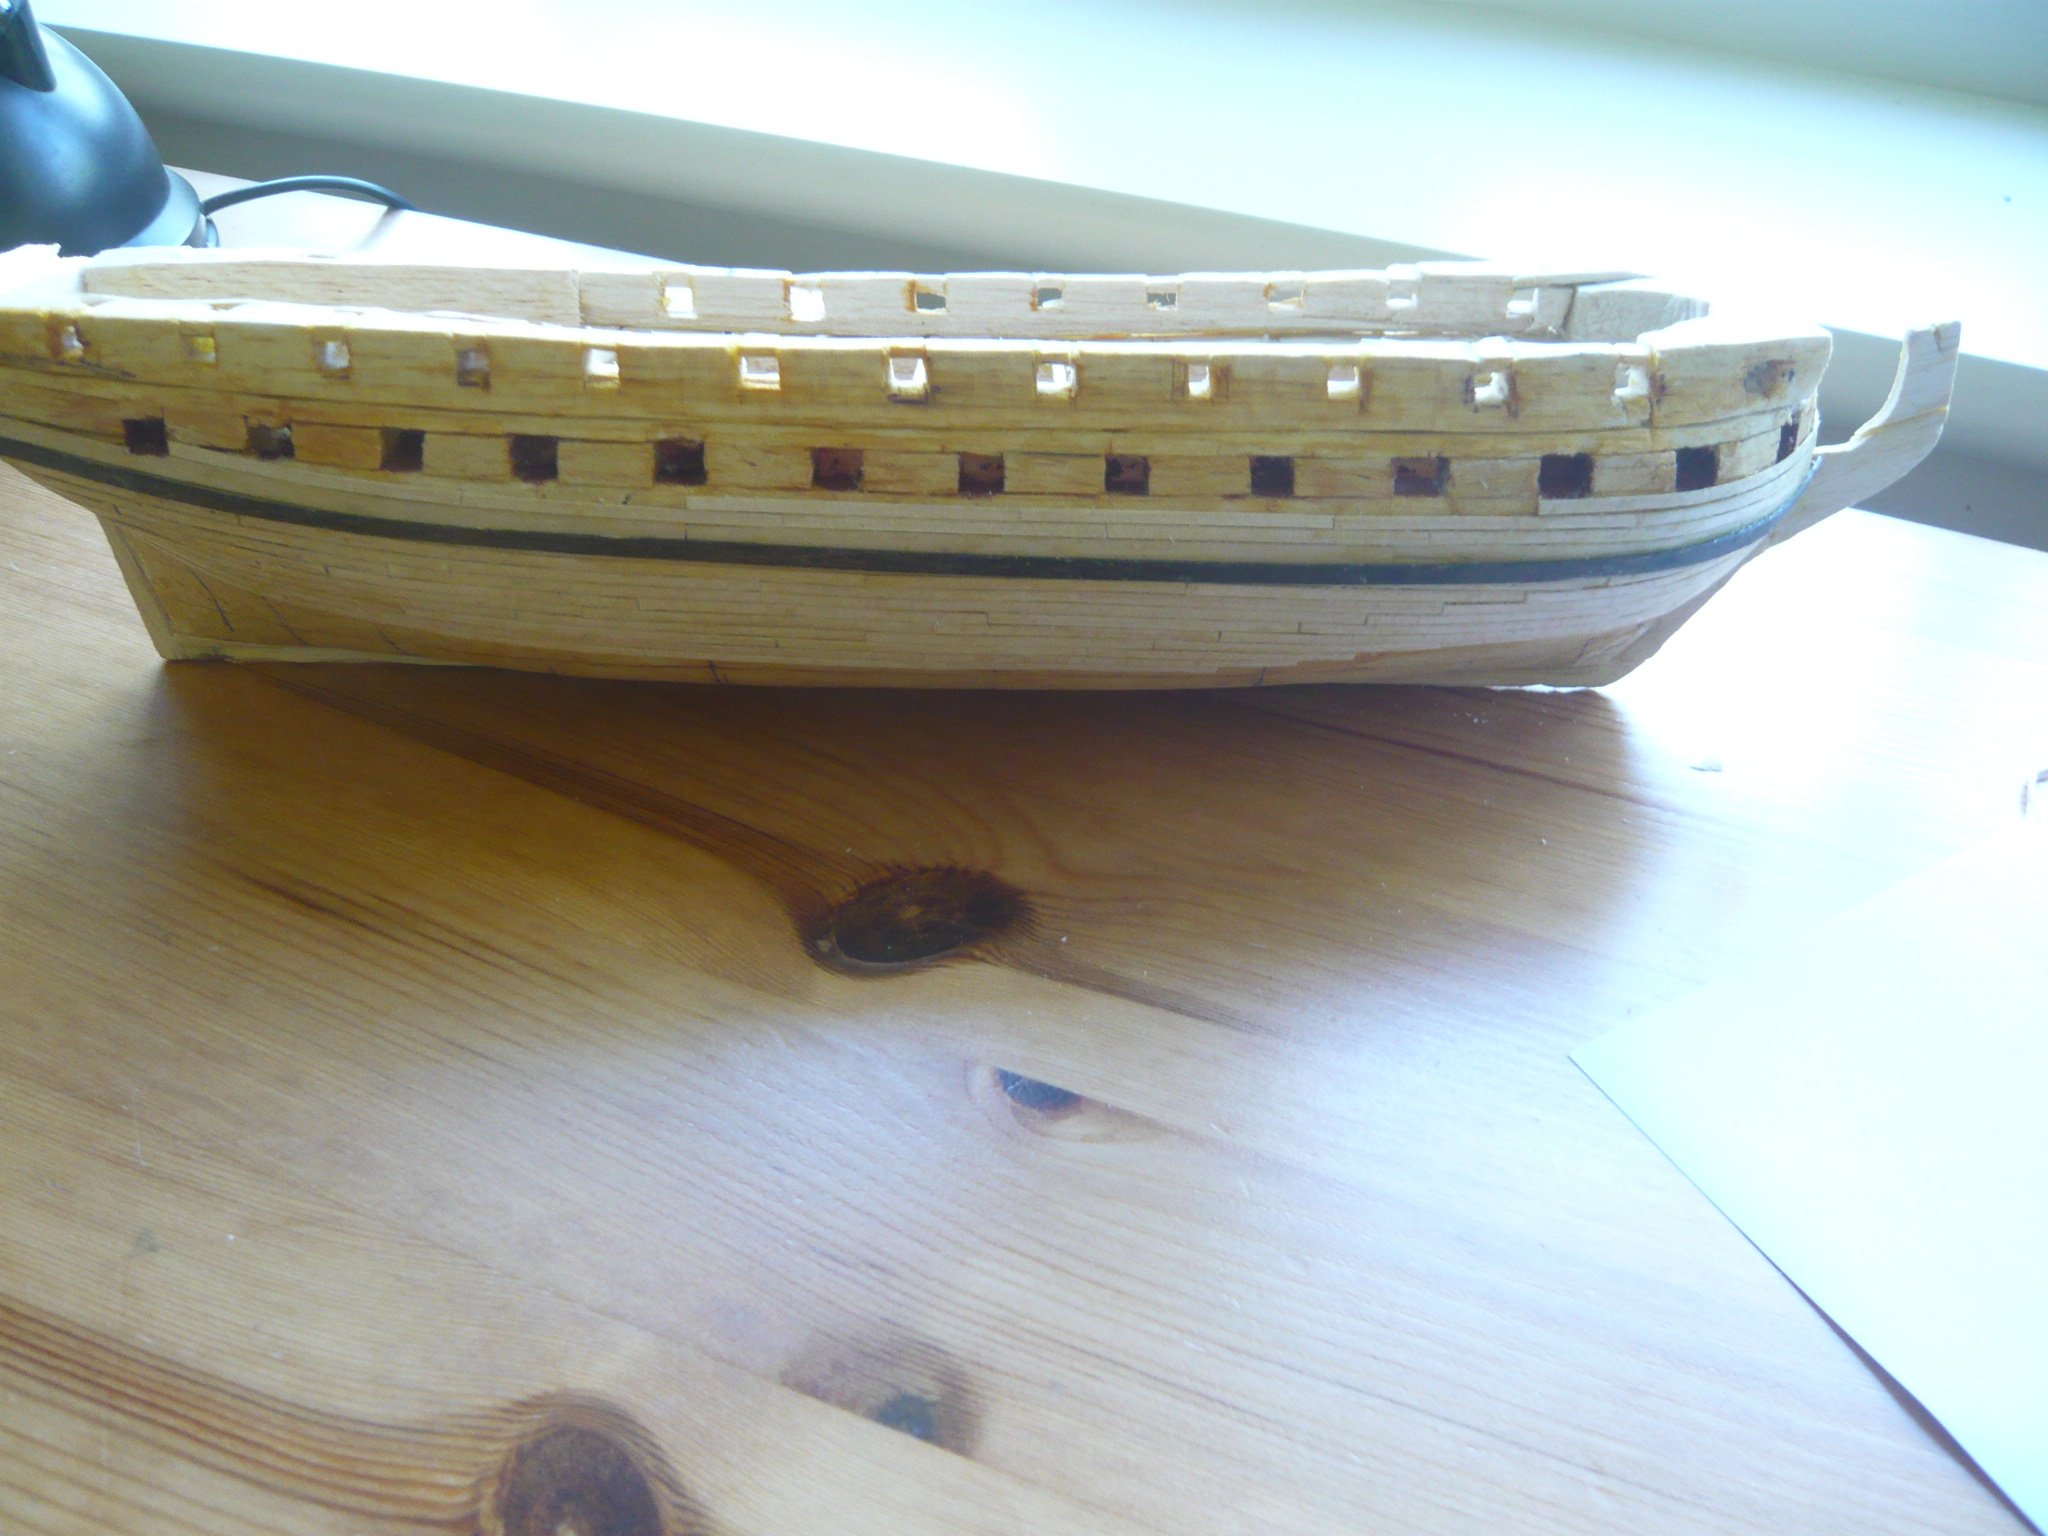
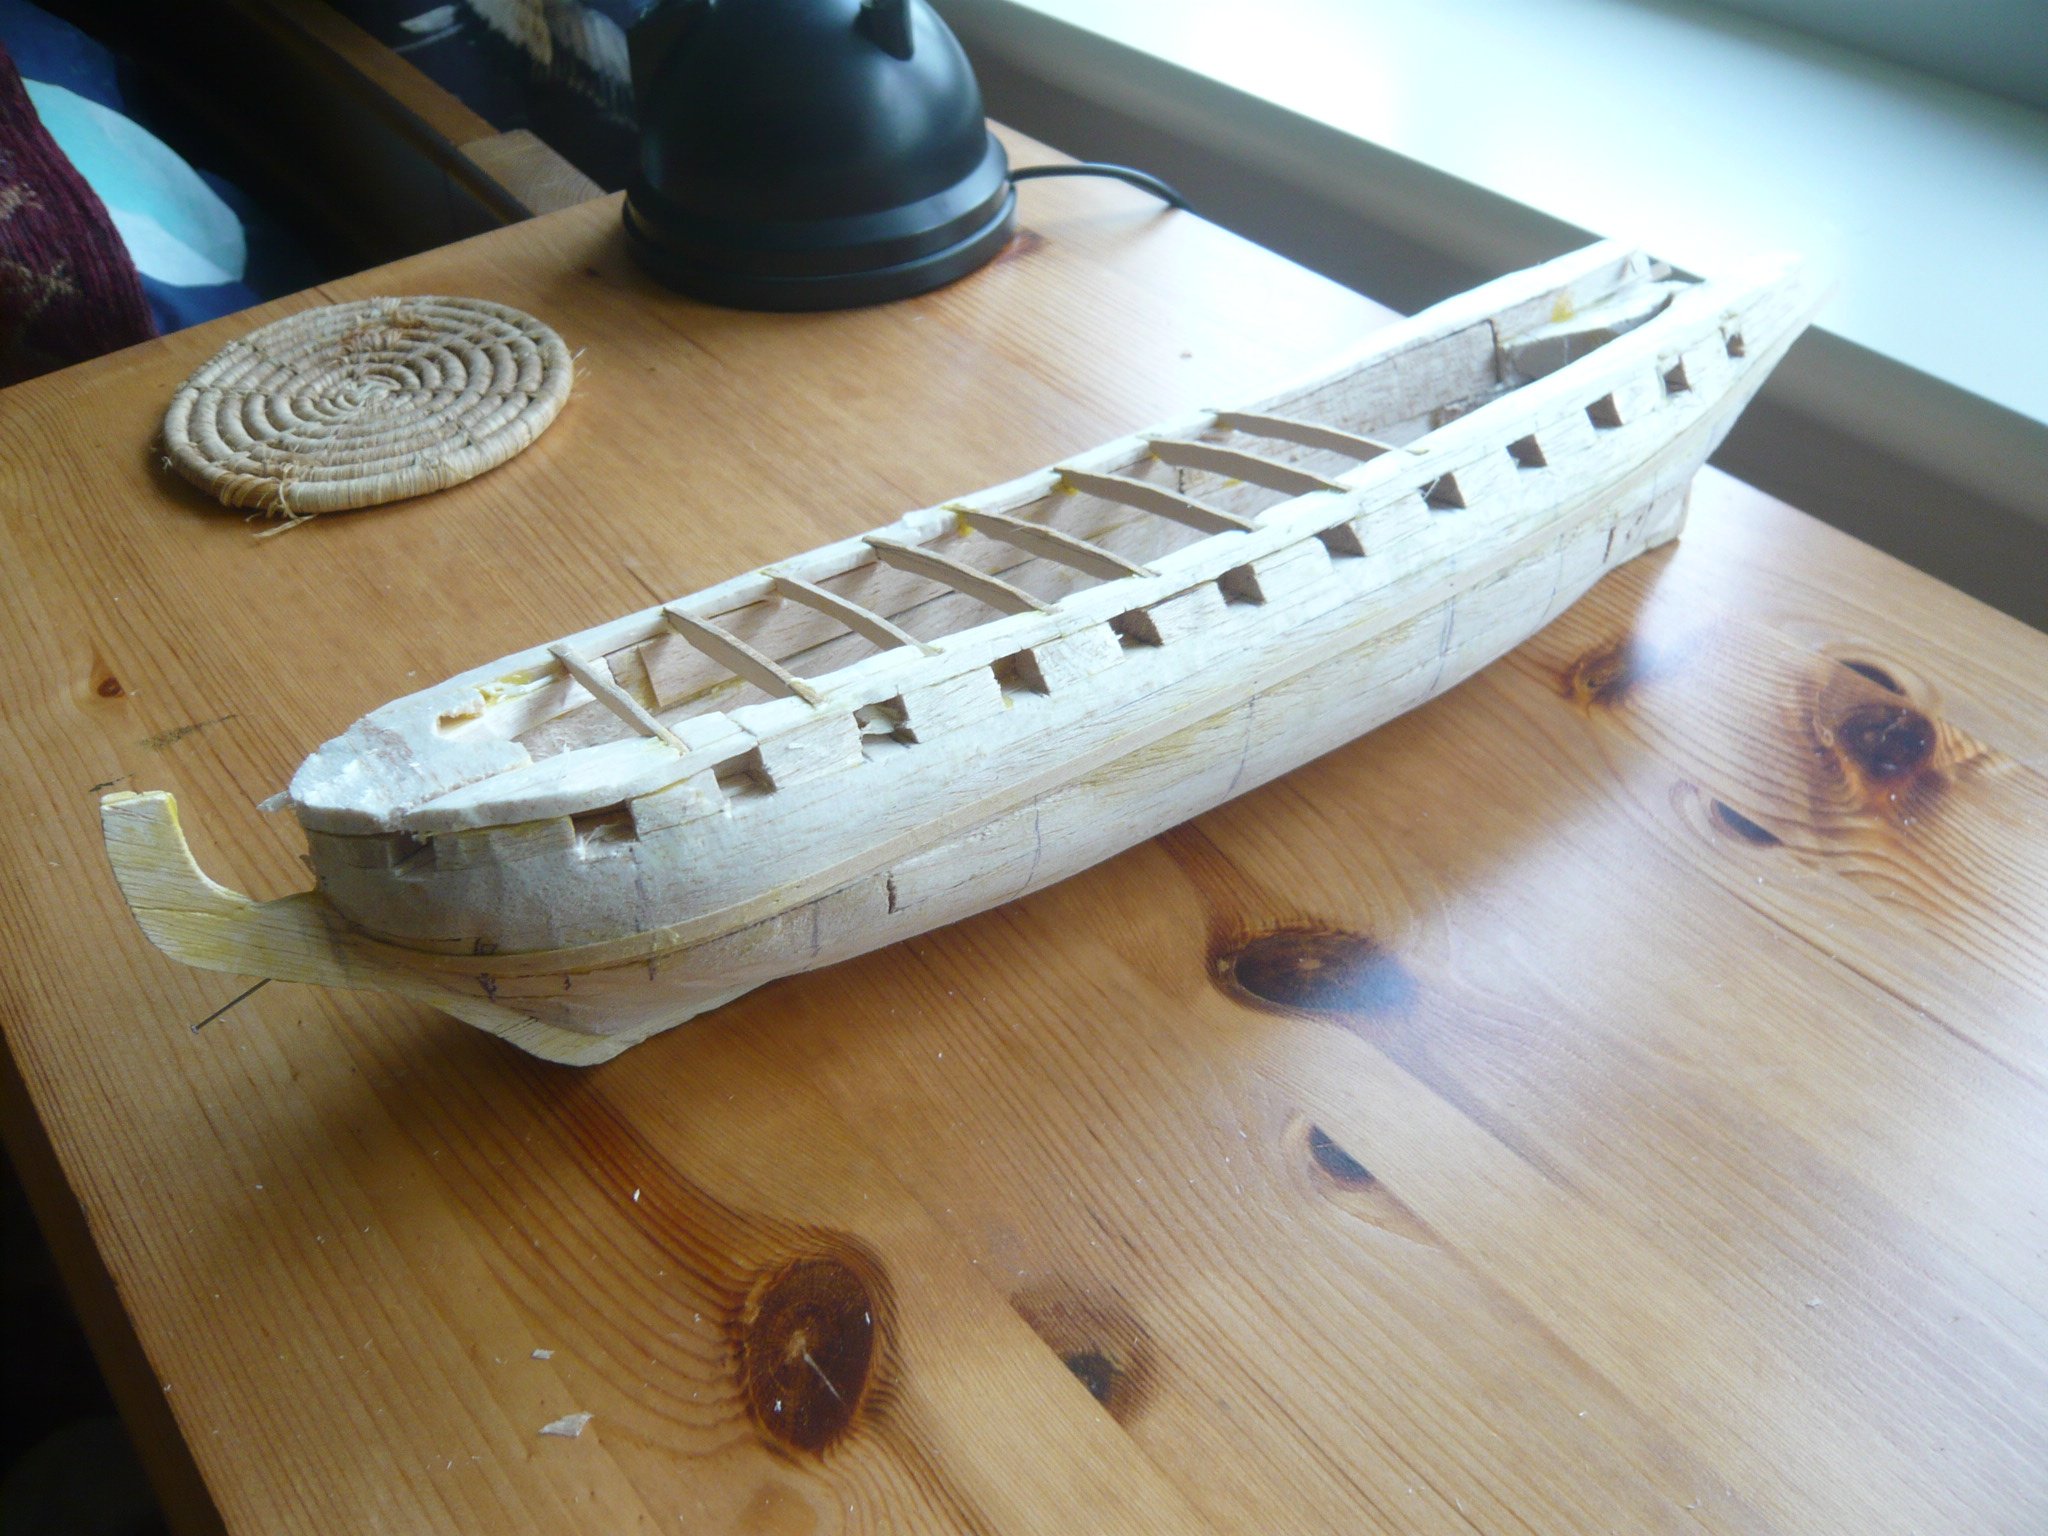
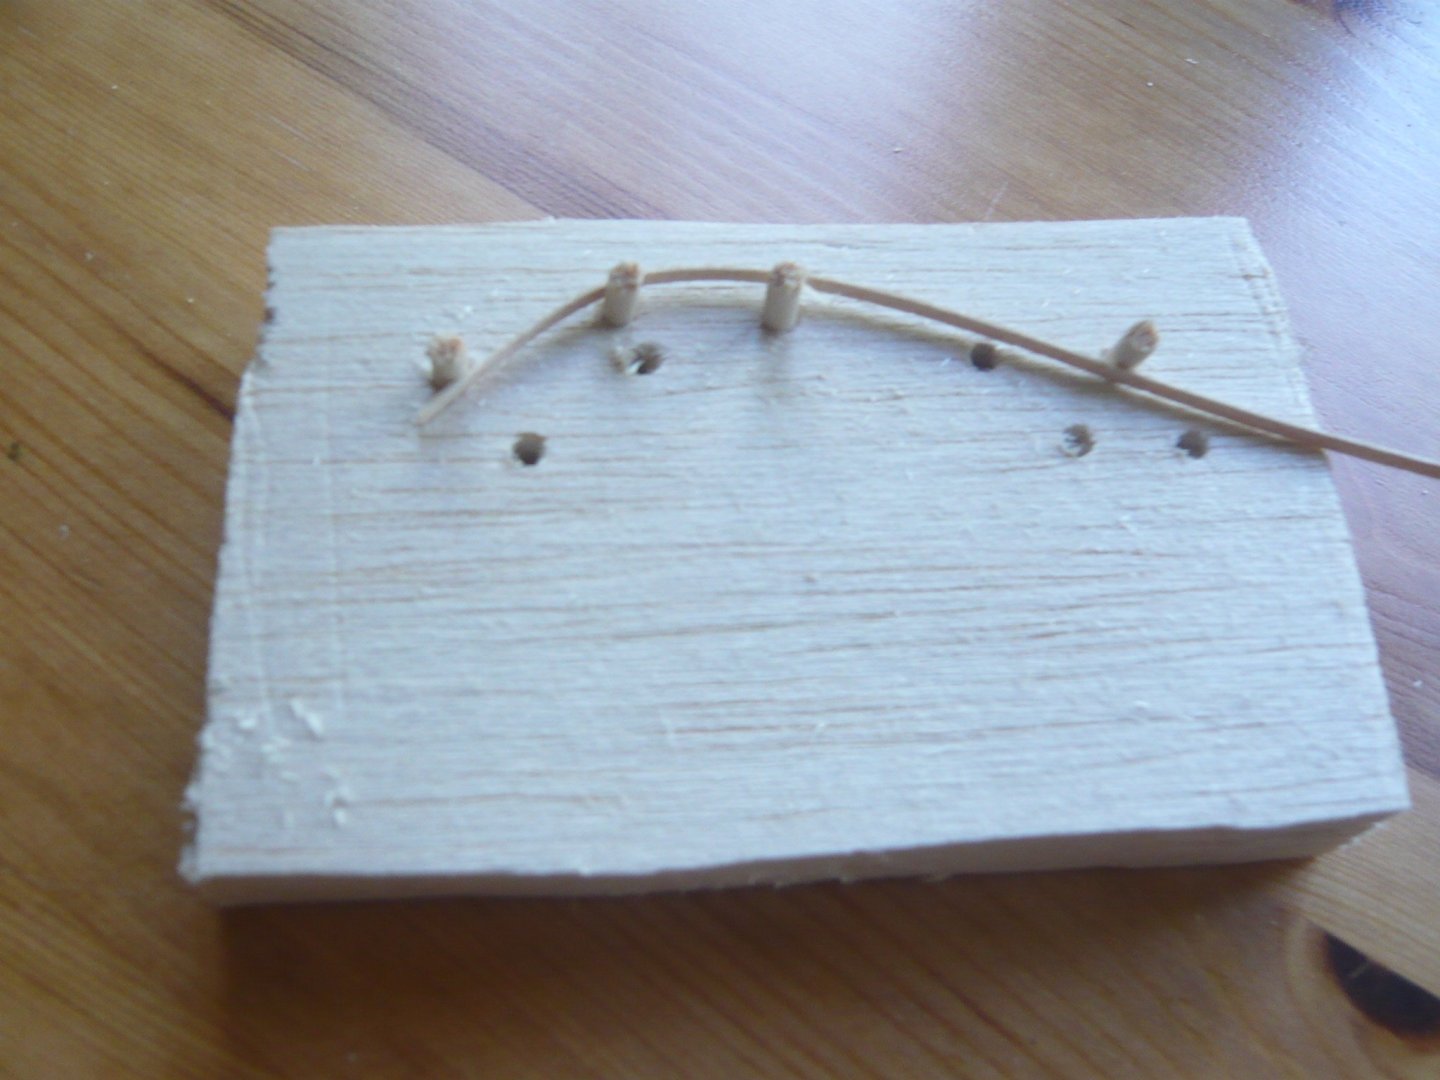
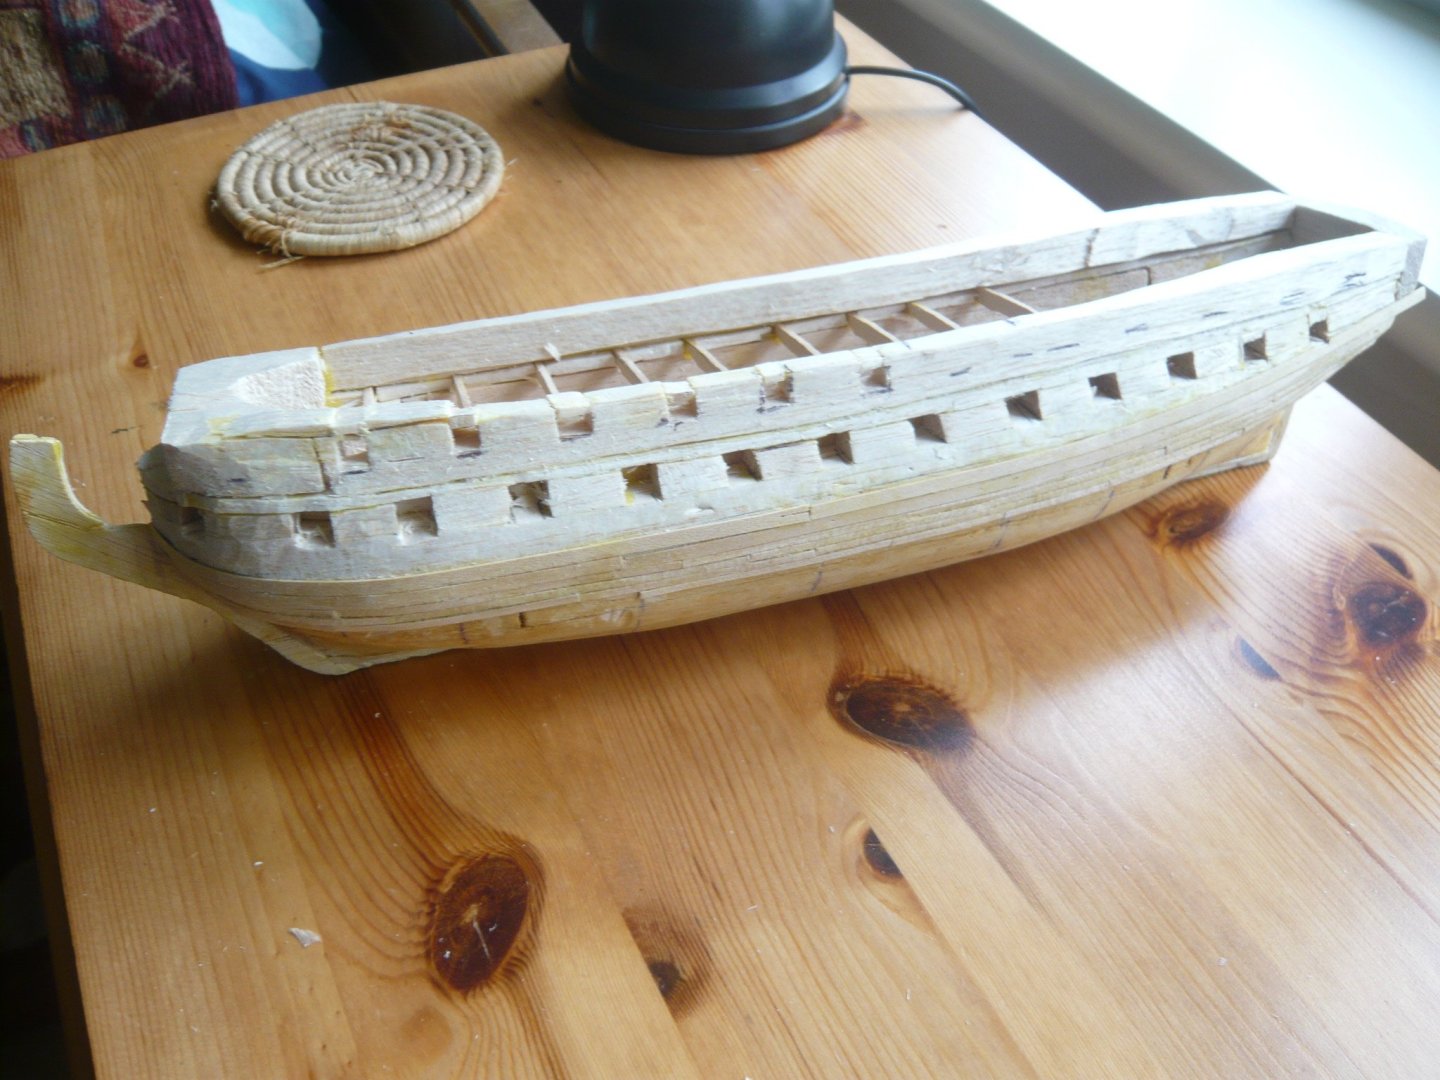
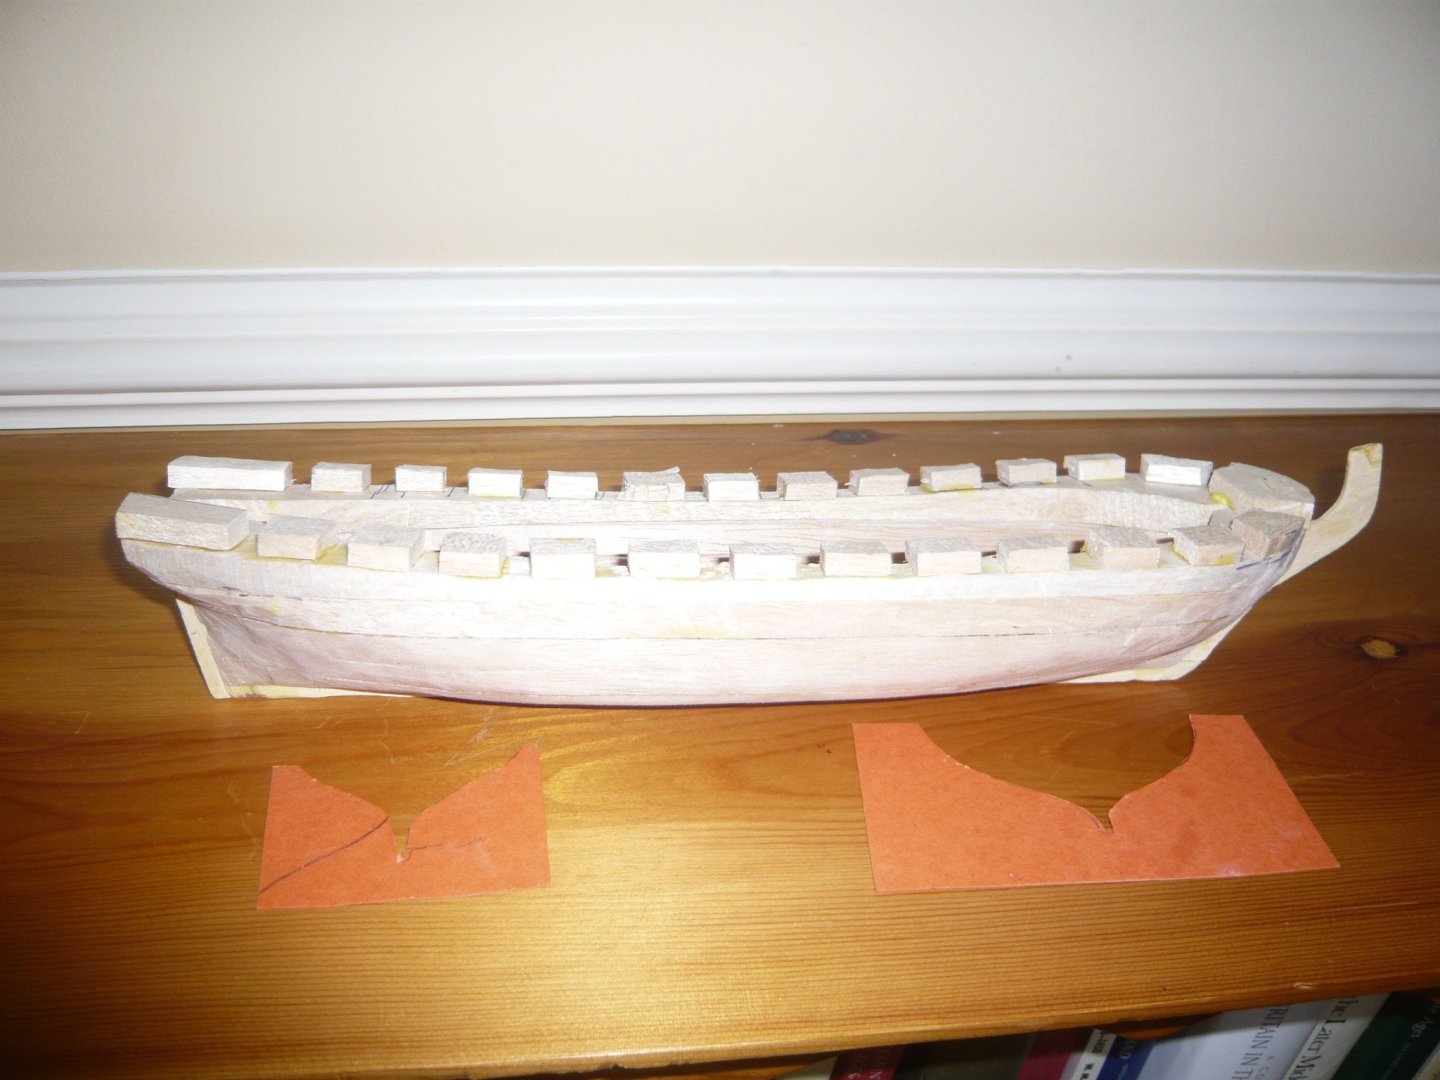
Now, planking. One way of simplifying it would be not to plank the hull below the wales, and just to paint it white. This is what eighteenth-century modelmakers did with bread-and-butter hulls, and it’s what I did in the late 1950s, as in this model I made of a 6th rate (I think the sails, by the way, were cut from an old pillowcase). Apologies for the reflection on the case in this picture. No doubt the ‘white stuff’ used to protect hulls before the advent of copper plating hid some of the planking lines, but the picture by John Cleveley the elder of ‘A Sixth Rate on the Stocks’ does show some at least of the lines made by planking. So, I’ll plank this hull. It’s a bit like three-dimensional marquetry.The balsa wood is a bit of a problem as it soaks up the glue too much, so the first step is to put on a coat of shellac. Then I began with the wale, or at least with a plank which will in the end be under the wale. Calculations for the rest suggest that at the bow the planks will need to be roughly 2/3 of the width on the rest of the hull, and with any luck it might even be possible to do the planking without any need for steelers or drop planks. At this scale, with planks 0.5 mm x 2 mm, bending them is not too much of a problem. I have found it sufficient to soak the wood in hot tap water - no need for boiling - for an hour or so to soften it. It could be a different story with thicker and wider wood strips. I find a thumbnail often better than any tool, but a simple jig helps. The extent of the bend can be adjusted by using different holes for the pegs. Where it gets more difficult is that the planks near the bow need to be bent in three dimensions, and after finding a helpful video on the web, I am using formers to create the desired bend, which helps to prevent the planking having an appearance of clinker build. The formers are made of two blocks, with a template between them. I know it looks primitive, but it works. The glue I am using, incidentally, is ‘aliphatic’, whatever that means, and yellow. Like so many excellent things, it comes from Cornwall Boats. There’s no question of trying to reproduce the treenails that would have been used to fix the planks on the full-size ship - that would be impossible at this scale. Nor do some very fine models, such as that of Bellona on the stocks in the National Maritime Museum, show them. The picture above shows the start of the planking process, with the hull still in a pretty crude state. Do remember that it's very small. Next shows the start of work on the wales. The wales could be difficult, but I’ve not gone for a complex solution. The main wale should rightly consist of three strakes, with complex butt and hook joints. However, when I built Agamemnon to the same scale I tried anchor stock joints, but by the time the wales were sanded and painted, most of them could not be seen. So, I have gone for two strakes of 0.5 mm x 3 mm, with no joints. I’ve ignored the evidence of the model of Centurion’s bow in the National Maritime Museum, which shows what look like a double wale; the model made for Anson has solid black wales, and that seems right for this period. I have dyed the wood as this should make neater edges than painting.


-
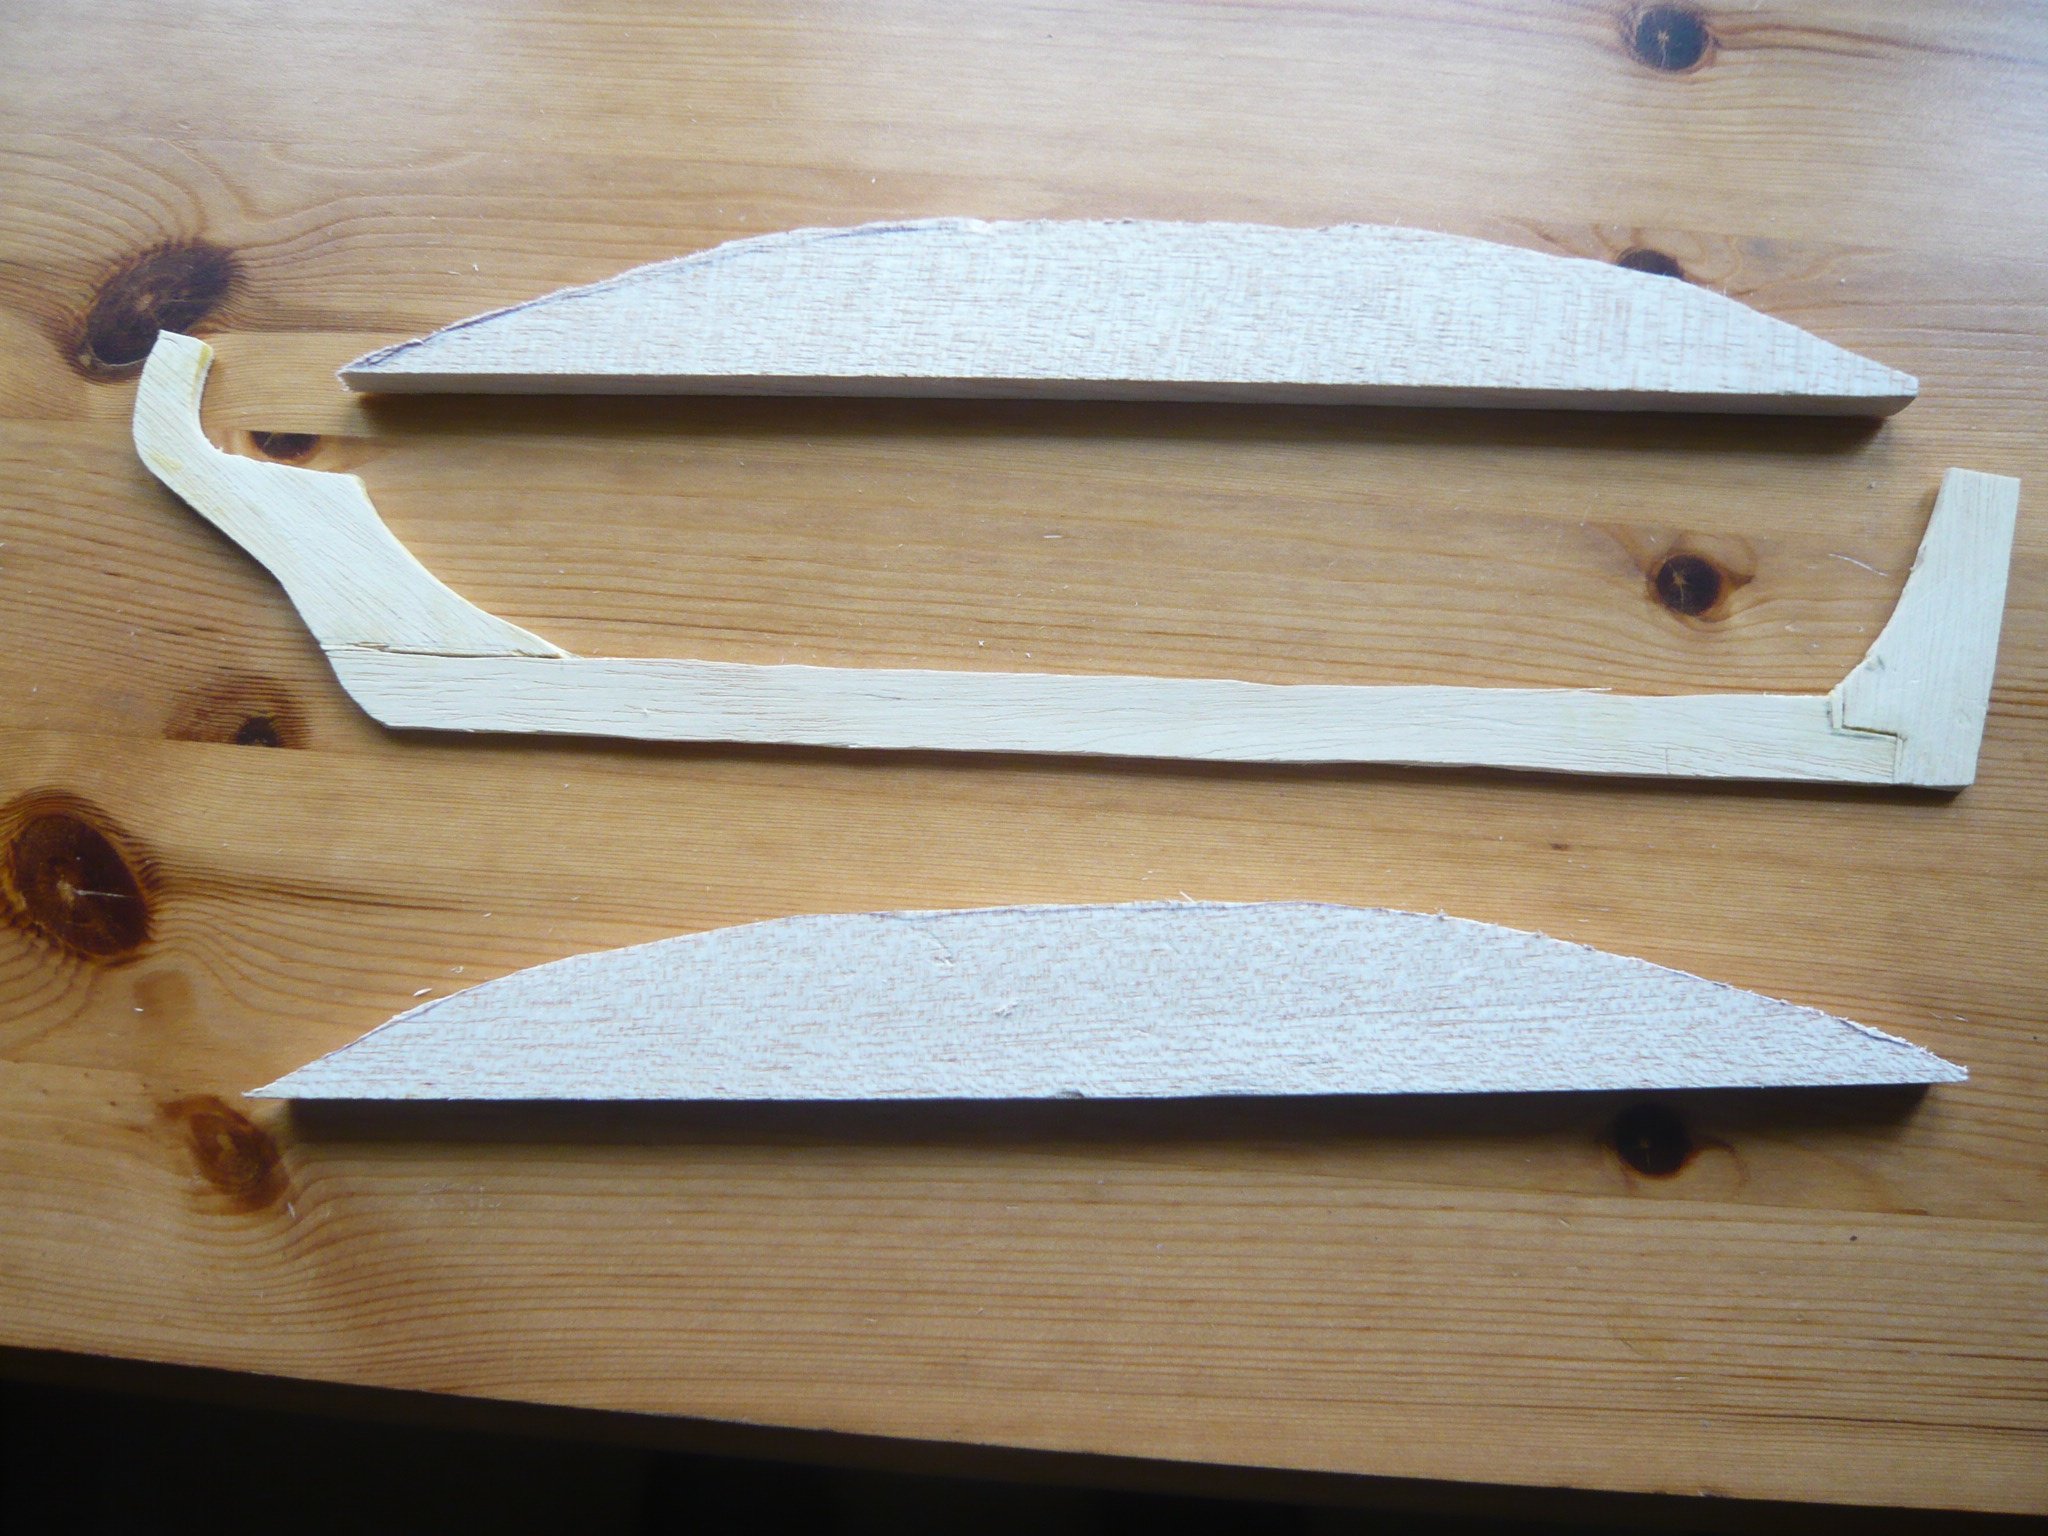
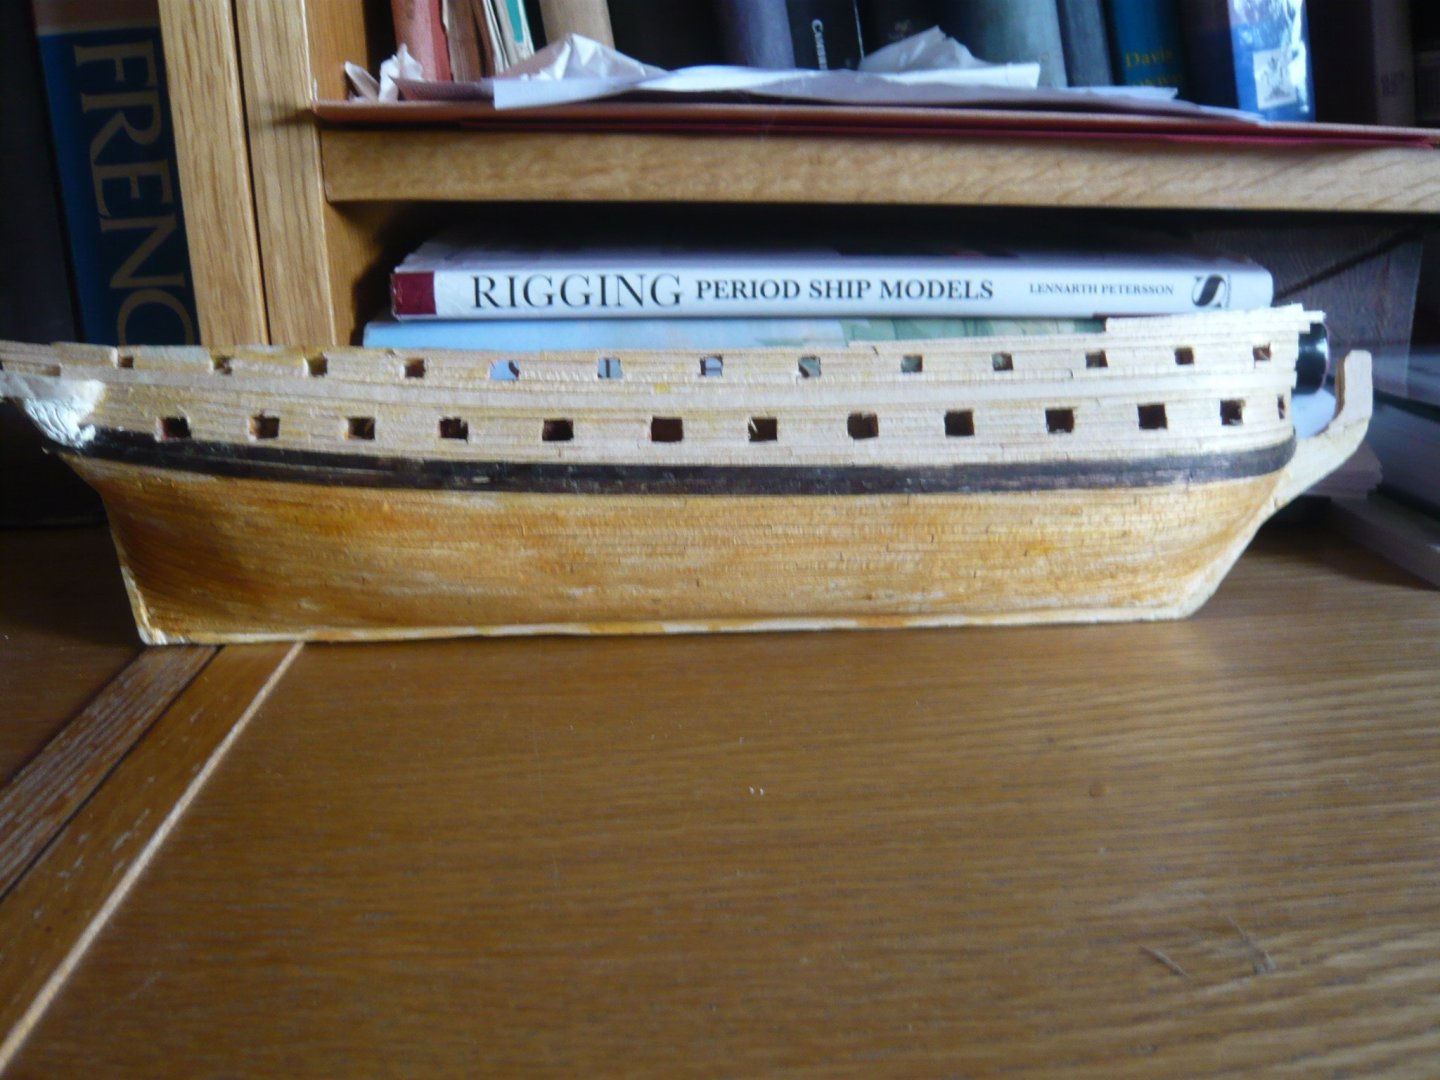
Deciding what ship to build is never easy. Having finished Agamemnon, I considered a three-decker, but they do look rather clumsy to me, and the prospect of quite so many gunports was off-putting. So, though I was briefly tempted, I decided not to go for Royal William. That figurehead with two horses was just too much. An eighteenth-century ship seemed the best answer, though for reasons which may not be clear to readers of this blog, there are some who might expect me to try a medieval ship, say the Christopher which took Edward III abroad in the late 1330s, with a crew of 103 sailors. But, of course, there are no details of the ship herself, so that was out of the question. Nor are the building accounts for Edward’s Philippa any use, though they provide evidence to fuel arguments about the size of her sail. Centurion was tempting, for there are plans in the National Maritime Museum, and good photographs of the model made for Anson, who commanded her on the famous circumnavigation. I did make a model of an early eighteenth-century two decker back in the late 1950’s, based on a model in the Pitt Rivers Museum in Oxford, which is now residing in my daughter’s attic, but I don’t believe that I will be repeating myself. So, Centurion it is. There will be problems, particularly with the decoration, but there’s no point in attempting a model that does not present challenges. I’m intending to build the hull using the bread-and-butter method. This does not seem to be much in vogue these days, but it is how models were made in the early eighteenth century (the so-called Georgian style). The open-framed Navy Board style would be difficult with a small model, and is anyway beyond me. My bible in my youth was Barrot de Gaillard’s Construisez des Modeles Réuoits de Marine, which advocated bread-and-butter, and it’s still the method I prefer. Bulkheads would of course be possible, but that method would probably demand double planking, though in my youth I did try layers of sticky brown paper on one model, which worked well, and still looks fine. As for making a fully framed model, that would be beyond me. The plans in the National Maritime Museum present something of a difficulty, for there are two, and they are not quite the same. It may be that one was drawn up prior to building the vessel, and the other represents the ship as built. Or, possibly, the latter was drawn to assist Benjamin Slade, when he made the model that was presented to Anson himself. It seems to me posssible that it shows the ship following her refit in 1739 prior to the famous circumnavigation. The first is noted on the back as being for ‘A 60 gun ship’, while the second has Centurion named. I’ll make use of both, but have for the most part used the earlier plan. The issue is discussed elsewhere on this site, at https://modelshipworld.com/topic/37674-centurion-of-1732/#comment-1078072 . The NMM also has a plan of the stern, catalogued as being of Centurion 1732. It resembles the stern as depicted in the later plan, but not the way the model has it. So, here’s the start. Note that the scale is 1:160, so the model will be about a foot in length. It all looks very primitive in the early stages, but there seemed little point in trying to fabricate the keel as one would have to do with, say, a scale of 1:48 as used by the craftsmen who built such splendid models in the 18th century. The wood for the bread-and-butter slices is balsa, and I dare say that choice will not meet with much approval. But it is easy to work, and does not warp, twist, expand or contract, at least to judge by the way the models I made in the late 1950s have lasted. The next photo shows initial progress, with just a couple of templates I’ve used to check that the model follows the plan reasonably closely. I’ve tried something new for me, Barrot de Gaillard’s method of making gunports. It does ensure that they are all lined up correctly. He was a little concerned that the sheer meant that the rectangular blocks were not quite vertical at the bow and stern, but that’s easily remedied by making the blocks less than absolutely square. I’ve not decided whether to have the gunports, at least the lower ones, open or closed, but that decision can wait. I think that these gunports are too small for it to be worth lining them, though it would make them neater. Next is another view, showing deck beams installed. There is a long way to go.


-
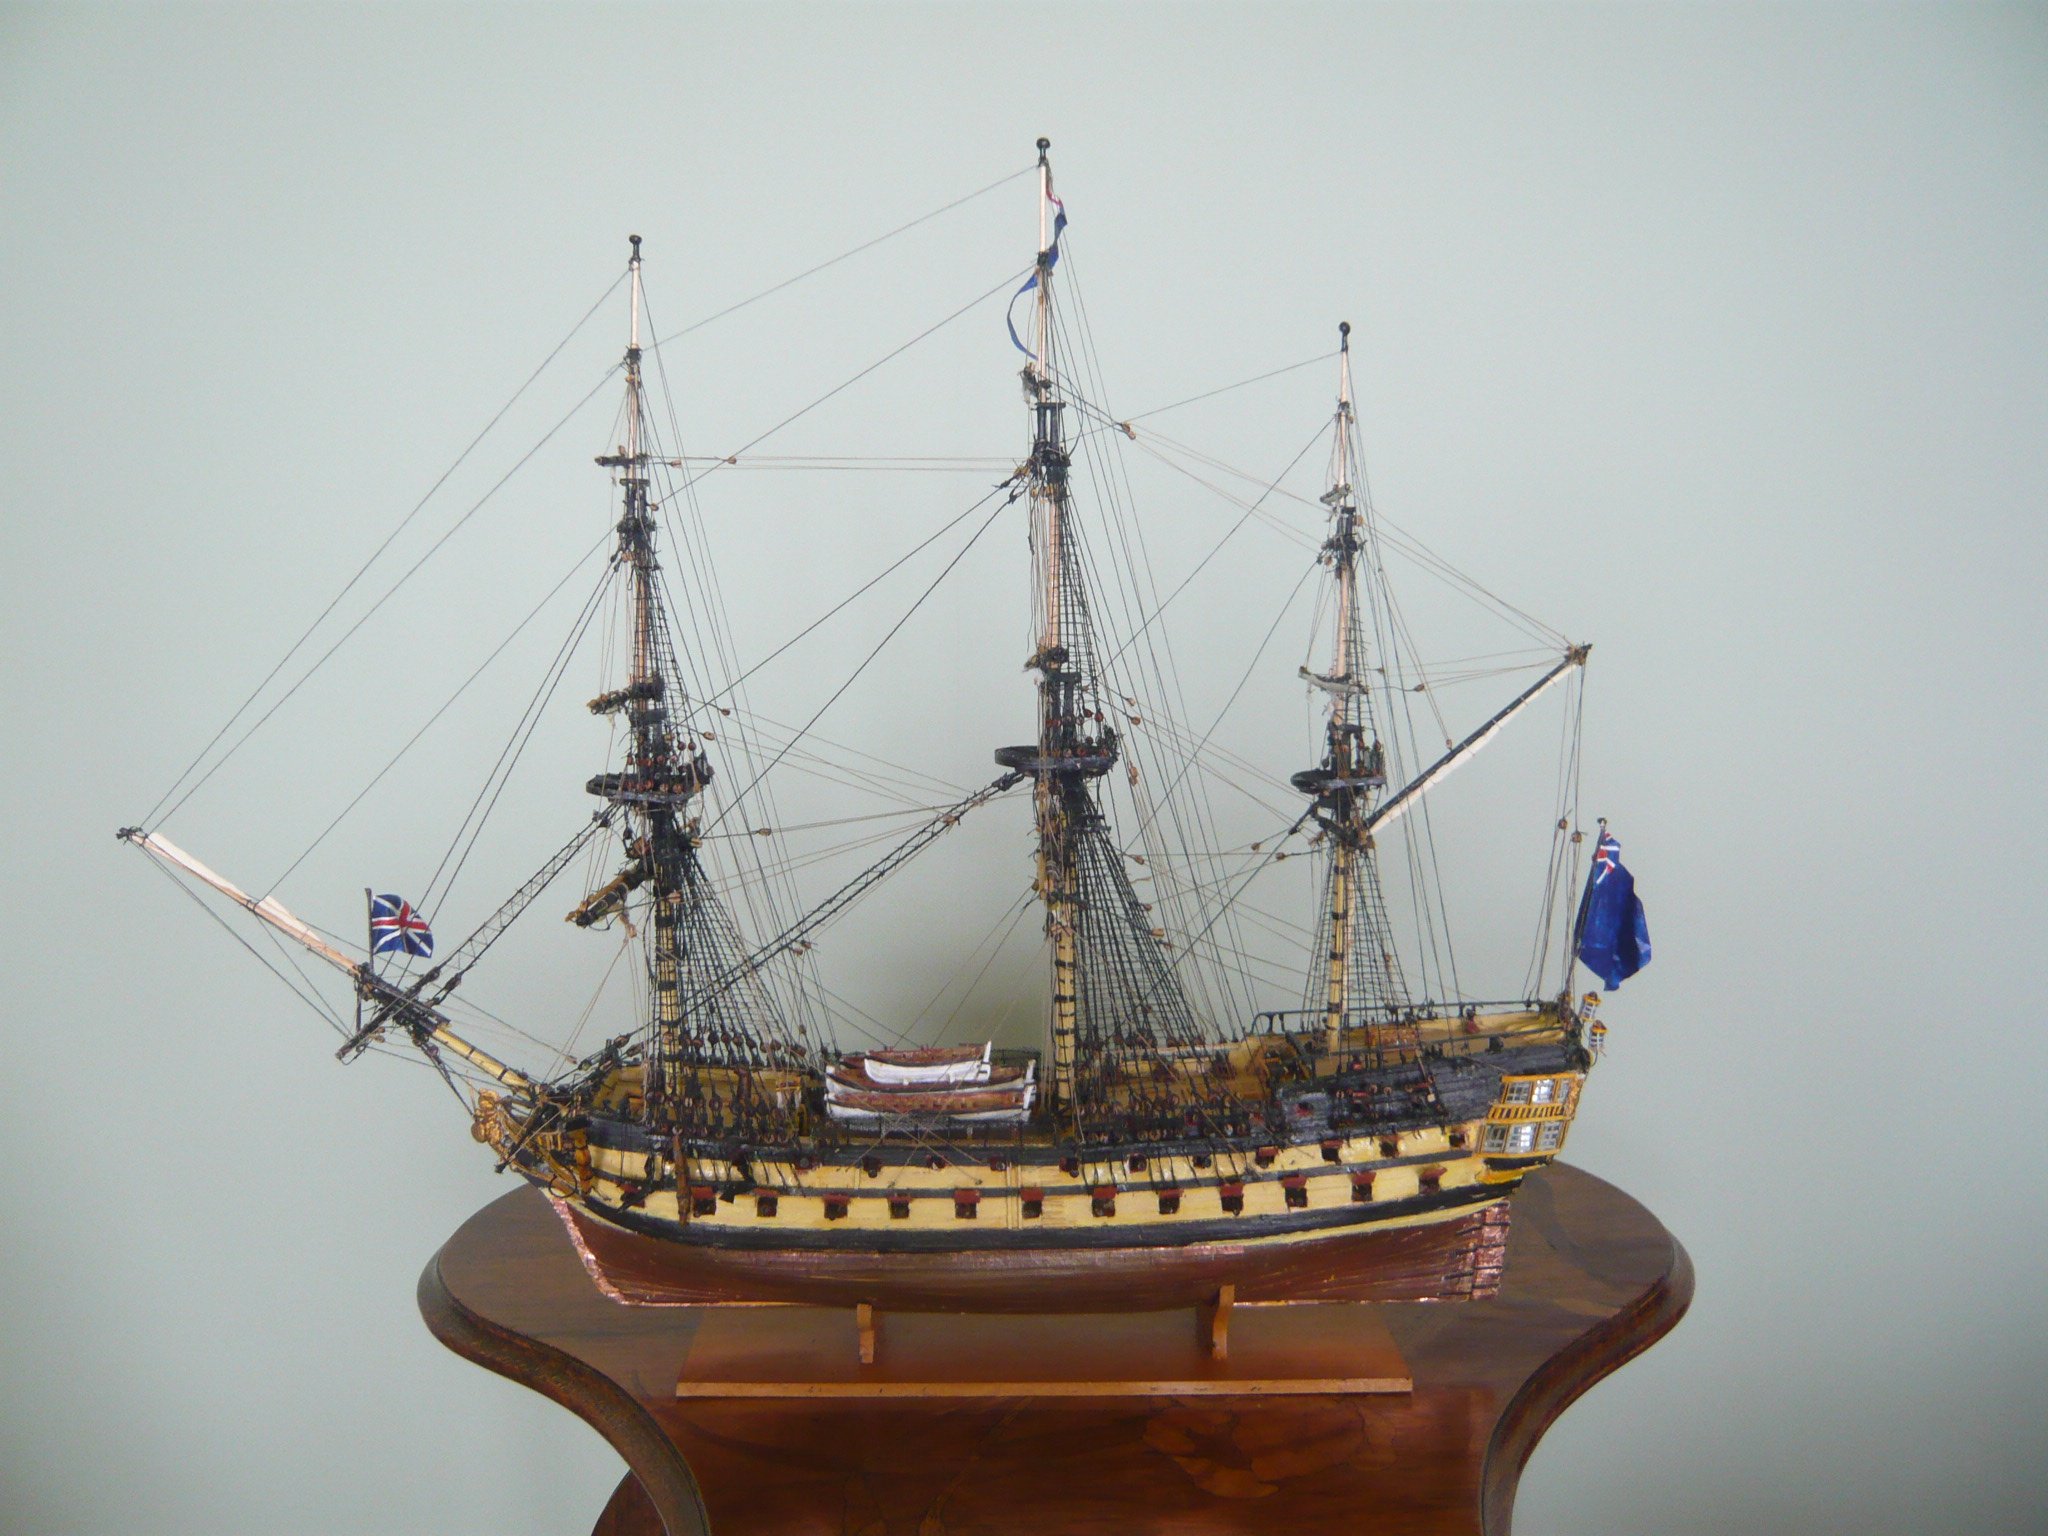
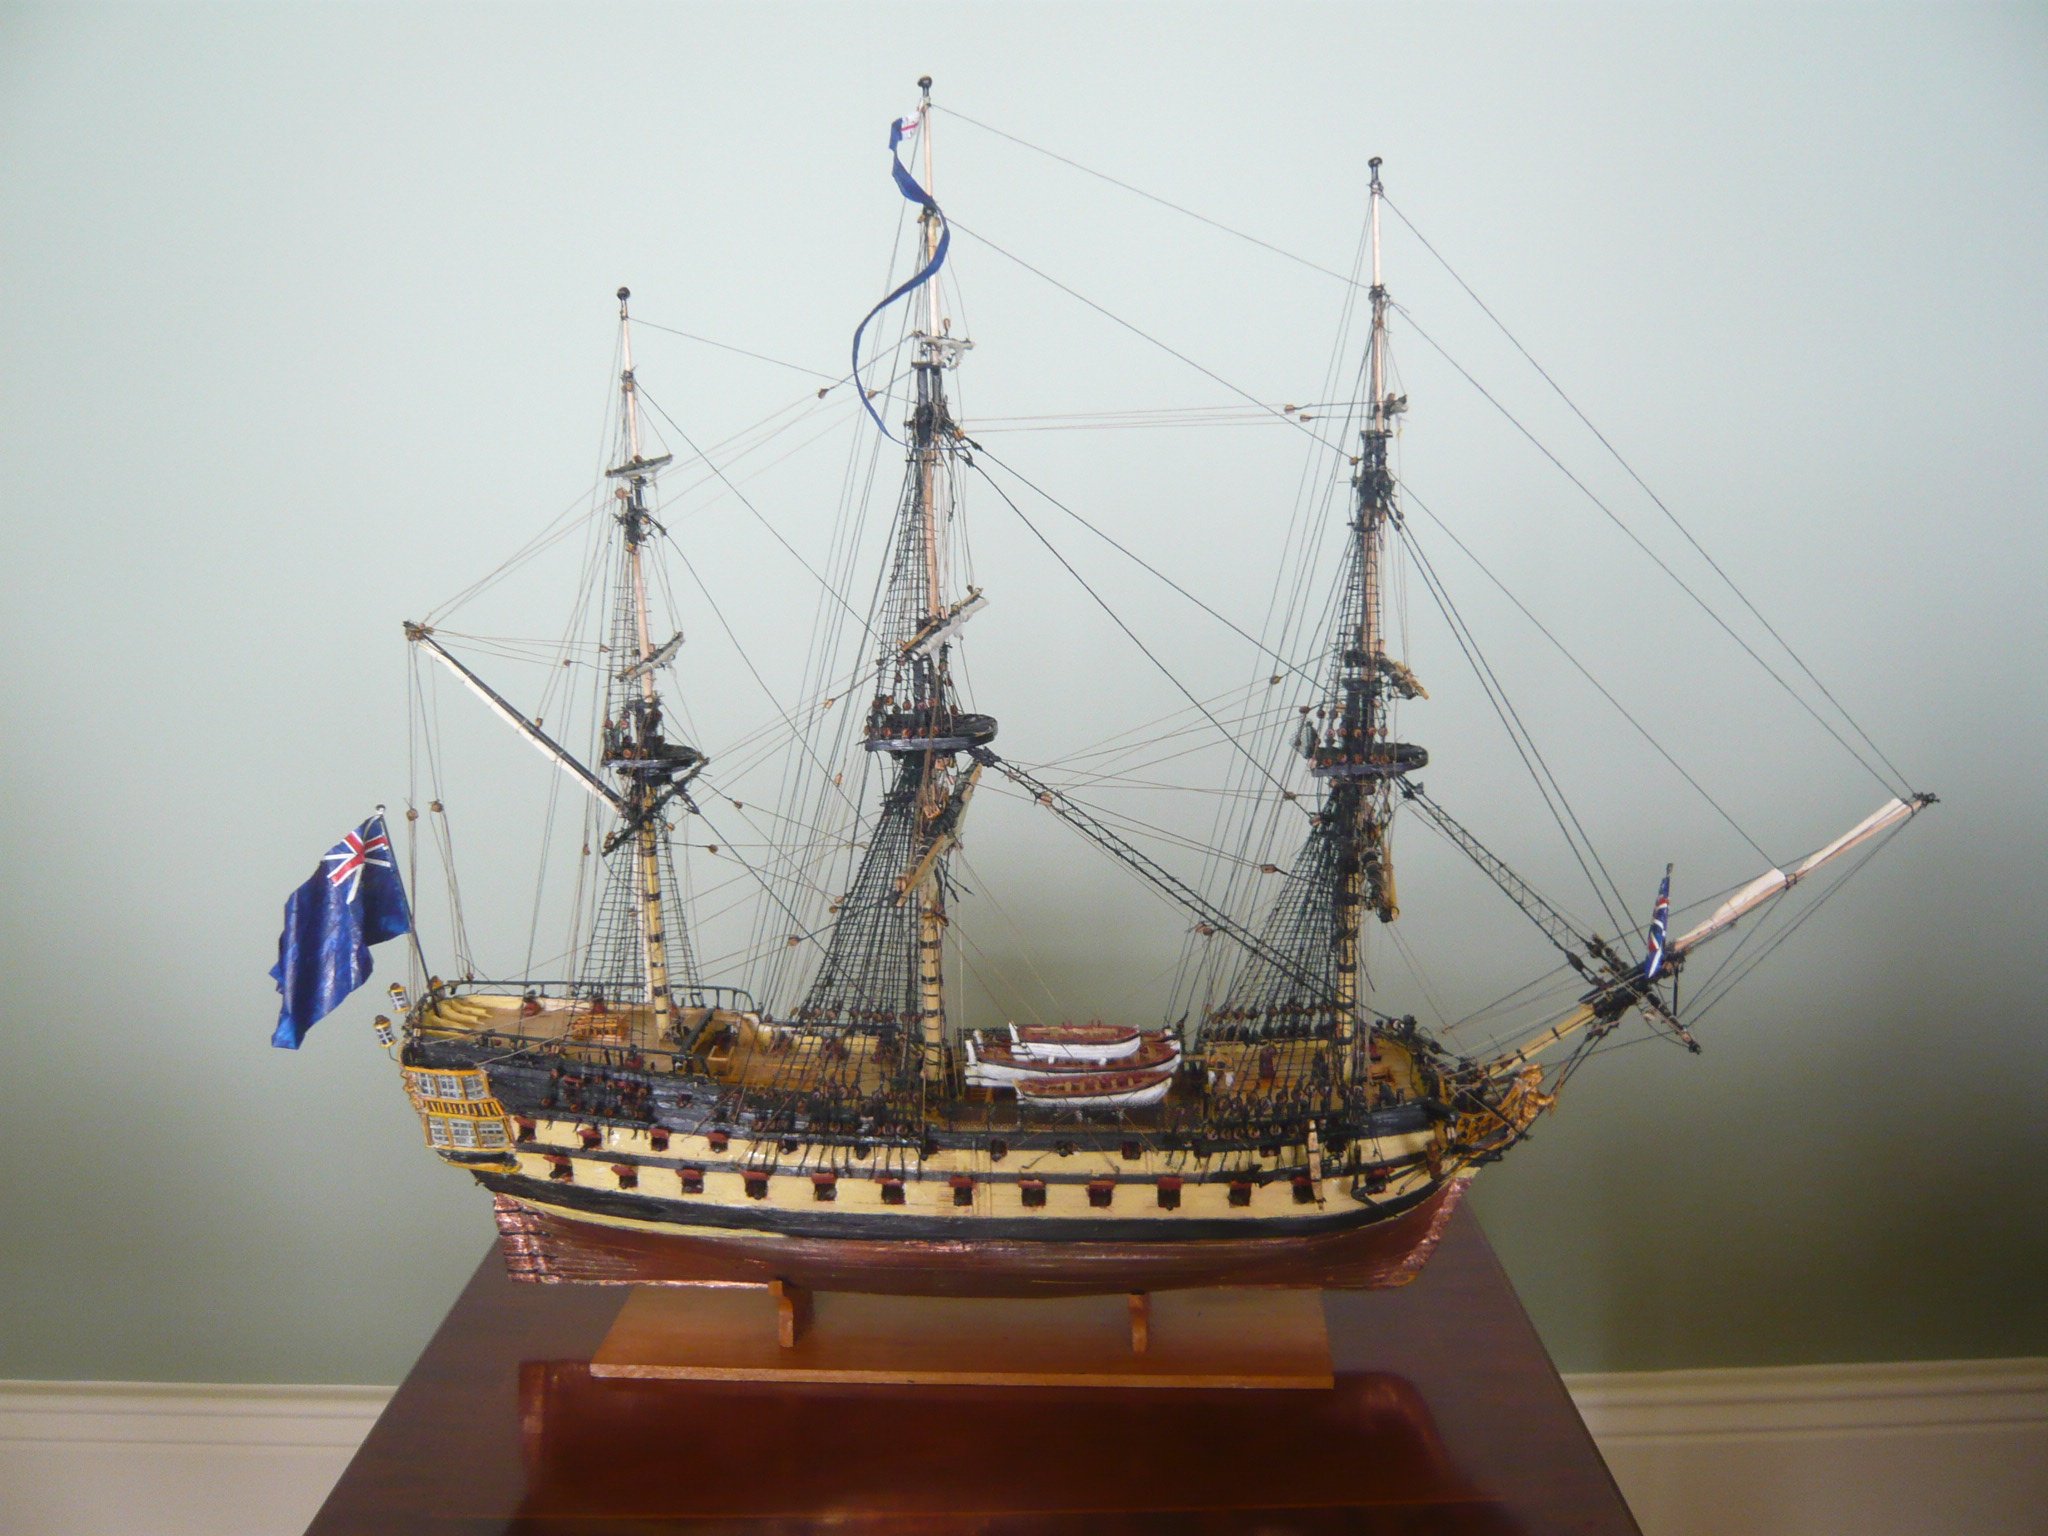
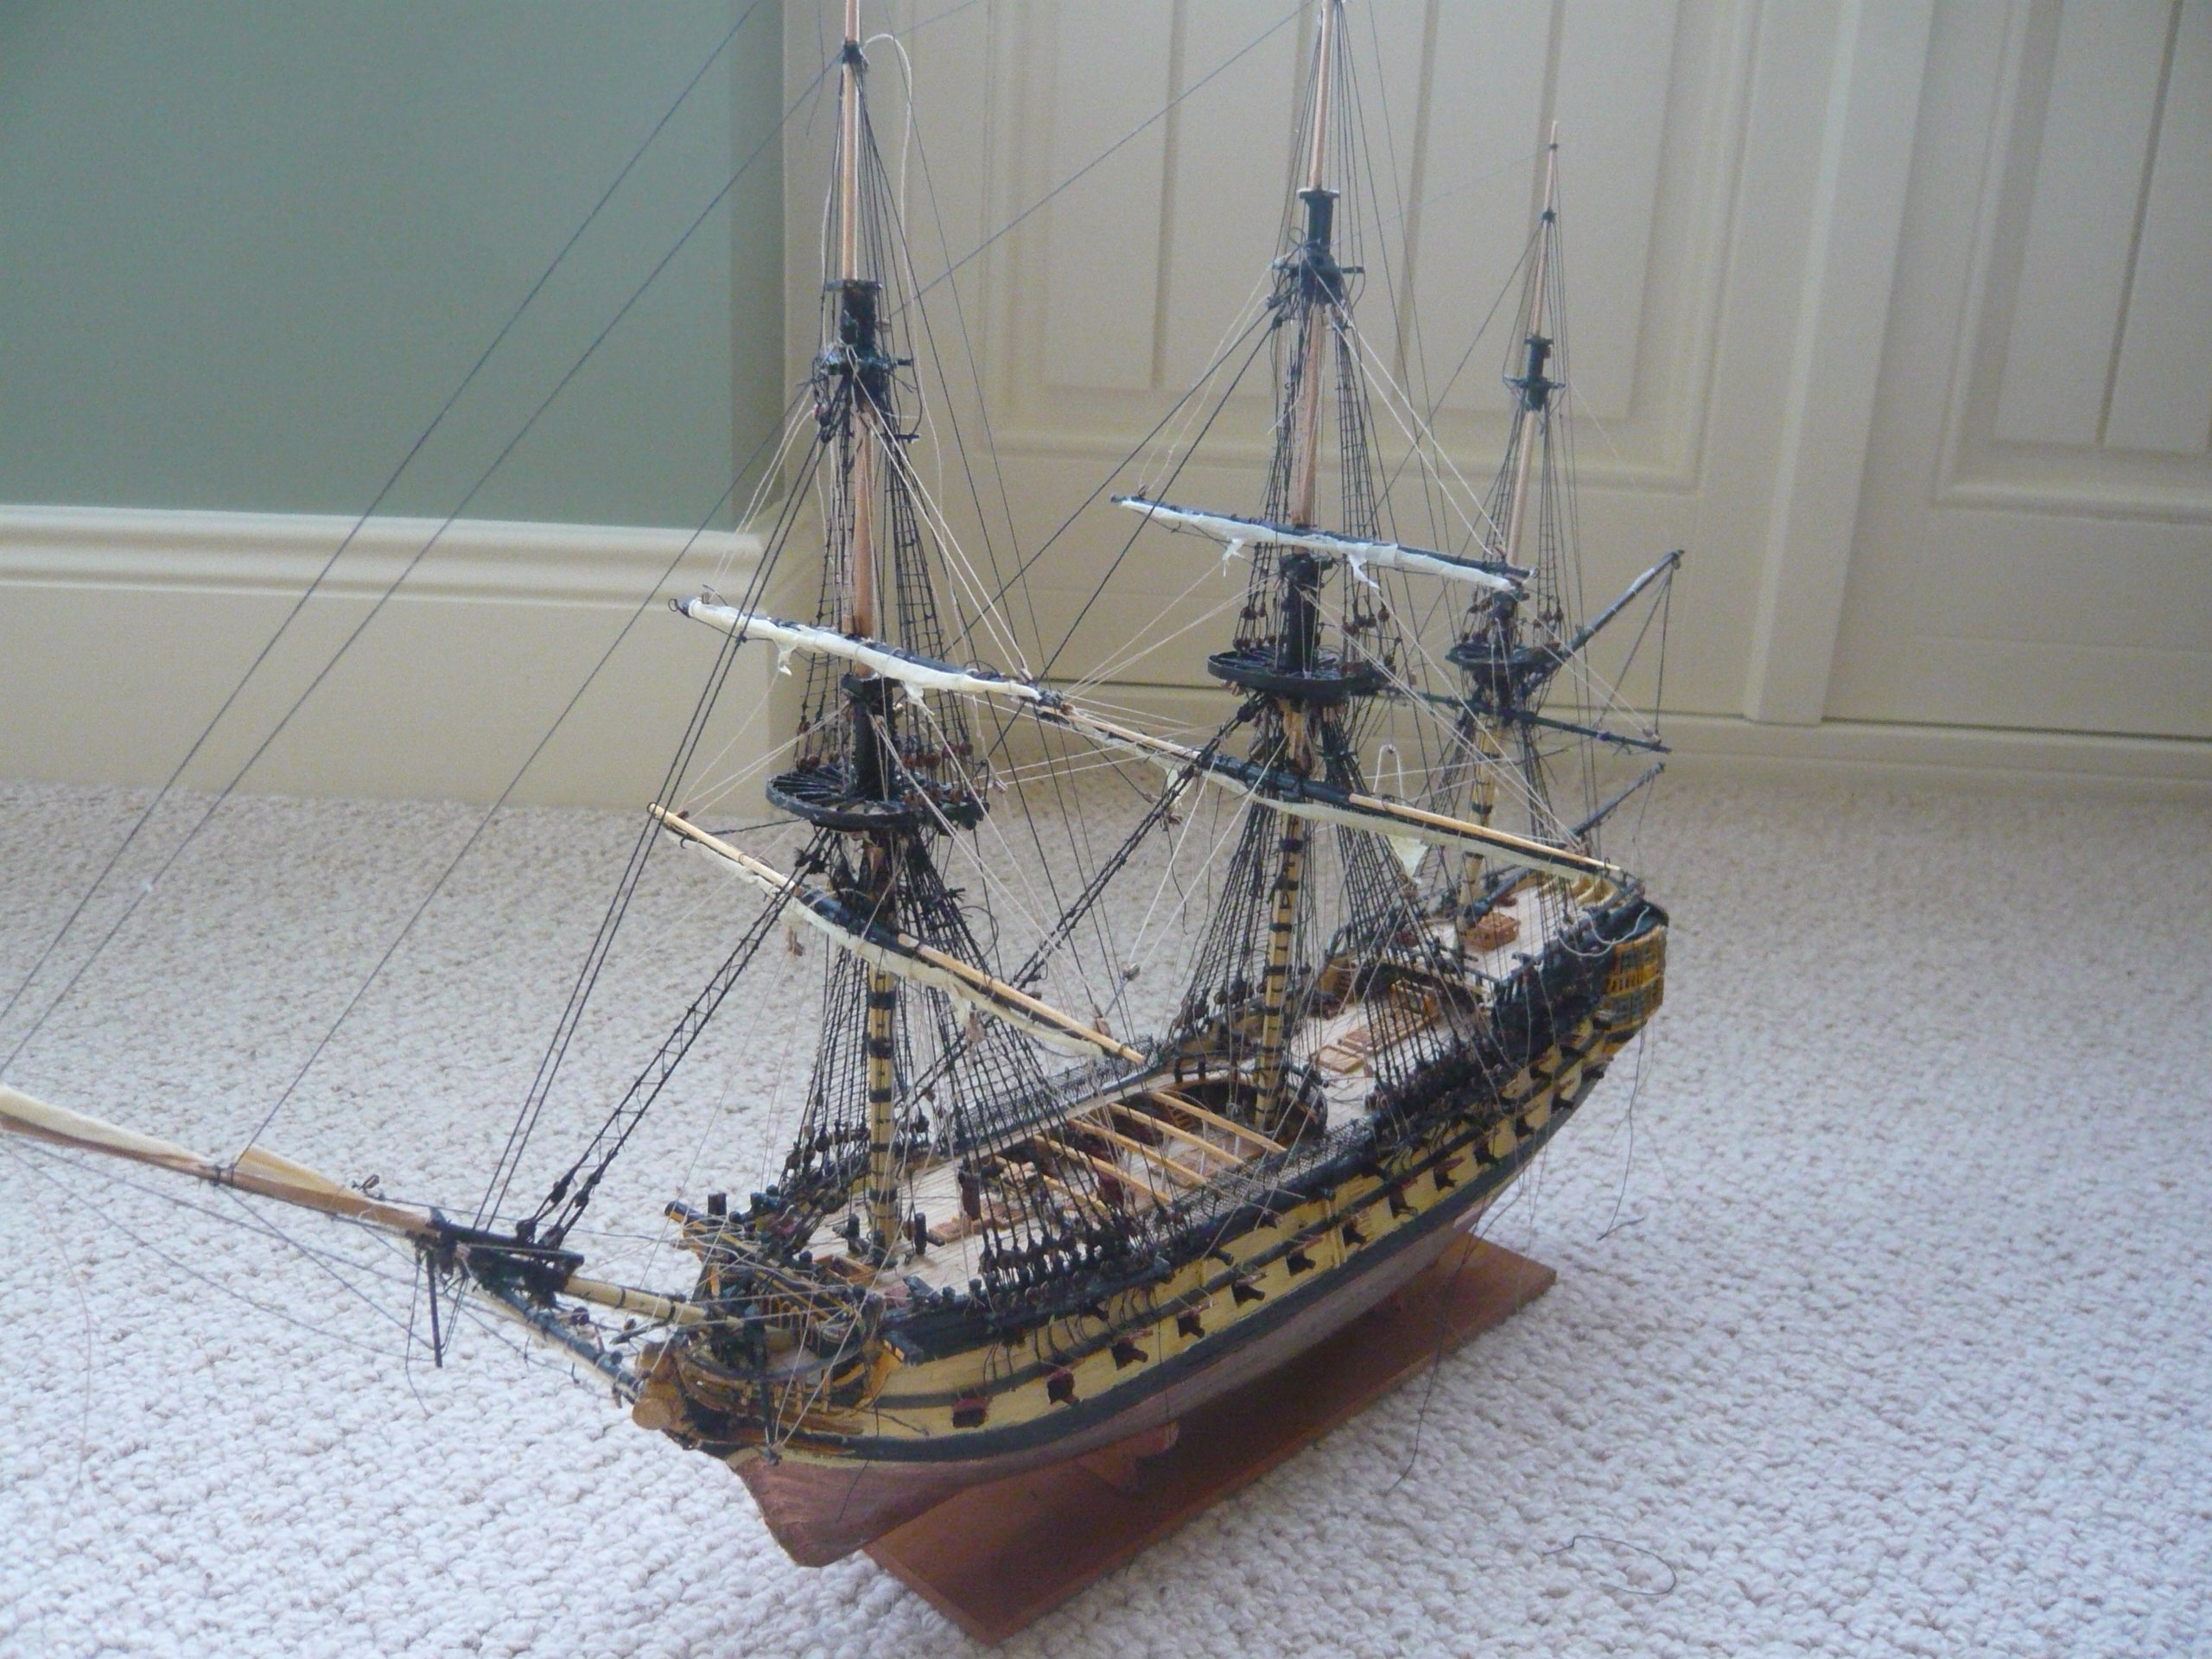
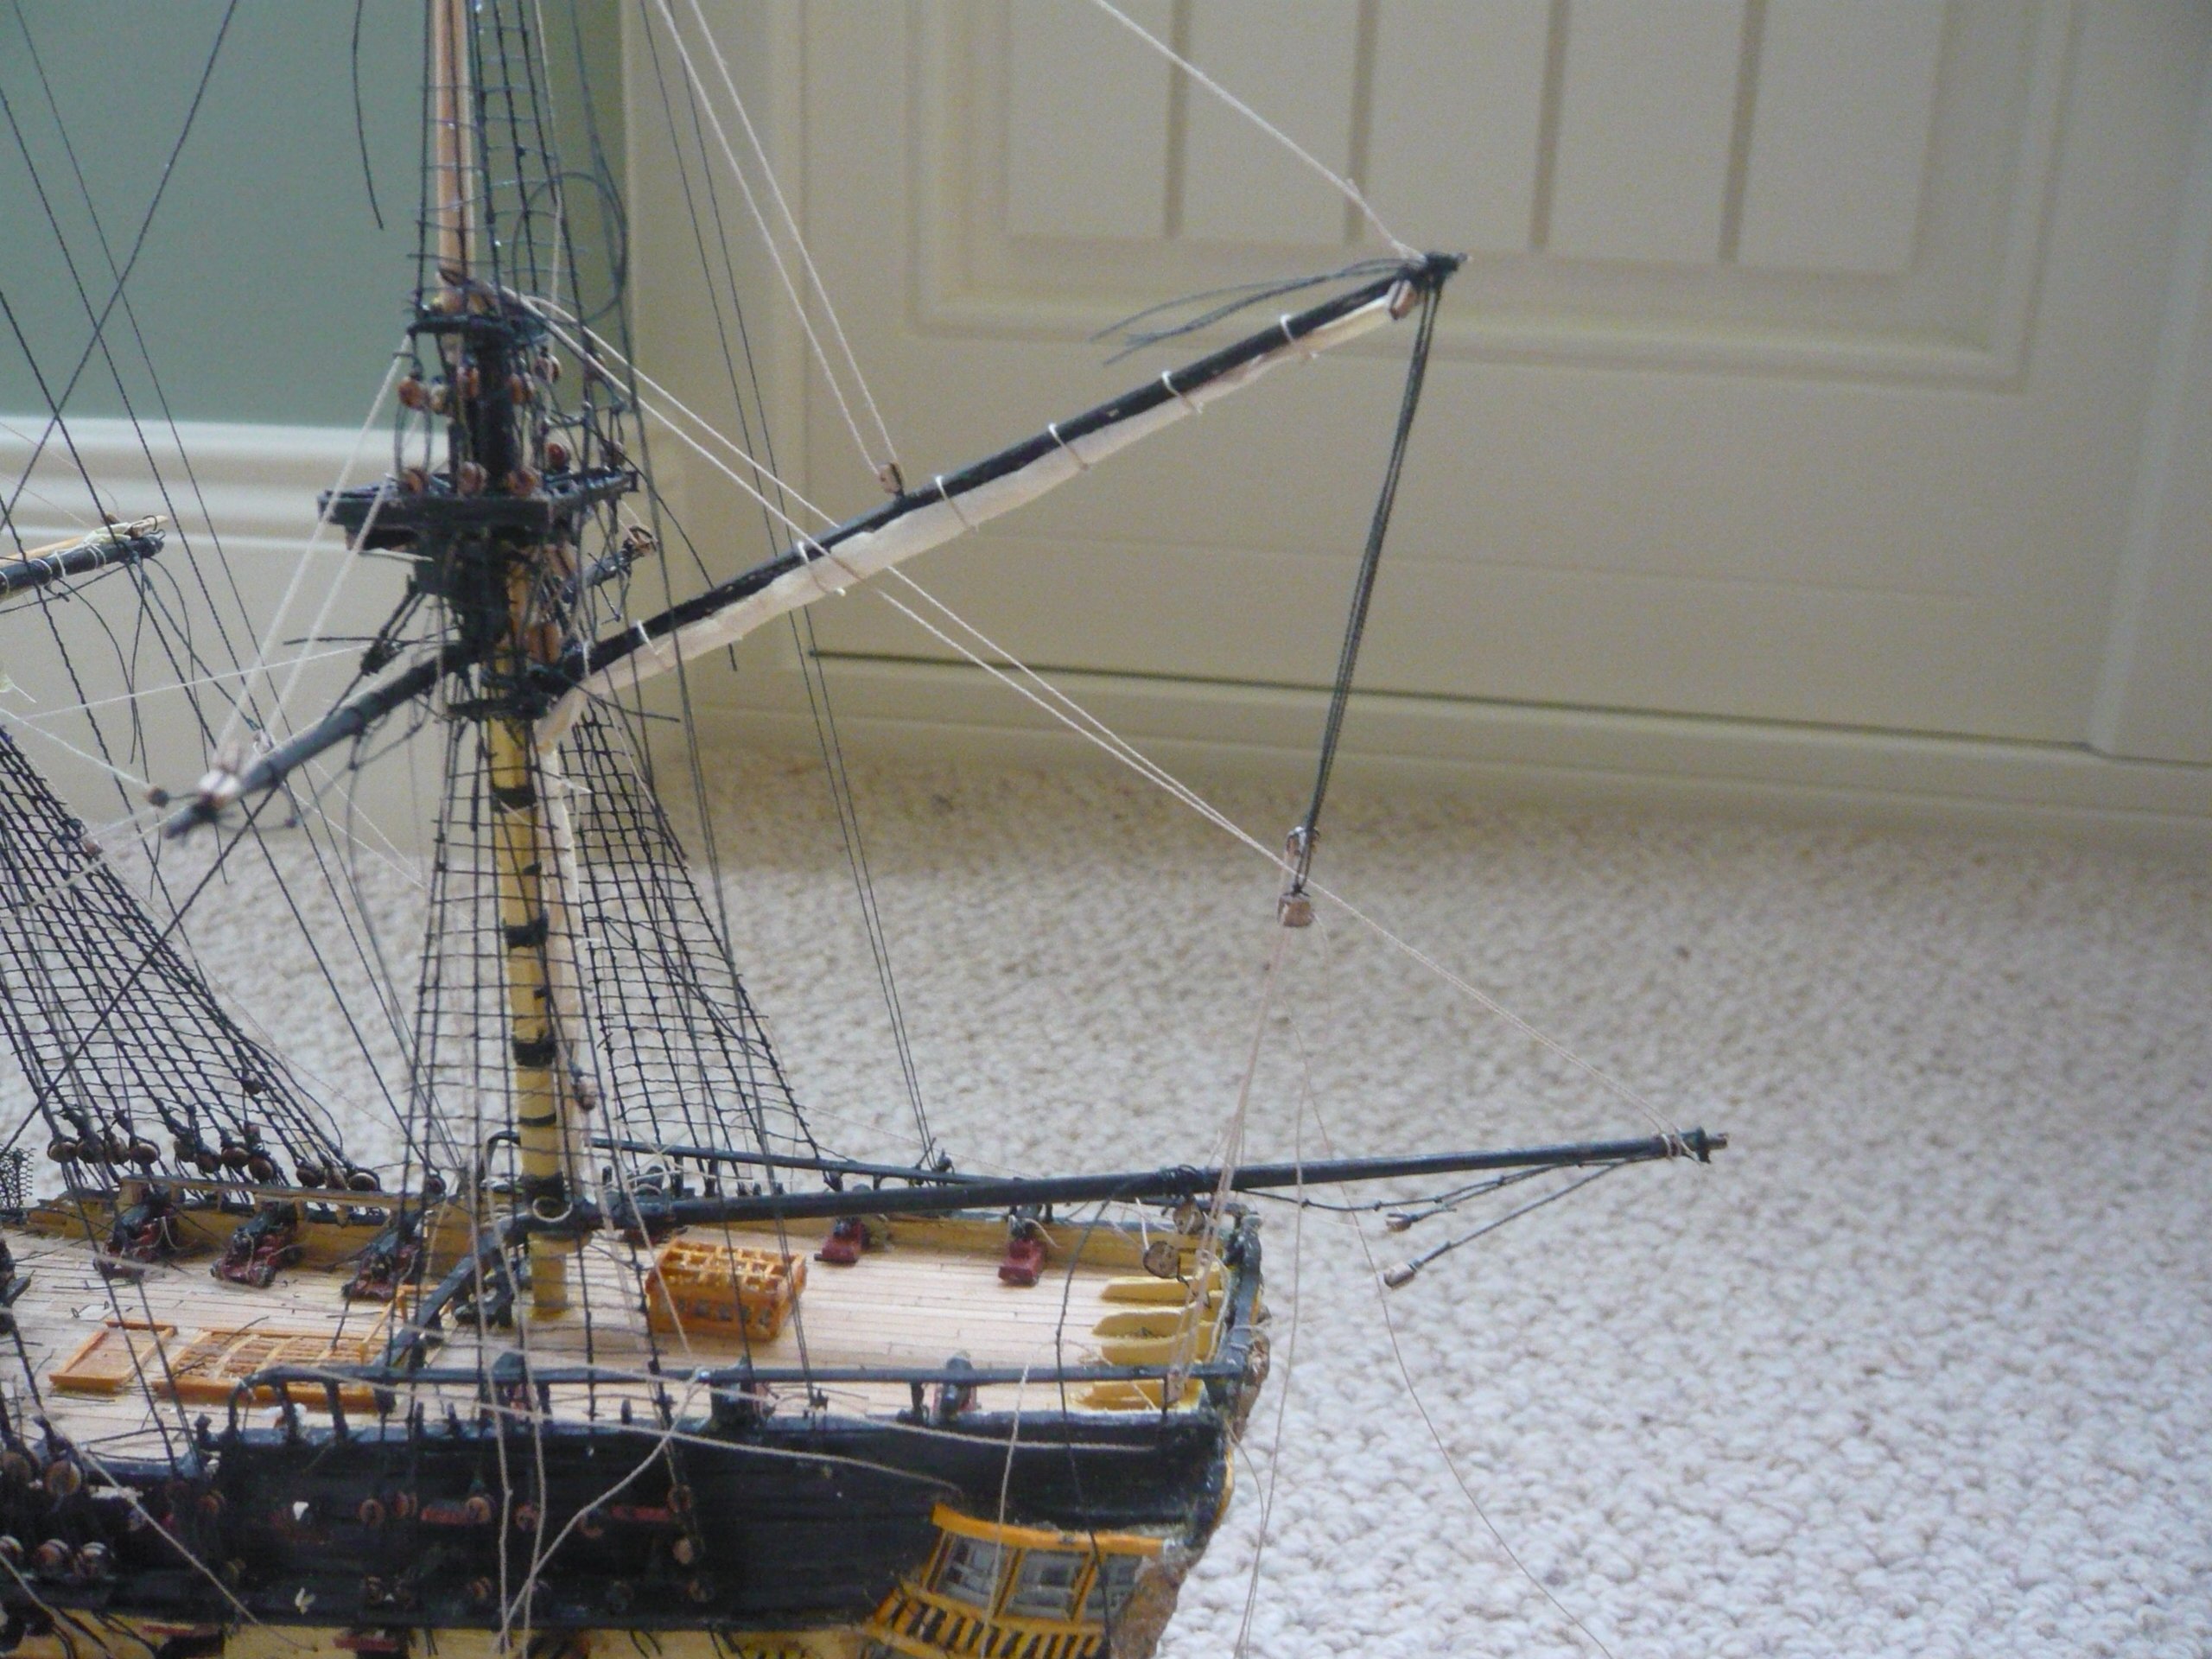
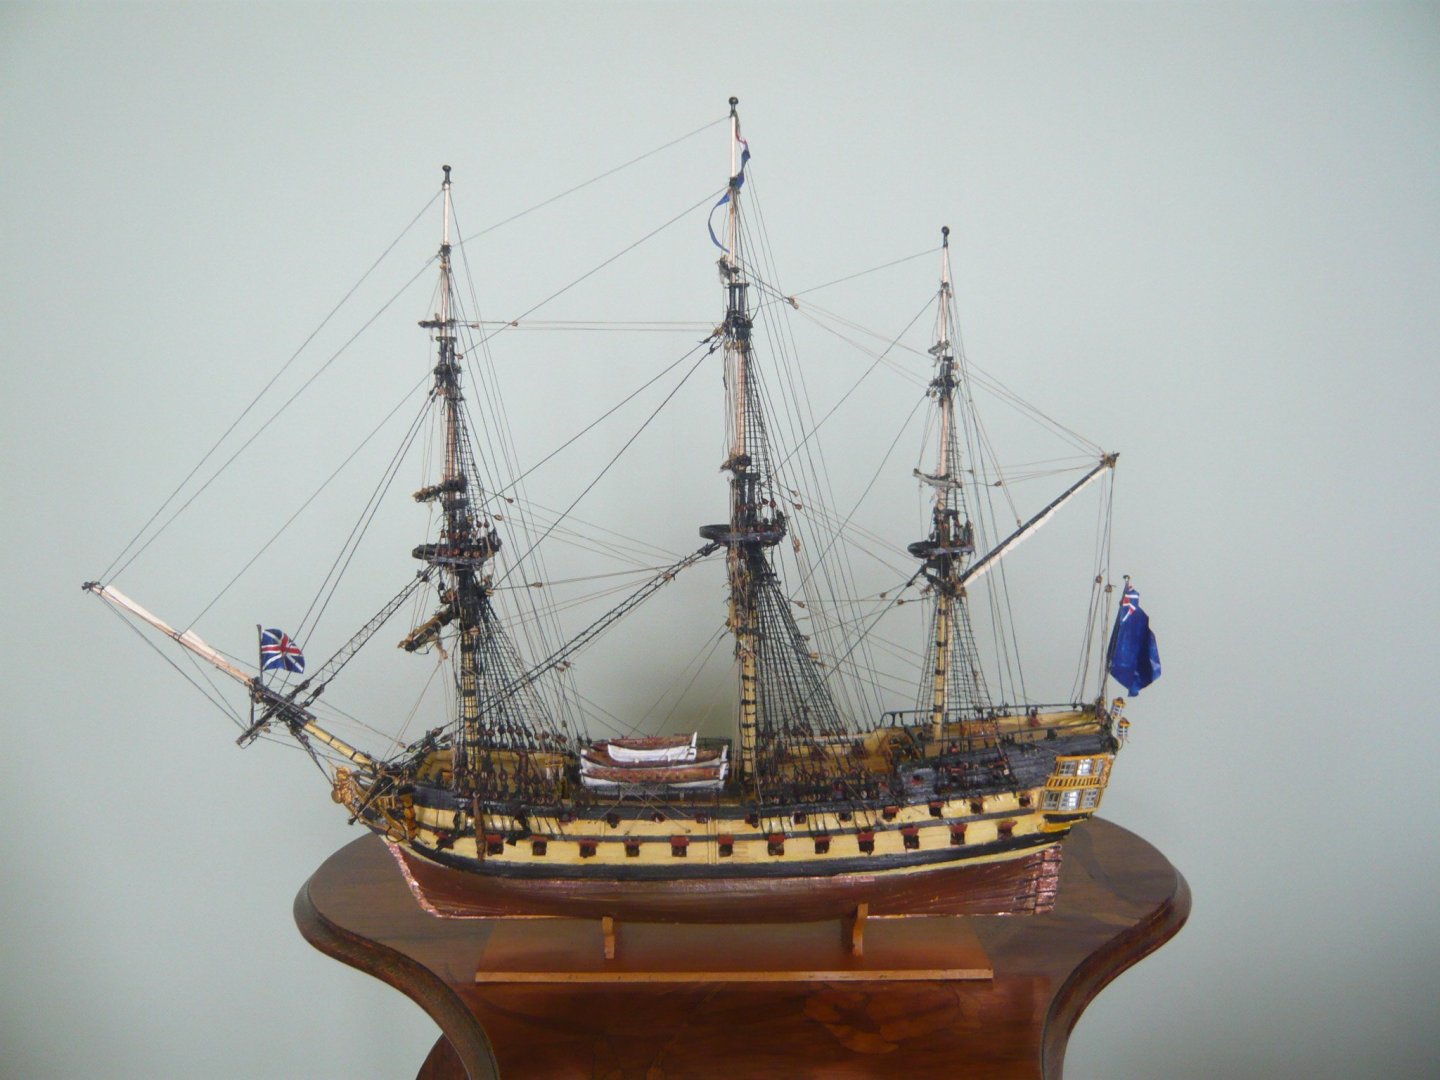
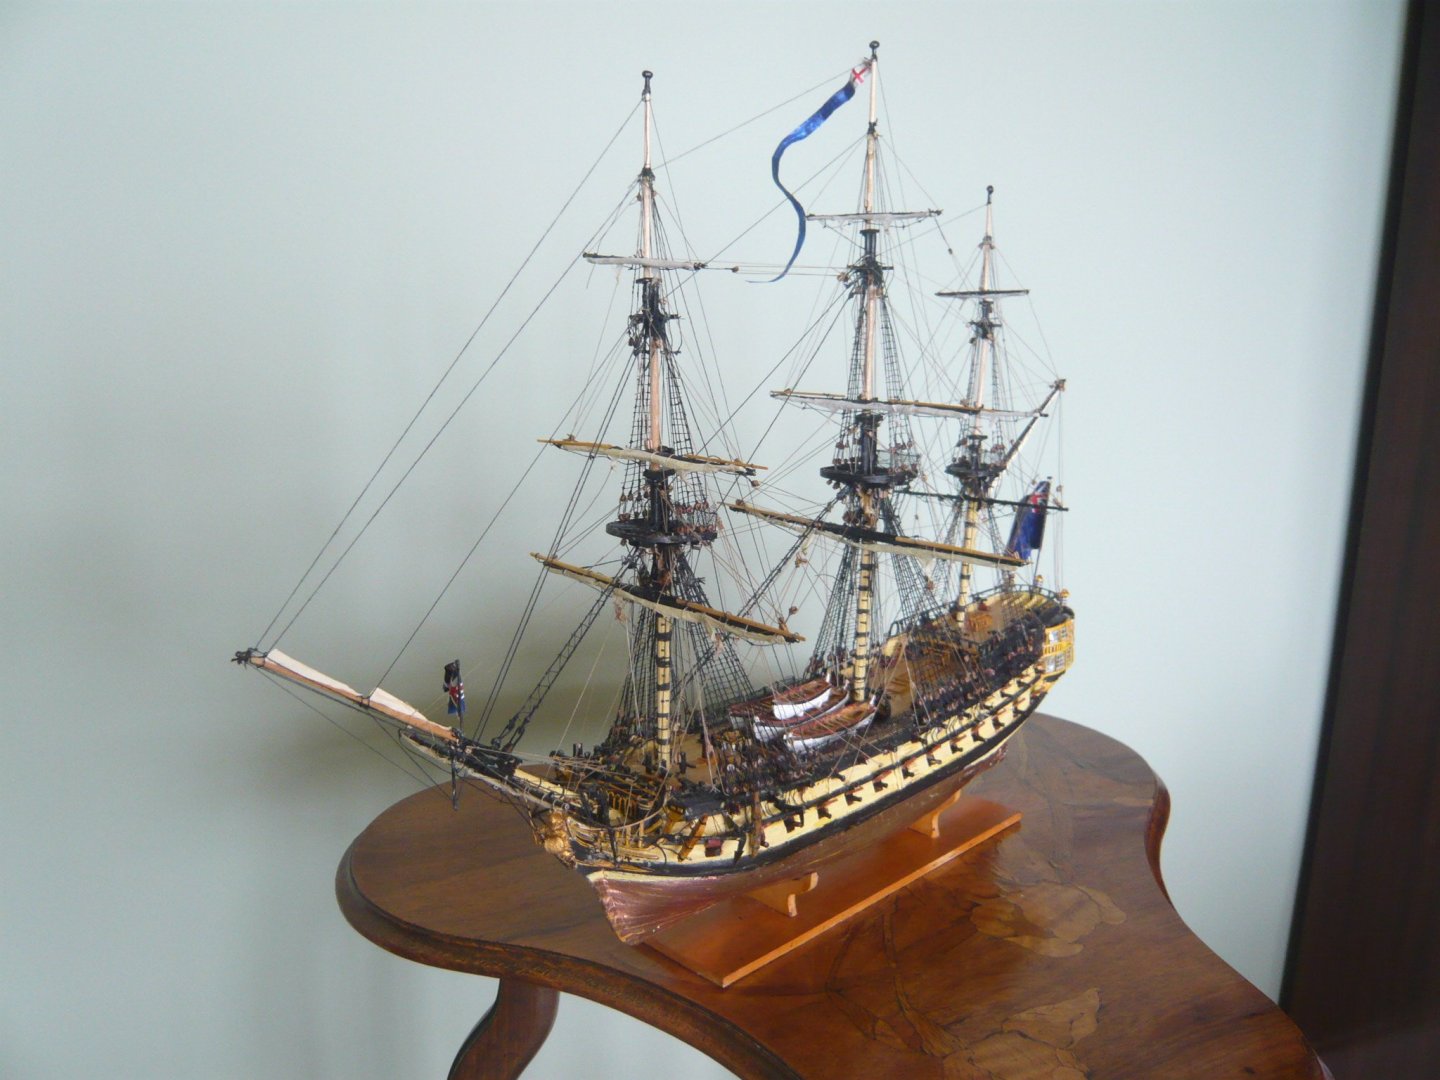
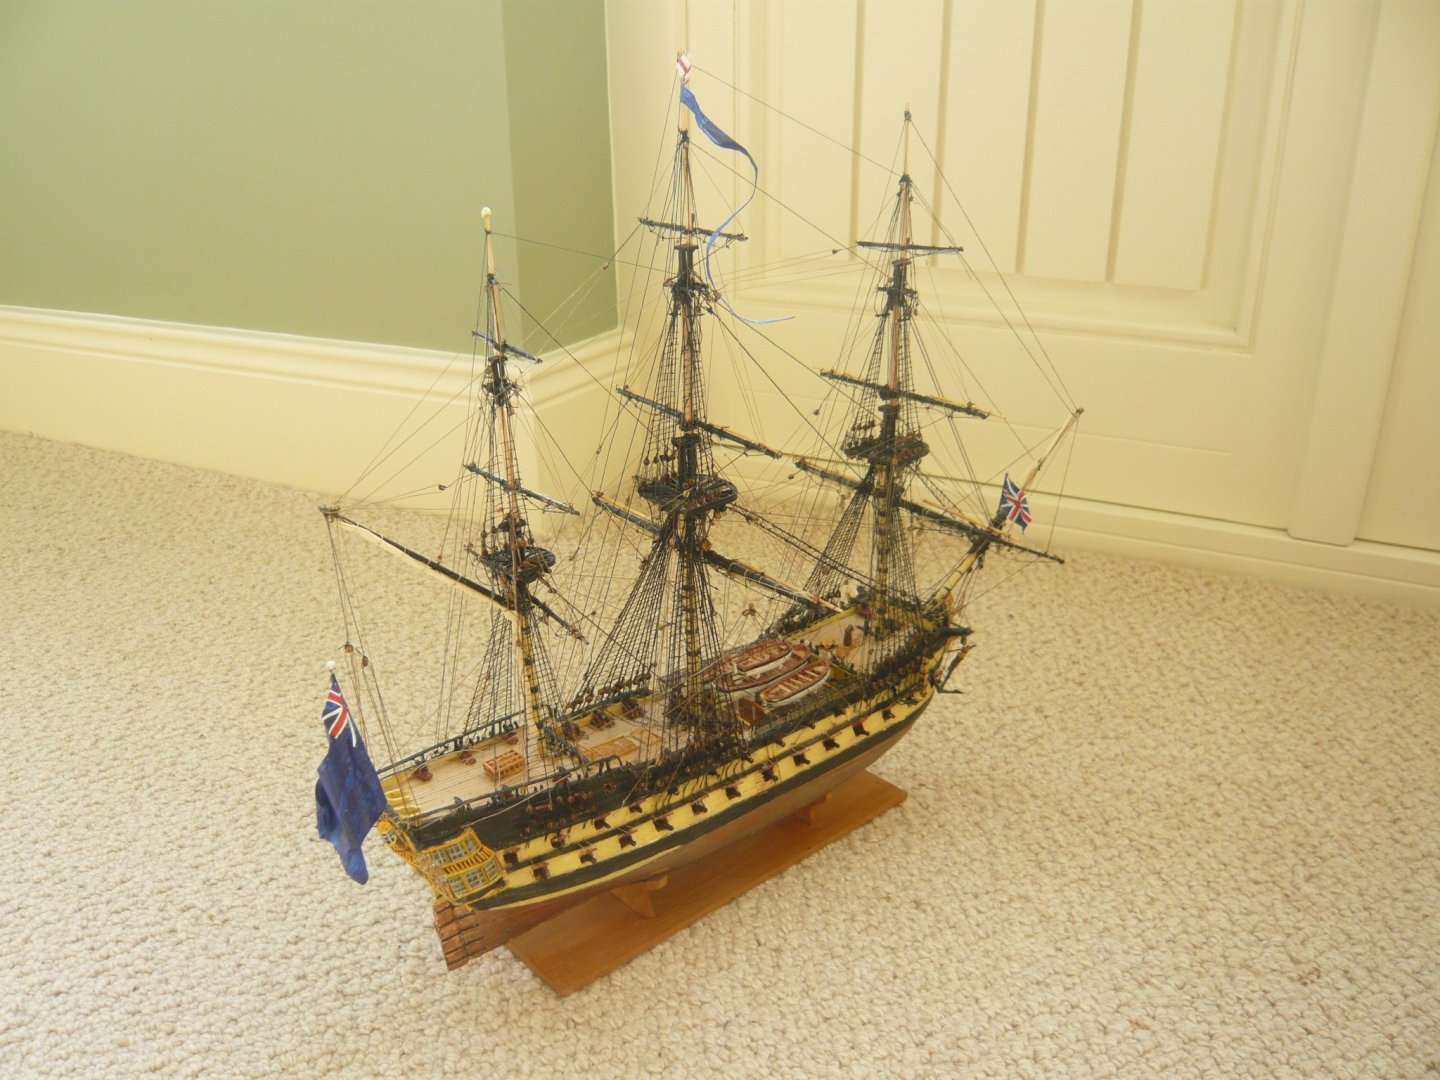
Now, some remarks about rigging. It’s perhaps worth saying that the most useful book was Lennarth Petersson’s Rigging Period Ship Models with its superb drawings ; beyond that I don’t have a large library of works on rigging. R.C. Anderson The Rigging Ships unfortunately does not go up to the period of this model; it’s a book I have found invaluable in the past. And rigging did not change as much as might be expected over time. Photos of models on this site have of course been very helpful, though in one respect I have shifted away from most of them. I was unhappy with the pale colour of the running rigging I adopted to start with, even though it looked like the shade used in many models, particularly kit ones. Aesthetically, it stood out far too emphatically, and a darker shade looks better. I have yet to see a contemporary painting or watercolour that shows the runnng rigging as close to white as it appears in some models. To judge by Steel’s Elements none of the rigging was without some tar. He wrote that ‘Yarn for cables requires more tar than for hawser-laid ropes. For running and standing rigging, the less tar the better, provided the thread is well covered The yarn, therefore, was soaked in a solution of tar. So I have used some wood dye (Colron mellow pine, a shade no longer available) on the running rigging to darken it somewhat. What I could not do was to lighted the black I used for the standing rigging. Ideally, I think, I should have found a mid-brown for the running rigging,, and a dark brown for the standing. Anyway, I think that though staining the rigging when it’s in place is a bit tedious and fiddly, the model does look better for it. I discussed the question of the driver boom previously (see above), and have little to add. I have decided to dispense with it. Partly this is for a practical reason. The case I had ordered a good time ago will take the ship with driver boom fitted, but there’s little room to spare, and the model will look better without it. Steel has a table suggesting that ships of 64 guns and above did not have driver booms, and the pictorial evidence points the same way. That is not to say that it would be wrong to fit one for the 1790s; either way would surely be acceptable. It’s hard to see how the driver boom would have always avoided the stern lanterns, and an ensign staff would have to have demountable. The watercolour of Agamemnon by Pocock in the National Maritime Museum (PAF5874) does show a driver boom, and royals, neither of which feature on my model, but the picture was drawn a good many years later than the event it depicts, and may not be correct. I’ve been wondering whether to have royals. Steel has them, as in his plate showing a ship with all her sails. Most pictures of the period don’t show them, but Pocock’s sketch of Agamemnon, has them. The sketch, however, was made in 1810, and I think I’ll be safe in following the example of, for example, the National Maritime Museum’s model of HMS Mars. There’s a practical reason too, in that I don’t have any thread thin enough to look right for royals. One difficulty has been deciding how much rigging to leave out. Including everything would have been almost impossible, and a particular problem in the case of this model was how to do the lines that helped to control the sails. It’s easy, for example, to see where bowlines went if the sails are fully set, but harder to fit them with the sails furled. So I have omitted a good deal, but I hope the overall impression is adequate. One final touch might have been to complete the rigging with rope coils where running rigging came down to the deck. But enough is enough, and I could not do this neatly or convincingly at such a small scale. I did manage a few in a model I completed in, I think, 1960, but my fingers were nimbler then, and the scale was not so small. I’ve put a photo on the first page which shows a coil, as well as a surprising amount of dust for a model in a case. There are always more finishing touches possible, but I think that completes the model, bar putting it into its case, and of course taking it to the village show next September. And now to think about what next. I don’t think it will be such a big ship, or such a small scale, but I’m quite undecided. I’d like to thank those who have followed this build; I’m most grateful for the support. I’ll end with a few more photos of the completed model.


- 60 replies
-
- 10
-
-

-
- Agamemnon
- Ardent-class
- (and 2 more)
-
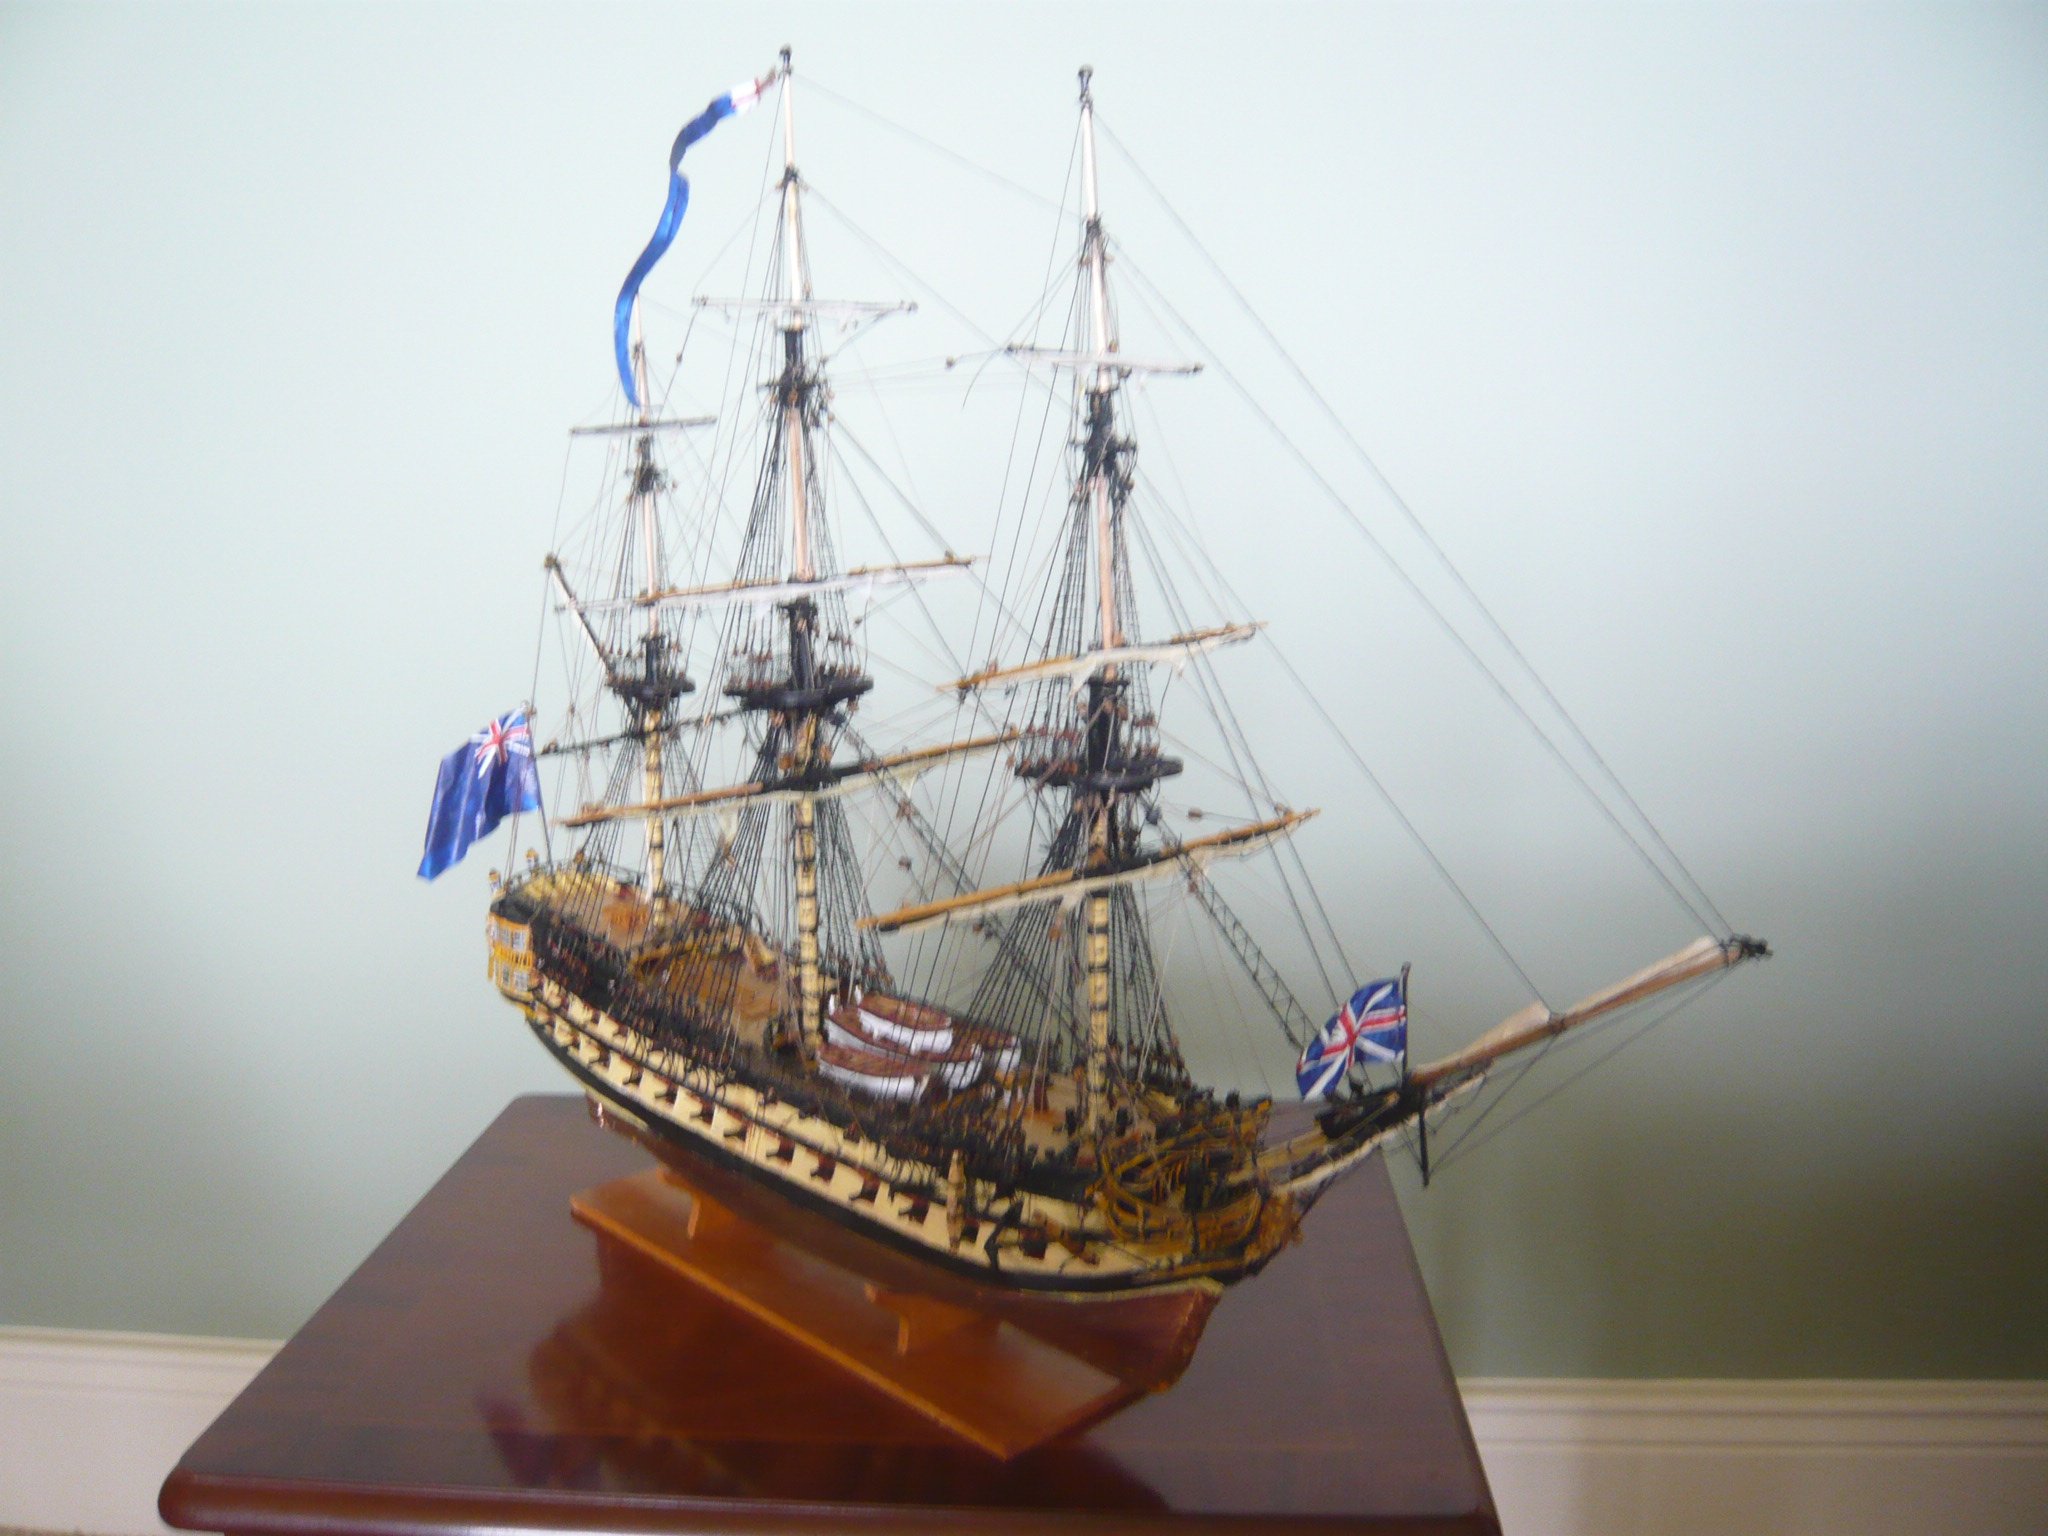
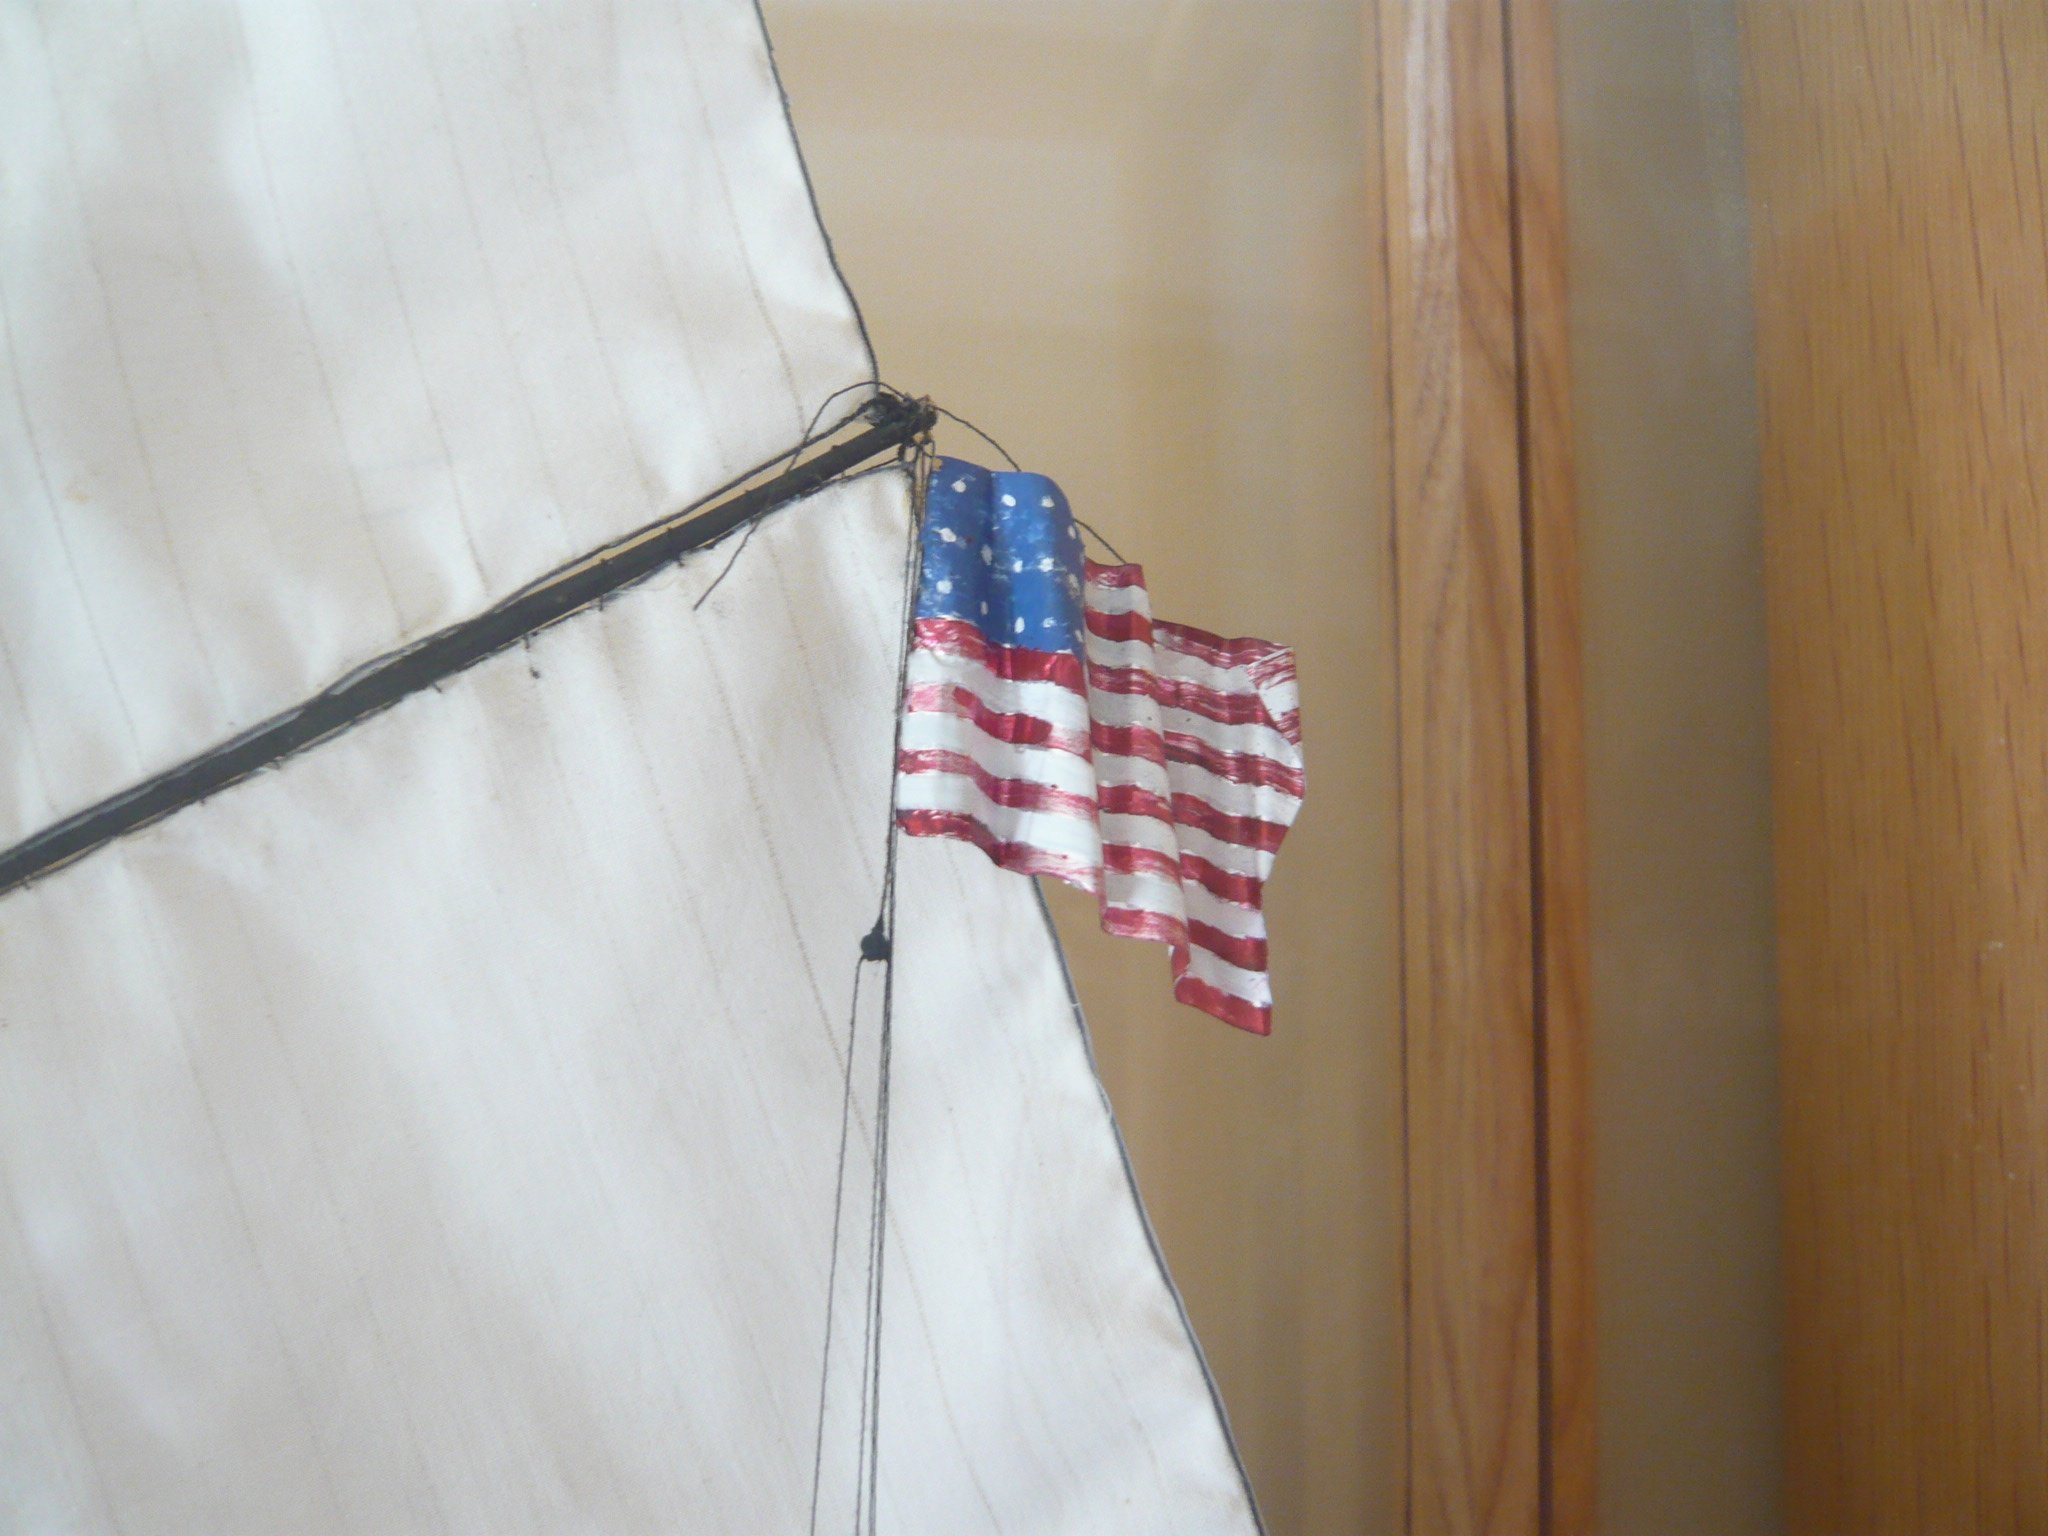
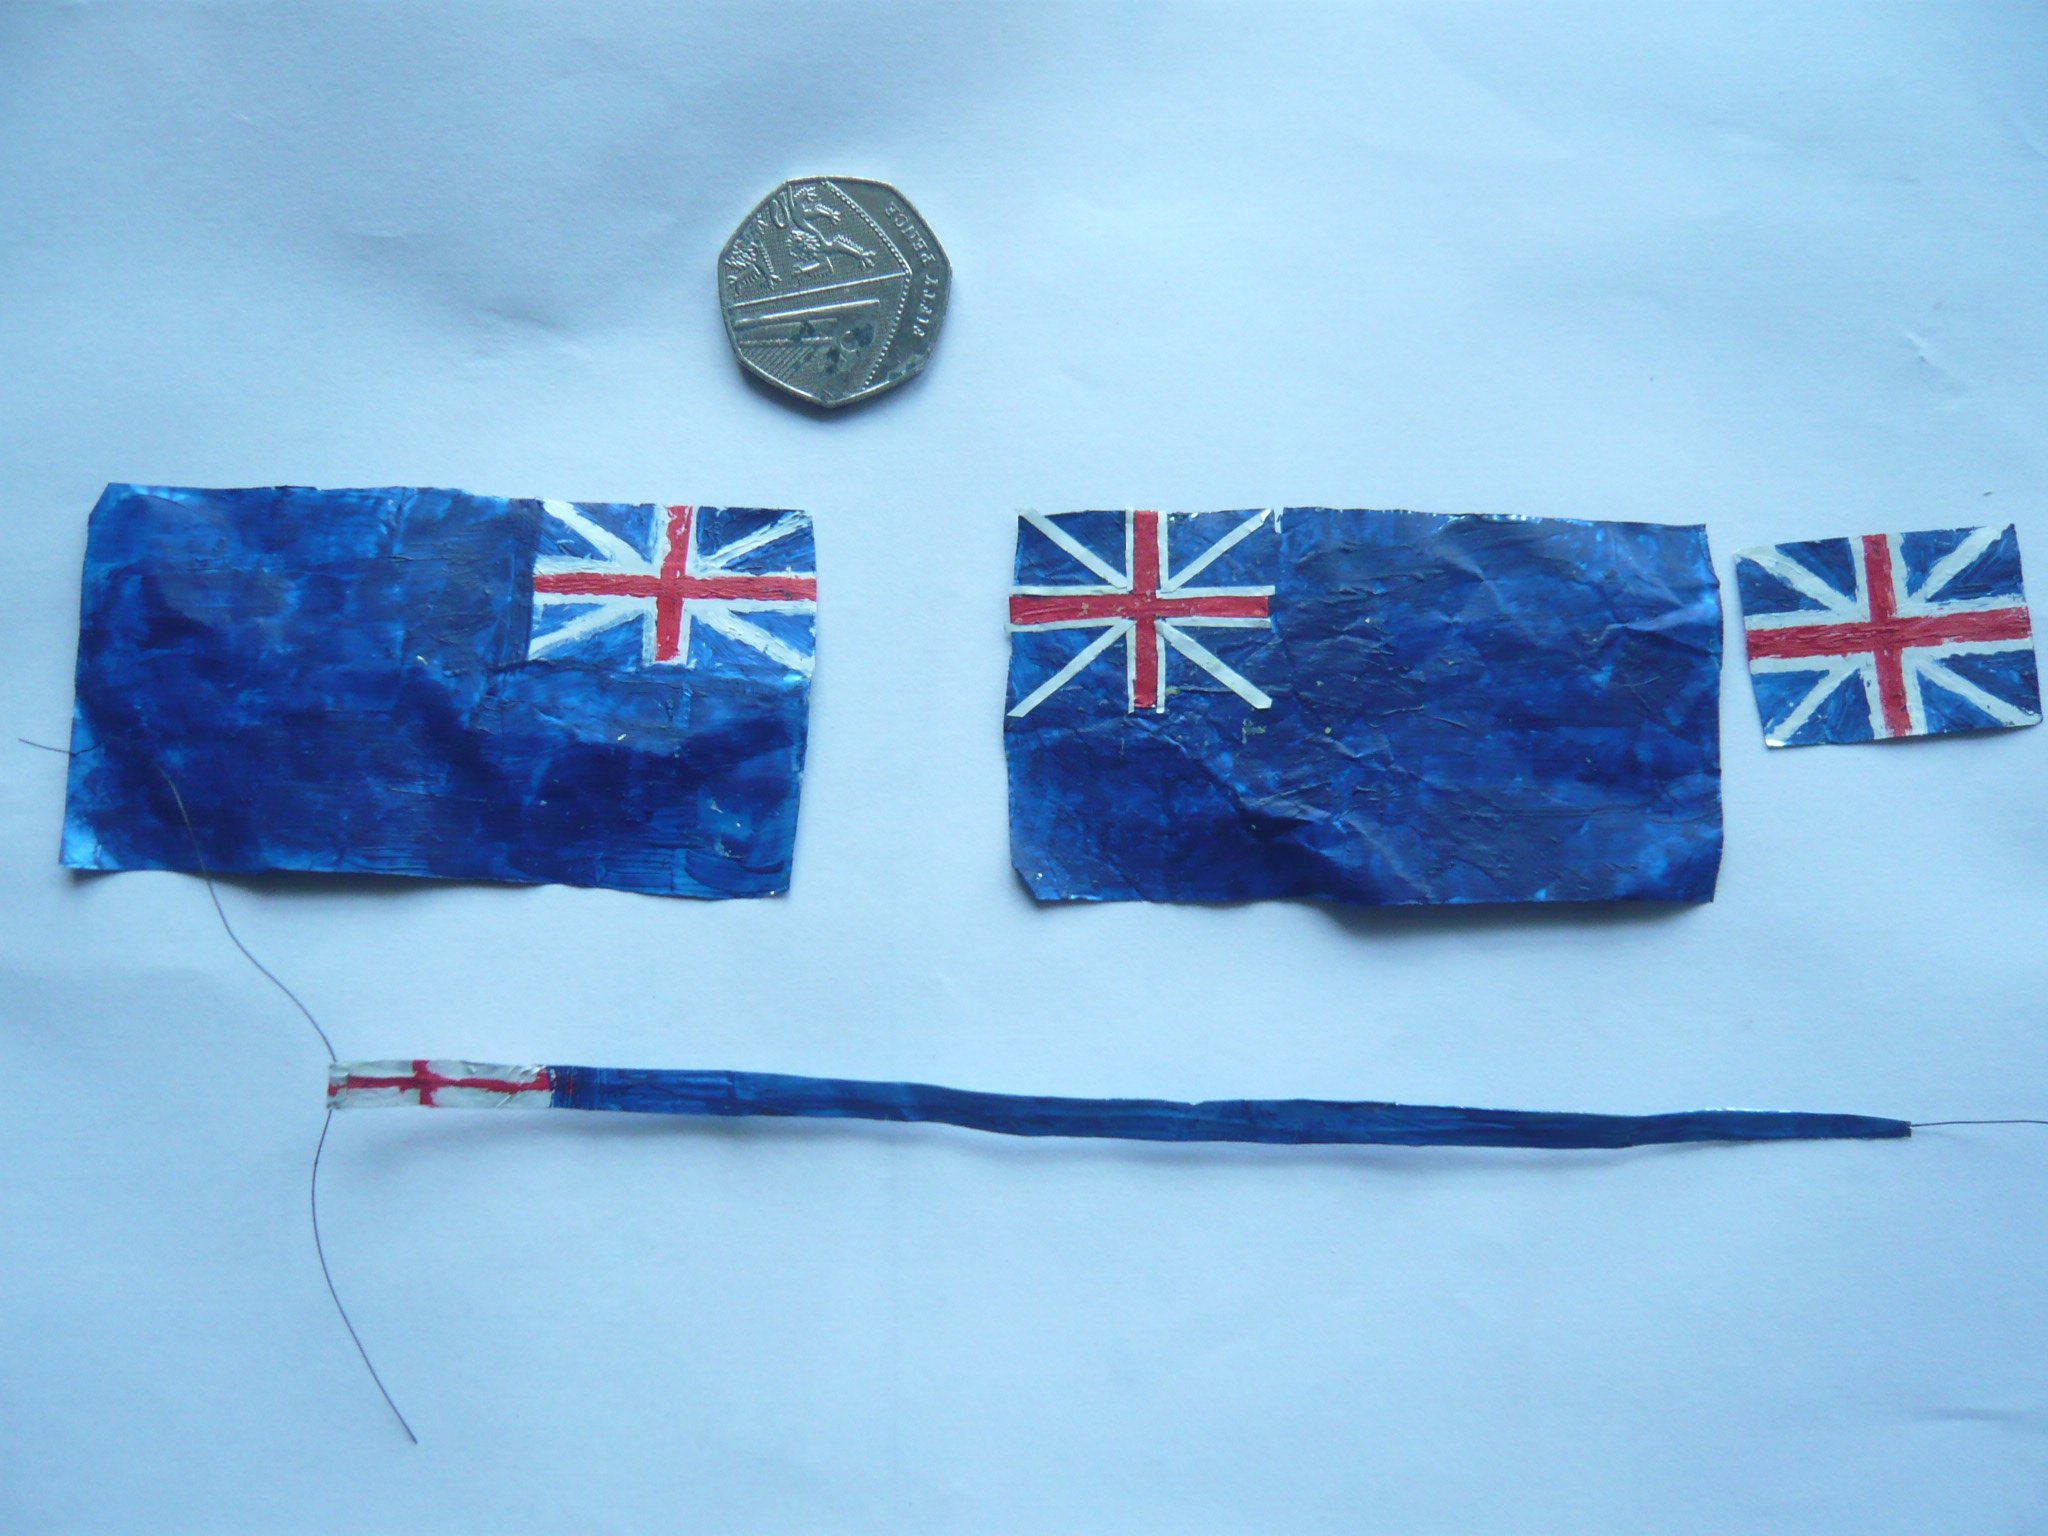
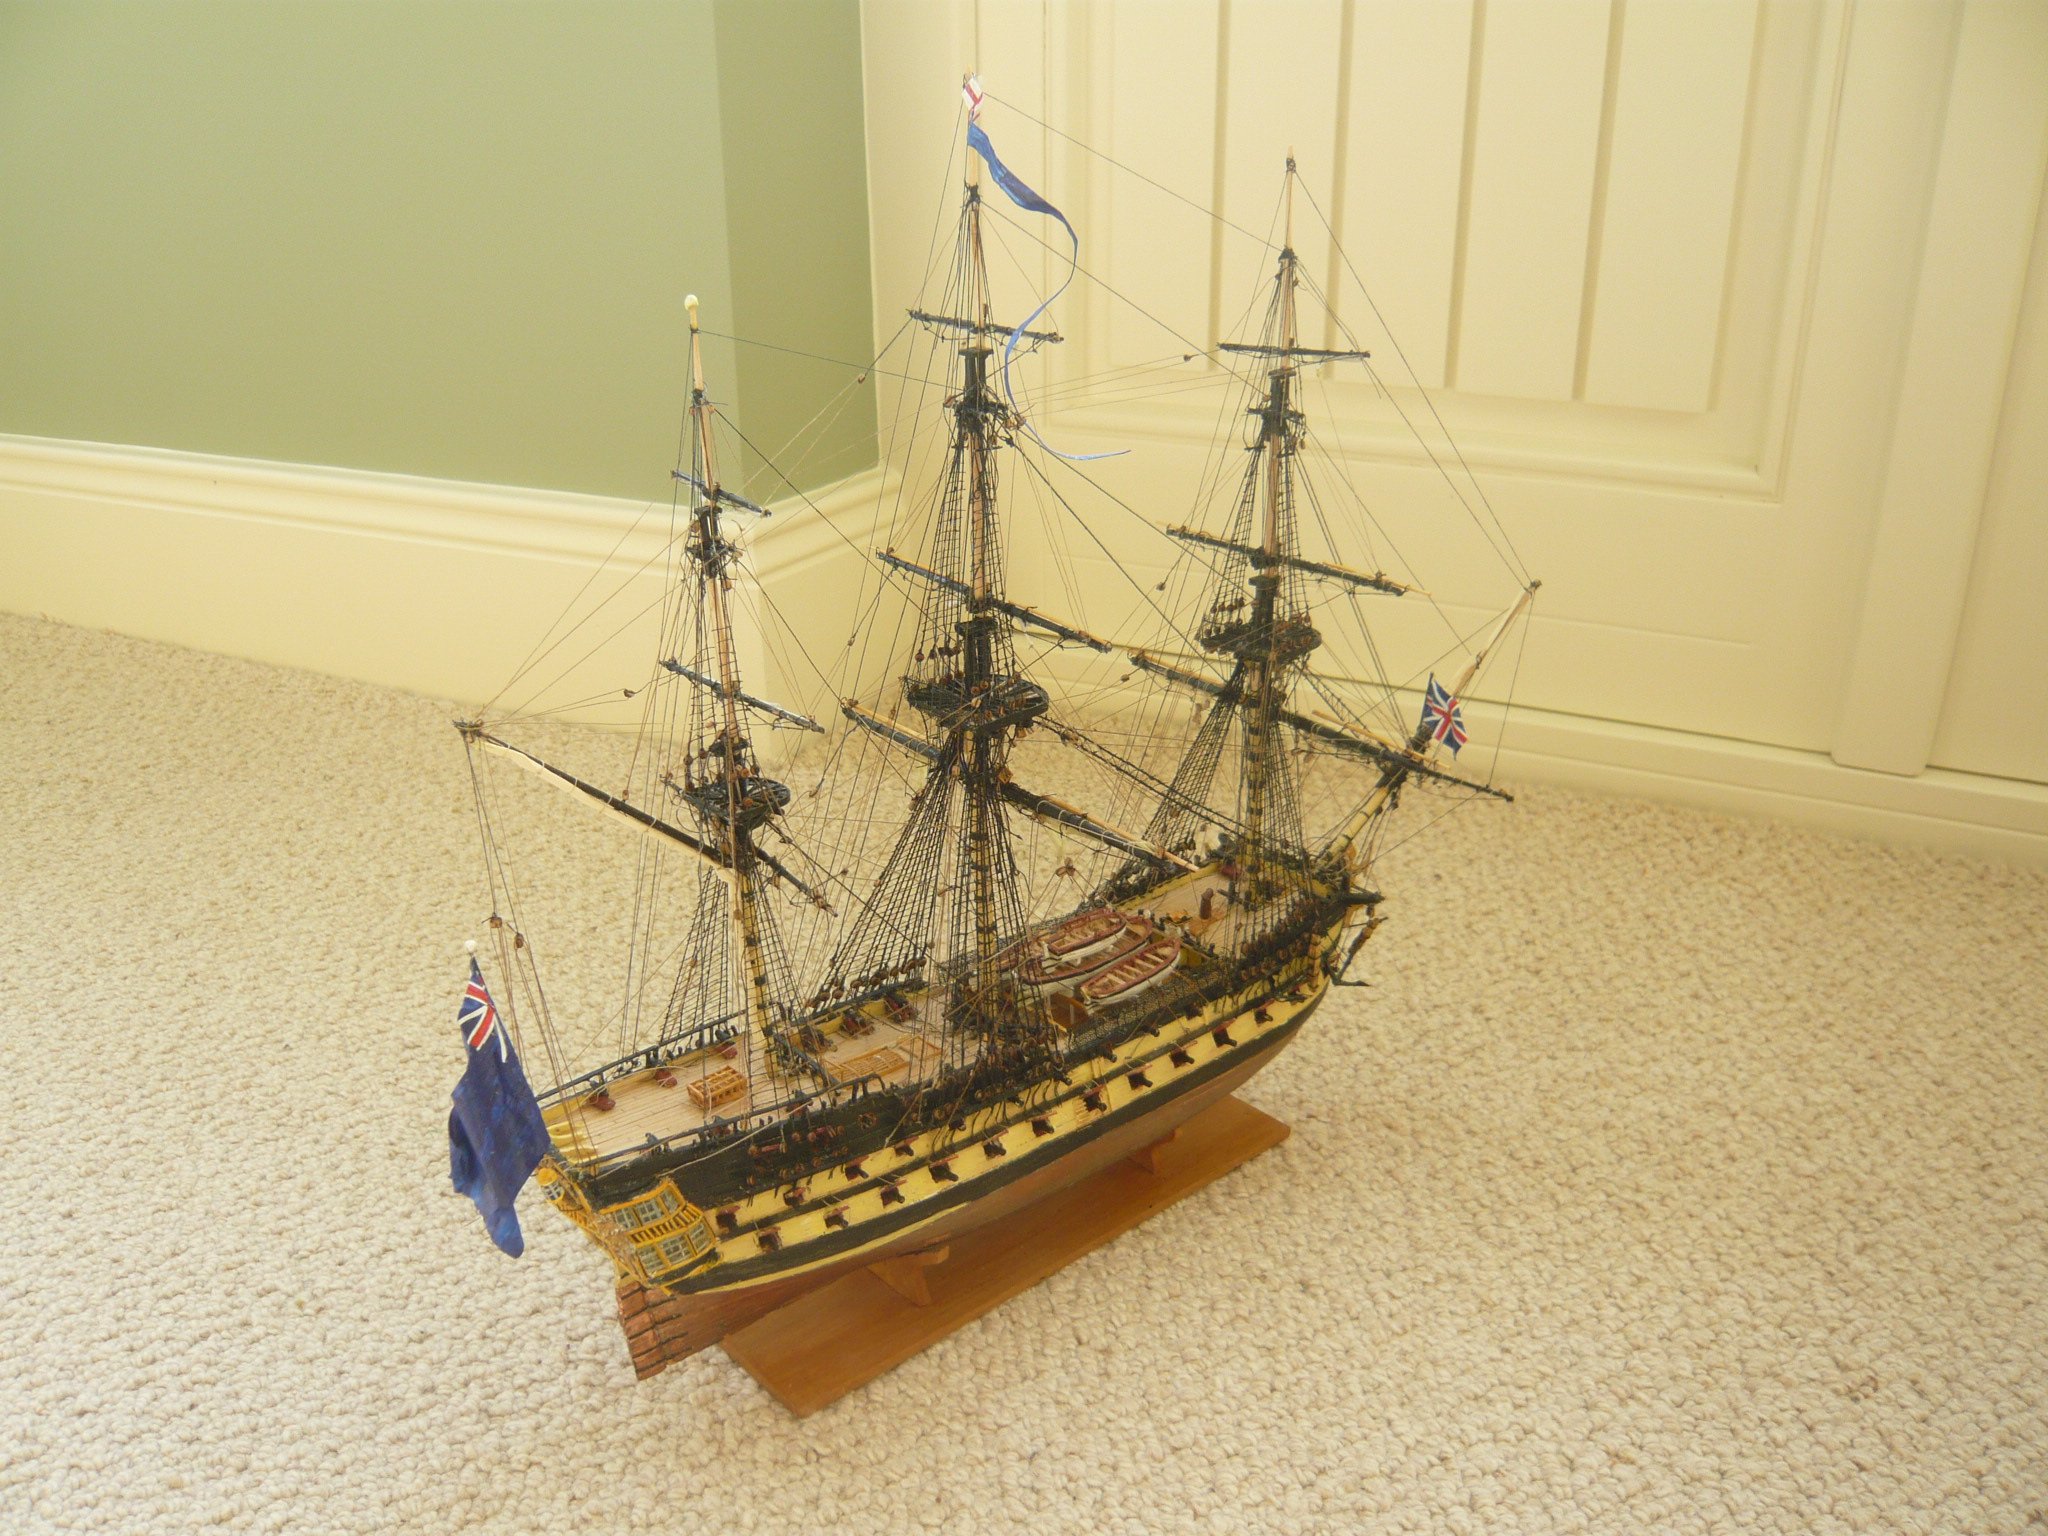
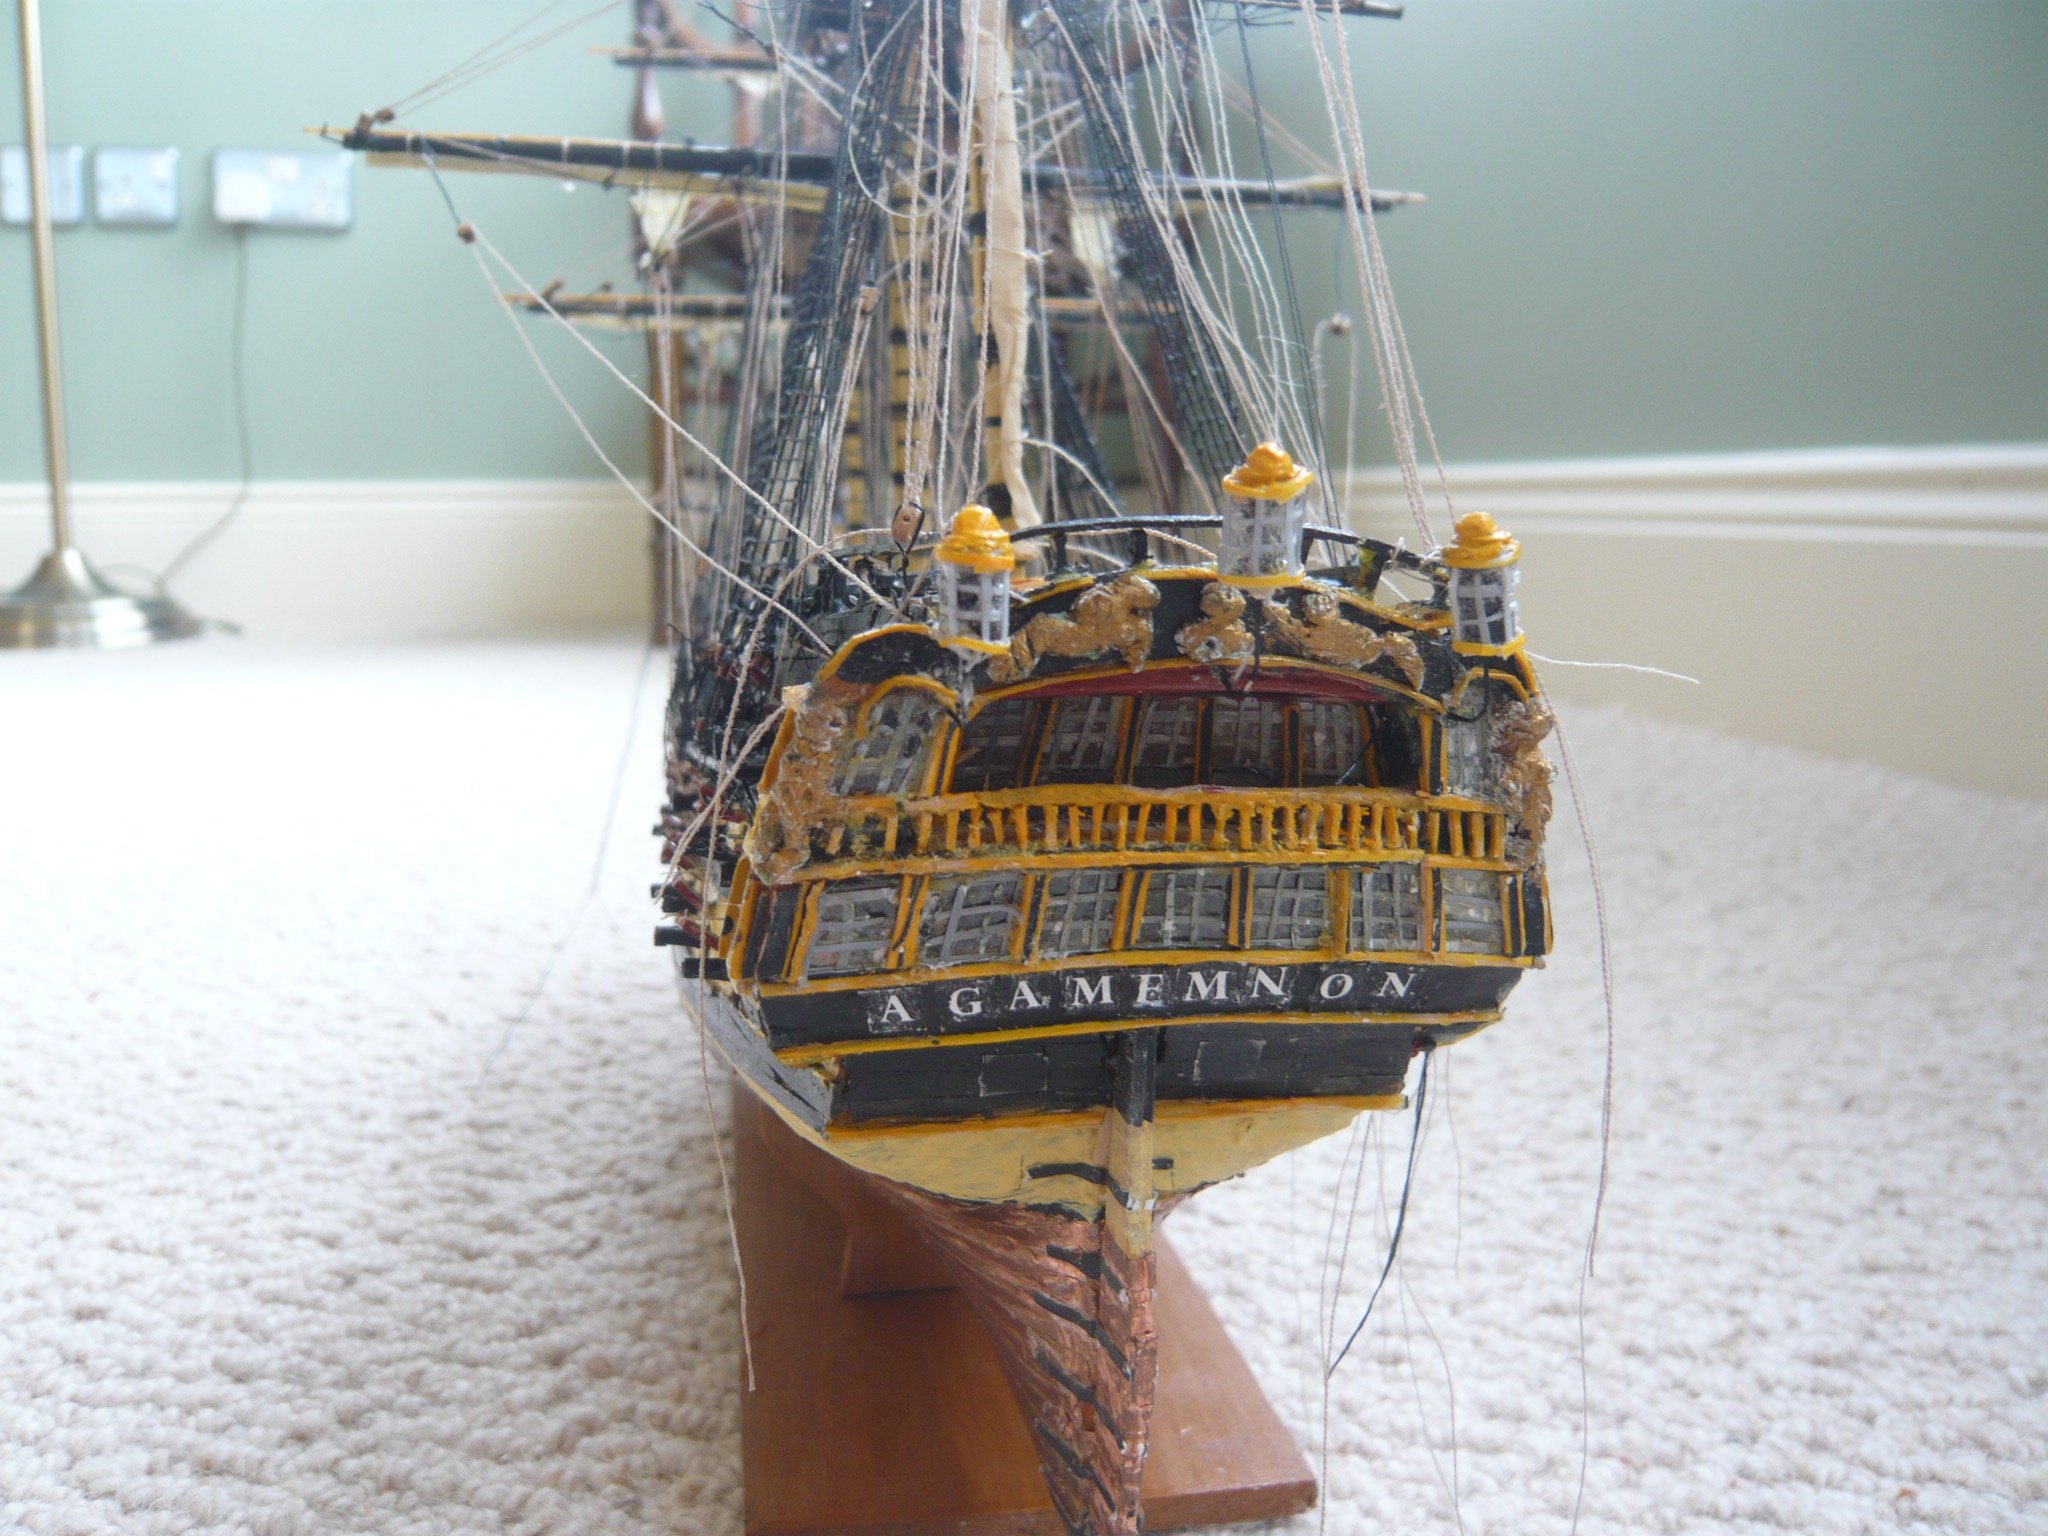
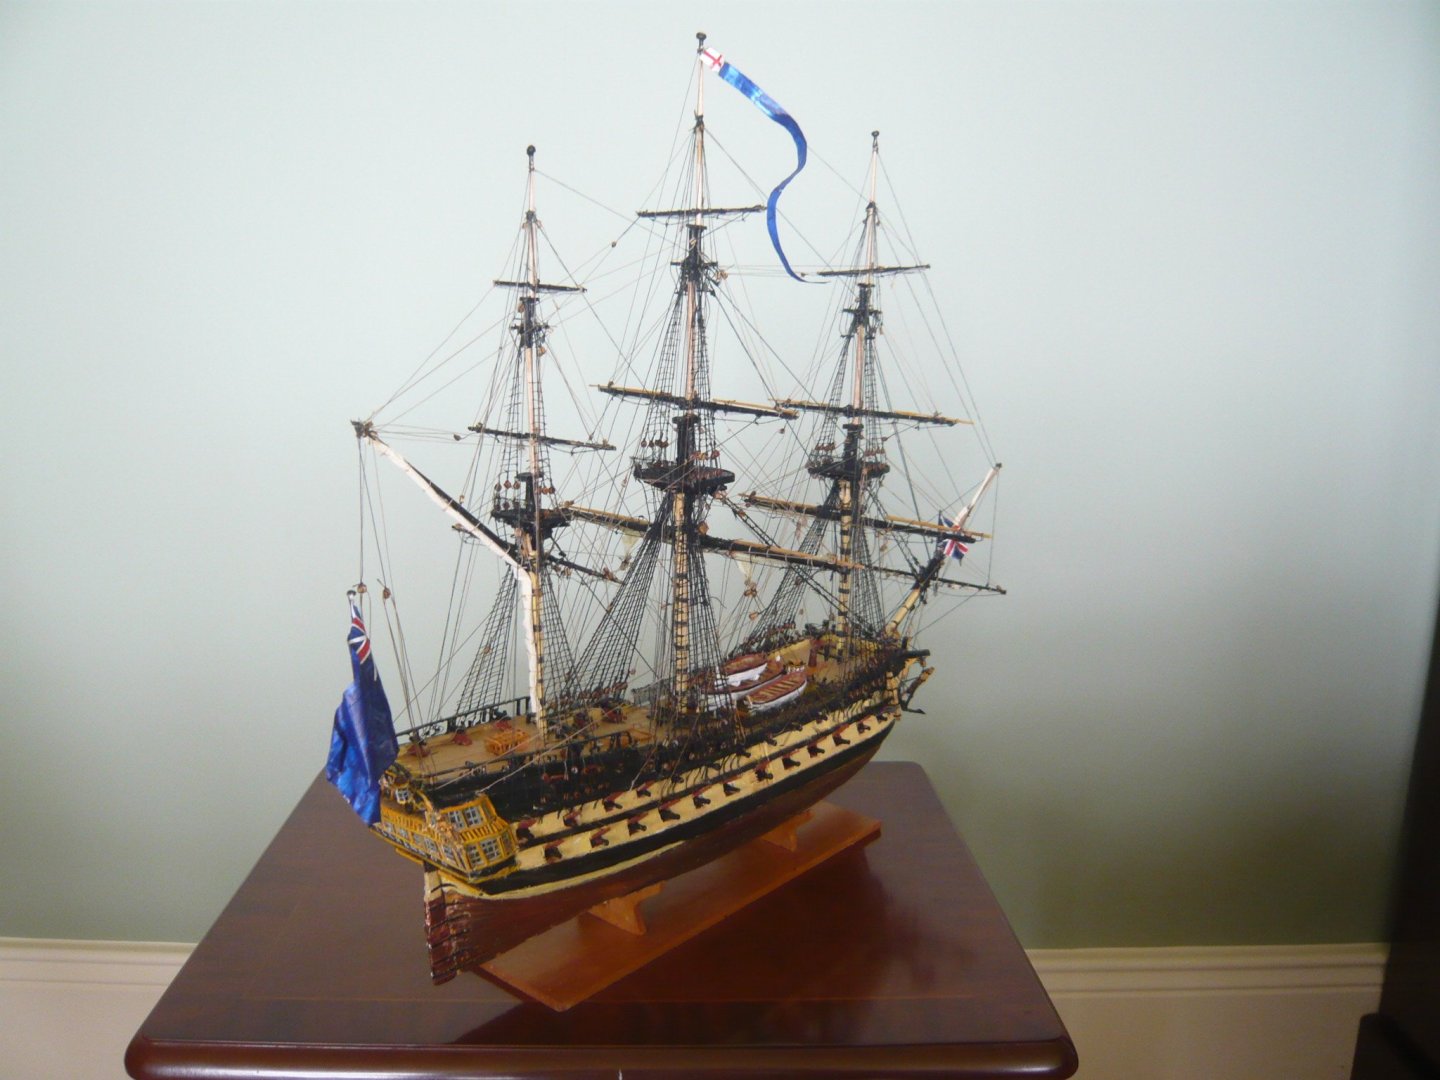
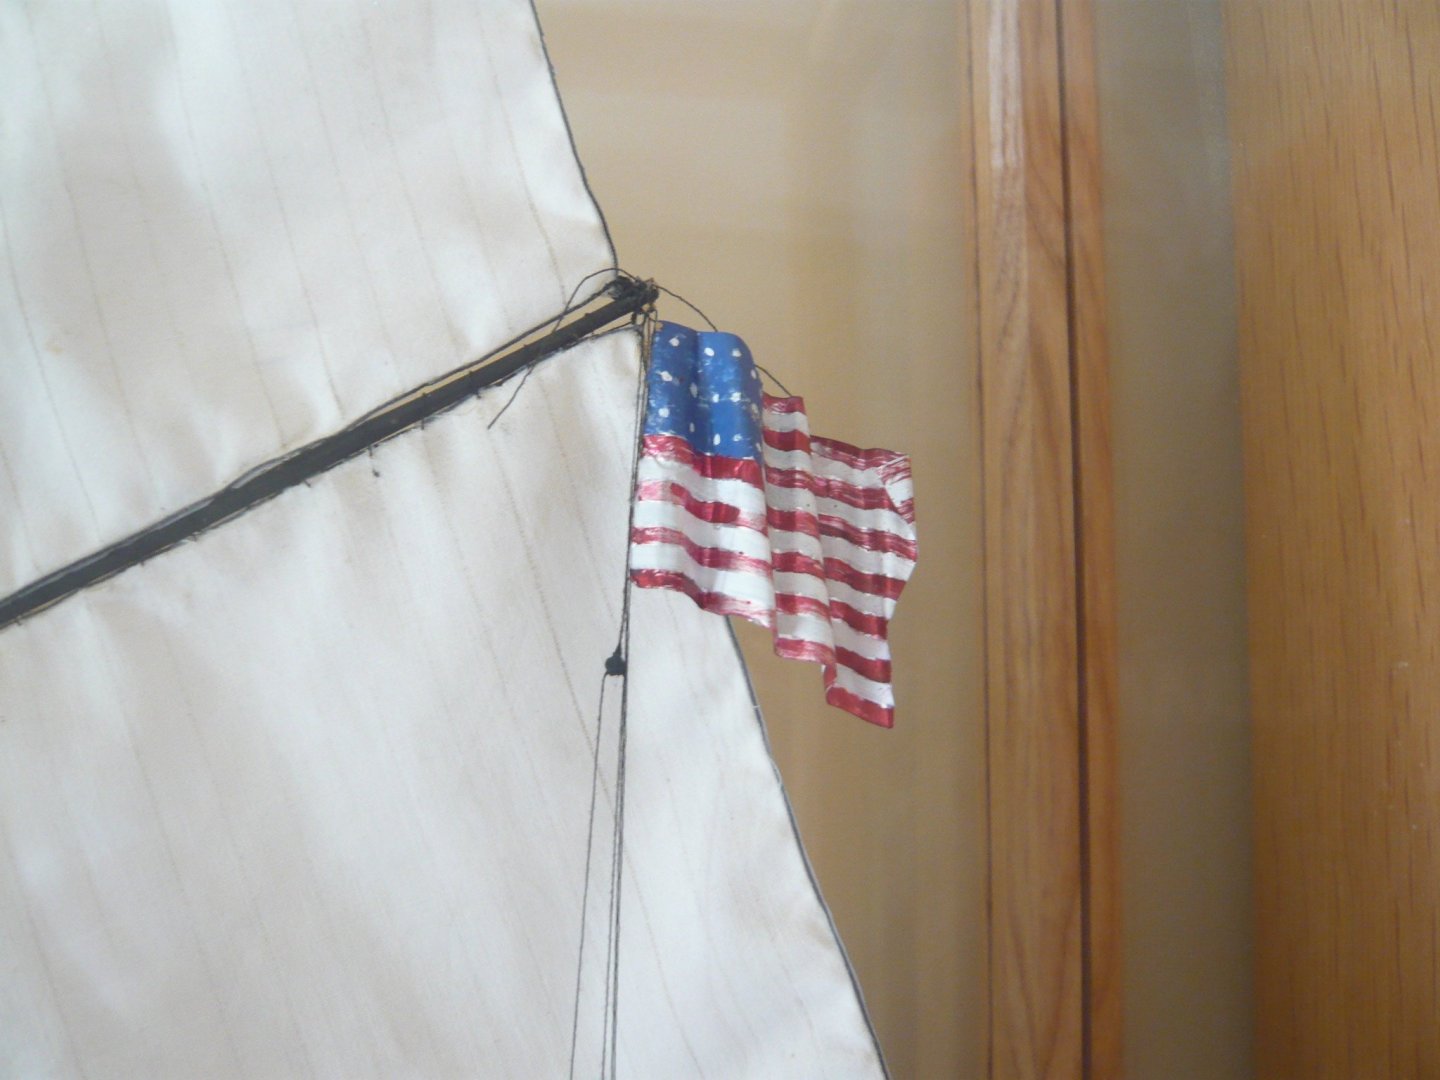
Flags. I have read with interest on this site about various methods of making flags, involving colour printer, transfer paper, and all sorts of things which are quite beyond me. Eleven year old grandson (not the one with a 3d printer) produced similar ideas, but I have ignored them - they were too much me. So, I have gone for painted kitchen foil flags, a method I first used in the late 1950s. I still have the model, so here’s a picture. Foil has the advantage of being able to fold it to hang or droop a bit more realistically than some methods allow. I was struck by a model of the Agostini Sovereign of the Seas in the local auction, which had what looked like cloth flags sticking out stiffly and looking totally wrong. The problem I have with foil is painting them sufficiently neatly, as this photo shows. The answer has been, on my wife’s advice, to glue painted strips onto the flags, which means that the lines are all straight and neat (that's the one in the middle, with the union design too big). The ensign is blue, which is right for the summer of 1796, when Jervis was vice-admiral of the blue, and Nelson was under his command in Agamemnon. And Pocock's watercolour, though later, shows a blue ensign. What I am not sure about is the commissioning pennant - should that be all blue, or blue and white? Incidentally, I have stiffened the pennant to make it hang effectively, by means of folding it and fitting a very thin wire within it. The ensign and union flag did not need anything so elaborate. So, the next photo shows the flags in place. The model is now near completion - not much more needs to be done apart from a lot of tidying up. I have noticed that some models have gone so far as to include crew members, but that would be surely be very hard at this scale. And to be anything like realistic, around a hundred little figures would be a minimum, given that the total number of the crew would be around 500.

- 60 replies
-
- 3
-
-
-
- Agamemnon
- Ardent-class
- (and 2 more)
-
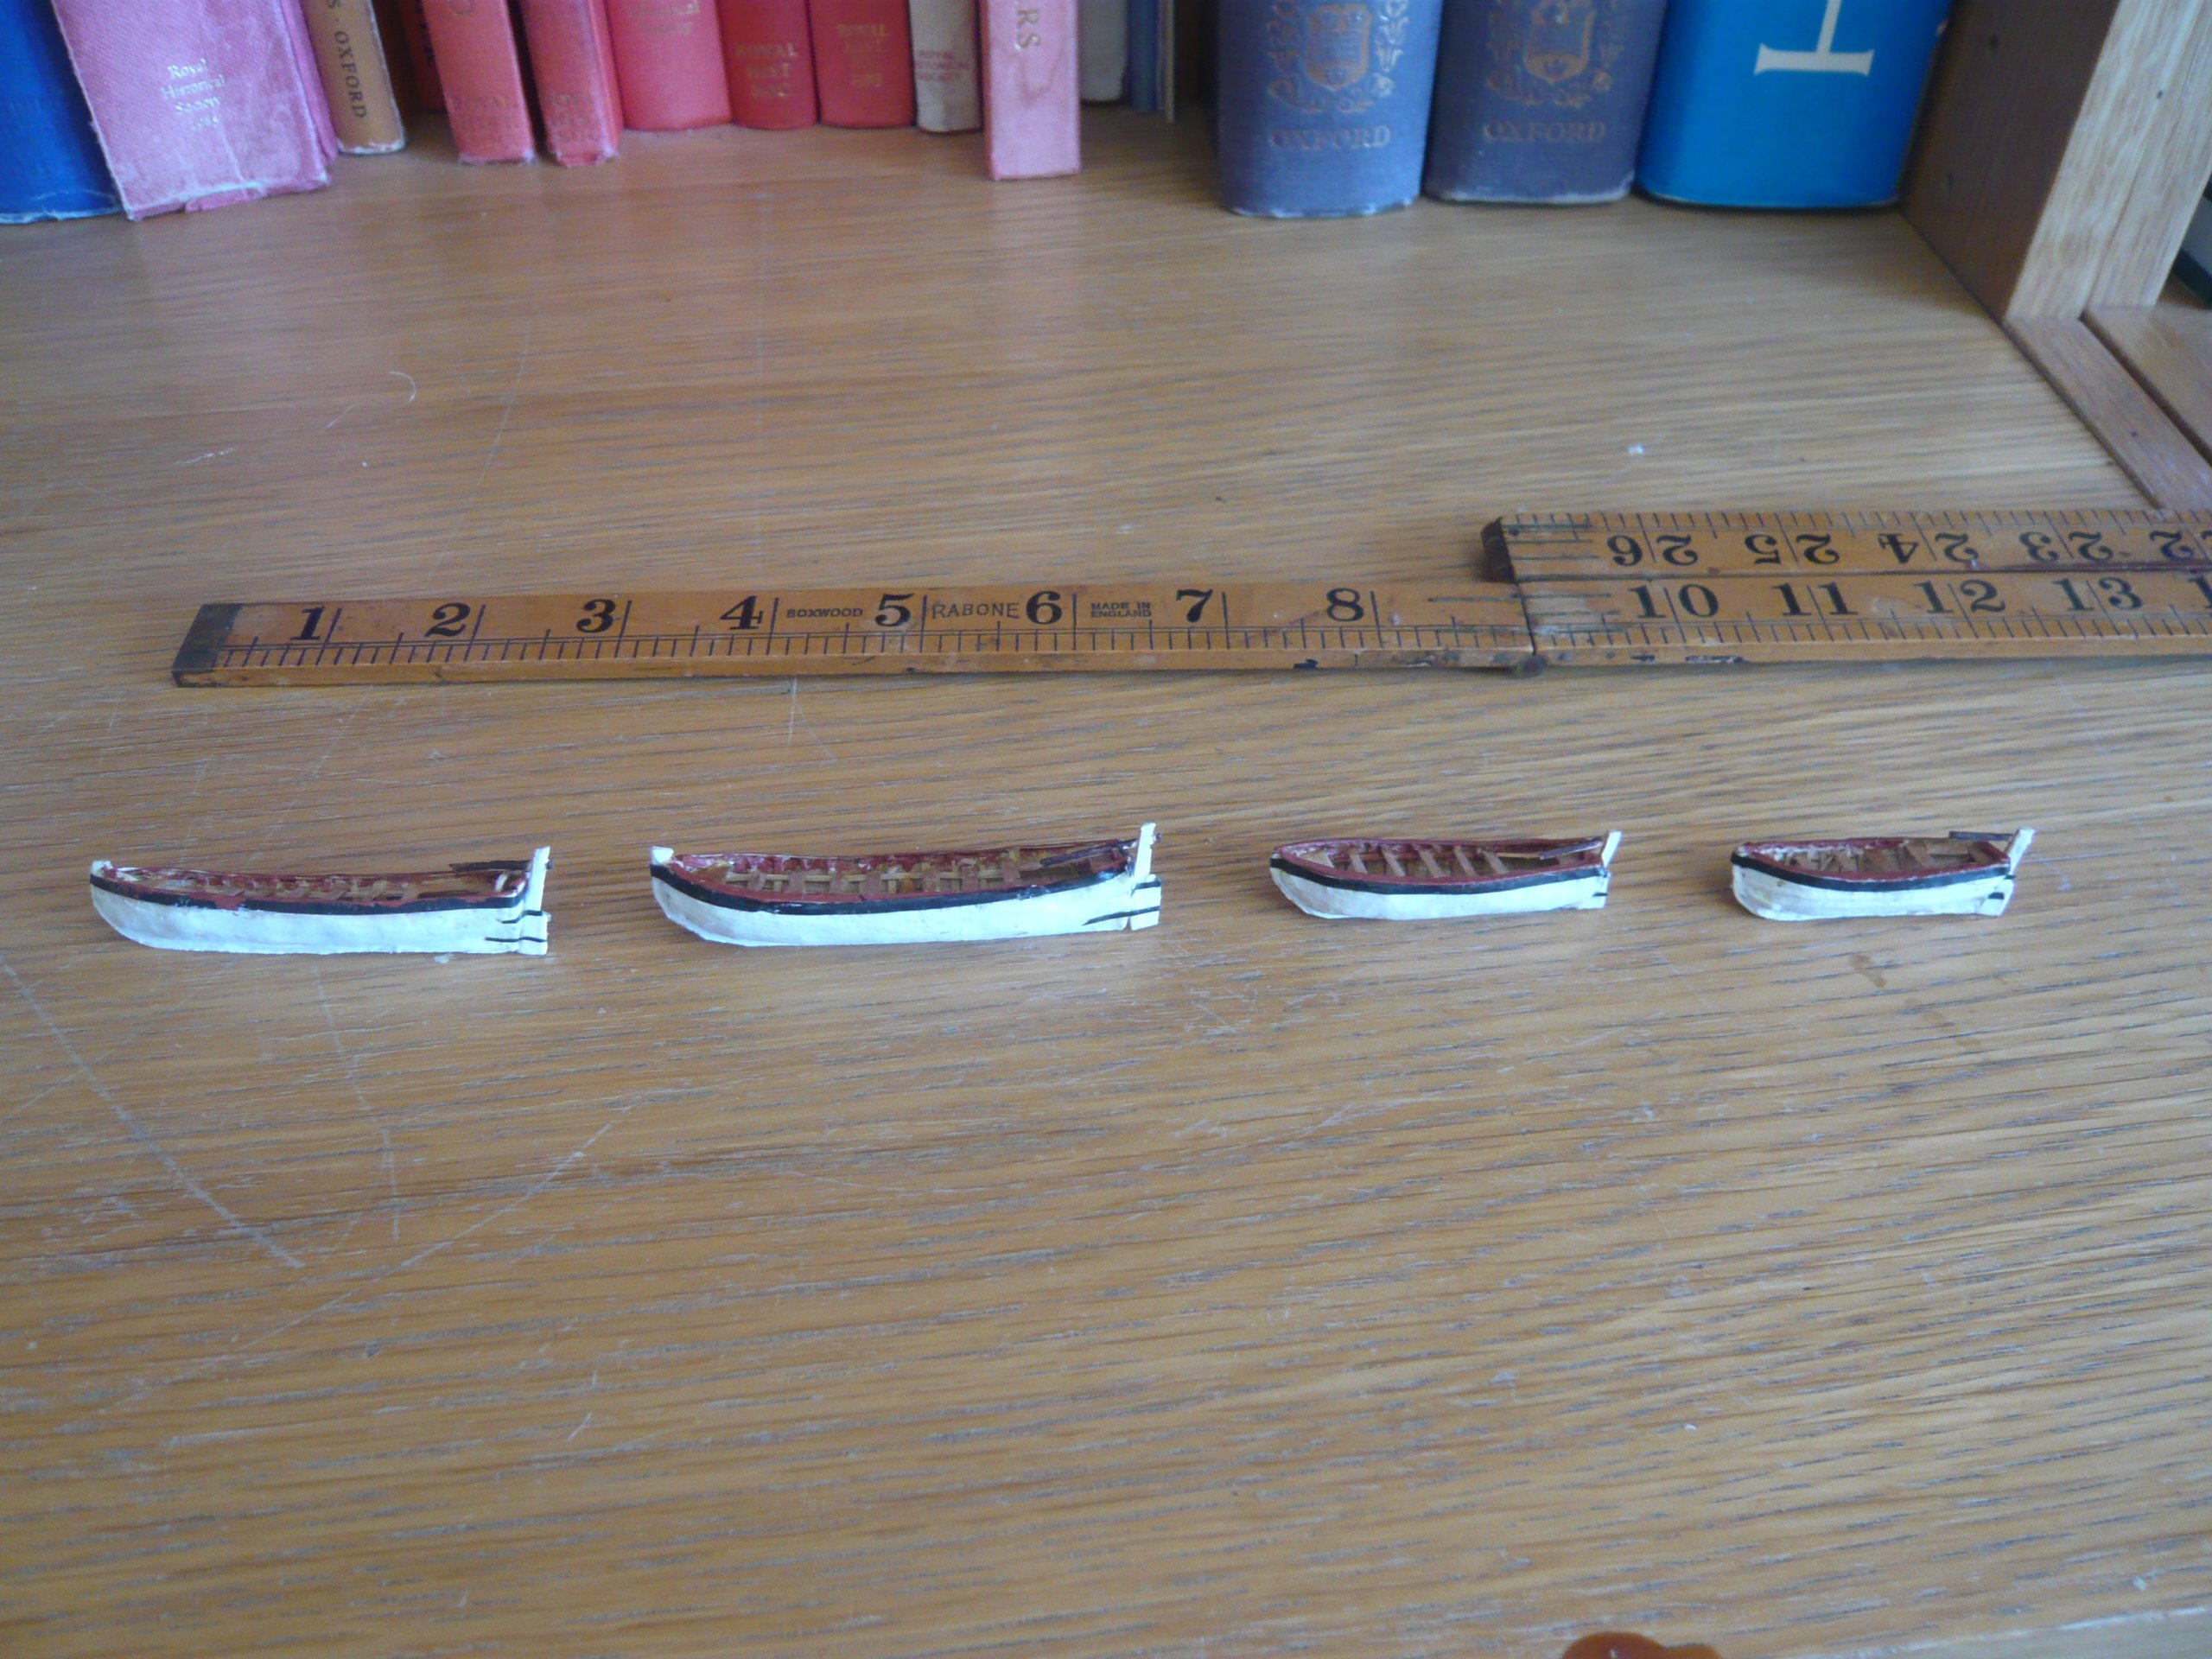
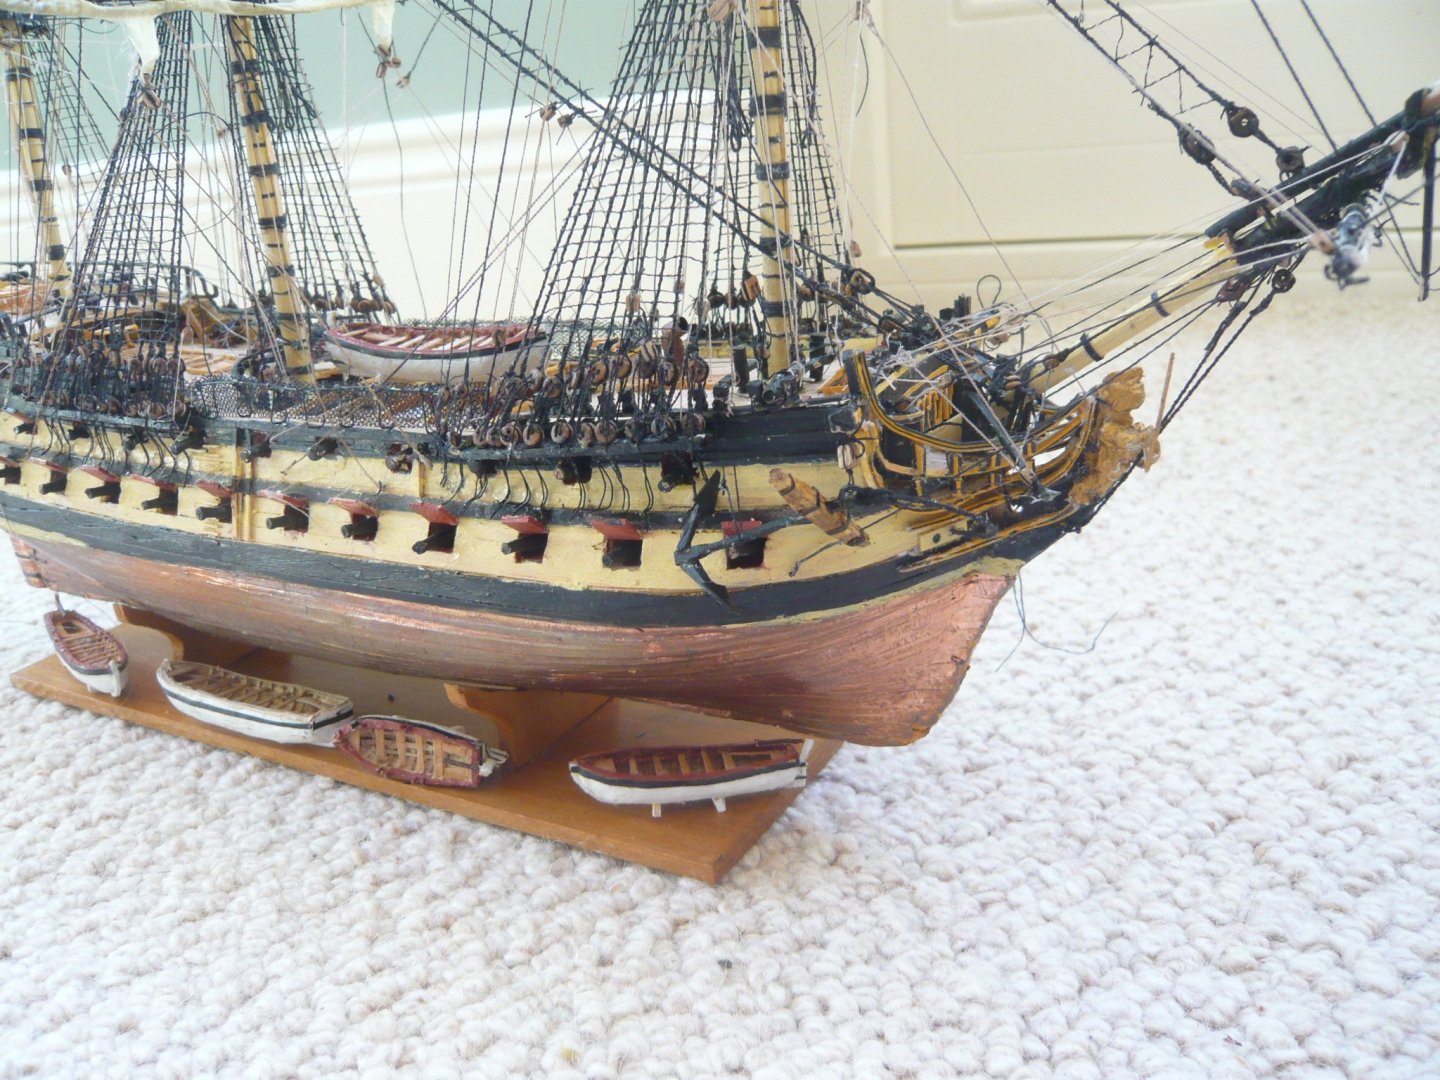
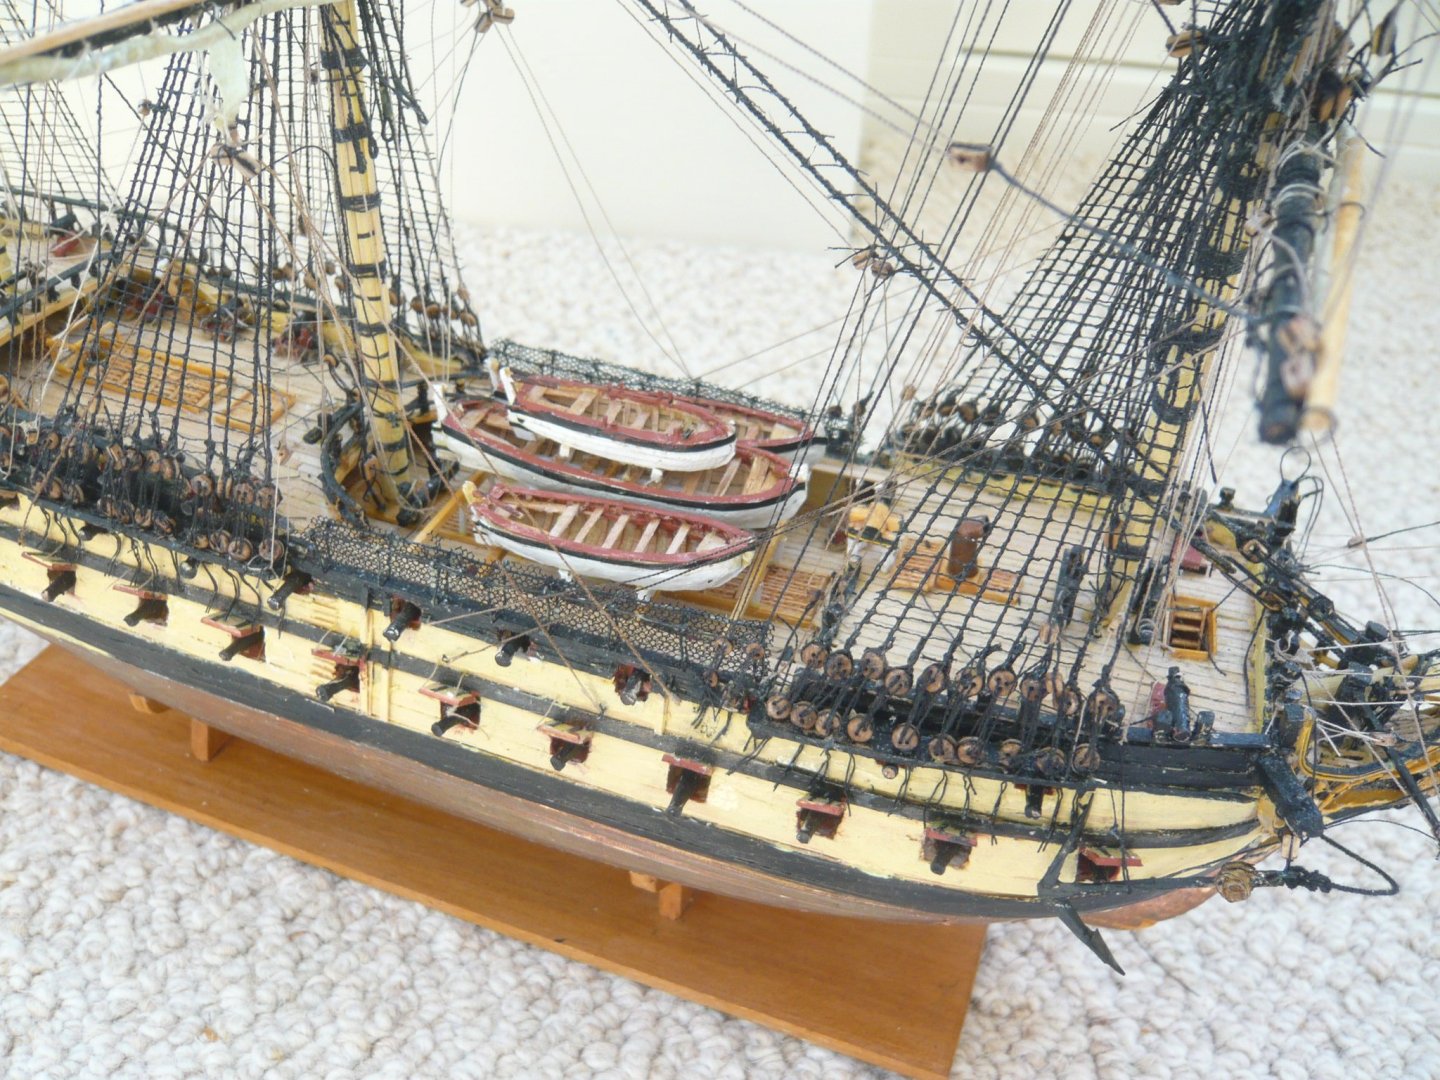
I made the boats some time ago, and now seems a reasonable time to put them in place. There are few contemporary models, as far as I know, that show boats in position. An exception is the early 19th century frigate in the National Maritime Museum (SLR0346 ; I’ll not put the photo up for copyright reasons) which has three boats in the waist, and a further one hung from stern davits. I have limited myself to four boats, though May, in his The Boats of Men-of-War, in a slightly confusing table, suggests that there would have been seven. That many would be very hard to fit in, and puzzles me, though I don’t think it’s wrong. One answer might have been to follow the example of the eminent ship modeller MalcoIm Darch, and leave all but one of the boats lying around on the bottom of the stand, but that does not seem quite right (https://julianstockwin.com/wp-content/uploads/2017/10/darchblog2-whole-ship.jpg?). It would look something like this: So, the boats are now installed where they should be. I tried to fit all of them with rowlocks, but this was difficult, and looked odd, so it’s just the jolly boat that has them. It would have been possible to put oars, in the boats, though the sail and associated equipment for the longboat would have been far too hard to do. So, at least for now, the boats just have their thwarts. And I have not added clutter in the form of the spare yards that would have been alongside the boats.
- 60 replies
-
- 6
-
-
- Agamemnon
- Ardent-class
- (and 2 more)
-
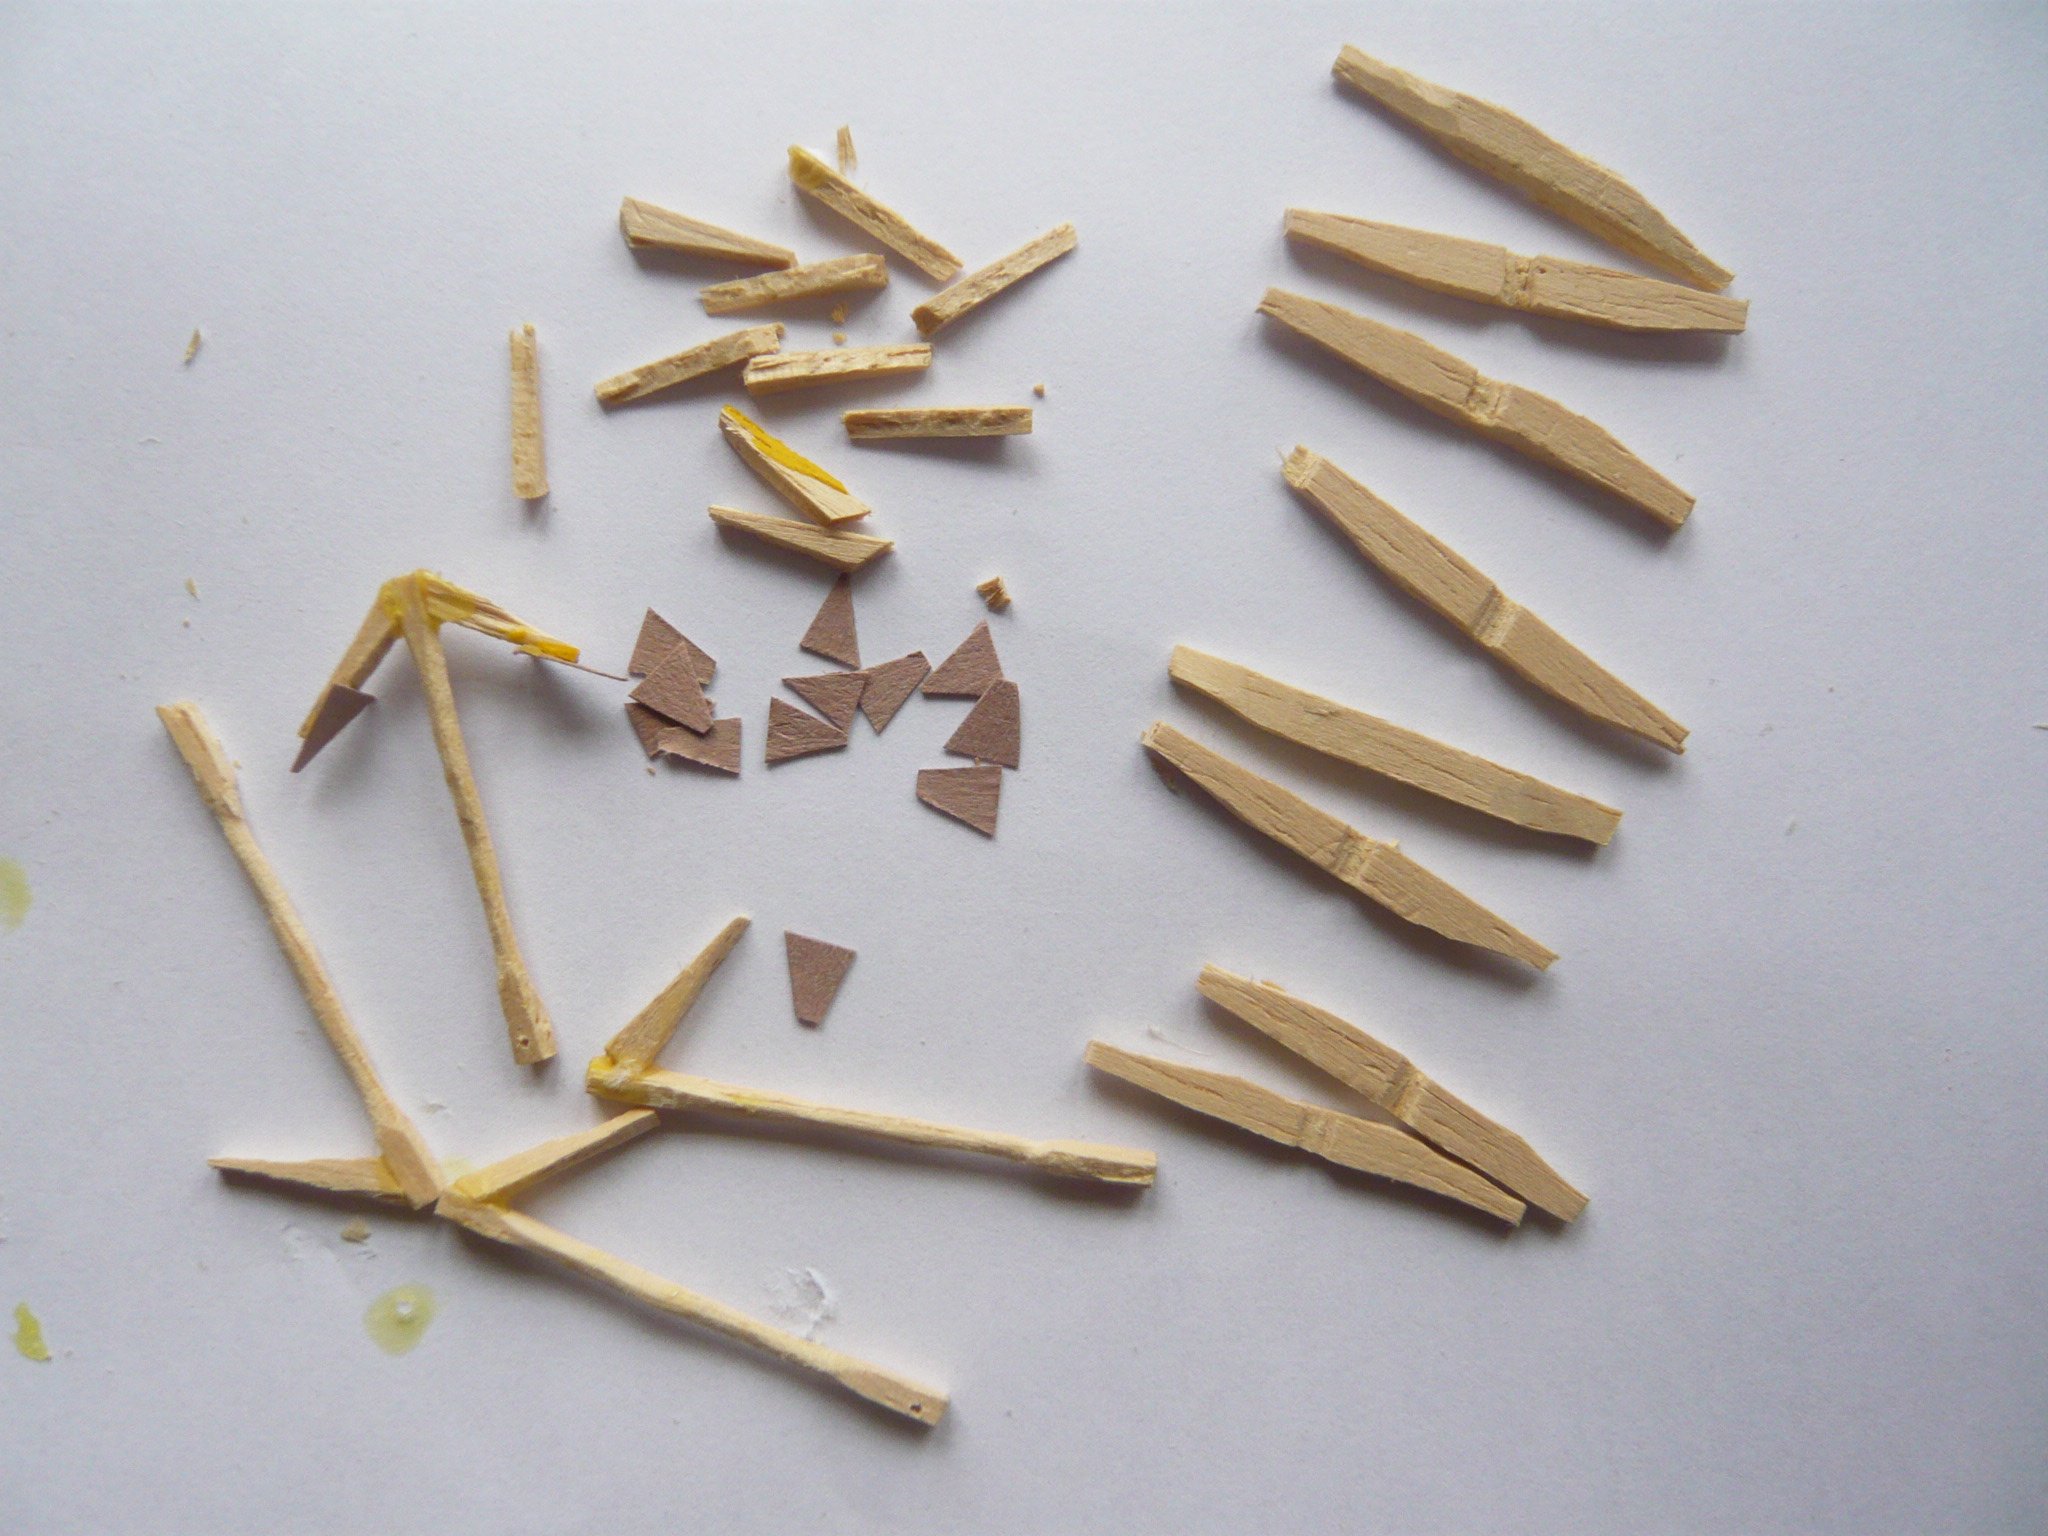
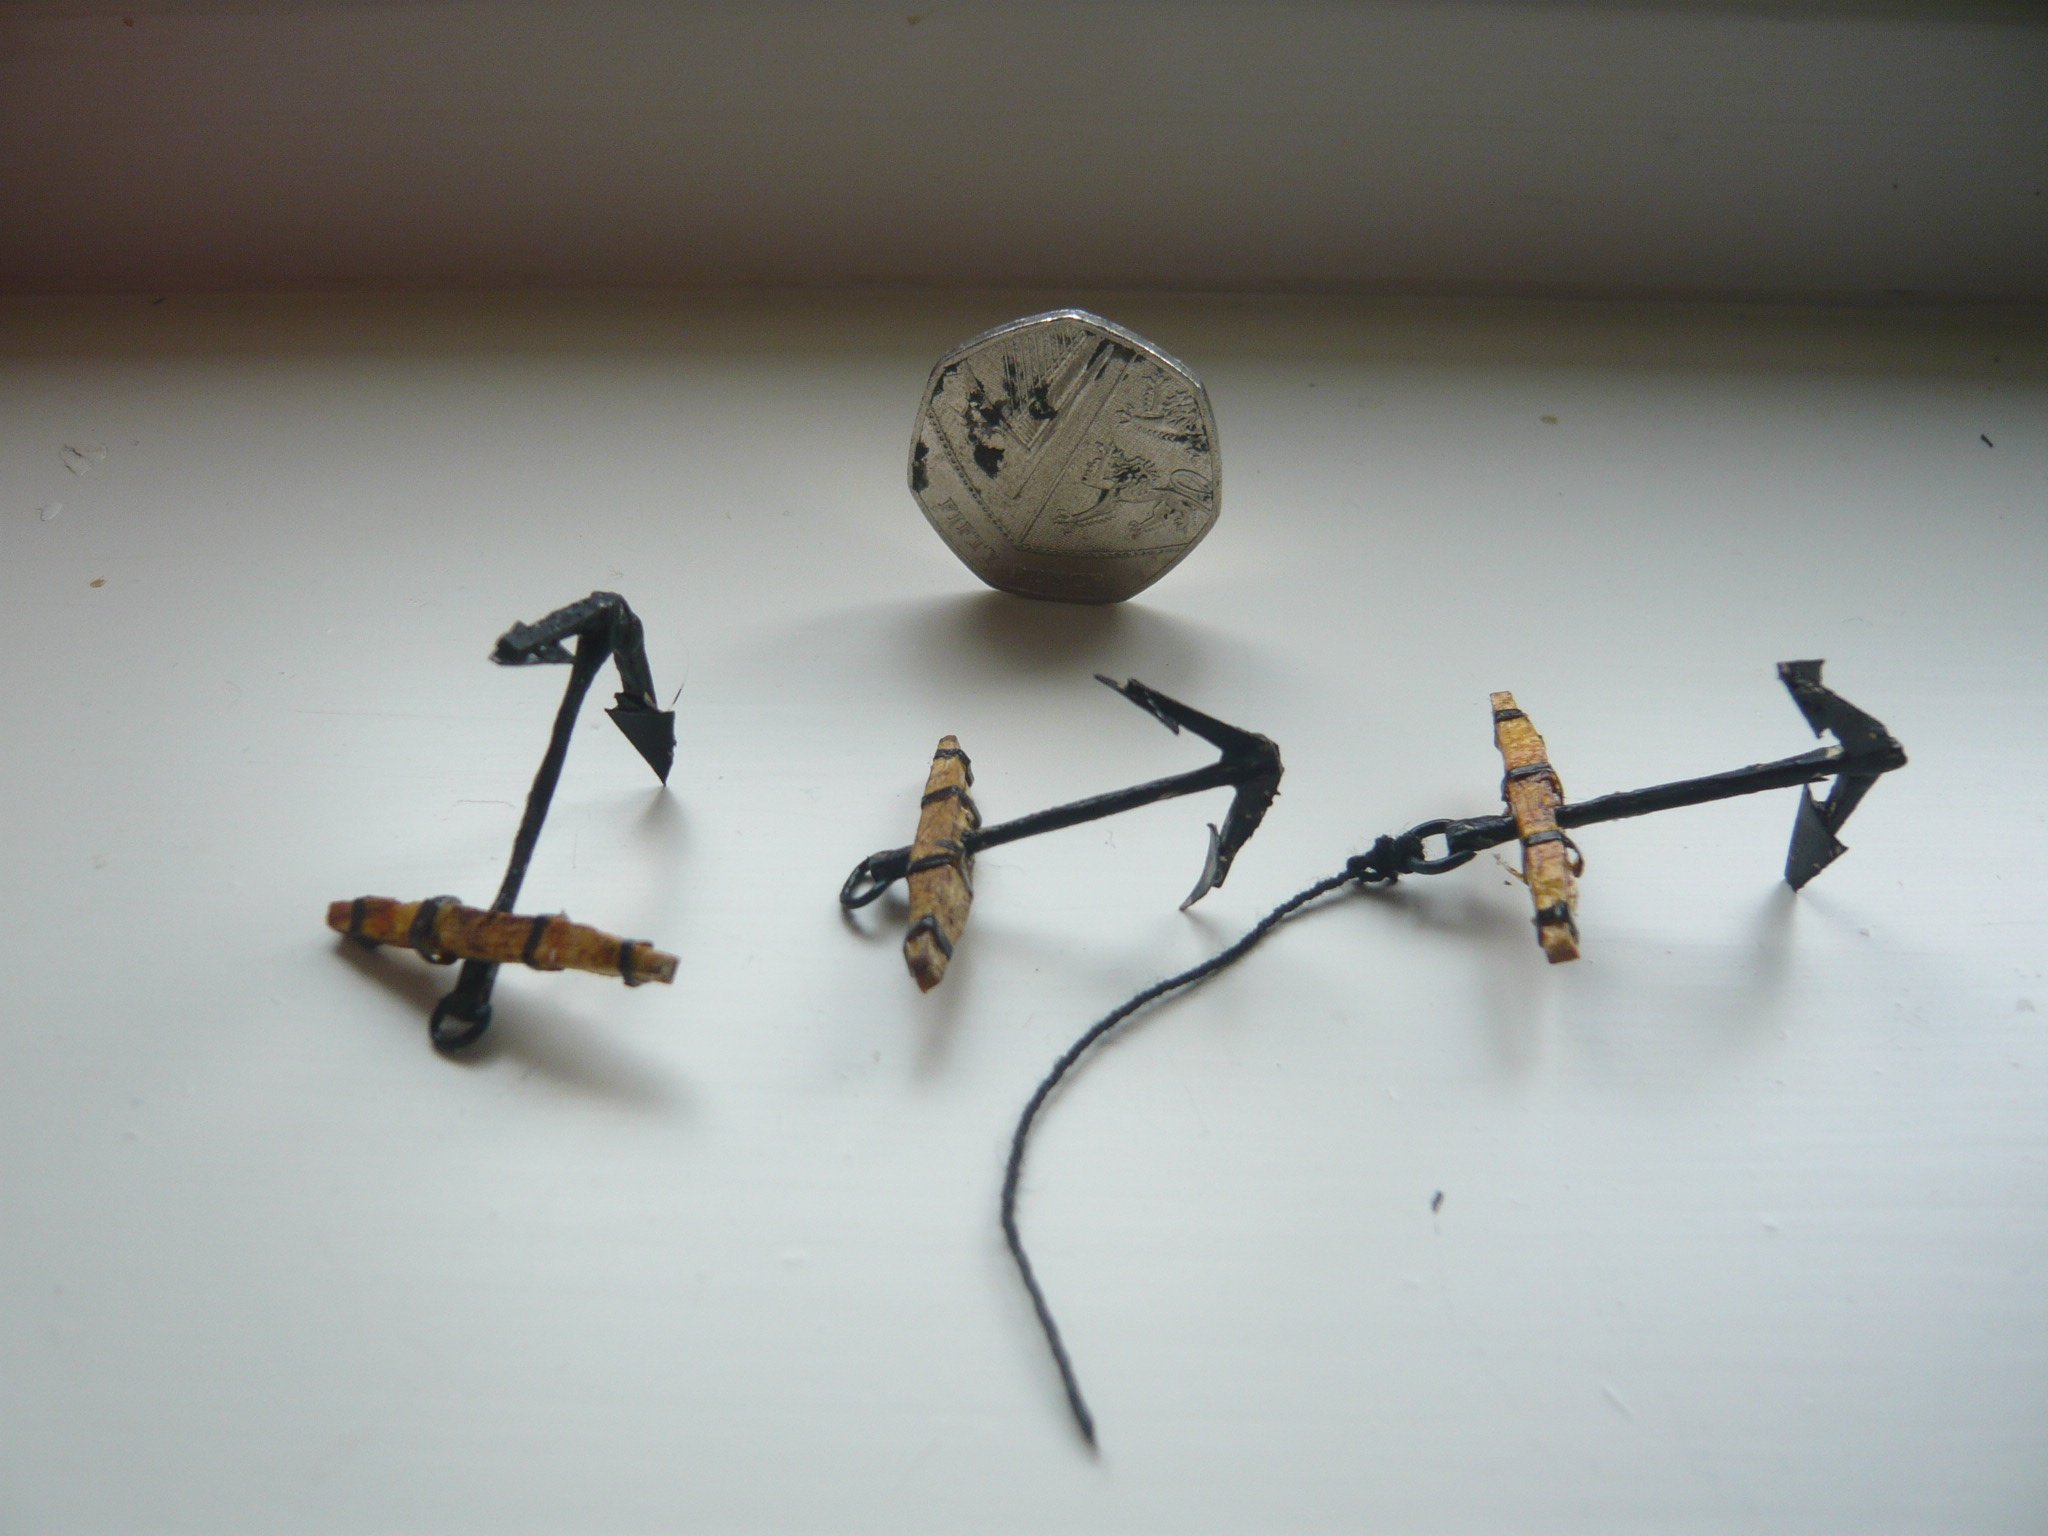
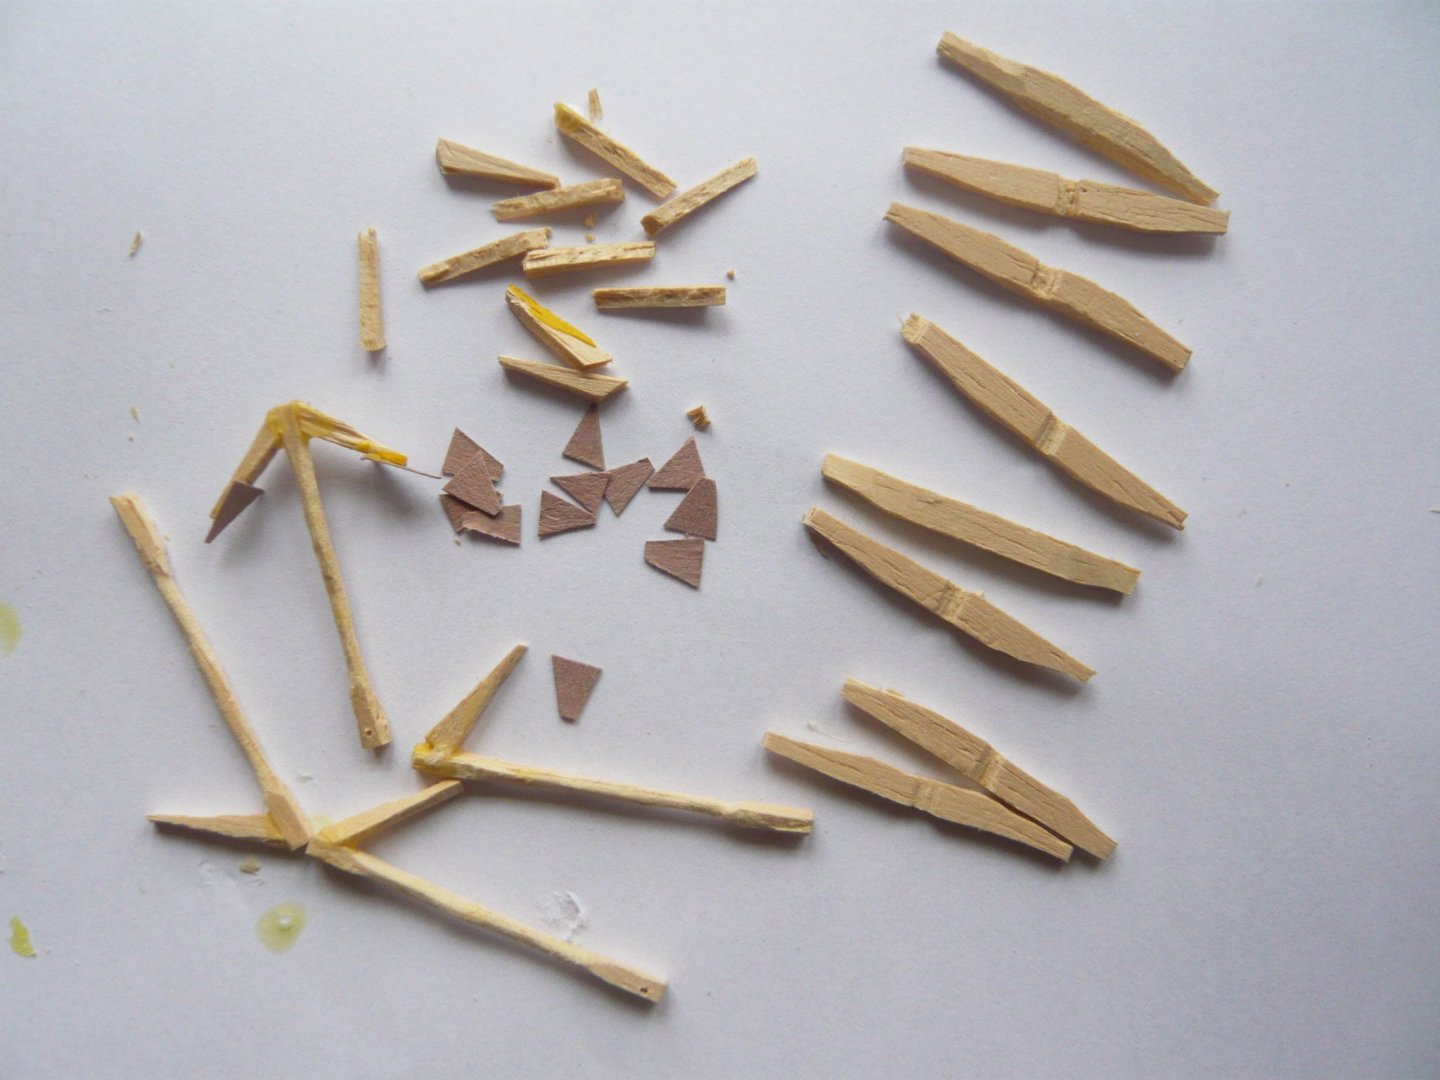
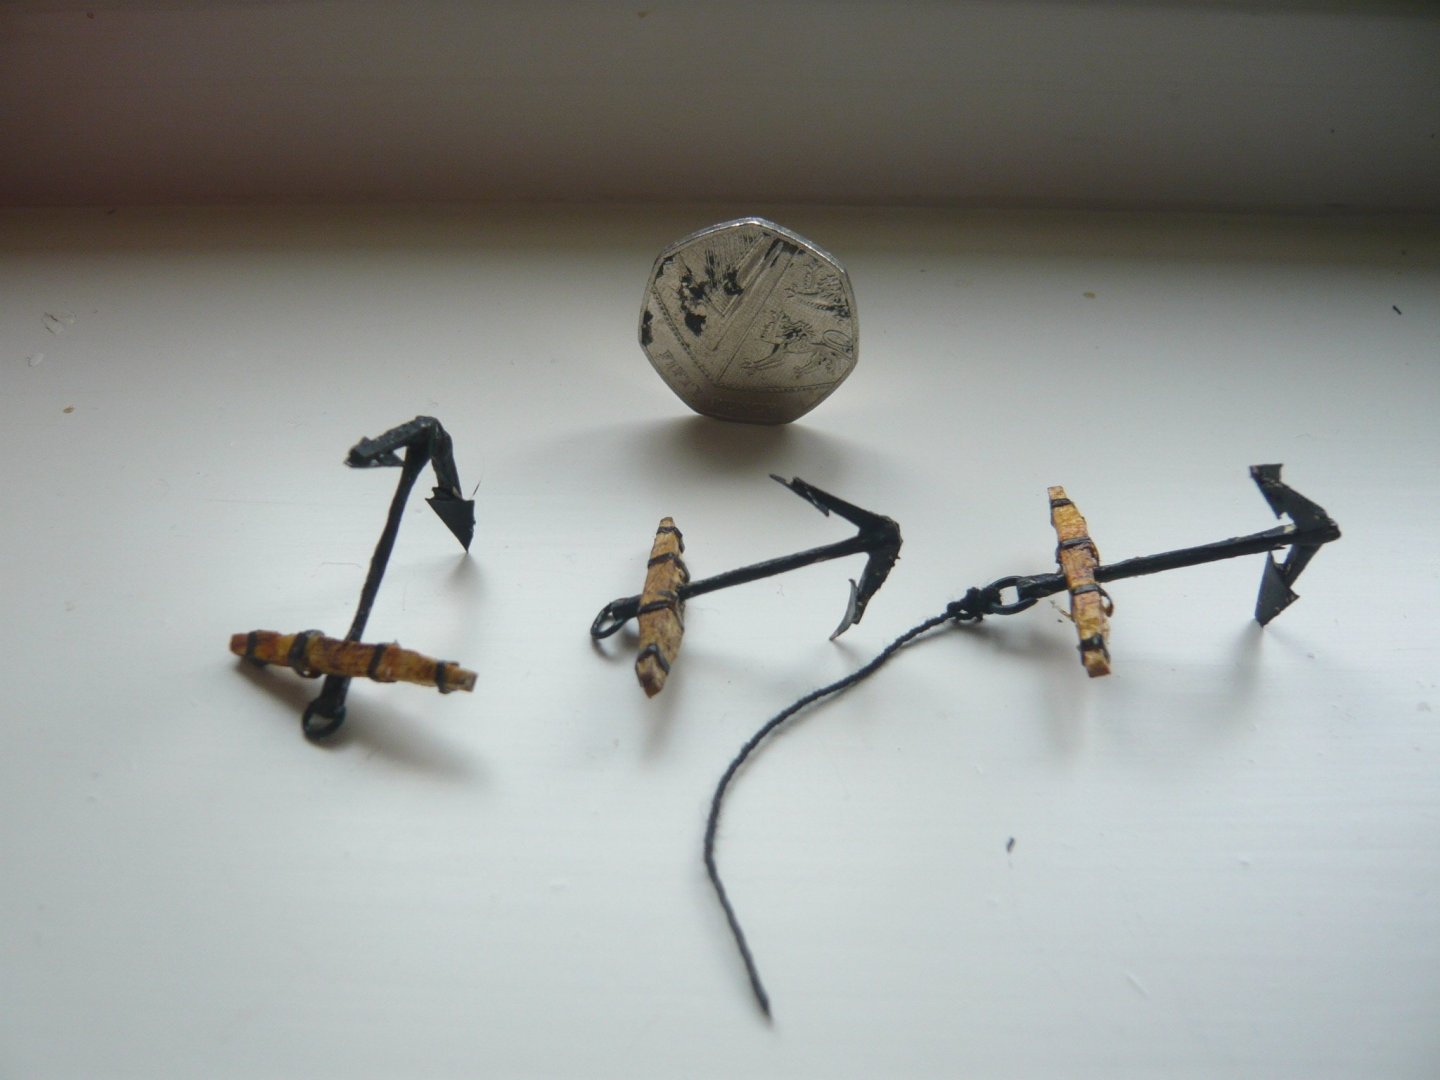
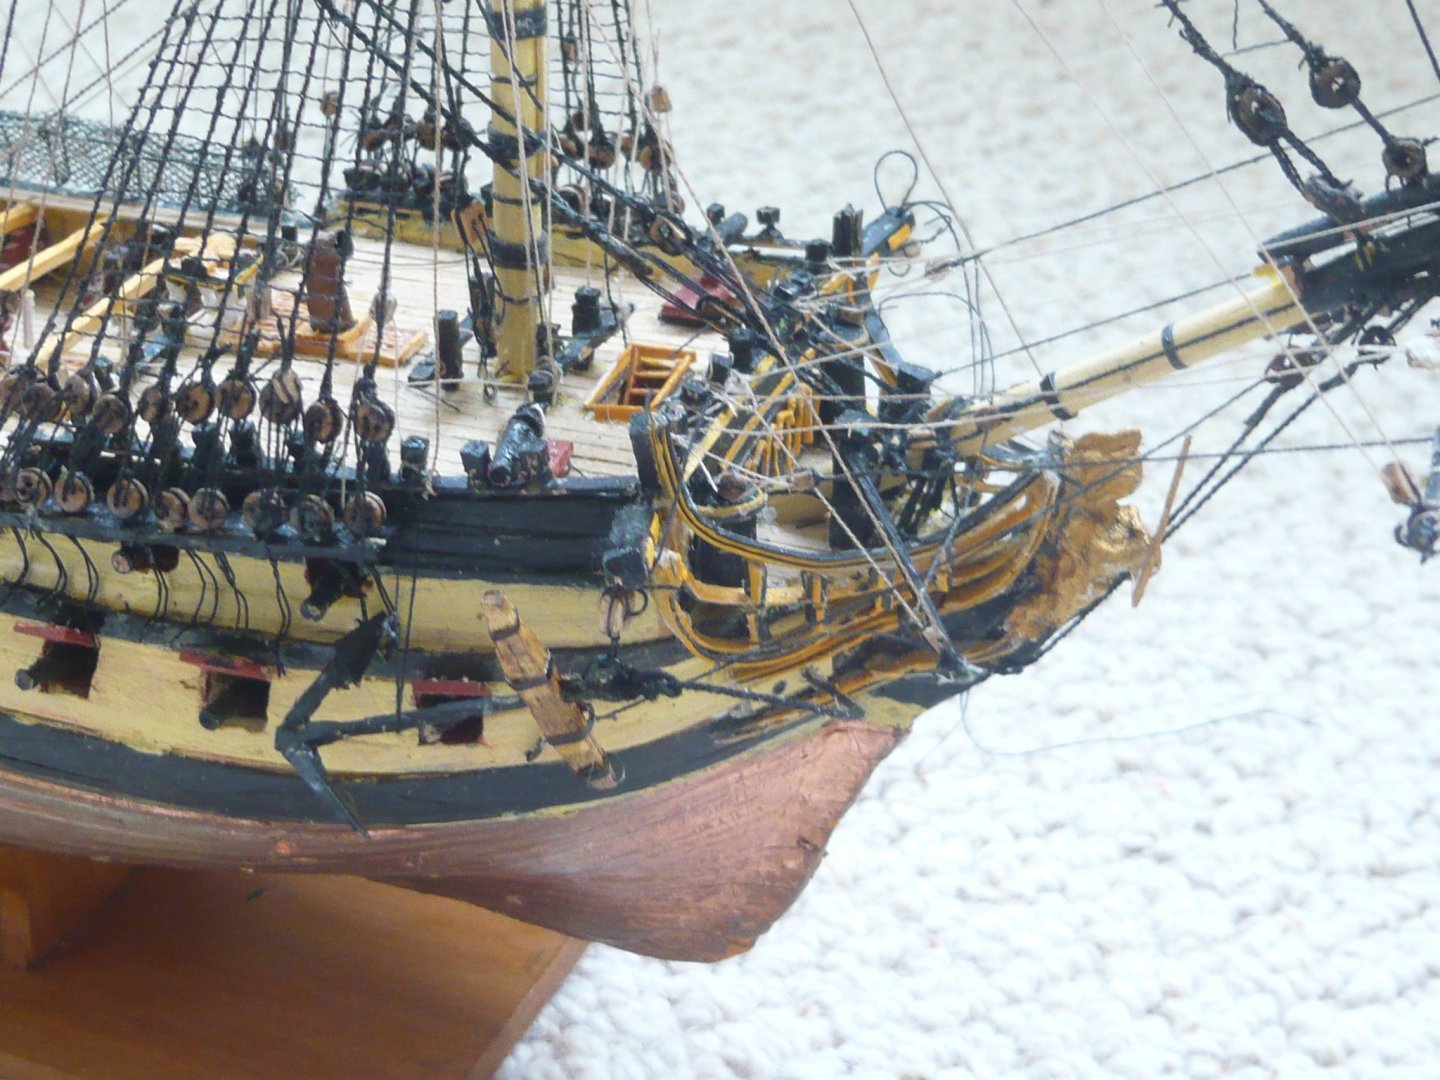
As usual, apologies for it being so long since I last posted. Firstly, I’ve now put the stern lanterns in place. I’m not sure about the colour (yellow ochre), which perhaps stands out a bit too clearly. So I may try painting the tops of the lanterns bronze. And they do need a tiny chimney on top. Comments welcome. I may even have another go at making them, as I’m not all that happy with their look, though as usual they seem better in the flesh than in the photo. The small scale does not help on that score. Oh yes, I used a much thinner wire to hold them in place than that shown in an earlier picture. I knows the rigging in this photo looks a mess, but it will soon be sorted. I though it time to have a go at the anchors. At this scale, there’s no point in trying to find a way of making metal ones, nor was it worth troubling my grandson to see if he could do them with his 3d printer. So, they are wooden, with flukes cut from card. Here are the various bits and pieces more or less ready to be assembled, and the final version Anchor dimensions are conveniently set out in by Steel in a table; he also has a drawing which is useful. It was a bit fiddly getting them thin enough, and fitting the rings was harder than it should have been. My first effort used much too thin a gauge of wire, but some plastic-covered garden wire worked all right, and meant that I did not have to try to serve the rings with rope. One question was what colour to make the anchor cables. This has been a matter of some debate on this site, with opinion generally favouring a pale colour on the grounds that it was unlikely that the cables were tarred. Photos of HMS Victory show pale anchor cables. However, I went with black. Partly this was on aesthetic grounds, and partly because the model of HMS Mars in the National Maritime Museum has black cables. The anchor cables on the Mary Rose were coated in pitch, though fibres themselves curiously do not look to be tarred. Of course, the chronology reduces the value of this evidence. See https://maryrose.org/blog/collections/doing-the-twist-anchor-cable-cleaning/ . I think, however, that it would have been normal to tar the cables to prevent them from getting soaked, but I could well be wrong.

- 60 replies
-
- 6
-
-
-
- Agamemnon
- Ardent-class
- (and 2 more)
-
Goodness! I can’t begin to match that. Printing lanterns is way beyond me. A grandson does have a 3d printer, but I don’t believe he could manage anything like that. Inevitably, the photo of what I’ve managed so far emphasizes the faults; in practice the lanterns don’t look that bad, but I’ll probably try again, just once more. At least they are glazed, by using transparent glue. I’ve made them black inside, in an attempt to follow the look of the two surviving lanterns in the National Maritime Museum. I do wonder, incidentally, about the use of lanterns once driver booms came into use. It would surely have needed some care to ensure that they were not knocked off. On a different topic, I’ve been wondering whether to have royals. Steel has them, as in his plate showing a ship with all her sails. Most pictures of the period don’t show them, but a sketch of Agamemnon, showing her in 1796, by Nicholas Pocock has them. The sketch, however, was made in 1810, and I think I’ll be safe in following the example of, for example, the National Maritime Museum’s model of HMS Mars. There’s a practical reason too, in that I don’t have any thread thin enough and matching what I’ve uo, it’s now just a matter of finishing off the rigging of the topgallants.
- 60 replies
-
- 2
-
-
- Agamemnon
- Ardent-class
- (and 2 more)
-
Many thanks, Gabe. I'm trying a very simple method, using UHU Hart glue. Since the panes are no more than 1.5 mm square, if that, it covers the gaps quite easily, and looks like glazing. But I'll continue trying out possibilities, as a break from rigging. Oh, and the skies have been very clear here of late. Michael
- 60 replies
-
- 2
-
-
- Agamemnon
- Ardent-class
- (and 2 more)
-
Many thanks, Gabek. I may have another go at glazing, but I found it quite impossible on another model, which was a bit bigger than this one. It's difficult to know what the original lanterns looked like in this respect - if you search the National Maritime Museum for 'stern lantern', it comes up with one dating from the mid-seventeenth century, which has dark opaque panels of some sort. But it's about 30 inches high, surely far too small for the stern. I suppose it's possible that horn rather than glass was used, and that a pale opaque material might be correct. Clear resin is certainly an interesting thought.
- 60 replies
-
- 2
-
-
- Agamemnon
- Ardent-class
- (and 2 more)
-
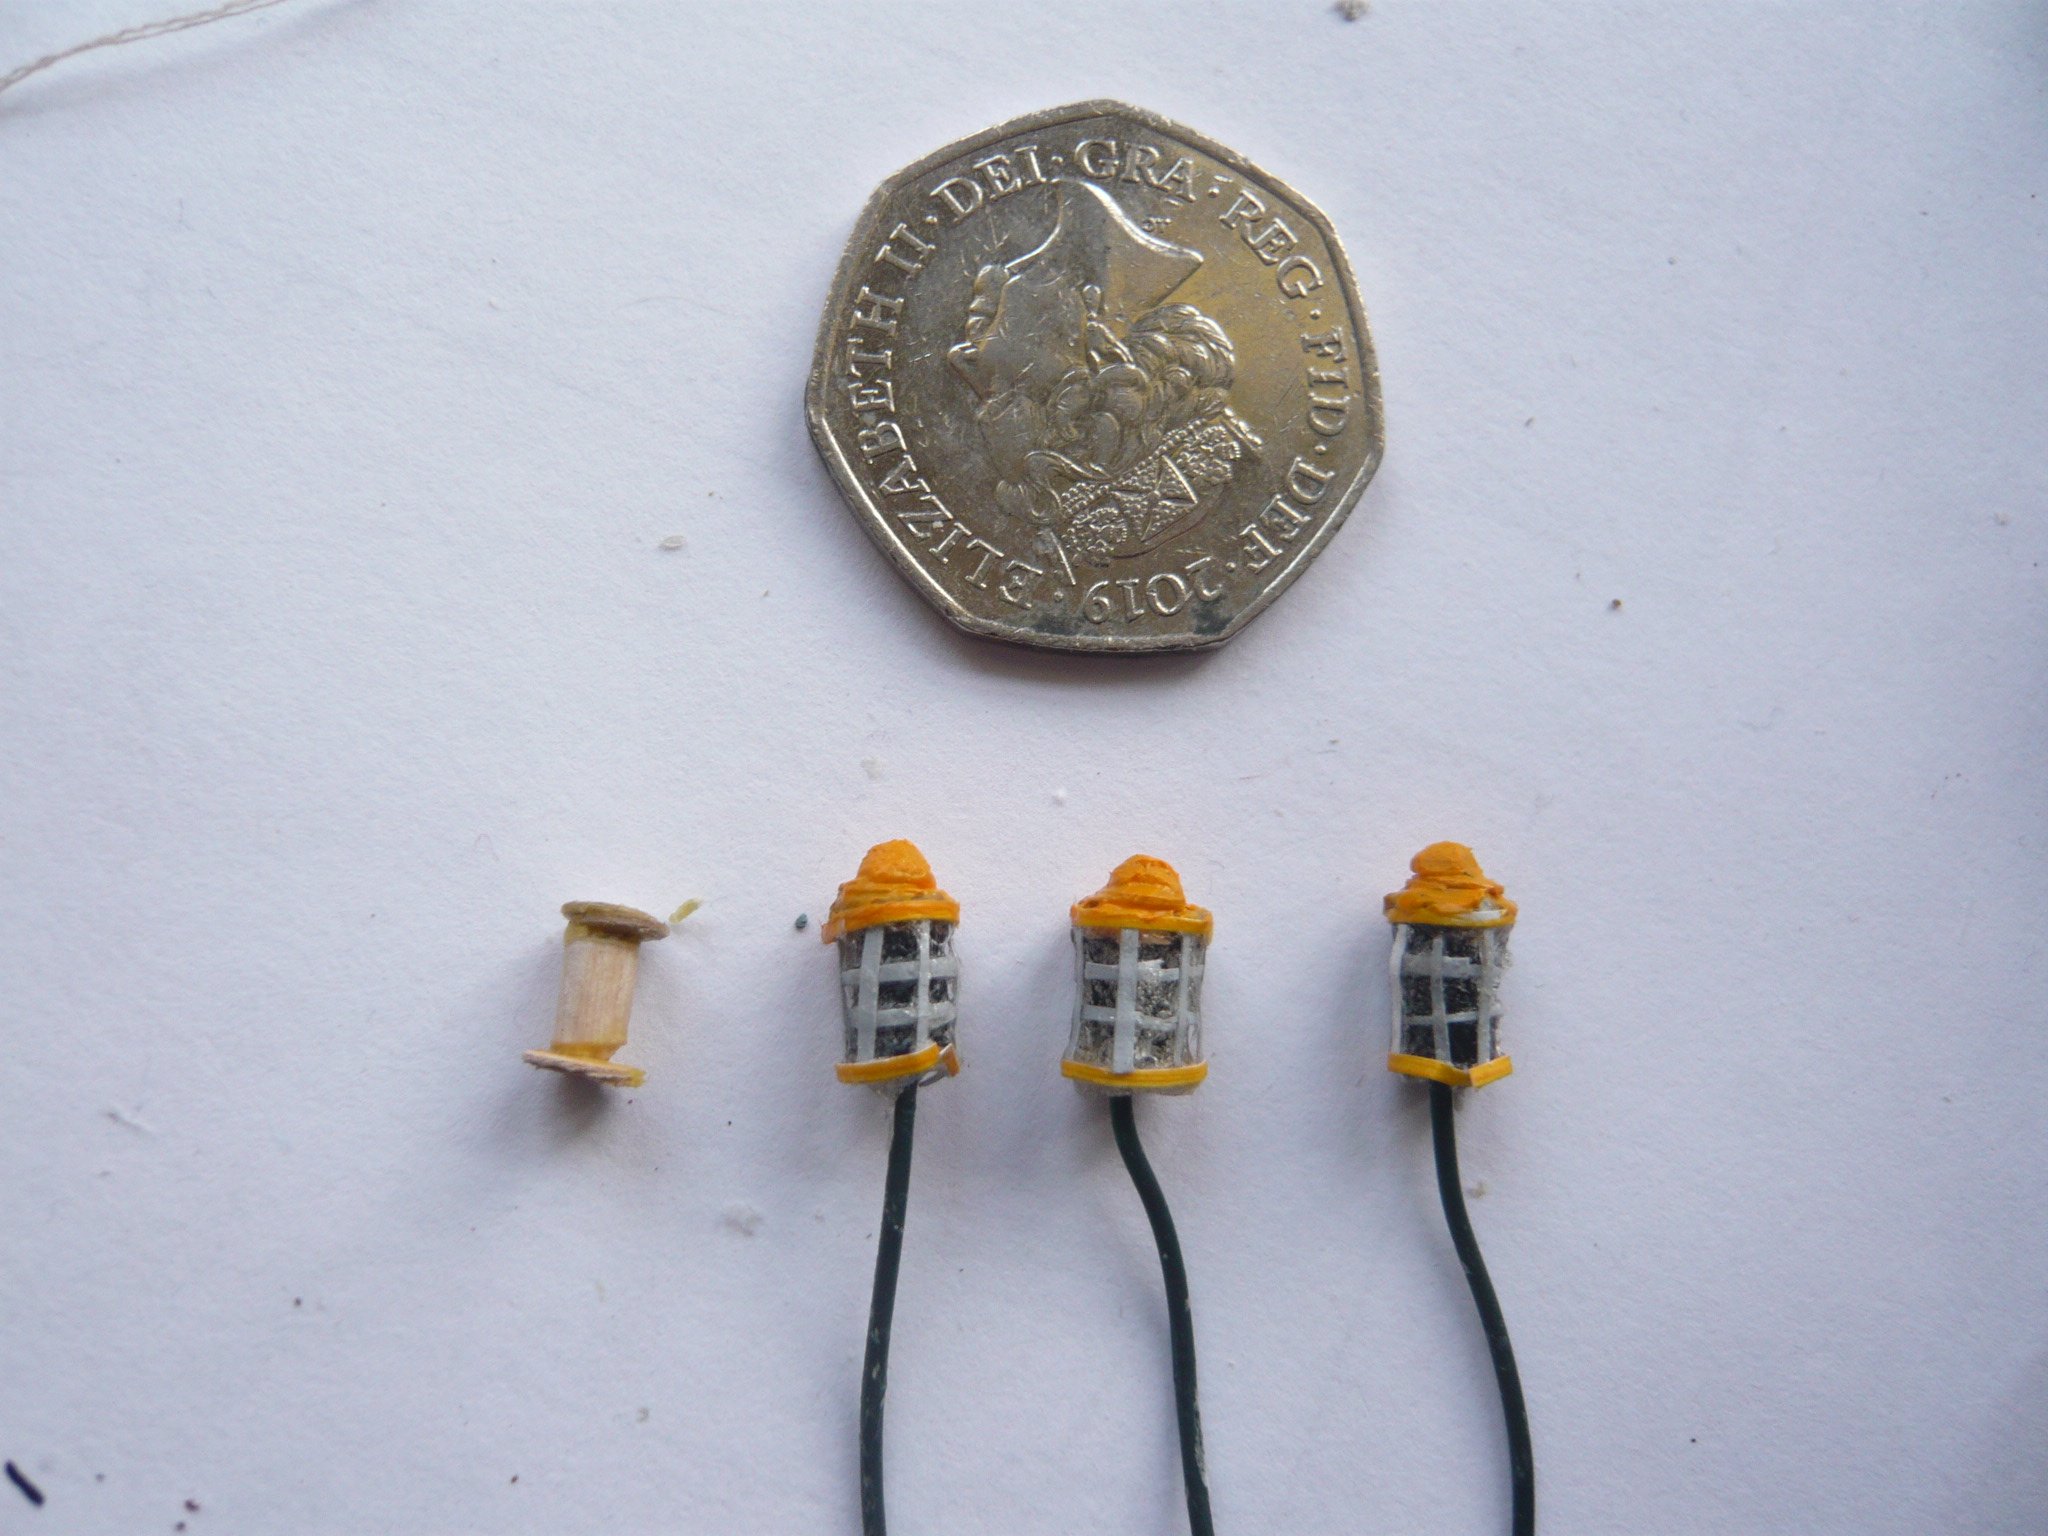
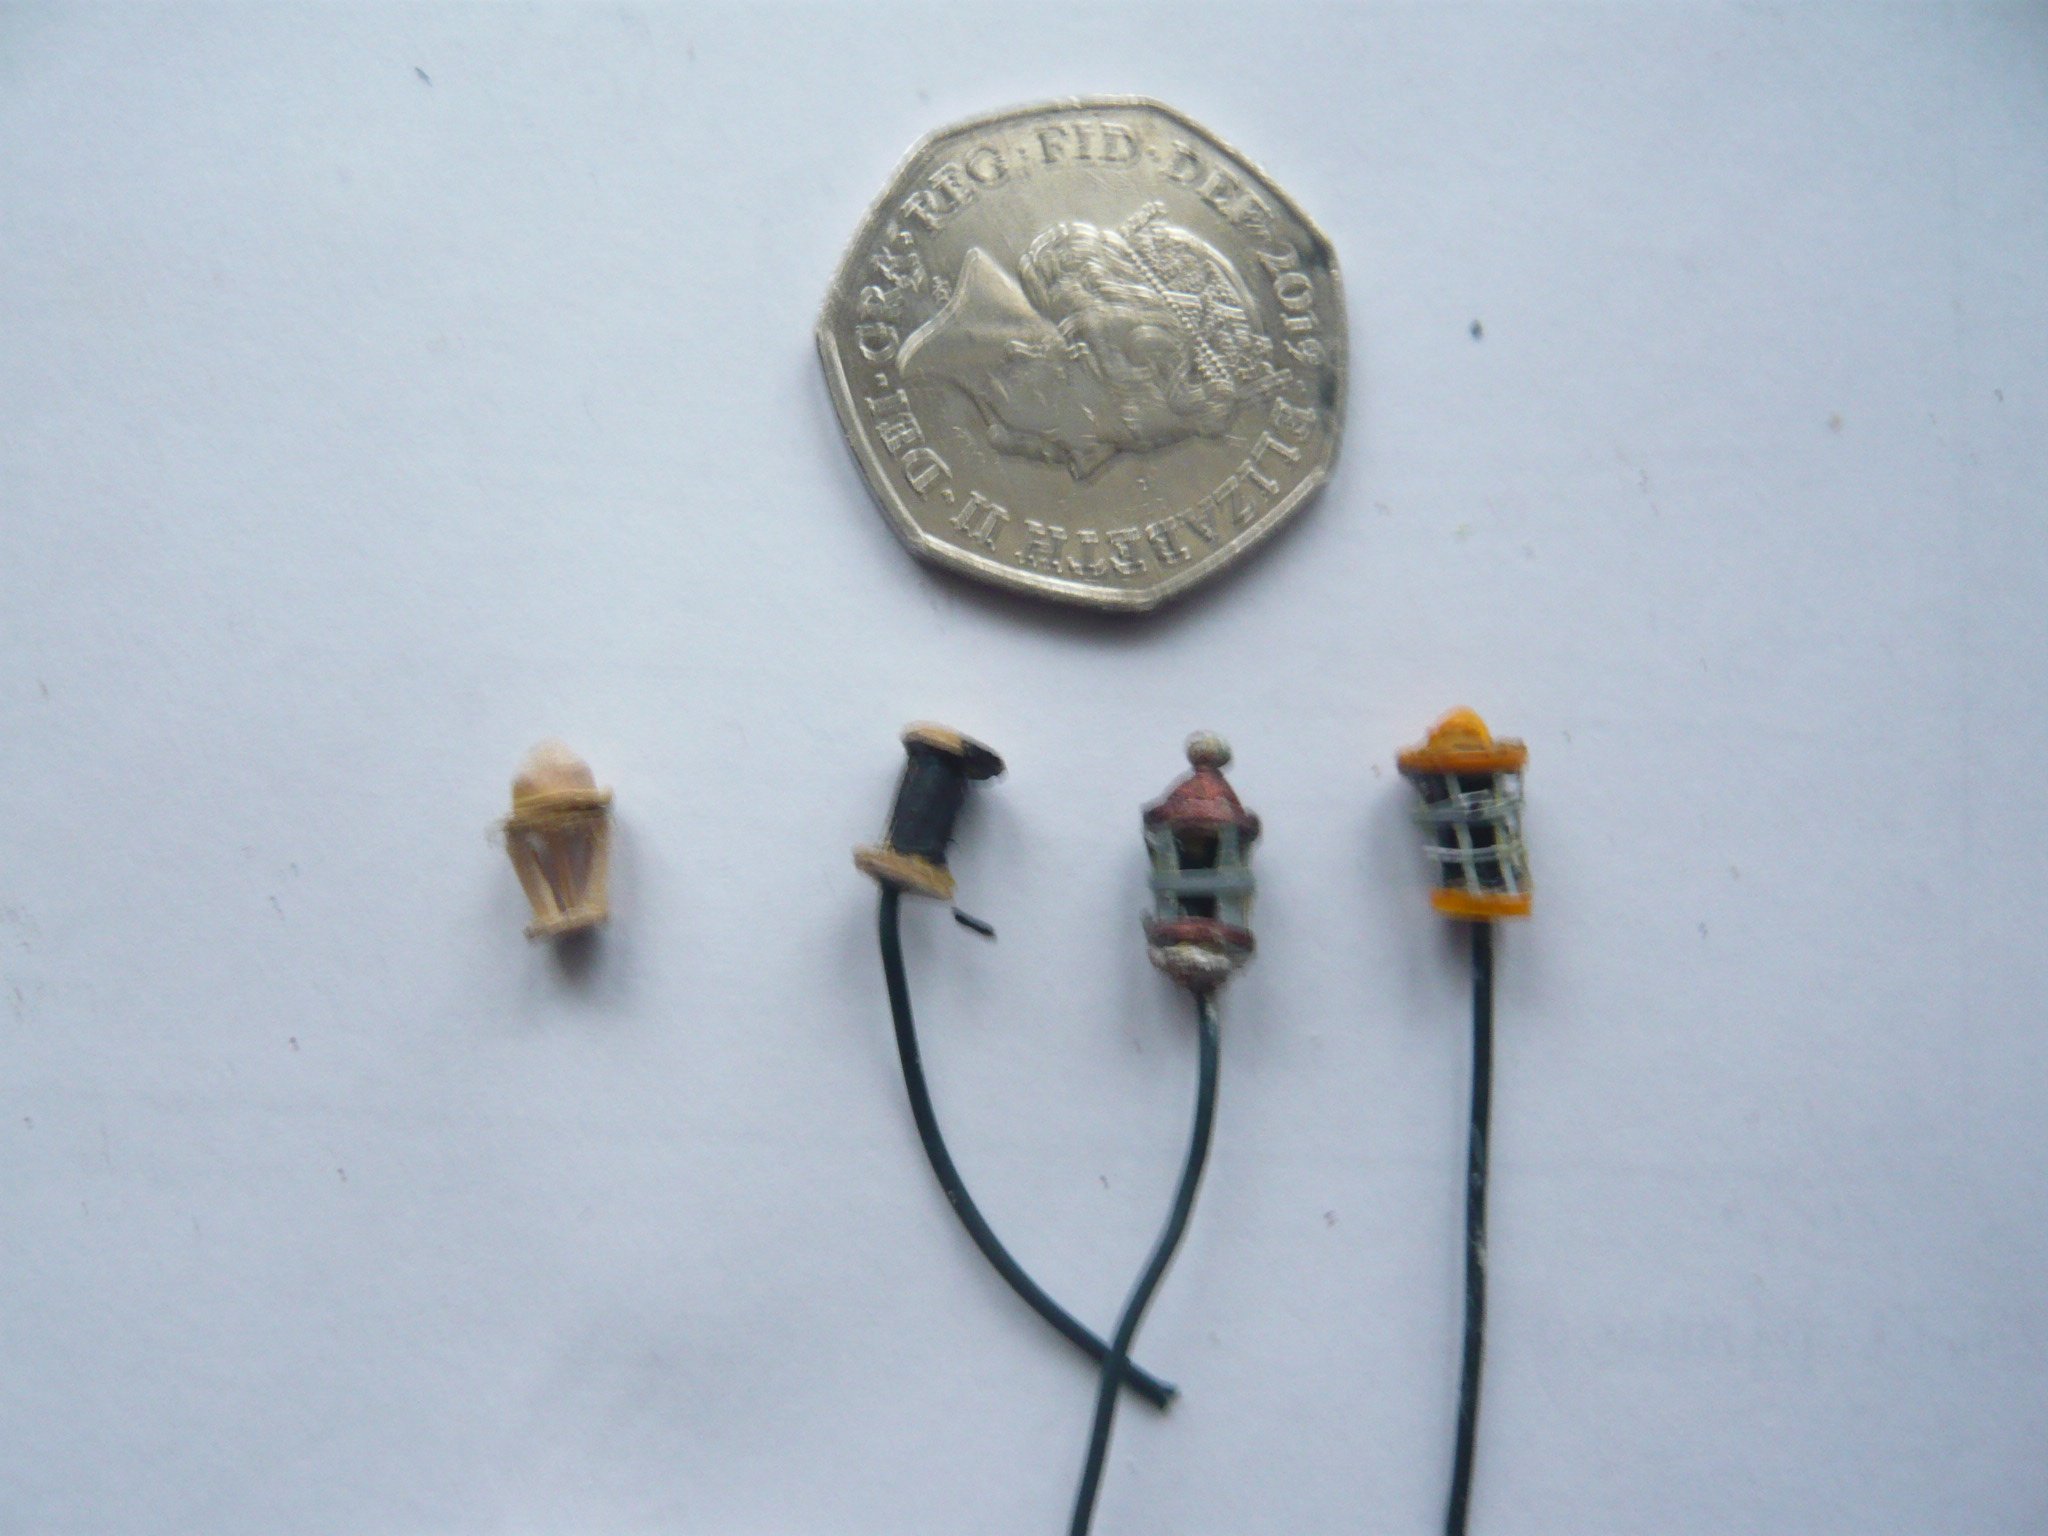
Many thanks, Gabe. Yes, I'm probably the only person to know what's left out. In the intervals of doing the rigging, I have struggled with the stern lanterns. I could miss them out, for Pocock’s drawing of Agamemnon cutting out some French ships in 1796 (in the National Maritime Museum) does not show them, but that would be a pity. It seems impossible to glaze them, and after ineffectual attempts to make them straightforwardly from wood, what I have done is to stamp out card circles with a hole punch, inherited from my mother-in-law. These were then stuck together, and glued onto a tiny piece of dowel. I drilled a hole into the dowel, to take the wire that holds the lantern. The inside of the lanterns were painted black, and frames cut from paper were glued into place. The final result is, I hope, not too different from that in the painting of the Glorious First of June by Nicholas Pocock, where a stern lantern is dangling off the stern of HMS Brunswick (I’m bothered about copyright, so have not reproduced it. But you can find it easily at https://www.rmg.co.uk/collections/objects/rmgc-object-11963. The photo below shows, on the left, an initial attempt in wood, next the interior of the lantern, then the first effort at the method I’ve decided to use, and on the right what I hope is a final version. I think the real thing actually looks a bit better than the photo. And now for two more lanterns.

- 60 replies
-
- 6
-
-
-
- Agamemnon
- Ardent-class
- (and 2 more)
-
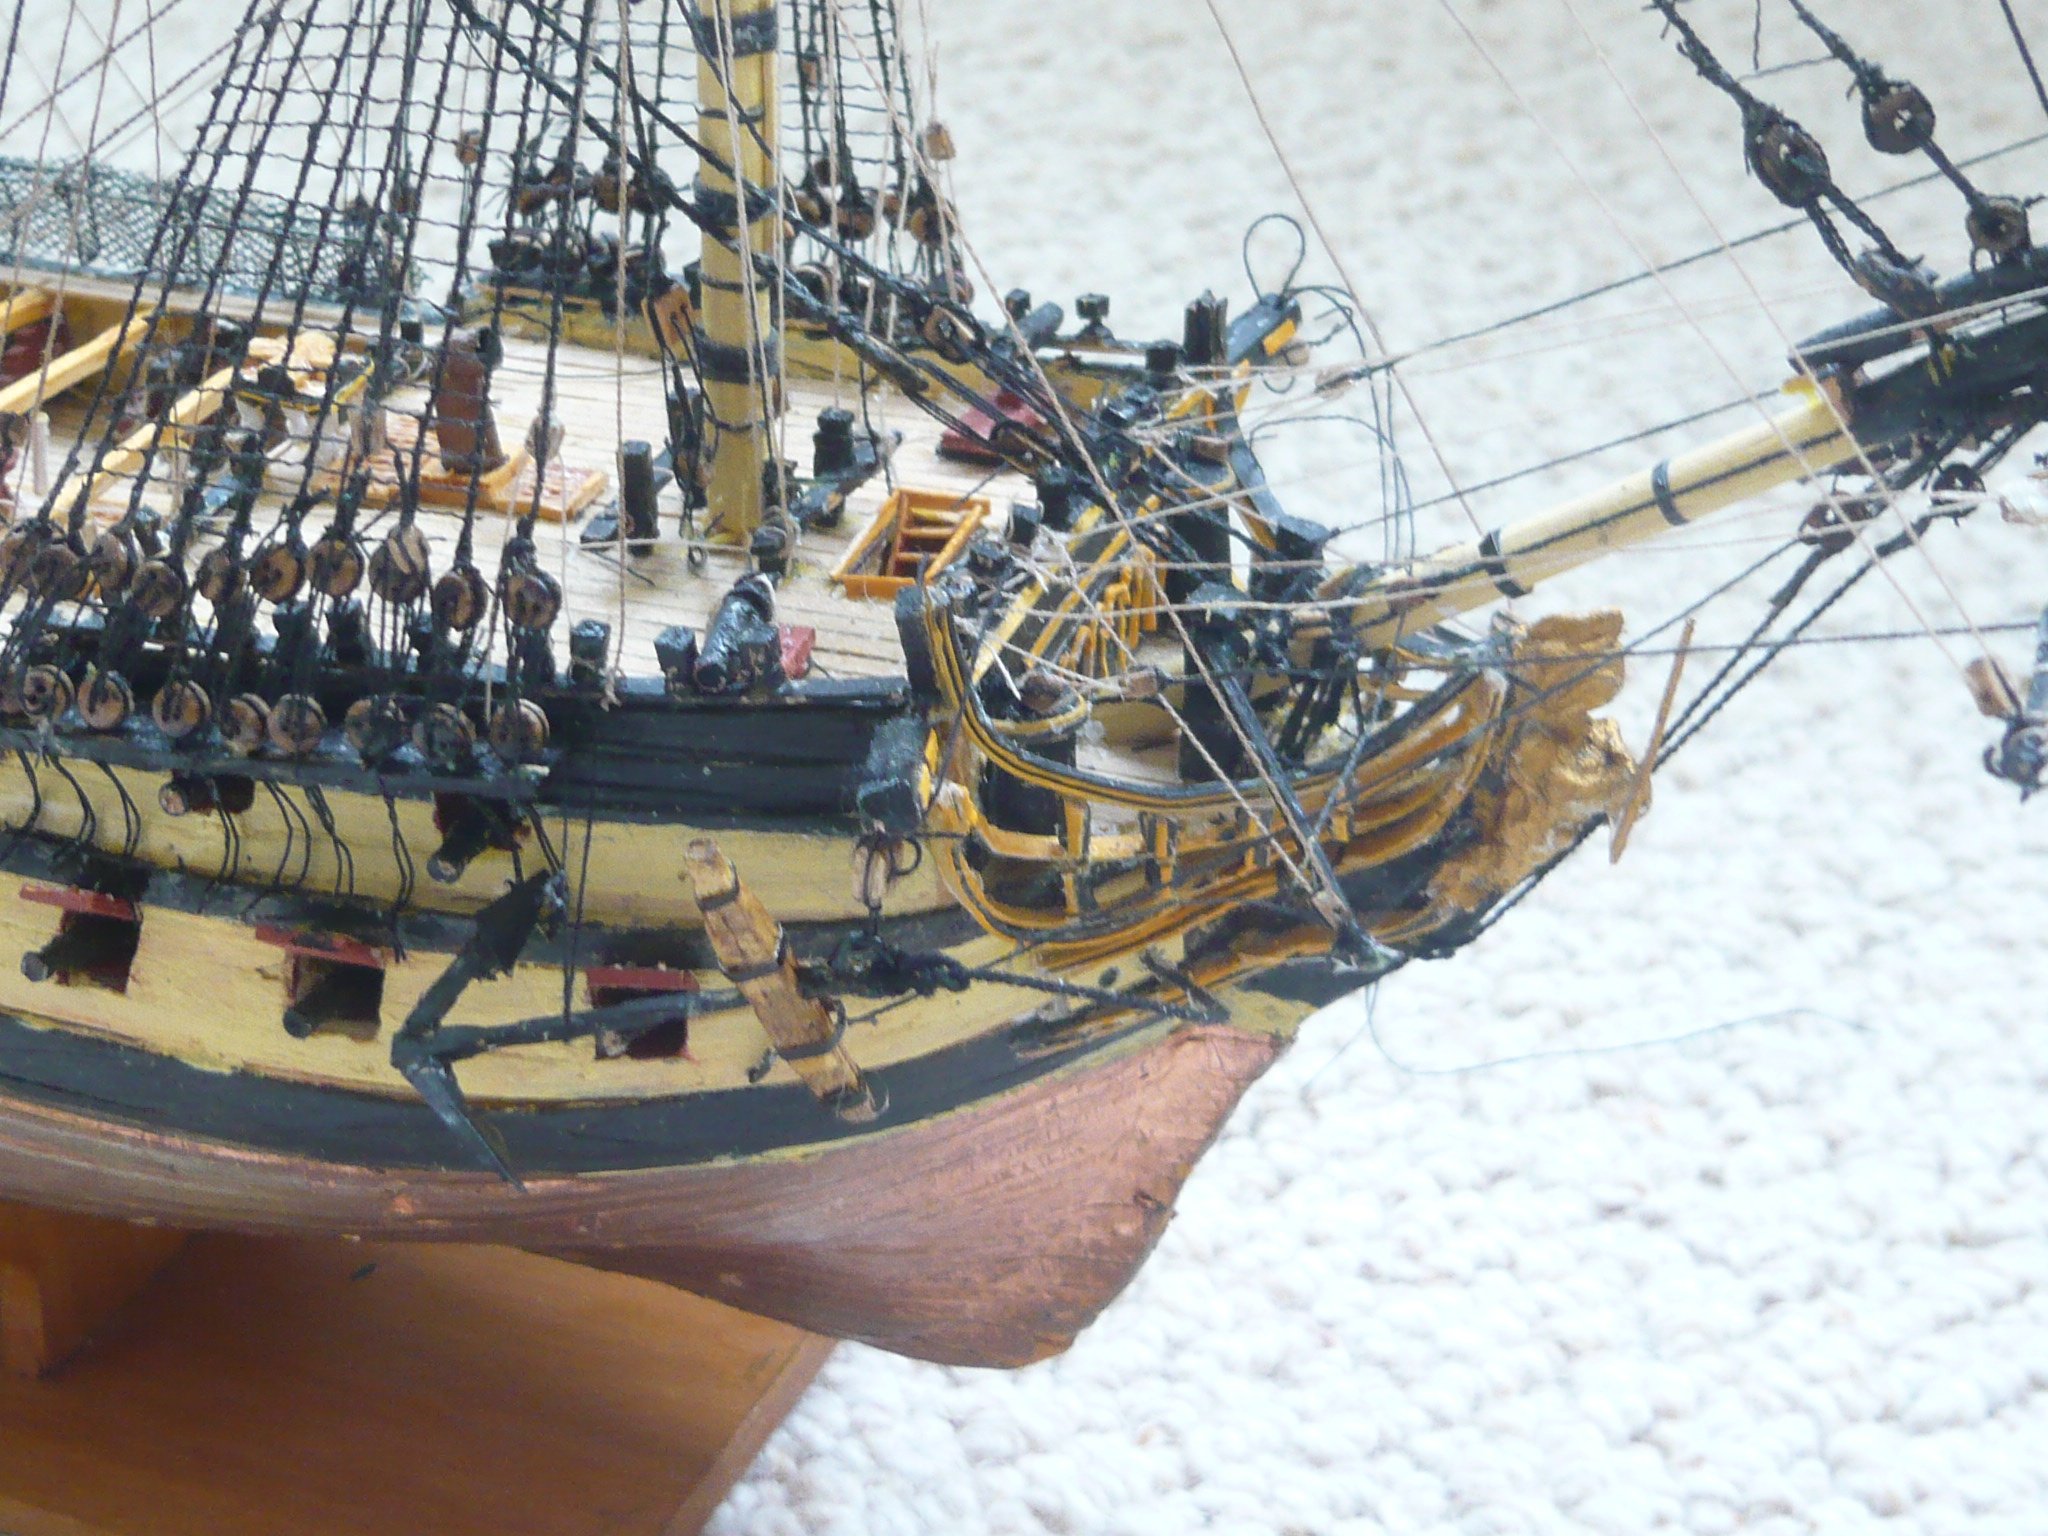
It’s more than time for an update, but there’s not that much to report as progress has been far too slow. Most of my attention has been devoted to the rigging. There are lots of problems, of course, many as a result of the small scale I’ve ambitiously adopted. Remember that the hull is only about 15 inches long. I’ve cheated with the ratlines, and have simply glued them into place. I don’t think I could possible knot them neatly, without pulling the shrouds. In any case, to do them properly would involve making eyes for the ends of the ratlines, as well as knotting them. I added the ratlines after the shrouds were installed - I don’t like the idea of the alternative technique of making shrouds, with ratlines, on a jig before mounting them. Blocks are a problem. So far, I’ve mainly been using 2 and 3 mm blocks from Cornwall Boats. In practice, there would have been a far greater range of size. Steel stated that blocks vary in size from 17 inches to four inches, while I read that Victory had blocks ranging from 26 to six inches. In the mid-eighteenth century, Invincible had, according to the archaeological record, single blocks ranging from five to twenty inches in height. At the scale I am using, the 2 and 3 mm blocks would equate to about 12 and 18 inches. I have found it possible to cut down the 2 mm ones somewhat, but they then look a bit clumsy. So, I have a problem. I need to find a way to make smaller ones if the rigging of the topgallants, and royals if I fit them, is not to look grotequely oversized. Does anyone have ideas? It may be that all I can do for the tiniest blocks is to tie knots, and dab them with glue, but it would be hard to shape them. Milliput may be the answer, and I’ll try that. One irritation with the bought blocks is that the holes in them are mostly too small for easy threading, and it take time to drill them out, though it can be done. Parrels are a nuisance to make, but Cornwall Boats provides appropiate tiny beads, and the spacers work cut from wood. I have previously used wire not thread, and that seems best. I will, however, cheat, and simply glue the completed parrels in place. Nor, to date, can I make them small enough for the topgallants. One problem with the rigging is what to leave out. Bowlines, for example, do not go easily with furled sails. It’s possible that they were unshipped when the sails were furled, or somehow folded up within the sail. The only answer is just not to fit them. And I’ll omit many of the lines used to control the sails. Ideally I suppose there should be rigging for the stunsail yards, but I have no idea how it would work, and won’t try to fit it. My hope is that I’ll be able to provide a reasonable general impression. Some idle thoughts about the differences between making model ships now, and in the late 1950s. One very important change is the availability of plans and photgraphs, primarily through the National Maritime Museum website. That has transformed research. In the old days, I used to cycle to the Natural History museum in Oxford, go through the hall with the dinosaur skeletons, into the Pitt Rivers museum. After a quick look at the shrunken heads, I would note down what I could of the model of HMS Lizard and that of an eighteenth century 50 gun ship. Since those days the range of relevant publications also exploded, and there was of course no equivalent of the web, nor of this magnificent site. In the 1950s I used what materials I could get from Oxford’s two model shops - mostly balsa wood and glue. Professional model makers had, of course, good access to materials, but I did not. Cornwall Boats has transformed all that. Lastly, a photo showing the present state of play.

- 60 replies
-
- 9
-
-
-
- Agamemnon
- Ardent-class
- (and 2 more)
-
My attention is largely confined to the rigging at present, but here’s a thought about the figurehead. It’s made from Milliput, and I apologise for it - it was the best I could at this scale. Now, I read in the Mariner’s Mirror (May 2018) an article by David Pulvertaft, who knows all there is to know about figureheads, arguing that the majority were painted white, with a fair number polychrome. His evidence was taken from a long period, 1727-1900, and the article made me wonder if I had been right in having a gilded figurehead. One contemporary model, of HMS Mars, in the National Maritime Museum (oddly, not cited in the article), shows a fine white figurehead. As the photograph below shows, I tried an off-white colour - but though it may have been historically correct, it just did not look right. It makes it stand out too much. Pulvertaft did allow for gilded figureheads, citing the examples of HMS Semiramis (1808), and HMS Conqueror. In the latter case, Captain Pellew petitioned for the replacement of the figurehead lost at Trafalgar by one showing Nelson, ‘gilded in burnished gold’. Pellew and his officers paid for this. Pictorial evidence is surprisingly scant (artists tended to prefer stern views), but Loutherbourg’s picture of the Glorious First of June (available on Wikpedia) shows a French ship with a polychrome figurehead, and an English one with a white one. Nicholas Pocock’s painting of Nelson’s flagships at anchor has Vanguafd with a white figurehead. I think it nevertheless that it would be acceptable to show Agamemnon with a polychrome figurehead, but I don’t have the skill for that at this scale. So, the off-white has gone, and it remains gilded, because that looks best. Gold paint can be a problem, however. The Humbrol I used in the 1950s remains absolutely fine, but some of the gold I used three years or so ago has gone a vile green. What I use now is a gold paste made by Liberon, which seems entirely stable. I just might try silver for the shield and spear, but I’ll leave the figurehead as it is for now. More about the rigging soon, with any luck.

- 60 replies
-
- 8
-
-
- Agamemnon
- Ardent-class
- (and 2 more)
-
As usual, the rigging is not going as fast as I’d really like, but it is proceeding. I have given up with the model aircraft tissue for the furled sails, as it was proving too hard to fold up. So, it was back to tissues from the supermarket, which though flimsy when split into three sheets, are easier to work with. I have hit an unexpected problem, and would be very grateful for advice. The question is whether it is right to fit a driver-boom (spanker-boom if you prefer). I have done so, but have been wondering if this was in fact correct, even though Longridge has one in his Anatomy of Nelson’s Ships, as does Petersson in his very useful book on Rigging Period Ship Models. There is an obvious difficulty, discussed at length elsewhere on Modelshipworld, in that the driver-boom would hit the flagstaff as the ship went about.The model of HMS Mars in the National Maritime Museum shows the problem, with both boom and flagstaff fitted. This is not an acute difficulty, as presumably the flagstaff could be dismounted, or folded down. I thought that paintings might provide an answer, and Nicolas Pocock’s Ships at Spithead, 1797 (https://www.meisterdrucke.ie/fine-art-prints/Nicholas-Pocock/1503372/Ships-at-Spithead-1797.html) shows three ships with no driver-boom. Equally, his picture of the frigate Triton, built in 1798, does not have one. Pocock’s sketches of Agamemnon are not clear enough to determine the answer, though that showing the engagement with four French frigates in 1793 looks as if there may be no driver-boom. Sorry not to reproduce the pictures, but I’m hesitant to include them given possible copyright issues. Paintings and drawings, of course, are not photographs, and may not be correct. Interestingly, Steel (The Elements and Practice of Rigging And Seamanship, 1794) provides a table of boom-lengths, which shows that 64 gun ships should have no driver-boom, no jackstaff, and no ensign staff. Driver-booms were just for smaller vessels. Surviving ships are not to be trusted, as the rigging is modern, but Trincomalee has driver-boom and flagstaff, as did Victory (not sure of the present position). As for Agamemnon herself, there is no clear clue. The ship was refitted at Leghorn late in 1794, and I suppose it is possible that a driver-boom was installed then. I am inclined to remove the boom, but to leave it for now and ponder the issue further. It may well be correct either way. What does anyone think? Please excuse the unfinished ends of rope etc in the photo - all will be tidied up in due course.

- 60 replies
-
- 6
-
-
- Agamemnon
- Ardent-class
- (and 2 more)
-
As a break from rigging, I’ve more or less completed four boats - a longboat, a pinnace, a cutter and a jolly boat. They are made as I described earlier. A balsa mould, newspaper and glue for the hull, cut in half when dry. Then the halves are stuck together onto the keel, and card ribs and interior planking are fitted. Thwarts etc are of wood. Sounds easier than it is in practice, but it’s the best method I can manage for such tiny boats. The jolly boat features clinker planking externally. There probably should be more boats - the tables in May’s book on Boats of Men-of-War suggest that a 64 gun ship should have five. I’ll think about that, but it does start to look very overcrowded to have that many. There are elements that I just could not manage at this scale. There are no rowlocks, as everything I tried either looked too big and clumsy, or was just about invisible. Suggestions welcome, and I’ll continue to consider this. The tillers, at least on some of the boats, should be nicely carved - I found a good example at https://www.bada.org/object/19th-century-oak-boat-tiller , but as ever, that would be impossible when they are so tiny.

- 60 replies
-
- 5
-
-
- Agamemnon
- Ardent-class
- (and 2 more)