HOLIDAY DONATION DRIVE - SUPPORT MSW - DO YOUR PART TO KEEP THIS GREAT FORUM GOING! (Only 72 donations so far out of 49,000 members - Can we at least get 100? C'mon guys!)
×

Scotty W
-
Posts
76 -
Joined
-
Last visited
Content Type
Profiles
Forums
Gallery
Events
Everything posted by Scotty W
-
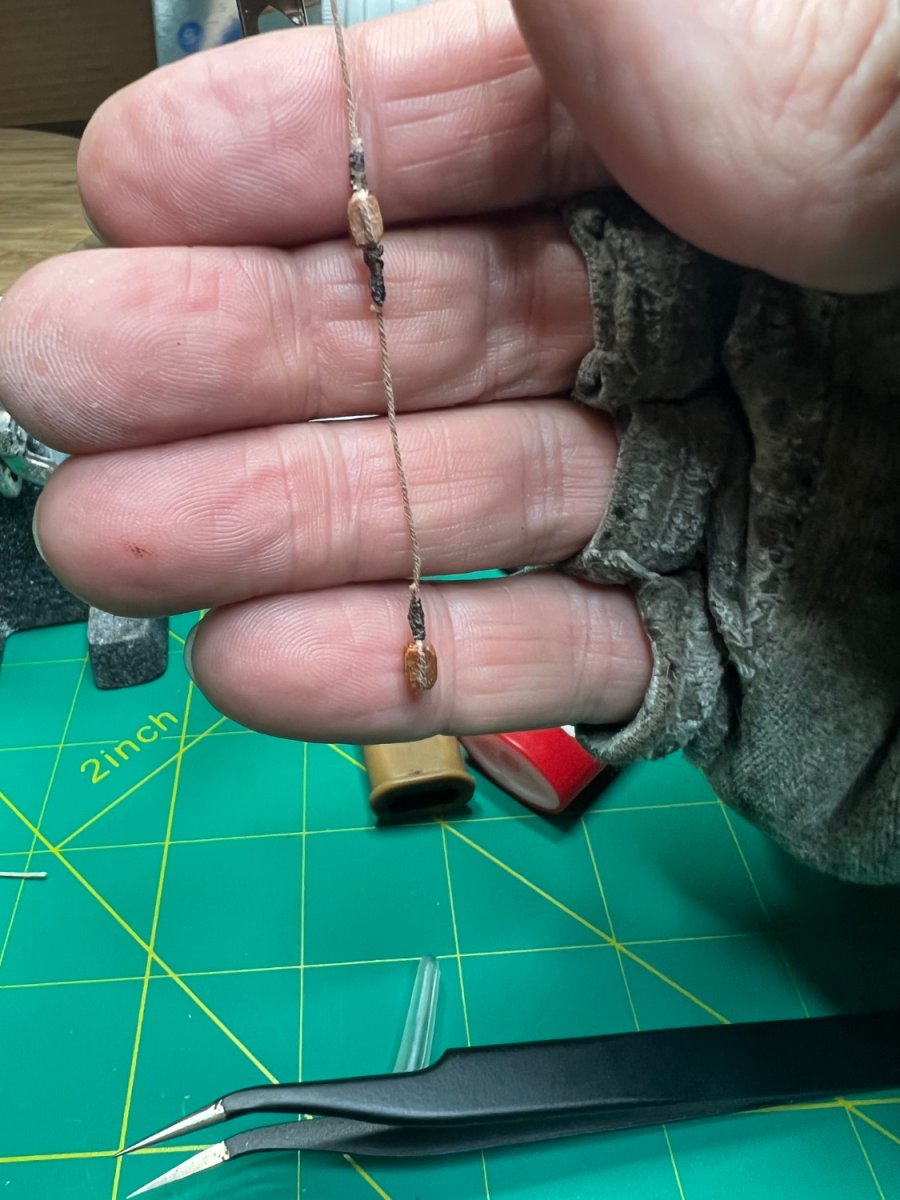
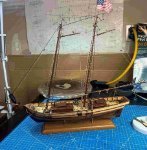
 WoooHooo! Got my ropes from BenT of RopesOfScale.com today and they look great! (Current, not in the past like the rest of the log is until caught up) Thanks Ben! Time to start stropping, joy. These are practice ones with original rope and thread I had while waiting for the rope. I need somemore practice lol but not bad for first ones ever.

- 59 replies
-
- 2
-

-
- Swift
- Artesania Latina
- (and 1 more)
-
Thanks Keith. I appreciate that. Won’t stop until it’s in a case.
- 59 replies
-
- 2
-
-
- Swift
- Artesania Latina
- (and 1 more)
-
Looks like I need to add some nails per that last picture. Busy working on my two guns at the moment waiting for warmer weather to varnish everything.
- 59 replies
-
- 1
-
-
- Swift
- Artesania Latina
- (and 1 more)
-
Polaris by Paula - OcCre - 1:50
Scotty W replied to Paula's topic in - Kit build logs for subjects built from 1801 - 1850
I lived in Austin from 1980-2000 but landed in Wash St. not Portugal. Good luck on your first build! I'm on mine as well. Hope you get your ship yard set back up and all goes well, keep us posted. Cheers! Scotty -
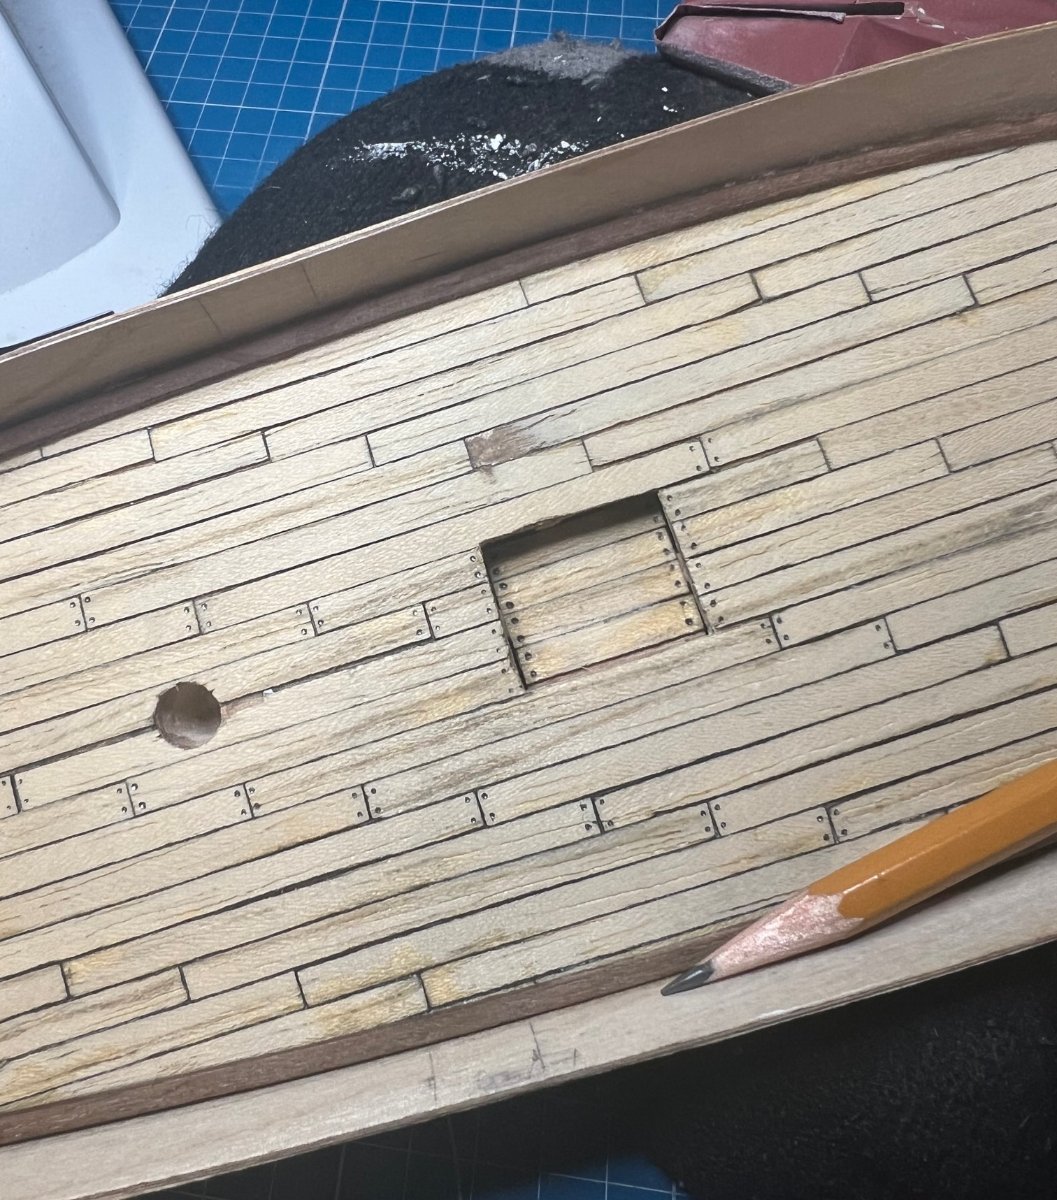
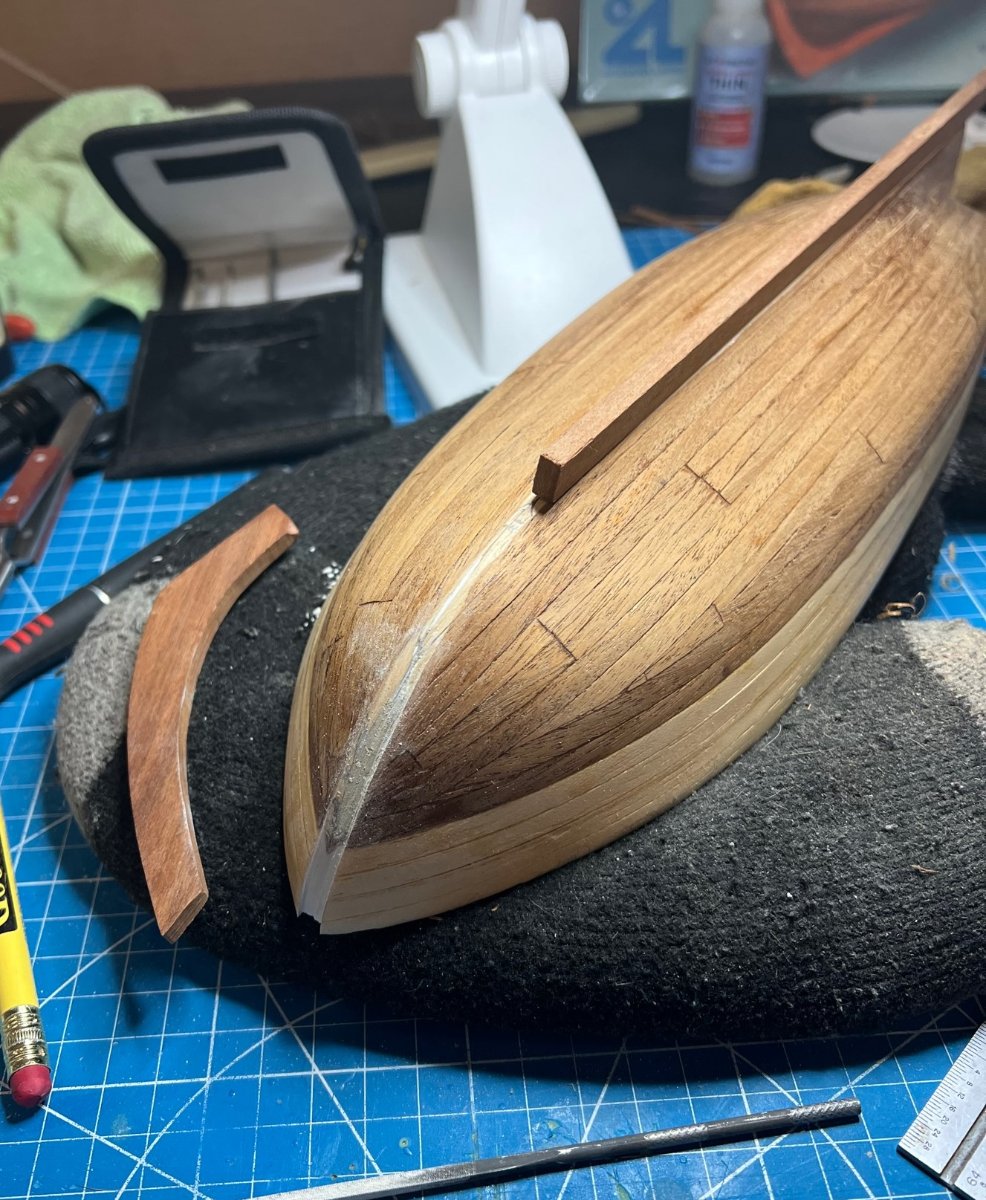
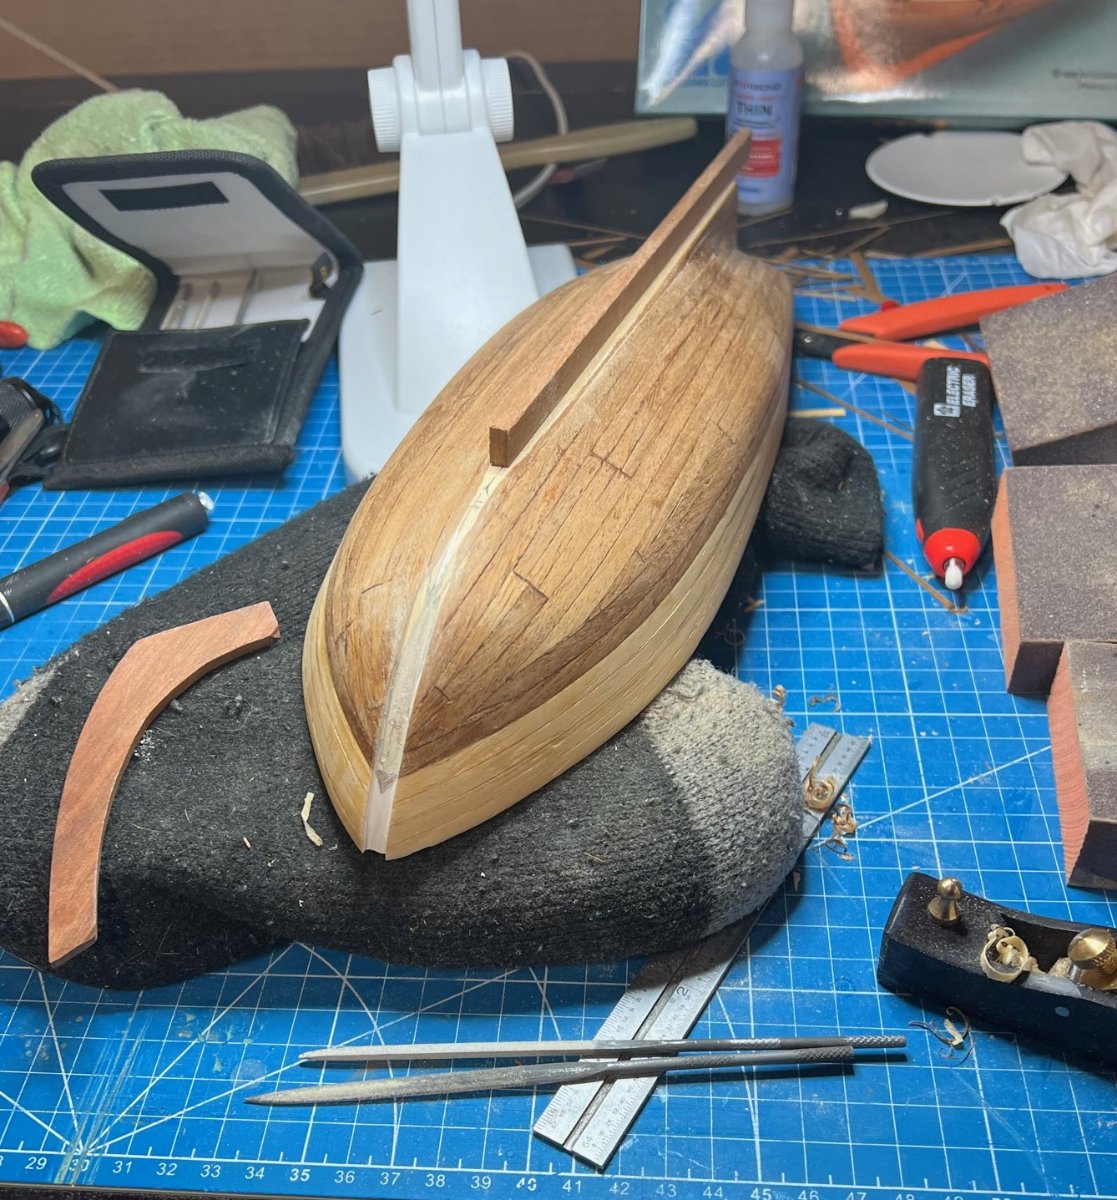
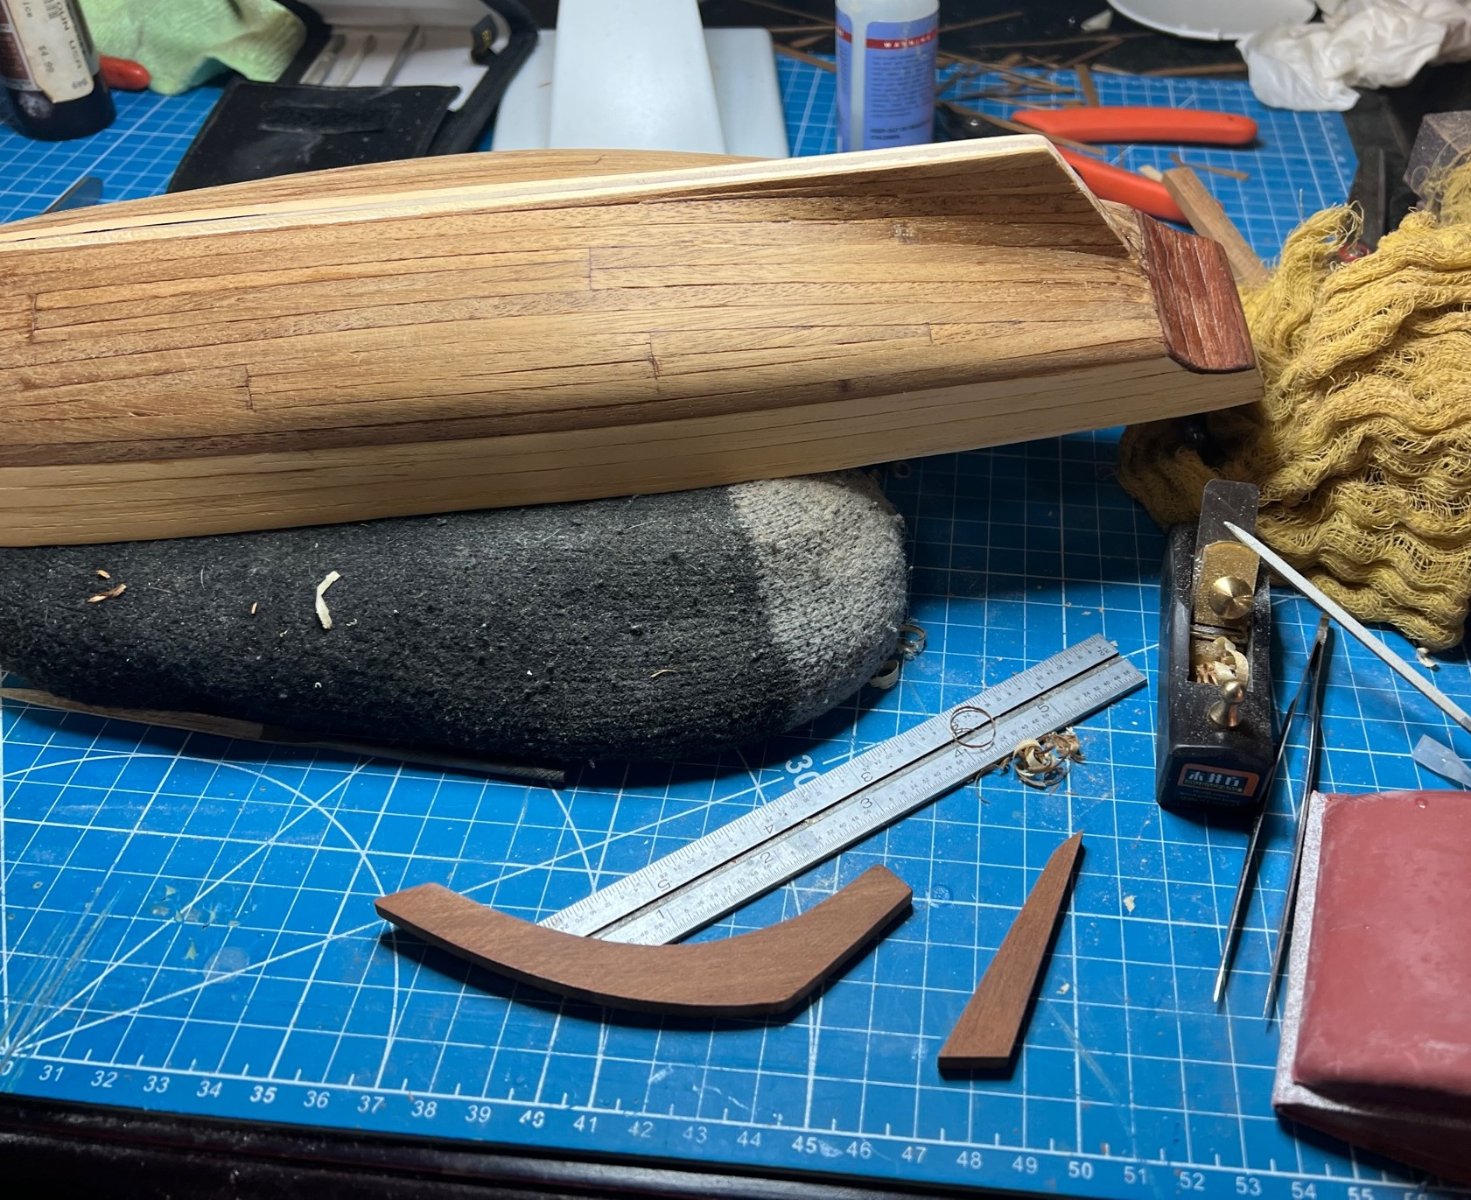
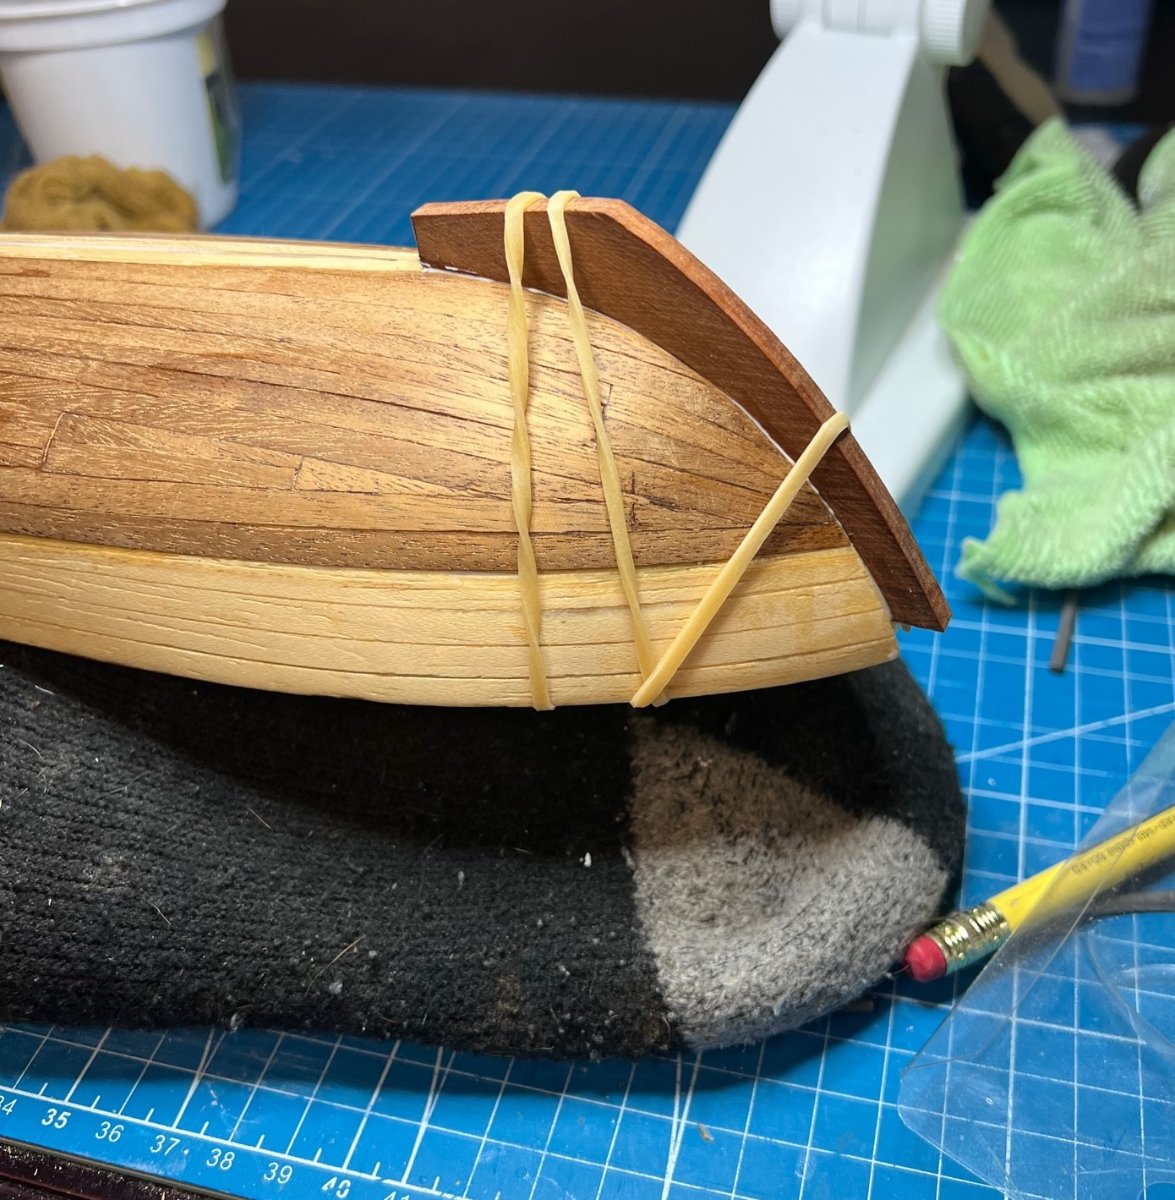
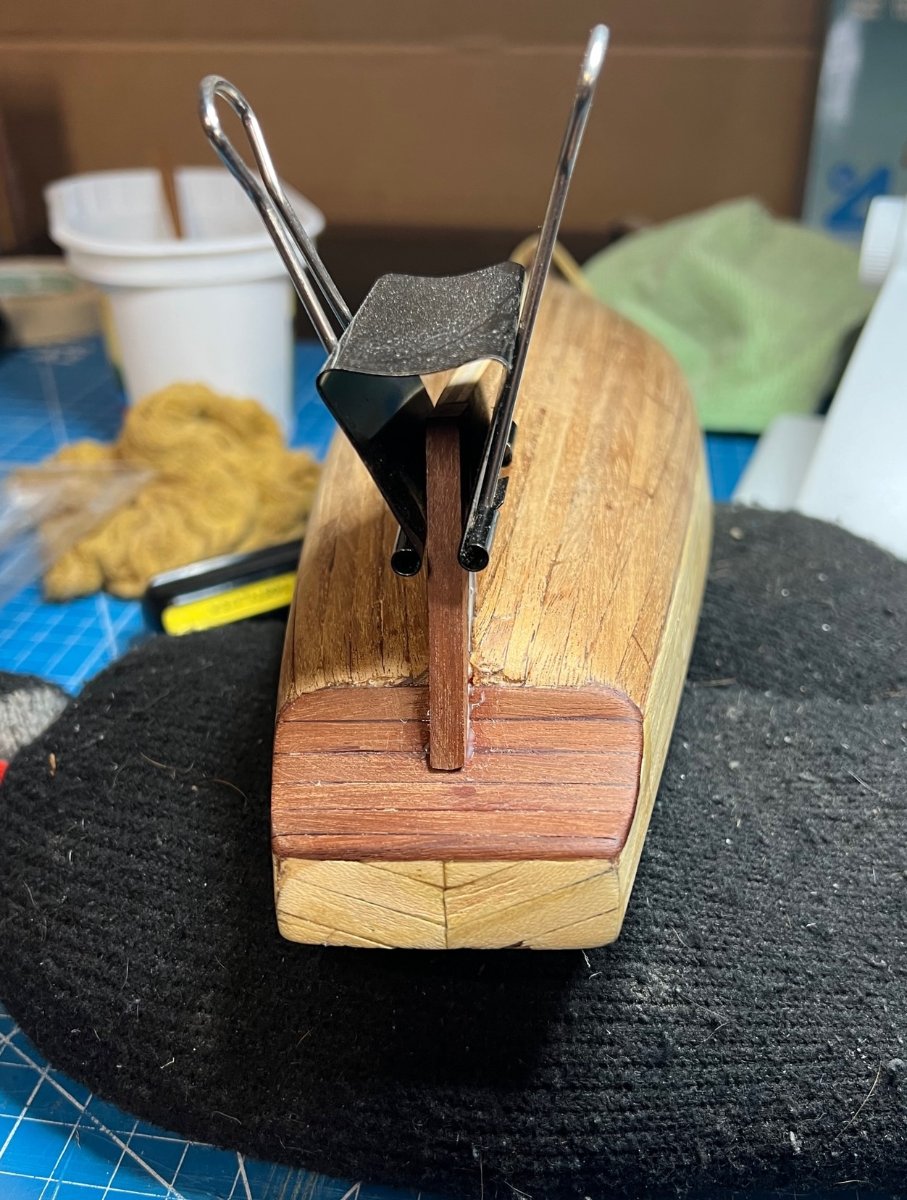
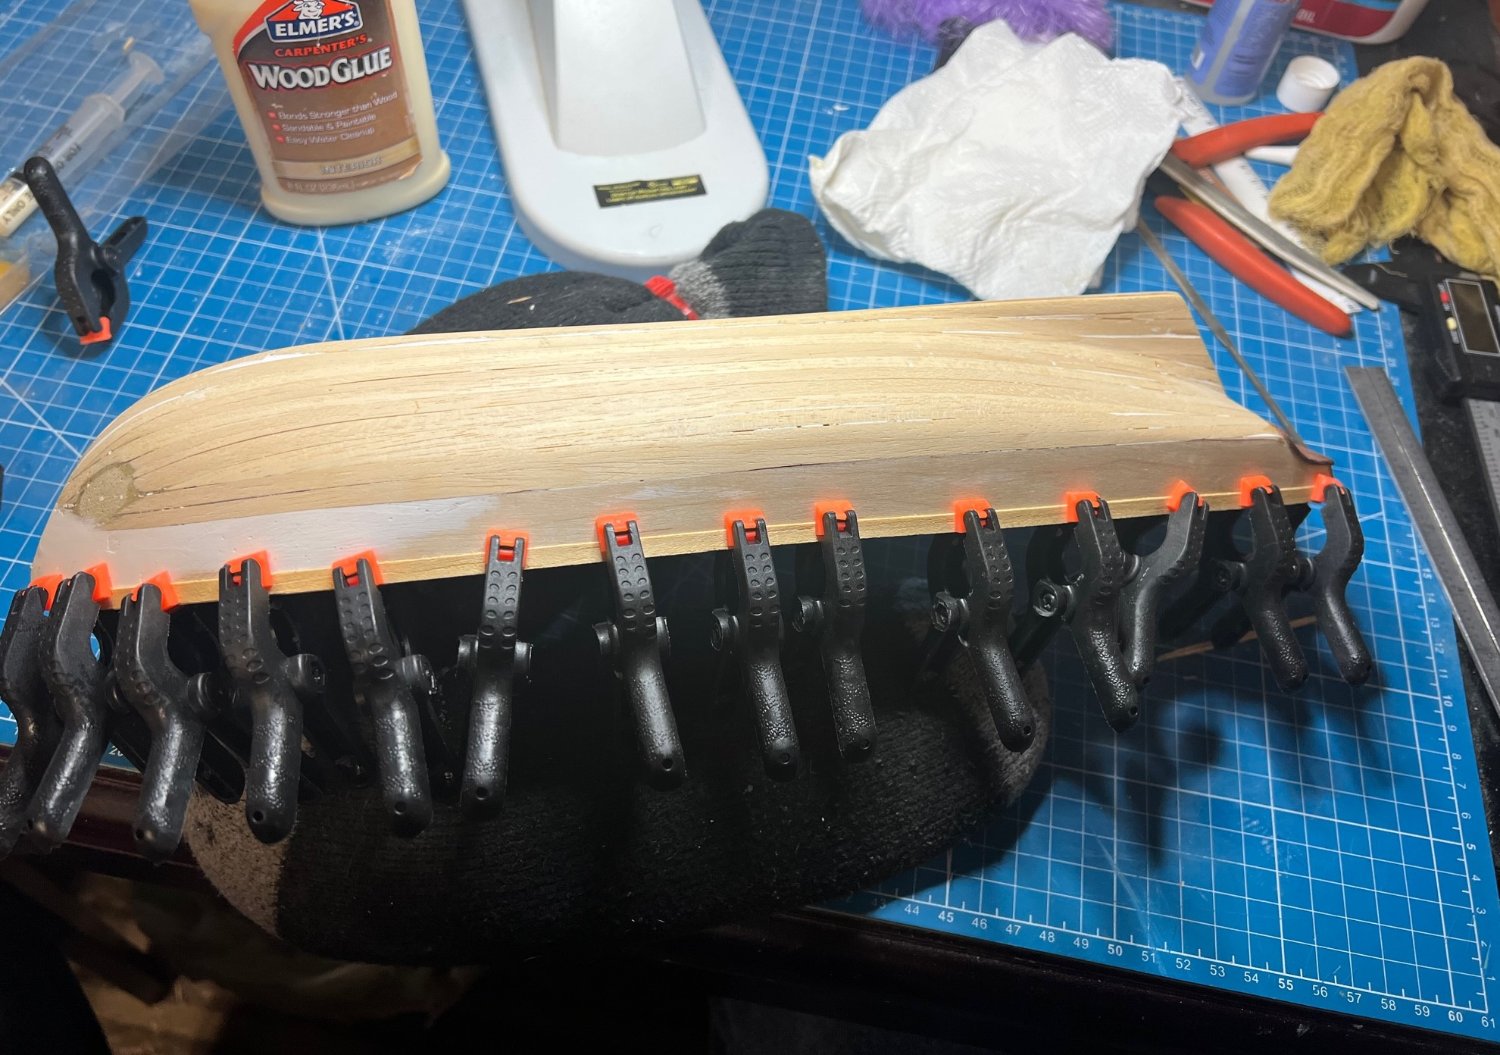
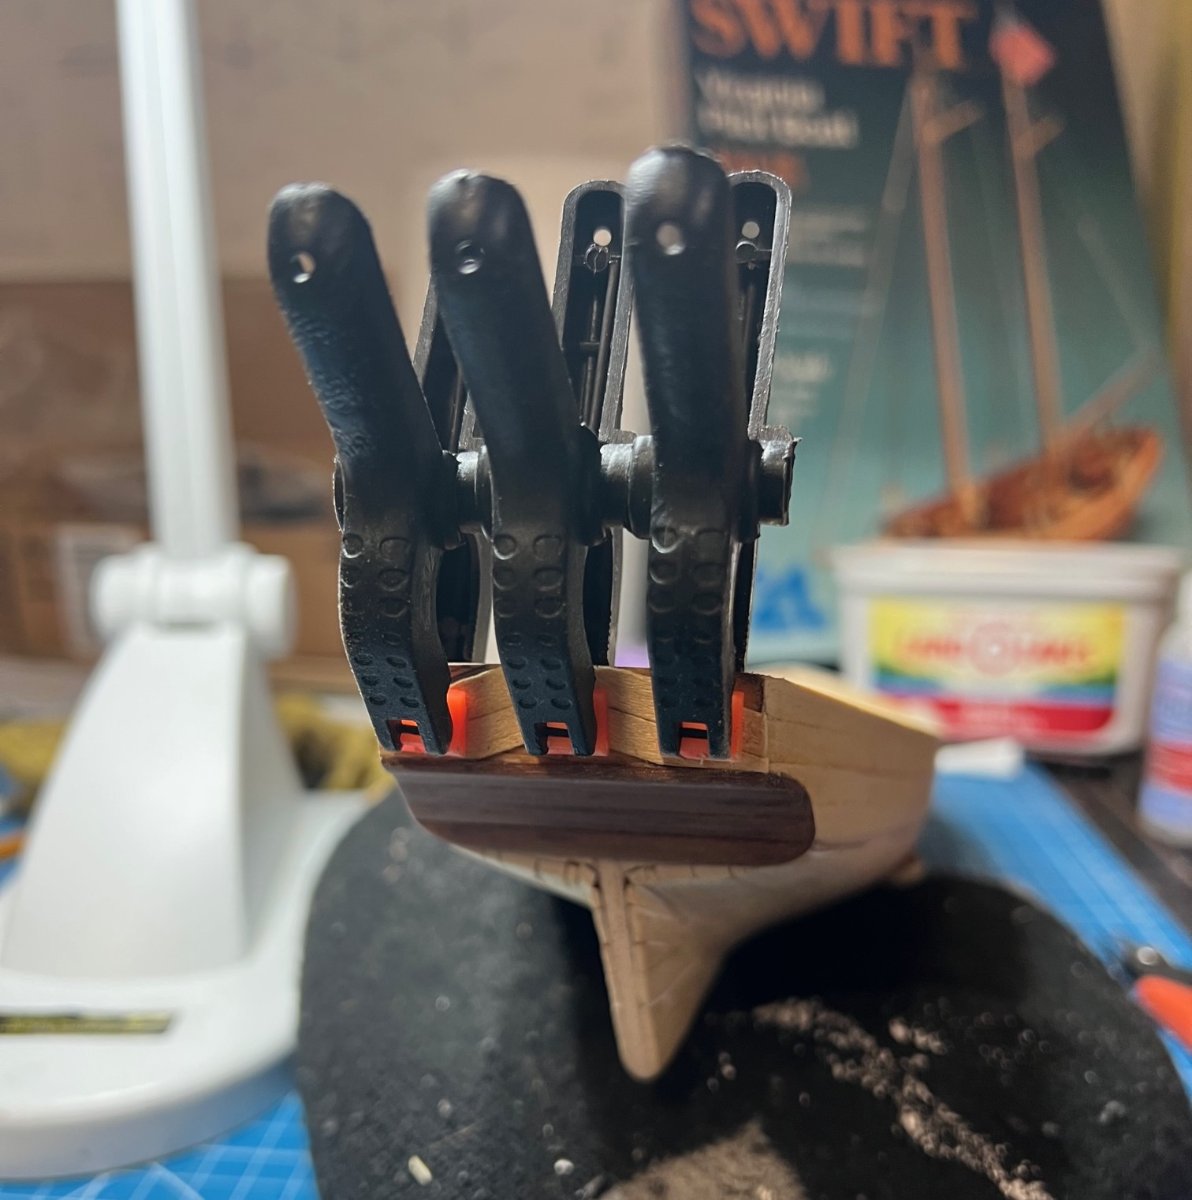
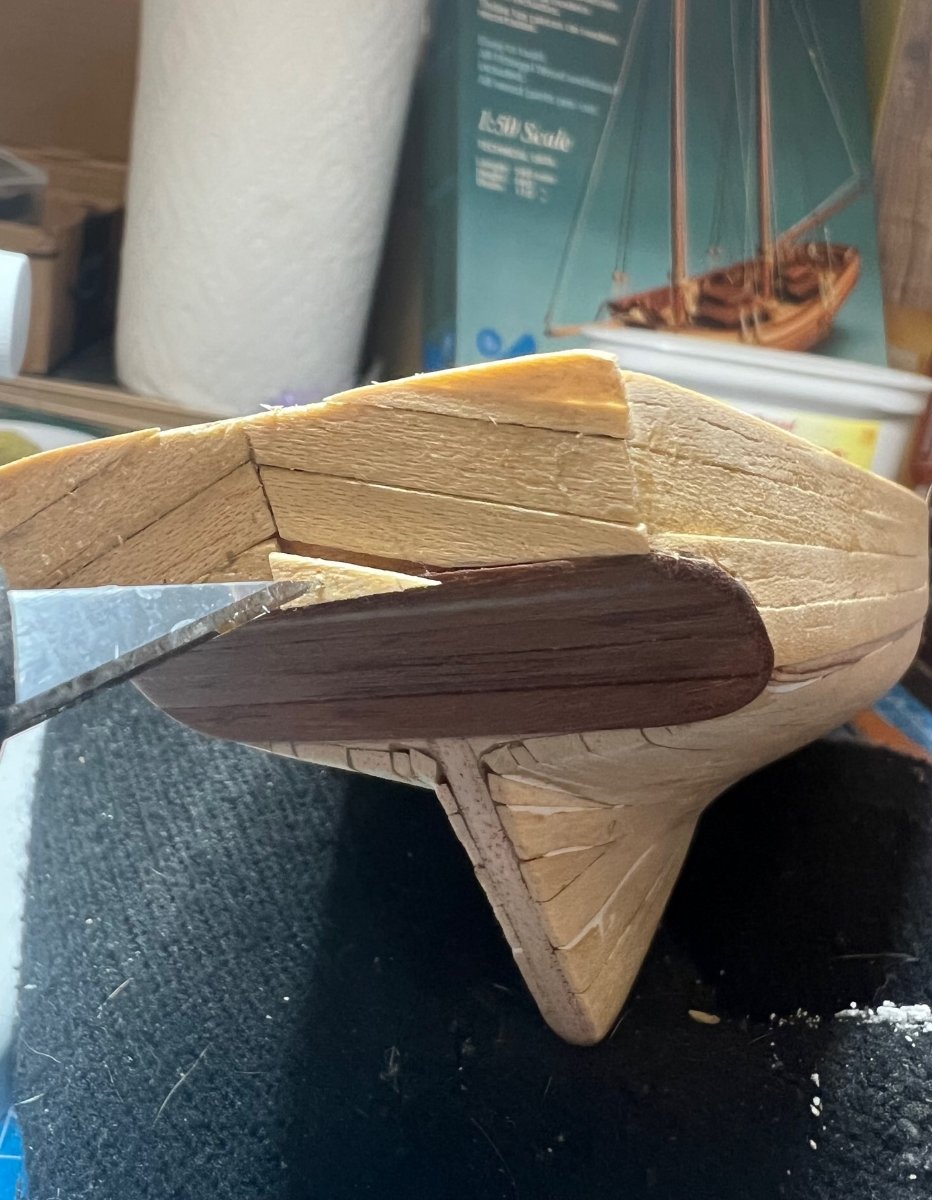
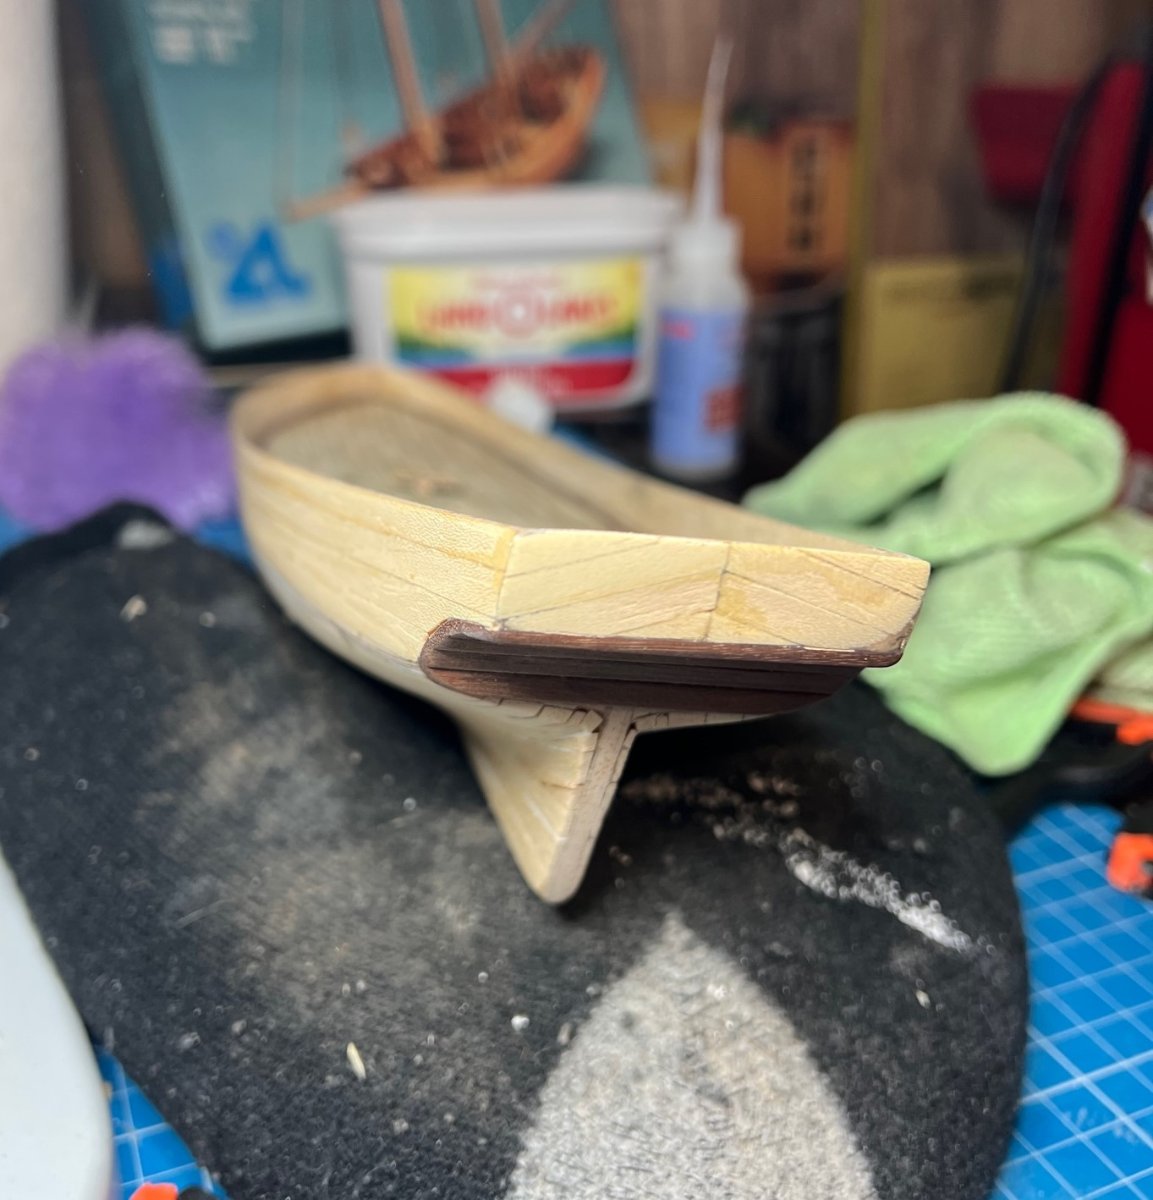
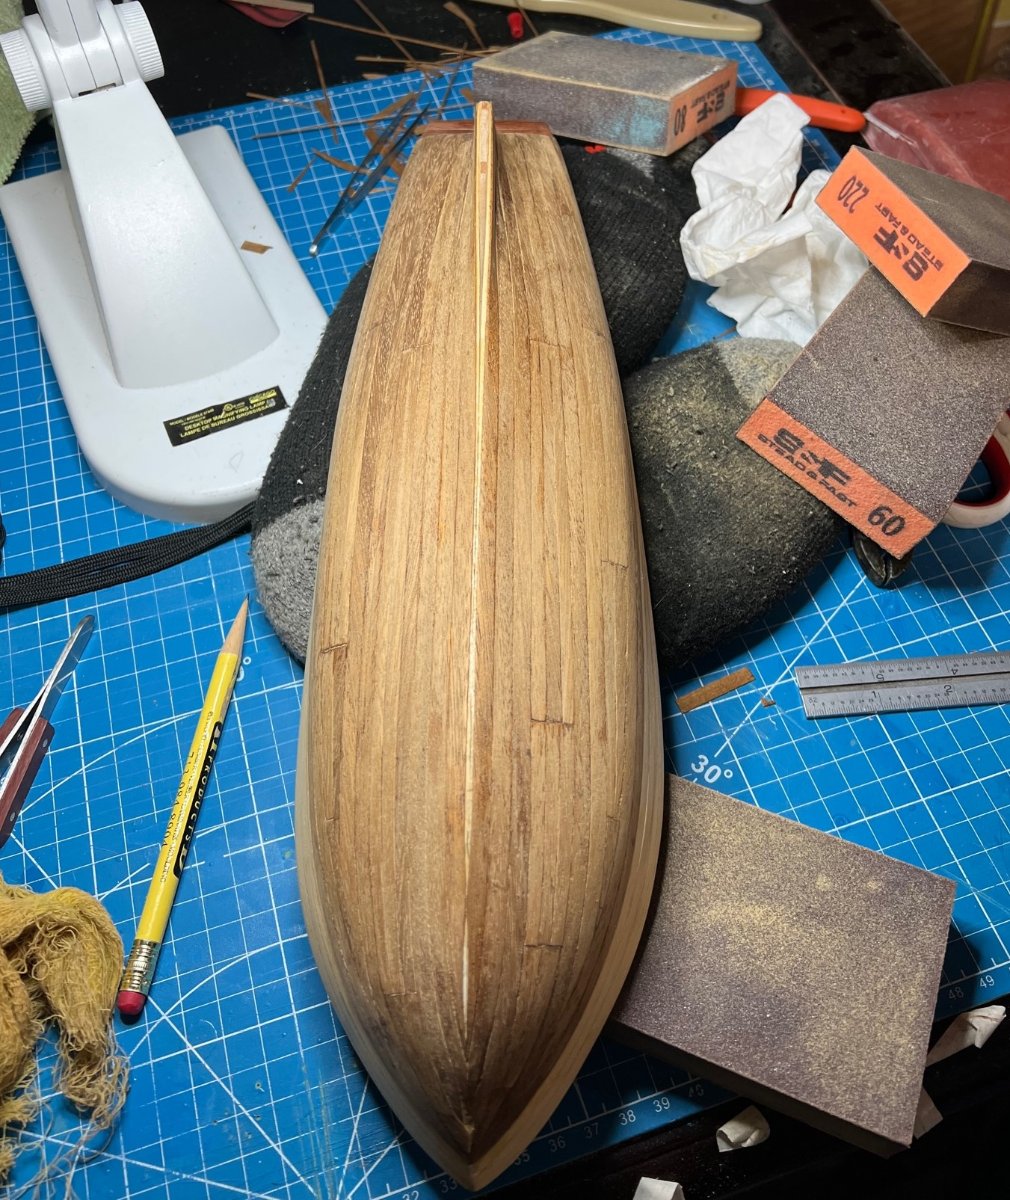
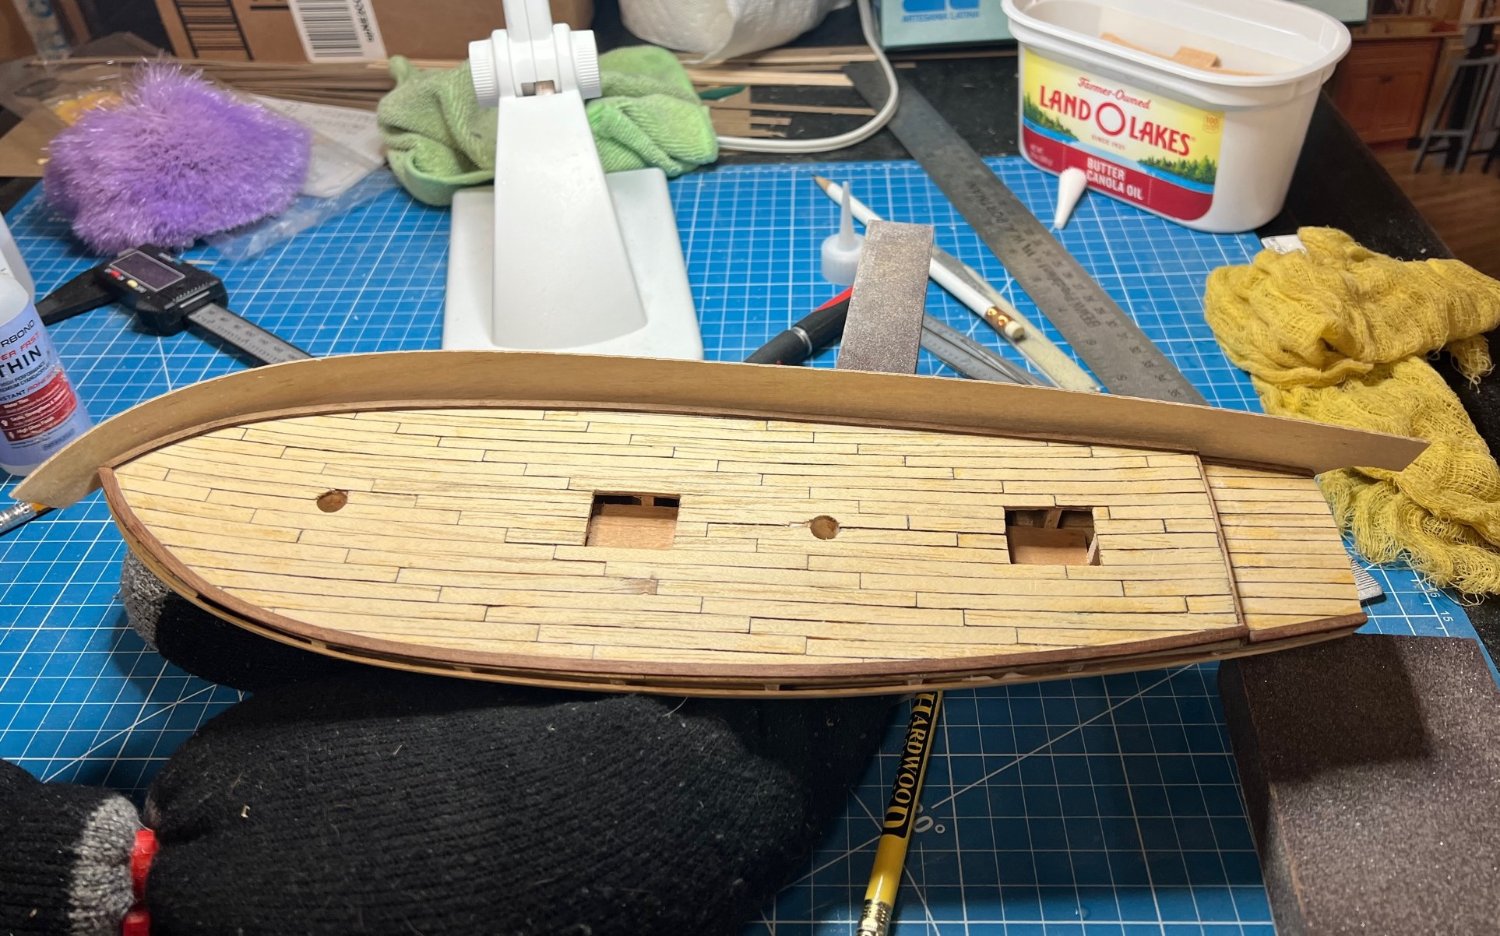
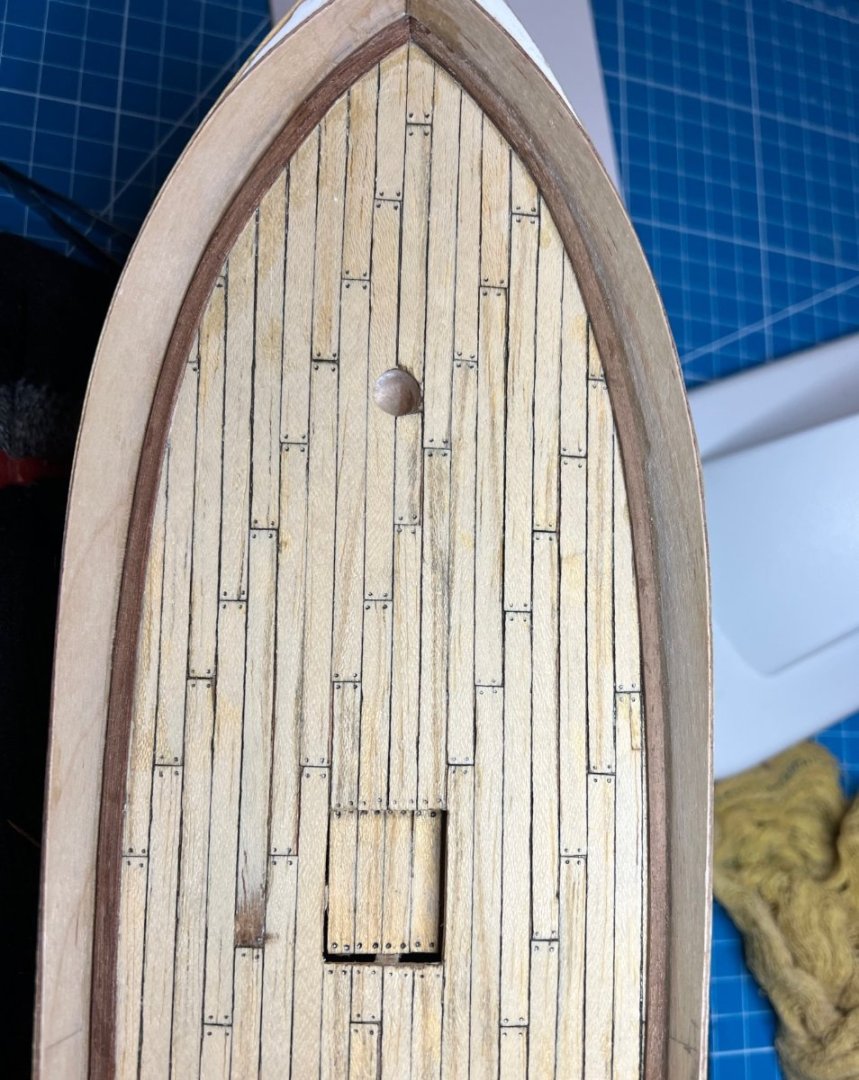
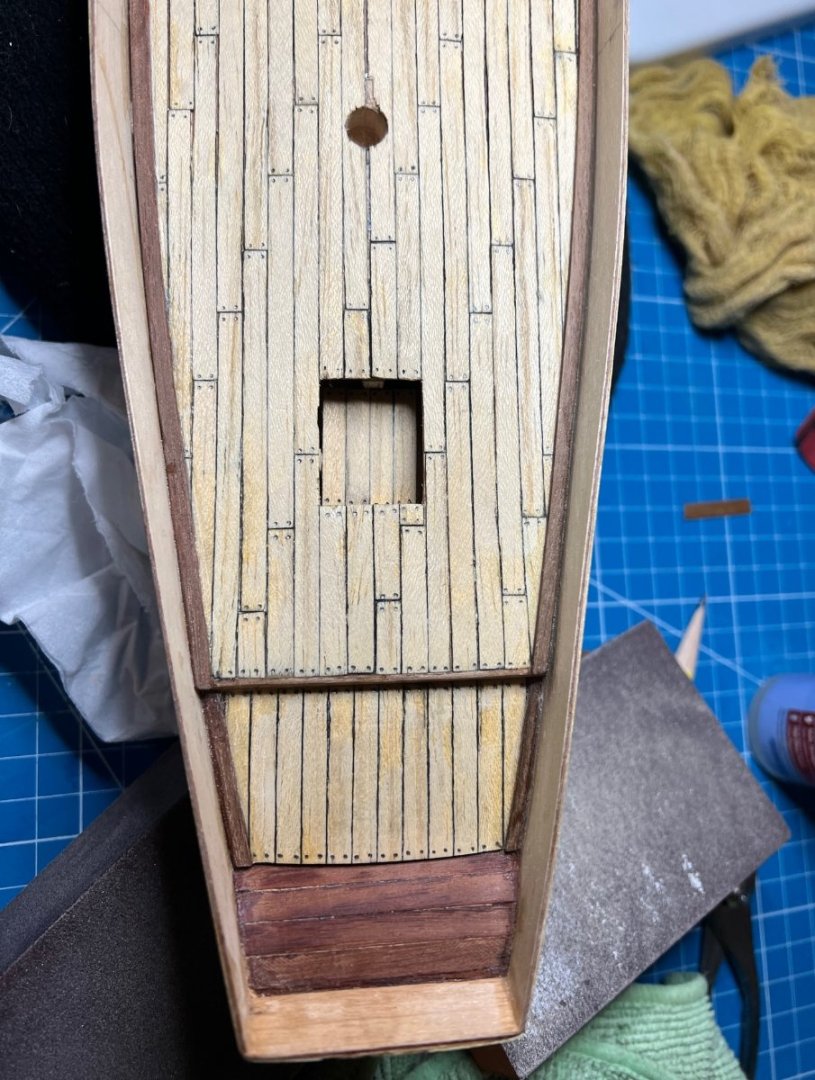
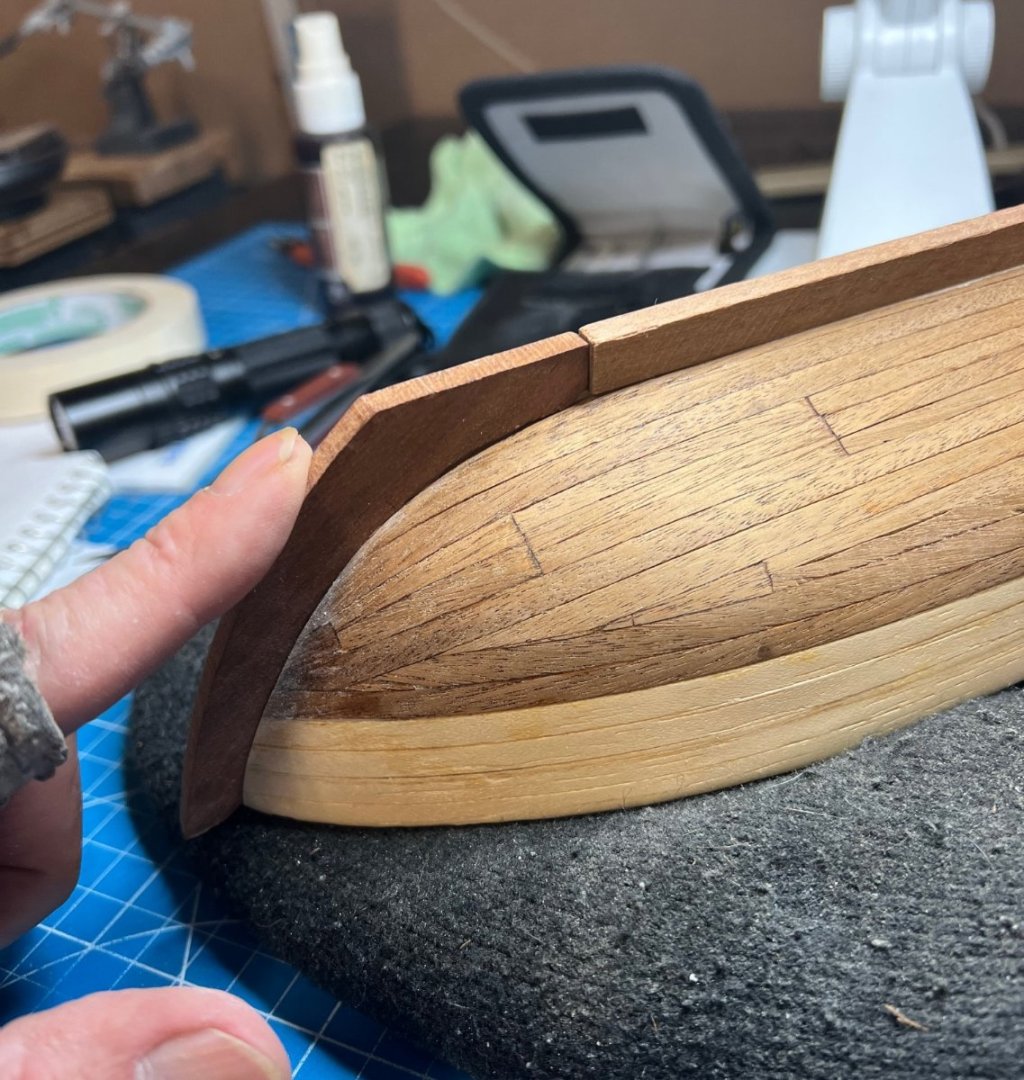
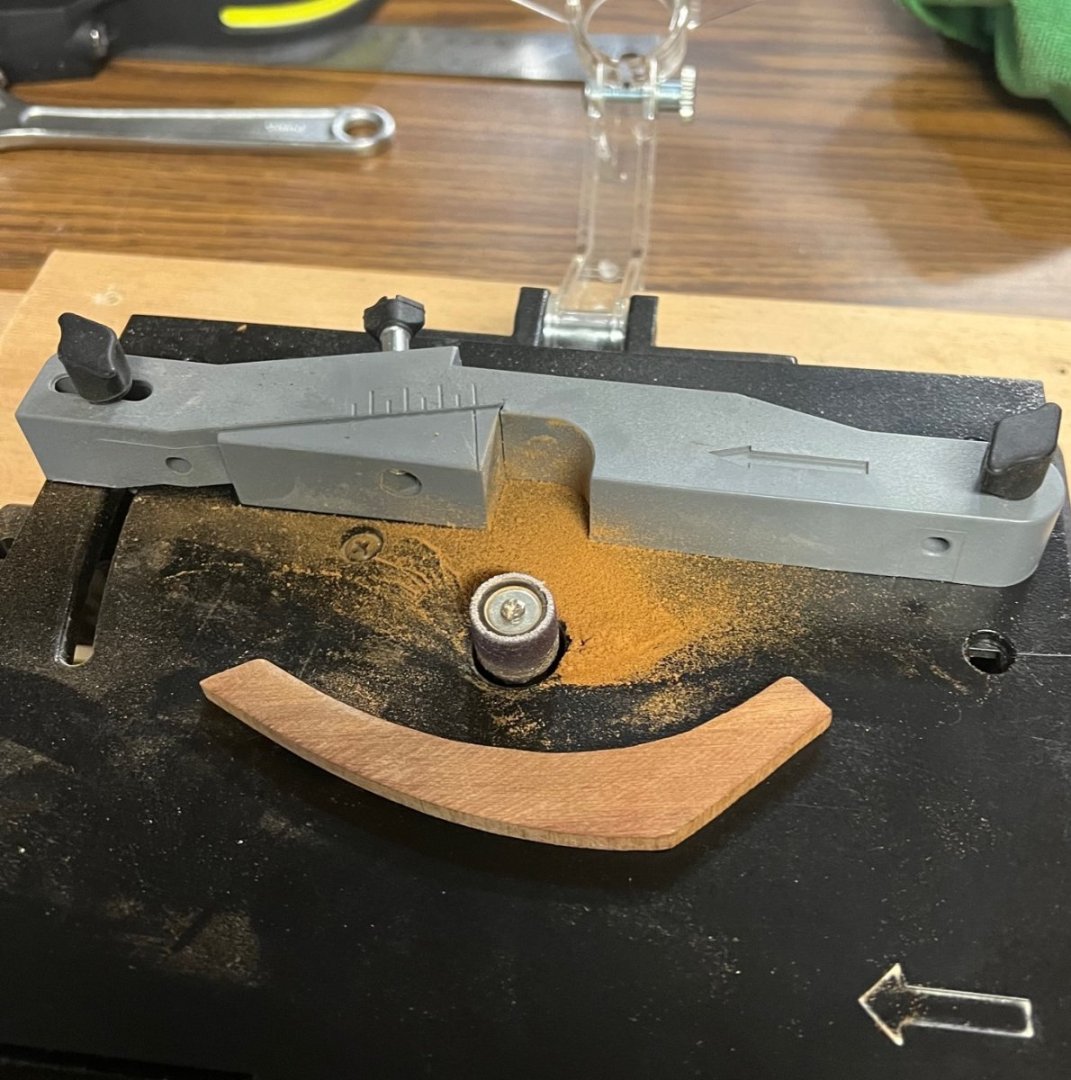
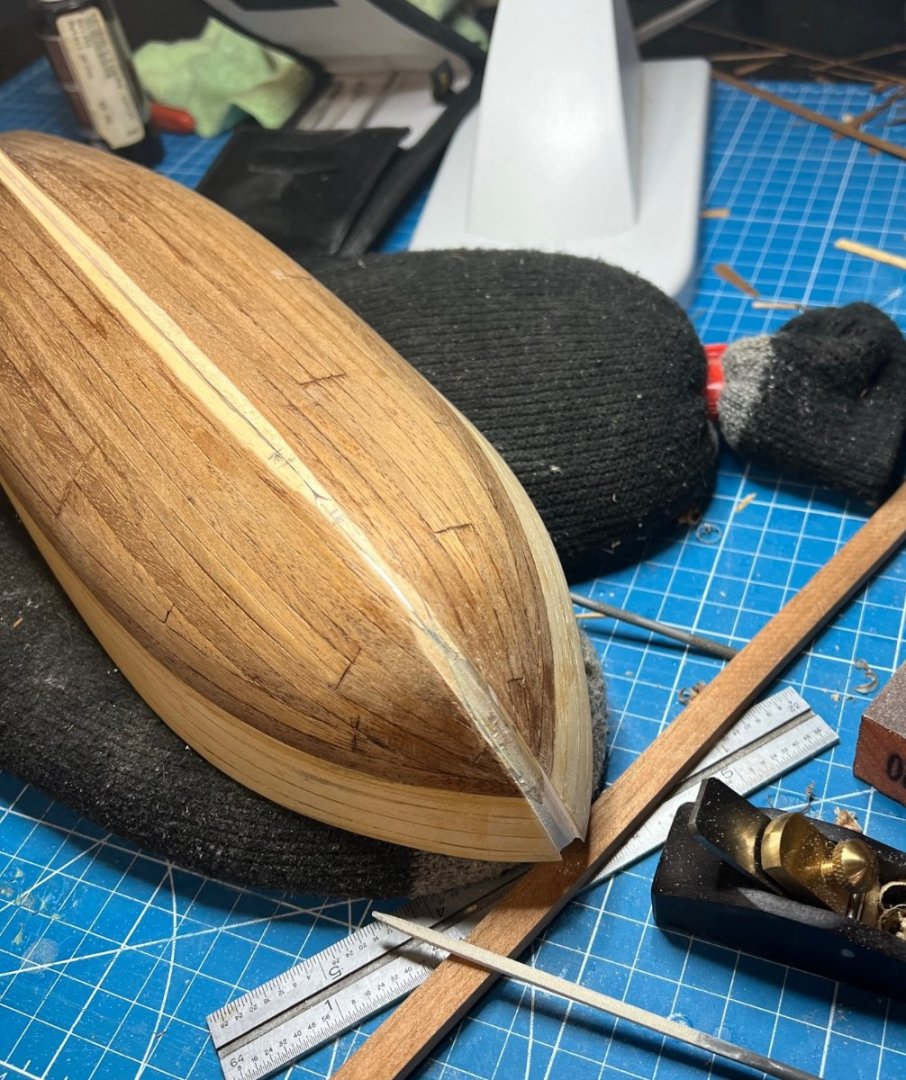
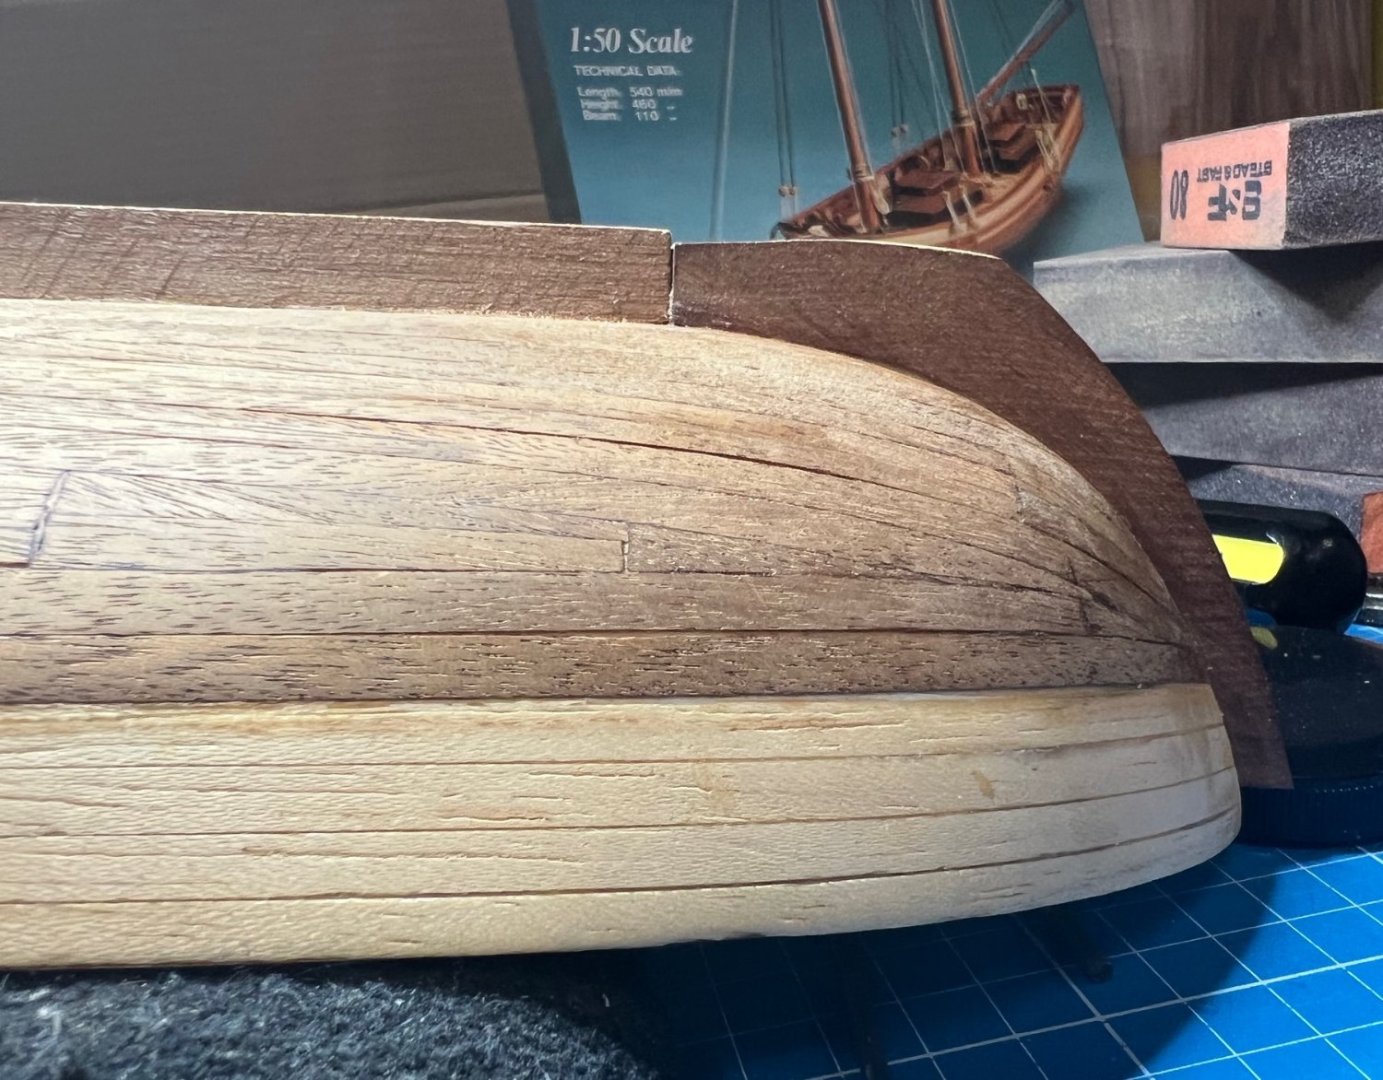
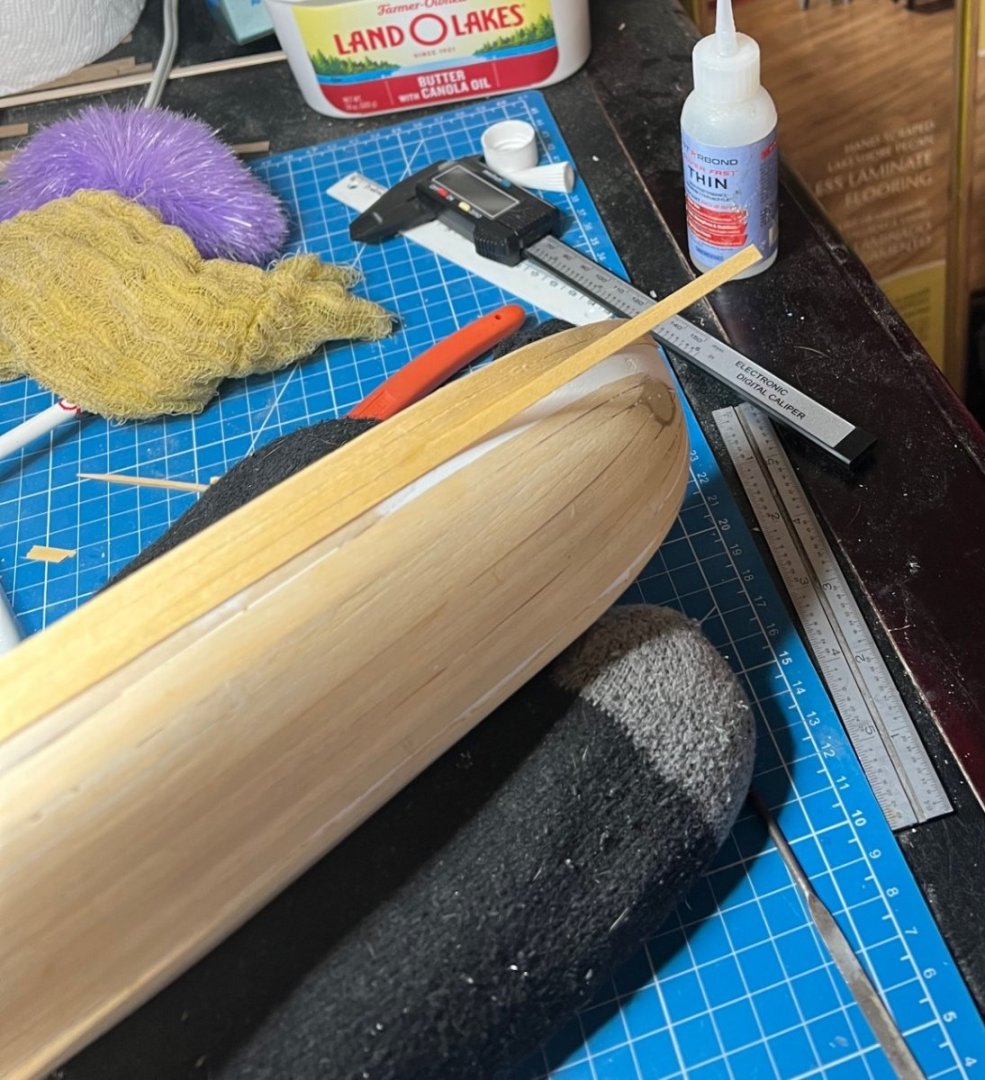
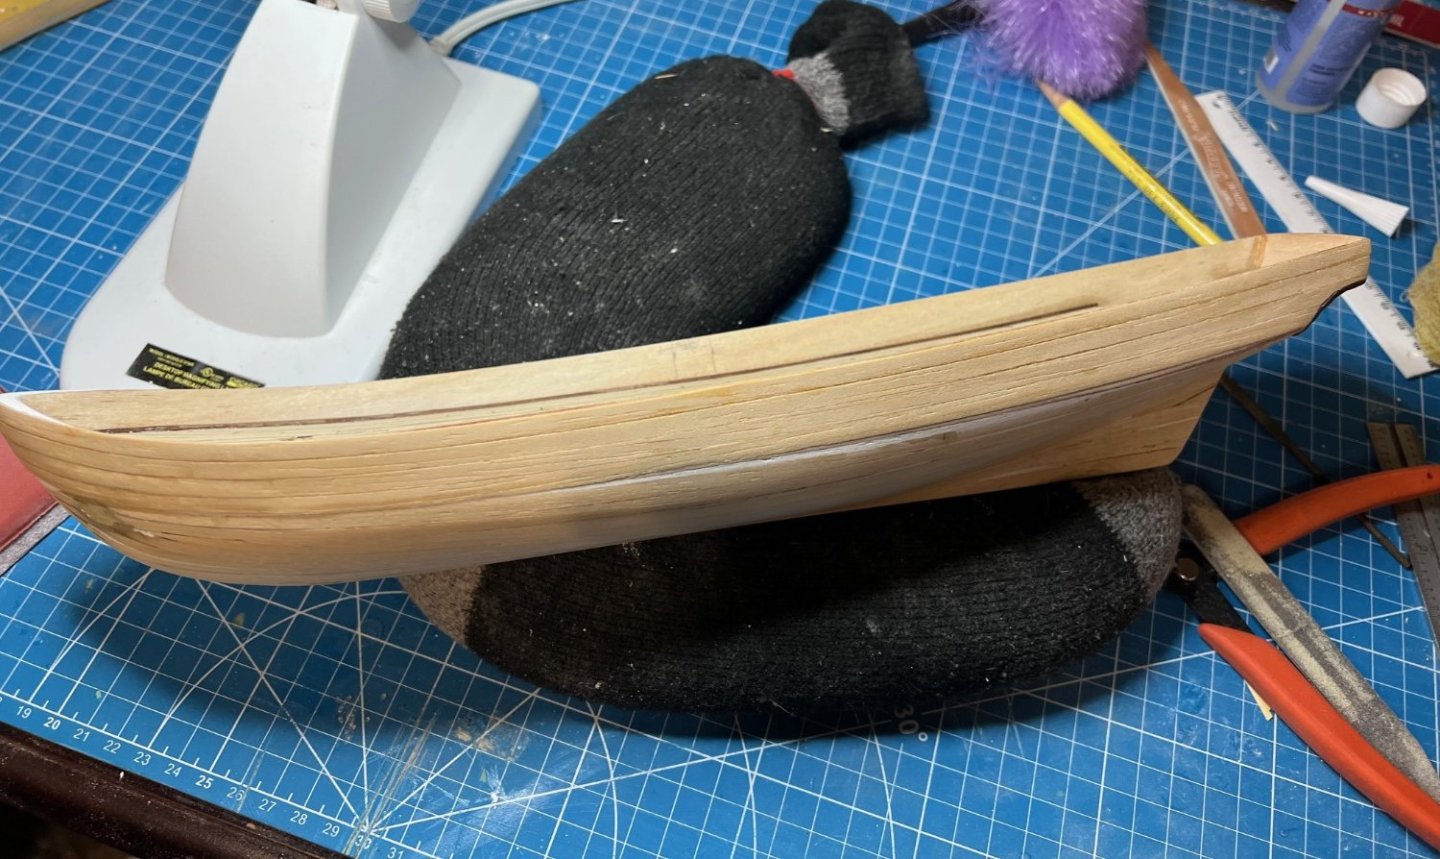
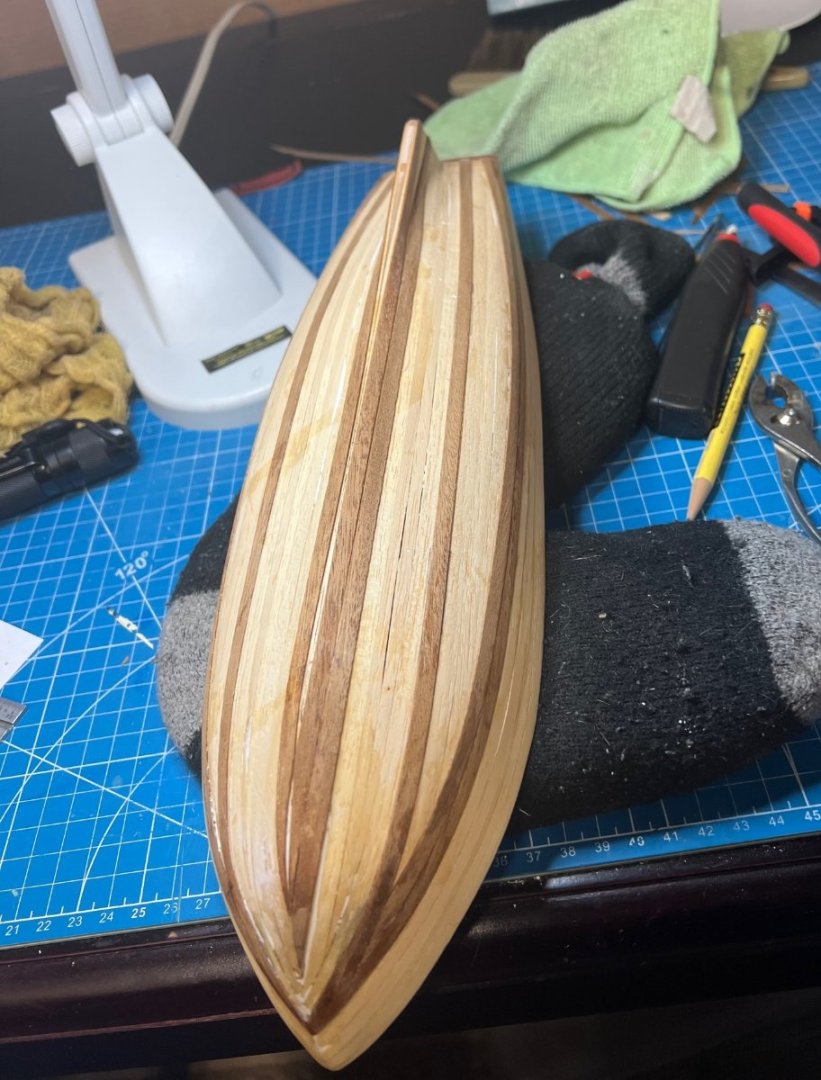
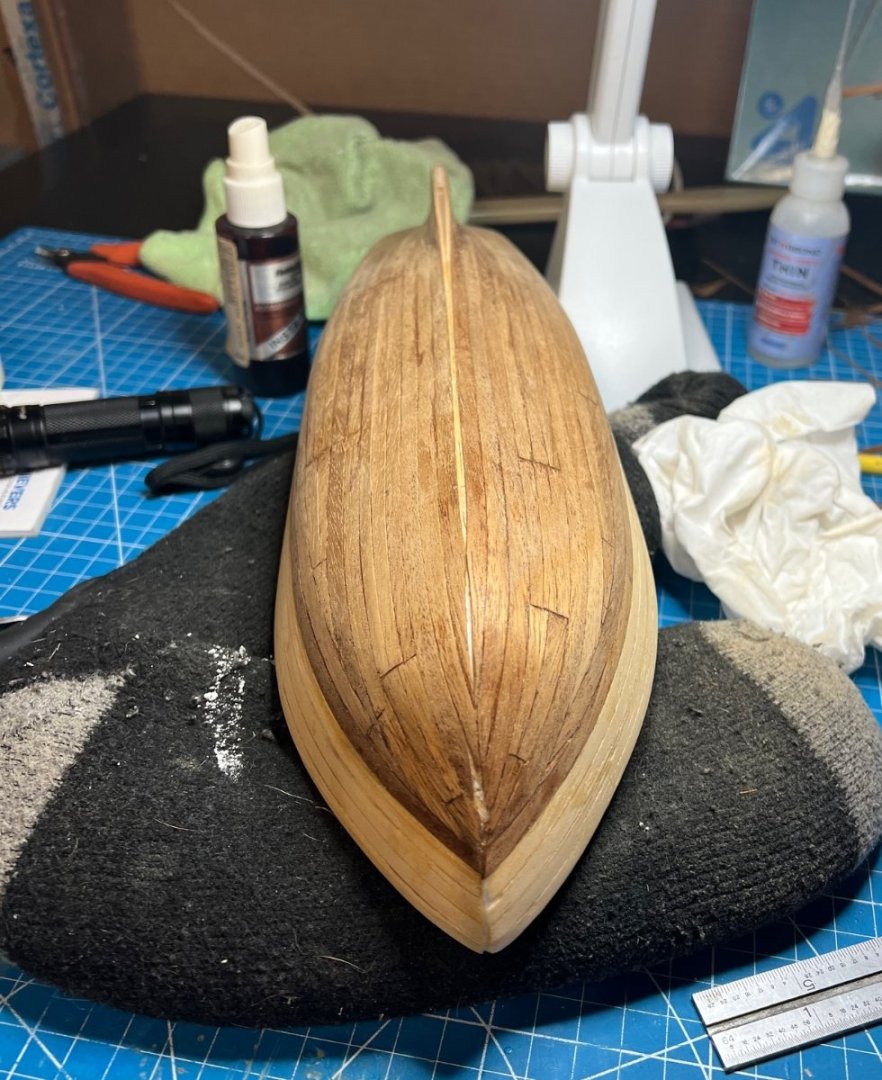
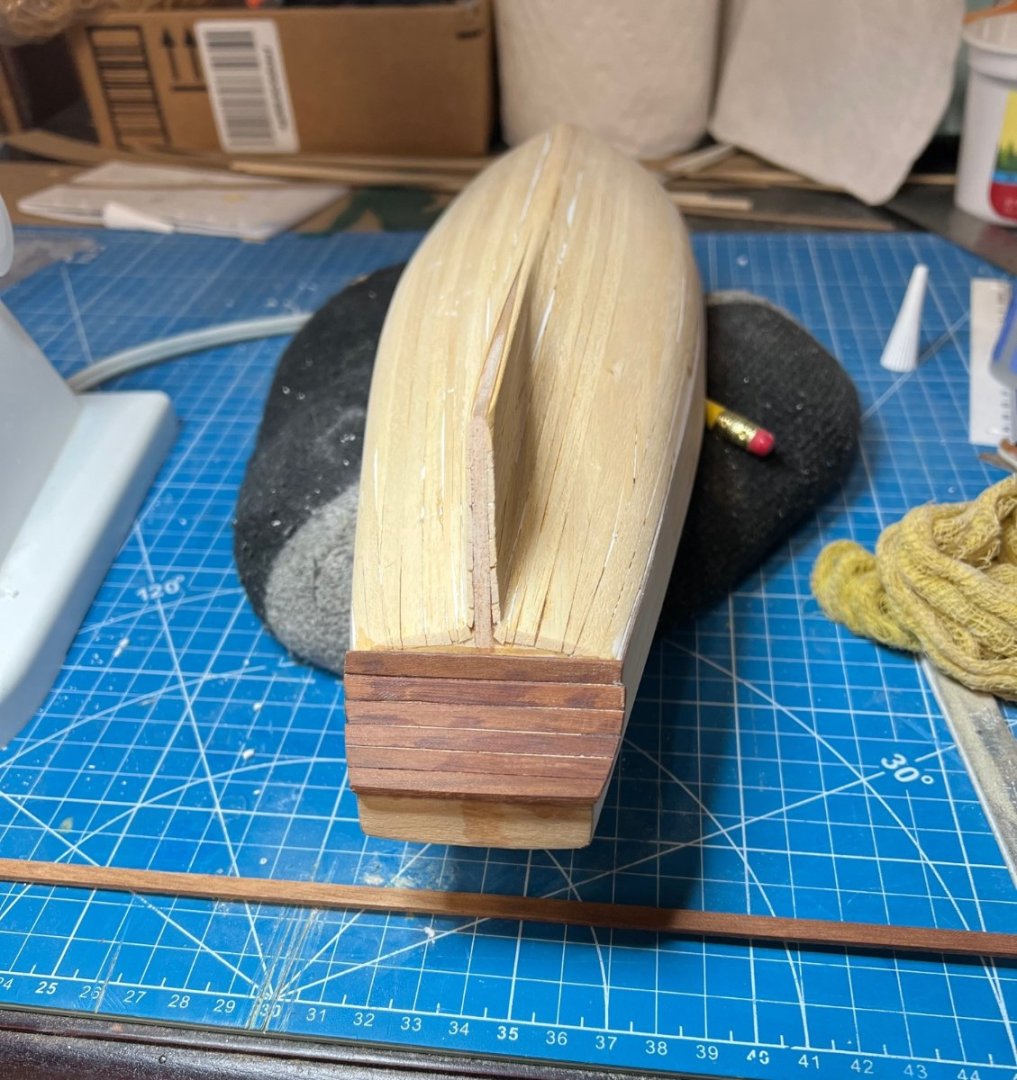
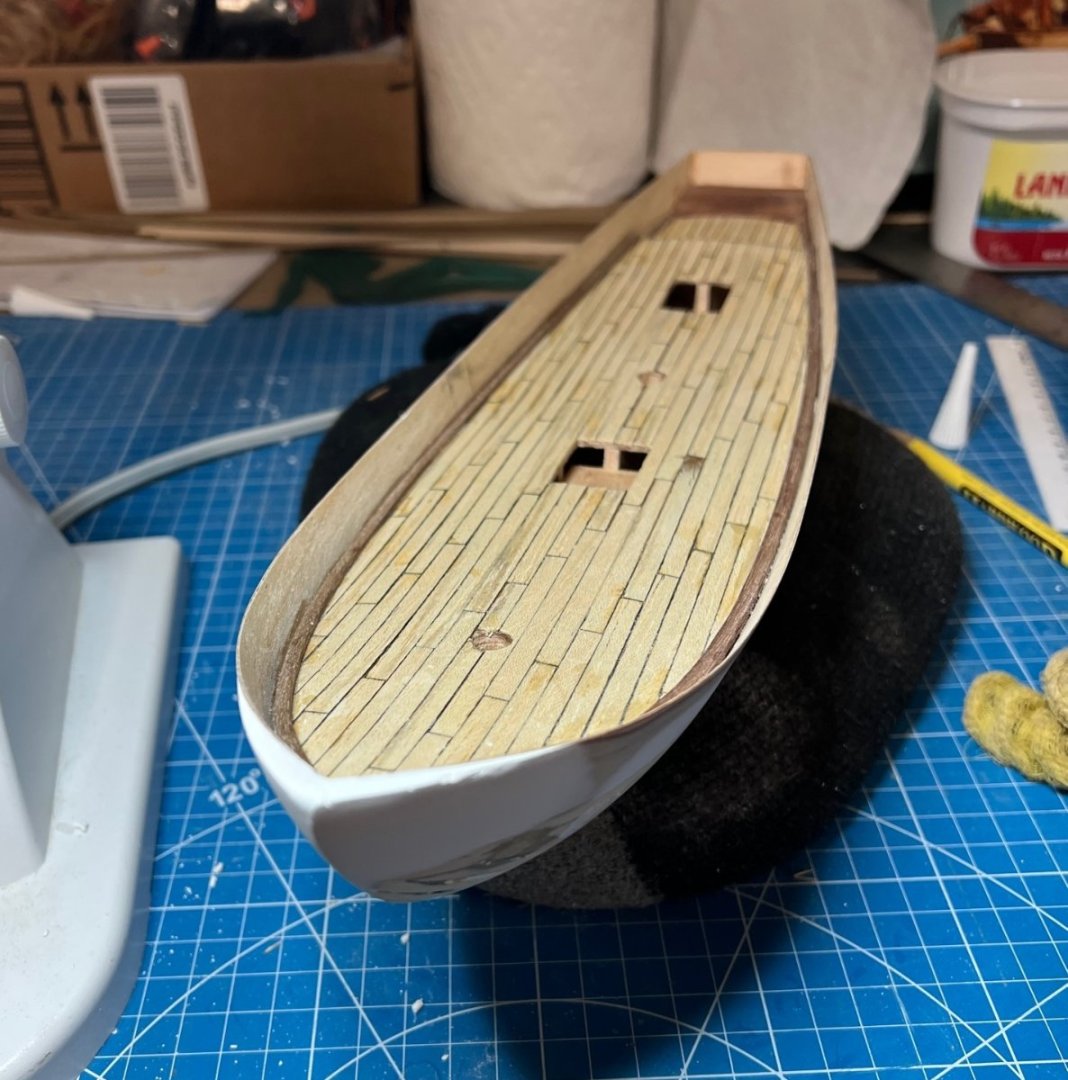
“Nailing” the Deck and attaching the Keel: I decided not to go crazy treenailing my deck like Olha Batchverov does on her ships on my first build. Instead I chose the sharp pencil method. It took a while, but finally I had four nails at every joint, adding some nice detail. Since it was the dead of winter, I knew I couldn’t varnish it until spring since my shipyard doubles as an uninsulated garage with only a small space heater underneath my desk blowing on my feet and legs. If I got a smudge I could just use my rotary eraser and redo any “nails” needing attention. I also roughed in where I thought the guns might go but it was too early for that now. I did later give the deck a coat of golden oak stain on a day in almost reached 50*F and thought it looked great (by my newbie standards anyway). Onward to the damn keel. The keel was comprised of three different colors of what they call “bokapi” wood. It’s a fine grain reddish wood that shapes well. I followed the kit’s instructions and planed and sanded the false keel flat from stem to stern. I then started dry-fitting the pieces and thought the bow stem had to be from another kit because it fit so poorly. Not only against the hull but also where it met up with the straight portion of the keel running to the stern stem. I struggled and struggled with a plan to achieve the geometry I was looking for. I figured the only way I was going to get the bow stem to fit was to cut a rabbit in the bow and reshape the bow stem itself. The work began. I used mini mitre saws and files to hack my was through the planks, wood filler, plywood and frame to create a rabbit (slot) to put the keel piece back in line, or close, with the hull. It was very time consuming and difficult but I figure it was because of some mistake I’d made earlier. (Remember I extended the bow with wood filler because it looked short? Yeah, that.) I then started shaping the bow stem on my Dremel shaper table, taking off ever so little, test fitting and rinse and repeat ad nauseum. Finally, and I mean days of this before ever even thinking about glue, I got it to what I settled was good enough. File, file, file. Measuring and cutting the center piece. Fitting the stern stem. Almost there... More shaping... Finally! Get out the PVA glue! Sophisticated clamping technology. Closed chip bags too! I did have a slight issue where the bow stem met the middle piece that I had to patch with a little bit of what I cut off the end of the middle piece. I made a tiny little wedge, glued it on and smoothed out after drying. I was pleased with the "damn keel" installation but would never want to have to do that again. I kept telling myself that this damn keel was not going to stop me and that I had gotten this far, only a chump would give up now. That's better. Still have some repairs to do on the hull too. Thank God! The damn keel is on and stained. I used a sock stuffed with rice for my pad up until now. Time for a new temporary stand. Someone asked me how many hours I have in this ship. I could only guess without getting a calculator out. Good thing I’m retired. This installment gets us to Dec. 15th, 2022. Next up: Bulwarks stanchions and dressings and more which went much better. Thanks for reading, please feel free to comment on what I could have done to make this part go easier next time.


- 59 replies
-
- 4
-
-
- Swift
- Artesania Latina
- (and 1 more)
-
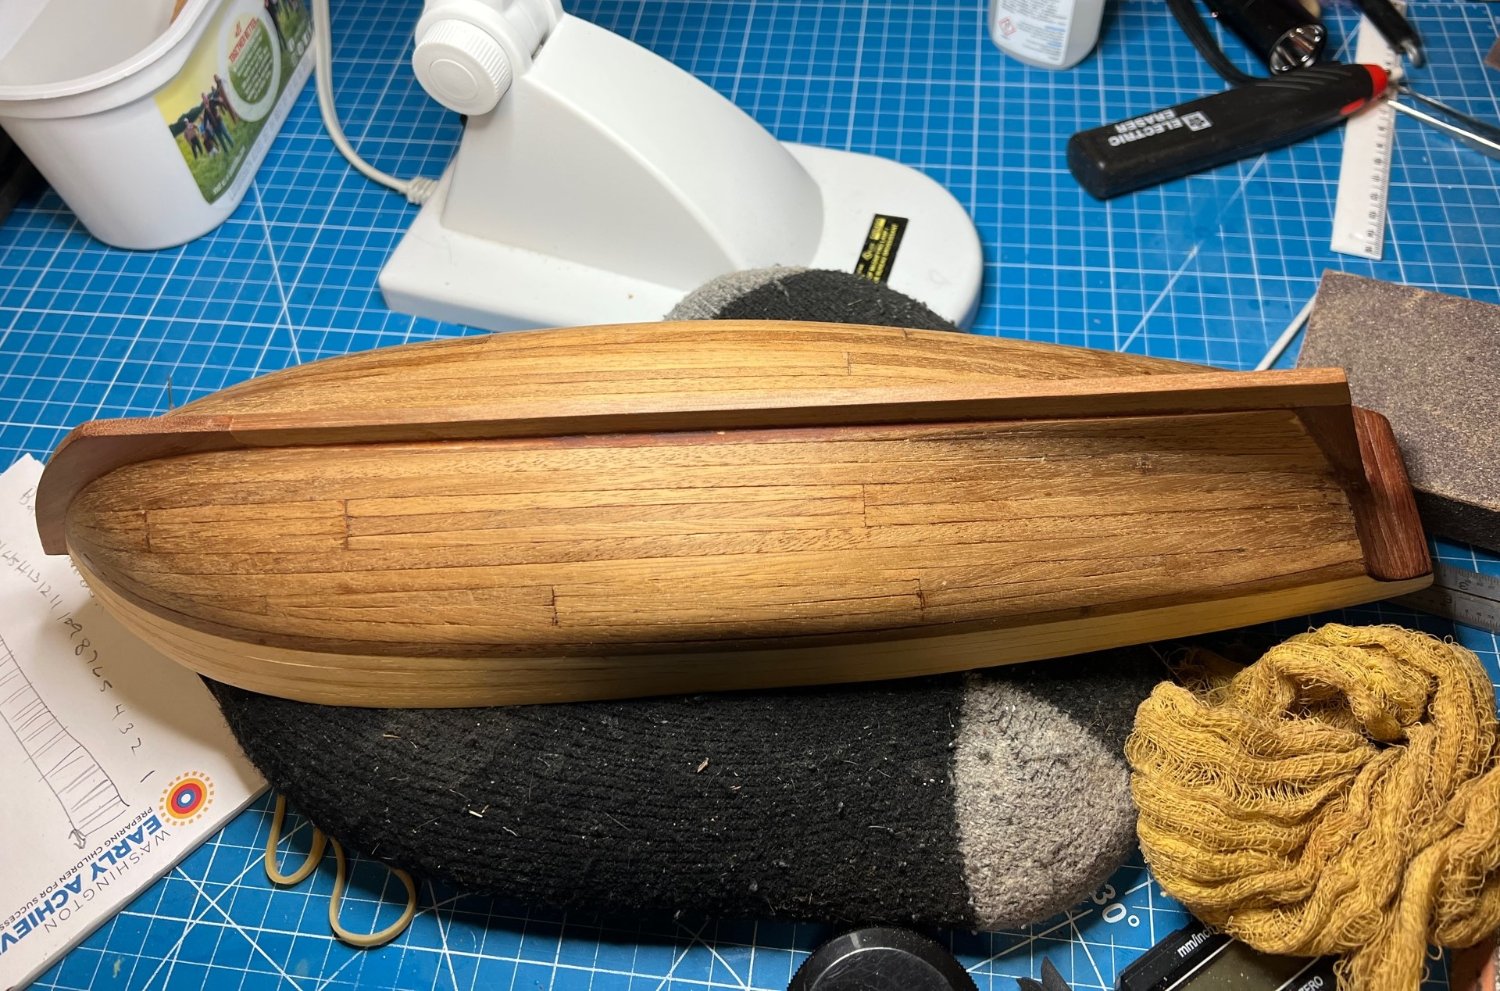
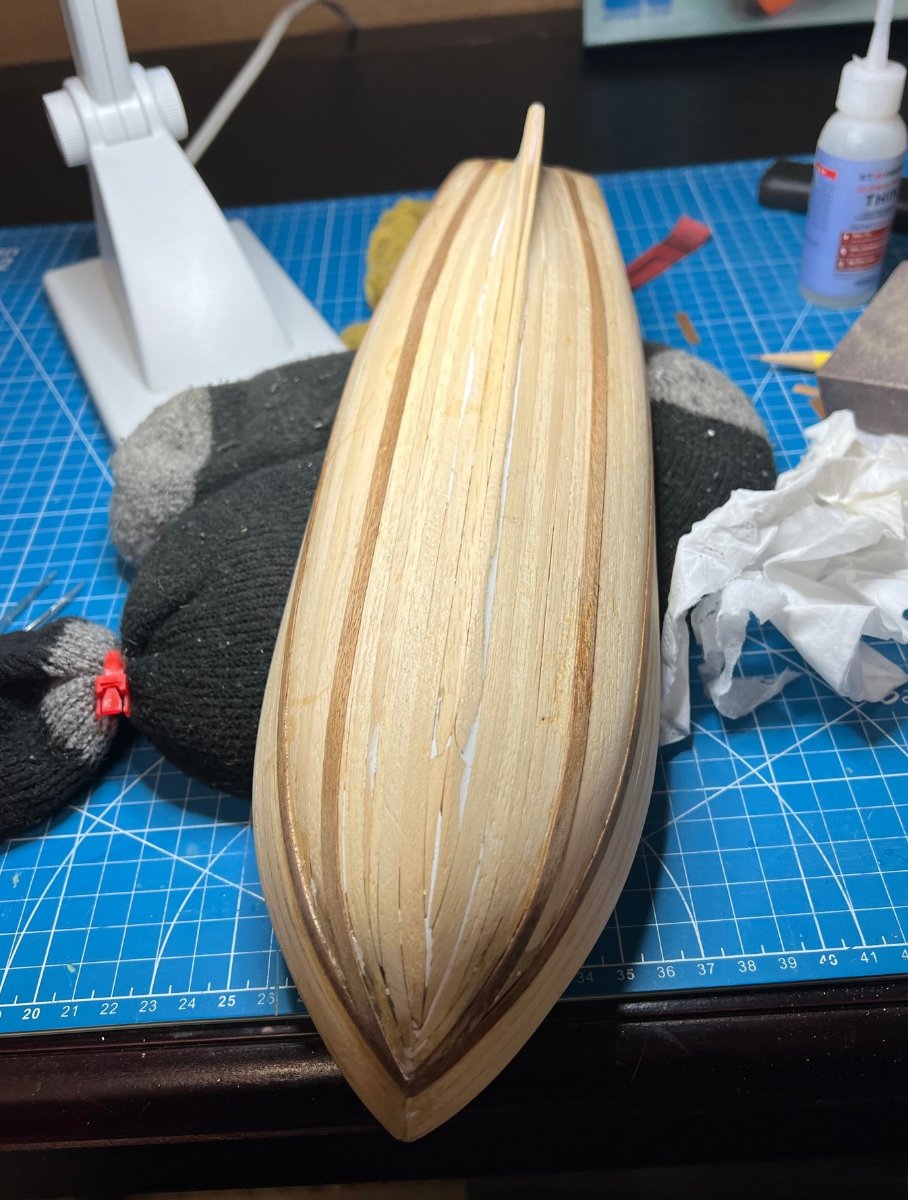
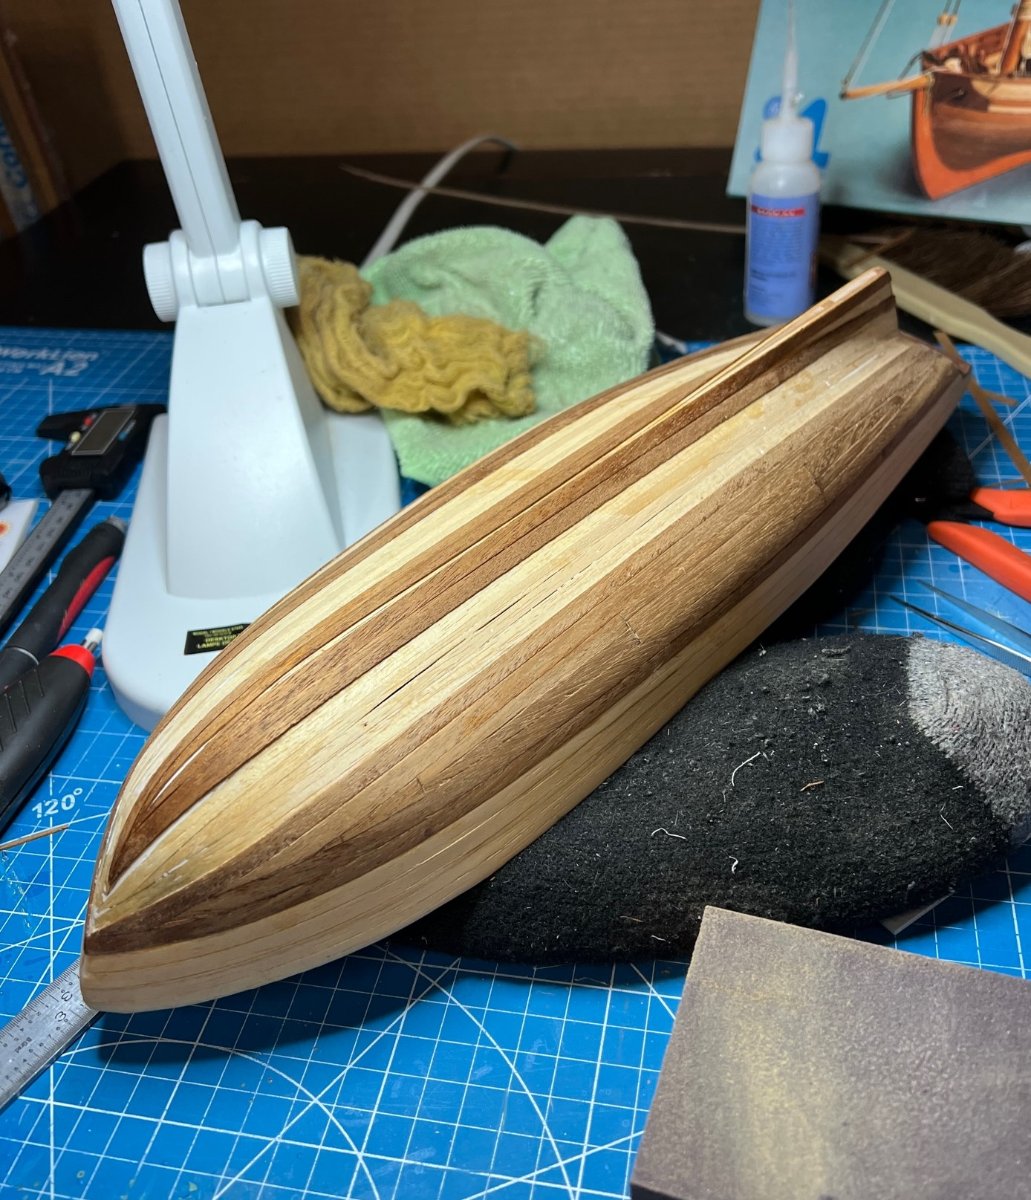
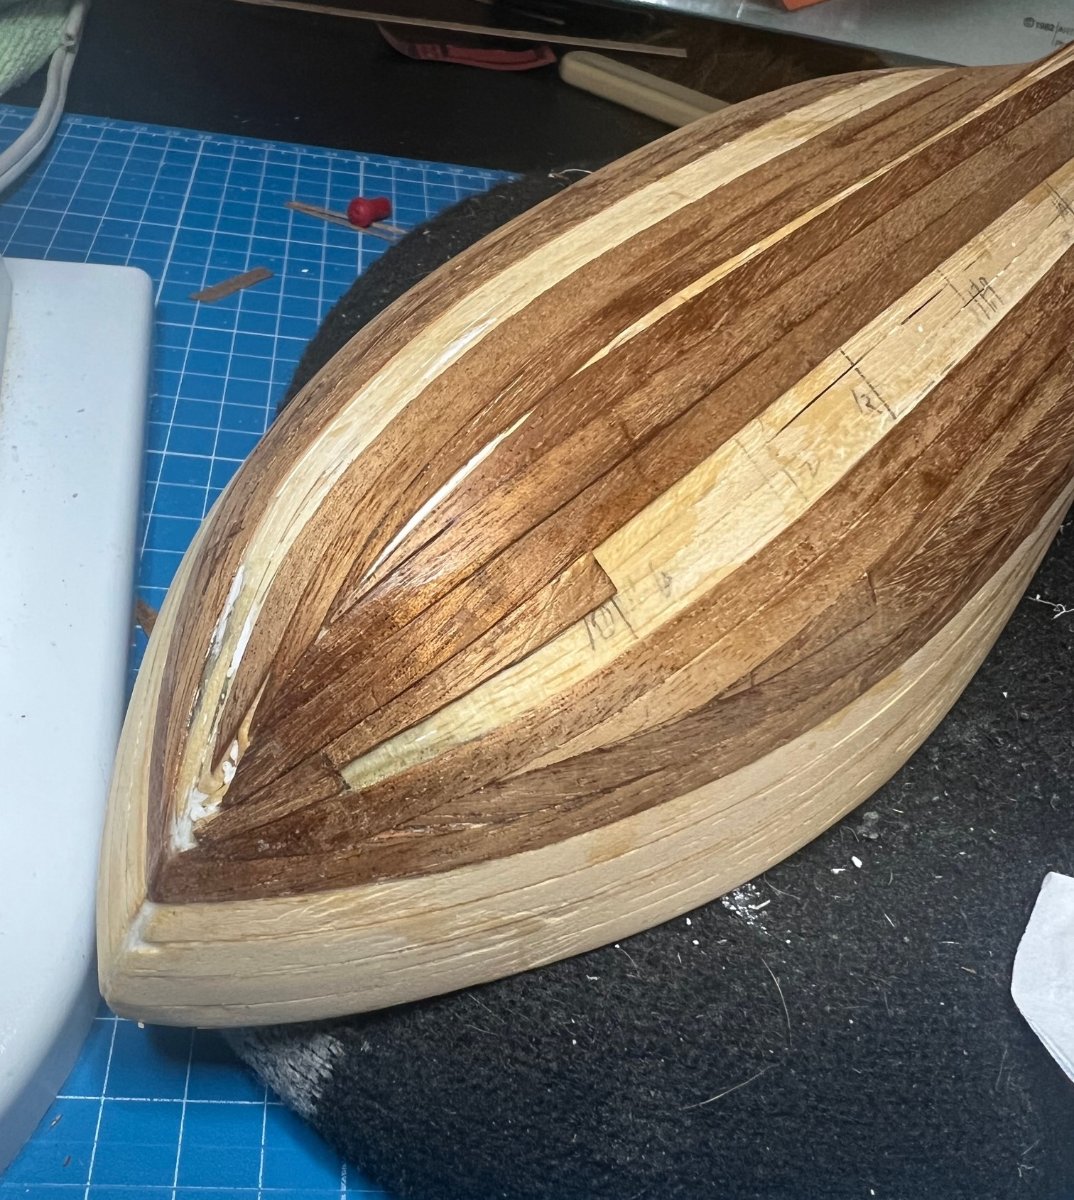
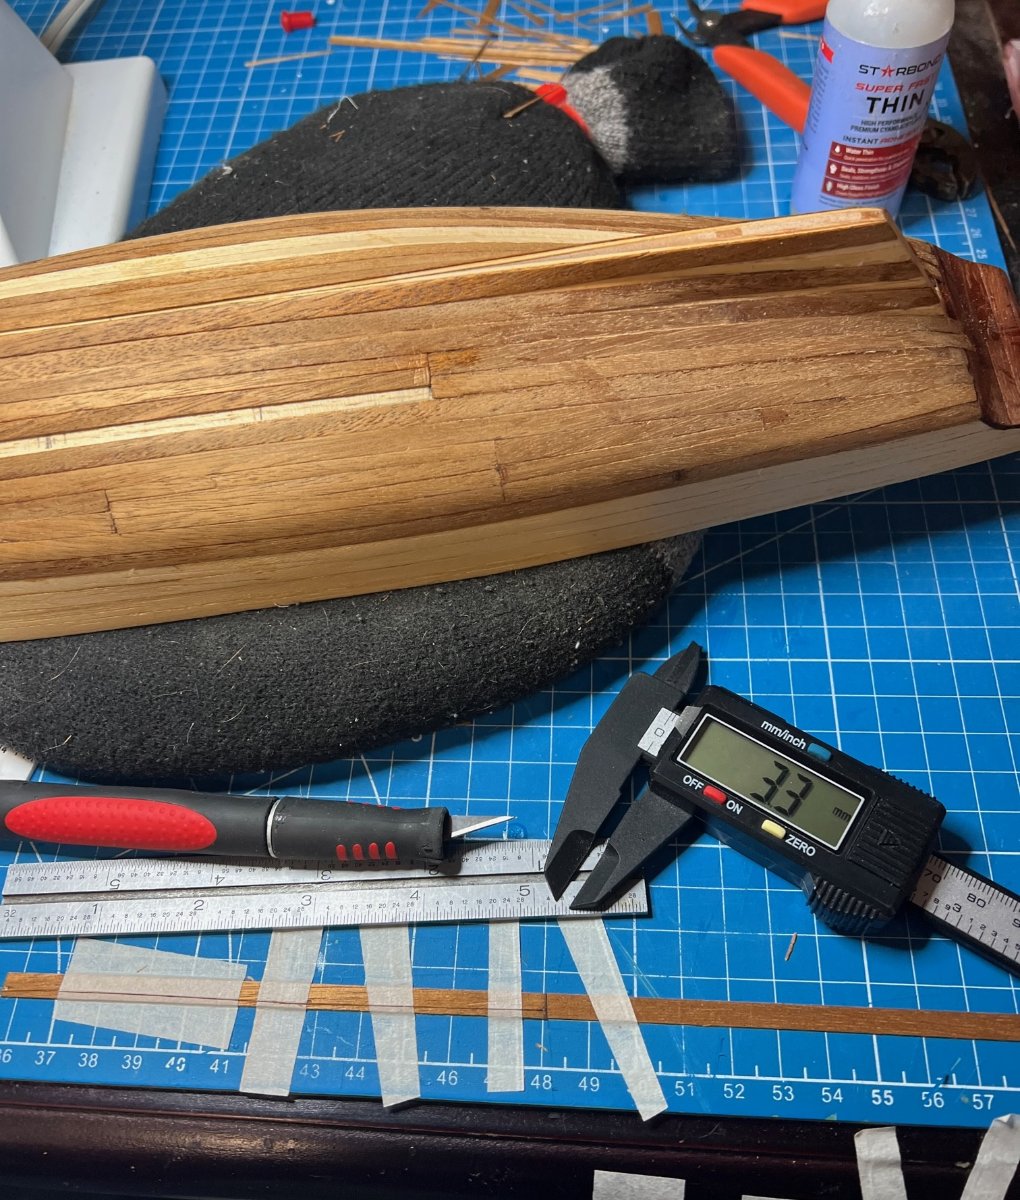
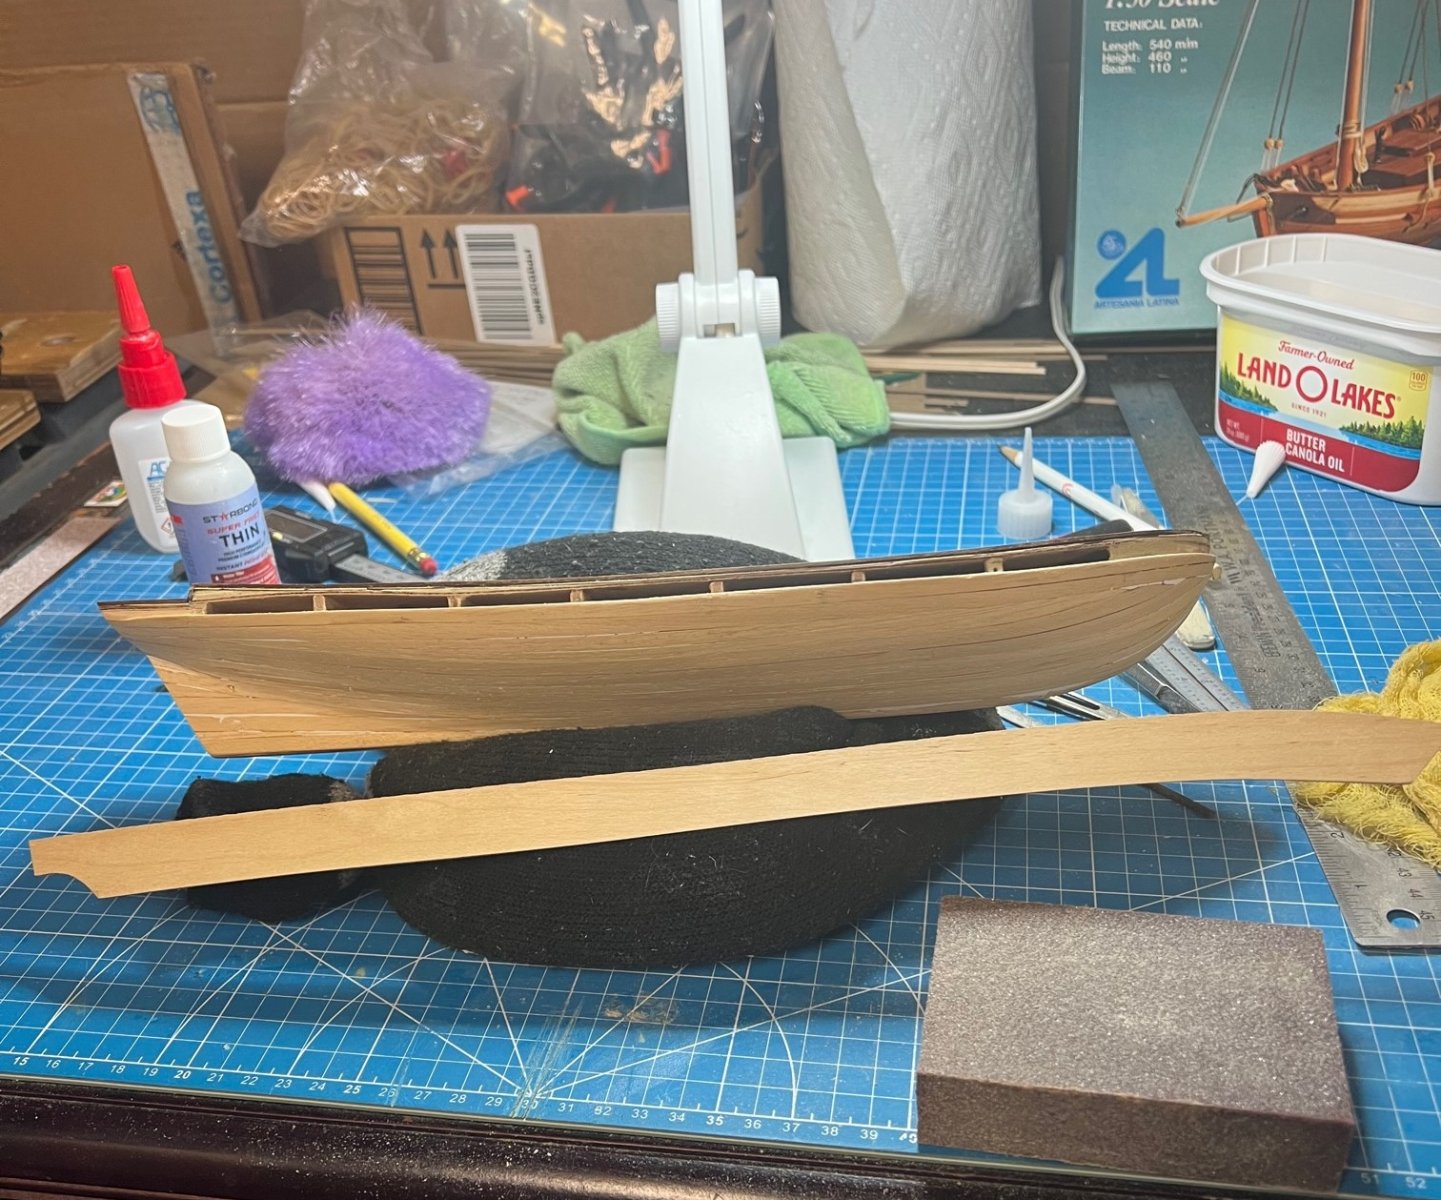
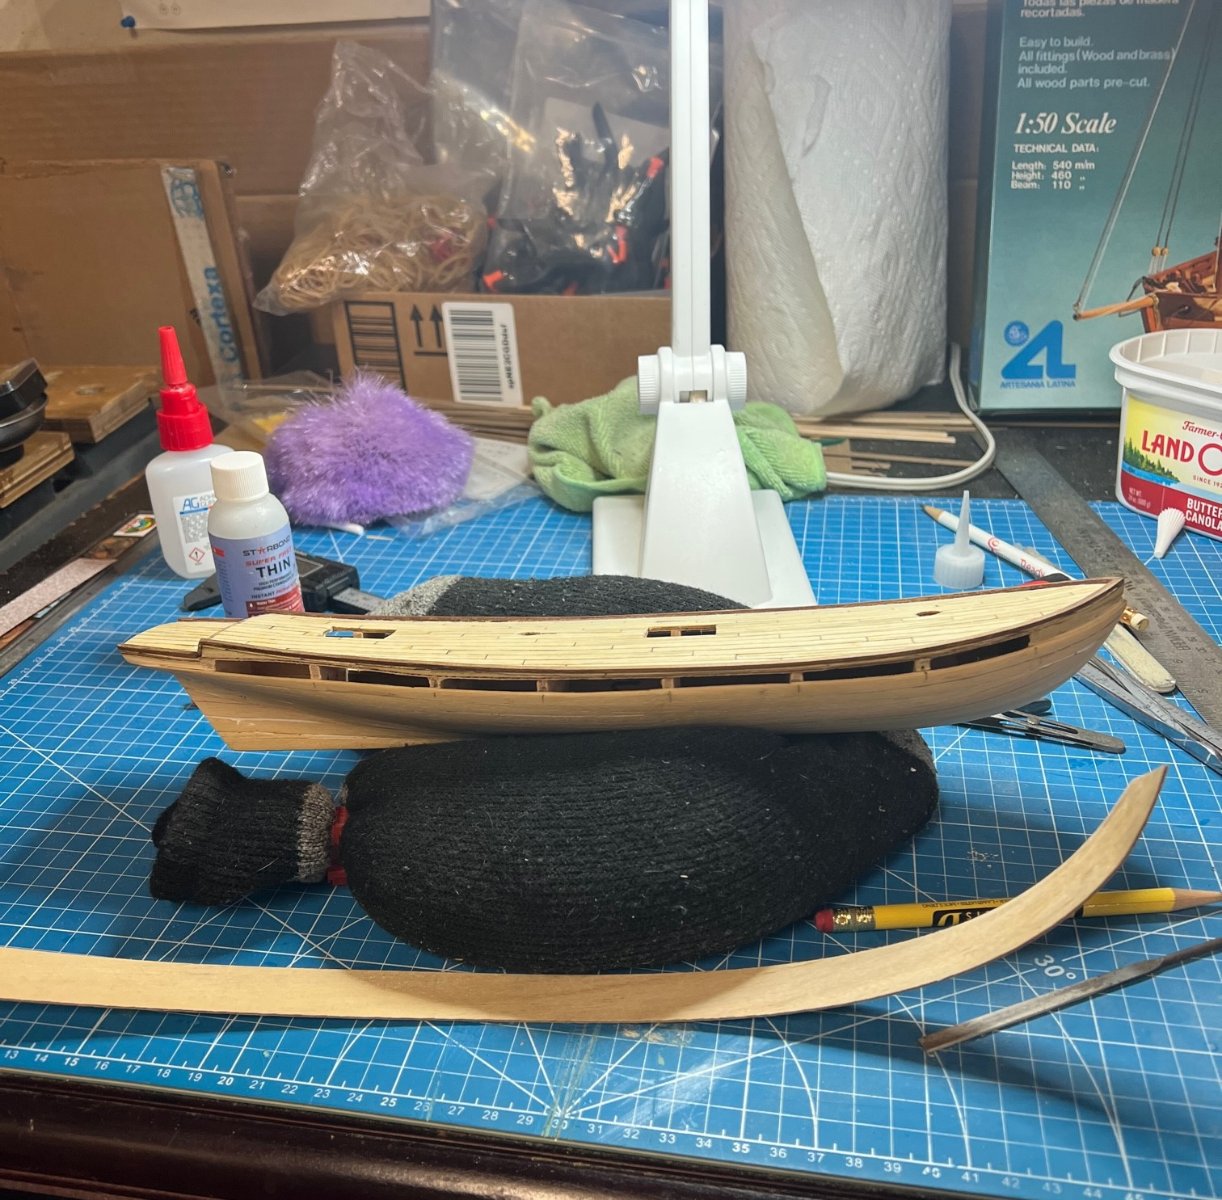
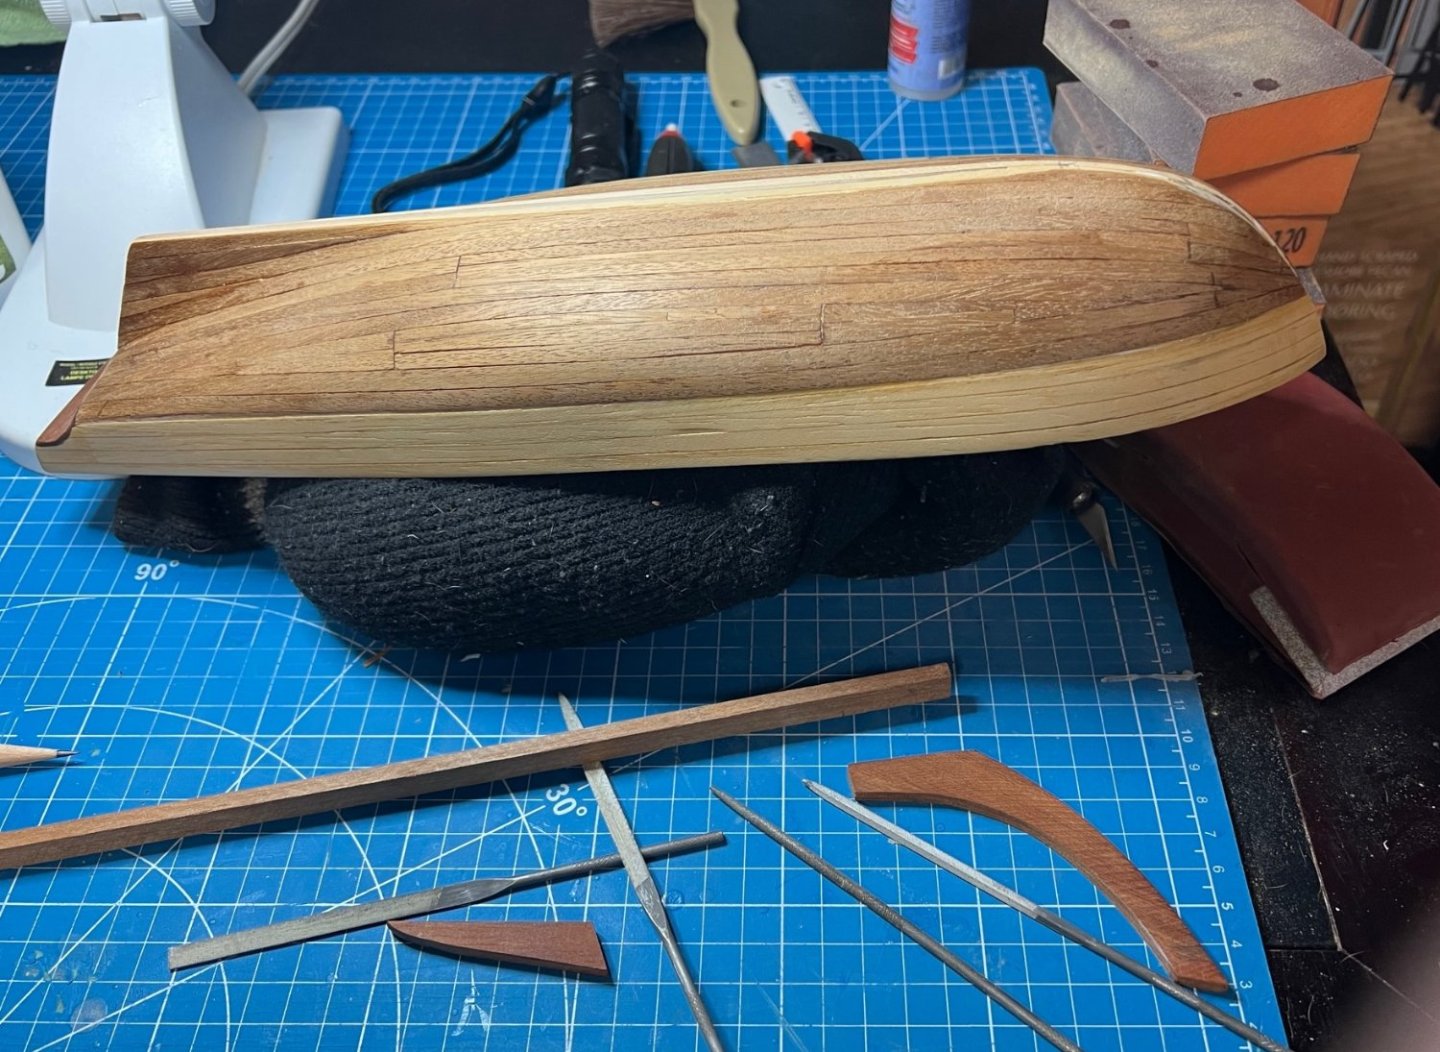
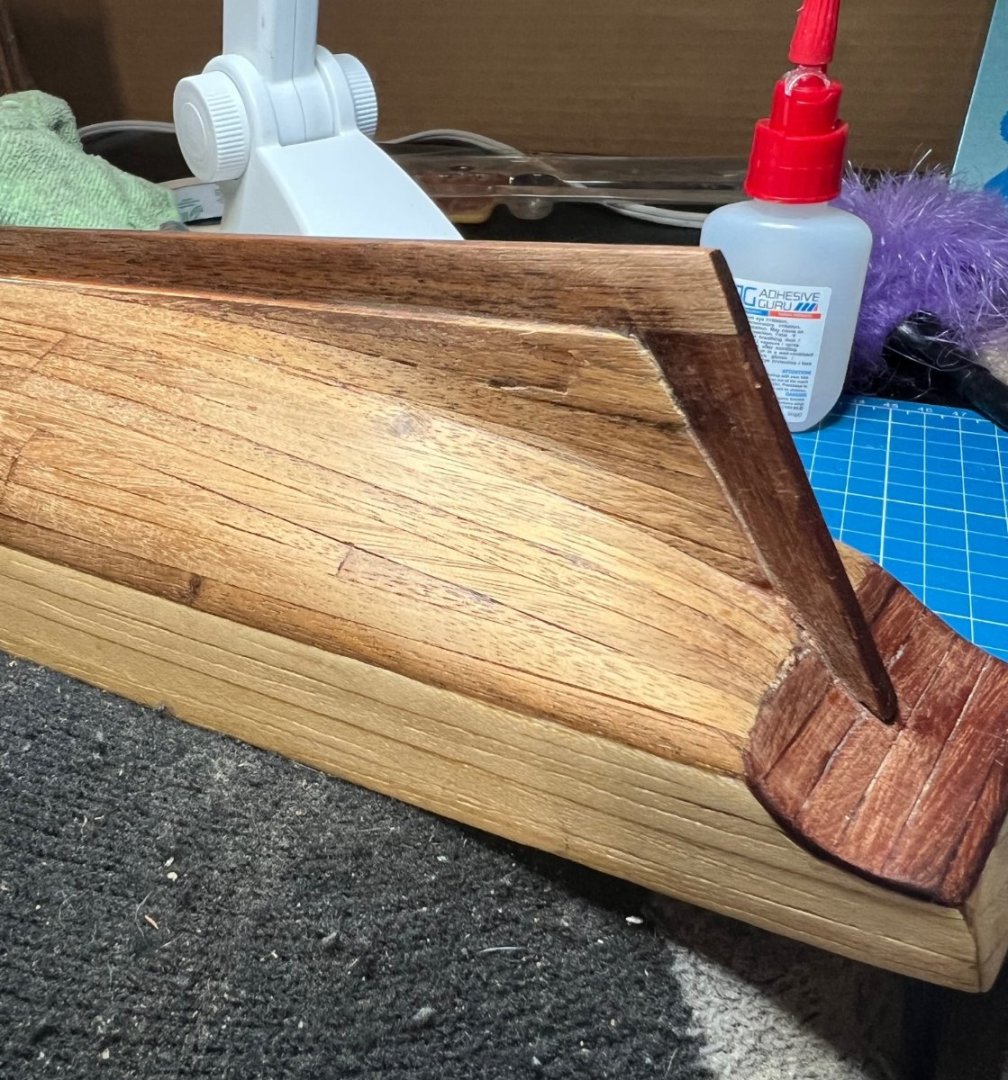
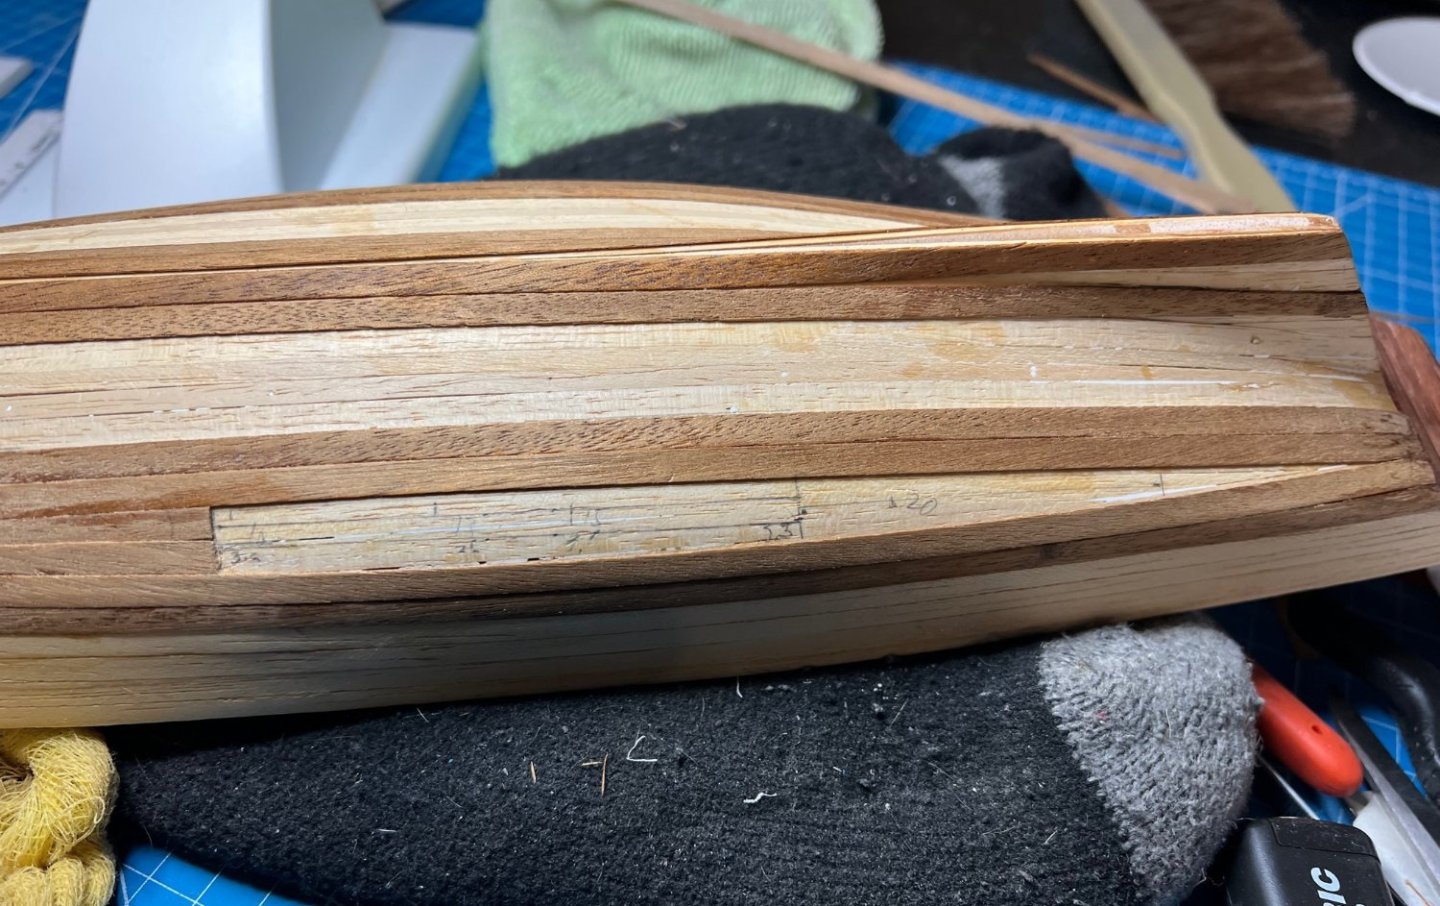
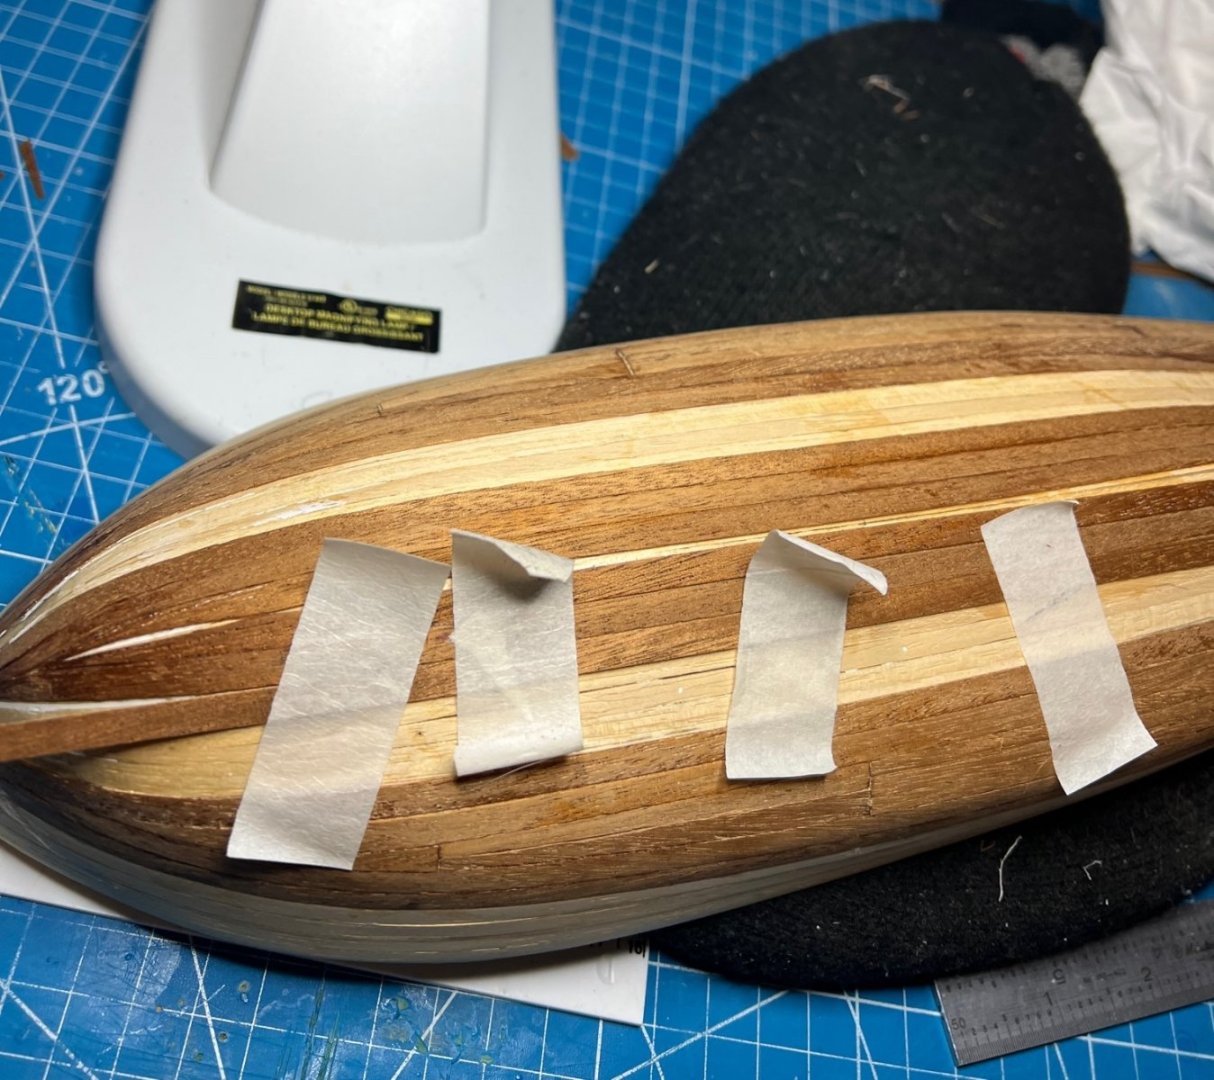
Planking the Bulwarks and Stern, Second Hull Planking The 0.6 x 5mm boxwood planking was much easier to work with being so thin. No pre-bending was required. I began at the bow with CVA glue and clamped it against the bulwark continuing to the stern and cut off excess. I alternated sides as I went to attempt to keep some symmetry. The bottom plank left me a little gap exposing the bulwark beneath at the stern, but I didn’t fret it as this would be covered by the fenders later on, pays to read ahead and read all before starting. Next, I moved to the stern where I drew out a plan for the pattern I would use laying the pieces at an angle, meeting at the center of the transom. This went well and I left the clamped up planks to dry. For the second planking, I knew there would be no layer to cover any screw ups during this operation so I planned and figured and planned some more. I watched more videos on planking, I think I’ve exhausted the supply of planking videos on YouTube, if that’s possible. One thing I wasn’t going to do was taper any of these planks more than half their 5mm width except for the wedges in the deadwood area on the stern. If one plank didn’t fill the gap, I cut them so two equal widths would fill it. If two planks wouldn’t fill a gap I cut them so that three would fill the gap. Had to do that a few times and I just measured at each bulkhead, divided by the number of planks and used the pointy edges of my calipers to mark the thickness at each point along the plank. I then used a metal straight-edge and my scapple to cut them. To cut the planking, I taped it down to my mat and cut through the tape to keep everything still as I cut from mark to mark to shape the pieces. I measured and drew the planking out on the hull before starting, writing the widths on the hull and on a drawing of each plank. Tedious but paid off. I used CA glue to do this planking having acquired better glue bottles with long replaceable microtips for better application. I glued my fingertips to the ship on many occasions but all was well. I did have some issues where the planking met the stern because it wasn’t quite smooth enough to terminate well into the stern. I finally reached the Whiskey Plank and christened the new hull with a few drops and poured the rest in me. There would be a bunch of patching later with tiny pieces of the planking which came out ok after sanding. Had I had some experience at this, I would have known to sand the false keel at the stern down to half it’s width before planking so that it’s width would match the width of the stern stem. Live and learn. I then over-sanded the second planking near the stern attempting to compensate and had to patch with custom cut out pieces of planking which was ridiculously hard to make buy finally got it to where it was acceptable to me. I think I’ve found 5 or 6 more places to patch since then as well. SWMBO and I celebrated the completion of the planking for my first ship with the adult beverage of our choice. Little did I know what perils lay ahead. We’re now up to Dec. 5th, 2022 and so much more to come. Thanks for reading. Keel coming next.


- 59 replies
-
- 4
-
-
- Swift
- Artesania Latina
- (and 1 more)
-
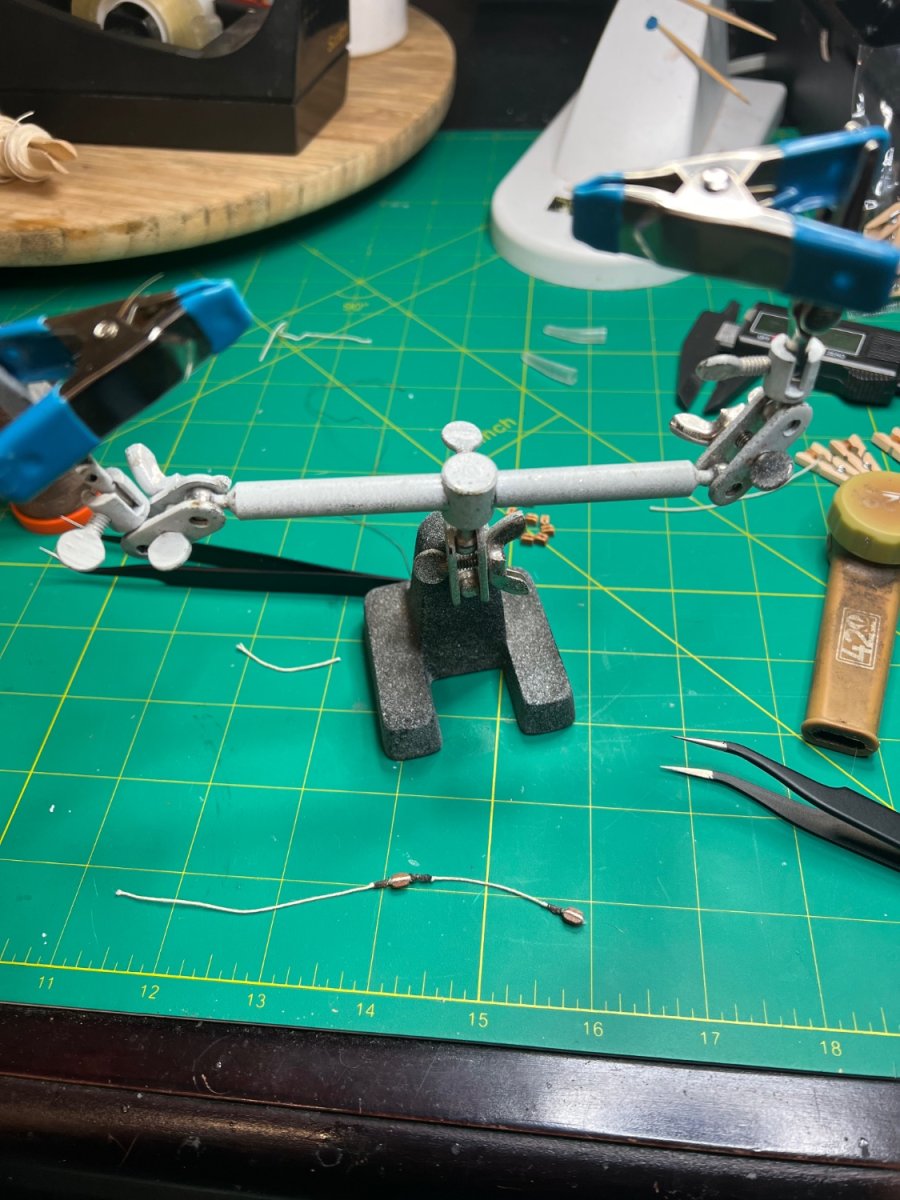
I clicked the link you gave me and tried to order but when I got to the Ship to it only gave UK as a country and wouldn’t let you change it. It did say Amati I think. I then went on a Brave search and found them at ModelersCentral.com. Forget google. While waiting I tried my first stropping of blocks with the repaired blocks and ropes that are being replaced. Tweezer tying I call it, fun, fun. Getting the hang of the whipping clove hitches.


-
Thanks Bob, I tried the site you suggested but they apparently don't ship to the US. I found a close match on ModelersCentral.com and ordered there. I assume the measurement they give is the height of the anchor from crown to ring. I needed 26mm but 30mm was the closest I could find anywhere. It's a kit too which will be fun to put together and you're right, much more realistic than the cast crap that was in the 50 year-old kit. The shipping was more than the anchors though. I had to replace the blocks but found those on Amazon made by Model Shipways with free Prime shipping. The 5mm size I needed seems to be out of stock at other sites. Spending more on replacement parts than the kit cost. lol
-
Tying stays and shrouds to foremast top
Scotty W replied to Scotty W's topic in Masting, rigging and sails
Yeah, the instructions are like that too, vague. Therefore I made the decision to use the order you recommended, shrouds then stays, when the time comes. I’ve ordered new blocks to replace the crap blocks that come with the kit and Ropes Of Scale rope from BenD. Had to find new anchors too because I melted one trying to solder a fluke back on that had broken off. Spent way more on parts for this ship than the kit itself, even adjusting for $40 in 1984. lol -
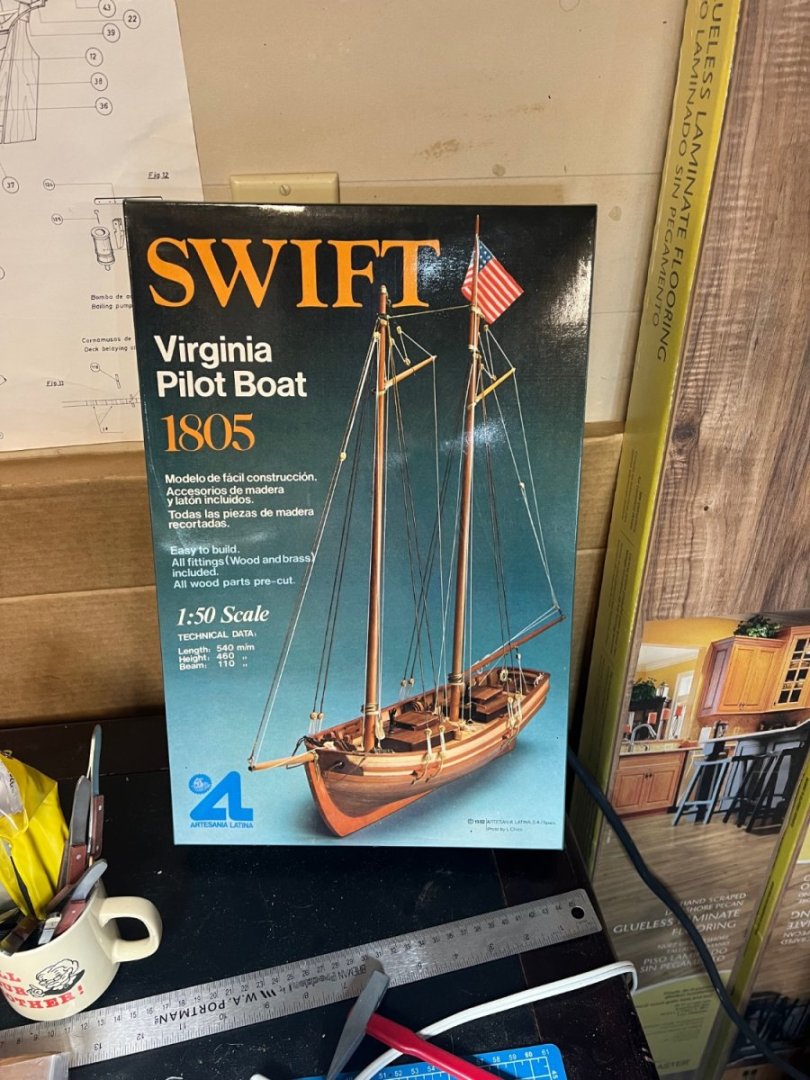
Unfortunately one of my cheap cast anchors was deformed in my 1982 Artesena Latina kit of the 1/50 scale Swift 1805 Virginia Pilot Boat and broke during a repair attempt. I glued it CA glue and it held. While finishing it, it broke again so I tried to solder it and melted it. It’s beyond repair and need replacement(s). The other one is ok, for now. lil’ help please.


-
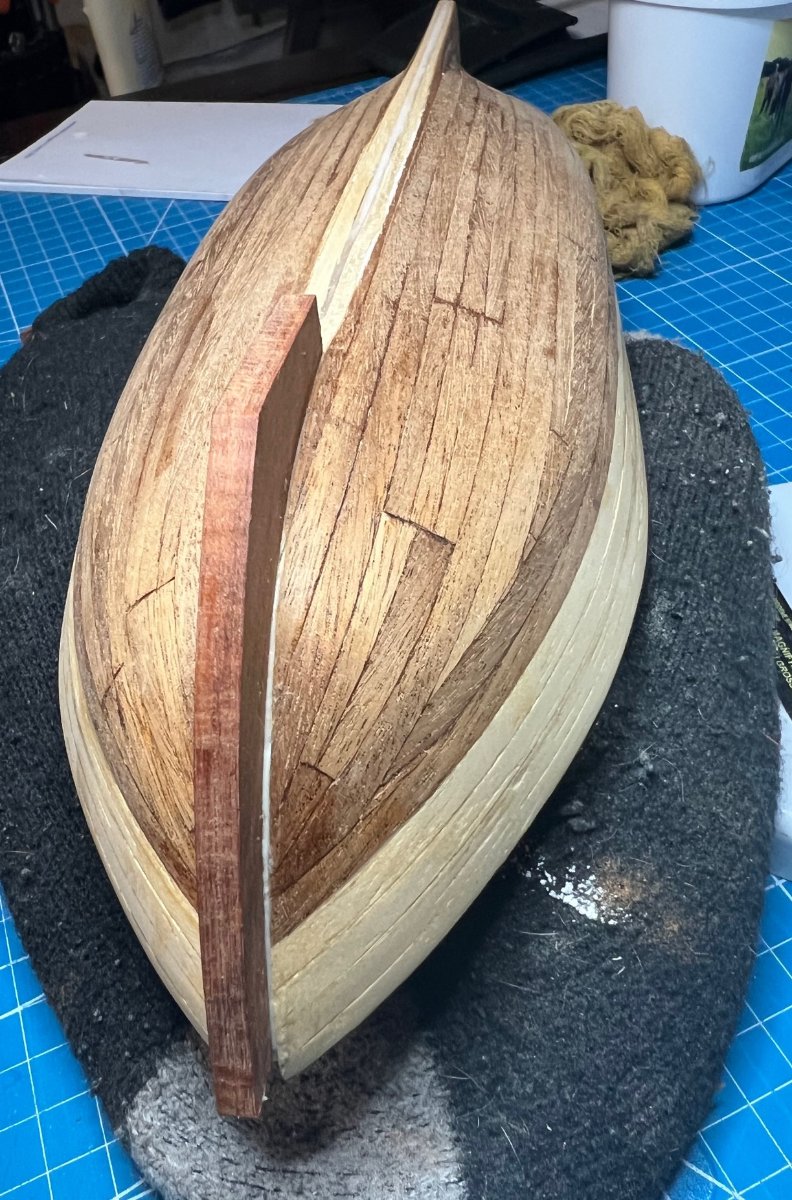
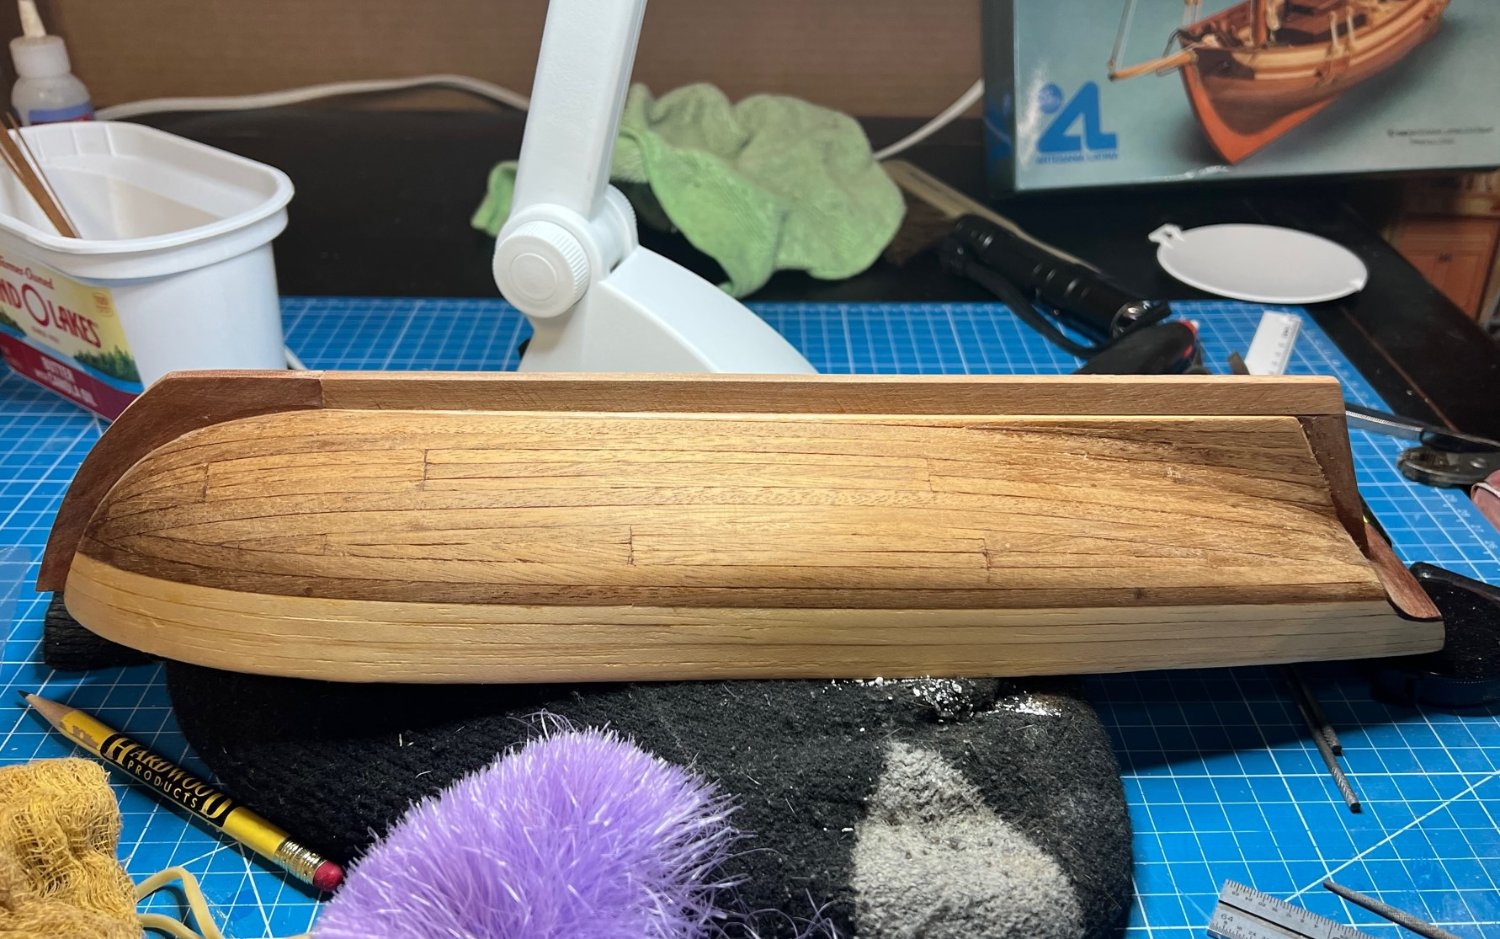
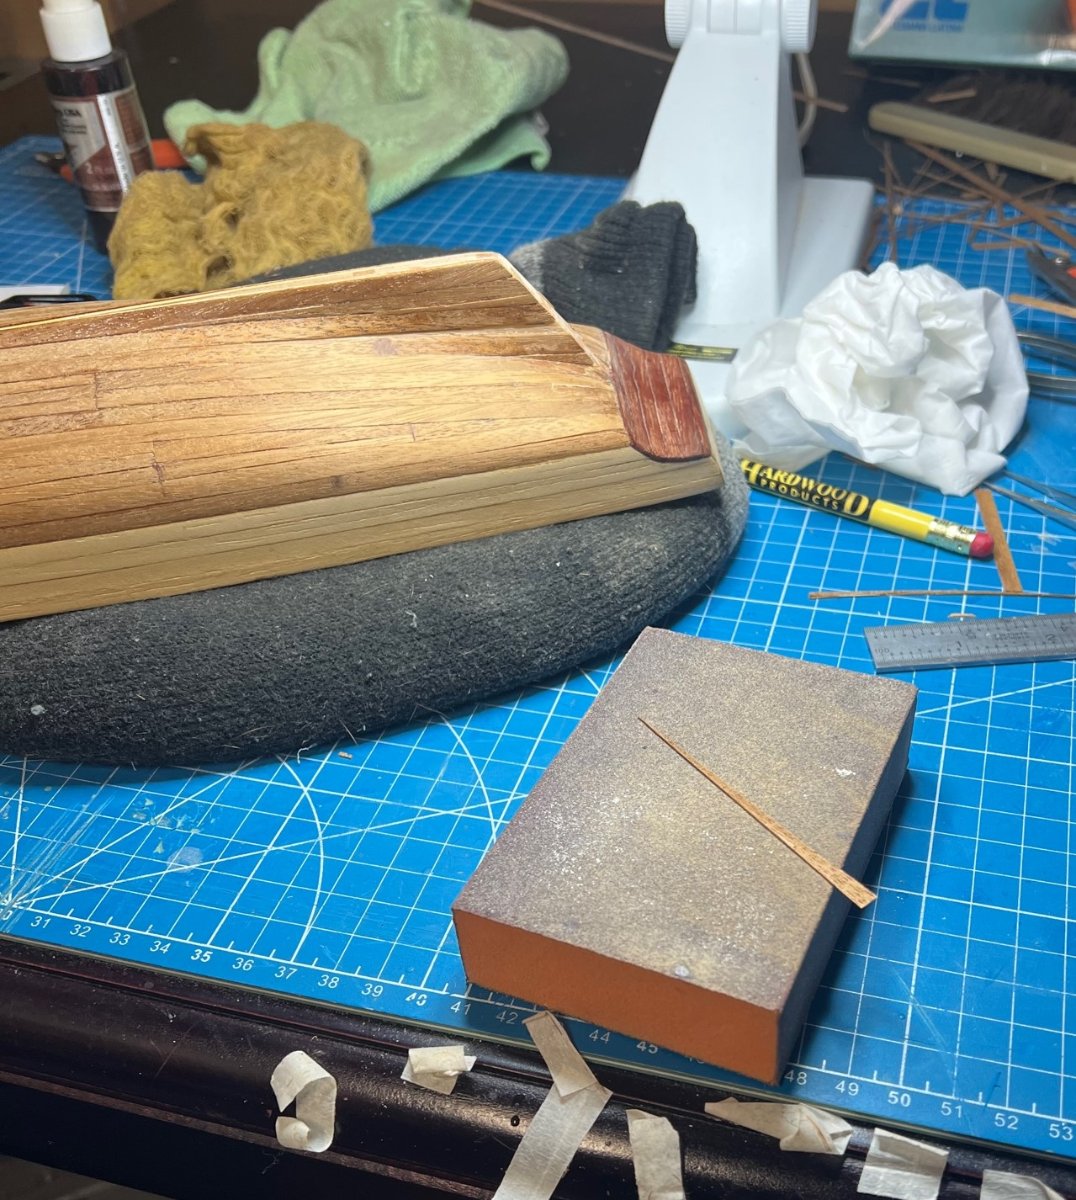
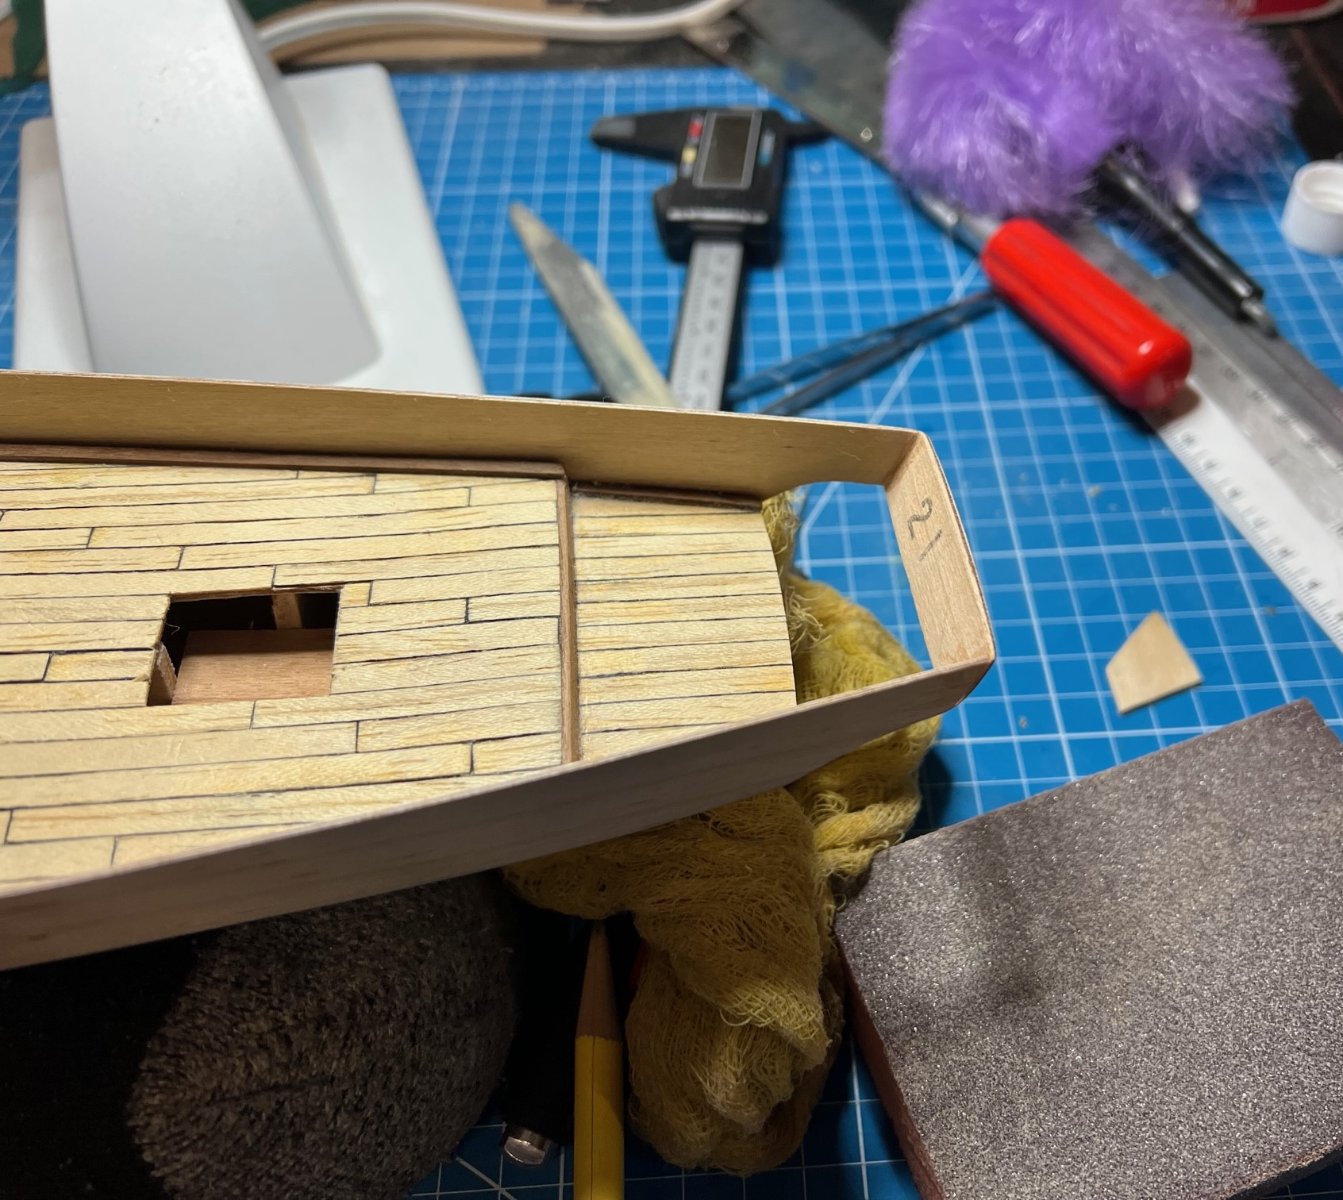
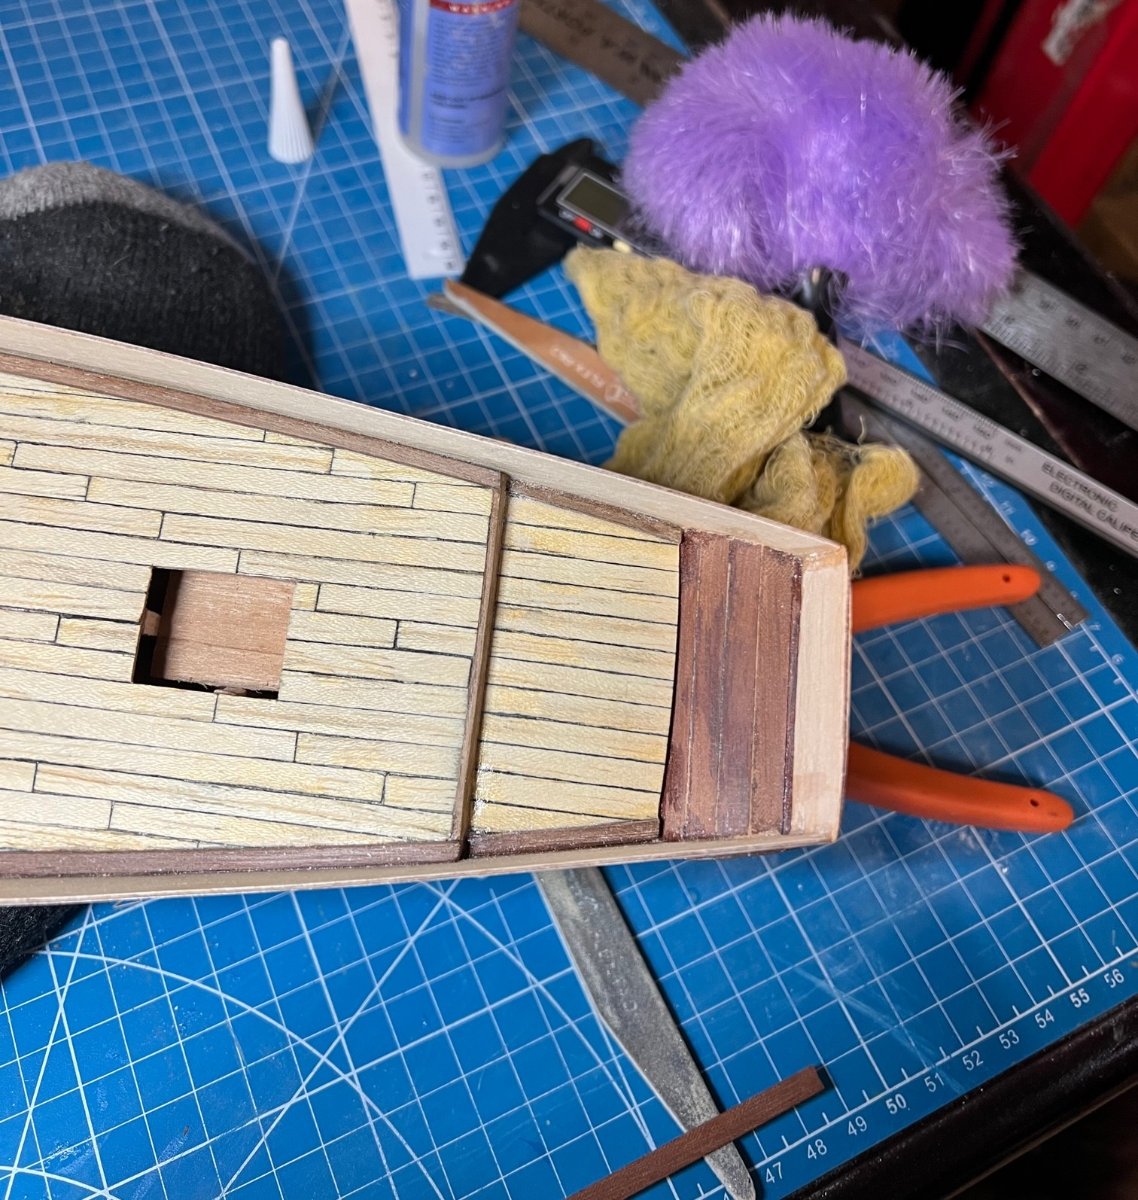
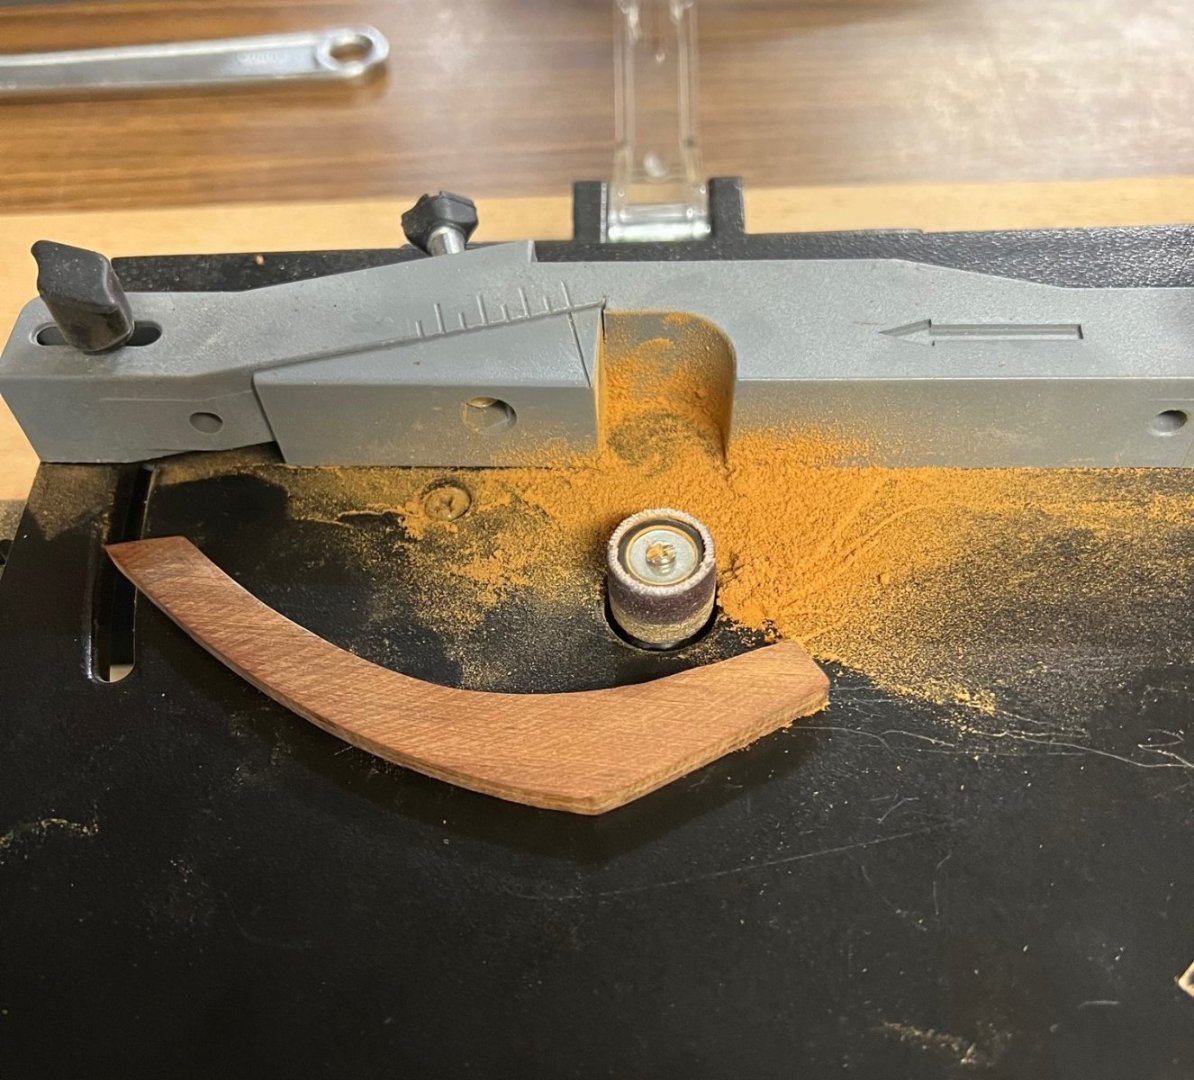
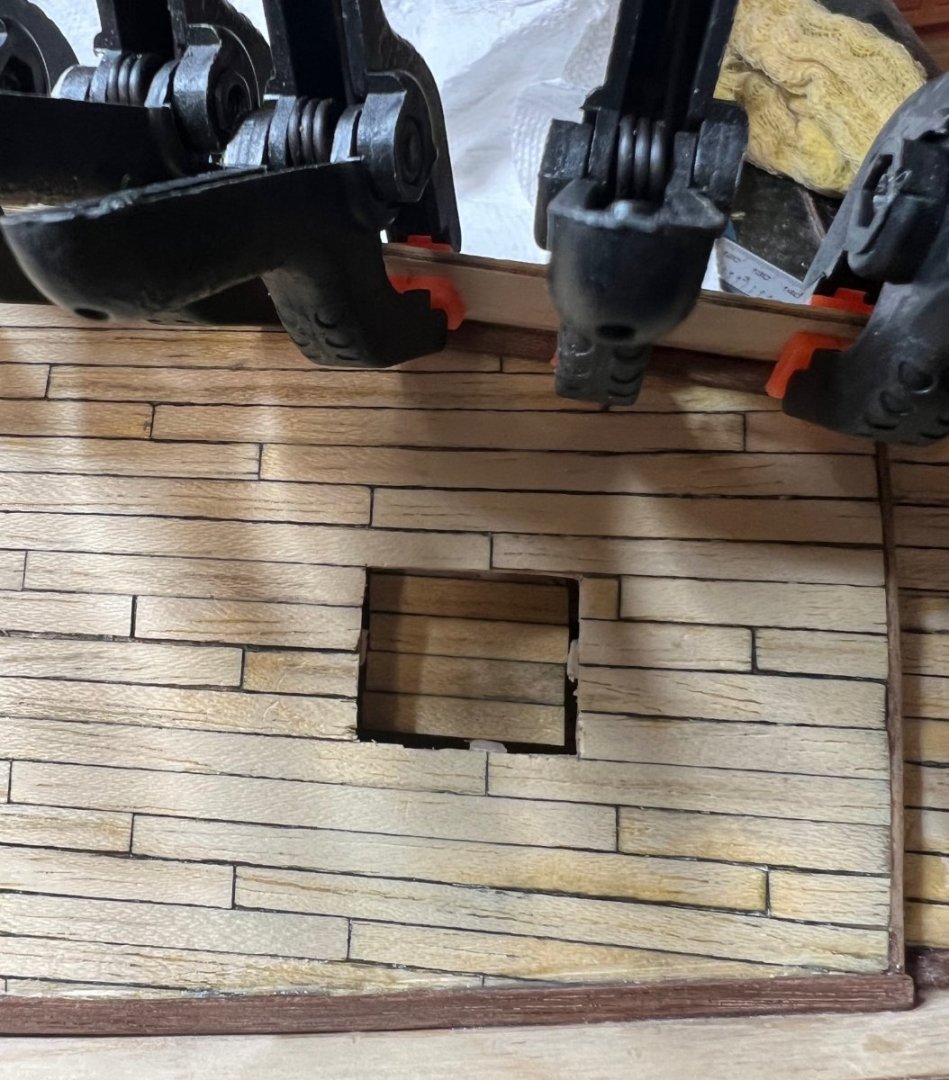
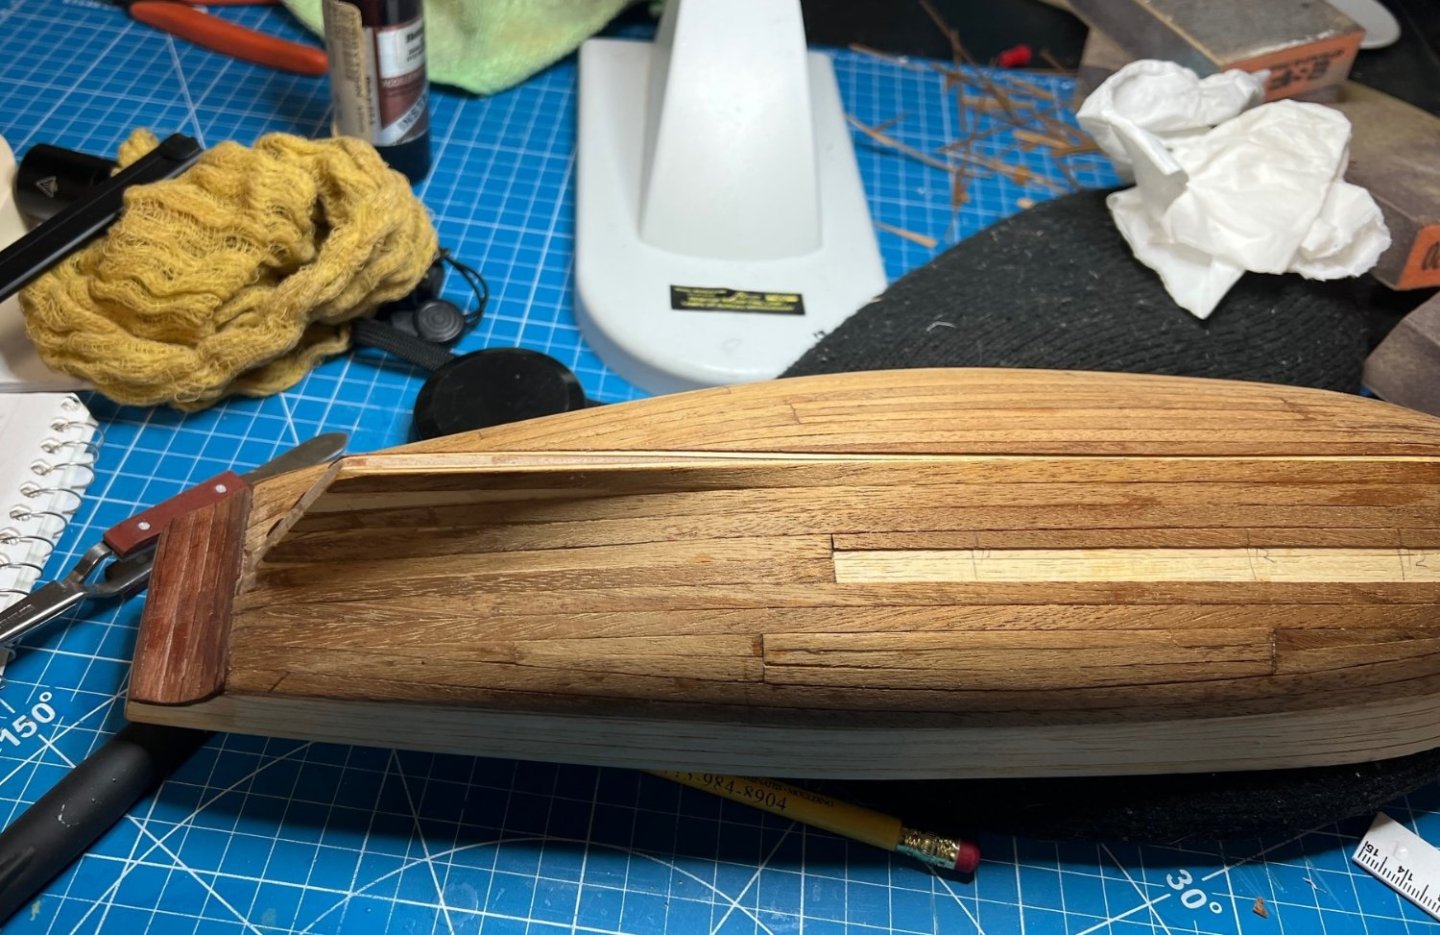
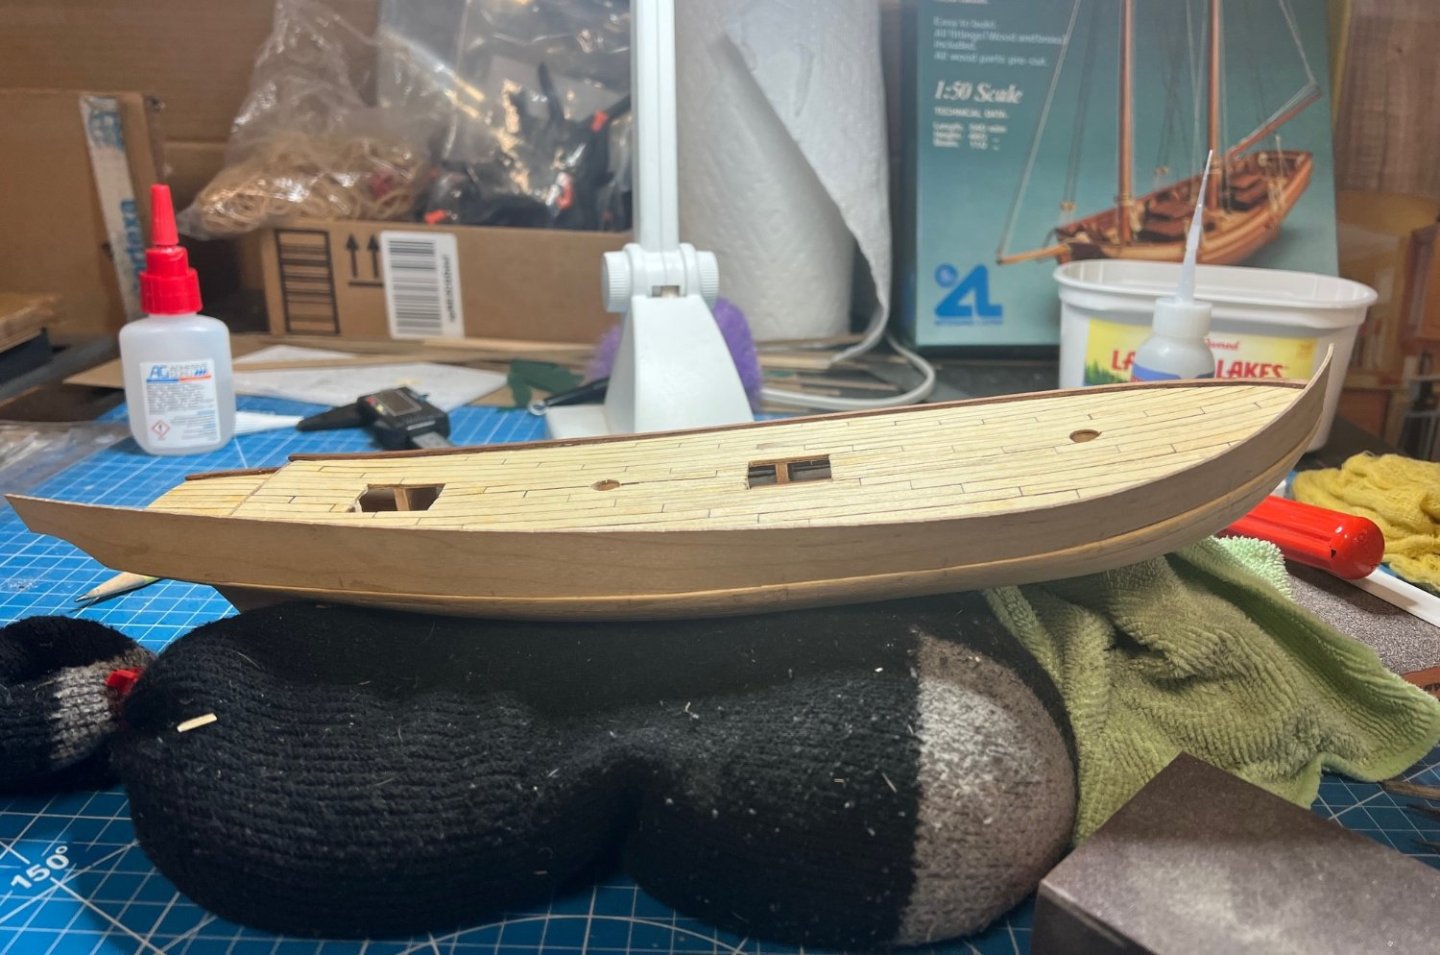
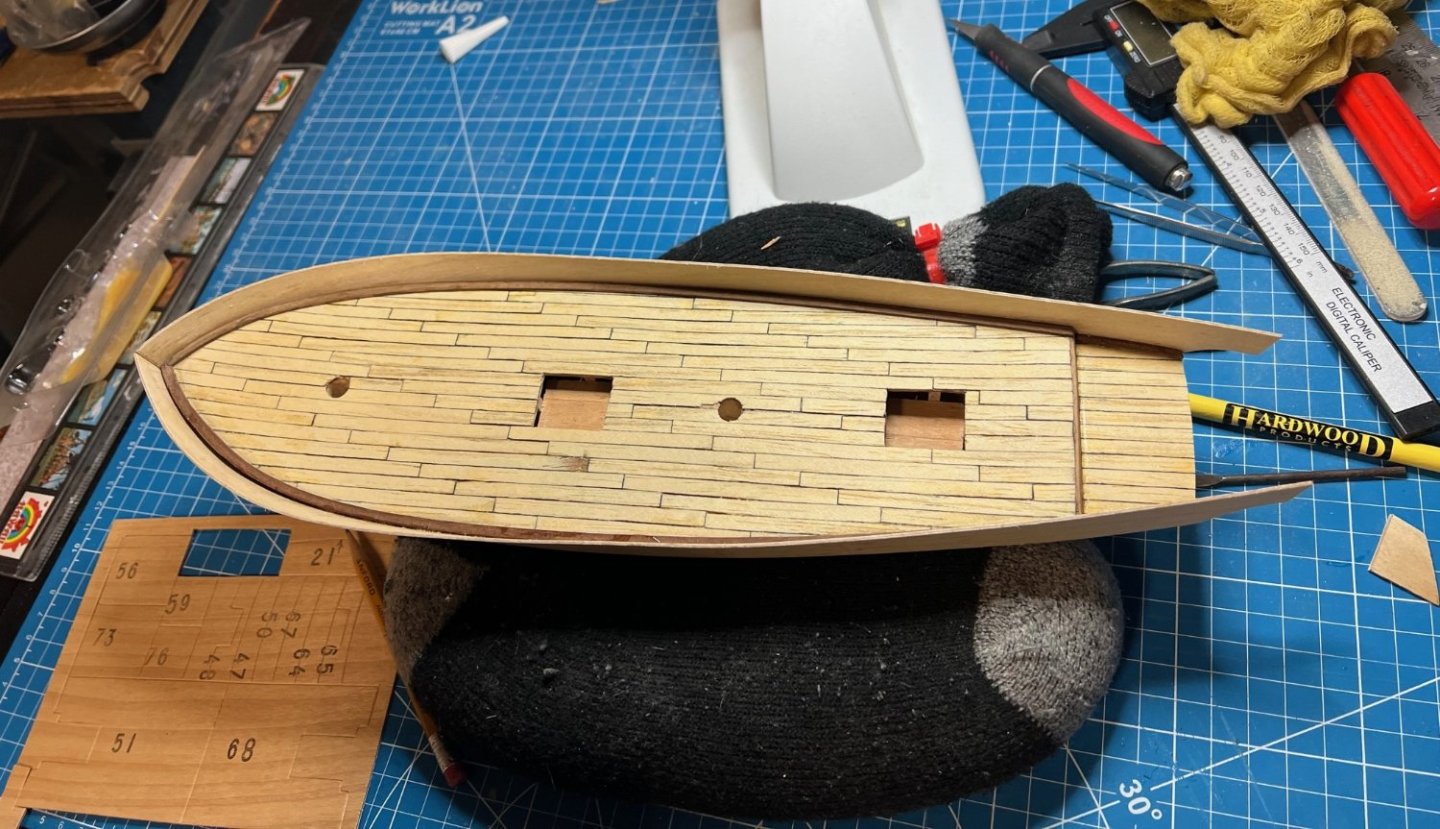
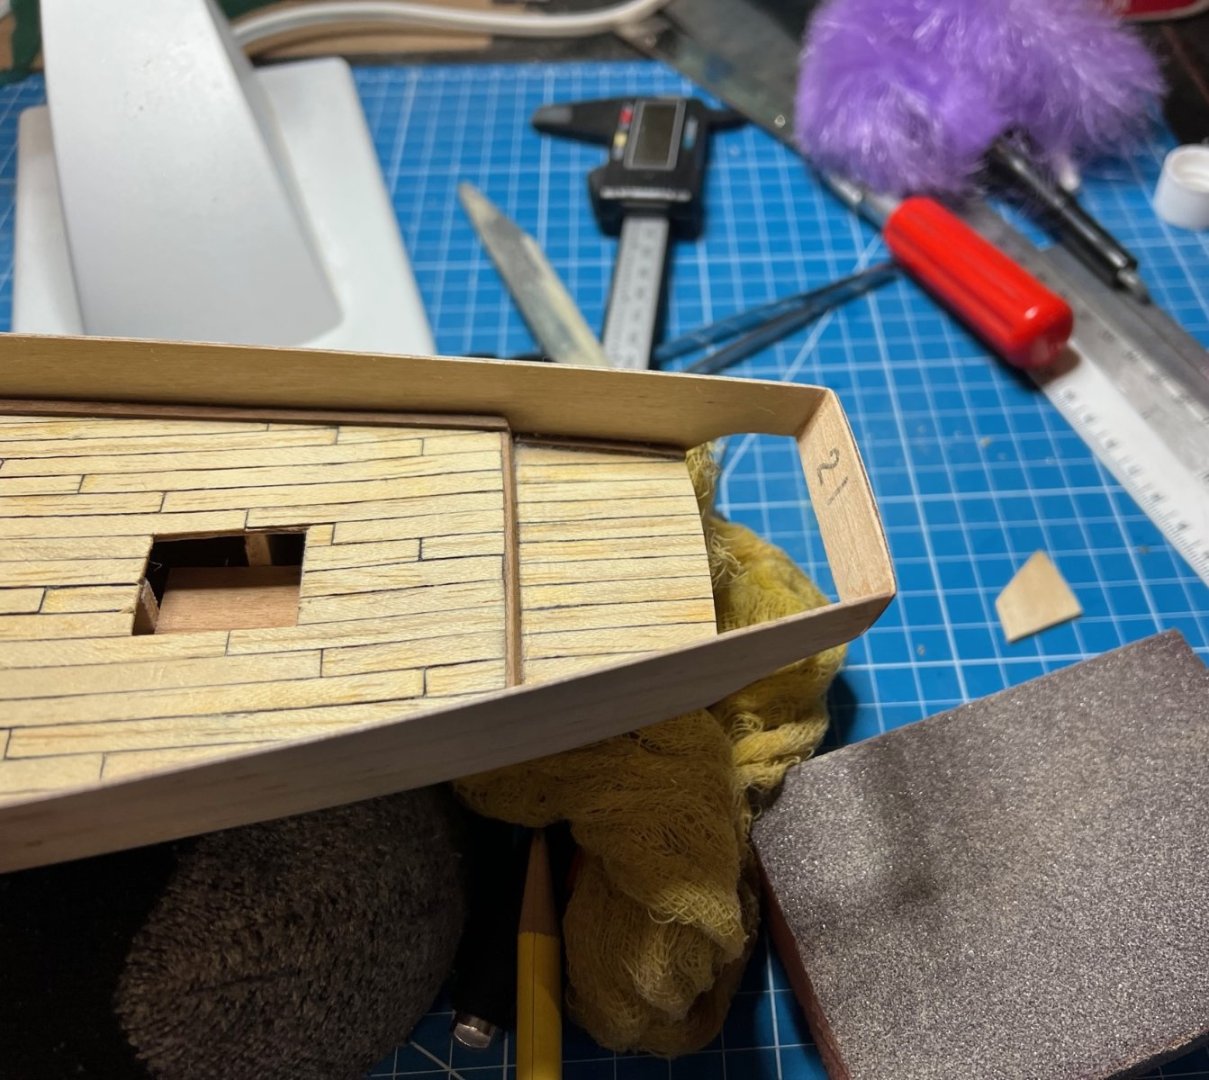
Bulwarks and Stern: The bulwarks supplied with the kit were too long in the front as noted in other logs of this kit. To overcome this I first bent the starboard bulwark using my electric plank bender and bending jig, repeatedly wetting and bending to get the severe curve at the bow. I decided to use the medium CA glue to attach it to give me some time to precisely locate it. I got lucky with my first bulwark as I guess all the practice I had with bending the first planking made the bend fit nicely toward the bow. The excess was then cut off where the two pieces would meet. I then repeated the operation for the port bulwark and thought it came out nicely. I’m not sure if it flares appropriately but looks fine to me. The only thing I wished I’d done was put these on before the deck stringers because I had a pretty big gap between the stringer and the bulwarks toward the bow and decided to live with it since I saw it as too difficult to use filler in there and couldn’t match the stringer color anyway. One of many mistakes made or yet to be made in my first build. Continuing on, I cut and installed the remaining deck trim and the stern piece from the die-cut plywood. Next, I followed instructions and worked on the stern, filling the hole under the bulwarks in the back with bokapi planking. It had to be beveled to try to form a curve to the stern. A lot of sanding and filing got it close enough for me. I used CA glue here too as I didn’t see a way to cleanly clamp it. I filed and scraped as much of the excess glue as I could find as I was still learning to control the application of that stuff. I mostly use a needle to apply it now. I forgot to mention somewhere during faring I suppose, the ship came up a little short and a little shallow in the draft. To overcome the first problem I added wood filler, fattening the bow a little which would be covered by the top rails later on. You can see the fattened bow in the pic below. It will be hidden and I will have to use more care next time when faring. Not much I could do to increase the draft of the ship at this point so again, I’ll live with it. I’m now nearing the point of the “you can’t cover this up” part of the build and was getting nervous but was pleased with what I had so far. Next time, I’ll cover planking the bulwarks and stern which was relatively easy compared to the first hull planking. Then, the second planking with the thin walnut strips. Still have the keel pieces (3) to deal with to after the planking is finished. Thanks for reading. We’re up to Nov. 28, 2022 now and catching up when I have time. Now get back to work in the shipyard!


- 59 replies
-
- 4
-
-
- Swift
- Artesania Latina
- (and 1 more)
-
Tying stays and shrouds to foremast top
Scotty W replied to Scotty W's topic in Masting, rigging and sails
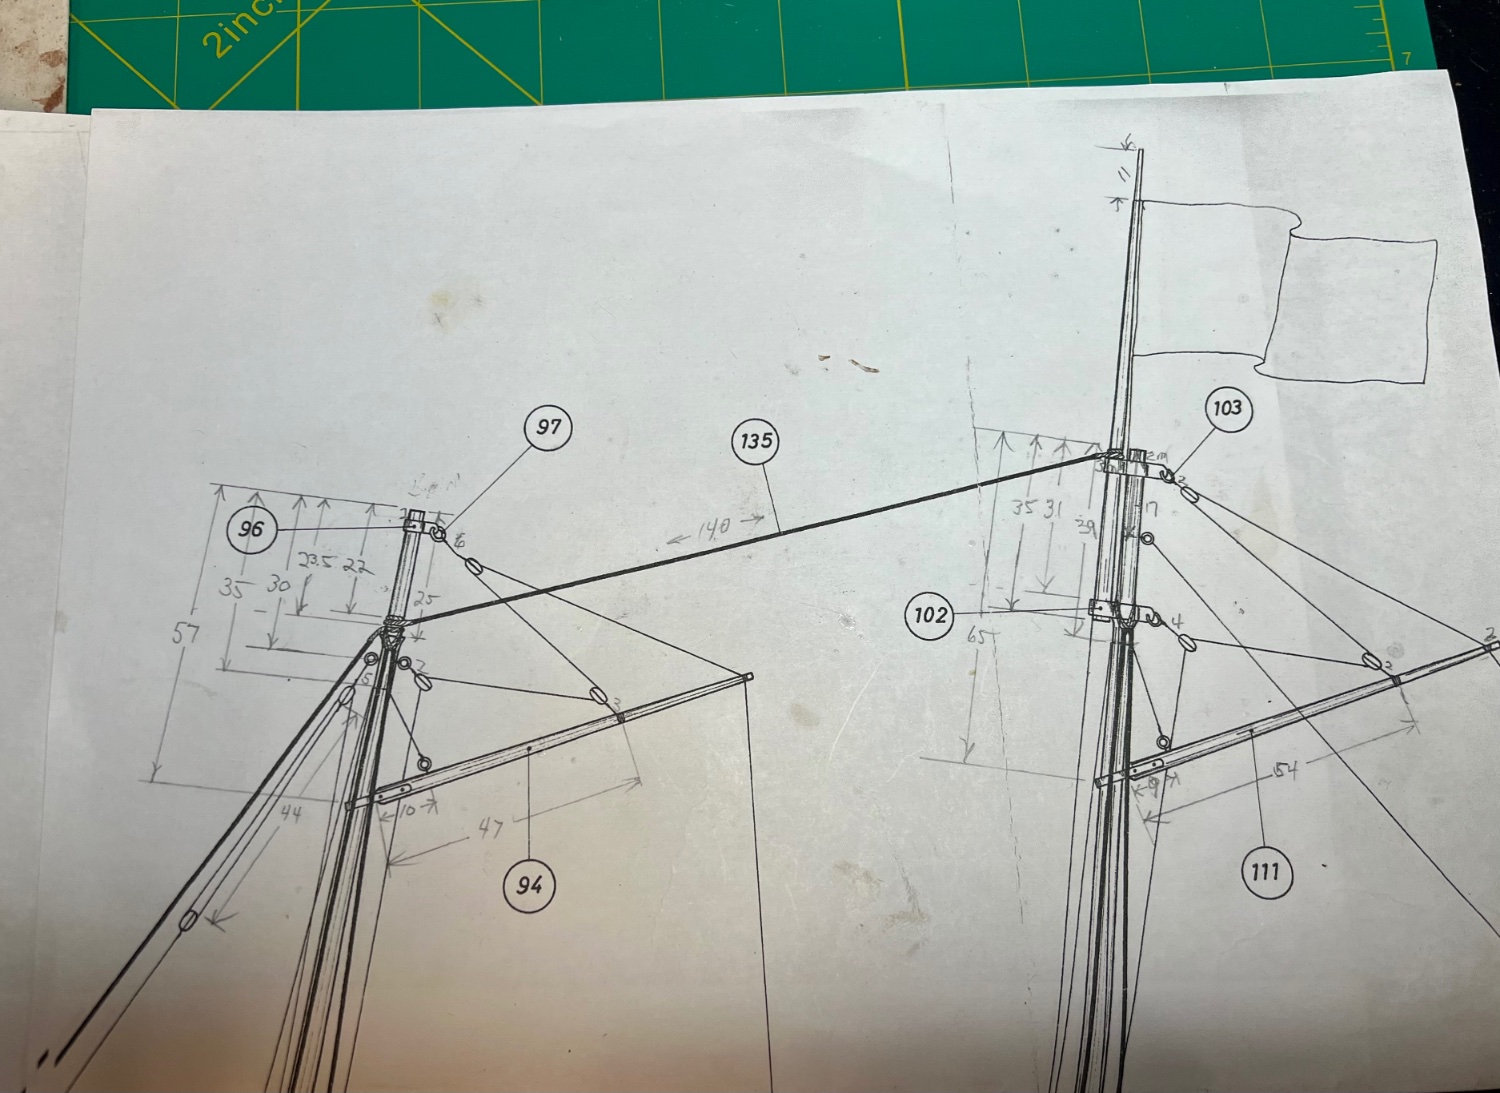
At first I thought the top loop on the foremast was a shroud from the starboard side but there’s one on the main mast too and it’s shrouds are tied below between the flag mast and main mast supported by the bottom bracelet so… ? -
Tying stays and shrouds to foremast top
Scotty W replied to Scotty W's topic in Masting, rigging and sails
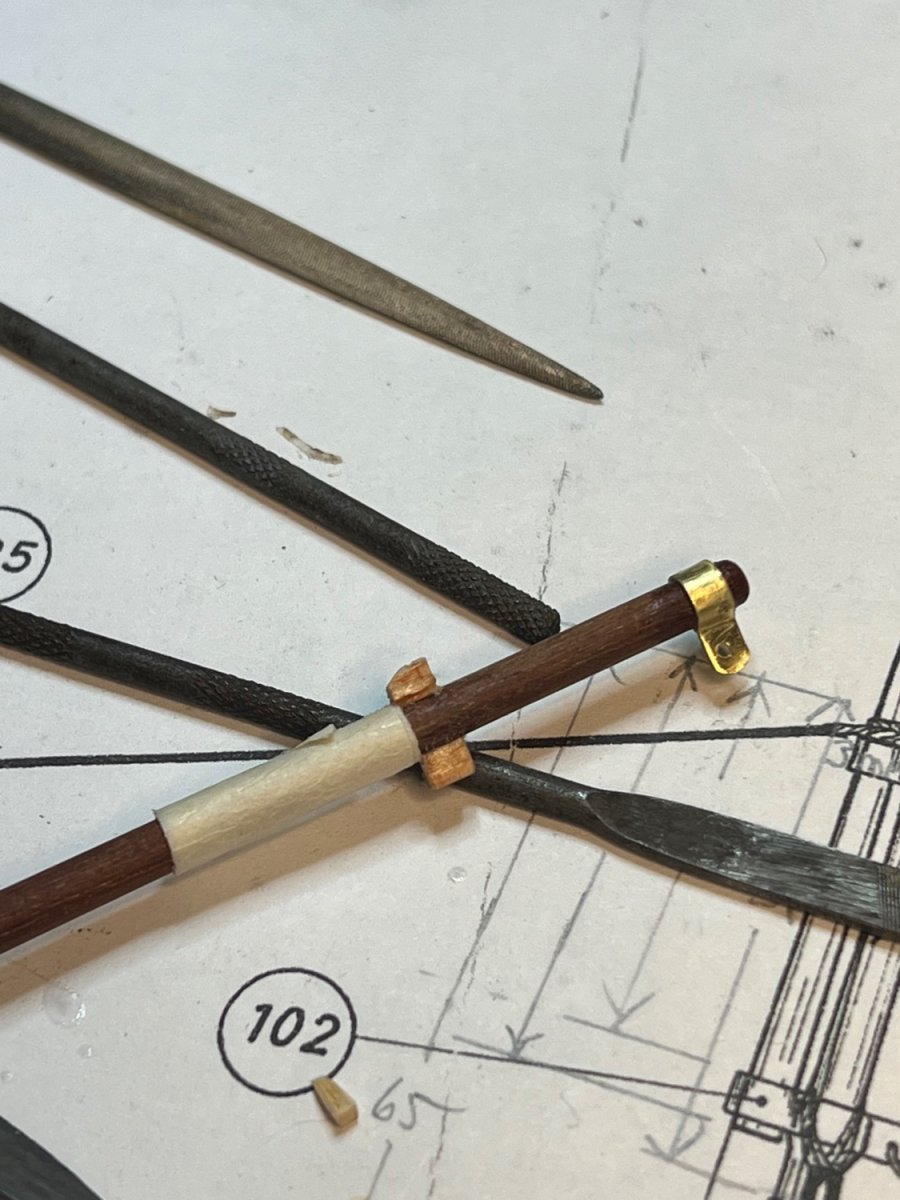
Thanks Allan, That would be awful to have everything mounted and then break off a shoulder during rigging so I may have to reconsider and do a “pass through” design like you show but after all that work and filing I’ll have to think about it while hooping my anchor stocks today. They seem strongly bonded to me as I filed a radius into the contacting surface for maximum surface area contact between the mast and shoulders and clamped them as shown. Before I plant the masts, I’ll throw a loop around it and give it a tug. If they break, I’ll start over, if not, I’ll go with it. Also it appears to me that the plans show the order you described: shrouds, forestay then the stay that runs to the main mast (the kit calls it the Top Mast Stay). There are no stays going to the masts from the stern on this schooner per the plans. I would rather put the forestay on last to hold the other 5 loops down against the shoulders as the one running back to the main mast slopes upward to it. It’s just so hard to make it out in the drawings. Sorry if I’m not using the correct terminology. There appears to be another loop of line over the ends of the top mast stay on both masts. Unless the loop is doubled on both? I appreciate you taking the time to help a guy out on his first build.

-
Tying stays and shrouds to foremast top
Scotty W replied to Scotty W's topic in Masting, rigging and sails
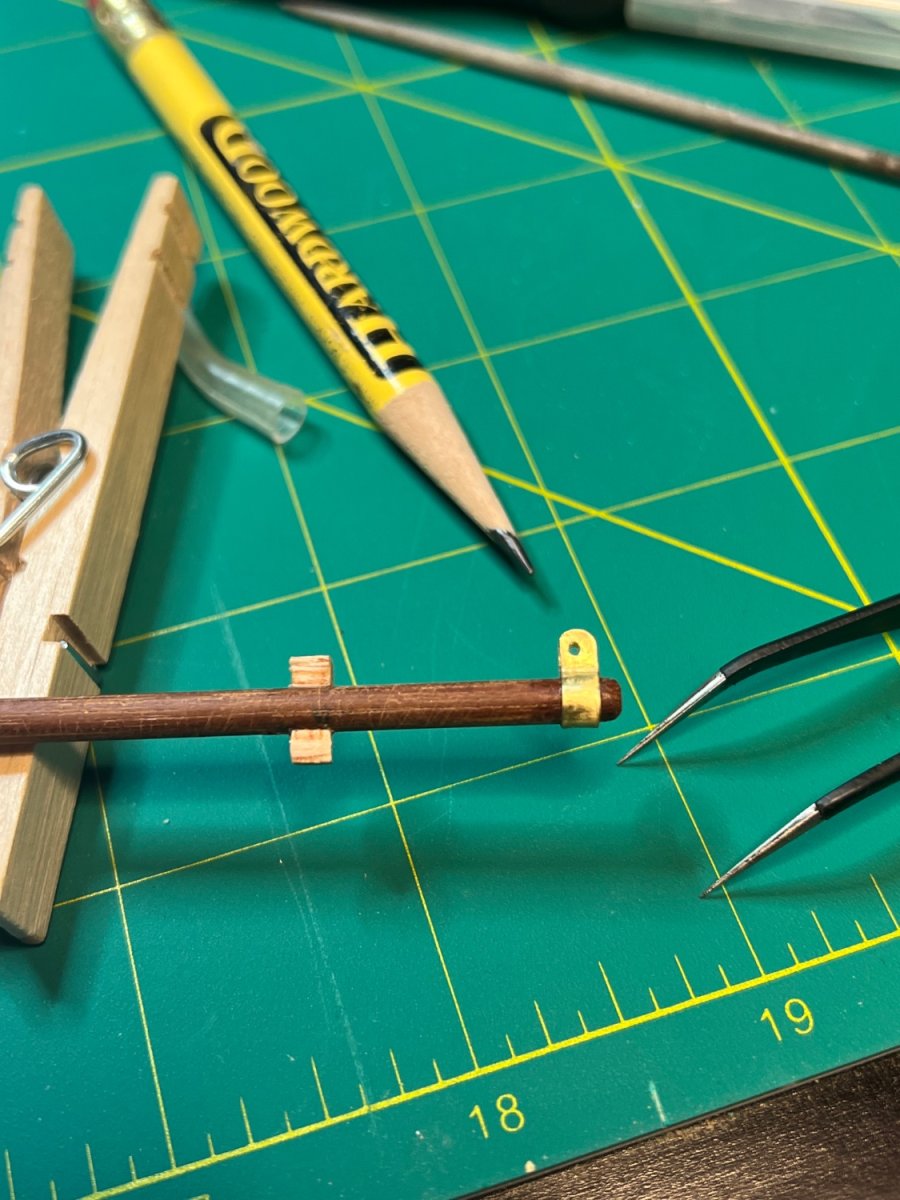
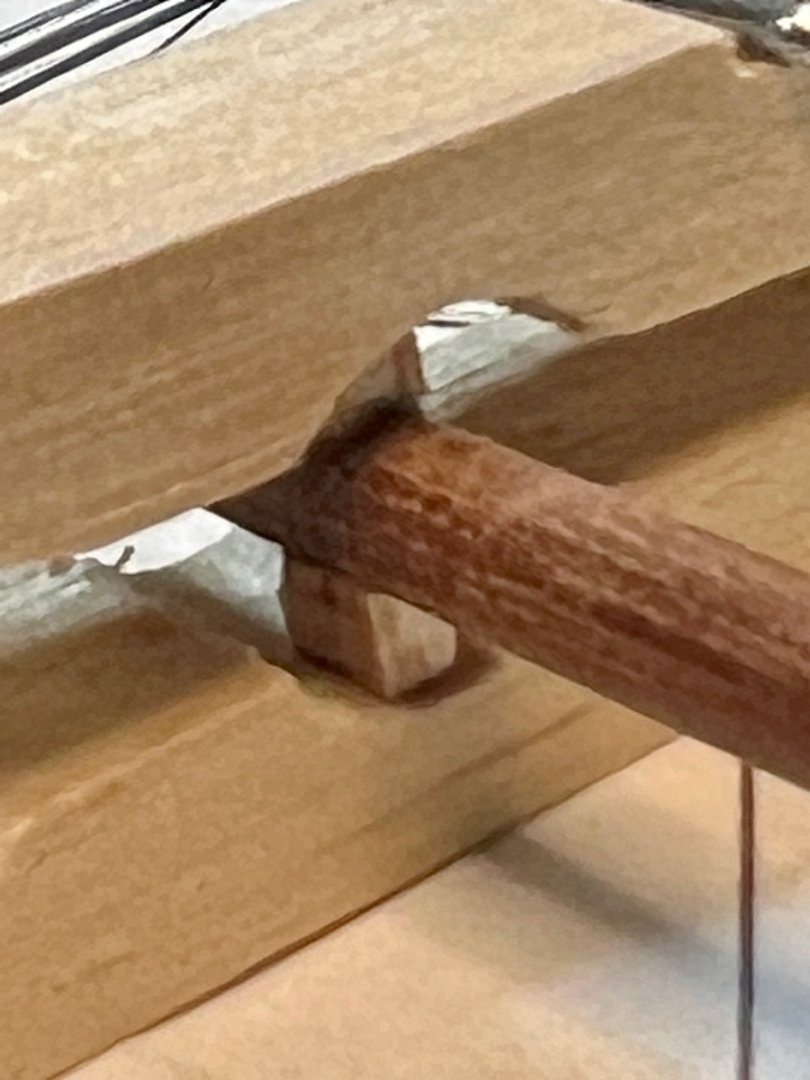
10 minutes? Bwaahaha! The piece could only be 3mm tall or it would run into the eyebolts to be mounted below. About 4 hours but I’m old and slow. Filed a radius on the edge of a piece of plywood left over from frame, disk sanded it down to 3mm wide and shaved off the outer laminations. Cut out 2 2x3mm pieces with radius on one edge. Glued them on first with PVA, clamped, then let CA go on the edges. Then file, file, file and stain. Smallest scratch built parts I ever made. SWMBO thinks I’m insane. 😆 It’ll work. The parts were so small I had to finish shaping them AFTER they were installed. Crazy.

-
Pre-shaped planking?!?!? That's cheating and I like it. lol
-
Tying stays and shrouds to foremast top
Scotty W replied to Scotty W's topic in Masting, rigging and sails
You’re right. Shrouds on wedges mounted fore and aft on the mast, then stay above the shrouds. Thanks again. -
Tying stays and shrouds to foremast top
Scotty W replied to Scotty W's topic in Masting, rigging and sails
Will be a tough couple of pieces to fabricate for me. Make a cone, cut it in half and file out a tapered channel on each to fit around the mast. That’ll take me a full day, oh well better get busy. Thanks! -
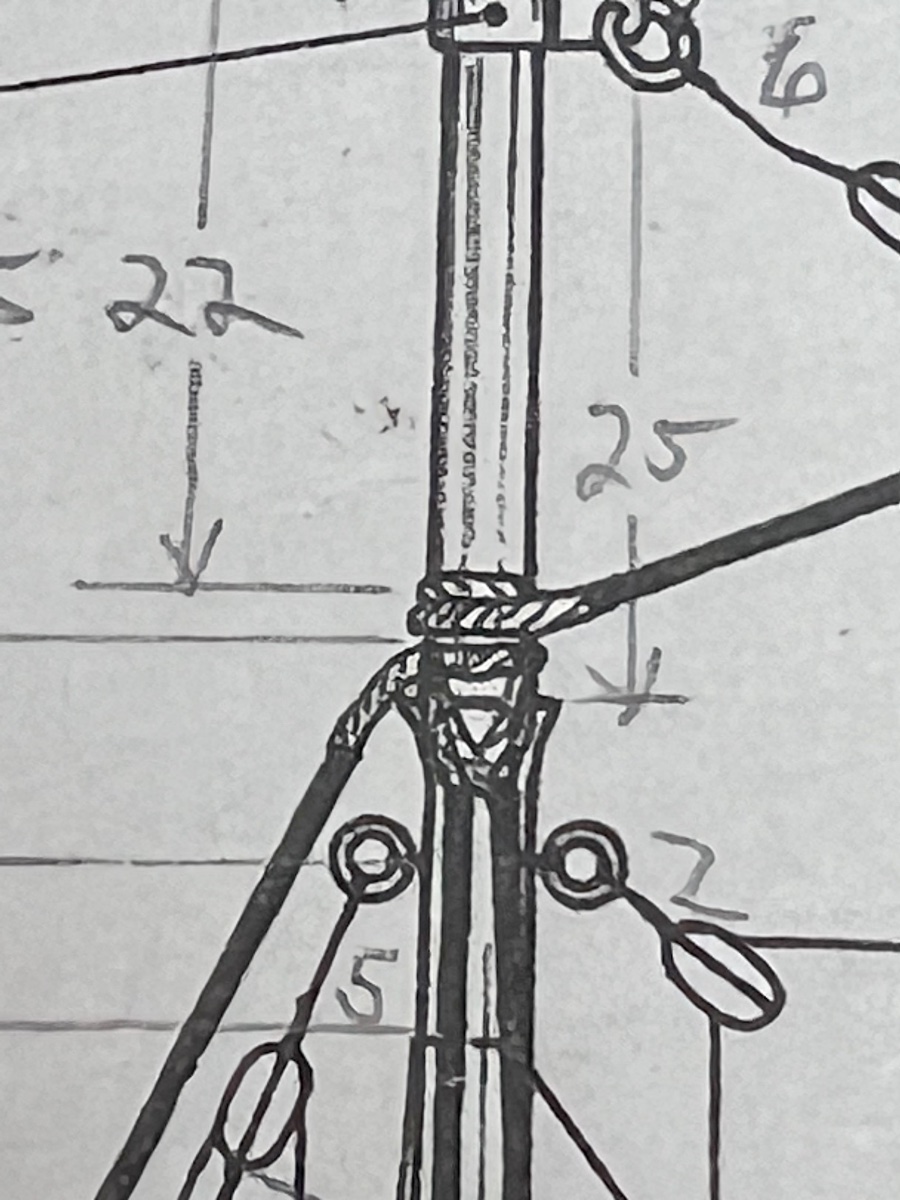
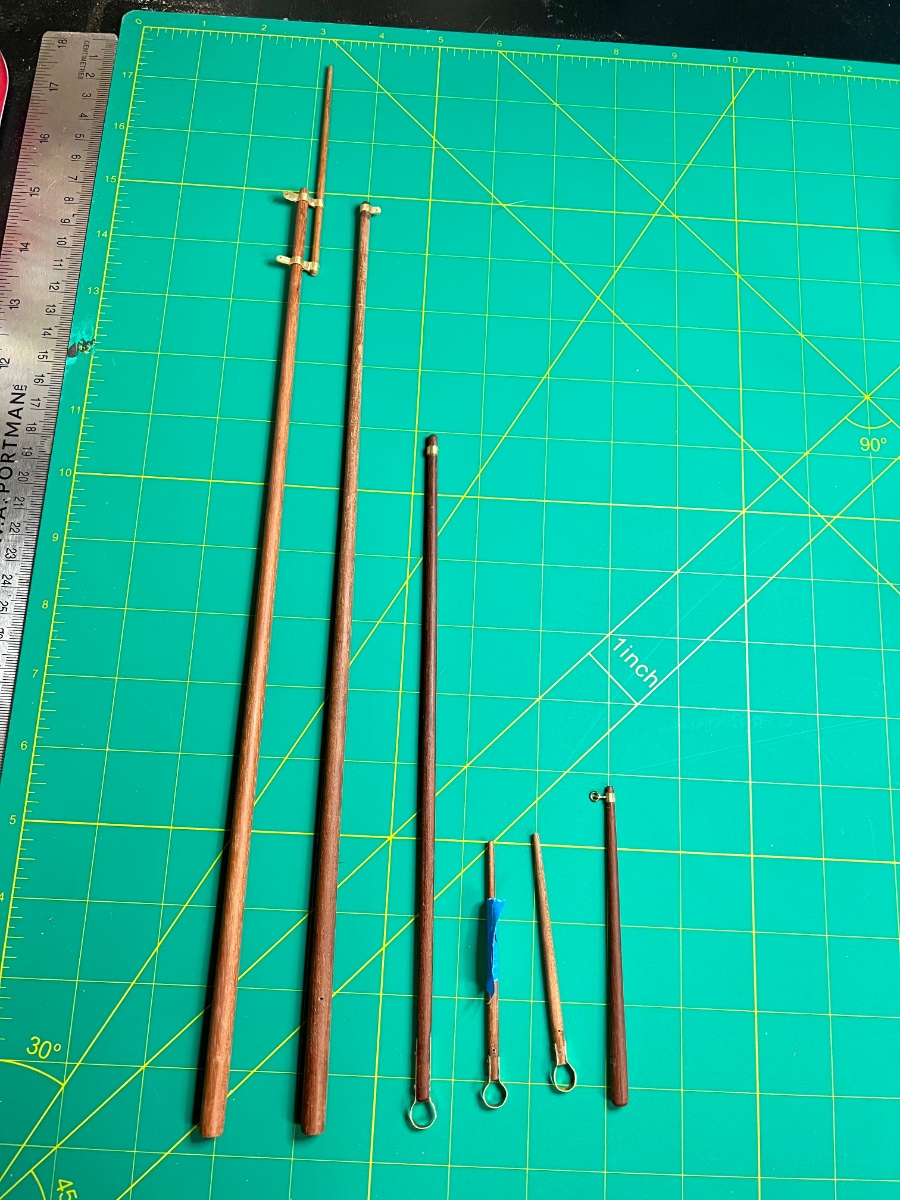
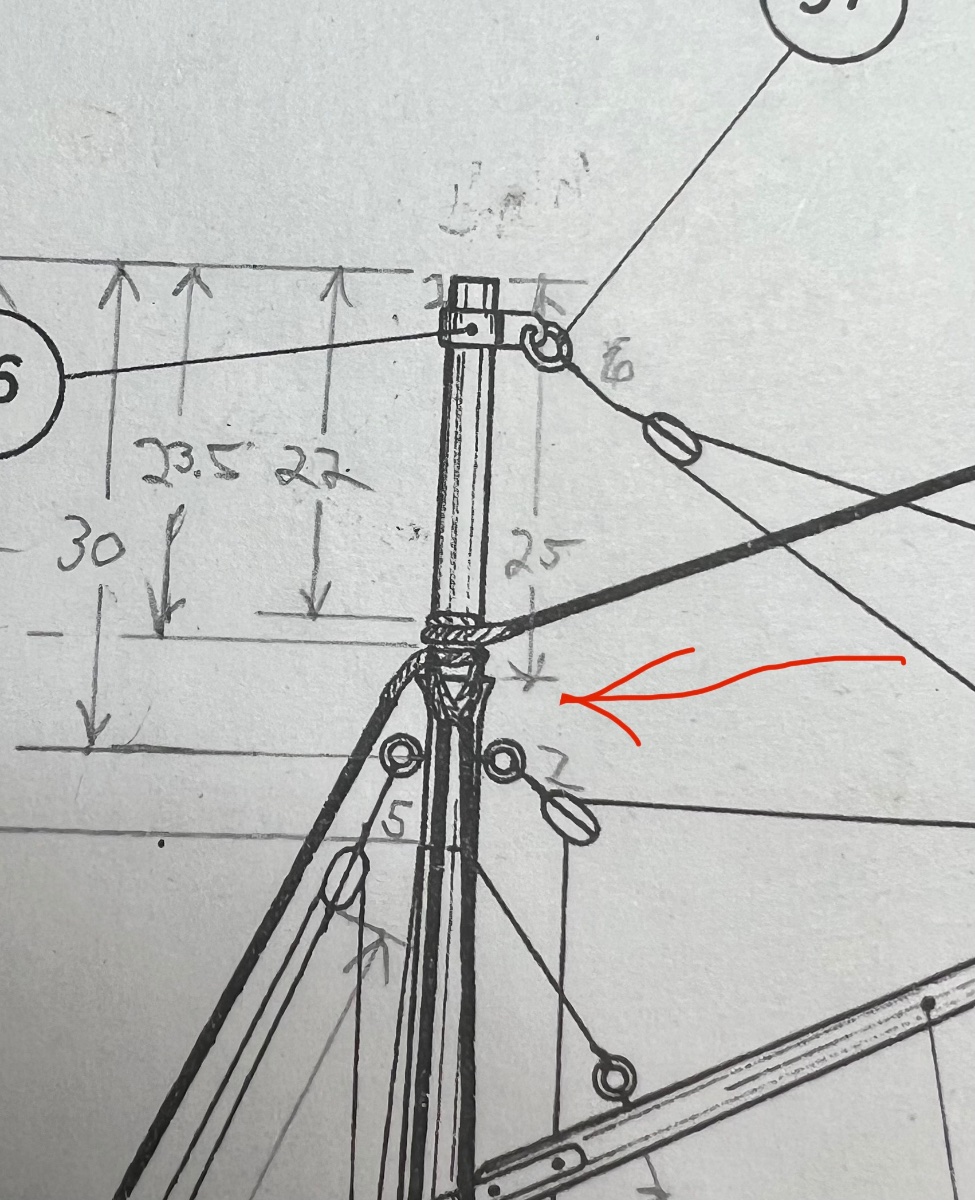
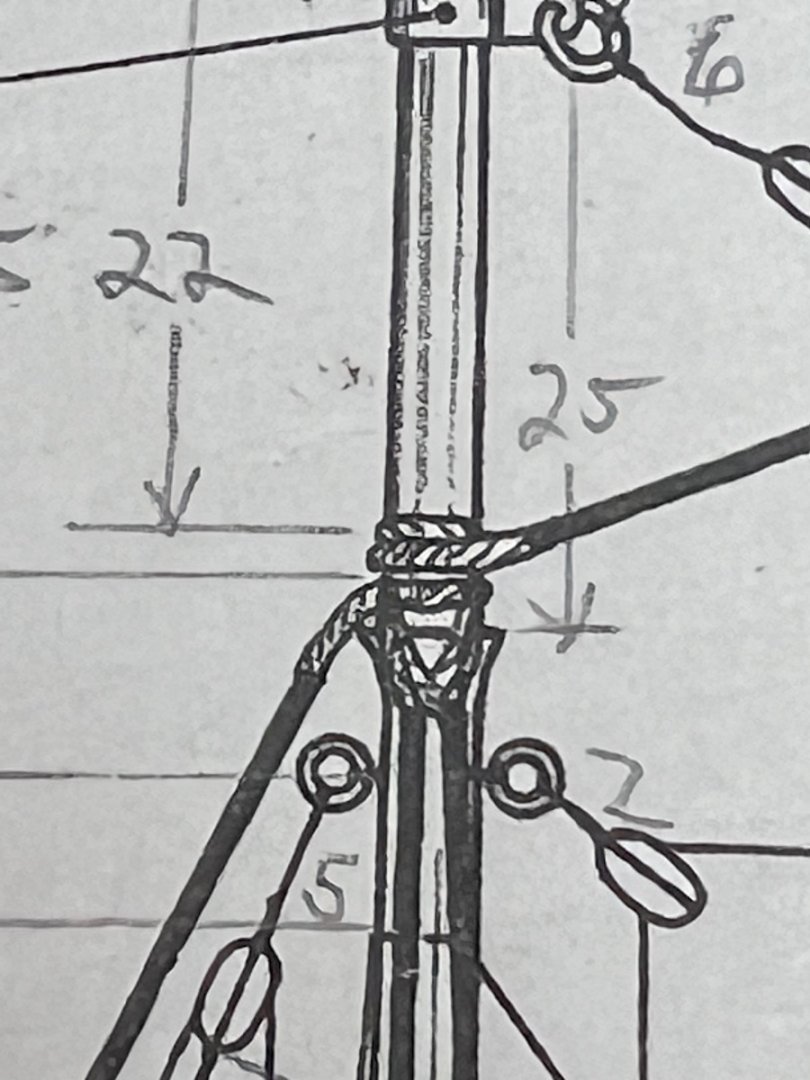
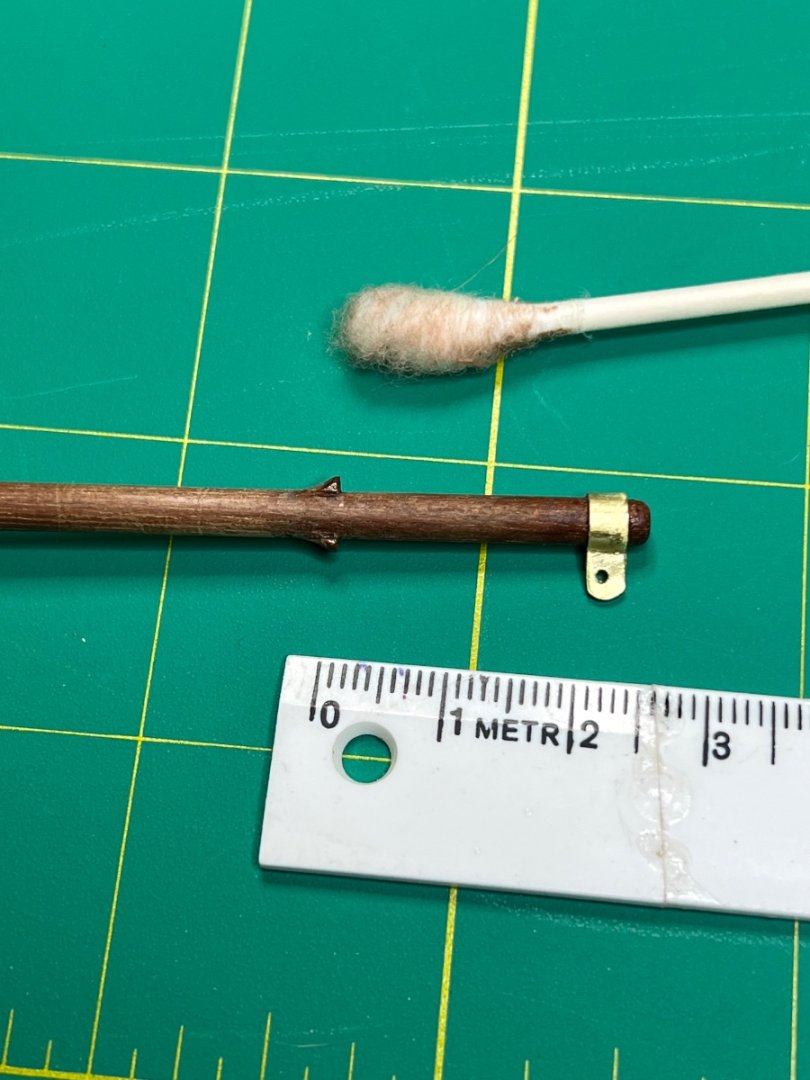
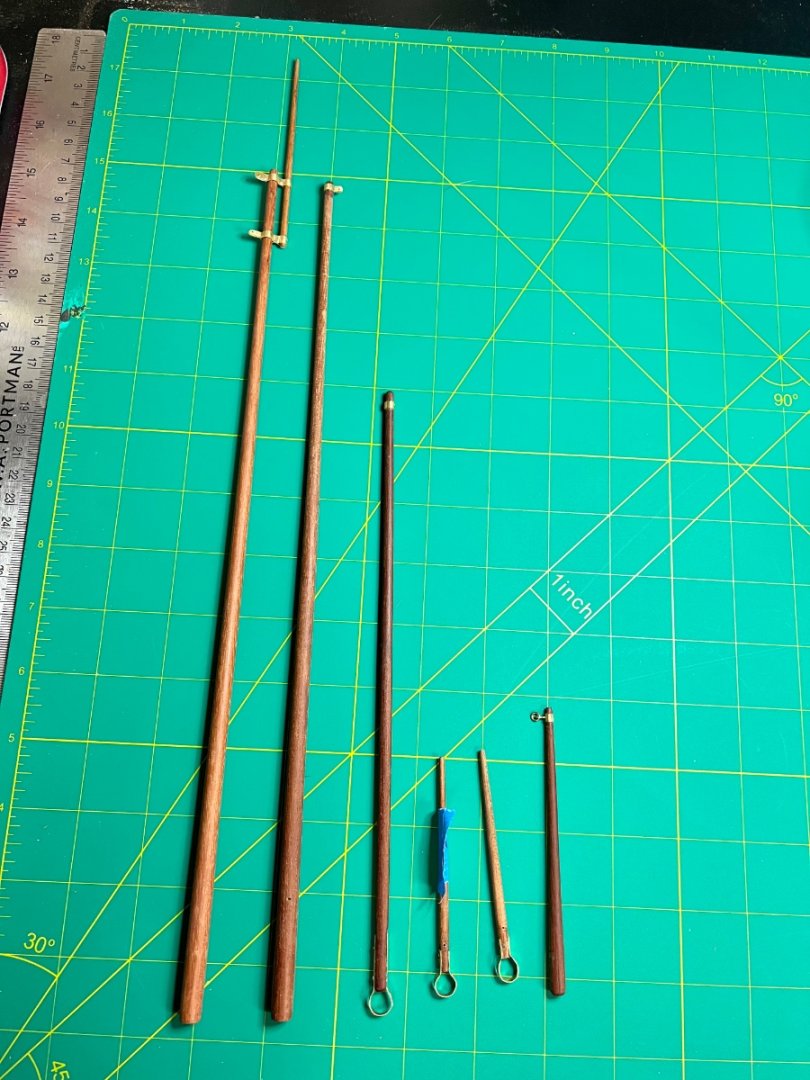
I have a little problem with my Swift build. I tapered the foremast as indicated in the instructions down to 4mm at the top. The fore stay and 5 of the shrouds tie 25mm down from the top but there is nothing to support the 5 loops that go over the mast. I looked closely at the plans (below) and can barely make out a flange of some sort 25mm down from the top (red arrow) and I now have a straight tapered mast. Any suggestions for how I can put something there to hold up the loops? See pics, foremast is 2nd from left.

-
I am about to the point of varnishing my deck, hull, masts, spars and deck cabins and have pretty much decided on a satin finish. When shopping online for spray, Minwax has 4 different types listed on Amazon: 1. Minwax water based polycrylic satin. 2. Minwax Helmsman Spar Urethane satin 3. Minwax Lacquer satin 4. Minwax Polyurethane satin. My first ship build and would love to hear your recommendation for a finish. It’s still too cold to spray varnish here but warmer weather is around the corner or it better be and I want to be ready. SWMBO wants gloss but you know how they like shiny things. 😂 I told her I didn’t want it to look like a toy. Thoughts?
-
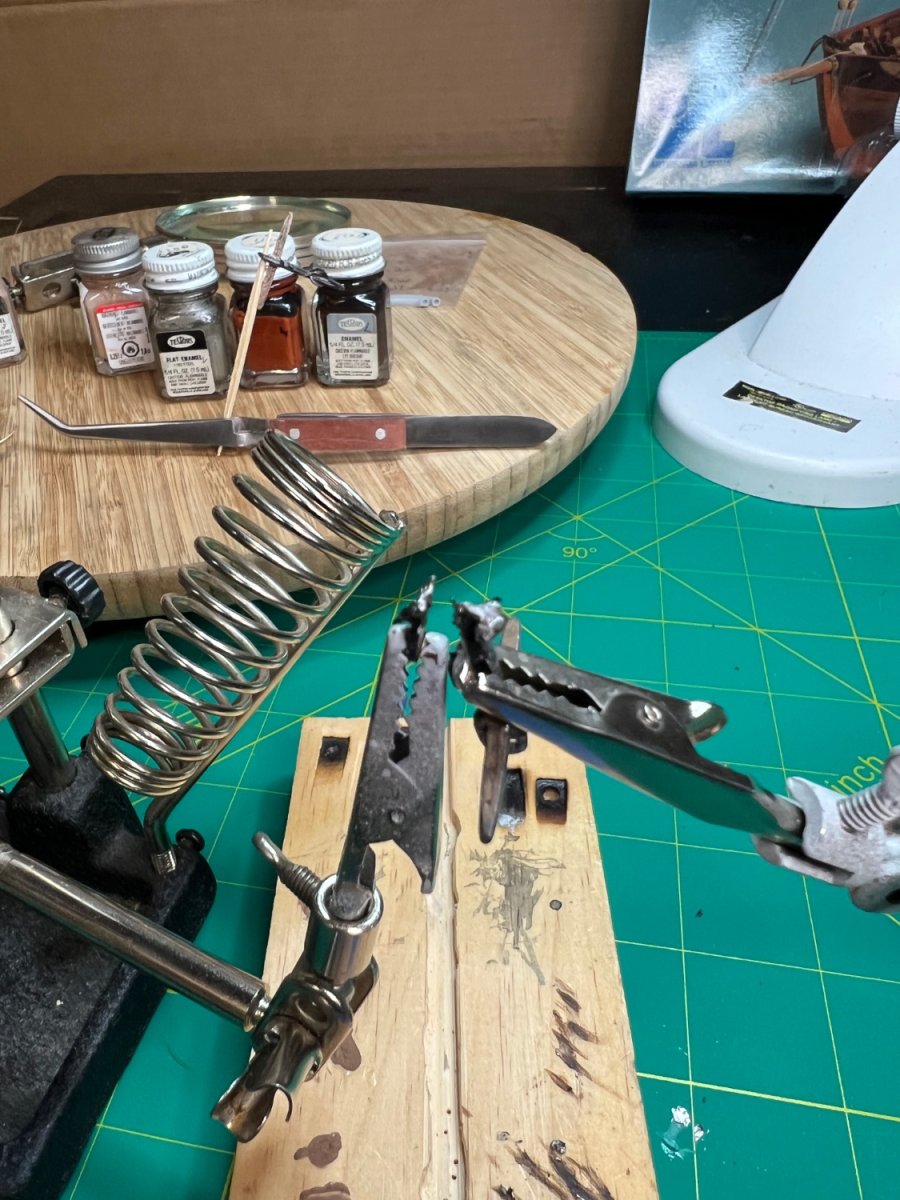
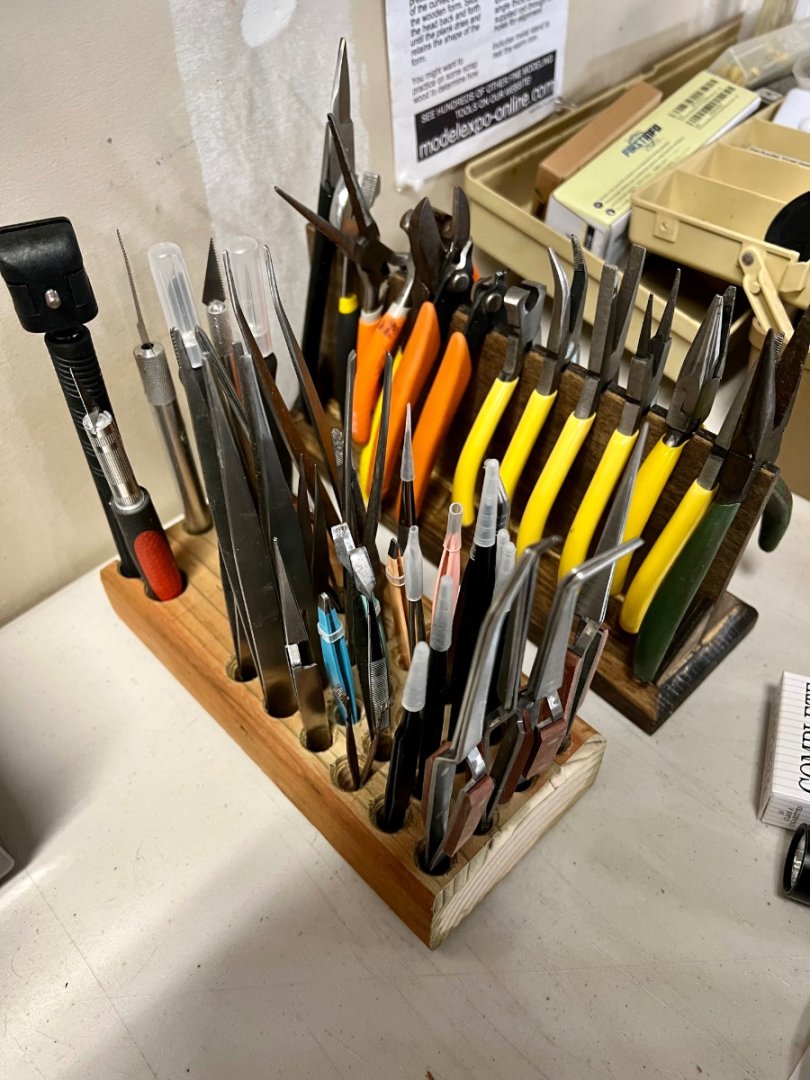
Made this last night. Thanks for the idea! All my tweezers and knives handy. I think I have too many tweezers unless they’re like clamps which you can’t have enough of. Anyhow, another improvement to my shipyard and SWMBO is pleased since I didn’t have to buy anything for it.
- 59 replies
-
- 5
-
-
- Swift
- Artesania Latina
- (and 1 more)
-
Hi Ben. Many here have recommended Ropesofscale.com. I am new to ship building and nearing the stropping of blocks and rigging of my vessel. My ship is 1/50 scale and the ropes that were supplied and kit shown below. The kit says these are 1 and .25mm respectively but this rope is 50 years old and being a newby, I’m sure I don’t have enough of it. Could you recommend the ropes I would need (color, size, etc) to replace these? I also need something small for whipping or sheiving and had seen to use contrasting colors for your whipping. I’m ready to order if you can assist me. I’m in Washington State. Thanks!

-
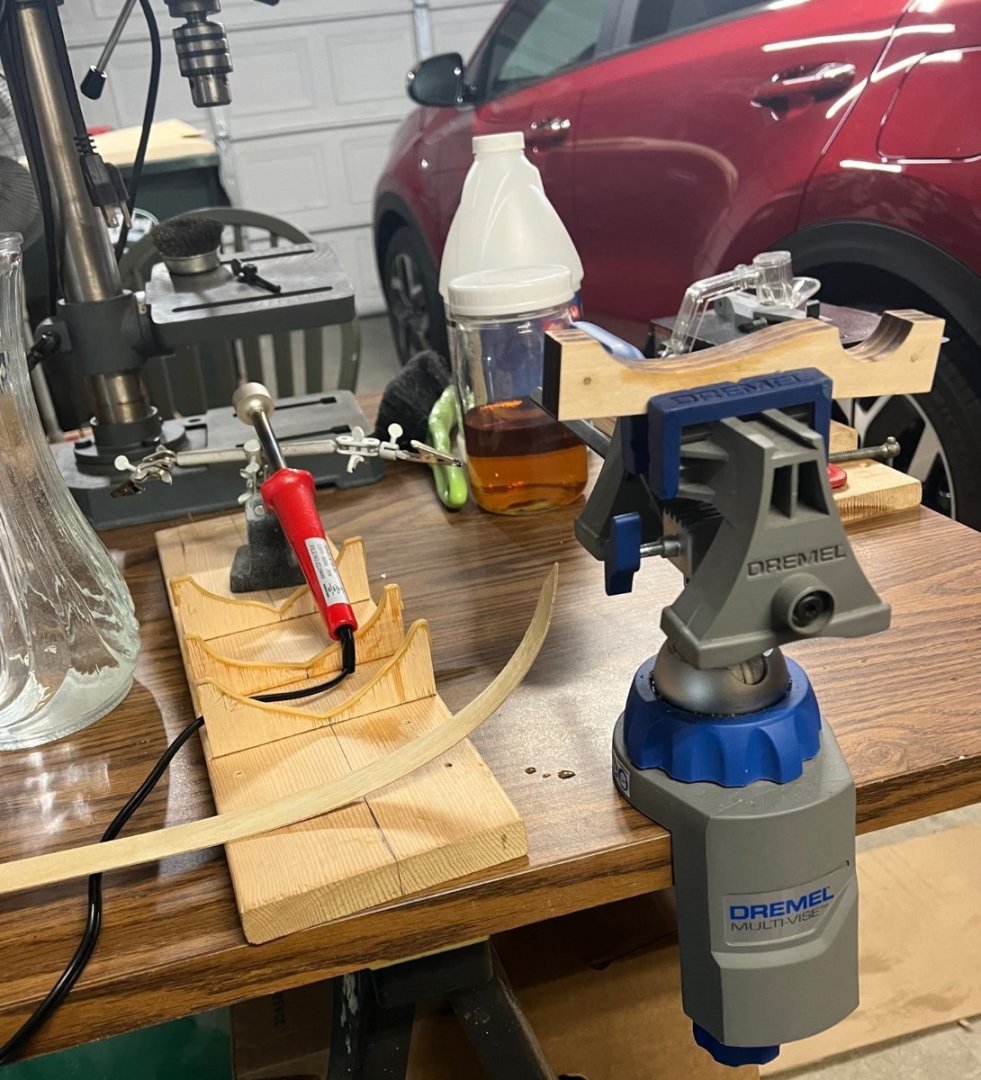
Thanks rcmdrvr! I find the bourbon helps control my shaking working at this scale and the neurapathy and numbness in my fingers doesn’t help either. The other side of the sword is there may be some boo-boos in planning or execution due to too much of the brown liquid at time. lol
- 59 replies
-
- 5
-

-
-
- Swift
- Artesania Latina
- (and 1 more)
-
Thanks Knocklouder! I used water and an electric bender and bending jig for all my first planking and bulwarks but edge-bending stringers and rails was another animal with 50-yr-old bokapi planks. I like the sound of your varnishing method. My instructions just say basically “ok, at this point you should varnish the ship and masts” and that’s about it said. I had already bought some Minwax Gloss polyurethane that I was going to hang the ship on an old guitar string through the bowsprit hole and spray a couple of light coats. Similarly the masts and spars but I’m reconsidering that now seeing so many experienced builders going with satin. My CFO, as Peanut calls his better half, said she wants it to be shiny because , you know, they like shiny things lol. I’ll let her have her opinions I suppose, if I want to eat and not have to sleep on the couch.
- 59 replies
-
- 3
-
-
- Swift
- Artesania Latina
- (and 1 more)
-
A spanker? I have to keep referring to a nautical glossary to keep up with you. First build? I call them “pulley things” and “port notched thingy” and terms like that, but slowly learning. Ha ha. It’s retaining the info at my spring chicken almost 66 that gets me.
-
Didn’t know my blocks, which are still in the bag, had an upside-down, they look symmetrical to me but probably because the ones in my kit are not accurate.
- 129 replies
-
- 1
-
-
- Bounty Jolly Boat
- Artesania Latina
- (and 1 more)